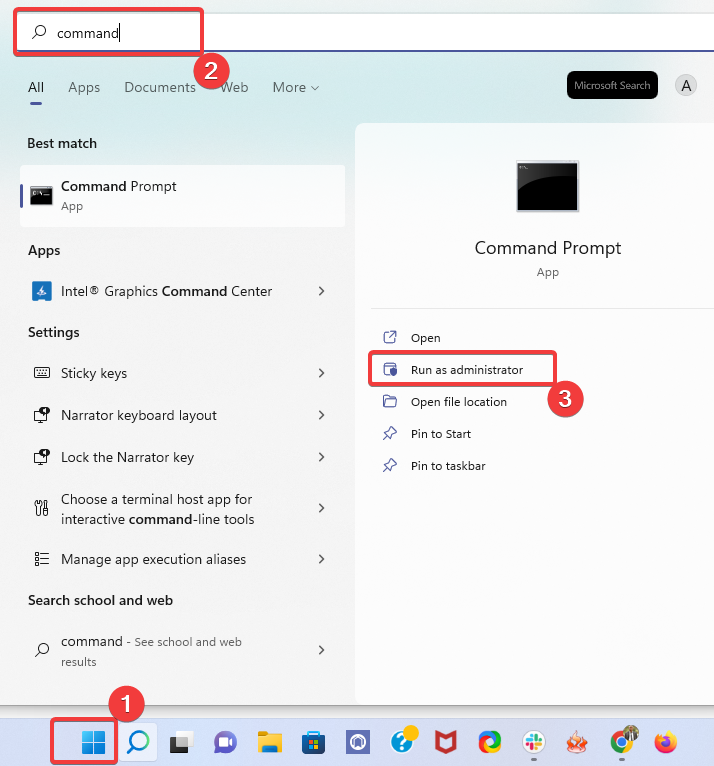
Fix: Firefox Keeps Crashing on Windows 10 & 11 [Quick Guide]

Firefox is one of the best browsers for Windows. However, that doesn’t mean the software runs perfectly.

Firefox occasionally crashes and closes unexpectedly. When the software crashes, a Mozilla Crash Reporter window keeps popping up, stating that Firefox had a problem and crashed. Then you’ll need to press the Restart Firefox button on that window to reopen the browser.

Irrespective of the cause and severity, this guide contains simple yet effective fixes to solve the problem. You only need to follow the instructions carefully, and you will be fine.

Why does Firefox keep crashing?

Various things can cause Firefox to keep crashing on Windows 10/11. The possibilities are numerous, from issues with some of the browser files and settings to problems with your PC.

Below are some of the well-known causes:

  • Outdated browser version
  • Presence of malware on PC
  • Faulty extensions
  • Corrupt browser data

Why does Firefox keep freezing my computer?

If Firefox makes your computer freeze, it is most likely due to excessive or faulty extensions affecting your browser. It is recommended to keep the number of extensions to a minimum that you use frequently.

This is because they can increase Firefox’s CPU and RAM usage, affecting your PC performance. Lastly, if your browser is outdated, it can cause your PC to freeze when in use.

Therefore, we compiled a guide of applicable solutions to help you successfully resolve the Mozilla crash reporter keeps popping up error.

How do I fix Firefox when it keeps crashing in Windows 10/11?

1. Update Firefox

  1. Open Firefox and click the menu button in the top right corner.
  2. Select the Settings option.
    settings firefox keeps crashing windows 10/11
  3. Scroll down to the Firefox Updates section and click the Check for updates button.
    chcek for
  4. It will show you if there are any updates to install.
    check updates

Mozilla usually irons out a few bugs in every Firefox version. The Firefox tabs keep crashing on Windows 10 or 11 might have been fixed in a newer release. So, ensure you’re running the latest version.

2. Check for Windows Updates

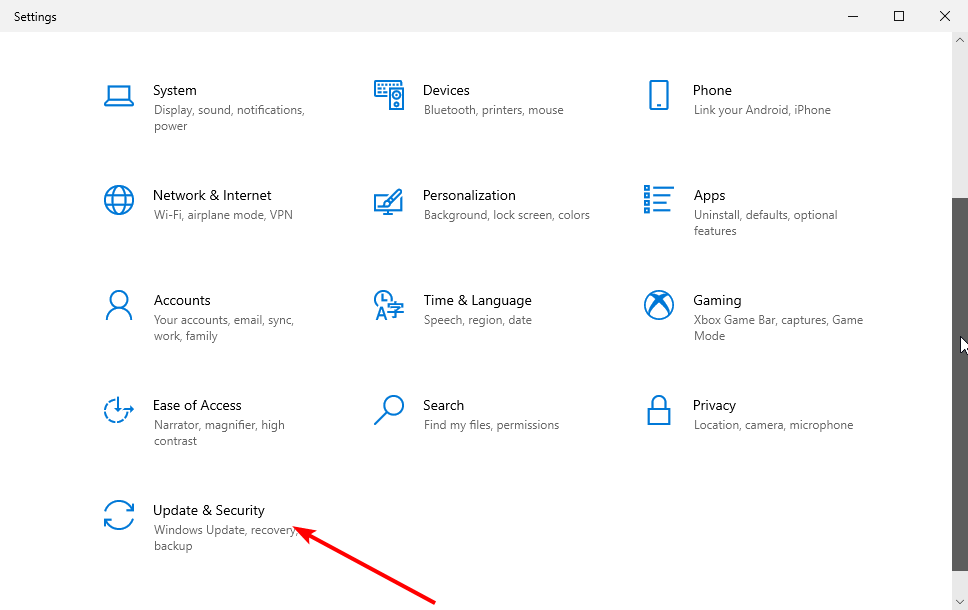
  1. Press the Windows + I keys to launch the Settings app.
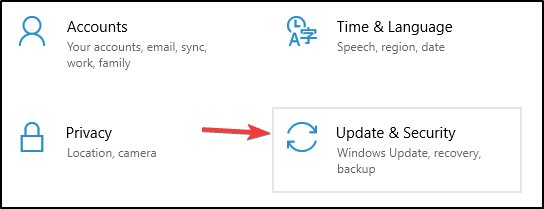
  2. Select the Update & Security option.
    update firefox keeps crashing windows 10/11
  3. Click the Check for updates button.
    check pc firefox keeps crashing windows 10/11
  4. Finally, click the Install now button if there are any updates available.
    install now

Windows updates help fix bugs and improve your PC’s overall effectiveness and security. An outdated operating system is a disaster waiting to happen and could be why Firefox keeps crashing on Windows 10/11.

Ensure you restart your computer after the update before relaunching Firefox.

3. Scan for malware

3.1. Scan for malware with built-in tool

  1. Press the Windows + I to open Settings.
  2. Select the Update & Security option.
    update firefox keeps crashing windows 10/11
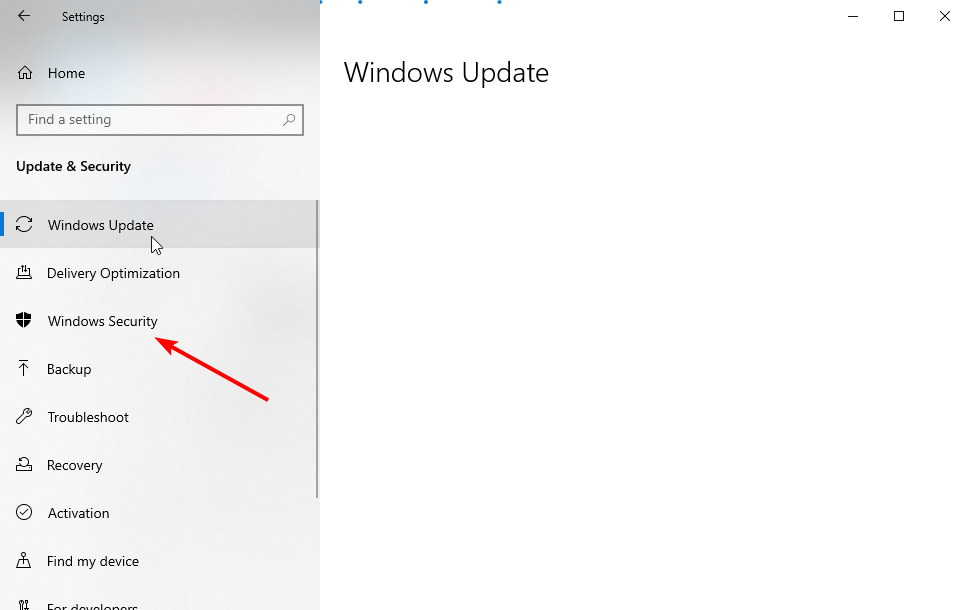
  3. Choose Windows Security in the left pane.
    windows security
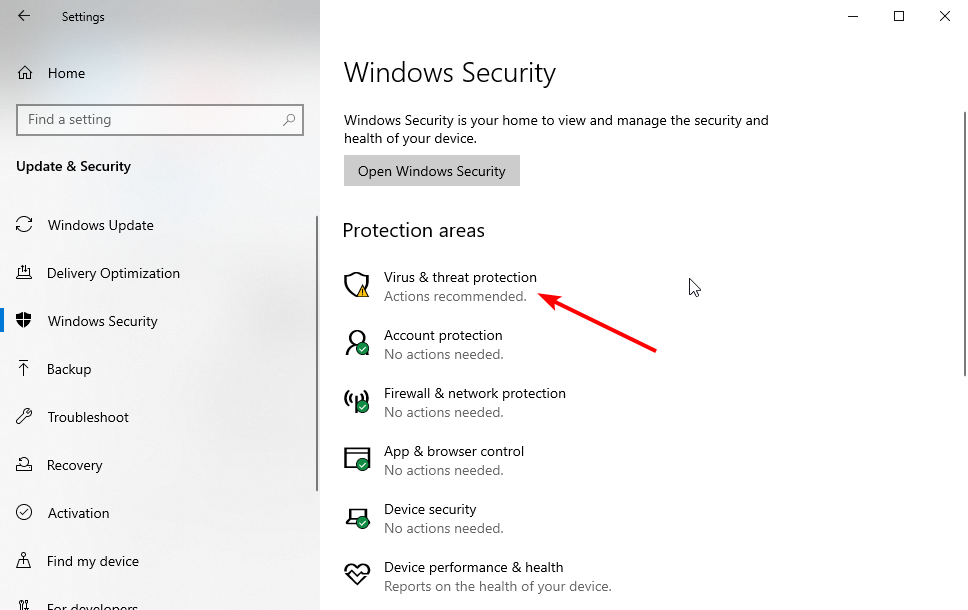
  4. From here, select the Virus & threat protection option.
    virus and threat
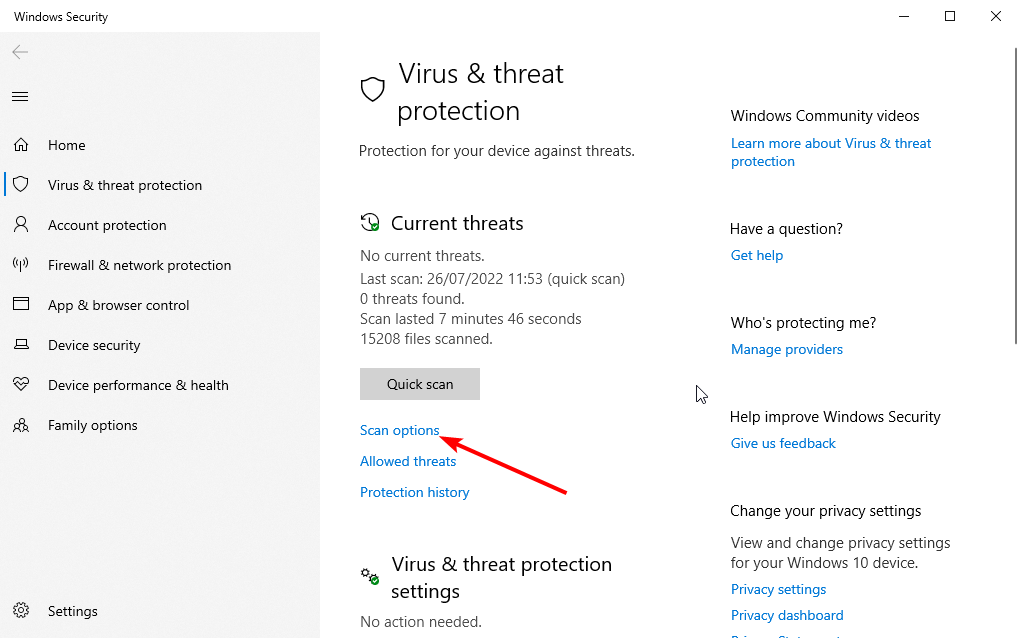
  5. Click on Scan options.
    scan options firefox keeps crashing windows 10/11
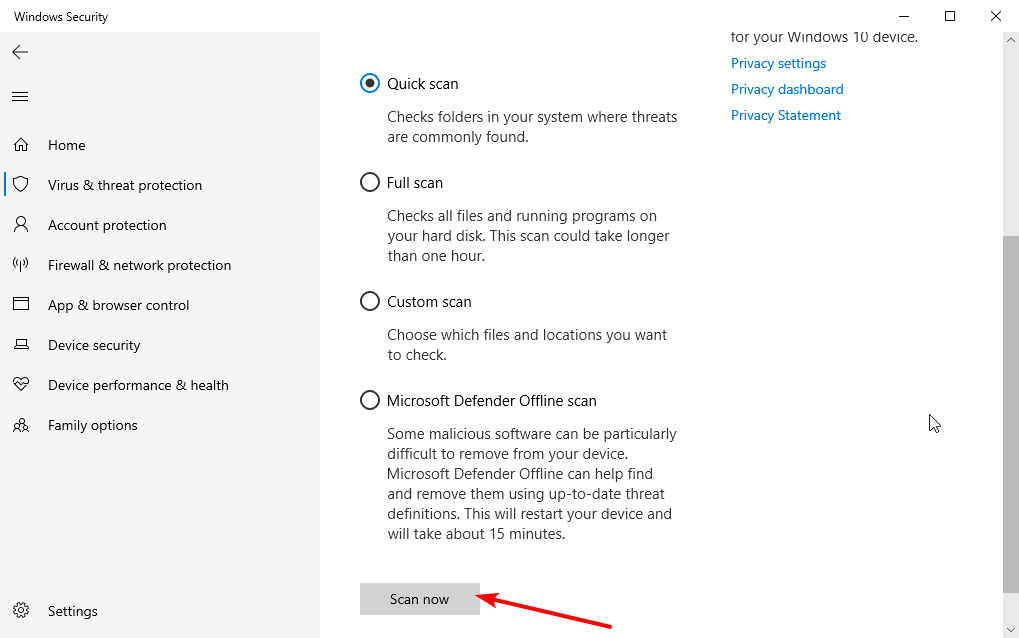
  6. Select your preferred scan option and click the Scan now button.
    scan now

Malware crashes most types of software. You may face issues like Firefox closed unexpectedly while starting and other crashes if you have a virus on your PC.

Choose the Full Scan or Microsoft Defender Offline scan option for a thorough scan.

3.2. Scan for malware with a third-party tool

Windows Security does a good job of protecting your PC. However, you can still improve your security with dedicated antivirus software.

And speaking of top-notch antivirus, none comes close to the award-winning ESET NOD32 software.

The ESET NOD32 is a fast and light antivirus that takes total care of your PC security while you worry about other things. It offers both online and offline protection and detects viruses before they can affect your PC.

It also completes the set by offering ransomware and antiphishing protection. Lastly, it helps you encrypt your most sensitive data, ensuring that no one can steal them. It might just be the only thing you need to prevent and fix issues like Firefox keeps crashing on Windows 10/11.

⇒ Get ESET NOD32

4. Disable Add-ons

  1. Click the menu button on Firefox and select the Settings option.
    settings firefox keeps crashing windows 10/11
  2. Select Extensions & Themes in the left pane.
    extensions and themes
  3. Toggle the switch before each extension backward to disable it.
    disable extensions

While extensions improve the functionality of your browser, too many of them can cause problems. Also, if you have one or two faulty extensions, it can lead to Firefox keeps crashing on Windows 10/11 issue.

So, you can disable all the extensions and check if that solves the problem. If your browser works well, use the elimination method to know the add-on causing the issue and delete it.

5. Clear Firefox’s Cache, Cookies, and Page History

  1. Download and launch CCleaner.
  2. Click Custom Clean on the left of its window.
  3. Click Applications.
  4. Select Firefox’s Internet Cache, Internet History, and Cookies checkboxes.
  5. Press the Analyze button to run a preliminary scan.
  6. Click the Run Cleaner button and press OK to clear the browser data.

The accumulation of cache, cookies, and page history files can cause Firefox to hang or crash. This is especially true if the files are corrupt.

While Firefox has a built-in function to clear browser data, using CCleaner helps you to remove the most stubborn files. Also, it can be used for other programs and help clean old files on your PC. And since it has a free version, you have nothing to use.

6. Restart Firefox in Safe Mode

  1. Open Firefox and click the menu button.
  2. Click the Help option.
    help menu
  3. Select the Troubleshoot mode… option.
    troubleshoot mode
  4. Click the Restart button when prompted.
    restart safe firefox keeps crashing windows 10/11

Firefox has a troubleshooting mode that helps to troubleshoot crashing, hanging, and other issues like entry point not found. In this mode, your browser will run with all extensions, themes, and custom settings disabled.

7. Switch off Hardware Acceleration

  1. Open Firefox and click the menu button.
  2. Select the Settings option.
    settings firefox keeps crashing windows 10/11
  3. Scroll down to the Performance section.
  4. Uncheck the box for Use recommended performance settings.
    use recommended
  5. Finally, uncheck the box for Use hardware acceleration when available.
    use hardware

Firefox’s hardware acceleration makes the most of your desktop’s or laptop’s graphics card to render objects on web pages.

However, hardware acceleration doesn’t always work well with some graphics cards and drivers and can also crash Firefox. So switching hardware acceleration off can be an effective fix for fixing the issue.

8. Update the graphics card driver

8.1. Update driver manually

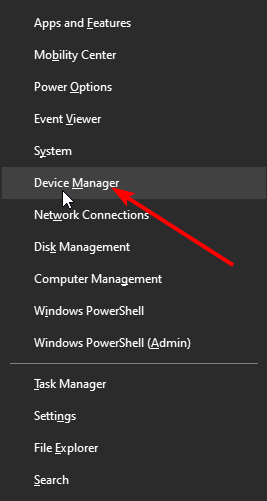
  1. Press the Windows key + X and select the Device Manager option.
    device manager
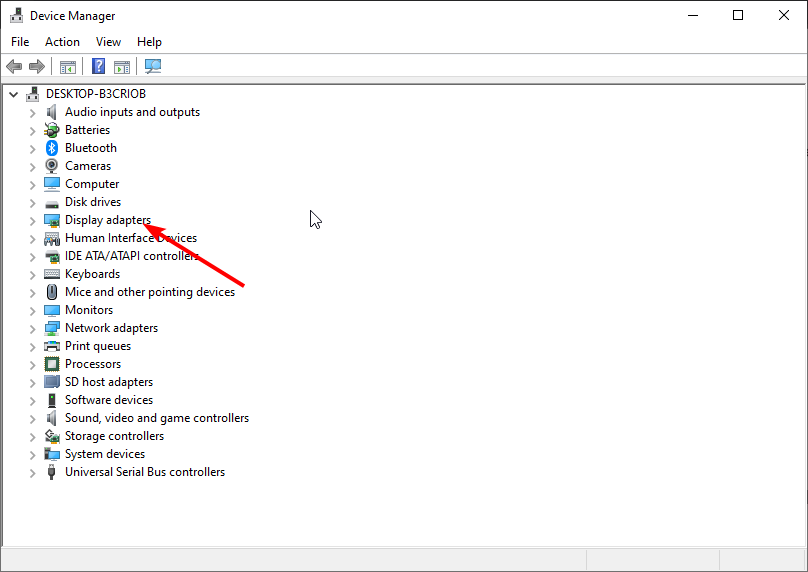
  2. Double-click on Display adapters to expand it.
    display adapters
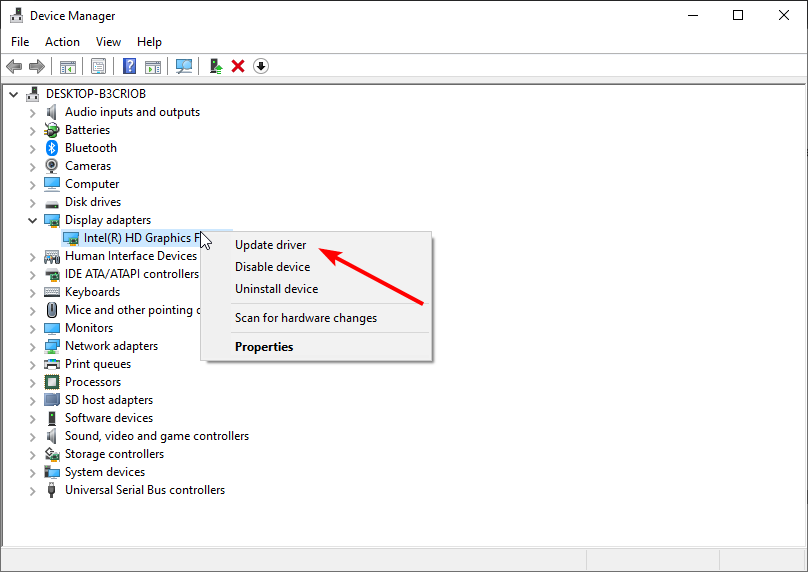
  3. Right-click on the driver there and select Update driver.
    update driver
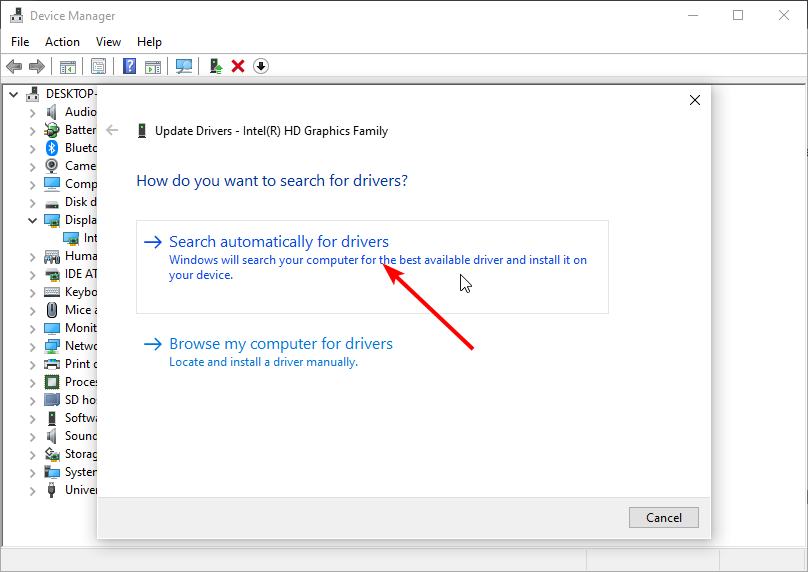
  4. Choose the Search automatically for drivers option.
    search automatically
  5. It will show you if there is any update to install.

The Firefox keeps crashing on Windows 10/11 issue can be due to problems with the graphics card. This occurs when the driver is outdated and cannot meet the requirement of Firefox hardware acceleration.

Updating the driver should help restore normalcy in this case.

8.2. Update driver automatically

What if you have the option of automating your driver update and never have to worry about outdated drivers again? That is what you get with one of the world’s leading driver updaters in Outbyte Driver Updater.

Outbyte Driver Updater is an excellent software that takes care of everything that has to do with drivers update. It completely automates the process, requiring only confirmation from you before it can install a driver.

Outbyte Driver Updater automatically scans and fixes broken, missing, and outdated drivers. It recommends original drivers for your PC from its database of over 18 million trusted drivers. It is one of the tools you need to keep your system running optimally.

9. Reset Firefox

  1. Click the Firefox menu button and select the Help option.
    help menu
  2. Choose the More troubleshooting information option.
    more troubleshooting firefox keeps crashing windows 10/11
  3. Click the Refresh Firefox… button.
    refresh firefox
  4. Click the Refresh Firefox button again when prompted to confirm the action.
    refresh button firefox keeps crashing windows 10/11

Resetting Firefox is another good way to fix crashes. Refreshing the browser restores it to its default settings and removes extensions and themes that can crash Firefox. However, you will retain your bookmarks and cookies after resetting the browser.

How can I fix the Firefox had a problem and crashed. We’ll try to restore your tabs and windows when it restarts prompt?

Firefox had a problem and crashed. We’ll try to restore your tabs and windows when it restarts prompt is usually related to fonts. The easiest fix is to delete any recent font downloaded recently.

If that does not work, you should try the general Firefox crash fixes above.

What can I do if Firefox keeps crashing after Windows 10/11 update?

If Firefox keeps crashing after Windows 10/11 update, the most obvious fix is to update your browser. This is because your current browser version might not be compatible with the OS.

If the crash does not stop, restart Firefox in Safe Mode. This will help disable any extension or theme causing problems on your browser.

Firefox keeps crashing on Windows 10/11 issue is unpleasant and can make you lose valuable info. But if you carefully go through the list of the fixes in this guide, you should be able to solve the problem for good.

Are you facing other issues like Firefox not responding? Then Check our guide for quick and effective ways to fix it. We also have a guide on Annotation GraphicsCriticalError Firefox crash, so don’t miss it.

Feel free to let us know the solutions that helped get Firefox working normally again in the comments below.
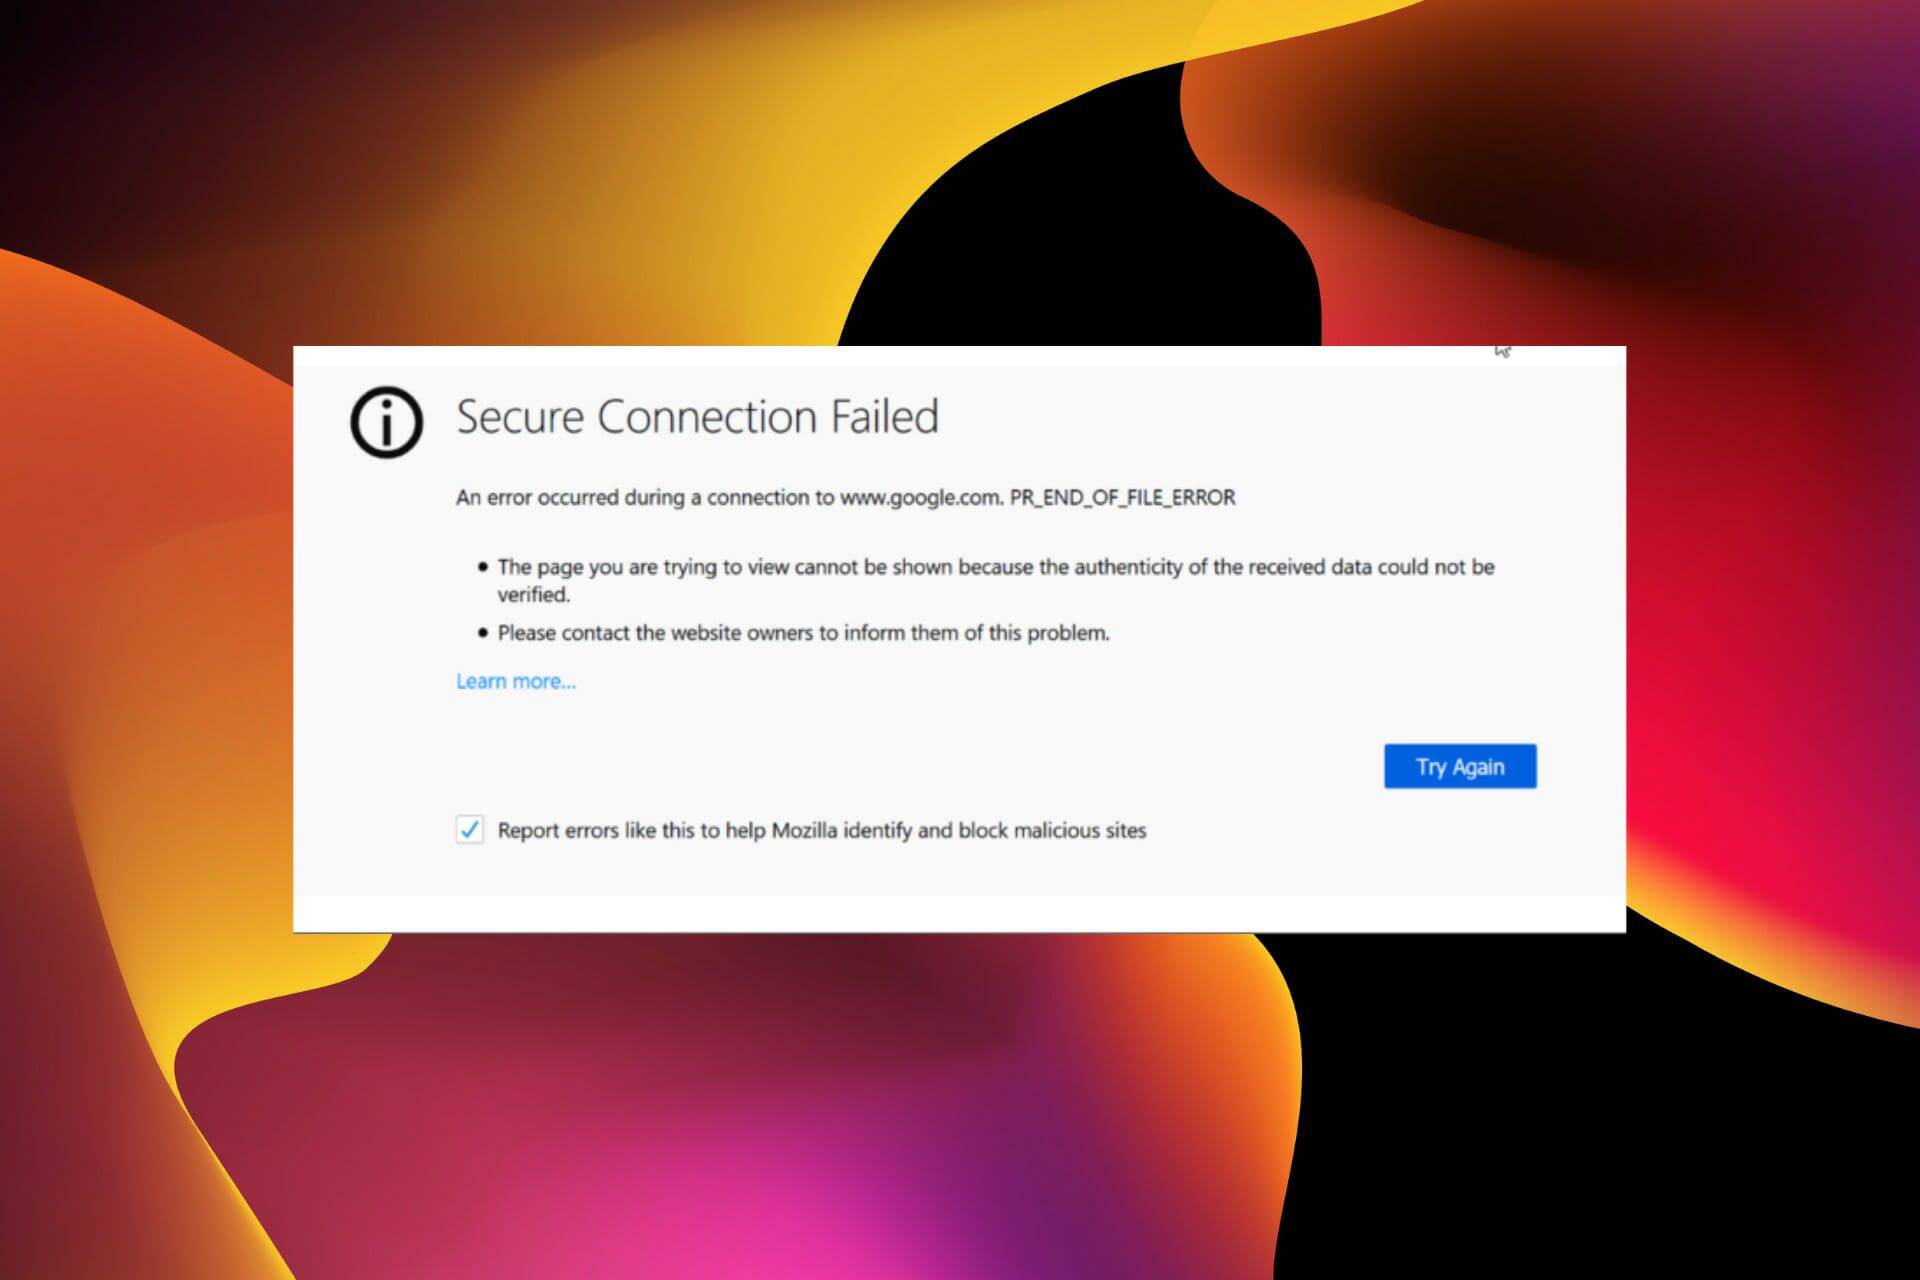
2 Ways to Bypass YouTube’s Secure Connection Failed Error

Firefox boasts a secure connection feature that verifies a website’s security certificate and the connection method. If this verification is successful, it will establish a connection. Otherwise, it will display a Secure Connection Failed error.

This is to keep you secure against malicious websites and links. However, this error showing up on a trusted website like YouTube shows a problem with the browser rather than the website.

Making this more frustrating, it will not display any prompt to add a security option to bypass this error.

As always, we have gathered three practicable fixes for this issue. All you need to do is follow the instructions and be fine.

Why do I keep getting secure connection failed?

The secure connection failed issue often happens due to certificate verification problems. However, if YouTube can’t provide a secure connection or the problem occurs on well-known websites, it is usually down to issues with your browser.

Below are some of the popular causes:

  • Corrupt browser data
  • Interference from antivirus software
  • Glitches within your browser

Quick Tip:

Fixing YouTube’s connection issues on Firefox might prove difficult no matter how hard you try. In this case, there is an alternative browser in Opera One.

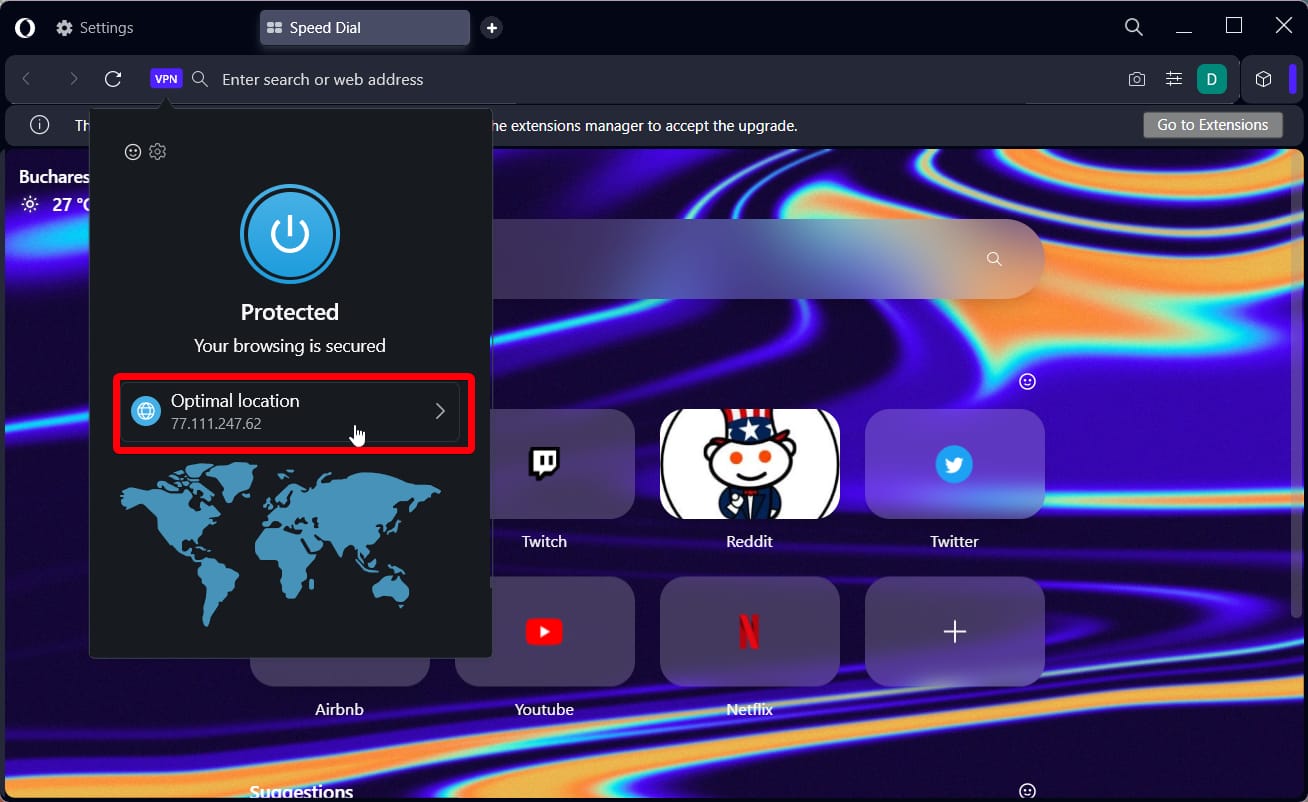
Opera One is a secure browser that protects your online presence without blocking access to trusted sites. It features built-in VPN support for identity and data protection online, and an Ad blocker that removes all ads.

Opera One

Enjoy a seamless YouTube experience with this fast browser with a built-in adblocker and secure VPN.

How can I fix YouTube secure connection failure on Firefox?

1. Clear Firefox cache and history

  1. Click the menu button (three horizontal lines) in the top right corner.firefox settings secure youtube connection failed
  2. Select the Settings option.
  3. Choose the Privacy & Security option on the left pane.clear data
  4. Now, scroll down to the Cookies and Site Data section and click the Clear Data button.clear history firefox youtube secure connection failed
  5. Lastly, scroll to the History section and click the Clear History button.

For more advanced browser cleaning options you can use a dedicated utility such as CCleaner. It has more specific categories such as download history, last download location, specific sessions, and more.

2. Disable SSL on your antivirus software

Most modern-day antivirus software has a special security feature called SSL scanning or SSL filtering. This feature keeps you secured online by filtering through the security certificates of the websites you visit.

With this, the antivirus blocks access to malicious websites and links. However, it is not worth it if it is starting to block secure websites like YouTube.

Hence, you should disable SSL filtering within the app if YouTube secure connection still failed on all browsers after clearing your browser data. If this does not solve the problem, you can disable the Firefox secure connection we showed how to enable above.

The only difference would be to replace the value true with false in the last step and relaunch your browser.

How do I enable a secure connection in Firefox?

  1. Type about:config in the Firefox Address bar and press the Enter key.about config
  2. Click the Accept the Risk and Continue button when prompted about the security of your PC.
  3. Copy and paste the command below in the search bar of the newly opened window. security.ssl.enable_ocsp_stapling
  4. Double-click on the search result to set the value to true.set true firefox youtube connection secure failed

If the value is set to true, you don’t need to make any changes.

How do I enable a secure connection in Chrome?

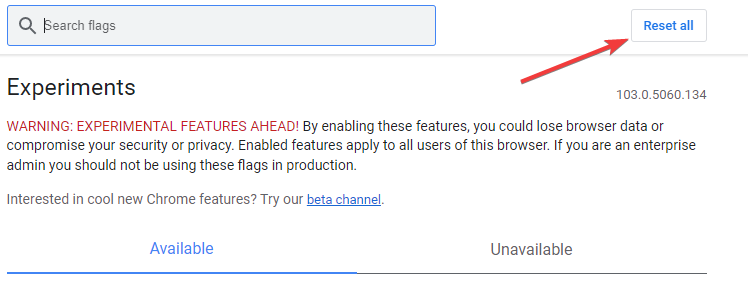
  1. Open Chrome and type chrome://flags in the address bar.
    chrome flags type secure connection failed
  2. Press the Enter key.
  3. Type secure in the search box and locate the Insecure origins treated as secure.
    secure type
  4. Click the dropdown in front of it and select the Enabled button.
    enabled
  5. Restart your browser.

Allowing this feature is not advisable as it makes you vulnerable to malicious websites. However, if YouTube or other trusted websites failed to secure a connection on Chrome, you can enable it temporarily.

The YouTube secure connection failed on Firefox problem can be frustrating, especially when you need to visit the website urgently. Thankfully, it is not an issue that is difficult to fix, as we have shown.

If you face other YouTube errors aside from this, you can check our detailed guides to fix them effectively.

Feel free to discuss the fix that got YouTube working perfectly again on Firefox in the comments section below. You can also mention any verified fix you have tried that is not on this list.

3 Quick Ways to Enable or Disable Chrome’s System Print Dialog

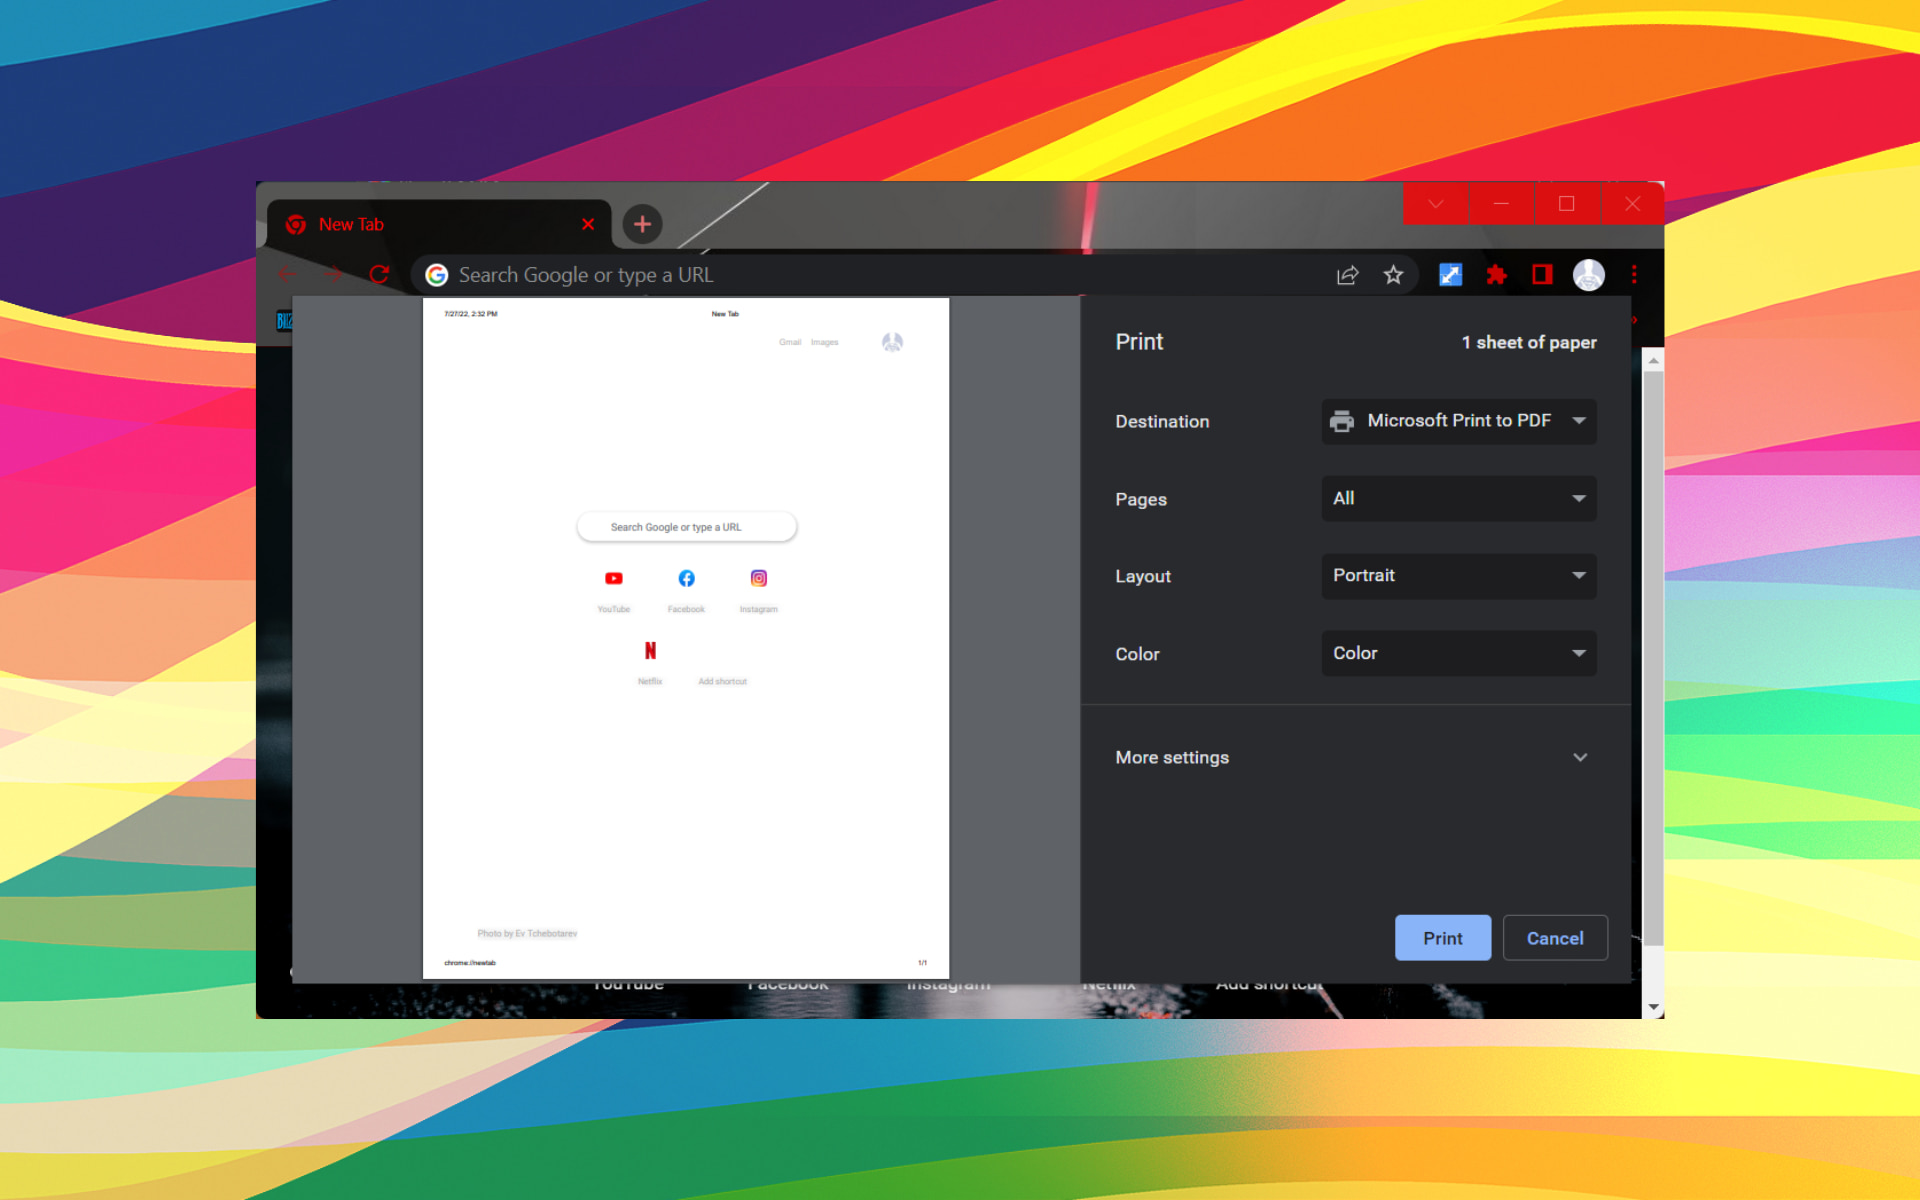
Google Chrome includes its own print dialog box that pops up when you select to print a webpage.

Some users might prefer the default system print dialog box or to skip straight to printing.

You can disable Chrome‘s print dialog or bypass it with two command-line switch modifiers.

Can you turn off the print preview?

Yes, you can. As with most software features, there is an easy way to activate or deactivate them, depending on what your needs or preferences are.

Doing so will only require a couple of minutes of your time, and doesn’t involve any tech-savvy work, so don’t even worry about that.

Do I need print dialog in Chrome?

The Print dialog box allows the user select options for a particular print job, so we’re going to go on a limb and say you might need it.

If you don’t want extra information about the printing process or really don’t want to think too much about it, you can disable it.

Quick Tip:

There is another method you can use the print functionality in your browser, switching browser with Opera One.

You can’t change the print dialog from the homepage, yet this browser includes mouse gestures that assure browsing actions like printing in 1 second. Plus, you have app integrations with useful tools.

Opera One

Use this highly customizable browser that offers you printing actions and many more features.

How do I turn off print dialog in Chrome?

1. How do I turn off the Print dialog box in Chrome?

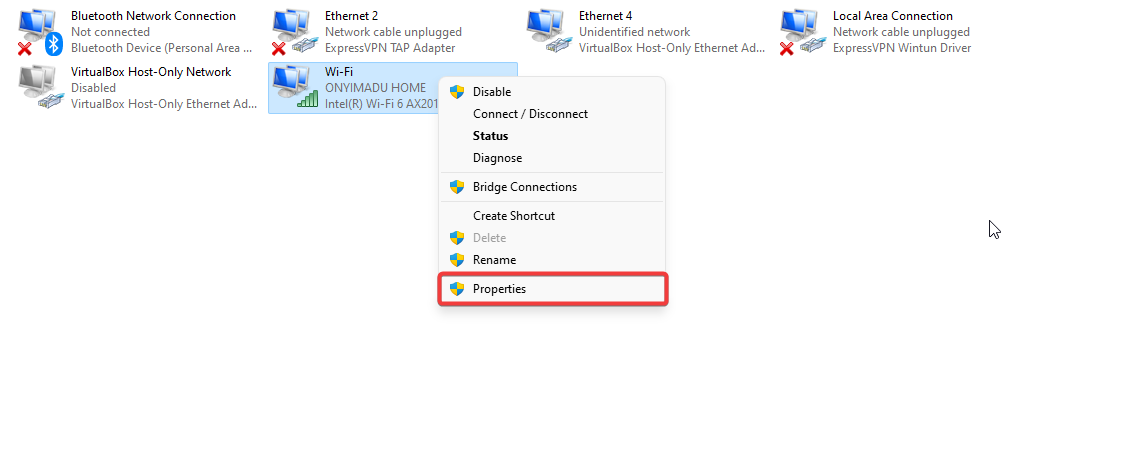
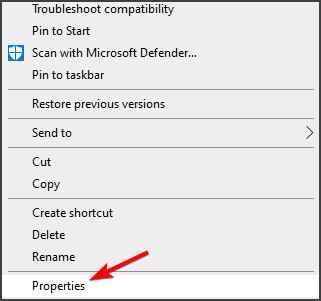
  1. Right-click your Google Chrome desktop shortcut.
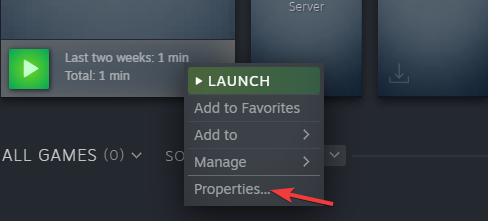
  2. Select the Properties option to open the window shown in the shot directly below.
    Shortcut tab chrome system print dialog
  3. Now add this command-line switch to the end of the Target box: –disable-print-preview.
    --disable-print-preview switch chrome system print dialog
  4. Click the Apply button.
  5. Click the OK option.

Now when you click the Print option in Chrome, the system print window will open instead. Therefore, Google Chrome’s own print preview has effectively been disabled.

To re-enable Chrome’s print dialog, right-click the shortcut you added the switch to and select Properties. Then delete the -disable-print-preview switch, and click Apply.

2. How do I print from system dialog in Chrome?

You can also open the system print window to print webpages in Chrome by pressing the Ctrl + Shift + P hotkey.

However, Chrome’s default print preview will still open when you select that browser’s Print option if you don’t enter the disable command-line switch in its Target box.

System Print dialog chrome system print dialog

3. How do I bypass the Print dialog box?

  1. Make sure Chrome isn’t running.
  2. Right-click a desktop shortcut for Google Chrome to open its context menu.
  3. Select the Properties option.
  4. Next, enter –kiosk-printing at the end of the Target box.
    --kiosk-printing switch chrome system print dialog
  5. Press the Apply button.
  6. Click OK to close the window.

Chrome’s print dialog box will now briefly open and then close when you click the browser’s Print option. Your selected default printer will then print the page open in Chrome.

Thus, Chrome’s print dialog is effectively bypassed in kiosk print mode.

You can disable kiosk print mode by right-clicking Google Chrome’s shortcut that includes the kiosk switch and selecting Properties. Delete the –kiosk-printing switch from the end of the Target box.

Alternatively, you could add a new Chrome shortcut to the desktop. Then you can print without bypassing Chrome’s print dialog window by opening the browser with a second shortcut that doesn’t include a command-line switch modifier.

How do I change print preview settings?

  1. Open Chrome.chrome settings
  2. Click on the three dots in the top right corner and select Print.chrome print
  3. Click on More settings.print settings

That’s all you have to do in order to change the print preview settings in your Chrome browser, a process that will cost you two minutes.

So, that’s how you can disable Chrome’s print dialog box or bypass it for more direct printing. However, note that extensions like PrintWhatYouLike and Print Friendly & PDF can also enhance Chrome’s printing in many ways.

That’s all you need to know about Chrome’s print dialog, the print dialog box not appearing in Chrome, or how to access Chrome and disable print dialog altogether.

Remember that Chrome uses system print dialog by default, and from time to time you could run into problems like Chrome print using system dialog not working.

Whether you want a Chrome extension to print without dialog, or Chrome direct print without dialog, now you know the inner workings.

How to Remove Most Visited Sites from Google Chrome [Android, PC]

Google Chrome’s default New Tab page includes a search box and displays thumbnail shortcuts for users’ most visited sites.

However, what if users don’t really need the most visited websites included at the bottom of Chrome’s New Tab page?

There are a few ways users can remove those thumbnail shortcuts from the New Tab page, but Chrome doesn’t include an option to turn them off within its Settings tab.

Keep in mind that our previously mentioned tips and solutions may be easily applied by all those looking for ways to:

  • Hide most visited sites in new tab page/Chrome extension – Assuming that’s your main concern, rest assured that you can delete the browser’s data or turn Off the Top Sites from Site Engagement Setting.
  • Remove most visited sites in Chrome – Another quick fix to consider is adding the Remove Most Visited Pages Extension to Chrome.
  • Disable most visited sites in Chrome Android – To do so, you just need to tap and hold the website’s icon until a new window pops up. Then, just select Remove in the pop-up window.
  • Chrome doesn’t show recent sites – If that’s an issue you often face, consider switching to a different browser. Unlike Chrome, Opera’s Top Sites always holds the web pages you visit most often.

Let’s take a closer look at how you can remove top sites in Chrome, with or without using commands such as chrome://newtab/#most_visited.

Quick Tip:

When it comes to keeping web pages truly organized, there is no better option than Opera One. As expected, the Home screen includes Top Sites, a section with the web pages you most often.

Unlike what happens in Chrome, you can keep tabs on related subjects in the same workspace, so you’ll never spend too much time looking for a tab again. And you can even keep relevant pages in one place.

Opera One

When hiding the most visited sites in Chrome turns into a challenge, switch to this redesigned browser.

How do I see my most visited sites?

This can easily be done from the Settings section of your Chrome browser, as we are about to show you right now.

  1. Click on the three dots in the top right corner and access Settings.Chrome settings
  2. Access the Privacy & Security tab, then Site settings.privacy settings chrome
  3. Click on View permissions and data stored across sites.chrome sites
  4. Sort by Most Visited.chrome sites sort

How do I change my most visited sites?

You should know that customizing the Most visited section of the New Tab page for Google Chrome is simple and also quick.

Just hover your mouse cursor over a thumbnail that belongs to each website to display two commonly used options like Pin and Remove.

How do I stop Google Chrome from showing the most visited sites?

1. Delete each shortcut separately

  1. Click the Edit shortcut button at the top right of a thumbnail shortcut to open the window shown directly below.

  2. Then, you just need to click the Remove button to erase it.

2. Delete the browser’s data

  1. You can also remove all the most visited site shortcuts from the New Tab page by deleting browser data.
  2. Click the Customize and Control Google Chrome button to open the browser’s menu.
    The Google Chrome menu hide most visited in new tab page google chrome
  3. Select More Tools and click Clear browsing data to open the window shown directly below.
    Clear browsing data window hide most visited in new tab page google chrome
  4. Select the Advanced tab on that window.
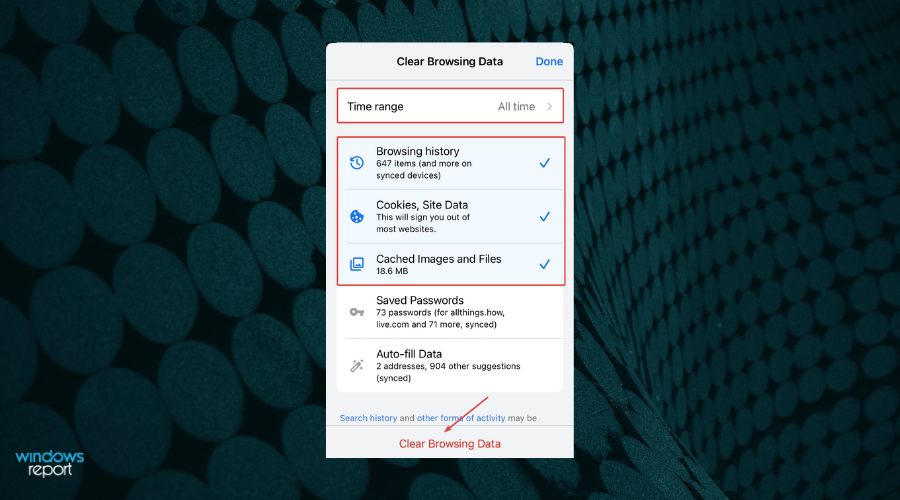
  5. Click the All-time option in the Time range drop-down menu.
  6. Select the Browsing history, Download history, Cookies, and other site data, and Cached images and files checkboxes.
  7. Then press the Clear data button.

3. Add the Remove Most Visited Pages Extension to Chrome

Another option is to remove the most visited page shortcuts with the Remove Most Visited Pages shortcuts extension.

That extension redirects the New Tab page to the Google homepage, almost exactly the same as the default New Tab page.

However, you can’t customize the page’s background as it doesn’t support themes. Therefore, go to the Remove Most Visited Pages page to add that extension to the browser.

After that, the browser’s URL toolbar will include a Remove Most Visited Pages icon to highlight that the extension is on.

The Google New Tab page will no longer display any page shortcuts so long as the extension is on.

You can turn off the extension by entering this in the URL bar and then clicking the button at the bottom right of the Remove Most Visited Pages box: chrome://extensions/

4. Turn Off the Top Sites from Site Engagement Setting

  1. Enter this in the URL bar and press the Return button: Chrome://flagsThe flags page hide most visited in new tab page google chrome
  2. Enter Top Sites from Site Engagement in the search flags box at the top of the page.
  3. Note that the Top Sites from Site Engagement option isn’t included in the latest version of Google Chrome.
  4. Select Disabled on the drop-down menu for the Top Sites from Site Engagement option.
  5. Then press the Relaunch Now button to restart Google Chrome.

Some Chrome users can turn off the New Tab page’s most visited sites shortcuts with a Top Sites From Site Engagement flag option in earlier 2018/2019 versions of the browser.

How to remove Top Sites from Google Chrome Android

  1. Open Chrome on your device and tap the address bar.
  2. Type the chrome://flags and press Enter.
  3. Tap on the Search flags and enter Explore websites.android disable
  4. In the dropdown, switch from Enabled/Default to Disabled.

So, that’s all you need to know on removing the most visited sites in Chrome, on the New Tab page. Alternatively, users could add New Tab page extensions to Chrome instead to remove frequently visited pages in Chrome.

Extensions like Infinity New Tab give users more customizable New Tab pages that don’t include most visited site shortcuts.

Besides, to perform a disturbance-free search, you may turn off trending searches on Google.

YouTube is not Working in Internet Explorer: 8 Ways to Fix It

Although Internet Explorer is no longer Windows’ default browser, it still has retained a loyal user base. However, some of its users have said on software support sites that YouTube videos don’t play in Internet Explorer.

One IE user stated that some, but not all videos show up as black screens, no controls no video, some do play audio, and others don’t respond at all.

If you experience the same issue as well, these are some of the potential resolutions that might fix YouTube video playback in IE.

Why is YouTube not working or loading?

There isn’t just one reason why YouTube won’t work. The main, and most obvious reason, is that your Internet connection is either insufficiently fast or stable or not working at all.

You would be surprised but YouTube could also refuse to work due to an outdated operating system, so you might want to look into that as well.

It’s rare for YouTube to have a complete outage, so we’re going to exclude that. It could also happen due to corrupted Cookies and Cache or extensions, or because your YouTube app isn’t up to date.

That being said, the simplest way to fix this issue is to hit the reload button on your browser. If that won’t work, we have a special guide for you.

How do I update YouTube on Internet Explorer?

You don’t. You can only update YouTube on your PC if you are using it as a standalone app, which you can get from the Google Play Store.

The YouTube website you access from your browser can only be updated by the site developers, not by individual users.

What can I do if YouTube videos aren’t playing in IE?

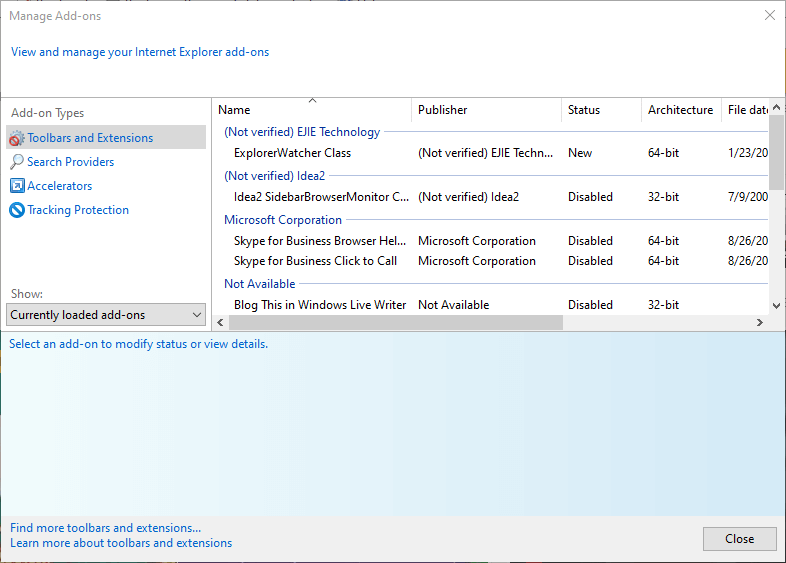
1. Check video (multimedia) add-ons are enabled

  1. Internet Explorer has numerous multimedia add-ons that enable it to play videos without any hiccups. To check if IE’s required video add-ons are enabled, click Tools in Internet Explorer.
  2. Select Manage add-ons to open the window shown directly below.Manage Add-ons window internet explorer youtube videos not playing
  3. Check that the Shockwave Flash Object, Windows Media Player, Shockwave ActiveX Control, and Java plug-ins are enabled there. If not, select those add-ons and click Enable.

2. Check that Java is enabled

  1. Even though the Java extensions are enabled, Java might still not be activated in Internet Explorer.
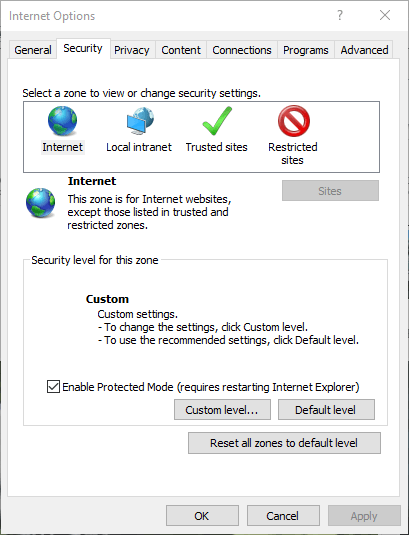
  2. To check if Java is enabled, you’ll need to click Tools > Internet options in IE.
  3. Select the Security tab.Internet Options window internet explorer youtube videos not playing
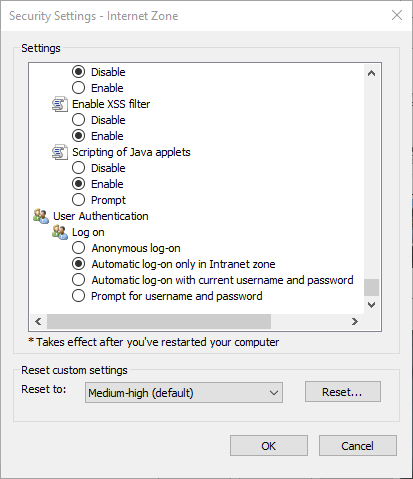
  4. Click the Custom level bar button.
  5. Scroll to the Scripting of Java applets option shown directly below. Select the Enable radio button for that option.The Scripting of Java applets setting internet explorer youtube videos not playing
  6. Press the OK button.

If you want to know how to change Internet Options in Edge, take a look at this useful article.

3. Play the videos in Incognito Mode

  1. Playing videos in Incognito Mode might fix YouTube playback for some users. Click the Tools button at the top right of the browser.
  2. Select Safety and then InPrivate Browsing option.inPrivate Browsing option internet explorer youtube videos not playing
  3. A window will open that confirms Incognito Mode is active. Try playing YouTube videos in that browser window.
  4. If those videos then play ok, you might need to disable some plug-ins to fix video playback outside of Incognito Mode. Try disabling IE’s plugins that aren’t needed for video playback.

4. Switch to another browser

Some browsers don’t play YouTube videos properly. That’s what happens with IE, so you can opt for a browser that even lets you detach online videos into their movable, floating window. We’re talking about Opera One.

Opera One comes with the amazing feature of video pop-out which lets’ you detach the video playing from its main window. Not only that but it also has a lot of features that will improve your browsing even a native AI

Opera One

Can’t you play YouTube videos? Install Opera One, and you’ll love its video pop-out picture-in-picture style feature!

5. Clear Internet Explorer’s cache

  1. Video playback issues can arise due to a corrupted browser cache. To clear the cache in Explorer, press the Ctrl + Shift + Del hotkey.Delete Browsing History window internet explorer youtube videos not playing
  2. Select the Temporary Internet files and website files, Cookies and website data, and History checkboxes there.
  3. Click the Delete button.

6. Select the Use software rendering option

  1. Users have confirmed they’ve fixed YouTube video playback in Internet Explorer by selecting the Use software rendering option. Click the Internet Explorer’s gear button.
  2. Select Internet Options on the menu.
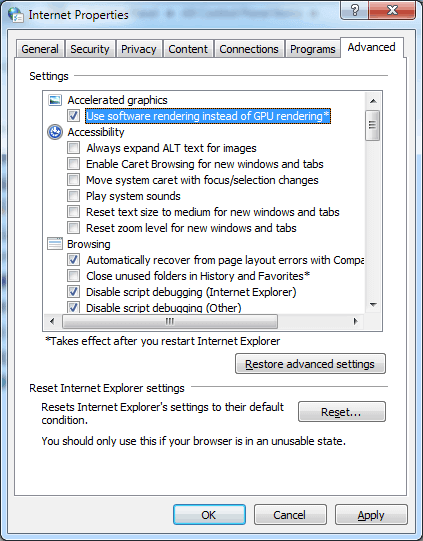
  3. Click the Advanced tab shown directly below.Use software rendering instead of GPU rendering option internet explorer youtube videos not playing
  4. Select the Use software rendering instead of GPU rendering check box there.
  5. Click the Apply and OK buttons.

7. Turn off ActiveX filtering

  1. ActiveX filtering turns off ActiveX controls, which might have an impact on YouTube video playback in IE. To turn off ActiveX filtering, click the Tools button.
  2. Select Safety on the menu.ActiveX Filtering option internet explorer youtube videos not playing
  3. Click ActiveX Filtering to turn it off if it’s ticked.

8. Reregister the flash.ocx file

  1. YouTube videos not playing might be due to a corrupted flash.ocx file. To fix a corrupted flash.ocx, press the Windows key + R keyboard shortcut.
  2. Enter cmd in the Run box. Press the Ctrl + Shift + Enter hotkey to open the Command Prompt as administrator.
  3. Input this command in the Prompt, then press the Return key: regsvr32 c:windows\system32\macromed\flash\flash.ocxThe regsvr32 command internet explorer youtube videos not playing
  4. Click OK on the confirmation dialog box that opens.
  5. Restart Explorer after reregistering flash.ocx.

Worried that the Windows Key is not working? Check out this quick guide to correct the issue in no time.

Some of those resolutions have fixed YouTube video playback for numerous Internet Explorer users. Those fixes are not necessarily guaranteed, but they’re worth a shot nonetheless.

Many users have reported Internet Explorer not playing videos over the years, so it’s a more common issue than you think.

Internet Explorer is no longer supported by Microsoft and is out of service, so you can use one of the other newer browsers out there.

Before you go, you might want to check out our guide on DirecTV YouTube problem.

If you have any other questions or suggestions about YouTube not supporting Internet Explorer, leave them in the comments section below, and we’ll be sure to check them out.

Internet Explorer keeps crashing on Windows 10 [Easy Fix]

With the latest version of Internet Explorer 11 on the market, I am sure you are interested to find out what are the improvements and new apps implemented.

Unfortunately, as promising as it sounds, Internet Explorer 11 has also brought with it some issues. The major issue we have found with Internet Explorer 11 is when it crashes while using it on Windows 10.

Your Internet Explorer 11 can crash in Windows 10 for example if your graphics are not responding at a fast rate thus making the IE stop responding or just close unexpectedly.

Another reason your Internet Explorer 11 might crash is if you have Add-ons installed that are not compatible with your new web browser on Windows 10.

You may wonder why does iexplore.exe crashes? We will give you more information on these issues in the lines below, as well as a way to stop Internet Explorer from crashing in Windows 10.

How can I fix Internet Explorer 11 crashes in Windows 10?

1. Change your browser

If the issue persists and you cannot surf the Internet because IE is constantly crashing on your computer, maybe it’s time to switch to another browser.

While Microsoft still offers support for IE 11 on Windows 10, there are many excellent alternatives out there, such as Opera One.

Opera One comes with features such as integrated VPN and Ad Blocker, native AI and lots of organizational tools like workspaces and tab islands.

Opera One

Having a backup browser is always a good idea, and Opera One is a great one to have around.
Free Download Visit website

2. Reset IE

  1. Open Internet Explorer 11.
  2. Click on Tools option.
  3. Select Internet Options.
  4. Go to the Advanced tab.
  5. Click left on the Reset button.
  6. Click again on Reset in the new window that opened.reset internet explorer
  7. Wait for Internet Explorer 11 to reset to default settings.
  8. Restart the Internet Explorer 11.
  9. Restart your Windows 10 PC.
  10. See if the Internet Explorer 11 still crashes.

3. Use software rendering

  1. Open Internet Explorer 11.
  2. Go to the Tools menu.
  3. Left-click Internet Options.
  4. Click left on the Advanced tab.
  5. Left-click on the Settings feature.
  6. In the Acceleration graphics select Use software rendering instead of GPU rendering.Use software rendering instead of GPU rendering internet explorer
  7. Left-click on the OK button.
  8. Reboot your Windows 10 device.

Note: If this workaround fixed your issue, then you will need to upgrade your graphics driver to the latest version compatible with Windows 10.

Upgrading drivers manually can be tricky, so we recommend using a dedicated driver updating tool to do that automatically for you.

4. Check your add-ons

  1. Press  Windows key + R.
  2. In the run type iexplore.exe –extoff.
  3. Press Enter.
  4. If your Internet Explorer 11 is working properly now then one of your add-ons is causing this issue.

Note: You can open your add-ons by going to the Tools menu and clicking left-click the Manage Add-ons topic. From there you can disable them and see if the issue persists.

5. Use an antivirus to scan your system for malware

If you are used to running complete virus scans of your device, then you probably see the difference in how much better your browser works afterward.

That being said, we recommend that you use one of the best antiviruses for browsing, as they score high for their real-time online protection.

Such antivirus software incorporates several layers of defense that will block all malicious threats before they can get a chance to infect your system.

They have very low rates of false positives, so they will not interfere with any legitimate software or website.

6. Check for Windows 10 updates

  1. Press Windows key + I to open Settings.
  2. Click on Update & Security.
  3. From the Windows update menu, click on Check for updates button.
  4. Install any updates shown here.
  5. After it’s finished reboot your Windows 10 PC.

Note: It is always good to keep your system up to date. Windows updates bring new features or repair security glitches, or any bugs discovered. Updates for IE can be included in Windows updates.

7. Reinstall IE

  1. Press Windows key + S.
  2. Type Windows features.
  3. Left-click on Turn Windows features on or off.
  4. Uncheck the box next to Internet Explorer 11.
  5. Left-click on the OK button.
  6. Reboot your Windows 10.

Now you only need to go back and check again the box next to Internet Explorer 11 and reboot your Windows 10 PC. This way it will automatically reinstall Internet Explorer 11 in your system.

So, these are the reasons why your Internet Explorer keeps crashing in Windows 10. Knowing which is the root cause of the problem allows you to quickly fix it.

If Internet Explorer is producing more headaches, you should consult our list with the best browsers for Windows 10 and choose another such solution.

We also have a great guide on what to do if Internet Explorer opens Edge, so don’t miss it.

If this article was helpful or you need more information on the issue, let us know in the comments below.

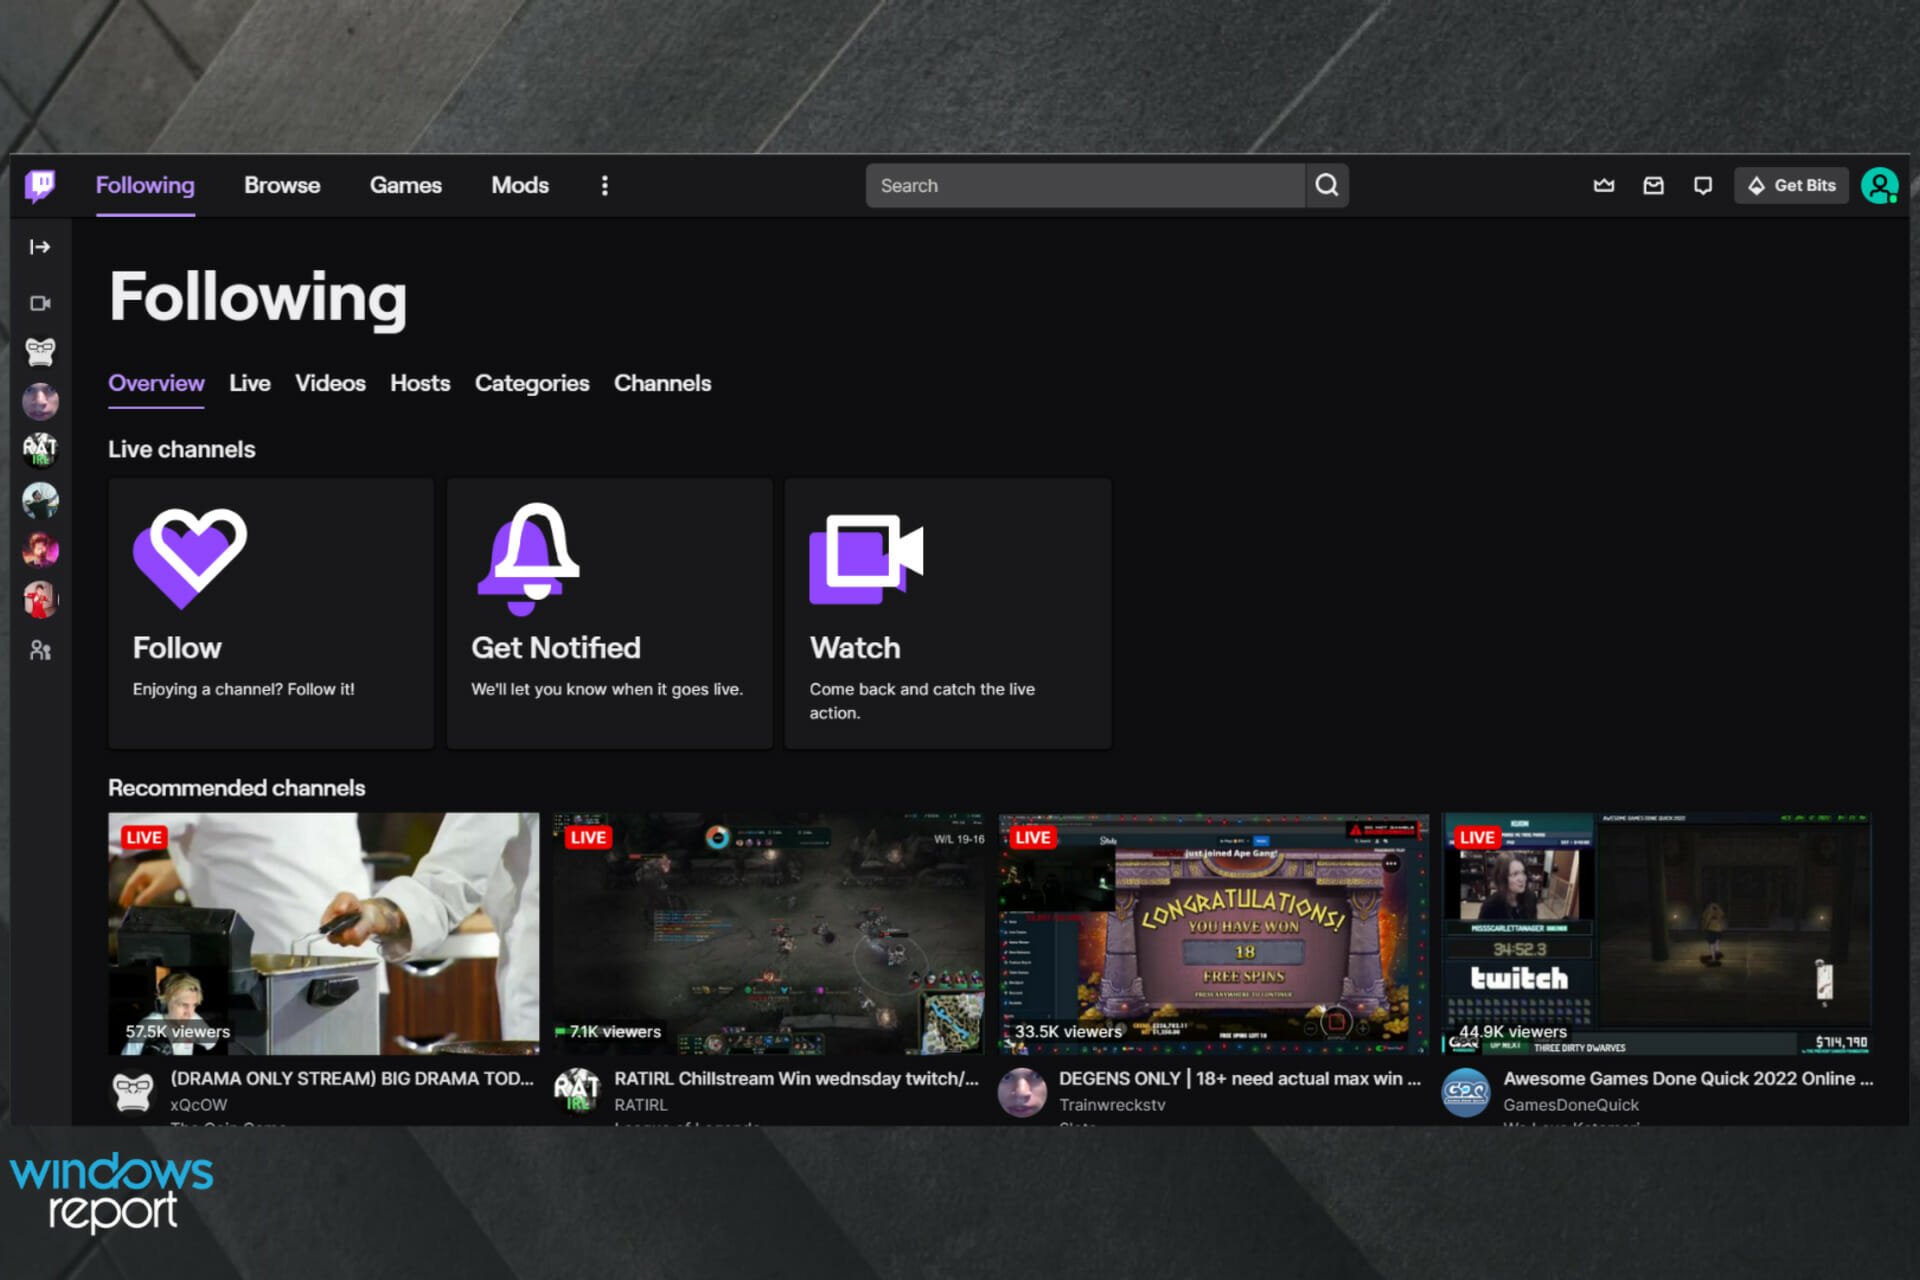
How To Fix The Most Common Twitch Banner Issues In 2026

Twitch is a great application that allows you to either stream your gaming online or watch other people stream games online.

Besides this, it enables you to communicate directly with the streamer and participate in the stream if you choose to do so.

The importance of knowing how to deal with Twitch banner issues becomes even more important if you’re doing video-game streaming for a living.

For this reason, in today’s How-to article, we will explore some of the most common twitch banner issues and how to fix them on Windows 10 and 11. Read on to find out more details.

What is a Twitch banner, and what related issues can I encounter?

Twitch banners are meant to be cover images or headers over a channel or page. The great thing about these is that you can easily customize them according to your preferences.

By uploading an interesting and unique image of art, you can use it for advertising or simply attract more users to your Twitch channel. The recommended size for your Twitch banner is 1920 x 480 pixels.

Even if a Twitch banner can be a great idea, there might be something you should know. Some users reported several related issues, and we’re here to present the most common ones as follows:

  • Twitch banners are not showing up on the screen
  • Not being able to update the Twitch banner after uploading it
  • The Twitch banner is not fitting
  • Twitch banners are not centered
  • Not being able to upload a Twitch banner

How do I fix the most common Twitch banner issues?

1. Twitch banner not showing

In some cases, the image might take some time to appear on your screen normally. This happens because of the amount of data the Twitch server needs to process every minute of every day.

Depending on the number of requests applied for on that specific day and at that specific time, your Twitch banner might take a while to be displayed (a few hours to a few days). Please be patient and allow the Twitch servers time, and the issue will solve itself.

However, your browser can also be to blame for the way your Twitch banner is displayed (or not displayed).

Thus, we suggest you switch to a different browser that is faster, better, and optimized for media and gaming, and it is called Opera.

Millions of users are using it, and it is still growing in popularity, but let’s see why is this happening.

Opera is a great alternative for streamers or gamers. The Speed Dial or Instant Search are just two of its most amazing features that allow you to browse the web faster than ever before.

Its built-in AdBlocker not only removes distractions and speeds-up loading but also includes cryptocurrency mining protection.

Opera has another browser that is specifically designed with gamers in mind, and it is called Opera GX.

Among other things, it features dedicated Twitch integration, which guarantees that things like banner issues will be a thing of the past.

Being a Chromium-based browser makes it extremely fast and also frequently updated, so whatever changes Twitch may bring, know that Opera will not be far behind.

2. Twitch banner not updating after upload

As in the case of the previous issue, the Twitch servers are sometimes overloaded with data that needs processing. If you upload a new banner to your profile and the image is not being uploaded instantly, you will need to allow the servers some time.

If you feel that you’ve waited enough, you could also try to upload your banner from a different browser software and see if that makes any difference.

3. Twitch banner is not fitting

Having a good-looking banner uploaded to your profile that doesn’t contain white or black edges is very important. This becomes even more important if you want your profile to stand out or make a good impression on your followers.

To achieve this, you will have to create your banner with these sizes width: 2600px, height: 480px, and use the space found in the first 900px from the left of your image.

Using these sizes and creating your artwork in the 900px area to the left of the image will give you the best results. For editing images, you can use Canva or any other tools you prefer.

4. Twitch banner is not centered

Having your banner centered will vary a lot depending on the size of the display your followers are looking at your profile.

The best way to create your banner is by following the instructions in the 3rd method from this article.

Tip icon Tip
Some users also suggest not using too much text, as that can ruin the way your banner is displayed.

5. Twitch banner is not uploading

To streamline the process of uploading your Twitch banner, you will need to make sure that the size of the Twitch banner image is not too big. Twitch allows a maximum 10 MB size. Make sure your banner doesn’t exceed this limit.

To reduce the size, it is also recommended that you use a .jpeg format and not .png.

6. Twitch banner blurry

Even though Twitch recommends a ‘1200×480’ banner site, you can upload one with a higher resolution by maintaining the proper aspect ratio. It will help to fix the Twitch banner’s low quality or blurry problems.

7. Twitch offline banner not showing

You can go through method 2 for this. You will need to wait for a while even the time can be longer. Give time to the Twitch server to reflect the update. Also, make sure you have uploaded a banner with a 16:9 aspect ratio and at least 1920X1080 pixels.

This article has provided you with the common Twitch banner tips and solutions for common problems. The solutions will work not only for the mentioned ones but also for Twitch banner blocked by video or any other similar issues.

These are the most common banner issues encountered by users inside the Twitch application. Let us know if this guide was of help to you by leaving a comment below.

Can VPN Help with Packet Loss? 7 Best VPNs to Pick From in 2026

Packet loss is annoying. The fact that it occurs randomly and there’s no immediate fix makes it even worse. You can perform some troubleshooting and try to isolate the issue, but most often it will go away by itself.

Since its list of causes is not exactly narrow, there are a lot of factors that play a role in its occurrence. The culprits range from a bad Ethernet cable to poorly configured routing on your ISP’s network.

However, rumor has it that VPNs can fix packet loss for good. Although we agree that VPNs act as a panacea for a wide range of issues, we will debunk the myth once and for all.

Can VPNs fix packet loss?

Realistically speaking, VPNs alone can’t do much if you’re losing packets. However, they can patch a few things up if your ISP doesn’t meet its expectations.

For instance, if you know for a fact that your ISP is not exactly good when it comes to delivering the service you’re paying them for, a VPN might alleviate the issue.

Additionally, if your routing is bad, using a VPN such as Private Internet Access can and probably will improve your connection’s quality by a great deal.

If you need further help, check our dedicated guide that explains how to check what causes your packet loss problems. 

VPNs route all your traffic through their servers, which are often top-notch, bypassing your ISP’s cheap ones (if that’s the case). That way, you have a far better connection without switching ISPs or investing in new hardware.

However, note that not even VPNs can improve your speed if there’s nothing to improve in the first place. For instance, you can use a VPN on DSL, but it won’t magically upgrade your connection to T1, T3, or fiber optics.

The bottom line is you can expect your VPN to streamline your connection by improving ping and curbing packet loss.

If you are wondering: Does VPN really help with ping?, rest assured that we have an answer for that and a selection of great VPNs that won’t disappoint you.

So, rest assured that using a leading VPN helps you reduce in-game packet loss for Valorant, Warzone, War Thunder, League of Legends, NBA 2K20 gameplay, or even for MediaCom customers.

What are the best VPNs to improve packet loss?

ExpressVPN – best VPN to improve packet loss

ExpressVPN

As an alternative solution for packet loss, ExpressVPN can provide professional help with your internet connection trouble.

If you’re craving software that has awesome features regarding speed or web security, ExpressVPN is probably a wise choice for you to make. Moreover, 256-bit AES encryption eliminates any threat from online browsing. 

Briefly, to avoid packet loss on the web you should use this tool because of its supersonic servers. Besides all the pros, the speed of VPN servers is among the most recognized benefits by users. 

Therefore, if you want to solve connectivity problems and prevent ISP limitations, a guaranteed solution would be this fast and efficient VPN service.  

Check out what you need to know about ExpressVPN:

  • 164 server locations across 94 countries 
  • Download anonymously 
  • Very fast servers and internet speed 
  • No blocked content across borders

ExpressVPN

For a better internet connection and no packet loss, address your VPN needs using ExpressVPN as your comrade. 
Check price Visit Website

Private Internet Access – biggest server network

Private Internet Access is an excellent VPN from Kape Technologies that you can use if you want to curb packet loss and improve your ping values without too much effort.

As stated above, VPNs can only improve packet loss if there’s an issue with your ISP.

Therefore, make sure that the issue is not, in fact, with you or the server you want to connect to. PIA has a vast network of servers that you can easily switch between.

For packet loss issues, we recommend using the auto-connect feature. Just launch the app and click on the power button.

The VPN will automatically connect you to the most secure and fastest server based on your actual location and configuration.

If you notice your current connection is dragging you down, switch the server and the issue should go away.

Here’s what you need to know about PIA:

  • An impressive network of over 35 000 servers in 80+ countries
  • Eliminates high ping and packet loss with fast servers
  • Supports up to 10 devices on the same account
  • 30-day money-back guarantee

Private Internet Access

Notice packet loss on your ISP’s side? PIA can help you fix it and improve your ping.
Check price Visit Website

NordVPN – foolproof antitracking features

NordVPN is a leading VPN program that can tackle packet loss with its powerful features, including fast and secure P2P.

This VPN solution has no bandwidth limits, allowing you to watch your favorite series online or play your favorite games for as long as you please.

Moreover, you can connect to thousands of servers in 59 countries and stream content without interruptions caused by ISP throttling.

NordVPN provides you with 5500+ ultra-fast VPN servers and lets you connect from up to six devices. And you can use it on Windows, iOS, macOS, Android, and Linux.

Alternatively, try connecting it directly to your Wi-Fi router for secure online activity and no packet loss risks.

NordVPN supports OpenVPN and allows you to configure it on your router manually.

Here are other key features of this VPN program:

  • No-logs policy
  • Automatic Kill Switch
  • Cloud file encryption
  • DNS leak protection
  • 24/7 Customer support

NordVPN can fix packet loss issues and improve your overall online experience. Moreover, the price options are flexible and it’s the ideal choice if you want to use it for business purposes.

NordVPN

Improve packet loss with this reliable VPN solution!
Check price Visit Website

Surfshark VPN – speedy servers on a budget

Surfshark VPN, from Surfshark LTD, is one of the best services when it comes to state-of-the-art encryption technologies.

Surfshark VPN will keep your business private, no matter what your daily routine involves, away from prying eyes.

It can tackle mundane tasks such as lifting geo-restrictions, improving ping, and, more importantly, reducing packet loss.

However, note that packet loss reduction can be achieved only if the issue is with your ISP. If you have bad hardware or the server you’re connected to has some trouble, a VPN won’t be able to fix things.

Here’s what you need to know about Surfshark VPN:

  • Holds a network of 800 servers
  • Fast servers to ensure low ping and packet loss incidence
  • One of the best encryption services
  • 30-day money-back guarantee

Surfshark VPN

Have trouble with packet loss? Let Surfshark VPN take care of that.
Check price Visit Website

CyberGhost VPN – great VPN apps for all your devices

use CyberGhost VPN for your Windows 10 laptop

CyberGhost VPN is yet another excellent VPN service from Kape Technologies that can help you curb packet loss. You need to launch it, connect to the server of your choice, and the issue should go away.

You might want to use a recommended server if you only care about speed. CyberGhost VPN can recommend the fastest server based on several parameters, such as location, current speed, and configuration.

So, even if you did everything above and the packet loss issue persists, you can switch the server. Disconnect from the current one, pick another one, and re-establish the connection.

We’re sure you will find the right combination in no time.

Here’s what you need to know about CyberGhost VPN:

  • Has over 6,400 servers in 89 countries
  • Lets you connect up to 7 devices to the same account
  • Fast servers to help you improve your ping and packet loss
  • 45-day money-back guarantee

CyberGhost VPN

Does packet loss trouble you? CyberGhost VPN can help you get rid of it.
Check price Visit Website

Bitdefender VPN – advanced anti-throttling technologies

download bitdefender

Bitdefender VPN is a great VPN solution from the popular Bitdefender group, which aims to help you overcome privacy, security, and connectivity issues from the same place.

So, if you suspect your ISP is throttling your connection or leaking packets everywhere, a tool such as Bitdefender VPN can help you bypass these problems without significant effort.

You have to launch the VPN, connect to a recommended server, and check to see if the issue persists. If not, you’re a winner. If it does, you can try another server.

Here’s what you need to know about Bitdefender VPN:

  • Lets you unblock various restricted content
  • Secures your Wi-Fi connections
  • Multiple virtual connections

If you want to find out more, check out our Bitdefender VPN review.

Bitdefender VPN

Bitdefender VPN can reduce packet loss if your ISP is triggering it.
Check price Visit Website

VyprVPN – dedicated DNS security

VyprVPN is a strong VPN service from Golden Frog GmbH, which can help you tackle issues such as high ping, poor connectivity, or packet loss.

However, the packet loss problem should be on your ISP’s side and not yours or the server you’re trying to connect to for this quick and easy fix to work.

Launch VyprVPN on the target PC, connect to a server, and then check if your packet loss issue is still occurring. If it does, try another server or check that your ISP is triggering it.

Here’s what you need to know about VyprVPN:

  • Fast servers to curb ping and packet loss issues
  • Anti-DDoS feature to eliminate worries about DDoS attacks
  • VyprDNS support, along with several encryption protocols
  • Includes NAT firewall

VyprVPN

VyprVPN can help you bypass packet loss issues effortlessly.
Check price Visit Website

How to prevent packet loss?

If you want to make the best of your connection and prevent packet loss from happening or at least keep it a little bit under control, you can make some changes to your network configuration.

➡️ Use a good Wi-Fi router: if you are on a wireless network, it’s very important to make sure your data is transmitted via a stable router

➡️ Try to reduce the number of connections: one of the most common reasons for packet loss is network congestion; try to disconnect unused devices and close web browser tabs or other idle activities 

➡️ Connect using Ethernet: many users say that their packet loss issue improved after enabling a wired connection

➡️ Update your network adapter drivers: make sure that you run the latest version. Otherwise, you will experience connectivity problems, bugs, and packet loss

These are not mandatory if you decide to use a VPN, but they are good ideas you can try if you have problems with your connection.

Concluding here, consider our guide that explains everything there is to know about packet loss and how to fix it.

You can also visit our VPN Hub to discover more reviews, guides, and news regarding Virtual Private Networks.

Should I worry about packet loss?

Packet loss can be a nuisance. If you don’t keep it under control, you’ll face poor internet speed, connection interruptions, other performance issues, and even 100% packet loss.

Unfortunately, most of the tools to deal with packet loss are in your ISP’s hands. But if you follow the recommendations outlined in our guide, you can do your bit to improve your online experience.

How much is an acceptable packet loss?

Any amount of packet loss is a sign of a problem. However, there’s an acceptable level that won’t create noticeable network issues.

That’s usually the ratio between 1% and 2.5%. A bit above that may still be bearable, but anything over 5% will surely impair connection quality.

How to fix FFXIV error 2002 [Lobby server connection error]

As Final Fantasy XIV is a multiplayer RPG, an internet connection is essential for that game. However, FFXIV players can’t connect to that game’s lobby when error 2002 arises.

Some other common issues encountered by FFXIV fans include the inability to download patch files in this game.

If you make time for playing and then see the error 2002 arise, it is understandable that you would get annoyed and scour the web for a solution.

The message states: The lobby server connection has encountered an error.

How can I fix the FFXIV error 2002 for good?

Restart the router

Even though it might seem like an obvious step, being a server connection error, it is most likely caused by an issue with your Internet connectivity, or the servers not being online from the developer’s side.

To eliminate the possibility that the dreaded 2002 error doesn’t appear because of your network, performing this action will surely help.

Try restarting (or resetting) your router first. Power off your router, and then unplug it. Wait for about 30 seconds so the entire router’s settings and packets are cleared.

After this time, simply plug in your router again, and turn it on.

If you find that this method doesn’t change anything on FF14, follow the next described methods one by one.

    Allow FFXIV through the firewall

    Error 2002 often appears due to firewalls blocking FFXIV’s internet connectivity. Therefore, you can try to resolve this problem by modifying the corresponding firewall settings on your PC.

  1. 1. Press the Windows key + S to open the search box.

  2. 2. Type firewall in your search box.

  3. 3. Click Windows Defender Firewall in the search results to open the Control Panel applet.

  4. 4. Click Allow an app or feature through Windows Defender Firewall to open the Allowed applications window.

  5. 5. Click the Change settings button to adjust options.

  6. 6. If FFXIV is not listed, click the Allow another app option.

  7. 7. Then click Browse to select the FFXIV EXE file.

  8. 8. Click the Open and Add buttons.

  9. 9. Select both the Private and Public checkboxes for FFXIV.

  10. 10. Press the OK button to save the changes.

Turn off Windows Defender Firewall

Alternatively, you can turn off Windows Defender Firewall to ensure it isn’t blocking FFXIV.

  1. To do that, open the WDF Control Panel applet as outlined within the second resolution.
  2. Click Turn Windows Defender Firewall on or off on the left of the WDF applet.
  3. Select the two Turn off Windows Defender Firewall options on the Customize Settings window.
    Customize Settings window ffxiv error 2002
  4. Select the OK option, and close the firewall applet.
  5. Try playing FFXIV with the firewall off.
  6. If the game runs well, then turn the firewall back on and allow the game through the firewall using the previous solution.

Uninstall third-party antivirus software firewalls

The best way to ensure a third-party antivirus firewall isn’t blocking FFXIV is to uninstall an installed antivirus utility.

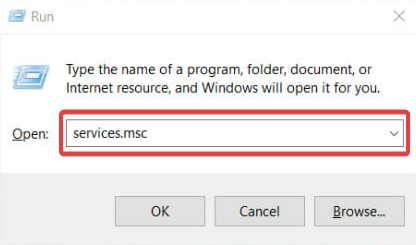
  1. To do that, launch Run by pressing the Windows key + R keyboard shortcut.
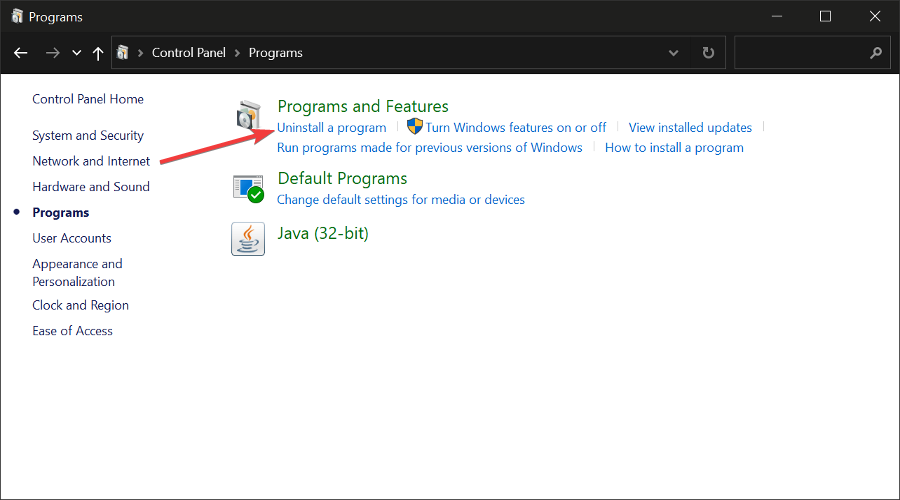
  2. Type appwiz.cpl in Run and click OK to open Windows’ uninstaller.
  3. Select your third-party antivirus software.
  4. Click Uninstall and Yes to remove the antivirus utility.
  5. Restart Windows after uninstalling the antivirus software.

Before uninstalling a third-party antivirus utility, you can try disabling it via its context menu. Right-click its system tray icon to open a context menu that will include options for the antivirus software.

Norton Security's context menu ffxiv error 2002

Select to disable the antivirus software there until restart if you can. If that doesn’t resolve error 2002, however, uninstall the utility as outlined above.

Uninstall the WTFast software

  1. Error 2002 can also be due to the WTFast internet utility. To uninstall that software, open the Programs and Features applet as outlined for resolution four.
    The uninstaller ffxiv error 2002
  2. Then right-click WTFast to select an Uninstall option for it.
  3. Click Yes to confirm and uninstall the software.
  4. Restart your desktop or laptop after uninstalling WTFast.

Connect to the Internet with Ethernet cable

Some users have also said they’ve fixed error 2002 by connecting to the Internet with cables. If your PC has an Ethernet port and cable for it, try connecting to the Internet with that.

Connect your router to the PC with the Ethernet cable. Then try playing FFXIV.

In case you can’t use your Ethernet connection, there is a multitude of solutions for this issue as well.

Those are some of the more likely fixes for FFXIV error 2002. However, error 2002 can sometimes be due to server maintenance. You can check for server maintenance announcements at the FFXIV forum.

Before you leave, don’t hesitate to check our latest guide on FFXIV script error for more interesting solutions.

Feel free to share your thoughts with us by using the comment section found below this article.

Fix: AT&T Throttling And Data Slowing Down [2026 Workaround]

The FTC fined AT&T for throttling its Unlimited data plan without disclosure. If you are one of these unsatisfied customers and are considering changing your ISP, try using a VPN to stop AT&T throttling first.

Not all virtual private network services are fit for the job, though, so you should take the time to explore your options. Or you can go with our recommendations since we’ve tested countless VPN apps.

Although there are free VPNs you can use, we’re against them because they are either filled with adware, collect and share your data with marketing agencies, or both. Instead, a premium VPN is worth it. Check out the step-by-step instructions below to bypass AT&T throttling with a VPN.

How do I stop AT&T’s throttling and data slowing down?

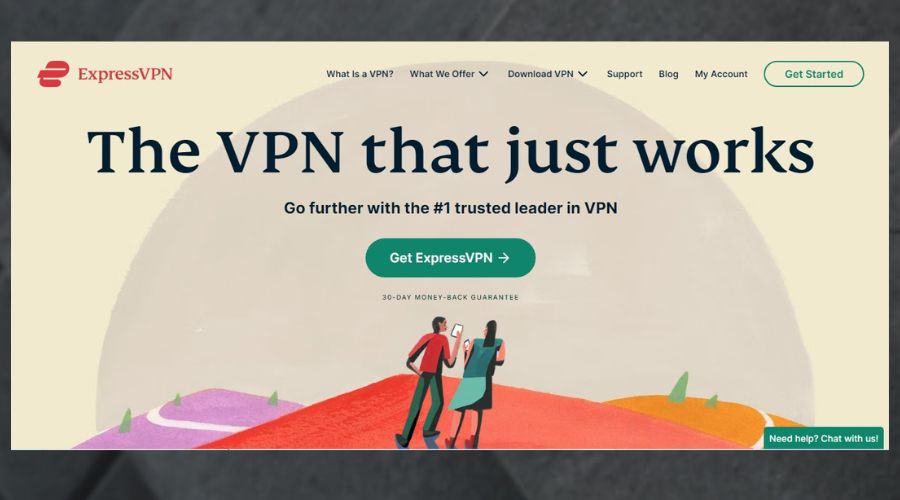
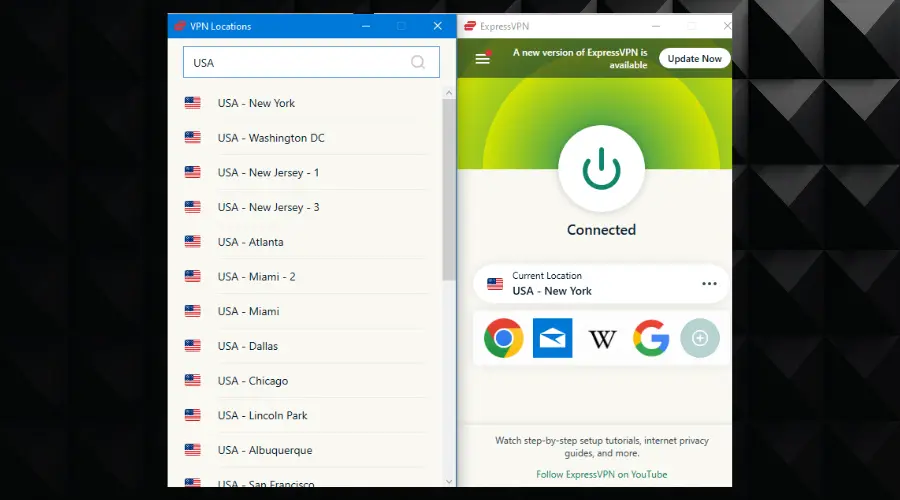
  1. Download and install ExpressVPN on your device.expressvpn subscription page
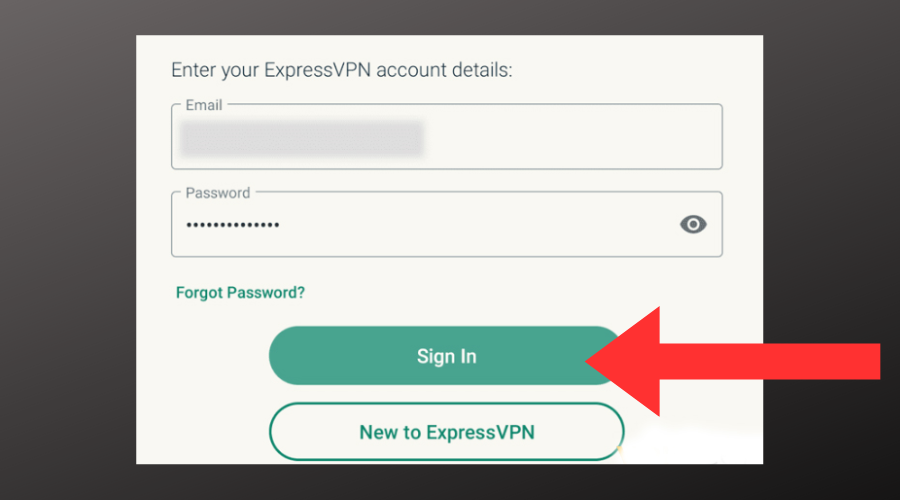
  2. Run the app and log into your account.sign in to expressvpn
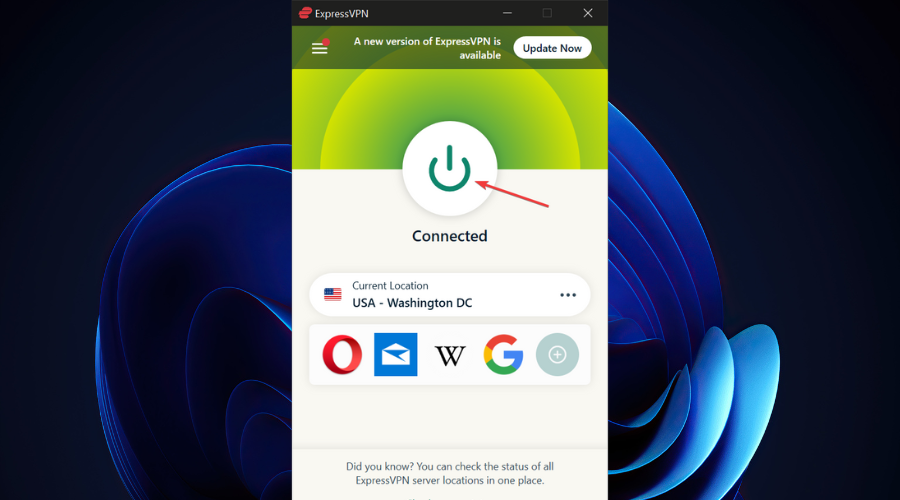
  3. Click on the current location and choose a server to connect too.connect to any expressvpn server
  4. Press the big power button to connect to the VPN server.
  5. Try accessing the previously-restricted online resource.

What is network throttling?

Throttling your internet bandwidth is the process by which your ISP (internet service provider) limits the speed of your connection.

This usually happens for a few reasons, which we will discuss further:

➡️ Surpassing the data packet you paid for

As you might expect, if your ISP contract mentions a specific network data cap, your internet connection will become increasingly slower as soon as you reach it.

This is a tactic used by ISPs to persuade users to renew their data packets with their company. From this perspective, it would make sense that the internet connection would be limited after reaching the cap mentioned in the contract.

That being said, depending on the ISP company, throttling is sometimes used even while paying for a so-called unlimited internet plan. The ISP engages in this procedure whenever your data transfer reaches a certain soft cap, which is not fixed but dependent on your location, internet connection type, and surge in network data processing.

➡️ The ISP wants to stop you from accessing specific online resources

To access certain streaming services or download large files through a torrent client, your internet connections need to be running at a certain speed.

By using the throttling process, your ISP reduces the amount of data that can be transferred at once through their network, thus stopping you from using the services mentioned above.

➡️ The ISP’s network is used by a large number of people at once

Bandwidth throttling also happens if the ISP observes that their network can’t deal with the number of people using their connection simultaneously.

As ISPs have a limited amount of bandwidth to share among users, if there is a surge in traffic, the speed at which you can stream and download content will be reduced to accommodate all users.

Does AT&T slow down data?

The answer here is affirmative because the company stated that slowing down your Internet speed in different situations is possible.

For instance, your wireless connection can be throttled if the network is too busy. That’s because many people use mobile data at the same time, and the result is network congestion.

In spite of this eventuality, you can stop Internet throttle by getting more expensive unlimited plans and avoiding slow PC navigation.

How do I know if my bandwidth is being throttled?

To check if your bandwidth is being throttled, you should start by checking your contract with AT&T, and read the stipulations regarding your connection’s data caps, and bandwidth limits.

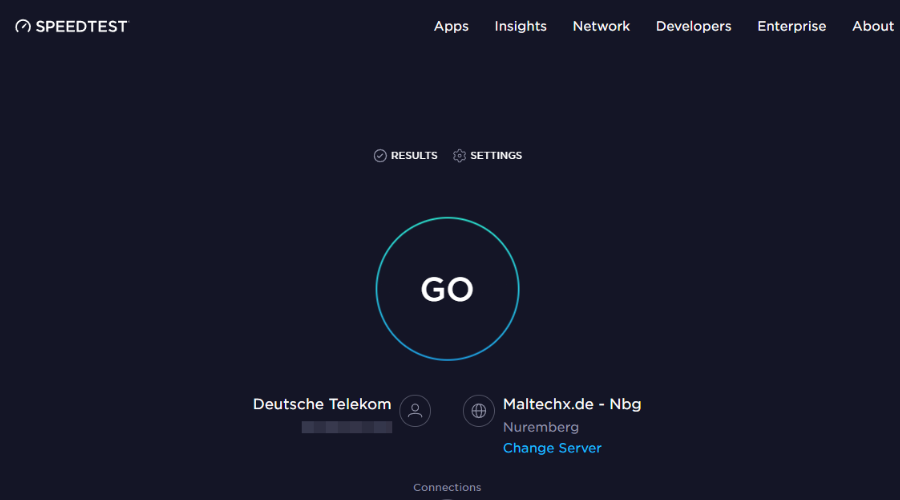
Once you have this information, test the internet connection speed by using an online tool like Speedtest.net.

All you need to do is to visit the website and click the GO button appearing on the screen.

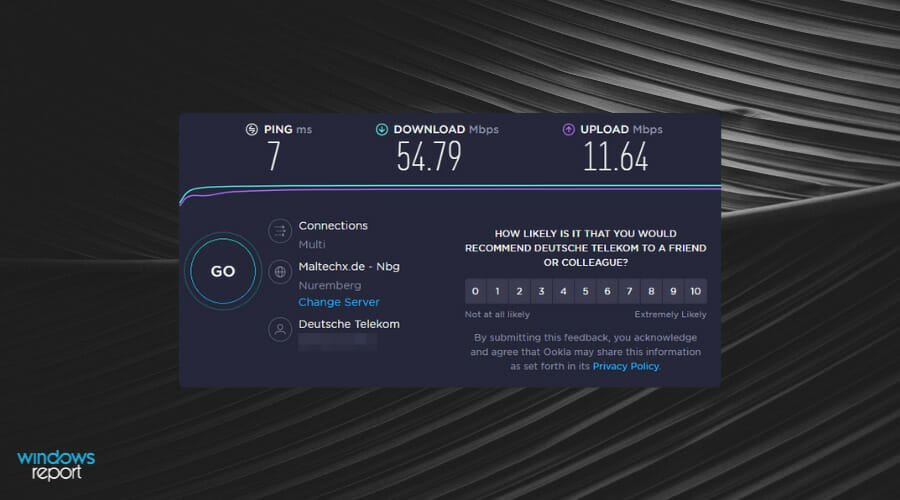
As soon as you do, the website will start analyzing your internet connection, and you will get a set of results at the end that will look something like this:

Comparing the Download and Upload values found after the speed test with the values mentioned in your AT&T contract will show you whether throttling is active on your case.

If you find that throttling is being used, it is recommended that you first check if the data cap on your AT&T contract has not been reached.

In case you still have data available for usage, then it is possible to conclude that the ISP is limiting your bandwidth for one of the reasons mentioned previously.

To avoid this problem, good VPN software will do the trick by not allowing the ISP to observe how you’re using the bandwidth and thus limiting their capability to engage this protocol.

Can a VPN help with throttling?

A powerful VPN will help with AT&T throttling home Internet in 2024, but not all software in this category can do this successfully.

Capable VPN software will effectively change your IP address, and thus stop the ISP’s processes from identifying if you’re using the data to download torrents, or simply access a streaming service that they don’t condone.

That being said, if the throttling from AT&T happens because you reached your data cap, VPN software will not be able to do much. Even if your IP address will be changed, and your ISP will not know who you are or where you live exactly, the internet connection will still be throttled until you renew your data packet subscription.

Does VPN throttle speed?

Usually, your Internet speed can get slower if you connect to another VPN server because of data encryption.

However, that does not mean you’ll have a much slower speed, especially using a reliable VPN connection.

That said, using a high-end VPN privacy will hide your IP address from your Internet provider and thus stop the Internet throttle and low speed.

Is it legal for AT&T to throttle your internet traffic?

Yes. AT&T’s throttling policy is following the law in the USA regarding all internet traffic being treated roughly in the same way.

This situation is caused by the FCC under the Trump Administration which repealed the Open Internet Order, and also the regulation enforced by the Obama Administration which allows ISPs to discriminate users based on a variety of factors like service type, content, and the device used, etc.

Even if that’s the case, AT&T’s policies do not engage in any sort of discriminatory actions in regards to their users, but they are fully within their rights to do so.

Is there other VPN software that can help with throttling?

If you already made sure that your ISP’s data cap hasn’t been reached, then there are a few other software options that can help you with this endeavor.

As you might expect, all of them will work without problems when it comes to AT&T throttling.

➡ NordVPN

➡ Private Internet Access (PIA)

➡ Surfshark

➡ CyberGhost VPN

➡ VyprVPN

As you can see, throttling applied by ISPs can happen for a variety of reasons, and will severely impact the internet speed for browsing, but also stop you from accessing streaming services like Netflix, and from downloading torrents.

How do I bypass AT&T hotspot throttling?

Firstly, you must know that many plans of this ISP company include hotspot limits in order to control data usage or network congestion.

➡️ You can try to bypass these hotspot throttling cases for your mobile or PC using various methods:

  • Use the PdaNet+ app to share your Android Internet data
  • Monitor your Internet data
  • Purchase additional hotspot data
  • Get an AT&T hotspot device for 4G network

Luckily, using a powerful VPN can help if your ISP bandwidth cap hasn’t been reached, and we discussed some of the best options available on the market.

No less important, troubleshooting AT&T Family Map not working can be easily done when applying the steps detailed in our guide. Don’t hesitate to take a closer look.

Feel free to share your experience with us using the comment section below.

Definitive Guide for Pinterest Privacy: 8 Best Settings

Pinterest is a very popular image sharing and social media site that allows people to save images and videos on boards. The Pinterest privacy settings help you to keep a low profile.

The service offers a great way to discover new information and ideas with lots of features.

If you’re a frequent user of Microsoft Edge, Pinterest has an excellent extension for saving and creating collections with the press of a button.

The idea of Pinterest is to publicly share your collection, but some people may want a degree of privacy. Not everyone wants their information out there.

Fortunately, Pinterest has a lot of tools at the disposal of its users that they can use to protect personal information or just want to keep things to themselves.

But there’s still one question you may have on your mind. Can Pinterest itself be trusted?

Internet security is something on everyone’s mind and worries that their favorite site may be tracking them. Several websites have combated this, but the same can’t be said about Pinterest.

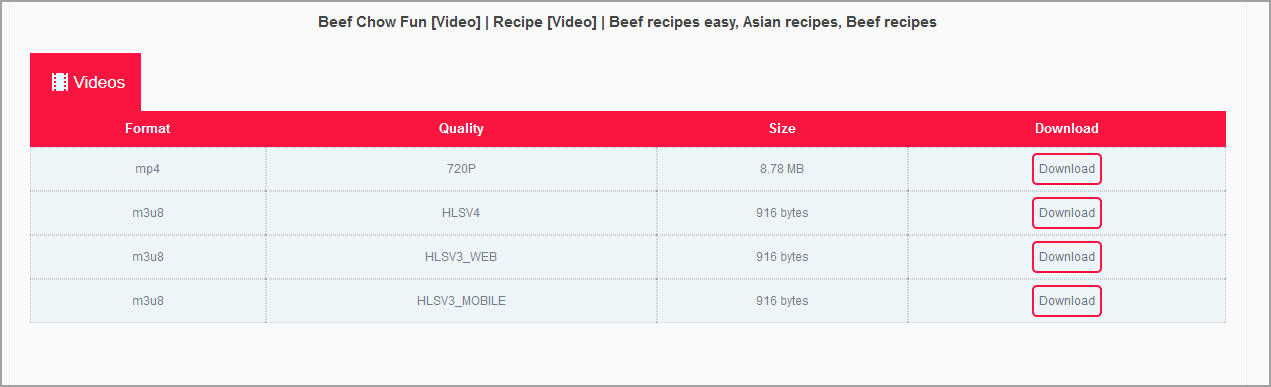
Can we download videos from Pinterest?

Pinterest doesn’t allow you to download videos by default. This is to prevent copyright infringement and distribution of other people’s content.

However, if you just want to make a backup of a video, you can do it with many third-party services. One of the best ones for that task is PintoDown.

The service is incredibly simple to use, in requires no registration, and you can download any video in a matter of minutes, so be sure to give it a try.

⇒ Try PintoDown

Does Pinterest track search history?

Yes, but only if you allow them to. In the past, Pinterest has been accused of tracking people’s information.

The website has said that they do indeed track information like your search history in order to better serve people.

It’s a way to provide personalized ads. The ads are meant to be ways for people to grow their individual boards by seeing what’s out there, but many out there have found it annoying, or they hate it.

In response to this, Pinterest has stated that they respect Do Not Track features on browsers to protect personal information. They will not intrude on people’s boards if they want to.

The website also has multiple ways to maintain privacy and the Pinterest privacy settings can be accessed in your account’s Settings menu.

This resource guide will show you how to stop someone from seeing your Pinterest, so keep on reading.

How do I make my Pinterest account private?

1. Turn on search engine privacy on desktop

  1. Log into your Pinterest account.
  2. Click the down-facing arrow to make a drop-down menu appear.
  3. Click Settings.
  4. On the left-hand menu, select Privacy and data.
  5. Under Search Privacy at the top of the entry, check the box next to Hide your profile from search engines.
  6. A window will appear telling you that it’s going to take several weeks before your Pinterest collections page stops appearing on search engine results.
  7. Click I understand.
  8. In that same window, there’s a link to Google’s tool that does something similar. This is optional, but you can click that link to go to the tool.
  9. Google’s tool allows you to get rid of pages on the web. Select the New request button.
  10. In the new window, enter the name of your Pinterest profile then hit Submit.
  11. After submitting, a window will appear telling you that the request has been submitted and to frequently check back on the status.

This is also a guide on how to hide your followers on Pinterest because if you make your profile private, no one will be able to see your followers either.

The Pinterest privacy settings extend to many other aspects so read on to find out how to protect your identity.

2. Turn on search engine privacy on mobile

  1. You can do the same on mobile too. The steps are the same for Android and iOS.
  2. Open the mobile app and tap Saved in the bottom right corner.
  3. On your profile page, tap the three dots in the upper right-hand corner.
  4. A window will pop up from the bottom. Tap Settings.
  5. In this new menu, tap Privacy and data.
  6. Toggle the switch that is to the right of Search privacy to hide your information from search engine results.

3. Create secret boards on desktop

  1. It’s possible to create secret boards only for yourself or have them be invite-only.
  2. Log in to your Pinterest account then click the profile picture to go to your account.
  3. Hover over a board that you’ve created and click the pen icon that appears.
  4. A new window will appear allowing you to edit your board.
  5. Scroll down and check the box next to Keep this board secret.
  6. Click Done when finished.

By adjusting the Pinterest board privacy settings, you can hide your boards from unwanted users.

4. Create secret boards on mobile

  1. You can do the same on mobile. The process is the same for Android and iOS.
  2. Log onto your Pinterest accounts and tap Saved in the bottom-right corner.
  3. In the profile, tap the board you want to edit.
  4. Tap the three dots in the upper right-hand corner then select Edit board.
  5. Toggle the switch next to Keep this board secret.
  6. Tap Done in the top-right corner.

5. Disable data collection and personalization

  1. Sign in to your account and click the downward-facing arrow to make a drop-down menu appear.
  2. Click Settings and then Privacy and data on the following page.
  3. You do have a choice in how much data you want to send, and you can turn that off in this section.
  4. Uncheck the box next to Use sites you visit to improve which recommendations and ads you see on Pinterest.
  5. Go down the list; uncheck the box next to Use partner info to improve which recommendations and ads you see on Pinterest.
  6. Uncheck the box next to Use your activity to improve ads you see about Pinterest on other sites or apps you may visit.
  7. And finally, uncheck the box next to Share activity for ads performance reporting.
  8. When done, click the Save button at the bottom.
  9. You can do the same on mobile.
  10. Again, go to the Settings menu by first tapping on the three dots found in the top-right corner of your profile.
  11. In Settings, tap Privacy and data.
  12. Under Privacy and data, toggle off the switches underneath Data personalization.
  13. This includes options like Use your activity to improve ads about Pinterest and Share activity for ads reporting.

6. Delete search history

  1. Start by clicking on the downward-facing arrow next to your Pinterest account and select Settings.
  2. This time, go to Tune your home feed.
  3. Here you can pick and choose which pins you’d like to turn off. You can do so one by one or turn them all off.
  4. You can also click on Topics and then select which topics to remove from your feed.
  5. On mobile, go to the Settings menu in your account.
  6. Tap on Privacy and data.
  7. At the bottom of the page, tap Clear app cache.

If your question was how do I delete my Pinterest history, you should know that on desktop, Pinterest has removed the option to clear out the search history.

The closest thing you can do now is to clear out your home feed but the solution above using the Pinterest privacy settings will also protect you from data collection.

7. Use Pinterest privacy settings to hide pins

  1. On the home page, click on the three dots in the corner of a pin.
  2. Select Hide Pin.
  3. Select a reason why you want to hide this pin.
  4. If you made a mistake, click Undo on the pin.
  5. On mobile, tap on the three dots below an image on the home page.
  6. A small window will appear. Tap Hide Pin.
  7. Like on desktop, select a reason.
  8. Again, select Undo to reverse the changes.

So, if you were asking how do I hide pins on Pinterest, this solution will clear that up with just a few clicks.

By hiding the pins by using the Pinterest privacy settings you won’t need to make your entire account private.

Adjusting Pinterest privacy settings on iPhone or any other platform is incredibly simple, so be sure to do that.

8. Deleting account

  1. On desktop, sign on to your account and click on the downward-facing arrow yet again.
  2. Select Settings.
  3. Click on Privacy and data.
  4. In this section, scroll down and click on the button that reads Delete data to get rid of your profile.
  5. If you ever plan on returning, it’s recommended that you first select Request data below so you can have your profile information. According to the help page, it may take up to 48 hours.
  6. On mobile, tap on Saved in the bottom right corner and then tap the three dots in the upper right-hand corner.
  7. Tap Settings from the bottom winder and then tap Privacy and data.
  8. Near the bottom, you will see Delete your data and account. Tap it.
  9. Tap Continue to get an email where you start the process of deleting your Pinterest account.

If all else fails, then you should delete your Pinterest account to outright stop data collecting and maintain privacy.

Are there other interesting things I should know about Pinterest?

There are a lot of interesting things concerning Pinterest, since, as stated earlier, it’s one of the most popular photo-sharing services out there.

We will also try to ask some of your most important questions:

➡ Is Pinterest a safe app? – Yes, it definitely is as long as you don’t share your personal information willingly.

➡ Can anyone see my pins on Pinterest? – If you’re using a secret board, and now you know how to do that, only people you invite will see your pins.

➡ Can you make a Pinterest a board private? – As you’ve read our solutions above, yes, you can turn your board into a secret board.

➡ Can my followers see my secret board on Pinterest? – No, only you and people that have an inviate can view your secret board on Pinterest.

There is a lot to learn about Pinterest, for instance, we have a great guide on how to batch download an entire Pinterest board.

This involves downloading a ton of images at the same time, of which there are multiple methods on how to do this. If you’re looking for ways to automatically post, there are lots of software for this.

You should know that these apps also work for Instagram, so there’s a lot of cross-over. Buffer is one of these apps, which is a management software that can schedule uploads to Pinterest and other sites.

And finally, it’s recommended that you learn how to fix Pinterest’s browser button. It’s the browser extensions that make accessing the website super easy and quick.

But there are times when the button suddenly doesn’t work. You may need to use a different browser, disable the other extensions, or clear out the cache of data. It may be interfering.

Feel free to leave a comment below if you have any questions on other Windows 11 apps. Also, leave comments about reviews that you’d like to see or information on other Windows 11 features.

4 Quick Ways to Fix Corrupted Content Error

Some users have stated that a Corrupted Content Error shows up in Firefox when they try to open a few specific websites in their browsers.

The error message states: The site at [URL] has experienced a network protocol violation that cannot be repaired.

As a consequence, users can’t open the required sites in Firefox. These are a few resolutions that will probably fix the Corrupted Content Error in Firefox. The solutions listed here will also work in the following cases:

  • Corrupted Content Error in Gmail
  • Corrupted Content Error on Outlook
  • Sharepoint Corrupted Content Error
  • Firefox NS_ERROR_FILE_CORRUPTED

What causes Corrupted Content Error?

There are various reasons behind the error, but one of the most common is being connected to a public network. So, verify that and connect to a home network.

Also, a corrupt browser or DNS cache can cause the error on Gmail. When it’s encountered, the screen reads, The site at https://mail.google.com/mail/u/0/ has experienced a network protocol violation that cannot be repaired.

Besides, there’s also a possibility that the problem lies at the website’s end, and in this case, you may report it to the administrator and wait while the issue gets resolved.

Quick Tip:

The corrupted content errors in Firefox are not so scary, but they are definitely annoying because they prevent you from accessing certain websites.

So, the easiest solution to avoid them is to use a better, error-free browser like Opera One. This browser is free, and you will be able to import the bookmarks from Firefox in no time.

Opera One

Change your browser and avoid errors to enjoy a sleek browsing experience.

How do I fix a Corrupted Content Error?

1. Clear Firefox’s Cache

  1. Launch Firefox, and press Ctrl + Shift + Del to open the Clear Recent History utility.
  2. Select Everything from the Time range to clear dropdown menu.everything
  3. Check the box for Cache, and click on OK at the bottom.clear cache to fix corrupted content error

The Corrupted Content Error is usually due to corrupted caching. Firefox users have confirmed that clearing the browser’s cache fixes the issue.

Also, you could use an efficient and trustworthy repair tool to remove unwanted browser add-ons, repair invalid registry files, or speed things up when started.

2. Is the webpage down?

It might just be the case that the website is down. So, check if the website you’re trying to open is down or not. To do that, open the Is It Down Right Now website in a browser.

Then enter the website’s URL in the text box and click the Check button. The server status check will then tell you if the website is down. If it’s down, it’s possible that Firefox will show a corrupted content error.

3. Hard refresh the webpage

If the website isn’t down, try refreshing the website where you come across the Corrupted Content Error.

To do that, press Ctrl + Shift + R in Firefox. That will hard refresh the page (or bypass the cache) to ensure that it displays updated content. If this doesn’t fix the error, head to the last method.

4. Clear the DNS Cache

  1. Close Firefox if it’s open.
  2. Press Windows + S to open the Search menu, enter Terminal, right-click on the relevant result, and select Run as administrator.terminal
  3. Click Yes in UAC.yes
  4. Press Ctrl + Shift + 2 to open Command Prompt.
  5. Now paste the following command, and hit Enter:ipconfig /flushdnscommand to fix corrupted content error

Some users have also stated that they’ve fixed the Corrupted Content Error in Gmail by clearing the DNS cache. Clearing the DNS cache will also ensure that it gets updated.

Those are the best resolutions that have fixed the Corrupted Content Error for Firefox users. Also, find how to fix the Server not found error in Firefox.

If you have any other solutions in mind, write them in the comments section below.

How to Check the BIOS version on Windows 10

Every PC has a BIOS chip on its motherboard, and you can access BIOS and change certain hardware settings with ease.

BIOS is a crucial part of every PC, but sometimes you need to check which version of BIOS are you currently using, and today we’re going to show you how to do that on Windows 10.

You usually need to check your BIOS version if you plan to update it with a newer version.

If you’re an advanced user, it’s always good to know which version of BIOS you are using in order to keep track of potential issues related to that version.

Finding the version of BIOS that you’re currently using isn’t that hard on Windows 10, and you can do that by using one of our solutions.


How can I check the BIOS version on Windows 10?

Use Command Prompt

  1. Type cmd in Windows search and click on Run as administrator under Command Prompt to launch the app with full privileges.
  2. When Command Prompt opens, enter wmic bios get smbiosbiosversion, and press Enter.
  3. Now you should see SMBIOSBIOSVersion and the version of your BIOS in a new line. In our example, our version is 0507, but you’ll get different results on your PC.
    check-bios-version-cmd-2

Some users recommend to use systeminfo command. To do that, just start Command Prompt as administrator, type systeminfo, and press Enter.

You should now see all sorts of system information. Look for BIOS Version value to see the version of your BIOS.

check-bios-version-cmd-3

As you can see, checking your BIOS version with Command Prompt is relatively simple, and you can do that simply by entering one command.

Command Prompt is an extremely powerful tool that allows you to make all sorts of changes to your system by using the command line.

In addition to making changes, you can also use Command Prompt to view important system information, such as BIOS version for example.


Use System Information tool

  1. Press Windows Key + S and enter system information.
  2. Select System Information from the list of results.
  3. When System Information window opens, select System Summary in the left pane.
  4. In the right pane look for BIOS Version/Date. In our case, our BIOS version is 0507.
    check-bios-version-system-information-2

System Information tool contains all sorts of useful information regarding your PC. Using this tool you can see information related to both your hardware and software.

This method might be simpler for some users, and it also shows additional information regarding your BIOS such as the type of BIOS that you’re using along with its version.

Using System Information tool you’ll get access to more information regarding your system and BIOS, so be sure to try it out.


Enter BIOS

  1. Open Start Menu and click the Power button.
  2. Hold the Shift key and click Restart.
  3. You’ll see three options available. Select Troubleshoot, select Advanced options and click on UEFI Firmware Settings.
  4. Click the Restart button.
  5. Your PC will now restart and you’ll access BIOS.

You can check your version of BIOS simply by accessing BIOS itself. Accessing BIOS is simple and you just need to keep pressing Del, F2, F10 or F12 keys on your keyboard while your system boots.

To see which key you need to press in order to access BIOS we advise you to check your motherboard manual.

Your PC might also tell you to press a specific key in order to access SETUP during the boot sequence, so keep an eye for that message.

After you manage to enter BIOS, you need to check its version. To do that, simply navigate to the Main tab and look for BIOS Version value.

This value can sometimes be hidden depending on your type of BIOS, so you’ll have to look for it a bit.

You can check the exact shortcut for your device using this guide on how to get the BIOS key, which helps you confirm the right key for your motherboard.


Use the Registry Editor

  1. Press Windows Key + R and enter regedit.
    check-bios-version-regedit-1
  2. When Registry Editor opens, navigate to the following key in the left pane: HKEY_LOCAL_MACHINE\HARDWARE\DESCRIPTION\System\BIOS
  3. In the right pane locate the BIOSVersion value (This value represents your BIOS version. In our case it’s 0507, but it should be different on your system).
    check-bios-version-regedit-2
  4. Optional: Some users are recommending to navigate to the following key and check the SystemBiosVersion value: HKEY_LOCAL_MACHINE\HARDWARE\DESCRIPTION\System\
    check-bios-version-regedit-3 You can also double click SystemBiosVersion value to see all the necessary information.
    check-bios-version-regedit-4

When Windows 10 starts, information regarding BIOS is stored in your registry and you can easily access it by opening Registry Editor.

This is a powerful tool that can be used to change your system configuration, but today we’re going to use it just to view information.


Use DXDiag

  1. Press Windows Key + R, enter dxdiag and press Enter or click OK.
    check-bios-version-dxdiag-1
  2. When DXDiag opens, navigate to System tab and look for BIOS section (It should hold the necessary information regarding BIOS version).
    check-bios-version-dxdiag-2

DXDiag is DirectX Diagnostic tool, and this tool is designed to help you fix DirectX issues. In addition, this tool will collect information regarding your hardware, display, and audio drivers.


Check the POST screen

When you turn on your PC, your computer performs a hardware scan. During that process, certain computer information will appear on the screen.

In addition, there might some information regarding your BIOS version on the top of the screen, so keep an open eye.

Depending on your settings, this information might be on the screen for a second or two, so you’ll need to look closely and write down your BIOS version.

Few users suggest that you can keep the system information visible simply by pressing the Esc or Tab keys while your system boots.

In addition, you might be able to pause POST process simply by pressing the Pause key on your keyboard, so be sure to try that as well.


Use BIOS update tool

If you’re looking for the version of your BIOS, you’re most likely planning to update it.

Updating BIOS is an advanced procedure, but many motherboard manufacturers provide a special tool that you can use to update your BIOS easily.

Many of these tools will show you the current version of BIOS, so you can easily know which version you need to install.

If you don’t plan to update your BIOS, be sure to avoid any BIOS update tools and use any other solution to find out your BIOS version.


    Check BIOS version in PowerShell

    You can use PowerShell to check your BIOS version. PowerShell is a command-line tool similar to Command Prompt, but it has more power than Command Prompt. This is an extremely powerful tool that can do all sorts of things. You can create automated scripts with it or remove core Windows 10 components.

  1. 1. Press the Windows key and the X key at the same time to open the Power Menu.

  2. 2. Select Windows PowerShell (Admin) from the list.

  3. 3. When PowerShell starts, type Get-WmiObject win32_bios.

  4. 4. Press Enter to execute the command.

  5. 5. A list of information will now appear. Look for SMBIOSBIOSVersion value. This value represents the version of your BIOS.


Use third-party tools

According to users, you can easily find your version of BIOS by using third-party tools such as Speccy or CPU-Z.

Both of these apps have a BIOS section, and in there, you can see all the necessary information regarding your BIOS, including the version of BIOS.

Now that you know how to find out your BIOS version, you can update bios on Windows 10 using different methods.

Checking your version of BIOS on Windows 10 is relatively easy, and you can do that simply by using any of the methods we showed you in this article. No less important, here are the best BIOS settings for Windows 10 to easily improve your PC’s performance.

Opera Silent Uninstall & Install With Group Policy [How-to]

Group Policy simplifies Opera browser management, ensuring consistency and efficiency across office computers.

It ensures everyone’s computer is set up the same way, which saves time and avoids problems. Here are 3 different ways to install and uninstall it easily:

How to silent install/uninstall the Opera browser

1. Install with Command Prompt

  1. Go to the official site and download the Opera installation file.
  2. Copy the exe fille to a new folder created in the Downloads section on your PC.
  3. Press the Windows key, search for the command prompt, and launch it as an administrator.
  4. Navigate to the Downloads section.
  5. Input the following codes into the command prompt and press Enter: Opera_64.0.x.x_Setup_x64.exe /silent /allusers=1 /launchopera=0 /setdefaultbrowser=0
  6. Wait till it installs automatically on your PC.

This is the more popular way of installing the Opera browser with a Group Policy. It should easily be installed on every device connected to the network.

2. Uninstall using CMD

  1. Press the Windows key, search for the command prompt, and launch it as an administrator.
  2. Enter the following command and press Enter: "%ProgramFiles%\Opera\Launcher.exe" /uninstall /silent
  3. Wait for Opera to be uninstalled.

3. Use Windows Powershell

  1. Press the Windows key, search for Windows Powershell, and run as an administrator.
  2. Input the following codes and press Enter:
$LocalTempDir = $env:TEMP; $OperaInstaller = "OperaInstaller.exe"; (new-object System.Net.WebClient).DownloadFile('https://dl.google.com/Opera/install/375.126/Opera_installer.exe', "$LocalTempDir\$OperaInstaller"); & "$LocalTempDir\$OperaInstaller" /silent /install; $Process2Monitor = "operaInstaller"; Do { $ProcessesFound = Get-Process | ?{$Process2Monitor -contains $_.Name} | Select-Object -ExpandProperty Name; If ($ProcessesFound) { "Still running: $($ProcessesFound -join ', ')" | Write-Host; Start-Sleep -Seconds 2 } else { rm "$LocalTempDir\$ChromeInstaller" -ErrorAction SilentlyContinue -Verbose } } Until (!$ProcessesFound)

It is important to note that all these must be done with the administrator’s permission or else, it may fail.

How can I set Opera as the default browser with GPO?

  1. Download opera admx file that supports configuration via GPO.
  2. Create a single xml file that set Opera as the default browser.
  3. Open the Group Policy Management Editor and follow this path: Computer Configuration > Policies > Administrative Template > Windows Components > File Explorer
  4. Double-click on Set a defaut association configuration file and Enable it.

These are the various ways to install and uninstall Opera with Group Policy. Ensure you follow each solution strictly for a higher chance of success.

You can leave your questions and suggestions below in the comments section. We’d like to hear from you.

How to Download Video From Pinterest Without an app

Pinterest is a great platform, and sometimes you find interesting content that you want to download. Since this isn’t natively possible, today we’ll show you how to download video from Pinterest without an app.

This process is simpler than you think, and it only takes a couple of seconds. It doesn’t require you to install any additional software, and the only thing you need is your browser.

To make sure that videos are working properly on your PC, always use a browser with AV1 video support.

Keep on reading and follow the instructions from this guide to learn how to properly download Pinterest videos.

Can you download videos from Pinterest?

By default, this option isn’t available, meaning that you won’t be able to download videos from Pinterest.

However, there are third-party services and apps that you can use to download Pinterest video online without issues.

Why can’t I save videos from Pinterest?

This is implemented by Pinterest developers to prevent users from downloading and sharing content from other users without their approval.

By not being able to download videos, you can’t reupload them to your online account and make a profit out of someone’s else content without their knowledge.

However, if you just want to create a backup of videos, be sure to try one of these best Pinterest video downloader services.

How can I download video from Pinterest without an app?

Use PintoDown

  1. Visit the PintoDown page.
  2. Now paste the URL. Next, click the Download button.
  3. Select the download format.
  4. Wait for the video to download.

This is a great method if you want to download Pinterest videos on iOS or iPhone because it doesn’t require any third-party apps.

The service can also download a Pinterest video in mp4 format, which will surely come in hand to many users.

Is there an app to download Pinterest videos?

Yes, there are a handful of Pinterest video downloader apps that can you can use to download videos. However, they are often removed from app stores, so obtaining one can be difficult.

Using one of many available online services is a better and more reliable solution, so we suggest doing that. with these services, you can download Pinterest video in Chrome, or any other browser, so feel free to try it out.

As you can see, it’s incredibly simple to download a video from Pinterest without an app. There are many more services that can help you with that, but we mentioned only the best in this guide.

Using our methods, you don’t have to download anything, no applications or extensions, so these methods will work on any device, out of the box.

If you want to learn how to save whole pages, then read our guide on saving a web page to PDF for detailed instructions.

What methods do you use to download videos? Let us know in the comments section below.

How to Uninstall Microsoft Edge from Windows 10 & 11

Want to know how to uninstall Microsoft Edge from Windows 10 or 11? Microsoft Edge is deeply integrated into Windows, making its removal a bit tricky. While the system doesn’t offer a standard uninstall option for Edge, there are safe workarounds you can try.

Let’s get to it.

How do I completely remove Microsoft Edge?

1. Uninstall Edge with PowerShell

  1. Open MS Edge and copy the version number.
  2. Next, type CMD in the search bar and choose to run it with admin privileges.
  3. When the Prompt opens, type in the following commands and press Enter after each one: cd %PROGRAMFILES(X86)%\Microsoft\Edge\Applications\[version number]\Installer setup.exe --uninstall --system-level --verbose-logging --force-uninstall

Powershell will let you uninstall Microsoft Edge even when it’s greyed out in your Windows 10/11.

After running the command, just restart your PC. The browser should be gone.

2. Use Command Prompt to Remove Edge

For system-bundled Edge versions:

  1. Go to: C:\Program Files (x86)\Microsoft\Edge\Application
  2. Open the folder with the version number (e.g., 125.0.xxxx)
  3. Open the Installer folder inside it
  4. Right-click the address bar > click Copy as pathcopy as path
  5. Open Command Prompt as Administrator
  6. Paste the command below:
setup.exe --uninstall --system-level --verbose-logging --force-uninstall

This forcibly removes the bundled version of Microsoft Edge.

3. Disable Microsoft Edge via Group Policy (Windows 10 Pro/Enterprise)

If you don’t want to delete it but stop it from launching:

  1. Press Win + R, type gpedit.msc, hit Enter
  2. Navigate to:
    Computer Configuration > Administrative Templates > Microsoft Edge
  3. Enable policies like Prevent Microsoft Edge from starting automatically

4. Use dedicated software

Since its first development, Edge has come a long way, and Microsoft has finally made it so that it cannot be uninstalled like any other typical app.

To bypass this issue, you should consider using an automatic third-party removal tool to delete Microsoft Edge. Such tools can force-remove stubborn software without negatively impacting your PC.

This is, without doubt, the best method to securely uninstall Microsoft Edge on Windows 7, 10, and 11.

How do I change my default browser on Windows?

The Windows operating system allows you to change default apps, including browsers. The steps to follow are simple, as shown below:

  1. Press the Windows + I keys to open the Settings app.
  2. Click the Apps option.
    apps option uninstall microsoft edge
  3. Select Default apps in the left pane.
    default apps
  4. Scroll down to the Web browser section and click the app there.
    default
  5. Choose the browser to set as the default.
    choose

FAQs

What Happens If I Uninstall Edge?

System stability won’t break, but some features like in-app web previews, certain Windows Help features, and embedded browser views may stop functioning.
Windows Updates might reinstall Edge during major system updates.

Should You Remove Edge?

If you never use Edge and rely on other browsers, removing or disabling it might be useful to reduce background processes.
However, Microsoft doesn’t recommend uninstalling it, and you might encounter minor bugs or errors in apps that depend on Edge components.

How do I uninstall Edge on Windows 11 if there’s no uninstall button?

Use the Command Prompt method to force uninstall Edge from system directories.

Is it safe to uninstall Edge completely?

Generally yes, but some embedded tools in Windows might misbehave if Edge components are missing.

Why can’t I uninstall Edge like other apps?

Edge is tied to the OS and helps render content in apps like Settings and Widgets.

Should I just disable Edge instead?

Disabling Edge using policies or debloating tools is safer and reversible.

Can I reinstall Edge later?

Yes, visit Microsoft’s Edge download page to reinstall it anytime.

Simple as you like! With this, you uninstall Microsoft Edge or keep knowing that you can always use another browser as the default.

Feel free to let us know in the comments below if you encounter any problems during the removal.

50 Best Keyboard Shortcuts to Use in Opera & Opera GX

In this guide, we will give you 50 keyboard shortcuts for the Opera browser to make your browsing experience much smoother and easier.

The list will include both the common set and unique keyboard shortcuts exclusive to the Opera browser. Let’s get right into it.

What are the best Opera keyboard shortcuts?

Here’s a quick look at the best Opera & Opera GX keyboard shortcuts & what they do:

Opera-specific keyboard shortcuts

Basic shortcutsKeyboard shortcuts
Add to bookmarksCtrl+D
Add to Speed DialCtrl+B
BackCtrl+Left
Alt+Left
Print without previewCtrl+Shift+P
Show sidebarS
Clear browsing dataCtrl+Shift+Del
Close all duplicate tabsAlt+Del
Close tabCtrl+W
Ctrl+F4
Close windowCtrl+Shift+W
Alt+F4
Cycle forward through tabsCtrl+Tab
Cycle backward through tabsCtrl+Shift+Tab
Developer toolsCtrl+Shift+I
Focus address barAlt+D
Ctrl+E
Ctrl+L
Toggle full screenF11
ExtensionsCtrl+Shift+E
Speed DialAlt+Home
New tabCtrl+N
New private windowCtrl+Shift+N
Open SettingsAlt+P
Ctrl+F12
Go to the parent directoryCtrl+Backspace
Reload without the cacheShift+F5
Ctrl+F5
Remove highlighted suggestionShift+Del
Reopen the last closed tab or windowCtrl+Shift+T
Reset zoom to 100%Ctrl+0
Ctrl+Num 0
Save pageCtrl+S
Save page as a PDFCtrl+/
Manage bookmarksCtrl+Shift+B
DownloadsCtrl+Shift+7
Ctrl+J
SnapshotCtrl+Shift+5
Show task managerShift+Esc
Force dark pageShift+D
View page sourceCtrl+U
Zoom inCtrl+Num Plus
Shift+=
Ctrl+=
Ctrl+Shift+=
Zoom outCtrl+Num -
Ctrl+-
Open Facebook Messenger in sidebarF
Open Instagram in sidebarI
Open WhatsApp in sidebarW
Open My Flow in sidebarM
Open Player in sidebarP
Zoom in or outCtrl + Mousewheel
Scroll downSpacebar
Closes tabs if clicked on a tab, opens links in a new tab, scrollMousewheel Press
Scroll upShift+ Spacebar
Scroll down/upPage Down / Up
HistoryCtrl+H
Toggle sidebar’s recently used messengerCtrl+Shift+M
View page sourceCtrl+U
Toggle mute tabT
Save tab to pinboardR
Switch to the last tabL
Reload all tabsA

Additionally, besides the standard shortcuts, you can also create your own or change the presets. Here’s how:

How to manage and create your own Opera shortcuts

  1. Launch Opera.
  2. Click on the Opera logo and select Settings.
  3. In the Search settings bar, type Configure shortcuts.
  4. Open Configure shortcuts option.
  5. Here you will see all the keyboard shortcuts.
  6. You can move the cursor onto the keyboard shortcut and click on the Type a shortcut button to add a new keyboard shortcut to the function.
  7. Also, you can hover over the already assigned keyboard shortcut, delete it, and set a new shortcut altogether.

Besides the shortcuts, if you like a smooth workflow, check out the mouse gestures options below:

What are the Opera mouse gestures?

Below are all the Opera mouse gestures that you will be able to perform once you enable the mouse gesture option.

ActionGesture
Go back one pageLeft gesture (Move left)
Go forward one page
Right gesture (Move Right)
Open a new tabDown gesture (Move down)
Reload the pageUp down gesture (Move up, then down)
Close current tabDown right gesture (Move down, then right)
Open a link in a background tabDown up gesture (Move down, then up)
Open a link in a new tabDown gesture (Move down)
Open a link in a new windowShift + Down gesture (Move down, holding shift)

How to enable Opera mouse gestures

  1. Open the Opera browser.
  2. Click on the Opera logo at the top left.
  3. Select Settings.
  4. Select Basic from the left pane.
  5. Scroll down and under Shortcuts section, toggle on Enable mouse gestures option.

Additionally, there is one more feature that you can use with your mouse in the Opera browser called Rocker Gestures.

This enables you to navigate forward and backward through pages by clicking the right or left mouse buttons.

Though it can be a bit difficult to use, but when mastered, it makes it fun and easy to cycle forward and backward through pages.

Here’s how you can enable Opera Rocker Gestures:

  1. Launch Opera.
  2. Click on the Opera logo and select Settings.
  3. Select Browser from the left pane.
  4. Toggle on the Enable rocker gestures option.

That is it from us in this guide. We hope that you found it helpful. All these shortcuts are incredibly useful and you can use them to zoom in and out in Opera and more, so don’t hesitate to use them.

We also have a new guide dedicated to Opera Incognito shortcut, so don’t miss it for more information.

Keyboard shortcuts can also help if Opera is open but not visible, so make sure you learn them.

How to Fix an Add On for This Website Failed to Run [Edge, IE]

The Add-on for the website failed to run error is usually encountered on older Windows versions.

Today we will address this issue, and present you with a list of methods that you can apply in Microsoft Edge as well as Chrome to fix it.

How do you fix an add-on for this website failed to run?

1. Allow IE mode

  1. Open Edge and click the three dot-menu followed by Settings.settings-edge-menu an add on for this website failed to run
  2. Next, navigate to Default browser and change the option next to Allow sites to be reloaded in Internet Explorer mode (IE mode) to Allow.allow-IE an add on for this website failed to run

2. Turn off your extensions in Edge

  1. Open Edge then click the three-dot menu followed by Extensions. ext-edge an add on for this website failed to run
  2. Next, select Manage Extensions.manage-ext an add on for this website failed to run
  3. Here, click the toggle button next to all your extensions to turn them off then check whether the An add on for this website failed to run error is gone.

3. Turn off extensions in Chrome

  1. If you got An add on for this website failed to run, start a new Chrome window and click on the three-dot menu followed by More tools and Extensions.extensions-chrome your connection was interrupteda network change was detected. err_network_changed
  2. Next, turn off the toggle next to all of your extensions to fix the issue in Chrome.disable-ext your connection was interrupteda network change was detected. err_network_changed

4. Reset browser

Edge

  1. Open Edge and click the three-dot menu followed by Settings.settings-edge-menu an add on for this website failed to run
  2. Here, navigate to Reset settings followed by Restore settings to their default values.reset-edge an add on for this website failed to run
  3. Click Reset and you’re done!

Chrome

  1. Resetting Google Chrome will turn off all its extensions, which might fix the error. Start by clicking on the three-dot menu followed by Settings.chrome-settings windows 10 blocking chrome install
  2. From the left menu select Reset and clean up.
  3. Next, click the Restore settings to their original defaults option.restore-settings windows 10 blocking chrome install
  4. Finally, click Reset settings.reset-settings-yes windows 10 blocking chrome install

After restarting your PC, the Add-on for the website failed to run error should now be fixed.

On rare occasions, when this error message still pops up after running all the four troubleshooting fixes in this tutorial, you can contact the Microsoft support team.

Don’t hesitate to leave a comment in the section below and share your thoughts with us. Thanks for reading!

How to Get Rid of the Paragraph Symbol in Microsoft Word

Having issues on how to get rid of paragraph symbol in Word? Look no further. Microsoft Word has a formatting mark button that looks like this .

The paragraph symbol indicates where a paragraph is and can be helpful in some situations. Many users, however, find this symbol distracting to have it on while typing.

Also, there’s a chance that you end up printing out your documents with the paragraph symbols littered over it. Use one of the detailed methods below to learn how to turn the paragraph symbols on and off.


How do I get rid of paragraph symbol in Word?

Use the Hide/Show paragraph symbols button in the toolbar

  1. Navigate to the main toolbar and home button.use-hide-or-show-How-to-get-rid-of-paragraph-symbol
  2. Spot the  Show/Hide Formatting Marks button.
    • The Hide/Show Formatting Marks button resembles a paragraph mark (¶).
      use-hide-or-show-How-to-get-rid-of-paragraph-symbol
  3. Click the Formatting Marks button to erase the paragraph symbols.

 If you wish to turn it back on, you just have to click on it again.


    Disable paragraph marks

    A quick and secure method to ensure you get rid of the paragraph symbol in Word is to disable paragraph marks from showing on your documents using Settings. This option will apply to all your documents. All you need to do is follow these steps:

  1. 1. Press the Windows Key and type word in the search bar.

  2. 2. Click on the result to open the Word app.

  3. 3.  In the app, select Options from the menu on the left.

  4. 4. Click on Display.

  5. 5. Below Display look for the section marked Always show these formatting marks on the screen.

  6. 6. You will notice a checked box labeled Paragraph Marks. Uncheck it.

  7. 7. Click the OK button below to apply and save the changes. After this, the paragraph mark will seize to appear on any of your subsequent documents.

You can also uncheck any other formatting marks with this method, like hidden text, object anchors, and spaces.


How to get rid of paragraph symbol in Word for Mac OS X

how-to-get-rid-of-paragraph-symbol-in-mac
  1. Select Preferences in the Word menu.
  2. Select View.
  3. You will see a section titled Nonprinting characters, check or uncheck the appropriate boxes to view the marks of your choice.
  4. Click OK to save your changes.

You can also toggle between displaying and hiding formatting marks. To do so:

  • In the paragraph group section for Windows, click on the paragraph icon located in the Home tab.
  • For Mac OS X, the paragraph Icon can be found in the standard toolbar. Click on it to toggle.

Having the paragraph symbols on while typing can be very helpful in situations where you need to delete a page break, and you can’t tell precisely where the markup is.

To learn more about Word, don’t miss our guide on how to add a signature line without X in Microsoft Word.

For more helpful tips on mastering Word features, see this guide on how to use Microsoft Word.

However, if you don’t want it and wish to remove it, then use the steps stated above correctly. Did it work? Let me know in the comments.

Microsoft shares its latest quarterly earnings in a new report

We know that many of you are wondering what kind of numbers Microsoft makes of all its products and, as always, we’re here to shed some light on the matter.

As you are probably used to by now, the tech colossus has posted strong figures for the last quarter of the 2022 fiscal year as it looks forward to starting the 2023 fiscal year.

Just so there is absolutely no confusion, keep in mind that the company’s 2022 fiscal year ended on June 30th, 2022.

Microsoft reports $51.9 billion in revenue this last quarter

So, since we’re talking money, let’s discuss the fact that, in its latest quarter, Microsoft’s revenue was $51.9 billion, which is a 12% increase (16% Constant Currency) compared to the same period in the previous fiscal year.

The operating income entry had only a single-digit growth of 8% (14% CC), which amounts to a staggering $20.5 billion.

As far as net income goes, it increased by 2% (7% CC) to $16.7 billion and diluted earnings per share were $2.23, up by 3% (8% CC).

Keep in mind that, while all of these are positive figures, the Redmond-based tech company has also highlighted some unfavorable global and macroeconomic conditions that negatively impacted its results.

These are totally unforeseen circumstances that the tech company did not bring up in its forward-looking statements published in April 2022 whatsoever.

Thus, the Redmond giant has announced that unfavorable foreign exchange rates negatively affected revenue and diluted earnings per share by $595 million and $0.04, respectively.

As a result of an overall reduction in advertising spending, LinkedIn took a massive impact, with Search and news advertising revenue decreasing by $100 million.

Microsoft also mentions extended production shutdowns in China which, with the deterioration in the PC market in June, led to a decline of $300 million in Windows OEM revenue.

Microsoft is known to have also scaled down its operations in Russia, which means that the tech giant posted operating expenses of $126 million in lieu of bad debts, asset impairments, and severance packages.

Even outside of Russia, the realignment of its business groups across the globe resulted in employee severance payments of $113 million.

Moving on, Microsoft also posted the quarterly Productivity and Business Processes revenue, which stood strong at $16.6 billion, going up in percentage by 13%.

The company explains that this was powered by significant growth in revenue for Office Commercial products (9%), Office 365 Commercial (15%), Office Consumer products (9%), LinkedIn (26%), Dynamics products (19%), and Dynamics 365 (31%).

Another interesting fact about growth, since we’re on the subject, is that Microsoft 365 subscribers also grew to 59.7 million people, which is a lot.

Intelligent Cloud revenue was at $20.9 billion, which constitutes a giant growth of 20%, due to Server products growth (22%) and Azure (40%).

As for revenue in the More Personal Computing category, while overall revenue grew by 2% and stood at $14.4 billion, Windows OEM revenue declined by 2% and Xbox content and services were down by 6%.

Also, note that Windows Commercial products grew by 6% and Surface revenue was up by 10%, as reported by Microsoft.

Drawing the line for the fiscal year 2022, revenue was at $198.3 billion (18% growth), operating income was $83.4 billion (19%), net income was $72.7 billion GAAP (19%), $69.4 billion non-GAAP (15%), diluted earnings per share was $9.65 GAAP (20%), and $9.21 non-GAAP (16%).

Going into the new fiscal year, Microsoft has set some target objectives that it plans to stick to, as follows:

  • intense competition in all of our markets that may lead to lower revenue or operating margins;
  • increasing focus on cloud-based services presenting execution and competitive risks;
  • significant investments in products and services that may not achieve expected returns;
  • acquisitions, joint ventures, and strategic alliances that may have an adverse effect on our business;
  • impairment of goodwill or amortizable intangible assets causing a significant charge to earnings;
  • cyberattacks and security vulnerabilities that could lead to reduced revenue, increased costs, liability claims, or harm to our reputation or competitive position;
  • disclosure and misuse of personal data that could cause liability and harm to our reputation;
  • the possibility that we may not be able to protect information stored in our products and services from use by others;
  • abuse of our advertising or social platforms that may harm our reputation or user engagement;
  • the development of the internet of things presenting security, privacy, and execution risks;
  • issues about the use of artificial intelligence in our offerings that may result in competitive harm, legal liability, or reputational harm;
  • excessive outages, data losses, and disruptions of our online services if we fail to maintain an adequate operations infrastructure;
  • quality or supply problems;
  • government litigation and regulatory activity relating to competition rules that may limit how we design and market our products;
  • potential consequences under trade, anti-corruption, and other laws resulting from our global operations;
  • laws and regulations relating to the handling of personal data that may impede the adoption of our services or result in increased costs, legal claims, fines, or reputational damage;
  • claims against us that may result in adverse outcomes in legal disputes;
  • uncertainties relating to our business with government customers;
  • additional tax liabilities;
  • the possibility that we may fail to protect our source code;
  • legal changes, our evolving business model, piracy, and other factors may decrease the value of our intellectual property;
  • claims that Microsoft has infringed the intellectual property rights of others;
  • damage to our reputation or our brands that may harm our business and operating results;
  • adverse economic or market conditions that may harm our business;
  • catastrophic events or geo-political conditions, such as the COVID-19 pandemic, that may disrupt our business;
  • exposure to increased economic and operational uncertainties from operating a global business, including the effects of foreign currency exchange and
  • the dependence of our business on our ability to attract and retain talented employees.

What are your thoughts on Microsoft’s latest revenue report? Share your opinions with us in the comments section below.

Hardware Acceleration in Opera Browser: How to Turn It Off/On

Opera browser hardware acceleration is a feature that uses your computer’s GPU to handle graphics-heavy tasks like video rendering or animations. This reduces the load on your CPU and can improve performance. However, it may cause problems on older systems or with certain graphics drivers.

If Opera is lagging, freezing, or displaying visual glitches, you can disable hardware acceleration to troubleshoot the issue. Here’s all you need to know about disabling/ enabling it.

How to disable and enable hardware acceleration in Opera GX

How to Turn Off or On Hardware Acceleration in Opera

1. Open Opera Settings

  • Click the Opera icon in the top-left corner of the window.
  • Select Settings, or press Alt + P on your keyboard.

2. Go to the System Section

  • Scroll down and expand the Advanced settings.
  • Find the System category.

3. Disable/Enable Hardware Acceleration

  • Toggle off/on Use hardware acceleration when available.
  • Click Relaunch when prompted to restart Opera with the setting applied.

How to Disable/ Enable Hardware Acceleration in Opera GX

1. Open Opera GX Settings

  • Click the GX Control sidebar icon or press Alt + P.

2. Find the System Option

  • Expand the Advanced menu and scroll to System.

3. Turn Off/On the Setting

  • Switch off/on Use hardware acceleration when available.
  • Restart Opera GX for the change to take effect.
opera gx use hardware acceleration when available

Why You Might Disable Hardware Acceleration

  • Video playback stutters or becomes unresponsive
  • The browser UI is laggy or slow
  • You see black screens during streaming
  • Compatibility issues with older or unsupported GPUs

Disabling hardware acceleration is a common fix when these symptoms appear during regular browsing.

Is hardware acceleration good for browsers?

Yes, hardware acceleration is good for browsers. It makes them faster by using the GPU. As a result, you get quicker page loads and smoother video.

However, it may cause screen glitches, black screen, video issues, and slower performance on PCs with old or incompatible graphics drivers. In that case, you’d be better off not using the feature.

Why does Opera GX take so much CPU?

Opera usually takes up too much GPU, up to 100% when you don’t have hardware acceleration enabled, or when you have way too many active tabs open. It could also happen when you use certain add-ons or you haven’t cleaned up your cache in a while.

Browsers like Opera and Chrome and even streaming apps like Twitch include hardware acceleration to let you adjust your browser for best performance. Moreover, if you want to know how to disable hardware acceleration in Firefox, we’ve got you covered.

This built-in feature can improve your experience and as you can see in the guidelines above, enabling and disabling it in Opera is easy.

If you have any questions or need more help, drop a comment below.

Takeaways from Microsoft’s FY22 Q4 earnings report

Despite missing its own cautious projections for FY22 Q4, Microsoft’s stock is up 4.8% as investors let the dust settle and sort through various gains the company presented yesterday.

Perhaps leading the bullish trade winds is Microsoft’s confidently speculative projections for FY23 Q1, where the company believes it will continue double digit cloud growth.

Just before Microsoft held its earnings call at the end of the day yesterday, corporate vice president Frank Shaw blasted off a list gains each of the company’s businesses raked in for Q4 via a Twitter thread.

Among the items highlighted by Shaw were revenue increases for LinkedIn Marketing Solutions which surpassed $5B in annual revenue, various Security Solutions accounting for a 40% increase in the division’s revenue, along with the newsworthy Netflix advertising partnership which should boost its Microsoft advertising revenue in the future.

Xbox

Looking into more specific segments such as gaming, Microsoft fell victim to pandemic inflating behaviors as did many. Total Xbox revenue dropped by 7% with hardware declining 11% year over year. In addition, Xbox content and services saw a 6% decline in revenue which Microsoft’s believes is a result of lower engagement hours.

The results are a mixed bag when looking at the numbers as it appears that while coming off its previously highest revenue quarters, Game Pass helped level losses from the hardware side of the Xbox division.

The entire Xbox division was down 7% year over year but it was Game Pass’ shallower 6% decline in revenue that helped stabilize the hardware losses that came in at 11% for the quarter.

Cloud

Another business that saw declines was Microsoft’s golden goose cloud business which missed the projected $21.09B revenue rate despite growing from $17.38B to $20.91B within the quarterly year.

Buried under the dower headlines is the fact that gross margin dollars grew by 15% and revenue for the sector was up 20% year over year.

Azure contributed its own 40% growth in revenue from server products, bringing up the rear with a 22% revenue gain year over year.

MS FY22 Q4 - cloud

Even though Microsoft missed its own goal for Q4, market analysts seem optimistic about future revenue gains as Wedbush analysts Daniel Ives puts it, “Shockingly robust and speaks volumes about cloud demand holding up.”

Ives is speaking of the rather turbulent economic environment that’s had several tech companies missing their intended targets for the recent quarter.

Windows & Surface

Lastly, there is fun stuff we like to indulge in here at OnMSFT which is the More Personal Computing segment which has seen relatively better days.

The entire section could be summed up as operating expenses increased while operating income decreased.

MS FY22 Q4

Windows OEM revenue declined by 2% with production shutdowns being attributed to the loss.

The aforementioned Xbox division is bundled in the business portfolio with its losses as well, and the Surface hardware business saw a modest 10% revenue gain and Microsoft is projecting that trend will continue in the near future.

Is Microsoft on the right track for continued success? Let us know in the comments below.

3 Tips on How to Change the Location in Your Browser

If you want to change browser country on any of the popular web browsers, go through this article to get the appropriate guide.

Your web browser can detect the country you’re from, but did you know that you can set your country manually in your browser?

That’s right, and you can do this simply by changing a few settings in your web browser; today, we’ll show you how to do that.

Why should I change my location in the browser?

For many privacy reasons, you may like to hide your location and even spoof it to confuse the third party. These reasons include the followings:

  • Accessing geo-restricted contents
  • To surf the internet in more private ways
  • Ensuring internet freedom
  • Hiding your real identity from the third party.

What region is best for browsing?

The US is still the top pick as browsing and streaming region. Else, Canada, Iceland, Singapore, etc., are also hot choices.

From the United States, you can enjoy the majority of the web. It makes it a very common and best region for browsing.

There are several ways you can follow the ensure it. In this article, you will know about the most effective methods.

How do I change my browser to another country?

1. Opera One

1.1 Enable VPN

  1. Using the Opera One address bar, go to the following location: opera://settings/privacy
  2. Scroll down and expand Advanced.
  3. Enable VPN.enabling VPN Opera

1.2 Change Location

  1. While browsing any website, click on the VPN icon in the top left corner.
  2. Choose your preferred location as shown in the screenshot.

This way, you can easily set a country on the Opera One browser using the built-in VPN.

If you haven’t tried the Opera One browser yet, perhaps it’s time you did because it comes with a lot of handy features that will make browsing more efficient.

To mention just a few: integrated ad blocker, customizable workflow, a customizable personal news feed, battery saver, integrated messengers for Twitter or Instagram, or crypto wallet.

Opera One

Try this browser with the free incorporated VPN and choose any location on the globe with just a few clicks.

2. Firefox

  1. Input about:config in the address bar and press enter.
  2. If the warning message appears, select I accept the risk.
  3. Search for geo.enabled and set it to False.
    disabling geo-enabled firefox
  4. Search for geo.wifi.uri and set it to String. Now click the + icon.adding geo.wifi.uri firefox
  5. Enter the following value:
    • data:application/json,{"location": {"lat": 40.7128, "lng": 74.0060}, "accuracy": 27000.0}

After making these changes, your location should be changed. Remember that you need to use coordinates matching your desired country.

2. Chrome

  1. Open Developer Tools – you can do that quickly by using Ctrl + Shift + I shortcut.
  2. Locate the Console tab and click the three dots next to it and choose Sensors.going sensors chrome dev tools
  3. Set Geolocation to Custom location or anything you prefer.changing location chrome

In this way, you can change Chrome or Chromium-based browser location country. Tor, Puffin, Brave, Edge, etc., are Chromium-based browsers where you can do the same or similar things to change country or location.

If the above steps don’t work for these specific browsers, you should consider using a VPN like Private Internet Access (PIA). This service has extensions for Chrome, Firefox, and other Chromium-based web browsers. These extensions make it easy to change location and country.

This article has shown how to change browser location country. If you have any questions or know any better method, feel free to let us know in the comment box.

Do Extensions Slow Down Your Browser? Here’s What You Can Do

DebugBear recently analyzed 26 browser extensions to study whether Chrome extensions are slowing down your computer or not.

The test was carried out on some of the most popular extensions, such as  Adblock Plus, uBlock, HTTPS Everywhere, LastPass, and Grammarly among many others.

We are here today to answer the same questions, do Chrome extensions affect the performance of your browser? Let’s find out!

Do Chrome extensions affect performance?

Although many Chrome extensions can run additional code on every page that you view, well-built extensions will only run code when it is required to do so.

Activity on the CPU can cause a page to hang and become unresponsive, increasing the amount of battery that must be used. However, if the processing takes place after the initial loading of the page, the effect on the user experience might not be as significant.

A few extensions, such as Loom and Ghostery, execute a significant amount of code without affecting the time the page begins displaying.

However, some extensions such as Total Adbllock, Clever, Lastpass, and DuckDuckGo Privacy Essentials begin executing code as soon as the page starts loading, which delays the time the user can initially access the website’s contents.

Does Grammarly slow down your computer?

Yes, Grammarly slows down Chrome. On-page CPU time was reduced by over 100 milliseconds for users of Grammarly, Microsoft Office, the Okta Browser Plugin, Avira Safe Shopping, and Avira Browser Safety.

Does Honey slow down your computer?

Unfortunately, Honey slows down your computer as well. There is evidence that widely used browser add-ons like Honey, Evernote Web Clipper, and Avira Browser Safety can considerably slow page load times.

If you wonder whether LastPass is slowing down Chrome, it does. It was found to be one of the culprits that caused the browser to slow down.

Quick Tip:

Google Chrome is known for taking up most of your RAM and CPU. Using a different browser that allows full control over how much it eats from available resources has a huge impact on browsing.

Opera GX is built using the same Chromium engine as Google Chrome, so all Chrome extensions are compatible. It also comes with a built-in CPU, RAM, and bandwidth limiter.

Opera GX

Control resource usage for your browser and never experience lags or slowdowns.

How do I make Chrome extensions faster?

The conclusions of this analysis are not at all surprising. They confirm what many users already noticed, Chrome extensions are slowing down your computer. Specifically, certain browser extensions may increase power consumption.

This happens because these extensions put a strain on your CPU. Let’s look at some numbers to see which extensions require your CPU to do more work.

ExtensionWhat is it?UsersExtra CPU time*
HoneyAutomatic coupon code finder10M+636ms
GrammarlyGrammar checker10M+324ms
Evernote ClipperSave web content to Evernote4.7M265ms
StayFocusdLimit time spent on websites700K224ms
LastPassPassword manager8M139ms

Things Chrome extension devs should consider

code chrome extensions slowing down computer

Chrome extension developers need to consider the following points to reduce the impact their products have on the browsing experience: Content scripts should be used on the domains as per the requirements.

Secondly, the content script should not be run on document_start. The developers should avoid overloading the code with JavaScript. It can be loaded quickly whenever you need to include the JS bundle. 

Note icon NOTE
In case you want to be secure while surfing the internet, you will need to get a full-dedicated tool to secure your network. Install now Private Internet Access and secure yourself. It protects your PC from attacks while browsing, masks your IP address, and blocks all unwanted access.

Main takeaways

The researchers have also mentioned some key findings of the study. The performance cost of the single extension can be small, but the combined performance cost might add up to a significantly large value, thus causing Chrome extensions to slow down computers.

The performance can significantly be improved by using privacy tools in those cases when the website is overloaded with analytics or ads. 

The study also has some limitations as well, it has only considered just a single browser i.e Google Chrome. We have to extend the research to other popular browsers to find out how the results vary with respect to each browser.

Furthermore, the sample size should be kept large by increasing the number of extensions in future experiments.

browser extension slow browsing

In short, the study revealed that Honey and Grammarly are extremely slow as far as browsing performance is concerned.

The power consumption is usually increased when you have so many extensions installed in your system. The extension developers should follow the best practices in order to avoid performance problems in the future.

Privacy is a major concern these days in view of the recent cyber-attacks and data leaks by 3rd party apps and programs. Experts recommend that you should reduce the number of extensions installed in your browser.

How can I improve my browser performance?

You may improve the performance of Google Chrome by installing a specialized extension if you find that it is not as quick as it was in the past.

However, the challenge is that many of these products are on the market, each of which asserts that it is superior to the others.

The performance can only be improved by installing those shown to be beneficial. Extensions affect performance; depending on the extension, they can either make Chrome run faster or slower.

That is the only way to increase your browser’s performance along with ensuring the safety of your sensitive data. And if you’d like an ad-free experience on YouTube Music desktop, we have the perfect tricks.

So, do extensions slow down Chrome? The short answer would be yes, but it depends on the extension, amount of RAM, CPU power, number of open tabs, and other factors. You can also get ad blockers to declutter your browser and speed up page loading.

How many extensions are currently installed in your browser? In the comments section below, let us know which of them is the real culprit behind any performance issues you may have experienced.

Windows 11 Insider Preview Build 25163 is now available on the Dev Channel

Yesterday we mentioned the two new Insider Preview Builds for Windows 11 that Microsoft has released to the Beta Channel, in the form of 22621.436 and 22622.436 (KB5015888).

We also told you that the Redmond-based tech company is hosting a new Bug Bash event for KB5015888, if you are into that kind of activity.

Now, Microsoft has provided availability for a new Windows 11 Insider build to the Dev Channel. Build 25163 is the Sun Valley 3 (Windows 11 23H2) development for Windows Insiders, which will eventually become the version that is released in 2023.

What’s new in Windows 11 Build 25163

The new build brings a new Taskbar feature called Taskbar Overflow, which has a re-designed experience for the operating system.

This latest taskbar experience has been thoughtfully crafted to offer you a more productive switching and launching experience when space is constrained.

After installing this build, your taskbar will automatically transition into this new overflow state when it has hit its maximum capacity.

In this state, the taskbar will offer an entry point to an overflow menu that allows you to view all your overflowed apps in one space.

Taskbar will offer an entry point to an overflow menu that allows you to view all your overflowed apps in one space.

You should also know that the overflow menu will contain many of the current taskbar behaviors users are familiar with, such as supporting pinned apps, jump list, and extended UI.

Thus, after invoking overflow, the menu will quietly dismiss once you click outside of it or navigate to an application.

Just like with KB5015888, the discovery of devices under nearby share when sharing a local file from the desktop, File Explorer, Photos, Snipping Tool, Xbox, and other apps that use the built-in Windows share window has been enhanced by using UDP (Network needs to be set to private).

Bluetooth has also been added, to discover nearby devices, which means you will now be able to discover and share to more devices including desktop PCs.

Also, when sharing a local file from the above-mentioned sources that use the built-in Windows share window, you can choose OneDrive as a target to directly upload the file to OneDrive and share it further along with access control options.

Know that absolutely all this can be done right from sharing local files in File Explorer without any context switches or opening the OneDrive app.

Note icon NOTE
This feature is currently only available for Microsoft accounts. A user will need to switch to their Microsoft account via the top right profile icon in the share window if logged in via AAD. AAD support will be added in a future update.

Fixes

[File Explorer]

  • Fixed an explorer.exe crash when dragging tabs around.
  • Did some work to fix a memory leak when using tabs with File Explorer.
  • Fixed an issue where the preview thumbnail for File Explorer in the taskbar, ALT + Tab, and Task View might show the title of an adjacent tab and not the currently selected one.
  • If “Show all folders” is enabled, the dividers in File Explorer’s navigation pane should no longer show. With this change, it should also address the issues where dividers were unexpectedly showing in some other folder pickers.
  • Fixed an issue where Narrator wasn’t reading out the titles of tabs as focus moved through them.
  • Fixed an issue where a closed tab might appear again in File Explorer after you dragged File Explorer across your monitors.
  • Fixed an issue where the tab row might unexpectedly expand vertically, covering the command bar contents.
  • Removable drives should no longer unexpectedly be displayed in a section by themselves in the navigation pane, which was breaking up the section with This PC and Network.
  • Fixed an issue where the add new tab button wasn’t clearly visible when using Aquatic or Desert contrast themes.
  • The add new tab button shouldn’t overlap with the minimize button in the title bar when using text scaling with a lot of tabs open anymore.

[Taskbar]

  • Fixed a rare explorer.exe crash that could happen while on a Microsoft Teams call, related to sharing windows from the taskbar.

[Settings]

  • Made a change to help fix an issue where using Windows Spotlight on the desktop might revert to a solid color background.
  • Improved the padding around the uninstall button when using Apps > Installed Apps in grid view.
  • Fixed a couple issues that could lead to Quick Settings crashing on launch.

[Input]

  • Fixed an issue which was leading to certain apps freezing after a copy action if Suggested Actions was enabled.

[Other]

  • Fixed a high hitting crash impacting suggested actions reliability.

Known issues

[General]

  • We’re investigating reports that SQL Server Management Studio is failing to launch for some Insiders.
  • Some games that use Easy Anti-Cheat may crash or cause your PC to bugcheck.

[File Explorer]

  • The up arrow is misaligned in File Explorer tabs. This will be fixed in a future update.
  • We’re working on a fix to address reports that launching File Explorer in certain ways when using dark mode (for example, from the command line) is showing the body of File Explorer unexpectedly in light mode.

[Widgets]

  • Notification badge number may appear misaligned on the taskbar.
  • In some cases, the notification banner for some badging will not appear in the widgets board.
  • We’re working on the fix for an issue causing Widgets preferences (temperature units and pinned widgets) to unexpectedly get reset to default.

[Live captions]

  • Certain apps in full screen (e.g., video players) prevent live captions from being visible.
  • Certain apps positioned near the top of the screen and closed before live captions is run will re-launch behind the live captions window positioned at top. Use the system menu (ALT + Spacebar) while the app has focus to move the app’s window further down.

Don’t forget that Microsoft published a new video series that will help Windows 11 newcomers to find their way around easier.

How to enable Taskbar overflow

Before we go into this, know that not all insiders from the Beta channel can test the updated taskbar overflow.

Microsoft only made it available on build 22622.436, not 22621.436, because Microsoft has two builds in a single Beta channel.

Even more confusing is the fact that even Insiders with build 22622.436 get randomly selected to test the new overflow feature.

Those that weren’t among the lucky ones selected for testing can try a popular ace up their sleeves called Vivetool.

As reported by tech-savvy users over Reddit, we’re about to show you how this can be done even if you don’t officially have the right to test Taskbar overflow.

  1. Access Vivetool on GitHub repository, download the app, and extract it.
  2. Run Windows Terminal as Administrator and access the Vivetool folder using CD C:\Vive.
  3. Type vivetool /enable /id:35620393 and press Enter.cmd
  4. Type vivetool /enable /id:35620394 and press Enter.
  5. Restart your system to apply changes.

If, for any reason, you decide that you are done and want to revert these changes, simply type the vivetool /disable command with the same IDs.

Remember that the new overflow system is not the only taskbar-related novelty in preview Windows 11 builds.

Have you noticed any other issues after installing Windows 11 Build 25163? Share your experience with us in the comments section below.

How to Search & Delete all Chrome History [By Date, On mobile]

The history on Google Chrome, or any browser for that matter, comes in handy when you are trying to locate a page opened earlier. But, how far can you search for the Chrome history? Is there a way you could search all Chrome history at once?

These are the questions we will be addressing in the article because history plays an important role in a seamless browsing experience.

So, without further ado, let’s find out all about the full Chrome history and how you can view it.

Quick Tip:

The Opera One browser allows you the option to search and filter history by date seamlessly. You can manually select the start and end date, and Opera One will list the pages visited in that period.

The new structure of the Opera One browser brings you Tab Islands along it’s already known workspaces. This feature allows you to arrange your tabs into groups that can then be expanded or collapsed for more organized browsing sessions.

Opera One

Smooth your browsing experience with a cleaner and more organized interface.
Free Download Visit website

How far back can I search Chrome history?

If you search for a previously opened website page in Google Chrome, you will find that the browser’s History page goes back about three months. You can open Chrome’s history page using the following path:chrome://history/

The browser history prior to the 90-day period is not deleted but stored as a file on your computer and can be accessed. Though it wouldn’t be listed on the browser’s History page.

Can I search Chrome history by date?

Chrome doesn’t allow you to filter history by date, but there are other browsers that do. For instance, Firefox and Opera automatically categorize history by date and list them under different sections.

Let’s now see how you can search all history in Chrome.

How do I see Chrome history all time?

Note icon NOTE
This method would only work if you have a Google account linked to Chrome and enabled Web & App Activity.
  1. Paste the following path in Chrome’s address bar and hit Enter:chrome://settings/
  2. Click on Manage your Google account.Manage your Google account
  3. Now, click on Manage your data & privacy under Privacy & personalization.manage your data & privacy to search all chrome history
  4. Scroll down and click on Web & App Activity.web & app activity
  5. Click on the Chrome icon under See & delete activity.chrome
  6. The entire Chrome history will now be visible.search all chrome history
  7. Also, you can add a filter to search history by date. To do that, click on the Calendar icon.calendar
  8. Again, click on the Calendar icon.calendar to search all chrome history
  9. Now, select a date here, and click OK.date
  10. Once done, click on Apply.apply
  11. The Chrome history for that date and the one before it will be displayed.

This is a simple method to search all Chrome history and doesn’t require installing third-party extensions or tools.

Earlier, we had an extension that allowed searching and viewing all Chrome history, but it was taken down from the Web Store.

How to view Chrome history on phone?

  1. Launch Chrome on your phone, and tap on the ellipsis near the bottom left.ellipsis to search all chrome history
  2. Now, tap on History in the menu.History
  3. Chrome’s history will now be displayed.view
  4. To delete the history, tap on Clear Browsing Data at the bottom.clear browsing data
  5. Now, select the time range from the dropdown menu, check the data you want to delete, and tap on Clear Browsing Data.clear browsing data

That’s it! You now know how to view and delete all search history in Chrome. These methods will come in handy and improve your browsing experience.

Also, find out how to recover Chrome history that disappeared, in case you are looking for older search history.

If you know of other methods, drop them in the comments below.
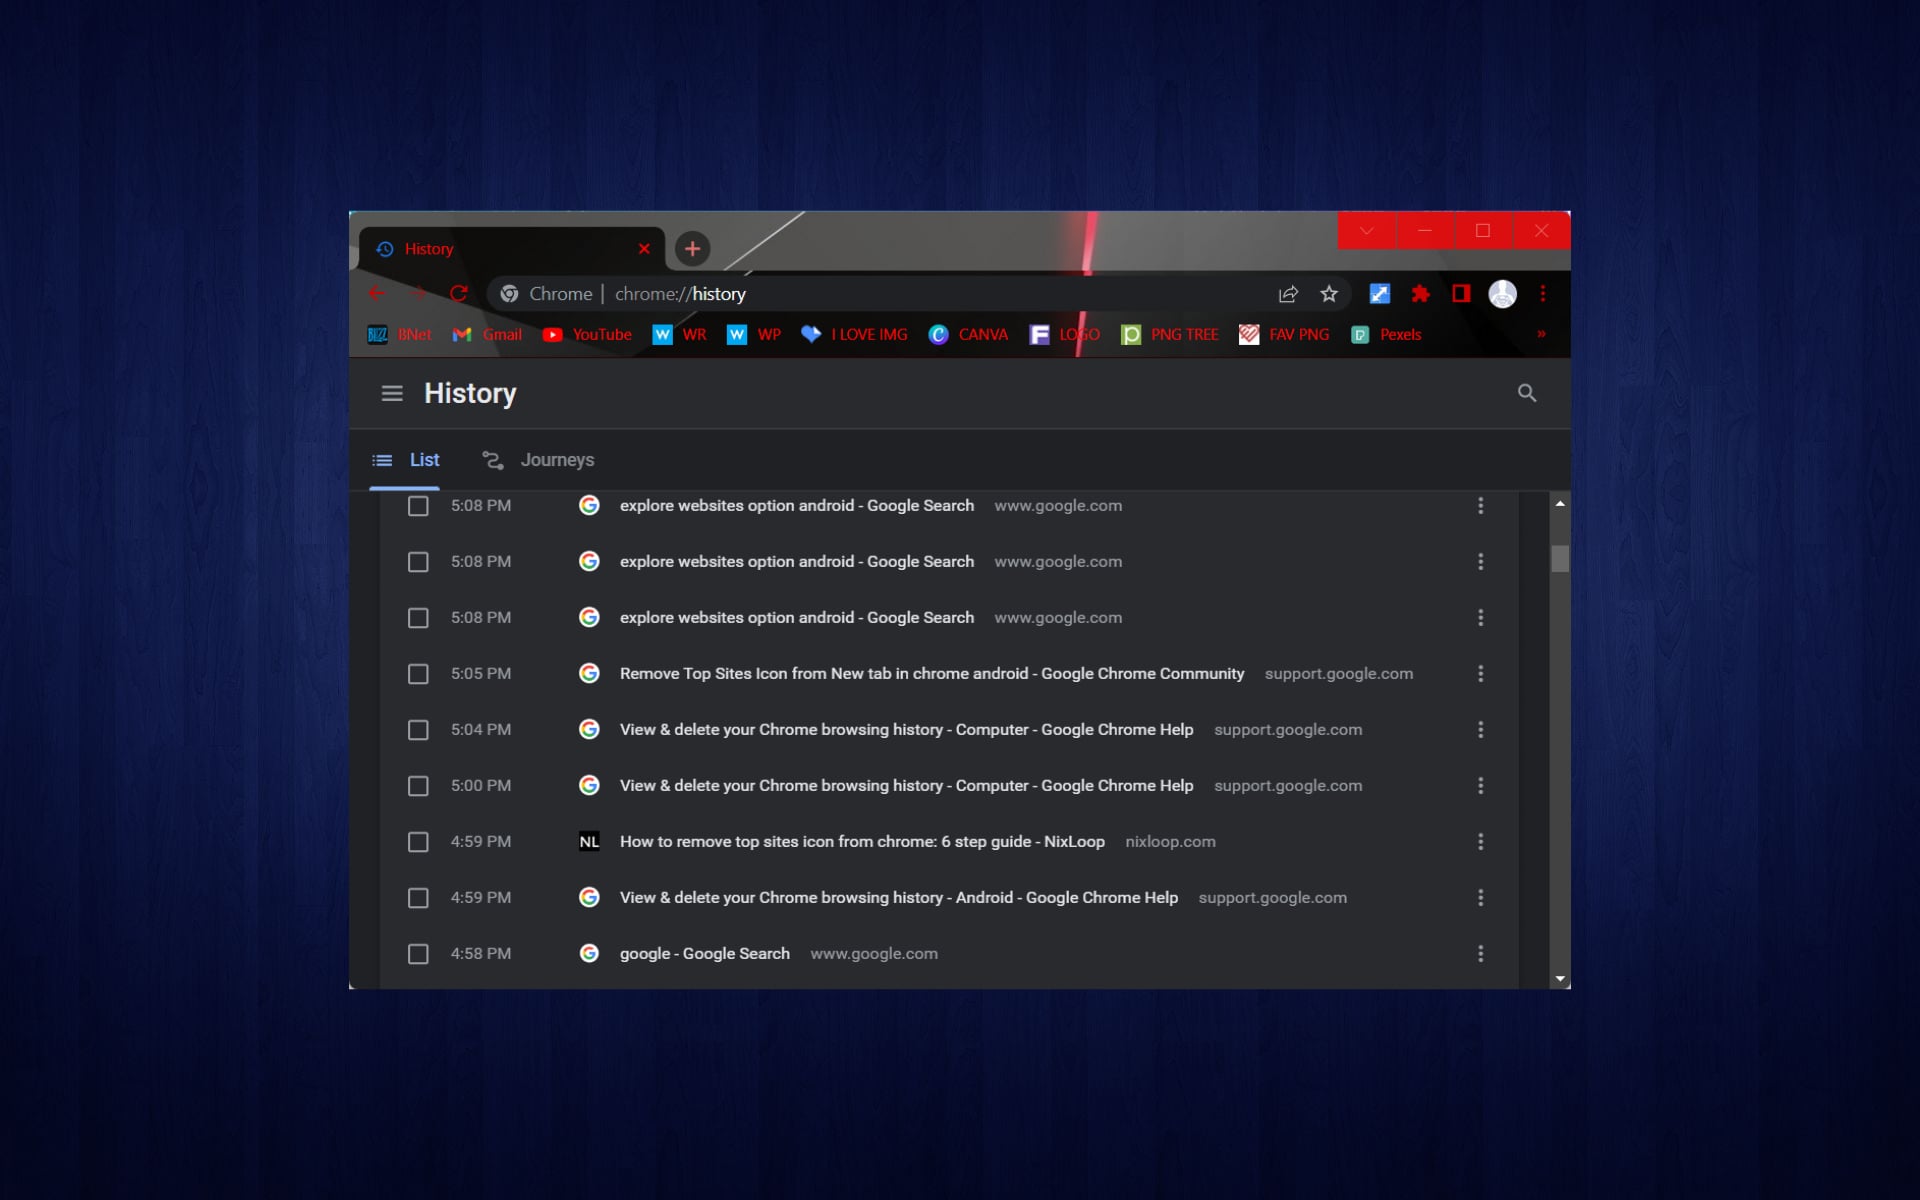
Opera Browser History File Location [How to Find It]

We’ll show you how to access the Opera browser history file location so you can easily access previously visited websites and back up your data.

Don’t worry if you don’t nail it the first time; we’ve got a few methods listed. So you can try another if needed.

How do I find history on Opera?

1. Use the History option

  1. Launch the Opera browser on your device and click on the Menu button.
  2. Select History from the drop-down options.

The history location on the browser is where all your Opera browser history is stored. You can modify it to see the all-time history or just the recent ones alone.

2. Find the History files on your drive

  1. Launch the Opera browser and search the following: opera://about
     
  2. Copy the profile path and launch File Explorer.
  3. Paste the profile path copied to navigate through using this: C:Users<username>AppDataRoamingOpera SoftwareOpera Stable
  4. The History and History-journal files in that directory hold your Opera browsing history.

How long does Opera store history?

Opera will hold your browsing history indefinitely unless you choose to remove it manually. It doesn’t automatically remove the browsing history.

How do I delete all history on Opera?

  1. Start Opera and press Ctrl + Shift + Delete.
  2. Set the Time range to All time. Make sure that only the Browsing history is checked. Lastly, click on Clear data.
  3. Your Opera browsing history will now be gone.

Can you see the deleted history on Opera?

No, once the history is deleted from Opera, you can’t see it or access it anymore.

Accessing your browser history can be useful, especially if you want to transfer data from Opera to Opera GX or just want to keep track of what you’re up to.

Knowing the location of your browser history can help if you need to install Opera without losing data.

Alternatively, you can check out how to fix Opera browser not working issues. Even more, we have an article on how to restore Chrome browsing history that disappeared.

Do not hesitate to let us know if you also managed to apply the above steps in the comments area below.
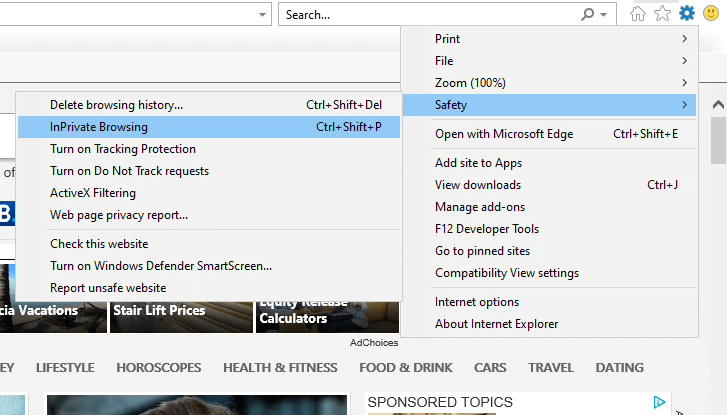
Summer Spotlight 2022 kicks off with 75 new games coming to Xbox

Summer Spotlight 2022 is underway as of July 26, and this year’s spotlight features 75 upcoming games headed to Xbox One and Xbox Series X|S. These are some of the most hotly anticipated games of the season. New titles will be added each week, so it pays to check back often to see what’s new in the spotlight. There will also be special giveaways through the official Xbox Wire Twitter account below.
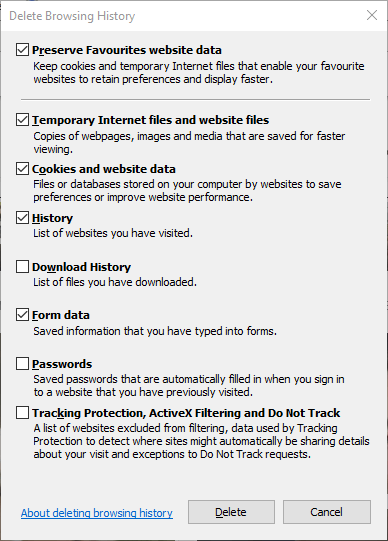
Summer Spotlight will run over the next six weeks, through September 5. During that period, when you spend $50 on eligible games and movies you will receive 5,000 Microsoft Rewards Points. That’s quite a nice little bonus! Here is a preview of just a few of the titles featured as part of Summer Spotlight 2022. But don’t forget that many more are to follow.

New games will be added to the spotlight each Tuesday. And the latest Summer Spotlight games will be streamed over on the official Xbox Twitch Channel on Fridays from 11am to 12 pm PT. Don’t miss out on this exciting summer gaming event.


How to Add Trusted Sites in Chrome [Windows & Mac]

Sometimes you might encounter certain error messages if the website you’re trying to visit isn’t added to your list of trusted sites in Chrome. However, you can avoid these errors simply by adding the website to the trusted sites list.

In this article, we’ll show you how to correctly add a website to the trusted sites list in Chrome on Windows 10 and 11 and some other popular browsers.

How do I know if a site is trusted?

The easiest way to know a secure site in the modern internet world is by verifying it has an SSL certificate. However, not all secure websites should be trusted. You usually want to visit websites you know and are familiar with.

You, however, can not stick only to the ones you are familiar with, so here are some other things you may do to determine if you should visit a website:

  1. Make sure the URL starts with HTTPS and not HTTP.
  2. Ensure the URL has no typos, for example, windowsreport.com and not w1ndowsreport.com.
  3. Analyze the page and verify that it has a modern theme.
  4. Find out who owns it using services like Whois.

How do I find trusted Sites?

These are usually the sites you use every day. There is no unique way of finding trusted sites; just ensure that if a link feels or looks spammy, you stay away from clicking it until you have done a background check.

Quick Tip:

Did you know that some browsers have a built-in ad blocker and a VPN? That’s right. The Opera One browser does this.

Sharing some similarities with Chrome, you can browse the web more safely and faster because Opera One is based on Chromium. You will see fewer ads, and your privacy will be higher if you turn on the option to block trackers.

Opera One

Easily switch to Opera One and enjoy a faster, safer, more private browsing experience.

How do I add a site to trusted in Chrome?

Add trusted sites in Chrome

1. On Windows

  1. Launch your browser and navigate to the URL you want to trust.
  2. Click on the padlock sign and select Site settings.
    chrome trusted sites
  3. Click on the drop-down lists to allow access based on your preferences.
    chrome trusted sites

Trusting a site in this manner will work both on Windows 10 and 11. The process is virtually identical on Mac.

1. On Mac

  1. Launch your browser and navigate to the URL you want to trust.
  2. Click on the padlock sign and select Site settings.
    chrome trusted sites
  3. Click on the drop-down lists to allow access based on your preferences.

As you observed, this is the very same process as Windows. And it would be the same in almost every Chrome browser OS.

Add multiple trusted sites in Chrome

  1. Click on the ellipses or the three dots found in the upper right part of your browser.
    chrome trusted sites
  2. Select Settings from the options.
  3. On the left pane, select Privacy and security, then click on Site Settings on the right.
    chrome trusted sites
  4. Click the arrow in front of any of your recently visited sites, and it gives you access to permissions you can grant that site,
    This process is similar in most operating systems, including Windows, Mac, and Linux.

    How to add trusted sites in Chrome using Internet Options

    Windows OS users can quickly add trusted sites to their Chrome browser using the built-in Internet Options in Control Panel. You can manually add sites to the list of Trusted Sites, and that list will apply to all the browsers you use, including Chrome.

  1. 1. Click on the Start menu, type internet options, and select the Internet Options app.

    internet options windows
  2. 2. Navigate to the Security tab, then select Trusted Sites (the icon with a green check mark).

    chrome trusted sites internet properties
  3. 3. Click on Sites.

  4. 4. On the new window, type the URL of the site you want to add to trusted sites in the Add this website to the zone text field.

    chrome trusted sites add site
  5. 5. Click the Add button.

  6. 6. Continue to add as many websites as you want.

  7. 7. Close the window when you finish.

Please note that this last method is unique to Windows OS.

How do I get rid of the trusted site security warning?

You must note that security warnings are meant to keep you safe online. In most cases, you should not ignore them, but if you are positive that the website you are requesting poses no security risk, then you can go ahead and trust the sites using any of the solutions we have mentioned above.

On the Chrome browser, you can open the site settings and add the URL to your permitted sites, and on Windows, you may add them to the list of trusted sites using the Internet Options app.

There you go, a quick and easy way to add trusted sites in Chrome and others on Windows 10, 11, and Mac.

This is a pretty straightforward process; with a few clicks, you should be able to access any website freely. For servers, check out our guide that illustrates what to do if you don’t have permission to access a server.

Let us know if these solutions have worked for you. We are curious to hear from you in the comments section.

Fix DLG_FLAGS_INVALID_CA Error Code & Bypass Website Warnings

You probably got the error message that reads dlg_flags_invalid_ca. So let us tell you how to fix it.

If the site you are visiting uses a certificate, the error says there are issues with it. Since the web owner or administrator has authority over the certificate for that particular website, there isn’t really much you can do.

However, we will show you what to do for the little possibility that the issue emerges from the user’s PC.

There are many certificate-related errors, and for general solutions, consult our guide on fixes when there is a problem with a website’s security certificate.

What is DLG_flags_sec_cert_cn_invalid?

It is often vague the reason behind this error, but most commonly, it is attributed to web certificate complications and other factors like:

  • Installation of certificates
  • Admin renewal issues
  • Malicious content on websites

This error code is not particular to just one browser, and users have also experienced dlg_flags_invalid_ca in Internet Explorer, dlg_flags_sec_cert_date_invalid in Windows 10, in group policy, and also even within signed certificates.

The DLG FLAGS INVALID CA error acts as a safeguard to stop harmful stuff from entering your machine in any of these instances.

How do I fix error code dlg_flags_invalid_ca?

1. Try out a different browser

If you’re tired of seeing the same old error messages on most of your browsers, then suggest you switch them with a better alternative.

On that note, we would like to showcase Opera One, a web browser built using the Chromium engine that boasts high levels of security, a light feel, and low resource requirements.

Given your current situation, you’ll like knowing that Opera One is also frequently updated, sometimes every day, so any potential errors you may encounter won’t be there for long anyway.

Besides, you don’t have to worry about websites not being secure since the browser comes with a built-in VPN and ad-blocker that will significantly diminish the chances of data breaches.

Opera One

Visit your favorite websites without running into error messages.

2. Check the Time and Date Settings

  1. Press the Windows key + S hotkey.
  2. Type date and click on the Date & Time settings app.
    dlg_flags_invalid_ca
  3. Toggle on the option to Set time automatically if it’s not already selected.
    dlg_flags_invalid_ca
  4. If the time and date don’t seem quite right even with the Set time automatically option enabled, scroll down and click on Additional clocks.
  5. Click the Additional Clocks tab, tick the Show this clock checkbox, and select a timezone.
  6. Then select the Internet Time tab, and click the Change settings button.
    dlg_flags_invalid_ca
  7. Select the Synchronize with an Internet time-server option. Then choose a server on the drop-down menu, and press the Update now button.
  8. Click OK.
  9. Now confirm if the dlg_flags_invalid_ca error is resolved.

3. Clear the browser’s cache

  1. Click on the ellipsis (3 vertical dots) at the top right corner of your browser.
    dlg_flags_invalid_ca
  2. Select More tools, then click the Clear browsing data option.
    dlg_flags_invalid_ca
  3. On the pop-up, select the Basic tab, then choose a Time range from the drop-down menu.
  4. Check options for Browsing history, Cookies and other site data, Cached images and files, then click on the Clear data button.
  5. Finally, restart the browser and see if the dlg_flags_invalid_ca error is resolved.

You may also use an automated solution if you believe it would be more helpful. Try the professional program CCleaner and its Intelligent Scan feature, which allows you to erase only certain cookies, cached files, and logs.

Passwords saved from social networking sites or emails will not be affected, and the Intelligent Scan will erase only the cookies you identify as unwanted.

Furthermore, it will remember the next time you wish to clean, and you will only need to click once to erase the specific data.

4. Reset the Browser

  1. Click on the ellipsis (3 vertical dots) at the top right corner of your browser.
    dlg_flags_invalid_ca
  2. Click on Settings.
    dlg_flags_invalid_ca
  3. Expand the Advanced settings on the browser’s left pane, then click Reset and clean up.
  4. Select the option to Restore settings to their original defaults and click the Reset settings button.
  5. Check if the dlg_flags_invalid_ca error is resolved.

5. Deselect the Warn About the Certificate Address Mismatch Option

  1. Press the Windows key + S keyboard shortcut.
  2. Enter the keyword internet options in the search box, and select the Internet Options app.
    dlg_flags_invalid_ca
  3. Select the Advanced tab, then uncheck the Warn about certificate address mismatch box.
  4. Select the Apply option, and click OK to exit the window.
  5. After that, restart Windows.

How do I make my network secure?

If you want to keep your network safe and secure, these are a few things you must do:

  1. Change the connection’s default name.
  2. Make sure that the password is strong and unique.
  3. Ensure that network encryption is enabled.
  4. Turn off the options for network name and broadcasting.
  5. Access the network via VPNs.

With these steps outlined in the article, you should have successfully resolved the dlg_flags_invalid_ca error.

Note that this error is not particular to Chrome and could also arise in some other browsers. Also, remember that it may also be a warning to keep you safe online. In such cases, proceeding to the website is not advised.

Note that the browser error code dlg_flags_invalid_ca also arises due to website administrators not renewing their sites’ certificates. In which case, some users might need to remind site administrators to update their websites’ certificates.

Opera System Requirements: Which Devices is it Compatible With?

Before installing the Opera browser on your device, it is integral to know Opera’s system requirements. Keep reading to find out if your PC can handle Opera.

What are the requirements for Opera?

1. Windows

  • Supported versions: Windows 10, 11
  • CPU: Intel Pentium 4 / AMD Athlon 64 with SSE2 or newer

2. Mac

  • Supported versions: macOS 10.15 or later

3. Linux

  • Supported versions: 64-bit Ubuntu 18.04+, Debian 10+, openSUSE 15.2+, or Fedora Linux 32+, openSUSE, Fedora, and others
  • CPU: Intel Pentium 4 processor or later with SSE3 support

These are the minimum requirements to run the Opera browser without hassles. However, it is often advised to have higher specs to improve the experience of using the browser. The higher the specs, the better the browsing experience.

What is Opera compatible with?

Opera is compatible with all desktop platforms as well as iOS, Android, and Chromebook.

How much RAM does the Opera browser need?

For optimal performance during multi-tasking with 20 tabs, Opera needs around 2GB.

You can check out our detailed guide on how to download and install the Opera browser here. Also, we have an article on fixing the Opera browser if it fails to install or download.

We also have a guide on how to install Opera without losing data, so don’t miss it.

We hope that the above details made things clear for you. Let us know in the comments if you happen to have any questions.

KB5015878: All you need to know about this Windows 10 update

We’ve recently been talking about a lot of Microsoft-designed updates for their plethora of products, but about Windows 10 and Windows 11 in particular.

If we’re talking about Windows 11, we can remind you of KB5015882, Preview Build 25163, or KB5015888, which have all been released recently to the Dev, Beta, and Stable channels of the OS.

Circling back to Windows 10, the last build we presented to you was the most recent Release Preview Channel rollout, in the form of Build 19044.1862.

It’s time to leave all that in the past now, as Microsoft just released a brand new cumulative update for Windows 10, one that comes with some much-needed fixes.

Let’s take a deeper dive and see exactly what Redmond developers managed to fix and break at the same time through this latest patch.

What’s new in KB5015878?

We’re talking about KB5015878, which first of all gives you the option to receive important notifications when focus assist is on.

You might already know what Focus Assist is, and if not we’ll just tell you. It works like a do not disturb mode that hides notifications.

Furthermore, this update restores functionality for Windows Autopilot deployment scenarios that are affected by the security mitigation for hardware reuse.

KB5015878 removes the one-time use restriction for self-deploying mode (SDM) and pre-provisioning (PP) and also re-enables any User Principal Name (UPN) display in user-driven mode (UDM) deployments for approved manufacturers.

  • Addresses an issue that causes certain docking stations to lose internet connectivity when waking from Sleep mode.
  • Adds functionality that improves the OS upgrade experience. 
  • Addresses an issue that might cause consecutive video clip playback to fail in games that use DX12.
  • Addresses an issue that affects certain games that use the XAudio API to play sound effects.
  • Addresses an issue that affects the height of the Search box when you use multiple monitors that have different resolutions.
  •  Addresses an issue that prevents certain troubleshooting tools from opening. 
  • Reduces the overhead of resource contention in high input/output operations per second (IOPS) scenarios that have many threads contending on a single file.
  • Improves the reliability of a push-button reset after an OS upgrade.
  • Addresses an issue that makes the tenant restrictions event logging channel inaccessible if you remove the EN-US language pack.
  • Addresses an issue that prevents certain troubleshooting tools from opening.
  • Updates the Remove-Item cmdlet to properly interact with Microsoft OneDrive folders.
  • Addresses an issue that causes certain docking stations to lose internet connectivity when waking from Sleep mode.
  • Adds functionality that caches additional audio endpoint information to improve the OS upgrade experience.
  • Addresses an issue that might cause consecutive video clip playback to fail in games that use DX12.
  • Addresses an issue that affects certain games that use the XAudio API to play sound effects.
  • Addresses an issue that causes port mapping conflicts for containers.
  • Addresses an issue that causes Code Integrity to continue trusting a file after the file has been modified.
  • Addresses an issue that might cause Windows to stop working when you enable Windows Defender Application Control with the Intelligent Security Graph feature turned on.
  • Addresses an issue that affects the height of the Search box when you use multiple monitors that have different resolutions as measured dots per inch (DPI).
  • Addresses an issue that prevents the Storage Migration Service (SMS) from completing inventory on servers that have many shares. The system logs error event 2509 in Microsoft-Windows-StorageMigrationService/Admin channel (ErrorId=-2146233088/ErrorMessage=”Invalid table id”).
  • Addresses an issue that causes the Windows profile service to fail sporadically. The failure might occur when signing in. The error message is, “gpsvc service failed to sign in. Access denied”.

Known issues

  • Devices with Windows installations created from custom offline media or custom ISO image might have Microsoft Edge Legacy removed by this update, but not automatically replaced by the new Microsoft Edge. This issue is only encountered when custom offline media or ISO images are created by slipstreaming this update into the image without having first installed the standalone servicing stack update (SSU) released March 29, 2021 or later.
  • After installing the June 21, 2021 (KB5003690) update, some devices cannot install new updates, such as the July 6, 2021 (KB5004945) or later updates. You will receive the error message, PSFX_E_MATCHING_BINARY_MISSING.
  • After installing this update, IE mode tabs in Microsoft Edge might stop responding when a site displays a modal dialog box. A modal dialog box is a form or dialog box that requires the user to respond before continuing or interacting with other portions of the webpage or app.
  • Microsoft has received reports of issues affecting some printing devices following installation of this update. Symptoms observed may include duplicate copies of printers installed on a device (commonly with a similar name and the suffix “Copy1”), and applications which refer to the printer by a specific name cannot print. Normal printer usage might be interrupted, resulting in failure of printing operations.

As you can see, Microsoft manages to break a lot of stuff while fixing other problems, but that’s no longer news to anyone.

By far, the biggest achievement of this update is the fix of the dreaded DX12 problem, for which gamers will surely be most thankful for.

If you are looking to get this update, you can obtain it through the Microsoft Update Catalog and install it directly on your PC.

That is if you haven’t already received the option to install it via the Windows Update tool on your device, which is less likely.

We’re going to keep an eye out for future updates as well and present them to you as soon as the Redmond tech giant puts them put.

Remember to only download Windows updates directly from Microsoft and not from other sources, as that might lead to your system becoming compromised.

Have you found any other issues after installing KB5015878 on your device? Share your experience with us in the comments section below.
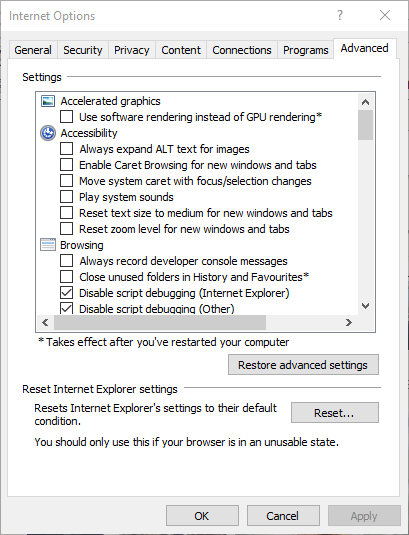
DNS Probe Finished NXdomain: What Causes It & How to Fix It

Google Chrome might be the most popular web browser in the world, but it has its occasional share of issues. One problem that Windows 10 users reported in Google Chrome is DNS PROBE FINISHED NXDOMAIN error, which can prevent you from visiting certain websites. 

This affects both older and newer versions of Windows and can be caused by specific network settings or by some programs and apps installed on your PC.

So today, we’ll analyze possible causes and show you how to fix the error.

Note that for other DNS issues on Windows 10 and 11, you could use our guide to fix them.

What causes DNS_PROBE_FINISHED_NXDOMAIN?

When you see this error, it is, in most cases, a problem from the user’s side. A few of the more common reasons are as follows:

  • Typos in inputed data
  • Bad network or internet connection
  • Poorly configured DNS
  • Outdated browsers

Whatever the case is, we will help you fix this error.

What does DNS failure mean?

A DNS failure usually shows up in your browser when you lose network or Internet access, and, of course, you will be unable to see the webpage you were trying to load.

This error points to the fact that your browser could not look up the IP address for the domain you’re trying to access.

DNS failure example

The DNS failure comes in many forms, with different messages, but they all mean the same thing: your browser can’t connect to the page’s domain.

Quick Tip:

DNS over HTTPS is a feature supported by the Opera One browser. This is a privacy and security feature that encrypts DNS transmission to avoid eavesdropping and DNS data manipulation.

When the option is activated in the Opera One web browser, all DNS queries are routed through Cloudflare servers, and through its built-in proxy VPN rerouting the traffic to avoid network congestion.

Opera One

The built-in VPN and DNS support in this browser is effective and passed our tests successfully.

How do I fix DNS probe finished NXdomain error?

1. Check your antivirus

  1. Click on the Start menu, type windows security, and then select the Windows Security app.
  2. On the left pane, click on Firewall & network protection, then on the right pane, toggle on the switch for Microsoft Defender Firewall.
    dns probe finished nxdomain windows 10
  3. Retry to see if the error has disappeared.

The issue might be your antivirus if you’re getting DNS_PROBE_FINISHED_NXDOMAIN error on Windows 10 and 11.

To fix the problem, change your antivirus configuration and disable certain antivirus features. If that doesn’t work, your next step would be to disable your antivirus entirely.

However, removing the antivirus should be only the last resort; instead, try using an antivirus with little impact on other processes, such as ESET HOME Security Essential.

Besides getting the highest scores in the latest specialized tests, thanks to the advanced technologies this software uses, it protects your Windows 10 device in real-time with minimal impact on your system performance.

The intuitive interface and the working modes make it a perfect antivirus solution for any home user.

⇒ Get ESET HOME Security Essential

2. Use Command Prompt

  1. Click the Start button, type cmd, and select Run as administrator to start Command Prompt with full privileges.
  2. When Command Prompt opens, enter the following and press Enter:
    ipconfig /flushdns
  3. After the process is completed, close Command Prompt and check if the problem is resolved.

If the flushdns command doesn’t fix this error, you might want to try running the following commands as well:

ipconfig /release

ipconfig /all

ipconfig /flushdns

ipconfig /renew

netsh int ip set dns

netsh winsock reset

Once done, verify that the DNS probe finished NXdomain error in Windows 10 and 11 is fixed.

3. Use Google’s Public DNS

3.1 Windows 10

  1. Right-click the network icon in your Taskbar and select Open Network & Internet settings.
  2. Now click on Status on the left pane, then select Change adapter options from the right pane.
  3. Locate your network connection, right-click it and choose Properties from the menu.
  4. Select Internet Protocol Version 4 (TCP/IPv4) and click the Properties button.dns probe finished nxdomain windows 10
  5. Select Use the following DNS server addresses option and enter 8.8.8.8 as Preferred DNS server and 8.8.4.4 as Alternate DNS server.
    dns probe finished nxdomain windows 10
  6. After you’re done, click the OK button.

3.2 Windows 11

  1. Click the Start menu, type control panel, and then open the Control Panel app.
  2. On the left pane, click on Change adapter settings.
    dns probe finished nxdomain windows 10
  3. Right-click on your connection and select Properties.
  4. Select Internet Protocol Version 4 (TCP/IPv4) and click the Properties button.
    dns probe finished nxdomain windows 10
  5. Select Use the following DNS server addresses option and enter 8.8.8.8 as Preferred DNS server and 8.8.4.4 as Alternate DNS server.
  6. After you’re done, click the OK button.

After this procedure, your DNS will change, and hopefully, the issue will be resolved.

As mentioned, the error occurs in Chrome. If you’re not willing to spend time troubleshooting it and looking for a quick solution, the recommendation is to switch to a more reliable browser, such as Opera.

Note that it comes as a more stable browser than Chrome, thanks to its multiple integrations with various other tools and apps.

4. Reset Chrome to default

  1. Open a new tab in Google Chrome and enter:
    chrome://flags/
  2. Click the Reset all button.
  3. Restart Chrome and check if the problem is resolved.

5. Restart the DNS Client service

  1. Press Windows key + R and enter services.msc.
  2. Locate DNS Client service, right-click it and choose Restart from the menu.
    dns probe finished nxdomain windows 10
  3. After restarting the DNS Client, close Services window and check if the problem is resolved.
  4. Check if the DNS probe finished NXdomain error is fixed.

6. Disable VPN software

Many users use VPN software solutions to protect their privacy online, and even though VPN clients are beneficial, sometimes they can cause certain problems with DNS.

To fix this problem, we highly recommend that you temporarily disable the VPN client and check if that fixes the error.

If disabling the VPN client doesn’t fix the problem, you might have to remove it from your PC temporarily. Users reported issues with Cisco AnyConnect Secure Mobility Client, but almost any VPN client can cause this issue to appear.

To completely remove your VPN from your PC and prevent any future problems, it’s advised to use a cleaning utility to remove it.

In case you’re not familiar, a PC cleaner such as CCleaner is a special application designed for removing unnecessary files from your PC. Some of these tools also include an advanced uninstaller.

In addition to removing programs, this application will also remove all files and registry entries associated with that program.

As a result, it will be as if the application was never installed on your PC. It’s simple to use, and you should be able to remove any application and all of its files easily.

⇒ Get CCleaner

7. Disable proxy

  1. Press Windows key + I to open the Settings app.
  2. When the Settings app opens, go to Network & Internet section.
  3. Select Proxy from the menu on the left menu and disable all options from the right pane.
  4. Alternatively, on Windows 11, when you select Network & Internet like in step 2, scroll down and choose Proxy from the right pane, then disable all options.
    dns probe finished nxdomain windows 10

After that, your proxy should be disabled, and the problem will be resolved.

Proxies are not to be ignored, though. Many users rely on proxies to protect their privacy, but sometimes your proxy can cause errors such as this one to appear.

8. Check your extensions

  1. Click the Menu button in the top right corner, choose More tools, and select Extensions.
    dns probe finished nxdomain windows 10
  2. A list of extensions will now appear. Disable all extensions by toggling the on/off switch.
  3. Once you disable all extensions, restart your browser and check if the issue still appears.

You can try enabling applications individually or in groups if the problem is resolved. By doing so, you can locate the problematic extension and remove it.

Once you find the extension causing the issue, remove it from your browser, keep it disabled, or update it and check if that solves the problem.

This is an effective way of fixing the DNS probe finished NXdomain in Windows 11.

In most cases, the DNS PROBE FINISHED NXDOMAIN error is caused by security or privacy extensions, so be sure to disable them first and check if that solves your problem.

9. Update your browser

  1. Open Chrome and click the Menu icon.
  2. Choose Help and select About Google Chrome from the menu.
    dns probe finished nxdomain windows 10
  3. Now you’ll see the information on the Chrome version you’re using. If any updates are available, they will be downloaded automatically.
  4. Check if the dns_probe_finished_nxdomain Chrome error is fixed.

If it shows up even after updating to the latest version, consider switching to the Beta or Canary version of Chrome.

How do I find my DNS server in Windows?

  1. Click on the Start menu, type command, and select Run as Administrator.
    dns probe finished nxdomain windows 10
  2. In the Command Prompt, type in the code below and hit Enter.
    ipconfig/all
    dns probe finished nxdomain windows 10
  3. From the displayed results, search for DNS Servers. Under this option, the first address you see will be your primary DNS, and the next one will be your secondary DNS.

Also, remember that newer browser versions offer new features and bug fixes, so using them is always recommended.

You should have successfully resolved the issue if you have read this far.

To conclude, problems such as DNS_PROBE_FINISHED_NXDOMAIN can be troublesome, and if you don’t want to switch to a different web browser, we suggest you try some of our solutions.

Dungeon Siege 2 no Mouse: 4 Ways Fix it if it’s not Showing

Dungeon Siege is one of the best games that combines role-playing elements with high-intensity and over-the-top action. However, many reported that Dungeon Siege 2 has no mouse.

Some users complain that when playing Dungeon Siege 2, there is no mouse cursor in Windows 10 and no error message that could indicate what should be done next to solve the issue.

This is a somewhat common issue, and we already wrote about what to do if your mouse cursor disappears randomly on your PC.

In this article, we will show you the steps you need to take to fix the Dungeon Siege 2 no mouse issue on Windows 10.

Why is there no mouse in Dungeon Siege 2?

If you do not see your mouse cursor while playing the game, it could be because of any of the following reasons:

  • Driver-related problems – Drivers are a primary concern for this error, especially when you run on outdated drivers.
  • Resolution problems – Resolutions for the game often affect how you interact with it and may lead to this error.
  • Game compatibility – If you have just upgraded the OS, this may be an issue if you do not have a version that works well on the new upgrade.

Once you know what may be causing the error, you will know which solutions below would fix the issue.

What can I do if there’s no mouse in Dungeon Siege 2?

Before going through these processes, consider playing the game from GOG. This will save you the stress of troubleshooting. The game should work perfectly, and this may be a good alternative.

1. Use a specialized software

Most of the time, the situations where the mouse is not working correctly have a lot to do with, or even more, are caused by faulty or outdated drivers.

You can assure your drivers are always up to date with specialized driver updating software. In just a few minutes you can download and install the right drivers for your system.

2. Change the resolution

  1. Launch Steam and navigate to Library.
    dungeon siege 2 no mouse
  2. Locate the game in your Steam library and right-click on it, then select Properties.
  3. Navigate to Browse Local Files, then click Browse Local Files.
    game file does not match the server
  4. Open Dungeon Siege Video Conf and set it to the highest resolution.
  5. Next, run the Dungeon Siege.exe from inside this folder.
  6. Try to open the game again and see if the problem is solved.

If this solution fixes the Dungeon Siege 2 no mouse on the Steam issue for you, remember that you need to run the game from the installation directory every time.

Alternatively, you can create a shortcut of the .exe file and put it on your Desktop for quick access.

3. Change the compatibility mode

  1. Press Windows + E to open File Explorer, then navigate to the path below:
    C:\Program Files (x86)\Steam\steamapps
  2. Open the Common folder.
  3. In the Dungeon Siege 2 folder, locate the DungeonSiege2.exe.
  4. Right-click the .exe file and choose Properties from the menu.
  5. Go to the Compatibility tab and check Run this program in compatibility mode. Select the desired version of Windows.

You might have to experience different settings until you find the compatibility mode that works for you.

Hopefully, this solution should help you if there’s no cursor in Dungeon Siege 2.

4. Change launch options

  1. Open Steam Library.
  2. Locate Dungeon Siege 2, right-click it and choose Properties.
    Click on game properties
  3. Select Set launch options.
  4. Now enter the following and save the changes: fullscreen=false width=1920 height=1080

These steps will force the game to run at a specific resolution in windowed mode. However, remember that you can use any other resolution that matches your display.

After making this change, check if Dungeon Siege 2 mouse is still not showing up.

We hope one of the solutions in this article helped you fix the Dungeon Siege 2 no mouse in full-screen mode.

Please let us know in the comments section below if you have additional recommendations or suggestions; we would love to hear them.

Opera Installed Itself: 3 Quick Ways to Fix it

Many users reported that Opera installed itself without their knowledge, and they are rightfully worried. In today’s guide, we’ll show you how to prevent this from happening in the future.

What is Opera and why is it on my computer?

Opera is a web browser, and sometimes it comes bundled with different software, or with Acer devices.

What do I do if Opera has installed itself?

Before we start, scan your PC for malware and check any recently installed applications. uTorrent and other various applications can sometimes install Opera automatically, so you might want to remove them.

1. Check your AppData directory on Acer laptop

  1. Press Windows key + R and enter %localappdata%. Click OK.
    run window with %localappdata% command
  2. Navigate to OEM\Hermes\classes
  3. In there, you should find the Opera setup file. Try to remove it.

This solution works only on Acer devices, as Opera comes preinstalled with the device.

2. Uninstall from the Control Panel

  1. Press the Windows key, search Control Panel and click Open.
  2. Navigate to Programs and Features, then select Uninstall a program.unable to uninstall program windows 10 11 app won't uninstall
  3. Find Opera from the list, right-click and select Uninstall.Unistall in Control Panel

To make sure that Opera is completely gone you will need to remove the software leftovers as well.

3. Disable scheduled tasks

  1. Press the Windows key + S and type task. Select Task Scheduler from the list of results.task scheduler in windows 11
  2. Navigate to Task Scheduler Library and locate and select all Opera tasks.
  3. Right-click and select Disable.
    disable opera scheduled tasks

Hopefully, with our recommended solutions, you have been able to solve the issue with Opera browser being automatically installed.

If you encounter issues where Opera fails to install or download, take a closer look at our comprehensive guide on the steps to follow. We also have a guide on what to do if the Opera installer is stuck on downloading, so don’t miss it.
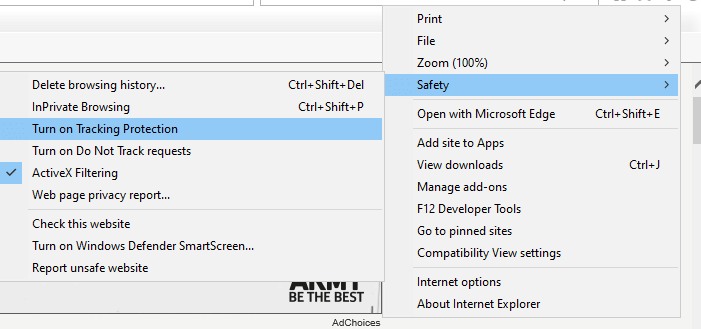
If you ever choose to switch to Opera, don’t miss our guide on how to install Opera without losing any data.

Let us know of any additional thoughts you may have on this topic in the comments section below.
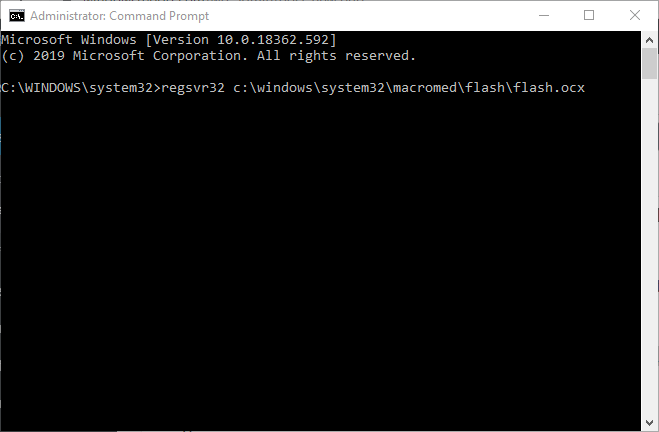
Microsoft Edge Black Screen: Get rid of if With 5 Methods

A few users are discouraged by the Microsoft Edge Black Screen; however, Edge is still one of the better web browsers. It comes in-built with Windows 10 and is the default web browser.

Unlike its predecessor, Internet Explorer, users will find that Edge works smoother and faster compared to other contemporary web browsers. Also, it isn’t as heavy on the system and is regularly updated along with Windows updates.

Microsoft Edge has its fair share of bugs and malfunctions, like all tech. Although not typical, the Edge user can expect to run across problems every once in a while.

One such error that has been reported recently is the black screen. This happens randomly without much provocation and usually occurs when the user attempts to open a new tab or access the features panel on the right-hand side.

This detailed guide will show you how to effortlessly fix the Microsoft Edge black screen issue.

Why is the Microsoft Edge screen black?

There are various reasons the Microsoft screen could be black. From browser problems to various PC issues, the possible causes are diverse.

Below are some of the popular ones:

  • Presence of malware on PC – As you may know, malware can cause many problems on your devices, especially when you do not use a solid antivirus. This Egdge issue is sometimes one such problem.
  • Faulty browser extensions – For browsers, a major source of errors is the extensions. Corrupt or faulty extensions may trigger the Edge black screen.
  • Wrong browser settings – Users may have tinkered with the settings, which may set off a black screen if not correctly done.
  • Outdated display drivers – Screen issues are often linked to the display driver and may be the case with the browser’s black screen.

Quick Tip:

Opera One is a browser very similar to Edge, minus the errors. They are both built using the Chromium engine, but Opera One is far more stable and can be enriched thanks to its built-in.

More so, Opera One ranks high in the security department, thanks to its built-in VPN and ad-blockers. The browser also integrates most popular social media and messaging apps, and comes with a built-in AI.

Opera One

Lighting-speed Internet surfing, a highly customizable UI, and enhanced security features are just some things you’ll get if using Opera.
Free Download Visit website

How do I fix the black screen on Microsoft Edge?

1. Disable/remove extensions

  1. Launch Edge and click on the menu button.
  2. Select the Extensions option.
    extension menu
  3. Click the Manage extensions option when prompted.
    manage extension microsoft edge black screen
  4. Toggle the switch before each extension backward to disable it.
    disable
  5. Click Remove under each extension to delete it.
    remove

If you are facing the Microsoft Edge black screen issue on video streaming sites like YouTube and Netflix or others like Discord and OBS, it might be down to a faulty extension on your browser. If you find any extension, you don’t remember installing; it is best to remove it.

Lastly, you should disable other extensions to know if they cause the problem.

2. Check for malware

2.1. Scan for viruses manually

  1. Press the Windows + I keys to open the Settings app.
  2. Select Update & Security.
    update microsoft edge black screen
  3. Click the Windows Security option in the left pane.
    windows security
  4. Select Virus & threat protection.
    virus and threat
  5. Now, click on the Scan options.
    scan options microsoft edge black screen
  6. Choose any of the scan options available and click the Scan now button.
    scan now

If the Microsoft Edge screen goes black when scrolling or is flashing some dark screen, it is likely due to a virus on your PC. Select the Full Scan or Microsoft Defender Offline scan options to perform a deep scan.

2.2. Scan for viruses with a third-party app

While Windows Security is strong enough to protect your PC most times, there is still considerable room for improvement. So, to achieve complete and satisfactory security online and offline, you might need a third-party antivirus in TotalAV.

TotalAV is top-notch security software that uses cutting-edge technology to protect you online and offline. It detects viruses before they manifest and eliminate them quickly.

This software is also fast and light on PC resources. With this, you are sure it won’t slow you down or hog your PC resources. It might be all you need to solve issues like the black screen on Microsoft edge.

⇒ Get TotalAV

3. Restart the system to perform a clean boot

  1. Press Windows + R to open up the Run dialogue.
  2. Type msconfig and hit Enter.
    msconfig
  3. Navigate to the Services tab and check on Hide All Microsoft Services.
  4. Select Disable all.
    disable all microsoft edge black screen
  5. Navigate to the Startup tab and select Open Task Manager.
    startup
  6. Right-click on each process and select Disable.
    disable  microsoft edge black screen
  7. Click Apply and OK.
    apply and ok
  8. Restart the computer.

If the black screen problem is resolved, try enabling each application again, one at a time.

The moment the black screen reappears, you will know that the application you most recently re-enabled is the source of your problem. Remove the program. You may try re-installing it.

4. Update display drivers

4.1. Update driver manually

  1. Press Windows + X keys and select the Device Manager option.
    device manager
  2. Double-click on the Display adapters option to expand it.
    display microsoft edge black screen
  3. Right-click on any driver there and select Update driver.
    update driver
  4. Click the Search automatically for drivers option.
    search auto
  5. It will show if there are any available updates to install.

Outdated drivers are a disaster waiting to happen. This can be the reason for Microsoft Edge’s black screen issue. Ensure to restart your PC after the update to sync the changes made.

4.2. Update drivers automatically

Going through the many steps above to search for driver updates and installing them yourself might be tiring. To make things easier, you can automate the process with Outbyte Driver Updater.

Outbyte Driver Updater is a world-renowned driver updater that takes care of the smooth running of your PC. It automatically scans for missing, broken, and outdated drivers.

It also recommends original drivers from trusted sources around the world. All these with little to no input from you.

⇒ Get Outbyte Driver Updater

5. Reset Edge configurations via PowerShell

  1. Press Windows + E to open File Explorer and navigate to the path below: C:/Users/Your Username/AppData/Local/Packages/Microsoft.MicrosoftEdge_8wekyb3d8bbw
  2. Clear the contents of this file.
    path microsoft edge black screen
  3. Press the Windows key and search for PowerShell.
  4. Right-click on PowerShell and select Run as Administrator.
    run admin
  5. On the PowerShell interface, copy and paste the following command and hit Enter: Get-AppXPackage -AllUsers -Name Microsoft.MicrosoftEdge | Foreach {Add-AppxPackage -DisableDevelopmentMode -Register “$($_.InstallLocation)AppXManifest.xml” -Verbose}
  6. If the process was successful, you should see a report printed out in yellow, ending with the following: C:\Windows\System32
  7. If the process fails, copy and paste the command below and hit Enter. Get-Appxlog | Out-GridView
  8. Now, repeat Step 5.
  9. Once you’re through, Edge will reset its initial settings, and the problem should no longer appear.

This fix is a technical one known to solve the Microsoft Edge black screen issue. Ensure to create a restore point on Windows 10 or Windows 11 before starting. This is to help undo any costly errors while trying to fix your browser.

There you go; using these solutions, you should be able to fix the black screen on Microsoft Edge. Note that some of the fixes are technical. So you need to follow the instructions to the letter.

If you found this guide helpful, feel free to comment below.