6 Ways to Fix Youtube no Stream, Tap to Retry Error

YouTube is watched by billions across the globe on a daily basis. You can watch a wide variety of videos on YouTube and it is one of the favorite past-times of many users.

However, YouTube users, especially iPhone and iOS device owners, have reported that they are facing a YouTube no stream tap to retry error.

This happens when they try to watch a video, and out of nowhere, this error pops up. Notably, when a similar video is played on another platform, for instance, an Android smartphone, it works with no issues.

Moreover, the problem doesn’t go away even if you tap on retry multiple times. Several iPhone users have reported this issue on various platforms, but there doesn’t seem to be a specific solution to fix this problem.

Thankfully, in this guide, we have compiled a list of effective solutions, after thorough research, that will help you fix the YouTube no stream tap to retry error and get back to streaming your favorite content.

Why am I facing YouTube no stream tap to retry error?

The YouTube no stream tap to retry error has been predominantly reported by iPhone and iOS users across the globe.

After research, we found out that there isn’t any specific reason for this issue to get triggered. However, there can be the below-mentioned reasons why you may come across this error:

  • The YouTube app on your phone isn’t up to date
  • There’s something wrong with your internet connection
  • Airplane mode is activated
  • Corrupt cache data is causing issues
  • There are some issues with official YouTube servers
  • The YouTube app isn’t allowed to use the mobile data

Now that you are aware of the common reasons that can give rise to YouTube no stream tap to retry error, let us check out in detail how you can resolve the problem at hand.

How can I fix YouTube no stream tap to retry error?

1. Check for the app update

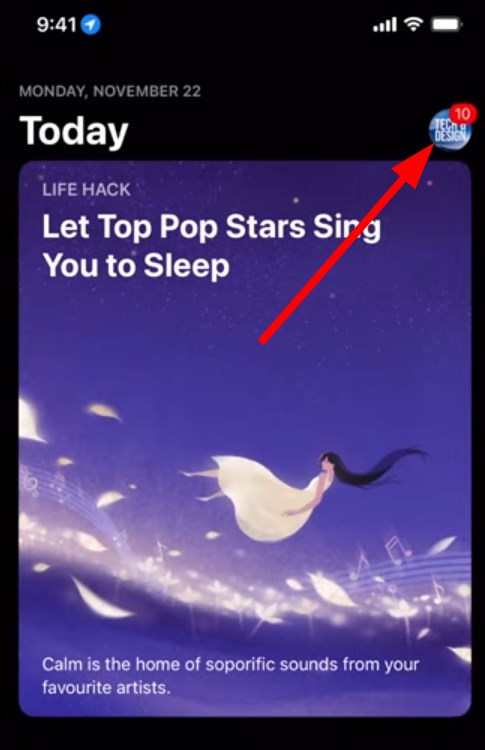
  1. Open App Store on your phone.
  2. Select your profile picture.
  3. Swipe down to see pending updates.
  4. If a new YouTube is available then tap on Update.
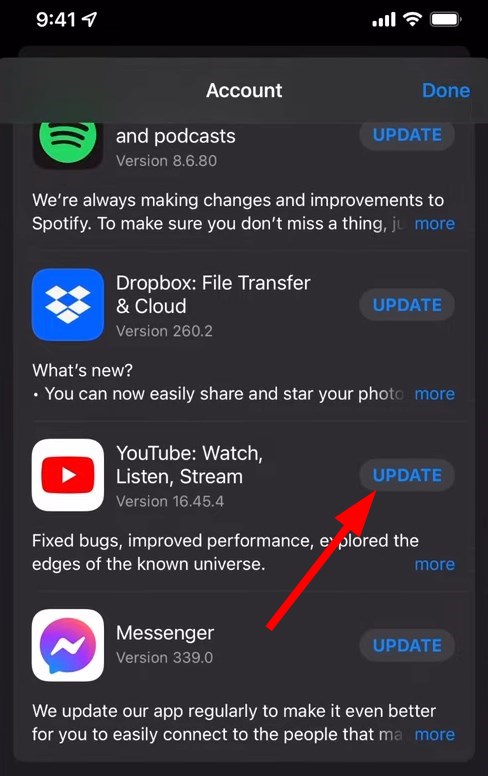
Keeping all apps up to date lets you not only enjoy all the latest features but also fix all the bugs that were present in the previous version of the app.

So, in order to fix the YouTube no stream tap to retry error, you should check the App Store and install the latest update.

2. Check your internet connection
roku internet speed

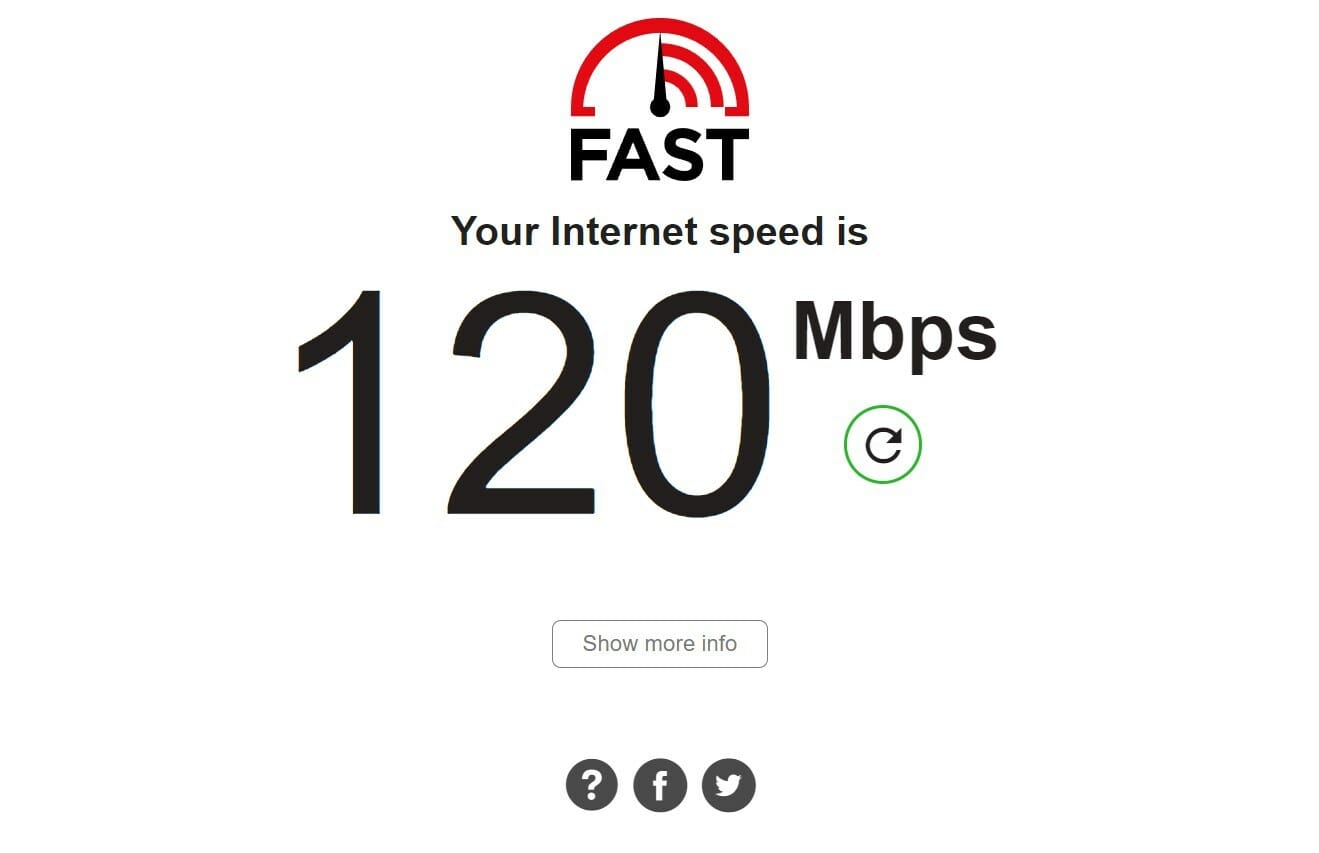
Almost all YouTube errors are triggered because of poor or faulty internet connections. If you are coming across a YouTube no stream tap to retry error, then you should check if your internet is working properly or not.

In order to check if you are getting appropriate internet speed as per your data plan, then you can use websites such as Fast or Speedtest.

If there are any issues, then you can contact your ISP and get the issue resolved, and then check if this fixes the issue or not.

3. Check if Airplane mode is enabled

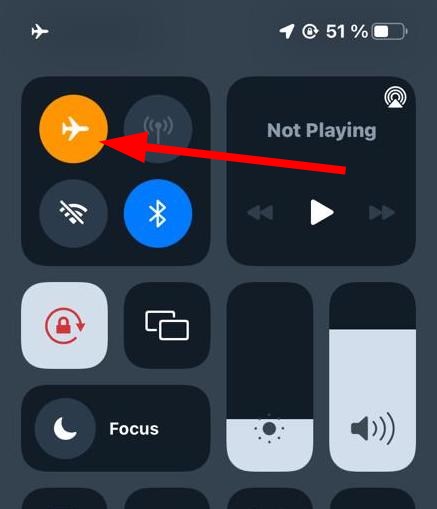
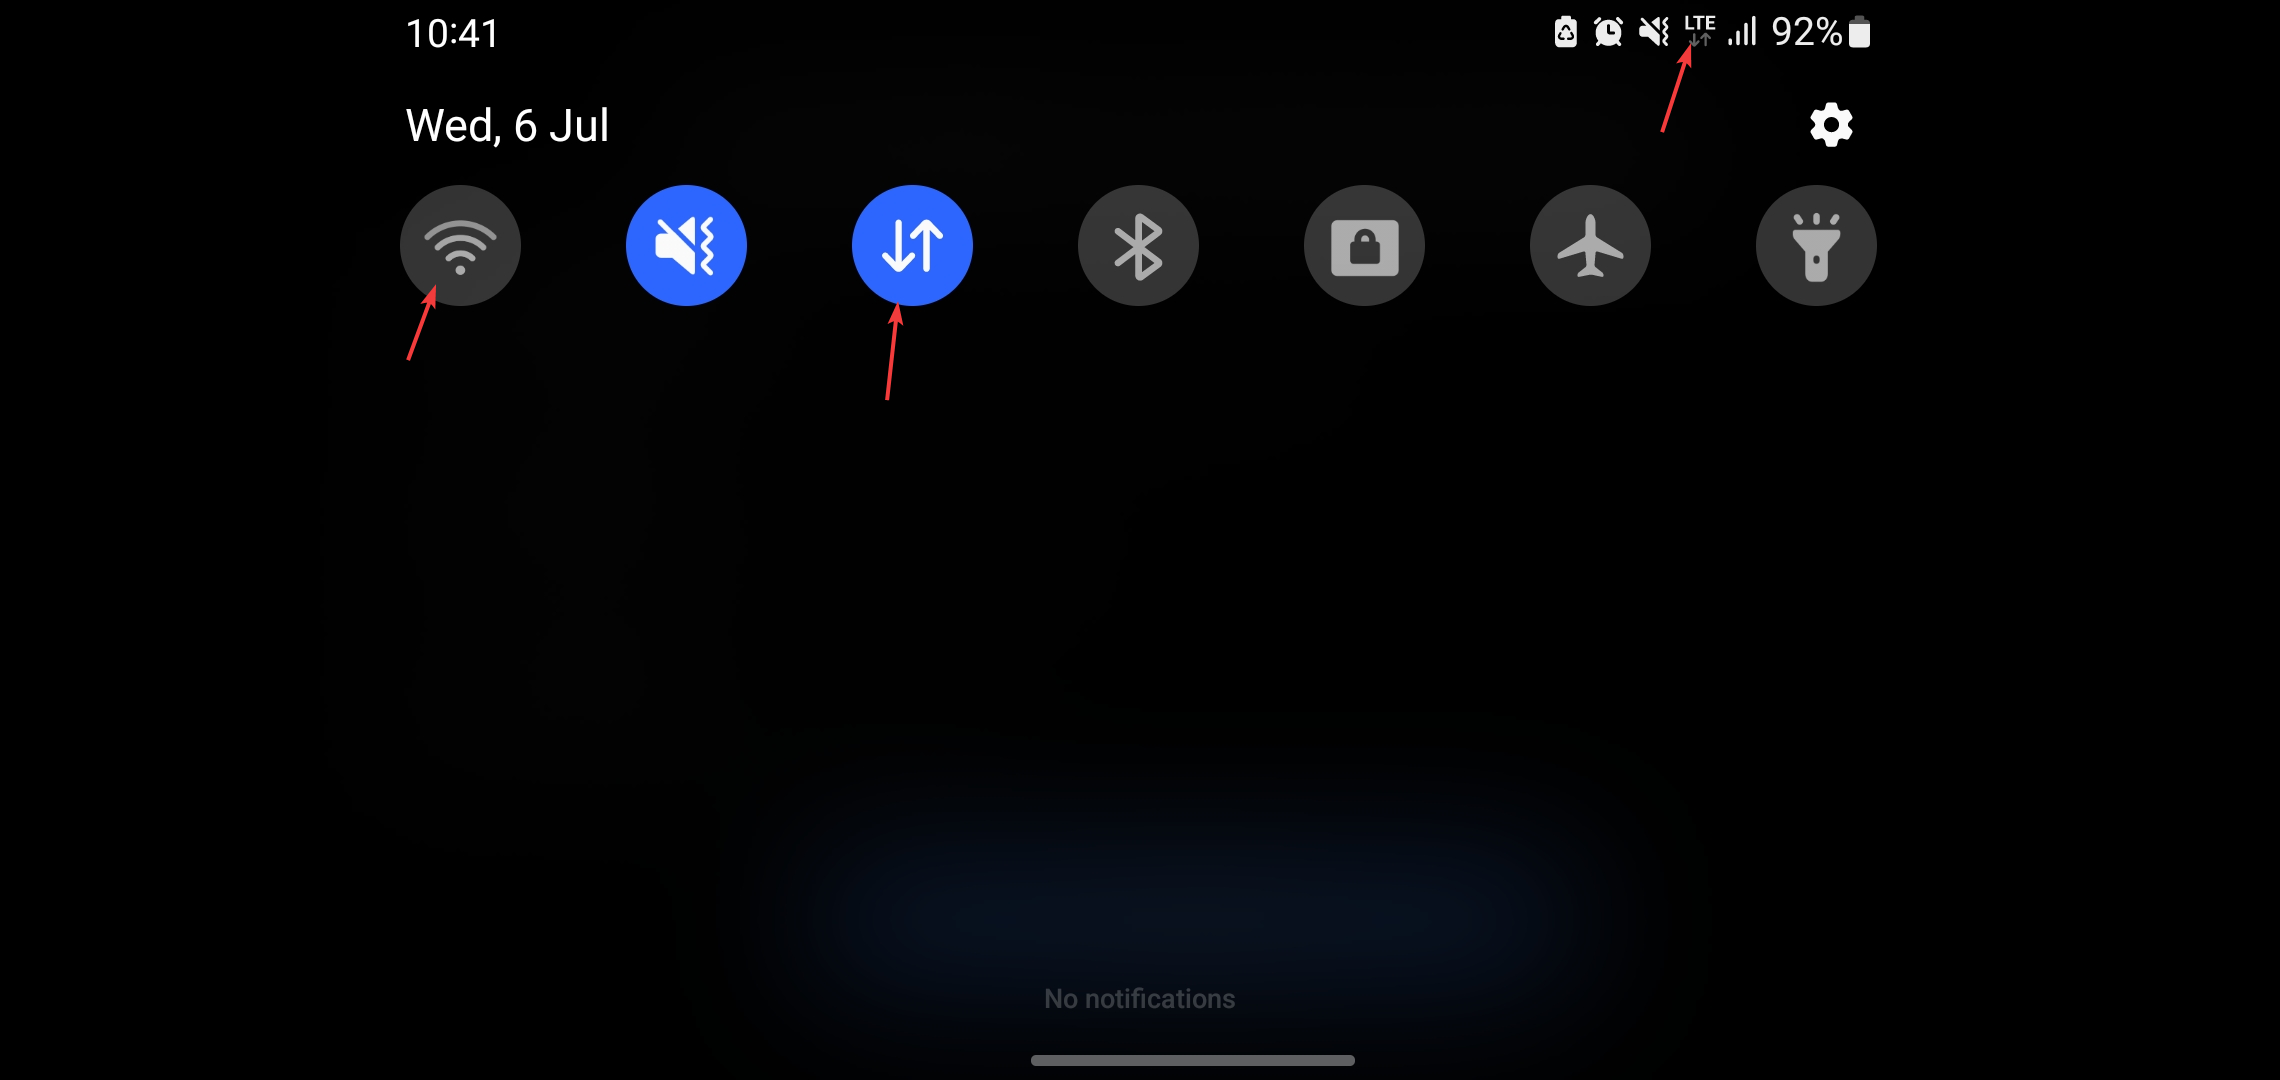
  1. Access the notification panel.
  2. Tap on Airplane mode to disable it.
  3. Connect to the internet and check if this fixes the issue or not.

Often because of your mistake, you will come across issues on your smartphone. So, it is better to check if by accident you enabled Airplane mode or not.

If yes, then simply disable the Airplane mode and check if this fixes the issue or not. Because if Airplane mode is enabled then YouTube won’t be able to connect to the internet, and hence won’t load any content.

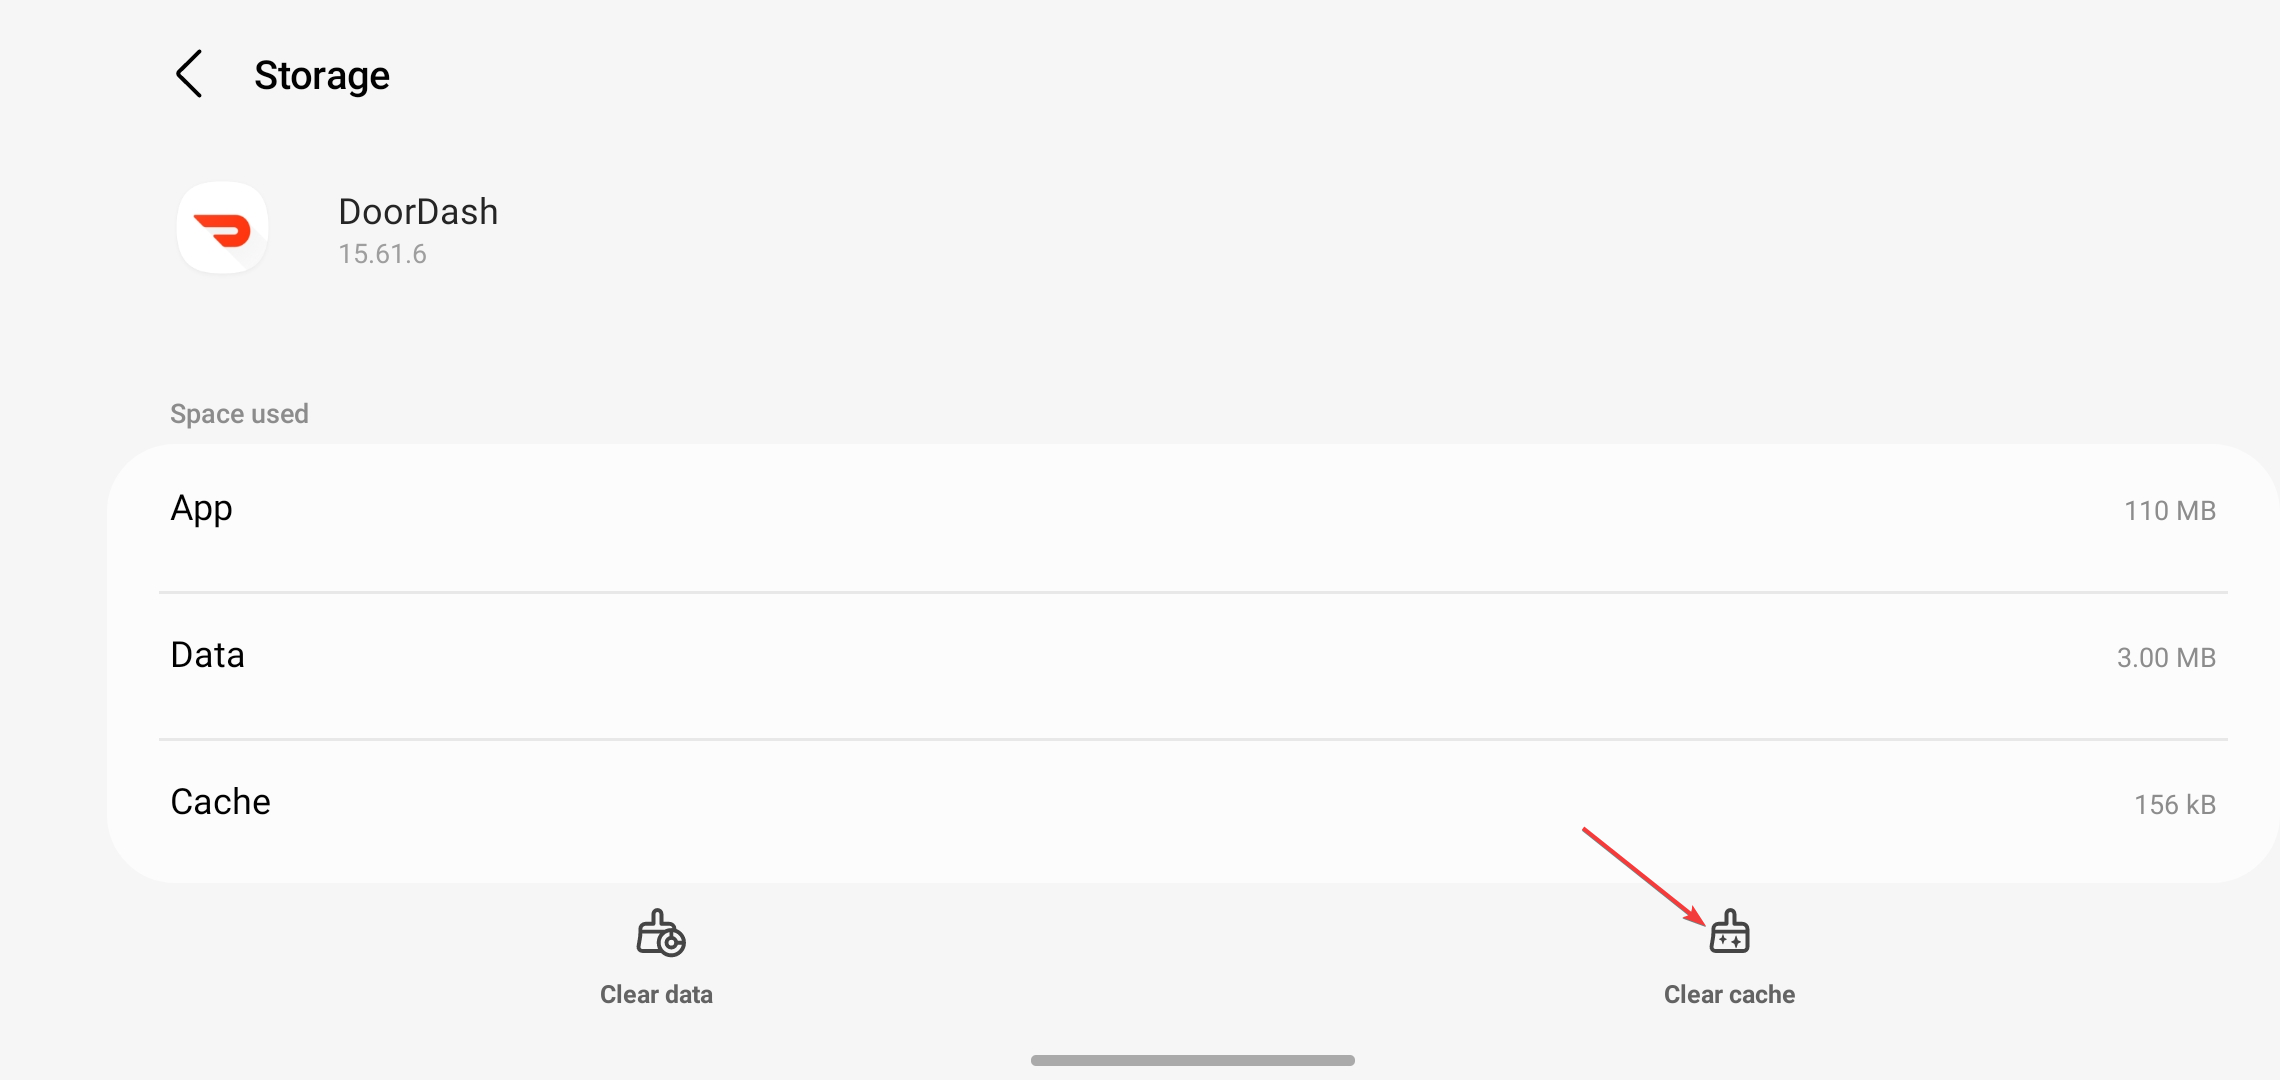
4. Clear app cache

  1. Open the Settings app.
  2. Tap on General.
  3. Select iPhone Storage.
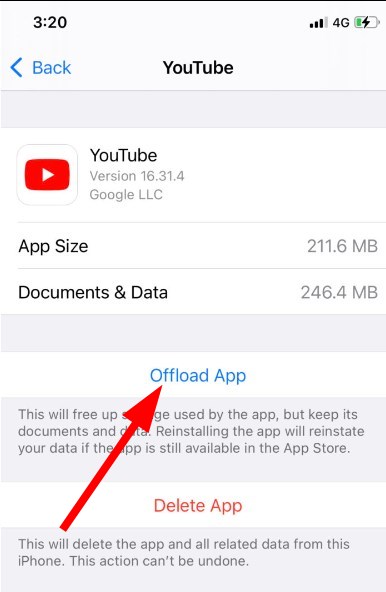
  4. Scroll down and tap on YouTube.
  5. Tap on Offload App.

Cache files are stored on your smartphone because they contain your personalized settings and other app-related files so that they function as per your needs when you access them later.

If the cache files get corrupt, then it can cause several issues, such as the YouTube no stream tap to retry error. So, simply follow the steps above, clear the app cache, and check if this resolves the issue or not.

5. Check YouTube server status
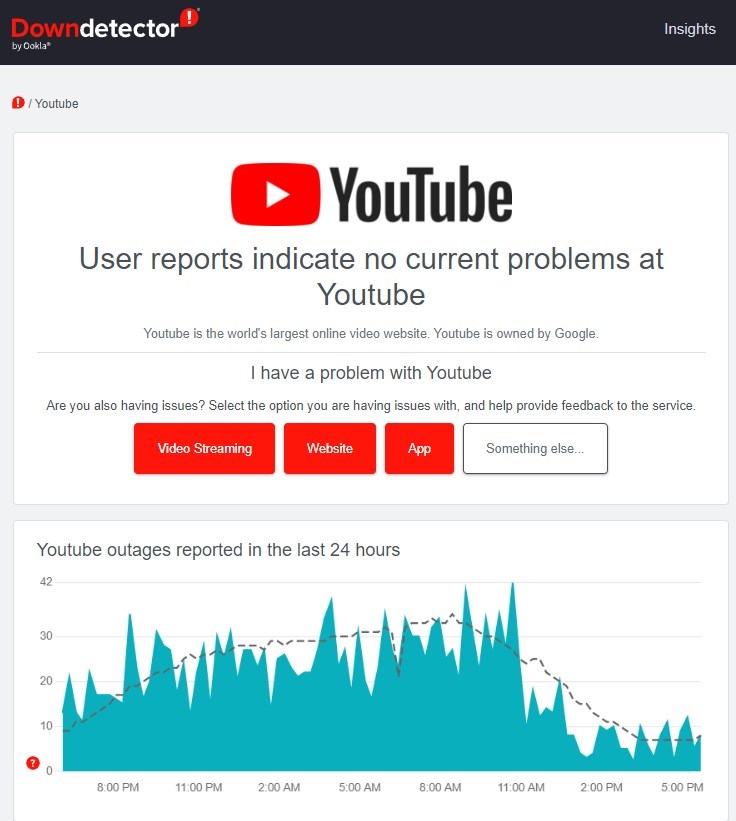
There is a good chance that the issue is not on your end but on YouTube. And the problem is mostly related to the server.

In such a case, you can visit websites such as Downdetector or IsItDownRightNow to check the YouTube server status. Moreover, you also check the official Twitter handle of YouTube or other platforms to know if the platform is going through maintenance.

6. Check if YouTube is allowed access to mobile data

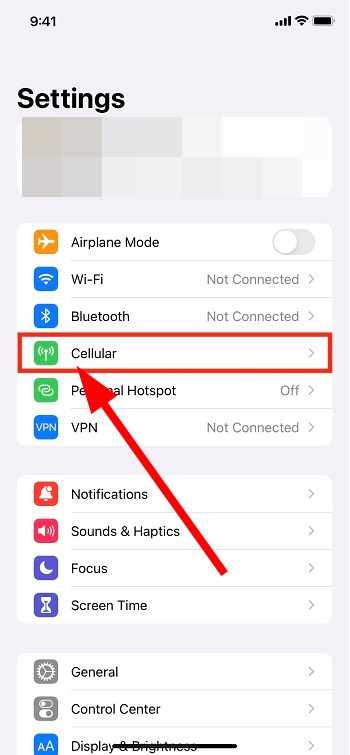
  1. Open Settings on your iPhone.
  2. Tap on Cellular.
  3. Scroll down and check if the toggle next to YouTube is green or not.
  4. If not, then turn on the toggle for YouTube.
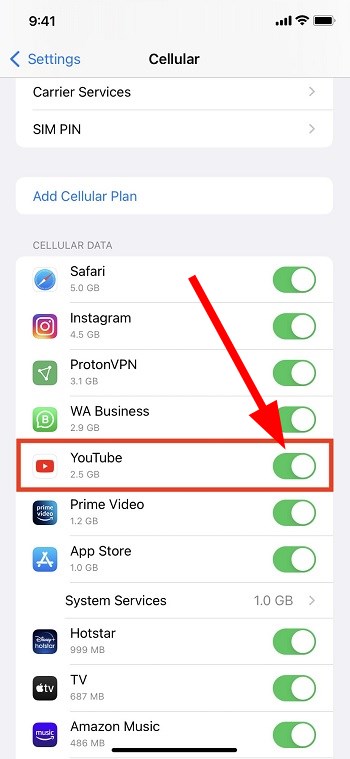
For some users, the YouTube no stream tap to retry error was appearing because by accident they turned off the mobile data toggle for YouTube.

Following the above steps, you can enable the mobile data toggle for YouTube and check if this fixes the issue or not.

What else can I do to fix YouTube no stream tap to retry error?

If none of the above solutions resolved the issue for you, then you can also check out some additional tips mentioned below and possibly fix the problem at your end.

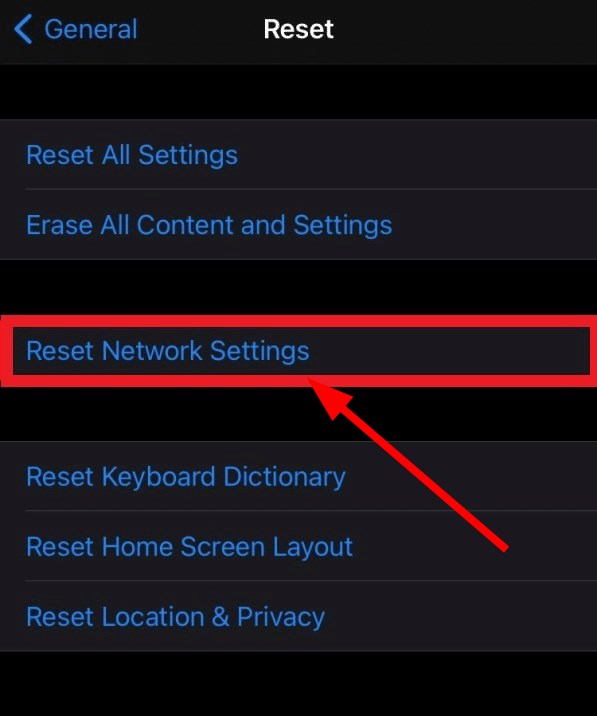
  • Reset network settings
    1. Open Settings.
    2. Under General select Reset.
    3. Tap on Reset Network Settings.
  • Restart your device
    • You can try restarting your iPhone. Restarting clears all temporary files and loads all system files from scratch.
  • Update your firmware
    1. Connect to the internet with mobile data or Wi-Fi.
    1. Go to Settings.
    2. Select General.
    3. Tap Software Update.
    4. If there is a new software update available, download and install it.

There you have it from my side in this guide. Hopefully, the methods mentioned in this guide were good enough for you to fix the problem on your end.

Let us know in the comments section below, which one of the above solutions helped you fix the YouTube no stream tap to retry error.
Messenger Sent But Not Delivered? Here’s Why It Happens & How to Fix

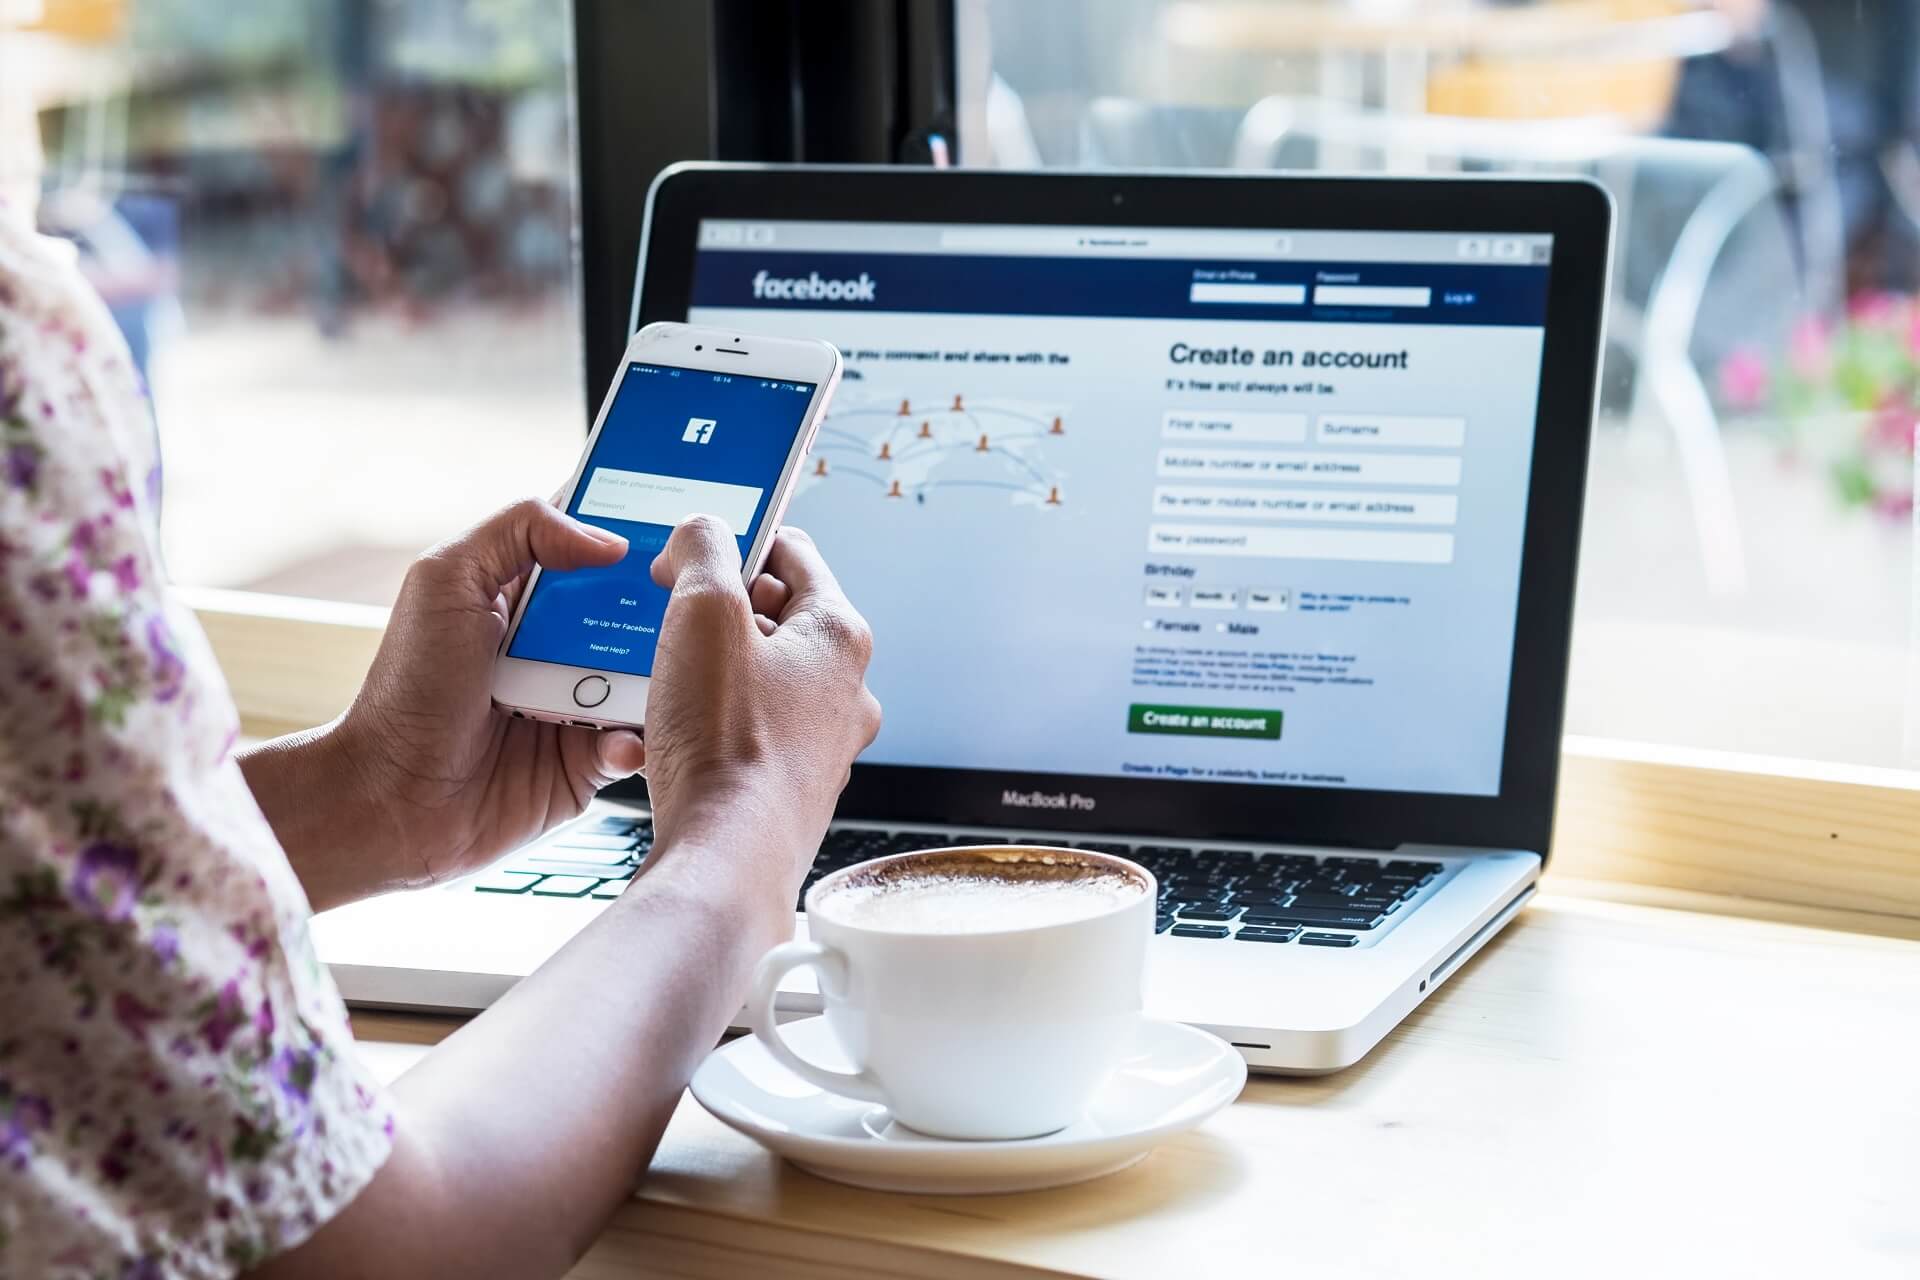
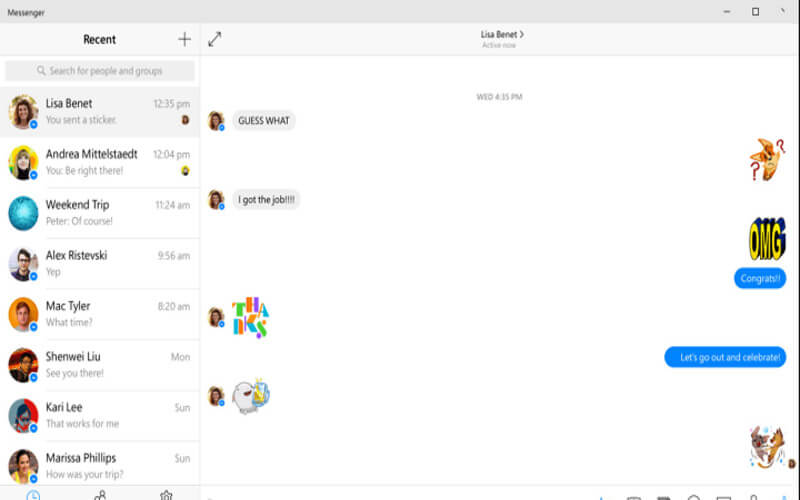
If you’ve ever seen a Messenger sent but not delivered status, you know how confusing it can be. Messenger normally switches from sent to delivered quickly, but sometimes it gets stuck. Understanding what sent vs delivered on Messenger really means helps you figure out whether the issue is on your end or the recipient’s.

Why Messenger Is Not Delivering Messages

  • It might be a problem on the recipient side – a server problem, an Internet problem, a settings problem, or a data storage problem.
  • There might be some delays between when you send the message and when the recipient opens it (although they have received it).
  • A slow connection on your end will also cause a delay in updating the status of the message.
  • The recipient can be connected to Facebook but not actively looking through their messages to see yours. what' the difference between sent and delivered messages
  • The recipient might have quickly read your message from the notification or status bar. Still, the app will not mark it as delivered or seen until the recipient opens the conversation with you.
  • If you send a message to a person who is not your Facebook friend/ Messenger contact, your messages get in a Message Requests folder, and your message will be marked as delivered when the other person has accepted it.
  • Or it’s just that the recipient has deliberately ignored your message.

How to Fix Messenger Not Delivering Messages

1. Check Your Internet Connection

Switch between Wi-Fi and mobile data. A weak connection can leave messages stuck on sending.

2. Update or Reinstall Messenger

Open the Play Store or App Store and install the latest version. If Messenger is not delivering messages even after that, reinstalling often clears corrupted cache.

3. Log Out and Log Back In

Sometimes reauthentication fixes issues where Messenger cannot send messages properly.

4. Check Facebook’s Server Status

Visit Downdetector or Twitter to see if other users report problems. If servers are down, you can only wait.

5. Confirm You’re Not Blocked

If messages stay as sent not delivered for days while the person shows active now, it might mean you’re restricted or blocked.

6. Use the Web Version

If the Messenger app just says sending, try logging in via messenger.com.

Messenger sent vs. delivered

There are cases where the Messenger message was sent but not delivered. Here are the main differences.

The main difference is that a delivered message implies that the message has gotten to its destination. We break this down below.

When a message is delivered, there is some text transmission from the server to the receiver; when it is sent, there is a transmission of the text from a sender to a server.

The difference also affects notifications. For example, in the case of delivery, if the recipient activates “Message Get Receipt,” only then will they get a notice, and in the case of sent messages, you will always receive a notification.

Wrap up

We hope this guide helped you figure out why your Facebook messenger message was sent but not delivered and you were able to fix it.

Sometimes, messages get stuck as “sent but not delivered” due to common Facebook Messenger glitches like “An unknown error has occurred (code 1)”, “Error performing query”, or the generic “Something went wrong” message. These errors often stem from server issues, app corruption, or connectivity problems.

If you encounter these, try clearing the app cache, reinstalling Messenger, or checking Facebook’s server status to resolve the problem and get your messages flowing again.

If you’re a Facebook fan, check out our special Facebook section for more exciting stuff. Get the latest info about the app’s new features, how to use them, and how to troubleshoot Facebook Errors.

Also, in our Web & Cloud Hub, you can find many valuable guides and recommendations.

Epiphany Browser: How to Download & Install it on Your PC

Epiphany Browser, also known as GNOME Web is a Linux web browser. The browser has achieved massive popularity on the Linux platform over the years.

But many users still don’t know much about this popular browser and are unable to benefit from the plethora of features that it offers.

What is the Epiphany Browser, and what it can do? We’ll answer these questions in today’s article.

Is Epiphany a good browser?

Epiphany is one of the best browsers in case you are looking for simplicity and a straightforward interface. Along with that, its support for web apps makes things a lot easier for users.

It also offers a built-in Application Manager to remove the web apps that you have created earlier. And, the built-in features are at par with any modern browser. Besides, the security protocols employed by Epiphany keep you safe on the Internet.

Quick Tip:

Epiphany is a lightweight and reliable browser, but it lacks certain features. Opera One is a lightweight alternative and it can handle web pages and multiple tabs with ease.

At the same time, Opera One has an Ad blocker, so you won’t have to deal with ads anymore. VPN is also available, and it offers unlimited bandwidth for free as an extra layer of security.

Opera One

Have multi-tab management, organized integrations, or proxy VPN integrated with one browser!

What is Epiphany browser and should I use it?

1. What is Epiphany Browser?

epiphany browser window

Epiphany Browser is an open-source browser based on WebKitGTK and developed by The GNOME Project. The browser is the default web browser on GNOME, Debian, elementary OS, and Bodhi Linux.

Epiphany Browser is also a part of GNOME Core Applications, so it’s fully integrated with GNOME settings and GNOME’s password manager.

As for the features, the browser has a built-in reader mode and support for mouse gestures and smart bookmarks.

In addition, Epiphany Browser has a built-in ad blocker and support for Google’s Safe Browsing.

In 2012, the browser changed its name from Epiphany to GNOME, but the Epiphany name is still used by developers.

2. How to download Epiphany?

Note icon NOTE
There are several ways to download Epiphany but we would recommend Flatpak since it offers the latest updates, and is more secure and seamless.
  1. Go to the GNOME Web official website to download the Epiphany browser.
  2. Click on the Download button at the bottom.Download Epiphany browser
  3. Click Install on the FlatHub page that you redirected to.Install
  4. Now, wait for the download to start.

3. How to install Epiphany?

Before you install GNOME Web or Epiphany, you will first need to install Flatpak by following the instructions listed on the official website.

Once done, just run the following command to install Epiphany:flatpak install flathub org.gnome.Epiphany

To open the browser, you will need to run the following command:flatpak run org.gnome.Epiphany

If you were wondering whether there’s a way to download the Epiphany browser for Windows, there actually is but it’s a lot more intricate, and we would recommend sticking to Opera One for now.

Also, before we bid adieu, it’s imperative to mention that the Epiphany browser doesn’t support extensions as of now, but it offers most of the commonly used features built-in.

If you have any other queries or would like to share your experience with the browser, drop a comment below.

3 Best Supported Browsers To Watch Viaplay

Streaming services have provided excellent support to people across the globe by delivering personalized content. However, to access a streaming service like Viaplay, you may require a browser.

The good news is for Sports and film enthusiasts, Viaplay can now be accessed through browsers. However, Viaplay is only available in about 11 select countries due to international copyright rules.

Viaplay offers live premium sport, original series, documentaries and films, the latest international TV releases, as well as all-time classic series, films, and children’s most loved animation and series.

In this article, we recommend the best browsers for Viaplay in order to have a seamless viewing experience.

Can you watch Viaplay on your browser?

Yes, you can watch Viaplay on browsers. All you just need to do is use any of the supported browsers as well as the need to connect your laptop or mobile device to a decent WiFi network.

Better still, in the absence of a WiFi network, your mobile data should be available to stream your chosen content as Viaplay is not an offline application.

What browsers support Viaplay?

Though Viaplay is available on web browsers, you may have to use the primary browsers only to watch ViaPlay, such as Mozilla Firefox, Google Chrome, Microsoft Edge (on Windows), and Safari (on macOS).

Since you are likely to have one or more of the devices listed above, you won’t possibly face any trouble while accessing ViaPlay.

What are the best browsers for Viaplay?

Mozilla Firefox -Best known for Speed

Firefox is an outstanding web browser for Viaplay because it has been around for a long time and was one of the most popular browsers before Chrome and others took over.

Regarding resource efficiency, Firefox is clearly superior to Chrome since it uses less memory and is less taxing on your computer’s operating system. Additionally, very little information about you is gathered on the browser.

You can perform address bar searches, access bookmarks, collect smart search recommendations and history, and do lots more using Firefox. This makes Firefox a feasible option for you to use Viaplay.

⇒ Get Firefox now

Safari – Best for MacOS Users

As a macOS user, you can also access Viaplay via Safari. It is the browser made specifically for the OS and works seamlessly on every MacBook Air device. You probably will find it hard to switch to any other browser after getting used to Safari.

Moreover, it is a leader in online privacy thanks to critical features like intelligent tracking avoidance and its privacy report.

Additionally, the Privacy Report displays information detailing how your online privacy is protected. Hence, you’ll notice a list of site trackers that the browser won’t let profile you.

Besides the aforementioned, if you have missing credentials, you can benefit from its password manager, which helps you store and manage your data.

Additional features:

  • Tab Management
  • Text Copying and Quick Sharing.
  • Bookmark Management.

⇒ Get Safari

Microsoft Edge– fast browsing speed

This is by far the best browser you can use on Windows 11 since Microsoft makes it, and they are constantly trying to push users into using it.

Besides, it comes integrated into the system. During the Windows 11 reveal. It promises more privacy, secure browsing, and clear visuals on 1080p HD quality. For this, you need not bother to go hunting for another browser to use Viaplay.

Microsoft Edge has a new interface on the latest Windows and runs on the Chromium Engine.

Additional features:

  • Vertical tabs to work efficiently
  • Smart copy feature to save time
  • Tracking prevention for privacy
  • Password monitor to keep track of credentials
  • Enhanced InPrivate mode

⇒ Get Microsoft Edge

The suggested browsers offer unique opportunities to enjoy the best browsing and streaming experience with Viaplay.

Further, we have an article on the best browsers for Skyworth TV here. Also, you can check out our guide on selecting the best browser for Peacock TV.

Should you have any questions or comments, kindly drop them in the comment box.

This Plugin Is Not Supported: Meaning & How to Fix [Chrome, Edge]

This plug-in is not supported is an error message that various website media content, such as videos, might display whilst you’re browsing in Google Chrome.

Google Chrome, and other browsers, no longer supports NPAPI plug-ins; and media content on a website page that depends on unsupported plug-ins will display the error message in Chrome.

Since 2015, Google has been abandoning plug-in support for its flagship browser in favor of HTML5. As such, the browser no longer supports Java, Silverlight, and ActiveX plug-ins.

Since Flash isn’t available anymore, many are looking for ways to enable Adobe Flash Player for Google Chrome.

These are a few fixes that might help you with This plugin is not supported in Chrome message, so be sure to try it.

What does it mean when it says this plugin is not supported?

This message usually appears when you visit a website that requires a certain plugins that aren’t available in your current browser.

In the past, this message appeared when accessing a Flash website, but now it usually appears if you don’t have other components available.

Fixing this issue is easier than you think, and you just need to enable these plugins manually or install them.

Some variations of this issue include:

  • Plug-in not supported/This plug-in is not supported – Chances are you’re no stranger to this issue while using Chrome. As a quick tip, you may enable Flash in Google Chrome and check if this makes any difference.
  • Microsoft .net plug-in not supported – Countless users keep seeing this error message every time they try to log in to a bank account. An add-on is probably the culprit, so uncheck Enable third-party browser extensions from the Advanced tab or install a reliable browser such as Opera One to avoid these issues altogether.

Quick Tip:


To reduce the possibility of getting this error, consider switching to a more stable browser like Opera One. It supports most plug-ins and extensions that are available in Chrome.

It’s a modern browser and doesn’t support legacy (NPAPI) flash plug-ins, but other than that provides great functionality. Furthermore, it has extra benefits like a built-in ad blocker, an anti-tracking feature, and a free VPN.

Opera One

Solve this annoying error by simply using the Opera One browser.

How do I fix plug-in is not supported?

This plugin is not supported Chrome

1. Add the NoPlugin extension to Google Chrome

  1. Go to NoPlugin download page.
  2. Now click Add to Chrome.
  3. Click on Add extension to confirm.
  4. Once the extensions are installed, read the instructions and start using them.

This is a simple workaround, but it can help you with Vivotek plugin not supported error.
2. Add the IE Tab extension to Chrome

  1. Add IE Tab to Chrome.
  2. When you’ve added the extension to Chrome, click the IE Tab icon to install the IE Tab helper (which loads the rendering engine).
  3. Open a website page, and click the IE Tab icon on the toolbar to load it in an IE-based tab.
  4. You can right-click the IE Tab icon on the toolbar and select Options to open the extension’s settings in the snapshot below.
  5. Then you can enter the URLs of websites to automatically open in IE Tab in the text box shown below.
  6. You can also bookmark any page open in IE Tab by pressing the Bookmark this page in IE Tab folder on the toolbar below.
  7. Click Customize Google Chrome and select Bookmarks. Now go to Bookmark Manager and choose IE Tab to open bookmarked pages.

This is a great workaround, and it might help you with 6007 device/browser does not support premium content message.

3. Update the Google Chrome browser

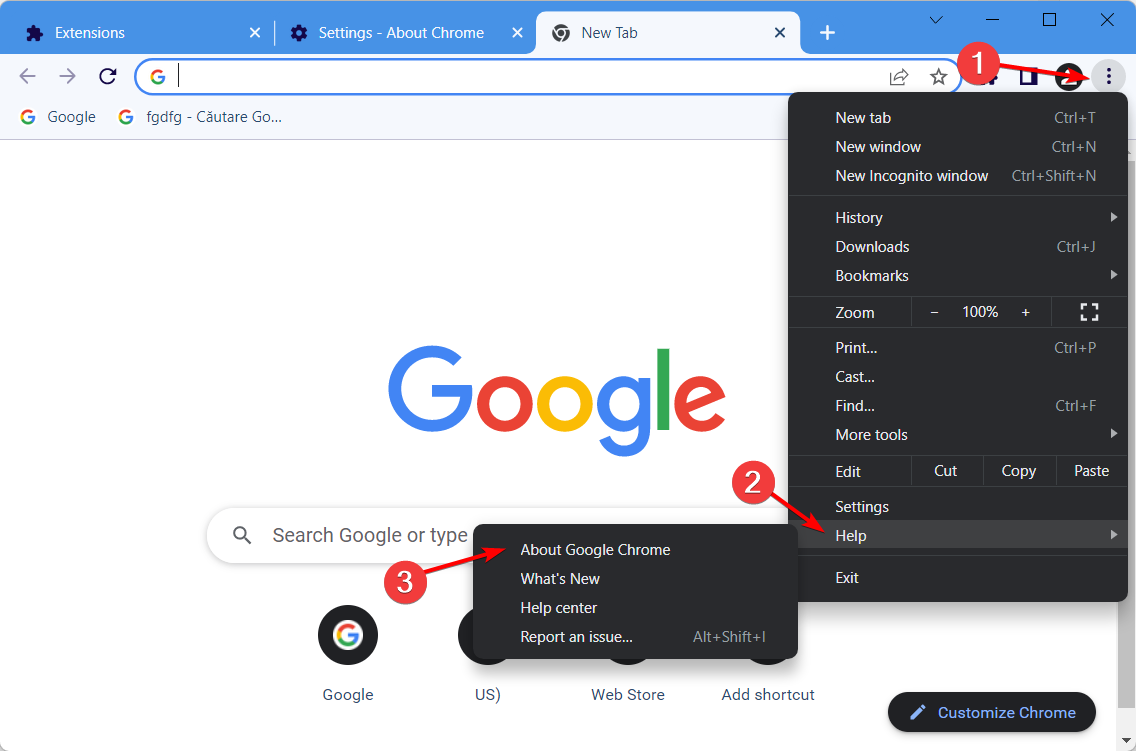
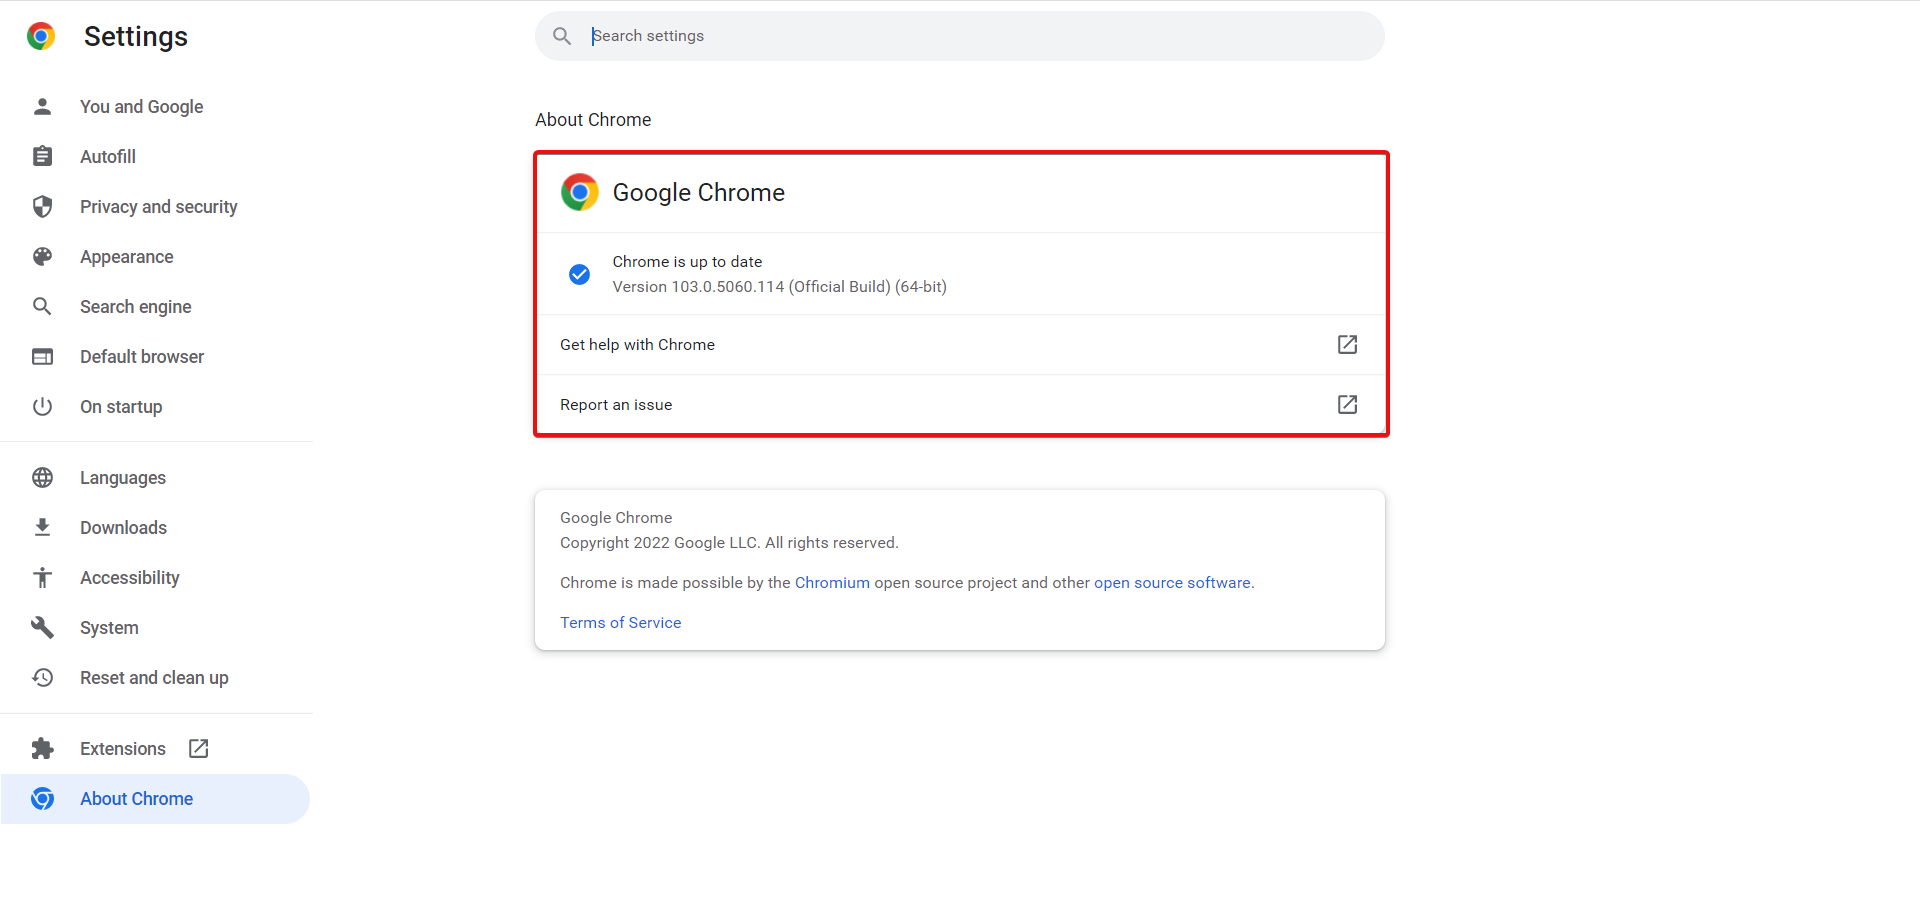
  1. You can update the browser by clicking the Menu button. Now go to Help and select About Google Chrome.
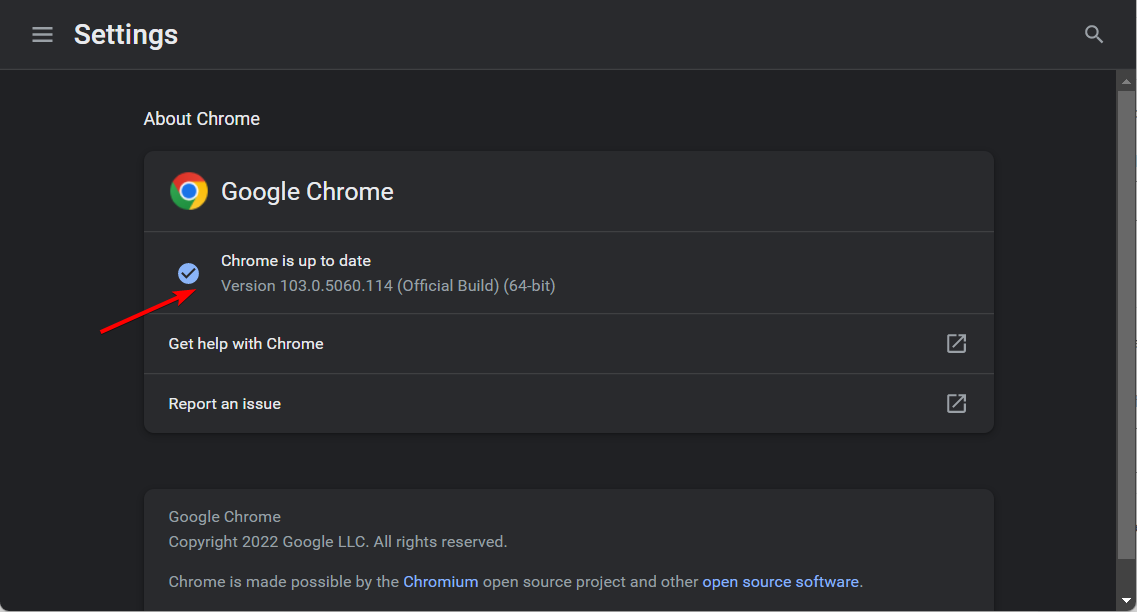
  2. That opens the tab below which highlights if the browser needs updating or not.
  3. Press Relaunch if there are available updates.

After updating your browser, the This plug in is not supported message will be gone.

4. Clear the cache

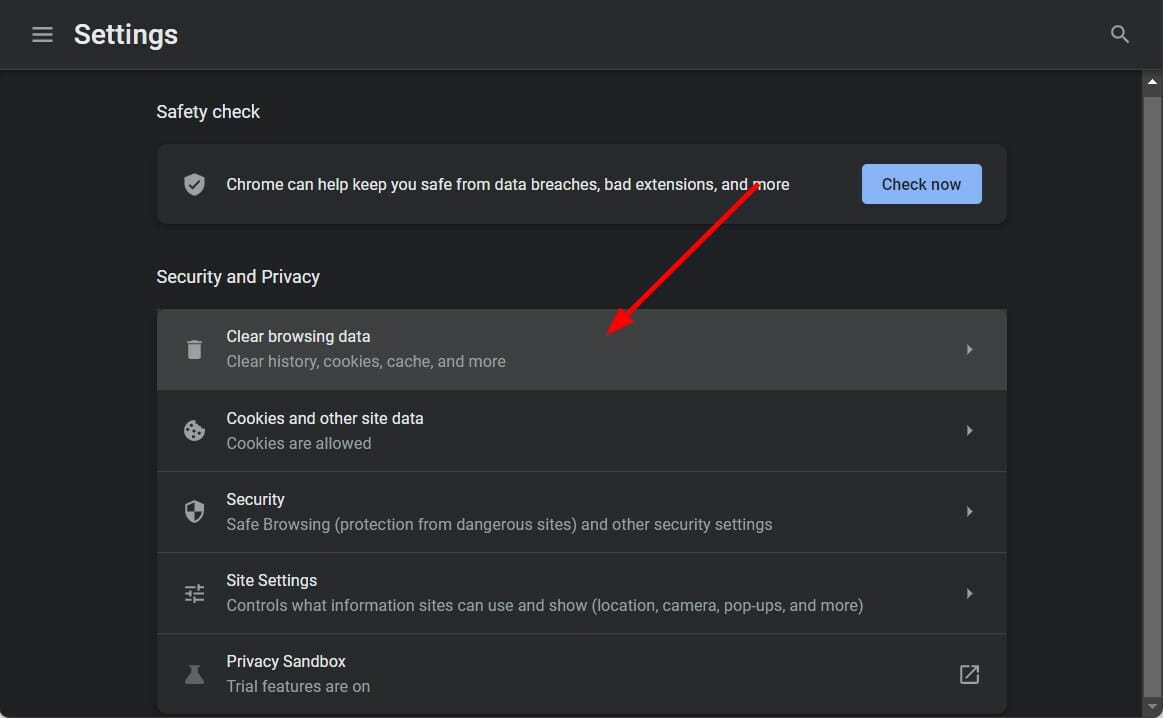
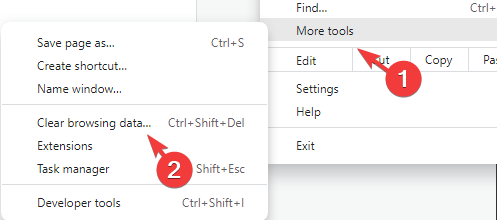
  1. Click the Menu button and then select More tools. Now select Clear browsing data.
  2. Now select the files you want to remove.
  3. Click on Clear data.

After clearing the data, check if Easy Viewer plugin not supported message is still there.

This plugin is not supported Edge

Use SWF to HTML

  1. Open Edge.
  2. Navigate to SWF to HTML page.
  3. Click on Get and wait for the plugin to install.

This plugin is not supported Internet Explorer

This issue rarely appears in Internet Explorer, so you most likely won’t encounter it. The browser is out of date, so it’s not the safest option.

If you still want to play Flash content, maybe consider these browsers that support Flash.

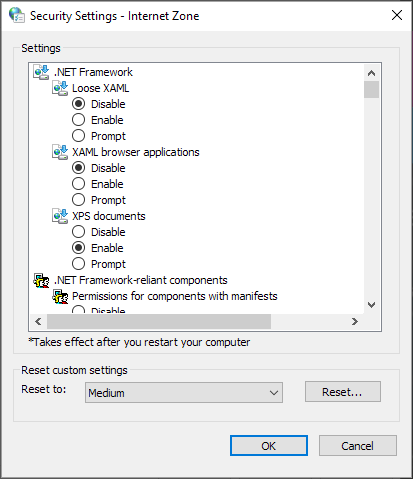
Microsoft .NET plug-in not supported with current security settings

  1. Press Windows key + S and enter internet options. Select Internet Options from the list.
  2. Navigate to Security tab and set the security level to Medium. Next, click the Custom level button.
  3. Set .NET Framework settings to enabled and save changes.

Both NoPlugin and IE Tab provide the best fixes for Chrome’s plug-in not supported error.

They’ll enable you to play multimedia content in Chrome that might otherwise display a plug-in not supported error message.

If you’re having additional problems, visit our NPAPI plug-in support guide for more information.

Besides, if you see the An error was encountered while trying to load this plugin message in BetterDiscord, it’s easy to fix!

There you go, these are just a couple of simple solutions that should help you fix This plug-in is not supported error in Google Chrome.

Did you find a different solution to this problem? Let us know in the comments below.

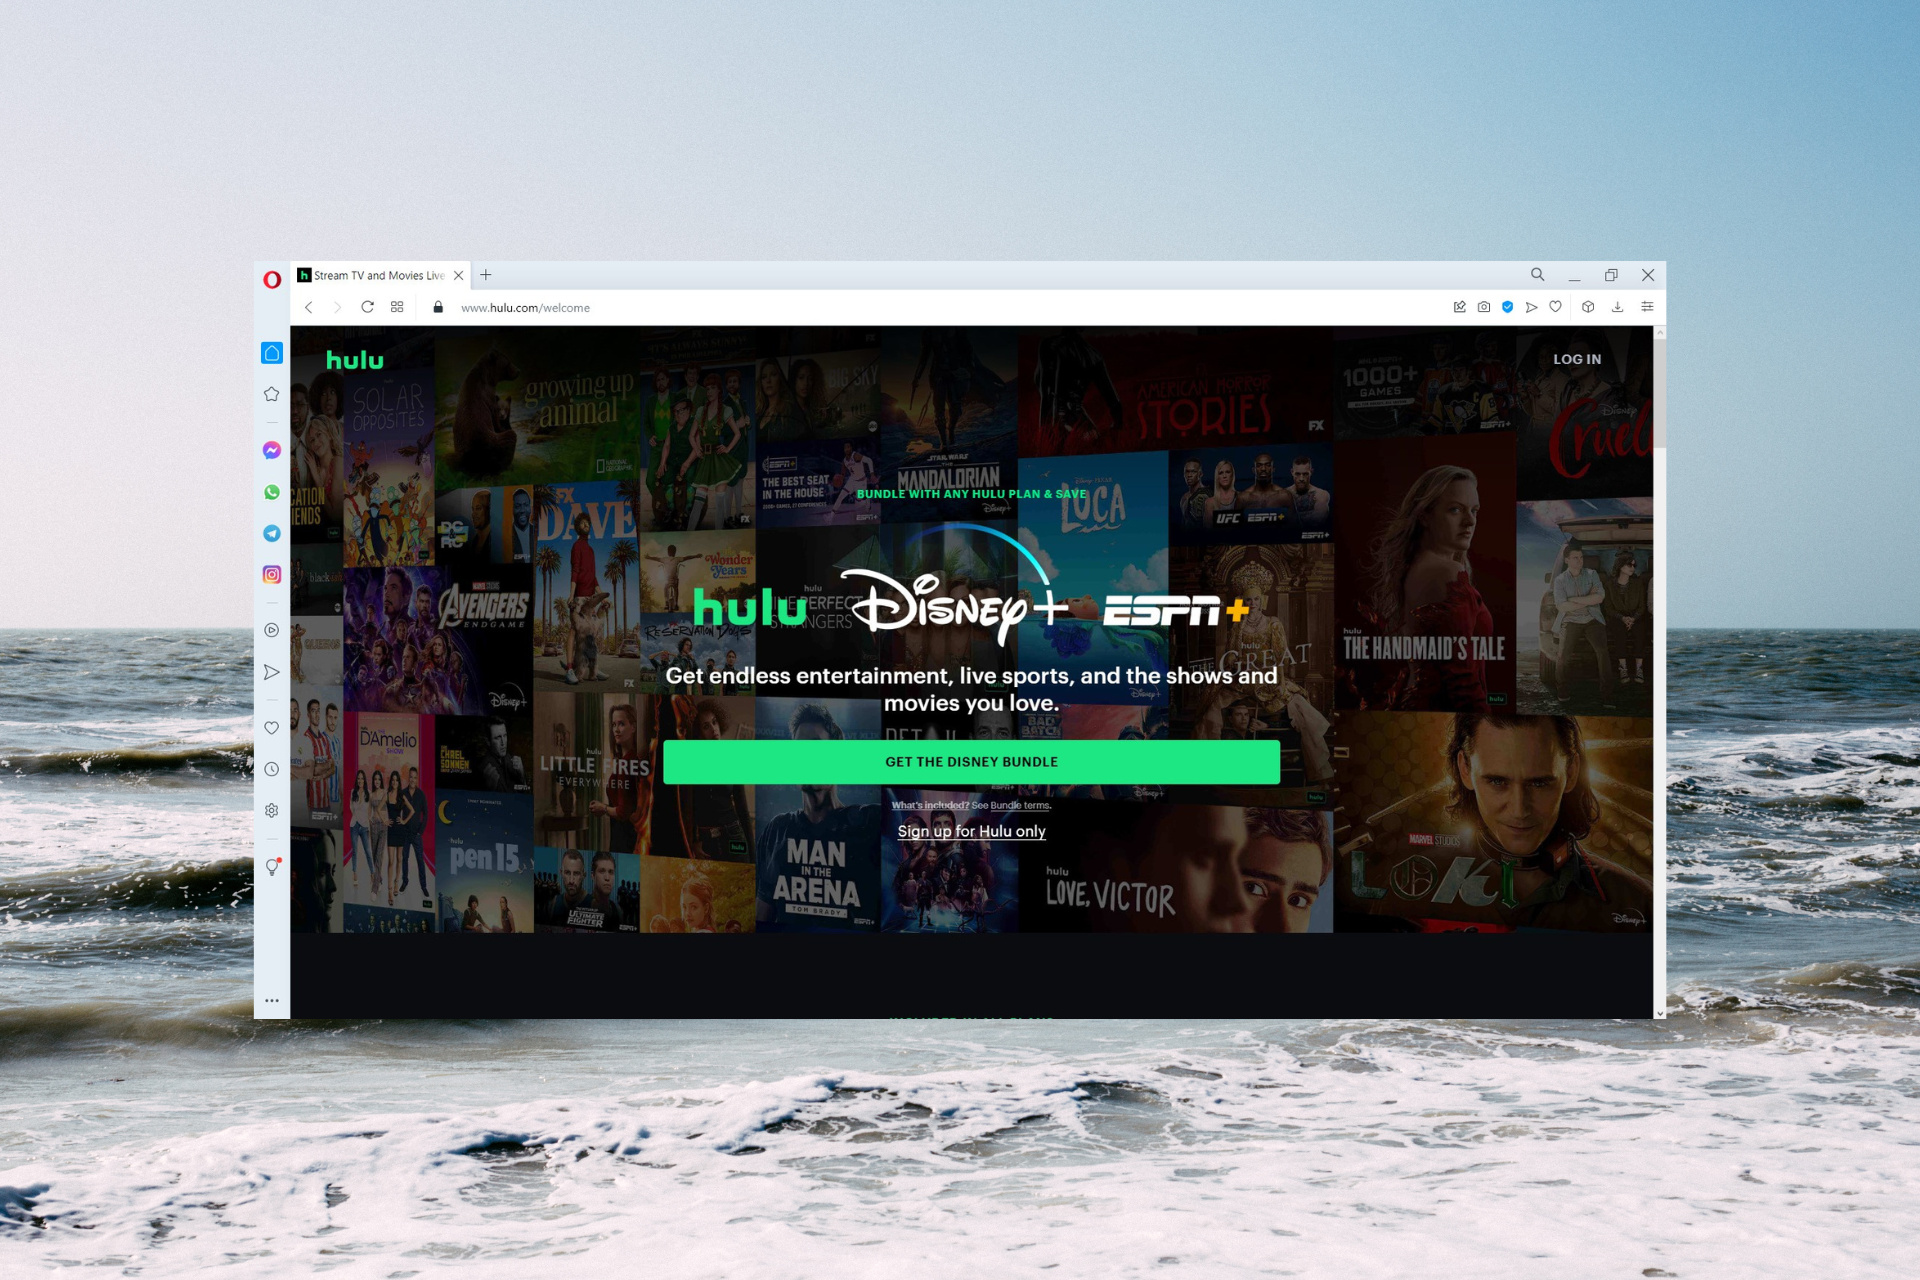
3 Best Browsers for Flawless Hulu Live TV Streaming

Streaming online Live TV is quite more demanding than streaming, say, films or TV shows. Slow networks below 5.0 megabits per second will only take out of the thrill of the moment.

A browser streaming at 720p, below 1080p means it’s not the best High Definition quality for Hulu TV.

That’s where a good and reliable browser comes into play. In this article, we present the best browsers for Hulu Live TV streaming.

Does Hulu have a web browser?

Like any on-demand video platform, Hulu has its own content management system but you can hardly call that a browser.

However, you can watch Hulu on any major browser and you can see our recommendations below.

How do I update my browser for Hulu?

Hulu recommends keeping your browser updated at all times to make sure that you have an optimal viewing experience.

Nowadays, all the major browsers update automatically, but you can do that manually as well by following the steps below for each browser.

Opera One

  1. Click on the Opera One menu button from the top-left corner and select Update & Recovery.
  2. The app will automatically search for new updates, and if it finds any, it will automatically install them. Just click on the Relaunch now button afterward.

Edge

  1. Click on the Menu button from the top-right corner (the three vertical dots) and select Settings.
  2. After you click on About Microsoft Edge from the left pane, the browser will look for updates and install any new ones. If it installs a new update, you will need to restart the browser.

Chrome

  1. Click the Chrome’s Menu button from the top-right corner (the three vertical dots), select Help, then choose About Google Chrome.
  2. On the next screen, the browser will search and install any new updates and if it does, you will have to restart the browser for the changes to take effect.

We have shown you how to update the three browsers recommended by us below but the procedure is very similar on other browsers as well.

For instance, here’s our guide on how to update Safari on Windows 10 & 11.

The list of Hulu-supported browsers is long, but we selected only the best for an enjoyable experience.

What is the best browser for Hulu Live TV streaming?

Opera One – Most integrated for streaming

Opera One ranks as the best browser for Hulu Live TV due to innovative technology and simple design, and we’d also recommend that before anything else, you give it a try.

When you need an ad-free browser that loads videos fast without delays then Opera One is a perfect choice.

It can download heavy video files with advanced parallel downloading technology at 4 x faster downloads.

Opera One also ensures your browsing sessions are secure and private from phishing or hacking using a built-in VPN and a variety of blocking tools.

Opera One

The best browser when it comes to enjoying flawless Hulu Live TV streaming.

Microsoft Edge – Best for seamless HD streaming

Microsoft Edge made some sterling and innovative improvements to the application. Now you can stream HD videos at 1080p resolution.

Microsoft further allows users to install plug-ins to heighten the experience using Edge.

Running on such features makes Chromium Edge arguably one of the best browsers for Hulu Live TV.

One other plus with Edge is the exciting HD viewing even with its low battery consumption when streaming videos.

Edge, however, works best with Windows 10 OS, therefore; older versions of Windows might require a little more to enjoy the Chromium Edge experience.

⇒ Get Microsoft Edge

Google Chrome – Simple UI to start streaming

Google Chrome streams standard definition videos at 720p which does not give impressive HD quality. Hence, you might not be tempted to see it as one of the best browsers for Hulu Live TV.

The plus for Chrome, however, lies in its simple design that increases the speed of loading web pages. However, with the aid of the Chrome extension, you can experience better viewing quality.

The one drawback with using Chrome is, that it can be CPU-intensive, drawing so many system resources when opening multiple tabs.

Please note, that watching Hulu Live TV at 720p might not show much difference on your laptop.

So Hulu 1080p on Chrome is not possible on your laptop, but once you connect your laptop to beam signals to your TV the difference with 1080p visuals would become obvious.

⇒ Get Google Chrome

Hulu Windows 10 app vs browser

The Windows 10 Hulu desktop version has clear advantages over browser viewing, at least function-wise.

You can make captions, use keyboard controls, and use the Hulu Watch Party to view the content with other subscribers.

However, if you’re out and you don’t have access to your PC, the best way will clearly be the browser.

Some of our readers have also mentioned that the Hulu app was not working for them at all and that can be a definitive tie-breaker.

Coming back to our subject, several factors besides the browser can further determine what the best browser for Hulu Live TV would be.

And they include speed, lagging or loading time, High Definition videos, battery drain for laptops, etc. The systems’ RAM, internet, or processor speed all combine to affect the browser performance.

We hope you found these suggestions helpful. Which browser have you tried from them? Leave us your answer in the comment section below.

5 Best USB Extension Cables For Webcams

USB cables are, without a doubt, a must-have for any professional office or home. USB is a universal tech standard with so many devices having a port supporting it.

The interface can be used to transfer data, charge your phone, or in the case of this guide, connect your webcam to your computer. But not all cables are created equally. You should look for the best possible USB cable for your webcam.

What should I look for in a USB extension cable?

The most important thing to look at is the length. People typically keep their webcam close to their monitors so it’s unnecessary to have a cable that’s long.

Having an extension cable that’s 10 feet in length behind your computer would only make a mess. Conversely, you also don’t want one that’s too short. You should look for cables that support USB 3.0.

USB 3.0 is a connection standard that ensures high-speed connectivity; as high as 5 Gbps. If you find USB 2.0, that’s fine. It’s not the best, but it isn’t slow either.

This guide will showcase a list of the best USB extensions that you can use for your webcam. It should be mentioned that these are made out of durable material, and it’s unlikely they will use any sort of breakage.

What are the best USB extension cables?

Belkin Pro Series USB 2.0 Extension Cable

  • Cheapest entry on this list
  • Comes in varying lengths, starting at three feet
  • Works with most USB-A peripherals
  • Flexible and durable
  • Comes in a clear white
  • Only supports USB 2.0

Kicking off the list is the Pro Series USB 2.0 cable from Belkin. From the name, you can infer that this cable only supports USB 2.0 which is certainly a disappointment. USB 3.0 is one of the best standards we have now.

USB 2.0 is decent but isn’t ideal. That said, there are still a lot of benefits to using this cable. For starters, it’s the cheapest on this list, costing you just a few dollars. And if you can believe it, it goes on sale for even lower prices.

Besides the low price point, the Pro Series cable ends in a USB-A connector, and as such, works with the vast majority of USB-A devices. It’s also pretty durable, so you won’t have to worry about the protector ripping.

The Pro Series starts with a length of three feet and has a maximum of 16 feet. This cable is great if your webcam is close to the computer, or if it’s far away. The longer cable costs more, but not by much.

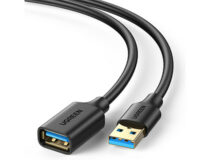
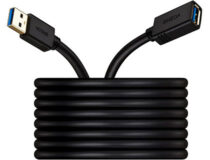
UGREEN USB Extender

  • Comes in varying lengths
  • Low price
  • Compatible with webcams, keyboards, Oculus VR, and more
  • Male-to-female connector
  • Supports USB 3.0
  • Only comes in black

Next up is UGREEN’s USB Extender, also another cheap option. It, too, goes on sale for an even lower price. And like the previous entry, it comes in various lengths to suit your needs. You can get one that’s three feet long and up to 15 feet.

What makes this cable superior to the first is that it supports USB 3.0. The big deal about USB 3.0 is that it can transmit data at a maximum rate of 5 Gbps. There are some cables that support USB 3.2 which is slightly faster than 3.0.

Nevertheless, 3.0 gets the job done. You should also know that it’s compatible with a lot of different devices besides webcams, thereby giving the cable a great deal of versatility.

You can use the USB Extender to connect your computer to a mouse, hard drive, video game controller, and even an Oculus virtual reality headset.

Amazon Basics USB 3.0 Extension Cable

  • Comes in varying lengths
  • Supports USB 3.0
  • Comes 10 cables to a pack
  • Has protective shielding to protect against noise
  • Resistant to corrosion
  • Frequently out of stock

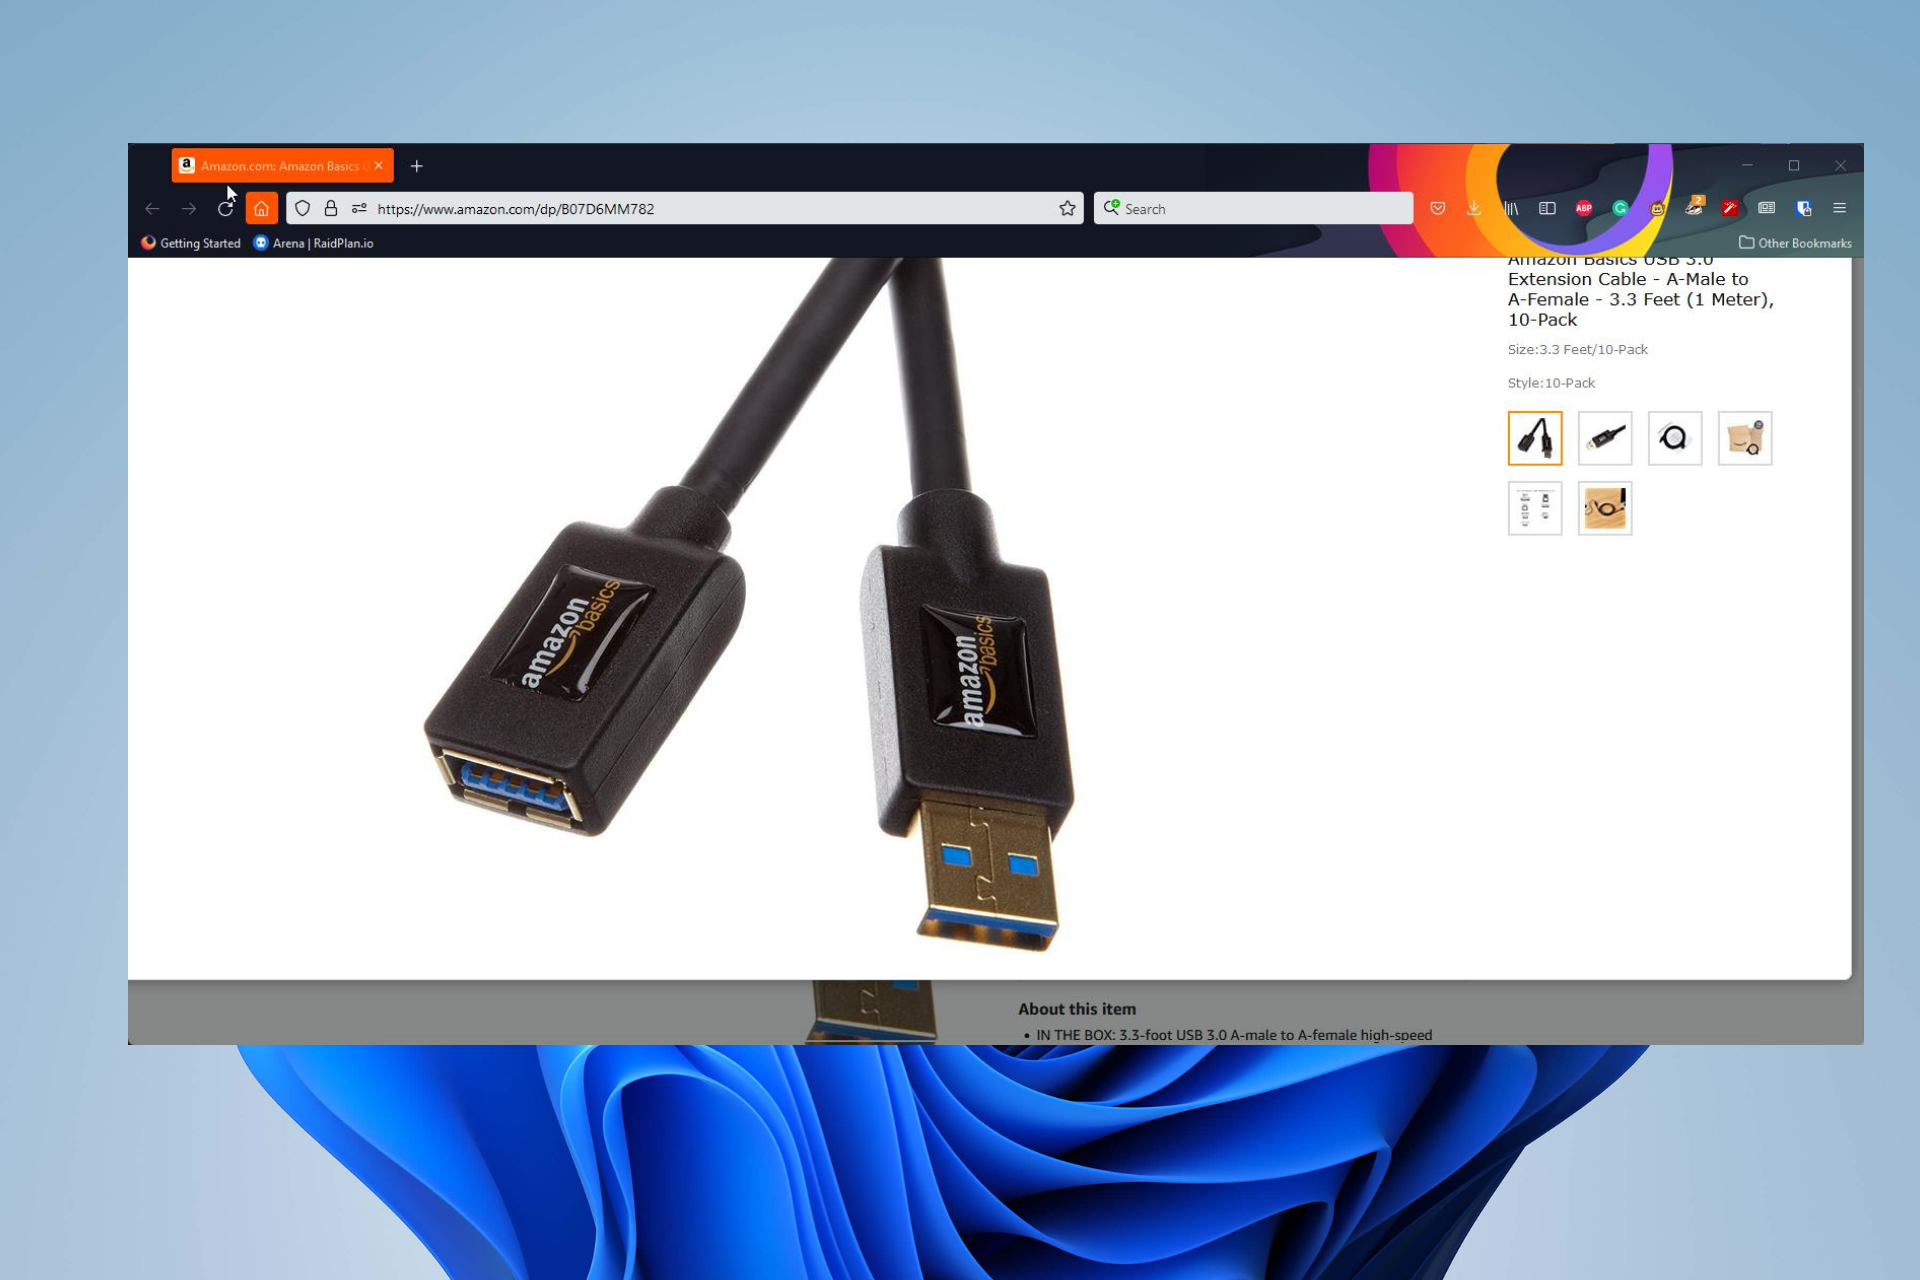
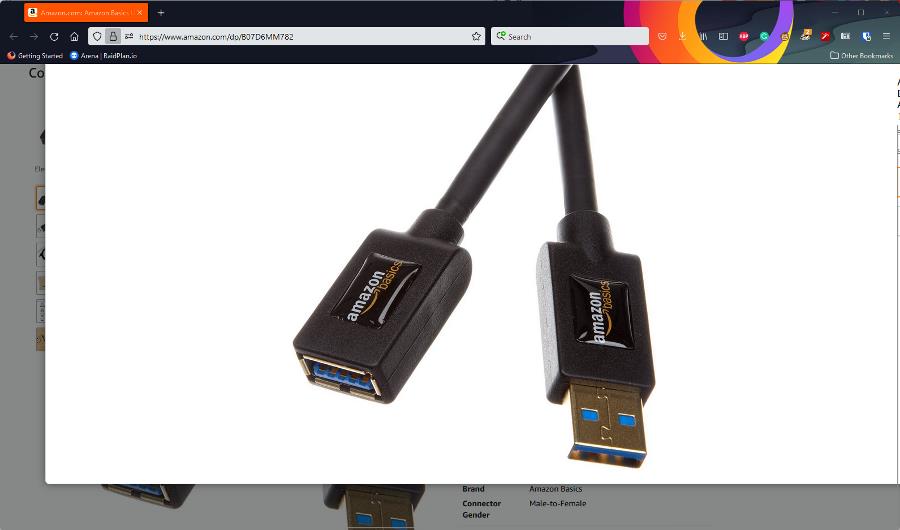
Amazon actually has its own label for everyday products called Amazon Basics. The brand covers a lot of different products, including batteries, lifting straps, and even crayons. Basics products are pretty good quality and their USB cables are no different.

Because of their high quality, Amazon Basics’ USB 3.0 cable is often out of stock. They’re high-quality cables that support USB 3.0 so you can expect high-speed connectivity.

Amazon also sells these cables in packs. You can buy singles, two in a pack, or even 10. Length-wise, they go from a little over three feet to a bit under 10 feet. The connectors are gold-plated to protect against corrosion messing up the signal.

The cable itself is wrapped inside protective shielding to repel outside noise from interfering with the signal inside. If a USB-A to USB-A cable doesn’t work for you, Amazon has other options.

For example, there are USB-A to USB-C cables available. And there are even cables that have the USB-B connector for the few people who need it.

NIMASO USB 3.0 Extension Cable

  • Supports USB 3.0
  • Supports fast charging
  • Compatible with a variety of operating systems
  • Backward compatible with USB 2.0 and 1.1
  • Covered with nylon to resist knotting
  • Limited length variety

Now we have USB 3.0 extension cables from NIMASO. This particular entry is a two-for-one as this product is made up of two separate cables. The only difference between the two is their lengths.

One cable is 3.3 feet while the other is 6.6. With these two cables alone, you’re pretty covered in terms of lengths. Most setups don’t really require very long cables. But if you need something longer than six feet, then this cable isn’t for you.

That said, it’s still a high-quality product. It supports USB 3.0 while also being compatible with USB 1.1 and 2.0. This is a great feature to have for older devices.

Unique to this cable is the nylon braided covering that resists tangles and knots, no matter how often it’s twisted. Plus, it comes with layers of protection against outside interference and corrosion for a longer lifespan.

The official Amazon product listing claims the cable is able to last a decade without needing to buy a new one. It’s unknown if this is true, but you can’t deny the high-quality of NIMASO cables.

VCZHS USB Extension Cable

  • Comes in white
  • Compatible with video game consoles
  • Comes in a variety of lengths
  • Supports USB 3.0
  • Resistant to outside interference
  • Long length can be overkill

The last entry on this list is the USB Extension Cable from VCZHS. This cable has the most radical length out of the other entries. It can be as long as 30 feet. That long length is great for webcams far from the main computer.

For smaller setups, it’s pretty impractical. Fortunately, VCZHS has cables as short as a foot long, two feet, and five feet. On top of that, the cable is compatible with a variety of devices including printers, hard drives, and video game controllers.

Best of all, it supports USB 3.0 for those quick data transfer speeds. The product is compatible with older formats if you need that old support. It’s made out of a flexible and durable material to resist outside interference.

The connectors themselves are gold plated for corrosion resistance. The cable also comes in white, if you are interested in a different look. All in all, a solid extension cable that will surely meet all your needs.

Are there other USB products or fixes that I should know about?

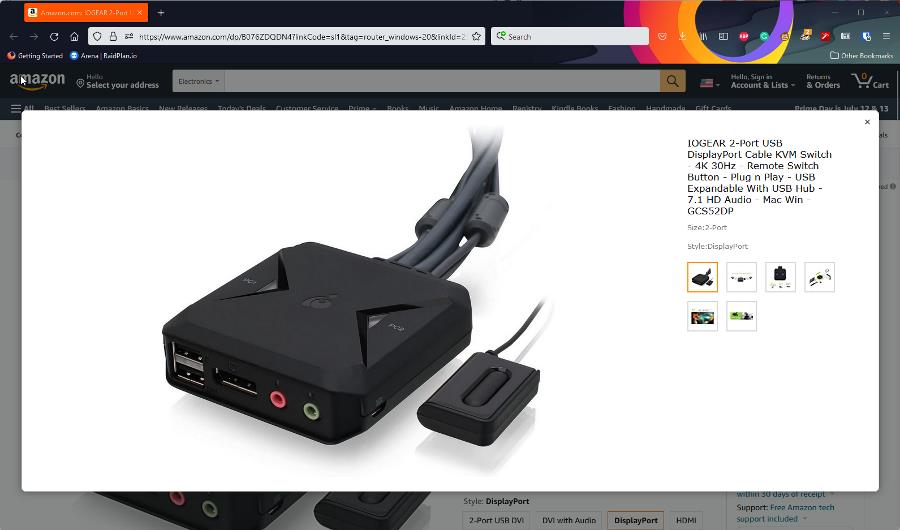
When it comes to USB and products surrounding the interface, there is so much to know. For example, if you have multiple computers, you should look into getting a USB switch.

A USB switch is a device that lets you connect computers to other devices via a USB cable. This is especially helpful if you want to control multiple devices from afar. You should learn how to fix recognition issues.

Sometimes your Windows 10 or Windows 11 computer may not recognize a USB device. This could be because your drivers are outdated, or you may need to disable USB3 support.

Feel free to comment below if you have any questions on other Windows 11 apps. Also, leave comments about reviews you’d like to see or information on other Windows 11 features.

7 Highly Secure Browsers For Government Websites

The use of secure browsers by government websites is essential to protect citizens and their data from cyberattacks. Secure browsers are used to encrypt information sent between a visitor and the website. 

This means that if someone tries to intercept the data in transit, it will be unreadable. Government websites can use this to protect sensitive information like people’s tax returns or medical records from being hacked or stolen.

It is the government’s responsibility to protect its citizens’ information and data. The use of the Internet by federal, state, and local governments is increasing exponentially, hence the need to look for the best browser for government sites.

If you use a browser that is not secure, you may get a warning such as there is a problem connecting securely to this website.

Which browser has the highest security? 

The browser is one of the most important software applications on your computer. It’s a gateway to the Internet, and it exposes you to all kinds of dangers.

Fortunately, most browsers are pretty good at keeping you safe from malicious websites and other threats. But which one has the highest security?

Chrome has an excellent track record when it comes to security. It automatically updates itself so that you’re running the latest version with all the latest security fixes.

Firefox also has built-in protection against malicious websites and other threats, as well as automatic updates that keep your browser secure without requiring any action on your part. It also allows you to install extensions that improve its functionality or add new features. 

All in all, it depends on what you are looking for as each browser has its pros and cons so you need to prioritize your needs first and then select a browser fit for your activities.

What are the best browsers for GOV sites?

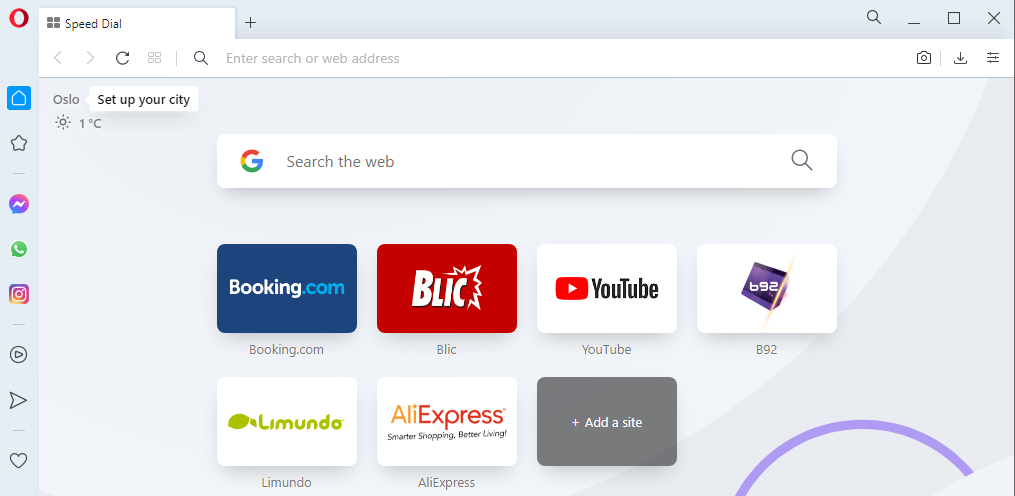
Opera One – Best privacy and security from all

Opera One is the most suited browser for government web pages because it guarantees the highest privacy and speedy navigation.

With this practical solution, you have security improvements from the start with an integrated Ad blocker to stop pop-up or tracking ads, plus free VPN protection to secure your digital presence.

You can also guard official websites with different customization tools for better performance, such as multiple workspaces or pinboards, unit time converter, file sharing utility, and many more.

Additional features:

  • Customizable newsfeed section
  • Data synchronization for all devices
  • Great performance on mobile devices
  • Cryptocurrency secure payments
  • VPN Pro benefits

Opera One

Create the most secure web environment with high-level privacy and skilled browsing tools.

AVG Secure Browser – Encrypted Gov Navigation

If you’re using government websites regularly and need more security, this encrypted browser is all you can ask for.

AVG is famous for effective antivirus protection, so the browser also has privacy benefits like included ad-blocker, a private cleaner to erase browsing data, plus easy integration with the AVG AntiVirus.

For that reason, you are completely covered against phishing attacks or any attempts of stealing your confidential data.

In addition, the AVG browser assures anti-tracking technology and digital fingerprint protection for 100% private navigation.

Additional features:

  • Deficient extensions
  • Malicious websites shield
  • Integrated VPN connection
  • Adware security
  • Faster navigation

AVG Secure Browser

Navigate securely on any government websites out there with this high-secured browser.

Google Chrome – Best Overall

Chrome is the most widely used browser in the world and for good reason. It’s fast, secure, and easy to use. The auto-updates help keep your version up-to-date with the latest security fixes as they become available.

It also has a ton of extensions that can help you do everything from block ads to control your data usage.

Additional features:

  • Built-in encryption that protects all communications 
  • Sandboxed tabs that prevent one tab from affecting another tab or even accessing data
  • Built-in antivirus to scan websites for malware and phishing attacks

⇒ Get Google Chrome

Mozilla Firefox – Popular customizable browser

Mozilla Firefox is an open-source web browser with a strong focus on security, privacy, and user control. The browser has a very strong privacy policy and doesn’t track you for marketing purposes, which is great for government websites that want to protect their citizens’ privacy. 

It also has a number of security features that help protect users from malware and phishing attacks.

Additional features

  • Has a private browsing mode that keeps your activities private
  • Firefox’s Tracking Protection feature allows you to block sites that track your online activity 
  • Supports plugins and extensions that allow you to customize your browsing experience

⇒ Get Mozilla Firefox

Brave – Privacy-focused browser

Brave is an open-source web browser that prioritizes speed, security, and privacy. It is a welcome alternative to Google Chrome or Mozilla Firefox because it blocks ads and social media trackers.

The Brave browser is based on Chromium and also has some security features that make it ideal for government websites.

Additional features:

  • Blocks trackers automatically
  • Browse faster since it blocks most tracking scripts and popups
  • The browser doesn’t store your browsing history or any other private information on its servers 

⇒ Get Brave

Tor – Encryption-focused browser

The Tor Browser is a free, open-source browser that provides anonymous web browsing and a high level of privacy. 

It uses the Tor network to protect your identity and keep you safe from websites that might try to track you.

Additional features:

  • Tor Browser has several built-in security features such as NoScript
  • Uses encryption to protect your data
  • Routes your traffic through multiple servers to confuse trackers

⇒ Get Tor

Microsoft Edge – Intelligent browser

Microsoft Edge has some nice security features that make it ideal for government websites. The browser helps protect you from phishing scams and other threats thanks to SmartScreen Filter. 

The filter uses community intelligence and machine learning to identify unsafe links and pages before they can cause damage to your device or personal information. 

If you’re using Office 365 services, Microsoft Edge helps keep your data safe by automatically saving passwords and form entries so they’re not stored on your device in plain text.

Additional features:

  • Supports custom extensions from the Microsoft Store for added security
  • Has built-in support for technologies like fingerprint authentication
  • InPrivate Browsing lets you browse without saving any of your data on Microsoft servers

⇒ Get Microsoft Edge

If you have been looking for a browser to securely access your personal details without worrying about cyberattacks, we hope our list has been able to meet your needs.

While you are still here, feel free to check out the best browsers for army websites for your protection.

Let us know your preferred browser and your reasons in the comment section below.

3 Tips to Fix Can’t Cancel Voicemod Subscription Error

Are you done using Voicemod and want to cancel your subscription, but for some unknown reason, you can’t cancel your Voicemod subscription? If so, then you are in the right place.

Because this guide will give you some tips that have helped users facing the can’t cancel Voicemod subscription issue.

The solutions mentioned in this guide are carefully researched and have helped users get out of their Voicemod subscription.

For some users, the cancel subscription button isn’t working, or as a matter of fact, for some users, the cancel subscription is missing.

While this is an issue that has been troubling users for quite some time, Voicemod hasn’t taken notice of it, and users are stuck with using the hit and trial methods to cancel their Voicemod subscription.

With that being said, let us check out the effective tips, that will help you fix the can’t cancel Voicemod subscription issue.

How can I cancel Voicemod’s subscription?

  1. Open the Voicemod app.
  2. Click on Settings on the homepage.
  3. Select License from the top-right corner.
  4. Below your license information, you have a button to Cancel the Renovation.
  5. This will take you to a paddle process to Cancel your subscription.

While this is the default process of cancelling a Voicemod subscription, users have reported having issues cancelling their subscription following this process.

Users have reported that after hitting the cancel the renovation button, nothing happens. They even tried to send an email in response to which they were asked to cancel the renovation, not the subscription.

In such a case, we would suggest you follow the below tips and get done with cancelling your Voicemod subscription.

How can I fix the can’t cancel Voicemod subscription error?

1. Use Xsolla Messenger

  1. Open the Xsolla website.
  2. Click on the chat messenger icon.
  3. Select the appropriate options as asked.
  4. Give the details required.
  5. Xsolla will cancel your subscription.

If you have made payment to Voicemod using Xsolla then you can make use of Xsolla voice chat to cancel Voicemod subscription. Xsolla customer care will cancel your subscription pretty easily, using a few details.

2. Cancel autopayment

  1. Open Voicemod app.
  2. Click on Settings and select My account.
  3. You will be redirected to a website where you will see your subscription information.
  4. Hit the Cancel subscription button.
  5. To confirm your selection hit the Cancel subscription button.

Once you do the above, your subscription will be cancelled and auto-renewal will also be removed. However, your license key will remain active till the expiration date.

If the above doesn’t work, then you can head to your payment method, such as PayPal or your credit card provider website, and simply deselect the Autopayment option.

For PayPal, here are the steps:

  1. Open the PayPal app.
  2. Click on your Wallet.
  3. Scroll down and select Automatic payments.
  4. Tap on Voicemod.
  5. Hit the Remove PayPal as your payment method at the bottom.

3. Contact customer support

  1. Open the Voicemod website.
  2. For the Let’s talk drop-down menu, select Licenses and Subscriptions.
  3. Then for the Lincenses and Subscriptions drop-down menu, select Cancel subscription renewal.
  4. Type the message and explain the problem that you are facing regarding can’t cancel Voicemod subscription.
  5. Enter all of the details asked like your name, email, country, platform you are experiencing trouble in, etc. and hit the Send button.

Well if none of the above solutions work, then as a last resort you need to get in touch with the Voicemod customer support and ask them to cancel your subscription on your behalf.

You may be asked a few questions to confirm your subscription, and once you have provided all the information, your subscription will be removed. The subscription will continue on your website until the last date.

How to use Voicemod to sound like a singer?

  1. Launch Voicemod (You will need Voicemod Pro for this to work).
  2. On the homepage, click on Voicelab.
  3. Activate Voicetune, located at the top of all effects.
  4. Select Key as C and Major as Scale.
  5. Toggle on Reverb.
  6. Under the Reverberation window, set the Room Size between 70 and 80.
  7. Toggle on the High Pass filter and set Mix to 100 and Frequency to about 15.
  8. Turn on Stereo effect and adjust it accordingly.

Using the above mentioned settings is not some kind of a specific rule to use the above mentioned settings. However, using the above settings, you will definitely hear improvements in your voice and you will sound similar to one of your favorite singers.

If you are having trouble setting up your mic or Voicemod isn’t recognizing your mic, then you can check out our dedicated guide that will help you fix the error.
That’s it from this guide. Let us know in the comments below, which one of the above method helped you fix the can’t cancel Voicemod subscription problem.

Posted in Fix

7 Best Browsers for Treasury Direct [Ranked by Security]

Treasury Direct is an online platform using which investors can purchase federal government securities directly from the US Treasury.

You will have to create an account to buy, manage, and redeem eligible treasury security through the Internet.

One thing to note is it requires a browser that supports 128-bit encryption. This includes transmitting sensitive data like your Tax Identification Number and Bank information.

Keep reading this post to learn about the five best browsers for Treasury Direct.

Is Treasury Direct secure?

The authentication method used by treasury direct is very secure. It matches the information entered by customers after completing the online application form with trusted Government and commercial databases. The 128-bit Secure Sockets Layer (SSL) encryption protects this private information exchange during transactions.

Is treasury direct legitimate?

The Bureau of Fiscal Service under the United States Department of Treasury runs TreasuryDirect. It allows individual investors in the US to purchase treasury security directly from the US government.

TreasuryDirect follows modern security standards and allows money to be deposited and withdrawn to personal bank accounts.

What is the website for TreasuryDirect?

Treasury Direct is a secure financial services website that allows buying and selling of securities directly from the US treasury department. Using this website, users can enjoy managing their savings portfolio as required.

To open the website, open your internet browser and type www.treasurydirect.gov in the address bar.

What are the best browsers for Treasury Direct?

Opera One – Greatest speed and security tools

Opera One is a long-term solution if you need reliable security or clever tools for enhanced privacy on treasury official websites.

You can navigate on this browser with no fear of unsecured behaviors or personal data phishing due to its developed anti-tracker or VPN protection.

There are useful safeguarding tools integrated into easy setup panels that allow covering your online behaviors with just a click.

Moreover, the browser supports SSL (Secure Sockets Layer) versions 2 and 3 along with TLS protocol that improves communication security for highly sensitive financial data.

It’s worth knowing that you have the highest security level on Opera One with 128-bit encryption aid.

Opera One

Benefit from this optimized browser for sensitive data protection on treasury activities online.

AVG Secure Browser – Government-suited encryption

This next browser focuses on users’ privacy and comes with powerful web encryption needed for Treasury Direct transactions.

There are plenty of security benefits that can help you make online purchases 100% safe.

You can use tools like Privacy Cleaner to erase browsing history or cookies, the Stealth mode, anti-tracking functionality, or online traces masking for advanced privacy.

Even more, the AVG browser includes easy integration with an effective VPN shield and antivirus software which can protect your digital privacy while purchasing treasury assets.

AVG Secure Browser

Ensure your online privacy with this browser while buying US treasury.

Firefox Browser: Enhanced Tracking Protection

best browser for treasury direct

The Firefox browser is the first choice among all privacy-oriented web browsers. The browser supports 128-bit SSL encryption making it one of the best browsers for treasury direct.

Its stealth mode automatically avoids trackers without having to use the incognito mode. Some other features Firefox offers are default ad blocking and tracking, Siri shortcuts, and a clean user interface.

Mozilla Firefox is the best browser for all browsing requirements but the lack of tabs could be frustrating sometimes.

Many users have complained about Firefox not responding in Windows 11. If you’re among those, read this post to fix this issue.

⇒ Get Firefox

Safari Browser: Check a Privacy Report

Next on our list is Apple’s own Safari web browser. Safari is the fastest web browser based on a fast JavaScript engine.

It is supported only on Apple devices. But offers many robust customization options like powerful privacy protection and reduced loading.

Regarding security, Safari always encrypts information exchange with the website. It will protect your login information, credit card numbers, addresses and other secure data.

Microsoft Edge: Control Your Privacy

best browser for treasury direct

The Edge browser is now available as a replacement for the old Internet Explorer. It has various features and benefits making it a real alternative to popular browsers like Chrome and Firefox.

The browser is robust, with built-in defenses against phishing and malware. It now comes with its password encryption saved in the OS storage area.

Microsoft has also enhanced the browser’s gaming capacities with a personalized gaming home page. It brings exclusive Xbox features and curated content to improve the user’s gaming experience.

Google Chrome: Cross-browser availability

Chrome is one of the best browsers for treasury direct used worldwide. It offers a privacy-conscious and polished surfing experience. It also has a variety of add-ons, privacy settings, and a straightforward user interface.

Chrome’s cross-platform availability makes syncing data easy across all your devices. It also offers various extensions to make your browsing experiences hassle-free.

The Chrome browser encrypts local passwords and cookies using AES-256 encryption standards. It also leverages the data protection API built into the OS to handle encryption sources.

Several users complain about the keyboard not working in Chrome. Rest assured that our guide shows you what to do in case that happens.

⇒ Get Google Chrome

Comodo IceDragon Browser: Browse securely

best browser for treasury direct

The Comodo browser is built using chromium technology, offering users a faster and more stable browsing experience. It provides very solid features in terms of security.

The browser is very lightweight and can quickly scan web pages for malware. Comodo internet security is installed by default with the browser to make your internet browsing experience safer.

⇒ Get Comodo IceDragon

Is there an app for treasury direct?

Yes, there are Android and iOS apps for treasury direct. This treasury direct app uses tokens to enhance data protection while accessing your securities.

Here are the links to download the Android and iOS apps for treasury direct.

How do I set up a TreasuryDirect account?

Follow these steps to open treasury direct account:

  1. Open your Internet browser and type www.treasurydirect.gov in the address window.
    best browser for treasury direct
  2. On the TreasuryDirect home page, in the upper right corner, select Open an Account.
  3. On the TreasuryDirect – Open an Account page, select TreasuryDirect.
  4. To open an Individual TreasuryDirect account, make sure you have these things:
    • A Social Security Number.
    • A United States address of record and a checking or savings account.
    • An e-mail address and a web browser that supports 128-bit encryption.
      3 steps
  5. Once you have gathered what you need, follow the instructions on screen to set up your account in TreasuryDirect.
    best browser for treasury direct

These were the 5 best browsers for treasury direct. Among the above-mentioned, Firefox and Safari are the two most recommended once you can try.

If the guide was helpful, do let us know in the comments below.

Fix: Website Online but Isn’t Responding to Connection Attempts

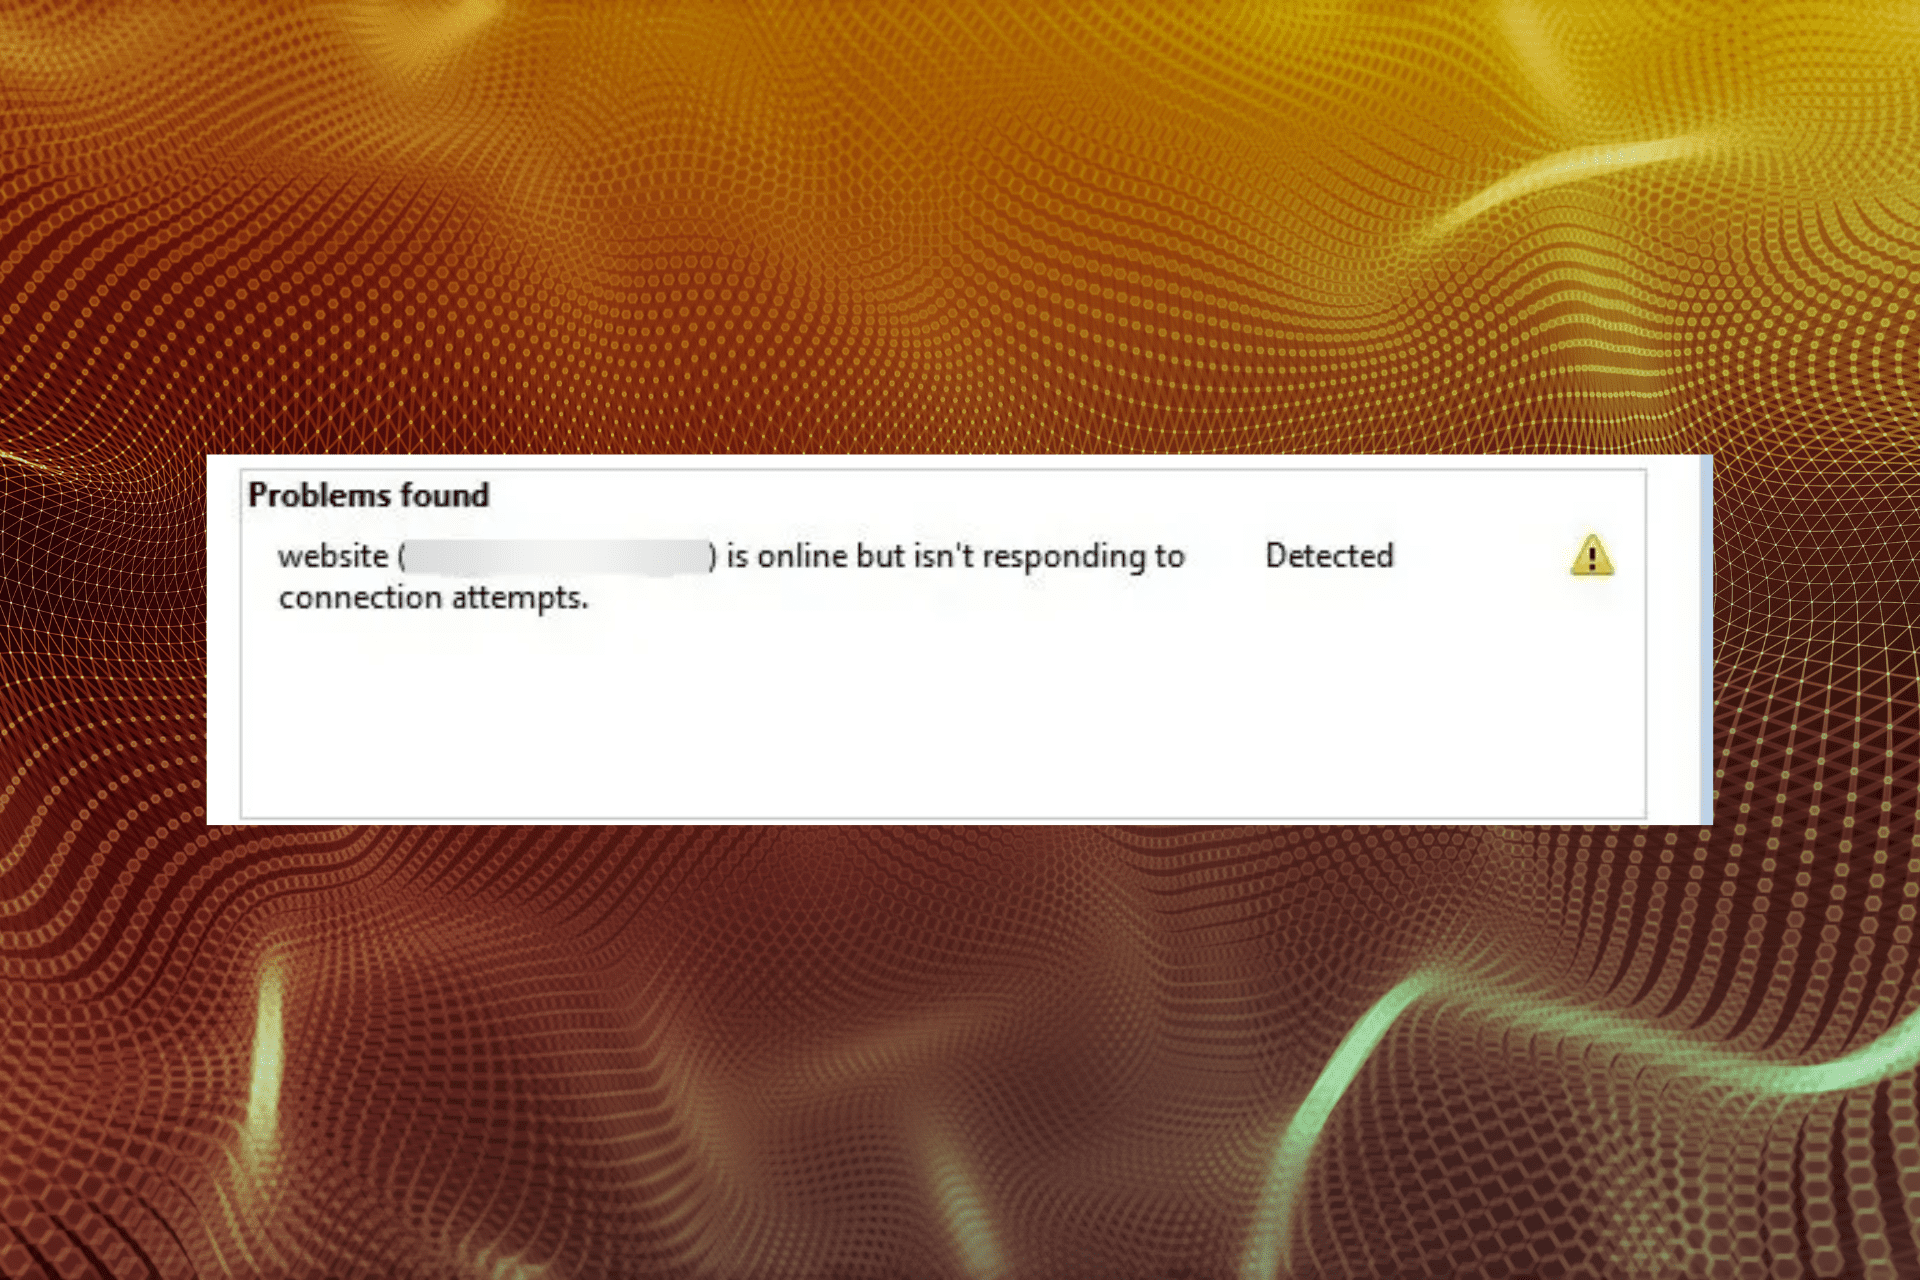
The Website is online but isn’t responding to connection attempts error prevents users from accessing a website, and is displayed when you run the dedicated troubleshooter.

Also, the troubleshooter only displays the error and is unable to take any action to eliminate the underlying cause, leaving users in a lurch.

For these reasons, in this article, we will discuss the best way to deal with this dreaded error. Read on to find out more.

What is online but isn’t responding to connection attempts error?

The error basically indicates that the problem lies at your end and the website is running just fine. In this case, it’s the misconfigured proxy settings causing the issue.

Also, an extension/add-on installed on the browser, generally a VPN, to modify the connection properties could be preventing you from accessing the website. Besides, a corrupt DNS cache is just as likely to cause the error.
Quick Tip:

This error is caused by your browser so the easiest way of fixing it is to switch to another, more reliable software. We recommend Opera One because, firstly, it doesn’t produce such errors.

It’s a very fast browser with a modern design that’s getting upgraded every month. If you’re into social networks, you will have Facebook, WhatsApp, and Instagram conveniently placed in your sidebar.
Opera One

Connectivity errors are less likely to appear in this browser, thanks to the proxy VPN that assures a smooth connection.
How do I fix this Website is online but isn’t responding to connection attempts?

1. Disable any add-ons found in your browser(s) to fix the Resource is online but isn’t responding to connection attempts error in Windows 7

The most common cause for Website is online but isn’t responding to connection attempts error are your browser add-ons, so be sure to disable them all. Here’s how you can disable them for Opera One, Chrome, and Firefox.

Opera One

  1. Launch Opera One, and press Ctrl + Shift + E to open the Extensions page.
  2. Now, click on the Disable button to turn off the problematic extension or use the toggle.Disable extension to fix website is online but isn't responding to connection attempts

Google Chrome

  1. Open Chrome, click on the ellipsis in the top-right corner, hover the cursor over More tools, and select Extensions.Extensions
  2. Toggle off the problematic extension that you want to disable.Disable

Mozilla Firefox

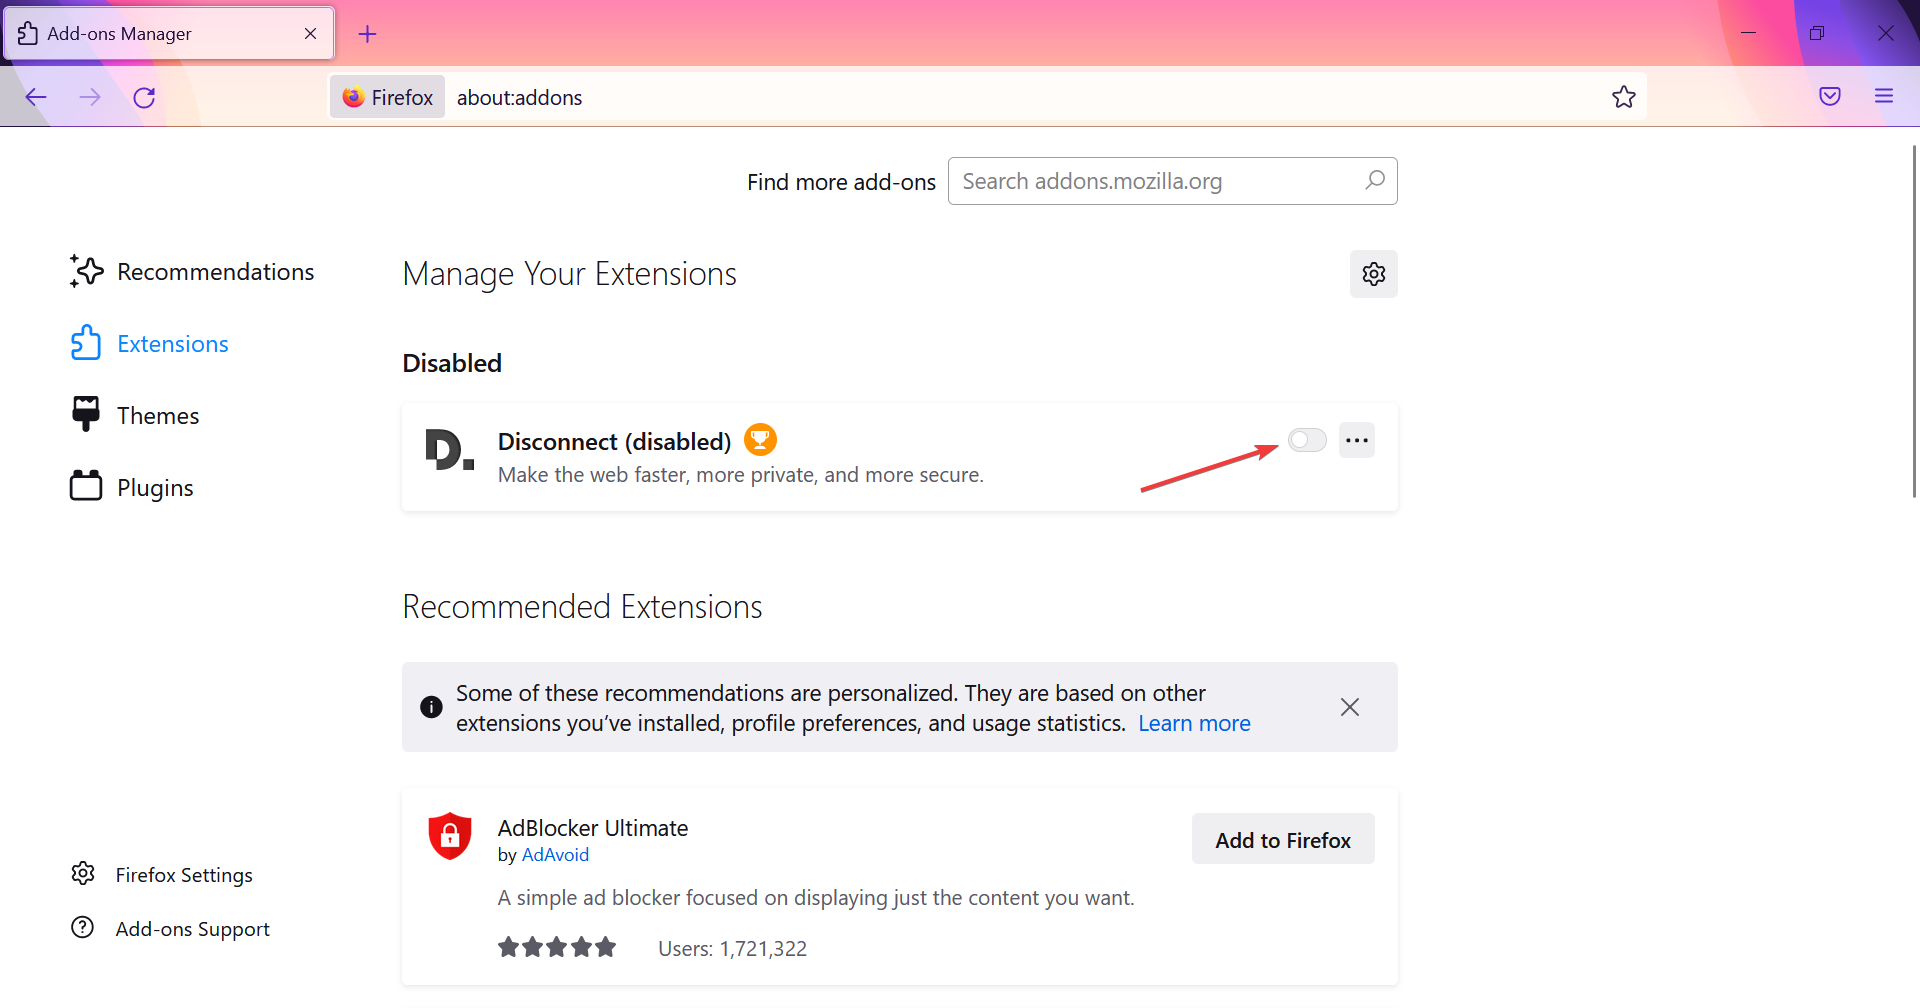
  1. Launch Firefox, and press Ctrl + Shift + A to open the Add-ons window.
  2. Select the Extensions tab from the left.Extensions
  3. Click on the toggle for the extension that you want to disable.Toggle off to fix website is online but isn't responding to connection attempts

2. Turn off proxy settings to fix the Resource is online but isn’t responding to connection attempts error with printer

  1. Press Windows + I to launch Settings, and select Network & internet from the left.Network & internet
  2. Click on Proxy on the right.Proxy
  3. Now, disable the toggle for Automatically detect settings.Turn off proxy to fix website is online but isn't responding to connection attempts
  4. Try reconnecting to your network.

Once done, check if the Resource (web proxy) is online but isn’t responding to connection attempts error is resolved.

If your proxy was the issue, you might want to consider switching to a VPN. It has many advantages compared to a proxy, and if you’re looking for a reliable solution, we suggest Private Internet Access.

For those who are unaware, the Virtual Private Network works by rerouting all your Internet browsing through secure networks all over the world.

Nobody will be able to see your identity when you’re connected to a VPN. The main difference between a proxy and a VPN is that a proxy encrypts web traffic while a VPN takes care of all kinds of traffic.

We also have to mention that a free proxy can be oftentimes dangerous and can inject malware. Never mind the countless forced ads to pay off their usage.

3. Reset TCP/IP and DNS

  1. Press Windows + R to launch the Run command, enter wt, hold Ctrl + Shift, and then click on OK.Terminal
  2. Click Yes in the UAC prompt.Click Yes
  3. Press Ctrl + Shift + 2 to open Command Prompt in a new tab.Command Prompt
  4. Paste the following one at a time and hit Enter after each:netsh int ip reset ipconfig /flushdns

Clearing the DNS cache removes all the entries, deletes any invalid records, and forces your system to repopulate those addresses the next time you try accessing those websites.

4. Try resetting your network settings to fix the Resource is online but isn’t responding to connection attempts error with Windows Server

  1. Press Windows + I to launch Settings, and select the Network & internet tab.Network & internet
  2. Select Advanced network settings.Advanced network settings to fix website is online but isn't responding to connection attempts
  3. Click on Network reset.Network reset
  4. Next, click on the Reset now button.Reset now to fix website is online but isn't responding to connection attempts
  5. Click Yes in the confirmation prompt that appears.Yes

Fix: Resource is online but isn’t responding to connection attempts error due to a VPN

In many cases, it was an installed VPN that lead to the error for users. Here, the most effective solution would be to uninstall the app.

If the VPN features come built-in with the antivirus, try disabling it and verify if the problem is eliminated. You could also switch to an effective third-party antivirus which doesn’t lead to these errors.


In this article, we explored some of the best methods that will help you solve the Website is online but isn’t responding to connection attempts error in Windows 10/11.

Also, find out what to do if you come across the Can’t connect to this network error in Windows or if you get The remote device won’t accept the connection message.

We hope this guide helped you reconnect to the Internet and get access to your favorite websites. Please feel free to let us know if this article helped you by using the comment section below.

Are Images not Loading in Chrome? Fix & Display Pictures Now

Google Chrome is the most popular browser in the world. But nothing is perfect, and Chrome is no exception. Many Windows 11 users reported that images are not displaying in Chrome.

The fastest way to fix this problem is to switch to a different browser; however, there are other solutions. We’ve created a quick guide, detailed below, so read on.

Why do images not load in Chrome?

Chrome might be loading a previously saved version of the page since your Internet connection is currently offline, or there are errors on the website you are attempting to load at this time. Another scenario is that your antivirus program is interfering.

extensions images not loading in chrome

Alternatively, one of the settings in Chrome might be preventing photos from loading. A browser add-on could be preventing the website from loading properly too.

What can I do if Google Chrome is not loading images?

1. Clear Chrome’s cache and cookies

  1. Press the Windows key, type Chrome, then click the first result in order to open the browser.chrome-search twitch extensions not working
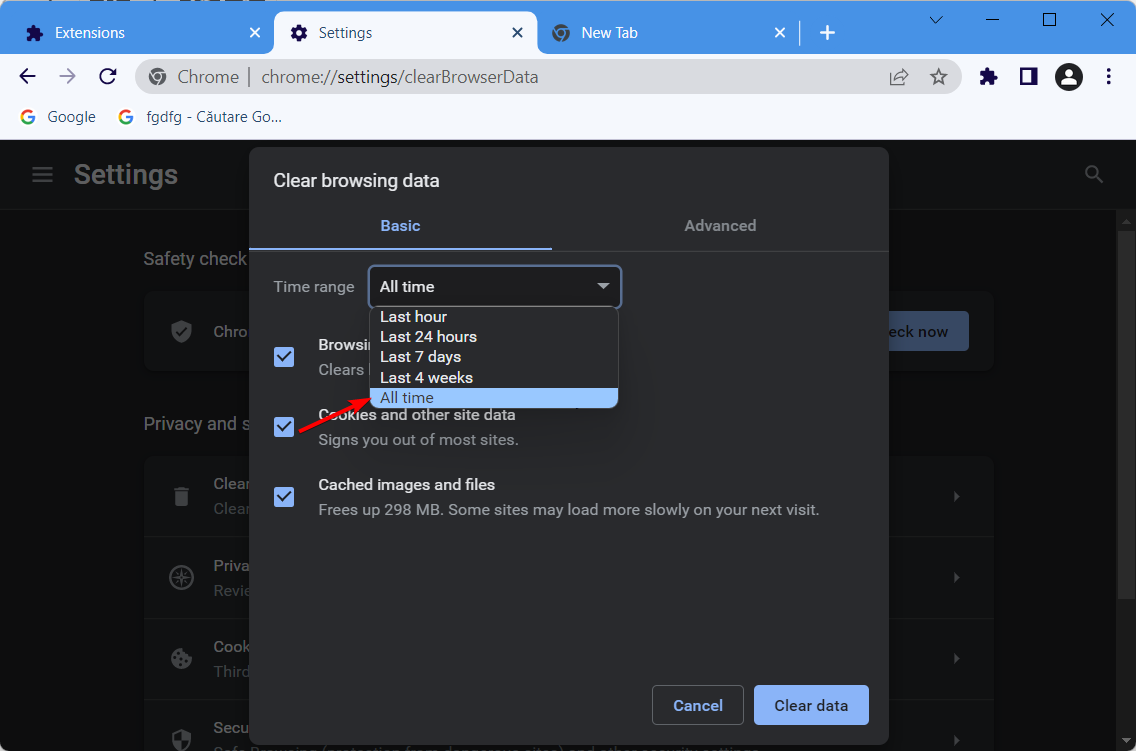
  2. Next, use the following keyboard shortcut to access the Clear browsing data menu: Shift + Ctrl + Delete and select All time as the time range.all-time-chrome images not loading in chrome
  3. Checkmark the Cookies other site data and Cached images and files options.cookies-and-cache-chrome images not loading in chrome
  4. Click Clear Data. The Chrome not displaying images issues will be resolved.clear-data images not loading in chrome

2. Browse incognito

  1. Press the three dots menu in the top right corner of Chrome.chrome-menu images not loading in chrome
  2. Select New Incognito Window and check whether the pictures not loading on websites issue is still happening.new-incog-window images not loading in chrome

3. Disable installed extensions in Google Chrome

  1. If you got the images not loading in Chrome on Windows 10/11 issue, open a new Chrome window and click the three-dot menu followed by More tools and Extensions.extensions-chrome your connection was interrupteda network change was detected. err_network_changed
  2. Now, turn off the toggle next to the extensions displayed in order to fix the issue.disable-ext your connection was interrupteda network change was detected. err_network_changed

4. Enable JavaScript

  1. Click the three dots menu in the top right corner of Chrome and select Settings.chrome-settings images not loading in chrome
  2. Click Privacy and security from the left side menu followed by Site settings from the right side.privacy-chrome images not loading in chrome
  3. Scroll down then click JavaScript. java-script images not loading in chrome
  4. Make sure to check the radio button next to Sites can use JavaScript. That’s it! Note that this solution also works in case images are not loading in Chrome on Mac.sites-use-java-chrome images not loading in chrome

5. Turn off hardware acceleration

  1. Tap the three dots menu in the top right corner of a new Chrome window and select Settings.chrome-settings images not loading in chrome
  2. Type hardware inside the Settings’ search bar then turn off the Use hardware acceleration when available option.use-hardware-chrome-off images not loading in chrome
  3. Restart Chrome and see if the images not loading in Chrome issue is gone.

6. Update Google Chrome

  1. Click the three dot menu from the top right corner of a new Chrome window and select Help followed by About Google Chrome.menu-help-about-chrome images not loading in chrome
  2. You will be shown whether Chrome is up to date or if you can update it to a more recent version. Click the Update button in case it shows up for you. chrome-update images not loading in chrome

Twitter images not loading in Chrome

It’s possible that a browser plugin is to blame for your Twitter photos not loading properly when you use Chrome as your browser.

As a result, we strongly suggest that you deactivate your browser extensions, just as we have shown in the above fourth solution, and then check to see which one was responsible for the error.
Outlook 365 not displaying images in Chrome

  1. At the top of your Outlook page, select Settings to open the quick settings panel.settings-outlook images not loading in chrome
  2. Under Arrange message list select Group into conversations and under Arrange the reading pane select either Newest on top or Newest on bottom.group-convo images not loading in chrome

Facebook images not loading in Chrome

A number of factors might cause images on Facebook to fail to load, but the majority of the time, the problem lies with the user. However, this isn’t always the case, so it’s a good idea to check the status of the server on Facebook’s developer page to see if they’re having any problems.

Facebook’s presence may now be found almost everywhere in the modern world. You anticipate that it will always remain operational, ready to satisfy your demand to spy on individuals from your distant past and participate in whatever bizarre groups you are a member of.

If images on Facebook are unable to load, then this undermines a significant part of the attraction of the social networking site.

Make sure to try out our solutions in case images aren’t displaying in Chrome, and do let us know if these fixes were helpful by leaving a comment in the comments section below. Thanks for reading!

4 Ways to Fix Discord if Twitch Integration Is Not Showing Up

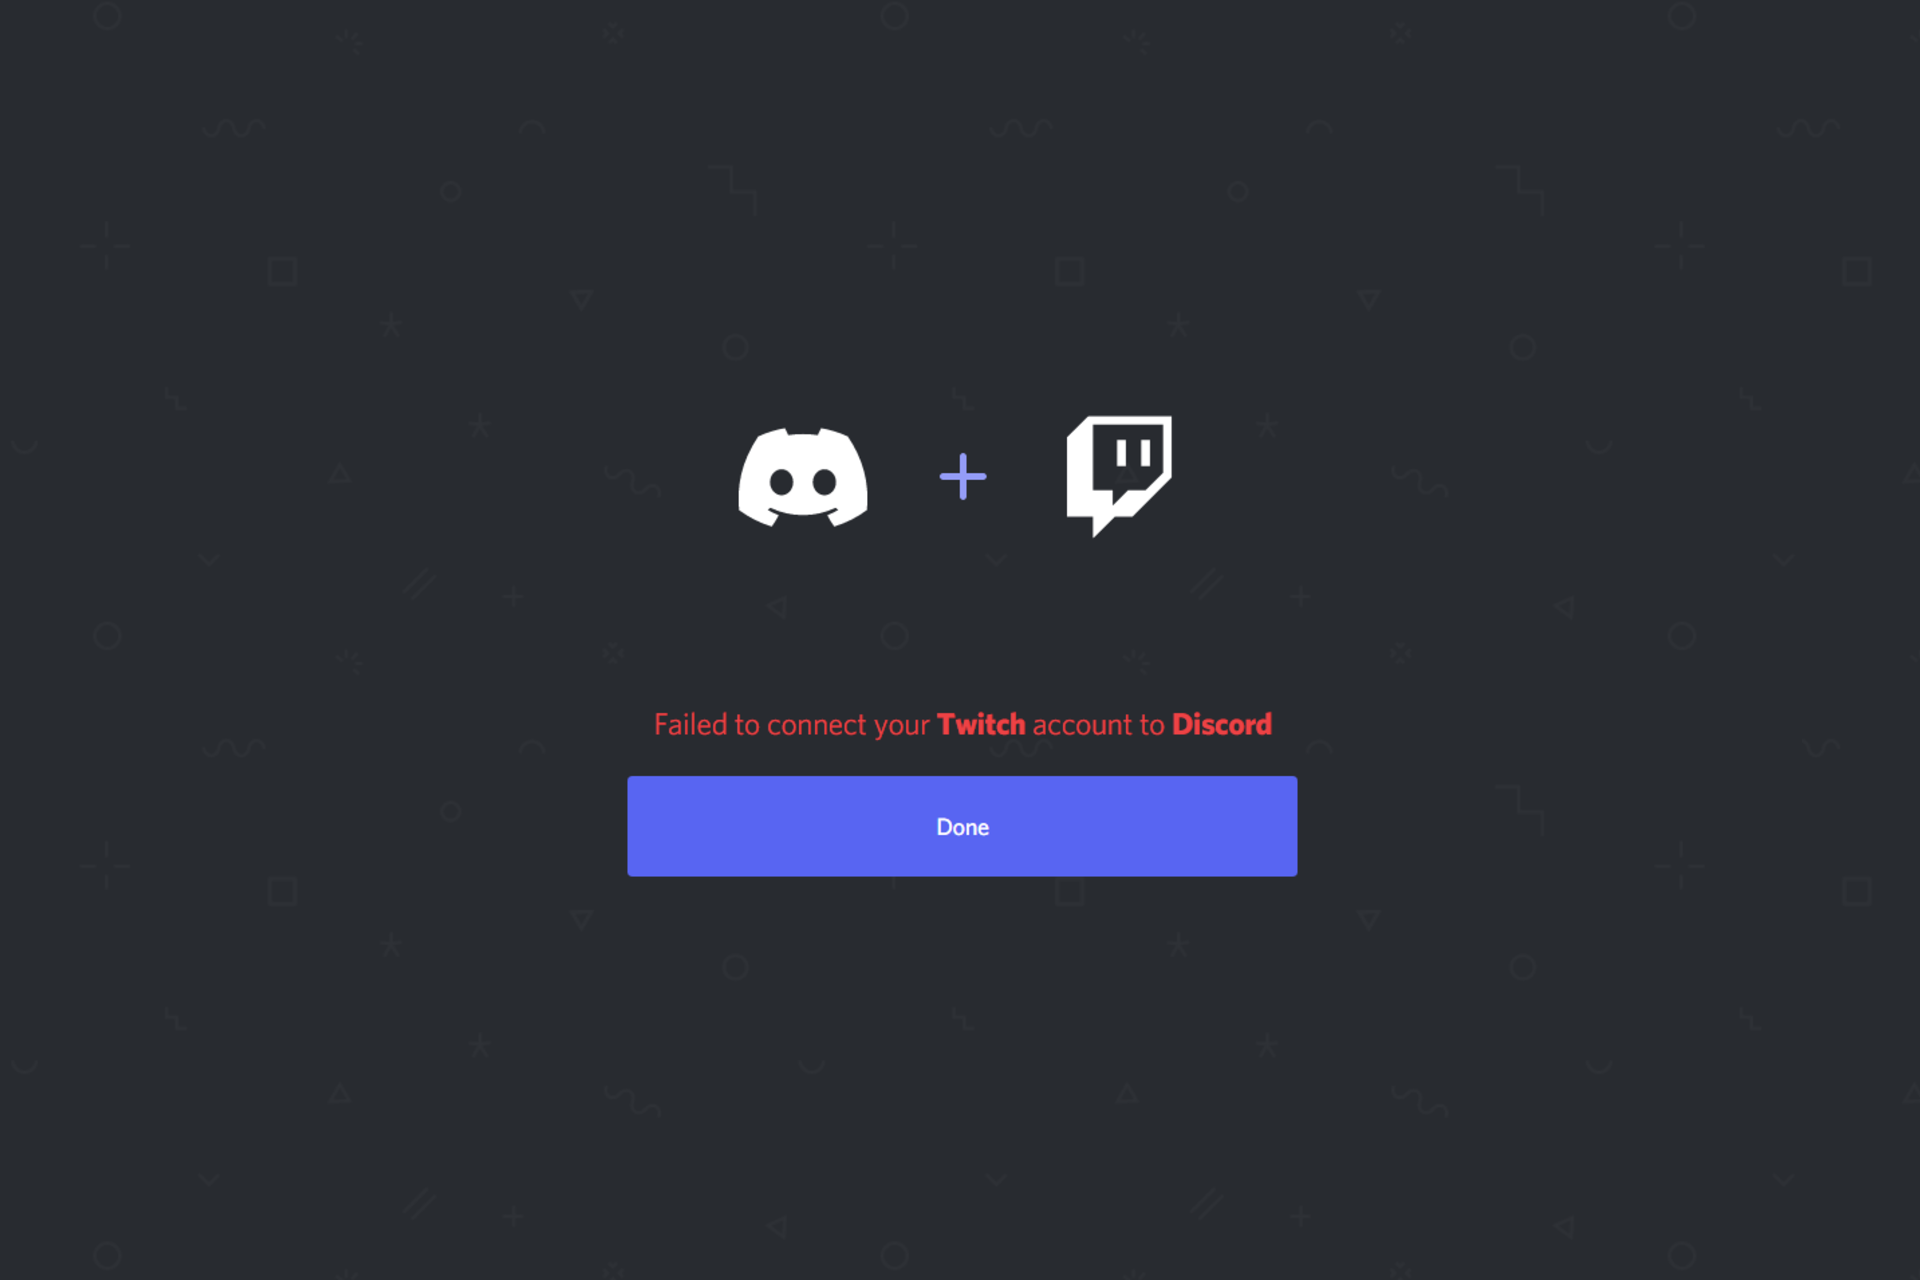
These two platforms are popular gaming services, and recently a Twitch integration was added to Discord. However, many users reported that Discord and Twitch integration is not working for them.

The integration means you can get all your gaming and chatting done on one platform. How cool is that? This integration has only helped to boost the user experience.

So, when it stops working, it can be annoying, and in today’s article, we’re going to show you how to fix this issue quickly, once and for all.

Another problem users have had is when the Discord Live viewing stops working, this also may be fixed in a few steps, but without more diversions, let’s go straight to the integration issue.

Why is my Twitch integration not working on Discord?

There are a few reasons why a Discord Twitch integration may not work. The two major culprits are:

  • Authorization issues between Twitch and Discord
  • Internet connection issues

Because the basic fixes might seem along the obvious lines, some users forget about them. In some instances, they can rectify most of the underlying issues.

Before discovering the advanced solutions, you should try out a few simple recommendations. First of all, make sure there aren’t any network connectivity issues.

It would help if you tried switching to the wired connection from wireless (via Ethernet Cable, USB Tethering, etc.) or vice versa. In addition, sharing your device’s carrier network via Hotspot might help you.

Also, take into consideration refreshing the network by restarting the router.

Many users reported various problems with Twitch and Discord, and in most cases, it’s just a syncing issue that will be gone after a couple of hours on its own.

If the Discord and Twitch integration is still not working after executing all these tweaks, make sure you keep reading to find how to fix this issue quickly.

Quick Tip:

With a dedicated gaming browser, you can get Twitch-Discord integration quickly. Thus, you can see followed channels from Twitch at a glance or talk to your friends on Discord in the sidebar.

In other words, the Opera GX has all your gaming apps integrated with the home menu and many more great features.

Opera GX

With a sidebar integration with Discord and Twitch, never miss any streamers and get the most of the online support.

How do I enable Twitch integration on Discord?

1. Make sure that you’ve authorized Twitch on Discord

  1. Open Discord on your browser, then log in with your credentials.
  2. Go to Settings on the bottom left of the page. You’ll find the option marked as a gear.
  3. In the left window pane, select Connections.
  4. Find the Twitch icon in the right window pane, then check if it’s displayed like this.
  5. If not, click on the Twitch icon, then confirm the authorization.
  6. The app will appear in the Connections list.

2. Remove Twitch integration and add it again

2.1 Disconnect the Twitch integration from Discord

  1. Open Discord on your browser, then log in with your credentials.
  2. Go to Discord Settings on the left bottom of the page. You’ll find the option marked as a gear.
  3. Now go to the Connections tab and click the X button next to Twitch.
  4. Confirm by clicking on the Disconnect button.

2.2 Deauthorize Discord from Twitch

  1. Go to the Twitch website.
  2. Click on the Log In button. You can find it in the right top corner of the window.
  3. Now, click on your Profile icon in the right top corner of the window, then navigate to Settings.
  4. Now, select Connections.
  5. Scroll down to Other Connections.
  6. Check if Discord is in the authorized apps list. Click on the Disconnect button next to the app.

Additionally, you can deauthorize Discord if you want, but this isn’t mandatory. So, we recommend using it only to be sure you’ve made a clean removal from both sides. Once done, move to solution 3.

3. Add the Twitch integration on Discord

  1. Open Discord on your browser, then log in with your credentials.
  2. Go to Settings on the bottom left of the page. You’ll find the option marked as a gear.
  3. Navigate to Connections.
  4. Click on the Twitch icon, then on the Authorize button.

After doing that, check if the problem is still there.

4. Contact Twitch support

If the problem with Discord and Twitch is still there, even after a couple of days, this might be a perfect moment to contact Twitch support.

Most likely, the issue is on their end, so you’ll have to report it and wait for them to fix the problem.

Discord sub enabled servers not showing up

The main reason why your Twitch sub doesn’t function on Discord is that your Twitch account wasn’t authorized there. In addition, the Discord/Twitch integration may not work due to bugs and errors in Discord or problems with the browser you’re using to run Discord.

To fix this, you must follow solution 2 (Remove Twitch integration and add it again) described in the previous section.

What are the best Discord integrations?

Like any platform, getting the most out of it often means pairing it with another tool, which is why Discord integrations can help your team boost productivity and streamline processes.

Besides Twitch, this app can be integrated with other amazing programs, and let’s have now a look at them:

  1. GitHub Discord integration
  2. Zapier Discord integration
  3. Slack Discord integration
  4. Twitter Discord integration
  5. YouTube Discord integration
  6. Trello Discord integration
  7. Google Sheets Discord integration
  8. Patreon Discord integration
  9. Nightbot Discord integration
  10. Twitch Discord integration
  11. XSplit Discord integration

Twitch integration is a welcome addition to Discord, but if you’re having problems with it, be sure to try some of our solutions.

We hope you find the solutions in this guide helpful. They are all pretty straightforward, and as long as you do not skip a step, you should have your integration perfectly set up.

For any additional questions or curiosities, feel free to use the comment section listed below.

5 Best Browsers for WordPress [Editing, Development, Admin]

The best browser for a WordPress editor is one that guarantees more security and quick response time. Also, a professional needs the ease with downloadable extensions, add-ons, etc.

Developers rely on tools like PHP, JavaScript, CSS editing, debugging sites, productivity tools, project management, etc. Whether you prefer using one or multiple browsers, here are some of the best browsers with compatibility for WordPress editing.

How do I make my WordPress site compatible with all browsers?

Cross-browser compatibility is essential because you can never tell where your website will be accessed. Because of this, you must take the necessary steps to ensure that the user gets the best experience regardless of the browser.

here are our recommendations for creating websites that are compatible across browsers:

  • Test across browsers – While most of your users will access the site with Chrome, during creation, you must test across as many browsers as possible and tweak the site design to be optimized for as many of them as possible.
  • Use simple and easy code – Ensure you consistently use simple code and keep the design to just what is needed and nothing more.
  • Set the HTML Doctype – This will help every browser to figure out the HTML version.
  • Set CSS reset rules – These rules will ensure your design code is not interpreted differently when new browsers are used.

What are the best browsers for WordPress?

Opera One – Best for slow connections

With a slower connection, Opera One is one of the best browsers for editing WordPress, thanks to its exceptional Turbo mode. That’s because Opera One runs faster on the PC than other browsers.

Opera Turbo compresses web traffic to improve your browsing speed by patching the traffic through Opera One’s servers. Re-routing helps minimize data consumption and bypass ISP content restrictions.

Opera’s versatility and use of add-ons, plugins, and Chrome extensions make it an exciting option for editing WordPress sites.

More so, you don’t have to worry about regions where WordPress is not available since Opera One also comes with a built-in VPN that is completely free, has no daily limit, and allows you to choose from 3 server locations.

Here are some of the perks of using Opera One:

  • Ultra-fast and great for older PCs
  • Comes with a built-in VPN
  • Low CPU footprint
  • Fast loading times
  • Completely free

Opera One

Use WordPress at lightning-fast speed with the help of this lightweight and efficient web surfer.

UR Browser – Most lightweight

UR browser takes the lead in the pack due to its excellent features that make working with WordPress a breeze. You might be missing out on real value if you are a conservative, used to the already popular browsers. UR Browser is one of the best browsers for editing WordPress sites.

Its extensive features, add-ons, extensions, and built-in VPN helps make working with UR browser exciting. The ad-blocker and virus scanner help give you more peace of mind from attacks and infiltration.

UR browser gives 4 x faster speed for downloading files and browsing using the advanced parallel downloading technology. With UR browser’s Mood, you can organize your work, shopping, and home activities better.

With UR browser’s VPN, it ensures no restriction with opening blocked sites.

Additional features:

  • Ad blocker
  • Invisible tracker blocker
  • Third-party cookie blocker

UR Browser

A web browser that puts user experience upfront using website-creation tools like WordPress.

Mozilla Firefox – Best for developers

With the recent re-engineering, Firefox offers great hope for bloggers and developers using WordPress. Firefox’s innovative approach has helped reduce the percentage of system resources utilized even with multiple tabs opened.

Other features include the Firefox open access to file extensions, flexibility, and strict privacy tools. And these are some of the things most developers on WordPress look for.

Additional features:

  • New tab page
  • Page Actions menu
  • Private browsing

⇒ Download Mozilla Firefox

Google Chrome – Most compatible with WordPress

Google Chrome is one of the best browsers for editing WordPress, with most of the market share running into hundreds of millions. Chrome offers WordPress users fast performance and the ability to utilize unlimited resources for WordPress editing.

Google Chrome makes it possible to install add-ons and Chrome extensions to make the website developer’s job easier. A WordPress user can install additional plug-ins needed for editing WordPress to enjoy maximum efficiency.

However, the drawback with Google Chrome is its heavy browsing requirements. That means systems with low Ram might have issues with speed when working with Google Chrome plus data management.

Lastly, other exciting features are the improved privacy settings, WebAuthn (two-factor authentication), password-free logins, flexibility with VR headsets, accelerators, etc.

Additional features:

  • Video live captions
  • Extensions in incognito
  • Tab casting

⇒ Download Google Chrome

Microsoft Edge – Best for testing on Windows

Microsoft has said that Chromium Edge offers 37% more browsing speed than Google Chrome and uses Metro software; therefore, it easily accesses other metro applications.

Its integration with Windows 10 and 11 gives it more flexibility and multiple tools to work with for WordPress editing.

Microsoft Edge browser opens pages fast and has a Reading mode. Lastly, the fact that it is built on Chromium also means it gives you access to the same set of extensions that you will have using google chrome.

Additional features:

  • Startup boost
  • Sleeping tabs
  • Browser sync

⇒ Download Microsoft Edge

Best browser for WordPress development

Firefox is an excellent developer browser, not limited to WordPress development or coding. A separate developer edition is integrated with best-in-class tools and CSS grid support for developers.

Best browser for WordPress admin

Google Chrome wins in this criterium. It is about the most robust web browser available. This means for an Admin; you can use new features because, in most cases, they are built for Chrome before they are adapted for other browsers.

Best browser for WordPress editing

Opera One has a slight edge over other browsers for editing. It comes with many built-in functionalities, which means you can test it against most of these native integrations while editing your WordPress site.

All the browsers we have discussed are supported for WordPress, but the list does not end here. These are simply the ones we love to recommend.

WordPress browser compatibility has become less of an issue as the tech improves, and almost every modern browser is compatible with the CMS. In the end, we hope your personal preferences and our guide help you choose the best WordPress browser.

Lastly, you always have the option of editing your sites offline; to do this, you must install WordPress on your Windows PC.


[wl_navigator]

You’ll soon be able to assign seats in Together Mode in Teams

According to Microsoft 365 Roadmap, Microsoft Teams will soon allow meeting organizers to assign seats to participants in Together Mode. Together Mode was incorporated into teams to enhance the user experience. For instance, availing it for all meeting sizes as well as allowing users to customize Together Mode scenes for more fun meetings.

Previously, users could only assign the presenter or meeting organizer a seat using the custom scene for Together Mode. However, with this new ability that is supposed to reach general availability sometime in September, meeting organizers will now be able to control and decide where each meeting attendee sits.

According to the folks at Neowin, “Microsoft is currently targeting those who use Teams on desktop PCs and Mac. The Together Mode improvement will initially be available for these two platforms only”.


Developer makes hacked Windows 11 more usable on Surface Duo with Wi-Fi, eSIM, cellular drivers

You might already know about it, but Gustave Monce has been on a quest to bring Windows 11 over to the Surface Duo. In the latest step on that journey, the developer has a new release for his project, which makes Windows 11 more usable on the dual-screen device with several key driver updates.

As seen on GitHub, version 2207.32 of Monce’s latest WOA project release brings six big changes. The bulk of those involves Wi-Fi, Cellular Data, Cellular Texts, eSim, and GPS all working as intended. If you’re adventurous enough to try it, these might help you use the Surface Duo more like a Windows 11 tablet. However, critical things like calling, and the camera, or even the graphics card do not work right. Some of those can be seen below in the list of known issues.

  • Automatic Orientation only works for the left panel, using the right panel orientation sensor
  • USB Dongles that are not externally powered may not currently work
  • USB C Billboard devices will not currently work
  • External Display Stream support will not currently work
    Additional information provided by the posture sensor is currently not available for public consumption, this includes peek events.
  • Digitizers will not react to the device being folded over
  • Displays will not react to the device being folded over most of the time
  • Physical device data is incorrect
  • Graphical Rendering Issues

For that reason, we obviously don’t suggest trying this out and risk bricking your Surface Duo. While the Surface Duo now has a follow-up, (the Surface Duo 2,) it is still a great device to use, and Microsoft is still updating it with monthly security updates.

Twitch App vs Browser Performance [Useful Comparison]

Choosing between the Twitch app and the browser-based web app may have been confusing for the uninitiated.

While the desktop client and mobile app offer flexibility, the browser version is still the preferred medium for many users.

In this quick comparison, we try to compare the Twitch app vs browser performance to help you find the best medium to stream Twitch content.

Alternatively, check out the best browsers to stream Twitch effortlessly if you want to enhance your Twitch web experience.

Is Twitch app better than the browser?

We will explore this further in the article, but a tell-tale sign is that Twitch has gotten rid of the Twitch Desktop app.

Is the Twitch App good?

While it lasted, it was the preferred means of using Twitch for some users. It came with its advantages; for instance, app users don’t have to worry about the usual problems associated with streaming and viewing live feeds through a web browser.

But far more users stream on the web application, making it a more appealing option.

Is the Twitch desktop app faster?

For app users, their primary argument is that while playing games and viewing broadcasts, the app lags less than Twitch’s online version. Hence it may have had a slight speed advantage over the web version. So the web app is an excellent Twitch desktop app alternative.

What browser should I use for the Twitch web version?

If you are looking to switch to Twitch app due to browser issues, try Opera GX – A special version of the Opera browser built specially to enhance your browser gaming experience.

Built-in Twitch integration in your sidebar makes it easy to see the channel you follow, who’s online, and receive notifications.

With this browser, you’ll be able to control your privacy and security with the free integrated browser VPN.

Also, you’ll have fewer headaches in your browsing experience. In addition, websites will load much faster with the built-in ad blocker.

Check out some additional Opera GX tools that you should try out:

  • Completely customizable
  • Works on mobile and delivers free games
  • Fast Action button

Opera GX

Enjoy all gaming features in the browser and access your Twitch content in a second.

How is the Twitch app vs browser compared in performance?

For streamers and creators 

The most apparent difference between the Twitch app and the browser-based web app is the number of features for streamers that are missing on the mobile app.

Limited chat and stream customization features are annoying for avid streamers. In addition, the app lacks customized sound alerts for new subs, hosts, and raids in the chat.

On the other hand, the Twitch web app offers unlimited customization options, including those mentioned earlier. 

Intrusive ads 

While pre-roll ads are integral to Twitch streaming, browser ad blockers can help you block intrusive ads easily.

However, with the Twitch desktop or mobile app, you don’t have the luxury of using ad blockers. Even more, ads on the Twitch app cannot be skipped as of now. So you would have to wait till the ad is completed to watch the video.

Another annoying fact is that if you accidentally click out of the video and reenter, you will have to go through the pre-roll ad again.

Intrusive ad issues can be negated to an extent in the Twitch web app. There are plenty of ad blockers for browsers that can block both pre-roll and on-page ads successfully.

Accessibility and Portability 

The Twitch app shines when it comes to accessibility and portability. For example, if you are a streamer, you can use the smartphone camera to stream and not be dependent on an external imaging device.

The Twitch app is a boon for vloggers who stream on the fly. While the customization options are limited and some features can be buggy, it offers a lot of flexibility for vloggers.

Performance and experience 

The Twitch app does many things right, especially for the vloggers who fancy streaming on the fly.

Regular users can chat with any Twitch users they have added as friends, make voice and video calls, and even share their screens.

However, it is not ideal for game streamers due to its lack of customization options and occasional performance issues. The app also lacks add-on enhancements that come with BetterTV and FrankerFaceZ add-ons.

While it’s not completely error-free, sometimes displaying download errros, the Twitch web app offers better performance for streamers and viewers.

Why is Twitch getting rid of the app?

The Twitch app offers flexibility to users who want to watch streams and vloggers on the go. It also comes with voice chatting, text, and video calling options.

However, if you are a streamer who streams from home or office, the Twitch web app on the browser offers more features and reliability than the mobile or desktop app.

Twitch decided to remove the desktop app after considering many users’ feedback. The move also means that Twitch users can expect more and better features on the web app since the area of concentration is narrowed down.

There you have it, our Twitch app vs browser comparison. We would have said the decision comes down to your specific situation, depending on what you value most, but since there is no longer a desktop app for PC use, you are stuck with the browser web app.

Feel free to share your opinions with us in the comment section below.

6 Best Browsers With Dark Modes [Windows, Mac & Android]

In this article, we give you our recommendation for the best browser with dark mode.

More and more developers have been adding dark modes to their software. Those modes apply black color schemes to apps’ user interfaces.

Dark modes have become trendy because they can save mobile devices and laptops battery life.

Browsers are among the most widely utilized software on PCs and mobile devices.

So, it’s not surprising that there are now multiple browsers with dark modes. Hence, we will share some of the best desktop and mobile browsers with dark modes.

Also, you may use these tips to enable dark mode in the control panel.

Can I make my browser dark mode?

It is possible to make your browser display in dark mode; however, this setting is not available in every browser.

This guide will show you the best browsers with full dark mode settings.

Is dark mode better for your eyes?

Although dark mode doesn’t immediately ease eye strain, it may provide some comfort. For instance, a bright screen makes it tougher for your eyes to focus in low light. On the other hand, the identical outcome will occur in a room with a dark screen and bright lighting.

Now let’s talk about our top recommendation for browsers with night mode or a dark theme.

What are the best browsers with dark mode?

Opera One – Best dark mode browser

Opera One is a Chromium web browser that’s been around since the 1990s. This is one of the most customizable browsers with a better feature set than Google Chrome.

It also boasts an extensive assortment of extensions because its users can utilize Opera One and Google Chrome extensions.

Opera One has a built-in Dark option you can utilize that’s accessible on its Easy setup bar.

Users utilizing the Android Opera One browser can also select a Dark web pages option along with a dark theme setting. With both those options selected, Opera One is the darkest of all web browsers!

It also has a special Opera GX version that packs additional gaming features on top of Opera One’s standard feature set.

Opera GX users can limit RAM, check tab system resource usage, and limit network usage via that browser’s GX Control sidebar.

Other useful Opera One features

  • Users can capture webpage snapshots with built-in screenshot utility
  • Opera One’s battery-saver feature extends battery life on portable devices
  • It includes a conversion tool for units and currencies
  • This browser incorporates a built-in VPN (virtual private network)

Opera One

Easily switch to Dark mode and experience the same lighting speed browsing with new features.

Vivaldi – Most customizable

Vivaldi is an ultra-customizable Chromium browser with many unique features. This browser is similar in design to Opera One, including a Speed Dial page and sidebar.

A co-founder launched Vivaldi as a browser that retains classic Presto engine features from the original Opera.

Vivaldi has the best tab management features of any browser. Its users can stack or group, multiple tabs, and select tab hibernation options.

This browser incorporates tiling settings that enable users to view two to four pages within a window. Vivaldi even includes a tree-style tab sidebar.

Aside from its excellent tab features, Vivaldi includes nine pre-defined themes. One of those is a Dark theme, which turns the browser’s UI black when selected.

Vivaldi users can also modify theme colors, adjust the contrast & saturation of the browser’s themes, and even schedule times for them to change.

Other useful Vivaldi features

  • Vivaldi includes customizable keyboard shortcuts
  • Users can utilize Vivaldi with mouse gestures
  • It includes a Quick Commands utility for searches and page actions
  • The Vivaldi sidebar incorporates a handy notepad

⇒ Download Vivaldi

AVG Secure Browser – Customizable homepage

This is a free cross-platform browser developed by AVG brand that allows dark mode navigation with a simple UI.

Firstly, you have plenty of security enhancements and more private browsing due to AVG Antivirus integration and VPN shield.

Except that, you can change the browser’s homepage to dark mode, which reduces eye strain and saves battery life as well.

It’s also beneficial to use this especially useful for people who spend a lot of time surfing the web at night or in low-light conditions.

In addition to that, the browser is also faster than others and it includes all the privacy features you need.

Other useful AVG Browser features:

  • Extension guarding
  • No phishing threats websites
  • Password manager tool
  • Automatic adblocker

AVG Secure Browser

Take advantage of this customized browser with useful privacy integrations.

Firefox – Best for privacy

browser with dark mode

Mozilla revolutionized its Firefox browser with a new Quantum web engine that utilizes four processes for web page content.

That revolution has made Firefox one of the most system-resource efficient and responsive browsers.

Firefox boasts a robust feature set and incorporates an ad-blocker, password manager, and a Ctrl + Alt-tab cycler.

Users can also select screen capture, link copy, and tab tools on Firefox’s Page Actions menu.

Mozilla Firefox is among the most customizable browsers with expansive add-on and theme repositories.

Its users can configure Firefox’s toolbar via the Customize Firefox tab. Users can also select the browser’s Dark theme from that tab on the Themes drop-down menu.

Other useful Firefox features

  • This browser includes a Task Manager tab
  • Firefox’s Send Page option enables users to send tabs to other devices
  • Its users can select alternative Standard and Strict enhanced tracking protection settings
  • The Picture-in-Picture mode allows users to view videos outside Firefox’s window

⇒ Download Firefox

Google Chrome – Best for plugin expansion

browser with dark mode

Chrome is falling behind some of the competition regarding features, but it’s still the world’s favorite browser.

Maybe that’s because Chrome has the best mobile integration and syncing. It also incorporates cutting-edge web technologies that make it one of the fastest browsers.

Chrome packs in some convenient features. It incorporates a password manager that can generate new passwords for users.

Chrome’s Task Manager is a handy tab management feature. This browser also includes many site control settings for users to configure webpage permissions and content.

Google Chrome for Android has a built-in dark setting. Desktop users can select Windows 10’s Dark app setting to activate a matching black theme in Chrome.

Alternatively, users can select a built-in black color setting within the desktop Chrome browser to apply a dark theme.

Other useful Google Chrome features

  • It includes integrated YouTube toolbar controls
  • Users can utilize Chrome’s Omnibox URL box for unit conversions
  • Google Chrome’s site settings enable users to block images and pop-ups on webpages
  • Chrome also incorporates a built-in PDF viewer

⇒ Download Google Chrome


Microsoft Edge – Most compatible with Windows

browser with dark mode

Edge has changed for the better since its conversion to Chromium code. Now it has a more rounded and cleaner Chrome-like UI design.

Microsoft added a new rendering engine, profiles manager, and tracking prevention to Chromium Edge. Furthermore, Edge users can now utilize Chrome’s extensions!

Edge has unique features you won’t find in all browsers; for example, its New Tab page includes alternative layout settings and a customizable feed.

Users can collect web content, such as images, with Edge’s Collections utility and take snapshots with the browser’s Web capture tool.

The built-in dark mode setting from the old Edge remains in the Chromium iteration of the browser.

Its users can select a Dark theme on this browser’s Settings tab. Or users can choose a System default option for Edge to match the Windows 10 theme.

Other useful Edge features

  • Includes built-in support for PDF documents
  • Its users can select a Read aloud option for pages
  • Edge can auto-generate new passwords for users
  • This browser incorporates three tracking-blocking settings

⇒ Download Edge

How do I get dark mode on all websites?

  1. Launch your Chrome browser.
  2. On the Address bar, copy and paste the below link and click Enter.
    chrome://flags/#enable-force-dark
  3. Expand the drop-down list for Auto Dark Mode for Web Contents and select Enable.
    browser with dark mode
  4. Lastly, click the Relaunch button at the lower right corner.
    browser with dark mode

Those are five of the best browsers with dark modes compatible with Windows, Mac, and Android platforms.

Whether you utilize them on mobiles or laptops, you can make the most of the dark modes in these browsers to prolong your device’s battery life and give them a bit of a makeover.

If you’re using Chrome, don’t miss our guide on how to turn off dark mode in Chrome, if you ever get stuck.

Let us know in the comments which of these is your favorite browser with dark mode in Windows 10/11.

Here’s What to Do When You Can’t Install Chrome On Windows

There are a few different reasons why you can’t install Google Chrome on Windows 11.

Your antivirus might mistake it for a threat, you might get registry issues or you’d get a Microsoft-verified error, just to name a few.

Today, we’ll help you navigate this problem and show you different tested ways to fix it.

How do I fix Google Chrome not installing?

1. Use Uninstall troubleshooter

  1. Download and launch the software.
  2. Click on Next to start troubleshooting the problems.troubleshooter for chrome install failed
  3. Select Installing if you cannot install the Chrome browser.select installing
  4. Check if Google Chrome appears on that list, otherwise select Not Listed.check google chrome in list
  5. After the processing stage, you will see a notification about the problems which have been solved.
  6. You can click on Explore additional options if you are curious about other program features.
  7. If you consider you finished the job, click on Close the troubleshooter.Close troubleshooter

2. Change app installation settings

  1. Press Win + I to open the Settings app.
  2. Select Apps from the list.apps settings
  3. Select Advanced app settings and go to the Choose where to get apps option.
  4. Change this setting from The Microsoft Store only (recommended) to Anywhere.choose where to get apps set to anywhere
  5. Go back to Chrome’s website and try to download and run the installation file.

Changing the app installation settings to Anywhere allows you to bypass the Microsoft verification and install Chrome directly from Google’s website.

3. Check your antivirus

Many people who’ve had an antivirus interference got an error that reads Google Chrome installation failed due to unspecified error, error code 0xa043.

To test if this is the problem, disable your antivirus and try to run the installer again. But make absolutely sure you downloaded the installation file from Chrome’s official website or from the Microsoft Store.

disable antivirus protection

If it works, it means your antivirus mistakenly identified Chrome as a threat and stopped the installation to protect your PC.

To prevent this from happening again, keep your anti-virus up to date and use a reputable option such as TotalAV.

4. Uninstall all previous versions of Chrome

  1. Open the Run dialog by using the hotkeys Windows + R.
  2. Type Control Panel and hit Enter.
    type control panel
  3. Select the Uninstall a program option.
    select uninstall a program
  4. Click on Google Chrome, then click the Uninstall option.
    uninstall
  5. Follow the wizard to complete the uninstallation.

Restart your computer to make sure all actions take effect and try installing Chrome again.

If you want to prevent this from happening, you can use an uninstaller software that automatically checks and removes obsolete software files.

5. Check if the necessary services are running

  1. Go to Start > Control Panel > System and Security > Administrative Tools > Services.administrative tools
  2. Open Background Intelligent Transfer Service. This will open a window with settings and service details.
    background intelligent transfer services
  3. Change the Startup type to Automatic and ensure the Service status is Running.

BITS is a system service that facilitates the asynchronous, prioritized, and throttled transfer of files between machines using idle network bandwidth.

In other words, this system allows you to install different programs from other devices and the Internet.

6. Modify your registry

  1. Go to Start > Run.
  2. In the Run tab, write regedit and click OK.regedit
  3. From the Registry Editor menu select HKEY_CURRENT_USERGoogleUpdateClientState
    hkey_curent_usergoogleupdateclientstate in registry

Once you delete the {4DC8B4CA-1BDA-483e-B5FA-D3C12E15B62D} folder, you can close the Registry Editor tab and try to install the browser one more time.

Several users recommend completely deleting any Chrome registry entries before you try installing it. To do that, find these keys in your registry and remove them:

  • HKEY_CURRENT_USERSoftwareGoogle
  • HKEY_LOCAL_MACHINESoftwareGoogle
  • HKEY_LOCAL_MACHINESoftwareWow6432NodeGoogle

Once you remove those keys, check if the Chrome not installing in Windows 10 is resolved.

7. Delete Google Update directory

  1. Press Windows Key + R and enter the value below:
    %LOCALAPPDATA%Google
    windows key
  2. Now press Enter or click OK.
  3. You should see the Update directory available. Delete this directory.

8. Use beta versions

  1. Download the Beta or the Canary versions by clicking the Download Chrome Beta or Download Chrome Canary buttons.
    download beta or canary
  2. Save the downloaded file and double-click on it to start the installation.
  3. Follow the wizard to complete the installation.

9. Turn on User Account Control

  1. Press Windows Key + S and enter user account control; select Change User Account Control settings.
    change user account control settings
  2. Move the slider to the default position and click OK to save changes.
    change to default

Summary

We hope this answers your questions and that the steps above helped address the Chrome installation failed issue. If you have any more questions, feel free to let us know.

And if you were able to fix this in a different way, leave a comment telling us how. You might help out a peer in need.

Fix: Hmm We’re Having Trouble Finding That Site in Firefox

You have stumbled upon this guide because you encountered the error Hmm we’re having trouble finding that site on Firefox. Let us walk you through some important elements.

Looking at the current numbers, Mozilla Firefox is the greatest alternative to Google Chrome. After Mozilla revitalized its native browser with the Quantum update, Firefox retook its rightful place.

So if you have stuck to this browser and this error puts you off, let us walk you through possible causes and the most reliable solutions.

Why does Firefox error Hmm we’re having trouble finding that site appear?

This error message in Firefox typically indicates that the browser cannot establish a connection to the website you’re trying to access. This can happen for any of the following reasons:

  • Network connectivity issues – If there is a problem with your internet connection, such as a weak or unstable signal, your browser may not be able to reach the website.
  • DNS resolution problems – The website’s domain name system (DNS) may not be resolving properly, which can prevent your browser from connecting to the site.
  • Website server issues – If the website you’re trying to access is experiencing server issues or is temporarily down, your browser may not be able to establish a connection.
  • Browser cache or cookies issues – Sometimes, clearing the browser’s cache or cookies can help resolve connectivity issues.

Quick Tip:

Before committing to try and fix Mozilla Firefox, maybe you should consider replacing it altogether or at least using another browser until you fix it.

A great alternative is Opera One. This web browser uses the same source code as Google Chrome and Edge, namely the Chromium engine.

Opera One

Access all of the websites that you’ve ever needed without any restriction thanks to this amazingly versatile web browser

How can I fix Hmm we’re having trouble finding that site error?

1. Reset the network settings

  1. Press Windows + R to launch the Run command, enter wt in the text field, press and hold the Ctrl + Shift key, and click OK.
    hmm we're having trouble finding that site
  2. Click Yes in the UAC prompt that appears.
    Click Yes
  3. Press Ctrl + Shift + 2 to open the Command Prompt tab.Command Prompt
  4. Now paste the following commands one at a time and hit Enter after each:
    ipconfig /release ipconfig /renew ipconfig /flushdns

Once done, restart the computer for the changes to effect and check if the Hmm. We’re having trouble finding that site. Firefox error is fixed.

2. Run the dedicated Troubleshooter:

  1. Press Windows + I to open the Settings app, and click on Troubleshoot on the right.Troubleshoot to fix hmm. we're having trouble finding that site. firefox error
  2. Click on Other troubleshooters.Other troubleshooters
  3. Locate the Internet Connections troubleshooter and click the Run button next to it.Run
  4. Follow the on-screen instructions to complete the process.

Connection issues are always difficult to deal with due to a variety of possible reasons why the network is down. Maybe it’s on your side, or maybe it is the ISP. So, it’s best to let the dedicated troubleshooter do all the hard work.

3. Clear Firefox’s cache

  1. Press Ctrl + Shift + Delete to open the Clear browsing data dialog box.
  2. Select Everything under the Time range to clear the dropdown menu.Everything
  3. Make sure to check all the options here, and then click on OK.Clear data to fix hmm. we're having trouble finding that site. firefox error

Firefox, like any other browser, collects a lot of cached data. Besides the browsing history, it’ll collect cookies that store the website data.

The intention here is to speed up your surfing experience, but cookies can, when pilled up, cause issues within the browser. We recommend clearing all browser-stored files and trying to connect again.

Just don’t forget to back up your passwords, as this procedure will delete those, too.

4. Use the Troubleshoot Mode to identify issues

4.1 Enable Troubleshooting mode

  1. Open Firefox, click on the hamburger menu and select Help.Help
  2. Next, click on Troubleshoot Mode.Troubleshoot mode
  3. Click Restart in the confirmation prompt.Restart to fix hmm. we're having trouble finding that site. firefox error

Firefox will now launch with the extensions and other customized items disabled. Now check if you can open the websites that were inaccessible before. If that’s the case, one of the disabled items likely caused the issue. So, we will now start disabling the extensions.

Before you proceed, close the Troubleshoot Mode window and launch Firefox normally.

4.2 Disable or remove extensions

  1. Press Ctrl + Shift + A to open the Add-ons page.
  2. Select Extensions from the left.Extensions
  3. Turn off the toggle to disable the extension.Disable to fix hmm. we're having trouble finding that site. firefox error
  4. Disable the extensions one at a time, restart the browser after each, and check if the problem is fixed. Once the problem is eliminated, the extension last disabled was causing it.
  5. Click on the ellipsis next to it, and select Remove.Remove to fix hmm. we're having trouble finding that site. firefox error
  6. Again, click Remove in the confirmation prompt.
    Remove

If nothing else worked yet to fix the Hmm. We’re having trouble finding that site. Firefox error, disabling the add-ons might help. This especially applies to proxy/VPN extensions that hide your IP address and replace it with the public one.

They are only browser-based; in my experience, free options never worked for me. They either have a low data limit or slow down the bandwidth substantially.

Paid solutions are much better but still fall short compared to VPNs.

5. Disable IPv6, Proxy, and DNS prefetching

  1. Open Firefox, paste the following path in the address bar, and hit Enter:
    about:config
  2. Click on Accept the Risk and Continue to proceed.Accept to fix hmm. we're having trouble finding that site. firefox error
  3. Enter network.dns.disableIPv6 in the search bar, and use the toggle on the right to set it to false. to disable IPv6.disable ipv6 to fix hmm. we're having trouble finding that site. firefox error
  4. To disable the DNS Prefetch option, paste network.dns.disablePrefetch in the search bar and click on the toggle to set it to true.Set true
  5. To disable Proxy, paste the following path in Firefox’s address bar and hit Enter:
    about:preferences
  6. Scroll to the bottom and click on the Settings button under Network Settings.Settings
  7. Select No proxy and click OK to confirm the changes.No proxy
  8. Restart Firefox for the changes to come into effect.

Mozilla Firefox works with IPv6 rather than with IPv4. If you’re solely sticking with the IPv4 protocol, we recommend disabling the IPv6 in Mozilla Firefox.

This should avoid further issues, and the abovementioned error should be addressed. In addition, if you don’t use the general Proxy server settings, we suggest disabling this option.

And finally, disable the DNS Prefetching. This feature allows Firefox to load uncached sites faster.

6. Reinstall Mozilla

  1. Press Windows + R to launch Run, enter appwiz.cpl in the text field, and click OK.hmm we're having trouble finding that site
  2. Select Mozilla Firefox from the programs listed here, and click Uninstall.hmm we're having trouble finding that site
  3. Follow the on-screen instructions to complete the process, and once done, restart the computer.
  4. Now, download Mozilla Firefox from the official website and install it.

A better way to uninstall Mozilla Firefox is if you use a dedicated third-party uninstaller since it will eliminate the program itself and any residual files that it may otherwise leave behind.

We recommend picking one of the best uninstaller software because they are proven completely safe. They affect nothing else on your PC besides the apps you want to remove.

On top of that, most worthwhile uninstallers come with additional optimization features that help your PC run smoother. They are easy to use and will eliminate possible errors when reinstalling.

That should do it! In case you’re still encountering the Hmm. We’re having trouble finding that site. Firefox error, we recommend sending a ticket to Mozilla support.

On that note, don’t forget to share your questions or alternative solutions with our readers and us in the comments section below.

Draftkings Network Error Code 5-0-2-503: 5 Ways to Fix

Fortunately, you can easily fix most issues with the DraftKings application on your own without any problems. Apart from the DraftKings error code 5-0-2-503, most of the other issues are majorly technical and can be solved similarly as discussed in this article.

Before going through the solutions, head over to the DraftKings service status page and see if the servers are down or under maintenance.

For instance, on 04.23.2024, DraftKings servers were in a Planned Maintenance status so if you’re trying to reach the services, you will receive the DraftKings error code 5-0-2-503.

How do I fix the DraftKings error code 5-0-2-503?

1. Check your Internet connection

draftkings network error - internet connection
  1. Launch a browser on your device.
  2. Visit another website to ensure that there is a connection.
  3. Try to use a WiFi network instead of a cellular network connection.

2. Check the State/Country you are accessing DraftKings from

draftkings network error - states supported
  1. Launch your device menu and tap on Settings.
  2. Select location from the menu.
  3. Tap to enable location. DraftKings is only legal in the following states; AZ, CO, CT, IL, IN, IA, LA, MI, NH, NJ, NY, PA, TN, VA, WV, and WY. It is also legal in Canada and other select jurisdictions.

3. Use the latest version of the DraftKings application

  1. Visit the Google Play Store for Android users or the iTunes app store for iOS users.
  2. Search the DraftKings Sportsbook & Casino to see if there is an update.
  3. If there is one, update it.

4. Uninstall and reinstall the DraftKings application

  1. Depending on your device, tap and hold the DraftKings application.
  2. Select uninstall and wait for a few seconds for the app to be uninstalled.
  3. Restart your device.
  4. Visit Google Play Store for Android or iTunes App Store for iOS.
  5. On the search bar, type DraftKings and start the installation process.

5. Ensure that your account is active

  1. Launch the DraftKings application and visit the account settings.
  2. Check if your account is inactive, closed, or maybe pending closure after you or someone else made the request.
  3. Contact customer support to restore your account.

What makes DraftKings better than other applications?

Anyone who knows a thing or two about betting or gambling in the United States of America has most likely heard about DraftKings. This is because it is the leading application in the country in sports and online gambling. 

Using the application, new customers gain access to generous welcome casino bonuses and other offers. All players are offered regular promotions to add value to their DraftKings experience. 

There is also an exclusive VIP club with a host of games, promotions, and offers. DraftKings is among the few approved gambling applications in the United States. However, the company faces stiff competition from other operators such as PointsBet and Caesars Sportsbook. 

What can I do when the DraftKings application is slow?

No one likes slow applications. Sometimes, the DraftKings applications might be extremely slow to a point where you cannot place any bets. There are many reasons for this, including the DraftKings network error, and others that might be coming from your end or from the application’s end.

For instance, the application might be slow during big games when a large percentage of the app’s users place bets at the same time. When this happens, you can wait for a few minutes for the traffic to reduce. 
Another common reason might be a poor internet connection. Always make sure that you are using a stable internet connection. Finally, it is always advisable to use the latest version of the application.

If you still have questions or suggestions, feel free to use the comments section below and let us know about them.

4 Ways to Fix uBlock Origin When it’s Not Working on Firefox

Many Firefox users have been reporting an issue where the uBlock Origin extension is not working and not blocking ads anymore.

This means that it does not block the ad pop-ups on any website defeating the entire purpose of having an ad-blocker.

However, if you are looking for the best browsers with built-in ad-blockers, we have a nice selection for you.

Fortunately, we have a few workarounds, but before we delve into them, here’s why your uBlock Origin extension may not be working.

Why is uBlock Origin not working?

Some of the reasons why the uBlock Origin extension is not working include:

  • Outdated Firefox browser
  • Interference by another extension
  • Connection problems by IPV6
  • Accumulated browser cache
  • Extension requires update
  • Change in the browser configuration

So, if the uBlock Origin extension is not working on Firefox or Chrome, you can try the below methods to fix the issue.

What can I do if uBlock origin doesn’t work on Firefox?

1. Turn off IPV6 in Firefox

  1. Open Firefox and navigate to the below address: about:config
  2. You will see a warning page. Here, click on Accept the Risk and Continue to proceed.
    Accept the risk and continue
  3. In the Search field, type network.dns.disableIPv6.
  4. Now, go to the result and click on the Toggle Button to network.dns.disableIPv6 to change its value to True.
    change preference value to true

Since Firefox automatically supports IPv6, this may lead to network problems, and hence, disabling it may help you fix the uBlock Origin not working issue.

For YouTube-specific fixes, follow our dedicated guide on uBlock Origin not working on YouTube for steps tailored to YouTube’s anti-adblock changes.

Now, restart Firefox and check if the uBlock Origin extension is working properly.

Whether the uBlock Origin is not working on Firefox for YouTube, Twitch, or any other similar websites, this method is applicable for all.

2. Clear the browser cookies and cache

  1. Launch Firefox and click on three lines on the top right and click on Settings.
    Firefox settings
  2. On the Settings page, click on Privacy & Security on the left.
    firefox Privacy & Security
  3. Now, on the right, scroll down and under Cookies and Site Data, press Clear Data.
    firefox Cookies and Site Data
  4. Next, in the Clear Data window, select both Cookies and Site Data, and Cached Web Content, and press Clear.
    firefox clear data
  5. In the prompt, press Clear Now again to confirm.
    firefox Clear Now

Now, restart your browser and the uBlock Origin extension should be working fine now.

To clear cookies and cache for other browsers also on Windows 11, you can refer to our detailed post here.

3. Reset uBlock Origin

  1. Open your browser, and click on the three gear icon in the menu to open the dashboard.
    unblock origin not working in firefox
  2. In the dashboard, under the Settings tab, scroll down to the bottom.
  3. Here, click on Back up to file and then click on Restore default settings.
    reset settings for ublock origin

This will help you create a backup for your saved settings and reset the extension.

So, if you are facing the issue where uBlock Origin is not working on Chrome or other browsers, this method can be helpful.

4. Try another browser

If you are having issues with uBlock Origin on Chrome or Firefox, you can also try the Opera One browser.

Although Opera One comes with a built-in ad blocker, uBlock Origin works seamlessly with the browser.

Best of all, it can also read and create filters from host files. So, while the extension blocks the annoying ads, you can do more on the web with a fast and secure browser.

Does uBlock Origin work on Firefox?

Yes, uBlock Origin works pretty well with the Firefox browser, however, it makes sure that the extension is updated to its latest version.

Here’s how you can check for updates for the extensions.

  1. Launch Firefox, click on the three lines, and select Add-ons and Themes from the list.
    firefox add ons and themes
  2. On the Add-ons Manager page, go to the uBlock Origin extension.
  3. Here, click on the three dots icon next to it and click on Manage.
    ublock origin not working on firefox
  4. On the next screen, click on the gear icon on the right and click on Check for updates.
  5. Firefox will update the add-on if the latest version is available.

You can also quickly clear the browser cache in Windows 11 by following the methods in our post since it’s one of the reasons why uBlock Origin may stop working.

Alternatively, you can also install the Ublock Origin developer’s build from Github, based on the browser you are using. This will help you fix the issue.

Besides, you can also check for any latest update for Firefox or disable any other extension that may be causing the uBlock Origin to malfunction.

But if the uBlock origin is specifically not blocking Twitch ads, you can refer to our detailed guide for further help.

For more queries on browser extensions, you can let us know in the comments box below.

7 Ways to fix Voicemod when the Login is not Working

Are you having problems with Voicemod login and looking for solutions? If so, you’ve come to the right place.

Because this guide will show you the effective solutions that have helped multiple users fix the login not working problem with Voicemod.

Voicemod is a real-time voice changer for Windows gamers and content creators, mainly used with popular communication platforms such as Zoom, Discord, Skype, ASMR, VR Chat, TeamSpeak, etc.

It comes with built-in voice filters, which you can apply and change your voice in real-time as you speak with your friends. This is a nice app to add some fun to your streams.

Well, users who are facing issues with Voicemod not recognizing their microphone, can check out this guide and get their issue resolved.

Now there are some users that have reported that when they try to log in, often the Voicemod app continues to show Almost there! We’re just verifying your social account. Once complete, we’ll take you back to the Voicemod app message.

In such a case, you can apply the solutions mentioned in this guide, and hopefully, get the issue resolved.

What are some useful tips to sound like a pro in Voicemod?

While using voice filters will help you change your voice in real-time and use it on various communication platforms, there are a few tips that you can make use of to sound more professional.

Moreover, in order to sound professional, you do not require any professional setup. Using the Voicemod application, you can do that simply by tweaking a few settings.

By professional, we do not mean you will actually sound like you are in a professional setting, but it will help you negate the unwanted sounds and distortions that may creep up while you communicate using Voicemod.

Here are the settings that you need to tweak to sound like a pro in Voicemod.

  1. Open Voicemod.
  2. Select the Clean option from the Voicebox tab.
  3. Tweak the Bass, Mid, Treble, Mix, and Voice volume as shown in the image.
    • Mix here lets you adjust how much you would like to mix your voice with the sound effect.
    • Voice volume lets you adjust the output level of your voice.
  4. Click on the speaker icon at the bottom right corner next to the mic icon.
  5. Turn on the Reduce background noise toggle.
  6. Lower the level of the background noise by moving the slider to the left and adjusting it accordingly.

How can I fix the Voicemod login not working issue?

1. Restart PC

Start off by restarting your PC. Restarting will load all the system files and files important for Voicemod back from scratch, which might have failed to load during the previous session.

Restarting also removes the temporary files that may be in conflict with the smooth functioning of Voicemod. If this doesn’t help, check the next method.

2. Set a default browser

  1. Open Settings menu by pressing Win + I buttons.
  2. Click on Apps from the left pane.voicemod login not working
  3. Select Default apps from the right side.voicemod login not working
  4. In the search bar, type your browser’s name example, Google Chrome and press Enter.
  5. Hit the Set default button at the top to make Chrome your default browser.voicemod login not working

This method is helpful when you are trying to log in to Voicemod but the browser is not opening. To fix this, you need to set any web browser installed on your PC as your default browser to complete the verification and log in process.

If setting a browser, i.e., Chrome, does not work, you can try setting a different web browser as default and check if this fixes the Voicemod login not working problem.

3. Unblock Voicemod in Windows Firewall

  1. Open the Start menu.
  2. Search for Control Panel and open it.
  3. Click on Windows Defender Firewall.
  4. From the left side, click on Allow an app or feature through Windows Defender Firewall.
  5. Click on Change Settings button.
  6. Scroll down and locate Voicemod. In case Voicemod is not listed, you can click on Allow another program… button and add Voicemod from the list.
  7. Check both the Private and Public boxes for Voicemod.
  8. Click OK.

4. Clear browser cache

  1. Open Google Chrome.
  2. Click on the 3-dot menu button.
  3. Select Settings.chrome settings
  4. Click on Privacy, and Security.
  5. Select Clear browsing data on the right side.clear-browsing-data-metamask-not-working
  6. Check the boxes next to Cached images and files and Cookies and other site data.
  7. Click on the Clear data button.

In any case, you can utilize a faster method to clean your browsing data like cache or cookies using a renowned cleaning tool, CCleaner.

You have smart functionality that detects your browser and lets you choose to erase cookies, cache, or temporary files.

5. Use a Reddit solution

  1. Launch Voicemod.
  2. Click on Enter Voicemod.
  3. You will be asked to login or create an account using multiple options. But before logging in, fully close Voicemod, by right-clicking the app icon on the taskbar below and selecting Close all windows.
  4. Go back to the browser to login to Voicemod.
  5. Close the browser.
  6. Now open Voicemod.

This solution has been suggested by a community manager on Reddit, and probably has helped quite a few users.

6. Reinstall Voicemod

  1. Open the Start menu.
  2. Search for Control Panel and open it.
  3. In the View by option, select Large icons.
  4. Select Programs and Features.
  5. Locate Voicemod and click on it.
  6. Select Uninstall from the top.
  7. Follow the on-screen instructions and uninstall the program.
  8. Now, head to the official website of Voicemod.
  9. Download the software and install the program.
  10. Set it up as previous and check if this fixes the issue or not.

7. Write to Voicemod support

  1. Head over to this website.
  2. Select the topic of the query, enter your issue, along with your name, email address, country, etc., and expect a reply from their end for a solution.

Are there any alternatives to Voicemod?

If for some reason, you do not like Voicemod and are looking for an alternative to it, then you are in luck.

Because there is actually a couple of voice changer software that are simple to use and a good alternative to Voicemod.

➡ AV Voice Changer Software

  • Clever voice morphing algorithms
  • Batch file Morpher to select multiple audio files
  • Voice recorder/Voice editor tools
  • Connect with Skype, Twitch, or any VoIP programs
  • Modify pitch and timber with smart output controllers

⇒ Get AV Voice Changer Software

➡ Clownfish

  • It is freeware available on the internet with barebones features.
  • Clownfish voice changer supports Steam, Skype, Viber, Ventrilo, TeamSpeak, Discord, etc.
  • It features around 14 voices to choose from.
  • Clownfish comes with text to speech feature, which Voicemod doesn’t have.

⇒ Get Clownfish

➡ MorphVOX

  • MorphVOX is a paid voice changer app the subscription of which starts at $19.99.
  • It features low bandwidth and CPU usage for excellent performance.
  • You can add background noises such as war, city, nature, and workplace sounds.
  • MorphVOX Pro comes with a timbre slider that can drastically help you sound original and this feature isn’t available in Voicemod.

⇒ Get MorphVOX

There you have it from us in this guide. Let us know in the comments below which of the above methods helped you in resolving the Voicemoc login not working issue.

Posted in Fix

4 Effective Fixes for Error Code 6 on The Cycle: Frontier Game

The Cycle: Frontier is an intense survival game that has certainly piqued the interest of many gamers. The game’s developer is highly engaging, with an active audience.

But, like most game clients, The Cycle: Frontier is not free from issues. One of the current problems is the error code 6 that stops users from playing the game.

Fortunately, as we have done for other gaming errors like the unrecognized game client, we have curated the most effective fixes to solve this issue.

What is the meaning of error code 6 on The Cycle: Frontier?

According to many gamers, error code 6 on The Cycle Frontier is due to problems with the game’s server. Also, it might be due to a slow internet connection. 

However, sometimes the cause might be difficult to pinpoint, as the game’s developer hinted.

How do I get rid of error code 6 on The Cycle: Frontier?

1. Restart the game client 

While this might be an obvious and predictable fix, it can help eliminate any bug causing the error code 6 on The Cycle: Frontier.

Hence, before proceeding to the other solutions, restart the game through the Steam client and see if the error persists.

2. Check the game’s server status

Server downtime might be why you see the error code 6 on The Cycle Frontier. The Cycle used to have an official page for checking the status and other backend info, but that is no more.

However, the game still has a very active official Twitter page, providing near real-time updates.

So, you can always check the page for updates on the server situation and other reported issues. If the problem is down to the server, there is nothing you can do but wait. 

3. Check Internet Speed

  1. Open your browser and type internet speed.
    type
  2. Select a trusted website like SpeedTest.
    google page
  3. Click the GO button and you will see a live evaluation of your internet performance.
    go button

It is no secret that you need a fast and stable internet connection to play The Cycle: Frontier game. Anything short can lead to issues like the error code 6.

If your network strength is low, you might need to switch to another one to get past the error message.

4. Restart PC

restart pc frontier error code cycle 6

This fix is a universal one that you should only apply if all the above solutions fail. This is because the issue might not be with the game client but due to a glitch within your PC.

Restarting your system, in this case, will help restore normal service.

The Cycle: Frontier error code 6 is not only frustrating but can sap your gaming spirit, as it prevents you from playing the game. Thankfully, it is an issue that is solvable, as shown in this guide.

Are you facing other gaming issues like Launcher error code 15? Check our guide to solve the problem quickly.

Feel free to let us know the fix that helped restore normalcy to your game in the comments below.

3 Ways to Fix Download Failed System Busy Chrome Error

Chrome is one of the best browsers for downloading large files and surfing the web generally. It is secure and does well to flag files that are not safe for download.

However, Chrome, like other browsers, is not free from issues. One of the common download errors is the system busy problem. This issue can be due to numerous factors, from problems with the download websites to glitches in your browser.

This guide will show you how to fix the download failed system busy error on Chrome easily.

What does a failed system busy mean?

The download failed system busy error means that your browser cannot save the download to your device for some reason. Below are some of the popular causes:

  • Problem with the download file
  • Issues with the download website
  • Browser issues

Why does my download keep stopping in Chrome?

There are a series of reasons your download might be stopping in Chrome. The prime suspect is an unstable or interrupted network connection. This is usually accompanied by a network error when downloading single or multiple files on Chrome.

Another known cause is interference from antivirus software. This happens when the file you want to download is deemed dangerous to your PC.

How do I fix download system busy?

1. Retry the download

The easiest fix for the Chrome download failed system busy error is to cancel the download and try again. This is because the problem might be a network glitch or a temporary issue with the website.

So, simply reloading the page and retrying the download should help solve the issue.

2. Use the Save as option

  1. Right-click on the file you want to download.
  2. Select the Save image as… option. This will differ depending on the file you want to download.
    save as chrome download system failed busy
  3. Choose a location and change the file name if needed.
    change
  4. Click the Save button.
    save

If you are facing the Chrome download failed system busy error, a quick way to force the download is using the Save as an option.

3. Try an alternative browser

You should try another browser if you still can’t download your file after trying the fixes above. And there is no better alternative to Chrome than Opera One.

Opera One is a typical modern-day browser with stunning feathers. It is based on the same Chromium engine as Chrome, meaning you won’t lack anything in speed.

Also, it downloads files quickly without some of the common errors in most browsers. Lastly, it is one of the most secure and smart browsers due to it’s built-in VPN and AI

⇒ Get Opera One

The system busy error is one of the common download issues users face on Chrome. While the causes are many, the fixes are within a close circle, as shown.

Are you facing other issues like download failed: network error on Chrome? Then check our well-detailed guide on how to fix it.

To learn what to do when Chrome leaves partial files behind, read this guide on opening CRDOWNLOAD files in Google Chrome .

Feel free to let us know the fix that helped you solve the issue in the comments below.

Video DownloadHelper not Working in Firefox: 3 Ways to Fix it

Are you trying to use the Video DownlooadHelper extension on Firefox to download videos but it’s not working?

While the Video DownloadHelper extension works seamlessly with Windows, it may sometimes stop working completely.

But if you want to watch videos on a browser without buffering, we recommend some of the best browsers in this detailed guide.

In this post, we will highlight a few workarounds that may help you fix the Video DownloadHelper not working in the Firefox issue.

Why is DownloadHelper not working?

If your Firefox Video DownloadHelper add-on has stopped working out of nowhere, it could be due to:

  • An outdated Firefox version
  • Too much of Browser cookies, cache, and search history
  • Unsupported formats of video and copy-protected
  • No official update available for the new DownloadHelper version

The good thing is, that we have come up with a few possible ways to fix the issue when the Video DownloadHelper is not working in Firefox.

Quick Tip:

DownloadHelper may be working fine and the underlying issue is actually with your browser. Try installing it in Opera One instead. We suggest this browser because it’s very responsive.

Despite not having a dedicated DownloadHelper extension in its add-on shop, it supports all Chrome extensions. Just search for it in the Chrome web store and select Add to Opera One.

Opera One

Quickly download any video you want without slowing down your device.

What can I do if DownloadHelper doesn’t work in Firefox?

1. Update the Firefox browser

  1. Open Firefox and click on the three lines located on the upper right. Firefox menu
  2. Select Settings from the menu. firefox menu - settings
  3. On the Settings page, under General, scroll down and locate Firefox Updates.
  4. Here, you can click on Check for updates and Firefox will start looking up for any available updates.firefox - check for updates
  5. If available, it will automatically install the update.

You can now try downloading videos using the Video DownloadHelper add-on and it should work fine now.

2. Clear the browsing data

  1. Launch Firefox and click on the three parallel lines to open the menu. firefox menu
  2. Here, click on Settings. firefox menu - settings
  3. On the Settings page, click on Privacy & Security on the left. Firefox Privacy & Security
  4. Now, on the right side, scroll down, go to Cookies and Site Data and press Clear Data. Cookies and Site Data
  5. In the Clear Data prompt, select Cookies and Site Data, and Cached Web Content. Press Clear. Firefox Clear Data
  6. Now, wait till all the browsing data is cleared.

Once done, restart Firefox and check if the Video DownloadHelper is still aggregating slow or not working.

If you want to speed up the process and have more control over the data you delete/keep, use CCleaner. It scans your browser and lets you select exactly which data you want to be removed.

3. Reinstall DownloadHelper

  1. Launch Firefox and click on the three lines placed in the upper right. firefox menu
  2. Select Add-ons and themes. firefox add ons and themes
  3. Now, on the right look for Video DownloadHelper.
  4. Click on three dots next to it and click on Remove. remove Video DownloadHelper
  5. Press the Remove button again in the prompt to confirm. uninstall video downloadhelper
  6. Once removed, head over to the Firefox Add-Ons page.
  7. Here, search for Video DownloadHelper and click on the result. Video DownloadHelper
  8. Next, click on the Download file link. download video downloadhelper
  9. Click on Add in the prompt. add video downloadhelper extension
  10. Once added, it’s re-installed now.

Restart Firefox and now check if it’s working now. It can also fix the Video DownloadHelper audio out of sync issue.

How do I enable Video DownloadHelper in Firefox?

If you are trying to download YouTube videos on Firefox using the Video DownloadHelper add-on and it’s not working in Firefox, chances are, it’s not installed.

To check if it’s installed, follow the below instructions:

  1. Launch Firefox and click on the three parallel lines on the top right. click on firefox three lines
  2. Click on Add-ons and themes in the menu. firefox add ons and themes
  3. Now, in the Firefox Add-ons Manager window, check if you can find Video DownloadHelper. Video DownloadHelper add on
  4. If you can see the icon and it still does not appear on the toolbar, click on the Firefox menu (three lines) again. firefox menu
  5. Now, select More tools.firefox more tools
  6. Next, select Customize toolbar. Customize toolbar
  7. Here, from the toolbar palette, drag the DownloadHelper icon back to the toolbar. drag the DownloadHelper icon

You should now be able to access Video DownloadHelper and continue downloading online videos without any interruption.

Alternatively, you can restart the Firefox browser and your PC, or re-install the browser to check if it helps fix the issue.

Or, you can install the beta version of the Video DownloadHelper plugin to get rid of any issues.

But if you are still facing the same issue, you can use a Video DownloadHelper alternative on Firefox.

However, if you are having trouble downloading large files, here are some of the best browsers for downloading large files on PC.

For any other queries on browser extensions, do leave your message in the comments box below

4 Tips on What to Do When Naruto Online Servers are Down

Many users encounter different issues with Naruto Online when its servers are down like black screen, slow performance, lags, etc.

However, sometimes the issue could also be due to a temporary browser issue and for that, you can try refreshing the browser by pressing the Ctrl + F5 shortcut keys.

You can also refer to our detailed guide on some of the best browsers to play Flash games seamlessly.

But if refreshing the browser does not help, we will tell you what to do when the Naruto Online servers are down.

How many Naruto Online servers are there?

You can access Naruto Online and play its games via 4 main regions. U.S. East, U.S. West, Europe, and Asia/Oceania.

Each of these regions features plenty of servers that a user can connect to based on the closest location.

However, Naruto Online recommends four primary servers based on your location. You can visit their home page for the Naruto Online server list.

What can I do if Naruto Online servers are down?

1. Try another browser with a built-in VPN

  1. Launch Opera One and click on the gear icon (Settings) on the left side of the pane and click on Advanced. advanced settings in Opera
  2. Now, on the right, scroll down and expand the Advanced option. enable Opera VPN
  3. Scroll down to the VPN section, go to Enable the VPN option, and turn it on.

Once done, now, try opening Natura Online and it should work fine now.

It’s suggested to use a VPN when the network’s link is not connecting to the server and shows timed out.

In this case, you can use a browser like Opera One that comes with a built-in VPN that creates a secure connection to one of its five server locations around the world.

The VPN not only allows you to choose where to appear on the web but also offers online privacy and security while making it easier to access Naturo Online’s private servers.

Opera One

Get into your Naturo online world with this VPN browser that ensures a stable server connection.
Free Download Visit website

2. Verify your own network

  1. Press the Win + R shortcut key combination to launch the Run console.
  2. Type cmd in the search bar and hit Enter to open the Command Prompt window. open elevated command prompt by pressing Ctrl + Shift + Enter together
  3. Now, copy and paste the below command and hit Enter: ping google.compin google coommand
  4. This will help you check if there are delays in the network. Anything below 150ms means the network is working fine.

If it’s working fine, try connecting to the Naruto Online server a few times and you should be able to connect.

3. Use a VPN software

It’s possible as well to resolve server connection issues on Naruto Online using a practical VPN with the fastest server network out there.

By choosing PIA (Private Internet Access), you benefit from open-source privacy with a rich network of high-speed servers in 84 countries, plus a 10Gbps connection speed.

Hence, this VPN solution includes advanced server technology and no bandwidth limitations so you can play Naruto gameplay online without server downtimes or errors.

⇒ Get Private Internet Access

4. Turn off Windows Defender Firewall

  1. Open the Run console by pressing the Win + R keys simultaneously.
  2. In the search bar, type firewall.cpl and hit Enter.type firewall.cpl in run console
  3. Next, on the left, click on Turn Windows Defender Firewall on or off.Turn Windows Defender Firewall on or off
  4. Now, in the Customise Settings window, select Turn off Windows Defender Firewall under Private network settings.Turn Windows Defender Firewall off
  5. Repeat the same for Public network settings.Turn Windows Defender Firewall off
  6. Press OK to save the changes and exit.

We’ve shown you how to turn off the Windows Defender Firewall but if you have a third party antivirus, you should also turn off their firewall from the settings.

Now, check if you can open Naruto Online since it could be possible that Firewall was blocking the game servers. 

How do you switch servers in Naruto Online?

There is an option on the type right corner that allows you to change servers.

Each server has its own respective character account. By changing servers, you will create your own respective character account to play on.

Since each character account is respective to their servers, they cannot be moved to another server.

You can also keep a check on their Twitter handle, their Facebook page, or their official forum for an update on Naruto Online server status.

Whether you are facing any issue with Naturo Online due to an actual server issue or due to some other issue, our solutions will help you fix the issue.

If you are looking for the best VPNs to host game servers safely, we have a quick list for you in our post.

For any suggestions or questions, feel free to use the comments section below and we will get back to you.

3 Ways to Fix Naruto Online When It’s Not Loading

The Naruto Online game has been popular since its launch in 2014, however, users often experience the game not loading issue.

If you are a fan of Naruto Online, you may want to consider some of these best anime games for your Windows 10/11 PC.

Unfortunately, game lovers often report facing issues like Naruto Online not working when they try to load the game.

The good news is, that we have a couple of workarounds that may help you fix the Naruto Online not loading issue.

Can you still play Naruto online?

Yes, you can still play Naruto Online through different mediums on your browser. For example, you can play the games by:

Besides, there are still some browsers like Chrome, Firefox, or Edge that support Flash.

However, make sure that you install the latest version of the mini client and use the updated versions of the web browsers.

Below are a few troubleshooting methods that may help you fix the Naturo online when it’s not loading or working properly.

Quick Tip:

If you have trouble connecting, try opening the game using Opera GX. This gamer’s browser has an integrated free VPN option. Enable it and select a server location and try loading the game again.

Opera GX is built to support online gaming, so it should have no issues with Naruto online. You can also use its RAM and CPU limiters as well as battery saver mode to boost up performance even more.

Opera GX

Play Naruto online using a browser with dedicated features for error-free and uninterrupted gaming!

How do I fix Naruto online if it doesn’t load?

1. Clear browsing history

  1. If you are using Chrome, launch the browser and click on the three dots on the upper right. chrome three dots (more)
  2. Select More tools in the menu and then select Clear browsing data. Clear browsing data
  3. In the Clear browsing data window, click on the Advanced tab and set the Time range to All time. Chrome Clear browsing data - advanced
  4. Now, select Browsing history and press Clear data. delete browsing history

Once the browsing history is cleared, relaunch Chrome and check if Naruto Online is working.

You can follow a similar procedure for other browsers also.

2. Update the graphics driver

  1. Right-click on the Start button and select Device Manager. select Device manager from Start menu
  2. Expand Display adapters, right-click on the graphics card, and select Update driver. update graphics driver
  3. Now, in the Update Drivers window, select Search automatically for drivers. Search automatically for drivers
  4. Windows will now start detecting the latest version of the driver. If found, will automatically install the driver.

Once the drivers are updated, you should be able to open and play the Naruto Online games.

You can also refer to our detailed guide on how to update the graphics driver on your Windows 11 PC.

It is also possible to visit the manufacturer’s official website, and download and install the latest drivers to fix the Naturo Online not loading issue.

However, you can go for a better alternative that will surely help you fix this issue for Naruto gameplay.

Outbyte Driver Updater is the professional software that scans your system for outdated or missing drivers and then updates them in a short time.

So you will have your graphics driver updated automatically and regain the joy of playing Naruto online.

⇒ Get Outbyte Driver Updater

3. Verify the game integrity of the game files

  1. If you are playing the game on Steam, go to its Library. go to steam library
  2. Now, right-click on the Naruto Online game and select Properties. Click on game properties
  3. In the new window, click on Local Files on the left. Click on local files in steam
  4. Next, on the right, click on Verify integrity of game files. Verify integrity of game files
  5. Now, wait till Steam completes the game files verification.

Once completed, restart Steam and try playing the Naruto Shippuden game and it should be working now.

Why isn’t Naruto Online loading?

Your Naruto Online game may fail to load due to either of the below reasons:

  • Due to the browsing history of the web browser
  • If the graphics drivers are outdated
  • When game files are not verified
  • If the antivirus is blocking the game
  • Your location is outside the server regions
  • Due to network error

How to play Naruto Online without Flash?

You can still play Naruto Online using the latest versions of the browsers like Firefox, Chrome, or Edge, as recommended by its official website.

On mobile devices running on Android or IOS, you can play the games using the Puffin browser, since it allows you to view the websites in desktop mode.

Moreover, you can also try disabling any antivirus software on your PC because in many cases, it may be blocking Naturo Online.

Alternatively, you should also check if your network connection is up and running, or you may use a VPN (worked in my case), if you are outside the server regions.

Besides, if you want to know how to play the Naruto browser games, you can refer to our detailed guide for clarity.

But if you are still facing any issues with the Naruto Online games, you can leave a message in the comments box below.

5 Best Browsers for Skyworth TV [Web Browsing & Streaming]

Skyworth TV is one of the best TVs on the market. The Skyworth group is a company that manufactures, designs, and sells TV and other audiovisual products.

Its products are of good qualities, integrated features, and visual qualities. However, today’s article will guide you through some of the best browsers for Skyworth TV.

Also, it allows you to operate your TV system in a custom format and download browsers for your Skyworth TV.

Furthermore, we’ll look at the best browsers for Skyworth TV that you can stream with, browse the internet, and do other things.

Does Skyworth TV have Google?

Skyworth TV is Google certified, which means it is authorized to work with Google. It means users can browse and access lots of information on their TVs like movies, games, and favorite shows.

Installing Google Chrome on your TV allows you to google search. A good way of doing this is using Chromecast to connect your device with your TV and set it up with Google.

How do I update my Skyworth TV browser?

  1. Launch Skyworth smart TV, then connect to a stable Wi-Fi network.
  2. Click on the Apps tab and select Google play store.
  3. In Google Play Store, go to the available updates tab and check if there’s an update available for your Skyworth browser.
  4. Click the Update button to install it
  5. Restart your TV to sync the new updates.

How do I search Google with Skyworth TV?

  1. Download the Google Chrome APK through this page.
  2. Move the APK file to a USB drive.
  3. Insert the drive into the USB port of your Skyworth TV.
  4. On your remote, press Home and go to Apps.
  5. Select install APK, then select Chrome and press OK.
  6. Wait till the process is complete.

What browser should I use on my Skyworth TV?

Google Chrome– Best overall performance

Google Chrome is one of the best browsers for Android TVs like Skyworth. Even though it is not pre-installed on the TV, it is still one of the best recommendations as a browser for Skyworth.

Chrome is a Chromium-based browser with lots of features and customizable options. Thus, if you use Chrome on your device, you can access your bookmarks, history, and lots more.

Also, Chrome is known for its overall speed for streaming. So, it is worthy of being considered.

⇒ Get Chrome

Puffin TV browser – Packed with great features

Aside from the fact that the Puffin browser comes with features that make it the best, it is compatible with all Android TVs.

It allows you to operate your browsers with your device remote, which isn’t something most TV browsers allow.

Another amazing thing is that there is a version specially for Android TV like Skyworth. It is fast, light, and easy to navigate.

⇒ Get Puffin browser

Mozilla Firefox– Best for cross-platform access

Mozilla Firefox can work as an android TV browser, even though there is no dedicated version for it. It is fast and easy to navigate.

Firefox’s compatibility level is second to none. This browser supports all devices from Windows and macOS to Linux, iOS, and Android.

Also, it has lots of extensions that you can download to get a better internet experience.

⇒ Get Firefox

TVWeb browser – Ideal for Android users

As the name implies, the TVWeb browser is a browser that is specifically designed for Android TVs. Apart from its lightweight speed, the user interface is basic and easy to navigate.

Also, it allows you to navigate your bookmarks and add favorites. It also uses voice search to browse and is compatible with your device’s remote controller.

⇒ Get TVWeb browser

Brave – Best for privacy and security

This browser is recommended for Skyworth TV because of its privacy and security features on all devices.

It is one of the most compatible browsers for most devices. It uses voice search and allows you to bookmark your favorite websites. Another feature is that you can use Chromium extensions on it to further increase its streaming functionalities.

There are some wireless keyboards with touchpads you can use for your Android TVs like Skyworth, here are our recommendations.

Another thing you should know how to use is how to take screenshots with a Smart TV, and we have a guide on that also.

5 Ways To Bypass DoorDash’s Network Error

DoorDash is one of the most widely used applications in the United States of America. The application is used when ordering food from different restaurants across the US to any location of your choice. However, you might come across a DoorDash network error when using the app.

This can happen on any device, whether Android, iOS, or even the DoorDash website. Encountering this error does not mean that the app is not good. This is something that can happen even with the best applications. Fortunately, you can fix this problem easily without any problems.

How does DoorDash work?

DoorDash works following an on-demand logistics model where the company acts as an intermediary between prospective buyers and merchants. The buyers can make orders from their location and have the products delivered to wherever they want. 

The company was established in 2013 and currently deals with food delivery. As a technology company, they have tried as much as they can to come up with one of the best mobile applications for both Android and iOS, as well as a web-based application.

However, as discussed above, even the best tech companies face challenges with their applications from time to time. This might be caused by several issues such as the inability to log in, or an error validating basket during checkout. Luckily, they can easily be resolved for users to resume normal operations.

How do I troubleshoot the DoorDash network error?

1. Restart the DoorDash application

Android

  1. Tap the recent apps shortcut on the homepage or swipe up the homepage.recent apps from home - doordash network error
  2. Swipe right or left to locate the DoorDash application.recent apps - doordash network error
  3. Once you locate it, swipe the application up to close it.recent apps - doordash network error
  4. Go to applications and tap on the DoorDash icon to start the application.

iOS

  1. Swipe up from the bottom of the phone to open the app switcher.
  2. While swiping right or left to locate the DoorDash application.
  3. Swipe up on the DoorDash app to close it.
  4. Launch the DoorDash application again.

2. Check your internet connection

check connection - doordash network error
  1. Check if you have a strong cellular signal at the top or rather the status bar of your phone.
  2. Launch your browser and visit another website to see if your internet works.check your browser
  3. If the above options do not work, consider changing from your cellular connection to a Wi-Fi connection.

3. Clear data and cache

Mobile application

  1. Launch the Settings app on your phone and navigate to Apps or Applications.apps on settings
  2. If you do not see the DoorDash app, click on See all apps.
  3. Select the DoorDash application.doordash application
  4. Tap on Storage and cache and then tap on Clear cache.clear cache

Chrome browser

  1. Click on the three dots at the top right of the Chrome browser.chrome settings
  2. Navigate to settings.
  3. Click on Privacy and security on the left-hand side panel.privacy and settings
  4. Select Clear browsing data.
  5. Make sure that Cookies and other site data and Cached images and files are selected.
  6. Click on the Clear Data button at the bottom. clear browsing data
  7. Clear cache on other browsers as well if not using Chrome.

4. Restart your phone

  1. Long press the power button of your phone.
  2. Choose the restart option.restart phone

5. Check if DoorDash is down

doordash network error
  1. Visit the DoorDash network status page at Downdetector to see if the service is down.
  2. You can also launch a browser and search “Is DoorDash down?”

What else can I do if the DoorDash application does not work at all?

Following the solutions discussed above, you should be able to troubleshoot the DoorDash network error. The application should actually start working with just one of the solutions. However, what can you do when you still have not found a solution?
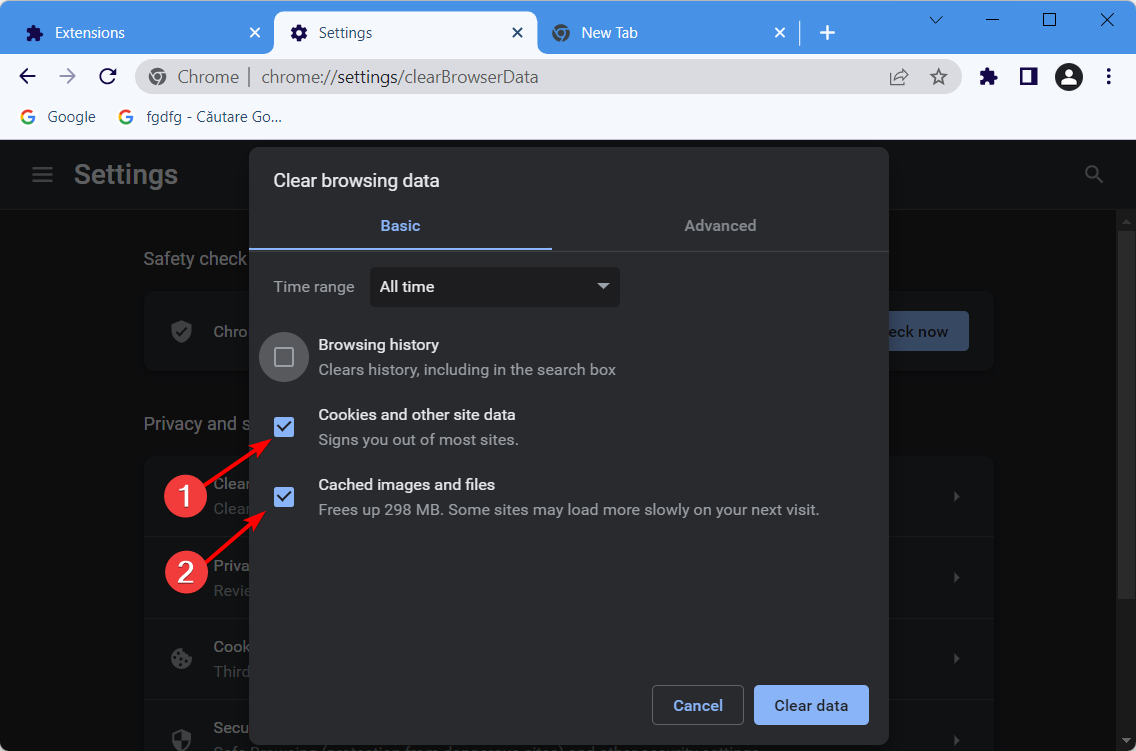
In that case, it means that the problem is not with DoorDash or your internet connection but with your phone.

This isn’t the only error you can encounter, and many reported DoorDash Payment error, but we have a special guide that addresses that one.

To solve the Doordash network error, try getting another device and accessing DoorDash with it. This can be another phone where you can install the app or maybe a browser where you can order food via the web-based application.

5 Best Browsers For Peacock TV [Hassle-Free]

NBCUniversal’s Peacock TV is one of the surprising streaming service platforms that created a breakthrough in the market today. To watch content on Peacock, you have two options: you can either download the Peacock app or stream Peacock in a web browser.

Many argue that it’s even better and cheaper than Netflix. You can watch classic TV shows, well-loved films, sports, news, and other exciting content. Also, it launched a free streaming option that is not available from other competitors.

In this article, we will explore the best browsers which can provide you with a pleasant viewing experience.

What device does Peacock support?

NBCU’s Peacock was a service available only to Xfinity X1 and Flex Comcast customers initially, then expanded to many devices.

These devices are iOS, Apple TV, Amazon, PlayStation, Roku, and Apple TV HD. Android, including Android TV and Chromecast. Xbox One S, Xbox One X, and PS4. Vizio Smartcast etc. Peacock is available across a variety of devices.

Which browser is best for streaming?

After conducting a survey on the browser that works best for streaming, we discovered Google Chrome is the best option for streaming. Although Peacock TV supports others too, the Chrome browser outshines overall performance.

What are the best browsers for Peacock?

Google Chrome – Best overall performance

It is safe to say Chrome is the father of speedy modern browsers. This is because most of them, with very few exceptions, are based on its open-source Chromium engine.

Chrome offers a minimalistic interface that is suited for the Peacock TV. Also, it is a browser for all devices as it is available on platforms like macOS, Windows, Linux, iOS, Android, and, of course, Chrome OS.

It has the largest extensions store of all browsers, which can be used to extend its functionality as a browser for Peacock TV streaming.

⇒ Get Chrome

Microsoft Edge – Ideal browser for Windows

Microsoft Edge is the built-in browser for Windows PCs, and it’s no surprise it is the best browser for Windows devices. It is a wholly different enterprise from its predecessor – Internet Explorer.

Since its move to the Chromium engine, it has been consistently ranked amongst the fastest browsers. Since speed is integral to enjoying streaming, this browser is also considered suitable for Peacock TV.

⇒ Get Microsoft Edge

Mozilla Firefox – Best for cross-platform access

Firefox has been around for a long time and was one of the most popular browsers before Chrome and others took over. It is not surprising that it is browser compatible with all devices from Windows and macOS to Linux, iOS, and Android.

Firefox has always been fast but has taken things to another level since its Quantum update. This update has elevated it to an incredible speed level, making it a recommendable browser for streaming Peacock TV.

⇒ Get Firefox

Safari – Best for macOS and iOS

Safari is a browser that’s been optimized for Mac and iOS devices. It has a simple design that you can customize to some degree.

Thanks to the unstacked design, it is one of the fastest browsers currently available for streaming. What’s more, it is compatible with Chrome extensions. This allows you to extend its features as you wish.

Lastly, Safari is only available on Apple devices. It used to be a thing on Windows, but it has been stopped officially since 2012.

Other great features:

  • Offers a privacy report
  • Has a tab preview feature
  • Works with extensions

⇒ Get Safari

Brave – Security Juggernaut

If you are looking for a browser to stream Peacock TV with assured privacy and security on all devices, the Brave web browser has everything you want. It has an app with a simple yet well-stocked interface.

Also, it has other security features like fingerprint protection and upgrading website connections to HTTPS. Lastly, it uses low system resources.

Other features:

  • Fast and secure
  • Brave rewards for earning tokens
  • Tab search

⇒ Get Brave

Why can’t I get Peacock on my TV?

This is probably because you are yet to connect your casting device to your TV. Verify your Google Home app is installed on your mobile device. The Google Home app is available in the iTunes Store and Google Play Store.

Make sure your Chromecast device is connected to your TV. Make sure the Chromecast device and your streaming device are both connected to the same Wi-Fi network.

How do I install Peacock on my smart TV?

To get Peacock TV on any one of these smart televisions, simply go into your TV’s App Store, then search for and download the app.

The best browsers for all devices should offer a wide range of compatibility across major platforms. We have shown a list of including individual browsers and how they fit your Peacock TV.

Do you want a more streamlined list like the best lightweight browsers for Windows PC? Then, do not hesitate to check our guide for the top options to select.

Hulu is not Working in Firefox: 3 Ways to Quickly Fix it

Mozilla Firefox has many features that make it a great choice for streaming your favorite movies and TV shows on Hulu. However, users have reported issues with Hulu not working in Firefox. Keep reading to find a quick solution to this problem.

Users also report Hulu acting up on smart TVs and Safari. If you’re having issues with Hulu not working on Chrome, we have solutions for that as well.

Why won’t Hulu play on my browser?

Hulu may not play in browsers that are outdated or not supported. The streaming platform supports the latest versions of Google Chrome, Firefox, Safari, and Microsoft Edge. Hulu also may not work properly with ad and cookie blockers.

Hulu compatible browsers.

Does Hulu not work on Firefox?

Firefox is one of the compatible browsers for Hulu and should work. If you are running into issues with Hulu not working in Firefox, make sure any ad blockers are disabled and you have HTML5 enabled.

Quick Tip:

Opera One is a Chromium-based browser that uses the same engine code base and supports HTML5, JavaScript, and Cookies for Hulu.

With the User-Agent Switcher add-on for Opera One, you may shapeshift it into any other accessible choice in the list, including Firefox.

Opera One

Streaming Hulu on Opera One can be the same as on Firefox, only shape-shifted with the add-on.

How do I fix Hulu if it doesn’t work in Firefox?

1. Check for updates

  1. In Firefox, click on the three lines in the top right corner and select Settings. Open Firefox settings.
  2. In General, scroll until you see Firefox Updates.
  3. Click on Check for updates. Check for updates Firefox.
  4. Perform any required updates.

To avoid any problems or bugs while browsing in Firefox, make sure you keep it up to date. It’s recommended that you allow Firefox to automatically install updates so you don’t have to worry about it.

2. Clear browser data

  1. In Firefox, click on the three lines in the top right corner and select Settings. Open Firefox settings.
  2. Go to Privacy & Security and under Cookies and Site Data select Clear Data. Firefox clear browser data if Hulu not working.
  3. Check the box next to Cookies and Site Data and the box by Cached Web Content. Check the boxes.
  4. Click Clear.

If your cache and site data are backed-up it can cause issues with sites like Hulu. A good indicator of when it’s time to clear the cache is when Hulu won’t load the homepage.

3. Disable extensions

  1. In Firefox, click on the three lines in the top right corner and select Add-ons and themes. Firefox addons and themes.
  2. Go to Extensions and go through and disable your installed add-ons. Disable addons if Hulu is not working in Firefox.
  3. Restart your browser.

Usually, ad blocker extensions can cause issues with streaming websites, but try disabling all your installed add-ons to see if it solves the issue. Because extensions are from third-party companies, they may not be updated or can be faulty leading to problems arising in your browser.

How do I fix compatibility issues in Firefox?

  1. Click on the Start menu and search for Firefox.
  2. Right-click and select Open file location. right-click firefox and open file location.
  3. Select Firefox and right-click then click Properties. Firefox properties.
  4. Under Compatibility, select Run compatibility troubleshooter. Run compatibility troubleshooter.

If you’re having compatibility issues in Firefox, running the troubleshooter will reveal any problems that need to be fixed. Also, make sure that Compatibility mode isn’t turned on to run for Windows 8.

We hope one of the above solutions helped fix any issues with Hulu not working in Firefox. Be sure to let us know which step worked for you or if you have a solution that is not listed above.

Microsoft news recap: Activision acquisition to face UK anti-competitive regulator, Bing Maps gains new features, and more

Microsoft news recap is a weekly feature highlighting the top Microsoft news stories of the past week. Sit back, grab some coffee, and enjoy the read!

Xbox Series X|S has now sold 250,000 units in Japan

Following off the back of recent positive weekly sales figures in Japan, Xbox Series X|S have now crossed over 250,000 unit sales in Japan, continuing to show strong performance in the Japanese market.

Microsoft faces UK anti-competitive regulators over Activision acquisition

The UK’s Competition and Markets Authority has announced that it has launched an investigation into Microsoft’s acquisition of Activision, adding a possible hurdle to Microsoft completing on the acquisition. The aim of the investigation is to determine “whether the deal may harm competition – through higher prices, lower quality, or reduced choice.”

UK CMA Office Logo

Bing Maps can now help you calculate distance, gas prices, and find parking for your road trips

New features have arrived on Bing Maps this week, including the ability to calculate the distance between locations, see gas prices, as well as find parking spots.

bing maps

That’s it for this week. We will be back next week with more Microsoft news.

3 Simple Ways To Fix The PS5 Redirect Error

PS5 is a stunning console with many endearing features. With it, you can play games with mind-blowing graphics and connect to the community of gamers, as you can use Discord on PS5 without a PC.

It is no wonder people are queuing to buy the console that is in limited supply. Unfortunately, users encounter the redirect error that ultimately stops them from accessing the purchase site.

This guide will show you how to solve the PS5 redirect error and get through to buy the console.

Why do I keep getting the redirect error?

The redirect error occurs when trying to purchase a PS5. With the high number of buyer requests, you will need to be assigned a queue number. 

You will eventually be redirected to another page where you must click a link to buy. This is where error codes like rejected or used queue numbers pop up.

These error messages might be due to an unsupported browser or corrupt cookies. Also, the cause might be hard to pinpoint, as Sony has yet to comment on the issue.

How do I fix the PS5 redirect error?

1. Clear browser cookies

  1. Launch your browser and click the menu button (three vertical dots) at the top right corner.
  2. Select the Settings option.
    settings ps5 redirect error
  3. Choose Privacy and security on the left pane.
    security
  4. Click Clear browsing data.
    clear browsing
  5. Click the dropdown beside the Time range and select All Time.
    time range ps5 redirect error
  6. Now, check the box for Cookies and other site data.
  7. Click the Clear data button.
    clear button

Corrupt cookies cause many problems and could be why the PS5 redirect error is showing. After clearing the cookies, relaunch your browser and visit the site again.

2. Use a supported browser

Before buying a PS5 console, you must have a PSN account and log in to the Playstation Direct website. However, only the browsers below are supported for the website:

  • Google Chrome version 71 and above
  • Firefox version 64 and above
  • Safari version 11 and above
  • Microsoft Edge version 43 and above
  • Any native mobile browser

Hence, if you log in on any other browser, it might be why you keep facing the PS5 redirect error. So, you will need to change browsers in this case.
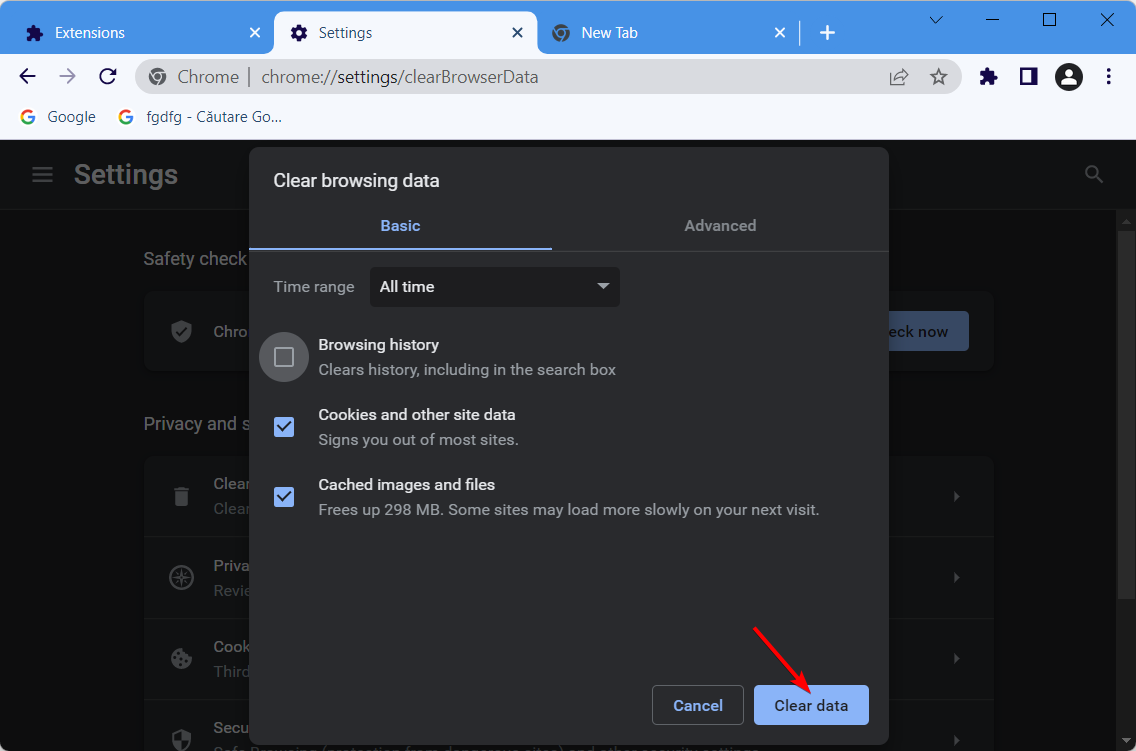
3. Contact Sony for help

If all the fixes above prove futile, the only option is to visit the official Playstation customer support page for help. You will need to prepare all the right info, such as the type of device you are using, the browsers, and where you are trying to buy the PS5.

Lastly, note that Sony has limited the purchase of PS5 to one per household. This is because of the high demand. So, don’t bother contacting customer service if you already have one console at home.

The PS5 redirect error can be exasperating, as the cause can sometimes be impossible to pinpoint. However, you should be able to fix the issue by the time you exhaust the solutions in this guide.

Do you want to know how to update your PS5 controller’s firmware? Then check our guide to do it effortlessly.

Feel free to let us know the fix that helped you push your purchase through in the comments below.

5 Ways to Get Past your Browser Can’t Play this Video Pop Up

Many users come across an error, Your browser can’t play this video while trying to play videos on a website or video streaming site.

The glitch is more common with YouTube videos, however, it could also show up with videos on other websites, social media, or other streaming sites.

But if you are facing a problem like a video not playing on your Windows 10/11 PC, you can refer to our detailed article for quick solutions.

However, before we move on to the solutions, let’s understand what the error means.

What does it mean Your browser can’t play this video?

There are several possible reasons why your browser may fail to load videos:

  • Interference by browser extensions or add-ons
  • Too many cache and cookies
  • Outdated browser version
  • Due to network connection issues

Fortunately, we have a couple of solutions that will help you get rid of Your browser can’t play this video error and continue watching your favorite videos.

How do I fix unable to play this video?

1. Turn off Chrome’s hardware acceleration

  1. Open Chrome, type the below path in the address bar, and hit Enter: chrome://settings/system
  2. Now, go to Use hardware acceleration when available on the right. disable use hardware acceleration when available
  3. Move the toggle switch to the left to turn it off.

This will free up the GPU from being used for other tasks and can be rather used to render web pages on Chrome.

You can disable the hardware acceleration feature for other browsers also including Opera, Safari, Firefox, and Edge.

2. Check your extensions and cache & cookies

  1. Launch Chrome and click on the three dots at the top right.
  2. Select the New Incognito window option from the menu. New Incognito window
  3. Try opening the video in Incognito mode and check if it plays.

If the video plays in Incognito mode

  1. Exit the Incognito window, and open the new Chrome window (normal).
  2. Navigate to the below path in Chrome: chrome://extensions/
  3. Turn off all of your Chrome extensions.Turn of all chrome extensions
  4. Go to the video on its site and click on the Reload icon on the top left to refresh the page. Reload video website
  5. If the video plays normally, then try turning on each extension to find out which one is creating the problem.
  6. As you detect the problem extension, press Remove to delete.remove problem extension

This should help you fix Your browser can’t play this video error and play the video normally.

But if the video is still not playing, enable all your extensions, and move on to clear the browser history.

If the video does not play in Incognito mode

Clear browsing history, and cache & cookies
  1. If you are using Chrome, open the browser and click on the three dots. chrome menu
  2. Next, click on More tools in the menu and select Clear browsing data. Clear browsing data
  3. It will open the Clear browsing data window in Chrome settings.
  4. Here, click on Advanced and then select All time in the Time range field. Chrome Clear browsing data - advanced
  5. Now, select Browsing history, Cookies and other site data, and cached images files. Press Clear data. clear browsing data chrome

Now, wait till the data is removed. Once done, relaunch Chrome and you should be able to play the videos normally on the web.

This process is also applicable to other browsers including Edge, Firefox, Opera, and Safari.

3. Update the browser

  1. Open Chrome and click on the three dots located at the top right. chrome menu
  2. Click on Help and then About Google Chrome in the menu. About Google Chrome
  3. Now, wait till the browser check for any latest updates. If available, it will install the update automatically. chrome checking for updates
  4. Click on Relaunch to restart Chrome and check if the video plays normally now. relaunch chrome

If you are using any other browser, follow a similar method to install the latest update.

4. Reset browser settings

  1. If using Chrome, launch the browser and click on the three vertical dots. chrome menu
  2. From the menu, select Settings. chrome settings
  3. On the Settings screen, click on Reset and clean up on the left. chrome Reset and clean up
  4. Now, go to the right and click on Restore settings to their original defaults. Restore settings to their original defaults
  5. In the Reset settings pop up, click on Reset settings to confirm. chrome Reset settings

Once done, Chrome will restart automatically. You can now try playing the video on the web and check if the error still persists.

You can reset your browser in a similar manner if you are using anything else apart from Chrome.

5. Reset your Internet connection

  1. Shut down your PC and unplug your modem or the wireless router is a separate device.
  2. Then, wait for about one minute.
  3. Now, plug in your modem/wireless router and wait for till all the lights to stop blinking. unplug modem

Boot up your PC, go to the video on its site, and refresh the page. You should not see Your browser can’t play this video error anymore.

The host server is down, so make sure to check the service status page for information on known issues

Your browser can’t play this video Chrome

Chrome may sometimes disable any external plug-ins including JavaScript for security, hence enable the feature as below:

  1. Open the Chrome browser, and click on the three dots. chrome menu
  2. Next, click on Settings. chrome settings
  3. Now, on the Settings page, click on Privacy and security on the left. chrome -  Privacy and security
  4. Go to the right and click on Site Settings. Chrome - Site Settings
  5. On the next screen, scroll down and under Content, click on Javascript.Chrome - javascript
  6. Next, under Default behavior, select Sites can use Javascript.Sites can use Javascript

Now, refresh the website containing the video and check if it’s playing now.

Your browser can’t play this video Opera

If you notice the error Your browser can’t play this video on the Opera browser, you can fix the issue, by following the below method:

  1. Open Opera, and click on Settings (gear icon) on the left.opera settings
  2. On the browser settings page, click on Advanced on the left and select Browser. Opera settinnsg browser
  3. Now, on the right, scroll down and Reset settings, and click on Restore settings to their original defaults. opera - Restore settings to their original defaults
  4. Press Reset again in the prompt to confirm the action. Restore settings to their original defaults

Once the reset is complete, restart Opera and the video should now play normally.

Alternatively, you can also re-install the browser to check if it helps fix the issue.

Your browser can’t play this video Safari

If the video is not playing on your Safari browser, you can follow the below process:

  1. Click the Apple icon in the browser menu.
  2. Click on Force Quit Safari in the menu.force quit safari
  3. In the Force Quit Applications dialog, click on the Safari app and press Force Quit.force quit safari

Now, relaunch the Safari app and check if this helps you play the videos again on your browser.

Your browser can’t play this video Firefox

If the video won’t play in Firefox, then you can enable the Autoplay feature as explained below:

  1. Open the website in Firefox that contains the video and that’s not playing.
  2. Click on that padlock located on the left side of the URL and click on Connection secure. Firefox padlock
  3. Next, click on More Information.More Information
  4. In the Page Info dialog, select the Permissions tab.
  5. Here, locate Autoplay and deselect User Default.
  6. Now, select Allow Audio and Video.autoplay - allow audio and video

Now, restart your browser, try opening the video and you should not see the error message, Your browser can’t play this video anymore.

Alternatively, the issue could also occur if the host server is down, and in such a case, you must wait till the server is back up and running.

But if the video doesn’t play on your browser because it does not support the video format, you can try using another browser. Speaking of which, we have a whole guide dedicated to videos not playing in Opera, so be sure to check it out.

However, if your browser does not support HTML5 video, you can refer to our detailed guide for some quick fixes. On some websites you may encounter error 101104, but we have a guide that should help you fix it.

If you have any other issues with your browser, you can leave a message in the comments box below.

3 Tips on What to do When YouTube is not Working in Brave

YouTube is our go-to video streaming platform in everyday life to watch music videos, content from our favorite creators, educational stuff, and much more.

While YouTube works and supports all browsers, there are a few users that have brought to light that for them YouTube is not working in the Brave browser.

Brave browser is a well-known security-focused web browser with ad-blockers, built-in VPN, malware and phishing protection, IPFS protection, and much more. You can check out our comparison between Brave, Chrome, and Firefox browsers for an in-depth understanding.

If YouTube is not working in the Brave browser and you are looking for solutions, thankfully, this guide is the one for you.

Here, we will discuss some of the best tips you can apply to fix the issue. Let us check out the guide.

Why is YouTube not working on Brave?

YouTube not working on the Brave browser isn’t a new issue that has crept up for users but has been troubling users for quite some time.

While a simple restart has helped some users, the simple tip hasn’t worked wonders for others. So, we did careful research and found the following reasons that could possibly be triggering the issue for you on the Brave browser:

  • Your current user profile files are corrupt.
  • Host cache files are corrupt, causing conflict with websites.
  • The flush and idle sockets are choked up, and you need to clear them.

What can I do if YouTube is not working in Brave?

1. Create a new profile

  1. Launch the Brave browser.
  2. Click on the 3-horizontal line menu icon.
  3. Select Create a new profile option.
  4. In the new window, you can do the following customizations:
    • Enter your profile name or set a label such as work, student, etc.
    • Choose your profile image.
    • Pick a theme color for your profile.
    • Choose whether you would like to add your profile as a desktop shortcut or not.
  5. After you have selected everything, hit the Done button.
  6. A new Brave browser page will open with your profile loaded along with your profile theme.
  7. Now, try opening YouTube and check if this fixes the YouTube not working on the Brave browser issue or not.

2. Clear host cache

  1. Open Brave browser.
  2. In the Address bar, type or paste the below command. brave://net-internals/#dns
  3. Click the Clear host cache button.

3. Close idle sockets, and Flush socket pools

  1. Open Brave browser.
  2. In the Address bar, type or paste the below command. brave://net-internals/#sockets
  3. One by one, click on the Close idle sockets and then Flush socket pools buttons.

For several users, clearing the idle sockets and flush socket pools helped resolve the YouTube not working in Brave error.

How do you get YouTube to play in the background on the Brave browser?

  1. Launch Brave browser.
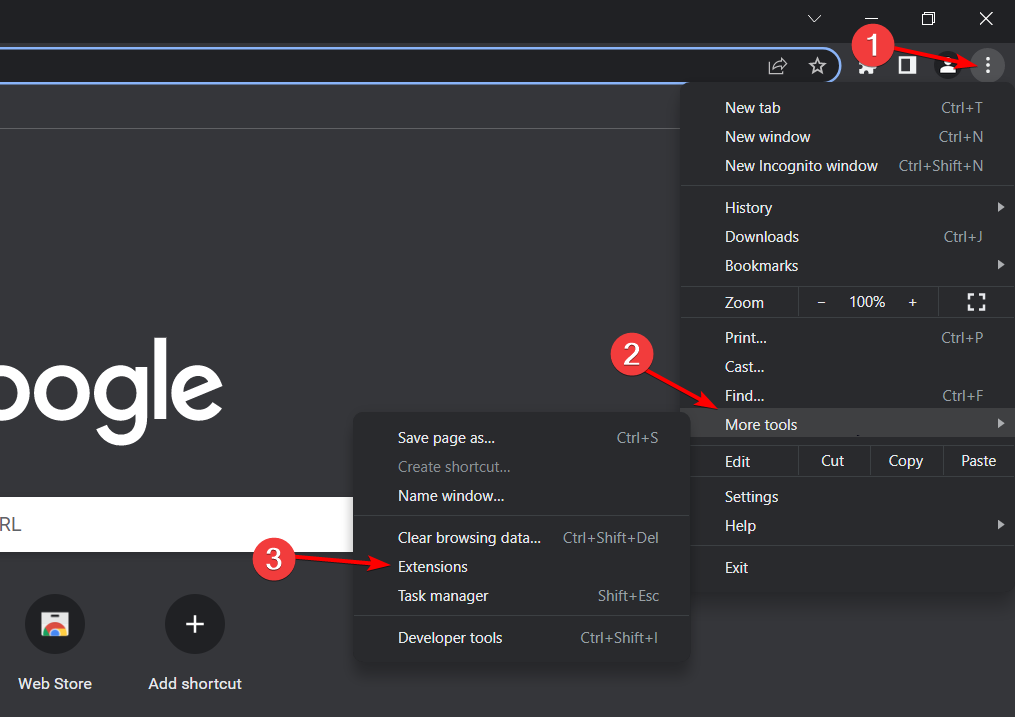
  2. Click on the 3-dot icon at the bottom toolbar.
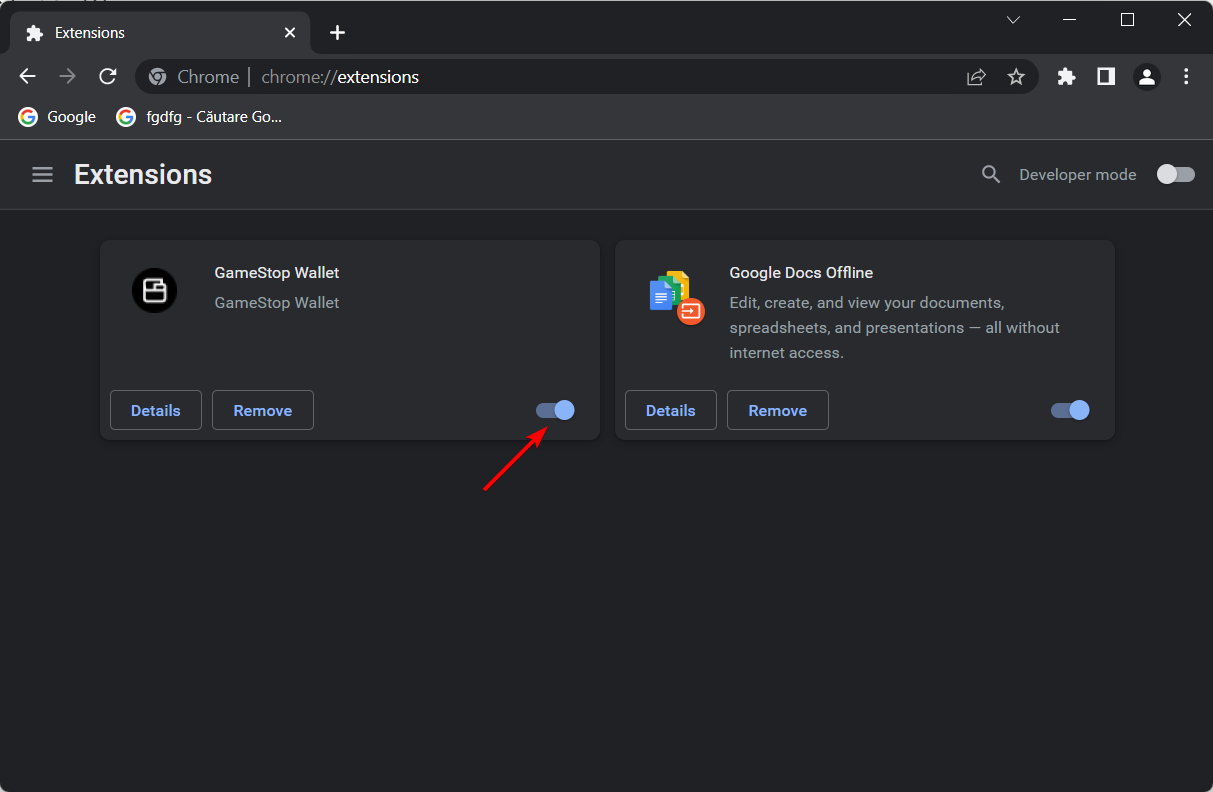
  3. Tap on Settings.
  4. Scroll down and under General, toggle on Background video playback.
  5. Tap on RELAUNCH NOW.

After this, visit the YouTube website, search for the video, and swipe back to the home screen, and you will hear the video running in the background.

There you have it from us in this guide. Hope this article helped you fix the YouTube not working in the Brave browser issue. For more solutions, don’t forget to visit our This page has been blocked by Brave guide.

In the comments section below, let us know which solution fixed the problem for you.