Pokémon Showdown is an online battle simulator that allows users to play against others from their browser. However, users have reported Pokémon Showdown not working in Safari and Chrome. Follow our solutions to solve this issue.
Why is Pokémon Showdown not working in my browser?
Pokémon Showdown could be acting up for several reasons, one of which is a poor internet connection. If you’re in an area with an unstable or public connection, it could be causing loading issues.
Another reason could be the platform you’re using. If using a browser on a mobile device, it might not be supported like the desktop version.
Quick Tip:
Open Pokémon Showdown using Opera GX. It’s a dedicated gaming browser specifically optimized to load and support long hours of gaming without interruptions.
It includes performance-oriented features like a RAM and CPU limiter, built-in integrations for Twitch and Discord, and a wide range of gaming-related installable add-ons.
Opera GX
Take your gaming to the next level with dedicated support for peak performance!
What can I do if Pokémon Showdown is not working in my browser?
1. Play it in your PC browser
Users reported having issues when playing using a browser on their mobile device, mainly using Chrome or Safari.
The game may be getting stuck in loading mode as it would when offline, even when users have a stable internet connection. Try playing from a browser on your PC to see if this fixes the issue.
If in Chrome on Windows hold down Ctrl and press F5.
In Safari on macOS press Cmd + Shift + R.
Doing this will force a full refresh and restart of the server, which may solve the issue. Remember that this does not clear the browser cache; follow the next step to see how to do that.
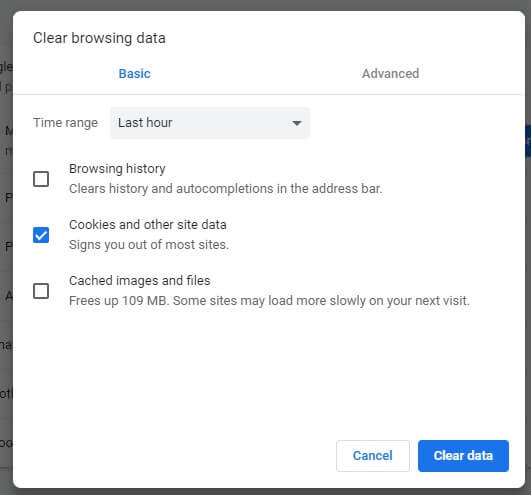
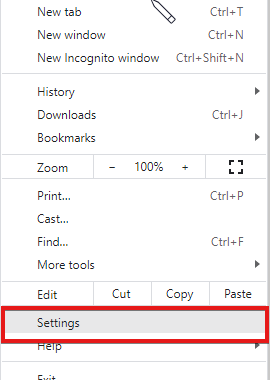
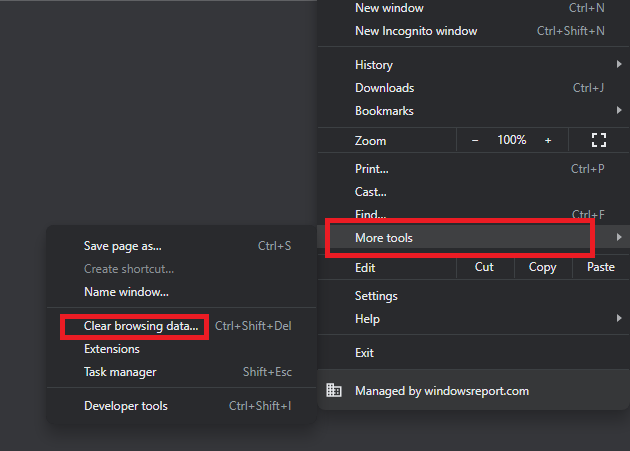
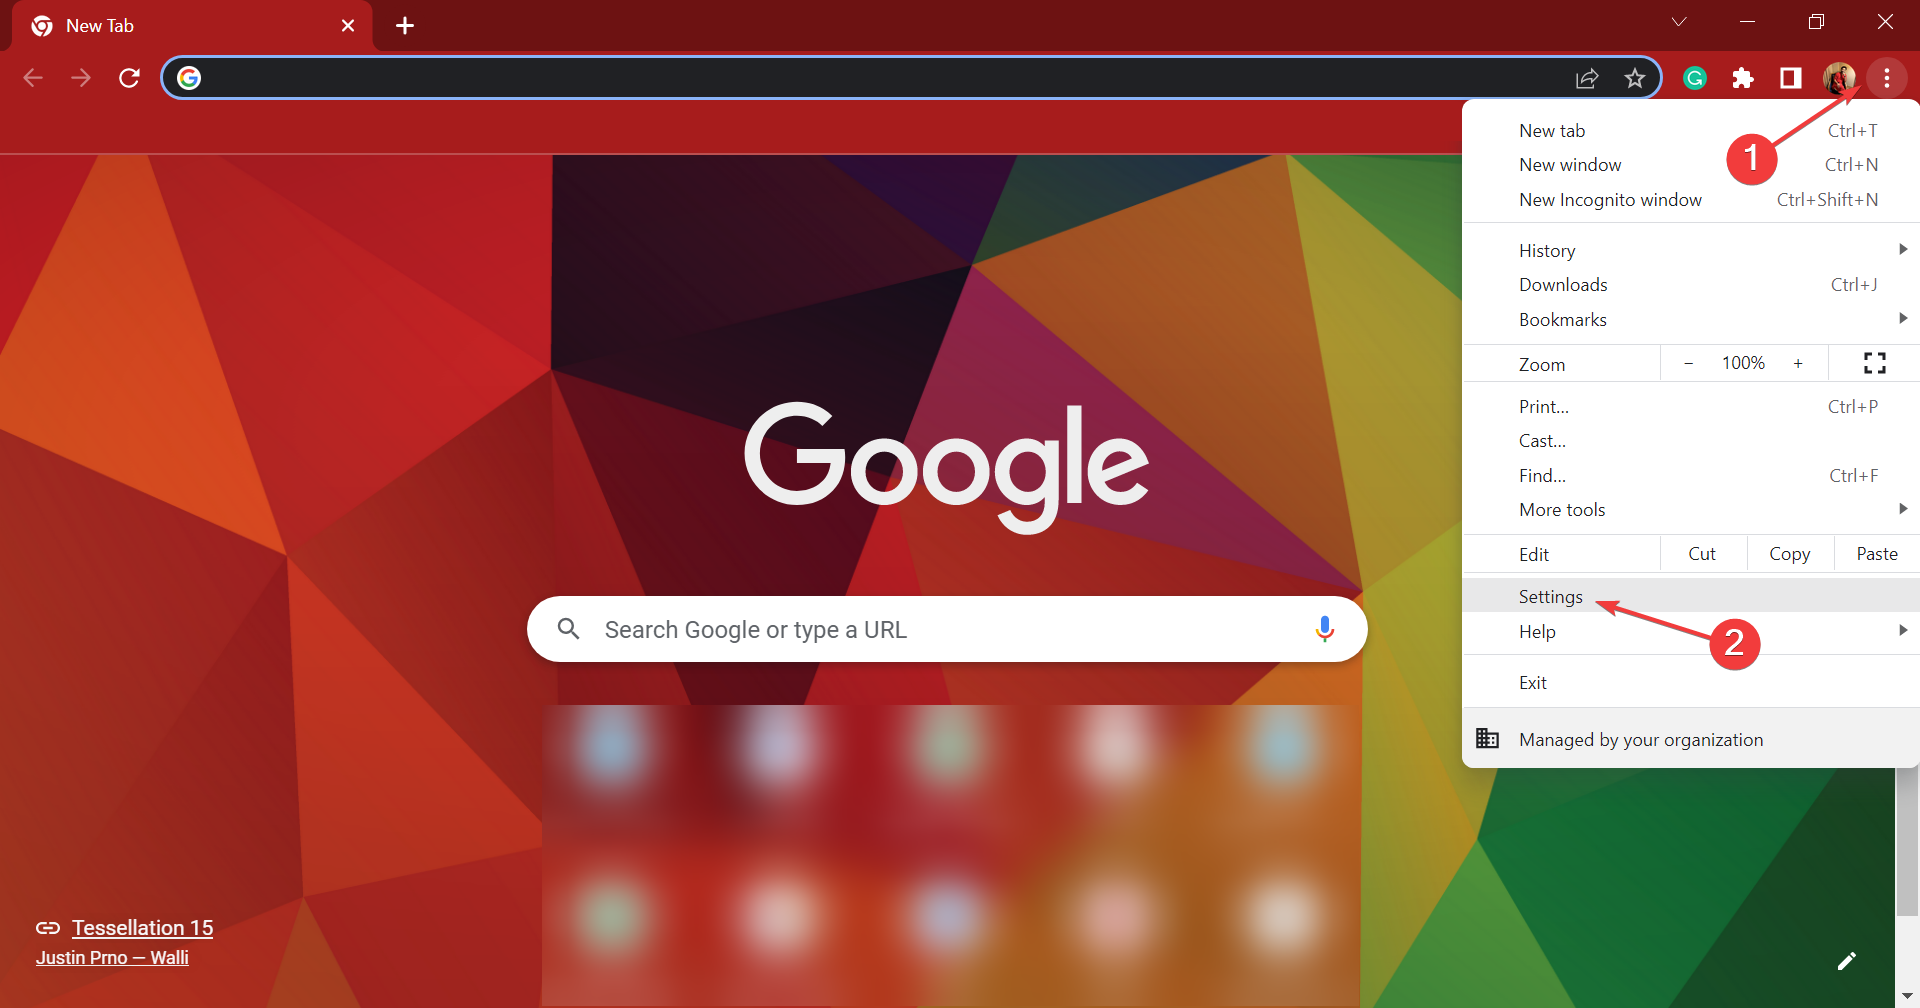
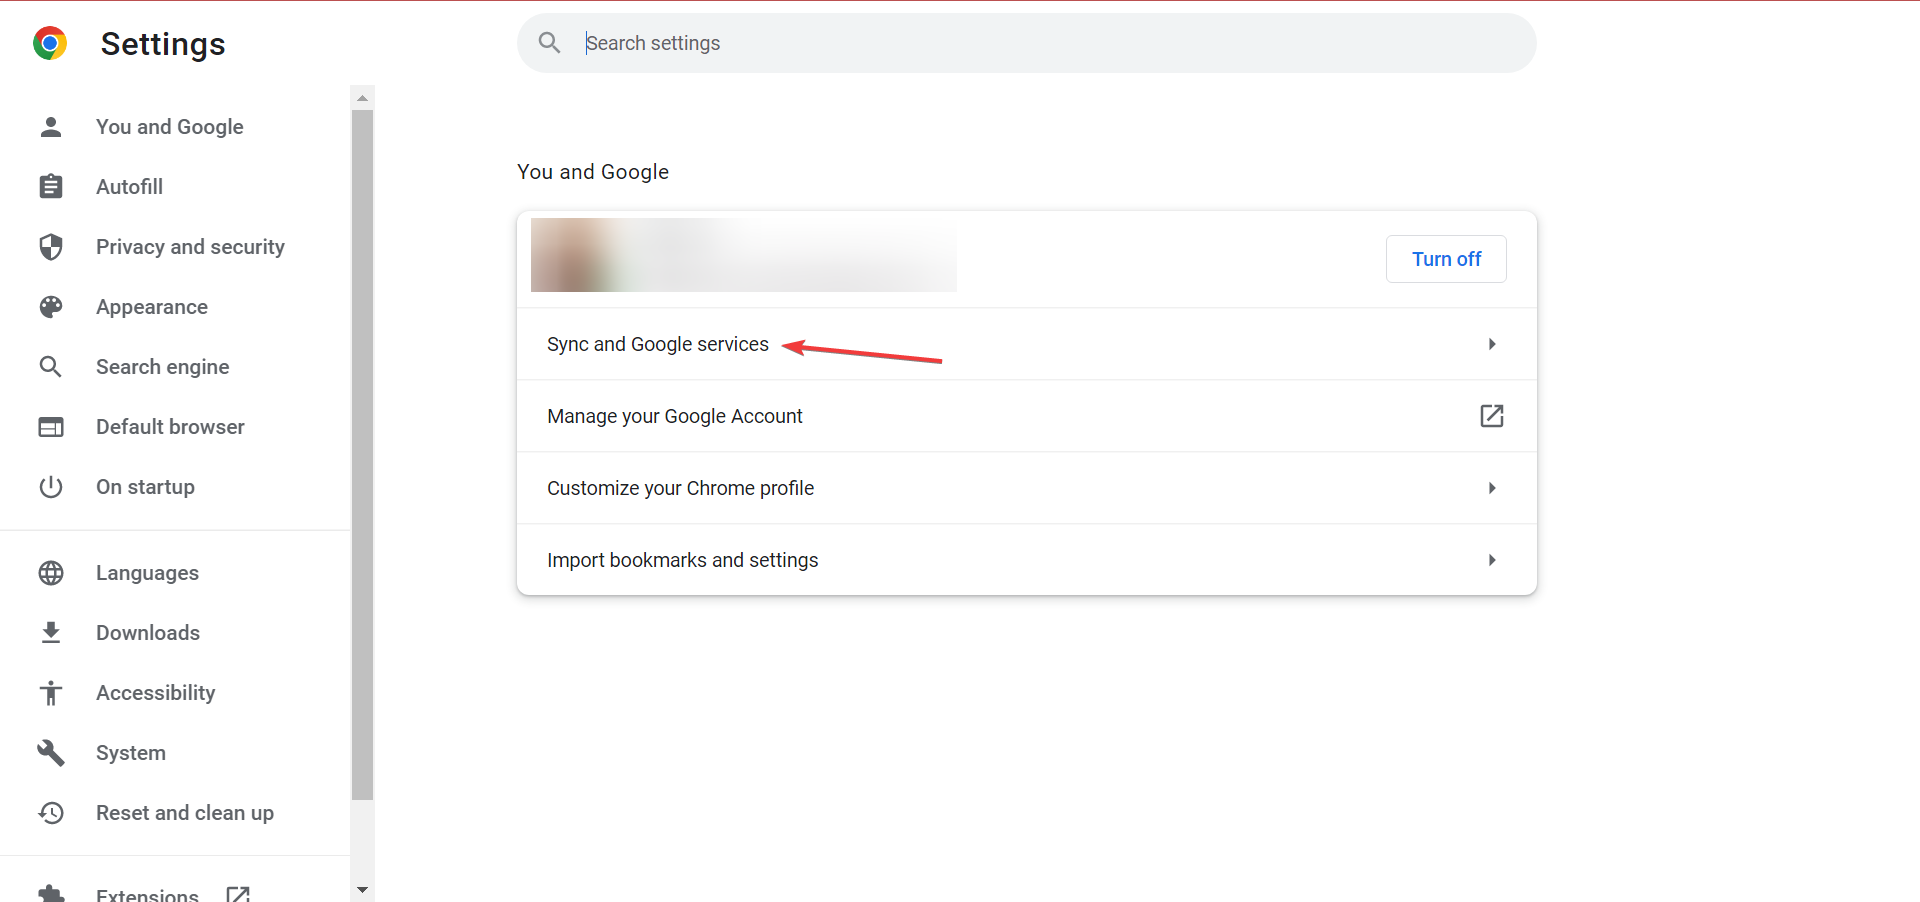
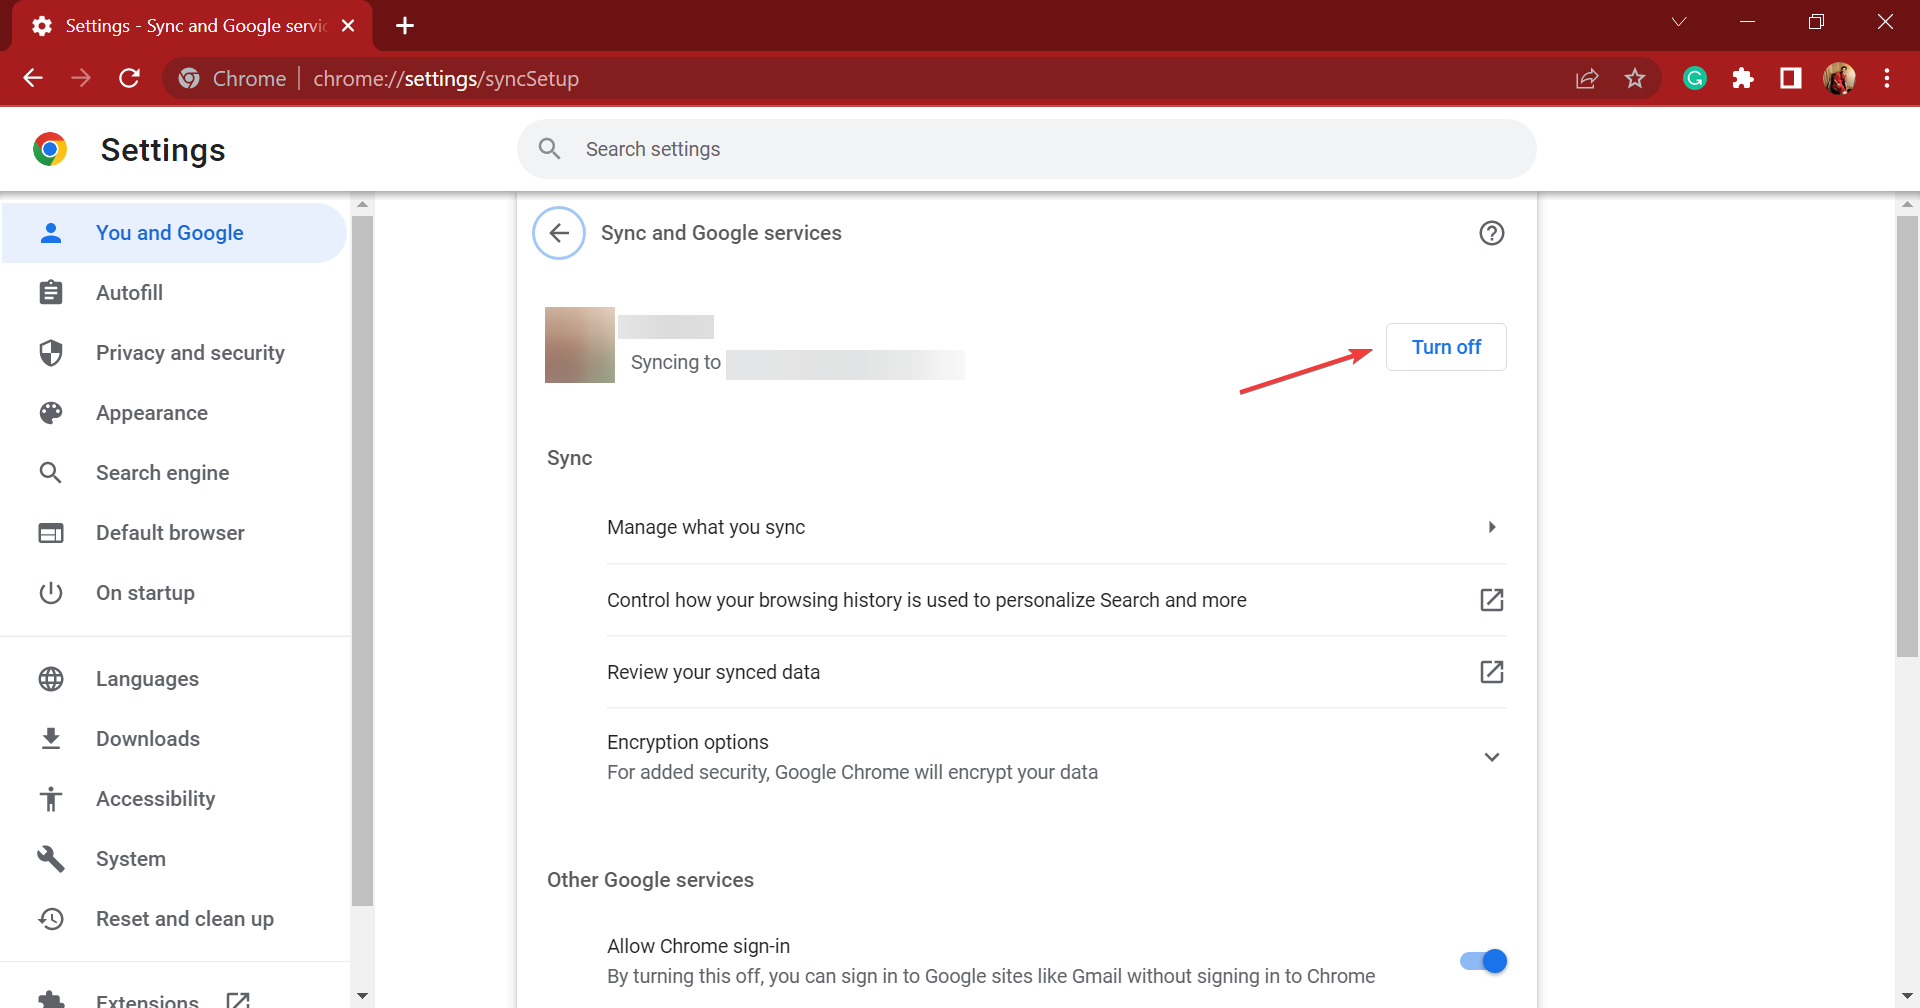
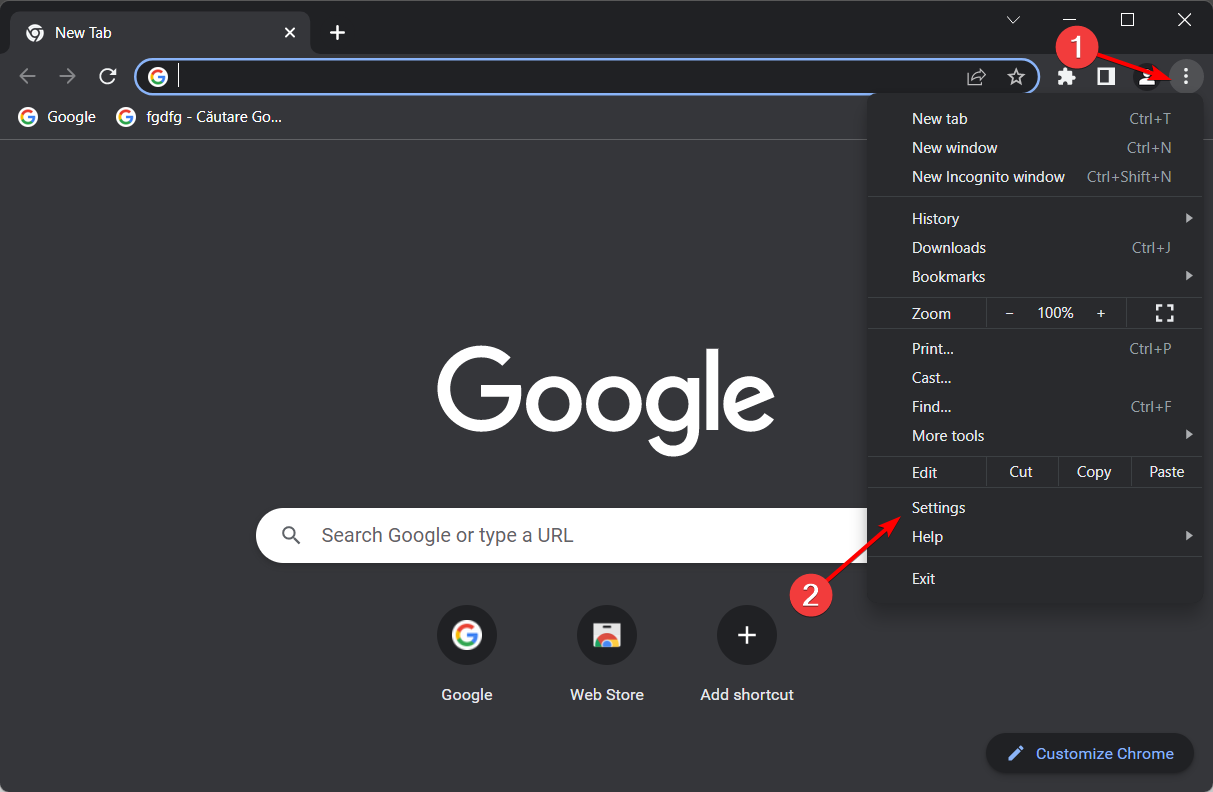
In Chrome, click on the three dots in the top right corner and select Settings.
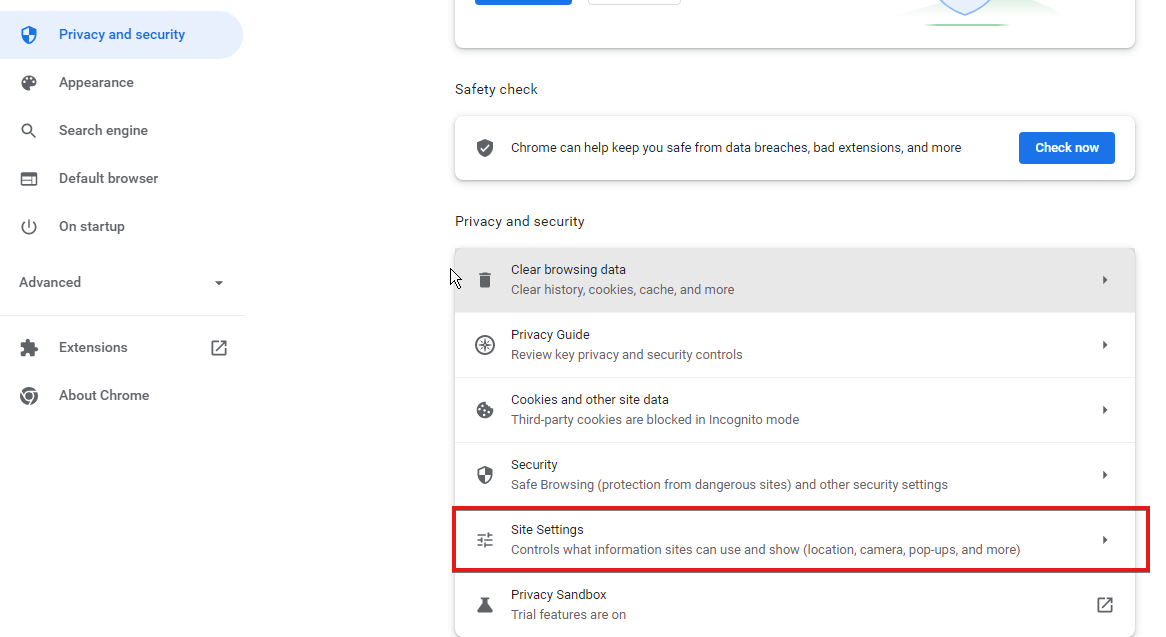
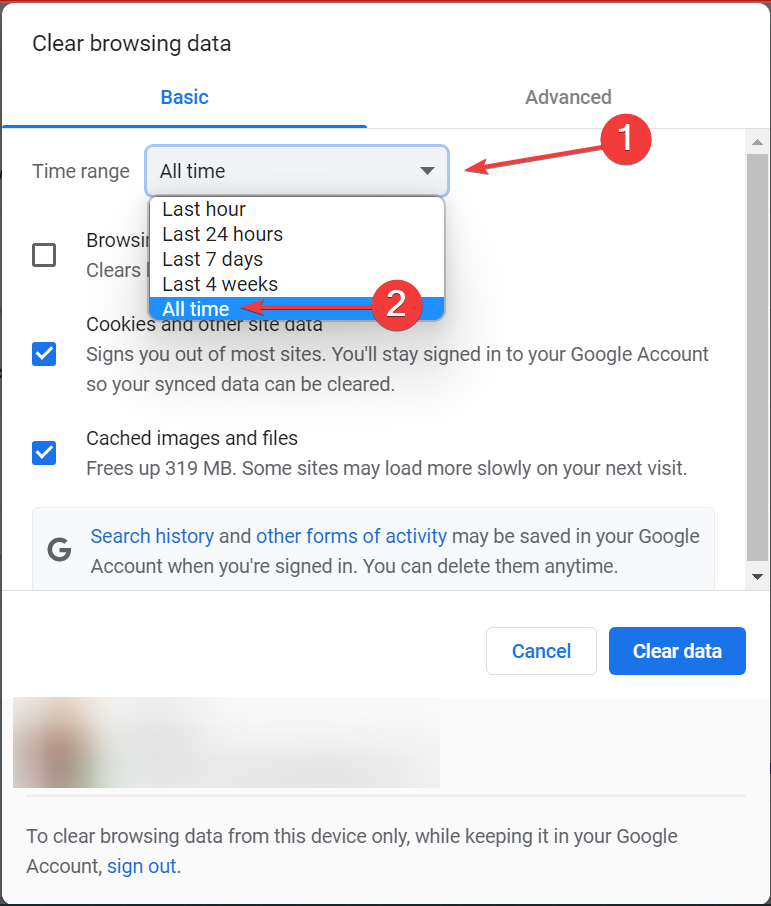
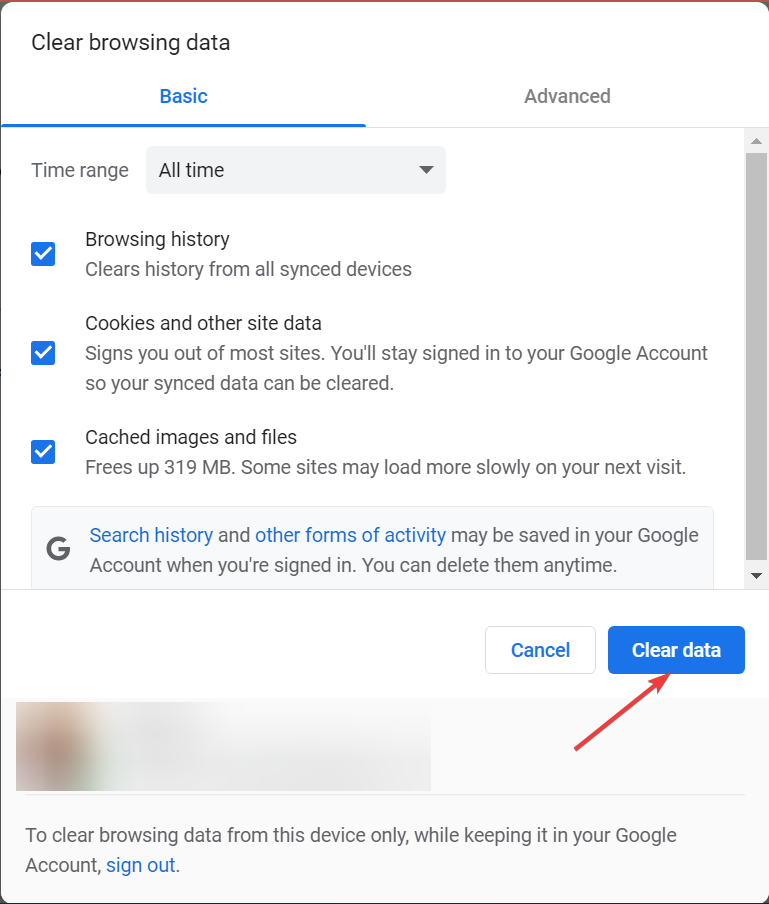
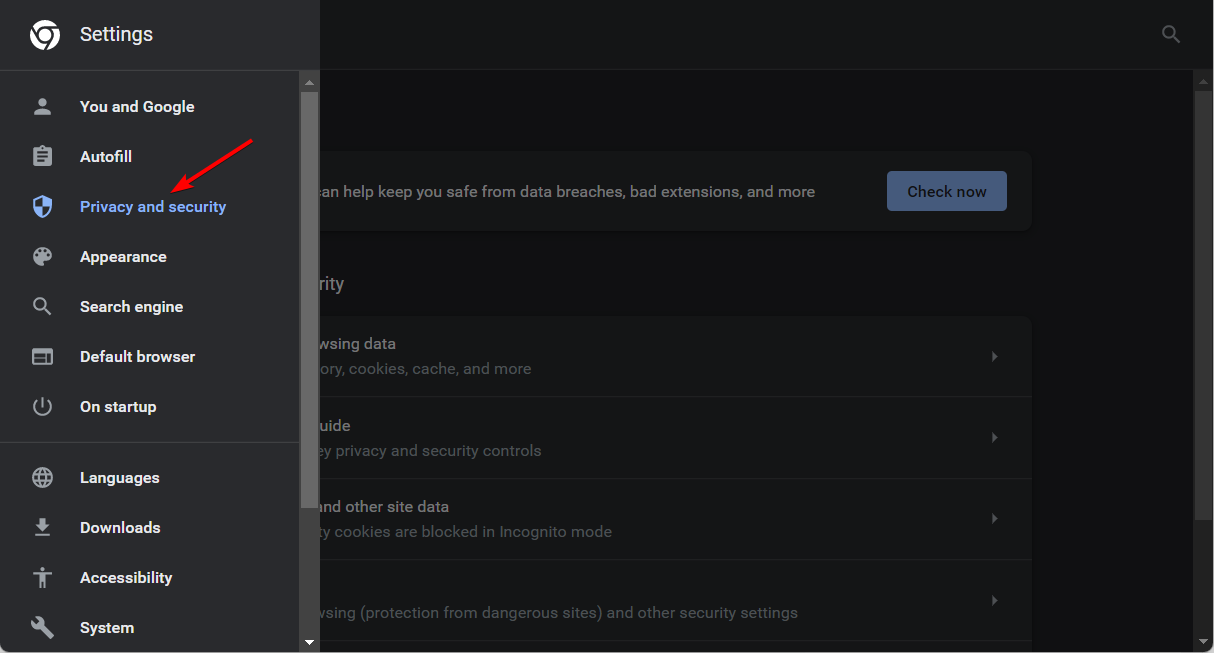
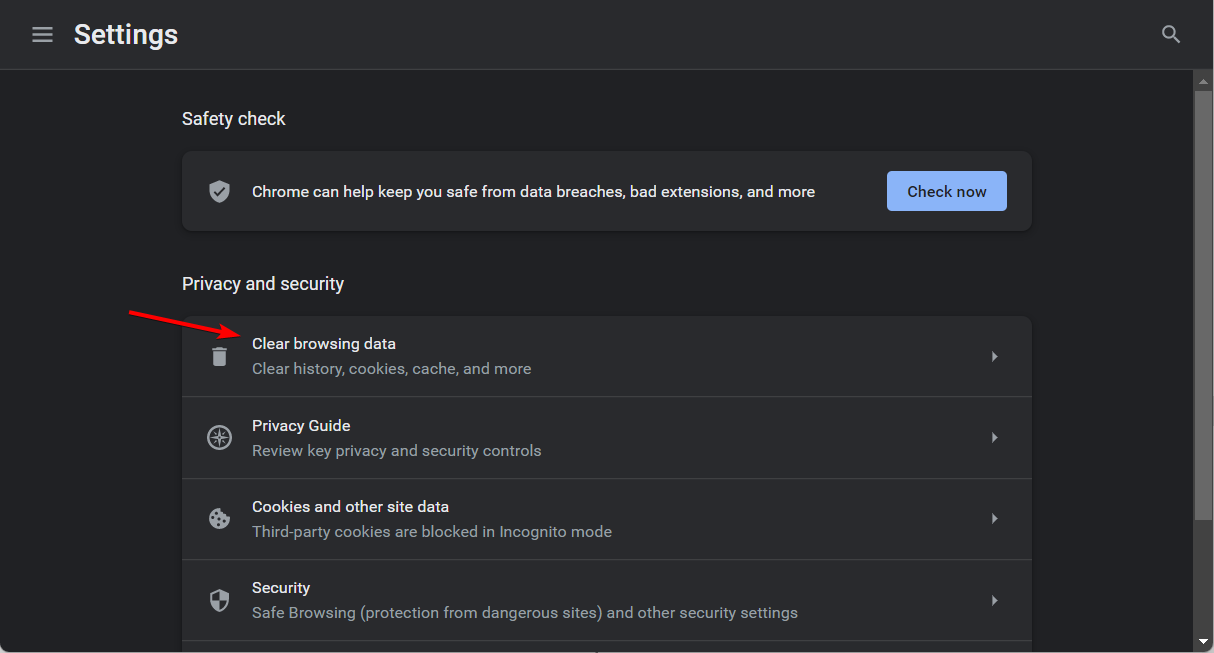
Under Privacy and security, select Clear browsing data.
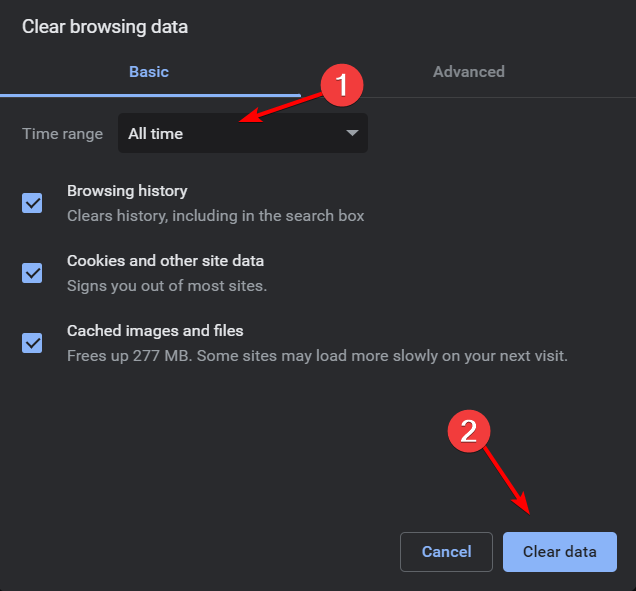
Click Clear data.
Restart your browser.
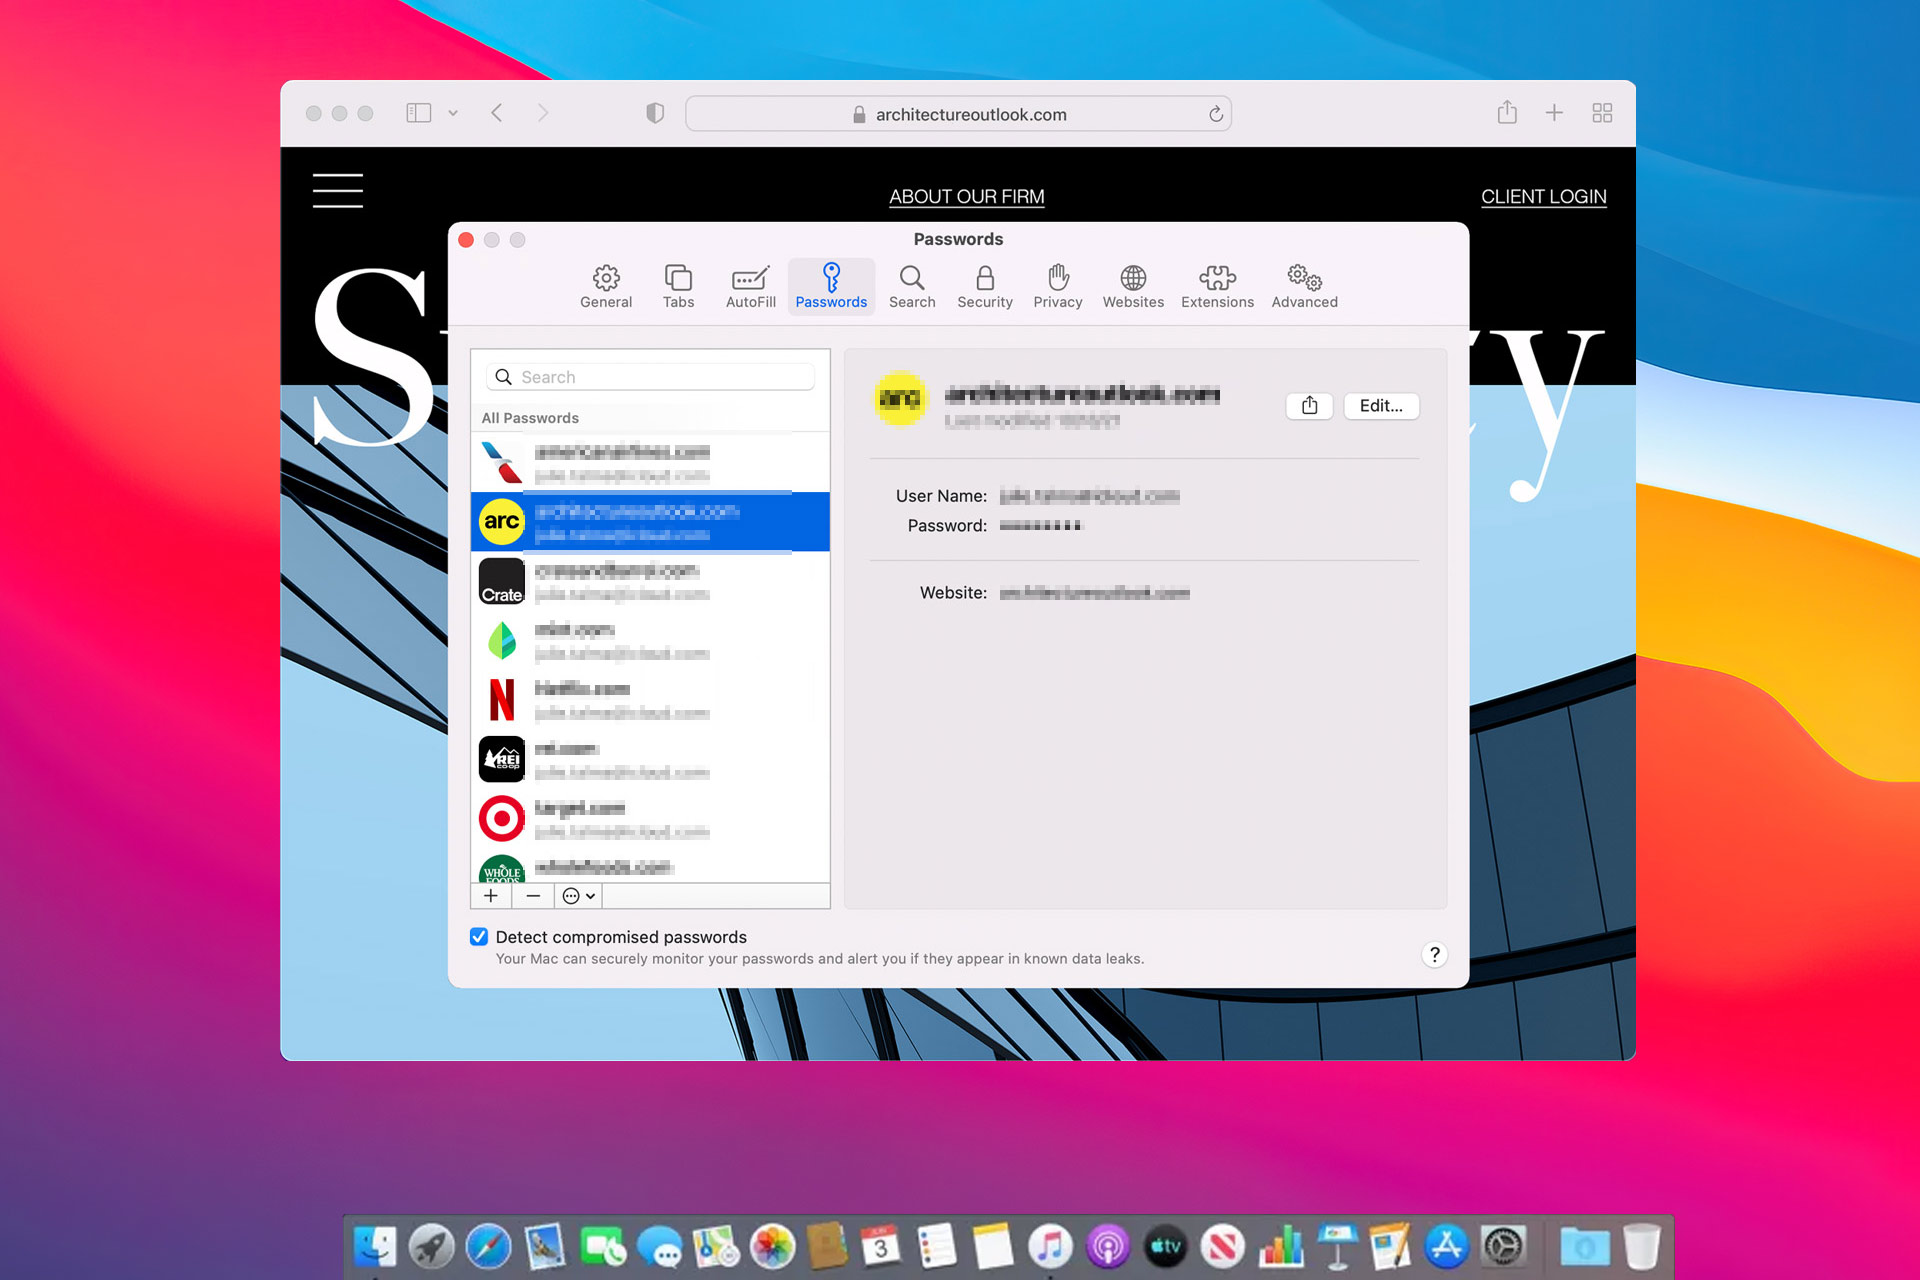
If using Safari and Pokémon Showdown is not working, you can clear the browsing data by selecting clear history from the menu. Many users reported that clearing their browser cache helped get Pokémon Showdown working again, as it refreshes the game and gives access to any client changes.
We hope one of the above solutions helped solve Pokémon Showdown not working on Chrome or Safari. For a more detailed guide on how to fix Safari if the server stopped working, we have solutions for that.
Sometimes Microsoft Edge is not opening, displaying a message saying it’s taking too long to connect.
It’s most likely due to corrupt system files, misconfigured settings, or a problem with the current user profile. Below, we show you how to address these common causes to make your browser work properly.
How do I get Microsoft Edge to open?
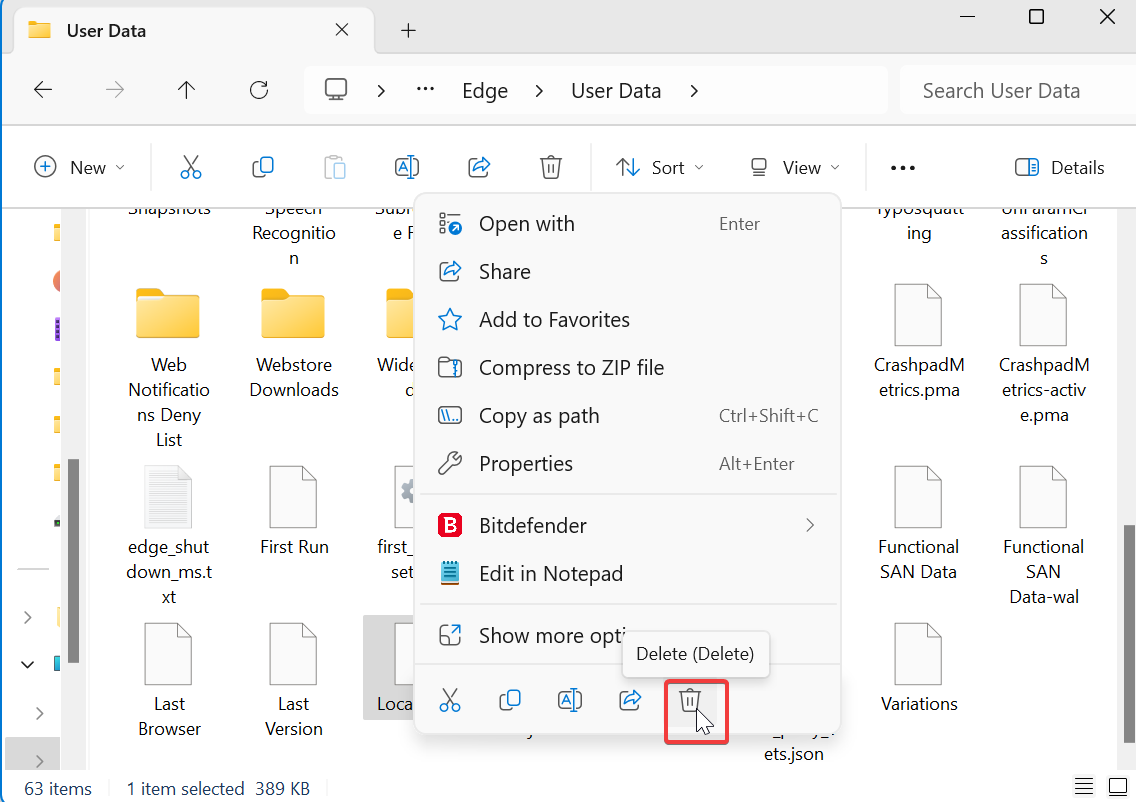
1. Delete the Local State file
Press the Windows key + F to open File Explorer.
Type %LocalAppData%\Microsoft\Edge\User Data\ in the address bar and press Enter.
Look for a file called Local State.
Right-click on it and click the bin icon to delete it.
Deleting the Local State file forces Edge to create a new one. This could fix the issue if the file becomes corrupt and prevents Edge from opening.
2. Repair Microsoft Edge
Press Windows + I to launch Settings, and select Apps from the tabs on the left.
Click on Apps & features on the right.
Now, locate Microsoft Edge, click on the ellipsis next to it, and select Modify from the menu.
Click Yes in the UAC prompt.
Finally, click on Repair.
3. Clear cache and browsing history
Launch Edge, click the Menu button in the top right corner, and choose Settings.
Select the Privacy, search, and services tab from the left, and then click on Choose what to clear under the Clear browsing data section.
Make sure the Time range is set to All time, all three options, Browsing history, Cookies and other site data, and Cached images and files, are selected, and then click on the Clear now button.
A crowded cache could also lead to bugs that prevent Edge from opening, so consider clearing it. As a rule of thumb, keeping tabs on your cache is good practice if you want good performance and no errors.
Log in with an administrator account on the computer.
Press Windows + R to launch the Run command, type msconfig in the text field, and then click on OK.
Go to the Services tab, select theHide all Microsoft services check box, and then click onDisable all.
Go to the Startup tab and then click on Open Task Manager.
Select each item on the list, right-click on it, and then select Disable.
Go back to the System Configuration window and click on Apply and OK.
Now, restart the computer.
After this, Windows will boot with minimum drivers, services, and programs. If Microsoft Edge is now opening, the underlying cause could be related to an interesting driver or app.
So, start enabling them one at a time and restart the computer after each to identify the problematic process, driver, or service.
Once done, make sure to keep it disabled until Microsoft Edge addresses the problem in the subsequent versions.
5. Run the System File Checker tool if Microsoft Edge won’t open from Taskbar
Press the Windows + R to launch the Run command, type wt, hold the Ctrl + Shift keys, and then click on OK.
Click Yes on the UAC prompt that pops up.
Press Ctrl + Shift + 2 to open Command Prompt in a new tab.
Type the following command, and press Enter to run the SFC scan:sfc /scannow
Do not close the Command Prompt window until the verification is 100% complete.
The SFC (System File Checker) scan is used to identify the corrupt system files and replace them with the cached copy stored on the PC.
6. Run PowerShell Command
Press Ctrl + Shift + Esc to launch the Task Manager.
Click the File menu at the top-right, and then select Run new task.
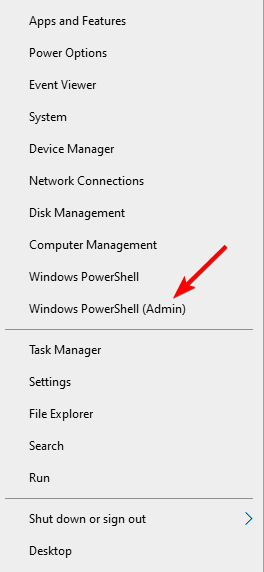
Enter powershell in the text field, check the Create this task with administrative privileges option, and then click on OK.
Type the following command in the Powershell window and hit Enter:Get-AppXPackage -AllUsers | Foreach {Add-AppxPackage -DisableDevelopmentMode -Register "$($_.InstallLocation)AppXManifest.xml"}
Wait for PowerShell to complete the process. Ignore the errors (in red) that might pop up.
If Microsoft Edge is not opening in Windows 10/11, this command would get things up and running in no time.
7. Close all other Edge processes
Press Ctrl + Shift + Esc to start Task Manager.
Right-click on processes related to Edge and choose End Task from the menu.
Do this for all of the Edge processes.
After ending all such processes, you should be able to start Microsoft Edge again without any issues. Keep in mind that you might have to repeat this solution if the issue reappears.
Press Windows + I to open the Settings app, and go to the Accounts tab.
Click on Family & other users.
Now, click on the Add account button next to Addother user.
Click on I don’t have this person’s sign-in information.
Now click on Add a user without a Microsoft account.
Enter the desired user name and a password for it though it’s not mandatory, and then click on Next.
11. Try an alternative browser
If Edge won’t load or crashes frequently, perhaps it’s time to try another browser. In this particular situation, we recommend using Opera One.
The tool comes with customized versions for PC, mobile (including older phones), Mac, or Linux. Besides, you can synchronize the Opera One browser across all your devices, to easily manage all the settings.
Starting from the basic version, you can bring your own flavor to the browser, adding icons, sidebars, workspaces, and bookmarks for ease of access and a better-organized workflow.
Opera One
Switch to Opera for better stability and up-to-standard browsing features!
Tell us which method worked best for you. As always, if you have any other questions or suggestions, feel free to leave them in the comments section below.
Web browsers are among the most essential software for all device platforms. All users will need a browser to navigate the web on Android, Windows, iOS, or macOS devices. Thus today we will show you the best cross-platform browser to use.
There are quite a few browsers to choose from but most users are probably only familiar with a minority of them.
A lot of them only have a very small share of a software market increasingly dominated by Google Chrome.
Internet Explorer was once the king of the browsers, but that has steadily declined in the wake of more cross-platform browsers.
Today, users prefer to utilize cross-platform browsers that support various desktop and mobile platforms.
The advantage of utilizing the same cross-platform browser on multiple devices is that users can sync data between PCs and mobile devices.
For example, users can open page bookmarks bookmarked with their desktop browsers on their mobiles with bookmark syncing.
What is a cross-platform browser?
A piece of software that has been designed to run on more than one kind of computer platform is referred to as a cross-platform application. In a similar vein, a website that has been designed to work across several browsers is referred to as a cross-browser website.
If there were a single platform that developers had to focus on, the job would be much easier. However, since we all use more than two devices in our day-to-day life, such as a PC and a mobile device, cross-platform applications ensure that we have access to the same app on all of our devices.
How do I ensure cross-browser compatibility?
When you’re designing your website, make sure the code you use is straightforward and reusable. Write a reusable function that you can use whenever you need it, and you won’t have to waste time copying and pasting the same code into other files.
Incorrect HTML and CSS code might cause your website to behave incorrectly in a variety of different ways depending on the browser being used.
It may be difficult to locate the flaws. And even after doing so, the website will generally still build with a few minor issues that seem to be completely random. This, in turn, makes it difficult to debug.
In a perfect world, you would be able to do in-person testing of your website using a wide variety of browsers and computing platforms. On the other hand, this may not be feasible for organizations with smaller teams.
Hence, you may wish to investigate cloud-based browser testing. Which enables your website to be concurrently tested on a variety of various browser combinations.
Testing for compatibility across several browsers may be performed rapidly and effectively using LambdaTest, BrowserStack, and SmartBear, respectively.
Opera One is a reliable browser that matches many of Chrome’s and Firefox’s features and even surpasses them. Despite having embraced a Chromium engine, it retains a distinct look from Chrome and most other alternatives.
It is compatible with Windows, Linux, and macOS desktop platforms. Opera Mini and Mobile are two alternative versions that users can utilize on iOS and Android devices. Thus we regarded it as the best cross-platform browser.
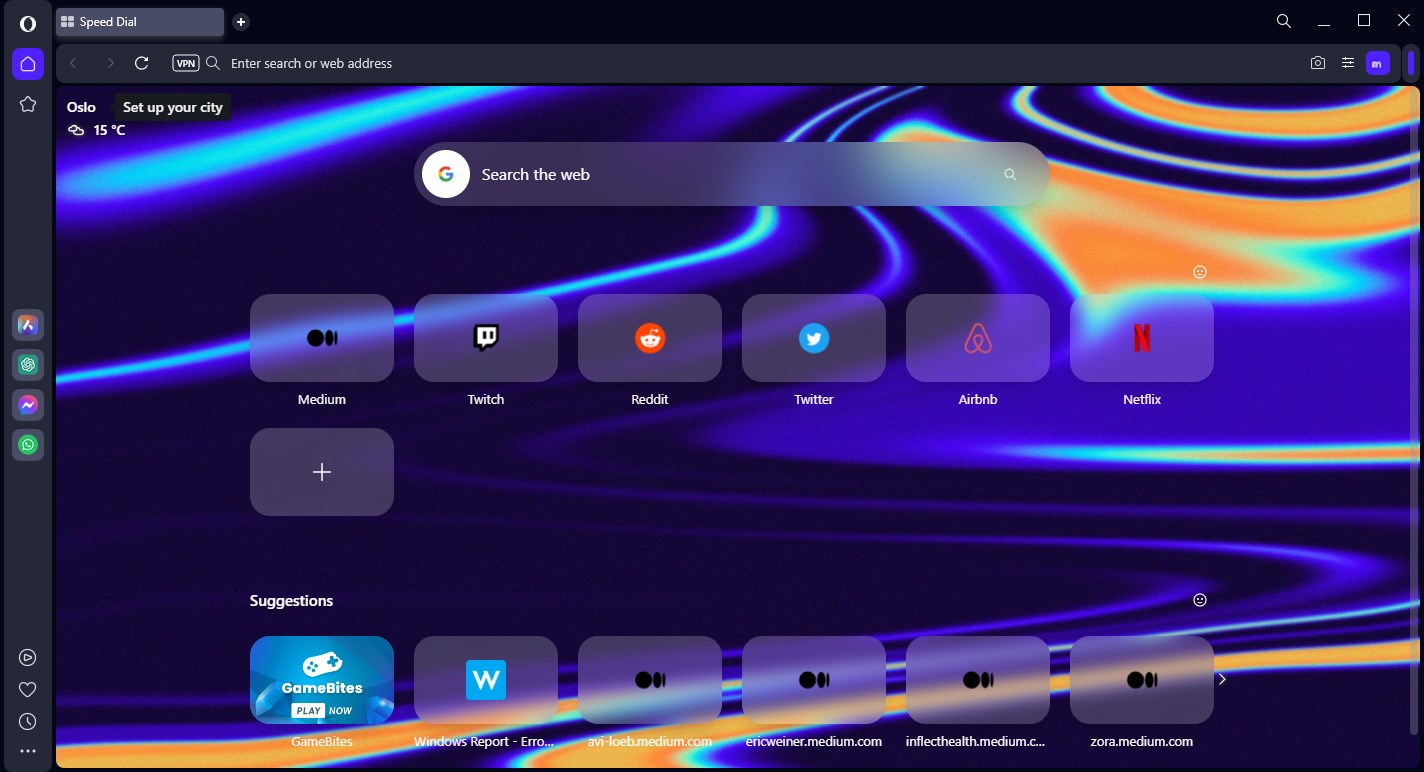
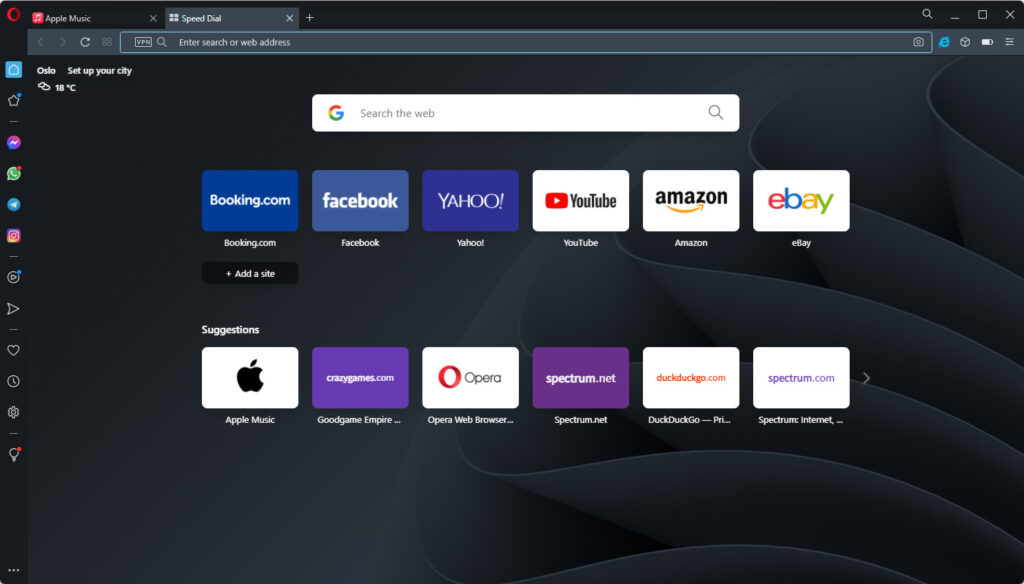
When users first open the Opera One browser, it’s immediately apparent that this isn’t just some Chrome clone. The browser’s Speed Dial, which enables users to merge multiple page shortcuts together, is a more novel tab page.
Users can select to pin the Speed Dial’s sidebar which includes handy shortcuts to the browser’s bookmarks, page history, Speed Dial tab, extension tab, and more.
Among other Opera One key features is the snapshot for screen capturing and the Turbo Mode that speeds up browsing by compressing webpage images and graphics.
Thanks to a built-in adblocker you can further increase speed and remove distractions. The flow syncing function helps you sync images, links, text snippets, and notes with other devices.
Other useful features:
Snapshot tool
Workspaces
Pinboards
Opera One
Level up your Internet experience with an excellent browser that improves your workflow!
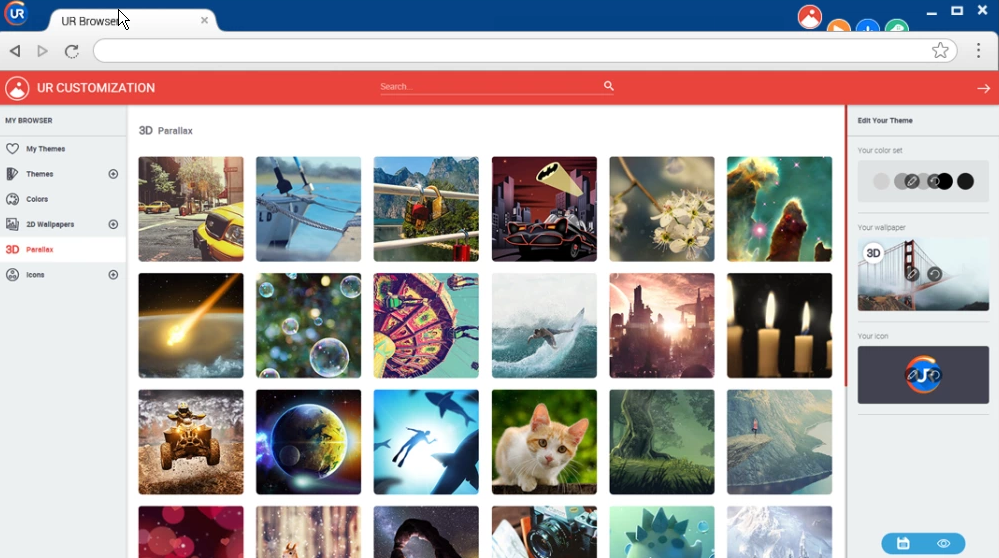
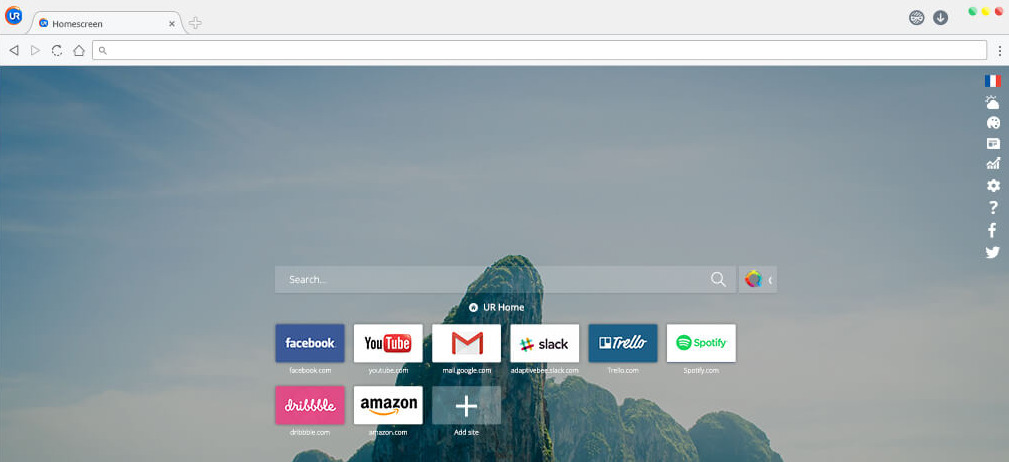
The constant evolution of software development brings more and more quality browsers. UR Browser is something you shouldn’t sleep on.
Everything a user wants from a browser is reliability, speed, and obviously, these days, a seamless transition between platforms. Add the full privacy-oriented remarkableness and you have yourself a perfect browser.
UR Browser hits the sweet spot between these points with, obviously, being focused on privacy and speed.
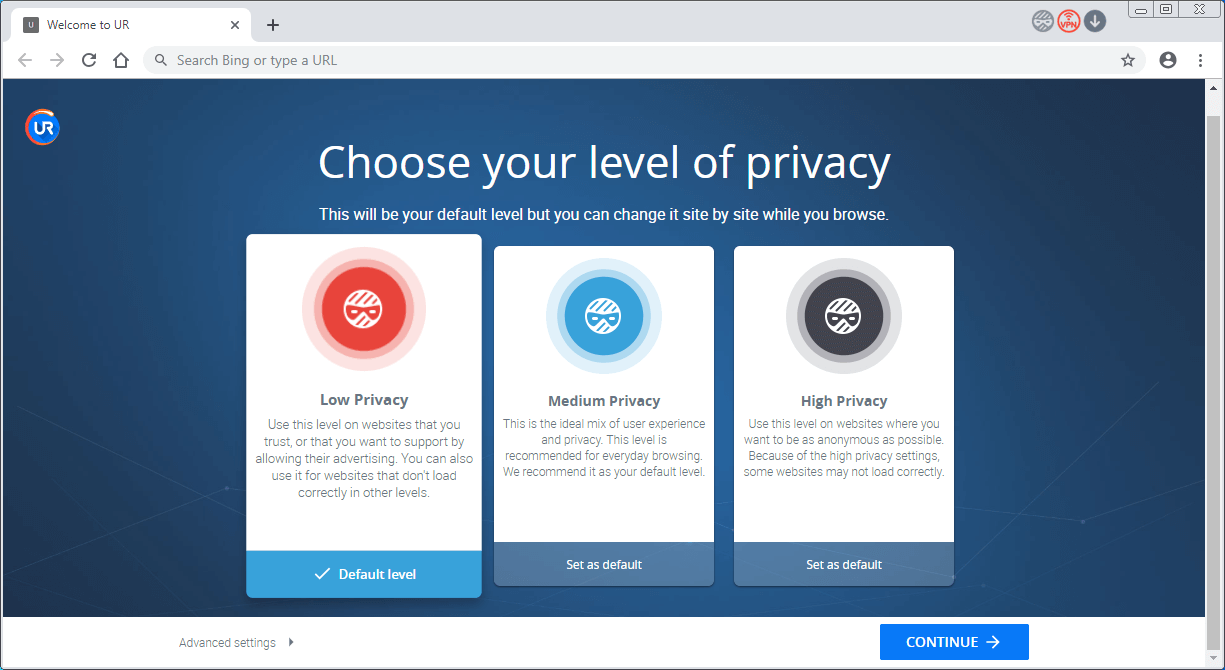
Some of its key features include Windows and Mac compatibility making it the second best cross-platform browser. In addition, it offers 3 levels of Privacy dedicated to keeping your privacy untouched in the virtual world and preserving your virtual identity.
You can go as much as staying completely anonymous while browsing or go lighter on limitations while browsing a trusted website
There’s also the first-party VPN integration that comes with the browser to hide your digital tracks.
Other useful features:
Third-party cookie blocker
Virus scanner
Anti-fingerprinting
Ur Browser
Get your hands on a great browser that comes with advanced privacy features so you can feel safer online!
AVG browser is a privacy-first solution that can be used cross-platform and provide all the security services you need.
First of all, this browser earns its place due to anti-tracking assistance and digital fingerprint masking for smooth navigation on any of your devices.
If you’re worried about adware, it’s covered. AVG comes with an automatic ad-blocker that detects irritating ads from afar.
When it comes to functionality, you have useful tools such as Stealth mode for tracking cookies or a Privacy cleaner to erase every bit of browsing data.
Besides all, there is a smooth integration with AVG’s famous antivirus that will keep your devices safe regardless of platform.
In addition to that, you have VPN integration for anonymous navigation no matter your real location.
AVG Secure Browser
Surf on every website securely and don’t look back for unsecured browsing.
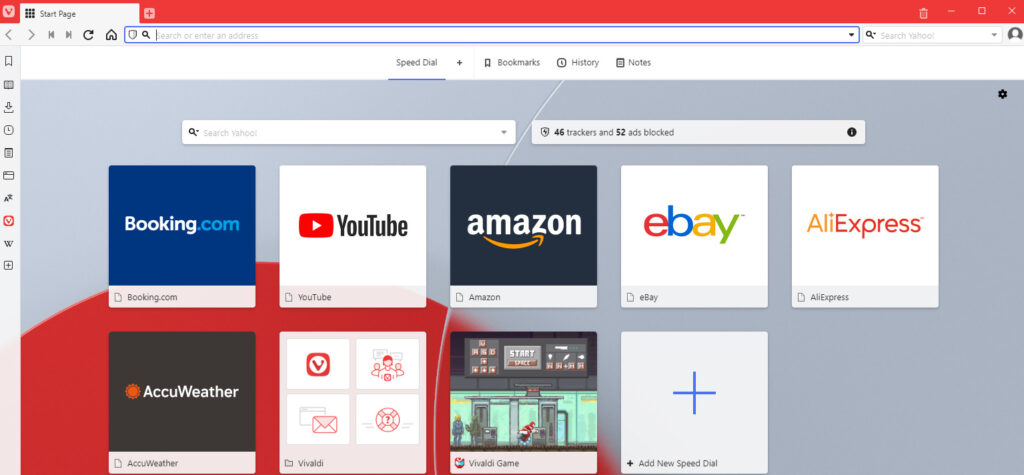
Vivaldi Technologies launched the browser in 2016 to revive the features of the old Presto-based Opera One, which is now Chromium-based software.
Thus, Vivaldi is similar to Opera One, and it is compatible with Windows (from Win 7 to Win 10), OS X, and Linux.
Vivaldi is among the best cross-platform browsers as it boasts a plethora of built-in customization settings that few others can match.
Its users can customize the browser’s tab and tab bar positions, address bar, window appearance, Start Page, and keyboard shortcuts.
Some key features you’ll enjoy are the page action settings that can help you customize the page display to your specific needs.
You can also further customize Vivaldi with the full repository of Chrome’s extensions. Another perk is the cutting-edge tab bar with 14 tab management options, page thumbnail previews, and more.
You can group tabs by stacking them and then tiling the stacks to display multiple pages within one window.
Chrome is the world’s favorite cross-platform Internet browser developed by Google. This search engine didn’t climb to the top of the browser pile for nothing as it incorporates all the latest web tech, integrates neatly with Google’s services, and packs in handy options and features.
This browser is also compatible with a wide variety of platforms, such as Android, Windows, Linux, iOS, macOS, and Chrome OS.
You’ll love Chrome’s streamlined UI design, speed, and extensions. Benchmarks highlight that Chrome is at least among the fastest browsers.
With a vast repository of extensions and themes, you are free to customize the browser in many ways. It also provides in-built handy tools such as its profile manager, task manager, and a built-in ad-blocker,
Chrome features advanced sync settings such as the sync Chrome apps, bookmarks, open tabs, themes, settings, and extensions.
It is compatible with iOS and Android platforms, as well as Windows (users can sync browser data to most mobile devices). Thus, we recommend it as another best cross-platform browser.
Other useful features:
Automatic translation and spell check of web pages
Firefox was the foremost browser for a while before the rise of Google Chrome. This browser’s user base might have declined, but Mozilla Firefox is just as good as it once was, if not better since its Quantum update back in 2017.
Firefox is open-source software that users can utilize on Windows, Linux, Android, iOS, and OS X platforms.
Today, Firefox is widely regarded as the best Chrome alternative, especially for laptops and desktops with lower system specifications.
Firefox is among the most system resource-efficient browsers that utilize less RAM than Chrome and other alternatives.
Thanks to its high adaptability you can add and remove buttons from the URL toolbar and select new themes for the browser.
A great feature you’ll like is the Options tab that includes customization settings for Fox’s New Tab page, fonts, tabs, and page scrolling. In addition, you also have a plethora of Firefox extensions available.
This is a great browser that provides bookmark sync, allows you to take a screenshot, copy a link, send a tab to a device and enables users to send tabs to Firefox on synced devices.
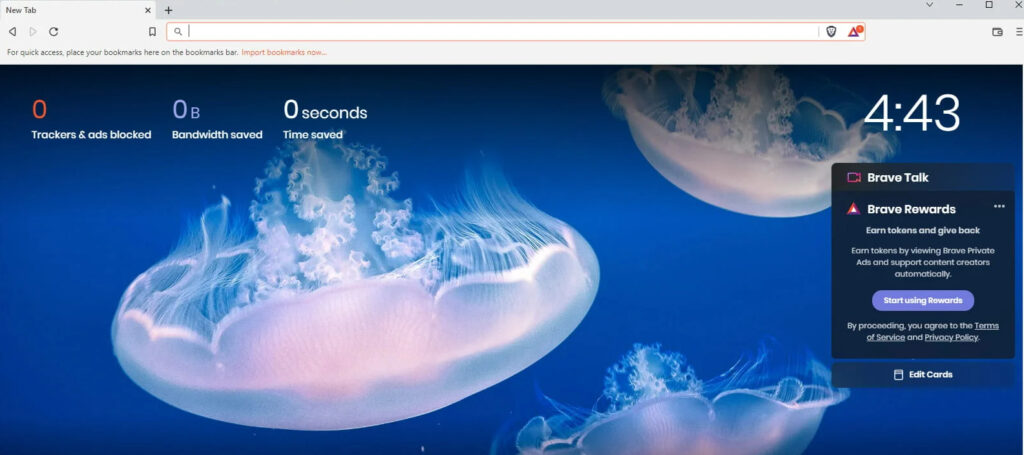
With Brave, it is possible to prevent advertisements from displaying on websites that you visit by using this browser, which, similar to other browsers, does not cost anything to download or use.
Chromium, an open-source project that is maintained by Google and others, serves as the foundation upon which Brave was created.
Brave is powered by the same back-end technologies that are used to power Chrome. These technologies include the Blink rendering engine and the V8 JavaScript engine. And of course, it is another best cross-platform browser to use.
Instead of relying on Apple’s Safari browser, Brave for iOS uses WebKit, an open-source foundation that also drives Apple’s Safari browser.
It supports Windows, Mac, Linux, iOS, and Android platforms thus making it another powerful option for those looking for the best cross-platform browser.
The worldwide Internet browser startup Maxthon has published Maxthon 6 browser, which has technologies based on blockchain to revolutionize the way the Internet is used.
Blockchain technology like Bitcoin SV (BSV) is the only one that can make this new Internet and the Maxthon 6 browser a reality. Since 2003, Maxthon has been offering a cutting-edge, multi-platform web browser that is one of the most popular in the world.
In fact, it is the default browser for more than 670 million users. Since its beginnings, Maxthon has achieved several top prizes in About.com’s Readers’ Choice Awards, a nomination for PCWorld’s 100 Best Products, a 5-star rating from CNET, and the title of Best Free Software.
The latest version of Maxthon, version 6, aims to be a fully-featured web browser. It incorporates the most interesting aspects of the widely used Maxthon 5 browser as well as the most useful aspects of Google’s open-source Chromium project. Such as cross-platform integration for Windows and Mac.
Other useful features:
Built-in Flash, Java, and ActiveX blocking capability
Multiple web pages may be seen side by side in the same window using split-screen surfing
So, these are the best cross-platform browser for users who use the web on multiple devices. They also include all the essential browser features along with additional novelties and extensive customization options.
What is the difference between native platforms and cross-platform?
Native applications are software that has been developed expressly for a particular operating system by making use of programming languages that are platform-specific.
The process of developing applications or software that must be used on certain devices and mobile app platforms such as Android and iOS is referred to as native app development.
Designing apps that are optimized for a particular platform assures that the apps will have a high level of performance.
Cross-platform apps are compatible with several platforms and will offer easy deployment, strong functionality, and cost-effective manufacturing.
In the long term, it is beneficial for both the owners of businesses and the developers of software to get reusable code that is supported by increased productivity and efficiency.
In this respect, a cross-platform app development framework has a distinct advantage over several other available options.
How do you keep your data synced across devices? Share your experience with us by reaching the comments section below.
CSS isn’t working in the Safari browser? It can be a real pain, especially if you’re trying to complete a project.
Safari is one of the most popular browsers in the world. It’s available on iOS, macOS, and even Windows computers. It is compatible with most website design software so you can always expect it to deliver efficiency.
However, if you are developing a website or web application and you want to use CSS to style it, then you might have come across a problem such as CSS not loading in Safari.
CSS stands for Cascading Style Sheet and is used to style your website. It is a powerful tool that changes the look and feel of your website.
Does Safari support CSS?
Safari does support CSS and is compatible with most modern browsers. However, because it’s not as popular as Chrome or Firefox, users tend to ignore it.
Why does CSS not work on Safari? If your website is not working in Safari, that means a few things. You either have a CSS error that needs to be fixed or you have a browser compatibility issue.
Other reasons include:
Old web browser – If you have an old version of Safari installed, you should update it immediately. The older versions of the browser may have some bugs and glitches which can cause problems with CSS styles. In such cases, you may experience CSS not showing in Safari.
Wrong syntax code – Syntax refers to the way a code is written so that it can be read by machines or computers. If you are developing a website using HTML5 or XHTML5 then make sure that you have used the proper syntax code correctly and accurately otherwise it won’t work properly on any browser including Safari.
You’ve used an unknown/unsupported CSS – There are thousands of CSS properties and even more new ones being added all the time, but only a small subset is supported by any browser. If you’re using one that isn’t supported, it won’t work in any browser and you may get a message saying WebKit CSS not working in Safari.
While there is no CSS hack code for Safari, there are some workarounds you can attempt to get it working again on your browser.
What can I do if CSS doesn’t work in Safari?
1. Update your browser
First, make sure you’re using the latest version of Safari. You can check for updates by opening the App Store app and looking for an option to update your software.
An updated browser ensures all the latest and stable tools are available at your disposal and that there are no limited functionalities when you try out your codes.
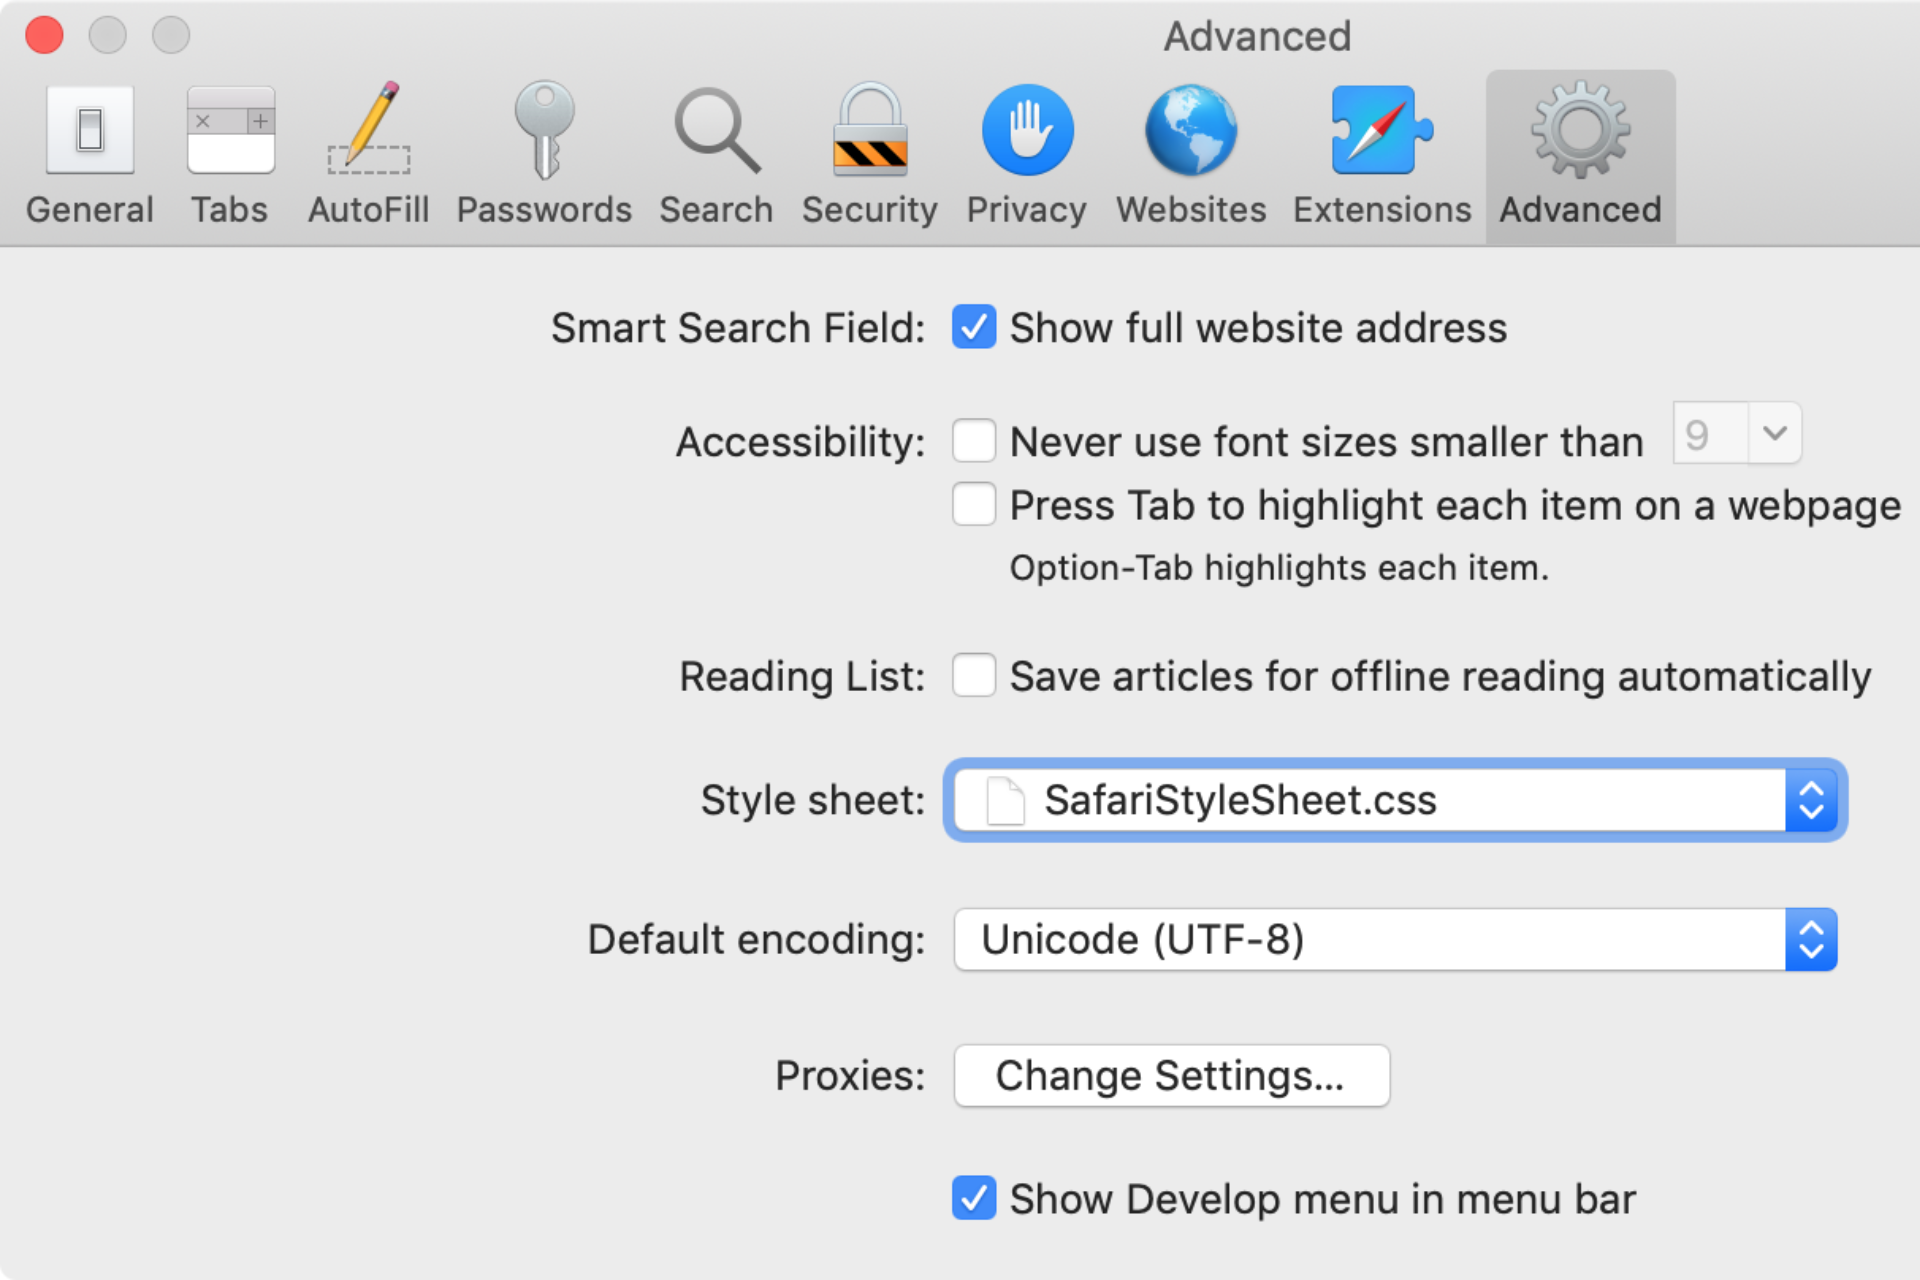
Navigate to Safari on the menu bar and select Preferences.
Click on the Advanced tab and check the Show Develop menu in menu bar box.
Select Develop on the menu bar and hit Empty Caches.
3. Validate your CSS code
The CSS code that is copied from the web is not always correct. Sometimes this is because of a typo and sometimes it’s because of bad CSS coding practices. It’s easy to accidentally paste an invisible character such as a newline or tab, which can break the code.
You can paste your code onto a CSS validator or an HTML editor with a built-in validator. Alternatively, you can type it manually and see if the problem persists.
How do I make CSS compatible with all browsers?
CSS is not inherently compatible with all browsers, because there are many different ways to interpret the same CSS rules.
The best-case scenario to widen your reach is to use CSS as intended. That means using the correct syntax and naming conventions for your properties and values.
Hopefully, this article was able to shed some light on what to do if CSS is not working on your Safari browser.
While you are still here, we’d like to redirect your attention to our comprehensive list of web authoring software that you may find useful when building a website.
Let us know what solution worked for you in the comments section below.
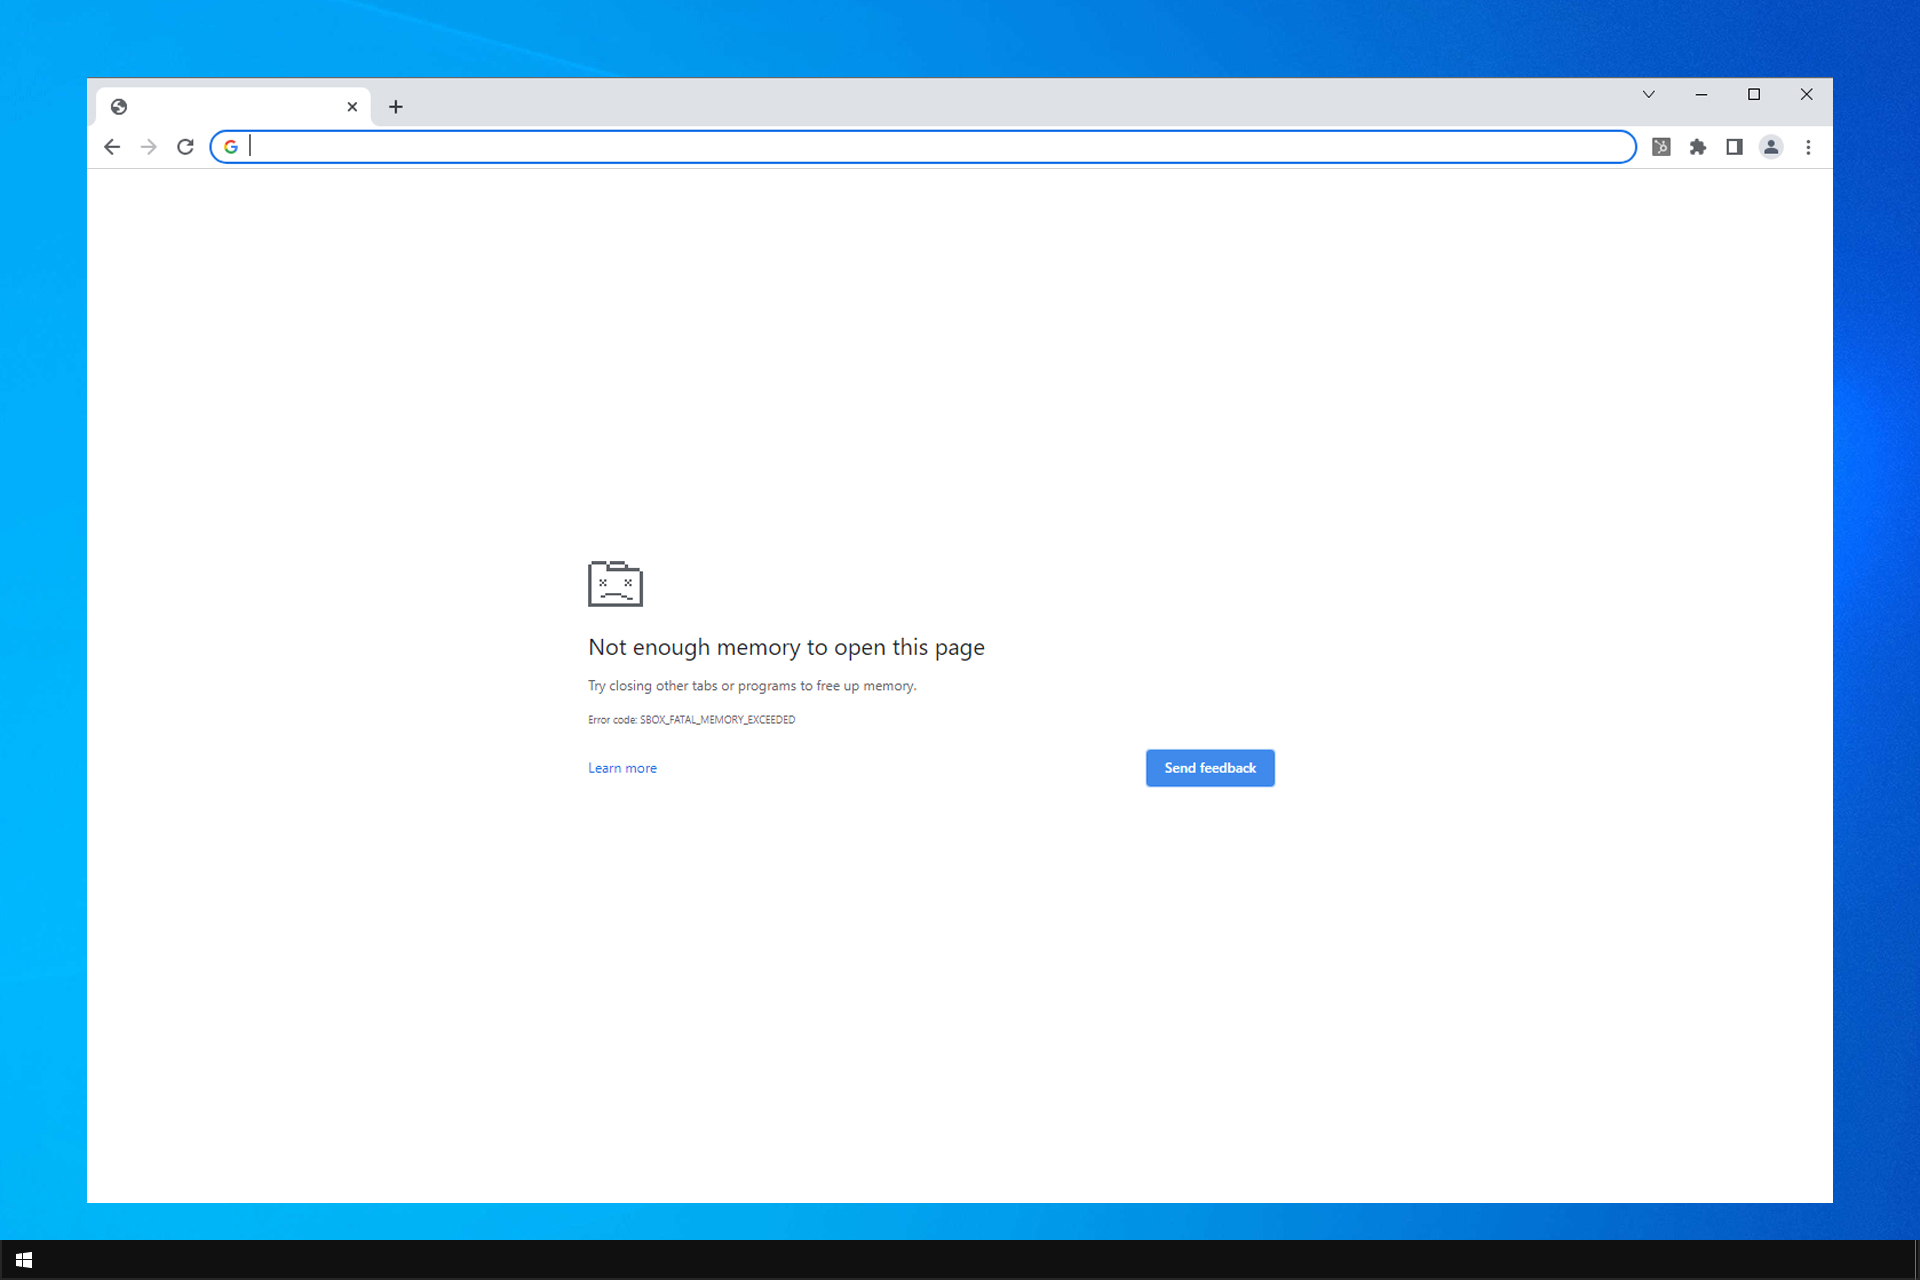
Some Chrome tabs might display a Not enough memory to open this page or oogle Chrome ran out of memory while trying to display this page error messages when you try to open a webpage.
That usually means that there isn’t enough free RAM. Here’s how to fix it:
How do I fix Not Enough Memory to open this page?
1. Close tabs and disable the browser extensions
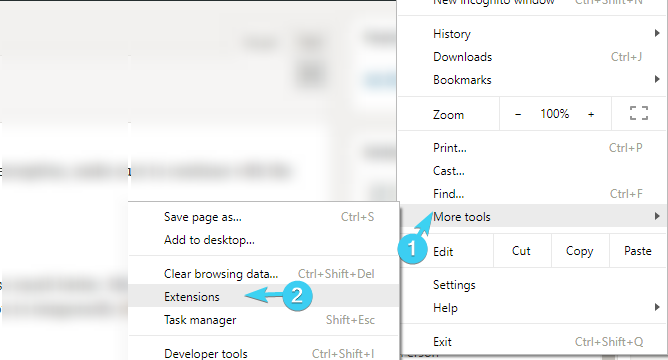
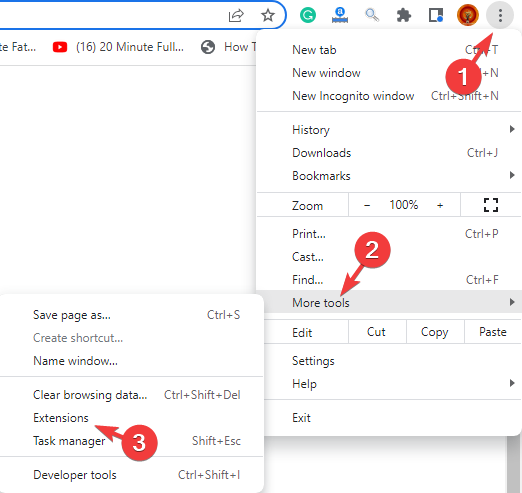
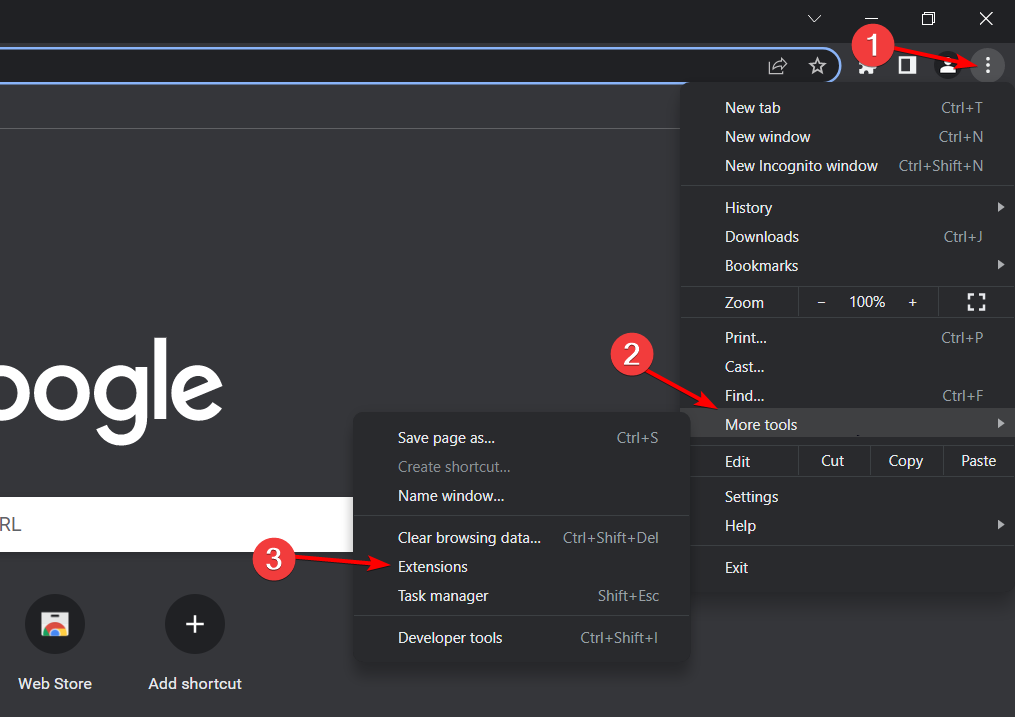
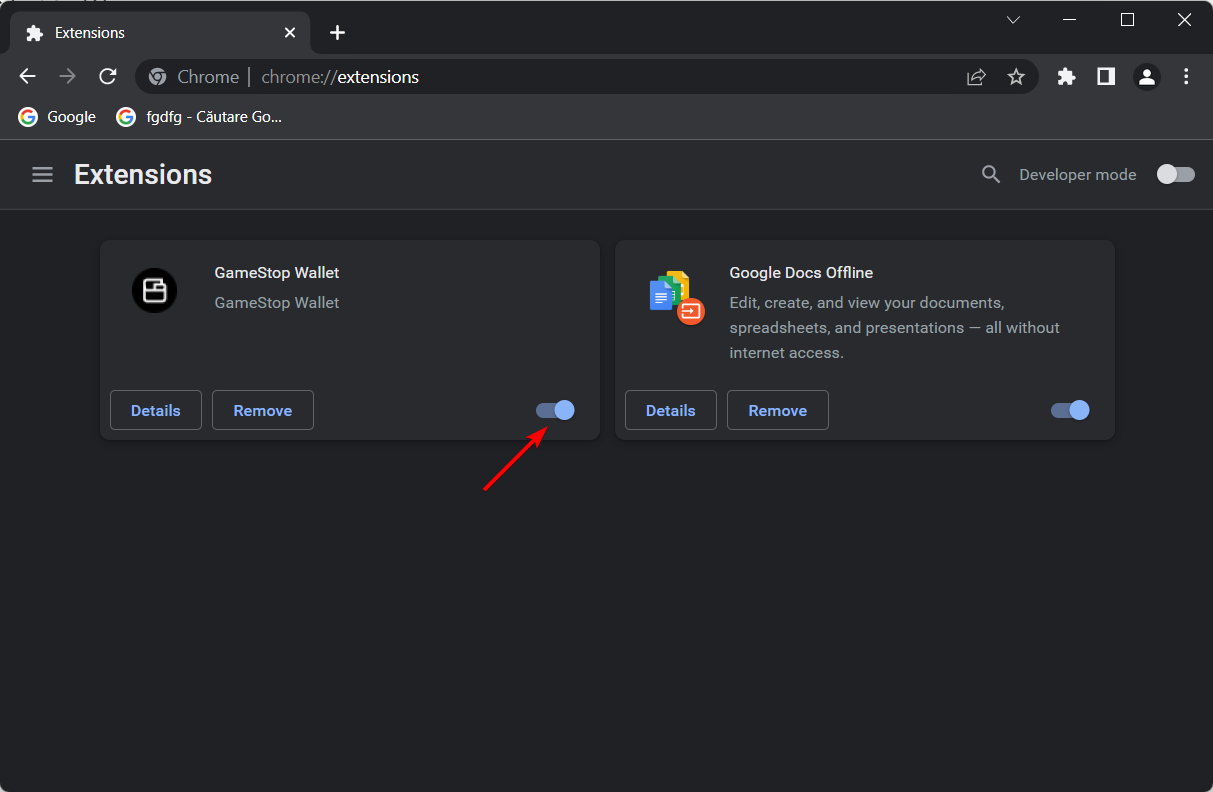
Press the Customize Google Chrome button.
Click on More tools, and select Extensions.
Then click all the extension switch buttons to turn off the add-ons. Alternatively, users can press the Remove button to delete the extensions.
Restart Chrome after turning the extensions off. Then try opening the page that didn’t open before.
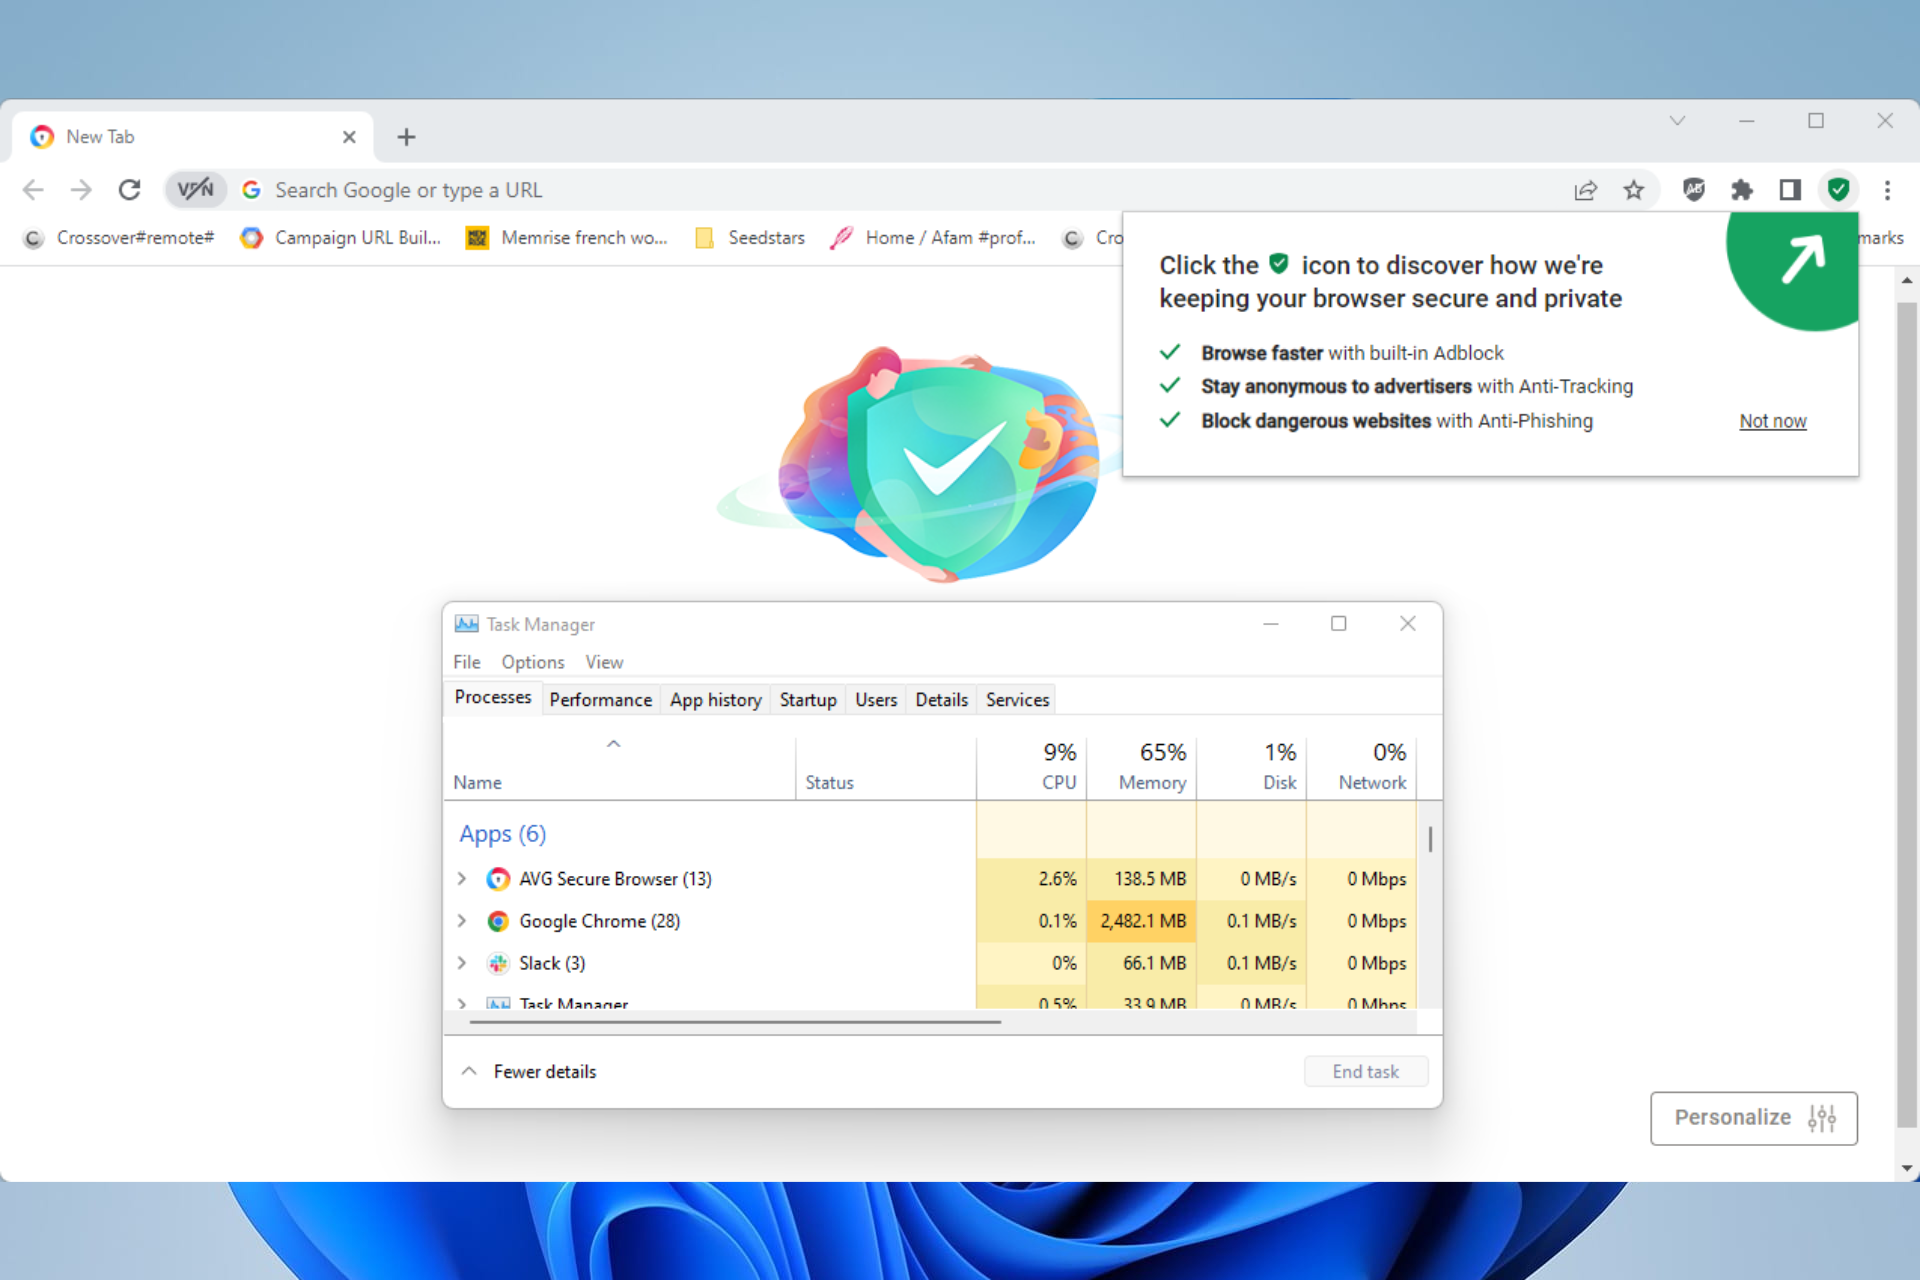
Users should also close other third-party programs. To do that, right-click the taskbar to select Task Manager. Then, users can close listed programs on the Processes tab by right-clicking them and selecting End task.
If you’re getting not enough memory in Chrome messages, disabling the unused applications and extensions is the best way to fix them.
2. Expand page filing
Open Cortana by pressing the Type here to search button on the taskbar.
Enter advanced system settings in the search box. Then click View advanced system settings.
Press the Settings button.
Then click the Advanced tab on the Performance Options window.
Press the Change button.
Deselect the Automatically manage paging file size for all drives option.
Select the Custom size radio button.
Now enter a figure in the Initial size text that eclipses the Recommended and Currently allocated values shown at the bottom of the window.
Users can enter the same number in the Maximum size text box as the one input in the Initial size box. Alternatively, enter a higher value in the Maximum size text box.
Press the Set button, and then click OK to close the window.
If you’re getting Not enough memory to open this page on Windows 10/11, adjusting the virtual memory settings can help.
Quick Tip:
You can also try a browser that has built-in features that help reduce memory usage in order to get the best performance.
We suggest you try Opera GX because it’s light and easy to use, and you can enable the CPU and RAM limiter by just toggling a button.
Opera GX
Use this lightning-fast browser with minimal resource usage to open any page!
Enter the following in Google Chrome’s URL bar: chrome://settings/
Go to System in the left pane.
Then toggle the Use hardware acceleration when available option off.
Restart Google Chrome.
5. Disable extensions
Click on the three vertical dots in the upper-right corner of the Chrome browser window.
Hover over More Tools in the dropdown menu, then click on Extensions.
Toggle off the switch next to each extension to disable it. The switch will turn from blue (enabled) to gray (disabled).
Doing this stops extensions that use too much memory or are unstable and interfere with performance.
How do I get more memory for Chrome?
To give Chrome more memory, disable unused extensions, close unneeded tabs, and shut down other applications. If memory issues persist, consider adding more RAM.
Some browsers don’t have the configuration option to access DOD or army websites. It is why you need to download the best browser for army websites. Many browsers are online, but only a few can unblock military websites.
The conduct of the military around the world is strict, with maximum security. Military websites require validation certificates like DOD root certificates before the browser can unlock them. Also, navy website certificates for validation are the SSL certificate.
It would help if you had a secure and private browser before accessing any army websites. As we go through this article, we’ll examine the five best secure & confidential browsers for army websites.
How do I unblock military websites?
1. Use a VPN (Virtual Private Network)
The easiest way to unblock any website is by using a VPN. It can serve many purposes ranging from clearing sites that are geographical restrictions, keyword filters and blocked IP addresses, etc.
Also, VPN protects your browsing activities from intruders by encrypting your web traffic. So, use a VPN to unblock military websites and other restricted websites. It is, however, not illegal to unblock websites with a VPN.
If you are not planning to use a browser that can unlock the army websites, it is advisable to use a VPN.
2. Try using an open web proxy
Using a web proxy can quickly unblock some websites. In addition, it does not require any download or installation. All you have to do is to connect to a proxy server, then go to the website.
However, web proxy is a good way of unlocking sites, but there are some it can’t get by. Hence, the need for browsers for army websites.
3. Use the section of the Restricted site in your browser
In your browser, you need to do some troubleshooting to be able to unblock websites. So, check if the website you want to visit is on the restricted sites list. It is possible the website is not safe, so it is blocked.
Also, you may need to download a certificate on your browser to give it access to be able to access restricted sites. For example, the SSL certificate unblocks sites in your browser.
You don’t need to install a VPN if you have a good and reliable browser. The browsers listed below have an inbuilt security system that functions like a VPN. However, if the reason for you being unable to access a website is location related, the VPN is the best option.
It is a very productive browser and a good choice for unblocking websites. In addition, it has an SSL certificate which helps it unblock sites.
UR Browser is also very customizable. It’s not really a useful feature to access army websites but it helps you enjoy your experience and that’s important, right?
Install DOD root certificates on your computer through the InstallRoot utility.
Install the DOD CA certificate.
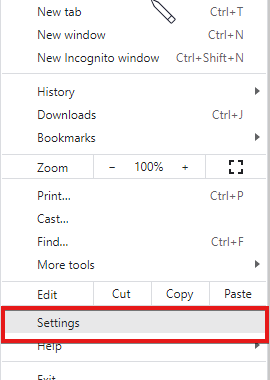
Launch Google Chrome and go to Settings.
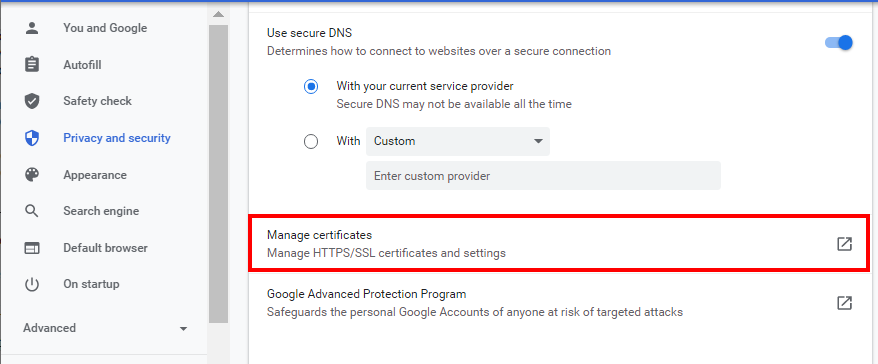
Click Privacy and security, then scroll down.
Select Manage certificates and check if the CAC is there. (If it appears, restart your computer, and you are good to go)
However, there are different reasons why a website to blocked. It can be inaccessible without a particular certificate. It can be geographical, identity, etc.
So, depending on why one is, the list of the best browser for army websites will help access DOD sites.
Windows 10 comes with a totally new look that is not only easy to use but also very well designed to work seamlessly on desktops as well as systems that have a touch-based interface. In this post, we will explain how to get Mac OS X El Capitan theme for Windows 10 with a free download
You get a bunch of new themes with the default Windows 10 installation but you can also download themes for Windows 10 if you want to try a new look.
But did you know that there are transformation packs available for Windows 10 that can make it look like some other operating systems?
There are numerous software and transformation packs available in the market today which can make your Windows 10 desktop look like Mac OS X – El Capitan.
All these software and applications are easy to use and run. We shall discuss a handful of this software in this post below.
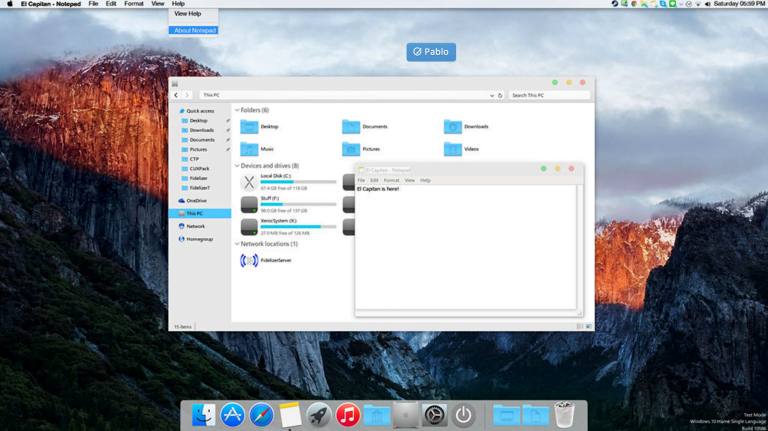
Mac OS X – El Capitan is the newest iteration of Mac OS X and comes with a better-polished UI for Macs. This look is loved by many people around the world.
El Capitan Transformation Pack will provide you with all new MAC OS X El Capitan user experience such as theme; system resources, wallpapers, and new OS X features combined working on Windows platform, from Windows XP to up to Windows 10.
In this combo, you’ll have the best user experience which greatly resembles the original OS X El Capitan from a Windows perspective.
Downloads & Features of the transformation pack:
Picture perfect installation and uninstallation giving users safe transformation
Easy to configure in a single click with intelligence Metro User Interface design
Designed for all versions of Windows XP/Vista/7/8/8.1/10 including Server Editions
Genuine OS X El Capitan/iOS 9 system resources
Auto-repair feature added and Windows update friendly
Ux Style memory patching
OS X El Capitan/iOS 9 themes, user’s pictures, wallpapers, and login screen
OS X Dock emulation optimized for stability/performance
Install El Capitan Transformation Pack 2.0 – Procedure
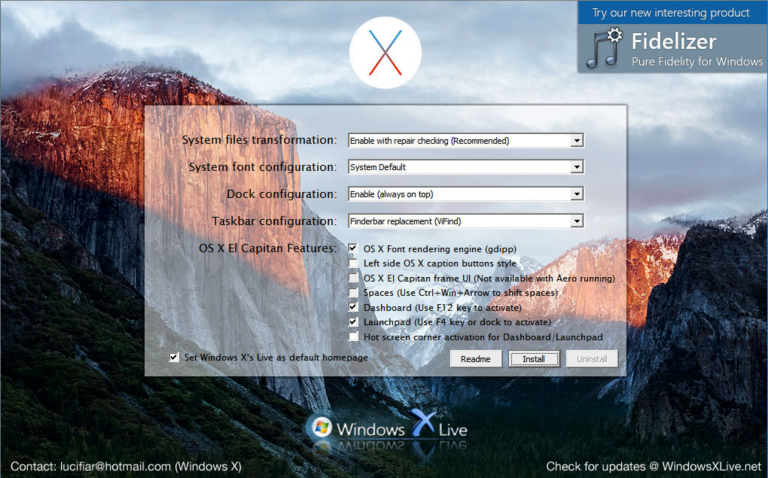
Head over to the El Capitan download link and download the ZIP file that the transformation pack comes in.
After the pack is downloaded, just extract the file and save it.
Now double-click the extracted file and start the setup to start the installation of the El Capitan Transformation Pack.
You will be asked to choose from a set of options so go ahead and choose the exact settings you want.
After going through the installation wizard, the installation will be complete.
As soon as the installation is complete, you will notice that your PC now has similar looks as that of Mac OS X – El Capitan.
As mentioned in the features section above, you get to have looks that are similar to Mac OS X – El Capitan on Windows 10, and this even works on older versions of Windows i.e. Windows XP, Windows Vista, Windows 7, and even Windows 8/8.1.
So go ahead and install this transformation pack if you want to have a Windows 10 system that has El Capitan looks. If you are facing any issues or have any doubts regarding the procedure feel free to drop a comment below.
If you’re not a great fan of Windows Ink Workspace, you might want to disable it on your Windows 10 PC. In this guide, you will find out step-by-step solutions on how to do that.
In Windows 10 Anniversary update Microsoft introduced a new Windows Ink workspace feature to improve the pen experience. With the help of this feature tablet users whose stylus or pen can write on their device just like on paper.
If the supported pen or stylus is identified by your Windows 10 device, the Windows Ink icon will automatically appear in the system tray or in the notification area on the taskbar.
Windows Ink Workspace offers you a variety of features like you can create sticky notes, write notes on the web pages, take a screenshot of the Windows screen using screen sketch or sketchpad, create reminders using Cortana, you can draw anything on the whiteboard, edit any image and more.
Even on the Microsoft surfaces device, it is integrated with Microsoft Office, Edge, and Maps. It is really a useful feature for those whose devices are supported by a stylus or pen.
How can I disable Windows Ink Workspace on Windows 10?
In case, your device does not support a pen or stylus, then you will not find it useful and definitely want to disable Windows Ink Workspace on your Windows 10. Here is how to do it:
Disable Windows Ink Workspace using Group Policy Editor
A good method to disable Windows Ink Workspace is to use Group Policy Editor. It is a built-in administration tool which allows you to configure settings on your PC.
1. Press the Windows Key to open the Start Menu and type gpedit.msc in the search box.
2. Click on the result to launch the Group Policy Editor.
3. When the UAC pop-up appears, click Yes to continue.
4. Navigate to the following path: Computer Configuration ->Administrative Templates ->Windows Components ->Windows Ink Workspace
5. On the right pane, look for Allow Windows Ink Workspace Settings and double-click on it.
6. Another window will open where you need to switch from “Not configured” to “Enabled” settings.
7. Under action settings, switch from ON to Disabled.
8. After that, click onApplyand thenOK to save the changes.
Disable Windows Ink Workspace on Windows 10 (Home Edition)
Launch Registry Editor by typing regedit in the Windows 10search bar. When you see Regedit run command at the top of the result, click to run it.
In the Registry Editor navigate to the following Registry key: HKEY_LOCAL_MACHINE\SOFTWARE\Policies\Microsoft\WindowsInkWorkspace Note: If there is no WindowsInkWorkspace Registry Key, Simply create one manually.
Select WindowsInkWorksapce Key.
Here on the right panel make a right-click and select New-> DWORD (32-bit Value) to create a 32-bit DWORD value and name it AllowWindowsInkWorkspace. Make sure its Value Data is set to be 0, confirm this by making a right-click on the same value.
Once done, you need to Sign out and Sign-in back to your Windows account to apply the changes.
Some users reported that they noticed the changes after restarting their devices. So if Signing out and Sign-in didn’t work for you, then you can also reboot your device.
That’s it.
By applying the above registry hack, you can disable the Windows Ink Workspace feature from your Windows 10 PC.
In case, you want to enable the Windows Ink Workspace feature back, then you simply need to delete the AllowWindowsInkWorkspace parameter from the Registry Editor.
Let us know in the comments, if you’re a great fan of Windows Ink Workspace or not?
Encountering a Google Chrome black screen can be frustrating, especially if it happens when opening the browser or during regular browsing. This issue can occur on both Windows 10 and Windows 11 and may show as a completely black page, a flashing black window, or Chrome opening to a blank screen.
The problem is often linked to GPU hardware acceleration, outdated browser data, incompatible extensions, or conflicts with your graphics drivers. Below are effective ways to fix the Google Chrome black screen and get your browser working normally again.
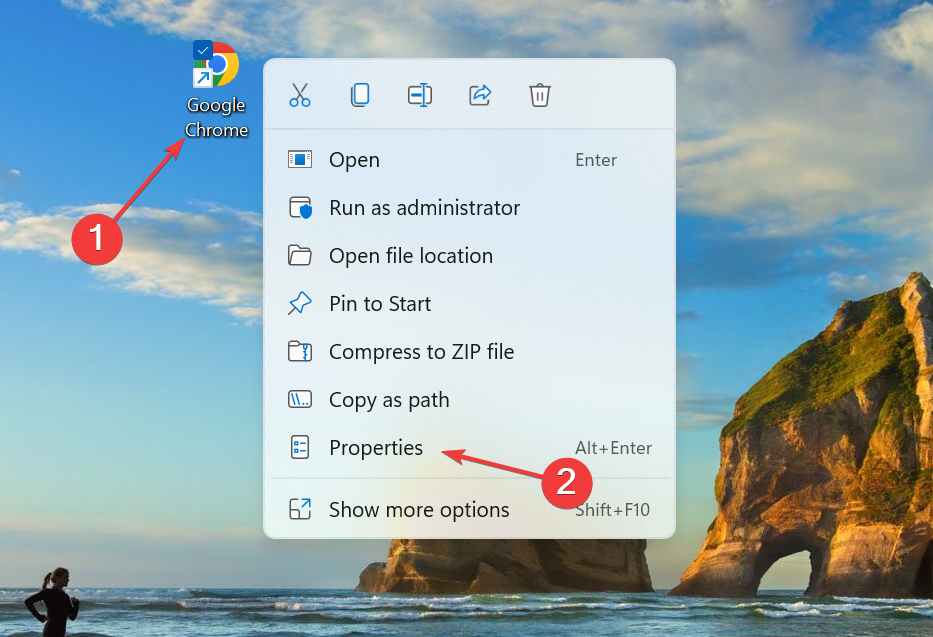
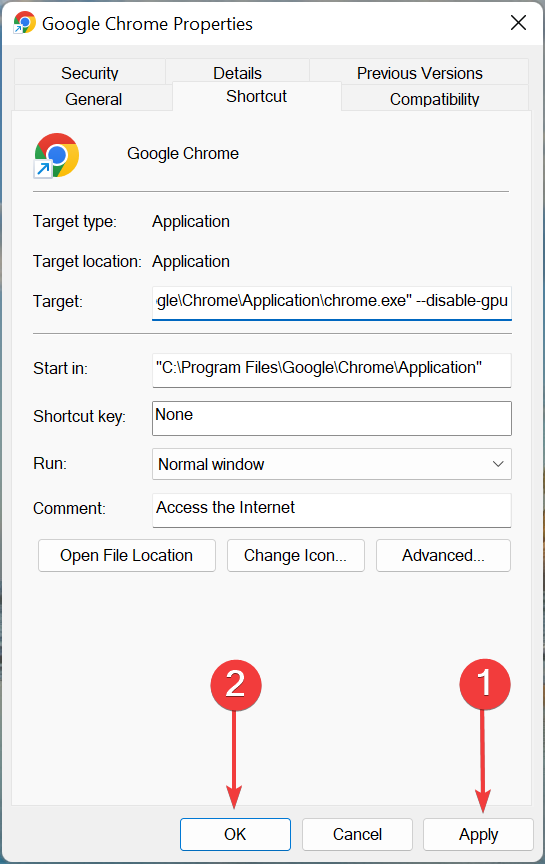
Create a Google Chrome shortcut on Desktop (in case you don’t have it).
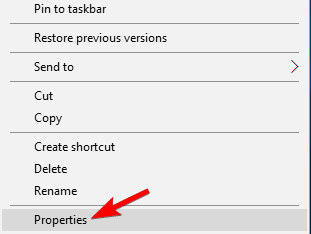
Right-click the shortcut, and select Properties.
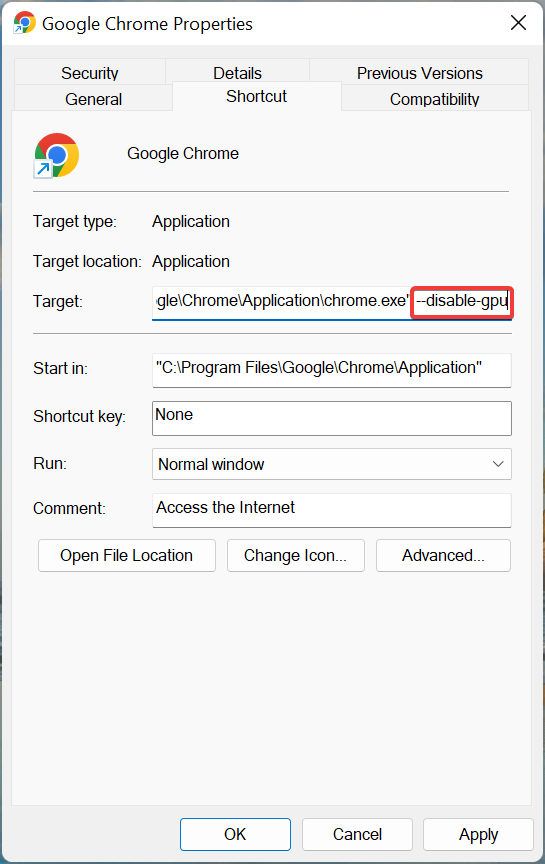
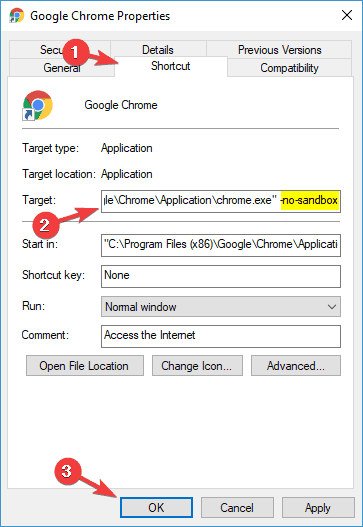
In the Target text field, add the following text: “[space]–disable-gpu” (so the path should look like chrome.exe” –disable-gpu”).
Click on Apply and then on OK to save the changes.
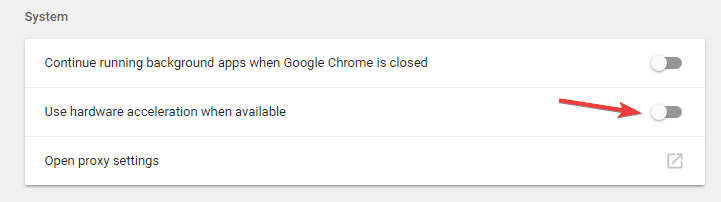
Now, open Chrome, paste the following in the address bar, and hit Enter:chrome://settings/system
Next, just disable the Use hardware acceleration when available option.
Restart Chrome.
The most common workaround for black screen issues in Google Chrome is to disable GPU compositing on all pages.
This solution proved to be the right one in most of the cases, and for the majority of users. However, if you’re still experiencing the black screen issues in Google Chrome, move on to another solution.
2. Disable plugins to fix Chrome flashing black screen
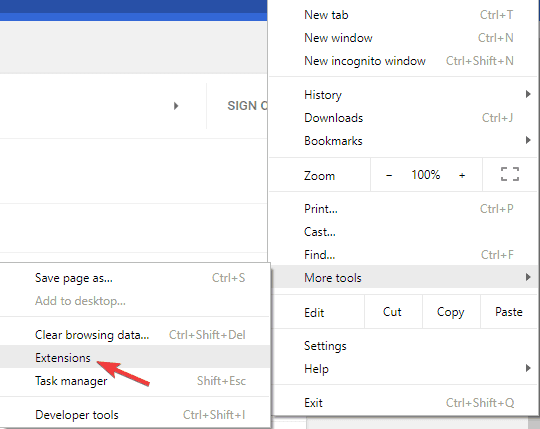
Click the Menu icon and choose More tools > Extensions.
A list of all extensions will now appear. Disable all extensions by clicking the switch icon next to the extension’s name.
After disabling all extensions, restart Chrome and check if the problem is still there.
If you’re wondering why has your google screen gone black, the issue might be related to extensions.
A plugin might not be fully compatible with your version of Chrome or it might be buggy causing the issue to appear.
To fix the problem, you need to find and disable the problematic plugin.
If the issue doesn’t reappear, you can start enabling extensions one by one until you find the one that is causing the issue. Once you find it, you can keep it disabled or remove it from Chrome.
3. Disable Chrome flags to fix the Chrome black screen after sleep
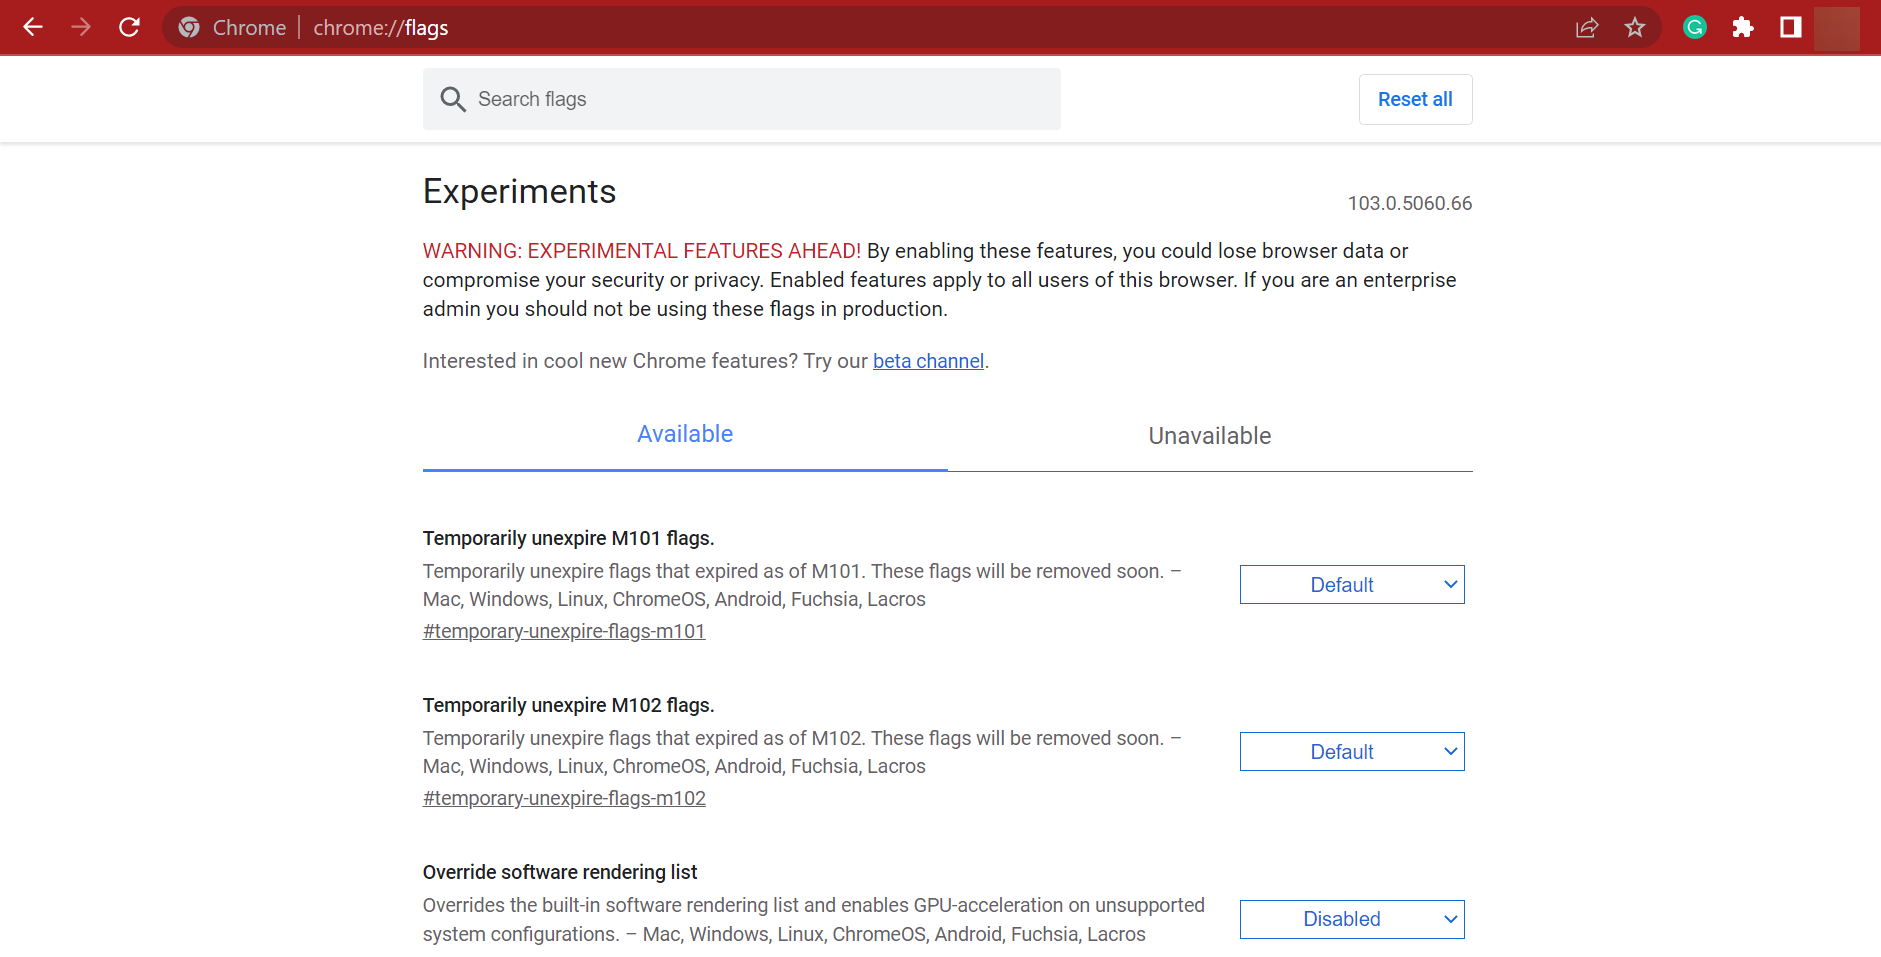
If Google turned black on your PC, you can disable some Chrome flags, in order to fix this problem. Flags are experimental features and can introduce instability. So, it’s recommended that you proceed with extreme caution when enabling these.
Now, if the problem started after enabling a flag, disable it right away. To view all the flags available on Chrome, paste this in the address bar and hit Enter:chrome://flags/
This solution proved to be helpful only to some users, as others reported it as unsuccessful. Nevertheless, you should try it, and see if disabled flags make any difference.
4. Resize the window to fix Chrome’s black screen when playing videos
According to users, you might be able to fix this problem simply by resizing Chrome. To do that, just click and hold Google’s title bar in order to resize it.
After doing that, restore Chrome back to the original size and check if the problem is still there.
Keep in mind that this is just a workaround, so it won’t permanently solve this issue. If the black screen reappears, simply resize your browser again and the problem will be temporarily solved.
5. Run in Compatibility mode to fix Chrome black screen when scrolling
Locate the Chrome shortcut, right-click it and choose Properties from the menu.
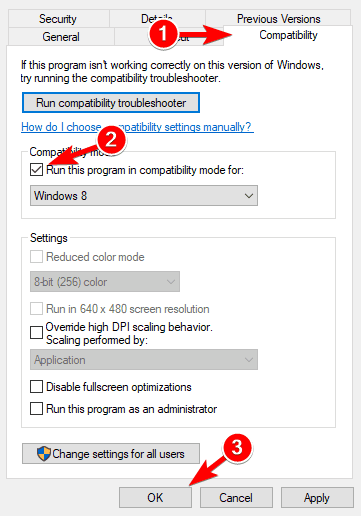
When the Properties window opens, navigate to the Compatibility tab and check Run this program in compatibility mode for.
Now select the desired version of Windows. Many users recommend using Windows 7, so you might do that.
Lastly, click Apply and OK to save changes.
Compatibility mode is a useful feature of Windows that allows you to run older applications.
Speaking of which, many users reported that they fixed black screen issues in Google Chrome simply by enabling Compatibility mode.
After enabling Compatibility mode, try starting Chrome again. If the issue reappears, repeat the same steps, but this time click Change settings for all users button.
In addition, you might want to try different versions of Windows and check if that helps. Also, this method would come in handy if you find the Chrome black screen to flicker continuously.
6. Add -no-sandbox launch parameter
Right-click Chrome’s shortcut. Choose Properties from the menu.
Navigate to the Shortcut tab and in the Target field add –no-sandbox at the end. Now click Apply and OK to save changes.
According to users, you might be able to fix Chrome black screen issues on Windows 10 by adding a -no-sandbox parameter to Chrome’s shortcut.
In case you don’t know, Google Chrome uses a Sandbox mode in order to separate its processes.
This means that even if your browser encounters malware, the malware will be contained thanks to the Sandbox mode.
As you can see, Sandbox mode is a useful security feature, but sometimes it can cause Google Chrome display issues. To fix the problem, some users are suggesting disabling Sandbox mode.
7. Reinstall Chrome
According to users, sometimes in order to fix the black screen in Chrome, you need to reinstall it completely. Reinstalling Chrome might remove all your bookmarks and history, so you should export them or enable syncing.
There are several ways to uninstall Chrome, but the best one is to use uninstaller software. In case you’re not familiar, uninstaller software is a special application that will remove the selected application along with all of its files and registry entries.
There are many great uninstaller applications for Windows 10, so go over the list and use the one suitable for your PC. Once you remove Chrome with one of the tools, install it again, and check if the problem is resolved.
Furthermore, a professional uninstaller application will do complete scans of your PC after uninstallation to eliminate excess data. As a result, you get a clean PC, as if Google Chrome had never been installed on your computer.
How do you reset Google Chrome?
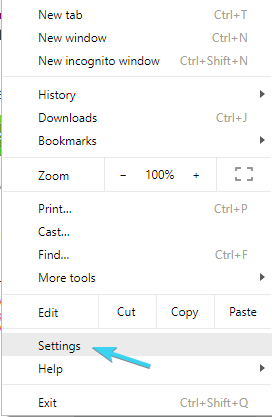
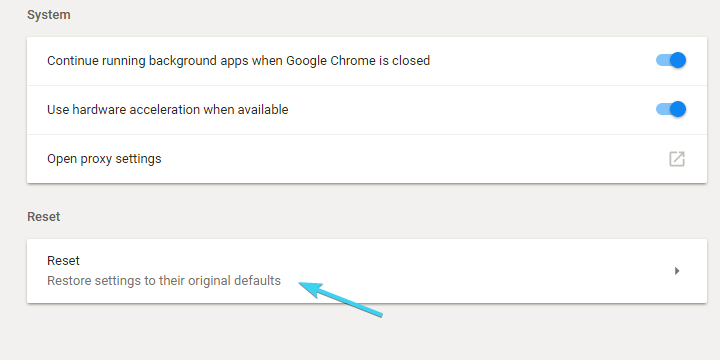
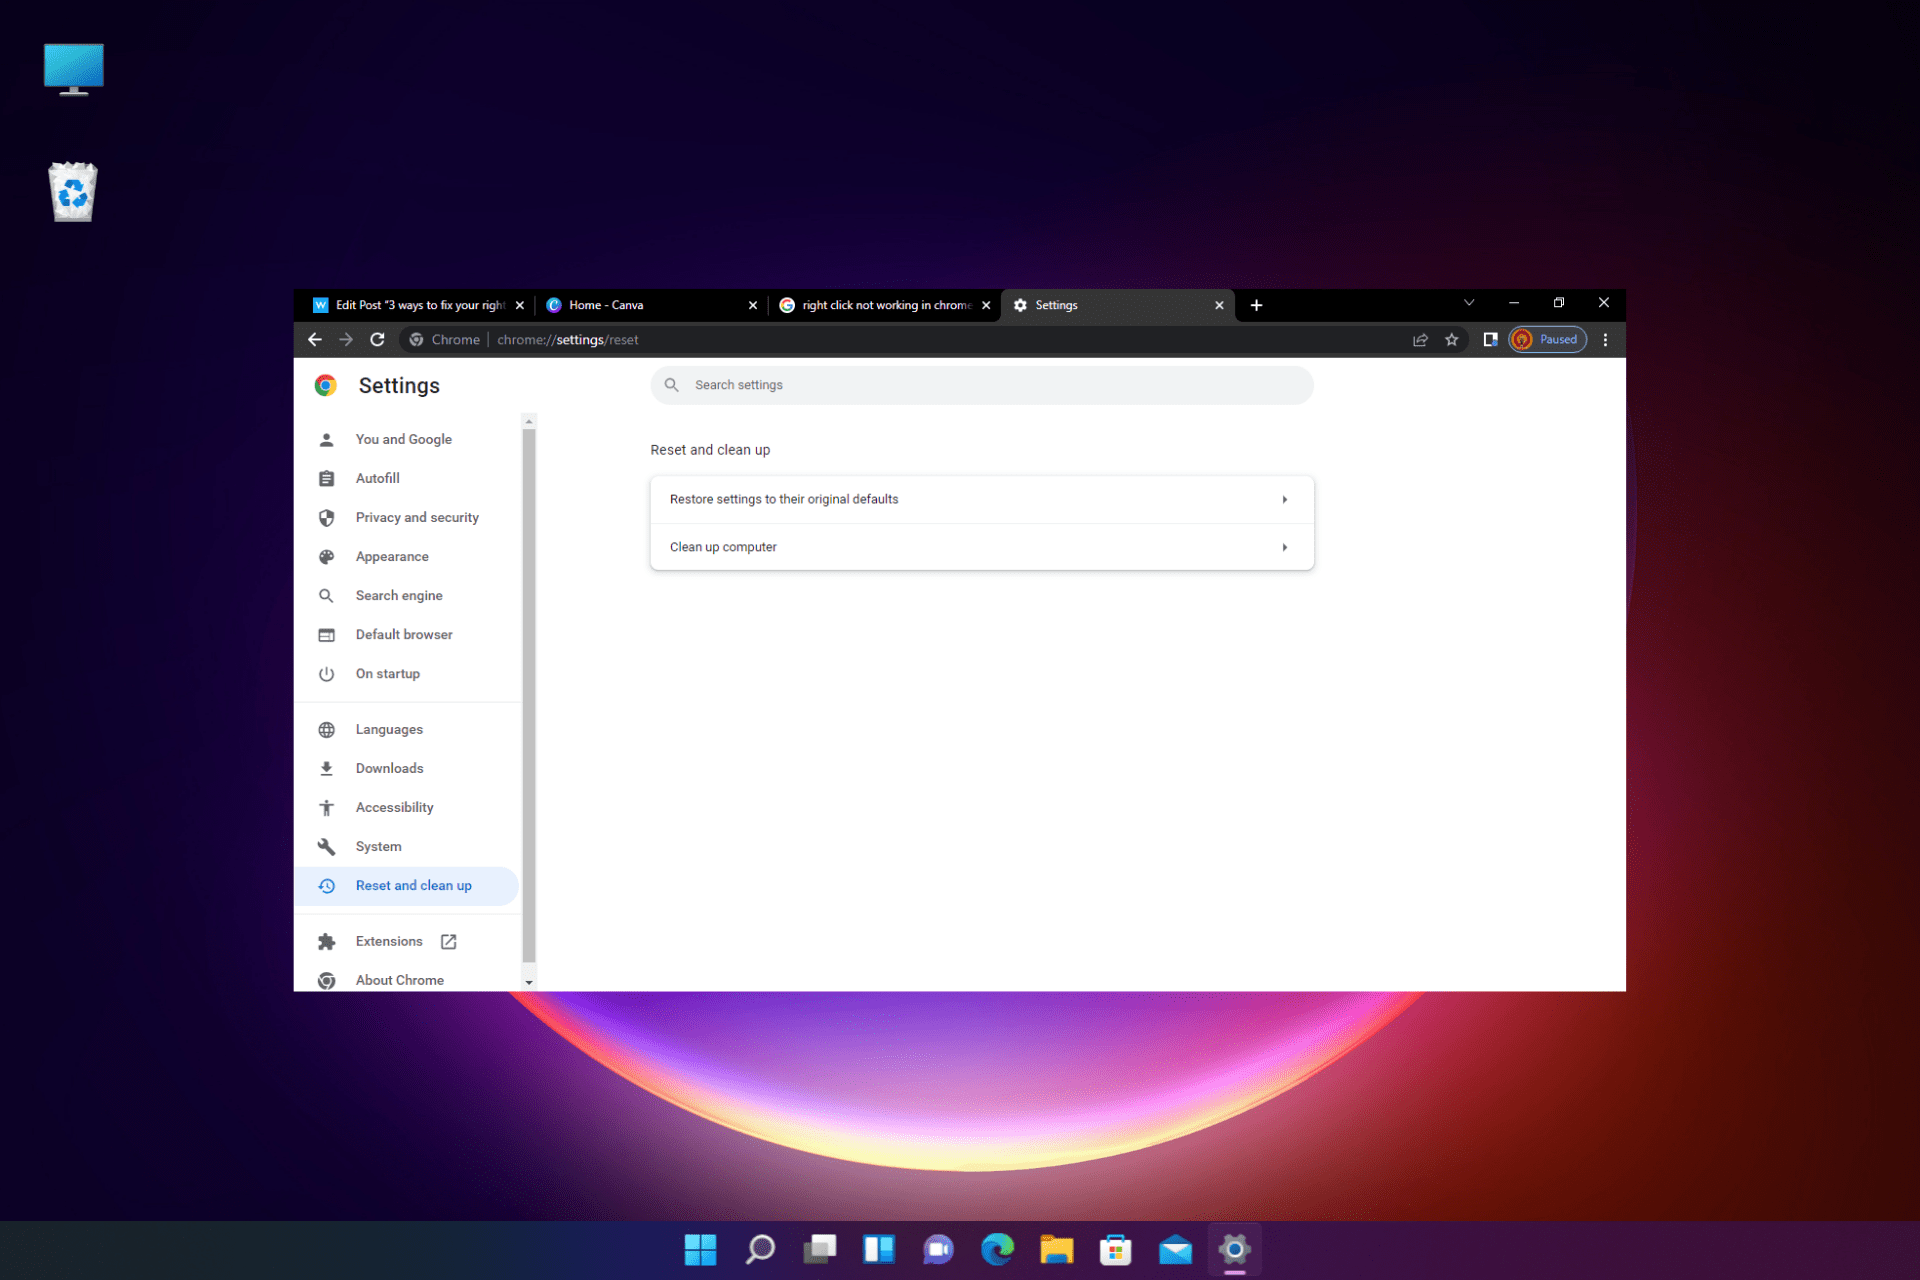
Click the Menu icon in Chrome and choose Settings from the menu.
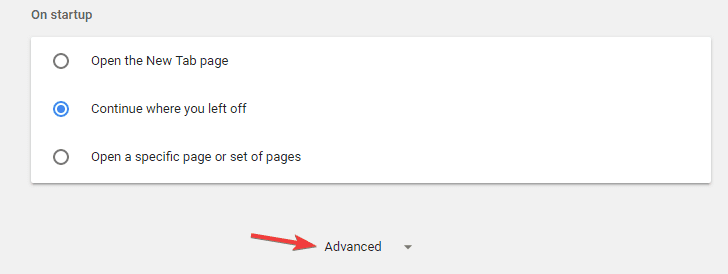
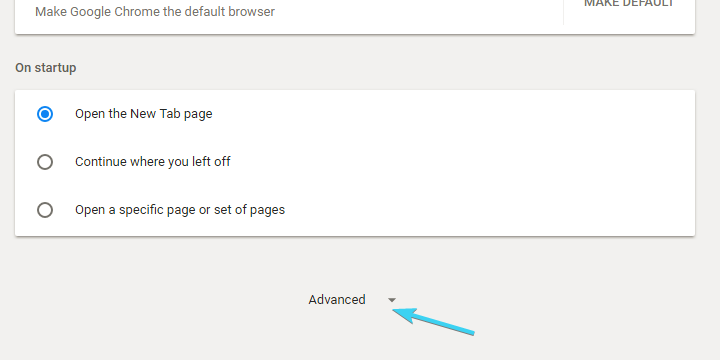
When the Settings tab opens, scroll down and click Advanced.
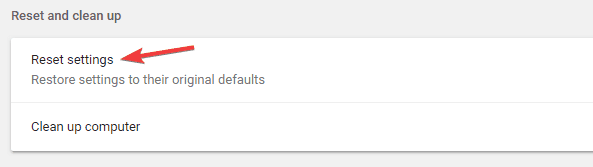
Navigate to Reset and clean up section and click Reset settings.
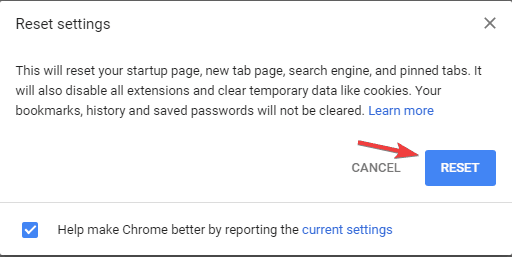
Click the Reset button to confirm.
If you’re having problems with Chrome, you might be able to solve them simply by resetting Chrome to default. By doing that you’ll reset all its settings and remove all extensions.
Keep in mind that this will remove all your bookmarks and history, so be sure to enable syncing or exporting your data. You can do that easily with a few efficient tools.
By following these steps, you should be able to fix the Google Chrome black screen in Windows 10 issue.
Let us know which solutions worked best for you by leaving us a message in the comments section below.
A VPN is only as useful as it can work in a seamless manner with your browser of choice. For some, this seems to be the problem since they’re unable to use both Chrome and the VPN of choice.
Chrome is indeed a memory hog but it’s still far and beyond the most used browser out there. So, the possible effects of VPN incompatibility can deem it completely redundant.
Now, since the issues are, arguably, instigated by VPN itself, it’ll be hard to cover hundreds of them in one article. Therefore, we offer general troubleshooting to avoid all other possible accomplices in the crime.
For the rest, the premium support of a given VPN should provide a solution. So, make sure to check the steps below before you send a ticket to VPN.
The solutions listed below will also work if you need help with the following issues:
Google not working with VPN
NordVPN Chrome extension not working
Chrome not working with VPN (most likely you are using a proxy or a VPN that prevents proper playback)
Chrome VPN extension is not working
Therefore, if you value online privacy, the guide below will give you step-by-step instructions for all of these scenarios.
On condition that you use a reputable VPN and take care of your Internet settings, you should be able to re-establish a connection in Chrome in just a few minutes.
Why is my VPN not working with Chrome?
Before we get to the troubleshooting process, in order to better understand the problem, it’s important to know why such things happen in the first place.
Issues such as the setup VPN not working on Chrome, the NordVPN Chrome extension not working, not being able to access the Internet when connected to VPN, or the VPN is connected but not working are pretty common.
They can be the result of conflicts with your system’s security (Firewall) or proxy servers, the Internet not working, other extensions getting in the way, or other security limitations.
Which browser has a built-in VPN?
There are a few browsers that offer users a built-in VPN service, among which we can include the UR browser, Avast Secure, Aloha, Epic, and Opera One.
If you really need a VPN to work, then maybe you should use an alternative browser until you are done fixing Chrome. Opera One is a great option since it has precisely what you need: a free, built-in VPN.
Opera One’s VPN gives access to several locations, plus it places no limits on traffic data. You can keep it enabled all the time.
Opera One
Surf the Internet in complete privacy thanks to Opera Oneand the built-in VPN that it brings completely free!
Click on the 3-dot menu in the upper right corner and open Settings.
Scroll down and click on Advanced to expand the advanced settings.
Scroll to the bottom and click on Reset settings.
Run the dedicated Windows Troubleshooter:
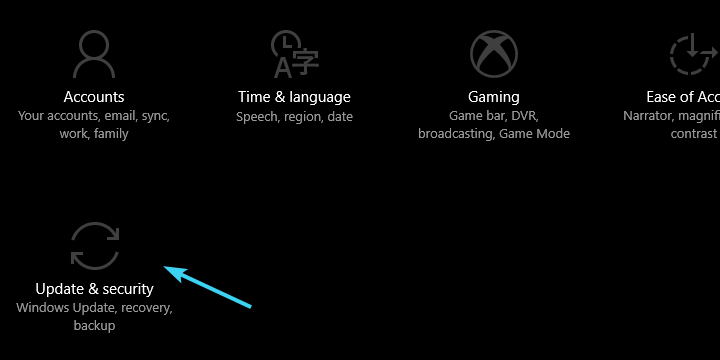
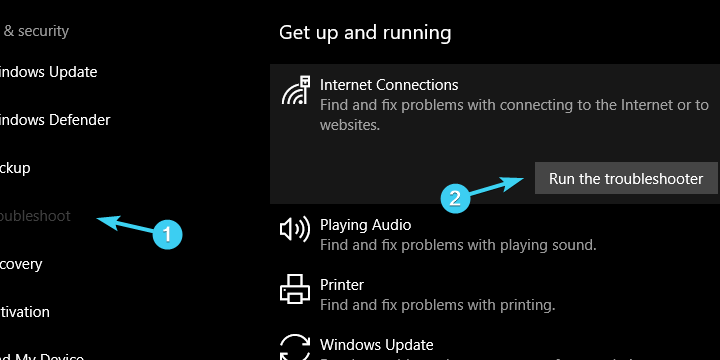
Press Windows key + I to open Settings.
Open Update & security.
Select Troubleshoot from the left pane.
Highlight Internet Connections and click on the Run the troubleshooter button.
Reset native IP address:
Type cmd in the Search bar, right-click on Command Prompt, and run it as an administrator.
In the command line, copy and paste the following lines and press Enter after each: netsh winsock reset netsh int ip reset ipconfig /release ipconfig /renew
Close the elevated command line and try again.
If that doesn’t help, try the following:
Update the modem’s/router’s firmware.
Check Ethernet and Wi-Fi drivers.
These guidelines can be helpful if the VPN setup is not working in Chrome, so be sure to try them.
2. Switch servers
For better geolocation, we strongly recommend using the Private Internet Access tool. It covers over 2500 servers in 47 different countries, so you have plenty of choices as far as connections are concerned.
Most VPN solutions offer at least a dozen different servers on different geolocations. Now, there’s always the slightest chance that an individual server won’t work or it’s down at the moment.
So, make sure to switch between the servers and look for changes. There’s a small difference between the slow connection and the complete absence of connection.
As a side note, you can try to change the encryption protocol, too. It’s an unwritten rule that the more powerful the encryption protocol, the slower the connection.
If Google is not working with VPN, be sure to switch to Private Internet Access to fix the problem for good.
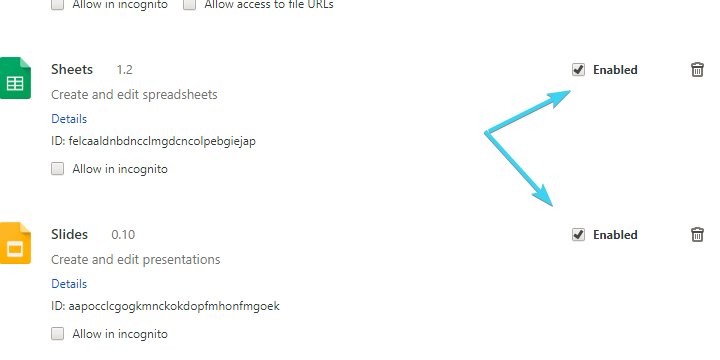
Click on the 3-dot menu and then More tools > Extensions.
Disable all extensions individually and restart Chrome.
This method can be helpful if the NordVPN Chrome extension isn’t working, so be sure to check your extensions for interference.
If Chrome is still unable to connect, make sure to move on to the alternative steps.
In addition, you can clear the cache. Sometimes the piles of the cache can affect overall usability.
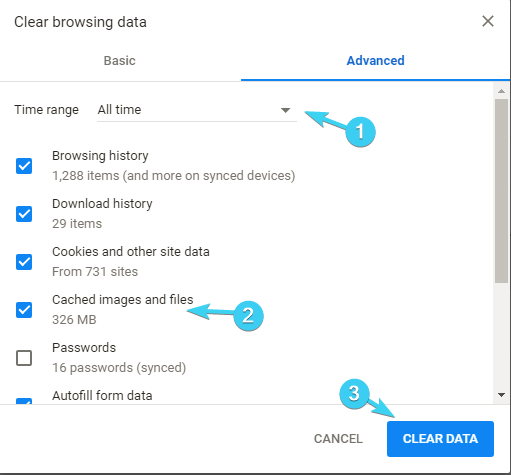
This might not be the exception. Here’s how to clear cache in Chrome:
Open Chrome.
Press Ctrl + Shift + Delete to open the Clear browsing data dialog box.
Select Advanced.
Under Time range, select All time.
Uncheck (or don’t, it’s your choice) other boxes but keep checking Cached images and files.
Click on Clear data.
4. Disable proxy
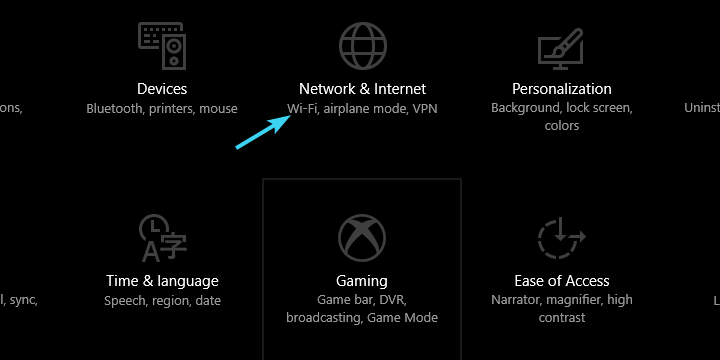
Press Windows key + I to open the Settings app.
Select the Network & internet option.
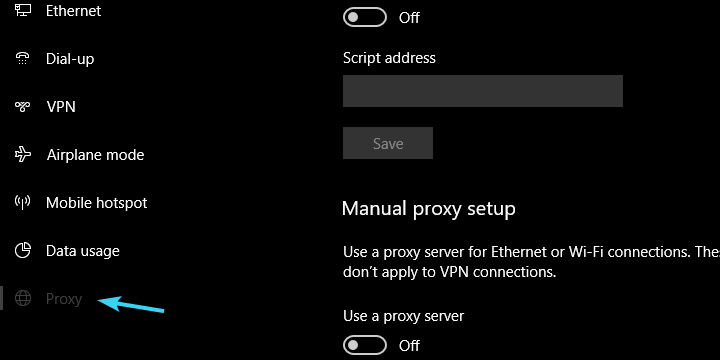
Click on Proxy at the bottom of the left pane.
Make sure everything is disabled for both manual and automatic configurations.
Exit and try using Chrome in combination with VPN again.
Sometimes your proxy can cause issues with VPN and Chrome. If you’re using VPN, there’s no need for a proxy whatsoever.
A built-in proxy is usually off by default, but you can always disable it by following the instructions above.
5. Update Chrome
Open Chrome.
Click on the 3-dot menu, then Help > About Google Chrome.
This should automatically update Chrome and you should see the final version installing.
Restart the browser and look for changes.
After updating Chrome, check if Google is still not working with VPN.
6. Turn off antivirus/firewall
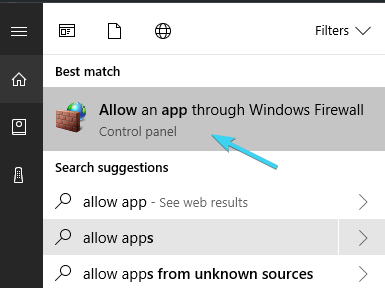
In the Windows Search bar, type Firewall, and open Allow an app through Windows Firewall.
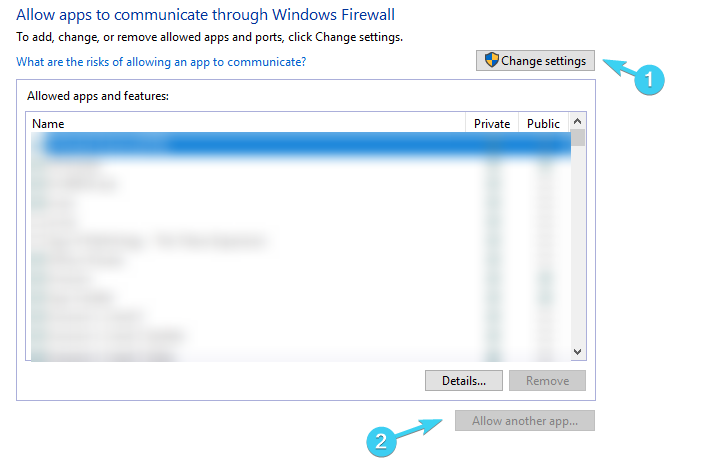
Click Change settings.
Choose to Allow another app
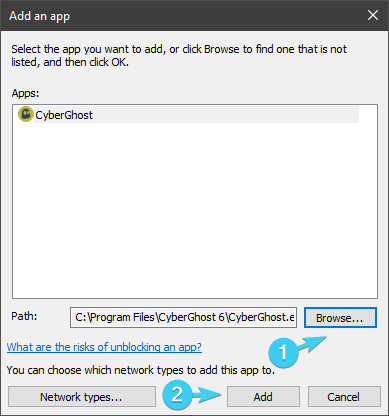
Browse for VPN in Program Files and add EXE file.
Click Add.
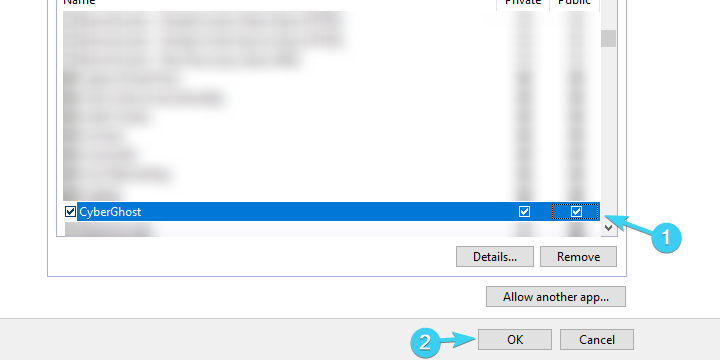
Let the VPN communicate through both Public and Private networks.
Click OK to confirm changes.
7. Disable VPN network lock
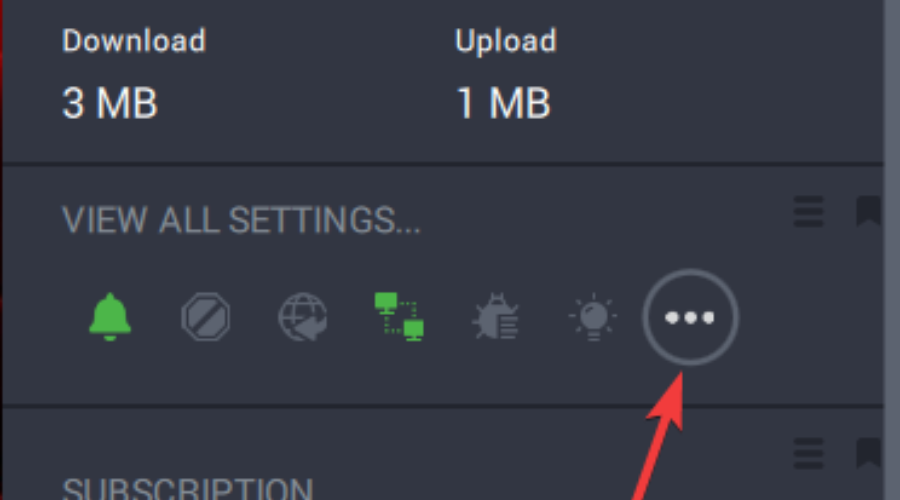
Open the VPN you use.
Access the VPN’s Settings.
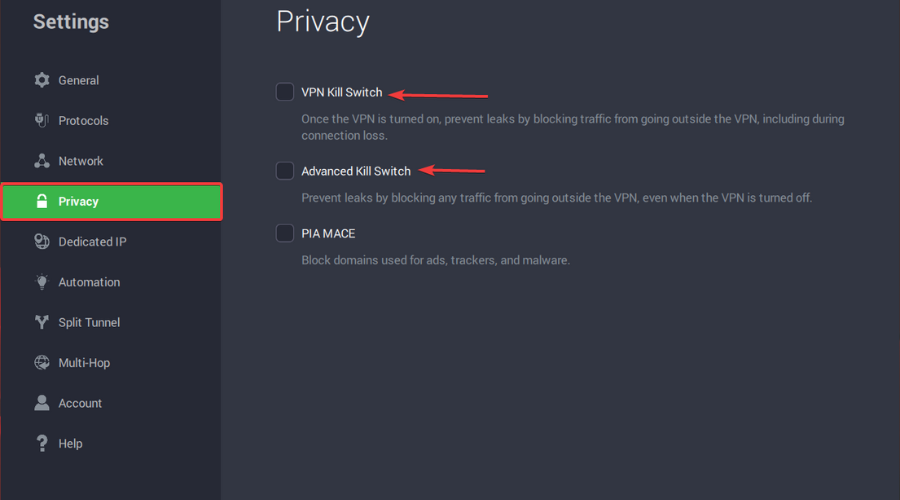
Go to the Privacy tab and disable the VPN and Internet kill switches.
The kill switch is a feature that’s offered by reliable VPN providers, that disconnects you from the internet if your VPN connection drops to ensure that your real IP isn’t leaked online.
How to turn on VPN in Chrome on Windows 10/11?
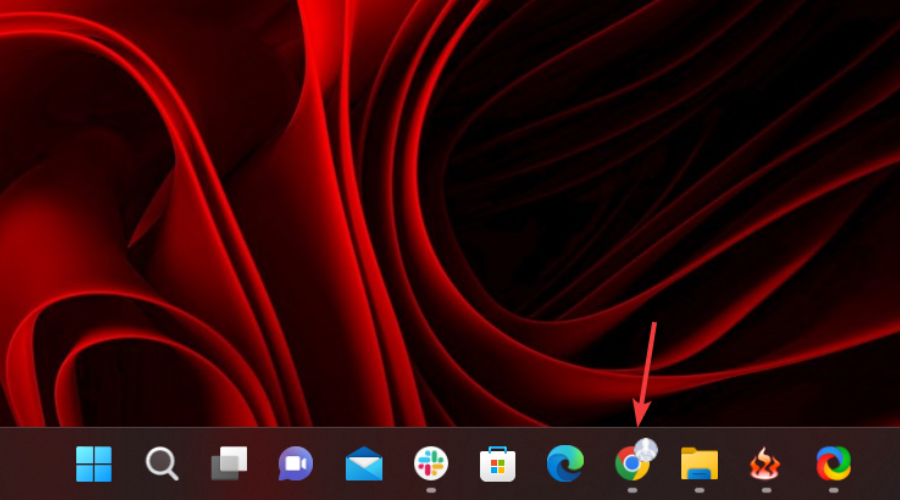
Open Google Chrome.
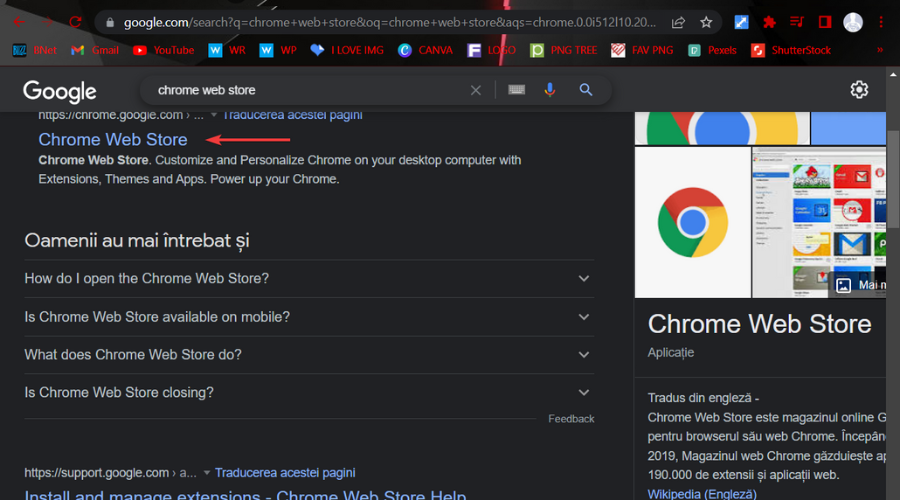
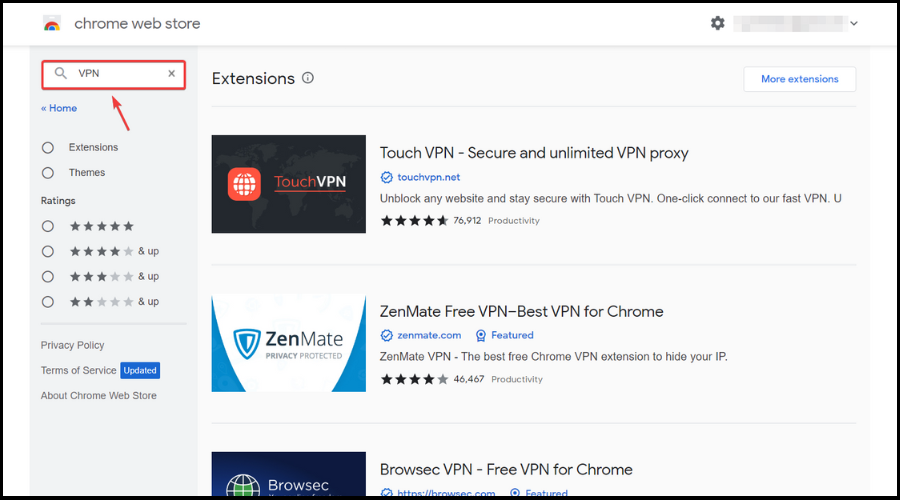
Search for Chrome Web Store.
Enter VPN in the search box and press Enter.
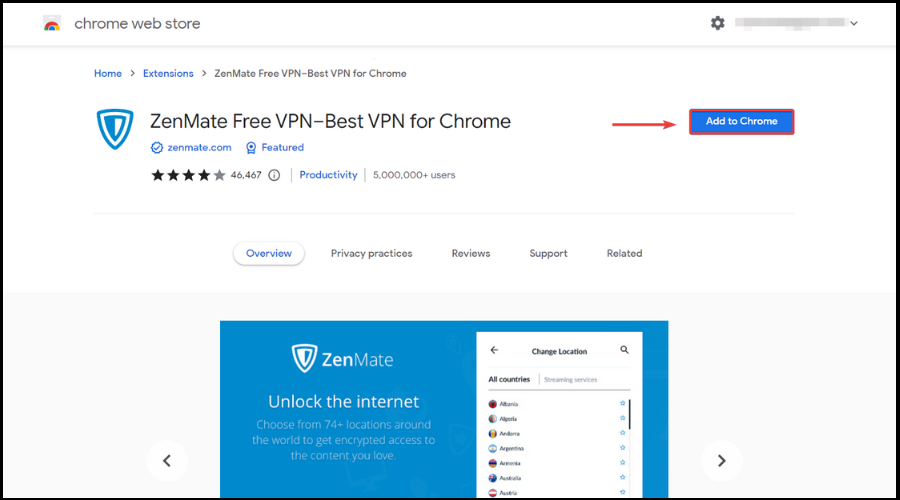
Click on the VPN you want to install and press the Add to Chrome button.
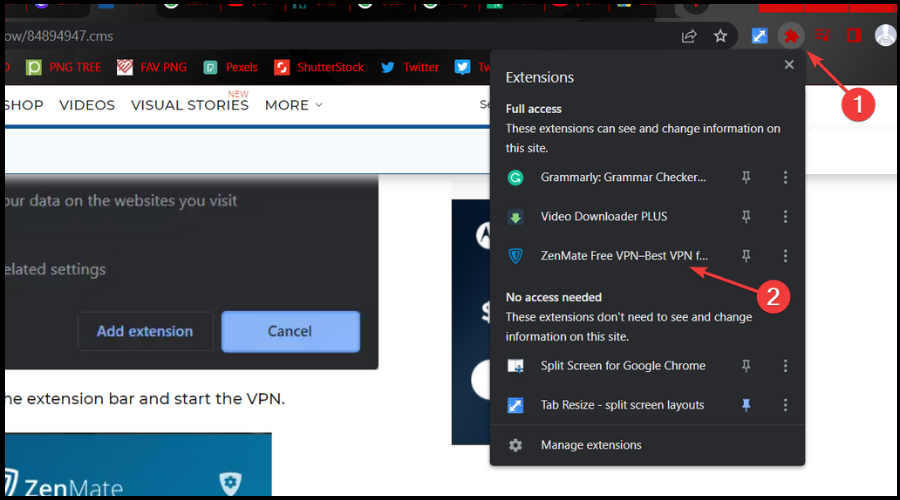
Access the installed VPN from the Extensions button.
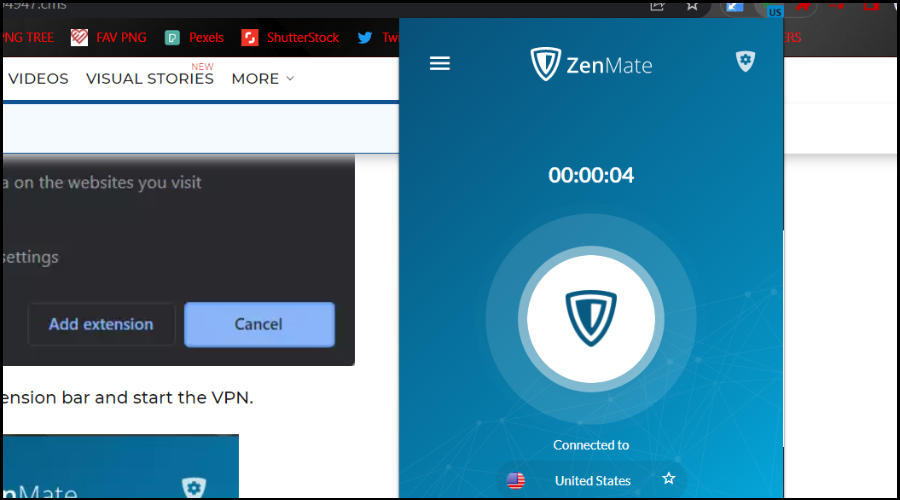
Activate or deactivate the VPN according to preferences.
Most antivirus suites come with a dedicated firewall that tends to block VPN solutions and prevent them from communicating through the PC’s network freely.
Therefore, you can choose to either disable the firewall completely while using the VPN or create a firewall exception for the affected VPN.
That should do it. If you’re still unable to resolve your problems, we advise you to contact VPN’s technical support. In addition, make sure to share alternative solutions or questions with us. The comments section is just below.
Who doesn’t appreciate it when browsers implement new CSS features? However, sometimes certain features, such as the column gap, are not working in Safari.
The gap property is an effort to provide a property similar to the CSS grid and flexbox. It will be in charge of the space (gutters) between columns and rows.
However, certain browsers, including Safari, do not enable the gap property when using the flex layout. This isn’t the only issue with the browser, and many reported that Safari cannot download a file, but we covered that problem in a separate guide.
Does gap work in Safari?
If the column gap or grid gap is not working in Safari, it is most likely because you are using a Safari version less than 14.
Row-gap and column-gap are now supported in Flexbox containers in Safari 14.1. This update makes it feasible for flexbox to be used in web design without the need for awkward margin hacks.
But if the column-gap is not working in Safari, there are ways to fix it.
Is Flexbox Gap supported in all browsers?
Most modern browsers support flexbox. Several web browsers have an experimental implementation of flexbox. Using a vendor prefix was the standard procedure for developing experimental implementations.
Gap Flexbox support in various browsers (Source: CanIUse)
This issue affects only Safari before version 15.4, but if you’re using this or any newer release, you don’t have any problems.
Now that you know more about this feature, let’s see what we can do if grid-gap is not working in Safari.
Quick Tip:
Simply put, you can resolve this website issue with gap columns or rows by simply switching your browser to Opera One.
This workaround doesn’t fix the problem on Safari but still delivers optimized navigation with gap property support and lots of integration features, even a native AI.
Opera One
Navigate without errors on any webpage using advanced features and accessibility.
How do I fix the gap if it doesn’t work on Safari?
1. Update your Safari to the latest version
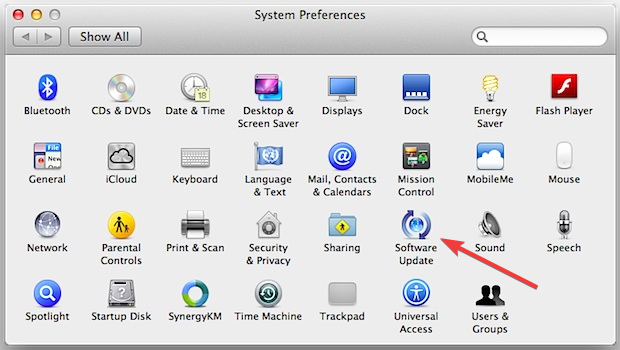
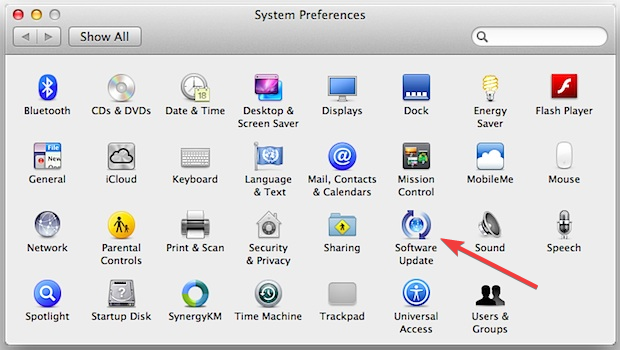
Select System Preferences from the Apple menu in the corner of your screen.
Click on Software Update.
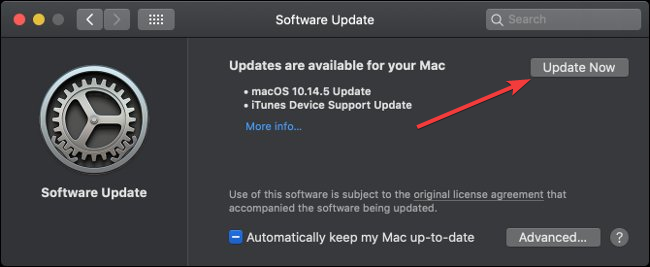
Wait for the Mac to do an update check.
Click Upgrade Now if there are any accessible updates.
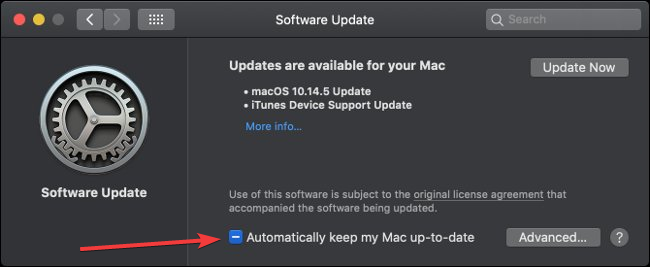
Check the option labeled Automatically keep my Mac updated to get macOS and Safari upgrades automatically.
Wait for any updates to be installed on your Mac.
This solution isn’t a Safari flex gap workaround, and it will permanently fix the problem on your computer.
2. Flex gap workaround
Open your CSS file.
Now add to the desired element the following code: display: grid; grid-gap: 8rem; gap: 8rem;
Save changes.
If CSS flex gap not working, you can fix this issue is by using a workaround. There is no support for Flexbox in Safari less than 14.
Grid gap is supported in previous Safari versions; therefore, switching from display flex to grid would be preferable.
3. Employ the lobotomized owl selector
Open the CSS file in your favorite editor.
Now add this line of code:.parent_div>*+* { margin-left: 8rem;}
Save changes.
An unusual three-character CSS selector exists in the form of the lobotomized owl selector. Because it bears an uncanny likeness to an owl’s vacuous look, it is called the lobotomized owl selector.
Instead of using gap in CSS 3, you can use margin-right in CSS 3. If gap is not working at all in Safari, you can follow the abovementioned solutions to fix this issue.
However, the gap issue seems to be fixed in the newer versions of Safari, so you won’t have to resort to workarounds anymore.
If the gap is not working in Safari, the best option would be to update your browser, but if that’s not an option, then you’ll have to resort to workarounds.
This is a client-side issue, but many had server-side issues, such as the server stopped responding Safari messages, but these can be fixed as well.
Did you manage to fix the gap issue in Safari? Let us know which solution worked for you.
Roku is a media player that works great with a wide range of streaming services. Even though Roku supports various services, many are wondering if they can use Roku as a web browser.
Roku used to have a web browser called Web Browser X. However, it didn’t come included with the device, but as a separate app that the user had to pay for.
In the meantime, Roku has removed all browser apps for some time now. Since the device has been designed as a streaming tool, the need for an integrated browser has been ignored.
Even so, a lot of users would like to use Roku as a fully-featured streaming device and surf the web as well.
While there are two or three text-based browsers that work on Roku, the use of regular browsers is limited to the situation when you cast one from Windows to your Roku device.
Roku doesn’t have an official built-in native web browser. However, some browsing applications from third-party developers are available in the Roku store. Unfortunately, not all of them are powerful enough. Also, it is not very comfortable to use all of them.
What browser can I use on Roku?
Even though there are several options, we think Opera One is the best web browser for Roku. According to our real-world tests, it performed exceptionally better than other Roku browsers.
Opera One is the best-performing browser on Roku. It can do everything you can do in a standard browser.
Else, if you are curious enough to learn more about the best web browsers that you can use on Roku, we suggest you go through the following list.
As mentioned, Opera One (or any other traditional browser) can be used on Roku only when you’re connecting the streaming device to your Windows laptop or PC and using the regular keyboard to search.
We’re recommending Opera One because of the few resources it needs and for the fast response time to search queries.
The unlimited integrated VPN will allow you to stream any show you want, from anywhere in the world, while also protecting your online identity.
Besides, the video pop-out feature for YouTube is extremely handy when you want to watch a video while searching for other things on the Internet.
Furthermore, Opera One has a brand-new user interface with a built-in AI assistant that can help you with all kinds of information.
Opera One
Use this blazing-fast, responsive, and extremely lightweight browser to stream your favorite shows on Roku.
Google Chrome is the most popular browser in the world, and rightfully so. It comes with Google integration, allowing you to access various Google tools quickly.
This allows you to access Gmail or Google Docs even if you’re offline. In addition, thanks to the integration, you can use the built-in translate option to translate pages and text that’s not in your native language.
The browser has a wide array of extensions and security features that protect you from fraudulent websites.
Chrome browser on Roku isn’t available natively, but you can work around this by using the casting option.
If you’re looking for a light and secure web browser, there’s no better option than Firefox. The browser will automatically block third-party tracking cookies and social trackers.
In addition, the browser will block ad trackers, so you’ll see fewer ads while browsing the web. The browser can also stop autoplay so it won’t have random videos playing automatically anymore.
It’s important to mention that the browser is highly customizable, and you can change its look or enhance it with various extensions.
Overall, Firefox is an excellent browser for advanced users, and with the casting support, you can also use it on your Roku.
Vivaldi browser comes packed with features, and it will block ads and tracking cookies out of the box. The browser also has advanced tab management, allowing you to have two websites open side by side in the same tab.
The interface is highly customizable, and you can change the look of almost any UI element. In addition, there are features such as mouse gestures and macros for advanced users.
Vivaldi comes with a built-in mail client, notepad, calendar, and feed reader, making it one of the most versatile browsers on the market.
Vivaldi might be a perfect choice if you need a reliable and free web browser for Roku.
Safari is the only actual native Roku browser on our list. It means you can install it directly from the Roku channel store. It works well, better than our expectations.
Even though you can cast the standard Safari browser from a Mac or iOS device to Roku, there are some limitations. First, it is only possible for Roku TV. So, the native one you find in the store is the only choice for most users.
The native Safari browser is not as robust as other browsers in our article, like Opera One.
Otherwise, Safari would get a better position on our list. To experience a native browsing experience and do basic tasks, Safari is a desirable option for Roku.
Media Browser is another native application for Roku that you can use to browse media content. However, that is not possible if you want to use it as a standard web browser. But, if you want to use it as an entertainment browser, it is a perfect option.
This browser allows you to play all of your supported local content. In addition, if you have a TV tuner, you can watch live TV on it.
Even though it is not a perfect choice compared to any of the browsers you use daily, Media Browser for Roku still can give you a good experience for particular purposes.
As Opera One is the best web browser for Roku, but it is not a native application, you must take some extra steps to use it on this platform.
How to download Opera One on Roku?
As Opera One or any other standard web browser is not available on Roku Channel Store, there is no way you can download Opera One on Roku directly. Likewise, Roku doesn’t allow you to install or download anything outside of its official store.
You cannot even add an internet browser as a private channel on Roku.
However, we have the trick. Download Opera One on your Android Phone or PC/Mac. Then, take additional steps.
You will not need to install Opera One on Roku. There is no way to install any powerful browser on this platform. But, you can easily use it by casting from Android or a desktop computer. Here are the instructions.
Open Opera One browser on your PC or Mac.
Right-click on anywhere and go to Cast.
It will now look for the available device.
Choose Roku from there.
Follow any additional on-screen instructions if needed.
You also can use Opera One on Roku by using screen mirroring and other ways from PC and Android. For this, we have another article with proper instructions. Read: How to can I use a web browser on Roku TV/Stick.
If you’re a Roku user looking for a Roku TV web browser, you’re out of luck because there are no powerful native browsers available for that platform.
However, you can circumvent this limitation, and we already have several guides on Roku, so be sure to them out.
Are you a Roku user, and did you have the chance to use a browser on your device? If so, share your experiences with us and let us know which one is the best browser for this platform, in your opinion, by using the comments section below.
ExpressVPN is a top choice for accessing Microsoft Rewards due to its combination of performance and privacy features. Its easy-to-use interface and strong security protocols ensure a smooth experience.
The advanced split tunneling feature allows you to route specific apps through the VPN, ensuring seamless access to Microsoft Rewards while keeping other activities unaffected.
Here are the key features of ExpressVPN:
No-log policy
Advanced split tunneling
Kill-Switch
Servers in 90+ countries
Private DNS on every server
ExpressVPN
Access Microsoft Rewards from anywhere without being tracked/blocked!
PIA or Private Internet Access is one of the best VPNs that you can download. This VPN comes with multiple features, such as a no-logging policy, 24×7 live chat support, no IP/DNS/WebRTC leaks, etc.
Its advanced split tunneling allows for selective VPN use, which is useful for accessing Microsoft Rewards while managing other traffic.
The speeds of private internet access servers are decent and reliable, and you get to choose the encryption level to stay protected online.
What else should you consider PIA for:
3000+ VPN servers in 84 countries
10 simultaneous connections at once
Advanced split-tunneling
Ad and malware blocking
Advanced encryption
WireGuard protocol
Private Internet Access
Remove restrictions with no effort with this highly encrypted and fast VPN!
NordVPN is an extremely popular and widely used VPN app across the globe. This is all thanks to its high-end security features, streaming and torrenting capabilities, and ultra-fast servers.
It comes with some unique features compared to its competitors. This includes a Double VPN feature that routes your internet traffic via two servers, making your internet presence safer than ever.
You can connect up to 6 devices to one account. There is reliable 24/7 support to tackle all of your troubleshooting needs.
Some of the notable features of NordVPN are:
Unlimited bandwidth support
Features include Kill Switch, auto-connection, etc.
5600+ servers in 60 countries
No logs policy
Double VPN feature
NordVPN
Spoof your location and surpass geo-blocks from any device!
SurfShark has become quite popular, thanks to all the usability features it offers right off the bat. It is priced competitively and offers unlimited simultaneous connections with 3000 servers in 65 countries.
If you are not sure to commit, you can take the 30-day trial to test the waters. SurfShark VPN offers features such as split tunneling, SmartDNS, GPS spoofing, WireGuard protocol, and P2P-optimized servers.
It gets updated very often with new features and bug fixes, blocks ads and malware, unblocks streaming websites, and much more.
Here are some of the key features of SurfShark:
Strong security features
Unblocks streaming platforms
GPS-spoofing feature
3000 servers in 65 countries
Surfshark
Connect all your devices & get fast Internet with unlimited bandwidth!
CyberGhost isanother popular option that is user-friendly and is designed well for Windows PCs. Notably, it has over 9,000 VPN servers across 91 countries, giving you extensive coverage.
You also get features like one-click to connect, fast and reliable servers, unlimited torrenting, a 45-day money-back guarantee offer, and much more.
CyberGhost VPN also comes with ad-blocking, supports multiple platforms, offers a no-logs policy, a kill switch to protect your data when your PC disconnects from the VPN, impressive 34/7 customer support, etc.
Check out some of the key features of CyberGhost VPN:
Offers 256-AES encryption
Built-in Kill Switch
Fast and stable servers
Robust features such as ad-blocking, unlimited torrenting, etc.
Over 7,900 servers in over 91 countries.
CyberGhost VPN
Bypass any geo-block and stay untraceable with powerful encryption and security features!
IPVanish is another decent option in our list of best VPNs for Microsoft Rewards. It has 2,000+ high-speed servers in over 75 countries.
With the shared IP addresses feature, it easily masks your online presence with over 40,000 IPVanish IP addresses.
It comes with 24/7 customer support, LAN blocking, IPv6 Leak Protection, comes with encrypted web browsing, a no-log policy, and also a 30-day money-back guarantee for you to decide if IPVanish is your VPN or not.
Here are some notable features of IPVanish:
Split tunneling
VPN Kill Switch
Multiple VPN Protocols support
DNS Leak protection
2,000+ servers in over 75 countries
IPVanish
Quickly connect to a fast server and access Microsoft Rewards restriction-free!
We hope that the above guide gives you all the information regarding whether or not you should use a VPN to gain more points in Microsoft Rewards. Even if you wish to go ahead using a VPN, you can take a look at the above list and try your luck.
Drawing games can be fun and a learning experience for children. If you are an adult, playing drawing games allows you to show your imagination and creativity in your art.
Some drawing games allow you to work with your friend or even players from other parts of the world.
The players can draw something on the screen, and their teammates would guess the object in the drawing and type it in the given box; you are basically drawing with friends.
This article explores the top 5 best drawing PC games found online that you can play using the web browser. We also suggest online multiplayer drawing games.
Quick Tip:
While you can play online games on any modern browser, Opera GX is a special version of the Opera browser explicitly built to complement gaming.
It has unique features to help you get the most out of gaming and browsing.
Using the Opera GX browser allows you to set a network limiter to decide how much data the browser can use. It also comes with a RAM and CPU limiter to control resource usage.
Opera GX
This browser offers you incredibly useful gaming features and high-speed internet browsing.
There are a few excellent drawing game options. The main categories are:
Guessing games – Usually, a player tries to draw a shape while others guess what it is.
Puzzle games – These are like your regular puzzles but with an element of drawing.
Pixel-based – In these games, you will build images by placing and arranging pixels.
Is there a way to draw with friends online?
There are many applications and games that are great for collaborative drawing. For example, most of the games we will discuss fall under this category and will be perfect for friends and families.
What are the best drawing games to play on the web?
Drawize is one of our favorite fun little online drawing games to play with friends.
All the team members get a chance to draw one of the pre-selected objects, and other team members should correctly guess the drawn object to score points.
If you are playing alone, use the Play Online feature that matches you up with other players to form a team.
Use the Play with Friends feature to create a new room and play with your friends. It would help if you shared a URL with your friend to invite them into your room.
Skribble.io is a popular free multiplayer drawing and guessing game online. It is similar to Drawize where you draw, and your friend can guess the object in the drawing.
To play the game, enter your name and click Play. If you want to play with your friends, create a private room, and send them invites to join your team.
The updated version of Skribble now features additions of new languages that include Italian, Estonian, Korean, Hungarian, and Tagalog.
It also features more player support, custom words, and drawing time in private rooms.
Quick Draw is an initiative from Google that focuses on teaching a neural network to recognize doodling. But is it possible?
This is where you come in. The Quick Draw from Google is an online drawing game where you are tasked with drawing an object given to you in advance.
You help the company’s initiative by adding your drawings to the world’s most extensive doodling data set, shared publicly to help with machine learning research.
Color Pixel Art Classic is a fun pixel-based drawing game where you can choose from different pre-made objects and try to stack them using the given colors.
You can choose one of the objects in the library. The objective is to find and apply the right colors while drawing.
You can zoom in to the canvas to view the drawing pane easier. Let your imagination go wild and create a masterpiece with Color Pixel Art Classic.
For 60 seconds, try to guess whose photo it is. Then, you will alternate taking turns being the one who conjures up pictures so that others may comprehend what you want to say.
The enjoyable competition is free to enter. Players all around the globe display their skills in Let’s Guess It, either by painting an image that illustrates a word or by duplicating an image.
You may play it for fun if you don’t enjoy keeping score. The outcomes are scored, and the one with better abilities wins points. Let’s Sketch It provides sophisticated bots to battle against or pits you against players scattered globally.
There you have it. Some of the most fun drawing games to play with friends online. Note that we have not written this list in any particular order and expect that your personal preferences determine what games you play.
By advancing in some of these games, you may have multiplayer drawing games unblocked and readily available.
Whatever your reasons, changing the Windows 11 display language should be easy. However, when you upgrade to the OS, you can encounter an issue where it is not correctly set.
You might see the language change, but it still displays what you originally had on your system even after a reboot.
How do I change the display language in Windows 11?
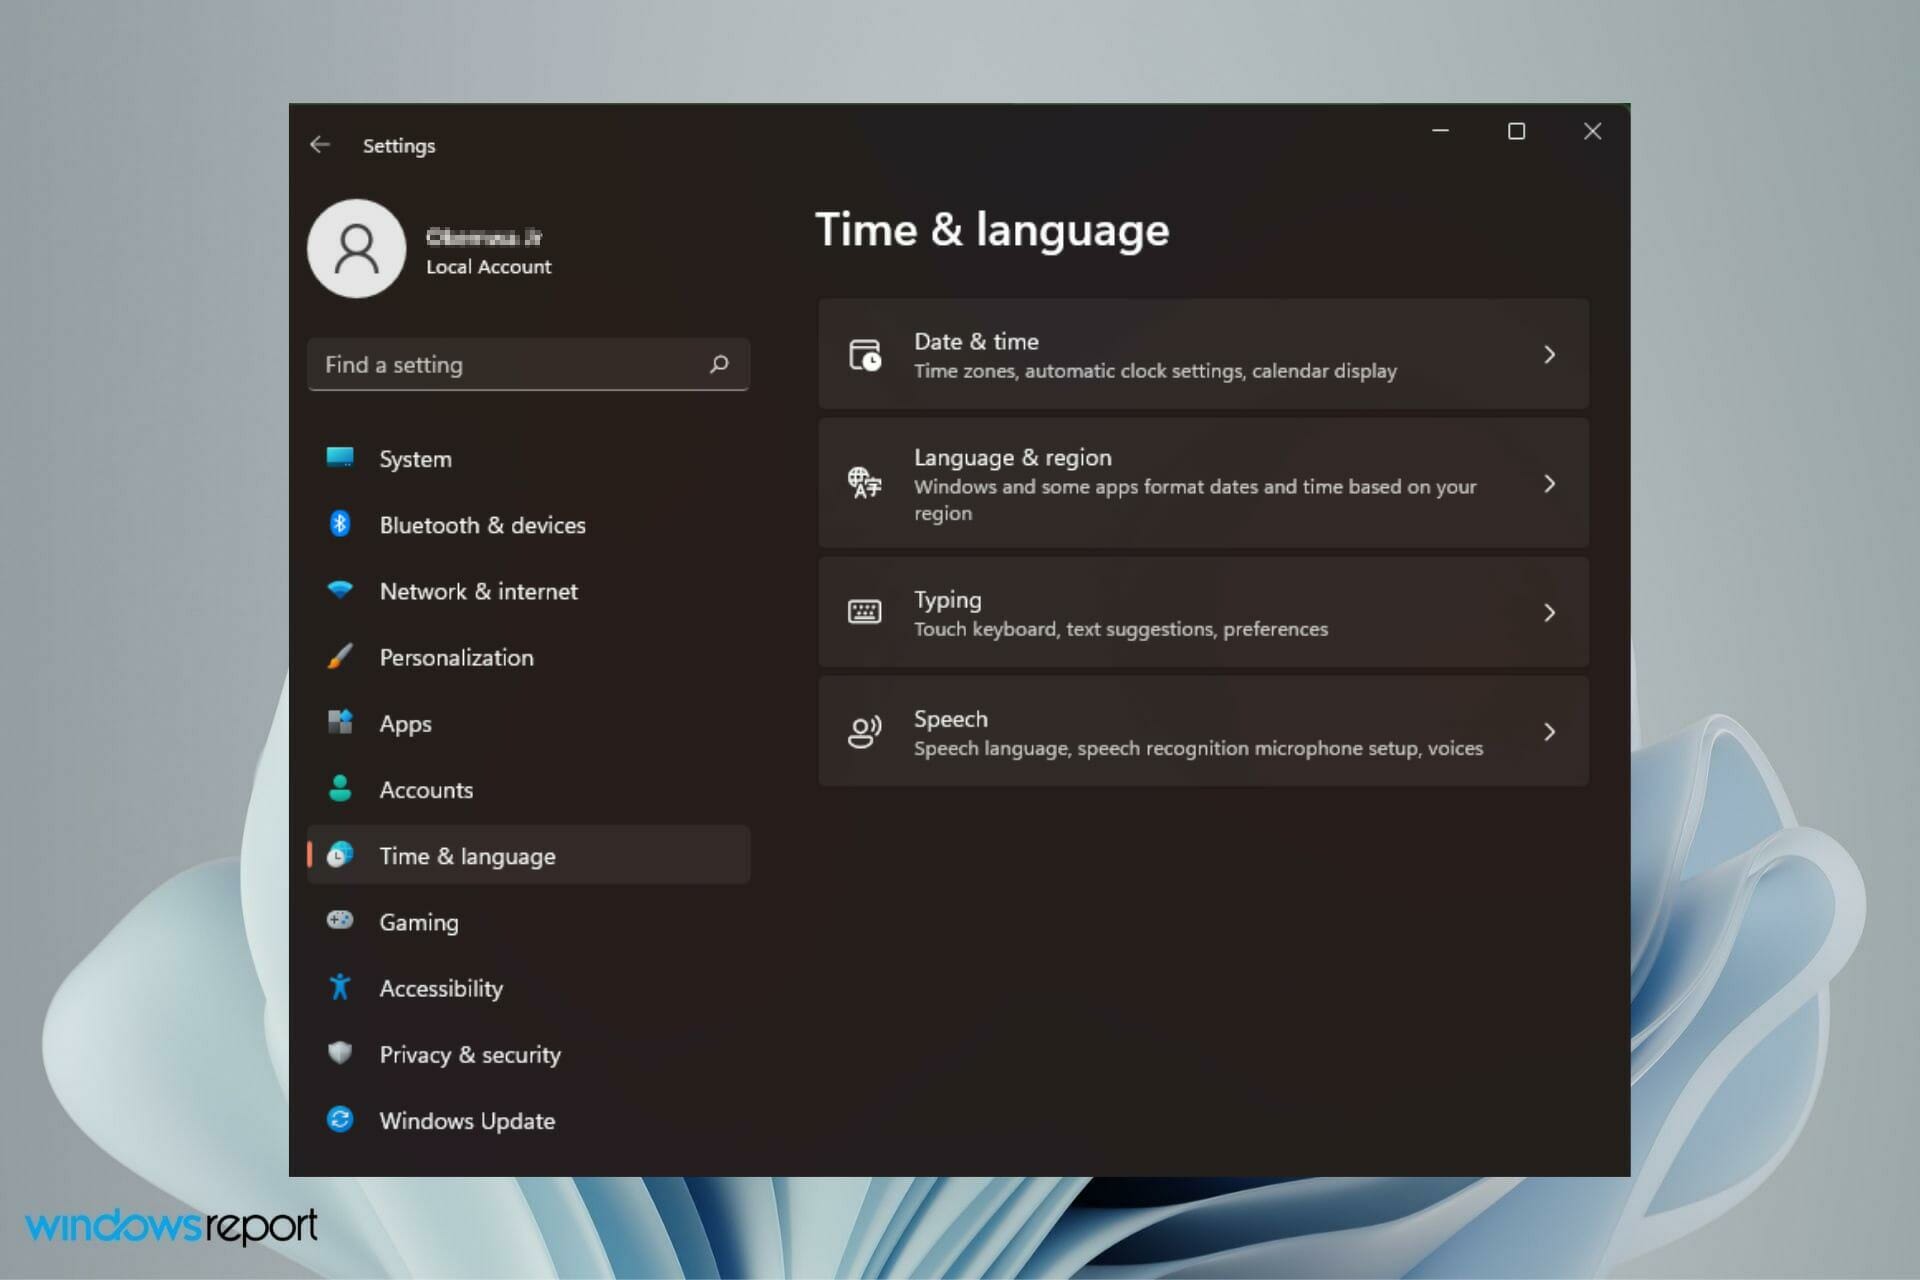
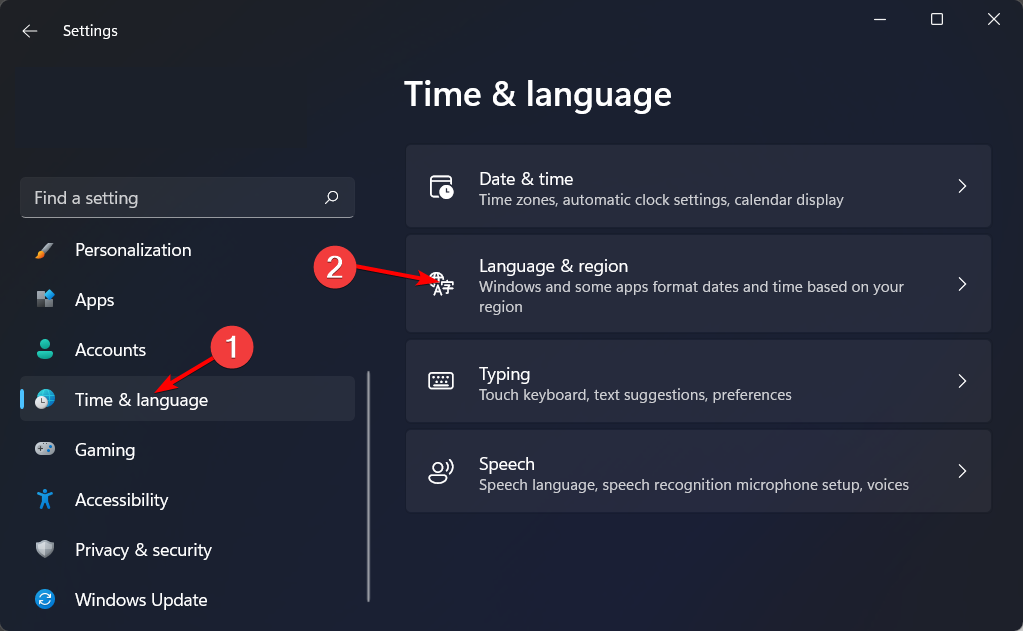
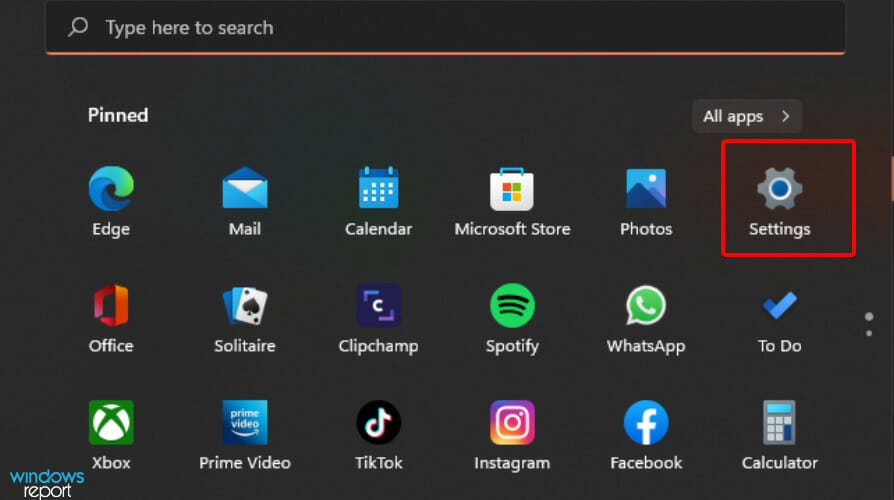
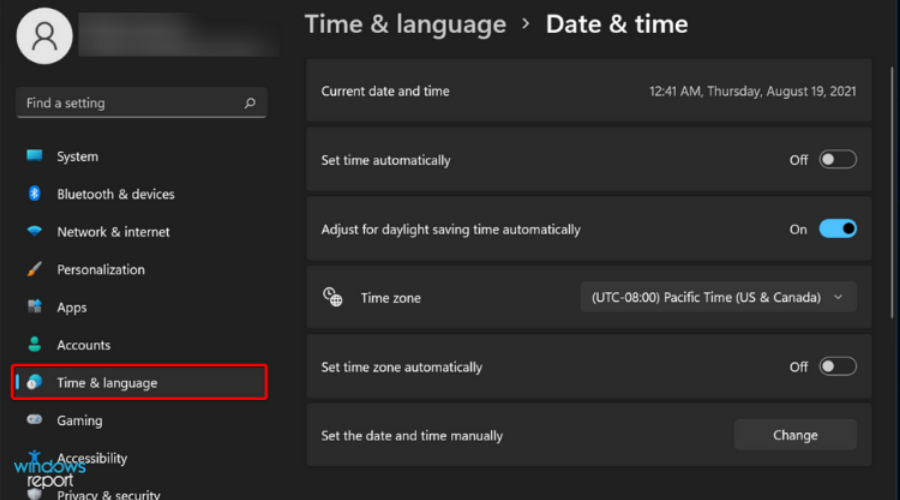
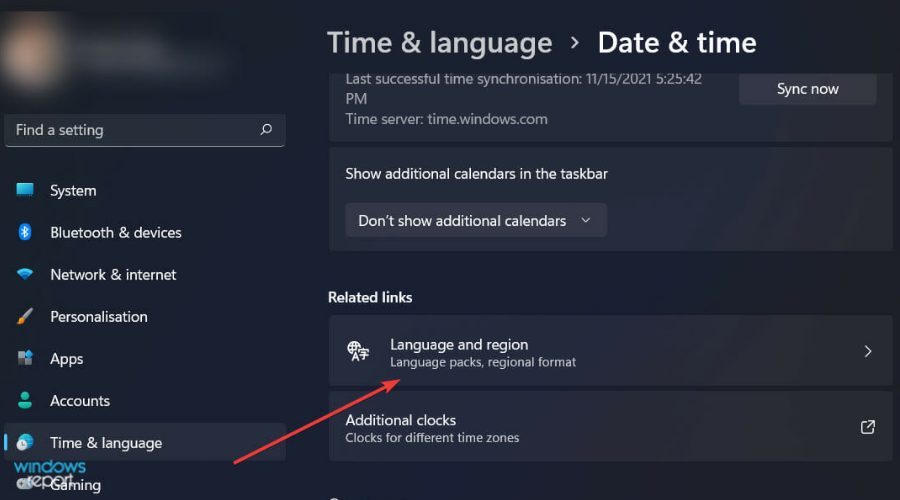
Press Windows + I in order to open Settings and navigate to Time & language followed by Language & region.
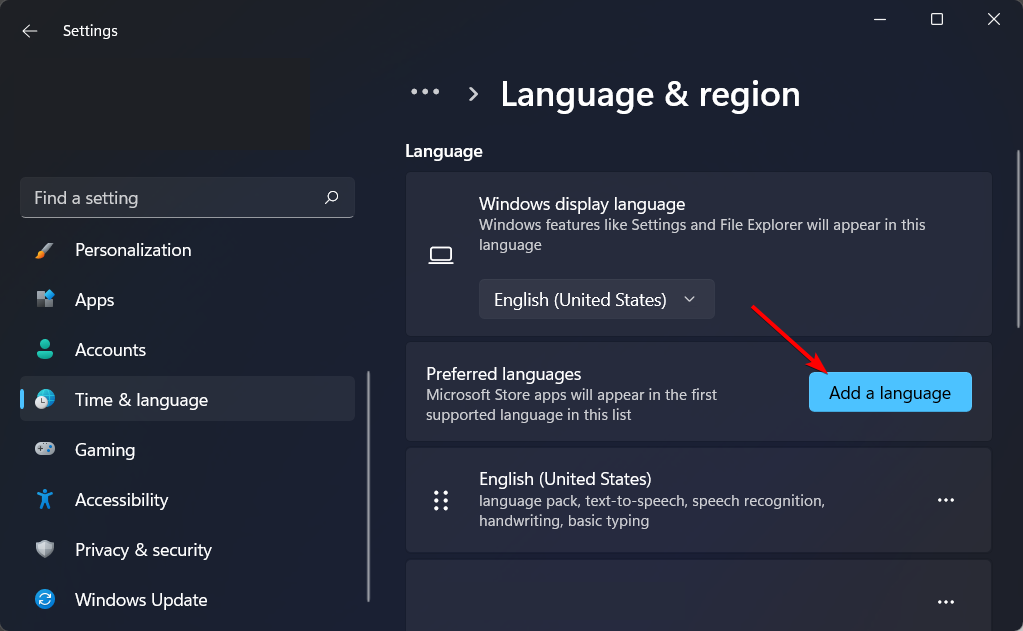
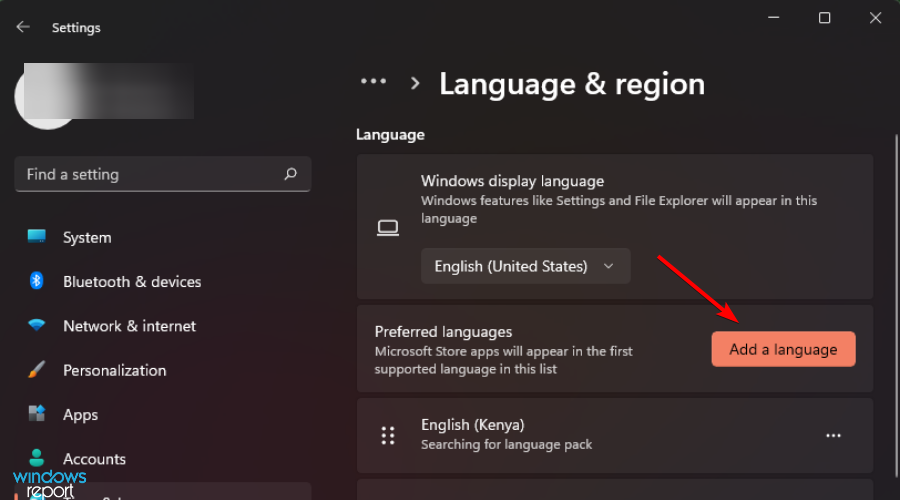
Next, click on the Add a language button.
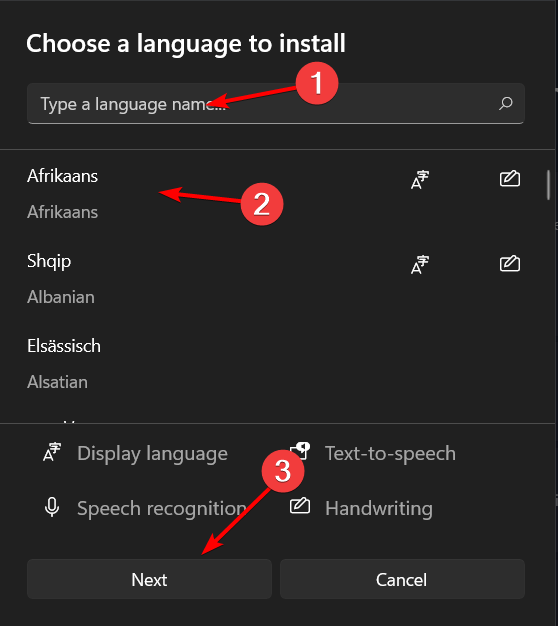
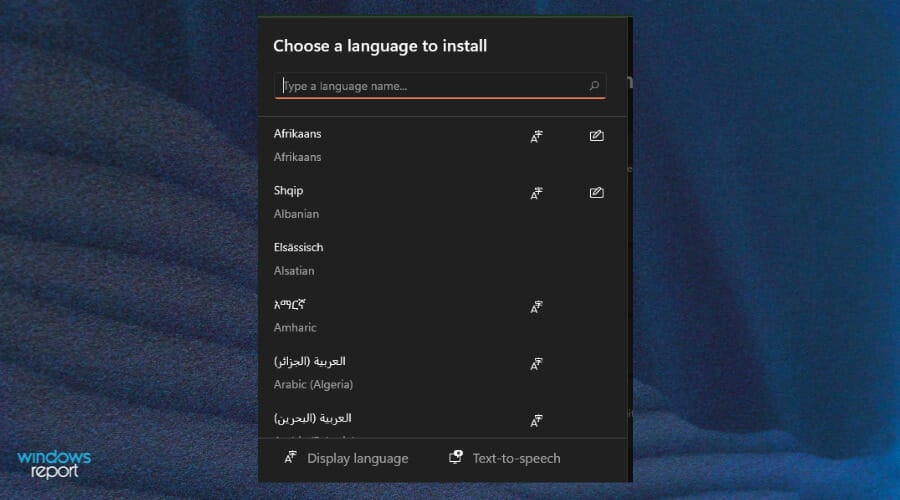
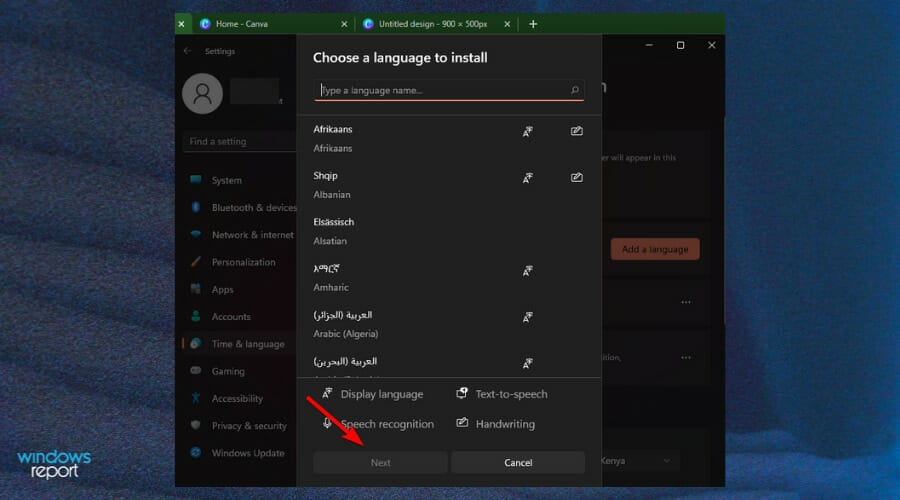
Now, search for the desired language, click on it and select Next.
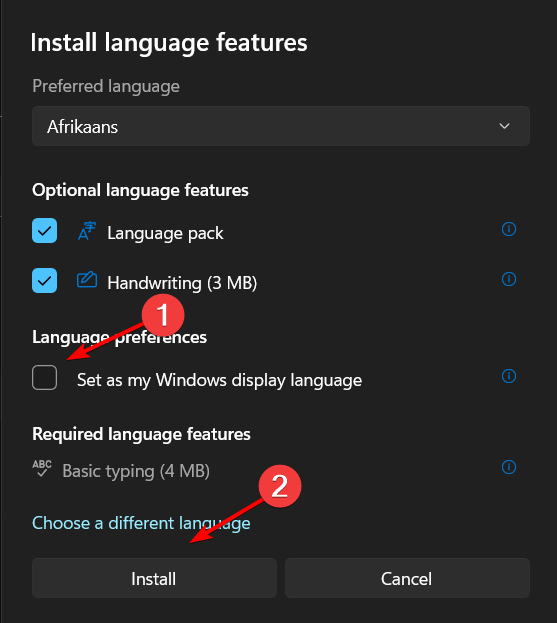
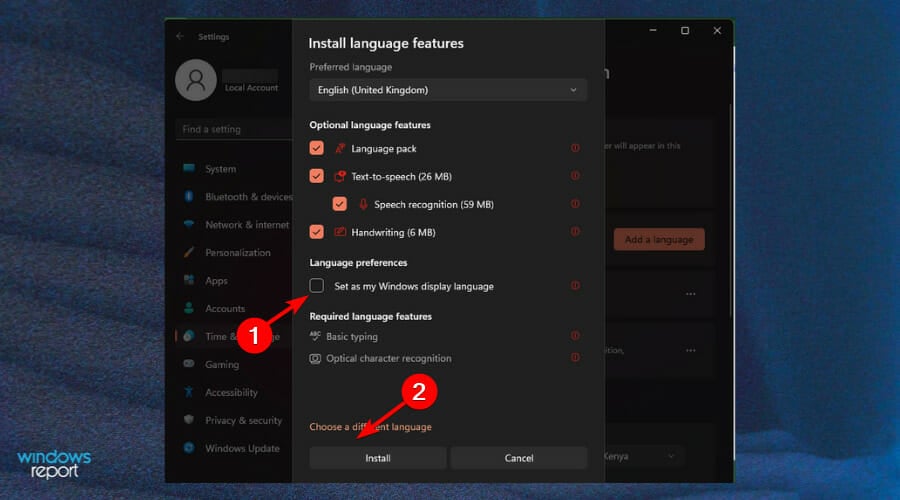
Check the Set as my Windows display language and select Install.
The inability to change your display language can be a frustrating experience since you need to understand what you are doing on your device. If you can’t maneuver, you can be stuck for a while.
It might seem like a small issue at first glance, but it’s pretty important if you want to use your computer in multiple languages.
Some of the reasons you may be unable to change the display language are:
You don’t have administrator privileges – If your user account doesn’t have administrator privileges, or you are logging in as a guest, you may not be able to make any changes. You need to sign in to your Microsoft account to make any changes.
Note that you need to enable additional languages for your country/region – You can only change the display language in Windows if you have set multiple languages for your country or region.
You need to download and install the language pack – The pack contains several languages you can choose from. Without it, you can only access the default language on your device. You can install the language pack and choose one from the list so that you can be able to toggle between languages.
What can I do if I can’t change the display language?
1. Install the language pack
Press the Windows + I keys to open Settings.
Select Time & language on the left pane.
Choose the Language and region option.
Click the Add a language button.
Select your preferred language and press Next.
Check the box for Set as my Windows display language then press Install.
Restart your PC to effect the changes.
2. Adjust the region settings
Press the Windows + I keys to open Settings.
Click on Time & language.
Click the Language and region page on the right side.
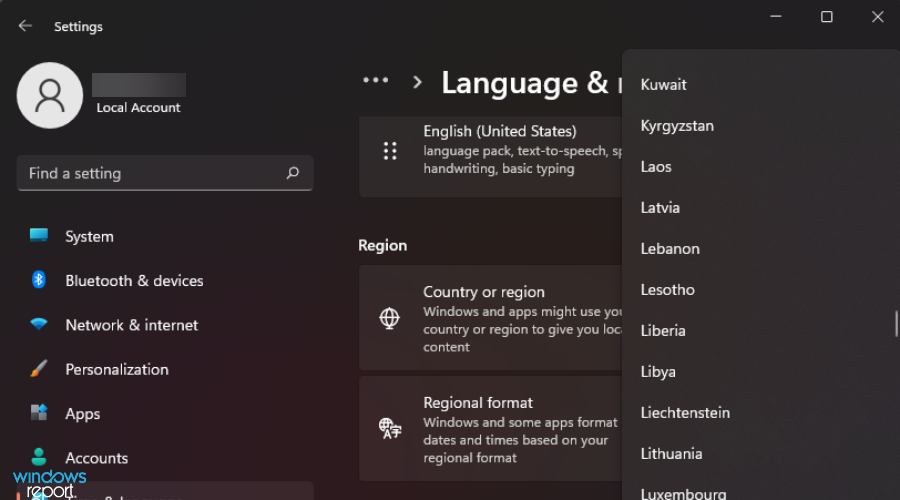
Under Country or region, update your location if applicable.
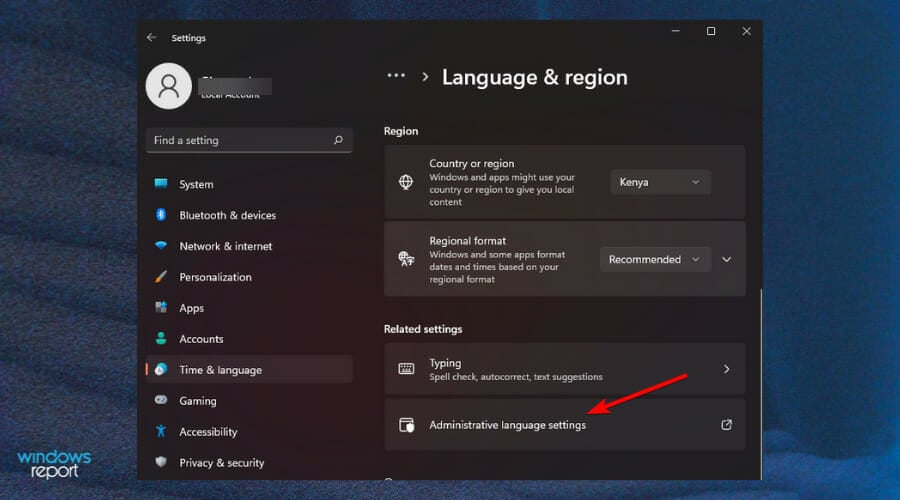
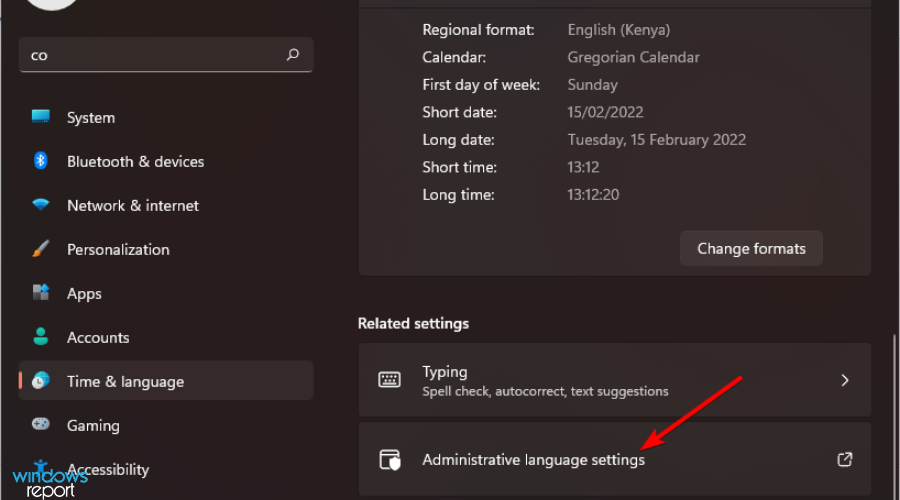
Next, go back to the Administrative language settings.
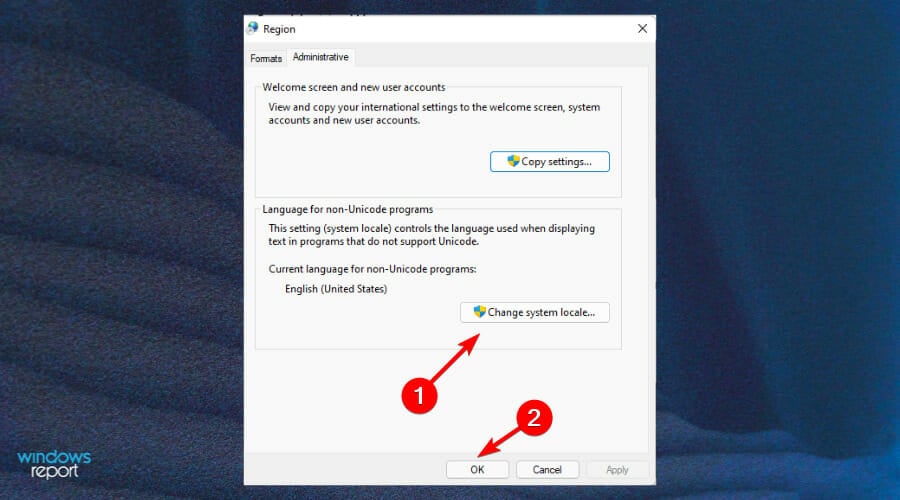
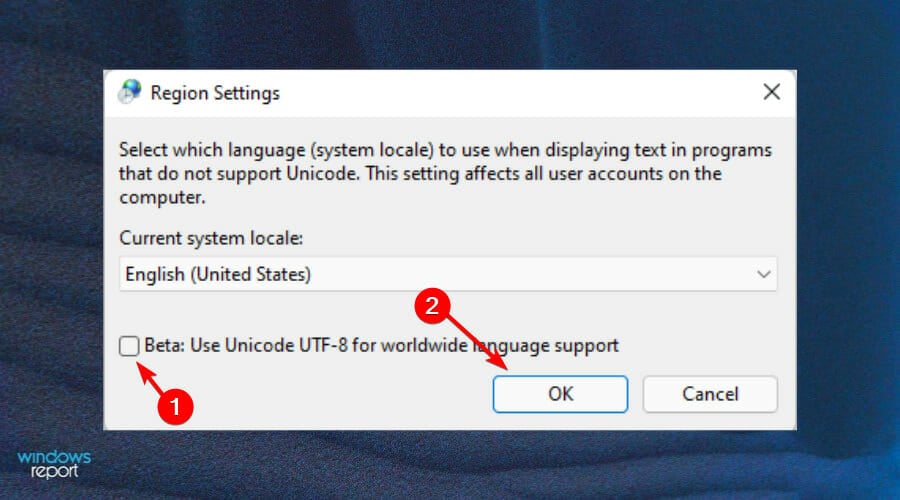
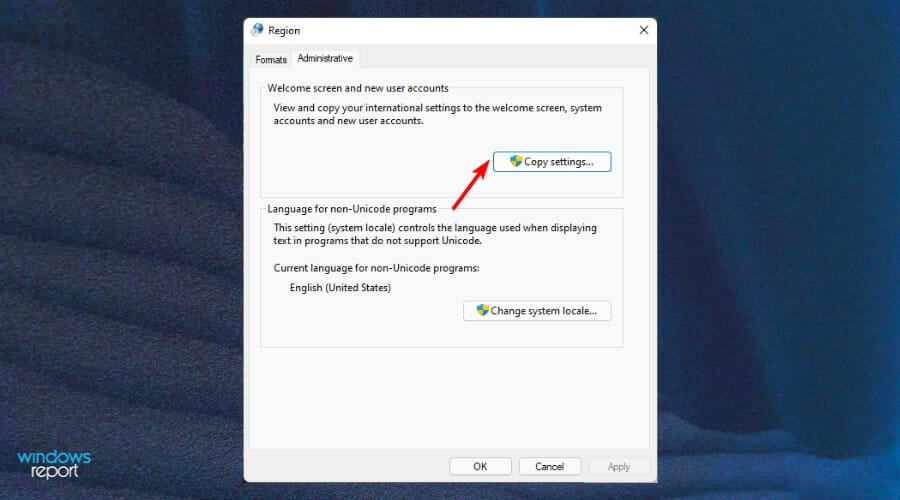
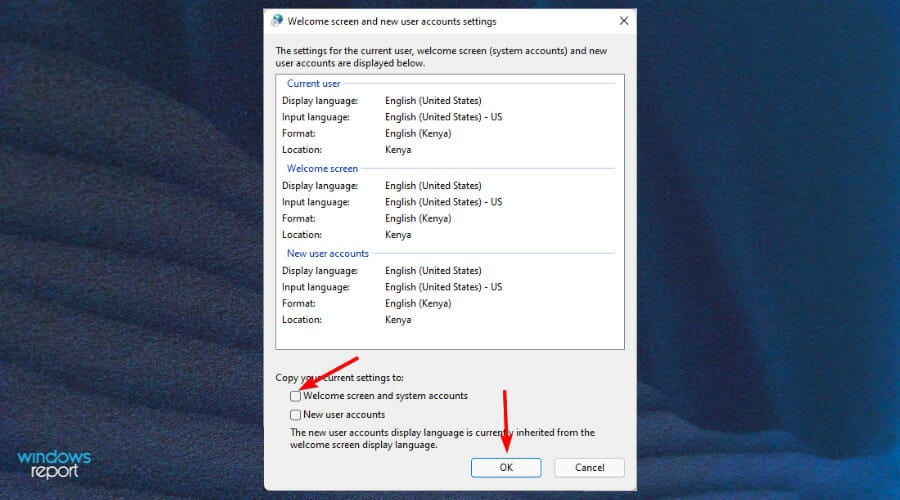
Select Change system locale button then press OK.
Specify the new language, check the Beta: Use Unicode UTF-8 for worldwide language support box and then click the OK button.
Restart your PC and try changing your display language again.
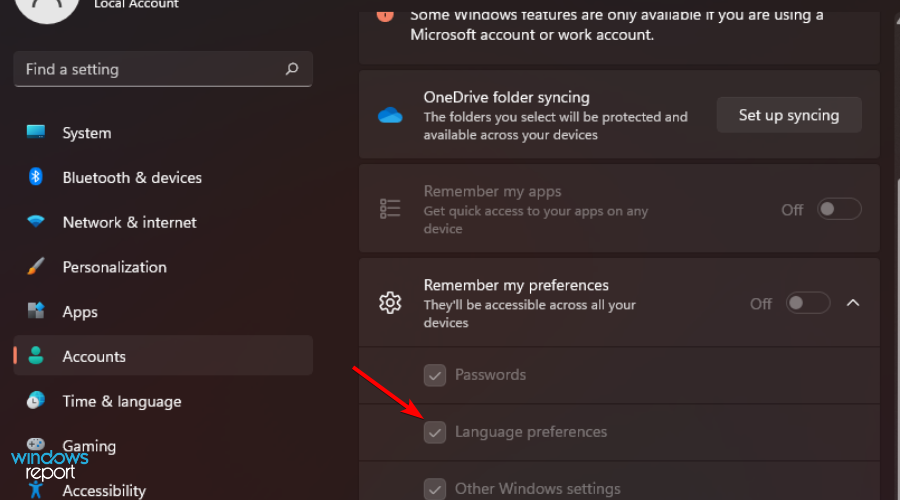
3. Disable sync for language settings
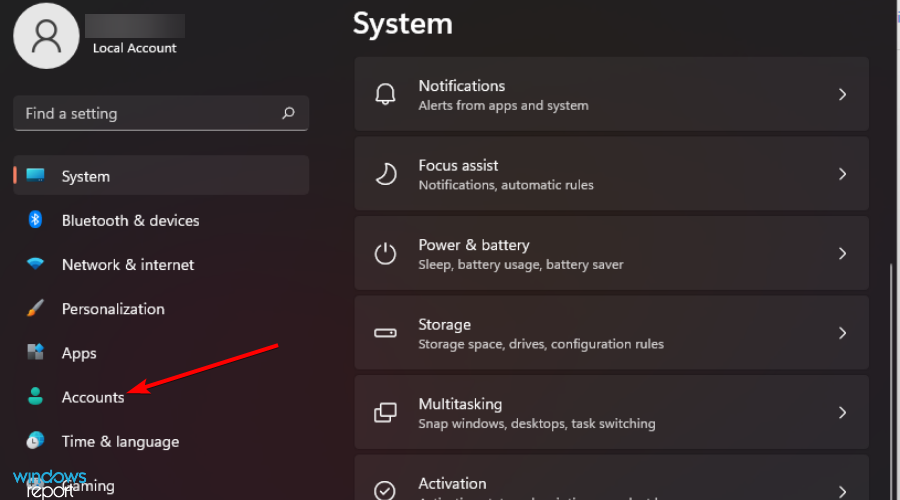
Press the Windows + I keys to open Settings.
Click on Accounts.
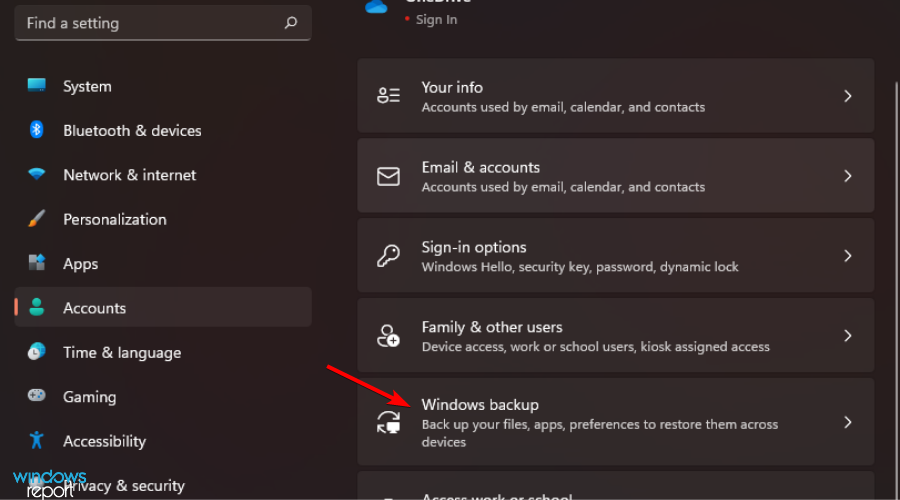
Click the Windows backup page on the right side.
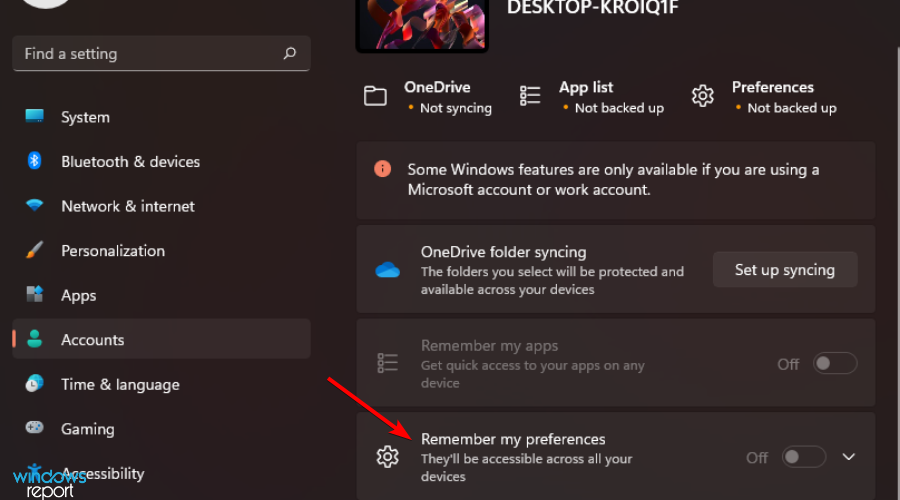
Click Remember my preferences and toggle it on.
Clear the Language preferences option.
You should now be able to change your display language.
How do I add a display language in Windows 11?
Hit the Windows key to open Settings.
Click on Time & language.
Select Language and region on the right pane.
Under the Language section, press the Add a language button.
Select your preferred language from the drop-down list and click Next to install.
How do I add the language bar to my taskbar in Windows 11?
Having the language bar floating on your taskbar is the most efficient way of switching between languages while you’re working on your computer. Once you add it, you’ll be able to change your keyboard layout with a single click instead of navigating through the Control Panel.
To add it to the taskbar, follow the steps below:
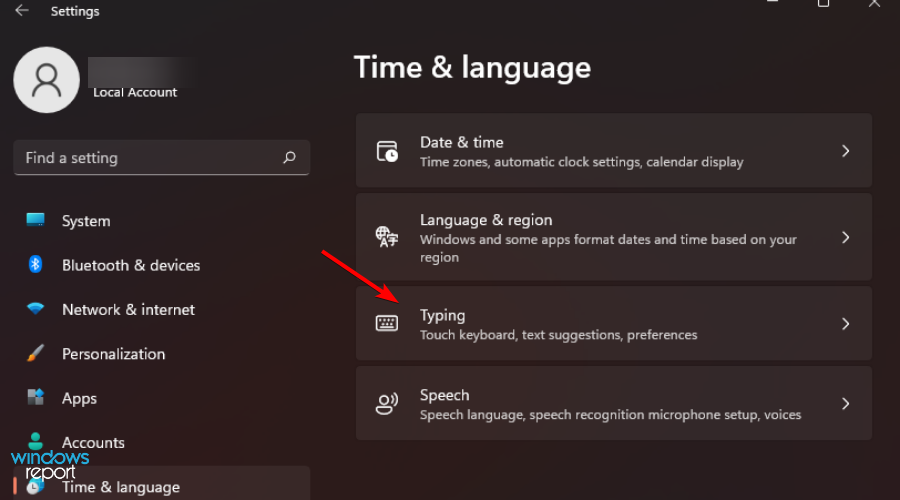
Press the Windows + I keys simultaneously to open Settings.
Select Time & language.
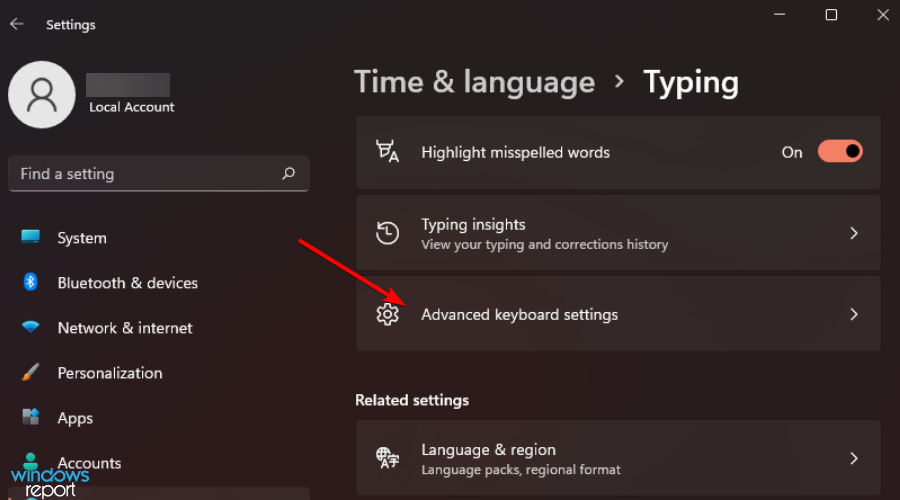
Select Typing option on the right pane.
Click on Advanced keyboard settings option.
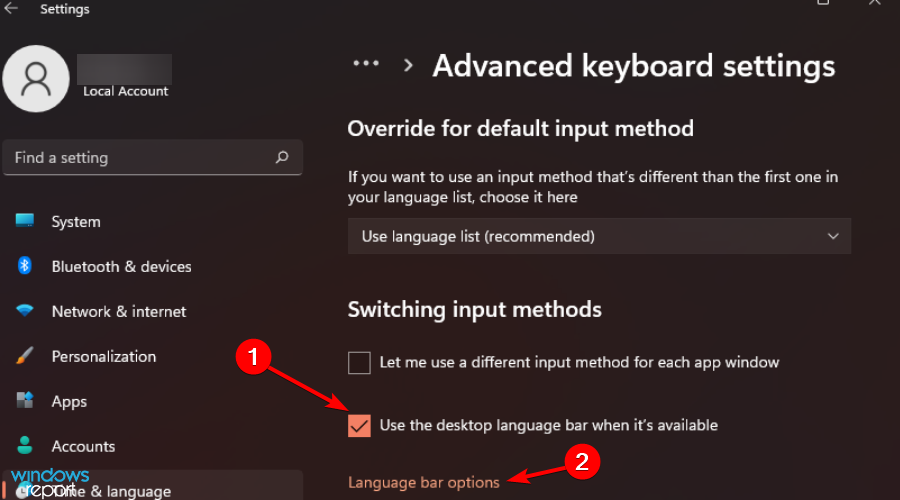
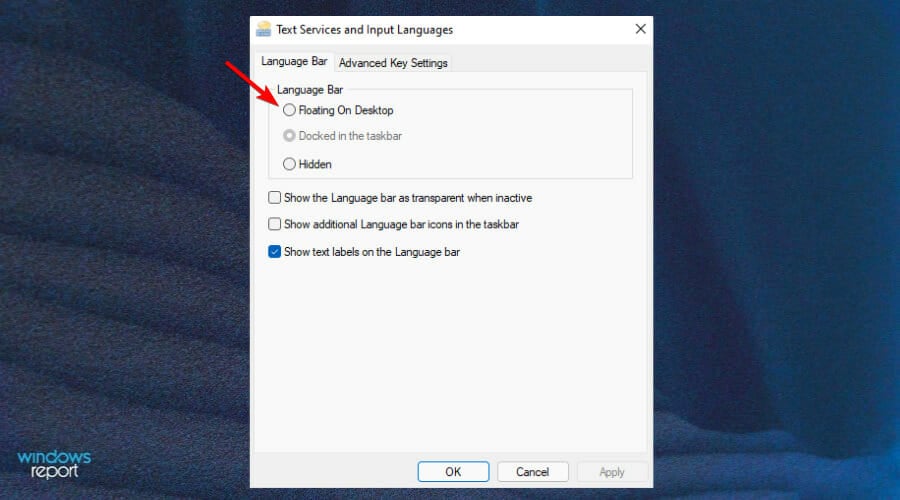
Check the Use the Desktop language bar when it’s available box and select Language bar options.
On the Language Bar tab, select Floating On Desktop.
Also, check the Show additional Language bar icons in the taskbar and Show text labels on the Language bar boxes.
The language bar should now appear on the taskbar.
How do I change the Welcome screen language in Windows 11?
To change your Welcome screen language, follow the steps below:
Press the Windows key to open Settings.
Select Time & language.
Select Language and region on the right pane.
Scroll down and go to Administrative language settings.
Under the Administrative tab, select Copy settings.
Check the Welcome screen and system accounts box, and proceed to saving the changes by clicking OK and restart your computer.
Your Welcome screen is now changed.
What can I do if my Windows license supports only one display language?
If your edition of Windows is not licensed to support multiple display languages but you have already added another during installation, you can still keep using that new language pack.
This will give you enough time while evaluating whether you want to purchase a product key that will enable all of its features going forward.
Once you are ready and have selected your preferred system language, you can proceed to uninstall and install language packs for a fresh start and avoid errors.
If you experience difficulties and your language pack does not work, we have an excellent guide to help you solve the problem.
Additionally, your system language is not the only setting you can tweak to select your preferred choice. You can also change your keyboard language.
Although you may rarely need to change your display language, knowing how to do so will be useful when you travel to a new region and desperately need to use your PC. And if the Windows lock screen language is different, you could re-enable Windows Spotlight and solve the issue in no time.
That’s it for this article, and we hope you can change your system language successfully.
Remember that language packs take up a lot of drive space, so you might want to exercise some limitations in installing multiple languages you don’t need.
If you have further comments, suggestions, or queries on this subject, share them in the comment section below.
Google Chrome is an undisputed winner in terms of features and speed, but it’s also prone to many problems that include the right-click not working issue.
This issue could occur while browsing the web, and there could be different reasons why the right-click context menu does not open.
According to a blog post by Ars Technica, researchers have identified a new piece of malware dubbed SessionManager that hackers have been using to back door Microsoft Exchange servers for the past 15 months.
Internet Information Services (IIS) is installed as the web server by default on Exchange servers, which organizations use to “deploy IIS modules to streamline specific processes on their web infrastructure”. The malware in return then exploited this and then presented itself as as legitimate module.
Based on information gathered by researchers from Kaspersky, “34 servers belonging to 24 organizations that have been infected with SessionManager since March 2021”. Earlier in June, Kaspersky had indicated that 20 of the organizations still remained affected by the malware.
SessionManager provide “an ideal means to deploy powerful, persistent, and stealthy backdoors”. This means that they get to respond to specifically crafted HTTP requests sent by the operator, which in return helps the hackers gain crucial information from emails and expedites their access. It is quite difficult for one to tell the regular HTTP requests from these malicious ones.
According to the blog post, “Such malicious modules usually expect seemingly legitimate but specifically crafted HTTP requests from their operators, trigger actions based on the operators’ hidden instructions if any, then transparently pass the request to the server for it to be processed just like any other request,” Kaspersky researcher Pierre Delcher wrote. “As a result, such modules are not easily spotted by usual monitoring practices: they do not necessarily initiate suspicious communications to external servers, receive commands through HTTP requests to a server that is specifically exposed to such processes, and their files are often placed in overlooked locations that contain a lot of other legitimate files.”
The malware then takes control over your device where the user can now get access to the passwords stored in your memory and even get to install additional tools such as PowerSploit-based reflective loader, Mimikat SSP, ProcDump, and a legitimate Avast memory dump tool.
Kaspersky has further indicated that they speculate a group of hackers identified as Gelsemium could be behind SessionManager. They have also highlighted that it is a complicated process to workaround this issue.
Attack on Titan is a popular anime series, and over the years there’ve been several games from this franchise. But did you know that there’s Attack on Titan browser game available as well?
That’s right, the browser game is available for free, and you can play it from any browser. In this article, we’ll show you how to play the game and which browser to use for best performance.
In case you need more similar games, we encourage you to visit our best anime games guide for more suggestions.
Do I need to play AOT 1 before 2?
No, it’s not necessary to play AOT1 before the sequel. The second game coves the story from the very start so it’s not mandatory that you play the first game to know the story.
For the best experience, users are recommending to watch anime or read the manga as you play the game to understand the story properly.
As for the web game, you can download Attack on Titan browser game or play it online, and in this guide we’re going to show you how to do that.
How do you play AOT browser game?
To play Attack on Titan browser game, you just need to do the following:
Click on Unity Web Player to download and install it.
Follow the instructions on the screen.
Once the Unity Web Player is installed, refresh the page and the game should start.
This is a Attack on Titan tribute game, and it’s the only web version that is available.
We have to mention that certain browsers will offer different performance with this game. For the best performance, it’s advised to use a gaming browser such as Opera GX.
This browser is focused on online gaming and it comes with a couple of features that will make your gaming experience more enjoyable.
First off, there’s a GX Control feature that will limit the amount of CPU and RAM that your browser can use, thus leaving you enough resources for other tasks.
The browser also has a built-in messenger, so it’s perfect if you want to chat with your friends during the gaming sessions. There’s also Twitch integration allowing you to keep track of your favorite streamers.
The browser is extremely light, and thanks to the built-in ad blocker, your webpages will open faster than before. There’s also a built-in free VPN with unlimited bandwidth if you need an extra layer of security.
Opera GX
An action-packed game like Attack on Titan should be played on a web browser for hardcore gamers such as Opera GX!
Yes, AOT browser game is available for free to all users, so you don’t need to buy it or register in order to play it. Simply visit the game’s website and run the game.
Keep in mind that the game requires Unity Web Player, so be sure to install it before you start the game. Without it, the game won’t be able to run at all.
Playing Attack on Titan in your browser is simple as long as you follow the instructions from this guide. You just need to visit the website, install the necessary components and you’re good to go.
If you’re looking for online multiplayer in Attack on Titan game, you’ll be pleased to hear that you can play this game with your friends online as well.
We have a special guide about the best browser games, so be sure not to miss it if you want to find out more great titles to play.
What are your other favorite browser games? Let us know in the comments below.
This latest custom Xbox is quite possibly the most radical yet. It is styled after Mjolnir – the hammer of the thunder god Thor from Norse mythology. More specifically, it is styled after that from the upcoming Marvel Studios film Thor: Love and Thunder.
Starring Chris Hemsworth, the Thor: Love and Thunder will premiere on July 7 in the UK and July 8 in the US. It is a direct sequel to 2017’s Thor: Ragnarok.
To enter the sweepstakes for a chance to win this custom Love and Thunder Xbox Series X simply Follow @Xbox on Twitter and retweet with #ThorLoveandThunderXboxSweepstakes. You can do this via the Twitter link above. You can read the official rules here. And good luck.
Online privacy is of great concern in this day and age, and this is why many are using browsers with VPN for an extra layer of security.
On the other hand, some users prefer using browser without tracking to keep their online activities private, but that’s not always the best choice.
For these reasons, in this article, we will explore some of the best browsers with VPN services included in the package that don’t actually slow down your Internet connection.
Is there a VPN that doesn’t slow down your Internet?
VPN doesn’t slow your Internet as much, and it all depends on the server that you’re using. For example, if you use a server that’s on another continent, you might encounter some latency issues due to the distance.
With browser VPNs that’s usually not the case because they are configured to automatically pick the fastest and closest sever to you, so you can get maximum performance.
What browser works best with a VPN?
All browsers work with a VPN, but if you want one that works best, we’d probably pick a privacy oriented browser for an extra layer of security.
Alternatively, you can pick a browser that has a reliable VPN extension, or better yet, why not choose a browser with a built-in VPN?
If you’re looking for a browser with a built-in VPN, there’s no better choice than Opera One. The browser comes with an unlimited VPN for free, and it allows you to choose between 3 different locations.
Based on a Chromium engine, Opera One is quite similar to Google Chrome, and it even works great with Chrome extensions. To keep your browsing experience fast, there’s also a built-in ad blocker, so you won’t have to deal with ads ever again.
Additional features include workspaces for tab management and an extensive search feature for tabs, so you can easily work with multiple tabs.
Overall, if you need a browser with a built-in VPN, Opera One is your best choice.
Other great features:
Twitter and Instagram integration
Built-in messenger
Video pop-out feature
Data sync
Available on all mobile and desktop platforms
Opera One
Browse the web lightning fast using Opera and its unlimited VPN security.
UR Browser focuses heavily on privacy protection with its built-in VPN service. Beyond this, this software gives you access to a wide range of customization features, addons, and very fast website loading.
The developers of this software wanted to create a piece of software that will stand out from the crowd. They managed to do it flawlessly.
UR Browser has a very low impact on system resources, and that doesn’t mean that the interface had to suffer. It is also one of the most versatile browsers on the market in terms of customization.
You can choose from a wide range of pre-made skins or can create your own if you choose to do so.
By using this browser, you also get access to very fast download speeds, no matter how big the software/video is.
All of these elements make UR Browser the best option on the market with a built-in powerful VPN service. For more information, you can check out our in-depth review of UR Browser.
Other great features:
Built-in scanner for downloaded files
Protection against phishing websites
Redirection to HTTPS websites
Parallel download technology
UR Browser
Looking for the best browser with built-in VPN? UR’s VPN is great in terms of advanced private browsing!
Another great browser that has a built-in VPN service is the Aloha Browser. This software offers decent capabilities when it comes to keeping your information private online.
Its integrated free unlimited VPN encrypts and compresses traffic, while the trackers’ protection cuts your private data from being transferred to third parties.
The settings menu can be a bit overwhelming if you don’t know what you’re looking for, but overall, this browser can be a useful tool to have under your proverbial belt.
When it comes to the impact it has on your computer’s resources, this browser doesn’t disappoint. It has decent system requirements and the speed at which it loads webpages is pretty good too.
Epic Privacy Browser, as the name suggests, is built specifically to reduce the risks of somebody gathering your search engine data, private information, etc.
This is accomplished by removing the possibility to use any add-ons and extensions. Even though this increases privacy, it ranks in the 3rd position because of the lack of versatility.
This browser resets all your cookies and settings to the default mode after each use to avoid any possible information leaks.
When compared with UR Browser in the security department, Epic Privacy Browser offers similar protection, but the lack of features and the ability to expand its features gives it a big issue.
When it comes to the loading speeds, this browser works fine, but it can’t compare to the lightning speeds UR Browser has to offer.
It can become a bit sluggish when streaming big videos online, and the download speeds of files are basic.
In this article, we explored what the market has to offer these days when it comes to browsers with VPN.
Our top pick is Opera, as it offers everything you need for a fast, secure, and private experience online. However, for advanced users maybe a free VPN that doesn’t slow down Internet would be a better option.
Please feel free to let us know your opinion about these software options by using the comments section below.
Fiverr is one of the biggest freelance marketplaces. It grew by offering a lot of services for five dollars, but today it’s evolved into much more, and you can deliver all sorts of services for whatever price you set.
That said, you will get the best of the Fiverr service only if you use the best browsers. Since its pages are very dynamic, only a browser robust enough to render a range of data types without unnecessarily blocking important details will suffice.
After a lot of testing, we will like to present our expert opinion on the best browser you can use for Fiverr. We will run you through a list, and any of them should fit the bill.
For a beginner, the steps are quite simple. First, you will need to create an account and determine if you want to be a seller or a buyer.
A seller offers services while a Buyer uses or purchases services. As a seller, you will have to create a gig which is a detailed description of your gig, including price, delivery time, your portfolio, etc.
Which browser is safest for Fiverr?
The safest browser must have great privacy flexibility as well as features like an in-built VPN to help conceal locations and IP addresses. It should also have features like anti-tracking, anti-phishing, etc. In conclusion, with this consideration in mind, Firefox slightly comes out tops.
Opera is an easy pick and about the best browser for Fiverr. It is a fully developed browser that is robust enough to handle all sorts of media. Also, you could mask your IP using its built-in VPN and enjoy safe browsing using its anti-tracking feature.
We also love it because it has a lot of inbuilt integration, including Messenger, WhatsApp, and Twitch, and an easy-to-use tab grouping feature.
Additional Features:
Distraction-free and intuitive browsing
Keyboard shortcuts
Fast loading and Ad-blocker
Opera
Integrations, an organized sidebar, and a plethora of extensions to help you get the most out of freelancing on Fiverr.
Firefox prioritizes stability, and with only a few mouse clicks, you can easily personalize this tool to feel like your own.
Since Firefox tabs are not considered distinct processes, you can operate more tabs than Chrome without lag or system crashes. And finally, it is a safe option and offers a private browsing mode to ensure elevated privacy for users.
If you are looking for a Fiverr browser whose features can be customized the most, it must be Chrome. It is built on the Chromium engine and features the biggest extensions library in the entire browser niche.
Because of its popularity, many vendors adapt their websites to suit Chrome, so it can load every type of website page.
If you use a Windows 11 computer to browse Fiverr, then you should use the Edge browser. It is the OS’s default browser and the most compatible with Windows.
It seems to be playing catch-up with other established browsers like Chrome, but with the introduction of Chromium, a lot seems to be changing, and users will be able to enjoy the vast extensions library that Chrome uses.
A lot of work has been put into developing this browser, and now it easily stands as one of the most Robust browser options. It will render Fiverr pages perfectly without concealing any detail.
Safari also has an excellent option for browsing Fiverr on mobile devices; it is our favorite on the iPad and iPhone.
The user interface of Vivaldi is comparable to that of Opera, but it provides more personalization choices and tab management features than most other browsers.
Due to its low processing requirements, the browser will be smooth for usage with Fiverr and for maintaining your portfolio with simple video uploads.
Vivaldi is great for power users since it offers customization options for graphic components.
The UC browser is famous for being a mobile-first browser. This streamlined niche has made it a great choice in rendering websites like Fiverr on mobile devices.
Additionally, it offers a wide range of modern features, like ad-free surfing, cloud sync, minimal data consumption, auto-close, Video-Bar, malware protection, etc.
Here is a secure and compact web browser. In addition to the standard functionality offered by other respectable web browsers, Maxthon offers a wide variety of tools and functions.
You may pick up where you left off on Fiverr with other devices by using its cloud services to synchronize your data between devices.
If you need to upload your videos to a Fiverr portfolio, you may want to use the Torch browser; this is what we love the most about it.
This customized browser has several features that make managing and accessing various media sources easier and lastly, it is based on the Chrome rendering engine.
The browser utilizes the Firefox engine. Privacy and utility are equally balanced. It is light enough for quick video uploads and secure enough to protect your online data.
Finally, Waterfox particularly does not transfer or collect data on your internet browsing other websites.
Iridium is very quick in all regards; it starts quickly, loads quickly, and renders very complicated websites.
Iridium is a highly safe browser based on Chromium and is available to everybody immediately. Additionally, it is straightforward and simple to use; no specialized expertise is needed.
15. Epic browser – Best anti-third-party widgets browser
There are several advantages to Epic. To begin with, it hides your IP and surfing by using an encrypted proxy server.
Epic has built-in security against third-party cookies, widgets, and ad tracking scripts. And lastly, it gives you a distraction-free Fiverr experience.
What is the best browser for Fiverr if I have a low-end PC?
We will recommend the UR Browser. We have already spoken about it in the article but would like to note that for a browser to work efficiently on a low-end PC, it must be sufficiently lightweight and robust enough to handle different media types.
Even though browsers like Epic and Iridium come a close second, the UR Browser slightly edges them.
With any of the browsers we have discussed, you will enjoy an easy experience surfing gigs or creating your own Fiverr gigs.
Lastly, we have not made this list in any particular order and hope you pick your best according to personal preferences.
With a premium Minecraft account, you’ll enjoy perks such as changeable skin, customized masks, new characters, and access to Premium servers.
Usually, Minecraft charges a one-time payment before allowing new players to access these premium options. But there is a way in which you can access those features at zero cost. Keep reading to see how.
How can I get a free Minecraft account for PC, MAC, and Linux?
NOTE
Note that you might also run across some websites that offer free Minecraft accounts if you click on certain links, create accounts on their platforms, or give up personal information. We want to inform you that all those are nothing more than scams, and the only legitimate methods for getting free accounts are the ones described in this article.
Next, click on Log in and select the Register one here option.
Here, make sure to enter the required Minecraft account information.
Once done, select Create account.
You will receive a code at the email address you provided.
Go to the registration page and enter it in the Verification code box.
Finally, click Verify.
NOTE
These steps can be followed regardless of which type of device you are using. For example, the activation steps are the same for Windows 10, Mac, or Linux users.
2. Use the Minecraft forum giveaways
Although not as easy to believe, there are many blogs and forums where you will find people giving free premium Minecraft accounts and password access.
This is a fairly common practice, and it’s inspiring to see how others are willing to support passionate players in getting a free account.
Moreover, there is always a promotion that offers a consistent price discount. And there is always the option to buy the base game, mine coins, or bundles separately.
As a side note, protect yourself from hacks, cheats, or generators found on the web. You will probably be asked to share personal details such as account credentials or demographic attributes in these situations.
It is never a good idea to provide personal details such as login or password, credit card information, or name, so keep them secure.
Is a Microsoft Minecraft account free?
You can sign into Minecraft using a Microsoft account, which will help you access your purchases, Realms, and other Minecraft content across your Minecraft devices.
Microsoft accounts are free to set up and use on any Minecraft device, so the answer to the question above is yes.
When playing Minecraft on Xbox, Windows, or Android and iOS mobile devices, you can sign in with your Microsoft account and use your Xbox Gamertag to save your progress and purchases and play online with your friends using Realms.
That said, you will still need to purchase an Xbox Live Gold subscription to play online on Xbox consoles.
On other devices, such as PS 4 and Nintendo Switch, you can use a free Microsoft account to sign in to Minecraft, but you will still need the appropriate subscription service to play online.
Is Minecraft Java Edition free?
For this edition of Minecraft, you will take out your wallet and pay a small fee, as this is not a free product.
The good news is it only costs $26.95, so you won’t have to dig deep into your pockets. And, if you want the version that has both Java and Bedrock, the price will be $31.
And, in case you were wondering, you can link your existing Microsoft account to your new purchase during the purchasing process.
That’s about it; we hope this article helped you learn more about creating a free Minecraft account bedrock.
As you can see, several ways will allow you to create it free of cost.
You can either go on the official website or search for giveaways sites where you could win a free account without having to pay for it at all.
Please let us know in the comments section below if you have additional comments or suggestions.
Someday you are trying to visit a website and suddenly you see this message pop up: Browser not supportedSafari.
This message may have two culprits, the Safari version, and the website. Older versions of Safari are no longer supported because they are out of date. Although many websites function flawlessly, developers no longer typically test for these versions.
If you are sure that the browser is the issue, here are three fixes that will fix your issue.
What versions of Safari are still supported?
The most reliable and supported version of the app is Safari 12. You might encounter the Browser not supported Safari error if you are using an older version.
Safari 5.1.7 was the most recent version released for Windows, but it is now out of date, and Apple no longer releases updates for the program.
Quick Tip:
If you want an up-to-date browser that offers dedicated support for macOS computers, we suggest you try Opera One as a Safari alternative.
It’s light and secure, with a low error rate. Plus, it has an auto-update feature, so you can benefit from the newest features and implementations with no effort.
Opera
Use Opera’s latest version to open web pages straight away, no errors, no freezing!
Change your browser as a workaround if you are still seeing the This version of Safari is no longer supported message after applying the above said fixes.
Given that it is user-friendly and quicker than most browsers, Opera is the best replacement for Safari.
If you still want to use Safari, then replacing your laptop or computer might be the final solution.
In the comment section below, let us know if you were able to successfully fix Browser not supported Safari problem.
2. Use the desktop site option on the Chrome mobile version
Open Chrome on your smartphone.
Visit the EPFO member portal and click on the three dots on the top right side of the screen.
Select Desktop site from the menu.
3. Disable extensions
On Chrome, go to Settings.
Select Extensions.
Toggle-off all extensions.
Go back to the EPFO site and see if it’s now working.
If it’s working, re-enable them one by one and re-check each time to identify the extension that was interfering with EPFO.
4. Flush DNS
Type Command Prompt in the Start search bar and select Run as an administrator.
Type ipconfig /flushdns and press Enter.
Restart Chrome and try again.
5. Try another browser
If all else fails, you may be better off if you try connecting from another browser. Opera One is a good alternative because it’s lighter than Chrome, making it less likely to prompt such errors.
It offers performance-oriented features like a battery saver, an adblocker, and a hardware acceleration option. Plus, all your EPFO data will be protected with a free VPN.
Opera
Use this responsive browser to connect to the EPFO website without any problems!
Just like other digital services, government websites can also face downtime or login errors. We’ve already published a detailed guide about the IRCC portal not working that walks you through practical fixes.
For more queries on browser errors, you can leave a message in the comments box below.
Udemy is an online learning platform where you can learn about almost anything on your own schedule. All you need to have is a mobile phone or a PC.
The most important aspect of learning from Udemy, apart from the subscription, is that you should have access to a device with a screen and audio.
But several Udemy users have reported that they are facing Udemy audio not working in Chrome, ultimately not allowing them to continue learning their course.
While this may not sound like much of a big deal as you can easily switch over to a different device with working audio, some users prefer using their PC and Chrome browser to learn things from Udemy.
If you are one of such users, and facing the Udemy audio not working in Chrome issue, then this guide is for you. Because in this guide, we will give you some effective solutions to resolve the issue and get back to learning.
Why can’t I hear audio on Udemy?
There can be multiple reasons why you may come across the Udemy audio not working in Chrome issue. After careful research, we have listed down some of the common reasons this issue might get triggered:
Your browser is outdated
The correct output device is not selected
Installed extensions are conflicting with the smooth functioning of Chrome
The cached data is not cleared
Udemy may not be compatible with the hardware acceleration feature
Quick Tip:
You have a better alternative to help you fix Udemy sound problems. Namely, using a sky-rocket speed browser like Opera GX
This browser works on the Chromium model too and it provides optimized navigation with light resource consumption, plus the network bandwidth limiter for improved connection speed.
In this way, you can surely access Udemy courses and learn without any sound difficulties.
Opera GX
Speed up your browsing through Udemy classes with this lightning-fast browser.
What can I do if Udemy audio doesn’t work in Chrome?
1. Try using incognito mode
Open Google Chrome.
Click on the 3-dot menu icon and select New Incognito window or press Ctrl + Shift + N.
2. Uninstall extensions
Open Chrome.
Click on the 3-dot menu icon.
Go to More settings, then Extensions.
Remove or disable all extensions one by one.
The above steps will let you narrow down on the culprit extension that might be conflicting with the smooth functioning of Google Chrome.
3. Update your browser
Open Google Chrome.
Click on the 3-dot menu icon.
Select Help, then About Chrome.
Chrome will automatically look for the update and install it if a new one is available.
4. Clear your browser history and cache
Launch Google Chrome.
Click on the 3-dot menu icon.
Select Settings.
From the left pane, click on Privacy and security.
Click on Clear browsing data.
Check the boxes next to Cookies and other site data and Cached images and files.
Hit the Clear data button.
5. Turn off Hardware Acceleration
Launch Google Chrome.
Click on the 3-dot icon and select Settings.
From the left pane, select System.
Turn off the Use hardware acceleration when available toggle.
6. Try a different browser
If Udemy audio is not working in Chrome and you tried the above solutions and it didn’t work, then you can go ahead and try a different browser.
We have already compiled a list of some of the best browsers that you can try on your Windows 11 PC. Chances are, because of a bug or glitch, you are facing an Udemy audio not working in Chrome issue. Let Chrome fix it. In the meantime, you can continue using a different browser.
7. Check your system audio settings
Right-click on the Volume icon located on the bottom-right Taskbar.
Click on Open volume mixer.
Ensure that your sound output device volume is not muted and set to a reasonable limit.
Also, check if the correct Output device is selected or not.
How to fix other audio issues with Udemy?
Audio cracking: If you are hearing audio cracking in Udemy, it may be caused if the gain is turned too high. Try lowering the gain on your audio device.
Background hiss: Background hiss may generally occur if you are using a poor-quality microphone or headphones. Try switching to a better device.
Audio stuttering: This issue has been investigated by the Udemy team. And if none of the above solutions work, you can simply download the lesson and use any video player on your PC to view it.
There you have it. If you find this guide helpful and used any of the solutions to fix the Udemy audio not working in Chrome issue, then let us know in the comments down below.
Google searches appearing on other computers are a common occurrence, especially if you operate a shared device or at some point, have accessed your Google account on another computer.
By default, your browsing history is automatically backed up on a registered Google account, mainly if you use the Google Chrome browser.
Typically, Google searches start appearing on other devices that have, at one point or another, been used to access certain Google services that operate in sync with your Google account.
If you are stuck in this situation and looking for a way out, this tutorial will significantly help.
Why is my Google search history showing up on other devices?
The Google search or browsing history and bookmarks will appear on other devices if the browsers are synced. Or, you are using the same Google account for both devices.
This could happen on Google Chrome or other browsers, but Opera One is probably the best.
Is browsing history shared between devices?
Browsing history is shared between devices only if you use the browser with relevant settings in place or the same Google account. But this is the default setting for most browsers, and you must disable it manually.
If you don’t want Google searches to appear on other devices, try the solutions listed next to reconfigure things and fix the problem.
How do I stop my Google search history from showing on other devices?
1. Try an alternative browser
Google has its sneaky ways to ensure that you’re always on your account and that all your activity is meticulously registered. Including, of course, Search history.
If you log in with, say your YouTube account, it’ll automatically log you on the Google search engine. That’s why we suggest switching to a different browser to avoid tracking.
If you want to prevent Google searches from appearing on other devices, switch to Opera One.
This nifty browser is extremely privacy-oriented and it comes with a full-scale native VPN solution that not only keeps your data confidential but also anonymizes your browsing history.
That way, you’ll never be stuck with Google and the reoccurring Google searches on any other PC you once logged on.
In addition, Opera One keeps trackers and cookies at bay thanks to a built-in ad blocker, so its loading speeds are much better than the competition.
A worth-mentioning fact is that Opera One is rebranded with an outstanding chromatic for its interface and tab islands to make multitasking more efficient.
Let’s quickly look at its key features:
In-built VPN tool to unblock restricted content and anonymize your online activities
Integrated snapshot tool to capture your desktop without leaving your browser
Adblocker solution to speed up loading times even more and avoid disruptions, as well as third-party data tracking
Redesigned interface
Tab islands
In-built instant messaging to streamline communication
Opera One
Enjoy private, secure, and fast browsing without any unrequested Google searches.
We have listed the steps for Google Chrome, but the concept remains the same for all the browsers.
Launch Google Chrome, and click Ctrl + Shift + Del to open the Clear browsing data window.
Select All time from the Time range dropdown menu.
Next, tick the checkboxes for all the three options here, and then click on Clear data.
If your Google searches keep appearing on other devices, you might be able to fix the problem by clearing the search history. Once this is done, proceed to the next stage.
3. Remove additional Google accounts
Open any web browser, go to the Google Account page, click on the profile icon at the top-right, and select Sign out of all accounts.
Click Continue.
From all the accounts listed here, click on the one that you want to use.
Enter the password for it, and click on Next.
To stop Google searches from showing up on other devices, this stage is essential. Here, you would have to remove all the other accounts (that are not yours) from your device. Once this is done, you would have only one (proprietary) account operating on the PC.
How do I turn off Google Sync?
Launch Chrome, click on the ellipsis near the top-right corner, and select Settings.
Next, click on Sync and Google services.
Click on the Turn off button to disable sync.
Finally, click Turn off in the confirmation prompt that appears.
To stop any other computer from accessing your searches, you have to disable the Google synchronization service to ensure your Internet searches/history/activity remains available only on your PC. Any changes made to it from now on won’t reflect on other devices.
So, if Google history showed searches you didn’t do, the methods listed here would help resolve things. Besides, if you want to perform searches quicker with minimal interference, consider disabling trending searches.
Let us know if you solved this issue using one of the suggested fixes, and of course, if you know any other possible resolutions, feel free to share them with us via the comments section below.
Choose between the 64 bit and 32 bit offline package, and click on the one you want to install.
Once downloaded, double-click on the file to launch the installer.
Now, follow the on-screen instructions to complete the process.
Opera GX is stuck on installing for the current user could signal a problem with the network connection. In this case, trying the offline installer should help.
2. Disable the antivirus
If Opera GX is taking too long to download or install or is getting stuck each time, your antivirus or firewall could cause the problem.
In this case, disable the antivirus before starting the download and enable it only after the installation is complete.
3. Switch networks
Click on Windows + R to launch the Run command, enter control panel, and then click on OK.
Select Network and Internet.
Under Network and Sharing Center, select Connect to a network to change to a different known network. To set up a new network click View network status and tasks.
Click Set up a new connection or network.
Choose your connection option and then follow the steps to set up the connection.
Many users report switching to a different network fixed the Opera GX failed to install issue. This might also solve the problem if you’re receiving a 503 Service Temporarily Unavailable message when trying to download.
If the Battery saver mode is turned on, click on the tile to disable it.
Try downloading after turning off the battery saver and make sure your PC is plugged into charging. Your computer turns off functions that consume a lot of power when the battery saver is on. Thus, Opera GX may get stuck on downloading with the feature enabled.
5. Temporarily turn off the Firewall
Press Windows + S to launch the Search menu, enter Windows Security, and click on the relevant search result.
Select Firewall & network protection.
Click on Private network.
Toggle Microsoft Defender Firewall to off.
Click Yes on the UAC prompt that pops up.
Similarly, disable it for the Public network as well.
Also, remember to turn the firewall back on after installing Opera GX to keep your PC protected.
We hope these methods helped you solve Opera GX stuck on installing for the current user.
In case you have a solution to this issue that wasn’t listed above or need more help, let us know in the comments.
Even if you’re using a browser like Chrome or Firefox in incognito mode, your personal information, such as your geolocation, can be exposed to third parties.
However, using a secure browser with NordVPN is an excellent method to keep yourself safe online and safeguard your personal information.
Secure browsers are referred to as having privacy-protection tools. At the end of this article, you will know the best browsers to use with NordVPN to improve security.
Does NordVPN have a browser?
NordVPN does not have a browser, but you can use a privacy browser extension to help you have a private and secure browsing experience.
With NordVPN extensions, you can ensure that your online experience is safe.
Which browser has the best incognito mode?
The browser with the best incognito mode is Mozilla Firefox. It’s the fastest, most user-friendly, and most private browser accessible.
Due to its open-source nature, Firefox is the foundation for many alternative browsers that prioritize privacy. Users can use it to ensure that the browser operates as expected.
Also, the privacy options in Firefox allow you to turn off all telemetry (which sends your browsing information back to Mozilla and 3rd party add-ons).
Because of this, Firefox is a good option for those who want to keep their browsing activities private.
Firefox is an easy-to-use, quick-to-load, and less invasive web browsing solution. In terms of security, it is a solid choice.
Like other key market competitors, the private browsing mode incorporates tracking, virus and phishing prevention, pop-up blocking, and anti-fingerprinting protection.
Key features
You can switch to a more secure default search engine, like DuckDuckGo
Firefox is entirely open-source
It contains a great collection of security add-ons
Google Chrome is an excellent choice for safe web browsing. And because it is continually improving its safety measures, the browser is a solid choice.
It works extremely well with NordVPN and has a host of security and privacy features that optimize the experience for users.
Key features
You can use Chrome’s extensions to increase privacy further
The Epic browser’s principle is that all privacy settings should be enabled by default. Epic does not store your search history, login information, databases, or personal information.
When you type in an address, it doesn’t keep links for autosuggestion or save your browser history. RTC calls, which may disclose your IP address, are likewise blocked by the browser.
Key features
Automatically gives connections secured with SSL higher priority
This new Chromium-based browser, Brave, delivers a powerful punch. It comes loaded with advanced security features enhance your browsing experience.
An ad-blocker, a password manager, stalking protection, and script blocker are all built-in, as well as an anti-fingerprinting feature that you can activate with a single click.
Edward Snowden’s endorsement of Tor has made it one of the most popular privacy-focused browsers on the market today.
The browser automatically blocks any plugins that hackers may manipulate into revealing your IP address. As a result, it’s impossible for hackers to trace you, especially when coupled with the NordVPN solution.
Key features
It automatically deletes all of your previous searches
Yes, you should. By using the extension, you’ll be protected from third-party surveillance. Use the Threat Protection function of this extension to prevent advertisements, dangerous websites, and other risks while viewing non-HTTPS websites. A NordVPN membership includes a free extension.
Internet browsing can leave you vulnerable and expose you to privacy and security threats. Rest assured that your data will be protected by using a browser and the right VPN extension.
Please share your thoughts in the comments section below.
However, it can also crash anywhere, anytime, causing a lot of discomfort for the music fans.
In this post, we will cover some of the effective troubleshooting methods to fix the Spotify not working issue on your desktop or mobile phone browser.
What is wrong with the Spotify web player?
With over 400 million users across the world, Spotify is one of the most popular audio streaming services, that has been catering to music lovers since 2006.
However, due to some issues with the browser or the web player, Spotify may not work.
It could be possible that you are unable to run Spotify due to an unsupported browser, an ad-blocker, cache files, or if the playback content is not enabled in your browser.
Fortunately, we have a couple of solutions that may help you get over the issue and you continue to listen to uninterrupted music.
Does Spotify work on thebrowser?
Yes, Spotify can be played on a browser using its web player on both desktop and mobile phones.
To open the Spotify web player in a browser, simply open your browser and go to the dedicated website.
This will open the web version of Spotify. You can now log in and start enjoying your favorite audio.
But if you are wondering how to play Spotify on a mobile browser, simply visit play.Spotify.com and log in to start listening to music.
However, if the Spotify web player is not working in your browser, you can follow the below methods to troubleshoot the issue.
Quick Tip:
Try to log on to the Spotify web app using a lightweight and responsive browser. Opera One is a great option, comes with built-in VPN and AI>
You can activate the battery saver mode and hardware acceleration for better speed. If you use the free version of Spotify, you can enable Opera One’s adblocker for seamless streaming.
Opera One
Stream your favorite music seamlessly with one of the fastest browsers in the game!
Press the Win + R keys together to open the Run console.
In the search bar, type the following command and hit Enter: ipconfig /flushdns
This will reset the internet connectivity settings on your system.
The Spotify web player should be working fine now.
2.2 Flush the DNS cache for Chrome
Launch Chrome and open a new tab.
Type the following line in the address bar and hit Enter: chrome://net-internals/#dns
Now, on the page that you see, click on the Clear host cache button on the right.
This will clear your Chrome browser’s DNS cache.
2.3 Flush the DNS cache for Firefox
Open Firefox and in a new tab.
Now type the following line in the address bar: about:networking#dns
On the page that you see, click on the Clear DNS Cache button.
This will clear the DNS cache from your Firefox browser.
Once you have cleared the DNS cache from the system and the browsers, the Spotify not working in your browser issue should be fixed.
3. Choose the correct playback device in Spotify
Launch your browser and open the Spotify web player.
On the home page, navigate to the bottom right and click on the Connect to a device icon.
You will see a list of playback devices if connected.
Select your browser (This Web Browser) from the list.
Now, Spotify will start working on your web browser and play music.
4. Disable the ad-blocker in your web browser
If you are using Chrome, launch the browser and click on the three dots on the upper right.
Select More tools from the menu and then select Extensions.
On the Extensions screen, navigate to the ad blocker and turn it off.
Try opening Spotify on your browser and the not working issue should be resolved.
However, if you are using any other browser like Firefox or Edge, you can refer to this guide to disable AdBlock.
5. Reset the browser
5.1 Reset Chrome
Open Chrome, type chrome://settings/reset in the address bar, and hit Enter.
In the Settings window, click on Restore settingsto their original defaults.
You will now see a Reset settings prompt.
Here, click on Reset settings again to confirm the action.
Once done, check if the Spotify web player is opening now.
5.2 Reset Edge
Open Edge, type edge://settings/reset in the address bar, and hit Enter.
Click on Restore settingsto their default value.
In the Reset settings prompt, click on Reset to proceed.
Once the browser is reset, check if you can now open Spotify on your browser.
5.3 Reset Firefox
Launch Firefox and navigate to about:support.
It will take you to the TroubleshootingInformation page.
Here, on the right side, under Give Firefox a tune up, click on Refresh Firefox.
Click Refresh Firefox again the prompt to confirm.
Once the reset process is over, try to run Spotify on the Firefox browser and check if the issue is resolved.
6. Change current location
Open the Spotify web browser on your preferred browser and based on your location.
For example, replace US at the end of the URL with UK.
In the Spotify window, click on your Spotify ID at the top right and click on Account.
As you reach Account Overview, click on Edit profile on the left.
Now, on the right side, scroll down and select your current country and click on Save profile.
Changing the location could be useful when you are traveling and Spotify is not working.
Alternatively, you can also use another browser instead of the current one, or try another audio streaming service to continue with your music love.
Spotify browser not working on Windows 11
If your system is running on the Windows 11 N version, then you may come across the Spotify not working issue on your browser.
This is because the N version does not ship with the Media Feature Pack. Follow the below instructions to install the pack:
Press the Win + I shortcut keys to open Windows Settings.
Click on Apps on the left side of the Settings app.
Now, click on Optional features on the right.
On the next screen, go to Add an optional feature and click on View features on its right.
In the new window, search for Media Feature Pack.
Select it and click Next.
Next, click on Install.
Once it’s installed, you can check if Spotify is now working.
NOTE
If you are unable to find the Media Feature Pack in Optional features, you can visit the official Microsoft Download Center page.
From here, download and install the pack.
Spotify browser not working on Windows 10
Whenever you enter a URL in the browser, some of the data from the site gets stored in the browser as a cache even after you exit the website.
While a part of the data is important for the website to function properly, the remaining data may lead to the Spotify web player not working on Chrome or on other browsers.
This will also help you fix the Spotify web player not working with a black screen issue.
Spotify browser not working on Mac
While this method helps you fix the Spotify browser not working issue on Mac, it’s also effective for all browsers on Windows 10/11 as well.
Follow the below steps to enable the playback of protected content:
If you are using Chrome, launch the browser and type the below path in the address bar, and hit Enter: chrome://settings/content
It will take you to the siteSettings page.
Here, scroll down and expand Additional content settings.
Now, click on Protected content IDs.
Next, go to Default behavior and select Sites can play protected content.
Once done, relaunch Chrome, and check if the Spotify not working on your browser issue is resolved.
NOTE
To enable playing protected content in Firefox and Edge browsers also, follow the methods explained on the Spotify support page.
Spotify browser not working on Android
If you are missing out on your favorite music because the Spotify browser is not working on your Android phone, you are not alone.
You can reboot the device first to check if it helps fix the issue.
Alternatively, you can also sign out from your Spotify account and sign in again to check if this helps fix the issue.
Spotify browser not working on iPhone
Open the Spotify web app and click on the profile icon on the upper right.
Select Account from the menu.
Now, under Account overview, scroll down and look for Sign out everywhere.
Click on the Sign out everywhere button. This will log you out from all devices wherever you are running Spotify.
Sign in again to check if this helps you run Spotify again on your iPhone.
Did Spotify crash while playing on your iPhone browser? While the first thing you must check is if the internet connection is working, you can also try restarting your iPhone. If this doesn’t help, you can follow the above process.
While Spotify not working on browsers is a common issue, our solutions will help you resolve the problem effectively.
You can then continue to listen to your favorite music on your desktop or mobile phone browser in the usual manner.
The server error in ‘/’ application can occur when your programs and file types are not compatible with your .NET Version. This prevents your website from running on the Server.
This is a server side issue that prevents the web app from running properly. The problem is associated with ISS and ASP.NET.
Here’s how to fix it:
How do I fix server error in ‘/’ application runtime error?
To start off, if you get this error in a browser, check the URL of the page you’re trying to access. Make sure it’s correct. It the issue persists, move to the solutions below:
1. Try a different browser
If you notice that this error appears on your default browser, try using a different one and see if the issue persists. Any browser will do, but if you want a reliable, and responsive option, we recommend Opera.
Being often updated to meet the latest standards, if you don’t have any underlying issues with your .NET framework or drivers, you won’t have this error if you use it.
If you can load the page in Opera One, then you may be better off setting it as your default browser. All of its components are of the latest version at all times, so errors such as the one described above are less likely to occur.
Opera
Browse the web with a lighter browser that keeps up with the latest security and performance needs!
Type Administrative Tools in Windows Start menu search box.
Select the Administrative Tools icon to launch it.
You will see Internet Information Services (IIS) when the Administrative Tools window opens.
Click to maximize the server window in the left hand pane.
Select Application Pools.
Continue by right-clicking on the Domain Name, and choosing Basic Settings to move to the next option.
Next, a pop window will display, click the .NET Version that is compatible with your program and file in the drop-down
Finally, select OK to confirm your option.
This is a simple method, and it can help you if you’re having Server error in ‘/’ application runtime error in Visual Studio.
This error can be frustrating because it prevents you from making proper use of your site. But thankfully the methods discussed in this article will solve the Server error in ‘/’ application on Windows 10.
Make sure to read through the steps correctly so that you can get rid of this problem permanently. In case the problem is still there, visit our Internal server error in NGINX guide.
Leave comments below, so we know if you are okay with the solutions provided in this article.
Despite Google ensuring users can use the Translate app offline, it still has the feature automated on the Chrome browser. This feature guarantees you do not miss out on vital information due to language differences.
But for some reason, users are complaining that the Translate feature is no longer working on Chrome. And it is fair to say it has reduced the ease of use of the browser.
To help restore normalcy, we have gathered five effective fixes for the problem. These solutions cut across a wide area and should get your Translation back in no time.
Why is my Translate not working?
There are various reasons why Translate might not be working in Google Chrome. Below are some of the common ones:
Outdated browser
Corrupt extensions and browser data
Page language could not be identified
The website to translate was built with Flash or similar text-containing technology
How do I enable translation in Chrome?
Click the menu button (three vertical dots) and select Settings.
Select the Language option.
Toggle the switch for Offer to translate pages that aren’t in a language you read forward.
With this, Chrome should always offer to translate pages for you.
Quick Tip:
Try installing the extension to another browser. If you want a browser that keeps up with the latest web developments while staying light and fast, we suggest trying Opera One.
The Google Translate extension is available to download in the Opera One add-ons store. Not only that but the browser comes with a native AI and modular AI-ready design that can help you with your translation needs.
Opera One
Use this versatile browser to integrate the Translation extension and any other tool that will help you stay productive!
What can I do if Translate doesn’t work in Chrome?
1. Update Chrome
Click the menu button and choose the Settings option.
Select the About Chrome option on the left pane.
Your browser will automatically search for available updates.
Sometimes, the simplest fix might be the most effective. An outdated browser could cause all manner of problems.
Browser update has proved to fix the Translate option not working or showing on Chrome on Android, iOS, and PC.
2. Delete browsing data
Click the menu button and select the Settings option.
Select the Privacy and security option.
Choose the Clear browsing data option.
Click the dropdown next to Time range and select All time.
Mark the boxes for Browsing history, Cookies and other site data, and Cached images and files.
Finally, click the Clear data button.
If the Translate option is not working on Google Chrome on some websites, it might be due to the accumulation of corrupt browsing data. Clearing them should do the trick here.
3. Disable Extensions
Click the menu button and select More tools.
Choose the Extensions option.
Toggle the switch in front of each extension backward to disable it.
Click the Add extension button to confirm the action.
If the Translate page option is not showing on Chrome after applying the fixes above, using the extension might be your best bet to restore normal service.
Select Restore settings to their original defaults.
Click the Reset settings when prompted.
How do I fix This page could not be translated?
This page could not be translated issue is usually down to the website. Either the page is written badly and hard for Google Translate to understand, or the website is built using text-containing technology. And that is out of your reach to fix.
The Translate not working issue can deny you access to valuable information due to language differences. But with the fixes in this guide, you should get things working normally again.
RSA Conference 2022 was held at the Moscone Center in San Francisco this year and hosted over 600 speakers and 400 plus exhibitors and countless industry sessions and networking events. Microsoft attended this year’s RSA Conference with its own executives and security professionals to offer guests at the event a chance to get hands on with 20-plus Microsoft-led sessions as well as a chance to explore the latest company solutions that included Microsoft Entra, Sentinel, and Defender Experts for Hunting.
Microsoft CVP of Security, Compliance, Identity and Management Vasy Jakkal introduced the company’s attendance with a keynote on the future of cybersecurity, followed by CVP and CISO Bret Arsenault who gave a special fireside chat on managing the concept of Shadow IT along with CVP of Identity and Access Joy Chik.
Aside from keynotes and fireside chats, attendees were able to partake in immersive art installations as well as snag some treats to take home from Microsoft’s infamous swag bar. For anyone who couldn’t make it to Microsoft’s massive North Expo booth that hosted over 40 sessions with several of its security solutions on showcase such as Defender, Sentinel, Pureview, Priva, Entra, and Endpoint Manager, there were at least 20 sessions held elsewhere during the conference.
Microsoft highlighted the following as some of its “standout sessions” during RSA 2022.
Practical Learnings for Threat Hunting and Improving Your Security Posture: Hosted by Jessica Payne, Principal Security Researcher and Threat Intelligence Strategist at Microsoft, and Simon Dyson, Cyber Security Operations Centre Lead in NHS Digitals Data Security Centre, this 50-minute session addressed threat hunting and security posture improvements from a threat intelligence-informed perspective. Attendees gained insights from Jessica’s experience in demystifying and defusing real-world ransomware attacks. They also got a first-hand recounting of Simon’s work securing the complex network maintained by England’s National Health Service (NHS) during the pandemic, and how his team’s experience can benefit all of us.
Conti Playbook: Infiltrate the Most Profitable Ransomware Gang: Participants learned how a disgruntled affiliate exposed one of the most infamous ransomware gangs, divulging its ransomware-as-a-service (RaaS) secrets to help take them down. This immersive, hands-on workshop guided attendees through a typical Conti attack sequence and provided tips to defend against advanced persistent threats. Thanks to Tom D’Aquino, Fabien Guillot, and Arpan Sarkar of Microsoft partner Vectra AI for this presentation.
Microsoft Defender Experts for Hunting Has Got Your Back: Abhishek Agarwal, Chief Security and Technology Officer at Helix Biotech, examined threat hunting’s virtuous cycle: track, hunt, and analyze. Specifically, attendees learned how Microsoft Defender Experts for Hunting uses AI to accomplish all three components of the cycle faster, providing automated detection, hunting, and analysis to help the team track and stop threats across the company’s multi-national enterprise.
Microsoft Security Research—How We Responsibly Disclose Vulnerabilities to Apple, Google, and the Linux Community: Jonathan Bar Or, Principal Security Researcher at Microsoft, discussed how disclosing bugs makes the world safer and benefits users, as well as giving Microsoft Security a better understanding of the technologies we work to protect. The goal is to challenge our own detections and prove product truth—making Microsoft Defender stronger by challenging our own blue teams.
Solve Secure Access Needs for Workload Identities with Microsoft Entra: Microsoft Product Managers Nick Wryter and Sandy Jiang led this informative session on the phenomenon of exploding workload identities. Currently, workload identities outnumber user identities five to one; the challenge being that many traditional identity and access management solutions don’t manage these prevalent and frequently over-permitted identities. Nick and Sandy explained how the new Microsoft Entra addresses this problem by providing a comprehensive view of every action performed by any identity on any resource, detecting anomalous permission usage at cloud scale.
Tracking Highly Evasive APTs with Vectra Detect & Microsoft Sentinel: Tom D’ Aquino, Senior Security Engineer at Vectra AI, led this demonstration of real-life threat-hunting using Vectra Detect and Microsoft Sentinel. Tom demonstrated real-world workflows for threat tracking, including individual threat severity, lateral movement, threat targets, and more.
The Shift of “Why” and “How” of Ransomware Attacks; How Microsoft Helps Customers Survive Ransomware: Led by MacKenzie Brown of Microsoft’s Detection and Response Team (DART), this session examined the how and why behind the recent increase in ransomware attacks. Attendees learned how attackers have evolved their methods to exert minimum effort for maximum return on investment (ROI), and why DART’s methodology can help you defeat them.
Microsoft also offered its Security Excellence Awards to 10 winners this year covering a series of cross-functional security sectors. To read up on the details of the award categories, finalist and winners, Microsoft has published that info here.
Wondering why your web browser is not supported on Samsung TV? We’ll help you figure it out. If you’re having browser problems like the inability to access certain sites or can’t fire up the browser at all, check the solutions below.
Samsung Smart TVs come with built-in browsers, and you cannot install any third-party browser on them. However, there are ways in which you can improve and tweak the existing one. Check them out.
Why won’t my web browser work on my Samsung Smart TV?
Your browser may not be working on Samsung TV for various reasons, depending on model and OS. Here are the most common reasons:
Outdated firmware – The TV’s software isn’t up to date, so the browser may crash or not work with modern websites.
Browser engine is too old – The built-in browser lacks features or codecs required by newer websites.
You can’t install other browsers – Samsung TVs don’t allow Chrome, Firefox, or Edge; only the pre-installed browser is available.
TV model is too old – Older models (especially with Orsay OS) may not support the browser or certain apps at all.
Internet issues – Weak Wi-Fi, DNS problems, or incorrect date/time can stop the browser from connecting.
Regional restrictions – Some apps and browser features may be blocked or missing depending on your country settings.
Corrupted app data – Temporary glitches or broken browser files may prevent it from launching.
What can I do if my browser isn’t supported by Samsung TV?
1. Restart the TV
Turn the TV off.
Pull the power cord out of the wall outlet.
Turn on the TV after waiting for three to five minutes.
When it comes to electronics, restarting is the simplest technique. It might assist in removing any extra cache that could be creating browser difficulties on your Samsung TV.
2. Clear the cache
Click on the three dots at the top right of your browser.
Click on Settings.
Select Privacy.
Click on Browsing history, Cookies and site data, Cached images and files.
Click on the Clear data button.
Clearing the cache is also essential when you have issues with your Samsung TV browser server not being found.
Select any app or browser and click the Lock/Unlock button.
Input your pin, and the browser will be locked.
You can follow the same process to lock your apps.
Finally, note that a Samsung smart TV web browser update would have been a good solution, but you can not do a browser update. Instead, you may try updating your TV software as a last resort if the browser is not supported on Samsung TV.
Alternatively, if you want to use a specific browser on your TV that Samsung won’t support, you can connect your Windows PC to your Samsung TV and access whichever browser you want.
This isn’t the only issue you can experience, and we recently covered Samsung TV Plus is not working guide, so be sure to check it out if you’re having issues with this app.
Frequently Asked Questions
Why is my Samsung TV web browser not working?
There are several reasons why the web browser might not work on your Samsung Smart TV. In many cases, the TV’s software is outdated and needs a firmware update. The built-in browser may also be too old to support newer websites or media formats. If your internet connection is unstable—such as weak Wi-Fi or incorrect DNS settings—the browser may fail to load pages or crash entirely. On some older models, especially those running the legacy Orsay OS, the browser might be unsupported or behave unreliably. Occasionally, the app itself becomes corrupted and stops working properly, requiring a restart or reset.
Can I update my Samsung Smart TV browser?
Not directly. The Samsung Internet Browser is a built-in app and doesn’t have a separate update option like on a phone or computer. Instead, the browser is updated automatically when you update the TV’s firmware. To do that, go to Settings > Support > Software Update > Update Now. Keeping your TV’s software up to date ensures that you have the latest version of the browser along with any performance and security improvements.
Are all browsers supported on Samsung TV?
No, Samsung Smart TVs do not support third-party browsers like Google Chrome, Mozilla Firefox, or Microsoft Edge. The app store on Samsung TVs only allows the pre-installed Samsung Internet Browser, and there’s no official way to add alternatives. This means you’re limited to the default browser’s capabilities, which may not be compatible with all websites or media.
The best software for selling online can help businesses meet their diverse needs based on their budget, products and services, and other salient factors.
Among the essential elements of online selling are shopping carts, which are a must-have if you want to sell on your website.
E-commerce is where the world is currently at, so for such a huge and ready market, businesses have many choices regarding the best software for selling online, whether it is website design or inventory management, a specialized tool can significantly increase the quality of your services.
But what each business picks, depends on the kind of features they want and their business needs.
Shopping cart software helps track and manage inventory, maintain databases, track sales while fulfilling and shipping orders, plus maintaining a loyalty program and market to customers.
Buyers are looking for a straightforward shopping experience to get their products faster, on time, and without hassles, so check out our top picks for the best software for selling online.
What is the best online selling software for businesses?
This all-in-one e-commerce solution lets you create a stunning online store, with responsive themes and a comprehensive site builder, so your unique store is ready – without code – in minutes.
Some of the powerful features of this best software for selling online include inventory management, payment collection, unlimited product options.
You can easily connect using your favorite tools like social channels, and add advanced functionality using its powerful apps and integrations.
It also has built-in SEO management, a newsletter, and CRM, so you can keep in touch with, and update your customers regularly about the business and new products or offers.
The rich intuitive and easy content editor lets you make changes to your store on the fly without coding, plus you can create your own store and optimize for sales with a custom domain.
With eye-catching product pages with multiple photos and video options to fully merchandise your products, this software lets you brilliantly showcase everything about what you sell.
When orders start rolling in, Volusion lets you process phone and mobile orders so you can make more sales.
Payments can be done with credit cards, Amazon Pay, cash, wire payment, PayPal, Stripe, electronic checks, and money orders – with secure checkout.
It is also ship savvy, plus you get a 99.99 percent uptime guarantee that your site won’t go down easily and anytime.
This is one of the most popular and best software for selling online, trusted by hundreds of millions of customers around the globe to check in and check out with information from their Amazon account.
For most customers who used Amazon before, then this platform offers a familiar and convenient buying experience to help your customers shop more and spend less time checking out.
It is ideal for both small and large businesses, as a trusted site for customers who also leave their personal information knowing it will be secure.
Businesses have the reassurance of advanced fraud protection and payment protection policy, at no additional cost to you.
The benefits of Amazon Pay include a trusted and familiar payment solution, plus you get complete transactions on your site as Amazon Pay also integrates with your existing CRM.
The software is also available across devices, in the home, and on the go so you benefit from years of Amazon innovation.
The GetResponse Ecommerce Marketing Automation tool is the top marketing automation platform although it’s extremely simple to use.
It was designed for multichannel customer engagement and it features one-click integration with the most popular e-commerce platforms such as Shopify, PrestaShop, Magento, and a lot more.
The best asset of this solution is the powerful email marketing software that offers professional email templates, easy design tools, and reliable deliverability.
However, it also provides marketing automation features, including SMS, and web push notifications.
A key to e-commerce is personalization and with this software you get important information on customer purchases, order history, and behavior on your sites.
That helps you create segments for groups of customers and create targeted marketing campaigns that will convert into sales.
With GetResponse, you may even synchronize promo codes from your platform, and then drag and drop them into your newsletters, automation messages, or autoresponders.
It’s most certainly a powerful suite designed to consolidate your marketing strategies and boost your sales quickly.
Don’t draw your credit card just yet because you can sign up for free and test the tools before making any commitments.
Next in line is a reliable e-commerce solution dedicated to helping you master the secrets of advanced repricing. As an inside scoop, it’s all related to maximizing ownership of the Buy Box with Aura.
While some online selling software tools offer fantastic guidance, others – such as GoAura – end up doing the job for you.
Setting it up is straightforward. Then, define your competitors and decide whom you want Aura to reprice against or if Amazon is on the listing.
Take your time to complete all steps and remember that GoAura is powered by artificial intelligence.
So, the longer you use it, the more effective it becomes in knowing and surpassing your competition.
Up next, once it is up and running, it enables you to increase Amazon sales and profits with tailored repricing strategies.
Finally, you’ll want to keep an eye on how your listing performs over time. Feel free to add in your costs or unlock detailed profit analytics with ease.
All these make it a top choice for small businesses that are just starting out and larger stores that sell a range of products alike.
Wix is a reliable eCommerce solution that helps you create HTML5 websites and mobile sites using online drag and drop tools.
The unique Wix ADI (Artificial Design Intelligence) function can build a website based on your preferences and social media content.
All you have to do is answer a few questions about the site you want to create and allow the ADI to access your social network information.
After the automatic process has been completed, you’re free to edit the website as you please.
Moreover, you can choose from 500+ professional online store templates and customize every element to suit your eCommerce business, including the product pages and store members area.
With Wix Payments, you can accept money without setting up a third-party payment provider and control all your business transactions from a single dashboard.
Also, the built-in dispute tool enables you to monitor, accept or dispute chargebacks.
Other key functions of this software are represented by the Logo Maker and Business Name Generator tools, but also an integrated analytics dashboard.
This amazing tool provides SEO instruments, native marketing solutions, and multiple sales channels, including Facebook, Amazon, or eBay.
You can also benefit from the buy now, pay later options like Afterpay, Sezzle, Affirm, and store subscriptions. You also have automated paid ads and the Wix Owner App.
Premium packages from Wix come with a one-year free domain voucher and discounts for advertising on Google and Bing.
In case you are not satisfied with their services, you can cancel the plan within 14 days and receive a full refund.
Wix
Easily design and manage appealing e-commerce websites with Wix’s drag and drop-based builder.
Meet the Unbounce service and say goodbye to difficult coding requirements to build your website strong. This is a modern e-commerce platform that offers complete digital media services.
Firstly, what you have to know is that Unbounce masters the brand designing needs for selling online.
Whether you need a professional landing page or a product description template, this software helps you to construct anything digital.
Say you are just starting your online business and need to build a strong digital presence. With this solution, you have a smart page builder, on-design templates, conversion support, or Smart Traffic AI tools.
With these tools assured, the only thing you need to think of is your business plan and purposes, and less about web presentation skills. And coding, no way.
Even if you have no experience with digital marketing software you still don’t need to worry because this tool offers efficient Landing Page build-up and website infrastructure.
More exactly, it includes features such as drag and drop campaign creator, marketing automation and CRM, WordPress direct publish plugin, Analytics in-app, and many more.
That being said, choosing this performant digital software means that you invest directly in your business, and accomplish your benchmarks fast.
Unbounce
Increase your conversion rate while reducing bounce for your online business using this solution.
Whether you want to sell online via your website, or on social media, Shopify is the best software for selling online, with no design skills needed, plus you can brand your store your way.
With this tool, you can establish your brand online with a custom domain name and online store, and instant access to hundreds of awesome themes, and complete control over the site’s look and feel.
In this way, you get a store that reflects your own personality and that of your business, so give it a try.
Everything is in one place with Shopify’s unified platform so you can run your business with ease.
You can also add new sales channels in seconds, manage unlimited products and inventory, and in one single step, you can fulfill customers’ orders.
It is perfect for both beginners and pro users, as the site is fully customizable complete with an online store and blog, unlimited bandwidth, product inventory, and customer data.
You can also sell on new channels like Pinterest and Amazon, accept credit cards with Shopify Payments, save time and money with shipping and discounted rates.
You can even get 24/7 customer support if you have queries or troubleshooting issues.
Shopify gives you a mobile commerce ready store with a built-in mobile commerce shopping cart, over 100 professional storefront themes, social media integration, analytics, plus so much more.
This is an easy-to-use, maintain and modify software for selling online, with awesome design templates so your eCommerce site can be up and running fast, at an affordable rate.
All you pay with X-Cart is a one-time licensing fee, with no transaction or monthly fees, no sneaky add-on fees and if you want to upgrade, press one button and it is done automatically.
It also gives open-source PHP code to control everything as you want it and adds extra features as your business grows.
Other features include a huge and active community of developers and eCommerce professionals so you can get answers to your burning questions.
X-Cart is the only PCI DSS compliant software for your own server as it works on any hosting, naturally and seamlessly, integrating with top payment gateways, so you can start selling immediately.
Sell anything, everywhere in multiple currencies and languages, with a site that is fully customizable, fully compliant with payment data security standards, and also mobile-ready.
You also get unlimited products, services, and downloads, integration with shipping carriers, marketing tools including coupons, banners, and even sell via Facebook with f-Commerce GO.
This software for selling online is pretty easy to use and is everything you need to add a store to your site.
Besides having a free plan, Ecwid also doesn’t have setup or transaction fees, and you don’t need a credit card to use this platform.
You can also set up shop anywhere and add it to multiple sites, blogs, and social networks, then manage from any place and all changes are mirrored instantly across all your sites.
It installs in just minutes, seamless blends into your site and your website’s design will be unaffected. You can also sell on any device and on the move.
The design is responsive so that your store looks perfect on desktop, tablet, or even mobile, so you get a mobile POS on your smart device.
You don’t need to worry about upgrades, Ecwid does everything from SSL certificate security, server configuration, and hosting – all you do is sell.
You also get a customer address book, language detection in 45 different languages, a smart shipping calculator, track inventory, boost sales, and five-star customer care.
Ecwid synchronizes with POS systems such as Clover, Vend, and Square, plus you can accept payments on the go with your smart device, while your customers enjoy seamless shopping and easy checkout.
How to get the best online selling software for businesses
In a fast-paced world where we’re all always on the run, shoppers are looking for a straightforward shopping experience so they can get their purchases quickly and without too much hassle.
If we also factor in the pandemic times that have visibly affected all of our direct interaction capabilities, then surely the prospect of an online business is appealing to everyone, both buyers and sellers.
But choosing the best online sales software for businesses is not always easy, and there are some things to consider.
Choose a solution that is easy to access and implement
All you need is software that allows you to build a website based on your preferences and social media content using online drag and drop tools.
You don’t need to struggle with algorithms and code like a real IT technician, you just need access to an AI-based tool that does the work for you.
Pick a feature-rich software
Perhaps the most important aspect in choosing an online selling software for businesses is the functions it provides to both the business owner and the direct customer.
The more features that the tool you choose provides you with when offering your services or products online, the more satisfied customers you will have.
Nothing is more important than having eye-catching product pages with multiple photos and video options to fully merchandise your products in a competitive virtual world.
Pay attention to the security aspect
Security is obviously one of the primary concerns of users and those who provide their services or products online. And for a good reason, especially as we live in an age of insecurities and cyber challenges of all kinds.
You need to provide customers with a site that is fully compliant with payment data security standards, and proper online selling software can help you with it. Features on other platforms like Facebook’s sell something button may go missing at times and interrupt workflow.
Even if you own a small or even larger business, a reliable website for customers who also leave their personal information knowing it will be safe is all you care about.
It’s not unusual for such apps to run into glitches. For solutions, see our full Flipp app not working guide.
Found the best software for selling online from our list? Let us know which one you’ve used before or are using now, by leaving a comment in the section below.
Everybody experiences a computer problem once in a while, and one problem that Windows 10 users reported is A network change was detected or ERR_NETWORK_CHANGED in Google Chrome.
Occasionally, the displayed message also says A network change was detected. Error 21. This error message will prevent you from accessing the Internet, therefore, it’s crucial to know how to properly fix it.
Why do I keep getting the message a network change was detected? This error message appears for users whenever there is a break in the connection that exists between their browser and the Internet.
It occurs most often when there is a change in the network configuration. A physical disconnect from the network or corrupted browser data or cache can be all causes of this issue.
Moreover, buggy browser extensions or plug-ins, outdated network drivers, or interference from a virtual private network (VPN) or proxy are some of the other reasons why this may occur.
What does it mean when it says network change detected? The network change detected message indicates that your IP address has changed due to the causes above, or that the connection to the network has been tweaked.
Don’t worry, as we’ve put together a comprehensive list of solutions for you to apply and fix the Your connection was interrupted. A network change was detected. err_network_changed situation. Keep on reading!
How do you fix your connection was interrupted a network change was detected ERR_NETWORK_CHANGED?
1. Try accessing an alternative browser
If the connection error persists with Chrome, try accessing another browser. Oftentimes, the problem is not your PC or your network, but the browser itself.
We recommend a lighter browser such as Opera One since it requires fewer resources and it loads considerably faster.
As opposed to Chrome, Opera One has integration with a lot of tools and apps.
This is why the browser comes fully equipped with the most productivity tools one could wish for, from news feeds and workspaces to messengers and battery savers. Plus, VPN and ad blocker.
You just have to activate each or pin particular icons to the sidebars for easy access. This guarantees a faster response time and almost zero errors.
Opera One is a great browser, and if you’re getting Your connection was interrupted error, switch to Opera and check if the error is still there.
Opera One
Try and enjoy an error-free Internet experience with this browser’s built-in features.
Press the F5 key on your keyboard, Ctrl + R, or click the Reload this page button in order to refresh your current page.
Alternatively, close the entire window, reboot your computer and open a new Chrome window.
3. Disable your browser extensions
If you gotA network change was detected in Windows 11, start a new Chrome window and click on the three-dot menu followed by More tools and Extensions.
Next, turn off the toggle next to all of your extensions in order to fix A network change was detected in Chrome.
Note that this solution will also work in the case where you get A network change was detected in Microsoft Edge, and the steps will be similar.
VPN software is great if you want to protect your privacy online, but the VPN software can be the cause why your connection was interrupted in Windows 10.
If you’re getting A network change was detected in Windows 10, the problem might be related to a malware infection. To fix the issue, you need to perform a full system scan.
There are many great antivirus tools that can help you with that, but if you’re looking for a reliable antivirus you should consider the list linked. Many of them offer great protection and it should fix your problem.
These tools can run deep system scans and will find all the vulnerabilities that affect your system, including malware, outdated programs, weak passwords, duplicated files, and more.
They will also look thoroughly at each problem they find, and take the necessary actions.
Therefore, any PC user should take into consideration dedicated antivirus software for browsing and defending the system from the most advanced online malware.
6. Reinstall Google Chrome
Another solution to go around the network change error is to simply reinstall Google Chrome. (As mentioned before, the issue appears mainly in this browser.)
There are several ways to remove Chrome, but the best one is to use uninstaller software.
If you’re not familiar, uninstaller software can remove any application from your PC, along with any leftover files and registry entries associated with that application.
By using one of these tools, you’ll ensure that the application is completely removed from your PC. Moreover, reinstalling Chrome will also address the A network change was detected on Mac devices.
If you’re looking for good uninstaller software, be sure to choose the product that fits your needs, install it, and you’ll uninstall Chome in no time.
7. Update the network driver
Right-click on the Start icon and choose Device Manager.
Here, expand the Network adapters section and right-click on the first option to choose Update driver.
If this issue appears in other browsers as well, it might be that your network configuration is not correct or that your network adapter driver is outdated.
Update drivers automatically
We strongly recommend a third-party tool to scan for outdated drivers on your PC and then download the latest ones if that is the case.
You could update the drivers yourself with a professional tool that will help you avoid permanent damage and file loss caused by downloading and installing the wrong driver version.
One of the simplest solutions is to restart your modem and check if that fixes the Network change detected error on your laptop.
Sometimes your modem or computer configuration might not be correct, and that can prevent you from accessing the Internet.
To fix that, simply press the power button on your modem to turn it off. Wait for 30 seconds and press the power button to turn it back on again. After turning on your modem, check if the issue is resolved.
9. Flush the DNS settings
Right-click on the Start icon and choose Windows Powershell (Admin).
When it opens, enter the following command and press Enter: ipconfig /flushdns
After you get the message that the DNS was flushed close the window and check if the problem is resolved.
Right-click on the Start icon and select Windows Powershell (Admin) from the menu.
After it opens, enter the following commands and press Enter after each: netsh int ip set dns netsh winsock reset
By running these commands, you’ll reset the required components, and you’ll hopefully fix the Your connection was interrupted error.
11. Use Google’s Public DNS
Right-click on the Start icon from your Taskbar and choose Network Connections.
Select Change adapter options.
When the Network Connections window opens, locate your current connection, right-click it and choose Properties.
Select Internet Protocol Version 4 (TCP/IPv4) and click the Properties button.
Select Use the following DNS server addresses option and enter the following values: Preferred DNS server: 8.8.8.8 and Alternate DNS server: 8.8.4.4. Once you’re done, click OK to save the changes.
Use this solution if you think that the default DNS server is the one causing the A network change was detected issue.
12. Clear browsing data in Chrome
Click on the Menu icon in the top right corner and choose Settings.
From the left menu select Privacy and security.
Next, click on Clear browsing data.
Set the Time range to All time and check all the options. Now click Clear data.
13. Disable the Energy Efficient Ethernet feature
Open Device Manager by right-clicking on the Start icon and selecting the option with the same name.
Locate the Network adapters section on the list and double-click on the first option under it.
Navigate to the Advanced tab, look for the Energy Efficient Ethernet option, and set its value to Disabled.
After doing that, check if the problem is resolved. If you don’t have the Energy Efficient Ethernet option available, then this solution doesn’t apply to you, and you can just skip it.
14. Use either Ethernet or Wi-Fi on a single device
According to users, A network change was detected error can appear if you’re using both Ethernet and Wi-Fi connections on your PC simultaneously.
This can lead to other issues besides this one, and in order to fix the problem, it’s advised to use just Wi-Fi or Ethernet. Speaking of Ethernet, be wise, and choose the best adapters on the market.
15. Don’t use Google’s IPv6 DNS
Right-click on the Start icon and select Network Connections.
Click on Change adapter options.
After the Network Connections window opens, find your current connection, right-click it and select Properties.
Select Internet Protocol Version 6 (TCP /IPv6) and click Properties.
When the Properties window opens, select Obtain DNS server address automatically and click OK to save changes.
After making these changes, the issue should be resolved, and you should be able to visit any website without problems.
A network change was detected error in Chrome will prevent you from accessing the Internet, and since this error can be caused by network configuration or by a bug in Google Chrome, sometimes it might not be easy to fix it.
Nevertheless, we hope that you managed to solve it using one of our solutions. If not, you might consider changing your browser, as suggested in the second solution.
Neopets is an online virtual pet website, where you can select a pet from fantasy creatures and name it afterward, and today we’re going to show you the best browser for Neopets.
In the game, you can take care of the created animal by playing games, purchasing food, and exploring the land of Neopia, as the game title suggests.
If you want to play the game, you might want to consider using one of these browsers for gaming that we’re about to mention.
Can you play Neopets without Flash?
Yes, you can still play your favorite games even without Flash. Developers of Neopets are committed to converting all their content using modern web technology, so they won’t have to rely on Flash anymore.
There are many Neopets non Flash games, but keep in mind that not all game components are converted. However, the developers are working hard to fix that in the future.
How can I play Flash games in 2022?
Playing Flash games without Flash is possible, but you’ll need to rely on third-party solutions and game archives.
Opera GX is the perfect choice for playing all kinds of games online, including Neopets.
Thanks to this browser you will see that there will be a lesser use o resources as compared to other browsers.
What makes Opera GX special is that this browser was specially created for gaming, which means that it comes with gaming-related services already integrated.
Moreover, when you are using it, aside from the unique gaming features available, you will also benefit from the regular Opera features, such as free VPN, built-in ad-blocker and amazing task management options.
Other useful Opera GX features
A reliable built-in adblocker.
Exclusive wallpaper themes
Integration with Facebook, Whatsapp, Telegram, and Vkontakte messengers.
Free VPN integrated.
Opera GX
Play Neopets and enjoy a fantastic user experience with this reliable browser that comes with unique gaming features.
If you were wondering if Neopets works on Chrome, know that the answer is definitely yes.
This browser comes with built-in online protection, sync features, built-in ad-blocker which means your game will not be interrupted by annoying games.
You can use multiple tabs in Chrome without slowing it down and there are several options available for efficiently managing them.
Even though Chrome has not been built specifically for gaming, the available features are worth giving it a try if you want to play Neopets HTML games.
These are our recommendation for the best browser you can use in order to play Neopets online.
A good browser can definitely bring the gaming experience to another level, but if you need more browser, visit our article about the best browser to play Flash games.
Please share with us in the comments section below which one have you used so far, we would love your input.