Millions of gamers use Steam on a daily basis to play their favorite games, but some users have reported Engine error: Could not load library clienterror when they try to launch their favorite games on Steam, so today we’re going to show you how to fix this error on Windows 10.
What is Engine Error: Could Not Load Library Client And How To Fix It On Windows 10
Speaking of this error, users reported the following issues:
Could Not Load Library Client CS GO, Left 4 Dead 2, HL2 mod, Goldeneye Source, CS Source, Wolfenstein, GMod – This error can affect many games such as Global Offensive, Garry’s Mod, Wolfenstein and many others. If you’re having this problem, be sure to check the integrity of the game cache of the affected games.
Could Not Load Library Client Try restarting – Sometimes you might encounter this error message on your PC. If that happens, be sure to restart Steam using Task Manager.
Could Not Load Library Client w3btrv7.dll – If you encounter this error on your PC, the problem is related to the missing files, so you might have to install the missing components to fix this error.
Could Not Load Library Client Steam – As previously mentioned, this error message usually occurs when using Steam. However, you should be able to fix the problem by using one of our solutions.
According to reports, “Engine error: Could not load library” affects only Valve’s games, such as Counter-Strike: Global Offensive or Dota 2, making your favorite game unplayable, so what can you do to fix this problem?
1. Download Microsoft Visual C++ 2010 Service Pack 1 Redistributable
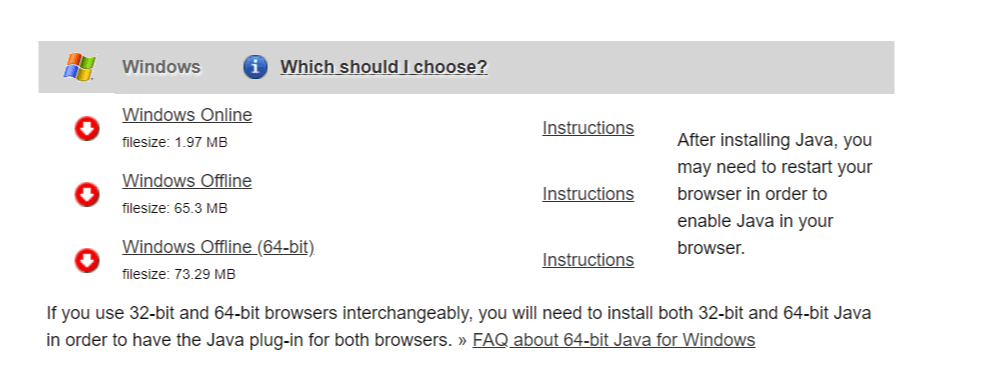
If you’re getting Engine error: Could not load library client error, it might be that some Visual C++ Redistributable files are missing on your computer, and you can download all the necessary files from here. Just remember to install both x86 and x64 version if you’re running a 64-bit version of Windows 10.
2. Temporarily disable your antivirus
If you’re encountering Engine Error: Could Not Load Library Client message on your PC, the cause might be related to your antivirus. To fix this issue, be sure that the Steam directory is added to the exclusion list in your antivirus.
If that doesn’t help, you might have to temporarily disable your antivirus and check if that solves the problem. In case the issue still persists, you might have to uninstall your antivirus.
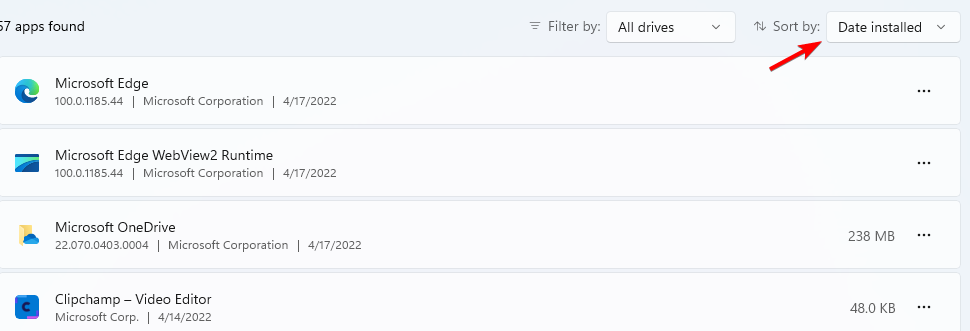
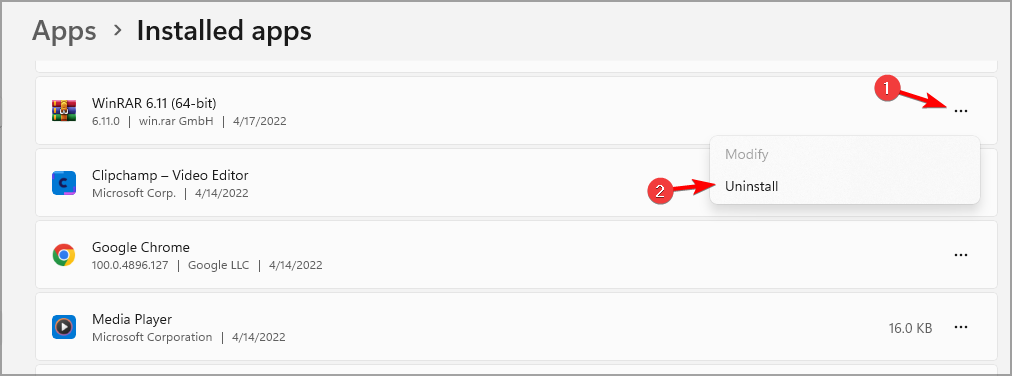
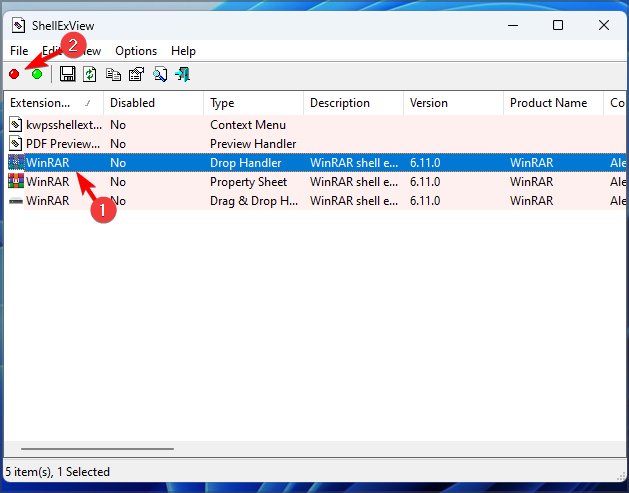
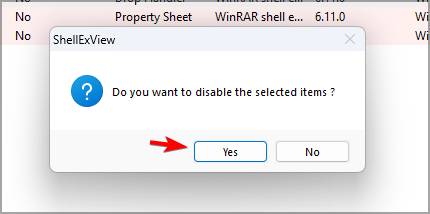
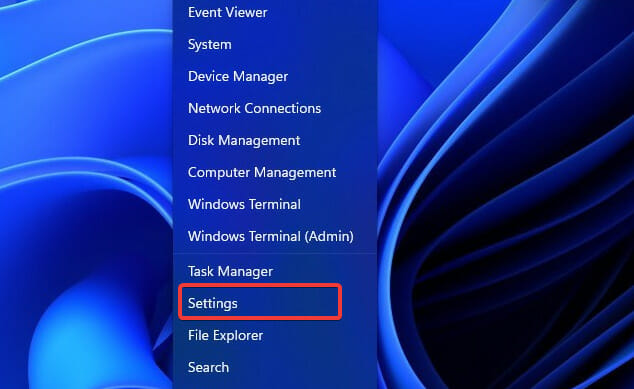
You can do that from Windows Settings, but we advise you use a dedicated utility that will uninstall your antivirus and remove its corresponding files and registry entries.
Removing any trace of an application when you reinstall ensures that there’s n risk of getting similar errors in the future. It will also make it easier for you if you want to reinstall it in the future.
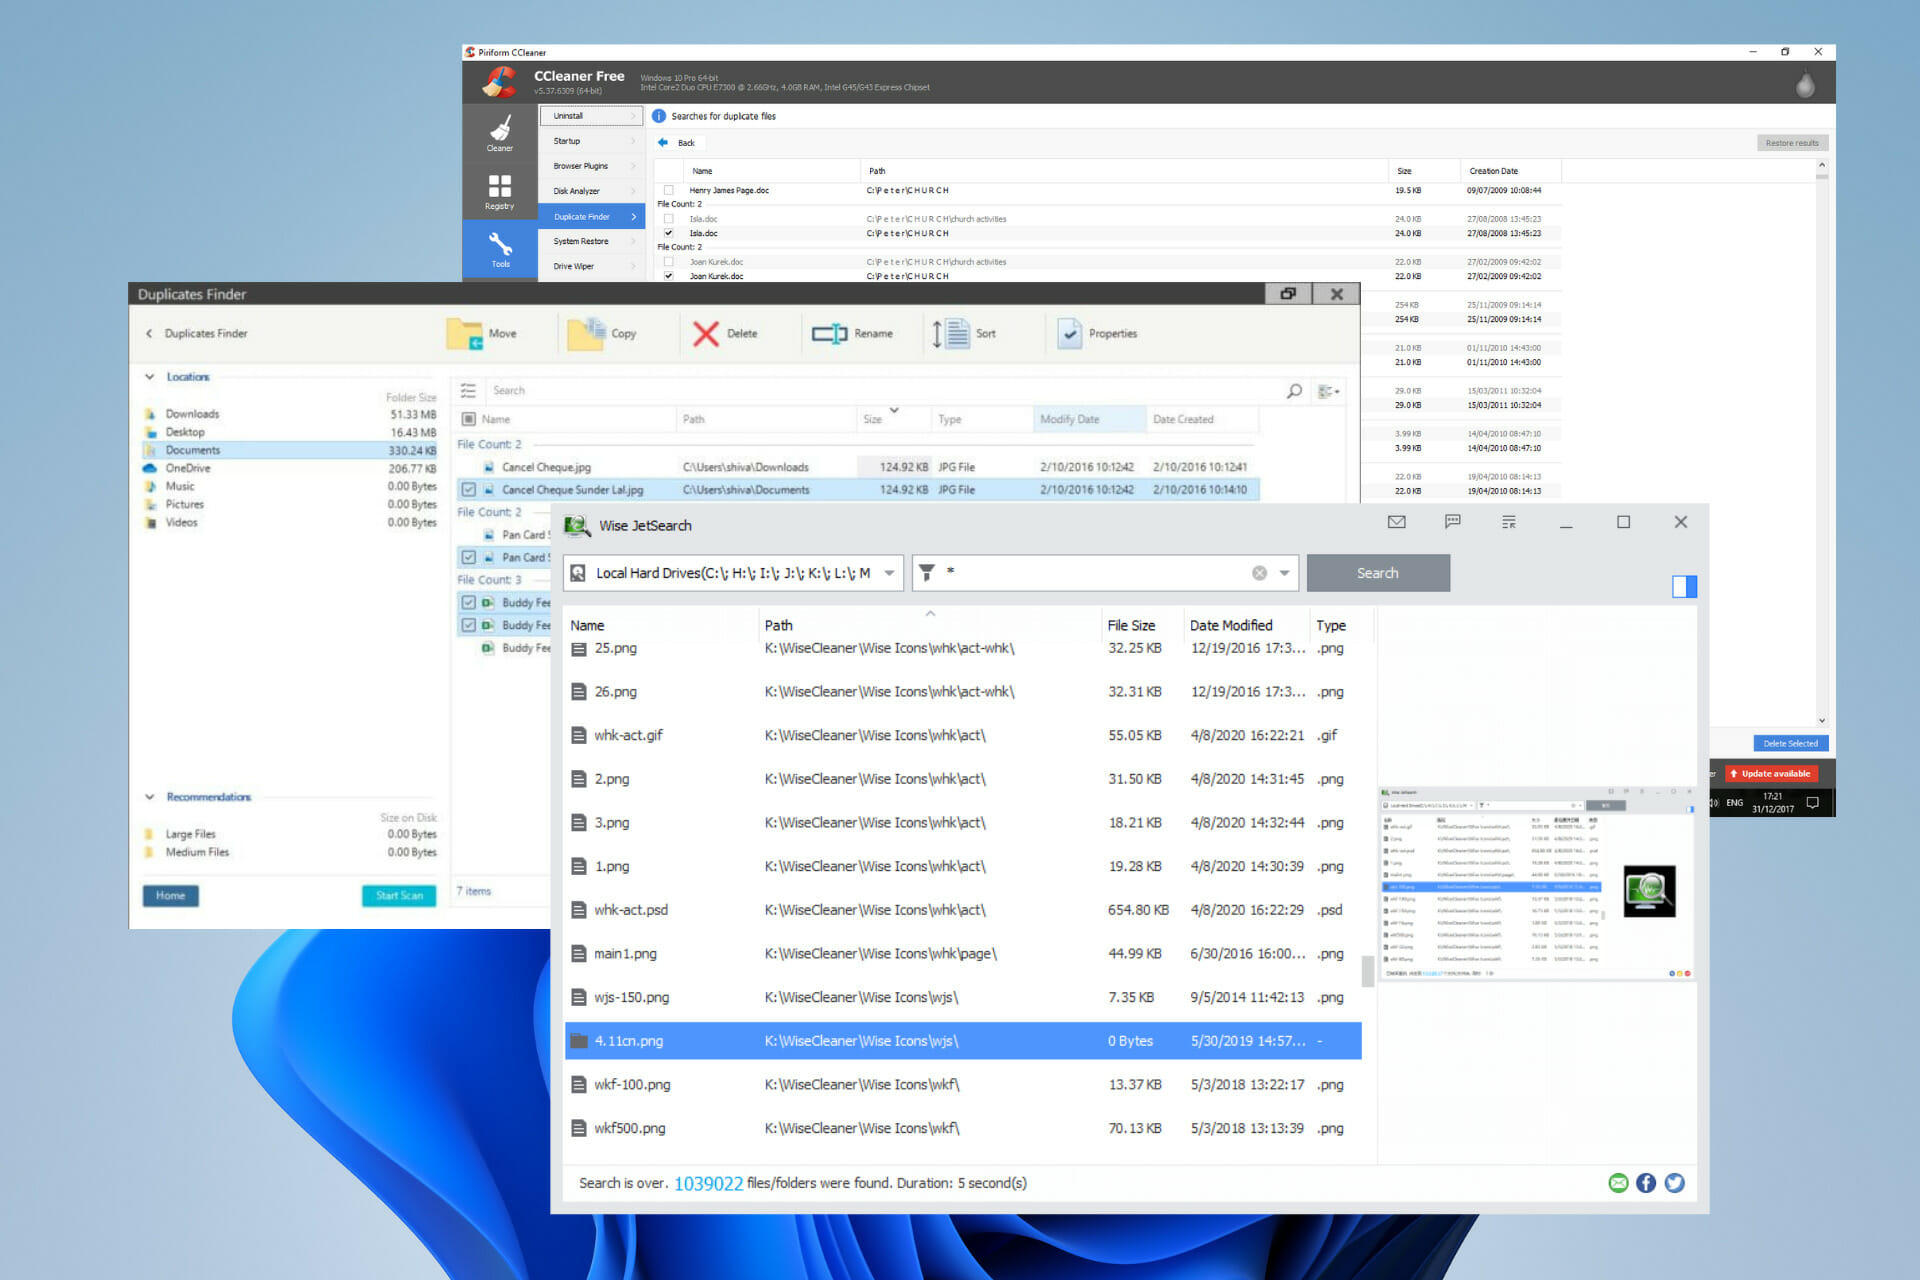
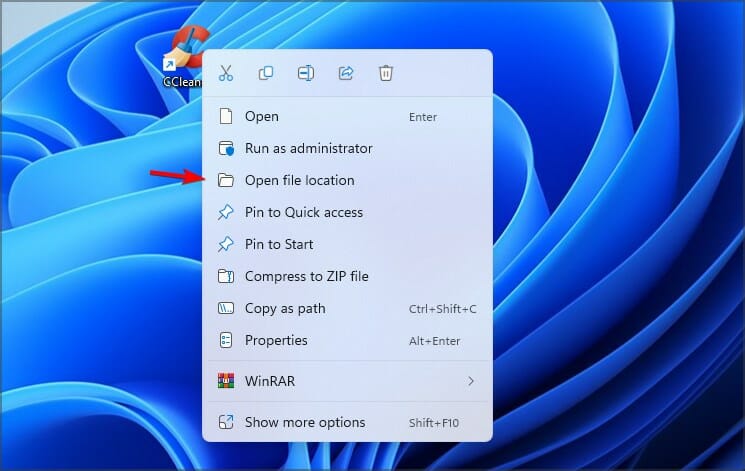
For this job, we recommend you use CCleaner because it is a very simple to use utility that embodies a powerful yet simple uninstaller that lets you remove apps in just a few clicks.
It also includes a registry cleaner as well as a junk file cleaner. It is safer to use it than to try to manually detect leftover files. The registry utility includes a backup option that you can use to make sure everything goes smoothly.
If “Engine error: Could not load library client”error is giving you trouble, try restarting Steam. Make sure that you turn off Steam completely, you can even check with Task Manager if the Steam is running. After turning off Steam completely, start it once again to see if the problem has been resolved.
4. Move your Steam installation
If the problem persists, and Steam is installed to a location that contains letters or symbols that are not in the English alphabet, you might have to move your Steam installation. Don’t worry, your Steam games will be saved, and if everything goes well you won’t have to download them again.
Before we start moving your Steam installation, make sure that you know your username and password, because you’ll need it to access Steam later.
Make sure that Steam isn’t running.
Go to the Steam installation directory. By default it should be:
C:Program FilesSteam However, this location might be different on your computer.
Delete all the files and folders except for the SteamApps folder (this is where your downloaded games are stored) and Steam.exe.
Move these two files to another location.
Launch Steam.exe from a new location, and log in to your account.
Steam will now update, and you’ll be able to play your favorite games again. In addition, it wouldn’t be a bad idea to verify game cache files. If you have any issues after moving your Steam games to a new directory you should delete Steam data from your registry. To do that follow these instructions:
Go to your Steam directory and delete all files from it, except for the SteamApps folder. It’s advised that you move the SteamApps folder to a different location because you’ll need it later.
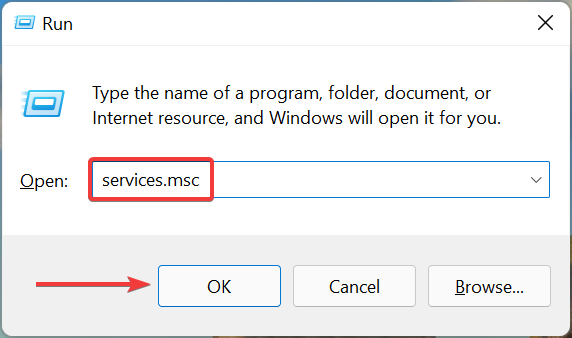
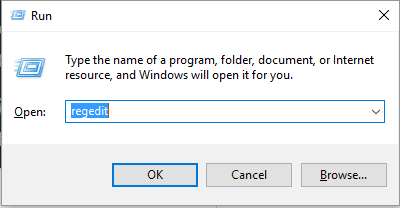
Now, start the Registry Editor. You can start it by pressing Windows Key + R on your keyboard and typing regedit in the Run dialog. After typing regedit click OK or press Enter.
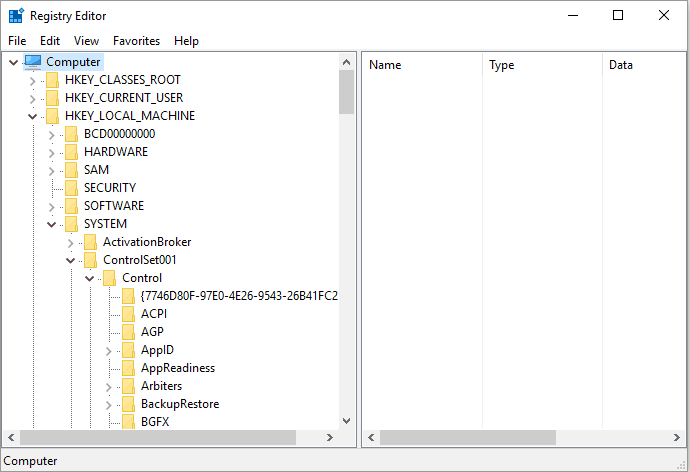
When Registry Editor opens navigate to the following key in the left pane:
HKEY_LOCAL_MACHINESOFTWAREValve (if you use a 32-bit version of Windows 10)
HKEY_LOCAL_MACHINESOFTWAREWow6432NodeValve. (if you use a 64-bit version of Windows 10)
Right-click on the Valve key and choose Delete.
Close Registry Editor.
Now go to Steam’s website and download the new Steam client.
Install it, and move your SteamApps folder to it.
After doing that, log in to Steam. It’s also advised that you verify the game cache of the games you want to run.
5. Repair the Steam Client Service
Make sure that Steam isn’t running.
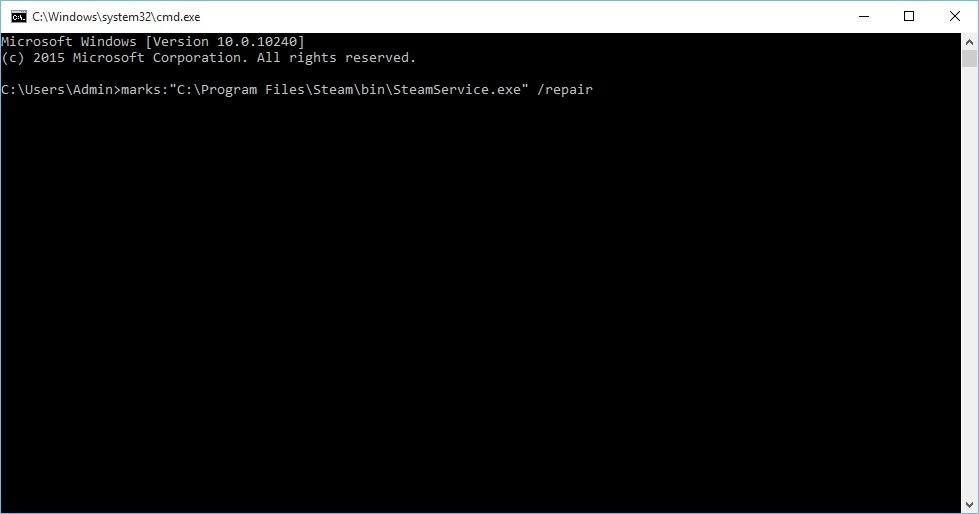
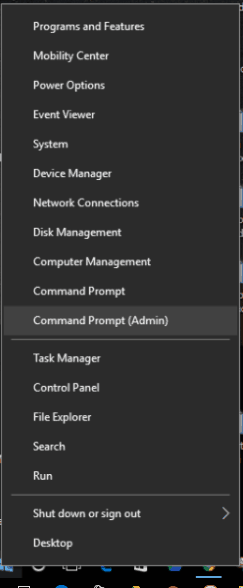
Start Command Prompt as administrator. To do that, press Windows Key + X to open the Win + X menu and choose Command Prompt (Admin) from the menu.
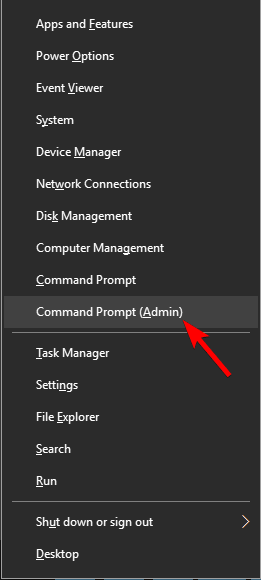
Remember to change the location between the quotes, so that it matches your Steam installation directory.
Press Enter to run it. This might take a while, but after the process is completed, you should get a message saying “Steam Client Service repair completed”.
After the process is completed, close Command Prompt and restart your computer.
6. Verify the game cache
To verify the game cache of the game that gives you Engine error: Could not load library client error you need to do the following:
Open Steam.
Right-click the game that doesn’t work and choose Properties.
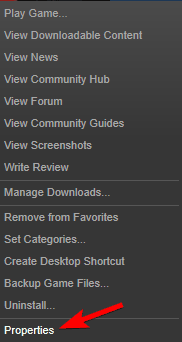
Next, navigate to the Local Files tab and click Verify Integrity Of Game Files.
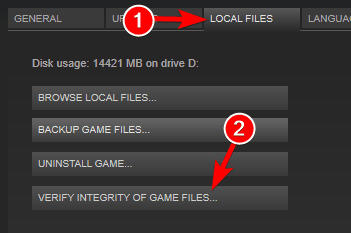
This process might take a while, so be patient.
After the verification process has been completed, try running the game again.
7. Delete bin folder
If a certain game is giving you this error, you might want to delete its bin folder. Sometimes some .dll files can move to the wrong locations, so let’s try to delete the bin folder. We have to warn you, sometimes by deleting a game folder you can cause damage to your game, and if that happens you might have to download the game again.
In our example use used Garry’s mod, but this could be any other game that isn’t working properly. To delete the bin folder follow these instructions:
After you have deleted the bin folder, try to start the game again.
If the problem still isn’t fixed go to:
C:Program FilesSteamSteamAppsyour_usernamegarrysmod and delete all folders and files except the garrysmod folder.
Try to start the game again.
8. Change the gameinfo.txt file
This solution applies to game mods, so if you’re having any problems with mods, try the following steps:
Go to mod folder and open gameinfo.txt file.
Find the following line:
Game hl2 and change it to:
Game sourcetest
Save the changes and try running the mod again.
As you can see, Engine error: Could not load library clienterror can create some trouble, but in most cases, you can fix it by downloading Download Microsoft Visual C++ 2010 Service Pack 1 Redistributable files.
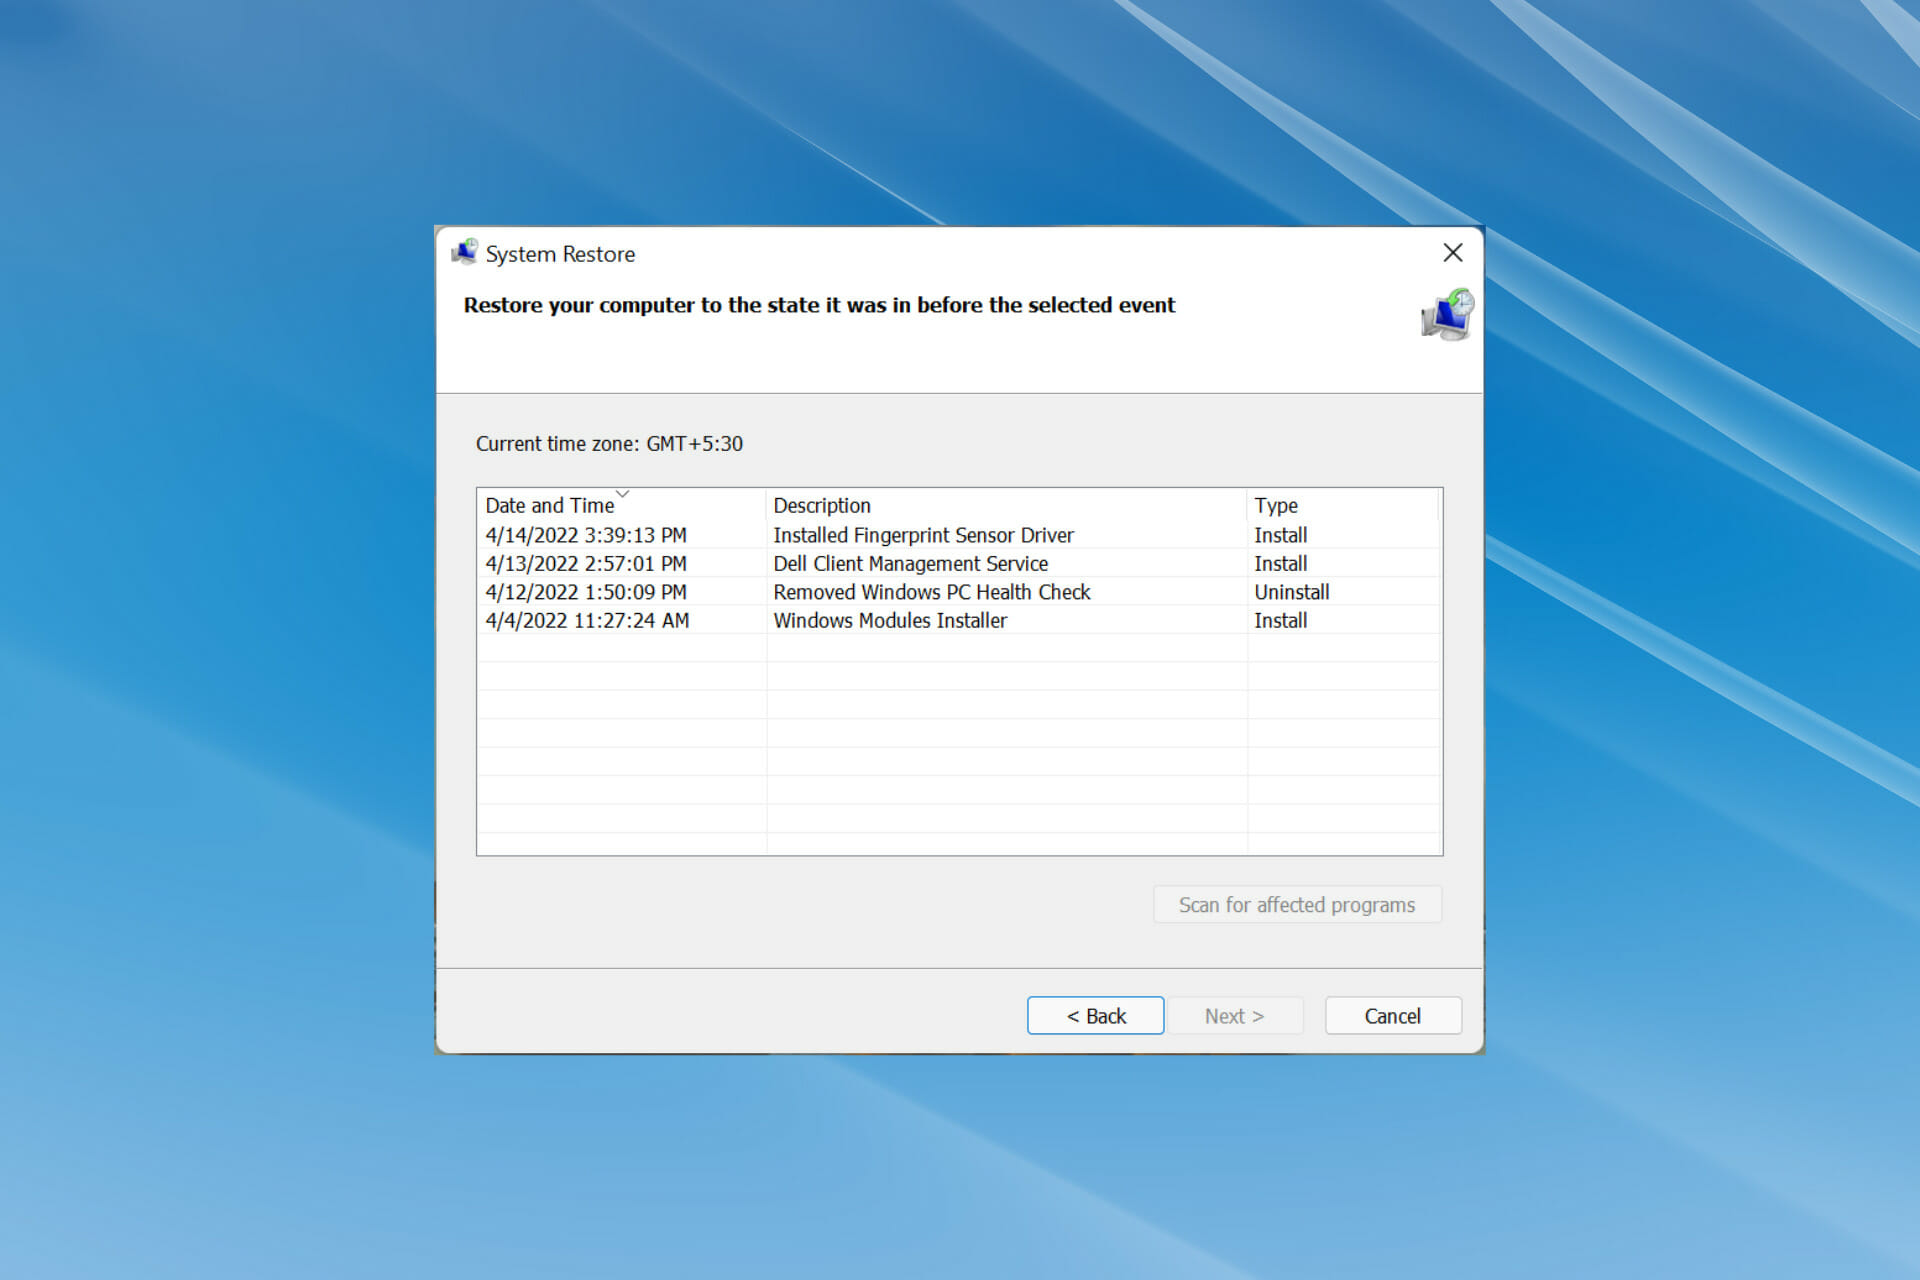
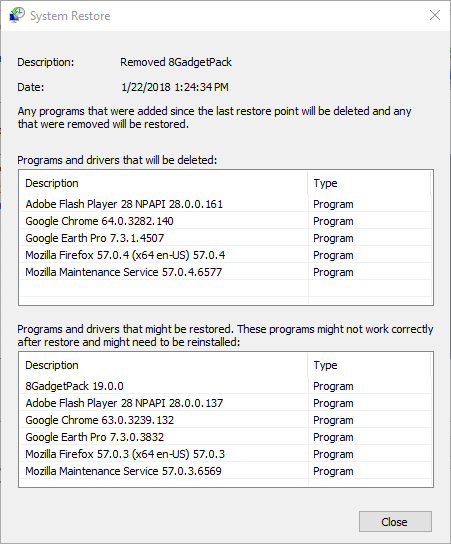
System Restore is often considered the best troubleshooting method whenever a major error is encountered and other fixes don’t seem to work. But many users have reported that System Restore is taking a long time in Windows 11.
In case it’s been just a couple of minutes, you should let the process run uninterrupted for at least an hour. However, if Windows 11 system restore is stuck, it points to an issue with the restore point, the system files, or a background process/app conflicting with System Restore.
So, without further ado, let’s walk you through the most effective fixes in case Windows 11 System Restore is taking a long time.
What do I do if Windows 11 System Restore is taking a long time?
1. Run the SFC scan
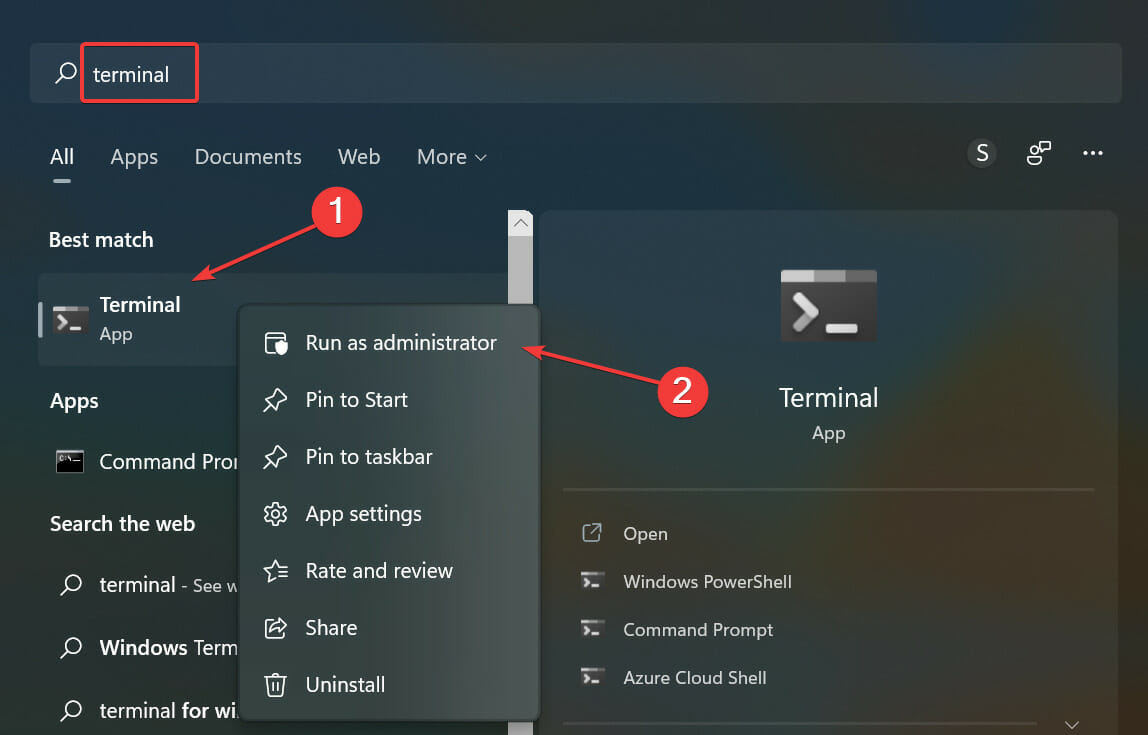
Press Windows + S to launch the Search menu, enter Windows Terminal in the text field at the top, right-click on the relevant search result, and select Run as administrator from the context menu.
Click Yes in the UAC (User Account Control) prompt that pops up.
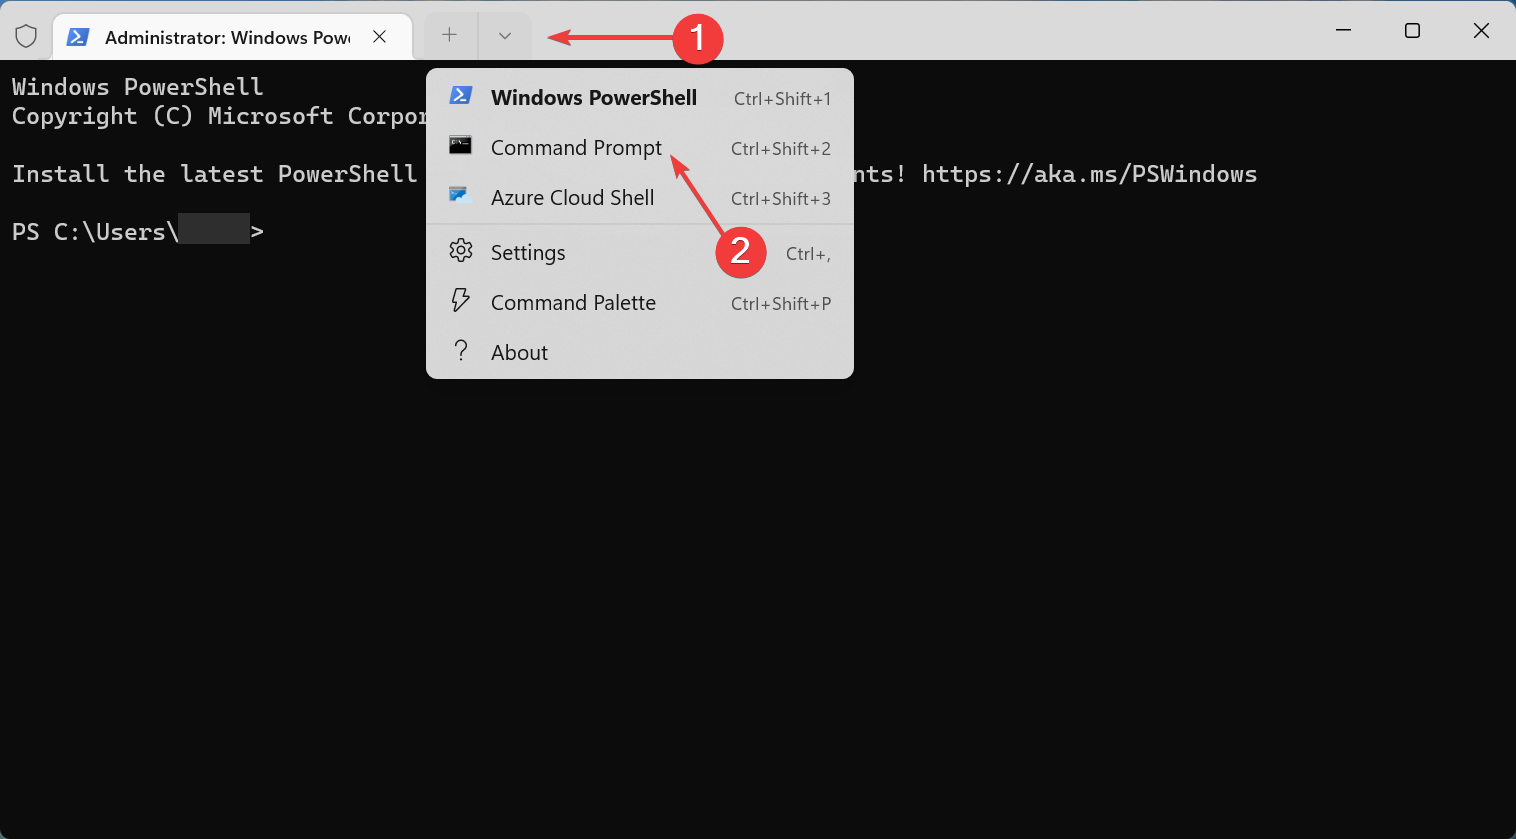
Now, click on the arrow at the top, and then select Command Prompt from the menu. Alternatively, you can hit Ctrl + Shift + 2 to launch Command Prompt in a new tab.
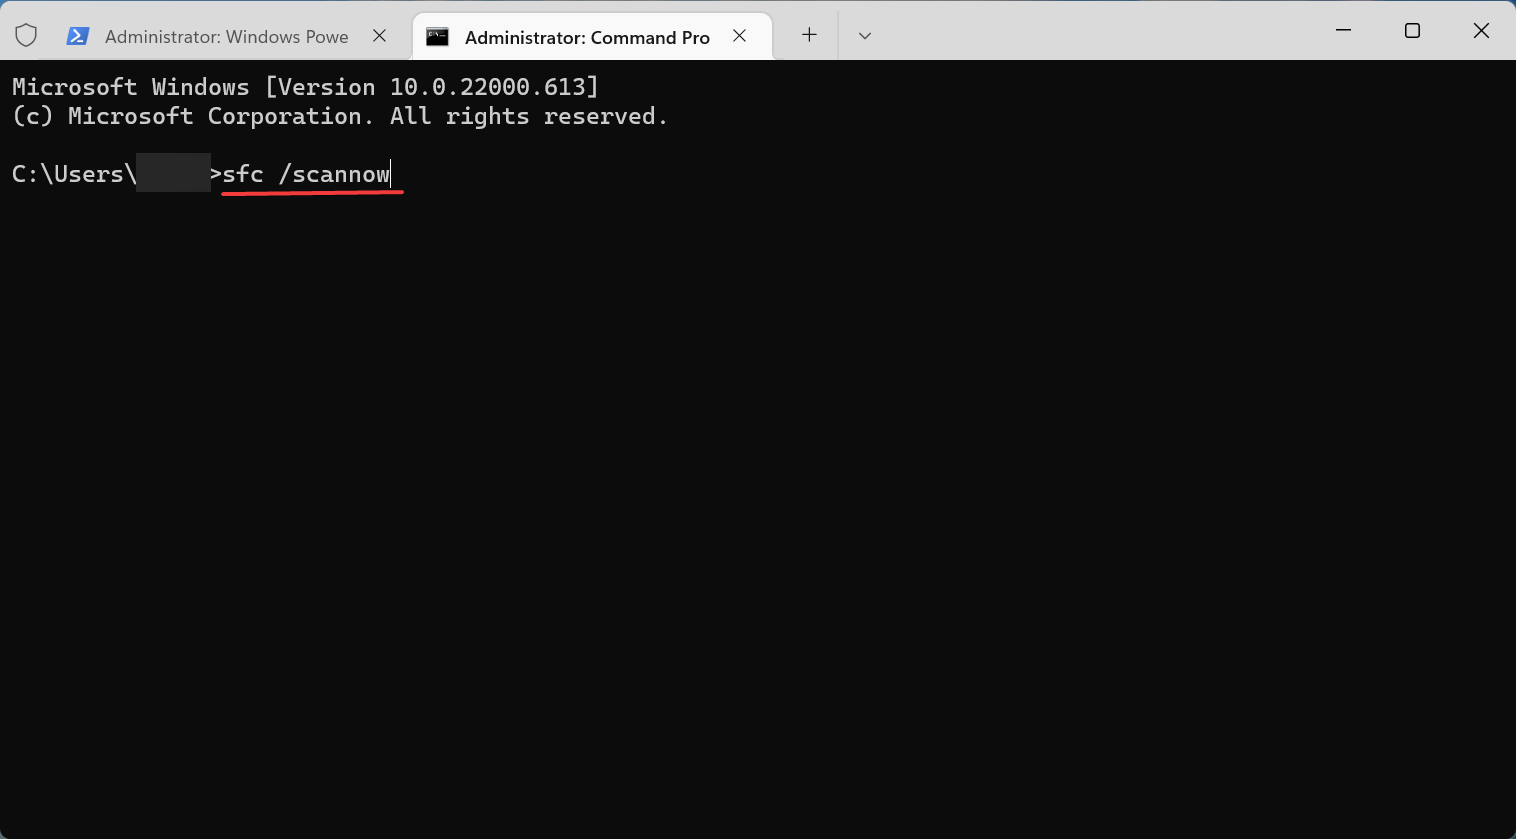
Now, paste the following command and hit Enter to run the SFC(System File Checker) scan:sfc /scannow
Corrupt system files are a common reason behind Windows 11 System Restore taking a long time, and since this method is the simplest and quickest, try it before proceeding with the ones listed next.
2. Try a third-party repair tool
If the system files are corrupted or missing, professional third-party software can repair corrupted or damaged files, restore your registry, and even give full hardware analysis and replace broken Windows entries.
It is ideal to choose a universal system optimizer and repair solution that can eliminate malware and fix any virus-related harm to your computer. In addition, the programs can repair both system and application crashes.
Because such programs are automated, you may correct all of the System Restore difficulties and more with only a few clicks. As well, these can analyze PC stability since your operating system was installed on the computer.
3. Try a different restore point
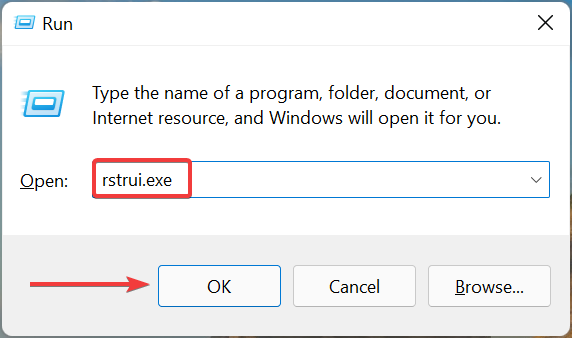
Press Windows + R to launch the Run command dialog box, enter rstrui.exe in the text field, and either click OK or hit Enter to launch System Restore.
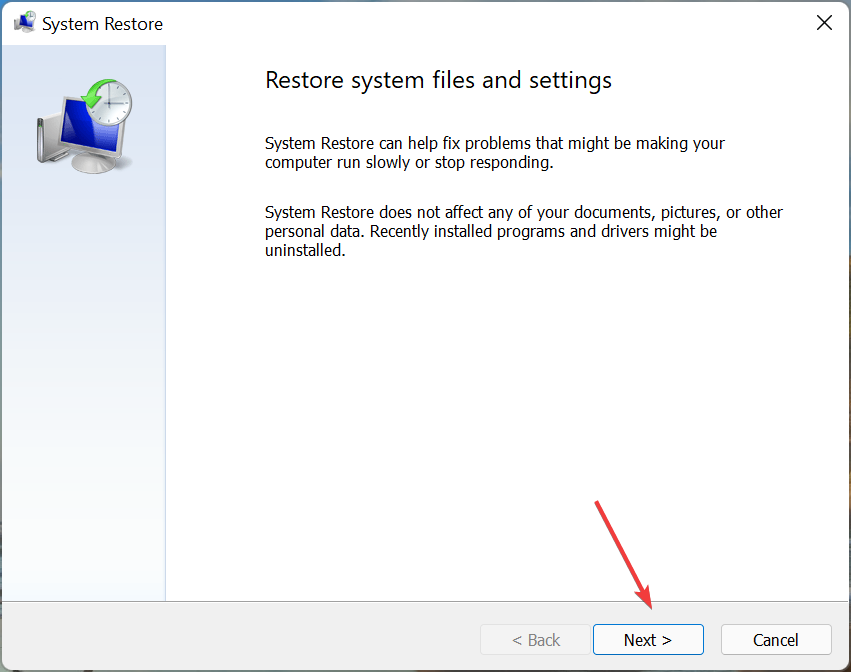
Click Next at the bottom to proceed.
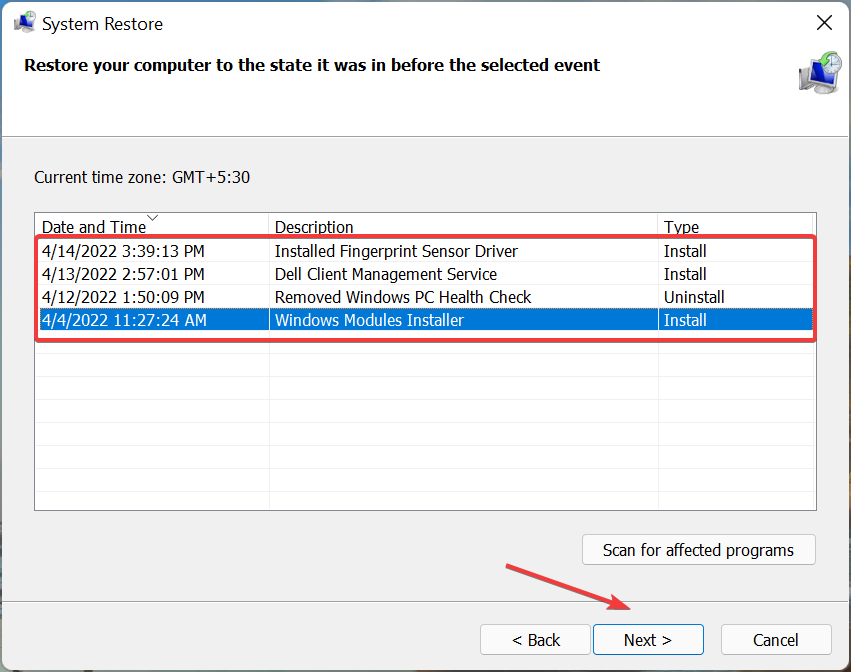
Now, select a restore point different from the one you selected the last time, and then click on Next.
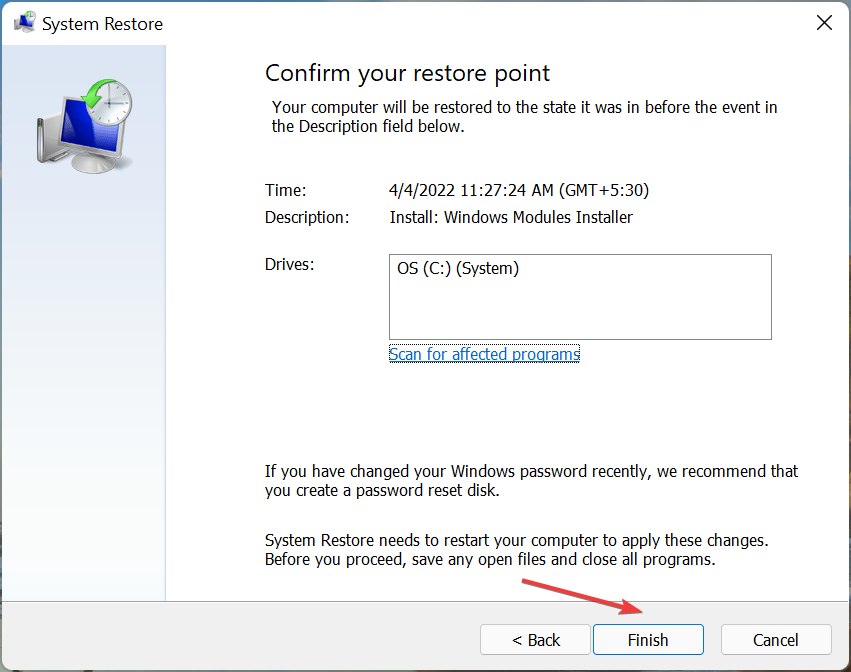
Verify the details, and then click on Finish to start the restore process.
Oftentimes, it is an issue with the restore point itself that leads to Windows 11 System Restore taking a long time. If the current restore point is not critical, try using another one and check if the process goes through smoothly.
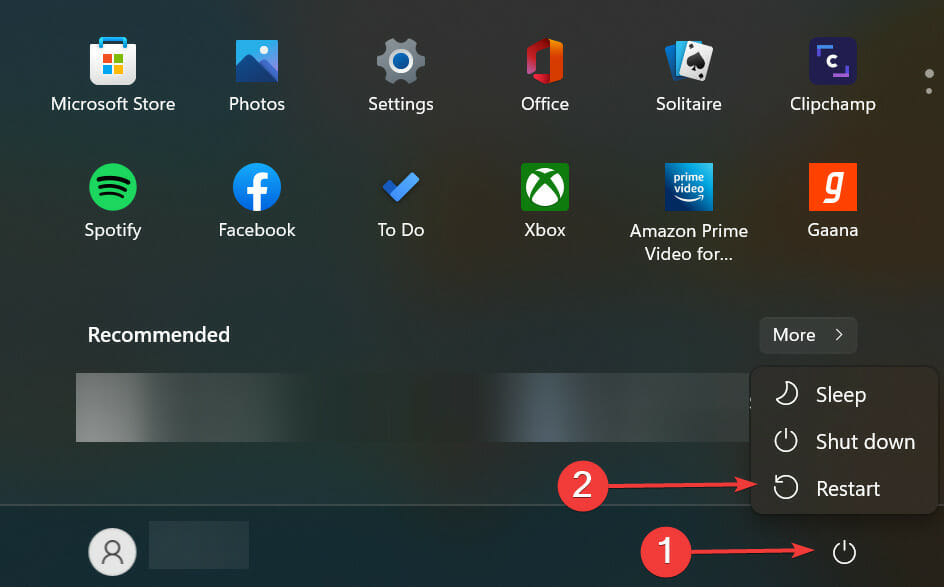
Press the Windows key to launch the Start menu, click on the Power button, hold the Shift key, and then select Restart.
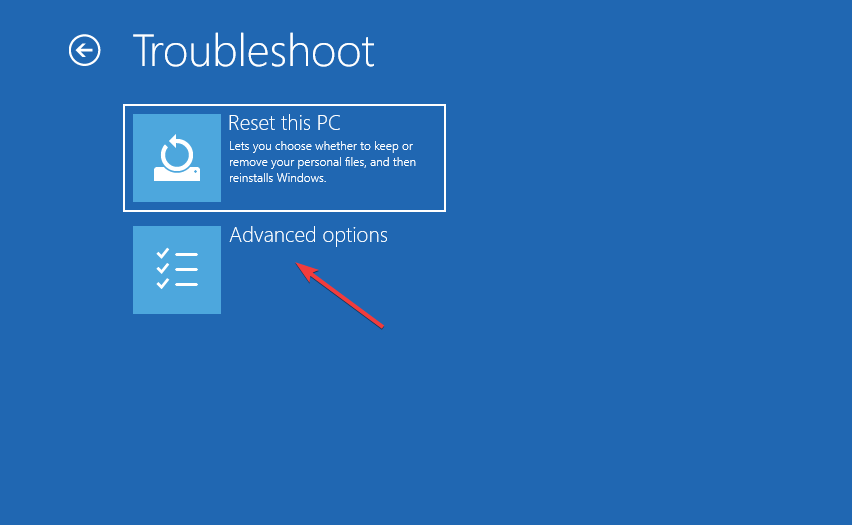
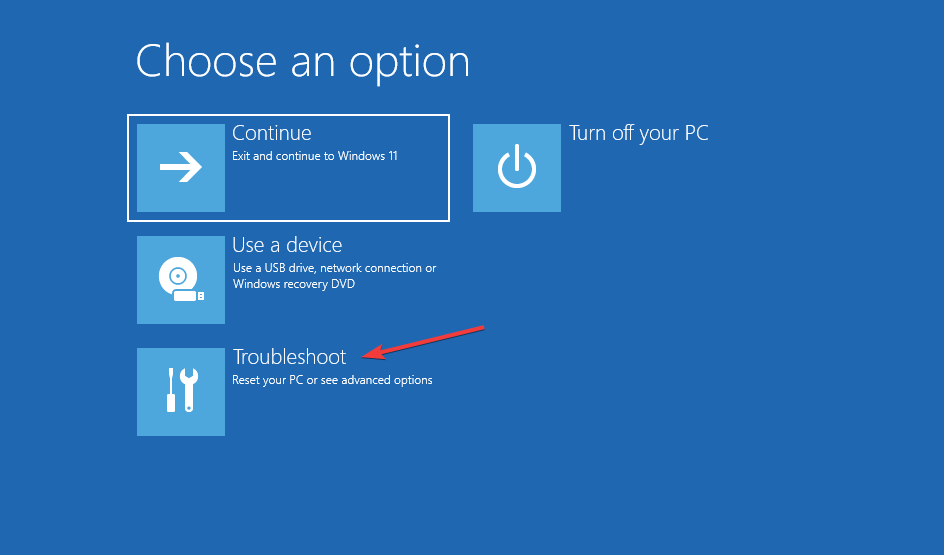
Once Windows boots in the Recovery Environment, select Troubleshoot from the options listed here.
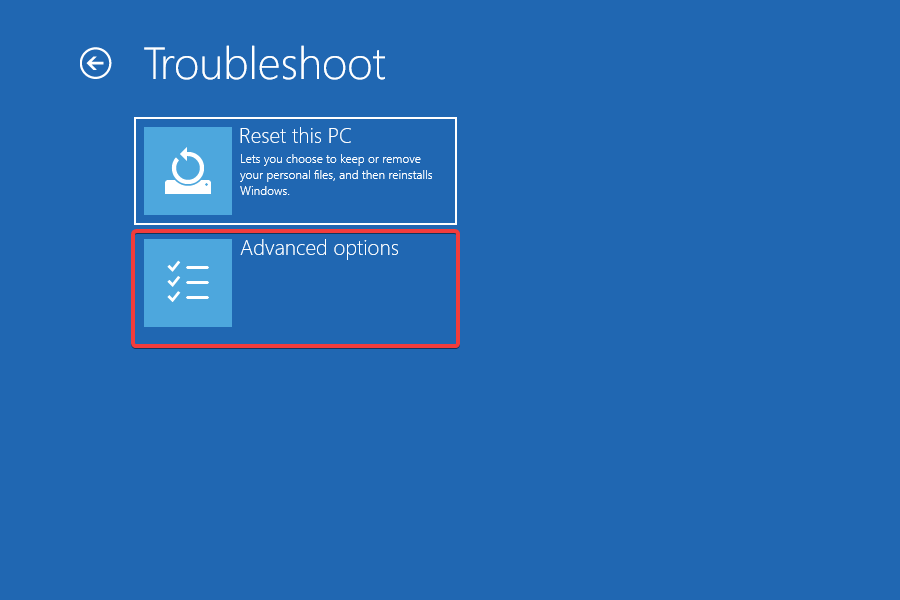
Click on Advanced options.
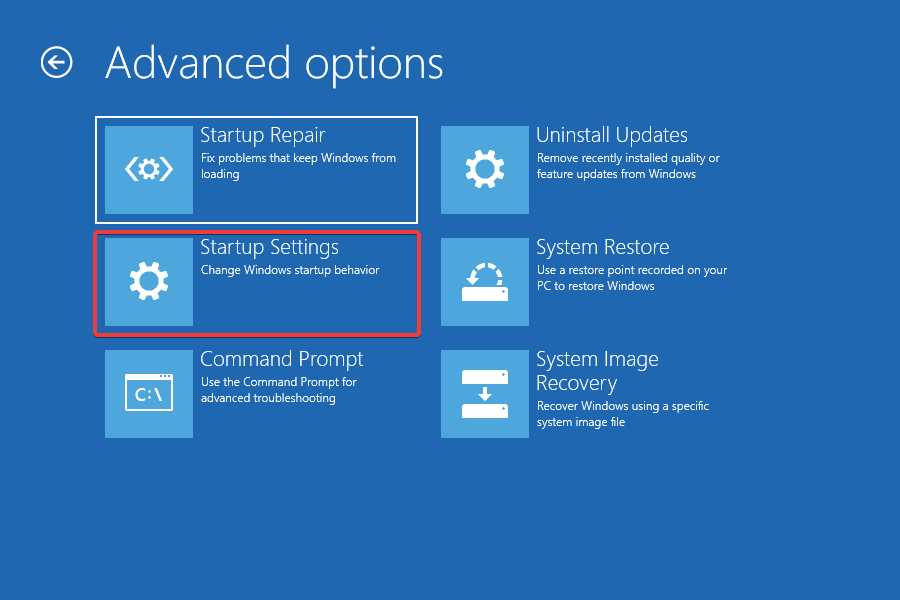
Next, click on Startup settings in the Advanced options screen.
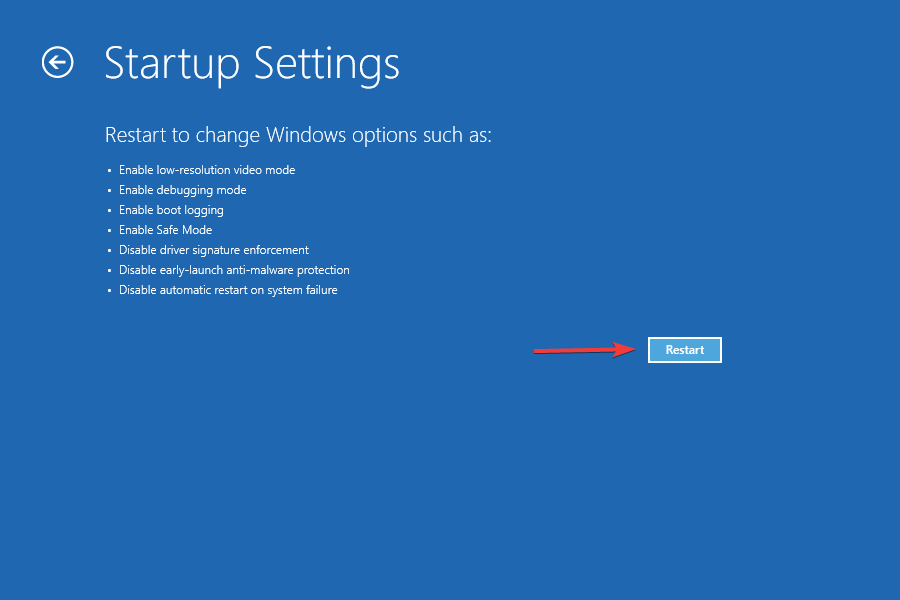
Click Restart at the bottom.
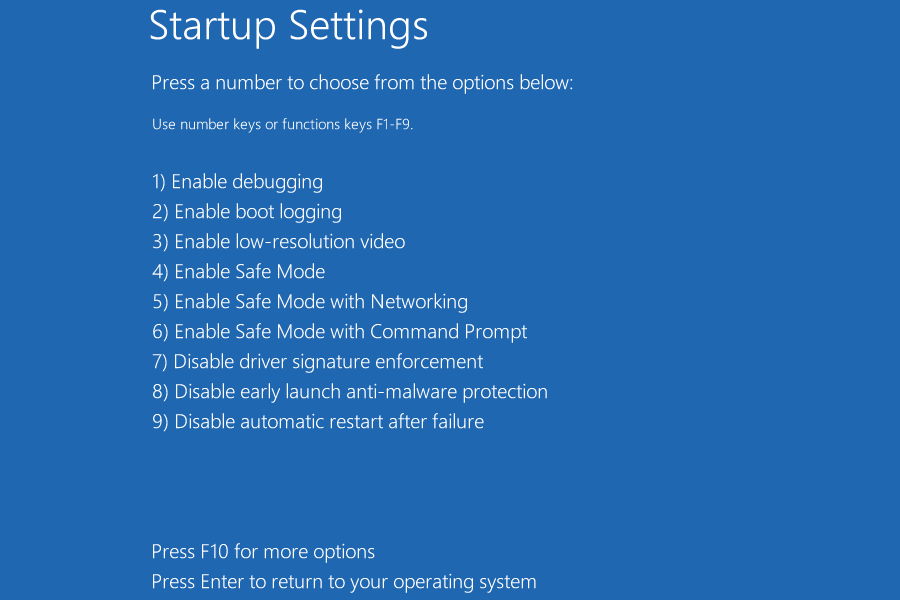
Now, either press 6 or F6 to boot Windows in Safe Mode.
Many users reported that it was a conflicting program or process behind Windows 11 system restore taking a long time.
The best option here is to boot into Safe Mode, where only the critical programs, services, and drivers run, and then try performing the restore process, as discussed earlier.
5. Perform Startup repair
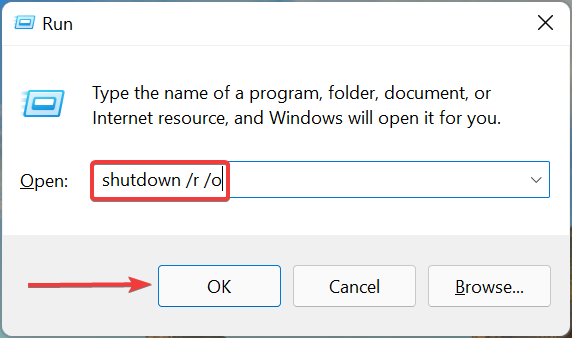
Press Windows + R to launch the Run command dialog box, enter shutdown /r /o in the text field, and then click on OK to enter the recovery mode.
Click on Troubleshoot.
Next, select Advanced options.
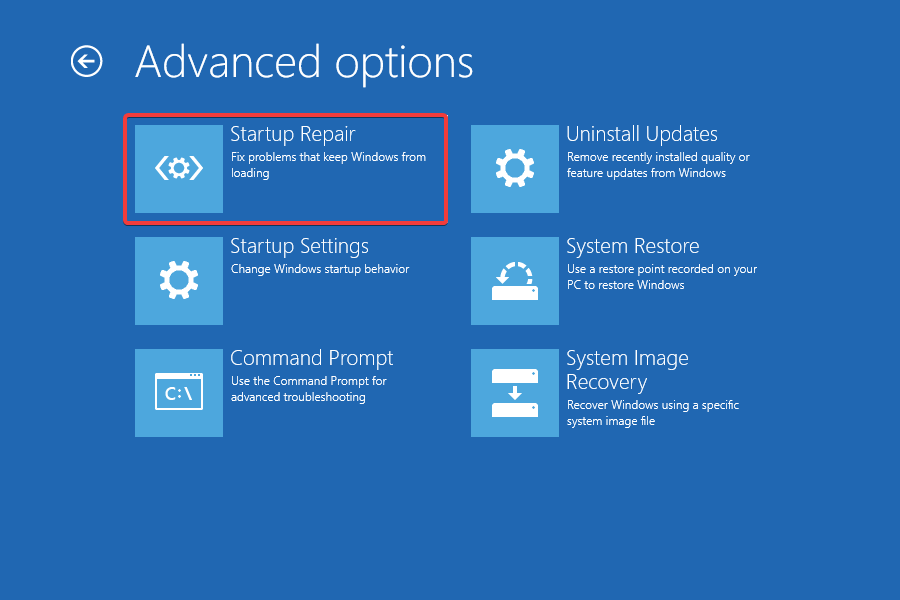
Now, click on Startup Repair from the six options listed here.
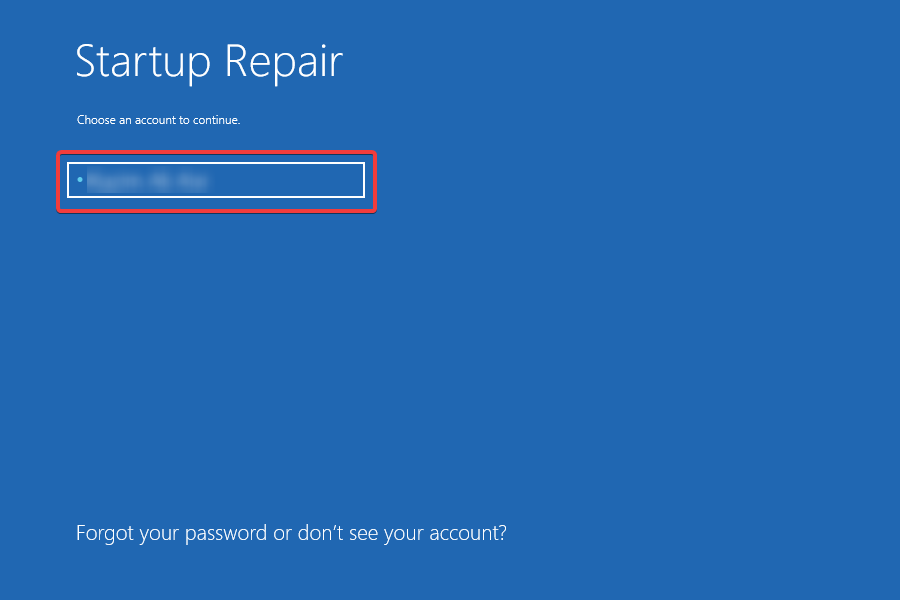
Select an account to proceed.
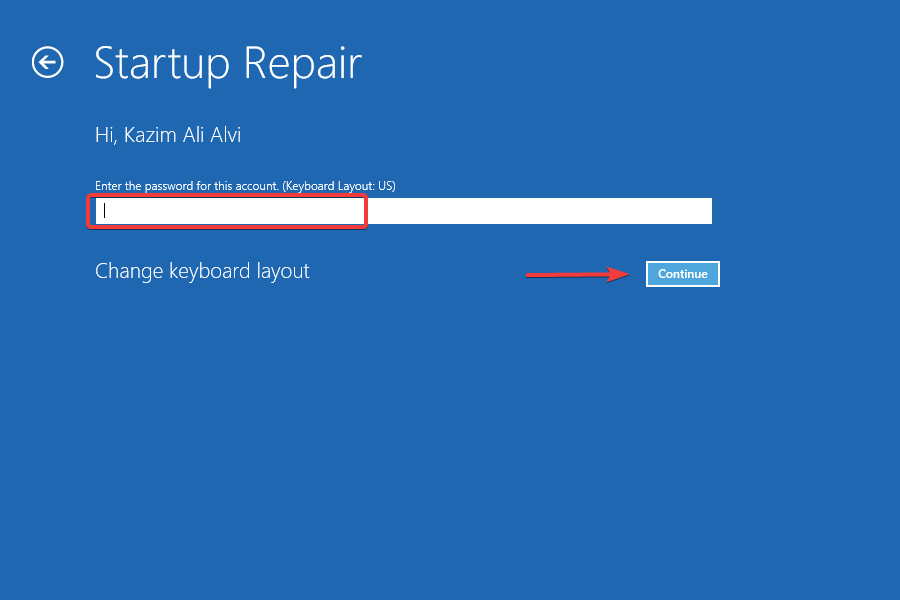
Enter the password for the account and then click on Continue. If you haven’t set a password, leave the field blank.
The repair process will now start and eliminate issues that stuck System Restore in Windows 11.
One of the four methods listed here should definitely help eliminate the System Restore taking a long time in Windows 11 problem. Remember to follow them in the listed sequence for quick troubleshooting.
Microsoft Office is a must-have when it comes to processing files and interacting with them due to the high capabilities of this Microsoft client software.
Most file types can be opened with Microsoft Office like Word files, PDFs, and excel sheets, even though there are a few exceptions.
Users have reported some problems with the app when attempting to open Zip files that they recently archived or downloaded from the web.
While there are no official answers to this problem, numerous specialists have addressed it on many forums and websites, such as Microsoft’s official website.
What applications does Microsoft Office contain?
Microsoft Word, Microsoft Excel, and Microsoft PowerPoint were included in the initial version of Office, which was originally a marketing phrase for an office suite.
It now includes Word, Excel, and PowerPoint, as well as an e-mail client (Outlook), a database management system (Access), and a desktop publishing application (Publisher).
There is also a web version of Microsoft Office, which consist mainly of three web applications: Word, Excel, and Powerpoint.
This special and lightweight edition of Microsoft Office also comes with Outlook.com, OneNote, and OneDrive, all of which can be accessed via a unified app switcher.
What can I do if Microsoft Office cannot open this file because of the .zip archive error?
1. Open with File Explorer
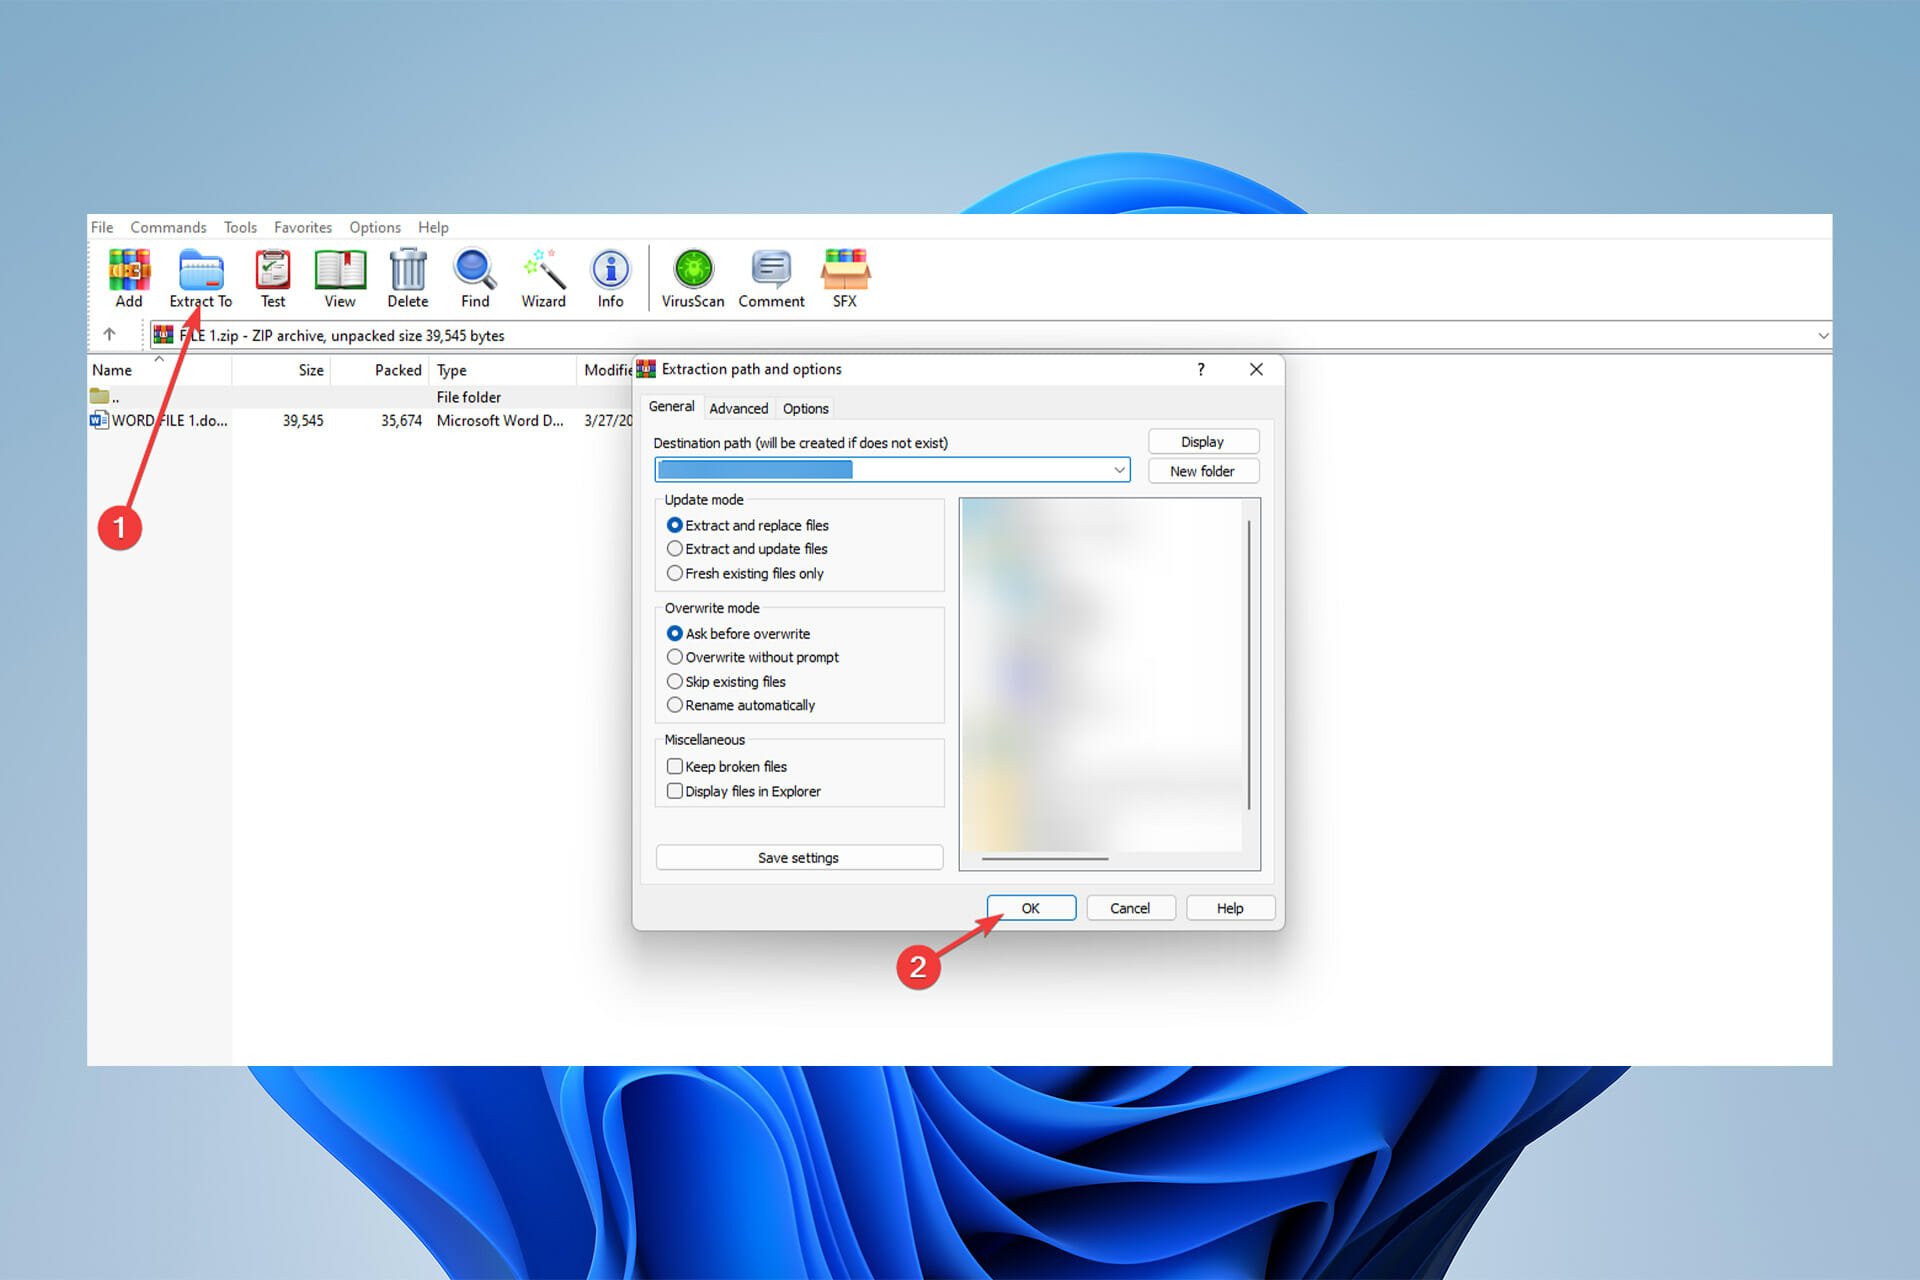
Right-click on the zipfile, then select Windows Explorer from the Open with menu.
Double-click any of the Word documents you want to interact with.
You should save the document using Save as rather than the Save.
Be sure to change the location where it will be saved from the temporary directory that will be the default to somewhere more convenient, like your Desktop
If you can’t open the file, it’s possible that you don’t have the required app installed on your computer; check the file extension and then install the necessary app.
Now, check to see if Microsoft office cannot open this file because the .zip archive issue has been resolved if not proceed to the next solution.
Because Microsoft Office lacks any programs designed to open zip files, it’s understandable that it has trouble handling archives.
Windows itself has extraction tools but like many other official applications, it can be a headache to work with and is slower than any other third-party app.
While using Microsoft Office, a set of supplementary tools might be recommended based on the user’s experience and workload to make the job easier.
That is why having a separate application for handling zip files is a recommendation while working with such files.
The demand for Windows hosting is getting higher every day, and that’s why the market is filled with various such services packed with lots of features.
Moreover, the remote desktop access is a must nowadays because it will allow you to control everything from a centralized console wherever you may be.
How do I pick the best hosting service with remote desktop?
There are a lot of Windows hosting out there on the market but not all of them offer remote desktop access.
Also, let’s go through some of the most important criteria to choose the best one for you:
➡ Guaranteed uptime
All of the solutions recommended below have excellent uptime but the best advise here is to check the forums for client feedback because they definitely tried the services.
However, let’s face it, there is no failproof solution. It will be hard to find hosting with 100% uptime so it’s also important to look for a service with good support record.
➡ Dedicated resources
Server sharing is OK if you have a small blog or a website and you want to cut some costs but if you’re in full development and the visitors are pouring in, things need to change.
Look for a service and plan that offers dedicated servers and resources to match your content amount and traffic.
➡ Scalability
If you don’t want to move your website(s) too many times, look at the plans of the hosting service and make sure that you can scale up your service.
AccuWebHosting provides low-cost Windows VPS hosting that guarantees 99% uptime so it’s worth your consideration.
The VPS hosting plans provide full root access and remote desktop access to connect to your Windows Virtual Machines.
This solution provides 24/7 live chat assistance to make sure that all your issues are solved, and your VPS hosting experience is a real asset to all of your online needs.
Internet connectivity will ensure extreme reliability that is also backed by fire suppression systems, constant video surveillance, and more.
The data centers are geographically dispersed, and this means that you will get really high-quality network with low latency.
You will benefit from the Self-Managed support option on all the traditional VPS plans. Check out more details on AccuWebHosting on the service’s official website.
Check out the best features that you will be able to enjoy once you decide to use ACCU Web Hosting:
Superior Windows VPS hosting with flexible plans
Bulletproof network and infrastructure
Root access capability
Choose your VPS data center from the USA and Asia locations
Onsite staff, 24 hours a day, seven days a week
All of the HyperVisor nodes run with a 1Gbps connection
Ideal for software apps, website hosting, forex hosting, game servers, web developers, business needs, and more
AccuWebHosting
Low-cost Windows VPS hosting with 1Gbps connectivity speed, 99.9% uptime, and 100% customer satisfaction.
GoDaddy is one of the world’s largest web services companies and it provides an industry-standard cPanel to install apps, manage backups and security.
In terms of web hosting, it offers classic website hosting for Windows of Linx, WordPress hosting (including site management tools), or server hosting (VPS or dedicated servers).
You can start with a low plan but if you require more power for your site, you will be able to increase your CPU/RAM, I/O, and storage with a one-click purchase seamlessly.
GoDaddy has state-of-the-art data centers in North America, Europe, or Asia-Pacific to ensure faster page loads and a better visitor experience.
An advantage over other hosting services are the commercial apps that can be implemented with a single click so if you’re a merchant, we strongly recommend it.
The service also comes with Deluxe, Ultimate, and Maximum plans, with enhanced features, but pricier.
A quick look at the key features in the Economy plan will reveal:
Unmetered bandwidth
1-year Office 365 subscription included
50 FTP users
1 website
99.9% uptime guaranteed
100 GB storage
GoDaddy
Superior performance and load times, plus award-winning 24/7 support – get all that and more with GoDaddy!
If you are looking for a virtual desktop that can be installed in straight 20 minutes for your clients, employees, or students, then V2 could be your best bet.
In just about 10 clicks you can deploy a cloud-based virtual windows desktop making the entire process unbelievably simple.
V2 Cloud offers a fully managed virtual desktop solution, that helps business owners or IT managers to save time.
The best part is that this virtual cloud-based virtual desktop solution is fast, cost-effective, and flexible.
Get access to all the controls, settings, resources, and more under one roof through a responsive dashboard.
You get the advantage of both single and multi-user desktops, and also publish a Windows app to a client in their browser with access to just the application and not your full desktop.
V2 Cloud comes with an intuitive management console that offers access to all your security settings, cloud resources, user controls, billing, and more, all on a simple and secure pane.
Available as a web and mobile app, it enables you to access your cloud desktop on the go, while it protects it with a secure SSL connection.
V2 Cloud key features:
No minimum proficiency, no IT skills, and no long-term contract are required
Real-time protection and night scan with fully managed Malwarebytes Pro antivirus software in business plans
AD integration and backup snapshots
Multi-factor authentication for added security and automatic integration with the SSO provider of your choice
Offers live support with the technical support team
Also available as a desktop app for Windows, Mac, and Linux, and as a Raspberry Pi app
V2 Cloud
Build a cloud-hosted Windows virtual desktop in just 20 minutes with no prior technical skills.
Riptide Hosting offers remote desktop hosting that enables you to log in from all kinds of devices in order to run and share software and files with other people.
This service also provides server hosting including Microsoft SQL server and website hosting on both dedicated and virtual servers.
Riptide Hosting delivers three plans for the users’ needs with different pricings: Dedicated Server Hosting, Virtual Server Hosting, and Terminal Server Hosting.
You can check out the complete extensive set of features that are packed in Riptide Hosting and choose the best plan that this server has to offer from the official website.
This service offers redundant power and network for maximum uptime and Dell hardware and Intel CPUs.
Check out the best features that this service is able to offer you below:
Maximum uptime for your app’s needs
Secure data centers, networks, and hardware
Multiple tier 1 bandwidth providers, and it keeps you always online
Windows dedicated server hosting, terminal server hosting, and also server colocation
Sales and support are available non-stop via phone
Class-A data centers with redundant power and blended bandwidth in order to maximize uptime
With SolVPS, you will be able to use any PC, Mac, or smartphone to connect to your Windows cloud server with RDP.
You will be able to use Remote Desktop Connection on your PC, TeamViewer, and other various RDP clients.
Windows VPS instances are offered with a standard installation of Windows Server, with ready-to-deploy server roles and features, and with the possibility to install your own apps as well.
You can choose your favorite version of Windows for free, and this includes Windows Server 2016, Windows Server 2012 R2, and Windows Server 2008 R2.
Then, add more licenses for Microsoft Office, Exchange, SharePoint, SQL Server, and other Microsoft software.
Every VPS is a fully licensed system that provides constant access to Windows Updates and more Microsoft Services.
Check out the most exciting features that are included in this service:
You can run the apps securely on a hosted desktop
The Administrator RDP access comes with all Windows VPS cloud server services
Hosted cloud desktop to run your software
Create additional system users and RDP hosts for your team’s members
RDS Licensing for every user
Windows Server is enhanced to offer users the best performance of cloud desktops
Remote desktop software solutions are a great option when you need to access a computer, server, or any other device, which is not located near you, but at a considerable distance.
However, when you need want to play a game on a remote computer, or you’re using design software, you need software that can transfer images with high frame rates.
Fortunately, there are many great remote desktop software with high frame rates that will not cause any resolution loss, even when the bandwidth is not so great.
How can remote desktop software help you with gaming?
These tools allow you to connect and take over the keyboard and mouse controls for any computer that is connected to the Internet.
And that will help you access the resources on a remote computer without physical contact. Let’s say that you will be able to collect some saves or add-ons that you don’t have on your local computer.
In this guide, we will present you with the most reliable remote desktop tools that will display the image in high resolutions, and with the best performance.
What is the best remote desktop app with high frame rates?
Mikogo is a great choice when you need an optimized solution for remote desktop connections with high frame rates.
It is mostly used for online meetings, rather than remote control support tools. However, it is possible to hand over the control of your computer to somebody else, and vice-versa.
This app allows you to show only the application windows you want the others to see and hide the rest of them. It also has multiple monitor support for up to 4 screens at high resolutions.
If you need to share files from your computer with others, Mikogo lets you send documents up to 200MB.
Some other important features include:
Allows you to share the desktop with up to 25 meeting participants in real-time
You can use it on your smartphone
The sessions can be recorded to review later
It includes a chat to improve the communication between participants
Mikogo
A remote desktop solution with high performance that you can rely on is waiting for you right away!
SupRemo is a reliable and cost-efficient remote access, tech support, and remote work tool that is not demanding on the system and doesn’t hinder its performance.
If you want the smoothest experience both in terms of connectivity and frames during the sessions, this is the perfect software for you.
Additionally, SupRemo has cross-platform availability between Windows, iOS, macOS, Linux, and Android. Use the program on any device, from anywhere in the world.
You can use the software free for non-professional and/or non-continuous use. If you wish to hold multiple simultaneous sessions, you’ll have to buy a quarterly or annual subscription plan.
One license can be installed on an unlimited number of devices with the only restriction being the number of simultaneous sessions that you have. There is actually no limit of endpoint or seats where you can install the license.
Don’t worry, it’s really affordable, with starting prices of $6/month per user. You can also use it freely for 21 days with the fully functional trial.
Besides giving you complete mobility, freedom, and total security, SupRemo also comes with the following useful features:
Encrypted connections and Allowed ID to make sure there is no unauthorized access to the data
File Transfer and Remote Printing to easily manage your work between the connected devices
Installation as a service lets you connect whenever you want without needing access from the connected PC
Chat with the connected person during the sessions through instant messaging
Online Reports monitors the connections made throughout the day
Online Address Book allows the transfer of contacts between SupRemo users
Customizable interface to bring your own unique brand, info, and references
AnyDesk is one of the most reliable remote desktop software to use when you need to access a computer with high screen resolution, and you definitely don’t need any lags.
You will enjoy a smooth remote desktop experience, due to its technologies that use the available bandwidth in an efficient manner, resulting in breath-taking frame rates.
Moreover, the latency will be imperceptible. So, play your favorite games at the best performance even when you do it remotely.
But it can do a great job also in a corporate environment because this tool comes with top-grade TLS encryption.
You can also use AnyDesk as an app on your smartphone, with the same performance, reliable security, and stable connectivity.
Some of the best features include:
Secure solution that uses military-grade TLS
Encrypts every connection with asymmetric RSA 2048 key exchange
Two-Factor Authentication is possible
You can control which devices are allowed to connect to your PC
Splashtop is another reliable solution to use, that offers fast and secure remote access to high-end workstations, with high frames.
This software allows you to access remotely any workstation that has resources and processing-intensive tools as if you were sitting in front of that computer.
Additionally, Splashtop makes possible 4K streaming at 40 frames per second (fps) at low latency. It will also reduce CPU utilization, thus, you can open even more apps.
Furthermore, it features an optimized encoding and decoding engine to take advantage of the latest hardware acceleration from Intel, NVIDIA, and AMD.
Known for offering secure remote access and support, some of its other major features include:
Protects your remote access activities with advanced security solutions like two-factor authentication and SSO
Complies with government and industry regulations like SOC2, GDPR, CCPA, and HIPAA
User-friendly, quick to install, and available as a single application that works across all major platforms – Windows, Mac, Linux, iOS, and Android.
Experience high-quality (4K) visuals and blazing fast framerates (60fps) with minimum latency
Anytime support for any of your queries from any part of the globe
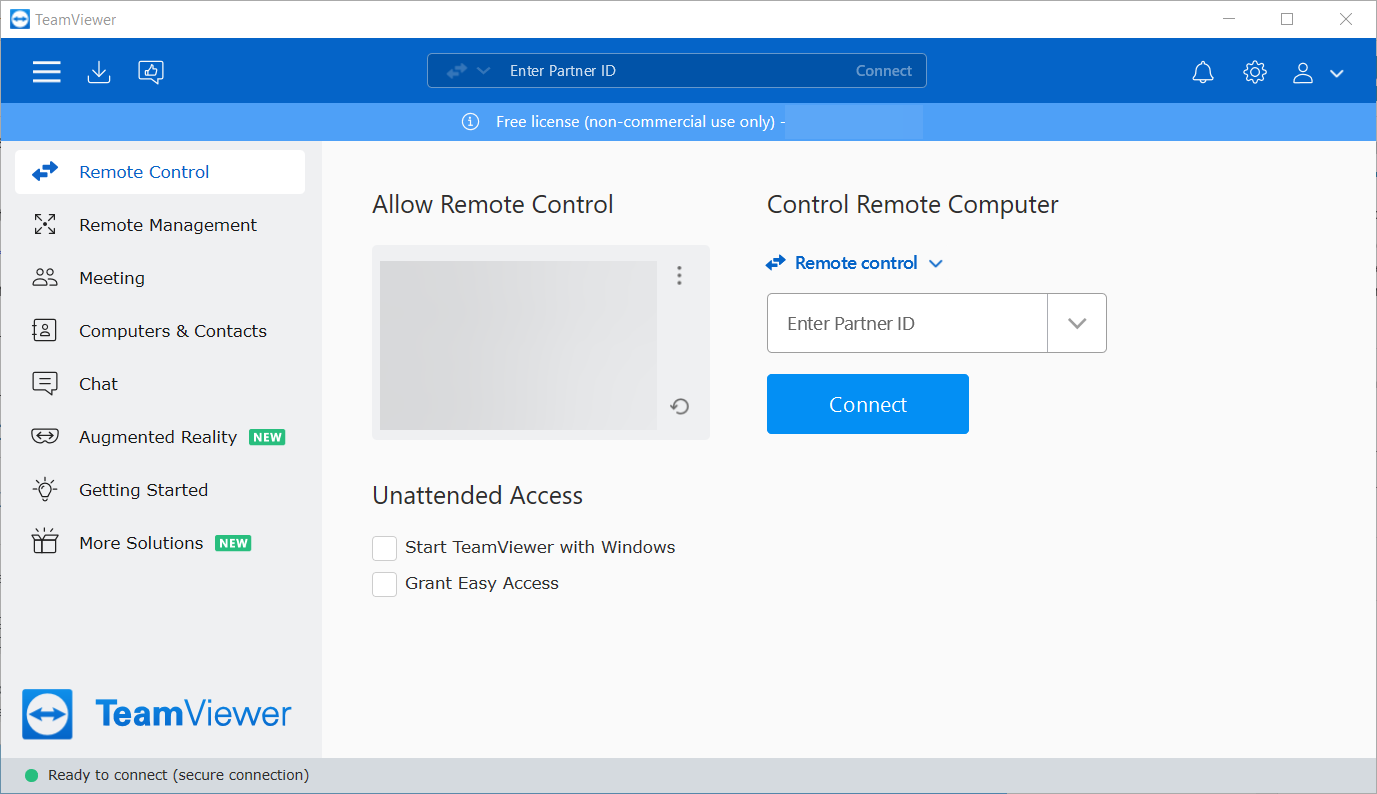
TeamViewer is maybe one of the most used and known remote desktop applications worldwide. It was launched in 2005 and provides support in more than 30 languages.
Featuring automatic resolution scaling, it allows you to connect to a remote computer with ultra-high resolution. It allows adjustments in order to fit within the display of the PC.
Moreover, if the remote computer is connected to multiple UHD monitors, you can view them side by side, or switch to see just the one you want.
TeamViewer is a great tool for remote desktops that allows you to access computers with high display resolution and see them at the maximum performance of your monitor.
A cloud-based platform for remote access, TeamViewer also offers some additional useful features:
Connects just about anything – servers, mobile devices, computers, IoT devices, and more even in low bandwidth areas
Offers an AR assisted remote access and support for improved productivity, remote IT management, and encrypted video meetings
Comes with cross-platform IT support or global remote access for corporate IT services
Supports industry process with digitally advanced, high-tech support using AR and IoT solutions
Protects the remote connections with end-end-end encryption offering complete security to your data
Parsec is another remote desktop solution, intended for gamers. It uses its own peer-to-peer networking protocol called BUD, Better User Datagrams.
This protocol is optimized for low-latency video delivery with lightning-fast adjustment to packet loss and congestion. It is the cornerstone of the Parsec core technologies.
Moreover, it is a secure software, which supports the best security features available with DTLS 1.2, and AES128 or AES256 cipher enabled on every single packet sent over the Internet.
Its fine-tune technology allows for 60FPS, on UHD displays, which lets you play all your games from any device, with no lag and latency.
A reliable name in the remote desktop category, Parsec also offers some more useful features:
Provides a pristine clear, interactive HD experience for remote desktop
Allows you to connect on the go with a friend or a co-op and play your games from wherever you are
Stay remote and get access to dual displays, drawing tablet mode, and more
Enjoy visual enhancements, bonus settings, and added controls
More crisp colors and compatibility with NVIDIA on Windows PCs running GTX 1000 or newer and 11th-gen or newer Intel CPUs
These are the best remote desktop software tools with high frame rates during the session. You can use any of them whenever you want to access a computer with high screen resolution.
If you work from home, you’ll need remote connectivity apps, project management tools, and more. To find them all, check our guide including the best telework software.
Feel free to tell us which one you like, or if you have a suggestion for us, share it in the comments section below.
Opera introduced the Opera Crypto wallet to support crypto lovers and enable them to enjoy the Web 3 features with a lot of security and privacy.
They partnered with several blockchain providers like Foain, Polygon, Soana, Bitcoin, Ronin, Nervos, etc., to create access to other services easier.
It comes as a setting on the Opera browser, where you can turn it on and off and connect to your mobile to unlock all the opportunities.
They have enabled users to make payments and transactions from the browser. Despite being helpful, one may experience connection problems when accessing his wallet.
This article will discuss several ways to troubleshoot the crypto wallet connection error.
What are the causes of Opera crypto wallet connection errors?
The main cause of this error is a network-related issue. The majority of the users who have network issues or improper network configuration may have difficulty accessing their wallets and may experience the error.
Another common is the use of third-party apps like VPN, firewalls, and antivirus, which block the user’s IP from accessing the IP address of the crypto wallet.
There are several ways you can fix the error and continue enjoying your crypto experience with Opera.
How can I fix the Opera crypto wallet error in Windows 10 & 11?
1. Restart your PC
Restarting your computer can help you get rid of the error. Just click the Start button, then the Power icon, and select Restart.
This enables your PC to clear any performance issues by clearing cache and temporary files that may affect the computer’s overall performance.
It flushes the RAM and fixes all emerging issues like updates, application crashes, network issues, etc.
2. Clear the browser cache and cookies
Open your Opera Crypto Browser and click the Settings icon.
Click on the Advanced option, then select Privacy and Security.
Select the Clear browsing data option.
Choose the Time range to All time, check the Browsing history, Cookies and other site data, Cached images and files, and click Clear data.
When you use a browser, such as Opera, it saves information from the websites you visit in its cache and cookies.
Clearing these can help a website’s formatting and loading problems, as well as make your browsing activity more secure.
Of course, you can do all that a lot easier and automatically by using a dedicated cleaning tool like CCleaner.
It is a well-known computer optimization app that includes powerful tools for clearing your history and cookies files with a single click.
CCleaner’s automatic cleaning of your browser’s cookies, trackers, internet history, download history, and cache is one of its best features, and it can even delete individual session activity.
Next, click on the Properties button of your connection.
Click on the Private option and close the window.
Confirm if your Network settings are set to public. Public networks sometimes block users from accessing the blockchain ports.
If it doesn’t work, try connecting to another network, e.g., if you use Ethernet, try connecting to Wi-Fi.
The use of a public network sometimes affects the network’s performance, making it slow. Try changing it to Private and reconnecting to the wallet.
4. Turn off your VPN
Sometimes VPN blocks you from accessing your wallets. This software sometimes blocks connections to and from the wallet. It can affect the overall performance of your wallet connection and raise that error.
VPN prevents users from accessing the wallet by blocking the IP addresses that stop the server throws the error.
Hit the Accept and install button to start the installation process. Try accessing your wallet again.
6. Disable and uninstall other extensions
Open your Opera browser and press Ctrl + Shift + E to open the Extensions list. Opera will show all the list of extensions installed on your browser.
Click on the Disable button or flick the switch to the right to disable the extension.
With third-party extensions, you can also click the Remove button to get rid of them completely.
7. Flush your DNS
Go to the Start button, type command prompt, and select Run as administrator.
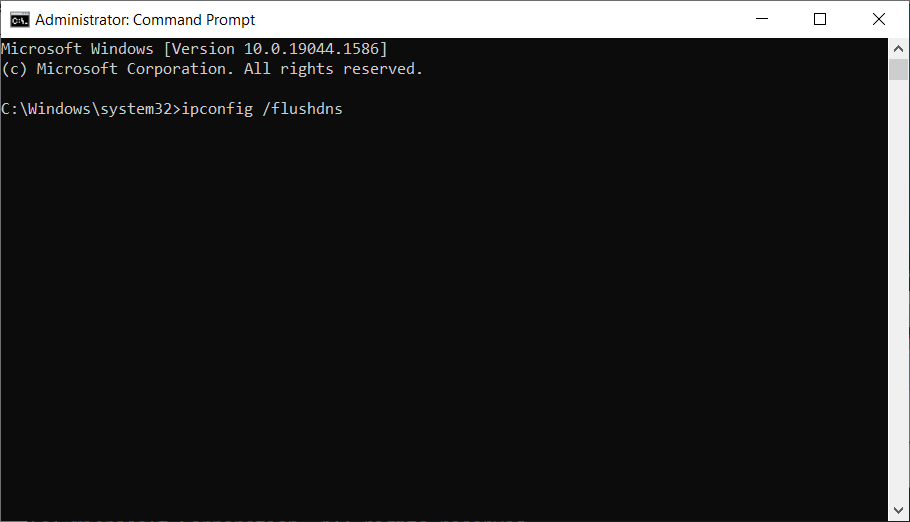
Type the following command and hit Enter (Give it a few seconds, and you will receive a notification that DNS Resolver Cache is successfully flushed): ipconfig /flushdns
Flushing DNS helps you eliminate IP and DNS addresses that raise the connection error by clearing and deleting them and replacing them with the correct addresses.
DNS handles the IP address of the wallet you are visiting. Perform this step after trying the other methods like restarting, VPN, change of network, etc.
8. Change the DNS server
8.1 Use Control Panel
Go to the Search box, type control panel, and click the app on the results.
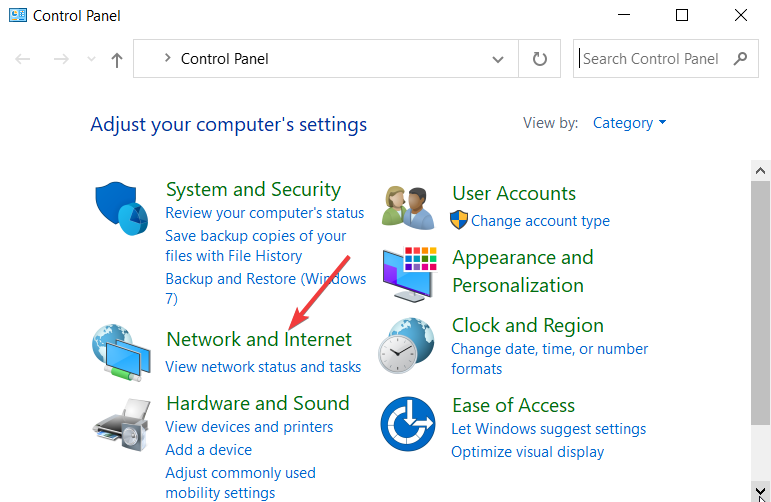
Click the Network and Internet Option.
Select the Network and Sharing Center.
Click the Change the adapter settings.
Right-click on the Network connections you use and choose Properties.
Tick the Internet Protocol Version 4(TCP/IPv4).
Click the Properties button.
Select Use the following DNS server addresses.
Try changing the Preferred DNS server to 8.8.8.8 and 8.8.4.4 as the Alternate DNS server or 208.67.222.222 and 208.67.220.220 alternatively and click OK.
Close the settings.
After changing the addresses, the changes will be saved, and you can try again connecting to your crypto wallet.
8.2 Use Command Prompt
Go to the Start Search box, type command prompt, and choose Run as administrator.
Type netsh and hit Enter to open the network settings.
Type interface show interface command and hit Enter to display the names of the network adapters.
Type the following command (Replace the X symbols with the DNS addresses we used above, in step 8.1. Also, replace the network name with yours): interface ip set dns name="NETWORK-NAME" source="static"address="X.X.X.X"
After that, the address change, and you can try to see if the error still exists.
9. Run the Internet connection troubleshooter
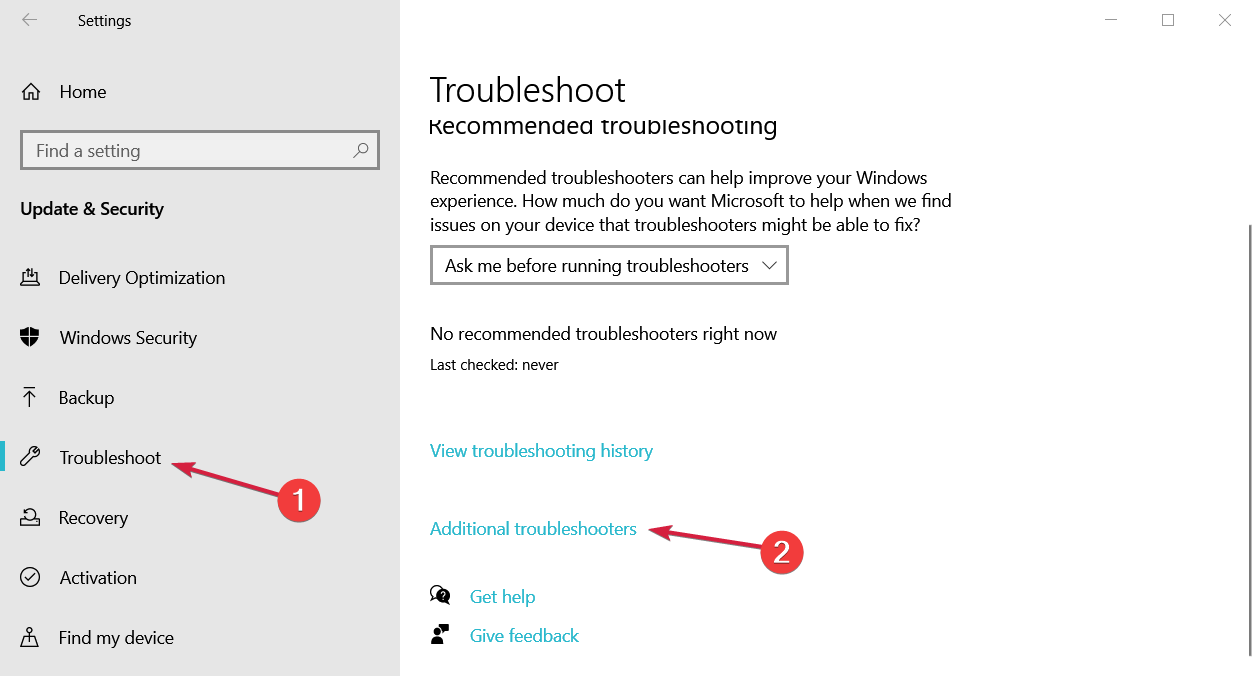
Click on the Windows Start button and select Settings.
Navigate to Update & Security.
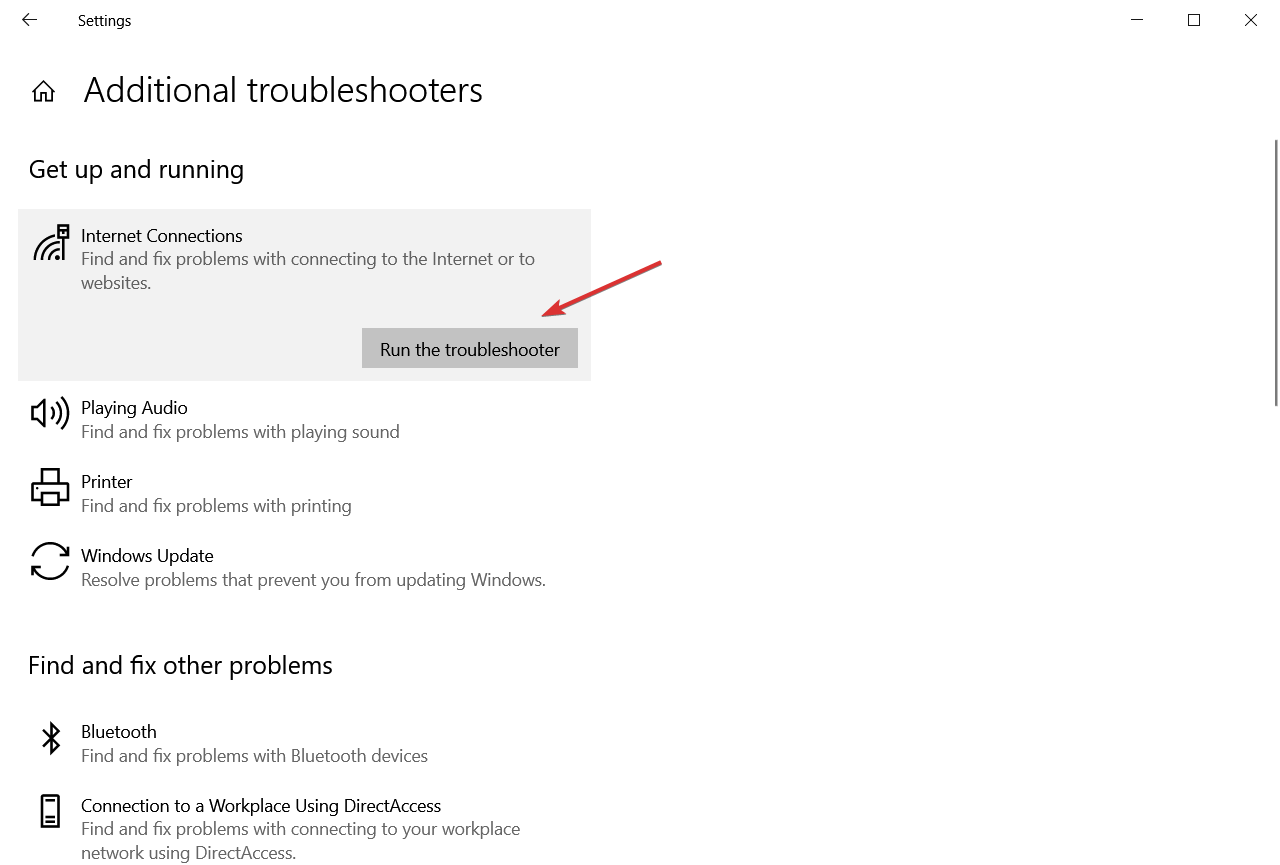
Choose Troubleshoot and select Additional troubleshooters.
Select the Internet Connections option, then choose Run. Give it a few minutes to see if the problem gets fixed.
10. Contact Opera
If you have tried all the above methods, you still get the same error. The best way is to contact them by sending them an email letting them know the issue you face on your end even after troubleshooting.
They might help you or give you other options you can use.
How can I fix the Opera crypto wallet connection error in Windows 11?
Luckily, Windows 10 and the newer OS are not that much different and this is mainly an Opera problem so it’s the same on any OS.
However, you can also rely on the other solutions too even for Windows 11 because they are pretty much the same.
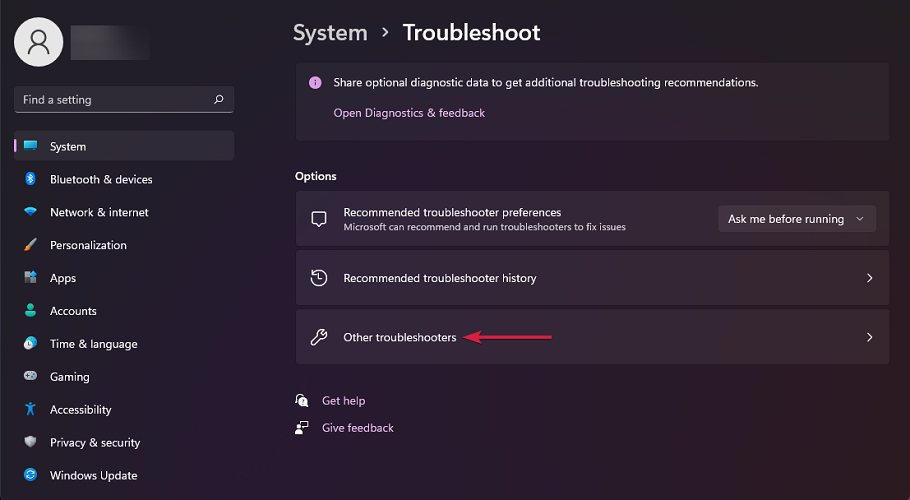
There are, however, small differences. For instance, you will find the Internet Connections troubleshooter in the Other troubleshooters section from the System tab in Settings.
Is the Opera crypto wallet safe?
Opera protects your crypto wallet from manipulation by other users and apps. Many crypto providers struggle with the security of the users. Some countries consider crypto as a method of money laundering and theft.
The browser comes with an Adblocker, free VPN, Tracker blocker, and Flow file sharing to improve the security of the users. It also uses a secure system lock to make transactions easier by not asking the users for PINs or passwords.
If you have little knowledge or no idea about the Opera crypto wallet, learn how to use the browser to transact with ease.
Before you leave, did you know that Opera Crypto Browser existed? We have an entire guide dedicated to it, so check it out.
Which solution helped you solve the error? Leave us a comment below.
Computer mice come in all shapes and sizes, but all are not equal. Some are designed to be compact and portable, others are for gaming, and some are for productivity. Logitech, though, has the new Lift Vertical Ergonomic Mouse, which is all about comfort and promoting a better posture. I was sent one for review, and after using it as my daily driver for the past week, here’s a little more on why I think the mouse is very comfortable and intuitive.
The design
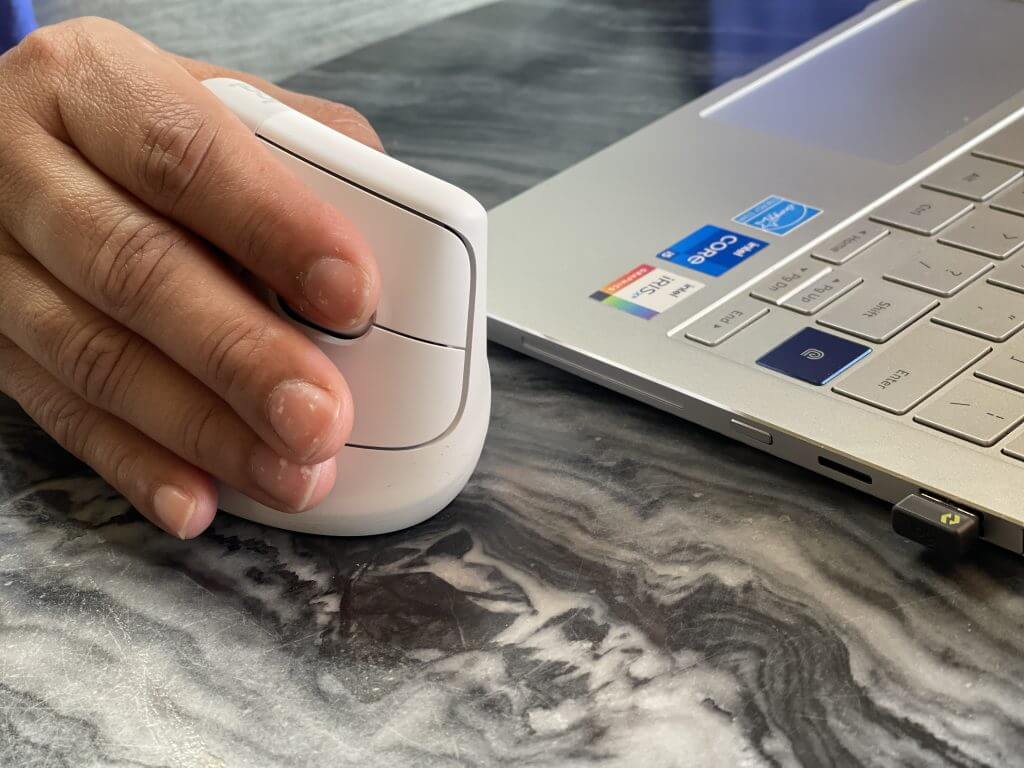
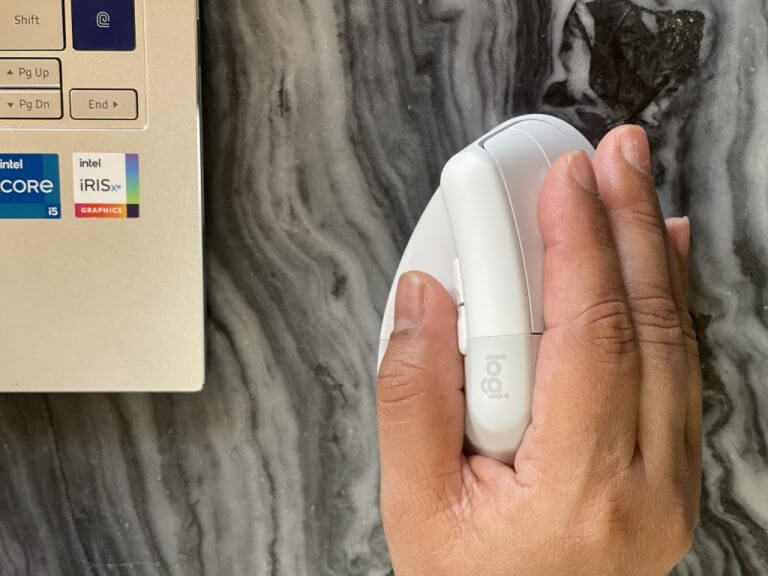
The Logitech Lift Vertical Ergonomic isn’t your ordinary mouse. It is specially designed in Logitech’s Ergo Lab, where testing is performed on products with real people through the use of pressure sensors, and various prototypes. That’s why you’ll find that the 57-degree vertical design naturally “lifts” your hand up to a more natural position to take pressure off your wrists. It’s also why Logitech has a special left-handed version of the mouse, which is something not every accessory maker is able to accomplish.
If you’re after dimensions, the mouse comes in at 2.8 in x 2.7 in x 4.25 in. It also weighs in at 4.4 oz. Logitech is using plastic on the Lift, which is what keeps it light and easy to move around a desk. A portion of Lift’s plastic parts are made from post-consumer recycled (PCR) plastic. There are also six buttons on board the mouse, (Left/Right-click, Back/Forward, Middle button, Scroll-wheel with middle click.)
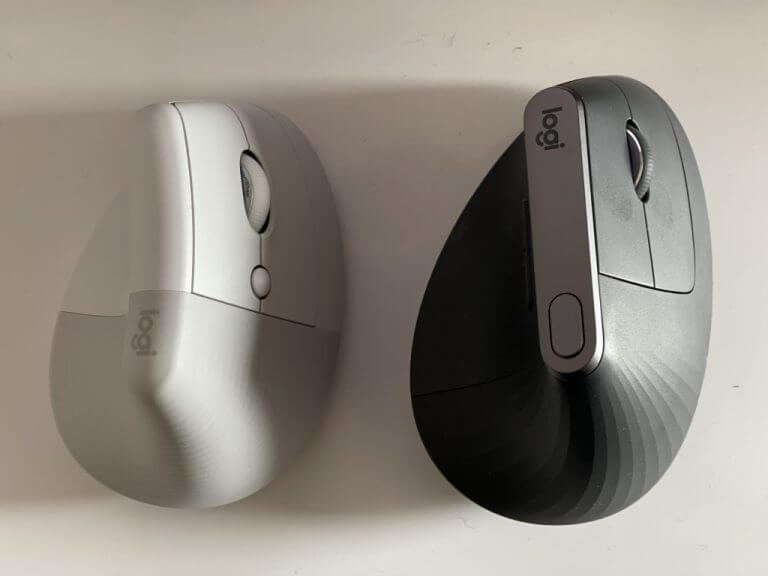
But looking at the main design, when compared to other products like Logitech’s popular MX Vertical, the Logitech Lift Vertical Ergonomic is crafted differently. It sports what Logitech is calling a “Zen” surface. That surface has a rubberized grip, as well as a cozy thumb rest, which is more refined for smaller hands like my own. It’s a change from the MX Vertical, which has a more premium “heavy” feel and an anodized aluminum finish.
For me, this design means that during my long days of work, I felt as though my palm naturally fit in with the shape of the mouse, just like I was shaking someone’s hands. There are no pain points whatsoever, even when adapting from coming from a regular mouse. Logitech tells me that the Lift Vertical Ergonomic is 22% smaller than the MX Vertical and suggests that folks with larger hands try that product, instead.
In other areas of design, the mouse comes in three different colors. There’s Graphite for the left-handed version, and Rose or Pale Gray for the right-handed version. I was hands-on with the Pale Gray option and will be giving away the left-handed version soon, so stay tuned!
The experience
The experience of using the Logitech Lift Vertical Ergonomic is really amazing. I’m accustomed to using a Logitech MX Master 3 as my daily mouse, and shifting to the Lift Vertical Ergonomic was great in terms of comfort and productivity in three very specific ways.
The first way has to do with the buttons and scroll wheel. My usual mouse, the MX Master 3, can be pretty loud when clicking through webpages. Additionally, the clicks produce a sort of “hard” reaction and a small bounce back on my fingers. With the Logitech Lift Vertical, clicks are softer and quiet. To test this, I actually gave my mom the mouse to use for a short period, and when I went upstairs to my home office, I didn’t hear her clicking, as she normally would with her regular mouse. The Lift Vertical Ergonomic is truly quiet and can help you keep focus.
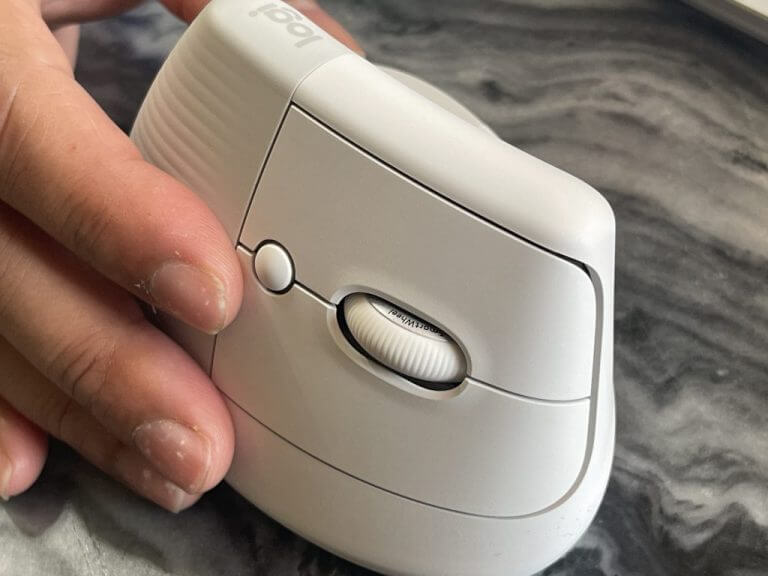
And speaking of quiet, the magnetic SmartWheel is quiet, too. It’s quite smooth to use for scrolling web pages and makes almost no noise. I also loved the rubber texture, which helps in controlling finer precise movements in longer documents that I frequently edit or scrolling on web pages. One thing I did miss, though, was the side-scrolling wheel from my MX Master 3, but it’s something that’s worth the sacrifice, as this mouse is all about comfort, and getting that perfect grip. Note that the SmartWheel on the Lift is the same as the Signature M650, which is a traditional mouse.
Second up is the connectivity options. The Logitech Lift Vertical Ergonomic is easy to pair. It works with up to three different devices, via Bluetooth, or the Logi Bolt USB receiver. I paired the mouse up with my iPad Pro via Bluetooth, a Samsung laptop via USB dongle, and a Surface via Bluetooth. A button under the mouse lets you switch between devices. It’s a feature that’s also on my MX Master 3, and something I’ve come to love since one mouse can now do it all for me, and in comfort, too.
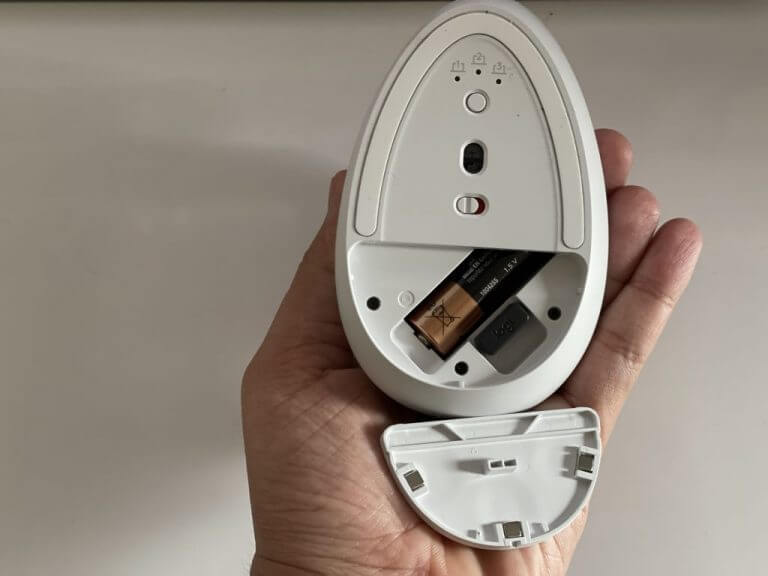
Finally, is the third thing, which is the way the mouse is powered. I really do love rechargeable mice, but for a product like this one, having AA batteries makes a lot of sense in terms of design. There’s no “hole” in the front of the mouse for cables, which really helps keep the Lift look clean and keep to its ergonomic theme.
Simply pull the bottom off the mouse (it is attached magnetically,) and you’ll see a space for the dongle, as well as the AA battery. The battery lasts up to 24 months according to Logitech, which is great. I got a little extra peace of mind knowing that I didn’t have to find a cable to charge my mouse if it dies. AA batteries are common, and the ones included held a 95% charge out of the box.
I’ll end this section by mentioning the sensor technology on the mouse. In use is Logitech’s Advanced Optical Tracking. This means you get up to 400-4000 DPI. It’s fully adjustable within 100 DPI increments with the button under the scroll wheel. I usually keep the DPI in the midrange level, but that’s a personal preference.
The customization
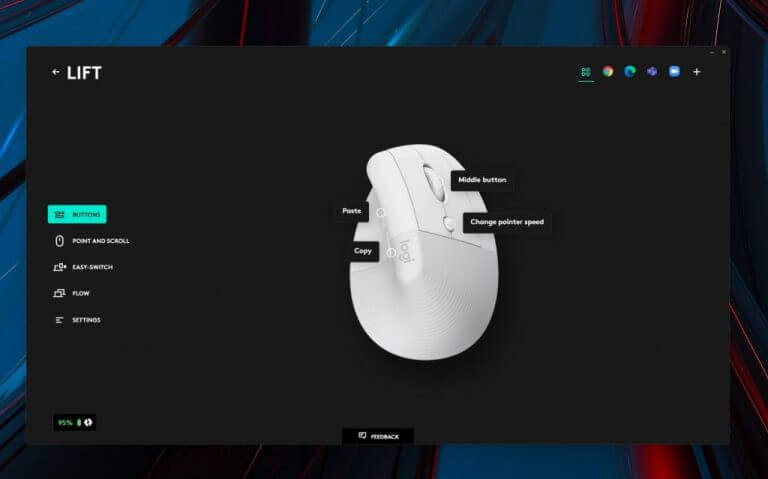
Finally, I’m at customization. This is what makes Logitech MX products great, and it is no surprise that the Logitech Lift Vertical Ergonomic is supported by Logi Options +. Plug the mouse in, boot up the app, and you’ll be greeted with an introduction, and ways to customize your mouse. Spoiler alert, there are many!
Of the things I customized on my mouse are the side buttons. Being an editor, I copy and paste text a lot, so I programmed those to do exactly that. You also can tweak the scroll wheel to change scroll direction or enable smooth scrolling. Or, change the pointer speed. The final week I made to the mouse was the middle button, which I swapped out to summon task view. All of these help in boosting my workflow.
Outside of all that, app-specific shortcuts can be enabled for the buttons, too. Compatible apps include Chrome, Edge, Teams, and Microsoft Office, though you can add your own apps if you see fit. For me, in Teams, I configured the buttons to start and stop the video, mute and unmute the mic. The possibilities are endless, though!
The final verdict
Priced at $70, the Logitech Lift Vertical Ergonomic Mouse is well worth the money. Compared to its expensive sibling, the MX Vertical, the mouse is a lot comfy for folks with smaller hands. It’s also smaller, lighter, and has awesome customization options. This makes it a special mouse that’s one of the comfiest and most intuitive that you can buy.
Ever since the pandemic hit a lot of businesses and organizations picked up on a work-from-home kind of arrangement. As a result, they had to employ tools that would help them run their business as usual but from home.
Microsoft advocates for the use of Microsoft Teams as a video conferencing tool, although there are some users that prefer to use other Video Call Apps such as Zoom, Slack, and Skype among others over it. In this particular guide, we’ll be looking at how a user can schedule Google Meet using Microsoft Outlook. In fact, Google provides users with an add-on for Microsoft Outlook to get integrated with the software.
Google meet on the Outlook web app
Launch the Outlook web app.
Log in to your account.
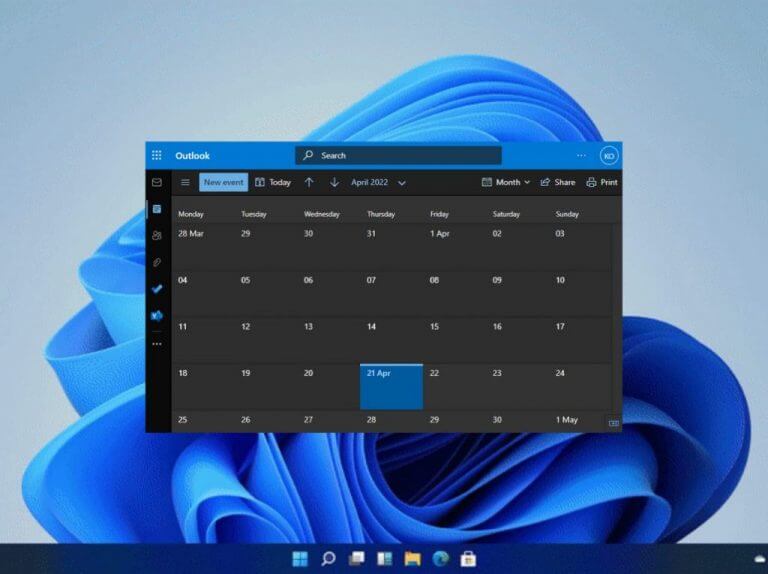
Then, click on the Calendar tab and navigate to the Outlook Calendar.
Select the New Event option where you will then be required to enter details pertaining to the meeting.
Then, click on the ellipses at the top of the page and select the Get Add-ins option.
You will then be redirected to a dedicated add-in store. Here search for Google Meet and install the add-in to your Microsoft Outlook calendar.
Click on the ellipses at the top, at this point the Google Meet add-in should appear there, click on it and sign in using your Google credentials.
Click on Google Meet and enter the meeting details and select Add Meeting. The event will be created and the information will be included in the notes tab.
Finally, click on Save.
Google Meet on Outlook Windows App
Launch the Application on Windows.
Then, go to the Home menu and click on Browser Add-ins.
You will be directed to a dedicated add-ins store.
Search for Google Meet in the store and download and install it to Microsoft Outlook.
Navigate to the Calendar tab and click on the New Meeting button at the top.
Then, from the Add Meeting menu, click on the ellipses and open Google Meet.
Click on Google Meet and then select Add a meeting.
Schedule your Google Meet using Microsoft Outlook
If you are a Microsoft user and want to schedule a meeting with someone who uses Google, then you can use the above steps to make it happen. And if you were ever so inclined, you could even schedule a recurring Google Meet. Be sure to also refer to our expert guide on how to easily schedule a Microsoft Teams meeting from Google Calendar.
Sony may be taking a page from Microsoft’s rumored in-game ad platform strategy to also boost developer payouts.
Last week Business Insider reported that Microsoft wants to launch a new ad program for the Xbox platform that would allow developers and brands to work together to deliver in-game advertising opportunities on free-to-play games. Echoing Microsoft’s sentiment, it’s now being reported that the company’s biggest rival in the gaming industry may also pursue the viability of free-to-play games being partially supported with in-game ads.
Once again, Business Insider is breaking the news that Sony is considering plans to develop an in-game ads platform that could be ready to go as soon as the end of 2022, and just as before, there are few details. When Business Insider reported on Microsoft’s plans for in-game ads, it did so with a kernel of information regarding how the company plans to institute direct-developer revenue sharing.
If rumors hold, Microsoft is looking to give game developers 100 percent of the revenue derived from their in-game ads. However, it seems that with the Sony model, developer revenue appears to be a question still left in the air.
While Sony seemingly follows Microsoft with the design of its own game subscription service, it’s doing so in its own way rather than a 1:1 copy and the same might come about if and when the company rolls out its in-game ads platform.
For now, both Microsoft and Sony’s “plans” or “considerations” for in-game advertising are still rumors backed up by anonymous people “familiar” with the matter. However, the rumors seemed to be based on educated guesses due to the trend of developers squeezing revenue out of games long beyond their release date with added in-game purchases, DLCs and addition content for purchase.
Perhaps, Sony and Microsoft are looking to focus a trend that will be mutually beneficial to both gamers and developers who sign on to these revenue sharing subscription services they provide in the future.
Notably, this issue is not limited only to Facebook Messenger, but it is happening to other apps, including Windows Messenger, Skype, etc. as well.
The result of this is that the unwanted process running right during the startup makes the boot a bit slow, and hampers the overall performance of the Windows PC.
Reportedly, the issue is so severe that sometimes, users are also experiencing frozen screens, blue screens, high CPU and RAM usage, laptops getting heated up, etc., problems.
This can be pretty annoying if you simply do not use any of the apps on your PC. Thankfully, this is where this guide comes into the picture.
Because we will provide you with a carefully curated list of solutions that have assisted users in resolving their queries on how to stop messenger from opening on startup. Let us get right into it.
What are the reasons behind Facebook messenger opening on startup issues?
Apps opening or running during Windows startup is quite common, but for some essential apps. For instance, system processes, antivirus software, and productivity tools load right during the startup.
However, there are a few notorious apps that muscle their way into the startup process. These apps aren’t necessary to load up during the startup, as they aren’t essential.
There are a few reasons why several users are experiencing messenger or app opening during Windows startup.
The app is added to the list of start-up apps. This can be done by the software itself, without your input. For some users, apps like Facebook Messenger have made their way to the top of the startup apps list and caused trouble for them.
Besides, most apps come with an in-built toggle or option to run the program at startup. For obvious reasons, if this feature is turned on, your PC will load the program during startup.
Another very common reason why apps such as Facebook Messenger, etc. automatically open or run during the startup is that your PC is infected by a virus or malware.
It is not that the Facebook Messenger app is a virus, but you might have downloaded an app or software from an unreliable third-party source, giving way for the virus or malware to enter your PC. This, in turn, will interfere with the smooth functioning of the PC and will cause multiple issues.
How can I stop Facebook Messenger from opening on startup?
1. Disable app from Windows Task Manager
Open the Start menu.
Search for Task Manager and open it.
Switch to the Startup tab on the Task Manager
Select the problematic program, in our case, the Facebook Messenger.
Click on the Disable button.
Close the Task Manager.
Restart your PC and check if this fixes the issue or not.
We have shown you the process with a different app, but the steps are the same for Facebook Messenger, Windows Messenger, or any other app.
One of the easiest and most effective ways of preventing unwanted software or programs from loading during the Windows startup is to use the Task Manager.
Using the simple steps above, you can disable all the apps that you do not want to load during startup and improve the start-up speed and overall performance of your Windows PC.
2. Remove apps from the startup folder
Press the Win+ Rkeys to open the Run dialogue.
Type the below command and press Enter. shell:startup
Inside the Startup folder, right-click on the problematic program.
Select the Delete option.
Close the folder.
Restart for the changes to take effect and check if this fixes the issue or not.
Another option that you can use to avoid unwanted programs from opening during Windows startup, is to delete the app from the Startup folder.
Once you have deleted the app from the folder, that particular app won’t bother you anymore by automatically opening up during the Windows startup.
3. Disable apps from Windows Settings
Press the Win + I buttons to open Settings.
Click on Apps on the left pane.
Select Startup from the list of options.
Locate the app on the app list and disable it.
Again we have shown the process using a different app, but the process is the same for disabling the Facebook Messenger app.
What else can I do to stop apps from opening up on startup?
Removing unwanted apps from loading or opening up during Windows startup can be pretty annoying. Also, it eats up your PC’s resources.
While the above three methods should be sufficient to stop apps or programs from loading up during startup, there are a few methods that can help you get rid of the apps, once and for all, from your PC.
➡ Uninstall the app
Press the Win + I buttons to open Settings.
Click on Apps on the left pane.
Click on Apps & features.
Locate the app and click on the 3-dot icon corresponding to the app name.
Select Uninstall.
Let your PC remove the program.
Restart your PC.
If none of the methods worked to solve your query on how to stop Messenger from opening on startup, then you should remove or uninstall the app from your PC.
Even if you use the app, then you should remove it from your PC and make use of the web version till the bug is fixed by the app developer.
➡ Tweak in-app settings
Open the Facebook app.
Tap on the menu icon on the right side of the app.
Scroll down and click on App Settings.
Turn the Facebook Chat toggle off.
There are chances that you might have left the Facebook Chat option on, which is why the app loads up when your PC starts up. Check if the above methods help in fixing the issue or not.
➡ Turn off Run at the login option
Press the Win + I buttons to open Settings.
Click on Apps on the left pane.
Click on Apps & features.
Locate the app and click on the 3-dot icon corresponding to the app name.
Select Advanced Settings.
Scroll down and look for Runs at log-in option. Toggle it off.
This method will definitely help you stop the app from loading during the log-in or startup. Multiple users on the official Microsoft forum have reported this solution to be actually helpful in fixing the app opening on the Windows startup issue.
➡ Scan your PC for virus
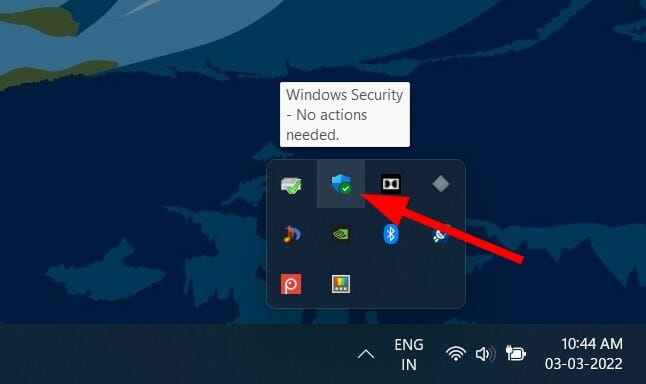
Click on the upward arrow on the bottom right taskbar.
Select Windows Security.
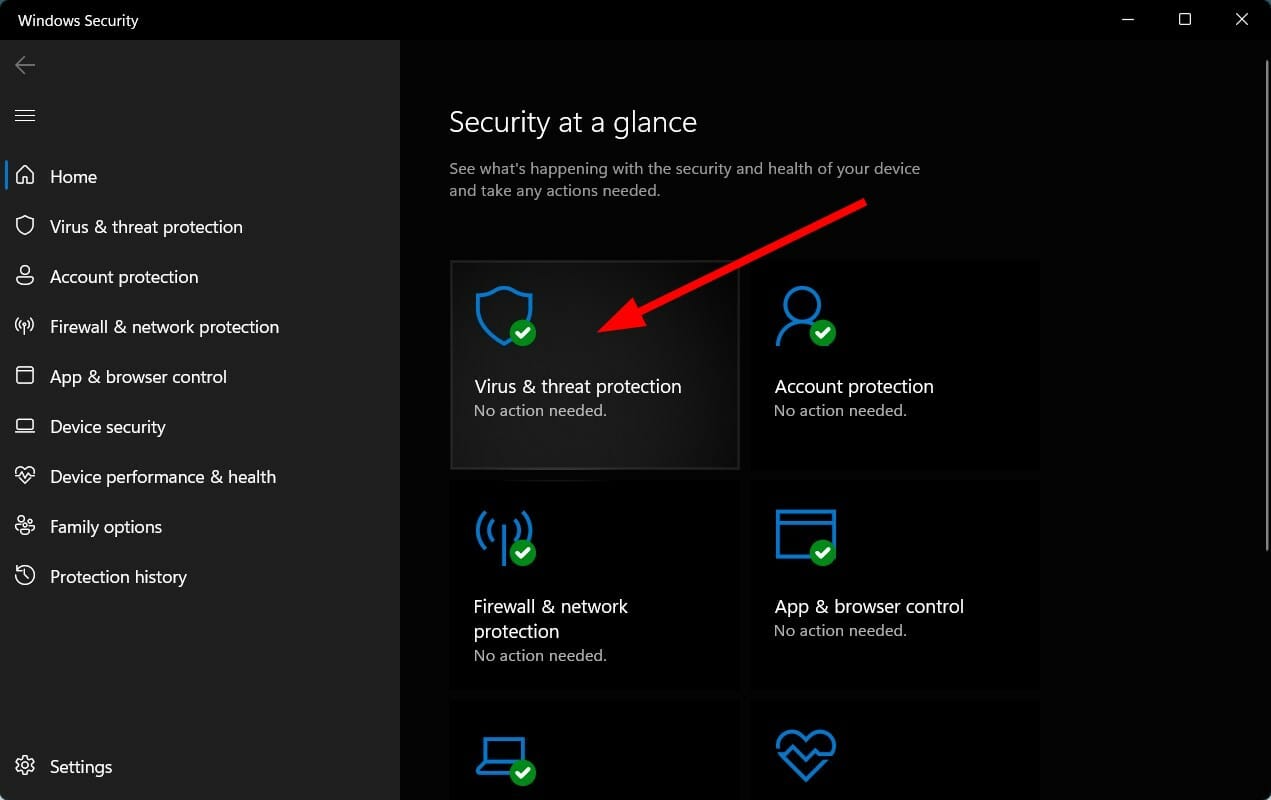
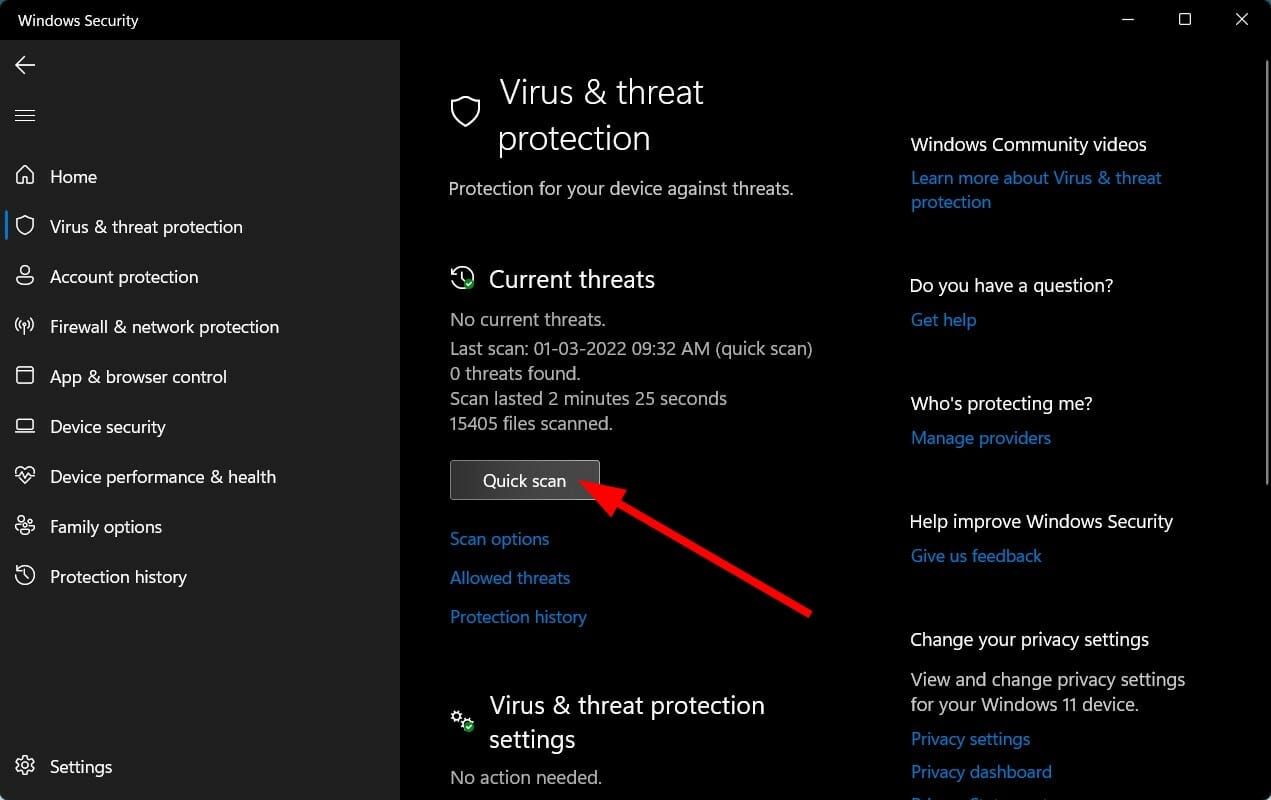
Click on Virus & threat protection.
Choose Quick Scan.
Let Windows Security scan your PC for viruses and malware.
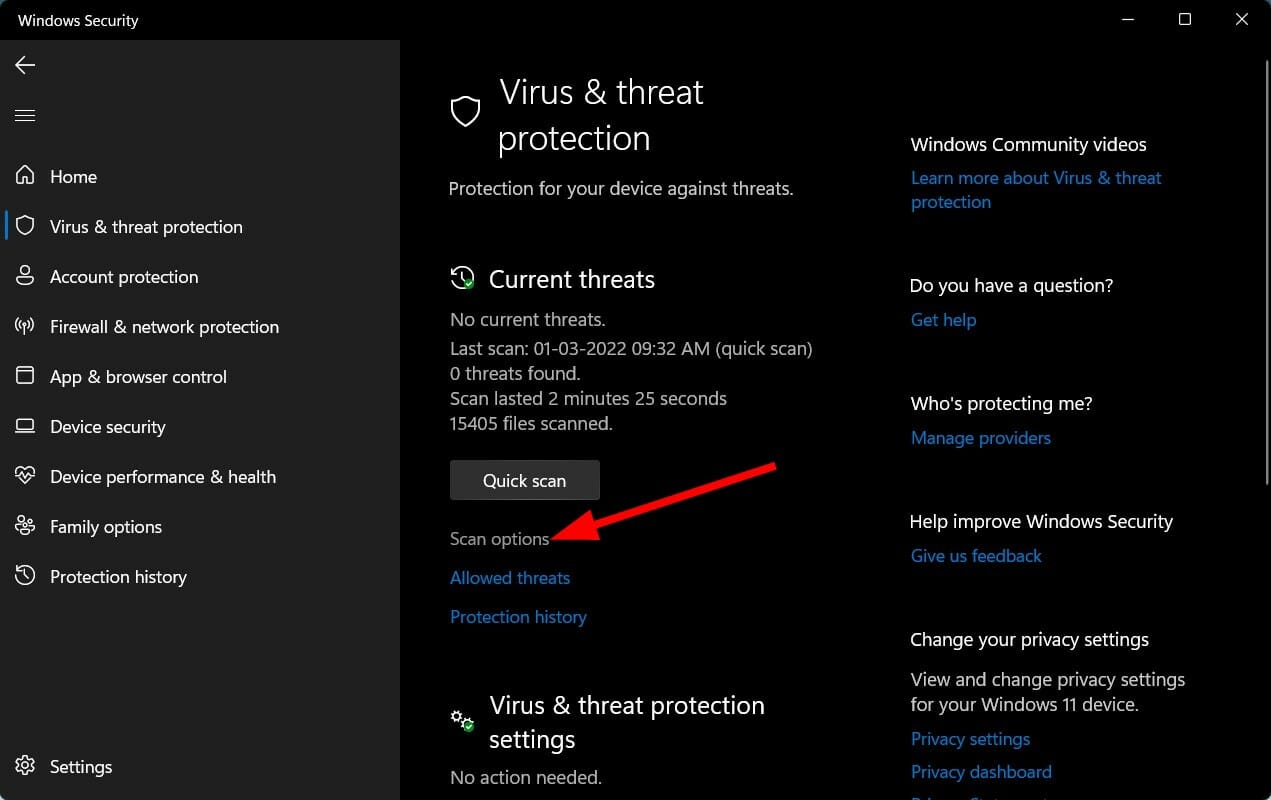
You can also select the Scan options button.
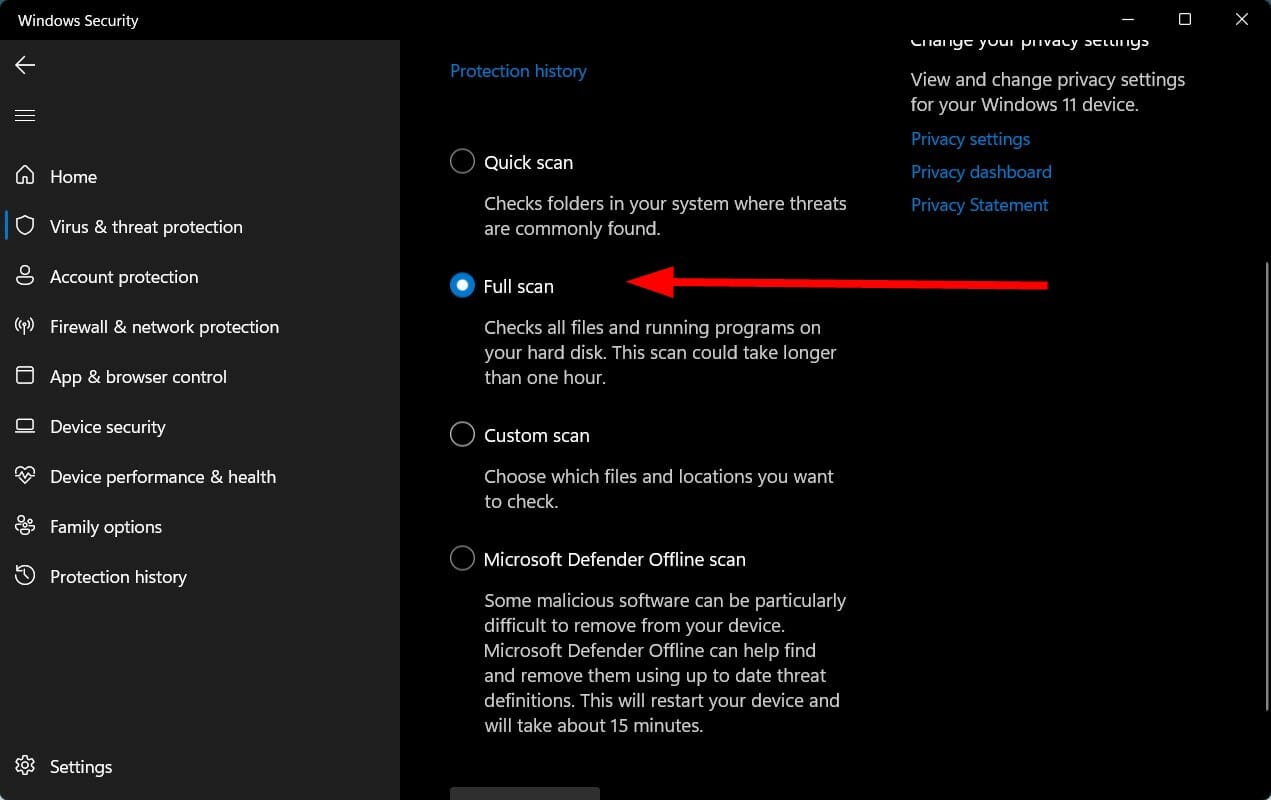
Under Scan Options, you can also choose Full scan to deeply scan your PC for viruses or malware.
To show off the process of scanning PC for viruses and malware, we used the Windows Security Defender. However, you can use any third-party antivirus applications to do the same.
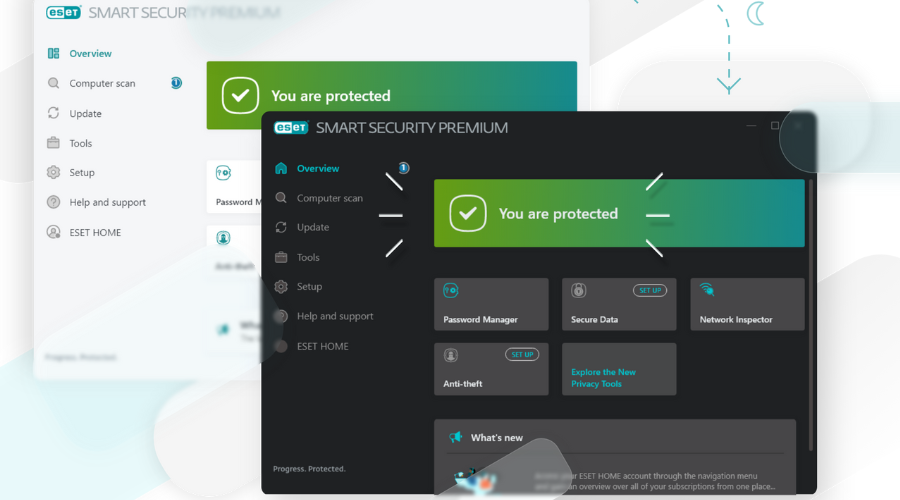
We would recommend you install the ESET HOME Security Essential antivirus tool. It comes with multiple features such as antispyware, ransomware shield, provides a one-click solution, banking and payment protection, firewall, network inspector, and much more.
The above steps give you an idea that you need to perform a scan to check for any viruses or malware present on your PC.
Viruses or malware not only cause several issues, but can also be pretty harmful to your personal data. It will also affect the smooth functioning of your PC, and give rise to errors such as the messenger opening on Windows startup.
Since viruses and malware are of different types, they can cause different problems. So, we would advise you to check your PC for viruses.
Well, the above solutions are probably sufficient enough for you to solve your query on how to stop the messenger from opening on startup.
Let us know in the comments section below which one of the solutions helped you eliminate the problem. You can also share any other solution or tip, that helped you fix the problem in the comments section below.
The procedure entry point is Windows error, and it usually affects Uplay application. This error can also prevent other applications from running, so today we’re going to show you how to fix it on Windows 10.
The procedure entry point could not be located [FIXED]
1. Reinstall the Uplay application
As previously mentioned, The procedure entry point error message usually appears when trying to start Uplay. However, you can easily fix the problem simply by reinstalling Uplay. Users reported that removing Uplay and deleting all files from its directory fixed the problem for them, so be sure to try that.
On the other hand, several users reported that your antivirus can interfere with Uplay and cause this error. According to users, the problem is related to Bullguard Antivirus and Firewall, so you might want to disable it temporarily. Users reported that they fixed the problem by following these steps:
Turn off Bullguard Antivirus and Firewall completely.
Restart your PC. When your PC restarts, make sure that Bullguard Antivirus and Firewall are disabled.
Delete Uplay.exe from game folders.
Reinstall Uplay.
After you reinstall it, turn the Bullguard antivirus back on.
Several users claim that you don’t even have to uninstall Uplay to fix it. Simply download the latest Uplay setup file and run it to update Uplay. After doing that, you should be able to use Uplay without any problems.
2. Rename the libcef.dll.old file
Locate libcef.dll.old file. By default, it should be located in the Uplay installation directory.
Once you locate the file you need to rename it. To do that, first, you need to reveal file extensions. You can do that by clicking on View and checking File name extensions.
Right-click libcef.dll.old and choose Rename. Change its name from libcef.dll.old to libcef.dll .
A warning message will appear. Click on Yes to proceed.
According to users, the cause for The procedure entry point error can be your libcef.dll file. This file is related to Uplay, but for some reason, the name of the file can change. If the file name isn’t correct, Uplay won’t be able to start and you’ll encounter this error. To fix the problem, you just have to rename this file by doing the steps above.
After you rename the file, the issue should be resolved completely. Keep in mind that this solution works only if you don’t have libcef.dll available. If this file is present in the Uplay directory, this solution doesn’t apply to you, so you can just skip it.
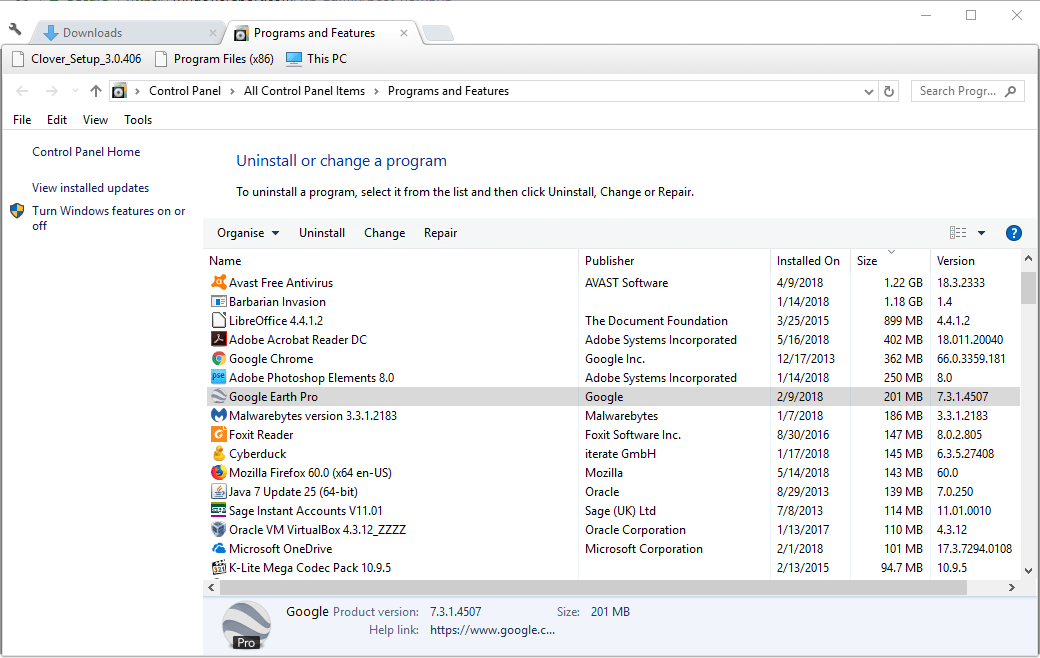
When Control Panel opens, go to Programs and Features.
A list of all installed applications will now appear. Select Microsoft Visual C++ Redistributable and click on Change.
Now choose Repair from the menu and follow the instructions on the screen.
Many applications rely on Visual C++ Redistributables in order to work. However, if there’s any problem with Visual C++ Redistributables you might encounter The procedure entry point error. Several users claim that you can fix the problem simply by repairing Visual C++ packages. To do that, follow the steps from above.
Keep in mind that you might have to repair all Visual C++ Redistributables that you have on your PC in order to fix this problem. If repairing the Redistributables doesn’t help, you might have to reinstall them. Keep in mind that you’ll have to install multiple versions of C++ Redistributables and not just the latest one. Different applications often require different versions of C++ Redistributables in order to run properly, so you’ll have to install multiple versions.
4. Use Steam to launch your game
Press Ctrl + Shift + Esc to open Task Manager.
When Task Manager opens, go to Processes tab and look for Uplay process. If you find it, right-click it and choose End task. You can also go to the Details tab and check if the Uplay process is running. If so, right-click it and choose End task from the menu.
Now you need to download Uplay again and install it. To do that, follow these steps:
Download the Uplay setup file and run it.
Make sure not to run Uplay at the end of the installation.
Now start Steam and launch your game.
According to users, you can fix The procedure entry point error simply by starting your game from Steam instead of Uplay. To fix the problem, first, you need to close Uplay entirely. Sometimes Uplay can run in the background, so you’ll need to use Task Manager to close it.
By starting your game from Steam, Uplay will automatically start and you won’t have any problems with it. Keep in mind that you might have to start games from Steam as a workaround until you find a permanent solution.
In the Display adapters section locate your graphics card driver, right-click it and choose Uninstall device.
Now check Delete the driver software for this device and click on Uninstall.
After you uninstall your driver, restart your PC.
Once your PC restarts, Windows will install the default driver. After the default driver is installed, check if the problem still persists. If not, you might want to update your driver, but be sure not to install the same version that caused you this problem.
According to users, The procedure entry point error can appear due to problems with your Nvidia graphics drivers. To fix the issue, users are suggesting removing your driver and checking if that solves the problem.
There’s also one more way to remove your driver. We showed you how to remove it from Device Manager, but this method can sometimes leave leftover files and registry entries that can still cause the problem. To completely remove your graphics card driver, we suggest that you use Display Driver Uninstaller. This is a freeware third-party tool that will automatically remove your graphics card driver and all files related to it. If you want to be sure that your graphics card driver is completely removed, we suggest that you use this tool.
Users reported this problem with Nvidia drivers, but even if you don’t use Nvidia graphics, you might want to try reinstalling your drivers and see if that helps.
6. Disable Windows Defender
If you have a third-party antivirus tool installed, disable it.
Disconnect your PC from the Internet.
Now you need to start Group Policy Editor. To do that, press Windows Key + R and enter gpedit.msc. Now press Enter or click OK to run it.
In the left pane, navigate to Computer Configuration > Administrative Templates > Windows Components > Windows Defender. In the right pane, locate and double click Turn off Windows Defender Antivirus.
Select Enabled and click on Apply and OK to save changes. Several users are recommending to select Disabled option instead, so you might want to try doing that as well.
After you disable Windows Defender, reinstall your game and check if the problem still appears. We have to mention that Group Policy Editor is available only on Windows Pro or Enterprise Editions. If your Windows doesn’t have Group Policy Editor, you can disable Windows Defender by modifying your registry. To do that, follow these steps:
Press Windows Key + R and enter regedit. Press Enter or click OK to open Registry Editor.
In the right pane, double click the DisableAntiSpyware key. If this key isn’t available, you need to create it. To do that, right-click the empty space and choose New > DWORD (32-bit) Value. Enter DisableAntiSpyware as the name of the new DWORD. Now double click the DisableAntiSpyware DWORD to open its properties.
Set the Value data to 1 and click OK to save changes.
Several users reported that they encountered The procedure entry point error while trying to run certain games. It seems that this problem can be caused by Windows Defender, so in order to fix it we need to disable Windows Defender. To do that, you just need to follow the steps described above.
Keep in mind that editing the registry can be potentially dangerous, so use extra caution. If you want to enable Windows Defender again, simply change the value data of DisableAntiSpyware DWORD to 0 or delete it.
7. Completely remove VLC player from your PC
The procedure entry point error usually affects Uplay, but it can also appear in other applications. Users reported this error in Tunngle, and it seems that it was caused by VLC Media Player.
To fix the problem, you need to uninstall VLC Media Player and remove all registry entries associated with it.
To completely remove VLC from your PC, you might consider a cleaning software that can help you remove any unwanted programs.
CCleanercan perform this job in a few clicks and also erase junk files or temporary files from your system.
Users reported that removing the VLC player fixed the problem for them, so be sure to try it. If you still want to use VLC as your media player, be sure to download and install the latest version and check if the issue still appears.
8. Replace the configuration and .dll files
Users reported The procedure entry point error while trying to run Assassin’s Creed 4. According to users, the issue is caused by corrupted configuration and .dll files. To fix the problem, you’ll need to replace the corrupted files with new ones. The list of files that you need to replace includes orbit_api, steam_api, steam_api.dll, uplay_r1.dll, and uplay_r1_loader.dll.
Keep in mind that downloading these files from third-party websites can be a security concern, therefore it’s always better to copy them from another user that has a working copy of the game. After you copy these files to the game’s directory, the problem should be fixed and everything will start working without issues.
If the problem still persists, users are suggesting disabling Windows Defender entirely and checking if that solves the problem. For more information on how to disable Windows Defender, be sure to check Solution 6 for detailed instructions.
9. Disable your antivirus
Your antivirus software is rather important, but it can sometimes cause The procedure entry point error to appear while trying to play certain games. To fix the issue, it’s advised to temporarily disable your antivirus and check if that solves the problem.
This is just a simple workaround, but if it works, be sure to use it in the future if this error appears again. Keep in mind that almost any third-party antivirus software can cause this problem to appear, so be sure to try this solution.
10. Install the latest updates
If you’re frequently getting The procedure entry point error message, you might be able to solve it by updating your Windows. By default, Windows 10 automatically installs the necessary updates in the background, but sometimes you might miss an important update.
However, you can always check for updates manually by doing the following:
Open the Settings app. You can do that quickly simply by pressing Windows Key + I.
When Settings app opens, navigate to Update & security section.
Now click on Check for updates button. Windows will now check for updates and download them automatically in the background. If any updates are available, Windows will install them as soon as your PC restarts.
Keeping your Windows up to date is one of the best ways to ensure that errors such as this one don’t appear, so be sure to update Windows as often as you can.
11. Copy the steam_api.dll file
Users reported The procedure entry point error message while trying to start a Gmod server on their PC. Apparently the problem is occurring because steam_api.dll file is missing. To fix the issue, you just need to copy the missing file to the Gmod server directory. This is rather simple, and you can do it by following these steps:
Go to the gmodserver directory on your PC.
Now navigate to the bin folder.
Once you open the bin directory, search for steam_api.dll file. Copy that file.
Now go back to gmodserver directory and paste the steam_api.dll file in that directory.
After you copy the steam_api.dll file, the problem should disappear and you’ll be able to run Gmod server without any problems.
12. Copy libxml2.dll file
According to users, this error message can appear while using APPandora app. The problem occurs because a certain .dll file is missing, but you can fix the problem simply by copying that file. To do that, follow these steps:
On a 64 -bit Windows, go to the
C:Program Files (x86)Common FilesAppleApple Application Support
directory. If you’re using 32 -bit version of Windows, navigate to the
C:Program FilesCommon FilesAppleApple Application Support
directory instead.
Once you open Apple Application Support directory locate libxml2.dll file and copy it. The procedure entry point error message usually tells you which file is missing, so you need to find it in Apple Application Support directory and copy it.
Now navigate to C:WindowsSysWOW64 directory and paste that file. If you’re using a 32-bit version of Windows, you need to navigate to C:WindowsSystem32 directory and paste your file there.
After copying the missing files, APPandora app will start working again without any problems.
Google Chrome is a great browser, but it can also suffer from The procedure entry point error. Several users reported this error message in Chrome, and in order to fix it, you just have to reinstall Chrome on your PC. Keep in mind that you’ll need to install the latest version of Chrome in order to fix this issue.
In addition to Chrome, this issue also affects Firefox, so if you’re using Firefox as your default browser, reinstall it and update it to the latest version to fix this problem.
Solution 14 – Rename the dxgi.dll file
According to users, this error can appear while trying to use mods with certain games. The cause for this problem is dxgi.dll file, and in order to fix the issue, you need to find and rename that file. To do that, follow these steps:
Go to your game’s installation directory and look for dxgi.dll file. If this .dll isn’t available, go to C:WindowsSystem32 directory. Locate the dxgi.dll and copy it to the game’s installation directory.
In the game’s installation directory, right-click dxgi.dll and choose Rename from the menu. Rename the file from dxgi.dll to d3d11.dll .
After renaming the file, try to start the game again and check if the problem still appears.
Solution 15 – Change System Variables
According to users, The procedure entry point error message can appear while starting DWG Viewer or DWG TrueView software. If you’re using these tools, you might be able to fix the problem simply by changing your system variables. To do that, follow these steps:
Press Windows Key + S and enter advanced. Choose View advanced system settings from the menu.
Environment Variables window will open. In the System variables section, select Path and click on Edit button.
A list of path variables will appear. If C:Program FilesCommon FilesAutodesk Shared isn’t available on the list, you need to add it. To do that, simply click an empty space on the list and enter C:Program FilesCommon FilesAutodesk Shared . Now click OK to save changes. If this path is available, be sure to check if it’s correct.
After doing that, you just need to save changes and the problem should be resolved. Keep in mind that this problem can also affect other applications. If you’re having this error with other applications, we strongly advise you to check their Path variables and edit them if necessary.
Solution 16 – Reinstall Jabber and remove MeetingService files
Several users reported this error message while using Jabber. To fix the issue, you need to uninstall Jabber and remove certain .dll and .xml files. To do that, follow these steps:
Uninstall Jabber.
Now navigate to Jabber’s installation directory. By default, it should be
Locate and remove MeetingService.dll and MeetingService.xml files.
After removing these files, reinstall Jabber.
This is a simple solution, and users reported that reinstalling Jabber and removing MeetingService files fixed the issue for them, so be sure to try it out. Several users reported that removing the entire Cisco Jabber directory fixed the problem for them, so be sure to try that as well.
Solution 17 – Verify the integrity of game files
The procedure entry point error message usually appears when trying to run certain games using Uplay. According to users, the issue can occur if your game files are corrupted. To fix the problem, you’ll need to check the integrity of your game cache. To do that in Uplay, follow these steps:
Open Uplay and click on Games.
Select the game that is giving you this error message. Now click on Verify files button.
The verification process will now start. This process can take a while, so you’ll have to be patient.
If you’re having this problem with Steam games, you can verify the game cache by doing the following:
Open Steam and go to your game library. Locate the game that is giving you this error, right-click it and choose Properties from the menu.
When Properties window opens, go to Local Files tab and click on Verify integrity of game cache button.
The verification process will now start. The verification can take a while so be patient.
After the verification is finished, check if the problem still appears. Few users claim that verifying their games solved the issue for them, so be sure to try that.
Solution 18 – Reinstall Adobe Photoshop
According to users, the issue can appear after installing Adobe Photoshop. The issue is caused by a corrupted .dll file, and in order to fix this problem, you need to reinstall Photoshop. To do that, you need to follow these steps:
Once you download the tool, run it. The tool will remove any files associated with Adobe Photoshop from your PC.
After you finish the process, download and install Adobe Photoshop again.
After you reinstall Photoshop, the problem should be resolved and you’ll be able to use it without any issues.
Solution 19 – Perform a System Restore
If The procedure entry point error message started appearing recently, you might be able to fix the problem by performing a System Restore. This is a useful feature that will restore your PC to the previous state and fix any recent problems. Keep in mind that this feature might remove any recently saved files, so you might want to back them up. To perform a System Restore, do the following:
Press Windows Key + S and enter system restore. Choose to Create a restore point from the menu.
System Properties window will appear. Click on System Restore button.
When System Restore window opens, click on Next.
List of available restore points will appear. If available, check the Show additional restore points option. Now select the desired restore point and click on Next.
Follow the instructions on the screen to complete the restoration process.
Once you restore your PC, check if the problem still appears.
Solution 20 – Copy the missing .dll files to the Syncios directory
This error message can appear while using the Syncios software on your PC. Missing .dll files are causing this error to appear, and in order to fix it, you need to copy them to Syncios directory. To do that, follow these steps:
Navigate to the
C:Program FilesCommon FilesAppleApple Application Support
directory. If you’re using a 32-bit version of Windows, you’ll need to navigate to C:Program Files (x86) directory instead.
Once you open Apple Application Support folder, select libxml2.dll , WTF.dll , libxml3.dll , and WebKit.dll files. Now press Ctrl + C to copy these files.

Navigate to C:Program FilesSyncios directory. If you’re using a 32-bit version of Windows, you’ll need to navigate to C:Program Files (x86)Syncios directory instead.
Once you open Syncios directory, press Ctrl + V to paste the files.

After doing that, the problem should be fixed and you’ll be able to run Syncios app without any problems.
Also, you may visit the Windows 10 Errors section for guides on fixing common Windows problems with the computer.
The procedure entry point error message can prevent you from running your favorite applications or games. This error is usually caused by missing .dll files, but you should be able to solve it by using one of our solutions.
Plex Media Server is a popular local streaming software available for multiple platforms and allows users to stream content from their local server like Nvidia Shield Pro over the internet from anywhere.
However, at times you may face difficulty installing Plex Media Server. Several users have reported Plex Media Server won’t install issues in the Reddit community forums.
Server version: Trying to install the latest PMS 1.1.4.2757 OS: W10 HP x64 Had PMS installed many months ago now and removed it for one reason or another. Wanting to devote some time to it on my main rig so have tried to install it again afresh after installing the OSX version of PMS on my Mac recently. Run the installer as admin, let it run the install flows and it comes up with the setup successful – great. Until you click launch and it does nothing. After further investigation, no Plex directories in C:ProgramFilesx86, no start menu shortcuts, nothing – Not even in LocalAppdata.
Follow these steps to troubleshoot Plex Media Server won’t install issue in Windows.
How to fix Plex Media Server Won’t Install
1. Run the Setup File as Admin
Windows may prevent some files from installing and making changes to the registry entries due to insufficient privileges.
Locate the Plex Media Server setup file that you downloaded from the official website.
Right-click on the Setup file and click on Run as Administrator.
Wait for the installation to complete and reboot the system.
After the restart, navigate to C:ProgramFilesx86 and check if the app is correctly installed.
2. Uninstall and Clean Old Registry Entries
If you are trying to reinstall Plex Media Server, it is possible that the old registry entries are preventing the fresh installation.
It is also possible that uninstallation was partially successful thus creating issues with the installation. You can always rely on professional registry cleaning software to do this in just a few minutes.
3. Run Microsoft Apps Troubleshooter
Microsoft offers a Program Install and Uninstall Troubleshooter application that helps you automatically repair issues when any installation-related issues occur.
Adobe Creative Cloud Express is a unified task-based, web, and mobile app developed by Adobe Inc, that offers powerful and useful image and video editing features.
Even if it provides tons of premium functionalities, developers were still wondering how they can improve Creative Cloud Express and this is what one user had to say on the UserVoice forum.
On desktop and in Spark Post, I would love to be able to drag and drop images to folders and asset libraries. Often, I am able to find the folders in my finder but then I need to browse to the directory to find it again to upload. I thought this would speed up my workflow. Thank you!
Adobe hopes to better connect its software with amateur users. To do so, it’s offering up easy-to-use templates, drag-and-drop functionality, and a ton of other features in a streamlined and (much) more approachable interface.
If you’re interested in discovering more about the Creative Cloud Express drag and drop feature, make sure you read this guide completely.
How can I use Creative Cloud Express Drag and Drop?
With the latest Adobe updates, the drag and drop functionality has never been easier.
In order to take advantage of it, you’ll need to drag a file (image or video) from your desktop onto your Creative Cloud Express canvas quickly and easily.
After that, your canvas will retain the zoomed-in state when you drop your asset on it.
For now, this is all we know about the Creative Clod Express drag and drop functionality. Until developers come up with more details, feel free to download from the manufacturer’s official website and test it.
The modern internet browser does not require the users to install Java on Windows. However, millions of users still the run older version of Windows and require Java to perform some tasks. That said while updating Java, you may encounter unable to launch the java update installer, the operation was canceled by the user error.
Another similar error reads Java(TM) Update Unable to launch the Java(TM) Update installer: The requested operation requires elevation.
This error can occur due to issues with administrator rights. In this article, we show you how to fix unable to launch the Java update installer error in Windows.How to fix Java Update Installer errors
Manually download and install Java
1. Uninstall old installer
Press Windows Key + R to open Run.
Type control and click OK to open Control Panel.
Go to Programs > Programs and Features.
From the list of apps, select Java.
Click on Uninstall (top toolbar).
Click Yes if asked to confirm the action.
Use a dedicated app
If you are unable to uninstall the Java client using the Control Panel, use CCleaner.
Download the latest version of Java from the official website.
Right-click on the installer.
Select Run as administrator.
If prompted by the User Account Control, click Yes to continue.
Wait for the installation to complete.
The error occurs if the previous installation has some leftover files creating issues with the new installation or if the installer requires administrator rights to run. By following the steps in this article you can fix this issue in no time.
Do you have a program that you can’t remove with the Windows uninstaller (Programs and Features)? If the Windows uninstaller is not working for a specific program, you might not need to fix the uninstaller. It might instead be the case that the software’s installation is corrupted or you don’t have sufficient access rights. These are a few resolutions for removing a program when the Windows 7, 8.1 or 10 uninstaller doesn’t uninstall it.
Third-party uninstallers usually uninstall software more thoroughly than the Windows uninstaller leaves a few leftover registries behind.
Leftover files not only keep your PC cluttered, but they may prevent you from reinstalling the program in the future because the installer wizard may wrongfully detect that the program is already installed on your PC.
Furthermore, uninstaller utilities have the ability to detect software that won’t be listed in the Add or Remove Programs panel.
If you want a safe uninstaller that is proven to completely remove an application along with all its corresponding files, we recommend you get CCleaner.
CCleaner is an overall PC cleaning and optimization utility that includes a powerful and easy-to-use uninstaller. It is similar to the Windows built-in Add or Remove programs panel, displaying a list of all the apps currently installed on your PC.
Just select what you want to remove and wait for the process to complete. The uninstaller feature is available in the free version, but if you want additional help with maintaining your PC such as automatic driver updates, you should consider the premium version.
CCleaner
Leave no trace of unwanted apps with an easy to use uninstaller utility
2. Open the program install and uninstall Troubleshooter
First, check out the Program Install and Uninstall troubleshooter. That Microsoft troubleshooter can fix errors that block users from uninstalling software. You can utilize that troubleshooter in Windows 10, 8.1 and 7 as follows.
Press the Download button there to save the Program Install and Uninstall troubleshooter to a folder.
Then open the troubleshooter from the folder you saved it in.
Click Advanced and select the Apply repairs automatically option.
Press the Next button, and then select the Uninstalling option.
Select the program that you can’t uninstall from the list shown directly below, and press the Next button. The troubleshooter will then provide potential fixes.
3. Repair the program
Open the Run accessory by pressing its Windows key + R hotkey.
Enter ‘appwiz.cpl’ in Run’s text box, and press the OK button.
Select a program and press its Repair button.
If there is not Repair option for a program, select the Change button instead. That will open a window like the one shown in the image below.
Then select a repair option on the window that opens to fix installation issues for the selected software.
The Windows uninstaller doesn’t always uninstall corrupted programs. Programs and Features include a Repair option for some programs that you can select to fix corrupted installations.
4. Activate the Built-in Admin Account
First, enter Command Prompt in the Windows search box (on the Start menu or within Cortana).
Press the Ctrl + Shift + Enter hotkey to open the Command Prompt as administrator.
Then input ‘net user administrator /active:yes’ in the Command Prompt and press Return to activate the built-in admin account.
Sign out and log back in to Windows with the administrator account.
Uninstall the required program within the new admin account.
Note that you might need elevated admin rights to remove some software. If you don’t have sufficient access rights, a window pops up stating, You do not have sufficient access to uninstall.
If that dialog box window pops up for you, you’re probably uninstalling the software within a standard user account.
5. Remove the Program With System Restore
Press the Windows key + R to open Run.
Enter rstrui in the Open text box and click OK to open System Restore.
Press the Next button to open the list of restore points.
Then choose a restore point to roll Windows back to. Select a restore point that predates the date you installed the software that Windows doesn’t uninstall.
You can see what software gets uninstalled with a restore point by pressing the Scan for affected programs button.
Click Next and press the OK button to restore Windows.
System Restore is a Windows utility that rolls your system back to a selected restore point. As such, restoring Windows to an earlier date also removes third-party software installed after the restore point.
So, this utility might also get rid of a program that the Windows uninstaller doesn’t uninstall. You can roll Windows back to a restore point as follows.
So that’s how you can remove a program when the Windows uninstaller doesn’t uninstall it. Aside from those resolutions, try removing programs in Windows Safe Mode, which you can access in earlier Windows platforms by pressing the F8 key during system startup.
Note that some system optimizers also include uninstaller utilities that you can utilize as an alternative to Programs and Features.
The solutions mentioned above are also useful if you are interested in the following topic:
Setup/uninstall has stopped working – All solutions mentioned above will help you when the Windows Uninstaller fails to work properly.
Let us know which of the solutions mentioned above helped you by leaving us your feedback in the comments section below.
Adobe recently announced several updates to its Creative Cloud Express design, and they seem to be extremely practical for tons of users, especially when it comes to the features of the shapes.
In case you’re not already familiar with this software, keep in mind that Creative Cloud Express is a simple program, available on the web and mobile, that allows you to quickly put together templates.
Like any other premium photo editing app, it offers a variety of fonts, place assets, or shapes.
Shapes are one of the basic tools of this program and often one of the first things that get placed in your project.
Of course, the more shapes there are from which to choose, the more likely you are to find what you’re looking for.
Clicking on the Icons button in the program brings up new and familiar shapes. Use the new customization abilities to adjust fill and border colors or to change border width to look just the way you want it to.
How can I use the Creative Cloud Express shapes?
When it comes to the Creative Cloud Express menu, there are some nice improvements at the level of basic shapes.
Thus, it will be possible to add rectangles, circles, hearts, lines, and more to your designs.
Once the shape has been added to your project, you can simply modify its size and style, in particular by customizing the colors of the shape and the borders.
So, for now, this is all we know about the newly released Creative Cloud Express shapes updates. In order to discover more about this subject, make sure you keep an eye on your guides.
If it’s happening to face any additional related questions, make sure you share them with us by leaving a comment in the section below.
You might remember Loomi in Opera, but what happened to this service, and it is still available? This guide will answer all your questions, so let’s get started.
What is Loomi by Opera?
Loomi is a streaming service that allows you to watch movies for free with advertisements. Opera had this service integrated into its browser.
How can I use Loomi in Opera?
This service was released in Poland several years ago, and it doesn’t seem to be available in Opera or Opera GX anymore. This means that you can’t access it at all.
The service seems to be shut down, as we can’t find any information about it online. Even the official website redirects to Opera’s homepage.
Users also reported that Bitdefender was detecting scripts from Loomi’s website as malicious, and this might’ve been a false positive.
One of the highest costs for a company is its IT assets. Computers, routers, printers, mobile devices, you name it.
IT hardware is expensive and must be constantly maintained and/or upgraded to keep peak efficiency and avoid security risks.
Add in the cost of licenses for software, support contracts, and other incidentals, and you have an important piece of your company assets that need to be efficiently managed.
While some companies still use spreadsheets for IT asset management, these are hard to maintain and are limited to having a list of your assets.
Now, if you want to keep an up-to-date asset inventory, real-time control of ownership, identify devices that need to be patched, and have a clear understanding of your IT financials, you need an IT Asset Management system.
How do I choose the best IT inventory management software?
Selecting an IT tool can be quite a challenge, especially since there are a lot of options available.
Although the criteria might be a bit company-specific, the right IT asset management software should provide you with:
➡ Up-to-date inventory: Know exactly what assets you have, where they are, who is using them, and what condition they’re in.
➡ Remote support: Access and manage your assets at any time, from anywhere, so your database is always up to date.
➡ Patch management: Keep track of which devices need to be patched and when to ensure peak security for your company.
➡ IT financials: Understand the cost of your IT assets and make informed decisions about upgrades and maintenance.
So, if you were looking for the best IT asset management software out there, we’re going to lend a helping hand.
If you want to discover all IT assets connected to your network without installing any other software on your devices, Lansweeper can help you.
That’s because it grabs information on all assets, then lists all the installed software, user details, hardware specs, and much more.
Thus, with Lansweeper’s IT Asset Data Platform, you will get complete end-to-end visibility of your network, saving your IT staff a lot of time and effort.
Furthermore, you gain access to a single source of truth, an accurate and centralized repository of all your hardware, software, and users.
The solution gathers all the data in a centralized System of Record. That means you will have 100% visibility into your distributed IT environment.
You will automatically know which assets you own, their location, who is using them, and lots of other insights.
The tool connects right to your existing technology stack, so you won’t need to perform any complicated implementation steps.
If you haven’t heard of Device42 yet, it’s an agentless full-stack Hybrid IT discovery and dependency mapping solution.
With this tool, you get access to information that mirrors the reality of what is in your environment, making you more efficient in the process.
This software discovers and connects to all the assets on your network, getting data from servers, hypervisors, cloud, network devices, applications, and more.
Of course, it can also extract information from external tools such as puppet, Chef, and receives data via Rest APIs.
Then, the built-in technology performs the cleansing, deduplication, and enriching of the data.
In the end, you will be able to access dynamically generated impact charts that will help you reduce risk and potential downtime.
The tool provides detailed configuration discovery for major applications such as Oracle, Microsoft SQL, MongoDB, PostgreSQL, MySQL, ColdFusion, IIS, Apache, and more.
Take a look at some of its key features below:
Fast network investigation
Agentless discovery using native protocols
Visualizes application to device relationships
Dynamically generated impact charts
Discovers application components such as Oracle, Postgres, MySQL, MongoDB, and IIS
If you’re looking for an open platform with a more casual approach, Kaseya might do the job.
This solution delivers the technology SMBs and managed service providers (MSPs) need to improve their productivity.
For instance, from the security standpoint, you will be able to manage software patching, antivirus & antimalware and perform backups from a single dashboard.
Another advantage is that you can manage and monitor all the devices from the network remotely and troubleshoot them quickly, but also create service tickets.
Of course, with Kaseya it’s also possible to monitor and manage all the devices on your network, including servers, endpoints, and (SNMP) network devices.
The complete Kaseya package includes VSA, Vorex, and IT Glue. Although Kaseya VSA covers the management and monitoring, you will also need the Vorex helpdesk and IT Glue to integrate all of them.
It will take a little bit of tweaking from your IT staff to get all of them working seamlessly so if you need a simple product, look elsewhere.
Let’s see some of Kaseya’s most important features:
Monitors all devices in your network
Software patching and antivirus monitoring
Create, manage and automate tickets
Perform automated backups
Remote access and troubleshooting from a central dashboard
When it comes to inventory management tools, it’s easy for things to get unwieldy and hard to manage. Therefore, you want to find something that is user-friendly, intuitive, and thorough.
InvGate Insight is all that and more. Its easy-to-use interface provides you with a unified inventory of all IT assets connected to your network. You can access data and insights from any device, desktop or mobile.
You also have the ability to access data and insights related to individuals as well as groups of assets.
InvGate Insight is a state-of-the-art IT asset management tool that is easy and convenient to access thanks to its web and mobile interfaces that can be accessed from any device.
This combination of power and ease of use makes it an ideal tool not just for inventory management, but also for asset discovery, license management, and software deployment.
It is a very comprehensive ITAM tool, tremendously useful in a number of different scenarios.
InvGate Insight balances power and ease of use, making it an ideal tool not just for asset management, but also for asset discovery, license management, and software deployment.
Having the ability to effortlessly discover your entire IT infrastructure, resulting in a 360-degree view of both your cloud and physical assets, is priceless.
This simplifies inventory management and ensures that you’re running a tight ship since your entire IT ecosystem is mapped out (complete with configuration management data).
The fact that users can then build dynamic views of how these systems and applications related to each other in a visual CMDB data model is a bit like using an operating system in God Mode.
And where it really helps with inventory management is the ease with which you can store acquisition costs, vendor information, and more inventory details within each asset in your IT ecosystem.
This makes it a piece of cake to keep track of inventory information for reporting and budgetary purposes. Additionally, IT security compliance is an essential part of InvGate Insight.
The software has the ability to report on devices in your inventory running outdated software versions; you can set up instant alerts for devices that are flagged as running outdated or unmaintained software.
This helps protect your assets and data, helping your team take proactive measures to protect your organization from any security vulnerability.
You can also check assets with upcoming warranty expirations, helping you take the required steps to strengthen your IT security.
InvGate Insight is available as a 30-day free trial (with no credit card required).
Take a look at InvGate Insight’s best features:
360-degree view of both your cloud and physical assets
Full IT security compliance
Very comprehensive ITAM tool
Accessible from web and mobile interfaces
Set up instant alerts for devices that are flagged as running outdated or unmaintained software
These are the best IT inventory management software solutions we recommend if you are in need of such a tool for your business.
Depending on what exactly you are looking for, surely you will find an option that is best tailored to your needs.
And while we’re talking about your infrastructure, you might also want to take a look at our best network performance management software and get up to speed with the latest tools.
Which software solution proved to work best for you? Share your experience with us in the comments section below.
Are you an Edge user? If the answer is yes, then you will surely rejoice in knowing that Microsoft just provided yet another Dev Channel build for the browser.
Build 102.0.1227.0 has plenty of new features such as a management policy to control the Network Sandbox service, and it also fixes a lot of different crashing issues.
Let’s get right into it and see what the latest browser version brings to the Insiders that are actively testing the software.
What’s new in Build 102.0.1227.0?
As we mentioned in the title, Microsoft added a management policy to control if the Network Service Sandbox is Enabled.
Keep in mind that actually disabling the Network process sandbox is an increased security risk, and updates to documentation and administrative templates may not have occurred yet.
Improved reliability:
Fixed a crash on startup.
Fixed a crash on launch on Mac when certain pages are restored during startup.
Fixed a crash when enabling Rewards.
Mobile:
Fixed a crash when interacting with the address bar.
Fixed a crash when interacting with popups.
Fixed a crash when using Read Aloud.
Fixed a crash in WebView2 apps when their window position changes (Issue 1531).
Changed behavior:
Reduced the amount of duplicate autofill entries that are saved in Settings.
Improved the number of forms that get autofilled accurately.
Fixed an issue where autofilling travel data sometimes results in dates being filled incorrectly.
Fixed an issue where dropdowns in PDF forms sometimes can’t be interacted with.
Fixed an issue where the Setting to control the Picture in Picture button isn’t available.
Fixed an issue where searching for a setting makes the Settings page go blank.
Fixed an issue where certain Settings pages like the Profile Preferences page are blank.
Mobile:
Fixed an issue where the webpage sometimes goes blank.
Fixed an issue where Read Aloud is unexpectedly disabled.
Fixed an issue where Read Aloud sometimes unexpectedly stops and can’t be restarted.
Fixed an issue where copy/paste sometimes doesn’t work.
Fixed an issue where copy/paste sometimes works when it shouldn’t because it’s restricted via management policy.
Fixed an issue where certain management policies like for setting the Homepage don’t work.
Users of certain ad blocking extensions may experience playback errors on YouTube. As a workaround, temporarily disabling the extension should allow playback to proceed. See this help article for more details.
Some users are still running into an issue where all tabs and extensions immediately crash with a STATUS_INVALID_IMAGE_HASH error. The most common cause of this error is outdated security or antivirus software from vendors like Symantec, and in those cases, updating that software will fix it.
Users of the Kaspersky Internet Suite who have the associated extension installed may sometimes see webpages like Gmail fail to load. This failure is due to the main Kaspersky software being out of date, and is thus fixed by making sure the latest version is installed.
Some users are seeing “wobbling” behavior when scrolling using trackpad gestures or touchscreens, where scrolling in one dimension also causes the page to subtly scroll back and forth in the other. Note that this only affects certain websites and seems to be worse on certain devices. This is most likely related to our ongoing work to bring scrolling back to parity with Edge Legacy’s behavior, so if this behavior is undesirable, you can temporarily turn it off by disabling the edge://flags/#edge-experimental-scrolling flag.
Microsoft also mentioned that next week is its final expected week for Dev 102.
PlayStation 5 owners just got a bit of relief when it comes to updating the firmware of their controllers. Announced on Twitter, Sony has just made it possible for gamers to update their DualSense wireless controller with the latest firmware from Windows 11 and select Windows 10 devices, without connecting to a PS5.
To do this, you’ll have to download the Firmware updater for the DualSense Wireless Controller program and save it to your PC. From there, install it, and then download any additional software requested. You can then connect the controller to your Windows PC and follow the on-screen instructions.
This system works a lot like how you can update and manage Xbox controllers on Windows 10 and Windows 11 with the Xbox Accessories app. That app can be downloaded via the Microsoft Store.
Duplicate files in computers cause performance issues since they use valuable hard drive space, slowing down the entire system.
The more duplicate files there are, the more crowded the system becomes. This may result in poor overall PC performance or files and applications that will no longer open.
Identical files occur for a variety of reasons, and whatever you’re doing on your Windows 11 PC isn’t at the top of the list of reasons.
There are, however, a variety of other third-party software tools that perform an excellent job of decluttering hard disk space.
Firstly, we strongly recommend avoiding removing duplicate files by yourself. We understand that doing so piques your interest in cleaning the PC. But if you do this in the wrong way, it can soon leave your computer unbootable.
The best duplicate file finder will have different functions customized to your needs and wants. Everyone is different and doing various activities on the PC, so we advise you to choose what’s best for you.
Let’s have a look at the options we have for Windows 11 operating system and how those apps can be useful.
Does Windows 11 have a duplicate file finder?
The Windows 11 operating system lacks native features for removing duplicate files. However, there is one we tested available in the Microsoft store that has basic functions if you want to try it.

The Windows 11 PC labels similar graphics as duplicates, so it may be difficult for it to which version of a video or song you consider a copy.
You may also generate an inventory of everything on your computer. Even so, we recommend doing so just for your Music, Pictures, Documents, and Videos folders. Doing it elsewhere will result in thousands of system files you don’t need to modify in this scenario.
A duplicate file finder may discover differences between photos, videos, music, and files with the same content but encoded differently.
Text and documents are generally more straightforward to make a difference since written words can be detected easily.
Which are the best duplicate file finder apps for Windows 11?
Fortect uses advanced scanning technology to detect junk and duplicate files on your machine.
Despite being very thorough, the scanning process only takes a couple of minutes, and then you’ll be able to see a report on everything found.
After that, you’ll just have to select what you want to remove in just a few clicks. The utility is lightweight, fast, and easy to use.
On top of being able to find and remove junk files such as duplicates, installer wizards, and temp files, Fortect can also help you clean your registry and remove malware and malware traces off your PC.
Additionally, it includes some repair features that will ensure your PC and operating system work properly.
Other key features of Fortect include:
Browser Cleanup
Registry optimization
Detects and repairs stability issues
Real-time software and malware monitoring
Fortect
Get rid of duplicate files in just a few clicks with this trustworthy tool.
As an extra feature, Piriform’s free freeware CCleaner includes a duplicate file finder that works great for Windows 11.
Checking the properties of the files will provide the date of creation, as well as some indication of ownership.
The duplicate file finder function in CCleaner is built-in and quickly accessible. You can use the utility to discover and delete duplicate files on a computer since it has essential features.
Following the scanning process, CCleaner will locate all duplicates in your selected folder and list them in detail. These elements include the name, location, size, and creation date of these files.
The truth is that Duplicate Finder is not all included in versions of CCleaner. There are two versions for Windows: Free and Professional.
Fortunately for Windows users, a free trial of the Pro edition is available to test the software before any purchase.
But, if you need to continue using the duplicate file finder, you need to buy the Pro version of CCleaner.
Let’s see some of its key features:
Locate all duplicates in your selected folder and list them in detail
Identifies files by name, location, size, and creation date
Simple and easy to use interface
One-click deletion of duplicate files
Save the report in a TXT file
CCleaner
CCleaner is a utility tool by Piriform that is used to clean up unnecessary files such as junk files on a computer, and a reliable duplicate finder.
WinZip System Utilities Suite can easily locate duplicate files in a folder or directory and it’s compatible with any Windows 11 PC operating system.
You may scan your entire computer or just certain folders. If you need to scan your whole computer, simply press the Scan button to begin your duplicate file search.
When the scan is finished, you will see a list of duplicate files that were discovered. The original file will be left unchecked, but any duplicates discovered will be checked.
Inspect the files, uncheck the ones you don’t need, and then click the Delete button to get rid of them.
If you want to search within a certain directory or folder, you can select a folder to browse and choose it, then select the folder, and scan for what’s identical.
To identify and delete duplicate files, go to the Home screen and select the Maintain tile, then the Duplicate Finder tile.
Take a look at its best features:
Quick scanning process
Advanced file duplicate report features
Localized or broad duplicate file search
Simple and quick deletion
Keeps the original file safe, removing only the duplicates
WinZip Duplicate Finder
Millions of organizations and individuals rely on WinZip to increase productivity, facilitate file sharing, and keep information private.
Copernic Inc. developed the Copernic Desktop Search program, a duplicate file finder that is suited for a Windows 11 PC.
This software helps you to quickly locate files, emails, photos, videos, and other items on your PC.
It may be used in place of Windows Desktop Search to quickly locate e-mails, files, and documents.
The program creates an initial index of your hard disk and provides an easy-to-use search interface that returns results immediately after you enter your term.
Over 150 file types are supported, and the results include image thumbnails for photo matches as well as highlighted keywords in the document preview. Copernic Desktop Search may also search your online browsing history, Contacts, and Favorites.
While both Windows Desktop Search and Google Desktop Search provide excellent PDF search capabilities, they have one major limitation.
The disadvantage is that Copernic is only free for personal use, therefore you can’t use it for office work.
Copernic, like cached web pages in Google search, may highlight all instances of the search word in the content.
You may also explore the discovered document directly from Copernic, without the need for an external reader.
A specific word or phrase is present in a PDF document, but you won’t know where that phrase is located or how frequently it appears in the document. Copernic Desktop Search overcomes this obstacle.
Let’s go through some of its best features:
Quickly locates files, emails, photos, videos, and other items on your PC
Over 150 supported file types
Highlight all instances of the search word in the content
No external reader needed to analyze the files
Advanced content comparison feature
Copernic Desktop Search
Copernic’s comprehensive keyword map allows you to access a plethora of information on your PC in over 150 file types and 11 languages.
Tenorshare Duplicate File Finder can assist you in finding even hidden files and folders in your Windows 11 PC.
It uses a complex MD5 Message-Digest Algorithm to locate files fast and accurately. Using this tool, you may easily remove irritating duplicates such as images, movies, and other data.
Duplicate files may be found and deleted in only three steps. Firstly, download and install Tenorshare Duplicate File Finder on your Windows PC. You may use the mouse to select a folder or a partition to scan.
Secondly, select the gear icon in the bottom left corner to access options for customizing your file search. After you’ve chosen a scan mode, click Scan Duplicates to move on to the next stage.
Tenorshare Duplicate File Finder will show all duplicate files depending on your search parameters after scanning.
The amount and size of each file type are displayed on the right panel. You may preview the file by clicking the eye symbol.
After you’ve selected the duplicate files you want to delete, just click Remove and they will be gone.
This software makes it simple to find duplicate files in Windows 11. You may easily clean up troublesome copies, such as images, recordings, noises, reports, and other documents.
You will benefit from these best features:
File preview option
Advanced search parameters capability
Complex MD5 Message-Digest Algorithm for duplicate file identification
Simple and friendly interface
Great file type segmentation
Tenorshare Duplicate File Deleter
Organize images, movies, audio, documents, and other items to simplify file searching, save up storage space, and increase speed.
Quick Search is a free local search application that allows users to rapidly find files or folders using key terms. It is a much quicker and more user-friendly alternative to Windows 11 Search.
When you type key letters, it searches and presents real-time search results. Quick Search has a simple UI and a search filter to restrict the search range and narrow the search results for greater working productivity.
Several new features have recently been implemented, like using keywords to find files and directories. Rapid file indexing and searching are quick and real-time.
Quick Search has a search filter that allows you to limit the search range and narrow down the search results for greater working efficiency.
Enter a partial file or folder name into the search area, and the results will be shown immediately.
You may filter the list of files by name, path, and type using the Search field in the upper right corner of the main window.
When you type some letters into the Search area, you will see the number of linked files that fit the search parameters in real-time directly below.
Take a look at its most important features:
Uses keywords to find files and folders
Rapid file indexing and searching
Filters the list of files by name, path, and type
Lots of file types supported, including shortcuts
Minimal footprint on your system
Quick Search by Glarysoft
Quick Search by Glarysoft is using minimal resource consumption and it’s simple to use, with a straightforward user interface.
Wise JetSearch is a simple tool for finding files on your Windows 11 computer.
You may have hundreds of files on your computer, and it may be hard to trace the one file you are looking for, especially if the Microsoft Windows search feature does not find it.
Wise JetSearch is a free search application that is a superior search software. The software is quick and simple to use, supports wild card searches, and can search all disks on your computer, even portable devices.
The tool will provide the search results, including file/folder name, path, size, and latest changed date. A right-click can also give you a quick and easy way to deal with the file/folder you found.
It allows you to define the file you’re looking for as well as some wildcard keywords. If you don’t know what the file/folder name is, you can use * or ? to fill in the blanks with letters you don’t recall.
You also have the choice of a wild card selection, such as photographs, movies, archives, email, and so on. You may pick one file type, and it will automatically fill in the required wild card text in the form.
Let’s review some of its key features below:
Extensive search options
Supports wild card searches
Quick and easy to master
The search results include file and folder names, path, size, and latest changed date
Can search on all your internal and external drives
Wise JetSearch
Quickly search for files, movies, photos, and music on local and removable disks, including FAT and exFAT drives.
Auslogics Duplicate File Finder is a free tool that locates and deletes duplicate photographs, music, movies, and other files on Windows 11 and older versions of the operating system.
It appears to be simple to use, and it works with images, music, video, and nearly anything else.
The tool has been around for a long time and claims to improve disk space by up to 50% by deleting useless duplicate files, identical photos, documents, and any other files.

The files are compared not just by their titles, but also by their contents. This program may also be used to manage media collections by removing unnecessary files.
When duplicate files are deleted, the time required for hard drive defragmentation is reduced.
The Auslogics Duplicate File Finder employs the MD5 search engine, which allows users to search for files based solely on their content, without regard for additional match criteria.
Let’s go through some of its best features:
Locates and deletes duplicate photographs, music, movies, and other files
Helps you manage media collections
Title and contents comparison
Built-in MD5 search engine
Advanced file type segmentation
Auslogics Duplicate File Finder
This File Finder will assist you in removing unnecessary file duplicates to save up disk space and better organize your file collections, giving you complete control.
TextCrawler is an excellent program that works great in Windows 11and for everyone who deals with text files.
This robust tool allows you to search for and change words and phrases across many files and directories in real-time.
It makes use of a versatile Regular Expression engine to allow you to execute complicated searches, preview replace, perform batch operations, extract text from files, and more.
It’s quick and simple to use, and it’s as reliable as you need it to be. The Find and Replace function is one of the most useful tools of any text editor worthy of your attention.
This is generally quite useful when working on the same page, but what if you want to edit the same term or value in many documents?
The first option is to open each document and use Find and Replace in each one, while the second is to install TextCrawler.
You just need to choose the folder containing the files to be modified, specify the format, text, or docx, and the words or values to be replaced.
As a result, the application is particularly useful for altering variables inside source code across several web pages.
The application removes the need for you to open each document that you want to modify.
Let’s see some of its best features:
Instantly find and replace words and phrases across multiple files and folders
Built-in flexible Regular Expression engine
Create sophisticated searches, preview replace and perform batch operations
Is it safe to use duplicate file finder apps in Windows 11?
Using a duplicate file finder on your Windows 11 PC is safe and secure, but there are a few things to consider before dealing with it.
Files should be removed in a secure manner. Select the option to move unwanted duplicates to the Recycle Bin. With this method, you may simply retrieve data that have been accidentally deleted.
Make the most of your customizability possibilities. All duplicate file finders include a variety of filtering and action options. They can help you increase productivity and avoid accidental file deletion.
Make a backup of your files. It is not required; however, it is a recommended practice before performing any file cleanup procedures. You may back up your data to a separate disc or use cloud storage.
Important folders should be excluded. We recommend voiding directories and system files from scanning if you wish to check your whole hard drive for duplicate files.
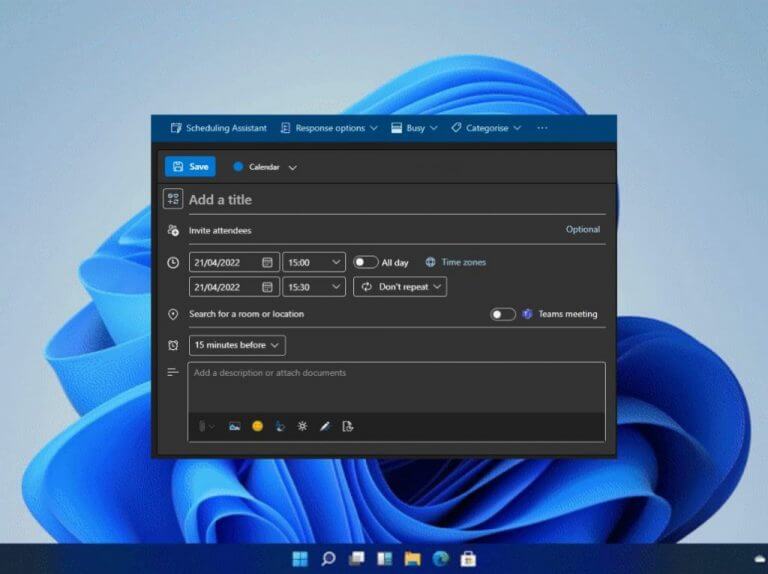
So, there you have it, the best duplicate file finders for your Windows 11 computer.
It is important not to delete anything from the operating system’s directories. Since this might have a negative influence on the stability and performance of your computer, go on the safe side.
Finally, because virtually all commercial solutions provide a free trial or demo, we recommend giving them a go and choosing what works best for you.
The unofficial tool, called JoyDance, was made by a Redditor going by the username redphx who posted a video of the tool in action. According the the post, JoyDance also works with Google Stadia and PlayStation consoles in allowing use of the JoyCons with Just Dance. Reportedly the tool works perfectly with no latency, and can support up to six players.
Seeing as how the Kinect did make a return for the next-gen Series X/S, players wanting the kinesthetic experience of the game had until now had to resort to using their smart phones. The ability to use JoyCons provides a better alternative for most.
JoyDance is available to download on GitHub. But be forewarned: the installation process is apparently a complicated one, so be sure to check the README for requirements and instructions.
Error code 0xc0000409 can be the result of a known issue with the new Windows 10 Insider Preview Build 19624. Microsoft reported that they are looking into this issue with some users not able to update to this build with error code 0xc0000409. If you experience this error, you should pause updating until a future fix.
Error code 0xc0000409 may also refer to a critical error in Windows 10 and usually has to do with a registry entry that might have become corrupted.
No matter how overwhelming the error might seem to be, getting around it is rather easy.
How can I fix Windows 10 error code 0xc0000409?
1. Create an installation media
You will need the installation media of Windows 10 (either an ISO file or USB) to get started.
The installation media should be of the same edition and same (or newer) build as the one already installed on your PC. Even the language of the installation media has to be the same as that of the Windows 10 version on your PC.
If you have 32-bit Windows 10installed on your device, ensure you are using a 32-bit ISO. Another requisite is that there should be about 9 GB of free space available in the hard disk for the refresh process to complete successfully.
A repair install won’t delete any of your information even though you will lose all the Windows 10 updates that got installed.
Before we begin with the process, disable, or uninstall any third-party anti-virus software installed on your device.
2. Performing Windows 10 repair install
Open the Windows 10installation media be it an ISO file or a USB drive.
Run setup.exe for the Windows 10 Setup process to begin.
Click on Yes on the User Account Control window that opens.
In the Windows 10 Setup screen that opens, opt for the Upgrade this PC now option and click on Next.
You will get to the see Windows getting prepared with a percentage meter showing the progress.
Click on Download and install updates in the next page that opens. Click on Next.
The Windows 10 Setup will progress and will also lead to your PC restarting during the process.
Accept the notices and license terms, for obvious reasons.
In the Ready to install page that opens, click on Install.
Make sure Install Windows 10 Home and Keep personal files and apps are selected.
Once the repair installation is completed, you will be prompted to log in.
Follow on-screen instructions for setting time zones, present time, and so on.
That’s it. Your system is now ready with a fresh installation of Windows 10 which hopefully is devoid of all the errors present in the previous installation.
3. Utilize a PC repairing software
In case you want to resolve the 0xc0000409 Windows 10 error, there is specialized software to offer valuable support.
You can fix registry key problems on your PC more efficiently with an expert repairing and optimization tool. They can scan your system, identify problematic files and either fix them or replace them. All in just a few minutes.
If you meet with a Windows 10 error, you will find the solution in our Windows 10 Errors Hub.
We hope that this new problem doesn’t give you too many headaches but if you have any suggestions or questions, please let us know about them in the comments section below.
In a bid to deprecate the outdated and unsafe SMB1 file sharing technology on Windows, Microsoft has announced a new milestone moment. Indeed, as shared on the Microsoft Tech Community, Microsoft now says that SMB1 is now disabled by default for Windows 11 Home Insiders builds.
What this means is that heading into the near future, any Windows 11 Insiders interested in using the technology in legacy situations will have to manually enable it through the Turn Windows features on or off option. However, Microsoft is also planning to remove SMB1 binaries in a future Windows 11 release, too. For these folks, Microsoft will provide an out-of-band unsupported install package for organizations or users that still need SMB1 to connect to old factory machinery, medical gear, and consumer technology.
SMB1 technology was first deprecated by Microsoft in the Windows 10 Fall Creators Update, where it was not installed by default. Home and Pro versions, though, did have the option to re-enable it.
You may not be familiar with the name Chris Novak, but you’ve experienced the fruits of his work if you have used Xbox Game Pass, Xbox Live or Xbox Cloud Gaming. As head of Xbox research and design, Novak was responsible for directing user experience for a range of Xbox related products and features from cloud gaming to achievements. Here’s his LinkedIn post announcing the resignation:
Novak had held the role for over 5 years. Before that he held the positions of Xbox design director and Xbox design architect. Upon stepping into the head of research and design role, Novak had a major hand in creating the Xbox Play Anywhere feature – a cross-buy program which allows users to purchase and play certain games between Xbox One and Windows 10 PC – as well as the Touch Adaptation Kit for Xbox Cloud Gaming. Novak has listed these as some of his proudest accomplishments in his 20 years with Xbox.
Novak has said that he wants to take time off to learn new things, rather than going to another company, at least for the time being.
If your Acer Swift 3 laptop microphone is not detected and there’s no sound, this can be annoying.
While the microphone shows active, you simply don’t hear any sounds while playing or recording audio, playing games on apps like Discord, or communicating on Skype.
There could be different reasons that may trigger this issue, some of the common ones include outdated or corrupt drivers, etc.
This post will cover all these issues and more and offer you different solutions to fix the Acer Swift 3 built-in microphone not working issue.
What can I do if the Acer Swift 3 Microphone is not detected?
1. Run the Recording Audio troubleshooter
Press the Win + I keys together on your keyboard to launch the Settings app and click on Systems.
Now, on the right side look for Troubleshooter and click on it.
On the next screen, on the right side, select Other trouble-shooters.
Next, on the right side, click on Run next to Recording Audio.
Wait for the troubleshooter to detect any issues with the microphone.
Follow the on-screen instructions to fix the issue automatically.
This is a basic step that should you must follow even before you try any other methods. Once done, your laptop microphone should be working now.
2. Check the microphone privacy settings
Press the Win + I shortcut key to open the Settings app and click on Privacy & Security.
On the right, under App permissions, click on Microphone.
Now, turn on the option – Let apps access your Microphone.
Go to the Microsoft store apps in the list and turn on the microphone for the desired app.
Navigate to Let desktop apps access your microphone and turn it on.
Close the Settings app and now check if your Acer Swift 3 microphone is working.
3. Check if the microphone is enabled
Right-click on Start and select Device Manager.
Expand the Audio inputs and outputs section, right-click on the built-in microphone, and select Enable (if it shows disabled).
Skip the above two steps if it’s already active and continue with the below steps
Press the Win +R keys simultaneously and the Run console opens.
Type mmsys.cpl in the search bar and hit Enter.
In the Sound dialogue box, go to the Recording tab. Here, right-click on the active microphone and check for an arrow pointing downwards. Select Enable.
Now, close the window, reboot your PC and check if the microphone is working on your Acer Swift 3 laptop.
4. Set as the default recording device
Right-click the Start button and select Run to open the Run console.
In the search box, type mmsys.cpl in the search bar and press Enter to open the Sound dialogue box.
Under the Recording tab, check which microphone has the green checkmark. This means that this device is set as default.
If the correct microphone is not set as default, right-click on the preferred device and select Set as the Default Communication Device. Press Apply and OK to save changes and exit.
Now, test your microphone and see if it’s working.
Go to Start, right-click and select Device Manager. Now look for Audio inputs and outputs.
Right-click on it and select Update driver.
In the Update Drivers screen, click on Search automatically for drivers.
Wait till Windows finds and recommends a new driver. Follow the on-screen instructions to finish the installation.
Close Device Manager and reboot your PC. Check if the Acer Swift microphone not detected issue still persists.
It could be possible that the microphone is not detected on your Acer Swift 3 laptop due to outdated drivers. Hence, updating the driver may help resolve the issue.
Sometimes, manually updating drivers can be time-consuming. If you are looking for an automated solution to update your drivers faster and safely without any risk to harm your PC, we recommend you Outbyte Driver Updater, a third-party tool that can update, fix, or replace drivers automatically.
Additionally, you can also uninstall and reinstall the driver to check if it helps fix the issue. You can also test your microphone levels to make sure it’s set correctly.
If all the above methods fail, you can perform a repair install using a Windows installation media. This will help you replace all the Windows files with healthy ones and ensure that the Acer Swift 3 microphone is working.
Let us know in the comments section below which of the solutions worked for you.
If you have recently reinstalled the Windows OS, upgraded to Windows 11, or installed the latest Windows update, you may come across an unexpected SMBus controller error in the device manager.
The Intel SMBus Controller is a chipset on the computer’s motherboard that monitors the motherboard’s voltage and temperature.
A yellow triangle with an exclamation mark next to the SMBus Controller driver means that Windows does not recognize the hardware. This indicates a driver issue, for instance, an outdated or missing driver. Fortunately, this can be fixed easily.
What is the reason for the SMBus controller error?
The Intel Chipset Device software does not install device drivers for the Intel SMBus Controller and this leads to the error (the yellow exclamation mark).
This prevents the current SMBus Controller to transmit device and hardware information to the OS.
The error prevents the driver to display the correct name for the specific hardware in Device Manager.
This post will highlight a few solutions that may help you fix the SMBus controller not recognized in the device manager error.
How can I fix the SMBus controller not recognized error?
1. Roll back to the previous Intel SMBus Controller driver
Press the Win +R keys together to launch the Run console.
Type devmgmt.msc in the search field and hit Enter to open the Device Manager window.
Here, go to System Devices, expand the section, right-click on the SMBus Controller device, and select Properties.
Now, in the SMBus Controller Properties dialogue box, navigate to the Driver tab. Click on the Roll Back Driver button.
Once done, press OK to save changes.
Exit Device Manager, reboot your PC, and now check if the SMBus Controller driver issue is resolved.
NOTE
If you do not find System Devices in the Device Manager, click on the View tab at the top and click on Drivers by type. You should now see the System Devices section.
It will take you to theIntel Downloads Center. Here, type chipsets in the search field and press Enter.
On the next screen, from the left pane (Filter By), go to Download Type and select Drivers.
Next, under the Operating System, select your Windows OS, for example, Windows 11.
Now, on the right side, click on View Details for the latest chipset driver software links and check the date.
If it’s the latest, click on the Download link to download the zip folder.
Open the Zip folder, select the .exe file, and click on Extract to at the top to extract the setup file to your desired location, for instance, to the Desktop.
Go to desktop or the location where you extracted and double-click to run the file.
Follow the on-screen instructions to install the latest chipset driver.
Once done, restart your PC and check if the SMBus controller not recognized in the device manager error is gone.
Go to Start, right-click and select Device Manager.
Expand the System Devices section in Device Manager, right-click on SMBus Controller device, and select Update driver.
Now, in the new window, click on Browse my computer for drivers.
Next, select Let me pick from a list of available drivers on my computer.
On the next screen, select the correct Manufacturer on the left column and the SMBUS Controller Driver under the Model column on the right.
For example, if your PC supports an Intel motherboard, select Intel as Manufacturer and SMBus controller as Model.
Press Next to install the select driver.
Once done, close the Device Manager, restart your system and check if the SMBus controller not recognized issue is resolved.
An outdated, corrupt, or missing driver can trigger an error and prevent the related device to malfunction on your Windows PC.
To make things easier, you can use driver detector software to find missing drivers, detect drivers and automatically install them for you.
Otherwise, you have another effective method to update or install new driver versions on your PC.
Outbyte Driver Updater is a driver updater and troubleshooting software capable to manage all your drivers, updating them with the official versions from its manufacturers.
This automated tool will scan the entire system for outdated or broken drivers and proceed to update them in just a few minutes.
Memory_corruption BSOD Windows 11 error is an annoying display that interrupts your work or game and reboots the system. It is both painful and frustrating.
The issue of Blue Screen Of Death (BSOD) is not peculiar to a specific version of Windows installed on your PC.
This is why there has been users’ report of memory_corruption BSOD in Windows 11. We have taken our time to compile different ways to resolve the problem.
Why does my PC experience memory_corruption BSOD in Windows 11?
Users who are familiar with the progress of the Microsoft Windows build will observe that the Blue Screen Of Death (BSOD) is a bit different on some Windows, instead of Blue, it is Black; thus Black Screen Of Death (BSOD). There have been reports of Green Screen of Death in the recent beta version of Windows 11.
Technically, BSOD is designed by Microsoft to protect your computer from significant damage. This is the reason for its name stop error. It seldomly occurs but when it is consistent, then you need to worry.
Aside from memory_corruption or error with RAM, other issues that may trigger BSOD include corrupted drivers, incompatible software, and malware/ransomware, among other things.
Irrespective of the cause, we have taken our time to explain in this article, how to get rid of BSOD and reclaim your system.
How can I fix memory_corruption BSOD in Windows 11?
1. Restart your system
The BSOD may not have been triggered by a major issue. Before you start the more sophisticated fix methods, perform a simple restart. Users have confirmed this fixed the issue.
There is no special technicality to do this. You only need to restart the system like you would normally. Shutting down and then booting again will work too.
2. Check for Windows Update
Open Run with Windows key + R.
Type control update to launch the Windows Update.
Check for updates. If any is available download, then Restart to install.
3. Fix corrupt files with a third-party tool
As stated earlier, the reason you are experiencing memory_corruption BSOD Windows 11 might be because of corrupted files on your system. You can fix this using third-party tools programmed for the purpose.
You may use them to check and restore any damaged Windows files on your system, as well as secure real-time protection that safeguards your computer from dangerous applications before they cause any damage.
3. Run the troubleshooter
Launch Windows search by left-clicking on theWindows logo icon in your Taskbar.
Type Troubleshoot, then select Troubleshoot settings or click on the Open option.
If you can’t find any Recommended troubleshooters, select Other troubleshooters.
Scroll to find and locate Program Compatibility Troubleshooter. Click on Run to launch.
Allow the system to complete scan and display reports.
4. Check the computer for memory problems
Launch the Windows search. Type Memory, then press Enter.
Click on Windows Memory Diagnostic, then Run as administrator.
Select Restart now and check problems (recommended) to Check your computer for memory problems.
Make sure you have all your works saved before performing this action because it will restart the system.
5. Scan disk for error
Open File Explorer by pressing Windows key + E.
Locate and click on This PC on the left side of the Window.
Right-click on the system main drive (usually C:). Select Properties.
Click Tools then select Check.
You may get a pop-up notification saying You don’t need to scan this drive. Select Scan drive.
Check the scan results for errors. Follow the system prompts to fix them.
6. Check for corrupted files with an SFC scan
Type cmd in Windows search. Right-click on Command Prompt or select Run as administrator.
Paste the command below or copy and paste: sfc /scannow Ensure the command is spaced accordingly as above.
Wait for the system to complete Verification. Check if it is able to fix any corrupted files.
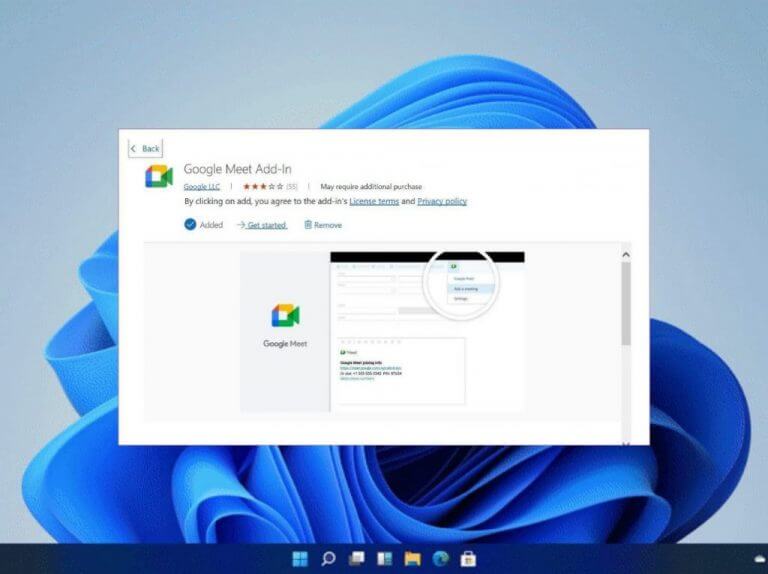
Restart your laptop.
The System File Checker (SFN) comes with your Windows operating system. It is designed to help find and fix corrupt files that might be hindering the proper functioning of the PC such as in the case of memory_corruption BSOD Windows 11.
Click on Windows Security in the displayed results or select Open in the panel to the right after focusing your mouse on the preferred option.
Under the Security at a glance, select Virus & threat protection.
For this purpose, ignore the Quick scan and instead select Scan options.
Choose Microsoft Defender Offline Scan, then select Scan now. This may take about 15 minutes and your system is sure would restart.
Malware is unpredictable such that you can only guess what it could do but never exactly how it will impact your system operation. This method will help you detect the culprit.
As a double attack against any malware that might have infected your precious system, after the scanning method explained above, you can also use third-party anti-malware software to fish out any other hidden malware.
8. Uninstall the latest updates
Press Windows key + I to launch Settings.
Select Windows Update. Next, click Update history.
Scroll to find and select Uninstall updates.
Right-click on recent updates installed before the system started experiencing BSOD. Select Uninstall.
9. Update drivers
Launch Run by pressing Windows key + R.
Type the command below or copy and paste: devmgmt.msc
Click OK or tap Enter.
Under Network adapters, right-click on Realtek device. Select Uninstall device.
When you get Warning: You are about to uninstall this device from your system, choose Uninstall.
We included this fix because some users disclosed that Realtek Wireless USB 2.0 adapter driver was the cause of their BSOD. If the issue is the same for you, the process explained above should help solve it.
You can try Outbyte Driver Updater, a third-party tool that makes the process seamless. It is capable of fixing any other driver issue on your system.
Any combination of the methods highlighted so far should be able to help you resolve your memory_corruption BSOD Windows 11 issue.
Let’s know the one that works for you in the comment section. We would also be glad to help in case you have any other issues. Don’t forget to share any other method that worked for you, in case you found another way.
Microsoft announced that they will be holding an event on April 20 dubbed Project Management for a Connected World. It is geared toward helping users learn how to make the most out of Microsoft Planner, Microsoft Project, and Dynamics 365 Project Operations. Essentially, they are in place to help users stay organized and ultimately help them deliver projects both effectively and efficiently.
During the event, users will not only learn about how to make the most out of Microsoft’s connected experiences but also get to create their own schedules. This way the users will get a tailored experience that will be tuned to meet their expectations.
Moreover, users will also have the opportunity to interact with Microsoft product engineers and decipher how the updates made can be leveraged to elevate their businesses to the next level. Besides, there will also be an interactive Q&A chat for each session where you will get to ask as many questions as you want and get real-time responses. “You’ll also get to delve into how the product roadmaps will meet the needs of a more complex hybrid workplace.”
Users will get to go through the previous update releases, and get a glimpse of what is in store for these project management products through the product roadmap. In the grand scheme of things, this move will help “drive more collaboration and visibility across your projects”
At the end of it all, users should be able to identify which project management product is best suited for their businesses, thus, optimizing operations. Be sure to register for the event to experience all these and more.
It is normal to experience code error b4 while taking a test through the browser. To mitigate such errors, you can check the security settings in IE and the overall functionality of the IE. You should ensure the IE is reset to default security levels and try the exams again.
The web app is available for both Windows and Mac. It locks down the testing environment within the Blackboard so that the students cannot print, copy, go to URL, or access other applications.
The students are locked in the program during an assessment until they submit it for grading.
LockDown uses the same HTML engine, system components, and settings as Microsoft Edge and Macintosh. It functions much like a standard browser, though with a few options removed.
It would help if you only used it for testing. If you use the software to access additional coarse content like worksheets and lecture notes, the program may encounter problems.
The error can occur when the instructor changes the exams or edits the settings after enabling it. Where the LockDown Browser has already been enabled, here is how to make changes to an exam.
Whenever you update a new version of this Respondus software, installing all necessary system updates is essential to ensure your system is up to date. Also, ensure you have the latest version of Microsoft Edge for Windows users and Safari for Mac.
How does the Respondus LockDown Browser work?
You should know how to enable the LockDown Browser Building Block as a requirement for individual exams to use it.
The software works in the following ways:
Assessments are displayed full screen and cannot be minimized
Browser menu and toolbar options are removed except for the Back, Forward, Refresh, and Stop options
Printing and screen capture functions are disabled
Access to other applications like messaging, screen sharing, virtual machines, and remote desktops is prevented
Copying and pasting anything to or from an assessment is prevented
Right-click menu options, function keys, keyboard shortcuts, and task switching are disabled
The LockDown Browser is effective in its operations. It detects everything you do during the test. Any attempts to cheat or use blocked functions can raise the alarm for close monitoring.
How do I fix the Respondus LockDown Browser error code b5?
1. Fix the error for instructors
Log in to Blackboard and navigate your course.
Look under the Course Management menu, expand the Course Tools menu, and click the Respondus LockDown Browser.
Click Continue to LockDown Browser to Open the Respondus Dashboard.
Locate the test with the associated error.
Fix the error by clicking the Fix button.
The exam integration has been repaired, and students can reaccess the test.
2. Fix the error for students
Click the Start Menu icon.
Access the Control Panel, go to the Network and Internet option.
Click the Internet Options.
Make sure the settings are no higher than medium on the Security tab.
Under Reset Internet Explorer settings, click Reset.
Click Delete Personal Settings in the pop-up window on the Advanced tab.
Restart the computer and try to reaccess the exam dashboard.
Ensure you open the exam with Respondus LockDown Browser with all other applications closed before you begin. Also, ensure the URL is set to blackboard.UND.edu and not blackboard.NDUS.edu.
This web app can detect when conflicting programs are still running in a system, and it will request you to close these programs.
Some programs like Dell Dock and Google Toolbar run as background processes, and to proceed in the LockDown, you will have to shut them down.
Some programs can cause the Browser to lock up or stop responding. Programs that use Java or the Internet iTunes and other media programs, file sharing agents like Bittorent, and instant messenger applications have a higher risk of causing the web app to lock up.
While taking an exam, you can lose the Internet connection, and LockDown may stop responding. To resolve the issue, shut down the system by unplugging all power from the computer, including the power cables.
This Respondus program is a great web tool. Institutions can protect the integrity of their online exams, and students can undertake tests easily within the learning management system. You can also check the best browsers for E-learning.
The above fixes for the software help you resolve the error issues effectively. You can also check more information on how to install the LockDown Browser.
Let us know which one of the fixes worked for you. Feel free to tell us by leaving a message in the comment section.
Cloud storage is proving to be more than just a place where you can store volumes of data and files.

Today, you can move around your office virtually, no matter the location, and access any of your files and/or data from your computer or device.
What’s more, it can be used by individuals, or small and large organizations alike, saving you time, stress, and costs that come with finding storage devices (which you also have to keep carrying around), and this can be cumbersome.
Cloud is a SaaS (Software as a Service) solution, which you can get either for free or subscribe to paid versions for more features if you like.
However, there is free cloud software for Windows that you can use, which offers a wide variety of features from storage, to syncing data, work team collaboration, and so much more.
This article looks at the top 7+ free cloud software for Windows OS to get you started.
What are the best free cloud tools for Windows 10?
This tool is amazing as it offers you 5 GB of free storage when you sign in on their website. After that, all users that want to get more storage space (if they are satisfied with the service), can pay a fee.
For all of you who want some essential files that are not bigger than 5 GB to be safe – this is the perfect spot.
You will have guaranteed protection as the files are encrypted when downloaded, so even if someone wants to steal them, they will be useless as its end-to-end encryption will not allow this.
You will also be able to share your files with other persons even if they do not have a Sync account.
Sync also supports teamwork so you can let other persons work on the same documents and have total control of their actions to keep the work progressing.
You will access your files from any device and from any location – all you will need is an active internet connection. We strongly recommend this cloud software with its start-free storage.
Sync.com
The Sync platform and apps provide ground-breaking privacy-protection frameworks that limit the amount of personal information which may be accessed.
pCloud is another effective cloud storage solution for personal use on Windows platforms. With a one-time payment, you receive military-grade encryption, speedy file sharing with block-level sync, low pricing options, and up to 10 GB of free storage for starters.
All PCs and browsers are available, mobile devices are used to download music and video, Facebook and Instagram connection is enabled, and links can be downloaded and uploaded quickly.
It also offers a 30-day free trial, which we recommend to test it before deciding to cloud storage for personal files.

Fast file sharing with block-level sync enables you to attach an external drive to your computer without fear of data loss, or virus attacks.
The pCloud development team is certain that they have created client-side encryption software that is impenetrable to hackers. To demonstrate this, they challenged hackers from all around the world.
Participants from major universities such as Berkeley, Boston, MIT, and 613 other organizations tested the encryption technology.
None of them were successful, and this is a significant step for a cloud service, so you can be confident that your personal data is safely stored.
pCloud
Want your data to be as secure as possible? Simply upload them to their Crypto folder with pCloud.
If you’re looking for a safe home for your data, easy accessibility to your files and information, privacy, a transparent and growing community you can share with for constant improvements, collaboration and scalability, then this is the best free cloud software for Windows you can choose.
Features include access to all your files from any device and/or location, sharing options with other users including password protection for public links, security for self-hosted file sync and sharing, workflow management to control and direct data flow between users or servers, easy tracking of changes or modifications, and tracking of downloads of shares, or comments to your files.
Through its Monitoring app, you can monitor the health and performance of your cloud system using a graphical interface and API endpoint.
You can also monitor activity for mobile and desktop clients, encrypt data with the Encryption app, and share your calendar or contacts with other users.
You can operate your own audio/video communication in a secure environment, and invite others to collaborate in a group – this cannot be intercepted, not even by the server administrator.
It also has the Collabora Online feature, a powerful office suite that supports most major document, spreadsheet, and presentation formats including DOC, DOCX, PPT, PPTX, XLS, XLSX, and much more.
In this feature are editing options for collaborative editing when several people edit simultaneously from their browser, plus WYSIWYG rendering and preserving document layout and formatting.
We suggest Mega.io as a cloud storage provider if I need to upload a large file to a server. When you join up for the online cloud for the first time, you get 20 GB of free storage to manage your private or business data folders.
You can also download a desktop application for your Windows PC that allows you to upload huge files in the background.
This way, you can start the file transfer once and continue using your computer while it uploads the files to the server.
Mega cloud storage allows you to pause and resume uploads, so if your internet service goes down while you’re uploading, the software will let you resume the file once the internet is restored.
Mega generates a folder on your PC called mega sync; everything you put in there will be instantly synchronized with the cloud and any other PCs linked to that account.
This can greatly simplify things. If you employ several computers, such as at work and at home. Mega has a great level of security and quick transmission rates.
It is a dependable service with out-of-the-box end-to-end encryption. Mega is an excellent choice for both individual and company use.
MEGA Mobile Apps put MEGA’s power at your fingertips, allowing you to access all of your data at all times. MEGA Mobile Apps make it simple to access, view, and share files that were not originally uploaded from your mobile device.
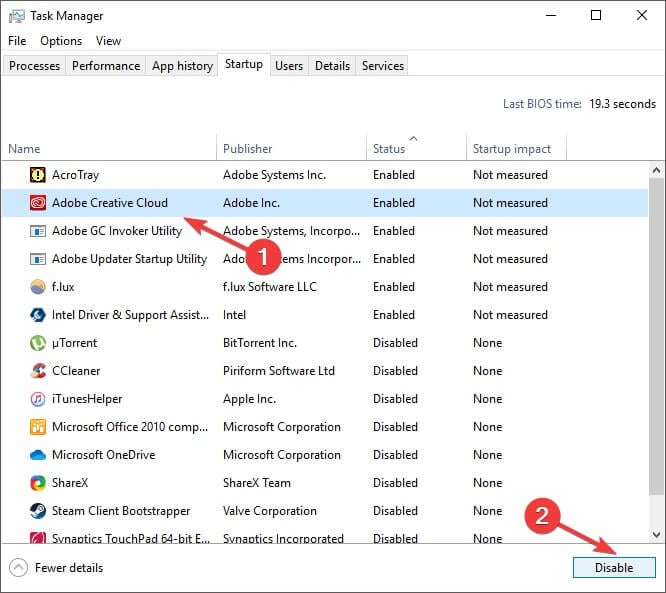
There’s so much you can do when you have your own cloud storage, and this free cloud software for Windows promises a safe home for all your data. With ownCloud, you can access your data, and share files or calendars and contacts or mail from any device.
Developed in a transparent and inviting way, this cloud software keeps your files secure, and private and offers flexibility for all your digital needs.
You can access your data through a web interface, sync clients, or WebDAV on a platform where you can view, sync, and share across multiple devices under your control.
Store your private digital media files, documents, and contacts on your server, a rented VPS or public OwnCloud providers, and access your data on an FTP drive when at work, or images shared via Dropbox through your OwnCloud server.
Features include data access from any device and any location, sharing editing and collaborating options including password-protected public links, video calling, flexible external storage, mobile and desktop syncing, activity feed, and notifications to keep you updated.
Other features include versioning and undelete features, galleries for digital media, and playing music or watching movies using the Music and Streaming apps, plus integration of antivirus scanning with the antivirus app.
For secure file control, sharing, and management, this free cloud software for Windows is your best bet.
Pydio offers a web-rich application so you can preview the most common file formats, with a comprehensive sync and share solution for team collaboration through its software that is deployed either on-premise or in a private cloud.
Features include access from computers and mobile devices, desktop sync apps, advanced sharing like password protection or download and sharing time limits, customizable user interface, secure management, and control of access to your data and files by deploying it on your own infrastructure with easy integration.
You also get real-time monitoring and a dashboard you can manage from, plus professional support for troubleshooting issues.
Other features include connection to many storage systems and user directories such as OneDrive, Dropbox, LDAP, SHIBBOLETH, AD, RADIUS, and many others.
It also comes with the Collabora Online feature, a powerful office suite that supports most major document, spreadsheet, and presentation formats including DOC, DOCX, PPT, PPTX, XLS, XLSX, and much more. In this feature are editing options for collaborative editing when several people edit simultaneously from their browser.
You can also share and collaborate across clouds as though you were on the same server. Through the File Gateway tool, you can serve public links through a dedicated URL and avoid showing your own server address, thus there’s improved security for your infrastructure.
This is another free cloud software for Windows that offers to sync and sharing options with high reliability and performance.
It is an enterprise file hosting platform that lets you put files on your server and organize them into libraries that can be encrypted by a password you choose before syncing, and access or share and sync them as a virtual disk, thus improving your productivity.
You can also access files in the cloud from your local drive without syncing them, which ideally extends the disk space with the huge storage on the server, and you can use them offline as well.
Seafile is easy to upgrade via a simple script, plus you don’t need a huge database upgrade as it records a few items in it.
It is also enterprise-ready with AD/LDAP integration, group syncing, and fine-grained permission control so you can apply it to your enterprise easily.
When it comes to safety and security, Seafile is known to provide a reliable syncing tool, with more than 3 years of polishing its algorithm which is stable and reliable, plus works in extreme situations and guarantees no data loss.
Features include cross-platform or device file syncing, mobile access to your files, extension of local disk space using Drive client, file sharing and permission control, file versioning, and snapshot for folders.
Additionally, you also gain access to file locking to prevent concurrent editing and conflicts, online editing and co-authoring, audit logs so you can monitor your system and user activity. and more.
This is pretty simple to use, free cloud software for Windows.
It offers unlimited storage because the files are kept on your own infrastructure, simplicity of installation with its one-click AeroFS client installation which takes up to 5 minutes and gives automated updates, and your own private cloud so you can use it to deploy the software 100% privately.
It is easy to use, plus secure for file syncing and sharing as your data is on your infrastructure. AeroFS never stores your files, meaning you can maintain control, centralized security, administration, and remote wipe capabilities.
Data and files are protected with an end-to-end in transit AES 256-bit encryption.
You also get to share and sync files once you drop them in the AeroFS folder, track changes easily with version history, integrate with LDAP/AD/Open ID that simplifies sign-on and also use familiar shortcuts, menus, and right-click options with your existing workflow.
With this free cloud software for Windows, you can sync your digital files whether it is photos, music, videos or other documents to any device.
Features include the One Time Send PRO, which is the fastest, most private way to send files to multiple recipients without sharing the full folder, or creating a permanent sync connection.
You can also sync folders automatically to all devices and they are automatically available on all linked devices, change access permissions or assign ownership and revoke access on the fly using Advanced Folders feature, or use the Selective Sync feature to download what you need without replicating the entire folders on each device.
This software also lets you control bandwidth usage, keeps your files safe through automatic backups and disaster recovery sites you create, sends large files very fast, access files on the go, and use it on any device as it is available for different operating systems and multiple platforms.
This free cloud software for Windows replaces proprietary sync and cloud services with an open, trustworthy, and decentralized one.
With this software, your data is yours, and you determine where to store it and how to share or transmit it over the internet.
It is secure and private, but you can use encryption and authentication features to perfect forward secrecy, prevent eavesdroppers, and allow explicit permissions to your cluster.
It is easy to use, with features such as the Web GUI which you can configure and monitor the software via your browser. It is also portable as you can run it on your computer or devices, plus it is simple with no need for IP addresses or advanced configuration. You can also synchronize as many folders as you want with different users.
Is it safe to use cloud storage for personal files?
Yes, your data is secure in the cloud—probably far more secure than it is on your own hard drive. Files are also straightforward to access and maintain. Cloud services, on the other hand, ultimately place your data in the hands of third parties.
This isn’t a big concern if you don’t care about your privacy. However, if you have sensitive information that you’d like to keep hidden from prying eyes, it’s best to keep it on a different hard drive from your home computer.
The services recommended above are also good if you’re interested in the following topics:
Free cloud server software – All the services listed can be used or tried for free
Free cloud backup software – All entries on this list can be used for backing up personal data
Have you settled on one of these free cloud software for Windows, or is there one you’re currently using that you’d like to share? Let us know your choice by dropping your comment in the section below.
The SolarWinds Custom Query error processing the request appears in the Orion Web Console in connection to one or more widgets. Now, SolarWinds errors are by no means a novelty.
SAM, VAMI, Orion – here are 3 intriguing terms at a first glance. We feel these concepts require a bit of context before we deal with the actual troubleshooting, don’t you agree? If so, read on.
What is Orion in SolarWinds?
SolarWinds is mistakenly perceived as an exclusive network monitoring program. While NMP (Network Performance Monitor) is an SNMP monitoring-based industry-leading tool that supports the detection, diagnostic, and resolution of network performance issues and outages, there is more to it than meets the eye.
In fact, SolarWinds delivers a full-scale integrated and highly versatile IT monitoring platform that includes powerful management tools designed to optimize enterprises’ IT infrastructure.
Its expertise covers numerous sectors such as cloud monitoring and performance tools, network surveillance and configuration software, net flow and database performance analyzers, server and virtual machine management tools, log, system, and security software, and more.
This generous array of technical services and solutions are reunited in the Orion platform, an extensive and customizable IT performance monitoring system relying on 6 major pillars:
Network Performance Manager (NPM)
Netflow Traffic Analyzer
Network Configuration Manager
Virtualization Manager
Server and Application Monitor (SAM)
Storage Resource Monitor (SRM)
NOTE
It’s in your power to pick out individual resources that best suit your business or get more (even all of them) as a bundle and deploy the Orion Web Console.
The console provides centralized management and a solid dashboard with clear overviews of your entire IT infrastructure for enhanced efficiency.
What causes the SolarWinds error related to request processing?
Even though it’s convenient, the console can generate occasional issues such as the SolarWinds Custom Query error processing the request.
The SolarWinds Orion platform has its very own query language called SWQL – a proprietary subset of SQL – that you can use to obtain very specific network-related details by querying your database.
So why does this happen? While the Custom Query resource is very practical, the widget sometimes has a hard time indexing the GUI-hosted pages without clear and customized order indications.
These are the top 3 reasons behind the SolarWinds Custom Query error related to processing requests:
Invalid SWQL syntax and queries
Missing ASCX file
Corrupt or incomplete SAM module installation
How can I fix the Custom Query error in SolarWinds?
1. Set the custom query output to ordered
The first thing you need to do is check the OrionWeb.log and identify the error (It can provide valuable information about the cause of failure).
The path for the log files is commonly found under C:\Documents\Settings\All Users\SolarWinds
If the error hints at the ordering issue (and this is a recurrent scenario), proceed with the following indications.
Log in to Orion Web Console and select View.
Click the + icon to add a custom object resource. Then select, Custom Query and confirm by hitting the Add Selected Datasource button.
Next, click the Edit button (Configure this resource) and make sure you add the Order by condition when you paste the custom SWQL query for all your widgets.
Click Submit.
If you’ve integrated an Events API into the SolarWinds host via a script, you should also see these details in the Event Viewer.
Simply open the Event Viewer app from the Start menu.
In the left pane, click to unfold the Windows Logs section.
Select Application and check the associated events in the main area.
Now, the syntax is important and there are a few things to keep in mind when dealing with the SWQL language.
Feel free to explore the SolarWinds page and get more useful indications on how to build valid custom queries in the Orion platform.
2. Flush your DNS and restart AMA
Type cmd in the search zone of your taskbar. Select and open the Command Prompt.
In the typing area, insert the following command: ipconfig /flushdns
After flushing the DNS, press the Windows Key + R on your keyboard.
When the Run menu opens, type in services.msc and click OK.
Identify the Advanced Monitoring Agent (AMA) service in the list.
Right-click on this item and click Restart.
Buyer’s tip
If you feel like you’re running out of options as far as SolarWinds’ NPM environment is concerned, this news will cheer you up.
➡ Instead of struggling to identify missing modules and files or repair invalid SWQL queries, you can use Paessler Network Monitor (PRTG), an entirely error-free network monitoring tool.
Similar to the Orion suite, PRTG can handle complex IT infrastructures based on cloud monitoring. In fact, you have a built-in Cloud HTTP sensor as well as a Cloud Ping sensor to provide reliable, accurate, and fully customizable information.
You can choose to receive these notifications as Syslog incident reports, alerts with adjustable frequency, or view your network stats in real-time.
You can also monitor your bandwidth (there are no less than 11 different sensors available just for this purpose), apps performance, server surveillance, and much more, including an overview of all your systems and traffic.
The incorporated Wifi analyzer will keep a close eye on all your connected devices and constantly check for key factors such as device status, speed, load, traffic, and signal strength.
Who attacked SolarWinds?
Here’s one more reason to consider switching to a better network monitoring tool such as PRTG. Back in 2020, SolarWinds’ Orion suite was targeted by a large-scale intrusion campaign that was so elusive that it went undetected for months.
The security breach affected multiple verticals and worldwide customers from both the public and private sectors became victims of this malware attack that compromised professional environments and lead to irreparable data thefts.
The attackers used the Orion software updates to disguise their light trojan-based malicious code into the SolarWinds.Orion.Core.BusinessLayer.dll communicating to third-party servers via an HTTP protocol.
If you assume this is an isolated event, you couldn’t be more wrong. In fact, a 2021 CISA report showed that hackers also used VPNs to inject malware into the SolarWinds Orion software and steal credentials on SolarWinds servers.
PRTG
Forget about complicated syntax errors and keep an eye on your entire network with this ultimate tool!
3. Use native repair tools (Orion Configuration Wizard)
Log in to the Orion Server using a Windows administrator account.
Go to Start, SolarWinds Orion, and select Configuration Wizard.
Pick the items that need to be repaired and click Next.
Verify that all selected details are correct (SQL Server, authentication method, and database, valid account, and password, IP address, etc.).
Review the items and click Next.
Upon completion, click Finish and launch the Orion Web Console again.
By checking the files on the webserver as well as the overall structure of your database, the Configuration Wizard can help you troubleshoot and repair issues including rebuilding missing files such as the ASCX file.
The SolarWinds SAM error there was an error processing the request can be caused by missing components in the SolarWinds Orion package or even permissions causing unexpected errors during the SolarWinds installation.
If the issue still occurs, you can apply further fixes to the Orion Core Services (Job Engine, Collector, and Information Service) within the Orion platform.
Even though antiviruses and firewalls are top cybersecurity programs, they can sometimes prevent you from using legitimate apps such as the SolarWinds’ NPM environment or at least limit their functionality.
Thus, either of them can trigger the Custom Query error processing the request.
To counter-balance this scenario we suggest you make sure your antivirus software does not restrict the access to the InetPub folder located on your C drive.
If you’re up for a change, we recommend you consider an alternative antivirus software that seamlessly collaborates with other security programs without messing up your settings such as TotalAV.
Furthermore, you can disable the Microsoft Defender firewall from the Windows Settings or set an exception for the Orion Web Console widgets.
There you go, now you know how to quickly and easily get rid of the SolarWinds SAM error There was an error processing the request.
A control panel ensures that the host communicates with its resources to help assign them to servers, manage and install them, and normal running of the play. Many people use the free panels as they cannot afford the paid version, which is expensive.
Administrators control the servers giving them the power to assign the resources to each CPU, shut down and restart the server, remove players, and change rotations. You can access the control panels using websites or installing their respective applications.
Each panel has its features has different games, and the admin can remove some players. The article will cover a list of the best server control panel for Windows 11.
What should I consider when buying a game server control panel?
When you want to buy this tool, it will depend on if it’s the first time you want to use it or if you have experience.
Lack of knowledge about the servers can lead you to make the wrong decision. Here are some of the factors to put in place when purchasing one:
Make sure the panel provides statistics of all the gaming sessions
Check their level of security
Confirm the type of payment methods they accept for billing
Ensure it supports different types
It must have the support of file management
A hosting control panel, in conjunction with a dedicated server, will allow you to quickly get your server hosting business up and running, as well as provide a professional and dependable service.
What are the best game server control panels for Windows 11?
Easy-Wi is an open-source, free control panel with many outstanding features like a game server, webspace, voice server, TSDNS server, etc.
It automates most of the tasks to help in speeding the whole process. Its space runs on servers like Apache, Lighttpd, Apache2, and Ngnix.
The server enables users to use and edit templates, install several of them on the same port, easy monitoring processes, perform modifications and automatic updates, etc.
Its user interface defines different roles like the user, administrator, and reseller, which are easy to create and manage.
It uses CMS to run functions like setting up blogs, SEO, comments sections, supporting different languages, search functionality, an editor, and pages to create content and free templates without branding.
Additional features:
Works well with MySQL databases
It fits all types of screens sizes
Easy to create and manage backups
You can manage the servers on LAN
It has one of the best customer services you can access through the ticketing system or their Discord channel
It’s secure and it ensures only the authorized plugins run on the server
Pterodactyl is a control panel built on PHP, NodeJS, and Go. It makes running and configuring games and applications instances easy.
It consists of daemons that act like machines that run on hardware, and the control panel hosts the web interface that communicates with the daemon.
The daemon uses isolated Docker containers to run the servers. Docker runs all the codes using the Docker file, which carries all the dependencies and codes the applications need to run.
This feature saves users from installing, configuring, and deploying the app requirements several times.
It’s very secure. When users upload applications that have malicious code or viruses, it doesn’t affect other users as it’s a single isolated file.
It makes it easier to destroy the bad file using less time. It supports HTTPS and AES-256-CBC encryption.
Other notable features include:
Friendly user interface
Free to use
Easy to upgrade
It saves memory and CPU usage due to using one docker file to carry the majority of the code
GameDash is a control panel that has both freemium and paid versions. Its prices range from $7-$12 per month. It is one of the best panels in the market due to the number of features.
If you are on other platforms and want to migrate to this panel, it takes a few minutes to finish due to the interoperability of in-game server management.
It has the best billing customization as you can decide your subscription intervals, supports six payment methods, dashboard of the earnings, and automatic upgrade and downgrade of payment plans.
Additional features are:
It supports over 20 applications
Network monitoring
It automatically installs dependencies and updates
Has DNS support
You can set your servers in less than five minutes since it’s easy to install with the help of documentation
It is a free control panel whose web interface and server run with PHP/MYSQL and Perl.
OGP has a fantastic community that enables them to attract more visitors who, in turn, use the panel to control their servers for gaming companies, individuals, gaming groups, etc.
This panel limit features like IP addresses and ports used for each game. Some games are given a specific CPU size or boxes, which forces the users to determine how they can balance them across the games.
Other features include:
In case of server reboots, you have to restart it
It supports WHMCS integration
It has proper documentation and is easy to install
Admin has the power to control the quota disk space
Ability to update the steam-based games using the web interface
It’s easier to clone a game from the panel, giving you a chance to make new game servers from the templates
Is it compulsory to install a game server control panel?
No, you can access most of the servers on the web interface, where you can create accounts and start using them instantly.
In some exceptional cases, you have to download others and install them on your PC to use them.
You have to be careful when choosing the type of control panel. Most of them are free and open source.
When dealing with the servers, you must consider security before looking at the other stuff. Some of the servers run some popular games like WarCraft which has many players across the globe.
Which server control panel do you use? Let us know in the comments section.
Refreshing and preparing a Windows image are operations that can be completed by using dedicated DISM commands.
The Deployment Image Servicing and Management (DISM) command-line tool can also be used for repairing the most common Windows software-related problems, so being able to execute DISM commands is quite important.
That’s why, when experiencing the error 50, you should learn how to address the malfunctions that are preventing DISM from running correctly.
Even though such system issues may require more technical know-how, you can dive deep into the problem and resolve it step-by-step.
There are also specific commands you can use in order to fix the persistent error on your Windows device.
So, if you tried to execute a certain DISM command, but you got the Error 50 DISM does not support servicing Windows PE with the /online option message, you are in the right place. In this guide, we will see how to fix the DISM toolkit on Windows 10.
When the error 50 appears it means that Windows thinks that the location from which you run the command is within Win PE (Pre-installation Environment) and this happens because of a misplaced registry key. So, for fixing this error you need to remove this key by following:
Press the Win+R keyboard keys for bringing up the Run box.
There, type Regedit and press Enter.
From Registry Editor located the HKEY_LOCAL_MACHINE entry and expand it – just click on it.
From the new list that will be displayed expand HKEY_LOCAL_MACHINESYSTEMCurrentControlSetControl.
Under the Control field, there should be a folder named MiniNT.
Right-click on this folder and choose Permissions.
Make sure that your username is mentioned there and also ensure that the Full control option is checked.
Right-click on the MiniNT folder again and this time choose Delete.
Confirm your changes and restart your Windows 10 system.
In case you require a professional cleaning tool that will repair any registry entries problems, you can employ CCleaner.
Using this software you can detect different problems in your Windows registry and fix them automatically in a more secure manner.
2. Reset BIOS
On your computer access BIOS (reaching BIOS is different depending on each manufacturer).
From BIOS look for the Default Options entry and access it. From the menu that will be displayed on your computer choose reset to default or factory default. Confirm your changes and restart your device.
That should be all and the Error 50 DISM does not support servicing Windows PE with the /online option should be now resolved.
3. Refresh the DISM software
NOTE
If you cannot complete the steps below try to create a new Windows account before starting this troubleshooting solution.
In your cmd window (which should be already opened since you received the DISM 50 error) type dism.exe /image:C: /cleanup-image /revertpendingactions.
Next, reboot safe mode on your Windows 10 system: press Win+R, enter MSConfig, switch to Boot, and choose Safe Mode.
From safe mode open an elevated cmd window: press Win+X and select Command Prompt (Admin).
In the cmd window type SFC/ scannow and wait while the scan runs – it might take a while depending on how many files and programs are stored on your device.
Afterward, reboot into Windows mode as that should be all.
It’s possible to resolve DISM error 50 by using specific commands in the Windows Command Prompt utility.
There are a few commands that you can try in order to repair this operational issue and are as follows:
Type Command Prompt in the Start Menu and then press Enter.
Assure you have administrator rights before entering the commands.
Type in the next commands to fix the specific DISM error.
wmic logicaldisk get name
dir drive-letter:
DISM /Online /Cleanup-Image /RestoreHealth
There you have it; those were the troubleshooting solutions for the Error 50 DISM does not support servicing Windows PE with the /online option error message.
If you are trying to find other Windows Update solutions, make sure to check the Windows Update hub.
Take a quick tour of our specially created Windows 10 Errors Hub. Here you will find more solutions like this one to help fix a multitude of system errors.
You can also share your own experience with us and our readers by using the comments field below.
Ever since the early days of Windows, there was a useful option that allowed you to open the direct location of the file that you just clicked on.
It’s a useful feature that many used for quick and easy access to their files, but it seems that this isn’t possible anymore in Windows 11.
According to users, the open file location option is missing in Windows 11, but there are ways to fix this issue, and in today’s guide we’re going to show you how to do it.
Why is there no open file location option?
There are multiple reasons for this issue, but in most cases, your Windows may be out of date. An outdated operating system can have various bugs, such as this one for example.
Third-party applications can cause this problem, so you might have to remove the problematic software or disable its context menu.
What can I do if the open file location option is missing on Windows 11?
1. Make sure your system is up to date
Open Settings by pressing Windows key + I.
Navigate to the Windows Update section.
Now check for available updates and install them.
This issue can occur if there’s a bug with your currently installed version
2. Remove any recently installed software
Open the Settings app.
Navigate to Apps and click on Installed apps in the left pane.
Set the Sort by to Date installed.
Locate any non-Microsoft apps that you installed recently and click on three dots and select Uninstall.
Follow the instructions on the screen to complete the process.
Users reported having issues with Abbyy FineReader since the application modifies the right-click menu.
To completely erase all data, use CCleaner to uninstall and delete all files related to these apps. Find the Uninstall option in the Tools submenu, order the apps by install date and uninstall them in just a few clicks.
Navigate to Options and check Hide all Microsoft extensions.
Select the application that you suspect is causing the issue and click on the red button in the toolbar.
When the confirmation dialog appears, click on Yes.
Make sure that all instances of the problematic app are disabled by repeating the last two steps.
After doing that, check if the problem is resolved. Sometimes certain applications can add their entries to the context menu thus causing this issue to appear.
With this method, you’ll remove those entries without uninstalling the software, so make sure you try it out.
How to find app location on Windows 11?
If you want to find the location of any app on Windows 11, you can just right-click its shortcut and choose Open file location from the context menu.
This option works on shortcuts and search results, but it won’t work for Microsoft Store apps, so keep that in mind.
If the Open file location option is missing on Windows 11, it’s possible that there’s a glitch on your system or that a certain application is interfering with the context menu.
Navigating your way through Windows can be a little confusing from time to time, and it can be even more confusing when Windows 11’s Settings app missing problem comes up.
The Settings app can be accessed in a variety of ways, some of which are even more convenient than finding the Settings button on the desktop or in the options menu.
Some devices have buttons on their keyboards dedicated to opening Settings, making it much easier for the users to find this much-needed app.
Why is Windows 11’s Settings app missing?
This issue of the Settings app missing occurs for individuals who have upgraded to Windows 11 from a previous Windows operating system and is caused by wrongly updated files.
It has been addressed by Microsoft a few times and had its own Fixit tool but now that Microsoft doesn’t support these tools it can’t be downloaded.
What can I do if Windows 11’s Settings app is missing?
1. Restart Windows Explorer
Right-click on the Windows logo and select Task Manager.
Select the Processes tab.
Scroll down and select Windows Explorer, right-click then select Restart.
After doing as instructed the screen may go black for a few seconds which is normal and nothing that you should be worried about.
2. Install a PC repair tool
To fix Windows-related problems, PC repair tools analyze your computer for corrupt system files and then replace them.
There are a lot of repair tools currently on the market, which are reliable PC repair solutions. Apart from fixing issues like the missing Settings app by replacing damaged Windows files, these programs can detect risky websites and remove malware threats.
3. Run SFC and DISM commands
Restart your computer.
Click on the Start menu, type Command Prompt, right-click on it then select Run as administrator.
Type the following code then press Enter. (This step can take anything from a few minutes to 30 minutes to complete.) DISM.exe /Online /Cleanup-image /Restorehealth
After you see a message that says The operation completed successfully, type the following code and press Enter: sfc /scannow
After you see a message that says, Verification 100% complete, close the Command Prompt window.
The sfc /scannow command checks the integrity of all protected operating system files and, where possible, replaces erroneous, corrupted, altered, or damaged versions with proper versions.
If the damage cannot be repaired, DISM should be used to fix the Windows 11 settings app missing problem.
Press the Windows + X keys then select Windows PowerShell orWindows Terminal.
Copy and paste these commands one at a time then press Enter: Get-AppXPackage -AllUsers -Name windows.immersivecontrolpanel | Foreach {Add-AppxPackage -DisableDevelopmentMode -Register “$($_.InstallLocation)\AppXManifest.xml” -Verbose} Get-AppXPackage | Foreach {Add-AppxPackage -DisableDevelopmentMode -Register "$($_.InstallLocation)\AppXManifest.xml"}
Restart your PC.
There may be some red errors while the procedure is running, which you should disregard.
5. Try other ways of opening the Settings app
Click on the Start menu, type Settings, and select the application from the list.
Right-click the Start menu and choose Settings from the menu.
Simultaneously press the Windows + I keys.
Press Windows + R keys to open a Run box, type ms-settings: and press the Enter.
To better understand how the Settings app works and explore every section it includes, take a look at our detailed overview of System Settings in Windows 11.
What are other Windows update problems?
The Windows 11 Settings app missing problem is not the only error users can encounter after updating to the new operating system.