The Partitions on the Disk are Not in Order [Windows 11 Fix]

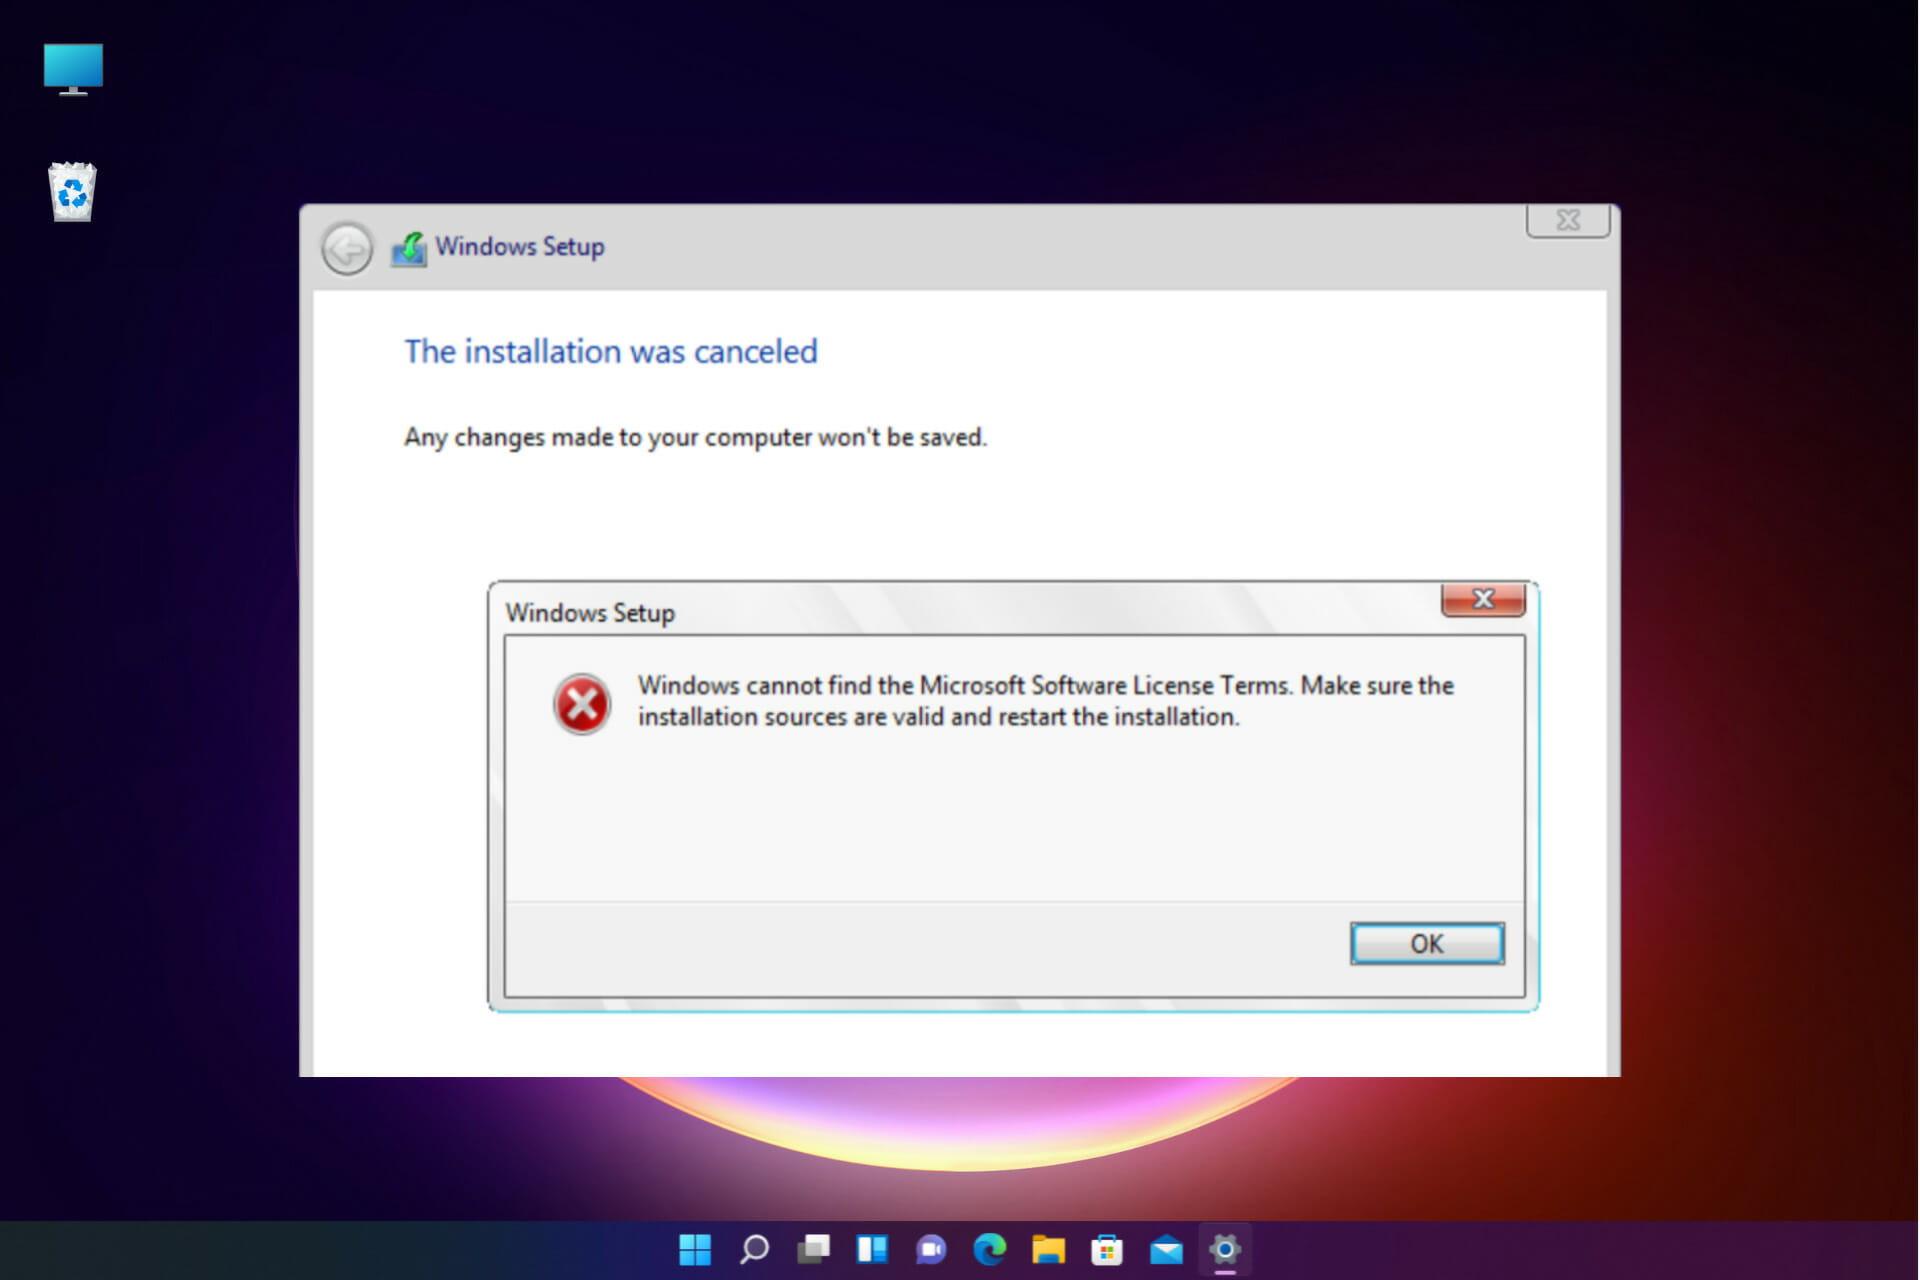
Windows 11 installation can be stressful if you get many partitions errors during the booting process. The error pops up immediately you try to boot and may be hard if you have no idea what to do next.

Installation should be a straightforward process. However, this problem is most likely to appear when you try to update or upgrade your PC to a newer version of Windows. The major reason for this problem is a lack of adequate space on your hard disk’s EFI system reserved partition.

The EFI system partition (ESP) is a partition on your hard drive or SSD that Windows uses to comply with the Unified Extensible Firmware Interface (UEFI) (UEFI). When a computer is turned on, the UEFI firmware loads the operating system and other programs installed on the ESP.

This guide will look at several solutions you can use to fix the error.

What are the causes of partition errors in Windows 11?

The majority of the partition errors occur during Windows 11 installation. The error comes as a result of the following:

  • Damaged partition table located in the Master boot record which handles most of the logic and carries file systems.
  • Corrupt MBR, which corrupts the file system.
  • Incorrect system boot sequence that leads to unsuccessful booting.
  • Having two or more partitions marked as active on the hard disk. It should be only one active partition so that the disk can load.
  • Additional external hard disks on your PC.
  • Outdated BIOS version.

How can I fix Windows 11 partition errors?

 1. Do preliminary checks

  1. Disconnect external devices – Having external devices interferes with the partitioning. Remove all the external drives and remain with the Windows fie USB and the main hard disk. External devices can be SD cards, USB, SSD, WIFI, and Bluetooth adapters.
  2. Use a 2.0 USB – Installing Windows from USB 3.0can be problematic, causing partition issues. Try using a USB 2.0 flash disk to create the installation media, which solves all your problems.

2. Correct the bootable device using third-party software

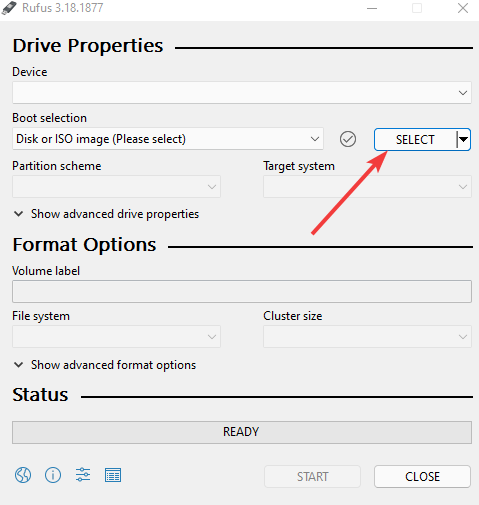
  1. Download bootable creating software for our instance Rufus.
  2. Download Windows 11 ISO from the Microsoft website.
  3. Double click the downloaded executable to run Rufus, under the Device, Select the USB you want to create the installation media from.
  4. Select the ISO file.
  5. Click Start and let it run upto when it says READY and follow the on-screen prompts.

When you make installation media using a Media creation tool, it causes partitioning issues.

3. Convert the partition from MBR to GPT

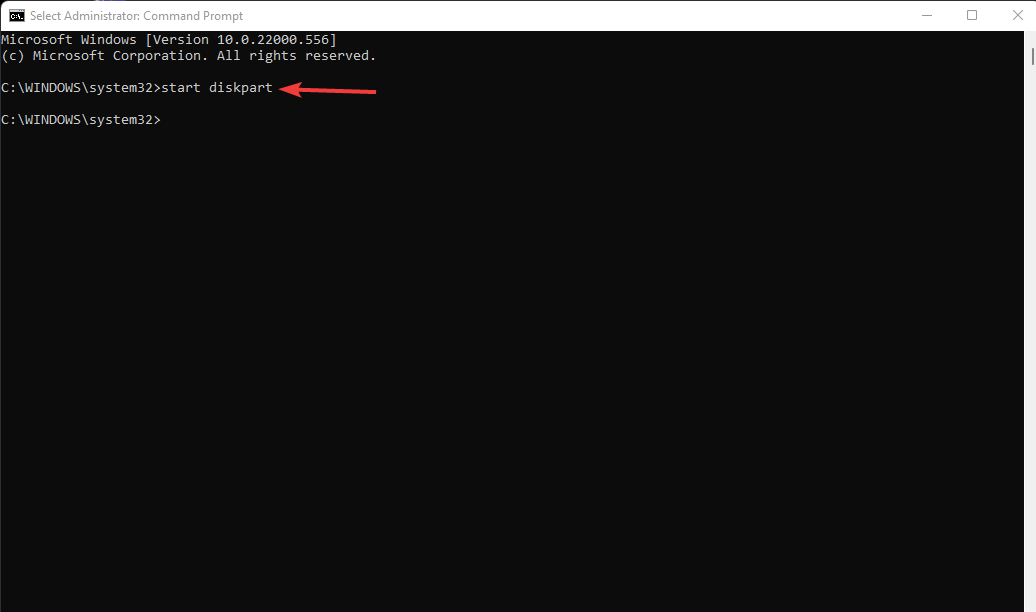
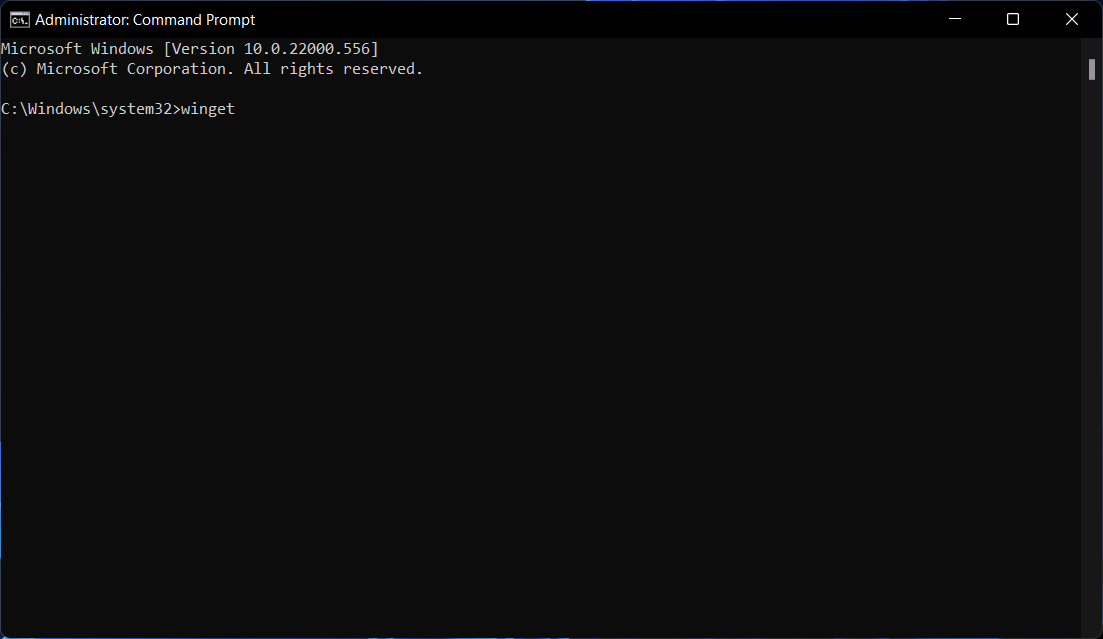
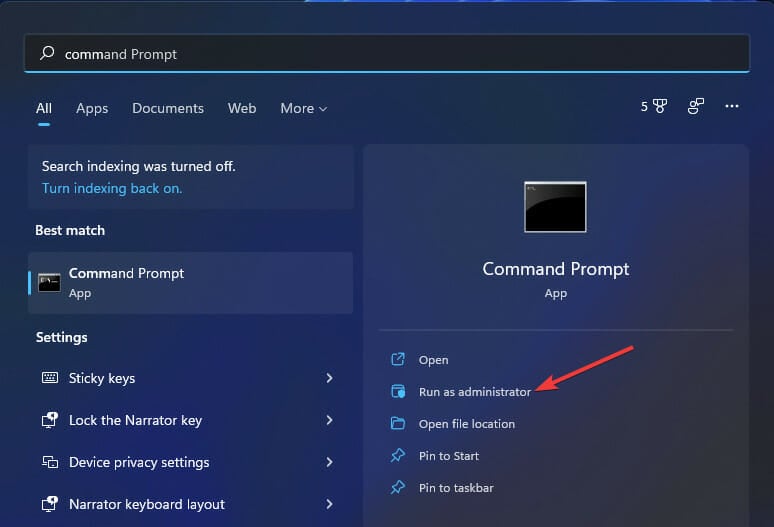
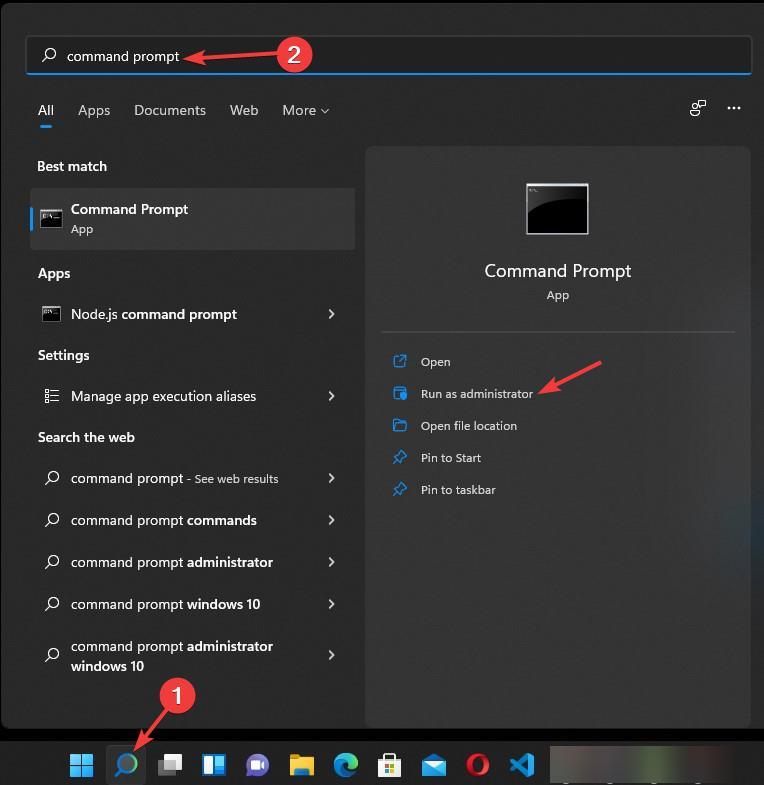
  1. Go to the Search box, type Command Prompt and click Run as an administrator.
  2. Type start diskpart and hit Enter.
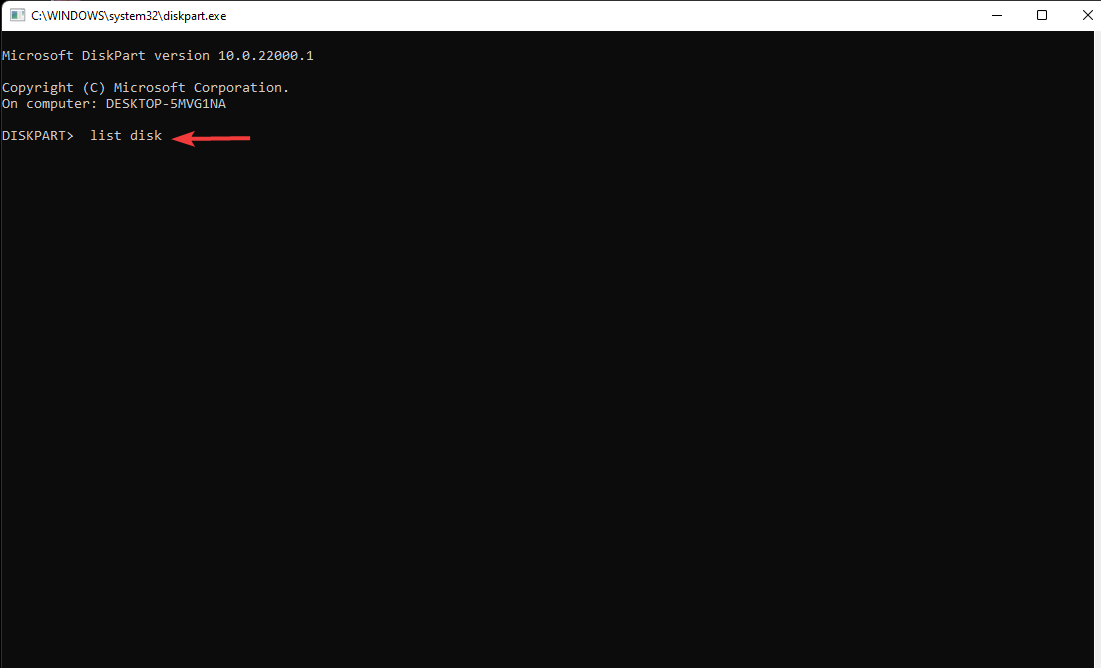
  3. Select the hard disk with partition issues, type list disk, and hit Enter.
  4. Type clean and Enter to delete all the files from the hard disk.
  5. Type convert gpt to finalize this procedure.

If you dont want to lose data, you can use the MBR2GPT and gptgen, which Microsoft developed to address the issue.

GPT supports a hard disk with over 2TB storage, and it’s fast, works well with UEFI  mode, and can support upto four partitions.

MBR has limits. It works with devices with storage of below 2TB, is slow when booting, and it’s the commonly used boot mode.

Using a third-party tool is highly advised. For example, the Tenorshare Partition Manager tool can safely convert partitions from MBR to GPT and vice versa. It supports conversion for all file systems, including FAT, NTFS, and HFS.

It is also a good solution for typical activities, including disk creation, deletion, cloning, splitting, formatting, resizing, etc. It also has more complex capabilities that allow users to have complete control over their disk settings.

⇒ Get Tenorshare Partition Manager

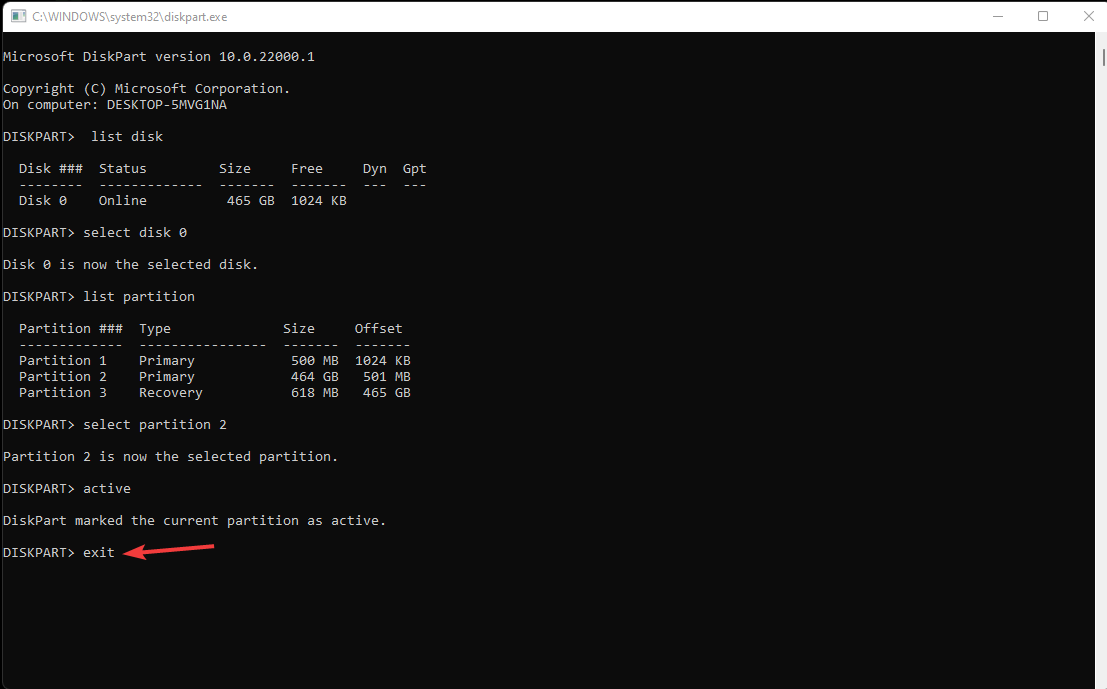
4. Make the partition active

  1. Go to the Search box, type Command Prompt and click Run as an administrator.
  2. Type start diskpart and hit Enter.
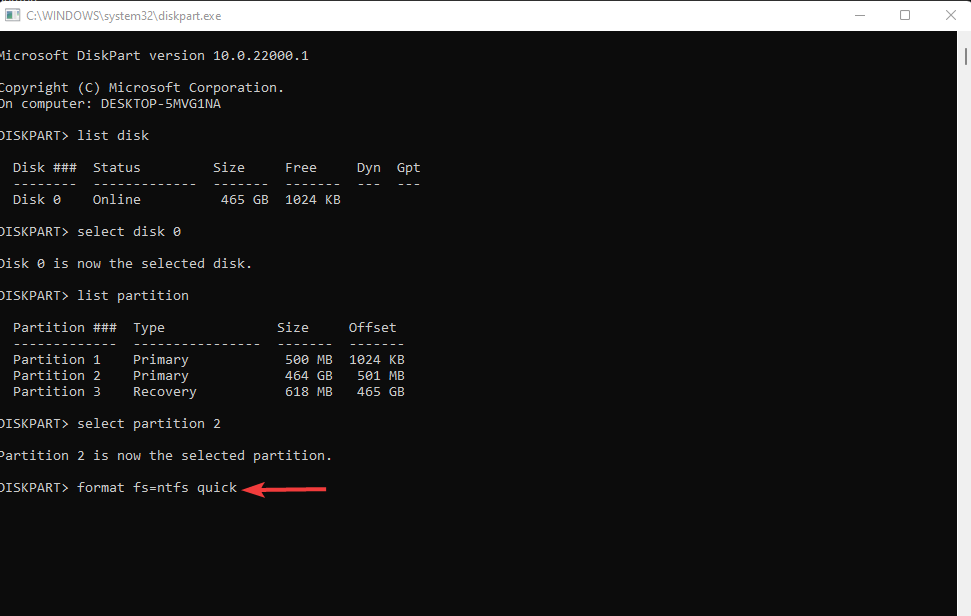
  3. Type list disk and hit Enter to display all the disks on the PC.
  4. To select the disk, type select disk 0 (the number is according to the number of disks you select).
  5. Type list partition and hit Enter.
  6. Select the partition you want to fix, type select partition 2 (Enter the number according to your hard disk), and hit Enter.
  7. Type active and Enter.
  8. Type exit and press Enter to close the Command Prompt.

The primary partition should be active since it will host the operating system which controls the computer resources, both the hardware and software.

Only one partition can be active and should be the main one.

5. Set the hard disk as the first boot device

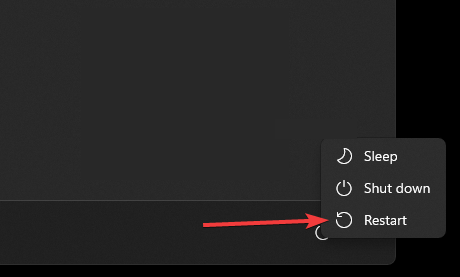
  1. Restart your computer.
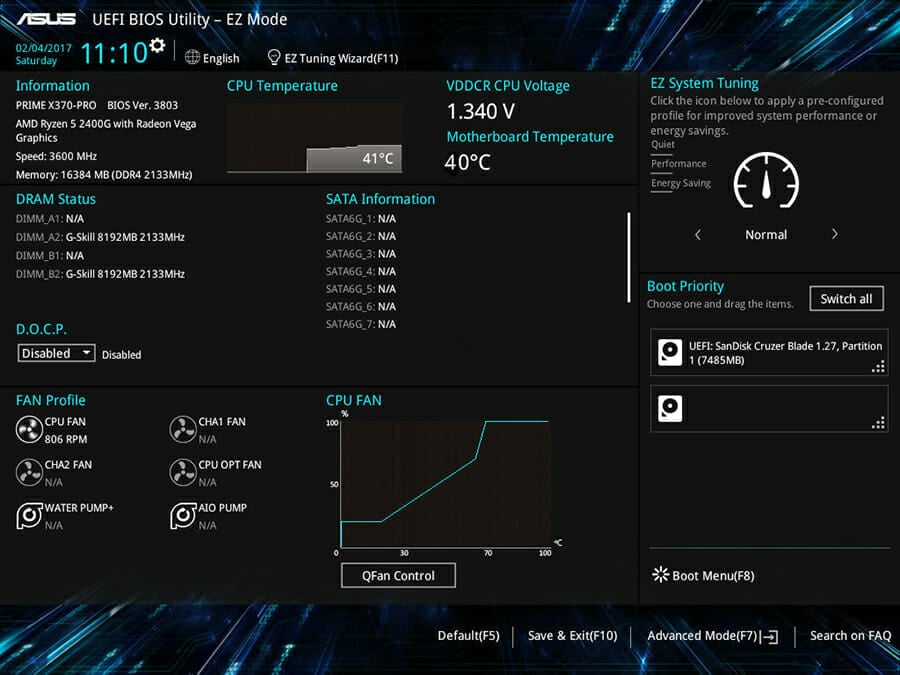
  2. Press Esc or any special keys like F10, F2, F1, F9, F12 according to your PC type to enter into BIOS mode.
  3. Change the boot device and select the hard drive as the first option. It makes sure that the hard drive is the first boot device.
During Windows installation, most users set USB drive as the first boot device. Sometimes the drive gets seen as the hard disk making it throw the partition error.

6. Use diskpart

  1. If you get the partition error during Windows 11 installation, close the error button, Click Advanced tools, and select Command Prompt.
  2. Type start diskpart and hit Enter to display the number of disks on the PC.
  3. Type list disk and press Enter to display the number of hard disks on the computer.
  4. Locate the number of the disk you want partitioned and type select disk 0 (number of disk), and hit Enter.
  5. Next, we type several commands to finish the process. Type the commands as you hit Enter for each.
  • clean-permanently erases all the data on the hard disk.
  • create partition primary-it makes the partition the main one(primary).
  • active-makes the primary partition active.
  • format fs=ntfs quick-it convert the hard disk partition from NTFS to FAT32.
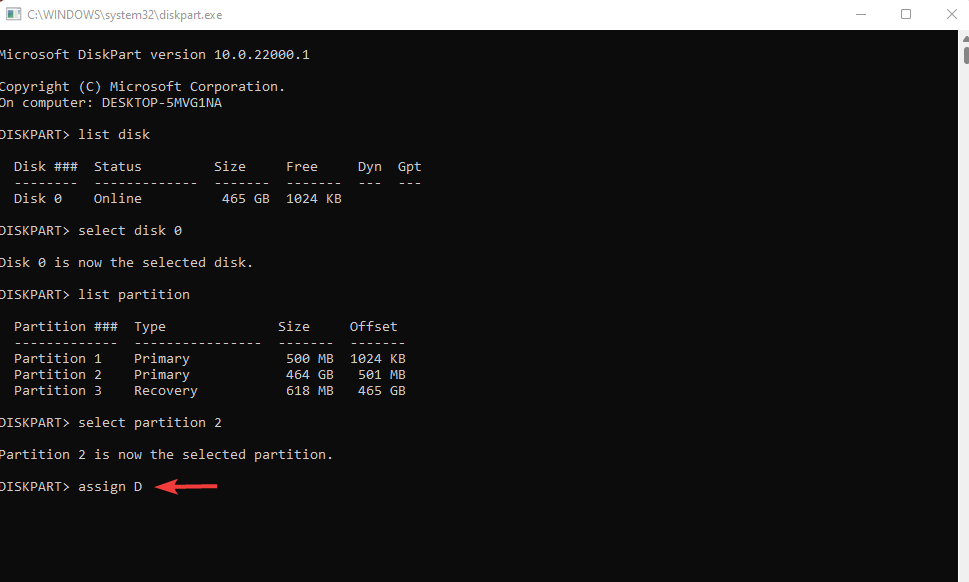
  • assign-it assigns a letter to the selected disk.
  1. Type exit to close the Prompt.

This process deletes all the files on the hard disk drives. You have to back up your data during these steps as it may get lost.

7. Disable other hard drives in the BIOS

  1. Restart the PC.
  2. Press F10 to enter the BIOS setup, you can do it using Esc, F2, F9, F12 according to different manufacturers.
  3. Look for all the hard disks or SSD connected to your PC.
  4. Disable them and leave the one you are fixing the errors.
  5. Save and Restart your machine. 

8. Upgrade the BIOS version

When you have outdated BIOS, it can cause partition errors. You have to update the version to eliminate the errors to solve this.

Download the latest BIOS version setup from the manufacturer’s website and install it on your PC. Check this to learn how to upgrade the BIOS version.

What happens if I delete boot partition?

Whether it is an EFI system partition or a system reserved partition, both can assist you in booting the installed operating system. Both include boot files that will be used by firmware during Windows startup.

Your computer will be unbootable if you accidentally deleted the boot partition in Windows 11 or if the boot files are missing or corrupted. To summarize, you shouldn’t delete the computer’s boot partition.

There is no need to worry when you see the error; most of them arise due to the hard disk and booting process problems.

You can do several things to avoid such errors in the future. Fixing these errors takes less than 4 hours.

If you find this article successful, kindly share it with your friends to help them fix these errors.

We would like to hear your say on this article. Leave a question, suggestion, or say which fix worked for you in the comment section below.


Far Cry 6 and two other games featured on this weeks Xbox Free Play Days

From now through Sunday, March 27 Game Pass and Xbox Live Gold members will be treated to three games as part of this week’s Free Play Days event.

The highlight of this week’s lineup for most will be Far Cry 6.  This latest installment of the popular Ubisoft open world first person shooter has players exploring an expansive – and gorgeous – fictional Caribbean island while fighting to take down a ruthless dictator.

Before We Leave is a city-building game set in deep space. Think of something along the lines of the classic SimCity games…with aliens. Only a lot more sophisticated and robust in terms of city building/management mechanics.

Finally, Lost Judgement is an investigative role playing game. Don’t think the game will have you merely interviewing people and rummaging around dark buildings to find clues the whole time, however. Instead, players will have to take to the dance floor, the boxing ring, and other unlikely places to uncover the truth behind a seemingly impossible crime.

Xbox Free Play Days is one of the many perks of Game Pass and Xbox Live Gold. A different lineup of games is offered each weekend which players can install (either via Xbox.com or the Xbox Store on console) play as much as they like throughout the event. It is a great way to try out something new and maybe even find a new favorite.


In nine years ID@Xbox program helped Indie developers earn $2.5 billion in revenue

Independent game developers have earned over $2.5 billion dollars just through partnerships with the ID@Xbox program since its inception nine years ago. What’s even more impressive is the fact that this number has almost doubled over the past three years alone. This is not only a testament to the ID@Xbox program’s success, but also speaks to the fact that independent game development is alive and well on Xbox platforms.

Established in 2013, ID@Xbox was founded with the goal of helping small and independent game developers create games for Xbox and Windows PC, and creating an inviting ecosystem in which such game creators could thrive. At that time indie games had proven their worth, and had become a driving force in the video game market across all platforms.

Over the course of the nine years since, the program has worked with over 4,600 developers in 94 countries (1,000 of which have signed up in the last two years alone) to produce over 3,000 games. Such celebrated titles as Limbo, Superhot and The Escapists have been released through the ID@Xbox program.

It has been by no means a one-sided relationship, however, as Xbox has benefitted greatly from the original experiences that indie games can provide. The partnerships made through ID@Xbox has produced a broad range gaming experiences that simply would not have existed otherwise, and this variety has added to the value of Xbox as a platform for all types of gamers.

Warzone Pacific Gets Stuck on the Loading Screen? Fix It Now

Call of Duty: Warzone Pacific is undoubtedly one of the greatest masterpieces delivered on the gameplay market. However, some users seem to run into specific troubles while running it.

One of the most annoying related problems is that Warzone Pacific might get stuck on the loading screen.

This issue can occur on the PC and consoles (like a PS4, PS5, or Xbox series), and according to users, when launching the Warzone game, it just doesn’t start, or its lobby is shown.

Many gamers claimed that they needed to forcefully close the loading screen of Warzone by using the Alt + F4 keyboard shortcut. 

To discover how you can easily fix this issue without being necessary to force the closing process, make sure you carefully follow the steps listed below.

What can I do if Warzone Pacific gets stuck on the loading screen?

1. Temporarily disable/uninstall security software

1.1 Windows Defender

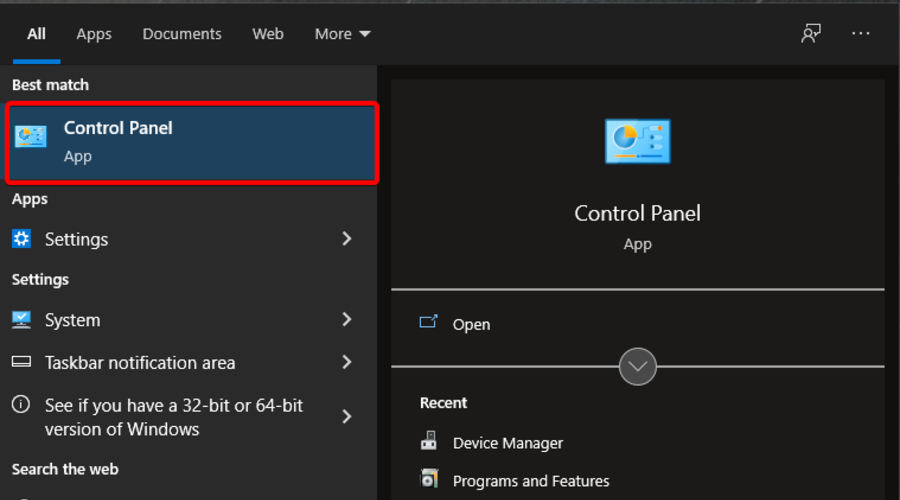
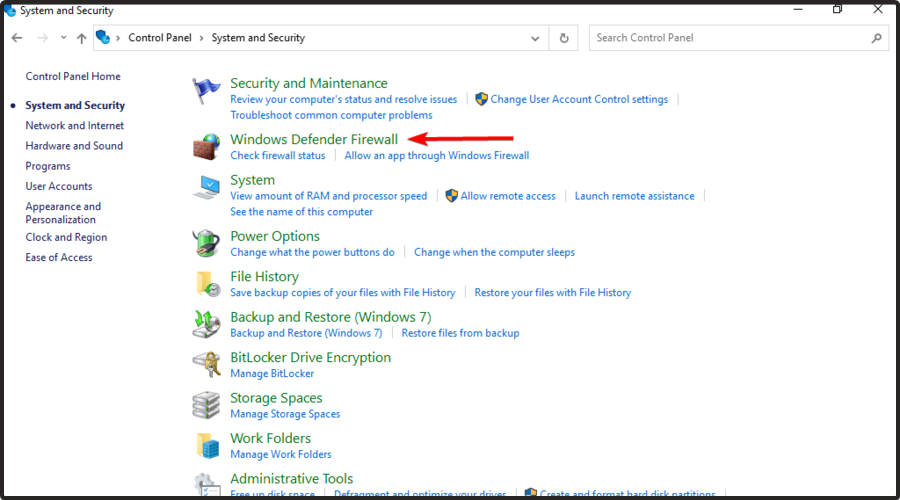
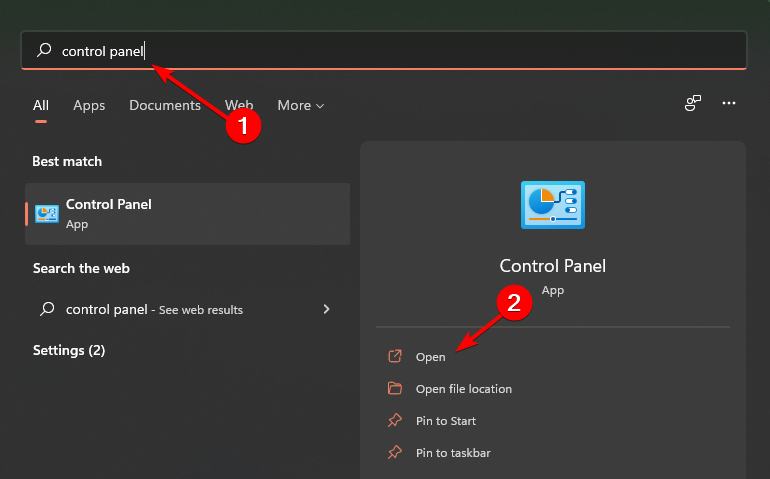
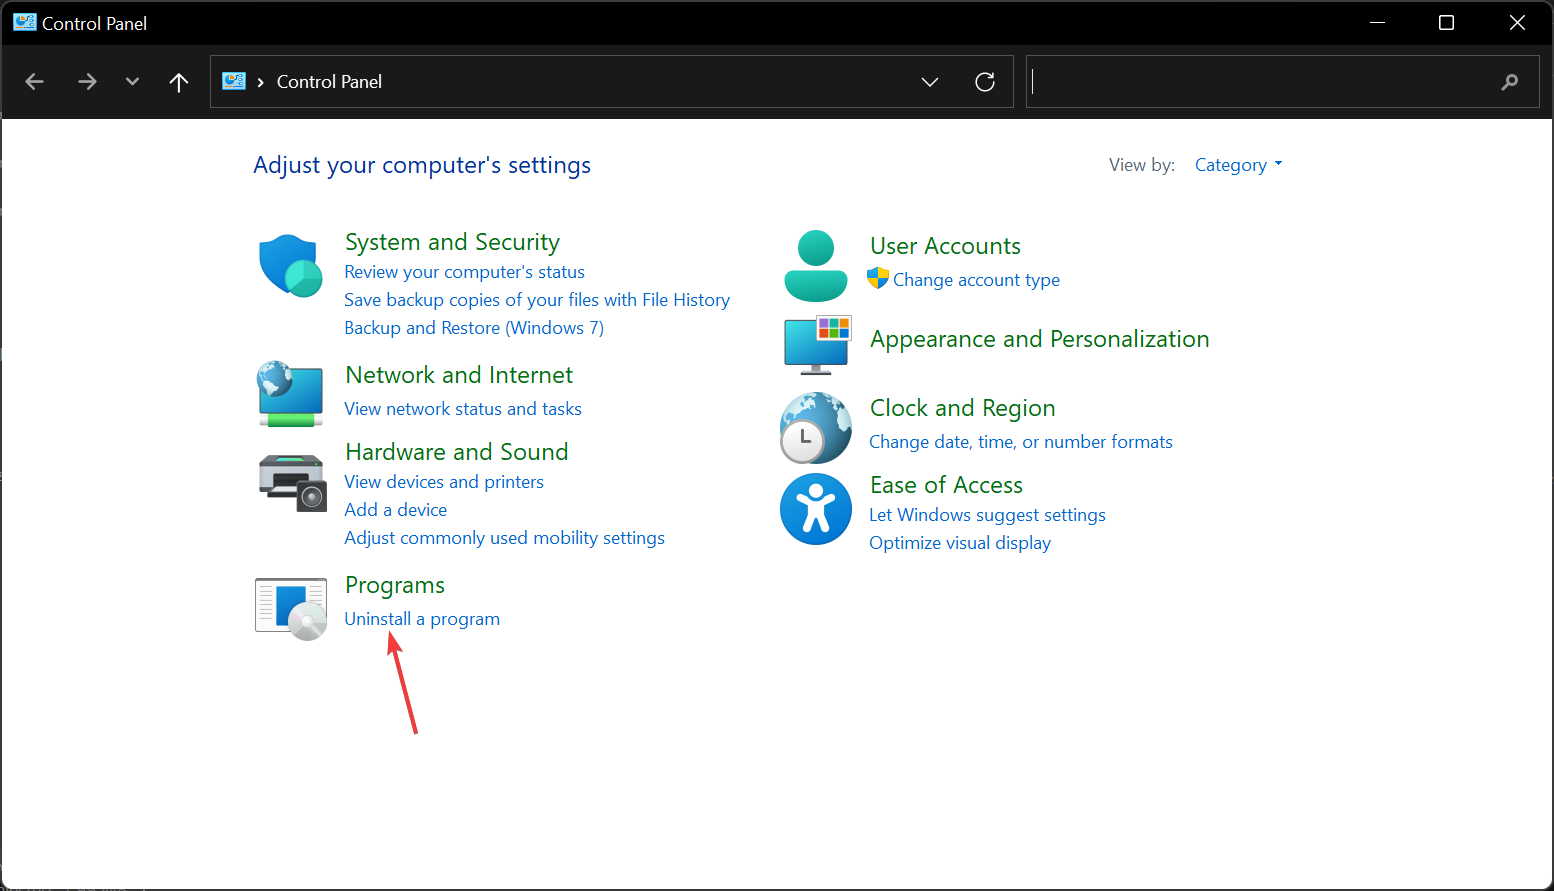
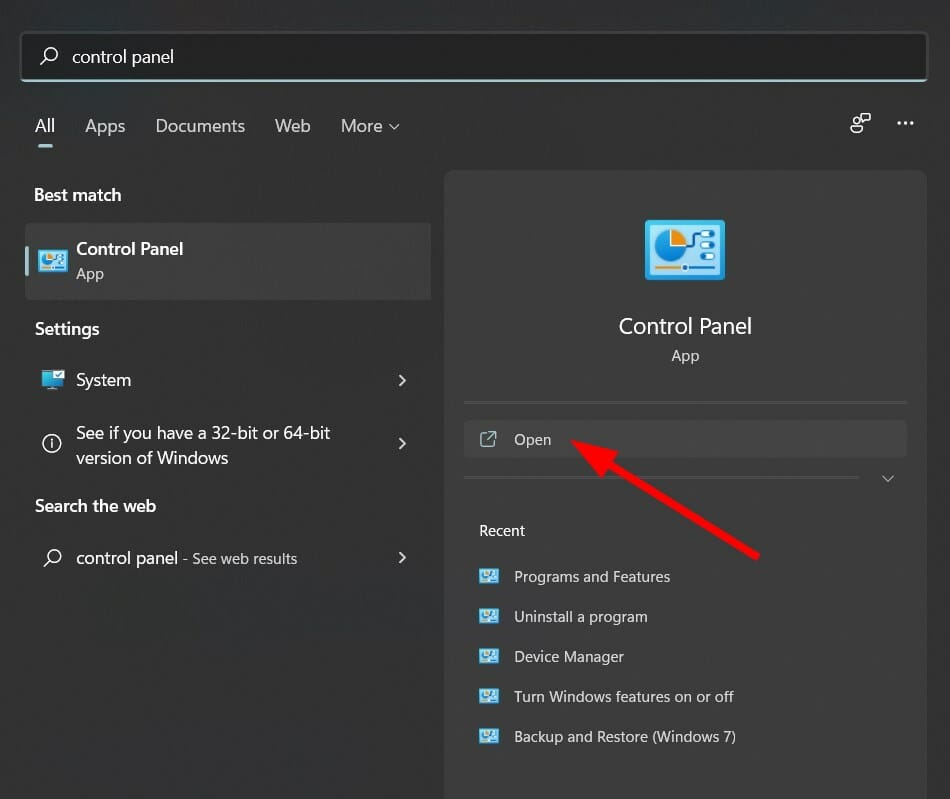
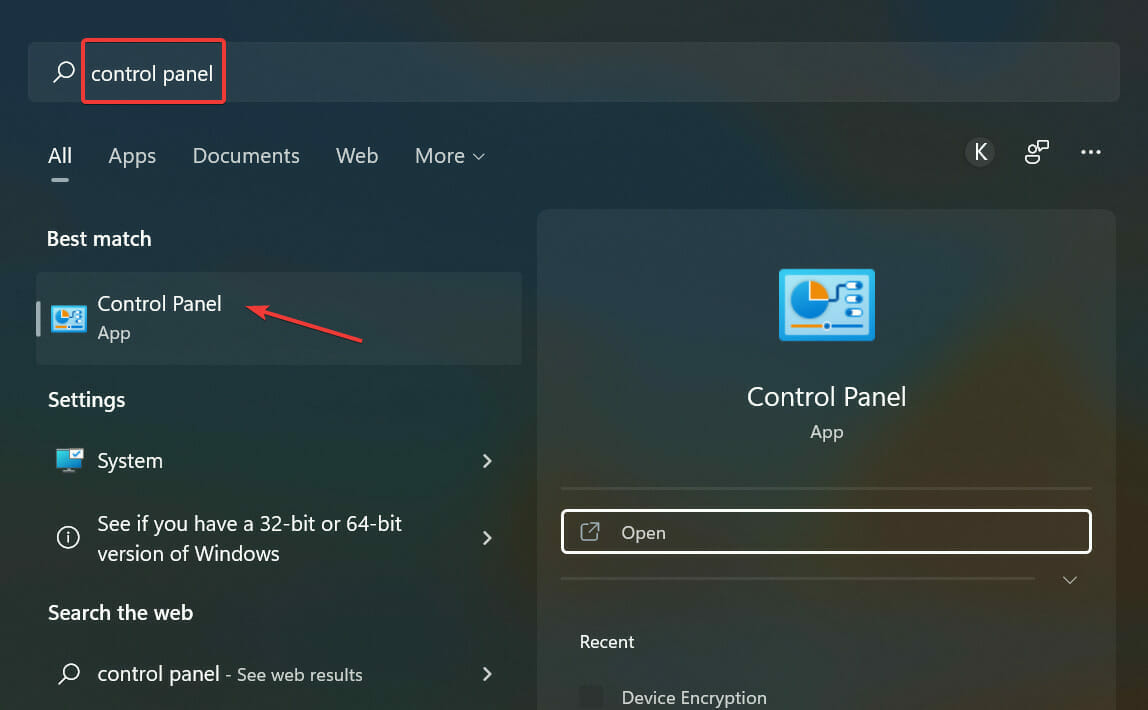
  1. Type Control Panel in the Windows search bar (located in the bottom-left corner of your Windows Taskbar), then navigate to the first result.
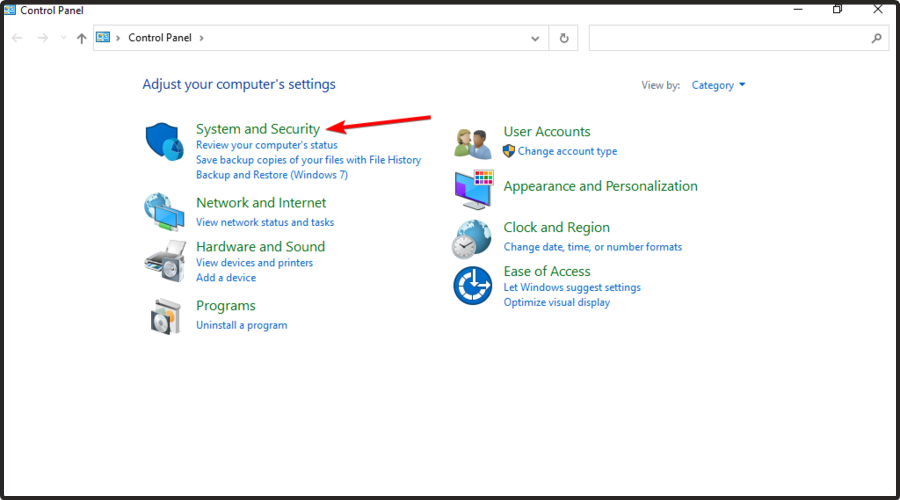
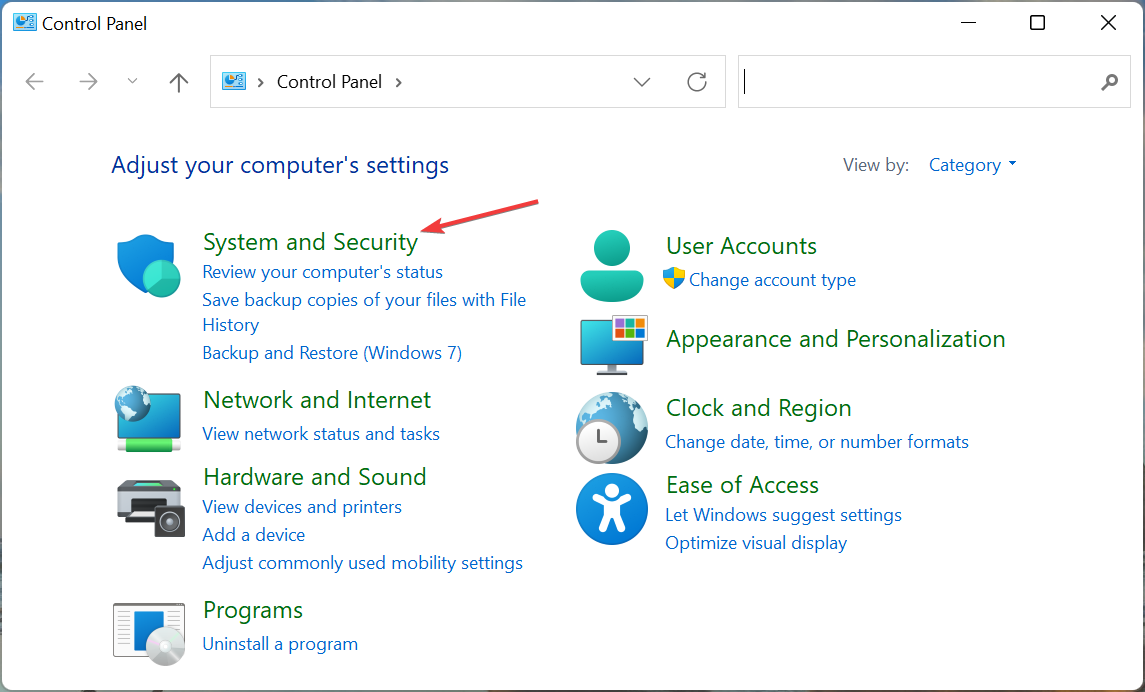
  2. In the opened window, navigate to System and Security.
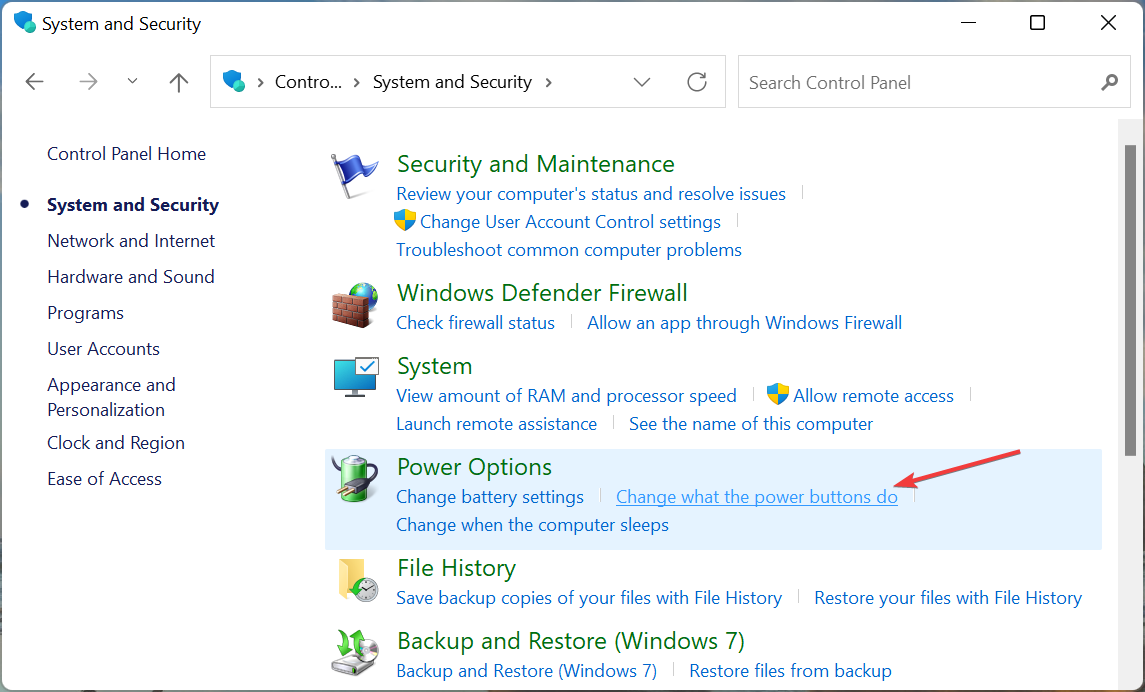
  3. Go to Windows Defender Firewall.
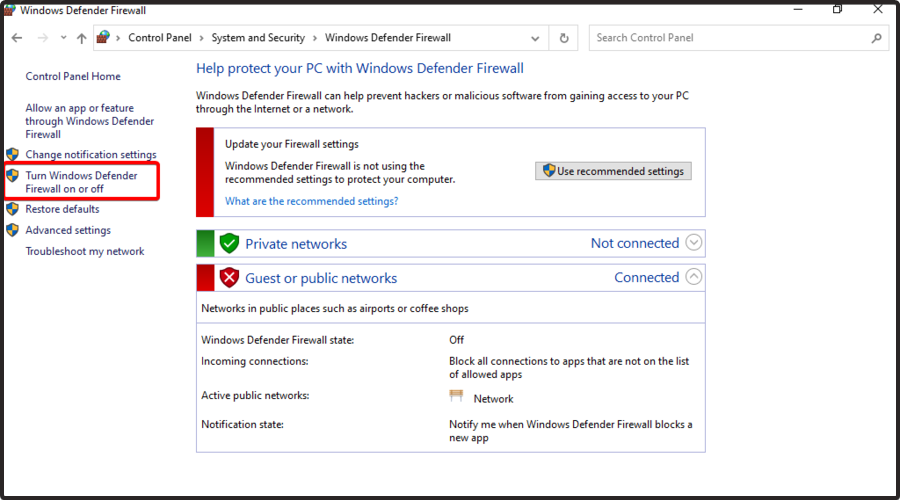
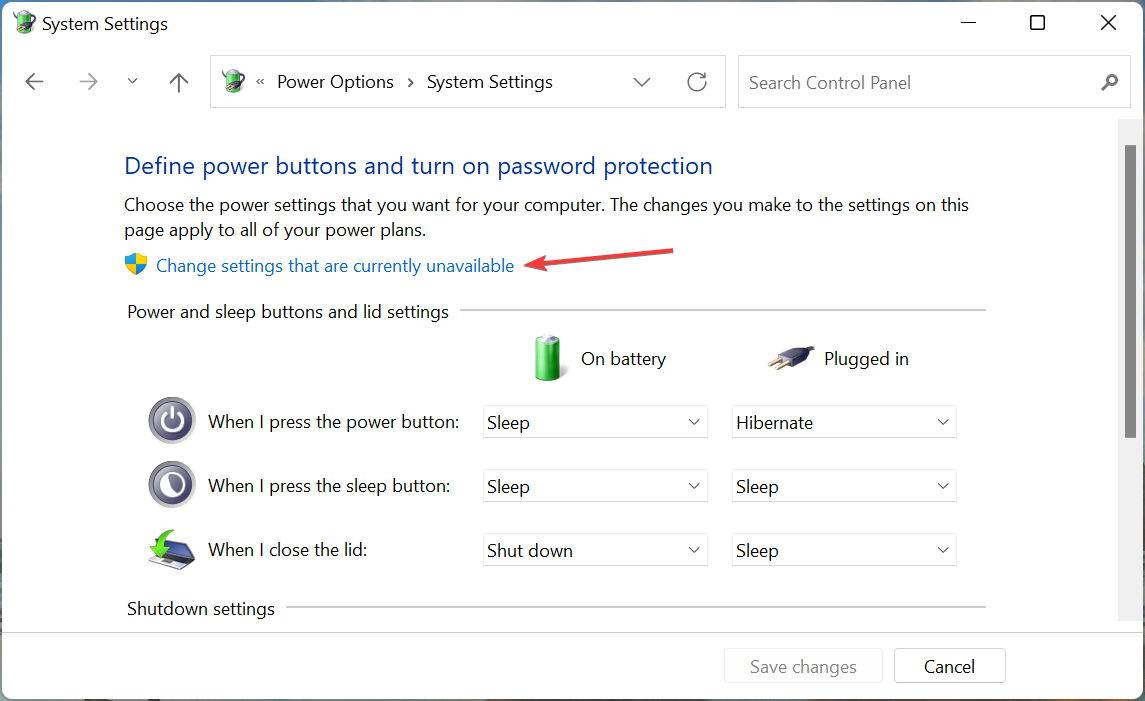
  4. From the left window pane, choose to Turn Windows Defender Firewall on or off.
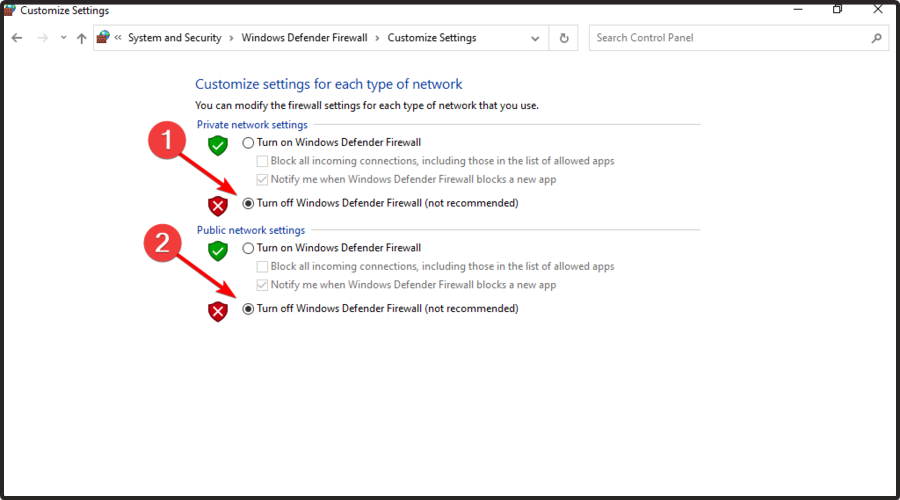
  5. Make sure you check marke the Turn off Windows Defender Firewall (not recommended) sections, as we show directly below.

1.2 Other security programs

If you’re using an antivirus program that might be overprotective, Warzone Pacific might get stuck on the loading screen, so we recommend temporarily disabling it, too.

Of course, the process depends on what app you’re running, but generally, the steps should be pretty similar in most cases.

If you’re unsure how to do it, you can access the manufacturer’s official page and check there.

However, it would be safer if you switch your antivirus program with a more valuable option, that won’t ever interfere with any of your activities.

If we were in your shoes, we would go for TotalAV, as it offers tons of powerful features and complete experiences.

2. Update/Reinstall the graphics drivers

2.1 Update

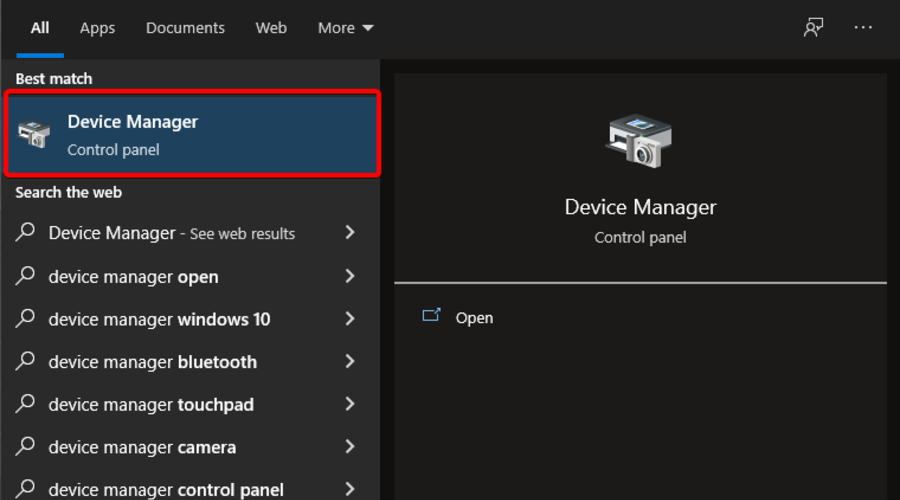
  1. Hit the Windows key, type Device Manager, then open it.
  2. To perform an update process, just expand the Display adapters section, then click on the related component and choose to Update driver.
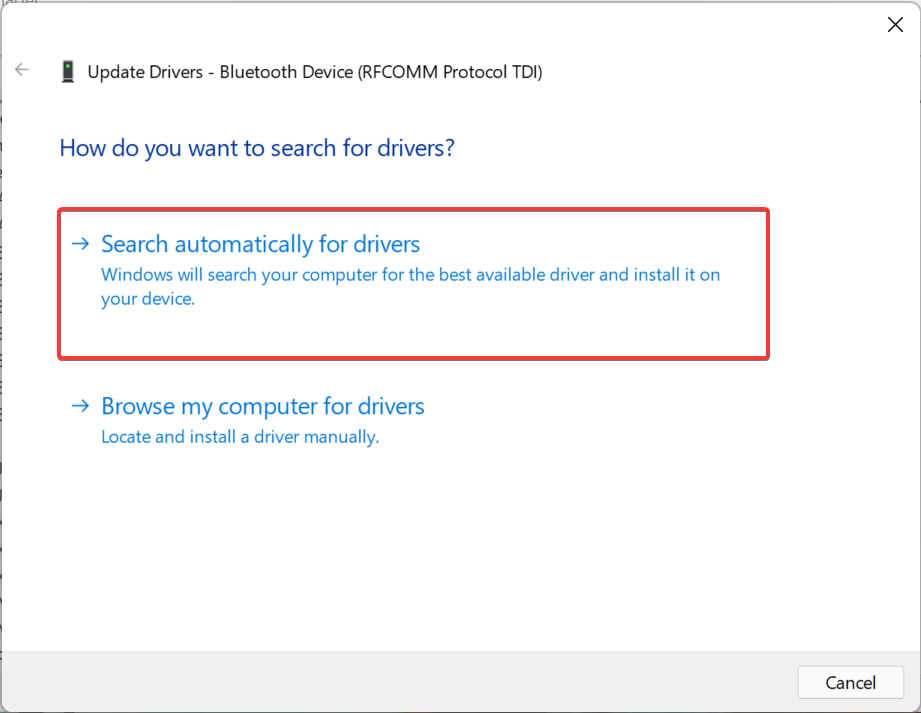
  3. Now, click on Search automatically for drivers.
  4. Your system will notify you in case any available options are found.

2.2 Reinstall

  1. Hit the Windows key, type Device Manager, then open it.
  2. To perform an update process, just expand the Display adapters section, then click on the related component and choose to Uninstall driver.
  3. Confirm the process.
  4. Now, navigate to the manufacturers’ official page, and search for the newest version of the driver you’ve just already uninstalled.
  5. Download it and follow the on-screen instructions to complete the process.

So, these are the most reliable solutions you can try if Warzone Pacific is stuck on the loading screen.

Also, do not forget that some users also reported that Warzone Pacific sometimes gets stuck on fetching online profiles. To prevent this annoying problem, you should check our dedicated guide.

This isn’t the only issue, and many reported Goldflake error on Warzone, but we have a guide that addresses that issue in detail.

As this game also might get into trouble due to a poorly optimized network or restriction to the essential online resources, you can also consider using a specialized VPN tool while running Warzone.

If you’re not sure what option is worth your attention, we feel compelled to offer you an honest opinion.

Private Internet Access is a VPN that will always take care of your online traffic with military-grade encryption. Plus, it will be your main ally against game enemies that can target you in massive DDoS attacks.

In case of facing any additional questions, feel free to leave a comment in the section below.

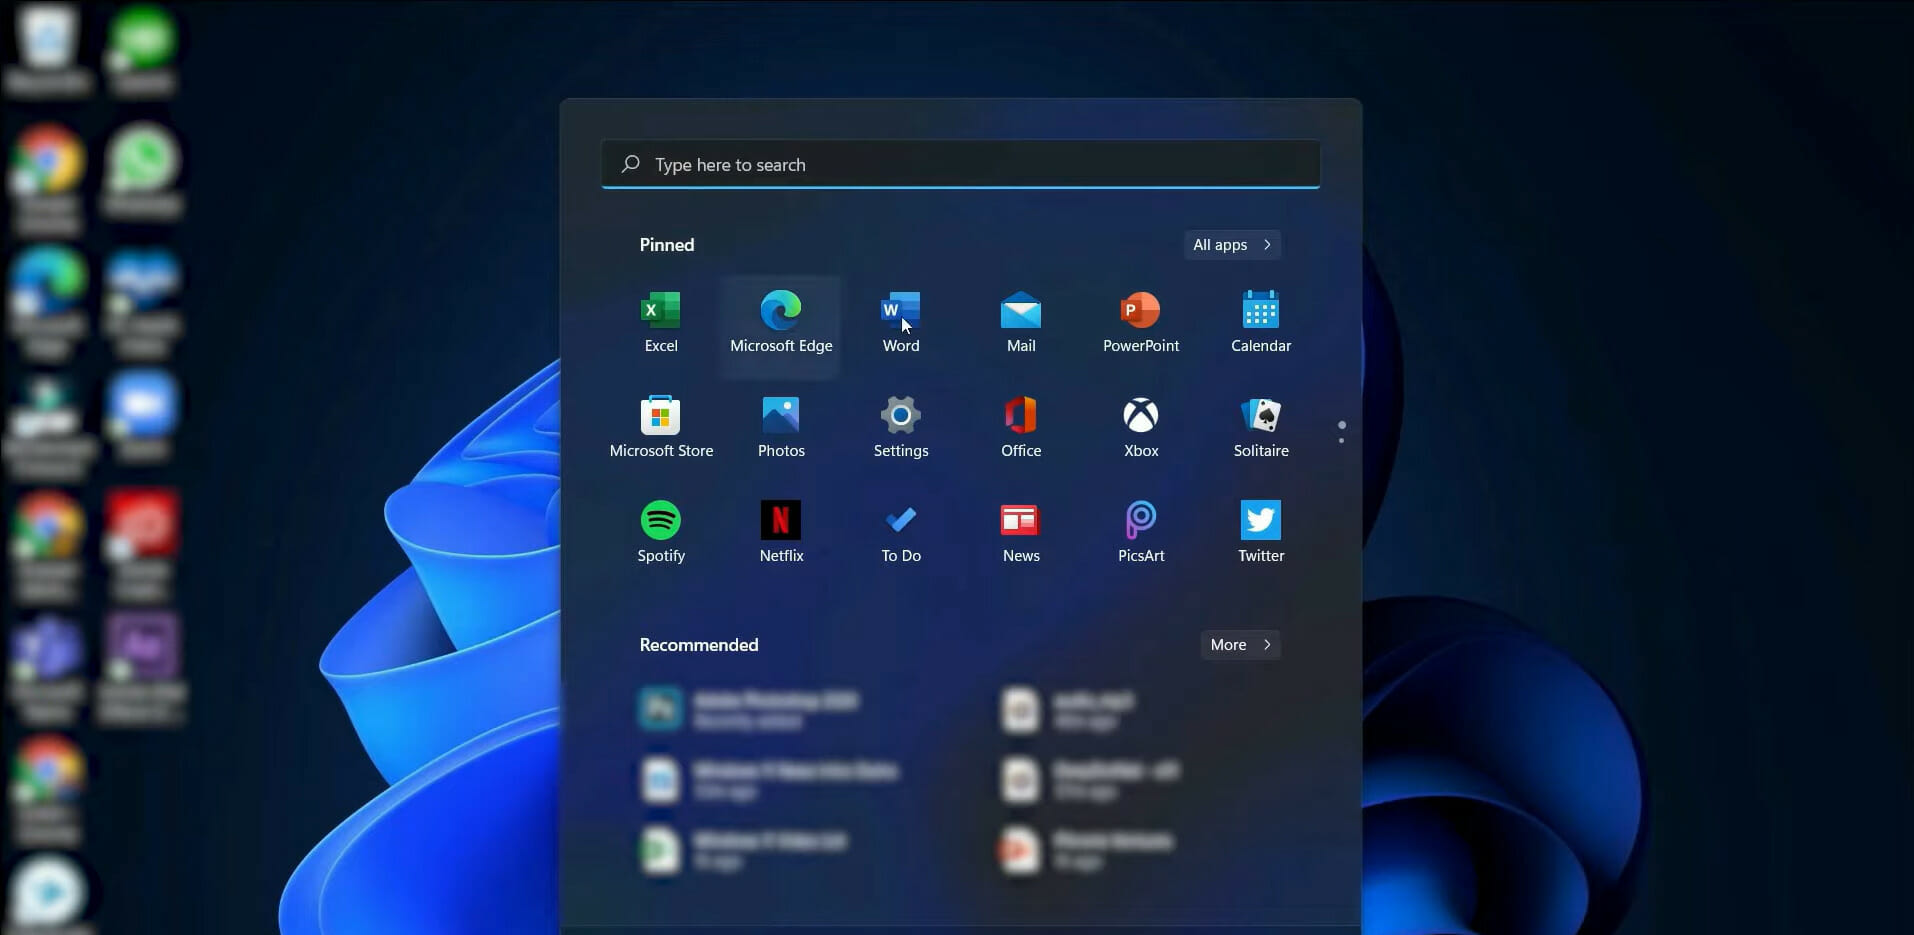
Windows 11 Start Menu Replacement: 5 Best Free Alternatives

For Windows users who are unhappy with the new Start menu in Windows 11, a free or paid Start menu replacement app is the best option.

One of the most debated features of Microsoft’s new operating system is the revamped Start menu, which many users dislike.

Fortunately, third-party apps allow you to replace this feature with a prior version of the Start menu or even totally customize it yourself.

?️Quick Tip:

A third-party utility that uses customization features is Stardock WindowBlinds which includes the grid ball, window frame, shutter, and control button to optimize and modify Windows.

If you absolutely require a pixel-perfect depiction of your trip down memory lane with previous Windows themes, Windowblind’s customizing assets might be able to do it for you. You can customize the look of your whole system by selecting an elegant Start menu and even desktop interface theme skins.

There are many paid apps, but here are five free alternatives for Windows 11 Start menu.

What are the best Start menu apps for Windows 11?

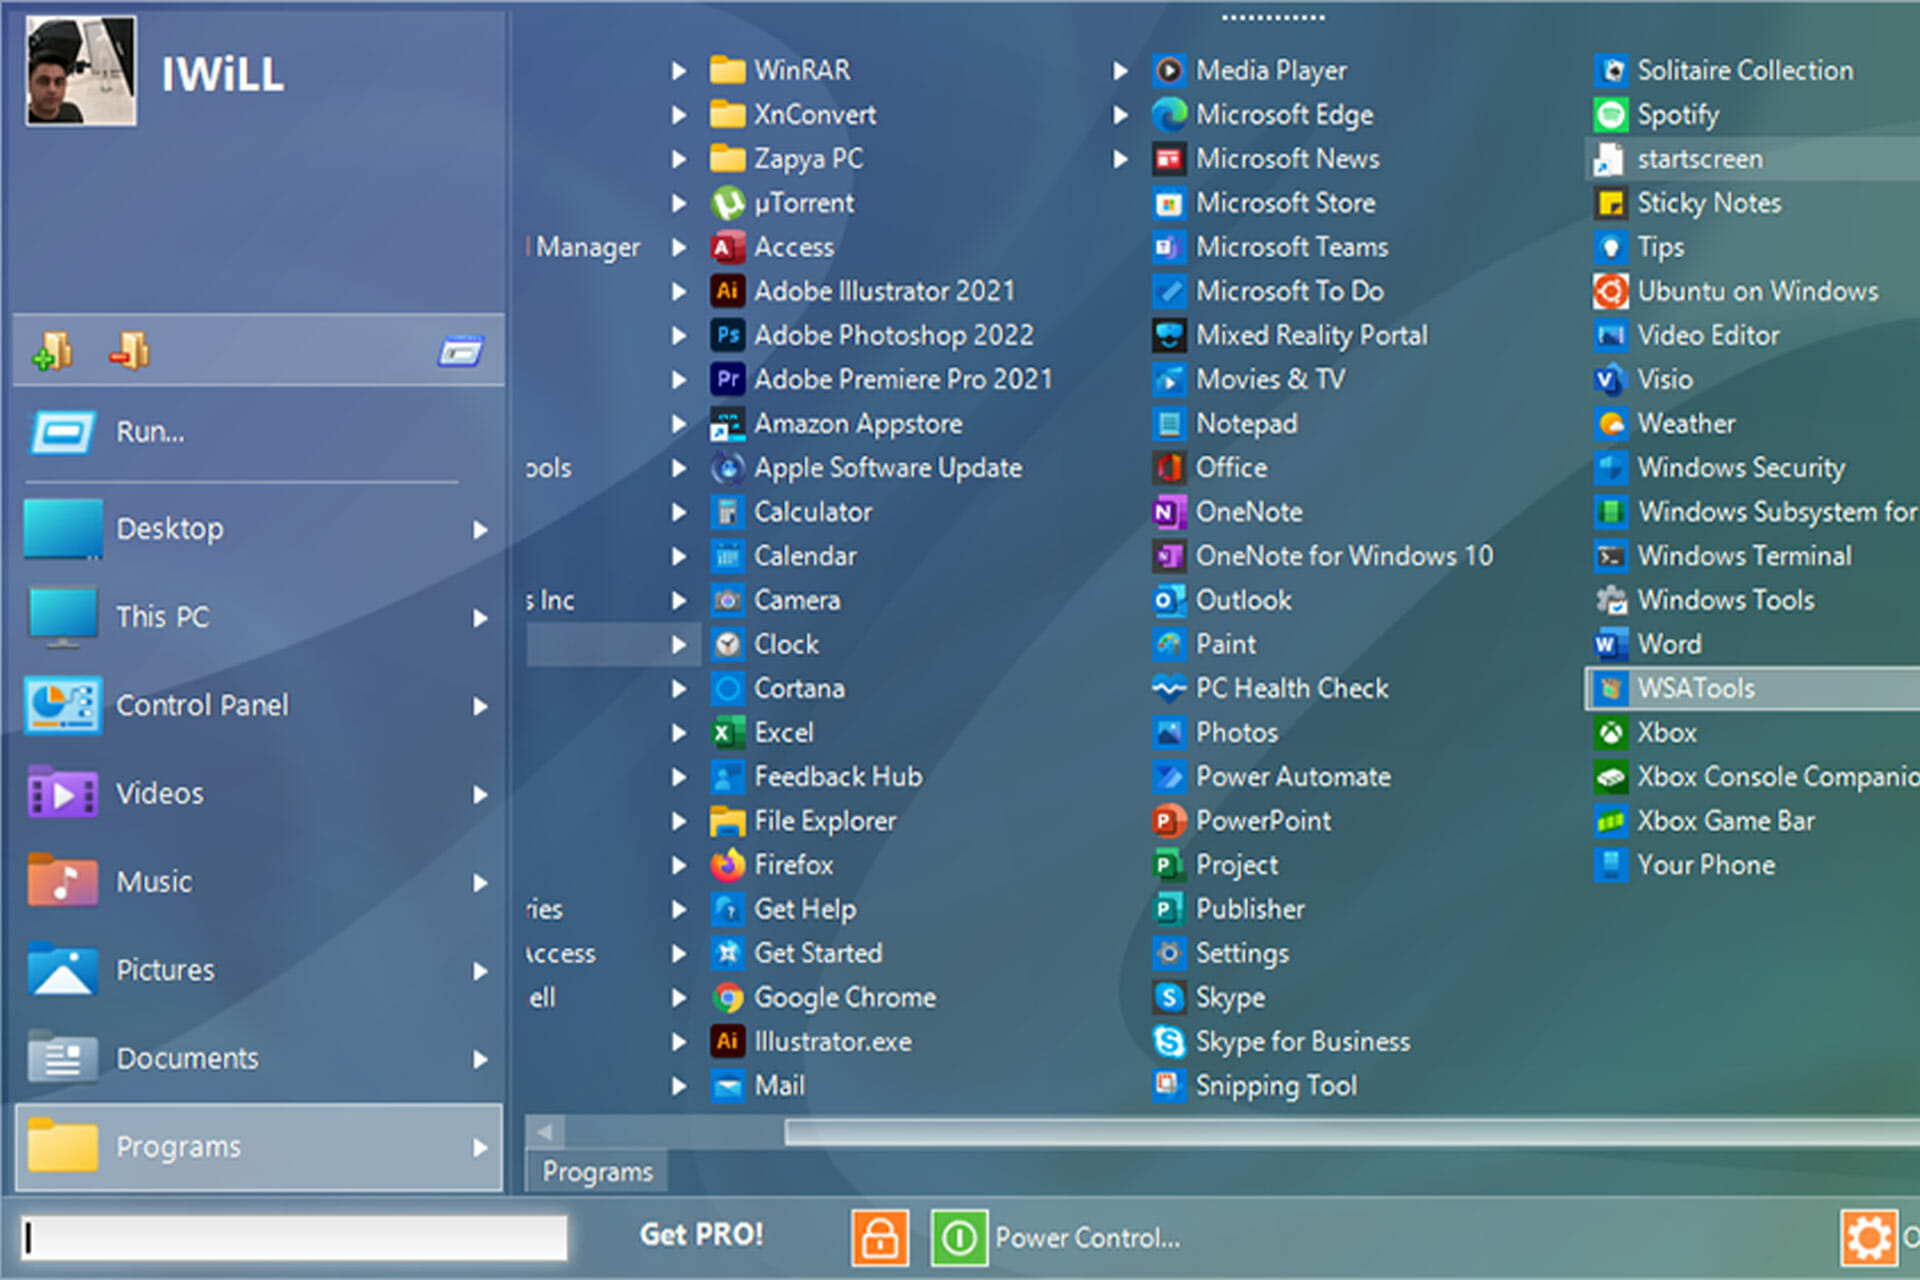
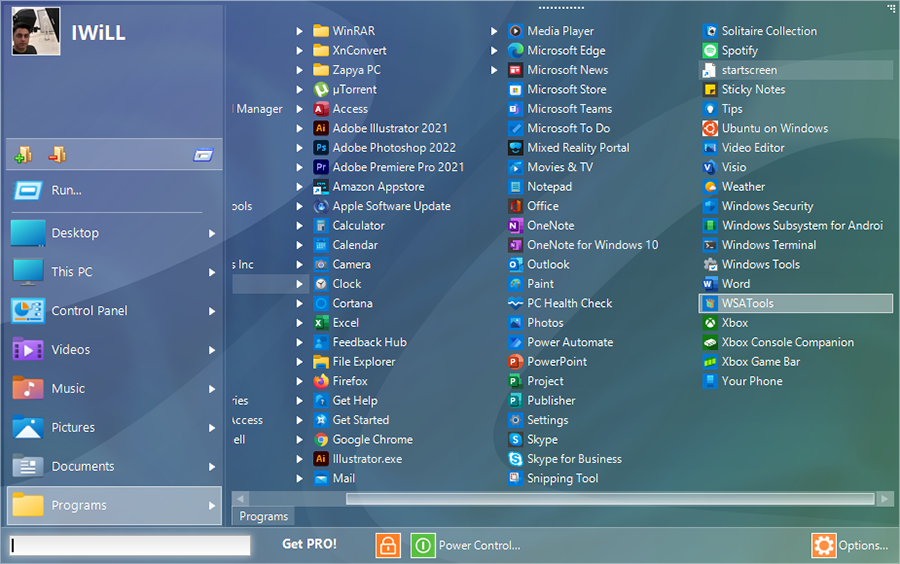
Start Menu Reviver

Start Menu Reviver

This Start menu has 11 different styles and lets you create tiles for applications, Windows tasks, websites, documents, and any other file you need to be accessible all the time.

The tiles can be resized in the same way that they are in Windows 10, and they are also touchscreen-friendly.

While the Start menu Reviver 2.0 officially is only compatible with Windows 7 through 10, it works fine with Windows 11. Additionally, it’s available in multiple different languages.

⇒ Start Menu Reviver

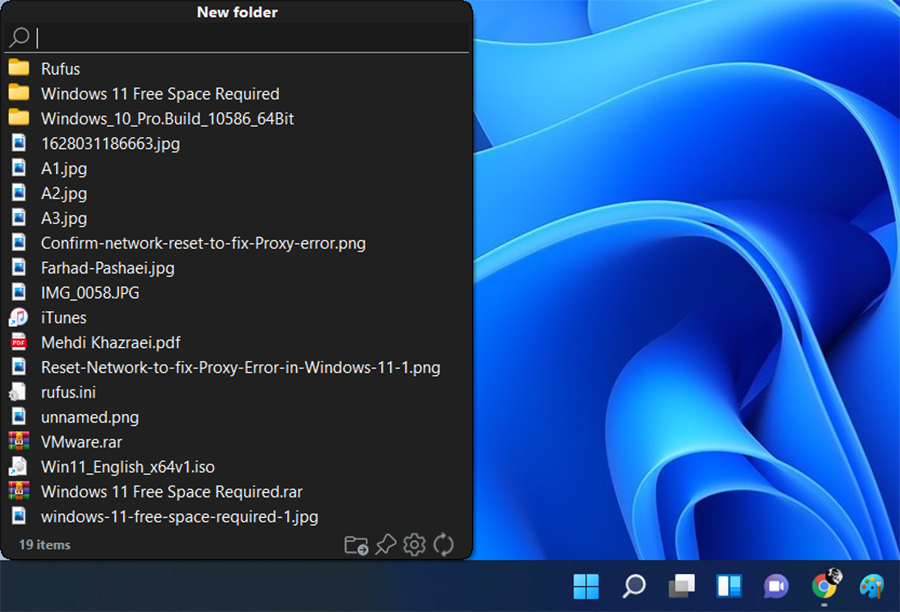
SystemTrayMenu

SystemTrayMenu

This Start menu replacement is a free open-source Start menu alternative for Windows 11/10. It is a handy freeware that you can use to browse and open your files and folders.

It is more like a personalized Start menu where you can add custom root directories and then easily search files through the selected directories.

You can add the folders that you visit frequently or work on often. Then, browse files from those selected folders.

⇒ SystemTrayMenu

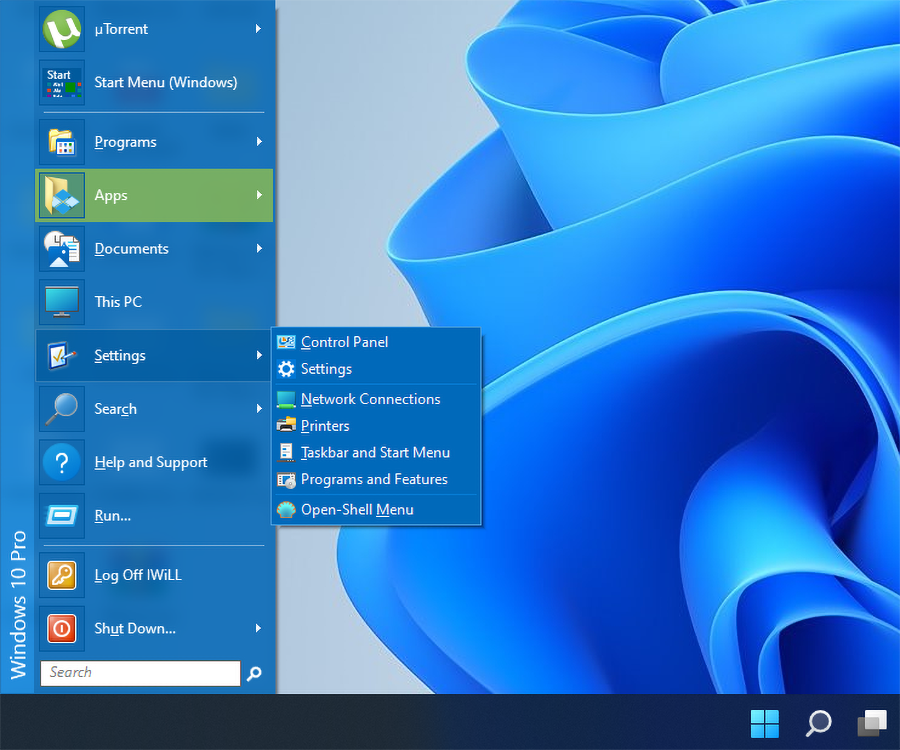
Open Shell

Open Shell

Open Shell can be used to restore the classic Start menu, Explorer, and Internet Explorer shells to a computer’s operating system.

Classic Shell was a popular software that allowed users to restore functionality to OS iterations that had been discontinued by Microsoft.

After the first introduction of Windows 8, the software gained in popularity as users chose to operate with a traditional Start menu rather than the Start UI.

You can learn more about bringing back the classic Start menu experience by reading this detailed guide on the Open Shell Classic Start Menu.

⇒ Open Shell

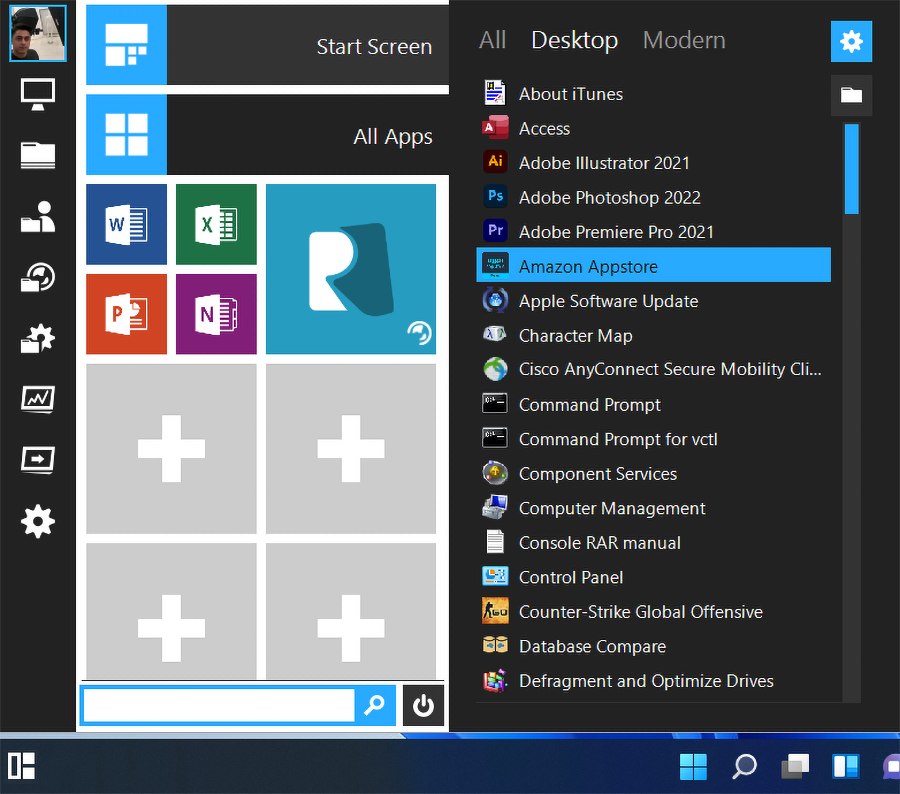
Start Menu X

Start Menu X

Star Menu X is a highly functional replacement for the Start menu, even though they have a paid version, the free version of the website offered on their website has many features.

Here are some of the features of the free version: Replace the Menu, Shut-down timers, Easily varying size, Any scale for any DPI, Internal document search, and Virtual groups.

⇒ Start Menu X

Launchy

Launchy

Launchy isn’t a Start menu replacement and rather an alternative for the concept of a Start menu. It’s an open-source keystroke launcher.

Press Alt + Space to open Launchy, type what you need, and hit Enter to launch the matching result. While you can choose from a few different themes, you won’t waste much time with customization.

Launchy is a free and open-source app; however, its developers accept donations to support their efforts.

⇒ Launchy

Does Windows 11’s Start menu have the ability to be customized?

Though the new Start menu in Windows 11 isn’t as customizable as the one in Windows 10, if you still like to customize it slightly to your liking, there are ways to make it look and work the way you want.

You can change recommended Apps and Files, add folders, add or remove pinned apps, realign the Start button, hide recommended items and change the background color.

To customize the Windows 11 Start menu:

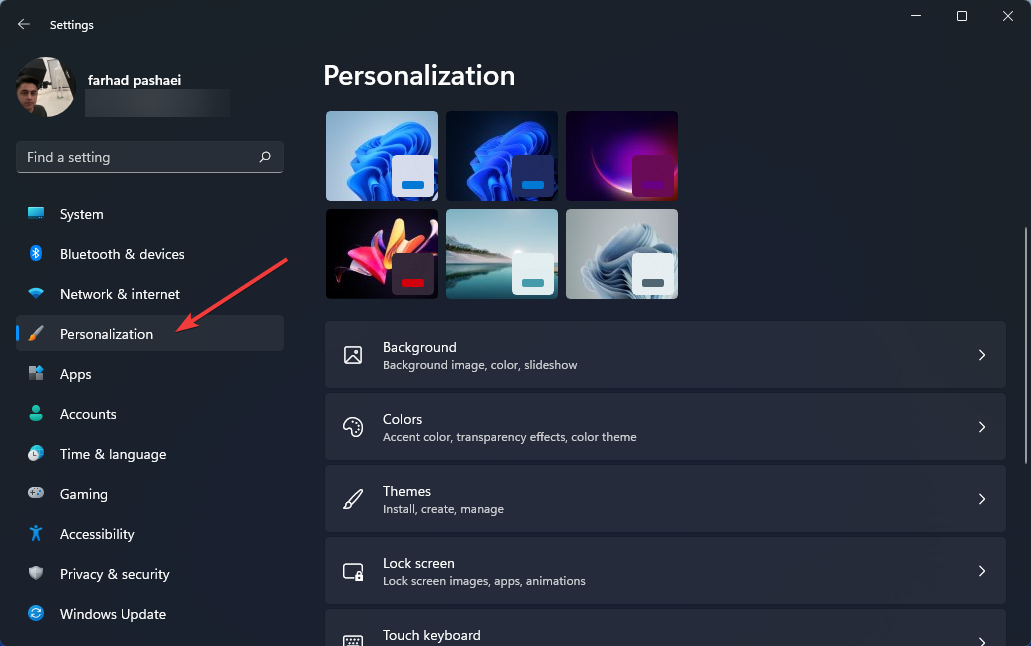
  1. Open the Settings app by pressing Windows + I keys.
  2. Head to Personalization.
    Personalization in Settings app
  3. Start and dig into the few options available here.
    Customizing Windows 11 Start menu

If you’re still unhappy, you can always check the widely available paid Start menu alternatives. Most of them allow you to test the menu for free before you buy it.

It is worth noting that with SystemTrayMenu, you have complete control over what appears on your Start menu, making it the perfect alternative for those who want the maximum personalization options.

Also, make sure to delete the Start menu replacement app if it wasn’t what you were looking for.

These apps are uninstalled similarly to normal apps, which means you must navigate to the Apps & Features option in Settings and uninstall them.

Check out this article if your Start menu is not functioning properly.

Hopefully, these free apps mentioned in this article will help you achieve the desired result according to your preferences.

Let us know which Start menu replacement you prefer and why in the comments section below.

We Can’t Tell if Your PC has Enough Space on Windows 11 [Fix]

You must first check that your PC has enough storage space before installing any operating system, including Windows 11, or you may receive a free space required error.

As you may be aware, Microsoft’s newly released OS includes a revamped Start menu, Settings app, Action Center, and a slew of security improvements.

As a result, Windows 11 demands an excessive amount of free space before being installed, which is understandable. Thankfully, this isn’t a problem that can’t be fixed in a few simple steps.

Before we get into the solutions, let’s look at how much space Windows 11 requires. So without further ado, let’s get started.

How much space does Windows 11 installation need?

According to the official Windows 11 requirements, the drive on which you’ll install the operating system must have 64 GB of free space or more.

In other words, 64 GB is the minimum space required to install this newly released operating system.

So, if your computer does not have enough space, you may receive a number of error messages when trying to update to Windows 11 or install it from scratch.

These required error messages are as follows:

  • Windows needs more space
  • Can’t install due to low disk space
  • Get more space with external storage
  • There is not enough free space on the partition (C:)

When receiving these errors, some may think of buying a new computer. But don’t rush; it doesn’t mean you have to buy anything. Instead, there are easy solutions you can apply to become a Windows 11 user.

How can I fix Windows 11 free space required error?

1. Perform a Disk Cleanup

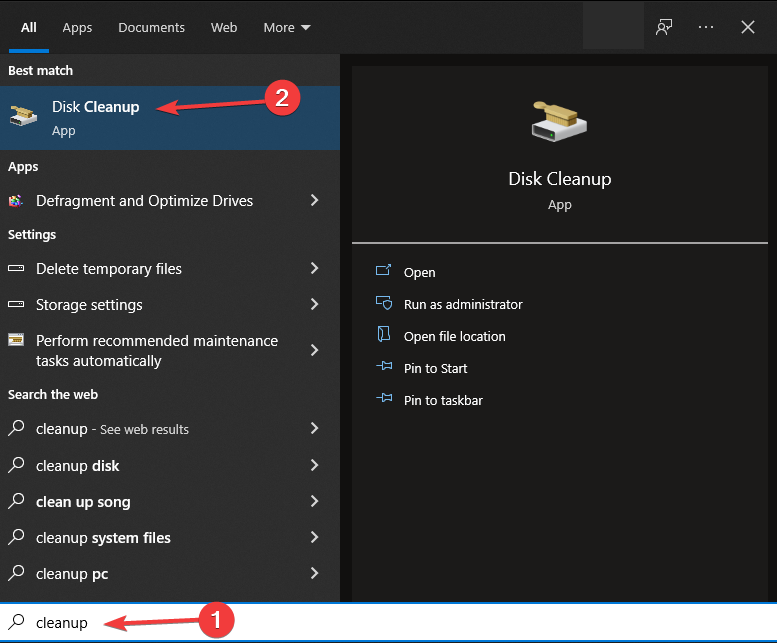
  1. Press the Windows key to open the Start menu.
  2. Type Cleanup in the search box and click on Disk Cleanup.Search for Disk cleanup
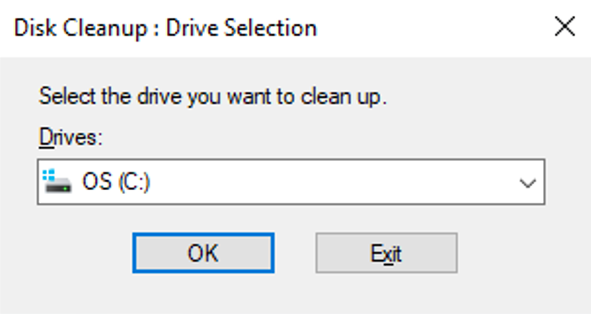
  3. After choosing drive C: or any other drive on which your operating system is installed, click OK.Select drive C
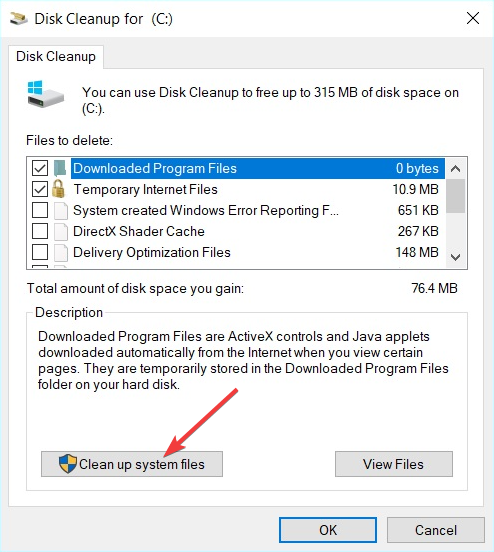
  4. Wait until your drive gets scanned. In the following window, click on Clean up system files.System files
  5. Select that drive again, and click OK.Select drive C
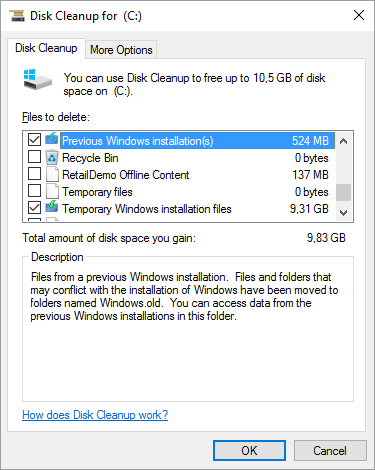
  6. After that, choose Previous Windows installation(s) checkbox and hit OK. Previous Win installations

You’ll need to launch the Disk Cleanup if you want to use a Windows built-in tool to erase the old and outdated data in the Windows.old folder.

In order to execute a system restore or a rollback to a previous version of Windows, Windows.old folder stores the essential Windows files.

Although this folder seems helpful, it can take up to 20GB or more space. So, it’s recommended to delete these files to solve the free space required error. 

Using a tool like CCleaner to clean your hard drive is one of the simplest ways to do it. This software is capable of automatically locating and deleting junk and temp files to clear up a significant amount of space.

CCleaner also offers safer web browsing and scans your PC, recommending quick fixes to improve its performance.

⇒ CCleaner

After performing the steps above, check to see if you have enough space on the drive where the new OS will be installed. If you answered yes, the Windows 11 free space required error has been resolved.

2. Delete hibernation file

  1. Press the Windows key to open the Start menu.
  2. Type Command Prompt in the search box then right-click it and choose Run as administrator.Command Prompt
  3. Type the following code in Command Prompt and press Enter:
    powercfg.exe /hibernate offpowercfg exe code

When Hibernation activates, it consumes some of the system’s disk space for its files. These files also use about 75% of your computer’s RAM.

Deleting these files will also free up a lot of space on the drive where the operating system is installed.

3. Delete temporary files

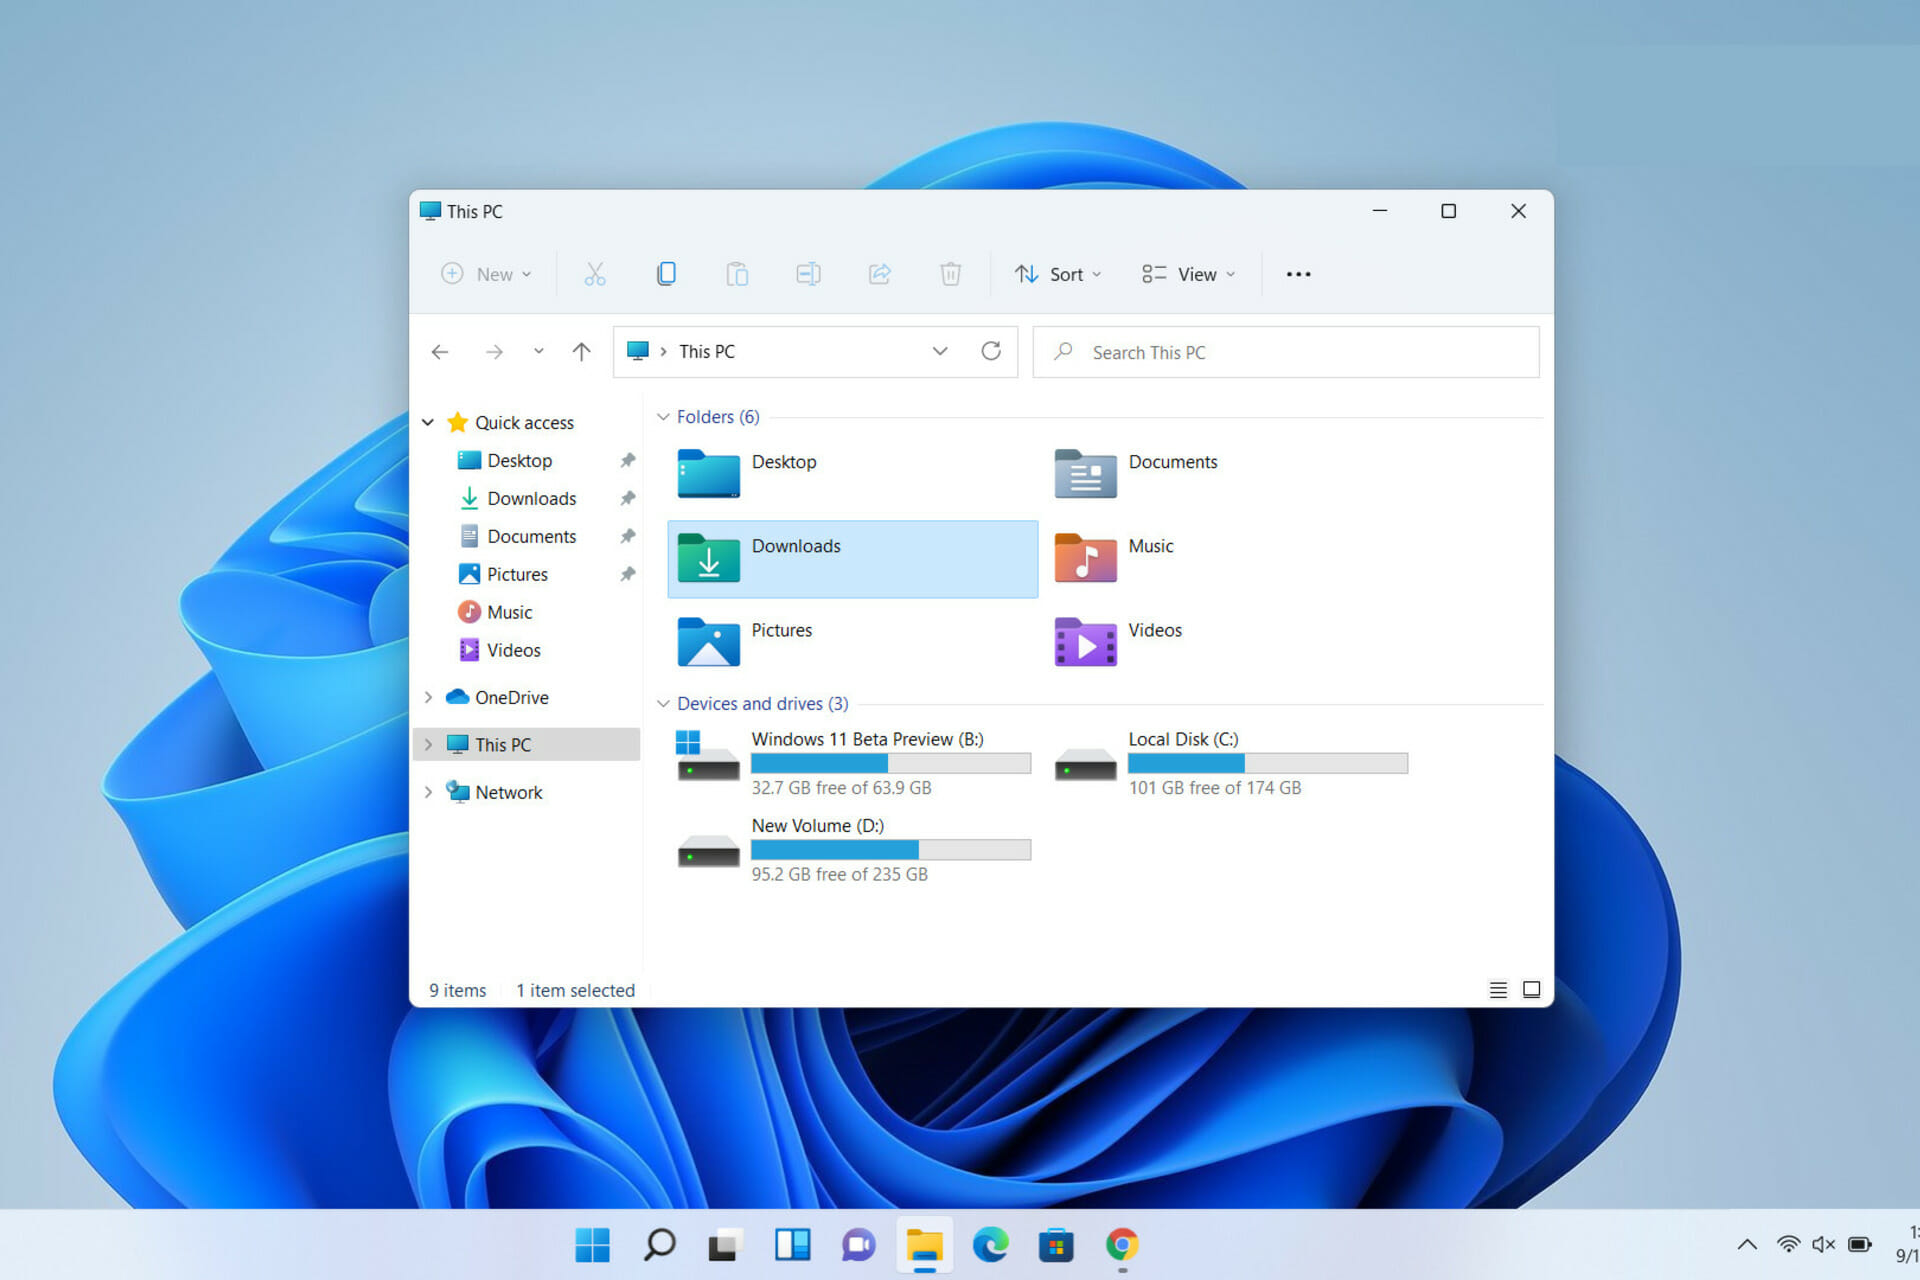
  1. Click on the magnifying glass on the taskbar and open File Explorer.File explorer
  2. On the left pane, click on This PC.This PC
  3. Go to the following directory to find the temporary files folder.
    C:\Windows\Temp or C:\%userprofile%\AppData\Local\Temp 
  4. Select the files in these folders then press Shift + Delete keys to delete them permanently.Deleting temp files

There are many temporary and junk files on your computer or laptop. As you work with your computer daily, these files occupy more and more of your disk space.

You can manually delete junk files from your computer using the steps explained above, or you can leave it to a tool like Windows Disk Cleanup or PC cleaner software.

If you still require additional space, make sure you have all of the following requirements before performing method number four:

  • A second computer or laptop as a bootable drive
  • Two USB flash drive with at least 16GB free space available
  • Two available USB ports on your computer or laptop

4. Install Windows 11 using USB flash drives

Create installation media

  1. Connect one of the two USB flash drives to the second computer or laptop.
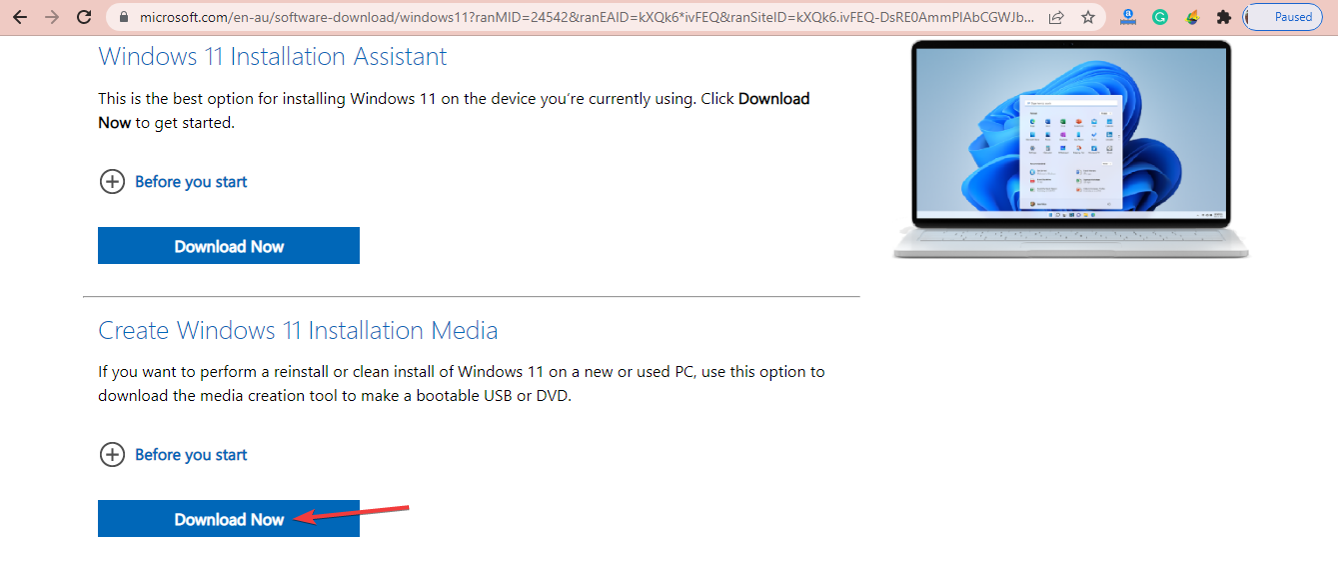
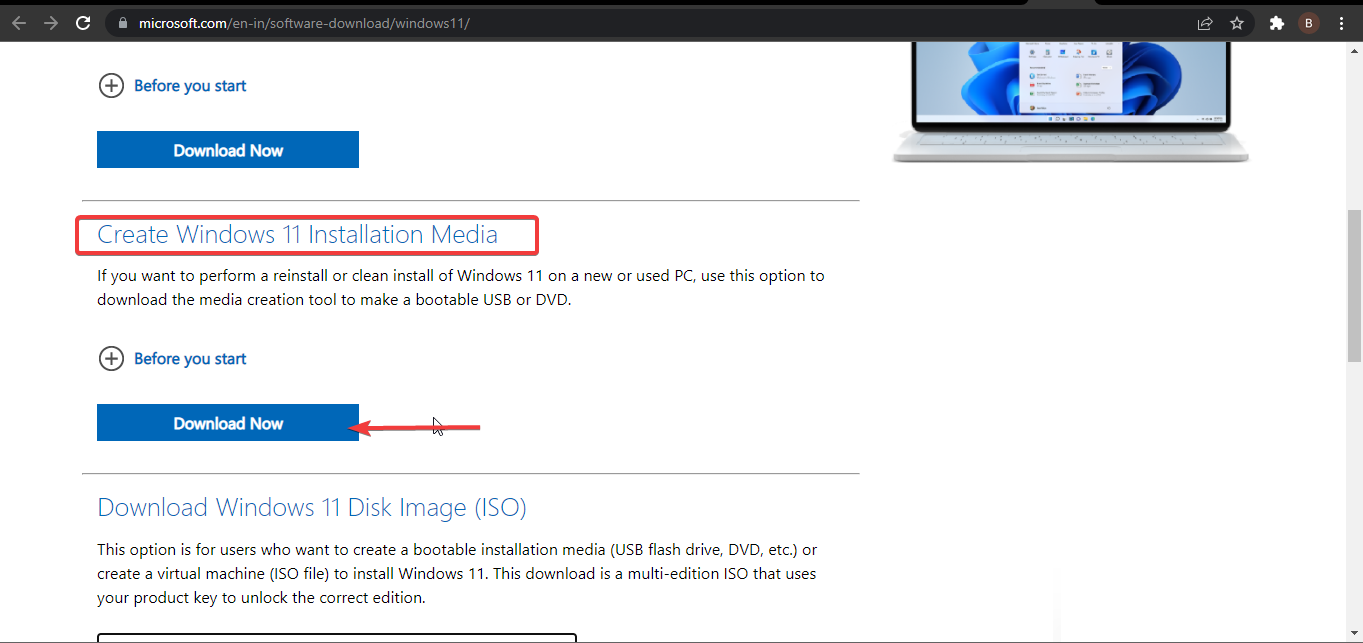
  2. Go to Windows 11 download page.
  3. Under Create Windows 11 Installation Media, select Download Now.Create Windows 11 Installation Media
  4. When the download is complete, double-click on the MediaCreationToolW11.exe file to run the tool.
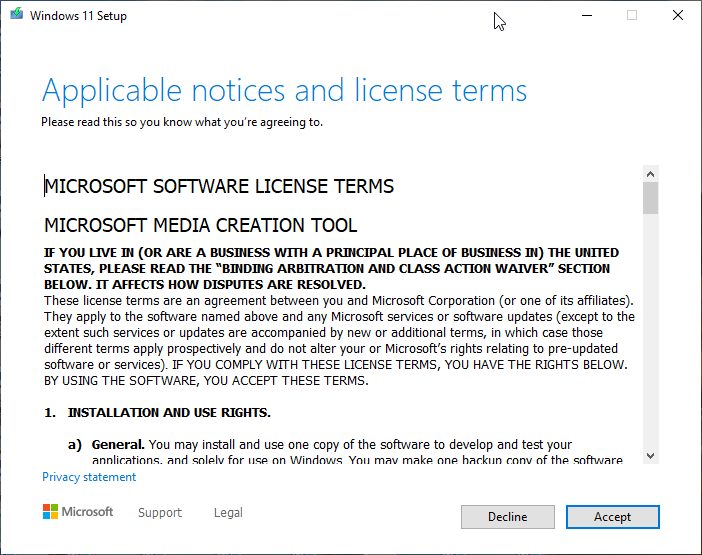
  5. Click on Accept to agree with Microsoft Software License Terms.
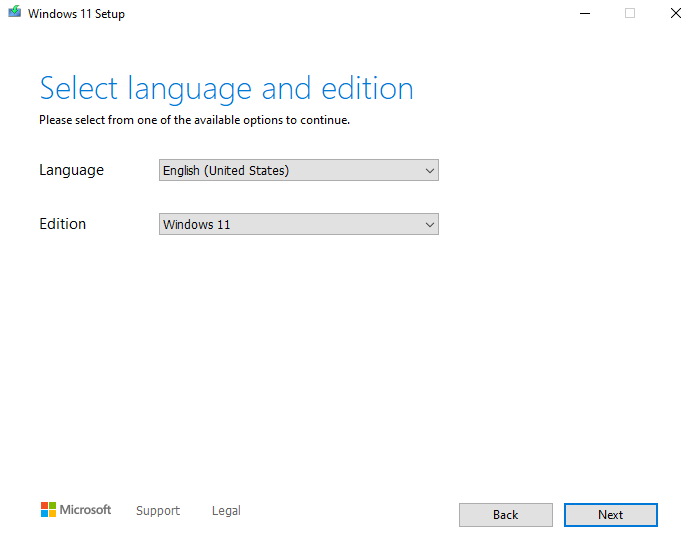
  6. Choose the desired language and edition of Windows 11.Choose edition
  7. Hit Next. 
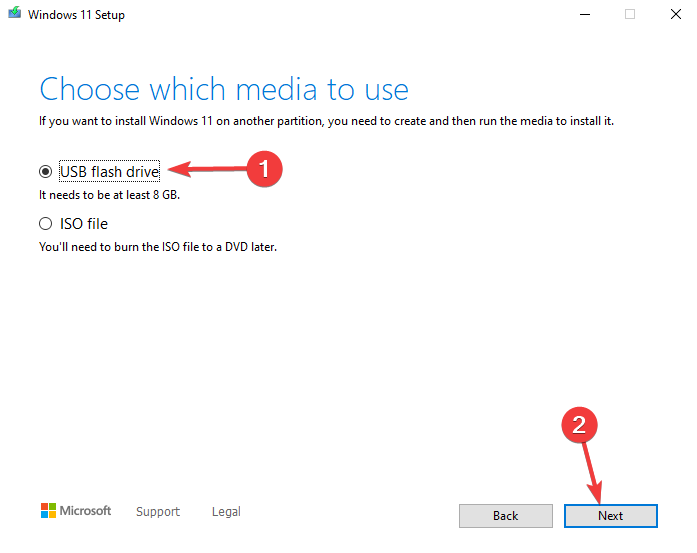
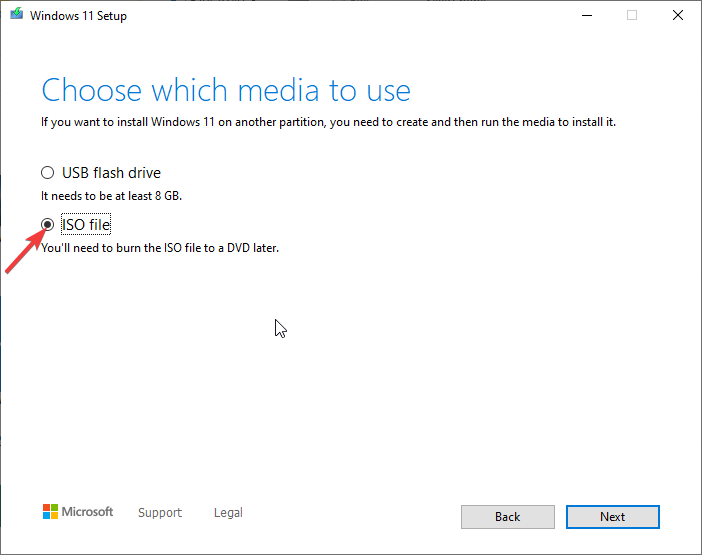
  8. In the following window, select USB flash drive and click Next. Select Flash Drive option
  9. Select the USB flash drive and select Next. 
  10. After the process is finished, click on Finish. It may take minutes. 

Installation process

  1. Connect both of the flash drives to your computer.
  2. Hit Windows + E keys to open File Explorer then from the left-hand menu, select This PC.This PC in File Explorer
  3. Select Devices and drives, and then double-click the flash drive containing the Windows 11 installation files.
  4. To start the installation, double-click the setup.exe file.
  5. Then, follow the on-screen instruction. On-screen instructions
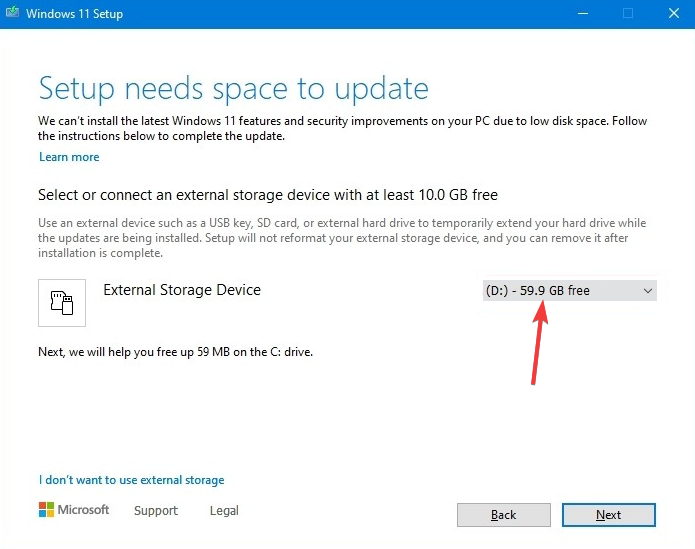
  6. When you reach the step entitled Setup needs space to update, click the drop-down next to External Storage Device and select the empty USB flash drive.Setup needs space to update
  7. Click the Next option.
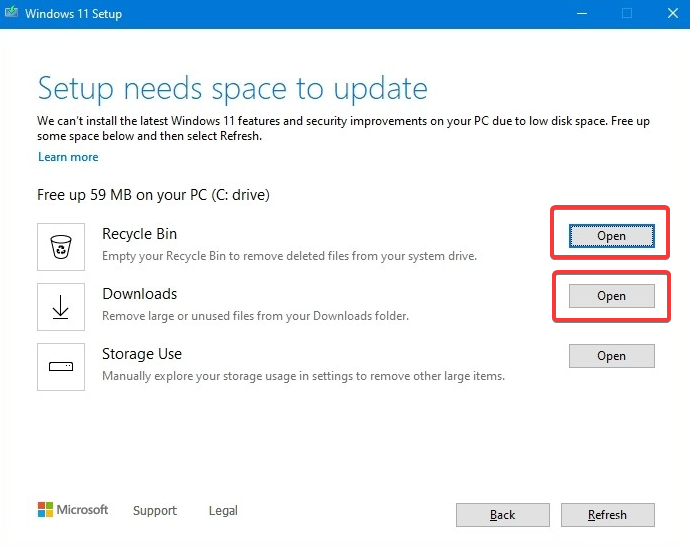
  8. If your computer still has insufficient storage, open the Recycle Bin and Downloads folders, then delete any unnecessary files.Open Download and Recycle bin
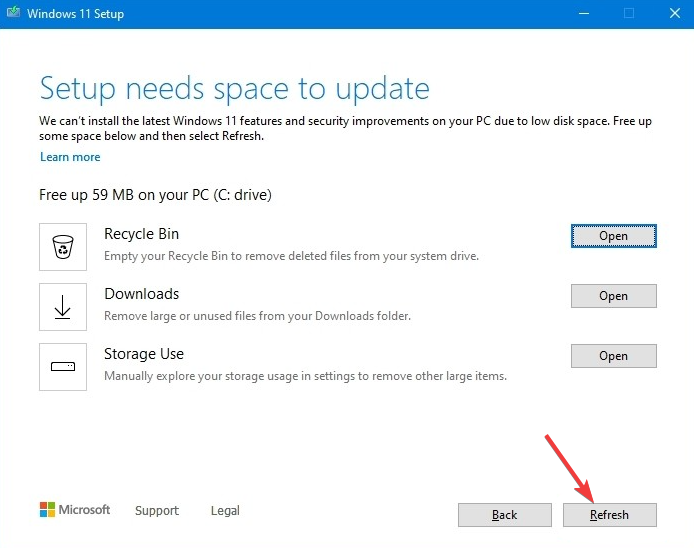
  9. Click the Refresh option. Refresh Windows Storage
  10. Follow the on-screen instructions to complete the setup process.

This strategy is a safe bet for those who have little storage space on their laptops or computers. You only need to take a few more steps with this method. 

Why does Windows 11 need so much space for installation?

The new Start menu, Action Center, universal media control, ability to run Android apps, revamped Settings app, and other security features are all included in Windows 11.

Thus, it’s reasonable that it takes up a lot of space. However, the most pressing issue is that Windows 11 demands 64 GB of free space before it can be installed.

The main reason is that Windows 11 necessitates a certain amount of free space in order to complete the installation process.

During the installation, for example, data is written and removed, requiring an excessive amount of disk space.

So, over 18 GB can be used at any given time throughout the installation process. As a side note, if you have less than 64 GB of storage, Windows 11 will perform poorly.

To get back to our core issue, you can use built-in tools like the Disk Cleanup app to delete junk files if you get a free space error.

You can also use different third-party software and free up the space needed for Windows 11 to be installed completely on your computer. 

Fix: Can’t install Horizon Forbidden West [Gamers’ Guide]

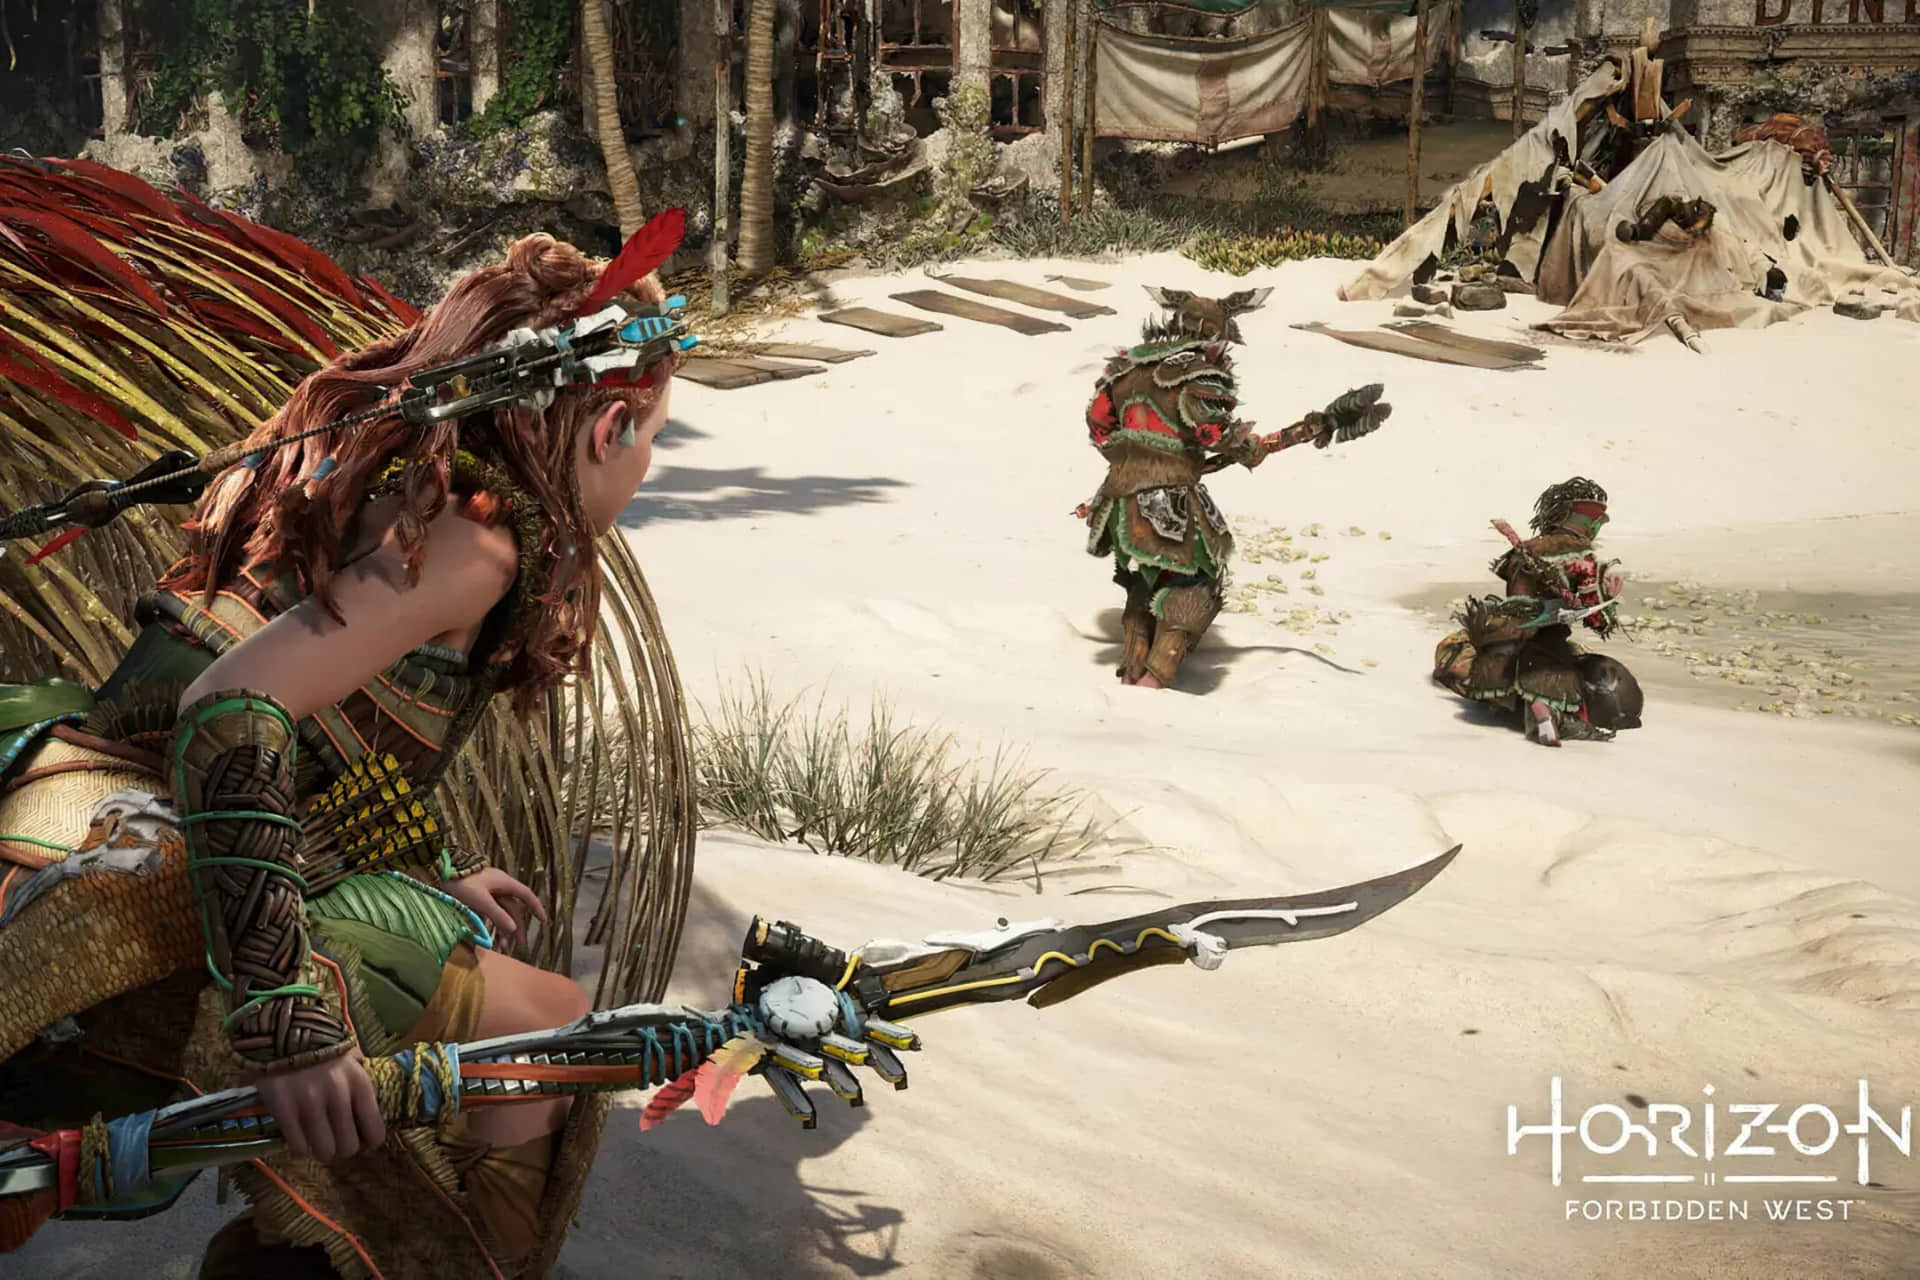
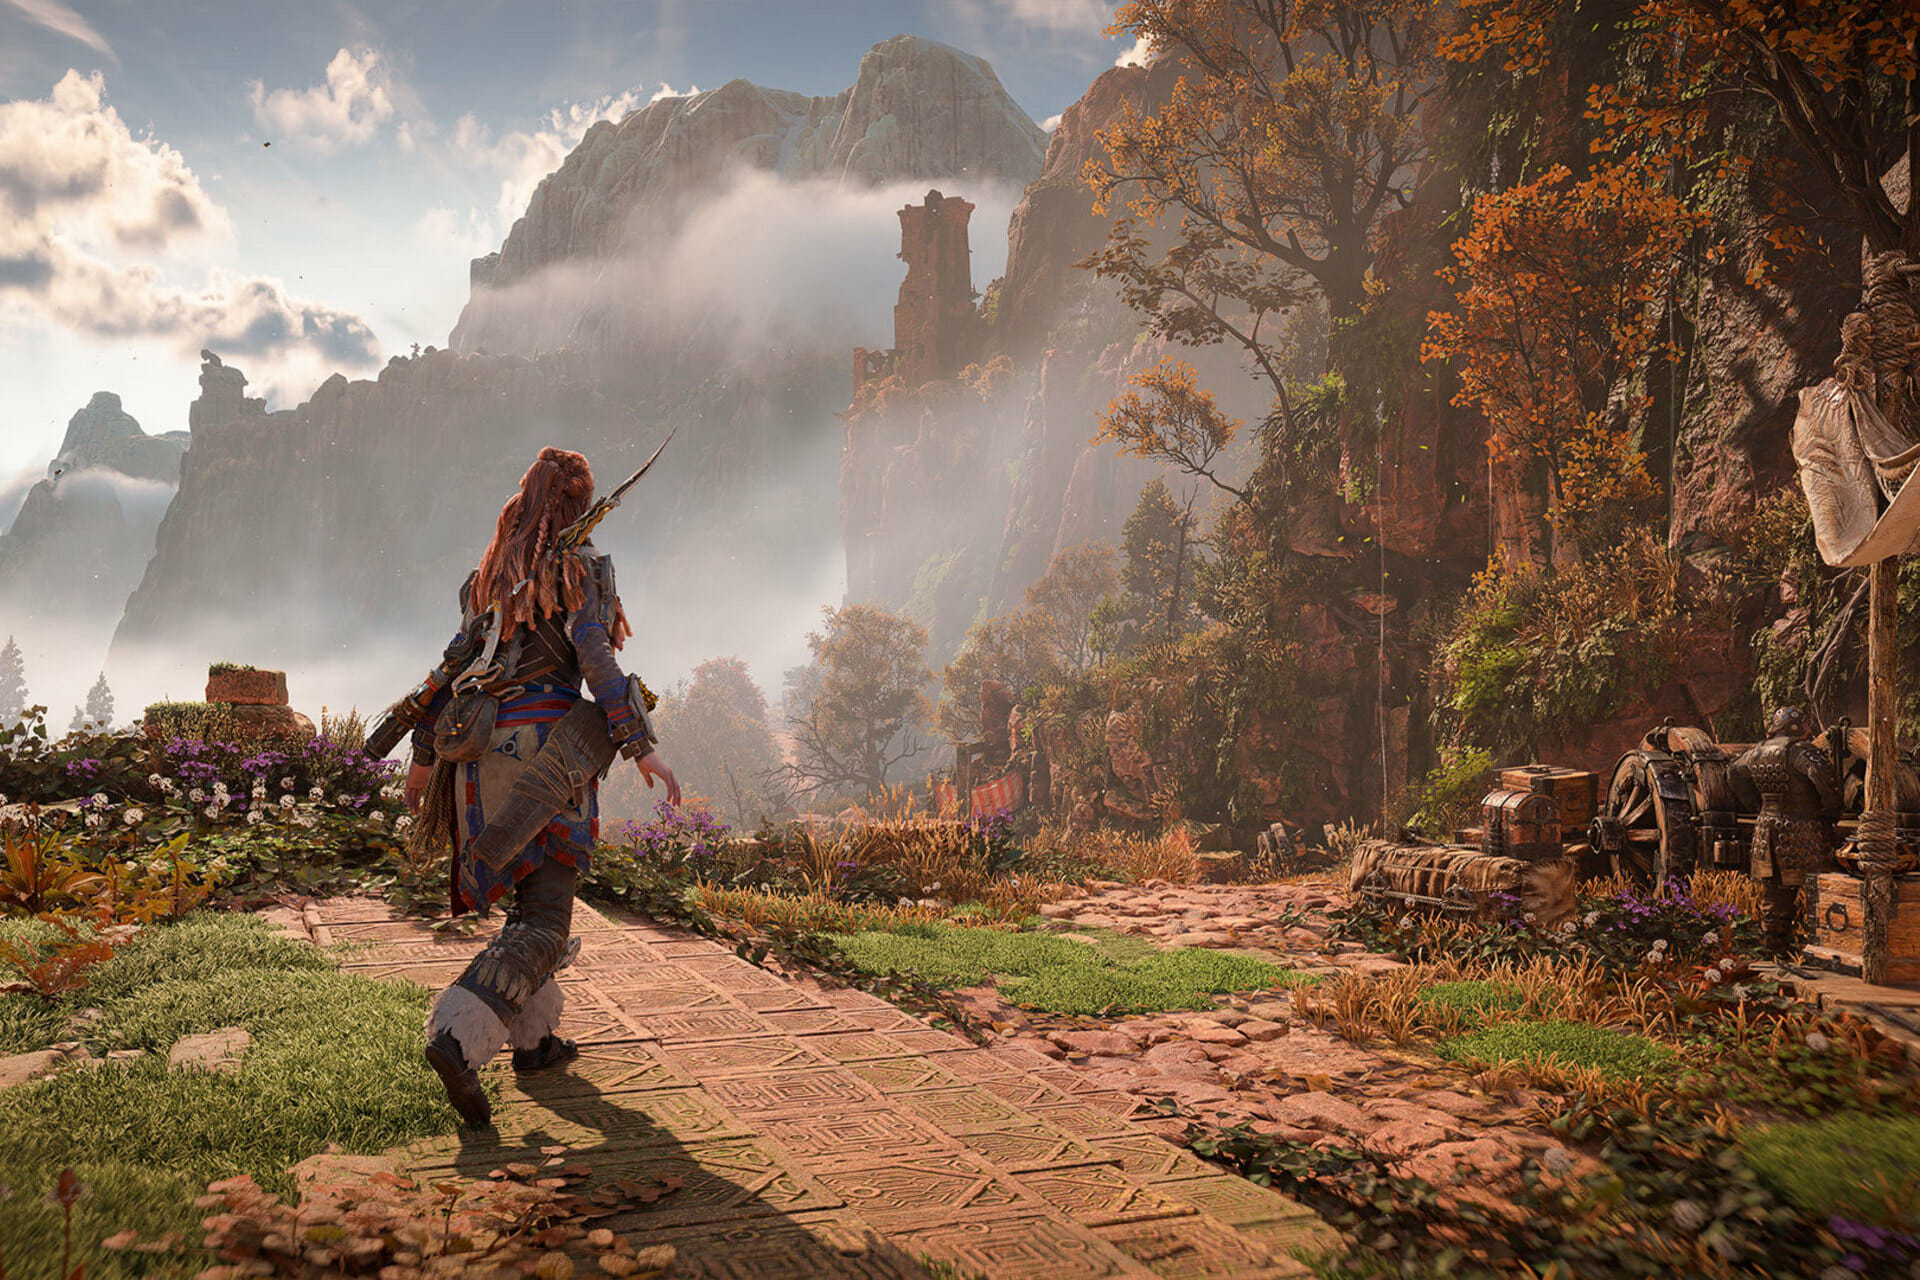
It is undoubtedly that Horizon Forbidden West is a unique game that places you in an amazing post-apocalyptic open-world.

In this matter, many worldwide users are already in the middle of the action and positive feedback didn’t come as a surprise.

Unfortunately for some other excited players that can not wait to tests its amazing tools, it seems like Horizon Forbidden West is not installing in proper terms.

If you want to discover more about how this issue can manifest, check one user’s declaration listed below:

Just picked up this game and I seem to be running into a rare-ish issue. Right around 30.6 GB, the install fails.

As strange as it is, I’ve been able to move the install forward about .03 GB by simply retrying over and over again (it initially happened at 30.562, but im sitting at 30.595 now).

Am I just gonna have to return the disc and buy digital?

Edit: A few more retries and I’ve pushed it to 30.614 now. Maybe if I get past this hump it’ll finish normally

In 90% of cases, this annoying issue might appear on your PlayStation 4 or 5 due to some disk space-related issues. However, randomly appearing bugs can also explain it.

Fortunately, we’ve compiled a few fixes that will help you if Horizon Forbidden West is not installing.

What can I do if Horizon Forbidden West is not installing?

1. Restart your console

1.1 PS4

  1. Power off your console completely, then unplug any cables (Keep in mind not setting it to Rest Mode).
  2. Press the power button on your PS4, then hold it down until you hear two beeps (It usually takes like 10 seconds).
  3. You’ll see a black screen when the system boots up in Safe Mode.
  4. There, you can either choose Restore Default Settings, Initialize PS4, or Initialize PS4 (Reinstall System Software).

1.2 PS5

  1. Press and hold the power button for aproximately 10 seconds, and release it after you hear two beeps.
  2. Connect a DualSense wireless controller via a USB cable.
  3. Then, press the [PS] button on the controller.
  4. Your system should now be in Safe Mode.
  5.  Now, you can choose to Restore Default Settings or Reset PS5.

As we mentioned before, Horizon Forbidden West might not be able to install due to some temporary bugs and glitches. In this matter, it would be worth restarting your console and checking if the issue persists.

2. Make sure you have enough disk space on your console

2.1 PS4

  1. Go to Settings.
  2. Scroll down to System Storage Management.
  3. On the opened page you’ll see how the disk space is distributed and how much free space you have.
  4. Make sure that you have enough to install Horizon Forbidden West.
  5. If not, delete you should delete other saved data.

2.2 PS5

  1. Open PS5 Settings.
  2. Scroll down to Storage.
  3. There, you’ll be able to view both the Console Storage and the Extended Storage.
  4. Click on each of them and check the free disk space.
  5. If you don’t have enough, make sure you delete other saved data.

In conclusion, these are the best two workarounds you can try if Horizon Forbidden West is not installing as it should.

If you encounter any related questions, do not hesitate to leave a comment in the section below.

Fix: Horizon Forbidden West is not detecting HDR

Probably any gamer that got to experience the post-apocalyptic Horizon Forbidden West scenario is totally impressed by its amazing lands, machines, characters, and tribes, all covered in an amazing action environment.

Horizon Forbidden West and all its game-brothers are great, but like any other software, they can sometimes give you serious headaches, and not detecting HDR is a reliable example in this matter.

It seems like similar problems were occurring in Horizon Zero Dawn and this is how one user describes the situation:

When I get into the settings, it says HDR Rendering Unavailable and it says on the bottom: Requires an HDR compatible display.

Well, it’s hooked up to a 4K HDR TV, so what gives? (I’m playing on a PS4 Pro)

Now, even if developers didn’t come up with some specific fixes for Horizon Forbidden West, we can learn from the past.

Thus, make sure you check this guide completely because we’re going to recommend some useful solutions in case you notice that Horizon Forbidden West is not detecting HDR.

What can I do if Horizon Forbidden West is not detecting HDR?

Make sure you follow the correct HDR set up process below

1. PS4

  1. Check the manual for your TV or whatever monitor you’re using to discover which HDMI port supports HDR content.
  2. Go to the TV settings.
  3. Make sure that TV HDMI ports are set to enable HDR content (HDR, Wide Color Mode, HDMI Enhanced Mode, UHD Color Mode, Ultra HD Premium, Ultra HD deep color). The UHD Color Mode must be turned on.
  4. Use a your HDMI cable and connect the console to the right HDMI port.
  5. Keep in mind that your PS4 needs to be paired directly to the TV to output HDR.
  6. Now, on your PS4 console, navigate to Settings.
  7. Go to Sound and Screen.
  8. Cick on Video Output Settings, and make sure that the HDR and Deep Color Output settings are Automatic.
Note icon NOTE
According to some users, in some cases, it would be useful to turn any PS4 screen settings to Auto.

2. PS5

  1. Consult your TV’s specifications to find out which HDMI port supports HDR content.
  2. Go to the TV settings.
  3. Make sure that TV HDMI ports are set to enable HDR content.
  4. The UHD Color Mode must be turned on.
  5. Use a your HDMI cable and connect the console to the right HDMI port.
  6. Open your PS5 Settings.
  7. Go to Screen and Video.
  8. In the Video Output tab, make sure that HDR and Deep Color Output are set on Automatic.
Note icon NOTE
According to some users, in some cases, it would be useful to turn any PS5 screen settings to Automatic.

How can I customize my PS HDR settings?

1. PS4

  1. Go to Settings.
  2. Click on Sound and Screen.
  3. Navigate to Video Output Settings.
  4. Choose to Adjust HDR.

2. PS5

  1. Head to Settings.
  2. Navigate to Screen and Video.
  3. Choose to Adjust HDR.

So, for now, these are the only reliable solutions you can try if Horizon Forbidden West is not detecting HDR.

Until we come up with more fixes, you’ll most probably manage to get rid of this error by using the above steps.

The comment section listed below is dedicated only to you! So, if it’s happening to face additional questions, feel free to use it.

Fix: Bluetooth File Transfer not Completed on Windows

Bluetooth is a useful method for transferring data, but some users claim that Bluetooth file transfer is not working on their Windows 10 PC. This can be a problem, but you should be able to fix it using one of our solutions.

There are many Bluetooth issues that can occur, and speaking of issues, here are some of the most common Bluetooth problems that users reported:

  • Bluetooth file transfer not completed Windows was unable to transfer some files – This message can occur for various reasons, but you might be able to fix it by using the Bluetooth troubleshooter.
  • File not sent Bluetooth Windows 10 – If you can’t send files over Bluetooth on Windows 10, make sure that you’re sending them using the Bluetooth icon in the system tray.
  • Bluetooth file transfer not completed an invalid argument was supplied, an address incompatible – Sometimes this issue can occur if you don’t have a COM port created on your PC. To fix the problem, you just have to create the COM port.
  • Bluetooth file transfer is not completed – Sometimes you might encounter this problem if your Bluetooth drivers are out of date. Simply update them to the latest version and the issue should be resolved completely.

Why is Bluetooth share unsuccessful on Windows 11?

This can happen if Bluetooth isn’t working in Windows 11, and in most cases, the cause of this is outdated drivers, so updating them is a must.

It’s also possible that there’s an issue with the adapter, so if Bluetooth is missing in Device Manager it’s possible that your hardware is having issues.

There are other reasons for this issue, and we covered them in detail in our Bluetooth not detecting devices guide, so be sure to check it out.

What to do if Windows was unable to transfer some files?

1. Use the Bluetooth icon on your Taskbar

If you’re unable to use Bluetooth file transfer on your PC, the problem might be related to the file transfer method. To fix this issue, you just have to do the following:

  1. Right-click the Bluetooth icon in the bottom right corner.
  2. Choose Receive a file from the menu.
  3. Now send the file that you want to transfer from your phone.

After doing that, the file transfer should start and your file will be transferred. This might seem like a workaround, but many users reported that this method works, so be sure to try it out.

2. Use Hardware and Devices troubleshooter

  1. Open the Settings app.
  2. You can do that quickly with Windows Key + I shortcut.
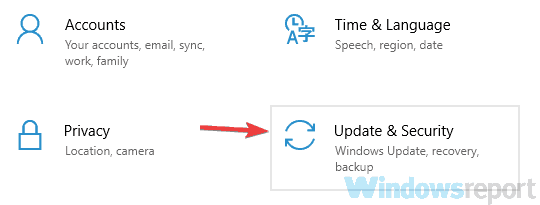
  3. When the Settings app opens, navigate to the Update & Security section.
    Bluetooth file transfer not completed Windows was unable to transfer some files
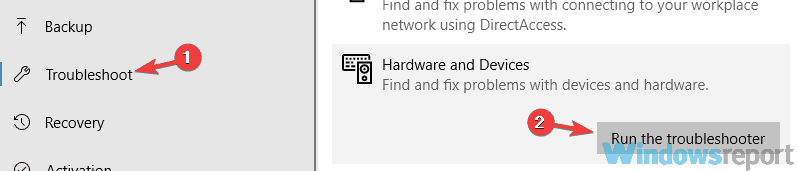
  4. In the left pane, select Troubleshoot.
  5. Now pick Hardware and Devices and click the Run the troubleshooter button.
    File not sent Bluetooth Windows 10
  6. Follow the instructions on the screen.

If you’re having problems with Bluetooth file transfer, you might be able to fix the issue simply by running the built-in troubleshooter. Windows has various troubleshooters available, and you can use them to automatically fix various problems.

Once the troubleshooting process is finished, check if the problem is still there. Keep in mind that this isn’t the most reliable solution, but it might help you out with certain problems.

3. Update your Bluetooth drivers

Outbyte Driver Updater-Banner

Sometimes Bluetooth file transfer is not working because there’s an issue with your drivers. Outdated Bluetooth drivers can sometimes cause this problem to appear and in order to fix it you need to update them.

The best way to do that is to visit your Bluetooth adapter manufacturer’s website and download the latest drivers for your device. After downloading and installing the latest Bluetooth drivers, the issue should be resolved and everything will start working again.

Keep in mind that downloading the drivers manually can be a tedious and complicated task, especially if you don’t know how to properly search for drivers. However, you can use tools such as Outbyte Driver Updater to automatically download and update all drivers on your PC.

The program was created to work for users of all levels, and since the update and fix process is semi-automated, your input is minimal.

Just launch it, select the drivers that you need to be updated or fixed, and that’s pretty much it.

Outbyte Driver Updater

Scan your PC for outdated drivers and update them quickly and automatically with Outbyte Driver Updater.
Free trial Visit Website

4. Set a COM port for your PC

Bluetooth file transfer not completed an invalid argument was supplied
  1. Select Bluetooth from the menu on the left and in the right pane click Bluetooth options.
  2. In Bluetooth settings click the COM Ports tab.
  3. Now click the Add button and select Incoming (device initiates the connection).

According to users, sometimes Bluetooth file transfer issues can occur if you don’t have a COM port set up.

After doing that, you should be able to receive Bluetooth files. Keep in mind that you’ll need to use the method described in Solution 1.

5. Reinstall your Bluetooth drivers

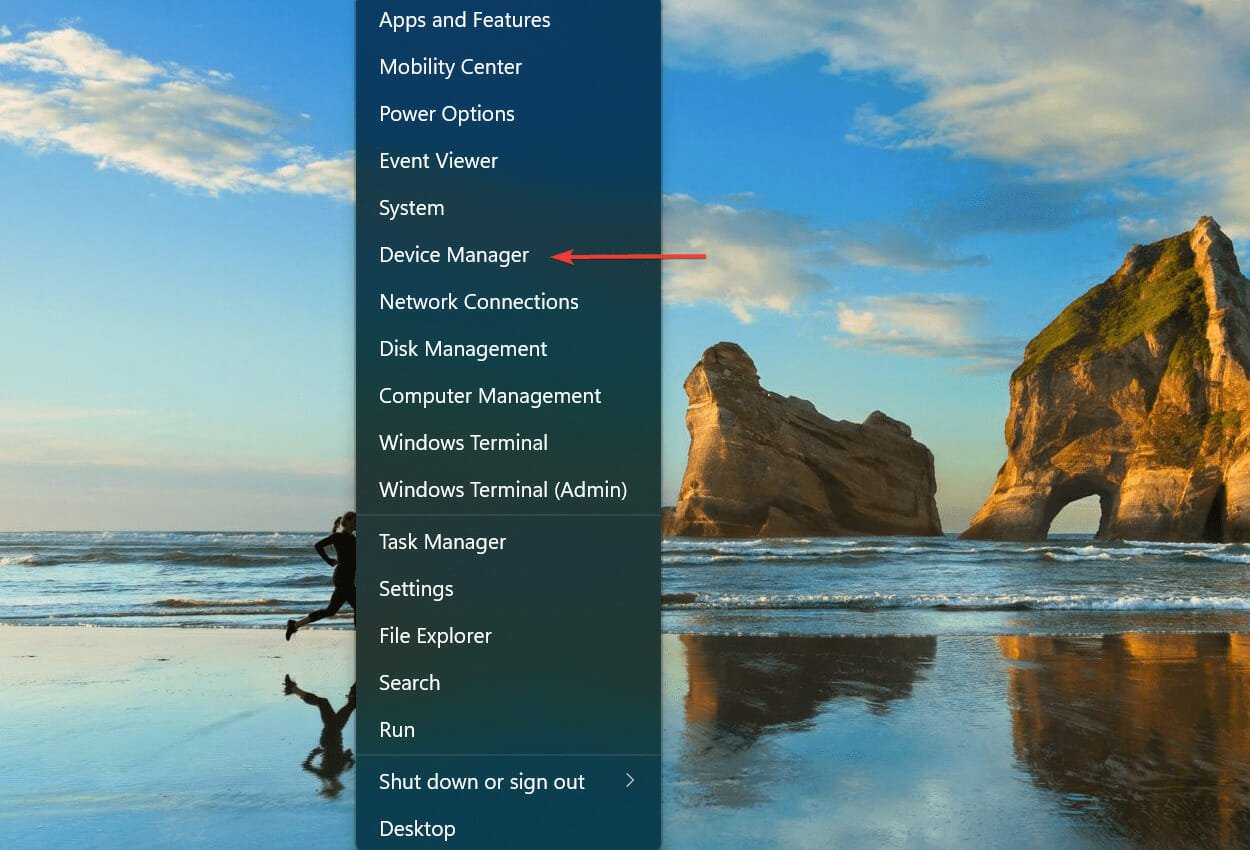
  1. Press Windows Key + X to open Win + X menu.
  2. Now select Device Manager from the list.
    Bluetooth file transfer is not completed
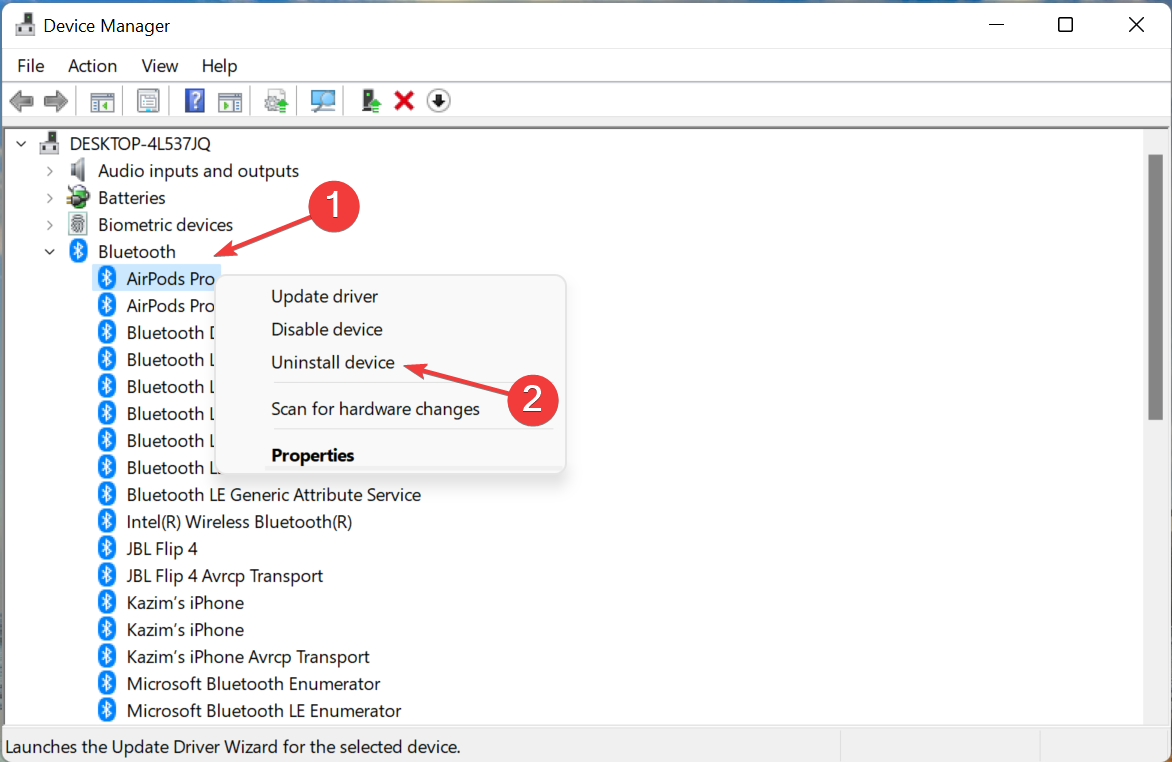
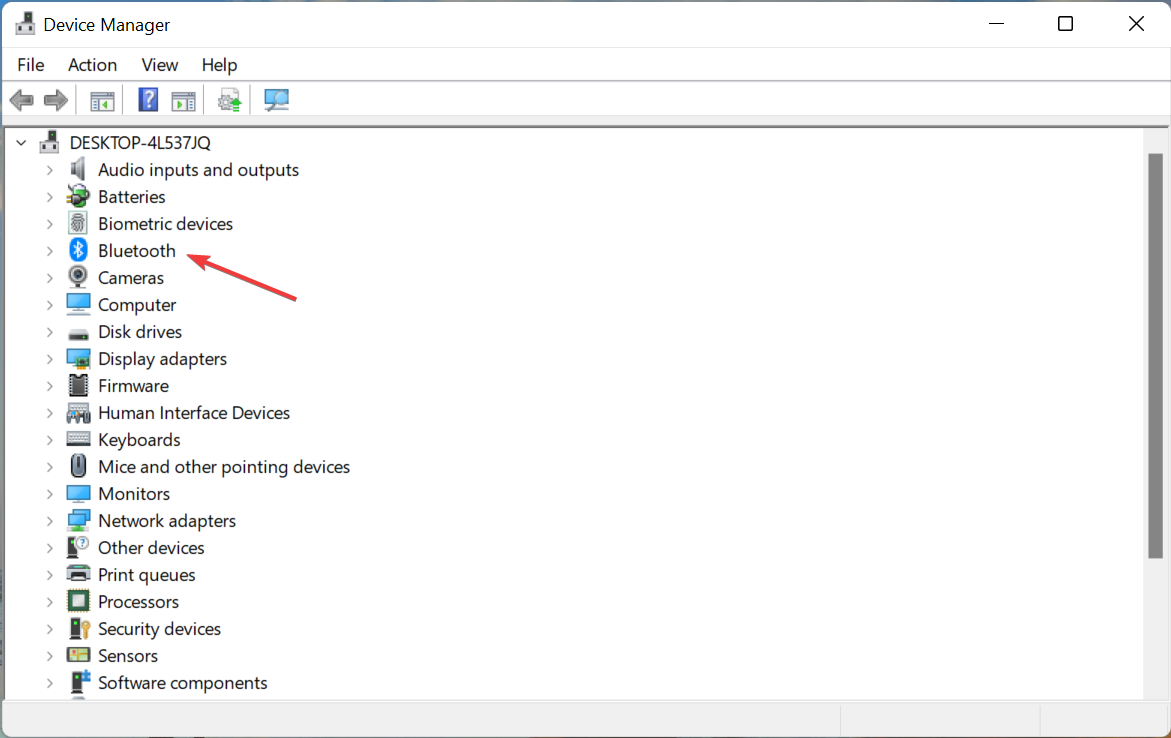
  3. Locate your Bluetooth adapter on the list, right-click it, and choose Uninstall device from the menu.
    Bluetooth file transfer not completed Windows was unable to transfer some files
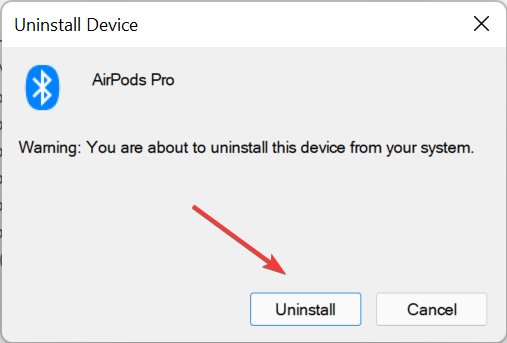
  4. When the confirmation dialog appears, check to Remove driver software for this device, if available.
  5. Now click Uninstall.
    File not sent Bluetooth Windows 10
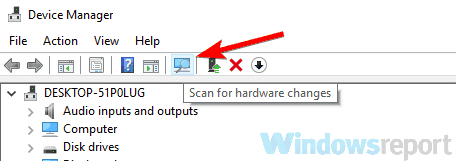
  6. After the driver is removed, click Scan for hardware changes icon.
    File not sent Bluetooth Windows 10

As we already mentioned, Bluetooth file transfer issues can sometimes occur due to your drivers. If you’re having this problem, several users are suggesting simply reinstalling your Bluetooth drivers in order to fix them.

After doing that, the default Bluetooth driver should be installed and the issue will be resolved. If the problem is still there, we advise you to update your Bluetooth drivers to the latest version and check if that solves the issue.

6. Make sure that the Bluetooth service is running

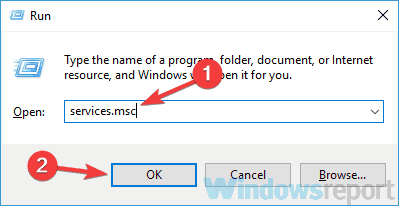
  1. Press Windows Key + R and enter services.msc.
  2. Now press Enter or click OK.
    Bluetooth file transfer not completed an address incompatible
  3. When Services window opens, locate the Bluetooth service and double-click it to open its properties.
  4. Now click the Start button and click Apply and OK to save changes.
    Bluetooth file transfer not completed an invalid argument was supplied

If you’re having problems with Bluetooth file transfer, the issue might be your services. Bluetooth requires certain services in order to run properly, and if these services aren’t running for some reason, you might encounter problems such as this one.

After doing that, try to transfer your files again and check if the issue is still there.

In addition to running the Bluetooth service, some users reported that they fixed the problem simply by making small adjustments to the Bluetooth Support service. To do that, follow these steps:

  1. Open the Services window and double-click Bluetooth Support service to open its properties.
    Bluetooth file transfer is not completed
  2. Go to Log On tab and make sure that This account is selected. Also, set This account value to Local Service.
  3. Remove everything from Password and Confirm password fields and click Apply and OK.
    • Note: Some users are recommending entering your Windows login password in Password and Confirm password fields, so you can try that as well.
  4. After doing that, start the Bluetooth Support service and the problem should be completely resolved.

If the problem is still there, you might have to make changes to the Data Sharing Service as well.

7. Enable file sharing for devices that use 40 or 56-bit encryption

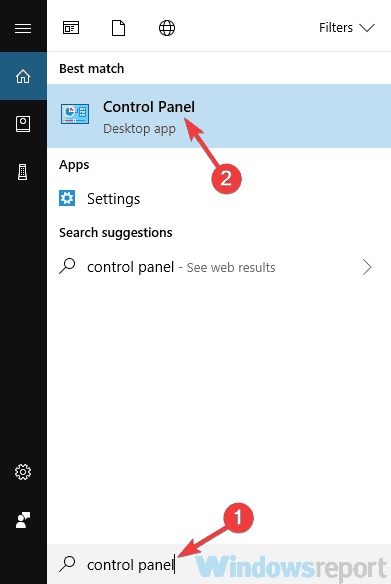
  1. Press Windows Key + S and enter control panel.
  2. Select Control Panel from the list of results.
    Bluetooth file transfer not completed Windows was unable to transfer some files
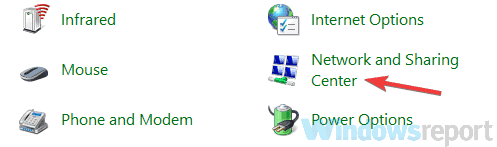
  3. Select Network and Sharing Center when Control Panel opens.
    File not sent Bluetooth Windows 10
  4. From the menu on the left pick, Change advanced sharing settings.
  5. Expand All networks section and check Enable file sharing for devices that use 40- or 56-bit encryption. Now click Save changes.
  6. Now restart your PC to apply changes.

If you’re having issues with Bluetooth file transfer, the problem might occur because you don’t have certain features enabled.

After doing that, the problem with Bluetooth should be resolved and you’ll be able to transfer files without any problems.

8. Use fsquirt command

  1. Press Windows Key + R and enter fsquirt.
  2. Now press Enter or click OK.
    Bluetooth file transfer not completed an invalid argument was supplied
  3. Select Receive files from the menu.
  4. Now try to send your files over Bluetooth.

Sometimes Bluetooth transfer might not work, but you can fix this problem simply by manually initializing the file transfer.

This method might not be the most efficient, but it works, so be sure to try it out.

9. Install the latest updates

  1. Open the Settings app and go to the Update & Security section.
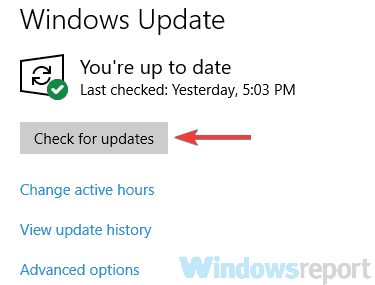
  2. Now click Check for updates button.
    Bluetooth file transfer is not completed

If you’re still having problems with Bluetooth file transfer, you might be able to fix the issue simply by installing the latest Windows updates.

Microsoft is frequently releasing new updates, and these updates can sometimes fix various issues, such as this one.

If any updates are available, they will be downloaded automatically in the background. Once your system is up to date, check if the problem is still there.

Bluetooth file transfer issues can be quite annoying, but we hope that you managed to fix them using the solutions from this article.

FIFA 21 PC Controller Not Working: How to Fix It Easily

Players around the world are reporting that they are having issues with their controllers when playing FIFA 21.

It would seem that whenever they launch the game, the controller starts to behave erratically

 […] for some weird reason the controller is freaking out and moving and choosing random stuff on its own, I tried third party controller applications, still same problem.

This wouldn’t be the first time players are having problems handling a FIFA title with their controller anyway and it’s certainly not the sole version to be affected. Here’s what users had to say about this.

Where can I encounter this issue and what to expect?

  • FIFA 20/21/22 PC controller moving on its own
  • FIFA not recognizing controller
  • Different triggers (FIFA 21 controller not working in-game/stops working mid-game)
  • FIFA 21 scrolling bug/PC controller skipping or settings bug (settings not saving)
  • Twice the problem: FIFA 21 detecting 2 controllers (You may know this issue under the following names: FIFA 21 double controller bug or FIFA 21 PC controller double input)
  • FIFA 21 controller menu glitch
  • FIFA 21 PC controller not working Origin/EA Play

This article covers a few simple solutions that you can use in order to make your controller work fine while playing FIFA 21.

Tip icon Editor’s tip
FIFA 21 is not just a game, it is the closest thing to football that you can get without actually being at the stadium. Get it now for PC, Xbox, PlayStation, and Nintendo Switch!
  • 700+ teams
  • 30 official leagues
  • Unparalleled graphics
  • 17,000+ authentic players
  • Have a career in professional football and grow
  • Play as one of the best football teams of the 2021 season
  • Playing online can be a pain with an older PC

What to do if my controller is erratic in FIFA 21?

1. Make sure you have the latest drivers

  1. Make sure your controller is connected to your PC
  2. Head over to your device manufacturer’s website and download the latest driver for your controller
  3. Press Windows + X
  4. Right-click on the controller and select Update driver
  5. A new window will pop up.
    • Choose Browse my computer for driver software
  6. Click Browse, go to where you downloaded your browser in step 2
  7. Click Next, and let the update unfold
  8. Disconnect and reconnect the controller to your PC
FIFA 20 controller issues browse driver

Additionally, you could always go for a third-party driver updater or fixer to help with the job.

One perfect example is Outbyte Driver Updater, a tool that is so lightweight, you might as well consider it portable.

Outbyte Driver Updater automatically update drivers

However, don’t let this trait fool you, since you can easily fix and update all drivers on your PC and laptop, regardless of whether they are broken, old, or missing entirely.

Simply download and install it, and let the scanning procedure do its thing.

Outbyte Driver Updater will then download and install the latest drivers for all your hardware components, and all you have to do is finish off with a system Restart.

Outbyte Driver Updater

Updated drivers mean no controller issues, and no controller issues mean more games that are won, so get Outbyte Driver Updater!
Free trial Visit website
Outbyte Driver Updater

Outbyte Driver Updater

Updated drivers mean no controller issues, and no controller issues mean more games that are won, so get Outbyte Driver Updater!
Free trial Visit website

2. Make sure your controller is correctly configured in the Control Panel

  1. Press Windows + R
  2. Type in control.exe, which will open the Control Panel
  3. Click on Hardware and soundCongigure xbox controller control panel
  4. Go to Device and Printers
  5. Look for your controller in within the list in front of you
  6. Right-click it and select Properties
  7. Check to see if all settings are in order

Tired of downloading drivers all on your own? We’ve got you covered!


3. Make sure FIFA’s controller settings are set appropriately

If you have the PC version of FIFA 21, then make sure it is set to play using a controller and not a mouse and keyboard.

A well-known issue makes it so that the controller may behave randomly in such situations.

If you want to know more about how to use your Xbox One controller in Windows 10, check out this dedicated guide.

Not an Xbox fan? A similar guide for PlayStation controllers exists as well.


4. Make Windows install the default drivers for you

  1. Press Windows + R
  2. Type in control.exe, which will open the Control Panel
  3. Click on Hardware and sound
  4. Go to the Device Manager
  5. Look for your controller in within the list in front of you
  6. Right-click it and select UninstallFIFA 20 controller issues install default driver
  7. Disconnect the controller from the PC
  8. Restart your PC and reconnect the controller
  9. Wait for the default drivers to install

5. Install the latest version of your favorite controller emulator

There are plenty of controller emulators out there for both Xbox and the PS4, and if you’re using one, make sure you have the latest version.

More so, you should consider trying different ones from time to time, as some may become incompatible with a new game’s coding.


6. Wait for a new patch to fix things up

Electronic Arts is infamous for having a long history of releasing FIFA titles full of bugs, so what’s happening with FIFA 20 isn’t much of a surprise.

However, they are quick to fix any major issues, and an uncontrollable controller is indeed a major issue.


By following these steps, you should no longer have any controller issues with FIFA 21.

Let us know which solutions worked best for you by leaving us a message in the comments section below.

Windows 11 Tweaks: 7 Best That You Must Try

Windows 11 has certainly lived up to the billing of the first major OS upgrade by Microsoft in years.

It is a considerable improvement on the already superb Windows 10, boasting some mind-blowing features and options. It is, without doubt, the joy of gamers, editors, and designers.

However, with Windows 11 being relatively new, there are many experiences and performance-enhancing features yet to be tapped by users.

No matter what you think of this OS after the upgrade, know that there are a series of alterations that can make your experience better in all ramifications. This guide packs in the best Windows 11 tweaks and tips that will help you take advantage of its features.

Is it safe to alter Windows 11 default settings and features?

Yes, it is absolutely safe to tweak Windows 11 settings and features. The settings are there to be altered to suit your preferences.

The best Windows 11 settings improve your PC performance exponentially. Also, some of the best tweaks improve your productivity and effectiveness.

Windows 11 is designed to give optimal user experience, and you can only be limited by how well you can play around with the settings and features.

What are the best Windows 11 tweaks for a better experience?

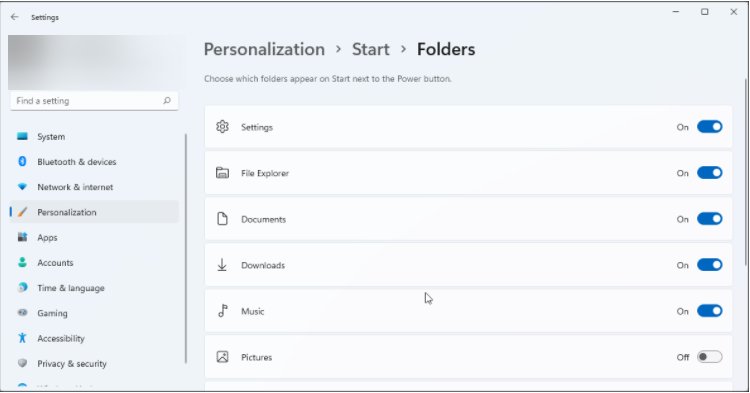
1. Add folders to the Start Menu

  1. Right-click on any space on the desktop and select the Personalize option.add startup folders windows 11 tweaks
  2. Select the Start tab on the left plane and subsequently Folders.
  3. From here, toggle the switch of any folder forward to add it to the Start Menu.

Ease of access is the first and probably the most important in user experience. This tweak allows you to bring your favorite folders next to the power button in the Start menu. It does not just save you the stress of navigating through the File Explorer but also improves your productivity.

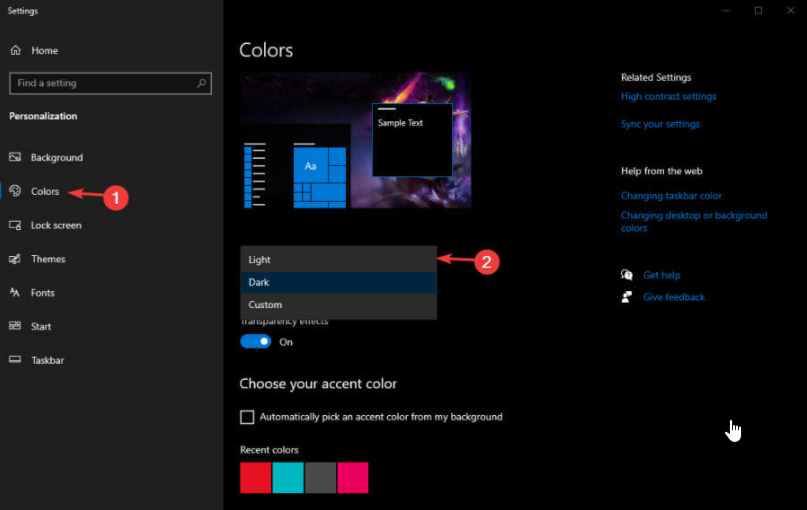
2. Enable dark mode

  1. Right-click on any space on the desktop and select the Personalize option.
  2. Select the Colors tab on the left planedark-color-windows-11-tweaks
  3. Go to the Choose your mode section and select the Dark mode from the dropdown of 3 modes displayed (Light, Dark, and Custom).

Virtually all apps are now incorporating the dark mode for improved user comfort, and Windows 11 is no different. If you find the light mode troublesome for your eyes or just need a cool color for a change, this mode can make a whole world of difference.

3. Activate Storage Sense

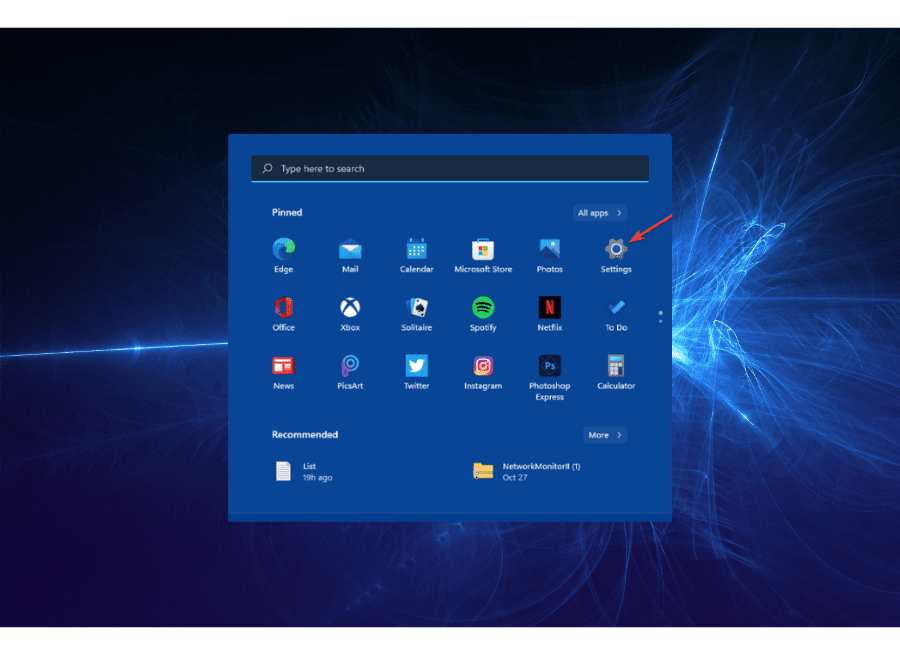
  1. Click the Start button on the Taskbar and select the Settings option.settings-windows-11-best-tweaks
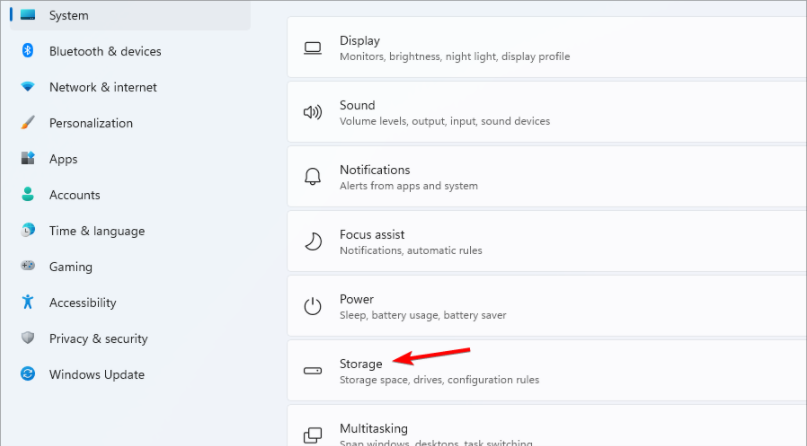
  2. Select the System option on the left plane, followed by Storage.storage-best-tweaks
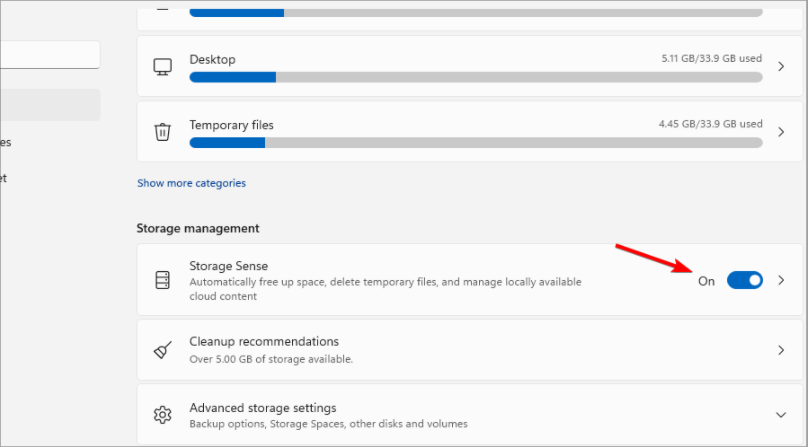
  3. Choose the Storage Sense option and toggle the button forward to enable it. storage sense windows 11 best tweaks

Storage Sense helps memory optimization. It automatically frees up space and deletes temporary files. This, in turn, improves your PC speed and overall performance.

4. Enable Focus Assist

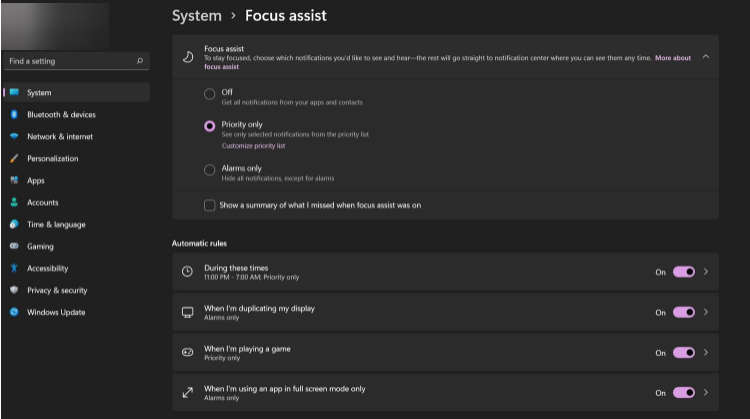
  1. Press the Windows key + I to open settings and click on the System option.focus assist windows 11 tweaks
  2. Select Focus Assist
  3. Choose the Priority only option to select a few notifications that can show up. The Alarm only option disengages all notifications temporarily except alarms.

Focus Assist is a carryover feature from Windows 10. It helps you focus on a set task on your PC without disturbance when it is enabled.

It disengages notifications and updates, which in turn improves your productivity.

5. Customize Taskbar

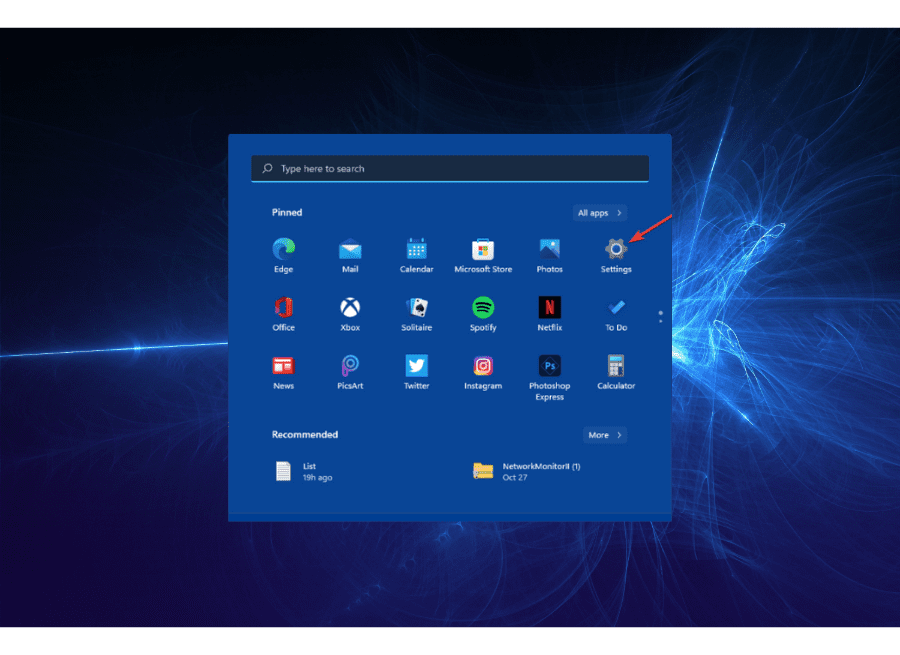
  1. Press the Start button and choose the Settings option from the menu.settings windows 11 tweaks
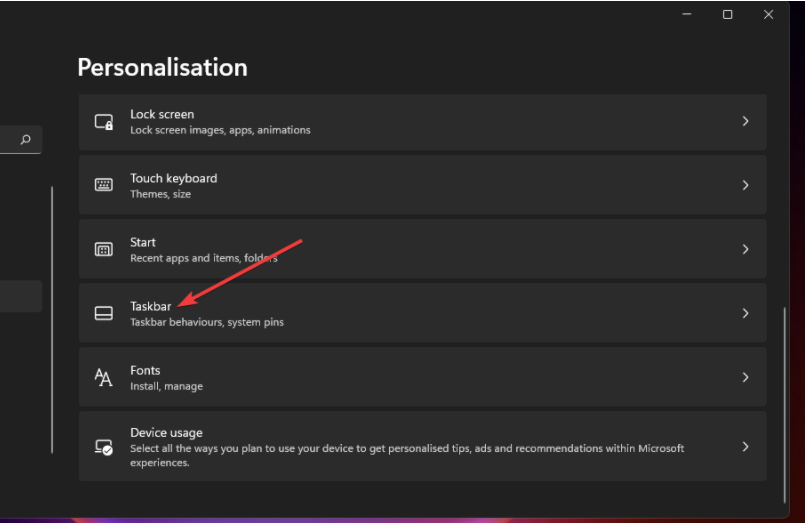
  2. Select the Taskbar option from the Personalisation tab.taskbar best windows 11 tweaks
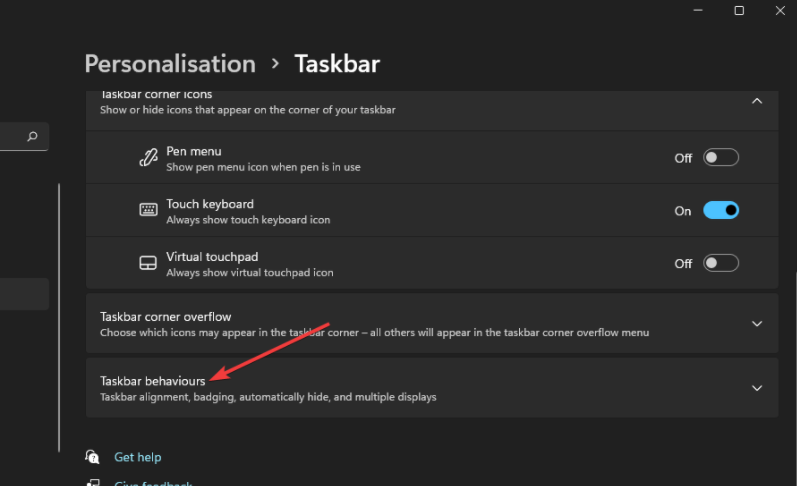
  3. Open the Task behaviors and customize the settings as you wish. taskbar behaviour best tweaks

One of the noticeable changes in Windows 11 compared to its predecessors is the centralization of the Taskbar. But with this tweak, you can align the Taskbar back to the left for easy access and hide it, among other customizations.

6. Disable visual effects

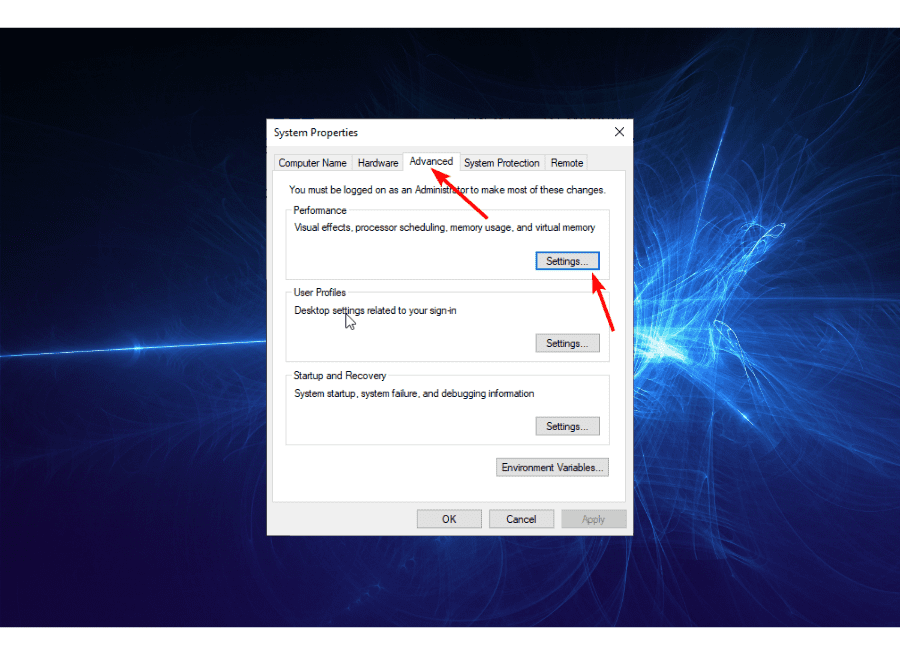
  1. Click the Windows tab on the Taskbar, search for View Advanced System Settings, and click on the app.
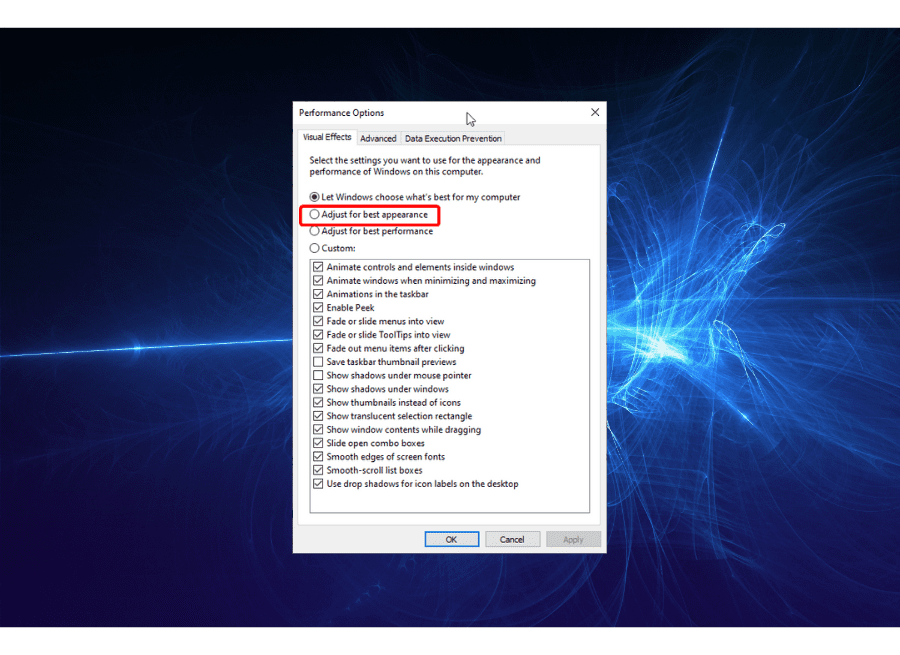
  2. Click on the Advanced tab at the top menu, followed by the Settings button.visual settings windows 11 tips
  3. Check the Adjust for best performance radio button.visual adjust windows 11 best tweaks
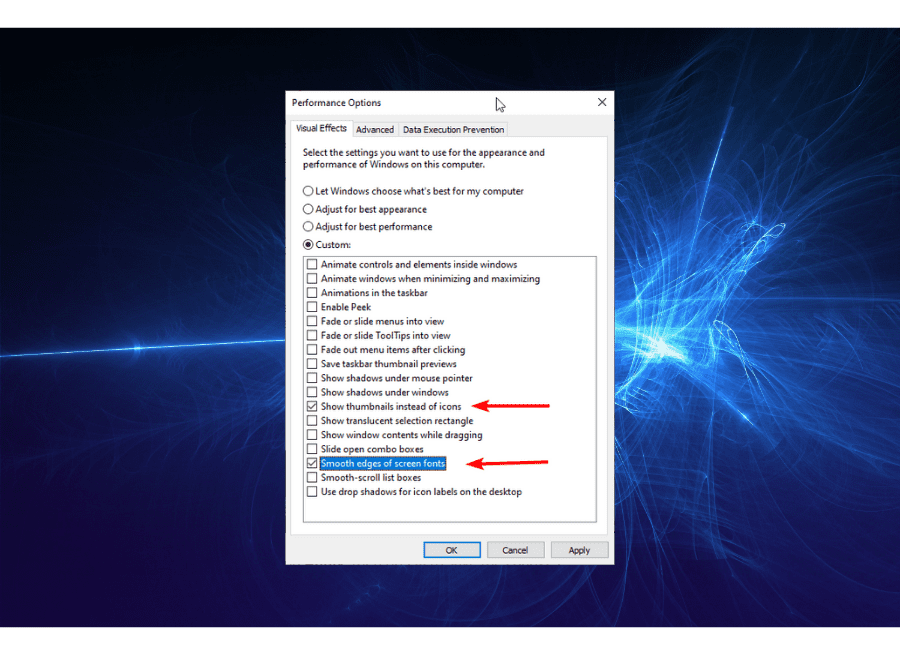
  4. From here, check the Show thumbnails instead of icons and Smooth edges of screen fonts checkboxes.disable visual windows 11 tweaks
  5. Now, click the Apply button followed by the OK button to effect the changes.

It is without a doubt that the visual effects make for eye-catching views. But it comes at a tradeoff: the usage of enormous system resources.

With this tweak, you will reduce the load on the GPU (Graphics Processing Unit) considerably, leading to better overall PC performance and speed.

7. Disable Startup apps

  1. Press Windows + I keys on your PC to open settings.
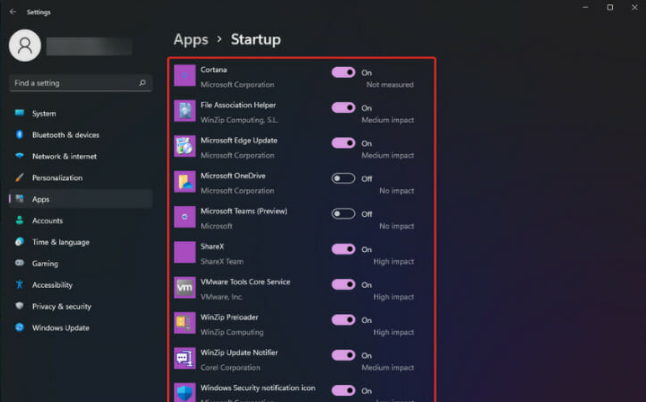
  2. Select the Apps option.disable startup apps windows 11 tweaks
  3. Click on the Startup option and toggle the apps you don’t want to start up automatically backward.

Disabling backup apps improves your system’s startup time. Aside from these apps startup automatically upon starting your PC, they also continue working in the background.

This causes them to consume valuable memory storage resources and keeps your processor busy. With this simple tweak, you can improve your PC speed by freeing these resources.

Does disabling Virtual Based Security (VBS) affect my PC?

One of the features gamers tweak on Windows 11 to improve gaming performance is the VBS.

VBS is a crucial security feature that prevents your PC from being compromised. This is done by isolating the important components from the less important ones.

It plays an important role in maintaining the integrity of your PC and shields your OS from attacks.

Disabling VBS has proven to lead to a 5 – 10% increase in gaming performance. But it is not a tradeoff that is worth it if you have valuable data on your PC as it will be susceptible to attacks.

However, if it is purely a gaming PC with no important data, it might be worth the risk to squeeze peak performance from it.

We all want maximum return on our investments. And that is top-level performance and satisfactory experience in Windows 11.

This makes this list of best Windows 11 tweaks a worthy trial to help you extract maximum value from this new, exciting OS.

Be sure to try these tweaks on your PC, as they are all safe. You can also share any valuable tweaks for Windows 11 we missed in the comment section.

Miracast Not Supported by Graphics Drivers in Windows 10/11

So, you want to connect your device via wireless to a new display. But something goes wrong and you get an error message informing you that Miracast is not supported by your graphics drivers.

What could we ever do about this? Before we delve into the solutions, let’s take a few moments to talk about what Miracast really is.

Miracast, in simpler terms, works just exactly like an HDMI cable, but without the need to actually plug it in.

This feature enables you to mirror various device screens, such as tablets, and laptops to displays like monitors, TVs, or projectors without the use of a USB cable.

The possibilities are virtually limitless. So enough theory-crafting, and let’s get back to finding the solutions of how to fix Miracast not supported.

Why am I getting Miracast: not supported by the graphics driver on Radeon graphics?

If you’re getting this error, it’s possible that your device doesn’t support Miracast at all, so it’s advised to check if you meet the requirements.

Even if your PC meets the requirements, it’s still possible that Microsoft display adapter is not connecting because there’s an issue with it.

This can also occur if your AMD driver crashes, so you might want to reinstall or update it and check if that helps.

What can I do if Miracast is not supported by graphics drivers?

  1. Verify Miracast compatibility
  2. Set up Miracast
  3. Reinstall your network drivers
  4. Check your Wi-Fi connection
  5. Disable your VPN

1. Verify Miracast compatibility

1.1 Verify your network adapter

  1. Press Windows key + R to open up a Run dialog box.
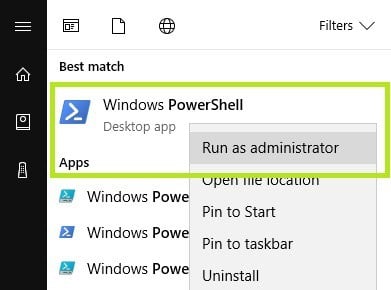
  2. Type powershell in the field and press Enter.
  3. Type the following command and press Enter to verify if you have the right network adapter driver version: Get-netadapter|select Name, ndisversion
  4. If the returned value that is being displayed is above 6.30, your machine is up and running to support Miracast in respects to network capabilities;
  5. Close the Powershell.

1.2 Verify your graphics card

  1. Press Windows key + R to open up a Run dialog box. In this run box you’ll type dxdiag and press Enter to open the DirectX Diagnostic page;
  2. Once the page is opened, expand the Display tab and look at the bottom of the Drivers column for the Driver Model. If the driver model isn’t showing WDDM 1.3 or higher, your system is not compatible with a Miracast connection.

Sometimes, the easiest way to fix a problem is by finding out if your machine can support Miracast in the first place.

2. Set up Miracast

  1. Turn on the selected device you wish to project to.
  2. Press Windows key + I and select Devices.
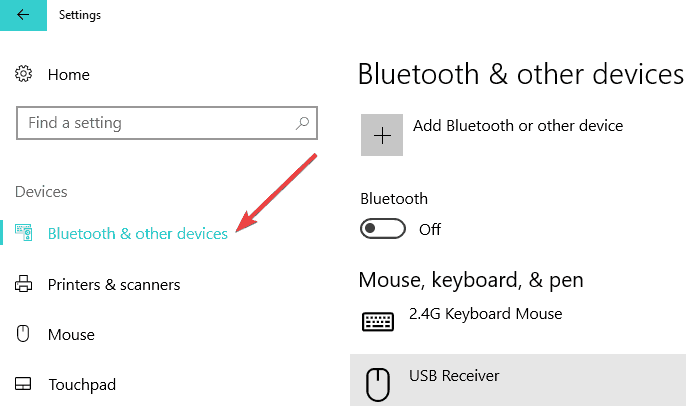
  3. In the Bluetooth & other devices section, click Add Bluetooth or other device.
    bluetooth other devices
  4. Click on Wireless display or dock.
  5. Click your display device to project your Windows 10 machine to it.
  6. You’re all set, enjoy.

3. Reinstall your network drivers

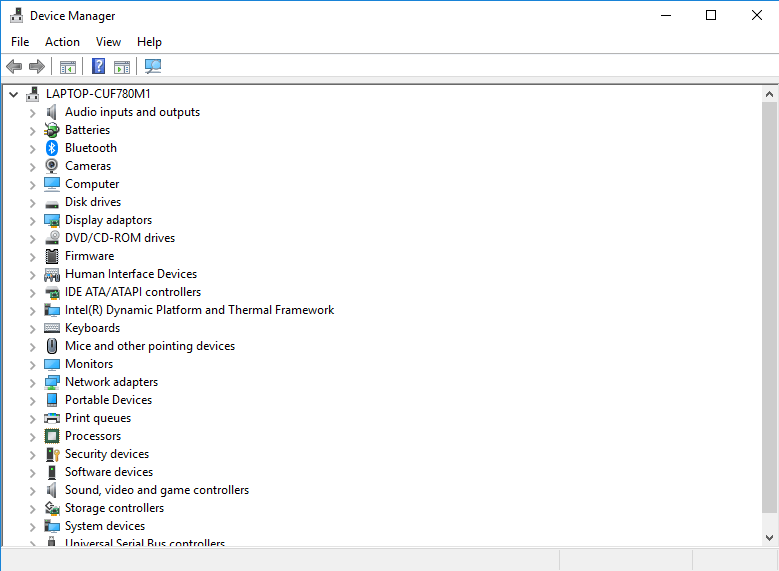
  1. Press Windows key + R and type devmgmt.msc in the field, and press Enter.
    skype error cant access your sound card
  2. Click on the Network adapters menu, then right-click on your Wireless Network Adapter and then click on Uninstall Device.
  3. Restart your machine.
  4. On start-up Windows will reinstall your network drivers.
  5. You’re good to go.

If the error keeps showing up, then the best solution is to just uninstall and reinstall your network drivers.

In some instances, you’re dealing with corrupted drivers or a faulty installation, so the best solution is to re-install them.

Reinstalling your drivers shouldn’t be much of a headache, but to be sure you install the right drivers and to save your time, we recommend you automatically install your drivers using a professional tool.

4. Check your Wi-Fi connection

  1. Press Windows key + R to open up a Run box.
  2. Type ms-settings:network-wifi and press Enter to open the Network & internet Settings menu.
    network and internet bluetooth problems
  3. Check that Wi-Fi is turned On.

Miracast uses Wi-Fi Direct, so the only thing to worry about is that your devices are connected to the same network.

5. Disable your VPN

Some third-party VPN solutions will regularly reject connections from Wi-Fi Direct. So it’s a good idea to disable the VPN’s in question to solve any connection issues.

Additionally, you may also disable your antivirus and firewall. Don’t forget to enable your security tools as soon as possible to protect your computer.

We hope that these fixes could help you. In the meantime, on what devices are you projecting at the moment? Let us know in the comment section down below.

How to fix Error Code 47 in Warzone Pacific

This is far from being a secret, as we all know that Warzone Pacific is actually struggling with a wide range of issues on Xbox and PlayStation consoles.

Lately, however, there’s a new issue that’s affecting players that want to log in and best their foes in the popular battle royale.

The Warzone Pacific error code 47 is making the game impossible to play on Xbox Series X|S and PS5, as data seems to be corrupted.

That being said, don’t worry about it, as there are simple solutions for both the Xbox and PlayStation gamers.

What can I do to fix Error Code 47 on Xbox Series X/S?

Contrary to what you may have been thinking, there is no elaborate solution or intricate workaround for this version of the popular game.

Thus, completely reinstalling the game on both Xbox Series X|S is actually the most effective and only way to get rid of this bug. 

  1. Press the Xbox button to open the guide.
  2. Select My games & apps.
  3. Select See all.
  4. Select Games, and highlight Warzone Pacific.
  5. Press the view button on your controller.
  6. Select Uninstall all.
  7. Select UNINSTALL ALL to confirm.

That being said, if you are using a PS5, there is another way to fix the corruption of Warzone files without reinstalling the game.

We would have suggested the same workaround for Xbox players as well, but such a feature doesn’t exist for Microsoft’s console.

How do I fix Error Code 47 on PlayStation?

  1. Turn off your PS5.turn off PS5
  2. Hold the power button until you hear a beep to start PS5 in Safe Mode.hold down ps button
  3. Select Rebuild Database.rebuild database
  4. Wait for the process to complete.rebuilding databse
  5. Turn on your PS5 normally and run Warzone. run warzone

In order to actually fix the error on a PlayStation 5, you need to rebuild the database. However, if that doesn’t take care of the issue, clear the Warzone saved data.

The action can be done as we are going to describe to you right now:

  1. Go to System Storage.
  2. Access Saved Data and select Warzone.
  3. Date all the Saved Data for Warzone
  4. Reboot your PS5.

This workaround has been reported to work for a lot of Warzone players that were in the same situation, so you can trust the process.

If, however, this doesn’t work for you, completely uninstall Warzone Pacific and reinstall the game. Was this guide helpful to you? Let us know in the comments section below.

Horizon Forbidden West: Not enough room in potion pouch

Horizon Forbidden West is a one-of-a-kind masterpiece that helps you access an extremely impressive open world.

You can easily upgrade weapons, pouches, outfits, potions, and special gear at the workbench, creating a better overall experience for Aloy.

Unfortunately, this game is available to play only on PlayStation 4 or 5. So, if you’re seeking the PC version, you have to wait a bit more.

Even if Horizon Forbidden West comes up with tons of incredible features, some users claimed that they do not have enough room in the potion pouch.

It can be extremely annoying and this is how one player described this issue on one of the most popular gaming forums:

Hello fellow players, not sure if I’m missing something or have a glitch. I’ve upgraded my potion pouch to the max and it only lets me put 5 purple grade potions and four blue grade and says I’ve reached maximum. Can’t put anything else in the pouch. Anyone else have this issue?

Now, if you’re struggling with the same problem, make sure you check this guide completely because we’re going to give all the answers you need.

How can I create room in Horizon Forbidden West potion pouch?

  1. Press R1 to navigate to Inventory/Tools.
  2. Press the Start button to change to type.
  3. Store traps and potions you don’t need (Keep in mind that you may need to store all potions).
  4. Now, press L1 to go to Stash/Tools.
  5. Take potions you want. You can only take two or three.
  6. This should now fix pouch.

What else should I know about Horizon Forbidden West Stash?

If you don’t already know, Stash is one of the best new additions to the game and it helps you with carrying the capacity or Inventory that Aloy has, letting her carry more items throughout Horizon Forbidden West.

Keep in mind that Stash is different from the normal Inventory. While the Inventory is limited, the Stash is not, and any materials that Aloy collects will go directly into it.

You’re able to use the items from the Inventory to craft other items (such as potions), but you cannot use the items in the Stash unless you access them manually.

According to some users, if you hold down on the T-pad and hit square to change, you’ll notice extra potions.

There’s probably 1 that’s taking up a slot accidentally even if it’s not equipped in the Sub Menu while you’re running the game. You have to either use it to open up the slot or manually stash it away in the box.

If it’s in your Inventory, it takes up a spot which is why you should don’t auto-take from enemies/treasures that have potions listed unless it’s a potion you want to use immediately or the same potion that you use which is Large.

The lower ones would accidentally enter the inventory and you might forget about them.

Do not forget that this error might appear because you might have potions in your inventory that aren’t listed/equipped in your T-Pad selection.

This is what you can do if you don’t have enough room in the Horizon Forbidden West potion pouch. Make sure you follow our recommendations carefully, so you won’t struggle with this issue again.

Also, some gamers reported that they can’t talk to the Herbalist in Horizon Forbidden West. If you ever face this issue, feel free to check our dedicated fixing guide.

Because your opinion matters to us, do not hesitate to share it by leaving a comment in the section below.

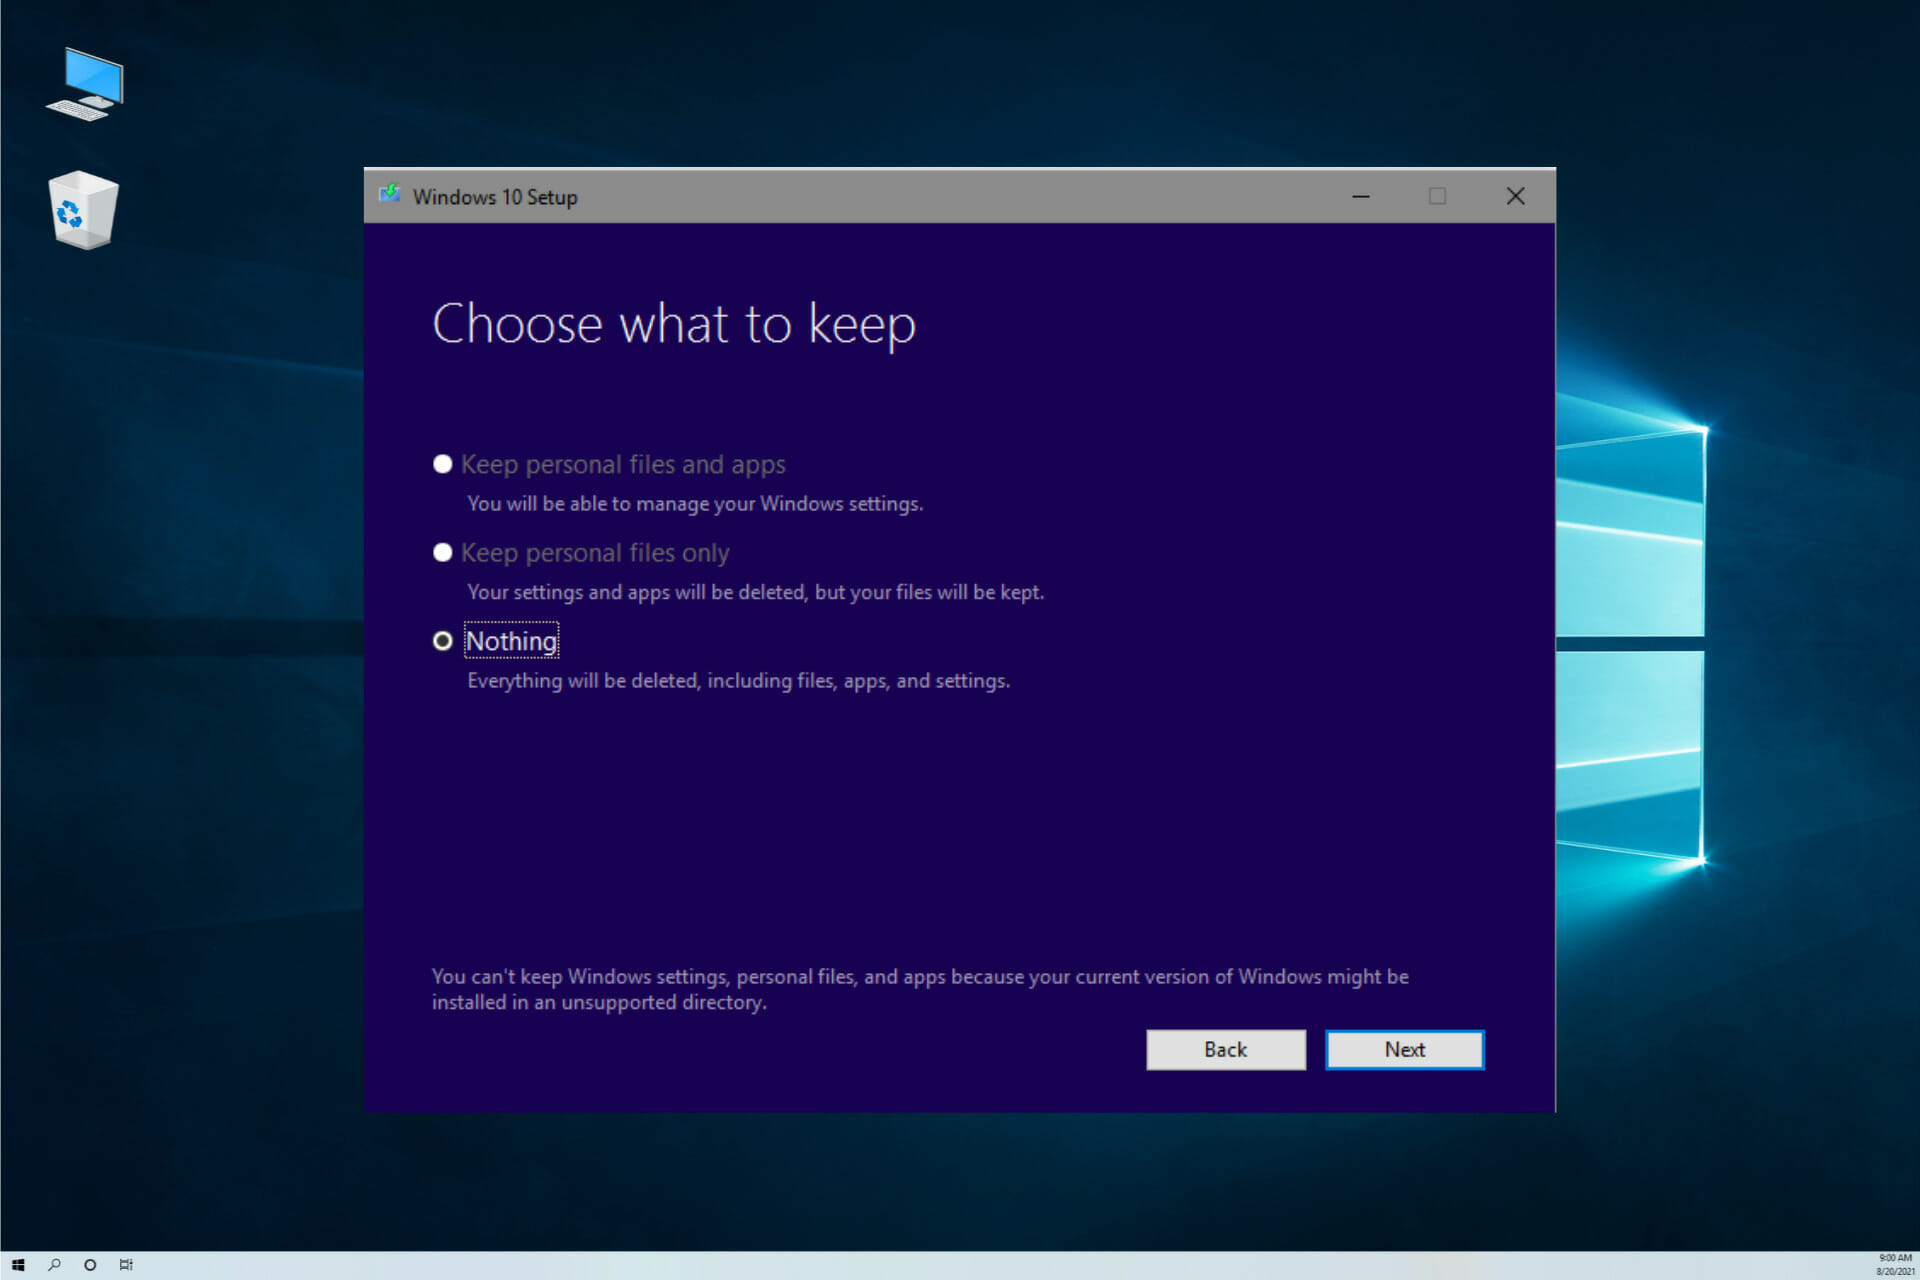
Fix: Keep Personal Files and Apps is Greyed Out

When upgrading Windows you usually have the option to Keep your personal files and apps, but for some, this option is greyed out. This issue is mostly caused to the fact that you’re trying to install a lover version of Windows that the currently installed or the personal files and apps are stored into unsupported folders.

If you’re running an old Windows 10 version, your PC is victim to a bub that can be fixed by installing the Feature Update to Windows 10 20H2 via Enablement Package (KB4562830) from the Microsoft website.

The problem may also be due to a different language installation or corrupted system files. Here are some other ways to fix it.

How can I fix Windows settings, personal files, and apps error?

1. Check your system language

  1. Click the Start button, type cmd, and select Run as administrator to run Command Prompt with full privileges.
  2. When Command Prompt starts, enter the following command and press Enter: DISM /online /get-intl
  3. You should see your operating system language in the Default system UI language section.
  4. Insert Windows 10 DVD or a bootable USB drive and boot your computer from it.
  5. Choose the Repair option.
  6. Select Troubleshoot.
  7. Click on Advanced options.
  8. Select Command Prompt.
  9. When Command Prompt starts, enter the following and press Enter to run it: DISM /image:C: /set-uilang:en-US
  10. This will set your system language to en-US and you’ll be able to keep your files when you upgrade to Windows 10. If en-US doesn’t work, you might have to set your language, so it matches the language from the Windows 10 ISO.

You might get the You can’t keep Windows settings, personal files, and apps message if your system language doesn’t match the language on Windows 10 ISO. To change the system language, do as described above.

If you’re having trouble accessing Command Prompt as an admin, then you better take a closer look at our guide on how to fix Command Prompt.

2. Update your drivers

  1. Right-click the Windows button and select Device Manager from the list.
  2. Expand the Display adapters section, then right-click the driver and select Update driver.
  3. Choose Search automatically for drivers.
  4. If the system detects a new one, it will install it and you will be prompted for a restart. If it doesn’t, click on Search for updated drivers on Windows Update.
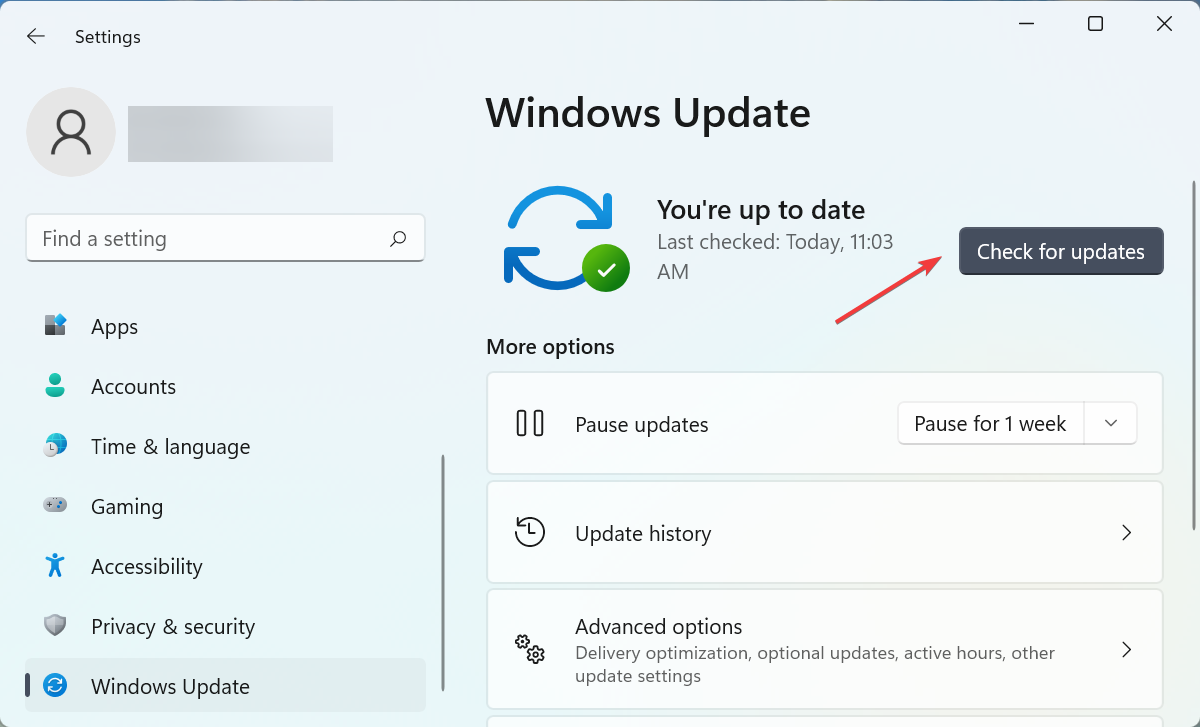
  5. You will be redirected to Windows Update. Click on the Check for updates button.
  6. If the system doesn’t find new updates, click on View optional updates.
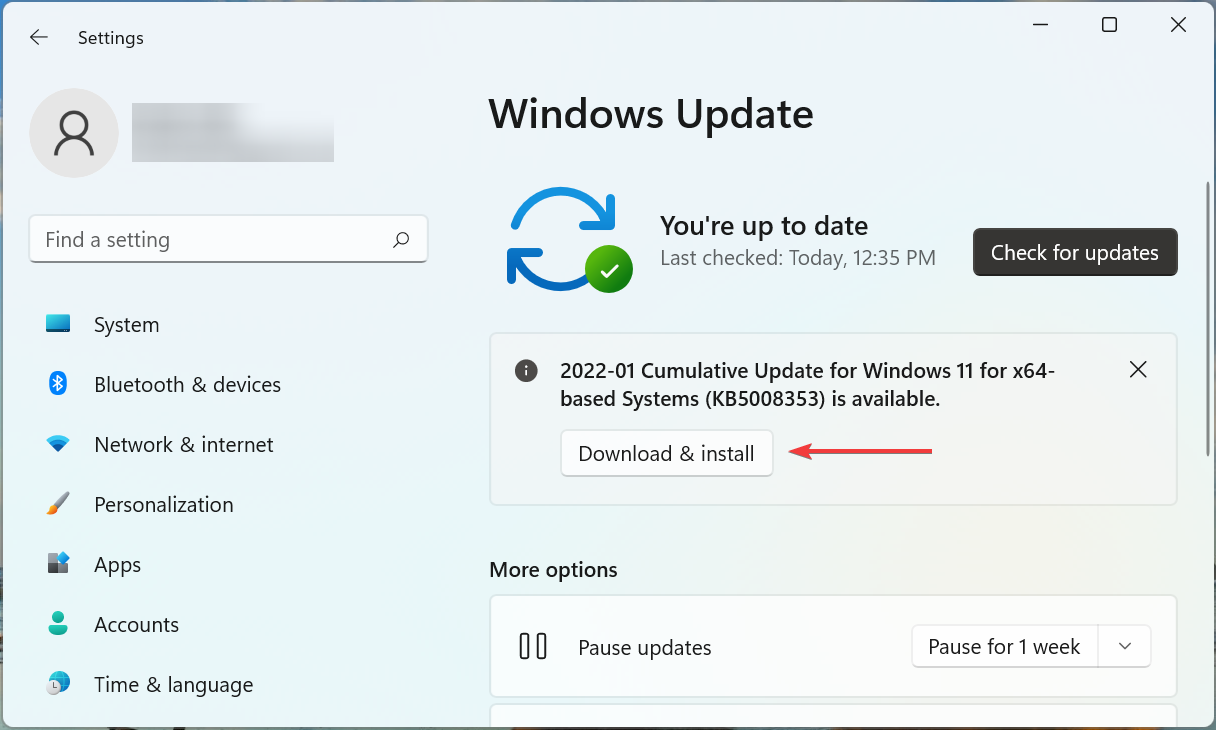
  7. Expand the Driver updates section and check if there are any updates related to your graphics card, click their box, and hit the Download and install button below.

Drivers are a crucial part of Windows, and without drivers, you won’t be able to use your hardware properly.

Speaking of drivers, several users reported that the You can’t keep Windows settings personal files and apps error was caused by outdated drivers.

According to them, their graphics card driver was out of date, and that caused this problem to appear. To fix the issue, update your graphics card driver to the latest version and check if this makes any difference.

If you find this solution too complicated, be sure to check our guide on how to update the graphics card driver.

Keep in mind that other drivers can also cause this problem, so be sure that all your drivers are up to date before you try to upgrade.

Did you know that the majority of Windows 10 users have outdated drivers? Be a step ahead and learn how to update your drivers.

We strongly recommend using a dedicated driver-updated tool and automatically downloading all the outdated drivers on your PC.

With this kind of tool, you will be safe from downloading and installing the wrong driver versions, which could seriously harm your system.

⇒ Get Outbyte Driver Updater

3. Change system locale from Control Panel

  1. Open Control Panel and go to Region.
  2. Go to the Administrative tab and click on Change system locale.
  3. Set Current system locale to English (United States) and click OK to save changes.
  4. Click Apply and OK in the Region window.
  5. Restart your computer and try to upgrade to Windows 10 again.

You can’t open Control Panel? Take a look at this step-by-step guide when Control Panel is not opening to find a solution.

4. Download the Windows 10 version that matches your system language

You can’t keep Windows settings, personal files, and apps message appears during Windows 10 setup when the language from your previous operating system doesn’t match the one on your Windows 10 ISO file.

We showed you how to change your system language in order to install Windows 10, but what if you wish to keep your current system language?

If you don’t want to switch your system language to US English, you can simply download the Windows 10 ISO that uses the same language as your current operating system.

To do that, just download the Media Creation Tool and choose the desired language from the list of languages.

Having problems with the Windows Media Creation Tool? Don’t worry, we’ve got you covered with this quick guide on what to do if the Media Creation Tool is not working.

5. Remove problematic applications

If you can’t upgrade to the latest version of Windows 10, the problem might be a third-party application that is installed on your PC.

It seems that this problem was caused by Java installation. To solve it, it’s advised to uninstall Java and try to perform the upgrade again.

It’s worth mentioning that a regular uninstall might not be able to remove Java completely.

Sometimes certain leftover files and registry entries can still interfere with Windows causing this and many other problems to appear.

To fix the issue, it’s advised to completely remove the problematic application. For this, we recommend you use a dedicated utility that’s able to uninstall Java and remove any junk files left behind.

These applications are specially designed to completely remove any application from your PC, so we encourage you to try them out.

That’s why is strongly recommended to use a professional tool like CCleaner that has a simple to use Uninstall utility built-in.

Once you remove the problematic application, the issue should be resolved. Keep in mind that other applications can also cause this problem, so you’ll need to find these applications on your own and remove them.

If you don’t know how to complete this procedure in Windows 10, take a look at this dedicated guide on how to uninstall programs.

6. Remove any additional non-English languages

If you can’t keep your files from the previous version of Windows, perhaps you should try removing any other installed languages.

After you’ve removed all additional languages besides English, try installing Windows 10 again. This might not be the best solution, but it works according to users, so you might want to try it out.

7. Remove your antivirus

Sometimes the main cause for You can’t keep Windows settings personal files and apps error is your antivirus.

Even though antivirus software is important, sometimes it can interfere with Windows and cause this problem to appear.

To fix the problem, it’s advised that you disable your antivirus completely. If the issue persists, you might be able to solve it simply by uninstalling your antivirus software.

For the Norton users, we’ve got a dedicated guide on how to completely remove it from your PC. There’s also a useful guide for McAfee users.

If you’re using any antivirus solution and you want to get rid of it, be sure to check out this amazing list with the best uninstaller software you can use right now.

If removing the antivirus solves the problem, you might want to consider switching to a different antivirus in the future. There are many great antivirus solutions that are offering advanced security features and are also compatible with all versions of Windows 10.

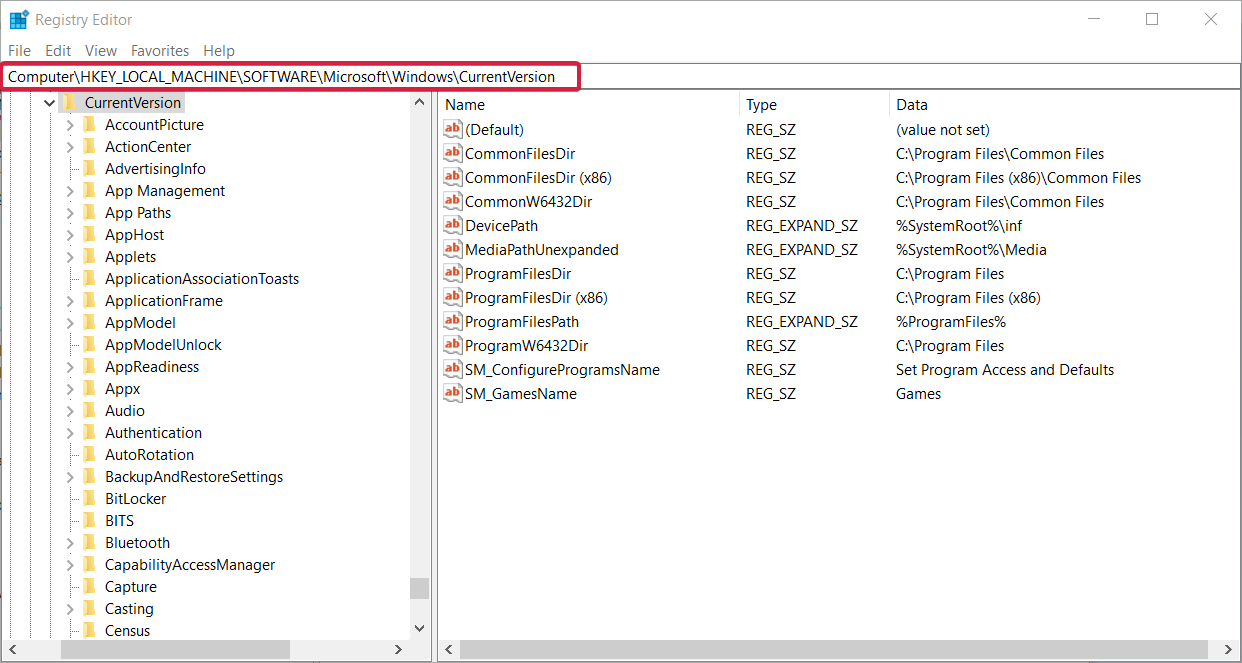
8. Check your registry

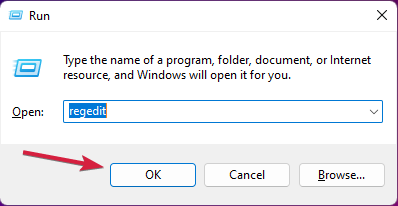
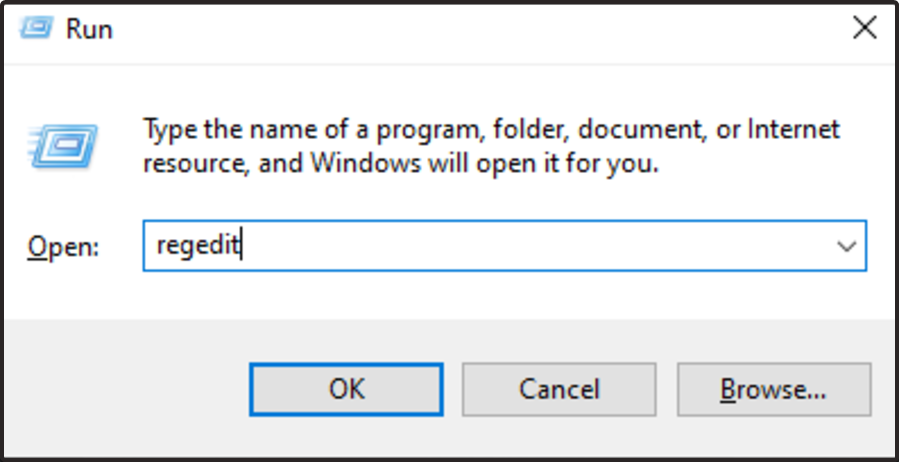
  1. Press Windows key + R and enter regedit. Press Enter or click OK.
  2. In the left panel, navigate to the following key: Computer\HKEY_LOCAL_MACHINE\SOFTWARE\Microsoft\Windows\CurrentVersion
  3. In the right panel, locate ProgramFilesDir, Program FilesDir (x86), ProgramFilesPath, and ProgramW6432Dir. Check the data values for these strings. If you changed the location of the Program Files directory, the values should look like X:\Program Files. To fix that, open each of these strings and change the drive letter to C.

According to users, you can sometimes encounter You can’t keep Windows settings personal files and apps message due to your registry settings.

Several users reported that they changed the location of the Program Files directory, and that caused this issue to appear. However, you can fix the problem by doing as described above.

After making changes to your registry, try to upgrade your Windows again and check if the problem reappears.

Read this handy guide if you can’t edit Windows 10’s Registry and find the quickest solutions to the issue.

9. Check the location of user account directory

If you’re trying to install a new version of Windows, you might find keep personal files and apps greyed out. This can appear if your user account directory is moved.

While installing a new version of Windows, your user account directory is needed in order to create a backup of your files.

If this directory is moved or missing, you won’t be able to upgrade, and you’ll encounter this problem.

However, you can fix the issue simply by moving your user account directory to the C: Users folder on your PC. After doing that, you should be able to upgrade without any problems.

10. Change your product key or edition

  1. Open the Settings app. You can do that quickly by pressing Windows key + I.
  2. When the Settings app opens, go to the System section.
  3. Navigate to About section in the menu on the left. Now select Change product key or upgrade your edition of Windows.
  4. Click on Change product key.
  5. Now enter the product key for the version of Windows you’re upgrading to.

Sometimes, the error saying You can’t keep Windows settings personal files and apps can appear if you’re trying to switch to a different version of Windows.

Many users reported this problem while trying to switch from Home to Pro version of Windows. Since you can’t keep personal files and apps as they are greyed out, things shouldn’t remain this way for too long.

In case you notice that your Windows default apps are missing, it’s possible that this issue is causing this problem.

This isn’t the only feature that can go missing, and many reported that Windows Update is not showing on their PC as well.

Problems such as grayed out Windows apps are caused by corrupted installation, so you might have to repair it to fix this problem.

Personal files and folders are rather important, and if you’re getting this error during installation, make sure that you try some of our solutions. Even more, check out this guide if Windows 10 doesn’t let you access your files.

As always, for additional questions and suggestions, do not hesitate to use the comments section below.

Horizon Forbidden West Patch 1.09 brings various bug fixes [Patch Notes]

The creators of Horizon Forbidden West, Guerrilla Games, have released update 1.09 (1.009) details for PS4 and PS5 players.

The upcoming Horizon Forbidden West 1.09 patch notes speak about various bug fixes, tweaks, and gameplay adjustments.

Furthermore, the Horizon Forbidden West update 1.09 (1.009.000) will also include performance and stability improvements.

What’s new in Horizon Forbidden West?

Unfortunately, players are still facing a number of issues with the game, which Horizon Forbidden West version 1.09 will address.

Basically, this is what we’re looking at with this latest game patch, as developers informed all players and people that bought the title:

  • Addressed various graphical issues regarding shimmering and sharpening.
  • Addressed issues related to screen saturation.
  • Fixed multiple issues where the player fast travels to any campfire while gliding inside of a tornado.
  • Fixed an issue where receiving the reward after completing the Black Box Collectibles activity.
  • Added stability and performance improvements.

The most important tweaks here are definitely the graphics ones. Players have been constantly reporting visual fidelity bugs since launch day.

Even more good news is that the campfire bug has finally met its match and will no longer bother us while enjoying our new favorite title.

Everyone is still waiting on extra information about the last entry in the patch notes list, which states that stability and performance improvements have been added.

KNOWN ISSUES

We are currently looking into several issues reported by the community. Please note that these issues are not yet fixed in this patch, but our teams are investigating them with high priority.

  • The team are continuing to investigate and tweak the reported graphical issues regarding shimmering, sharpening and screen saturation.
  • Some players have reported multiple issues with various types of traversal after the player fast travels to any campfire while gliding inside of a tornado.
  • Some players have reported an issue with receiving the reward after completing the Black Box Collectibles activity.

FIXES AND IMPROVEMENTS

Main Quests

  • Fixed an issue in main quest ‘To The Brink’ where using Silent Strike on a quest-specific Bristleback would teleport the player to Chainscrape.
  • Fixed an issue in main quest ‘The Dying Lands’ where Varl and Zo would sometimes idle outside of Plainsong and block progression.
  • Fixed an issue in main quest ‘The Dying Lands’ where Aloy’s companions would not lead the way after restarting from a specific save.
  • Fixed an issue in main quest ‘The Broken Sky’ where reloading a certain save could sometimes disable fast travel unintentionally.
  • Fixed an issue in main quest ‘Cradle of Echoes’ where loading a save created on the previous patch would cause Aloy to be stuck in the Base.
  • Fixed an issue in main quest ‘Thebes’ where Aloy’s breathing sounds were playing during a cinematic sequence.
  • Fixed an issue in main quest ‘All That Remains’ where restarting from a certain save would cause Aloy to spawn in the Base and unable to leave.

Side Quests

  • Fixed an issue in side quest ‘The Bristlebacks’ where Ulvund didn’t get the memo and stuck around in Chainscrape after the quest was completed.
  • Fixed an issue in side quest ‘What Was Lost’ where Kotallo would sometimes become unresponsive when reloading from a specific save.
  • Fixed an issue in side quest ‘Blood For Blood’ where Kavvoh and Arokkeh could not be interacted with in specific circumstances, blocking progression.
  • Fixed an issue in side quest ‘Forbidden Legacy’ where fast traveling during the Slitherfang encounter would cause the machine to not respawn, thus blocking progression.
  • Fixed an issue in side quest ‘The Roots that Bind’ where the quest objective “Go to the Drumroot” would not complete after damaging the Widemaws from a large distance.
  • Fixed an issue in errand quest ‘Call And Response’ where killing the enemies before receiving the objective to do so could block progression.

World Activities

  • Fixed an issue in Gauntlet Run, where passing the finish line in last place would result in a win in specific circumstances.
  • Fixed several issues with specific Firegleam and Metal Flower icons not being displayed on the map.
  • Fixed an issue where Firegleam icons would not be correctly removed from the map once the related activity was completed.
  • Fixed an issue where fast travel would be disabled in specific circumstances when loading a save made while playing Machine Strike.

UI/UX

  • Fixed an issue where the Machine Strike UI would briefly flicker at the end of a game.

Graphics

  • Fixed an issue where Aloy wouldn’t appear wet anymore after being in water.
  • Multiple graphics fixes and improvements in cinematics.
  • Multiple visual improvements in shadows and clouds.
  • Fixed an issue where Photo Mode controls would be frozen when initiating Photo Mode during a swan dive.

Performance and Stability

  • Multiple crash fixes.
  • Multiple performance and streaming improvements in cinematics.
  • Removed multiple unintentional loading screens and black screens.
  • Fixed multiple instances of streaming and visual popping.

Other

  • Made several improvements to the NPCs’ movement and animations in settlements.
  • Made it easier to tag individual components when using motion aiming and scanning machines.
  • When picking up potions or tools that don’t fit in your toolbelt anymore they are now moved to the stash.
  • Several balancing changes to weapons and enemies.
  • Fixed several instances where Aloy could get stuck in geometry.
  • Fixed an issue where the ‘All Machine Types Scanned’ trophy could be easily missed during the final main quest ‘Singularity’.
  • Fix for the mount call sometimes causing the flying mount to be spawned in undesirable positions and in rare cases be unreachable.
  • Several datapoints that are located in areas that the player could not return to are now automatically unlocked upon the player leaving that space.
  • Fixed multiple instances of specific music tracks getting stuck and repeating.

No, there are no changes, improvements, or tweaks of any kind coming to the PC version, as the game is still a PlayStation exclusive.

Have you encountered any other bugs while playing Horizon Forbidden West? Share your experience with us in the comments section below.

Windows 11 Training Courses: 4 Best Picks to Choose From

Windows 11 is relatively new, and of course, as is the case with all new tech, there is a learning curve. Luckily the OS is very similar to Windows 10, and you should be able to figure out a lot just by playing around with it.

However, to be a more proficient user, you must understand more deeply all the different options in navigating and getting the best out of your Windows 11 PC.

Sadly apart from quick how-to articles and a handful of YouTube guides, you may not find any complete, free Windows 11 training on the internet.

In this article, we will introduce you to some of the less pricey Windows 11 tutorials you should be trying.

What is the best Windows 11 training on the internet?

Learn Windows 11 the Easy Way Video Training Course

windows 11 free training

With more than a Hundred training courses, Simon Sez boasts of being the number 1 go-to for tech education. This Windows 11 training is just the latest in the long list and aims at taking you from beginner to Windows 11 expert.

Over 60 self-paced video sessions totaling more than 5 hours of instruction are included on this Training DVD.

Unlike the other courses on our list, this one does not demand monthly charges or a training subscription.

The course is only available on DVD and is only compatible with Windows Computer.

You can expect detailed and easy-to-follow explanations from this team of Microsoft expert trainers. They adopt a slow but thorough approach to discussing every Windows 11’s complexity.

At the end of this training, you should know how to install and uninstall applications, use the address book, mail, and calendars, use Focus Assist, manage multiple accounts, and more.

⇒ Learn Windows 11 the Easy Way Video Training Course

Windows 11 Essential Training

windows 11 free training

This course will teach you all you need to know about Windows 11, the newest addition to Microsoft’s operating systems.

Regardless of your exposure to Windows, you will find this course easy to follow and very explanatory.  

Nick Brazzi, a LinkedIn Learning teacher, starts with the fundamentals of the operating system, such as handling files and directories. He then demonstrates locating and utilizing applications, navigating the web, and managing calendars, emails, and contacts.

Additionally, the training shows how Microsoft Teams chat integration is used to receive and send messages without having to start Teams. You’ll also be shown how to personalize Windows by changing your account and display settings.

The course will show you how to utilize Cortana, Microsoft’s digital assistant, back up Windows, and transfer data across Windows devices.

The course includes one project, twelve quizzes, access on phone and tables, and a completion certificate.

This course is paid, but with a free month LinkedIn learning trial, you should be able to complete the course for free.

⇒ Windows 11 Essential Training

The Ultimate Windows 11 Training Video Course

windows 11 free training

This Ultimate Windows 11 training course is designed to walk a first-timer through the features of the new OS.

Ideally, before starting this course, you should have installed a copy of Windows 10, especially since the course takes you right from the process of upgrading to the new OS.

This Windows 11 training includes 65 lectures, accounting for 4 hours of learning time, most of which focus on the basics of Windows 11.

From the rudimentary, you will be instructed on how to make the best out of the OS with your businesses. This will include training on calendars, emailing, and the Edge browser.

You will also be shown how to optimize some essential apps for use with Windows 11.

The training is not free and will set you back about $15.

⇒ The Ultimate Windows 11 Training Video Course

Windows 11: From Beginner to Advanced

windows 11 free training

Warrick Klimaytys, the instructor, takes you on a tour of Windows 11 and exposes you to the numerous new capabilities available in Microsoft’s latest os.

As the course advances, you will explore important computer optimization and become adept at maintaining your OS.

You’ll need a Windows 11 PC or laptop for this course, and you’ll be ready to go even if you’ve never used Windows before.

With an assortment of valuable shortcuts, techniques, and tips, you should be able to perform essential software maintenance to leverage the Windows 11 computer’s full processing capacity and manage programs and apps more efficiently by the end of the course.

The training costs $13 but is excellent value for money.

⇒ Windows 11: From Beginner to Advanced

This list has been made in no particular order. Generally, equipped with your Windows PC, you should be able to start any of the tutorials.

Unfortunately, there are no Windows 11 in-depth courses online that don’t require you to pay, but choosing the right guide will be a lot easier after reading through the list of options below.

We are curious to know which training you opt for. Please share with us in the comments.

How to fix pit fights melee bug in Horizon Forbidden West

Horizon Forbidden West is beyond any doubts one of the greatest games to go live in 2022 so far, with a huge fanbase and a great story

But you know what else Forbidden West came within abundance? Bugs, and a whole lot of them, as you’ve probably experienced if you purchased the game.

However, whether you can’t talk to the herbalist, you are having trouble examining the machine’s carcass, or you simply can’t get the game to work, we can help you solve these issues.

That being said, Forbidden West players started flagging a new issue lately, one that won’t allow them to melee during the fighting pit quests.

Luckily for you, once again you came to the right place to get such tedious problems solved in just a matter of minutes.

How do I fix not being able to melee in Forbidden West?

This issue apparently happens if the player attempts to start a challenge or tutorial in the melee pit located in Chainscrape in Horizon Forbidden West.

The game can end up showing a back screen. It is still running in the background and we can hear the sound and everything, but there won’t be anything shown on the screen.

If you can’t melee in Forbidden West, we suggest you go through this quick troubleshooting process:

  1. Run Horizon Forbidden West.run forbidden west
  2. Head to your Stash.go to stash
  3. Open the Weapons tab.weapons tab
  4. Search for the Champion’s Spear.champion spear
  5. Take it from the inventory and equip it.take spear
  6. Return and face the challenge.pit master

Also, if you have the deluxe edition of the game, all you need to do is to remove the deluxe edition or pre-order bonus equipment from inventory.

This includes the armor and weapon from the first game. After getting rid of it, you should be able to fix the melee pit bug in Horizon Forbidden West.

Have you also dealt with this bug while playing? Share your experience with us in the comments section below.

How to Install Arduino Drivers & Software on Windows 10

You just bought your first Arduino board and you want to start building your very own digital device. Well, first off, you need to install the Arduino software on your Windows computer as well as the necessary drivers.

In this article, we’ll show how you can install all the tools you need in less than 10 minutes.

How can I download Arduino Nano driver on Windows 10?

In order to avoid Arduino problems on your PC, it’s important that you have the necessary drivers installed.

The lack of drivers will lead to certain issues, such as Arduino port not showing up for example, so you can see why it’s important to keep drivers up to date.

This will also lead to Arduino upload error, therefore visit the official website and download the latest drivers from there.

How to install Arduino software on Windows 10

  1. Download Arduino IDE to your Windows PC.
  2. Wait until the download process completes > install the software and choose the components that you want to install, as well as the install locationinstall arduino IDE software
  3. Accept driver installation when prompted by Windows 10

If you choose to select the Zip package, you should know that you need to install the board drivers manually.

How to install Arduino drivers on Windows 10

  1. Go to Start > type ‘device manager’ > double click the first result to launch the Device Manager.device manager
  2. Go to Ports > locate the Arduino UNO port
  3. In case you can’t find that port, go to Other Devices and locate Unknown Device
  4. Select the Arduino UNO port > click on Update Driver
  5. Select the option ‘Browse my computer for Driver software’ > go to the Arduino software download location > select the arduino.inf file/Arduino UNO.inf (depending on your software version)
  6. Wait until Windows finishes the driver install process.

Installing drivers manually can be a hard task if you do this for the first time. Another option is to automatically install your drivers with a professional driver updater tool that can help you save time and safely install the drivers you need in seconds.

Now that you installed the Arduino software and driver on your computer, it’s time to open your first sketch. Select your board type and port and upload a program to make sure that your board is up and running.

That’s pretty much it, follow the steps listed above and you should be able to get your Arduino board started in just a few minutes.

Should you encounter any issues while using your board, Windows Report compiled a list of the most common issues affecting Arduino and their corresponding fixes.

Fix: Verify directory access error in Windows 10/11

The Verify that you have access to that directory error is one that arises for some users when they try to install certain software. The full error is Error 1310, Error writing to file: (folder path). Verify that you have access to that directory. Users can’t install the required software in Windows when that error message pops up.

How do I fix Verify that you have access to that directory error when installing programs? For starters, make sure you’re logged in with your Admin account. Installing programs requires administrative permissions. Alternatively, you can restore folder permissions with Permissions Time Machine or reregister Windows Installer.

Read below for thorough step-by-step instructions for each solution.

How can I fix Verify that you have access to that directory error on Windows 11?

This issue is similar to Access denied Windows 11 error, and it usually appears if you don’t have the necessary privileges to access certain directories.

In case this happens, you might have to change the owner, and to do that, read our how to take ownership of a folder on Windows 11 guide.

The solutions to this problem are same like the ones in our You don’t have permission to open this file guide, so be sure to check it out.

Fix Verify that you have access to that directory error

  1. Log In to an Admin Account
  2. Restore Folder Permissions With Permissions Time Machine
  3. Reregister the Windows Installer

1. Log In to an Admin Account

The Verify that you have access to that directory error is often a folder permission issue. Some users might need to install the required software within an admin account instead of a standard one to fix the error. Users can activate a built-in admin account to log in to as follows.

  1. First, click the Type here to search button to open Cortana’s search box.
  2. To open the Command Prompt, enter ‘cmd’ in the search box.
  3. Right-click Command Prompt and select Run as administrator.
  4. Then input ‘net user administrator /active:yes’ and press Enter to activate the built-in admin account.net user administrator /active:yes cmd
  5. Close the Command Prompt, and log out of Windows.
  6. Thereafter, users can select the new Administrator account to log in to.
  7. Press the Windows key + E hotkey to open File Explorer.
  8. Open the folder that includes the installer for the software that the error arises for.
  9. Then right-click the installer and select the Run as administrator context menu option.

2. Restore Folder Permissions With Permissions Time Machine

The Verify that you have access to that directory error states that users need to verify that they have access to the installation directory. Users can restore folder permissions for the installation folder path included within the error message with Permissions Time Machine. Follow the guidelines below to restore folder permissions with the freeware version of the software.

  1. First, open the Permissions Time Machine page.
  2. Click Download > Here to save a Permissions Time Machine ZIP file.
  3. Open the Permissions Time Machine ZIP in File Explorer.
  4. Click Extract all to open the Extract Compressed window.extract compressed folders
  5. Click Browse to select a folder path, press the Extract button.
  6. Then click the Permissions Time Machine setup wizard in the extracted folder to install the software.
  7. Open the Permissions Time Machine window shown below.permission time machine
  8. Click the … button on the File System tab to select the folder path you tried to install the software to (referenced in the error message).
  9. Click the red Select Users And Group button.permission time machine users or groups
  10. Then select a user to reset folder permissions for and click OK.
  11. Select Full Control on the drop-down menu.
  12. Press the Reset button, and select Reset Now to confirm.

3. Reregister the Windows Installer

  1. Some users might need to reregister the Windows Installer module to fix the verify directory error. To do that, enter ‘msiexec /unregister’ in Run and press Return.
  2. Then input ‘msiexec /regserver’ in the Open box, and click the OK button.msiexec /regserver run
  3. Restart Windows after reregistering Windows Installer.

The above resolutions will usually resolve Verify that you have access to that directory error. In addition to those fixes, selecting an alternative installation directory for the software the error occurs for might also fix the issue.

How to Fix Win + X Not Working in Windows 11

Several options are available to you if Win + X is not working in Windows 11. The shortcut should open the power menu as right-clicking on the Start button does, however sometimes it can malfunction.

The causes of this problem can vary from hardware issues such as burnt keys to software issues such as a bug inside the Explorer process.

Follow along as we will show you how to troubleshoot the Win + X not working in Windows 11 situation, right after we see how long it takes to install the OS on HDD.

What are the new keyboard shortcuts in Windows 11?

It’s impossible not to appreciate a nice keyboard shortcut. The fact that they are efficient and that you can train yourself to use a new one will pay benefits in the future, as you will save seconds of time over and over again.

A number of new keyboard shortcuts are included in Windows 11, Microsoft’s most recent iteration of the operating system, which is connected to new functionality.

It used to be that you could only snap the focus window side to side with Windows shortcuts. However, now you can use the Windows key along with the Up arrow and Down arrow to snap it to the top or bottom as well.

Furthermore, you can now open the Quick Settings menu with Windows + A, and many more. Here are the other new shortcuts that you should know:

New Windows 11 shortcuts ( Source: tom’s HARDWARE)

For further information on how keyboards and shortcuts work, check out our post on how to change keyboard layouts in Windows 11.

This being said, let’s move on to troubleshooting the Win + X not working in Windows 11 error before you start fooling around with the newfound shortcuts.

How can I fix Win + X not working in Windows 11?

1. Check the keyboard

Before you can proceed with software debugging, you must first determine who is to blame for the current state of affairs.

In order to determine if the problem is with the keyboard, try pressing the Win key together with another key, such as I, and see if the Settings app opens.

Once you’ve done that, test the X key by typing some text inside Notepad or another writing software. It may be necessary to change your keyboard or the two keys if one of them, or possibly both, doesn’t function properly. Otherwise, proceed with the following solutions.

2. Update the keyboard drivers

  1. Press Windows + S and lookup Device Manager.device-manager-search win + x not working windows 11
  2. Once you have entered it, expand the Keyboards section and right-click on each keyboard driver in order to choose Update driver.update-keyboard win + x not working windows 11
  3. Alternatively, you can choose Uninstall device and then restart your computer in order for it to reinstall the driver automatically. After this, the Win + X not working error should go away.uninstall-keyboard win + x not working windows 11

Even though Windows is in charge of updating your computer drivers, you will have to update them manually from time to time.

Alternatively, we recommend that you can use a third-party software tool that automatically finds and installs all your missing and outdated drivers, such as Outbyte Driver Updater.

The Win + X not working in Windows 11 issue could have easily been avoided, as well as any other driver-related errors.

⇒ Get Outbyte Driver Updater

3. Restart Explorer

  1. Press the CTRL + ALT + DELETE buttons simultaneously, then click on Task Manager in order to access it.
  2. Here, look for the Explorer task under the Details tab, click on it and choose End task.end-explorer win + x not working windows 11
  3. Now click on File, followed by Run new task and type Explorer inside it in order to solve the Win + X not working issue.run-explorer win + x not working windows 11

Explorer is a program manager process that is responsible for providing the graphical interface that you use to interact with the majority of Windows — the Start menu, taskbar notifications area, and File Explorer — as well as the notification area.

Occasionally, any of the components that make up the Windows graphical shell can begin to behave abnormally, if not completely freeze, but restarting the process will most definitely fix the errors.

4. Run the SFC scan

  1. Press the Windows + S keys together and search for cmd. Right-click on the top result and choose Run as administrator.cmd-search win + x not working windows 11
  2. Once you are inside the Command Prompt window, type or copy-paste in the following command: sfc /scannowsfc-scannow win + x not working windows 11


Alternatively, you can refer to our article on what to do if the mouse and keyboard are not working in Windows 11 and ensure that your keyboard bugs are gone.

And lastly, if the above solutions didn’t fix the software issue, read our guide on how to fix Windows 11’s Start menu.

Was this guide helpful for you? Don’t hesitate to tell us in the comments section below, as well as whether you have any more solutions in mind.

How to Fix Low AirPods Volume on Windows 11

AirPods are one of the finest wireless earbuds available in the market. The best part is they can be connected to non-iOS devices as well, be it Android or Windows. But, many users have recently reported that their AirPods volume is low after upgrading to Windows 11.

And for most of them, the AirPods worked just fine when they were running the previous iteration or even if they connect it to another device. So the problem here likely lies with Windows 11 or its settings, as you may have guessed.

But what all issues could lead to AirPods’ low volume in Windows 11 problem and how you can eliminate them is the real question here? Let’s find out.

Why is the AirPods volume low in Windows 11?

Issues with the AirPods or any other similar device can arise due to problems with the Bluetooth connections. Other than that, misconfigured settings also lead to the low volume issue with AirPods in Windows 11.

Since many users are encountering the same problem after upgrading to Windows 11, it seems like a bug in the OS itself. We know that the latest iteration uses an AAC (Advanced Audio Coding) audio codec for Bluetooth connections while Windows 10 used a different one.

Also, if you started encountering the low volume or no sound in AirPods in Windows 11 after updating the OS, it could be a problem with the current version itself. In which case, uninstalling it seems like a viable solution.

And when it comes to issues with the peripherals, drivers too are found to be the culprit. Be it outdated or corrupt drivers, both are equally likely to cause the problem.

Let’s now head to the most effective methods to fix the low AirPods volume issue in Windows 11.

What do I do if the AirPods’ volume is low in Windows 11?

1. Reconnect the AirPods

  1. Press Windows + S to launch the Search menu, enter Device Manager in the text field, and click on the relevant search result.Device Manager to fix Airpods low volume in Windows 11
  2. Check all the options here, locate any entry related to the AirPods, right-click on it and select Uninstall device from the context menu.Uninstall device to fix airpods low volume in Windows 11
  3. Click Uninstall in the confirmation prompt that pops up.Confirm Uninstall
  4. Repeat the same process for all similar devices listed here. You will find other AirPods related drivers under Audio inputs and outputs, Bluetooth, and Sounds, video and game controllers. Once done, restart the computer.
  5. Now, open the AirPods case and hold the round-shaped button at the back for 10-15 seconds, until amber light flashes a few times.Reset Airpods
  6. Press Windows + I to launch the Settings app, and select Bluetooth & devices from the tabs listed on the left.Bluetooth & devices
  7. If Bluetooth is not already turned on, click on the toggle to enable it.Turn on Bluetooth
  8. Next, click the Add device option.Add device to fix airpods low volume windows 11
  9. Select Bluetooth in the Add a device window.Bluetooth
  10. Now, wait for your AirPods to appear, and then click on it to connect.Connect to fix airpods low volume windows 11
  11. After a connection has been established, click on Done at the bottom.Save changes

Most often than not, it’s a problem with the connection or the way your AirPods are configured. The easiest and most effective fix here is to uninstall every related driver, reset the AirPods, and then reconnect it.

Once you are done, check if AirPods low volume issue in Windows 11 is resolved. If not, head to the next method.

2. Turn on Loudness Equalization

  1. Press Windows + S to launch the Search menu, enter Change system sounds in the text field at the top, and click on the relevant search result.Change system sounds
  2. Navigate to the Playback tab.Playback tab
  3. Right-click on the AirPods entry, and select Properties from the context menu.Properties to fix airpods low volume windows 11
  4. Now, go to the Enhancement tab, tick the checkbox for Loudness Equalization, and click on OK at the bottom to save the changes.Enable loudness equalization to fix airpods low volume windows 11
  5. Once done, restart the computer for the changes to come into effect.

Now, check if the bad audio quality with AirPods in Windows 11 problem is fixed.

3. Update Bluetooth drivers

  1. Press Windows + X to launch the Quick Access/Power User menu, and select Device Manager from the list of options.Device Manager
  2. Double-click on the Bluetooth entry here to expand and view the devices under it.Bluetooth
  3. Right-click on the Bluetooth adapter, and select Update driver from the context menu.Update driver to fix airpods low volume windows 11
  4. Finally, select Search automatically for drivers from the two options that appear in the Update Drivers window.Search automatically for drivers

Your system will now find the best available driver and install it for the Bluetooth adapter. Once done, the Airpods low volume in Windows 11 issue should be fixed.

If the Device Manager is unable to find a better version, as is the case with many, you can manually install the latest driver version. In case it was a bug in the current version or the driver simply ran into an issue, updating it should fix the problem.

Also, there’s a simpler alternative to automatically update all the installed drivers on your system, use a reliable third-party app. We recommend using Outbyte Driver Updater, a dedicated tool that will download the install the driver updates, once it’s available, and keep the ones on your PC up-to-date.

⇒ Get Outbyte Driver Updater

4. Update Windows 11

  1. Press Windows + I to launch the Settings app, and select Windows Update from the tabs on the left.Windows Update
  2. Click on Check for updates.Check for updates to fix airpods low volume windows 11
  3. If any new versions are listed after the scan, click on Download & install.Download & install

5. Run the Playing Audio troubleshooter

  1. Press Windows + I to launch the Settings app, and select Troubleshoot on the right in the System tab.Troubleshoot
  2. Click on Other troubleshooters.Other troubleshooters
  3. Locate the Playing Audio troubleshooter and click on the Run button next to it.Playing audio troubleshooter to fix airpods low volume windows 11
  4. Now, follow the on-screen instructions and choose the appropriate response when prompted.

Microsoft offers several built-in troubleshooters to eliminate issues with the system or connected devices. And in this case, the Playing Audio troubleshooter could help.

After running it, check if the AirPods low volume in Windows 11 issue is fixed.

6. Uninstall recent Windows 11 update

  1. Press Windows + I to launch the Settings app, and select Windows Update from the list of tabs in the navigation pane on the left.Windows Update
  2. Next, click on Update history on the right.Update history to fix airpods low volume windows 11
  3. Scroll down and select Uninstall updates under Related settings.Uninstall updates
  4. Now, select the problematic update, and click on Uninstall.Remove update to fix airpods low volume windows 11
  5. Finally, click Yes in the confirmation prompt that pops up.Click Yes

If you started encountering the AirPods low volume issue in Windows 11 after installing an update, it could be a bug in that very version. In this case, instead of having to deal with the issue, you can simply uninstall that particular update, and wait for the next one to release.

By the time you are done executing the methods listed here, the low AirPods volume problem in Windows 11 should be resolved. Once that’s done, you can continue using your favorite AirPods while watching movies, or in meetings.

In case the AirPods is not working in Windows 11, the issue is likely with the connection or the driver. So make sure to check these two before you go with the intricate methods listed in the linked guide.

Tell us which fix worked and your experience with the AirPods in Windows 11 by using the comments section below.

Winget is Not Recognized: How to Get it to Work

A command-line-based package manager, known as WinGet by its users, allows you to rapidly locate, download, install, upgrade, remove and configure apps on computers running Windows 11 or 10. Thus, we will show you today how to fix WinGet not recognized in Windows 11.

Microsoft’s Windows Package Manager simplifies the process of managing applications by allowing users to use a single command.

Without further ado, let’s look in more detail at what WinGet does and then jump into the list of solutions that show you how to fix WinGet not recognized in Windows 11. Follow along!

How does WinGet work?

Package managers are widely used on Linux systems. Rather than searching for a program on the web, downloading an installer, and navigating through a wizard, you may simply run a short command to search for and install an application by its name, saving you time.

Other businesses and individuals can host their own software repositories, which are hosted by Microsoft on the back end of the system. For developers and system administrators, it’s a critical feature that helps them work more efficiently on Linux.

cmd winget not recognized windows 11

The WinGet program is compatible with installers based on the EXE, MSIX, and MSI file formats. The Windows Package Manager Community repository, which is open to the public, contains manifest files for supported apps in the YAML format.

Installing applications through the Microsoft Store, as well as command auto-completion, have been available since September 2020, thanks to an update released by Microsoft.

Windows Package Manager employs a variety of processes to limit the possibility of harmful software making its way into the repository and onto the target machine. These processes include Microsoft SmartScreen, static analysis, SHA256 hash validation, and others.

Source code for the WinGet client and the community manifest repository is available for download under the MIT License and hosted on GitHub.

How can I fix WinGet not recognized in Windows 11?

1. Join Windows Package Manager

  1. Head to the Windows Package Manager form and fill it out in order to join the program.microsoft-insider winget not recognized windows 11
  2. Once you’ve done this, make sure that you are logged into Microsoft Store with the same account.store winget not recognized windows 11

2. Go to the application path

  1. Open File Explorer and enter the following path: %userprofile%\AppData\Local\Microsoft\WindowsAppsmicrosoft-apps- winget not recognized windows 11
  2. If you find winget.exe to be inside the folder, then move to the next step, otherwise, download and install the latest Windows Package Manager release.
  3. Open the Windows search bar and type in Edit the system environment variables and click on the top result.edit-system-variables winget not recognized windows 11
  4. Now click on Environment Variables.environment-variables winget not recognized windows 11
  5. Click on Path and Edit.path-edit winget not recognized windows 11
  6. Click on New and then enter the following path: %userprofile%\AppData\Local\Microsoft\WindowsApps\new-variable winget not recognized windows 11
  7. Click OK for all dialogs in order to apply the changes made and open a new CMD window as an administrator in order to try WinGet out.cmd-search winget not recognized windows 11

When a variable’s value is set outside of a program, it is known as an environment variable. This is often done through capabilities built into the operating system or a microservice.

Any number of environment variables can be generated and made available for use at a given point in time, and each variable has a name and a value associated with it.

3. Reinstall Windows

  1. In order to reinstall Windows without losing all your data, open the Settings app and go to System followed by Recovery.system-recovery winget not recognized windows 11
  2. Now click on Reset PC.reset-pc winget not recognized windows 11
  3. In the new window, choose whether you want to Keep your files or delete them along with the new OS installation.KEEP-my-files winget not recognized windows 11

For more information on WinGet, take a look at our post on the new way to remove software in Windows 10 and 11.

Alternatively, you can check out our article on the best software package installers for Windows, in case you don’t want to use WinGet anymore.

And lastly, users found it helpful to read out guide on how to remove software leftovers on their computers, since they were causing more trouble than was needed.

In order to improve our future posts, we recommend that you leave us a comment in the section below and tell us what you think. Additionally, if you have more solutions in mind, don’t hesitate to write them down.

Windows 11 Waiting for You to Review the License Terms [Fix]

Windows 11, being the first major OS upgrade by Microsoft for over six years, was met by wide adoption, with users not wanting to miss out.

Microsoft made it easier to hop on this fast-moving train by making the upgrade free for Windows 10 users.

However, with Windows 11 still relatively new and lots of improvements still expected, users have been facing some problems upgrading from Windows 10.

One such problem is the Windows review license terms error, which is why you are here reading this article.

Be at ease as you are about to find out how to solve this problem in three practical and effective ways. All you need do is follow the instructions to the letter, and you will be fine.

What are the requirements for Windows 11?

Before moving to the fixes, it is imperative to know if the system you are looking to upgrade meets the Windows 11 requirements.

The following are the basic requirements as stated by Microsoft:

  • Processor: 1GHz speed or faster, 64-bit compatibility, and 2 or more cores
  • TPM: TPM 2.0
  • System Memory: Minimum of 4GB
  • Display: High definition (720p), 9-inch minimum diagonal, 8 bits per color channel
  • Storage: 64GB minimum
  • Graphics: Direct X 12 API, WDDM 2.0
  • System firmware: UEFI, Secure Boot capable

If your computer meets the above requirements, then there should be nothing stopping it from upgrading to Windows 11 from Windows 10.

Check out the linked article to learn more about Windows 11 requirements, specifications, and supported devices.

How can I fix the Windows 11 review license terms error?

1. Use Windows Troubleshooter settings

  1. Press the Windows button and click the Settings icon.
  2. Select the Update & Security option.update windows troubleshooter review terms error
  3. Click the Troubleshoot option on the left plane followed by the Additional troubleshooters option.troubleshooter license terms error
  4. Now, click the Windows update option and select Run the troubleshooter in the next window.update windows windows11 review license terms error
  5. Wait for the troubleshooting process to complete, restart your computer, and try the upgrade again.

2. Use a dedicated repair tool

The license terms error might be caused by corruption within the system files and if you don’t want to invest too much time in troubleshooting, a dedicated repair tool can help you.

This kind of apps are equipped with powerful features that allow you to scan for, identify and quickly fix any broken system file.

3. Use the Windows 11 Installation Assistant

  1. Go to the Windows 11 download page on Chrome or any browser.
  2. Locate the Windows 11 Installation Assistant section and click the Download Now button.download installation assistant windows 11 review terms
  3. Once the download is complete, run the exe file and click Yes to allow it to make changes to your PC.
  4. If you have installed the PC Health Check app (app for checking if a system meets the Windows 11 requirements) on your system, click the Accept and Install button. If not, download the app, check your system requirement, and come back to refresh.accept installation assistance windows 11 review license terms error
  5. From here, the Windows 11 Installation Assistant will start downloading updates automatically.downloading update Windows11 license terms error
  6. After verifying the updates, it will start installing Windows 11 on your PC. Note that you have to save your ongoing projects because your PC will restart automatically when the installation finishes.

4. Use the Media Creation Tool

  1. On the Windows 11 download page, locate the Windows Installation Media section and click the Download Now button.download media tools windows 11 license review error
  2. Run the exe file after the download is complete and accept the Applicable notices and license terms in the next window.media tool application license windows 11 review terms error
  3. Windows 11 should be the title in the Edition field in the next page automatically. Don’t change anything here and click the Next button.
  4. Select the ISO file when prompted to Choose which media to use.choose iso file windows 11 license terms error
  5. Save the ISO to Desktop or any folder of your choice when prompted.windows 11 license terms error save iso
  6. Wait for the download to complete and double-click the ISO file to open it.
  7. Click Yes to allow it to make changes. This will load the Windows 11 page.
  8. Click Next when prompted to Install Windows 11. This will start checking for updates which will take some time to complete.iso file windows 11 review license terms error
  9. Accept the Applicable notices and license terms again and wait for it to get the available updates.
  10. Before installing, a Ready to install window will pop up. Make sure the keep personal files and apps box is checked. This is important to prevent data loss after the upgrade.windows 11 license terms review error
  11. Finally, click the Install button to finish the process, and Windows 11 will be installed on your computer.

There you have it: three effective fixes for Windows 11 review license terms error when trying to upgrade from Windows 10.

This article covers the basic requirements a computer needs to meet to be eligible for the upgrade. It has also broken down three straightforward fixes to the menacing problem.

With this guide, the Windows 11 review license terms error should never stop anyone from enjoying the latest features of the new OS again.

We also have a very useful guide on what to do if a Windows 10/11 activation key doesn’t work.

If you have any questions or advice, don’t hesitate to use the comments section below and we will get back to you as soon as possible.

Microsoft Pluton vs TPM: The differences and similarities

Are you curious about Microsoft Pluton? Do you want to know about the difference between this new security processor and the existing popular one? This article is all about Microsoft Pluton vs. TPM.

Microsoft already announced its security processor called Microsoft Pluton. It is currently known as the future of the next generation of Windows PCs, laptops, and tabs. Also, many people have started considering it as a powerful alternative for TPM.

As MS Pluton seems to be an alternative, what will be the future of TPM? Also, there is a lot of confusion among the people about these two chips, particularly the Pluton.

In this article, we will try to bring the end to all of these confusions so you can understand these two security modules properly, find their differences, and know some essential key information.

What does a security processor do?

A security processor is a dedicated chip embedded into modern devices or microprocessors that handles multiple security measures that improve security and create resistance against various security threats, including cyber-attacks.

Without a security chip, we cannot imagine any modern smart devices. It has been an industry standard now. There are various security processors we see in different types of devices. Some of the known chips are HSM, TPM, Secure Enclave, Microsoft Pluton, etc.

TPM has been an industry-standard security chip for PCs for years. However, Recently, Microsoft Pluton has entered the competition. So, we will talk about these two security modules in this article and find the differences and similarities.

Microsoft Pluton vs. TPM: The similarities and differences between two security processors

What is Microsoft Pluton?

Microsoft Pluton Cloud Update

Microsoft Pluton is a security processor for modern smart devices which was first introduced for Xbox game consoles back in 2013. Later, it was introduced on Azure Sphere to bring better security. In this year, the Pluton has landed on the PC and laptops too.

AMD Ryzen 6000 series laptop CPUs have come with MS Pluton embedded into it. Qualcomm and Intel are also bringing support for Pluton with their processors.

People think that, in the future, Pluton may replace the TPM chips for Windows devices as it provides the same level of security plus some other extra benefits.

The main goal of Microsoft Pluton is to bring better security in the PC industry as well as provide better protection for Windows 11 or future Windows operating systems. Microsoft has claimed that Pluton has solved the weaknesses of TPM.

Key features

1. Physical attack resistance

Pluton provides much better security than the traditional security chips. It is because the MS Pluton comes as a built-in part with the CPU itself rather than being available as a separate module.

As a result, there is no external communication between the CPU and the security processor. So, the data passing between chips are not exposed to physical attacks.

2. Security updates from the cloud

Microsoft has announced that their new security chip will get the update directly from the cloud via Windows update. As a result, the security module’s framework will always remain up to date, which will make it very secure.

3. Trusted and proven

Pluton is already a proven chip with better technology. Microsoft has been using this security module in Xbox and Azure Sphere for years. They also collaborated with other companies like AMD, Intel, Qualcomm and now collaborating with other ecosystem partners. It has made the Pluton more trusted and reliable.

Compatibility

One of the fantastic things about this new security chip is it is totally compatible with the existing security systems that have been used for Windows computers. Pluton works with existing TPM APIs. So, you can continue using BitLocker and System Guard without any problem.

Limitations

No security chip is hacker-proof. Pluton is not different. But, It is indeed a better option than the existing ones which have been used on PCs, laptops for years. If you talk about the realistic limitation, we only see one thing. That is, Pluton is relatively new for the computer industry. There are no other significant things that we can see as limitations or downsides.

What is TPM?

TPM Chip

The full form of TPM is the Trusted Platform Module. It is a tiny chip that enhances your computer’s security. It provides cryptographic keys to the computer operating system for doing various tasks that require authentication.

TPM can be separate from CPU and memory or sometimes may be embedded into the CPU. The PC industry has been using this small security chip for years.

When the first time it was introduced, it brought a lot of security advantages which were game-changers.

Sometimes, TPM can be totally virtual. It means there may not be any physical chip. It will work as software. But, security experts don’t recommend this type of TPM.

Modern Windows operating systems require TPMs for security purposes. When Windows 11 was introduced, it was mandatory to have TPM version 2.0 on a computer in order to be able to run Windows 11. In that time, people started to know about TPM more.

But, TPM was introduced as the industry standard in 2009. Since then, we have got several TPM versions.

Key features

1. Trusted

TPM has been in the industry for quite a long time. As a result, it has gained trust in the industry. Else, this security module has been protecting users for many years without any major drawbacks.

2. Resistance against cyber threats

TPM has been improved a lot after a lot of developments over the past few years. It can now protect users from more types of threats. The latest version of TPM can use different algorithms to protect against specific threats in case the existing algorithm doesn’t work.

In this way, it has gained strong resistance against various cyber attacks.

3. Variousness

There are different types of TPMs available. Each of them has little difference in terms of performance and features. TPM can be available as a separate external module on your motherboard, or it can be integrated into the CPU.

Else, there are Firmware or software-based TPMs too. These are similar in terms of functionalities. However, the physical ones are always a bit better for security and smoothness.

Compatibility

As TPM has been available in the PC industry for a very long time, there are no major compatibility issues. Many matured authentication systems and security solutions are already utilizing TPM.

Windows Hello, BitLocker, Measured boot, Credential guard, etc., utilize the TPM to ensure better security. Microsoft Pluton is also compatible with the existing solutions that are using TPM.

Limitations

Basically, TPM is a very secure technology. However, it has some downsides too. Software-based or virtual TPMs may have bugs. Also, it provides security against theft of the system only. TPM can be more vulnerable to external attacks while rebooting the system.

It has more minor flaws. As a result, new security chips are under development to replace TPM.

How is Pluton different than TPM?

Though TPM can be integrated into the CPU, usually, it comes as a separate hardware chip that communicates with the CPU via the appropriate communication channel. That leaves the data vulnerable, especially when cybercriminals get physical access to a computer.

On the other hand, Microsoft Pluton is built-in with the processor itself. It reduces the chance of physical attacks.

Microsoft Pluton is the next step of TPM. It means the Pluton is far more advanced than the TPM. According to Microsoft, Pluton has solved many security issues of TPM.

Another difference is the updating process. TPM firmware gets an update from different channels. It may not get a proper update in some cases due to various factors. But, Microsoft Pluton has one official channel for the update. So, the update process is much more stable and better.

Microsoft Pluton also uses the SHACK (Secure Hardware Cryptography Key) technology that hides the data from the rest of the system, even from the Pluton firmware. It makes the encryption keys not exportable from this new security chip. For TPM, it is not the case.

Pluton also can emulate TPM and act as an ideal alternative to this security chip. It allows MS Pluton to work smoothly with existing software that utilizes the TPM features. However, on the other hand, TPM cannot emulate the Pluton.

There are many other minor differences exists between these two security processors. But, significant ones have been mentioned to give you an idea.

Microsoft Pluton vs. TPM: Main similarities

When we have already discussed the differences, we cannot ignore the similarities. The first similarity is that both are security chips, which are made to provide better security for Windows users.

Both Pluton and TPM store cryptographic keys and other data that are used to verify various things of OS in the hardware. Both technologies are compatible with existing features like Bitlocker, Windows Hello, etc.

People may have a misconception that only Pluton has the feature to protect digital media rights using DRM technology. In fact, TPM also can do the same. Also, both of them can protect software licenses.

Though not in all cases, sometimes, like Microsoft Pluton, you may see the TPM is directly embedded into the SoC.

Will Pluton end piracy on Windows?

Microsoft has ended piracy on Xbox using the Pluton chip and integrating the software with it. Now, people may want to know if the same thing will happen on Windows 11 or not.

Though Pluton has not come into the mainstream market yet, right now, Microsoft addressed that the objective to bring their own security chip is to improve the security of the Windows operating system. As things may change, we may see DRM technology may be strictly used on Windows using the advantage of Microsoft Pluton.

However, Microsoft also addressed that OEMs have the option to turn Pluton off and use the TPM or just use the Pluton as the replacement. So, If Microsoft plans to end piracy on Windows, it may not happen anytime soon.

What is the future of TPM?

Microsoft partnered with AMD, Intel, and Qualcomm to bring Pluton in the future PCs. AMD is using Pluton for their Ryzen 6000 series processors. But, the OEMs will be the ones who will decide what will be the default security chip in their laptops or PCs.

However, We are seeing that some pluton-enabled laptop models are coming. It doesn’t say anything about the TPM’s future.

Before releasing Windows 11, Microsoft made the TPM 2.0 as one of the key requirements to run their new desktop operating system. So, Many users with old systems were not able to install Windows 11.

Microsoft is continuously bringing new features and changes to its latest operating system. In the recent Windows 11 Build 22572, Microsoft has brought some changes that indicate that Windows 11 is not finished yet. We will see more features and changes that will make it complete.

We can predict that if Microsoft releases Windows 12 in the near future, they may make the Pluton as the requirement to run this next-generation Windows OS. However, for this, there should be a significant amount of Pluton-enabled PCs and laptops in the market.

If the above thing happens, the future of TPM may be ended there for Windows devices. However, to gain that much market share, Microsoft will need to do many things that may require a few years.

So, if you don’t have a Pluton-enabled computer right now, you should not worry.

This article has explained the differences and similarities between Microsoft Pluton and TPM, along with some essential information. If you have any thoughts or opinions about the topic, just let us know in the comment box.

Dying Light’s Xbox Series X update is now live

The next-gen patch for the original Xbox One Dying Light video game is now live with a variety of enhancements for the last-gen high-end Xbox One X console and the current-gen Xbox Series S and Xbox Series X consoles.

All three Xbox consoles now feature a 25% increase in level of detail (LOD) distance.

Here’s the brief patch notes for each Xbox console with the improvements that players can now expect:

Xbox Series S and Xbox One X

  • Performance mode offers 30 FPS in full HD resolution
  • High resolution mode targets 30 FPS in Quad HD resolution

Xbox Series X

  • Performance mode offers 60 FPS in full HD resolution
  • Balanced mode that targets 60 FPS in Quad HD resolution
  • High resolution mode gives 30 FPS in 4K

Dying Light launched on Microsoft’s Xbox One console back in early-2015. The game was originally planned to also launch on the Xbox 360 but that version was canned due to the hardware limitations of that console.

A sequel, Dying Light 2: Stay Human, launched just last month on both Xbox One and the newer Xbox Series X console families.

Need more Xbox gaming news? Follow us on Facebook, Pinterest, and Twitter.

Windows 11 Free Upgrade Deadline: Is it Still Free?

Have you taken advantage of the Windows 11 free upgrade offer yet? It is common to be a bit skeptical whenever a new OS is released but Windows 11 has been out for a couple of months now and from the reviews, it seems to be doing great so far.

If you are still on the fence on whether to make the switch, you can refer to our Windows 10 versus Windows 11 comparison to help you make up your mind.

You can download Windows 11 from Microsoft’s website or upgrade your current PC once you get a notification. 

Why should I upgrade to Windows 11?

The best reason for downloading Windows 11 is that it’s the latest version. And if you don’t upgrade, you won’t be able to get the latest features ir new critical updates of the software.

Windows 11 is everything a modern operating system should be. You’ll love its simplicity, ease of use, and speed.

So what happens if you continue using Windows 10? Nothing bad. You can use the OS but at some point, it will stop getting new features, and Microsoft will eventually stop supporting it.

How long does the Windows 11 free upgrade last?

Free upgrades to Windows were a first for Microsoft, helping people upgrade faster than ever before. They typically last a year but for the latest OS released in October 2021, there is no known deadline yet.

In recent times, once the deadline passes, users would continue to get Windows on a new device or purchase a full version at the Microsoft Store.

If you’re using Windows 10, you’ll receive a notification that there is a new update available for download. Simply follow the on-screen instructions to upgrade your current PC or laptop to Windows 11.

Provided your PC meets the Windows 11 minimum system requirements, the installation should be seamless.

By default, your files should move forward when you upgrade but you shouldn’t take any chances. Ensure you back up your files in case anything happens.

Is there still a reason you are yet to make the switch to Windows 11? Let us know your reservations in the comment section below.
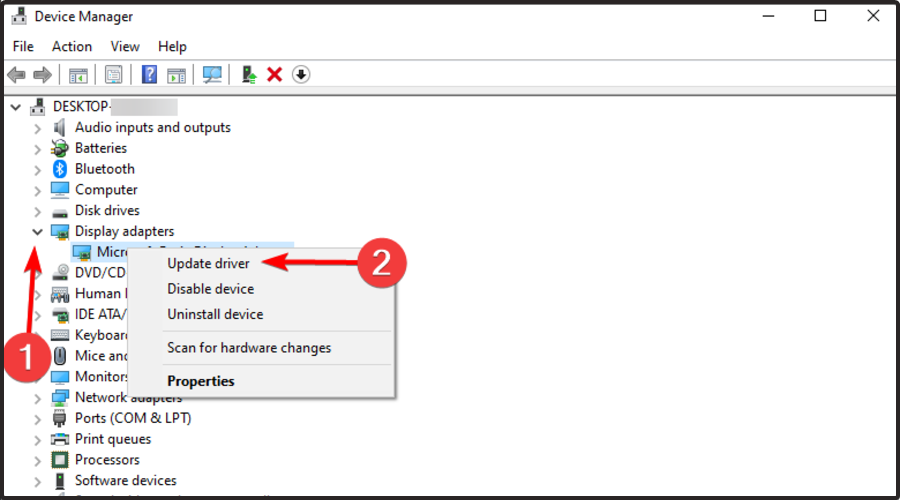
How to Fix the Windows 11 VirtualBox Error

Windows 11 is one of the most popular operating systems among users and offers many benefits. However, there are some problems that may arise when using it with VirtualBox.

Virtualization software can be useful to create and manage virtual machines. Although this type of program is mainly used by advanced users, it can also be interesting for the rest of us.

Whereas VirtualBox has many benefits attached to it, you may at times face errors while using it making it a frustrating experience.

If you are lucky, a few tweaks can easily fix the error but if not, you can proceed with our advanced troubleshooting methods.

Why should I run VirtualBox on Windows 11?

For most people, it’s a good idea to have a virtual machine running on their Windows 11 desktop. 

It gives you a safe environment in which you can experiment with software or configuration changes that might be risky. If they go badly, you just need to roll back the snapshot.

If you run Windows 11 inside VirtualBox, you will be able to use it without interfering with your existing setup. 

This can be beneficial if you want to try out a new operating system without committing to the change, or if you need to run an older version of Windows for compatibility reasons.

It will allow you to run multiple operating systems on your computer at the same time. This is great for those who need to test applications on multiple operating systems or want to experience another operating system without causing problems to their main installation.

A virtual machine is also a useful way of running potentially dangerous software without affecting your main operating system. 

This is because any changes made can easily be undone by simply deleting the virtual machine from your hard drive. You don’t need to worry about bugs affecting any essential files.

What can I do to fix the Windows 11 VirtualBox error?

1. Disable Firewall temporarily

  1. Press the Windows key, search for Windows Security and click Open.
  2. Select Firewall & network protection.
  3. Click on Public network.
  4. Next, toggle Microsoft Defender Firewall off.

2. Uninstall and re-install VirtualBox

  1. Hit the Windows key, type Control Panel and click Open.
  2. Select Uninstall a program.
  3. Find VirtualBox, right-click and select Uninstall.
  4. Navigate to your browser and download the Windows 11 ISO file.
  5. Install Oracle VM Virtual Box.
  6. Check if the problem persists.

3. Switch to a different version of Windows

  1. Launch VirtualBox, navigate to Settings, and select the General tab.
  2. In the Version entry, click to open the drop-down menu and select another version of Windows.

4. Use a third-party software

If all else fails, you can always go for alternative software that offers the same services as VirtualBox. VMware is a program for creating and running virtual machines, a type of computer that runs on top of your normal operating system.

If you’re using VirtualBox and run into this error, try installing VMware instead.The software consists of a number of components that can be used in various combinations to fit different needs.

Products include virtualization, networking and security management tools, software-defined data center software, and storage software.

⇒ Get VMware

What are the requirements to run VirtualBox?

VirtualBox does not require much in terms of hardware resources. In fact, it can be installed on many 32-bit host operating systems, even on relatively old computers.

For Windows 11 users, the requirements are a bit stricter. Your virtual machine must have TPM support.

The other requirement is a hard drive with enough space to house your VMs. More RAM is always better to be prepared for any eventualities.

Some users may be worried about malware and viruses infecting their PCs. VirtualBox will also automatically isolate the network connection for any VM running on your computer. 

This means that anything dangerous happening in a VM is unlikely to spread outside of that VM and infect your host PC.

You can always add an extra layer of protection to be on the safe side by installing reliable antivirus solutions to protect your PC.

Does VirtualBox slow down PC?

VirtualBox doesn’t necessarily slow down your system’s operations but under different circumstances, your speed may be affected.

While virtualization gives users the ability to run multiple operating systems simultaneously and can be useful for some things, it can cause the host computer to run slower than it normally would. 

The amount of slowdown depends on several factors such as hardware, version of VirtualBox, and the number of virtual machines running concurrently.

The more virtual machines you are running, the more your computer may experience slowdowns and lag due to resource allocation issues.

Windows 11 on its own is already a RAM-hungry OS so adding on to this may lead to reduced speeds while using the OS.

Depending on the versions of VirtualBox and your host OS, there are ways to speed up performance or limit resource usage in order to avoid these slowdowns.

We also have a guide on VirtualBox installation error that will help you solve any issues you may encounter.

If you are new to virtual machines, we have responded with an article on Virtual Machine management and how to go about it.

Let us know what solution worked for you and share any additional thoughts in our comment section below.
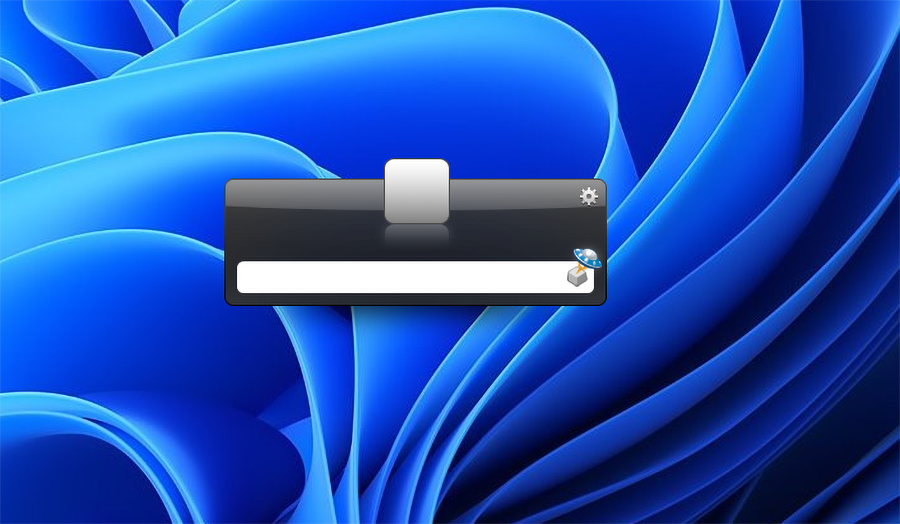
Fix: Can’t talk to the Herbalist in Horizon Forbidden West

Horizon Forbidden West was just released. As many players claimed, it is undoubtedly one of the greatest masterpieces when it comes to video gaming, but keep in mind you can play it only on PlayStation.

Even if it comes up with tons of incredible features and impressive stories, it seems like some users are struggling with irritating situations.

Thus, they claimed that they can’t talk to the Herbalist and this is what one user had to say about the situation:

Can’t speak to the Herbalist or the Armorer in Chainscrape.

I just started this area and can’t speak to either of them for some reason. Is that normal? Or can you speak to them from the start? Any advice is appreciated!

Keep in mind that it is not a game-related issue and you should carefully verify what we and other worldwide users found

How can I talk to the Herbalist from Horizon Forbidden West?

According to some worldwide gamers, you’ll only have to play a bit more of the story and all of its amazing features will open up.

So, these are the three missions you have to complete before talking to the Herbalist:

  • Gather Scarletstems 0/3
  • Go to Plainsong
  • Go to Riverhymn

It seems like you’ll also need to clear out the Bristlebacks first. The Bristlebacks is a new machine that can be used to farm Metal Shards.

In case you’ve completed all the mentioned missions, but you’re still unable to speak to the Herbalist, it might be a game glitch.

So, until we come up with some specialized fixes, you’ll probably need to restart or reinstall the game.

In conclusion, this is all you have to know about the reasons why you can’t talk to the Herbalist from Horizon Forbidden West.

Also, keep in mind that in larger settlements, like those with a Stitcher and Herbalist, Side Quests markers may not show up on the map until you’re actually in or near the settlement itself.

In order to get a smooth and complete Horizon Forbidden West experience on your PlayStation, you should constantly update your device.

However, some users reported encountering the PS4 system software update error. If you also face this one, try our dedicated solutions to fix it.

For any additional related questions or curiosities, make sure you leave a comment in the section below.
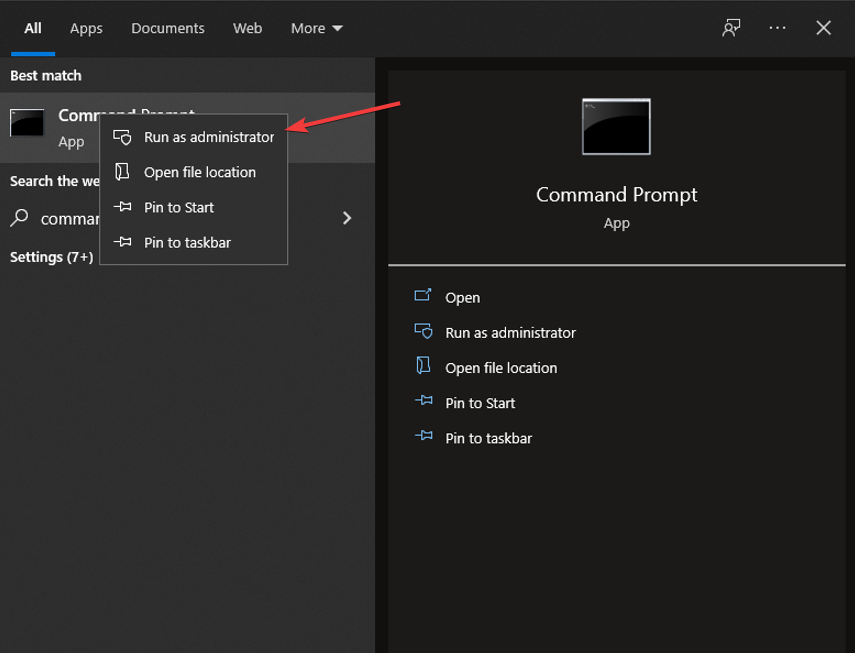
5+ Best PNG to ICO Converter Apps for Windows 11

Are you looking for PNG to ICO converter software for Windows 11 computers? If so, then you are in the right place.

Because in this guide, we have created a curated list of some of the best PNG to ICO converter apps for Windows 11.

ICO is an image file format that is used in the Microsoft Windows OS as an icon file format. Basically, you can change an image into an ICO to use it as an icon image.

It is a single pattern and multi-color image file that can vary in size. ICO files also have a certain area that contains a transparent area.

All the icons that you see on your Windows OS homescreen or explorer window, contain an icon in the ICO format.

ICO or icon files come in different sizes, but the maximum size of an icon should be 256×256 pixels, 24-bit color, with 8-bit transparency.

If you want to convert your company logo, webpage, or software logo into an icon, they cannot be directly used as an icon, as they may be in different image formats, possibly PNG.

In this guide, we will share with you some of the best PNG to ICO converter software for Windows 11. Let us check them one by one.

What are the steps to resize icons in desktop and Taskbar in Windows 11?

1. Resize desktop icons

  1. Navigate to the homescreen of your Windows 11 PC.
  2. Right-click on any blank area of your desktop.
  3. Select View.png to ico converter windows 11 view
  4. Choose between different size options, i.e., Large icons, Medium icons, Small icons.png to ico converter windows 11 icon size
  5. Select the appropriate size.

If you select the Large Icons option, the desktop icons will be set to the maximum available size in Windows 11.

It may look a bit odd, so setting the icon size to medium works the best with any desktop setting. But you can tweak it to your liking.

2. Resize Taskbar icons

  1. Press Win + R keys together to open the Run dialogue.
  2. Type the below command and press Enter. regeditregedit-windows11
  3. Navigate to the below address. HKEY_CURRENT_USER\Software\Microsoft\Windows\CurrentVersion\Explorer\Advancedpng to ico converter windows 11 regedit
  4. Right-click on the Advanced folder.png to ico converter windows 11 advanced
  5. Select New and click on DWORD (32-bit) Value.png to ico converter windows 11 new key
  6. Name the new value TaskbarSi.
  7. Double click on the TaskbarSi value.
  8. You can set the value 0,1, or 2 which will give you small, medium or large icon size.
  9. Close registry editor.
  10. Reboot your PC.

Now that you know how you can tweak and change the size of the icons on your desktop or Taskbar in Windows 11, let us take a look at some of the best PNG to ICO converter apps for Windows 11.

What are the best PNG to ICO coverter apps for Windows 11?

1. Adobe Illustrator CC

Adobe Illustrator

Adobe Illustrator is a full-fledged image editing software from the house of Adode, that also has Photoshop in its arsenal.

It is a very powerful software that not only helps you edit your images professionally but can also create or convert icons with it.

This software lets you create icons or ICO files as small as a smartphone screen, or scale them for desktop screens or billboards.

Adobe Illustrator CC lets you convert your images into vectors then convert them into icons. Overall, a great tool if you are into image editing.

Here are some of the key features of Adobe Illustrator:

  • You can use it create an icon of any size.
  • It produces high-quality icons.
  • You can create your own icon style by adding color and depth.
  • Option to create flat icon designs by combining vectors.

⇒ Adobe Illustrator

2. IcoFX

IcoFX

IcoFX is another tool that lets you convert or create icon files. You can create icon files in all sizes, and it goes up to 1024×1024 in size.

This tool supports formats such as BMP, PNG, JPG, JPG2000, TIF, and GIF files. If you have any images in the before-mentioned formats, then you can easily create ICO using IcoFX.

It also gives you an advanced editor using which you can easily edit your icons. IcoFX also comes with 40 different effects allowing you to create your own icon style.

IcoFX supports batch processing, meaning you can create or convert multiple icon files simultaneously. You can also capture a part of your screen and turn it into an icon using this software.

Here are some of the best features of IcoFX:

  • Supports batch processing.
  • You can create an icon of size up to 1024×1024.
  • It supports multiple image formats.
  • You can combine image objects to create icons.

⇒ IcoFX

3. Convertico

convertico png to ico converter windows 11

One of the best and no-nonsense PNG to ICO converters for Windows 11 is Convertico. It is an online or web-based solution that offers the option to convert PNG files to ICO format and vice-versa.

It is free-to-use, and you do not need to log in or connect to any sort of account in order to use the Covertico features.

You can either drag and drop downloaded PNG or ICO images onto the website interface or paste the link to the file.

Do note that Covertico comes with certain limitations, which is understandable as it provides everything for free.

You can covert up to 50 images, each 2MB in size. The conversion quality of Covertico sits right at the top among other online image converters.

The only downside that we discovered with Covertico is that it stores the uploaded image on its servers for 24 hours. So, if you have anything private, think twice before using this option.

Here are some of the best features of Covertico PNG to ICO converter for Windows 11:

  • Offers all its features for free.
  • The conversion speed is fast.
  • Provides image link support.
  • The interface is pretty easy to use.

⇒ Convertico

4. Zamzar

zamzar

Zamzar not only offers you the option to convert PNG to ICO but there are a host of converters that you can make use of.

You can convert almost every format into the one you desire. Notably, you don’t need to give your email address in order to get the output of the conversion.

The user interface is clean and easy to use. All you need to do is upload your image and hit the “Convert Now” button to download the output.

There is a status bar that shows you the progress of your conversion, which is a nice touch on the interface of Zamzar.

However, there are some major downsides to using Zamzar. If you don’t have a Zamzar plan subscribed to, then you can only convert 2 files for free in a day.

Moreover, your files will be stored on the Zamzar servers for 24 hours. So, uploading private images is something that you should avoid.

Here are the key features of Zamzar PNG to ICO converter for Windows 11:

  • Offers a host of converters.
  • Speed of conversion is good.
  • The interface is clean.
  • Shows you a status bar for the progress of conversion.

⇒ Zamzar

5. CloudConvert

cloudconvert

CloudConvert is a trusted and popular name when it comes to conversion. Among other conversion tools, CloudConvert offers the option to convert PNG to ICO.

This online tool supports over 200 formats for conversion. One of the best features of CloudConvert is that thanks to its advanced data security, no one except you will have access to your uploaded files.

Another unique feature of CloudConvert is that not only can simply convert PNG to ICO, but you can even resize, rotate or change the density of the output as well.

It also offers the option to remove any metadata attached to the image file. You can upload files from your PC, paste the URL, or even upload them from Google Drive, Dropbox, and OneDrive as well.

Here are some of the best features of CloudConvert:

  • Supports over 200 formats for conversion.
  • Doesn’t store your on its servers.
  • Offers the option to resize and rotate the image.
  • Can upload images from Google Drive, Dropbox and OneDrive.

⇒ CloudConvert

6. ICO Convert

ico convert

ICO Convert is a feature-loaded PNG to ICO converter online tool. It is not only free, but lets you convert PNG, JPG, and BMP images to ICO.

There are multiple features, such as the option to convert multiple PNGs to one ICO, batch convert PNG to ICO, and even batch convert ICO to image files.

You can take customization to the next level by cropping the original image, applying different styles, selecting the output sizes, and more.

If you are not looking to apply new frame styles to your icon files or do not want to crop images, then you can access the old website that offers clean and faster conversion.

Here are some of the key features of ICO Convert:

  • Offers option to convert mulitple PNGs to one ICO.
  • You can batch convert PNG to ICO and also batch ICO to image files.
  • Customization options include crop, frame styles, output sizes.
  • Conversion speed is fast.

⇒ ICO Convert

7. Convertio

convertio

The name of this next PNG to ICO converter for Windows 11, i.e., Convertio may spell similar to Convertico, but it is a different online conversion solution.

Convertio can be used online on a web browser, or you can even install an extension on your Google Chrome browser for faster access.

In order to use the platform for free, you need to make sure that the uploaded PNG image isn’t larger than 100 MB in size. If you wish to upload a file larger than 100 MB, you need to sign up for the service.

The images uploaded for conversion are stored on the Convertio servers for 24 hours. Moreover, you can only convert 2 images at a time.

It gives you the option to upload files from your computer, and even from Dropbox or Google Drive.

Here are the key features of Convertio:

  • Conversion speed is fast.
  • Can upload images from Dropbox or Google Drive directly.
  • Available as an extension as well.
  • Clean user interface.

⇒ Convertio

8. PNG to ICO Converter

freeconvert

Another free PNG to ICO converter for Windows 11 is simply called the PNG to ICO converter.

It has a pretty simple user interface, with no learning curve. You can upload files a maximum of up to 1GB in size.

If you want to upload a file larger than 1 GB, then you need to sign up for the service. The website comes with advanced options as well.

You can select the format and size from 16×16 to 256×256. There is also an option to set auto orientation, which uses the gravity sensor data stored in the EXIF.

PNG to ICO converter supports over 20 formats of image files that can be converted over to ICO icon format.

Here are some of the best features of PNG to ICO convert:

  • It is available for free.
  • Lets you upload files up to 1GB in size.
  • Offers advanced options such as settings format and size.
  • Easy to use interface.

⇒ PNG to ICO converter

What are some other options to convert PNG to ICO in Windows 11?

While the above list gives you a wide variety of PNG to ICO converter options for Windows 11, there is dedicated software as well, that can help you with the same task.

⇒ Photoshop

Adobe-Photoshop

Photoshop not only lets you edit your images, but it has a host of other features, that will help you with all your image-related needs.

One such feature is the option to convert PNG to ICO within Photoshop. The best part about using Photoshop to convert PNG to ICO in Windows 11 is that it creates output without any quality loss.

However, you need to purchase the full version of Photoshop in order to enjoy all the capabilities of the software to its full potential.

In order to operate the software, you need to go through a learning curve. Besides, you need to download an ICO format plug-in for Photoshop as it does not support converting images to ICO format natively.

⇒ iConvert Icons

iconvert icons

Simple software that handles all the ICO conversion-related tasks is iConvert Icons. You can download it for your Windows or macOS PC.

It is also available as a web app. iConvert Icons supports formats such as PNG, ICO, ICNS, and SVG. It isn’t available for free, but the web app is.

These are just a few of the software that you can rely on for your PNG to ICO conversion needs. There are multiple other tools available that you can use to convert PNG to ICO in Windows 11.

Let us know in the comments below which tool worked the best for you to convert PNG to ICO in Windows 11.

File Explorer Tabs Missing? How to Get Them Back

Microsoft manufacturers promised that they’ll come up with complete tab support for Windows users, but the biggest news didn’t appear yet.

Fortunately, you’re allowed to enable tabs in File Explorer, but only on the latest Windows 11 build in the Dev channel.

The full tab support would be extremely useful, especially because it seems like some users are facing problems with the File Explorer missing tabs.

As an example, according to worldwide users, the File Explorer tabbed UI is currently hidden in Windows 11.

Because it is a pretty common issue, we’ve managed to compile a list of useful fixes, so make sure you check them all.

How can I get my Explorer tabs back in Windows 11?

1. Restart Windows File Explorer

  1. Use this keyboard shortcut: Ctrl + Alt + Delete.
  2. Click on Task Manager.
  3. In the opened window, right-click on Windows File Explorer and choose to Restart it.

2. Try a specialized tool to restore the missing files

Maybe the best solution you can try is optimizing your system in an automatic way with the help of specialized optimization tools.

In case the system files are affected or missing, the software can replace corrupted or damaged files, restore your registry, and even provide detailed hardware analysis to the user.

Most antivirus software will not be able to deal with these issues, and you’ll be left with crashes, missing files, and other problems.

3. Use a specific folder

  1. Use this keyboard shortcut to open the Windows run dialog box: Windows + R.
  2. In the opened window, type regedit, then press on OK.
  3. Navigate to the following location: HKEY_CURRENT_USER\Software\Microsft\Windows\CurrentVersion\Advanced
  4. Click the right window, and select New, then DWORD (32-bit) Value.
  5. Rename the new pop-up as SeparateProcess.
  6. Double-click on the already created file and change the Value data from 0 to 1.
  7. Press on OK.
  8. Close Regedit, then restart your PC.

The above steps will help you restore Windows 10 File Explorer in Windows 11, so make sure you follow them carefully to get the old and complete look.

4. Enable the Windows File Explorer tabs by using Files Apps

  1. Press on the Windows key, type Microsoft Store, and navigate to the first result.
  2. In the search bar, type File Apps, then hit Enter.
  3. Look for the free app, then click on it.
  4. Select the Get button.
  5. Once you finish the installation process, click on Open button.
  6. Now, instantly, a new file explorer will open on your screen with tab support.

You can also perform this process by navigating to the Microsoft Store official page.

Note icon NOTE
This app won’t actually add Tab Support to native File Explorer, but you get a modern file explorer with amazing features, and Tab support is one of them.

After adding Tab support in File Explorer, it will become easier for you to manage various directories of folders right from the single File Explorer window.

As you can see, you can easily fix your File Explorer missing tabs in Windows 11 by following some simple steps. And if you are bothered by the Windows 11 bug where File Explorer keeps taking focus, it’s easy to fix.

Some users also reported that File Manager is sometimes not showing files and to discover more about this situation, do not hesitate to check our dedicated guide.

In case of encountering any additional questions or curiosities, make sure you leave a comment in the section below.
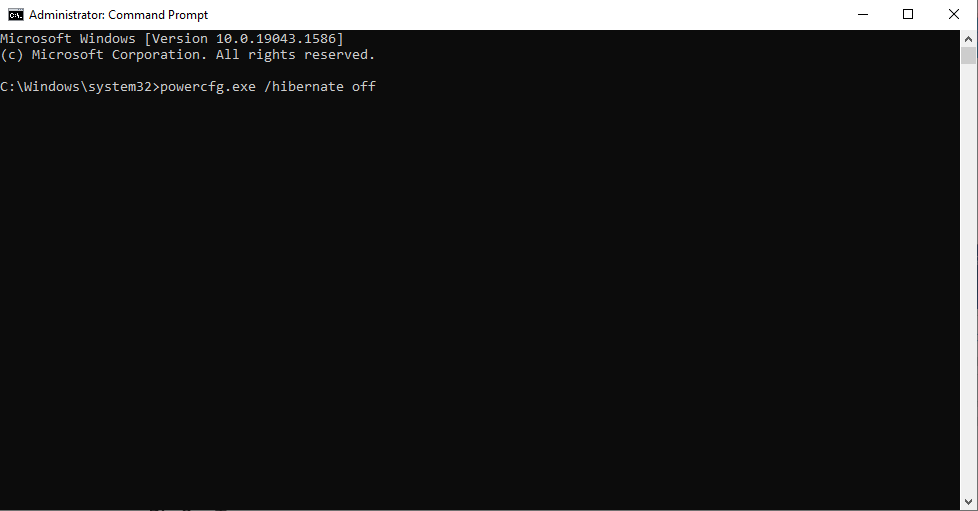
Here’s How to Get the Best Power Efficiency in Windows 11

Is your Windows 11 laptop battery draining faster? Are you looking for ways to get the best power efficiency from your Windows 11 laptop?

If so, then you are in the correct place. Because in this guide, we will give you the steps that you need in order to get the best efficiency on your Windows 11 laptop.

Similar to the previous version of Windows, Microsoft has included different power modes. These power modes use a combination of specific hardware and system settings to provide the chosen performance level.

By default, your Windows 11 machine will be set to balanced mode. In this mode, the system automatically balances the hardware and system settings to give you the best performance and battery life.

However, if you are running resource-intensive tasks or gaming, then this mode may not be preferable, as you will experience lag and stutter.

Whatever the case may be, depending on your use case scenario, changing to a different power mode makes sense.

With the help of this guide, you will be able to change the power mode in three different ways. More importantly, you will learn how you can get the best power efficiency from your Windows 11 PC. Let us check them out.

What are the steps to turn on battery saver mode in Windows 11?

1. Enable battery saver

  1. Press Win + I buttons to open Settings.
  2. Select System.
  3. Click on Power & battery.best power efficiency windows 11 1
  4. Under Battery, click on Battery saver setting.best power efficiency windows 11 2
  5. Hit the Turn on now button for Battery saver setting.best power efficiency windows 11 3

2. Enable automatic battery saver

  1. Press Win + I buttons to open Settings.
  2. Select System.
  3. Click on Power & battery.best power efficiency windows 11 1
  4. Under Battery, click on Battery saver setting.best power efficiency windows 11 2
  5. Click the Turn battery saver on automatically at and select the battery level where the battery saver will start automatically.best power efficiency windows 11 4

It may not always be good to run your Windows 11 PC in the best performance mode, as it will drain your laptop’s battery pretty quickly.

In particular, if you are traveling or have forgotten to bring a charger with you. So, to slow down the battery-draining process, you can either enable the battery saver mode or use the option to turn on the battery saver automatically at a specific battery percentage.

Now, let us check out how you can change the power mode on your Windows 11 PC to the best power efficiency mode and make your PC last longer.

How can I get the best power efficiency in Windows 11?

1. Using Windows Settings

  1. Press Win + I buttons to open Settings.
  2. Select System.
  3. Click on Power & battery.best power efficiency windows 11 1
  4. In the Power mode, click on the drop-down arrow and select Best power efficiency.best power efficiency windows 11 5

2. Using Control Panel

  1. Click on the Start menu.
  2. Search for control panel and open it.control panel
  3. Click on Power Options.best power efficiency windows 11 6
  4. Under Preferred Plans heading, select Power saver option.best power efficiency windows 11 7

3. Using Command Prompt

  1. Open Start.
  2. Search for command prompt.
  3. Click on Run as administrator.run as administrator option for command prompt
  4. Type the below command and press Enter. powercfg /list
  5. The currently applied power scheme will be marked with an asterix (*).
  6. Execute the below command to change the power mode. powercfg /setactive GUID
  7. Now in place of GUID, you need to enter the number for the power mode you wish to switch over to. Notably, the number will be different for different PCs.
  8. In our case, to select Power Saver mode, we will use the following command: powercfg /setactive a1841308-3541-4fab-bc81-f71556f20b4achange-power-mode-cmd

So, following any of the above-mentioned methods, you can change the Power Mode in your Windows 11 PC and get the best power efficiency on it by selecting the Power Saver mode.

After you select the power mode, your PC will switch over to that mode and you will notice that your battery will perform much better than before.

4. Use a specialized tool

reviversoft

You can also use a battery optimizer tool called ReviverSoft. Using this tool, you will be able to extend the battery life of your Windows 11 laptop in minutes, optimize and tweak the battery performance of your laptop, and manage the battery and other aspects.

It is a lightweight tool and does not eat up on your resources. ReviverSoft is safe and uses the latest technology to provide you with a safe diagnosis and monitor your device’s battery performance.

⇒ ReviverSoft

What can I do to improve the battery performance of my Windows 11 PC?

If you have recently upgraded to Windows 11 and are facing some battery issues, then you aren’t alone.

There are several Windows 11 users who have reported that they are getting less battery life out of their Windows 11 PC compared to Windows 10.

Well, this could be a bummer as you may not be able to use your laptop for an extended period of time, let’s say if you are traveling or not carrying a charger with you.

Just like every other Windows problem, there could be multiple reasons why you are getting poor battery life on your Windows 11 PC.

We have some tips listed below that will help you get the most out of your laptop’s battery life and, of course, improve its battery life as well.

⇒ Keep your PC up-to-date

It is very important that you keep your PC updated with the latest version of Windows update installed.

Not only does it improve the performance of your PC, but it will also fix the bugs that may be the reason behind the poor battery performance of your Windows 11 PC.

⇒ Do not charge your PC for a prolonged period

If the battery on your laptop is completely charged, then it is advised that you plug off the charger from your laptop.

Keeping the charger plugged in for a prolonged period even after the battery is charged degrades the battery life by heat dissipation.

⇒ Change background activity of some apps

To get optimal performance from your PC, it is advised that do not run too many applications or instances of an application running in the background.

Because doing so will drain your battery faster, you may need to plug in the charger more often. Under Power & battery settings, make sure to tweak the background activity of apps and only allow important apps to run in the background.

⇒ Reduce display brightness

It is also a good practice to use an optimal level of display brightness while you are using your laptop.

This would put less load on your laptop to perform and thereby increase the overall battery life.

⇒ Turn off connected devices and Wi-Fi

If you are not using any of the connected devices, such as wireless mice or keyboards, webcams, etc., or the Wi-Fi network, then you should consider turning them off.

So there you have it. Following the solutions mentioned in this guide and the tips at the end, you should rest assured that you will get the best power efficiency on your Windows 11 PC. They also come in handy when features like undervolting in the Omen Gaming Hub are not working.

However, if none of the methods helped you to get the desired result, then we would advise you to get your laptop checked by a professional, as it may be because your device’s battery is already at its last stage.

We have a dedicated guide on how to keep the monitor on when the laptop is closed in Windows 11.

Let us know in the comments below if you found this guide helpful. You can also share other tips and tricks for improving battery life on a Windows 11 PC in the comments section below.
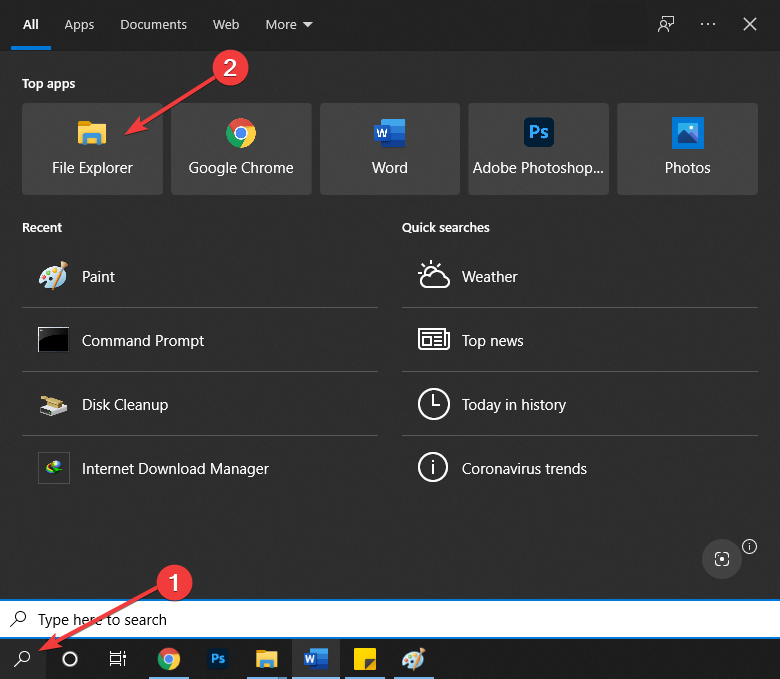
Horizon Forbidden West: Can’t examine carcass [Fixed]

It’s time to talk about Gorilla Games’ new Horizon Forbidden West title and the problems that came with it ever since the official launch.

We’ve already shown you what to do if the game isn’t working, how to transfer saves from PS4 to PS5, and fix bugs like not being able to drop down from ledges.

Now, we’re about to tackle another frustrating bug that players reported, which is not being able to examine a machine’s carcass during a quest.

Don’t be alarmed and don’t throw your controller at the TV, as we’re about to show you a quick workaround that will allow you to get past this quest.

How can I fix not being able to examine the carcass?

Many Forbidden West gamers reported that, during the tutorial mission, which is a quest called Reach for the Stars, there’s an objective to examine the machine carcass.

This carcass is on the edge of a river and the main quest marker is there to indicate that it’s where the game intends for players to go.

However, once someone approaches it, there’s absolutely no way to interact with it, thus no way of advancing the story.

Here’s how you can restore game functionality and complete this quest without exiting the game:

  1. Pause the game and select Restart from save.restart from save
  2. Press X to confirm the action.confirm action
  3. Walk back to the quest marker.horizon quest
  4. Inspect the machine’s carcass using the triangle button.examine machine carcass

Once you’ve completed the steps in our guide, you should be able to continue the mission as normal.

That is how you solve this annoying glitch and move on with your game, forgetting that this nasty business ever affected your gameplay.

Has this guide been of help to you? Let us know in the dedicated comments section below.
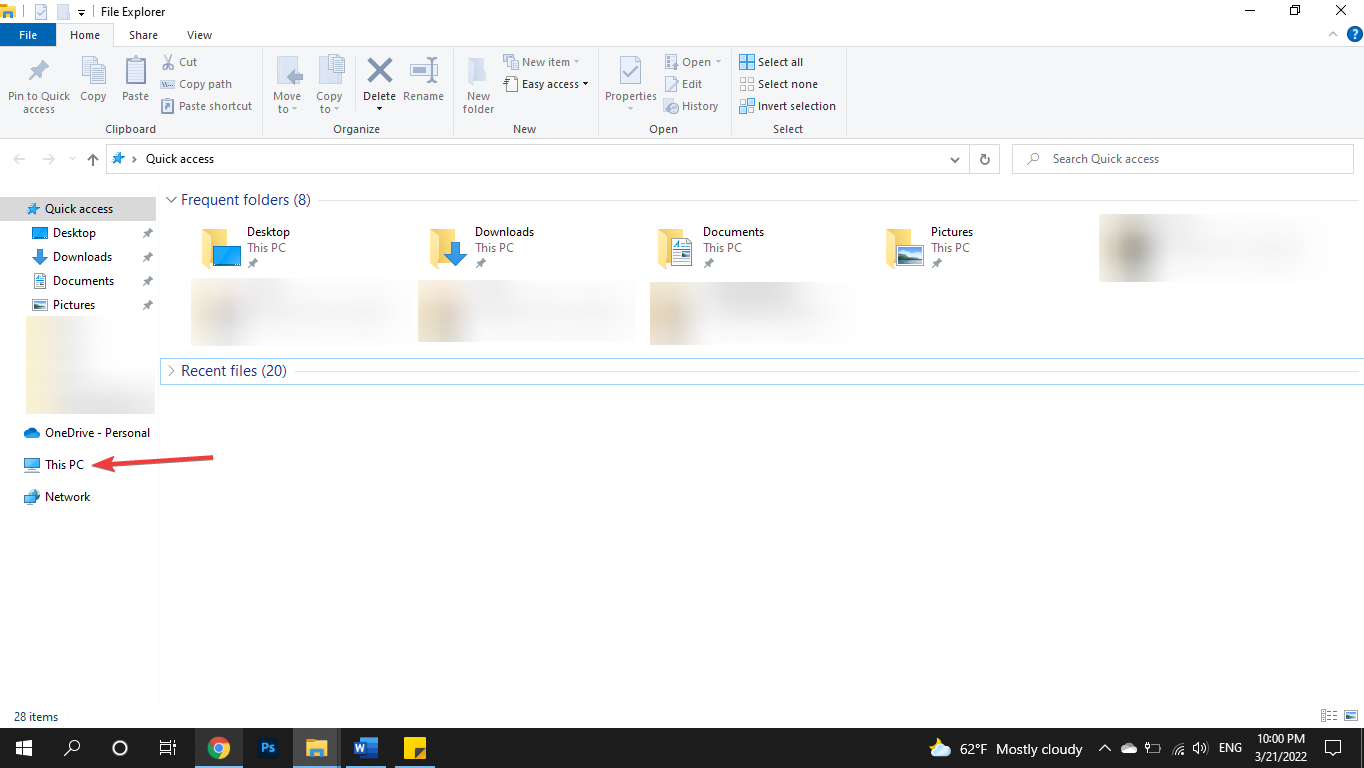
Best Windows 11 Version for Gaming [Simple Choice]

We are still in awe of the robust Windows 11 operating system. For dedicated Windows 10 users, it is another step in the right direction. There is almost no learning curve, and the user experience is aided by the flexibility it gives for customization.

Users can choose to buy or install from a range of Windows 11 editions, including Home and Pro editions. The former is built for the consumer user, while the latter contains extra security and networking features and the capacity for joining a domain.

You might wonder which Windows 11 editions would serve you better with this premise in mind.

This article explores this subject from a gamer’s perspective and helps you understand the best windows 11 edition for gaming.

Is Windows 11 better than other Windows editions for gaming?

If you have played games on windows 10 and are unsure if an upgrade to Windows 11 will serve you any better, you should not delay. Windows 11 is the gamer’s OS.

It is optimized for new gaming technology initially seen only on Xbox consoles and does away with some of the baggage from earlier Windows editions. An improved Game Mode from Windows10 has made it the OS for every gamer, among other features.

These improvements will add significant and subtle differences to the gameplay experience.

Windows 11 Home vs Windows 11 Pro : which is best for gaming?

Auto HDR makes a difference

best windows 11 edition for gaming

Auto HDR is a Windows 11-only function that can presently be found in Microsoft’s Xbox Series X/S consoles.

By extending the spectrum of color and luminance, Auto HDR increases color and detail for a more engaging and authentic scene.

It accomplishes this by making images appear more detailed, deepening shadows, and boosting brightness, such as sun rays.

In Windows 11, games that operate on DirectX 11 and DirectX 12 are supported by Auto HDR.

This Auto HDR is a feature present in the Home and Pro versions of Windows 11.

DirectStorage is the newest addition

DirectStorage is a huge game-changing feature of Windows 11 since it streamlines game data processing and speeds up game loading times.

On the surface, it may not appear to be a particularly noteworthy feature, but load times apply to the game itself and asset loading and cutscenes in open-world settings.

DirectStorage can achieve this because it uses state-of-the-art storage hardware like NVMe SSDs, to decrease CPU burden by loading assets directly from the PC’s graphics card.

This technology boosts performance during gameplay and optimizes the multitasking process more effective when playing games. This is great for individuals who stream or use several monitors.

Users on both the Home and Pro versions of Windows 11 will have this feature.

Read more about DirectStorage for windows 11 on our Windows 11 DirectStorage API guide.

Game Mode – a must-have for gamers

best windows 11 edition for gaming

This feature isn’t new to the Windows OS. It was also available in Windows 10. When people play games with Game Mode activated, they get an enhanced gaming experience.

Game Mode in Windows 11 has received a significant update and works better than it did with the Windows 10 OS.

The feature limits background activity during gameplay by preventing Windows Updates from installing drivers and sending notifications.

The game receives additional resources to increase frame rate stability; as a result, individuals playing on outdated hardware may profit from more memory allocation.

This feature also exists on both Home and Pro versions of Windows 11.

CPU differences

The minimum installation system requirements for Windows 11 Home and Pro versions are the same.

Users of the Windows 11 Pro OS will be able to use several CPU sockets to support two CPUs with up to a 128 CPU core count. On the other hand, Windows Home is limited to a single CPU with 64 cores.

However, with the new DirectStorage and an upgraded Game Mode feature, a single CPU’s limit should have little bearing on gamers since resource management is optimized during gameplay.

RAM has a great impact on gaming

If you enjoy bragging about how much RAM your gaming computer has, you should like that Windows 11 is not deficient in this department. Windows 11 Home will support up to 128GB, while Windows 11 Pro will support up to 2TB.

For gaming, 128GB is more than sufficient, and there’s no reason to go higher if you’re only going to play games on your computer.

Security options are an optional plus

best windows 11 edition for gaming

Windows 11 Pro comes with improved security thanks to its BitLocker encryption feature.

These additional levels of security, while pleasant, are unnecessary for gamers, and reliable antivirus software and VPN will lessen the danger of computer breaches or hacks.

Regular updates are necessary

As a gamer, if you are counting on updates for an improved gaming experience with certain games, what edition should you lean towards?

What you must note is that updates are made as much as there is a need, many times to fix bugs and issues reported.

With that in mind, you must understand that there are no regular intervals for Microsoft updates. Both the Pro and Home editions will get updates as the situation demands, and it is impossible to estimate which will end up getting more game-centered updates.

Price is an important thing to consider

If you previously had Windows 10, then an upgrade to Windows 11 Home is free as long as you meet the minimum system requirements for installation. On the other hand, Windows 11 Pro is paid even if you upgrade from Windows 10.

A Windows 11 Pro OS is great if you need all the additional features businesses would require. On the Pro, you would expect better security, more CPU optimization, and more primary storage.

When considering an OS strictly for its gaming features, Windows 11 Home is the better option. It includes all the enhanced gaming functions at no extra cost.

You can read our guide to learn more about 11+ best new features in Windows 11.

Bitlocker an Internal Error Was Detected on Windows 11 [Fix]

BitLocker is a built-in feature in Windows which encrypts all the files and data on the drive. And, just like the other features, it too is prone to errors. In this guide, we will tell you how to fix the various BitLocker errors in Windows 11.

Though, do remember that the BitLocker feature is not available for the Home edition of Windows 11, and you can only use it on the Pro edition. But, certain 2-in-1 laptops and tablets offer the Device Encryption feature, which is similar to BitLocker.

So, if you are having trouble with BitLocker and encountering errors in Windows 11, read the following sections to find out the solutions.

How is BitLocker helpful to users in Windows 11?

As already stated, BitLocker encrypts the hard drive, and protects it from any kind of intrusion or data breach. But, you will need to have a TPM (Trusted Platform Module) chip for BitLocker to work and fully encrypt the drive.

Also, since it’s a native Windows feature, there’s no additional cost involved and you can have it up and running without shelling an extra penny.

But if you are willing to shell a couple of bucks, there’s an amazing tool, Folder Lock, that does a lot more than just encrypt files and keeps your system more secure than ever.

Besides, BitLocker doesn’t affect the system performance considerably and will continue to run without hogging the resources. So, even if your computer has low RAM, having BitLocker set up shouldn’t be a problem.

Now that you have a basic understanding of it, let’s see how you can fix the various BitLocker errors in Windows 11.

How do I fix BitLocker errors in Windows 11?

1. Uninstall problematic updates

  1. Press Windows + I to launch the Settings app, and select Windows Update from the tabs on the left.Windows Update to fix bitlocker error windows 11
  2. Next, click on Update history on the right.Update history
  3. Now, scroll down to the bottom and click on Uninstall updates under Related settings.Uninstall updates to fix bitlocker error windows 11
  4. Select the problematic update, and click Uninstall at the top.Uninstall
  5. Click Yes in the confirmation prompt that pops up.Yes

If you started encountering errors with Bitlocker in Windows 11 after installing a particular update, it could very well be a bug in it. In this case, it’s best that you uninstall the last update for a smooth experience, and once there’s a newer version available, go for it.

2. Disable Fast Startup

  1. Press Windows + S to launch the Search menu, enter Control Panel in the text field, and click on the relevant search result that appears.Control Panel
  2. Now, click System and Security from the six options here.System and Security to fix bitlocker error windows 11
  3. Click on Change what the power buttons do option.Change what the power buttons do
  4. Next, click on Change settings that are currently unavailable near the top.Change settings that are currently unavailable to fix bitlocker error windows 11
  5. Finally, untick the checkbox for Turn on fast startup (recommended), and click on Save changes at the bottom.Disable fast startup

Fast Startup is a feature in Windows that reduces the boot time. However, it’s often found to mess up with the other features or drivers and lead to a bunch of errors. So, disable it, and check if the BitLocker error in Windows 11 is resolved.

3. Update the BIOS

BIOS or Boot Input/Output System is responsible for letting Windows take over when you turn on the computer. It’s one of the most important components, and issues with it can cause severe problems, if not dealt with right away.

One of the simplest ways to ensure that it works as expected is to update the BIOS. Now, the update process itself is tricky, and we wouldn’t recommend you to do it if you don’t understand the intricacies involved.

BIOS in ASUS device

A minor lapse here could leave your computer useless, but it’s also imperative to mention that updating the BIOS solves a bunch of errors. So, if you are unable to do it on your own, get in touch with someone who can to fix the various Bitlocker errors in Windows 11.

4. Disable BitLocker in Windows 11

If nothing else works, you are left with no option but to disable Bitlocker in Windows 11. Though this will leave your drive relatively unsafe, it’s better than not being able to use the PC at all.

There are various ways to disable BitLocker. If you are able to boot Windows 11, go with the Control Panel method. In case you are unable to load the OS, you can always disable it by accessing Command Prompt from the Recovery Environment (RE).

How can I find the BitLocker recovery key in Windows 11?

  1. If you are asked to enter the BitLocker recovery key, you can get it from your Microsoft account.BitLocker recovery
  2. To find out the BitLocker key, find another PC with a working Internet connection, go to your Microsoft account’s recovery key section, sign in if prompted, and copy the key listed under the Recovery Key column.copy key to fix bitlocker error in Windows 11
  3. Once done, enter this key and you should be able to sign in.

The BitLocker recovery key is a pretty long one, and if it has been somehow misplaced, you can easily access it from the Microsoft account.

However, if you end up entering the wrong pin or key, way too many times, it would take TPM to a locked state. In which case, you will have to wait for 2 hours before you get another chance to re-enter the recovery key.

If you decided to disable BitLocker, make sure to use the other highly-effective security features in Windows 11 to keep your system secure.

Also, if your PC does not support BitLocker, as is the case with the Windows 11 Home edition, there are several other third-party data encryption software that you can use.

Tell us which fix worked and the error you were facing in the comments section below.
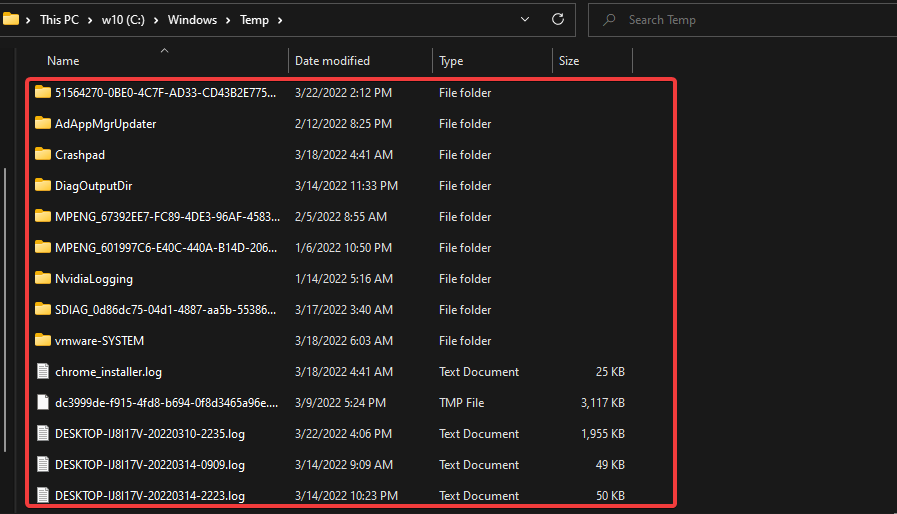
GoG Galaxy not launching /opening /not connected [Full Fix]

GOG Galaxy is the client software for GOG that’s comparable to Steam. This is game launcher software with which users can download titles from GOG.COM and organize game libraries. With GOG Galaxy, you can import and organize games across platforms.

However, users have reported a few issues for GOG Galaxy on its support forum. Some GOG Galaxy users encounter connection issues, while others can’t open the client software or launch games from it. Check out some of the resolutions below if you need to fix GOG Galaxy not launching games, opening, or connecting.

Why does GOG Galaxy crashes on launch?

If GOG games won’t launch, it’s possible that the installation is damaged thus causing the application to crash.

Corrupted installation can also cause blurry text in GoG Galaxy among other issues, so you might want to consider reinstalling the software.

Keep in mind that it’s advised to store GOG games on backup drive if you’re planning to reinstall the software.

What can I do if GOG Galaxy is not working?

GOG Galaxy not connected

Reset network adapter

  1. Click the Type here to search button.
  2. Input cmd in the search box.
  3. Next, right-click Command Prompt and select the Run as administrator option to open an elevated CP window.
  4. Then type netsh winsock reset, and press the Enter key.
    netsch winsock command gog galaxy not opening, not connected
  5. Close the Command Prompt when the reset Winsock is done.
  6. Thereafter, restart Windows.

Disable antivirus utilities

GOG Galaxy not connected errors for certain games, such as Gwent, can arise due to third-party antivirus utilities.

If a GOG connection error occurs when you try to play a certain game, try disabling your antivirus software.

To do so, right-click the system tray icon for your antivirus software and select a disable or turn off option of some kind. Select to disable the third-party antivirus software for at least an hour if you can.

Avast shield control settings gog galaxy not opening, not connected

Alternatively, try whitelisting a couple of GOG Galaxy folders in your antivirus software. Whitelist the GalaxyClient and GOG.com folders.

Certain antivirus applications can prevent you from running GOG Galaxy, and to avoid this issue, it’s advised to switch to a more reliable antivirus software, such as TotalAV for example.

This software will give you full protection against malware, ransomware and other online threats. Thanks to the built-in firewall, only the approved applications and services will be able to access the web.

It’s important to mention that the software has a Gamer Mode so it won’t interfere with your gaming sessions at all.

⇒ TotalAV

GOG Galaxy not opening

  1. Enable DirectPlay to kick-start the software.
  2. Enter appwiz.cpl in Run, and select the OK option. (Turn on DirectPlay)
  3. Click Turn Windows features on or off to open the window in the snapshot directly below.
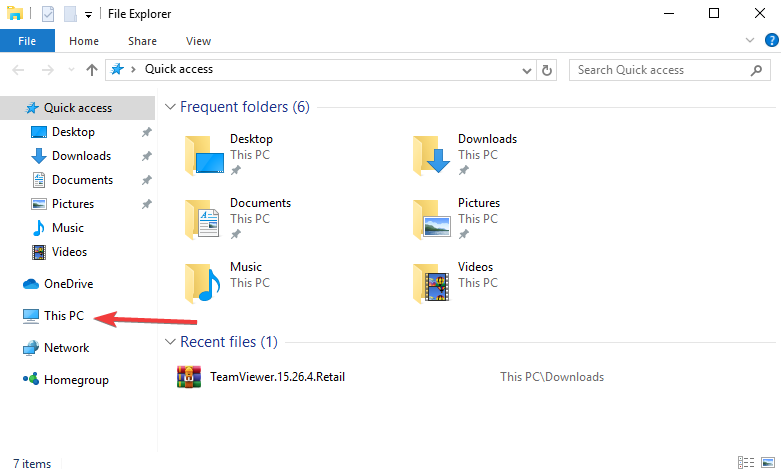
    Windows Features window gog galaxy not opening, not connected
  4. Click Legacy components to expand that category.
  5. Select the DirectPlay option.
  6. Click the OK button.

GOG Galaxy not launching

GOG Galaxy verify repair not working

Launch games outside GOG Galaxy
  1. Open File Explorer.
  2. Open the GOG game data folder.
  3. Then click the EXE file for the game you can’t open from the GOG Galaxy client software.
Disable the Run this program as administrator option for games
  1. Open the File Explorer’s window.
  2. Open the installation folder for the game that doesn’t launch.
  3. Right-click the game’s EXE to select Properties.
  4. Select the Compatibility tab in the snapshot directly below.
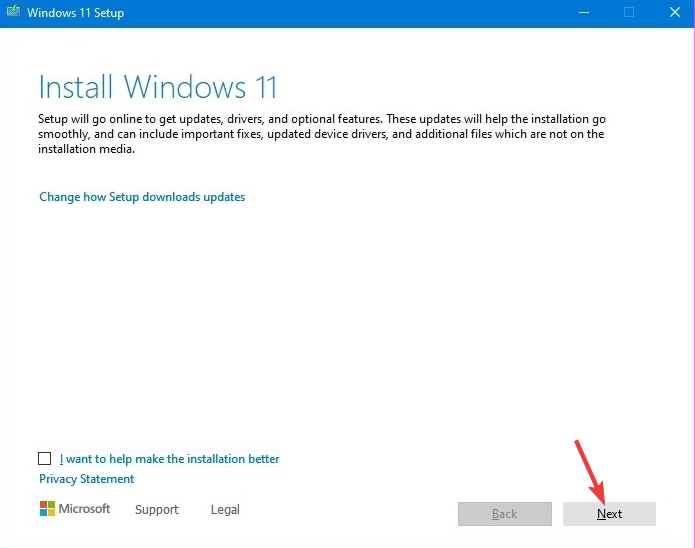
    Compatibility tab gog galaxy not opening, not connected
  5. Deselect the Run this program as an administrator checkbox.
  6. Click the Apply option.
  7. Press the OK button.

So, that’s how you can fix GOG Galaxy not opening, launching games, or connecting. If you still need further resolutions, check out the GOG Support Center from which you can submit support requests.


[wl_navigator]