Microsoft Edge Insider Beta channel for Windows 10 leaks online

Now that download links for the macOS version of Microsoft Edge have been shared by Microsoft watcher WalkingCat yesterday, it turns out that the Microsoft Edge Beta channel for Windows 10 is now available to download thanks to another leak. Twitter user ADeltaX shared the download links earlier today ahead of an official announcement for Microsoft, and we’ve been able to try it on one of our PCs.

Compared to the Dev and Canary channels, the Beta channel will be updated much less frequently, with new builds coming every six weeks. Microsoft says on the Microsoft Edge Insider website that it should be “the most stable Microsoft Edge preview experience,” though we did experience one crash after installing the beta version on a Surface Pro 4 today.

Microsoft had several sessions dedicated to its new Chromium-based Edge this week, and the web browser will soon get a new Collections feature, a Privacy dashboard, an Internet Explorer mode, as well as a Fluent Design update. It remains to be seen if the new Beta channel will officially launch before the end of Build 2019, but a public announcement is likely imminent.

6 best cloud encryption software for Windows PC users

Are you looking for the best cloud encryption tool for your cloud storage? Look no further. Read this guide to learn what are the best cloud encryption solutions to use in 2019.

Cloud storage service is another form of cloud computing that has made it easier to keep files safe in the cloud accessible via the web.

Unlike redundant file storage techniques, files stored in the cloud can be accessed anywhere and at any time.

However, as the internet has evolved, cloud storage services have experienced security breaches over the years.

There are several news of individual or business cloud storage accounts hijacked or accessed by third-party such as hackers, government, media, etc.

Therefore, there is a need to encrypt your files and prevent unauthorized access to your files on the cloud.

This keeps your personal information and identity safe and secure.

The Windows Report team has compiled this list of the best cloud encryption for Windows PC users. This will help you choose the best solution for your needs.

Best cloud encryption tools

Boxcryptor

cloud encryption toolsBoxcryptor is a German-based cloud encryption software known for its freemium model and user-friendly interface. This cloud encryption tool takes control of your cloud storage account thereby reducing security breaches.

With Boxcryptor cloud encryption tool, users can make use of its end-to-end encryption protocol which encrypts their online activity from desktop to the cloud and vice versa.

Boxcryptor uses a combined encryption algorithm involving asymmetric RSA and symmetric AES encryption; this ensures that every file retains its unique random encrypting key which is generated during the formation process of the file.

The file key is then used to encrypt and decrypt the file contents leading to secured storage.

You can choose to test the free plan which allows access to a single cloud storage provider and gives encryption options. The major advantage of upgrading to paid options is simply more control over a larger number of accounts.

Also, the premium plans enables you to configure your cloud security and provides protection to sensitive personal and company data.

Meanwhile, Boxcryptor is compatible with over 30 different cloud storage services such as Dropbox, Google Drive, OneDrive, ownCloud, GMX, Egynyte, Cubby, Amazon S3, CloudMe, Nextcloud, and many more.

Download Boxcryptor

Cryptomator

cloud encryption toolsIf you want a free cloud encryption tool with advanced features that gives you without subscription or registration, Cryptomator is the best cloud encryption tool for you.

This cloud encryption tool is an open source technology which can be configured to your personal desire.

One of the major advantages of Cryptomator is its use of transparent encryption which means that users won’t notice any difference when working with files.

In addition, Cryptomator uses military-grade encryption protocol i.e. AES encryption to encrypt your cloud information.

Your cloud account is protected from brute force and other hacking attempts with its advanced security and regular security updates by Cryptomator.

You also get a virtual hard drive to access your files on your cloud storage as well as a vault where your encrypted files are kept.

In addition, this cloud encryption tool is lightweight and comes with responsive user interface unlike other cloud encryption tools.

The setup is easy as you only need to put username and password removing the need to create accounts, key management, or cypher configuration.

On the other hand, files are encrypted individually even when placed in groups or batches.

This is particularly useful due to the fact that when changes are made to a specific file, only the specific file is modified while still retaining its encryption state.

Download Cryptomator

Tresorit

cloud encryption toolsTresorit helps protect your files with end-end cloud encryption thereby preventing hackers, government and snoops from accessing your cloud storage.

With this cloud encryption tool, you can easily secure your files using the AES 256 end to end encryption protocol which uses randomly generated encryption keys to ensure file safety.

The keys generated by the software are available only to individual users as no copy is sent to Tresorit servers.

Therefore, your files stored on the cloud can only be accessed by you with your unique private decryption key.

In addition, this cloud encryption tool also comes with a password protected link feature whereby you can send files through an encrypted link which cannot be traced or decrypted by unauthorized users.

Passwords can also be placed on the encrypted file link to add an extra layer of security.

Moreover, Tresorit also offers cloud storage facilities giving users access for up to 1000GB free encrypted storage to keep files on their secure servers.

Tresorit is also cross-compatible among several platforms such as Windows, Android, iOS, Mac, and Linux; therefore, you can encrypt and decrypt your files across other Operating Systems as well.

Download Tresorit

pCloud Crypto

cloud encryption toolpCloud Crypto uses state-of-the-art TLS/SSL encryption to keep your information safe on your cloud storage.

This cloud encryption tool utilizes three different server locations to ensure that your information is kept secure at all time.

With pCloud Crypto, users get access to the secure 256-bit AES encryption for files alongside with the 4096-bit RSA encryption for private keys.

The cloud encryption tool also offers cloud storage services which let you store your files on its cloud platform.

Since the software uses highly encrypted protocols, your files on their cloud servers are encrypted using its end-to-end encryption and password protection.

pCloud Crypto may seem like a laid-back option unlike Tresorit or Boxcryptor.

It delivers where desired due to its dual cloud computing services i.e. cloud storage and cloud encryption.

pCloud offers a multi-layer protection, meaning that the encryption algorithms have more protection layers and keys.

Moreover, the user has the option to lock the personal data with a password, making it inaccessible to other users.

Download pCloud Crypto

SpiderOak

cloud encryption toolSpiderOak is a popular cloud encryption tool which offers consolidated secure cloud storage and cloud encryption services.

This cloud encryption tool encrypts files using its centralized account system in enabling Windows users to easily synchronize their cloud storage account across different platforms.

Also, the strict adoption of zero-logs policy prevents your personal information from being leaked as well as your files which are well-encrypted on the SpiderOak’s servers.

Still, in spite of restrictive compliance regulations, SpiderOak software allows the user to efficiently communicate and organize data.

This cloud encryption tool also provides additional protection against ransomware and data loss which is quite effective.

Users can access the cloud based storage without the need for VPN when accessing their cloud storage account.

Moreover, SpiderOak comes with data recovery toolset which help users recover deleted or lost data on the cloud storage.

Download SpiderOak

IDrive

idrive cloud encryption tools

If you’re looking for cloud storage that will keep your files encrypted and protected at all times, perhaps you might want to consider IDrive.

This service can work with almost any platform and you can sync your data using Windows, iOS, Mac or Android.

The service supports real-time synchronization, so you can rest assured that all your files will be regularly updated on the cloud.

This service also supports snapshots and versioning, so you can easily view and restore up to 30 previous versions of all your files.

IDrive also has a web-based console available, and you can use it to manage your backups and restores remotely with ease.

The service also has continuous data protection, so it can recognize modified segments of your files and back them up.

What separates this cloud storage service from the rest is its 256-bit AES encryption.

The encryption uses a user-defined key, and this key isn’t stored on the server, so only you will be able to decrypt your files.

Overall, IDrive offers solid features in terms of cloud storage, it’s fast and it works perfectly with almost any platform, and thanks to the 256-bit encryption, you can rest assured that only you can access your files.

The most basic plan is available for free and it offers 5GB of storage, but if you want more storage space and certain advanced features, you might want to consider getting a yearly plan.

Overview:

  • Free (with up to 5GB of storage)
  • Available on all major platforms
  • File backup and versioning up to 30 versions
  • 256-bit AES encryption

Have you used any of the cloud encryption tools we mentioned above? Feel free to share your experience with us.

RELATED GUIDES TO CHECK OUT:

Mojang releases Minecraft Classic on the web to celebrate the game’s 10th anniversary

Minecraft Classic is now available to play for free on the web browser. The release comes just ten days before the iconic game’s tenth anniversary, so anyone wanting to get their hands on the very first version of the game can now do so, no purchased copy necessary.

The Classic game comes with the same set of just 32 blocks that were first introduced, and “all the original bugs” that came with one of the very the first releases. Of course, if you own the full Java version of the game, you can always still play it straight from the Minecraft Launcher.

The classic version of Minecraft was first made available for free on PC, Mac, and Linux platforms with Java installed. Since its release, the game has received hundreds of new blocks, items, and other features. The game also saw its way to smartphones and tablets in the form of Pocket Edition, and eventually consoles as well.

Microsoft later purchased the game’s development company, Mojang, for $2.5 billion, making it the first multi-billion dollar acquisition under Microsoft’s current CEO Satya Nadella’s lead. Since then, we’ve seen Minecraft released on the Windows 10 Microsoft Store, and cross-compatibility added to the Pocket, Console, and Windows 10 editions of the game, all of which have become what is now known as Bedrock Edition.

The Minecraft team also has more surprises for the game’s tenth anniversary, which officially lands on May 17th. In addition, we’re also expecting an AR release of the game, which was teased in a video towards the end of yesterday’s Build 2019 event.

Xbox 360’s From Dust and Costume Quest video games are now playable on Xbox One

The Xbox 360 video games, From Dust and Costume Quest, are now playable on Xbox One consoles after gaining backwards compatibility functionality.

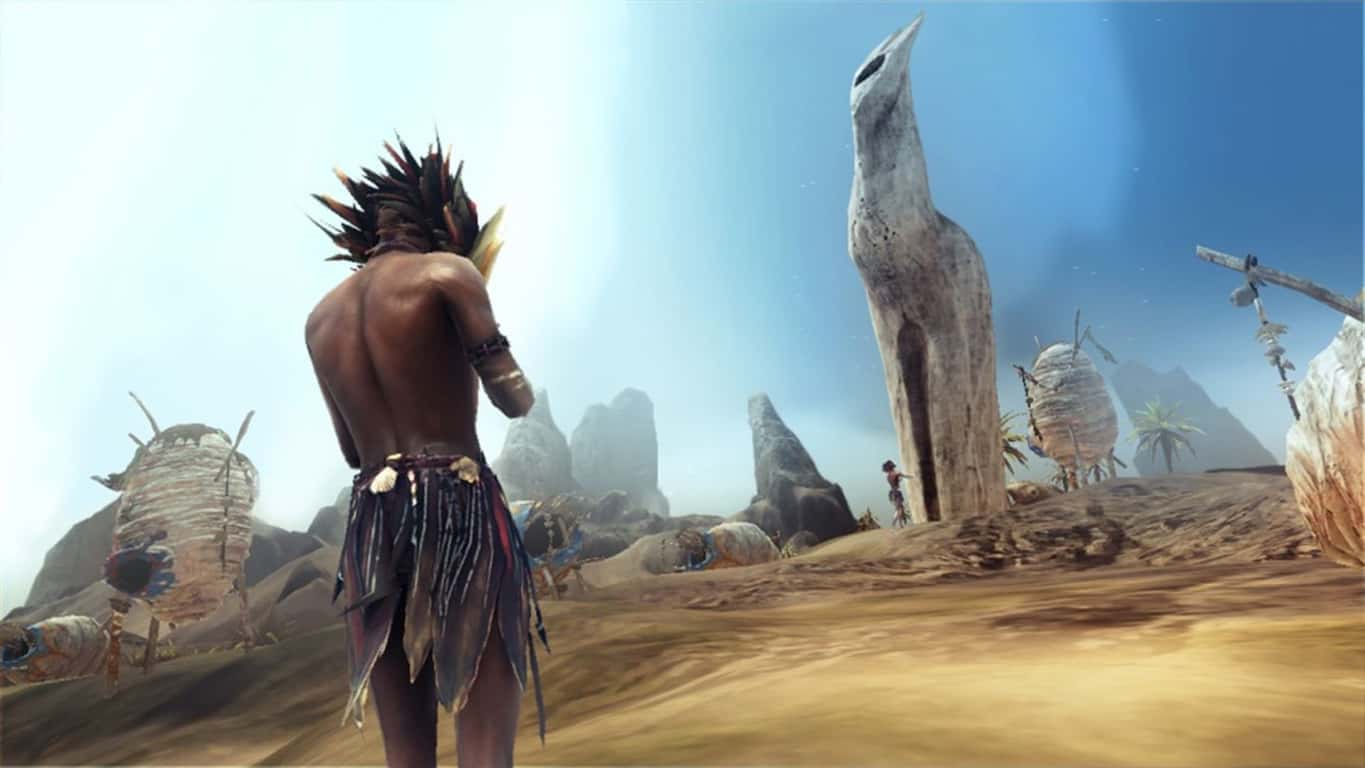
From Dust is classified as a god video game, a type of game that places the player in a god-type role and tasks them with manipulating the in-game environment and elements to achieve tasks such as helping a primitive tribe survive.

The game originally launched on the Xbox 360 in 2011 and received a fair bit of praise for its art direction and graphics.

Here’s the official game description for From Dust:

Discover a unique Modern God game where nature is the star: From Dust, the latest original concept by Eric Chahi, visionary creator of Another World.Behold the beauty of a primitive world pulsing with life and face the might of nature. Beware the danger of a world that is constantly changing under your command. Control the destiny of a tribe struggling to survive and help it recover its ancestors’ lost powers.Immerse yourself in a world as exotically beautiful as it is dangerous. A universe where Nature reclaims what is Hers; and you are your people’s only chance of survival.

Costume Quest launched on the Xbox 360 in 2010 is a family-friendly roleplaying game set around Halloween. Players are tasked with collecting items for their costume as they explore their neighbourhood and battle monsters.

Here’s the official game description for Costume Quest:

Rediscover Halloween in this imaginative RPG from Tim Schafer’s Double Fine Productions. Explore the monster-filled neighborhood of Auburn Pines, Autumn Haven Mall and Fall Valley Carnival. Collect magical costumes with super powers, unique weapons and special items as you hunt down quests. Level-up your heroic warrior and battle the evil overlords in this epic adventure to save Halloween!

Have you been waiting for From Dust or Costume Quest to come to the Xbox One? Let us know which one you’ll play first in the comments below and then follow us on Pinterest for more Xbox gaming content.

The app was not found in the store. ?


The app was not found in the store. ?

Here’s how to boot Windows XP on your Nintendo Switch

A lot of people tried running Linux and Android on their Nintendo Switch in the past few years. It has been a year now that a YouTube user demonstrated Windows XP booting on Nintendo Switch. As a result, Windows XP fans tried to run the OS on their devices as well.

Redditor Alfonso Dingo Torres Jauregui, made a recent attempt that came under the highlights. He explained how his attempt turned out to be a successful one.

He basically installed L4T Linux and used QEMU to run Windows XP on Nintendo Switch. The user also says that the total installation and setup process took around 6 hours.Handheld Mode

Enjoy Pinball 3D at a full speed

Jauregui used QEMU to run Windows XP on a virtual machine. Virtualization is a process where an OS runs on top of another one.

You may be thinking about the performance of the system. The user claims that anyone can enjoy Pinball 3D “at a full speed”.

Play Pinball 3D

When talking about the specifications he says,

I have the Cinnamon DE running and have a 2GB Swap dime in order to keep things nice and smooth.

He clearly said that if you want to replicate the procedure on your Nintendo Switch you should first install QEMU and allocate a 10 GB hard disk space.

This recent experiment proves that Nintendo Switch is a lot more than a simple gaming console. Jauregui says that his modified version of the Switch is working perfectly well until now.

Some Reddit users are excited to play Pinball 3D on their console devices. Furthermore, they also demanded Jauregui to try some more games. 

It looks like users are interested in running more such experiments. They wonder if joycons works as inputs within Windows XP. 

Yeah but can the XP system run Android in a VM with another nested VM inside it running Ubuntu that run Yuzu emulator on top of it?

Comment down below if you are one of those who tried out Windows XP on their Nintendo Switch.

RELATED ARTICLES YOU NEED TO CHECK OUT:

Unable to automatically step into the server: Get the best fixes here

When trying to debug WCF (Windows Communication Foundation) service, you may encounter different types of error. One such error is Unable to automatically step into the server.

The full error reads Unable to automatically step into the server.  The remote procedure could not be debugged. This usually indicates that debugging has not been enabled on the server.

If you are trying to troubleshoot this error on your server, here are some valuable suggestions.

How do I fix ‘Unable to automatically step into the server’ errors?

  1. Add a Web.Config file to the Web Service
  2. Check for .NET Framework Compatibility
  3. Repair Visual Studio Installation
  4. Run Visual Studio with Administrative Privilege
  5. Troubleshoot Compatibility for Devenv.exe

1. Add a Web.Config file to the Web Service

While using Microsoft Visual Studio, this issue may occur due to a missing Web.Config file. Visual Studio does not create a Web.Config file automatically while creating a Web Application or Web Service. And when you try to debug the Web service, you may end up with this error.

Web-config file add visual studio

To fix the issue, you need to add a Web.Config file to the Web service. Here is how to do it.

You need to create a Web.Config file and add <compilation debug=”true”> line between the <system.web> section.

If you already have a Web.Config file, you need to add the <compilation debug=”true”> line and save the file.

2. Check for .NET Framework Compatibility

microsoft dotnet framework

If you have built the service project using a different version of .NET Framework than your client, it causes compatibility issues resulting in a server error.

To fix this make sure that you and your client projects are on the same .NET Framework. That is if you have built your project using Framework 4.5 and your client’s project was on .NET Framework 4.0 then you may need to change the project properties of service project to have .NET Framework 4.0.

3. Repair Visual Studio Installation

To enable debugging it is important that you install a version of ASP.NET framework before installing Visual Studio on your system. If you have installed Visual Studio first and then decided to install ASP.NET, you may see the “Unable to automatically step into the server” error.

You can fix this issue by repairing the Visual Studio installation from the Control Panel. Here is how to do it.

Steps for Visual Studio 2010 and Earlier

  1. Press Windows Key + R to open the Run dialog box.
  2. Type “control” and hit enter.
  3. In the Control Panel, click on Programs > Programs and Features.
  4. Located and select the Visual Studio program.
  5. On the top, click on the Repair/Change option and follow the on-screen instructions.
  6. After the repair is complete, reboot the system and check for any improvements.

Visual Studio 2019

If you have the latest version of Visual Studio installed, follow these steps instead.

  1. Find Visual Studio Installer by clicking on Start > Visual Studio Installer (search in the letter V).
    visual-studio-installer
  2. Alternatively, you can also find the installer by visiting the following path:
  3. C:Program Files (x86)Microsoft Visual StudioInstallervs_installer.exe
  4. Run the Visual Studio Installer, and it will open the launcher.
  5. Under the installed tab, click on the More button and select the Repair option.
    Visual Studio Installer 2019 - Repair
  6. Follow the on-screen instructions (if any) and wait for the installer to Repair the Visual Studio framework.

Alternatively, if repairing the Visual Studio client doesn’t work, you can try to reinstall the Visual Studio application as well.

4. Run Visual Studio with Administrative Privilege

visual studio

If the issue persists, you can try to run the Visual Studio launcher with the administrative privileges. Running the Visual Studio with the administrative access fixes any issues that occur due to inadequate permission.

  1. Click on Start, type Visual Studio.
  2. Right-click on your version of Visual Studio and select Run as Administrator.

5. Troubleshoot Compatibility for Devenv.exe

visual studio icon

While we have discussed the compatibility issues earlier, you can try to fix any compatibility issue by using the built-in compatibility troubleshooter in Windows. Devenv.exe is a software component of Microsoft Visual Studio. Try to run the compatibility troubleshooter for it and see if that resolves the error.

  1. Open “File Explorer” and navigate to the following location:
  2. C:Program Files Microsoft Visual Studio version Common IDE
  3. Right-click on devenv.exe and select “Troubleshoot Compatibility”.

What to do if USB device blocks Windows 10 v1903 install

Microsoft made it clear it would block upgrades to the Windows 10 May 2019 Update if external media such as a USB device or SD card is attached to the computer.

This happens because the OS may  assign the wrong letters to your SD cards or USB devices.

Microsoft says that Windows 10 users who try to install the update may experience the following error:

This PC can’t be upgraded to Windows 10. Your PC has hardware that isn’t ready for this version of Windows 10. No action is needed. Windows Update will offer this version of Windows 10 automatically once the issue has been resolved.

How to fix Windows 10 May 2019 Update install errors

Here is a quick solution that you can use to unblock the Windows 10 May Update. You should unplug all external media attached to your device such as SD cards or USB devices.

The solution is pretty simple but you should have physical access to the computer.

However, you may also experience the same issue on a remote computer but there is a workaround to resolve it as well.

Make sure that the USB device is not detectable on the system. Only then can you begin the installation process of the Windows 10 May 2019 Update.

You need to follow the complete procedure mentioned below.

  1. Click the Start menu and navigate to the search bar and type Device Manager. Alternatively, you can also press Windows key + X, and click Device Manager from the list of options.
  2. At this step, you need to look for the devices that will be disabled. You can find it under Universal Serial Bus controllers section.
  3. Now when you have found your desired device, Right-click on the device and click Disable device.disable USB devices windows 10
  4. It will display a warning: Disabling this device will cause it to stop functioning. Do you really want to disable it?
  5. Confirm your choice.

Now you can install Windows 10 May 2019 Update again and this time the process should complete without any issues.

Additionally, you can enable your devices through the Device Manager. Right-click your device and click Enable Device.

RELATED ARTICLES YOU NEED TO CHECK OUT:

Microsoft Photos is getting quicker access to image cropping, automatic tags, and custom file info

Microsoft Photos is receiving some changes to improve the image editing experience in Windows 10. Most notably, the app will feature quicker access to image cropping by including the icon on the top navigation bar immediately upon opening an image (via MSPoweruser).

For those who are particular about their image details, Microsoft Photos will also allow users to edit information such as such as the capture date and file name straight from the menu accessible by right clicking an image. Additionally, anyone can also choose to have People tags automatically applied to photos though the use of facial recognition technology, with the option being initially available from the privacy screen when the updated app is first launched.

Microsoft is releasing the app to Insiders first to test and help sort out potential bugs, but it shouldn’t be long before everyone gets it. If you want to see these changes now, you can join the Preview program straight from the settings within the Photos app.

Microsoft’s Xbox One All-Digital Edition available now, includes three games for $249

Microsoft has released the Xbox One S All-Digital edition today, so anyone that has had their mind set on it can go ahead and order it right now. It’s available for $249 on the Microsoft Store and online, as well Best Buy, Amazon, and Walmart, and other retailers worldwide.

https://twitter.com/Xbox/status/1125792531797557248

Microsoft is pitching this as a cheaper alternative to the Xbox One S that comes with the disk drive, with a starting price of $249 and three games included—Minecraft, Forza Horizon 3, and Sea of Thieves. Although Microsoft promises to keep its $50 price difference on its systems online and at its physical stores, it’s worth mentioning that the console with the disk reader can still be purchased for slightly over $200 from third-party sellers on Amazon.

Still, the Xbox One S All-Digital console could serve as an inexpensive way to get into gaming for those who aren’t already invested in physical games and movies. If you’re new, we recommend getting a Game Pass membership which will give you access to over a hundred games right off the bat for just $9.99 per month. New subscribers get three months for just $1, which is an ample amount of time to decide whether to keep it.

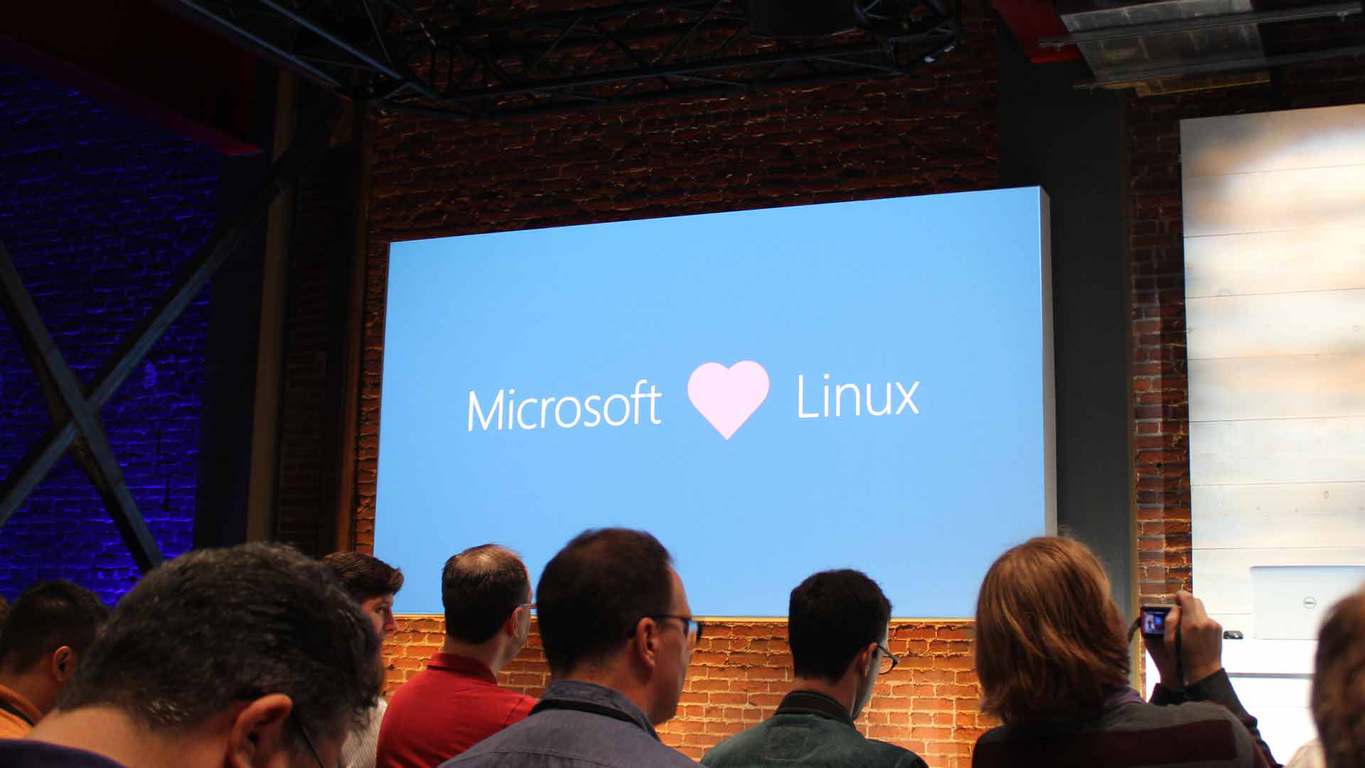
Windows 10 to get a custom-built Linux kernel later this year

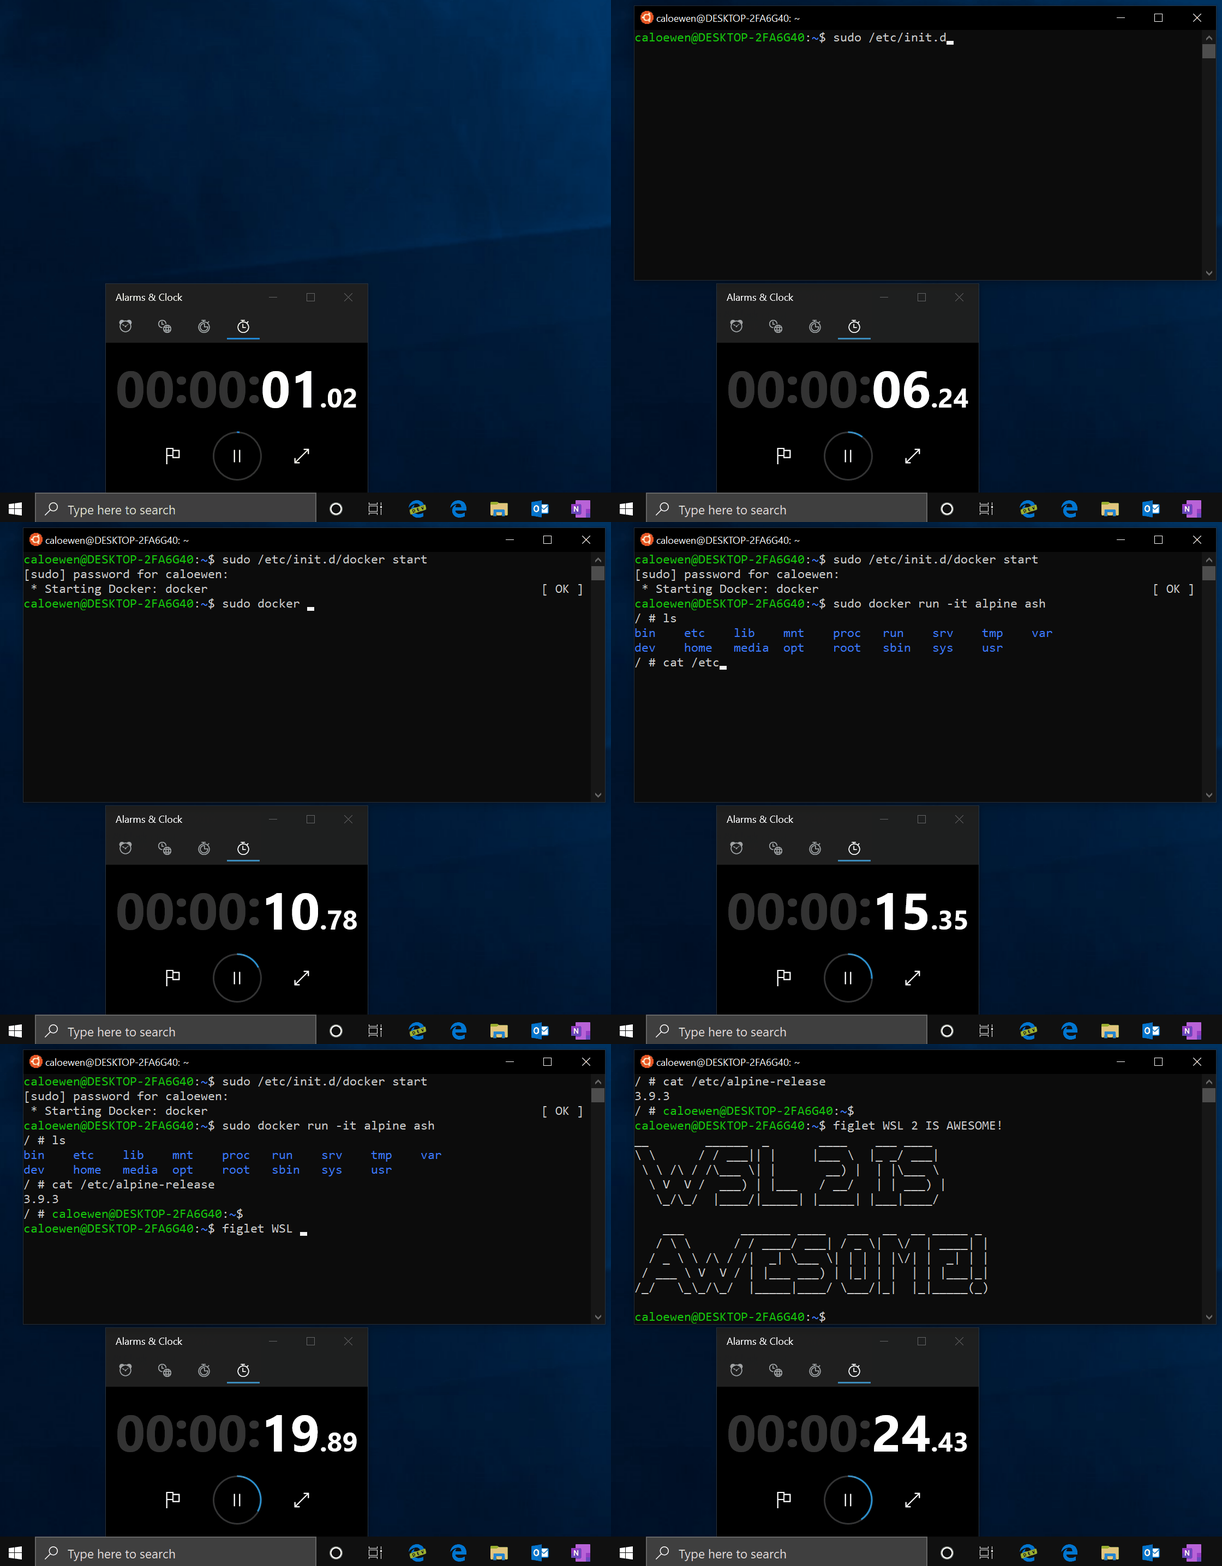
Microsoft is bringing the full Linux kernel to the Windows 10 operating system, which will replace the emulation architecture that was a part of the initial release of the Windows Subsystem for Linux, or WSL for short. Taking advantage of the full kernel, WSL2 will bring “up to 20x faster” performance for Linux apps, and full system call compatibility to allow many apps that were previously incompatible to run without issues.

Docker is an example of an app that can take advantage of the full Linux kernel.

Microsoft is initially starting out with version 4.19 of the Linux kernel, which is the most recent long-term release of the system. The company is also promising to keep the kernel updated to the latest long-term release so that any developer “always has the latest Linux goodness,” according to Microsoft’s program manager Jack Hammons.

Of course, while the full kernel is available, none of the userspace binaries are included by default. Instead, a user must select one through the installation of their preferred Linux distro on the Microsoft Store, or by creating their own custom package. In addition, thanks to its open source nature, developers will also be able to create their own WSL kernels, with instructions being made available soon on GitHub.

The company hasn’t verified when full kernel will be readily available in Windows 10, but we could see it as soon as the next major release of the opening system codenamed 19H2, which is due for later this year. To make the overall experience even smoother, Microsoft is also introducing a new tab-based Windows Terminal that will allow developers to access Windows Subsystem for Linux, PowerShell, and Cmd from a single command line interface.

Descenders joins Microsoft’s Xbox Game Pass video game library

The downhill freeriding video game, Descenders, is now available to play in full for all Xbox Game Pass subscribers.

The game is streamlined yet feature-packed concept tasks the player with navigating downhill courses, avoiding obstacles, and outlasting the opponents to rank higher in the leaderboards. All courses are procedurally generated before each playthrough so there’s no way to learn a track. The emphasis is on reaction times and speed.

Here’s the official feature list:

  • Procedurally generated worlds: Take on different jumps, slopes and hillbombs every time you play
  • Freestyle bike controls: Control every subtle movement of your rider, with an in-depth physics system made for slick whips and scrubs
  • Risk vs reward: Push your rider for massive scores and combos — but bail too many times and you might lose it all
  • Build your Rep: A fully-featured online Rep system lets you show off your worth, and earn new bikes and threads
  • Become the next Descender: Can you survive the game in a single run, and reach the ranks of the legendary Descenders?
  • Wear your team’s colors and apparel with pride, and receive exclusive team gear
  • Your Rep points go towards your team’s total Rep, and exclusive prizes are awarded to the top team
  • Gain access to your team’s exclusive channel on the Descenders Discord server

Xbox Game Pass is Microsoft’s monthly subscription service that gives members full access to around 100 video games on Xbox One consoles.

Other games coming to Xbox Game Pass this month include Surviving Mars, Tacoma, Black Desert, For The King, The Surge, and Lego Batman 3.

Are you an Xbox Game Pass subscriber and will you play Descenders? Let us know why or why not in the comments below and then follow us on Pinterest for more Xbox gaming content.

Descenders
Descenders
Developer:
No More Robots
Price:
Free

Xbox One, Nintendo Switch, and PS4 Fortnite players can no longer merge their accounts

Back in February, Epic Games launched an official method for merging Fortnite accounts so that players with game saves on multiple platforms could bring all of the items and in-game currency under one username.

As of yesterday, this functionality has been completely discontinued, though, so those that were unable to merge their accounts before the deadline, or had completely forgotten to do so, will now have to choose which of their accounts to abandon and which to play under.

The account merging feature was created in response to PlayStation 4 players who were forced to create new Fortnite accounts when playing the popular game on other platforms due to Sony’s hard stance against crossplay and cross saves with rival consoles. When cross-platform functionality was eventually enabled on the PS4, Fortnite players could then use the one Fortnite account and a need for bringing all of their purchases and unlocked items under one system was needed.

Fortnite is currently one of the most-popular video games in the world and is playable on Xbox One, Nintendo Switch, and PS4 consoles in addition to Windows, iOS, and Android devices.

Did you manage to merge your Fortnite accounts in time or were you caught out? Share your experience with the community in the comments below and then follow us on Pinterest for more Xbox gaming content.

Fortnite
Fortnite
Developer:
Epic Games Inc.
Price:
Free

How to fix NSIS error when installing AMD driver

NSIS (Nullsoft Scriptable Install System) Error usually occurs when the user tries to install a driver on their Windows system. The error is caused when the user tries to install a corrupt or incomplete application that fails to initiate the installer.

The Error reads NSIS error; installer integrity check has failed. Common causes include incomplete download and damaged media and clicking on OK closes the launcher. If you are facing this error as well, here are a couple of troubleshooting tips you can try to fix the error.

How do I fix Nullsoft Scriptable Install System error on AMD driver

  1. Move the Installer to a Different Folder
  2. Rename the Installer
  3. Run the Installer from the Command Prompt
  4. Download the Installer from Another Source
  5. Scan your Computer for Malware
  6. Install Pending Windows Updates
  7. Run System File Checker

1. Move the Installer to a Different Folder

As strange it may sound, moving the installer to a different folder has worked for many users. Folder-related errors are not uncommon, so it should not be surprising.

  1. Open File Explorer and navigate to the location where the installer is located.
  2. Right-click on the Installer and select Copy.
    Rename Folder Windows 10
  3. Create a new folder containing only English letter and move the installer to the new folder.
  4. Run the Installer from the new folder and check if that resolves the error.

2. Rename the Installer

The simplest working fix for the NSIS error is to rename the installer. Users have reported that renaming the installer has allowed the installation to complete successfully.

  1. Open, File Explorer and navigate the directory where the NSIS installer is located.
  2. Right-click on the Installer and select the Rename option.
    Rename AMD Installer
  3. Enter a single word name for the installer.
  4. Try to rerun the installer and check for any improvements.

3. Run the Installer from the Command Prompt

You can install the NSIS installer using the Command Prompt. Windows requires all the executable files to pass the corruption test. However, using the NCRC command, you can skip this test and proceed with the installation without any error. Here is how to do it.

  1. Press Windows Key + R to open the Run dialog box.
  2. Type “cmd” and hit enter. It will open the Command Prompt.
  3. Open File Explorer and navigate to the directory where the NSIS installer is located.
  4. Drag and drop the installer onto the Command Prompt. Doing so will add the installer path in the Command Prompt.
    NCRC - AMD NSIS Installer
  5. Press the Space key and type /NCRC. Hit enter to execute the file.
  6. This should open the NSIS installer installation window. Proceed with the installation.

4. Download the Installer from Another Source

If the installer is corrupted at the source end then no matter how many times you download the file, it will show NSIS error. In this case, you need to download the installer from other sources or find an updated version of the driver.

The best way to download any installer is by the official source. In this case, visit AMD’s website and download the latest driver. If not, wait for developers to release a new version with the bug fix.

5. Scan your Computer for Malware

If your computer is infected with malware or virus, it may also affect other programs and installers resulting in corruption or malfunction. Some adware is known to cause such errors where the user is prevented from installing any new driver or software on their system. We recommend scanning your PC for malware with dedicated anti-malware software for a threat-free PC.

6. Install Pending Windows Updates

If you have downloaded the latest version of the NSIS driver and your Windows OS does not have the latest build installed, it may cause compatibility issues.

To fix this, check if any updates are pending to be installed for Windows.

  1. Click on Start and select Settings.
  2. Open Update and Security.
  3. Click on Windows Update and click on Check for Updates.
    Windows Update Download - Pending - Ready to Download
  4. Windows will check for updates and notify if updates are ready to download. Click on the Download button to download and install the updates.

7. Run System File Checker

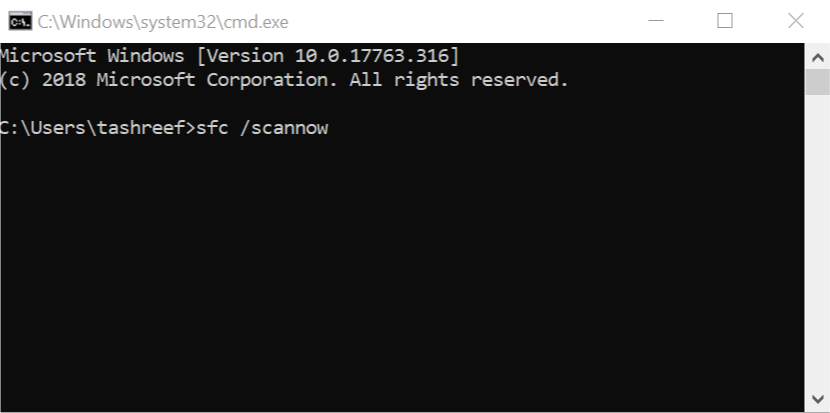
Windows OS comes with a built-in System File Checker. It is a command line-based tool that allows you to scan the system for corrupt or missing system files and replace it with new files.

  1. Press Windows Key + R to open the Run dialog box.
  2. Type cmd and hit enter.
    Sfc scannow
  3. In the Command Prompt, type the following command and hit enter.
    Sfc /scannow
  4. Wait for the System File Checker to complete the scan and fix any problems.

Reboot the system and check for any improvements.

How to fix frequent Mortal Kombat 11 issues on Xbox

Choose your destiny! The newest installment of the Mortal Kombat series is out. Brought to us by NetherRealm Studios and published by Warner Bros. Interactive.

Test your skills out on the platform of your choice, warrior, the game is available on Microsoft Windows, Xbox One and other platforms.

As we all know, no game launch is truly without some hiccups. And the newest installment from the Mortal Kombat series makes no exception, with certain issues related to connectivity, game progression and save games. But there are instances of graphical and audio bugs occurring.

But fear not, we’ve got a list of fixes that will help you to fix some of the most frequent Mortal Kombat 11 game bugs on the Xbox One.

How can I fix Mortal Kombat 11 issues?

  1. Game freezes
  2. Connectivity issues
  3. Update won’t install
  4. Controller won’t work
  5. Reset your Xbox
  6. Reinstall your game

1. Fix game freezes

This nifty solution helps out in the event the game the game freezes up, or it fails to launch too. In order to do this, follow these steps:

  1. Firstly, Press your Xbox button on the controller to open up the guide.
  2. Now press the Menu button on the controller and quit the game.
  3. You can now restart your game.

2. Connectivity fix

You should check if either your console or network adapter is running into issues or not. In order to fix your connection, follow these steps:

To test your network connection:

  1. Press your Xbox button to open up the guide.
  2. Now you’re going to select System, and then Settings.
  3. Next, select Network, and Network settings.
  4. Select Test network connection.test network connection xbox one

Check data usage:

  1. Open the Settings menu on your Xbox One.
  2. Go to the Network
  3. Open Network settings.
  4. Now select Bandwidth usage on right side of the screen.

To fix your connection:

  1. Firstly, unplug your Ethernet cable, if one is connected at the moment.
  2. Open the Settings app on your Xbox One console.
  3. Go to the Network
  4. Now select Network settings.
  5. Then select Set up wireless network.
  6. Choose your wireless network from the list of available networks.
  7. Don’t forget to enter your network password.
  8. Click Continue to finish the setup process.

3. Fix update issues

Sometimes you might facing issues with outdated patches on your console or game. In order to solve this issue, follow these steps:

  1. Firstly, press the Xbox button to open up the guide.
  2. Now select System and go to Settings.
  3. Select System and now press Updates & downloads.
  4. Select Keep my console up to date for console and Keep my games and apps up to date for Mortal Kombat 11.

4. Controller fix

If you’re running across controller problems, this solution can help you out. Just follow these steps:

  1. Turn on your Xbox One.
  2. Next, turn on your controller by pressing the Xbox button.
  3. Press and release the Connect button on your console.
  4. Press and hold the Connect button on your controller.
  5. The Xbox button should flash a couple of times, but your connection should be stable afterwards.

5. Reset your Xbox

In order to perform this action, simply press and hold the power button for more than 10 seconds, until your Xbox One is on. Next, you’re gonna unplug everything from the console, wait for 10 seconds or more till you plug everything back in. Or alternatively, you can follow these steps:

  1. From your Menu, go to System.
  2. Now select Settings, and select Console Info.
  3. Next, you’re going to select Reset Your Console.Console info & updates xbox one
  4. Select one of the three options and proceed.
  5. This should restore your default settings.

6. Reinstall Mortal Kombat 11

If everything else failed, and you’re still running into problems, the best solution is to uninstall and reinstall your game. In order to do this, follow these steps:

  1. From the Home menu and select My Games and Apps.
  2. Select the Games
  3. Select Mortal Kombat 11 and press the Menu button on your controller.
  4. Choose Manage Game, and select
  5. Once this is completed, reinsert your game disk into your Xbox, and reinstall your game.

QUICK TIP FOR SMOOTH MORTAL KOMBAT GAMING SESSIONS ON XBOX

Always remember to check whether or not the Xbox Live service is working, then proceed with the steps at hand.

We hope that these solutions were of help to you, and you’re able to complete your journey in Mortal Kombat 11.

In the meantime, let us know in the comment section down below on what other issues have you faced while playing the game on your Xbox One.

RELATED STORIES TO CHECK OUT:

Download Tencent Gaming Buddy for Windows

PUBG is still one of the most popular games on the planet. Millions of players compete daily in this tough environment. They all have the same purpose in mind: to be the last man standing.

The mobile version of the game is very addictive but it also brings some disadvantages due to hardware and software limitations.

If you want to enjoy a smooth PUBG Mobile gaming experience, we suggest you download Tencent Gaming Buddy emulator on your Windows PC. 

In this manner, you can emulate PUBG Mobile on the screen of your computer.

Tencent developed this emulator specially for PUBG Mobile. 

The controls are fully optimized and properly mapped on your keypad and mouse. Various layout are available to choose from.

How do I install Tencent Gaming Buddy PUBG Mobile emulator on PC?

The steps to follow are very simple and intuitive:

  1. Follow the download link above.
  2. Hit the install button to download and install the emulator.Tencent Gaming Buddy PUBG Mobile emulator
  3. Now, hit the Start button .
  4. The download process continues with the game engine.
  5. After a couple of minutes, the emulator will download PUBG Mobile on your PC.
  6. Once the process is finished, you can hit the Play button.

Enjoy the game!

Over to you now: How has your Tencent Gaming Buddy PUBG Mobile been so far? Let us know in the comments below.

Office 365 lets you better control what data you share with Microsoft

After the GDPR was officially adopted, Microsoft promised to make the necessary changes to the way it collects data from users. The company is now introducing two new categories (Required and Optional) to the data collected from Office 365 Enterprise users.

Microsoft faced criticism for GDPR violations on multiple occasions. These violations were mostly related to how Office apps collected user data and shared with their parent company.

Microsoft didn’t bother about users’ privacy concerns during the process. Neither had they the option to disable the data collection process itself.

Office 365 becomes GDPR compliant

Microsoft says that these changes are made to address the concerns of European clients. The company is of the view that the “Required data” will be the one that is required to ensure your account’s security or to make your products work.

The big M plans to roll out both these features in the next few months for Office 365 Pro Plus and Windows 10 users. Moreover, products like Dynamics 365 and Xbox will get additional changes and features in the next few months.

The company is planning to list down details regarding these changes into a report. The published report will include details when the company steps back from collecting specific user data.

Microsoft claims it does not collect details of your personal files, your email or other personal data. IT administrators will now have the option to enable or disable privacy controls for other users on the same Office 365 account.


In case you want to be secure while surfing the internet, you will need to get a full-dedicated tool to secure your network.  Install now Cyberghost VPN and secure yourself. It protects your PC from attacks while browsing, masks your IP address and blocks all unwanted access.


Data breach scandals on the rise

Users were not concerned about data privacy a few years ago. The ever growing number of data breach scandals affecting major tech companies pushed users to focus more on their privacy and how companies user their data.

Microsoft is now addressing some of users’ concerns. The recent changes to Microsoft’s data collection policy are really impressive. Now it’s up to Microsoft to put in the efforts necessary to keep its promises.

RELATED STORIES TO CHECK OUT:

What is RtHDVCpl.exe And Should You Remove it?

Many users encountered unknown RtHDVCpl.exe file in the list of running processes, and they are rightfully concerned.

Unknown exe files should make every user suspicious, and many users reported that exe files aren’t opening on their PC.

So join us while we take a closer look at this file and see what it does and whether should you remove it from your PC.

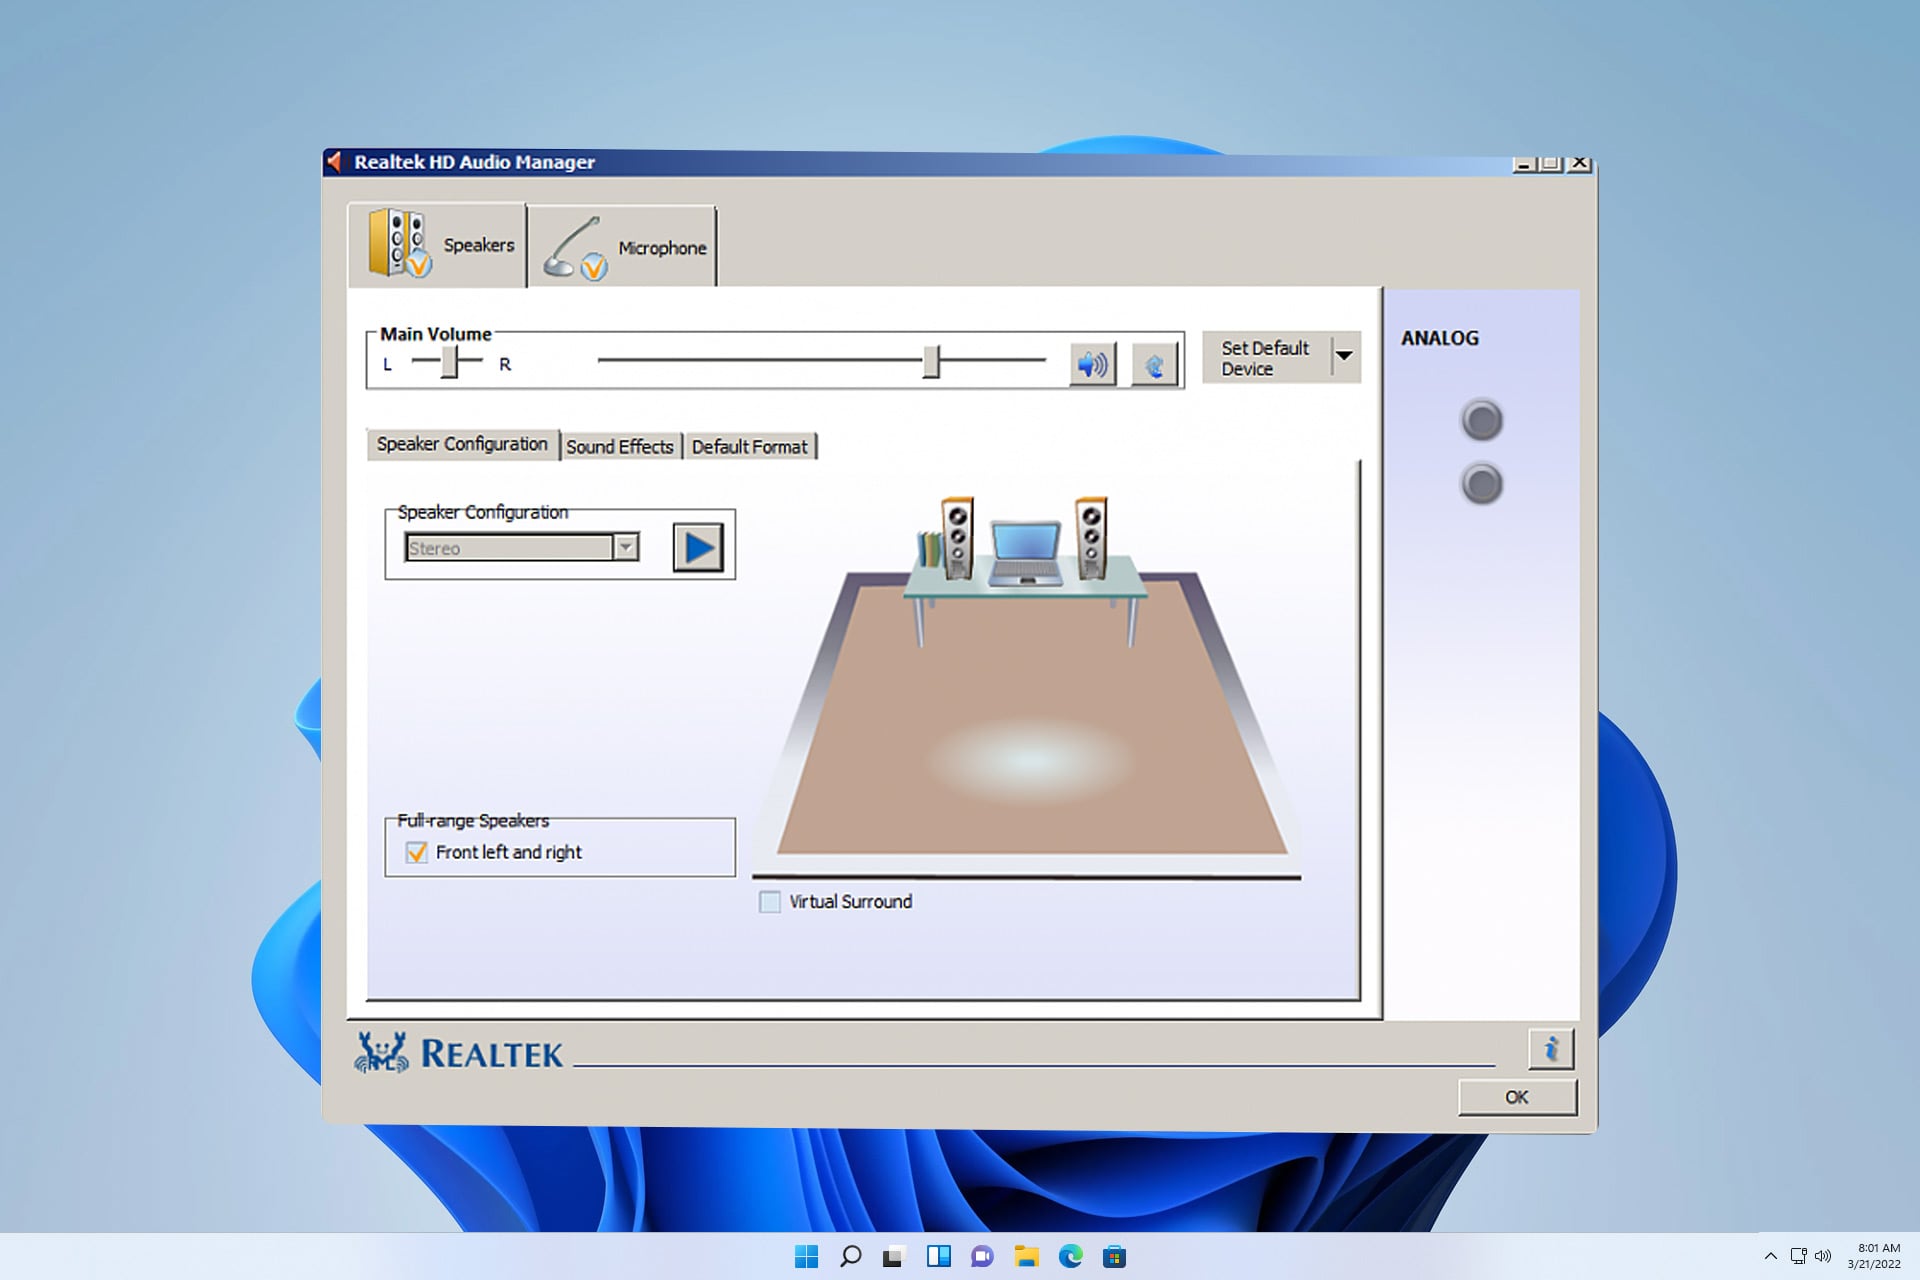
What is process RtHDVCpl?

RtHDVCp means Realtek High Definition Volume Control Panel. The real RtHDVCpl.exe file is associated with Realtek High Definition Audio Driver, and it does the following:

  • Works as an interface between your OS and Realtek sound card.
  • Allows you to configure volume settings.

Is RtHDVCpl.exe malware?

No, this process isn’t malware, but if you want to make sure, do the following:

Is RtHDVCpl.exe needed?

This software isn’t needed, but you might want to keep it for the following reasons:

  • You configure your sound settings using Realtek software.
  • There might be some potential issues with Realtek software if you delete it.

If, by some chance, this file is affected by malware, you should consider removing it.

How can I remove RtHDVCpl from startup?

Use Task Manager

  1. Press Ctrl + Shift + Esc to open Task Manager.
  2. Navigate to the Startup tab.
     
  3. Locate this file, right-click it, and choose Disable.

After doing that, the software will be disabled, and it won’t start with your PC anymore. Disabling is usually a better option since you won’t get any messages regarding missing files.

As you can see, the Realtek audio HDA rthdvcpl.exe file is harmless, so you shouldn’t remove it. If it’s causing you any problems, you might want to consider disabling it instead.

To learn more about this software and whether you need it on your PC, read our guide on Realtek HD Audio Manager.

Have you ever encountered this file before? Let us know in the comments below.

Imperator: Rome may trigger all these bugs on your PC

The grand strategy wargame formula is back in the mix, this time with Imperator: Rome. Brought to us by Paradox Interactive, the game serves as a sequel to the well-known Europa Universalis: Rome game.

In terms of timeline, the action is set between the foundation of the Roman Empire, till onset of the Diadochi Wars. The map is set in the Iberian peninsula, featuring more than 7000 cities, with this many terrain to go by, all nations present in the game are playable.

As we’re more and more familiar, no game launch can be deemed flawless. And Imperator:Rome is no exception to this. With unrest amonst the gaming legionaries on Steam threads, pointing out to game crashes, black screens, save issues, map problems and the game not synch-ing properly with Steam.

With all this being said and done, we’ve compiled a list of common bugs reported by users.

Common Imperator: Rome issues:

  1. Black screen
  2. Savegame problems
  3. Connection issues
  4. Game crashes
  5. Game freezing up
  6. Multiplayer problems
  7. No sound
  8. Endless validation

1. Black screen

Sometimes when you’re launching the game, the only thing you’ll see is a black screen.

I’m having an issue that whenever i launch this game, i get a black screen, cursor show that it’s loading, but if you click on it, it goes white, then pop up the not responding with the option to close or wait for it to respond.

2. Savegame problems

Numerous players have reported having troubled with saving their progress, requiring that they start a new game. With problems carrying over when they load a previously saved game.

So I have a problem, my savegame got somehow corrupted. When I want to load and continue playing (unpause) the game freezes. It doesn’t work with other savegasmes also

3. Connection issues

There have been reports of legionaries facing connectivity problems with their accounts. Mostly being related to their Steam accounts not synch-ing with their game.

I can login inside the game…but when I try to bind the account to Steam, I get a POP_error

4. Game crashing

Some people have experienced the game crashing at various points in the game, with no particular pattern.

The game keeps crashing at random intervals and I get a CrashReporter.exe – Application Error that says: The Application was unableto start correctly (0x000007b). The game usually crashes after a few minutes. Any known fixes for this?

5. Game freezing up

There are instances of players who weren’t able to play due to it freezing up, the occurrence taking place when they start playing the actual game.

My computers specs are perfectly fine and the game loads great all the way until I start to actually play. Within a couple of minutes of gameplay the entire thing just freezes. The audio is still in tact and makes noises when I hover the cursor over objects in the game, however visually everything just freezes

6. Multiplayer problems

Forming an alliance with a friend is part of the great aspects of the game. But when this isn’t possible, we’re bound to exile.

Almost every time when I want to load a MP game that i play with a friend, i get the message that the alliance is broken with him (When i’m in the server lobby!!!!). When i start the game i get the message a second time and the alliance is gone. I can form the alliance directly after that.

7. No sound

We all love to immerse ourselves in the world pictured in Imperator, but some users have reported the game having no sound whatsoever.

There is no sound at all. That can’t be right. Is it? Even in Settings, you can select ‘Audio’, but there is nothing in that selection. Any ideas??

8. Endless validation

It’s all fun and games when you get the game in your Steam library, but when the game is stuck in an andless validation loop, there’s no laughing matter here.

Downloaded the game late last night, opened it up and set all the settings to max graphics. Opened it this morning and said exe was invalid. I then validated the game, it said 1 file had issues and after validating would stop and then begin to validate again. It has been doing this for over 5 minutes; each loop is about 30 seconds.

How do you like the game so far? Do you rule your empire with iron fist or do you run vouch for peace? Let us know in the comment section down below.

RELATED STORIES TO CHECK OUT:

FIX: Windows 10 is not giving focus to gamebar

Windows 10 users encounter Game bar focus issues quite frequently. More specifically, they can’t select the menu options using both an Xbox controller and mouse.

Here’s a guide on how to fix this Game bar issue in Windows 10.

What to do if Windows 10 is not giving focus to gamebar

  1. Make sure Game bar is granted permission to work
  2. Have your Xbox app up to date
  3. Terminate Game Bar
  4. Try turning Game Bar off and on
  5. Reinstall the Xbox app
  6. Disable Gamebar Presence Writer

1. Make sure Game bar is granted permission to work

Verifying Game Bar’s activity permission status should be the first thing you should check. To do so, follow these steps:

  • Press the Start button > open Settings
  • Click Gaming > make sure to have Record game clips, screenshots, and broadcast using Game Bar set to On.Record game clips using Game Bar

2. Have your Xbox app up to date

Having the latest version of the Xbox app minimizes the potential of errors occurring.

To find the latest updates you, follow the next steps:

  • Press the Start button > type microsoft store in the search box and open Microsoft Store
  • Press the three dots on the right side of the store > click Downloads and updates > Get updatesupdate microsoft store app
  • Restart the app and try to see if Game Bar works

3. Terminate Game Bar

Another solution that reportedly worked for some users involves terminating the Game Bar process and rebooting the PC. To complete this task, you need to:

  • Press the Start button > open Settings 
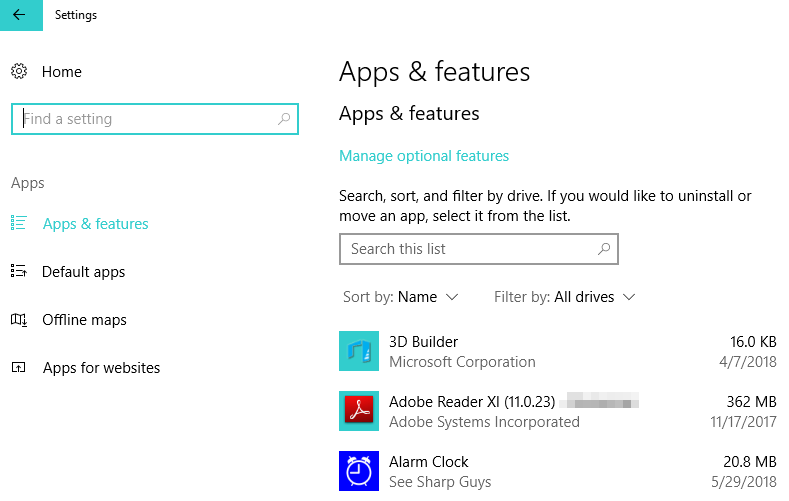
  • Click on Apps > Apps & Featuresapps & features windows 10
  • Find Game Bar > click Advanced Options > press Terminate
  • Restart your computer and see if it works

4. Try turning Game Bar off and on

Disabling and enabling Game Barback is another solution worth trying. To enable/disable it follow these steps:

  • Press Start button > open Settings
  • Click Game Bar > turn off
  • Restart your PC
  • Go back to the PC settings > Game Bar > turn on

5. Reinstall the Xbox app

Game Bar is integrated into the Xbox app, so try uninstalling the Xbox app first.

Reinstall the app from the Microsoft Store, then check to see if the issue has been solved.

6. Disable Gamebar Presence Writer

The Gamebar Presence Writer is a process that enables in-game video recording. Stopping this process proved to fix the issue from some users.

To disable Gamebar Presence Writer you need to follow these steps:

  • Open the Xbox app > click the Settings icon
  • Click Game DVR > select to turn off Record game clips and screenshots using Game DVR

These were the best solutions we could find for fixing the Game Bar lack of focus issue. If you have any other fixes for this issue, feel free to list them in the comment section below.

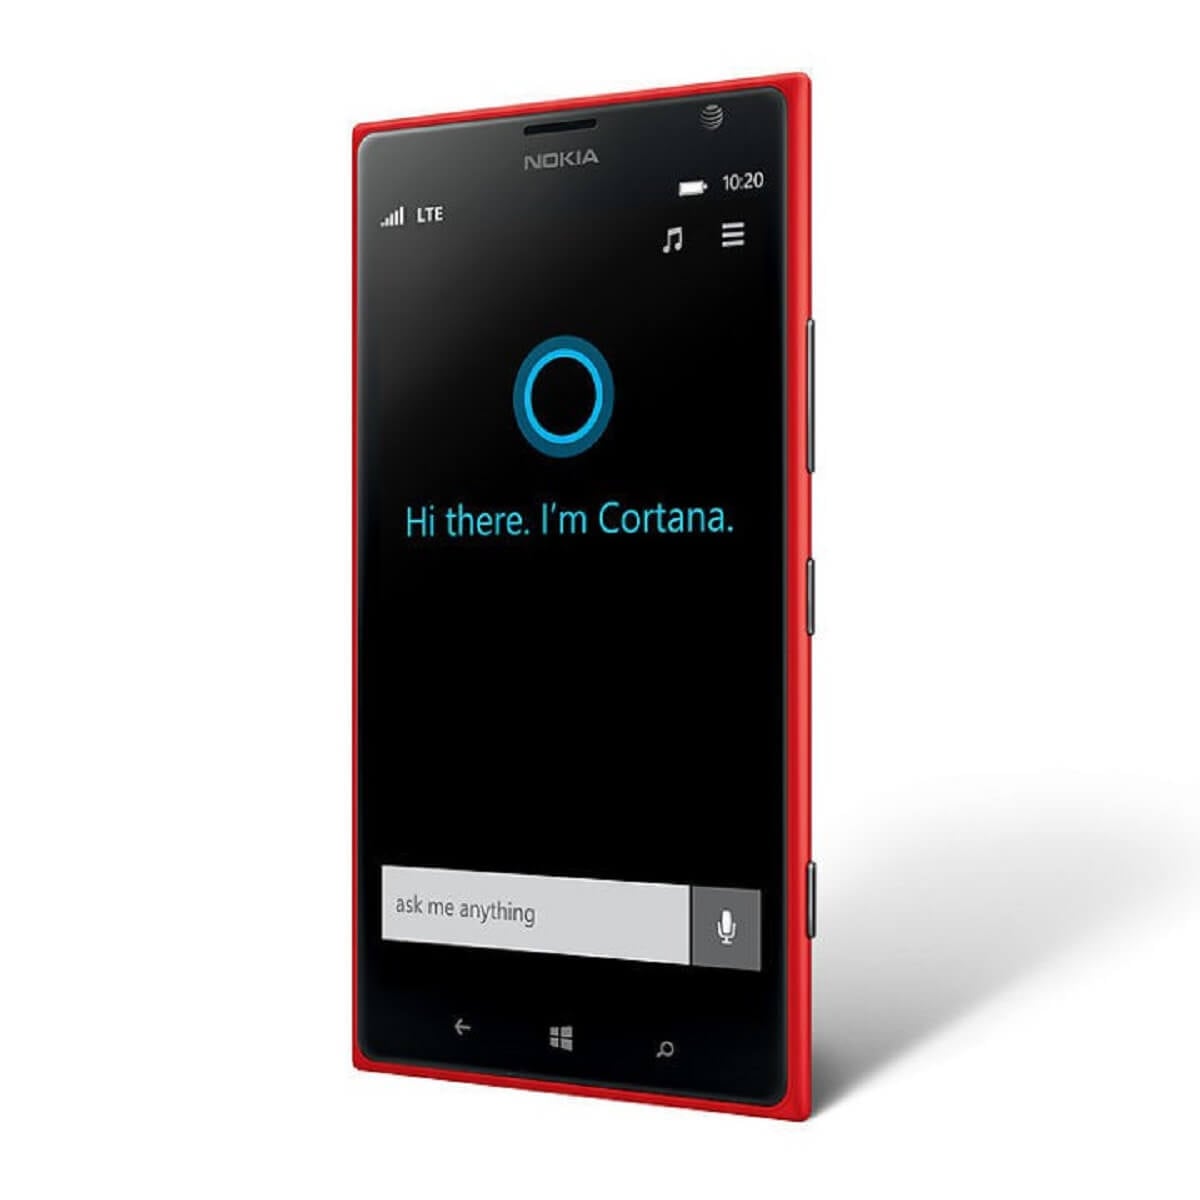
How to set a timer with Cortana on Windows 10

The latest Windows 10 Preview build 14352 introduces the ability to set a timer with Cortana.

This is useful if you need to be reminded of something in a short period of time and don’t want to bother with regular reminders.

Simply tell Cortana to set a timer and for how long, and you’re good to go.

Commands to set a timer with Cortana in Windows 10

If the “Hey Cortana” option is enabled, you basically just need to say it, but you can also write the command in the Search bar and Cortana will set up a quick timer for you that way.

Besides setting up a timer, you can also manage it by checking how much time is left or completely cancel it.

Here’s what you need to say to Cortana to be able to manage your current timer.

  • “Hey Cortana, set a timer for 10 minutes”
  • “Hey Cortana, how much time is left?”
  • “Hey Cortana, cancel my timer.”

So, open Cortana. You can do this by clicking the Start button and typing “Cortana”.

cortana timer windows 10

After the timer expires, Cortana will notify you with a pop up and a buzzer sound. If you are playing music or watching a video with sound, the volume of the alarm will be lowered.

It was already possible to set up a timer in Windows 10 before, but it required using the built-in Timer app.

With the introduction of this feature, the Timer app is not needed anymore.

This feature is only available for Windows 10 Insiders running the latest Preview build on PC.

We expect it to also arrive on Windows 10 Mobile Insider Preview with one of the upcoming builds, and to the general public with the upcoming Windows 10 Anniversary Update in July.

What do you think about the ability to set a timer in Windows 10 with Cortana?

Do you find this addition useful, or will you not even pay attention to it? Tell us your opinion in the comments below!

RELATED STORIES YOU NEED TO CHECK OUT: 

Import Outlook Express mail to Outlook 2010 [How To]

Outlook Express was one of the most used email clients in the past, long before Windows 10 was released. However, Microsoft made a few changes and made Outlook a part of its Office suite.

If you used Outlook Express in previous versions of Windows, you probably have some emails on your hard drive, and speaking of which, today we’re going to show you how to import Outlook Express mail to Outlook 2010.

Outlook Express was a default email client on older versions of Windows, and many people used it on daily basis. This application was simple, and with its user-friendly design and basic functionality, it became a favorite.

Although Outlook Express isn’t available anymore, you can still import your Outlook emails to a Outlook 2010 by following our instructions.

How can I Import Outlook Express mail to Outlook 2010?

1. Outlook Express and Outlook 2010 are on different computers

Before you move your emails, you need to open Outlook Express and find out the location of your emails on your hard drive. To do that, you need follow these steps:

  1. Open Outlook Express and choose Tools > Options.
  2. Navigate to the Maintenance tab.
  3. Click the Store Folder. Store Location window should open showing you where your email messages are stored. Copy the folder address or write it down, because you’ll need it for future steps.

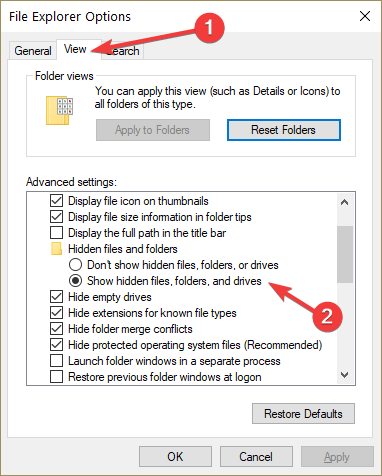
Before you can find your email messages, you have to turn on the option to show hidden files and folders. You can do that by following these steps:

  1. Navigate to My Computer and choose Tools > Folder Options.view tab
  2. Go to the View tab and find Hidden files and folders section. Click on Show hidden files and folders option.show hidden files and folders
  3. Click Apply and OK to save changes.

With hidden files and folder enabled, you can easily locate your emails on your hard drive by doing the following:

  1. Navigate to the folder where your emails are stored. If you remember, we got its location from Maintenance tab in Outlook Express.
  2. After you’ve found the folder, copy it to a removable media, such as USB flash drive for an example.
  3. Connect the USB to a different computer that has Outlook 2010 installed and copy these files to your Desktop or any other folder you can easily access.
  4. Open Outlook 2010 and choose Open > Import.
  5. Select Import from another program or file and click Next.
  6. Select Outlook Express 4x, 5x, 6x or Windows Mail and click Next.
  7. Locate the files you transferred from the USB flash drive and select them in order to import them.

In case you are looking for a way to import your Outlook emails to iPhone, check out this guide to find the easy steps.

2. Outlook Express and Outlook 2010 are on the same computer

  1. Open Outlook 2010.
  2. On the File tab choose Open, and then Import.
  3. From the list that appears, click Import Internet Mail and Addresses, and then Next.
  4. Then click on Outlook Express and check Import mail.
  5. Click Next, then Finish.

3. Import only the account name and account settings

  1. Open Outlook 2010.
  2. On the File tab choose Open, and then Import.
  3. Click Import Internet Mail Account Settings, and then click Next.
  4. Click on Outlook Express and then hit Next.
  5. Follow the instructions in the wizard to finish.

As you can see, transferring emails from Outlook Express to Outlook 2010 might not be the simplest process, but since Outlook Express isn’t being developed anymore, the only solution is to migrate your email messages to a new computer.

Even though Outlook Express and Windows Live Mail aren’t being developed anymore, there are many great alternatives available and OE Classic might be a perfect Windows Live Mail alternative for you.

If you’re looking for a similar email client to Outlook Express in Windows, we recommend you to check out our Best Windows 10 Email Clients and Apps to Use right now.

If you have any more questions about Outlook Express or Outlook 2010, don’t hesitate to reach for the comments section below.

Asphalt 9: Legends and two other Gameloft mobile games to gain Xbox Live functionality

A little less than two months ago, Microsoft made its Xbox Live infrastructure available to all developers creating iOS and Android games. The initiative is already having some good results as Gameloft, the company behind popular mobile games such as the Asphalt series will soon make three of its games Xbox Live-enabled (via Gameindustry.biz).

Asphalt 9: Legends, Asphalt 8: Airborne, and Dragon Mania Legends will all get Xbox Live functionality later this year, with support for Achievements, Friends Lists, and leader boards. All three games are currently available on iOS, Android and Windows 10, and they’re also all free to play.

There used to be many Xbox-Live enabled on Windows Phone back in the day, but it remains to be seen if more developers will embrace Microsoft’s new mobile SDK. Xbox Live monthly active users rose to 63 million in the last quarter, but Microsoft is now looking at the millions of users playing games on mobile devices to find new sources of growth.

Fix: Experience Index missing on Windows 10

Microsoft introduced the Windows Experience Index in Windows Vista. It was a way to measure your computer’s performance and give it a simple solid score.

The WEI wasn’t very popular, and was hardly used professionally. Still, it was useful for the bragging rights after spending all of your savings on a brand new PC.

While the WEI is not a very practical way of measuring your computer’s performance, it is very simple to understand.

Unfortunately, Microsoft abandoned it in Windows 8 and did not bring it back in Windows 10.

As it is with Microsoft though, the actual code for the index is still in Windows 10. You can run the Windows System Assessment Tool via a simple command in the command prompt.

It is not unusual for Microsoft to keep around code of depreciated features from Windows.

It could be for legacy or it could just be laziness.

Also, maybe some other component of Windows still depends on the Windows System Assessment Tool and might stop working if it is not found.

Whatever the reason is, the point is that it is available and can be used via commands if not by the normal graphical interface.

Experience Index missing on Windows 10, how to fix it?

To see what your WEI score is, all you have to do is follow these steps. Note that this works on both Windows 8 and 10.

  • On your keyboard, press and hold the Windows Key and then press R to open the Run command box.Screenshot_3
  • In the Run command box, type shell:Games and press Enter.Screenshot_4
  • You should now be able to see the Windows Experience Index score on the right sidebar.

Checking your score is as easy as it can get. However, reevaluating it takes a bit more effort.

The Windows System Assessment Tool is the utility that gives your PC the WEI score. Still, any way to trigger it has been removed from the normal Windows GUI.

There is however still remnants of it left around Windows so you can still trigger it in Windows 10 for now. It is not every hard to do, simply follow these steps:

  • Open your Start Menu and type “cmd”, and open the Command Prompt.Screenshot_5
  • In the Command Prompt, type winsat formal and press Enter – this will launch the WinSAT in a separate window and start running the tests. You will have to wait for it to finish and it can take however long it might take.Screenshot_6
  • After the WinSAT tool has finished running successfully, just repeat the steps given earlier to see your new score.

While this works, it is not exactly the best solution because of all the hoops you have to jump through to get to it.

Since the UI is disabled or removed from the latest Windows iteration, the community decided to build its own UI for the WinSAT service.

One of such tools is called WinAero WEI Tool. Here’s how to get it:

  • Go to this link and simply scroll to the bottom to click “Download”.
  • Once downloaded, extract the files and simply run the program – there is no installation required.

weiui[1]

WinAero WEI Tool is best of both worlds. Also, it doesn’t require you to install anything new to your system.

It works on top of existing Windows features and it provides a full fledged UI for the whole Windows Experience Index platform.

It also has some nice features such as the ability to save results as an HTML file,something by default was not present in previous Windows versions.

Windows adds and removes features with every iteration. However, the actual code for it sticks around within the operating system for much longer.

Sometimes this is useable, like this in case, but most of the time it is not and just takes up space without doing much.

WinSAT and WEI were a nice feature to be introduced in Windows Vista at a time when computers were not that powerful.

Also, Microsoft needed a push for hardware makers to up their game and make better consumer products to run more complicated operating systems.

It served its purpose for Windows Vista and 7 but today, WEI fulfills no purpose except for giving you bragging rights.

Moreover, there are much better options for benchmarking and scoring that are operating system agnostic and are support across devices.

These tools are also much more accurate and are generally more specific instead of giving you a general overall score.

READ ALSO:

Microsoft’s Joe Belfiore opens up about difficult Edge decisions

In an interview with The Verge, Corporate Vice President in the Experiences and Devices division at Microsoft, Joe Belfiore opened up about how the company came to the decision to shutter its in-house web browsing development for an off-the-shelf approach to its new one. While it may seem pretty self-explanatory to anyone with a cursory understanding of the competitive web browsing landscape, Belfiore elaborated on some of the reasons Microsoft CEO Satya Nadella pushed the company to replace its own rendering engine with that of an open-sourced one.

“Google is doing well with web-based collaborative experiences, the Office team is investing more to improve ours, we want the web browser to be better.”

Not only was Google doing well, but they have arguably also become the de facto web browsing experience for most people which highlighted one of EdgeHTML’s shortcomings in distribution. With EdgeHMTL development handcuffed to Windows 10 releases, there just wasn’t enough overall users despite its comparatively large install base.

In addition, being locked to just a Windows 10 powered desktop, the company couldn’t iterate quick enough to offer a competitive alternative to Chrome, as features, security and patchwork were all tied to the update release cycle of Windows 10. While adoption remains a huge issue to tackle for Microsoft, the other was a developer-imposed injury that involved its original rendering engine. Since Chrome and Safari used far more similar rendering engines and EdgeHTML didn’t have the user base to command developer attention, testing against it usually became a low-to-no priority for most web developers. The end result were quirky page renderings that usually left a less than desired experience amongst Edge users.

One of the other big issues Microsoft had to contend with was the stagnant UWP platform development to which EdgeHTML was an integral part. Without the ambitious adoption of UWP development Microsoft had hoped for, shackling Edge advancements to UWP updates was becoming an exercise in futility for the company as it continued to watch Google run away with and solidify large swaths of former IE and Edge users.

When enough was enough and annoying user-facing prompts or pop requests for default app status weren’t netting the results the company had hoped for, it came time for drastic change. First, the company commissioned to side projects called “Blade” and “Septagon”: the former would incorporate the Blink engine in the background of the existing Edge application, while the latter would fully implement Chromium.

During Microsoft’s high-level Friday meetings that include a “Research of the Amazing” overview, the top executives reviewed the Septagon project and were pleased with the results. The positive feedback from the RoTA meeting was only the beginning: Belfiore and team then had to shop the project around for further feedback and assessment that included a demo to former Microsoft CEO Bill Gates, board member Reid Hoffman, and the CEO of popular open source repository GitHub, Nat Friedman.

After deliberating on the pros and cons of going down the Chromium path, the company made the final decision to switch in September 2018 roughly a year after the journey began.

“We were a bit nervous,” admits Jatinder Mann, a Microsoft Edge program manager. “The fortunate thing is, as soon as we made the announcement, we got a lot of positive responses from Chromium engineers, from other Chromium browser vendors that were pretty excited to see us join this community.”

With the cat out of the bag, though, it was now time for Microsoft and Google to become even closer development partners. With Chrome engineers well-versed in contributing to the Chromium project, Microsoft sought their counsel and have been working closely with Chrome developers on projects such as scrolling, accessibility features, and touch controls, all of which Edge arguably had the advantage over Chrome.

Seven months removed from the big announcement, Chromium development on Edge had sped it way closer to feature parity with Chrome, with the occasional hiccup here and there resulting in conspiracy theorist invoking the bad blood between Microsoft and Google as an explanation for some early developmental issues. While at face value Microsoft’s adoption of Chromium appears like a great move, there are still linger questions that remain, including how the company plans to market/remarket and push its revitalized browser. Additionally, it’s still not clear how Google plans to cooperate long term with Microsoft, or potentially sabotage the company’s efforts in the name of competition.

As Insiders become further steeped in using the new Chromium-based Edge browser, a side-by-side comparison of Microsoft’s EdgeHTML development and that of its new browser quickly shines a light on the “headwinds” the former development path was going to take the company through. Ultimately, that’s why the move to Chromium feels less earth-shattering and more evolutionary than anything.

Samsung Galaxy S6 / Edge can’t connect to Windows 10/11 [FIX]

Many of us transfer files from PC to smartphones frequently, and usually this is a simple and straightforward process. Unfortunately, a number of Windows 10 users reported that Samsung Galaxy S6 / Edge can’t connect to Windows 10.

How can I fix Samsung Galaxy S6 / Edge can’t connect to Windows 10? You can resolve connection issues easily by using an original Samsung cable. Many connection problems involve defective cables and USB ports. If this doesn’t fix your problem, uninstall Samsung composite device and change the USB Power settings.Samsung galaxy s6/edge connection problem windows 10

What to do if Samsung Galaxy S6 / Edge can’t connect to Windows 10:

  1. Install Media Feature Pack for Windows N
  2. Use an original Samsung cable
  3. Connect your smartphone to the USB port on the back
  4. Uninstall Samsung composite device
  5. Change the USB options of your phone
  6. Download Samsung Smart Switch
  7. Install Smart Switch and change the registry
  8. Use Command Prompt
  9. Change USB Power settings
  10. Enable Developer mode and USB debugging on your phone

1. Install Media Feature Pack for Windows N

There are two versions of Windows available, a standard one, and a N version for European market. The N version of Windows 10 doesn’t come with Windows Media Player, Music, Video, Voice Recorder and Skype preinstalled.

In addition, certain media technologies are also missing from the N version of Windows 10. The lack of these technologies can cause issues with certain devices and one of these devices is Samsung Galaxy S6.

According to users, their smartphone isn’t recognized after connecting to Windows 10 PC, but you can easily fix that after downloading and installing Media Feature Pack for Windows 10.


2. Use an original Samsung cable

check USB cable Samsung Galaxy S6 can't connect Windows 10

According to the users, their smartphone wasn’t recognized by the PC unless they were using an original Samsung USB cable from a different Samsung’s device.

Certain USB cables are just designed for charging and not for file transfer, and that can often cause all sorts of problems with your smartphone.

To fix this issue, be sure that you’re using an original Samsung cable that you got with your device.


PC can’t recognize your Android phone? Here’s how to quickly fix that!


3. Connect your smartphone to the USB port on the back

Front USB ports might be easier to access, but they are often slower when it comes to the transfer speed. In order to fix this issue, users are suggesting that you connect Samsung Galaxy S6 to the USB 3.0 port on the back of your PC.

These ports might not be as easy to access, but they offer better transfer speed. If you don’t have a USB 3.0 port on your PC, try connecting your smartphone to different USB ports on the back until you find the one that is working for you.


4. Uninstall Samsung composite device

Users reported that you can fix the connection problem with Windows 10 and Samsung Galaxy S6 by removing the Samsung composite device from your PC. To do that, follow these steps:

  1. Connect your Samsung Galaxy S6 to your PC.
  2. Press Windows Key + X to open Power User Menu and choose Device Manager from the list.
    samsung galaxy s6 edge device manager
  3. When Device Manager opens locate the Samsung composite device, right click it, and choose Uninstall from the menu.
    samsung galaxy s6 edge uninstall driver
  4. Reconnect your smartphone to the PC.

Want to uninstall applications permanently from your PC? Here’s how to do that like a pro!


5. Change the USB options of your phone

According to Samsung’s support, you can fix this issue by connecting your phone to your PC, opening the notification menu and tapping the Connected for charging, touch for other USB options.

Select MTP from the list and your phone should be now recognised by Windows 10. If you don’t have MTP option, select Transferring Data Files option.

You can also change this option by going to the Settings > Developer Options > USB Configuration on your phone.

Bear in mind that this method works for all Android devices, therefore even if you don’t own Samsung Galaxy S6 you can try this solution if you have problems connecting your smartphone to your PC.


6. Download Samsung Smart Switch

Few users reported that this problem can be fixed by downloading and installing Samsung Smart Switch.

According to them, after installing the tool you just need to change your USB mode to MTP like we explained in the previous solution.


7. Install Smart Switch and change the registry

Users reported that they fixed the problem with Samsung Galaxy S6 and S6 Edge after installing Smart Switch. According to them, you need to install Smart Switch and make certain changes to the registry.

To edit your registry do the following:

  1. Press Windows Key + R and enter regedit. Click OK or press Enter on your keyboard.
    samsung galaxy s6 edge regedit
  2. Once Registry Editor opens, go to HKEY_LOCAL_MACHINESYSTEMCurrentControlSetControlClass{eec5ad98-8080-425f-922a-dabf3de3f69a} key in the left pane.
  3. In the right pane, locate UpperFilter and delete it.
    samsung galaxy s6 edge not connecting delete registry

We have to mention that modifying registry can lead to system instability, therefore be extra cautious and be sure to create a backup of your registry in case anything goes wrong.


You can’t access Registry Editor on your PC? Don’t worry, there’s a fix available!


8. Use Command Prompt

According to users, you can fix this issue by using Command Prompt. To do that, follow these steps:

  1. Press Windows Key + X and select Command Prompt (Admin) from the menu.
    samsung galaxy s6 edge cmd admin
  2. Enter net localgroup administrators local service /add and press Enter on your keyboard to run the command.
    samsung galaxy s6 edge can't connect command prompt

Now you just need to connect your Samsung Galaxy S6 and everything should be working without any problems. If the problem still appears, try to change USB options like in Solution 5.


9. Change USB Power settings

Users reported that this problem is caused by your USB power settings, but you can easily fix this problem by doing the following:

  1. Press Windows Key + S and enter power options. Select Power Options from the menu.
    samsung galaxy s6 edge power options
  2. Once the Power Options window opens, locate your currently active plan and click the Change plan settings.
    samsung galaxy s6 edge won't connect Windows 10 change plan settings
  3. Now click on Change advanced power settings.
    samsung galaxy s6 edge change advanced
  4. Go to USB settings > USB selective suspend setting and set it to Disabled.
    samsung galaxy s6 edge USB selective suspend setting
  5. Click Apply and OK to save changes.

10. Enable Developer mode and USB debugging on your phone

Few users reported that this problem was fixed after enabling Developer mode and USB debugging on their phone. To see how to enable these features, be sure to check your phone’s manual for detailed instructions.

Usually on Android, you’ll have to go your phone’s Settings > About phone > Build number and click 7 times on your build number. Now, in the System tab a new option called Developer Options should appear. Click on it, scroll down and check USB Debugging.

Not being able to connect Samsung Galaxy S6 or S6 Edge to Windows 10 PC can be a big problem, but we hope that one of our solutions helped you fix this issue.

If you’re looking for a full and updated guide on newer Samsung Galaxy products, check out these links:

Don’t forget to tell us in the comments section below what other issues with Samsung Galaxy s6/Edge have you encountered and we will be sure to take a look.

[wl_navigator]

Fix: Nokia 1520 battery drain

Many Lumia phone models are unfortunately infamous for their battery drain issues. Although users have been complaining for years about fast battery drain, only recently has Microsoft officially acknowledged the problem.

Microsoft officially admitted there was a battery drain problem on certain Lumia models only when the Windows 10 build 14379 was released.

The tech giant then rolled out battery improvements for mobile devices with build 14385 and build 14393.

While these fixes and improvements have reduced the intensity of the battery drain, many users are still experiencing battery issue on their phones. More specifically, it appears that only certain phone models are concerned: Lumia Icon, 930, 830, and Lumia 1520.

Here’s how users describe the problem:

hi gang i have the same problem when i updated from 8.1 to win 10 on my nokia 1520

the battery lasts a couple of minutes if u r taking vid or pics […] my wife has a 1520 still using 8.1 no prob my daughter has 930 using 8. no prob

so do not update to win 10do

microsoft read these posts because it is all over the internet […] i have to take a battery back up to use it but the battery drain s in a flash

As far as the root cause of this issue is concerned, users’ comments point to one main culprit: Cortana.

Many users noticed the battery drain and overheating issues began when they turned on Cortana and pinned it to the Start screen. Users then turned off Cortana and unpinned it from the Start screen, and it appears this solved the problem.

They repeated the process to see if their hypothesis was right, and it turned out to be accurate.

However, it is absolutely necessary to unpin Cortana from the Start screen, because if you simply turn it off, the battery drain problem persists.

Yes, I have tried all variations of Cortana on/off and pinned/unpinned. The only combination that prevents the overheating and battery drain is Cortana OFF and UNPINNED. I’ve even tried removing some seldom used live tiles from the start screen to eliminate the possibility of overtasking the CPU.

How can i solve battery drain with Nokia 1520? You can fix the problem simply by turning Cortana off and unpin it from the Start screen. In most of the cases, Cortana is the main reason of the battery drain. If this doesn’t help you, try using the Battery saver and turn off idle apps and services.fix battery drain on nokia 1520

For more information on how to do these things, follow the steps below.

What can I do if I have battery drain and overheating issues on Lumia 1520?

Particular solution – Unpin and Disable Cortana:

  1. Unpin CORTANA from the Start screen
  2.  Go to Settings > Applications > open Cortana
  3.  Turn off Cortana
  4. Reset the phone
  5. Go to Settings > Applications > Cortana
  6.  Turn on Cortana but don’t choose to pin it to the Start screen
  7. Go to the app list > select CORTANA and allow it to set itself up.
  8. You can access Cortana using the Search icon or from the app menu.

Of course, it’s possible that this workaround only diminishes the battery issue on Lumia 1520 running Windows 10 Mobile builds. If this problem prevents you from properly using your phone, you should also consider rolling back to the production OS.

Other general solutions you can apply:

Use the Battery Saver:

  1. Go to Start > All apps list > Settings > System > Battery saver.
  2. To turn on the Battery Saver when the battery falls below a certain level, go to > Battery saver settings >select  Turn battery saver on automatically if my battery falls below > set the battery threshold.

Set a shorter duration before your screen times out:

  1. Go to Start > All apps list > Settings > Personalization > Lock screen.
  2. In Screen times out after, select the box to change the screen’s time out duration.

Reduce your screen’s brightness:

  1. Go to Start > All apps list > Settings > System > Display.
  2. Turn Automatically adjust display brightness off .
  3. Select the Brightness level that you want to use instead.

Use a dark background:

Go to Start > All apps list > Settings > > Personalization > Colors > select Dark.

Turn off idle apps and services:

  1. Go to Start > All apps list > Settings > System > Battery saver > Battery use
  2. Select an app from the list > select Details >  turn off Allow this app to run in the background.

Battery drain is a passive problem but overheating is an active problem that can cause serious damage to your hardware if you don’t take any action. Our solutions cover both issues and can improve your Lumia 1520 usability and lifespan.

Share your experience with the Lumia 1520 as well as how you solved your problems with it in the comments section below.

[wl_navigator]

New Microsoft patent shows Xbox controller with haptic Braille output

Microsoft is expanding its gaming accessibility efforts with a new patent intended to support Braille in a cool new way. According to reporting from Windows Central and a patent discovery by LetsGoDigital, Microsoft’s Xbox division has a patent to design an Xbox Elite Wireless Controller that incorporates a panel on the back of the controller that houses a shifting Braille setup.

Supposing this design makes it to market, visually impaired gamers will be able to use the Braille panel to read texts by way of the back of the controller. The patent also expounds on the possibility of the new controller converting speech to Braille so that users can keep up and communicate with their favorite game streamers.

A follow-up to the widely praised Xbox Adaptive Controller was always going to be an uphill task, but if the newly found controller patent is an actual work in development, Microsoft may have another great accessory that could really help to make gaming more inclusive.

Microsoft Build 2019 Overview: Clouds, AI Services and Open Ecosystems

The winds of change have arrived and the days of reporting solely on Windows and Office developments are becoming few and far between for Microsoft observers, journalists, and fans.

Over the past few years, Microsoft has seemingly been drawing developer attention away from what used to be its mainstay business products to investments in future endeavors and at this year’s Microsoft developer’s conference BUILD 2019, the company is full steam ahead with a cloud and open ecosystem focus and Windows in the rear view.

With over 6,000 attendees covering 200,000 square feet of conference area consisting of 2,600 customers and partners  and 500 student-age-developers, Microsoft is taking the time this week to cover, among other things, Microsoft education Cloud ecosystem, Microsoft 365 Platform, AI Services, evolved developer toolkits, Power Apps, Blockchain technology and more.

At some point over the past 18 months, Microsoft has covered in great lengths the above list of technologies but will be putting an emphasis on how developers can use the tools to create cross-platform future-leaning economies at scale.

Other notable areas of interest for Microsoft developers this year appear to be adding convenience to the world of IoT with more Plug and Play modeling language and utilizing Azure IoT Edge integration with Kubernetes clusters to intelligently manage scale and spikes in demand.

Beyond just offering its own custom services and tools, Microsoft is also making a concerted effort to envelop OSS and an Open Ecosystem.

Microsoft has already stated its plans to open source its Q# compiler and quantum simulators as a way to make Quantum computing development more transparent and accessible. In addition to giving developers more access to quantum computing technologies, Microsoft is also planning to bring academic institutions that leverage OSS into the fold with its sharing of Q#.

As it is a developer conference, a focus on the evolution of developer tools is also on display with advancements in Visual Studios as its mixes subscriptions with GitHub Enterprise, adds more code support to its IntelliCode platform and Code Remote development extensions. Microsoft also hinted at .NET 5 arriving in 2020 with a .NET Core 3.0 preview 5 rolling out this month.

With much of the focus on how developers can create ecosystems around Microsoft’s new and updated technologies, the company has also set aside some time to discuss protection of these new tools as well as protecting democracies in which they thrive.

On the heels of the 2018 mid-term election and just a year out from the 2020 Presidential election, Microsoft is plunging itself into the arbiter role of election safeguard by offering campaigns and developers new tools to thwart attempts at election tampering.

A new ElectionGuard SDK should be rolling out to developers via open source channels as well as Microsoft CampaignGuard.


There will be much to cover in the comings days, but it seems Microsoft’s tangential focus on Windows continues to wane while the future of Azure, IoT, AI, and even blockchain are becoming bright stars in the company’s portfolio.

Shipments of official Xbox Hooded Union suits (onesies) have apparently been cancelled

Apparently, the official Xbox Hooded Union onesies are being cancelled and no longer shipped out to customers. As noted in a tweet, William Bailey posted his displeasure with a screenshot of an email he received from the Microsoft Store regarding the issue.

Personally, I had a similar issue. I pre-ordered the Xbox Hooded Union Onesie, but never received the item. Microsoft Store said the Xbox Hooded Union Onesie was shipped out to me, however I never received a tracking number, just a confirmation that the item was delivered. Upon further inspection, Microsoft found that no item was actually shipped to me and refunded me my purchase amount. Interestingly enough, you can find the item available through Ebay for double the purchase price.

Microsoft has yet to make an official comment on the matter, but it is frustrating to see how Microsoft dropped the ball on an item like this. Major Nelson touted these suits as being a must-have for Xbox fans, but I imagine many other customers faced similar situations when ordering this item.

What is CryptnetUrlCache directory and how do I remove it?

This tutorial is designed to get you enlightened on what the CryptnetUrlCache is all about. Is it a security threat? What purpose does it serve? How can I remove it? We will be providing credible answers to all these and more in this guide. Read on!

What do I need to know about CryptnetUrlCache?


What is CryptnetUrlCache on Windows 10?

what is CryptnetUrlCache how to remove it

CryptnetUrlCache is a folder associated with the storage of information or files that are automatically acquired (often without your knowledge) from the Internet.

Basically, while navigating through various sites on the Internet, your computer automatically scraps off certain information from these sites, usually to improve your browsing experience. These sets of information are in varying degrees and types and are thus stored in various folders. One of such folders is CryptnetUrlCache.

CryptnetCache can be found on your computer in the following directory: %USERPROFILE% > AppData > LocalLow > Microsoft. With the cryptic nature of this folder, it is widely viewed as a security risk.

Hence, one of the commonly asked questions concerning this folder is: does it pose a security risk? We’ll be providing an answer to this question in the subsection below.

UR Browser CryptnetUrlCache

If you’re concerned that CryptnetUrlCache might host some malicious content, you might want to consider switching to a more secure browser. UR Browser blocks third-party cookies and invisible trackers, so you can rest assured that no malicious cache files will be stored on your PC or in CryptnetUrlCache directory.


Is CrytnetUrlCache a malware or ransomware?

This claim – that CryptnetUrlCache is a malicious folder – is strengthened by the fact certain security programs often fail to detect it while running full system scans. For some reason, the folder is able to hide from the searchlight of certain third-party scanners, including standard security programs like AVG and the likes.

However, if you’ve discovered this folder on your PC, and an AV scan does not reveal it, you can run a manual scan on the folder itself, to check for malicious content. In most cases, you would find no trace of ransomware, malware or any form of malicious content.

In a nutshell, the CryptnetUrlCache is NOT ransomware, neither is it a virus or bug. And, in the event that you notice any malicious content, it is probably introduced by a third-party tool and not the CryptnetUrlCache directory.

While the folder has been ascertained as safe and secure, the question now is: what purpose does it serve?


What purpose does CryptnetUrlCache serve?

The folder location of CryptnetUrlCache indicates a certain level of confidence, regarding the safety of the folder. As a cryptic folder, it is designed to improve and protect access to certain websites on the Internet. This is especially related to websites that are encrypted with the SSL protocol or other encryption protocols.

The folder is usually associated with computers that use Internet Explorer and Google Chrome to navigate the Internet; although it is encountered on virtually all PCs, including those running different browsers.

Essentially, the CryptnetUrlCache folder is there to store certain sets of information that have the role to protect the access on the Internet. It does not contain any sensitive file that can compromise system functionality.


How do I remove CryptnetUrlCache?

Despite the fact that CryptnetUrlCache poses no threat to your computer, many computer users still want to remove this directory. If you fall within this category, you can easily remove the folder, without having to worry about any form of file loss or damage.

However, it is important to note that removing this folder might expose you to certain irregularities and attacks, especially if you perform online transactions frequently. To remove CryptnetUrlCache from your PC follow the step-by-step guidelines below:

  1. Open the Run dialog box by pressing Windows Key + R keys.
  2. Type the folder’s path:
    %USERPROFILE%\AppData\LocalLow\Microsoft
    run window CryptnetUrlCache

    and click on OK.

  3. On the displayed window, find and right-click on the CryptnetUrlCache folder.
  4. Select Delete on the list of options.
    CryptnetUrlCache folder delete
  5. In the pop-up confirmation window, confirm the action to erase the folder from your PC.

The CryptnetUrlCache folder, as described in this article, is not a security threat to Windows 10 (or any other Windows version). In fact, it is more of a “security-enhancer”, reinforcing your security and improving accessibility on the Internet.

However, if you feel the need to remove this folder, we have outlined a short guide for you, to safely remove it.

READ ALSO:

What to do if you can’t add a user to friends list on Xbox?

Xbox allows you to add your friends on Xbox Live to play together. However, some Xbox users have reported that they are unable to add friends on Xbox Live.

Whenever the user tries to add a friend on Xbox live the Sorry, we can’t add this friend at the moment. Try again later. You want to check your privacy settings error is displayed.

In this guide, we take a look at the best fixes to resolve this error for Xbox users.

Can’t add a friend to Friends list on Xbox? Here’s the fix

  1. Check your Internet Connection
  2. Add Friends Online
  3. Check for Active Gold Membership
  4. Check Privacy Setting for Child Account
  5. Perform a Power Cycle
  6. Reset Xbox Console

1. Check your Internet Connection

A slow internet connection can cause some issues with your console and may result in an error while performing actions like adding friends etc.

Slow-loading

If you have a slowinternet connection and using a Wi-Fi connection, try to connect using a wired internet connection. Another way to check if the error is due to a slow internet connection is to try and add friends online through the Xbox website. Check the second solution to know how to do it.


2. Add Friends Online

Microsoft allows you to add friends to your Xbox Live account online in case you are unable to add a friend through the app. Here is how to do it.

  1. Launch the browser on your Xbox console or PC.
  2. Go to Xbox.com and sign in with your Xbox credential.
  3. Select your Profile (gamerpic) and select Friends.
    Xbox Online Add friends
  4. In the Search box, type the Gamertag (of your friend) and hit enter. Make sure the gamertag’s spelling and spacing are correct.
  5. From the search result, select Add friend to add the person’s gamertag to your friend list.

That’s it. Now login to your Xbox Live account and check your friend list. The friend should be added to your friend list successfully.


3. Check for Active Gold Membership

Xbox Live Gold

To play multiplayer games online, an Xbox user needs to have an active Gold membership tied to their account.

You can check whether you have an active Gold membership or if it is expired by logging into your Xbox Live account.


4. Check Privacy Setting for Child Account

If you have a child account or the friend has a child account with age restrictions, you may not be able to add a friend to your Xbox live account.

To fix this, sign into your adult Xbox account and change the privacy setting. Here is how to do it:

  1. On your Xbox console, sign into your Adult account.
  2. Press the Xbox button on your controller to open the guide.
  3. Go to System > Settings and click on Account.Xbox Live Privacy
  4. Under Privacy & online safety, select Xbox Live Privacy.
  5. Here you can either select a default profile or customize the settings as per your settings.
  6. Click on view details and customize to make the necessary changes to the privacy setting.

5. Perform a Power Cycle

You can perform a power cycle to fix common problems on your Xbox One console. The process does not erase any of your game data.

  1. Press the Xbox button on your controller to open the guide.
  2. Select Settings and then choose Restart Console.
  3. Select Yes to confirm the restart.Restart xbox

Alternatively, if you can’t access the guide by pressing the Xbox button, press and hold the Power button on the Console until the console is turned off.

If your Xbox friend list disappeared, we have a quick fixing guide for you.


6. Reset Xbox Console

As a last resort, you can try to hard reset your Xbox console to fix this issue on your device. Resetting the device to factory default can help you fix major problems with the device.  Here is how to do it:

  1. Press the Xbox button on your controller to open the guide.
  2. Select System > Settings.
  3. Select System > Console Info.
    Xbox Reset
  4. Select Reset Console option. Here you have two reset options:
  • Select Reset and keep my games and apps – This option will reset the setting but will not delete game data. Try this option first and if that does not work, go with Reset Everything option.
  • Select Reset and Remove everything – Selecting this option will reset the console to factory setting and will delete all the stored data including accounts, saved games, setting and home Xbox associations — your game data although will stored on the cloud and can be restored after the reset is complete.

The resetting process may take some time, so wait for it to reset normally and the Console will restart after it is reset to factory default. Sign in using your Xbox account and check if the error is resolved.

RELATED STORIES YOU SHOULD CHECK:

Windows 10 news recap: Windows Lite may not be announced until 2020, Facebook is working on a faster Messenger app for Windows, and more

Welcome back to our Windows 10 news recap, where we go over the top stories of the past week in the world of Microsoft’s flagship operating system.

MSN apps will be retired on Windows 8.1 next month

Next month, Microsoft’s MSN apps on Windows 8 and 8.1 will be deprecated. After 3rd June 2019, the MSN News app will not function on Windows 8 and 8.1 devices, according to a notification.

Windows 10 Your Phone app can now save photos on your PC and display contacts pictures

Those making use of Microsoft’s Windows 10 app to link their phone to their PC can now save photos on their PC and display contact pictures, thanks to a new update to the Your Phone app. The update is initially available for Windows Insiders.

Windows Lite reportedly may not be publicly announced until 2020

Microsoft’s new lightweight operating system, Windows Lite, that is reportedly aimed at competing with the rise of Google’s Chromebook offering, apparently won’t be publicly announced at Build this year, and may not be announced until 2020.

Laptops on a table

Facebook is building a new faster, smaller Messenger app for Windows and MacOS

As Facebook works to improve its platform as a whole following a number of privacy scandals, the company is now working on a new app for Windows and MacOS, the company is expected to launch a new faster, smaller app for Messenger.

That’s it for this week – we’ll be back next week with more Windows 10 news.

Microsoft news recap: HoloLens 2 Development Edition announced, Outlook hackers stole Bitcoin and other cryptocurrencies from users, and more

Microsoft news recap is a weekly feature highlighting the top Microsoft news stories of the past week. Sit back, grab some coffee, and enjoy the read!

Microsoft announces HoloLens 2 Development Edition: $3500 or $99/mo, includes Azure credits and Unity trial offers

The HoloLens 2 Development Edition has been announced, along with pricing and finance details. The price for Microsoft’s mixed reality headset will set you back $3500, whilst it can also be purchased for $99/mo. It’s available in a bundle that brings $500 in Azure credit, 3-month trial of Unity Pro, amongst other goodies.

Outlook hackers stole Bitcoin and other cryptocurrencies from users

Following the recent security blunder affecting Outlook.com, where hackers were able to view certain details of emails from users’ accounts, has come at a cost to some users. According to a report, multiple victims have had cryptocurrencies, such as Bitcoin, stolen from them as a result of the attack on Microsoft’s web-based email service.

Microsoft’s Office apps are getting new privacy controls

Microsoft is set to make it easier for users to control what data is collected by Microsoft’s suite of Office apps. New privacy controls will allow users to enable or disable certain bits of data from being collected, however, some data which is required for running the service will still be collected, such as diagnostic data.

Xbox’s xCloud streaming service reaches “takehome” milestone

Microsoft’s cloud game streaming service, xCloud, is taking strides in getting closer to being publicly available later this year. According to Microsoft’s Head of Xbox, Phil Spencer, xCloud has now reached its “takehome” milestone, meaning that it can now be used by employees and the general public outside of Microsoft, such as at their home addresses.

That’s it for this week. We’ll be back next week with more Microsoft news.

Here’s how to disable GameBarPresenceWriter.exe once and for all

In this article, we are going to be looking into what GameBarPresenceWriter.exe is about, and how you can safely disable it on your PC.

Basically, we will be showing you what the .exe file does on your system, as well as how to turn off its function, if and when required.

What is GameBarPresenceWriter.exe?

GameBarPresenceWriter.exe is an executable file that is associated with the Xbox app and Game Bar. While this feature can be useful, the GameBarPresenceWriter.exe (Game Box) feature can cause certain problems and use more resources that it should.

Furthermore, various degrees and types of errors have been recorded with regards to this feature. And despite its relative importance, most people find it too cumbersome or not cost-effective to use.

Hence, they prefer to disable it while running Xbox games on their PCs.

To assist you in disabling this feature, we have come up with a set of solutions, any of which can easily be employed to safely disable GameBarPresenceWriter.exe, and thus allow you to run Xbox games at optimum capacity, while also conserving your resources.

How to get rid of GameBarPresenceWriter?

There are several methods that can be employed to disable this function on Windows PCs. However, we will be limiting our article to only three that have been proven, beyond doubt, to be effective in safely disabling GameBarPresenceWriter.exe.

These methods have been described in the three subsequent subsections.

  1. Disable Xbox DVR
  2. Disable it in Settings
  3. Disable via regedit

1. Disable Xbox DVR

As emphasized above, GameBarPresenceWriter.exe is a built-in feature of the Xbox app. And there is a simple and straightforward avenue to disable it directly on the app.

To do this, follow the guidelines below:

  1. Go to Start and then type Xbox.
  2. From the list of options, click on Xbox to launch the gaming app.gamebarpresencewriter exe xbox app
  3. In the  Xbox window, navigate to the lower left-hand side; locate and click on the Settings icon.xbox app settings gamebarpresencewriter exe
  4. On the Settings window, locate and click on Game DVR.
  5. Uncheck the Record game clips and screenshots using Game DVR.share clips and screenshots gamebarpresencewriter exe
  6. Exit program and restart your PC.

This process should disable GameBarPresenceWriter.exe. If you feel this process is too cumbersome or in the event that it could not resolve the issue, you can try the next method.


2. Disable it in Settings

To disable the Game Bar function in Settings, and any issues with GameBarPresenceWriter.exe, do the following:

  1. Press the Windows key.
  2. In the lower left position, locate the Settings icon and click on it.settings icon gamebarpresencewriter exe
  3. On the Settings window, locate and select Gaming > Game bar.gamebarpresencewriter exe
  4. Uncheck the Record games clips, screenshots and broadcast using the Game bar.gamebarpresencewriter exe
  5. Exit and restart PC.

Once this is done, you can then run your Xbox game(s) to see if the GameBarPresenceWriter.exe has been disabled.

If the feature remains enabled, you can try the next method to disable it.


3. Disable via regedit

You can also disable the GameBarPresenceWriter.exe (and other related functions) using the Registry Editor (Regedit). To do this, follow the steps below:

  1. Open the Run dialog box: press Windows Key + R.
  2. In the box, type in regedit and press Enter.gamebarpresencewriter exe regedit
  3. On the displayed window (Registry Editor), locate the entry:
    • HKEY_CURRENT_USER\SOFTWARE\Microsoft\Windows\CurrentVersion\GameDVR
  4. Locate the key: AppCaptureEnabled, and set its value to 0 (off).gamebarpresencewriter exe GameDVR
  5. Locate the key: GameDVR_Enabled, and set its value to 0 (off).
  6. Click on OK.
  7. Exit program and restart PC.

In rare cases, where none of the solutions outlined herein could disable the GameBoxPresenceWriter.exe, you might have to uninstall and reinstall the Xbox app.

There you go, these are just a few solutions that might help you fix the problems with GameBarPresenceWriter.exe. Be sure to let us know if you found our solutions helpful.

READ ALSO:

Connection to Google is Temporarily Unavailable on my PC [2026 Fix]

Google Apps Sync errors do occur, preventing users from connecting to Google servers. Usually, when this issue occurs, the following error message pops on the screen: Connection to Google is temporarily unavailable.

It is worth mentioning that this error often prevents Outlook from connecting to the servers, even when having a working internet connection.

To fix this common issue, we share a series of solutions below. This is a general troubleshooting guide you can use whenever you get this error, irrespective of the programs it affects.

What to do if Google connection is temporarily unavailable?

1. Restart Outlook/Reboot computer

As simple as it may sound, restarting Outlook and rebooting your computer could solve your issue.

First, close Outlook, re-open it, and see if it works. If this does not work, restart Windows and try opening Outlook again.

2. Make sure Date & Time is accurate

Making sure that your date and time are correct is imperative. Inaccurate date and time settings may mess up the internet encryption mechanisms.

To change Date & Time, follow these simple steps:

  • Press R + the Windows key at the same time
  • Type timedate.cpl in the Run box
  • In the Date and Time window that pops up, first click the button under Set the time automatically off, if you initially had it on
  • Click under the Change the date and time section > Change
  • If the date and time are not correct, modify the settings
  • Click OK > Apply > OK

3. Enable contact sharing in the Google Apps control panel

To enable contact sharing, follow these steps:

  • Go to the Google Apps control panel > Settings > click Contacts on the left side
  • Click Enable contact sharing > Save changes

4. Disable antivirus and firewall

Your firewall or antivirus tools could be the culprits behind Google Apps Sync‘s inability to connect to the servers.

Different antiviruses have different way of being turned off. You should be able to find the way of disabling your antivirus easily though.

To disable the firewall, you need to follow the next steps:

  • Press the Start button > open Control Panel
  • Click System and Security > Click Windows Firewall / Windows Defender Firewall
windows firewall
  • In the left side, select Turn Windows Firewall on or off
  • Select Turn off Windows Firewall (not recommended) > Click OK
turn off windows firewall pc

Check to see if Outlook can connect to the servers now. If it still does not work, we recommend you turn the antivirus and the Windows Firewall back on.

We hope that our solutions proved helpful. If this guide helped you out, or you have other solutions to fix this error, please leave us a comment in the comment section below.