Miss FMV video games? A new one is now out on Microsoft’s Xbox One consoles

Full motion video (FMV) video games used to be all the rage back in the day due to their ability to offer gamers a proper interactive movie experience. As video game graphics improved though, interest in FMV titles waned and the genre was almost completely abandoned.

Wales Interactive has been one of the very few games publishers that has refused to give up on FMV titles and has released a new one today on Xbox One consoles called The Complex.

The Complex is a Sci-Fi FMV and boasts the writing talent of Lynn Renee Maxcy (The Handmaid’s Tale) and stars Michelle Mylett (Letterkenny, Bad Blood) and Kate Dickie (Game of Thrones, The Witch).

Here’s the game description and trailer:

The Complex is an interactive sci-fi thriller movie from Wales Interactive. After a major bio-weapon attack on London, two scientists find themselves in a locked-down laboratory with time, and air, running out. With choose-your-own-narrative style gameplay, your actions and your relationship with other characters will lead you to one of eight suspenseful endings.

Having treated the victims of a chemical attack in the totalitarian state of Kindar, Dr Amy Tenant is a leader in the advancement of Nanocell Technology. Now, in London, news breaks of a blood-vomiting civilian whose identity is far from coincidental. Reunited with an old friend, Amy is trapped in an impenetrable HQ of laboratories—a womb of scientific advancement with a perilous secret.

For every decision you make, every interaction, your character’s personality is being tracked. At the end of each playthrough, you are rewarded with a Personality Score and a breakdown to see how you played the game. Discover the five basic dimensions of a personality; openness, conscientiousness, extraversion, agreeableness and neuroticism. Which of those will your character play?

The Complex can be bought by itself or as part of a bundle containing Late Shift, Wales Interactive’s previous FMV title, and within a larger Ultimate FMV Bundle containing even more games in the genre to play on Xbox One.

Are you a fan of FMV video games or will this be your first one? Share your thoughts with the community in the comments below and then follow us on Pinterest and Twitter for more Xbox gaming news.

The Complex
The Complex
Developer:
Wales Interactive
Price:
$12.99


The Interactive Movie Bundle


The Ultimate FMV Bundle
Developer:
Wales Interactive
Price:
$49.99

Skype Voicemail not working? We got fixes for that

Skype provides a very useful networking tool for individuals and businesses, but sometimes your Skype voicemail just isn’t working. Several reasons can account for Skype voicemail not working, and today we’ll show you how to fix them.

How to fix Skype Voicemail problems on your PC? Firstly, go to Skype settings and make sure that Call forwarding is enabled.

If it is, disable Call forwarding temporarily or adjust your privacy settings and allow everyone to call your Skype number.

What do I do if Skype Voicemail isn’t working?

  1. Check if call forwarding is enabled
  2. Disable Call Forwarding temporarily
  3. Change privacy settings
  4. Ensure to Set up Skype Voicemail correctly

1. Check if call forwarding is enabled

  1. Sign in properly to your Skype account.
  2. Go to Manage features and select Call forwarding and voicemail.
    call forwarding enable skype voicemail not working
  3. Make sure call forwarding is Enabled.
  4. Go to the Skype profile picture at the top to click on Sign out.
  5. Now, sign in again. This should help to resolve the issues with voice messaging issue and enable voicemail.

2. Disable Call Forwarding temporarily

  1. Sign out of Skype account.
  2. Close the Skype application.
  3. Launch the Skype URL at https://www.skype.com/en/
    skype log in call forwarding enable
  4. Login into Skype account via My Account on the Skype website.
  5. Locate Manage Features and select Call forwarding and voicemail.
  6. Check the Call forwarding option to disable it.
  7. Wait patiently for 3 to 5 minutes before re-enabling the call forwarding option.
  8. Log out of the Skype website.
  9. Re-open the Skype application and log in to Skype account.

This should take care of the problem and Skype voicemail should start working properly again.


3. Change privacy settings

  1. From Skype settings go to Tools and then Options.
  2. Select Privacy and then Allow calls to my Skype Number(s) and click on Anyone.
  3. Click on the Save option.

Now check if the problem is resolved.


4. Ensure to Set up Skype Voicemail correctly

  1. Go to the Skype client page.
  2. Log in to Skype and select Options.
  3. Locate the Tools menu.
  4. Under menu ensure that Receive unanswered calls as voice message is activated or checked.

There you go, these are just a couple of solutions that can help you if your Skype Voicemail isn’t working. Be sure to try all of our solutions and let us know in the comments section if you found them helpful.

[wl_navigator]

FULL FIX: Xbox error code 80072ef3

Many people play their favorite games on their Xbox online, but sometimes certain errors with Xbox can occur and prevent you from enjoying your favorite game.

Users reported Xbox error code 80072ef3 and today we’re going to show you how to fix this error.

Error 80072ef3 usually occurs when you try to sign in to Xbox Live on your Xbox console. This error will prevent you from playing games online, and that can be a major problem for most gamers.

This issue is usually caused by a network connection problem or corrupted data on your console’s hard drive, but fortunately, there are few ways to fix this problem.

How can I fix Xbox error 80072ef3?

1. Restart your console

Usually, you can fix most problems with your Xbox simply by restarting your console. To do that, you need to follow these steps:

  1. On your Xbox controller press and hold the Xbox Guide button for 3 seconds.
  2. A menu will now appear. Select the Turn Off console option and press the A button.
  3. Your console will now turn off. Wait for a few seconds and press and hold the Xbox Guide button on your controller to turn the console back on.

After your console turns on, check if the problem is resolved.

2. Delete the corrupted content

Sometimes this error can occur due to corrupted save game files, and one way to fix this problem is to delete the corrupted file. To do that, follow these steps:

  1. Press the Guide button on your controller.
  2. Go to Settings and choose System Settings.
  3. Now go to Storage.
  4. Select a storage location and press the A button.
  5. Select Games and Apps and press the A button again.
  6. Scroll down and check for corrupted game save files. Corrupted files will have a yellow exclamation point so they’ll be easy to find.
  7. If you manage to find a corrupted file, select it and press the A button.
  8. Select Delete and press the A button again.
  9. You’ll get This will permanently delete the selected content from your console. Are you sure you want to delete the message. Select Yes.
  10. Repeat this process for all corrupted save game files.

Corrupted save game files can cause this and many other problems on your Xbox console, but you should be able to fix them simply by finding these files and removing them from your device.

3. Clear your cache

Corrupted save game files can cause error 80072ef3 to appear, but this error can also be caused by corrupted system cache.

To fix the problem with corrupted cache, you’ll have to remove it from your console. This is a simple procedure and you can perform it by following these steps:

  1. Press the Guide button on your controller.
  2. Go to Settings and open System Settings.
  3. In System Settings select Storage.
  4. Select any available storage device and press the Y button.
  5. Select Clear System Cache from the menu.
  6. Choose Yes to confirm that you want to clear the system cache.

If you have multiple storage devices available, you don’t have to clear the cache for all of them. Simply select any of the available devices and clear its cache and the cache will be clear for all storage devices.

After the cache is cleared, check if the problem is resolved.

4. Make sure that you don’t have any unpaid subscriptions

Many Xbox gamers use all sorts of services that require subscriptions, but sometimes this error can occur if you have any unpaid subscriptions.

If that’s the case, you have to pay the required subscription before you can fix this problem. To do that, follow these steps:

  1. Go to Services & subscriptions section of your Microsoft account.
  2. Locate any past-due subscriptions. These subscriptions will be in red so you’ll be able to easily recognize them.
  3. Select the Pay now option and follow the instructions to pay the subscription.

After all subscriptions are paid, this error should be fixed.

5. Delete and re-download the profile

In some cases, there might be a problem with your profile that is causing error 80072ef3, and in order to fix it, you need to delete and re-download the profile stored on your console. This is quite simple and in order to do it you need to follow these steps:

  1. Press the Guide button on your controller.
  2. Go to Settings and choose System.
  3. Select Storage > All Devices.
  4. Navigate to Gamer Profiles and select the gamertag that you want to delete.
  5. Select Delete.
  6. Now select Delete Profile Only. By choosing this option your profile will be deleted, but save games and achievements will remain.

After deleting your profile, you’ll have to redownload it by following these steps:

  1. Press the Guide button on your controller.
  2. Select Download Profile option. If you don’t see this option, it means that you’re probably signed in to your profile, so you’ll need to sign out first.
  3. Log in using the Microsoft account that is associated with your gamertag.
  4. Select the storage device for your profile and the download process should start.
  5. After the process is completed, sign in to your profile and check if the problem is resolved.

Facing slow download speeds on Xbox One? Check out this guide and have it fixed in no time.

6. Restart your network connection

You can sometimes fix error 80072ef3 on your Xbox simply by restarting your network connection. To do that, simply turn off your router and wait for a few seconds. After that, turn the router back on and check if the problem is resolved.

7. Check if you have verified second email address

If you forget your account password, you might need to use a second email address to recover it.

If you don’t have your second email address verified or any other alternate way of recovering your profile, we suggest that you add it and verify it in order to fix this problem.

Few users reported that they fixed this issue by adding a third email address to their profile, so you might want to consider doing that as well.

8. Check if Xbox Live is available

Error 80072ef3 can occur if Xbox Live is having issues. If that’s the case, be sure to check with others if Xbox Live is working for them. It’s unlikely that Xbox Live is down, but if that’s the case, you’ll have to wait until Microsoft fixes the issue.

9. Perform a factory reset

Before you start this procedure, we strongly suggest to back up all files from your console. This process will delete all files from your Xbox, therefore be sure to back up all important files such as your downloaded games.

To perform a factory reset, do the following:

  1. Press the Guide button on your controller and select Settings > All Settings.
  2. Select System and go to Console info & updates.
  3. Select Reset console option.
  4. You should see Reset and remove everything and Reset and keep my games & apps option. You can choose the second option and check if that solves the problem for you. If that doesn’t work, repeat the process and choose Reset and remove everything option.
  5. After resetting your system, check if the problem is resolved.

Once again, we have to mention that resetting your Xbox will delete all files, therefore be sure to back them up.


Xbox error code 80072ef3 can be a nuisance, but you should be able to fix it after restarting your Xbox.

If that doesn’t work, feel free to try any other solution from this article and let us know what worked for you in the comments section below.

[wl_navigator]

Xbox error E74: Get the full fix here

Sooner or later you’re going to experience some error on your Xbox. While some errors are harmless, other errors, such as Xbox error E74, can prevent your console from starting.

Since this is a serious error, today we’re going to show you a few potential solutions that might help you.

How can I fix Xbox error E74?

This error is often caused by a hardware problem, most commonly HANA/ANA chip warping away from the motherboard. This issue usually occurs due to excessive heat that causes the chip to warp away.

This is a hardware issue, and if your Xbox is under warranty, we strongly suggest that you send it to the Microsoft repair center or ask for a replacement.

The warranty period for error E74 is one year since the purchase date, so if your console is still covered by warranty, we suggest that you send it to the repair shop.

Even if your warranty is expired, you can still have your console repaired for a fee. The following solutions are potentially dangerous, and they can damage your Xbox permanently, therefore use them at your own risk.

Most of the following solutions will break your warranty, so keep that in mind as well.

1. Use pennies and electrical tape

To perform this solution you’ll need electrical tape, pennies, thermal paste, and a bit of super glue. The first thing that you need to do is to open your Xbox and remove all the components, including heat sinks, motherboard, and pads from the RAM chips on the bottom side.

Now you need to make 4 sets of 2 pennies and wrap each set in electrical tape. It’s crucial that you cover penny sets completely in electrical tape in order to avoid causing damage to your console.

Now you need to apply a thin layer of thermal paste to the RAM chips where the old pads were. Put the penny sets instead of pads and use just a bit of super glue to glue them.

Be sure to scrape old thermal paste from the processors and heat sinks. Apply the thermal paste to the chips under the heat sinks.

Put the heat sinks back on along with X-clamps. Put your Xbox back together and screw the black screws on the bottom of the case tightly.

Make another stack of pennies, protect it with electrical tape and be sure that it can fit under the white heat duct while pushing it up a bit.

Now insert the duct and DVD drive back. Make another stack of pennies covered in electrical tape and position it so it can apply pressure when you put the top of the case back on.

Now put the case back on and screw in the screws carefully. Pennies will apply pressure to the HANA/ANA chip and make your console run. Thanks to the pressure from the pennies, the chip will attach itself again due to heat.

2. Apply the pressure to the heat sink

According to some users, in order to fix this problem, you just need to apply pressure to the heat sink. Open the console, locate flat silver heat sink and remove it. Apply some thermal paste to the chip below the heat sink and return the heatsink to its original position.

Apply pressure to the heat sink and put the cover back on. If there’s enough pressure on your heatsink, the error E74 should be resolved.

3. Clean the heat sink

Few users reported that in order to fix error E74 you just need to remove the heat sink from the processor and clean the old thermal paste from it. After that, you need to apply a thin layer of new thermal paste and put the heat sink back on.

After doing that, the issue should be resolved. Some users are also suggesting to reset your Xbox by starting it without a heat sink until you see two red lights on the power button.

After that, leave your Xbox to cool down, put your heat sink back on again and check if the problem is resolved. Keep in mind that starting your Xbox without a heatsink can cause permanent damage, therefore use extra caution.

4. Block your fans

According to users, you can sometimes fix the E74 error on your Xbox by blocking your fans. This is a potentially dangerous solution so use it at your own risk. Simply unplug your Xbox and put it in a horizontal position.

On the back, locate the fans and block them with any non-metal object. After blocking the fans, start your console.

Wait until you see two red lights around the power button. After that, turn off your console and remove objects that are blocking your fans. Wait until your Xbox cools off and start your console again and the problem should be resolved.

5. Apply pressure to the HANA/ANA chip

Users reported that the HANA/ANA chip is the cause of this problem and in order to fix it be sure to apply pressure to the chip. To do that, take a couple of pennies, super glue them and cover them in electrical tape.

Place the pennies on the HANA/ANA chip and then put the fan cover back on. If the cover doesn’t fit as well as before, don’t worry, this is what is needed to apply the pressure to the chip.

Now insert your DVD drive and add place about 7 CDs or DVDs on it to apply more pressure to the chip. Put the case back on carefully and make sure that the pennies or CDs don’t move.

If they move, you’ll have to repeat the same process again. After doing that, turn on your console and check if the problem is resolved.

6. Clean the thermal paste and replace the X-clamps

Error E74 sometimes appears due to your X-clamps. These components are flexible and sometimes they can bend and cause this issue to appear.

To fix this problem you need to open your console and remove the heat sinks. After doing that, carefully remove the X-clamps. These components are hard to remove, therefore use extra caution and be sure not to damage your motherboard.

After removing the X-clamps, remove the old thermal paste. Apply the new thermal paste and add new X-clamps. You can also use your old X-clamps, but it’s highly recommended to replace them.

After that, return the heat sink and all other components and check if the problem is resolved.

7. Unplug the AV cable

According to users, you should be able to fix this problem simply by unplugging your AV cable. Unplug the AV cable and turn on your console.

A red ring will appear around the power button. Quickly connect the AV cable and press the controller to reassign the button if needed. Turn off and turn on your console and the issue should be resolved.


Xbox error E74 is a serious error, and if you have it, it means that there’s a hardware problem with your console. If your device is still under warranty, we highly recommend that you send it to the repair center or ask for a replacement.

Most of these solutions are advanced, and if you’re not careful you can cause irreversible damage to your console, so use them cautiously.

[wl_navigator]

5+ easy ways to fix Xbox purchase error 807b01f7

Xbox Live allows you to purchase all sorts of content such as games and DLCs, but sometimes certain errors can occur while making online payments.

Users reported error 807b01f7, and according to them, this error occurs whenever they try to make a purchase on Xbox Live. This can be a big problem, but there are a few solutions that you can try.

How can I fix Xbox error 807b01f7?

1. Check the status of Xbox Live services

Xbox Live relies on certain services in order to work properly, and if one of those services is down, you might experience error 807b01f7 while making an online purchase.

You can check the status of Xbox Live services simply by visiting the Xbox website, but if any of the services are down, you can only wait until Microsoft fixes the issue.

2. Test your Internet connection

According to users, you might be able to fix this issue simply by testing your network connection. This is a simple procedure, and you can perform it on Xbox One by following these steps:

  1. Open Settings on your Xbox One.
  2. Select Network.
  3. Network Settings screen will now open. In the Troubleshooting section select Test network connection.
  4. After the scan is completed, select Test multiplayer connection.

To test your connection on Xbox 360, do the following:

  1. Press the Guide button on your controller.
  2. Select Settings > System Settings and go to Network Settings.
  3. Select your wireless network or choose the Wired Network option.
  4. Now select Test Xbox Live Connection.

If there’s any problem with your network connection, you have to resolve it before you can make purchases on Xbox Live.

3. Remove your Xbox profile and download it again

This error can sometimes appear if your Xbox profile is corrupted, and one of the best ways to fix it is to remove your profile and download it again. To do that on Xbox One, you need to follow these steps:

  1. On the Home screen, scroll left to open the Guide.
  2. Select Settings > All Settings.
  3. Under Account section select Remove accounts.
  4. Select the account that you want to remove.
  5. Select Remove to confirm.
  6. After you’re done, select Close.

Now you need to add your account again by following these steps:

  1. Scroll left on the Home screen to open the Guide.
  2. Move all the way down on the Sign in tab and choose Add & manage.
  3. Select Add new.
  4. Enter your Microsoft account login information.
  5. Read the Microsoft Service Agreement and Privacy Statement and choose I Accept option.
  6. Follow the instructions on the screen to configure Sign-In & Security preferences.

To delete your profile on Xbox 360, follow these steps:

  1. Go to Settings and select System.
  2. Select Storage.
  3. If you have an external storage device connected to your Xbox, such as a USB flash drive or a portable hard drive, select All Devices. If you don’t have any external devices, select Hard Drive option.
  4. Select Profiles and choose the profile that you want to delete.
  5. Select Delete option.
  6. Now choose Delete Profile Only. This option will delete your profile but it will keep your saved games and achievements intact.

After deleting the profile, you need to add it again by following these steps:

  1. Press the Guide button on the controller.
  2. Select Download Profile option. If this option isn’t available, you need to check if you are signed in to any Xbox profile. If you are, press X to sign out and then select Download Profile option.
  3. Select the Download Profile button on the Download Profile screen.
  4. Enter your login information.
  5. Now select the storage location and wait until your profile is downloaded.

After removing and downloading your profile again, the issue should be resolved.

4. Clear the system cache

Xbox error 807b01f7 can appear due to a corrupted cache, and if you want to fix this error you need to clear your cache. This is a simple process and in order to do it on Xbox One you need to follow these steps:

  1. Press and hold the power button on your console until it turns off.
  2. Unplug the power cable from your console.
  3. Now press the power button few times to completely drain the battery.
  4. Connect the power cable to the console.
  5. Wait until the light on power brick changes from white to orange.
  6. Press the power button on your console to turn it on again.

To clear the cache on Xbox 360, you need to do the following:

  1. Press the Guide button on your controller.
  2. Go to Settings > System Settings.
  3. Select Storage or Memory.
  4. Highlight any storage device and press Y on your controller.
  5. Select Clear System Cache option.
  6. When the confirmation dialog appears, select Yes.
  7. Restart your console.

After clearing the cache, check if the problem is resolved. Some users are suggesting clearing your cache after you delete your Xbox profile, so you might want to try that. To see how to delete and download your Xbox profile, be sure to check our previous solution.

5. Keep trying to make a purchase

According to users, you might be able to circumvent this error by trying to make the purchase again. Users reported that they were able to make their purchase after trying a few times. If that doesn’t work, you might want to wait for an hour or two and try again.

6. Start a game and log in to your Xbox Live account

Some users claim that they fixed this error simply by starting their game and logging in to Xbox Live from the game itself. This is a simple solution, therefore be sure to try it.

Not being able to purchase content on Xbox Live can be a big problem, but as you can see, there are several solutions that you can use to fix Xbox error 807b01f7. Which one worked for you? Let us know in the comments section below.

[wl_navigator]

How to fix Xbox billing errors [COMPLETE GUIDE]

You can purchase all sorts of content online with your Xbox such as movies, games and DLCs. Unfortunately, certain errors can appear while buying multimedia content online, and you might get Xbox billing error on your console.

Billing errors can prevent you from buying content online, but there are few ways to fix these types of errors.

How can I fix Xbox billing errors?

1. Change your billing information

If you get a billing error on your Xbox, you might want to try changing your billing information. You can easily do that using your web browser or directly from your Xbox One or Xbox 360. To change the billing information in your web browser, follow these steps:

  1. Sign in to your Microsoft account in any web browser.
  2. Go to Payment & billing and select Billing info.
  3. Now select Edit profile and make the necessary changes to your billing address.

To change your billing information on Xbox One, do the following:

  1. Scroll left from the Home screen to open the Guide.
  2. Choose Settings > All Settings.
  3. In Account section select Payment & billing.
  4. Now choose Change billing address.
  5. Enter your billing information. Keep in mind that you can skip the billing information that you don’t want to update by pressing B on the controller and choosing Next.
  6. Now select Save info to save changes.

You can also change your billing information on Xbox 360 by following these steps:

  1. Make sure that you’re signed in to your console.
  2. Go to Settings and select Account.
  3. Choose Manage Payment Options.
  4. Select the payment option that you want to update.
  5. Update the billing information.
  6. Select OK to save changes.

After making the necessary changes to your billing information try to make the purchase again.

2. Check the status of Xbox Live services

Xbox Live relies on certain services in order to run properly and if one of those services isn’t running, you might encounter all sorts of billing errors. To check the status of Xbox Live services, simply visit the Xbox website.

If the Purchase and Content Usage service is up and running you should be able to make purchases online. If this service is down, you’ll have to wait until Microsoft fixes the issue.

3. Make sure that you don’t have any balance due

Billing errors such as 80153021 can appear if you have a balance due on your account. If that’s the case, you won’t be able to make any purchases until you settle the balance due. To do that, follow these steps:

  1. Sign in to your Microsoft account on any web browser.
  2. Navigate to the Services & subscriptions page.
  3. Select Pay now option and follow the instructions on the screen to pay the balance due.

After settling the balance due check if the error is resolved.

4. Check if your country or region matches your PayPal country or region

If you recently moved to a different location or country, you might experience billing errors on your console until you change your region settings. Changing your region on Xbox One is simple, and you can do it by following these steps:

  1. Sign in to your Xbox One.
  2. On the Home screen scroll left to open the Guide.
  3. Select Settings > All Settings.
  4. Select System.
  5. Now choose Language & location.
  6. Select a new location from the list and then choose Restart now.

To change your region on Xbox 360, do the following:

  1. Sign in to your console.
  2. Go to Settings and choose System.
  3. Select Console Settings.
  4. Choose Language and Locale > Locale.
  5. Select the desired locale.

As you can see, changing your region or locale is simple, but there are certain limitations that you should know about. Firstly, you can change your region only once every three months, so keep that in mind.

Also, you won’t be able to change your region if your account is currently suspended or if you have a balance due on your Xbox Live subscription.

You should also know that money from your Microsoft account won’t be moved if you choose to change your region, therefore be sure to spend it. Lastly, certain services might not be available in some regions, so keep that in mind.

5. Contact your bank or financial institution

Sometimes you can get billing errors due to problems with your credit card. It can happen that your card is not activated or that it’s not authorized for online purchases or automatic billing.

If that’s the case, you should contact your financial institution and ask them if they can fix the problem.

6. Try to perform the purchase at a different time

You might get billing errors if you made several purchase requests that were declined. In addition, your card might be flagged as a suspicious payment option and that can lead to these types of problems.

Using an incorrect region can also cause billing errors to appear, and if that’s the case, wait for 24 to 48 hours and try to make your purchase again.

7. Use Xbox gift card

If you’re having billing errors, you might want to consider using an Xbox gift card. Simply purchase it and add it to your account. Keep in mind that not all purchases work with Xbox gift cards, so be sure to check if your desired purchase can work with a gift card.

8. Add a new payment option

If you have problems with billing information errors, you might want to consider using PayPal to purchase content online. To add a new payment option on your Xbox One, do the following:

  1. Sign in to your console with a Microsoft account.
  2. On the Home screen scroll left to open the Guide.
  3. Select Settings > All Settings.
  4. Select Account > Payment & billing.
  5. Select Add credit card or Add PayPal and follow instructions on the screen.
  6. Follow the instructions on the screen and enter the necessary information.

To add a new payment option on Xbox 360, do the following:

  1. Make sure that you’re signed in to your Microsoft account.
  2. Go to Settings > Account.
  3. Choose Manage Payment Options.
  4. Select one of the following options: Add Credit Card or Add PayPal and follow the instructions on the screen.

9. Check if the credit card information is valid

Billing error can occur if your credit card information isn’t correct or if your credit card is expired. To update a payment option on Xbox One, do the following:

  1. Sign in to your console with a Microsoft account.
  2. Scroll left on the Home screen to open the Guide.
  3. Select Settings > All Settings.
  4. Select Account > Payment & billing.
  5. Scroll down to the payment option that you want to update and select Edit.
  6. Update payment option details and select Save info once you’re done.

To do this on Xbox 360, follow these steps:

  1. Sign in to your Microsoft account on your console.
  2. Go to Settings > Account Management.
  3. On the Account Management page, select Manage Payment Options.
  4. Navigate to Your Memberships and select the membership you want to update.
  5. Select Change Payment Options.
  6. Optional: You might have to select Modify Membership to select the membership plan.
  7. After that, enter the new payment option and select OK.

You can also change a payment option on your Microsoft account in any web browser if these methods don’t work for you. To do that, follow these steps:

  1. Sign in to your Microsoft account with any web browser.
  2. Go to Payment & billing and select Payment options.
  3. Choose a payment method and select Edit info.
  4. Now change the desired information and click Next.

10. Check if the prepaid card is activated

Users reported billing error 801613FB while using a prepaid card, and to fix this error you need to check if the prepaid card is activated.

According to users, activation of the prepaid card can last up to 24 hours. If the problem still persists after 24 hours, we suggest that you contact the retailer and check if your card is activated.

11. Check your internet connection

Sometimes billing errors can occur due to problems with your Internet connection, but you should be able to fix them simply by testing your Internet connection. To do that on Xbox One, follow these steps:

  1. Open Settings and select Network.
  2. In the Troubleshooting section select Test network connection option.
  3. After the scan is completed, select the Test multiplayer connection option.

To test your connection on Xbox 360, do the following:

  1. Press the Guide button and go to Settings.
  2. Select System Settings > Network Settings.
  3. Select Wired Network or the name of your wireless network.
  4. Select Test Xbox Live Connection.

Need some help in archiving files on Xbox One? Check out this guide on 8 Zip


12. Delete and download your profile again

You might be able to fix some billing errors simply by removing and downloading your Xbox profile. This is a simple procedure and to do it on Xbox One you need to follow these steps:

  1. Scroll left on the Home screen to open the Guide.
  2. Choose Settings > All Settings.
  3. Select Account > Remove accounts.
  4. Now choose the account that you want to remove.
  5. Select Remove to confirm.
  6. After you’re done, choose Close.

To add an account on Xbox One, do the following:

  1. Scroll left on the Home screen to open the Guide.
  2. On the Sign in tab move all the way down and select Add & manage.
  3. Enter your Microsoft account login information and select Enter.
  4. Read Microsoft Service Agreement and Privacy Statement and select I Accept.
  5. Follow the instructions on the screen to configure your Sign-in & Security preferences.

To remove your Xbox account on Xbox 360, follow these steps:

  1. Go to Settings > System.
  2. Select Storage > Add Devices.
  3. Choose Gamer Profiles.
  4. Select the Xbox Live profile that you want to delete.
  5. Choose Delete > Delete Profile Only. This option will delete your profile but it will keep your saved games and achievements.

To download your Xbox Live profile on Xbox 360, do the following:

  1. Press the Guide button.
  2. Select Download Profile option.
  3. Enter your Microsoft account login information.
  4. Select the storage device for your profile.

After deleting and redownloading your profile check if the billing error still appears.

13. Clear your cache

You can fix some billing errors simply by cleaning your cache. To do that on Xbox 360, follow these steps:

  1. Press the Guide button on the controller.
  2. Go to Settings > System Settings.
  3. Select Storage or Memory.
  4. Select any storage device and press Y on the controller.
  5. Choose Clear System Cache.
  6. When the confirmation message appears, select Yes.
  7. Restart your console.

On Xbox One this procedure is a bit different, but you can do it by following these steps:

  1. Press the Power button on your console and hold it until the console turns off.
  2. Unplug the power cable from the console.
  3. Press the Power button on the console few times to drain the battery completely.
  4. Connect the power cable to the console again.
  5. Wait until the light on power brick changes from white to orange.
  6. Press the Power button again to turn on your console.

After clearing the cache, check if the billing error is resolved.

Billing errors can prevent you from purchasing online content, but you should be able to fix these errors simply by using one of our solutions. Let us know what worked for you in the comments section below.

[wl_navigator]

How to fix Avipbb.sys errors on Windows 10/11

Errors like the avipbb.sys can be very frustrating for a beginner to fix. Even some professionals might encounter issues while fixing this error.

Having this avipbb.sys error connotes that something is wrong with your computer and needs urgent attention.

If the avipbb.sys error is not fixed on-time it might lead to another serious issue that might disrupt your computer from functioning properly.

Nevertheless, here are some easy steps that you can follow to get the avipbb.sys error out of your way.

How can I fix Avipbb.sys error on Windows 10?

  1. Restart your computer
  2. Make a deep virus scan
  3. Fix corrupt registry
  4. Try to reinstall newly installed and uninstalled programs
  5. Update your computer drivers to the latest
  6. Run System File Checker
  7. Use System Restore
  8. Install Windows updates
  9. Scan the hard disk for errors

1. Restart your computer

Though this solution seems just too easy, the fact is many computer issues have been solved just by restarting your PC. If this works fine for you, there’s no need to try any other complex solutions.

2. Make a deep virus scan

  1. Get into Safe Mode with Networking.
  2. Erase Temporary Files.
  3. Use Windows key + R shortcut to open the Run window.
  4. Type cleanmgr and hit OK.
    cleanmgr Avipbb.sys Error
  5. Wait for the process to finish.
    disk cleanup scan Avipbb.sys Error
  6. Select Temporary Files and the ones you want to erase, then hit OK to delete them permanently.
    disk cleanup temporary files Avipbb.sys Error
  7. Perform an antivirus scan. If your current antivirus didn’t detect the malware, try a different antivirus such as ESET HOME Security Essential for example.
  8. After scanning, remove the malware, and restart the computer.

Note that some malware like spyware, Trojan horses, and viruses can encroach into your system even when you have an antivirus.

Malware can even try modifying the avipbb.sys and other files. Therefore, you should pick the best antivirus protection for your computer and prevent that from happening.

ESET HOME Security Essential is able to detect even the sneakiest threats with its multi-layered protection features that ensure there are no weak points in your system.

⇒ Get ESET HOME Security Essential

3. Fix corrupt registry

  1. Open the Registry Editor by pressing on to Windows key + R key on the keyboard as seen in the picture.
    Avipbb.sys Error windows key + r
  2.  Type regedit in the box and hit the OK button.
    regedit Avipbb.sys Error
  3. Right-click on the Computer and hit on Export in the displayed box.
    registry editor export Avipbb.sys Error
  4. Create a file name and the location for a backup file and click on save

If the registry entries connected to the avipbb.sys are corrupt, then you will get avipbb.sys error. Registry errors are mostly caused by malware attacks, improper installation, and uninstallation.

Consistent registry maintenance is needed to keep your computer fast and error-free.

If you want to edit your registry by yourself, you would need to follow the steps written above But make sure you create a total backup of the registry before repairing it.

Note that manually editing your registry is at your own risk, so you might consider a professional’s help.

4. Try to reinstall newly installed and uninstalled programs

  1. Shut down the program that uses the avipbb.sys file.
  2. Open Program and Features by right-clicking on the Start Button.
    programs and features Avipbb.sys Error
  3. Select the program that is using the avipbb.sys file in the list.
  4. Click the Uninstall option at the top to remove it.
  5. An uninstall window will show up. Follow the instruction to uninstall the program.

If a certain application isn’t installed properly that can lead to avipbb.sys error.  If you are experiencing any issues, try consulting a professional.

5. Update your computer drivers to the latest

The avipbb.sys error can also be caused by outdated or faulty drivers. To fix the issue, make sure that your computer drivers are up-to-date.

There are several methods you can use to fix this problem, but the fastest and simplest way to update your drivers is to use a third-party tool.

Fortect Driver Updater scans your drivers and automatically downloads and installs the newest versions available. It is also able to repair issues related to damaged or missing drivers.

⇒ Get Fortect Driver Updater

6. Run System File Checker

  1. In the start search box type cmd.
  2. A small window will appear, right-click on Command Prompt and choose Run as administrator.
    command prompt administrator Avipbb.sys Error
  3. Now in the Command Prompt window type sfc/scannow and press the Enter key.
    sfc /scannow command prompt Avipbb.sys Error
  4. The System File Checker will perform a scan and replace any corrupted files.

The System File Checker, also called the sfc/scannow is an essential Windows service that can be used to scan system files and repair them.

The sfc/scannow is able to replace these system files with new ones when they are damaged or altered. Therefore, running a System File Checker is recommended for avipbb.sys error.

7. Use System Restore

  1. In search box type system restore and select Create a restore point.
  2. Click the System Restore button.
    system restore button Avipbb.sys Error
  3. Click Next.
    system restore main window Avipbb.sys Error
  4. As soon as the Wizard window appears, select a restore point.
restore points Avipbb.sys Error

Note: Click on Scan for affected programs, only if you are not sure which programs are affected. Then click on Next, follow the instruction and wait until the restore is completed.

The main purpose of this is to roll back your system files and programs to the previous state when it was working perfectly.

When troubleshooting avipbb.sys error, this might be very helpful because it will roll back system files, installed programs, registry entries, and many other files.

8. Install Windows updates

  1. Open the Settings app.
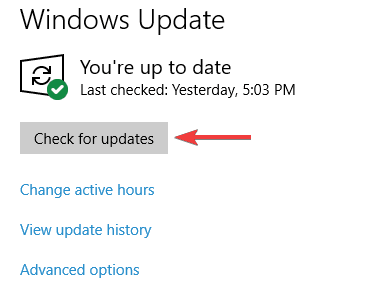
  2. Go to Update & Security section and click Check for updates button.
    check for updates Avipbb.sys Error
  3. Wait while Windows downloads the latest updates.

Did you know that Microsoft often releases updates and security patches for their software? Sometimes installing windows updates can be a good solution to avipbb.sys error.

9. Scan the hard disk for errors

  1. Press down the Windows key + E button at the same time.
    windows key +e shortcut Avipbb.sys Error
  2. Right-click the Local Disk C and select Properties.
    hard drive properties Avipbb.sys Error
  3. Click on Tools and hit on the Check button.
    check hard drive Avipbb.sys Error
  4. Click On Scan drive to continue the process.
    scan drive Avipbb.sys Error
  5. If an error is found, perhaps you might have to replace your hard drive.

Hardware failures and software problems can lead to avipbb.sys blue screen error. This is why it is important to often check the hardware.

Disconnect newly added hardware devices such as printers, RAM sticks etc. If the avipbb.sys error is resolved, then it’s certain that disconnected hardware was the problem.

If these errors still remain, check the hard disk for errors.

If our solutions helped you fix avipbb.sys error, let us know in the comments section below.

Jraid.sys: What it is, frequent errors and how to fix them

System files are used in Microsoft Windows and DOS operating systems mainly to store hardware drivers, various system settings, and related Windows functions.

Despite .sys files being super important to the smooth running of a computer, they are one of the most misunderstood categories of files. Some Windows users even go to the extent of labeling them malware. Now, one such .sys file is the jraid.sys file.

What is jraid.sys?

JRAID runs on the Microsoft signed jraid.sys file and can be seen from the processes tab in Windows Task Manager.

Where is jraid.sys located?

The file resides in the folder C:WindowsSystem32drivers. This is the same location where you find countless other driver software for your various devices.

Is jraid.sys a virus?

Jraid.sys doesn’t seem to be malware. However, some of the creators of malicious software label their dangerous programs after genuine apps. To see whether yours is legit, perform an antivirus scan using a reliable tool.

Function of jraid.sys

Drivers allow your PC to communicate with connected devices and hardware and being a driver file, jraid.sys acts as a bridge between Windows and controller chips (specifically those supporting RAID).

This function enables you to use your PC hardware without hitches.

To work properly, your version of jraid.sys must be compatible with the Windows edition in your machine, be it a 32-bit or 64-bit system.

What are the most common jraid.sys issues?

Jraid.sys may from time to time cause your computer to malfunction. If this happens, your PC issues various error messages including:

  • STOP 0x0000000A: IRQL_NOT_LESS_EQUAL – jraid.sys
    • This indicates driver problems perhaps due to issues with the file.
  • STOP 0x0000001E: KMODE_EXCEPTION_NOT_HANDLED – jraid.sys
    • This blue screen bug means that the file driver/function could be facing challenges.
  • Your PC got problems and needs to restart. We are just collecting information and then restart it for you. If you need to know more, search online for jraid.sys error:
    • The error implies that yourPC could have crashed as a result of a bad JRAID
  • STOP 0×00000050: PAGE_FAULT_IN_NONPAGED_AREA – jraid.sys
    • Again this points to a fault in your systems jraid driver file configuration.
  • A problem was detected and Windows shut down to prevent further damage to the computer.
    • The problem is likely caused by the Jraid.sys file: You are confronted with this issue if any of the related system files are destroyed or deleted.

What causes jraid.sys errors?

Jraid.sys problems are due to a variety of reasons.

  • Memory issues
  • Corrupted system files
  • Malware infection.
  • The file failing to load properly during computer startup.
  • Difficulties while executing specific functions.
  • Conflicts with newly added third party software.
  • Incorrect Windows registry.
  • Spoiled hardware such as a hard disk.

How can I fix jraid.sys errors?

There are a number of walkabouts for the aforementioned jraid.sys complications.

1. Scan your System for Malware

Disinfecting your PC of any malware may remove the relevant error. There are a few top-level security antiviruses that come with a trial option that you can use for this purpose. If stuck, visit the manufacturer’s website with instructions.

We suggest you take a look at what TotalAV has to offer. It is one of the most well-received security software on the market because it provides full security while being light on your system.

Not only does it protect against all threats, old and new, but it also includes safe online payment features, a powerful firewall, webcam protection, parental controls, and more.

⇒ Get TotalAV

2. Restore Your Computer

  1. On the search box (in the taskbar), type control panel
  2. Then select control panel from the results.Jrais.sys - Blue Screen.
  3. Go to the Control Panel’s search box and type recovery.Jraid.sys
  4. Click on Recovery.
  5. Now choose Open System Restore.jraid.sys
  6. The Restore system files and setting dialog box comes up. Click Next.Bsod 1d jraid.sys
  7. Choose the relevant restore point (the one that worked before sys started issuing warnings.
  8. You can also choose Show more restore points checkbox to view more restore points.
  9. Select Scan for affected programs.
  10. A listing of items to be deleted once you remove the chosen restore point is displayed.
  11. Select Close then Next and finally Finish If you’re fine with the deletions.

This action will retrieve the last settings that worked according to the restore points you may have created manually. Automatic restore points are also created when you install new apps or drivers and also show up in the list of available restore points.

3. Uninstall any newly program

  1. Tap on the Start  button.
  2. Select Settings  then Apps.
  3. Select the program you desire to discard, and then choose Uninstall.jraid sys bsod

You may also opt to uninstall an app you’ve installed if you suspect it of triggering Jraid.sys-related hitches.

4. Repair Corrupt Files Using sfc /scannow

  1. Go to the search box (on the taskbar) and enter Command Prompt.
  2. Right-click the Command Prompt (Desktop app) option (from your search results).
  3. Select Run as administrator.jraid.sys bsod
  4. Enter DISM.exe /Online /Cleanup-image /Restorehealth (there is a space before each /).
    • Be patient as this command can take up to 30 minutes to complete (See the screenshot after step 5).
  5. Now enter sfc /scannow (maintain the space between sfc and /).BSOD jraid.sys+4396

The SFC (System File Checker) is a powerful Windows 10 utility that inspects your system for file corruption. Initialize it and see if the annoying error will halt.

5. Run ChkDsk

  1. Press Windows key + X
  2. From the results, click on Command Prompt (Admin).jraid
  3. Click Yes if the UAC window prompts you for permission to start the feature.
  4. On the next command prompt,type chkdsk D: /f /r /x (note the spacing) then press Enter.
  5. Insert your drive letter in place of D. JRAID. SYS ERROR
  6. This prompts you to schedule the tool to scan the hard disk during the next start up.
  7. Type Y then press Enter.

Running CheckDisk command can also help rule out corruption in the hard disk and assist your recovery from the jraid.sys troubles.

6. Install the latest Windows Updates

  1. Tap the Start.
  2. Select Settings.
  3. Click Update & Security.jraid.sys
  4. Choose Windows Update.
  5. Press Check for updates.jraid.sys

Sometimes the jraid.sys error will cease bothering you once you download and install the latest Windows 10 updates. You then wait for the updates to install before restarting your PC.

7. Check your memory for errors

If the jraid.sys blue screen errors started appearing after installing a new RAM module, then you need to investigate the added memory chip. It could be incompatible or wrongly set up.

Just open your computer casing and detach the concerned RAM. Restart your PC and see how it will behave. Needless to say, you will be required to change the memory if this solves your predicament.

By following these steps, you should be able to get rid of any error messages related to jraid.sys.

If you know of any other solution that we may have missed out on, leave us a message in the comments section below.

FIX: Windows installation encountered an unexpected error

In comparison to previous Windows iterations, installing Windows 10 is rather simple. Especially since almost everything, including drivers, is managed by the system itself.

Also, software distribution is much simple nowadays with the Media Creation Tool. However, this, on a paper simple procedure, posed quite a burden for various users.

The Windows installation encountered an unexpected error prompt and the consequent installation failures are not uncommon.

In order to address this, we prepared a list of possible solutions. If you’re stuck with this error after multiple tries, make sure to check the steps we provided below.

How do I  fix the Windows installation error?

  1. Check the system requirements
  2. Check RAM and HDD
  3. Switch USB port and the USB drive
  4. Remake the installation media with the Media Creation Tool

1. Check the system requirements

Let’s start with compatibility. Windows 10 isn’t exactly too distinct from Windows 7 when it comes to system requirements. However, there are some disparities, and you should take them into account if you’re installing Windows 10.

Extra RAM here and a tad more storage space there can make a great difference.

Here are the system requirements you’ll need to meet in order to install Windows 10:

  • CPU: 1 gigahertz (GHz) or faster processor or SoC
  • RAM: 1 gigabyte (GB) for 32-bit or 2 GB for 64-bit
  • HDD space: 16 GB for 32-bit OS 20 GB for 64-bit OS
  • GPU: DirectX 9 or later with WDDM 1.0 driver
  • Display: 800×600windows installation encountered an unexpected error

If you met the system requirements, make sure that your installation media is well-created.

2. Check RAM and HDD

  1. Download the USB version of MemTest86, here.
  2. Plug in the USB. Have in mind that this procedure will erase all its data.
  3. Extract (unzip) the file and run “imageUSB tool“.windows installation encountered an unexpected error
  4. Select the USB drive and create a bootable drive.
  5. Restart your PC and boot from a USB drive.

Amongst the various hardware issues which can cause installation errors, RAM and HDD sit at the top.  We suggest investigating RAM health with the third-party tool called MemTest86.

This tool is highly regarded as the best for the job. The thing with it is that you’ll need to mount it on the bootable media in order to work.

HDD-wise, you can use the built-in utility or resort to third-party tools to check for bad sectors and health issues.

  1. In the Windows Search bar, type cmd, right-click on Command Prompt and run it as an administrator.
  2. In the command line, type the following command and press Enter:
    • chkdsk c: /rwindows installation encountered an unexpected error
  3. Wait until the procedure ends.

Another thing you can try if the error is persistent after you click Install is formatting the drive via the Command Prompt. This is what you need to do:

  1. When the bootable USB drive boots, click Repair your computer.
  2. Choose Troubleshoot.
  3. Click Command Prompt.
  4. In the command line, type the following commands and press Enter after each:
    • diskpart
    • list volume
  5. Now, you should see what’s the number beside your system partition. Remember it. Will use “3” as an example. Act with caution and make sure you’re not selecting the data partition. If everything is merged in one partition
  6. Enter the following commands and press Enter:
    • select volume 3windows installation encountered an unexpected error
    • clean
  7. After that, close the Command Prompt and try installing Windows 10 again.

3. Switch USB port and the USB drive

Another thing that seemingly slips under the radar is the installation media itself. Even though the majority of USB thumb drives with 6 or more gigs of space will suffice, some might not.

For that reason, if possible, switching to an alternative USB flash stick might get you going. As a side note, we recommend sticking with the 2.0 USB drives if you’ve never installed Windows 10 and enabling USB legacy in the BIOS settings.

On the other hand, even if the bootable USB drive works fine, the problem might be within the USB port you’re using. Some users managed to address the issue at hand by simply restarting the PC and switching between the USB ports.

Finally, you can, if the circumstances allow, try using an ISO file to create a bootable DVD.

4. Remake the installation media with the Media Creation Tool

  1. Download the Media Creation Tool from here.
  2. Plug in the USB flash drive with at least 6 GB.
  3. Run Media Creation Tool and accept the License Terms.windows installation encountered an unexpected error
  4. Choose Create installation media (USB flash drive, DVD, or ISO file) for another PC.windows installation encountered an unexpected error
  5. Choose the fitting language, architecture, and edition and click Next.windows installation encountered an unexpected error
  6. Select USB flash drive and then click Next.windows installation encountered an unexpected error
  7. Media Creation Tool will download the setup and copy the installation files onto the USB flash drive.
  8. Restart your PC and boot with the newly-created installation media.

In the end, if none of the previous steps resolved the issue at hand, we encourage you to remake the bootable drive. The best and the most favorable way is to use the Media Creation Tool.

With that said, the whole procedure is rather simplified and it won’t last too much. Of course, this depends on your bandwidth speed. Due to unwelcome circumstances, you can use any other PC to create a bootable installation media for Windows 10.

After that, you should be able to install Windows 10 without any issues whatsoever. If the error is persistent, we recommend contacting your computer OEM.

And on that note, we can wrap it up. In case you have some additional questions or suggestions, feel free to share them with us. You can do so comfortably in the comments section below.

FIX: The current active partition is compressed

When switching to Windows 10 from previous Windows iterations, users have two options. Either they can install Windows 10 clean on the formatted drive or, in the more likely scenario, upgrade over older iteration and retain all applications and data.

However, the latter convenient option seems to be impossible for some users, as they run into the prompt message informing them that The current active partition is compressed.

After that, the upgrade process can’t be continued and they are forced to stick with Windows 7/8.1.

This is a severe problem, especially since Windows 10 is becoming (mostly due to security traits) a system you would want to use these days.

Luckily, there’s a solution to every issue, and we made sure to acquire and post some of them on the list below. Therefore, if you’re unable to upgrade to Windows 10 due to the partition error, you’re at the right spot.

How do I fix the The current active partition is compressed error?

  1. Disable drive compression
  2. Check HDD for errors
  3. Expand the reserved partition
  4. Use Media Creation tool to upgrade to Windows 10
  5. Clean install Windows on an alternative HDD/SSD

1. Disable drive compression

  1. Open My Computer.
  2. Right-click on the system partition (usually it’s C:) and open Properties.
  3. Under the General tab, uncheck the Compress this drive to save disk space box and confirm changes.windows 10 error the current active partition is compressed
  4. Restart the upgrading process and look for changes.

First things first. In order to preserve the system partition’s storage space, some drives might be automatically compressed. It depends on the configuration setup, as some prebuilt configurations tend to compress data on the system drive, as they’re rarely upgraded, storage-wise.

This is mostly the case with the workstations, but there are exceptions in the non-enterprise pre-built configurations as well.

For various reasons, Windows 10 can’t be upgraded on the compressed system partition within one drive. The most prominent one concerns data allocation, as Windows 7/8.1 is preserved in a folder later on in order to preserve the data.

You can address this by simply unchecking the drive compression and trying to upgrade again.

2. Check HDD for errors

  1. In the Windows Search bar, type cmd, right-click on Command Prompt and run it as an administrator.windows 10 error the current active partition is compressed
  2. In the command line, type the following command and press Enter:
  3. chkdsk c: /rwindows 10 error the current active partition is compressed
  4. Don’t forget to replace c: with an alternative letter assigned to your system partition.
    • Albeit, the C is commonly used.
  5. Wait for the procedure to scan for errors and close Command Prompt.
  6. Restart your PC and retry upgrading.

Another thing worth checking concerns the overall health of the HDD at hand. Of all the hardware pieces, HDD is the most prone to malfunction. Symptoms are easily distinguishable: system booting and loading take longer than usual and, eventually, you’re unable to boot.

It might be too late to do something when the boot errors occur, so you should check your data storage drive on regular basis.

In order to check for HDD corruption and faulty sectors, you can use third-party tools or built-in system resources. Either way, those can help you address minor errors and give you an insight into HDD’s overall health.

And it’s good to know if it’s in good shape or close to its demise, so you can backup your data timely.

3. Expand the reserved partition

The reserved partition is the small part (around 500MB) allocated from your system partition. It stores essential data during the installation procedure and it should be active, on both Windows 7 or Windows 8.1 if you want to upgrade to Windows 10.

Now, there are 3 things that should occupy your attention regarding the Reserved system partition:

  • It needs to have at least 500 MB
  • It needs to be set to Active partition mode
  • You can’t use compressed Reserved system partition

With that in mind, we need to check if all the conditions are met before moving to alternative upgrade procedures. In order to do so, follow the steps we provided below:

  1. In the Windows Search bar, type Disk and open Create and format hard disk partitions from the results.windows 10 error the current active partition is compressed
  2. Right-click on the System Reserved partition and open Properties.
  3. Under the General tab, uncheck the Compress this drive to save disk space box and save changes.windows 10 error the current active partition is compressed
  4. Also, make sure that the partition meets all of the aforementioned conditions.
  5. Restart your PC and give upgrading another go.

You can also opt for an easier solution and use third-party software with multiple capabilities that allow you to manage partitions with ease and more.

4. Use Media Creation tool to upgrade to Windows 10

  1. Download Media Creation Tool 
  2. Plug in the USB flash drive with, at least, 8 GB of storage space
  3. Run Media Creation Tool and accept the License Termswindows 10 error the current active partition is compressed
  4. Select ”Create installation media (USB flash drive, DVD, or ISO file) for another PC”.windows 10 error the current active partition is compressed
  5. Choose the preferred language, architecture, and edition and click Next.windows 10 error the current active partition is compressed
  6. Media Creation Tool will download the setup and copy the installation files onto the USB flash drive.windows 10 error the current active partition is compressed
  7. Now, you should tend to back up your data. Finally, restart your PC.
  8. In the initial boot screen press F10, F11, or F12 to access the Boot menu. It differs depending on your motherboard.
  9. Select your preferences and choose to Upgrade rather than Custom installation and the installation process should commence.

Now, back in the days, when the free upgrade was offered through the Windows Update, users were able to obtain Windows 10 through the system interface.

However, since that’s a goner, there are few ways to obtain and perform an upgrade to Windows 10 legally. You can download Media Creation Tool and upgrade to Windows 10 from the Windows 7/8.1 interface.

Or you can create the installation media (USB or DVD) and upgrade to Windows 10 with it.

Now, even though the former is much easier, it’s not particularly better. Especially, if we take into consideration the error at hand. So, we’ll show you below how to create an installation media and upgrade to Windows 10 that way. Make sure to backup your data just in case something goes astray.

5. Clean install Windows on an alternative HDD/SSD

Finally, if none of the previous steps addressed the issue and you’re still stuck on the The current active partition is compressed screen, we recommend the clean reinstallation.

It’s for the better for various reasons. In theory, the Windows 10 platform should integrate all files and applications from the former system iteration. However, and based on our experience, this doesn’t work that well in practice.

For that reason, and if you’re positive that you indeed have enough storage space, properly configured reserved system partition, and non-active partition compression, we recommend clean reinstallation.

Just make sure to backup your data and Windows 7/8.1 license key. Afterward, you can install all applications from scratch. You can find detailed instructions in this article.

That’s a wrap-up. Just in case you have any questions regarding the aforementioned steps or an alternative solution for the upgrade error at hand, make sure to tell us in the comments section below.

FIX: This unsafe download was blocked by SmartScreen

Microsoft SmartScreen is a security mechanism that can protect you from malware and phishing attacks. In addition, this filter can protect you from potentially dangerous files.

Unfortunately, users reported the This unsafe download was blocked by SmartScreen message while downloading certain files, and today we’re going to show you how to fix it on Windows 10.

How do I bypass the Microsoft SmartScreen filter on Windows 10? The simplest way is the ‘Download unsafe file’ option. This only applies if you’re absolutely certain that the file is safe and the message is the result of an error.

A more complicated solution that will surely work is to disable the SmartScreen.

If you want to know how to do that, keep on reading.

Quick Tip:

If you need a browser that will keep you safe from pretty much anything, then look no further than Opera One.

So, you get a free VPN that has no traffic quota, an ad-blocker that will prevent adware from spamming you, and a tracker-blocker so anything you do remains unrecorded.

With so many layers of protection, having to deal with unsafe downloads will be a thing of the past as soon as possible.

Opera One

Not just a web browser, but also a VPN, an ad-blocker, and a tracker-blocker, all rolled up into one amazing tool.

What do I do when SmartScreen blocks unsafe downloads?

  1. Click the Download unsafe file option
  2. Disable SmartScreen

1. Click the Download unsafe file option

  1. Open Microsoft Edge.
  2. Click the Hub icon in the top right corner and then click the Download icon on the right. Alternatively, you can use Ctrl + J keyboard shortcut to quickly open the Downloads panel.
  3. Locate the problematic download, right-click it, and choose Download unsafe file from the menu. The problematic file should have its name in red, so it will be easy to spot.

Sometimes, the This unsafe download was blocked by SmartScreen message that can appear while downloading certain files.

If you’re certain that your file isn’t malicious and that it comes from a safe source, you can easily fix the problem by locating the file in the download list, right-clicking it, and choosing Download unsafe file.

If you’re using Internet Explorer, you can download unsafe files by following similar steps:

  1. Open Internet Explorer.
  2. Click the Gear icon in the top right corner and choose View downloads from the menu. Alternatively, you can use the Ctrl + J shortcut to open the Downloads window.
  3. Once the Downloads window opens, locate the problematic file, right-click it, and choose Download unsafe file from the menu.

2. Disable SmartScreen

  1. Press Windows Key + S, type Internet Options and click the first result.
  2. When the Internet Properties window opens, go to the Security tab and click Custom level.
  3. Locate the Miscellaneous section. Now, locate the Use SmartScreen Filter option and set it to Disable. Click OK to save changes.
  4. Optional: You can disable SmartScreen by going to the Advanced tab and unchecking the Enable SmartScreen Filter option. After doing that, click Apply and OK to save changes.

You can also turn off SmartScreen Filter right from Internet Explorer. To do that, follow these steps:

  1. Start Internet Explorer.
  2. Click the Gear icon in the top right corner and choose Safety. Then, click Turn on SmartScreen Filter.
  3. Choose the Turn off SmartScreen Filter option and click OK to save changes.

If you’re frequently getting the This unsafe download was blocked by SmartScreen message, you might want to consider disabling SmartScreen entirely.

If you’re using Microsoft Edge, you can disable SmartScreen by following these steps:

  1. Click the More icon in the top right corner and choose Settings from the menu.
  2. Scroll all the way down and click on the View advanced settings button.
  3. Scroll all the way down and disable the Help protect me from malicious sites and downloads with SmartScreen Filter option.

You can also disable SmartScreen by using the Windows Defender Security Center. Keep in mind this method might not work on your PC if you have Windows Defender disabled or if you’re using a third-party antivirus.

To disable SmartScreen using this method, do the following:

  1. Open Windows Defender Security Center.
  2. Click on App & browser control tab in the left pane.
  3. In the right pane, locate the SmartScreen for Microsoft Edge section and choose Off from the menu.

If you’re an advanced user, you can disable SmartScreen for Edge by modifying your registry.

Remember, modifying the registry can lead to certain issues if you’re not careful and therefore it’s highly recommended you create a registry backup just in case.

To disable SmartScreen using the Registry Editor, follow these steps:

  1. Press Windows Key + R and enter regedit. Click OK or press Enter.
  2. When the Registry Editor opens, navigate to the following key in the left panel:
HKEY_CURRENT_USERSOFTWAREClassesLocal SettingsSoftwareMicrosoftWindowsCurrentVersionAppContainerStoragemicrosoft.microsoftedge_8wekyb3d8bbweMicrosoftEdgePhishingFilter
  1. In the right pane, double-click EnabledV9 and change its Value data to 0 to turn off SmartScreen. Now click OK to save changes.
  2. Close Registry Editor.

After disabling SmartScreen for Internet Explorer or Edge you should be able to download your files without any issues. Keep in mind that these methods will completely disable SmartScreen protection, meaning that it won’t scan downloaded files or websites you visit.

While this can be a security concern for some users, with third-party antivirus software installed, you should have no issues.

If you want, you can also disable SmartScreen system-wide. To do that, follow these steps:

  1. Press Windows Key + S, type Control Panel and click the first result. disable smartscreen filter windows 10
  2. When the Control Panel opens, select Security and Maintenance.
  3. Click on Change Windows SmartScreen settings.
  4. Click on Don’t do anything (turn off Windows SmartScreen) and click OK to save changes.

You can also disable SmartScreen system-wide by using Registry Editor. To do that, follow these steps:

  1. Open Registry Editor.
  2. Navigate to HKEY_LOCAL_MACHINESOFTWAREMicrosoftWindowsCurrentVersionExplorer in the left panel.
  3. In the right panel, locate SmartScreenEnabled and double-click it. If this value isn’t available, right-click the right panel and choose New > String Value. Set the name of the string value to SmartScreenEnabled.
  4. Change the Value data to Off and click OK to save changes.

If you don’t want to modify your registry, you can also disable SmartScreen by changing your Group Policy. To do that, follow these steps:

  1. Press Windows Key + R and enter gpedit.msc. Click OK or press Enter.
  2. In the left pane, navigate to Computer configuration > Administrative Templates > Windows Components > File Explorer. In the right pane, locate and double-click Configure Windows SmartScreen.

  3. Select the Disabled or Not Configured option and click on Apply and OK to save changes. In addition, choose the Turn off SmartScreen from the Options panel if available.

By using one of these methods, you’ll completely disable SmartScreen on your Windows 10 PC, which will allow you to download and run any file you want.

Disclaimer: Some settings, file paths, or options can differ depending on your Windows 10 version and patch. Be sure to check similar named features/options.

If you’re aware of another way to solve the problem, please share it in the comments section below. If you have any other questions, post them there, as well.

When you visit a website, SmartScreen compared the code on the respective page with its database to detect threats. If there is any string of code matching its threat database, the tool blocks your access to the respective website.

  • Should I disable Windows SmartScreen?

SmartScreen is a very useful security feature that protects your computer against malware and phishing attacks and it is not recommended to disable it. The security risks you run by turning SmartScreen off are far greater than the benefits.

  • How do I disable SmartScreen?

Here are the steps to follow to disable SmartScreen:

  1. Navigate to Settings > Update & Security
  2. Go to Windows Security > App & browser control
  3. Locate the option SmartScreen for Edge
  4. Check the off checkbox to disable SmartScreen.

T.asm file and web.vortex: Here’s why browsers download them

Oftentimes, when users connect to Microsoft Answers, a file called t.asm begins to automatically download. Since no details are available about this file, many users panic when they see it on their desktop fearing they just downloaded a virus.

The t.asm file is usually downloaded on devices running iOS as well as on Windows 7 and Windows 10 computers. The file primarily gets downloaded when users connect to Microsoft’s Answers website and when they try to create a new Microsoft account.

What is the t.asm file that downloads every time I log into this site?
The .asm extension suggests an assembly language file. That leaves me a little uneasy.
So, what is this file and why does it download every time I sign into a Microsoft community?

What is a t.asm file? What is web.vortex?

The download of the t.asm file is actually triggered by an incompatibility issue between Microsoft’s website and the browsers installed on certain computers.

Technically, Microsoft Answers doesn’t support Safari and this explains why the file is downloaded to iOS. However, we still don’t know why Windows 7 and Windows 10 browsers download it as well. All in all, the file itself is not harmful and can simply be deleted.

Some users complain that the file prevents them from accessing Microsoft’s forums:

It’s only on iOS devices where access to the site is blocked, for me at least.  On a Mac, the downloads just go harmlessly into a folder.  But on an iPhone or iPad, they stay on the screen and cannot be removed.

If the t.asm file prevents you from accessing Microsoft Answers, you can use this workaround: Don’t log into the site. As long as you don’t try to log in, you should be able to connect to the website.

According to user reports, the t.asm file is also accompanied by the web.vortex extension in the History/Cache listings. It appears that the web.vortex.microsoft.com is what serves the website and the t.asm is part of the sign in routine.

If you’ve got additional information about the t.asm file, use the comment section below to tell us more about it.


UR: A browser that won’t download anything on its own

There is a swarm of malicious files out there and, even though t.asm and web.vortex aren’t malicious, it’s discouraging to see your browser downloading files on its own.

It’s a risk not many are welcoming. That’s why UR Browser is perfect: it prevents files from automatically downloading, even when they come from trusted sources.

download UR-Browser

In case some website wants to download files, you’ll be immediately prompted. You can block it or even permanently prevent the said website from repeating that action.

In case you, accidentally, download something you’re unsure about, the built-in antivirus will scan it and tell you whether it’s safe or not to keep that file.

UR Browser is free browser made by a small but dedicated team of enthusiasts focused on privacy. It’s built on the Chromium project, so it might look like Chrome but it’ll certainly exceed your expectations. Check it out now.

Editor's recommendation
ur browser
  • Fast page loading
  • VPN-level privacy
  • Enhanced security
  • Built-in virus scanner

  1. Download an assembler such as MASM32
  2. Install the assembler. Click OK on any error windows that may appear on the screen.
  3. Write the Assembly
  4. Go to the folder where you saved the file and compile it into an executable file.

[wl_navigator]

Skype Delayed Messages: 4 Ways to Deal With Pending Messages

Skype is the pioneer of messaging and video conferencing software. It remains the most used and, with its many integrated services, is undoubtedly one of the best applications in the market. But many users reported that Skype had delayed messages.

For some, Skype is sending messages late, while others found that Skype messages are stuck on sending and don’t go through at all. No matter the case, the problem can be easily fixed, and we will help you.

Why are my Skype messages delayed?

Here are a few reasons Skype is taking forever to send messages:

  • Problem with network connectivity: A slow Internet or random loss of connectivity can often lead to delayed messages, so check this aspect first.
  • Bug in the installed version of Skype: The problem was mass reported on particular versions of Skype and in the same period, which points to a bug in the update.
  • Corrupt app data or missing files: Sometimes, problems with the initial installation or a corrupt app cache can trigger issues in Skype, and resetting the app should do the trick.

What can I do about delayed Skype messages?

Before we head to the slightly complex solutions, try the quick ones first:

  • Turn off the modem/router by unplugging the power cable for at least two minutes and then power it on. While doing so, restart the computer as well.
  • Log out of all devices except the primary one where you want to continue using Skype.
  • As a quick workaround, type /refresh all in the chat box and hit Enter to view any pending ones if Skype is not sending messages to one contact.
  • In case you see delayed messages in a group chat on Skype, try creating a new group. This has worked for some users.

If none work, move to the fixes listed next.

1. Update Skype

1.1 Downloaded from Microsoft Store

  1. Press Windows + S to open the Search menu, type Microsoft Store, and click on the relevant result.microsoft store
  2. Click on Library near the bottom left.library
  3. Now, click on Get updates.get updates to fix skype delayed messages
  4. If a newer version of Skype is available, wait for it to install.skype

1.2 Downloaded from the website

  1. Launch Skype, and press and hold the Alt key for the various menus to appear.
  2. Click on the Help menu, and select Check for Updates.update to fix skype delayed messages
  3. Wait for the pending updates to install, and then restart Skype.

2. Reset Skype

Note icon NOTE
The steps listed here work when you download Skype from Microsoft Store. In case you got Skype from the official website, locate the folder for it under AppData and rename it to Skype.old.
  1. Press Windows + I to open Settings, select Apps from the navigation pane, and click on Installed apps.installed apps
  2. Locate Skype, click on the ellipsis next to it, and choose Advanced options.advanced options
  3. Click on the Reset button.reset to fix skype delayed messages
  4. Again, click Reset in the confirmation prompt.confirm
  5. Once done, launch Skype, and log into your account.

Resetting any app fixes a range of issues, which also works in the case of delayed messages on Skype. After completing the reset, check whether the problem is resolved. If not, you are left with limited options.

3. Install the classic version of Skype

If the previous solutions didn’t work, you could download the classic version of Skype. Most users who reported problems with the regular version found Skype Classic working seamlessly without any delayed messages.

Just ensure you don’t already have Skype installed when running the setup. If that’s the case, uninstall the application and then launch the setup for Skype Classic. Though if you have previously installed Skype from the Microsoft Store, both versions should run together.

4. Use the web version of Skype

Certainly not the first choice for many, but when all else fails, you can always use the web version of Skype. Simply head to the website, log in, and you should be ready.

This negates the idea of using Skype as an application, which is far more seamless but could be used as a temporary measure.

These are all our solutions when Skype has delayed messages; we hope one of these did the trick for you. In case you delete messages and would like to recover them later, we have an interesting article on how to recover deleted Skype messages.

Besides, if you are looking for alternatives, check our curated list of the most secure video conferencing software.

For any queries or to share solutions that worked for you, use the comments section below.

Skype can’t access your sound card? We have the best fixes

Sound cards serve as the ultimate controllers of all audio functions on computer systems.

Hence, every program (system or installed) that hosts an audio (or video) function requires a seamless connection to the sound card, to enable it to function properly. One of such programs is Skype.

Skype is an instant messaging app, which is prominent for its video calling functionality.

This calling function significantly relies on the computer’s in-built sound system, for recording sounds (outgoing calls) and receiving sounds (incoming calls). In this regard, the sound card is a very important component.

However, at times, Skype users often encounter the Skype can’t access your sound card error. In this case, the app is unable to use the computer’s microphone.

What causes Skype error: Can’t access your sound card?

There could be a myriad of reasons for the Skype can’t access your sound card error. The most notorious of these, however, are system updates and Windows upgrades.

These often result in some form of system modifications, which remove Skype’s permission to access the sound card and use the microphone.

Another notable cause of this error is an old and outdated sound card driver. The idea is that, a freshly updated Windows system that operates on outdated drivers is liable to encounter various forms of errors.

As such, outdated sound card drivers running on newly updated computers will most likely result in access error for Skype and other audio-related programs.

Aside the aforementioned causes, a whole lot things could cause the Skype audio error.

However, you don’t have to worry much, as we have compiled comprehensive solutions, to help you resolve this issue. Follow with rapt attention!

How to I fix Skype can’t access your sound card error?

1. Upgrade Windows sound card drivers

  1. Click Start and type settings in the searchbox.
  2. Select Settings and click Update and Security.
  3. Navigate to the Windows Update tab
  4. Locate and select Check for Updates to search for available updates.check for updates button slack microphone
  5. Download and Install all available updates (if any).
  6. Open Skype and check if the error is resolved

If the Windows update could not fix the error, try updating the drivers. To update your sound card drivers, follow the steps outlined below.

  1. Close the Skype window.
  2. Click on the Start
  3. Type device manager in the searchbox.
  4. Locate Device Manager in the pop up options and right-click on it. (For convenience, you can easily press the Windows Key + R to open the Run dialog box. Type in devmgmt.msc in the box and select OK).skype error cant access your sound card
  5. On the Device Manager window, locate Sound, video and game controllers, and expand it to open up more options. This will reveal options High Definition Audio and Intel(R) Display Audio.skype error cant access your sound card
  6. Update both drivers by right-clicking on each driver and selecting the Update driver
  7. On the displayed window after an update, click Search automatically for updated driver software. Windows will automatically find the new driver and this should resolve the error.
  8. Reopen Skype and check if this process effectively resolves the Skype can’t access your sound card error.

Updating drivers manually can be a bit tedious, especially since you need to know the model of each component you’re trying to update.

However, you can use a third-party tool to update all your drivers automatically with just a couple of clicks.

⇒ Get Fortect Driver Updater

If unsuccessful i.e. the method was ineffective against the sound card error, try the next method.

2. Allow programs to access your computer sound system

For Windows 8 and older versions:

  1. Close your Skype app.
  2. Click on the Start button and navigate to Control Panel.
  3. Change the window’s view to Category and select Hardware and Sound.hardware and sound control panel
  4. On the displayed options, select Sound.
  5. Navigate to the Recording tab, located at the top left corner of your screen. This will reveal to you the type of microphone you are using.
  6. Click on the displayed Microphone and select Properties, which is below the microphone icon, by the right hand side.microphone properties
  7. On the displayed window, navigate to the base of your screen and locate Device usage drop-down menu.
  8. On the drop-down options, select Use this device (enable).enable microphone
  9. Scroll up and navigate to the right hand side to locate the Advanced Click on the tab.
  10. Locate Exclusive mode.
  11. Under this mode, locate the Allow applications to take exclusive control of this device checkbox and uncheck the box
  12. On the same window, locate the Give exclusive mode applications priority checkbox and uncheck the box.exclusive mode microphone settings
  13. Click Apply to save changes.
  14. Repeat the process for Speaker device and close the window.
  15. Reopen Skype and check if the Skype can’t access your sound card error still persists.

For Windows 10:

  1. Close Skype.
  2. Click on the Start
  3. Type Settings and click on Settings on the pop up options.
  4. Locate Privacy and click on it.
  5. Locate App permissions by the left hand section of your screen and click on it.
  6. Locate Microphone and click on it.
  7. Check if the Allow access to the microphone on this device pop up option is On. If not, change it to On.let apps use my microphone
  8. Locate Allow apps to access your microphone and set it to On.
  9. Locate Skype under installed apps, set the slider to On, under Skype.
  10. Relaunch Skype and check if the error is still there.

By default, Windows computers allow programs to access the microphone.

However, due to some changes, tweaks, scans, repairs or updates, this default setting might be disrupted. Hence, a program like Skype may be denied access to the system’s microphone.

3. Use Windows Media Creation tool

  1. Navigate to Microsoft site to download the Windows Media Creation tool.
  2. After successful download, double-click on the tool’s executable file tagged .exe. This with open the file’s setup.
  3. Click on Accept
  4. Select Update this PC now and click Next. This action will download some files.
  5. Scan your computer to check for updates.
  6. On the displayed windows after the update, select Accept, to agree to terms & conditions.
  7. After agreeing to the terms, a Ready to install window will pop up, with the options Install Windows and Keep personal files and apps.Reset Windows 10 - Keep personal files and apps
  8. Proceed with the installation.
  9. Relaunch the Skype program and check if the problem still persists.

In case the Skype error still persists, proceed and try the next method.

4. Clean install Skype

  1. Click the Start button
  2. Type Settings in the box and click on it in the displayed options.
  3. Select Apps > Apps & Features.
  4. Locate Skype on the displayed window and click on it.skype error cant access your sound card
  5. Click the Uninstall
  6. Finish uninstallation by clicking the pop up Uninstall

After successful uninstallation, the next step is to clear every associated file from the system. To do this:

  1. Press Windows Key + R.
  2. Input %appdata% in the Run dialog box and press OK
  3. Right-click on Skype and select Delete

The next step involves clearing Skype’s registry entries. To do this:

  1. Press Windows Key + R.
  2. In the dialog box, type regedit.
  3. Click Ctrl + F (Find) and input Skype in the provided box.
  4. Select Find next.
  5. Delete any found registry entry (key).
  6. Repeat the process to delete the next registry key.

Note: Some keys might require special permissions to successfully clear them. In this case, you can get the necessary permission under your user account settings.

Lastly, after removing every file associated with the uninstalled Skype, you can then proceed to download the app and reinstall it. This should effectively eliminate the Skype can’t access your sound card error.

This is like the last resort to resolving the Skype can’t access sound card error. It entails removing every file and program related to Skype from your computer and then downloading and reinstalling a new, bug-free, app.

Note: You can backup your Skype chats on your computer by moving it to another file location on your system.
To do this, search for %appdata%/Skype in the Run dialog box to locate the My Skype Received Files. Press Ctrl + C on the folder and paste it under a new folder on your system.

Conclusion

Skype, a prominent instant messaging/calling app, is one of the common programs that use sound card on computer systems.

However, for various reasons, Skype might not be able to connect to a computer’s sound card — hence, the emergence of Skype can’t access your sound card error message.

To solve this problem, one of the above solutions will definitely work for you.

Microsoft event recap: Teams for Consumer, Microsoft 365 Personal, and more

If you didn’t know it already, Microsoft held an online press-only event today, centered around productivity, and including a number of significant new announcements. The roughly 30-minute long event touched a lot of bases across Microsoft’s productivity suite, ranging from Teams, Office, Outlook, and more. It’s a lot to digest, but we’ve got your back with a recap. Here’s everything you need to know.

Microsoft launches Microsoft 365 Personal and Family

The biggest news from the Microsoft event was the launch of Microsoft 365 Personal and Family. This subscription essentially replaces Office 365 for consumers, and comes with some other benefits and added extras which we describe next. If you’re an individual, you can buy into Microsoft 365 Personal for $6.99 a month. Families, meanwhile, can buy into Microsoft 365 Family for $9.99 a month per user, for up to six users. Plans will be available for purchase starting April 21.

Microsoft Editor in Word, PowerPoint Designer, Presenter Coach, Money in Excel

Along with the announcement of Microsoft 365 Personal and Family, Microsoft also announced some new features for its core Office 365 apps. A lot of these features are designed for those who are subscribing to Microsoft 365, but they will be available for non-subscribers too, with limitations.

Starting first with Microsoft Editor, this feature will be coming to Microsoft Word, as well as a browser extension on Chrome and Edge, and experience on Outlook. The editor feature essentially can help you become a better writer. It will suggest grammar, spelling, punctuation, and other sentence structure changes. It’s powered by A.I. and will be available in 20 languages. Subscribers to Microsoft 365 will have access to advanced grammar and style parts of the Editor. Non-subscribers can still use it but just to correct spelling and grammar.

Next, there’s PowerPoint Presenter and Designer. The Presenter Feature is designed to help you improve your presentation skills and uses A.I. to detect if you’re talking too fast, saying “umm” too much, or just reading the text from your slides. The Designer feature, meanwhile, allows you to add images and special videos to your presentations. Subscribers to Microsoft 365 will have access to advanced layouts and templates in PowerPoint designer, and pitch, originality and speech refinement tools of Presenter Coach. Non-subcribers can enjoy layout recommendations, and the ability to filter words and pacing.

When it comes to the creativity side of PowerPoint, subscribers to Microsoft 365 will have access to an additional 300 templates, 8,000 images, 175 looping videos, 300 fonts, and 2,800 icons. Non-subscribers only have access to 2,000 templates, 750 images, 25 looping videos, 82 fonts, and 320 icons.

Finally, there’s Money in Excel. On this front, Microsoft is making it manage, track, and analyze your money and spending. Thanks to a partnership with Plaid, you’ll be able to connect your bank and credit card accounts to Money in Excel, so you can import transactions and account balances automatically. You also can use the feature to use different Excel data types to help you better import and expand your spreadsheets. These include food, movies, places, and more. Money in Excel is a feature exclusive to Microsoft 365 Personal and Family.

Microsoft teases Teams for Consumer

The other big news from Microsoft’s event is Teams for Consumer. This isn’t a new version of Teams, but it rather adds new consumer-facing features to Teams. The features are mobile-only to start and are designed to help you manage your work and personal life together under Microsoft Teams. Features include a “dashboard” where you can see all your shared pictures, keep your important passwords, account information and rewards numbers. Teams for Consumer will launch in the Fall and a preview will come later this summer. You’ll be able to switch between work and personal accounts from the Teams app.

A new Family Safety App

To tie in with Microsoft 365 Personal and Family, Microsoft also launched a new Family Safety app for iOS and Android. This app is coming later in the year and will help parents manage their family’s digital lives. It has controls to help manage screentime across Windows, Android, and Xbox. It also has location sharing capabilities, too. A preview will be coming soon.

New features for Edge, Outlook

Vertical tabs Edge

Of course, Microsoft’s other products were touched on during this event too. Microsoft announced some new features for Outlook, which can help you better manage work and personal life. You’ll be able to link your personal calendar from other accounts like Gmail your work calendar, and with a toggle switch, show your real availability in your work account.

Microsoft also announced some features for Edge, too. These include Vertical Tabs, Smart Copy With vertical Tab, you’ll be able to see your tabs in your vertical format, on the left side of the browser instead of along the top. Meanwhile, with Smart Copy, you’ll be able to make sure that pasted text keeps its original formatting when inserted into its destination. Other Edge news includes collections heading to the iOS and Android versions of Edge, and a new Password Monitor which can help you see if your password is stored on the dark web.

Office 365 business plans are being renamed to Microsoft 365

Image of reflection on glass showing people working with Microsoft devices with "Office 365" text

Finally, Microsoft is also announcing that all small and medium business plans will begin using Microsoft’s new Microsoft 365 brand. Come April 21, there will be a few name changes.

Of note is the following: Office 365 Business Essentials will become Microsoft 365 Business Basic. Office 365 Business Premium will become Microsoft 365 Business Standard. Microsoft 365 Business will become Microsoft 365 Business Premium. Office 365 Business and Office 365 ProPlus will both become Microsoft 365 Apps.

Select Office 365 for Enterprise plans will not be impacted by the change. You can see these here at Microsoft.

Official Xbox magazine is being discontinued

Apparently, the Official Xbox Magazine (OXM) quietly closed down last week. According to a post on Eurogamer, the media publisher Future, shuttered OXM and five other magazines due to a decline in video game retail sales.

In a statement, Future indicated it was looking to keep layoffs at an “absolute minimum,” and the reason for the OXM closure and layoffs is not due to the coronavirus, just poor timing.

“Like many organizations right now, we find ourselves being forced into making difficult decisions. We have a duty of care to all our staff during this time and our focus is on protecting the business for them and for our customers. We have introduced a raft of measures to keep the numbers of lay-offs to an absolute minimum, including significant pay cuts for our Executive Team and Board. Whilst the decline in retail footfall impacts our magazine business, we are well placed with significant digital audiences and diversified revenues to continue delivering on our customers’ changing needs at this time.”

OXM started in November 2001 right around the time the original Xbox launch, with Future paying Microsoft a licensing fee to publish OXM online and in print. Overall, Future employs about 900 people in Bath, UK, and the layoffs will affect about 55 roles.

What will you miss most about OXM? Let us know in the comments.

Office 365 business plans are being renamed to Microsoft 365, too, beginning April 21

Today, Microsoft released a range of new Office 365 announcements for small and medium-sized businesses.  With this announcement, all small and medium business plans will begin using Microsoft’s new Microsoft 365 brand.

Effective April 21, 2020, these products will automatically receive new names:

  • Office 365 Business Essentials will become Microsoft 365 Business Basic.
  • Office 365 Business Premium will become Microsoft 365 Business Standard.
  • Microsoft 365 Business will become Microsoft 365 Business Premium.
  • Office 365 Business and Office 365 ProPlus will both become Microsoft 365 Apps. Where necessary we will use the “for business” and “for the enterprise” labels to distinguish between the two.

With the change, the features and costs for each plan will not change, and while these changes are in name only, they represent a larger shift in Microsoft’s approach to transforming Office beyond the apps that most of us know and love.

It should be noted that these plans will not be impacted:

Office 365 for Enterprise

  • Office 365 E1
  • Office 365 E3
  • Office 365 E5

Office 365 for Firstline

  • Office 365 F1

Office 365 for Education

  • Office 365 A1
  • Office 365 A3
  • Office 365 A5

Office 365 for Government

  • Office 365 G1
  • Office 365 G3
  • Office 365 G5

Microsoft also announced new Microsoft 365 Personal and Family subscriptions with more consumer-oriented features.

Outlook on the web gets new features to better help you manage your work and personal life

Today’s Microsoft event was heavily focused on the new Microsoft 365 Personal and Family subscriptions, as well as new features for the Office apps, but Microsoft also talked about Outlook, too. The company detailed that Outlook on the web will be getting new features that will better help you manage your work and personal life.

With a new “Outlook Calendars” feature, you’ll be able to link your personal calendar (say from Gmail) to your work calendar, and with a toggle switch, show your real availability in your work account. This will also make it so that you can maintain privacy around your appointments and other business meetings. When enabled, your coworkers will be able to see your personal commitments as blocked time, without the personal details.

Meanwhile, for schools, teachers, and students, they will be able to add in their specific school district calendar. With the feature, these folks will be able to see school news at a quick glance, be it parent-teacher conferences, virtual learning sessions, or other school-related cancellations.

In other Outlook news, Microsoft is also expanding Play my Emails on Android. This will help Cortana provides an intelligent read-out of your emails. Microsoft says this will be rolling out in the coming months.

New Microsoft 365 Personal and Family subscriptions to launch on April 21, with Microsoft Teams for consumers later this summer

Microsoft announced a significant revamp of its Office 365 consumer subscriptions this morning. The ongoing rumors about a consumer version of the Microsoft 365 enterprise bundle were true, and Office 365 is indeed switching to the Microsoft 365 branding next month

The new Microsoft 365 consumer subscriptions will go live on April 21, with no price changes: Microsoft 365 Personal will cost $6.99/month, while the Microsoft 365 Family subscription for up to six family members will cost $9.99/month. However, Microsoft is also launching today new services to organize your family life, which will leverage the existing Microsoft Teams app.

Microsoft Teams is already free to use with personal Microsoft accounts, and Microsoft also already has a free “Microsoft Family” feature allowing families to create a family calendar, receive activity reports, set screen time limits, and more. The new Microsoft Teams for Consumers that will launch later this summer will bring together messaging, video calls, photo, tasks, and calendar sharing all in one app. All of this will work by just adding your personal account to the Microsoft Teams app.

A separate Family Safety app will also allow parents to set screen time limits, add content filters, and check on a child or senior’s location, including their activity while driving. Microsoft is also building a “Safe” feature that can store passwords for shared services such as Netflix. This new Family Safety app will support Xbox, Windows, and Android devices when it launches later this year, and you can already sign up for the preview on this page.

If the rebranding of Office 365 to Microsoft 365 won’t happen until next month, the company also discussed today new features coming to the main Office 365 apps. Word is getting a right panel offering writing suggestions, Excel is getting a new Money template, while PowerPoint is getting premium templates and a new Presenter Coach feature. The aforementioned features are rolling out today, though some of them will require a subscription.

Fix Groove Music Can’t play error with ease

Listening to music can be very relaxing, especially when you can listen to your favorite tracks. It can be very annoying when you can’t play a specific song because of an app error, as many Groove Music users complain.

The issues seem to manifest mostly on Windows 10 devices. Groove Music could not play tracks because of the following error message: Can’t play – Another app is controlling your sound right now.

However, users confirmed they were not using another app to play the respective tracks.

Microsoft managed to fix this issue in its latest Windows 10 builds and assures users that Groove will work smoothly. However, this is not the only problem Windows 10 phone owners encountered when trying to use the app.

Another frequent issue is the 0x1010036 error code:

i have uploaded all of the music i had on my lumia 920 to my onedrive – groove music fond the music but it doesn’t play most of the songs claiming error 0x1010036 – couldn’t find this error anywhere and since i am not in the US – it won’t let me sign in either – again very annoying with a phone i have had for less than a week.

A growing number of users also complain that Groove Music simply stops after playing two or three tracks:

I’ve been using the Groove Music App on my Windows 10 phone (550), and it stops playing after a few tracks when I physically have headphones plugged in, but it is perfectly fine when I connect with Bluetooth headphones.

I have to then turn on the screen, roll the track back and then select the next track. It’ll only seem to work for 2 or 3 tracks before I have to repeat the process.

The weird things are that it doesn’t happen if I connect Bluetooth headphones, or, if I’m selecting music within a single artist or album, it only seems to affect me when I play all or shuffle all.

If you’re bothered by the same issues, then we suggest you check out our article on how to fix Groove Music crashes and see if our fixes work for you.

Don’t worry, as nothing complicated is waiting for you. You just need to check your settings, clear the Temp folder, or use the System File Checker tool to fix corrupt files.

Even more, Groove Music issues should be less frequent now because Microsoft also fixed an issue where multiple UWPs might start crashing on launch after getting stuck on their splash screen.

Since Groove Music is a UWP app, it is possible it could have been affected by the aforementioned bug.

LiveKernelEvent Error Causes Windows 10/11 to Stop Working

Windows 10 users report that Patch Tuesday updates are causing Windows 10 to stop working correctly. Thousands of users viewed this forum thread dedicated to the annoying LiveKernelEvent error.

So, this error message is affecting a large number of computers. Reports show that the LiveKernelEvent error is prevalent for Windows 10 computers.

At the same time, users confirmed this problem appeared after they installed the latest cumulative updates for Windows 10.

LiveKernelEvent error plagues Windows 10 users, as we may all see:

I am going quietly nuts over the following. I am not using the beta versions of Windows 10 available in Windows Insider. The problem has occurred several times since last week […]

A problem with your hardware caused Windows to stop working correctly.
Problem signature
Problem Event Name: LiveKernelEvent
Code: ab […]

How can I fix LiveKernelEvent error?

1. Use hardware diagnostic tools

Is LiveKernelEvent error a hardware failure? Users often confirm that their computers have no hardware problems. However, you may also use the best hardware diagnostic tools for PCs to rule out this option.

2. Fire up SFC/DISM scans

While some say that the SFC/scannow command finds nothing and DISM scan health reports no problems, you could also try firing up SFC/DISM scans to confirm your case.

Any ideas on how to fix LiveKernelEvent error? When no hardware failure is involved, and SFC/DISM scans report no issues, you may look for signs of viruses or further inspect the latest Windows 10 cumulative updates.

Well, Event Viewer reports no critical errors, and the Windows 10 hardware troubleshooter doesn’t find anything wrong.

Since all these checks couldn’t pinpoint the exact root cause of this issue, Windows 10 users concluded that the problem occurred as a result of installing the latest Windows 10 cumulative updates.

This isn’t the only kernel error you’ll encounter, and we also covered LiveKernelEvent code 1a8 and 1b8 in one of our other guides.

It seems to be a bug – from MS!
I have seen it on several and different kinds of computers, and asked around some really qualified experts and they dont know anything about it, and if they knew they dont know how to fix it! Some therefore said it’s a bug. […]
The “thing” is – it dont occur every day, but, as it seems, randomly… Which could be a good indication for a bug! So – it’s up to MS to try to find what’s up! And a solution to this problem! Come on MS!

If, by any chance, you’ve come across a workaround for this LiveKernelEvent error, feel free to list the troubleshooting steps in the comments section below.

FIX: Source file not found on Windows 10/11 at apps install

Computer errors can occur once in a while, and some errors such as Source file not found can occur while installing certain applications on your Windows 10 PC.

This error can prevent you from installing new applications, therefore it’s important that you know how to properly fix it.


How do I fix source file not found errors?

1. Common source file not found errors

1.1 Check your installation media for damage

Sometimes this error occurs when you’re installing a new application from a DVD or a CD media. Apparently, this error can occur if your installation media is damaged, therefore be sure to clean it with a soft, lint-free cloth.

If you have more than one DVD drive, be sure that the installation media is inserted in the correct drive.


1.2 Disable your antivirus software

Certain antivirus tools can interfere with the installation process and cause Source file not found  error to appear. If you’re experiencing this error on your computer, we strongly suggest that you temporarily disable your antivirus and try to run the setup again.

If that doesn’t work, you might have to temporarily uninstall your antivirus and check if that solves the problem.


1.3 Install the software from your hard drive

If you’re getting this error while installing software from the installation media, you might want to consider installing it from your hard drive. To do that, you just need to copy the contents of the installation media and run it from your hard drive.

Simply open the installation media and select all files. Create a new folder on your PC and paste all the files from the installation media. Remove the installation media from your computer and start the setup process from your hard drive.

Keep in mind that this method doesn’t always work, but it might work for some applications.


1.4 Uninstall your DVD drive driver

  1. Press Windows Key + X to open Win + X menu and choose Device Manager from the list.
    source-file-not-found-device-1
  2. When Device Manager opens, locate the DVD driver, right-click it and choose Uninstall from the menu.
    source-file-not-found-device-2
  3. When the confirmation message appears, click OK.
  4. Now restart your PC.

If you can’t install software from your DVD drive, it might be because the driver is corrupt. One way to fix this problem is to uninstall your DVD driver and let Windows 10 install it again.

When your PC restarts the default driver should be installed. Try to start the installation again and check if the problem is resolved.


1.5 Be sure to extract the setup file from the archive

Many applications are distributed in archives because it’s the most convenient way to transfer large amount of files while providing some form of compression. However, this problem can occur if you try to start the installation directly from the archive without extracting your files.

Even though this is a more convenient way to install applications, many applications can’t be installed without extracting their files first. To properly install the application that comes in an archive you need to open the archive and extract all files to your PC.

After doing that, navigate to the extraction folder and run the setup file from there.


1.6 Unregister and reregister Windows Installer

  1. Press Windows Key + X and choose Command Prompt (Admin).
    source-file-not-found-cmd-1
  2. When Command Prompt opens, enter msiexec /unreg and press Enter to unregister the Windows Installer.
  3. After the command is executed, enter msiexec /regserver and press Enter. This will reregister Windows Installer.
  4. Close Command Prompt and check if the problem is resolved.

Many installations rely on Windows Installer service in order to run, and if there’s any problem with Windows Installer, you’ll have to unregister and reregister it.


1.7 Use Registry Editor

  1. Press Window Key + R and enter regedit.
  2. Press Enter or click OK.
    source-file-not-found-regedit-1
  3. When Registry Editor opens, navigate to the following key in the left pane:
    • HKEY_LOCAL_MACHINESYSTEMCurrentControlSetControlNlsCodePage
  4. In the right pane locate 1252 string and double click it.
  5. When Edit String window opens, change the Value data from c_1252.nls to c_1251.nls.
    source-file-not-found-regedit-2
  6. Click OK to save changes.
  7. Close Registry Editor and restart your PC.
  8. After your PC restarts, run the setup again and check if the problem is resolved.

Sometimes you can fix Source not found error simply by making few changes to your registry. We have to mention that modifying your registry comes with certain risks, therefore we advise you to back up your registry before making any changes to it.


1.8 Delete the installation folder and disable your antivirus

  1. Locate the Maya installation folder and delete it. By default, it should be C:autodesk.
  2. After deleting the folder, disable your antivirus software completely.
  3. Download Maya installer and extract it.
  4. Keep your antivirus disabled and run the installation again.

Users reported this error while installing Maya software, and according to them, the problem can be fixed by deleting the installation folder and disabling your antivirus.

After disabling the antivirus and recreating the installation folder, the software should be installed without any errors.


1.9 Clear the Temp folder

  1. Press Windows Key + R and enter %temp%.
  2. Press Enter or click OK.
    source-file-not-found-temp-1
  3. When the Temp folder opens delete all files from it.
  4. Open the Run dialog once again and enter %TEMP%.
  5. Press Enter or click OK.
    source-file-not-found-temp-2
  6. Delete all files from the Temp folder.

Applications will sometimes move installation files to the Temp folder on your PC. However, those files can become corrupt and prevent the installation from running.

If you’re having Source file not found error, you might be able to fix it by deleting everything from the Temp folder. After you delete all files from both Temp folders, try to start the installation again.


1.10 Disable User Account Control

  1. Press Windows Key + S and enter user accounts.
  2. Select User Accounts from the menu.
    source-file-not-found-uac-1
  3. Select Change User Account Control settings.
    source-file-not-found-uac-2
  4. Lower the slider all the way down to Never notify.
  5. Click OK to save changes.
    source-file-not-found-uac-3

User Account Control is a security feature designed to notify you whenever you make a change to your system. This feature can sometimes protect you from malicious software, but in most cases, users disable it because of its frequent notifications.

In fact, User Account Control can interfere with the installation process and cause Source file not found error to appear. After disabling User Account Control, restart your PC and check if the error is resolved.


1. 11 Run the setup as administrator

  1. Locate the setup file and right-click it.
  2. Choose Run as administrator from the menu.

In some cases, this error can occur if you don’t have the administrator privileges, but you can fix this problem with just a couple of clicks. In addition to running the setup as administrator, users are also suggesting to disable your antivirus and check if that solves the issue.


1.12 Install the latest Windows updates

Windows updates often fix many hardware and software errors, and if you’re having this problem on your PC, we strongly suggest that you check if you have the latest updates installed.

Simply navigate to the Windows Update section and download the latest updates for your PC. After installing the updates, the issue should be resolved.


2. Source file not found Asus Smart Gesture

2.1  Extract the setup file to a different location

Users reported that this error occurs when you extract Asus Smart Gesture files to your PC. This problem most likely occurs because the path to the setup file exceeds the limit set by Windows.

Since you can’t change the limit, you’ll have to change the path to the setup file. The simplest way to do that is to extract the installer files to the C: directory and run the setup file from there.

After doing that, you should be able to install Asus Smart Gesture without any problems.


2.2 Make sure that you’re using the correct setup file

Users reported this issue while trying to reinstall Asus Smart Gesture. According to them, they deleted the previous installation, but while trying to install the software, they got the Source file not found error.

According to users, to fix this problem be sure to run the Setup file and not the Setup TP driver file. After starting the correct setup process, the error should be resolved.


3. Source file not found disk1.cab error

3.1 Move the installation to a different partition

Users reported this error while installing League of Legends, and according to them, they managed to fix the problem simply by moving their installation to a different partition. To do this, simply change the installation directory from C to D while installing the game and the problem should be resolved.


3.2 Move the setup file to the root directory

Source file not found disk1.cab error can appear while installing SourceTree software on your PC. According to users, they managed to fix this issue simply by moving the setup file to the root directory of any hard drive partition.

Root directory is C:, D:, etc., so you can move it to any root directory and try to install it from there. Although this solution applies to SourceTree software, it can also be used for any other application.


3.3 Change the values in your registry

  1. Open Registry Editor and navigate to the HKEY_LOCAL_MACHINESoftwareMicrosoftWindows NTCurrentVersionWinLogonAllocateCDRoms key in left pane.
  2. Locate AllocateCDRoms value in the right pane and double click it. If the Value data is set to 1 change it to 0.
  3. Restart your PC and try to install the application again.

One way to fix this error is to make changes to your registry. Modifying the registry comes with certain risks, therefore be sure to create a backup of your registry before proceeding.


3.4 Copy all installation files to your hard drive

If you’re installing the application from your hard drive, be sure to copy all files from the installation media to your hard drive. If you have an application that requires two CDs for installation, be sure to copy files from both of them to your hard drive and try to run the setup.

Some users are also suggesting to copy files from both CDs to the same directory before trying to start the installation.


4. Source file not found error in Maya

4.1 Copy the file and change its extension

  1. Locate the problematic file.
  2. Go to the View tab and check the File name extensions option.
    source-file-not-found-extensions-1
  3. After that, create the copy of the problematic file.
  4. Keep the same name of the file, but change its extension from .bin to .dll.
  5. After doing that, try to install the software again.

According to users, you can fix this problem simply by finding the file mentioned in the error message and changing its extension. It seems that the file is present in the directory, but instead of having the .dll extension, it has .bin extension for some reason.

4.2 Remove the failed installation and disable your antivirus

According to users, both Norton and Avast can cause this problem to appear on your PC. To fix this problem you need to disable Norton or Avast and delete the failed installation.

After that, try to install the software again. Users reported problems with Super Anti-Spyware tool as well, therefore be sure to disable it if you have it installed.

By following these steps, you should be able to get rid of any Windows 10 errors caused by faulty or missing source files.

If you know of any other solution to this issue that we may have missed out on, let us know by leaving us a message in the comments section below.

Skype Closing Automatically on Windows 10: 5 Ways to Stop It

Skype is a popular video conferencing software for office and home use. Released in 2003, it was among the first in the category and was a favorite back then. Over the years, problems with Skype have increased, and for many, it’s now closing automatically in Windows 10.

Be it the case when Skype for Business closes immediately after opening or it doesn’t launch altogether, we have a solution that will work in every case. Let’s find out!

Why does Skype keep closing?

Here are a few reasons Skype for Business keeps crashing in Windows 10:

  • Bug in the installed version of Skype: Skype offers two download options for Windows users, one via Microsoft Store and the other through the official website. And there are times when the former doesn’t work as well.
  • Issues with Windows: In many cases, a buggy Windows update could lead to Skype crashing randomly.
  • Third-party conflicts: A third-party antivirus or security software is often found to be the reason apps crash in Windows 10, and the same could be the case with Skype.

What can I do if Skype is closing automatically on Windows 10?

Before we move to the slightly complex changes, here are a few quick things to try:

  • If your Skype status is set to Invisible, switch to Available and check whether the crashes stop. Also, if you get enough time, switch to Invisible and then back to Available.
  • Check for any available Windows updates and install them.
  • In case the problem is widespread, it’s likely a bug in the latest version of Skype, and you could switch to Skype Web for the time being until a patch is released.

If none work, the fixes listed next would.

1. Update Skype

1. For Skype downloaded from the website

  1. Launch Skype, click on the ellipsis, and choose Help and feedback.help and feedback
  2. Skype will not automatically check for available updates and download them.update skype to fix closing automatically windows 10
  3. If any are available, wait for the process to complete and restart the computer.

2. For Skype downloaded from Microsoft Store

  1. Open Microsoft Store, and click on the Library icon near the bottom left.library to fix skype closing automatically windows 10
  2. Now, click on Get updates.get updates
  3. If Skype gets updated, we recommend you restart the computer for the changes to come into effect.update to fix skype closing automatically windows 10

3. Update the graphics driver

  1. Press Windows + X to launch the Power User menu, and select Device Manager.device manager
  2. Expand Display adapters, right-click on the graphics adapter, and select Update driver.update driver to fix skype closing automatically windows 10
  3. Choose Search automatically for drivers and wait for Windows to install the best available version.search automatically for drivers
  4. Finally, restart the computer.

For some users, updating the graphics driver does the trick when Skype keeps closing automatically in Windows 10. Also, if an update can’t be found automatically, manually install the latest driver.

4. Reset Skype

  1. Press Windows + I to open Settings, and click on Apps.apps
  2. Select Skype from the list, and click on Advanced options.advanced options to fix skype closing automatically windows 10
  3. Scroll down and click Reset.reset to fix skype closing automatically windows 10
  4. Again, click Reset in the confirmation prompt.reset
Note icon NOTE
Once you reset the Skype application, you will lose all the data in the app. So our suggestion is for you to take a backup of your user data before starting the process of resetting.

After resetting Skype, check whether it’s still closing automatically in Windows 10. In all likelihood, things should work fine, as they did for others.

5. Download the desktop version of Skype

When nothing else works, there’s always the option to switch to Skype for Desktop, a downloadable version available on the official website. It’s found to be less affected by errors and issues, so give it a try.

Before you do, check if the Microsoft Store version of Skype is installed, and uninstall the program. Now, navigate the following path, and rename the Skype for Desktop folder to Skype for Desktop_old (Username is the active profile name):C:\Users\Username\AppData\Roaming\Microsoft\Skype for Desktop

Now, download Skype for Desktop, and it should work just fine.

Tip icon Tip
Several Windows 10 S mode users also reported the problem, and switching out of S mode fixed things, so you can try that. Remember, you can’t revert the change, so make sure you first try the other solutions here.

One of these solutions should help when Skype is closing automatically in Windows 10. These are all verified and confirmed by other users to work, so make to try them all.

Besides, find out how you can access Skype directly from the browser and get rid of all app-related issues. And if you are interested, check the best Skype call recording software and get one today!

Tell us which fix worked for you in the comments section below.

FIX: The specified account already exists Skype error

The specified account already exists error is one that pops up for some Skype users. That error message pops up when some users try to update Skype. Consequently, the users can’t update their Skype software. Does that error message ring a bell? If so, here are a few tips for fixing the specified account already exists error.

How do I fix Specified account already exists Skype error?

  1. Reset the Skype App
  2. Reinstall Skype
  3. Turn Off Antivirus Software
  4. Check the Windows Firewall Settings

1. Reset the Skype app

  1. Open Cortana’s search box by clicking its Type here to search taskbar button
  2. Then enter apps in the search box, and select to open Apps & features.
  3. Enter Skype in the app search box as shown directly below.
  4. Select Skype and click Advanced options to open the options shown directly below.

  5. Press the Reset button, and click Reset again to confirm.

— RELATED: FIX: Oops, we have detected an issue on Skype


2. Reinstall Skype

  1. To uninstall Skype, press Start menu button.
  2. Click All apps on the Start menu to open the menu’s app index.
  3. Right-click Skype on the Start menu and select its Uninstall option.
  4. Then press the Uninstall button to confirm.
  5. Before reinstalling Skype, open this page and click Download to save the Program Install and Uninstall troubleshooter.
  6. Open the folder that you saved the troubleshooter to.
  7. Then open the Program Install and Uninstall troubleshooter (MicrosoftProgram_Install_and_Uninstall.meta) shown in the window directly below.
  8. Click Advanced and select Apply repairs automatically.
  9. Then press the Next button.
  10. Select the Installing option.
  11. Then open this page, and press the Get Skype for Windows 10 button. Or click the arrow on the button to select an alternative platform.
  12. Reinstall Skype with its installer.

If resetting Skype doesn’t do the trick, reinstall the app. Some users have confirmed that reinstalling Skype and utilizing the Program Install and Uninstall troubleshooter fixes the The specified account already exists error.


3. Turn off anti-virus software

Third-party anti-virus software can interfere with software updates. To ensure that isn’t the case, temporarily disable your anti-virus package before updating Skype.

Most anti-virus utilities include a disable or turn off option on their system tray context menus. If you can’t select a disable option on the utility’s context menu, open its window and select a disable or turn off option from there.

— RELATED: 10 best Skype call recording apps and software to use


4. Check the Windows Firewall settings

  1. In addition, check that Windows Firewall isn’t blocking Skype. To do that, click the Type here to search button.
  2. Enter Windows Firewall in the search box.
  3. Select Allow an app through Windows Firewall to open the window shown directly below.
  4. Press the Change Settings button.
  5. Then scroll down to Skype and select all its check boxes if they’re not checked.
  6. Click the OK button.

One of those resolutions might fix Skype so that you can update it once again. Remember that older Skype versions aren’t going to work after September 2018.

So, it’s essential that Skype is update. You can check out this post for further Skype update details.

[wl_navigator]

FIX: Oops, we have detected an issue on Skype

Skype for Windows 10 is far from a good app. Lots of users were glad that the old win32 Skype version was getting a modern look. However, it seems that the app trades the functionality and stability for the contemporary instant messenger looks.

One of the common errors is as follows: Oops, we have detected an issue. Please exit and restart Skype. Of course, after the restart, the affected users weren’t able to resolve the issues.

Hopefully, one of these steps will. Check our troubleshooting list and we just might get in the clear with Skype for Windows 10.

How can I fix Oops, we have detected an issue error in Skype?

  1. Run app troubleshooter
  2. Update display and camera drivers
  3. Reset Skype and Photos settings
  4. Reinstall the app
  5. Grant Skype access to camera and microphone
  6. Disable antivirus temporarily
  7. Try Skype Classic

1. Run app troubleshooter

  1. Right-click Start and open Settings.
  2. Choose Update & Security.oops we have detected an issue skype
  3. Select Troubleshoot from the left pane.
  4. Expand Store Apps troubleshooter and run it.oops we have detected an issue skype

2. Update display and camera drivers

  1. Right-click Start and open Device Manager.
  2. Expand Display adapters.
  3. Right-click on your graphics card and choose Update from the contextual menu.
  4. Do the same for Imaging devices > camera.oops we have detected an issue skype
  5. Restart your device and try using Skype again.

Now, once we confirm that the software is up to the task, let’s confirm that the hardware is closely following. Lots of users reported black screen flashing which led to the error at hand.

This unwelcome sequence mostly appeared during the video calls, which leads us to believe that something’s indeed wrong with your drivers, so updating them is highly recommended.

Updating drivers can be a tedious process if you’re doing it manually, so it’s better to use an automated solution that will update all your drivers automatically with a single click.

Thus, it will keep your system safe from permanent damage by downloading the wrong driver version.

More so, with an online database that contains over 18 million drivers, the program will manage obsolete drivers efficiently and optimize your devices.

Finally, you can definitely improve your driver devices and the overall system by choosing this driver automated support.

⇒ Get Fortect Driver Updater

3. Reset Skype and Photos settings

  1. Open Settings.
  2. Choose Apps.oops we have detected an issue skype
  3. Under the Apps & features, search for Skype and expand it.
  4. Click on Advanced options.oops we have detected an issue skype
  5. Scroll down and click Reset.oops we have detected an issue skype
  6. Repeat the same procedure for Microsoft Photos.

4. Reinstall the app

  1. Open Settings.
  2. Choose Apps.oops we have detected an issue skype
  3. Under the Apps & features, search for Skype and expand it.
  4. Click Uninstall.oops we have detected an issue skype
  5. Open the Microsoft Store and search for Skype.
  6. Install Skype.oops we have detected an issue skype

If the previous step fell short, let’s give reinstallation a try. Even though this is a far-fetched solution (reset is basically a reinstall), we should give it a try. At least, until we deplete our options.

5. Grant Skype access to camera and microphone

  1. Open Settings.
  2. Choose Apps.oops we have detected an issue skype
  3. Under the Apps & features, search for Skype, expand it and open Advanced options.oops we have detected an issue skype
  4. Under Permissions, toggle on Camera and Microphone.oops we have detected an issue skype

Since we mentioned the possible issue with Microsoft Photo integration, the same problems might occur in regards to hardware.

That’s why it’s important to confirm all the required permissions are granted to two associated devices: camera and microphone.

Even though those should be granted by default, some third-party software (or Windows Security) might have revoked them.

6. Disable antivirus temporarily

There’s no third-party tool that has a larger impact on the system than an antivirus. Some antivirus solutions come with privacy protection tools that will completely block access to a camera.

We’re aware that disabling these isn’t exactly preferable. However, for the time being, try disabling your antivirus temporarily and look for changes.

Also, disable all background apps which might take control of the camera. This might cause Skype crashes, as well.

If even this won’t help and you’re still unable to use Skype without being interfered by the “Oops, we have detected an issue. Please exit and restart Skype” error, the final step is the only viable solution we know of.

7. Try Skype Classic

  1. Follow the steps in the Solution 3 to uninstall the app.
  2. Click this link to start downloading Skype from the official site.
  3. Install it and sign in with your account. Don’t forget that your account email password is the Skype password, as well.
  4. Follow the instructions to configure Skype. We recommend disabling the auto-start option as it can slow down the system.

Finally, the solution which should deal with all your issues. If you’re not particularly fond of the new design and looking for a reliable option, the classic version of Skype for desktop is still available.

We’re not exactly attached to enforced novelties that fail to work and the Skype classic is just fitting right. Skype never was an instant messenger but rather a VoIP service and that’s what users mostly need.

Are you having additional problems with Skype? If so, be sure to check our Skype hub for more in-depth guides.

With that, we can conclude this article. Hopefully, you’ve found some resolution for your error. In case you have anything to add to a list or ask a question, feel free to do so in the comments section below.
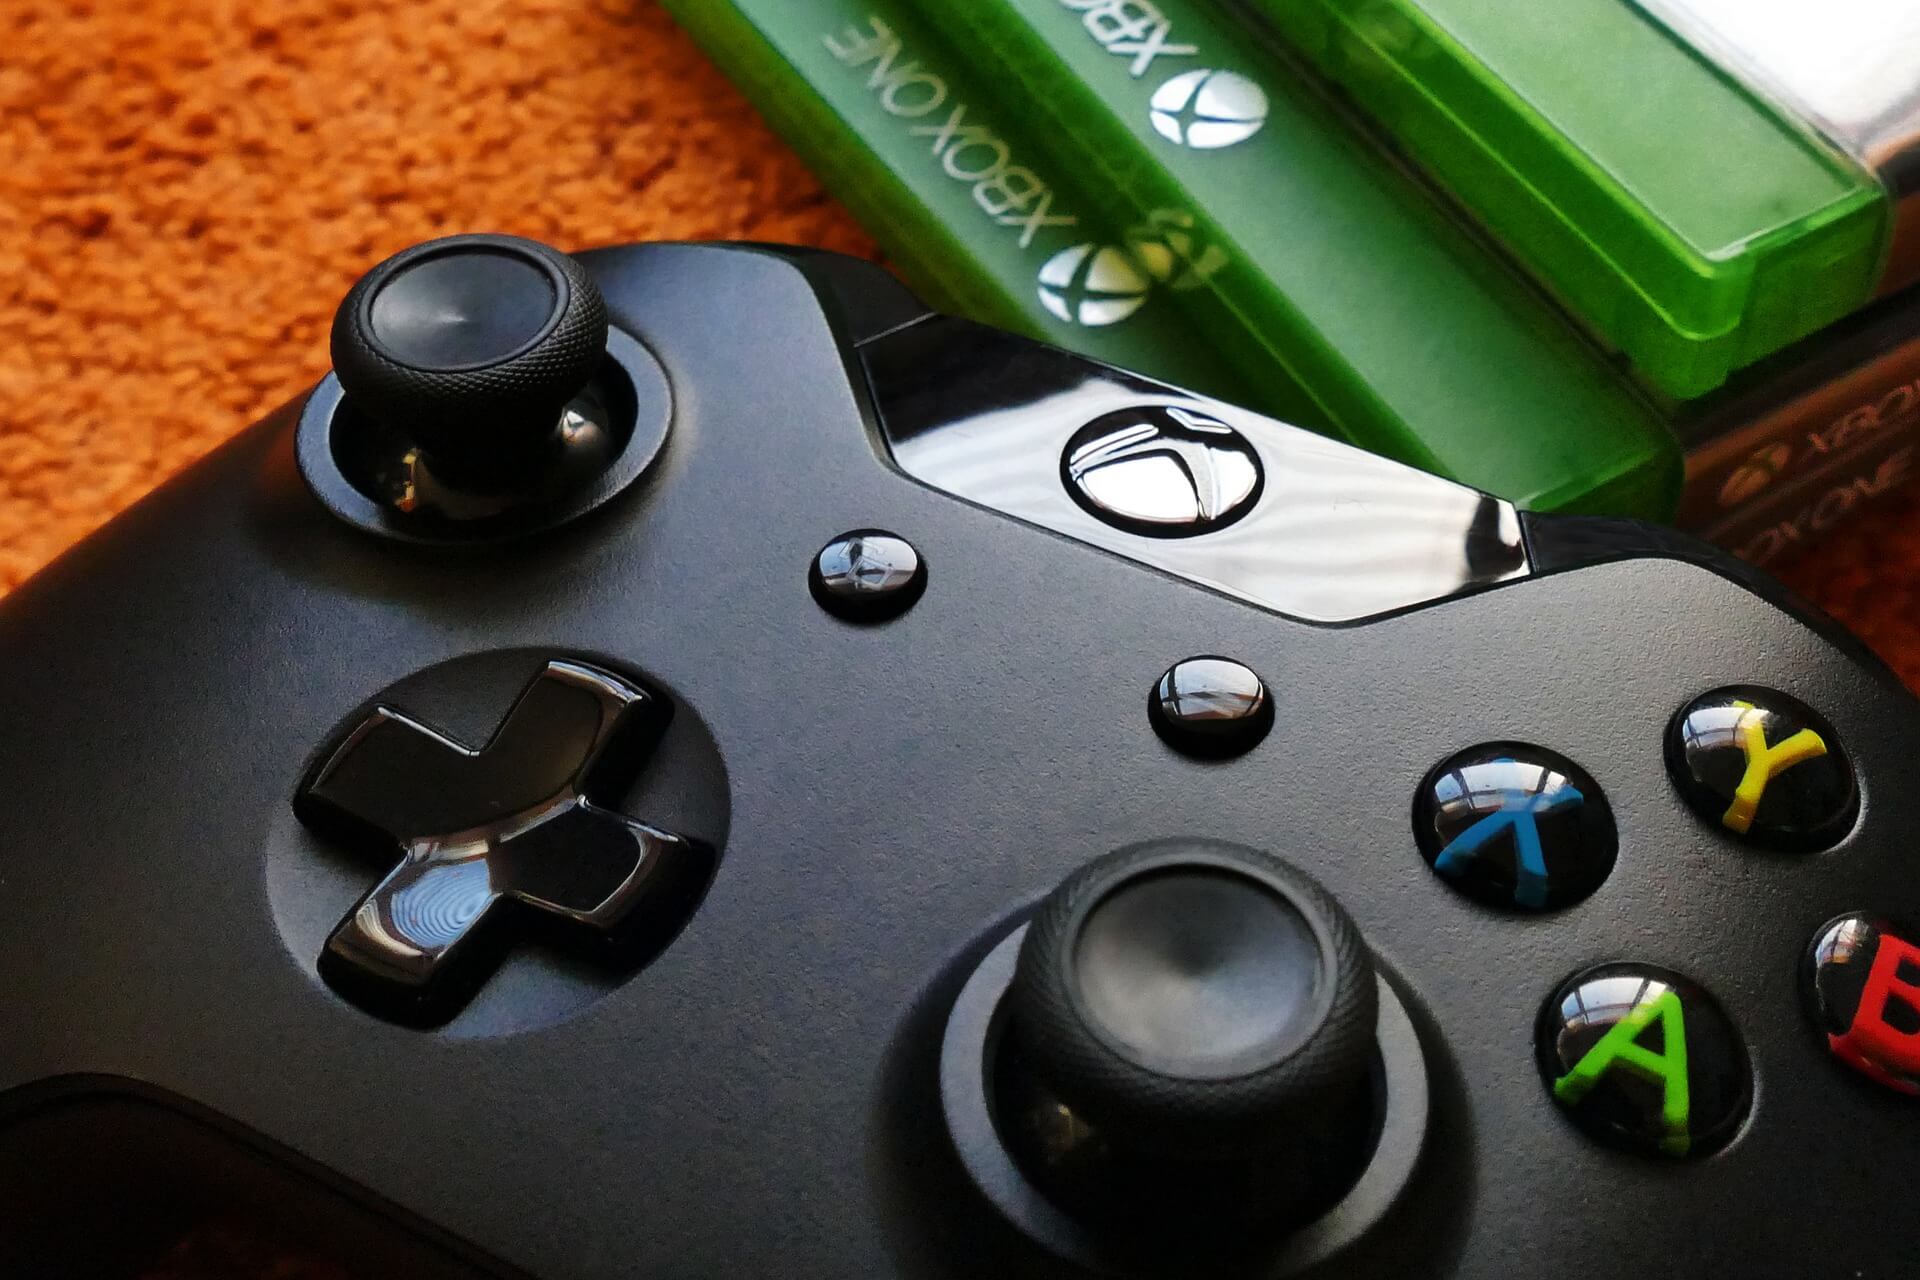
Fix: eight fixes to ERROR_IMAGE_SUBSYSTEM_NOT_PRESENT

System errors can occur on almost any PC, and some users reported ERROR_IMAGE_SUBSYSTEM_NOT_PRESENT error on their PC. This error usually comes with The subsystem needed to support the image type is not present message, and today we’re going to show you how to fix it.


How do I fix the ERROR_IMAGE_SUBSYSTEM_NOT_PRESENT error?

How to fix ERROR_IMAGE_SUBSYSTEM_NOT_PRESENT

1. Copy 32-bit version of Imagex

According to users, this error occurs when using Imagex. To fix the problem, you need to copy 32-bit version of Imagex from Windows AIK to the ISO folder instead of AMD64 version. After doing that, the problem should be completely resolved.


2. Install the latest updates

  1. Press Windows Key + I to open the Settings app.
  2. Navigate to the Update & security section.
  3. Click on Check for updates button.
    • If any updates are available, Widows will download them automatically in the background.

Windows 10 is a solid operating system, but it has few bugs and glitches. To ensure your PC is bug-free and up to date, it’s recommended to install the latest Windows updates.

By default, Windows 10 downloads these updates automatically, but sometimes you can skip an important update due to certain errors. After installing the updates, check if the problem still persists.


3. Check your antivirus

Windows 10 comes with Windows Defender that works as a default antivirus, but most users tend to install third-party tools because they offer more features.

Even though these tools offer more features, sometimes they can interfere with your system and cause this and other errors to occur. To fix this problem, it’s advised that you check your antivirus configuration and disable the problematic features.

If you can’t find the problematic feature, you might want to try disabling your antivirus tool completely. As previously mentioned, Windows 10 comes with Windows Defender so your PC will remain safe even after you disable your antivirus.

If disabling the antivirus solves the issue, you might want to try finding the problematic feature and disabling it. In addition, you can also try switching to a different antivirus software.

Lastly, you can also try to remove your antivirus software and check if that fixes the problem. Keep in mind that many antivirus tools tend to leave certain files and registry entries behind even after you remove them.

To make sure that all related files are removed, we recommend to use a dedicated removal tool. Most antivirus companies offer these tools for their software, so be sure to download one for your antivirus.

After you remove your antivirus software, check if the issue still persists. If not, you might want to consider switching to a different antivirus software or updating your antivirus to the latest version.


4. Check your PC for malware

Several users reported that this error was caused by malware infection. Malware infections can be sometimes hard to deal with so you might want to try using several different tools to remove the malware. Alternatively, you can also fix the problem by using a special antivirus software such as Bitdefender.

5. Perform an SFC scan

  1. Press Windows Key + X to open Win + X menu.
  2. Select Command Prompt (Admin) from the menu.
    • If Command Prompt isn’t available, you can also use PowerShell.
  3. Once Command Prompt opens, enter sfc /scannow and press Enter.
  4. Wait for the scan to complete.

Sometimes these types of errors can occur due to corrupted Windows files. However, you might be able to fix this problem by running an SFC scan.

This scan can take a while, so try not to interrupt it. After the scan is finished, check if the problem still appears.


6. Run DISM scan

If you can’t run SFC scan or if the SFC scan can’t fix the problem, you might want to try using DISM scan instead. To do that, follow these steps:

  1. Start Command Prompt as administrator.
  2. When Command Prompt opens, enter the following commands:
    • DISM /Online /Cleanup-Image /CheckHealth
    • DISM /Online /Cleanup-Image /ScanHealth
  3. If any of these two commands report any corruption, run DISM /Online /Cleanup-Image /RestoreHealth command to repair your system.
    • Keep in mind that this process can take more than 20 minutes, so be sure not to interrupt it.

If you’re using Server Core and you’re getting this error, you might be able to fix it by running DISM.EXE /online /enable-feature /featurename:ServerCore-WOW64 command in Command Prompt.


7. Use System Restore

  1. Press Windows Key + S and enter system restore.
  2. Choose Create a restore point from the menu.
  3. System Properties window will now appear.
  4. Click on System Restore button.
  5. When System Restore window opens, select Choose a different restore point and click on Next.
  6. Check Show more restore points option and select the desired restore point.
  7. Click the Next button to proceed.
  8. Follow the instructions on the screen to complete the restoration process.

If this error message started appearing recently, you might be able to fix it by restoring your system. This is rather simple and you can do it by using System Restore.

Thanks to this feature, you can easily restore Windows to the previous state and fix any recent problems. Keep in mind that this feature can cause you to lose recently saved files, so be sure to back up your important data.

After restoring your PC, check if the error message still appears.


8. Reset Windows 10

  1. Open the Start Menu and click the Power button.
  2. Press and hold the Shift key and choose Restart from the menu.
  3. Select Troubleshoot > Reset this PC > Remove everything.
    • You might be asked to insert Windows 10 installation media, so be sure to have it ready.
  4. Select your version of Windows and choose Only the drive where Windows is installed > Just remove my files.
  5. You’ll see a list of changes that reset will perform.
  6. Click Reset button to start.
  7. Follow the instructions on the screen to complete the reset process.

Several users reported that they managed to fix this error by resetting Windows 10. We have to warn you that this solution will remove all files and apps from your system drive, so use it only if other solutions can’t fix the problem.

Before you start the reset process it’s highly recommended to back up your important files. In addition, you might need a Windows 10 installation media, so be sure to create it.

After resetting your PC the problem won’t appear anymore. Once again, this solution will remove all your files and apps, so use it as a last resort.


How to fix The subsystem needed to support the image type is not present BIOS update

  1. Change your BIOS settings
  2. Enter BIOS. If you don’t know how to do that, check your motherboard manual for detailed instructions.
  3. Now look for SATA OPERATIONS setting and set its value to ATA.
  4. Save changes and exit BIOS.

According to users, this error message can start appearing after updating BIOS. It seems that the cause of this problem was a certain setting in BIOS, and in order to fix it you need to make few changes.

Users reported that setting SATA OPERATIONS to AHCI can cause this problem, but after changing the value to ATA the error message should be resolved.


2. Enable / disable SecureBoot

SecureBoot is a useful feature that will prevent malware from infecting your PC. However, this feature can also cause certain problems when trying to run 32-bit program in 64-bit WinPE environment.

If you’re getting this error while trying to run a 32-bit application, be sure to turn off SecureBoot in BIOS. Alternatively, you can choose to use Legacy Boot instead. To see how to do that, be sure to check your motherboard manual.

On the other hand, if you’re trying to run 64-bit app, be sure to turn on SecureBoot option. Alternatively, you can also rename 32-bit boot.wim file and copy Boot_x64.wim to its directory. To complete the process, rename the Boot_x64.wim to Boot.wim.

Keep in mind that this is an advanced solution, so be extra cautious while performing it. If you’re not familiar with WinPE and .wim files, you might want to skip this solution.


The subsystem needed to support the image type is not present message can cause certain problems on your PC, but we hope you managed to solve it by using one of our solutions.

[wl_navigator]

FIX: This update is not applicable to your computer error

Are you getting a The update is not applicable error when you attempt to install an update on Windows 10? If so, there are a variety of potential factors and fixes.

It could be that you have an incompatible desktop or laptop, that the update is superseded, that an update prerequisite is missing or something else.

This is how you can fix Windows updates that aren’t applicable.

This update is not applicable to your computer error message can prevent you from keeping your system up to date. Speaking of this error, here are some similar issues that users reported:

  • This update is not applicable to your computer – This error can appear on almost any version of Windows. Although our solutions are optimized for Windows 10, most of them can be applied to older versions of Windows.
  • This update is not applicable to your system – This is just a variation of this error, and if you encounter it, be sure that you have all the prerequisite updates installed. In addition, be sure to check if you’re trying to install the update that matches your system architecture.

How do I fix this update is not applicable to your computer?

1. Check the Update Package Matches Your Windows Version

First, note that updates are built for more specific platforms. It might be the case that the update you’re trying to install isn’t compatible with Windows 10.

So double-check the update is for Windows 10 and not another platform. The Microsoft Update Catalog always includes OS details for updates in the Products column.

2. Check the Update Package Matches Your Windows Processor Architecture

If the update is for Windows 10, you should also check the other system requirements for it. The updates are also published for more specific CPU architecture, which is usually stated within the title.

For example, if the update title includes x86 it’s for x86 CPU architecture and isn’t compatible with x64 Windows systems. You can check your CPU architecture as follows:

  1. Click the Cortana button on Windows 10 taskbar and enter ‘system’ into the search box.
  2. Then click System to open the window in the snapshot directly below.
    This update is not applicable to your computer Windows 7
  3. Your CPU architecture is listed as System type. So System type tells you what the CPU architecture is, and now you can check if that matches the Windows update.

If you’re interested in the differences between 32-bit and 64-bit apps, take a quick look on this article.

3. Check the Update History

If you’re sure the update matches both Windows platform and architecture, check that it hasn’t already been installed. Another update might have had the same payload. You can check your update history as follows:

  1. Enter View installed updates in the Cortana search box.
  2. Select View installed updates listed in Cortana to open the window below.
  3. This shows you a list of your previous Windows updates. So you can check if the update has already been added to Windows from there.
    This update is not applicable to your system
  4. Alternatively, you can check update history with the Settings app. Enter ‘update history’ in the Cortana search box and select Check for updates to open the window below.
    This update is not applicable to your computer server 2008 r2
  5. Click Update history to open a list of your Windows updates as below.

This update is not applicable to your computer Windows 8.1
So you can check if your update is already listed there. Another thing to check there is if a required prerequisite update for a Windows update is missing.

If that’s so, install the prerequisite update first and then add the other Windows update.

If you’re having trouble opening the Setting app, take a look at this article to solve the issue.


Disaster strikes! Your Check for updates button is missing. No worries, you’ll get it back with these simple steps!


4. Run the Windows Update Troubleshooter

Windows has a variety of troubleshooters, and one of those can fix Windows Update. So if an update is not applicable, running the Windows Update troubleshooter might fix it.

This is how you can fix updates with the troubleshooter:

  1. Open Cortana and enter troubleshoot into its search box.
  2. Select Troubleshooting to open the window below.
    This update is not applicable to your system
  3. Click the Fix problems with Windows Update option to open the window below.
    This update is not applicable to your computer server 2012 r2
  4. Click Advanced and select Apply repairs automatically if it’s not selected.
  5. Select Run as administrator and then click Next to run the scan and fix Windows Update.

If the Troubleshooter stops before completing the process, fix it with the help of this complete guide.


5. Update Windows 10 With the Most Recent KB Update

  1. If Windows hasn’t updated with the most recent KB update, consider installing that first. Open this web page that includes a list of most recent Windows 10 updates.
  2. Then you can find the most recent Windows 10 KB update, which is usually included at the top of the list on that page. Note down the KB number for the update.
  3. Open the Microsoft Update site, and input the KB number into the search box.
  4. Then click the update’s title to save it to Windows.
  5. Click Open to add the KB update to Windows 10.

6. Run DISM and SFC Tools in Command Prompt

Windows has a couple of file scan tools that could feasibly fix update errors. They are the DISM and SFC tools you can run with the Command Prompt. This is how you can fix Windows Update with SFC and DISM:

  1. Press Windows Key + X to open Win + X menu. Now choose Command Prompt (Admin) from the list. If Command Prompt isn’t available, you can also use PowerShell (Admin).
    This update is not applicable to your system
  2. Then enter DISM.exe /Online /Cleanup-Image /RestoreHealth /Source:C:RepairSourceWindows /LimitAccess in Command Prompt and press Return. It might need five to 10 minutes for this scan to finish.
  3. When DISM is done, enter sfc /scannow into the Command Prompt and press Return.
  4. Close the Command Prompt and restart Windows when the SFC scan is done.

If you’re having trouble accessing Command Prompt as an admin, then you better take a closer look on this guide. There’s a similar article about scannow problems and how to fix them.


It seems that everything is lost when DISM fails on Windows 10? Check out this quick guide and get rid of the worries.


7. Change your system locale

According to users, if you’re unable to install certain updates due to This update is not applicable to your computer message, you might want to consider changing your system locale. Sometimes certain updates can encounter issues if the system locale isn’t set to English.

However, you can always fix this issue simply by changing your locale manually. To do that, you just need to follow these simple steps:

  1. Press Windows Key + S and enter control. Now select Control Panel from the list.
    This update is not applicable to your computer server 2008 r2
  2. When Control Panel opens, navigate to Region.
    This update is not applicable to your computer 8.1
  3. Make sure that Format is set to English (United States).
    This update is not applicable to your system
  4. Now navigate to Administrative tab and click on Change system locale.
    This update is not applicable to your computer server 2012 r2
  5. Set Current system locale to English (United States) and save changes.
    This update is not applicable to your computer Windows 7

After changing the locale to English, try to install the update again. After the update is installed, you can revert locale settings to the desired values.


You can’t open Control Panel on Windows 10? Take a look at this step-by-step guide to find a solution.


8. Use System Restore

If you can’t install an update due to This update is not applicable to your computer message, you might be able to solve the issue by using the System Restore.

In case you’re not familiar, System Restore is a useful feature that allows you to restore your PC to an earlier state. To do that, just follow these steps:

  1. Press Windows Key + S and enter system restore. Choose Create a restore point from the list of results.
    This update is not applicable to your system
  2. Now click the System Restore button.
    This update is not applicable to your computer server 2008 r2
  3. System Restore will now start. Click Next to proceed.
    This update is not applicable to your computer Windows 7
  4. If available, choose Show more restore points option. Now select the desired restore point from the list and click Next.
    This update is not applicable to your system
  5. Follow the instructions on the screen to complete the restoration process.

Once your system is restored, be sure to install the necessary updates and then try to install the desired update.

If you want to know how to create a restore point and what are the benefits of having one, take a look at this dedicated guide.


If System Restore isn’t working, don’t panic. Check this useful guide and set things right once again.


9. Perform an in-place upgrade

If you can’t install the desired update due to This update is not applicable to your computer error, you might be able to circumvent the issue by performing an in-place upgrade.

This method will force Windows 10 to upgrade using the Windows 10 installation media. However, all your files and registry entries should remain intact. To perform an in-place upgrade, do the following:

  1. Download and run Media Creation Tool.
  2. When Media Creation Tool opens, select Upgrade this PC now.
  3. Setup will start preparing. This can take a bit so be patient.
  4. Now you’ll be asked to download important updates. This option isn’t mandatory, but it’s recommended to perform it. If you’re in a hurry, you can always skip the updates and install them later.
  5. Now you’ll see Ready to install screen. Make sure to click on Change what to keep option.
  6. Select Keep personal files and apps and click Next.
  7. The installation will now start. Follow the instructions on the screen to complete the installation.

Can’t run the Windows Media Creation Tool? Don’t worry, we’ve already covered this issue in this amazing guide.


Once the upgrade process is finished, you’ll have a fresh copy of Windows 10, and all your files and applications will be preserved. Keep in mind that in some cases you won’t have Change what to keep option in Step 5.

If that happens, you won’t be able to keep your personal files and applications, and you’ll perform a clean install using this method.

So those are some potential fixes for the update is not applicable message. First, check the update’s system details beforehand; but if it’s compatible run the Windows Update troubleshooter and Command Prompt file scan tools.

If you have any other questions, feel free to leave them in the comments section below and we’ll be sure to take a look.

FIX: Emerging issue 67758 in Windows 10/11

Windows 10 relies heavily on Universal apps, but sometimes these apps can’t run properly on your PC. Users reported that Emerging issue 67758 prevents apps from running, so let’s see how to fix this error.

But first, here are some more similar issues you can resolve with the same solutions:

  • Emerging issue 6619 – This is another error code that basically tells you the same thing as the error code 67758. So, you can use the same solutions here.
  • Windows 10 settings not opening – Out of all the Windows 10 app, the emerging issue 67758 most commonly affects the settings app.
  • PC settings not working Windows 10 – Not being able to access the Settings app will make it harder for us to resolve the problem. But there are a few tricks you can try.
  • Windows 10 settings icon not working – Emerging issue 67758 may even cause the Settings app icon to disappear.

How do I fix emerging issue 67758 on Windows 10?

Table of contents:

  1. Using Microsoft’s troubleshooter
  2. Use SFC and DISM to repair your installation
  3. Fix emerging error using PowerShell
  4. Change the DNS
  5. Delete the local cache
  6. Use System Restore

1. Using Microsoft’s troubleshooter

Microsoft is aware of this problem, and they already released a troubleshooter that addresses this issue. To fix this problem, find and download the troubleshooter for Emerging issue 67758 and run it. A number of users reported that it worked for them, so be sure to give it a try.

2. Use sfc and DISM to repair your installation

  1. Start Command Prompt as administrator. You can do that by pressing Windows Key + X and choosing Command Prompt (Admin) from the menu.
    emerging-issue-67758-admin
  2. When Command Prompt opens, enter sfc /scannow and press Enter. Wait for the process to complete and don’t interrupt it.
    emerging-issue-67758-scannow
  3. After that, enter dism/online/cleanup-image/restorehealth and press Enter. Wait for the process to finish.
    emerging-issue-67758-dism
  4. Once the DISM scan is completed, restart your PC.

Bear in mind that you don’t have to run both sfc and DISM scan. DISM scan is designed to run if sfc can’t fix the problem, so be sure to check if the issue is resolved after running sfc scan.

3. Fix emerging error with PowerShell

According to users, you might be able to fix this problem by running PowerShell. We have to warn you that PowerShell is a powerful tool and if you’re not careful you can cause problems with your operating system. To start PowerShell, do the following:

  1. Press Windows Key + S and enter PowerShell. Right-click PowerShell from the list of results and choose Run as administrator.
    emerging-issue-67758-powershell
  2. When PowerShell starts, enter Get-AppXPackage -AllUsers | Foreach {Add-AppxPackage -DisableDevelopmentMode -Register “$($_.InstallLocation)AppXManifest.xml”} and press Enter to run it.
  3. Wait for the command to complete, and then close PowerShell.

After the PowerShell command has been completed, check if the issue is resolved.

4. Change the DNS

  1. Press Windows Key + X to open Power User Menu and select Network Connections.
    emerging-issue-67758-network-connections
  2. When Network Connections window opens, locate your network connection, right-click it and choose Properties.
    emerging-issue-67758-properties
  3. Select Internet Protocol Version 4 (TCP/IPv4) and click the Properties button.
    emerging-issue-67758-ipv4-properties
  4. When the Properties window opens, select Use the following DNS server addresses and enter 8.8.8.8 as the Preferred DNS server and 8.8.4.4 as Alternate DNS server. Alternatively, you can use 208.67.222.222 as Preferred and 208.67.220.220 as an Alternate DNS server.
    emerging-issue-67758-dns
  5. After you’re done, click OK to save changes.

Few users are suggesting to change your MAC address so that it matches your actual MAC address. To do that, follow these steps:

  1. Open Command Prompt as administrator and enter ipconfig /all. A list of data will appear. Locate Physical Address and write it down. In our example, it was 62-DA-F5-C1-00.
  2. Open Network Connections, locate your network, right-click it and choose Properties.
  3. Click the Configure button.
    emerging-issue-67758-configure-network
  4. Go to the Advanced tab and select Network Address. Select the Value option and enter the MAC address that you got in step 1. Be sure not to enter any dashes.
    emerging-issue-67758-mac
  5. Once you’re done, click the OK button.

5. Delete the local cache

Some users claim that deleting the local cache fixes the problem, and in order to do that follow these steps:

  1. Press Windows Key + R and enter %localappdata%. Press Enter or click OK to run it.
    emerging-issue-67758-local
  2. Go to PackagesMicrosoft.WindowsStore_8wekyb3d8bbweLocalCache folder.
    emerging-issue-67758-local-cache
  3. Delete all files and folders from the LocalCache folder and restart your PC.
  4. After your PC restarts check if the problem is resolved.

6. Use System Restore

  1. Press Windows Key + S and enter restore. Select Create a restore point.
    emerging-issue-67758-restore
  2. Click the System Restore button and then click Next.
    emerging-issue-67758-system-restore
  3. Select the restore point you wish to use and click Next to restore your PC.
    emerging-issue-67758-restore-point

Emerging issue 67758 can cause many problems with Universal apps on your Windows 10 PC, but you should be able to fix it by using one of our solutions.

FIX: The content of this message is unsupported Skype error

If you’re getting the annoying The content of this message is unsupported Skype error, read this article to learn how to fix it.

This error message usually occurs when users initiate a video call. After about 60 seconds the call fails with The content of this message is unsupported error. It is worth mentioning that chat functionality is not affected.

This error affects all platforms, including Windows 10, Xbox, Android, iOS Skype, and it happens across the board even with Echo/Sound Test. Strangely enough, this problem is prevalent for Skype Home users, while Skype for Business seems to be immune to it.

Here’s how one user describes this problem:

In the last few days, when I try to initiate a video call with a friend using Skype Windows 10 App […], there is not answer and when the call stops ringing it ends with The content of this message is unsupported in my chat window. Is there a solution to this? What is going wrong?

How do I fix The content of this message is unsupported Skype error?

Download and install the Classic version of Skype

Many users confirmed that the best way to fix this problem is to download and install the classic version of Skype. Go to Skype’s download page and scroll down to the middle of it. You should see a blue rectangle informing you that Skype for Windows 10 is already in your computer but if you’d like to use the classic version of Skype you should click the download button.

This version is a desktop app style interface that also comes with menu bar and an annoying ad banner. You should also know that it uses a lot more resources than the newer version. But the good news is that this version works for users where the newer version fails. All the other functionalities are available.

The content of this message is unsupported error can be problematic, but we hope that this article helped you fix it.

[wl_navigator]

FIX: RAVBg64.exe tries to use Skype

Many users use Skype on daily basis, but issues with Skype can sometimes appear. Speaking of issues, users report that RAVBg64.exe is trying to use Skype whenever it starts. This isn’t a serious problem, but it can be rather annoying, so today we’re going to show you how to fix it.

What can I do if RAVBg64.exe tries to use Skype?

Many users think that RAVBg64.exe is a virus, but in fact this file is related to your Realtek Audio driver, so it’s perfectly safe to use.

Even if you receive a message that this file is trying to access Skype, there’s no need to worry since this file isn’t malicious at all. Now that we know what this file is, let’s see how to fix this problem.

1. Install the latest version of Skype

All applications have some bugs, and Skype is no exception. If you’re getting a message telling you that RAVBg64.exe is trying to access Skype, you might want to check for updates.

Most bugs are fixed with updates, so if you’re having this problem, be sure to check if you have the latest version of Skype installed. If not, update it and check if the issue still persists.


2. Reinstall Skype

  1. Make sure that Skype is completely closed.
  2. Open the Settings app. You can do that quickly by pressing Windows Key + I.
  3. Now navigate to Apps section.
  4. List of all installed applications will now appear. Locate Skype on the list and select it. Now click on Uninstall button.
  5. Follow the instructions on the screen to remove Skype.

After you remove Skype, you just have to download the latest version and install it again. After reinstalling Skype, check if the problem still appears.


3. Reset Skype settings

  1. Close Skype completely. If needed, start Task Manager and end all Skype processes.
  2. Now press Windows Key + R and enter %appdata%. Now press Enter or click OK.
  3. Locate the Skype directory, right click it and choose Rename from the menu. Change the name to Skype_old.
  4. After changing the name of the directory, start Skype again.

Your Skype settings will now revert to default and the problem should be resolved. Keep in mind that resetting your settings will remove your chat history, but you can easily restore it by copying it from Skype_old directory.


4. Change Skype’s settings

  1. Open Skype.
  2. Click on Tools > Options.
  3. Go to Advanced settings in the left pane and in the right pane click on Manage other programs’ access to Skype.
  4. Select RavBG64.exe from the list and click on Change.
  5. Now select Allow and click on OK.
  6. Select OK and click on Save.

After doing that, the message should disappear completely.

Problems with RavBG64.exe aren’t serious, but they can be rather annoying. This isn’t a serious error, and we hope that you managed to solve it by using one of our solutions.

[wl_navigator]

Nier: Automata is coming to Xbox Game Pass while a Nier Replicant Xbox One remake is in the works

Nier:Automata Become as Gods Edition is set to join the Xbox Game Pass subscription service later this week on April 2nd.

The game is an action role-playing game published by Square Enix and developed by PlatinumGames Inc. It originally came out on Xbox One in mid-2018 and has developed a bit of a cult following with gamers who enjoy the anime aesthetic.

Here’s the official game description and trailer:

Invaders from another world attack without warning – unleashing the machine lifeforms. To break the deadlock, a new breed of android infantry is sent into the fray: the YoRHa squad. Highly-acclaimed and award winning NieR:Automata™ is a fresh take on the action role-playing game (RPG) genre that gracefully blends mesmerizing action with a captivating story.

The NieR:Automata™ BECOME AS GODS Edition includes the action-packed 3C3C1D119440927 downloadable content* which features “Revealing Outfit” costume for 2B, “Young Man’s Outfit” costume for 9S and “Destroyer Outfit” costume for A2. After completing new sub-quests in this downloadable content, you can enjoy playing the game while wearing these costumes from NieR Replicant. Sub-quests take the form of three different battle challenges at three different colosseums. Special music video: NieR:Automata meets amazarashi “Deserving of Life,” from collaboration with rock band amazarashi, is also included as part of the scenario.

Also announced today was an Xbox One remake of Nier Replicant which will be called Nier Replicant Ver.1.22474487139…. No release date has been set yet but a teaser trailer has been uploaded to the official Square Enix YouTube channel.

Are you a fan of the Nier games? Let us know why or why not in the comments below and then follow us on Pinterest and YouTube for more Xbox gaming content.


Xbox Game Pass for Console

Skype is Not Sending Images: 7 Tested Solutions to Fix

Many Windows users are reporting that Skype can’t send images anymore, and that is often caused by problems with your internet connection or with the server.

This may also be due to a corrupt Skype database but we have some tested solutions to fix these problems. Also, try changing the DNS so Google’s (8.8.8.8 or 8.8.4.4).

What do I do if Skype can’t send images?

1. Delete the problematic entry from the database

  1. Download SQLite browser.
  2. Locate main.db file. To do so, press Windows Key + R shortcut to open the Run dialog. Enter %appdata% and press Enter or click OK.
  3. Roaming folder will appear. Navigate to Skype folder. Now enter the folder named as your Skype username.
  4. Locate main.db file and open it with SQLite browser.
  5. When SQLite opens, click the Browse Data button and navigate to MediaDocuments table.
  6. Now you should see the list of all received or sent files. You need to find the corrupted file and remove it from the database. To do so, you can use the original_name column to find a file by its name.

We have to mention that this process is a bit advanced, so it might take you a few attempts to perform it.

Few users reported that they were unable to identify the corrupted file, but after deleting all media files from the database the issue was resolved.

It’s worth mentioning that modifying your Skype database can cause you to lose sent files or messages. You might want to create a copy of the main.db file in order to prevent file loss and potential Skype issues.

2. Reset Skype settings

  1. Close Skype completely.
  2. Press Windows Key + R and enter %appdata%. Press Enter.
  3. When the Roaming folder opens, locate the Skype folder and rename it to Skype_old.
  4. Press Windows Key + R again and type %temp%/skype. Press Enter or click OK.
  5. Locate DbTemp folder and delete it.
  6. Try to start Skype again and check if the problem still persists.

This process is quite simple and after deleting the files Skype should reset to default and the problem should be resolved.

If you’re concerned about your messages, they are safely stored in the Skype_old folder that you created in Step 2.

Few users reported this solution didn’t work for them until they downgraded to the older version of Skype. If this solution doesn’t work, you might want to try installing an older version of Skype and performing the same steps again.

3. Download the latest version of Skype

If this is a major issue, Microsoft will most likely address it in the future version of Skype.

According to users, this issue affects users with commas in their username. If you still have this issue, be sure to download and install the latest version of Skype to check if that solves the problem.

4. Reset the host file

Hosts file allows you to assign certain addresses to specific IP addresses on the internet. This file is extremely useful but can also be a target for malicious users.

Malicious applications can modify your host file and prevent you from accessing certain websites or redirect you to malicious websites.

In addition, many users suspect that modifying the host file can prevent you from sending images over Skype.

Fortunately for you, you can fix this problem simply by resetting the host’s file. Resetting hosts files isn’t hard, and we already explained in detail how to reset hosts files on Windows 10.

If you’re a more experienced user and you know how to modify and edit the host file, you can comment out custom entries to fix this problem.

Few users reported that only certain entries in the host’s file caused this problem on their PC, so there’s no need to reset it.

Simply remove or comment them out and save the changes to the host file. After that, you’ll be able to send files over Skype without problems.

5. Check if you’re using the correct password

Sometimes this problem can occur if you change your Microsoft account password. Many users use their Microsoft account to log in to Skype, but this can also lead to certain issues.

Users reported that they changed their Microsoft account password, but they were still able to log in to Skype without any problems. Despite being able to log in, they were unable to send pictures over Skype.

To fix this problem, you need to log out of Skype and log back in with a new password. After doing that, you’ll be able to send pictures over Skype once again.

Keep in mind that this solution only applies if you’re using your Microsoft account to log in to Skype.

6. Check your security applications

Sometimes third-party antivirus tools or applications can interfere with Skype and cause this error to appear. Users reported that Spybot Anti Beacon software was causing this issue.

To fix the problem, open Spybot Anti Beacon and check your settings. According to users, you have to disable immunization for OneDrive services in order to fix this problem.

If the issue persists, you might want to try disabling immunization for other services or removing the Spybot Anti Beacon from your PC.

We also advise you to check your antivirus, firewall, or any other security software for potential issues. If there’s no problem with configuration, try disabling your security software and firewall and check if that solves the issue.

7. Use /msnp24 command

According to users, you can fix this problem in Skype simply by entering the /msnp24 command. To do that, just open Skype and enter /msnp24 in any chat window. After running that command, restart Skype and check if the problem is resolved.

Not being able to send images or other files over Skype can be a big problem, but we hope that you solved the issue by using one of our solutions.

Microsoft suspends custom gamerpics on Xbox consoles and apps due to high usage during COVID-19 lockdowns

The increase in gamers jumping onto their Xbox One consoles while self-isolating during the global COVID-19 pandemic shouldn’t come as a surprise to that many people but what is unexpected is the fact that Microsoft’s had to (via WC) deactivate the ability to upload custom images for use as gamerpics due to the increase in usage.

“As people look to gaming for social connection,” the official note reads, “we’re seeing record numbers across Xbox Game Pass, Xbox Live, and Mixer. To streamline moderation and ensure the best experience for our community, we’re making small adjustments. We’ve temporarily turned off the ability to upload custom gamerpics, club pics, and club backgrounds.”

Thankfully it seems that this temporary limitation isn’t due to a strain on the Xbox servers but rather a need for more people to moderate what images are uploaded. The Xbox Support page also states that refunds have been delayed for 72 or more hours though it’s unclear if this is due to the pandemic or not.

The larger than usual number of people jumping online all of a sudden has resulted in a variety of digital services making adjustments to deal with the extra internet traffic. Mixer, Twitch, and YouTube have all limited the resolution of their videos and Disney+ was forced to launch in several European regions last week without the option for 4K. Interestingly, Mixer also added a new Education category to cater to those learning from home while in self-isolation.

Has your gaming been affected by the pandemic? Share your experiences with the community in the comments below and then follow us on Pinterest and Facebook for more Xbox gaming content.

How to integrate Microsoft Teams and Slack in a few steps

Doing your job at the office would be a lot harder if you couldn’t communicate with your team members and colleagues. That is why there are plenty of collaborative software tools available for companies to use

One such collaborative program is Slack. Slack is a cloud-based instant messaging tool that allows people to group up together in channels known as Workplaces.

Another good example of a great collaborative tool is Microsoft Teams. It combines persistent workplace chat, video meetings, file storage, and application integration.

These two services sound very familiar and serve a common purpose, so integrating one’s feature into the other was bound to happen at one point of another.

How can I integrate Slack and Microsoft Teams?

1. Use Web services

Mio

Several web services out there offer you the chance to integrate Slack and Microsoft Teams with each other.

Some of the most popular ones are the following:

The great part about these tools is that they all pretty much function in the same way:

  1. You have to go to anyone of these websites
  2. Input both your Slack and Microsoft Teams‘ login credentials
  3. Click on a Connect or Link button

One thing you should remember about these services is that they only work with the browser versions of Slack and Microsoft Teams. As such, if you are going to be using the two constantly, you might as well go ahead and uninstall the desktop clients.

Additionally, some of these services aren’t free, which is kind of disappointing given how they are used to connect two free services together.

2. Use APIs and bots slack teams

Microsoft made a Slack connector available in its connector inventory. It enables some Slack and Microsoft Teams crossover, and you will benefit from functionality like joining a Slack channel and can even set triggers for certain events.

As you may have noticed, there aren’t many things that you can do if you want to integrate Microsoft Teams with Slack. The lack of direct integration features between the two services probably stems from the fact that the two are actually in direct rivalry with each other.

Whichever the case, if you want to integrate some of Microsoft Teams‘ functionality into Slack and vice-versa, at least you now know that it can be done, albeit in a limited fashion.

Do you think Slack and Microsoft Teams should be able to integrate with each other more directly?

Let us know what your opinions on the matter are in the comment section below.

  1. Slack has a more user-friendly and intuitive UI and it’s easier to set up. Microsoft Teams has a bigger learning curve and the setup is more complex.
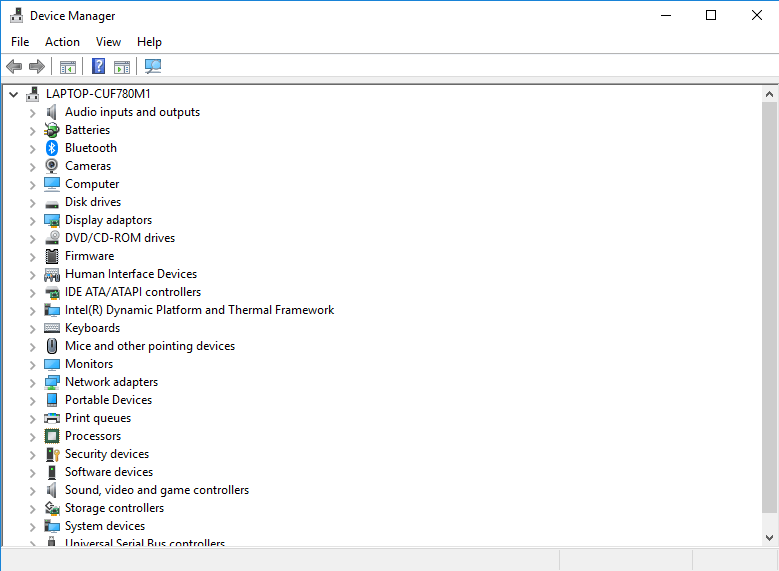
  2. Microsoft Teams is aimed at large enterprises. Slack is excellent for both small businesses and enterprises.
  3. Microsoft Teams offers flawless and complete Office 365 integration, while Slack offers limited Office 365 integration.
  4. Slack has a message history limit of 10K messages. If you want to access messages beyond that limit, you need to upgrade your plan. On the other hand, Teams offer unlimited message history access.
  5. You can host meetings of up to 250 participants on Teams, while Slack meetings can accomodate a maximum number of 15 participants.
  6. Screen sharing is available on all Teams plans, while Slack supports this feature only on paid plans.
  • What big companies use Slack?

Thousands of big companies and enterprises rely on Slack for employee collaboration. Some of the biggest companies using Slack internally include BBC, IBM, Airbnb, Pinterest, Dropbox, Medium, Vodafone, RBC, The Fox Broadcasting Company, Hubspot, Intuit, Trivago, Shopify.

If you want to see what other companies are using Slack, visit Slack’s Customer Stories page.

[wl_navigator]

Microsoft To Do gains new task sorting feature with latest Windows 10 app update

The Windows 10 version of the Microsoft To Do app updated today with the new preference to have fresh tasks automatically added to the top of a list after they’re created. This change was recently added to the iOS and Android apps so it’s good to see some more consistency across versions.

This update also added announcements for when deleting data associated with tasks.

Here’s the full release notes with the details:

You asked, and we listened. You can now add new tasks to the top! But that’s not all, starred tasks can now move to the top too. Set your preference in settings.

We made a number of accessibility fixes including announcing the removal of due dates, recurring tasks and reminders.

Microsoft To Do is a free productivity tool made by Microsoft for managing tasks and keeping track of projects. Let us know how you use To Do in the comments below and then follow us on Pinterest and Twitter for more Microsoft app update news.

How to Create and Manage Teams in Microsoft Teams

Microsoft Teams is a cloud-based collaboration application for Office 365, which turns into a virtual workspace for your team members to interact. As an admin, you can easily create teams in the Teams client or the Microsoft Teams admin center.

Then, you’re in control of the settings and permissions of your team. If you’re just a member, you can only submit a request and wait for it to be accepted or denied. If you’re a team owner, you can add someone new to the team, give editing permission to members, and more.

That’s why today we will show you how to adjust these settings. Why don’t you keep on reading to find out more?

How do you create a team on Microsoft Teams?

Team productivity

1. Create a team in Microsoft Teams

  1. Open up the Microsoft Teams app.
  2. On the right-hand side of the page you can see different areas such as Teams, Devices, Locations, Users, and more. Click Teams.
  3. You will be directed to all different teams that you are part of.
  4. At the bottom left-hand corner of the teams’ list, click New team.Teams in Microsoft Teams
  5. Then, click Create a new team.
  6. In the popup dialog box, name your team and give it a description.
  7. You will then be asked to add the members of the team, so type in their name.
  8. Any matches will pop up for you to select from.
  9. Once selected, click the Add button.
  10. When you’re done adding members, click Close to finish the process.
  11. Once created, your team will appear in the Admin Center, and in Teams too.

2. Add new Teams members

main Teams overview grid
  1. Go to the main Teams overview grid.
  2. Navigate to the team’s profile page.
  3. Here you can see the members, owners, and guests that belong to the team, along with all the team’s channels and settings.
  4. From the team profile page, feel free to:
  • set whether members can edit and delete sent messages – in Conversation settings.
  • set whether the team is public or private – in Privacy settings.
  • add new members:
Add a new member
  1. Click More options > Add member.
  2. Start typing a name, distribution list, security group, or Office 365 group to add to your team.
  3. Type the email addresses for adding people outside your organization as guests.
  4. Once all team members are added, just select Add.
  5. Then, select Close.
  6. People you’ve added will receive an email letting them know they are now your team members.

Note: A team can hold up to no more than 5000 members.

3. Create channels for your team

Manage channels
  1. Find the team that you created.
  2. Click More options > Add channel.
  3. Give the channel a descriptive name.
  4. As a team owner, you can automatically favorite channels for the whole team, making them more visible to all members.

Note: You may easily add new channels or edit or remove existing ones. However, you can’t delete the default General channel.

As you can see, building your first team in Microsoft Teams and managing members or other related service features is relatively straightforward. It’s clear that you aspire to do so, yet what if you’re struggling to get started?

You’d be able to save time by organizing all your work in one hub, sharing content on the go, and making everyone feel like part of an active team. However, none of these will happen, at least not until you find a solution when you have a hard time creating the team in the first place.

Here, we’ll explore the best ways to solve this issue and easily achieve your goal. Read on to find out more.

What to do if I can’t create a team in Microsoft Teams?

1. Sign out and restart Microsoft Teams

Restart Microsoft Teams
  1. First, click your profile picture at the top of the app.
  2. Select Sign out.
  3. Restart the app.
  4. If your impossibility to create a team is a temporary cache related issue, then a quick sign out and relaunch should fix it in no time.
  5. If the problem persists, keep the app closed for a few minutes and relaunch it again.
  6. Check if the problem is now solved.
Latest version of Microsoft Teams
  1. Click your profile picture at the top of the app.
  2. Select Check for updates.
  3. Any new update is downloaded and installed when your computer is idle.
  4. In case of using the mobile version of Microsoft Teams, also check for the most recent version of the app on the Play Store.

Any outdated app may not operate properly. Here’s how to make sure you’re running the latest Microsoft Teams and avoid erratic behavior.

Note: When Microsoft Teams is installed to Program Files via installation scripts rather than to the default location, the client can’t auto-update even if new versions are available. Make sure to install the application in the default location: userAppdata.

3. Ask for permission from your IT/Office 365 Admin

Office 365 Admin Group creation

Teams is a part of Office 365. Any Office 365 security group set up to limit users from creating Office 365 Groups will carry over to Teams.

So, there’s a big chance to discover that the admin has restricted Office 365 team creation to security group members. That’s why you most likely need to ask for permission from your IT/Office 365 admin to change the security group settings for your organization.

Global administrators don’t have the option to create new teams in the Teams application or web portal. That’s why they need to reach out for help. If no such settings were ever made, the other two viable solutions come into play.

Now that you have created teams, you may set up Microsoft Teams Avatars from the admin center for all the members. And you can also enable Microsoft Teams Together Mode through the app’s settings, as detailed in our guide.

Before you leave, don’t miss our guide on how to use Microsoft Teams Exploratory and gain a free trial of other Microsoft services.

We also have a guide on how to join Microsoft Teams meetings without an account, so don’t miss it.

To learn about additional features of Teams, don’t miss our guide on Flipgrid for Microsoft Teams.

Do you know any other things you can do to ensure that creating a team in Microsoft Teams works like a breeze? Use the comments area below to share them with other readers.