Windows has various background processes that ensure executable files function smoothly. One such file is the mad.exe which is associated with Microsoft Exchange but could also cause problems for your PC if the file is corrupt.
If you’ve noticed the mad.exe file and wonder if it is a security threat, this article provides a comprehensive overview of the MAD process.
What is mad.exe?
The mad.exe, also known as Microsoft Exchange Server – System Attendant, is a software component of Microsoft Exchange developed by Microsoft Corporation.
It is a critical background process that facilitates the exchange of email and calendar servers on Microsoft Exchange.
It performs several functions, like loading additional DLLs when you make config changes to Exchange 2000.
Further, it’s a background message tracking and logging process and sometimes does browser monitoring.
The original file is in the following file location: C:\Program Files\Exchsrvr\bin
If you have the Exchange 5.5 service pack or lesser, the file size could vary from 8.9 Mb, 2.2 Mb, to 2.3 Mb.
The mad.exe runs at startup to facilitate the operations of the Exchange domain controller and can consume large amounts of PC resources.
This is the basic overview of the file. So, we will explore ways to troubleshoot issues that may occur due to the process.
How do I fix mad.exe issues?
Before we proceed with more technical solutions, it wouldn’t hurt to attempt the following quick fixes:
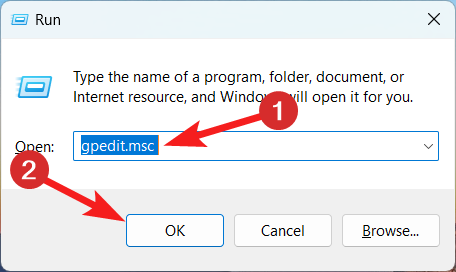
Press the Windows key + R, type in gpedit.msc, and hit Enter.
In the new window, navigate this file path: User configuration\Policies\Administrative templates\System
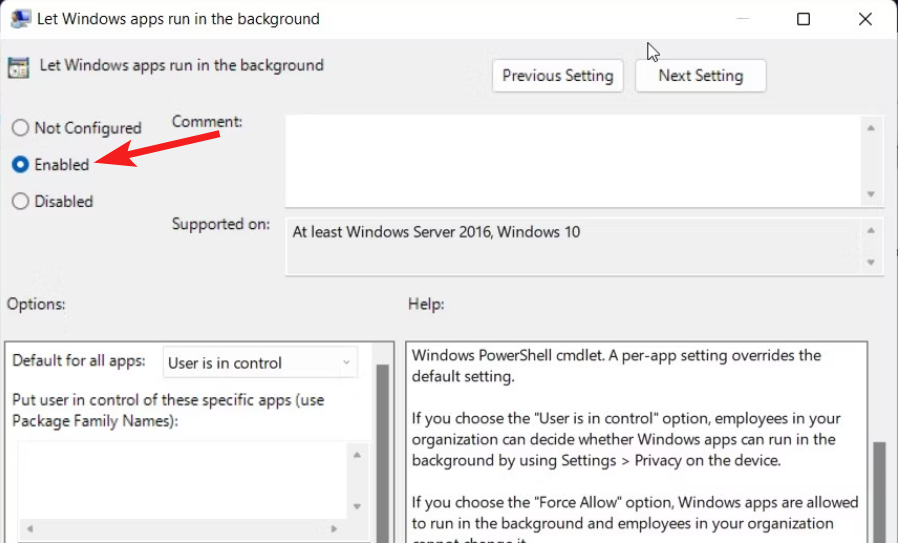
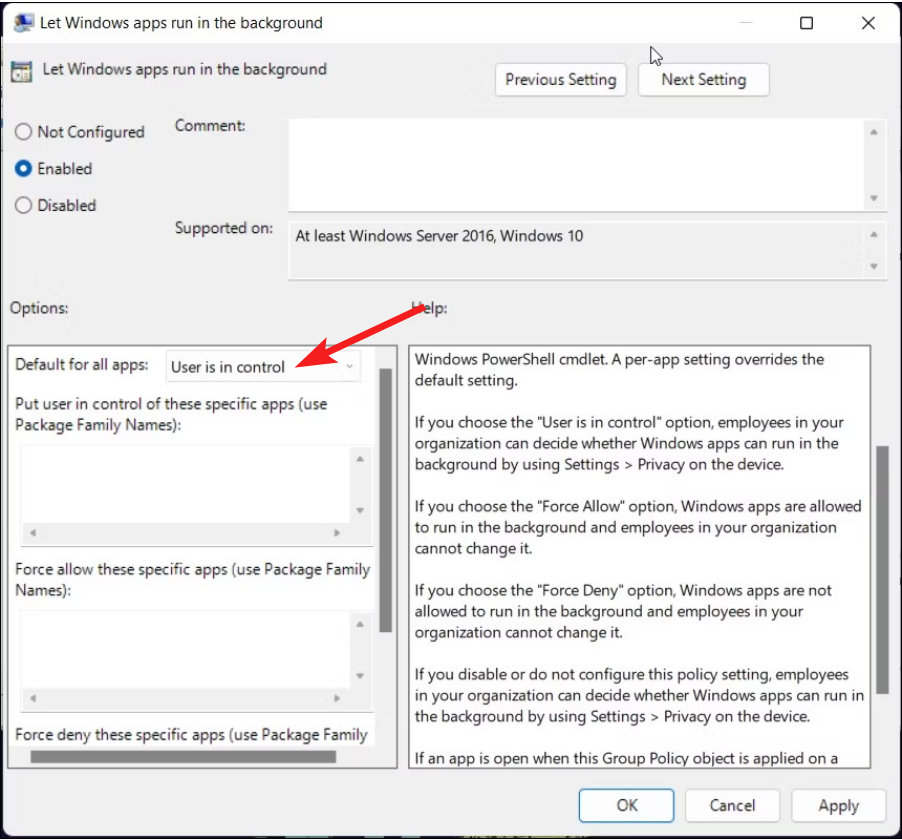
Double-click on Don’t run specified Windows applications, and click Enabled in the new window.
Click the Show button, and type in mad.exe to block the file from operating.
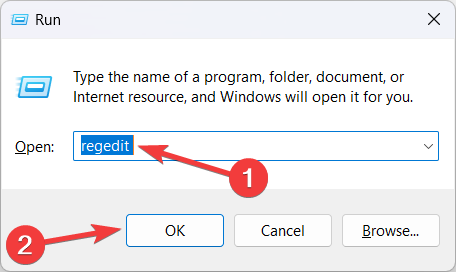
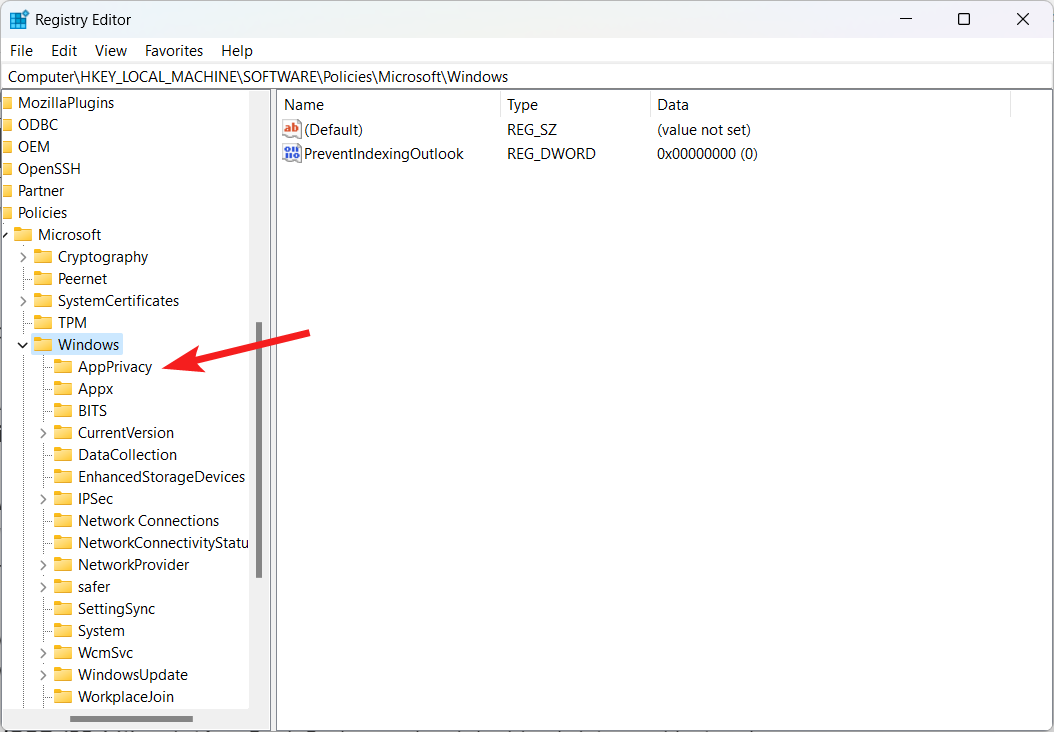
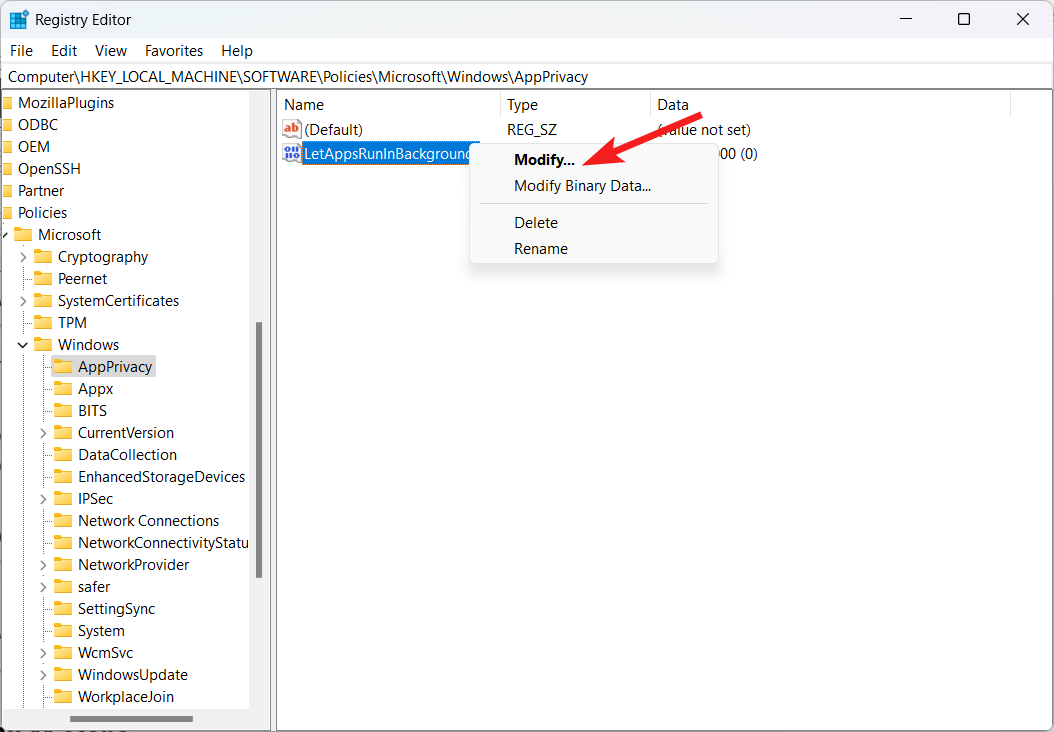
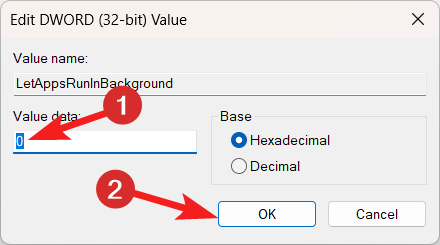
Close the Registry Editor, and restart your PC to complete the process.
To ensure the mad.exe file is safe, you should verify its security risk ratings using these parameters: check the file size, verify its location, check for spelling discrepancies, etc.
The mad.exe is typically a legitimate application file used by MS Exchange Server. However, based on the outlined points above, you might block the process in Group Policy Editor if it disrupts smooth system performance.
You can also check out our guide, which gives a comprehensive overview of wispitis.exe. Let us know in the comments if you have any questions or suggestions.
Microsoft 365 is an extensively used editor offering a wide range of applications, and with time, it has become the primary choice of many. But Office apps are prone to errors. One that affects Excel users is You need to sign in with an account associated with the subscription.
The entire message reads, Couldn’t Refresh Data Types. You need to sign in with an account associated with a subscription to use these data types. Select Sign In at the top of Excel. The error is often encountered when using the Stock or Geography data type.
Keep reading to find out all about it!
Why is Microsoft Excel asking me to Sign in?
Here are a few reasons you are unable to access the data types and Excel is prompting you to sign in:
Temporary bug in Excel: The problem was widely reported in Excel by users across the globe, and Microsoft, on its part, has acknowledged it. But we continue to encounter the error occasionally, indicating a temporary bug.
Signed in with another account: If you are indeed using another account that’s not subscribed to Office 365, the You need to sign in with an account associated with a subscription Excel error will appear.
Running an outdated version of Excel: For some users, it was an outdated version of Excel that triggered the error.
How do I stop Excel from asking me to Sign in?
Before we move to the slightly complex solutions, here are a few quick ones to try:
Restart the computer and verify whether the error message disappears.
Ensure you are signed in with the same account used for the Office 365 subscription.
Sign out of Excel, restart the computer, then log back in and check whether the You need to sign in with an account associated with a subscription Excel error disappears.
Wait for 24 hours and verify if others, too, are experiencing the issue.
If none work, head to the fixes listed next.
1. Update Microsoft Excel
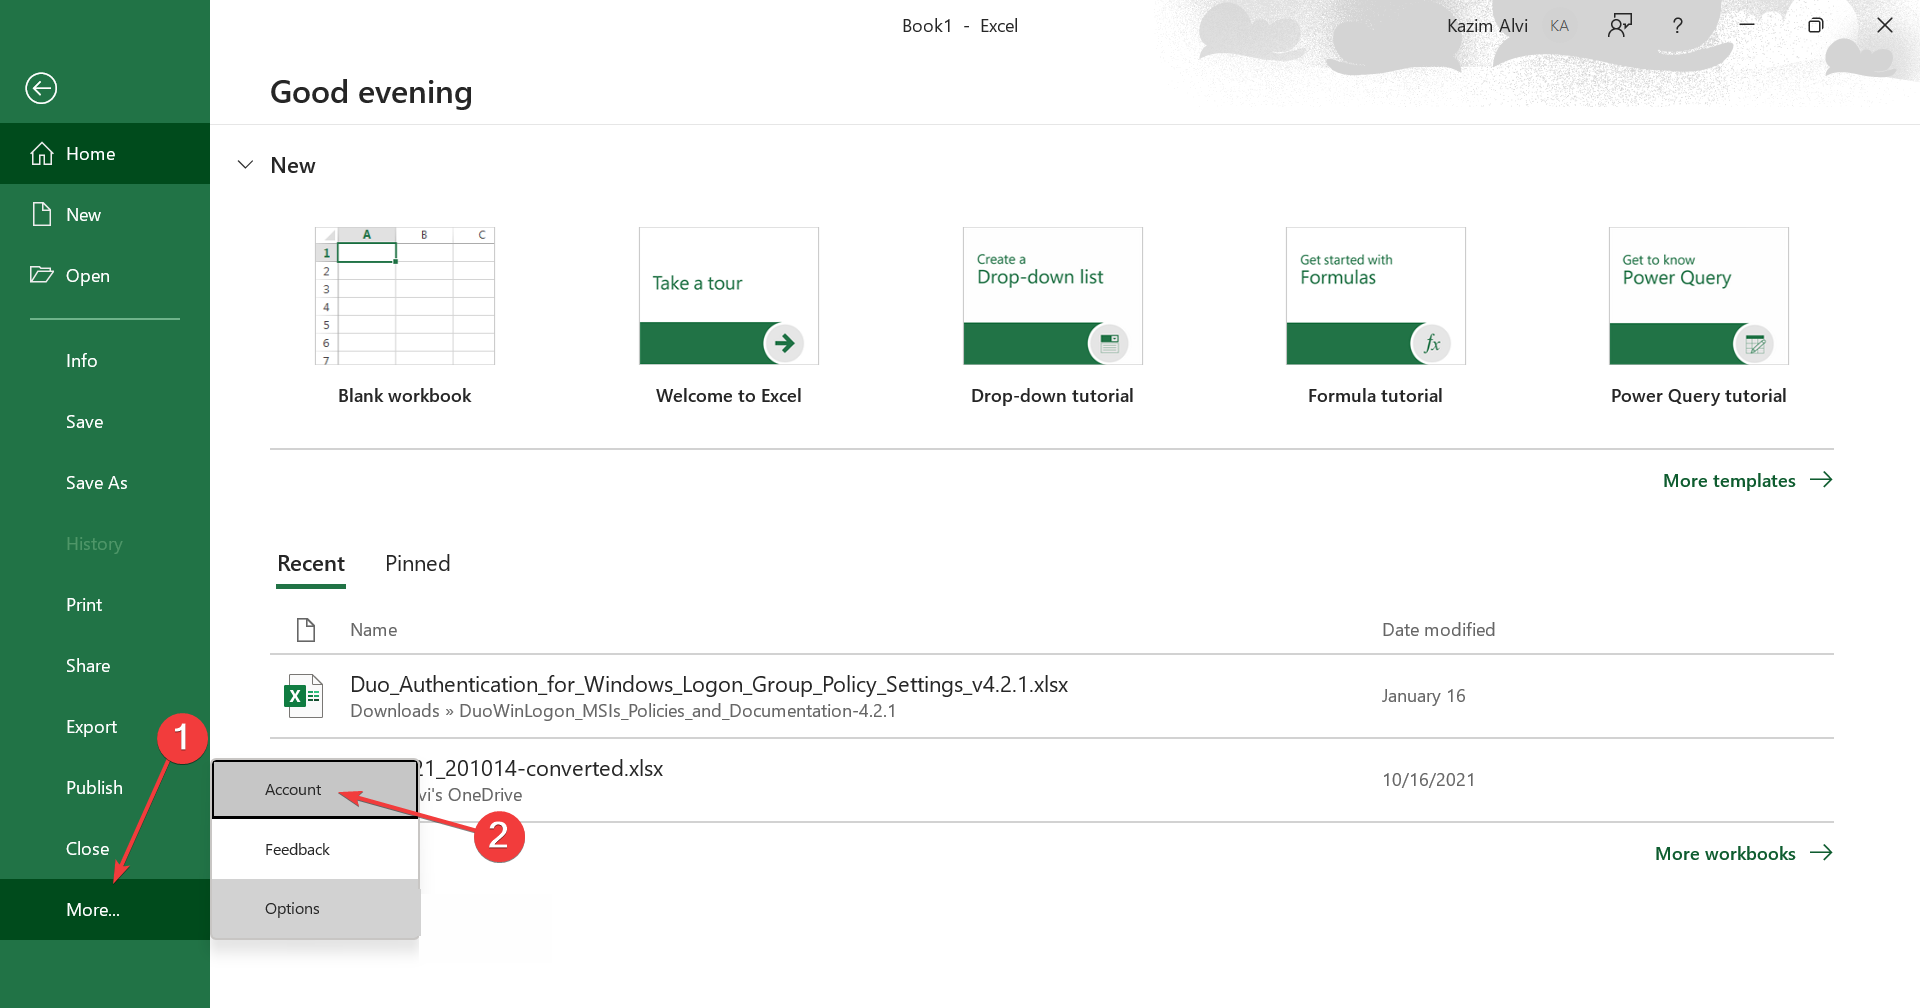
Launch Microsoft Excel, and click on the File menu near to top left.
Click on More and choose Account from the flyout menu.
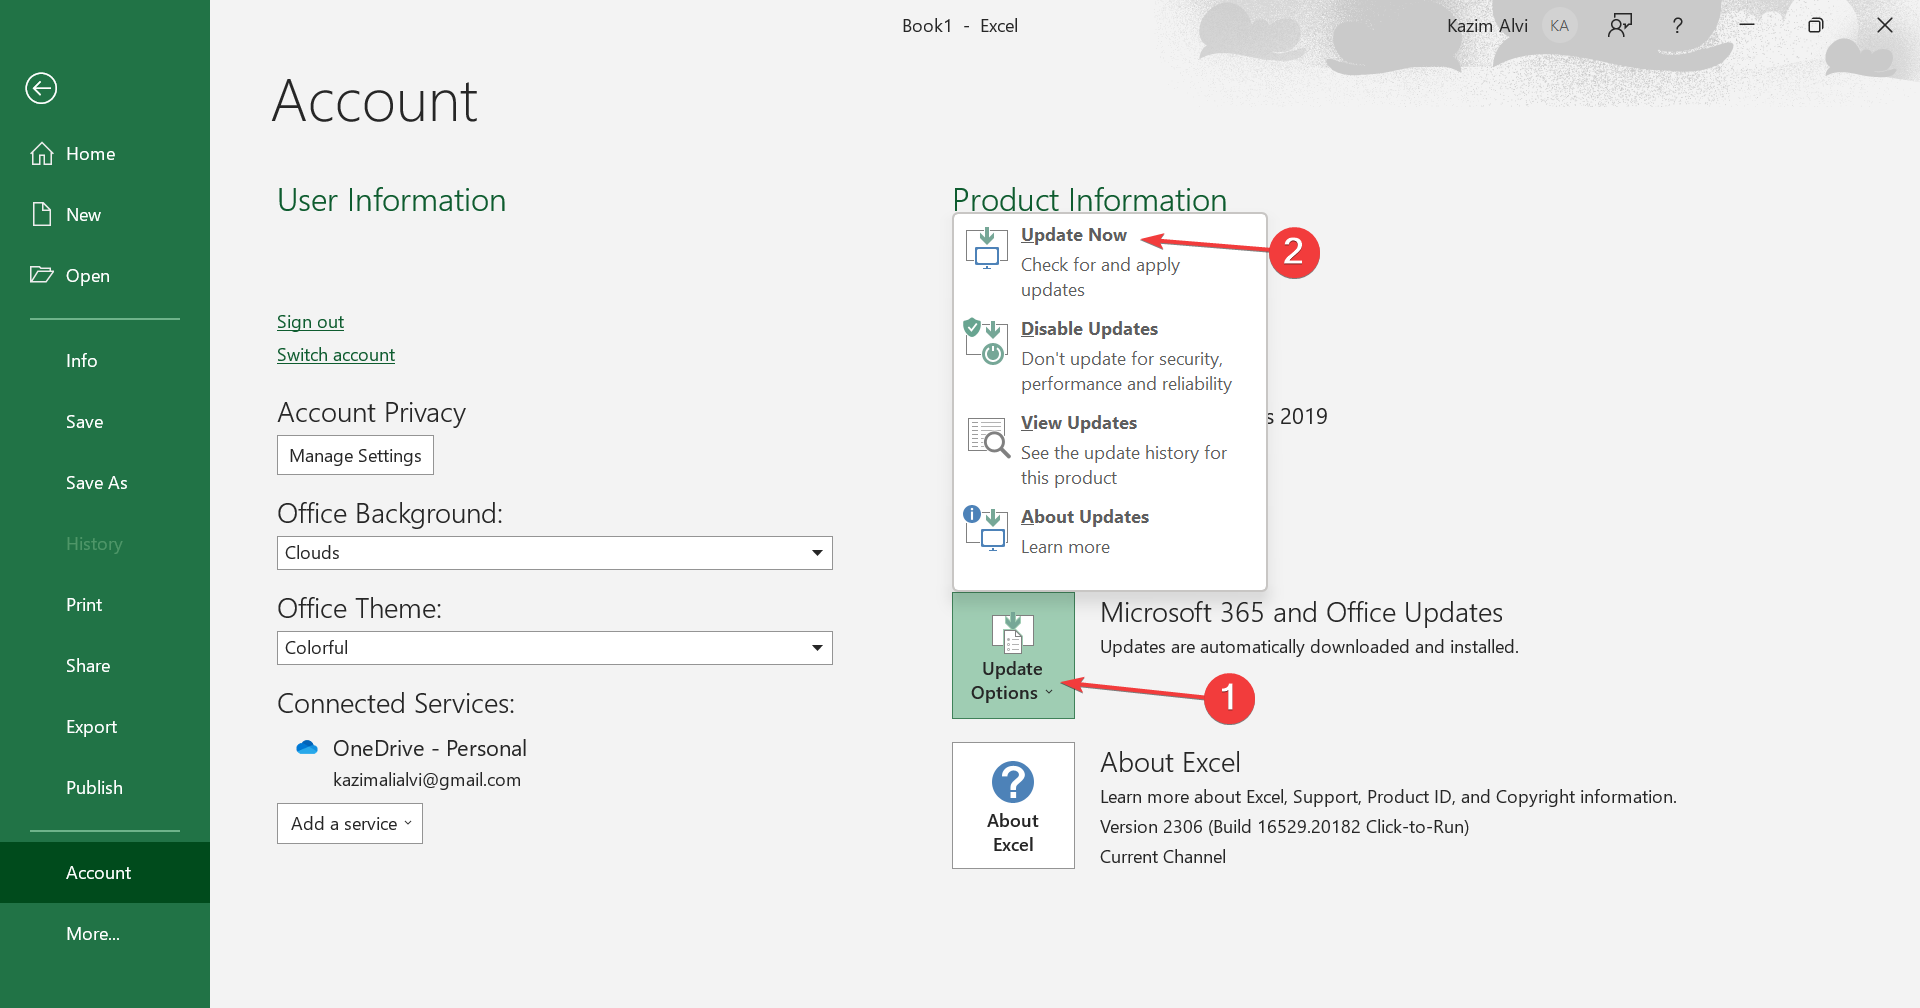
Click on Update Options and select Update Now.
Wait for any pending updates to install and restart the computer.
Often a quick solution when Excel can’t access the data types and asks you to sign in with an account associated with the subscription is to update the app. Since the problem has been acknowledged, a fix for it should be underway!
2. Re-enable Cloud delivered protection
Press Windows + S to open the Search menu, type Windows Security, and click the relevant search result.
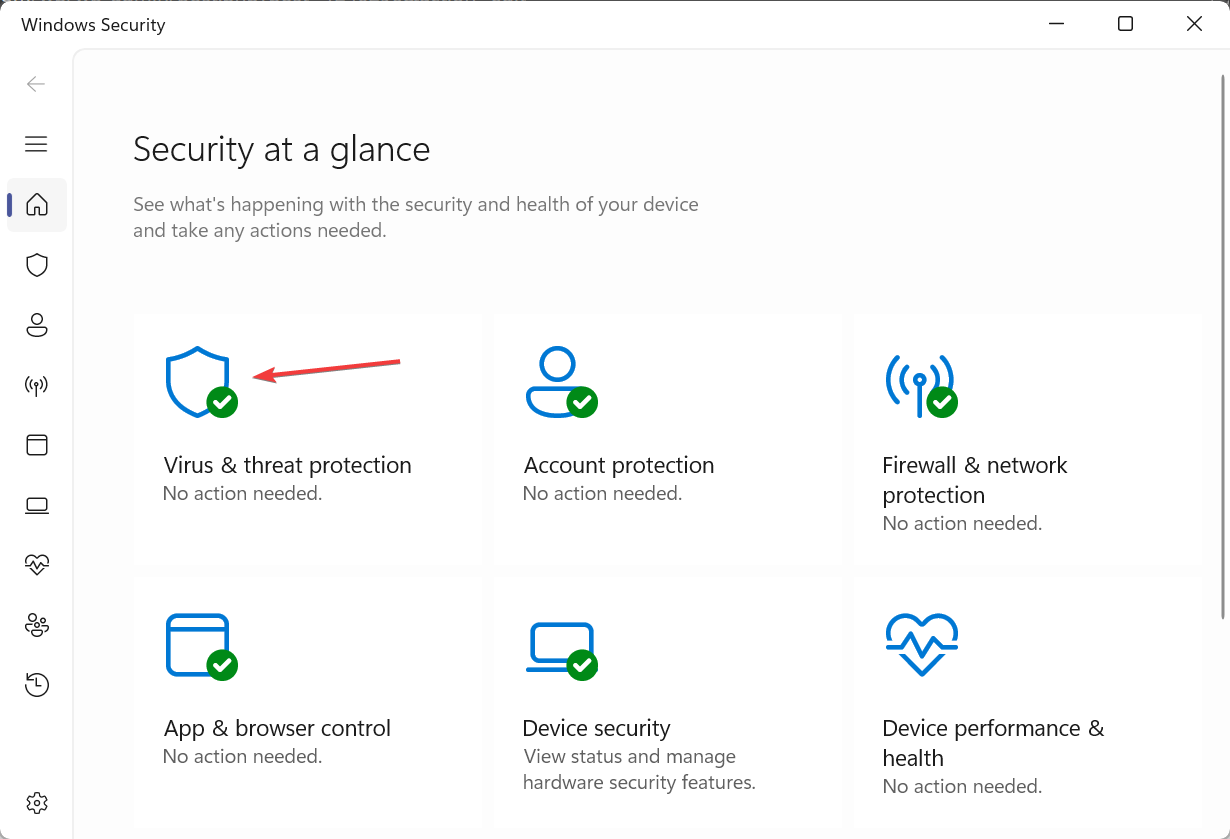
Click on Virus & threat protection.
Now, click on Manage settings under Virus & threat protection settings.
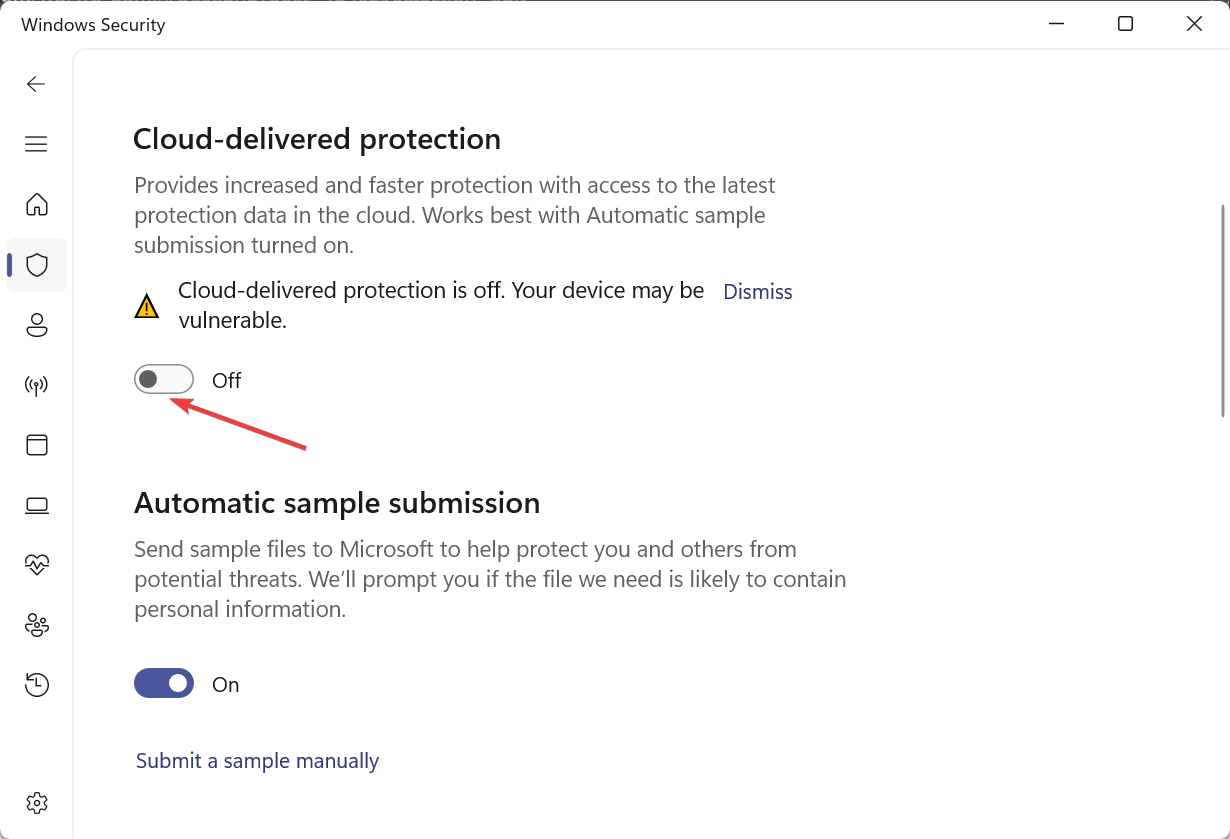
Disable the toggle under Cloud-delivered protection.
Click Yes in the UAC prompt.
Again, enable the toggle for Cloud-delivered protection.
A few users reported that the Cloud-delivered protection feature in the installed antivirus triggered the You need to sign in with an account associated with a subscription Excel error.
The steps here are for Windows Security. In case you are using another reliable antivirus solution, check the manufacturer’s website for the process to enable/disable the equivalent feature.
3. Repair Office 365
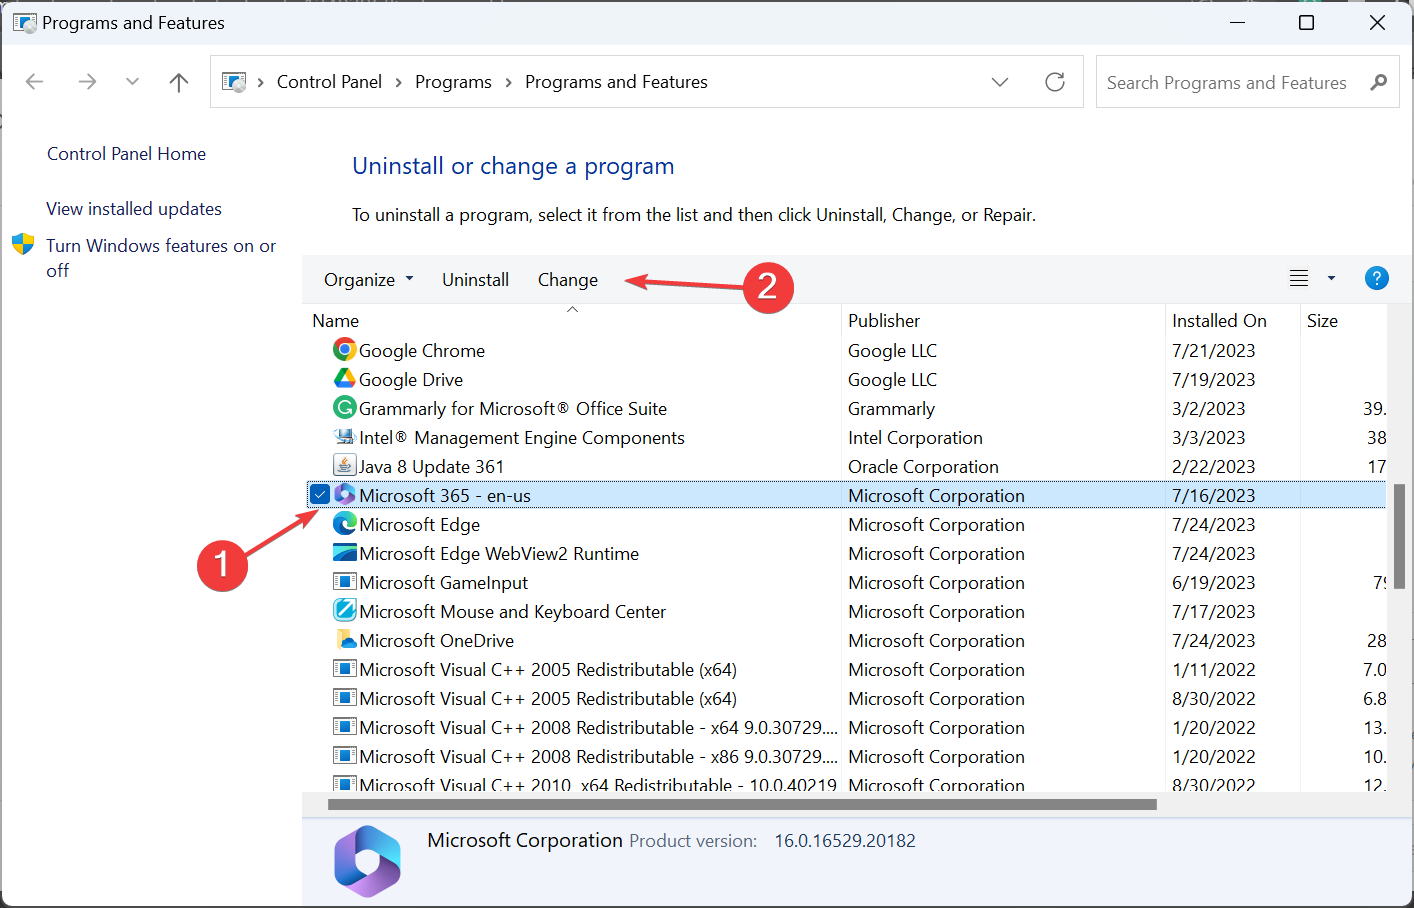
Press Windows + R to open Run, type appwiz.cpl in the text field, and hit Enter.
Select Microsoft 365 from the list of programs, and click on Change.
Click Yes in the prompt that appears.
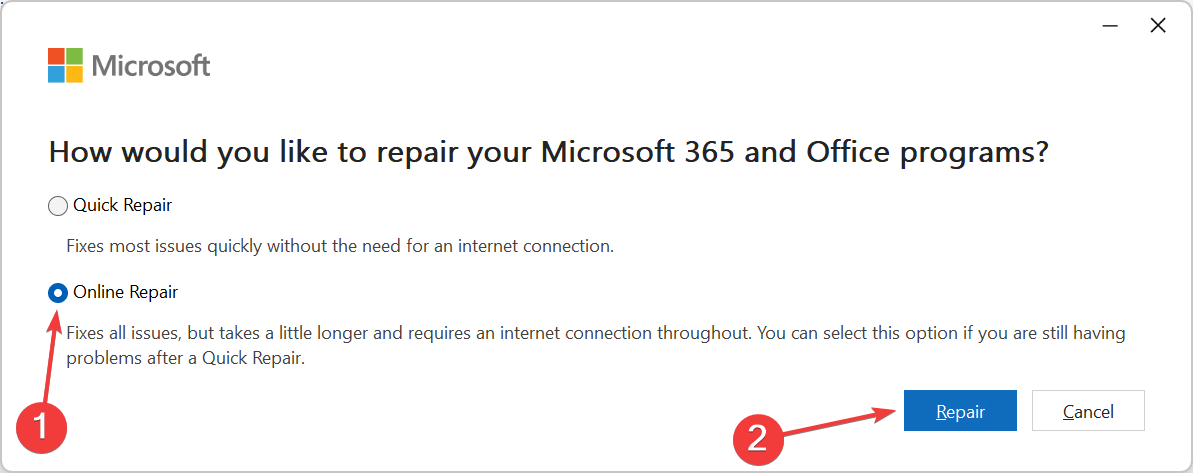
Choose Online Repair and click on Repair.
Again, click Repair in the confirmation box to start the process.
If the previous solutions didn’t work, an Online Repair of Office 365 will help! The repair will identify issues with the installation and eliminate them. However, it will take some time and require an Internet connection. But, in all likelihood, it should fix things.
That’s it! One of these solutions should have helped get rid of the You need to sign in with an account associated with a subscription Excel error when trying to use Data Types.
Before you leave, find out some quick and effective tips to make Excel run faster in Windows.
For any queries or to share the solution that worked for you, drop a comment below.
Snapchat is a popular instant messaging and social networking platform. It was the first to introduce the concept of stories (content that would last for a day) and was an instant hit amongst the masses. The growing popularity led to the question, can Snapchat be hacked?
Hacking, though illegal and immoral, has witnessed a tremendous increase in the last couple of years. The primary reason is users are casual with the preventive measures. And the most common concern amongst users is, can Snapchat be hacked by adding someone?
The following sections will explore all possible situations and scenarios and offer tips to keep your Snapchat account safe.
Can hackers get into your Snapchat?
Yes, it’s possible to hack into someone’s Snapchat account, and it’s not as difficult as many would imagine. Thousands of users across the globe lose access to their accounts due to hacking every day.
As technology advances, hacking into a Snapchat account has become easier. Though the instant messaging platform keeps an eye out for exploitable loopholes, the number of victims is rising.
Here are a few ways your Snapchat account can be hacked:
Malware or virus: Hackers create viruses and malware that can record the screen, identify and collect data, including login information, and access the microphone and webcam. This makes it easier to find out someone’s login credentials.
Data leaks: Third-party applications often collect data, and when their servers are hacked into, Snapchat credentials, too, become available. We have had instances where critical data from these leaks was put up for sale on the dark web.
Phishing: This is a technique where you receive an unsuspecting link that redirects to a webpage that looks identical to the actual login page. And when you enter the sign-in credentials, it gets into the wrong hands.
Using a public Wi-Fi: One of the most common and often unthinkable ways of hacking into Snapchat is via public Wi-Fi. Hackers often find vulnerabilities in the network and exploit these to collect information from connected devices.
Employing brute force attack: In a brute force attack, hackers use sophisticated tools that try out thousands of different password combinations until the correct one is identified. Honestly, you can’t prevent these, but it can make the task much more difficult.
How do I protect my Snapchat account?
1. Create stronger passwords
Hacking into a Snapchat account, or any account for that matter isn’t difficult for hackers. They know countless ways to exploit vulnerabilities, collect login credentials or use advanced tools.
The simplest way to beat a hacking attempt is to create a strong password, preferably a combination of upper case, lower case, special characters, and numbers. Avoid using simple passwords like abcd, 1234, your name, or a family member’s.
Let’s illustrate how this helps. In the case of Brute Force attacks, the tool starts with the commonly used passwords and then moves to the complex combinations. The trickier the password, the more difficult it would be to identify. And there is a good chance that you can beat this attempt!
2. Never click on unreliable links
A common practice amongst hackers is to gain access to one account and then use it to send a link to other users added to it. So, even when you receive a link from someone you know, make sure to verify that the sender’s account is not hacked.
The best approach is to avoid clicking on all links you are unsure of when logged into a Snapchat account. This way, you can prevent your Snapchat account from being hacked.
3. Only download apps from the dedicated store
Apps collect data all the time, even when you are not actively using them. The popular ones usually have a dedicated team to ensure strict adherence to all security protocols.
But many available web downloads don’t usually follow the best practices. And their database is often the first to be breached. So, when downloading apps, ensure you only get these from the App Store on iPhone or the Play Store on Android devices.
Though there’s no guarantee that it will eliminate the possibility of data leaks, the ones available in the store usually perform better regarding security and privacy.
4. Enable 2-FA
2-FA or two-factor authentication is a great way to secure your account. Of late, all major platforms offer the feature which adds an additional layer of security.
Even after providing the login credentials, users are asked to authenticate through a related app or a one-time OTP when 2-FA is enabled.
So, even if someone manages to secure the Snapchat login credentials, they won’t be able to access the account, let alone hack it. Find out more about Snapchat’s two-factor authentication on the official support website.
5. Provide accurate and up-to-date information
Providing accurate and updated contact information won’t directly prevent your Snapchat account from getting hacked. But it’s a great way to regain access to it.
Even if the hacker has changed the Snapchat password, you can use the email address or phone number to recover the account.
That’s it! These tips and tricks will help protect your Snapchat account against hacking attempts.
And for those asking, can my phone be hacked through Snapchat? That shouldn’t be the case for most. It requires a great deal of effort and resources. If a capable technology is developed, regular users shouldn’t be a victim.
Nvwmi64.exe, also known as Nvidia WMI (Windows Management Instrumentation), is a component of the Nvidia GPU driver by Nvidia Corporation. However, the nvwmi64.exe application error can be triggered when it encounters an issue or fails to run correctly.
Consequently, it can result in a system or app crash or render the whole Nvidia GPU faulty. Hence, we recommend you explore this guide to the best fixes to troubleshoot it.
What does a nvwmi64.exe application error mean?
The nvwmi64.exe application error indicates a problem with the nvwmi64.exe executable file associated with Nvidia graphics drivers.
This error message can appear when the Nvidia WMI provider(Windows Management Instrumentation) encounters an issue or fails to run correctly.
It might lead to crashes of applications or processes that rely on it.
Any error related to the original file may affect the functionality of your GPU.
A nvwmi64.exe application error might cause the system to freeze, stutter, or even have the infamous Blue Screen of Death (BSOD).
If nvwmi64.exe has stopped working, it can cause the overall system to slow down.
Regardless, you can resolve the nvwmi64.exe application error on your computer using the fixes discussed in the coming section.
How do I verify if nvwmi64.exe virus alerts?
Although the file is considered harmless, hackers could camouflage it to breach your PC. Hence, to assess the security risk rating of this file, you need to verify the following:
Ensure the file is stored in this file location to avoid registry error: C:\Program Files\NVIDIACorporation\Installer2\Display.NVWMI.0\nvWmi.exe
Verify the digital signature on the file properties as Nvidia Corporation to ensure its legitimacy.
Check for differences in file size. If the file size is too big, you may need to remove it.
If the process causes high CPU usage, excessive fan speed, or memory consumption, you may need to remove it.
Run an antivirus scan via the Windows Defender to identify issues with the file if it appears in autostart entries.
To effectively clear the nvwmi64.exe virus alerts on your computer, follow the steps below, end the task, and delete nvwmi64.exe malware from File Explorer, but only if you’re positive that the file is infected.
Speaking of File Explorer, it too can be affected by issues, but we already covered those in our explorer.exe application error article.
How do I fix nvwmi64.exe errors?
Before attempting any advanced troubleshooting steps for the nvwmi64.exe Application Errors, go through these preliminary checks;
Restart your computer to resolve temporary issues causing the nvwmi64.exe error.
Try performing a clean boot to identify if third-party apps are causing conflicts with the nvwmi64.exe process.
Temporarily disable antivirus software and turn off background apps on your computer to resolve any interferences.
Run a thorough scan with your antivirus software to check for any malware infections that might be affecting the system’s stability.
Press Windows + R key to open the Run dialog box, type devmgmt.msc, and press Enter to open the Device Manager.
Click on the Display Adapters entry, right-click the Nvidia driver, and select Uninstall device from the drop-down menu.
Then, check the box for Attempt to remove the driver for this device and click on Uninstall.
After uninstalling the driver, restart your computer.
Navigate to the location of the downloaded driver and double-click the executable file to start the installation process.
Then, follow the on-screen instructions in the Nvidia driver installer to complete the installation process.
Restart your PC and check if it helps resolve the nvwmi64.exe crash.
Reinstalling the Nvidia driver can help resolve issues related to the previous installation, compatibility, or performance problems. Then, check our guide about what to do if the Nvidia driver is not installing on your PC.
Sometimes updating drivers and your system might not be as easy, especially if you’re dealing with gwxux.exe application error, but we have a specialized guide that tackles this issue.
Plex users across different platforms have complained about a playback error when opening a media file. This prevents access to streaming or accessing the content of the media file.
However, the challenge remains how to overcome and resolve the playback error in Plex. Hence, this guide will provide you with detailed steps to fix it.
What does not available for playback mean on Plex?
Not available for playback error refers to a media item that cannot be streamed or played back through the Plex Media Server or the Plex app.
The Plex playback error indicates a failure during streaming or playing the selected media item.
In short, the playback error content is unavailable on the Plex Media Server, or the Plex app.
What are the common playback errors on Plex?
Conversion failed. The transcoder encountered a deadlock situation and is not progressing.
The video did not start playing in time – When the content takes too long to load.
Connection to the server is not fast enough – Occurs due to network congestion or slow internet speed.
Playback was not possible. No compatible streams are currently available. Please try again later or contact your system administrator for details.
The server is not powerful enough to convert video – Often, this relates to issues with the server and may require checking the server status to know if it’s active.
An error occurred while attempting to play this video. Please try restarting both the Plex Media Server and this app.
Why does playback error occur?
The media file associated with the item might be missing or inaccessible by the Plex server.
Temporary issues with the Plex server or the network can prevent the media from being accessed for playback.
An unsupported file format on the Plex server or the client device may prompt the error.
Some content may be available in the Plex library but not playable due to licensing restrictions or geographic limitations.
The server owner may have restricted some media items you want to access.
Unsupported codec packs or device drivers may trigger the playback error.
Nonetheless, you can resolve the error using the troubleshooting steps discussed in the next section of this article.
How do I fix the Plex playback error?
We recommend you observe the following preliminary checks:
Try restarting the Plex Media Server and the app you use to access Plex to resolve temporary issues.
Power cycle your router/modem or connect to a stable network to fix network congestion on your device.
If you use a VPN or proxy, disable it temporarily to see if it resolves the playback error.
Verify if Plex and the client device support the media file format. If not, convert the file to a compatible format using dedicated tools.
Disable VPN or proxy temporarily to fix interferences and see if it resolves the playback error.
In case these preliminary checks can’t fix the error, proceed with the solutions highlighted below:
1. Change video quality in the Plex app or web
Launch the Plex app on your device or web browser.
Choose the media item you want to play from your Plex library.
Click on the media item to start playback. You should get the playback error message, then go to More.
For the web, click on the settings icon during playback.
Click the Playback Settings option and then select Quality.
Check the box for the Original Quality.
After selecting the video quality, save the changes.
The above steps are the most confirmed to be effective for fixing the playback error in Plex. This option plays the video in its original quality without any transcoding. Check what to do if the Plex app is not working on your device.
2. Clear the Plex Media Server data
Ensure the Plex Media Server and any Plex apps are closed.
Press the Windows + E key to open File Explorer.
Go to the following location in File Explorer: C:\Users\<your_username>\AppData\Local\Plex\
Replace <your_username> with your actual Windows username.
In the Plex folder, locate the Cache folder, right-click, and select Delete from the drop-down menu.
Find the Transcode folder in the same folder, right-click on it, and select Delete from the context menu.
Restart the Plex Media Server and open the Plex app to check if the playback error persists.
Clearing the cache would help resolve playback issues and free up storage space used by cached data. Also, it deletes corrupted data interfering with its processing.
Open your web browser and go to the Plex web app or launch Plex Player.
In the top-right corner, click on the user icon and choose the player you want to change the transcoder quality for.
Click on the settings icon in the top right corner.
Select Quality, then click the Transcoder option.
Change the Transcoder Quality to Automatic, then click the Save Changes button.
Note that the steps to change transcoding quality may vary depending on the Plex app (e.g., Android, iOS, Smart TV, etc.). However, the general idea is to find the app’s settings and look for a section related to video quality or transcoding.
If you are not using Windows Media Player or if it is not working for you, and you are looking for ways to uninstall it completely, we’ve got you covered!
We will discuss step-by-step instructions to remove Windows Media Player from your Windows computer easily.
How can I uninstall Windows Media Player?
Before proceeding with any steps for uninstalling the program, go through the following preliminary checks:
Ensure you have administrator privileges to the computer.
Close Windows Media Player if running.
Once you are through these, follow any of the methods mentioned below to get the job done!
1. Use the Settings app (The basic way)
Press Windows + I to open the Settings app.
Go to Apps, then click Optional features.
Under Installed features, locate Windows Media Player and click the downward arrow to open options, then click Uninstall.
Wait for a couple of minutes, and Windows Media Player will be removed from the list.
2. Use the Windows features on or off window
Press the Windows key, type control panel, and click Open.
Select View by as Category, then click Uninstall a program.
From the left pane, click the Turn Windows features on or off link.
In the Windows features on or off window, locate Media Features.
Expand it and remove the checkmark next to Windows Media Player and click OK.
On the next prompt, click Yes to confirm the action.
The changes will be applied; you will be prompted to restart your PC; click Restart now to do the same.
Press the Windows key, type powershell, and click Run as administrator.
Copy & paste the following command to disable or remove Windows Media Player and hit Enter: Disable-WindowsOptionalFeature –FeatureName "WindowsMediaPlayer" -Online
Wait for the process to complete, then close PowerShell and reboot your computer.
4. Use the Applications folder
Press Windows +R to open the Run window.
Type the following command and click OK: shell:AppsFolder
You will get the list of installed applications. Locate Windows Media Player.
Right-click it and select Uninstall.
You will get to the Optional Features page on Settings.
Locate Windows Media Player, click the downward arrow, and click Uninstall.
Now wait for a few minutes; Windows Media Player will disappear from the Optional features list.
5. Use the DISM command
Press the Windows key, type cmd, and click Run as administrator.
Type the following command to uninstall the Windows Media Player app and press Enter: DISM /online /disable-feature /featurename:WindowsMediaPlayer
Once done, you will be notified and prompted to restart your machine.
So, these are some easiest methods to uninstall Windows Media Player from a Windows computer completely.
If you don’t want to work too much, you may also use one of the best uninstallers on the market that will do the job automatically.
Before we get down to the nitty-gritty about what happens if you decline the Windows 11 upgrade, let’s rewind for a moment.
Does this mean that there’s a deadline for the free offer? Windows 11 is currently on a free upgrade offer for all Windows 10 users on their PCs or from Microsoft’s official website.
Those yet to upgrade to Windows 11 may wonder whether there are any consequences if they decline the upgrade offer.
Why are people declining the Windows 11 free upgrade offer?
The Windows 11 upgrade offer is free, so why would anyone decline? Well, there’s more to it than meets the eye.
Below are some reasons why users are hesitant to jump on the Windows 11 bandwagon:
System requirements – First of all, the minimum system requirements are a bit too stringent for users. Upgrading will ultimately force one to purchase a new device if the old one is not up to par.
Frequent bugs – Some users have also reported that the OS is plagued by a number of recurrent bugs that make it unstable hence the hesitation.
New UI – The rest are not impressed with overhauling the entire user interface. Whereas most people have received the new features, others would prefer the old UI.
While these reasons are all valid, there might be consequences for failing to upgrade in the near future.
What will happen if I decline the Windows 11 upgrade?
If you decline the Windows 11 upgrade, assuming you’re on Windows 10 now, you’ll continue to receive security updates. This will only apply as long as your version of Windows 10 is supported.
As of right now, Microsoft will support all versions of Windows 10 through October 2025. The dates could change before the tech giant decides to end support for them. For now, we can assume that it will be at least a few years.
On an operating system as large as Windows 10, there will inevitably be updates that contain bugs that need to be fixed.
When that happens, your PC won’t get security updates anymore and could become vulnerable to malware and other threats. In general, Microsoft wants all devices running the latest version of its OS for security purposes.
Another reason is that Microsoft may also want to avoid fragmentation issues among different versions. This will help avoid issues as it continues to develop new features.
If you decline the upgrade to Windows 11, there’s a chance that some apps might stop working. In such cases, you may not be able to do much about that besides upgrading.
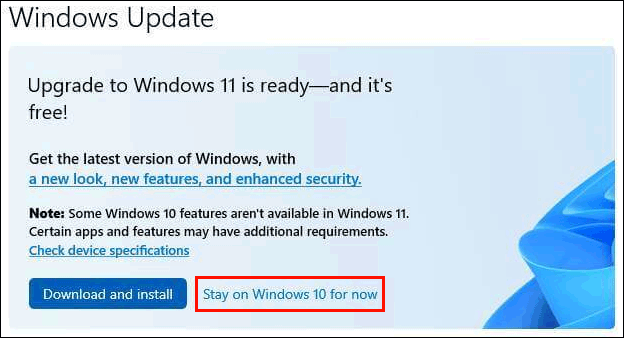
No, Microsoft will not force you to accept the Windows 11 upgrade. Refusing to upgrade is as easy as canceling a pop-up window.
Depending on your user account and settings, you might even be able to turn off the update reminder entirely or at least indefinitely.
While the latest version of an operating system will often have new features or a more streamlined interface, it’s important to remember that when it comes to tech products like software, newer doesn’t necessarily mean better.
Ultimately, whether you like it or not, there shall come a time when you will have to upgrade. It’s just a matter of time until Microsoft pulls the plug on your OS, and you stop receiving critical updates.
The risks of running an unsupported version of Windows are way too many to ignore the upgrade. So while it’s possible to extend the life of your existing software by not upgrading, it will only last for so long before you have no choice but to upgrade.
We hope you now have a clearer picture of the consequences of declining the Windows 11 upgrade.
FTPM is an acronym for Firmware implemented Trusted Platform Module. Interestingly, fTPM is a version of TPM that does not use a physical chip, but instead generates its keys via the primary UEFI/BIOS chip.
While TPM chips add weight, money, and complexity and consume valuable space on small motherboards, AMD likes to use fTPM to keep costs on the lower side.
What is fTPM and how does it work?
fTPM used in AMD CPUs is a firmware-based TPM that provides similar functionality. Further, the technology works in the same way as the chip-based approach followed by Intel.
It can be implemented in AMD CPUs without any additional hardware. This allows users to unlock their devices without having to input a password every time, thus improving the overall security of the computer.
fTPM seals the encryption keys concerning specific parameters such the firmware and hardware configuration. Consequently, updating any firmware or hardware on your PC will require you to use recovery keys in order to gain access.
What is the difference between fTPM and PTT?
PTT is what Intel likes to call its TPM, which is the acronym for Platform Trusted Technology. It is implemented directly into the processor and provides similar functionality to that of AMD’s fTPM.
However, you may have to reconfigure your encryption in that case and generate new keys because your old ones would be incompatible after this transit.
How can I check if fTPM is enabled on my AMD CPU?
Press Win + R key together. This will open the Run dialog box.
Type: tpm.msc, and press Enter.
A new window will open with all sorts of information regarding your fTPM, version, and specification. If you notice that it is disabled, keep reading, we have got you covered.
How can I enable fTPM on my AMD CPU?
Shut down your PC.
Turn on your PC into boot mode, by tapping one of the Del, F2, F10, or F12 keys to enter BIOS. Check the manual of your motherboard for the right indications.
After that, head over to Advanced and then to AMD\AMD fTPM configuration.
Toggle the drop-down menu next to the TPM Device Selection option, and choose Firmware TPM.
Enable the feature and exit BIOS after saving the changes.
How to check fTPM is enabled?
Click on Win key and search Device Security.
In the Device Security menu, click on Security Processor.
Now click on Secure Processor Details, and there, you will see if the fTPM was detected and working
If you see Standard hardware security not supported, then probably Windows did not recognize the fTPM.
In that case, either you may need to follow the step again or contact your device manufacturer.
AMD has had problems with their CPUs lately due to the fTPM-related memory transfer to SPI flash.
This issue may cause stuttering or a slow response from the system, and in this case, you should revert the changes.
Here we conclude our guide on how to enable fTPM on AMD CPUs and we hope that you managed to finish the procedure.
If you have any suggestions or questions, feel free to write us a comment in the dedicated section below.
WhatsApp can be difficult to use on mobile for long conversations with chatty people. Thankfully, you do have the option to use WhatsApp o your browser directly for more efficient communication.
We will show you in this article the exact steps you need to take to access WhatsApp on Chrome safely.
Why can’t I use WhatsApp Web on Chrome?
Several readers complained that WhatsApp web is not working in their browsers. Here are the possible causes of this problem:
Connectivity issues – If you don’t have a steady internet connection, the web app may fail to connect to the server, thus not opening at all.
The web app is opened on more than one browser – If you open the WhatsApp on more than one browser on the same device, linking the web app will usually fail.
Issues with Chrome – If Chrome is not loading pages or working slowly as well, make sure you delete the cache and cookies and install the latest updates.
You may read further to learn how to use WhatsApp in Chrome, or you may follow our quick tip to use the chat app readily available.
Quick tip
Opera One is a browser that has put a lot of effort into offering one of the best experiences when it comes to online communication apps.
Thanks to the integrated features, you can chat directly from your browser in WhatsApp in just one click.
The WhatsApp icon is on the left side of the taskbar, and you do not have to open a special WhatsApp tab to access the conversations.
Opera One
Use the best browser for the WhatsApp app to help you keep in touch with everyone while enhancing your productivity.
The Legend of Zelda is an action-adventure game that was developed and published by Nintendo. The game has a lot of versions and was previously limited to Nintendo Switch.
Not anymore; now you can download and play Zelda on your Steam Deck using an emulator. In this guide, we will discuss step-by-step instructions to get it on the handheld device.
How can I play Zelda on Steam Deck?
1. Install EmuDeck
For SD cards, format the SD card in Game Mode on SteamOS.
On your Steam Deck, press the Steam button, then press the Power button, and select Switch to Desktop.
Download EmuDeck Installer from the official website. Copy the installer to your Steam Deck’s desktop and run it.
Next, locate the Emulation/roms folder created by the installer and copy your games to it.
Launch Steam ROM Manager via EmuDeck. Every parser corresponds to an emulator; enable the ones you like to use.
Once selected, click Preview, then Parse. The images will be downloaded; wait for the process to complete.
Click Save to Steam. Once done, selected ROMs and tools will be added to the Steam library.
Close Steam Rom Manager, click Return to Game Mode on the desktop to complete the installation.
2. Install PowerTools (Optional, helps with performance)
Go to the latest release, under Assets, locate, and click USBHelperInstaller.exe to download the file. Double-click the installation file and follow the instructions to finish the process.
Now select the region and agree to the disclaimer.
Next, the app will ask you to select a folder to store games. So, create a folder in your drive and name it USBHelper Downloads; next, create two folders inside this folder, naming them DL-Enc and DL-Dec, respectively. Choose DL-Enc and click Selected Folder.
Next on the Ticket page, For the WiiU option, enter this command and click OK: titlekeys.ovh
The Wii U USB Helper app will load; it may take some time, so wait for the process to complete.
Once loaded, go to the Extraction directory option.
On the next window, select the DL-Dec folder that you created previously.
Now, it is all set; you can download the games to your PC.
4. Get the game in .wua format
On the Wii U USB Helper window, type legend of zelda and choose the version you want to download.
Select the version you want to install, and on the right pane, select Add, Add DLC & Add update.
Now click Start downloading.
You will see a Download Manager showing the progress.
Once it is done, right-click it and select Unpack (Cemu) and select the folder.
Go to Desktop and double-click Cemu to open it.
Next, go to File, then select Install game title, update, or DLC.
Locate and select the game folder; once the title is installed, you will receive Title installed! message. Click OK to close.
The game will appear in the Cemu menu. Click Tools, then Title Manager.
On the Title Manager window, right-click the base version of the game, and click Convert to compressed Wii U archive (.wua).
This will convert the old archaic Wii U ROM structure into a single file, saving storage space.
On Steam Deck, go to Desktop mode, use the Discover app, and search & install Warpinator. This tool will help communicate with the Winpinator app to transfer files.
Press the Windows key, type winpinator, and click Open. Launch Warpinator on Steam Deck.
Ensure you are on the same network on both devices to establish a connection.
Now transfer the game file (.wua); if it asks to extract, don’t do it.
6. Setting things up on Steam Deck
On Steam Deck, go to Desktop Mode, and download Cemu (Windows-x64 version). This will replace the Cemu version with EmuDeck, as the experimental version has native support for .wua ROM files, which are easier to handle.
Once downloaded, extract the version and drag & drop the files to this location. the path may differ depending on where you installed the EmuDeck: EmuDeck Emulation/roms/wiiu
Follow the instructions to write in or overwrite the files if prompted.
Now right-click Cemu.exe and select Add to Steam.
Launch the Steam app, right-click Cemu.exe, and select Properties.
Now clickCompatibility, then select Force the use of a specific Steam Play compatibility tool and choose the latest version of Proton (7.0-4).
Locate the Zelda .wua file and move it to this folder: EmuDeck Emulation/roms/wiiu/roms
Next, launch Cemu.exe from Steam and check if the game appears in the menu.
Close Steam and launch Steam ROM Manager; scroll to the parsers list to find Nintendo Wii U – Cemu (.wud, .wux, .wua), ensure it is enabled, and click it.
Scroll down the settings on the right pane, locate Executable Configuration, and change the path to this folder: EmuDeck's Emulation/roms/wiiu/Cemu.exe
On ROM Manager, click Preview, then Generate app list, and change the filter to Wii U. The Zelda game will appear; click Save app list and close Steam ROM Manager.
Launch Steam again, right-click The Legend of Zelda game shortcut from the games list, and select Properties.
Click Compatibility, then select Force the use of a specific Steam Play compatibility tool and select Proton’s non-experimental version, and it is done.
You can return to Gaming Mode and start playing Zelda on Steam Deck; however, if you want to optimize it for smooth running and better FPS, move to the next section.
7. Optimize the game
First, you need pre-rendered shader caches; you can find them for the game version from the GitHub page.
Next, extract the shaders and copy the content to this folder and overwrite the files if prompted: EmuDeck's Emulation/roms/wiiu/shaderCache/transferable
Launch Steam, then Cemu.
In Cemu, select the game, go to Tools, and select Edit graphic packs.
From the window that pops up, click Download latest community graphic packs.
Next, expand the Mods tab, enable FPS++.
Now, to change mode, select Advanced Settings and Framerate LimitS, then choose 40 FPS.
Switch to the Workarounds tab, enable Enhancements and Graphics.
To play at native Steam Deck resolution, click Graphics and change Aspect Ratio, then choose 16:10, and for Resolution, select 1280×800.
Next, ensure you have the PowerTools plugin installed and launch the Zelda game from Gaming Mode.
In-game, click the physical three dots button on your Deck.
On the Performance tab, click Refresh Rate, and select 40.
Click Framerate Limit, and select 40.
Next, click the same three-dot button on Steam Deck.
Go to the Plugin tab, and go to PowerTools. Click Disable SMT; and then for Threads, select 4.
If you want to play the game offline without interruption, go to next section.
8. Play offline
Launch Desktop Mode on Steam Deck, then launch Steam.
Next, launch Cemu via Steam.
Go to Options, then click Input Settings.
Go to Controller 1 (DSUController), and hit the minus button to delete the profile leaving only XInput.
Change Emulated controller from Wii U Gamepad to Wii U Pro Controller.
Deleting it will prevent Cemu from loading DSUController devices that need an internet connection.
So, these are the steps that you follow to install & play Zelda on Steam Deck and get on to the action-adventure journey of Zelda.
ZIP is a popular format that will help you to store files safely and compress them to save space. However, attackers are using the ZIP format to infuse malicious programs or perform virus attacks on the target’s PC.
In this guide we will explain to you are antivirus any good against ZIP virus attacks and can antivirus scan ZIP files. We will also show you an alternative method to detect threats with ZIP files.
What is a ZIP file and what are its benefits?
ZIP file is a file format that is used to compress multiple files and store them in a single location. You might have multiple documents related to a topic, but they are all over the place.
Instead of sending each file one by one, you can ZIP the documents into one file and send them to the target, without the hassle of sending each one individually.
So, this saves time in sending files and also makes the transfer of files faster. At the destination, the user can simply unzip and get the original files.
Here are some of the benefits of a ZIP file:
Compresses multiple files into a single file
Saves disk space
Faster file transfer
Help protect your files by settings a password to the ZIP file
Does not reduce the original file quality
Now that you know the benefits of the ZIP file, let us go through the steps that can help you on how to scan ZIP files on your PC.
How can I scan the ZIP files?
Install any antivirus software on your PC.
Right-click on the ZIP file and select Scan with (the name of your antivirus software).
Wait for the scan to complete and let your antivirus produce a result.
Check if any virus or malware is detected by your antivirus or not.
As you could see, you may even scan the ZIP archive by using the built-in antivirus in Windows.
If your antivirus detects any issues such as malware or virus infection, then we would suggest you to immediately let the antivirus remove the file. And after the file is removed, run a proper deep scan of your PC to check if the file did not affect any files on your system.
For a list of some of the best antivirus software, we would suggest you to check out our dedicated guide that will help you with the search.
Antivirus like other apps on your PCs, are programs that are designed to perform certain tasks. If your antivirus software comes with the ZIP scan ability, then it will perform the actions.
However, even though some antiviruses claim to scan ZIP files, and archives in general, some of them fail to detect infections.
Moreover, some antivirus need to temporarily decompress the contents of the ZIP file to scan them, which is advantageous for the ZIP Bombs. While other antivirus software only scan the file contents after fully extracting them.
Furthermore, antivirus software can try to detect malware certificates that it is trained to scan. In case some new malware is in the market and its signature is unknown to the antivirus, then it could let that malware pass through.
Is there any other way to scan ZIP files?
1. Manually check the extension
Open the location where you have saved the ZIP files.
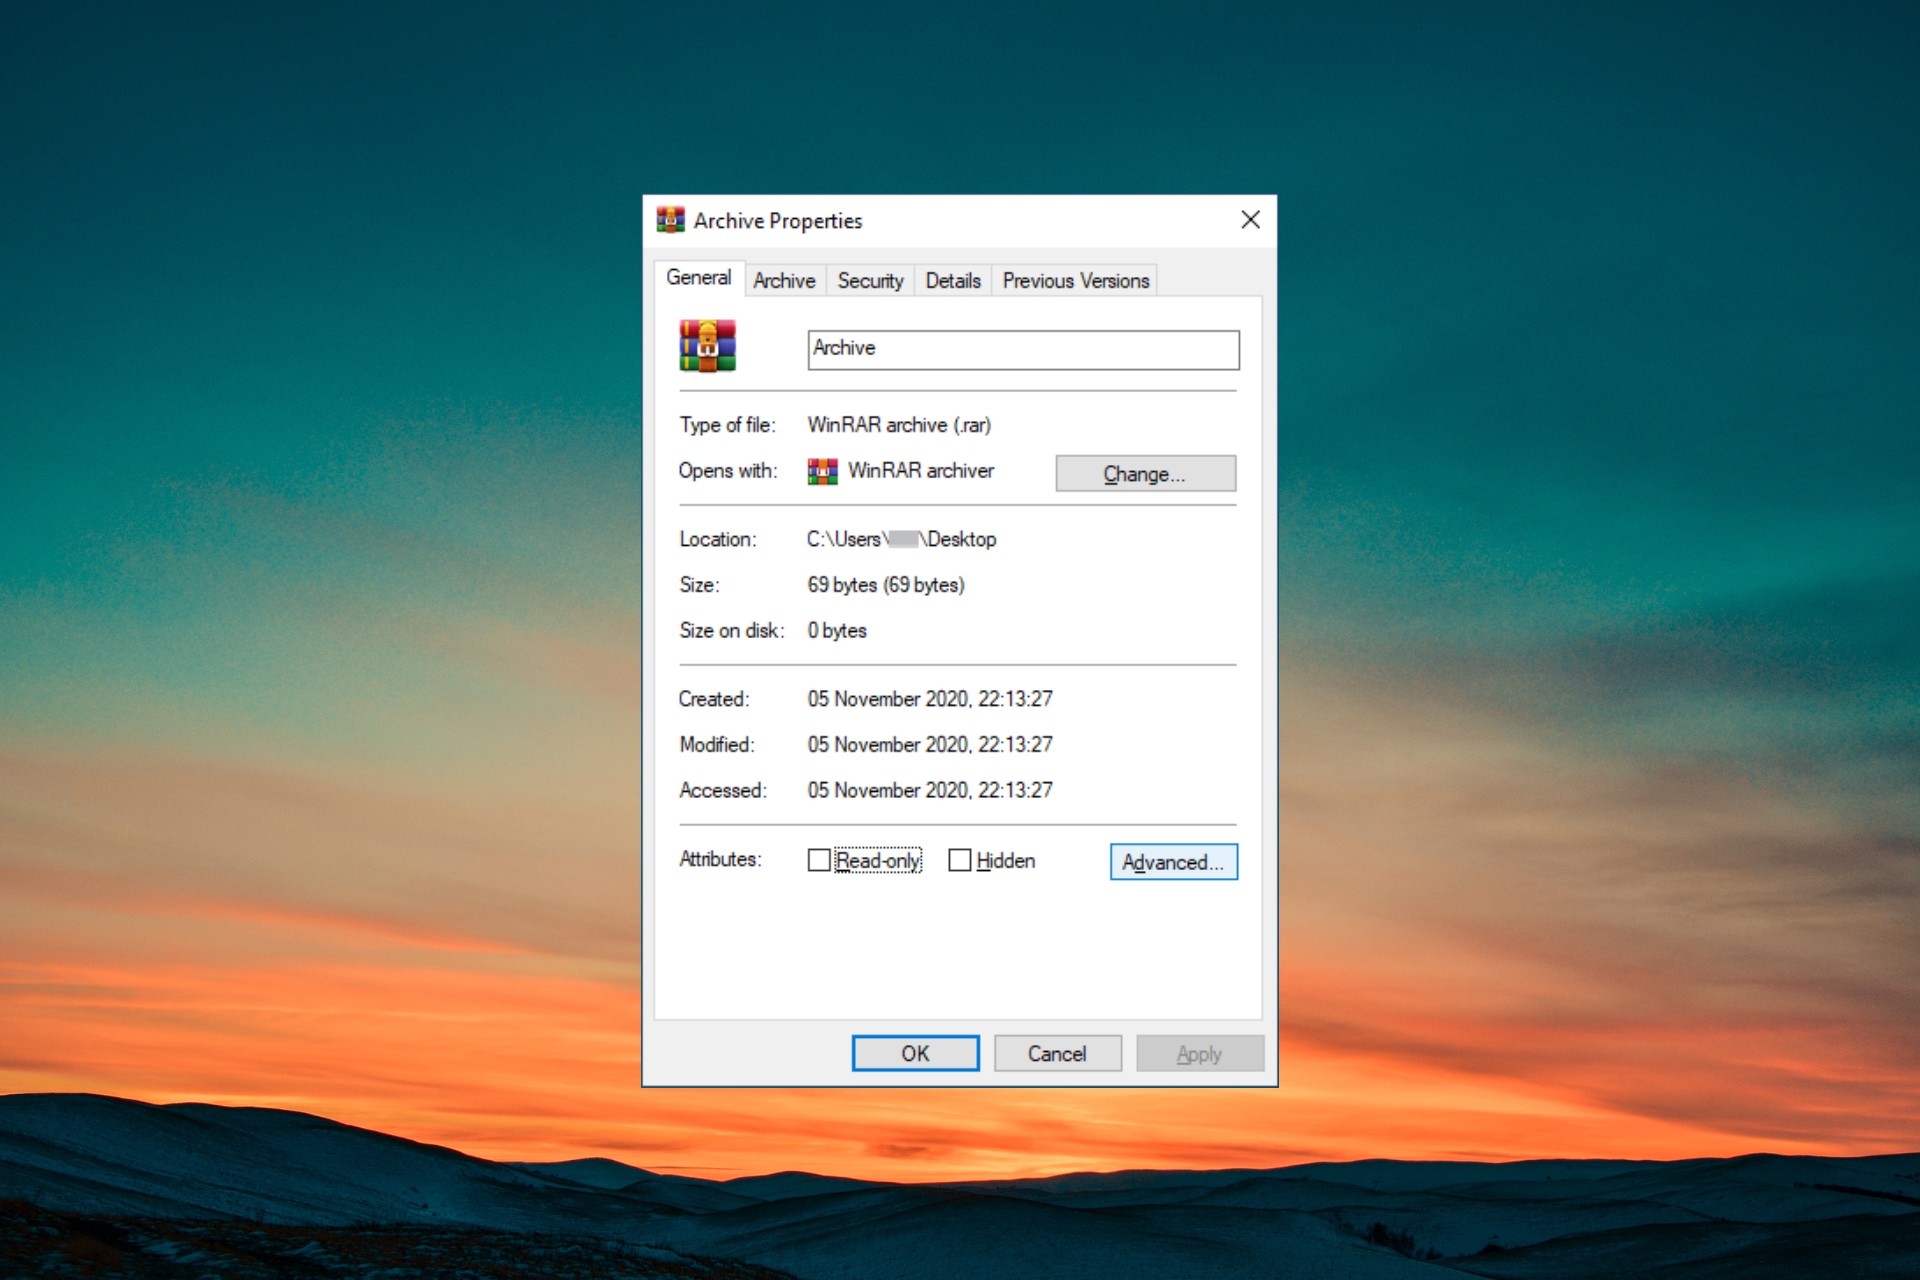
Right-click on the ZIP file and select Properties.
Check the extension of the ZIP file under the Type of file section.
Ensure that it is in the ZIP format. If yes, then it will show .zip.
However, if you see something else, for example, .zip.exe, then it means that the file is 100% a malware.
This is the manual way of checking if the ZIP file is a malware or infected file or not. In case, you see a different format, you should delete the file and scan your PC with your antivirus software to protect your PC.
2. Use online tools
There are many online tools available on the internet that will help you scan the files that you have downloaded and check if they are legit or not.
We would suggest you to check out Meta Defender or VirusTotal online websites, where you can upload the ZIP file and check its authenticity.
The best part of using these online tools is that they can run on any browser or PC, and they offer their services for free.
That is it from us in this guide. We have a guide that explains in detail how you can force open a corrupt archive file on your Windows computer.
Also, you can learn about what does archive is corrupted mean and what are the different reasons that could corrupt an archive.
Feel free to let us know in the comments below, if you liked this guide on can antivirus scan ZIP files and the different methods that you can manually take to scan ZIP files.
AutoFit is a feature in PowerPoint that shrinks the text’s size if you type more text than what can fit in the text placeholders.
It is usually enabled by default so that more text can fit in on a slide; this might work for some people, but if it doesn’t for you, you can turn off AutoFit in PowerPoint to create easy-to-read text slides.
Why you might want to disable AutoFit? You might wonder why AutoFit is a bad feature as it reduces the text’s size to ensure the text stays inside the placeholders, making the slides look neat.
However, the feature allows adding too much text to the slides, cluttering them and making them hard to read, making the presentation less effective and difficult to follow.
How do I get rid of AutoFit in PowerPoint?
1. Use the AutoFit Options
On the slide, if you have written the text, you can see upward and downward arrows in a box.
Click it and unselect the radio button next to Stop Fitting Text to This Placeholder.
Now you can arrange the text in your presentation as you like on the PowerPoint app.
2. Use the Format Shape options
Right-click the text placeholder, and select Format Shape.
The options will appear on the right side of the Presentation slide; click the Text Options tab.
Select the third option Textbox under the Text Options tab.
Click on the radio button for Do not Autofit.
How can I turn off AutoFit for the entire presentation?
1. Use the File menu
Go to the File menu.
Click Options.
Go to Proofing, and select AutoCorrect Options.
Next, on the AutoCorrect window, switch to AutoFormat As You Type.
Under Apply as you type, remove the checkmarks next to AutoFit title text to placeholder & AutoFit body text to placeholder.
Click OK.
2. Use the AutoFit options
Click on any of the textboxes or placeholders, and the AutoFit options icon will appear.
Now click AutoFit Options icon and choose Control AutoCorrect Options.
On the AutoCorrect window, go to the AutoFormat As You Type tab.
Remove checkmarks next to AutoFit title text to placeholder & AutoFit body text to placeholder.
If you see Your account has been disabled. Please see your system administrator while trying to logon on to your Windows computer; this guide can help!
We will discuss some expert-recommended solutions to fix the problem so that you can easily access your PC.
What does account disabled by server administrator mean?
Your account has been disabled; please see your system administrator error occurs when you try to log in to your Windows PC. It indicates that the Administrator user account has been disabled, and you are logged out of the account until it is enabled again.
This is a complex issue for an average computer and can be frustrating as you can’t access your computer.
Why has my account been disabled by the administrator?
There could be various reasons for a disabled admin account; some of the common ones are mentioned here:
Administrator action – The obvious reason would be that the administrator disabled your account for some reason. Communicating directly with him/her, will hopefully clear this problem.
Improper shutdown – If you have shut down your computer during restart, reset, or restore, you may face this issue. To fix it, you need to create a new account with admin rights in safe mode.
Malware infection – Viruses on computers could cause all kinds of issues, including this one. Try running a deep scan using a reliable antivirus tool to get rid of malware.
If you work on a device operated by an organization, the only solution to this problem is to find the reason for account disabling. If you’re not in this situation and you own the device, follow the solutions below.
What can I do if the account has been disabled?
1. Creating a new account with administrative privileges in Safe Mode
1.1 Enter the Safe Mode
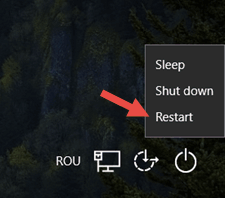
Press & hold the Shift key on the login screen, then click the Power button. A menu will appear; click Restart while pressing the Shift key.
Remove your finger from the Shift key as you see the Advanced Recovery Options screen.
Now on the Choose an option page, click Troubleshoot.
Next, select Advanced options.
From the Advanced options screen, click Startup settings.
Click Restart.
Your computer will reboot, and you will get a blue screen with options, press the number key on your keyboard next to Enable Safe Mode with Command Prompt.
Your computer will reboot in safe mode, and you will see the built-in administrator account; then log in on it.
1.2 Create a new user with admin rights
Press and hold the Shift key, then click the Power button. You will see a menu; click Restart while pressing the Shift key.
Stop pressing the Shift key once you see the Advanced Recovery options screen.
Click Troubleshoot.
Next, select Advanced options.
Click Command Prompt.
Copy & paste the following commands one by one and press Enter after every command:
net user /add <username for the account that you want to create>
net localgroup administrators <username for the account that you want to create> /add
Once the commands are executed, you will get a new account with admin rights.
Type the following command to reboot your PC, and press Enter: shutdown /r
Close the Windows Command Prompt window.
2. Performing a System Image Restore
Press and hold the Shift key, then click the Power button. You will see a menu; click Restart while holding down the Shift key.
When you see Advanced Recovery options screen, let go of the Shift key.
From the Advanced Recovery options menu, click Troubleshoot.
Next, select Advanced options.
Click System Image Restore.
You will get a list of restore points; select the point to which you want to restore your system settings and initiate the process. If you get a prompt to select a user account, choose the one with Administrator rights.
Wait for the process to complete, and restart your computer.
Follow this method after following any of the two methods available, or directly if you can, another username with administrator rights.
Log in to your computer with another user account with administrator privileges. Press Windows + E to open the Windows File Explorer.
Locate, right-click This PC and press the Shift key to get advanced options. From the context menu, click Manage.
On the Computer Management window, go to the left pane, and click Local Users and Groups to expand it.
Click Users to get the list of users.
On the right pane, locate the disabled user account, right-click it, and select Properties.
On the Properties window, locate the Account is disabled option, remove the checkmark, and click OK to confirm the action.
Reboot your computer to let the changes take effect.
4. Use the Registry Editor
4.1 Make changes to a registry entry
Press and hold the Shift key, then click the Power button. You will see a menu; click Restart while holding down the Shift key.
When you see Advanced Recovery options screen, let go of the Shift key.
From the Advanced Recovery options menu, click Troubleshoot.
Go to Advanced options.
Now under Advanced options, select Command Prompt.
On the command prompt, type the following command and hit Enter: regedit
In the Registry Editor window, select HKEY_LOCAL_MACHINE, go to File, then click Load Hive.
In the Load Hive window, choose This PC, then navigate to this path: Windows\System32\Config
Under the Config folder, locate and double-click the SAM file; you will get a Load Hive window; there you will have to create a new key.
Next, rename the new key as testkey and click OK.
Navigate to this path: Computer\HKEY_LOCAL_MACHINE\testkey\SAM\Domains\Account\Users\000001F4
From the right pane, locate and double-click F.
It will open the Edit Binary Value window, locate the line starting with 0038, then double-click 11, replace it with 10, and click OK to save the changes.
Next, close the Registry Editor and Command Prompt. You will be back on Choose an option screen; click Continue.
Now, your computer boot and sign in to a hidden administrator account.
4.2 Enable the user
Locate, right-click This PC and press the Shift key to get advanced options. From the context menu, click Manage.
On the Computer Management window, go to the left pane, and click Local Users and Groups to expand it. Click Users to get the list of users.
On the right pane, locate the disabled account, right-click it, and select Properties.
On the Properties window, locate the Account is disabled option, remove the checkmark, and click OK to confirm the action.
In case the sign-in option is disabled for you, you can check out this guide to find quick and easy fixes.
5. Use the Command Prompt
While on the lock screen, press & hold the Shift key, then click the Power button. Now you will get the menu; click Restart while holding down the Shift key.
Stop pressing the Shift key once you see the Advanced Recovery options screen.
Click Troubleshoot.
On the Troubleshoot page, select Advanced options.
Now click Command Prompt.
On the CMD window, copy & paste the following command and hit Enter: net user administrator /active:yes
Now restart your PC; it will allow you to log in using the administrator account.
So, these are the methods to fix the Your account has been disabled. Please see your administrator error and regain access to your user account.
Many of our readers have reported coming across Windows error 1061 which comes with an error message The service cannot accept control messages.
This Windows error 1061 usually happens when the network services or the internet connection is not running fine. In this guide, we will share with you some solutions that will help you fix error 1061. Let us get right into it.
What is error message 1061?
Apart from problematic network services, this issue happens when the Application Services fails to respond to the requests to open applications to admin in Windows 11 and 10.
Moreover, it happens when there is a temporary mismatch between the requested control and the state of the core service.
Here are some of the common causes of Windows error 1061:
Corrupted or damaged system files – Chances are some of the network-related system files are corrupt or missing from your PC causing the problem.
Outdated drivers – Because of outdated network drivers, you will come across multiple issues including the one at hand.
Credential Manager services aren’t running – Some third-party programs might have disabled the credentials manager services on your PC, thereby causing the problems.
Let us check the different solutions that will help you resolve error 1061 The service cannot accept control messages.
How do I fix error 1061: The service cannot accept control messages at this time?
1. Restart the Credential Manager Service
Press the Win + R keys to open the Run dialogue.
Type services.msc and press Enter.
Locate Credential Manager Service and double-click on it.
Under the Startup type, select Automatic.
Hit the Run button for the Service status option.
Click Apply and OK to apply the changes.
Many users have reported that restarting the Credential Manager service has helped them resolve the error code 1061 The service cannot accept control messages.
Press the Ctrl + Shift + Esc button to open the Task Manager.
Select the IIS Worker Process and hit the End task button.
Reboot your computer and check if this fixes the error 1061 or not.
The W3wp.exe or IIS Worker Process runs in user mode that runs in order to process requests for each application pool.
If that process becomes faulty then you could come across issues such as error 1061. Simply kill the process and check if this solves the issue or not.
4. Use SFC and DISM scans
Press the Win key to open the Start menu.
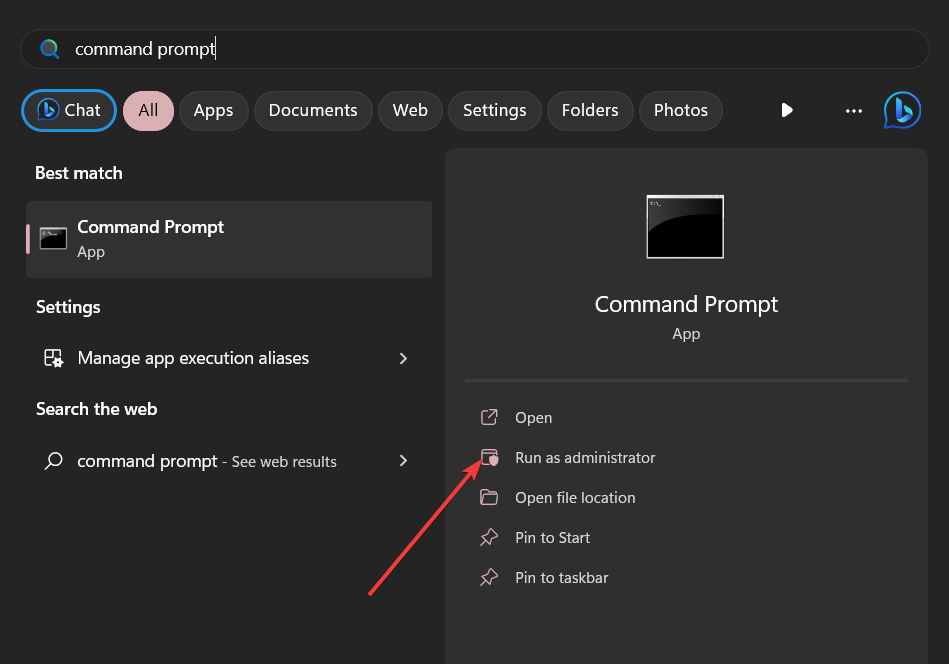
Type the command prompt and open it as an administrator.
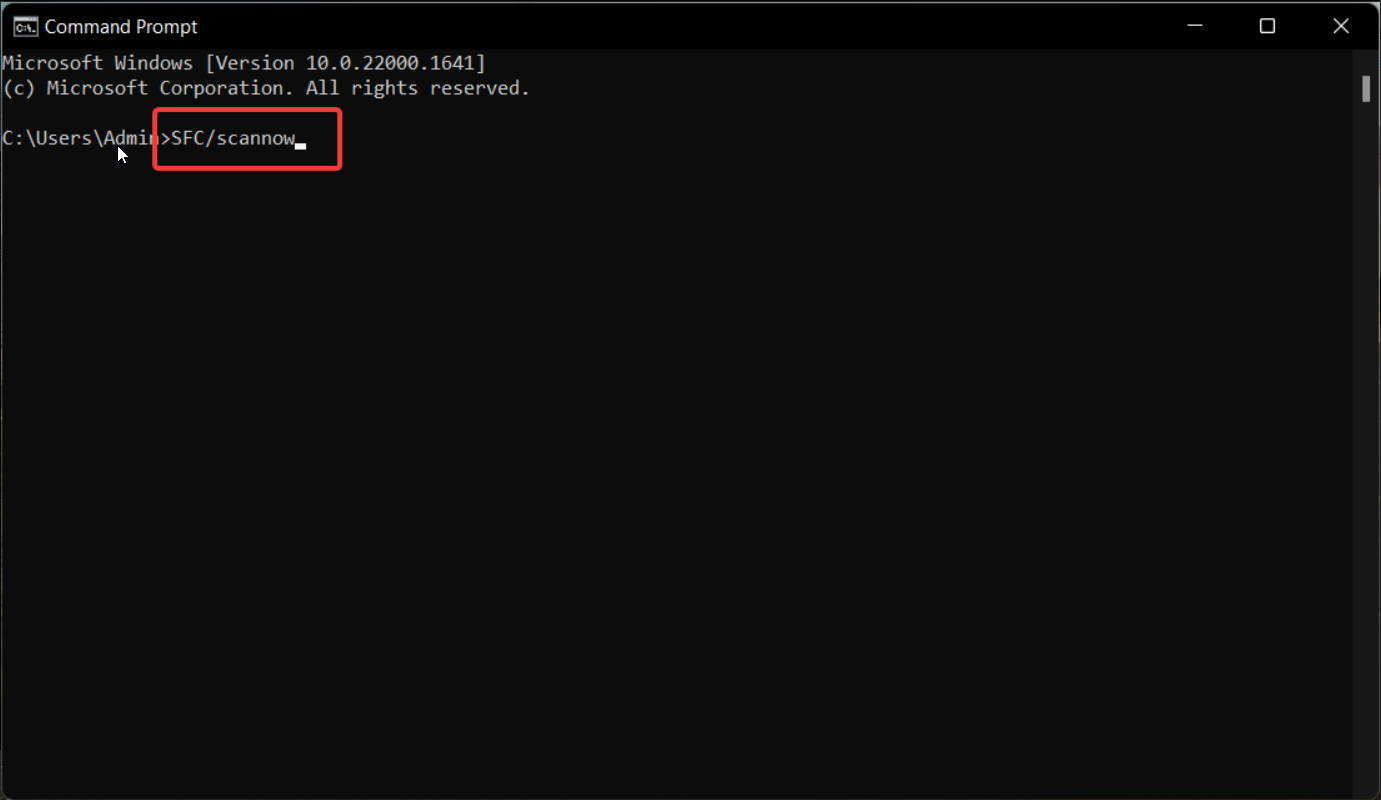
Type the below command and press Enter. sfc /scannow
Wait for the command to fix the corrupt system files.
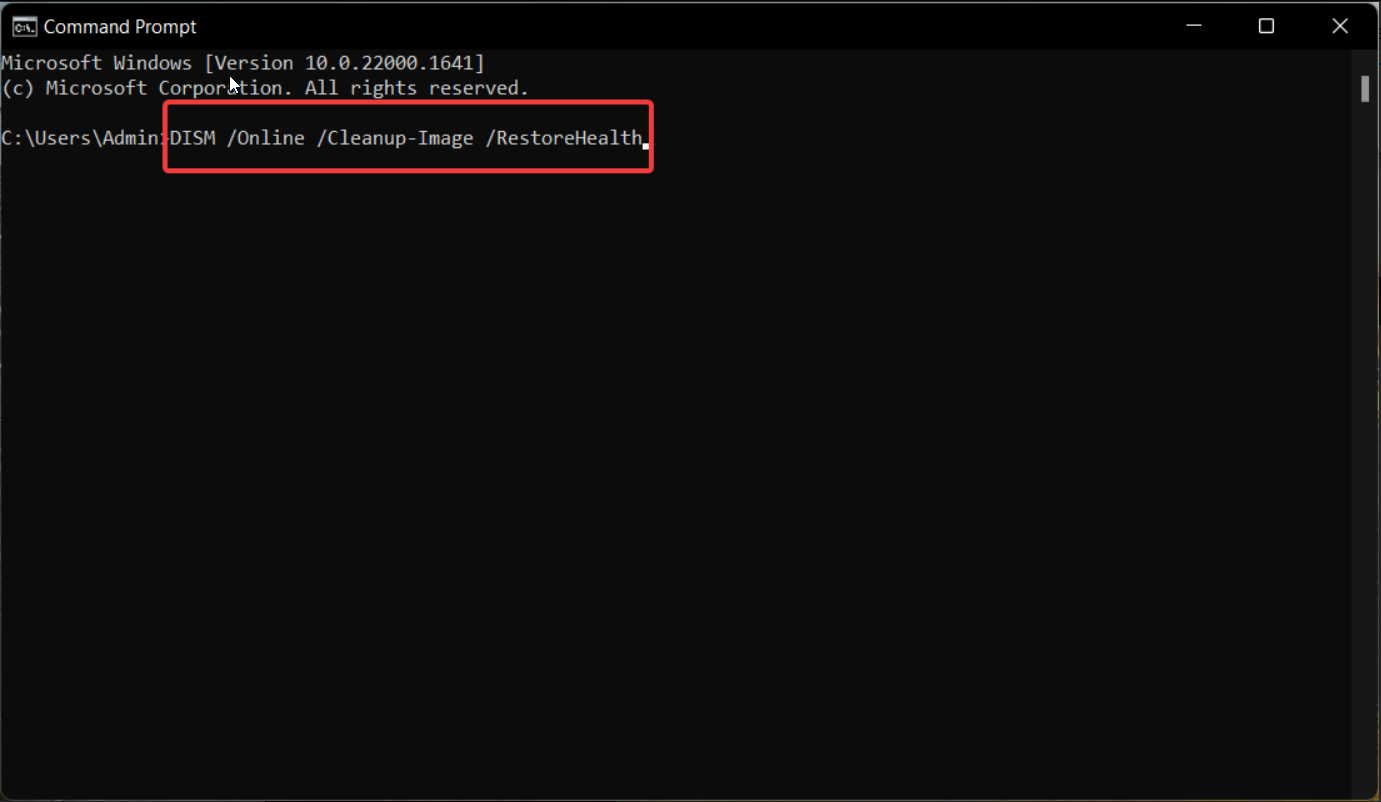
Execute the below commands to restore your system files health. Dism /Online /Cleanup-Image /CheckHealthDism /Online /Cleanup-Image /ScanHealthDism /Online /Cleanup-Image /RestoreHealth
The corrupt system files can help you fix the error 1061 as chances are some network-related system files might be corrupt or missing from your computer.
Many users have reported that the SFC Scan is not working, for which we would suggest you apply the solutions mentioned in our dedicated guide.
5. Tweak your network adapter
Press the Win key to open the Start menu.
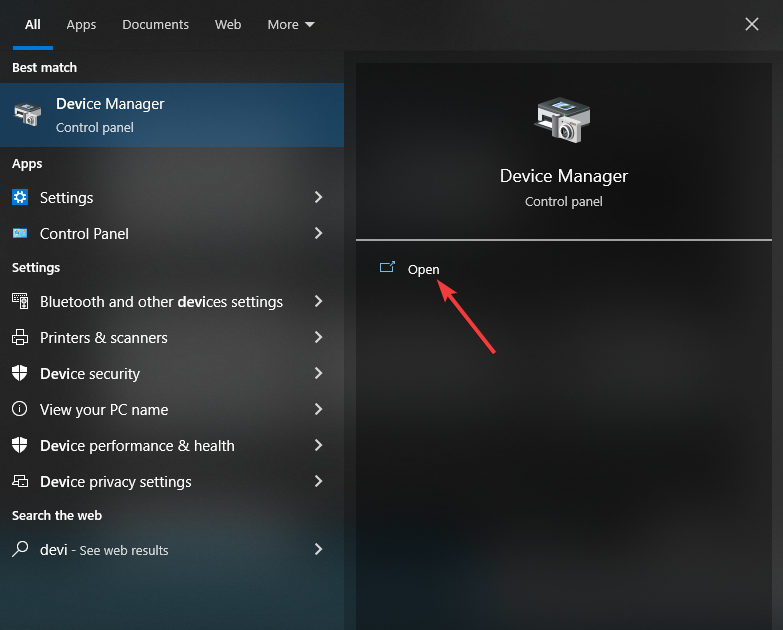
Type Device Manager and open it.
Expand the Network adapter section.
Right-click on your network adapter and enable it.
Exit the Device Manager.
Open the Start menu by pressing the Win key.
Type Command Prompt and run it as an administrator.
Execute the below command to know if your network supports virtualization or not. netsh wlan show drivers
If under the Hosted network supported, it says Yes, then you are all set.
Run the below command to set up the ad hoc wireless mode. netsh wlan start hostednetwork=allow ssid=<enter_network_name_here> key=<enter_password_here>
Execute the below command to start the network. netsh wlan start hostednetwork
Reboot your computer.
Just make sure to enable the internet connection sharing feature for your network by heading over to Network & Sharing Center in Control Panel.
You can refer to our guide and apply the solutions to resolve the DLL error code 126 on your PC. Besides, we also have listed some effective solutions to fix the error code 53003.
If you are getting error code 80090016 on Office 365, then apply the solutions to resolve the problem.
Feel free to let us know in the comments below, which one of the above solutions resolved error 1061 The service cannot accept control messages.
We all know how annoying it can be if a page takes forever to load or when the speed drops from Mbps to Kbps while downloading media. Some of our readers worry that antivirus software is the cause.
While there’s a possibility that antivirus can slow down the internet, there can be several other factors. This article will clarify whether the antivirus software is the cause and how to fix the issue.
Can antivirus slow down internet speed?
Yes, antivirus software can slow down internet speed as it performs some of its security duties for the computer due to various reasons. Below are some of them:
Scanning internet activities in real-time to prevent users from entering malicious websites can cause delays.
Your antivirus scans your internet twice, at the network and browser levels.
The antivirus firewall consumes CPU and RAM resources as it continuously scans incoming or outgoing traffic on a computer.
Some antivirus software lacks optimization for internet-related tasks, affecting browsing speed.
Now that you know that antivirus can slow down the internet, let’s check how to tell if that is the case for you.
How to tell if antivirus is affecting your internet speed?
1. Run internet speed tests before and after disabling Real-time protection
Go to speedtest.net and click the big Go button to initiate the test.
The speed test will run a series of tests to measure your network connection’s speed and performance. The results will be displayed on the Website once the test is complete.
Press the Windows key, type Windows security, and launch it.
Click on Virus & threat protection and click on Manage Settings.
Now toggle off the switch underneath Real-time protection.
Rerun the internet speed test and compare the results.
Now, turn back on your Real-time protection.
The results for the internet speed tests are expected to be different, but if they are similar, something other than your antivirus is the cause of the slow internet connection.
2. Check for high CPU usage in Task Manager
Right-click on the Start menu and click on Task Manager.
Navigate to the Processes tab and check the percentage of CPU usage for your browser and antivirus.
If you notice unusually high CPU usage while using your internet browser or other tasks, it might indicate that your antivirus is a possible cause for your slow internet connection.
Having confirmed any of the methods above, you may discover that your antivirus is not guilty of your slow internet connection. The following are several other factors that can affect your internet speed:
Network congestion – If too many devices are connected to your Wi-Fi, and all use the Internet intensely, it can slow the speed.
Wi-Fi signal – Obstructions or physical distance between your device and the Wi-Fi router can weaken the signal and affect connection strength.
Quality of your Wi-Fi router – If your router is too old or of low quality, it may not be able to provide your device with higher Internet speed.
Wireless connection – It has also been tested that wired ethernet connections generally offer faster and more stable internet speed.
Although there are other factors, such as interruption from background applications, VPN usage, and Malware, the above are common reasons for a slow internet connection.
What are the alternatives to prevent the antivirus from affecting Internet speed?
To prevent the antivirus from affecting internet speed, try these options:
Clear your browser cache to prevent the stored data from aiding the antivirus in slowing your internet speed.
Perform a router power cycle or reconnect your internet.
Add internet-using apps in the exception lists on your antivirus.
Use ad-blocking software to prevent websites from slowing internet speed.
If none of this is helpful, consider applying the tweak below.
Disable Windows Defender Firewall
Press the Start button and search for Control Panel.
Click on System and Security.
Then, choose Windows Defender Firewall.
Click the Turn Windows Defender Firewall on or off option from the left sidebar.
Now, tick the Turn off Windows Defender Firewall (not recommended) radio button under both Private and Public network settings, and then click OK at the bottom.
The Windows Defender Firewall protects your device from unauthorized incoming and outgoing traffic. But, it is known to slow down the internet speed. Thus disabling it could be a potential fix.
Hopefully, the answers and methods provided in this guide will help you fix your internet lagging issues. If you have any questions or suggestions, please use the comments section below.
You need to ensure that the event logs that you note give you the right information about the network health or attempted security breaches, because of advancements in technology.
While organizations are trying to apply best practices for Windows Event logs, they still fail to formulate a security-focused monitoring policy.
In this guide, we will give you 10 of the best practices for Windows Event Log that will help you address any adverse challenges in your network. Let us get right into it.
Why is applying the best Windows Event log practices essential?
Event logs contain important information about any incident that happens on the internet. This includes any security information, login or logoff activity, unsuccessful/successful access attempts, and more.
You can also know about malware infections or data breaches using the event logs. A network admin will have real-time access to track the potential security threats and can immediately take action to mitigate the occurring issue.
Moreover, many organizations have to maintain Windows Event logs to comply with regulatory compliance for audit trails, etc.
What are the best Windows Event log practices?
1. Enable auditing
In order to monitor the Windows Event log, you need to first enable auditing. When auditing is enabled, you will be able to track user activity, login activity, security breaches or other security events, etc.
Simply enabling auditing isn’t beneficial, but you have to enable auditing for system authorization, file or folder access, and other system events.
When you enable this you will get granular details about the system events and can troubleshoot based on the event information.
2. Define your audit policy
Audit policy simply means that you have to define what security event logs you want to record. After announcing compliance requirements, local laws and regulations, and incidents that you require to log, you will multiply the benefits.
The major benefit would be that your organization’s security governance team, legal department, and other stakeholders will get the required information to tackle any security issues. As a general rule, you need to set the audit policy by hand on individual servers and workstations.
3. Consolidate log records centrally
Do note that Windows event logs aren’t centralized, meaning that each network device or system is recording events in its own event logs.
To get a broader picture and help mitigate the issues quickly, network admins need to find a way to merge the records in the central data for complete monitoring. Furthermore, this will help in monitoring, analysis, and reporting much easier.
Not only consolidating log records centrally will help but it should be set to be done automatically. As the involvement of a large number of machines, users, etc. will complicate the collection of the log data.
4. Enable real-time monitoring and notifications
Many organizations prefer using the same type of devices all across along with the same operating system, which is most commonly Windows OS.
However, network administrators, may not always want to monitor one type of operating system or device. They might want flexibility and the option to choose more than just Windows event log monitoring.
For this, you should opt for Syslog support for all systems including UNIX and LINUX. Moreover, you should also enable real-time monitoring of logs and ensure that each polled event is recorded at regular intervals and generates an alert or notification when it is detected.
The best method would be to establish an event monitoring system that records all events and configure a higher polling frequency. Once you get hold of the events and the system, you can then chalk out and dial down the number of events that you wish to monitor.
5. Make sure to have a log retention policy
Only collecting logs centrally doesn’t mean much in the longer run. As one of the best Windows event log practices, you should make sure to have a log retention policy.
When you enable a log retention policy for longer periods, you will get to know the performance of your network and devices. Moreover, you will also be able to track data breaches and events that happened over time.
You can tweak the log retention policy using the Microsoft Event Viewer and set the maximum security log size.
While having logs of all events is a great thing to have in your arsenal as a network admin, logging too many events can also take your attention away from the one that is important.
You may overlook the critical information and it may lead to security breaches bypass. In such a case, you should carefully audit your security policy and as one of the best Windows Event log practices, we would suggest you log only critical events.
7. Make sure that the clocks are synchronized
While you have set the best policies to track and monitor the Windows Event logs, it is essential that you have synchronized clocks across all of your systems.
One of the essential and best Windows Event log practices that you can follow is to make sure that clocks are synchronized across the board to make sure you have the correct time stamps.
Even if there is a small discrepancy in time among the systems, it will result in harder monitoring of events and could also lead to security lapse in case the events are diagnosed late.
Make sure that you check your system clocks weekly and set the correct time and date to mitigate security risks.
8. Design logging practices based on your company’s policies
A logging policy and the events that are logged is an important asset to any organization to troubleshoot network issues.
So, you should make sure that the logging policy that you have applied goes in line with the company’s policies. This could include:
Role-based access controls
Real-time monitoring and resolution
Apply the least-privilege policy when configuring resources
Check logs before storing and processing
Mask sensitive information that is important and crucial to an organization’s identity
9. Ensure the log entry has all information
The security team and administrators should come together to build a logging and monitoring program that will ensure that you have all the information required to mitigate attacks.
Here is the common list of information that you should have in your log entry:
Actor – Who has a username and an IP address
Action – Read/write on which source
Time – Timestamp of the event occurrence
Location – Geolocation, code script name
The above four pieces of information constitute the who, what, when, and where information of a log. And if you know the answers to these crucial four questions, you will be able to properly mitigate the problem.
10. Use efficient log monitoring and analysis tools
Manually troubleshooting the event log isn’t that foolproof and can also prove to be a hit and a miss. In such a case, we would suggest you make use of logging monitoring and analysis tools.
For your convenience, we have a guide that lists some of the best event log analysis tools that you can use. The list contains free and advanced analysis tools.
Moreover, you can check out our list of the best log monitoring software for Windows 10 and 11 to automate and get a helping hand in tackling issues.
It is always a topic of debate that apart from protecting our PCs from viruses or malware, can antivirus be any good in detecting phishing attacks?
Well, in this guide we will find out about that. We will also share with you some prevention guides to safeguard yourself from phishing attacks.
What is phishing and how does it work?
Phishing simply means that you are persuaded to take action over something online that gives access to your computer to the attacker. The attacker can pretend to be someone from an organization or a person you trust.
Once they are on your devices, they can hack your personal information, and financial information, and blackmail you giving them ransom in return for your details.
You can fall into phishing scams by clicking an attachment that you receive in an email, following a link, filling out a form with personal information, and more.
Phishing works normally to:
Infect your devices with malware
Steal your personal and financial information
Control or steal your online accounts
Blackmail users send money in return for their information
Can an antivirus detect phishing?
In order to protect themselves from viruses or malware, users opt for the best antivirus software. But the question is, can antivirus detect phishing?
The answer is yes. However, there should be a specific system or a feature within the antivirus tool to protect users from phishing.
Do note that installing an antivirus program isn’t enough to deal with phishing scams. You should ensure that you install all the latest updates available for that antivirus software and keep it turned on all the time.
How can I prevent falling into phishing scams?
1. Apply common sense
The most common mistake that we all do when we are in panic is to use our brains. When you get a call or an email from your bank or other major institution, never just give away all the details they ask.
It is also your right to ask questions and know the details about the person that is calling, from where they are calling, etc. If you receive a call, ask them that you will visit the nearest branch of that institution and provide whatever information is asked.
Moreover, if you receive an email from your banks, never click on the link that you receive in the email. Instead, type the email link in a new browser window and check if such a link exists or not.
2. Verify alarming messages
You are busy, and all of a sudden you receive a message saying that a certain amount has been debited from your account. Such alarming messages should be treated with utmost care.
In such situations, you should immediately contact your nearest bank branch and ask the genuine person whether your account was debited or not. You can also cross-check this information by using the bank application.
Besides, reputable companies or even banks, won’t ask for your DOB, bank information, credit card details, etc., via emails. If you receive such emails, report them as phishing emails after verifying them from a legit source.
When you are online, try avoiding redirected links or clicking/opening attachments in any email. Make sure that you are visiting genuine websites and that you are not redirected to some fishing websites.
Often scammers can redirect you to a web page almost identical to the one you are using for a certain service.
Once you enter your credentials into the fake website, they will reach the attacker who will gain access to your account.
So, if you do click on a certain link, check if the address and data on the website are 100% legitimate.
4. Keep your browser updated
Whichever browser you are using, make sure that it has some sort of a mechanism to avoid phishing scams or avoid visiting malicious websites.
We have a list of some of the best web browsers that you can use on your Windows PC. More importantly, you should keep your browser up to date as the latest updates can fix the bugs and update the browser’s virus definition.
5. Use an antivirus software
It is very important, especially now, that you invest in trustworthy antivirus software that has positive reviews from actual users to protect your data from scammers.
You should create a firewall around your PC so that it becomes almost impossible for scammers to infect your machines. Make use of a combination of a desktop firewall as well as a network firewall to lower the number of hacking and phishing attempts drastically.
For your convenience, we have a guide that lists down some of the best anti-malware tools that you can opt for to stay protected, as an antivirus tool can protect you from phishing scams.
That is it from us in this guide. Now that you know that an antivirus tool can detect phishing scams, we would also suggest you keep your Windows operating system and software up to date to avoid phishing attacks.
Feel free to let us know in the comments below if you were satisfied with our answers to the question: can antivirus detect phishing scams or not?
AMC not working with your VPN can cause an error code with one of the following messages:
Did you forget to turn your ad-blocker off? Turn it off so you can access this content.
This content is not available in your location.
The page you requested could not be loaded.
Does that mean you won’t be able to keep watching shows like The Preacher and The Walking Dead outside the US?
No. The same happened to me but by tweaking my settings and trying a few different things, I figured it out.
So, if you’ve hit a roadblock and AMC is not working with your VPN, keep reading!
Is AMC not working with VPN? Here is how you can fix it!
If your AMC is not working with VPN, it probably noticed you are connecting from somewhere outside the USA and blocked your IP address.
However, the good news is that I have several fixes you can try. If one doesn’t work, move on to the next till you figure it out.
Let’s get started:
1. Change to a different US server
If AMC has blacklisted your VPN IP address, switching to a different server in the United States can provide you with a new IP.
And if the new VPN IP address is not blocked, you can establish a connection again.
Follow these steps to change servers:
Launch and log in to your VPN app.
Expand the ellipses or arrow beside the existing location to see the server list.
Click on the server of your choice.
Go back to the AMC website and see if it works.
2. Disable built-in adblocker
Some VPNs include inbuilt adblockers which may interfere with your experience with AMC. If the streaming platform detects it, you’ll get the following error:
If this happens, navigate to your VPN’s settings and make sure to disable the adblocker. Then reconnect to a VPN server and try to access the platform again.
Don’t know how to find the feature?
Most VPNs with such service either have an extra section for it in the main UI, or you can configure it from the General Settings Menu.
In most cases, these features have branded names. For instance, NordVPN’s is called Threat Protection, Surfshark’s is called CleanWeb, and CyberGhost’s is called Content Blocker.
3. Delete browser cookies
If you have ever accepted cookies on AMC, it might be accessing these files to detect your location, even if you are using a VPN.
However, deleting your cookies can help resolve this because by doing so, you eliminate the information that identifies your IP address, allowing you to reconnect as a new user.
To achieve this:
Open your browser.
Click on the three dots in the upper right corner of your browser to access the menu.
Scroll down to more tools and click on it.
Select Clear browsing data.
On the Basic tab, click the drop-down and select All Time.
Check all the boxes beside browsing history, cookies, and other sites.
Click the other Advanced tab.
Repeat the same process.
Click on clear data, and try using the website again.
4. Change to a different VPN protocol
Your VPN might not be working because the protocol you are using is not fast or secure enough to work reliably with AMC.
In this case, all you need to do is check your VPN settings to see if your VPN supports multiple protocols and switch to a different one
Follow these steps to change to another protocol. I used NordVPN as an example, though the process is very similar regardless of which VPN service you use.
In your VPN App, go to Settings.
Navigate to Connection.
Click on VPN protocols or VPN preferences.
Choose another protocol than the one you’re currently using.
Try opening your AMC app or website again.
Below are the protocols that have worked on AMC for me:
➡️ WireGuard: This protocol is one of the fastest available now. It is also well-suited for streaming because it can provide a high level of security without sacrificing performance.
➡️ OpenVPN: This protocol uses strong encryption, therefore, making it secure for streaming. It is also fast and can reduce buffering when watching a high-quality video on AMC.
5. Allow your VPN through a Firewall (Windows)
Without allowing your VPN through the firewall, your device may mistakenly see it as a threat and interfere with the VPN’s connection.
So, to allow your VPN through the firewall, follow the steps below:
On the Start menu, search for Windows Security. Click to open it.
Click on Firewalls & network protection.
Select Allow an app through Firewall.
Click the Change settings button.
Check the box beside VPN if it is empty.
If you cannot find NordVPN on the list, click the Allow another app button at the bottom right of the window.
Check the box under the type of network: either Private or Public, you want your VPN to access.
Click Ok.
Go back and try to use AMC again. It should work now.
6. Use a dedicated IP address
It’s easier for AMC to know that you are using a VPN when other users are sharing your IP address.
On the other hand, a static IP address will be yours alone. Then, AMC will find it difficult to detect any abnormal traffic from your connection or block your IP.
To get a static IP address, use the steps below:
Subscribe to a VPN that offers dedicated IPs. Note that many VPNs have it as an extra option that you have to add to your plan, for an additional fee.
Download the VPN, log in, and launch it.
Connect to the OpenVPN (UDP) or OpenVPN (TCP) protocol. For some VPNs, the dedicated IP option will only appear when a user connects to this protocol.
On your VPN, go to Options, or on the homepage, drop down the Specialty servers downward arrow to choose Dedicated IP.
Choose a location you want to use the IP on. Connect to it.
Then, go back to AMC and try again.
A static IP address also reduces the appearance of CAPTCHAs.
Examples of VPNs that offer dedicated IP addresses are NordVPN, Surfshark, CyberGhost, PureVPN, and Ivacy.
7. Upgrade to another VPN
If none of the methods above work, it means that AMC has blacklisted all of the IP addresses associated with your current VPN service.
To resolve this issue, you need to upgrade to a VPN with measures in place to get around AMC’s blocks.
To achieve this:
Subscribe to another VPN provider. I recommend ExpressVPN because of its speed, ability to bypass geo-restrictions, and security. It also rotates its thousands of IP addresses for every time you connect so you don’t have to share IPs. It kind of works like a dedicated IP, but without the extra cost.
Download and install the app on your device.
Click on the ellipsis to see the server list.
Choose any location from the list of US servers and connect to it.e
Try to access the AMC website or app again.
Furthermore, If you are still unable to resolve the issue after trying the above-mentioned steps, reach out to your VPN’s support team for assistance.
Does AMC block VPNs?
Yes, AMC blocks VPNs and this is done to enforce its geographical restrictions and comply with copyright and licensing agreements.
Customers using VPNs to watch AMC outside the US could result in AMC facing severe financial consequences as they breach AMC’s copyright and licensing agreement.
So to prevent this from happening, AMC attempts to block VPNs from accessing its service. And this is done by blocking the IP addresses a VPN provides.
How does AMC detect my VPN?
AMC detects VPN usage by identifying shared IP addresses used by multiple customers, signaling that it is a VPN IP address and so it stops the connection.
And this only occurs when you use a VPN with fewer IP addresses than users, thereby forcing users to share IP addresses.
Does AMC work with a VPN?
AMC works with VPNs that are reliable, fast, and not easily detected.
Yes, many VPN service providers claim to be all these, but how many can really live up to these claims?
A VPN with multiple server locations, 256-bit military encryption, and fast or secure protocols like OpenVPN is best to bypass the geo-restrictions on AMC.
Also, a VPN with a large server network is an excellent choice to avoid bandwidth capping even during high traffic to enable you to watch AMC lag-free from anywhere in the world.
With a staggering 3000 servers spread across the globe, including 29 server locations within the United States, ExpressVPN ensures seamless access to AMC’s vast content library from anywhere in the world.
Moreover, to guarantee maximum security and privacy, ExpressVPN utilizes AES-256-bit encryption, the industry standard for safeguarding sensitive data.
Furthermore, one of ExpressVPN’s standout features is its automatic kill switch. It acts as a fail-safe mechanism, immediately severing your internet connection if the VPN connection drops unexpectedly.
This prevents any accidental exposure of your online activities and ensures AMC is unable to detect the direction your traffic is coming from or detect your IP.
When it comes to speed, ExpressVPN’s lightning-fast servers ensure a seamless streaming experience with minimal buffering and lag. This is crucial if you want to watch AMC videos in high quality.
ExpressVPN also allows five simultaneous connections on multiple devices, such as smartphones, tablets, smart TVs, or computers, all under a single subscription.
✅ Pros
Unlimited bandwidth
Dedicated IP
Split tunneling
Zero activity log
30-day money-back guarantee
❌ Cons
Expensive
ExpressVPN
Get ExpressVPN for unlimited access to high-quality US servers that unblock AMC in a heartbeat!
NordVPN has over 5000 servers worldwide, including 1970 servers in the US alone. Hence, it offers an extensive reach and ensures optimal performance for AMC streaming.
It would be easy for you to stream many episodes of an interesting series ifor hours on end When this happens, your ISP will throttle your bandwidth thereby causing lag while you are streaming.
However, with the 256-bit encryption, NordVPN scrambles your traffic and this in turn hides your activity. This will help prevent ISP throttling and you can stream for long hours without buffering.
What’s more?
NordVPN offers unlimited bandwidth connections and servers that run on 10Gbps. All of these features make your time on AMC worthwhile.
The VPN also offers a split tunneling feature that can enable you to set up your VPN connection for only the AMC website while using normal internet for all other online activities.
In addition to this, this VPN has an automatic kill switch. What this does is immediately disconnect you from the internet if your network connection drops.
✅ Pros
Double VPN
Obfuscated servers
Strict no-logs policy
6 simultaneous connections
30-day money-back guarantee
❌ Cons
No refunds for purchases from iTunes/App Store
NordVPN
Upgrade to this reliable VPN with top-notch features that won’t let you down when streaming on AMC!
PIA has earned its reputation as one of the best VPNs for AMC. Firstly, PIA offers a vast network of servers strategically located in all 50 states in the US.
This expansive server network ensures that users can connect to their preferred AMC content from anywhere in the world.
PIA’s servers also boast high speeds and reliable connections, allowing for smooth streaming experiences without frustrating buffering
Additionally, PIA offers unlimited bandwidth that allows you to stream loads of high-quality movies without experiencing lag due to data caps.
Also, this VPN uses AES- 256-bit encryption to scramble your traffic and then replace your IP address with another. This enables you to bypass geo-restrictions on AMC without detection.
Furthermore, PIA’s customer support is good. With a dedicated team of experts available around the clock, any queries or technical issues are promptly addressed.
✅ Pros
Extensive US-based servers in all 50 states
Unlimited simultaneous connections.
No logs policy
Unlimited bandwidth
Split tunneling
30-day money-back guarantee
❌ Cons
Based in a 5-eyes alliance country
PIA
Fire up PIA and connect to any server in the US for unrestricted and high-quality streaming on AMC!
Surfshark is an exceptional VPN service that stands out among its competitors, particularly when it comes to providing an optimal streaming experience for AMC.
This VPN has a whopping 600 servers in the United States of America. The extensive server coverage guarantees a reliable and uninterrupted streaming experience.
In addition, Surfshark offers unlimited simultaneous connections meaning that users can connect multiple devices to the VPN service using a single account.
Furthermore, Surfshark’s split tunneling feature is another noteworthy aspect. This feature allows you to route specific applications or websites through the VPN while excluding others.
By doing so, you can customize VPN usage according to your preferences. Hence, prioritizing AMC streaming through the VPN while accessing other websites directly.
By leveraging this protocol, Surfshark offers users a swift and reliable connection, minimizing any potential slowdowns that might hinder the streaming experience.
✅ Pros
Fast servers
Unlimited simultaneous connections
30-day money-back guarantee
24/7 live chat support
Strict no-logs policy
Easy-to-use app
❌ Cons
No split tunneling for iOS
Surfshark
Say goodbye to errors, slow downs and unreliable connections by using Surfshark whenever you watch something on AMC!
If you are facing issues with AMC not working with VPN, the methods listed in this article should fix it. If you still have difficulty, reach out to AMC customer support for further assistance.
If you’re dealing with Windows 11 background apps missing from your settings, you’re not alone. This issue can happen because of corrupt system files, outdated Windows versions, or registry settings that disable background app controls.
In this guide, you’ll find effective fixes to restore the missing background apps option on your Windows 11 PC.
How to fix the background apps missing issue in Windows 11?
1. Edit Group Policy Editor
Use the Windows + R to launch the Run dialog box. Type or paste the following command and press the OK button to launch it. gpedit.msc
Paste the following path in the address bar of the Group Policy Editor. Computer Configuration\Administrative Templates\Windows Components\App Privacy
Look for and right-click the Let Windows apps run in the background policy option and choose Edit from the context menu.
Enable to radio button preceding the Enabled option.
Next, look for the Default for all apps option under the Options section and choose the User is in control option from the drop-down.
Now press Apply to save the changes and OK to exit the window.
Close the Group Policy Editor window and restart your PC.
If the background apps are not available on a work computer, it may be because the background app permissions are disabled via the group policy editor. You can easily modify the group policy to enable the background apps on Windows 11 devices.
Group Policy Editor is only available in the Pro, Enterprise, and Education versions of the Windows 11 operating system and not on a Home edition by default. However, you can easily enable the group policy editor on Windows Home PC by following the instructions listed in this guide.
Modifying the Windows registry can be risky, so before proceeding, you should back up your registry and understand the potential risks involved.
Use the Windows + R shortcut to launch the Run dialog box. Type or paste the following command and press OK to bring up the registry editor window. regedit
Navigate to the following location the pasting the following path in the address bar on top. Computer\HKEY_LOCAL_MACHINE\SOFTWARE\Policies\Microsoft\Windows
Look for AppPrivacy in the left sidebar under the Windows key. If you find the key, click it to access its contents.
Right-click LetAppsRunInBackground on your right and choose Modify from the context menu.
Assign 0 in the Value data field and press OK to save the changes.
If you do not find the AppPrivacy key, right-click Windows and select New followed by Key from the context menu.
Rename the new key as AppPrivacy and double-click to view its contents.
Right-click anywhere in the right section and choose New followed by DWORD (32-bit) from the context menu.
Rename the DWORD (32-bit) as LetAppsRunInBackground and double-click to modify its value.
Assign 0 in the Value data field and press OK to save the changes.
Reboot your PC now, and the background apps option for all the apps downloaded from Microsoft Store will now be enabled on your Windows 11 PC.
3. Run SFC and DISM scans
Press the Windows icon to launch the Start menu. Type cmd in the search bar on top and choose the Run as administrator option from the search results.
Click Yes on the User Action Control prompt to launch the command prompt with administrative privileges.
Type or paste the following command and press Enter to initiate the SFC scan. SFC /scannow
Wait for the Verification 100% complete message and then execute each command one after the other. DISM /Online /Cleanup-Image /CheckHealthDISM /Online /Cleanup-Image /ScanHealthDISM /Online /Cleanup-Image /RestoreHealth
Background apps can go missing in Windows 11 if your system files are damaged. You can run the SFC and DISM scans to repair corrupt system files and images if necessary, or even use a third-party repair app to ease the process significantly.
4. Repair the Settings app
Press the Windows key to launch the Settings app. Type settings in the search bar on top and choose the App settings option from the right results section.
Scroll down until you reach the Repair section, and press the Repair button located underneath.
Wait for the progress bar to complete and check whether or not the background apps option is available. You can press the Reset button if the issue persists.
A glitch in the Settings app can be the reason why the background apps permission option is missing in Windows 11. You can rule out this case by resetting the Settings app.
That’s pretty much it! Hopefully, one of the methods listed below succeeded in bringing the missing background apps back on Windows 11 PCs.
If the issue persists after repairing the app, you can try resetting the Settings app from the same menu. After that, you should see the background app permissions option as before.
While they can do so, Microsoft does not offer any software for it, if you want to do it, so you must resort to third-party apps. Most of them are safe, and you can install them without worries, however, it seems that a lot of them will eventually crash into internal conflicts with Windows 11, as it’s the case here.
So if your Windows 11’s is already customized and you did install KB5028254, then your Windows 11’s Start menu will literally start crashing. It is a known issue, and Microsoft is working to come forward with a solution. However, there are some workarounds.
Here is how to somehow fix the KB5028254 known issue
While this is not an official solution, by any means, Microsoft recommends you should uninstall all the UI customization apps before installing KB5028254. This you, you won’t be affected by the issue.
However, if you were not aware of this problem before installing the update package, and you installed it anyways, then you’ll need to contact customer support for the developer of the app you are using. They will then tell you what are the next steps.
Currently, only Windows 11 version 22H2 is affected so far. However, it’s good to know that not all devices might be affected. Microsoft hasn’t released a list of the apps that are causing the issue, but it seems some of the devices that are already customized are not affected by it.
In any case, contacting customer support could prove to be a temporary solution, at least until Microsoft fixes this known issue.
Are you currently affected by this bug? Let us know your experience in the comments section below.
The major difference between password spray and credential stuffing is the requirement needed to carry out the attack. They are both brute-force attacks used by bad actors to illegally gain access to user accounts.
While this might sound scary at first, they still depend on mistakes from your end. In this password spray vs credential stuffing guide, we will show how to prevent these attacks and the differences between them.
What is password spray?
A password spray is a form of brute-force attack where the wrongdoer tries some random commonly used password on different valid usernames. That means that the attacker does not have any legitimate information.
Instead, they spray some of the common and easy-to-remember passwords an average user uses on many valid usernames. Some of these weak passwords include password, 123456, 123abc, and 111111 etc.
They repeat this procedure with different common passwords till they eventually breach one of the accounts.
What is credential stuffing?
Unlike password spray, in credential stuffing, the attacker gets access to the login credentials for a user’s account. This usually happens via online leaks; maybe the website’s database where you have an account got compromised.
With the password from the single account, the bad actor tries to get access to other online accounts held by the same user. If the password does not, the hacker tries different variations of the same password.
For example, a hacker might get access to a user’s Facebook username, email, and password. He then will try the password to get into the person’s Twitter or Gmail account. If this does not work, they use a variation of the password instead.
What is the difference between password spraying and credential stuffing?
1. Objective of attack
The major objective of these two types of attacks is to illegally get access to users’ accounts. However, for credential stuffing, the objective is to use a leaked user credential for one account to get access to multiple accounts held by the same user.
Password spraying, on the other hand, requires the bad actor to have a list of common passwords that will be sprayed on different valid usernames.
The requirement for a credential stuffing attack is a leaked online credential base to work with. They usually get this through online leaks or by hacking an organization’s database.
While password spraying requires no leaked data. Just a random list of valid usernames, which is usually an email address and commonly used and simple passwords.
3. Mode of operation
While credential stuffing can be done manually, hackers use botnets. They feed the available data to the bots that start making different variations to get access to other accounts.
This form of attack works because most internet users do not keep unique passwords for different accounts. Instead, they use the same password over and over or a variation of it.
Attackers also use botnets for password spraying. The bots work with valid usernames and match them to commonly used passwords till they get a valid credential for an account.
This form of attack is sometimes successful because an average internet user has tens of accounts that require passwords. So, most people prefer to use these weak and so-called easy-to-remember passwords. This makes it easy for hackers to get access to their accounts.
How can I prevent credential stuffing and password spraying?
Below are some of the things an organization and individual can do to prevent these brute-force attacks:
Use unique passwords – While it is tempting to just go for the commonly used passwords, this usually ends badly. Always use a strong and unique password for different accounts. If you are worried about having to remember them all, you can use a trusted password manager instead.
Reject commonly-used passwords – As an organization with online portals, you need to have password creation policies that reject weak and commonly-used passwords. With this, you can quickly notice a password spray attack before it comes to fruition.
Use Multifactor Authentication (MFA) – To make the security of your portal and accounts stronger, you need to reduce the importance of passwords. One effective way to do this is to implement a two-factor (2FA) or Multi-Factor Authentication. With this, users will need to provide additional information, have access to their devices, or use biometric verification in addition to their passwords.
Frequently check for database breaches – At times, some organizations check their database, especially the shared ones with a database of known leaked credentials. With this, you can know and quickly take action against breached accounts.
Limit login attempts – Another effective way to prevent credential stuffing and password spraying is to limit the number of login attempts at a time. Also, you can introduce CAPTCHA and other liveliness detection tools into the login process to limit bots.
We have reached the end of this credential stuffing vs password spray guide. With the information therein, you now have everything you need to know about these forms of attack and how to prevent them.
If you need a list of offline password managers to help you protect your credentials, check our detailed guide for the top picks available.
Feel free to share your experience with these brute-force attacks with us in the comments below.
Microsoft released Build 25915 to the Canary Channel, and the build comes with previous features released to the Dev Channel, and some new changes and improvements.
For example, the new Outlook has come to Windows 11 in this build, and it is now an inbox app. You’ll be able to connect work and personal emails, calendars, and contacts in one secure place.
Earlier this week, Microsoft unveiled that a lot of new features are coming to Windows 11 live servers, including a new Notification bell. The bell will cleverly respond to new notifications by changing its colors.
And now Build 25915 brings another important improvement to Windows 11. Ethernet-connected devices will no longer lose network connectivity after updating to this build. On Windows 11, there are often issues with connectivity when it comes to Ethernet-based devices. But it seems that with this update, you’ll no longer have to worry about it anymore.
Ethernet cable devices should work on Windows 11 with this update
Not only Ethernet cable devices will be able to connect without any issues from now on, but Build 25915 brings some other important changes. Below is the complete list of changes and improvements coming with this build.
The New Outlook for Windows is now an inbox app
Starting with this build, the new Outlook for Windows Preview is now an inbox app. With the new Outlook for Windows, you can connect work and personal emails, calendars, and contacts in one secure place. Learn about the new Outlook for Windows here and the most recent set of updates for Insiders here. You can click here to learn more about the future of Mail and Calendar in Windows.
Changes and Improvements
[Graphics]
We have improved refresh rate logic to allow different refresh rates on different monitors, depending on the refresh rate for each monitor and content shown on the screen. This will help most with refresh rate-dependent multitasking, like playing a game and watching a video at the same time.
While a Dynamic Refresh Rate (DRR) is selected and Battery saver is also enabled, Windows will remain at the lower refresh rate and not switch to the higher rate until after Battery saver is disabled.
Fixes for known issues
The issue that resulted in some Windows Insiders in the Canary Channel on ASUS devices or PCs with ASUS motherboards has been resolved and these Insiders should receive this flight.
Ethernet-connected devices will no longer lose network connectivity after updating to this build.
What do you think about these changes coming to Windows 11? Let us know in the comments section below.
Modern security software now protects users online and offline, and Avast is one of the leading ones. However, some users are complaining that Avast antivirus is slowing down their internet connection.
While this can be caused by several factors, it is not the most difficult issue to fix, requiring minor tweaks in most cases. In this guide, we will show you to fix the issue for good and restore normal service.
Does Avast antivirus slow down internet speed?
The Avast antivirus software can sometimes slow down your internet speed due to features like Web Shield. This is due to protective options that scan your HTTPS connections, stream downloads, and other internet resources.
So, usually, during the Avast antivirus scan active period, your internet will slow down a bit. Aside from this, below are some factors that can slow down your internet while using Avast:
Outdated browser – In some cases, this issue might occur because your current version of your browser does not work well with Avast. You need to update your browser to the latest version to fix this.
Wrong router configuration – If you did not configure your router properly to permit the activities of Avast, you might face this problem. The solution to this is to make the necessary changes to your router settings.
Outdated app – Avast Antivirus itself might be outdated, leading to a slow internet connection. You need to update the security software to improve your internet speed.
What can I do if Avast Antivirus is slowing down my internet?
Before exploring the sophisticated solutions in this section, try the following basic troubleshooting steps:
Update Avast Antivirus
Check and modify your router configuration
If the issue persists, you can now proceed to the fixes below.
1. Tweak the Scan Frequency settings
Press the Windows key, type cmd, and select Run as administrator under Command Prompt.
Type the path (change the path if it is different for you) below and hit Enter to open the Avast folder: cd C:ProgramDataAvastSoftwareAvast
Now, open the ini file (usually avast.ini) in the Avast folder using Notepad.
Next, type the command below: [GrimeFighter]: ScanFrequency=999
Finally, save the ini file and restart your PC.
If the Avast antivirus software scans your PC frequently, it uses your resources and slows down your internet. Hence, you need to reduce the scan frequency, as shown above.
Press the Windows key + X and choose Task Manager.
Now, right-click any unnecessary process like Avast Cleanup.
Finally, choose the End task option.
When you install Avast, it comes with a lot of other packages. Some of these processes do not add anything to your security.
Instead, they use your resources and can slow down your internet when active. So, you need to disable them.
3. Update your browser
Launch your browser (we use Chrome as an example here) and click the Menu button in the top right corner.
Select Help and click About Google Chrome.
Now, wait for your browser to automatically check and install any available updates.
Finally, click the Relaunch button.
At times, the Avast antivirus might be slowing down your internet because the version of the browser you are using does not work well with it. Simply updating your browser should do the trick here.
If this does not work, you might need to switch to another browser.
4. Change the Web Shield settings
Launch Avast, click the Menu button at the top and select Settings.
Now, select Protection, followed by Core Shields.
Next, click the Web Shield tab under the Configure shield settings section.
Unmark the box next to Enable HTTPS scanning.
Avast has a series of protection feature that protects you from malware attacks online. One of them is HTTPS scanning, which prevents your malware from getting into your PC from HTTPS connections.
However, this feature can make the Avast antivirus slow down your internet. It is important to mention that disabling this feature is risky, and you shouldn’t use it unless you only visit trusted websites.
5. Reinstall Avast
Press the Windows key + R, type appwiz.cpl, and click the OK button.
Right-click the Avast antivirus and select Uninstall.
Now, follow the onscreen instructions to remove it.
If, after trying the solutions above, Avast still slows down your internet, you might need to go for broke and reinstall the software. This is because the issue is likely with your installation.
If the Avast antivirus is slowing down your internet, it might be due to different factors. Fortunately, this can be fixed with the solutions in this guide.
In the same vein, if you are considering switching to another top antivirus software, we have selected the absolute best in our guide. Avast has some files like avastvboxsvc.exe that leave a large memory footprint and need to be removed.
Feel free to let us know the solution that helped you fix this issue in the comments below.
I’ve been there and I know how frustrating it can be.
The truth is,
A lot of people complain about this issue every day. The crazy part is, their voicemail works perfectly as soon as they disconnect their VPN.
If you’ve ever experienced this, then this article will help you understand why it happens.
You will also get a detailed guide with fixes you can use to fix the error of voicemail not working with a VPN on your smartphone.
So, let’s dive right in!
Why is your voicemail not working with a VPN?
Below are some of the reasons proven to cause the issue of voicemail not working with a VPN:
Outdated voicemail app.
Incorrect voicemail app setup.
Phone network or carrier issues.
Call forwarding or diverting is on.
Voicemail not working with VPN on Android: Fixes
If your voicemail isn’t working with a VPN on your Android device, below are a few fixes to help you get your voicemail back up and running:
1. Restart your phone
This simple act has fixed most errors hindering connectivity and proper functionality on phones for the longest time.
Restarting your phone quickly refreshes your device and puts an end to all running apps and processes.
Simply long-press your power button and select the restart option to reboot your phone.
Doing this can resolve your voicemail issue and get it to work properly.
Alternatively, you can toggle on and off on the Airplane mode tab on your phone as this does pretty much the same thing.
2. Clear app cache
To clear cache:
Click onSettings on your Android device, then select Apps.
On the apps list, locate yourVoicemail app and click on it.
SelectStorage usage and clickClear cache or Clear data.
Confirm if the error has been fixed.
This is another quick fix you should consider whenever your voicemail isn’t working with a VPN.
Clearing your app cache deletes every pre-existing information that could be interfering with voicemail.
3. Update your voicemail app
Using an outdated voicemail app can also cause the error you’re getting with your voicemail app. This is because some older versions of apps don’t run effectively with VPNs.
Check your voicemail app to see if you’re using an older version and update to the newest version on the Google PlayStore to ensure that it’s functioning properly.
4. Contact your network provider
In many cases, your network carrier’s support is one call away and ready to help you fix any issue you have with any of their services.
Therefore, this is a valuable option that can help you resolve the issue of voicemail not working with your VPN.
5. Use your VPN’s split tunneling feature
To use this feature, follow these steps:
Open up your VPN app and select Options.
Click on the Split tunneling option.
Tick the box that says Do not allow selected apps to use the VPN.
Select your voicemail app from the list and close the settings page.
Check if your voicemail app error is fixed.
In some cases, the feature may have a different name depending on your VPN provider.
The ugly truth is that most network carriers dictate the functionality of their voicemail service. As such, they simply do not work when you have an active VPN connection.
In fact, some don’t work when you’re using a WiFi connection.
The best way to fix this is to turn on split tunneling in your VPN app.
Split tunneling allows you to exclude certain apps from accessing the internet through your encrypted VPN tunnel.
This feature conveniently lets the selected apps connect directly to the internet without the need to disable or disconnect your VPN.
5. Change your VPN provider
Disabling your VPN just to use your voicemail app is not only a bad idea, but it also exposes your privacy to threats from malicious individuals.
On the other hand, changing your VPN provider to a quality one like ExpressVPN allows you access to split tunneling so you can maintain your privacy protection even when you use your voicemail.
To get ExpressVPN:
It’s committed to ensuring your online privacy with its use of industry-standard security features.
Install ExpressVPN on your phone from the Google play store.
Sign in with your newly-created account and connect to any server of choice
Open the settings tab to access the split tunneling feature.
If your current VPN app does not have the split tunneling feature, then this fix is for you.
But wait!
How about if you’re using an iPhone?
Voicemail not working with VPN on iPhone: Fixes
1. Ensure your voicemail app is on
Worried about how to check?
Click on yourPhone app from the home screen and select Voicemail at the bottom right corner of the screen.
If the Set up voicemail button is showing, that means it’s off and you need to set it up.
If not, it means the voicemail is on and you only need to set up your custom greeting and other available options.
Most users complain of voicemail not working on their iPhones when it’s not even switched on.
Before you conclude like them, be sure to check if your voicemail app is on.
2. Restart your iPhone
For this fix:
Long press the power button.
SelectRestart from a list of options that pops up
When your phone comes up again and is done booting, check if the error has been fixed.
Sounds cliche already? It works! Try restarting your iPhone as this may just put an end to what’s interfering with the voicemail app which could be an app running in the background.
3. Contact your phone network carrier
Yes! Each network provider dictates how their voicemail service works, so there’s no one-size-fits-all fix for this problem.
However, your carrier can help you resolve the issue or at least identify the cause of the problem.
It’s advisable to visit their official website and chat with their online customer support team, they’ll be able to help.
4. Update your OS
Running apps on an outdated version of iOS could be causing so many issues like voicemail not working with VPN on your iPhone.
Check if your iPhone needs an OS update as some apps are usually temporarily disabled until your phone’s iOS is updated.
To check if your iPhone operating system needs an update:
Navigate toSettings and click on General.
SelectSoftware Update, you’ll see if there’s an update required.
5. Check and ensure call forwarding is off
If your voicemail is still not working with VPN on your iPhone, you should check and see that call forwarding is off.
To check:
Go to your phone settings and click on Phone.
Scroll to the Calls option and click onCall Forwarding.
If it’s on, toggle it off.
Call your phone from another phone to confirm if your voicemail is now working.
Having your call forwarding option on will redirect missed calls to another number instead of them going straight to your voicemail box.
In addition to the fixes mentioned above, if you’re using a free VPN on your iPhone, it’s in your best interest to change to a much more reliable and premium VPN like ExpressVPN (as recommended in the Android fix).
Setting it up is just as easy as it is for Android users:
Once you downloaded the app, sign in with your account credentials.
Follow the setup prompts and select Allow if you get a “ExpressVPN” Would Like to Add VPN Configurations message.
Now you can connect to VPN. If you want ExpressVPN to automatically connect you to the best server based on your location, just tap the big power button. Alternatively, if you want to pick a server location yourself, tap on the current location below the power button.
Although ExpressVPN’s iOS app may not have split tunneling due to Apple’s policy on consumer VPNs, it’s still the best tool to help you protect your privacy on your iPhone.
It also has a password manager to help you safeguard your passwords so you can sign into your favorite services securely.
ExpressVPN
Upgrade to ExpressVPN for a seamless experience with Voicemail!
Voicemail is one of the oldest means of communication and not so much has changed about it.
It makes it easy to drop voice messages in a situation where the person you’re trying to reach is busy or just not reachable and they can always come back to respond to those messages.
However, most providers now offer visual voicemail which allows you to read voice mails as text messages.
This makes it more convenient for many people to quickly get the content of their voice messages and manage spam without having to dial in.
If you have been having issues getting the app to work with your VPN, hopefully, you now know why.
The above fixes for both Android and iPhone have been tested to clear the error of voicemail not working with VPN.
Microsoft released a lot of updates for Windows 11 this week, in the Windows Insider Program. KB5028245 was released and it brought with it a lot of quality updates for Windows 11, including a fix for the Sleep mode.
It seems that Sleep mode is causing audio and display drivers to not work anymore, every time the PC gets out of it. But with this update, the issue should be resolved.
KB5028251 was another update patch released this week, and it mainly focused on File Explorer. It seems Windows 11’s File Explorer would often crash and show transparent backgrounds. But with this patch, the issue is fixed. While it’s in the Insider Program, the update should arrive on the live servers soon.
Now, it seems Microsoft is changing Windows 11’s Notification Icon in a new update patch for the Insider Dev Channel. The Notification icon is an elegant bell now, which will be colorized based on your system color. Where there are no notifications the bell will be empty, and when there are notifications, the bell will be colorized.
According to Microsoft, the notification count will no longer be displayed on Windows 11 moving forward. Below is the full list of features, changes, and improvements coming with Build 23511.
New notification icon and new Windows Spotlight features
[General]
If a camera streaming issue is detected such as a camera failing to start or a closed camera shutter, a pop-up dialog will appear with the recommendation to launch the automated Get Help troubleshooter to resolve the issue.
[Windows Copilot]
Windows Insiders in the Dev Channel who login and are managed by AAD (soon to be Microsoft Entra ID) will notice that the Windows Copilot Preview is no longer available in this build. This is just a temporary issue. You may enable it temporarily via this policy located here in Group Policy Editor: User Configuration > Administrative Templates > Windows Components > Windows Copilot. Please note that this policy name will change in an upcoming flight. The Windows Copilot Preview will be defaulted on in a future flight including support for Bing Chat for Enterprise.
[Start menu]
For people logged into an Windows 11 Pro or Enterprise editions with an AAD account (soon to be Microsoft Entra ID), we are providing a richer preview when hovering over files such as Word documents under Recommended on the Start menu. For this initial release, thumbnails will not be available for all files and a later update will enable the experience for more files and for MSA users. Additionally, when right-clicking on cloud file recommendations, there is now an option to quickly share these files.
Under All apps in the Start menu, Windows 11 system components will now show a “system” label. This change is beginning to roll out and so not all Insiders in the Dev Channel will see it right away.
[File Explorer]
Made some changes which should noticeably help improve the performance of the “calculating” phase when sending a large number of files at once in File Explorer to the recycle bin.
[Snap Layouts]
We have fixed the bugs that were causing some crashes that resulted in us turning off suggestions in Snap Layouts and are beginning to roll this out again to Windows Insiders in the Dev Channel. Suggestions in Snap Layoutsthat help you instantly snap multiple app windows together. When hovering over the Minimize or Maximize button on an app (or WIN + Z) to launch the layout box, you will see app icons displayed in various layout options to help recommend the best layout option that works best. This experience is beginning to roll out (again) so not all Windows Insiders in the Dev Channel will see it right away.
[Settings]
We have fixed the bug that could cause some instability which resulted in us disabling the new Settings homepage with Build 23506 last week. We have begun rolling the new Settings homepage out again to Insiders in the Dev Channel.
We are beginning to roll out a new option under Settings > Bluetooth & devices > Phone Link to disable Phone Link all together in Windows 11. This setting will prevent Phone Link from communicating with your mobile devices.
Fixes
[File Explorer]
Fixed an issue where copying files out of large archives or using “Extract All” might have been slower than expected for “solid” .7Z or .rar archives.
Fixed an issue where when decompressing some of the newly supported archive format types, the folder names might become gibberish.
Fixed an underlying issue where in some cases the context menu background in File Explorer was appearing transparent.
[Notifications]
Fixed an issue that was preventing apps from opening when you selected inside a notification popup for that app.
Fixed an issue causing Insiders to unexpectedly see a notification suggesting you turn off notifications for an app named NotifyiconGeneratedAumid_*.
[Taskbar & System Tray]
Fixed multiple explorer.exe crashes that were impacting taskbar reliability.
Fixed an issue that was causing quick settings not to open when selecting the network, volume, and battery icons in the system tray.
[Task View & Desktops]
Adjusted the desktops switching animation to ease into the animation a little more.
[Search on the Taskbar]
Fixed an issue where search was not actually hiding when set to hide in taskbar settings.
[Windows Ink]
Fixed an issue where writing in the address box in Microsoft Edge might not work correctly. Make sure Microsoft Edge is up to date with the latest version.
NOTE: Some fixes noted here in Insider Preview builds from the Dev Channel may make their way into the servicing updates for the released version of Windows 11.
Known issues
[General]
[NEW] We’re investigating reports that explorer.exe is crashing on the login screen (with an error pop up) when attempting to enter safe mode.
[Start menu]
[NEW] Some apps under All apps on the Start menu, such as PWA apps installed via Microsoft Edge, may incorrectly be labeled as a system component.
[Windows Copilot]
You can use Alt + Tab to switch out of Windows Copilot, but not back into it. Windows + C will move focus back to Windows Copilot
When first launching or after refreshing Copilot while using Voice Access you’ll need to use “Show grid” commands to click in the “Ask me anything” box for the first time.
[File Explorer]
Insiders may experience a File Explorer crash when dragging the scroll bar or attempting to close the window during an extended file-loading process.
[NEW] In some cases, the icons on your desktop may all go blank. If this happens, using the refresh option in the desktop context menu should resolve it.
[Dynamic Lighting]
Switching user accounts can turn off device LEDs.
[Windows Ink]
Windows Ink does not convert handwriting to text into the main content (e.g., Word documents and Excel spreadsheets) in Microsoft 365 applications.
Search boxes in Microsoft 365 applications (e.g., Microsoft Word) might not work correctly.
Comment fields in Microsoft 365 applications (e.g., Microsoft Word) might not work correctly.
What do you think about the new Notification icon coming to Windows 11? Let us know in the comments section below.
Microsoft is leaning on a new 4.2 oz mammal to help revitalize brand awareness for its Edge browser named Edgehog the Hedgehog.
Microsoft may not be prepared to launch a multi-billion dollar ad blitz across print, radio or digital media, but the company does have a new strategy of utilizing a hedgehog to get users acquainted with its Edge browser.
Edgehog the Hedghog was introduced via Microsoft Edge’s Twitter and greeted with its own personal Microsoft employee badge as well as a series of small videos following the tiny spiked Erinacine through a day of climbing, sleeping, and playing at a company office.
Despite the addition of the new cuddly mascot, it doesn’t seem like Microsoft is ready to let off its aggressive tactics to etch out more browser market share which has led to many Windows users complaining about an abundance of pop ups, prompts, and settings trickery to inflate its usage numbers as of late.
It’s also unclear how Edgehog plays into the larger artificial intelligence narrative Microsoft is forming around new Edge features, or how long the Edge team plans to use the tiny ball of spikes as its new mascot.
Whatever the purpose or length to Edgehog’s association with Microsoft’s replacement to Internet Explorer, many are finding its presence a nice departure from the traditionally stuffy and manufactured brand ambassador efforts companies participate in.
Are you using Edge and are you making use of the latest AI features?
Static, crackling, and buzzing noise is pretty common in Bluetooth and wired headphones. It is especially prominent on cheap Bluetooth headphones, but some users experience it on quality devices too.
This annoying humming sound can be caused by varieties of factors, ranging from the distance between your device and the headphone to physical obstruction. Fortunately, you can eliminate the static noise by following the steps in this guide.
Why do I hear static noise in my Bluetooth headphone?
Several factors can be responsible for the static noise you hear in Bluetooth headphones. Below are some of the notable reasons:
Low headphone battery – Oftentimes, the cause of the crackling noise on a quality headphone is low battery. So, you need to charge the battery before anything else.
Physical obstruction – If there is a physical blockage, like a wall between your headphone and PC, you will likely hear unpleasant noise. Remove this barrier, and things should be back to normal.
Wireless signal interference – Sometimes, this issue might occur if another wireless signal like that from your Wi-Fi interferes with your headphone’s line of connection. You can restart the wireless device in question to fix this.
Faulty drivers – If your audio driver is faulty, you might also hear these annoying humming noises. The solution to this is to reinstall or update your drivers.
Now that we know the possible causes of this problem, let’s fix it by using the solutions below.
How do I get rid of static noise in my Bluetooth headphone?
Try the basic troubleshooting steps below before proceeding to the more complex solution:
If you’re using a Bluetooth dongle, make sure that it’s properly connected to your device
Remove any interfering wireless device
Charge headphone battery
Ensure you are in close proximity to your PC
Remove any physical obstruction
Check the app you are using with the headphone for issues
If you are still hearing the noise, proceed to the solutions below.
1. Update audio drivers
Press the Windows key + X and select the Device Manager option.
Double-click the Sound, video, and game controllers section and right-click your audio device under it.
Now, choose the Update driver option.
Finally, select Search automatically for drivers and install any available updates.
One of the major causes of the reason you keep hearing static noise in your Bluetooth headphone is an outdated audio driver. So, try to update your audio drivers and maybe check if there are updates available for your Bluetooth drivers.
2. Disconnect unused Bluetooth devices
Press the Windows key + I to open the Settings app and select Bluetooth & devices in the left pane.
Select the Devices option in the right pane.
Now, click the three vertical dots before the unused device.
Finally, select the Remove device option.
If you have too many Bluetooth devices connected to your PC at once, you are likely to hear static noise on your wireless headphone.
This is because the devices might be interfering with your headphone. So, you need to remove any device that is not important.
Press the Windows key + X and select Task Manager.
Right-click any app that you are currently not using.
Finally, click the End task button.
In some cases, some background apps might be running processes that interfere with your Bluetooth connection. This might be the reason you are getting a static noise on your Bluetooth headphone on Windows 10 and 11.
The solution to this is to close these apps for good using the Task Manager.
4. Disable all sound effects
Right-click the sound icon on your Taskbar and select the Sound settings option.
Select the More sound settings option.
Now, double-click your headphones.
Click the Enhancement tab at the top.
Finally, mark the Disable allsound effects option and click the Apply button, followed by OK.
If enabled too many sound effects and enhancements on your PC, it can cause the static noise you hear on your Bluetooth headphones.
Many users have been able to fix this issue by simply disabling all sound effects on their PC. So, you should try it too.
5. Run the Playing Audio troubleshooter
Press the Windows key + I and select Troubleshoot in the right pane.
Choose Other troubleshooters on the next page.
Now, click the Run button before the Playing Audio option.
Finally, wait for the scan to complete and apply the recommended fixes.
Some users have found this issue to be down to problems with the audio output of their PC. Thankfully, Windows has a built-in troubleshooter that can help you diagnose and recommend fixes for this issue.
After running the Audio troubleshooter, you can also run the Bluetooth troubleshooter to check for potential issues.
There you have everything you need to get rid of static noise on your Bluetooth headphone. While it is true that there are many causes for the issue, the solutions are just minor tweaks here and there.
So, apply the fixes in this guide carefully, and the crackling and buzzing noises should be gone for good. Similarly, if your Windows 11 audio is stuttering, check our detailed guide to fix it.
Feel free to let us know the solution that helped you fix this issue in the comments below.
Rec Room is an interesting multiplayer online game with a built-in integrated game creation tool. Unfortunately, many users are starting to complain that Rec Room is not working on their devices.
This can be due to issues on the user’s end or server problems on the game’s path. Irrespective of the cause, the solutions in this guide will help you fix this issue for good.
Why is Rec Room crashing?
There are several factors that might cause Rec Room not to work on your device. Below are some of them:
Antivirus/firewall interference – Oftentimes, this issue is usually caused by antivirus or firewall on your PC. You need to disable the security software temporarily to fix this.
Server issues – At times, this problem might be due to server downtime. In this case, you might get an error code Notebook in Rec Room or other error codes.
Compatibility issues – If your device is not compatible with Rec Room, the game is unlikely to work on it. You need to check the list of system requirements for PC.
With these possible issues in mind, let’s fix Rec Room if it’s not working with the solution below.
How can I fix Rec Room if it’s not working?
Before proceeding to the solutions in this section, try the following preliminary troubleshooting steps:
Restart your device
Check the internet connection
Check the server status. Like other Rec Room issues like error code Student, the game might not be working because the server is down. Go to the official Discord or Subreddit page to check for any related posts.
If you’re not using a PC, verify if the game is compatible with your device.
If the issue persists, proceed to the fixes below.
1. Disable the antivirus and firewall temporarily
Press the Windows key, type virus, and select Virus & threat protection.
Click the Manage settings link.
Now, toggle the switch for Real-time protection backward to disable it.
Next, press the Windows key, type firewall, and select Windows Defender Firewall.
Select Turn Windows Defender Firewall on or off.
Tick the radio buttons for the Turn off Window Defender Firewall button for both the Public and Private network settings.
Finally, click the OK button.
The first thing to check if Rec Room is not working on your device is if your security software is not blocking it. You can do this by disabling the built-in and third-party security software.
If this solves the problem, you need to create an exception for Rec Room on your firewall and antivirus.
In case you’re using a third-party antivirus, you will need to disable that from its settings.
If Rec Room is still not working after trying the solutions above, the issue might be due to your game installation. What you need to do here is to uninstall and reinstall the latest version of the game from official sources.
3. Verify the integrity of your game files (Steam only)
Launch Steam and click the Library tab at the top.
Right-click on Rec Room and select Properties.
Now, select Local Files.
Finally, click on Verify integrity of game files in the right pane.
If Rec Room is not working on your Steam client only, you can fix it by verifying the integrity of your game files. This has worked for many users, and you should try it too.
We can now conclude this guide with this solution. Provided you follow the solutions above, you should be able to get Rec Room working again.
In the same vein, if you are dealing with issues like Rec Room error code Summer, check our comprehensive guide to fix it quickly.
Feel free to let us know the solution that helped you fix this issue in the comments below.
Windows 11 is endowed with many customization options, including a series of themes and wallpapers. While these themes are aesthetic in their own way, some users still want to know their background location on Windows 11.
This guide will show different methods to get to the Windows 11 theme background location.
What is the Windows 11 default theme background?
The Windows 11 default theme background is a blooming, abstract royal blue flower with a sky blue background. This background is one of the most popular, thanks to the anticipation that preceded the release of the OS.
1. Using the Run utility to reach your current theme backgrounds
If you want to open your current theme background wallpaper directly, press the Windows key + R to launch the Run utility, type the command below, and hit Enter: %AppData%\Microsoft\Windows\Themes\TranscodedWallpaper
Now, select the app you want to use to open the background.
To open the folder containing your current theme background wallpaper instead, launch the Run utility, copy and paste the command below, and click OK: %AppData%\Microsoft\Windows\Themes\CachedFiles
Finally, you will see a CachedFiles folder open in File Explorer, which contains all your theme backgrounds. You can open them with any image editor to make changes to them.
If you want to reach the location of your current theme backgrounds on Windows 11, this method is the easiest and fastest.
2. Locating your downloaded theme backgrounds
Press the Windows key + E to launch File Explorer and click the View tab at the top.
Select Show and click Hidden items.
Now, navigate to the path (replace <username> with your user account name) below: C:\Users\<username>\AppData\Local\Microsoft\Windows\Themes
Next, double-click the theme folder you want to open.
Finally, open the DesktopBackground folder to view all the images available for that theme.
Unlike the Run command option, which allows you to open the location of your current theme background on Windows 11, this method helps you to open just about any downloaded theme.
It is especially useful if you use a slideshow theme with multiple wallpapers.
3. Use PowerShell to locate your current theme background
Press the Windows key, type powershell, and select Run as administrator under Windows PowerShell.
Now, copy and paste the following commands and hit Enter after each: $TIC=(Get-ItemProperty 'HKCU:\Control Panel\Desktop' TranscodedImageCache -ErrorAction Stop).TranscodedImageCache[System.Text.Encoding]::Unicode.GetString($TIC) -replace '(.+)([A-Z]:[0-9a-zA-Z\\])+','$2'
This will display the path of your present background theme.
Finally, you can copy and paste the path in the File Explorer search bar to go to the location. Alternatively, you can remove the img extension at the end of the command to open the folder and get access to other backgrounds.
If you want to find out the location of your current Windows 11 theme background wallpaper, whether the default or downloaded, you can run the command above using PowerShell. It will give you the path you need to follow to locate the wallpaper.
4. Locate your default theme backgrounds
Launch File Explorer and navigate to the path below: C:\Windows\Web
Here you will find different folders, including Wallpaper and Screen.
Finally, open any of the folders to view the different images used for Windows default background themes.
If you are only interested in the location of your default theme backgrounds wallpapers on Windows 11, the Web folder contains a multitude of them.
5. Locating the current desktop background registry path
Press the Windows key + R, type regedit, and click OK.
Navigate to the path below in the left pane: HKEY_CURRENT_USER\Control Panel\Desktop
Double-click the WallPaper option in the right pane.
Next, copy the path in the Value data box and click the OK button.
You can now past the path in the File Explorer search box to open the Wallpaper path.
To get the path of previously set theme backgrounds, follow the path below: HKEY_CURRENT_USER\Software\Microsoft\Windows\CurrentVersion\Explorer\Wallpapers
Finally, double-click any of the BackgroundHistoryPath options in the right pane to open it Value data box and copy its value.
In some cases, you might need the location of a hidden Windows 11 background wallpaper via the Registry Editor. You will find everything in the registry locations above.
We can now conclude this detailed guide on how to reach the Windows 11 background location. With the options provided in this guide, you should be able to find just about any wallpaper on your PC.
Lastly, if you need a list of the top Windows 11 themes and skins to give your PC a fresh look, our guide contains some mesmerizing options.
Did you manage to locate the theme background on your PC? Comment in the dedicated section below.
You will find deleting files pretty quickly, as all you need to do is select the file and hit the Delete button. However, there are times when you struggle to delete files, especially if they are corrupt.
In this guide, we will show you how you can fix the problem of corrupted files are not deleting on your Windows PC. Let us check out the guide.
Why can’t I delete corrupted files on my PC? Often, the simple process of pressing the Delete key won’t work in deleting the corrupted files on your PC. There are several reasons why corrupted files are not deleted on your PC, some of which are listed below.
The corrupted files/folder is in use – Chances are that while deleting the corrupted file or folder, there is another instance of it opened on your PC.
The computer wasn’t shut down properly – If you did not shut down your PC properly after the installation of a new program on after the installation of a new update, your PC might restrict you from making any changes to files or folders.
The hard drive has disk errors – There are some disk errors in your PC’s hard drive which is why you are not able to delete the corrupted files.
Virus infection – Your PC might be infected with a virus or malware which is why you aren’t able to delete files or perform any changes.
The file or folder is read-only – Because of some reason, the file or folder that you are trying to delete is set as read-only.
Let us now check out the solutions that will help you resolve the problem of corrupted files not deleting.
How can I delete corrupted files on my PC?
Before you apply the actual solutions, we would suggest you make sure that you use an administrator account to delete the files.
Chances are that you aren’t using the admin account in order to delete the files. Some folders require special access before you can delete them.
Simply, switch over to an admin account and check if your problem of corrupted file not deleting is fixed or not. In order to learn how you can become an admin on your PC, you can read our dedicated guide on how to make yourself an admin.
Let us now apply the advanced solutions to resolve the problem.
1. Use Command Prompt
Press the Win key to open the Start menu.
Type Command Prompt and run it as an administrator.
Type the below command and press Enter. Del /F /Q /A < file path > (In place of the file path, you have to type the location of the corrupted files that you wish to delete)
/F means to force delete files
/Q means to delete read-only files,
/A means to select files with the archiving attribute.
Reboot your computer.
If the normal method of deleting the corrupted files isn’t working, then we would suggest you take the first step in force deleting them by using the command prompt as shown above.
2. Delete files in Safe Mode
Press the Win + I keys to open the Settings menu.
Click on Recovery on the right side.
Hit the Restart now button next to Advanced Startup to boot into Windows Recovery Environment.
Select Troubleshoot.
Choose Advanced options.
Hit the Startup Settings and select Restart.
Select any of the below options based on your preferences;
F4 – Enable Safe Mode
F5 – Enable Safe Mode with Networking
F6 – Enable Safe Mode with Command Prompt
Often some programs can conflict or interfere with the smooth performance of the PC and can also cause malfunction with simple operations. You can try booting your PC in safe mode and then try deleting the corrupted files and hopefully resolve the problem.
Press the Ctrl + Shift + Esc buttons to open the Task Manager.
Locate the Windows Explorer process, select it, and hit the Restart task button at the top.
Relaunch Windows Explorer and try deleting the files.
Sometimes an issue with the Windows Explorer or the File Explorer process can cause multiple issues on your PC. In such a case, we would suggest you restart the File Explorer process and check if this resolves the issue or corrupted file not deleting.
4. Fix your hard drive
Press the Win key to open the Start menu.
Type the command prompt and run it as an administrator.
Type the below command and press Enter. CHKDSK *: /f /r (Replace * with the drive letter that you wish to repair)
/f – fix any errors it detected.
/r – Locate bad sectors on the drive and try to recover it
Reboot your computer.
After fixing the hard drive errors, we would suggest you try deleting the corrupted files and hopefully resolve the issue.
If this doesn’t work, then we also have a guide that lists down some of the best file deleter software that will help you remove any type of file from your PC.
That is it from us in this guide. We would suggest you check out our dedicated guide on how to force delete any folder if it is not getting deleted via the usual method.
Let us know in the comments below, which one of the above solutions fixed the problem for you.
Emulation has been a longstanding controversial topic within the gaming community, and now console creators, including Xbox, are intensifying their efforts to curb it even further. Recently, Xbox has taken a firm stance against console owners who use emulators to play games, resulting in the issuance of 15-day bans to those exploiting the emulation loophole.
The bans came to light thanks to YouTuber Hikikomori Media and were reported by VGC. The Xbox Emulation Hub Discord server, a gathering place for Xbox owners discussing emulators, now features warnings advising against emulating games on Xbox consoles while in retail mode.
RETAIL MODE ON XBOX IS DEAD! – 15-day suspensions handed out to users of retail emulators as a warning shot from Microsoft. – Devs warning users to delete emulators – Retail Mode team disbanding and shutting down the Patreon. Sorry to bear the bad news. RT to warn others pic.twitter.com/nYAQHgtow5
Xbox had previously prevented emulators from being used in retail mode, but a group on Discord discovered another workaround, charging $2 for instructions on how to use it. However, this workaround has also been discovered, and users are now being urged to stop employing it as Xbox is imposing 15-day bans. Additionally, some users attempting to upload Xbox emulators that work in retail mode have reportedly received permanent bans.
It is worth noting that emulators can still be used in the console’s developer mode, but this comes with certain limitations. In developer mode, players cannot run retail games or regular apps, nor can they fully utilize Xbox’s quick resume feature. While this may be acceptable for some emulator enthusiasts, others may find it inconvenient, given the risk of a 15-day ban if they resort to emulating in retail mode.
As the debate on emulation continues to unfold, console creators like Xbox and Nintendo are taking stronger measures to protect their platforms and intellectual property. The ongoing battle between preserving gaming history and preventing unauthorized emulation remains a complex and contentious issue within the gaming industry.
As reported by Neowin, U.S. Senator Ron Wyden (D – Oregon) has called for investigations by the Department of Justice, the Federal Trade Commission, and the Cybersecurity and Infrastructure Security Agency (CISA) in response to the breach. Senator Wyden has raised concerns about Microsoft’s security practices and wants the agencies to examine whether the breach occurred before a diplomatic trip to China last month, which included high-ranking officials such as Commerce Secretary Gina Raimondo, Ambassador to China Nicholas Burns, and Assistant Secretary of State Daniel Kritenbrink.
The hackers exploited an error made by Microsoft, using a stolen encryption key meant for consumer accounts. A validation error in Microsoft’s code allowed them to generate fake tokens for government and organizational accounts hosted by Microsoft, granting them unauthorized access.
Senator Wyden is pressing CISA’s Cyber Safety Review Board to investigate Microsoft’s role in the incident, particularly how the company’s practices were not detected during required audits. Additionally, he has asked the Department of Justice to examine whether Microsoft’s negligence violated federal law.
Criticism has been directed at Microsoft for handling the hack, with Senator Wyden noting the company’s failure to take full responsibility for previous incidents like the 2020 SolarWinds campaign attributed to Russia.
In response to the incident, a Microsoft spokesperson acknowledged the evolving challenges of cybersecurity and reaffirmed their commitment to working with government agencies and sharing information to address the issue.
The Chinese hacking group Storm-0558 has a history of high-profile attacks. Still, the Chinese embassy denies any government involvement in hacking Microsoft accounts. U.S. officials, however, remain concerned that the stolen encryption keys could potentially lead to further access to federal systems.
In the fields of statistical computing, data analysis, and data visualization, RStudio and the powerful language R are well-known to everyone.
R and RStudio are popular among data professionals and researchers due to the powerful statistical capabilities of R and the user-friendly interface offered by RStudio. Together, they make data analysis and visualization much easier and faster for people.
RStudio usually runs smoothly on most Windows versions. However, some Windows 11 users have experienced problems where RStudio either doesn’t open or works fine initially, but the app suddenly stops working.
This guide will provide quick and effective solutions to get RStudio working again.
Why is RStudio not opening?
There could be several reasons why RStudio is not opening. Here are some common causes:
Software or system compatibility issues: RStudio may not be compatible with the version of the operating system you are using, or there might be conflicts with other software installed on your computer.
Corrupted installation files: If the RStudio installation files are corrupted or incomplete, it can lead to issues with the application not opening properly.
Insufficient system resources: RStudio requires a certain amount of system resources, including RAM and CPU power, to run smoothly. If your computer lacks sufficient resources, RStudio may fail to open or may become unresponsive.
Antivirus or firewall blocking: Sometimes, antivirus software or firewall may block RStudio from running, mistaking it as a potential threat.
Startup conflicts: Conflicts with other applications or startup processes can prevent RStudio from Starting properly.
What can I do when RStudio is not opening on Windows 11?
This issue is usually minor and can often be fixed using these simple solutions before attempting more complex ones.
Run as administrator: Try running RStudio as an administrator. Right-click on the RStudio icon and select Run as administrator. This step can sometimes help fix permission-related issues.
Restart your computer: Restarting your computer can fix temporary glitches or conflicts that might stop RStudio from opening.
Check for RStudio updates: Make sure that you have the latest version of RStudio installed. Visit the RStudio website to download the most recent version, as newer releases may include bug fixes and compatibility improvements.
Antivirus/Firewall conflicts: Check if any antivirus or firewall software is blocking RStudio from opening. Temporarily disable your antivirus or firewall and try opening RStudio again. If it opens, you may need to add an exception for RStudio in your security software settings.
1. Install R environment
NOTE
After installing RStudio, you need to set up the R environment before launching it; otherwise, it won’t work. Also, make sure you have R version 3.0.1 or a newer version installed to ensure compatibility.
Go official CRAN website and download click on the Download R for Windows link.
Next, click on the install R for the first time link to proceed.
After that, click the download link to download the setup file of the latest R version (R-4.3.1).
After downloading, run the R executable file to initiate the installation process, and then grant permission for the app to make changes to your device.
Follow the on-screen instructions to install the R.
After installing R, try launching RStudio again, and it should work properly now.
2. Reset RStudio’s state
Open File Explorer, navigate to the following location, and then delete or rename the RStudio folder replacing Username with your actual username: C:\Users\Username\AppData\Roaming
After that, go to another location and delete or rename RStudio while replacing Username with your actual username: C:\Users\Username\AppData\Local
Then, restart your computer and check if the RStudio not opening issue is fixed.
Removing or renaming these folders will reset RStudio’s state. Renaming creates a backup of your settings, so you can always go back to them if needed. Don’t worry if the folders are not there; RStudio will recreate it when you reopen the program.
3. Change the R version and rendering engine
Hold the Ctrl key while launching the RStudio app.
Choose the version of R you want to use and select Software from the Rendering Engine drop-down menu.
Then, click OK to save the changes and then launch the app.
If the latest version doesn’t work, download and install a previous version of R, and then select it from this Choose R Installation window.
4. Reinstall R and RStudio
If none of the above steps work, you can uninstall the apps and reinstall RStudio and all the R installations. After uninstalling the app, remove all leftover files from the system before reinstalling R and RStudio.
This can be useful when certain files or settings have been damaged or set up incorrectly, leading to the issues you’re experiencing. The new version may include bug fixes and improvements to help resolve the RStudio not opening problem.
Although R code is typically written using RStudio, it can also be composed using other code-writing tools.
Feel free to let us know the solution that helped you fix this issue in the comments below.
As per Microsoft, Microsoft Security is gearing up for its presence at the highly anticipated Black Hat USA 2023 event, going to be held at Mandalay Bay in Las Vegas, Nevada, from August 5 to 10.
What is Black Hat?
Black Hat is a globally acclaimed cybersecurity event series delivering advanced and pertinent information security research. These multi-day gatherings offer the security community access to cutting-edge research, developments, and trends, ensuring attendees stay abreast of the latest technical insights.
At booth 1740, attendees can connect with Microsoft security experts and explore the Microsoft Threat Intelligence Interactive Experience. Product demonstrations covering cloud security, threat protection products, and more will be available in the mini-theater. Visitors can also engage with Microsoft representatives to discuss their company’s security priorities and how Microsoft Security solutions can bolster defense against threats across all endpoints and clouds.
Microsoft has scheduled an exciting series of sessions to share thought leadership and product innovations. Sessions include:
Discussions on automating threat hunting with MDTI.
Simplifying defense with Microsoft Sentinel.
Introducing the Microsoft Incident Response Retainer.
The mini-theater will also feature presentations by members of the Microsoft Intelligent Security Association (MISA), a collective of cybersecurity experts committed to enhancing customer security.
A highlight of the event is an exclusive customer happy hour on August 9 at Lupo by Wolfgang Puck, co-hosted by Kelly Bissell and Aanchal Gupta, Corporate Vice Presidents at Microsoft Security.
Throughout Black Hat USA, Microsoft Security will conduct sessions on various topics, including AI in defense, AI Risk Policy, and tackling vulnerabilities affecting millions of industrial devices. The company will also celebrate the security community and its close partnerships with researchers in an invite-only Microsoft Researcher Celebration.
Additionally, Microsoft demonstrates its commitment to driving positive change by sponsoring the Cybersecurity Woman of the Year Awards Gala and participating in SquadCon, a reimagined cybersecurity conference promoting inclusivity.
Security professionals and enthusiasts can look forward to an information-packed week of knowledge sharing, networking, and celebrating the diverse community of security experts at Black Hat USA 2023.
The MMS.exe is one file responsible for facilitating the operations of Acronis products and software. However, the file is uncommon, and you may be prompted to delete it on discovery.
If you’ve noticed the MMS.exe file and are unsure what to do on your smart device, this article provides a comprehensive guide and offers solutions to common errors triggered by MMS.exe.
What is MMS.exe?
MMS.exe (managed machine service) is an executable file or component which belongs to the Acronis Managed Machine Service process and comes along with the Acronis backup software.
It acts as an intermediary process that communicates requests between the Acronis family of products.
Removing the file will not affect Windows because it’s not an operating system file but it may cause problems with Acronis True Image.
Acronis True Image offers data protection services, e.g., system-wide backups of the entire system, even the operating system.
MMS.exe facilitates the backup and recovery process on Windows, as it communicates the requests made by the different products in the Acronis Backup software.
Is MMS.exe Safe or a Virus?
MMS.exe is a known and trusted file that facilitates backup and recovery. Typically, the file is completely safe and poses no threat to the Windows OS.
However, hackers can disguise malware as this file. Hence, you need to check its security risk rating using these parameters:
File Location – The process must be in this file path, or else there’s a registry error: C:\Program Files\Acronis\BackupAndRecovery\BackupAndRecoveryMonitor.exe
Digital Signature – You can check the file’s signature using Microsoft’s Process Explorer. If the file status is listed as unable to verify, the file might be a virus.
Process behavior – Having MMS.exe run in the autostart entries, high CPU or memory usage, and multiple process instances in Task Manager are red flags warrant file review.
Changes in spelling – Take note of changes in file spelling to truncate camouflaging malware. Anything that differs from MMS.exe or mms.exe should be treated as malicious.
Having identified if the file is safe, you should check ways to disable it below.
How do I disable or uninstall MMS.exe?
Uninstall Acronis Backup & Recovery 11 Agent
NOTE
Acronis Backup & Recovery is a great software, so perform this step only you need to remove it for the sole purpose of getting rid of the mms.exe file.
Press the Windows key, type control panel, and hit Enter.
Click Uninstall a program under the Programs option in the Control Panel window.
Scroll through the list of apps to locate Acronis Backup & Recovery 11 Agent for Windows and click Uninstall.
Follow the onscreen instructions to remove Acronis Backup & Recovery 11 Agent from your PC.
Once you complete the uninstallation, restart your PC. This should stop MMS.exe from functioning.
Removing executable files or processes is not recommended, especially if they’re essential Windows components. However, you might need to disable or uninstall MMS.exe if you discover anomalies with the file/process.
Also, if you find out that the software was not causing any issues, you can install a fresh copy.
How do I fix MMS.exe errors?
Before we proceed with more advanced solutions, here are a few quick solutions you can attempt –
Press the Windows key, type in cmd, right-click on the displayed result, and select Run as Administrator.
Click Yes to grant the app administrative access in the User Account Control window.
Once the command prompt opens, type the following, and hit Enter: sfc /scannow
Wait till the scan is complete, and restart your PC to check if the error persists.
Corrupt system files are common causes of MMS.exe error messages; an SFC scan identifies and repairs any corrupt file on your PC but you can also try third-party repair software for an in-depth look.
3. Perform a system restore
Left-click the Start menu, type restore and click Create a restore point.
Select System Properties and choose System Restore button.
In the Restore Files and Settings box, click Next.
In the next window, select the Restore Point to which you wish to restore your PC, and click Next.
Then, click Finish to complete the system restore.
A system restore reverts your PC to an earlier state, free of recent errors. If you noticed the MMS.exe errors recently, you can quickly fix them by performing a system restore.
However, you need to back up your PC before running a system restore to avoid file loss.
MMS.exe is an essential component for the Acronis backup software; removing it poses no threat to your OS but will stop Acronis apps from functioning. Disabling or removing executables is not recommended, but if you have a good reason to do so, ensure you follow the steps listed in our guide to remove them safely.
If you’ve got any questions or suggestions, please let us know in the comments. You can also share this article with a friend to help them get a comprehensive understanding of MMS.exe.
Cyber threats and malware attacks are no longer a distant possibility but a harsh reality that can strike anyone. Therefore, leaving your devices defenseless is not an option anymore. With this, the market share of antivirus software and other cybersecurity tools has increased exponentially.
In this comprehensive report, we will reveal the latest antivirus statistics and some facts, giving you an insight into the hidden risks and knowledge to choose the best defense.
What percentage of people use antivirus?
With the rise of sophisticated cybercrimes, people with mobile devices and computers have learned that getting an antivirus solution is necessary.
According to the data from Statista, more than 89% of desktop users use antivirus software, compared to laptop users with 80% and mobile users with 49%, which puts mobile devices in imminent danger.
There is no definitive number on the percentage of people using antivirus software. Still, the global antivirus software market is witnessing remarkable growth with increased usage of digital platforms for work, social life, and education.
According to the antivirus trends, the market is presumed to reach up to $4.54 billion by 2025. The projection reflects that individuals and organizations understand that they need a robust antivirus program to safeguard their sensitive digital assets.
How effective is the antivirus?
From our research, the average cost of basic antivirus software could range between $20 to $50 per year. Years ago, all antiviruses worked likewise; they scanned your computer and compared the files on your computer with the database of known malware types to detect infection.
Nowadays, leading antivirus companies are also constantly working on evolving the techniques used for malware detection.
With signature-based protection, they use artificial intelligence, patching automation, behavior analytics, and big data analysis to keep malware attacks at bay.
These security tools are robust and reliable enough to not just deal with viruses, trojans, and worms but ransomware & zero-day attacks.
According to the latest Antivirus Market Annual Report by Security.org, Norton has the most paying users in terms of antivirus installed on their personal computers, followed by McAfee.
However, the same paper states that 61 percent of users relied on free antivirus in 2022. Knowing that the free antiviruses offer essential protection, it’s only a matter of good security hygiene practices to protect your devices.
You must remember not all antivirus solutions work the same; they vary in impact on device performance, quality of protection, and false positive rates. Therefore, to choose the one that matches your needs, you must consider these factors:
1. Real-time web protection
We use the internet for everything; therefore, it is essential to stay protected when browsing, so make sure the software you choose has a web protection feature.
Generally, most antivirus programs come with real-time web protection, but there is no harm in double-checking.
2. Malware detection rates
Antivirus programs are developed to detect and neutralize various types of malware, including viruses, worms, trojans, spyware, botnets, and ransomware.
The leading antivirus program companies boast a malware detection rate of approx. 99.9%, their software can identify and mitigate most malware threats, reducing the security risk.
Most antivirus solutions come with real-time scanning and heuristic analysis, which enables them to detect and block viruses. Industry-leading security software can defend against approximately 98% of common viruses.
4. Zero-Day threat protection
Suppose you are looking for a security solution for your organization. In that case, one of the most important factors to decide upon is how the antivirus deals with zero-day protection.
Some of the best antivirus software utilizes behavior-based detection & machine-learning algorithms to secure your device and reduce the risk of successful attacks, making them a perfect choice.
5. Phishing detection and prevention
One of the most common ways to exploit is phishing attacks; all it takes is a click on a link or tap on the attachment, and the next thing you know, you are under attack.
So, if you deal with emails and websites all day, you should consider an antimalware tool with a phishing detection feature.
Most advanced antivirus software is equipped with anti-phishing features which analyze emails and websites for dubious content, links, and attachments.
These tools scan, monitor phishing scams, block access to malicious websites, and warn against suspicious emails.
With these factors included, always choose a security tool that regularly updates its virus definitions and security database.
Why should I use an antivirus tool?
You must use security software to keep your devices safe and eliminate malware; let us take a look at the benefits of using it:
Real-time threat detection – Monitors your system to look for any signs of suspicious activities to ensure any threat detected can be neutralized then and there.
Data and privacy protection – Safeguards private and sensitive data from being accessed by cybercriminals, which is crucial in this digital era of online transactions.
Web protection – All good security solutions come with web protection, which blocks access to all malicious websites, preventing you from inadvertently visiting suspicious sites.
No manual intervention – Allows you to schedule regular system scans, ensuring that your computer or mobile devices are always protected.
Email security – Scans outgoing and incoming emails for malicious links or attachments, safeguarding you from phishing scams and other email-related threats.
Which is the No 1 virus protection in the world?
The best antivirus protection in the world is the one that solves your purpose. Every user’s requirements for antivirus can’t be the same; there can’t be a single tool for all.
If you are looking for a security tool tailored to your needs, we advise you to read this article to choose what is best for your devices.
Is the world ready to face the rising tide of cyber threats?
With most of our lives shifting to digital platforms, a significant rise in malware infection and other cyber attacks is witnessed as cybercriminals constantly refine their tactics, making it impossible to detect.
According to a report issued by Elastic Security Labs, the percentage of malware differs depending on the installed operating system, i.e., 39% for Windows, 55% for Linux, and 6% for macOS.
From their findings, CobaltStrike was the most popular threat for Windows endpoints, with approximately 35% of all detections, followed by AgentTesla at 25% and RedLineStealer at 10%.
Cybercriminals have also exploited increased dependence on digital platforms due to remote work setups, online communication, and e-commerce activities.
In addition, users knowingly and unknowingly visit illegal sites, according to online piracy statistics, exposing their devices to more risks.
Several types of malware threats emerged and are now prevalent; some of the common ones are:
Adware – Also known as spam, are unwanted or malicious ads on your endpoint. It is relatively harmless but irritating as it could hamper your computer’s performance.
Fileless malware – Utilizes legit system tools like PowerShell to carry out malicious activities. By leveraging these tools, it can avoid detection, making it challenging to identify and remove.
Virus – Replicates by attaching to legit files or disguising itself as legitimate software, making detection and removal challenging.
Worms – Exploits the operating system, apps, or network protocols to replicate and spread across computer networks without human intervention.
Trojans – Disguises as legit software and gains unauthorized access to your devices, allowing cybercriminals to steal sensitive data, monitor activities, or execute malicious commands.
Botnets – Networks of infected computers controlled by a single entity, which enables hackers to perform coordinated attacks, distribute malware, and launch DDoS attacks.
Spyware– Secretly monitors users’ activities and collects sensitive data, leading to privacy breaches and identity theft.
Ransomware – Encrypts your data and demands a ransom in exchange for the decryption key, resulting in data & financial loss and operational disruptions.
According to Kaspersky Lab, 70 percent of malware infections are caused due to Microsoft Office components’ vulnerabilities.
Microsoft is struggling to keep up with the vulnerabilities in its products by patching up to 100 CVEs per month. However, the process from finding to patching a loophole is not fast enough to stop the attackers.
How many viruses are created each day?
As per the latest reports, over 6000 new computer viruses are detected daily, with the old continuously becoming more sophisticated.
However, it’s hard to reach a clear figure as most of them are not detected immediately upon their release.
How many virus attacks are each day?
Over 1 billion malware programs exist worldwide, and according to Astra, over 560,000 new ones are detected daily.
To conclude, the latest antivirus statistics show a staggering number of new malware threats detected daily, emphasizing the need for cybersecurity tools to protect our digital world.
So, you must invest in a reliable antivirus solution whether using a Windows server, Windows Home or Professional, macOS, iPhone, or Android, keep your devices and software updated, and exercise caution while browsing the web and accessing emails.
With these preventive measures, we can strengthen our digital defenses and enjoy a secure & more productive digital environment.
Please feel free to give us any information, tips, and your experience with the subject in the comments section below.