Regularly backing up your Windows files is as essential as having a routine Windows update. This is because a backup not only protects you from random data corruption, which can creep on your PC for a myriad of reasons, but it also keeps a check on the loss of data caused by human errors, malware attacks, and so on.
We’ve previously covered how to back up your files using the System Restore, File History, etc. But that’s not all. Yet another, more straightforward method will do the job just as well; we’re, of course, talking about the Command prompt. Command prompt offers you a slew of commands to ehlp you create a backup for your files.
Let’s go over all of them one by one.
How can I back up files using Command Prompt?
1. Robocopy
The Robocopy command is a handy Cmd command that can copy any of your Windows files with ease. With Robocopy you can copy all the files or subdirectories from the source folder to the destination folder, including empty directories.
To backup your files using the Robocopy command, run the following snippet in Command prompt and hit Enter:
Here, replace the “source folder path” with the path of source folder in realtime; similarly for “destination folder path.” The /mir option will then mirror the source folder to the destination folder; this means the destination folder will also delete any deleted files from sources.
Also, the /r and /w parameters will specify the number of retries and wait time in case of any errors. At the same time, the /np and /log parameters specifies the progress of the backup and maintain a log file of the backup, respectively.
For example, to copy a file ‘file1’ from the Downloads folder in D: drive to E: drive, the command will be something like this:
robocopy D:\Downloads\file1 E:\ /MIR
2. XCOPY
Yet another powerful tool offered by Command prompt, the XCOPY command copies your files from one location to another. This command is handy in copying all files and subdirectories from the source folder to the destination folder, including any files and empty directories.
To run the XCOPY command, use the following format:
Again, for example, if you want to backup an entire folder from one place, let’s say, the Downloads folder in C: drive, to E: drive, you’ll run a command that will look something like this:
xcopy C:\Users\shaantminhas\Downloads E:\ /s /v
The parameters /s and /v are useful for copying directories and subdirectories and verifying each downloaded file respectively.
3. Wbadmin
Want to back up your operating system files to protect them from random corruptions and errors? The Wbadmin will come to your rescue here, letting you back up and quickly restore your operating systems, volume, files, or application.
Here’s how to create a backup with Wbadmin in Command prompt:
From above, replace the “BackupDrive” with the drive letter or network location where you’d like to store the backup on your PC. You can back up a specific file or folder with Wbadmin as well. For example, to create a backup of your drive D: in your drive F:, type in the following command and hit Enter:
Here, replace “BackupDrive” with the drive letters or network letters where you’d like to store your data, and “00:00” with the time you want to perform this backup.
You can explore many other combinations like this, with the help of different parameters.
To learn more about these commands, we have a great copy vs xcopy vs robocopy guide that should help you.
Backing up your files using the Command prompt
Keeping a regular backup of your Windows files is as essential as getting regular, timely updates for your PC. Following some of the above commands, you can back up your files using the Command prompt for good in no time as well.
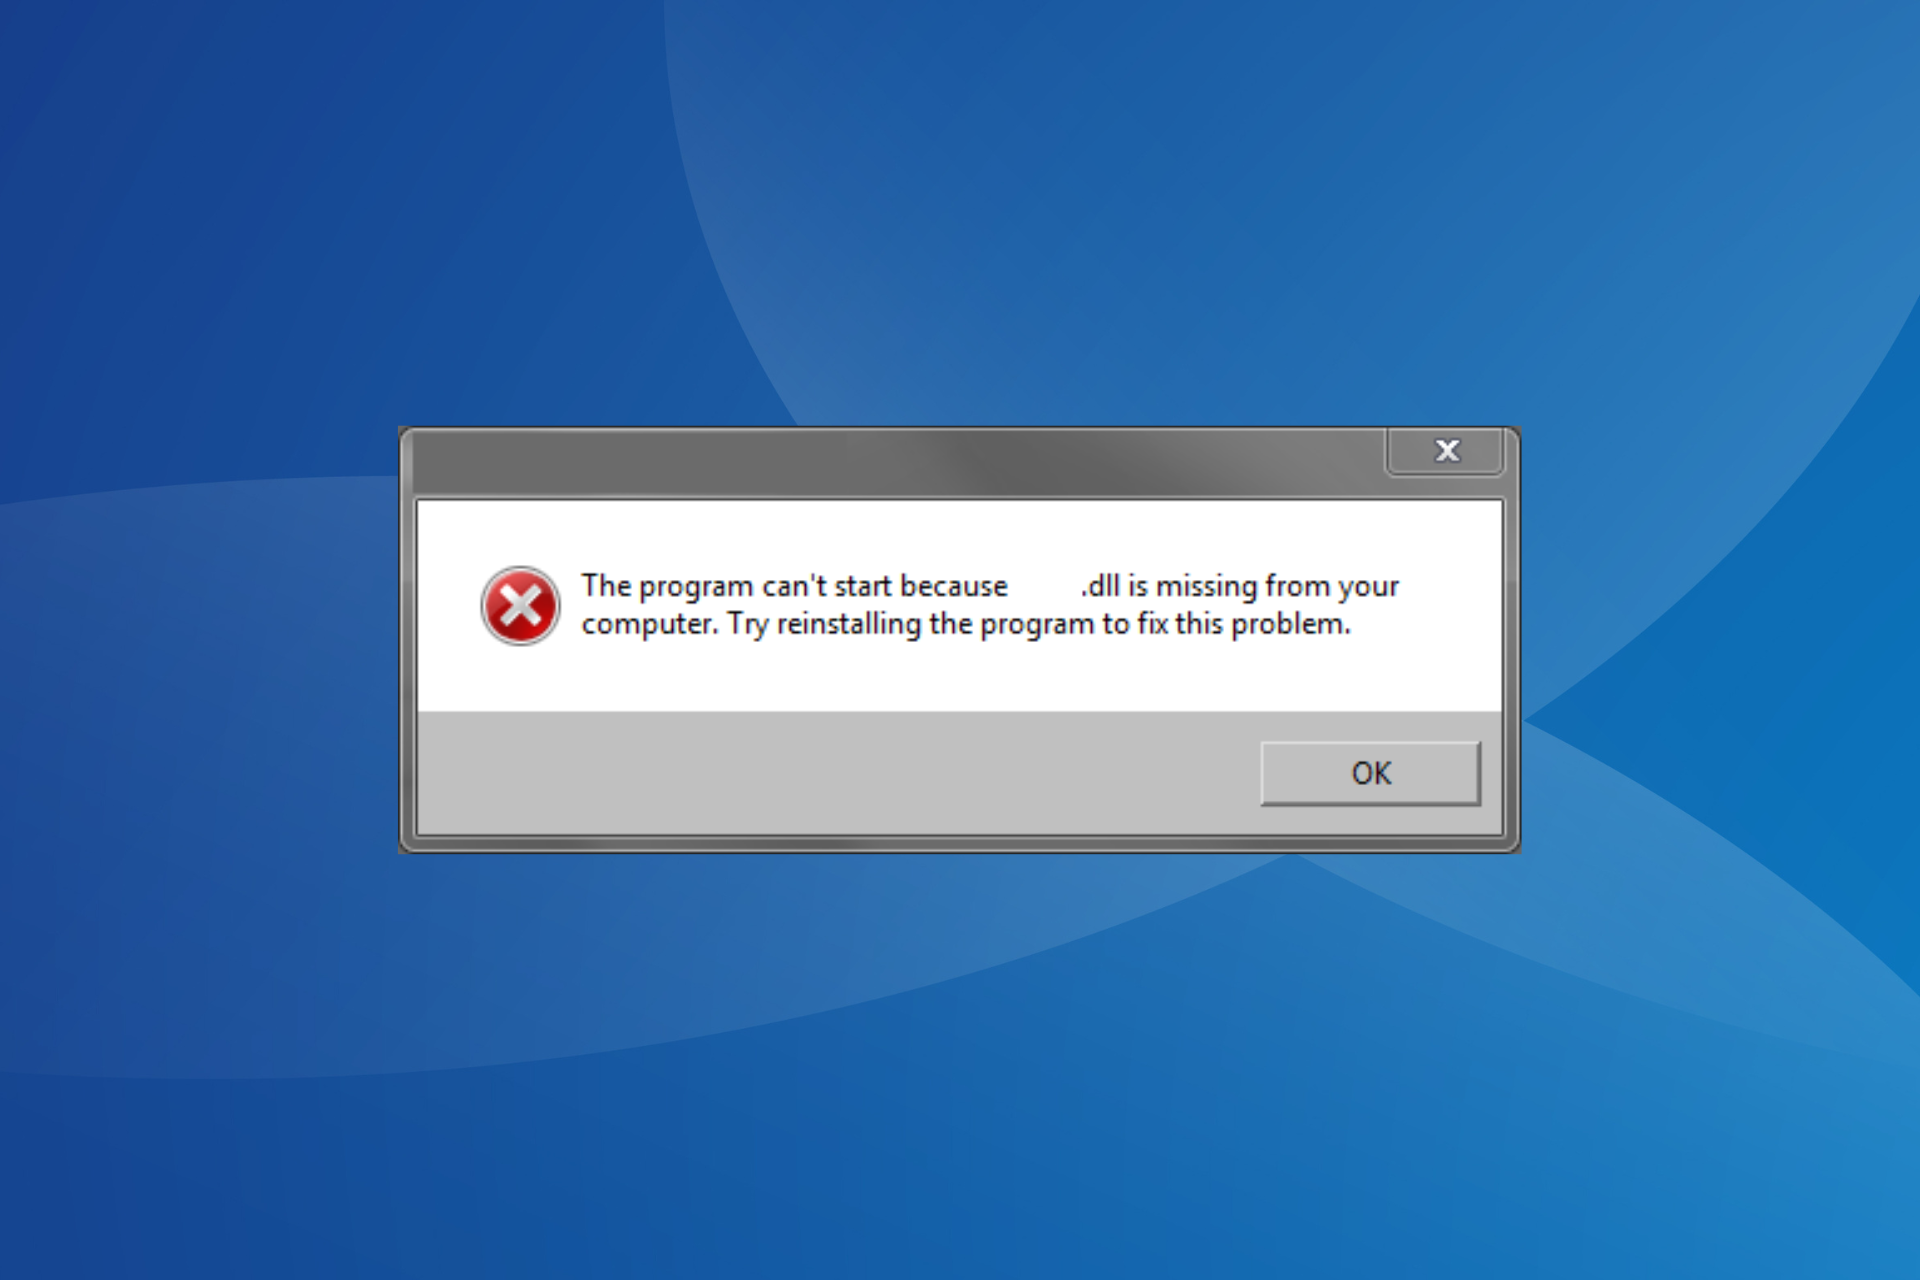
Steam_api.dll is a dynamic link library (DLL) developed by Valve Corporation and is an integral part of the Steam client. It manages several services like user authentication, user profiles, game stats, cloud storage, and more.
If the DLLs are missing, Steam games won’t start because cannot connect to the game servers.
Why is the Steam_api.dll file missing?
There can be several reasons why the DLL is missing from the Steam client installation folder.
App interference – Missing Stream_api.dll issue commonly occurs when an antivirus installed on your PC blocks the DLL considering it suspicious.
Software conflicts – Conflicts between the Steam client and Windows can cause system-level related issues such as the one at hand.
Corrupt Windows Registry – Corrupt registry database damages the system configuration settings, which triggers errors like missing DLLs in Windows.
Malware or virus infection – Malicious software mess up your system and modify the essential system level and DLL files.
Program not installed properly – If the Steam client was interrupted during installation, the steam_api.dll might not have been installed. You can uninstall the affected apps and reinstall them again.
You can try the methods discussed below to replace the missing DLL file and play games on Steam without any errors.
How can I resolve the missing steam_api.dll issue?
1. Use a DLL fixer tool
Windows might be unable to recognize the DLL because of incompatibility with the game and Steam client. Resolving these inconsistencies yourself is not easy and may cause further damage.
To avoid this, you can use a reputable DLL-fixing software that can easily fix the system-level issues hogging your computer and can replace the steam_api.dll from the large library of DLLs it maintains to address the complexities arising from missing, corrupted, and overwritten DLL files.
2. Disable real-time protection
Launch the Settings app using the Windows + I shortcut.
Choose Privacy & security from the left sidebar and then the Windows security option from the right.
Choose the Virus and threat protection option.
Follow the Manage settings located in the Virus and threat protection settings section.
Toggle Off the switch under the Real-time protection section.
Windows Defender has been reported to block the steam_api.dll file considering it a potential threat. You can turn off the real-time protection feature in Windows Security before launching the Steam client. If you have a third-party antivirus installed, you can disable it for time being.
3. Install DirectX
Visit the official DirectX download website, select the relevant language from the drop-down, and press the Download button to initiate the DirectX Web Installer download.
Navigate to the download location, double-click to run the Web Installer, and follow the on-screen instructions to install all the packages.
After the process is complete, reboot your PC and launch the Steam client and the game you intend to play.
Hopefully, the missing Steam_api.dll error will no longer bother you from you install DirectX. Several games and apps rely on DirectX for graphical support and for employing backend mechanics in the in-game systems.
DirectX is also equipped with several DLL files to help it function, which may alleviate the issue.
4. Update the display drivers
Right-click the Windows icon on the taskbar and choose Device Manager from the Quick Links menu.
Expand the Display adapter category.
Right-click the graphics driver and choose the Update driver option.
Choose the Search automatically for drivers option from the window.
Wait for Windows to look for the best driver available and automatically install it on your system. Steam clients utilize the graphics drivers to deliver exceptional gaming experience, and outdated graphic drivers may cause incompatibility between the DLL and the Steam app hence the error.
You can prevent multiple driver-related issues by using reliable driver update software and finding the latest and correct versions for all your device drivers.
5. Manually install the missing DLL
Remember you should always dread installing the DLLs and other system files from suspicious websites to avoid falling prey to malicious programs disguised as legitimate downloads. However, it is safe to download steam_api.dll from trusted online resources like DLL-files.com, which offers genuine DLL files.
You can also use an online virus scan tool to ensure the link is not infected before downloading the DLL. After downloading the DLL compatible with your computer’s OS version and architecture, you need to paste it into the installation folder of the Steam client.
Now execute the following command on Command Prompt to register the steam_api.dll on PC. regsvr32 steam_api.dll
That’s all! We hope the steam.api.dll not found error is now successfully resolved on your computer.
If you run into the missing DDraw.dll error, the solutions provided in this guide will help resolve it. Out latest guide covers what to do if awesomium.dll is missing, so don’t hesitate to check it out.
Were these methods effective in resolving the missing Steam_api.dll error? You can let us know in the comments section below.
Audiocontrol.dll is a Dynamic Link Library developed by AverMedia Technologies. It contains the essential code, resources, and driver functions required by RECentral, a streaming and recording tool.
If the DLL file is missing or has become corrupted, the program will not be able to operate properly and may even fail to run.
Why is the audiocontrol.dll missing?
While it is not possible to rule out the exact cause, the following may be the possible reasons for this issue:
Missing system files – DLL-related errors, like the one you are facing, usually get triggered by faulty or corrupt system files.
Virus and Malware – Virus and malicious programs modify, delete and even overwrite the DLL, and, as a result, it can no longer be traced by Windows.
Incomplete installation – If the installation of RECentral was interrupted, the audiocontrol.dll might not have been installed in the first place. You can uninstall the program and then reinstall it back.
Outdated application – If the app hasn’t been updated for long, there can be incompatibilities with the system hence the error.
Fortunately, you can effortlessly resolve the missing audiocontrol.dll error using the methods discussed in this guide.
How do I fix the missing audiocontrol.dll error in Windows?
1. Use a DLL fixer
Incompatibility between the third-party app DLL files and Windows is the main reason the DLL files cannot be located on your computer.
Attempting to deal with system-level issues yourself messes up your system, so it is advised to use a dedicated DLL fixer that is effective against the DLL-related problems afflicting your PC.
Such tools include repositories of DLL files, which can instantly replace the missing or corrupt DLL files. Thus, they will come in handy to resolve the missing audiocontrol.dll file when launching the apps that require it.
2. Run SFC and DISM scans
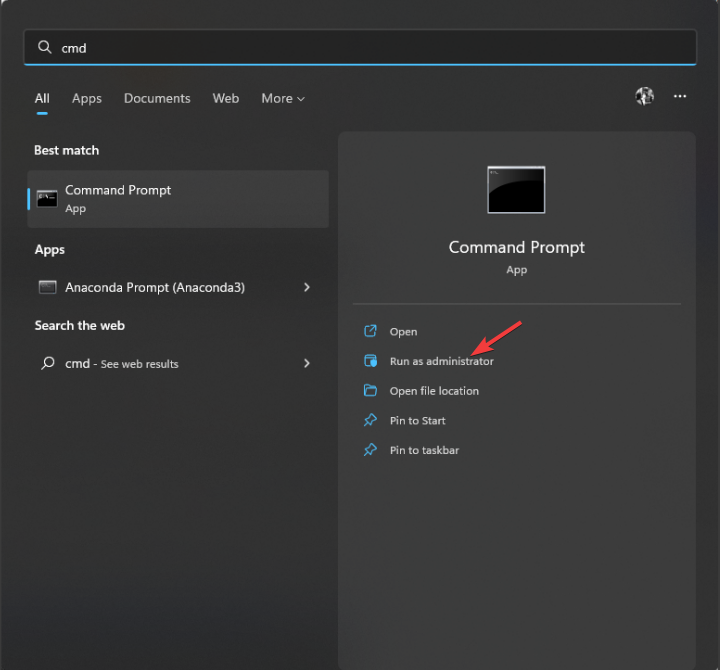
Press the Windows key to bring up the Start menu, type cmd in the search menu on top, and choose the Run as administrator option from the result section.
Choose the Yes option on the User Account Control window.
Type or paste the following command and hit Enter to execute it. SFC/scannow
Wait for the SFC scan to complete, then execute the command given below. DISM /Online /Cleanup-image /Restorehealth
Wait for the DISM scan to fix the corrupt system images, and once completed, restart your PC.
Running the SFC and DISM scan will restore the missing or corrupt system files and, hopefully, resolve the missing audiocontrol.dll error you are facing at the moment.
Right-click the Windows icon on the taskbar and choose Device Manager from the Quick Links menu.
Expand the Sound, video, and game controller category to view the list of sound drivers installed on your computer.
Right-click the concerned driver and choose Update driver from the context menu.
Choose Automatically search for drivers option from the pop-up window.
Alternatively, you can visit the manufacturer’s website to install the latest available driver.
Having outdated device drivers can cause discrepancies between the DLL file and AverMedia Recental which is why it is no longer recognized. In such a situation, updating the drivers should do the trick.
To avoid any potential damage to your PC, we suggest you try a dependable tool like Outbyte Driver Updater to detect outdated or malfunctioning drivers and find the newest updates from an extensive online database.
4. Scan your PC for viruses and malware
Use the Windows + I shortcut to launch the Settings app.
Choose Privacy & Security from the left navigation pane followed by Windows Security from the right.
Next, select Virus & threat protection option.
Click the Scan options located on the right side.
Choose Microsoft Defender Antivirus (offline scan) and hit the Scan now button.
The Windows Defender program will scan your PC to eradicate viruses and malware eliminating your PC. You can also employ a third-party antivirus to remove viruses and malware damaging your system files.
5. Manually download the missing DLL
We always advise you to refrain from downloading and installing any DLLs from suspicious sources to avoid the risks involved.
But you can manually download and install the missing DLL from trusted websites such as DLL Files.
You should only download the audiocontrol.dll compatible with your OS and system architecture. Once downloaded, paste the DLL into the install directory of the affected app. You can also paste it in the following location to make it universally accessible. C:\Windows\System32
Now reboot your computer as you normally do, and Windows will recognize the DLL upon startup.
These easy-to-implement workarounds will help you replace the missing audiocontrol.dll file on your computer.
In case multiple DLLs are missing from your computer, refer to this guide to seek troubleshooting assistance.
Which of these methods mentioned in the guide helped resolve the audiocontrol.dll missing error? Mention it in the comment section below.
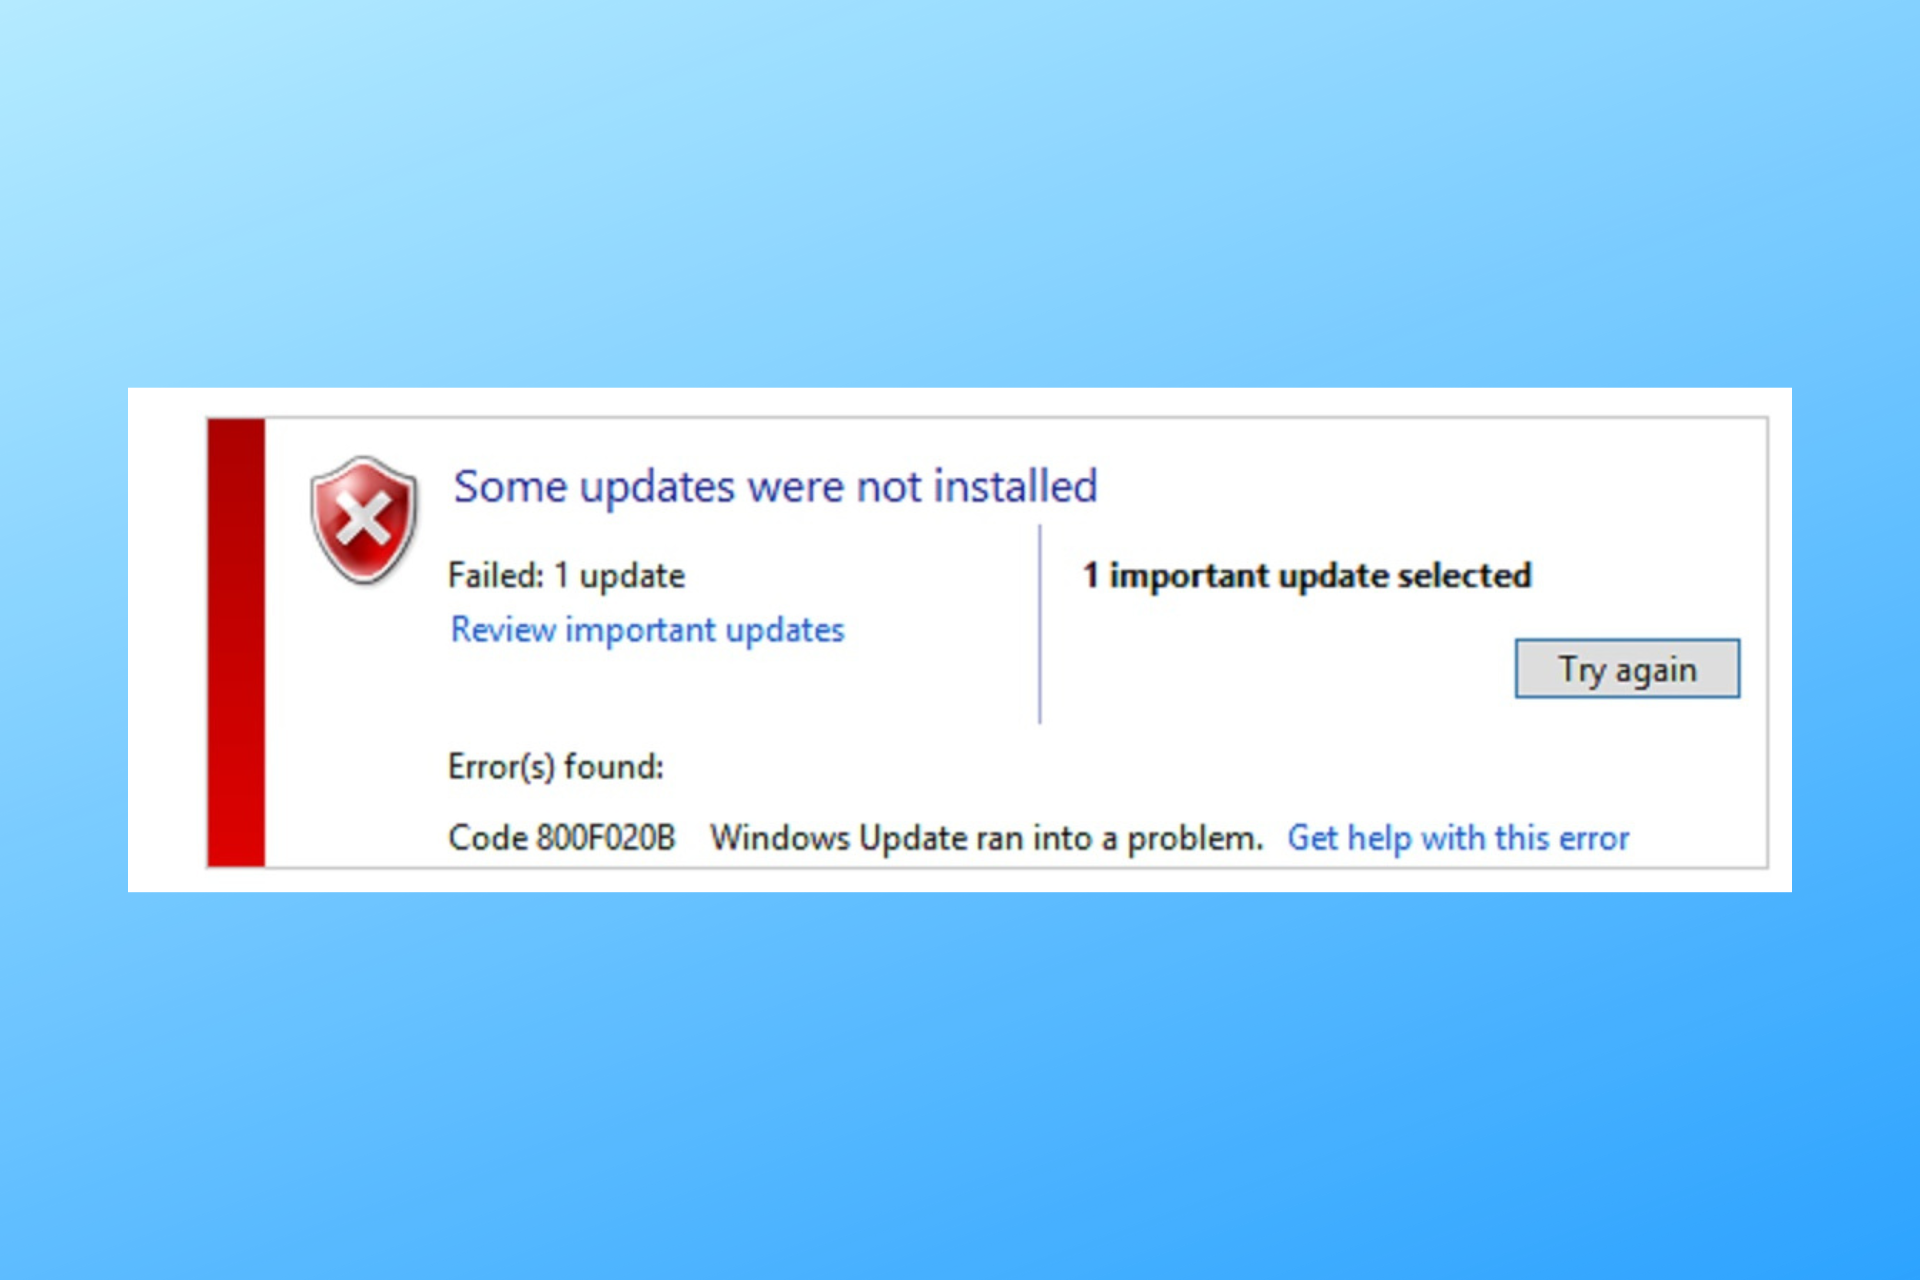
If you have encountered the error code 800F020B on your computer while applying Windows updates, this guide can help!
We will discuss some expert-recommended methods to fix the issue right after talking about the causes.
What causes the 800F020B Windows Update error?
There could be several reasons for this update error; some of the common ones are mentioned here:
The printer doesn’t accept updates via Wireless connections – Printers generally won’t allow updating their firmware via a wireless connection. Try switching to a wired connection.
A driver update is not suitable – When the optional driver update pushed by Windows doesn’t apply to your device, you get this update error. Hide and unselect the update to fix the issue.
Pocket media drive is not connected – The error might occur if a pocket media fails to connect to your PC while Windows is updating its software. Reconnect the device to fix the error.
Corrupted driver – Windows tries to update that driver that is corrupted, so you get this error instead. One of the solutions below will help you with that problem.
Now you know the reasons for the update error, let us check out the solutions to fix it.
How can I fix the 800F020B Windows Update error?
We recommend you go through these preliminary checks:
Restart your computer and try again.
If the update concerns the printer, switch to the wired connection.
So, these are methods you can follow to fix the 800F020B Windows Update error. If you have any questions or suggestions, feel free to mention them in the comments section below.
Many of our readers complained about encountering the Windows Update error 0x80240440 when updating their Windows Server machines for security patches.
In this guide, we will explore the expert-recommended fixes to get rid of this error right after discussing the causes.
What causes the 0x80240440 Windows Update error?
There could be various reasons for this update error; some of the common ones are mentioned here:
Malware infection – If your computer is infected with a virus, it could corrupt your system files required for the update. You need to run a deep scan to remove the infection.
Windows Update service – The Windows Update service must be up and running for the update to be successful; if it is not working properly, you may see this error.
Windows Registryissues – If the registry entries are broken or missing, you might encounter a Windows update error. A registry cleaner would help a lot in this situation.
Network issues – To successfully install updates on your Windows server, you need an uninterrupted and stable network connection. The update may fail if you have a poor connection.
Now that you know the causes of the error, let us move on to the fixes to resolve the problem.
How can I fix the 0x80240440 Windows Update error?
1. Delete the cache from the Windows Update folder
1.1 Stop the Windows Update service
Press Windows + R to open the Run window.
Type services.msc and click OK to open the Services app.
Locate and right-click Windows Update and select Stop.
Wait for the service to stop and minimize the window.
1.2 Delete the DataStore folder
Press Windows + R to open the Run window.
Type the following path and click OK: %windir%\SoftwareDistribution\DataStore
File Explorer will open with the DataStore folder on the screen, press Ctrl + A to select all content and click the Delete button to remove all content.
1.3 Restart the Windows Update service
Now go to Services again.
Locate and right-click Windows Update and select Start.
Wait for the process to start, then close the Services window.
2. Delete the WUServer and WIStatusServer entries
Press Windows + R to open the Run window.
Type regedit and click OK to open Registry Editor.
Navigate to this path: Computer\HKEY_LOCAL_MACHINE\SOFTWARE\Policies\Microsoft\Windows\WindowsUpdate
On the right pane, locate, and right-click WUServer & WIStatusServer, to clean the download path.
Press the Windows key, type cmd, and click Run as administrator.
Copy and paste the following command to repair the system files and hit Enter: sfc/scannow
Wait for the process to complete, then restart your server.
4. Disable the Application Control in Sonicwall NSA
Go to Firewall, then click App Control Advanced.
On the App Control Advanced page, you can sort your search results.
For Category, choose a category from the drop-down menu; for Application, select an app and for Viewed by, select Signature.
You can also type in the Lookup Signature ID if you know it.
Click Configure icon (pencil-shaped) to edit the settings.
You will get the App Control Signature Settings window; for the Block option, select Use App Settings (Disabled) and click OK.
Sonicwall NSA might cause network connectivity issues if the Application Control is enabled. You can check if any firewall settings are blocking the traffic, causing this Update error.
So, these are the methods you can follow to fix the 0x80240440 Windows Update error. If you have any questions or suggestions, feel free to mention them in the comments section below.
Error 0x87d1fde8 usually appears when using Windows Intune or Azure Active Directory (Azure AD) for enrollment.
This issue will prevent you from adding new accounts, so it’s crucial to fix it, and this guide will show you how to do it properly.
Why does 0x87d1fde8 (2016281112) error appear?
The issue appears if the device isn’t enrolled in Intune or if the policy isn’t configured properly. You can also get this error if the device doesn’t meet the compliance requirements or if you have conditional access enabled.
How can I fix error 0x87d1fde8?
Before trying anything else, ensure that your device is connected to the Internet and enrolled in Intune. Also, your device needs to be compatible with your policies.
You also need to review your policies and make sure that Windows is up to date.
Click on the Menu at the top left corner and select Azure Active Directory.
Select Protect & secure on the left pane, then click on Conditional Access.
Under the Access policy option, toggle it Off.
Conditional access is a security feature that you can use with Intune to help keep corporate data protected. If you are worried about disabling this feature, you can create a custom policy for unsupported devices.
2. Re-sync the policy
Hit the Windows key and click on Settings.
Click on Accounts on the left pane, then Access work or school on the right pane.
Locate your account connected to your AD account and click on Info.
Click on Accounts on the left pane, then Access work or school on the right pane.
Locate your account connected to your AD account.
Check whether the Info option is available. This is the confirmation that assures you that you have enrolled your device in Intune.
Alternatively, you can sign in to the AD portal and view your devices using the Intune device status page.
If this doesn’t work, check and disable your VPN if it is active. Elsewhere, you may come across the error 0x87d101f4, an Intune compliance error. Find out how to bypass it easily in our expert article.
We also share a step-by-step process on how to sync your devices with Intune, so be sure to check out our article on the same.
When you try to deploy Office 365 updates in SCCM, you will notice that the updates are stuck in a downloading state and never complete. You may get an error 0x87d0024a, which lets you know the update has failed.
If you are getting this error while installing Office 365 in your organization, you may want to check out our guide on fixing such software deployment errors.
Why is my Office 365 not updating?
Policy blocking – It is possible that the update does not apply to your environment or a group policy is blocking it.
Problematic update – You may have already deployed an update that has caused a problem before. Some updates create compatibility issues with other software components.
Pending reboot – Some updates require a reboot before installing any other updates. You can check whether there is a pending reboot before trying again.
Firewall settings – If you have newly installed an antivirus program, it may be blocking the updates.
Change of site code – If you have changed or upgraded your server, the client will not receive any new updates.
Missing hotfixes – SCCM hotfixes are software updates made available through Microsoft System Center Configuration Manager (SCCM). These updates provide faster and more targeted fixes for specific problems.
How do I fix Microsoft Office not updating?
Before you begin this process, ensure your client’s computers have internet access and he is using a valid configuration package, the target computer meets all the requirements for installing the update, and restart your WSUS server.
1. Disable the firewall temporarily
Hit the Start menu icon, type Windows Security in the search bar, and click Open.
Click on Firewall & network protection, then select Public network.
Locate Microsoft Defender Firewall and toggle the off button.
2. Uninstall recent Windows updates
Hit the Windows key and select Settings.
Click on Windows Update and select Update history on the right pane.
Scroll down and under Related settings, click on Uninstall updates.
This will take you to the most recent installed updates.
Select the topmost update and click on Uninstall.
Restart your PC and check if the problem persists.
Some users said the Office updates worked fine until they updated their operating system. A particular patch may be causing a certification failure. If the same case applies to you, uninstalling the problematic update could be the fix you need.
Hit the Windows key, type cmd in the search bar, and click Run as administrator.
Type in the following command to change the destination path: C:\Windows\CCM
Now, Enter the following command to begin the repair process: ccmrepair.exe
The repair may take a while, and once it has been successfully completed, the status will read as Done.
There are many reasons the SCCM client is not working properly. Most of the time, it is due to corruption on the client cache and log files. The repair option will attempt to fix these problems by cleaning up the SCCM client cache and rebuilding some of its components.
4. Reinstall the SCCM client
Hit the Windows key, type cmd in the search bar, and click Run as administrator.
Type in the following command to uninstall the SCCM client: C:\Windows\CCMSetup\CCMSetup.exe /uninstall
Wait for the process to finish, then Enter the reinstallation command. Remember to replace XXX with the site code of your primary server: CCMSetup.exe SMSSITECODE=XXX
When your SCCM client is out of date, it can cause problems with your SCCM infrastructure. If it has been a long time since you’ve reinstalled your client, then chances are that some of the hardware is no longer supported by Microsoft.
Some common symptoms are slow deployment times and the inability to install/apply software updates. Reinstallation is a good way to register any needed updates and remove corrupt files.
The status code 0xc000041d is a hexadecimal numerical code representing a generic error message issued by an application or the operating system. This number is the standard used to represent errors that may occur during program execution or runtime.
According to users, it happened on the Internet Explorer browser and crashed the web-based application the user was trying to access. The error code can appear under various circumstances, so let’s look at this article in depth.
What is 0xC000041D?
The error message generated by the exception code 0xc000041d is an unhandled exception was encountered during a user callback. This issue occurs when Microsoft Internet Explorer (IE) crashes while loading a web page or during other routine operations.
You may also encounter this error when you try to open a file or access some system features. The root cause of this issue is that the application tries to use a callback function provided by MSHTML, but the application fails to set up the callback function correctly.
A null pointer exception can be caused when a program tries to access memory that is no longer valid, often due to a programming error. When this happens, the program crashes and can no longer run.
Other reasons include:
Corrupt system files – The 0xc000041d error message is mainly caused by misconfigured system files inside the Windows OS. These corrupted files can be a result of a recent software change.
Viruses – It’s possible that the computer is infected with malware that causes crashes when it tries to access sensitive areas of memory or resources on your hard drive.
Corrupt registry – A corrupted registry can lead to a variety of problems with your PC, including blue screens, slow boot times, and random crashes during use.
Memory leak – This is usually caused by an application that fails to release memory when it is no longer needed. A memory leak can cause the system to run out of memory and cause the program to hang or crash without an apparent cause.
How can I fix the exception error code 0xc000041d?
A few workarounds that could resolve the issue include:
Ensure your browser is up-to-date with the latest security patches.
1. Run Windows update
Hit the Windows key and select Settings.
Click on Windows Update then select Check for updates.
If available, click on Download & install.
2. Run the DISM and SFC scans
Click on the Search icon on your taskbar, type cmd in the search bar, and click Run as administrator.
Type the following commands and press Enter after each one: DISM.exe /Online /Cleanup-Image /Restorehealthsfc /scannow
Restart your PC.
3. Clean your Registry
The registry is the central repository of all your settings and information related to the system. It contains many files required for the system’s proper functioning. If there are any issues with these files, it can lead to many problems.
It is good practice to clean your registry regularly. With the help of today’s Registry cleaners, you will be able to remove all unnecessary files from your computer and make it run faster and smoother.
To do so, we suggest that you manage your registry cases with system repair software that will scan and restore broken registry files automatically.
Press the Start Menu, search Windows Security, and click Open.
Select Virus & threat protection.
Next, press Quick scan under Current threats.
If you don’t find any threats, proceed to perform a full scan by clicking on Scan options just below Quick scan.
Click on Full scan, then Scan now to perform a deep scan of your PC.
Wait for the process to finish and restart your system.
5. Reinstall the application
A number of users also admitted to having reinstalled the problematic application throwing the 0xc000041d exception error. However, the error reappeared every time they turned off their PCs and turned them back on.
If you’re in the same predicament, the issue could be that the installation files are corrupt. To fix this, when you uninstall the application, ensure you also get rid of any residue files before installing the program again.
That’s all we had for this article, and hopefully, one of these methods has resolved the 0xc000041d exception code. If none work, you may have to perform a repair install.
Also, check out the exception error code 0xc0000374 and our recommended fixes.
Do let us know which method worked for you in the comment section below.
While several hundred DLL files are stored in the System32 and SysWOW64 folders, that’s not the end. Many specific third-party programs can be found in their dedicated directory, and when these DLLs are missing, the app fails to launch. One of these is flexRelease_x64.dll.
Linked to Fallout 4, when the file is not found, users can’t run the Steam game and encounter an error. The error log reads, Unhandled exception “EXCEPTION_ACCESS_VIOLATION” at 0x7FFB2B997AE3 flexRelease_x64.dll+0027AE3. So, let’s find out how to fix flexRelease_x64.dll.
Why is flexRelease_x64.dll missing?
Here are a few reasons the DLL is missing or not found:
The file was moved or deleted: Though rare, there’s always the possibility of the end user moving the DLL out of the game’s directory or deleting the file without realizing it, which will trigger the error message.
Corrupt game cache: In most cases, the missing flexRelease_x64.dll error appeared when Fallout 4’s game cache was corrupt on Steam. And there’s a built-in solution for it.
Issues with the game installation: For a few users, it was the initial problematic game installation to blame. When the installer runs into problems, or there are issues with the Internet, such errors may be reported.
What can I do when flexRelease_x64 is missing?
Tip
We recommend against downloading flexRelease_x64.dll from the online platforms (websites) that claim to be hosting it. The reason, there are times when the file turns out to be malware and subsequently damages the PC.
1. Use a dedicated DLL repair tool
For third-party apps, like Fallout 4 on Steam, it’s often tricky to identify and download the missing DLL compared to the ones published by Microsoft. Because for the latter, you have the SFC scan, DISM tool, and a plethora of other built-in Windows solutions.
So, when flexRelease_x64.dll is missing, it’s recommended to use the best DLL repair tool, which will automatically locate and replace the missing/corrupt DLL file. Its extensive database stores almost every DLL published to date.
2. Move the file to the affected game’s folder
A solution that worked for many was copying the missing DLL from another PC and moving it to the game’s directory on the affected computer. With default installation settings in place, the path should be:C:\Program Files (x86)\Steam\steamapps\common\Fallout 4
Though in some cases, it’s the Program Files folder instead of Program Files (x86). Whatever the case, get the flexRelease_x64.dll file from a computer running Fallout 4, move it to the discussed folder, and things should run seamlessly. Can’t do that, fret not! We have other solutions.
3. Verify the integrity of game files
Launch Steam, and then navigate to the Library from the top.
Right-click on Fallout 4, and select Properties.
Navigate to the Local Files tab, and click on Verify integrity of game files.
Wait for the process to complete, and then check if you can launch the game.
With Steam’s built-in option to fix minor issues with game files, you can get things up and running in minutes when flexRelease_x64.dll is missing in Fallout 4.
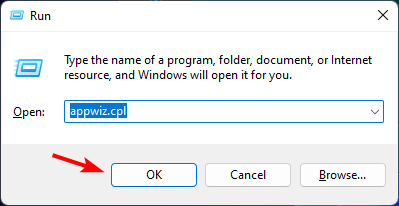
Press Windows + R to open Run, type appwiz.cpl in the text field, and hit Enter.
Select Fallout 4 from the list of programs here, and click Uninstall.
Follow the on-screen instructions to complete the process.
Once done, make sure to delete any files in the following locations (depending on the drive Steam is installed in) as well:\Steam\SteamApps\Common\Fallout 4\Documents\My Games\Fallout 4
Next, restart the computer for the changes to come into effect.
Problems with the app installation are a common reason flexRelease_x64.dll is missing in Fallout 4 on Steam. And a quick solution is to uninstall the app and then reinstall it from scratch. If there are still some leftover files, use an effective uninstaller software for the best results.
Besides, after downloading flexRelease_x64.dll, we recommend you get a reliable DLL repair tool to avoid running into similar issues.
For any queries on the subject or to share more solutions with us, drop a comment below.
DLL files are vital in running programs on the PC. While Microsoft develops some, others are published and released by third-party developers to support their apps. And one such that affects quite a few programs, including UModel and Visual Studio, when not found, is SDL2.dll.
Simple DirectMedia Layer or SDL is a library available across platforms to make writing operations to multimedia applications, for instance, emulators, games, and editing/rendering software, easier. So, let’s find out all about when the SDL2DLL file is missing from your computer.
Why is SDL2.dll missing in Windows?
Here are a few reasons the DLL file is not found:
Improper app installation: In most cases, an app that requires the DLL has it bundled with the installation package. So, if you can’t find the SDL2.dll, it’s likely that the installation didn’t go through correctly.
Mistakenly deleting the DLL file: In a few cases, users inadvertently deleted the DLL file while making certain changes. Even changing the path of the file could lead to issues.
DLL file is corrupted and not readable: Oftentimes, DLL files go corrupt after prolonged use. So, it’s not readable anymore, and the DLL can’t be found by the program.
What can I do if SDL2 dll is missing from my computer?
Before we head to the slightly complex solutions, here are a few quick ones to try:
Restart the computer and then launch the program throwing the error.
Check for any pending app or OS updates and install them.
Make sure SDL2.dll is not present in the Recycle Bin. In case it is, restore the file to its original location. Also, you could use dedicated software to recover files from the Recycle Bin.
If none work, move to the fixes listed next.
1. Use a dedicated DLL repair tool
Be it DLLs published by third-party sources or Microsoft, a quick way to download SDL2.dll when it’s missing is to use a reliable repair tool. For third-party apps, it’s usually incompatibility to blame, but the possibility of it missing can’t be ignored.
2. Move the DLL file to the program’s directory
Some users identified that moving the DLL file to the program’s directory, i.e., the folder where the launcher (.exe) and other files are stored, might help. So, first, go to the SDL2.dll location, which usually is:C:\Windows\System32
If you can’t find the DLL here, check all the sub-folder in the program’s directory and copy the file.
For 64-bit programs: C:\Program Files
For 32-bit programs: C:\Program Files (x86)
Steam’s folder
Once done, locate the program launcher and paste the DLL file into the same folder where the former is stored.
3. Reinstall the affected application
Press Windows + R to open Run, type appwiz.cpl in the text field, and hit Enter.
Now, select the application that throws the error, and click Uninstall.
Follow the on-screen instructions to complete the uninstall process.
Next, head to a reliable download source, either the official website or Microsoft Store, and download the app all over again.
A quick fix when the SDL2.dll is missing in Steam or other programs is to uninstall the application and reinstall it from scratch. You could also use a reliable uninstaller software to make sure all the leftover files are cleared.
Press Windows + R to open Run, type rstrui.exe, and click OK.
Select Choose a different restore point option, and click Next.
Pick a different restore point from the list and click Next. Make sure to select one created before the problem first appeared.
Verify the details, and click Finish to start the restore process.
Once done with the system restore, the error shouldn’t appear again.
System restore is an effective troubleshooting tool and can help fix a wide range of problems in Windows. This will help get back or install the SDL2 DLL file in no time.
Most programs installed on the PC, even the best games for Windows, require specific DLL files to run. And when the DLL is missing or not found, the apps fail to launch. A file that tends to affect several applications, particularly games, is glide2x.dll.
DLL stands for Dynamic Link Library, and these are files generally shared by several applications, which increases the chances of coming across an issue. So, let’s find out how to install glide2x.dll in Windows 10.
What is Glide2x DLL?
Published by 3Dfx Interactive Voodoo, Inc., the DLL file is used by games and other graphic-intensive programs. We have had several versions of it, with Glide3x being the latest one, though things, to a great extent, depend on the version compatible with the affected app.
Stored in the System32 or SysWOW64 folder, the program that requires the file first looks for it in the dedicated app directory and then in the System32 folder.
System32 folder
So if the file is present in any of these locations, you shouldn’t face any problems. But when the DLL is not found in either, the situation becomes complicated.
What can I do when glide2x.dll is missing?
Tip
When the DLL is missing, your primary approach should be to check the System32 folder or the program’s directory and copy the file to both these locations from another PC. Also, remember never to download DLLs online since the file, often malware, can potentially harm the PC.
1. Use a reliable DLL repair tool
When it comes to DLLs developed and published by third parties, there’s usually incompatibility between the file and the OS to blame, and the built-in Windows solutions aren’t much help. In such cases, we recommend using an effective DLL repair tool to download glide2x.dll in no time.
2. Reinstall the graphics driver
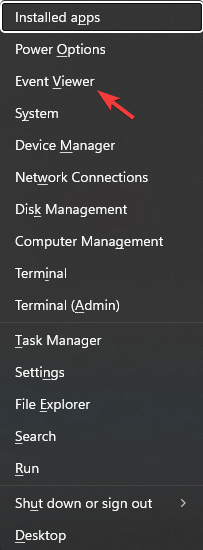
Press Windows + X to open the Power User menu, and select Device Manager from the list.
Expand the Display adapters entry, right-click on the graphics adapter, and choose Uninstall device.
Tick the checkbox for Attempt to remove the driver for this device, and click Uninstall to confirm.
Once done, restart the computer, and Windows will automatically install a fresh copy of the driver.
If it’s a corrupt driver to blame when you have a missing glide2x.dll in Need for Speed or other games, reinstalling it should do the trick. In case that doesn’t work, update the graphics driver to the latest available version.
Press Windows + R to open Run, type appwiz.cpl in the text field, and hit Enter.
Now, locate the application throwing the missing DLL error, select it, and click Uninstall.
Follow the on-screen instructions to complete the process.
Once done, go to the official app source, download the setup, and run it to reinstall the application.
Since the DLL file often comes bundled with the application requiring it, missing glide2x.dll points to an improper initial app installation, and reinstalling it, should get things running. Also, some readers reported that using an uninstaller software to remove any leftover files can help in this case.
After you have managed to get things working, we recommend keeping a reliable DLL repair tool installed to prevent such errors from reappearing.
Tell us which fix worked for you in the comments section below.
Bink2w64.dll is one of the top video codecs for games, developed by RAD Game Tools. It is required for running some top games like Watch Dogs and The Evil Within.
Hence, you wouldn’t want the DLL file to be missing on your PC. However, if you are getting an error that bink2w64 is not found for some reason, this guide will show how to get it back.
What does bink2w64 DLL do?
The bink2w64.dll file is closely associated with the RAD Video Tools. This DLL file helps in the effective operation of RAD Video Tools-based applications.
As you would guess, the list of apps dependent on it includes some sophisticated games and apps. Hence, if the DLL file is somehow missing or not found, some software might not be able to access certain API functionalities.
How do I fix the bink2w64.dll not found issue?
1. Use a dedicated DLL fixer
Bink2w64.dll is a third-party DLL file installed by the software that requires it on your PC. Hence, you are likely to face issues with compatibility.
Amongst the available options for rectifying this, the recommended one is to use a dedicated DLL repair tool. This is because this tool can eliminate any compatibility issues between your PC and any third-party DLL file.
2. Reinstall the faulty app
Press the Windows key + S, type control, and select Control Panel.
Click the Uninstall a program link under the Programs section.
Next, right-click the faulty app and select the Uninstall option.
Finally, you need to go to the official website to reinstall the program or use the original installation disk.
The bink2w64.dll was not found error message can sometimes be due to issues with the app giving the error. To fix this quickly, you must reinstall the app from official sources.
3. Update your PC
Press the Windows key + I to open the Settings app and select Windows Update in the left pane.
Now, click the Check for updates button.
Finally, download and install all available updates, including the optional ones and restart your PC.
An outdated operating system can sometimes be the cause of the bink2w64.dll was not found issue. Updating your PC to the latest version should eliminate the error message without fuss.
4. Perform a system restore
Press the Windows key + R, type rstrui.exe, and click the OK button.
Click the Next button on the page that pops up.
Now, select a restore point before you started experiencing the issue and click Next.
Finally, click Finish and follow the onscreen instructions to complete the process.
In some cases, the bink2w64.dll issue can appear because of some changes made to your PC intentionally or by another software. You need to perform a system restore to a point when everything is working well to fix this.
Go to a reliable third-party website like DLL files.com.
Click the Download option.
Next, unzip the downloaded file and move the bink2w64.dll file to the path below instead:C:\Windows\SysWOW64
Finally, restart your PC.
The last but certainly not the least fix on our list is to download the bink2w64.dll file from a third-party website. While this is not recommended, it is still an effective option.
If you still can’t fix the issue by pasting the DLL file in your system folder, you can paste it into the game or app folder as specified in the error message.
With this, we can conclude this detailed guide on how to fix the bink2w64.dll not found issue. Hopefully, you are able to resolve the issue before exhausting the solutions on our list.
Are DLL files are missing on your Windows 10 PC? Check our detailed guide to restore them quickly. Our latest guide covers the 32-bit version of a file, so don’t miss our bink2w32.dll article for more information.
Feel free to let us know the solution that helped you solve the problem in the comments below.
Fmodex.dll is a DLL file that is used in audio processing in games. It contains some important procedures and functions for the smooth launching and running of the programs that depend on it.
Unfortunately, some users report a frequent fmodex.dll missing error message while trying to launch games. If you are one of those facing this issue, we will show you how to resolve it quickly in this guide.
What is fmodex DLL?
At times in games, you need some tools to process the sound to give it a real-life feel. This is where fmodex.dll comes in.
This DLL file, also known as FMOD Ex SoundSystem, is used for audio processing in games like Hitman Absolution and World of Tanks. It plays an important role in the quality of the sounds you get on your favorite games.
How can I fix or download fmodex.dll if it’s missing?
1. Use a dedicated DLL fixer
Fmodex.dll is one of the many non-system DLL files that come with third-party software that need it. The downside to these types of files is a persistent compatibility problem, leading to various error messages.
Thankfully, you can rectify this using a dedicated DLL repair tool. This tool corrects any compatibility issues between your PC and any third-party DLL file with little to no effort from you.
2. Reinstall the faulty app
Press the Windows key + R, type appwiz.cpl, and click OK.
Now, right-click the problematic app and select Uninstall.
Finally, go to the official website to reinstall the program or use the original installation disk.
Sometimes, the fmodex.dll missing error message can be due to a faulty app installation. You can fix this quickly by reinstalling the app from official sources.
If you got the app via an installation disk, you need to use the original version from the developer.
3. Update your PC
Press the Windows key + I and select the Windows Update option in the left pane.
Click Check for updates in the right pane.
Finally, download and install all available updates, including the optional ones and restart your PC.
Sometimes, the fmodex.dll missing issue can be caused by an outdated PC. You need to install the latest patches for your PC, including the optional updates.
4. Run an SFC scan
Press the Windows key, type cmd, and click Run as administrator under Command Prompt.
Type the command below and hit Enter to run it: sfc /scannow
Finally, wait for the command to finish running and restart your PC.
If there are broken or corrupt system files on your PC, you are likely to get the fmodex.dll missing error. Repairing and restoring these files should do the trick here.
Visit a reliable third-party website like DLL files.com on your browser.
Click the Download link before the option for your PC architecture.
Next, unzip the file and move the fmodexj.dll file to the path below on a 32-bit PC:C:\Windows\System32
Move it to the path below instead if you are using a 64-bit PC: C:\Windows\SysWOW64
Finally, restart your PC.
If the solutions above prove abortive in fixing the fmodex.dll missing issue, you need to consider downloading the file from a third-party website. The only caveat is that you must scan the file to ascertain its safety.
Alternatively, you can paste the DLL file into the game or app folder as specified in the error message.
There you have everything you need to fix the fmodex.dll missing error message. You only need to follow the instructions in this guide carefully, and things should return to normal.
If you enjoy Airtel browsing and all the features this DTH box has to offer, you’ll definitely want to pair it with the best browser for the Airtel Xstream Box to make the most out of it.
Now, the Airtel Xstream Box will turn any TV into a Smart TV with built-in apps like Netflix, YouTube, Amazon Prime Video, and more.
So, how to install Airtel Xstream? All you need is an HDMI cable and a signal cable to connect your TV to your Xstream Box.
Then, you can install the Airtel Xstream app on Samsung Smart TV or any other Android TV via the Google Play Store. But how to use Airtel Xstream on the web?
Does Airtel Xstream have a browser?
It does not. In fact, Smart TVs don’t usually come with a browser pre-installed, and many app stores for Smart TVs including Android TV don’t offer browsers. The best way to install your favorite is to sideload it.
Here’s a quick preview of our favorite picks:
Opera – Fastest browser
Chrome – Cast any website
Firefox – Best for Xstream addons
Puffin – Most compatible with Android TV
TVWeb – Easiest to use
Unsurprisingly, Android TVs do not have their own browser and do not come with one already installed, so it will need to be sideloaded.
Let’s take Opera, for instance. Here’s how to download the Opera Aritel browser APK:
Next, press the Play Store URL in the right corner.
In the store window, look for the Opera browser. Copy the package name as indicated here.
Return to the downloader window and paste the name of the package, then press Generate Download Link.
You should obtain a window similar to this one. Go ahead and press to download com.opera.browser now.
Finally, transfer the APK file from your PC to your Airtel Xstream Box/Android TV.
Finally, Airtel Xstream allows users to cast videos directly to their TV screen using Chromecast. For it to work, users need a smart TV, such as Android TV, or a device that supports Chromecast.
The Chromecast feature comes built-in but remember that your phone (or other devices) and your Airtel Xstream Box must be connected to the same Wifi network.
Opera is quickly becoming one of the most popular alternative browsers because of its built-in security features, like a free VPN and ad blocker, and speed.
If you’re looking for the best web browser apps for Smart TV, look no further. You can use Opera on Smart TVs by sideloading it. Check out our helpful guide on installing Opera on Samsung Smart TV to use it from your TV.
Users can access their favorite features like Speed Dial and Adblocker right from their TV. It also has a simple interface that makes it compatible with TV screens.
Key features of Opera:
Built-in VPN and ad blocker
Speed Dial
Simple interface
Opera
Use the Speed Dial feature to easily access your favorite sites from your smart TV.
Users can cast Chrome from their mobile device or PC to their TV using Chromecast. With syncing, users can have all their bookmarks, passwords, and other browsing data on all devices with Chrome.
If users want a Chrome app they can sideload the browser by downloading Chrome APK for Android TV.
Open Chrome on your PC and launch the airtelxstream.in. Since the Airtel Xstream website is intended for Indian users, you may need to use a VPN if you’re out of the target country.
Click on the three dots in the top right corner and select Cast.
Select your Smart TV device under the Cast tab and start watching.
Firefox can be sideloaded onto a smart TV because there is no designated app for it on smart TVs.
Not only will all browser data be synced across devices with Firefox, but nearly all addons will also work with smart TVs and TV boxes like Airtel Xstream.
The built-in ad blocker will also work with Android TV so users can browse without being weighed down by ads.
Puffin TV Browser makes surfing the web from your smart TV easy and simple. It is specially designed to work with TV remotes, which also makes it one of the best browsers for Nvidia Shield TV and more.
However, users can connect their phones to the browser and send URLs right from their mobile devices to their TV.
Puffin can be installed directly from the Google Play Store so users do not need to sideload it.
With Chromecast, users can easily cast their favorite shows and movies from Airtel Xstream to their Android TV. If not in India, then users will need to use a VPN to access the site, here are our top VPN choices for streaming.
Let us know in the comments which browser you prefer to use on your Airtel Xstream Box or Smart TV.
Rgss202j.dll is one of the many DLL files that make things tick on your PC. PC games and some other applications especially use during the launching stage.
However, things are not usually smooth and straightforward with these files, with some users reporting that rgss202j.dll is not found on their PC. If you are among those facing this issue, the solutions in this guide will help you fix it.
What is the rgss202j DLL?
The rgss202.dll file is closely connected to the Ruby Game Scripting System. It plays an important role in the smooth running of your many PC games and other Windows apps.
Rgss202j.dll is one of the many DLL files that aids the launching and running of games on your PC. And since it is a system file, it is best to repair it if it encounters any issues instead of downloading or copying it from another PC.
The best way to restore the file is to use a dedicated DLL repair tool. The good thing about this tool is that it will 100% restore the rgss202j.dll file because it is a Windows DLL file.
2. Reinstall the faulty app
Press the Windows key + R, type control, and click OK.
Click Uninstall a program under the Programs section.
Now, right-click the problematic app and choose the Uninstall option.
Finally, go to the official website to reinstall the program or use the original installation disk.
Sometimes, the rgss202j.dll not found error message can be due to a corrupt app. The quickest way to restore the file is to reinstall the faulty app from official sources.
If you installed the app via an installation disk, ensure you reinstall it using the original version from the developer.
3. Run an SFC scan
Press the Windows + S key, type cmd, and select Run as administrator under Command Prompt.
Type the command below and hit Enter: sfc /scannow
Now, wait for the command to finish running and restart your PC.
According to some users, this rgss202j.dll not found issue can be due to corrupt or broken system files. You need to repair the files by running the command above and restarting your PC.
4. Scan for malware
Press the Windows key, type virus, and choose Virus & threat protection.
Click the Scan options link.
Now, tick the radio button for your preferred scan option and click Scan now.
In some cases, the rgss202j.dll can be due to the activities of malware on your PC. You need to perform a thorough virus scan to remove the viruses.
If Microsoft Defender could not eliminate the viruses, we recommend using outstanding antivirus software in TotalAV.
This app uses the latest security technology to detect viruses in whatever form and eliminate them before they can affect your PC.
Press the Windows key + R, type rstrui.exe, and click OK.
Click Next on the page that pops up.
Now, select the ideal restore point and click Next.
Finally, click the Finish button and follow the onscreen instructions to complete the process.
Sometimes, you might face this ucrtbased.dll issue because of some recent changes to your PC. Restoring your PC to a point when everything is working perfectly should do here.
6. Download from a third-party website
Go to a reliable third-party website like DLL files.com.
Click the Download link.
Next, unzip the downloaded file and move the rgss202j.dll file to the path below on a 32-bit PC:C:\Windows\System32
If you are using a 64-bit PC, move it to the path below instead:C:\Windows\SysWOW64
Finally, restart your PC.
If you still can’t fix the rgss202j.dll not found issue after applying the solutions in this guide, you can try downloading the file from a third-party website.
However, you need to the file to be sure it is safe from viruses. If pasting the DLL file in your system folder does not work, you can paste it into the game or app folder as specified in the error message.
We have reached the end of this comprehensive guide on fixing the rgss202.dll not found issue. All you need to do now is to follow the instructions therein, and the issue should be resolved in no time.
Microsoft may be considering pulling a certain Xbox title from its digital store over its achievements. The game in question, One Step After Fall, has not yet been delisted from the Xbox Store as of the time of this writing, but developer The Bergson’s Games Studios has decided to cancel the Spanish Windows release after the Spanish and German language versions were delisted.
Why, you may be asking? Because the narrative adventure game allows language-stacking of its achievements. This is when a game sees separate releases in different languages, with separate (though identical) achievements handed out.
This is done to attract achievement hunters and get them to buy multiple versions of a game. In this case, One Step After Fall can reward players with 1,000G in as little as 15 minutes. Stacked three times with the Spanish and German language versions, that’s a cool 3,000G in 45 minutes.
While this seems to be a gray area with regards to Xbox Store policies, nonetheless gamers have reported One Step After Fall (Espanol) and One Step After Fall (Deutsch) being removed from their game libraries. Gamers have to go through Xbox support to get refunded.
The Bergson’s Games Studios took to Twitter to issue a statement on the matter and offer an apology to anyone inconvenienced by the delistings.
(English translation from Portuguese:
We are officially speaking out on the removal of One Step After Fall versions: Initially on behalf of The Bergson’s Games Studios we would like to apologize for all the inconvenience caused to you, friends, players and consumers!)
Boa noite amigos!
Estamos oficialmente se pronunciando sobre a remoção das versões de One Step After Fall:
Inicialmente em nome da The Bergson's Games Studios gostariamentos de pedir desculpas por todo o transtorno causado a vocês, amigos, jogadores e consumidores! pic.twitter.com/tA821EmdJh
— The Bergson's Games Studios (@BergsonThe) April 16, 2023
Outlook is one of the most popular email clients in the world, and for good reason. It’s easy to use, versatile, and offers a range of features that make managing your emails, contacts, and calendar a breeze. However, there are three examples of hidden Outlook features that many people don’t even know exist that can help improve your productivity.
#1: Access your Bookings with me page
Booking appointments can be a hassle, but with Outlook’s Bookings with me page, it’s simple. To get started, open your calendar and click on the “My Booking Page” option on the left-hand side. You can now add different events that people can book with you, and once you’re finished, you can share the page so others can book time on your calendar. If you need help getting started, follow these easy-to-follow instructions.
Click the plus sign (+) icon next to Public to create a new Booking time for people to meet with you. You will be able to create meeting types and times and name them accordingly.
Now you need to enter the details for your booking time. For this example, I am creating a booking time for 30 minutes chats on Microsoft Teams. Click Save when you are finished.
After finishing the setup process, it’s time to personalize your Booking page and notify others that it’s ready for scheduling meetings with you. To share your Booking page with others, click on the Share</strong button and select from the available page-sharing options.
By clicking on Copy link, you can easily share a link to your public Booking page by copying it to your clipboard. If you prefer to share via email, click on Share via email to open an automated send function within Bookings. Additionally, you can automate the process of adding your Booking page to your Outlook email signature by selecting Add to email signature.
To change the banner image of your page, simply click on the three dots located next to Share and choose Edit banner image.
Keep in mind that depending on your region, you may not be able to access the Bookings with me feature at this time. Please allow for additional time for your Bookings with me page to completely set up as the feature is currently available in Preview.
#2: Read Outlook emails in Microsoft Edge
Microsoft Edge is an excellent browser, and it’s even better when paired with Outlook. To read your emails in Edge, go to the top right-hand corner of your screen and hover over the Bing logo. This will open up the sidebar, where you can click on the Outlook icon. From here, you can view and manage all your email, as well as access your calendar, contacts, and tasks. It’s a simple and convenient way to stay on top of your email game.
#3: Handle long email threads
Long email threads can be a pain, but this one of the more useful of the hidden Outlook features. Click on the “Reply All with Meeting” icon or use the keyboard shortcut Ctrl + Alt + R. This will open up a new meeting invitation in Outlook, which will pull in the subject, attendees, and context from the email thread. It’s an efficient way to handle long conversations without having to go back and forth over email.
Microsoft Outlook has many features that can help you work more efficiently and effectively. These three hidden features are just a few examples of how Outlook can make your life easier. By taking advantage of them, you’ll be able to manage your email, calendar, and contacts with ease, streamline your workflow, stay organized, and reduce the time you spend managing your inbox. Try these features today and see how they can supercharge your productivity!
Microsoft recently dropped support for Twitter as part of its Digital Marketing Center (DMC), specifically its “Smart Campaigns” that leverage multi-platform social network engagment within its Microsoft Advertising platform.
The move by Microsoft to drop support could be seen as a reaction to Twitter’s recent enterprise v2 and v1.1 API licensing price changes that would tag the company with over a $40,000 a month bill. In addition to Microsoft making the determination that Twitter’s dwindling audience base isn’t worth the API licesning increase, Twitter started off its API switch with a configuration break that affected both users and caused an outage within Twitter itself that would undoubtedly shake any business’ faith in the stability of a $40,000 a month service.
While Microsoft went about dropping support as subtly as possible by stashing the news in its Microsoft Advertising blog, Twitter CEO Elon Musk is seemingly responding to the company’s actions by accusing it of “illegally” training using Twitter data and threatening a lawsuit subsequently.
They trained illegally using Twitter data. Lawsuit time.
Musk followed his initial accusatory tweet with a bit more of an explantory response to another curious Tweeter who asked about the platforms long term plan following an API move that could most likely “kill traffic to Twitter itself from outside sources.”
I’m open to ideas, but ripping off the Twitter database, demonetizing it (removing ads) and then selling our data to others isn’t a winning solution.
At this point, Musk has only threatened Microsoft with a lawsuit via Twitter, but it should also be noted that since the API licensing hike, other businesses have also dropped the use of Twitter’s expensive APIs licensing such as the National Weather Service and Intercom.
Going forward, customers using Microsoft Advertising platforms will still be able to leverage audiences from other social media sites such as Facebook, LinkedIn, and Instagram from within their dashboards.
Mscoree.dll is an essential DLL file that is integral to updating and launching apps on your PC. Unfortunately, some users keep reporting a mscoree.dll file not found error for some reason.
This prevents so many apps from launching and updating. Thankfully, the solutions in this guide will help you restore this DLL file if it is missing on your PC.
What is mscoree DLL used for?
Mscoree.dll is an integral part of the .NET Framework, which is required by many apps. Hence, if your PC can’t access this file from the .NET Framework environment, you are likely to get the mscoree.dll DLL file missing or not found error on Windows 10.
The good thing is there are surefire solutions to this problem, as shown in this detailed guide.
How can I fix the mscoree.dll file not found issue?
1. Use a dedicated DLL repair tool
Mscoree.dll is a DLL file that plays an important role in the smooth running of your apps. Hence, if it is not found on your device, your best bet is to repair it instead of downloading or copying a new one.
The best way to restore this vital file is to use a dedicated DLL repair tool. The plus side of this tool is that it will 100% restore the mscoree.dll file since it is a Windows DLL file.
Now, accept the license terms and click the Next button.
From here, click the Next button to accept the recommended changes.
Finally, wait for the process to complete and restart your PC.
In some cases, problems with .NET Framework can cause the mscoree.dll not found issue. Thankfully, Microsoft has a dedicated tool for repairing the program.
You only need to download and run the tool, and it will do the rest.
3. Enable the .NET Framework
Press the Windows key, type turn windows, and select Turn Windows features on or off.
Check the box next to .NET Framework 3.5 (includes .NET 2.0 and 3.0).
Now, click the + sign next to .NET Framework 3.5 to expand it and check the box next to the two Windows Communication options.
Next, check the box next to .NET Framework 4.8 Advanced Services.
From here, click the + sign next to .NET Framework 4.8 and check the box for ASP.NET 4.8 under it.
Finally, click the OK button and restart your PC.
At times, the mscoree.dll not found issue can be due to the fact that the .NET Framework is disabled. The solution to this is to enable it and restart your PC.
4. Update your PC
Press the Windows key + I and select Windows Update in the left pane.
Click the Check for updates button.
Finally, download and install all available updates, including the optional ones and restart your PC.
In some cases, the mscoree.dll not found issue can be due to an outdated operating system. You need to update your PC to the latest version and install the optional updates too.
Press the Windows + S key, type cmd, and select Run as administrator under Command Prompt.
Type the command below and press Enter to run it: sfc /scannow
Finally, wait for the command to finish running and restart your PC.
Sometimes, the mscoree.dll is not found issue can be due to corrupt or missing system files. What you need to do is to repair these files using the System File Checker.
6. Scan for malware
Press the Windows key, type virus, and select the Virus & threat protection option.
Choose Scan options.
Now, select your preferred scan option and click Scan now.
At times, issues with mscoree.dll occur because of viruses on your PC. Performing a deep virus scan should eliminate the malware.
Another option is to use excellent antivirus software in TotalAV to remove even the most hidden malware on your PC.
This software scans all corners of your PC for viruses and removes any traces of malware before they can cause problems.
We have reached the end of this detailed guide on fixing the mscoree.dll not found issue. We believe you now have all the required info and only need to follow the steps carefully.
If you are facing a similar issue in Zlib1.dll not found, check our detailed guide to fix it.
Feel free to let us know the solution that helped you solve the problem in the comments below.
Ghostbusters: Spirits Unleashed is a fun, multiplayer game perfect for all skill levels. Four proton pack wielding Ghostbusters attempt to catch a Ghost haunting unique locations in asymmetrical multiplayer battles (online or offline). As players progress, they will unlock cosmetics and upgrades for both Ghostbusters and Ghosts to evolve their gameplay experiences. The look and feel will deliver to fans an immersive experience in the universe, allowing them to play out their Ghostbusting fantasies. Whether hunting or haunting, the game is easy to learn and fun to master!
Embrace the challenge of a roguelike deckbuilder with unique mechanics from the developers of Faeria and Richard Garfield, creator of Magic: The Gathering™. Build a team of two heroes, unleash powerful combos and defeat the legends of the Roguebook!
In addition, Call of Duty Modern Warfare 2 will have a free-to-play multiplayer event through Wednesday, April 26 at 1pm ET. This free trial will include season 3 content, with 10 multiplayer maps total and a whopping dozen game modes. The trial is available on both Xbox One and Series X|S.
Play 12 modes and 10 maps in #MWII Multiplayer for FREE in for a limited time between April 19 and April 26. Learn more ???? https://t.co/0ecKhAFjAF
???? 2v2 Gunfight ???? New S03 Map Pelayo’s Lighthouse ➕ Variety of other classic Maps and Modes pic.twitter.com/CrYYRLZejk
It’s no secret that the AI craze has now taken the world by storm. And with every given opportunity there’s a new trend, integration, or incorporation.
Microsoft in particular has been pushing the pedal to the metal on that front with its relatively new entry, the new Bing. The company refers to it as the AI copilot for the web and has been incorporating it across its services and products to enhance efficiency while simultaneously promoting productivity.
In February, Microsoft incorporated Bing Chat into Skype alongside Edge Mobile apps as well as Bing. This new integration redefined the user’s chat experience. In that, it allows users to make inquiries and generate ideas. Users can even manipulate the tool to present answers in an orientation of their choice.
More than 36 million people use Skype daily to connect through phone calls and chats across borders and around the world and the new Bing is going to enable some helpful and fun new scenarios and capabilities.
Today, we’re going to focus on how to add Bing to your group chat and leverage these capabilities to enhance your chat experience. Here’s what you need to do:
How to add Bing to your Skype group chat
There are still a lot of people who have signed up and joined the new Bing waitlist since it’s still in preview. This is despite Microsoft confirming that it has accelerated the approval process.
Earlier this year, Bing surpassed 100 million daily active users. Microsoft has attributed part of this success to the new Bing and has indicated that it was able to hit those numbers quicker because of the millions of users that signed up to preview the new Bing.
A major concern for users who might want to leverage the tool’s capabilities is its inaccessibility. However, Microsoft has provided a loophole for Skype users particularly those in group chats.
According to Microsoft, any user that’s part of a Skype group chat can make use of the new Bing’s capabilities even if they aren’t part of its preview. However, at least one member of the group needs to have access.
This way, they can be able to look up the new Bing in their contact list and add it to the group. From this point, everyone should be able to access it. Here’s what you need to do:
Head to the App Store or Google Play Store and download Skype.
Next, launch the app and sign into your Skype account or create a new one if you didn’t have an existing account.
Tap on the New Chat button at the bottom and select New Group Chat.
Name the group, add everyone you’d like to participate in the group, and hit the Done button.
Then, invite the new Bing to your group chat by clicking on the Add people button and select Bing.
From this point, you can interact and leverage the new Bing capabilities by simply typing @Bing followed by a query. For instance, we’re planning a group trip with my friend Edward to Malindi, Kenya, and have no clue how to go about it.
Here are some important notes and tips highlighting how the new Bing helped us map out this trip.
Hotel choices and preferences
We wanted a hotel close to the beach to cut down on the transportation cost to and from the beach. At the same time, we also didn’t want to spend an arm and a leg while in Malindi.
With the help of the new Bing in our group chat, we were able to get a comprehensive list of hotels that we liked and further narrowed down the list based on the hotels’ proximity to the beach and cost per night.
Itinerary planning
Since this was my first time traveling to this place, other than having knowledge that there were many sandy beaches in the area, I had no idea what other activities that one could take part in. I asked Bing to plan a weekend itinerary for us.
Bonus point
Queries are editable – You don’t need to ask Bing a question all over again in case you made a spelling mistake etc. You can just click on the message and tap on the Edit option to correct the mistake.
This is extremely helpful as it will help prevent the disruption and flow of the conversation while reducing clutter. This way it’s easier for the user to find information easily within the thread.
Final Words
I was thoroughly impressed by how fast I was able to plan that trip. I didn’t need any additional assistance from trip planners or agents which helped me meet my goal of traveling on a budget.
Moreover, it promoted inclusivity in the platform, everyone got to air out their opinions and ideas and through Bing, it was easy to blend the ideas and find a common ground.
I found the feature extremely helpful as I could refer back to the notes from the group even when in remote areas where the network was not as stable. I also liked how the responses had references linked to them.
This way it was easier for me to tell how relevant and credible the information was. Additionally, I appreciated how detailed the itinerary was and the incorporation of meals and drinks between the activities.
Wuaueng.dll, or Windows Update Agent, is a vital DLL file that is part of the Windows update process. However, some users report that the Wuaueng.dll is registering high CPU usage.
If you are here because of this issue, this guide will show you effective ways to fix it.
Why is wuaueng.dll using so much CPU?
The potential causes of the wuaueng.dll high CPU usage error are within a close circle. Below is a couple of them:
Outdated PC: Sometimes, this issue can be caused by an outdated operating system. You need to update your PC to solve the problem.
Issues with Microsoft app updates: In some cases, this issue can occur if your PC has issues updating other Microsoft apps. The solution to this is to change your update settings.
How can I fix wuaueng.dll if it’s using a high CPU?
1. Use a dedicated DLL fixer
Wuaueng.dll is important for updating your PC and keeping it secured. Since it is an integral part of your Windows PC, it is not advisable to download it from a third-party website.
Instead, we recommend repairing the file using a dedicated DLL fixer solution. These tools will fix the wuaueng.dll file if it is corrupt and replace the DLL file if it’s missing.
2. Update your PC
Press the Windows key + I to open the Settings app and select Windows Update in the left pane.
Click the Check for updates button.
Finally, download and install all available updates, including the optional ones.
According to users, this wuaueng.dll high CPU usage issue was prominent on the May 2016 update. However, it has been fixed in more recent updates.
Hence, make sure you update your PC to the latest version and restart it.
3. Change update settings
Press the Windows key + I and select Windows Update.
Select Advanced options.
Toggle the switch for Receive updates for other Microsoft products backward to disable it.
Finally, restart your PC and try to install the update again.
In some cases, the wuaueng.dll high CPU usage can be caused by problems installing Microsoft apps update. The solution is to disable this feature and install only the required Windows update.
Press the Windows key, type cmd, and click Run as administrator under Command Prompt.
Type the commands below and press Enter after each: net stop wuauservnet stop bits
Finally, wait for the commands to finish running and restart your PC.
If you still can’t fix this wuaueng.dll high CPU usage issue on your PC, you might need to disable automatic Windows update. This will eliminate the chief cause of the issue till there is a better update without the problem.
With this, we can conclude this guide on the wuaueng.dll high CPU usage issue. What is left for you to do now is to follow the onscreen instructions carefully, and things should be back to normal.
‘No Xbox’ briefly trended on Twitter following the news that Oxenfree II would release on most major platforms other than Xbox. The news came out of the game’s release announcement during yesterday’s Nintendo Indie Direct.
Oxenfree II is coming to Netflix, but not Xbox. lol.
Oxenfree II: Lost Signals is the follow-up to 2016’s indie classic Oxenfree, which released on Xbox and even came to Game Pass. Oxenfree developer Night School Studios was acquired by Netflix in 2021. The sequel may still eventually hit Xbox at some point in the future, but the omission of an Xbox release at launch has raised some eyebrows in the wake of other games that have unexpectedly been dropped from the console.
One notable example is Octopath Traveler II, sequel to another former Xbox Game Pass title. In fact, publisher Square Enix as a whole seems to be avoiding Xbox like the plague, and rumor is that there has been some sort of falling out between the two. In a response to Britain’s CMA pertaining to the Activision Blizzard deal, Microsoft revealed that Square Enix RPG juggernaut Final Fantasy XVI will not be releasing on Xbox due to exclusivity agreements with Sony.
Microsoft has been pushing updates to Windows 11 to enhance its user experience. Windows 11’s taskbar in particular has been redesigned and revamped in the recent past in a bid to provide users with a modernized experience. As is the case with last year’s Windows 11 2022 Update that shipped with a new quick setting in the taskbar to manage the Task Manager function.
And while all these new features and updates are welcomed, the Windows 11 taskbar is missing some legacy features that are available in Windows 10. However, some of these highly requested features now seem to be making their way to Windows 11’s taskbar.
Taskbar item labels (as well as ungrouped items) are indeed on their way to Windows 11 ✨ Here's a demo of the current state of the feature, definitely further along than last time we looked at it
These new additions include the ability never to combine buttons and show all running app instances with labels. The features were part of Microsoft’s build 23435 released to the Windows 11 Insider Dev Channel last week.
To this point, it isn’t yet clear when Microsoft intends to ship these legacy features to users. Albacore on Twitter has indicated that there isn’t an option available yet through which a user can upgrade the taskbar to feature these capabilities.
The task sequence error 0x800700a1 usually occurs when there is a problem with the computer hardware. It will usually be accompanied by a task sequence has failed message. The error message indicates that the operating system image cannot be applied.
Imaging a hard drive is a good way to back up your data and ensure you can recover it in a disaster. Unfortunately, imaging can fail if the hard drive is not partitioned properly. This seems to be the root cause of the error 0x800700a1, so let’s get into it.
What is the task sequence error 0x800700A1 when imaging?
When you’re imaging a hard drive, partitioning is the first thing you need to do. This is because the computer sees each partition as a separate drive, allowing you to image multiple partitions simultaneously.
Without partitions, there would be no way to tell Windows where different parts of your data should go or how they should be organized. A raw unformatted drive will also not allow you to access any data on it. This is why you’ll encounter the task sequence error 0x800700a1 when deploying software.
By default, Windows does not partition a new disk. You must manually create and format partitions. Some of the benefits of partitioning include:
It makes managing your disk space easier by letting you create multiple volumes on a single disk.
Allows you to keep data secure by isolating private or confidential information on its partition.
Partitions may also perform better than having everything stored in one large partition because each partition acts like an independent drive.
So what causes the error 0x80700a1?
Insufficient space – If there isn’t enough free space on the destination drive, image creation will fail because there isn’t enough room for all of the files from the source drive.
Unsupported configuration – If the target computer is using a non-supported configuration, for example, UEFI boot with MBR, imaging will fail.
Unpartitioned HDD – Partitioning allows multiple file systems to exist on the same physical storage device. If unpartitioned, the task sequence will have a hard time finding the path.
Bad sectors – If your hard drive is damaged, some parts of it may have become inaccessible.
Corrupt hard drive – If the hard drive has become corrupted due to a virus attack or hardware malfunction, imaging will not work.
How do I fix error 0x800700A1?
Perform the following simple checks before the complex solutions:
Remove all peripherals and connect only those required for the imaging.
Now that you know that your hard drive is the main cause of the task sequence error 0x800700a1, you need to pay more attention to disk management. Your system drive is crucial in the smooth running of your operating system hence the need to keep it junk-free.
To that effect, we have an expert article on how you can increase space on your drive. This will greatly boost the efficiency and performance of your PC.
Try these methods and let us know which helped you fix this issue in the comment section below.
Microsoft has announced that it will no longer support Twitter in its Smart Campaigns with Multi-platform. The company has already started sending out emails to its clients indicating that the Digital Marketing Center (DMC) intends to cut support for Twitter starting April 25.
Most users depend on Microsoft Advertising to better manage social media accounts in one convenient location, creating an easy way to track engagement and how well campaigns are fairing. Once this change takes effect, users will no longer be able to access their Twitter accounts through the Digital Marketing Center.
As such, starting next week, users will no longer be able to create, manage, or even schedule Tweets via the platform. Additionally, you’ll also not be able to check your old Tweets as well as engagement using the Microsoft Advertising platform.
It is worth noting that just like before, Microsoft Advertising will continue to allow users to create and manage their content on LinkedIn, Facebook, and Instagram using the tool.
And with this new change in place, companies will now need to seek other alternatives that will help them manage and track Twitter campaigns.
This news comes after Twitter had previously announced its plans to start charging a minimum of $42,000 per month for its API. It will be interesting to see how this move impacts Microsoft’s ad revenue. The company aims to double its advertising revenue to $20 billion per year, with a new lead, erstwhile Vice President at Microsoft Advertising, Kya Sainsbury-Carter.
At the beginning of the year, Elon Musk indicated that he intends to make the subscriptions represent 50% of the platform’s total revenue. At the time, the subscriptions stood at 290,000 which was well below the target revenue mark Elon intends to hit.
Microsoft Forms is part of the Microsoft 365 suite that allows users to create and share forms on the web. However, things aren’t always rosy, as you may encounter errors while opening Microsoft Forms, or a blank page may appear when you scan the QR code.
A blank QR code is usually caused by a temporary network problem or a problem with your computer’s configuration. If you are experiencing difficulty downloading your form, this article will assist you.
Why is the Microsoft Forms QR code downloading a blank page?
If you’re getting a blank page on Microsoft Forms when you scan a QR code, below are some possible causes:
Unsupported browser – You may be experiencing a case of browser compatibility issues. This means your browser doesn’t support the decoding of the QR code.
Outdated OS – If your computer is running an older operating system without support for modern software like Microsoft Office 365, this could cause issues such as a blank page when downloading a Microsoft Forms QR code.
Outdated application – You might be using an older version of Microsoft Forms. It’s very important to have up-to-date software versions so that you can continue enjoying all of its features.
Faulty camera – If your camera does not work properly or does not have enough light, it will be difficult to scan a QR code accurately.
We also have the answers on what to do when your account is not enabled for Microsoft Forms. That brings us to a close for this article, but keep the conversation flowing in the comment section.
Let us know of any other tricks you used to bypass this error.
When you install an update in Configuration Manager, it sends the updates to the client. The client then downloads the updates from the distribution point and installs them. However, this process can deviate from the usual and show the error 0x87d00215.
With the error 0x87d00215, users noticed that some Windows updates failed, but some were successful.
How do I fix error 0x87d00215?
We advise that you first try these workarounds before any advanced troubleshooting:
Check whether there are any pending updates and install them first.
Verify that your DPs have been updated with the content for the installation package.
Check that the updates were successfully downloaded to the client machine first.
Make sure that there are no conflicts between your software update point and your distribution points.
Reboot your PC to register any pending reboots before deploying any updates.
1. Disable the firewall temporarily
Hit the Start Menu button, type Windows Security in the search bar and click Open.
Click on Firewall & network protection, then select Public network.
Locate Microsoft Defender Firewall and toggle the off button.
If you have any other third-party antivirus program installed, also purpose to disable it and then try deploying the updates again.
2. Redistribute the package
Left-click the Start button, type Configuration Manager console in the search bar, then press Enter to open the SCCM console.
Navigate to the Software Library tab.
Select Software Update under the content types for redistribution.
On the Taskbar at the top of the ribbon, in the Properties tab, select Properties. Click on the Content Locations tab. Select the distribution point (or distribution point group) to redistribute the content.
Click on the Redistribute button, then hit OK to initiate the redistribution of the content.
Restart your computer and check if the error persists.
If you are getting the updatesdeployment.log error 0x87d00215, you might need to redistribute the package. Redistribution will overwrite the existing package, and a new version is downloaded instead.
Navigate to the following location: c:\windows\softwaredistribution
Open the SoftwareDistribution folder, select all items, right-click, and hit the Delete icon.
4. Install the updates manually
Left-click the Start button, type Configuration Manager console in the search bar, then press Enter to open the SCCM console.
Navigate to the Software Library tab.
Select Software Update, then select All software updates.
Right-click on the list of updates, then select Download.
If you don’t have too many computers or don’t want to make your clients wait, you can always install the updates manually on each computer.
What is error 0x87d00215?
0x87d00215 is a common error message in SCCM. It means the software updates could not be installed on machines because the client was missing a mandatory dependency.
System requirements – It is possible that the computer is not compliant with the requirements for that update. This could be because the machine does not meet the minimum hardware requirements or because there are missing drivers on the machine preventing the installation from completion.
Inaccessible WSUS server – You may have a problem with your WSUS server or the clients are not reporting to it.
Pending updates – There may be a reboot pending task in a previous schedule. This means your client will not install any other updates until the pending one is completed first.
Incorrect configuration – Another common cause for this is that the client settings are not configured properly on the client. The client settings will vary depending on the version of Windows you are running.
Firewall settings – You may have a firewall or other network restrictions that are preventing the client from downloading the update from WSUS.
Dependent errors – Sometimes, one update depends on another, and if this dependency isn’t met, the update won’t work properly.
Conflicting updates – Another reason for this error is when you try to install software updates on a computer that already has them installed. The package may have been deleted from the site server but still exists on distribution points which will produce error 0x87d00215 when you try to deploy the updates.
You may also encounter a similar error 0x87d00664 where updates fail, so don’t hesitate to check out our helpful article on navigating the issue.
For any further comments or inquiries, drop us a comment down below.
Most built-in or third-party programs throw pop-ups every time a critical action is performed. For instance, you get one from an antivirus when a threat is identified, quarantined, or even after a malware scan. But, many try to figure out how to stop pop-ups on Windows 10 desktop.
If you are fed up with the notifications appearing intermittently on the desktop and affecting the workflow, there are quite ways to get rid of these. So, let’s find out how to stop pop-ups on the Windows 10 bottom right corner.
Why do pop-ups keep appearing on my computer?
Here are a few reasons you see pop-ups in Windows 10:
Third-party app pop-ups: In most cases, when Windows 10 pop-ups start appearing all of a sudden, it’s likely a third-party app to blame. Maybe one of these has changed the PC’s configuration or is throwing its own notifications.
Malware infection: Malware infection can also trigger changes to the PC and lead to incessant notifications on Windows 10. This affects both the built-in and third-party apps, and a reliable antivirus should help in this case.
Browser-throwing pop-ups: When a malicious site is added to the home page, the browser keeps throwing random notifications. And is such cases, users look for ways to stop pop-ups in Google Chrome on Windows 10.
Windows informing you of critical actions: A malware scan result from Windows Security, the built-in antivirus, or the OS asking you to restart the PC after an update are a few pop-ups you come across in Windows 10, and it’s not recommended that you disable these.
How do I disable pop-ups on Windows 10?
1. Disable notifications from programs
Press Windows + I to open Settings, and click on System.
Now, go to Notifications & actions, disable the toggle under Get notifications from apps and other senders, and uncheck the following options:
Show me the Windows welcome experience after updates and occasionally when I sign in to highlight what’s new and suggested
Suggest ways I can finish setting up my device to get the most out of Windows
Get tips, tricks, and suggestions as you use Windows
This is an effective way to stop notifications and should apply to a wide range of apps.
If you were wondering how to stop antivirus pop-ups in Windows 10, a quick solution would be to change the system’s notification settings. Or you could configure the built-in settings for the antivirus itself.
2. Stop browser notifications
2.1 Google Chrome
Launch Google Chrome, paste the following path in the address bar, and then hit Enter: chrome://settings/content/notifications
Now, select the Don’t allow sites to send notifications option.
Once done, relaunch the browser for the changes to come into effect.
For those trying to disable Chrome notifications in Windows, a quick way would be to use the built-in settings. Alternatively, you could get an extension that would work as a Chrome pop-up blocker.
2.2 Microsoft Edge
Launch Microsoft Edge, click on the ellipsis near the top-right and choose Settings.
Go to Cookies and site permissions from the navigation pane, and click on Notifications.
Now, disable the toggle for Ask before sending.
Head back to the previous screen and select Pop-ups and redirects.
Make sure the toggle for Block is enabled. For those trying to figure out how to enable pop-ups on Microsoft Edge, simply turn off the toggle for Block.
Those wondering how to block pop-ups in Microsoft Edge on Windows 10, the browser’s built-in settings offers the option. Simply disable both notifications and pop-ups, and you should experience minimal interruptions.
3. Disable Start Menu pop-ups
Press Windows + I to open Settings, and click on Personalization.
Go to Start from the navigation pane, and disable the Show suggestions occasionally in Start option.
We often come across ads or pop-ups in the Start menu, and though these are not as intrusive or affect the overall experience, disabling them is no hassle. So, if you were looking for ideas on how to stop pop-ups on Windows 10, disabling StartMenu ads would be a great option.
4. Stop File Explorer pops-ups
Press Windows + E to open File Explorer, go to the View menu, and click on Options towards the right.
Navigate to the View tab, untick the checkbox for Show sync provider notifications, and click OK to save the changes.
The sync provider notifications are the ones from OneDrive or Microsoft 365 apps regarding the ongoing sync process in the background. So, you could easily get rid of OneDrive sync pop-ups by reconfiguring the Folder Options.
Press Windows + I to open Settings, and choose Personalization.
Now, go to Lock screen from the navigation pane, and click on disable the toggle for Get fun facts, tips, and more from Windows and Cortana on your lock screen.
If the option is not available, make sure you have Picture selected from the Background menu.
The lock screen is a vital part of the PC, and unnecessary ads, pop-ups, and tips there could affect the experience for users who want a cleaner OS. So this way, you can easily stop pop-ups on the Windows 10 lock screen.
6. Disable Windows Update notifications
Press Windows + I to open Settings, and click Update & Security.
Click on Advanced options on the right.
Finally, disable the toggle under Update notifications.
The Windows Update notifications, particularly the ones to restart the computer for the changes to apply, could be annoying to many users. And the best part, you can disable them in no time.
Also, many users keep asking, does Windows 10 have a pop-up blocker? The answer is yes. Though you won’t find a universal option to block all pop-ups in Windows 10, each kind of notification can be stopped individually.
Besides, third-party applications usually have a separate Notification Settings section for this very purpose. So, you won’t have to spend much searching on how to stop McAfee pop-ups on Windows 10 or other similar apps.
Everyone cares about internet privacy, especially those who live in the land Down Under. Obviously, we’re targeting some of the most used browsers but the ultimate goal is to find the best browser for privacy.
Now, privacy and protection are among the few things that people all over the world can agree upon. This is why we won’t simply be chasing the most popular browsers in 2023.
In addition to finding the no 1 browser in the world, we’ll be answering important questions such as: what is the best browser for privacy? What are the most used browsers in Australia? What is the #1 most used browser in the US? In short, we’ll focus on privacy-focused browsers only.
It’s safe to safe that cybersecurity infrastructure could use a boost pretty much everywhere. On the other hand, internet speed is actually pretty good according to Speedtest as it currently sits at:
16th place for Australia
19th place for the United States
46th place for the United Kingdom
All that speed is good for nothing if your internet is not protected which is what this guide will be going over.
What is the most commonly used browser?
Unsurprisingly, Chrome is the no 1 browser in the world when it comes to popularity. This information comes from Stat Counter which released a report on web browser market share worldwide from Mar 2022 to Mar 2023.
As you can see from the image, Chrome is king with over 60 percent of the market share. Chrome is among the most popular browsers in the world so it stands to reason that the situation is pretty much the same:
What is the #1 most used browser in the US? → Chrome with around 50%
Europe → Chrome is the most popular and used browser with around 60%
United Kingdom → Chrome is the most popular and used browser with around 50%
What browser does Australia use? → Chrome is the most popular and used browser with around 60%
Globally, Safari is second with around 20% due to it being the premier browser of macOS. And then you have Edge, Firefox, and Samsung Internet because of their prevalence in Android phones.
That said, popularity alone only gives reveals the most used browsers but not necessarily the best browser for privacy. The following recommendations have good privacy features but they’re not made equally.
Which browser is best for privacy (worldwide)?
1. Opera – best browser for privacy overall +Adblocker
The cool thing about Opera is that you can install Chrome extensions on it. You will need a special extension to do so which is the aptly named Install Chrome Extensions. So all the great security extensions Chrome has can be moved over to Opera.
Aside from the Chrome extension support, Opera does have some pretty security features. For starters, it comes with an ad blocker already installed on it. This protects you from malware and ensures browser speed stays high.
The browser can also prevent third-party websites from tracking you with its patented tracker blocker. This ensures your privacy. And to top it all off, Opera comes with a free VPN, one of, if not the only browser that does this.
The browser’s security settings are easy to access and easy to configure, You can change them without having to open a new window.
Additional features
Built-in VPN and adblocker
You can access recently closed pages
The browser also comes with a password manager to save log-in information
Opera
Secure your digital presence with cutting-edge tracking adblocker and VPN protection.
Arguably, the most secure and best browser for Australia has to be the infamous Tor. So, is Tor browser legal in Australia? For sure. Tor got famous for the ability to access the dark web which is a series of hidden websites on the internet.
Certain websites may be tucked away for a variety of reasons, usually for security purposes. It was created by the U.S. Navy for totally anonymous online communication and that’s exactly what you have with the best browser for privacy.
It uses Tor’s wide-reaching network to hide your IP, then secures your connection. The browser does this by jumping through multiple nodes in order to make it incredibly difficult for anyone or anything to track you.
Tor is mainly used by journalists to hide their information. Other notable features include the same anti-fingerprinting feature that Brave has and the ability to browse blocked websites.
That said, using Tor to browse the internet casually is a bit overkill. You probably won’t be actively using all the features it has, but it’s still one of the best.
3. Brave – Dedicated Shields to block ads & fingerprinting
Brave deserves a high placement on this list. It’s built on Google’s Chromium browser engine, the same as Chrome, but greatly improves upon it. Because of the Chromium base, some users are suspicious of Brave.
Chrome has had a reputation for tracking users in the past. First, Chrome gives people the option to opt out of user tracking. And second, Brave doesn’t do anything as close to what Chrome did in the past.
Brave has a suite of protection features which is called Brave Shields. In this suite, you have a built-in ad blocker that can stop websites from tracking you. It also boosts fingerprint protection.
Fingerprint protection doesn’t refer to literal fingerprints. It’s a type of online tracking where a third-party entity creates a profile of you based on your browsing behavior.
Things you click on, things you like, the sites you visit; all of this can be collected. Brave prevents this from happening making it truly unique.
Adaptive browser
Can import bookmarks from previous browsers
Security features are simple and easy to understand
It may be a newcomer and it’s surely not as famous as its giant-scale rivals that make for the most used browsers and the most popular browsers in the world. However, AVG is not one to be easily pushed aside.
Whatever it lacks in notoriety and market share percentage, it compensates in privacy features – starting with a dedicated Private mode that leaves no tracks after you close your current navigation session.
If your goal is to find out what are the 4 famous web browsers, you won’t find AVG there but you might have just discovered the best browser for privacy.
Another interesting feature is the Privacy Guard, which blocks anything and everything from ads to trackers and beyond. There is also a dedicated Extension Guard that will check and prevent untrusted add-ons from installing.
And speaking of trust, you’ll be most pleased to know that AVG Browser boasts a Web Shield feature that will detect and repel fake sites, phishing tentatives, and many other fraudulent behavior patterns. What’s not to like?
AVG Browser
Block untrusted sources such as websites, or extensions and browse at will, tracking-free.
Google Chrome is next on our list. Credit where it’s due, the browser is consistently getting new security updates that boost its protection. It’s certainly a great choice in the world in this regard.
But the problem with Chrome is that developers frequently find holes in Chrome’s security and it makes you wonder whether or not Google actually has good protection for its browser.
You can always supplement Chrome’s security with a wide variety of browser extensions, but it should be great from the get-go. You shouldn’t have to fix Google’s work. Plus, Chrome has been known to track users.
Microsoft has come a long way since the days of Internet Explorer. The old web browser was finally put to rest as Microsoft will no longer support it. Instead, it’ll focus its efforts on Edge.
Internet Explorer had security problems for its entire lifespan with government organizations telling people to get rid of it. So what’s different? Basically, Edge is now on par with other mainstream browsers.
You can now open private browsers and add extensions to them that can be used to enhance their security. Its main security feature, Microsoft SmartScreen, will protect people from malicious websites and downloads.
With SmartScreen, Edge will actively scan whatever you download to make sure it’s okay. If not, it’ll reject the file. Plus, it has a robust tracking prevention feature with various levels of protection.
Additional features
Organize search results with Collections
Know if passwords are compromised with Password Monitor
The premier browser of Apple devices just had to make this list. Safari doesn’t have any unique privacy features that other browsers don’t have. You can create private windows and prevent websites from tracking you on Safari.
But what makes Safari so good is how it incorporates macOS security features. The browser’s security features work best when used in tandem with macOS or iOS. Let’s look at the recent Apple WDCC event.
WDCC showed off a bunch of new features coming to Mac computers. For example, Apple wants its users to move away from passwords and use passkeys instead. These keys utilize biometric identification to create a unique login for Macs.
Safari will be getting the ability to translate images from the internet via Live Text plus Shared Tab Groups as a new way to collaborate with friends. A lot of nice quality-of-life changes are coming to the browser, but that’s really it.
The interesting new privacy features like greater Hide My Email support and Safety Check are for the overall macOS environment.
Additional features
Built-in sharing feature to share websites with others
Will soon switch to secure HTTPS protocol completely
Next, we have a personal favorite in Mozilla Firefox. Compared to something like Chrome, Firefox blows it out of the water. Natively, Firefox will block third-party websites from using cookies to track you.
It’ll block trackers from social websites. It can prevent annoying videos from playing automatically. The browser has DNS over HTTPS to prevent internet service providers from selling your data.
It’s available in over 90 languages and is compatible with Windows, Mac, and Linux computers. There’s a version for mobile devices so you can take high-quality security features on the go.
Firefox has a built-in password manager so you don’t have to remember any of it. Mozilla also included a cryptocurrency-blocking feature to prevent minors from using their computer for crypto tokens.
There is so much to Firefox that it’s difficult to go over everything. On top of that, you have an entire suite of extensions to enhance your browsing experience.
Additional features
Private browsing tabs now have enhanced tracking protection
SmartBlock will prevent common tracking scripts from working
Now we have Vivaldi. This browser has multiple security tools laid out in an easy-to-understand menu. Approachability is a major factor that some tech companies tragically overlook.
It’s not enough to have a secure browser with lots of cool features. You have to display them in such a way that people instantly understand them. People don’t want to dig through menus just to find one thing.
According to Vivaldi, the browser will protect you from websites and itself trying to track you. The app doesn’t collect data on its users, which is quite refreshing to hear. It comes with an ad block pre-installed.
And like other browsers, it comes with private browsing. But Vivaldi takes it one step further. The browser lets users change the search engine used. Plus, if you forget your password, you can download a backup encryption key to recover data.
People have complained in the past that Vivaldi is a little slow and may freeze. So do be aware of that.
Additional features
Visual Tabs let you preview what’s in a tab before clicking it
Trash Can to restore closed tabs or block pop-ups
Adaptive Interface lets you customize aspects of the user interface
In case you didn’t know, yes DuckDuckGo has a web browser but it’s only for mobile devices. It came out in late 2021 and has seen a ton of positive reviews for its security features.
DuckDuckGo markets itself as the anti-Google search engine. Google Search is known to track its users which the company claims are a way to better serve people. Others see it as an invasion of privacy.
DuckDuckGo keeps zero track of your information while you use its search feature. The browser will protect you against websites and apps tracking you, although the latter is still in beta so it isn’t perfect.
Also in beta is an email protection feature that, as you can probably guess, stops people from hiding trackers within your email. And then there’s the Fire button which clears out your browsing data with a single tap.
No other browser, mobile or desktop, has these features. It’s unknown if the developers plan on creating a desktop version besides the extensions but we hope they do.
Feel free to comment below if you have questions about the most used browsers. Also, feel free to leave comments about guides you’d like to see or information on browsers and their features.
If you were to look through an app’s installation folder or the specific system folders, there would be thousands of DLL files, each critical to the effective running of system processes and installed applications. But many reported that WMVCORE.dll was not found.
A missing DLL can wreak havoc if it’s shared by several programs because, in this case, the application won’t open and throw a WMVCORE.dllDLL not found error instead. So, let’s find out all about the DLL and the solutions that should work.
What is the use of WMVCore DLL?
The WMVCORE.dll is closely linked to the Media Playback in Windows and comes bundled with the Media Feature Pack. When the DLL file is missing, several applications, including GTA 4 and Adobe Premier Pro, stop working.
Here are a few reasons WMVCORE.dll is missing:
Corrupt system files: A common reason users face the problem is when the system files are corrupt, but this can be fixed with a few quick scans.
DLL file not available: Sometimes, the DLL is not available, probably deleted by the app or the user, or its storage path has been changed, and, as a result, Windows couldn’t read it.
Missing Media Feature Pack: Users running the N edition of Windows don’t have the Media Feature Pack installed, and thus the WMVCORE.dll was not found in Windows 10.
What can I do when WMVCORE.dll is missing?
1. Use a dedicated DLL repair tool
The WMVCORE.dll is ideally a Windows file and should be present in computers, but that’s not the case with the N edition of the OS. Also, the DLL could be deleted by a program. This is where a DLL repair tool comes to your aid.
With this software, you can download WMVCORE.dll and any other missing DLL from its database in no time. Get the tool and never worry about DLL issues ever again.
2. Move the DLL to the program’s folder
A solution that worked for some users was to move the DLL from the Windows directory to the affected program’s folder. To do that, use the following path to go to WMVCORE.dll location and copy the file:C:\Windows\System32
All that’s left is to paste the DLL into the program’s folder. Do that, restart the computer, and the program should launch without throwing an error.
3. Run the DISM and SFC scan
Press Windows + S to open Search, type Command Prompt, right-click on the relevant result, and then select Run as administrator.
Click Yes in the UAC prompt.
Now, paste the following commands individually and hit Enter after each:DISM /Online /Cleanup-Image /CheckHealthDISM /Online /Cleanup-Image /ScanHealthDISM /Online /Cleanup-Image /RestoreHealth
Once done, run the following command for the SFC scan:sfc /scannow
The DISM commands and SFC scan are effective against corrupt system files, and if that’s the reason WMVCORE.dll is missing for GTA 4 or Final Fantasy XIV, things should now be up and running.
Go to Microsoft’s official website, choose English from the Select Language menu, and click Download to get the Media Feature Pack for N and KN versions of Windows 10.
Select the file you want to download and click Next. If the first doesn’t work, try the other one the next time.
Once downloaded, run the setup, and follow the on-screen instructions to complete the installation process.
Finally, restart the computer for the changes to come into effect and verify whether the error message disappears.
5. Reinstall the program
Press Windows + R to open Run, type appwiz.cpl in the text field, and hit Enter.
Select the app that’s throwing the error, and click Uninstall.
Choose the appropriate response when prompted and follow instructions for the uninstallation to go through.
If nothing previously worked, reinstalling the affected program should fix things when WMVCORE.dll is missing in Windows. For a clean reinstall, use an effective uninstaller software to clear any leftover files.
Before you go, download one from the list of the best DLL repair tools and stop worrying about similar issues.
For any queries or to share what worked for you, drop a comment below.
The error code 0x80070000 is a common issue that occurs in legacy applications indicating a shutdown error in the Application Programming Interface functionality. This error code could cause disruptions in the app’s normal behavior.
In this guide, we will discuss potential ways to deal with the issue.
What is 0x80070000 Legacy API shutdown?
The Legacy API shutdown indicates that some process has issued a shutdown request using the older of two API functions available to request a shutdown.
To get more information about the issue, you must check the Event logs to ensure which process is initiating the shutdown.
What causes the 0x80070000 Legacy API shutdown issue?
There could be various reasons for this error code to appear; some of the common ones are:
Process requested shutdown – If a process issued a shutdown request using the older of the two API functions available to request a shutdown, you could see this message. You need to check the Event Viewer to understand more.
Task is scheduled – Your device might randomly shut down if a task is scheduled to restart your system. Check the Task Scheduler and disable the task if necessary.
Outdated app – If the legacy application is no longer supported or maintained by the developer, it may have known issues that can trigger the 0x80070000 error.
Antivirus is causing the issue – You might see this message if your antivirus is set to restart after scanning your machine or making any changes.
Now that you know the causes let us check out how to fix the problem.
How can I fix the 0x80070000 legacy API shutdown error?
Before engaging in advanced troubleshooting steps, you should consider performing the following checks:
Turn off your Wi-Fi or ethernet connection, temporarily disable your antivirus, and restart your PC. If the antivirus is causing the issue, reinstall it.
So, these are a few ways to check and fix the 0x80070000 Legacy API shutdown on your computer. If you have any questions or suggestions, feel free to mention them in the comments section below.
If you have encountered the 0x87D00669 (-2016410007) error while deploying updates via SCCM on a computer, this guide can help!
This error indicates that the client’s computer can’t find the update in the distribution package. We will discuss some popular fixes to resolve the issue in no time.
What causes the 0x87d00669 SCCM update error?
There are several reasons for the update error to occur; some of the common ones are listed here:
Content corrupted– If missing or corrupted, the content (update package & files) required for update installation may cause this SCCM update error.
Permission issues – The user account running the SCCM client doesn’t have appropriate permissions to install updates on the client’s machine.
Client communication issues – If the client machine cannot communicate with the SCCM server due to firewall settings or network issues, it could lead to an error.
Missing Boundaries and Boundary Groups – The apps or updates are installed after locating the distribution point and downloading the content; if the client can’t access the content, you might see this error. Check boundaries and boundary groups to ensure the network location is correctly set.
Now that you know how the error occurred, let us move on to the steps to fix the problem.
How can I fix the 0x87d00669 SCCM update error?
1. Check the boundaries
Press the Windows key, type configuration managerconsole, and click Run as administrator to launch SCCM.
Navigate to this path: Administration\Overview\Hierarchy Configuration\Boundaries
Now check the boundary set as IP range or anything appropriate.
2. Check the boundary groups
Press the Windows key, type configuration managerconsole, and click Run as administrator to launch SCCM.
Go to this path: Administration\Overview\Hierarchy Configuration\Boundary Groups
Select a boundary group, and right-click it to choose Properties.
Switch to the References tab, and click Add to add a new boundary.
In the Add Boundary window, choose the type of boundary you want to add. You can select among IP subnet, Active Directory site, IPv6 prefix, or IP address range.
Configure the properties of the boundary according to the selected boundary type and click OK.
On the References tab, place a checkmark next to Use this boundary group for site assignment and click OK to save the changes.
3. Redistribute an application to the distribution points
3.1 Use the Software Library
Press the Windows key, type configuration managerconsole, and click Run as administrator to launch SCCM.
Navigate to this path: Software Library\Application Management\Applications
Select the application from the available options: Package, Software Update, Applications, Boot Image, Operating system images, and more.
From the Home tab, click Properties.
In the Properties wizard, on the Content Locations page, select the distribution points or distribution points groups and click Redistribute.
So, these are the steps you need to follow to fix the 0x87d00669 SCCM update error. If you have any questions or suggestions, please feel free to mention them in the comments section below.
Today, Microsoft has officially launched Sentinel All-in-One v2. It’s been over two years since the company debuted the first version.
For those not conversant with Microsoft Sentinel, Microsoft defines it as follows:
Microsoft Sentinel delivers intelligent security analytics and threat intelligence across the enterprise. With Microsoft Sentinel, you get a single solution for attack detection, threat visibility, proactive hunting, and threat response.
As for Microsoft Sentinel All-in-One, it’s a product designed to assist both customers and clients to “quickly set up a full-fledged Microsoft Sentinel environment that is ready to use by customers speeding up deployment and initial configuration tasks in few clicks, saving time and simplifying Microsoft Sentinel setup”.
The new entry automates several processes designed to enhance efficiency and effectiveness for the users. For instance, Microsoft Sentinel All-in-One v2 enables Microsoft Sentinel on top of the workspace, health diagnostics for Analytics Rules, Data Connectors and Automation Rules, UEBA with the relevant identity providers (AAD and/or AD), and more.
Be sure to visit Microsoft’s Tech Community post for more details regarding the enhancements that ship with this update. It’s worth noting that you’ll need an Azure Subscription alongside an account with permissions to access this product. However, users who need to enable UEBA or even supported connectors will require access to higher privileges.
In this ever-changing online world, security is or should be the number one priority for everyone involved. However, that is easier said than done.
Malicious third parties seem to always be one step ahead of everyone, and staying protected means we need to also evolve and progress.
Now, Microsoft Security is making a big change in how it labels threat actors. Today, the tech giant revealed that from now on, these threats will be labeled based on weather terms.
Microsoft renamed threat actors based on wather
Speaking of security, you might want to look up how you can stay safe while online. On that note, we’ve prepared a lot of security-oriented articles to help you out.
If you are still using Windows 10, we’ve tested over 25 antivirus solutions and have compiled a list of the best ones for you.
Circling back, Microsoft said that, with the new taxonomy, it intends to bring better context to customers and security researchers that are already confronted with an overwhelming amount of threat intelligence data.
This initiative will offer a more organized, memorable, and easy way to reference adversary groups so that organizations can better prioritize threats and protect themselves.
Basically, security professionals will instantly have an idea of the type of threat actor they are up against, just by reading the name.
Furthermore, a large number of the new weather terms will identify the threat actors as coming from specific countries.
China
Typhoon
Iran
Sandstorm
Lebanon
Rain
North Korea
Sleet
Russia
Blizzard
South Korea
Hail
Turkey
Dust
Vietnam
Cyclone
The Redmond company will also break down some more specific threats from certain nation-states with additional sub-categories.
Russia has Blizzard as its main threat name, but it will also get Midnight Blizzard, Forest Blizzard, and Aqua Blizzard for more specific security issues, for example.
Of course, these new innovative weather terms will also extend to describe other threat actor issues, as you are about to see in the table below.
Financially motivated
Tempest
Private sector offensive actors
Tsunami
Influence operations
Flood
Groups in development
Storm
And, if a threat comes from an unknown source, or if one cannot be identified immediately, Microsoft will use the term Storm, followed by a four-digit number, as a preliminary label until it can be fully identified.
Microsoft claims that it has also established a new set of icons to go along with these new weather names for threat actors.
Each of these icons uniquely represents a family name, and where it makes sense will accompany the threat actor names as a visual aid. In truth, this new naming approach does not in any way change who the threat actors are that the company is tracking.
If you want to find out more about this new system, head on over to the dedicated Microsoft support page.
Know that all of Microsoft’s product pages that use security threat terminology will be updated with the new terms by September 2023.
We’ll monitor the situation and see what else Microsoft comes up with. Be sure to leave a comment below with your thoughts and opinions on this matter.
This error code indicates a problem with the WMI repository, a database that stores configuration information about WMI classes on a system. You can locate the repository here: %windir%System32WbemRepository
Press the Windows key, type cmd, and select Run as administrator.
Type the following command to stop the WMI service and hit Enter: winmgmt /verifyrepository
If it says WMI is not consistent, proceed to the following method.
2. Reset the WMI repository
Press the Windows key, type cmd, and select Run as administrator.
Copy and paste the following command to perform a consistency check and rebuild the repository if the inconsistency is found and press Enter: winmgmt /salvagerepository
Type the following command to ensure the repository is now consistent and hit Enter: winmgmt /verifyrepository
Copy and paste the following command to reset the repository to its initial state and press Enter: winmgmt /resetrepository
Press the Windows key, type cmd, and select Run as administrator.
Type the following command to stop the WMI service and hit Enter: net stop winmgmt
Wait for the services to stop; now copy & paste the following command to restart the WMI service and press Enter: net start winmgmt
Wait for the service to start, then close Command Prompt.
4. Rebuild the WMI repository
Press the Windows key, type cmd, and select Run as administrator.
Type the following commands one by one to disable & stop the WMI service, and press Enter after every command: sc config winmgmt start= disablednet stop winmgmt
To navigate to the WMI repository folder, type this command and hit Enter: cd %windir%system32wbem
Copy and paste this command to rename the repository and press Enter: ren Repository Repository.old
Type the following command to re-register all the DLL files and hit Enter: for /f %s in ('dir /b /s *.dll') do regsvr32 /s %s
To restart the WMI service and set it as automatic, type the following commands one by one and hit Enter after every command: sc config winmgmt start= autonet start winmgmt
Now to navigate to the root of the C drive, copy and paste the following command and press Enter: cd /d c:
If you have a 2012 Clustered server, please type the following command to recompile MOFs and hit Enter: dir /b *.mof *.mfl | findstr /v /i uninstall > moflist.txt & for /F %s in (moflist.txt) do mofcomp %s
Copy and paste the following command to restart the WMI service and press Enter: net start winmgmt
Close the Command Prompt window.
5. Force Recover WMI
Press Windows + R to open the Run window.
Type regedit and click OK to open Registry Editor.
Go to File, then click Export.
Now save the .reg file to a desired location to backup the registry entries.
Navigate to this path: ComputerHKEY_LOCAL_MACHINESOFTWAREMicrosoftWbemCIMOM
Locate and double-click Autorecover MOFs to check the Value data. If it is empty, copy & paste the registry key value from a healthy machine with the same configuration.
Once done, open the Command Prompt with admin rights using the step mentioned in the above methods, type the following command, and hit Enter: Winmgmt /resetrepository
Close the Command Prompt window.
We recommend you read our guide on SCCM application install error 0x87d00324, as this is one of the common issues encountered while deploying applications with Microsoft System Center Configuration Manager.
What causes the 0x80041002 error?
There could be various reasons for this error code to appear; some of the common ones are mentioned here:
Corrupted repository – If the WMI repository becomes inconsistent or corrupted due to improper shutdown, disk errors, or software conflicts, it may lead to this error.
Malware or security-related issues – Sometimes, malware infection or incorrect security settings may block WMI operations and processes, leading to this error.
Problems with WMI service – The WMI service, if disabled or stopped due to incorrect configuration or conflicts with other services, can result in the 0x80041002 error.
Other system errors – Other issues such as disk errors, incompatible software, and file system corruption could cause impact the functioning of WMI, hence the error.
So, these are the steps you need to follow to fix the 0x80041002 error. If you have any questions or suggestions, please feel free to use the comments section to mention them.