What is The 0x80070534 Error Code & How to Quickly Fix It

The error 0x80070534: no mapping between account names and security IDs was done, which can make accessing files from external drives hard.

It affects many Windows users and can occur for many reasons. Hence, we’ll guide you through some steps to fix it.

Also, you can read our article about the Desktop referring to a location that is unavailable on Windows PC.

What is the 0x80070534 error?

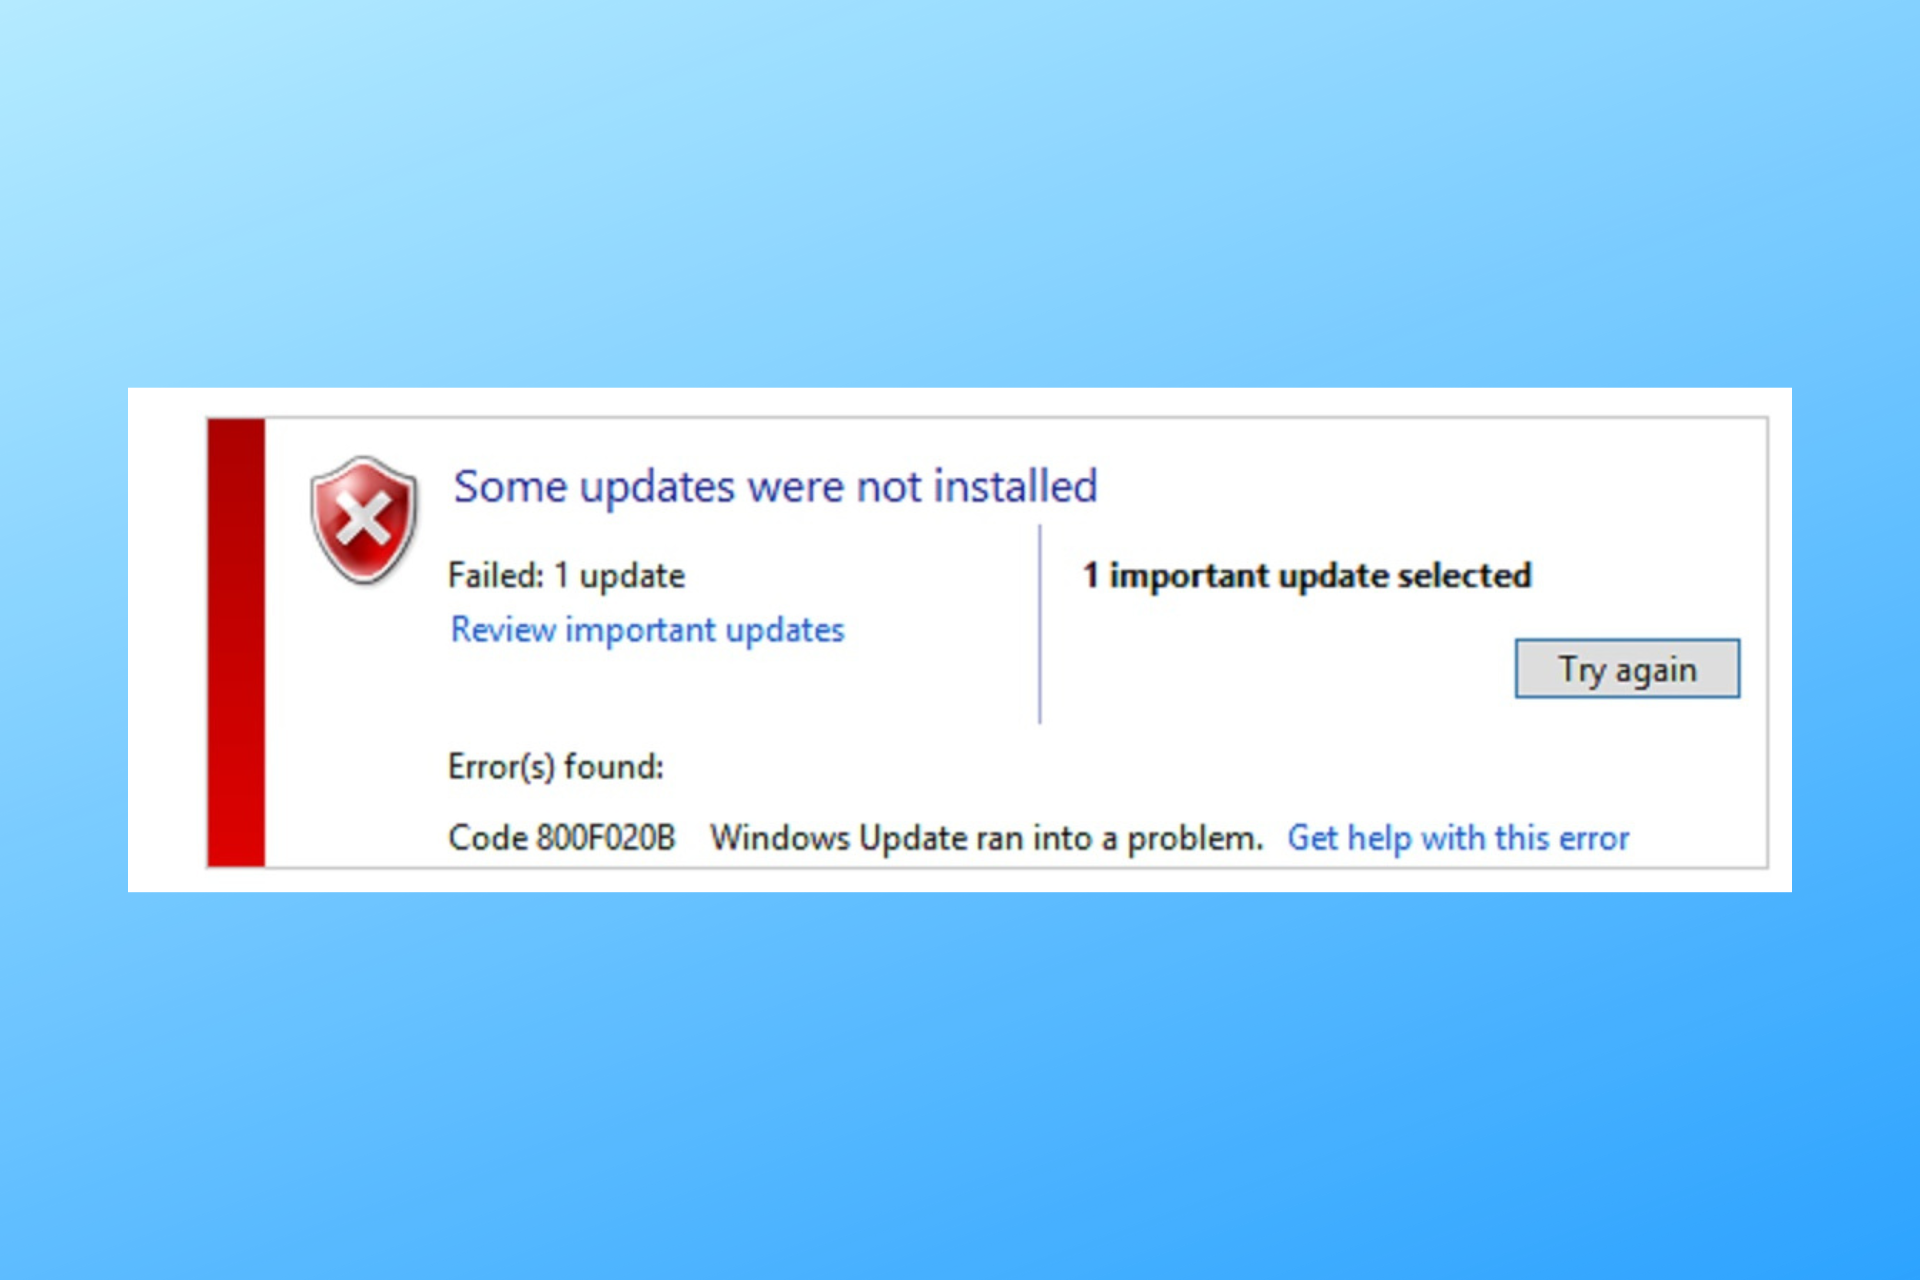
Users can encounter the error code 0x80070534 when trying to restore files from external storage devices on the device. It is accompanied by an error message indicating No mapping between account names and security IDs was done.

Furthermore, the error doesn’t necessarily indicate that the usernames are not matching. However, it can mean several possible problems with the file restore process.

What causes the 0x80070534 error code?

Some notable factors that can cause the error are:

  • Permission issues – There is a limit to the changes you can make to the system depending on the account you operate. Sometimes you need administrator permission to make certain changes.
  • Wrong Username or account – You can also run into the error code 0x80070534 if the username you entered is incorrect. Also, if you don’t have an account with administrator privileges logged in, you may be unable to restore files.
  • Issues with the external drive – If the external drive you’re trying to restore from is not working properly or has partition problems, it can cause issues with the activities running on it. Hence, it can result in the 0x80070534 error.

Nevertheless, you can resolve the error by following the steps below.

How can I fix the 0x80070534 error code?

Before trying any troubleshooting steps to fix the error, go through the following checks:

  • Free up memory space.
  • Restart your PC and try to restore the file.

If you can fix the problem, proceed with the steps below:

1. Take full control of the folder

  1. Right-click on the folder prompting the error and select Properties from the drop-down menu.
  2. Click on the Security tab and select the Username you want to grant access to. Then, click on the Edit button to change permission.
  3. Enable the Full Control option and click on OK.
  4. Repeat Step 2 above and click on Add.
  5. In the pop-up, select Advanced, select Find now, and click on Everyone.
  6. Close the Properties menu and restart your PC, then try to restore.

You need to identify the folder or file promoting this error and perform the listed process to fix it. It will give you full access to modify and export the file.

2. Run the CHKDSK Command

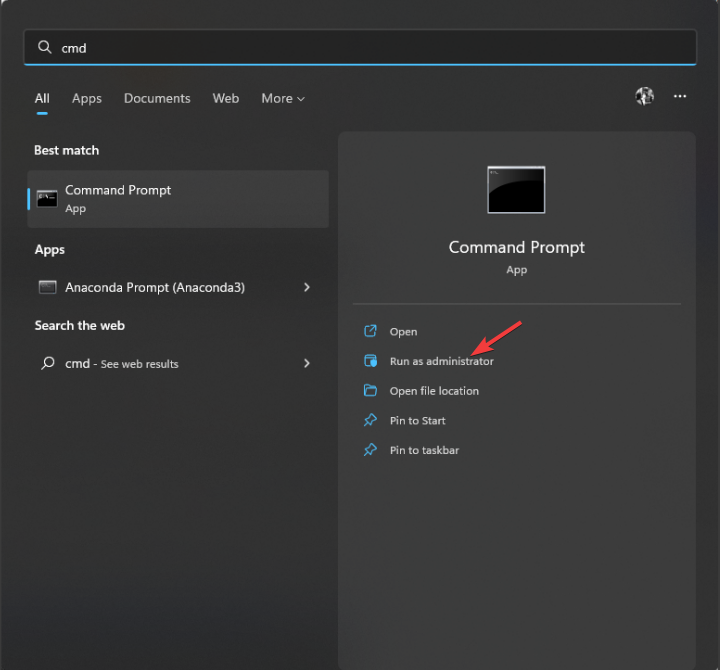
  1. Right-click on the Start button, type cmd and click on Run as administrator.
  2. Type in the following command prompt and press Enter: chkdsk c:/f/r/x 
  3. Replace the letter c in the command strings with the drive letter the user wants to repair.
  4. Close the Command Prompt and check if the error persists.

The Check Disk command will scan and find issues affecting the drivers on your system and resolve activities impeding their operation. Check our guide on how to fix Command Prompt not working on your PC.

3. Sign out of your Microsoft account via Credential Manager

  1. Left-click the Start button, type in Credential Manager, and click on it to open it.
  2. Select the Windows Credentials, navigate to the Generic Credentials section, and click on it.
  3. Select the Microsoft Account link. Click on Remove to delete the account from the device.
  4. Log in to your account and check if the 0x80070534 error appears when restoring files.

Signing out of your account allows you to sign in with the correct credentials and refresh your profile on the PC. You can read about how to fix Credential Manager not working on your PC.

4. Enable the Administrator account

  1. Right-click on the Start button, type cmd and click on Run as administrator.
  2. Type the following command and press Enter: net user administrator /active: yes
  3. Sign out from the current user account and log into the Administrator account shown on the log-on screen.
  4. Try restoring files from my external hard drive and check if the error message appears.

Enabling the Administrator account will grant you access to various locations, files, or programs that may require elevated administrator privileges.

Read our article about making your Administrator account on Windows PC.

In addition, you may be interested in our detailed guide on switching accounts from Standard users to an Administrator and vice versa. Also, you can check how to create a local account on Windows 11.

If you have any questions or suggestions about this guide, kindly drop them in the comments section.

Bootstrap.dll Not Found Error: 5 Ways to Fix It

Bootstrap.dll is a legit dynamic link library (DLL) file that is part of Tonido developed by CodeLathe LLC. Some applications or games may need this file to work properly.

Bootstrap.dll not found is a common issue that occurs when the DLL file can’t be located or accessed by the system.

What causes the bootstrap.dll not found error?

Several potential reasons could lead you to this error; some of the common ones are:

  • Corrupted file – If the DLL file is either deleted or has become corrupt due to malware infection or system error, you might see this error message. To fix it, run a malware scan.
  • Incomplete installation of bootstrap framework apps – If any of the apps related to the bootstrap.dll is installed incorrectly installed or uninstalled, it could cause the issue.
  • Software conflicts – Conflicts between different software on your computer, primarily related to web development, may result in the bootstrap.dll file being deleted or moved.
  • Incorrect file path – If the file path or configuration related to the file is incorrect in your application or system settings, it may result in the file being reported as missing.
  • Operating system issues – Issues with the operating system, including system file errors or compatibility issues, may also result in the error. To fix it, repair system files.

Now that you know the probable causes, let us move to the fixes.

How can I fix the bootstrap.dll not found error?

Before engaging in troubleshooting steps, you should consider performing the following checks:

If these didn’t work for you, proceed to the advanced fixes.

1. Run a DLL fixer

DLL file fixers are easy-to-use utility software that can help you fix common DLL-related errors, including missing, corrupted, and broken files that may occur when launching or running certain software applications or games.

These tools can scan and detect DLL-related errors or issues on the computer and attempt to fix or restore the affected DLL files to their original state.

One such reliable tool can find or replace DLL files like bootstrap.dll and restore the app’s functionality, resolving the conflict between your operating system and third-party app.

2. Run an SFC scan

  1. Press the Windows key, type cmd, and click Run as administrator.CMD elevated
  2. Copy and paste the following command and hit Enter: sfc/scannowSFCSCANNOW CMD
  3. The scan will take a few minutes to complete; once done, restart your computer.

3. Run a malware scan

  1. Press the Windows key, type windows security, and click Open.Windows Security open Windows key bootstrap.dll
  2. Go to Virus & threat protection and click Scan options.V& T Scan options
  3. Select Full scan, then click Scan now.Full scan
  4. The tool will scan your computer to find the malicious files. Once it shows the results, select the listed files and delete them to fix the issue.

4. Install the missing DLL manually

4.1 Replace the corrupted DLL file

  1. Go to the DLL files website and download the DLL file.
  2. Locate and right-click the file and select Extract All.Extractall
  3. Select the location and click Extract.Extract
  4. Locate, copy the file, and paste it into the program folder which is requesting the file in error. If the ShareX app is trying to use the DLL file, you need to navigate to this path and paste the file here: C:\Program Files\ShareX
  5. In case the older version of the file is available, choose it and click Rename button. Add .old to the existing file and then paste the new file.Rename old DLL file
  6. Restart your computer.

4.2 Register the DLL file

  1. Press the Windows key, type cmd, and click Run as administrator.CMD elevated
  2. Click Yes on the UAC prompt.
  3. Type the following command to register the DLL file and hit Enter: regsvr32 bootstrap.dllcmd 2 bootstrap.dll
  4. Reboot your PC to save the changes.

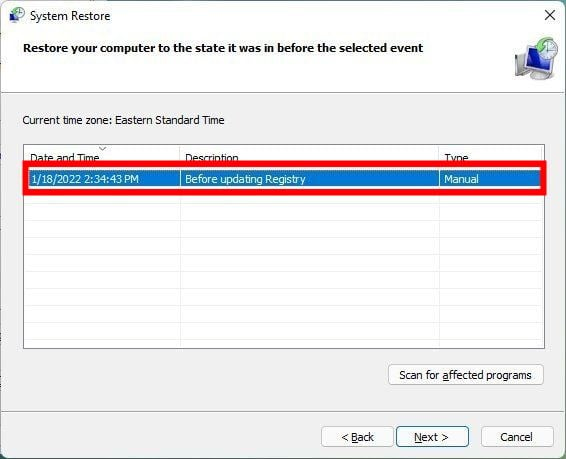
5. Perform a System Restore

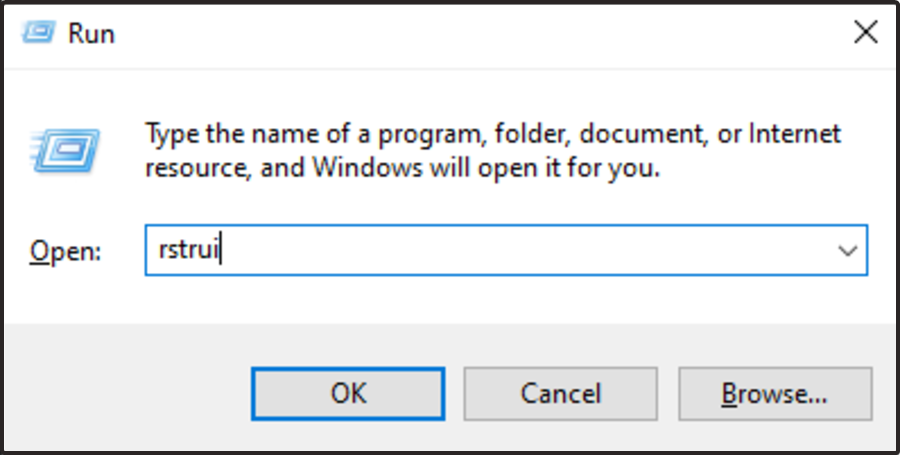
  1. Press the Windows + R to open the Run dialog box.RSTRUI
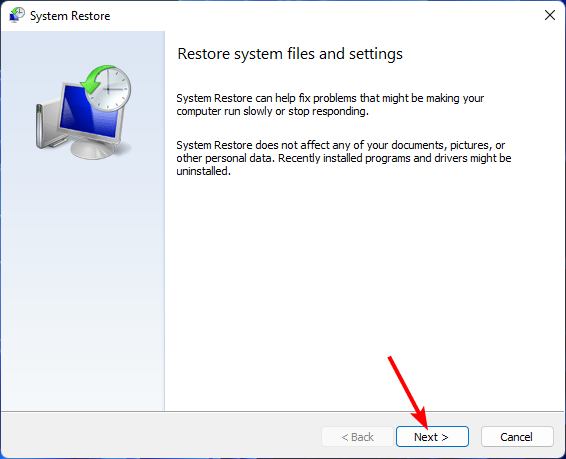
  2. Type rstrui and press Enter to open the System Restore window.
  3. On the next window, select Choose a different restore point and click Next.Next Choose a different restore point
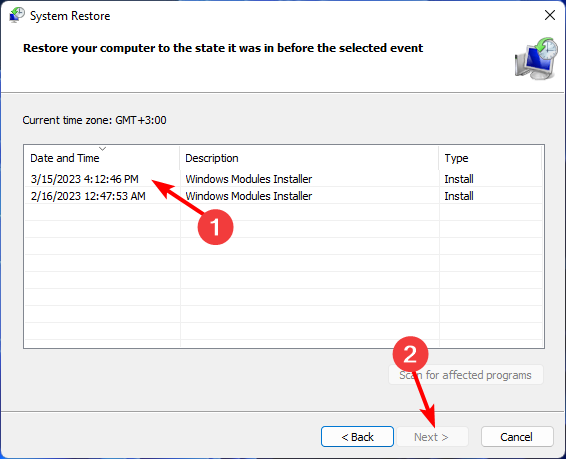
  4. Select the restore point and click Next.Choose a point bootstrap.dll
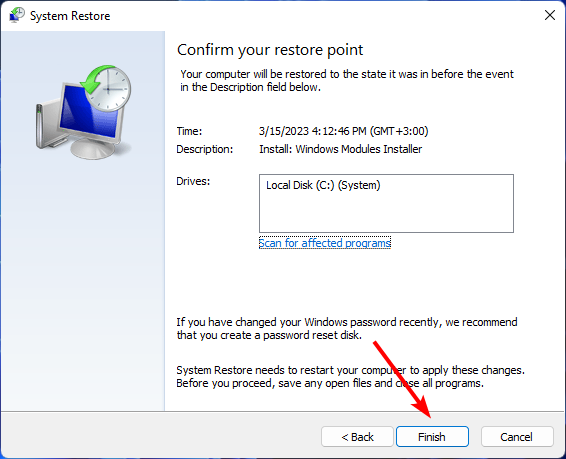
  5. Now click Finish to initiate the process. Your computer will restart, and the Windows settings will be reverted to the chosen point. Finish

If you’re tired of dealing with missing DLL files on Windows 11, check out our blog for expert tips and solutions!

So, these solutions could help you fix the bootstrap.dll not found error. If nothing worked for you, we advise you to reset your PC to fix the problem.

If you have any questions about this error, please mention them in the comments section below.

Beast32.dll: How to Download or Fix It if It’s Missing

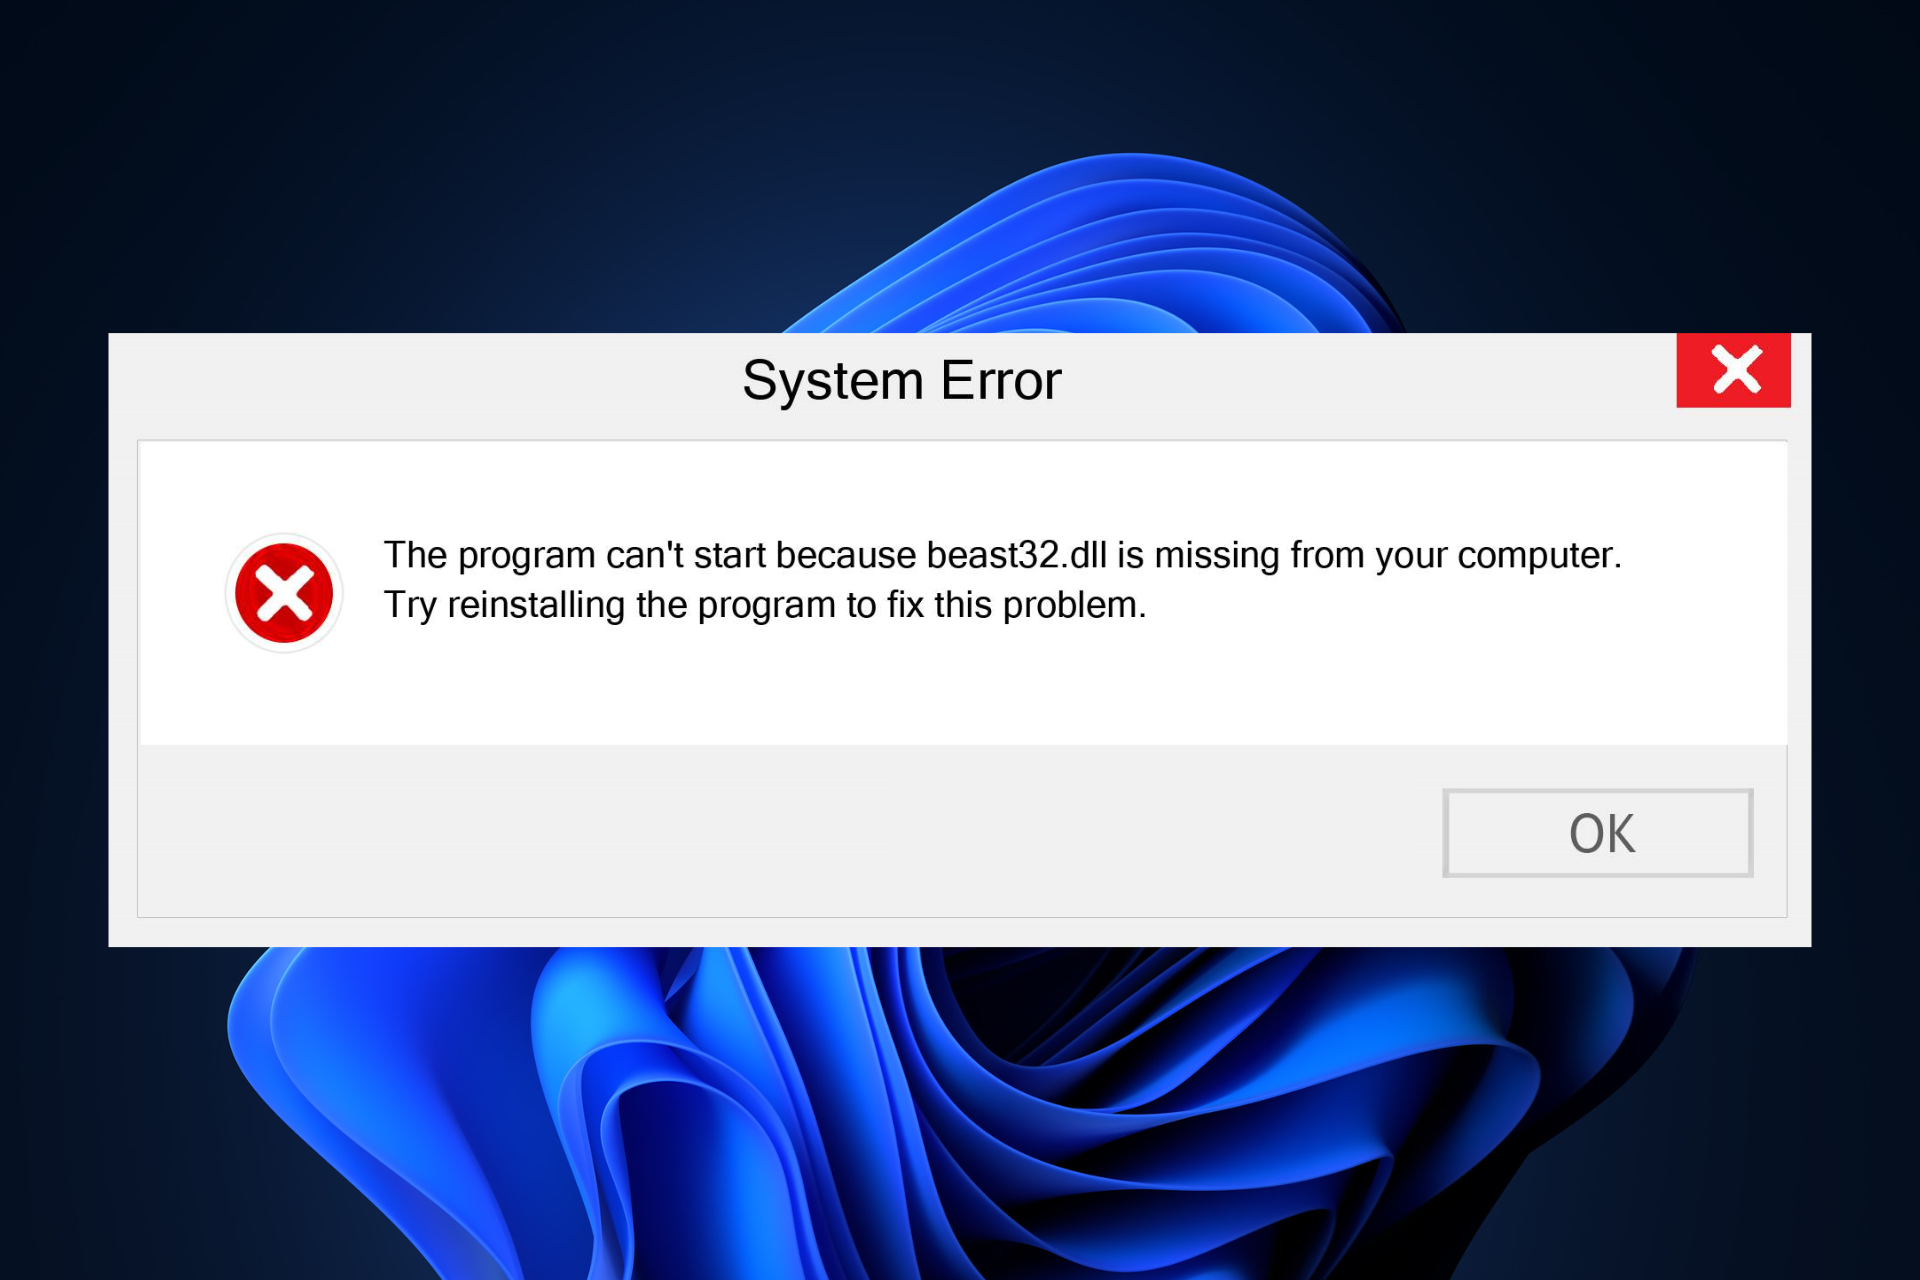
Beast32.dll is a dynamic link library (DLL) file associated with Beast API File Interface developed by AutoDesk. If the beast32.dll file is missing, it could result in errors or issues related to the software.

This guide will explore some potential solutions to fix the missing DLL issue and restore the smooth functioning of the applications or games.

What causes the beast32.dll file missing issue?

This error occurs due to various reasons; some of the common ones are listed here:

  • DLL file is removed – If the app or game related to the DLL file is being uninstalled or removed, you might see this error. You need to reinstall the software.
  • Software or program corruption – If the DLL file becomes corrupted due to a software or program error, it could lead to this issue.
  • Malware infection – Virus infections could delete or corrupt, missing DLL files, leading to this error. You need to run a malware scan to fix it.
  • Incorrect file location – If the software that requires this dll file cannot locate the DLL file at the specified file path or location, it may result in an issue. It would help if you reinstalled the software.

Now that you know the possible causes, let us move to the solutions.

What can I do if the beast32.dll file missing?

Before we go to the advanced fixes, here are a few preliminary checks you should do:

  • Reinstall the affected software.
  • Make sure there are no pending Windows updates.

If these didn’t work for you, proceed to the troubleshooting methods.

1. Run a DLL fixer

DLL file fixers are software utilities designed to detect and fix issues associated with dynamic link library files in the Windows operating system.

It can scan for missing, corrupted, or broken DLL files on a computer and attempt to restore them.

The repairing tool can also fix the DLL error specified to an app and resolve the conflict between your operating system and software, such as in the case of the beast32.dll file missing issue.

2. Run SFC & DISM commands

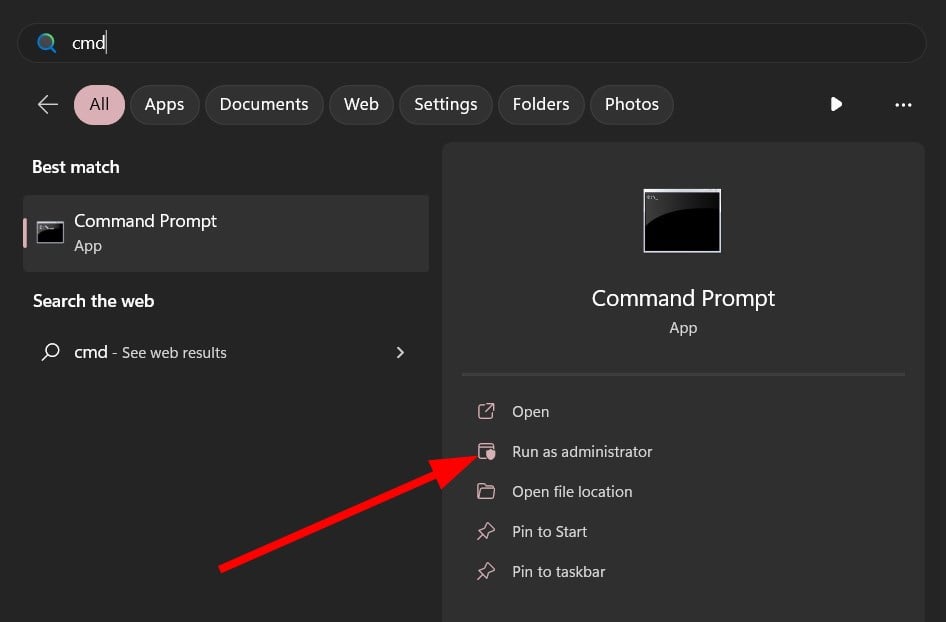
  1. Press the Windows key, type cmd, and click Run as administrator.CMD elevated beast32.dll
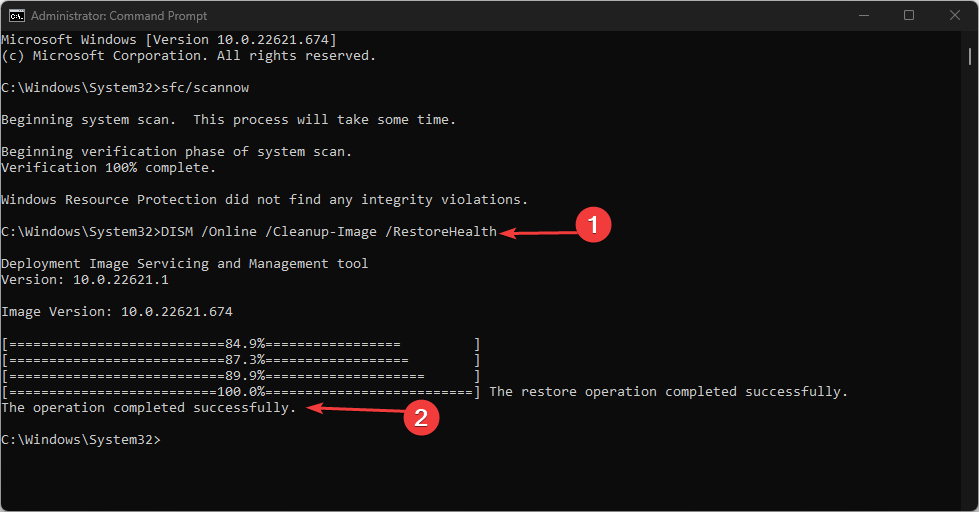
  2. Type the following command to repair the system files and press Enter: sfc/scannowSFCSCANNOW CMD
  3. The scan will scan the system files & try to fix them.
  4. Copy and paste the following command to repair the Windows OS image and hit Enter: DISM.exe /Online /Cleanup-Image /RestorehealthRestore health beast32.dll
  5. Once done, restart your computer to complete the process.

3. Run a malware scan

  1. Press the Windows key, type windows security, and click Open.Windows Security open Windows key beast32.dll
  2. Navigate to Virus & threat protection and click Scan options.V& T Scan options
  3. Select the radio button next to Full scan and click Scan now button to initiate the deep scan.Full scan - beast32.dll
  4. The security will scan and show you the list of infected files if present. Delete them to fix the error.

4. Install the missing DLL manually

4.1 Download the DLL file

  1. Go to the DLL files website and click Download.
  2. Right-click the downloaded file and select Extract All from the context menu.Extractall
  3. On the next window, choose a preferred location and click Extract.Extract
  4. Open the folder, and copy the beast32.dll file.
  5. Navigate to the Programs folder: C:\Program Files
  6. Locate the app that gives you the error and paste the DLL file.
  7. In case the old version of the file is there, select it and click Rename button. Add .old to the existing file and then paste the downloaded file. Reboot your PC.Rename old DLL file

4.2 Register the DLL file

  1. Press the Windows key, type cmd, and click Run as administrator.CMD elevated
  2. Click Yes on the UAC prompt.
  3. Copy and paste the following command to register the DLL file and hit Enter: regsvr32 beast32.dllcmd_beast32.dll
  4. Restart your computer to let the changes take effect.

5. Perform a System Restore

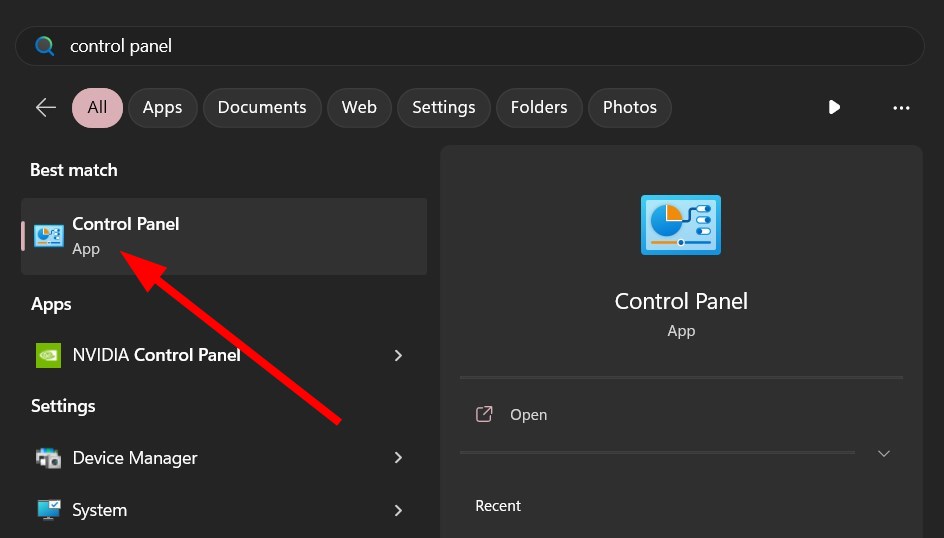
  1. Press the Windows key, type control panel, and click Open.Control Panel start menu
  2. Select View by as Large icons and click Recovery.Recovery Control Panel beast32.dll
  3. Click Open System Restore.Open system restore
  4. Select Choose a different restore point and click Next.Next Choose a different restore point
  5. Select the desired restore point and click Next.Choose a point beast32.dll
  6. Now click Finish to initiate the process. Finish
  7. Your computer will restart and be reverted to the chosen point.

If you’re frustrated with encountering missing DLL files on Windows 10, our blog offers valuable expert tips and solutions you won’t want to miss!

So, these are methods you can follow to fix the beast32.dll missing error. Try them and let us know what worked in the comments section below.

Fix: 0xc000027b Microsoft Store Crash Exception Code

Several users have reported facing Microsoft Store crash exception error code 0xc000027b. Notably, the Microsoft Store apps crash without displaying any error window. This makes it more difficult to investigate the issue since the error doesn’t show any error message.

However, we have researched and found some reasons that could trigger the Microsoft Store crash exception error code 0xc000027b. This guide will also help you with solutions to fix the problem at your end. Let us get right into it.

What is 0xc000027b, and how does it trigger?

The simple meaning of the error 0xc000027b is that Microsoft Store abruptly closes during an operation or opening of an app. Some of the common 0xc000027b app errors that you will come across are 0xc000027b start menu, 0xc000027b explorer, 0xc000027b calculator, etc.

Although there isn’t any error message displayed, most of the time, when users come across the 0xc000027b, after reading several user reports we found many reasons that could trigger the problem.

  • Time and date are incorrect: Simple it may sound, but several users reported that because the time and date aren’t correct on their PCs, they are getting this issue.
  • Windows Store is problematic: There are chances that there are some underlying issues that are causing the Microsoft Store crash error 0xc000027b.
  • Microsoft Store cache is corrupt: Because of corrupt cache files for Microsoft Store, you will come across various issues including the one at hand.
  • Corrupt Store registry key: Chances are some important registry keys related to the Windows Store are corrupt and causing problems.
  • System files are missing or corrupt: Also, because of some missing or corrupt system files, you may get several issues associated with the Windows program.

Let us check out the different solutions that will hopefully help you resolve the Microsoft Store crash exception code 0xc000027b.

How can I easily get rid of this Microsoft Store error 0xc000027b?

1. Set the correct time and date

  1. Press the Win + I keys to open the Windows Settings.
  2. Click on Time & language on the left.
  3. Select the Date and time option.
  4. Toggle on the Set time automatically option.
  5. From the Time zone drop-down, select the correct time zone.
  6. Scroll down and under Additional settings, hit the Sync now button to sync the time.

Notably, this solution was suggested by one user and has helped several users to fix the Microsoft Store error 0xc000027b.

You can try fixing the time and date for your PC and hopefully resolve the 0xc000027b error and other associated errors such as 0xc000027b start menu, 0xc000027b explorer, and 0xc000027b calculator,

2. Run the Windows Store app troubleshooter

  1. Press the Win + I keys to open the Windows Settings.
  2. Click on Troubleshoot.
  3. Select Other troubleshooters.
  4. Hit the Run button next to the Windows Store.
  5. The troubleshooter will start detecting the issues.
  6. Apply the prompted fixes.
  7. Restart your PC.

If there is an underlying issue with the Windows Store, it can be easily resolved by running the Windows Store troubleshooter.

It will detect the issue and prompt you to apply the fixes to resolve errors, including the Microsoft Store error 0xc000027b.

3. Reset Microsoft Store

  1. Press the Win + I keys to open the Windows Settings.
  2. Click on Apps on the left.
  3. Select Installed Apps.
  4. Click the 3-dot icon for Microsoft Store and select Advanced options.
  5. Scroll down and click on Reset.
  6. Hit Reset again in the prompt to reset the Microsoft Store.

Resetting the Microsoft Store helps reset all the files that might be corrupt or causing the problem. When you launch the Store after resetting, all files will be loaded from scratch.

4. Delete Windows Store cache

  1. Press the Win + R keys to open the Run dialogue.
  2. Type regedit and hit Enter.REGEDIT RUN COMMAND
  3. Navigate to the below path and press Enter. Computer\HKEY_CURRENT_USER\Software\Microsoft\Windows\CurrentVersion\CloudStore\Store
  4. Delete the Cache folder for Store.
  5. Close Registry Editor.
  6. Restart your PC for the changes to take effect.

This issue of Microsoft Store error 0xc000027b could also be triggered if several registry files are missing or corrupt.

You can easily clear the Windows Store cache registry files by following the above steps and see if this helps in 0xc000027b start menu, 0xc000027b explorer, 0xc000027b calculator, or other 0xc000027b associated errors.

5. Run SFC and DISM commands

  1. Press the Win key to open the Start menu.
  2. Run Command Prompt as an admin.
  3. Type the below command and press Enter. sfc /scannowSFCSCANNOW CMD
  4. Wait for the SFC Scan process to complete.
  5. Type the below commands and press Enter after each one.Dism /Online /Cleanup-Image /CheckHealth Dism /Online /Cleanup-Image /ScanHealth Dism /Online /Cleanup-Image /RestoreHealth
  6. Restart your PC.

Several users have also asked in forums whether the shellexperiencehost.exe 0xc000027b and kernelbase dll exception code: 0xc000027b errors are similar to 0xc000027b.

In short, yes. If you are facing the shellexperiencehost.exe 0xc000027b and kernelbase dll exception code: 0xc000027b errors, you can apply the fixes mentioned above. Moreover, you will also face these 0xc000027b errors with an app downloaded from the Microsoft Store, such as a calculator.

So, basically, some underlying problems with the Store are causing apps to misbehave. You can also apply the same solutions mentioned above to resolve these issues.

That is it from us in this guide. We have prepared a guide that lists down all the most common Microsoft Store error codes along with the solutions that will help you resolve them.

Feel free to let us know in the comments below which one of the above solutions fixed the Microsoft Store error 0xc000027b on your PC.

0x80070246 Windows Update Error: 6 Ways to Fix It

According to several Windows 10 and Windows 11 users, they are coming across error 0x80070246 when trying to install the Windows update. This error prevents them from upgrading their PCs and enjoying the latest features.

Thankfully, in this guide, we have listed some of the best solutions to help you resolve the Windows update install error 0x80070246 on your Windows 11 PC. We will also discuss the reasons that could trigger the problem in the first place. Let us get right into it.

Why am I getting Windows update install error 0x80070246?

There can be various reasons why you are getting the Windows 11 install error 0x80070246 on your PC. After some research, we have listed the main reasons below.

  • Windows update feature is problematic: Chances are that the Windows update tool itself is at fault and causing the update to fail.
  • Corrupt system files: If the system files on your PC are corrupt or missing, then you will come across multiple issues one of which is the update error 0x80070246.
  • Windows update service isn’t running: Chances are some third-party app, or you might have disabled the Windows update service, which is causing the issue.
  • Windows update components are conflicting: Often, Windows update components have been found the culprit behind various Windows update errors.
  • Windows update cache is problematic: Windows update cache files might be corrupt or cause a problem with the latest update that you are trying to download.

Let us go through the solutions that will help you resolve the Windows update error 0x80070246.

How can I fix Windows 11 install error 0x80070246?

Note icon NOTE
Users have been facing this update error on Windows 10 and 11 PCs. So, you can apply the solutions mentioned below on both operating systems.

1. Run Windows update troubleshooter

  1. Press the Win + I keys to open the Settings menu.
  2. Click on Troubleshoot.
  3. Select Other troubleshooters.
  4. Hit the Run button for Windows Update.
  5. The troubleshooter will begin diagnosing the issue.
  6. Apply the prompted fixes.
  7. Restart your PC.

If you come across any issue related to Windows update, you can try to run the Windows update troubleshooter and resolve the problem.

2. Clear Windows Update components

  1. Press the Win key to open the Start menu.
  2. Open the Command Prompt as an admin.
  3. Type the below commands and press Enter after each one.net stop bits net stop wuauserv net stop appidsvc net stop cryptsvc Ren %systemroot%\SoftwareDistribution SoftwareDistribution.bak Ren %systemroot%\system32\catroot2 catroot2.bak net start bits net start wuauserv net start appidsvc net start cryptsvc
  4. Restart your PC.

As mentioned, often Windows update components can conflict with the Windows update services and cause several issues including the Windows 11 install error 0x80070246.

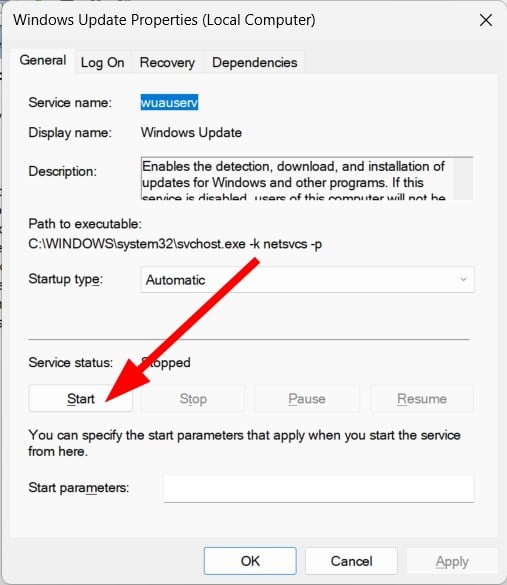
3. Make sure the Windows Update service is running

  1. Press the Win + R keys to open the Run dialogue.
  2. Type services.msc and hit the Enter key.Services Run Command
  3. Double-click on the Windows Update service.
  4. Press the Start button under Service status to run it.

To install the latest updates, you should ensure that the Windows Update service is running on your PC and it isn’t stopped.

You can follow the above steps to enable the service in case it is not running and check if this resolves the Windows update error 0x80070246.

4. Run SFC and DISM commands

  1. To open the Start menu press the Win key.
  2. Open Command Prompt as an admin.
  3. Type the below command and press Enter.sfc /scannowSFCSCANNOW CMD
  4. The SFC Scan process will initiate.
  5. Wait for the process to complete.
  6. Type the below commands and press Enter after each one.Dism /Online /Cleanup-Image /CheckHealth Dism /Online /Cleanup-Image /ScanHealth Dism /Online /Cleanup-Image /RestoreHealth
  7. Restart your PC.

Windows OS comes built-in with commands such as the SFC Scan and DISM that you can use to fix corrupt or missing system files. However, in many cases such as the error 0x80070246, it isn’t that useful.

For that scenario, you can use a system repair tool that can fix Windows errors, fix BSoD errors, or even detect malware or PUA threats from your PC.

5. Clear Windows Update cache

  1. Press the Win + R keys to open the Run dialogue.
  2. Type services.msc and hit the Enter key.Services Run Command
  3. Double-click on the Windows Update service.
  4. Right-click on the Windows Update service and select Stop.
  5. Open the Run dialogue by pressing the Win + R keys.
  6. Type C:\Windows\SoftwareDistribution\Download and press Enter.
  7. Select all files and delete each one of them.
  8. Go to the services.msc console.
  9. Start the Windows Update service.

Cleaning the Windows Update cache has helped several users resolve the Windows Update error 0x80070246 on their PCs.

Often cache files of old Windows updates can interfere with the new ones and won’t let them download on your PC. In such a case, we would suggest you follow the above steps to clear the Windows Update cache files.

6. Clean up disk space

  1. Open the Start menu by pressing the Win key.
  2. Open Disk Cleanup.
  3. Choose the disk drive where you have installed the OS from the drop-down.
  4. Select Clean up system files.
  5. Check the boxes for the files that you want to delete and press OK.
  6. Select Yes to remove all the files.

Chances are that there isn’t sufficient space left on your disk drive, because of which the update isn’t getting installed, and you are getting the Windows 11 install error 0x80070246.

That is it from us in this guide. If you are getting the Windows update error 0x80888002, check out our guide for a quick resolution.

We also have a detailed guide on Windows update error 0x8007000B that will help you resolve the issue at your end. For users getting the update error 0x8024402c, we suggest you refer to the solutions mentioned in our dedicated guide.

Let us know in the comments below which one of the above solutions fixed the Windows 11 install error 0x80070246 on your PC.

Error Code 22: How to Fix Your Graphics Device Driver

If your graphics devices on your PC are disabled by you or by a third-party application, then you will come across an error code 22. The graphics device driver error code 22 is another one of the Device Manager errors that users come across from time to time.

In this error code 22, the screen turns black, and there is no response from the affected program, which, in our case, is the graphics driver. This guide lists some effective solutions to help you resolve the graphics device driver error code 22. Let us get right into it.

What does graphics device error code 22 mean, and what causes it?

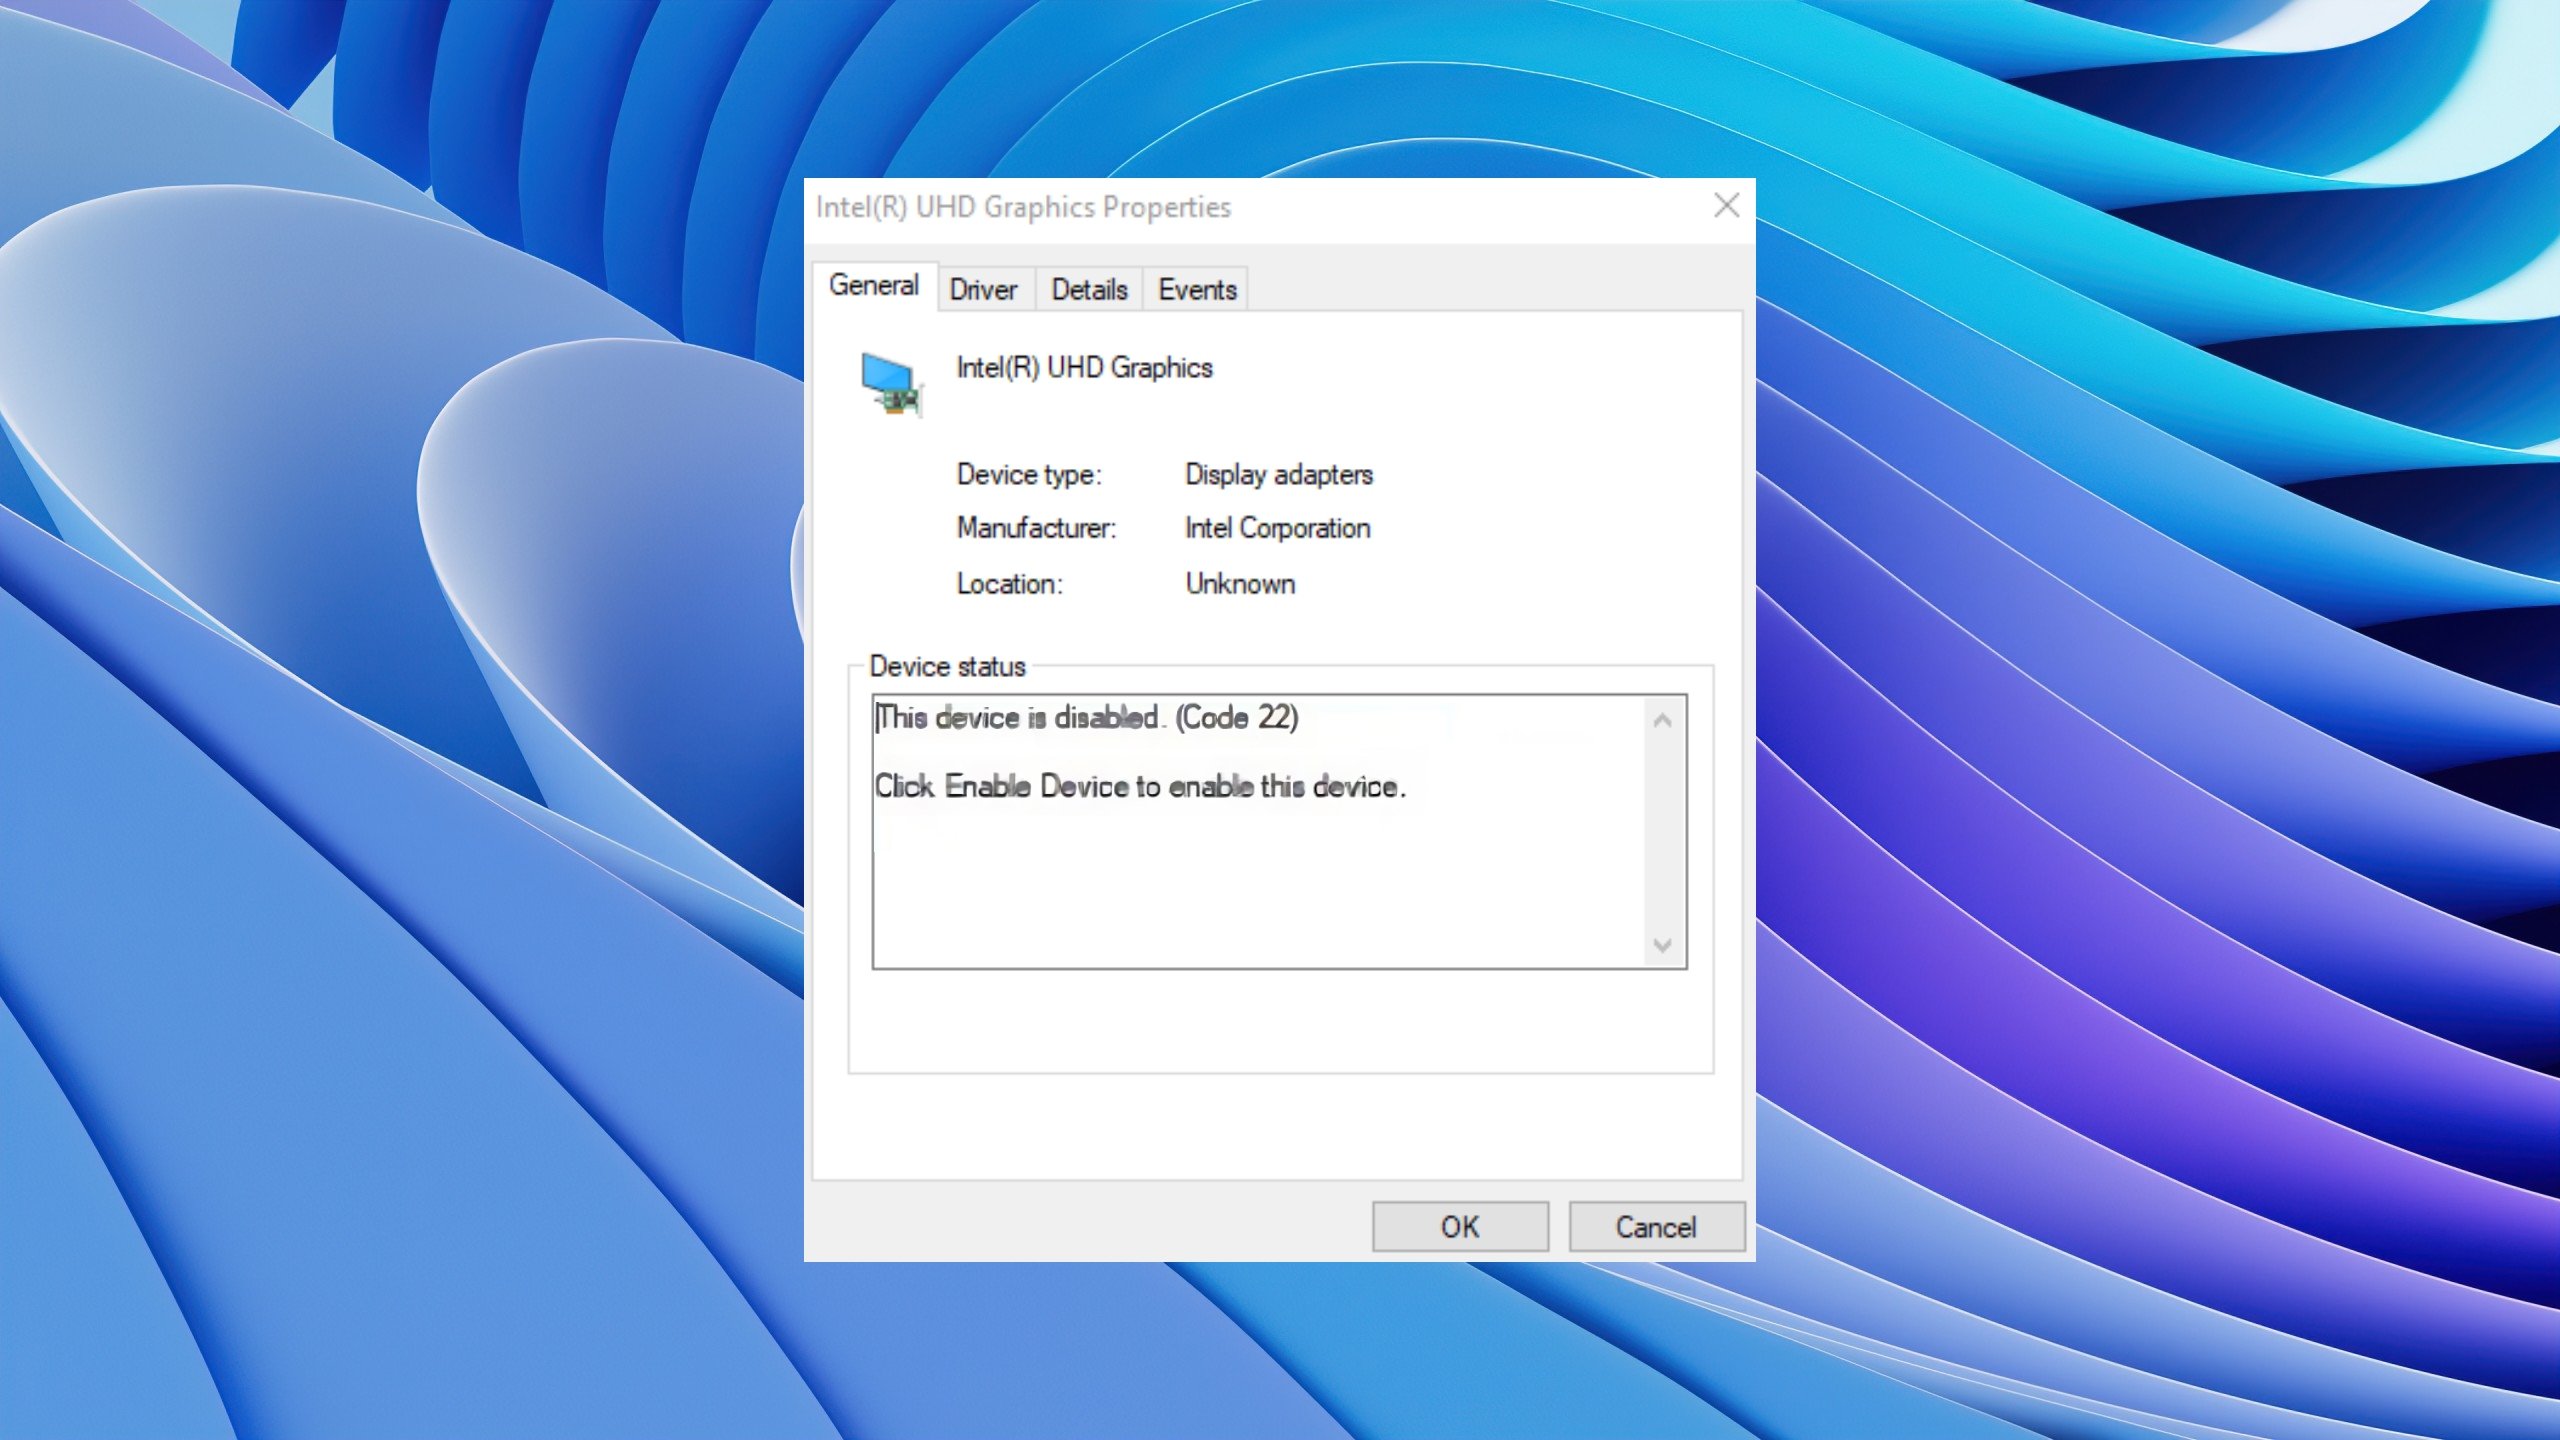
When you come across the error code 22, you will always see the error message This device is disabled. (Code 22).

You can view further details about this graphics device driver error code 22 by heading over to the Device Status area in the device’s properties.

We have also talked about the error code 43 in Windows 11. You can also check out our guide on how you can fix the graphics device error code 31 on your PC.

  • The device is actually disabled: There are chances that the device in question throwing you this error code 22 is actually disabled.
  • There is a driver issue: Incompatible or corrupt driver files can also cause multiple issues with the device program.
  • The driver isn’t up to date: You should ensure that you are running the latest version of the driver as latest updates bring bug fixes that might be causing this problem.
  • CMOS is creating an issue: Windows might have disabled the device due to a lack of system resources and clearing CMOS might help.
  • The slot is faulty: Chances are that the slot in which the graphics driver is attached is faulty and causing genuine issues.

Notably, the device is disabled. (code 22) USB driver and this device is disabled. (code 22) Wi-Fi is also a similar issue. You can apply the same solutions mentioned in this guide appropriate to the driver if you are experiencing error code 22.

Let us now check out the solutions that will help you fix the graphics device driver error code 22.

How do I fix the graphics device driver error code 22?

1. Enable the device

  1. Open the Start menu by pressing the Win key.
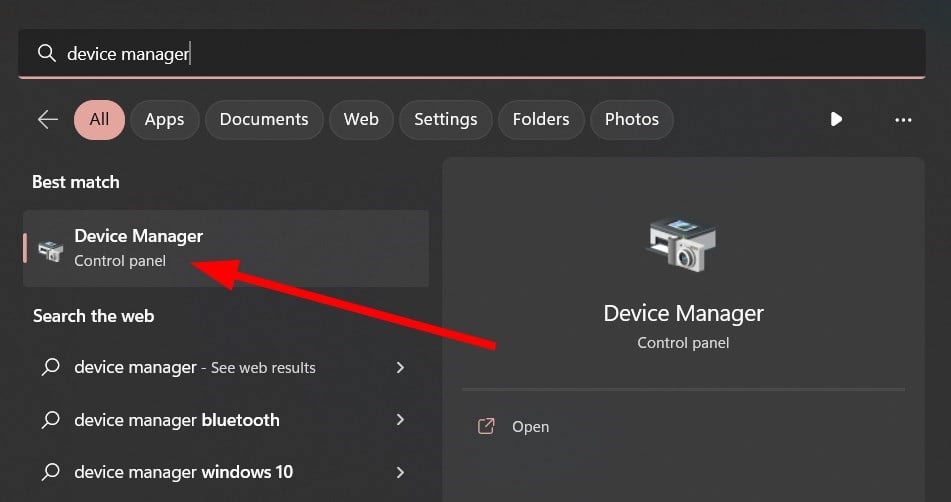
  2. Open Device Manager.
  3. Expand the Display adapter section.
  4. Double-click on your graphics driver.
  5. Switch to the Driver tab.
  6. Hit the Enable device button.
  7. Click OK to apply the changes.
  8. Restart your PC.

You can enable the graphics driver manually if you are coming across the error code 22. If the device is already enabled, then you can move on to the next solution.

2. Update your graphics driver

  1. Open the Start menu by pressing the Win key.
  2. Open Device Manager.
  3. Expand the Display adapter section.
  4. Double-click on your graphics driver.
  5. Click on the Driver tab.
  6. Select Update driver.
  7. Choose Search for drivers automatically option.
  8. Install the latest update.
  9. Restart your PC.

Make sure that you have installed the latest update for your graphics driver, as there could be an underlying bug or glitch that might be causing the problem.

In any case, you could better employ software to automatically update any drivers securely on your PC. That will help avoid this type of error code and optimize the performance as well.

Outbyte Driver Updater

Keep all your drivers up to date with this professional software.
Free Trial Download now

3. Reinstall the graphics driver

  1. To open the Start menu press the Win key.
  2. Open Device Manager.
  3. Expand the Display adapter section.
  4. Double-click on your graphics driver.
  5. Click on the Driver tab.
  6. Select Uninstall Device option.
  7. Click OK.
  8. Restart your PC.
  9. Visit the official website of your graphics driver and download the latest version.
  10. Install the graphics driver.

4. Clear CMOS

  1. Turn off your PC.
  2. Remove all the connected devices.
  3. Disconnect the power cable from the source.
  4. Remove the battery of your laptop.
  5. Wait for 2-3 minutes.
  6. Reconnect the battery back to your laptop.
  7. Connect all of your peripherals to your PC.
  8. Reboot your PC.

5. Perform a system restore

  1. Press the Win key to open the Start menu.
  2. Type create a restore point and open it.
  3. Hit the System Restore button.
  4. Click Next.
  5. Choose the restore point.
  6. Select Next.
  7. Click Finish.

The system will help you take your PC back to a state when everything is normal. However, we would like to inform you that the system restore works only when you have created a system restore point. We have a guide that explains how to create a system restore point.

6. Change the slot

Do note that for this method, if you are unsure what to do, take your laptop to an expert. You need to try changing the slot to which the GPU is connected on your PC or laptop.

Often, faulty slots can cause issues and affect the associated driver, causing the graphics device driver error code 22. Check if changing the slot for your GPU helps or not.

7. Replace the GPU

If nothing works, then as a last resort, we would advise you to get your GPU checked, and if it has some issues, then it is time for you to get a new one and replace the old GPU.

That is it from us in this guide. Note that you can also apply the abovementioned solutions to fix the graphics device driver error code 43. Before you leave, you should check out our guide that explains 5 ways that will help you check your graphics card on Windows 11.

Sometimes, problems with your GPU can lead to You are not currently using a display attached to an Nvidia GPU error, but we covered it in one of the previous guides.

Feel free to drop a comment below and let us know which solution fixed the graphics device driver error code 22 for you.

6 Quick Ways to Transfer Files from Windows to Mac

Have you moved on from a Windows PC to a Mac or used both and want to know the best ways to transfer files from Windows to Mac?

If so, then you are in the right place. Because in this guide, we will show you all the methods you can follow to transfer files from Windows 10 or Windows 11 PC to Mac.

Not only using Migration Assistant but there are several other ways, including using third-party apps to transfer your files from Windows to Mac or vice versa. If you are interested, you can learn how to transfer files from a PC to an iPhone as well. Let us get right through it.

How can I transfer files from Windows to Mac?

1. Use Windows Migration Assistant

  1. Download the appropriate version of Migration Assistant on your PC.
  2. Launch the Migration Assistant EXE file and hit the Next button.
  3. Accept the terms and agreements and click Install.
  4. Click Finish.
  5. You will be asked to quit all other background programs.
  6. You will be asked whether you would like to send app usage data to Apple. Choose from the below two options:
    • Automatically Send
    • Don’t Send
  7. Migration Assistant will begin searching for a Mac.
  8. Open Migration Assistant on your Mac.
  9. Follow the on-screen steps.
  10. Select the option From a Windows PC and click Continue.
  11. Click on your Windows PC icon and click Continue.
  12. On your Windows PC and Mac, check if the passcode appearing is the same and click Continue.
  13. Your Mac will begin scanning files on your Windows PC.
  14. Select the files that you wish to transfer to the Mac and click Continue.
  15. The transfer will begin.

The Windows Migration Assistant for Windows is a nice tool that will help you migrate all your Windows files to a Mac pretty quickly. The setup process may take a while, but using Migration Assistant to transfer files from Windows to Mac is smooth.

2. Via USB

A USB is a pretty effective tool if you wish are looking to transfer files from your PC to a Mac. It is portable, comes in various storage variants, and is simply plug-and-play.

All you need to do is copy all the files from your Windows PC that you wish to be moved over to a Mac inside the USB. Then plug the USB into your Mac and copy and paste the files that you moved from your Windows onto your USB to your Mac.

One important thing to note is that you should format your USB drive to exFAT file format since it is compatible with both operating systems to accomplish transferring files from PC to Mac via USB.

3. Use WiFi

  1. Open the Start menu by pressing the Win key.
  2. Open Control Panel.
  3. Click on Network and Sharing Center.
  4. Select the Change advanced sharing settings option from the left.
  5. Run command prompt as an admin.
  6. Type the below command and press Enter. ipconfigipconfig
  7. Note down the value next to IPV4 Address.
  8. On your Mac open Finder.
  9. Press Command + K keys.
  10. Type the below command followed by the IP address of your Windows PC (noted in step 7) and press Enter.
  11. Enter the credentials to log in to your Windows PC.
  12. You will be asked which folders would you like to copy to your Mac. Select those folders and press OK.

Following the above steps will help you transfer files from a Windows PC to Mac over Wi-Fi. You need to ensure that both your Mac and Windows PCs are connected to the same Wi-Fi network.

4. Use cloud storage

Another convenient way of transferring files from a Windows PC to a Mac is to make use of the different cloud storage services available.

Using cloud storage service is pretty easy. All you need to do is create an account in any cloud storage such as Dropbox, OneDrive, Google Drive, etc. You can check out the best free cloud storages that you can use in 2023 in our dedicated guide.

Upload all the files you wish to transfer to your Mac from your Windows PC. Now, log in to the cloud storage service on your Mac and download the files. Simple and easy.

More exactly, it’s possible to perform this action with a file-sharing tailored solution that can sync both devices simply and fast.

All you have to do is select the files you need to transfer, no attachment required, and press on the Share button to complete it.

Sync.com

Add your files to the cloud or transfer them quickly cross-platform with this method.
Check price Visit website

5. Use an external hard drive

If the USB drive storage isn’t sufficient for you, you can also opt for an external hard drive. There are so many options available for external hard drives to choose from, and you can pick the best one for you, upload your files and transfer them to your Mac.

6. Use a third-party tool

  1. Download and install Syncthing on both of your PCs.
  2. Launch Syncthing on your Windows PC.
  3. Syncthing will set up a Default Folder for you in your home directory.
  4. Your Windows PC will remain available on https://localhost:8384/.
  5. Click on Actions and then select Show ID to view your unique ID which you will use to connect with your Mac.
  6. Click on Add remote device at the bottom right.
  7. Enter the unique ID on your Mac.
  8. Select the folders that you want to share.
  9. Clicking on Save will make the remote device appear on the bottom right of the interface.

When you add files to this Default Folder, the files will get synced with the connected remote device, allowing you to transfer files from Windows to Mac.

That is it from us in this guide. We have listed some of the best tools that you can use to transfer files from PC to iPhone.

Feel free to let us know in the comments below which one of the above solutions you utilized to transfer files from Windows to Mac.

How to Increase SCCM Client Cache Size [Easiest Steps]

The SCCM client cache size determines the size of applications you can deploy during an OSD, and many are wondering how to increase SCCM client cache size.

Deploying a large file may fail if the SCCM Client Cache is too big to cache the app installation files, so it’s important to adjust it, and this is exactly what this article will do.

Also, our readers may be interested in knowing the causes and how to fix SCCM Application Error 0x87d00607 in a few steps.

What is SCCM Client Cache?

Microsoft System Center Configuration Manager client has a dedicated disk space for storing temporary files when it installs apps and programs.

These temp files store the client cache files. Whenever you deploy any app, the temp files are copied and transferred to the CCMcache folder located in C:\Windows\ccmcache

Furthermore, the SCCM client cache determines the size of applications to deploy during an OSD. If the app is larger than the client’s cache size, it will fail because the client is not big enough to cache the application installation files. However, you can configure the client cache settings.

Also, the default SCCM client cache maximum size is 5120 MB if you do not set the property while installing the SCCM Client. Likewise, the minimum value you can specify is 1 MB. You can set the maximum size in megabytes (MB), or the percentage of the disk.

How can I increase SCCM Client cache size?

1. Create new client settings

  1. Left-click the Start button, type Configuration Manager console, then press Enter to open the SCCM console.

  2. Click the Administration option from the left sidebar, then select Client Settings.
  3. Right-click and select Create Custom Client Device Settings from the drop-down menu.
  4. Check the box next to the Client Cache Settings option at the bottom of the list, then click OK.
  5. Click on Client Cache Settings from the left sidebar.
  6. Go to the Device Settings tab and set Configure client cache size to Yes, then input the desired cache size in MBs and click OK.
  7. Right-click on the new client settings, select Deploy from the drop-down, then select a target collection.

The client will use the new client settings on the next SCCM server logon.

2. Modify SCCM client cache size via PowerShell scripts

  1. Left-click the Start button, type PowerShell and click Run as administrator.

  2. Click Yes on the User Account Control prompt.
  3. Copy and paste the following lines of commands and press Enter: $Cache= Get-WmiObject -Namespace 'ROOT\CCM\SoftMgmtAgent'-Class CacheConfig$Cache.Size = '10240'$Cache.Put()Restart-Service -Name CcmExec
  4. Restart the client to allow the changes to take effect.

The above commands will modify the client cache size, allowing you to input whichever MB you want to increase it to.

After following these steps, you should be able to increase SCCM client cache size with ease.

3. Change the client cache size on a single machine

  1. Click the Start button, type control panel, then select Control Panel.
  2. Go to Configuration Manager Client Properties and click on Cache. Click on the Configure Settings option and change the value of the cache size to a maximum.
  3. Then, click OK.

Modifying the client cache size for a single machine will be deployed automatically compared to a custom client that undergoes a deployment process.

As you can see, it’s pretty simple to increase SCCM client cache size, and we hope you found this guide helpful.

Further, you can read through our guide about the reason behind the 0x87d00324 SCCM Application install error and how to fix it.

Also, you can check how to upgrade from Windows 7 to Windows 10 using SCCM on your PC.

Did we miss something? Let us know in the comments section below.

Fix: 0x87d00213 Application Deployment Error

Running the Microsoft System Center Configuration Manager (SCCM) allows you to manage and deploy applications across an enterprise. Sadly, our readers report the 0x87d00213 error during the deployment process. So, we’ll discuss the causes and ways to fix the error.

Also, we have a detailed guide on SCCM application error 0x87d00607, and how to fix it, so we suggest checking it out.

What causes 0x87d00213 Application Deployment error?

A few factors can cause the Application Deployment error; some common ones are listed here:

  • Incorrect application deployment command – If the SCCM client receives an incorrect or invalid application deployment command-line parameter, it may affect the deployment process, resulting in the 0x87d00213 error.
  • Software distribution failure – The error can occur when the SCCM client fails to distribute or deploy the software package to the target device due to incorrect package content or network connectivity issues.
  • User Account permission issues – If the user account operating the SCCM client does not have sufficient permissions to deploy the application package, it can cause the Application Deployment error 0X87D00213.
  • Timeout Configuration – When the deployed application is not given enough time to run, it can cause the Timeout Occurred error to appear with the error code 0X87D00213.
  • Damaged packaged content – You can also run into the error if the software package you’re trying to deploy contains corrupted files. It makes it impossible for the SCCM client l to install the app, resulting in an error.

Nonetheless, we’ll discuss the basic steps for fixing the error as we proceed with the article.

How can I fix 0x87d00213 Application Deployment error

Before engaging in any advanced troubleshooting steps, we recommend you go through the following:

  • Reboot the primary SCCM server.
  • Ensure the date & time are correct on both the client and server.
  • Verify if the app you are trying to deploy has dependencies included in the source file.

If the above checks can’t help resolve the error, then proceed with the solution below:

1. Perform a clean boot

  1. Press Windows + R key to open the Run dialog box, type msconfig, and click OK.
  2. Click the Services tab, check the box for the Hide all Microsoft services option, then click the Disable all button.
  3. Go to the Startup tab and click Task Manager.
  4. Select the startup programs and click the Disable button.
  5. Restart your PC and check if the application deployment error persists.

Performing a Clean boot will prevent services interfering with the deployment process from running when you boot the system.

You can check our guide on how to disable startup apps on Windows 11.

2. Redistribute package content to distribution point

  1. Left-click the Start button, type Configuration Manager console, then press Enter to open the SCCM console.
  2. Go to the Software Library tab.
  3. Select the content types for redistribution.
  4. In the taskbar at the top of the ribbon, select the Properties tab and click on Properties.
  5. Click on the Content Locations tab.
  6. Select the distribution point (or distribution point group) that you want to redistribute the content, then click on the Redistribute button.
  7. Click OK to begin the redistribution of the content.
  8. Restart your PC and check if the App Deployment 0x87d00213 error persists.

Repairing content distribution of the particular package you want to deploy will fix the deployment error. Also, it allows the device to overwrite the existing files.

3. Change the maximum run time

  1. Left-click the Start button, type Configuration Manager console, then press Enter to open the SCCM console.

  2. Go to Software Library\Overview\Application Management\Applications
  3. Select the application and then click Deployment Types.
  4. Right-click the application deployment type and click Properties.
  5. Select the User Experience tab, and modify the Maximum allowed run time in minutes to 60 minutes.
  6. Restart your PC and retry the application deployment.

Extending the Run Time gives the deployment process enough time to complete.

4. Uncheck Enables this distribution point for pre-staged content

  1. Right-click the Start button, and select Microsoft System Center under the All Programs list.
  2. Select Configuration Manager Console and go to Distribution Point’s properties.
  3. Go to the General tab, scroll down, and uncheck the Enable this distribution point for pre-staged content option, then click the OK button.
  4. Wait for a couple of minutes for the changes to take effect and check if the issue persists.

Disabling the distribution point for prestaged content allows the deployed app to run without being affected.

Alternatively, our readers can check our guide about 0x8007000f: SCCM Task Sequence error and ways to fix it.

What other solution did you use to fix this problem? Let us know in the comments section below.

How to Install GarageBand on a Windows 11 PC

GarageBand is only available on Mac and iOS platforms. However, this guide will discuss downloading, installing, and using GarageBand for Windows 11. So, there are means available for Windows users to run GarageBand on their PCs but with a different Operating System.

How can I download, install and use GarageBand for Windows 11?

1. Create a macOS virtual machine

1.1 Download Mac OS Monterey VM

  1. Download Mac OS Monterey Virtual Image and the VMware Player Patch Tool. Then, extract the files from the zip folders.
  2. In the Unlocker folder, right-click the win-install script and click Run as Administrator. This will auto-run the patch script in the Command Prompt.
  3. Open VMware after this process is complete.

1.2 Create Mac OS Monterey VM with VMware

  1. Select Create a New Virtual Machine and choose I will install the operating system later. Then click Next.
  2. Choose Apple macOS X, select macOS 12, and click Next.
  3. Input an easy name for the macOS Monterey VM. Then, copy the file path to your Desktop folder.
  4. Set the disk size to a minimum of 50GB in the next window, choose Store virtual disk as a single file, and click Next.

1.3 Edit the macOS Monterey VM settings

  1. Right-click macOS Monterey VM on the VMware screen and select Settings.
  2. Set the VM memory to 4GB minimum. Allocate at least 2 cores under Processors.
  3. Under New CD/DVD (SATA), select Use ISO image file. Then choose the macOS Monterey ISO file.
  4. Close the Hardware window and click Finish.

1.4 Edit the macOS Monterey VMX file for Intel/AMD hardware

  1. Launch the File Explorer and go to this default location:
  2. Find macOS Monterey.vmx, right-click it, choose Open with and select Notepad.
  3. Add the following lines to the bottom of the configuration file: C:\Users\YOURNAME\Documents\Virtual Machines\YOUR MAC OS X FOLDER
    For Intel: smbios.reflectHost = "TRUE" hw.model = "MacBookPro14,3" board-id = "Mac-551B86E5744E2388" smc.version = "0"
    For AMD: cpuid.0.eax = “0000:0000:0000:0000:0000:0000:0000:1011” cpuid.0.ebx = “0111:0101:0110:1110:0110:0101:0100:0111” cpuid.0.ecx = “0110:1100:0110:0101:0111:0100:0110:1110” cpuid.0.edx = “0100:1001:0110:0101:0110:1110:0110:1001” cpuid.1.eax = “0000:0000:0000:0001:0000:0110:0111:0001” cpuid.1.ebx = “0000:0010:0000:0001:0000:1000:0000:0000” cpuid.1.ecx = “1000:0010:1001:1000:0010:0010:0000:0011” cpuid.1.edx = “0000:0111:1000:1011:1111:1011:1111:1111”

1.5 Configure and install the macOS Monterey VM

  1. Choose Disk Utility and select VMware Virtual SATA hard drive Media from the Internal drive column.
  2. Select Erase option, give the drive a name, set Format to APFS, and Scheme to GUID Partition Map. Then click Erase.
  3. Return to the Monterey recovery screen and select Install macOS Monterey.
  4. Choose the drive created in Disk Utility and click Continue.

1.6 Install VMware tools to your macOS Monterey VM

  1. With the macOS VM running, select Player, go to Manage, and select Install VMware Tools.
  2. Choose Install VMware Tools from the installation disc window. Then follow the installer prompts o complete the process. Your PC will restart after the process.

2. Install GarageBand

  1. Go to GarageBand’s official download page and click Download. It will take you to the App Store.
  2. Click on Get or Download button and select Install app if it prompts it.
  3. Input your Apple ID and password and click Sign in.
  4. After downloading, you will see the app in the Launchpad or Applications or Finder.

The steps above help install and boot your system into macOS Sierra. Check our article on how to dual boot Windows 11 and macOS on the same PC.

Also, you may be interested in our detailed review of the best MIDI keyboard controller for GarageBand to buy.

Users who prefer to stay within the Windows environment instead of running a virtual machine can explore a GarageBand alternative for PC to create, mix and record music natively without switching operating systems.

If you have further questions or suggestions, kindly drop them in the comments section.

Modio.dll Not Found: 4 Ways to Fix It

You are probably reading this article because you just got the error message: modio.dll not found. This is not the hardest of bugs you can face, and we help you through the problem in this article.

However, before we get into this missing DLL issue, let us explore some common causes so that you may avoid a repeat case in the future.

What causes modio.dll files to go missing?

Here are the principal elements that trigger the missing error:

  • Malware infection – Viruses are notorious for deleting important files, and a virus may have deleted the library. This is why we recommend a solid antivirus.
  • Corrupted Windows registry – When the Registry is corrupt, some vital DLLs may stop functioning or be destroyed.
  • Upgrading or installing software – This may be the case, especially when an installation or upgrade is done with a faulty executable.
  • Third-party software conflicts – Users have also observed that the missing DLL error is often triggered when conflicting applications are on a device.
  • Driver issues – Drivers are an essential link between hardware and software. However, you may need to update drivers if they get corrupted.

What do I do if I get the modio.dll not found error?

Before going into the solutions, you may try the following:

  • Restart the computer – While this may not be a total fix, problematic processes cause some problems, and a reboot forces these processes to shut down.
  • Reinstall the problematic application – An app uninstallation will remove bad or corrupt program files, after which you should download a fresh copy from an official source.

If none of the prerequisite solutions work, you may proceed to the main fixes below.

1. Use DLL repair tools

Modio.dll, a third-party DLL, is associated with the Modio software and is essential for modifying game data. Using any of the best DLL repair tools may be the best call when it is missing.

2. Run an SFC scan

  1. Press Windows + R, type cmd, and hit Ctrl + Shift + Enter.
  2. Type the script below and hit Enter.
    sfc /scannow
  3. Wait while the scan executes; it may sometimes take several minutes.
  4. Restart your computer.

3. Download the DLL manually

You can head to the DLL Files website and get a fresh copy of the corrupt file. You should extract and place the newly downloaded file in the same directory as the problematic application.

Also, proper attention should be observed when downloading DLL files because they may come with malware and compromise your computer if gotten from the wrong source. However, some websites like DLL files verify their files, and they are safe.

4. Run a virus scan on your computer

  1. Type Windows Security in the Search bar, and click on the relevant search result.
    modio dll not found
  2. Click on Virus & threat protection.
    modio dll not found
  3. Select Scan options.
  4. Select Full scan and click the Scan now button at the bottom.

When modio.dll is not found, a virus scan may eliminate the problem if it is triggered by malware on your computer.

The fixes above should be adequate for the missing DLL issue. While we recommend using a repair tool, any solution may do the trick. We suggest trying what feels the most convenient.

We hope you have resolved the problem and want to know what worked for you. Please keep us informed using the comments section below.

Cardgames.dll: How to Download & Fix It When It’s Missing

Cardgames.dll is a legitimate dynamic link library file associated with various card games and other related software applications developed by Microsoft Corporation. This harmless file was initially available with Windows 7 games, including solitaire & hearts.

However, if you are playing the old games on your Windows 10/11 PC and encountered the cardgame.dll file missing error, this guide can help!

What causes the cardgames.dll missing error?

There are several potential reasons for this error, some of which are mentioned here:

  • Registry issues –Invalid or corrupt registry entries could cause various issues, including this one. To fix this, you need to repair system files.
  • File corrupted – If the DLL file is missing as it has been accidentally deleted or has become corrupted, you might see this error. To fix it, you need to download the DLL file again.
  • Software conflicts – Conflicts between different applications on your PC may result in the Cardgames.dll file being deleted or moved. You need to update or remove apps related to the file.
  • Malware infection – Infection on your computer can damage system files, including DLL files. Therefore, you need to run a malware scan to remove the infection.
  • Operating system issues – If your OS has issues like system file errors and misconfigurations, you may get this error. You must either restore the system to the previous version or repair the files.

Now that you know the reasons, let’s move to the fixes to resolve the problem.

What can I do if cardgames.dll is missing?

Before are some prerequisite checks you need to perform below applying the fix below:

  • Check for Windows pending updates.
  • Reinstall the affected program. This also helps when 3dmgame.dll is missing.

If these didn’t work for you, proceed to the advanced fixes.

1. Run a DLL fixer tool

If you don’t want to download the DLL manually or run commands on your computer to fix the problem, you can choose the easy way using a DLL file fixer.

2. Run an SFC scan

  1. Press the Windows key, type cmd, and click Run as administrator.CMD elevated
  2. Type the following command to repair system files and press Enter: sfc/scannowSFCSCANNOW CMD
  3. Wait for the process to complete. Once done, restart your computer to confirm the changes.

3. Run a malware scan

  1. Press the Windows key, type windows security, and click Open.Windows Security open Windows key cardgames.dll
  2. Go to Virus & threat protection and click Scan options.V& T Scan options
  3. Select Full scan and click Scan now.Full scan -
  4. The tool will scan your computer and list the malicious files. Remove the infected files to fix the issue.

4. Install the missing DLL manually

4.1 Download the DLL file

  1. Go to the DLL files website and Download the relevant DLL file
  2. Once downloaded, locate and right-click it and select Extract All.Extractall
  3. On the next window, select a location and click Extract.Extract CARDGAMES.DLL
  4. Once done, copy the file and paste it into the program folder using the file in error. If your DLL file is requested by ShareX, you need to navigate to the Programs folder and paste it there: C:\Program Files\ShareXrename old DLL file
  5. In case the older version of the file is there, select it and click the Rename button. Add .old to the existing file and then paste the newly-downloaded file.
  6. Restart your computer.

4.2 Register the DLL file

  1. Press the Windows key, type cmd, and click Run as administrator.CMD elevated
  2. Click Yes on the UAC prompt.
  3. Copy and paste the following command to register the DLL file and hit Enter: regsvr32 cardgames.dllcmd_1 cardgames.dll
  4. Reboot your PC to save the changes.

5. Perform a System Restore

  1. Press the Windows key, type control panel, and click Open.Control Panel start menu
  2. Select View by as Large icons and click Recovery.Recovery Control Panel cardgames.dll
  3. Click Open System Restore.Open system restore
  4. On the next window, select Choose a different restore point and click Next.Next Choose a different restore point
  5. Select the restore point and click Next.Choose a point cardgames.dll
  6. Now click Finish to initiate the process. Finish
  7. Your computer will restart, and the Windows settings will be reverted to the chosen point. This method may take a few minutes, so please be patient.

We recommend you check our guide on missing DLL files on Windows 11 to know more about the issue.

So, you can use these methods to fix the cardgames.dll missing error on Windows. Try them and let us know what worked in the comments section below.

Bdb.dll Is Missing? How to Fix The Error Or Download It Again

Bdb.dll is a dynamic link library (DLL) file developed by Ufasoft for Windows OS. This file contains data and code shared among multiple third-party programs & games, which enables them to perform specific functions.

However, if the bdb.dll file is missing or corrupted, it could lead to errors when running software that depends on it.

Why the bdb.dll is missing?

There are various reasons for this issue to occur; some of the common ones are listed here:

  • Virus infection – If your computer is infected with malware, system files, including the DLL files related to software, could get corrupted. To fix it, run a malware scan.
  • Deleted accidentally – If you have uninstalled a program that was using the DLL file, the file might have been deleted with it, leading to the error.
  • Corrupted software – The DLL file can become corrupted or missing if there are errors or issues with the software using the file. You need to reinstall the program to fix the problem.
  • Damaged Windows registry – If the registry entries on your PC are accidentally deleted or have become corrupt, then you might face this error.

Now that you know the reason, let’s proceed with the fixes.

What can I do if the bdb.dll file missing?

Before we go to the advanced fixes, here are a few preliminary checks you should do:

  • Check updates for Windows.
  • Reinstall the affected program.

1. Run a DLL fixer

Installing DLL files manually can be a daunting task, and if you are a novice, it is advised to use a DLL fixer software instead.

The repair tools can scan for any missing, corrupted, or broken files on Windows and try to restore or replace them.

The powerful tool below attempts to repair programs’ specific DLL files, thereby resolving the conflicts between third-party apps and your operating system. You can rely on this tool to fix issues like bdb.dll missing and avoid errors related to the problem.

2. Run an SFC scan

  1. Press the Windows key, type cmd, and click Run as administrator.CMD elevated bdb.dll
  2. Click Yes on the UAC prompt.
  3. Type the following command to repair system files and press Enter: sfc/scannowSFCSCANNOW CMD
  4. Please wait for the process to complete. Once done, reboot your PC to confirm the changes.

3. Run a malware scan

  1. Press the Windows key, type windows security, and click Open.Windows Security open Windows key bdb.dll
  2. Go to Virus & threat protection and click Scan options.V& T Scan options
  3. Select Full scan and click Scan now to start the deep scan.Full scan -
  4. The tool will scan the whole computer and show you the list of malicious files. Select and delete them to fix the issue.

4. Install the missing DLL manually

4.1 Download & install the DLL file

  1. Go to the DLL files website.
  2. Download the DLL file, right-click the downloaded file, and choose Extract All.Extractall
  3. On the next window, select the desired location and click Extract.Extract
  4. Locate the DLL file and copy it.
  5. Navigate to the Programs folder: C:\Program Files
  6. Locate the app that gives you the error and paste the DLL file.
  7. If the file’s older version is present, select it and click Rename button. Add .old to the existing file and then paste the new file.Rename old DLL file
  8. Restart your computer.

4.2 Register the DLL file

  1. Press the Windows key, type cmd, and click Run as administrator.CMD elevated
  2. Copy and paste the following command to register the DLL file and hit Enter: regsvr32 bdb.dllcmd_bdb.dll
  3. Restart your computer to let the changes take effect.

5. Perform a System Restore

  1. Press the Windows + R to open the Run console.RSTRUI
  2. Type rstrui and press Enter to open the System Restore window.
  3. Select Choose a different restore point in the next window and click Next.Next Choose a different restore point
  4. Select the restore point and click Next.Choose a point bdb.dll
  5. Now click Finish to initiate the process. Finish
  6. Your computer will restart, and the Windows settings will be reverted to the chosen point.

If you’re struggling with missing DLL file issues on Windows 10, check out our guide for expert tips and solutions that can help you!

So, these are methods you can follow to fix the bdb.dll is missing error. Try them and let us know what worked in the comments section below.

ChatGPT Stuck in Verification? Here’s How to Fix the Loop

ChatGPT is the new AI phenomenon that has taken the world by storm. You can ask it anything, and it will reply as if a human (with a great mind). However, several users have reported coming across a situation where ChatGPT is stuck in a verification loop.

If you are also among such users and are looking for a resolution, then you have landed in the right place. Because here, we will give you a bunch of solutions to resolve the ChatGPT stuck in verification loop. Let us get right through it!

Why is ChatGPT stuck in verification?

OpenAI, just like every other website, uses human verification to ensure that a human is using the website and not a robot. This helps them prevent any unusual activities on login from a user’s account.

Here are some reasons because of why the ChatGPT can get stuck in the verification loop:

  • Browser cache is corrupt: Often corrupt browser cache can interfere with the smooth functioning of a website.
  • A browser extension is conflicting: We use browser extensions to increase the feature set of our browsers. However, they can interfere with the browser’s performance and cause several issues.
  • Your account is at fault: Chances are that the account that you are using to access ChatGPT is blocked or facing issues.
  • ChatGPT server is problematic: The ChatGPT server might be under maintenance, because of which you are getting the error.

What can I do if ChatGPT is stuck in verification?

Before jumping ahead with the advanced solutions, we suggest you apply the fixes and check whether this resolves the issue.

1. Tweak the Disable site isolation flag in Chrome

  1. Launch Google Chrome, and head to the following address:chrome://flags
  2. Search for Disable site isolation flag.
  3. If you see it disabled, change it to default.
  4. Restart your browser for the changes to take effect.

One user pointed out that setting the Disable site isolation flag in Google Chrome to Default helped him overcome the ChatGPT stuck in human verification. This flag might get disabled because of third-party extensions you use in your browser.

2. Try using a different account

  1. Visit this OpenAI website.
  2. Click on the Sign up button.
  3. Enter your email address and click on Continue.
    (You can also make use of your Google or Microsoft account to login to ChatGPT. However, make sure it isn’t the one with which you are getting the verification error.)
  4. Create a password for your new ChatGPT account and click Continue.
  5. Verify your email address by clicking the link sent to your email ID.
  6. Login with this new account.

ChatGPT might have noticed some unusual activity from your account, which is why you are stuck in a ChatGPT Cloudflare loop.

You can try to use a different account by either creating a new one as mentioned above or using a different one, let’s say your friend’s account.

3. Clear browser cache

3.1. Google Chrome

  1. Open Google Chrome.
  2. Click on the 3-dot menu icon and select Settings.
  3. Click on Privacy and Security on the left pane.
  4. Choose Clear browsing data.
  5. Click on Cookies and other site data and Cached images and files options.
  6. Click the Clear data button.

3.2 Mozilla Firefox

  1. Click on the 3-line icon and select Settings.
  2. Click on the Privacy & Security tab on the left.
  3. Locate Cookies and Site data section and hit the Clear data button.
  4. Click on both Cookies and Site Data and Cached Web Content options.
  5. Click on the Clear button.

You can try clearing the browser cache by following the above steps and checking if this resolves the ChatGPT stuck in verification.

4. Disable browser extensions

  1. Launch Google Chrome.
  2. Click on the 3-dot icon.
  3. Choose More tools and select Extensions.extensions doordash internal server error
  4. Disable each extension by toggling them one by one.disable extension
  5. Restart your browser.
  6. Visit the ChatGPT website.
  7. Login with your account.

You should try disabling all the extensions on your browser and verify whether ChatGPT is still stuck on the verify human page.

5. Reset the browser

Note icon NOTE
The steps here are for Google Chrome, but other browsers follow a similar procedure. You could check the official website for the exact steps.
  1. Launch Google Chrome.
  2. Click on the 3-dot menu icon and select Settings.
  3. Choose Reset settings from the left pane.
  4. Click on Restore settings to their original defaults.
  5. Restart your browser.

That is it from us in this guide. Notably, another thing you can do is avoid using ChatGPT and wait until the issue is fixed.

Our guide explains how you can integrate ChatGPT with MS Word and enhance your abilities. You can also read our guide on integrating ChatGPT in WhatsApp. Also, find out all about ChatGPT Professional and why one should use it.

Many also encountered Error searching knowledge in ChatGPT, but we have a dedicated guide that addresses this issue.

Let us know in the comments below which one of the above solutions resolved the ChatGPT stuck in verification problem.

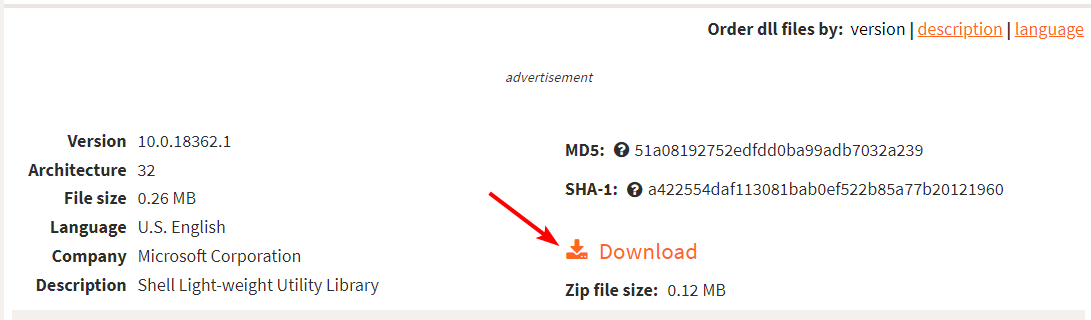
Shlwapi.dll Missing or Not Found: How to Fix It

The file name Shlwapi stands for Shell Light-weight Application Programming Interface. It is a critical DLL file required for the proper functioning of the Windows operating system. When things go wrong with your computer, it’s not uncommon for the DLLs to become damaged or corrupted.

As such, Windows may not be able to find the correct versions of these files needed to run programs. Just as you guessed, we’re going to look at various solutions if you find out that shlwapi.dll is missing from your PC.

What is the use of Shlwapi DLL?

Shlwapi is a dynamic-link library (DLL) that enables programs to use some of the features provided by Microsoft Windows. The name Shlwapi stands for Shell API, and it is used by applications that require support for the Windows shell functionality.

Shlwapi.dll is a critical component of the operating system, and it must be present for many applications to work correctly.

Therefore, if it is missing, you must address this issue to prevent random crashes and instability on your PC.

How do I fix the Shlwapi DLL not found error?

1. Use a DLL-fixer tool

The Shlwapi.dll file is one of the many files required to run programs on a computer. When DLL files are missing or corrupted, your computer will not be able to load its programs properly. This can lead to random crashes or even BSoD errors.

To address this issue, you’ll need a DLL-fixer tool. This software can help you fix a myriad of DLL problems. Even better, since this is a Windows-related DLL file, the fix will be 100%.

It does this by checking your system for the presence or absence of a particular file, and if it finds one, it will download it for you so that you can use it again.

2. Run DISM and SFC scans

  1. Hit the Start Menu icon, type cmd in the search bar, and click Run as administrator.cmd-run-admin-w11 unexpected kernel mode trap windows 11
  2. Type the following commands and press Enter after each one:DISM.exe /Online /Cleanup-Image /Restorehealth sfc /scannow

3. Scan for viruses

  1. Press the Windows key, search Windows Security, and click Open.
  2. Select Virus & threat protection.
  3. Next, press Quick scan under Current threats.
  4. If you don’t find any threats, proceed to perform a full scan by clicking on Scan options just below Quick scan.Scan options
  5. Click on Full scan, then Scan now to perform a deep scan of your PC.Full Scan Scan Now
  6. Wait for the process to finish and restart your system.

As good as Microsoft’s Windows Defender is, there are better options available. Windows Defender is designed to run alongside third-party antivirus software.

You, therefore, need a tool that is more comprehensive in its features and provides better protection to your system.

There are many good antivirus software available in the market to choose from, but our top pick has to be TotalAV. It is a powerful antivirus software that provides top-notch protection against viruses and other malware.

⇒ Get TotalAV

4. Download the DLL file manually

  1. Navigate to your browser and visit a trusted third-party website like DLL files.com.
  2. Click the Download button.
  3. After the download has completed, open File Explorer and navigate to where you saved the file on your computer (it should be in your Downloads folder).
  4. Right-click on Shlwapi DLL and select Copy from the menu that appears.
  5. Depending on whether you have a 32-bit or 64-bit, copy it to either of the following locations: C:\Windows\System32 C:\Windows\SysWOW64

If you’re experiencing this issue on your computer, you may be able to fix it by downloading the appropriate DLL file from a trusted website and installing it manually.

It’s important that you download the correct version of the file for your operating system. If you are using a 32-bit version of Windows, you need to download the 32-bit version of the DLL and vice versa.

Installing an incorrect version may cause problems like Windows crashes or errors when running certain programs. You should also have a reliable antivirus in place in case the file comes bundled with malware.

5. Perform a System Restore

  1. Press the Windows + R keys, type rstui, and hit Enter.
  2. The System Restore window will open. Click on Next.
  3. Select the restore point you wish to revert to and click on Next.
  4. Now click on Finish.

Find out how to navigate a similar issue with missing DLL files in Windows 10. Hopefully, one of these solutions has resolved the schwapi.dll not found error.

Feel free to leave a comment below for further suggestions or additional solutions.

Libdvdcss-2.dll Missing: How to Fix or Install It Again

Libdvdcss2.dll is a dynamic link library for the Windows operating system. A DLL file contains code that can be called upon when needed by an application or process. The purpose of this file is to provide support for DVDs on your computer. 

However, you may find that it is sometimes missing, causing instability issues in your PC. Missing DLL files is not new, and you shouldn’t be alarmed. If you find yourself in such a predicament, you’ll find this article of much help.

Why is the Libdvdcss-2.dll missing?

The Libdvdcss2.dll file is a library required to play encrypted DVDs on your computer. The libdvdcss2.dll missing is a common Windows error that happens when the DLL file is missing or damaged. It can be caused by one or more of the following reasons:

  • Outdated OS – Sometimes, outdated versions of Windows cause problems with programs.
  • Accidental deletion – If you were doing some cleanup of your PC, there is a possibility that some files got deleted when they shouldn’t have been deleted.
  • Virus infection – A virus infection can also cause this error message because some viruses target important system files such as the Libdvdcss-2.dll file.

How can I fix the libdvdcss2.dll missing error?

A few pre-requisites to check before performing any technical solutions include:

1. Use a dedicated DLL-fixer

Although there are various ways to find missing DLL files, DLL repair tools are a fan favorite. This is because of their ability to fix all kinds of DLL errors in seconds and their extensive library of DLL files.

These programs can also help you update and replace faulty DLL files on your computer so that your programs run more efficiently.

Given that the Libdvdcss-2.dll is a Windows file, you can rest assured that the software will take care of this issue 100%.

2. Run DISM and SFC scans

  1. Hit the Start Menu icon, type cmd in the search bar, and click Run as administrator.cmd-run-admin-w11 unexpected kernel mode trap windows 11
  2. Type the following commands and press Enter after each one:DISM.exe /Online /Cleanup-Image /Restorehealth sfc /scannow

3. Scan for viruses

  1. Press the Windows key, search Windows Security, and click Open.
  2. Select Virus & threat protection.
  3. Next, press Quick scan under Current threats.
  4. If you don’t find any threats, proceed to perform a full scan by clicking on Scan options just below Quick scan.Scan options
  5. Click on Full scan, then Scan now to perform a deep scan of your PC.Full Scan Scan Now
  6. Wait for the process to finish and restart your system.

Although the advanced scan in Windows Security can fish out any viruses that the regular scan may have missed, it may not be as effective as a third-party antivirus. That’s why you need a more comprehensive solution such as TotalAV.

This antivirus provides superior protection against malicious software. It’s reliable, easy to use, and effective at keeping your computer safe from viruses, trojans, and other malicious software.

⇒ Get TotalAV

4. Download the file manually

You can try replacing the file if the previous steps have not solved the issue. Downloading a new version of the Libdvdcss2.dll file and installing it in your system will help you fix this problem instantly.

You can download this DLL file from numerous websites available on the internet but make sure you only use trusted websites for downloading files.

There are many fake sites out there that can harm your system by injecting malware into it or infecting your computer with viruses.

5. Perform a System Restore

  1. Press the Windows + R keys, type rstui, and hit Enter.
  2. The System Restore window will open. Click on Next.
  3. Select the restore point you wish to revert to and click on Next.
  4. Now click on Finish.

A System Restore can help you go back to a point in time when your PC was working fine. Hopefully, the Libdvdcss-2.dll missing error will not be present in your select restore point.

Don’t forget to check out how to deal with missing DLL files in Windows 10 from our detailed article.

We’d love your feedback on what solution has helped you fix this issue in the comment section below.

Wlanapi.dll Missing or Not Found: How to Fix It

If you’re experiencing problems with your Wi-Fi adapter, it may be because of a corrupt or missing DLL file. The Wlanapi.dll is a dynamic link library file used by Windows to connect and communicate with wireless LAN adapters.

When called upon, this file may be missing, making accessing the Internet problematic. In this article, we will discuss why this happens and the different methods that can be used to fix the Wlanapi.dll not found error in just minutes.

Why am I getting the Wlanapi.dll error?

Below are some possible reasons why you’re getting the Wlanapi.dll missing error:

  • Outdated drivers – You may have an outdated driver version installed on your machine, which needs updating or replacing.
  • Corrupt files – Your driver files may be corrupt or damaged due to an accident like virus attacks or power outages.
  • Malware infection – If you have malware on your computer, it can cause many problems, including issues with your DLL files, such as Wlanapi.dll.

What is the easiest fix for a missing Wlanapi DLL error?

First, a few preliminary workarounds to try include:

1. Use a DLL-fixer tool

Wlanapi.dll file is important as it helps provide a network connection to your computer. When this file gets corrupted or damaged, it may cause issues like slow internet speeds and poor Wi-Fi connectivity.

Missing DLL errors in Windows 10 and 11 are common. The problem is that you can’t expect to know what’s wrong with the hundreds of DLL files in your system.

Luckily, with a DLL repair tool, finding the right solution for any missing DLL errors on your computer is easy.

2. Reinstall your Network adapter driver

  1. Click on the Windows key, type Device Manager in the search bar, and click Open.device manager w11
  2. Navigate to the Network adapter, right-click on your card, and select Uninstall device.Uninstall Network adapter to fix Proxy error in Windows 11
  3. Confirm Uninstall in the next prompt.
  4. Restart your PC for freshly installed drivers.

3. Run DISM and SFC scans

  1. Hit the Windows key, type cmd in the search bar, and click Run as administrator.cmd-run-admin-w11 unexpected kernel mode trap windows 11
  2. Type the following commands and press Enter after each one:DISM.exe /Online /Cleanup-Image /Restorehealth sfc /scannow

4. Run a virus scan

  1. Press the Windows key, search Windows Security, and click Open.
  2. Select Virus & threat protection.
  3. Next, press Quick scan under Current threats.
  4. If you don’t find any threats, proceed to perform a full scan by clicking on Scan options just below Quick scan.Scan options
  5. Click on Full scan, then Scan now to perform a deep scan of your PC.Full Scan Scan Now
  6. Wait for the process to finish and restart your system.

Still, we recommend using a third-party antivirus instead of relying on Windows Defender because it doesn’t have the same level of protection as other antivirus programs. TotalAV is a good place to start.

Its main advantage is its strong detection rate and real-time protection against all types of malware threats.

⇒Get TotalAV

5. Re-register the Wlanapi.dll file

  1. Hit the Windows key, type cmd in the search bar, and click Run as administrator.cmd-run-admin-w11 unexpected kernel mode trap windows 11
  2. Type in the following command and hit Enter: regsvr32 /u wlanapi.dll
  3. Next, type the following command to re-register the file: regsvr32 /i wlanapi.dll
  4. Close the Command Prompt window and restart your PC.

Re-registering a DLL file is usually done when something has changed in the system that prevents it from loading properly or accessing certain resources. The most common reason for this is due to a corrupted registry entry.

For example, if you have recently installed new hardware or updated drivers, there may be issues with your system configuration that prevent the DLL from loading correctly.

Although a handful of users reported this to be the best solution for the Wlanapi.dll missing error, it’s worth noting that re-registering DLL files does not always work.

So, if it doesn’t help your problem, you might need to look for other solutions. That’s all we had for this article but do check out our guide on how to deal with a similar error when the akisp11.dll error occurs.

Share with us any additional thoughts on this topic.

RoboForm vs Dashlane: Which One’s Better For You?

You will find multiple password managers to download. All these password managers have similar functionalities and features that put them apart from one another. This is where things get complicated for a user to decide which password manager they should opt for.

In this guide, we will compare RoboForm vs. Dashlane, two of the most popular password managers that users opt for. This guide will help you eliminate the confusion in deciding which is best suited for your needs.

Is RoboForm trustworthy?

In our tests, we found that RoboForm was trustworthy and offers plenty of features that other password managers offer you for a greater price.

RoboForm gives you enhanced AES 256-bit encryption, encrypts and decrypts your credentials locally, and gives you access to features such as a strong password generator, dark web monitoring, multi-factor authentication, and much more.

You should also know that recently, RoboForm has undergone a security audit and penetration test conducted by Secfault Security, proving that it’s a trustworthy solution.

Overview: RoboForm

RoboForm is a feature-loaded password manager. It uses the 256-bit AES encryption paired with PBKDF2 SHA256.

Moreover, the decryption of the passwords is done locally, comes with a multi-factor authentication (2FA) feature, and offers a password generator.

You can use the Security center to know whether your password is strong or not, whether it has been leaked on the dark web, etc.

The import/export feature is pretty seamless and works across browsers, It is supported on all platforms, is quick and easy to set up, offers one-click login, lets you share your passwords easily, and much more.

Here are the top highlights of the RoboForm password manager:

  • Offers one-click log-in.
  • Works across different platforms.
  • Seamless synchronization.
  • Can securely share your passwords with anyone.
  • It is quick and easy to set up.
  • The import/export feature is seamless.
  • Offers a password generator.
  • Form-filling feature is pretty advanced.

RoboForm

Keep all web accounts secure with this all-rounded password manager for Windows 11.
Check price Visit website

Overview: Dashlane

Dashlane is also a great password manager, with its strong foothold in form auto-filling. The Dashlane password manager is available across different platforms, including Windows, macOS, Android, and iOS, and supports various browsers.

You can share an unlimited number of passwords securely using Dashlane. It also offers a strong password generator.

Dashlane gives you advanced dark web monitoring, uses strong 256-bit AES encryption, offers Two-factory authentication, and follows a zero-trust approach.

Here are some of the best features of Dashlane:

  • Strong 256-bit AES encryption.
  • Advanced form-filling feature.
  • Comes with an effective password generator.
  • Offers 2FA.
  • Available for different platforms and browsers.
  • Offers dark web monitoring and alerts.

⇒ Get Dashlane

Is RoboForm better than Dashlane?

1. Security

Both are similar in many cases, which you will see in this RoboForm vs. Dashlane comparison. One of which is the security and encryption these password managers offer.

Both password managers come with 256-bit AES encryption, a cipher offered by the National Security Agency (NSA) to safeguard your passwords securely.

RoboForm offers a bit extra as it pairs the 256-bit AES encryption with PBKDF2 SHA256. Dashlane also uses AES encryption with a ciphering key derived using 10,000 PBKDF2 iterations.

RoboForm and Dashlane encrypt and decrypt the passwords locally at the device level. So, regarding security and encryption, we have a tie in this RoboForm vs. Dashlane comparison.

Winner: Draw

2. Features

2.1. Password importing

import roboform vs nordpass

Another set of similarities you will come across in our RoboForm vs. Dashlane comparison is the features they offer.

Both password managers offer password-importing features. All you need to do is opt for either one, set it up, and use the password-importing feature.

RoboForm offers a bulk password-importing feature, which is also available with Dashlane. The only difference is that the list of supported apps is shorter in Dashlane as compared to RoboForm.

While both offer secure password-importing features, RoboForm has a slight advantage here since it supports more apps.

Winner: RoboForm

2.2. Password generator

Both tools offer a great password generator feature built-in. RoboForm can exclude or include upper and lower case letters, numbers, hexadecimal, and symbols when generating a password.

The biggest benefit is using RoboForm to generate passwords with up to 512 characters. Dashlane, on the other hand, offers password generation of up to 40 characters. It also lets you exclude letters, digits, and symbols.

So, for those wondering, is RoboForm a good password manager, it certainly beats Dashlane when it comes to password generation.

Winner: RoboForm

2.3. Password sharing

share

RoboForm comes with the ability to share passwords using a link via email. You can even share folders using that and tweak or revoke access anytime.

The one criterion is that the recipient should also have a RoboForm account to access the shared password or folders.

Dashlane also offers the same shared password using a link via email feature, plus the ability to provide specific access or revoke the access whenever you want. The recipient requires a Dashlane account to access the passwords.

Winner: Draw

2.4. Auto filling

Another similarity in our RoboForm vs Dashlane comparison is in the autofill feature. Using both tools, you can easily autofill information about login, payment, and other form-filling activities.

In our testing, both tools’ autofill features worked perfectly and were simple. All you need to do is click on its icon, which will fill in all the necessary details.

Winner: Draw

2.5. Platform support and interface

In terms of platform support, RoboForm and Dashlane both support Windows, Android, macOS, and iOS. However, RoboForm takes the lead as it also supports Linus.

Both browser extensions are available for Chrome, Safari, Firefox, Opera, and Edge browsers. The interfaces of both password managers are easy to use, and one will get the hang of it pretty easily.

Do note that RoboForm has separate desktop apps for Windows, macOS, and Linux with pretty similar user interfaces.

On the other hand, Dashlane retired its desktop apps for Windows and macOS in 2022. This also means that the emergency access feature is also gone. It is now simply available as web and mobile apps.

For anyone asking if Dashlane is the best password manager, it’s certainly not when it comes to platform support. RoboForm has a clear lead here.

Winner: RoboForm

2.6. Extra feature

Dashlane has a unique offering of a built-in VPN that will help you keep yourself protected when surfing the internet. This feature isn’t available in other password managers, including RoboForm.

This could be a nice bundle if you opt for the Dashlane password manager, as both RoboForm and Dashlane are almost similar in features.

Winner: Dashlane

2.7. Mobile support

In our testing, we found that both RoboForm and Dashlane worked flawlessly on mobile phones. However, you will find the Dashlane mobile app, especially the Android app, more featureful than the RoboForm mobile app.

This is because the Dashlane Android app gives you almost all the features that you will find in the full version. RoboForm on the other hand, isn’t that bad, but Dashlane gets an edge over RoboForm.

Winner: Dashlane

2.8. Customer support

RoboForm has a 24×7 customer support feature, which will, although not reply to you immediately, is proven to be effective.

There are online tutorials, help, guides, a live chat feature, and email support that is more than enough to get all your issues away.

Dashlane also has pretty good customer support via live chat and email support. However, it is a close second to RoboForm.

Winner: RoboForm

3. Pricing

If anyone asks, is RoboForm free good, the answer will always be yes. RoboForm will cost you nothing for unlimited logins, filling forms, password audits, and password generation.

But for the RoboForm free vs paid comparison, its paid plans start at $39.95/year and give you access on all devices, premium customer support, share logins feature, and much more. Not a bad deal, is it?

For Dashlane, you can opt for the free plan that offers essential password management. Paid plans start at $2.75/month and go up to $4.99/month.

Both providers offer a 30-day money-back guarantee so that you can test the waters before jumping ship.

Overall, RoboForm is an ideal choice for the price you are paying because it gives you access to more features.

Winner: RoboForm

RoboForm vs Dashlane: Our Verdict

Well, based on our test and comparison, we found out that RoboForm is the one you should go for. RoboForm is free, and you can use it to get the taste of this password manager.

It has core features and some additional features, making it a brilliant password manager.

RoboForm wins in all major categories, such as features, pricing, security, ease of use, customer support, etc. So, it is our clear winner.

For those who might wonder, is there a better password manager than Dashlane, there certainly are some. But in our comparison of RoboForm vs Dashlane, the former has the clear lead.

We also have to mention that Dashlane has its share of issues, and we wrote about them in our Unexpected error occurred please try again in Dashlane guide.

If interested, check out our comparison guide between RoboForm vs. NordPass password managers. Also, we have done a comparison between RoboForm vs. Bitwarden that explains in detail why to choose one over the other.

That is it from us in this guide. We would love to hear your opinion on this guide Also, let us know if you want another such comparison between two password managers in the comments below.

RoboForm For Windows 10 & 11: How to Download & Install

Are you someone who forgets the passwords set for different websites? Well, if so, then you aren’t alone as it is actually pretty hard to remember all those passwords for various websites we visit. Well, that is where password managers like RoboForm come into the scene.

RoboForm is one of the best password managers with plenty of great features to keep your passwords safe and secure. In this guide, we will show you how to download RoboForm and install it on your Windows 10 and 11 PC. Let us get right into it.

What are the uses of RoboForm?

Before you understand how to download and install RoboForm, it is wise to understand what it is and its unique features.

RoboForm makes use of 256-bit AES encryption to encrypt your passwords, gives you 2FA, has an advanced form filing feature, a password generator, and the option to share passwords securely and more.

One of the unique features of RoboForm password manager is that it comes with data breach monitoring. This helps notify you in case your credentials have been leaked.

Some of the best features of the RoboForm password manager are:

  • Offers one-click log-in
  • Powerful form-filling feature
  • AES 256-bit encryption
  • Locally stores your password
  • Offers two-factor authentication
  • Available for all platforms

How do I download RoboForm?

Note icon NOTE
RoboForm’s download and installation process on Windows 10 and 11 is the same. So, you can apply the same steps for both OSs without any issues.
  1. Open the RoboForm official website.
  2. Click on the Download button at the top.
  3. Download the RoboForm for Windows client at the bottom by clicking the green Install button.
  4. Save the RoboForm installer file in your preferred location.
  5. Double-click the RoboForm installer that you downloaded.
  6. The installer will extract the contents and will begin the installation.
  7. It will add an extension to your Chrome browser.
  8. Click on Enable extension, and you will be redirected to the RoboForm login page.
  9. Choose either the Log In or Sign up option.
  10. Follow the onscreen steps to set up the RoboForm password manager.

You can follow the same steps to download RoboForm for Windows 10, and even the other iterations of the OS. Also, the steps here illustrate how to download the RoboForm extension for Chrome.

Many people have been asking if RoboForm is no longer free. That’s incorrect. Siber System, the team behind the password manager, offers it as a free version for you to test the waters. So, you can easily download RoboForm for free.

It gives you access to unlimited logins, an auto form-filling feature, password auditing, and its effective password generator feature. So, you don’t need to download RoboForm with crack.

Switching to the paid plan will get you access to features such as usage on all devices, account data backup, secure share your credentials, 24×7 customer support, and much more. The best part, you can also go with RoboForm download for Edge, Microsoft’s recommended browser.

Now that you know how you can download RoboForm and install it, there are chances that you might want to uninstall the application from your PC. Know how to remove or uninstall RoboForm from your PC should a situation arise.

Roboform

We all forget passwords, so change the game with this strong password manager.
Check price Visit Website

How can I uninstall RoboForm from my PC?

  1. Press the Windows + S to open Search, look for Control Panel, and launch it.
  2. Click on Programs and Features.
  3. Locate the RoboForm password manager app.
  4. Click on RoboForm and hit the Uninstall button at the top.
  5. Check the Remove all Logins, Identities, Safenotes (RoboForm user data) from this computer option.
  6. Click on OK.
  7. Click on Yes in the message prompt that appears.

The above steps will help you remove all the content of the RoboForm password manager from your PC.

That is it from us in this guide. You can similarly download RoboForm for Windows 7 and one of the most secure passwords manager.

You can learn all the differences between RoboForm and NordPass as well as a comparison between RoboForm and Bitwarden. Reading it will give you some clarity on which one you should choose and identify the advantages one offers over the other.

You can also refer to our guide on the best offline password managers that you can use.

Feel free to let us know in the comments below if you could download RoboForm and install it on your PC following the above steps.

MSVCP140D.dll was Not Found Error: 5 Ways to Fix It

While it is a bit easier when MSVCP140.dll is missing, the debug version of it, MSVCP140D.dll, if not found, introduces significant instability and does not allow apps to run. The problem is generally reported with apps developed using Visual Studio.

The MSVCP140D.dll for Visual Studio is used for software testing, and issues arise when users don’t have the debug Visual C++ Run Time binaries. Remember, when a DLL is missing, critical information cannot be found, thus affecting the effective functioning of the apps.

Why is the MSVCP140D.dll not found?

Here are a few reasons the file is not found:

  • Issues with the redistributable: A common reason the DLL is not found is an issue with the redistributables or not having the debug version of these. Mostly, the DLLs come bundled with the software, so checking that should be your primary approach.
  • Corrupt system files: When the system files are corrupt, Windows and even other applications could have trouble locating the required DLL.
  • The DLL is unreadable: In a few cases, the DLL becomes unreadable due to unwarranted changes that result in a corrupt file state. Here, replacing the DLL is the only viable solution.

How do I fix MSVCP140D dll error?

Before we proceed, here are a few quick tricks you can try:

  • Restart the computer and launch the software again.
  • Check for any pending Windows updates and install them.
  • Contact the developer and ask for the missing MSVCP140D.dll.

If none work, move to the solutions listed next.

1. Use a dedicated DLL repair tool

A missing Microsoft DLL is usually easy to retrieve, but with MSVCP140D.dll, things are not as simple. The DLL can’t be easily located. That’s where a dedicated DLL repair tool comes into the picture.

2. Copy MSVCP140D.dll from another PC

If you are willing to invest time and take a challenging route, there’s always the option to copy the file from another PC. The MSVCP140D.dll location is (version may vary):C:\Program Files\Microsoft Visual Studio\2022\Community\VC\Redist\MSVC\14.31.31103\debug_nonredist\arm64\Microsoft.VC143.DebugCRT

So, if you have two PCs running Visual Studio, head to the provided path on the other device, copy the DLL to a USB drive, and then transfer it to the exact location on the affected computer.

3. Repair Visual C++ Redistributables

  1. Press Windows + R to open Run, type appwiz.cpl in the text field, and hit Enter.appwiz.cpl
  2. Now, locate all Microsoft Visual C++ Redistributable listed here, select one, and click Change.repair to fix MSVCP140D.dll
  3. Click on Repair.repair
  4. Now, wait for the process to complete.repair to fix missing MSVCP140D.dll
  5. Similarly, repair the other redistributables here.

Often, trivial issues with Microsoft Visual C++ Redistributable may lead to MSVCP140D.dll not found in Windows 10. And a quick repair should get things up and running.

4. Download Visual C++ Redistributables

If you couldn’t find any Microsoft Visual C++ Redistributable installed on the PC, that’s probably the reason behind the error. To get those, head to Microsoft’s official website and download the latest redistributable packages.

Visual C++ Redistributables

Make sure to get the latest ones, and don’t miss any package for a given version. Download every single one, though the latest supported redistributables are listed at the top, so you shouldn’t face issues identifying them.

5. Run the DISM and SFC scan

  1. Press Windows + S to open Search, type Command Prompt in the text field, and click on Run as administrator.command prompt
  2. Click Yes in the UAC prompt.
  3. Paste the following commands individually and hit Enter after each to run DISM:DISM /Online /Cleanup-Image /CheckHealth DISM /Online /Cleanup-Image /ScanHealth DISM /Online /Cleanup-Image /RestoreHealth
  4. Once done, execute this command to run the SFC scan:sfc /scannowsfc scan to fix MSVCP140D.dll
  5. After all the scans are complete, restart the computer.

In case it’s the corrupt system files responsible for the missing MSVCP140D.dll, running the DISM commands and the SFC scan should help get rid of the error message in no time.

And before you leave, do check the best DLL repair tools and get one to prevent the error from reappearing. We also have a new guide on msdia80.dll, so check it out to learn more.

Tell us which fix worked for you in the comments section below.

fmod.dll was Not Found? How to Fix & Install It Again

DLL files are critical for the effective functioning of apps in Windows. While Microsoft publishes a handful, third-party developers release a major chunk of these to support their apps. One of these, fmod.dll, when missing, leads to significant problems.

When a DLL is not found, applications that rely on it won’t launch or run anymore and will throw an error instead. There are a few variations here, ranging from a corrupt file to an incompatible one, but the solutions remain the same. Let’s find out!

What is fmod.dll?

Developed and published by Firelight Technologies Pty, Ltd., the DLL is part of a vital library that allows playing almost every sound format. It’s essentially used by third-party apps, particularly games and similar applications, for enhanced audio functionality.

Here are a few reasons fmod.dll is not found or missing in Windows:

  • Issues with the app installation: When the file is bundled with another application and, still the DLL is missing, it’s the improper app installation to blame.
  • Another software locking the DLL: In a few cases, another program running on the computer might be presently using the DLL, and, as a result, other apps might have trouble accessing it.
  • The DLL is corrupt: A common reason behind the problem is the corrupt state of the file due to repeated changes, which renders it unreadable.

How do I fix a missing fmod.dll?

Tip icon Tip
A quick restart often helps get rid of missing DLL problems. Or you could copy the file to the affected PC from another computer. But in no case should you download the missing DLL from a website since there’s a likelihood of it being malware disguised as a legit file.

1. Use a dedicated DLL repair tool

DLLs published by third-party developers are often trickier to locate and replace when missing, given that the built-in Windows tools fail in such cases. The problem usually arises due to incompatibility between the file and the OS.

A dedicated repair tool should help quickly download fmod.dll and any other missing files from its extensive database. It can work for all users so far and is quite effective at the job.

2. Verify the integrity of game files (Steam games only)

  1. Launch Steam, go to Library, right-click on the affected game, and select Properties.game properties
  2. Go to the Local Files tab, and click on Verify integrity of game files.verify to fix missing fmod.dll
  3. Wait for the process to complete, and then relaunch the game.integrity

In some cases, the missing fmod.dll file affected Steam games launched in VR, particularly SCP, and a quick integrity check of the game files got things up and running in no time.

3. Reconfigure the app’s affinity

  1. Launch the program, and then press Ctrl + Shift + Esc to open the Task Manager.
  2. Right-click on the program here, and select Go to details.go to details
  3. Again, right-click on the process, and choose Set affinity.set affinity to fix missing fmod.dll
  4. Make sure the All Processors option is selected, and click on OK to save the changes.all processors
  5. Once done, relaunch the program and check if it now runs stably.

4. Reinstall the affected application

  1. Press Windows + R to open Run, type appwiz.cpl in the text field, and hit Enter.appwiz.cpl
  2. Locate the affected application from the list, select it, and click Uninstall.uninstall to fix fmod.dll
  3. Follow the on-screen instructions to complete the process.
  4. You can now download the app from a reliable source, preferably the official website or Microsoft Store.

When the fmod.dll for Minecraft is missing, and the problem remains unresolved, uninstalling the program and then downloading it all over again should do the trick. Downloading Minecraft is easy and shouldn’t take much time, though the fix works just as well for other apps.

5. Perform a system restore

  1. Press Windows + S to open Search, type Create a restore point in the field, and click on the relevant search result.create a restore point
  2. Click on System Restore.system restore to fix fmod.dll
  3. Select the Choose a different restore point option, if available, and click Next.choose a different
  4. Pick a restore point from the list and click Next. Make sure to select one created before the error first appeared on the PC.restore to fix missing fmod.dll
  5. Now, verify the details and click Finish to start the restore process.start system restore
  6. Wait for System Restore to complete.

A system restore helps revert any changes made to the PC that might be responsible for a missing fmod.dll in ETS2 (Euro Truck Simulator 2) and other applications. Besides, the personal files remain unaffected. And if things don’t work out as planned, you can always undo a system restore.

Before you leave, discover the best DLL repair tools in Windows and get one to keep such issues at bay.

For any queries or to share another solution with us, drop a comment below.

urlmon.dll Not Found: 4 Ways to Fix It

A wide range of programs uses Microsoft’s DLLs, be it the built-in ones or the third-party apps. And when a DLL is missing, the dependent apps won’t launch altogether. Speaking of which, the urlmon.dll file is often not found, which has, of late, affected several users.

DLL (Dynamic Link Library) files are shared amongst many programs simultaneously, and each makes some changes to it, which increases the likelihood of encountering an error due to a corrupt file state. So, let’s find out all about the urlmon.dll error in Windows.

What is the Urlmon DLL file?

The urlmon.dll file, published by Microsoft, is a vital one for loading the OLE (Object Linking and Embedding) library. OLE is a way to exchange information amongst the apps installed on the PC. Internet Explorer generally uses the DLL, but other programs, too, may rely on it.

The urlmon.dll file location is:C:\Windows\System32

urlmon.dll in the System32 folder

If urlmon.dll is not found, here a the primary reasons for it:

  • Corrupt system files: When the system files are corrupt, you are likely to face a range of issues with Windows, including a Blue Screen of Death.
  • The DLL was deleted: In some cases, users found out that the DLL got deleted either through their own fault or done by an application.
  • Issues with Windows: If you receive the urlmon.dll error along with a bunch of other problems in Windows, it could be complications with the OS to blame.

What can I do when urlmon.dll is missing?

Tip icon Tip
Microsoft publishes the urlmon.dll file, and is present on every Windows PC. So when facing issues with it, you can copy the file from another PC and move it to the System32 folder on the affected one.

1. Use a dedicated DLL repair tool

While there are a handful of ways to repair a corrupt DLL or replace a missing one, none guarantee results. And users are often caught in this endless loop where they keep trying one thing after another. And when things come to it, a DLL repair tool should be your primary choice.

2. Re-register the DLL file

  1. Press Windows + S to open the Search menu, type Command Prompt, and click on the relevant search result.command prompt
  2. Paste the following command and hit Enter:regsvr32 urlmon.dllregister urlmon.dll
  3. Wait for the confirmation message.confirmation

Once done, relaunch the application that earlier threw the error, and you shouldn’t see the missing DLL error for urlmon.dll anymore.

3. Perform a DISM and SFC scan

  1. Press Windows + R to open Run, type cmd, and hit Ctrl + Shift + Enter.cmd
  2. Click Yes in the UAC prompt.
  3. Now, paste the following commands individually and hit Enter after each:DISM /Online /Cleanup-Image /CheckHealth DISM /Online /Cleanup-Image /ScanHealth DISM /Online /Cleanup-Image /RestoreHealth
  4. Next, execute this command to run the SFC scan:sfc /scannowsfc to fix urlmon.dll
  5. Once all the scans are run, restart the computer for the changes to come into effect.

The DISM commands and the SFC scan are effective ways to combat corrupt system files and fix DLL-related issues in Windows, including when urlmon.dll is not found.

4. Perform an in-place upgrade

Note icon NOTE
The steps here are to perform an in-place upgrade on Windows 11. If you are running the previous iteration, download the Media Creation Tool for Windows 10 and run the setup to proceed.
  1. Go to Microsoft’s official website, choose your edition of Windows, and click Download to get the Windows 11 ISO.download
  2. Select the product language from the dropdown menu, and click Confirm.iso to fix urlmon.dll
  3. Click the link that appears to start the download.download
  4. Now, double-click the downloaded ISO, and click Open in the prompt.open ISO
  5. Run the setup.exe file.setup.exe to fix missing urlmon.dll
  6. Click Next to proceed.proceed
  7. Click Accept to agree to the license terms.accept to fix urlmon.dll
  8. Make sure the setup reads Keep personal files and apps, and then click Install to start the in-place upgrade.in-place upgrade to fix urlmon.dll

An in-place upgrade is an efficient way to eliminate every possible issue with Windows, be it a missing urlmon.dll or even slow PC performance.

And the best part, you don’t lose files or apps in the process, though it will take a few hours to complete. Go with this method if you also notice other issues with the OS.

Even after fixing the problem, we recommend you install an effective DLL repair tool to prevent such issues from arising.

No less important, you may also resolve DevIl.dll not a valid Win32 application using these techniques, so make sure to check our detailed guide.

For any queries or to share what worked for you, drop a comment below.

Qt5Core.dll was Not Found: 4 Ways to Fix This Error

DLL or Dynamic Link Library files are vital to both Windows and the apps installed on it. There are several of these published by Microsoft while third parties too develop files specific to their programs, and sometimes a DLL goes missing. This is commonly seen with Qt5Core.dll.

Multiple programs usually share a DLL, and when the DLL is not found, the dependent apps fail to launch. Even minor issues with it become complex problems requiring immediate resolution. Let’s find out all about it and how you can download Qt5Core.dll in Windows.

What is Qt5Core dll?

Qt5Core.dll, published by The Qt Company Ltd., is a vital file for applications developed using C++ or using the framework for execution. Since it isn’t a Microsoft-published DLL, any app requiring it will have the file bundled with the installation package.

So, why is Qt5Core.dll not found? Here are a few reasons for it:

  • App not installed properly: When a third-party DLL is not found, it’s most likely that the app it should come bundled with was not installed properly.
  • DLL file and launcher not stored together: Applications usually store DLLs in the same folder as the launcher, and that’s where they first look for the file. If you change the location of either the launcher or the DLL, things may not work.
  • A third-party app triggering conflict: In a few cases, a third-party application may conflict with the functioning of the one that relies on Qt5Core.dll, subsequently triggering the error.

What can I do if Qt5Core.dll is missing?

1. Use a dedicated DLL repair tool

DLL issues arise from time to time, and, more often than not, it’s a problem with third-party ones. The reason, third-party DLLs are more prone to compatibility issues with the OS, and, as a result, the programs depending on them don’t launch. In such cases, it’s best to use a DLL repair tool.

2. Place the DLL in the program’s directory

Third-party programs that have the DLL bundled as a part of the package require it to be placed in the same folder as the launcher. While this shouldn’t be a problem for most, some users often move the launcher (.exe file) to the desktop or another preferred location.

If that’s the case, revert the change and have the launcher in the program’s directory. Also, for those missing the Qt5Core.dll file, copy it from another PC running the same OS, and move it to the affected program’s folder.

3. Update the graphics driver

  1. Press Windows + X to open the Power User menu, and select Device Manager from the list.device manager
  2. Expand the Display adapters entry, right-click on the active graphics adapter, and then select Update driver.update driver to fix Qt5Core.dll
  3. Now, select Search automatically for drivers and then wait for Windows to install the best available one.search automatically
  4. Once done, restart the computer for the changes to come into effect.

If you come across the RadeonSettings -System error, The program can’t start because Qt5Core.dll is missing, a quick fix is to update the graphics driver. If this doesn’t work, manually install the latest driver in Windows from the manufacturer’s website.

4. Reinstall the program

  1. Press Windows + R to open Run, type appwiz.cpl in the text field, and hit Enter.appwiz.cpl
  2. Locate the program throwing the missing DLL error, select it, and then click on Uninstall.uninstall to fix Qt5Core.dll
  3. Now, follow the on-screen instructions to complete the process.
  4. After the program is uninstalled, head to its official website (or a reliable source), download the setup, run it, and install the program all over again.

That’s it! If the previous solutions didn’t work, reinstalling the problematic application should do the trick. Once done, you should find Qt5Core.dll in the program’s directory. Also, if this doesn’t work out on the first attempt, we recommend using a reliable uninstaller software to clear leftover files.

Before you leave, check the best DLL repair tool and get one today to fix such issues with ease.

Tell us which fix worked for you in the comments section below.

0x800736cc: How to Fix This Windows Update Error

Downloading and installing Windows Updates is important, but many of our readers have reported encountering the error code 0x800736CC.

To learn more about update issues, we suggest reading our Windows Update is stuck at 100% on Windows 11 guide.

In today’s guide, we will focus on this error and show you the best ways to fix it.

What causes Windows Update error 0х800736cc?

Many factors can contribute to the issues during the Windows Update process, resulting in error 0x800736CC. Some notable ones are:

  • Misconfigured or damaged Registry files – If the Registry files that are meant to store database information are not correctly configured or not intact, it can cause the error code 0X800736cc.
  • Corrupt or missing system files – Services like Windows Updates can run into errors if the system files are corrupt or inaccessible.
  • Outdated System drivers – If your system drivers are not updated, they can become corrupt and faulty due to the bugs affecting the current version.
  • Interference from apps – Sole applications installed on the PC can interfere with its functionality and performance, causing issues with the update process.

Fortunately, troubleshooting your PC is not fatal and can fix the error. So, we’ll enumerate the basic steps to fix it as we go further into this guide,

How can I fix Windows Update error 0x800736cc?

Before attempting any advanced troubleshooting steps, go through the following:

If you can’t resolve the error, go ahead with the solutions below:

1. Perform SFC and DISM scans

  1. Left-click the Start button, type Command Prompt, then click Run as administrator.
  2. Click Yes on the User Account Control (UAC) prompt.
  3. Type the following and press Enter: sfc /scannow
  4. Type the following commands and press Enter: DISM /Online /Cleanup-Image /RestoreHealth
  5. Restart your PC and check if the update error persists.

Performing an SFC scan will repair corrupted or missing system files affecting the Windows Update process. You can read about how to fix SFC scannow not working on your Windows device.

However, it’s advisable to go for a dedicated system repair tool that can efficiently diagnose your PC with no effort from you.

2. Run Windows Update troubleshooter

  1. Press Windows + I key to open the Settings app.
  2. Click on System, select Troubleshoot, then click the Other troubleshooters.
  3. Go to Most Frequent, select Windows Update, and click the Run button.
  4. Restart your PC and check if the 0x800736cc error persists.

The Windows Update Troubleshooter will find and fix issues affecting the Windows updates installed.

Our readers can check ways to run the Windows Update troubleshooter on Windows 11 for more detailed steps.

3. Reset the Windows Update components

  1. Left-click the Start button, type Command Prompt and select the Run as administrator option.
  2. Click Yes on the User Account Control prompt.
  3. Copy and paste the following commands and press Enter after each one: net stop wuauserv net stop cryptSvc  net stop bits  net stop msiserver
  4. Then, type the following: ren C:\Windows\SoftwareDistribution SoftwareDistribution.old  ren C:\Windows\System32\catroot2 Catroot2.old
  5. Restart the services by pressing Enter after each of these commands: net start wuauserv net start cryptSvc  net start bits  net start msiserver
  6. Close the Command Prompt and restart your PC, then reinstall the update you were trying to install previously.

Resetting Windows update components will fix the malfunctioning, causing the 0x800736cc update error.

Read our article if you encounter issues running the Command Prompt as an administrator on Windows 11.

4. Clear Windows Update cache

  1. Press the Windows + E key to open File Explorer.
  2. Go to Local Disk (C) and right-click, then click on Properties from the drop-down.
  3. Select Disk Clean-up, then click the Cleanup system files button.
  4. Check the boxes for Windows upgrade log files and Temporary Windows Installation files, then click OK.
  5. Restart your PC and check if the error persists.

Clearing the Windows update cache files will clear the corrupt update files impeding the process and allowing Windows to write new files. You can check what to do if File Explorer keeps crashing your PC.

5. Disable Windows Defender Firewall

  1. Click the Start button, type the control panel, then press Enter.
  2. Click on the Windows Defender Firewall option.
  3. Select the Turn Windows Defender Firewall on or off option from the left pane.
  4. Go to the Private network settings and Public network settings, then click the radio buttons for the Turn off Windows Defender Firewall (not recommended) option.
  5. Restart your PC to see if you’re able to update Windows.

Disabling the Windows Defender Firewall will resolve any interference it’s causing in the Windows update process.

6. Update the System drivers

  1. Press the Windows button and select Settings.
  2. Click on Windows Update and click Advanced options.
  3. On the next page, choose Optional Updates.
  4. Click on Driver updates, select the available updates, and click Download and Install.

Updating your device’s drivers will install updates for fixing bugs affecting the PC processes. Also, you can read about how to reinstall devices in Device Managers Windows 11.

Further, do not hesitate to go through our article about fixing slow Windows Updates on PCs. Also, read about error Code 0x8024500c and the steps for fixing it.

Should you have further questions or suggestions, kindly drop them in the comments section.

How to Disable Delivery Optimization Service in Windows

Many reasons can make you want to disable Delivery Optimization Service on your Windows PC. This guide will discuss ways to disable Delivery Optimization Service in a few steps. To learn more about services, you might want to check our how-to open services.msc guide for more information.

How do I turn off/disable Delivery Optimization Service?

1. Via Windows Settings

  1. Press Windows + I key to open the Windows Settings app.
  2. Select the Windows Update option from the left pane of the screen, and click the Advanced Options button.
  3. Scroll down to the Addition options section, and click the Delivery Optimization button.
  4. Go to the Allow downloads from other PCs option and toggle off the switch.

Toggling off the switch for the Allow downloads from other PCs option will disable Delivery Optimization from working during Windows Update.

2. Via Registry Editor

  1. Press the Windows + R button to open the Run dialog box, type in regedit, and press Enter to open the Registry Editor.
  2. Copy and paste the following path and press Enter: Computer\HKEY_LOCAL_MACHINE\SYSTEM\CurrentControlSet\Services\DoSvc
  3. Double-click the Start key on the right pane and set the hexadecimal value data to 4.
  4. Close the Registry Editor and restart your computer to effect the changes.

The above steps will tweak the Delivery Optimization service registry key to disable it. You can tear through our article on how to fix a corrupt registry on Windows.

In any case, you can make use of another method that automatically scans your registry and repairs potential issues, which helps you perform this action without causing system malfunctions.

3. Turn off using Windows Services

  1. Press Windows + R key to open the Run dialog box and type services.msc in the text bar, then press Enter to open Services.
  2. Find and double-click on Delivery Optimization from the list of services.
  3. On the Delivery Optimization Properties page, click Startup type and set it to Disabled. Then, click the Apply button.
  4. Restart your PC for the changes to take effect.

Disabling the Delivery Optimization service will prevent its activities from running on your PC.

4. Via Group Policy

  1. Press the Windows + R key to open the Run dialog box, type gpedit.msc, and press Enter to open Group Policy.
  2. Navigate to the following path: Computer Configuration\Administrative Templates\Windows Components\Delivery Optimization
  3. Double-click the Download Mode option on the right pane.
  4. Tick the radio button for the Enabled option, and select the Simple (99) option from the dropdown menu, then click the Apply button.
  5. Close the Windows Group Policy.
  6. Left-click the Start button, type Command Prompt and select Run as administrator.
  7. Select Yes on the User Account Control interface.
  8. Type the following and press Enter: gpupdate/force
  9. Restart your PC to take effect.

Enabling the Simple 99 download mode removes peer-to-peer support and allows Delivery Optimization downloads using HTTP only.

Check our guide about how to fix Group Policy errors in the Windows operating system.

5. Turn off by enabling a Metered Connection

  1. Press Windows + I key to open the Settings app.
  2. Select the Network & Internet option from the left sidebar. Click on the network you want to set as a metered connection in the right pane.
  3. Go to Authentication settings and toggle on the switch for Metered connection.

Windows will not use the Delivery Optimization service to upload or download updates when a Metered connection is on.

What does a Delivery Optimization Service do?

Delivery Optimization Service is an HTTP downloader with a cloud-managed solution. It allows Windows devices to download Windows updates, upgrades, applications, and other large package files from alternate sources.

Furthermore, it helps reduce bandwidth consumption by allowing multiple devices in your deployment to download these packages. Also, Delivery Optimization on Windows PC allows the system and Store apps to update faster on your network.

However, the Delivery Optimization Service can cause issues such as increased data usage if you use a metered connection. Hence, you should disable it on your PC for better performance.

Alternatively, our readers can check our comprehensive article about ways to turn on and off a Metered Connection on Windows 11.

For more information, you can check our article about Delivery Optimization files and how to delete them.

For further questions or suggestions on this guide, kindly drop them in the comments section.

Okiinasfierco.xyz Terminal Error: How to Fix for Good

The Command Prompt is a command line interpreter for Windows operating systems, and many have reported Okiinasfierco.xyz Terminal Error while using it.

It seems that this error causes the Command Prompt to pop up constantly. Hence, this article will discuss ways to troubleshoot the error on your PC.

What is Okiinasfierco.xyz Command Prompt error?

Okiinasfierco.xyz Terminal Error is a code that appears when the Command Prompt opens on its own.

This is an unusual error, and it can be a reason for concern, so it’s important to fix it as soon as possible. But before we do that, let’s see what causes this error to appear.

What causes the Okiinasfierco.xyz Command Prompt error?

Some factors that can cause the error are:

  • Corrupt system files – Having corrupt system files on your computer can cause issues with the programs and services running on it. It can infect the services depending on the corrupt files like Command Prompt, causing it to open or crash abruptly.
  • Virus and malware infection – The Okiinasfierco.xyz Terminal error on Command Prompt can appear due to malware infections such as Trojan Horse and other viruses infecting the system. They impede the activities of apps like the Chrome browser, causing the Command Prompt to malfunction.
  • Issues with the Chrome browser – Running an outdated Chrome browser can cause a terminal error to occur. Also, other issues like corrupt installation or browser updates can affect the Command Prompt’s functionality on your PC.

These factors are liable to vary depending on the PC and the circumstances surrounding the issue. Nonetheless, you can resolve the error by following the troubleshooting steps below.

How can I fix Okiinasfierco.xyz Command Prompt error?

Before proceeding with any advanced troubleshooting steps, go through the following checks:

  • Run a System File Checker (SFC) scan on your computer.
  • Run a full scan using Windows Defender.

If you can’t resolve the problem, go ahead with the solutions below:

1. Use ESET Scanner

  1. Go to the ESET’s Free Online Scanner’s page and click One-time Scan.
  2. Double-click on the downloaded app and click Run.
  3. Select the Language and choose Get Started.
  4. Click Yes when the UAC prompts for the administrative privilege.
  5. On the Terms of Use page, select Accept.
  6. Select Full Scan.
  7. Then, click on Enable ESET to detect and quarantine potentially unwanted apps and click Start scan.
  8. Then, click Continue after the virus has been identified to fix it.

Also, you can use other antivirus software to scan the system for viruses and malware.

To give you an answer, we suggest that you employ the machine-learning antivirus that entirely scans your PC and removes complex malware threats.

ESET antivirus is the go-to software to highly secure the system from cyber threats and avoid errors at all costs.

⇒ Get ESET HOME Security Essential

2. Uninstall the Chrome browser

  1. Press Windows + I keys to open the Windows Settings app.
  2. Select Apps and click on Installed apps.
  3. Find Chrome, click on the options, then select Uninstall from the drop-down menu.
  4. Restart your PC and check if the Command Prompt opens with the terminal error.

Uninstalling Chrome will resolve any corrupt app files or background activities causing issues with the system functionality.

3. Run System Restore

  1. Left-click the Start button, type Restore, and click Enter to open the Create a Restore Point.
  2. Then, select the System Protection tab, and click System Restore.
  3. Choose a different system restore and click Next to select a specific Restore Point.
  4. Select a Restore Point on your PC, and click Next.
  5. Click the Finish button and wait for the process to complete.

Running a System Restore will take your system to the selected restore point and remove recently added files or apps causing the Command Prompt error.

Check how to fix Restore Point if it’s not working and if you have any issues running it.

4. Reset your PC

Note icon NOTE
This solution will remove all your files from the system drive, so be sure to back up the important files beforehand.
  1. Press the Windows + I key to open the Windows Settings app.
  2. Select System and click on Recovery.
  3. Then, select the Reset PC button from the right pane.
  4. Select the Remove Everything option to perform a full Windows reset.

Performing a factory reset will fix the Windows Terminal opening and the okiinasfierco.xyz, but this should be used only if all other solutions don’t fix the problem.

If you’re having more issues, perhaps our CMD window opens and closes randomly guide could help you out.

What solution did you use to fix this problem? Let us know in the comments section below.

Microsoft quietly drops this feature from Windows 11 build 23440

This week, Microsoft released two new builds for Windows 11 Insiders, that is, build 23440 for the Dev Channel and build 25346 for the Canary Channel. The Dev Channel build in particular shipped with tons of changes as well as improvements for the Start Menu, Taskbar, Search on the Taskbar, and more.

However, Microsoft has quietly pulled the Search on the Taskbar changes and improvements that shipped with the build. While making the release the company had indicated that:

We are exploring a new hover behavior for the search box and search highlight gleam. The proposed interaction model aims to create a more engaging search experience by invoking the search flyout when you hover over the search box gleam. This behavior can be adjusted by right-clicking on the taskbar, choosing “Taskbar settings” and adjusting your preferred search box experience

But, these changes are no longer part of the release. Microsoft made an update on the changelog yesterday indicating that it has disabled the feature. The company resulted to this move after discovering an issue shortly after making the release.

Microsoft has indicated that it intends to bring this feature back via a future release. In the changelog, the company had also indicated that the new build shipped with several known issues. The company stated that

[Search on the Taskbar]
There is an issue where some people may not see the search box on the taskbar and/or the settings to adjust the search box experience on the taskbar after updating to Build 23403. We are aware of the issue, and we are working on a fix.

Perhaps this might be the issue that caused it to drop the feature from the 23440 release. Share your thoughts with us in the comments.

isPostback _RC_ Pendingupdates: 5 Ways to Fix This Error

The Windows Update Troubleshooter helps resolve update failures. However, users complain about the isPostback_RC_Pendingupdates error that appears when trying to use the troubleshooter. This guide will take you through some steps to help fix the issue.

Also, our readers can check our guide on Windows update error 0x80010105 and ways to fix it.

What causes isPostback_RC_Pendingupdates?

The following are some of the notable causes of the error:

  • Outdated system drivers – The error may occur if the device drivers running on your system are outdated. Also, corrupt chipset drivers can affect the Windows update process, resulting in the Detection details: isPostback_RC_Pendingupdates error.
  • Corrupt or faulty Windows update components – Windows update components are responsible for the update process. If they are not intact or accessible, it can cause the isPostback:False error to appear when running the Windows update troubleshooter.
  • Windows update Temporary Cache folder – Windows updates installer patch files are saved as cache files in a folder. However, they can become corrupt and cause interference with the Windows update process. Hence, the isPostback_RC_Pendingupdates error will occur when troubleshooting the issue.

Fortunately, our technical team has put together some solutions you can get to fix the error. As we go further into this article, we’ll discuss them.

How can I fix the error isPostback_RC_Pendingupdates?

Go through the following preliminary checks before attempting any advanced troubleshooting steps:

If you can’t resolve the error, go ahead with the solutions below:

1. Perform a Clean boot

  1. Press Windows + R key to open the Run dialog box, type msconfig, and click OK.
  2. Go to the Services tab, check the box for the Hide all Microsoft services option, then click the Disable all button.
  3. Go to the Startup tab and click Task Manager.
  4. Select the startup programs and click the Disable button.
  5. Restart your PC and check if the isPostback_RC_Pendingupdates error appears during the update.

Performing a Clean boot prevents services and tasks from interfering with the update from running when you boot the system. Check our guide on how to disable startup apps on Windows 11.

2. Adjust settings in Windows Services

  1. Press Windows + R key to open the Run dialog box, type services.msc, and click OK to open Windows Services.
  2. Right-click on Background Intelligence Transfer Service and then select Properties.
  3. Change Startup Type to Automatic and click OK. If it’s already Automatic, then stop and click Start.
  4. Repeat the Steps 2 and 3 for Windows Update Service.

If the Startup Type for Windows Update Service and Background Intelligence Transfer Service are not set to Automatic, it will affect the Windows Updates process and it will cause ispostback_rc_pendingupdates error to appear.

3. Restart the Windows Update components

  1. Left-click the Start button, type Command Prompt and select the Run as administrator option.
  2. Click Yes on the User Account Control prompt.
  3. Copy and paste the following commands and press Enter after each one: net stop wuauserv net stop cryptSvc  net stop bits  net stop msiserver
  4. Then, type the following: ren C:\Windows\SoftwareDistribution SoftwareDistribution.old  ren C:\Windows\System32\catroot2 Catroot2.old
  5. Restart the services by pressing Enter after each of these commands: net start wuauserv net start cryptSvc  net start bits  net start msiserver
  6. Close the Command Prompt and restart your PC to see if the isPostback_RC_Pendingupdates error persists.

Restarting the Windows Update service components will reset them and fix the malfunctioning update component causing the error when using the troubleshooter.

Our readers can check to fix issues running the Command Prompt as an administrator on Windows 11.

4. Uninstall recent Windows updates

  1. Press Windows + I key to open the Settings app.
  2. Go to Windows Update and select Update History.
  3. Click the Uninstall updates button and select the most recent update.
  4. Click on Uninstall to complete the process.

Uninstalling the recent Windows update will remove the last installed build likely to be corrupted or faulty and resolve the ispostback_rc_pendingupdates error. Read our guide on how to uninstall updates on Windows 11 for more steps.

5. Delete Windows Update download history

  1. Press Windows + E to open File Explorer.
  2. Go to Local Disk (C) and right-click, then click on Properties from the drop-down.
  3. Click Disk Clean-up, then the Cleanup system files button.
  4. Check the boxes for Windows upgrade log files and Temporary Windows Installation files, then click OK.
  5. Restart your PC to check if the error persists.

Deleting the Windows update cache files will remove the corrupt update files impeding the update process. You can read our article on what to do if File Explorer keeps crashing your PC.

Alternatively, you can check our list of the best Windows Update Repair Tools for Windows 10 & 11 in 2023.

Should you have further questions or suggestions, kindly drop them in the comments section.

DLL not Found in Visual Studio: How to Fix

Visual Studio is one of the most used coding applications, but many reported that DLL not found in Visual Studio message while using it.

This can be a big problem, and if you’re having issues with missing DLLs, we suggest reading our guide on missing DLLs on Windows 10.

As for Visual Studio, fixing the missing DLLs is a relatively simple task, and in today’s guide, we will show you the best ways to do it.

Where is DLL in Visual Studio?

To view the DLLs that your app uses in Visual Studio, you need to use the Modules window. To open it, go to Debug and select Windows. Lastly, select Modules.

Alternatively, you can use Ctrl + Alt + U shortcut.

How do I fix missing DLL files in Visual Studio?

Before we start, there are a couple of potential workarounds that you may want to try:

  • Moving the DLL files – Moving the DLL files to the same folder as the executable file is the quickest way to fix any problem with DLLs. You can automatize this process by creating a Post-Build Event.
  • Use the DLLs from a different location – Depending on your project, using the DLLs from a different path can help fix various issues. The suggested path is C:\Program Files (x86)\Microsoft Visual Studio 14.0\VC\redist\debug_nonredist\x64\Microsoft.VC140.DebugCRT
  • Check antivirus settings – Cylance Protect and other antivirus software can cause issues with DLLs. Adjust the antivirus whitelist to make sure that the DLL files aren’t blocked.
  • Delete the suo file – Close Visual Studio and delete the .suo file. The file is located next to the .sln file. Start Visual Studio and save all files.
  • Use the correct version of .NET – Ensure you’re targeting the correct version of .NET. Using the incorrect one can cause issues.

1. Use a dedicated DLL fixer

If DLL is not found in Visual Studio, you can always download the necessary files, but that can be a tedious process, especially if you need multiple files.

This is why many use DLL repair tools to quickly and easily restore missing files. After fixing the issue these apps also work great as long-term maintenance tools.

2. Set Environment Variables for Projects

  1. In Visual Studio, go to Projects and select Properties.
  2. Next, go to Configuration Properties and select Debugging Environment. Lastly, select Merge Environment.
  3. Now locate the PATH value and change it to: PATH=%PATH%;$(TargetDir)\DLLS
  4. Save changes.

A few users reported that using $(ExecutablePath) instead of $(TargetDir) worked for them, so try that as well.

3. Change build settings

  1. In the right pane, right-click the Solution and choose Properties.
  2. Now click on Configuration.
  3. Check the Build boxes for the projects. If they are already checked, uncheck them, and save the changes. After that, check them again.
  4. Optional: Some users are suggesting restarting Visual Studio after unchecking the Build boxes.
  5. Optional: Repeat Step 3 for both Release and Debug modes.

As you can see, you can easily fix the DLL not found in Visual Studio error. All that you have to do is to configure your projects properly.

Missing files can be a problem, and we have a great guide on missing DLL files on Windows 11, so we encourage you to check it out.

What other solutions did you use to fix this problem? Let us know in the comments below.

Microsoft’s Snap Assist feature on Windows 11 to get “Snappier” with AI

At the beginning of this year, there were indications that Microsoft was busy at work and looking to make its Snap Assist feature smarter on Windows 11. It was further disclosed that the company was looking to achieve this by incorporating AI capabilities into the feature that would in turn introduce new smart snapping features.

The new smart snapping features included recall snap layouts and OCR technology. More information pertaining to these enhancements has now surfaced, which could be an indication that Microsoft could be getting ready to ship these features to general availability via a future update.

Windows sleuth Zac Bowden reports that feature an early version of the feature has been unearthed in Windows 11 preview build 23435. He has further indicated that the feature is closely linked to the snap layouts interface which pops up when you drag an app window to the top of the screen.

What’s more, aside from the snap layouts that are presented in the interface, a new row of smart layouts has also been introduced. These smart layouts will reportedly feature extra apps that Windows presumes you’d like to have snapped together.

Of course, this will be based on how you interact with apps and the layouts you often organize them in. Therefore, it will now be easier to snap apps together rather than having to navigate through your Windows snapping one app at a time.

However, PhantomOcean3 on Twitter, who’s well known for uncovering hidden features in Windows 11 builds has highlighted that the snap suggestions feature doesn’t work properly in the snap bar. He further noted that it does work well in the snap layout though it’s a bit buggy.

via Windows Central

How to back up your files using the Command prompt

Regularly backing up your Windows files is as essential as having a routine Windows update. This is because a backup not only protects you from random data corruption, which can creep on your PC for a myriad of reasons, but it also keeps a check on the loss of data caused by human errors, malware attacks, and so on.

We’ve previously covered how to back up your files using the System Restore, File History, etc. But that’s not all. Yet another, more straightforward method will do the job just as well; we’re, of course, talking about the Command prompt. 


Command prompt offers you a slew of commands to ehlp you create a backup for your files.

Let’s go over all of them one by one.

How can I back up files using Command Prompt?

1. Robocopy

The Robocopy command is a handy Cmd command that can copy any of your Windows files with ease. 

With Robocopy you can copy all the files or subdirectories from the source folder to the destination folder, including empty directories.

To backup your files using the Robocopy command, run the following snippet in Command prompt and hit Enter:

robocopy "source folder path" "destination folder path"/e /mir /r:1 /w:1 /np /log: "log file path"

Here, replace the “source folder path” with the path of source folder in realtime; similarly for “destination folder path.” The /mir option will then mirror the source folder to the destination folder; this means the destination folder will also delete any deleted files from sources.

Also, the /r and /w parameters will specify the number of retries and wait time in case of any errors. At the same time, the /np and /log parameters specifies the progress of the backup and maintain a log file of the backup, respectively.

For example, to copy a file ‘file1’ from the Downloads folder in D: drive to E: drive, the command will be something like this:


robocopy D:\Downloads\file1 E:\ /MIR

2. XCOPY

Yet another powerful tool offered by Command prompt, the XCOPY command copies your files from one location to another. This command is handy in copying all files and subdirectories from the source folder to the destination folder, including any files and empty directories.

To run the XCOPY command, use the following format:

xcopy /s /e /h /i /y "source folder path" "destination folder path"

Again, for example, if you want to backup an entire folder from one place, let’s say, the Downloads folder in C: drive, to E: drive, you’ll run a command that will look something like this:

xcopy C:\Users\shaantminhas\Downloads E:\ /s /v

The parameters /s and /v are useful for copying directories and subdirectories and verifying each downloaded file respectively.

3. Wbadmin

Want to back up your operating system files to protect them from random corruptions and errors? 

The Wbadmin will come to your rescue here, letting you back up and quickly restore your operating systems, volume, files, or application.

Here’s how to create a backup with Wbadmin in Command prompt:

wbadmin start backup -backupTarget:<BackupDrive>: -allCritical -systemState -quiet

Type the above command in Cmd and hit Enter.

From above, replace the “BackupDrive” with the drive letter or network location where you’d like to store the backup on your PC.


 You can back up a specific file or folder with Wbadmin as well. For example, to create a backup of your drive D: in your drive F:, type in the following command and hit Enter:

wbAdmin start backup -backupTarget:D: -include:F: -allCritical -quiet

Additonally, to set a backup for your PC at a specific time, type in the following commands:

wbadmin enable backup -addTarget:<BackupDrive>: -schedule:00:00 -quiet

Here, replace “BackupDrive” with the drive letters or network letters where you’d like to store your data, and “00:00” with the time you want to perform this backup.

You can explore many other combinations like this, with the help of different parameters.

To learn more about these commands, we have a great copy vs xcopy vs robocopy guide that should help you.

Backing up your files using the Command prompt

Keeping a regular backup of your Windows files is as essential as getting regular, timely updates for your PC. Following some of the above commands, you can back up your files using the Command prompt for good in no time as well.

Steam_api.dll: What Is It & How to Fix It if It’s Missing

Steam_api.dll is a dynamic link library (DLL) developed by Valve Corporation and is an integral part of the Steam client. It manages several services like user authentication, user profiles, game stats, cloud storage, and more.

If the DLLs are missing, Steam games won’t start because cannot connect to the game servers.

Why is the Steam_api.dll file missing?

There can be several reasons why the DLL is missing from the Steam client installation folder.

  • App interference – Missing Stream_api.dll issue commonly occurs when an antivirus installed on your PC blocks the DLL considering it suspicious.
  • Software conflicts – Conflicts between the Steam client and Windows can cause system-level related issues such as the one at hand.
  • Corrupt Windows Registry – Corrupt registry database damages the system configuration settings, which triggers errors like missing DLLs in Windows.
  • Malware or virus infection – Malicious software mess up your system and modify the essential system level and DLL files.
  • Program not installed properly – If the Steam client was interrupted during installation, the steam_api.dll might not have been installed. You can uninstall the affected apps and reinstall them again.

You can try the methods discussed below to replace the missing DLL file and play games on Steam without any errors.

How can I resolve the missing steam_api.dll issue?

1. Use a DLL fixer tool

Windows might be unable to recognize the DLL because of incompatibility with the game and Steam client. Resolving these inconsistencies yourself is not easy and may cause further damage.

To avoid this, you can use a reputable DLL-fixing software that can easily fix the system-level issues hogging your computer and can replace the steam_api.dll from the large library of DLLs it maintains to address the complexities arising from missing, corrupted, and overwritten DLL files.

2. Disable real-time protection

  1. Launch the Settings app using the Windows + I shortcut.
  2. Choose Privacy & security from the left sidebar and then the Windows security option from the right.Steam_api.dll
  3. Choose the Virus and threat protection option.steam_api.dll
  4. Follow the Manage settings located in the Virus and threat protection settings section.
  5. Toggle Off the switch under the Real-time protection section.

Windows Defender has been reported to block the steam_api.dll file considering it a potential threat. You can turn off the real-time protection feature in Windows Security before launching the Steam client.
If you have a third-party antivirus installed, you can disable it for time being.

3. Install DirectX

  1. Visit the official DirectX download website, select the relevant language from the drop-down, and press the Download button to initiate the DirectX Web Installer download.steam_api.dll
  2. Navigate to the download location, double-click to run the Web Installer, and follow the on-screen instructions to install all the packages.
  3. After the process is complete, reboot your PC and launch the Steam client and the game you intend to play.

Hopefully, the missing Steam_api.dll error will no longer bother you from you install DirectX. Several games and apps rely on DirectX for graphical support and for employing backend mechanics in the in-game systems.

DirectX is also equipped with several DLL files to help it function, which may alleviate the issue.

4. Update the display drivers

  1. Right-click the Windows icon on the taskbar and choose Device Manager from the Quick Links menu.steam_api.dll
  2. Expand the Display adapter category.
  3. Right-click the graphics driver and choose the Update driver option.steam_api.dll
  4. Choose the Search automatically for drivers option from the window.steam_api.dll

Wait for Windows to look for the best driver available and automatically install it on your system.
Steam clients utilize the graphics drivers to deliver exceptional gaming experience, and outdated graphic drivers may cause incompatibility between the DLL and the Steam app hence the error.

You can prevent multiple driver-related issues by using reliable driver update software and finding the latest and correct versions for all your device drivers.

5. Manually install the missing DLL

Remember you should always dread installing the DLLs and other system files from suspicious websites to avoid falling prey to malicious programs disguised as legitimate downloads. However, it is safe to download steam_api.dll from trusted online resources like DLL-files.com, which offers genuine DLL files.

You can also use an online virus scan tool to ensure the link is not infected before downloading the DLL. After downloading the DLL compatible with your computer’s OS version and architecture, you need to paste it into the installation folder of the Steam client.

Now execute the following command on Command Prompt to register the steam_api.dll on PC. regsvr32 steam_api.dll

That’s all! We hope the steam.api.dll not found error is now successfully resolved on your computer.

If you run into the missing DDraw.dll error, the solutions provided in this guide will help resolve it. Out latest guide covers what to do if awesomium.dll is missing, so don’t hesitate to check it out.

Were these methods effective in resolving the missing Steam_api.dll error? You can let us know in the comments section below.

Audiocontrol.dll Missing Error: 5 Ways to Easily Fix It

Audiocontrol.dll is a Dynamic Link Library developed by AverMedia Technologies. It contains the essential code, resources, and driver functions required by RECentral, a streaming and recording tool.

If the DLL file is missing or has become corrupted, the program will not be able to operate properly and may even fail to run.

Why is the audiocontrol.dll missing?

While it is not possible to rule out the exact cause, the following may be the possible reasons for this issue:

  • Missing system files – DLL-related errors, like the one you are facing, usually get triggered by faulty or corrupt system files.
  • Virus and Malware – Virus and malicious programs modify, delete and even overwrite the DLL, and, as a result, it can no longer be traced by Windows.
  • Incomplete installation – If the installation of RECentral was interrupted, the audiocontrol.dll might not have been installed in the first place. You can uninstall the program and then reinstall it back.
  • Outdated application – If the app hasn’t been updated for long, there can be incompatibilities with the system hence the error.

Fortunately, you can effortlessly resolve the missing audiocontrol.dll error using the methods discussed in this guide.

How do I fix the missing audiocontrol.dll error in Windows?

1. Use a DLL fixer

Incompatibility between the third-party app DLL files and Windows is the main reason the DLL files cannot be located on your computer.

Attempting to deal with system-level issues yourself messes up your system, so it is advised to use a dedicated DLL fixer that is effective against the DLL-related problems afflicting your PC.

Such tools include repositories of DLL files, which can instantly replace the missing or corrupt DLL files. Thus, they will come in handy to resolve the missing audiocontrol.dll file when launching the apps that require it.

2. Run SFC and DISM scans

  1. Press the Windows key to bring up the Start menu, type cmd in the search menu on top, and choose the Run as administrator option from the result section.AudioControl.dll
  2. Choose the Yes option on the User Account Control window.
  3. Type or paste the following command and hit Enter to execute it. SFC/scannowAudioControl.dll
  4. Wait for the SFC scan to complete, then execute the command given below. DISM /Online /Cleanup-image /RestorehealthAudioControl.dll

Wait for the DISM scan to fix the corrupt system images, and once completed, restart your PC.

Running the SFC and DISM scan will restore the missing or corrupt system files and, hopefully, resolve the missing audiocontrol.dll error you are facing at the moment.

3. Update the sound drivers

  1. Right-click the Windows icon on the taskbar and choose Device Manager from the Quick Links menu.AudioControl.dll
  2. Expand the Sound, video, and game controller category to view the list of sound drivers installed on your computer.
  3. Right-click the concerned driver and choose Update driver from the context menu.AudioControl.dll
  4. Choose Automatically search for drivers option from the pop-up window.AudioControl.dll

Alternatively, you can visit the manufacturer’s website to install the latest available driver.

Having outdated device drivers can cause discrepancies between the DLL file and AverMedia Recental which is why it is no longer recognized. In such a situation, updating the drivers should do the trick.

To avoid any potential damage to your PC, we suggest you try a dependable tool like Outbyte Driver Updater to detect outdated or malfunctioning drivers and find the newest updates from an extensive online database.

4. Scan your PC for viruses and malware

  1. Use the Windows + I shortcut to launch the Settings app.
  2. Choose Privacy & Security from the left navigation pane followed by Windows Security from the right.AudioControl.dll
  3. Next, select Virus & threat protection option.AudioControl.dll
  4. Click the Scan options located on the right side.
  5. Choose Microsoft Defender Antivirus (offline scan) and hit the Scan now button.AudioControl.dll

The Windows Defender program will scan your PC to eradicate viruses and malware eliminating your PC. You can also employ a third-party antivirus to remove viruses and malware damaging your system files.

5. Manually download the missing DLL

We always advise you to refrain from downloading and installing any DLLs from suspicious sources to avoid the risks involved.

But you can manually download and install the missing DLL from trusted websites such as DLL Files.

You should only download the audiocontrol.dll compatible with your OS and system architecture. Once downloaded, paste the DLL into the install directory of the affected app. You can also paste it in the following location to make it universally accessible. C:\Windows\System32

Now reboot your computer as you normally do, and Windows will recognize the DLL upon startup.

These easy-to-implement workarounds will help you replace the missing audiocontrol.dll file on your computer.

In case multiple DLLs are missing from your computer, refer to this guide to seek troubleshooting assistance.

Which of these methods mentioned in the guide helped resolve the audiocontrol.dll missing error? Mention it in the comment section below.

800F020B Windows Update Error: 4 Ways to Fix It

If you have encountered the error code 800F020B on your computer while applying Windows updates, this guide can help! 

We will discuss some expert-recommended methods to fix the issue right after talking about the causes.

What causes the 800F020B Windows Update error?

There could be several reasons for this update error; some of the common ones are mentioned here:

  • The printer doesn’t accept updates via Wireless connections – Printers generally won’t allow updating their firmware via a wireless connection. Try switching to a wired connection.
  • A driver update is not suitable – When the optional driver update pushed by Windows doesn’t apply to your device, you get this update error. Hide and unselect the update to fix the issue.
  • Pocket media drive is not connected – The error might occur if a pocket media fails to connect to your PC while Windows is updating its software. Reconnect the device to fix the error.
  • Corrupted driver – Windows tries to update that driver that is corrupted, so you get this error instead. One of the solutions below will help you with that problem.

Now you know the reasons for the update error, let us check out the solutions to fix it.

How can I fix the 800F020B Windows Update error?

We recommend you go through these preliminary checks:

  • Restart your computer and try again.
  • If the update concerns the printer, switch to the wired connection.
  • Reconnect the Pocket media drive if it is the reason for the Windows Update failure.

If these small tweaks don’t work for you, proceed with the advanced steps.

1. Hide the Windows Update

  1. Download the Microsoft Hide and Show troubleshooter.
  2. Double-click the downloaded file to open it and click Advanced.Hide and show troubleshooter 800f020b
  3. Now place a checkmark next to Apply repairs automatically and click Next.Apply repairs automatically
  4. Wait till the scan completes, and select Hide updates.Hide updates 800f020b
  5. You will get the updates available; select the optional one you want to hide and click Next.
  6. Wait for the process to complete, then restart your computer.

2. Restart the Windows Update service

  1. Press the Windows + R to open the Run window.services msc 800f020b
  2. Type services.msc and click OK to open the Services app.
  3. Locate and right-click the Windows Update service to select Stop. Wait for the service to stop.Windows update service stop 800f020b
  4. Again, right-click Windows Update service and choose Start. The service will start.Windows Update Start 800f020b
  5. Restart your computer and check if the issue persists.

3. Use the System Restore point

  1. Press the Windows key, type control panel, and click Open.Control panel 800f020b
  2. Select View by as Large icons and click Recovery.Recovery Windows 10
  3. Click Open System Restore.System restore 800f020b
  4. Select either the recommended restore point or click Choose a different restore point and then Next.Next Choose a different restore point
  5. Choose the restore point before encountering the 800F020B error and click Next.Restore your computer 800f020b
  6. Now click Finish to start the restoration process.Restore Finish

If the System Restore is not working as planned, we recommend you check out this guide for more help!

So, these are methods you can follow to fix the 800F020B Windows Update error. If you have any questions or suggestions, feel free to mention them in the comments section below.

0x80240440 Windows Update Error: How to Fix It

Many of our readers complained about encountering the Windows Update error 0x80240440 when updating their Windows Server machines for security patches.

In this guide, we will explore the expert-recommended fixes to get rid of this error right after discussing the causes.

What causes the 0x80240440 Windows Update error?

There could be various reasons for this update error; some of the common ones are mentioned here:

  • Malware infection – If your computer is infected with a virus, it could corrupt your system files required for the update. You need to run a deep scan to remove the infection.
  • Windows Update service – The Windows Update service must be up and running for the update to be successful; if it is not working properly, you may see this error.
  • Windows Registry issues – If the registry entries are broken or missing, you might encounter a Windows update error. A registry cleaner would help a lot in this situation.
  • Network issues – To successfully install updates on your Windows server, you need an uninterrupted and stable network connection. The update may fail if you have a poor connection.

Now that you know the causes of the error, let us move on to the fixes to resolve the problem.

How can I fix the 0x80240440 Windows Update error?

1. Delete the cache from the Windows Update folder

1.1 Stop the Windows Update service

  1. Press Windows + R to open the Run window.Services Run command 0x80240440
  2. Type services.msc and click OK to open the Services app.
  3. Locate and right-click Windows Update and select Stop.Stop 0x80240440
  4. Wait for the service to stop and minimize the window.

1.2 Delete the DataStore folder

  1. Press Windows + R to open the Run window.DATASTORE PATH 0x80240440
  2. Type the following path and click OK: %windir%\SoftwareDistribution\DataStore
  3. File Explorer will open with the DataStore folder on the screen, press Ctrl + A to select all content and click the Delete button to remove all content.Delete DATA STORE CONTENT

1.3 Restart the Windows Update service

  1. Now go to Services again.
  2. Locate and right-click Windows Update and select Start.Start 0x80240440
  3. Wait for the process to start, then close the Services window.

2. Delete the WUServer and WIStatusServer entries

  1. Press Windows + R to open the Run window.Regedit 0x80240440
  2. Type regedit and click OK to open Registry Editor.
  3. Navigate to this path: Computer\HKEY_LOCAL_MACHINE\SOFTWARE\Policies\Microsoft\Windows\WindowsUpdate
  4. On the right pane, locate, and right-click WUServer & WIStatusServer, to clean the download path.Files delete 0x80240440
  5. Reboot your server to confirm the changes.

3. Run an SFC scan

  1. Press the Windows key, type cmd, and click Run as administrator.CMD elevated 0x80240440
  2. Copy and paste the following command to repair the system files and hit Enter: sfc/scannowSFCSCANNOW CMD
  3. Wait for the process to complete, then restart your server.

 4. Disable the Application Control in Sonicwall NSA

  1. Go to Firewall, then click App Control Advanced.
  2. On the App Control Advanced page, you can sort your search results.App control advanced 0x80240440
  3. For Category, choose a category from the drop-down menu; for Application, select an app and for Viewed by, select Signature.
  4. You can also type in the Lookup Signature ID if you know it.
  5. Click Configure icon (pencil-shaped) to edit the settings.
  6. You will get the App Control Signature Settings window; for the Block option, select Use App Settings (Disabled) and click OK.User settings disabled 0x80240440

Sonicwall NSA might cause network connectivity issues if the Application Control is enabled. You can check if any firewall settings are blocking the traffic, causing this Update error.

So, these are the methods you can follow to fix the 0x80240440 Windows Update error. If you have any questions or suggestions, feel free to mention them in the comments section below.

Error 0x87d1fde8: What Is It & How to Effectively Fix It

Error 0x87d1fde8 usually appears when using Windows Intune or Azure Active Directory (Azure AD) for enrollment.

This issue will prevent you from adding new accounts, so it’s crucial to fix it, and this guide will show you how to do it properly.

Why does 0x87d1fde8 (2016281112) error appear?

The issue appears if the device isn’t enrolled in Intune or if the policy isn’t configured properly. You can also get this error if the device doesn’t meet the compliance requirements or if you have conditional access enabled.

How can I fix error 0x87d1fde8?

Before trying anything else, ensure that your device is connected to the Internet and enrolled in Intune. Also, your device needs to be compatible with your policies.

You also need to review your policies and make sure that Windows is up to date.

1. Disable conditional access

  1. Sign in to your Azure account.
  2. Click on the Menu at the top left corner and select Azure Active Directory.
  3. Select Protect & secure on the left pane, then click on Conditional Access.
  4. Under the Access policy option, toggle it Off.

Conditional access is a security feature that you can use with Intune to help keep corporate data protected. If you are worried about disabling this feature, you can create a custom policy for unsupported devices.

2. Re-sync the policy

  1. Hit the Windows key and click on Settings.
  2. Click on Accounts on the left pane, then Access work or school on the right pane.
  3. Locate your account connected to your AD account and click on Info.
  4. Select Sync under Device sync status.

How do I know if my device is enrolled in Intune?

  1. Hit the Windows key and click on Settings.
  2. Click on Accounts on the left pane, then Access work or school on the right pane.
  3. Locate your account connected to your AD account.
  4. Check whether the Info option is available. This is the confirmation that assures you that you have enrolled your device in Intune.

Alternatively, you can sign in to the AD portal and view your devices using the Intune device status page. 

If this doesn’t work, check and disable your VPN if it is active. Elsewhere, you may come across the error 0x87d101f4, an Intune compliance error. Find out how to bypass it easily in our expert article.

We also share a step-by-step process on how to sync your devices with Intune, so be sure to check out our article on the same.

If you encounter any problems, we have a guide on what to do if The sync could not be initiated in Intune.

Drop us a comment below if we missed a solution that helped you in a similar situation.