Fix File Explorer Freezing / not Responding & More Issues

Many users have already switched to Windows 10, but some users that have switched to Windows 10 are experiencing specific issues.

Some users are having file explorer problems with Windows 10, but fortunately, there are a few solutions that you can try.

So, if you need any information on how to fix File Explorer not showing, you have come to the right place to do so.

Why does my File Explorer keep freezing?

It can happen for multiple reasons, as you are about to see. The following are the most common triggers:

Keep in mind that some applications or services running on your PC may be causing Windows Explorer to stop working.

Issues with this feature are relatively common in all versions, and many users reported that File Explorer is lagging in Windows 11.

That’s not the only issue, File Explorer crashes in Windows 11 have been occurring for some users as well, but luckily there are ways to fix them.

File Explorer problems can be rather annoying, and in this article, we’re going to cover the following issues:

  • File Explorer Windows 10 not responding, working, opening, loading, showing – There are various problems with File Explorer that can occur, and in this article, we’re going to show you how to fix most of these problems.
  • Windows 10 File Explorer hangs – Many users reported that File Explorer depends on their PC. This can be an annoying problem, but you might be able to solve it by using one of our solutions.
  • Windows 10 File Explorer won’t open, keeps closing – According to users, they are unable to start File Explorer on their PC. According to them, File Explorer keeps closing and won’t stay open at all.
  • File Explorer Windows 10 slow, crashes – Many users reported crashes and slowdowns while using File Explorer. We already covered File Explorer crashes and File Explorer slowdowns, so be sure to check those articles for more information.
  • File Explorer freezes Windows 10 – Many users reported that File Explorer freezes on their PC. We already covered this issue in our File Explorer freezes article, so be sure to check it out for more solutions.
  • File Explorer slow and freezing OneDrive in Windows 11 – Check for any Windows updates, or take a look at our dedicated page on Windows 11 File Explorer freezes.
  • Windows Explorer keeps freezing and not responding or crashing – Hide hidden files and folders as they might restrict the functionality of Explorer.
  • Windows Explorer freezes when selecting file / multiple files – Restart the explorer.exe process inside Task Manager.
  • File Explorer freezing when searching, saving, right-clicking, opening files – Perform a clean boot in order to start only with the necessary processes and apps.

Users report problems with Windows Explorer saying that Windows Explorer crashes or that it hangs when the user right-clicks something.

As you can see, this is a big problem since it can drastically limit your user experience, so here are a few solutions you might want to try.

How do I fix a corrupted File Explorer that keeps freezing?

1. Run netsh and winsock reset

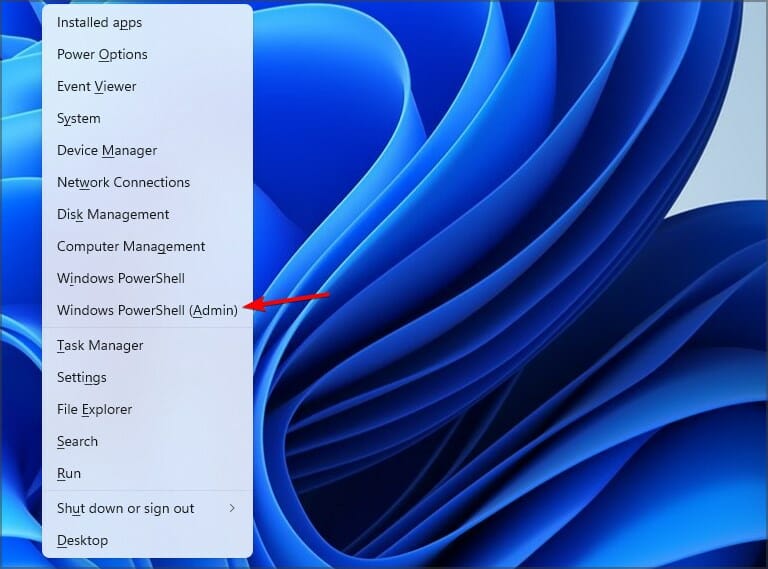
  1. Run Command Prompt as administrator. You can do so by pressing Windows key + X and choosing Command Prompt (Admin) from the menu. In addition, you can type cmd in the Search bar, right-click the Command Prompt, and choose Run as administrator.
    File Explorer Windows 10 slow
  2. Type netsh in Command Prompt and press Enter.
  3. Next, type Winsock reset into Command Prompt and hit Enter to run it.
  4. After the process is completed, you’ll be notified, and then you need to restart the computer for changes to take effect.

2. Uninstall KB3081449 and KB3081448 updates

Several users reported that update KB3081449 was the cause of the issue, so let’s see how to delete it.

  1. Go to Settings and navigate to the Update & Security section.
    Windows 10 File Explorer hangs
  2. Next, go to View installed update history > Uninstall Updates.
    Windows 10 File Explorer keeps closing
  3. Find update KB3081449 and uninstall it. If this doesn’t help, find update KB3081448 and uninstall it.

3. Hide hidden files and folders

If you’re having problems with File Explorer, such as crashes, you might be able to fix the issue simply by hiding hidden files and folders. Some files are hidden by default, but you can reveal them by changing your settings.

If hidden folders are revealed, you might experience issues with File Explorer, so you should revert these settings by doing the following:

  1. Press Windows Key + S and enter file explorer options. Select File Explorer Options from the list of results.
    Windows 10 File Explorer hangs
  2. When the File Explorer Options window opens, go to the View tab and select Don’t show hidden files, folders, or drives. Then, click on Apply and OK to save changes.
    Windows 10 File Explorer won't open

After making these changes, the problem with File Explorer should be resolved. Many users reported that this solution worked for them, so try it out.

4. Enable Launch folder windows in a separate process

Another way to fix File Explorer problems on Windows 10 is to enable Launch folder windows in a different process option. This is relatively simple, and you can do it by following these steps:

  1. Open File Explorer Options as we showed you in the previous solution.
  2. Now navigate to the View tab and check Launch folder windows in a separate process. Click Apply and OK to save changes.
    File Explorer Windows 10 not responding

This solution reportedly worked for many users, so we strongly encourage you to try it out.

5. Disable Quick Access and File Preview features

    If you’re having File Explorer problems, you might be able to fix them simply by changing a few settings. According to users, you have to disable Quick Access and File Preview features.

  1. 1. Open File Explorer Options.

    fix-file-explorer-problems-windows-10
  2. 2. In the General tab, set Open File Explorer to This PC. Now uncheck Show recently used files in Quick access and Show frequently used folders in Quick access options. Click the Clear button to get rid of the history.

    Windows 10 File Explorer hangs
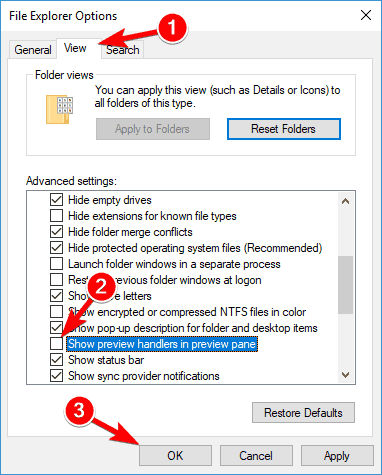
  3. 3. Now go to the View tab and uncheck Show preview handlers in the preview pane. Now, click on Apply and OK to save changes.
    Windows 10 File Explorer won't open
  4. 4. Lastly, make sure that the preview pane is disabled. You can disable it once you open File Explorer by pressing Alt + P on your keyboard.

After changing these options, check if the problems with File Explorer still appear.

6. Perform a clean boot

Sometimes specific startup applications can interfere with your PC and cause File Explorer problems. However, you can easily find the problematic application using a clean boot.

To do that, you need to follow these steps:

  1. Press Windows Key + R to open the Run dialog. Now enter msconfig and press Enter or click OK.
    File Explorer Windows 10 crashes
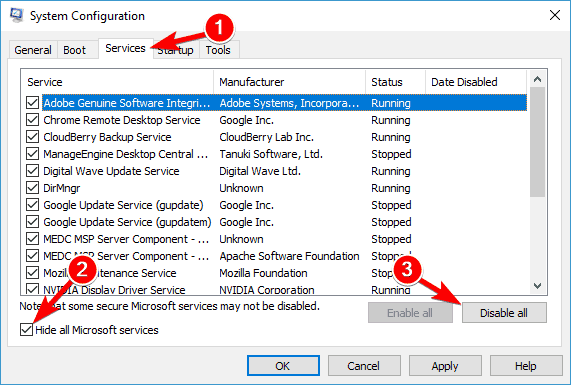
  2. Navigate to the Services tab, check to Hide all Microsoft services, and click on Disable all button.
    File Explorer freezes Windows 10
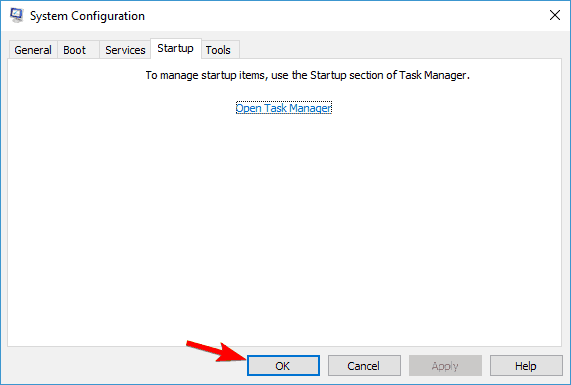
  3. Go to the Startup tab and click on Open Task Manager.
    File Explorer Windows 10 not opening
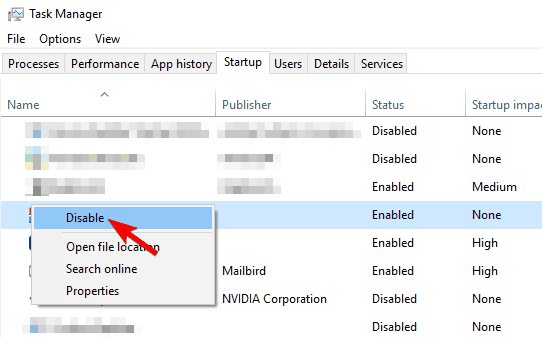
  4. A list of startup applications will now appear. Right-click the first entry on the list and choose Disable from the menu. Repeat this step for all entries on the list.
    Windows 10 File Explorer hangs
  5. Once you disable all startup applications, go back to the System Configuration window. Now click on Apply and OK to save changes.
    Windows 10 File Explorer won't open
  6. When asked to restart your PC, could you choose the option to renew it now?

Once your PC restarts, check if the problem with File Explorer still appears. If not, it means that one of your disabled applications or services was causing the issue.

To find the problematic application, you must repeat the steps above and enable applications and services individually or in groups.

Remember to save changes and restart your PC to apply them. Once your PC restarts, check if the issue appears. Keep enabling applications and services until you find the problematic application.

Once you find the problematic application, you can disable it, uninstall or update it and check if that solves the issue.

Many users reported that disabling startup applications fixed the problem for them, so be sure to try this solution.

Otherwise, you have the alternative of using different file management tools that certainly improves your workflow. Thus enjoy practical features and choose between the best file manager software.

7. Reset the file associations

If you have File Explorer problems such as freezing, the problem might be related to your file associations.

However, you can quickly fix that problem by resetting file associations to default. To do that, follow these steps:

  1. Open the Settings app. You can do that quickly by pressing Windows Key + I.
  2. Once the Settings app opens, navigate to the Apps section.
    File Explorer freezes Windows 10
  3. From the menu on the left select Default apps. In the right pane, scroll down to the Reset to the Microsoft recommended defaults and click the Reset button.
    File Explorer Windows 10 not loading

After resetting file associations to default, the problem with unresponsive File Explorer should be resolved.

8. Remove IDT Audio

According to users, many File Explorer problems can be caused by IDT Audio; to fix them; you need to remove this application. Once you remove it, it’s advised to delete all associated files and registry entries.

This is too complicated to do manually, so removing IDT Audio might be a good idea using uninstaller software.

Many great uninstaller tools are available, but many users reported that they removed this application and all its files using CCleaner (free download), so feel free to download it and try it.

It is excellent software from IObit, and it will help you remove all the leftovers of an app or program so they won’t interfere with your system’s functionalities. This is very useful; many programs use multiple directories and registry entries.

Once you remove IDT audio, the problem should be resolved entirely, and your File Explorer will start working again.

9. Change scaling settings

File Explorer problems can sometimes occur due to your scaling settings. For example, users reported that their File Explorer isn’t responding, but they managed to fix that issue with this simple trick.

Remember that this solution only works if you’re using scaling higher than 100%. To change the scaling, do the following:

  1. Open the Settings app and go to the System section.
    File Explorer freezes Windows 10
  2. Set the size of text apps and other items to 100%.
    File Explorer Windows 10 not working
  3. Check if File Explorer works. If it does, resize it and make it smaller than usual.
  4. Now restore scaling back to the original value.

After doing that, the problem should be resolved, and you’ll be able to use File Explorer without any problems. However, remember that this might not be a permanent solution, so you’ll have to repeat it if the problem reappears.

10. Make sure that your PC is set for dual monitors

According to users, File Explorer can become missing if your PC is configured for dual monitors. File Explorer can open on a second monitor that isn’t currently attached, so it might seem that File Explorer isn’t working for you.

However, you can quickly fix that by changing your computer configuration and setting your PC to work with only a single monitor.

Are you looking for the best dual-monitor software for Windows? Look no further, as here are the best options.

How to reset File Explorer in Windows 10?

  1. Press Ctrl + Shift + Esc to open Task Manager.
  2. Locate Windows Explorer on the list.
  3. Right-click it and choose Restart from the menu.

Keep in mind that a few users reported that Windows couldn’t find explorer.exe, making this process much harder to complete.

How can I fix File Explorer problems on Windows 11?

If you started experiencing File Explorer issues, restart File Explorer on Your Windows 11 PC as a first measure.

You can follow that with a PC restart. If you are still experiencing trouble, be sure also to clear the Windows 11 File Explorer’s Cache.

Check Windows Update for the latest software, use the System Maintenance Tool, and most importantly, scan your Windows 11 PC for Viruses and Malware.

Can I uninstall and reinstall File Explorer?

To answer this, yes, you can delete it if you have administrative access to the file system. But is it worth it?

Remember that you would no longer have a desktop to work with since the explorer.exe file is what you would be deleting.

Remember that this executable has two functions. Its first instance provides you with what you see as the Windows desktop environment. Any other model is what provides the File Explorer application.

As you can see, problems with file explorer can seriously limit your Windows 10 user experience, but we hope that these solutions were helpful to you.

If you have had File Explorer working on it for too long, it’s time to take action. If your File Explorer is not responding on your Windows 11 PC, refer to the solutions above.

You can also encounter situations where your File Explorer is not responding on Windows 10, but the solutions are still the same.

Explorer.exe not responding on startup will imply that measures need to be taken to solve the entire problem.

Remember that many users have reported File Explorer not responding when opening Microsoft Word, so if you are in the same situation, again, refer to the steps above.

If you have any comments, questions, or suggestions, reach for the comments section below.
Blue Yeti not Recognized: 4 Tips to Have Your Mic Detected

Blue Yeti microphones are well-known between Youtubers and users as an excellent piece of hardware for recording audio, from music to podcasts.

The reason is that the price-to-quality ratio is amazing. But many of them experience some connection or driver problems that make the mic unusable.

From a faulty USB cable to some corrupted drivers or anything in between, the issues pile up. For more info on how to do that, check the guide below.

Why is my blue yeti not recognized?

Because of hardware limitations, the connection to the microphone might be somewhat loose. It’s possible that the USB port didn’t detect the microphone you plugged in, resulting in the Blue Yeti X USB not recognized issue in Windows 10, and more.

Before you may use your Blue Yeti microphone, there are a few software-related requirements that need to be satisfied. This is true even if the microphone itself is fully operational.

Even after this, there are still things like the loudness of the system and the devices that produce audio that can change or halt the input that comes via the microphone.

Does Blue Yeti work with Windows 11?

Yes, Blue Yeti works with Windows 11. Though some users reported issues, it’s usually the drivers to blame and simply updating or reinstalling them fixed things.

Also, you must check the connections and try plugging the device into a different USB port on the computer.

Does Blue Yeti require drivers?

Yes, Blue Yeti requires drivers, but you won’t have to download and install them manually.

Just plug in the device, and it should start working automatically. Though if you encounter issues with it, the following solutions could help.

How do I fix Blue Yeti microphone if it’s not recognized?

1. Update, uninstall, or reinstall Blue Yeti drivers

  1. In order to fix the Blue Yeti won’t connect to PC issue, right-click the Start icon then select Device Manager.device-manager-w10 amd driver install problems
  2. In Device Manager find Sound, video and game controllers and expand it.Sound, Video and Game Controllers blue yeti microphone
  3. Find your Blue Yeti X drivers, right-click them and choose Update driver.
  4. When the new window appears, choose Search automatically for updated driver software and wait for the process to finish.automatically-search bluetooth not working windows 10

You can follow the same steps to disable or uninstall the device. Also, you can uninstall your mic, disconnect it from the PC, reconnect it and allow Windows 10 install the drivers.

  1. Download the driver from the manufacturer’s website.
  2. After the download has finished, right-click the installer and choose Proprieties.
  3. Go to the Compatibility tab.
  4. Under Compatibility mode, check Run this program in compatibility mode for and choose Windows 7.compatibility mode windows 10 blue yeti mic not recognized
  5. Click Apply and OK.

The Blue Yeti not recognized issue in Windows 10, 11, and Mac might also have been caused by a faulty installation, so in order to fix the issue, it’s best to remove, then reinstall the drivers. After this, your Blue Yeti drivers will work perfectly in Windows 10.

1.1 Update your drivers with an advanced tool

Improve the performance of your hardware with this professional software that can scan your device at light speed and provide an accurate report of all the drivers that need updating.

With this app, you have a database of over 18 million new files that you can download in order to to keep your system running smoothly all the time. Rely on the Schedule Manager feature to not miss any updates.

2. Inspect the hardware

  1. If Blue Yeti is not showing up in Device Manager, check your hardware – verify that everything is in working condition.
  2. Make sure your mic is turned on and functioning, and your Windows 10 PC doesn’t have any unknown problems.
  3. Check the connection – one of the most common problems is the cable.
  4. Try connecting the mic to another PC, if possible, and see if that helps.
  5. If not, change the cable and verify the integrity of the cable on both ends.

This seems like an obvious and quite silly fix, but you have to know that Blue Yeti mic’s only work on a USB 2.0, and not on USB 3.0.

Changing the USB helped the majority of users, as well as those who reported their Blue Yeti is not recognized by Mac, and it could also help you save a lot of time and hassle.

If the Blue Yeti microphone is not detected, then a good idea is to check your hardware and verify if the cables are working properly. If this doesn’t fix the problem, see our next solution.

3. Run the Playing Audio troubleshooter

  1. Go to Start, then select Settings.
  2. Click on Update & Security.
  3. In the left sidebar, select Troubleshoot.Troubleshoot blue yeti microphone not recognised
  4. In the right section, click on Playing Audio and then on Run the troubleshooter.
  5. Wait for the process to finish.The Blue Yeti Nano not detected issue will be solved.

When the Blue Yeti device is not recognized on your Windows 10, then it’s time you perform some troubleshooting, which in this case is quite easy to do if you follow our guide.

4. Set Blue Yeti as the default device

  1. Right-click the Speakers icon in the bottom left of your Windows 10 display.
  2. Click on Sounds.
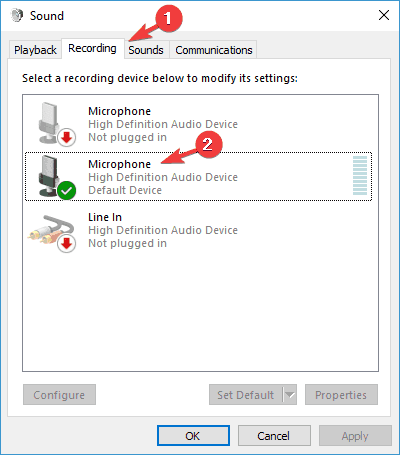
  3. Select the Recording tab.
  4. Find your Blue Yeti microphone, right-click it, and select Set as Default Device.sound settings microphone blue yeti mic not recognized
  5. Click Apply and then OK. The Logitech G Hub not detecting Blue Yeti issue will be fixed.

Another efficient option you can resort to if your computer is not recognizing Blue Yeti, is to set Yeti as your default device. Start off by opening the Sound menu then follow our instructions.

How do I get my Blue Yeti mic to work on Windows 11?

  1. Press Windows then type services and open the top result.services-search blue yeti not recognized
  2. Here, scroll down until you see the Windows Audio service, right-click it and choose Restart.windows-restart blue yeti not recognized

The Windows 11 Blue Yeti drivers can be updated in the same manner you do in Windows 10. Besides this, restarting the Windows Audio service will address the issue as well as the Blue Yeti recognized as USB advanced audio one.

As you can see there are various solutions you can resort to if the computer is not recognizing your Yeti mic.

From updating your drivers using a specialized tool to troubleshooting following our instructions we are sure that at least one of the solutions in this guide will help you fix the problem.

If you have any more questions about Blue Yeti mic’s on Windows 10/11, feel free to drop them in the comments section below.

3 Methods to Restore Windows 10 Registry Without Backup

The Windows Registry has low-level settings that run your entire system. However, you risk breaking the operating system when you edit values or keys in the Registry. If this happens, your only option is to restore Windows 10 Registry without backup.

You have to restore without backup because Windows 10 stopped automatically backing up the system registry since version 1803. So, you’d notice that the system32regback folder is empty.

You can still restore the Windows registry without a backup, so don’t be concerned. In this post, we’ll go through various techniques you may use to convert the Registry without a backup.

Does Windows 10 have a backup registry?

There is not an automatically backed-up Registry on Windows 10, but you can and, in most cases, should create a backup to your Registry before changing its values.

You have to export the Registry to its current location before effecting the changes, and this exported data will serve as a Registry backup when needed.

Can you restore registry files?

As we said, you will need to export Registry data to create a backup; the inverse is the case for data restoration. You should import the exported data, and you are good to go.

Some of our readers asked how to reset Registry in Windows 10 but the key word here is to restore, or to fix, not to reset.

The only way how to reset regedit to default is by performing a PC reset which is not preferable and it’s one of the last resort solutions.

Does System Restore reset registry?

It doesn’t really reset the Registry but reverts any changes made from the time the chosen restore point was created.

So, if your aim while performing a System Restore is to reset the Registry due to a particular change, we recommend either choosing a restore point created before the concerned change was made or factory resetting Windows.

How can I restore the Windows 10 registry without backup?

1. Restore Registry manually on Windows 10

  1. Click the Windows key, type regedit into the search box, and click on Registry Editor to open it.
    restore registry without backup
  2. Navigate to the path below.
    HKEY_LOCAL_MACHINE \ SYSTEM \ CurrentControlSet \ Control \ Session Manager \ Configuration Manager
    system32regback-is-empty-configuration-manager
  3. Right-click on Configuration Manager and go to New > DWORD (32-bit) Value.
    restore-registry-windows-10-without-backup-add-dword-value
  4. Set EnablePeriodicBackup as the name of this registry value, give EnablePeriodicBackup the Value of 1, and close the Registry Editor.
  5. Reboot your computer.
  6. On restarting, Windows will create its first backup.

2. Use the Task Scheduler

  1. Click on the Start Menu button.
  2. Search for Task Scheduler and click the result to open it.
    restore registry without backup
  3. Go to this path:
    Task Scheduler Library > Microsoft > Windows > Registry
  4. Right-click on RegIdleBackup and select Run.
    restore-registry-windows-10-without-backup-task-scheduler

This procedure triggers the task to run and back up the Windows 10 registry. It overwrites any older backups in the RegBack folder.

3. Restore Registry in Windows 10 without backup using CMD

  1. Press the Windows key + I combination to open Settings.
  2. Select Update & Security.
  3. Click on the Recovery option, and under the Advanced startup section, select Restart now.
    restore registry without backup
  4. Select Troubleshoot after the machine reboots, then Advanced options.
  5. Choose Command Prompt.
  6. In Command Prompt, enter your Windows drive letter, then hit Enter.
  7. Confirm that you’re in the correct drive:
    dir
  8. If the letter you entered in step 7 was incorrect, return to this step and correct it.
  9. Type the script below, then hit Enter to go to the System32 folder.
    cd d:windowssystem32
  10. Type the script below, then hit Enter to create a backup folder called configBak.
    mkdir configBak
  11. Copy and paste the script below, then hit Enter to back up the config folder.
    copy config configBak
  12. Type the script below, then hit Enter to enter the RegBack folder.
    cd configRegBack
  13. Type the script below, then hit Enter to copy the data RegBack to config.
    copy *...*
  14. Confirm every operation by pressing Y and Enter.
  15. Close the Command Prompt window.

On closing Command Prompt, your machine will restart and generate a backup. It would help if you had successfully been able to restore Registry in Windows 10 to default using the cmd prompt.

How to restore the Registry without backup on Windows 11?

  1. Press the Windows key + I combination to open Settings.
  2. Select System, then click on Recovery on the right pane.
  3. Choose Restart now under the Recovery option.
  4. Select Troubleshoot after the machine reboots, then Advanced options.
  5. Choose Command Prompt.
  6. In Command Prompt, enter your Windows drive letter, then hit Enter.
  7. Confirm that you’re in the correct drive:
    dir
  8. If the letter you entered in step 7 was incorrect, return to this step and correct it.
  9. Type the script below, then hit Enter to go to the System32 folder.
    cd d:windowssystem32
  10. Copy and paste the script below, then hit Enter to create a backup folder called configBak.
    mkdir configBak
  11. Type the script below, then hit Enter to back up the config folder.
    copy config configBak
  12. Copy and paste the script below, then hit Enter to enter the RegBack folder.
    cd configRegBack
  13. Type the script below, then hit Enter to copy the data RegBack to config.
    copy *...*
  14. Confirm every operation by pressing Y and Enter.
  15. Close the Command Prompt window.

On closing Command Prompt, your machine will restart and generate a backup. This process is very similar to Windows 10 except for minor UI changes in the Settings app.

How do I know if my Registry is corrupted?

After running the command, the SFC software will notify you whether it discovered or fixed any corrupt files.

This makes the application a valuable tool for determining if any registry items on your computer are damaged.

You must run the script below on a Command prompt with elevated privileges:

sfc /scannow

Note that using this tool may take as much as 30 minutes as it has to crawl through your entire drive.

Does restoring Registry delete files?

It depends on how you restore the Registry. If you go with the System Restore, the files stored on the computer won’t be affected.

While if you reset the OS to restore the Registry, you are bound to lose the programs, files, and configured settings on the PC. There’s a third and simpler way, restore the Registry using a dedicated backup, which wouldn’t affect the unconcerned parts of the OS.

In this article, we have shown you how to restore the Registry to default.

After performing these operations, you would have learned how to restore Windows 10 and 11 Registry without backups.

This guide also shows you how to enable the backing up of the Windows 10 registry. If you cannot restore the Windows registry using these solutions, let us know with a comment below.

JAR Files Not Opening: 7 Solutions to Fix

Many websites use Java to provide you with certain functionality. In addition to websites, you can download Java on your PC and open Java applications locally.

Java applications are saved as .jar files, but many users report that the files are not opening on Windows 10. While this can be a big problem, there’s a way to fix it!

In this article, we will guide you with easy-to-follow step-by-step instructions to solve the issue.

Why can’t I open a JAR file on Windows 10?

File association is the primary reason you can’t open a JAR file on your Windows 10/11 PC. Thankfully, this can be fixed by using a simple application dedicated to that purpose.

Another known cause of this issue is the outdated or faulty Java Runtime Environment app. A simple update or reinstallation should fix the JAR files not opening problem.

How do I fix jar files not opening on Windows 10?

1. Reinstall or update Java Runtime Environment

  1. Press Windows key + I to open Settings.
  2. When the Settings opens, go to the Apps section.
    apps jar files not opening
  3. Locate Java from the list and choose the Uninstall option.
    uninstall
  4. After that, navigate to Java’s website and download the latest software version.
  5. Open the folder where you saved it, right-click the Java install wizard and select Run as administrator.
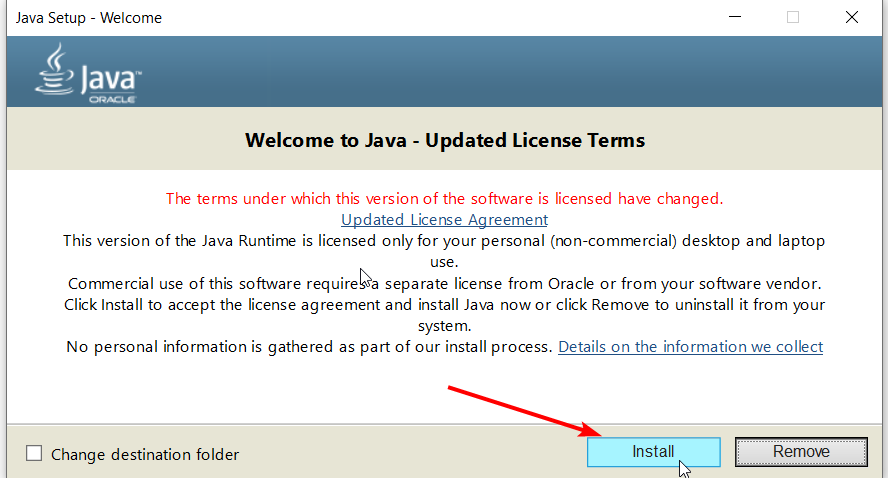
  6. Press the Install button to install Java.
    install jar files not opening
  7. Once installed, check if the problem is resolved.

Remember that you don’t need to remove your previous Java installation, so you can skip that step and install the latest version on top.

Java will also automatically check for updates, and if updates are available, you’ll get a notification.

To update Java, click the notification and choose the Update option. Now follow the instructions to complete the update.

Also, ensure your system has the correct version (32-bit or 64-bit). You will not be able to use 64-bit libraries with 32-bit Java software installed. This should fix the issue if the JAR file is not opening on double click.

2. Use an advanced Windows file utility

You can open .JAR files and hundreds of different formats with a single application. FileViewer Plus 4 is a universal file viewer for Windows that can open and display over 400 different file types.

You can also browse, edit, and convert text and image files. Furthermore, it features a decompression tool so you can quickly decompress your archived files.

It is a great tool to try when you have to open files that you aren’t sure what software you should use. File Viewer can open less common file formats, like source code files.

⇒ Get File Viewer Plus

3. Set file association

  1. Right-click the JAR file and choose Open with > Choose another app.
    open with
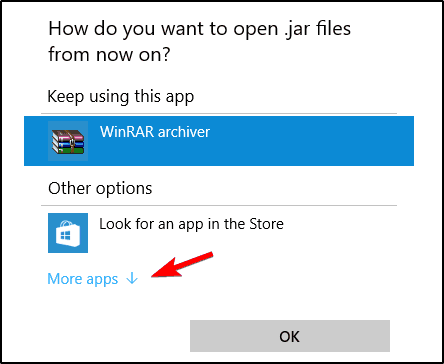
  2. A list of suggested applications will appear. Click on More apps.
    more apps
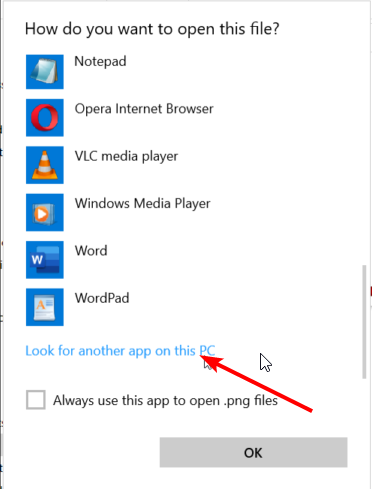
  3. Scroll down and choose Look for another app on this PC.
    look for
  4. Locate the java.exe file. It is usually located in Program Files/Java/Javaversion/Bin folder.
    java jar files not opening
  5. Select the application and click the OK button to set it as a default for .JAR files.
  6. Click the Jar file to launch its program.

JAR files can’t run on your PC if you don’t have the proper associations. For example, JAR files can be associated to run with other applications, or they could lack file association completely.

4. Use Jarfix

If you can’t open JAR files on Windows 10, you might be able to fix the problem by using Jarfix. As previously mentioned, these problems can occur due to file association, but you can fix them easily with this simple application.

To do that, firstly download Jarfix from the below link, then run the application and follow the instructions on the screen. Remember that you must run this application as an administrator to work correctly.

After using this application, you should be able to run JAR files on Windows 10 without any issues.

5. Create a .bat file

  1. Locate your JAR file and in the same folder, create a new Notepad file.
  2. To do that, right-click space in the directory and choose New > Text Document.text document jar files not opening
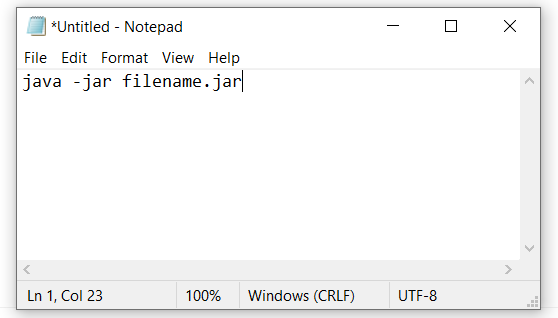
  3. When Notepad opens, enter Java -jar filename.jar , where  filename.jar is the actual name of the Jar file.
    notepad
  4. Navigate to the File > Save as.
    save as
  5. Set Save as type to All files and enter the desired name for the file.
  6. You need to have .bat as an extension, or else the solution won’t work.
    all files
  7. Save the file in the same location where your jar file is located.
  8. Locate your .bat file and double-click it. Your JAR file will now open.

According to users, you can run JAR files on Windows 10 by using this simple workaround. This solution requires you to create a .bat file and use it whenever you want to run a specific JAR file.

Remember that you need to repeat this process for every jar file you want to run on your PC. In addition, be sure to save the .bat file in the exact location as your JAR file.

6. Run it with Command Prompt

  1. In the Windows search bar, type Command Prompt and choose Run as administrator.
    cmd
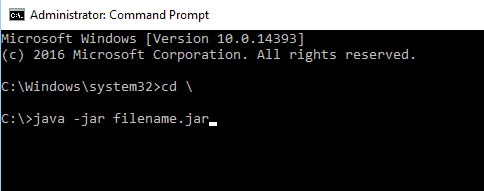
  2. When Command Prompt opens, enter the following commands: cd java -jar filename.jar
  3.  After doing that, your JAR file should open without any issues.

Keep in mind that you don’t have to move your JAR file to the root directory, but by doing so, you can access the file faster. If you choose not to move the file, you need to use the cd command to navigate to the directory where the JAR file is located.

Alternatively, you can enter java -jar followed by the path to the JAR file. This isn’t the best solution, but it is a solid workaround, so feel free to try it.

6. Use JAR Runner

Another freeware application that can help you open JAR files on Windows 10 is JAR Runner. Download and install this tool and drag and drop the jar file to the JAR Runner .exe file.

In addition, you can also choose to open JAR files with JAR Runner. This is a simple and free application, so download JAR Runner.

7. Check if your extension is correct

  1. Locate the problematic JAR file in File Explorer.
  2. Go to the View menu and check File name extensions.
  3. Now, check if your jar file has a .jar extension at the end.
  4. If not, rename the file and change the extension to .jar.
  5. After doing that, try to rerun the file.

If this problem persists, you might want to check your browser. Sometimes, it can download JAR incorrectly and can cause this problem to appear.

To fix it, be sure to use a different browser to download the file and check if that solves the problem.

How do I open .JAR files on Windows 11?

Opening JAR files on Windows 11 is the same process as on Windows 10. You can use a dedicated app or advanced Windows file utility.

If you have problems opening the files, you can use the solutions listed in this guide.

How do I unpack a JAR file?

The easiest way to unpack a JAR file is to use software to extract the compressed files. You will need to open the JAR file within the program extractor and access the individual folders.

While Windows has a built-in file extractor, it is advisable you use a dedicated tool like WinRAR.

JAR files not opening on Windows 10 can be a big problem, especially if you use Java applications frequently. However, you should be able to fix the problem simply by using one of our solutions!

If you want to know how to install Java on Windows 11, you can check our excellent guide to do it effortlessly.

Let us know if one of the fixes in this guide worked for you in the comments below!

Windows Product Key Not Working: How to Activate Windows 10 / 11

Is Windows activation or product key not working on your PC? If yes, we suggest you to go through this article.

The product key helps activate Windows and ensures that it’s a genuine copy, not registered on more devices than permitted. However several users have reported Windows product key not working instances.

It turns out that Windows 10 or 11 is not accepting the product key made of 25 characters.

This does not necessarily indicate that the key you have is no longer valid, as the error message suggests. There are a lot of reasons why you cannot activate your copy of Windows 11.

The trick here lies in identifying what’s causing the issue on your computer. We have dedicated this guide to simplifying the troubleshooting process and getting your copy of Windows 11 activated.

Go through it and by the time you are done, the OS would be activated.

Why can’t I activate my Windows 10 Pro?

There are several reasons you may not be able to activate Windows 10 or 11 Pro on your computer. It includes the following ones:

  • Incorrect product key
  • Hardware changes
  • The product key has been used on a maximum number of devices
  • Using product a key of a different version of Windows
  • Connection issues

Else, there may be other factors that may prevent you from activating Windows 10 Pro.

One of the most common reasons why Microsoft is not accepting your product key is when the one entered has already been used on the maximum allowed devices.

In this case, you must buy a new copy of Windows 10/11 or a product key.

Other than that, some users also fell victim to counterfeit or incorrect keys. There are many websites that claim to offer genuine product keys for free or at a reduced price.

But, these are not reliable, and it’s recommended that you buy one from an official source. Also, there’s a likelihood that the Microsoft servers that deal with activation are currently down.

That’s why you are always asked to wait for a few hours or even a couple of days before going for some advanced troubleshooting or getting a new key.

What happens if Windows 10 does not activate?

If you cannot activate Windows 10 or 11, you will have limited access to some Windows features. For example, you will not be able to change the desktop background and tweak any settings related to the visual appearance.

Periodically, you will also get messages to activate Windows. That may be not very pleasant sometimes.

Usually, people cannot activate this OS for the reasons which have been mentioned above.

Besides, there are several activation error codes that might shed some light on the underlying cause.

We have listed them below, and if you see any of these, just head to the linked guide to fix them if Windows 11 is not activated.

Now that you have a basic understanding of the process, and know the common activation errors, let’s head to the most effective solutions when Windows 10/11 is not accepting the product key.

How can I fix Windows 10 activation key if is not working?

1. Check the license status if the Windows product key is not working

  1. Press Windows + I to launch the Settings app, and click on Activation on the right in the System tab.Activation to fix windows 11 not accepting product key
  2. Now, check if the Activation state reads Active. If that’s the case, Windows is already activated.check activation state

The first thing you must check is whether Windows 10/11 is already activated.

In many cases, users go around activating an already registered version of the OS, and that’s why Windows is not accepting the product key.

In case Windows is not activated, and you still encounter the error, proceed with the methods listed next.

2. Make sure you are entering the right product key to fix this error

Oftentimes, users make the mistake of entering the wrong product key.

Microsoft has pretty much automated the process, and you don’t need to manually enter the key in case you are upgrading from Windows 10.

But if you are installing Windows 10/11 for the first time, verify that all the characters are entered correctly. People often confuse between 8 and B, so check for issues like this.

Also, check that you are activating the right edition. For instance, you cannot use a Windows 11 Home product key for Windows 11 Pro edition.

3. Check the Internet connection if your Windows product key is not working

You need a stable Internet connection in order to activate Windows 10/11. And for many users, this was the reason Windows was not accepting the product key.

application frame host windows

So, make sure that the Internet connection works fine and that you are not getting slow speed. Also, use a network speed monitor to keep a tab of it, and once the speed is stable, go ahead with the activation.

4. How to fix the Windows product key not working using the SFC scan

  1. Press Windows + R to launch the Run command, enter cmd in the text field, hold the Ctrl + Shift key, and either click on OK or hit Enter to launch an elevated Command Prompt.cmd
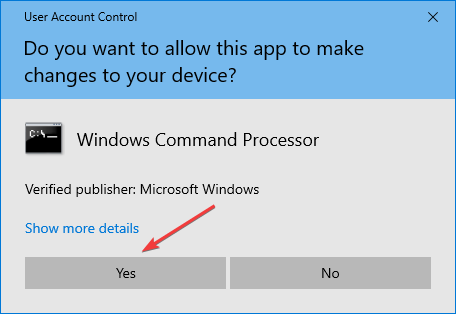
  2. Click Yes in the UAC prompt that appears.Yes
  3. Now, paste the following command and hit Enter to run the SFC scan: sfc /scannowsfc /scannow to fix windows 11 not accepting product key

If the Windows 10 product key is not working, running an SFC (System File Checker) scan could do the trick since one of the underlying causes here is the presence of corrupt system files.

And there is no more straightforward way than an SFC scan to fix corrupt files.

5. Run the Windows Activation troubleshooter

  1. Press Windows + I to launch the Settings app, and click on Activation on the right.Activation
  2. Locate and click on the Troubleshoot option here.
  3. Wait for the troubleshooter to run, and choose the appropriate response when prompted to complete the process.

The built-in troubleshooter is pretty helpful when Windows 10/11 product key is not working. It will automatically identify and eliminate the problem in no time.

Remember that you can only run the troubleshooter when logged in through an administrator account. Also, if the troubleshooter is missing, it’s most likely that Windows is already activated.

6. Reset the Windows 11 license

  1. Press Windows + S to launch the Search menu, enter Terminal in the text field, right-click on the relevant search result, and select Run as administrator.Terminal to fix windows 11 not accepting product key
  2. Click Yes in the UAC (User Account Control) prompt that appears.click Yes
  3. Now, click on the downward-facing arrow and select Command Prompt to open it in a new tab. Alternatively, you can hit Ctrl + Shift + 2.Command Prompt
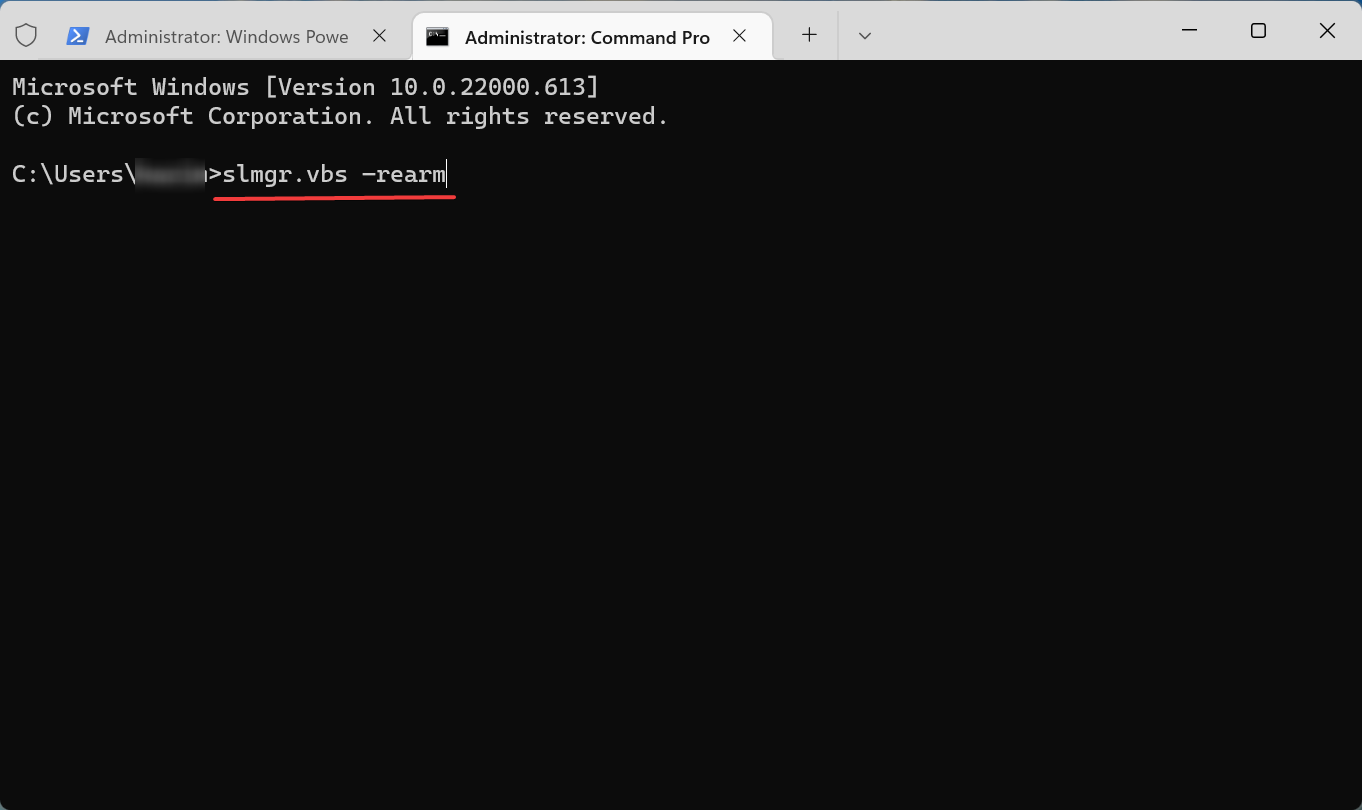
  4. Next, paste the following command and hit Enter to reset the license status:slmgr.vbs –rearmExecute command to fix windows 11 not accepting product key

Once done, restart the computer, and Windows 10/11 should accept the product key.

Though highly unlikely, if this method fails to work, you can do a clean install of Windows 11 and then activate it since there’s a chance that the installation did not go through properly the last time.

    7. How to fix Windows product key not working in Command Prompt

    Another method to fix the Windows 10 product key not working error is to perform a manual activation via Command Prompt.

    Sometimes, simply changing the activation method could fix things if Windows is not accepting the product key issue. And many users were able to get their copy registered using the CMD.

  1. 1. Press the Windows Key to open the search bar.

  2. 2. Enter Command Prompt in the search bar, and click on Run as administrator from the options on the right.

    Command Prompt admin
  3. 3. Click Yes in the UAC prompt that pops up.

    Click Yes uac
  4. 4. Now, paste the following command and make sure to replace the X’s here with the actual product key: slmgr.vbs -ipk xxxxx-xxxxx-xxxxx-xxxxx-xxxxx

    Execute command to fix windows 11 not accepting product key
  5. 5. Press Enter to execute the command. This will activate Windows 10 using the product key you just input.

This method will fix the Windows 10 product key not working error. You will just need to perform a manual activation via Command Prompt.

Sometimes, simply changing the activation method could fix things if Windows is not accepting the product key issue. And many users were able to get their copy registered using the CMD.

8. Run SLUI 4 command to fix the Windows product key not working

  1. Press Windows + R to launch the Run dialog box, type SLUI 4, and press Enter.SLUI 4 to fix windows 11 not accepting product key
  2. Choose your country from the dropdown menu, and click on Next.choose country
  3. Now, simply call one of the listed numbers and follow the instructions provided by Microsoft Support.Micorosft Support

If nothing else works, you always have the option to get in touch with the local Microsoft support.

Make sure to keep the installation ID listed here with you to help the support team better assist you and get Windows 10 to accept the product key.

The above methods will indeed help. However, if you encounter a Windows product key not working after a hardware change, then you may need to deactivate the license on the previous device. If it is not possible, you will need to buy a new one for the new device.

Please note that some license keys are bonded to your motherboard. If you change the mainboard, you will encounter this problem.

Can I use Win 10 without Activation?

Yes. You can use Windows 10 without activation. When your Windows doesn’t have a valid license key or is not active, you won’t be able to use some settings.

Usually, in an inactive Windows OS, users cannot change wallpaper, lock screen background, accent colors, etc. Else, Taskbar-related settings won’t also be accessible. But, if you forget about these limitations, you can easily continue using Windows 10/11 without activation.

Periodically, an annoying message will remind you to activate the OS. Just ignore it and do your work. But, for a smooth experience and to support the developers behind this fantastic OS, it is always better to have a valid license key to activate this OS.

How do I force Windows to activate?

If you need to successfully force Windows to activate, you should use the different solutions we have mentioned in this article.

While one solution may not be successful, we encourage you to try out the different options.

Is Windows 10 illegal without activation?

No, it is not.

You can use Windows 10 indefinitely without activating it, even though it won’t be perfect and won’t be particularly attractive. Without needing to provide a legitimate product key or digital license, Microsoft enables customers to download, install, and use the operating system for an infinite period.

Is Windows 11 a free upgrade?

Yes, Windows 11 is free, but for those running the latest version of Windows 10 and the computer has to meet the minimum system requirements for Windows 11.

If that’s the case, you should receive an update for it and can easily make the upgrade. But if Windows 11 is not showing up in Windows Update, there are other ways to upgrade to the latest iteration.

The latest iteration from Microsoft is an incredible operating system, simple to use, and best of all, it’s a free upgrade.

Also, you now know what to do if Windows 11 is not accepting the product key, which would have fixed the problem.

Besides, find out how to upgrade to Windows 11 on an unsupported PC. Activation problems can manifest as errors, and we recently wrote about activation error 0xc004f069 so don’t miss it.

If you need to get your product key, we have a whole article on how to get a Windows key using PowerShell, so don’t miss it.

If you have any other queries or know of a way that’s not listed here, drop a comment in the section below.

Azure VPN Gateway Not Connected: Efficient Ways to Fix It

If you experience the Azure VPN gateway not connected problem, this article will help you with some helpful steps to troubleshoot the actual issue.

Azure VPN gateway is required to establish a VPN connection with Azure. This is a very secure gateway that uses various protocols, IPsec, and IKE to secure your connection.

However, sometimes, while establishing a VPN connection, you may notice that the gateway is failing or it has been disconnected and is failing to reconnect.

Even if you have configured VPN correctly on Windows, the issue may repeatedly come on your end if something is wrong internally or on the server side.

Like the VPN establishment error with Cisco, we have come up with several solutions for this error too. Before that, let’s go through some essential relevant information.

How can I fix the Azure VPN gateway not connected issue?

1. Enable IKEv2 support on Windows

1.1 Update Windows

  1. Press Win + I on the keyboard.
  2. Go to Windows Update.
win 11 system settings windows update
  1. Click on Check for updates.
windows check for updates
  1. Click on Install/Download if any update is available.

If you do not wish to update in this way, you can download the following updates for these specific versions of Windows.

Windows VersionLink
Windows Server 2016
Windows 10 Version 1607 January 17, 2018
KB4057142
Windows 10 Version 1703 January 17, 2018KB4057144
Windows 10 Version 1709 March 22, 2018KB4089848

Updating Windows is recommended when there is no IKEv2 support, and you repeatedly see that the connection is failing.

1.2 Set a registry value

  1. Open the Start Menu.
  2. Type regedit and hit enter to open Windows Registry Editor.
windows registry editor
  1. Create or Edit a DWORD value in the following location and set the value to 1: HKEY_LOCAL_MACHINE\SYSTEM\CurrentControlSet\Services\RasMan\ IKEv2\DisableCertReqPayload
reg editor edit dword

1.3 Choose IKEv2

  1. Open Windows Settings like before.
  2. Go to Network & Internet.
win 11 system network and internet
  1. Go to VPN.
win 11 system settings vpn
  1. Click on Add VPN.
  2. Choose IKEv2 as the VPN type and provide other details to create the correct VPN connection.
win 11 add a vpn connection

Now, you should try to connect to the VPN. You will not encounter the Azure VPN gateway not connected issue this time.

2. Update NIC/Network Adapter driver

  1. Open the Start Menu.
  2. Type device manager and hit enter to open Device Manager.
win 11 device manager
  1. Expand Network Adapters.
  2. Right-click on your network driver and choose update driver.
device manager update driver
  1. Click on Search automatically for the drivers.
device manager search automatically for drivers
  1. It will look for the latest driver and install it if available.

Alternatively, to make sure your drivers are always in the best condition and up-to-date, use a dedicated utility like Outbyte Driver Updater. It’s a light software that scans your PC for any outdated drivers and automatically installs them.

The tool is tested and completely safe. In many cases, it has been able to detect new driver versions with higher accuracy than Device Manager. Plus, you can set it up to automatically update all drivers on a regular basis.

⇒ Get Outbyte Driver Updater

3. Enable background apps permission

  1. Open Windows Settings.
  2. Go to Apps.
win 11 system settings apps
  1. Click on Apps & features.
win 11 app settings advanced
  1. Look for the Azure VPN Client.
  2. Click on the three vertical dots and click on Advanced options.
azure vpn client advanced options
  1. Set Background apps permissions to Always.
allow azure vpn client to run in the background

4. Use different client

There are two types of Azure VPN Clients for Windows. One is available as an app in the Microsoft Store, and another one is like an addon that enables Azure VPN as a VPN provider in the built-in Windows VPN settings.

microsoft store azure vpn client

If you are using either of them, try another one to see if it fixes the Azure VPN gateway not connected error. For this, go to the Azure VPN client download page.

5. Configure the VPN device properly

A misconfiguration on the VPN device may be the reason you have been experiencing the problem. In this case, you should check if all configurations are OK.

Microsoft has obvious instructions for configuration on specific devices. You should check them out from this device configuration guide page.

6. Use proper IPsec parameters

Using incorrect IPsec parameters in the configuration can also be why you see the error Azure VPN gateway not connected.

You can check out the supported IPsec parameters by Azure from this documentation page. Verify if you are using the correct parameters. If not, correct where it is necessary.

Azure VPN connected but cannot ping

Some users report that even though they are able to secure an Azure VPN connection, it won’t ping.

If this happens to you, it’s possible that your firewall on antivirus is interfering.

Check your settings and make sure Azure is allowed through the firewall.

  1. Open the Firewall.
  2. Select Advanced settings.
  3. Go to Inbound Rules.
  4. Select File and Printer Sharing Echo Request -ICMPv4-In.
windows defender firewall enable rule
  1. Right-click on it and select Enable rule.

Other users around the web also recommend confirming that your on-premise devices and your VPN use the same tunnel.

These are the most effective methods to fix the Azure VPN gateway not connected issue. Feel free to let us know in the comment box if you have any other techniques that may help others.

Posted in Fix

4 Easy Ways to Fix Team Fortress 2 Can’t Connect to Server

A team-based multiplayer first-person shooter game, Team Fortress 2, was created by Valve Software and included in the game collection: The Orange Box. On October 10, 200.

This highly intriguing game is not without connection complications. Do you occasionally see a Team Fortress 2 can’t connect to server message on your screen?

As the matter of fact, you should know that Team Fortress 2 cannot connect to the server after 4 retries. The players may encounter this error when trying to connect to new games in TF2.

We got your back. We’ll look into what’s causing the problem and how to fix it for good.

Why can’t I connect to a Team Fortress 2 server?

Usually, being unable to connect to the Team Fortress 2 server will be an internet connection error. The most common network problems arise from:

➡️ Unstable Internet Connection – your Internet is very slow or fluctuating

➡️ ISP throttling – some ISPs artificially restrict traffic to preserve data

➡️ Team Fortress servers are down – in which case you’ll just have to wait it out

Whether the issue arises from your end, is located far from your router, or because your ISP has poor service or downtime, your gameplay will be affected.

✅ Pre-checks:

→ Before you arrive at any other conclusion and start troubleshooting the game, ensure to have your connection checked and intact.

→ Reinstalling the game can improve other bugs and help fix Team Fortress 2 FPS Drops and Stuttering.

→ Sometimes you might fix the server connection error by closing the game and reopening it. Restarting it might be of really great help to every gamer.

→ You can also check the game servers to see if the Team Fortress servers are down now.

→ Check if the antivirus or your firewall blocks the game.

How do I fix Team Fortress 2 unable to connect to the server

1. Troubleshoot the Internet connection

  1. Click the Start button: you can find this at the bottom left corner of your screen.
  2. Select Settings.team fortress 2 can't connect to server
  3. Select Update and Security.team fortress 2 can't connect to server
  4. Select Troubleshoot.team fortress 2 can't connect to server
  5. Select the Additional troubleshooters.
  6. Select Internet Connections.team fortress 2 can't connect to server
  7. Select Run the troubleshooter.

You should make sure that your computer can go online.

Can you browse different websites? It would help if you tried running the Internet troubleshooter tool to detect and fix any internet-related issues on your computer.

2. Check Team Fortress 2 game files

  1. Open the Steam Launcher.
  2. Click the Library section.
  3. Right-click on the game when you find it in the Library list.
  4. Click Properties
  5. Select Local Files.
  6. Click on the Verify integrity of the Game Files button and wait for the process to complete.

This problem can result from your game file being corrupted or missing. You must check the game’s reliability to repair this. If there is any problem with your game files, you will be notified.

3. Improve your connection speed with a gaming-focused VPN

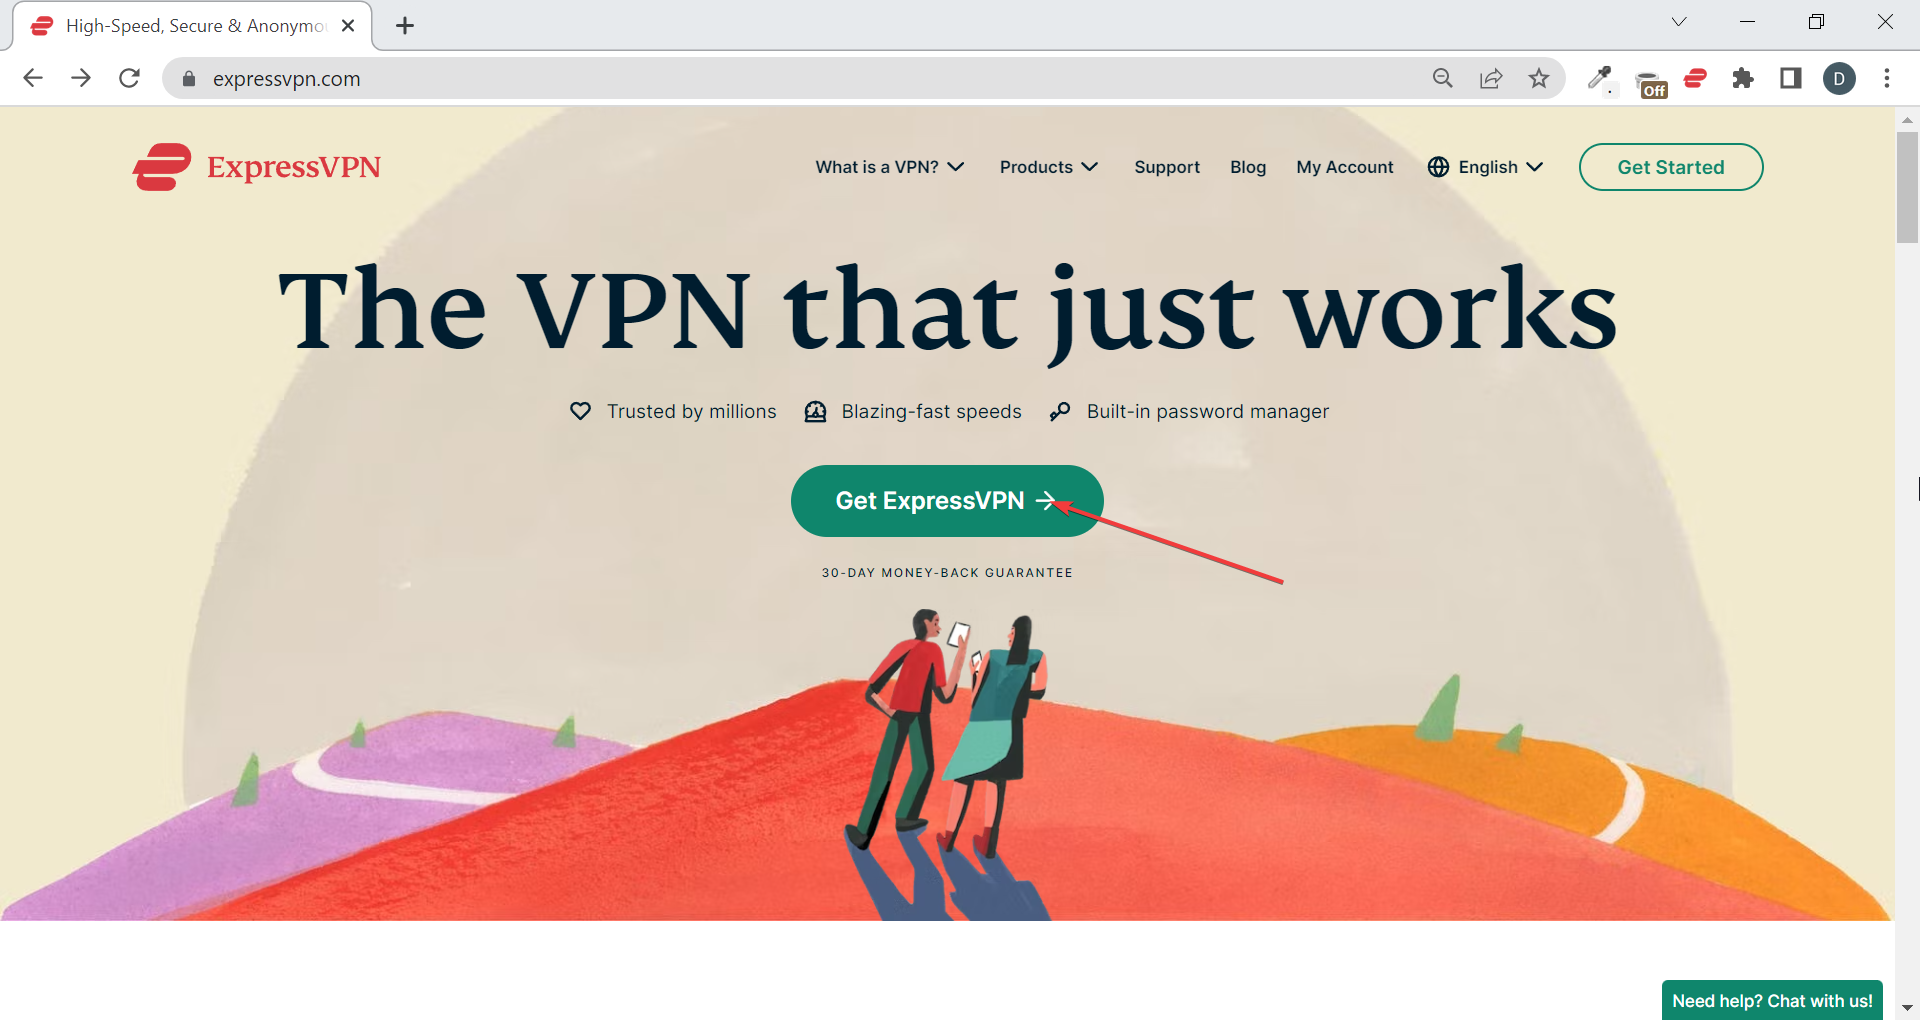
  1. Get a VPN subscription. We use ExpressVPN for gaming.
  2. Download the dedicated app for your device and install the VPN.
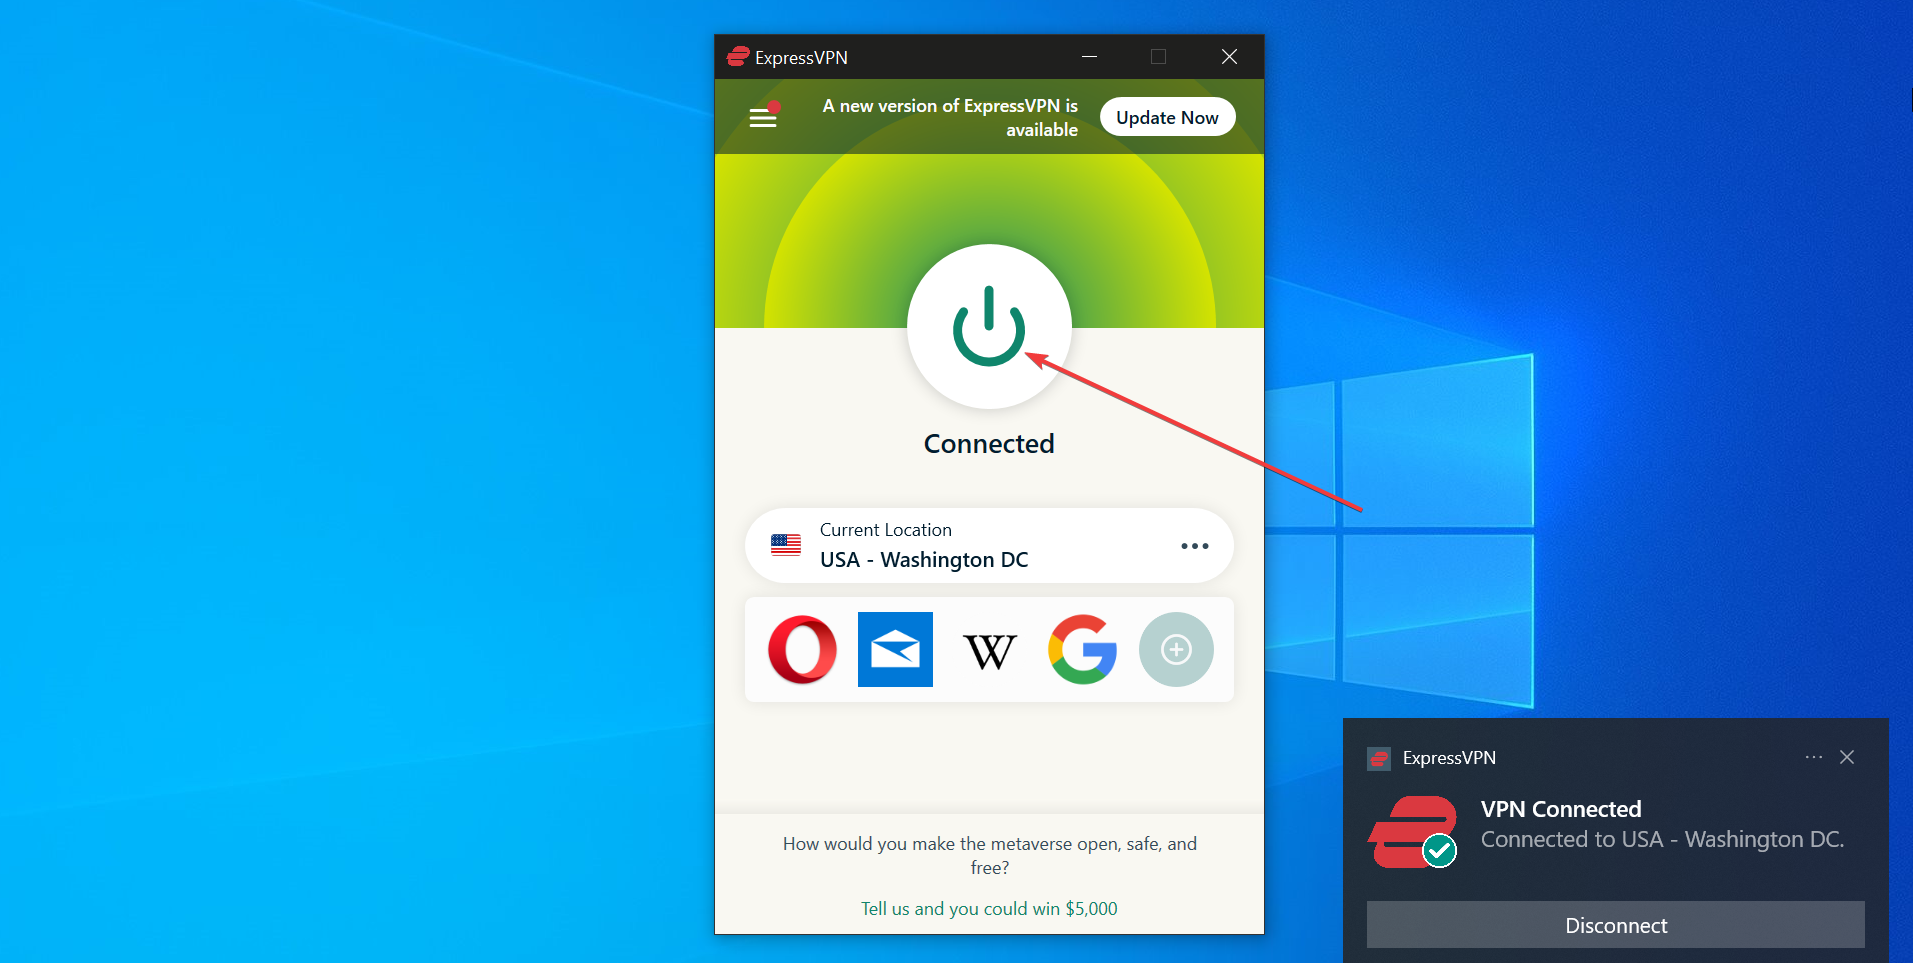
  3. Launch it and click on the power button to connect to a server.
  4. Open Team Fortress 2 and start playing.

VPNs are developed to safeguard your online privacy and make life difficult for hackers, and they can improve gaming by offering access to fast, unlimited servers.

For best performance in Team Fortress, either chose the server that’s closest in location to you (the closer, the faster), or you can match the location of your VPN server with the location of your TF2 server.

For example, if you play on a server located in Germany, just browse Germany in the server list, and connect to a server. ExpressVPN offers thousands of servers from 94 different countries.

It can improve connection speed which will in return get rid of this error and fix packet loss in TF2 by establishing a steady connection.

Additionally, it can also help reduce ping and fix lag in Team Fortress 2 as well as other similar online games.

ExpressVPN

Pick from thousands of speedy servers to remove connection errors in TF2!
Free trial Visit website

 4. Switch to a wired connection

Poor Internet connection beckons to game server connection issues and Team Fortress 2 is not an exception. This results in the server connection error when playing the game.

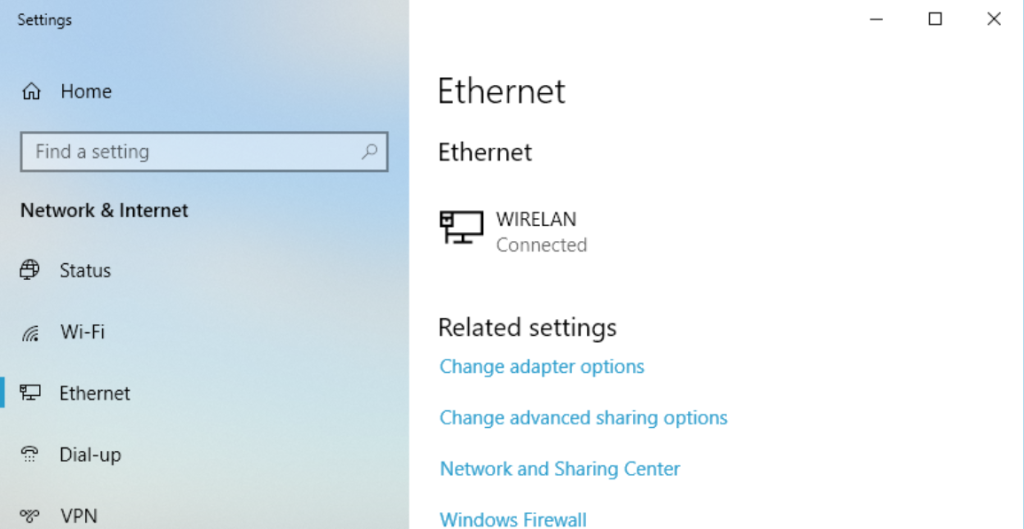
Some players suggest switching from Wi-Fi to Ethernet. Many seem to have a faster connection this way, and it’s definitely worth a shot since it’s a simple and cheap method.

Switching to a strong internet remains a viable solution to solving the server connection issue and getting rid of issues like Team Fortress 2 not working in Windows 10.

How do I connect to a Team Fortress 2 server?

The game has tons of different servers, so if you don’t know exactly which one you want to pick, look them up. You’ll see there are servers from different countries, varying in the number of players and speed.

? Auto (in-game) connection

  1. Launch Team Fortress 2.
  2. Under the Play option, select Find a Game.
  3. Select Community servers.
  4. You’ll get a list of all the servers available.
  5. Select the server you want to play on. 

? Manual connection

  1. Find and copy the IP address of the server you want to use (as mentioned above, there are many servers you can find online)
  2. Open your Steam library.
  3. Right-click on Team Fortress 2 and select Properties.
  4. In the general tab select Launch Options.
  5. Type -console and click ok.
  6. Launch the game. The console will automatically appear on the screen. 
  7. Type the IP address of your server and press Enter.

How do I fix Team Fortress 2 can’t connect to Steam?

If you cannot connect because of the Steam Launcher, we recommend reinstalling it. Over time, the launcher can become corrupt or buggy.

  1. Go to the Apps and Programs panel on your PC.
  2. Find Steam and select Uninstall. 
  3. Make sure all apps and folders related to steam are completely removed from your PC.
  4. Download the installer wizard from the official Steam website.
  5. Install it and log in with your credentials.

How to save a TF2 server to Favorites

After you’ve located the server’s IP address, the following are the steps required to connect to a team fortress 2 servers via steam favorites:

  1. Open the Servers panel in the TF 2 main menu.
  2. Click the Favorites tab, then select Add a Server.
  3. Select Add This Address To Favorites after pasting the Server IP into the pop-up box.
  4. From the list, choose your server, then click Connect. 

The connection issue is quite prevalent in this game. Players get all sorts of error messages and errors, from TF2 can’t connect to casual servers, to TF2 cannot connect to the server after 4 retries.

Making use of every solution mentioned above can go a very long way in solving the server connection issue. It’s also important to check if the game’s servers are down. That’s a temporary problem that you’ll have to wait out.

You deserve a seamless and intriguing gaming experience, with a sprinkle of security, and privacy, all offered by premium-level VPNs, that will fix the connection and lower ping and packet loss in TF2.

The comments section is open, do let us know what you think of these solutions and your experience in exploring them.

How to Create a Self-Signed Certificate in Windows 10

Adding an SSL certificate to your website is a straightforward process. You can either purchase a third-party SSL certificate and renew it on a yearly basis or use an open-source SSL certificate and create a corn job to renew it every month.

However, for development and testing, you can explore the possibility of creating a self-signed SSL certificate in Windows.

Creating a self-signed certificate is an excellent alternative to purchasing and renewing a yearly certification for testing purposes. You can make use of OpenSSL to generate a self-signed certificate for this purpose.

In this article, we explore how to create a self-signed certificate in Windows 10. The later part of the article also explores how to deploy the self-signed certificate to client machines.

Quick Tip:

Although you can save some money if you create a self-signed certificate, it may lead to a permanent block of your website for some users. This is caused by the certificate error message and in most cases cannot be undone.

Besides that, the process is time-consuming and really not worth your time which also has a certain cost. We strongly recommend using a 3rd party SSL service provider.

GoDaddy SSL Certificates

GoDaddy SSL Certificates

GoDaddy is one of the best web hosting providers that also offers affordable SSL certificates.
Check price Visit website

How can I generate a self-signed certificate in Windows 10?

1. Use OpenSSL to create a self-signed certificate

1.1 Install OpenSSL

Create a self-signed certificate
  1. Download the latest OpenSSL windows installer from a third-party source.
  2. Run the installer. OpenSSL requires Microsoft Visual C++ to run. The installer will prompt you to install Visual C++ if it is already not installed.
  3. Click Yes to install.
  4. Run the OpenSSL installer again and select the installation directory.
  5. Click Next.
  6. Open a command prompt and type OpenSSL to get OpenSSL prompt.

1.2 Create a public/private key file pair

Create a self-signed certificate command prompt
  1. Make sure you have OpenSSL installed.
  2. Open Command Prompt and create a new directory on your C drive:
    C: >cd Test
  3. Now go to the new directory:
    C: Test>
  4. Now you need to type the path of the OpenSSL install directory followed by the RSA key algorithm.
    C: Test>c:opensslbinopenssl genrsa -out privkey.pem 4096
  5. Run the following command to split the generated file into separate private and public key files:

C: Test>c:opensslbinopenssl ssh-keygen -t rsa -b 4096 -f privkey.pem

Once you have the public/private key generated, follow the next set of steps to create a self-signed certificate file on a Windows system.

1.3 Generate a self-signed certificate

generate a self-signed certificate via command prompt
  1. Open a Command Prompt window.
  2. Go to the directory that you created earlier for the public/private key file.
    C: Test>
  3. Enter the path of the OpenSSL install directory, followed by the self-signed certificate algorithm:
    C: Test>c:opensslbinopenssl req -new -x509 -key privkey.pem -out cacert.pem -days 1095
  1. Follow the on-screen instruction.
  2. You need to enter information about your organization, region, and contact details to create a self-signed certificate.

If you would rather use PowerShell to create a self-signed certificate, follow the next set of steps instead.

After creating your self-signed certificate, you can use certmgr.msc to view, import, or manage it directly from the Windows Certificate Manager for easier handling.


2. Generate a Self-Signed Certificate on Windows using PowerShell

  1. 1. Press the Windows key, and type Powershell in the search box. Right-click on the PowerShell app and select Run as Administrator.

    powershell windows 11 run as admin
  2. 2. Run the New-SelfsignedCertificate command, as shown below:$cert = New-SelfSignedCertificate -certstorelocation cert:localmachinemy -dnsname testcert.windowsreport.com

    Create a self-signed certificate
  3. 3. This will add the certificate to the locater store on your PC. Replace testcert.windowsreport.com with your domain name in the above command.

  4. 4. Next, create a password for your export file:$pwd = ConvertTo-SecureString -String ‘password!’ -Force -AsPlainText


  5. 5. Replace Password with your own password.

  6. 6. Enter the following command to export the self-signed certificate:$path = 'cert:localMachinemy' + $cert.thumbprint Export-PfxCertificate -cert $path -FilePath c:tempcert.pfx -Password $pwd


  7. 7. In the above command replace c:temp with the directory where you want to export the file.

  8. 8. You can import the exported file and deploy it for your project.

  9. Another great option to generate a self-signed certificate on Windows 10 is to use a command-line tool such as Powershell.

    With it, you don’t need to download any third-party software. You just need to input the appropriate command line in Powershell, and the tool will do the job for you.


How to add my self-signed certificate into the curls ca file on Windows 10?

Self Signed OpenSSL certificate
  1. Once you have created a self-signed certificate and installed it, you may want cURL to trust the certificate as well.
  2. The later versions of cURL don’t include a trusted listed a .pem file. You can download the .pem file and type the following command in the php.ini file.
    curl.cainfo = "C:xamppphpcacert.pem"
  3. Once done, you need to get cURL to trust your self-signed certificate. To do this, open your server.crt file. The file is created when you created your self-signed certificate.
  4. Copy all the content of the server.crt file and then add it to the cacert.pem file.

Creating a self-signed certificate using OpenSSL can be done using the Command Prompt or PowerShell. Being able to create your self-signed certificate allows you to create a temporary certificate for in-development projects that require an SSL certificate.

We hope you managed to generate a self-signed certificate on your Windows 10 PC. Let us know in the comments section which method you prefer to use.

Guild Wars 2 Unable to Connect to Login Server [Tested Fix]

The Guild Wars 2 unable to connect to login server notification is generally caused by underlying problems with your connection, or you are perhaps attempting to access the game from an unsupported country.

Guild Wars 2 is a widely played MMORPG (massively multiplayer online role-playing game) available to millions of users across the world.

However, this inconvenience can be avoided in many cases, which is why this article gives solutions to fix the problem.

Why is Guild Wars 2 unable to connect to the login server?

If you wonder why can’t you connect to Guild Wars 2, you should know that there are multiple possible reasons:

➡️ You forgot your password or account name

Forgetting a password or account name is one mistake that almost everyone makes. Some people can no longer play guild war and access their old accounts simply because of this issue.

The next time you create your account, jot the account name and password down, so you won’t forget them.

➡️ Troubleshooting error

Specific errors that you might easily overlook can hinder you from playing the game.

These include errors such as turning on your caps lock while not having any capital letters in your password, adding space to your password, and others that you might consider minor errors.

➡️ Server error

Server errors due to network issues can stop you from successfully logging into the game. Check the Guild Wars server status to confirm the connection is actually up.

➡️ Your account might have been disabled

You might not have considered that your account might already be disabled, which leads to you not being able to log in. You should always check your email before you log in to avoid this type of issue.

How to fix Guild Wars 2 unable to connect to login server

1. Check your credentials

The most common reason why most users can’t login successfully on Guild Wars 2 is the wrong credentials. So, one of the sure ways to fix log-in errors is to check your credentials.

  1. Head to the Account arena login page.
  2. Click on the Forgot your password? link.guild wars 2 unable to connect to login server
  3. Enter your email details and confirm.

In case of a forgotten password, you can do a quick reset to create a new password. Also, ensure that you back up your login credentials so that you won’t forget them.

Another great fix is to check your email to see if you’ve been banned from the game. If this is the case, you will need to contact support to appeal your ban.

2. Use a VPN to fix connection issues and bypass geo-blocks

Server errors and network issues can cause a lot of problems in Guild Wars 2. The Guild Wars 2 unable to connect to login server error often arises if you connect from a country where it’s not available.

Using a VPN for Guild Wars 2 like ExpressVPN connects you to the fastest available server for a smooth and uninterrupted connection.

Below are a few steps to install and use ExpressVPN on your device:

  1. Visit ExpressVPN’s official website to download and install the app to your device.
guild wars 2 unable to connect to login server
  1. Once it’s done installing, launch the app and click on the Connect button. Click on the three dots to browse the server list. As you can see, we picked a server from a supported location (France).
guild wars 2 unable to connect to login server
  1. Once the VPN is connected, launch and enjoy playing your game.

ExpressVPN can also help you bypass any speed-throttling limits set by your ISP, and help you access geo-restricted servers.

ExpressVPN

Fix connection issues in Guild Wars 2 with this reliable VPN for gaming!
Free trial Visit website

3. Contact support

If you’ve tried all the available solutions and you still can’t log in, the only option left is to contact support.

  1. Head to the Guild Wars 2 Help page.
  2. Click on Submit a ticket button in the upper right corner.guild wars 2 unable to connect to login server
  3. Enter your information and details about the error you get.

Make sure to note the error code (if you get one) you get whenever your login attempt fails in your feedback so they can help you fix it.

Is Guild Wars available worldwide?

Guild Wars 2 is not available worldwide, and you can’t access the game if you live in one of the restricted areas. If you are traveling or using a proxy/VPN from the banned countries, you won’t be able to log in.

Currently, Guild Wars is banned in the following locations:

  • Cuba
  • Donetsk People’s Republic
  • Iran
  • Luhansk People’s Republic
  • Russia
  • Syria

If you connect from here, your only chance to access the game is if you change your IP address using a proxy or VPN.

You don’t have to give up on your game simply because you have difficulty logging in. The Guild Wars 2 unable to connect to login server error is certainly annoying, but easy to fix.

Simply follow the recommended solutions listed above to fix any Guild Wars 2 login errors and enjoy a smooth gaming experience.

How to Mirror Your iPad/iPhone to a Windows 10 PC

AirPlay media streaming enables you to stream content from an iPhone or iPad to a Mac OS X desktop or laptop. This media streaming, otherwise mirroring, projects the iPhone display on a desktop or laptop.

This tool is Apple’s alternative to Miracast streaming.

With a little extra software, you can also mirror an iPhone display on a Windows PC. You can mirror an iPhone/iPad screen to Windows 10 PC.

What do I need before I can project my iPad or iPhone to Windows 10?

First, note that you’ll need an Apple device supporting AirPlay. You must have at least an iPhone 4, or a higher mobile device. The Apple tablet must be an iPad 2 or higher.

The Apple device and Windows 10 PC should also share the same Wi-Fi connection. If that’s the case, then you can mirror the iPhone or iPad display to the desktop or laptop as follows.

How do I mirror my iPhone or iPad screen to a PC?

ApowerMirror – The fastest option

apowermirror logo

    The fastest way to mirror your Apple devices on a PC, be it Windows or macOS, is to use third-party tools dedicated specifically to this task.

    Given the power of modern-day mobile devices, casting movies or even games on a bigger screen is almost as effective as playing the game straight to PC.

    Because of that, we recommend that you try out a universal mobile mirroring tool such as ApowerMirror.

    ApowerMirror allows users to mirror up to 4 devices to PC simultaneously, and they can connect their iPhone/Android to the PC with or without cable and control their phones from PC by using a mouse and typing with a keyboard.

  1. 1. Download and install ApowerMirror both on your iPhone/iPad and computer.

  2. 2. Make sure that both your PC and the iPhone/iPad are connected to the same Wi-Fi network. It also works if you connect the device to your PC via USB.

  3. 3. Open Control Center on your iPhone and tap Screen Mirroring.

  4. 4. Choose the name that displays Apowersoft.

  5. 5. Your iPhone/iPad screen will then be displayed on the computer.

    apowermirror use to project ipad to windows pc
  6. 6. When you’re done casting, simply tap on Stop Mirroring.

    close apowermirror when you're done mirroring your ipad to windows 10

ApowerMirror

Mirror everything that is on your Android, iOS, or TV to your PC easily with this amazing tool!
Free trial Visit Website

iOS Screen Recorder – Intuitive interface

ios screen recorder logo

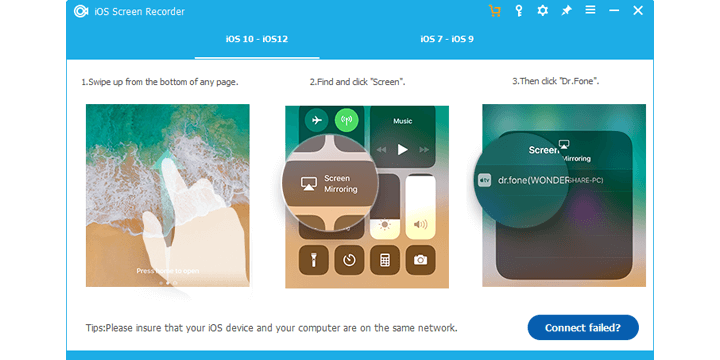
There is another app that you can use to quickly mirror your iPhone screen to your Windows 10 computer. iOS Screen Recorder allows you to mirror your iPhone to deliver presentations, show business information, share gaming videos, and more.

Keep in mind that you need to run the latest iOS versions in order to use this tool.

⇒ Get iOS Screen Recorder

LonelyScreen – Maximize window

  1. Add LonelyScreen to Windows 10 by pressing the Download for Windows button on this page.
  2. Open the LonelyScreen setup wizard to install the software. This will also install Bonjour software required for AirPlay.
  3. During the setup, a window might open informing you that Windows Firewall is blocking the app. Select the Private networks check box and click the Allow access button.
  4. Then you can open the LonelyScreen window shown in the shot directly below. If the software still states that LonelyScreen is blocked by the firewall, press the Fix It(Administrator) button.ios mirror
  5. Now select the Click to Change Server Name box that includes LonelyScreen by default. Enter an alternative server title there such as ‘Windows desktop.’ios mirror2
  6. Switch on your iPad or iPhone.
  7. Swipe up from the bottom of your Apple device to open the Control Center.
  8. Then tap AirPlay on the Control Center to open AirPlay options.
  9. The AirPlay page below lists the title you entered, ‘Windows desktop’ in my example, in the Change Server Name text box. Select Windows desktop, or whatever alternative title you assigned it.ios mirror3
  10. Now select the Mirroring option to switch it on (green highlights it’s on).
  11. Press the Done button to save the settings.
  12. Open the LonelyScreen window again. Now it will include your Apple iPhone or iPad display as shown below.ios mirror4
  13. You can also record your iPhone or iPad display with LonelyScreen. Press the red Start recording button to record the display.
  14. Press the Stop recording button when done. The recorded output automatically saves to your Videos folder as an MP4.

So now you can protect your Apple iPad‘s or iPhone‘s display in Windows 10! The advantage of mirroring iPhone displays with LonelyScreen is that you can maximize the window.

That effectively expands the iPhone display. It’s also handy for recording iOS videos and capturing iOS screenshots.

⇒ Get LonelyScreen

So, there you have some great software that you can use to mirror your iOS screen to Windows 10. Also, for anyone interested, you can use the iPad as a second monitor in Windows 11.

If you have any other questions or suggestions about how to project your iPhone or iPad to PC, don’t hesitate to leave them in the comments section below; we’ll be sure to check them out.

Windows 11 God Mode: What is it & How to Use

Windows 11 is a pretty complicated system, and it can be a long ride even for intermediate users to get to some apps and functions.

That is why our guides are increasingly detailed in explanations so that all users get to solve their problems or tasks as easily as possible.

However, Windows 11 has a little wormhole called God Mode, that will allow you to get to all of the settings and apps a lot easier.

And, in a way, it’s like in video games when you can pass through walls because when you use it, you will get past all the steps to get to the final setting you need.

What is God Mode in Windows 11?

This is a folder on your desktop, or anywhere you want to create it, that will feature more than 200 settings, controls, and apps from your OS, sorted alphabetically in 33 categories.

Then, you can double-click any of them to get right to the setting you want to use without going through time-consuming steps and windows.

Why do I need God Mode in Windows 11? You don’t! But if you have it and use it as we suggest further on in our article, it will save you a lot of time and effort.

For instance, if you want to get to, let’s say a simple setting like changing the mouse settings, you will need to do the following steps:

  1. Click the Start button and select Settings.access windows 11 settings via start
  2. Select Bluetooth & devices from the left pane.navigate to Bluetooth and devices
  3. Scroll down and click on Mouse.mouse settings
  4. Now select Additional mouse settings.go to additional mouse settings

If you want to go even further, you will need to access the tabs. Well, you can easily get to the last step by double-clicking a file after creating this folder.

Just like the Developer Mode in Windows 11, this feature needs to be enabled before you can use it, and in today’s guide, we’re going to show you how to do that.

What are the benefits of Windows 11’s God Mode?

The main benefit of this folder is the ability to access certain settings quickly. No longer will you have to open multiple windows to find a specific setting.

With God Mode on W11 enabled, you can find all these settings with just two clicks. You can make accessing these settings even faster by creating a shortcut on your Desktop.

Keep in mind that all these settings aren’t hidden, and they can be accessed quickly from the Search, but this folder groups and organizes them for quick and easy access.

We also have a dedicated guide on how to enable God Mode in Windows 10 that you can check out.

How do I enable God Mode in Windows 11?

  1. 1. Right-click on an empty space on the desktop, select New and choose Folder.

    create new folder on desktop
  2. 2. Paste the following line in the name of the folder and hit Enter: GodMode.{ED7BA470-8E54-465E-825C-99712043E01C}

    type the godmode command in windows 11
  3. 3. Right-click again on a free desktop space and select Refresh.

    refresh the desktop
  4. 4. Your folder will look like a Control Panel icon after refresh.

    godmode folder icon
  5. 5. Double-click the folder to access it.

  6. Before you can use God Mode, you need to enable it on your Windows 11 device. You can do this by creating a folder on the desktop named GodMode.{ED7BA470-8E54-465E-825C-99712043E01C}.

As you can see it’s pretty simple to activate God Mode on Windows 11, and it can be done in a matter of seconds.

How can I use God Mode in Windows 11 after creating the folder?

  1. Double-click the new God Mode folder.double click on the god mode folder
  2. Now you have access to over 200 shortcuts, apps and settings that you can click directly. Just scroll down and double-click the one that you need.see all shortcuts
  3. For instance, to get to the mouse settings we wrote about in the beginning of this article, type mouse in the search field from the top-right corner of the window, click the right arrow to search, then double click Change mouse settings.go to mouse settings
  4. There you go! You’ve reached the same window that we’ve told you about before. mouse settings windows in windows 11

That was just an example we used to highlight how much time and effort God Mode on Windows 11 can help you save time.

However, if you need to be even more effective, drag and drop the most used commands on your desktop to have them even more accessible.

What are the most interesting hidden features of Windows 11?

Many of you have been asking about the hidden features in Windows 11 and the straight answer to that is that there are no hidden features.

There are, of course, some new ones and some features that were present in Windows 10 and have been removed from the new OS.

If you want to know more about them, we have an excellent comparison between Windows 11 and Windows 10 regarding the new features.

On this matter, however, there are a few settings that you cannot get to in Windows 11 using the God Mode folder.

For instance, there is a new feature in Windows 11 where you can disable the network adapters by accessing the Advanced network settings from the Network & Internet menu in Settings.

advanced network settings windows 11
You can disable the adapters quickly from Advanced network settings

Well, there is no shortcut for this in the God Mode folder. In fact, we couldn’t even find the Network & Internet shortcut.

So, although this folder can help you a lot with some useful shortcuts to the most common settings, this tool is not yet updated with all the options from Windows 11.

And by the way, you can also use this on Windows 10 using the exact same steps as we described for the new OS.

Can I delete the God Mode folder?

Yes, you can safely and easily delete this folder. Remember, these are just shortcuts, so they are safe to delete. To delete it, just do the following:

  1. Locate the God Mode folder.
  2. Right-click it.
  3. Choose Delete icon from the menu.
    delete the god mode folder in windows 11

How do I turn off Windows God Mode?

This feature can’t be turned off, and you’ll always be able to create a God Mode directory on your PC. However, there’s a way to prevent users from accessing it.

As you probably guessed, this involves removing the entire directory, as we showed you in the previous section.

We hope that this guide has helped you add and use the God Mode folder on your Windows 11 and now you have your most-used shortcuts on your desktop.

Want to learn more about lesser-known features? If so, be sure to read our guide on experimental Windows 11 features.

Did you find this guide useful? Drop us a line with your experience and input in the comments section below.

How to Get Android Notifications on a Windows 10 PC

If you own an Android smartphone, you’ll be happy to know that you can finally manage Android notifications in Windows 10.

The app that links your phone with your PC is called Phone Link, formerly known as Your Phone, and it allows you to see notifications from your smartphone directly on your Windows 10 PC.

Also, you can see your entire SMS history or reply to messages directly from the PC.

Read on to find out how to connect your devices so that you can receive Android notifications directly on your PC.

How can I get Android notifications on my PC?

    If you want to connect your Android phone to a Windows 10 PC in order to receive notifications on the PC, you need to use the Phone Link app.

    First, make sure that you have the Phone Link app on your PC and that it’s updated. If you don’t have the app, you can get it from the Microsoft Store.

  1. 1. Press the Windows key on your keyboard and type Phone Link in the search box that opened, then click on the first result to open the app.

    search for phone link in windows search and open it
  2. 2. Click on Get Started.

    click on get started on phone link
  3. 3. Sign in with your preferred Microsoft account.

  4. 4. On your Android phone, navigate to the www.aka.ms/yourpc web address and install the Link to Windows app.

    When you’re done, go back to your PC and click on I have the Link to Windows app ready.

    click to pair your android with phone link via code
  5. 5. Choose between Pair with QR code and Pair manually. If you choose the first option, the app will create a QR code for you to scan using your Android phone, in order to automatically connect your devices.

    click to connect android to pc with qr code
  6. 6. If you prefer to choose the Pair manually option, you need to open the Link to Windows app on your device, click on Continue, allow the app to access your camera, and then press on Try another way.

    After, you need to sign in with your Microsoft account on your Android in order to connect the devices.

    pair devices manually phone link
  7. 7. After you connect the devices, you just need to review the permissions. You can choose whether you want to allow Windows Link to:

    • Access your contacts
    • Make and manage phone calls
    • Send and View SMS messages
    • Access photos and media on your device
  8. 8. After, click on Continue.

  9. 9. Select whether you want to let the app run in the background.

  10. 10. Click on Done.

  11. 11. And that’s it. From now on, you’ll receive notifications and messages from your Android phone directly to your desktop.

    If you’ve missed some of them, you can always find the in the Windows 10 Notification Center.

It’s worth mentioning you’re also able to reply to messages from all your messaging apps, not only from your default Android SMS app. One less to take your phone out of your pocket!


Your Phone app won’t connect to the smartphone? Check out our guide to solve the problem in no time.

In case your Android phone isn’t recognized by your Windows 10 PC, we have yet another dedicated guide that will help you fix the issue.

If you have any more questions or suggestions, feel free to leave them in the comments section below.

Overwatch 2 launch plagued with mass DDoS attack on its servers

The follow-up to Activision Blizzard’s 2016 smash hit hero shooter, Overwatch 2 went live yesterday as we reported in the hours leading up to its launch.

Unfortunately for fans, that launch is getting off to quite a rough start thanks to a mass DDoS (disrupted denial-of-service) attack on the game’s servers. This type of attack is typically a malicious effort to crash an online service by flooding it with synthetically-generated traffic.

President of Blizzard Entertainment Mike Ybarra put out a statement on social media assuring gamers that the team is “working hard to mitigate/manage” the widespread connection issues plaguing the servers.

As reported by Kotaku, the issues continue into the second day of the game’s launch, preventing players from logging in to the game. This isn’t the first time a Blizzard game has experienced a troubled launch: Diablo III’s infamous “Error 37” immediately come to mind.

Overwatch 2 is a free-to-play title. For the time being, however, you will be hard-pressed logging in to play the game. And that’s after enduring long queue times.

Link unfurling in Outlook reaches public preview

When running a business or organization, communication plays a crucial role as it determines the trajectory you’ll take which is why Microsoft keeps on making updates and adding features across its multiple platforms. Case in point, during Microsoft Build 2022, Link unfurling made its way to Microsoft Teams.

Namrata Khubchandani from Microsoft pens down that:

At Ignite 2022, we’re announcing public preview for Link unfurling in Outlook. Users will now be able to insert a link, and have it expanded into a rich actionable preview card (where a corresponding message extension supports it), allowing recipients to get additional context on the link and complete their workflows in Outlook, without context switching.

Link unfurling, therefore, enhances link sharing as senders will be able to add more information to the link shared through the tool. Recipients will also be able to make any actions such as update status, re-assign tasks, or add comments while in preview mode without having to switch context by opening the links completely.

Here’s a glimpse of how to make use of the tool in Outlook:

At the moment, the feature is in public preview and has already begun rolling out to users enrolled in the Microsoft 365 Targeted Release program as well as those who are members of the Office Insiders program and have Outlook for Windows installed from the Beta Channel.

However, if you are a developer and your message extension app supports link unfurling in Teams, and likewise has already been extended to Outlook, then you be able to use it in Outlook.

Xbox Series X consoles add special Fallout 25th Anniversary dynamic background

A new dynamic background is now available to use on Microsoft’s current generation of Xbox consoles which include the Xbox Series X and Xbox Series S.

This new animated wallpaper is inspired by the popular Fallout video game franchise which is celebrating its 25th anniversary this year.

To activate the Fallout dynamic background on your Xbox console, open the console’s guide by pressing the Xbox logo button on your controller and select Settings > Personalization > My background > Dynamic backgrounds, highlight the wallpaper, and press A.

Dynamic backgrounds inspired by Grounded, Halo Infinite, and Wasteland 3 should also be available for selection.

If you don’t see the Fallout dynamic wallpaper, make sure that your Xbox console is connected to the internet and that it has the latest operating system update installed. Note that dynamic backgrounds are not available on the last-gen Xbox One family of consoles.

Want more Xbox goodness? Follow us on Facebook and Twitter.

Walking Dead and more coming to Xbox Game Pass this month

Eight new titles have been officially confirmed as coming to Xbox Game Pass this month in addition to Chivalry 2 which was announced yesterday and went live today.

The first title is Medieval Dynasty which will be available from October 6th on Microsoft’s current-gen Xbox Series X family of consoles. The Walking Dead: The Complete First Season and The Walking Dead: Season Two are also set to come to Game Pass on October 6th but will be on PC Game Pass only, not the Xbox console tier.

On October 11th, Game Pass subscribers will be able to play Costume Quest on Xbox One and Xbox Series X consoles in addition to Xbox Cloud Gaming on supported devices. Also on the 11th, Eville will go live on Windows PC and both Xbox console generations.

Dyson Sphere Program comes to PC Game Pass on October 13th and is followed by Scorn the next day on Xbox Cloud Gaming, Windows PC, and Xbox Series X.

The final new Game Pass addition announced today is A Plague Tale: Requiem which will unlock on Windows PC, Xbox Cloud Gaming, and Xbox Series X on October 18th.

Need more Xbox news in your life? Follow us on Facebook and Twitter.

Telegram updates on Windows 11 with reaction changes and emoji statuses

The official Telegram app for Windows devices updated this week with several new changes to reactions and the launch of emoji statuses for Telegram Premium subscribers.

Groups and private Telegram chats now have access to a new expandable menu for selecting reactions from. More reactions are also now available for free users to use as some reactions that were previously exclusive to Premium users have now been unlocked for everyone.

In addition to the above changes, Telegram Premium users can now add up to three separate reactions to messages, a first (as far as I know) for a social media platform. It’ll be interesting to see if rival networks, like Facebook and Twitter, copy this functionality.

Telegram Premium users can also now add an emoji status next to their name to represent their current status.

Here’s the full release notes for this app update:

Infinite Reactions

  • A new expandable reaction menu was added in private chats and groups.
  • All users get access to dozens of new reactions, including reactions previously reserved for Premium users.
  • The reactions you use most frequently will always be displayed at the top.
  • Premium users can react to messages with thousands of custom emoji and add up to 3 reactions to each message.

Reaction Management

  • Group admins can control whether custom reactions are allowed in their groups.

Premium: Emoji Statuses

  • Premium users can add an animated emoji status next to their name to display their current activity.
  • To set a status, click your Premium badge in the main menu or Settings.
  • Popular suggestions for working, sleeping, traveling and more will be shown at the top.
  • To set a status for a specific duration like 1 hour or 2 days, right click the emoji.

And more

  • A new format was supported for username links, in addition to “t.me/username.” You can now open Telegram accounts, groups or channels using links like “username.t.me” or “https://username.t.me.”
  • Improved support for long media captions.

After more Windows app updates? Give us a follow on Twitter.

Telegram Desktop
Telegram Desktop
Price:
Free

How to Download & Play GOG Games Without Galaxy

GOG Galaxy is an amazing platform that allows users to combine all their gaming libraries, and access them in one go. But several users report that the application consumes a lot of resources and therefore are looking for ways to play games without GOG Galaxy.

The features offered by GOG Galaxy make it truly amazing, but users feel there should be an option to play games independent of it as well. And there’s is one, though most users are unaware of it.

Hence we decided to dedicate this guide to helping you understand how to play games without GOG Galaxy in Windows. Read along to find out!

Can I connect with friends on GOG Galaxy?

Yes, GOG Galaxy allows you to remain connected with your friends, both who are on GOG Galaxy and the ones who are not. After linking the various platforms and social media accounts, you can find your friends.

Along with that, you also have the option to message them across platforms and check their online status even if they haven’t joined GOG Galaxy. This added functionality makes the app stand out from its competitors.

How do I play GOG games without GOG Galaxy?

Note icon NOTE
We will be playing The Witcher Enhanced Edition without GOG Galaxy as an example below. Once you have an idea of the process, you can similarly play other games as well. The location of the launcher (.exe file) might be different for each, but it shouldn’t be difficult finding it.
  1. 1. Press Windows + E to launch the File Explorer.

    Launch File Explorer to play games without gog galaxy
  2. 2. Next, enter the following path in the address bar at the top, and hit Enter to navigate to it:C:\Program Files (x86)\GOG Galaxy\Games

    Navigate the path
  3. 3. Double-click on the game that you intend to play.

    Open game folder to play games without gog galaxy
  4. 4. Double-click on the launcher (.exe file) for the game, to start playing it.

    Open launcher to play games without gog galaxy
  5. 5. Select Yes in case a UAC (User Account Control) prompt appears.

    Click Yes to play games without gog galaxy
  6. 6. The game should launch right away.

    play games without gog galaxy
  7. If you’re looking to play GOG games without GOG Galaxy, you should know that you can open them directly from their .exe files.

    All you need to do is locate their installation folder and right-click on their respective .exe file, and the games will start without Galaxy.

    The installers for various games added to GOG Galaxy are located somewhere within their respective folder. For some, these may be pretty easy to find while in other cases, you will have to search a bit.

    But once you locate the launcher, you can play games without GOG Galaxy in Windows. Also, the launcher may be saved with another name, so it’s recommended that you look out for executable (.exe) files.

How do I install the missing DLL files to play games in GOG Galaxy?

Many users received an error mentioning that a certain DLL file is missing and that reinstalling the game should fix it. But, most were unable to eliminate the error even on subsequent installs.

system error when trying to play games without galaxy
System Error: DLL file missing

The error can be encountered both when trying to play games through GOG Galaxy or without it. The easiest way out here is to install the missing DLL files.

The process shouldn’t take more than a few minutes, and would most certainly eliminate the error. Here’s how you can do that:

  1. Go to the official DLL-FILES site, enter the missing DLL file in the search box at the top, and hit Enter. Go to dll-files.com
  2. Click on the relevant search result.Select DLL file
  3. Now, click on Download to get the required DLL file.Download DLL file
  4. Once it’s downloaded, head to the folder where it’s located, right-click on the saved file, and select Extract All from the context menu.Extract files
  5. Choose the desired location to save the extracted file, and click on Extract at the bottom to start the process.Choose extraction path
  6. Open the extracted folder, select the DLL file and hit Ctrl + C to copy it.Copy DLL file
  7. Now, navigate to the folder where the game files are saved and press Ctrl + V to paste the DLL file.Paste dll file
  8. The game should now launch without any trouble whatsoever.

However, make sure that you download a 32-bit DLL file for a 32-bit program and a 64-bit DLL file for a 64-bit program. If that’s not the case, you will encounter the 0xc000007b error.

You now know how to play games without GOG Galaxy in Windows 11 and the process to download DLL files, in case any are missing.

In case you are new to GOG Galaxy, check out our GOG review detailing every aspect of it.

Do not hesitate to tell us your experience of GOG Galaxy in the comments section below. We’re eager to hear from you.

How to Backup Origin Games Saves

Electronic Arts is one of the biggest video-game publishers on the market today. It published countless memorable titles such as the FIFA or the Dragon Age series.

It even released its own proprietary client that acts as a library, marketplace, news reading site, and messenger with all things EA-related.

This client is known as Origin, and like all pieces of software, it too has the occasional bug in the system.

If you already use Origin, then you know how all of your games can either be saved locally or in the cloud.

However, sometimes bad Internet connection can lead to an error in the cloud save.

Additionally, locally saved games mean you can keep your place in-game the next time you play, and restore a local save to overwrite a cloud save.

Read on to find out how to backup your Origin games so that you can easily install them later on, without having to wait for them to download.

How can I backup my Origin games and their save files?

    Before you can start the process to backup your Origin games, one thing you need to remember is that you have to backup any save files before you uninstall the game itself, or even Origin.

    If you do that, the game saves will be gone as well, and you’ll be left with just the cloud save.

  1. 1. Open File Explorer by pressing Windows + E on your keyboard.

  2. 2. Navigate to your Documents folder.

  3. 3. Locate the Electronic Arts folder in the list.

  4. 4. If you want to backup all your Origin games’ saves, right-click on the Electronic Arts folder and select Copy from the list of options.

  5. 5. On the other hand, if you only want to copy the game saves for one game, open the folder for that specific game and locate its Saves sub-folder.

    From there, right-click on the Saves folder and select Copy from the list.

  6. 6. Paste the game save in whatever location you use to store your backups.

    Origin Game saves location

How can I restore Origin games from the backup?

If you want to reinstall Origin or your games later, all you have to do is follow these steps:

  1. Go back to the Electronic Arts folder and paste the game saves wherever they should be.
  2. Launch Origin.
  3. Go to your Game Library in Origin.
  4. Right-click on your game.
  5. Select Game Properties.
  6. Click Cloud Saves.
  7. .Choose Restore Save
    • You’ll be prompted with a message stating that You are now reverting to a locally stored save file…
  8. Click OK.
Restore Origin Game save

The same can be done if trying to continue playing the same game saves from a different PC.

Keep in mind that you can only restore your last saves on games that have cloud saves, so rollbacks will not be possible.

We hope you enjoyed reading our article on how to backup your Origin games. Let us know what you think about this subject in the comments section below.

How to Backup GOG Games Using Offline Game Installers

Everyone loves the good old games of the past, and some argue that the newest releases can’t even compare to them.

If you share this mentality, then you surely must have at least heard of GOG.com (formerly Good Old Games), a digital distribution platform for video games.

This neat video-game distribution platform caters mostly to the gems of the past. More so, they manage to deliver them in a DRM-free manner.

However, not everyone around the world has access to a high-speed Internet connection. As such, re-downloading a game whenever you feel like playing it can take forever, and sometimes even more.

As such, users have been wondering how they can make a backup of their GOG titles on their hard drives.

What is an offline GOG backup game installer?

Simply put, an offline backup installer is an installer that is stored on your device and allows you to install games from it without having to access the internet. This is how installers used to function back in the day.

An offline game installer is very useful if you want to install GOG games without internet, for whatever reason.

How can I backup GOG games?

1. Backup a GOG game through GOG Galaxy

  1. Open GOG Galaxy.
  2. Select a game in your Library.
  3. Click More, next to Install or Play.
  4. Choose Backups & goodies.
  5. Select the game under Game Backup Copy.
  6. Wait for the backup to finish.
backup gog games example

2. Download a GOG offline backup game installer

  1. 1. Go to the GOG website.

  2. 2. Log in with your account.

  3. 3. Hover your mouse over your Account’s name in the main page.

  4. 4. Select Games from the drop-down list.

  5. 5. Hover your mouse over the game you want to download and press the downward arrow that appears.

  6. 6. Select VIEW DOWNLOADS.

  7. 7. Click on DOWNLOAD OFFLINE BACKUP GAME INSTALLERS.

  8. 8. Select each file, and it will start downloading through your browser or a download manager, directly to your device.

    Download GOG backup Installer
  9. You can download the GOG offline backup installer for any game you want directly from the official GOG website.

    In doing so, you will no longer need to install the game through GOG Galaxy, or have an internet connection while installing.

    Keep note that this second method will download the base game as it was originally uploaded on GOG.

    This means that any updates that were later applied will only become available the next time you open GOG Galaxy and have an Internet connection.

Apart from that, both these methods will allow you to back up your games in a location of your choosing. This means that you can even back them up on an external hard drive, and install them whenever you see fit.

More so, you don’t need to have GOG Galaxy installed on your PC in order to install or run the games.

Additionally, since the games are DRM free, they will not be detected as pirated content, and are thus 100% legal to use.

Let us know in the comments section what you think about GOG games and whether our guide helped you back them up.

How to Create a Desktop Shortcut for GOG Galaxy Games

GOG.com (formerly Good Old Games) is a digital distribution platform for video games, but also films.

It specializes in the distribution of older titles, hence the name, but it also deals with new ones as well.

What sets GOG apart from other similar platforms such as Steam or Epic Store is that the Games are DRM-free.

GOG also lets you download a client from where you can manage your game library.

This client is known as GOG Galaxy, and it boasts plenty of neat features.

However, some users have been wondering about some of the features that seem to be hidden from plain sight:

Just a quick question. Is there a way to create a shortcut for a game i’ve downloaded from Galaxy? I know that if you download the game from GOG’s website it automatically adds a shortcut to your desktop, but is there a way to do this with Galaxy?

While the games you downloaded could easily be accessible from the GOG Galaxy library, some people still seem to prefer the good old-fashioned icon on the desktop.

How can I create a desktop shortcut for GOG Galaxy titles?

    Normally, when you download a game via GOG, you should be prompted in the download location screen whether you’d like a desktop shortcut or not as well.

    However, you can set GOG Galaxy to create desktop shortcuts for all the games you download as a default feature.

  1. 1. Open GOG Galaxy.

  2. 2. Click on GOG.com. It is located in the upper-left corner of the screen.

  3. 3. Choose Settings from the list.

  4. 4. Select the Downloads tab.

  5. 5. Check the box next to the Create shortcut on desktop field.

    How to create a desktop shortcut for games
  6. 6. Close the window when you are done. The change should now apply to all future games you will download.

Remember that uninstalling GOG Galaxy will NOT uninstall the games you downloaded through it.

What are some other good game distribution platforms?

If you don’t like GOG, you should give other digital game distribution platforms a shot, such as Epic Games or Steam.

More so, all of them have massive sales that rotate on a weekly basis, with mega sales happening during Summer and Winter.

Some publishers, such as Electronic Arts, Ubisoft, or Rockstar Games have their own proprietary clients, namely Origin, Uplay, and the Rockstar Games Launcher.

We hope you managed to create desktop shortcuts for your favorite GOG Galaxy games. Let us know what you think about our article in the comments section below.

How to Recover OneNote Files That Were Deleted

Microsoft OneNote is a note-taking app that allows you to plan events and create a to-do list.

However, if you have lost notes recently that you were working on or had some important information, you may still be in luck and be able to recover deleted OneNote files.

In this article, we show you the best ways to recover OneNote files in Windows 10.

Are OneNote files backed up?

It is always a good idea to back up your OneNote notes, especially when you are sharing them with other users or collaborators.

By default, OneNote is set to automatically create backups of your files every single week. You can modify the OneNote Options to change the Save & Backup option.

How can I recover deleted OneNote notes and pages?

You can recover deleted OneNote files using the backup on your computer or notebook in OneDrive.

If not, there is third-party data recovery software that can help you recover deleted files with ease, and we will tell you all about it.

1. Recover deleted OneNote files from the app‘s Recycle Bin

  1. 1. Launch the OneNote desktop app on your PC.

  2. 2. Select the View tab from the toolbar. Make sure that OneNote is in full-screen mode.

  3. 3. Click on the Deleted Notes button. This will show all the deleted notes in the past 60 days.

  4. 4. Go through the list of deleted notes and pages to find the one you want to restore.

  5. 5. Select the one you want to recover and right-click on it, then press on Restore to.

    recover deleted onenote files
  6. 6. Next, select where you want to move and restore the file.

  7. The first method you should try out if you want to recover deleted OneNote files is access the app’s deleted files section.

    From there, you can manually restore whichever files or pages you want to get back to your Windows PC.

    However, you can only recover files that were deleted in the past 60 days. After this time period finishes, the files are gone forever.

OneNote 2016

recover deleted onenote files
  1. Launch the OneNote 2016 app on your PC.
  2. Open the History tab from the toolbar.
  3. Open the Deleted Pages tab. This will display all the notes deleted in the past 60 days.
  4. Right-click on the note that you want to restore and select Move or Copy.
  5. Select the desired Notebook to restore the deleted notes.

As mentioned earlier, you can only restore notes that are deleted within the past 60 days. Also, the notes must have been deleted from the OneNote app or desktop.


2. Use Stellar Data Recovery to retrieve deleted OneNote files

stellar app logo

Stellar Data Recovery is a popular, fast, and highly customizable file recovery tool that can be used to recover deleted OneNote files. 

The tool will display all the recovered files in a preview window. Although to recover the files, you need a licensed copy of Stellar Data Recovery.

Plenty of users have no idea how useful this tool really is. Don’t be one of them and read our elaborate Stellar Data Recovery review to find whether it is worth the money or not.

Stellar Data Recovery enables users to recover deleted, lost, and unavailable files from almost any storage device including SSDs, external hard drives, USB storage as well as smartphone.

Apart from the recovery features, it also comes with tools to create bootable recovery media, repair corrupt videos and photos, recover from encrypted drives as well advanced raid recovery.

  • Enables you to recover lost or deleted documents, email data files, videos, and photos
  • Retrieve data from PC, laptop, USB flash drive, and hard drives
  • Recover files lost due to drive formatting or corruption

We recommend you download and scan your storage with the Stellar Data Recovery tool. If your deleted files show up in the scanned results, you can purchase a license to restore the files.

Stellar Data Recovery

Stellar Data Recovery

Do you want to easily recover any lost OneNote files? Just try out this powerful software option!
Free trial Visit website

3. Search for backups on your computer

recover deleted onenote files
  1. Open the Notebook where you lost recent notes.
  2. Go to File, click on Info, and select Open Backups.
  3. In the Open Backup dialogue box, note the folder names that appear. Each folder represents a OneNote notebook that’s saved on your computer.
  4. Next, double-click on the notebook folder that you want to open.
  5. Select the backup file for the notebook section you want, and choose Open.
  6. If your deleted notes are included in the backup section or pages, right-click and select Move or Copy.

4. Restore the last deleted file in OneNote

If you have just accidentally deleted a file or page on your OneNote, worry not, because you can instantly restore it with a simple fix.

As long as your last action done on the computer was to delete that file, you can undo it. All you need to do is press the Windows + Z keys at the same time on your Windows keyboard.

However, as soon as you close the app, you can no longer undo the last deletion under any circumstance, and you have to use other methods to restore that file.

You can restore deleted OneNote files from the OneNote desktop app using the Deleted tab. However, if that does not work, you can use third-party recovery software like Stellar to restore the deleted files.

If you want to start fresh instead, here’s how to create a new notebook in OneNote.

We hope you managed to recover OneNote files that were deleted or missing from your PC using our guide. Let us know in the comments section below what you think about our article.

How to Activate Your Payoneer Card After You Create It

Payoneer is a financial services company that allows online money transfers, digital payment services, and working capital solutions.

It works pretty much like PayPal and it is used worldwide in over 200 countries. This is mainly because it is specialized in cross-border B2B payments.

Additionally, it offers other great services, such as cross-border wire transfers, online payments, and refillable debit card services, similar to Revolut.

This neat feature makes it ideal for big companies with thousands of employees around the world, especially when it comes to sending salaries.

Account-holders can even send and receive funds into re-loadable prepaid MasterCard debit cards.

If you’re new to Payoneer and you’ve just received your card, you’ll need to activate it before you can use it to make payments.

This step-by-step guide will tell you exactly everything you need to know about how to activate your Payoneer card.

How do I activate my Payoneer Prepaid Card?

  1. 1. Go to the official Payoneer Website.

  2. 2. Sign in to your Payoneer account using your credentials.

  3. 3. Navigate to Settings.

  4. 4. Go to Card Management. A list of all your owned cards will appear on the screen.

  5. 5. Browse through the list and locate the card that you want to activate. Select it, and click on ACTIVATE.

  6. 6. Press on the button for Card Activation.

  7. 7. Enter the 16-digit card number for your card.

  8. 8. Now you need to choose a PIN for your card. It has to contain 4 digits. You’ll have to remember this PIN since you’ll use it every time you want to withdraw money from an ATM machine. More so, you’ll also need it whenever making purchases.

    • Make sure your PIN is easy to remember
    • Never share your PIN with anyone else
  9. 9. Confirm your PIN.

  10. 10. Press ACTIVATE. A confirmation message will appear.

  11. 11. Once all steps have been completed, make sure you Sign Out from your Payoneer account.

  12. 12. Your Payoneer card is now fully activated and you can make full use of all of its services.

    Activate Payoneer card finish
  13. If you want to activate your Payoneer card, you can easily do this from the official website for Payoneer. Ensure that you access it from your private computer.

    Don’t activate your Payoneer card on a public PC, as it may put your personal info as well as your funds in danger

    Please keep in mind that your Payoneer card is a Prepaid Card, and therefore needs to be loaded with money before you can use it.

These steps also apply when trying to replace an old Payoneer card. More so, any money you may have had on the old card will automatically be transferred to the new card.

We hope you managed to activate your newly-bought Payoneer card using our guide. Feel free to write down in the comments section below whether you had any difficulties following our guide on Payoneer card activation and what you like most about this service.

How to Check FPS on Windows 10 PCs: Easiest Steps to Use

The number of frames that appear per second on your screen is generally known as FPS (frames-per-second).

A higher frame rate will help you to play the best Windows 10 games without any problem. This is ideal for both hardcore gamers and casual players.

Does Windows 10 have an FPS counter?

PC gamers previously relied on third-party FPS counters for purpose of finding out how many FPS per second appear.

However, Windows 10 users always longed for a built-in FPS counter to allow them to check their frames per second. Here is how a player asked about the same in a Reddit thread:

My kids have started playing the Windows 10 version and I can’t seem to find a way to show the fps. Any idea? Is there a / command or something?

Fortunately, Microsoft listened to the popular demand of the gaming community. The Redmond giant has announced the addition of frames per second (FPS) in Xbox Game Bar:

We heard you loud and clear, the Performance overlay needed a framerate counter. With the October 2019 Game Bar update, we’re introducing the highly requested frames per second (FPS) counter to the Performance overlay on Xbox Game Bar.

That being said, read on to find out how to check the FPS on your Windows device.

How can I show FPS on Windows 10?

  1. 1. Before you can use the Xbox Game Bar to show the FPS on your device, you must first install it on your device. If you already have it installed, skip to step 5.

  2. 2. Navigate to the Microsoft Store and search for the Xbox Game Bar application.

  3. 3. Wait for the Xbox Game Bar update to be installed on your system. You are required to accept some additional Windows permissions.

    Download Xbox Game bar Update
  4. 4. Reboot your system to apply the changes.

  5. 5. Launch a game in which you want to find out how many FPS you have.

  6. 6. Press the Windows + G keys at the same time on the keyboard to open the Xbox Game Bar overlay.

  7. 7. Go to the Performance section to see the framerate counter.

    click to access the performance tab in xbox game bar
  8. 8. A small box on your screen will display the performance data for your device. You can see the CPU, GPU, VRAM and RAM usage, as well as the FPS.

    You can move the Performance box wherever you want on the screen, in case its default position is not appropriate.

    check the window to show fps in windows 10
  9. The FPS frame rate counter should be available automatically on all Windows 10 PCs as a part of the October 2019 Update for the Xbox Game Bar.

    However, if you are using an older Windows 10 version, you still have the option to check for updates directly from the Microsoft Store.

    You can keep track of the changing game performance with the help of a graph available under the Performance section. On top of that, the update brings some additional options that allow you to track RAM, GPU and CPU usage.

In the past, it seemed like the new feature was restricted to only a subset of Windows Insiders. There were multiple reports on social media that the updates were not available for them.

Those users needed to wait for a few more weeks before getting the FPS counter, once the new Xbox Game Bar experience was made available for all users.

We hope you managed to check the FPS on your Windows 10 device using the built-in Xbox Game Bar. The method is simple and gets the job done within a few clicks, as you can see from the guide above.

Let us know in the comments section whether you encountered any issues while attempting to show the FPS with this app.

How to Transfer Money to a Payoneer Account

If you are looking for a company that provides online money transfer and digital payment services and working capital solutions, then Payoneer is a go-to solution.

This service is similar in many ways to other well-known services, such as Revolut, PayPal, or Monese.

Of course, since a major part of using Payoneer revolves around your sending and receiving money, knowing how to make transfers is a must.

As such, for those of your new to Payoneer, we’ve assembled a step-by-step guide on how to transfer money via Payoneer efficiently.

How do I transfer money from my Payoneer account?

1. Transfer money to another Payoneer account

  1. Go to the official Payoneer Website.
  2. Sign in to your Payoneer account.
  3. Hover your mouse over the Pay button.
  4. Select Make a Payment in the dropdown menu under Pay.
  5. Complete the form with your recipient’s details:
    • This includes the recipient’s email address
      • The recipient’s email address needs to be registered to a Payoneer account
    • The amount you wish to send
    • The type of transfer (purpose of the transfer)
    • Add a note
      • This is purely optional and acts as a side-note for both you and the recipient
  6. Click Make a Payment.
  7. The payment is sent to your recipient’s Payoneer account.

2. Transfer money from your Payoneer account to your bank account

  1. 1. Go to the official Payoneer Website.

  2. 2. Sign in to your Payoneer account.

  3. 3. Go to Withdraw.

  4. 4. Select To Bank Account.

  5. 5. Choose the currency balance or the card you want to withdraw funds from.

  6. 6. Enter the specific withdrawal details:

    • Choose the bank account you want to withdraw to
    • Write down the amount of money you want to withdraw
  7. 7. Click Review. You will receive a final overview of the transfer you are about to make. Read it and ensure that everything is in order.

  8. 8. If you want to make any changes to the money transfer, click on Edit. Otherwise, simply skip this step and go straight to step 9.

  9. 9. Finally, press on Withdraw.

  10. If you have money in your Payoneer account that you want to use from your bank account, you can simply transfer them from one place to the other.

    Basically, you withdraw money from your Payoneer account using your bank account. Do remember to make a last-minute check and ensure that the withdrawal details are in order before you proceed with the transfer.

If you are also dealing with issues on other finance platforms, check our Wealthsimple not working guide for step by step fixes.

3. Make a Payment Request through your Payoneer account

A Payment Request is Payoneer’s version of receiving money from an institution that owes you, similarly to an invoice.

  1. Go to the official Payoneer Website.
  2. Sign in to your Payoneer account.
  3. Go to Receive.
  4. Select Request a Payment.
  5. Complete the form with your recipient’s details:
    • This includes the individual or company’s email address
      • The individual or company needs to be registered to a Payoneer account
    • The amount you wish to send
    • The type of transfer (purpose of the transfer)
  6. Add a Payment due by date.

By following these steps you’ll know exactly how to send and receive money using Payoneer.

We hope you managed to transfer money to a Payoneer account using our guide. If you have any other Payoneer-related guides you want to ask of us, do not hesitate to do so in the comments section below.

Geekom Mini PCs: Pushing the limits of Intel GPUs

Starting at $279.00

Geekom’s similarities to Intel’s NUK mini-PCs may seem apparent at first glance but it’s in the details where customers save a little bit more with Geekom’s Mini IT11 and Mini Air 11 PCs.

We were given the Geekom Mini Air 11 and Mini IT11 as review units and while we are combining experiences for a single review, there is a gulf of performance between Intel’s former Celeron N590095 chip and its more mainstream 11th Gen Intel Core i7-1195G7 processor.

There are two very distinct computing styles Geekom is targeting with the Mini Air 11 and the Mini IT11 which would include a data tasker in search of stationary computing experiences and someone who requires a bit more headroom in flexibility of tasks, respectively.

GEEKOM MiniAir 11 GEEKOM Mini IT11 Intel NUC11
$279 $799 $849
117 x 112 x 34.2 mm 117 x 112 x 45.6 mm 117 x 112 x 51 mm
500.3 g 564.9 g 564.9 g
YES YES YES
Metal inner frame Metal inner frame Plastic Frame
11th Gen Intel Celeron N5095(4M Cache, up to 2.90 GHz) 11th Gen Intel® Core™ i7-1195G7 (4 Cores, 8 Threads, 12M Cache, up to 5.00 GHz) 11th Generation Intel Core i7-1165G7
Intel® UHD Graphics 605 Intel Iris Xe Intel Iris Xe Graphics
8G 16G 16G
32G 64G 64G
256GB 512GB 512GB
1T 2T 2T
Windows 11 Pro Windows 11 Pro Win 10 Pro
Intel® Wi-Fi 5, Bluetooth® v4.0 Intel® Wi-Fi 6, Bluetooth® v5.2 Wi-Fi 6, Bluetooth 5.2
Automatic Voltage adjustment between 100 and 240V AC,
50/60Hz, 45Watts(19V/2.36A), 3Pin,1.5 meters in length
Automatic Voltage adjustment between 100 and 240V AC, 50/60Hz, 3 pin,
65 Watts (19V/3.42A),1.5 meters in length
19V DC Input
1 x VESA Mount
1 x Power Adapter
1 x Storage Bag
1 x HDMI Cable
1 x Mini DisplayPort to HDMI Adapter
1 x User Guide
1 x Thank You Card
1 x VESA Mount
1 x Power Adapter
1 x Storage Bag
1 x HDMI Cable
1 x User Guide
1 x Thank You Card
2 x USB4 Type C Ports
1 x Power Adapter
1 x User Guide


Look and Feel

It’s a little black box, in every sense of the phrase. While there are turquoise stencils that adorned the top of the box, the majority of the design is a subtle black and grey toned box about the size of a medium sized external hard drive at 117 x 112 x 34.2mm.

The construction of both Mini 11 and the Mini IT are solid with zero flex or bend to any of the mostly metallic materials or the hard-plastic top.

Keeping with the general theme of multifunctional work horses the Mini 11 and Ari both sport a series of I/O that includes two USB-A Gen 1 Ports, USB-C data only slot, headphone jack and power button on the front of the boxes while the rear houses ventilation grills, an additional USB-C (data only) port, full size HDMI, two USB 3.2 Gen connectors, an Ethernet cable, Mini DisplayPort and DC power barrel port. On the right of the box is a single full sized SD card reader as well.

Geekom Mini Air - IT11 Ports

As previously mentioned, the size of either Mini device is ideal for most desktop setups because of its flush top and bottoms as well as its relatively pocketable design with its rounded corners that offer a bit of sleekness while adhering to some functional aspects of the design that allow it to be placed on its side, have items stacked on top or even VESA mounted to be completely out of the way.

The last thing I want to note is the accessibility of the device which houses four medium-sized Philips head screws under the rubber feet that make way to the inside of the computer and enables the owner to upgrade the SSD and dual channel RAM if desired.

Performance

After five minutes’ worth of setup that includes unboxing and plugging in the cables connected to the device as well as Bluetooth connected peripherals, the Mini’s were up and running.

Despite several marketing materials on the site and in the packaging, neither Mini desktop reference devices are made for gaming. However, that is not to dissuade the idea that Geekom isn’t squeezing the most out of Intel’s integrated GPUs.

Geekom - Air 11 Inside

For the 11th Gen Intel Celeron N5095 powered users are met with a admirable UHD 605 GPU paired with a 250GB M.2PCIe and 8GB of RAM out of the box. The end result of this pairing for the Mini Air is that customers are left with a highly performing data-oriented computer.

The Mini Air is fast and fluid at web browsing, opening and transferring most average-sized files, and light to medium productivity tasks in Office 365. However, the ceiling of those data-oriented experiences is moderately low thanks to the imbedded Intel Celeron processor, so opening up too many instances of Excel or Chrome will begin to choke the performance of the machine.

The Air is a more suitable purchase for anyone looking to spruce up an old workstation or unsightly desktop tower that may be over 5 or six years old.

As for the Mini IT11, that is where Geekom’s focus on value really shines. While the Mini IT is a bit pricier than the Air, it offers substantially more performance with its 11th Gen Intel Core i7 offering. While it made little sense to run performance benchmarks on the Mini Air when its struggles were readily visible, I did run some benchmarks for the more powerful IT11 variant.

Geekom - Mini - Side - Hero

Cinebench testing resulted in the Mini 11IT netting the highest single core performance marks against a NUC 9 with an i7, Ryzen 3 3399U, Ryzen 5 1600 and an M1 MacBook Air from two years ago.

However multicore testing through Cinebench against the same lineup saw the Mini IT11 come in near the bottom of the pack with a score of 5679 against the MacBook Air’s 6852 score. The limited four cores eight threads of the chipset quickly became a hindrance.

As for gaming, there are quite a bit more titles you can play on the Mini IT11 at 1080p settings beyond light RPG’s and turn based action found on the Mini Air, such as Dota 2, League of Legends, Minecraft, GTA V, Hitman 2, Fortnite, Rainbow, Witcher 3, Rocket League and more.

So, there is quite a bit of gaming to be had thanks to the bump in GPU performance going from UHD to Iris Xe.

Finding a nice middle ground between work and play on the Mini IT11 was much easier than on the Mini Air but one thing neither of the boxes could achieve is a sustained content creation workflow. Between larger file sizes sometimes freezing and locking up the Windows Explorer task or just navigating through layers on a 1080p film edit, neither the Air or the IT11 were best suited for content creation.

Sadly, the lack of horsepower for content creating on either the Air or IT11 appears to be mostly laid at the feet of Intel’s integrated GPUs. Intel is said to be introducing Arc CPUs as smaller scale for notebooks at some future date, that could further tip the scales in favor of Geekom’s value proposition for its mini desktop computers.

Summary

As with any purchase, buyer beware. I say this with utmost sincerity, that both the Geekom Air 11 and IT11 are great mini desktops that offer solid specs for a really good price, but they also exist in a world where more power and flexibility in desktop arrangements can be had at relatively similar prices.

That being said, anyone interested in a NUK may want to reconsider the Geekom Air or IT this year because there is better performance to be had and comes with a license of Windows out of the box. The Geekom can still be turned into a Chrome or Linux box with relatively little effort after the fact and thus becoming a bit more flexible in the process.

Buyers of the Air should be aware of its limitation up front and understand the Air 11 can be a great remolded replacement for an aging workstation or a fleet purchase to replace old towers in offices. Thanks to it more portable design, the Air 11 can be more easily transferred from work to home.

Geekom - Mini - Cables

However, what’s not being done on these Mini Air11 is creating YouTube videos, several layers deep photo or image editing or even intensive gaming.

Now over to the IT11, this machine is where attention is warranted for anyone looking to replace even their aging All-in-One or do quite of bit of their online activity evenly across their mobile device and computing one.

If you’re not into notebooks or would just prefer a centralized desktop, media player via Plex Server, IT11 should be considered. It’s as powerful as most laptops and comes in a few hundred bucks cheaper for the equivalent spec performance.

In addition, Geekom is having an anniversary sale on their site for the month of October starting on the 8th and lasting through the 31 to celebrate 19 years of great products.

GEEKOM 19TH BANNER

For the next month, buyers can shave an additional $170 of bundled packages that include keyboards and mice with their desktop PC or even snag the Anniversary branded kit that includes specially designed boxes, mousepads, storage bag, personalized Thank You Card, and mascot figurine for as little as $279.

How to Share Files on OneDrive With Others

The days when a little bit of extra storage meant buying a bigger hard drive or adding an external one to your inventory are long gone. Nowadays, cloud storage is the way to go.

While it may sound unsafe, it is evolving to become faster, safer, and overall better year after year, all while maintaining a relatively low price.

One good example of a great cloud storage service is Microsoft’s very own OneDrive.

Why do I need to use cloud storage?

One staple of cloud storage is the ability to share files and folders with other users via a specialized URL. This allows them to access the files and folders as if they were their own, but nothing else.

This allows great freedom when it comes to file sharing.

However, not everyone knows how to share something in OneDrive. That is why we’ve created this article to guide you in a step-by-step manner on how to share a file one OneDrive.


How do I share files on OneDrive with other people?

  1. 1. Go to the OneDrive website. You need to sign in with your Microsoft account or your work or school account

  2. 2. Pick whatever file or folder you want to share. You can do this by selecting the circle in the upper corner of the item.

    Multiple files or folders can be picked and shared together as well.

  3. 3. Look at the top of the page, and select Share.

    Onedrive click on the share button
  4. 4. Select Anyone with the link can edit.

  5. 5. Choose the options you want. You can allow editing, set an expiration date for the link, or set a password so that users can only access the file using the password.

  6. 6. Select Apply after you make your choice. You’ll be returned in the main Share box.

  7. 7. Select Copy Link to copy it to your clipboard.

    link settings onedrive
  8. 8. Paste the link in a message or email sent to the person who you want to access your OneDrive file.

  9. It is very simple to share a file in OneDrive with other users. All you need to do is share it via a link with them.

    Keep in mind that depending on the options that you select, people who have access to the files and folders can do a wide variety of things.

    If you allow editing, recipients will be able to add, edit or delete items from the folder that you have shared. Additionally, they will be able to forward the link to others, change permission settings and more.

    You can also set an expiration date, after which the link will no longer be valid. Finally, you can also set a password so that when a user checks in the link, they will need to input a password in order to go any further.

By following these steps, you should be able to make the entire or only part of the content of your OneDrive accessible to anyone.

If you’re looking to transfer files from one OneDrive to another, check out our dedicated guide.

Do you think sharing your cloud storage is a good idea? Let us know what you think about this in the comment section below. Likewise, feel free to ask us any questions about the process of sharing a file in OneDrive with other people.

How to Get a Black Cursor in Windows 11 [2 Ways]

When you are working on a bright, sunny day and you have to stare at your computer screen for hours, it is a good idea to change the color of your cursor to a darker shade of grey.

This will make reading easier, especially if you are working with black text on a white background.

Windows 11 users can personalize their computers’ interfaces by changing the desktop background, installing third-party applications that allow them to customize their system, and using the customizable interface.

If you like to change colors for fun, it is possible to customize the Windows 11 default cursor’s appearance. Both black and white are included as a set of colors from which to choose. The black cursor on a white screen is easier to see than the white cursor on a white screen.

Why is my cursor turning black?

If you plan to upgrade to your Windows, you may experience a black screen with a mouse cursor while installing the software if you don’t delete certain programs beforehand.

This might happen if your antivirus or firewall is interfering with the installation. Try temporarily disabling it to see if that solves the problem.

Even more, this step-by-step guide shows you how to change the color of your cursor and get a dark cursor in Windows 11.

How do I make my cursor black in Windows 11?

1. Use the Settings app to get a dark cursor

Note icon NOTE
By selecting the inverted or third style you can easily invert your cursor depending on its position. Moreover, the Size slider helps you resize it.
  1. Press the Windows key + I key to launch the Settings application.launch
  2. Then, click on the Accessibility setting option from the left panel.select
  3. Select the Mouse pointer and touch option under the Vision section.select
  4. Then, from the Mouse pointer style options, click on the Black cursor style and your cursor will turn to black color.select

2. Use Mouse Properties to change your cursor to dark theme

  1. 1. Click on the Search icon and type Mouse settings in the search box that opens, then press Enter.

    type mouse settings in windows search
  2. 2. Select Additional mouse settings under Related settings section.

    go to additional mouse settings
  3. 3. Switch to the Pointers tab in Mouse Properties.

    select the pointers tab
  4. 4. Now, click on the Scheme drop-down menu and select Windows Black (system scheme).

    select dark cursor in windows 11
  5. 5. Click on Apply, then select OK to save the changes.

    apply black cursor in windows 11
  6. Another easy method to set your cursor to dark mode in Windows 11 is via Mouse Properties. This is a dedicated menu for tweaking all your mouse settings to your liking. From it, you can change the cursor to black within a few clicks.

Why is my Windows 11 cursor not working properly? 

The cursor on your computer stops moving because the connection between the PC and the device you are using to control it is not working properly. It can be due to a physical problem with the device or because of a problem with the software that controls it.

Make sure your drivers are up to date. Some of the users are using old drivers which can cause this problem.

Also, turn off your antivirus because it can interfere with the Windows live messenger software and may cause problems when moving your cursor around. If this works, make sure you start using a fully compatible Windows 11 antivirus.

This will give you the chance to check if the problem persists. You can turn it back on after checking if this helps or not. Also, note that you can change the mouse cursor’s color in Windows 11 to better match your selected theme.

Were the above fixes able to turn your cursor to dark mode? Share your thoughts with us about having a black cursor in Windows 11 in the comments section below.

9 Best Antivirus Software for Windows Tablets: High Security

Windows tablets are in a class of their own thanks to the fact that they use Microsoft’s software. They are perfect for business and productivity purposes alike.

Just like their desktop counterparts, Windows tablets need protection against malware, even on iOS. Things are no different for Android tablets.

This is done through competent tablet antivirus software that acts as preventive medicine by keeping threats at bay, including viruses and ransomware.

Do Windows tablets need antivirus?

Malware and other online threats are constantly being updated, which means you can never be too prepared.

Even though Windows has its own security measures and apps, having an additional layer of protection provided by a paid or free third-party antivirus software will keep you the safest.

So, do you need virus protection on a tablet? Most certainly, if you are serious about your data being protected.

Doesn’t my tablet already have antivirus protection?

The antimalware software developed by Microsoft is called Microsoft Defender, and it can be downloaded for free on both Windows and Android devices.

Truth is, it offers enough protection for some users, however, if you value the safety of your device as well as all of your online accounts, you should invest in higher-quality security software rather than using the Microsoft Surface antivirus alone.

The varied antivirus solutions listed below allow for a very secure and prosperous experience both online and offline. That’s why we recommend them to all those looking for:

  • Antivirus for tablet/tablet antivirus – For the best antivirus software for tablets, we recommend BullGuard which edged out other popular solutions for the top spot.
  • Antivirus for Android tablets – BullGuard and Bitdefender are some of the world’s most trusted antivirus programs for Android. Take your time to check them out and make a choice!
  • Best free antivirus for Samsung tablets – Harmful viruses and malware may easily affect your Samsung tablet, so choose one of our previously mentioned solutions with no hesitation.
  • Windows ARM antivirus – For as long as the device is supported, Microsoft Defender will be able to assist in protecting Windows 10 and Windows 11 operating systems on ARM-based devices. However, the following antivirus programs can be installed to boost protection.

Without further ado, let’s jump right into the list of the top antivirus software that you can install and feel 100% safe. Keep on reading to find out more!

Which antivirus is best for a Windows tablet?

TotalAV – Best browser protection and system maintenance

TotalAV is an antivirus solution that has won several awards and is capable of identifying and completely eradicating malware for multiple devices at once.

There are benefits to using TotalAV as a free antivirus solution for your tablet, but there are also some cons. Since its introduction in 2016, it has developed into one of the anti-malware applications with the most rapid expansion rate on the market.

A learning algorithm and proactive defense are utilized by TotalAV in order to provide complete virus elimination and protection against a wide variety of forms of malware.

This anti-virus software will keep itself up to speed with the most recent advances automatically. Because of this, you will always have the most recent protection available against malware such as viruses, worms, Trojan horses, adware, spyware, and rootkits.

Your experience shopping and browsing online are kept secure with TotalAV since the software scans each page for potential dangers before showing the results in the built-in browser window.

Additionally, it is possible to disable monitoring websites that utilize your personal information for marketing purposes.

TotalAV’s key features:

  • Protection against an endless number of advertisements
  • Protect up to three different devices under a single login
  • Security against ransomware and other injection-based threats
  • The set-up and operation are both a breeze
  • Lightweight performance
TotalAV

TotalAV

Keep your shopping experience and browsing activity safe with this amazing antivirus tool.
Check Price Visit Website

Bitdefender Total Security – Unique protection features

How do I temporarily disable Bitdefender in Windows?

Bitdefender has been the talk of the town lately thanks to the pretty unique protection features it brings to the table.

While they are impressive nonetheless, they might not be exactly what most people would expect to read next. One of the greatest things about Bitdefender is the fact that it’s free.

Yes, that’s right, and no, you shouldn’t take that in stride. Antivirus software can amount to quite a pretty penny these days and they are actually a lot of folks that just can’t afford straight-up payment for protection.

Bitdefender’s key features:

  • Free antivirus for your tablet with cutting-edge features and tools
  • Makes online navigation much easier
  • Has a password manager
Bitdefender Total Security

Bitdefender Total Security

Bitdefender is a big name in the antivirus business. It is a wise choice for protecting your tablet!
Check price Visit Website

ESET NOD32 – Powerful and fast

antivirus old pc best antivirus windows vista

ESET NOD32 is a powerful, fast, and yet light antivirus that suits perfectly the gamer and the normal user as well, offering first-rate tablet virus protection.

For which devices is the antivirus available? All of them. It runs discreetly without causing interruptions, being an excellent antivirus software for Surface Pro X as well as other tablets, along with Windows, Mac, and Linux devices.

Let NOD32 detect viruses and clean them from your tablet when you create presentations, play games, or watch movies.

It will not require many resources from your hardware and you will not experience any slowdowns in your activity, due to this tablet security software.

ESET NOD32 Antivirus does a great job of removing different online threats from your device. It detects and cleans viruses, ransomware, worms, spyware, and other types of malware.

ESET NOD32’s key features:

  • Remote security check of your devices 
  • Ransomware Shield
  • Advanced Machine Learning
  • Idle-State Scanning
  • Small System Footprint

ESET NOD32 Antivirus

ESET NOD32 Antivirus

ESET NOD32 Antivirus will keep your computer safe from malware including viruses, worms, ransomware, and spyware.
Check price Visit website

Avira – Includes VPN features

Download Windows Antivirus for free | Avira

Avira Antivirus keeps your tablet connected and secured from various online threats. This friendly and powerful tablet antivirus software protects users from scams, financial loss, and identity theft. You can also secure your online activity using Avira’s built-in VPN feature.

Once you have downloaded, installed, and put it to work, Avira Antivirus will speed up and clean your PC. This will be the perfect moment for your device to attain peak productivity.

Use Avira and make viruses, malicious websites, and ransomware a thing of the past. Try its Speed Feature to enhance your tablet’s performance, and improve the security of your accounts with Avira’s Password Manager app.

Avira’s key features:

  • It safeguards you against fraud, identity theft, and financial loss
  • Secures your online activities with a free VPN
  • Optimizes and cleans your computer for maximum productivity

Avira Antivirus

Avira Antivirus eliminates viruses and ransomware, protects you from dangerous websites, and speeds up your tablet.
Free download Visit Website

Malwarebytes – Advanced malware protection

There are many things that recommend Malwarebytes, including the fact that it can make the differentiation between a known threat and just a threat that isn’t known but is a threat nonetheless.

What that means is that nowadays antivirus solutions must be able not just to identify threats, but to actively stop them.

When so many of its competitors are focused on enriching their databases, Malwarebytes steps outside the database confinement and judges threats by their actions rather than their names.

Malwarebytes’s key features:

  • A multitude of protection layers
  • Offers ransomware and exploits protection
  • Designed to accompany another antivirus on your device
  • Acts as a second control point between the Internet and the user

Emsisoft – Great for low specs tablets

Emsisoft - Anti-Malware-Endpunktsicherheit für Unternehmen

This one is an extremely powerful security software tool designed to run even on low specs PCs, tablets, and laptops. On the market, you will find it a decent price compared to others.

We recommend that you take a look at Emsisoft if you are looking for an anti-malware application that provides you with increased control while maintaining an intuitive user interface.

It blocks all the trojans or malware from malicious sites you do navigate. Its dual-engine scanner will check all the downloaded or modified files and it has a behavior-blocking system that monitors your processes for unrecognized threats.

Emsisoft’s key features:

  • Offers 4-layer protection in real-time
  • Cleaning and restoration capabilities
  • Shows you extended logs to check the past actions

Norton 360 – Versatility is a key feature

Norton is another veteran contender for the title of the best antivirus program. It has been around for a long time and it doesn’t show any signs of quitting anytime soon.

Norton’s antivirus solution is praised for its versatility and how easily it manages to handle different types of tasks at the same efficiency levels.

No matter what you’re trying to achieve on your tablet, Norton can assist with competent protection.

Norton 360’s key features:

  • Varied support portfolio
  • No strain on tablets or their performance
  • Great for cookie tracking and keyloggers
  • Has a preferential scan feature that allows users to exclude files from a scan

Kaspersky Standard – A pro in raw removal

Kaspersky is one of the most popular antivirus solutions out there. Like it is available on all other platforms, it can also be used on Windows tablets.

It features the kind of tools you might expect from a service of its caliber, and it doesn’t fail to impress in terms of effectiveness.

It’s easy to see where it shines brightest, and that is in its raw removal prowess. That doesn’t mean it doesn’t do great in other categories though.

Kaspersky’s key features:

  • Removes any malware
  • Support for multiple versions of Windows
  • Anti-phishing protection
  • Safe banking feature

Avast Free Antivirus – Keeps your network safe

Avast Antivirus has the main function of keeping your computer safe from viruses. Additionally, this powerful software will also keep your network safe from intruders.

Many customers are thrilled to use its intuitive interface and benefit from advanced application protection. Avast contains a passive mode that allows you to run multiple security products simultaneously.

Many antiviruses available nowadays will scan your computer for malware applications. Avast Antivirus contains this feature too, but it takes things a little further and monitors your existing applications to prevent them from getting infected.

Avast’s key features:

  • Verifies Wi-Fi network security
  • Avoids fake and unsafe websites
  • Secures against phishing sites
  • Stops PC remote access attacks

Are tablets more secure than laptops?

Because viruses are programmed to target PCs, portable devices such as laptops are more likely to get infected than tablets.

If you decide to buy a laptop, you should seriously consider investing in antivirus software to keep your documents and other important data safe.

Tablets, on the other hand, are also an area of concern. But, using good protection software, laptops, and tablets can be just as secure.

Are tablets safe for online banking?

With mobile banking, you can carry out many of the same transactions as with Internet banking by utilizing a mobile device such as a smartphone or a Windows tablet rather than a traditional computer.

By using one of the above antivirus software, your tablet will be more than safe for online banking. Rest assured!

Alternatively, you can look at our post with the 10 best antivirus software for online banking to stay one step ahead.

With so many great solutions available, it’s hard to see how many Windows tablets might have problems staying safe.

In the comments section below, let us know which antivirus software is your all-time favorite. Thanks for reading!

PowerToys gets smaller in latest release to version 0.63.0

PowerToys 0.63.0 is out today for those interested.  This version comes in a bit smaller, the previous version 0.62.1 came in at 125MB while this version is just 83MB, as work continues to make PowerToys smaller and more efficient.  In this release cycle, the team focused on stability and efficiency with a few tweaks along the way.

QuickAccent allows you to select a language, which cuts down on the number of special characters a user needs to enter.  Being able to share the WindowsApp SDK along with the VC++ redistributable helped cut down on the overall install size.  More plans to reduce the install size are coming in the future.

The new PowerToys version doesn’t come without a few issues.  If you’re running on an ARM64 device running Windows 10, Text Extractor may fail to recognize some text.  Also after install the new Windows 11 context menu entries for PowerRename and Image Resizer may not appear after the system restart.

For the rest of the changes and known issues, you can check them out here.

5 Ways to Fix the Claiming Bonus Error on Twitch [Channel Points]

Users receive Twitch Drops, or bonus items, in exchange for watching particular live streams. These could be unlockables for other digital content, early access to video games, or special in-game items.

Although the drops typically give consumers rewards for their enthusiasm for the newest video game releases, error claiming bonus on Twitch can be frustrating. 

On Twitch, viewers can accrue channel points by following a stream. Once their viewers reach a particular threshold of channel points, Twitch Affiliates and Partners can then put up several rewards for their viewers to choose from.

Streamers receive a set of pre-designed incentives that can be altered to meet the requirements of the specific channel. The streamer may give prizes to viewers as they watch and participate.

The benefits that streamers receive typically resemble those that only subscribers receive, though they may also contain other benefits. They may, however, also give rewards to non-subscribers.

What causes the error claiming bonus on Twitch?

The error claiming bonus on Twitch is usually caused by a problem with the Twitch website or the user’s account. Another reason could be that the prize is out of stock because the maximum number of stream redemptions was achieved. Issues with the stream key are also common causes.

A bonus may also have a per-user limit set by the streamer, and you have already used all your allowed claims. Additionally, if a counter is present, the award cannot be claimed until the duration expires.

How do I fix error claiming bonus on Twitch?

1. Check your internet connection and try again

  1. Check if you are able to connect to other websites, like www.google.com.google - error claiming bonus twitch
  2. If you are able to connect to other websites, try reloading the page or restarting your browser.Reload page
  3. If you are still unable to connect, please contact your ISP or try again later.

2. Make sure you are logged in to the correct Twitch account

  1. Click the profile icon on the top right corner of the page and then check your username.Twitch account
  2. Check to see if you are logged in to the correct account, and then try refreshing the page. 
  3. Try logging out of your account and then logging back in if refreshing the page does not work.log out - error claiming bonus twitch

3. Refresh the page and try again

  1. Open the browser window.
  2. Click on the refresh or reload button on the toolbar, or press the F5 key on the keyboard.reload - error claiming bonus twitch

4. Contact Twitch Support for help

  1. Go to the Twitch support website.
  2. Fill in the form as required and then click on the Submit button.Twitch support

5. Check Twitch social media accounts for issues

  1. Visit Facebook or Twitter to see if there are any updates on the claiming bonus error.Twitch Twitter - error claiming bonus twitch
  2. Wait for the issue to be addressed and then try again.

How do I claim a bonus on Twitch?

To claim a bonus on Twitch, you must go to the streamer’s channel and click on the Claim Bonus button. This will bring up a form that you must fill out in order to receive the bonus.

If you’re having trouble claiming a bonus on Twitch, there are a few things you can try. First, make sure you’re logged in to the correct account. Then, check to see if the bonus is still available.

If it is, try redeeming it again. If you’re still having trouble, contact Twitch support for help. Let us know of your experience in the comments section below.

4 Ways to Fix Maplestory’s Lag Spikes and High Ping for Good

Maplestory is an online role-playing game that has gained popularity globally despite the fact that it was originally created for just gamers in Asian countries.

However, there is a new version that is available globally. The game has different servers in various regions of the world.

That being said, gamers might face latency and lagging issues while playing the game.

These lead to bad frame rates, the game responding slower to commands, and other performance issues that diminish any bit of fun that you should have when playing.

Luckily, the problem can be fixed if you check and fix your network connectivity and adjust your settings a little bit.

Why is my Maplestory so laggy? 

MapleStory lagging leads to all sorts of problems during the game, leading to a very unpleasant experience. Some of the most notable issues gamers complain about include:

  • MapleStory lags while attacking
  • MapleStory lags when using skills
  • MapleStory lags every few seconds
  • MapleStory 64-bit lag

This does not mean that the game is terrible and you should abandon the game. It’s important to find what’s causing the problem and fix that root issue.

➡️ Limited connection – having an Internet plan with bandwidth limits is not ideal for gaming. You can change plans or use a VPN with unlimited bandwidth.

➡️ Hardware problems – It’s also possible that your machine doesn’t support the full graphics settings of the game. Make sure to check system requirements and lower graphics settings if necessary.

How to fix the Maplestory lag spike and high ping?

1. Use a VPN that can decrease the lag spike

 Sometimes the best thing to fix lag spikes and high ping is to use a Premium VPN such as ExpressVPN.

  1. Get an ExpressVPN subscription and download the client to your PC.maplestory ping
  2. Install ExpressVPN and launch it.
  3. Log in with your user and password, or use the activation sent by ExpressVPN.
  4. Click on the big power button in the UI to connect to a server.
  5. Open MapleStory again and see if the issue persists. You can switch around servers until you find the fastest option. ExpressVPN has thousands, in 94 different countries.

You should know that VPNs make your network connection considerably faster and the ping rate lower thus reducing the Maplestory lag spike.

You will also be able to bypass certain restrictions and connect with players outside your geographical location. Also, since the game is gaining popularity rapidly, Hackers might want to steal your account.

Still, if you make use of a VPN, they will not be able to have access to your account as VPN will encrypt your data, and you will be making use of a virtual IP address.

ExpressVPN

Use ExpressVPN to connect to fast and well-performing gaming servers, ideal for MapleStory!
Free trial Visit website

2. Use Ethernet instead of Wi-Fi

Do you know that almost everything, including the number of devices connected, walls, and even other network signals, can disrupt the WiFi signal you are receiving?

It would be best if you tried using a wired connection rather than relying on WiFi. Many players have a more stable connection and are able to fix the Maplestory lag spike using a cable.

Switching from WiFi to Ethernet will result in a more constant Internet connection and, in most cases, improve the speed of the Internet connection.

3. Close background apps

When playing games on a personal computer, shutting down any apps that are currently running in the background could solve the problem.

  1. Launch the Windows Task Manager menu.
  2. Find out which applications are currently running – in the Apps section.
  3. See which aren’t necessary, then click on each one and select End Task.maplestory lag spike

If you are streaming movies on Netflix and have anti-virus software running in the background, your router will have to work harder to handle the increased traffic.

So it would be best if you closed any web pages that aren’t necessary. It can help with lag and also other performance issues like FPS drops in MapleStory.

4. Tweak game settings

  1. Open MapleStory.
  2. Go to Options.
  3. Select the Graphics section.
  4. Reduce the quality of Background and Effects.maplestory lag spike
  5. Click ok to save your settings.
  6. Check if the game performs better. You can go back and re-adjust them until you find the best-performing combination for your machine.

Even if you have a powerful personal computer, you may experience more frustration than satisfaction if you ask the game to respond to every input you make while maintaining an extremely high frame rate.

To succeed at online gaming, you must ensure that the games you play run at the correct frame rate without causing Maplestory lag spike and high ping.

How do I check my ping in MapleStory?

High ping is when your device responds slowly to your command. You should know that there are options that you can follow to ensure that you have a noticeably lower ping and reduce the amount of money you need to invest in your existing internet connection.

  1. To open the Command Prompt on your computer, go to the start menu and type cmd.
  2. Under the resulting Command Prompt option, select Run as administrator.maplestory lag spike
  3. Type ping maplestory.nexon.net.
  4. Step 3: Press the Enter key to ping the MapleStory server.

You can use this command to check ping rates before troubleshooting and then run it again, after trying the fixes below to see if it improved.

While Maplestory has been increasing in popularity and the number of users has increased, so has the latency problem.

However, there are certain things that you can do to fix the latency and lagging issues and you should follow our recommendations. Let us know which fix worked for you.

5 Ways to Fix OneDrive Business when It’s Not Syncing

OneDrive Business has become one of the most popular cloud hosting service platforms that sees tons of usage.

Although plagued with many issues, such as the OneDrive Business not syncing, which is similar to the other syncing issues on the free version.

Most businesses rely on OneDrive due to its easy integration with Office apps. Hence, making file storage accessible and easier. Also, the Microsoft client server offers 1TB free for cloud storage on the company servers.

However, for all the benefits of OneDrive Business, there are times when you may encounter syncing problems.

This prevents your files from aligning with previous works. Thus, wasting time wondering ‘Why are my OneDrive files not syncing?’ can be catastrophic.

Why is OneDrive sync not working?

While Microsoft has done a remarkable job with OneDrive, it sometimes fails to sync or backup files. The causes can be traced to different factors as highlighted below:

  • Using an outdated app: If you failed to update their app versions, then there might be compatibility issues, preventing the OneDrive Business from syncing with other group files
  • Connection issues: In most cases, connection issues lead to OneDrive sync is pending
  • Problematic OS upgrade: If the OS is outdated, the OneDrive Business not syncing problem will surface

Other likely causes are denial of permission or uploading a large chunk of data at once.

Whatever the reason for the OneDrive Business not syncing issue, this comprehensive guide will show you easy ways to fix it.

What can I do to fix OneDrive Business when it’s not syncing?

1. Reset the app

  1. Click on the Starts icon on the bottom left of your screen, then click on the search bar.
  2. Input and search for the OneDrive app.
  3. Right-click the app and select App settings.
  4. A new window will appear; scroll down until you see Reset.
  5. Choose the Reset button to sync and restart all the files and previously saved files on OneDrive.

How do I reset my OneDrive for Business sync?

  1. Press Windows + R to open Run, type cmd, and hit Ctrl + Shift + Enter.cmd
  2. Click Yes in the UAC prompt.
  3. Paste the following command and hit Enter:%localappdata%\Microsoft\OneDrive\onedrive.exe /resetcommand to fix onedrive business not syncing
  4. Wait for the reset to complete. You should receive a notification once it’s done.

2. Adjust settings in the Group Policy Editor

  1. Press Windows + R to open the Run box.
  2. Type gpedit.msc and click OK.
  3. Navigate the folders using this path: Local Computer Policy\Computer Configuration\Administrative Templates\Windows Components\OneDrive
  4. On the OneDrive screen, under Setting, click Prevent the usage of OneDrive for file storage.
  5. In the Prevent the usage of OneDrive for file storage box, check if the value is Enabled.
  6. If yes, select Enabled, then click OK.

3. Install the latest Windows updates

  1. Click on the Starts icon on the bottom left of your screen, then click on the Settings icon.
  2. Choose Windows update.
  3. Then, click Check for update.

If there are new updates for the drivers on the PC, they will be outlined so you can download them, Hence, it would fix incompatibility issues preventing the OneDrive Business from syncing.

4. Reinstall and update the Microsoft OneDrive app

  1. Click on the Start icon on the bottom left of your screen and type Remove in the text space.
  2. Open the Add or Remove programs from the results.
  3. In the list of programs, locate OneDrive for Business and click on the options icon.
  4. Then select Uninstall from the drop-down options.
  5. After the process, go to the Official OneDrive download page and download the latest OneDrive app.
  6. Run the installation file (.exe) and follow the onscreen prompts to reinstall.

5. Use Command Prompt codes

  1. Click on the Starts icon on the bottom left of your screen, then click on the search bar.
  2. Input and search for the Command Prompt and Run as administrator.
  3. Input the following and press Enter: %localappdata%\Microsoft\OneDrive\onedrive.exe /reset

This will also reset the OneDrive for Business and as such, fix the not syncing issue.

How do I get OneDrive to sync more often?

There’s no way to change the automatic sync frequency on OneDrive or OneDrive for Business. For the former, sync occurs whenever a change is detected, while for the latter, it’s 10 minutes.

You can always manually initiate the sync operation on OneDrive to get the files to sync more often. This can be done as frequently as desired.

How do I force OneDrive to sync?

It is possible to force OneDrive to sync by manually adding files with drag and drop or uploading them to the OneDrive website.

Is OneDrive for Business free to use?

OneDrive for Business is free, just like the personal OneDrive account. It allows each user access to up to 1TB of storage capacity.

Meanwhile, administrators determine where to host the service and the server to use. Hence, it allows for a more personal integration than the Microsoft cloud client.

In this article, we have provided the best solutions to fix the OneDrive for Business not syncing issue. If none of this works for you, consider reading our guide on fixing OneDrive syncing issues on Windows 11.

Another guide that may prove helpful is our fix for OneDrive for Business credentials needed error.

If you have found this guide helpful, kindly leave a suggestion or feedback in the comments section.

Posted in Fix

Windows 11 2022 slows down when copying large files, Microsoft says

Microsoft has confirmed a file copy bug in Windows 11 2022 that’s causing the operating system to slow down.  The problem occurs when copying a multi-gigabyte file from a remote location to a Windows 11 machine. The performance could degrade as much as 40 percent.  Copying the same file on a previous version of Windows 11 doesn’t exhibit the issue.

Microsoft doesn’t have a permanent fix for the issue yet but does clarify the issue is not in SMB code. You could experience this issue doing local file copies as well. A workaround is offered using the robocopy or xcopy command with the /J syntax that does return your system to full performance. Microsoft will address the issue in a future update.

Via Petri.com

Official Doritos and Rockstar Energy in-game items are coming to Xbox titles

Xbox is partnering with Doritos and Rockstar Energy Drink to bring special edition packaging to select products and in-game content to Xbox games. Fans will be able to enter for chances to win from thousands of prizes by purchasing specially marked items. Also, first-time Xbox Game Pass Ultimate subscribers will receive a free month of the service.

There will also be exclusive content across some of the most popular games on Xbox. See the list below. (Note that some content may vary by country).
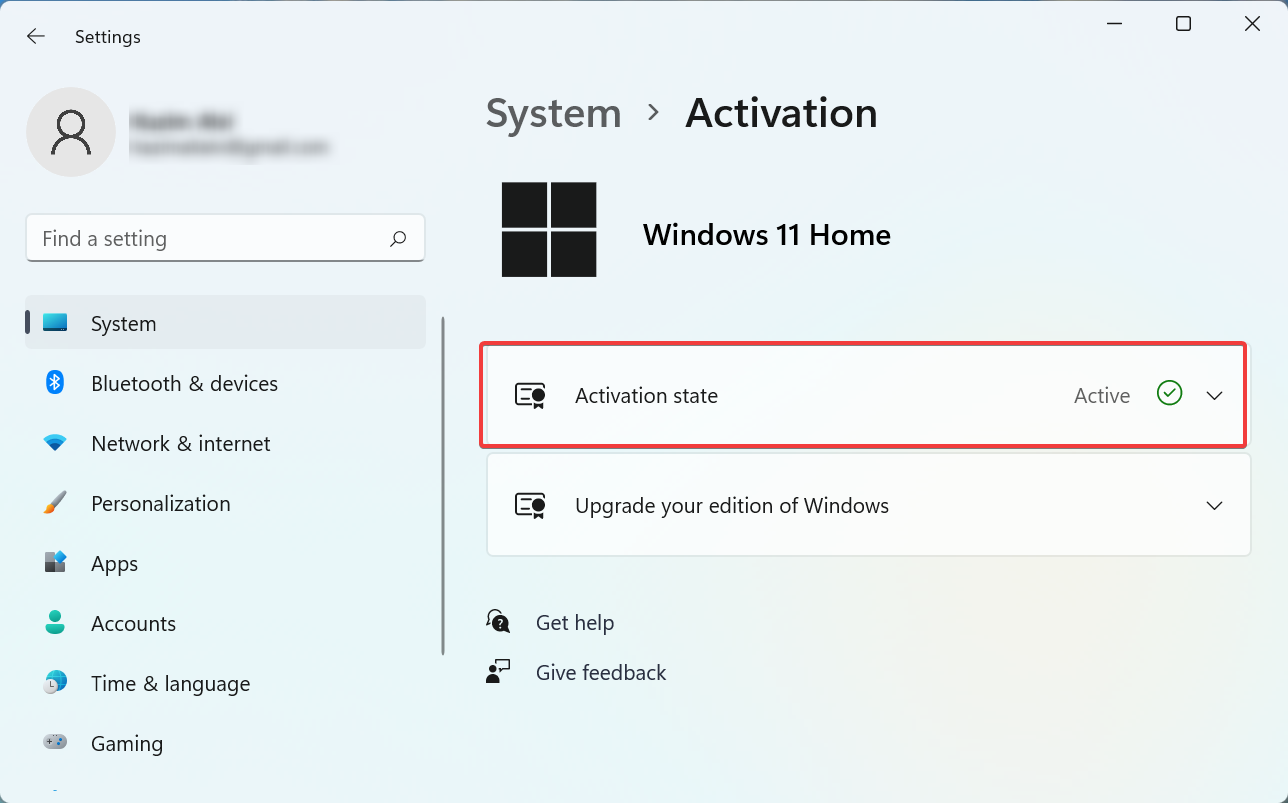
Participating Doritos and Rockstar Energy Products In-line Asset

Doritos in-game content

  • Fallout 76 – Heat-Eater Power Armor Paint
  • Forza Horizon 5 – Tankito Doritos Outfit
  • Halo Infinite – Tasteful Sensation Razorback and 2XP Boost
  • PUBG: Battlegrounds – Dinoland Mascot
  • The Elder Scrolls Online – Karthwolf Charger Mount
  • Madden NFL 23 – Doritos Ultimate Team Pack (exclusive to Doritos)

Rockstar Energy in-game content

  • Fallout 76 – Heat-Eater Power Armor Paint
  • Forza Horizon 5 – Tankito Doritos Outfit
  • Halo Infinite – Tasteful Sensation Razorback and 2XP Boost
  • PUBG: Battlegrounds – Dinoland Mascot
  • The Elder Scrolls Online – Karthwolf Charger Mount

These goodies are available in the US and other select markets. Check out the Xbox Wire post linked at the beginning for details on participating Doritos and Rockstar Energy products. The event begins October 3rd, and runs through December 30, 2022. Over 10,000 themed prizes will be given out including Xbox Series S consoles, Xbox Wireless Controllers, gaming chairs, and Xbox, Doritos, and Rockstar Energy gear.

Featured image via news.xbox.com.