Many users have complained about error code 73: Disney Plus is only available in certain regions. This guide discusses probable causes and offers WR software experts’ tested solutions to get past the problem and watch your favorite shows on Disney.
What does error code 73 mean on Disney Plus? The Disney Plus support error code 73 indicates that you are trying to access content from a region or country where service is unavailable. Some of the common reasons are:
Using a free VPN, & Disney Plus has detected your IP address.
Location services on your device are turned off.
Corrupted cache or missing app files.
How do I fix Disney error code 73?
Before proceeding with any steps to fix the Disney Plus support error code 73, go through the following preliminary checks:
Restart your device & router, sign out & sign in to your Disney Plus account, and turn off the VPN or use a different one.
Locate the Wi-Fi icon or Ethernet cable icon from the right side of the Taskbar, locate the connection, click Disconnect, wait for 30 seconds, and then click Connect.
NOTE
Most methods mentioned here will work on streaming devices compatible with the Disney+ app. However, the steps may vary depending on the operating system.
1. Turn on the Location services
Press Windows + I to open the Settings app.
Go to Privacy & security, then under App permissions, click Location.
Toggle on the switch for Location services.
Look for Disney Plus in the list of apps using location, and ensure the toggle switch is on.
If you are using an Android or iOS device, check the location services for it to ensure the app can detect the location.
2. Disable antivirus temporarily
Press the Windows key, type windows security and click Open.
Go to Virus & threat protection, then click Manage Settings.
Locate Real-time protection, then toggle off the under it to disable antivirus.
Click Yes on the UAC prompt to complete the process.
If this doesn’t resolve the issue, reverse engineer the steps to turn on real-time protection to ensure your computer is protected.
Type ncpa.cpl and click OK to open Network Connections.
Right-click the network connection, and select Properties.
Under This connection uses the following items, click Internet Protocol Version 4 (TCP/IPv4) and select Properties.
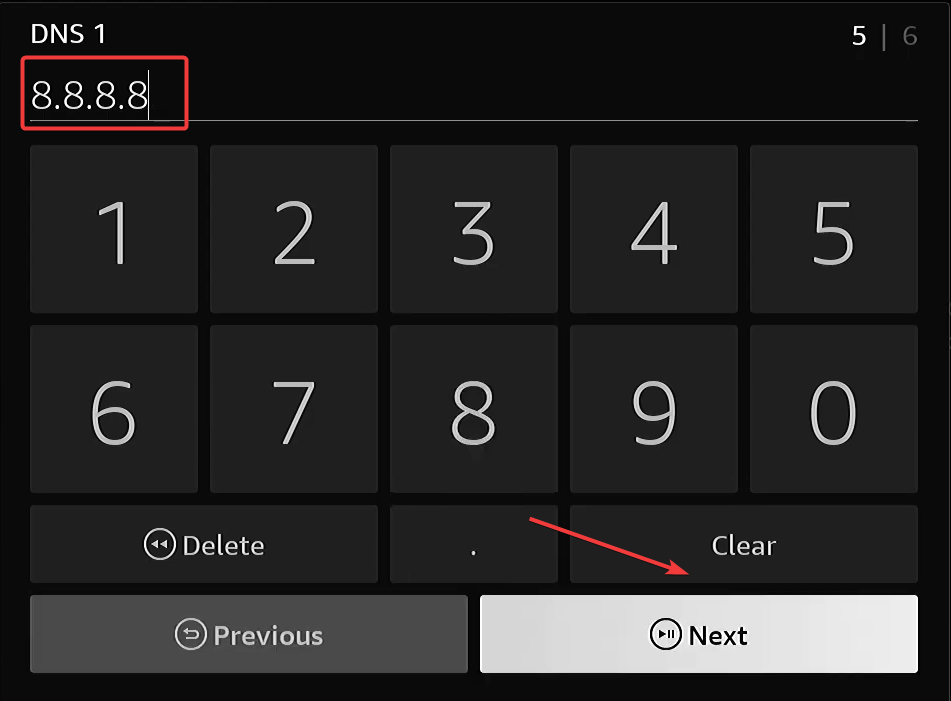
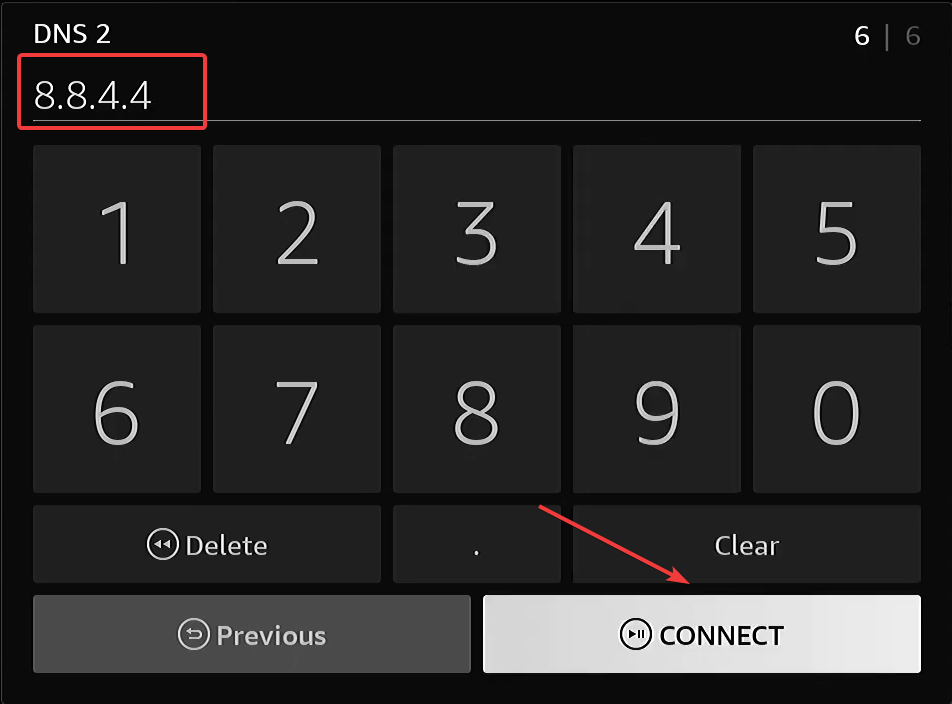
Place a checkmark next to Use the following DNS server addresses, then for Preferred DNS server: type 8.8.8.8 and for Alternative DNS server: 8.8.4.4
Click OK and reboot your PC to let the changes take effect.
Changing DNS can speed up your internet connection and refresh the network or fix the internet connection issues. Also, it helps with Disney Plus Error Code 43.
4. Clear the app data
Press Windows + I to open the Settings app.
Go to Apps, then click Installed apps.
Locate Disney Plus, click the three dots icon, and choose Advanced options.
Go to the Reset section, then click the Reset button.
Resetting the app will clear all the data, including your login ID and password for the app. So, keep the password handy as you need to sign in on the app again.
Clearing app data can help you fix other errors like Disney Plus keeps crashing; read this guide to know other solutions.
5. Update/reinstall the app
Press the Windows key, type store, and click Open.
On the Microsoft Store app, go to Library, then Get all updates.
Locate Disney Plus, and click Update if available.
If the update is not available, try reinstalling the app using these steps:
Press Windows + I to open the Settings app.
Go to Apps, then click Installed apps.
Locate Disney Plus, click the three dots icon, and choose Uninstall.
Click Uninstall again to confirm the action.
Launch the Microsoft Store app, search for Disney Plus, and click Get or Install to download & install it on your computer.
Reinstalling the Disney Plus app is a standard solution to many other issues related to the app, including error code 24.
Remember to keep apps on your computer or other streaming devices updated, as it helps them work in sync with your device’s operating system and fixes the bugs present.
Also, ensure you access the content available in your region, and to access the content elsewhere, use a premium version of a reliable VPN service.
If nothing has worked for you so far, please first contact your internet service provider, then Disney Plus technical support, and explain to them the issue and steps taken for further assistance.
Error during SSL handshake with the remote server will prevent the client from communicating with a server, making an online service or web app inaccessible.
If you’re hosting a service online, this is a major issue, so it’s crucial to fix the problem as soon as possible. This guide will show you a few ways to do so.
This error message occurs when a client can’t establish a secure connection with the server, thus giving a handshake error. The most common cause for this issue is your server’s SSL settings and expired certificates. You might get this error if both the server and the client don’t use the same protocols.
How do I fix error during SSL handshake with remote server?
1. Change Apache settings
Open the command line tool and access the server.
Now run the following command: sudo nano /etc/apache2/sites-available/your-site.conf
Make sure the following lines are available in the config file: SSLProxyEngine on SSLProxyVerify none SSLProxyCheckPeerCN off SSLProxyCheckPeerName off SSLProxyCheckPeerExpire off
Save changes.
2. Check allowed protocols
Open the command line and run the following command: sudo nano /etc/apache2/sites-available/your-site.conf
Next, configure the value as follows: SSLProxyProtocol all -SSLv2 -SSLv3 -TLSv1
Save changes.
In case you’re still having problems, make sure that values for SSLProxyCipherSuite are properly set.
3. Generate the self-signed certificate again
Start the terminal once again.
Once you connect to the server, run the following: openssl req -x509 -nodes -days 365 -newkey rsa:2048 -keyout ssl.key -out ssl.crt
This will generate the new certificate for your server.
This method works if you have previously generated a self-signed certificate on the server.
Open the terminal and run the following command: nano rproxy.conf
Make sure you add the following line: SetEnv proxy-sendchunked 1
Save changes.
You may also try to:
Force the proxy to set the compression to none. This can help if the proxy isn’t working with gzip.
Configure the application to use HTTP internally. This applies only if you’re using a local server for testing purposes.
Tips to prevent errors during SSL handshake
Ensure the SSL certificate provided by the server is valid, and check intermediate certificates in the chain. Try to use certificates issued by a trusted certificate authority.
Ensure that the certificate’s common name and subject alternate name match the hostname.
Check the protocols and ensure that both the client and the server are using compatible protocol versions. Also, check server and client SSL/TLS configuration.
Keep the SSL libraries up to date at all times.
Ensure that your firewall isn’t blocking port 443, which is used for SSL/TLS.
These steps should help you fix The proxy server could not handle the request reason: error during SSL handshake with remote server. In most cases, the issue is related to Apache configuration, and you need to adjust your server settings accordingly.
As for those worried about solving the ?gws_rd=ssl error on Google in no time, clearing the browsing and deleting unwanted add-ons are just two methods described in our dedicated guide. Don’t hesitate to check it out.
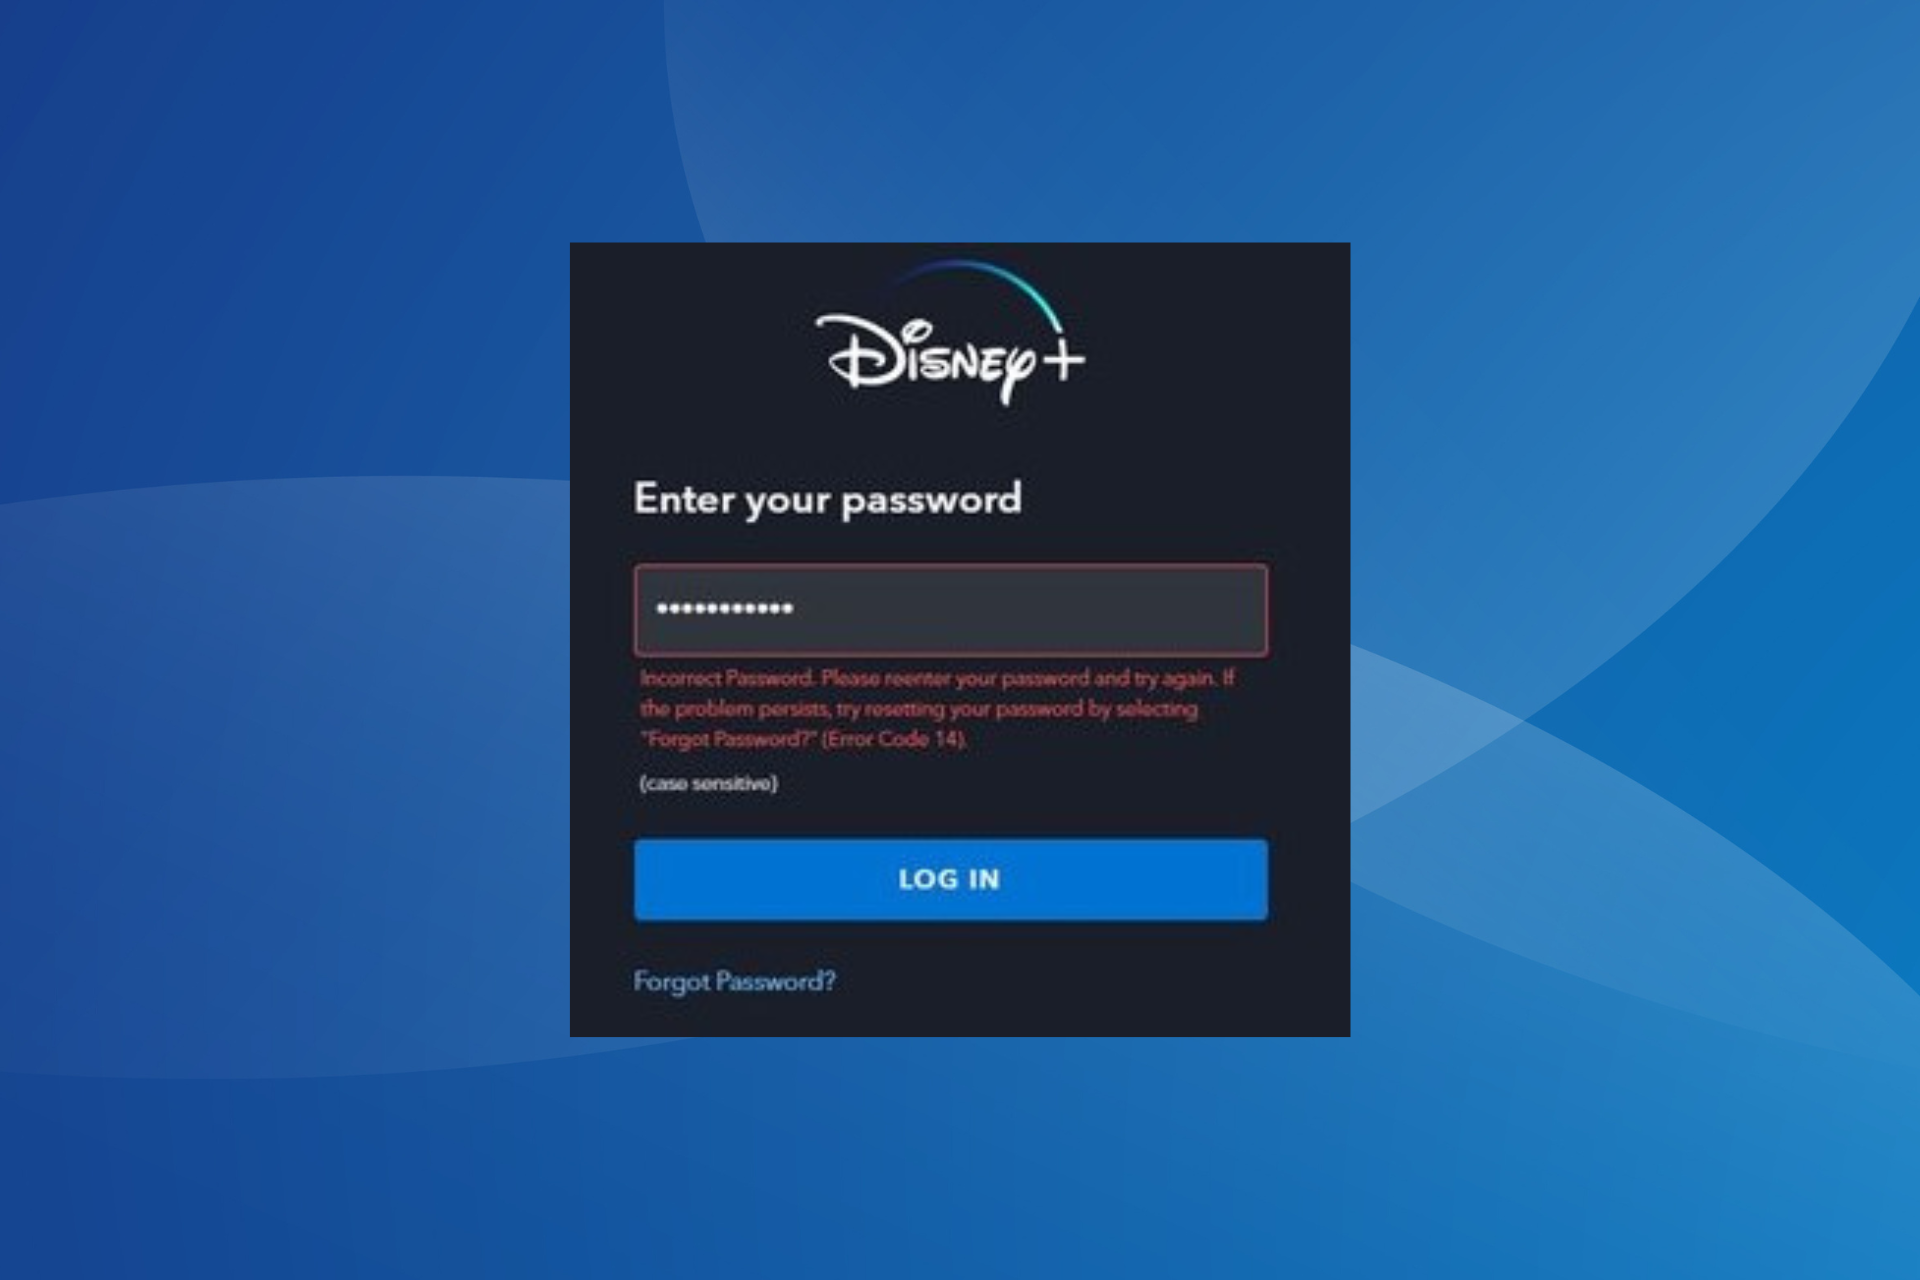
Disney Plus Error Code 14 is a sign-in issue that affects a range of devices, including computers, mobile phones, smart TVs, Roku Streaming Stick, and Amazon Firestick, amongst others.
What does Error Code 14 on Disney Plus mean?
It’s a sign-in error, which, as per Disney Support, arises due to incorrect credentials. The error message reads, Incorrect Password. Please reenter your password and try again. If the problem persists, try resetting your password by selecting “Forgot Password?” (Error Code 14).
The Disney Plus Error Code 14 may also appear with the correct password for some which may be caused by server connection issues.
How do I fix Error Code 14 on Disney Plus?
Before we start with the slightly complex solutions, try these quick ones first:
Check the login credentials. In case you share the account with others, verify whether they have changed the password. Also, activate the account if not done already.
Go to the Disney + login page, enter your email address in the text field, and click Continue.
Now, click on Forgot password.
You will now receive a six-digit verification code on your associated email. Find the code, enter it, and click Continue.
Enter the new password and confirm the change.
Now, verify whether you still get Disney Plus Error Code 14 after the password reset.
In case you are facing issues with password reset, contact the support team, and they will provide you with a direct link for it. Though there will be a verification measure in place.
2. Delete the cache
2.1 Browser cache
NOTE
The steps listed here are for Google Chrome, though they work the same way across all Chromium-based browsers. For other browsers, check the official website for the exact steps.
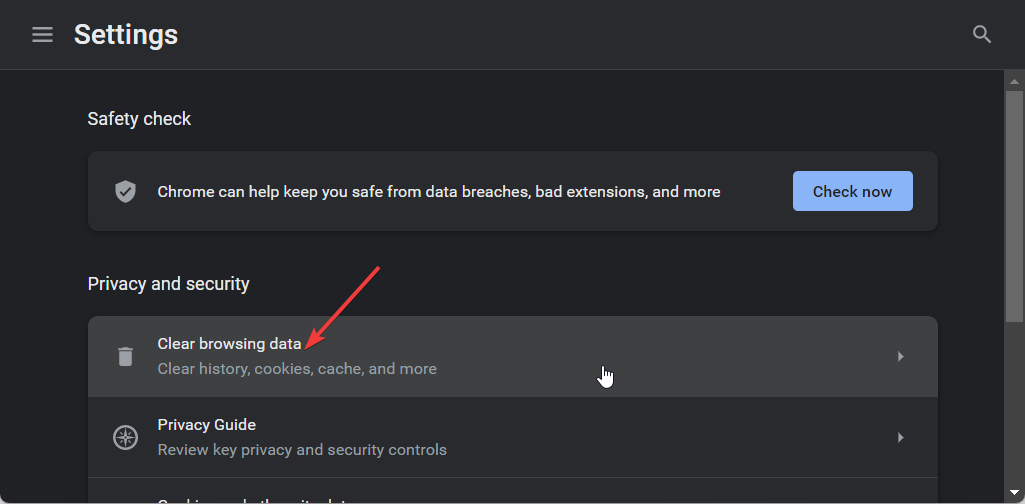
Launch the browser, click the ellipsis near the top-right corner, and select Clear browsing data from the flyout menu.
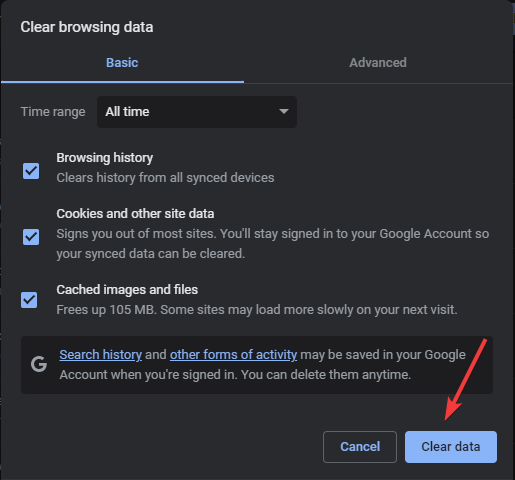
Choose All time from the Time range dropdown menu, tick the checkbox for Cookies and other site data and Cached images and files, and then click the Clear data button.
Once done, relaunch the browser and check whether you are able to log in to Disney Plus.
2.2 App cache (Android app)
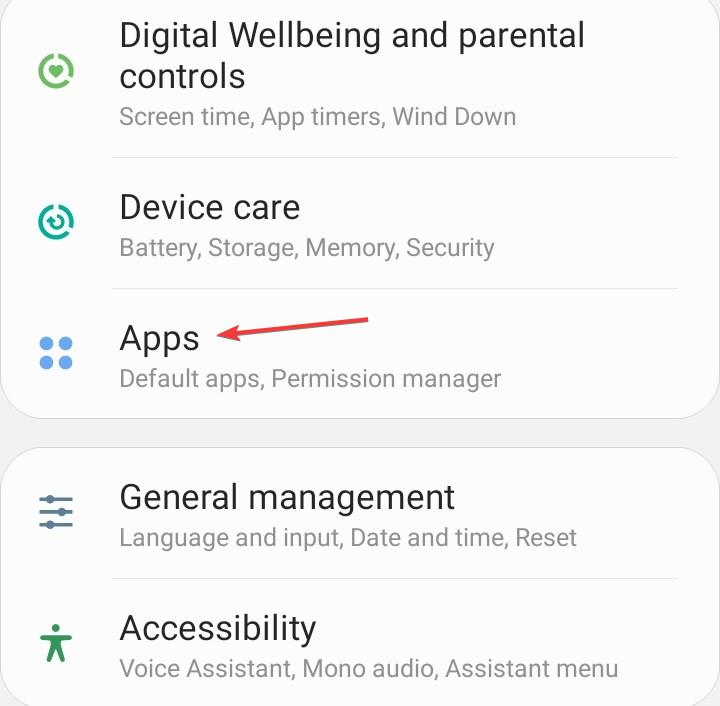
Open the Settings app on your Android device, and select Apps.
Choose Disney + from the list of applications.
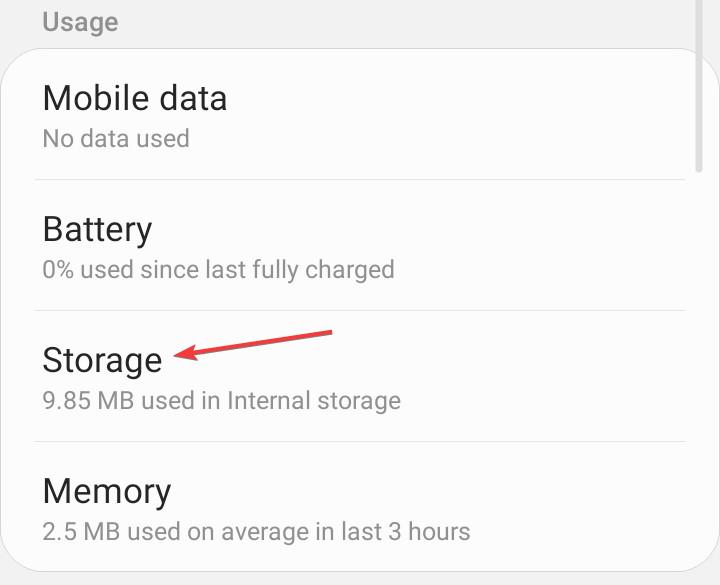
Tap on Storage.
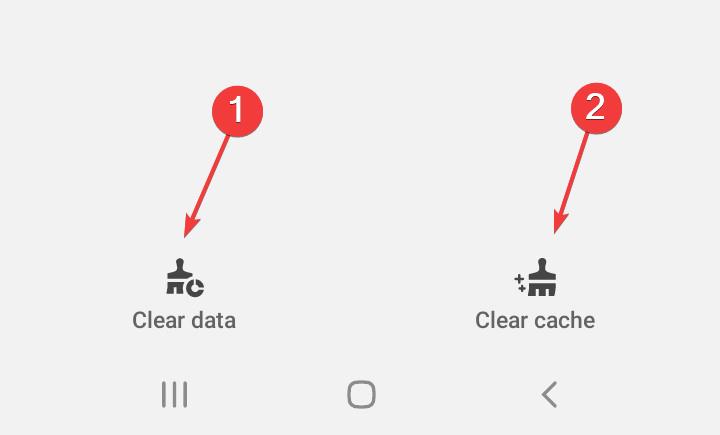
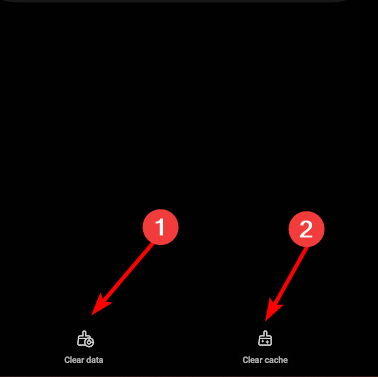
Tap on Clear data and then on Clear cache.
Open the Dinsey + app again and check for improvements.
When Disney Plus throws Error Code 14 while signing in on iPhone, offload the app and then reinstall it.
3. Force log out of Disney from other streaming devices
Tip
This solution only works in case you are logged in with the same account on another device and have access to it. If not, skip it.
Click on the profile icon near the top-right corner, and select Account.
In the Account details section, click on Log out of all devices.
Enter the account password in the provided field, and click the Log out button.
Often, a quick uninstall doesn’t work, in which case you will have to rely on an effective software removal tool which will clear all the left-over files and Registry entries.
Reinstalling the app can help you fix other issues related to the app, such as Disney Plus keeps crashing; read this guide to learn more.
5. Contact Disney Support
When nothing else works, the last option is to contact Disney support. They will inform you in case it’s a server outage or take the necessary action if it’s another problem to blame.
Rest assured, the support team will be able to help you as they did with other users facing Disney Plus error codes.
How many devices can be logged into Disney Plus?
Disney Plus does allow simultaneous streaming on up to 4 devices, six profiles, and logins on a maximum of 10 devices.
These are all the ways you can fix things on any device, including the Disney Plus Error Code 14 on Roku. Remember, in most cases, it turned out to be a problem at the user’s end or with the setup. Only rarely was it an issue with the servers.
If you have encountered the error 503 Backend Fetch Failed Varnish cache server while browsing the internet, this guide can help!
We will talk about the common causes and offer you WR experts tested methods to fix the problem right away.
What is a backend error 503? A 503 Backend Fetch Failed Varnish cache server indicates that the website or web service you are trying to access is currently unavailable or you have an unstable internet connection. Other probable causes are:
The server is under maintenance.
The website is considered suspicious and, therefore, blocked by Adblocker on your computer.
The server doesn’t have sufficient memory to process the incoming information.
How do I fix Error 503 Backend Fetch Failed?
Before proceeding with any steps to fix the 503 backend fetch failed error message, go through the following preliminary checks:
Using a different browser can be a direct solution to resolve this issue and others like 503 first byte timeout.
Press F5 to refresh the web page, close all the other active tabs, or reboot your computer.
1. Power cycle your router (For both frontend and backend users)
Unplug the modem and router from the power outlet.
Wait for 15-30 seconds, then plug the modem back into the power outlet.
Again, wait for 1 minute or 2, then turn on your router,
The router will start up; wait for all the lights to get green, then test your connection.
Power cycling the router can help clear local network issues and refresh DNS information. Thereby eliminating the problem if the issue with the website lies on your side. This could also help similar website-related issues like 503 error unavailable.
2. Ping your router to check the connection
Press the Windows key, type cmd and click Run as administrator.
Type the following command to ping the Google DNS servers and show you if there is any packet loss and hit Enter: ping 8.8.8.8
Pinging the router can help diagnose local network connectivity problems and rule out probable issues with your network.
3. Clear the browser cache
Open your preferred browser. Here, we are demonstrating the steps using Google Chrome.
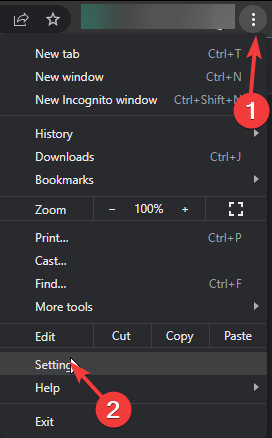
Go to the three dots icon, then click Settings.
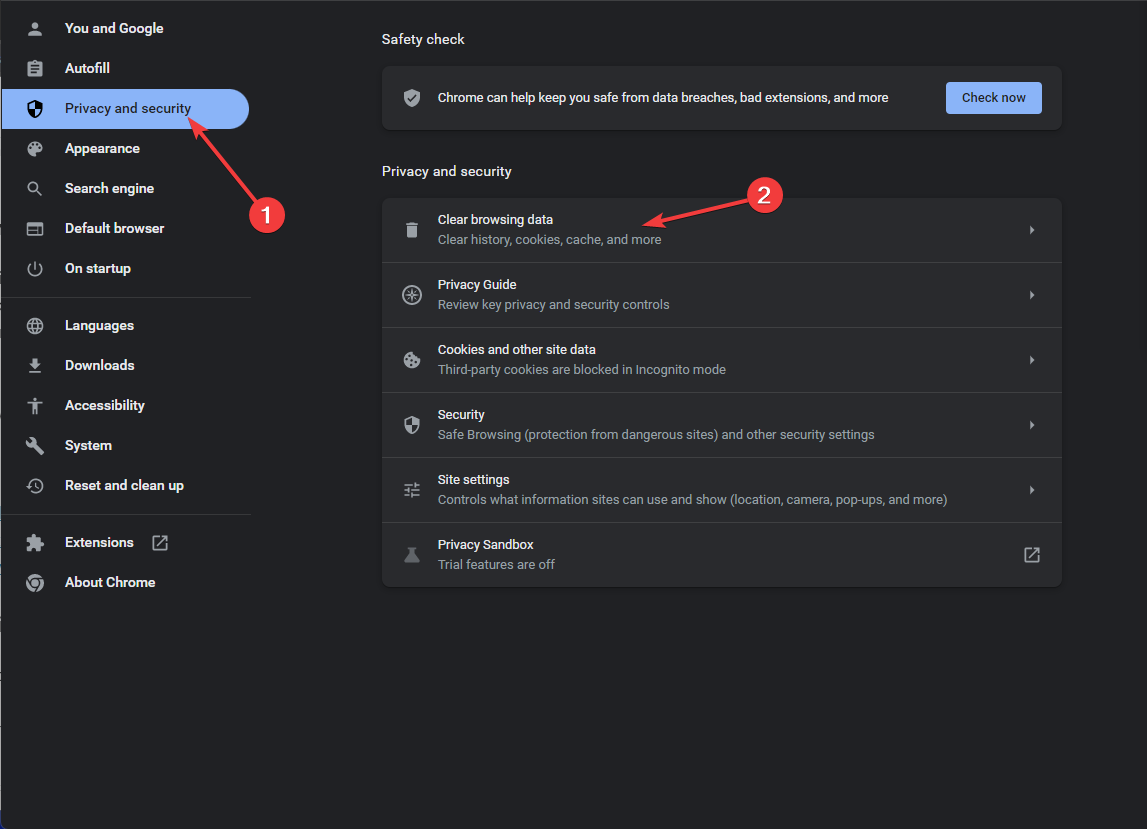
Click the Privacy & security option, and click Clear browsing data.
For Time range, select All time from drop-down list, and place a checkmark next to Cookies and other site data, & Cached images and files.
Click Clear data.
If you cannot access the website due to corrupted or outdated cached data stored in your browser, these steps could help you delete it.
Clearing the cache can help you get past the Error 503 certificate has expired issue so that you are not restricted to visiting any websites.
Open your preferred browser. Here, we are demonstrating the steps using Google Chrome.
Go to the three dots icon, then click Settings.
From the left side, select Reset Settings.
Click Reset settings to their original defaults.
Now, on the following prompt, select Reset settings.
If you can use the website on another browser but can’t open it on the preferred browser, it is time to reset it to default settings.
5. Re-enable the Varnish plugin (Backend users)
Go to your website Control Panel and log in using the credentials.
Next, go to Web Accelerator, then click Manage Varnish.
Click Disable Varnish.
Next, click Confirm Action to disable.
Now click Enable Varnish.
If the Error 503 Backend Fetch Failed issue is at the server end and caused by Varnish cache misconfiguration or other issues, refreshing the plugin can help. However, if the plugin is already disabled, try enabling it and check if the issue is resolved.
6. Modify the Varnish & NGIX configuration files (Backend users)
Ensure you have logged in using admin privileges. Locate & open the file in Ubuntu from this path in the text editor of your choice: /etc/varnish/default.vcl
Search this line and remove /pub from it:
.probe = {
.url = "/pub/health_check.php";
After the change, it should look like this:
.probe = {
.url = "/health_check.php";
If you don’t see /pub in the line, try adding it. Save the file.
Now locate nginx.conf.sample file in the Magneto 2 root folder, follow these steps:
Go to the Varnish configuration file: etc/default/varnish
Look for the http_resp_hdr_len line and change its value to 70000 bytes. In case if the parameter doesn’t exist, look for thread_pool_max and add this line: -p http_resp_hdr_len=70000 \
Locate http_resp_size and change its value to 100000; it should look like this:-p http_resp_size=100000 \
Press Ctrl + S to save the changes.
In case nothing worked for you, then try considering the website admin, explain the issue and fixes you tried for further assistance.
If you have any questions or suggestions about the subject, feel free to mention them in the comments section below.
The BBC iPlayer often throws the Error code: 02062 across all devices, including Amazon Firestick, Roku streaming stick, Xbox, and PlayStation.
The error message reads Something went wrong loading this program. This is usually a temporary problem. If it’s a program that’s just finished on TV, then try again shortly or try a different program, followed by the error code.
How do I fix BBC iPlayer Error Code 02062?
Power cycle Amazon Firestick. This also works for BBC iPlayer Error code 02062 on Xbox. In this case, power off the console.
Update the BBC iPlayer app, and if you are presently connected to a Wi-Fi network, switch to a wired connection or use a mobile hotspot.
Disable both if you use a VPN or proxy to access the streaming platform.
NOTE
The solutions listed here for an Amazon Firestick, though the idea remains the same across devices. If you face the error on the mobile or desktop app, apply the equivalent measures, and things should be up and running!
1. Update the smart TV’s software
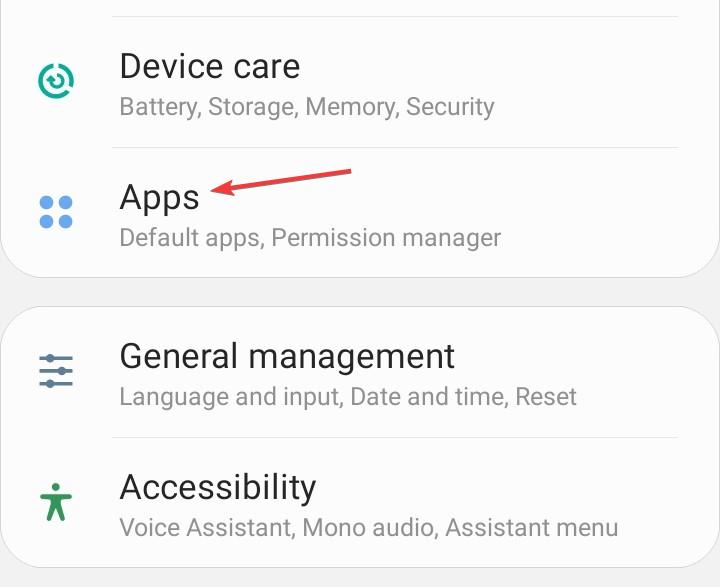
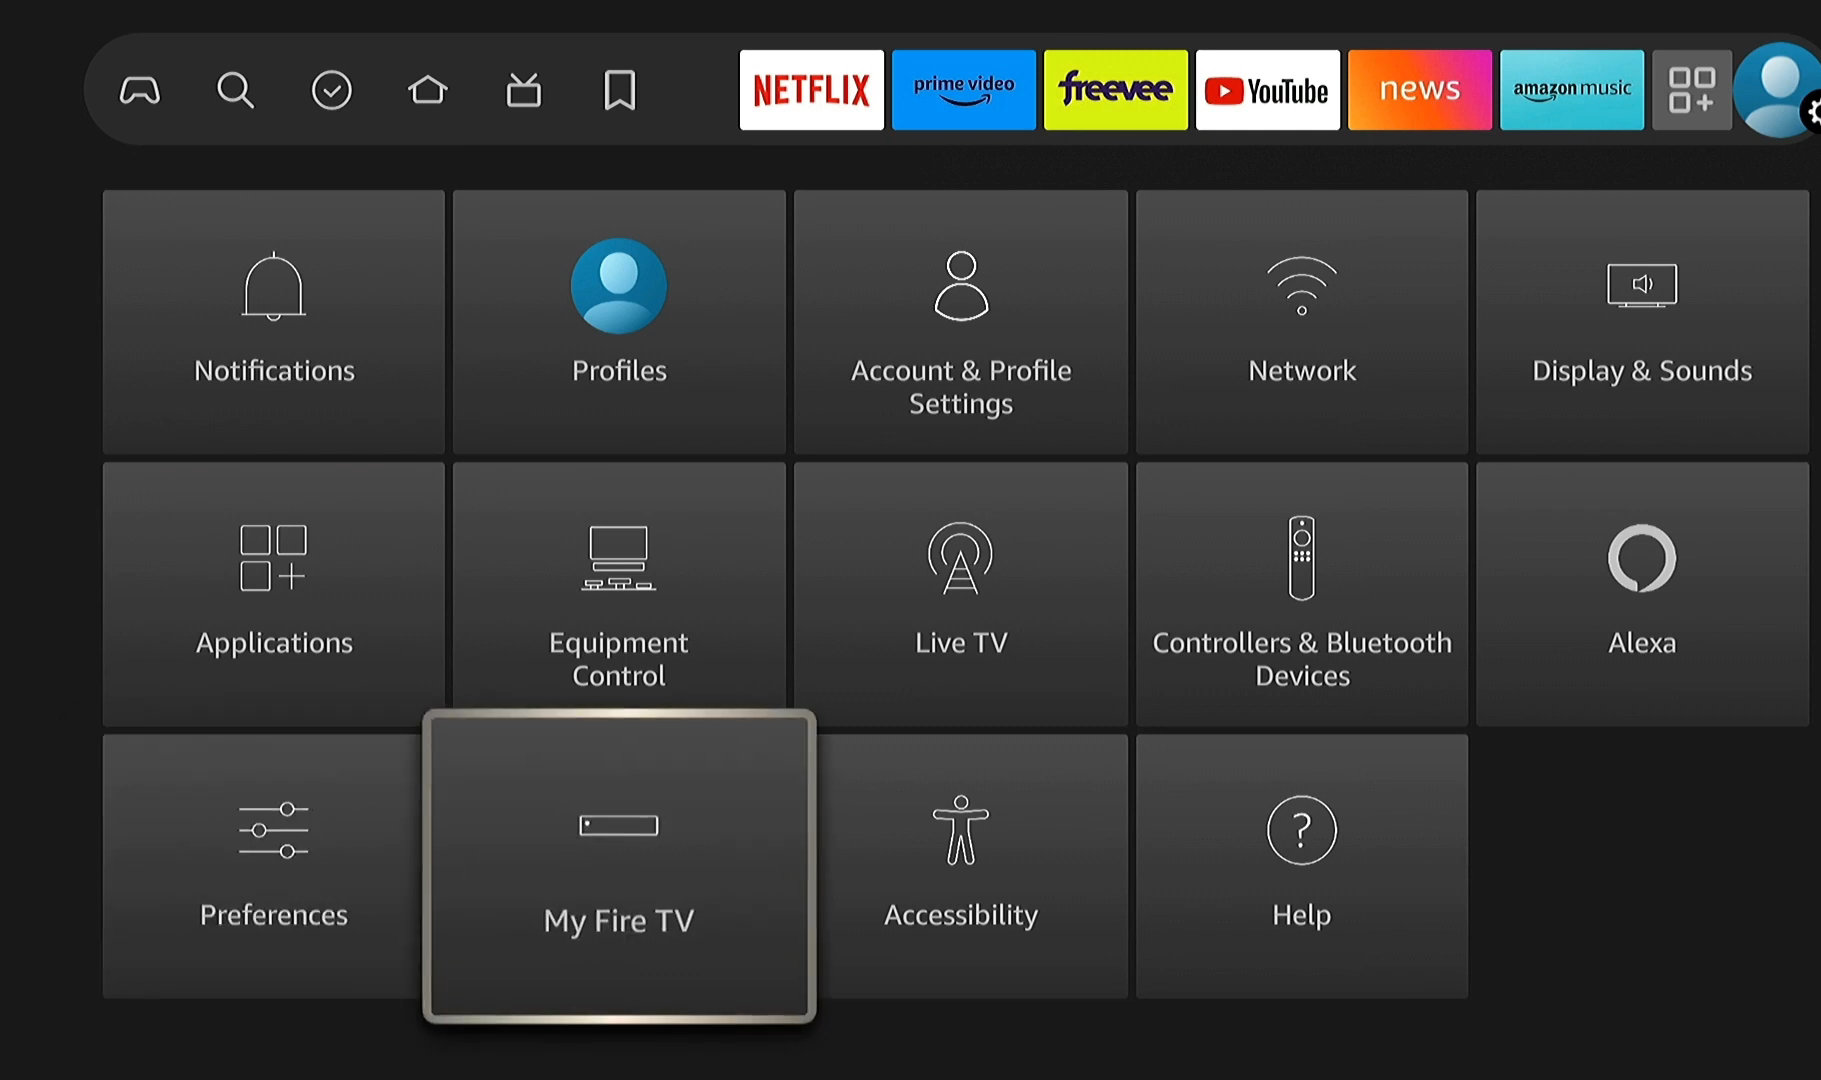
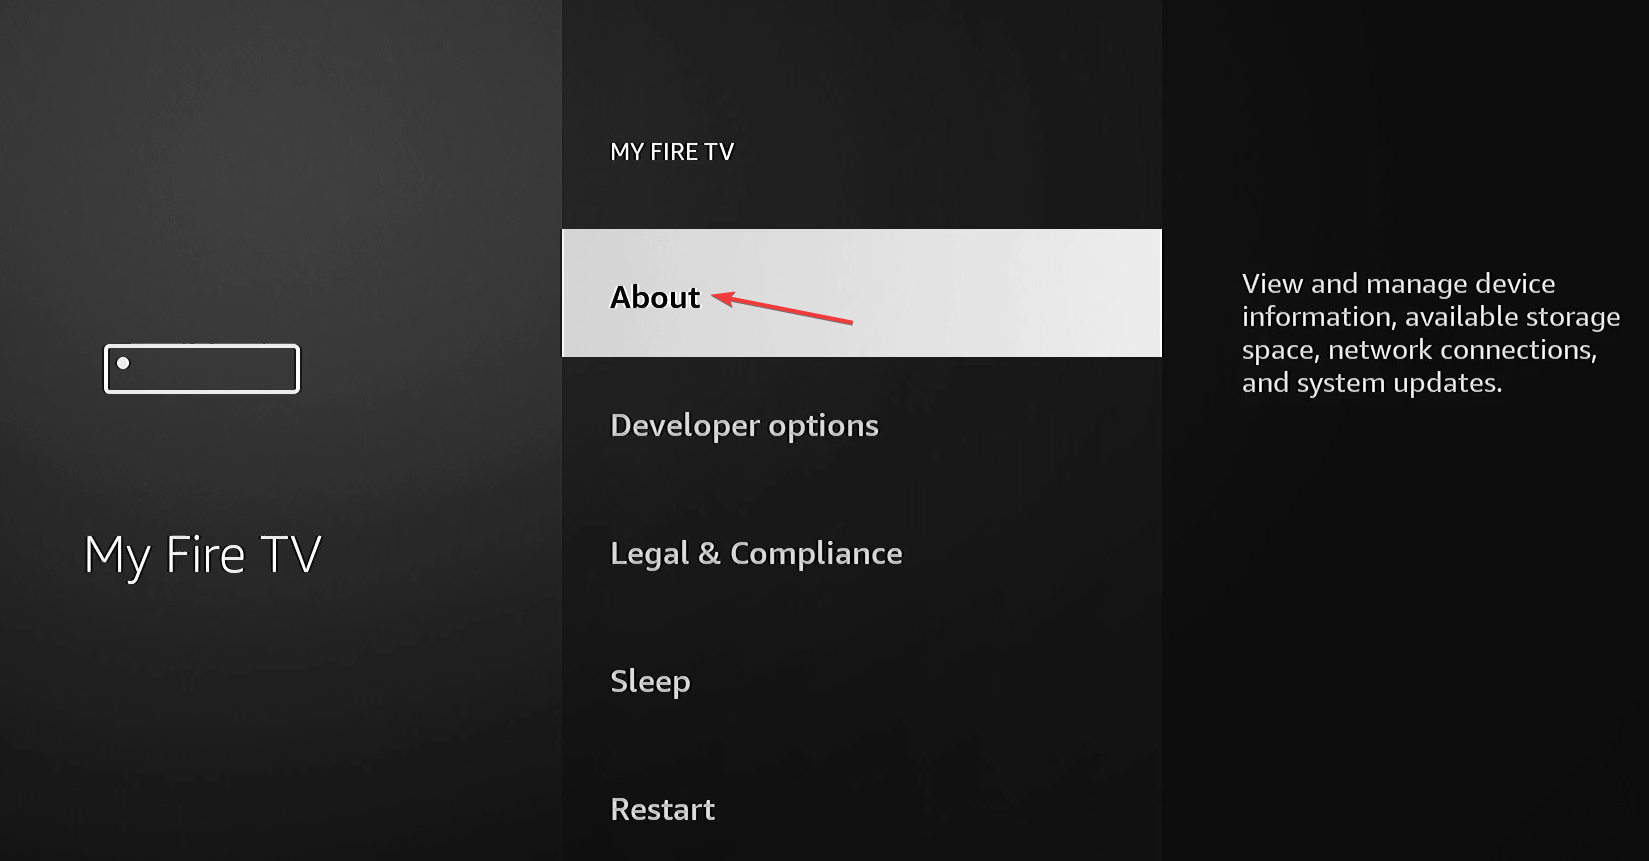
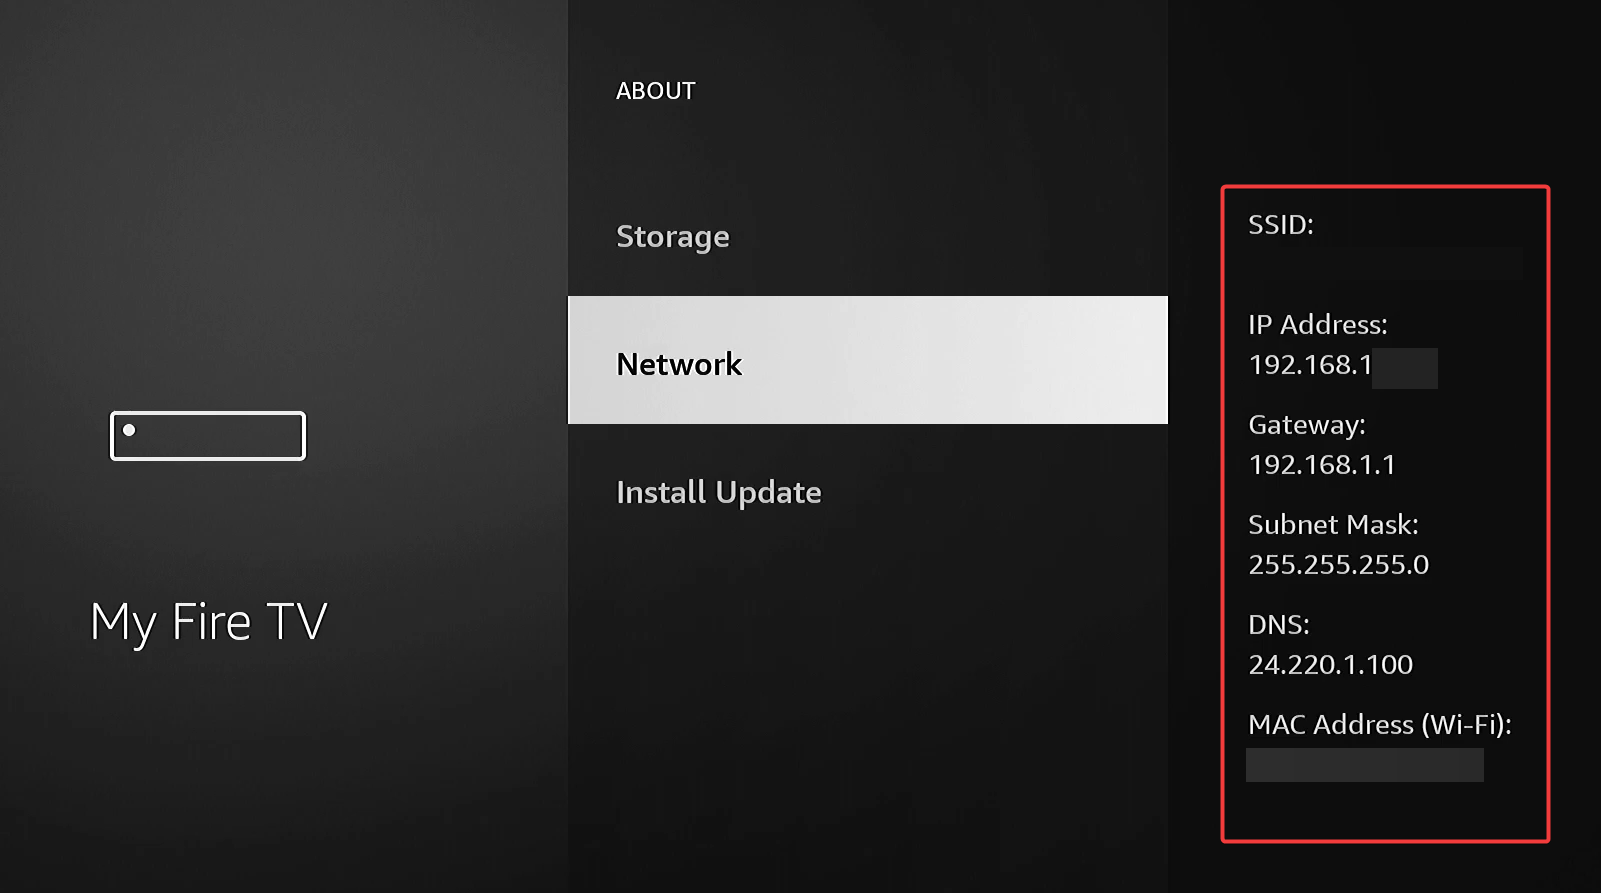
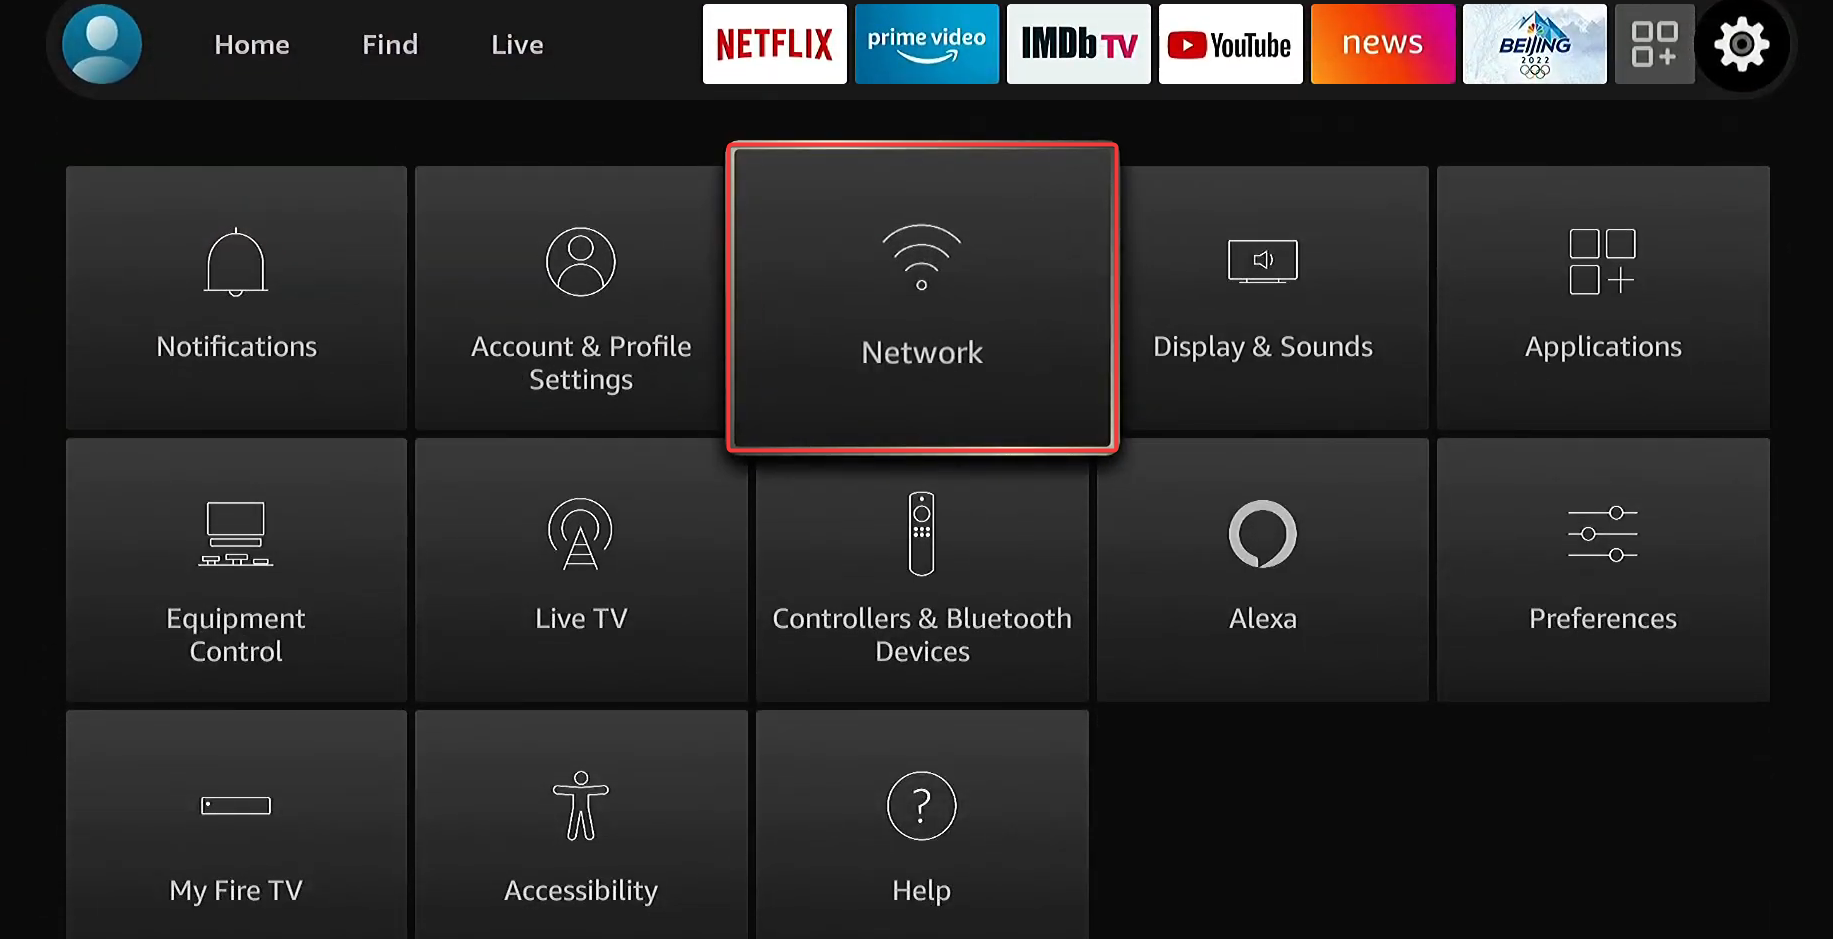
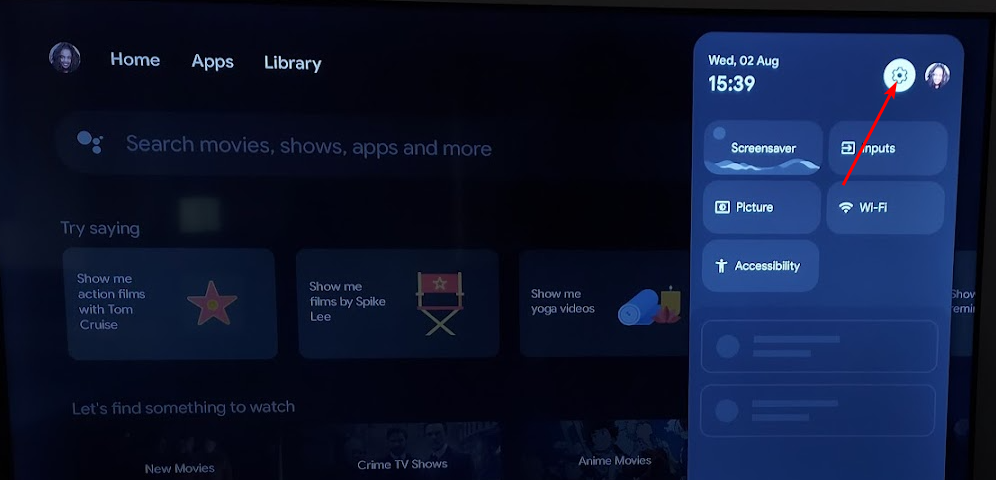
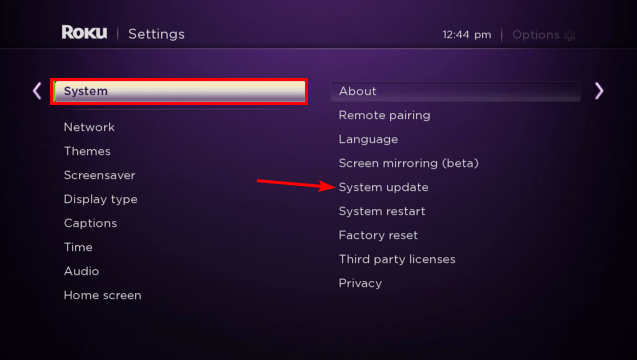
Power on the device, go to Settings, and select My Fire TV (different for other manufacturers).
Scroll down and select About.
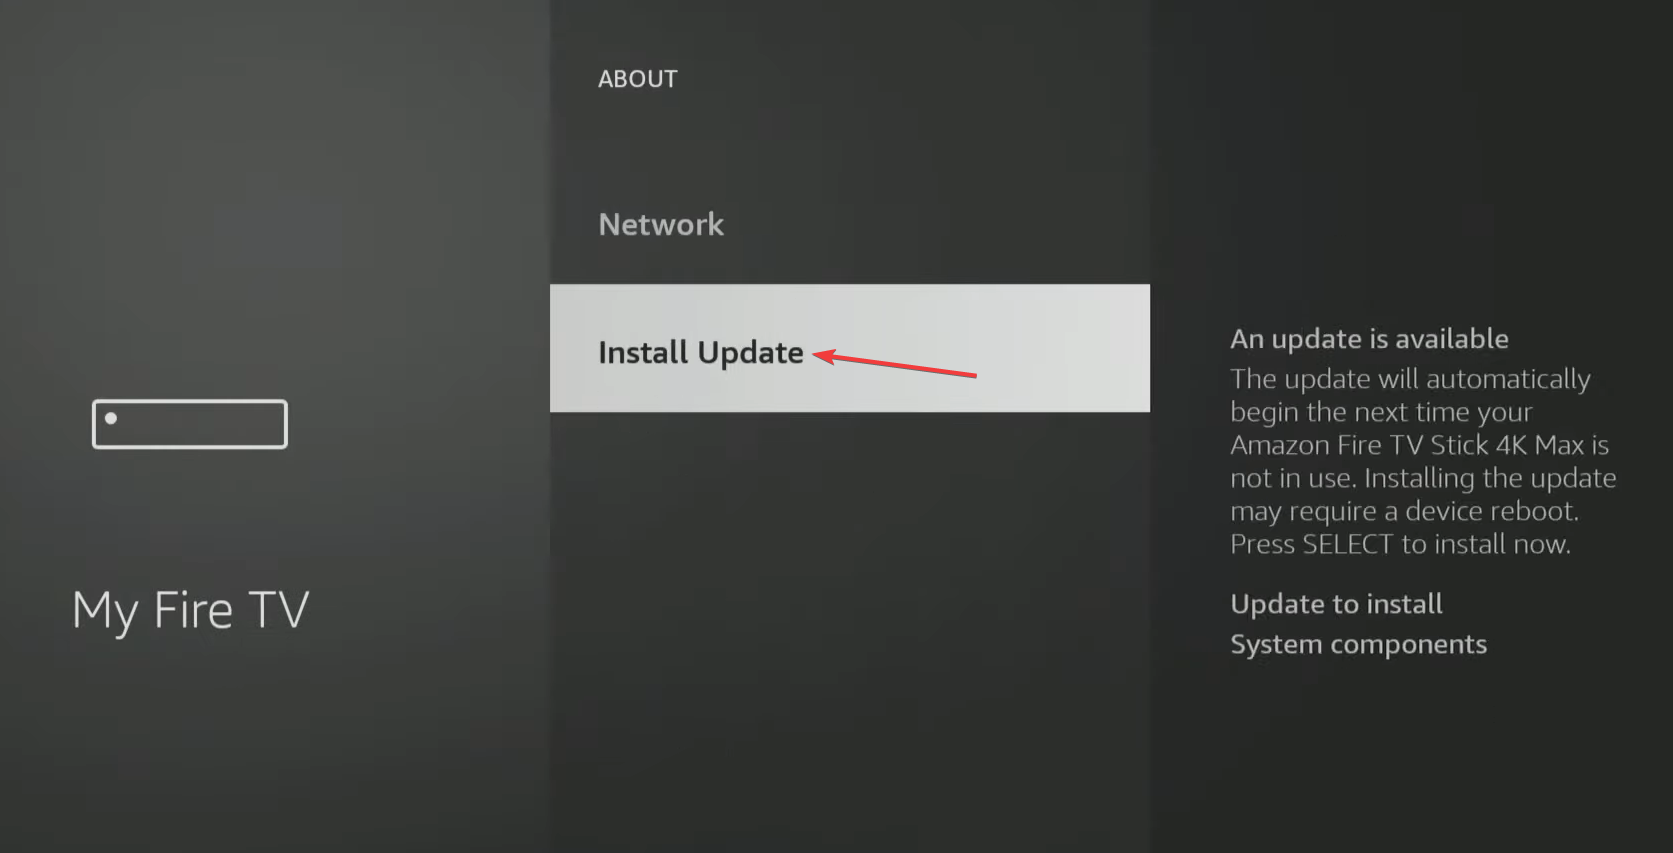
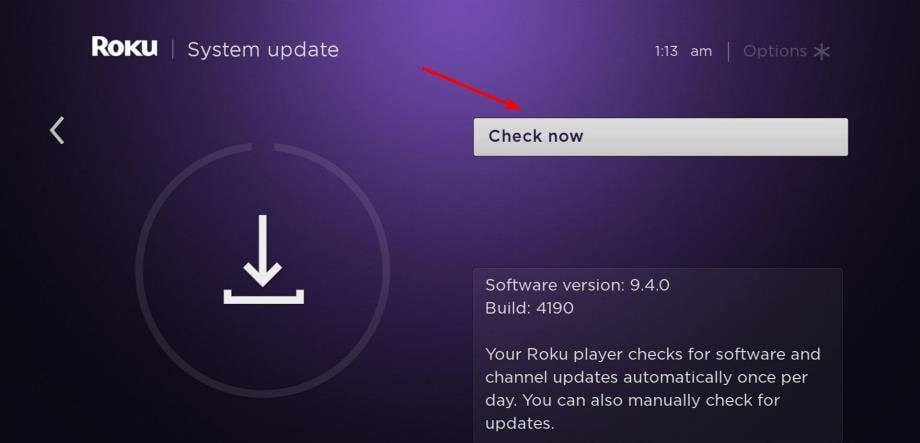
Head to Install update, and if there’s a newer version available, select the option to download it.
Wait for the device to restart.
Updating the smart TV firmware often helps with the iPlayer Error code: 02062 on a Samsung TV and other devices. This also works for the Something went wrong iPlayer error.
2. Clear the BBC iPlayer cache
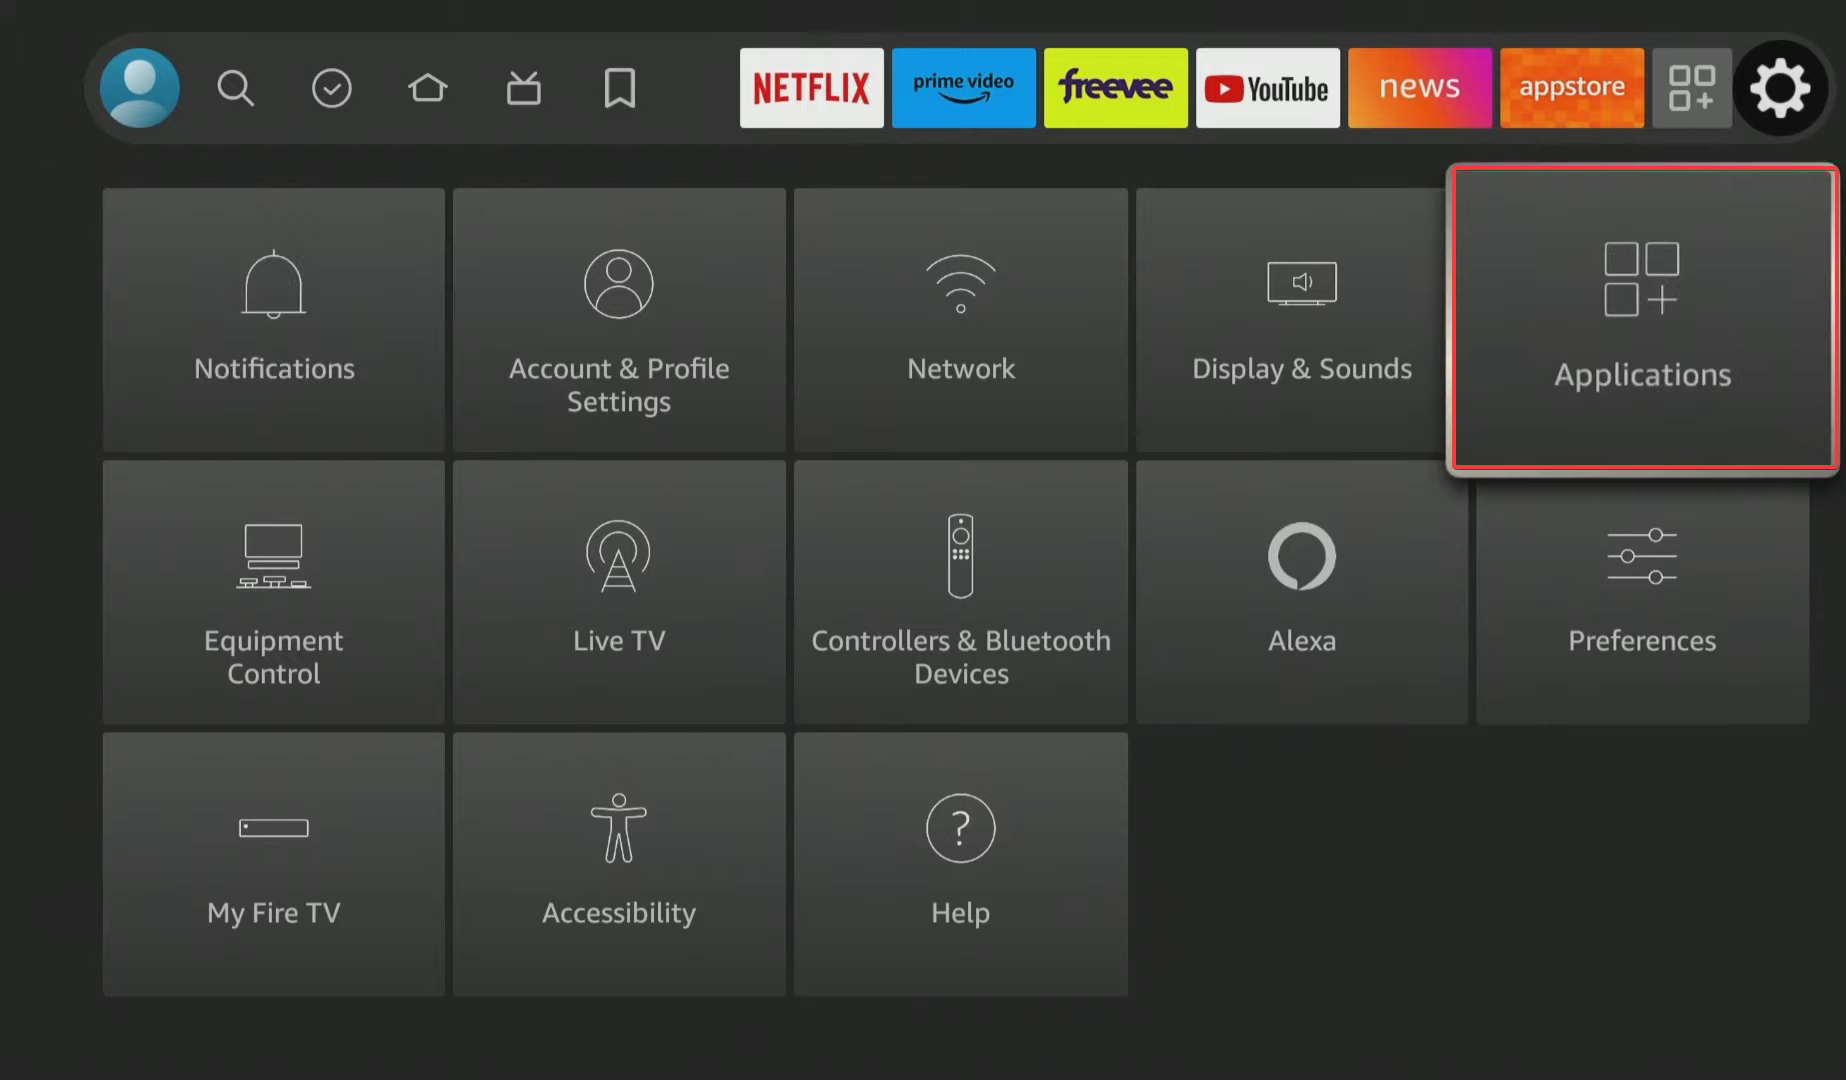
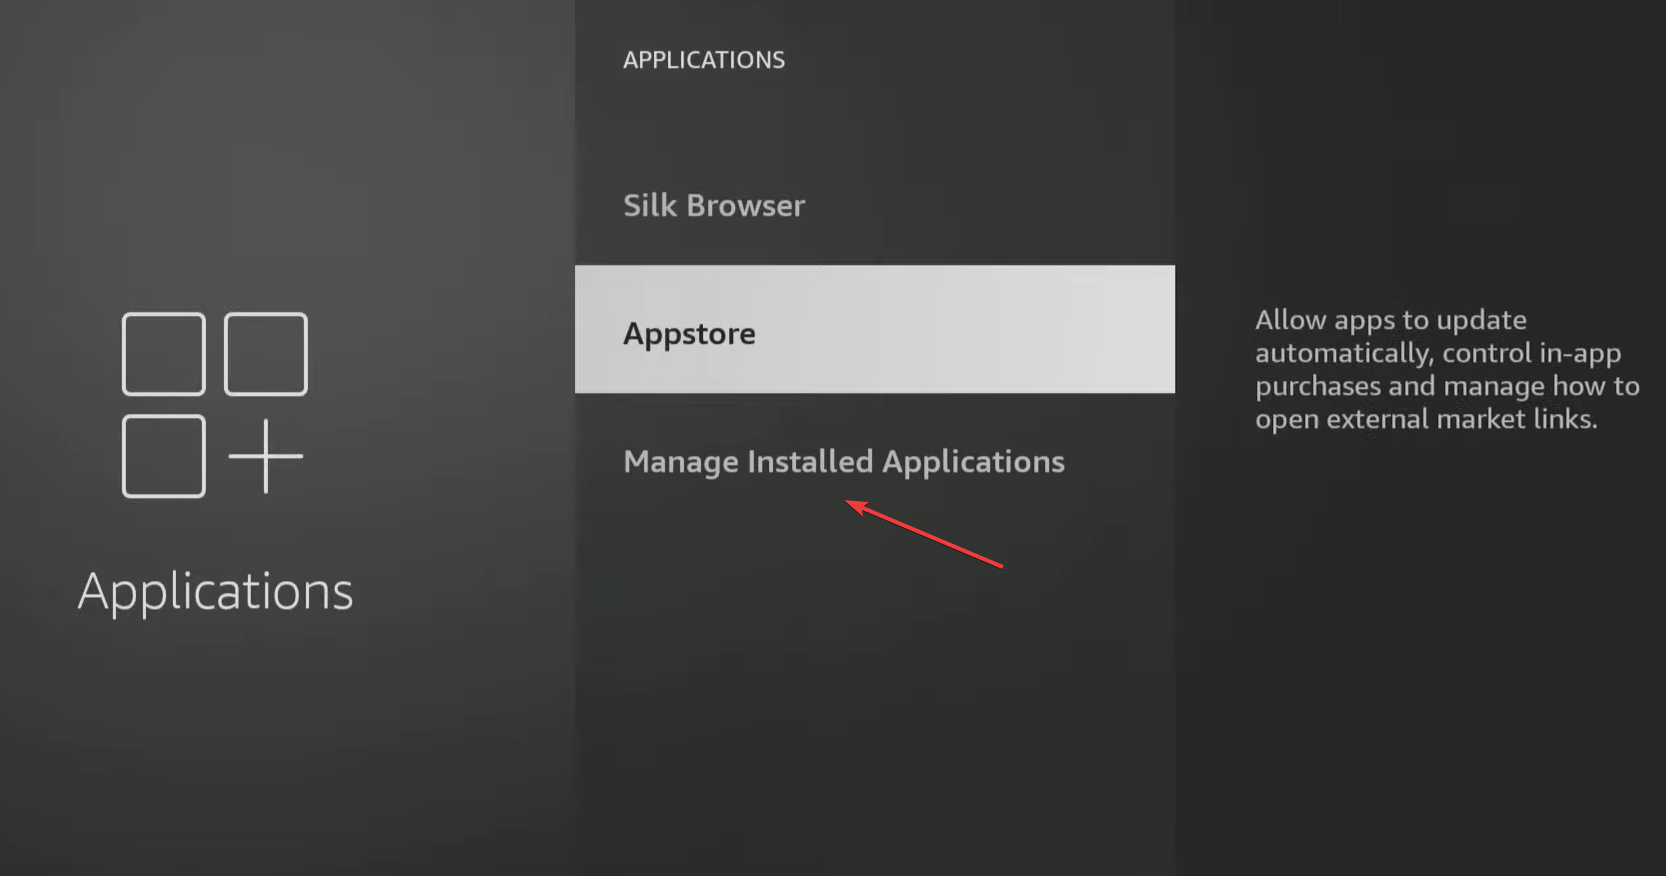
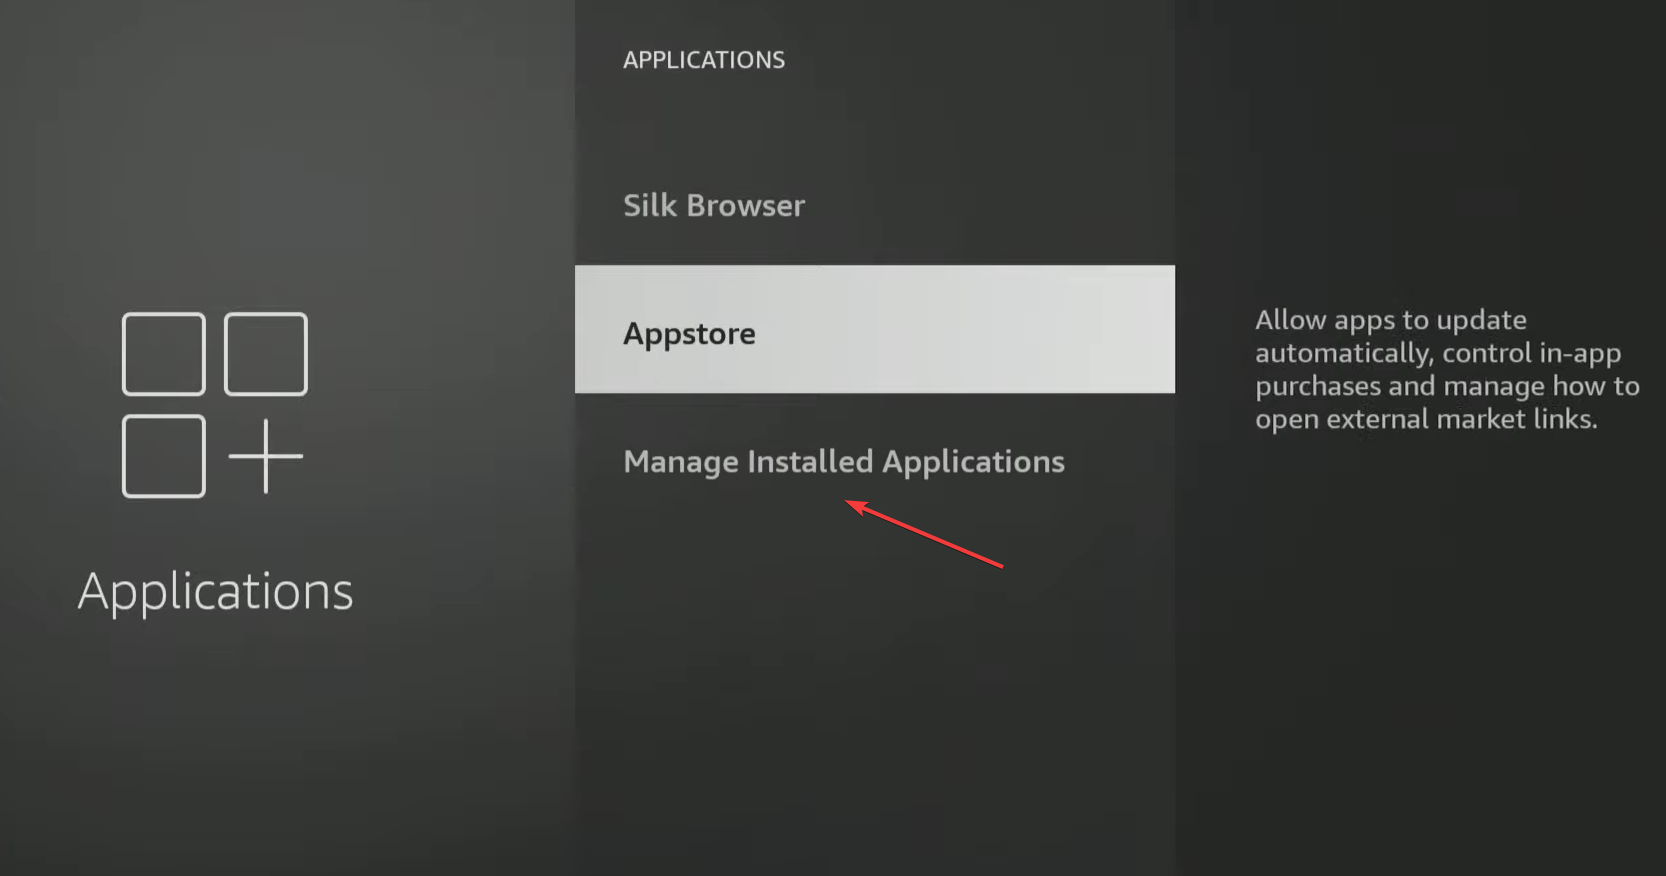
Go to your TV Settings, and select Applications.
Now, choose Manage Installed Applications.
Locate and select BBC iPlayer from the list.
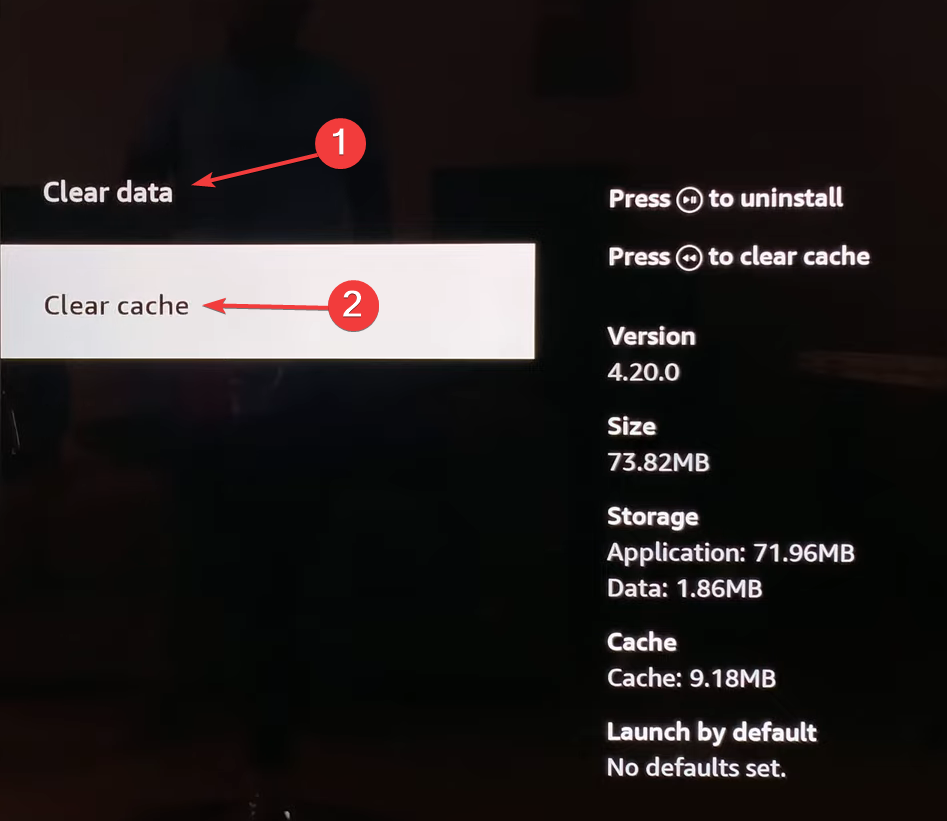
First, choose Clear data and then Clear cache to delete the non-critical app files.
Head down and select Manage installed applications.
Choose BBC iPlayer from the list.
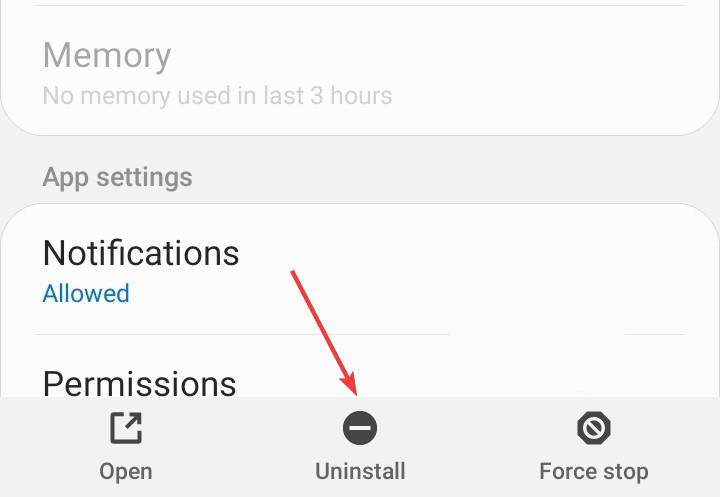
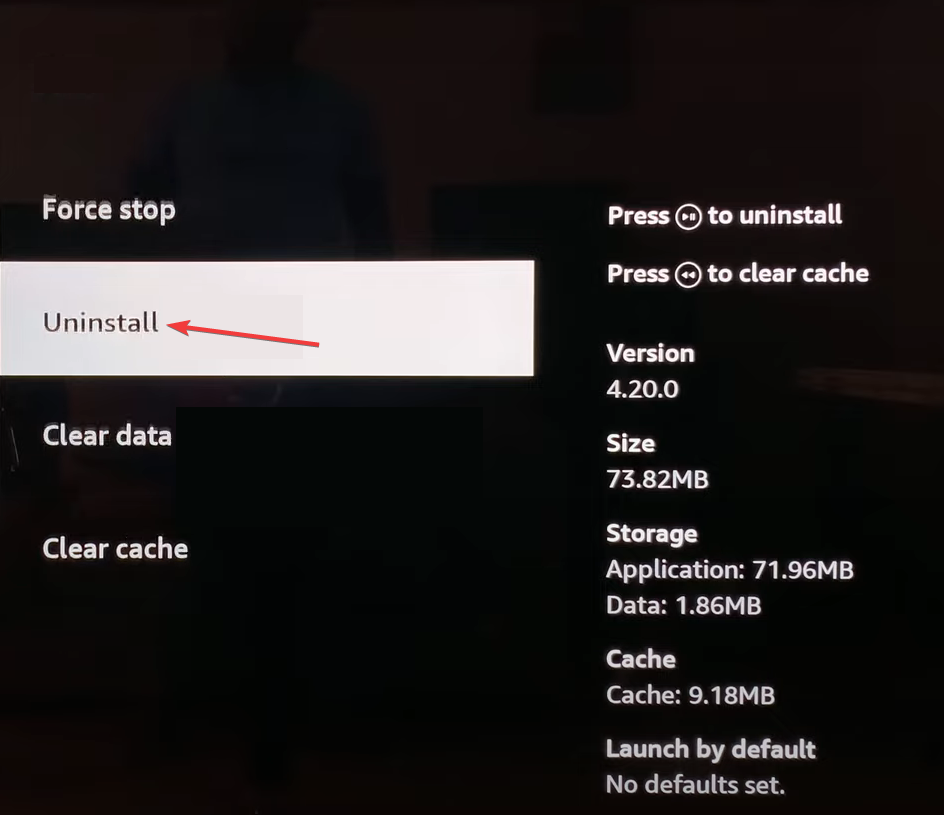
Scroll down to the bottom and select Uninstall.
Finally, choose Confirm to start the uninstallation.
Once done, reinstall the BBC iPlayer app from the dedicated app store and verify whether Error code: 02062 on Firestick is fixed.
5. Contact Support
When nothing else works, you can always contact the BBC iPlayer support. They will help identify the underlying cause and share a solution for it.
If it’s a bug in the installed app version, they will inform you about the expected time period for a patch.
Why am I getting BBC iPlayer Error Code 02062 on BBC iPlayer?
When faced with the error code, it could be the streaming device, app cache, or access rights issues to blame. Many based outside of the United Kingdom had this problem. Besides, it could be an unstable Internet connection or problems with the network settings.
How can I watch BBC iPlayer abroad?
To watch BBC iPlayer outside of the United Kingdom, you must connect to a VPN and choose a server based in the region. This will mask your actual location and reroute the connection through a server based in the UK.
The best part is that you don’t need to be connected to a VPN throughout the streaming. When the program starts playing, disconnect from the VPN and enjoy a fast download speed. In case BBC iPlayer won’t work with a VPN, switching to another one or a different server does the trick!
Summary
Remember, the iPlayer Error code: 02062 could arise for different reasons, but it is always easy to troubleshoot. In the unlikely scenario that the problem lies at the Internet Service Provider’s end, you will have to contact them. There’s nothing the support team can do!
Whether you’re a new homeowner setting up your entertainment system or a current Spectrum subscriber looking to understand the costs of running cable in your home, this guide can help!
We will break down the pricing details and other charges involved in running Spectrum cable services to help you make an informed decision.
How much does Spectrum charge to run cable?
Getting a Spectrum internet plan could cost you anywhere between 50 dollars to thousands of dollars as the cost depends upon the number of people using Spectrum in your area and its nearest node.
In simpler words, running cable to your house is cheaper if people in your area are already using Spectrum as the infrastructure to enable the connectivity is already there.
If the distance from the nearest coax connection is less than 250 feet, you need to pay $49.99 as installation cost.
There are two ways of getting Spectrum internet and installing equipment: a self-installation kit that can be purchased from the Spectrum store or book a professional installation.
Professional Installation
First, you need to contact Spectrum via chat, call, or visit the nearest office to get a price quote for the cable installation.
Once you have the price of professional installation, i.e, around $59.99, and cable charges in order, book an appointment and choose a mode of communication, preferably a phone call, to communicate for the appointment.
The Spectrum technician will call you one day before the appointment to confirm it by making two attempts to reach you.
If the appointment is confirmed, a technician will arrive at your home. During the installation, a person who is at least 18 years of age must be present and provide a national ID. The entire procedure takes 1-3 hours to complete.
Pros and Cons of Professional Installation
Pros
The technician performs the installation
Can move the connection to any room
Tech also checks the network health post installation and fixes issues, if any.
Cons
The installation fee is high.
Need to book an appointment
An adult must be available for 2-4 hours at the installation place.
The self-install kit can be bought from the nearest Spectrum store in your area so that you can install the Spectrum cable without the help of a technician.
Cost of Self-Installation Kits
The self-install kit is available for $ 24.99, and if you know what you are doing, it could take up to 30 minutes to install it.
The Spectrum internet installation kit includes a user guide, coax & ethernet cables, a coax splitter, modem, router, and a phone (if you opt for the phone service).
Pros and Cons of Self-Installation Kits
Pros
No appointment is needed.
It is cheaper than professional installation.
Setup is quick and easy
Cons
Can't move the connection to another room.
Might face issues if the wiring to the pole is old or the modem doesn't work.
If you don't get it right, you might face Spectrum packet loss.
Comes with a free modem, advanced Wi-Fi, antivirus software, and no data caps or contracts. In-home WiFi service available
Spectrum Internet
$49.99 for first year, then $69.99 for the next
200 Mbps
10 Mbps
Has reliable download speeds. Comes with a free modem, advanced Wi-Fi, and antivirus software. Has no data caps or contracts.
Spectrum Internet Ultra
$69.99
400 Mbps
20 Mbps
Allows you to stream HD video smoothly. Enables you to upload and download large files seamlessly. Comes with a free modem, advanced Wi-Fi, and antivirus software. Lets you connect smart home devices & voice assistants Has no data caps or contracts.
Spectrum Internet GIG
$89.99
1000 Mbps
35 Mbps
Enables streaming in 4k and 8k Has multiple online gaming streams & VR Enables uploading & downloading huge files Can connect Smart home devices & voice assistants
Remember, the GIG plan is available in a few areas; therefore, check the Spectrum zip code search tool to ensure it is available in your area. Also, the internet fees of the plans will increase once the first year of the service is up.
Wi-Fi Router Options from Spectrum
Wi-Fi plans
Price (per month)
Spectrum Internet (300 Mbps plan)
$5
Spectrum Internet Ultra (500 Mbps plan)
$5
Spectrum Internet GIG (1000 Mbps plan)
$5
Now that you know the prices and plans to get Charter Communications’ Spectrum cable at your home, you can check for all the factors, such as if Spectrum is serviceable in your area, by contacting customer care or booking a visit by a technician.
Also, if the technicians have to run the cables over long distances, the company would require permits and surveys to ensure the new connection doesn’t interfere with the existing ones.
By now, you know how much spectrum charges to run cable; if you have any questions or suggestions about the internet service provider, feel free to mention them in the comments section below.
After months of anticipation, Windows 11 23H2 is finally out, as Microsoft decided to release it on October 31, 2023. The package, also known as Windows 11 2023 Update, brings with it a lot of new features: from Copilot AI to Windows Switch, Dev Drive, and a rejuvenated File Explorer. Our coverage about it should be all you need to know about the package.
However, Microsoft also released some new and unannounced features with the 23H2 release. We’re talking about a new mini version of Microsoft Teams that replaces the Chats app on Windows 11.
The mini version is a compact Teams meant to keep in touch with friends and family while users are doing other tasks on Windows 11. The best part? It’s completely free.
All these new changes are coming with the 23H2 release, however, according to Microsoft, they are dormant even when installing the release. To enable them, users will need to install KB5027397, first.
Windows 11, versions 22H2 and 23H2 share a common core operating system with an identical set of system files. Therefore, the new features in Windows 11, version 23H2 are included in the latest monthly quality update for Windows 11, version 22H2 but are in an inactive and dormant state. These new features will remain dormant until they are turned on through the “enablement package,” a small, quick-to-install “master switch” that activates the Windows 11, version 23H2 features.
Microsoft
How to install KB5027397 on Windows 11
Fortunately, there is not much to do to install kb5027397 on Windows 11. The package will automatically install in Windows Update when you choose to install the 23H2 package.
To do it, you’ll need to open Settings > Windows Update, turn on Get the latest updates as soon as they’re available, and select Check for updates.
On another note, if you don’t install Windows 11 23H2 yet, you should know that support for the 22H2 version will reach its end in October 2024. Below you can see the support time for each Windows 11 release.
Version
Start Date
End Date
Version 23H2
Oct 31, 2023
Nov 11, 2025
Version 22H2
Sep 20, 2022
Oct 8, 2024
Version 21H2
Oct 4, 2021
Oct 10, 2023
Have you installed the Windows 11 23H2 release already? What’s your experience with it?
Windows 11 23H2 is now available everywhere, as Microsoft released it on October 31, 2023. The package is quite big, and it comes with a lot of features for Windows 11, as you can see in our detailed coverage of it.
However, Microsoft also added new and unannounced features with this package, such as a mini version of Microsoft Teams on Windows 11, which will replace Chats, and… it’s free to use, according to the Redmond-based tech giant’s latest blog post.
We’ve learned a lot from our customers and based on the feedback today, we’re enhancing the experience by replacing Chat in Windows 11 with Microsoft Teams (free), a newly refreshed communications experience that will instantly allow you to chat, call, create free meetings, and build a space for community groups to come together, in just a click or two.
Microsoft
The new mini Microsoft Teams version can be moved around on the Windows 11’s desktop, and Microsoft promises the compact Teams will allow users to be more productive on the operating system from now on, all while keeping in touch with their friends on Teams.
We’ve added a new view, a mini-compact size, which makes it easy to place the mini window anywhere on desktop, allowing you to passively keep tabs on your conversations in Teams as you browse the web or multi-task and be productive. We’ve also introduced a new People experience, so you can discover people that are already on Teams and instantly connect with them. If you ever need to expand and do more with Communities or manage multiple conversations, you can now simply maximize into a full windowed Teams experience.
Microsoft
How to get the new mini Microsoft Teams on Windows 11
Well, the solution is rather simple: update your Windows 11 to the latest 23H2 release, and you should automatically have the new (and free) Microsoft Teams on the taskbar.
To do it, you’ll need to open Settings > Windows Update, turn on Get the latest updates as soon as they’re available, and select Check for updates.
It shouldn’t take much to update to 23H2, especially if you’ve been updating your Windows 11 regularly. After rebooting your system, the new Microsoft Teams can be opened, and the mini version can be enabled.
It’s also good to know that some devices might not support 23H2 currently, and Microsoft acknowledged it. However, the Redmond-based tech giant will release the package to those devices, once all the issues are cleared.
If we detect that your device may have an issue, such as an application incompatibility, we may put a safeguard hold in place and not offer the update until that issue is resolved. We will begin the auto-updating rollout process in the coming months and share more information on the Windows release health hub.
Microsoft
Check out the latest Microsoft blog post on all the new enhancements coming to the free version of Microsoft Teams in Windows 11 23H2.
And be sure to let us know your experience with the new Microsoft Teams.
Windows 11 23H2 is now available everywhere. And with most big Windows releases, Windows 11 23H2 promises some big features coming to the operating system.
If we’re honest, these are, probably, some of the most exciting features to ever come to any Windows; we’re talking about Windows Copilot, a redesigned File Explorer, native RAR support, a new Settings page, the ability to see how much energy your battery consumes, and many more which we will discuss below in this article.
Build number
22631
To be released
October 31
Central features
Windows Copilot; a new File Explorer; native RAR support
Most of the features were already released across the various channels within the Windows Insider Program, but it will be Windows 11 23H2 that will bring them together in a single build, the 22631 Build.
There will be a lot of new features, and Windows 11 23H2 might seem overwhelming because of them, but don’t worry, we’ll walk through each and every one of them; this way, you’ll be able to know what to expect from the hotly-anticipated Windows 11 23H2 update package.
Windows 11 23H2: here is everything you need to know
Release date: October 31, 2023
First and foremost, Windows 11 23H2 was released on October 31, 2023.
Ever since it was announced, earlier this year, Copilot has been the star of the 23H2 update package. The AI assistant will replace Cortana (which was deprecated in August), to become your on-the-go tool for almost everything. Need to change your OS to dark mode? Say no more, Copilot will do it. Need a new recipe for a dinner with friends? Same, just hop on Copilot, and the tool will be more than happy to get it for you.
Copilot runs on Bing Chat, and it is currently available to test and experiment in the Windows Insider Program. However, Microsoft will greatly improve it over time, and the Redmond-based tech giant plans to transform it into a tool to use natively with Windows, from now on.
A brand new File Explorer is coming to Windows 11, and it is designed for a seamless navigation experience within the OS. You’ll have carousel-like thumbnails, a new Details pane, and a new Recommended area, which will showcase the files you access the most.
It also comes with a new layout for Quick Access, Favorites, and Recents. You’ll be able to see details such as comments, editing, and an overall different experience when interacting with these files.
New Settings page
The Settings page will debut a new layout with a brand new feature: interactive cards. For starters, there will be 7 interactive cards with the installation of 23H2: Recommended Settings, Cloud Storage, Account Recovery, Personalization, Microsoft 365, Xbox, and Bluetooth Devices. But worry not, Microsoft will add more interactive cards in the future.
Basically, these interactive cards will let you set-up your device much faster, with just a few clicks, without getting lost in all the panels that the Settings page currently features. This, alone, makes it one of the most useful features coming to Windows.
Native RAR support
After all this time, native RAR support is finally coming to Windows 11. While WinRar has become everyone’s favorite hero with its unlimited trial period, unfortunately, it will no longer be of any use on Windows 11 devices from now on.
For starters, the native RAR will support .tar, .tar.gz, .tar.bz2, .tar.zst, .tar.xz, .tgz, .tbz2, .tzst, .txz, .rar, .7z, and many other formats, and Microsoft promises to expand it in the future. The best news? It’s all free, and quite easy to use, as well.
The taskbar was changed and upgraded
The Taskbar will also welcome back some old features, Never combine, and Show labels. Microsoft removed these features when Windows 11 was released, 2 years ago, but due to popular demand, they’re back. You’ll be able to display each app individually on the taskbar, while also labeling the pinned ones, for easier management.
And, Windows 11 23H2 is coming with an elegant bell notification, replacing the current one. If you have any notifications, the bell will be shown as full. When the bell is empty, then there are no notifications. The feature is already live in the Windows Insider Program, and it’s amazing just how impactful it can be.
Improved Volume Mixer
There is a new Volume mixer coming to Windows 11 with the 23H2 release. This new Volume mixer will have settings for Spatial Sound, as well as options to control the audio on specific apps (such as Spotify, Microsoft Edge, and more), independent of your device’s audio settings.
Plus, you’ll be able to easily access it from your taskbar, just like you currently do in your Windows 11. There’s a new button that will open up the new Volume mixer, and once you’re there, you’ll know what to do. That’s how easy it is.
Windows Backup
This new app coming to Windows 11 23H2 will allow you to easily back up your device, including your files, apps, pictures, settings, and credentials, in case your device is compromised.
Plus, once your device has a backup, you can easily use it to migrate to another device, where all your stored info will be intact. Cool, isn’t it? It was about time, that Microsoft would release such a feature.
Dev Drive and Dev Home
Microsoft was thinking about software developers when developing these features, but Windows 11 23H2 will also welcome Dev Drive and Dev Home, 2 brand new apps that will allow software developers to build a working station from the comfort of their own Windows 11 device.
Dev Home will be the central hub for this, and it will include the Dev Drive, which is a drive especially designated as a space for development. Plus, Dev Home will include other utilities, such as GitHub, to allow you to easily access your favorite platform. Microsoft plans to enhance Dev Home with AI capabilities in the future, too.
RGB Lighting Controls
Maybe Windows 11 is not yet the most popular Windows around, but it will sure be the best Windows to game on, and the 23H2 release will make sure of that with the new RGB Lighting Controls feature coming to the operating system.
You’ll be able to control your device’s RGB lighting right from the Settings page, and it will include the customization of peripherals too. So if you have a mouse, or keyboard with RGB lighting, then you’ll be able to match (or mismatch) them very easily now.
Windows 365 Switch is another interesting and useful feature coming with Windows 11 23H2. This one will allow you to easily switch between your local PC and your Cloud PC. Of course, you’ll need to set-up your Windows Switch first, and then make sure you have a Cloud PC that is connected to it.
But once those steps are made, you’ll be able to go from your local device to your cloud PC as if you would switch tabs on your taskbar. Actually, it will be that easy. Windows Switch will operate inside your taskbar, and the taskbar will be the gate to your Cloud PC and vice-versa. For work situations on a personal device, this feature is heaven.
New sharing experience with just a click coming to Windows 11
You will be able to quickly email a file to yourself directly from File Explorer on Windows 11. The feature will appear as an option when you right-click a file. Once you select the share icon, a list of options will pop-up, including the ability to email the file to yourself.
However, there will be limitations to it, as files from OneDrive cannot be emailed. But this is a very useful feature, especially when you’re in a hurry.
Windows 11 23H2 will debut Dark Mode on Paint, Layers, and Cocreator
If you use Paint, for whatever reason, you need to know that Dark Mode is finally coming to it with the 23H2 release. Paint will be automatically in Dark Mode if your system is also in this mode, but if not, you’ll be able to get in Dark Mode, by accessing Settings inside the Paint app.
Plus, Microsoft Paint will also get Layers and an AI tool, called Cocreator, to help you bring to life your visions. We’ve checked it out, and it’s quite impressive, but you’ll have to join a waitlist in order for you to try it.
Voice access on sign-in
Lock-screen will feature voice access with the Windows 11 23H2 release. This means that every time you restart your computer, before signing in, you’ll be able to use the voice access on the Windows 11 lock screen. You can do it remotely, and away from your keyboard.
The feature will allow you to dictate your PIN and sign in. Even more, if you say show keyboard, the voice access will then show a keyword with labels on it. You can say the numbers on the keys to enter the letters associated with them. According to Microsoft, this will mask the actual password you are entering from being heard by anyone in your vicinity.
What other features are coming in Windows 11 23H2:
You’ll be able to set HDR wallpapers in JRX format as desktop backgrounds.
Task Manager will debut a new design for its dialog menus.
Passkeys will also come with this release, eliminating the worries of having your credentials compromised.
You’ll be able to dim the lights of your screen with your eyes, all thanks to the new Adaptive Dimming feature coming to Windows 11.
Important notifications will no longer show up content to respect your privacy when using a full-screen app on your Windows 11.
There will be a new VPN icon attached to your new Wi-Fi icon, which will tell you if your network is secure or not.
The Teams Chat app will be removed, and you’ll also be able to uninstall Microsoft Teams from your Windows 11.
You’ll be able to easily find out your Wi-Fi password now, by accessing Settings.
More features and options are coming to Windows Ink, as you’ll be able to put your handwritten text into any text box using your Surface Pen.
Natural Voices for Narrator will support French, Portuguese, English (India), German, Japanese, Chinese, and English (UK).
We can’t help but wonder: will Microsoft tone down its ads with the Windows 11 23H2 release?
So, will Microsoft tone down its ads and product placements on Windows 11 and the other apps we’re using on it? We don’t know, but assuming there are so many new features coming to it, maybe the Redmond-based tech giant will think it’s enough for now.
We’re going to have Copilot, and this tool alone will prompt people to update their Windows 11. But if there is more intentional and unintentional ad pushing, many will choose to either downgrade or return to Windows 10.
But Microsoft has listened to the community, and features such as Never Combine are coming back to Windows 11 after they were deprecated. So maybe, the tech giant will listen once more, and it will avoid pushing unnecessary software and products on users. But we’ll see.
At its core, disk cloning is the act of replicating the full content of one drive onto another. This technique offers substantial value, especially when one considers the various scenarios that necessitate such an action. The needs below perfectly illustrate the need for tools like Image for Windows from the TeraByte Drive Image Backup and Restore Suite.
Safeguarding Your Data
Cloning is akin to having a safety net for your data. Should your main hard drive malfunction, become corrupted, or fall victim to malicious software, a cloned drive stands ready, offering you an identical copy to which you can swiftly switch.
Prompt Data Retrieval
Data retrieval from a cloned disk is generally more rapid and direct than restoring from a traditional backup. The primary reason for this efficiency is that a clone is a mirror image of the source, eliminating the need for lengthy restoration procedures.
Facilitating Hardware Transitions
Transitioning to a new hard drive or replacing an outdated one becomes hassle-free with cloning. The process eliminates the chore of reinstalling the operating system, and software and adjusting settings to their original state.
Smooth System Shifts
Whether for business or personal use, moving to a fresh system can be a demanding task. Cloning can simplify this shift, ensuring a seamless transition by preserving a uniform digital environment.
Preemptive Measures for System Changes
Consider a scenario where you’re contemplating significant system alterations or software installations. Cloning your drive beforehand acts as a precaution. Should any unexpected issues arise post-modification, you have the convenience of reverting to the cloned version, avoiding potential disruptions.
Efficiency and Time Conservation
The act of cloning, in essence, is a time-saving endeavor. It circumvents the lengthy process of starting from ground zero, reinstalling, and reconfiguring systems and applications.
Recognizing the pivotal role of cloning in the contemporary digital setting, it becomes clear that dependable tools are essential. This leads us to an esteemed solution in the field: the TeraByte Drive Image Backup and Restore Suite.
A Holistic Approach to Disk Imaging
TBDIBRS stands out as a robust disk imaging software, adeptly safeguarding your valuable data across a variety of platforms. Features that distinguish it from other cloning and backup options like EaseUS Todo Backup, Acronis True Image Backup, and MSP 360 Backup include its encompassing methodology, providing users with a suite of tools tailored for diverse needs.
At the heart of this suite are several trusted components, including Image for Windows, Image for DOS, Image for UEFI, Image for Linux, and the OSD Tool Suite. This assortment ensures that, regardless of the platform you operate on, TBDIBRS has got you covered.
Adaptable Backup Solutions
Among the notable features of the suite is Image for Windows. With its user-friendly interface, it empowers users to back up the entirety of their hard drive – from data and applications to the operating system. Further enhancing its appeal is its adaptability. Users have the liberty to save their backups to an array of storage options, be it external devices like USB and FireWire™ drives or internal and network drives. Even traditional storage mediums like CDs, DVDs, or BDs are supported.
A Dependable Recovery Boot Disk
Another standout attribute of TBDIBRS is the MakeDisk wizard. This tool is especially handy when users find themselves in sticky situations. It guides users through the process of creating a recovery boot disk, a crucial resource when unforeseen system hitches occur.
Streamlined Data Restoration
For those instances when a system needs restoration, TBDIBRS offers an uncomplicated solution. Users can quickly bring their system to its previous state by booting from the recovery disk. After that, it’s a matter of choosing the required partition(s) or drive(s) to restore. This simplicity ensures minimal downtime and swift system recovery.
Steps for Efficient Hard Drive Cloning with Image for Windows
Initiating the Cloning Procedure
Upon having all the necessary components in place, the first step toward an efficient cloning procedure is the selection of the appropriate source drive. Within the “Source Drive” segment, designate the specific drive you wish to duplicate. Subsequently, attention must be turned to the “Target Drive” category. Here, specify the destination for the cloned data. It’s essential to reconfirm your choices, ensuring the accurate drive is selected to prevent any potential loss of data.
Commencing the Cloning Operation
Activating the cloning is a straightforward affair. Simply engage the “Start” function to set the cloning in motion. A designated progress indicator will provide real-time updates on the operation’s status. The duration of this process is contingent on the capacity of the source drive and the performance capabilities of your hardware components. Thus, a degree of patience may be required while allowing the software to execute its function diligently.
Post-Cloning Verification
Upon completion of the cloning process, verifying the integrity of the operation is of utmost importance. Start by scrutinizing the contents of the target drive to ascertain the successful transfer of all data elements. Additionally, for those who have duplicated their primary system drive, an optional yet beneficial action would be to conduct a boot test. This involves connecting the target drive and confirming that the computer initiates its startup sequence seamlessly.
The proficiency in utilizing “Image for Windows” by Terabyte Unlimited for hard drive cloning serves as an instrumental tool, particularly in the prevention of data loss and the facilitation of hardware enhancements. Whether the objective is enhancing storage capacity, consolidating data, or transitioning to a novel drive, this software stands out as a dependable and accessible tool for users.
Efficiently cloning your hard drive not only acts as a shield against unforeseen data loss but also smoothens the path for system upgrades and transitions. With “Image for Windows” by Terabyte Unlimited, the task becomes straightforward, ensuring that even those not well-versed in technical aspects can achieve flawless results. As we continue to generate and store more digital content, having the skills and tools to protect and replicate that data becomes an invaluable asset. Choose wisely, and let “Image for Windows” be your trusted ally in this endeavor.
Collabs aren’t new in the tech space, with more and more smartphone and tablet manufacturers marketing their devices as accessories focused on productivity. It seems it is Lenovo’s turn, as the company is collaborating with three fashion designers to create a Lenovo Tab Wear Collection that might (more like “certainly”) surprise you.
Yes, you read that right: Lenovo is working on a fashion collection! And thanks to our reliable source, we’ve got some incredible images for you.
The purpose of the collection is not to be a fashion statement but more a blend of fashion and practicality. Together with RANRA, Kit Wan Studios, and MAIUM, Lenovo has created a set of avant-garde garments that are also useful and tech-focused. The whole concept is based on “me-time”, Lenovo’s take on personal time, and it highlights the idea that me-time can be mobile, portable, and personal.
That’s a bold promise, me-time on the go. But let’s see if Lenovo did enough to convince you.
Lenovo x RANRA
RANRA is a London and Reykjavík-based fashion label specialized in transitional outerwear. The company focuses on nature and the urban environment, working with sustainable materials and processes. In collaboration with Lenovo, they brought more of the same, creating an anorak that isn’t tech-focused but more tech-ready.
The anorak features a packable tablet harness that’s specifically designed to help you work on the go but also keep your devices safe. It’s light, windproof, and waterproof and includes an isolation hood that helps with noise canceling and immersion into me-time.
The isolation hood may be a little weird, especially on the train or bus, but if it offers some privacy and gets your focus going, then it’s a job well done. Plus, the noise canceling (ish) might be a great addition for people living in crowded cities.
Lenovo x Kit Wan Studios
Kit Wan Studios is a Hong Kong-based independent menswear designer inspired by manga, high-tech, sci-fi, and mechanical aesthetics. The piece created in collaboration with Lenovo is based on the same principles and includes a packable tablet harness.
Kit Wan’s fashion piece is modular and resembles an exoskeleton more than a clothing piece. The print is created in a 3D program, then rendered and printed on the materials. The carry-on bag includes metal pieces and sculptures while keeping your tablet and accessories safe inside.
Is it for everyone? Probably not. But for those who can appreciate a cutting-edge design that’s also a statement might be just the right thing.
Lenovo x MAIUM
MAIUM is an Amsterdam-based fashion brand that mixes techwear with fashion and innovative design. It focuses on sustainability and the outdoors, creating weather-ready clothes that are also functional. In collaboration with Lenovo, the brand created a jacket adapted for me-time.
Like the other two fashion pieces, the jacket has a front pocket to store your table, but it can also turn into an inflatable hammock. Neat, right? It’s inspired by nature and promises to keep you warm and safe from rain while working on your day-to-day tasks or relaxing in the park.
It’s a bit more tamed than Kit Wan’s creation, with an everyday vibe. Think of it this way: you’re on a lunch break, go into the nearest park, install your hammock, and then relax. If that’s not a great way to clear your mind, what is?
All three brand pieces are a statement that fashion and tech can complement each other while still using sustainable materials and offering comfort. RANRA’s creation uses recycled textiles and trims, Kit Wan sourced materials from small-batch collaborators in Hong Kong, and Maiun used recycled polyester with a bionic finish eco layer. You can learn more about each creation at www.lenovotabwear.com.
Of course, the packable tablet harness and the pouch on the garments fit perfectly a Lenovo Tab P12 or a Lenovo Tab Extreme, but that’s not to say that you can’t use any other tablet with a similar diagonal.
But what’s your take on Lenovo’s dive into fashion? Share your thoughts on these designs and tell us if you’d buy one of these garments in the comments section below.
If you’re frantically pressing on your Sky Glass remote, but there’s no response, it means it is not working. Usually, the batteries are the obvious culprits, but not always.
We look at other common causes and how you can address them to continue enjoying your viewing experience.
Why is my Sky Glass remote not working?
It is possible that the batteries are dead, inserted incorrectly, or the contacts have corroded. Another reason is there’s something blocking the path between your remote and the TV box, or your remote has been damaged.
How do I fix my Sky Glass remote if it’s not working?
Try the following preliminary steps before any advanced troubleshooting:
Replace the remote control batteries with new ones and ensure the polarity of the battery matches the one on your Sky box. If using rechargeable batteries, ensure they are fully charged before use.
Clean off any dirt from the battery contacts and ensure the protective paper in the battery compartment has been removed, then reinsert them.
Verify your remote is connected to the Sky Box or Sky Glass TV via Bluetooth.
Move other electrical devices, such as microwaves or mobile phones, away from your Sky Glass remote control, as they can interfere with wireless signals.
Check for any software updates for your TV and restart it.
1. Twist your remote
At first glance, it seems unorthodox, given that your remote is not made of stretchy material. Well, according to most users, this was the fix that solved their Sky Glass remote not working issue.
Start by removing the batteries, then twist your remote as though you are ringing a cloth to remove excess water. Be gentle but also firm, and do it for a few seconds, then try again.
2. Re-pair the remote
Press and hold the 7 and 9 buttons simultaneously for three seconds.
Next, press and hold 1 and 3 simultaneously for three seconds and wait for the connected message on your TV, then select Continue.
Wait for the Connect your remote message on your TV and follow the on-screen prompts to pair.
Re-pairing the remote can help resolve any misconfigured settings that may have occurred during the initial pairing.
3. Use the Voice control feature
On your remote, press and hold the Microphone button to activate the voice feature.
Speak into the remote and release the button when done.
You can use this temporarily to navigate your TV as you figure out what’s wrong with your remote.
NOTE
A Sky Ultimate TV subscription is required for voice control to work.
4. Contact customer service
If your Sky remote is still not working after you have followed these steps, get in touch with Sky Help Centre. You can reach out to them via their email or visit their repair center to have your remote checked out.
If, at this point, you’re yet to fix your remote issues, it might be time to get a new one. You can request for Sky to get you a similar one or get a universal remote that works with most TVs.
Alternatively, if you’re not up to spending money on purchasing a new remote, you can control your TV from your phone. Sky has a dedicated remote app that does the job like the physical remote.
The only issue may be the numerous ads, but it’s a small price to pay for getting a free app. If ads are not your cup of tea, you can switch to online TV, and we have the perfect browsers to watch Sky Go. Just remember you’ll need a stable internet connection, or your Sky Go will be unable to load content.
What can I do if some buttons on my Sky remote are not working?
Make sure the batteries are inserted the correct way around and you’re using the recommended type.
Remove the batteries, press and hold each button individually to remove any residual power, then reinsert the batteries.
Reset your Sky boxTV by unplugging its power cord for about 30 seconds and plugging it back in again.
We hope the instructions above have eliminated your remote control issues and that it is now working as expected, especially if your Sky Glass TV wasn’t turning on.
If you have any other useful steps that favored you in this scenario or any other remote tips in general, please post a comment below.
An arithmetic overflow error converting expression to data type int is an SQL error, and if it occurs, your query won’t be executed, thus preventing you from obtaining your data.
As a result, certain parts of your app won’t work correctly, and this can cause additional problems. Therefore, it’s essential to fix this issue immediately, and in this guide, we will show you the best ways to do it.
What is an arithmetic overflow error converting expression to data type int?
This error indicates that a SQL value is too large and can’t be handled by an integer data type. If your value is larger than 2,147,483,647, the integer data type won’t be able to process it, and you’ll get the error above.
How do I fix arithmetic overflow error converting expression to data type int?
1. Convert the value to bigint
Open your code.
Use the following code: SELECT SUM(CAST(balance AS bigint)) FROM Accounts;
Save changes.
With the CAST command, you’ll convert the results from an integer to a big integer data type.
2. Alter the entire column
Open the SQL shell.
Now run the following commands: ALTER TABLE your_table_name ALTER COLUMN balance BIGINT;
Save changes.
Using these commands, you’ll change the data type of the entire column from int to big int, thus increasing the maximum supported value.
Next, locate the count line, it should look like this: count(*) as count
Replace it with the following: count_big(*) as count
Save the changes.
Arithmetic overflow error converting expression to data type int, the statement has been terminated error will cause your application to crash, since your variables are too big, but that can be quickly resolved by converting them, the same way as it works for the other overflow errors.
We also have a new guide on Error Arithmetic Overflow, so don’t miss it for more information. We cover another SQL issue in our ERROR_CANTSCROLLBACKWARDS guide, so you might want to check it out if you’re a developer.
Did you ever encounter an Arithmetic overflow error converting expression to data type int in SQL Server, and how did you fix it? Let us know in the comments below!
A lot of users have reported that Samsung One UI Home appeared in the Google Activity. It has been the case for years, as per forum reports.
First things first, Samsung One UI is completely safe. Though you should look out for other activities with names that resemble the Samsung app. These might be problematic!
What is Samsung One UI Home used for?
Samsung One UI Home is a launcher, a critical part of every Android device, that helps users customize the home screen, add/remove widgets, set custom wallpapers, and personalize the interface, amongst others.
One UI Home succeeds Samsung Experience and TouchWiz. The idea behind a native launcher is to simplify customizing phones with larger screens. And since it’s a built-in app, One UI Home is preinstalled on all Samsung devices.
What does Samsung One UI Home mean in Google activity?
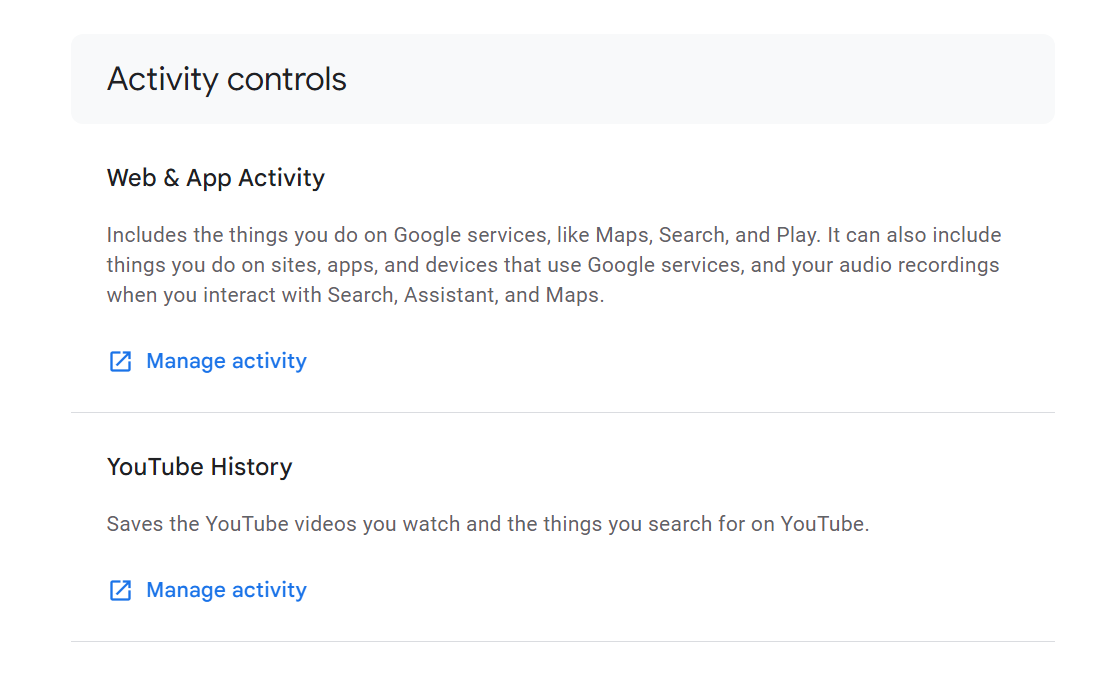
Google Activity keeps track of all (or almost all) actions on the device and interactions with Google services. Be it your search history, location history, and even recordings when you use audio searches on Maps and Google Assistant.
In addition to that, Google clearly states that your activity may include things you do on sites, apps, and devices that use Google services. So, if you have the Samsung One UI Home app running on a Samsung phone, it might appear in Google Activity.
Google Activity
Besides, background interactions, the ones triggered without any manual actions, may also show up. So, there’s nothing to be concerned about when Samsung One UI Home appears in Google Activity.
But as we discussed earlier, other threats may use a name similar to One UI Home, and if these are listed in Google Activity, you will have to take some action.
Start with a quick malware scan of the scan using a reliable antivirus solution. AVG and Avast have dedicated applications available on the Google Play Store. Or you could even factory reset the device.
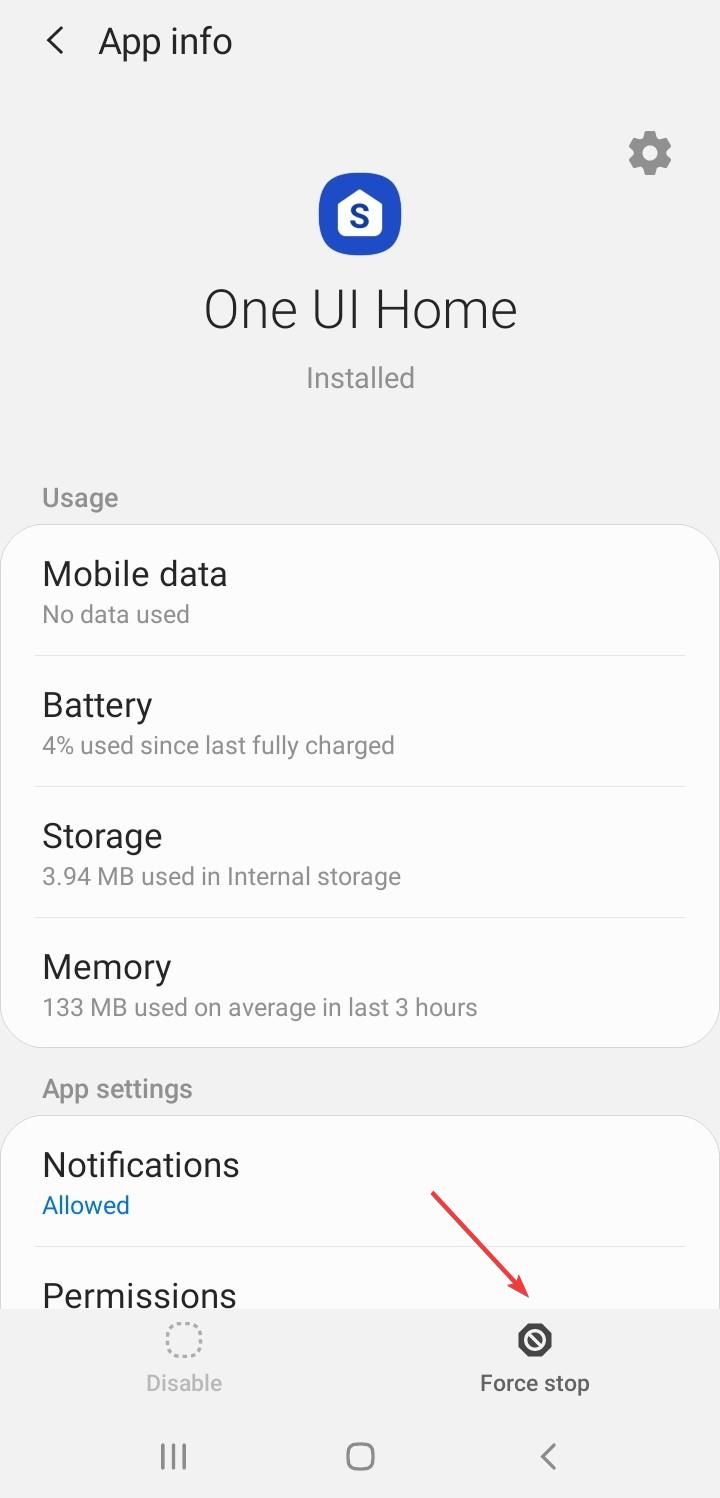
Samsung One UI Home is a system app on Android phones and can’t be removed. But if you are facing performance issues or it consumes high battery life, force-stopping the app or clearing the cache might do the trick!
Force stop One UI Home: Open the Android Settings > go to Apps > select One UI Home from the list > tap on Force Stop at the bottom > tap OK in the confirmation prompt > wait for a few seconds, and the interface will reappear.
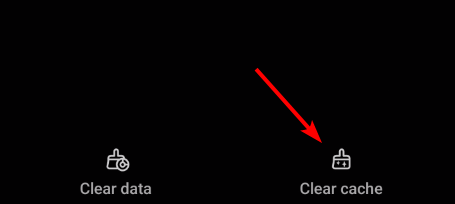
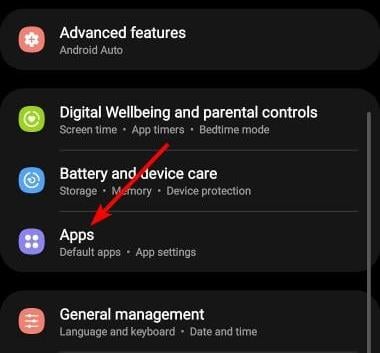
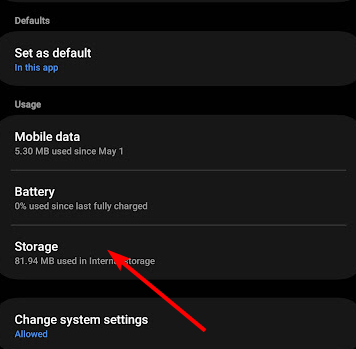
Clear One UI Home’s app cache: Launch Settings on your Android device > select Apps > choose One UI Home from the list > tap on Storage > tap Clear data > tap Clear cache.
So, in conclusion, One UI Home is a legitimate launcher developed by Samsung. Remember, though it can’t be removed like other non-system applications, you can always install an alternative launcher on the Android device.
Many users online reported that Sky Glass won’t turn on, and this can be a major problem since you won’t be able to enjoy any TV content, and it will completely ruin your viewing experience.
Although this is a big problem, there are a few troubleshooting steps that you can use to fix it, so without further ado, let’s get started.
Why won’t Sky Glass turn on?
Your remote isn’t working or adequately paired, so the TV isn’t responding to commands.
Temporary glitches with the TV.
Hardware or software malfunction.
How do I force Sky Glass to turn on?
1. Ensure that the remote is paired properly
Disconnect the Sky Glass TV from the power supply and connect it again.
Once the TV boots properly, press and hold 1 and 3 on the remote control.
This will start the pairing process, and once paired the TV should start working.
2. Disconnect the TV from the outlet
Disconnect the power cable from the power source.
Leave it like this for about a minute.
Plug it back in and wait for a few minutes to boot completely.
Optional: Some users suggested that doing this several times worked for them, so feel free to try it.
3. Disconnect the TV from the outlet and hold the Power button
Disconnect the TV from the power outlet.
Hold the Power button on the TV.
Connect the TV to the outlet again.
Keep the button pressed for another 10-20 seconds. If done correctly, the power light LED should flash.
The recovery process will now start, lasting about 15 minutes.
These are just a few simple solutions that might help with this problem. Since this is usually a glitch, a power cycle or a reset usually helps. If Sky Glass won’t turn on, but the red light is flashing, your device may be faulty.
If you’re still having issues with Sky, you can also use a browser to watch Sky Go, regardless of the device you’re using.
If you notice that certain buttons are giving you trouble, you can follow this dedicated guide on the Sky remote volume buttons not working issue to troubleshoot further.
These steps should be able to help you if Sky Glass is not working. If you have found a different solution, don’t hesitate to share it with us in the comments section.
A red light on a Sky Q box doesn’t necessarily mean trouble, but it should signify something. The lack of information is what troubles users!
Because no matter what they do, the red/amber light won’t go away. In some cases, users only had a red blinking light, while in others, the blue light appeared as well.
What does a red light on the Sky Q box mean?
There are several reasons you see a constant or flashing red light on the Sky Q box. It could be the ongoing recording, existing recording files, issues with the connection, problems with the remote, or even a hardware malfunction.
How do I fix my Sky Q box if it’s stuck on a red light?
Before we start with the slightly complex solutions, try these quick ones first:
Hold the green light button for 30 seconds to perform a full reboot. And make sure to disconnect the Sky Q box from the power source during the period.
Check for any pending disclaimers and clear them.
In case there are any stuck downloads, resume them and then cancel the process. Also, while you are at it, clear the download queue.
Press the Sky button on your remote and head to Recordings.
Now, locate any show recordings listed here, move to Delete all, and select the option.
Similarly, clear all the other recordings.
When faced with the Sky box red light in the middle, your primary approach should be to remove all the existing recordings. Also, make sure to clear the deleted recordings.
2. Reset the settings
Press the Home button on the remote, then scroll down to Settings from the left pane.
Press the 0, 0, and 1 keys, and then hit Select on your remote.
In the menu that appears, go to Reset from the navigation pane, and then on the right, choose Reset next to Factory reset.
Follow the on-screen instructions to complete the process and wait for the reset to complete.
A complete factory reset helps eliminate network issues and is also useful when Sky is blocking IPTV.
3. Contact support
When nothing else works, there is still a red light on the Sky Q box and it won’t turn on, you must contact Sky support.
For some users, the support team checked and replaced the box. This is the case when the red light keeps blinking due to a hardware malfunction, say, a short circuit within the box.
So, get it inspected because there are only a handful of troubleshooting options available.
Green light: It indicates that the device is currently powered on and everything is running fine.
Orange light: When it’s blinking, the box is trying to connect to the Internet. Besides, it indicates that a software update is available, which, in most cases, will be downloaded automatically.
Blue light: It’s not a good sign and often indicates a problem with the hardware. When you see a blinking or solid blue light, contact the support team. However, a blue light at night, when the device is powered on, could be a sign that it has entered Economy Mode to save power.
Red light: A red flashing light on the Sky Q box indicates hardware or software failures. Though a continuously illuminated red light is also referred to as the record light to highlight that a recording is in progress.
You now understand why there’s a red light, either blinking or continuously illuminated, on the Sky Q box and how to get rid of it.
Remember, in most cases that we came across, it was a problem at the user’s end. Only rarely would you have to ask for a replacement when the Sky Q mini box is not working with a red light
Many users complained that their Sky Glass is stuck on the Software update in progress screen; if you are one of them, this guide can help!
We will discuss the probable causes and offer practical solutions to complete the software installation process without any issues.
How long does the Sky software update take?
The time taken by Sky software update varies from the file size to the speed of your internet connection; however, it should not take more than 30 minutes. If you are stuck on a software update in progress screen for long, the reasons could be:
Weak internet connection.
If the file is large, it could take more time than usual.
Bugs or glitches in the device’s software or firmware.
How do I fix Sky Glass if it’s stuck at Update in progress?
Before proceeding with any steps to get rid of Sky Glass stuck at the update in progress screen, go through the following preliminary checks:
Inspect your router cables for damage.
Switch off your router, remove the cables from the router & power outlet, wait a few minutes, then plug the cables back in and turn on the router; this could also help fix Sky Go unable to load configuration.
Move your router closer to the Sky Glass TV or use an ethernet cable to establish a connection.
1. Perform a quick reset
Unplug the Sky Glass TV power cable from the outlet, then wait a minute.
Plug back the power cable and press the Power button on your TV for 30 seconds.
Now let the TV turn itself on.
2. Reset network settings
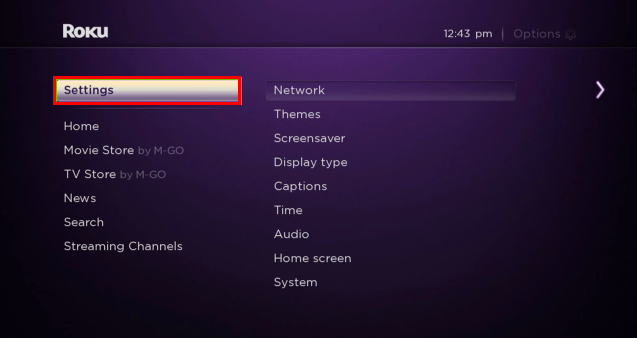
Press the Home button on the Sky Glass remote and choose Settings.
Locate Network, then select Status, then choose Reset.
Select Confirm on the following prompt.
Now follow the on-screen instructions to connect your TV to a network again.
3. Reset your TV
Don’t do anything on your TV for an hour for it to enter in Standby mode.
Now turn it off from the power outlet.
Wait for a few minutes, and turn your TV back on from the main switch.
Now try to update the software; if the issue persists, follow these steps to reset your TV to factory settings:
Switch on your TV, and press the Home button on your remote.
Select the Settings menu.
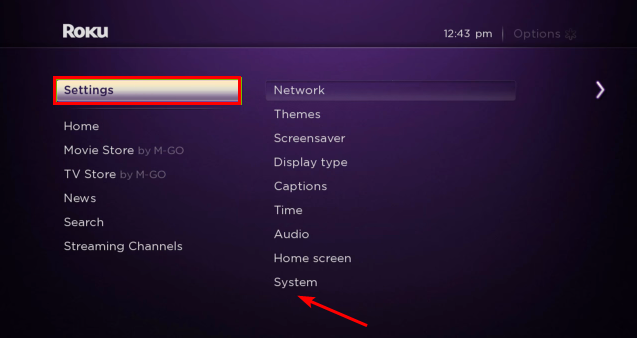
Go to System, then select Reset & Update.
Choose Factory Reset.
Select the Reset option, and the process will take some time to complete; wait for a while.
Switch the Sky Glass or Sky Stream puck to standby mode.
Turn off the main switch and remove the plug from the power outlet.
Plug the power cord again and turn on the main switch.
Let the television or puck be powered on for thirty minutes.
After that, switch the Sky Glass or Sky Stream puck to standby mode again.
Turn off the main switch and turn it on again; this time, don’t remove the power cord.
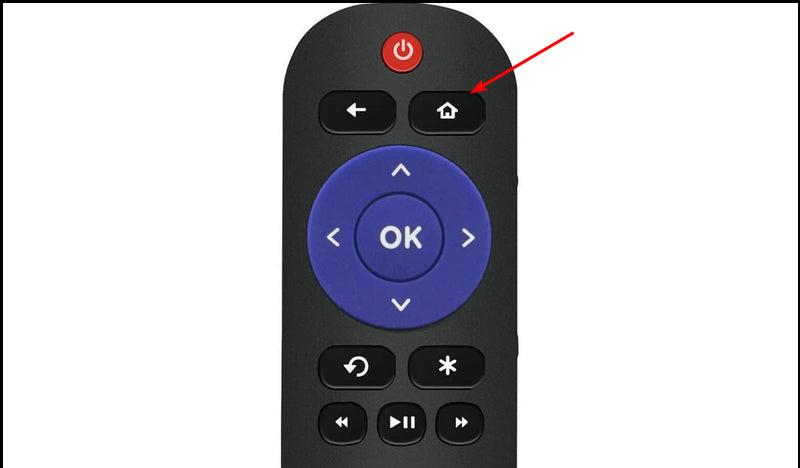
Press the Home button on the Sky remote.
Wait for the logo on your Glass screen, indicating it is starting. The latest software update is now installed.
Remember that this process takes time; you may feel stuck at 0% for a while; however, the entire process will take 20 minutes to complete.
Once done, you might have to manually configure your TV and log in to Sky and other streaming services accounts on your television.
If your TV is still taking time to start up and needs some time to install the update, you can watch your favorite channels, like BBC iPlayer, on a browser on your PC; read this guide to know the list of browsers.
How do I know if my Sky Glass has been updated?
The Sky Glass TV updates to the latest software version when the television is on Standby mode (not in use). You can check the software using these steps:
Press the Home button on the remote control and select Settings.
Go to System Management, select System Info, then check the Software version.
To ensure your Sky Glass TV or Puck stays up to date, you must use a stable internet connection. Also, ensure there is no interference between the television and the router.
If you think the router is far from the TV, try placing it near your television or use an ethernet cable for a seamless connection.
While Google is known to work seamlessly across devices and operating systems, the RPC executor service threw an error issue is common amongst these. It’s encountered on mobile phones, tablets, Windows PCs, and Macbooks, amongst others.
The error code highlights a sign-in issue and is commonly encountered on mobile devices after a factory reset. Besides, for affected users on PCs, the error appears while using Chrome or Edge, but in most cases, Firefox works fine.
What is an RPC executor?
An RPC (Remote Procedure Call) executor is used for client-server interaction. In this case, the end user is the client, while Google acts as the server. It facilitates quicker actions when the device has to interact with outside resources over the network.
How do I fix RPC Executor Service Threw an Error?
Before we start with the slightly complex solutions, try these quick ones first:
Make sure the Google servers are running fine. You could use the Google Status Dashboard or a real-time monitoring platform like Downdetector to check the same.
Verify that the credentials you entered are correct.
Switch to another network. If using Wi-Fi, switch to Ethernet or mobile data, and vice-versa.
In case you are facing the problem while logging into a Google service on the browser, check for updates and install the latest version.
When the RPC executor service threw an error after a factory reset, let the phone sit for a few hours while connected to the Internet and let the Play Services update.
If none work, head to the fixes listed next.
1. Clear the app cache
NOTE
This is a phone-specific solution, while the remaining will be focused on PCs. However, the idea remains the same for all. You can clear the cache on a PC or execute a solution listed later on a phone.
Open the Settings on the Android device, and go to Apps.
Tap the ellipsis near the top-right corner, and select Show system apps.
Now, choose Google Play Services from the list of apps.
Tap on Storage.
Now, tap Clear data and then Clear cache to delete all the app data.
Restart the device and check for improvements.
You can just as easily clear the cache on a Windows PC. The same applies to tablets and Macbooks. And if Google Chrome shows RPC executor service threw an error, clear its app data.
2. Disable/uninstall any firewall or adguard
2.1 Disable
To disable the program, head to the built-in settings, go to the General section, and you will find a toggle to turn off the firewall, adguard, or another program, as the case may be.
2.2 Uninstall
Press Windows + I to open Settings, go to Apps from the navigation pane, and select Installed apps.
Now, locate the program that could modify the network properties, click the ellipsis next to it, and select Uninstall.
Again, click Uninstall in the confirmation prompt.
Once done, relaunch the device and check for improvements.
Many users reported that disabling or removing their firewall or adblocker did the trick, especially uBlock and Ghostery. Remember, you can always re-enable/reinstall the software once the login is successful.
When getting RPC executor service threw an error with Gmail, it could be the browser to blame. Now, if updating hasn’t worked, you can always repair your browser profile.
Another option is to create a new browser profile altogether. This will eliminate any inconsistencies. And you can always import the data from the other profile.
This solution is based on Google Chrome, but disabling extensions will help across browsers.
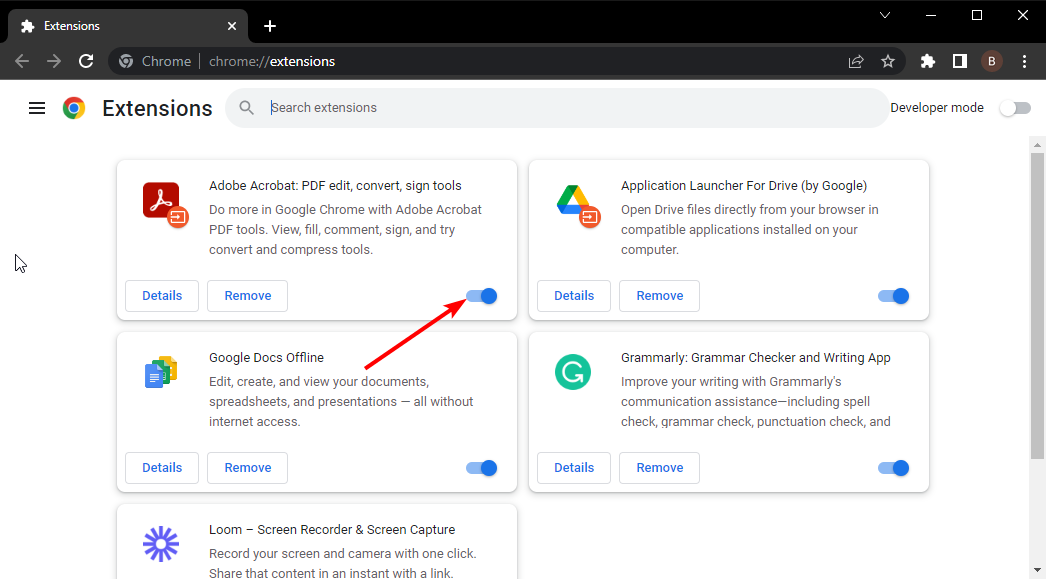
Launch your browser, paste the following path in the address bar and hit Enter: chrome://extensions/
Now, turn off the toggle for all extensions listed here.
If you are able to sign in, re-enable the extensions one at a time and wait for the problem to reappear. As soon as it does, the extension enabled last is to blame.
Click the Remove button under the extension.
Again, click Remove in the confirmation prompt.
5. Contact support
If nothing else works and the problem is with the Google account, you must contact Google support. They will help identify the underlying cause and effectively eliminate it.
Besides, you can contact the device manufacturer if the problem is device-specific. Say, when you can’t log in with the account on only one device while others work fine.
If you don’t receive a response or the error persists, the last option is to perform a factory reset. This especially helps with Android devices.
One of these solutions should have helped with the RPC executor service threw an error message and allowed you to set up the device or sign in. Remember, when faced with such problems, it’s best to wait for a few hours and then proceed to troubleshooting.
If Samsung TV Plus is not working, you won’t be able to view any TV channels on your device. This can be a problem, especially if you use TV Plus as the main source of TV content.
We at WindowsReport experienced this problem on our devices as well, and today we’re going to show you solutions that worked for us.
Before we start fixing this issue, there are a few basic checks you can perform:
Try power cycling your device by disconnecting it from a power source for a few minutes.
Ensure that the TV Plus app is updated to the latest version. By using an outdated version you might encounter compatibility issues.
The device should be updated to the latest version, so be sure to perform a firmware update. An outdated firmware might not support the latest features.
Check your network connection. A reliable Internet connection is necessary for Samsung TV Plus to work.
1. Samsung TV Plus not working on TV
1. Remove the cache
Use the remote control to open Settings.
Next, go to All Settings.
Choose Support and then Device Care.
Next, select Manage Storage.
Select the Samsung TV Plus and choose View Details.
After doing that, check if the problem is resolved.
2. Change the DNS
Open Settings and navigate to the Network section. This will open the network settings.
Select Network Status and choose IP Settings.
Set DNS Settings to Enter Manually option.
Enter 8.8.8.8 or any other DNS server and save changes.
Restart your TV, make sure your Internet connection is working, and check if the problem is gone.
2. Samsung TV Plus not working on phone
1. Clear the app cache
Tap the TV Plus app, hold it, and select App info.
Next, navigate to Storage.
Select Clear cache.
If that doesn’t solve the problem, repeat the same steps but this time select Clear data.
2. Reinstall the app
Tap and hold the Samsung TV Plus icon.
Select Uninstall from the menu.
Tap OK to confirm.
Once the app is removed, download it once again from the Play Store.
3. Samsung TV Plus not working on fridge
1. Check for system updates
Tap on Apps and then choose Settings.
Next, tap on About Family Hub.
If there are any updates available, wait for them to download.
2. Update installed apps
Tap on Apps.
Look for any app that has an arrow icon next to it.
To update the app, tap it or enable Automatic Update from the top.
If Samsung TV Plus is not working and you’re getting a black screen when you start it, check your settings and ensure the app is up to date. Alternatively, you can use a VPN on a Samsung Smart TV and test if it helps with the issue. If that doesn’t help, contact Samsung Support.
Samsung TV Plus can show a black screen when the app or firmware is out of date. For step-by-step streaming fixes on the same platform, see YouTube not working on Samsung TV.
Check your internet first in Settings > Network > Network Status. Restart the TV and router, update the TV firmware, and ensure the correct date and time. If channels are blocked, open TV Plus and allow it to refresh.
How do I fix network errors or buffering on Samsung TV Plus?
Use Ethernet or move closer to the router. Switch to a 5 GHz Wi-Fi band. Change DNS to 8.8.8.8 in IP Settings. Disable VPNs, proxies, or ad blockers, then restart the TV.
Samsung TV Plus disappeared from my Home screen. How do I get it back?
Go to Apps, search for Samsung TV Plus, and install or open it. On some models, select the Live TV tile. Enable it under Settings > General & Privacy > Start Screen Options. Also, check that your TV region supports it.
Why do I see “This content is not available” or a black screen?
Content might be restricted or temporarily offline. Try a different channel. Clear app data with Device Care > Memory Boost. Rebuild the channel list via Channel List > Edit Channels > Restore or Rescan. Make sure your TV time zone and location are correct.
How do I reset Samsung TV Plus without losing all TV settings?
Reset only the Smart Hub in Settings > Support > Device Care > Self Diagnosis > Reset Smart Hub. Reopen TV Plus to reinitialize channels. If issues remain, perform a full TV Reset as a last step.
Did you manage to fix the Samsung TV Plus not available issue on your device? If so, share your solution with us in the comments below!
The 7-Eleven app can be a lifesaver if you’re in a pinch and need something from the store. But what do you do when it’s not working?
Here are some tips and tricks to get you by and reduce these errors so you can have a much better shopping experience.
Why won’t the 7-Eleven app work?
If it’s been a while since you last logged into the 7-Eleven mobile app, you may have lost access to your account. Other reasons include an outdated application, server-related issues, built-up cache, or app glitches.
The app not working could manifest in ways such as the inability to log in, problems during checkout, or frequent app crashes and freezing.
What can I do if my 7-Eleven app is not working?
Try the following workarounds before moving to the slightly technical steps:
Ensure you have a stable internet connection by performing a speed test.
Check for app updates from the relevant app store.
Close out of other apps running in the background of your device before opening up the 7-Eleven app again.
Verify that you’re entering the correct email address when logging in.
Restart the application and restart your device.
1. Reset your password
You may have forgotten your password or haven’t logged in for a while. On the login page, click on forgot password option, then wait for further instructions in your email.
Now, enter the new password during the next login and see if the error persists.
If your connection isn’t strong enough or if there are too many people on the network at once, this could cause issues. Ensure you’re connected to high-speed Wi-Fi and try again later if necessary.
4. Update your device’s firmware
Your phone’s firmware is like its operating system. It controls how apps work and how your phone communicates with other apps, such as the 7-Eleven app. If it’s outdated, you may run into problems using it.
5. Reinstall the app
Open up your device’s Settings app and select Apps.
Tap on the 7-Eleven app, then tap Uninstall.
Restart your phone, open Google Play, and install the 7-Eleven app again.
This can sometimes help clear up issues that occur when an app has been corrupted or damaged because of a bad download or update.
According to a section of users, the app started being buggy after an update. This could indicate that the latest update is causing these issues. If so, you can always revert to the previous version as you wait for the discrepancies to be addressed.
Since you cannot roll back a previous app version on Android and iOS, you’ll have to uninstall the app and then download the previous version on a third-party site. If you choose this route, ensure you have a thorough antivirus solution in place.
NOTE
Note that WindowsReport has no affiliations with the Uptodown.com website and hence cannot verify the authenticity of the applications. Be sure to run an antivirus check before installation.
7. Use the web version
In some cases, the problem of 7-Eleven not working is isolated and affects the app only. You can try with their web version and see if it persists.
When using the web browser, ensure you have disabled your adblocker or other extensions that may interfere with normal website functions.
8. Check third-party server status
If you used third-party services such as Facebook to sign up, and they’re having server-related issues, therein lies the problem.
You’ll have to wait for these services to be up and running before your 7-Eleven app resumes normal working.
9. Contact Customer service
If your problem isn’t covered by any of the above solutions, contact 7-Eleven customer support. Here, you’ll be guided through on-screen prompts to describe your problem in detail.
However, if you want instant assistance, you can contact the 7-Eleven customer service team directly via their phone number.
How do I fix the error a02 on 7-Eleven?
Restart your Internet connection.
Reset your router and network connection.
Switch to another connection.
Clear your device’s storage to ensure there’s enough memory.
The error a02 is mostly linked to connection issues, so you’ll be able to regain the app’s functionality when you address your Internet issues.
If these steps don’t work, then the app might be experiencing issues. The developers may be working to fix it on a larger scale, and all you can do is wait.
Hopefully, these solutions have been of great help in addressing the 7-Eleven app not working. We’d love your input on any other tricks you may have on the same issue, so don’t hesitate to blow up the comment section.
Docker Desktop allows users to develop, manage, and share dockerized applications, but a few, when launching the app, received the Unexpected WSL error.
Most users who recently came across the Docker Desktop – Unexpected WSL error message were running Windows 11, but it can also occur on Mac.
What is the WSL2 error in Docker Desktop?
WSL2 errors with Docker Desktop indicate either misconfigured permissions or the absence of critical components, especially the Virtual Machine Platform, an optional feature in Windows.
Also, if WSL itself is not installed, no WSL commands will be executed. And even network issues were reported to be an underlying cause by many.
How do I fix unexpected WSL error on Docker Desktop?
Before we delve into the slightly complex solutions, try these quick ones:
Restart the PC. If you have to reboot every time to get Docker Desktop running, try the other solutions.
Check for available updates and install the latest version of Docker Desktop from the official website. Also, update the operating system. It helped many who came across the An unexpected error occurred. Restart Docker Desktop message.
Press Windows + S to open Search, type Command Prompt in the search bar, and click Run as administrator.
Click Yes in the UAC prompt.
Now, paste the following command and hit Enter to install WSL: wsl --install
Once done, reboot the PC and check for improvements.
If Windows Subsystem for Linux is not installed, you will receive the Docker Desktop – Unexpected WSL error. After you do it, also enable Hyper-V on the device. Docker Desktop must run.
2. Update WSL
Press Windows + R to open Run, type cmd, and hit Ctrl + Shift + Enter.
Click Yes in the prompt that appears.
Paste the following command and hit Enter to update WSL: wsl --update
If any updates are installed, restart the PC.
3. Modify the settings.json file
Press Windows + E to open File Explorer, paste the following path in the address bar and hit Enter: %Appdata%\Docker
Double-click the settings.json file.
Now, make sure it reads the following: "integratedWslDistros" : [ ] "enableIntegrationWithDefaultWslDistro" : false
If required, make the necessary edits and save the changes.
Once done, relaunch the project, and it shouldn’t throw the Docker Desktop failed to start WSL2 error anymore.
4. Change the Command Prompt settings
Press Windows + S to open Search, type Command Prompt, right-click on the relevant result and select Run as administrator.
Click Yes in the UAC prompt that appears.
Now, right-click on the top bar, and select Properties from the context menu.
Go to the Options tab, tick the checkbox for Use legacy console, and click OK to save the changes.
Press Windows + R to open Run, type cmd, hold Ctrl + Shift keys, and click OK.
Click Yes in the prompt.
Now, paste the following two commands individually and hit Enter after each to reset the corrupt or misconfigured network settings: netsh int ip resetnetsh winsock reset
Restart the PC and check whether the Docker Desktop failed to start error goes away.
6. Enable Hardware Virtualization in BIOS
Turn off your computer, then power it on, and as soon as the display appears, keep pressing the F2, F10, F12, Esc or Del key to access the BIOS, depending on the system manufacturer.
Now, use the arrow keys to go to the Advanced or System Configuration tab, and then select Virtualization Technology.
Finally, choose Enable, then save the changes and exit the BIOS.
It’s vital to enable Virtualization support on the PC for Docker Desktop to work properly. In the absence of this, you may receive the Docker Desktop – Unexpected WSL error.
7. Reinstall WSL
Press Windows + I to open Settings, go to Apps from the navigation pane, and click on Installed apps on the right.
Now, locate Windows Subsystem for Linux, click the ellipsis next to it, and select Uninstall.
Again, click Uninstall in the confirmation prompt.
Similarly, remove the following entries under installed apps if these exist:
Linux
Ubuntu
Now, go back to the Apps tab, and select Optional features.
Click on More Windows features at the bottom.
Untick the checkbox for Virtual Machine Platform and Windows Subsystem for Linux, then click OK to save the changes.
Restart the computer for the changes to apply.
Once done, reinstall WSL (Windows Subsystem for Linux).
When nothing else works, you can always reinstall WSL and get rid of the Docker Desktop – Unexpected WSL error. Start by uninstalling WSL and then re-download all the components.
What is the alternative for Docker Desktop in Windows WSL?
There are several alternatives for Docker Desktop, and many users have been switching to these, given the recent changes to the project’s license terms. Here are the popular options:
Rancher Desktop
Minikube
Podman
When switching to another software, verify compatibility with your OS, feature set, performance, ease of use, support team efficiency, and how often updates are released.
You must have eliminated the Docker Desktop – Unexpected WSL error by now. And if that’s not the case, wait for an update or switch to a reliable alternative. You know all the options!
The Spectrum self-install program is a convenient way to avoid exorbitant installation fees by setting up your internet and cable service, but sometimes, it’s not working.
In this article, we’ll go over some common reasons why the Spectrum self-install may not be working and how to fix them so you can get started immediately.
Why isn’t my Spectrum self-install working?
If you’re having trouble with your Spectrum self-install, you likely haven’t followed the instructions in the app or are using an incompatible device. Another common mistake is plugging the router cable into the wrong port or the signal strength is too weak to connect.
How do I activate Spectrum self-install?
1. Update your router firmware
If you’re using an older router, ensure it’s running the latest firmware to communicate with Spectrum’s Internet service properly. If it’s a Spectrum router, they are updated automatically whenever an update is available.
However, if it’s a standard router, the general process involves finding your router’s IP address, pasting it on a browser, and logging into the router’s admin page. Here, you’ll find an option to update the firmware.
2. Activate your service
Find your coax cable and connect it to a cable outlet and the other end to the modem.
Connect the power cable to an electrical outlet and power it on.
Wait for the online status light to turn from blue to green, then connect your Ethernet cable.
Now connect your Wi-Fi router to power and wait for the status light to turn from blue to green.
You’ll be prompted to set your Wi-Fi name, then go to your Spectrum app for activation.
Examine the equipment list and check whether your router or modem is listed after upgrading its firmware.
If it’s still not appearing in the list, your router probably doesn’t meet the requirements for authorized modems to connect to Spectrum Internet.
3. Check your network settings
Next, we want to check whether your network settings are interfering with how the Spectrum app works on your device. Although Spectrum supports both 2.4GHz and 5GHz network bands, some may have trouble connecting if there are interferences in the house.
You can move your router away from your radio, microwave, Bluetooth, or other wireless devices. You may also have to change the frequency manually for the device you’re trying to connect to so that they are on the same page for the initial setup.
4. Reinstall the Spectrum app
Locate the Settings app on your phone and go to Apps.
Find the Spectrum app and tap on Uninstall.
Go to your relevant App Store and download it again.
Sometimes, there’s a miscommunication in the app meant to activate your Spectrum Wi-Fi router. Uninstalling it will remove remnants of previous installations and allow you to start fresh.
When reinstalling, download from verified sources and use a strong connection. If the installation is interrupted, the files may become corrupted and interfere with the activation process.
5. Reset your modem/router
Resetting your modem or router will reboot the device and clear any temporary errors that might be causing problems with the installation. Some routers have a reset button, but if it doesn’t, unplug your modem from its power source for at least 30 seconds and then plug it back in.
Once it has been rebooted, wait another 30 seconds before plugging in your computer’s Ethernet cable again.
As you may be aware, Spectrum is only available for US residents, so anyone outside the US will have to use a VPN lest you get the access denied error.
If you’ve been unable to connect to the Internet, your location may be a major constraint, so adjust accordingly and retry.
And while you’re still at it, remember that using a VPN can lead to packet loss, especially if there’s network congestion, so be sure to go for a VPN like ExpressVPN to avoid such issues.
7. Troubleshoot your router
This can be a good step to see if there’s a problem with your Spectrum Internet connection. Your router’s settings may interfere with Spectrum’s signal, so try changing to a different Wi-Fi channel. Another issue may be your device’s inability to connect to Spectrum’s servers, so try sorting it out.
Also, check for the online status light. A solid blue light should tell you you’re yet to activate your connection, while a pulsating light will indicate the connection is in progress. Once connected, the LED light should go off.
8. Contact Customer service
Spectrum’s customer service department can help with most questions about your account and technical issues. The customer service representative will ask you to perform some tests to troubleshoot the connection, and they will walk you through the process until you’re connected.
If the phone call does not yield results, they must send a technician to troubleshoot from your home and perform a professional installation.
You may also:
Check the Spectrum website for any outages.
Double-check that you’ve accepted the Terms and conditions; otherwise, you won’t be able to proceed.
Ensure the coax cable is connected to the outlet where you’ll be connecting your gateway, the cable wires are securely connected to their respective ports, and the router is plugged in and turned on.
Check signal strength by running a speed test and moving your router away from interferences.
Move your router or modem to another cable outlet and connect your power cable to a direct wall outlet. Also, check whether the self-installation kit is complete.
How long does Spectrum self-install take?
The Spectrum self-install kit comes with everything you need to get your TV or Wi-Fi connected and working. The activation process should take anywhere between 10 to 20 minutes. If it’s taking longer, there might be a problem, and you need to troubleshoot using the above solutions.
Ultimately, as long as you can enter your account information correctly and do the necessary troubleshooting and research to ensure your router passes the compatibility test, the Spectrum self-install process shouldn’t be too complex.
And if you’re still not happy with the outcome, you can always switch your Internet Service Providers. In case you’re having issues like Spectrum remote volume not working, we have tackled the issue in a separate guide; check it out!
If this guide helped you figure out the problem and fix your system, please let us know by dropping a comment below. Even more, you can easily solve the Spectrum remote volume not working issue by applying the steps from our guide.
LG error code 106 will prevent you from connecting to the Internet on your smart TV. This is a major issue since you won’t be able to view any online content or access any online services.
However, it’s relatively simple to fix this error, and in today’s guide, we’re going to show you how to fix it and get back to your favorite streaming services.
Why won’t my LG TV connect to Wi-Fi anymore?
Temporary glitches on your TV can cause this problem.
Certain settings, such as Quick Start, can cause this problem.
Internet connectivity issues, such as incorrectly configured network settings, issues with DNS settings, or in some rare cases problems with Internet Service Provider.
Your Wi-Fi module is broken, thus causing an unstable Internet connection.
How do I fix error code 106 on my LG TV?
1. Try power cycling your TV
Press and hold the Power button on the remote control for 10 seconds to turn the LG Smart TV off.
When the TV is off, disconnect the power cord from the power source.
Keep it disconnected for about a minute or so.
Connect it to the power outlet and turn the TV back on.
After you complete the power cycle, open Quick Settings.
Next, select Network.
Choose a Wi-Fi connection.
Select your network on the list and enter its password and the Internet connection will be established.
2. Change the country in your settings
Press the Settings button on the remote.
Navigate to General settings.
Next, choose Location.
Now select LG Services Country.
Select a different region such as the US or Canada.
Confirm the changes and restart your TV.
Try to establish a WiFi connection again and check if the error message still appears.
3. Enable Live Plus
On your TV, go to the Settings menu.
Next, navigate to General and choose Additional settings.
Disable Quick Start +.
Lastly, go ahead and turn on Live Plus.
4. Reset TV to factory settings
Press the Settings button on the remote.
Navigate to All settings.
Next, select General and then System.
After that, select Reset to Initial Settings.
Select OK to confirm.
This will reset all your settings, remove all data, and fix any network connectivity issues.
LG TV WiFi error code 106 is usually caused by your settings, so you just need to adjust or reset them to fix the problem. In the worst-case scenario, your Wi-Fi module might be damaged, so you might need to contact the repair service. Alternatively, can use a wired connection as a temporary workaround.
Microsoft Teams will introduce Archive Channels to the platform, starting December 2023, according to the latest entry in the Microsoft 365 Roadmap.
They will allow IT admins and managers to archive chats that are no longer useful, without deleting them. Archiving them will preserve their content, including text messages, files, and tabs, as Microsoft states.
With Archive Channels, owners and administrators can archive channels that are no longer in use while preserving their content, including messages, files, and tabs.
Microsoft
The archive channels are most likely part of the new features Microsoft promised to release on the new Teams, a while ago. If you remember, Microsoft announced that Teams 2.0 will be the new default client for Teams moving forward. This new version is reportedly much faster and it can handle new capabilities, such as Copilot.
Microsoft Teams’ archive channels will be restorable
Microsoft says that if needs be, and the situation demands it, the archive channels can be restored back to their original form, and placed back to the active teams and channel lists.
The archived channel is removed from the active teams and channels list and no more actions will be allowed. If needed, the channel can be restored.
Microsoft
This is a very useful option to have: when an archived channel can be used again, it can be simply restored without having to worry about creating a new channel. It will let admins repurpose the archived channels without too much trouble.
This feature is scheduled to roll out in December 2023, on all platforms, including Web and Desktop. Microsoft Teams users on mobile should be able to see the archived channels on their chat lists, as well.
Microsoft recently announced that it will include new options for channel customizations in Teams, including multiple app branding. Coupled with this feature, it seems that the Redmond-based tech giant is bent on making Teams the go-to app for organizations.
Many readers have asked us if HBO Max notifies you when someone logs in, and the answer is Yes. HBO Max sends email notifications when someone is trying or has logged in, especially from a new device. You will also get details about the IP address, device/browser used, and location.
Can you see who’s logged into your HBO account? Yes, you can. To see who is logged into your HBO account, access that account and go to Managed Devices. You will see a list of devices that use that account. Read below for detailed instructions.
Is HBO Max sending notifications when logging in on a new device?
As highlighted above, HBO Max will send you notifications and e-mails with unauthorized login attempts from new devices, along with special offers, product updates, the latest shows, or new movies. However, if a device or browser has been authorized or recognized, you won’t get any login notifications from them.
1. How do I check who is logged into my HBO Max account?
1.1 On a browser(PC)
Go to the HBO Max website and log into your account, then select the profile you want to inspect.
Click your profile icon, and go to Manage Devices.
On the left, you will see exactly what devices are using the HBO Max account and when did they used it.
If you don’t recognize any of the current devices in the list, you can hit the X button to get rid of them. There is also the option to sign all devices out but that means you will need to follow the procedure to sign in from those devices again if you need them to be active.
1.2 On a mobile device
Run the HBO Max app on your device and log into your account if needed.
Select the profile and tap on the profile image from the top-right.
Then go to Settings and select Manage Devices.
Again, you will have the same options as in the browser to sign out and remove certain devices from the list.
HBO Max allows only 3 simultaneous streams so if more devices are trying to use the streaming services, you will get left out on yours. This solution will allow you to remove one or more devices or sign them off so you can enjoy the content on the current devices.
Access your account on the HBO Max website and click on your profile picture from the top-right corner.
Now, go to your profile, select Settings, then go to Notifications and turn them on.
This will allow HBO Max to send notifications to the email address of your account.
2.2 On a mobile device
Open the HBO Max app, tap your profile, and then select Settings.
Now, go to Notifications and switch the Emails from HBO Max and affiliates option to On.
3. How can I customize HBO Max Account Notifications?
Open the HBO Max app on your mobile device.
Go to your profile and access the Settings.
From there, access the Notifications menu and turn off the HBO Max Newsletter.
Yeah, we know that by turning on the app notifications, you will also get information about shows, programs, etc. However, to limit the content of the notifications, you can turn off the HBO Max Newsletter feature if you don’t need it. However, you can only do that on mobile devices and not on the Kid profiles.
Unfortunately, there is no way of setting the frequency of notifications or choosing which types of notifications you receive. You may only change the push or text notifications on your mobile device through the usual notification settings on your mobile.
What are the benefits of Account Notifications?
The bottom line is that we encourage you to keep the HBO Max notifications on because you will have some obvious benefits in keeping your account secure:
Increased security with instant alerts
Easier ability to monitor activity in real-time
Quicker response times for suspicious activity
What can I do to keep my HBO Max account safe?
Choose a strong password and update it regularly. Opting for multi-factor authentication for your HBO Max account is a huge plus to secure it.
Don’t open e-mails that look suspicious, pretending to come from HBO Max. There are phishing websites that look almost identical to the one you know but entering your credentials there will send them directly to the attacker.
Keep the list of devices in check. We showed you how to check which devices are using your account. If something feels suspicious, disable them at once.
To sum up our guide, HBO Max will send you notifications and emails if there is a new login from a new or unrecognized device but only if you have the notifications turned on. We have provided the information on what to do if you see any suspicious activity and how to protect your account and we hope that you are now safe.
BetterDiscord, also called the Discord enhancement project, allows users to customize the Discord app with plugins and themes, but many received the An error was encountered while trying to load this plugin message.
The error message appeared after a recent major update from Discord and broke the plugins and themes. While BetterDiscord itself works fine in most cases, the plugins fail to load.
What does an error was encountered while trying to load this plugin mean?
The error indicates the plugin’s inability to load alongside Discord. We usually come across An error was encountered while trying to load this plugin with the Xenolib library. The problem arises due to the following reasons:
An update affected the plugins and themes
Incorrect file permissions
Plugin compatibility issue
Other plugins conflict with the affected one
Issues with the JavaScript code
How do I fix an error was encountered while trying to load this plugin?
Before we start with the slightly complex solutions, try these quick ones:
Restart the device that throws the error and try again.
Install any pending updates for BetterDiscord, Discord, and the affected plugin. For BetterDiscord and the plugins, go to Discord Settings > Updates tab under BetterDiscord > click on Check for updates.
In case you have a fair understanding of JavaScript, inspect the code and check for errors. But don’t make any changes when unsure of the after-effects.
If none work, head to the fixes listed next.
1. Reset the affected plugin
Open the Discord app, and go to Settings.
Go to the Plugins tab under BetterDiscord from the left pane.
Click the Settings icon under the affected plugin.
Click the Reset button.
Finally, click Okay in the confirmation prompt that appears.
Relaunch Discord and check for improvements.
When faced with An error was encountered while trying to load this plugin from BetterDiscord, you may consider resetting the plugin. The option is not available for all plugins. And if the Settings icon is greyed out, make sure the plugin is enabled.
Open the Discord Settings, go to Plugins from the navigation pane, and click on the Open Plugins Folder button.
In the File Explorer window that opens, select the affected plugin and press Ctrl + C to create a copy of it. Paste it on the desktop or another location.
Now, hit Delete to remove that plugin.
Finally, move the copy you created earlier to the Plugins directory.
Relaunch Discord and check whether things now work out.
3. Disable conflicting plugins
Launch the Discord app, and open its Settings.
Go to Plugins from the left pane.
Now, turn off the toggle for all plugins except the affected one and verify whether things work out.
If it does, one of these conflicts with the plugin presently enabled. So, turn them on one at a time, and as soon as the plugin again starts throwing the error, the one enabled last is the culprit.
You may now keep it disabled or remove the plugin altogether.
Now, move the .plugin.js file to the dedicated Plugins directory.
Reboot the PC, launch Discord and check whether the error message goes away.
5. Reinstall BetterDiscord
Run the installer setup you used earlier to get BetterDiscord.
Tick the I accept the license agreement checkbox and click Next.
Choose Uninstall BetterDiscord and click Next.
Select the Discord version you choose during the installation, and click Uninstall.
Finally, head to BetterDiscord’s website, download the setup for the latest version, and reinstall the project.
When nothing else helps fix the An error was encountered while trying to load this plugin issue, reinstalling BetterDiscord is the only option. Also, for some users, reinstalling Discord did the trick!
Remember, BetterDiscord has acknowledged the problem, and we can expect a patch to be released soon, both from their and the plugin developer’s end. But until then, one of these fixes may get rid of An error was encountered while trying to load this plugin.
Plugin issues are not specific to Discord. You may also encounter The plugin is not supported error in browsers, but these are easy to fix.
For any queries or to share more solutions with us, drop a comment below.
Microsoft released a new Web connector to Microsoft Excel, according to the company’s latest blog post. For those of you who don’t know Web connectors in Excel allow users to connect Excel to websites and import data from those directly in a worksheet.
One of the best features of this tool is that it will auto-update: if the data from the websites suffers changes, then it will automatically update in Excel as well.
This tool has been in Excel for a while, but now Microsoft released a new and improved Web connector, and it comes with 2 new features that will ease the way users import web data into Excel.
Web connector on Excel: 2 new features you should check out
Suggested tables: Web connector now suggests and provides auto-detection of tables, which can greatly simplify work.
To use this feature, you need to:
Open your Excel, and create or open an existing project.
Once there, go to the Data tab, and click on it.
Type in the URL you want to extract the data from and click OK.
Excel will automatically suggest a list of tables with Suggested tables, as you can see in the image below.
Add a table using examples: the second feature allows users to provide examples of tables they prefer, and Excel will use AI to render similar tables that users can choose from.
To use this feature, you need to:
You need to extract data from the Web pages you’re visiting and using as a reference.
The feature will then provide you with an interactive page to place this data.
Once you click OK, Excel will then generate similar tables for you to put your data into.
The new features are a welcomed addition, considering Excel will also get Copilot in November, and the tool will also greatly ease workflow, and working with data.
Together with the new and improved Web connector, users will be able to create tables much faster.
What do you think about the new Web connector in Excel? Let us know your opinions.
Trouble calls when you spot a P-DEV317 error when trying to stream on Hulu. As with many other like error codes, there are basic troubleshooting steps.
Here at WindowsReport, this is an error we’ve experienced, so rest assured that these are tried and tested solutions.
What does Hulu Error Code P-DEV317 mean?
This is an error that pops up on your screen when you attempt to watch live content. Your screen will not load any video. According to most users, it happens because of an adblock extension, but your internet connection, type of browser, and outdated software also top the list.
How do I fix error code P-DEV317 on Hulu?
A few basic workarounds before the slightly technical steps you should try include:
Close the Hulu app or browser, including any background programs, and reopen it.
Perform an internet speed test of your connection and ensure it meets Hulu’s recommendations.
Check for any app or browser updates.
Ensure that your computer’s date and time settings are correct.
1. Disable your adblocker extension
Launch your browser, in this case, Chrome, and in a new tab, enter the following address:chrome://extensions/
Peruse through your extensions and toggle the Disable button for your adblocker plugin. UBlock was the most reported adblocker in this case.
While you’re still here, look through all your extensions and expunge any suspicious-looking ones. Repeat this step until you find the culprit.
2. Clear cache
2.1 Android app cache
Tap on settings on your phone.
Next, tap on Apps.
Find the Hulu app and tap on it.
Scroll down and select Storage.
Tap on Clear data and Clear cache,then try again.
2.2 Android TV cache
On your TV, find your Settings.
Go to Apps and select Hulu.
Scroll down and hit Clear data and Clear cache.
2.3 Browser cache
Click the three horizontal dots and select Settings.
Launch your browser, and for this step, we shall be using Google Chrome.
Go to Privacy and security and click Clear browsing data.
Select Browsing history, Cookies and other site data, & Cached images and files, then click Clear data.
3. Perform a system update
Whether you’re using a TV, Android, iOS or Windows PC to stream Hulu, ensure your firmware is up-to-date. For Windows users, all you have to do is check for the latest updates and install if available.
Other devices like TVs and mobile phones usually receive automatic system updates, but you can always check with your manufacturer and update accordingly.
4. Reset the Hulu app
Hit the Start Menu icon on the Taskbar and click on Settings.
Click on Apps on the left pane, then select Apps & features on the right pane.
Navigate to Hulu app, click on the three ellipses and select Advanced options.
Hit the Start Menu icon on the Taskbar and click on Settings.
Click on Apps on the left pane, then select Apps & features on the right pane.
Navigate to Hulu app, click on the three ellipses and select Uninstall.
Launch the Microsoft Store, search for the Hulu app, and click Install.
Follow the on-screen prompts and try again.
6. Use a VPN
If Hulu detects that you’re in a location where it doesn’t serve any content, it will block access to its website. And if you were already using one but still getting the same P-DEV317 error, Hulu has probably detected that you’re using one.
If so, switch to another reliable VPN service provider. Free VPNs are unstable and can be easily detected since they don’t give you unique IP addresses.
7. Reset your network
Hit the Windows key and click on Settings.
Navigate to Network & internet.
Select Advanced network settings.
Click on Network reset.
Next, hit the Reset now button.
You can resolve a lot of Hulu network and playback errors like error code 301-95 by resetting your network. This allows you to clear any technical glitches with your router and re-establish the connection.
8. Contact customer support
Having tried all the above steps, but the error P-DEV317 on Hulu is still persistent, it’s time to seek further assistance. Luckily, Hulu’s customer support is very responsive. You can also contact them on their X official handle for a faster response.
Meanwhile, as you wait for a fix, you can explore other streaming apps that offer equally great content. This way, you don’t have to depend on one service when it’s facing temporary glitches.
This isn’t the only issue you can encounter, and we already covered Hulu P-DEV313 error and Hulu error P-DEV336 in our other guides, so don’t miss them.
Out latest guide covers Hulu error P-DEV318, so if you want to learn more, don’t miss it.
So go ahead and try these easy-to-do solutions that we’ve shared. If you have tried any other that seems to be missing from our list, don’t hesitate to share it with us in the comment section below.
If the prompt to select a TV provider when trying to sign up for ESPN Plus has left you bewildered, this guide can help!
We will discuss the probable causes and offer practical solutions for signing up for ESPN without the need for a TV provider, allowing you to watch your favorite sports.
Why do I need a TV provider if I have ESPN+?
An ESPN+ subscription doesn’t give access to the ESPN TV network content, and if you want to watch that, you need a satellite or cable subscription.
However, you can enjoy live shows, an on-demand library, studio shows, and other exclusive content with a separate subscription. If you already have the service and still get this error, some of the common reasons:
Incorrect account information.
The ESPN Plus app is outdated.
Corrupted app cache.
You are using the app with more than 3 users.
How do I bypass the ESPN TV provider?
Before proceeding with any steps to fix the issue, go through the following preliminary checks:
Verify if you have a stable connection with at least 25 Mbps speed.
Streaming devices like Apple TV, Android Smart TV, Fire TV stick, or Roku.
ESPN Plus active subscription with the mentioned device limit.
1. Login using the streaming service
Launch the ESPN Plus app on your TV or mobile device.
Locate Settings.
Choose the TV provider option.
Select your service provider from the list, and look for the streaming service name that you have.
Enter the login credentials and sign in to get rid of the ESPN asking for TV provider issue.
2. Delete the browsing history & disable extensions (works for computer, & mobile devices)
Launch the browser you generally use; we are demonstrating steps using Google Chrome. Locate and click the three dots icon, then select Settings from the drop-down list.
Click Privacy & Security, then choose Clear browsing data.
For Time range, select All time from drop-down list, and place a checkmark next to Cookies and other site data, & Cached images and files.
Click Clear data.
Click Extensions from the left pane.
On the next page, click Remove for the unwanted extensions and toggle off the switch next to others to disable them temporarily.
Relaunch your browser and try using ESPN Plus now.
3. Clear the ESPN Plus Cache (mobile devices or TV)
On Android
Launch the Settings app from the home screen.
Go to Apps, then All Apps.
Choose ESPN Plus.
Tap Clear Cache to clear the app data.
On iOS
Launch the Settings app from the home screen.
Go to General.
Locate iPhone Storage.
Tap ESPN Plus, then choose Offload App.
Tap on the Offload App option again.
On Smart TV
Press the Settings button on the remote control.
Go to Apps, and click the See All Apps option.
Select Clear cache to remove all the app data on your television.
Android – locate Manage Apps and Devices on Android, then look for Updates Available, click ESPN Plus and tap Update.
iOS – Under Available updates, locate ESPN + and click Update if available.
If you have already tried these fixes and ESPN still does not work, check out our full ESPN not working guide for more solutions that cover login, buffering, and account issues.
On Smart TV
Click the Home button on the remote control.
Select Apps, then Google Play Store.
Go to the Updates Available, locate the app, and click Update. You can also click Update all to update all installed apps.
If nothing has worked for you, then the issue could be related to your ESPN account; you must contact ESPN support & inform them about the issue along with steps taken for further assistance.
What is the cheapest way to get ESPN?
NOTE
Prices listed are subject to change depending upon the market fluctuations, product offers and other factors. We recommend verifying the current prices before making your decision.
Several streaming services offer ESPN Plus with their bundled subscription, including YouTube TV, Hulu, SlingTV, and more. The cheapest is Sling TV, with USD 40 per month and 40 channels. However, if you need more channels, here are other options to explore:
Service
Price (USD per month)
Channels
YouTube TV
72.99
100+
fubo
74.99
178+
DirecTV Stream
74.99
75+
Hulu + Live TV
76.99
90+
If you want to watch your favorite sports streaming channel, ESPN on Windows, we have a detailed guide for you.
It is essential to check your subscription status & provider credentials before trying anything else. Also, make sure your ESPN app and device used are updated.
If you have questions or suggestions about the subject, feel free to mention them in the comments section below.
All 4 is one of the most popular streaming services worldwide, but for many, it’s not working on a smart TV. The problem is encountered across models, be it a Samsung TV, an LG TV, or a TCL Android TV, amongst others, with a different error message for each user.
The All 4 video on demand service recently rebranded as Channel 4. The two, All 4 and Channel 4, are the same. So any error codes on the latter, too, can be fixed with our solutions!
Why has All 4 stopped working on my TV?
All 4 is known to not work on older models, no matter if it’s a smart TV. Even for global manufacturers like LG, All 4 doesn’t work across models but only on select ones.
Some updates were also reported to break things. Besides, it could be the corrupt app cache or issues with the network connection to blame. Lastly, even blocking domains to prevent ads results in an error message for some.
How do I fix All 4 (Channel 4) if it’s not working on my Smart TV?
Before we start with the slightly complex solutions, try these quick ones:
Restart the TV. Also, disconnect the power cord while it’s turned off and wait for a few minutes.
Verify that your device supports the All 4 app. Check the manufacturer’s website for the same.
If All 4 is not loading on the smart TV, fix issues with the Internet connection or switch to another network.
Make sure none of the critical All 4 app domains are blocked. Many often block these to prevent ads. So, check the list and remove any that seem related to the streaming service.
Identify any downtimes or server outages with the All 4 app. You could use a real-time monitoring service like Downdetector.
If none work, move to the fixes listed next.
NOTE
The solutions listed here are for an Amazon Fire TV, though the ideas apply to smart TVs and devices, including PCs and mobile phones. Simply execute the equivalent steps on your device, and it should do the job!
1. Get a VPN
The easiest way out is to use a VPN. With it, you will be able to watch Channel 4 worldwide. This will eliminate any of Channel 4’s geo-restrictions. Simply select a UK-based server, and you are good to go!
And if Channel 4 doesn’t work on a VPN, you are probably running an unreliable solution, or there’s a problem with the account. So, create another All 4 profile.
A professional and reliable VPN solution, such as ExpressVPN can make all the difference when trying to enjoy your favorite Channel 4 shows.
This software comes with many servers all around the world, several of them are located in the UK, so you can pick a preferred location or just let ExpressVPN choose the one with the best connection for you.
EpressVPN
Never miss your Channel 4 shows with this amazing VPN tool.
Open your Smart TV Settings, and go to Applications.
Select Manage Installed Applications.
Choose Channel 4 from the list.
Now, select Clear data and then Clear cache.
Once done, reboot the smart TV and check whether All 4 is now working.
3. Update your smart TV
Open the smart TV Settings, and go to My Fire TV (this will be different for your device).
Locate and select About.
Now, go to Install update, and if one is available, select the option to get the latest software version.
4. Update the Channel 4 app
In the smart TV Settings, go to Applications.
Choose Appstore from the list.
Now, go to Automatic Updates and set the setting to ON.
Finally, reboot the device and let it download any available Channel 4 updates.
Often, updating the app does the trick when All 4 throws an app data error or is not working on a smart TV. This also helps with the Channel 4 4401-network-file error.
Finally, reinstall Channel 4 from the App Store, whichever one your TV supports.
6. Reset the Smart TV
Access the TV Settings tab, and go to My Fire TV.
Now, scroll down to the bottom and select Reset to Factory Defaults.
Finally, choose Reset when asked to confirm the change.
As a last resort, you can reset the smart TV when All 4 is not working. This especially helps with a Samsung TV, as reported by several users.
7. Contact the support team
When nothing works, it’s best you contact the Channel 4 support team. Besides, we recommend you also get in touch with the smart TV manufacturer in case the problem lies at your end.
For some users, Samsung shared an update that had to be installed via a USB stick. Contact both and see who is able to get rid of the issue.
Tip
While facing a playback problem, you can mostly access Channel 4’s official website just fine. So try that until the support team comes up with a resolution.
Does All 4 (Channel 4) work on all Smart TVs?
No, All 4 doesn’t support all smart TVs or devices. It’s limited to PS4, PS5, XBoxOne, Amazon Fire, Apple TV, Samsung, Roku, YouView, FreeviewPlay, Now TV, Sky, and Virgin Media.
Besides, even for manufacturers that fall in the supported list, a few models might be able to stream videos from Channel 4 and show a black screen instead.
Had All 4 not been working on your Smart TV earlier, it should now stream all the shows without throwing an error. Before you leave, find out how to set up a VPN on a Samsung smart TV. It’s easy and takes practically no time
If you are listening to music with your friends & the jamming session is interrupted by the Spotify can’t play the current song error message, this guide can help!
We will explore the common causes and delve into the WR expert-tested solutions to fix the Spotify won’t play certain songs issue in no time.
Why am I not able to play some songs on Spotify?
The content is unavailable in your region, or your Spotify Premium has expired.
Outdated app or operating system.
Insufficient storage space.
Weak internet connection or the Spotify server is down.
What can I do if Spotify is not playing some songs?
Before we go to the advanced fixes to fix the unavailable songs issue, here are a few preliminary checks you should do:
Ensure your device’s operating system and drivers are up to date, close unwanted apps & files, and check if you have enough space on your computer.
Press Ctrl + Alt + Esc to open Task Manager, locate Spotify, and click End task. Launch the music streaming service, and sign out, then sign in to your Spotify account.
Check if the song you want to play is restricted in your region; if yes, try VPN.
Ensure your Spotify Premium is active.
1. Edit the hosts file
Press the Windows key, type notepad, and click Run as administrator.
Go to File, then select Open.
On the Open window, navigate to this path: C:\Windows\System32\drivers\etc
For File type, select All Files from the drop-down menu.
Locate & select the hosts file and click Open.
Once you have the file open, you will see a block of text with # in front of every line and might get entries like these, wherein website would be replaced with some website or app name like:
0.0.0.0 website.com
127.0.0.1 website2.com
Look for entries with Spotify or Fastly in the address. If there are any, add the # in front of the file to comment out or delete it completely.
Press Ctrl + S to save the file, then close it.
Relaunch Spotify and try playing the unavailable song now.
2. Enable the Autoplay feature
Press the Windows key, type spotify, and click Open.
Go to the app’s top-right corner and select Settings from the drop-down.
Locate Autoplay, and toggle on the switch to enable it.
3. Turn off the High-Quality Streaming feature
Press the Windows key, type spotify, and click Open.
Go to the top-right corner of the app and select Settings from the drop-down.
Select Audio Quality, then choose Automatic,Low, Normal, or High from the options.
4. Turn off Crossfading & Hardware Acceleration
Press the Windows key, type spotify, and click Open.
Go to the app’s top-right corner, and select Settings from the drop-down.
Select Show Advanced Settings.
Go to the Playback section, locate the Crossfade songs button, and toggle off the switch next to it.
Next, go to Show Advanced Settings and click Compatibility.
Locate Enable Hardware Acceleration and toggle off the switch next to it.
Press the Windows key, type spotify, and click Open.
Click the three dots icon from the top-left corner, click File, then check if the Offline Mode option is selected.
If yes, then click it to deselect it.
6. Delete the app cache
Press Windows + I to open the Settings app.
Go to Apps, then click Installed apps.
Locate the Spotify app, click the three dots, and select Advanced options.
Scroll to find the Reset section and click the Reset button.
This action will remove all the app data from your computer. Once done, you need to sign in to your Spotify account, so keep your credentials handy.
7. Allow the app through the Firewall
Press the Windows key, type control panel in the search bar, and click Open.
Select Category as View by and click System and Security.
Click Allow an app through Windows Firewall.
On the Allowed apps page, click Change settings, then select Allow another app.
Click Browse, select the .exe file of the app and click Add.
Place a checkmark next to Private and Public for Spotify and click OK.
8. Update/reinstall the Spotify app
Press the Windows key, type microsoft store in the search bar, and click Open.
Click Library, then select Get updates.
Locate Spotify and click Update to install the latest version.
Once it is successfully done, restart your computer, then launch the app.
If you face the same error on your mobile devices, you can go to the App Store (iOS) or Play Store (Android), look for the app, and click Update if available to install the new version.
If you still face this issue, try reinstalling the app; follow these steps to do so:
Press Windows + I to open the Settings app.
Go to Apps, then click Installed apps.
Locate the Spotify app, click the three dots, and select Uninstall.
Click Uninstall again to confirm the action.
To reinstall it, press the Windows key, type microsoft store, and click Open.
Type spotify in the search box and press Enter.
Next, click Get or Install to download the desktop app.
Reinstalling the app can help you delete the app & install it fresh to remove the glitches, and it can help fix other error messages like Spotify won’t select songs.
How to play a specific song on Spotify without premium?
On your iOS or Android device, launch the Spotify app and tap Search.
Type in the name of your favorite song and look for it. Go to the song and swipe left to save it to the Liked Songs.
Go to Liked Songs, look for the song, then play it.
To conclude, we will leave you with a few takeaways: try playing the song on different platforms to determine if the issue is related to the app or the device.
Did we miss a step that helped you access the greyed-out songs? Feel free to mention it in the comments section below. We will happily add it to the list!
If you have an old, low-resolution clip that requires a quality boost and enhancement, a dedicated video upscaler software becomes essential. After extensive testing in the WR labs, VideoProc Converter AI impresses all with its exceptional performance.
Most upscaler software used in the market elevate the resolution of a video at the expense of quality preservation, but VideoProc Converter AI, armed with advanced Super Resolution technology, could seamlessly upscale videos of any sort without frame loss or introducing artifacts. In this post, we will walk you through how to upscale and enhance video with simple clicks via VideoProc Converter AI.
How do I upscale & enhance video with VideoProc Converter AI?
As the top video upscaling software, VideoProc Converter AI uses Super Resolution to upscale videos and images to up to 400%, enlarging 360p anime and reality videos to HD/4K without any frame loss or artifacts.
Beyond Super Resolution, it boasts additional AI enhancements like Frame Interpolation and Stabilization to take your video quality to even greater heights. Now free download and install VideoProc Converter AI and follow the steps below to upscale and enhance your videos!
1. Use the Super Resolution tool to upscale the video
On the home page, click the Super Resolution tab
Import the videos you wish to upscale by dragging or clicking the +/Add Media icon. You can add multiple videos at one time.
Choose the output type based on your input video. If your video is an anime video, choose Anime as the type; if your video is a real-world video, choose Reality, and the AI video upscale program will apply the corresponding AI upscaling algorithm.
Choose a Scale option for the output video size. You can choose 2x, 3x, or 4x, representing multiples of the original video size while maintaining the original aspect ratio. The maximum output resolution would be 4K (2160p).
(Optional) you can cut video to upscale only a specific segment and change video codec, audio codec, GOP, and output folder to your liking.
Hit the Run button to upscale your videos using VideoProc Converter AI.
2. Use the Frame Interpolation tool make the playback smoother
Open VideoProc Converter AI and select Frame Interpolation from the menu.
Import your video by clicking on the blue arrow button or dragging it into the app’s designated area.
As you may see in our screenshot, the clip was shot at roughly 30 FPS, but we can enhance the frame rate 5x to 150 FPS. However, we recommend stopping at 120 FPS because most displays won’t show any difference.
Next, if you have a video with scene changes, you should also check the Skip Scene Changes. This prevents adding frames in blank spots caused by scene transitions. You may also tune the sensitivity of the detection process.
Just like with Super Resolution, you may also change the video and audio codecs or select another folder to save to.
The Frame Interpolation feature could intelligently add frames using AI, enhancing the smoothness of your video playback. Gamers can particularly attest to the difference between running a game at 30 FPS vs 120 FPS.
3. Use the Stabilization tool to eliminate shaky movements of the camera
In the main app window, select Stabilization.
Import your video by clicking on the blue arrow button or dragging it into the app’s designated area.
Select the Mode (One or Two pass) and Preset (Best Stability, Fastest, Balanced, or Minimum Crop) from the drop-down menu on the right, and hit the Analyze button. Then the AI-process will run in the background. You can preview the stabilized video after analyzing.
Here we chose a Two pass mode with the Best Stability preset. According to your selection, the analysis will take between a few seconds to a few minutes. A better GPU will speed up the action a lot since the tool has level-3 hardware acceleration for all the new chipsets.
After analyzing the result, you may hit the Run button from the bottom right to make the changes for the whole clip.
When dealing with highly shaky videos, the tool may eliminate frames or crop the image to diminish the shaking effect so watch the preview carefully before applying the stabilization. After a few tries, we chose the Minimum Crop mode instead because it fitted the purpose a lot better for our clip.
Here we conclude our guide on how to upscale and enhance the video using VideoProc Converter AI. We hope that we provided useful information on how to use this tool and improve the video quality of your clips.
Right now, you can benefit from a 52% discount on the Lifetime License of VideoProc Converter AI. You can test the tool right now because VideoProc Converter AI comes with a free trial.
This AI video enhancer has a lot more features like digitizing DVDs, converting video and audio to most formats, popular devices, and social media, and downloading video and audio from hundreds of online sources.
Download the tool for free and tell us about your experience in the comments section below.
If your Sky Mini box is not working, you won’t be able to view any TV channels or content, and this can be a big problem since it will ruin your viewing experience.
Luckily, this is usually a minor issue, and it can be fixed in a matter of minutes, so today, we’ll show you the best solutions that you can use to address it.
Why is my Sky Mini box not working?
Temporary glitches can cause problems with the Sky Q Mini box.
Your device is not using a standard resolution.
Connectivity issues and Internet connection problems can interfere with your device.
How do I get my Sky box to work again?
1. Disconnect the Sky box from the power outlet
Turn the device off by pressing the Standby button.
Now, disconnect the power cable from the power source. You can also disconnect the HDMI cable.
Keep it like that for about a minute or two.
Connect the electrical cable again and start the device.
It might take up to 5 minutes for the device to fully boot and for all features to return.
2. Force it to use the standard resolution
Make sure that your Sky box is running.
On your remote, press Home1080Home.
Check if the problem is resolved.
This will force the device to use standard resolution and help if you get a No signal message.
Once Network settings open, select Reset button on the right side.
Follow the instructions on the screen to restore wireless connection settings to default.
This will restore the default settings for your network and reset your IP address configuration.
If the Sky Mini box is not working after a power cut or you’re getting a red light, that’s most likely a temporary glitch that can be fixed with a quick power reset or resetting your network connection. Alternatively, you can use an Ethernet cable for direct connection and check if that solves the issue.
Speaking of connectivity issues, using a weak internet could also cause issues like Sky Mini error code MR106; read this guide to learn more about it.
Sometimes, the remote works but the volume or other keys refuse to respond. In such cases, this in-depth Sky remote volume button fix explains the best steps to restore functionality.
Did you find a different way to fix this issue? If so, don’t hesitate to share it with us in the comments section.
When streaming content on Disney Plus and you notice playback issues, you’re likely experiencing the no valid bitrates error.
A bitrate that is too low will result in poor quality video and audio, but too high a bitrate can cause problems with streaming, so you need to achieve a balance.
What does no valid bitrate mean?
A video encoded with a bitrate below or above the acceptable level will have no valid bitrate and may not play.
When this happens, it could mean the original source was encoded at too high or too low a bitrate on film but later converted to digital. The new video format then becomes incompatible with your current bandwidth limits.
How do I fix the Disney Plus No Valid Bitrates Error?
Ensure your Disney Plus app is up-to-date.
Verify there are no scheduled maintenance or downtimes on Disney Plus.
Disney Plus allows you to stream content in three modes: Automatic, Moderate, and Save Data. The Automatic mode is the default one, which streams content in 4K quality, Moderate in HD, and Save Data in the lowest quality.
With the no valid bitrates error, you may be trying to stream a movie in 4K resolution, but your device doesn’t have enough bandwidth or processing power to play it smoothly. You can play with these settings until you get an uninterrupted streaming experience.
2. Resolve your connectivity issues
A myriad of connection problems could be why you’re facing the no valid bitrates error on Disney Plus. To cover all the bases, ensure you have not set bandwidth limits, and check with your ISP to verify there are no caps on your Internet speeds.
To boost your speeds, disconnect bandwidth-hogging devices from your connection, power cycle your router, update its firmware, and reset it where applicable.
In other cases, enable/disable your VPN connection, especially when trying to access content from an unauthorized location, lest you run into the protected license error. For extreme situations, reset your network connection or replace your router if it’s old and causes issues with streaming.
3. Update your Roku device software
Press the Home button on your Roku remote.
Scroll down and select Settings.
Click on System.
Select System Update.
Click on Check now for available updates.
4. Reset your device
If you have recently updated your software or installed certain apps, then it is possible that there was a conflict between them and the existing software on your device. Windows devices, browsers, and Roku are easier to reset through their settings.
If you are using an older model TV model, turn it off by unplugging it from power for 30 seconds and then plugging it back in again. Wait for about 5 minutes before turning it back on again.
If the above steps didn’t fix the problem, reinstalling Disney Plus might do the trick. Uninstallation will vary depending on your device, but for Windows, go to Settings > Apps>Apps & features>Find Disney+ and tap Uninstall.
Ensure you clear residual files, then go back to your app store and download it again.
6. Use a different streaming device
You can also use a different device to verify whether the problem lies with your device or Disney Plus’ servers. Disney Plus is supported on various devices such as Xbox, Roku TV, and web browsers.
After trying out different platforms and you get this error on both devices, it’s likely that Disney is having server issues and it’s not a device-specific bug.
7. Contact customer support
If you’ve already tried everything and still can’t get your video to play, you will need further assistance. Unfortunately, there are some issues that only the Disney Plus team can resolve.
And while you may have found an answer to the no valid bitrates error, there are still many other Disney Plus errors you may encounter. Luckily, we uncover most of them and give you top-tested solutions.
These steps are easy to implement and should work to resolve your issue. Give them all a try if needed, then report back to us with the results.
EE error 0 will prevent you from sending messages to your friends, and this can be a problem. However, there are a few solutions that you can try.
What does EE error code 0 mean?
This issue appears when you select the wrong service provider or have an incorrect default messaging app, usually the one from Google. Reaching the message or character limit can also give this error.
How do I fix the EE error 0?
Before we try more complex solutions, restart your phone and clean your SIM card. Also, ensure that EE servers are working and that you’re not exceeding any limits. Verifying your contact details or adding a contact again can help with this error.
1. Uninstall the other messaging app
Open the Settings on your Android device, and select Apps.
Locate any other messaging apps apart from the built-in default one and select it. This could be Google Messages. You could also identify the additional ones from the app icon.
Now, tap on Uninstall.
Tap OK in the confirmation prompt.
2. Change the default messaging app
Open the Android Settings, and go to Apps.
Tap on the ellipsis (three-dot icon) near the top-right corner.
Select Default apps.
Choose SMS app.
Finally, select Messages, one with the bubble and three dots in between.
Setting the correct default messaging app will do the trick if you get EE error 0. It also helps with the T-Mobile error 2.
3. Set the correct SMSC number
Open the default Messages app, tap on the ellipsis and select Settings.
Now, choose SMSC from the list of options.
Enter +447958879879 in the text field, and tap OK.
Once done, reboot the Android device and check for improvements.
Changing the SMSC (message center) number helps with O2 error 38.
This solution only applies when using Google Messages as the default app. If not, head to the next fix.
Open the Google Messages app, tap on the profile icon near the top right, and select Messages settings.
Choose Chat features.
Enable the toggle for Automatically resent as text (SMS/MMS).
Try resending the messages and verify whether you still get EE error 0 on Samsung.
5. Clear the message app cache
Open the Settings on your Android phone, and go to Apps.
Select Messages from the list.
Tap on Storage.
First, tap Clear data and then on Clear cache to delete both.
Finally, check for improvements.
6. Reset the network settings
Open the Android Settings and tap on General Management.
Tap on Reset.
Now, select Reset network settings.
Finally, tap the Reset settings button to confirm.
If faced with the EE error 0 SMS issue, resetting the network settings should help, as when users encountered T-Mobile error 111.
7. Contact the EE support
When nothing else works, you can always contact EE support. They will identify and do it for you if critical settings need to be changed or the SIM card replaced.
Trivial problems are mostly resolved over a phone call, while for complex issues, especially with the hardware, you will need to visit their store.
But rest assured, by the time you finish our guide, the EE error 0 should be gone for good! A similar Vodafone error 69 SMS issue is also encountered by users in the UK and across the globe.
Digiarty Software released VideoProc Converter AI, bringing 3 new AI tools: Super Resolution, Frame Interpolation, and Stabilization to enhance video/image quality.
This major update makes VideoProc Converter evolve into VideoProc Converter AI, an AI-driven video enhancer and converter. In this article, we will talk about its new features and how to use them to boost the quality of your video.
What is VideoProc Converter AI? VideoProc Converter AI is a multi-tool software that helps you enhance low-resolution videos & photos and increase their FPS, convert large/4K/HD/DVD video, edit, compress, download, and record with GPU acceleration.
System requirements for the new AI tools:
Windows OS: Microsoft Windows 7/8/8.1/10/11 or later (32-bit and 64-bit versions supported)
Hard Disk Space: 1GB
RAM: 2GB (Minimum)
Graphic: Make sure that your graphic card is compatible with Vulkan1.2.x or later.
What are the best features of VideoProc Converter AI?
1. Super Resolution
The Super Resolution feature of the new VideoProc Converter AI is simply spectacular. Not only that it can upscale a video to 4x the resolution, but it also enhances the image quality tremendously.
We tested the tool on a flimsy 360×640 pixels video shot with an ancient smartphone, and, as you can see in the screenshot, VideoProc Converter AI’s Super Resolution tool brought it up to 1440×2560 pixels.
We checked the Use High Quality Engine option, and that visibly sharpened the image.
The tool is extremely easy to use. First, drag and drop the video into the designated area. Then select the desired upscaling multiplication factor (2x, 3x, or 4x). La check if you want to enhance the image, and hit the Run button.
2. Frame Interpolation
Frame Interpolation is another new feature from VideoProc Converter AI that will help you enhance the video image quality.
The tool boosts the frame frequency by interpolating additional frames and improving the fluency of the playback.
We used a clip with 30 FPS, bringing it to a smooth 150 FPS by selecting the 5x interpolation factor. We recommend stopping at 120 FPS. Most displays won’t be able to play a higher frame density and you won’t see the difference.
Another smart feature of Frame Interpolation is skipping the scene changes. If you check the option in the UI, the tool will detect and avoid those parts.
3. Stabilization
Most cameras have a stabilization feature. However, it’s never enough and if you’re not using a tripod, your video is going to be shaky at best.
The AI Stabilization tool from VideoProc Converter AI analyzes and eliminates these unwanted shaky effects, whether you’re using a GoPro, phone, drone, or handheld camera.
And it does that with GPU-accelerated speed, controllable cropping ratios, and precise fine-tuning.
The tool offers four presets: Best Stability, Fastest, Balanced, and Minimum Crop. And it also allows you to change Border Color and Crop Type.
From our tests, after a 2-pass stabilization and Best Stability preset, the video was playing smoothly as if the camera was mounted on a professional gimbal.
More VideoProc Converter AI important features
VideoProc Converter AI has its roots in file conversion so it has a lot of other features:
Video & audio converter – The software is one of the best and fastest video and converters you can get right now, handling videos of up to 8K with lightning speed thanks to the level-3 hardware acceleration. It also converts audio and has dedicated presets for popular devices and social media.
DVD digitizing – Convert any DVD to a digital format including MP4, AVI, multi-track MKV, MP3, and ISO.
Downloader – Get music and video from hundreds of online sources just by inserting a link in the tool.
Multi-source recorder – Record anything that goes on anywhere on your screen or on your webcam at the same time.
How much do I pay for VideoProc Converter AI?
There are three paid plans for VideoProc Converter AI:
Premium 365 – Includes a 1 yr subscription for 3 PCs for $38.90
Lifetime License – Lifetime license for 1 PC for $78.90
Family License – Offers a lifetime license for 3-5 PCs for $119.90
Right now, there is a special Anniversary offer with a 52% discount for the Lifetime License, so, if you hurry up, you will get it for $45.95 instead of $78.90 for a full year.
You should also know that VideoProc Converter AI also comes with a free trial version so you can test it. There is also a 30-day money-back guaranteed policy.
VideoProc Converter AI comes to peaks Level-3 Hardware Acceleration fully powered by Intel, AMD, NVIDIA GPUs, and Apple M1/M2 (Pro/Max/Ultra). That’s how it can deliver smooth (4K/8K) video editing and transcoding without any quality loss.
To summarise our article, this AI video enhancer will help you increase video quality with just a few clicks by using the new tools. Super Resolution dramatically increases the resolution of your clips, while Frame Interpolation and Stabilization will make them play smoothly and without any annoying shakes.
We recommend trying the new VideoProc Converter AI and telling us all about your experience in the comments section below.


 NOTE