Many of our readers complained about encountering the Zoom error code 103033 while trying to join a meeting. This issue usually occurs if your email ID is not registered or skipped during registration. Here are our solutions to fix the problem after explaining the potential causes.
What causes the Zoom error code 103033?
There can be various reasons behind this Zoom error; some of them are mentioned here:
Zoom server issues – If the Zoom server is down or there is an internal bug, you may see this error. Check the server status to be sure.
Internet connectivity – The internet connection should be stable to use these communication apps. If not, you may see this error. Try troubleshooting your network connection.
Your email ID is not registered – If your email ID was skipped at the time of registration, you may not be able to access the meeting. Contact the meeting host.
Outdated app – Keeping apps like Zoom up to date is essential, as an obsolete app could cause various problems. Check for updates and ensure you have the latest version.
So, these are the causes of the error code; let us jump into the solutions.
What can I do to fix the Zoom error code 103033?
Before engaging in advanced troubleshooting steps, you should consider performing the following checks:
0x800423f4 VSS error happens when a backup or restore operation using Volume Shadow Copy Service (VSS) fails. This error indicates that the storage volume is running low on space or there is an issue with the VSS service itself.
The 0x800423f4 error can occur for several reasons, such as insufficient disk space, conflicts with other backup software or antivirus programs, Shadow Copy storage being corrupt, corrupt system files, or issues with VSS writers.
What causes the 0x800423f4 VSS error?
Let’s take a closer look at some of the common causes of 0x800423f4 error:
Insufficient disk space: If there is not enough free space on the drive where the VSS snapshot is being created, the snapshot may fail and result in the error code.
VSS writer or provider failure: The VSS writer or provider may fail due to various reasons, such as incorrect configuration, permissions, or compatibility issues with other software on the system.
Third-party backup or antivirus software interference:Antivirus software that uses VSS can sometimes interfere with VSS operations and cause errors.
System file corruption: Corrupt or damaged system files can also cause VSS errors.
Improperly configured VSS settings: Incorrect configuration of VSS settings can also cause the error code 0x800423f4. For example, if the VSS storage area is not configured properly, the VSS snapshot creation process may fail.
How can I fix the VSS error 0x800423f4?
1. Check and enable the Volume Shadow Copy service
Press the Windows + R on your keyboard to open the Run dialog box and type services.msc into the box and press Enter.
In the Services window, locate the Volume Shadow Copy service and double-click on it to open its Properties window.
Set the Startup type to Automatic or Manual.
If the service is stopped or paused, click the Start button to restart the service. Then, click Apply and then OK to save the changes.
After that, close the Service window and re-attempt the backup process. If the 0x800423f4 error persists, try the next method.
2. Disable Windows Defender Firewall and the antivirus program
2.1 Disable Windows Defender Firewall
Press Windows + R to open the Run dialog, type firewall.cpl, and click OK or press Enter.
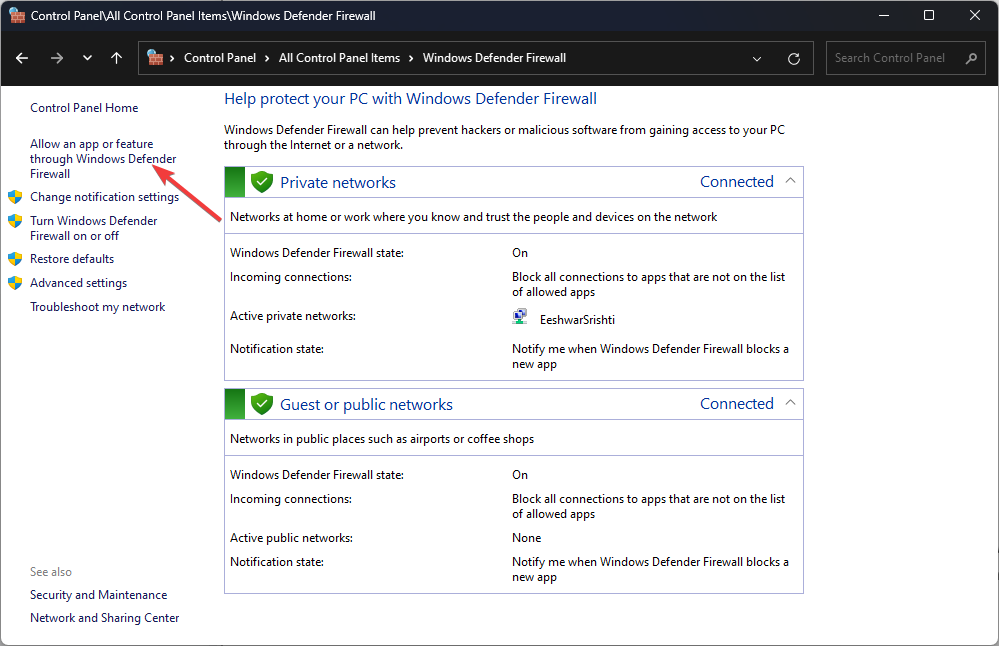
From the left sidebar of the Windows Defender Firewall window, click on Turn Windows Defender Firewall on or off.
Select Turn off Windows Defender Firewall (not recommended) under both Private and Public network settings and then click OK to save the changes.
2.2 Disable the antivirus program
Click the Show Hidden Icons button on the taskbar to view hidden icons and click on the Windows Security icon.
Navigate to Virus & threat protection on the left-side pane and click Manage settings underneath Virus & threat protection settings on the right pane.
Then, turn off the toggle under Real-time protection.
It’s not recommended to disable your antivirus for virus protection and security reasons. However, if you need to troubleshoot a Volume Shadow Copy Service error, you can temporarily disable the antivirus and check if the issue persists.
After turning off the antivirus program, check if the same problem happens again. Then, quickly turn the antivirus program back on to keep your computer protected.
3. Check the hard drive for errors
Open Windows Explorer by pressing Windows + E on your keyboard.
Right-click on the C drive and select Properties.
In the Properties window, click on the Tools tab.
Under the Error Checking section, click on the Check button or Check Now button.
In the Error checking dialog window, click the Scan drive option.
Press Windows + R to open the Run command box, type cmd, hold the Ctrl + Shift key, and click OK to run Command Prompt as Administrator.
Click Yes on the User Account Control (UAC) prompt window.
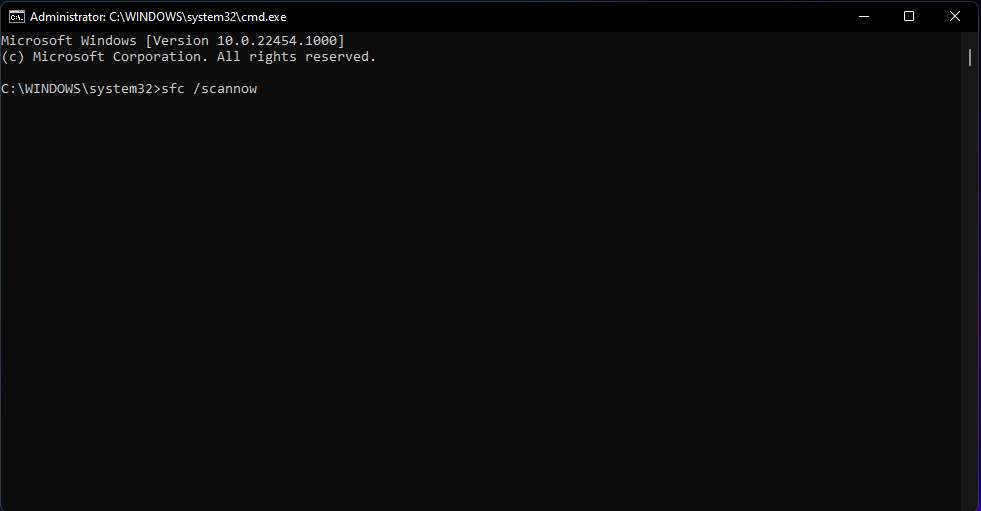
In the Command Prompt window, type the following command and press Enter: sfc /scannow
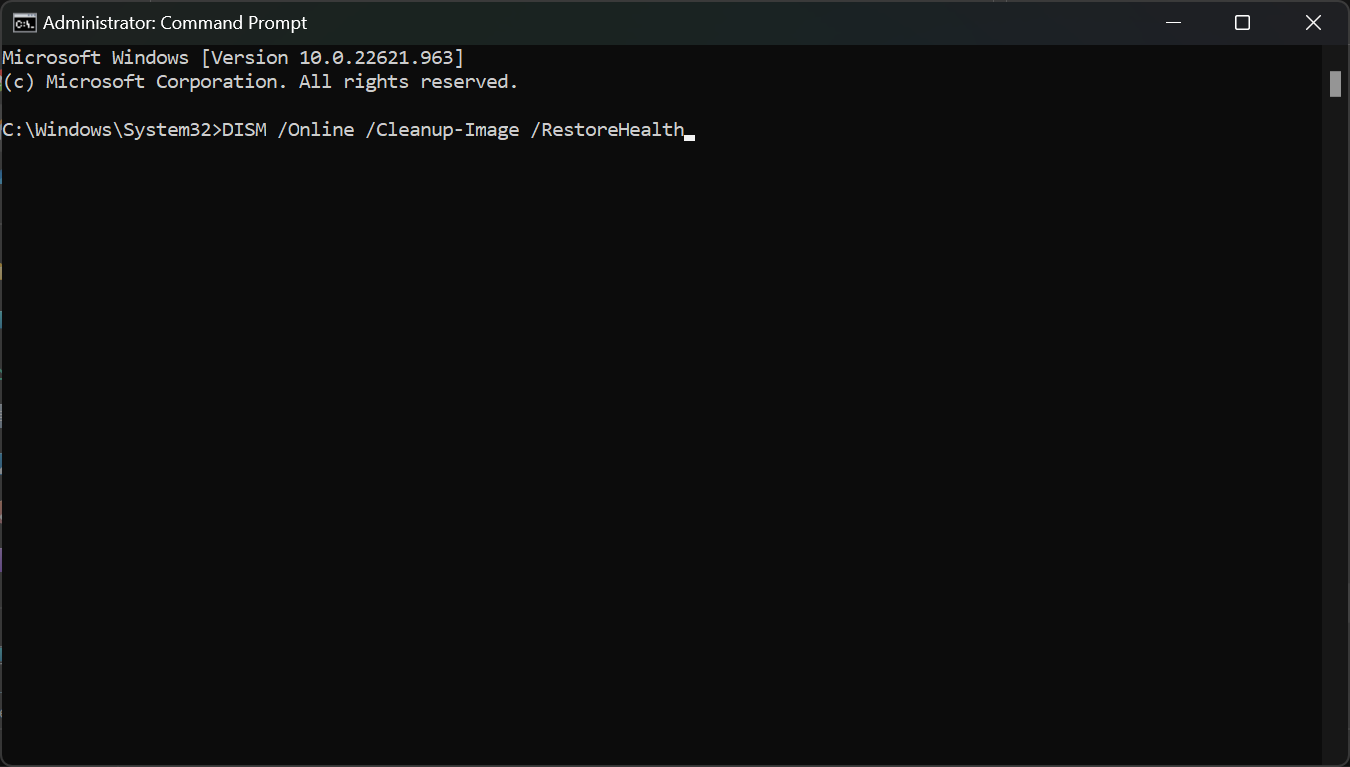
Wait for the SFC tool to complete the scan, then run the Deployment Image Servicing and Management (DISM) tool. To do that, type the following commands and press Enter after each: DISM /Online /Cleanup-Image /ScanHealthDISM /Online /Cleanup-Image /RestoreHealth
After running both the SFC and DISM tools, restart your computer to ensure that any changes made by the tools take effect.
Running the SFC and DISM tools can help fix issues with system files and Windows images, respectively.
5. Re-register the VSS configuration
Press Windows + R to open the Run command box, type cmd, hold the Ctrl + Shift key, and click OK to run Command Prompt as Administrator.
Click Yes on the User Account Control (UAC) prompt window.
Type the following command one after the other and press Enter after each one: net stop vssnet stop swprvregsvr32 /s ole32.dllregsvr32 /s oleaut32.dllregsvr32 /s vss_ps.dllvssvc /registerregsvr32 /s /i swprv.dllregsvr32 /s /i eventcls.dllregsvr32 /s es.dllregsvr32 /s stdprov.dllregsvr32 /s vssui.dllregsvr32 /s msxml.dllregsvr32 /s msxml3.dllregsvr32 /s msxml4.dllCd /d %systemroot%\syswow64regsvr32 /s ole32.dllregsvr32 /s vss_ps.dllregsvr32 /s es.dllregsvr32 /s stdprov.dllregsvr32 /s msxml3.dllregsvr32 /s msxml.dllregsvr32 /s msxml4.dll
Restart your computer, re-attempt the backup, and see if the 0x800423f4 reappears.
6. Repair VSS Writers
Open Command Prompt with Administrative privileges.
Type the following command and press Enter to list all the Volume Shadow Copy Service (VSS) writers that are currently installed on the system: vssadmin list writers
Then, confirm all the VSS writer’s States are showing Stable. Take note of any writers that are currently in a state of Failure.
After that, press Windows + R, type services.msc, and hit Enter to open the Services app.
Locate the service for the VSS writers that have failed and double-click on it.
Then, click the Stop button to stop the services.
Next, open Task Manager with Ctrl + Shift + Esc shortcut keys and kill the processes associated with the VSS writers that have failed.
Go back to the Services console and restart the services that you stopped earlier by clicking Start.
Return to the elevated Command Prompt and run the below command again to verify that the VSS writers are now listed as stable: vssadmin list writers
It’s important to keep your data safe by backing it up regularly. Hence, it’s essential to address the 0x800423f4 error code as soon as possible. By following these steps, you can resolve the error and continue backing up your data without any issues.
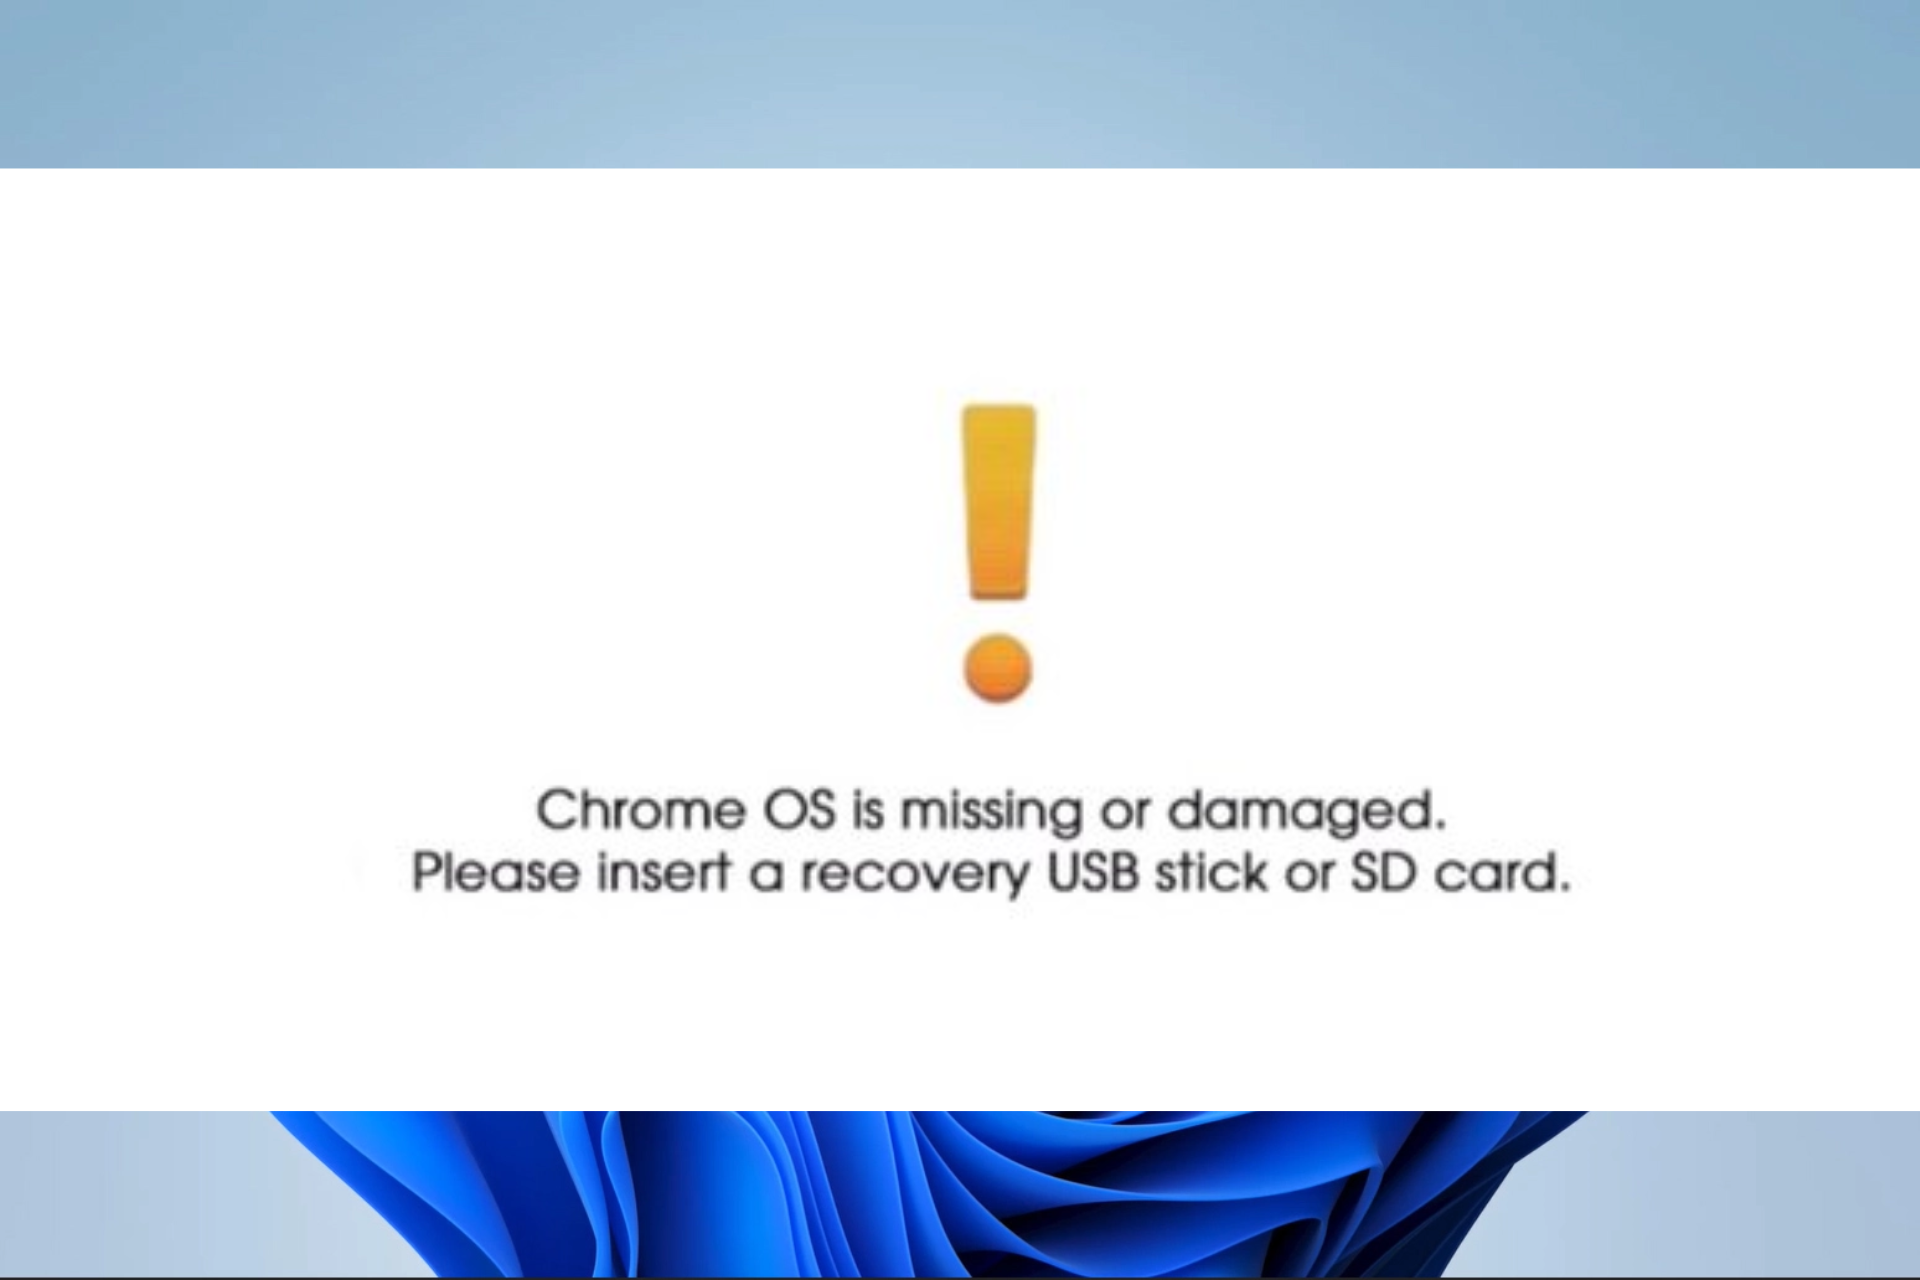
Chromebook users fear no error message more than Chrome OS is missing or damaged. This error may mean it is impossible to boot into the OS or use some key system functions.
However, several ways exist to address this issue and restore your laptop to full functionality. So, in this guide, we take you through some of the best approaches and explore potential causes.
What does it mean when my Chromebook says Chrome OS is missing or damaged?
This message on your Chromebook could indicate that the operating system has been erased or corrupted. There are several potential reasons for this problem, which may include:
Updates-related issues – For many users, this indicates that their software or system updates were either disrupted or not fully executed.
Malware or virus problems – Sometimes, the operating system may have been compromised by malware or viruses. We always recommend a robust antivirus system.
Power-related issues – Power outages or unexpected shutdowns while performing system updates or other important tasks can cause concern for certain users.
Hardware failure – One of the known triggers for system malfunctions is hardware issues, which may include a failing hard drive or other storage device.
This error cuts across manufacturers, and users may experience missing or damaged Chrome OS in HP, Acer, Samsung, and other brands.
How do I fix Chrome OS missing or damaged?
Before venturing into the solutions, to address this problem, a temporary solution is to switch off your device and then switch it back on using either the power button or a Hard reset. If this does not work, continue to elaborate fixes.
1. Factory reset the Chromebook
Make sure it is powered down completely.
Hold down the Esc, Refresh, and Power buttons for between 5 and 10 seconds to open the recovery screen shown below.
Hit the Crtl + D buttons, and as soon as the notification pictured below is displayed, hit Enter.
Your screen should turn off and come back on; then, you need to hit the Space Key to re-enable OS verification.
Now, you should hear 2 beeps, go through a screen that says Preparing for Developer mode, and return to the previous screen that asks you to Press Space to re-enable verification.
Press Space again.
On the screen for Press ENTER to confirm you wish to turn the OS verification on, hit the Enter button.
At this point, the system will begin to reboot, and finally, you only need to follow the onscreen settings to get correctly set up.
Verify that Chrome OS is missing or damaged is fixed.
Please note that executing this step will result in deleting all data stored on your device. Before proceeding, creating a backup of any critical files to an external drive or cloud storage platform is advisable.
Resetting your Chromebook can help you fix the Chromebook keeps restarting itself; read this guide to learn more.
2. Install a fresh copy of the OS
2.1 Create a recovery USB for Chrome OS
On a separate device, navigate to the Recovery utility page and click Add to Chrome.
Select App app or Add extension.
Click on Launch app.
Plug in a USB flash drive or SD card with at least 8GB of storage.
Click the Get started button.
Input your Chromebook model number (you will find it on the same page that shows the Chrome missing error) and click Continue.
Select your USB or SD card from the dropdown and hit the Continue button.
Hit the Create Now button to begin the media creation.
This process may take several minutes, but finally, click the Done button at the end, and you should have successfully created the Recovery USB.
2.2 Install using the Recovery USB
Make sure the computer is plugged in.
Start the Chromebook to get the screen that says Chrome OS is missing or damaged.
Insert the recovery USB into the Chromebook, and the device should recognize it and automatically start the recovery process.
Take out the recovery media once prompted, the system will restart, and you can configure the newly installed Chrome OS.
Of course, this installation process should be only used as a last resort since you will lose all the data previously on your device. However, it is very effective in fixing the error. Remember, after connecting the bootable USB, you may get The security module on this device is not working error.
That is as much as we will be discussing in this article. We have listed the solutions on a scale of difficulty, starting from the most straightforward fixes. So, we encourage you to walk your way down the steps.
Cloudflare is a popular name amongst those who understand the backend of the Internet and the aspects concerning security and privacy. Its primary role is to make things faster, more secure, and more reliable. But, the Cloudflare 521 error acts as an impediment when accessing a website.
The message reads, Web server is down, Error code 521, and is usually encountered on websites developed using WordPress. The problem has been present for a long time and gives developers and users a hard time. So, let’s find out all about it!
What is Cloudflare error reference number 521?
The error appears when the server doesn’t respond to requests from Cloudflare. And while the message lists server issues as the reason behind the errors, that’s not always the case.
Here are a few reasons users encounter the 521 error in Cloudflare:
The server is down: Though rare when using a reliable hosting platform, there’s still a chance that server downtime is the underlying cause here.
Misconfigured server settings: Often, misconfigured server settings are why users can’t access the website. Recent changes could also trigger the error.
Problems with the certificate: Cloudflare has its SSL (Secure Sockets Layer) certificates for enhanced security and encryption, and issues with it, too, can lead to a 521 error on Cloudflare.
Requests blocked by the server: In a few cases, the configured firewall blocks requests from Cloudflare, if identified as suspicious. This usually happens when there are multiple requests from the same IP address.
How do I fix 521 error Cloudflare?
Tip
For users getting the Cloudflare Error code 521, we recommend waiting for a while or checking with the website’s support team for a resolution. Since the problem usually lies with the backend, there isn’t much you can do other than apprise the team.
Before we move to the slightly complex solutions, here are a few quick things to try:
Disable proxy.
Purge the cache.
When a user complains of the 521 error Cloudflare, verify whether it’s a problem at their end triggering the error.
If none work, head to the fixes listed next.
1. Check the site status
For those wondering how to fix Cloudflare errors, your primary approach should be ensuring the site’s running fine. The easiest option is to run a ping test via the command line.
Use the following command for it while replacing website with the actual address:ping website
For instance, when checking for issues with the WindowsReport, the command becomes as follows:ping windowsreport.com
Check the test results and look for any anomalies here. Besides, you could use Downdetector, a reliable service that allows users to report issues with the website, thus providing statistics in real time.
2. Whitelist for Cloudflare
When the website’s status is fine, the next possible reason for the 521 error Cloudflare with DigitalOcean is blocking connection attempts at the backend. In this case, you must ensure that Cloudflare IPs are not blocked in the firewall, .htaccess, and iptables.
You can use the following command to allow connections from a given IP in iptables while replacing IP Address with the one for Cloudflare:sudo iptables -A INPUT -s IP Address --dport 443 -j ACCEPT
Check the full list of Cloudflare IPs, whitelist all these, and make sure port 443 is accessible. The process might be slightly different for each, depending on the configured firewall, but it shouldn’t be too tricky.
List of Cloudflare IPs
Also, while verifying this aspect, make sure to check with the hosting service whether they are blocking connection attempts from Cloudflare, and get this rectified,
3. Check for issues with the SSL certificate
For many users getting the 521 error Cloudflare with WordPress, the problem lies with the website’s security certificates. Users can generate the certificate from Cloudflare’s dashboard and upload it to the web server to eliminate such issues and ensure seamless connectivity.
In case the website already has an SSL certificate, check for issues with it and make sure the other settings are configured right.
Often, an incorrect encryption mode can trigger a 521 error Cloudflare with Nginx. Cloudflare offers several modes designed per the website’s and developer’s requirements. These are:
Flexible: Connections are established via HTTPS. Though less secure, it’s preferred by developers for websites that don’t have an SSL certificate.
Full: Allows connection via HTTP and HTTPS based on the request from the visitor but doesn’t check the certificates.
Full (strict): Similar to Full, but the SSL certificates are verified before a connection can be established.
Encryption modes
Now that you understand the three switch to different modes and verify which works best for your website, though it’s usually Flexible. Again, it depends on several factors, and for some users, setting SSL mode to Full (strict) did the trick.
5. Contact support
If none of the solutions listed here helped fix Cloudflare Error code 521, the last option is to contact Cloudflare support. They can better assist you if the underlying cause is tricky to identify.
You must have encountered the error message the requested address is not valid in its context, indicating that your device has issues resolving a specific address.
After conducting thorough research on the matter, we have compiled a guide that outlines the potential causes of the error and offers practical solutions to resolve it.
What causes the requested address is not valid in its context?
From our interactions with users, we conclude that the following are the primary triggers:
Network connectivity issues – This error may occur due to network connectivity problems, such as a slow or unstable internet connection or issues with the DNS server.
Proxy issues – A few users get this error because they have configured the device to access the internet using a proxy.
Firewall restrictions – The connection can be blocked, and this error can occur if a firewall or antivirus software is installed on the server or client.
The below solutions will help resolve the error.
How to fix the requested address is not valid in its context?
We recommend you try these workarounds before venturing to more detailed fixes:
Disable your antivirus/firewall – You may temporarily disable a very restrictive firewall since this is an easy trigger for the error.
Change your internet connection – A slow connection may trigger the problem, so you may consider switching your ISP or trying a wired connection.
Restart your computer – This is a general solution but may help resolve minor bugs that trigger the error.
If none of the above work, please proceed to more elaborate solutions below.
1. Reconfigure DNS
Press Windows + R to open the run dialog.
Type cmd and hit Ctrl + Shift + Enter.
Type the scripts below and hit Enter after each one. ipconfig /flushdns ipconfig /renew
Lastly, restart the computer and see if the requested address is not valid in its context persists.
2. Disconnect the proxy connection
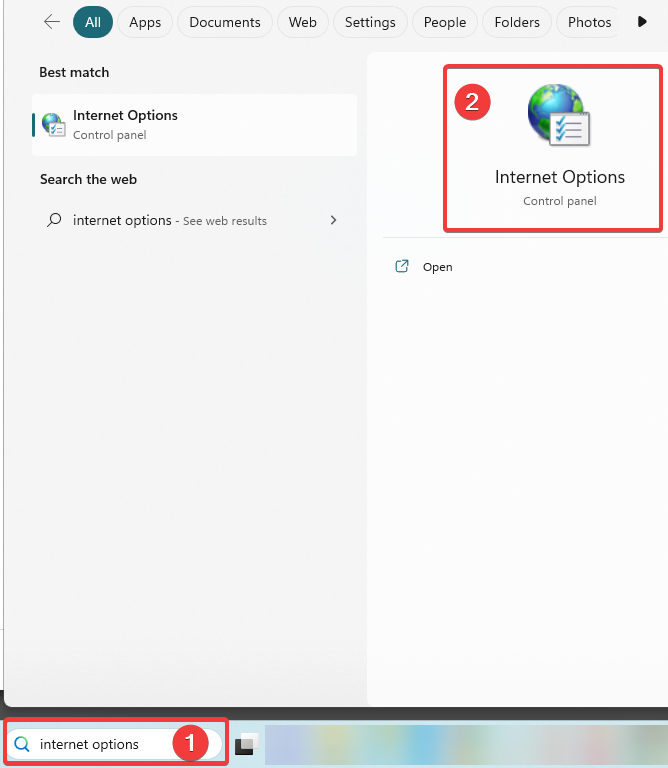
Press the Windows key, type internet options, and click on the application.
Select the Connections tab, then click on the LAN settings button.
If you do not use a proxy, uncheck the option for Automatically detect settings, then click the OK button.
Ensure to verify the address of the proxy server with your proxy service. if you are using one.
Press the Windows key, type connection, and select the View network connections option.
Right-click on your network and select Properties.
Uncheck Internet Protocol Version 6 and tick Internet Protocol Version 4.
Verify the requested address is not valid in its context is resolved.
4. Reset the TCP/IP stack
Press Windows + R to open the run dialog.
Type cmd and hit Ctrl + Shift + Enter.
Type the script below and hit Enter. netsh int ip reset
After it executes, restart the computer and verify that the error is resolved.
That is as much as we will cover in this article. Any of the above solutions may be an excellent fix for the connection problem. We recommend you start with the initial workarounds, then any solution that seems most applicable to you.
Lastly, do not forget to write in the comments section and tell us what solutions were most effective for you.
When accessing the Disk Management utility, a few of our readers have gotten a screen stuck with the message Disk Management connecting to Virtual Disk service.
For these users, it is impossible to access the utility, so we have come up with the most straightforward solutions you may explore in this guide.
Why am I stuck on Disk Management connecting to Virtual Disk service?
You could have trouble connecting to the Virtual Disk service in Disk Management for several reasons. Here are some potential causes:
Firewall restrictions – Sometimes, you will have this problem using a restrictive firewall that blocks connections.
Disabled services – If the VDS (Virtual Disk Service) is not running, you may not have access to the management utility.
Outdated drivers – The disk drivers are the main problem here, and if these drivers are outdated, you may expect varying problems using the Windows utility.
Note that the error message may vary as some users have gotten an Unable to connect to Virtual Disk Service error. This is the same problem, and the solutions below will work.
How to fix Disk Management connecting to Virtual Disk service?
Before getting into some practical solutions, you may try these workarounds:
Use an alternative disk management tool – A few third-party management utilities will get the job done and may not pose the same error, so they may be worth trying.
Eject peripherals – You may want to start by detaching all your external storage since some faulty peripherals may trigger the problem.
However, if the two workarounds do not work, you should proceed to more detailed solutions below.
1. Change the firewall settings
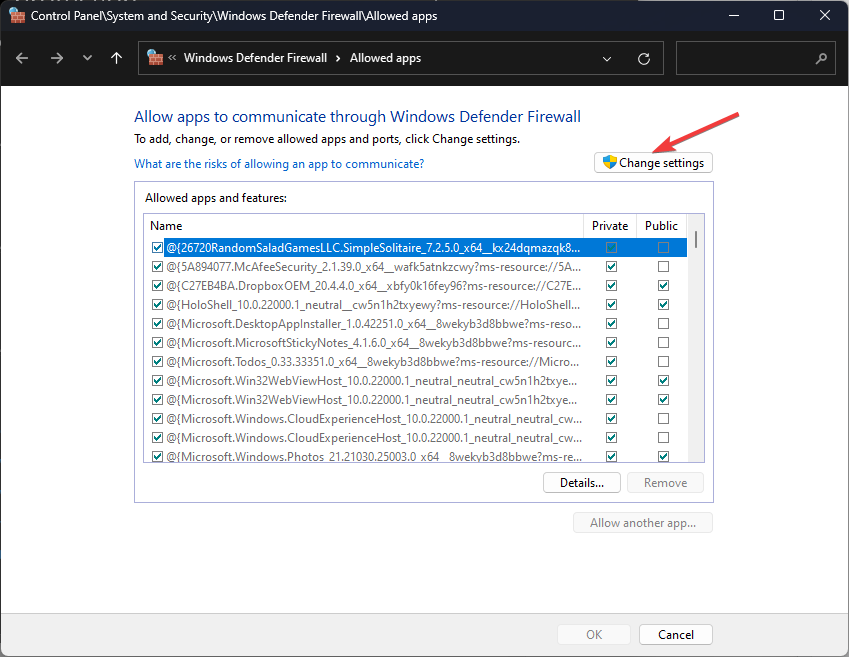
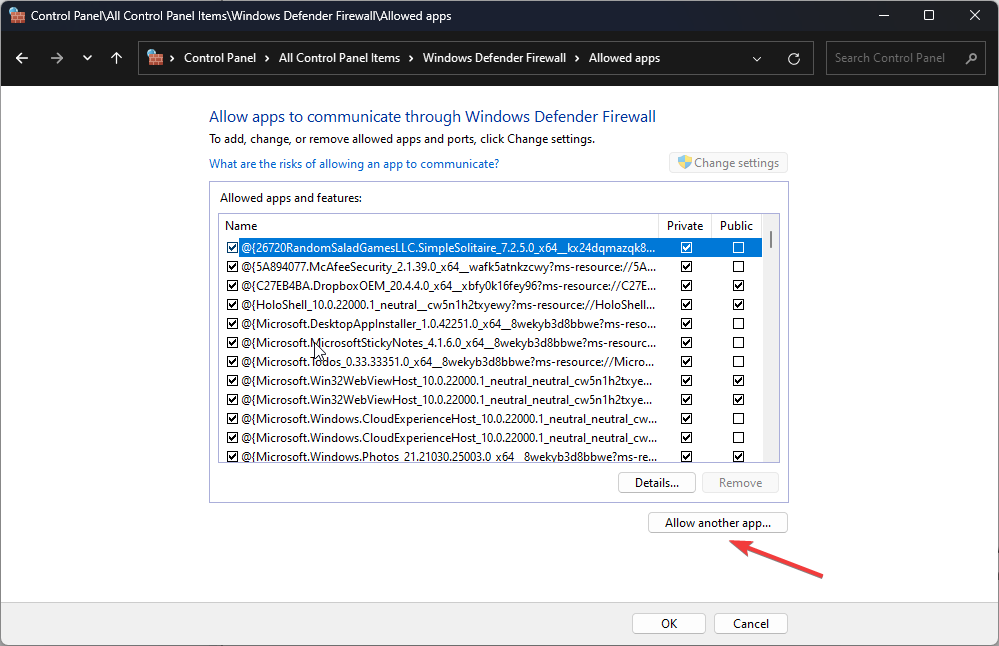
Press the Windows key, type firewall, and select the Allow an app through Windows Firewall option.
Click the Change settings button.
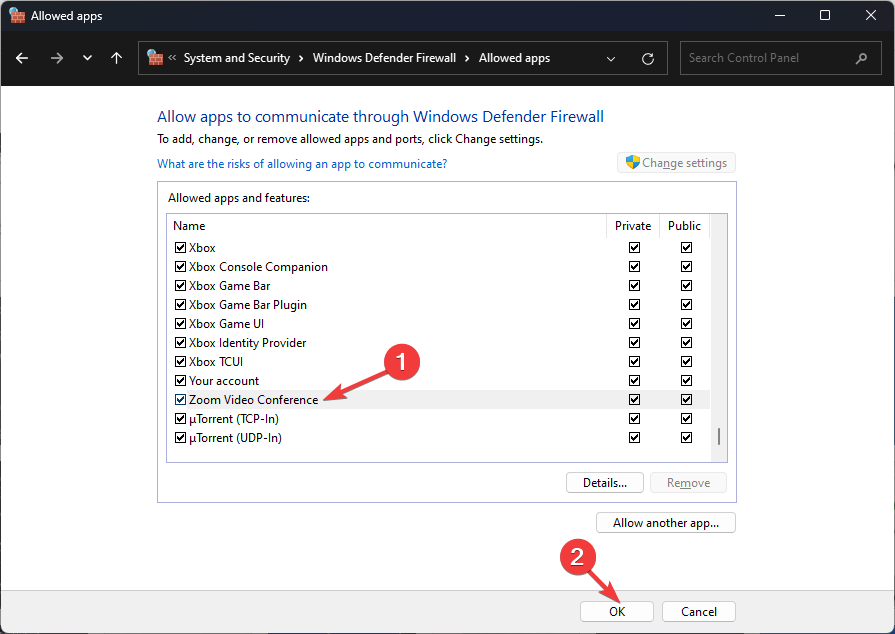
Tick both checkboxes in front of Remote Volume Management.
Finally, click the OK button to save your changes.
2. Update disk drivers
Right-click on the Start menu and select Device Manager.
Expand the Disk drives category, right-click on your disk driver, and select Update driver.
Click Search automatically for drivers.
Finally, follow the process to complete the update.
If you applied this method and it doesn’t seem to solve the issue, worry not because you can still fix it with a standalone app.
Accordingly, this driver manager will scan your PC for outdated or missing drivers, giving you the full report with the ones that need to be updated. From there, all you have to do is to press the button.
Press Windows + R, type cmd, and hit Ctrl + Shift + Enter.
Type the script below and hit Enter to locate and repair corrupted system files. sfc /scannow
Now type the two scripts below, hitting Enter after each one. exe /Online /Cleanup-image /Scanhealth exe /Online /Cleanup-image /Restorehealth
Finally, when the scripts are completely executed, verify if the problem is resolved.
Any of the above processes should fix the problem. However, we have not made these solutions in any particular order, and we encourage readers to start with what seems the most applicable.
We like to hear about your success, so please reach out to us in the comments section below and tell us which solutions worked best.
Chrome has long been the primary choice of users amongst all the reliable browsers. What makes it even better is the ability to sync between devices seamlessly. But many reported that websites are opening automatically in Chrome.
We did some digging and found that Chrome automatically opens sites on all devices, be it mobiles, tablets, or computers, and the problem usually has to do with an issue at the user’s end. Let’s find out all about it!
Why are websites opening on their own?
Here are a few reasons unwanted websites are opening automatically in Chrome on Windows:
PC infected with malware: In most cases, malware turned out to be responsible for the problem after a full system scan was run using either the built-in Windows Security or an effective antivirus solution.
Problematic browser extensions: We often install extensions to enhance the browser experience, but some of these affect its core functioning, and Chrome randomly opens websites.
Corrupt browser cache: When the browser cache is corrupt, there’s a likelihood of encountering problems while running Chrome.
Misconfigured Chrome settings: Various built-in settings might just as well be the underlying cause when sites open automatically in the browser, so you will have to check those as well.
How do I stop websites from opening automatically in Chrome?
1. Remove the problematic extension
Launch Chrome, click the Extensions icon in the toolbar, and then select Manage extensions.
Now, disable the extensions listed here one at a time, and restart the computer after each.
As soon as the problem stops, the extension disabled last was problematic.
Again, open the list of extensions, and click on Remove under it.
Click Remove to confirm.
For those wondering how to stop websites from opening automatically in Chrome, a quick solution is to identify and remove the extension causing it. If you have added any recently, start with those first, especially any related to shopping or coupons.
2. Run a malware scan
Press Windows + S to open Search, type Windows Security in the text field, and click on the relevant search result.
Click on Virus & threat protection.
Choose Scan options.
Now, select Full scan and click on the Scan now button.
Wait for the scan to complete. Then restart the computer and check if the problem is fixed.
Regardless of the Windows virus protection, you have more effective anti-malware solutions to consider.
For instance, we advise you to use enhanced security software that ensures you unbreakable virus defense and new emerging detection tools.
TotalAV
Avoid risky malware threats or unwanted programs with this multilayered antivirus.
Launch Chrome, and press Ctrl + Shift + Delete to open Clear browsing data.
Now, select All time from the Time range dropdown menu, tick the checkboxes for Browsing history, Cookies and other site data, and Cached images and files, and then click on Clear data.
Once done, relaunch the browser for the changes to come into effect.
When you find websites opening automatically in Chrome, it could be the corrupt browsing data to blame. And clearing it, in most cases, should do the trick.
4. Reconfigure Chrome settings
Open Chrome, click on the ellipsis near the top right, and select Settings from the flyout menu.
Choose Privacy and security from the navigation pane, and click on Site settings.
Now, click on Notifications under Permissions.
Finally, select Don’t allow sites to send notifications.
Once done, relaunch the browser for the changes to come into effect.
Launch Chrome, paste the following path in the address bar, and hit Enter:chrome://settings/reset
Now, click on Restore settings to their original defaults.
Click on Reset settings to confirm.
If the solutions listed previously didn’t help and websites are still opening automatically in Chrome, resetting the browser settings should work. This will also do the trick when unwanted websites are opening automatically in Chrome mobile.
6. Reinstall Chrome
Press Windows + R to open Run, type appwiz.cpl in the text field, and hit Enter.
Select Google Chrome from the list of installed programs, and click Uninstall.
Follow the on-screen instructions to complete the uninstall process, and then restart the computer.
Now, head to the official website and click on Download Chrome to get the setup.
Run the setup and get done with the installation.
Another solution that worked for users was to reinstall the browser when websites are opening automatically in Chrome. This will fix any misconfigured settings as well as get rid of conflicting extensions in Chrome. Make sure to create a new user profile after the reinstall.
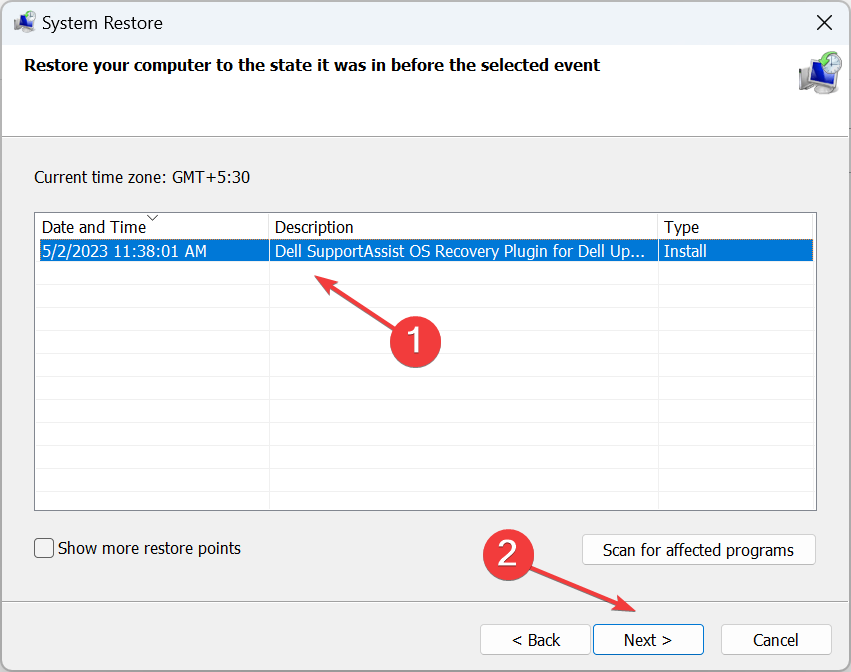
7. Perform a system restore
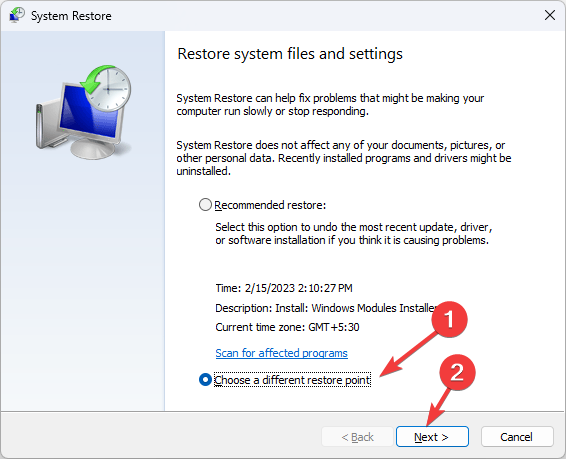
Press Windows + S to open Search, type Create a restore point, and click on the relevant search result.
Click on the System Restore button.
Select Choose a different point and click Next to proceed.
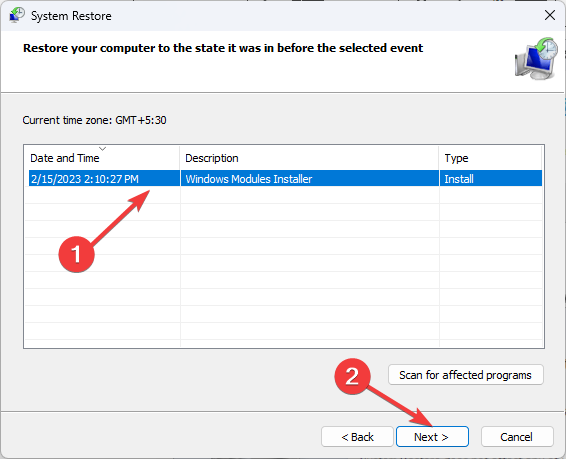
Pick a restore point from the list and click Next.
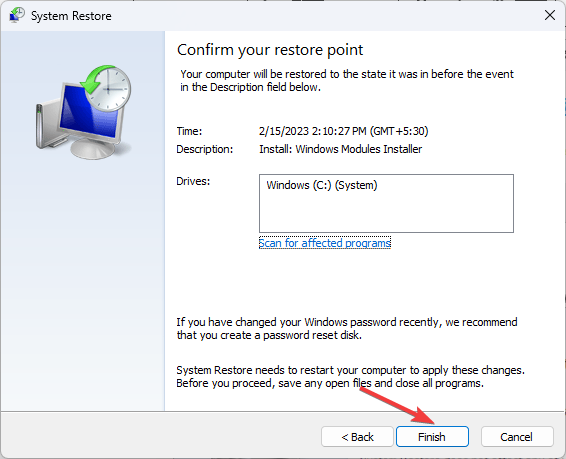
Verify the restore details and click Finish to start the process.
Wait for it to complete.
In many cases, users can’t figure out the changes that triggered things and led to websites opening automatically in Chrome. So, an ideal solution would be to perform a system restore. Just make sure to pick a point created before the problem first appeared.
Many of our readers have reported Error 0x80070569 that occurs when they try to start the virtual machine in Hyper-V Manager. The error can occur for many reasons, and it can be difficult to deal with. However, this guide is dedicated to providing solutions to resolve the error.
Also, you may be interested in our article about Hyper-V Error 0x8009030e and some steps to fix it on your PC.
What is the 0x80070569 error?
The error code 0x80070569 can appear with two varying error messages;
(‘VM_NAME’ failed to start worker process: Logon Failure: The user has not been granted the requested logon type at this computer.)
Failed to create Planned Virtual Machine at migration destination: Logon failure: the user has not been granted the requested logon type at this computer.
The error occurs when the virtual machines can’t start or when you can’t do a live migration for a Hyper-V virtual machine in Windows Server.
What causes the error code 0x80070569?
Some factors that can cause the error are:
Permission errors in the GPO policy – The error can appear when there is a configuration issue relating to the permissions of the GPO policy. Also, it can be that the NT Virtual Machine\Virtual Machines special identity doesn’t have the Log on as a service right on the Hyper-V host computer.
Connection issues between Hyper-V computer and the domain – You can also encounter the error code 0x80070569 if the Hyper-V computer is lost or can’t establish a connection to the domain. Issues such as a credentials mismatch can cause logon errors.
Fortunately, you can follow some basic steps to resolve the issue. As we go further into this article, we’ll discuss them.
How can I fix the error code 0x80070569?
Before trying the advanced steps, follow the preliminary checks below:
Go to the Server Manager console and install the Group Policy Management feature.
Follow the on-screen instructions to complete the installation.
Open the GPMC MMC snap-in and navigate to the policy that manages User Rights.
Right-click on the policy and select Edit from the drop-down menu, then include the following in the entries for Log on as a service: NT Virtual Machine\Virtual Machines
Exit the Policy editor.
Left-click the Start button, type Command Prompt, and select the Run as administrator option.
Click Yes on the User Account Control prompt.
Copy and paste the following in the command bar and press Enter to run it: gpupdate /force
Running the above command will refresh the policy and remove the user permissions that the policy has added. Hence, the user rights defined in the local security policy will take effect and resolve the permissions issue.
Screen timeout setting is one many users, and even administrators work with for various reasons. It helps conserve battery life though some prefer the display to be on even after minutes of inactivity. And this poses a problem when Windows 11 screen timeout is not working.
While it’s easy to change screen timeout in Windows 11, there isn’t much users can do without additional support when the feature is not working. And that’s what we are for! So, let’s learn about the problem and the solutions that work.
Why my screen timeout is not working?
Here are a few reasons screen timeout is not working in Windows:
Corrupt or outdated graphics driver: In most cases, it was an issue with the graphics driver that triggered the error. Usually, running a corrupt or outdated driver is the reason.
Misconfigured settings: Several settings affect how the timeout feature works, and if these are misconfigured, you are likely to face issues.
Issues with the recent Windows update: For some users, the problem started after updating to a new version of the OS, which points to a bug in it.
What can I do if Windows 11 screen timeout is not working?
Before we proceed, try these quick solutions first:
Install any pending OS updates if Windows 11 lock screen timeout is not working.
Disconnect all non-critical external peripherals from the computer since these could be preventing the display from turning off.
If none work, move to the fixes listed next.
1. Change the screensaver settings
Press Windows + S to open Search, type Change screen saver in the text field, and click on the relevant search result.
Select the desired screensaver from the dropdown menu, enter a wait time, and tick the checkbox for On resume, display logon screen.
Once done, click on OK to save the changes.
A quick solution that works for many when Windows 11 screen timeout is not working is to reconfigure the Screen Saver Settings. This will allow you to configure the screen timeout settings in Windows 11.
2. Update the graphics driver
Press Windows + R to open Run, type devmgmt.msc, and hit Enter.
Expand the Display adapters entry, right-click on the listed graphics card, and select Update driver.
Now, choose Search automatically for drivers, and Windows will install the best available one from the PC.
When facing issues with screen timeout settings, updating the graphics driver could get things up and running in no time. Updating drivers will also work when Windows 10 screen timeout is not working.
Remember, the offline update method doesn’t work in every case, so you may as well check the manufacturer’s website and manually install the latest driver.
3. Roll back graphics driver
Press Windows + X to open the Power User menu, and select Device Manager from the list.
Double-click on the Display adapters entry, right-click on the graphics adapter, and choose Properties.
Navigate to the Driver tab, and click on Roll Back Driver.
Select a reason for rolling back the version, and click on Yes to proceed.
Once done, restart the computer for the changes to come into effect.
If Windows 11 screen timeout is not working since a driver update, rolling back the driver could do the trick. It’s simple, and you can always reinstall the version if things don’t work out.
4. Perform a clean boot
Press Windows + R to open Run, type msconfig in the text field, and click hit Enter.
Go to the Services tab, tick the checkbox for Hide all Microsoft services, and then click on Disable all.
Now, navigate to the Startup tab, and click on Open Task Manager.
Select any apps that read Enabled under the Status column, and click Disable.
Once done, head back to System Configuration, and click on Apply and OK.
Click on Restart in the prompt that appears.
After the PC restarts, check if the problem is fixed. If yes, one of the processes or services you disabled earlier is the underlying cause.
Now, enable the services and startup apps one at a time unless the problematic one is identified, and then make sure to disable it.
A clean boot provides an optimal troubleshooting environment to identify the reason Windows 11 screen timeout is not working. And in most cases, things should work out once you are done. In case it’s an app, make sure you uninstall the app to prevent the error from reappearing.
Press Windows + I to open Settings, select Windows Update from the navigation pane, and click on Update history.
Scroll to the bottom and click on Uninstall updates.
Click Uninstall next to the recently installed update, after which the error first appeared.
Again, click Uninstall in the confirmation prompt.
Restart the computer once done.
If the Windows 11 screen timeout stopped working after installing a newer version, uninstalling the update should work. And by now, the problem should be fixed for good.
The 0x000000C5 BSoD error, or DRIVER_CORRUPTED_EXPOOL error, is a type of Blue Screen of Death (BSOD) that can occur when a driver tries to access a memory location that it is not authorized to access or when there is corruption in the system pool memory.
Many users have reported encountering this BSoD error when running a resource-intensive program, such as a video editor or a game. It can also occur during startup, shutdown, and while using specific applications.
Why am I getting a 0x000000C5 BSoD error?
This error occurs when a driver attempts to access an invalid memory location, which can happen for a variety of reasons, such as:
Outdated or incompatible drivers: If your computer’s drivers are outdated or incompatible with your operating system, they can cause this error.
Corrupted system files: If important system files are corrupted or missing, it can cause errors like this.
Malware or virus infections: Malware or virus infections can damage system files or drivers, leading to the BSoD error.
Hardware issues: Problems with your computer’s hardware, such as faulty RAM or a failing hard drive, can also cause the 0x000000C5 error.
How do I fix the 0x000000C5 BSoD error?
Here are some simple steps you can take to troubleshoot and resolve this error before diving into more complex solutions:
Restart your computer: Sometimes, a simple restart can fix the issue.
Uninstall the third-party antivirus or recently installed programs: You can try turning off the real-time protection of the antivirus program (such as SUPERAntiSpyware, Avira Antivirus, and Security Essentials), or uninstalling it completely if that doesn’t work.
If none of the above steps worked, you can try the solutions below one by one.
1. Repair the hard drive
Press Windows + R to open the Run dialog box, type cmd, hold the Ctrl + Shift key, and click OK to launch Command Prompt as Administrator.
Click Yes on the User Account Control (UAC) prompt window.
In the Command Prompt window, type the following command and press Enter: chkdsk /f/r
In case you are prompted to schedule the scan on the next restart, type Y and press Enter.
After that, restart your device to run the hard disk checkup.
2. Update the device drivers
Press the Windows key, type device manager, and click on Device Manager from the search result.
To update a driver, search for any outdated or faulty driver in the Device Manager window with a yellow exclamation mark beside it. Then, right-click on the driver and choose the Update driver option.
On the next window, select Search automatically for drivers.
In case a newer driver is available, the system will notify you. Simply follow the on-screen instructions to install it.
Then, restart your device and check if the problem is resolved.
If the Device Manager fails to update the driver, you may need to visit the manufacturer’s website and manually download the most recent driver.
Then, install the driver and restart the computer.
If you need a way to update all the drivers on your computer quickly, you can use a handy driver updater. It scans your computer to find old drivers and replace them with the newest versions.
Open Device Manager and locate the recently updated or problematic driver.
Right-click on the driver and select Properties.
In the driver Properties window, switch to the Driver tab, and click the Roll Back Driver button.
Select an appropriate reason and click Yes to roll back the driver.
After that, restart your computer and check if the error has been resolved.
NOTE
If you encountered the 0x000000C5 BSoD error after updating drivers, you can try rolling back the driver to the previous version. Rolling back a driver can help restore the device’s stability and functionality.
Go to the CoreTemp website on your browser and download the latest version of the Core Temp tool.
After downloading the tool, run the installer, click Yes at the User Account Control dialog and follow the on-screen to complete the installation.
While installing, uncheck the Build your Kingdom With Goodgame Empire option and click Next on the Select Additional Tasks screen to prevent bloatware installation.
Once the tool is installed, launch the Core Temp tool.
Now, take a look at the Temperature Readings for the CPU temperature.
Next, close all unnecessary programs, background processes, and non-critical services that might consume CPU resources.
If the computer crashes while running a particular application or game, try rerunning them and check the temperature readings.
If your CPU frequencies are overclocked or the temperature is too high, try to bring them back to the standard temperature and see if the 0x000000C5 error persists.
NOTE
Overheating has been reported as one of the most common causes that could lead to the stop code 0x000000C5. If you’ve overclocked your CPU and pushed it too far, it may result in overheating, which can cause this error.
Laptops, notebooks, and ultrabooks have higher temperature readings than desktop computers. Therefore, it’s crucial to research the standard temperature for your CPU model online to know what temperature range to expect.
A typical temperature range for idle PCs is between 30 and 40 Celsius. If you’re performing a resource-demanding activity like gaming, the ideal temperature range should be between 65 and 80 degrees Celsius to prevent overheating issues.
You could also apply or reapply thermal paste (if it has dried up), clean your CPU cooler, or even install extra cooling options to prevent your system from overheating.
5. Perform a Clean Boot
Open the Run command box by pressing Windows + R, type msconfig and press Enter.
Go to the Services tab, check the Hide all Microsoft services box, and click Disable all.
Then, click Apply to save the changes.
Next, switch to the Startup tab and click on Open Task Manager.
Now, check the Start-up impact section and disable the apps of high impact. Select the app and click the Disable button.
After that, restart your computer. When the computer restarts, it will only run the necessary services.
If the 0X000000C5 error no longer appears during clean booting, it means that the third-party program or service is the cause of the problem.
If this is the case, open the System Configuration console again, re-enable a few of the disabled services at a time, and then reboot the computer to see if the BSoD appears. Repeat the process until every previously disabled service is enabled.
After identifying the exact culprit, you can permanently disable the service or remove the associated app from your system.
6. Disable Overclocking
To check if your CPU is overclocked, download and install CPU-Z Software.
Then, launch the CPU-Z application and check Core Speed and Multiplier under the CPU tab. Alternatively, you can access the BIOS/UEFI settings and look for Core Ratio, Voltage, and FSB Frequency values.
If the Core Speed and Multiplier values exceed their original ones, your CPU is overclocked.
If your computer is overclocked, enter the BIOS / UEFI settings by pressing the appropriate key (usually F2 or Delete).
Once in the BIOS / UEFI settings, locate the Overclocking option, OC, or options related to frequency and voltage settings for your CPU, GPU, and RAM.
Then, disable overclocking or reset the frequency and voltage settings to their default values.
Restart your PC and check if the 0x000000C5 error stops happening.
Depending on your specific machine and motherboard, overclocking settings may be located in different sections of the BIOS / UEFI settings.
7. Manually install KB4012598 Windows update
Go to the Microsoft Update catalog and find the update patch compatible with your operating system.
Click the Download button next to the update you want to download.
On the pop-up window, click the hyperlink to download the update.
After the .msu file is downloaded, double-click on the file and follow the on-screen instructions to install the KB4012598 patch.
Once the patch is installed, restart your device and check if the 0x000000C5 BSoD error has disappeared.
NOTE
If you are experiencing the 0X000000C5 BSoD error on Windows 8 or lower version or Windows Server, it may be caused by a software malfunction. Microsoft has already released a patch update (KB4012598) to address this problem.
If the previous solutions don’t work, you can return to a previous point when your computer works fine using System Restore or completely start fresh by reinstalling Windows with the Windows reset feature.
If you happen to fix this BSoD error another way, please let us know in the comment section below. And don’t forget to take a closer look at our article on how to solve error code 0xc0000420, since more tips are included there.
The usb80236.sys Blue Screen of Death (BSOD) error typically arises due to various reasons, such as damaged system files and outdated or corrupted USB drivers, among others.
The error typically occurs when the operating system has reached a critical condition and cannot recover from the problem, resulting in a system crash and the blue screen of death (BSOD) with the usb80236.sys error message.
If you are experiencing the usb80236.sys Blue Screen of Error, this guide offers some effective solutions to help you eliminate the issue.
What is the usb80236.sys error?
The usb80236.sys error is a type of Blue Screen of Death (BSOD) error related to the USB device driver in Windows. This error can occur due to various reasons, such as:
Outdated or corrupted device driver: The USB network adapter driver may become outdated or corrupted, causing the system to crash and display the error.
Hardware malfunction: The hardware component of the USB network adapter, such as the USB port or the adapter itself, could be damaged or malfunctioning, leading to the error.
Conflicting programs: Sometimes, other programs or drivers may conflict with the USB network adapter driver, causing the error.
Malware or virus infection: Malware or virus infections can corrupt system files, including the USB network adapter driver, leading to the error.
How do I fix the usb80236.sys BSoD error?
1. Reinstall the USB driver
Press Windows + R to open the Run box, type devmgmt.msc and hit Enter.
Scroll down to the bottom of the list and click on Universal Serial Bus Controller to expand.
Right-click on the USB Root Hub (USB 3.0) device and select the Uninstall device option.
Then, Uninstall to confirm.
If you have more than one USB Root Hub device driver, uninstall all of them.
After that, reboot your computer.
After the restart, the driver will be automatically re-installed, but the usb80236.sys Blue Screen error should no longer occur.
2. Run System File Checker
Click on the Start button, then type Command Prompt and select Run as administrator from the options.
When the User Account Control prompt appears, click Yes.
Next, type the below command and press Enter: sfc /scannow
This will initiate a scan that can repair any corrupt or missing system files that may be causing errors.
3. Run the DISM scan
Press Windows + R to open the Run dialog, type cmd, hold the Ctrl + Shift key, and click OK to run Command Prompt as Administrator.
Then, type the following command lines, and press Enter after each: DISM /Online /Cleanup-Image /CheckHealthDISM /Online /Cleanup-Image /ScanHealthDISM /Online /Cleanup-Image /RestoreHealth
The DISM scan may take some time to complete, and you should not interrupt the process.
After completing the restoration process, restart your device and check if the usb80236.sys BSoD error still occurs.
Go to the Windows Update tab and click on the Check for Updates button.
Let the computer check for updates and install them.
Once the updates are installed, restart your computer.
5. Perform System Restore
Press Windows + R to open Run, type rstrui.exe, and press Enter.
In the System Restore control panel, select Choose a different restore point option if prompted and, click Next to continue.
Select a restore point from the list of available dates and click Next.
Finally, click Finish to start the restoration process.
Wait for the restoration process to complete, and then restart the computer to see if the usb80236.sys error has been resolved.
If the previously mentioned solutions did not work in resolving the usb80236.sys Blue Screen of Death (BSoD) error on your computer, you may want to consider resetting your PC. You can also run hardware diagnostics to identify and solve hardware-related problems.
By following the solutions provided in this guide, you should be able to eliminate the usb80236.sys BSOD error and ensure your Windows operating system is functioning correctly.
If you have any additional questions or suggestions, please leave them in the comments section.
Are you trying to switch to Spotify? You may have encountered the Spotify installation error code 53. Since a few of our readers have complained, this article will address the error and provide the best solutions.
People have encountered the error when installing from the official site, and the full error message reads: The installer encountered an unknown error. (Error code: 53).
What is error code 53 on Spotify install?
If you encounter error code 53 while installing Spotify, it may signify a conflict with an earlier installation or a file permission problem on your computer. Any of the below may trigger the error:
Conflicting installations – One of the leading causes of issues with Spotify is when another software that uses the same files is installed, causing conflicts.
Privilege issues – Some users may try an installation without the proper admin access, thus triggering the error.
Storage issues – For all installations, there must be adequate space. If the storage is less than required, users may get the error.
It would be best to try the fixes below to resolve the error.
How do I fix Spotify installation error code 53?
Before proceeding to the leading solutions, you should try the following:
Uninstall the app – Perform an Uninstallation of any existing or duplicate application instances on your computer.
Restart the computer – While a restart is general, it is often strong enough to clear out minor glitches that may cause the error.
You may now proceed to more detailed solutions below if the problem persists.
1. Extend the installation drive
Right-click on the Start menu and select Disk Management.
Right-click on your installation drive and select Extend volume.
Click the Next button.
In the Select the amount of space in MB dropdown, input how much extension you want, then click Next. You must note the maximum because you cannot go beyond that figure.
Lastly, click on Finish.
Once the extension is complete, you may try downloading and reinstalling Spotify again to verify that the error is fixed.
2. Move the AppData directory to Program Files
Press Windows + R to open the Run dialog.
Type cmd and hit Ctrl + Shift + Enter.
If you have a 32-bit OS, type in the command below and hit Enter. cmd /k move "%AppData%\Spotify" "%ProgramFiles%"
If you have a 64-bit OS, type in the command below and hit Enter. cmd /k move "%AppData%\Spotify" "%ProgramFiles(x86)%"
Lastly, if no errors are displayed in the Command Prompt, close the terminal and verify if the Spotify installation error code 53 is fixed.
Click the Start menu, type advanced startup, and select the Change advanced startup options menu.
Click on the Restart now button of the Advanced startup menu.
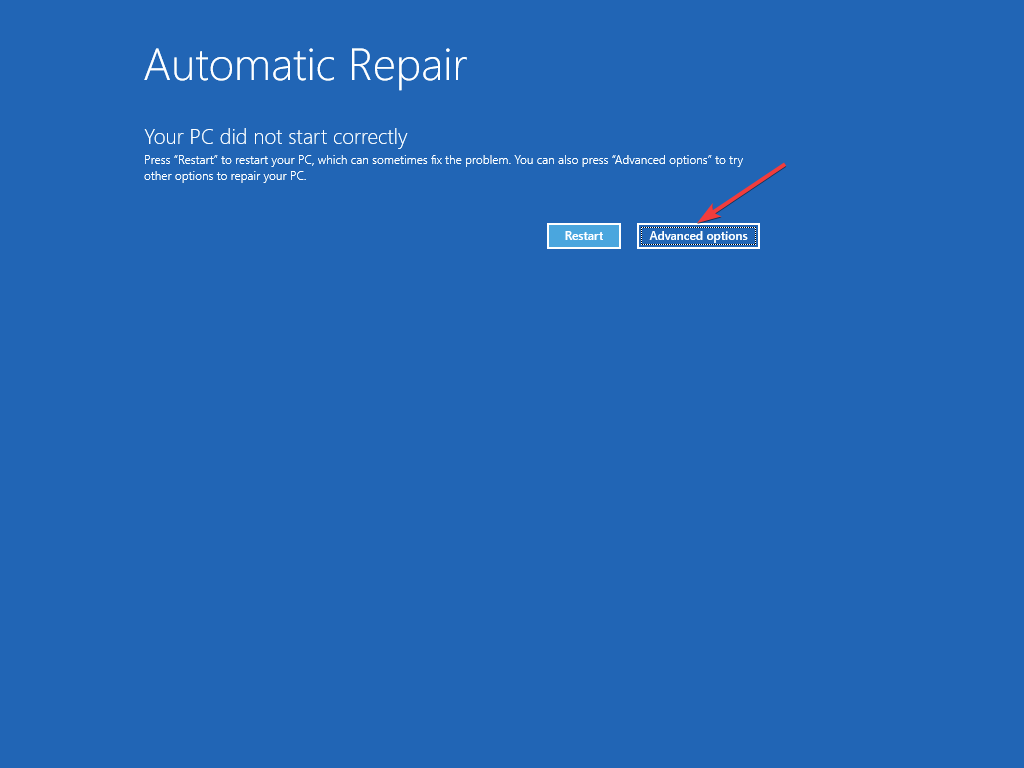
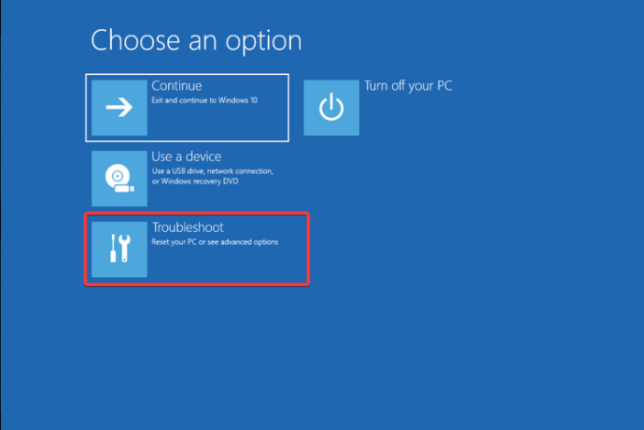
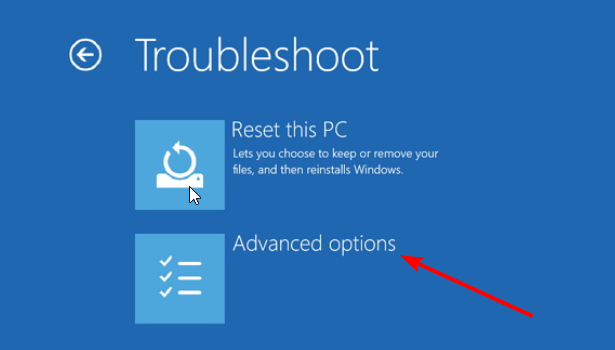
Navigate Troubleshoot, then Advanced options.
Select Startup Settings, then click the Restart button.
Press F5 or 5 to boot Windows in Safe Mode with Networking.
Now download Spotify from the official website and reinstall it. The Spotify installation error code 53 should have disappeared.
That will be it for this article. Remember that the initial workarounds are very important because they may save you the extra time of further troubleshooting. However, starting with any solution that seems the most applicable would be best.
If you have struggles booting into Safe Mode, this comprehensive guide on how to boot to Safe Mode may be useful.
Please let us know in the comments section below if these fixes have been effective for you.
The Windows Update error 0x80070008 occurs when the OS fails to update and it’s usually accompanied by the message: ERROR_NOT_ENOUGH_MEMORY, The system is out of memory. Let’s see why is this happening and how to fix the Windows Update error 0x80070008.
Why do I get the 0x80070008 error when updating Windows?
There are many reasons why the 0x80070008 error occurs but we will mention the most important:
Not enough memory – As the message suggests, there is not enough memory to install the update.
Connection problems – If you have a poor internet connection, the update is not downloaded properly and you get the 0x80070008 error code.
Insufficient disk space – You might run out of space on the system drive, so the update can’t be downloaded properly.
First, verify which is the failed update by checking the Windows Update section from Settings.
Now, visit the Microsoft Update Catalog website and look for that particular update or search for Windows 11 and see if you can find it on the list.
Then, hit the Download button to its right and double-click on it when it finishes downloading.
4. Disable the firewall temporarily
Click the Search button from the taskbar, type windows security, and click on the app from the results.
Now, choose Firewall & network protection.
Select the active firewall.
Finally, toggle Off the firewall protection.
Try to update Windows now.
Antiviruses may block the Windows Update download, so it’s recommended to turn off the firewall temporarily.
Also, if you’re using a third-party antivirus, you should use its settings to turn off its protection. If that was the problem, you should consider upgrading to a better antivirus that won’t interfere with your system and apps.
5. Run an SFC scan
Click the Search icon, type cmd, and select Run as administrator from the results.
Type or paste the following command and press Enter to run it: sfc /scannow
Wait for the scan to finish, then restart your PC and try updating Windows.
These are the best solutions to fix the Windows Update error 0x80070008 on Windows. You should also know that all the solutions above can be applied on Windows 11 and 10.
Runtime errors occur when running or executing a program that hangs or crashes, displaying an error message. The Could not call proc part means the app or script can’t execute a function or procedure. This often occurs due to a missing library or dependency.
Why do I get the Runtime error: Could not call proc?
There are many causes of the Runtime error: Could not call proc, but we will highlight the most probable:
The PC doesn’t meet the system requirements – If you’re trying to install software or a game without meeting the minimum system requirements, this error may occur.
Memory leaks – Due to memory leaks, although you have the right amount of RAM or GPU memory, the app is detecting less.
Corrupted installer – If the installer download didn’t finish properly, you might have a corrupted software kit, and installing it will return this error instead.
Virus or malware infection – Viruses and malware are known to mess with the system and files and if some of the installation files are corrupted, you will get this runtime error.
Now that we know the possible causes for the Runtime error: Could not call proc, let’s try to fix it.
How do I fix the Runtime error: Could not call proc?
Before getting into more complicated solutions, let’s check a few trusted methods for quicker recovery:
Check if your device meets the app system requirements.
Try to download the app installer again and ensure you have all the files for it.
Close all the programs and processes you don’t need before running the installer.
If these preliminary measures didn’t fix the problem, apply the solutions below.
1. Change the Temp folder location
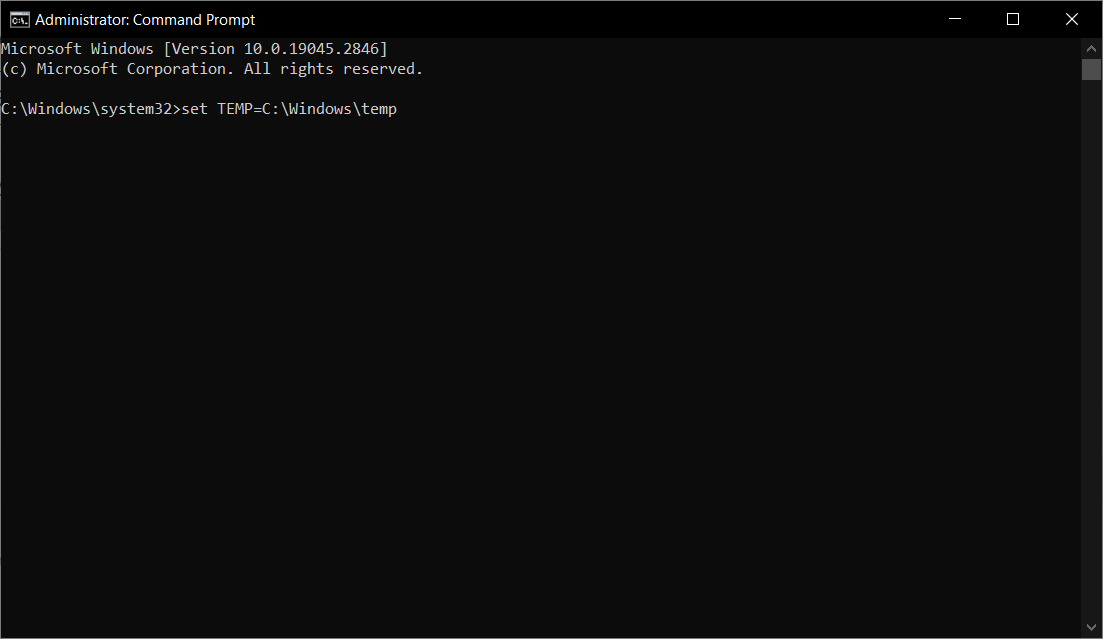
Click the Start button, type cmd, and select Run as administrator from the results.
Type or paste the following commands one by one, pressing Enter after each: set TEMP=C:\Windows\temp set TMP=C:\Windows\tmp
Now, try to relaunch the installer and see if the error persists.
As weird as it seems, if the Temp folder doesn’t have the right location, it can cause runtime errors while installing an application. Setting things right will solve the issue like magic.
2. Run SFC and DISM scans
Click the Windows button, type cmd, and select Run as administrator from the results.
Type or paste the following command and press Enter to run it: sfc /scannow
Wait for the scan to finish, then paste the following command to execute the DISM scan and press Enter: DISM /Online /Cleanup-Image /RestoreHealth
Wait for the scan to finish, then restart your PC and check if the error persists.
In case you find the steps below too technical and time-consuming, there is another method we tested for you.
It’s more likely to fix this runtime error code using a dedicated PC repair tool, as it can diagnose the system and replace corrupted system files immediately.
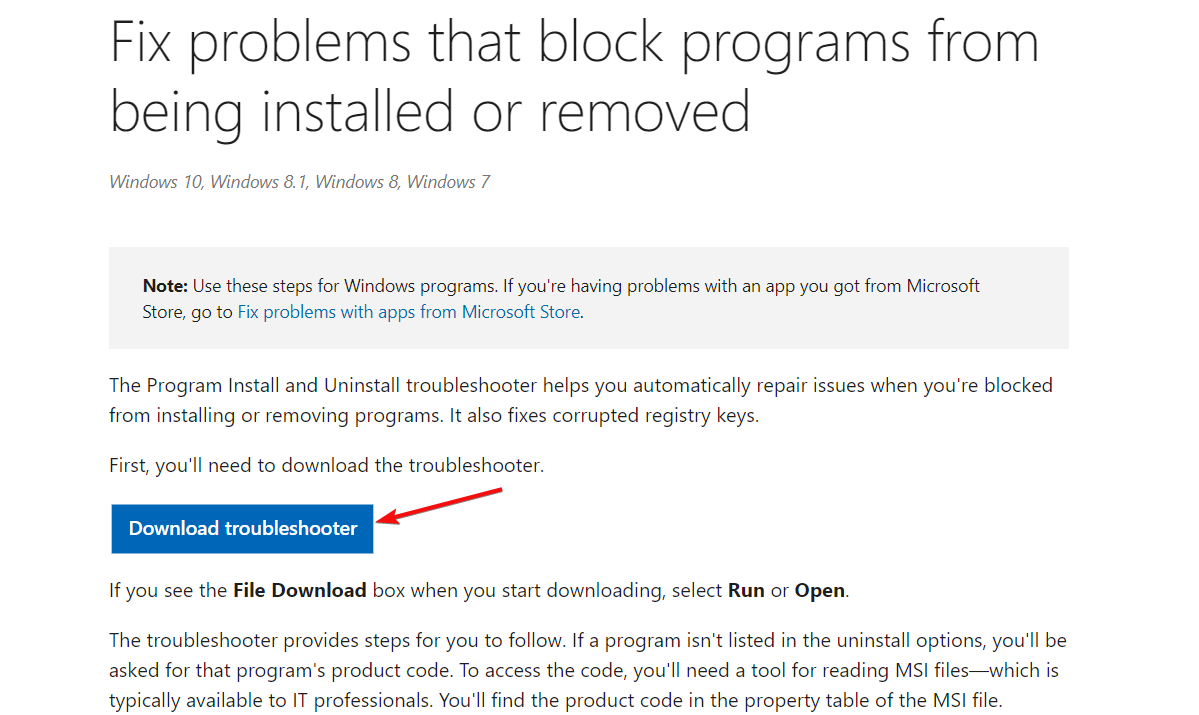
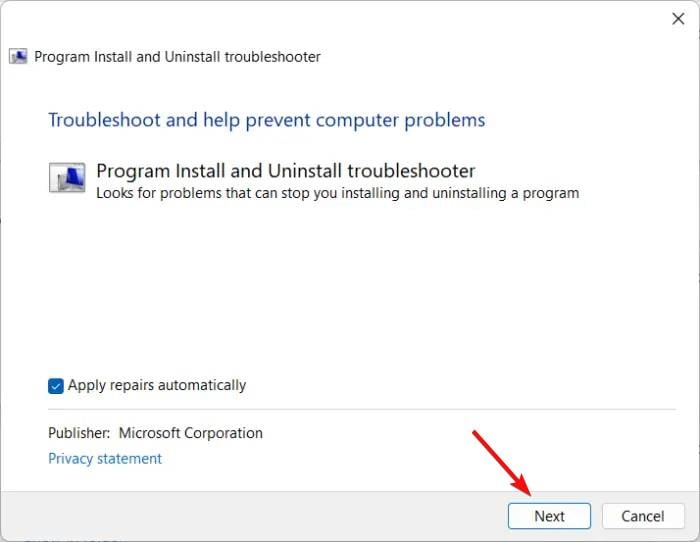
3. Use the Program Install and Uninstall troubleshooter
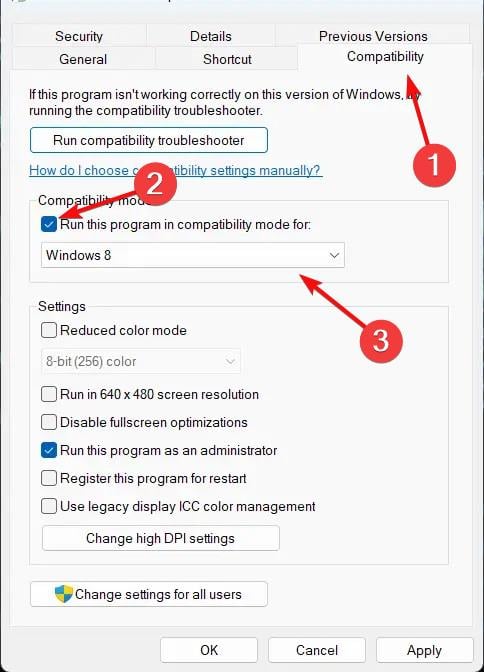
Right-click on the apps shortcut file on your PC and select Properties.
Go to the Compatibility tab.
Check the option Run this program in compatibility modefor and select Windows 8 from the drop-down below.
Now check the option Run this program as an administrator.
Click on OK to save changes.
Maybe the app you’re trying to run is not compatible with Windows 11 or even with the older Windows 10, and this solution will fix that problem.
All the solutions we highlighted above can also be applied to Windows 10 without any problems.
We also recommend exploring our runtime errors guides for more information regarding this problem. To understand these errors better, read our complete guide on what are runtime errors.
If you have any questions or suggestions, we wait for your feedback in the comments section below.
A few readers have asked us how to disable search suggestions in Chrome. This browser feature is very helpful since you only need to type a few letters, and the browser gives options for what searches you may make.
However, if you must let go of the setting, in this article, we explore your best options for disabling it.
Why should I disable Chrome search suggestions?
This feature works similarly to Google auto-complete. From interactions with users, any of the following may be valid reasons to get rid of the settings:
Autocomplete errors – To prevent autocomplete errors while searching, it can be helpful to turn off search suggestions.
Distraction prevention – If you find search suggestions distracting while focusing on a specific search term, disabling them can be helpful.
Privacy – If you share your computer or prefer to keep your searches private, disabling search suggestions can help protect your privacy.
Now that we have established valid reasons to disable Chrome search suggestions let us show you how.
How do I disable Chrome search suggestions?
1. Disable Chrome search suggestions on Windows 11
Launch the browser.
Click the ellipses or three dots at the top, far right of the browser, and select Settings.
Select Sync and Google services.
Please scroll down until you locate Autocomplete searches and URLs or Improve search suggestions (depending on your Chrome version), then switch off the option by toggling to the right.
2. Disable Chrome search suggestions on Android
Launch the Chrome browser.
Tap the ellipses or three dots at the top, far right of the browser, and select Settings.
Click on the Google services option.
Locate Autocomplete searches and URLs or Improve search suggestions (depending on your Chrome version), then switch off the option by toggling to the right.
Now when you type in Chrome you would no longer get suggestions pooping out.
Locate Autocomplete searches and URLs or Improve search suggestions (depending on your Chrome version), then switch off the option by toggling to the right.
There you go. On all devices mentioned above, the steps are very similar. They are also straightforward, and in very few steps, you should have disabled the service.
There are many other Chrome features you may need to try. Download and install Chrome to try out its many features.
Lastly, please let us know if you have been successful in disabling the service on your device.
Oculus is a popular software for VR gaming, though it also finds application in other tasks. While Meta has maintained the software, some problems are bound to appear. And one that commonly affects users is the Oculus Runtime Service error.
For those wondering what is Oculus runtime, it’s the background process triggered by the software and is responsible for managing all the activity and ensuring that everything is in order.
The error message reads, Can’t Reach Oculus Runtime Service. Your Oculus software may be updating. Please wait a minute and try again. If the issue continues, contact Oculus support. While the message doesn’t point you in the right direction, we will. Keep reading to find out all about the error!
Why am I unable to access Oculus services?
Here are a few reasons you are facing issues:
Running an outdated version of the software: For most users, it was an outdated or corrupt version of the software that triggered the Oculus Runtime Service error.
Services are disabled: When the critical services are disabled or are misconfigured, you are likely to get Can’t reach Oculus service with Quest 2.
Third-party apps conflicting with the process: An antivirus, firewall, or similar programs are often why users get an Oculus error code.
Once done with the download, click on Next to proceed.
Relaunch the software and install any pending updates.
The developers have acknowledged the Oculus Runtime Service error, and a patch for it was released. So, your primary approach when seeing the Can’t reach Oculus service message in Windows 10 should be to install the patch.
2. Run Oculus in compatibility mode
Press Windows + E to open File Explorer, paste the following path in the address bar, and then hit Enter:C:\Program Files\Oculus\Support\oculus-client
Right-click on the OculusClient.exe file and select Properties.
Navigate to the Compatibility tab.
Tick the checkbox for Run this program in compatibility mode for, select Windows 8 from the dropdown menu, and click OK to save the changes.
Once done, check whether the error disappears.
3. Modify the service configurations
Press Windows + R to open Run, type services.msc in the text field, and hit Enter.
Locate the Oculus VR RuntimeService, right-click on it, and choose Properties.
If the service is already running, click the Stop button.
Now, click Start to run it again, and click OK to save the changes.
Go back to Services, and double-click on Quality Windows Audio Video Experience to open its properties.
Now, select Manual from the Startup type dropdown menu, and click OK.
For many users, reconfiguring the Oculus VR Runtime and Quality Windows Audio Video Experience services did the trick when encountering the Oculus Runtime Service error.
4. Disable controlled folder access
Press Windows + S to open Search, type Windows Security, and click on the relevant search result.
Select Virus & threat protection from the options here.
Click on Manage ransomware protection.
Now, disable the toggle for Controlled folder access.
Click Yes in the UAC prompt to confirm.
Controlled Folder Access prevents applications from accessing or modifying certain protected files on the computer. Though helpful, it has been found to trigger the Oculus Runtime Service error, and disabling it did the trick.
In case this works, you can always allow Oculus through Controlled Colder Access instead of disabling the feature altogether.
5. Add Oculus as an exception in the antivirus
Launch Windows Security, the built-in antivirus, and choose Virus & threat protection.
Click on Manage settings under Virus & threat protection settings.
Click on Add or remove exclusions under Exclusions.
Now, click on Add an exclusion and select Folder from the menu.
Navigate the following path, choose Oculus, and click on Select Folder:C:\Program Files\Oculus\
Once done, restart the computer for the changes to come into effect and relaunch Oculus.
While this solution has worked for most, it also led to serious issues running Oculus on some computers, and users had to reinstall the app. So, proceed at your own risk.
Press Windows + E to open File Explorer, and navigate the following path:C:\Program Files\Oculus\Support\oculus-runtime\server-plugins
Now, select the RemoteHeadset.dll file and hit Delete to clear it.
Once done, restart the computer.
Corrupt or missing DLL files are often the reason users encounter errors in applications, including the Oculus Runtime Service error.
7. Reinstall the software
Press Windows + R to open Run, type appwiz.cpl, and hit Enter.
Select Oculus from the list of installed programs, and click Uninstall.
Follow the on-screen instructions to complete the process, delete its files and folders in all relevant directories, and restart the computer.
Now, go to the official website and download the Oculus installer.
Run the setup and wait for the installation to complete.
When nothing else works, you can always reinstall the software as a last resort in case of the Oculus Runtime Service error. If the problem remains unresolved, give it another go, but this time, use an effective uninstaller software to clear any leftover files and registry entries before reinstallation.
Windows had an interesting history over the years, and while it dominated the market in the 90s and early 2000s, that has changed in recent years.
Windows 11 market share is on the rise, but how did the market share look over the past years?
In today’s guide, we will take a closer look at Windows market share history over the last decades, so join us for an in-depth analysis.
Will Windows ever become obsolete?
No, Windows as a platform won’t become obsolete anytime soon. Certain versions of Windows will become obsolete, which is perfectly normal.
Until there isn’t a proper Windows replacement, Windows will remain a viable platform.
How did Windows’ market share history look over the years?
2009 – Slow rise of Windows 7
During the end of the 2000s, Windows XP was still the dominant Windows version, but it fell from 78.45% to 69.14% in 2009. In case you’re not familiar with it, we have a great guide on Windows XP features, so you can learn what made it so special.
This is somewhat expected since Windows 7 was released in late 2009, and it got 6.59% by the end of the year.
As for Windows Vista, it achieved its peak in October, but it was on the decline following the release of Windows 7. In 2009, it went from 19.93% to 23.38%, but its market share slowly declined.
2010 – Windows 7 overtakes Vista
2010 was a great year for Windows 7, and it went from 8.93% to 27.98% during that year alone. It overtook Vista in August that year and become the second most popular Windows version.
Speaking of Windows 7, we have a great guide on how to upgrade Windows 32-bit to 64-bit in order to better utilize your hardware.
Regarding Vista, its market share dropped from 22.53% to 16.76% that year. Windows XP was still dominating the market, but it was declining. Regarding the market share, it went from 67.69% to 54.74% in a single year.
2011 – Windows 7 takes the number-one spot
In 2011, Windows 7 finally took over Windows XP as the most used Windows operating system in October 2011.
In just a year, Windows 7 went from 30.08% to 47.23%. Windows XP was declining, and its market share dropped from 53.01% to 40.35%.
As for Vista, it was on a slow decline and it went from 16.41% to 12.05% during that year.
2012 – Windows 8 is released
During this year, Windows 7 was still on the rise, going from 49.17% to 60.89% in a single year. Windows XP was on the decline, and it dropped from 38.8% to 29.12% in 2012.
Vista was on its way out, and its market share dropped from 11.66% to 7.73%. Windows 8 was released in late 2012, and over a couple of months, it got just 2.02% of the market share. To learn more about it, we suggest reading our Windows 7 vs Windows 8 guide to learn all its features.
2013 – Microsoft releases Windows 8.1 update
Windows 7 still dominated the Windows market, and during 2013 it kept the same market share. It went from 61.16% to 61.19%.
Windows XP was declining, and its market share dropped from 28.05% to 22.1%. Vista was also on the decline, going from 7.61% to 4.8%.
As for the newcomer, Windows 8 didn’t achieve any major success, and it was greeted by harsh criticism from the users. During 2013, its market share went up from 2.92% to 9.08%.
Microsoft was determined to address Windows 8 shortcomings and released Windows 8.1 in late 2013. By the end of the year, the new version had 2.48% of the market share. To see what was new in this update, check our Windows 8.1 features guide.
2014 – Windows 8.1 to overtake XP?
During 2014, Windows 7 remained the most used operating system, and its market share increased from 61.17% to 61.31%.
Windows XP was on the decline, dropping from 21.53% to 14.88%. The newly released Windows 8.1 was on the rise, and it went from 3.62% to 14.69% that year.
Windows 8 was surpassed by Windows 8.1, and its market share went from 8.9% to 5.26% which was expected. As for Vista, its market share decreased from 4.45% to 3.54%.
2015 – Windows 10 takes the market by storm
In 2015, Windows 7 was still the dominant operating system, but its market share begin to decline with the release of Windows 10 in July 2015.
Windows 7 market share went from 61.99% to 55.89% that year. Windows 8.1 was on the rise, and it achieved its peak in July, but it started to decline shortly after.
Regarding its market share, it went from 16.19% to 14.31%. Windows XP was also on the decline, and it dropped from 13.59% to 9.95%.
As previously mentioned, Windows 10 was released the same year, and in just a couple of months, it overtook XP, and it was on its way to overtaking Windows 8.1. By the end of 2015, it had 13.98% market share.
2016 – Windows 10 set to overtake Windows 7
Windows 10 was on the steep rise, and in 2016 it went from 16.02% to 32.22% taking second place right after Windows 7.
As for Windows 7, it was on the decline, and it went from 54.78% to 47.74%. All other versions were declining, and Windows 8.1 went from 13.7% to 10%. As for XP, it went from 9.36% to 5.93%.
Although Windows XP was on its way out, many users want to keep using Windows XP, and we have a special guide that can help you with that.
For security reasons, it might be better to run Windows XP in a VM and continue using your operating system as the main one.
2017 – Windows 7 and Windows 10 clash for no.1 spot
2017 was an exciting year, and while Windows 7 was still the most used version, it was declining and losing its market share to Windows 10.
In one year, it fell from 47.46% to 41.89%. On the other hand, Windows 10 was on the rise, and it rose from 32.84% to 41.69 in 2017.
All other operating systems were on the decline, and Windows 8.1 went from 9.65% to 9.16%. As for Windows XP, it fell from 5.72% to 3.6%. Other versions of Windows had less than 3%.
2018 – Windows 10 dominates the market share
In 2018, Windows 10 finally overtook Windows 7, rising from 42.78% to 52.36%. Windows 7 was on the decline and its market share changed from 41.86% to 35.63%.
Windows 8.1 continued its decline from 8.72% to 6.95%. As for other versions of Windows, each had less than 3%.
2019 – The same trends continue
2019 was the year of Windows 10, and its market share went up from 53.18% to 65.4%. Windows 7 was on the decline and went from 35.05% to 26.79%.
As for Windows 8.1, it dropped from 6.67% to 4.87% that year. Other versions had negligible presence.
2020 – Windows 10 controls 75% of the market
Just like the previous year, Windows 10 continued to rise, and its market share went up from 67.35% to 75.68%.
Windows 7 was losing market share, and it went from 24.9% to 18.03%. As for Windows 8.1, it had 4.82%, but by the end of the year, it reached 3.95%.
2021 – Another great year for Windows 10
Windows 10 reigned supreme this year as well, and its market share went from 77.47% to 82.49%, a record for a Windows version.
Windows 7 was on the decline, and it dropped from 16.81% to 12.91%. Windows 8.1 was on the decline, going from 3.78% to 3.12%.
If you still want to continue using older versions, perhaps our guide on how to migrate Windows 7 to VM could be helpful to you.
2022 – Windows 11 on the rise
After a record-high market share, Windows 10 popularity begin to drop, and it went from 81.15% to 67.95%.
Windows 11 was recently released, and many Windows 10 users switched to it. This resulted in a steep rise from 2.6% to 16.97% by the end of the year. To learn more about it, we suggest reading our Windows 11 review for more information.
As for Windows 7, it was still on the decline and it went from 11.92% to 11.2%.
2023 – The same trend continues
In 2023, Windows 10 had a small increase in users, but it dropped again. It went from 68.86% to 71.36% and we expect to see its market share drop in the upcoming months.
On the other side, Windows 11 is on the rise, and it went from 18.12% to 23.11% in April. To learn if it’s time to switch to Windows 11, we suggest you read our Windows 11 vs Windows 10 guide for more information. As for Windows 7, it went from 9.55% to a record-low 3.78% in April.
In the US, it has 53.21%, while macOS has 31.45%. It’s safe to say that Windows has been on a decline for several years now, and we have to wait and see what the future holds.
To learn about the differences between the two, be sure to read our Windows 11 vs macOS guide.
What is Windows’ biggest competitor?
The largest competitor for Windows is macOS, and in the US, Windows has slightly more than half of the market share while Apple has almost a third.
Looking at long-term changes, macOS has steadily risen while Windows was declining. Even if you’re using one another, you can always dual boot Windows 11 and macOS and get the best of both worlds.
Will Apple overtake Windows?
We are doubtful, especially when looking at the global market. Apple has achieved tremendous success in the US, and its market share is rising.
However, the situation is a bit different outside of the US, and most users don’t have the economic power to purchase a Mac computer, so they settle for a PC.
We hope that you found this guide informative and that you learned everything there is about Windows and its market share.
If you’re interested, you might want to check operating system market share throughout the years on different platforms.
What version of Windows do you use and why? Let us know in the comments below.
The libScePad.dll file is typically installed along with the software or game that requires it, and it is not included in the standard Windows installation. Some advanced software applications and video games use libscepad.dll to access particular API functionality provided by Windows.
If you receive the error message libScePad.dll is missing, it indicates that the DLL file is missing or damaged in the Windows folder or the program folder. This article offers a reliable advanced DLL fixer tool and several other manual methods to resolve the error.
Why am I getting the libScePad.dll error?
The libScePad.dll missing error can occur for several reasons, including:
Malware infection – Malware or virus infections can corrupt or delete files from your computer.
Accidental Deletion – Deleting the file or uninstalling a program associated with it can also cause this error.
Registry errors – Registry errors or invalid entries related to the libscepad.dll file can also be a cause.
Hard disk errors – Hard disk errors or failures can result in the file being damaged or corrupted and can cause the error to appear.
How do I fix the libScePad.dll missing error?
There are several prerequisite solutions you can attempt, including:
Update Windows:Updating Windows to the latest version can resolve the libScePad.dll missing error that may be caused by an outdated operating system.
Reinstall the program: Reinstalling a program or game that is generating an error may resolve the issue.
1. Use a DLL-fixer tool
The libScePad.dll file is a 64-bit DLL file associated with Pad for Windows (DLL), and is developed by Sony Computer Entertainment Inc. Certain applications or games may require the libScePad.dll file to function properly.
If this DLL file is missing, you may encounter various errors when attempting to launch the application or game. If you encounter such situations, it is recommended to employ a DLL repair tool. We suggest using a dedicated tool, as it can effectively repair corrupted or missing DLL files.
While it is most effective when dealing with DLLs native to Windows, it is still a great solution for fixing the libScePad.dll missing error. This is due to its capability to resolve compatibility issues that may be responsible for triggering the error.
2. Re-register the DLL file manually
Press Windows + R to open the Run command, type cmd, and press Ctrl + Shift + Enter to open the Command prompt in administrator mode.
Click on Yes to the UAC prompt.
Type the following command and press Enter:regsvr32 libscepad.dll
Restart your computer to save the changes.
3. Run a full virus scan
Press the Start button, type in Windows Security in Windows search, and select Windows Security app from the search result.
On the Windows Security app, go to the Virus & threat protection section and click on Scan options on the right-side pane.
On the Scan options page, select Full scan and click Scan now to perform a deep scan of your PC.
After the scan is over, restart your computer.
There is an alternative way for you to scan your PC for various malware and efficiently destroy it with the most effective antivirus tools.
With such software, it’s more likely to detect dangerous malware on your OS and eliminate it for good. In this way, this DLL issue will be finally solved.
4. Update the device drivers
Right-click on the Windows icon and select Device Manager from the context menu.
Look for any devices in the Device Manager with a yellow exclamation mark or a red X next to them.
Right-click on the driver and select Update driver.
Select the Search automatically for drivers option.
Follow the on-screen instructions to update the driver.
Then, restart your device and check if the libScePad.dll error message is gone.
5. Run the System Checker
Press Windows + R to open the Run command box, type cmd, hold the Ctrl + Shift key, and click OK.
Click Yes on the User Account Control (UAC) prompt window.
In the Command Prompt window, type the following command and press Enter: sfc /scannow
After the scan is complete, then restart your computer.
6. Reset Windows
Press Windows + I to open Windows Settings.
Go to System settings and select the Recovery option on the right.
On the Recovery settings page, click Reset PC under Recovery options.
On the Reset this PC dialog window, select Keep my files.
Next, select Local reinstall.
Click Next to continue.
Finally, click Reset to start the reset process.
Registry cleaners can also be used to remove invalid registry entries that might be causing the DLL error for libScePad.dll. This can help improve your computer system’s overall health and performance.
For any queries or to share a solution that worked for you, drop a comment below.
Hal.dll is called Hardware Abstraction Layer Dynamic Link Library, a system file that links a computer’s hardware and software components.
If hal.dll is missing from your computer, your computer can’t communicate with the hardware. In this guide, we will discuss some of the tested fixes to resolve the issue right after talking about the causes.
What causes the hal.dll missing error?
There could be various reasons for the error; some of the common ones are mentioned here:
Damaged or corrupted boot.ini file – The .ini file, when damaged or corrupted, could cause various issues, including the DLL file. Try repairing the file using an SFC scan.
Hard drive is physically damaged – If your hard drive is physically damaged, your machine will not work properly and cause several issues.
Deleted or moved dll file -You might see this error if your dll file is deleted or moved from the original destination.
Virus infection – Viruses on your computer could corrupt system files, causing the missing DLL error. You need to run a deep scan using an antivirus tool.
Incorrect BCD configuration -If the data in the BCD is incorrect, BOOTMGR may load Windows with the wrong system root set, which could result in hal.dll not being located.
Now that you know the causes of the issue, let us move on to the methods to fix it.
What can I do to fix the hal.dll missing error?
Before engaging in advanced troubleshooting steps, you should consider performing the following checks:
Restart your computer.
Make sure the boot order in BIOS is correct.
If these tweaks didn’t work for you, check out the steps mentioned below.
1. Use a DLL fixer
This method will only work if your computer can boot. The easiest way to recover DLL files on a Windows computer is to use a DLL fixer tool.
These tools have a huge database of DLL files and can resolve the DLL missing or not found errors in a few clicks.
One such reliable DLL fixer tool can restore the hal.dll file, thereby resolving conflicts between OS and third-party apps, fixing various system issues, and enhancing the system’s performance.
2. Perform a Startup Repair
2.1 Enter Windows Recovery Environment
Press and hold the Power button for 10 seconds to turn off your device. Now, press the Power button to turn on your device.
When the manufacturer’s logo appears, repeat the same process twice.
This time, let it restart, and on the Automatic Repair screen, select Advanced options.
Now you are in Windows Recovery Environment.
2.2 Initiate Startup Repair
On the Choose an option screen, select Troubleshoot.
Select Advanced options.
Now select Startup Repair and click Restart.
Windows will restart, and it will try to fix the bootloader issues preventing your Windows operating system from loading.
3. Restore the Hal.dll file
Enter the Window Recovery Environment using the steps mentioned in Solution 2.
Now on the Choose an option screen, select Troubleshoot.
Now choose Advanced options.
Select Command Prompt and enter your login credentials if prompted.
Type the following command to access the System32 folder in your PC and hit Enter: cd system32
Now copy and paste the following command to check the CD ROM drive and press Enter: map
Type the following command to copy the file to the System32 folder and press Enter: expand d:\i386\hal.dl_
If it asks to overwrite, type Yes and press Enter.
So, these are methods you need to follow to fix the hal.dll missing error. If these steps didn’t fix the issue for you, you need to perform a clean installation of Windows to eliminate the problem.
If you have any questions or suggestions, feel free to mention them in the comments section below.
It’s that time again. Here’s the good news: Microsoft launched another build for insiders in the Beta channel. Billed as KB5026447, the update brings a few small improvements here and there.
You may remember the Build 25324 for Canary insiders that was shipped in late March 2023 where we saw the three-column widget board for the first time, and it continued in KB5025303 in late April.
The widgets board has two columns for the majority of users, but for some insiders, it displays an additional column, allowing them to customize the board with frequently used apps or news feeds.
The bad news is, just a week later, reports have emerged that the feature has vanished for some users following another update release. Microsoft has acknowledged the sudden disappearance of the feature has left users confused and frustrated.
When you launch the widgets board for the first time, you may see momentarily placeholders of the widgets/feed cards of the old 2-column layout even if your device supports 3-columns.
But to answer the title whether the 3-column widget board has vanished for good, we’re glad to say that it’s not going for good any time soon. Microsoft is likely working closely to fix this, given how massively revamped the widget feature is in the past few weeks.
Speaking of which, just like what they did with insiders in the Canary and Dev channels, KB5026447 also brings the new Facebook widget where you can access notifications from your accounts without logging into the browser.
A few months ago, Meta also launched a widget for the Messenger app, so this improvement is nice to see.
What other fixes and improvements that are coming in KB5026447, you may ask?
What other features are coming in KB5026447?
[General]
We are trying out providing alerts under Settings > Accounts advising users to add a recovery email address or phone number to their Microsoft account to ensure they never lose access to their account.
[Start menu]
We are trying out a small change with some Windows Insiders where the “Recommended” section of the Start menu is changed to “For you”. Let us know what you think in Feedback Hub if you see this change.
Fixes
[Input]
Made another fix for the underlying crash impacting the ability to launch the touch keyboard / PIN entry on the login screen.
[Notifications]
Fixed another 2FA code pattern which wasn’t being recognized. If you see any others, please file feedback!
[Task Manager]
Did some work to help address an issue which was causing random processes to sometimes get grouped under Microsoft Edge even though they weren’t related.
Fixed an issue impacting Task Manager reliability.
The search icon should be easier to see now when using a contrast theme.
Made the navigation pane a bit narrower. As part of this change, when necessary, the text will be wrapped now.
The creation of live kernel memory dump file submenu has access keys now.
Pressing enter when keyboard focus is on one of the sections (like Memory) in the Performance page should now actually switch sections.
Resizing Task Manager from the top of the window should work now.
Have you joined the Beta channel and installed KB5026447? How’s your experience? Let us know in the comments!
If you’ve ever wanted to keep someone in the loop when sending emails but didn’t want other people to know they were receiving communication, then you’ve just discovered blind carbon copy.
The BCC field is found in most modern email clients, including Gmail, Yahoo Mail, and Outlook. So what is it, and how does it work? Stay with us as we unpack how to make it work for you.
What is meant by blind carbon copy?
Blind carbon copy (BCC) is a feature in your email client that lets you send emails to multiple recipients without letting them know they were copied.
It’s a useful feature when you want to send an email to someone who’s also receiving the message but don’t want that person to know who else received the message. In simpler terms, it’s a way to keep the recipient list hidden from everyone except you instead of creating email groups.
So what are the benefits of using the BCC feature in an email? Below are some:
It’s a great way to send sensitive information like personal or financial information while still allowing people who need access to it to see it.
You can protect other people’s privacy by keeping their email addresses anonymous when replying to a large number of people.
It’s a good way to avoid getting unwanted responses from people who aren’t interested in the content of your email.
In an email, you’ll usually find three fields; To, CC, and BCC. The email’s originator can choose to add recipients to all these fields. Everyone else in the email thread can see anybody in the To and CC fields, but they can’t see those in the BCC field.
Those in the BCC field can also see these fields but cannot access any other recipients in the BCC field. When it comes to replies, it can go either of two ways;
If anyone in the To or CC field chooses to reply, it will only be delivered to the email’s originator. However, if they choose the reply all option, the email will be delivered to all those in the To and CC field. The BCC field recipients will be left out; only the originator can add them again when replying.
If anyone in the BCC field replies, the email will only reach the originator of the email. So who sees the reply all to a BCC? If anyone in the BCC field chooses the reply all option, their identity will be revealed to all those in the To and CC fields.
The BCC field is present in most email clients, so let’s look at some of the top ones.
Click on the BCC option and add recipients accordingly.
What is the difference between CC and BCC?
CC (carbon copy) and BCC (blind carbon copy) are both email addresses that you can include when sending an email.
A CC is a copy sent to someone who is not the primary recipient of the message, but the sender would like the involvement of the CC recipient(s).
This means the secondary recipient sees the sender and the primary recipient’s name on the message. BCC is used when you want someone to receive a copy of an email without anyone else knowing they have received it.
For example, if you want to email several people privately, use the BCC field instead of CC. The difference between them is that BCC will not be visible to the email recipient in the To and CC fields.
So, can you send an email with only BCC? No. An email must have a primary recipient in the To field. Unfortunately, only the sender can view the list of the BCC recipients.
It’s probably confusing why you would hide your installed programs instead of uninstalling them. However, some people get annoyed when they can’t find their favorite apps in the Start Menu or Desktop because too many unnecessary apps are taking up space.
So how do you go about hiding installed programs on your Windows device? Here is an article that details all the different ways you can achieve this.
Why should I hide installed programs?
You’re probably wondering why anyone would download an app only to hide it. However, there are compelling reasons, such as:
Clean up your desktop – A cluttered desktop or Start Menu can slow down your PC and make finding what you’re looking for harder.
Keep them out of sight until you need them – If you use some of these apps occasionally, probably once a month, there’s no need to have them on your Start Menu or Desktop at all times. You also avoid running low on memory at all times.
Quickly access priority apps – There are apps you use on a daily basis, and you need to access them quickly without searching. Hiding rarely-used apps can create space for your priority apps.
Parental controls – If you share your PC with children, some apps may not be age-appropriate hence the need to keep them hidden for privacy and protection purposes.
How do I hide all Programs in Windows?
Before you start hiding apps, there are some preliminary steps you need to take first. Here’s what you need to do:
Also, if you want to declutter your space, you can delete the app icon from your Desktop, unpin it from the Taskbar or hide it from the Start Menu.
Otherwise, if you’re looking for more permanent ways to hide installed programs, follow the below steps.
1. Use the Group Policy Editor
Hit the Windows + R keys to open the Run command.
Type gpedit.msc in the dialog box then hit Enter to open the Group Policy Editor.
Navigate to the following location: User Configuration/Administrative Templates/Control Panel/Programs
Find the Hide “Programs and Features” page option, right-click on it, and select Edit.
A new window will open. Check the Enabled option and click Apply and OK to save the changes.
To revert the changes, simply check the Not configured box, then click Apply and OK to save the changes.
The only downside with this method is that it hides all your installed programs. As such, if you experience any issues with an app, you cannot uninstall, change or repair the program.
Anyone who tries to access one of your installed apps will be hit with the Your system administrator has disabled Programs and Features message.
2. Use the Registry Editor
Hit the Windows + R keys to open the Run command.
Type regedit in the dialog box and hit Enter to open the Registry Editor.
If a UAC prompt appears, click Yes to proceed.
Navigate to the following location depending on the location of your target app: HKEY_LOCAL_MACHINE\SOFTWARE\Microsoft\Windows\CurrentVersion\Uninstall or HKEY_LOCAL_MACHINE\SOFTWARE\Wow6432Node\Microsoft\Windows\CurrentVersion\Uninstall
Enter SystemComponent as the new value name.
Double-click on it and set the Value data as 1.
Now go back to the Control Panel and confirm that the app has been hidden.
To unhide the app, repeat steps 1 through 4 and delete the SystemComponent entry.
The app will only be hidden from the uninstall list in the Control Panel. However, you can search for it via the Search utility on the Taskbar if you need to access it.
While this is the method that can hide individual installed apps, editing the Registry is a very risky affair. Moreover, hiding many applications can be tedious, and you can easily make a mistake.
You must have created a backup or created a restore point before. Otherwise, should anything go wrong, the results could be catastrophic, and your PC could be inoperable.
3. Use third-party apps
Seeing as the built-in methods to hide apps in Windows have their limitations, you may want to consider third-party apps. These apps offer many more features and have fewer steps than the two above.
When selecting an app to do this job, ensure it is from the Microsoft Store or at least a trusted site. For instance, the Hide from Uninstall app or Apphide. This way, you can make your computer more organized and clean without importing malware from these sites.
Some users also recommended hiding the drive partition where the installed programs are located. Still, if anyone was to discover that the drive partition is hidden and restores it, the apps will also reappear.
Elsewhere, you can also hide your Taskbar icons if you’re running low on RAM or want to declutter your screen.
That’s all we had for this article. Let us know your preferred method to hide apps and why in the comment section below.
Some of our readers experienced the rtwlane02.sys BSoD error with the message PAGE_FAULT_IN_NONPAGED_AREA while playing games. It is a bit frustrating because, in some cases, you can’t even boot Windows normally. However, we have the right solutions to fix the rtwlane02.sys blue screen error.
Why do I get the rtwlane.sys BSoD in Windows 10 & 11?
Here are some of the reasons why you may experience the rtwlane02.sys BSoD on your device:
Old or damaged drivers – Usually, this problem is caused by incorrectly configured, old, or damaged Windows device drivers. Our readers have especially pointed to the Realtek wireless adapter driver.
Corrupted Registry – If you recently installed an app that is/was using the rtwlane.sys file, this error may appear. Luckily, we have a complete guide on how to fix the Windows 11 Registry.
Hard disk damage – Unfortunately, Windows disk errors may be at the core of this BSoD error. The highlighted guide will help you.
RAM corruption – The rtwlane.sys stop code may also be due to memory corruption. A RAM test would be more than recommended in this case.
Virus or malware infection – It is well known that malware and viruses can mess up the system files and rtwlane.sys may be one of the victims. Running a reputable antivirus may solve this issue.
Now that we know the possible causes of this issue, let’s apply the solutions below to fix it.
How do I fix the rtwlane.sys BSoD on Windows 11?
1. Disable the wireless adapter
Click the Start button, type cmd, and select Run as administrator from the results.
Type or paste the following command and press Enter to see which one is the wireless adapter: netsh interface show interface
Now that we know the name of the interface, paste the following command and press Enter to run it (Replace Wi-Fi with the actual name of your wireless interface: netsh interface set interface Wi-Fi disable
The rtwlane.sys file is connected to the Realtek wireless adapter; disabling it will allow you to boot your PC normally.
2. Update the wireless driver
Right-click the Start button and select Device Manager from the list.
Extend the Network adapters section, then right-click on the wireless adapter and select Update driver.
Now, click on Search automatically for drivers.
If there is an updated version of the driver, the system will install it.
There’s also the option of visiting the Realtek drivers page and looking for the correct one for your system. However, the most effective and time-saving alternative is to update the wireless driver with dedicated tools.
With such software, you can initiate a full scan on your Windows OS to detect any outdated drivers, thus updating them automatically with the latest official version.
Outbyte Driver Updater
Take the chance to update all the PC drivers with one click and avoid various system errors.
Click the Windows Start button, type cmd, and select Run as administrator to start Command Prompt with full privileges.
Next, type or paste the following command and press Enter: chkdsk / f
If there are any errors on your hard drive, the tool will help you fix them. The scan will take a few minutes, depending on the size of your drive.
If this solution solves the problem, you might also think about replacing your drive with an SSD for Windows 11.
5. Check your RAM
Click the Start button, type memory diagnostic, and click on Windows Memory Diagnostic.
Select Restart now and check for problems.
After restarting, the system will look for any problems with your RAM modules.
Unfortunately, one of the RAM modules may be causing this BSoD. If Windows Memory Diagnostic finds any problems with one of the modules, try removing and placing it again in its slot.
If you still have the same problem, you may need to replace the damaged component.
How do I fix the rtwlane.sys BSoD on Windows 10?
Fortunately, Windows 10 and 11 are not so different after all, and all the solutions we outlined above will work seamlessly on Windows 10 as well.
These are the best methods of fixing the rtwlane.sys BSoD, and we hope that now, your problem has been solved.
We also recommend reading our complete guide on the causes of BSoD and how to fix them.
Got a Windows update error? You then know the frustration of dealing with one. While most are easy to fix, some take time and effort, given the dearth of reliable information. One such is the 0x8007370 error.
It appears when you check for updates, and even though one is available, it can’t be downloaded and installed. In some cases, users encounter the 0x8007370 error with a specific update, while for others, it could be with all new versions. Let’s find out how you can get things up and running!
Why does Windows Update fail with a 0x8007370 error?
Here are a few reasons you are facing the 0x8007370 Windows update error:
Issues with the Windows update components: The Windows update components are vital to the process of checking and installing OS updates, and often problems with them can cause the error.
Critical services not running: There are several background services to support the update process, which need to be running for it to go through.
How do I fix the 0x8007370 error?
Before we move to the slightly complex fixes, try these quick tricks first:
Restart the computer.
Check for issues with the network connectivity and make sure you have a fast Internet connection.
Disable any third-party antivirus on the PC. If that does the trick, we recommend you go with a Windows-friendly antivirus.
If none work, move to the solutions listed next.
1. Repair the corrupt system files
Press Windows + S to open Search, type Command Prompt in the text field, and click on Run as administrator.
Click Yes in the UAC prompt.
Paste the following three commands individually and hit Enter after each to run the DISM tool:DISM /Online /Cleanup-Image /CheckHealthDISM /Online /Cleanup-Image /ScanHealthDISM /Online /Cleanup-Image /RestoreHealth
Once done, execute the following command to run the SFC scan:sfc /scannow
Finally, restart the computer for the changes to come into effect.
If it’s the corrupt system files to blame for the 0x8007370 error, running the DISM tool and SFC scan should do the trick. The two will identify and replace any missing or problematic ones.
In addition to this method, it’s quicker and more effective to employ specialized repair software that is developed to fix corrupted Windows files.
2. Run the critical services
Press Windows + R to open Run, type services.msc in the text field, and hit Enter.
Locate the Background Intelligent Transfer Service, right-click on it, and choose Properties.
Select Automatic from the Startup type dropdown menu, click on the Start button, and then on OK to save the changes.
Similarly, make sure the following services are running as well:
Cryptographic Services
MSI Server
Windows Update
After running the critical services and restarting the computer, verify whether the 0x8007370 Windows Update error is fixed.
3. Reset the Windows update components
Press Windows + R to open Run, type cmd, and hit Ctrl + Shift + Enter.
Click Yes in the prompt.
Run the following commands to stop the services:net stop bitsnet stop wuauservnet stop appidsvcnet stop cryptsvc
Execute the following command:Del "%ALLUSERSPROFILE%\Application Data\Microsoft\Network\Downloader*.*"
Run these two next:rmdir %systemroot%\SoftwareDistribution /S /Qrmdir %systemroot%\system32\catroot2 /S /Q
Execute these commands to reset the BITS and Windows Update services:sc.exe sdset bits D:(A;;CCLCSWRPWPDTLOCRRC;;;SY)(A;;CCDCLCSWRPWPDTLOCRSDRCWDWO;;;BA)(A;;CCLCSWLOCRRC;;;AU)(A;;CCLCSWRPWPDTLOCRRC;;;PU)sc.exe sdset wuauserv D:(A;;CCLCSWRPWPDTLOCRRC;;;SY)(A;;CCDCLCSWRPWPDTLOCRSDRCWDWO;;;BA)(A;;CCLCSWLOCRRC;;;AU)(A;;CCLCSWRPWPDTLOCRRC;;;PU)
Now, run the following command:cd /d %windir%\system32
Run these commands individually to register the critical DLLs:
9. Run these commands to reset the network configuration:netsh winsock resetnetsh winsock reset proxy
10. Execute the following commands to restart the services stopped earlier:net start bitsnet start wuauservnet start appidsvcnet start cryptsvc
Once you have reset the Windows update components, restart the computer for the changes to come into effect, and the 0x8007370 error should disappear for good.
Double-click on the ISO file, and click Open in the prompt.
Run the setup.exe file.
Click Yes in the UAC prompt.
Click on Next to proceed.
Now, click Accept to agree to Microsoft’s license terms.
Finally, verify that the setup reads Keep personal files and apps, and click Install to start the process.
An in-place upgrade usually takes a few hours but is an effective fix against 0x8007370 and many other errors. And you don’t lose any files or apps in the process. Besides, after the repair, the system performance improves significantly.
While surfing the web, especially using Chrome and some other Chromium-based browsers, a few of our readers have encountered the result_code_hung error.
You will probably get the error message Aw, Snap! Something went wrong while displaying this webpage. It may make your page unresponsive. So, let us show you how to fix it.
What is Result_code_hung in Chrome?
This is an error that stops your browser from serving your web resources. This may be limited to a specific website or cut across all sites you visit. Any of the following may trigger the error:
A bad cache – Corrupted cache data means that your computer may be stuck with old files that no longer work, which will trigger the error.
Poor internet connection – For most users, it may be a sign of bad internet, and we recommend a wired connection.
An outdated browser – You will face more browser errors if your browser is outdated, the result_code_hung issue inclusive.
Conflicting extensions – Extensions are helpful but may have compatibility issues with other extensions and the browser.
Below, we explore your best actions to resolve the error.
How can I fix the result_code_hung error?
Before going through the main fixes we recommend, you should try these simple workarounds:
Use a different browser – Since Chrome is notorious for this error, you may opt for another robust browsing option like Opera.
Reboot your device – A reboot will reset several processes and may save you the stress of further troubleshooting.
Open in Incognito – This private mode blocks out elements like extensions that may trigger the error and could be a good workaround.
If the above pre-solutions do not work, continue with the more elaborate fixes we now discuss.
1. Clear the Chrome cache
Restart the browser.
Press Ctrl + Shift + Del.
Select All time, then tick the checkboxes and hit Clear data.
2. Clear your PC cache
Press Windows + I to open the Settings app.
On the right pane, click on Storage.
Select Temporary files.
Tick the boxes from the list presented according to what you need to eliminate. Also, ensure to tick Temporary Internet Files, then select Remove files.
Click on the ellipses at the top right, select Help, then About Google Chrome.
The update will start automatically. If prompted, click Relaunch.
4. Use Secure DNS
Launch the browser.
In the Address locator, type the pattern below and hit Enter. chrome://settings/security
If not greyed out, switch on Use secure DNS.
Switch to the With radio button, choose Google (Public DNS), and enter the details below for Prime and Secondary, respectively. 8.8.8.8 8.8.4.4
Restart the browser.
5. Reset the browser
Launch your browser.
Navigate to the address below: chrome://settings/
Click Reset on the left and Restore settings to their original defaults on the right.
Click Reset settings.
6. Uninstall recently installed extensions
Launch the browser.
Click on the extension icon and select Manage extensions.
Select the Remove option for your more recently added extensions.
Restart the browser.
The solutions mentioned above have worked for several users and would be very efficient for you. Since we have not written these solutions in any particular order, you should try what seems the most suitable.
As a last resort, you may consider installing a fresh Chrome even though you may lose some valuable data.
Lastly, tell us in the comments section which solution was effective for you.
It’s that time again. Microsoft released another build for Windows 11 insiders in the Dev channel. Just like what they did by introducing Facebook widgets for insiders in Canary, Redmond officials are back with Windows 11 Build 23451, shedding more light on this hotly-wanted feature on File Explorer.
You may remember that Microsoft first introduced the details pane on File Explorer earlier this year with Build 25276 on the Dev channel. After going through a lot of revamps, it is now official that the UI gets reconstructed with a much more modernized look.
Once you enable the pane by choosing the Details pane in the View menu, you can see the file’s thumbnail, share status and button, recent activity, related files and emails, and even other relevant pieces of information.
Microsoft also says that similarly, you can use the View menu or toggle button to access the preview pane as this updated pane is designed to replace the old details pane in File Explorer.
However, even if you’re in the Dev channel, there are still chances that you may not see this as Microsoft is rolling out this experience to select Dev insiders to monitor feedback before pushing it out for everyone.
What other improvements that this build brings, you may ask? Aside from the now-official details pane on File Explorer, here’s everything else you need to know as we’ve noted from Microsoft’s release note.
H2: What other features are coming in Windows 11 Build 23451?
[Start menu]
We’re beginning to expand the roll out of notification badging for Microsoft accounts on the Start menu. A Microsoft account is what connects Windows to your Microsoft apps, backs up all of your data, helps you manage subscriptions, and where you can add extra security steps so you’re never locked out of your account. With this feature, we’re giving customers quick access to important account-related notifications. These notifications can be managed by going to Settings > Personalization > Start.
Example of a notification badge on the Start menu.
We continue to work on adding more valuable content to the Recommended section in the Start menu by re-introducing websites after trying this out with Insiders last fall. One improvement we’ve made is to recommend more useful and personal websites based on your browsing history instead of generally popular websites. Insiders can right-click on a website and choose to remove a website individually at any given time. Only some Insiders will see this experience and, if you do, please share your feedback. This feature will apply to users who have opted into sharing browsing data with Microsoft and have visited enough websites in Microsoft Edge or Google Chrome (with Continuous Import enabled). As a reminder, the settings for what is recommended on Start can be adjusted via Settings > Personalization > Start. Commercial customers can manage this experience via policy.
Recommended websites based on your browsing history on the Start menu.
[File Explorer]
For Windows Insiders who have Gallery in File Explorer (which began rolling out with Build 23435), we have updated the icon for Gallery.
Updated Gallery icon in File Explorer.
[Widgets]
We are beginning to roll out a new widget picker experience with an image that gives a visual preview of the widget before pinning, a deep linking ability that allows users to jump directly to the picker from the provider app/service as well as a link to the widgets Store collection page where users can discover more apps with widgets.
Updated widgets picker.
We are beginning to roll out animated icons for Widgets on the taskbar. The animation triggers when you hover or click on the Widgets taskbar entry-point or when a new widget announcement is displayed on your taskbar. Currently, only a few weather and finance icons are supported.
Example of animated icons for Widgets on the taskbar.
[Live captions]
Languages support has been expanded to include Danish, English (Ireland), French (Canada), Korean, Portuguese (Portugal).
[Developer]
Enabling end task by right-clicking on an app on the taskbar under Settings > Privacy & security > For developers now works in this build. The setting for this first showed up with Build 23430 but the feature was not working.
Fixes
[Taskbar & System Tray]
Fixed an explorer.exe crash impacting taskbar reliability.
Fixed an issue that was causing Quick Settings and its project options to sometimes not respond when using ALT + F4 to close them.
[Start menu]
Fixed an issue that was causing the Recommended section in Start to be blank the first time it was opened.
[File Explorer]
We fixed the following issues for Insiders previewing the Windows App SDK version of File Explorer
We fixed an underlying issue believed to be the cause of explorer.exe crashing when opening the context menu in the previous flight for some Insiders.
If you use an Arabic or Hebrew display language, the tabs should be displaying correctly now.
We fixed the following issues for Insiders with Gallery in File Explorer:
Fixed an issue where the scrollbar for Gallery was displaying on the wrong side for Insiders with an Arabic or Hebrew display language.
If you have the Item Check Boxes setting enabled, the Gallery will now show check boxes on images.
[Search]
Did some work to fix an underlying issue which could cause Search to get stuck and not open. When this happened, you might also see a delay opening the Start menu.
[Input]
Fixed an issue where the Pinyin IME’s insert text button wasn’t displaying correctly in some cases.
Fixed an underlying crash impacting the ability to launch the touch keyboard / PIN entry on the login screen.
[Notifications]
Fixed another 2FA code pattern which wasn’t being recognized. If you see any others, please file feedback!
[Live captions]
Fixed an issue where caption characters shown in the second line of the default height window were getting clipped on top.
Features have been added to the enhanced speech recognition language files to improve performance and provide out-of-language filtering meant to limit the incorrect captions for speech not in the caption language.
[Accessibility]
Fixed an issue where using the down key while navigating by landmark with Narrator in Edge wasn’t jumping to the first line of the landmark correctly.
NOTE: Some fixes noted here in Insider Preview builds from the Dev Channel may make their way into the servicing updates for the released version of Windows 11.
Have you joined the Dev channel and installed Windows 11 Build 23451? How’s your experience? Let us know in the comments!
Windows updates are critical both to the performance of the PC and for its security. With every new version, you usually get a set of enhancements and vital security updates. But, the Windows Update errors act as a barrier here. One such is the 0x8009001D error.
The complete message, in this case, reads, There were problems installing some updates, but we’ll try again later. Error code: 0x8009001d. The error is similar to others in the same category and can be resolved in no time. Let’s find out how!
Why do I get the 0x8009001D Windows Update error?
Here are a few reasons users come across 0x8009001D:
Corrupt system files: The most common reason behind the error is corrupt system files. Besides the Windows update errors, these affect the PC’s performance and even lead to BSOD.
Problems with the update components: The Windows Update Components play a vital role in the process, and even the smallest of problems here can lead to the 0x8009001D error.
Third-party software blocking the updates: In many cases, it was a third-party antivirus or firewall blocking the process, triggering the error.
How do I fix the 0x8009001D error?
Before we proceed, try these quick solutions:
Restart the computer and try checking for updates.
Press Windows + S to open Search, type Command Prompt in the text field, and click on Run as administrator.
Click Yes in the UAC prompt.
Paste the following three commands individually and hit Enter after each:DISM /Online /Cleanup-Image /CheckHealthDISM /Online /Cleanup-Image /ScanHealthDISM /Online /Cleanup-Image /RestoreHealth
Once done, execute this command to run the SFC scan: sfc /scannow
A quick fix when you get the 0x8009001D update error is to check for corrupt system files and use the DISM and SFC scans to repair them.
Alternatively, you could resolve such issues more efficiently with a dedicated repair tool designed to patch your PC 100% automatically.
2. Make sure the relevant services are running
Press Windows + R to open Run, type services.msc in the text field, and hit Enter.
Locate the Background Intelligent Transfer Service, right-click on it, and choose Properties.
Select Automatic from the Startup type dropdown menu, click the Start button, and then on OK.
Once done, make similar changes to the following services as well:
Cryptographic Services
MSI Installer
Windows Update
3. Update Windows from the official website (Windows 10)
Run the Windows Update Assistant downloaded on the PC and follow the on-screen instructions to complete the process.
Another easy solution when you keep getting 0x8009001D while updating Windows is to use the update assistant. It should bypass various system-related problems and allow you to update seamlessly.
4. Clear the SoftwareDistribution folder
Press Windows + E to open File Explorer, paste the following path in the address bar, and hit Enter:C:\Windows\SoftwareDistribution
Now, press Ctrl + A to select all the files here, and then hit Delete to clear them.
Once done, restart the computer and again check for updates.
Press Windows + R to open Run, type cmd, and hit Ctrl + Shift + Enter.
Click Yes in the prompt.
Now, run these commands to stop the Windows Update, BITS, Cryptographic, and MSI Server services:net stop wuauservnet stop cryptSvcnet stop bitsnet stop msiserver
Paste the two commands and hit Enter to rename the SoftwareDistribution and catroot2 folders:Ren C:\Windows\SoftwareDistribution SoftwareDistribution.oldRen C:\Windows\System32\catroot2 Catroot2.old
Next, execute these commands to restart the services stopped earlier:net start wuauservnet start cryptSvcnet start bitsnet start msiserver
Finally, restart the computer for the changes to come into effect.
Resetting the Windows Update Components, a critical part of the process, has helped many users get rid of the 0x8009001D error. So, make sure you give it a try!
6. Manually install the updates
Locate the KB (Knowledge Base) number of the update that failed to install.
Click on Download next to the update that best matches your OS architecture and iteration.
Click on the download link in the pop-up browser window.
Run the setup and follow the on-screen instructions to install the update.
That’s it! When the previous methods fail to work against 0x8009001D, another solution is to manually install the missing updates in Windows. The process is quick but requires a basic understanding of the OS and the knowledge of PC specifications.
7. Reset Windows
When nothing else works, the last option is to factory reset Windows. You have two options here: keep the files or clear them all. We recommend the latter. But make sure to use an effective backup tool or copy the critical files to a USB drive to avoid loss of data.
The process will take some time but has an extremely high likelihood of getting things up and running.
With this feature, you can right-click on the taskbar icon of any open window and you’ll see options to close the window and end the task, as spotted by Windows enthusiast PhantomOcean3.
“You will soon be able to quickly end an entire task/process by right clicking it on the taskbar and choosing a new ‘End task’ option, Task Manager style. New in build 25300 and hidden. Feature name is just ‘EndTask'”
Compared to closing the window, ending the task means terminating all the activities for good and killing all background processes, and it could be a game changer for users who deal with lagged apps as they wouldn’t have to go to Task Manager anymore.
This feature reappears in Windows 11 Build 23430 from the Dev channel from April 2023, and unlike the previous releases, you won’t need a third-party tool like ViVeTool to activate it.
We are introducing a new setting under Settings > Privacy & security > For developers to enable end task when right-clicking an app on the taskbar. This setting is in Build 23430 but does not currently work when the feature is toggled on. It will be fixed in a future flight.
Then, in Build 23451 from May 2023, the feature is back and is completely functional, as seen on this tweet by the Windows enthusiast.
Here's the functional End Task on taskbar right click (force quit?) feature in 23451! Complete with killing explorer.exe to prove this actually ends the task lol pic.twitter.com/hwaNAIRZbP
The addition, however, is hidden and is met with a bit of polarizing reception from some users. They believe that it could cause confusion for users that aren’t specifically tech-savvy, or even those who are not attentive.
How to enable end-task from the taskbar on Windows 11
1. Make sure to join the Windows Insider program and opt for the Dev channel. Go to Settings ➜ Windows Update ➜ Windows Insider Program.
2. Make sure to choose Dev from the Insider settings dropdown.
3. Go back to Windows Update and hit Update.
4. Once the Build 23451 is installed, go to Settings ➜ Privacy & security ➜ For developers.
5. Enable End task when right-clicking an app.
6. On your taskbar, right click on any app you want to close and click End task.
Speaking of Build 23430, Windows enthusiasts have spotted another feature of the new WinAppSDK-powered File Explorer. There’s a details pane sitting comfortably on the right side of the Explorer screen where you can see the insights of the file (date modified, user, etc.)
Have you joined the Windows Insider program and installed Build 23430? Let us know in the comments!
It’s that time again. Microsoft rolled out another build for Windows 11 insiders. This time, those who opted for the Canary channel can install Build 25357 in their system.
As noted from Redmond officials’ release note of the build, insiders in the build can get a taste of Facebook’s new widget. Now in the preview version, you can see top notifications from your profile through the widget board without having to check on your browser.
Facebook is rolling out a preview version of their widget. To give it a try, download the Facebook app from the Microsoft Store or update to the latest version of the app. Then open the widgets board and navigate to the widgets picker by clicking the “+” button at the top-right of the board to pin your widget.
Earlier this year, you may remember that Meta launched a widget for Messenger chats, so this move makes total sense.
While the Canary channel oftentimes brings hot-off-the-presses updates, builds in this channel are the earliest and potentially the most unstable. It is recommended that only advanced users or developers use the Canary channel and that they use it on a secondary device or in a virtual machine to avoid any potential issues on their primary device.
But what other improvements does Build 25357 bring, you may ask? Facebook widget aside, there are a few important fixes that you may want to check out.
What other fixes and improvements are coming in Windows 11 Build 25357?
[General]
The new volume mixer experience in Quick Settings mentioned here is now available for all Insiders in the Canary Channel.
C++ packages for Win32 headers and libs per architecture
BuildTools package when you just need tools like MakeAppx.exe, MakePri.exe, and SignTool.exe
These NuGet packages provide more granular access to the SDK and better integration in CI/CD pipelines.
While the widget is not mandatory, it is evident that choosing to enable it could lead to an excess of notifications on your computer. However, the decision to do so ultimately lies with you.
In the previous Canary build, Microsoft reportedly worked on a feature that let you offload optional functions on Edge, like the crypto wallet for example, to ensure a faster browsing experience, especially for those running a low-end PC.
Have you joined the Canary channel and installed Build 25357? Let us know in the comments.
Tunnel.sys, a Microsoft Tunnel Interface Driver file under the Win32 EXE (Driver) category may get corrupt and result in a random blue screen crash.
If you are greeted with the message Your PC ran into a problem and needs to restart, and tunnel.sys is stated as the reason for it, walk through this guide to discover the possible solutions.
Why do I get the tunnel.sys BSoD error?
The tunnel.sys BSoD error can occur for several reasons. The most prominent ones are as follows:
Corrupt system drivers – Corrupt or outdated system drivers are no longer compatible and are the primary cause of this BSoD error.
Virus infection – If your PC is infected with malware, it may corrupt the system files and cause blue screen issues.
Corrupt registry – If the registry gets corrupt, your PC may crash randomly with the tunnel.sys error.
Broken system files – Broken system files cause your system to malfunction and cause random issues such as tunnels.sys BSoD error.
If you also encounter this BSoD error on your computer, you can implement the methods provided in the guide to resolve the problem.
How do I fix the tunnel.sys BSoD error?
Before you proceed to the complex solutions listed below, try the following workarounds.
Uninstall the problematic app and re-install it again.
If these methods did not help get past this BSoD error, employ the following fixes.
1. Restart your PC in Safe Mode
Hold down the power button for 10 seconds to turn off your device. Press the power button again to turn on your device. Repeat this process until you reach the Automatic Repair screen.
Press the Advanced options button to initiate the automatic repair process.
Next, choose Troubleshoot option.
Choose Advanced options from the next window.
Now click the Startup Settings option from the Advanced options window.
A list of options to log into the safe mode will appear on the screen. Hit the F5 key to select Safe Mode with Networking.
Now try the several troubleshooting methods listed below to resolve the tunnel.sys BSoD error.
2. Create a new user account
Use the Windows + I shortcut to bring up the Settings app.
Switch to the Accounts settings from the left navigation panel and select the Family & other users option.
Press the Add account button located under the Other users section.
Click I don’t have this person’s sign-in information on the new pop-up.
Next, click Add a user without a Microsoft account option.
Provide the login credentials and other related details on the next screen and press the Next button.
Press the Windows key to launch the Start menu, type cmd in the Search bar and choose Run as administrator from the right section of the search results.
Click the Yes button on the User Account Control window to launch the command prompt with elevated permissions.
Type or paste the following command and press the Enter key to initiate the System File Checker. SFC /scannow
After the message verification is 100% complete, type or paste the below command and press the Enter key. DISM /Online /Cleanup-image /Restorehealth
System File Checker will scan your PC to repair the corrupt system files, and the DISM tool scans and replaces the faulty Windows system images with the original file stored in the compressed folder.
After the scanning process gets completed, restart your computer and verify the tunnel.sys BSoD error has been resolved.
4. Run Driver Verifier
Use the Windows + R shortcut key to launch the Run dialog box, type the following command in the text box, and press the Enter key. verifier
Press Yes on the User Action Control prompt to allow Driver Verifier Manager to make changes on your computer.
Next, enable the radio button for Create Standard Settings option under Select a task window and press Next.
Now, choose Automatically select all drivers installed on this computer option and hit the Finish button.
Note the name of the problematic driver triggering the error code. You can then troubleshoot the issues with that driver to resolve the Blue Screen of Death error code.
The Driver Verifier runs in the background to test all the drivers and detect and troubleshoot the underlying driver issues and instabilities, such as the BSoD crash with the tunnel.sys error.
5. Reset your PC
Use the Windows + I shortcut to launch the Settings app.
From the System settings section, choose Recovery located on the right.
Press the Reset PC button present under the Recovery options section.
A Reset this PC window will pop up on the screen. Select the Keep my files option to reset Windows while losing your data.
On the next window, specify the method you would like to opt for reinstalling Windows. You can go with the Local reinstall option to install Windows locally.
Follow the step-by-step procedure to reset your PC. Reinstalling Windows will remove all the misconfigured settings and will restore the system files to get rid of the tunnel.sys BSoD error.
That’s all about it! We’re sure that this guide helped you troubleshoot the tunnel.sys BSoD error code without needing any external help.
In case, you run into the rt640x64.sys error during a BSoD screen crash, this guide will help you troubleshoot the issue.
If you have any queries or suggestions for us, feel free to drop them in the comments section below.
Many of our readers have run into an error .DLL is not a valid Win32 application when trying to launch a program or install an application.
This indicates that the DLL file is not supported, and as a result, Windows is unable to interpret its contents. Corrupt or missing DLL errors are frustrating but can be easily fixed using a few workarounds.
Why do I get the .DLL is Not A Valid Win32 Application error?
The error in question might arise because of one of the following reasons:
Virus and malware – If an antivirus is not installed, viruses and malware can modify, delete and even overwrite the DLL causing all sorts of issues. Scan your PC with a reliable antivirus.
Unsupported DLL version – The DLL version might not be supported with the system architecture of your Windows PC.
Incomplete installation – The error can occur if the application has not been installed correctly. Uninstall the affected program and re-install it.
Outdated application – If the concerned app hasn’t been updated for a long time, there can be incompatibilities with the system hence the error.
Now that we know the probable causes for this error, follow the solutions below to fix it.
How do I fix .DLL is not a valid Win32 application error?
1. Use a DLL fixer
The most prominent reason behind the .DLL is not a valid Win32 application error is the incompatibility issues between Windows and the program the DLL is a part of.
Trying to resolve such problems single-handedly is a Gordian knot, especially if you have little understanding of system-related errors.
Hence, it is recommended to use a reliable DLL fixer that is capable of resolving all sorts of DLL-related errors.
2. Run SFC and DISM scans
Press the Windows key, type cmd in the search bar, and select the Run as administrator option from the result section.
Type or copy-paste the following command and press the Enter key to initiate the SFC scan. sfc /scannow
After the verification is complete, type or paste the following command and press the Enter key to run the DISM scan. DISM /Online /Cleanup-Image /Restorehealth
When the scanning process is complete, reboot your PC and check if the .DLL is not a valid Win32 application error persists.
3. Re-register Shell32.dll
Press the Windows key to launch the Start menu, type cmd in the search bar and choose Run as administrator from the right result section.
Type the following command and press the Enter key to execute it. regsvr32 /i shell32.dll
Press the OK button on the register server prompt that states that the action is completed.
Shell32.dll is a crucial system file of the Windows operating system which is executed every time an executable file runs on your computer.
If this .DLL becomes gets unregistered, you are likely to run into the .DLL is not a valid Win32 application error every time you attempt to run an application.
Launch the File Explorer using the Windows + E shortcut and navigate to the file location.
Right-click the executable file and choose Properties from the context menu.
Switch to the Compatibility tab, enable the option saying Run this program in compatibility mode, and then in the drop-down, select the OS version in which you want to run the file.
Finally, press the OK button to save the changes.
5. Manually install the compatible DLL
We always discourage our readers from downloading app installers and DLLs from unreliable internet sources, as doing so means exposing yourself to various online threats.
However, you can manually download the DLL file from trusted websites such as DLL Files, having a library of legitimate DLL files.
Hence, you should make sure that you download the correct version of the DLL compatible with your computer. After the download is completed, unzip its contents, paste the DLL into the program installation folder, and try installing the program once again.
These are all the methods that will prove effective in resolving the .DLL is not a valid Win32 application error that appears when you launch a program on your PC.
Srv2.sys is a Server Message Block Version 2.0 server driver which may sometime cause a random blue screen issue or unexpected reboot on your computer. This may result in causes data loss and it restricts the inability to perform any task on your computer.
Why do I encounter the srv2.sys BSoD error?
There are several possible reasons why the srv2.sys BSOD error decided to show up on your PC. Some of the common ones are:
Corrupt kernel mode drivers – srv2.sys BSOD error primarily occurs due to corrupt kernel-mode drivers of your computer.
Malware infection – A system infected with viruses and malware is vulnerable to BSoD errors like the one you are currently facing.
Corrupt system files – Missing or damaged system files on your computer cause your system to malfunction and crash with a BSoD error.
Problematic Windows updates – Some Windows updates if buggy can cause multiple issues within the system instead of improving the user experience.
Conflicting apps – Some of our readers have experienced the srv2.sys crash right after installing some third-party apps.
Now that we know the potential causes, let’s fix the problem quickly with the solutions below.
How do I fix the srv2.sys BSoD error?
Before jumping on the advanced solutions listed below, perform the following workarounds on your computer:
If these methods did not do the trick, employ the following fixes one by one.
1. Restart your PC in Safe Mode
Power on your PC and quickly turn it off as soon as the Windows logo flashes on the screen. Repeat this process until you reach the Automatic Repair screen.
Now press the Advanced options button to go further with the automatic repair process.
Next, choose Troubleshoot option.
Choose Advanced options from the next screen.
Now select Startup Settings from the Advanced options window.
A list of options on the screen. Hit the F5 key to enable Safe Mode with Networking.
Your PC will be operating with the minimum number of apps and system drivers. You can now apply the methods listed below to troubleshoot the successfully troubleshoot srv2.sys BSOD issue.
2. Run SFC and DISM scans
Press the Windows key to launch the Start menu, type cmd in the Search bar and choose Run as administrator from the right section of the search results.
Click the Yes button on the User Account Control prompt to launch the command prompt with administrative privileges.
Type or paste the following command and press the Enter key to scan your system files using System File Checker. sfc/scannow
After the verification is 100% complete message appears, type or copy-paste these commands one at a time and press Enter key after each one. DISM /Online /Cleanup-image /ScanhealthDISM /Online /Cleanup-image /RestorehealthDISM /online /cleanup-image /startcomponentcleanup
The SFC scan analyzes your system for damaged files, and the DISM tool scans and repairs the faulty Windows system images which might trigger the srv2.sys blue screen error.
Instead of using Command Prompt processes, you’re able to diagnose your OS issues with dedicated repairing tools.
3. Run the CHKDSK command
Click the Windows icon on the taskbar, type cmd in the search bar on top, and choose the Run as administrator option from the search result section.
Press Yes on the User Action Control popup to launch Command Prompt with elevated permissions.
Now type the following command and press the Enter key to initiate the check disk utility. You can replace the letter C with the hard drive letter on which the operating system is installed. chkdsk c: /f /r
The CHKDSK command will scan your hard disk space to identify the bad sectors, automatically repair them and generate the status report. After the process is completed, restart your PC; hopefully, the srv2.sys BSOD error will no longer bother you.
Right-click the Windows icon and choose Device Manager from the Quick Links menu.
Double-click the Display adapters category to view the list of devices.
Right-click the graphics card and select Update driver from the context menu.
Choose the Search automatically for drivers option.
This will prompt your computer to find the best available driver for the graphics card on the system and will automatically download and install them.
However, if you see a message saying the best drivers are already installed, close the Update Drivers window and implement the other methods for updating the graphics drivers on Windows PC. Follow the same process to update the outdated drivers one by one under each category.
5. Perform System Restore
Click the Windows icon to bring up the Start menu, type create a restore point in the search bar, and choose the first search result to access the System Properties window.
Press the System Restore button present in the System Protection tab.
Choose the restore point from the list where your PC was working normally, and hit the Next button on the bottom right.
Press the Finish button on the Confirm your restore point window to initiate the system restore process.
Keep in mind that you restoring your PC to a previous state is only possible if you have created a restore point on your system before this BSOD error showed up.
Hopefully, the methods listed above successfully resolved the srv2.sys BSOD error such that the normal state of your computer is restored.
Refer to this guide wherever you encounter the BSOD with the 0xc0000001 error code on your PC. If you need further help in this context, do not hesitate to drop us a comment below.
Are you a Microsoft 365 user looking to stay ahead of the curve and get early access to new features and updates? If so, you’re in luck. The Microsoft 365 Insider program allows users to do just that, by providing early access to new features and updates before they’re released to the general public. In this comprehensive guide, we’ll walk you through the steps to join the Microsoft 365 Office Insider program and start exploring all that Microsoft 365 has to offer. If you’re interested in installing Microsoft 365 Insider builds on your device, follow the steps below to check if you’re eligible and pick the Insider level that best suits your needs.
Step 1: Check your eligibility for the Microsoft 365 Insider program on Windows
To check if you’re eligible to install Microsoft 365 Insider builds, open a desktop application like Word or Excel and click on Account. Look for your license under Product Information and compare it to the license types listed below.
If you have a Microsoft 365 Family or Personal subscription, you can install Insider builds by following the instructions provided on the page. Look for “Microsoft 365” under Subscription Product, and you should also see a “Microsoft 365 Insider” button.
If you have a Business/Education subscription, your Microsoft 365 administrator manages your subscription, and you won’t be able to install or manage Insider builds unless they enable it.
If you have a perpetual license, such as a year like 2019 or “LTSC” in your license name, you have a non-subscription version of Office and won’t be able to join the Microsoft 365 Insider program.
Step 2: Choose an Insider level
Microsoft 365 Insider for Windows offers two levels for those with a Microsoft 365 subscription: Beta Channel and Current Channel (Preview). The Beta Channel is best for those who want to use the latest builds to identify issues and provide feedback about new features still in development. The Current Channel (Preview) is best for early adopters who want early access to new features but also want to receive less frequent, more stable updates.
Step 3: Install Microsoft 365 Insider builds
To install Insider builds, open any Microsoft 365 app on Windows and click on File > Account > Microsoft 365 Insider > Join Microsoft 365 Insider.
In the Join Microsoft 365 Insider dialog box, check the box next to “Sign me up for early access to new releases of Microsoft 365 apps” and choose the Insider channel you want. Click the box to “Check for and apply updates” and “I agree to the terms and conditions…” and then click OK.
Depending on your notification settings, you may need to confirm that you want to allow the app to make changes to your device. After which you should get a confirmation message that you have successfully joined the program, be sure to click OK again.
Once you have successfully completed the process of joining the Microsoft 365 Insider program and have chosen the Insider level that best suits your needs, clicking OK will allow you to download and install new Insider builds of Microsoft 365 apps on your PC. These new Insider builds will have the latest features and updates not yet released to the general public. Being an Insider member lets you have access to these features early, enabling you to start using them before they become widely available.
However, keep in mind that these Insider builds are still in development, so they may not work seamlessly and can have sudden bugs or glitches that are yet to be ironed out. You can help improve Microsoft 365 Insider builds by giving feedback to Microsoft when a new version causes issues or if you have any suggestions. Overall, clicking OK is an exciting moment and the beginning of your journey to exploring the latest and greatest features of Microsoft 365.
Step 4: Join the Community
If you have any questions or feedback about the Microsoft 365 Insider program or want to access resources to help you get started with the program, the Microsoft 365 Insider Tech Community and the Answers forum are great places to start. These platforms offer a variety of resources, including step-by-step guides and forums where you can connect with other Microsoft 365 Insiders to share feedback and ask questions.
Conclusion
Becoming a Microsoft 365 Insider is an excellent opportunity to get early access to new features and updates before they are released publicly. By following the simple steps outlined in this guide, you can check your eligibility, choose an Insider level, and install Insider builds on your device. Additionally, you can connect with the Microsoft 365 Insider Tech Community and the Answers forum to provide feedback and ask questions. Join the Microsoft 365 Insider program today and experience all that Microsoft 365 has to offer. And if you’re interested in other Microsoft apps and services, be sure to check out our other guides, including Teams, Windows 11, and more.
The error code 0x4005(16389) is a common Windows system error that can occur when upgrading Windows. It usually indicates that there was an issue during the upgrade process, such as a failure to install or update a specific system component or driver.
In this guide, we will discuss the possible causes of the 0x4005(16389) error and provide step-by-step instructions on how to fix it.
What causes 0x4005(16389) error?
The error code 0x4005(16389) can occur during a Windows upgrade process and is usually associated with the following common causes:
Different Windows edition: If the Windows edition you are trying to upgrade to differs from the one currently installed on your computer.
Third-party antivirus conflicts: Certain third-party software installed on your computer may conflict with the Windows upgrade process and cause the 0x4005 error.
Insufficient storage space: If your computer’s hard drive does not have enough space to install the Windows upgrade files, the process may fail and result in the 0x4005 error.
Corrupt system files: If the essential Windows system files are corrupt, it can lead to the 0x4005 error.
Local Computer Description: If you set the computer description during the task sequence, the error code may occur if the script or command used to perform this action fails.
How do I fix the 0x4005(16389) error when upgrading Windows?
Before attempting more complex solutions, here are some straightforward steps to try:
Restart your device: Restarting your computer can often resolve the issue at hand.
Use the same Windows Edition to upgrade: If you attempt to upgrade to a different version of Windows than what’s on your computer, ensure that you upgrade to the same edition.
Disable third-party antivirus programs: Antivirus programs can sometimes interfere with the upgrading process and prevent it from completing successfully. To avoid this issue, you should disable your antivirus program temporarily.
1. Free up disk space
Open the Start menu, type disk cleanup, and select the Disk Cleanup app from the search result.
Select the drive system drive (typically labeled C🙂 and click OK.
Next, click the Clean up system files button.
Select the system drive again and click OK.
Now, select the files you wish to delete, and click OK.
Click Delete Files to confirm.
Insufficient disk space is a common issue that arises during Windows updates and upgrades, making it impossible to install them. According to Microsoft, you will need at least 20 GB of free space for upgrading to Windows 10 or 64 GB of free space for Windows 11.
You can also defragment the drive to free up some space and optimize the PC’s performance.
2. Extend the partition to create more space
Press the Windows + R to open the Run command, type diskmgmt.msc, and hit Enter.
If you want to shrink a volume, locate the drive or partition, right-click on it, and select Shrink Volume…
Enter the amount of space you want to subtract from the drive in MB and click Shrink.
In case you want to delete a volume, right-click on the unused drive/partition you want to delete and select Delete Volume...
Right-click on the drive/partition you want to extend and select Extend Volume…
In the Extend Volume Wizard window, click Next.
Click Next to add all the unallocated space to the drive you want to extend or specify the volume size you want to add and then click Next.
Click Finish to extend the drive.
If you see a warning prompt, click Yes to proceed.
NOTE
To expand the storage capacity of a drive or partition, you must first reduce the size of another drive or remove an unused drive to generate unallocated space. Then, you can use the unallocated space to increase the volume of any drive on your disk.
These instructions are intended for IT professionals or system administrators who are using System Center Configuration Manager (SCCM) to deploy Windows operating systems in an enterprise environment.
Confirm if the error is related to a script or command failing during the task sequence, which is responsible for setting the local computer description.
Open the task sequence in the System Center Configuration Manager (SCCM) console and locate the option for setting the computer description.
Add a Run Command-Line to the task sequence and then run the following command:cmd /c net config Server /SRVCOMMENT:"%OSDComputerDescription%"
Save the changes.
Run the task sequence again, and the error should now be resolved.
If you encounter the 0x4005(16389) error while attempting to set the local computer description using a script or command during the task sequence, you can use this method to resolve the error and successfully complete the task sequence.
4. Clean install Windows
4.1 Create Windows installation media
Insert a blank USB or blank DVD with at least 8 GB of space.
The MSVCP140_1.dll file is a Dynamic Link Library file that is part of the Microsoft Visual C++ Redistributable for Visual Studio 2015, 2017, and 2019. It is a necessary component used by many applications to ensure the proper functionality of the application.
An error message indicating that the MSVCP140_1.dll file is missing or not found means that the DLL file is corrupt or missing. Additionally, the application you are trying to run requires this file for proper operation.
What is the MSVCP140_1.dll?
MSVCP140_1.dll, also known as a Microsoft® C Runtime Library _1 file, is an essential component for running software applications created using the Visual C++ programming language.
There are several reasons why this error can occur, some of which are – missing or corrupt DLL, outdated or incompatible software, malware, registry errors, or hardware issues.
If the MSVCP140_1.dll file is missing or broken, it may cause various error messages, including:
The program can’t start because MSVCP140_1.dll is missing from your computer.
MSVCP140_1.dll missing.
MSVCP140_1.dll is missing from your computer. Try reinstalling the program to fix this problem.
MSVCP140_1.dll not Found.
This application has failed to start because MSVCP140_1.dll was not found. Reinstalling the application may fix this problem.
How can I fix the MSVCP140_1.dll was not found error?
1. Use a dedicated DLL repair tool
MSVCP140_1.dll file is essential for running various programs on a Windows operating system that were developed using Microsoft Visual C++. Hence, if it is missing from your device, it is best to use a professional DLL repair tool instead of downloading the DLL file from shady sites.
DLL fixers are a reliable solution for fixing DLL files as it automatically performs a thorough scan of your device and guarantees a 100% success rate in repairing all damaged or missing DLL files.
2. Reinstall the Microsoft Visual C ++ Redistributable Package
Visit the Visual C++ 2015 Redistributable download page on Microsoft’s official website, select the language, and click Download.
Select the vc_redist.X64.exe option and click Next.
After the file is downloaded, run the EXE file and follow the instructions to install it.
Then, restart your PC.
As you know, the MSVCP140_1.dll is part of the Microsoft Visual C++ Redistributable package. Hence, reinstalling the Microsoft Visual C ++ Redistributable Package will easily fix this issue.
3. Clean install the program
Press the Windows + R key to open the Run dialog box, type appwiz.cpl, and press Enter.
Right-click the program that caused the error and choose Uninstall. Click Yes if prompted.
After that, restart your computer and reinstall the program.
Launch the app and see if the error appears again.
4. Re-register the DLL file manually
Press Windows + R to open Run, type cmd, and press Ctrl + Shift + Enter to open the Command prompt in elevated mode.
Click on Yes to the UAC prompt.
Type the below command and press Enter:regsvr32 msvcp140_1.dll
Reboot your system to save the changes.
5. Run a full virus scan
Press the Windows key, type in Windows Security in the Search menu, and press Enter.
Go to the Virus & threat protection tab and click on Scan options on the right pane.
On the Scan options page, select Full scan, and click Scan now.
After the scan is over, restart your computer.
6. Run the System Checker
Press Windows + R to open the Run command box, type cmd, hold the Ctrl + Shift key, and click OK to run Command Prompt as administrator.
Click Yes on the User Account Control (UAC) prompt window.
Type the following command and press Enter: sfc /scannow
Wait for the SFC tool to complete the scan, then restart your computer.
In conclusion, the MSVCP140_1.dll not found error can be a frustrating issue to deal with, but several effective solutions are available to fix it.
You can try using a dedicated DLL repair tool which will automatically scan and replace any damaged or missing DLL files.
Before you leave, check the best Windows settings for enhanced performance and security.
By following these steps, you can successfully fix the MSVCP140_1.dll not found error and ensure your system runs smoothly without any further errors.
Looking for the best Skype alternatives now that Skype is discontinued? With Microsoft dropping support for the platform, many users are searching for Skype alternatives for Windows 11 and 10 that offer reliable messaging and calling features. Whether you’re after free Skype alternatives or dependable replacements for Skype phone call services, there are plenty of options to consider.
What is arguably the best Skype alternative, Discord quickly rose to the top as the premier VoIP app for internet communities. The best thing about Discord is you get so many great features for free.
It offers voice channels for gamers to communicate with each other in real-time without any lag, the ability to share screens, plus a robust set of moderation tools.
With those tools, users can create their servers and manage their communities. You’ll be able to create multiple channels within those servers, then assign roles with specific permissions to people.
Another great aspect of Discord is its intuitive interface which is easy to navigate if you join multiple servers.
There is a premium version called Discord Nitro, allowing users access to use custom emojis on other channels.
Zoom has been around for a little over a decade now, but only really rose to prominence within the last couple of years or so when remote work exploded in popularity.
In that time, the app has become the go-to software for professional video conferences thanks to its ability to handle a large number of participants and maintain a high-quality live stream.
Zoom has a more user-friendly interface with very clear ways of either joining or scheduling meetings. It even offers a simpler way to record meetings than Skype.
Other notable features include the ability to share screens, collaboration tools, as well as virtual backgrounds to add a bit of uniqueness to your meeting.
Zoom has a degree of privacy thanks to its powerful encryption and measures to protect user data.
Third on our list is Microsoft Teams which has usurped Skype as Microsoft’s main communication app for professionals.
It features a range of collaborative features such as in-app document editing and file sharing. This makes it easy for teams to collaborate without requiring multiple apps.
Additionally, Microsoft Teams is quite flexible thanks to its ability to create custom tabs and integrate with other Microsoft apps like Outlook and SharePoint.
This level of integration is great as it allows businesses to tailor their Teams’ workspace to meet their specific needs. Of course, it would be remiss of us not to mention the app’s level of security.
Thanks to data loss prevention, you don’t have to worry about data leaking. If it detects data being misused or lost, the software enacts protective measures.
The last entry on this list of the best Skype alternatives is Google Meet. Of the two, Google Meet is the superior one with more reliable and higher-quality video conferencing.
The audio is notably crisper, the video feed is sharper, plus there is very little lag involved. It would be remiss of us not to mention the fact that it integrated with other Google tools.
Which ones, you may ask? Well, almost all of them; from Gmail, Google Calendar, and Google Drive. This allows for document sharing among coworkers. It’s quite convenient.
Google Meet also has great features too, like the ability to host meetings with up to 250 participants and then record those meetings for later use.
Other people enjoy the virtual background tool for added privacy, real-time captions, and screen sharing. Security is strong on Google Meet thanks to end-to-end encryption.
Similar to Microsoft Teams, Slack is a communication app often used by professionals to talk with others about certain topics or projects, plus group conversations.
And just like Microsoft Teams, having this level of integration is great for when you need to switch tools on the fly. Besides the neat additions, Slack also has a customizable interface.
You can upload custom emojis to fit your workspace, set reminders for yourself, and create notifications. All this ensures Slack meets the specific needs of users.
Security is another important factor for communication apps. Rest assured, your data will be protected since Slack has two-factor authentication and encrypted messages.
WhatsApp is an easy-to-use communication app used by people to keep in touch with friends and family easily. It’s a titan in the industry, with over two billion active users worldwide.
A big reason for its popularity is its multiple features, user-friendly interface, and strong security WhatsApp allows users to send voice messages quickly and have access to their chat history.
You can also create giant group chats with up to 256 participants. And if you want to go even further, WhatsApp’s Community tool lets you add 5000 people into one gigantic group.
Regarding security, WhatsApp offers end-to-end encryption to all messages, calls, and video chats to make sure your conversations are totally secure.
Similar to Viber, you can make international calls with WhatsApp, and the best part, it’s free to do so.
Stepping away from work-centric apps for a bit, we have Viber. The software is particularly popular with people making international calls thanks to its Viber Out feature.
Viber Out is similar to Skype’s premium subscription in that it allows people to call non-users. Call rates differ from country to country. Calling someone in India, for example, costs $0.015 per minute.
Beyond making international calls, Viber has several other great features. First, it has a very friendly user interface, most so than Slack or Teams.
It can send short voice messages to others. The service offers group chats with up to 250 participants, plus you can send money through it via Viber Pay.
On top of all this, Viber has a wide variety of stickers, emojis, and GIFs within its database, making conversations a lot more fun and engaging than just static text.
Continuing down the list of personal communication apps, there is Line which has similar features to the two previous entries like voice and video calls, custom emojis, plus text messaging.
What’s unique about Line is that it has all these services within it that make it a digital one-stop shop. It comes with a timeline where people can share short video clips of their lives.
Line Doctor makes it easy to locate a nearby doctor. Line Pay allows users to send or request money from others. You can even play video games on it, like Dr. Mario World.
The app functions a lot like a social media platform of sorts. Beyond that, Line has several customization options like themes to add personalization and end-to-end encryption.
Like WhatsApp, people can make free international calls while sharing their real-time location on Line.
If you’re technically minded and know how to code, Jami is the communication app for you. Jami is an open-source platform meaning its code is publically available.
So you can download Jami onto your device and modify it via its built-in plugin platform. This makes the software a community-driven platform with a big focus on security.
Speaking of security, the software is built on peer-to-peer network architecture. So communicating is done directly between users without needing a centralized server to do the work.
This is important as it makes Jami a decentralized platform lacking a single point of failure or vulnerability to hacking by a bad actor.
Chanty is pretty unique among the others on this list. The reason is that it’s a combination of personal communication apps like WhatsApp and the business ones like Slack.
It can be integrated with business platforms such as Trello and Google Drive for flexible collaboration between platforms. Plus, end-to-end encryption prevents leaks from occurring.
As a comparison, Skype only offers encryption for a few features making it not very secure overall. Chanty’s premium plan adds screen sharing and 20GB of storage per user.
The free version offers 20GB for everyone. Moving past the business side, Chanty incorporates some social media-style tools like mentions with a unified inbox for messages and notifications.
There you have it: the 10 best Skype alternatives on the Internet. You can’t go wrong with any of these, but if we had to choose just one, it would be Discord.