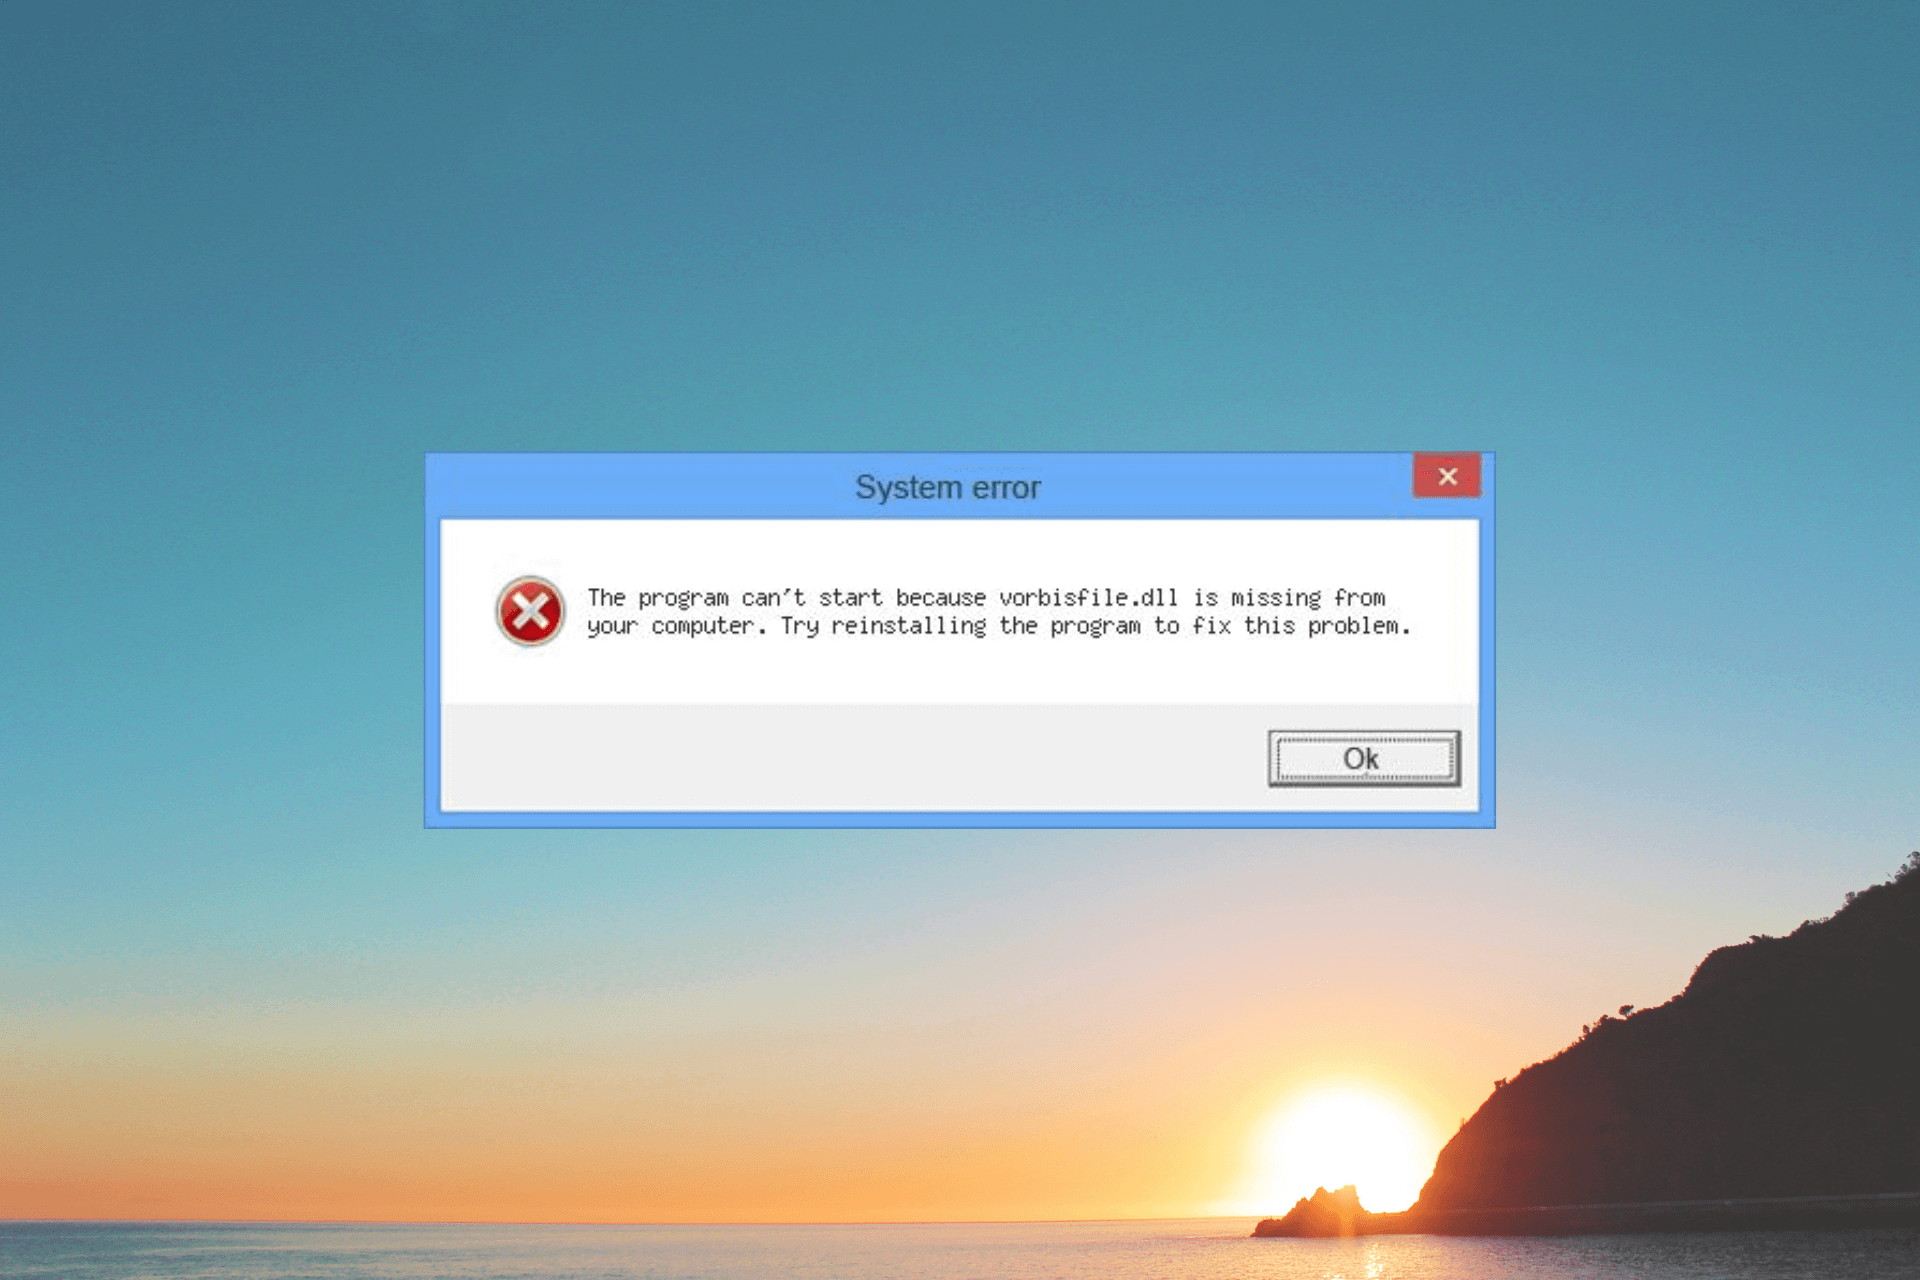
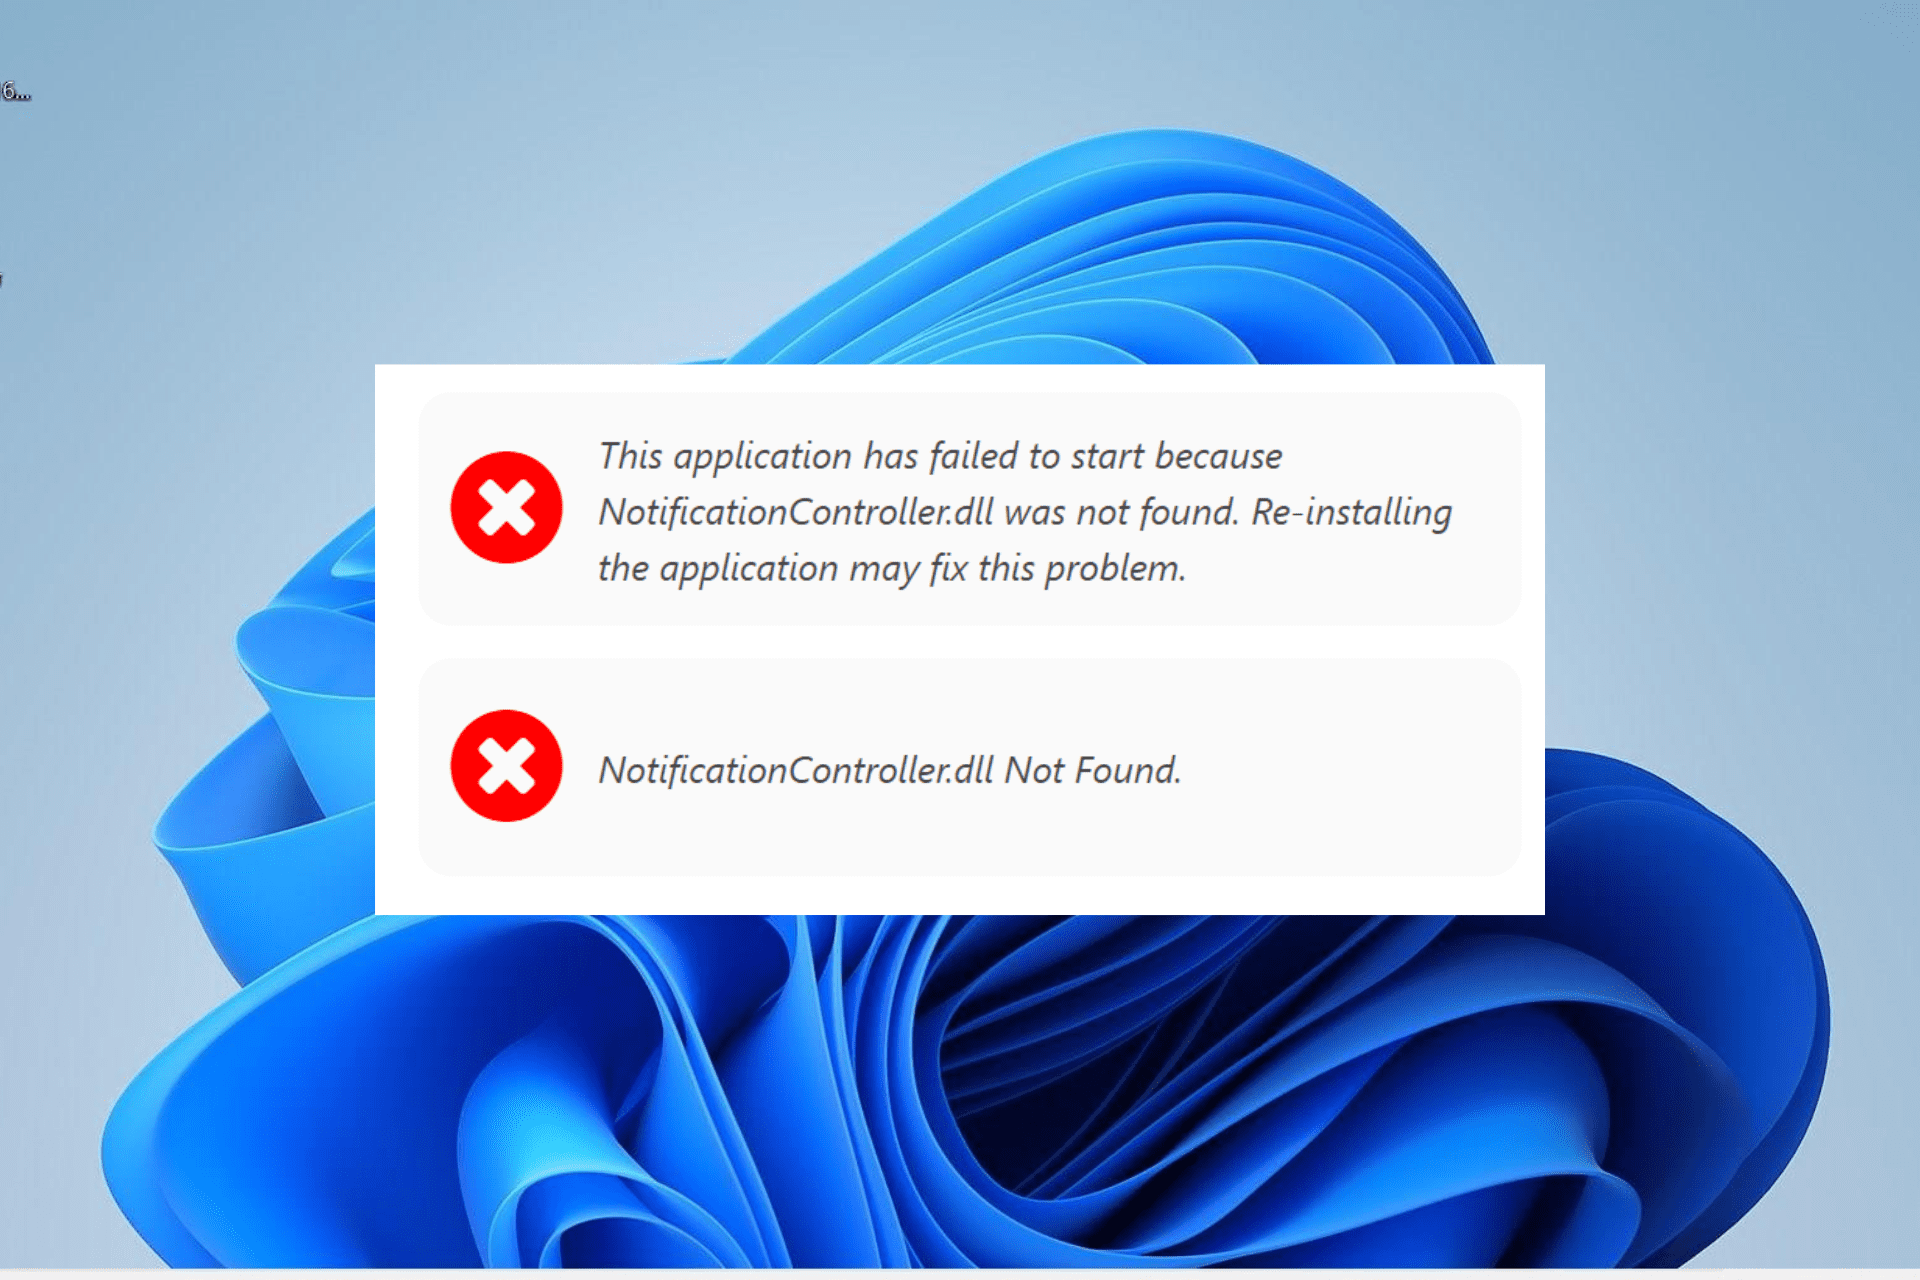
If you have encountered the Windows Update error 0x800700c1 while trying to update Windows, this guide can help!
We will discuss some of the working solutions to fix the issue right after talking about the causes of the problem.
What causes the Windows Update error 0x800700c1?
There are several reasons for this Windows update error; some of the common ones are mentioned here:
Weak Internet connection – If your internet connection is not stable or you often have network connectivity issues, you may get this error. Try troubleshooting your internet connection.
Missing system files – System files related to Windows updates, if damaged or corrupted, could cause this Windows Update error. Try repairing the system files to fix the issue.
Services related to Update not starting – If the services associated with Windows Updates are not starting up, they could stop you from installing Windows updates. Check the services.
Improper software installation – Any software if not installed correctly or was interrupted while getting updated, you may see this error.
Malware infection – If your computer is infected with viruses, it could damage it, causing various issues. Try running a deep scan using an antivirus tool.
Now that you know the causes, let us move on to the solutions to fix this Windows Update error.
What can I do to fix the Windows Update error 0x800700c1?
Before engaging in advanced troubleshooting steps, you should consider performing the following checks:
If these minor tweaks didn’t work for you, check out the detailed methods below.
1. Run the Windows Update troubleshooter
Press Windows + I to open the Settings app.
Go to System, and click Troubleshoot.
Click Other troubleshooters.
Locate Windows Update from the list and click Run.
Follow the onscreen process to complete.
Alternatively, you may consider a dedicated repair tool that fixes update issues rather than following the manual steps above.
2. Reset Windows Update components
Press the Windows key, type cmd, and click Run as administrator.
Type the following commands one by one to stop BITS, Windows Update, & Cryptographic services, and press Enter after every command: net stop bitsnet stop wuauservnet stop cryptsvc
To delete the qmgr*.dat files, copy & paste the following command and hit Enter: Del %ALLUSERSPROFILE%\Application Data\Microsoft\Network\Downloader\qmgr*.dat
To rename DataStore, Download, & catroot2, type the following commands one by one, and press Enter after every command: Ren %Systemroot%\SoftwareDistribution\DataStore DataStore.bakRen %Systemroot%\SoftwareDistribution\Download Download.bakRen %Systemroot%\System32\catroot2 catroot2.bak
Copy & paste the following commands one by one to reset the BITS & Windows Update to the default security descriptor, and hit Enter after every command: sc.exe sdset bits D:(A;CI;CCDCLCSWRPWPDTLOCRSDRCWDWO;;;SY)(A;;CCDCLCSWRPWPDTLOCRSDRCWDWO;;;BA)(A;;CCLCSWLOCRRC;;;IU)(A;;CCLCSWLOCRRC;;;SU)sc.exe sdset wuauserv D:(A;;CCLCSWRPLORC;;;AU)(A;;CCDCLCSWRPWPDTLOCRSDRCWDWO;;;BA)(A;;CCDCLCSWRPWPDTLOCRSDRCWDWO;;;SY)
Type the following command and press Enter: cd /d %windir%\system32
To reregister the BITS files and Windows Update files, copy & paste the following commands one by one and hit Enter after every command: regsvr32.exe atl.dllregsvr32.exe urlmon.dllregsvr32.exe mshtml.dllregsvr32.exe shdocvw.dllregsvr32.exe browseui.dllregsvr32.exe jscript.dllregsvr32.exe vbscript.dllregsvr32.exe scrrun.dllregsvr32.exe msxml.dllregsvr32.exe msxml3.dllregsvr32.exe msxml6.dllregsvr32.exe actxprxy.dllregsvr32.exe softpub.dllregsvr32.exe wintrust.dllregsvr32.exe dssenh.dllregsvr32.exe rsaenh.dllregsvr32.exe gpkcsp.dllregsvr32.exe sccbase.dllregsvr32.exe slbcsp.dllregsvr32.exe cryptdlg.dllregsvr32.exe oleaut32.dllregsvr32.exe ole32.dllregsvr32.exe shell32.dllregsvr32.exe initpki.dllregsvr32.exe wuapi.dllregsvr32.exe wuaueng.dllregsvr32.exe wuaueng1.dllregsvr32.exe wucltui.dllregsvr32.exe wups.dllregsvr32.exe wups2.dllregsvr32.exe wuweb.dllregsvr32.exe qmgr.dllregsvr32.exe qmgrprxy.dllregsvr32.exe wucltux.dllregsvr32.exe muweb.dllregsvr32.exe wuwebv.dll
Type the following command to reset winsock and press Enter: netsh winsock reset
To restart BITS, Windows Update & Cryptographic service, copy & paste the following commands one by one and press Enter after every command: net start bitsnet start wuauservnet start cryptsvc
Reboot your computer to let the changes take effect.
3. Run SFC & DISM scans
Press the Windows key, type cmd, and click Run as administrator.
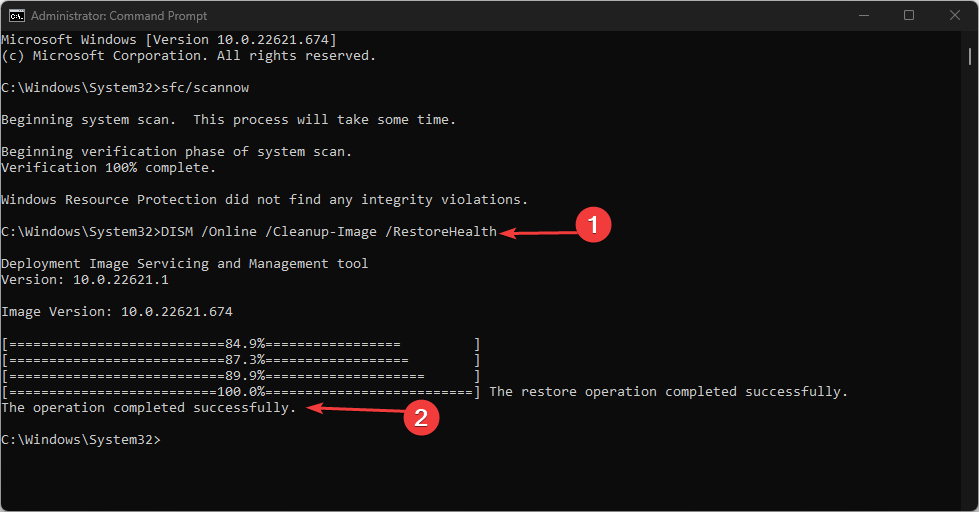
Type the following command to repair system files and press Enter: sfc/scannow
Wait for the scan to complete, copy & paste the following command to repair the Windows OS image, and hit Enter: DISM /Online /Cleanup-Image /RestoreHealth
Once the command is executed successfully, restart your computer.
Press the Windows key, type windows security, and click Open.
Go to Virus & threat protection and click Scan options.
Select Full scan and click Scan now.
The security tool will scan and find the infected files. Delete them when prompted.
5. Perform a System Restore
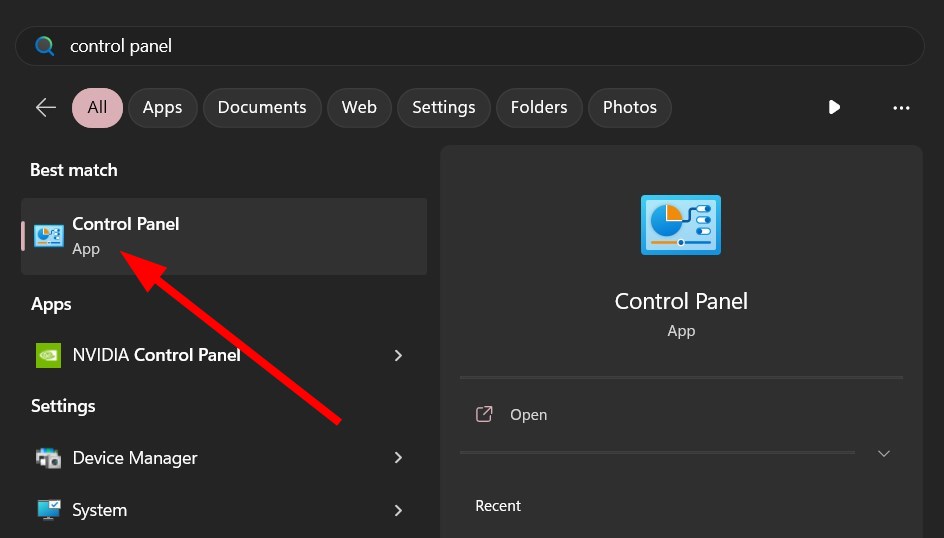
Press the Windows key, type control panel, and click Open.
Select View by as Large icons and click Recovery.
Click Open System Restore.
On the System Restore window, select Choose a different restore point and click Next.
Select the restore point and click Next.
Now click Finish to initiate the process.
Windows will restart and will be restored to the previous version selected. If the System Restore doesn’t work for you, we recommend you check out this guide to know the detailed solutions.
6. Reset the PC
Press Windows + I to open Settings.
Go to System, then click Recovery.
Under Recovery options, click Reset PC.
Now on Choose an option window, select Keep my files.
On How would you like to reinstall Windows window, select Cloud download.
Now on the Additional settings page, click Next.
On Reset this PC page, click Reset.
Windows will be reinstalled, and the settings will be set to default, but you will have your files intact.
So, these are steps you can follow to fix the Windows Update error 0x800700c1. If you have any questions or suggestions, feel free to mention them in the comments section below.
Dynamic Link Libraries (DLL) like jvm.dll are integral to the seamless running of many processes on the Windows operating system.
They hold vital code that helps native and third-party applications communicate; hence, missing DLLs becomes a real headache. We explore the best solutions for the missing jvm.dll.
What is the JVM dll?
As you may guess, this DLL is associated with the JVM (Java Virtual Machine) and JRE, integral for the smooth running of Java apps on the Windows OS.
Jvm.dll is responsible for memory management, exception handling, interpretation and loading of Java bytecode, and offering other runtime services for Java apps.
The library is stored in the JRE or JDK bin directory and gets loaded on memory by Java apps when needed for program execution.
What do I do if jvm.dll is missing on my device?
Some of our readers have noted that a few prerequisite solutions may save you time in troubleshooting. So, before trying anything complex, do the following:
Reboot your device – A simple restart forces problematic processes to end and may resolve minor bugs that trigger the missing error.
Reinstall the app – If an app specifically triggers the error, uninstall and reinstall it with a fresh copy downloaded from the official website.
Restore from the Recycle Bin – If the file has been accidentally deleted, getting it back from the bin is most convenient.
However, if none of the above work, you may proceed to more elaborate solutions below.
1. Use dedicated DLL tools
A dedicated tool can perform the roles of DLL repair or replacement. They do this with minimal input from a user and become an easy, stress-free solution.
These tools allow you to run in-depth scans of your system, identify any broken or corrupted files, and quickly replace them with fresh ones.
2. Manually download the DLL
You should download jvm.dll from a trusted website, extract it and place it in the same directory as the program that triggers the error before launching the said app.
You must use only trusted sources because DLLs are an easy way for malicious programs to be introduced to your computer.
However, if you have one, a better option may be transferring it from a backed-up location.
Since the DLL comes bundled with Java Development Kit and the Java Runtime Environment, installing Java should fix any missing issues you face.
Before you install the app, you should ensure you do not have an old Java installation or uninstall any old Java installations first.
4. Run a file scan
Press Windows + R, type cmd, and hit Ctrl + Shift + Enter.
Type the script below and hit Enter. sfc /scannow
Wait while the scan executes; it may sometimes take several minutes.
Any of the above solutions should effectively resolve missing jvm.dll errors on your Windows device. For most users, the error is linked to the Java installation. However, the suggested pre-fixes would be best since individual apps can trigger the issue.
We love hearing from you, so please let us know which fixes were most effective.
A few of our readers have complained about DLL errors, especially with opengl32.dll. These errors will often stop connected applications from launching.
Since these library files are an essential link between applications, we will discuss the best solutions if the DLL goes missing.
What is opengl32 dll?
This Dynamic Link Library is an Open Graphics (OpenGL) file Application Programming Interface component.
OpenGL is an API for rendering 2D and 3D graphics in computer-aided design, video games, multimedia applications, and scientific simulations. The DLL holds instructions that enable the app to interact seamlessly with your graphics hardware components.
This problem may be solved using a few minor fixes, so we recommend you try the following before more complex solutions:
Restart the computer – A simple reboot will fix many minor computer errors. The reboot can force a problematic process to end, thus fixing the error.
Reinstall the app – The app that triggers the error may be corrupt, so uninstalling and reinstalling a freshly downloaded copy may work.
Restore from the Recycle Bin – Some users have accidentally deleted the file; if you think you fall into this category, simply check for it in the bin and restore the file.
If none of the above work, proceed to the more elaborate solutions below.
1. Use dedicated repair tools
DLL specialized repair tools can fix DLL corruption or replace missing files. They do this only requiring very little input from a user, making them a convenient choice.
While they are a 100% fix for Windows native DLLs, they also fix compatibility issues that may result in third-party libraries like opengl32.dll going missing.
2. Download the file manually
A manual download is a practical solution if the DLL is no longer on your computer. You only need to navigate to a trusted opengl32.dll download site and get the file.
Note that this solution will only work if the downloaded file is extracted and placed into the same directory as the program that triggered the error.
Also, it would be best to be careful when downloading from third-party sources because the DLL may easily come bundled with malware and compromise your device.
Type Windows Security in the Search bar, and click on the relevant search result.
Click on Virus & threat protection.
Select Scan options.
Select Full scan and click the Scan now button at the bottom.
When opengl32.dll is not found, a virus scan may eliminate the problem if it is triggered by malware on your computer.
This is as much as we cover in this guide. While our top recommendation will be using a specialized repair tool, any fixes should solve the missing DLL error.
Please tell us what solution has been effective for you.
We have extensively covered many DLL missing errors, and in every one of these cases, they stop the proper functioning of specific applications.
Users have encountered d3dx9_39.dll missing errors in League of Legends as well as with other games and apps. So, this guide looks at the missing DLL error and introduces the best solutions.
How to fix the missing d3dx9_39 dll error?
Before going into the main solutions, you may try any of these quick procedures:
Restart your device – There are often little bugs that may trigger the error. A restart may be strong enough to shut them down and save you further troubleshooting.
Reinstall problematic apps – Your next call may be a reinstallation since the error may be triggered by the corruption of the game or app that needs the DLL.
1. Use a specialized tool
Many DLL tools are available to fix these errors. They can often replace a missing file or repair corruption.
For Microsoft native DLLs like d3dx9_39.dll, such tools offer a 100% guarantee.
2. Manual download of the DLL
When the old DLL is corrupted, or in cases where it does not exist on the computer, you may manually download d3dx9_39.dll from trusted sources.
Once downloaded, you need to extract and add it to the same directory as the problematic application before launching the app.
Also, take care to only download DLLs from sites you trust because it is pretty common for malicious programs to be introduced to your system via a DLL.
A system restore comes in handy because d3dx9_39.dll is native to the OS, and a restore would take the computer to a time it had all the files needed to run correctly.
Microsoft Edge is undoubtedly a far cry from Internet Explorer. It’s so much better than the old browser that we consider it one of the best for Windows 10.
What are the best password managers for Microsoft Edge?
When looking for a good password manager, you’ll need one that protects your sensitive information and hasn’t had a sizable data breach. It’s for that reason LastPass is not recommended.
You should also look for apps sporting unique protection features like AES-256 Encryption, which you’ll learn about later.
Kicking off the list is 1Password, which we consider one of the best password managers on the market. It has various security features to ensure your information stays safe.
It comes with two-factor authentication plus end-to-end encryption as part of its basic package. In addition to storing passwords, the app can store other sensitive information.
Credit card information, important notes, and even software licenses are just some of the credentials protected by 1Password, making it effective at being an all-in-one solution.
When it comes to Microsoft Edge, it can easily integrate with the browser for it to quickly autofill login credentials for your favorite websites, saving you a lot of time and hassle.
1Password even offers cross-device synchronization. This means your password can be shared amongst your other devices, from another Windows PC to an iPhone or Android device.
You can’t go wrong with 1Password. The main problem with this manager is you have to pay to use it if you want it for an extended time.
1Password
Keep your password stored and protected with this beloved pass manager.
The next password manager is not only suited for your Edge browser but also comes with multi-platform support for other devices.
You can utilize this password solution for flawless browsing on Edge and keep all your online credentials secured in one place.
In the first place, let’s see about the interface. RoboForm has a simple UI and easy-to-follow menus for more structure and clarity.
Hence, you can efficiently store as many passwords as you need and use them with one click while browsing online. The autofill option allows you to click ones and complete the section automatically.
In addition to this, there are helpful features you can benefit from, such as password syncing in the cloud to use them across any browser, including Edge and others.
It’s also likely to organize all your web passwords in folders, pin essential logins, or a password search utility.
RoboForm
Navigate freely on the Edge browser for the latest AI benefits using this password manager.
Like Dashlane, NordPass has a unique form of password encryption called XChaCha20 Encryption, a form of protection that Google uses for its services.
XChaCha20 is a relatively new technology with several benefits that make it better than AES-256. For example, AES-256 requires computers to have particular hardware acceleration.
It can run without this specification, although performance will suffer. XChaCha20, on the other hand, doesn’t require any special requirements or features to operate.
Modern computers typically have this exceptional hardware acceleration, so it’s not a big obstacle. But if you have an older computer, there’s a good chance it doesn’t have the necessary tools.
It has a Password Health feature to scan all passwords in your vault to check their vulnerability. If it discovers any weak passwords, the app will recommend updating them.
So if you looking for a password manager that can quickly encrypt information on an old computer, NordPass is highly recommended.
NordPass
Encrypt your web passwords and data with this most trusted solution.
Dashlane is a particularly good password manager because it incorporates AES-256 (Advanced Encryption Standard) Encryption into its service. But what does that mean?
Without getting too technical, AES-256 Encryption utilizes a 256-bit key to turn your information into a cipher. In other words, it scrambles up your data into something indecipherable.
Well, indecipherable to bad actors. Dashlane has the tools to put your information back together. It’s also worth mentioning AES-256 Encryption is used by the US government to protect classified info.
Dashlane users are getting some powerful protection. Besides AES-256, the manager can seamlessly integrate with Microsoft Edge via a browser extension.
This will allow you to autofill login credentials for websites to save you a ton of time and hassle.
Do note there isn’t a desktop version of Dashlane. It’s all done through the browser extension, or you can create a desktop shortcut.
Keeper may not be as well-known as the other entries on this list, but it’s no slouch for protecting its users. It has the same two-factor authentication tool as the others.
It can integrate with Microsoft Edge to autofill login credentials for websites. Its browser extension offers password sharing, allowing you to give out your password to trust people securely.
The cherry on top of Keeper is its AES-256 encryption, which protects your sensitive information like Dashlane. The service also has cross-device synchronization to access passwords on any device.
Unique to Keeper is its Keeper DNA feature, which uses biometric authentication to provide an extra layer of security – for smartwatches only.
Keeper DNA might not mean much for Microsoft Edge users, but it’s something to consider if you own a smartwatch.
Keeper
Acquire reliable password security with this leading cybersecurity tool.
Next on our list is Bitwarden, another popular password manager with much in common with 1Password. It also has two-factor authentication and end-to-end encryption as part of its package.
Additionally, the service has cross-device synchronization allowing users to their passwords from any device like other PCs, Macs, iPhones, or Android devices, allowing for easy management.
Unique to Bitwarden is its free version, which gives you access to some basic features like password storage and autofill. And you can keep it as long as you wish. 1Password’s free trial lasts two weeks.
The paid version adds important tools such as encrypted file storage. Its construction is also unique as Bitwarden is completely open source meaning anyone, like security experts, can read its code.
This is an important aspect every password manager should have. It’s crucial for developers to feel so confident in their password manager that they’re transparent with how it works.
Also, Bitwarden has a user-friendly interface that can integrate with the browser to autofill credentials for other services.
Passbolt is another great password manager that is also open source, like Bitwarden. And like Bitwarden, the goal of being open source is to show users the company has nothing to hide.
It aims to be as transparent as possible with people and assure everyone their passwords are being managed securely. The main difference between the two is that Passbolt is meant for businesses.
The free version, Passbolt Community, gives you access to private and shared folders, password management and sharing, plus two-factor authentication, to name a few things.
For about $40 a month, Passbolt Business adds the ability to synchronize users with your company directory and account recovery in case someone loses their passphrase.
There is a premium version called Passbolt Enterprise, allowing businesses to create a tailor-made manager to meet their needs.
Pricing can differ according to what you’re looking for, so you’ll need to contact a sales representative from Passbolt first. Features for this tier include disaster recovery consulting.
Even if you’re looking for something just for you, Passbolt is still a good option. It integrates with Edge to autofill your login credentials, plus the browser extension has password sharing.
You can’t go wrong with any of these password managers; however, if we have to choose one to put on our computer, it would have to be 1Password. Consider it to be the golden standard in the industry.
If you want something different, try NordPass and its XChaCha20 Encryption. Feel free to leave other suggestions on your favorite password manager in the comments below.
The ffmpeg.dll is a Dynamic link library. It contains code and data and is used by programs like Skype, Slack, WhatsApp, Teams, MTZ Client, Discord, and more.
If you have encountered the ffmpeg.dll goes missing error when opening an app; this guide can help! We will discuss some of the common methods which can help to recover the missing DLL file.
What causes the ffmpeg.dll missing error?
There could be various reasons for the DLL missing error; some of them are listed here:
Malware infection – If your computer is infected with viruses, they could damage your system files, including DLL files, leading to this error. Run a malware scan using an antivirus tool.
Faulty app – If it gets corrupted, the app using the DLL file could cause this issue. Try reinstalling the app and check if the issue persists.
DLL file corrupted – If the DLL file itself is deleted or damaged, you might see this error every time the file is called. To fix it, you need to recover the DLL file.
Corrupted Windows registry – Windows registry contains important information; if it is broken, you see this error. Run a registry cleaner to get rid of this problem.
So, these are the causes for the issues; let us jump to learn the methods to fix the problem.
What can I do to fix the ffmpeg.dll missing error?
Before engaging in advanced troubleshooting steps, you should consider performing the following checks:
Reboot your computer.
Reinstall the affected app.
Check your computer for Windows updates.
If these minor tweaks didn’t work for you, check out the solutions below.
1. Use a DLL fixer
One of the safest ways to fix the DLL not found error is using a DLL fixer tool which can scan and repair the missing DLL files automatically without any hassle.
This, in turn, helps deal with conflicts between third-party apps and operating systems and reduces system crashes, & slowdowns related to the issue.
2. Run SFC & DISM scans
Press the Windows key, type cmd and click Run as administrator.
Copy & paste the following command to repair the system files and press Enter: sfc/scannow
Wait for the scan to complete, type the following command to restore the Windows OS image and hit Enter: Dism /Online /Cleanup-Image /RestoreHealth
Wait for the scan to finish, and reboot your computer to save the changes.
3. Run a malware scan
Press the Windows key, type windows security and click Open.
Go to Virus & threat protection and click Scan options.
Select Full scan and click Scan now.
The tool will run a deep scan to scour the infected files. Delete them to fix the issue.
Installing DLL files from untrusted third-party websites is not advisable. However, If you know a trusted source, like DLL-FILES, that has been tested and verified, you can perform the steps below to restore the file.
Go to the DLL-FILES website, search ffmpeg.dll, select the appropriate option, and click Download.
Double-click the downloaded folder, locate and copy the .dll file from it.
Navigate to this path and paste the file: C:\Windows\System32
Restart your computer to let the changes take effect.
6. Clear application cache
Press Ctrl + Shift + Esc to open Task Manager and end all processes related to Microsoft Teams.
Press the Windows +R to open the Run box.
Go to the following paths one by one and delete any files present in the folder: %appdata%\Microsoft\teams\cache%appdata%\Microsoft\teams\blob_storage%appdata%\Microsoft\teams\databases%appdata%\Microsoft\teams\GPUcache%appdata%\Microsoft\teams\IndexedDB%appdata%\Microsoft\teams\LocalStorage%appdata%\Microsoft\teams\tmp
Reboot your Pc to save the changes.
7. Copy the folder into the Installation directory of the app
Press the Windows +R to open the Run box.
Type the following command and click OK: %localappdata%
Navigate the Microsoft folder and then Teams.
Locate the folders with the name Current. Now copy the contents of the new folder to the old one.
Click Yes.
Restart your computer to fix the issue.
If you’re facing the missing DLL files issue on your Windows 11, we suggest referring to our informative article that provides solutions for resolving this common problem.
So, these are methods to follow to fix the ffmpeg.dll missing issue. If you have any questions or suggestions, feel free to mention them in the comments section below.
QuickFontCache.dll is a Dynamic link library, a part of FL Studio Producer Edition, developed by Image-Line Software.
If you encounter QuickFontCache.dll not found on opening the related app, this guide can help! We will discuss the solutions to restore the missing DLL file.
What causes the QuickFontCache.dll not found error?
There could be various reasons for this error; some of the common ones are:
Faulty app – If the app using the DLL file is corrupted or damaged, you might see this error. Try reinstalling the app to fix the problem.
Malware infection – Malware can damage important system files, including DLL files, causing this issue. Run a deep scan using an antivirus tool to fix the error.
Damaged Windows registry files – If the registry entries of essential files go missing or get corrupted, you might face this issue. Run a registry cleaner to fix it.
Corrupted system file – System files are important for the smooth functioning of your PC. If these files are missing or damaged, there could be a lot of issues. Repair system files using an SFC scan.
Now you know the causes, let us move to the fixes.
What can I do to fix the QuickFontCache.dll not found error?
Before engaging in advanced troubleshooting steps, you should consider performing the following checks:
Restart your computer, as it could resolve the issue.
Try reinstalling the app.
Check to ensure there are no pending Windows updates.
1. Use a third-party DLL fixer
DLL missing error could interrupt the normal functioning of the app throwing the error. Fixing it manually could be daunting; that’s why it is recommended to get a professional DLL repair tool.
2. Run SFC & DISM scans
Press the Windows key, type cmd, and click Run as administrator.
Type the following command to restore system files and hit Enter: sfc/scannow
Wait for the scan to complete, then copy and paste the following command to repair the Windows OS image and press Enter: DISM /Online /Cleanup-Image /RestoreHealth
Restart your computer to let the changes take effect.
Press the Windows key, type windows security, and click Open.
Go to Virus & threat protection and click Scan options.
Select Full scan and click Scan now.
The tool will scour your computer for infected files and will show if found. Delete them when prompted.
4. Perform System Restore
Press the Windows key, type control panel and click Open.
Select Large icons as View by and click Recovery.
Now click Open System Restore.
On the System Restore window, select Choose a different restore point and click Next.
Select the restore point you want and click Next.
Click Finish to initiate the process.
Windows will restart, and the system will be restored to the selected version. If the System Restore fails, then we recommend you check out the informative guide.
5. Download the DLL file from a reliable website
NOTE
Installing DLL files from untrusted third-party websites is not advisable. However, If you know a trusted source, like DLL-FILES, that has been tested and verified, you can perform the steps below to restore the file.
Go to the DLL-FILES website, search QuickFontCache.dll, select the appropriate option, and click Download.
Open the downloaded folder, and copy the .dll file from it.
Navigate to this path and paste the file:C:\Windows\SysWOW64\
Restart your computer to let the changes take effect.
If you’re experiencing the missing DLL files issue on your Windows 10, we suggest referring to our informative article that provides solutions for resolving this common problem.
So, these are methods to follow to fix the vorbisfile.dll missing issue. If you have any questions or suggestions, feel free to mention them in the comments section below.
Our readers have reported coming across the dump file creation failed error on their Windows PC. The worst part is on investing, users found out that this error was thrown at them out of the blue since there was no dump file created on checking with the Event Viewer.
You are in the right place if you are also getting this dump file creation failed error and looking for solutions. In this guide, we will share many solutions that will help you quickly resolve the problem at your end. Let us get right into it.
What causes the dump file creation failed error?
After digging the internet, we have compiled a list of reasons that could trigger the dump file creation failed error on your PC.
Problematic third-party cleanup apps: If you are using a clean-up app to clean junk files on your PC, chances are it deletes the dump file on your PC, hence the error.
Corrupt system files: Corrupt system files can not only cause issues with the performance of the OS but also conflict with system-related programs.
Outdated BIOS: Multiple user reports have confirmed that this dump file creation failed an error occurred because of outdated BIOS.
RAM issues: Dump files are often written to RAM. In case there are some RAM-related issues on your PC, then you will face this error.
Let us go through the solutions that will help you resolve the dump file creation failed error on your PC.
How can I fix the dump file creation failed error on my PC?
1. Uninstall the cleanup program
Open the Start menu by pressing the Win key.
Open Control Panel.
Click on Programs and Features.
Select the cleanup app and hit the Uninstall button.
Follow the on-screen prompts (if any) to completely remove the app from your PC.
Restart your PC.
Cleanup apps are often responsible for deleting the dump file folder treating it as a temporary file. So, you can try to remove them and check if this fixes the dump file creation failed error.
However, they can help remove unwanted junk files from your PC and boost the performance of your system. You can check out some of the recommended junk file clean-up apps that you can try.
2. Fix corrupt system files
Press the Win key to open the Start menu.
Run command prompt as an admin.
Type the below command and press Enter. sfc /scannow
Wait for the SFC Scan tool to complete the diagnosing and fixing process.
Type the below commands and press Enter, one by one. Dism /Online /Cleanup-Image /CheckHealthDism /Online /Cleanup-Image /ScanHealthDism /Online /Cleanup-Image /RestoreHealth
3. Update BIOS
The dump file creation failed error is reportedly caused when your BIOS isn’t updated. An unstable BIOS version is also one of the key reasons. In such a case, we suggest you install the latest BIOS to keep your PC’s performance fit and fine.
However, it isn’t a cake in the walk to update the BIOS on your PC, as a wrong move can brick your PC. For that, we have created a dedicated guide explaining how you can update BIOS on your Windows 10 PC.
Windows 11 users do not worry, as we have covered a similar guide showing you steps to update BIOS on your Windows 11 PC. These guides also explain how you can check the version of BIOS on your Windows OS.
Check these guides out before you put the pedal to the metal, as they will help you safely upgrade the BIOS version.
Right-click on This PC icon and select Properties.
Click on Advanced system settings.
Click on Settings for the Startup and Recovery section.
Select Complete memory dump from the Write debugging information drop-down.
Click OK to save changes.
Restart your PC.
5. Tweak the registry
Open the Run dialogue by pressing the Win + R keys.
Type regedit and press OK.
Navigate to the below path and press Enter. HKEY_LOCAL_MACHINE\System\CurrentControlSet\Control\CrashControl
Right-click on the blank space on the right.
Select New and then DWORD (32-bit) Value.
Rename this newly created DWORD as DisplayParameters.
Edit the Value Data to 1.
Press OK.
Restart your PC.
Check if tweaking the registry as suggested above helps you to get rid of the dump file creation failed error on your PC.
6. Disable Automatic Restart Option
Right-click on This PC icon and select Properties.
Click on Advanced system settings.
Click on Settings for the Startup and Recovery section.
Under System failure, uncheck the Automatically restart box.
Click OK to apply the changes.
Restart your PC.
When you turn off or disable the automatic restart option, you ensure your system does not accidentally create a dump file with misconfiguration. This could also help you resolve the dump file creation failed error on your PC.
That is it from us in this guide. Notably, we have a guide that explains where you can find the dump files on your Windows 11 PC very easily. You should check that out if that interests you.
If you encountered the Windows Hello error code 0x801c0451 when setting a PIN, this guide could help! We will discuss some of the expert-recommended solutions to fix the error right after explaining the causes.
What causes the Windows Hello error code 0x801c0451?
There could be various reasons for this Windows Hello error; some of the common ones are mentioned here:
Sleep mode enabled – Sleep mode is helpful but also comes with bugs and errors that could cause this issue. Try disabling sleep mode to get rid of the error.
Multiple accounts – If you see multiple accounts under the Accounts section in the Settings app, it could cause this issue. Change the folder name to resolve the issue.
Now that you know what are the causes of the issue, let’s jump to the solutions.
What can I do to fix the Windows Hello error code 0x801c0451?
Before engaging in advanced troubleshooting steps, you should consider performing the following checks:
Try restarting your computer; sometimes, this could fix the error.
Make sure Windows has no pending updates.
If these minor tweaks didn’t help you, let us move to the detailed fixes.
1. Disable Sleep mode
Press the Windows key, type control panel, and click Open.
Select View by as Large icons, and click Power Options.
Click Change plan settings.
Locate Put the computer to sleep option, and from the dropdown select Never.
Click Save changes.
2. Change the Microsoft account to a local account
Press Windows + I to open the Settings app.
Go to Accounts, and click Your info.
Click Sign in with a local account instead.
Select the account and click Next.
Enter the password or PIN for the current account.
Choose the Username, New password, Confirm password, and Password hint for the local account, and click Next.
Click Sign out and Sign in using the new local account.
3. Reset or remove the PIN
Press Windows + I to open Settings.
Select Account, then click Sign-in options.
Click PIN (Windows Hello) and then select I forgot my PIN.
Now click Continue.
Enter your password and Sign in.
Now Verify your identity from the options available.
If nothing has worked for you, and you are still stuck with this Windows Hello error code, then we advise you to contact Microsoft Support. Explain the issue in detail and the steps you have taken to fix it. They can help you with advanced troubleshooting steps to resolve the problem.
So, these are methods you can use to fix Windows Hello error code 0x801c0451. Try them and let us know what worked in the comments section below.
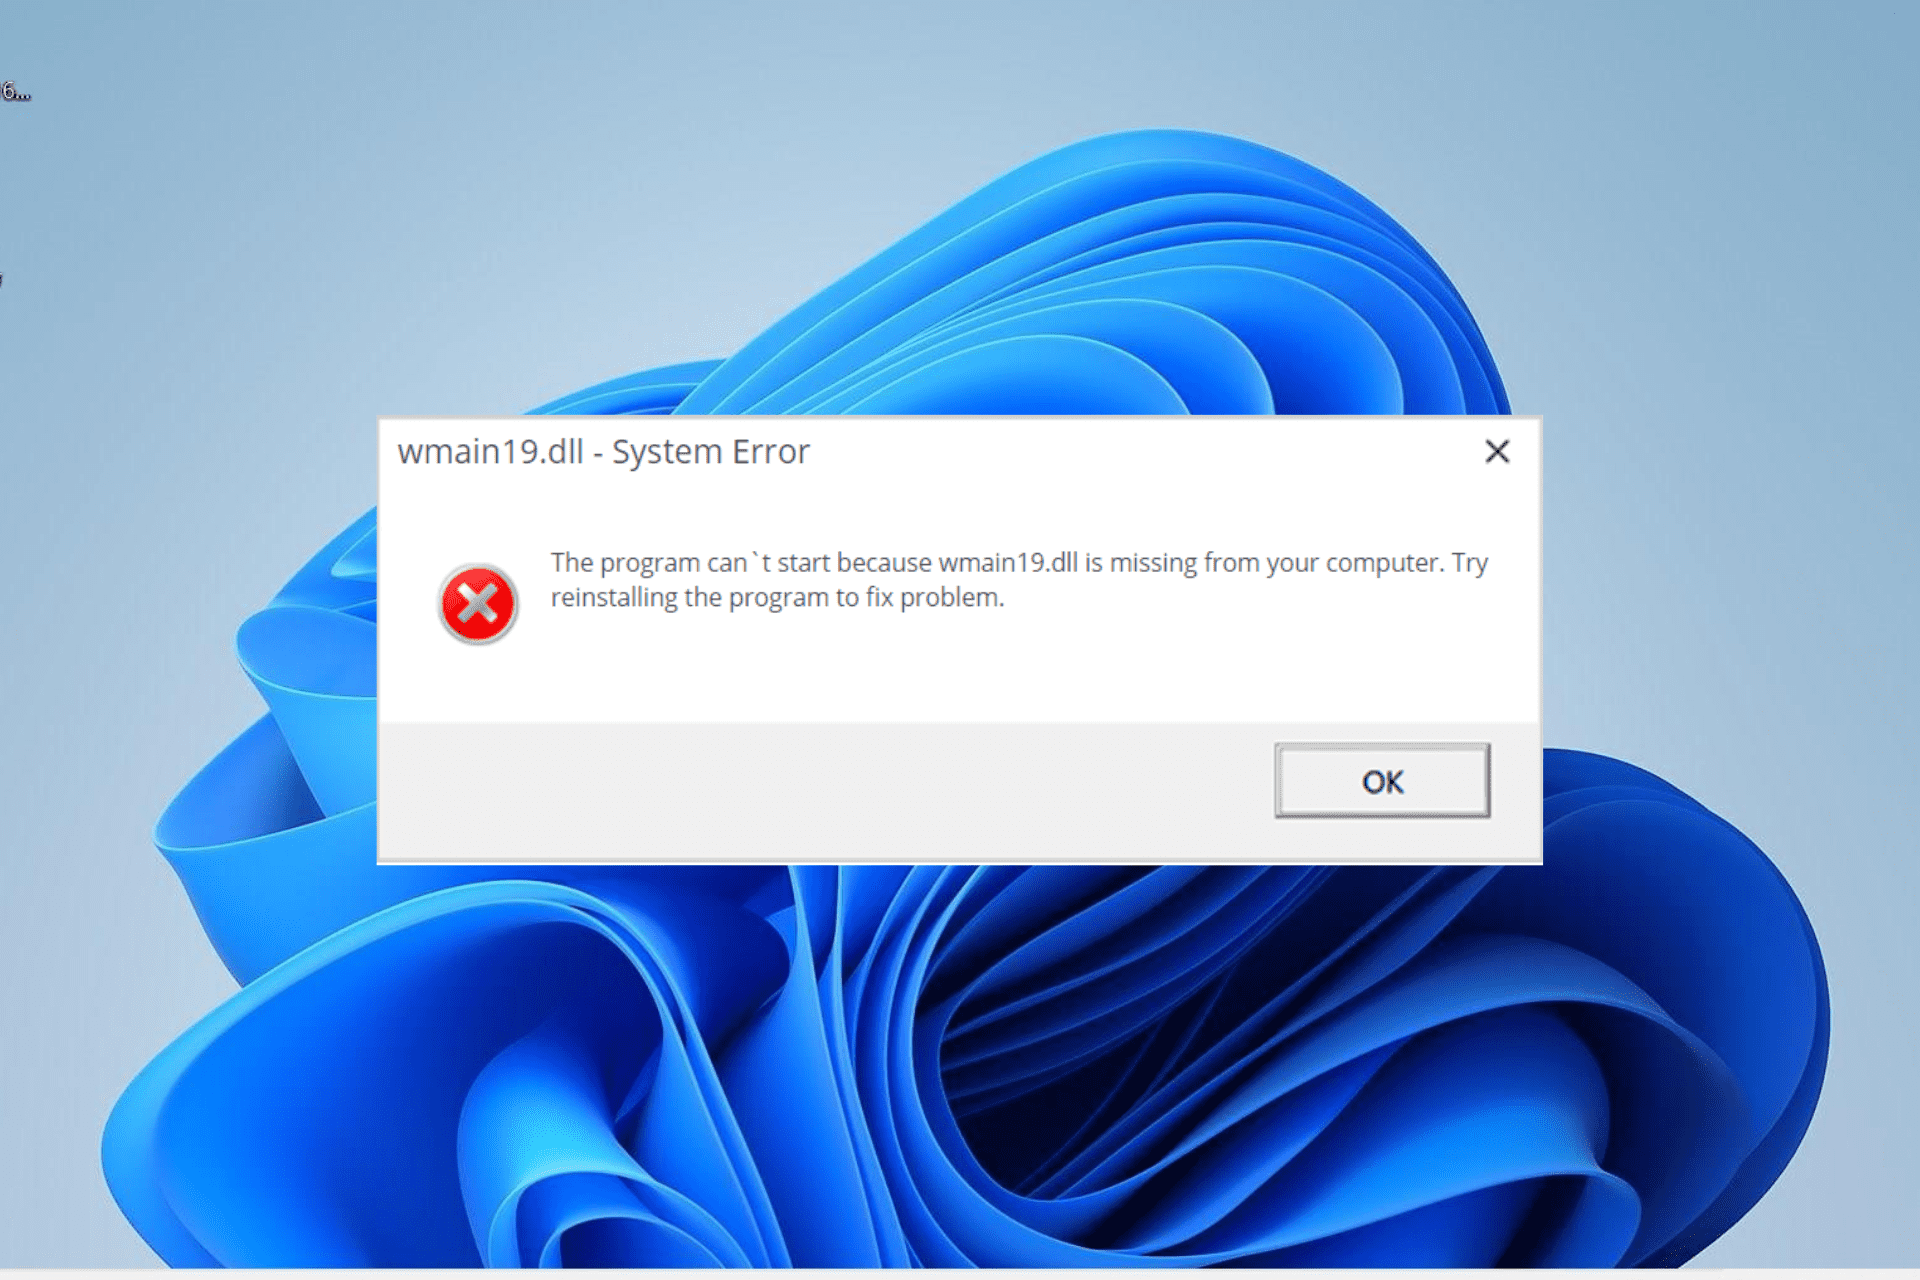
With the importance of DLL files, almost every user has encountered one or more DLL errors at one point or another. Among the prominent issues reported by users is the wmain19.dll not found error.
This error prevents some apps that depend on the file from launching and running properly. If this DLL file is missing on your Windows 11 computer, we have prepared the solutions to help you restore it in this guide.
Why is wmain19.dll not found?
Below are some of the notable reasons you are getting the wmain19.dll not found error on your PC:
Faulty app: The most prominent cause of this problem is issues with the app throwing up the error. You need to uninstall the program and reinstall it from official sources to fix this.
Presence of malware: In some cases, this prompt might be a false alarm caused by the presence of malware on your PC. The solution is to perform a full malware scan with your antivirus software.
Changes made to PC: Sometimes, the wmain19.dll not found error can start showing after you download some apps or make some changes to your PC. Performing a system restore should do the trick here.
How can I fix the wmain19.dll not found error?
1. Use a dedicated DLL fixer
Wmain19.dll is a third-party DLL file that comes with the software that needs it. It is pretty important, as quite a host of apps need it to run successfully.
So, you need to get the file in perfect working condition. One of the most reliable and effective ways to do that is to use one of the best DLL repair tools.
2. Reinstall the faulty app
Press the Windows key + R, type appwiz.cpl, and click OK.
Right-click the faulty app and select Uninstall.
Now, go to the official website to reinstall the program or use the original installation disk.
Frequently, the wmain19 .dll not found error message can be down to problems with the app giving the error. You need to completely uninstall the app and reinstall it from the official source to fix this.
Press the Windows key + S, type virus, and select the Virus & threat protection option.
Select Scan options.
Finally, choose your preferred scan option and click Scan now.
In some cases, the wmain19.dll not found error message is a false positive triggered by a virus. You need to perform a thorough check and eliminate all malware on your PC to fix this. Performing a deep virus scan should eliminate the malware.
Alternatively, you can use excellent antivirus software in TotalAV to remove even the most hidden malware on your PC.
This software scans all corners of your PC for viruses and removes any traces of malware before they can cause problems.
Press the Windows key + R, type rstrui.exe, and click OK.
Click the Next button on the new page.
Now, choose your desired restore point and click the Next button.
Finally, click Finish and follow the onscreen instructions to complete the process.
In a case where you started getting the wmain19.dll not found error message after making some changes to your PC, performing a system restore is your quickest option to restore normalcy.
Now, extract the content of the downloaded file if it is zipped and move the wmain19.dll file to the path below on a 32-bit PC:C:\Windows\System32
You have to move it to the path below instead on a 64-bit PC: C:\Windows\SysWOW64
Finally, restart your PC.
If all efforts to restore the wmain19.dll file prove abortive after trying the solutions above, you have no option but to download the file from a third-party website. While this is not advisable, it has proved effective for many users.
Just make sure you scan the downloaded file to be sure of its safety.
We can now conclude this detailed guide on fixing the wmain19.dll not found issue. You should now be able to solve the problem if you follow the instructions therein carefully.
While some go with a printer shared over a network, others have one dedicated to the PC. No matter the case, it still might throw errors, and one that’s troubling users for long is ERROR_BAD_DRIVER_LEVEL119 0x00000077. The complete error message reads, Operation could not be completed (error 0x00000077). The system does not support the command requested often accompanied by ERROR_BAD_DRIVER_LEVEL119.
How do I fix ERROR_BAD_DRIVER_LEVEL119?
1. Run the Printer troubleshooter
Press Windows + I to open Settings, and click on Troubleshoot on the right in the System tab.
Click on Other troubleshooters.
Now, click the Run button next to Printer.
Follow the on-screen instructions and choose the appropriate response when prompted to complete the troubleshooting.
The easiest solution when facing the print 0x00000077 ERROR_BAD_DRIVER_LEVEL119 is to run the dedicated troubleshooter. It will automatically identify and eliminate the underlying cause.
2. Reinstall the printer drivers
Press Windows + X to open the Power User menu, and select Device Manager.
Expand the Printers entry, right-click on the device throwing the error, and select Uninstall device.
Tick the checkbox for Attempt the remove the driver for this device, if available, and click Uninstall.
Once done, restart the computer, and Windows will automatically install a fresh copy of the driver.
3. Update the printer driver
Press Windows + R to open Run, type devmgmt.msc in the text field, and hit Enter.
Double-click on Printers, then right-click on the affected device, and select Update driver.
Select Search automatically for drivers and wait for Windows to install the best one available locally.
When it comes to printing issues and errors like 0x00000077, updating the printer driver usually does the trick. In some cases, you will get the newest driver via Windows Update, but it’s recommended to always check the manufacturer’s website to manually install the latest driver version.
Sometimes updating drivers can be annoying because it is not as straightforward for some users, that’s why we suggest an automated alternative.
A reliable option you can try is the Outbyte Driver Updater app, as it can detect all outdated and missing drivers after a thorough scan and immediately update them with the best versions.
Press Windows + I to open Settings, navigate to Bluetooth & devices, and click on Printers & scanners.
Select your printer from the list.
Click Printer properties.
Now, navigate to the Ports tab, and select the TCP/IP type from the list.
Go to Advanced and select another driver from the dropdown menu. For HP Color LaserJet Pro MFP M477, selecting the HP Color LaserJet Pro MFP M477 PCL-6 driver should work.
Finally, click Apply and OK to save the changes.
When facing 0x00000077 on HP printers, a quick solution would be to modify the printer properties. This can happen after installing Windows 11 or reverting from it to Windows 10.
Press Windows + I to open Settings, select Windows Update, and then click on Update history.
Scroll down to the bottom, and click Uninstall updates.
Click Uninstall next to the recent update.
Again, click Uninstall to confirm the change.
The KB5006670 update triggered a range of printer errors, including 0x00000077, and uninstalling it should work.
What is the 0x00000077 ERROR_BAD_DRIVER_LEVEL119 on printers?
The error prevents users from printing though the scanning and other operations may work just fine. Also, in a few cases, 0x00000077 appears after installing a new iteration of the OS or rolling back from Windows 11 to Windows 10.
Here are the primary reasons you encounter the error:
Issues with the driver: When you encounter problems with a printer, it’s most likely an incompatible, corrupt, or outdated driver to blame. And your primary approach should be to check for these.
Connection problems: In some cases, users found out that the printer had not been installed correctly initially or the connections were improper, usually a loose or damaged cable.
Misconfigured registry: Often, changes to the Registry, especially to the keys responsible for printing operations, can trigger ERROR_BAD_DRIVER_LEVEL119 in Windows 10. This could be done by a third-party app as well.
You must have, by now, fixed the ERROR_BAD_DRIVER_LEVEL119 and can execute the print jobs with ease. If the problem persists, we recommend you remove it and add the printer using the IP address.
Also, discover the best printer software and get one today for an effortless experience.
For any queries or to share which solution worked for you, drop a comment below.
Microsoft has announced that it is bringing the Accessibility ribbon in Excel and PowerPoint to Outlook for Windows. Just like in Excel and PowerPoint, the feature will promote accessibility and better navigation for Outlook for Windows users.
According to the company:
The Accessibility ribbon brings together all the tools you need to make your message accessible in one place. It is contextual and appears at the same time as the Accessibility Checker pane.
The feature is rolling out to Office Insiders running Beta Channel Version 2304 (Build 16321.20000) or later. You can access the feature by, clicking on Message at the top and then selecting CheckAccessibility.
Alternatively, you can type accessibility in Outlook’s Search bar to access the feature. From this point, select Accessibility Checker which can be found under the Best Action selection.
Additionally, through the feature, users have the capability of triggering the accessibility checker MailTip by composing a message marked as high importance and introducing a color contrast issue in the email body.
This will be an indication that there are additional through which you can make your message more accessible. You can find out more about this issue by clicking on Review accessibility issues.
If you’re encountering the wavessvc64.exe error, don’t fret – the solution is typically straightforward. Generally speaking, you’ll need to tweak a few settings in your registry.
We sincerely hope that this guide has proven to be of great value to you. If, by any chance, you come up with an alternative solution, please don’t hesitate to share it with us.
The MSVCR70.dll not found error occurs when the system component needing the file can’t access or use it.
It makes it impossible to use your apps or perform some tasks dependent on the file, and it can occur in several variations. Regardless, this guide will discuss fixing the error in a few steps.
Msvcr70.dll is a Microsoft C Runtime Library file and a critical component for some Windows applications and services.
It stores information and executable (EXE) instructions for running applications written in C++. Some applications cannot run without the file, so altering its presence can affect your system.
Why is the Msvcr70.dll not found?
Errors related to the msvcr70.dll file can occur due to different reasons. Some notable ones are:
Msvcr70.dll has been deleted or misplaced – There have been cases where the file is removed by accident. This usually occurs after an update or after installing certain software.
Corrupt system files– The file can become missing if your system files are corrupted.
These causes can vary on different computers. Nevertheless, we’ll take you through basic steps to fix the error.
What can I do if the Msvcr70.dll is not found?
Go through these preliminary checks before trying any advanced troubleshooting steps:
Run virus and malware scans on your PC to clean it up.
Reinstall the program prompting the Msvcr70.dll not found error.
If you can’t resolve the error, go ahead with the solutions below:
1. Repair the DDL file with a dedicated tool
The Msvcr70.dll missing or not found error can cause issues because it is an essential file. So it is crucial to find how to repair the DLL file to prevent crashes, bugs, and lagging. Sadly, it may be hard to repair if you’re not tech-savvy or have prior knowledge.
However, users can relieve stress and hassle by using dedicated tools for fixing 100% of DLL file errors. Hence, we recommend you repair the Msvcr70.dll error using a dedicated DLL repair tool for PCs.
2. Run an SFC and DISM scan
Left-click the Start button, type cmd, and select Run as administrator.
Click Yes on the User Account Control prompt.
Type the following and press Enter: sfc /scannow
Restart your PC and check if the Msvcr70.dll missing file error appears again.
If the issue is still there, start Command Prompt as administrator and run the following command: DISM /Online /Cleanup-Image /RestoreHealth
Click Next in the Restore system files and Settings page.
Choose the restore point you want to restore from, then click Next.
The System Restore will roll back recent system changes that can cause the Msvcr70.dll file to be missing. Read our guide on how to fix Restore Point if it’s not working on your PC.
The Mfplat.dll file is an essential Windows file from the Microsoft Media Foundation. Many users have reported running into an error saying Mfplat.dll is missing.
This can cause issues with multimedia content and the apps that run them. However, this article will discuss fixing the error on Windows PCs.
The Microsoft Media Foundation (MF) is a COM-based multimedia framework pipeline and infrastructure platform for Windows Devices.
However, it requires some components and files to run, and Mfplat.dll is an integral part of the required files.
Furthermore, the Mfplat.dll file missing or not found error prevents users from using video streaming services, like PLEX or similar apps.
Also, the error can appear during a gameplay session because games use the Microsoft Media Feature pack to play.
Why is the Mfplat.dll missing?
This problem can be frustrating, and usually, there’s one common cause:
Windows Media Feature Pack – N and KN versions of Windows don’t have Windows Media Feature Pack, which is why this file is missing.
What can I do if Mfplat.dll is missing on my PC?
1. Use a dedicated DLL repair tool
You can experience numerous problems running your PC due to the Mfplat.dll missing file. It can cause issues with its functionality because the services relying on the file can’t access it.
However, repairing the missing DLL file error may be difficult if you’re not tech-savvy. Nonetheless, you can use dedicated tools designed to resolve DLL file errors.
So, we recommend you repair the Mfplat.dll file with a dedicated DLL repair tool. The are simple to use and can completely resolve the error by finding and repairing the file.
2. Install the Windows Media Feature Pack
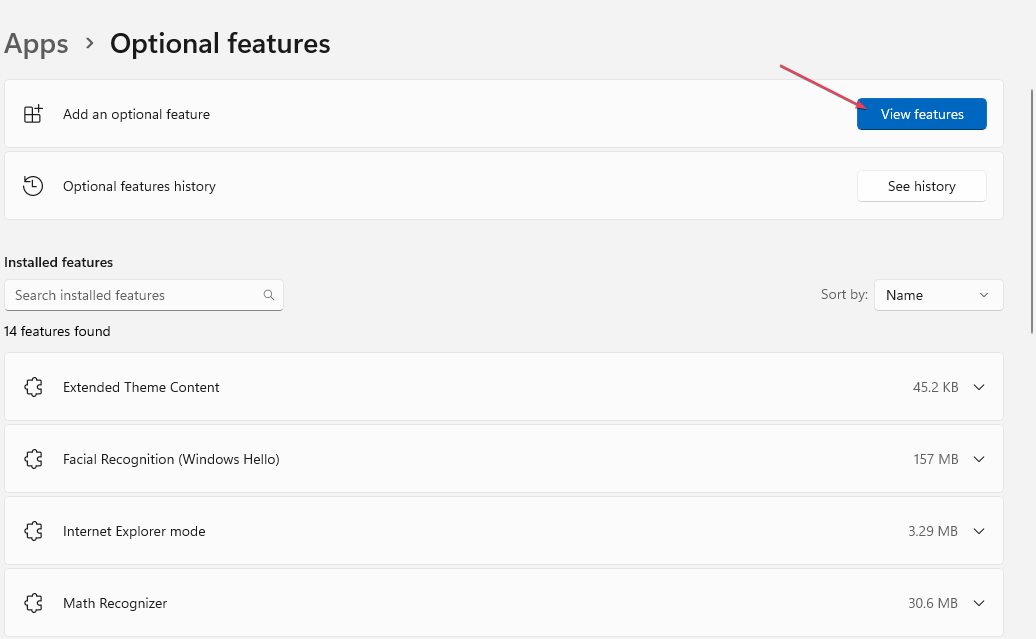
Left-click the Start button and click Settings.
Select Apps and click on Optional features.
In the next window, select View Features beside Add an optional feature.
Search for Media Feature Pack and click click Next. Then select Install.
Restart your PC and check if the Mfplat.dll missing or not found error persists,
Press the Windows + R key to open the Run dialog box, type gpedit.msc, and press Enter to open Group Policy Editor.
Navigate to the following path: User configuration\Administrative Templates\Start Menu and Taskbar\Notifications
Go to the Settings column, find the Turn off Quiet Hours policy, and double-click to open it.
Choose to Enable it to turn off Focus Assist and save changes.
Disabling the Focus Assist feature from the Group Policy Editor will remove the feature from the Settings app and stop it from functioning.
Check our guide about how to fix Group Policy errors in the Windows operating system.
On recent Windows versions, Focus Assist can get rid of distracting notifications. It is a productivity and efficiency feature that allows you to choose which notifications you want to hide and receive while the feature is enabled.
Furthermore, the hidden notifications will appear in your Notification Center. Then, you can check them whenever you’re ready to disable Focus Assist. Also, there are other options you can set in the feature to suit your needs.
Microsoft Windows is one of the most popular desktop operating systems on the market, but many wonder if Windows is losing market share.
This is a complex question, and to answer that, we need to look back at the history of Windows and other operating systems to find out. If you want to learn more, we have a special guide on Windows 11 market share in early 2023.
So join us while we take a closer look and examine the Windows market share and its changes over the past years.
Is Windows on a decline?
In short, yes, Windows is slowly but surely losing its market share to macOS and Chrome OS in the US, according to StatCounter desktop market share. While it was a market juggernaut 10 years ago, it has lost some of its popularity.
Despite that, Windows is still the most used operating system in the United States and worldwide.
Is Windows still popular?
Yes, Windows is still incredibly popular and a dominating operating system. It’s the number one operating system in the world, and it’s going to remain that in the future.
In 2013, Windows had 82.91% of the market share in the United States, while macOS had 15.83%. With the release of Windows 8 in 2012, we would expect the users to make the switch, but that wasn’t the case.
Windows 8 had 3.69% of the market share at the beginning of 2013. The operating system wasn’t well received by the users, and many didn’t like the removal of the Start Menu and increased focus on the touchscreen interface.
In fact, in early 2013, even Windows Vista and Windows XP had a larger market share despite being 10 years old. Windows 7 was the dominant operating system, with a 64.35% market share at the time.
It seems that Windows 8 didn’t achieve the desired success, and Microsoft was preparing to fix that with Windows 8.1 in late 2013.
To learn about the differences between Windows 8 and its predecessor, we suggest you check our Windows 8 vs Windows 7 article for an in-depth comparison.
2014 – Windows 8.1 overtakes Windows 8
At the beginning of 2014, Windows had 78.94% of the market share in the US, which can be attributed to the poor reception of Windows 8. Right about that time, Windows 8 would achieve its peak and start a slow downfall.
This was to be expected because Windows 8.1 update was released, and in May 2014, it overtook Windows 8 in terms of market share. To learn more about Windows 8.1, visit our Windows 8.1 feature guide.
However, Windows XP still had a larger share in 2014 than the new Windows 8.1, despite reaching the end of life in April of that year.
Windows 7 remained one of the most used versions, but its market share dropped to 61.12%.
Conversely, macOS had a small bump, reaching 17.6% of the market share. This could be attributed to the release of iMacs with 5K Retina display and the upcoming release of OS X Yosemite.
2015 – Windows 10 and 12-inch MacBook release
At the beginning of 2015, Windows had 79.42% of the market share but dropped to 73.96% in May of that year, probably due to the end of mainstream support of Windows 7 in January.
In 2015 Microsoft released Windows 10, and as a free upgrade from Windows 8, 8.1, and 7, it took the Windows market share by storm. By the end of the year, it overtook Windows 8.1, but it was still behind Windows 7.
On the other side, macOS had a 17.12% market share, which spiked to 21.58% in May following the release of the 12-inch MacBook. The device offered a Retina display, a fanless design, and a USB-C port, so it’s no wonder many users were eager to try it.
There was also one more competitor that tried to take a slice of the market share following the decline of Windows XP. That was Chrome OS, and even though it has been present for a while, in early 2015, it only had 1.15% of the market share.
If you never used Chrome OS, we have a great guide on how to download Chrome OS ISO and install it on your PC.
At the beginning of 2016, Windows had 79.07%, but it dropped way down to 70.92% in October. This can be attributed to the end of support for Windows 7.
In early 2016, Windows 8.1 had just 14.16% followed by Windows 10 with 19.81%. Windows 7 was still the most used with 51.81%, but that changed by the end of the year.
At the beginning of the year, Apple had 15.17% of the market with macOS, but it rose steadily, probably due to the release of macOS Sierra and the updated MacBook Pro with Core M processor.
As for Chrome OS, it rose to 2.02% of the market share at the beginning of 2016.
2017 – The end of Windows 7
At the beginning of 2017, Windows had 75.1% of the market. Windows 10 overtook Windows 7 a few months ago, and they shared around 41% of the market.
Due to the end of support, Windows 7 was on its way out, and its market share will slowly drop over the coming years.
However, many wanted to keep using Windows 7, and we have a great guide on how to stay on Windows 7 forever, if you want to.
Windows received a small market share increase, probably following the release of the Creators Update for Windows 10, which was announced in April 2017.
Regarding macOS, it had 19.51% at the beginning of the year, with a tiny increase by the end. As for Chrome OS, it held 3.03% at the beginning of the year.
2018 – Slow rise of Chrome OS
Windows started 2018 with 74.4% of the market share, but it dropped to 64.18% in November of that year. Windows 10 had 62.11% by the end of the year, and Windows 7 had 27.28% following a constant decline.
On the other hand, Apple had 20.26%, dropping a few percent by the end of the year. Chrome OS started with 3.26%, and by the end of the year, it had 5.06% of the market.
This can be attributed to the massive adaptation of Chromebooks in the education market due to their affordability and security. 60% of computers used in schools in March 2018 were Chromebooks, which kept rising by the end of the year.
2019 – Apple releases Mac Pro
In early 2019 Windows had 68.85% of the market, following the rise after a massive drop in November 2018. By the end of the year, the market share dropped to 65.08%.
The popularity of Windows 7 was waning, and that’s expected after Microsoft’s announcement to drop security updates and technical support for Windows 7 in early 2020.
By the end of the year, Windows 7 had 17.1% of the market, while Windows 10 had 75.42% in December of that year.
Apple started that year slowly, with 18.4%, but by the end of the year, it reached 24.89%. That was somewhat expected after the release of macOS Catalina in October. The same year Apple released a new Mac Pro workstation that was well-received by tech professionals.
Regarding Chrome OS, its market share rose to 6.4% by the end of the year.
2020 – Apple releases M1 chip
At the start of 2020, Windows had 65.14%, and by the end of the year, it dropped to 61.13%. Windows 10 dominated the market share with 83.99%, while Windows 7 was at a record-low 9.97%.
The year 2020 has been particularly challenging for Windows due to the global pandemic. With most of the workforce and students working or studying remotely, the market shifted.
According to IDC, Windows lost some of its popularity to Chrome OS. The operating system from Google has slowly but surely become associated with education, so it’s no wonder that many students opted for Chrome OS devices.
Apple also saw a massive jump in market share, and it went from 25.19% to a record 30.62% by the end of the year. This is expected with the launch of the line of M1 devices from Apple in 2020.
These devices used the M1 ARM chip and offered amazing performance, low power usage, and fanless design, making them the best buy during the 2020 pandemic.
2021 – Release of Windows 11
Microsoft Windows had 61% of the market in 2021, and by the end of the year, it received a minor jump at 0.67%. Regarding the individual operating systems, Windows 10 has achieved absolute dominance with 89.49%.
Windows 11 was just around the corner, and it was released in October 2021 with a mixed reception. The new operating system brought a new interface, as well as new hardware requirements.
Many of these new Windows 11 requirements made many PCs unable to upgrade, and Microsoft’s strict policy on being able to use Windows 11 only on approved hardware alienated some of the user bases.
Many PCs that were just a few years old weren’t eligible to upgrade to Windows 11, and that caused a negative reaction from the users.
macOS had 29.96% at the start of the year, but it lost 2% by the end of it. Chrome OS got 6.48% by the December of 2021.
2022 – Windows 11 is on the rise
Microsoft Windows had 61.33% of the market at the start of 2022, and we even saw a rise up to 67.56% in June, followed by a drop to 63.23% in December.
With Microsoft’s push to make Windows 11 the dominant operating system, by the end of 2022, Windows 10 dropped to 69.7% from 86.69%. On the other hand, Windows 11 saw a jump from 3.1% to 20.88% in the same year.
As for macOS, it achieved a drop to 25.52% in December. And the same goes for Chrome OS, which had 6.21% by the end of the year.
2023 – Rise of macOS and M2 processors
In the current year, Windows sits at 56.02% in March, while macOS has a 30.41%. This could be related to the release of M2 MacBook Air in 2022 and the release of macOS Ventura in the same year. Regarding the Chrome OS, it has 7.96%.
Regarding the Windows market share, in March, Windows 10 had 69.23% while Windows 11 had 26.3%. Surprisingly Windows 7 is still present with 2.57% of the market share.
Speaking of Windows 11, should you upgrade from Windows 7? Our Windows 7 vs Windows 11 guide will explain everything you need to know about the two operating systems in detail.
Keep in mind that all this information was for the United States. As for worldwide operating system market share, the situation is slightly better, and Windows has 69.4% while macOS has 17.21%. Chrome OS has only 3.23% worldwide.
Why is Windows’ market share falling?
The drop in Windows market share in recent years can be attributed to the release of the new M2 series, and we noticed the same jump when the M1 series was released.
These chipsets are focused on performance with longer battery life, so it’s no wonder they are capturing the attention of computer buyers in the United States.
This series was released during the pandemic, and with the increased need for a personal computer for remote work or school, many decided to go for the new Mac series or Chromebook.
So why are so many users switching to Chrome OS? Our Windows 11 vs Chrome OS guide might shed some light on that.
Meanwhile, Microsoft is pushing for Windows 11 upgrade, an upgrade that many didn’t expect or want, and to top it off, many of them won’t be able to experience it because of the incompatible hardware.
This is why macOS or Chrome OS might seem a better option for some users.
Will Apple overtake Windows?
Apple has gained massive popularity over the past decade in the United States and has doubled its market share in the last 10 years. With Windows losing its users, Apple can overtake Windows, at least in the US.
If that happens, it will probably take at least 10 years or more for Microsoft and Apple to have the same market share, so for the time being, Windows will remain a dominant OS in the US.
The same applies to the worldwide stage, where Windows has a noticeably larger market presence than Apple.
This depends primarily on your needs. Macs have superior build quality and amazing hardware, but that comes at a price.
In addition, Mac computers are a closed system, so you can’t tinker around with the system and software like Windows. This means you can’t upgrade hardware on your own and customize your computer as you like.
Many applications aren’t even available for macOS, although there are many great alternatives. Gaming is also a big issue; if you’re a gamer, Windows is a far superior choice.
While Macs work out of the box and offer great performance, the lack of hardware customization, high price, and subpar gaming support make Windows a better option.
To learn more, we suggest reading our Windows 11 vs macOS guide and learning about the differences in detail.
No, Windows won’t become obsolete, it’s a dominant operating system on desktop PCs, so we doubt that will happen in the near future.
However, your current version of Windows will become obsolete, and that’s inevitable. Newer versions are constantly being released, and just as Windows XP became obsolete when Windows 7 came out, the same will happen to the version you’re currently using.
Is 2025 the end of Windows?
No, 2025 is not the end of Windows, and newer versions will be released. However, Microsoft plans to retire Windows 10 in October 2025 to push users to upgrade to Windows 11.
2025 will be the end of Windows 10, but with Windows 11 released and with Windows 12 leaks, we’re positive that Windows is here to stay.
We hope this guide has answered all your questions regarding Windows and its market share.
Did we miss any important information? Let us know in the comments section below.
Microsoft’s Bing Chat is an on-demand personal assistant that understands and responds to questions in human-like language. However, many reported that Bing Chat is not working for them.
This feature has already had its share of issues, and we recently wrote about Bing error E010014 in a separate guide.
Fixing this issue is fairly simple, but before we address this issue, let’s see what causes this problem.
Why is Bing Chat not working?
For many reasons, Bing Chat, Microsoft’s latest addition to the Edge browser, may not work. Some of the reasons are:
Network connection issues – Bing Chat needs a stable and fast internet connection to connect to the necessary facilities and services. If you have network congestion or other network-related issues on your PC, Bing Chat may not work.
Bing Chat server not intact – Problems may occur during server maintenance or downtime, preventing Bing from connecting.
Corrupt browser cache and cookies – The issue may occur when the cache and cookies stored in the browser are corrupt and affect the web app’s performance. It also prevents the browser from writing new cache and cookies.
Interference from browser extensions – Some browser extensions may interfere with the activities of web programs, including Bing Chat. They can block the communication route of the web app, causing it to be unresponsive or freeze.
Outdated browser – Running Bing Chat on an outdated web browser can cause issues with its functionality. The browser is incompatible with the web app, resulting in Bing Chat crashing or not working.
These factors may vary on different PCs depending on the circumstances of occurrence. Nevertheless, you can fix the problem by following the steps outlined below.
What can I do if Bing Chat is not working?
Before proceeding with any advanced troubleshooting steps, we recommend you go through the following preliminary checks:
Open the Microsoft Edge browser on your PC, then click on the three dots on the top right to open the Menu. Select the Help and Feedback option from the left sidebar.
Click the About Microsoft Edge button from the side menu. Microsoft Edge will automatically check for updates on the About page if there are any.
Toggle on the switch for Download Update over metered connections to allow the app to download and install updates.
Updating the Edge browser software will fix all bugs in the previous versions affecting Bing Chat and resolve compatibility problems.
Click the Start button, type control panel, and press Enter.
Select the Windows Defender Firewall option.
Click the Turn Windows Defender Firewall on or off option from the left side of the page.
Go to the Private network settings and Public network settings, then click the radio buttons for the Turn off Windows Defender Firewall (not recommended) option.
Exit the Control Panel, then launch Edge to see if Bing Chat works.
Disabling the Windows Defender will troubleshoot any interference with the Edge browser. Check our guide on other ways to disable Windows Defender if you encounter any issues with the above steps.
Our readers complain about some of their files missing on OneDrive without having them deleted before that time. It is due to the general problem that OneDrive is deleting files automatically.
If your files are being removed automatically by OneDrive, then be sure to keep reading to learn how to fix this issue.
Why does OneDrive delete files automatically?
A couple of factors can be responsible for OneDrive deleting files automatically. Some common ones are:
Outdated OneDrive client – Not installing the latest update to the OneDrive client can prevent it from fixing bugs affecting its processes. Hence, it can start deleting files due to the bugs compromising the current version.
Corrupt system files – Like other apps running on your PC, OneDrive has system files that attend to its needs and help it function. If these system files are corrupt, they can cause the client to delete or modify files automatically.
Outdated Windows OS – You can also encounter the OneDrive deleting file automatically issue if your Windows operating system isn’t running the latest build for fixing bugs and improving app performance. Also, installing a damaged update can cause the OneDrive issue.
Hard disk damaged sectors – Having issues with the hard disk partitions on your PC can cause the files to delete automatically, making OneDrive the culprit.
Though these causes are liable to vary on different PCs, you can fix them by troubleshooting some settings. As we go further, we’ll take you through detailed steps to resolve the issue.
What can I do if OneDrive is deleting my files automatically?
1. Run the chkdsk command
Left-click the Start button, type Command Prompt, and click the Run as administrator option.
Click Yes on the User Account Control window.
Type the following commands and press Enter: chkdsk C: /r chkdsk/f
Restart your PC to see if OneDrive keeps deleting your files.
Running the Chkdsk command will scan the disk drives for bad sectors or partitions. It will fix the problems and prevent OneDrive from deleting the files.
A recipient can react to an email in several ways, including the Reply All option. However, not everybody uses this option, and many wonder how to turn off Reply All in Outlook.
Using this feature you can send a message to the original sender and other recipients on the To and Cc lines. This isn’t something that users always want, so many choose to disable it.
Why does Outlook keep adding my email to Reply All?
Sending out emails to recipients without designing a form and sending the emails issuing the form definition allows them to determine how to react.
The Design Form option in Outlook limits the sender’s options for how to react to the mail. Some are; reply, reply all, print, forward, or attach the message to another message.
However, Outlook doesn’t categorically keep adding your email to Reply All; the recipient does. It is because you haven’t specified the limit to the reaction options the email is exposed to. So, they can select the Reply All option on the message to add their email to the category.
Fortunately, users can decide how many options recipients can access when reacting to their emails. It helps prevent email recipients from selecting Reply All on your email.
How can I turn off Reply All in Outlook?
Design a form in Outlook
Launch Outlook on your PC and click File on the left corner of the top bar. Click on Options.
Then, scroll down, click Customize Ribbon on the left sidebar, and check Developer.
Select New Email.
Go to the Developer tab on the right pane, and click on Design a Form from the drop-down.
Find and click on Message, and then click the Open button.
Go to the Actions tab and double-click the line with the Reply to All option, to open the Properties.
Uncheck the box for the Enabled option, and click on OK.
Go to the Properties tab, and check the box for Send form definition with item option. Click on OK in the dialog box that appears to confirm the process.
Select Publish, and then click the Publish Form As option.
Click the Look In drop-down button, give the form a name, then click the Publish button.
The above steps will create and deploy the form definition with the Reply All option disabled whenever you send an email. If you can’t access certain options, be sure to read our missing Toolbar in Outlook guide and learn how to get it back.
In addition, you may be interested in our article about the best Outlook features to try right now.
For further questions or suggestions, kindly drop them in the comments section.
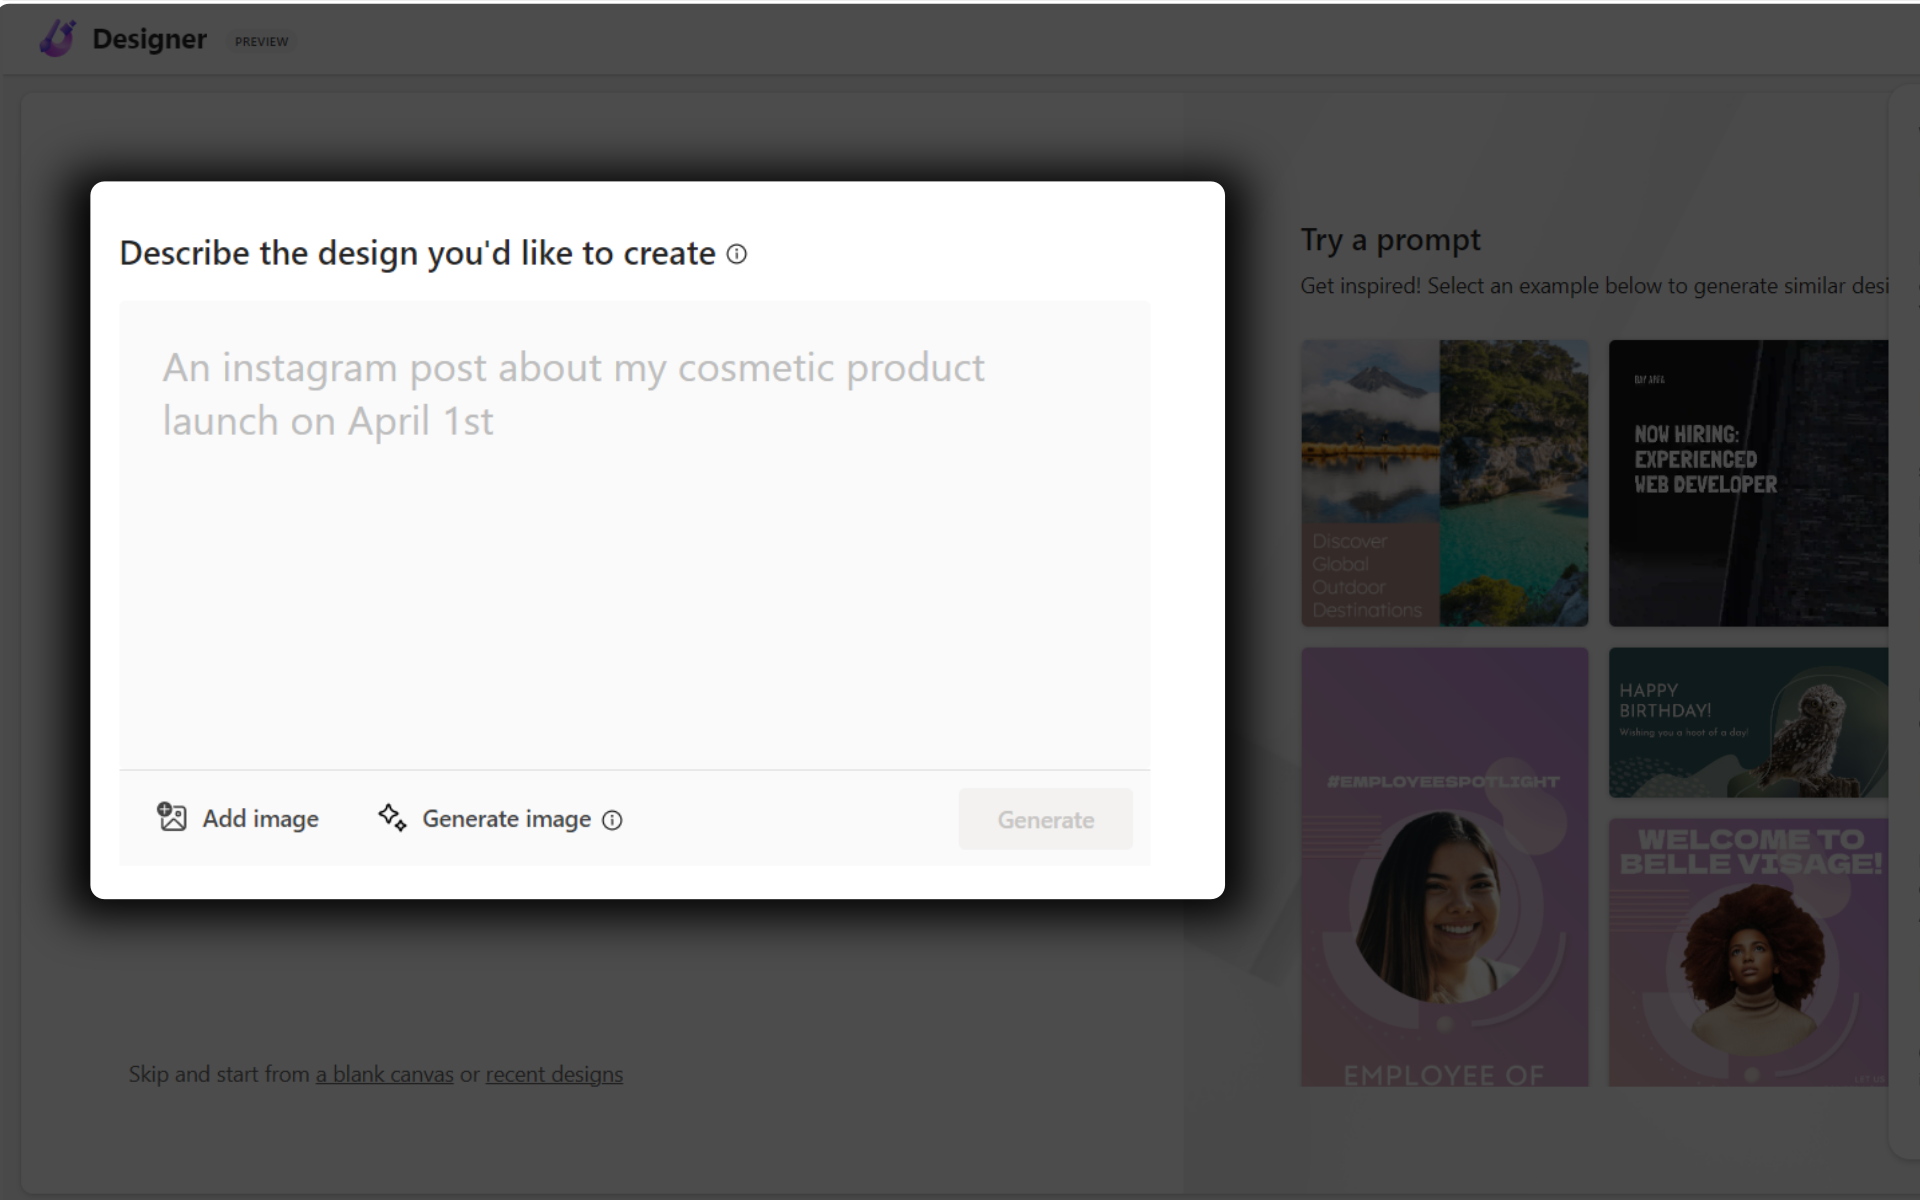
After weeks and months of rolling out on the waitlist, Microsoft finally launched its hotly-anticipated creator tool, Microsoft Designer, in public preview.
Derek Johnson, the app’s director of product, said that the team has been building with AI for 7 years and is excited for the Designer app to go live. It was previously released back in October 2022 for several select insiders, but now, the option to join the waitlist has been removed and you can access the preview right away.
Today is a special day as Microsoft Designer enters Public Preview! Try it out now for free at https://t.co/CdwrezVF5B.
When we started this journey to create Designer, I had no idea what I’d gotten myself into leading product for a v1 AI product at Microsoft. The last couple…
Similar to its competitor, Canva, Microsoft Designer allows you to create a social media post with simple word prompts. Here’s the catch: if you use Microsoft’s built-in browser, Edge, you can access Designer via the browser’s sidebar and work on your projects without switching to a different window.
With the power of AI, you can generate headings and taglines for the design and choose from dozens of templates that are available on the site, almost similar to DALL-E-powered Bing Image Creator which we’ve previously covered.
With that said, however, we may still need to wait a little longer for Designer to roll out for general availability. Being a preview-only feature means that the app still has a long road to improvement before hitting primetime.
In the meantime, if you’re still curious about how to access Microsoft Designer directly on Edge, here’s how. Up to this writing, only insiders with Edge Canary can access this, but once the feature is rolled out for the general public, we will keep you updated.
How to access Microsoft Designer directly on Edge.
3. Once the download is finished, double-click on the app
4. Finish the installation
5. Click + and scroll down to Designer (Preview), then click on the toggle to activate it.
But, can I access Microsoft Designer without using Edge? The short answer is yes, you can. Head over to Microsoft Designer’s website and you can try it out for yourself.
Have you tried Microsoft Designer directly on Edge? Let us know in the comments!
PowerPoint allows users to customize their presentations to suit their needs, increasing understandability and convenience. A common customizable feature is adding a timer to PowerPoint presentations. Hence, we’ll discuss inserting a countdown timer into your PPT.
Why should I add a timer to my PowerPoint presentation? Adding a timer to your PowerPoint presentation has many advantages for the presenter and the audience. Some notable ones are:
Inserting a timer fills you and your audience in on how much time has passed since the presentation began.
The timer helps the presenter to be cautious and aware in situations where you have a time limit.
Also, adding a timer to your PowerPoint presentation can serve as a break. It helps your audience know exactly when to be back in their seats.
Overall, a timer is a handy tool during a presentation, as every good presenter knows the importance of timing. However, we’ll discuss some basic steps you can follow to add the timer to your slides.
How can I add a timer to a PowerPoint presentation?
1. Use an add-in
Click the Insert tab at the top bar. Tap the Get Add-ins button in the toolbar to access the add-in menu.
You’ll be directed to Microsoft’s add-in store. Search for a timer to check the available options, then click the Add button.
Wait for the timer to reflect on your presentation.
The add-in will be inserted into your current PowerPoint slide and take effect in the presentation. Read our detailed guide on ways to fix the presentation cannot be opened error in PowerPoint.
2. Create a bar countdown timer
Open the slide to which you want to add the timer, click the Insert tab at the top bar, and then tap on Shapes from the toolbar. Select Rectangle to draw it.
Click on your desired shape and go to the Animations tab. Choose the Add Animation icon on the right pane, then select an option in the Exit section.
Click the Effect Options button on the Animation tabs, then choose in which direction you want your timer to disappear.
On the Animations tab, go to Timing, click on Duration, and type in how much time you want your timer to countdown.
Right above the Duration tab, click Start and select a cue to control exactly when the countdown begins.
The above steps will create a bar-like timer in a rectangular space and let you customize how it works.
Microsoft boss Brad Smith just announced that its gaming brand, Xbox, is partnering up with Nware.
In short, customers of the European third-party cloud gaming provider will be able to enjoy PC games created by Xbox studios, and potentially, Activision Blizzard games as well, in case the acquisition is still upheld after being appealed.
Microsoft and European cloud gaming platform Nware have signed a 10-year agreement to stream PC games built by Xnox on its platform, as well as Activision Blizzard titles after the acquisition closes. While it’s still early for the emerging cloud segment in gaming, this new partnership combined with our other recent commitments will make more popular games available on more cloud game streaming services than they are today.
We are full speed ahead in our mission to bring players more ways to play their favorite games. https://t.co/QIQMHXNHMP
An Nware subscription costs as little as $10.99/month, for Windows PC, Android mobile devices, & Android TV. The base plan includes perks like access to your synched games, keeping the progress, and priority access to gaming sessions.
Is Microsoft gearing up for EU regulators’ decision?
The news arrived not too long after UK regulators blocked Redmond’s attempt to acquire Activision Blizzard.
The deal, which was worth almost $69 billion, was axed due to cloud gaming issues. The Competition and Markets Authority (CMA) believes that Microsoft’s camp hasn’t effectively succeeded in addressing issues in this sector, despite its numerous deals involving other cloud gaming providers like Nvidia (GeForce NOW) and Nintendo.
As we’ve previously reported, the ultimate verdict to block the agreement was made because Microsoft’s proposed solution didn’t adequately resolve the apprehensions related to the cloud gaming industry, as laid out in the provisional findings of the CMA that were released in February.
Sony, Microsoft’s rival in the gaming sector with its PlayStation consoles, has been opposing this deal for so long. Although the UK has blocked Microsoft’s acquisition attempt, Redmond’s camp is still waiting to hear from the European Union.
What do you think about this recent move by Microsoft to sign another 10-year deal with Nware? Let us know in the comments!
The error restricts your use of video and audio files on the computer and often will require advanced video repair techniques.
Why am I getting the 0xc10100bf error?
This error is typical in Windows Media Player and VLC and can be a result of any of the following:
Digital Rights Management restrictions – Some files have restrictions placed on them, so they can not be played on specific devices.
File format compatibility – The error may get triggered if you try playing a file in a format unsuitable for your media player.
Outdated software – For some users, the issue occurs because they attempt to play files on outdated media players.
File corruption – This error is typical when a user tries accessing a damaged media file.
The following solutions will help resolve the error.
How do I fix error code 0xc10100bf?
Before going into the fixes, you should try the following:
Check your file format – If your media tool does not support the file format, you may consider using a different media player.
Restart your device – On rare occasions, it may be caused by a minor glitch, and a simple reboot can correct it.
Use specialized video file repairers – One major cause of the 0xc10100bf error is file corruption, so we recommend automating the repair process that fix these files with little user input.
Change the file format – You can use many tools to convert media files without losing quality. You should read your Player’s documentation to know what extensions it can play.
If none of the above is effective, proceed to the solutions below.
1. Use the built-in media player file fixer
Launch your media player (we use VLC for this example, but a few other media players have this feature).
Click the Tools tab, and select Preferences.
Select Input/Codecs, then select Always fix from the Damaged or incomplete AVI file dropdown menu.
Finally, try playing the file that caused the 0xc10100bf error.
2. Run the Video Playback troubleshooter
Press Windows + I to open the Settings app.
Click Troubleshoot on the right pane.
Select Other troubleshooters.
Click Run in front of the Video Playback troubleshooter.
These solutions have worked for many readers; if you have come this far, you should have also resolved the problem.
Now, however, let’s get to this big surprise and see exactly what we are dealing with. Please keep in mind that Steam is a free application, but some games cost money.
The new Steam in-game overlay packs tons of features
As some of you might know, Valve continues its rollout of slow but content-packed Steam client overhaul updates. And, the next one on the list is the aging in-game overlay.
As revealed today, this reimagining arrives as part of a larger code restructuring happening behind the scenes for the entire Steam software ecosystem.,
By that we’re referring to elements such as the desktop client, Big Picture mode, and of course the new Steam Deck handheld PC.
With this revamp, we can finally say goodbye to the multiple information boxes at the bottom, with a much cleaner toolbar.
The toolbar, which can be in icon or list view, takes its place to offer access to all the previous and some new options.
Naturally, users can pick and choose what windows they want open, and Steam will remember the selection between games for easy access.
The Game Overview is one of the new features, showing off what achievements are close to completing, playtime, screenshots, guides, and other relevant information to the game being played.
We also have to mention the Notes section, which allows players to jot down whatever they need on a per-game basis. Valve will sync across devices and is accessible outside games.
Furthermore, the Notes, Guides, Discussions, and the web browser windows can now also be pinned, letting their most essential parts hover in front of the game even when the overlay is disabled.
Please keep in mind that Valve has updated client notifications to show more relevant updates and the screenshot manager to be more offer more information and be snappier.
Steam users will also find minor UI changes across the client, with places like the header, settings, and server browser all getting some touch-ups.
That being said, know that in order to join the Steam Client Beta, head to the Account tab in settings and change the Beta Participation dropdown.
If you have a Steam Deck, this can be found in the System menu’s Beta Participation section, which goes the same for Big Picture users.
The Valve company has also highlighted that hardware acceleration is finally coming to macOS and Linux versions of Steam, enabling faster and more responsive UI elements.
Valve didn’t forget about Linux users, and they can try it out right now, but macOS users must wait a couple of weeks for their beta update to land.
Do you like the new and improved game overlay for Steam? Share your thoughts and opinions with us in the comments section below.
Gaming is a huge part of our lives, and Xbox is a massive name in this domain. However, with errors like 0x80190005, the user experience is affected.
The error often restricts your ability to sign into your Microsoft account or detect game services. So, we have compiled some of the most effective solutions in this article.
What is the 0x80190005 error code?
This error is related to Xbox services and connectivity on the Windows OS. Any of the following factors trigger it:
Issues with the app – If the Xbox app is outdated or contains bad or corrupt files, you may experience this error, and the Xbox app will not launch.
Corrupted cache – The error is triggered if the apps cache or Windows Store cache is outdated or corrupted.
Minor bugs and Microsoft Store glitches – You may face a host of tiny bugs with Microsoft Store; the inbuilt troubleshooter is very good at picking these.
It would help if you used the solutions below to solve the Windows Xbox app error.
How do I fix error code 0x80190005?
We encourage you to try these workarounds before the more elaborate solutions:
Log in with a different account – This step may help if your current user is corrupted.
Restart your device – A reboot is often effective when minor bugs or glitches trigger device errors.
However, if none of the above works, you should proceed to the steps below.
1. Reset the store
Press Windows + R to open the Run dialog.
Type the following command and press Enter. WSreset.exe
Restart your computer.
2. Clear the Windows Store cache
Press Windows + R, type cmd, and hit Ctrl + Shift + Enter.
Type the scripts below in the Command Prompt, hitting Enter after each one to stop some update services. net stop wuauserv net stop cryptSvc net stop bits net stop msiserver
Next, run the two scripts below to rename and clear the update folder. ren C:\Windows\System32\catroot2 Catroot2.old ren C:\Windows\SoftwareDistribution SoftwareDistribution.old
Restart the stopped services by running the scripts below. net start wuauserv net start cryptSvc net start bits net start msiserver
Restart your computer and verify that the 0x80190005 error has been resolved.
On the left pane, select Apps, then click Installed apps on the right.
Search for the Xbox app, click the 3 dots, and select Advanced options.
Scroll down and select Reset, then restart your computer.
4. Run the Windows Store troubleshooter
Press Windows + I to open the Settings app.
Click on Troubleshoot.
Select Other troubleshooters.
Scroll down to Windows Store Apps and hit the Run button.
Follow the instructions from the wizard to complete the process.
The solutions in this article should be sufficient to fix the error. We have not written them in any particular order, so you should try what feels most applicable.
The injection of AI across various products and services on the web has been very apparent since the year began, with Microsoft and Google at the forefront. Microsoft launched its own AI chatbot back in February which was shortly followed by Google’s Bard.
Both chatbots have experienced praise as well as setbacks in equal measure, but elaborate interventions have been put in place to remedy the issues. And as it seems, the rivalry and competition between Google and Microsoft is at an all-time high as first spotted by developer Vitor de Lucca on Twitter.
Now when you open Bard on Microsoft's Edge, it shows a button to compare the answers with Bing! Holy f… pic.twitter.com/xGpHc0Ztfn
— Vitor de Lucca |????️???? | vitordelucca.bsky.social (@vitor_dlucca) April 27, 2023
While trying to test out Google’s Bard on Microsoft Edge, the user spotted a Bing ad right next to Bard’s website URL. Perhaps an attempt by Microsoft to lure Google Bard users to the new Bing.
Deeper into the quest to try out Google’s Bard, Vitor spotted an animated “compare answers with the AI-powered new Bing” slide pop-up on the right side of the browser.
Gradually, the text disappears and leaves behind a Bing icon. It is worth noting, that the icon is rather out of place considering the fact that there’s also another Bing icon on the sidebar.
However, upon clicking on the new Bing icon after the slide disappears, the new split screen feature in Edge is launched allowing the user to compare answers with Google’s Bard.
Personally, I’ve tried to replicate the same results on Microsoft Edge, and here are my findings:
I first searched for Google Bard on Microsoft Edge (the latest version on the Stable Channel). Results pop-up alongside a “Try the new AI powered Bing and unleash the power of search” banner at the bottom which featured a Chat Now and Later button.
Upon clicking the Chat Now button, I was immediately redirected to Bing Chat in a new tab. It’s worth noting that I am already part of the preview program for the new Bing.
My assumption is that if I wasn’t part of the preview, I would’ve been prompted to sign up and join the tool’s waitlist. Given the recent acceleration of request approvals, perhaps, I would’ve immediately gotten instant access to the tool.
I didn’t see any ads upon clicking on the first search result and the process of joining Bard’s waitlist was seamless. I’m still on Bard’s waitlist, so I couldn’t experiment further.
What are your thoughts on Microsoft’s stunt to lure more users to its chatbot? Let us know in the comments.
Vorbisfile.dll is Dynamic Link Library, a file developed by Xiph.Org Foundation. It contains various instructions that are required by many programs to work properly.
If the vorbisfile.dll file is missing, the program dependent on the file may throw an error. In this guide, we will discuss some working solutions to fix the missing DLL issue.
What causes the vorbisfile.dll missing error?
There are several reasons for this DLL not found error; some of the common ones are:
Virus infection – If your computer is infected with viruses, your system files, including the DLL files, may get damaged. Run a deep scan using an antivirus tool.
Faulty app – The app or program throwing the error could be outdated or missing important files, leading to this error. Try reinstalling the app.
Damaged registry files – The registry entries are essential for the functioning of a computer; if missing, they could cause various issues. Use a registry cleaner tool to fix the problem.
Now that you know the causes, let us jump to the fixes.
What can I do to fix the vorbisfile.dll missing error?
Before engaging in advanced troubleshooting steps, you should consider performing the following checks:
Try restarting your computer.
Reinstall the affected app.
If these minor tweaks didn’t help, move to the below-mentioned solutions.
1. Use a third-party DLL fixer
Restoring a DLL file can be a troublesome task if done manually. Also, it is not recommended to get it from a third-party website. Get a DLL fixer to resolve the issue instead.
A DLL fixer can help identify and repair DLL errors that may be causing issues on your system, thereby resolving conflict between a third-party program and operating system and improving your PC performance.
2. Run SFC & DISM scans
Press the Windows key, type cmd, and click Run as administrator.
Type the following command to repair system files and press Enter: sfc/scannow
Wait for the scan to complete, then copy and paste the following command and press Enter: Dism /Online /Cleanup-Image /RestoreHealth
Reboot your computer to confirm the changes.
3. Run a malware scan
Press the Windows key, type windows security, and click Open.
Go to Virus & threat protection and click Scan options.
Select Full scan and click Scan now.
The tool will scan your computer and display infected files. Delete them to fix the problem.
Windows Defender is the standard method to scan for viruses that may be helpful, but it probably won’t repair the issue for good.
Fortunately, you can switch to multilayered antivirus software that uses high-end virus detection and malware defense to keep your PC always safe.
Installing DLL files from untrusted third-party websites is not advisable. However, If you know a trusted source, like DLL-FILES, that has been tested and verified, you can perform the steps below to restore the file.
Go to the DLL-FILES website, search vorbisfile.dll, select the appropriate option, and click Download.
Open the downloaded folder, and copy the .dll file from it.
Navigate to this path and paste the file: C:\Windows\SysWOW64\
Restart your computer to let the changes take effect.
If you’re encountering the issue of missing DLL files on your Windows 11, we suggest referring to our informative article that provides solutions for resolving this common problem.
So, these are methods to follow to fix the vorbisfile.dll missing issue. If you have any questions or suggestions, feel free to mention them in the comments section below.
Wondering if Windows 10 is still supported by Microsoft in 2025? You’re not alone. Many users ask if Windows 10 Pro, Home, 21H2, or 22H2 editions still receive updates or if it’s safe to use in 2024 and beyond.
In this article, we’ll break down the latest Microsoft support timeline, explain whether Windows 10 is still getting updates, and help you decide if it’s still secure, usable, and worth keeping on your PC or if it’s time to upgrade
However, to stay updated with the latest features of Windows and get all the security updates available, you must get Windows 11.
Is Windows 10 Still Supported?
Security Updates
Microsoft has declared the end of support for Windows 10, which is October 14, 2025, and the current version, 22H2, is the final version.
All the editions will get support along with monthly security update releases til the mentioned date. However, existing LTSC releases will get updates even after the date on the basis of their lifecycles.
Feature Updates
The latest feature update for Windows 10 is 22H2, which is the last one for this operating system. It didn’t bring new features but was all about performance, security, and reliability updates.
This is because Microsoft is now focusing on Windows 11 and bringing all new features to enhance the user computing experience.
Non-Security Updates
Nonsecurity updates usually contain bug fixes and performance improvements, and according to an announcement by Microsoft, the optional non-security updates will only be available for users with the most recent versions.
For Windows 10, that is the 22H2 version, and for Windows 11, it is the 21H2 and 22H2 versions. So we highly recommend you upgrade Windows to the latest version to stay updated.
Annual Updates
Beginning with Windows 10, Microsoft adopted the Windows as a Service model, which introduced the concept of releasing regular major updates to the operating system, typically twice a year via a Semi-Annual Channel.
However, with 21H2 and 22H2, the last two versions, the updates were released in the second half of the year through the General Availability Channel. These updates included new features and enhancements to improve the Windows experience.
Since the end of support date is declared, and Microsoft has another Windows version to concentrate on, sadly, there will be no annual updates for Windows 10.
Upgrade process for business customers
Before upgrading to Windows 11, you must perform these checks:
Must check your current devices to ensure you get the count of unsupported devices. You need to upgrade the hardware before upgrading to Windows 11.
Verify if all the important business-related software are supported by Windows 11.
Create a backup of all important files to an external storage. You can skip this step if you have saved your data to OneDrive, as it will transfer to Windows 11 seamlessly.
Once everything is in place, you can upgrade to Windows 11 from 10 for free, however, ISP fees may be levied for downloads, especially over a metered connection.
You can use Windows update, the Microsoft software download site, or create an installation media, depending upon which method is convenient for you to perform the upgrade.
Then, enter the product key manually, use Modern Device Management (MDM), a provisioning package, or command-line tool, depending on the supported path.
Manufacturer Warranty and Support
Every Windows OS comes with a life cycle policy of five years of mainstream support and 5 years of extended support, however, it is subject to conditions and may differ for LTSC versions.
It happened to Windows 7, is going to happen to Windows 10, and even the new favorite Windows 11 as well. To know when Windows 11 support ends, read this guide.
Till the time the operating system reaches the end of support, all the editions will get support with monthly security updates.
After the said date, there will be no security update or nonsecurity update patching Windows, leaving the system vulnerable to emerging threats and potential security risks.
This version of Windows comes with a bunch of useful accessibility features; here we are listing some of the best ones:
Narrator – A screen reader that reads text & describes activities on the screen, making the computer accessible for people with visual impairments.
Magnifier – Enlarges parts of the screen, making content on the screen more visible & readable for individuals with visual challenges.
Speech Recognition – Allows users to display captions or subtitles for videos, enhancing accessibility for people with hearing impairments.
Eye Control – Allows users to control the keyboard, text-to-speech, and mouse via eye tracking, which helps people with mobility impairments.
Dictation – Enables users to input text using their voice, which is helpful for people with mobility challenges.
Closed captions and subtitles – Allows to display captions or subtitles for videos, which is useful for people with hearing impairments.
2. Market share
Windows 10 is the most successful version of Windows; it overtook Windows 8.1 in December 2015, just five months after its launch, and has become more popular than Windows 7 in 2018.
According to Statcounter, in 2023, 71.62% of computers with Windows have Windows 10 installed globally.
If we talk about the United States, the percentage of desktop Windows version market share for the version is 70.58%.
Here are the details for top countries using Windows 10 vs other Windows OS versions on desktop:
Countries
Windows 10
Windows 11
Windows 7
Windows 8.1
Windows 8
Windows Vista
Global
71.64%
23.61%
3.34%
0.61%
0.35%
0.34%
U.S.A.
70.58%
25.69%
2.32%
0.61%
0.45%
0.21%
United Kingdom
74.22%
24.11%
1.06%
0.28%
0.13%
0.09%
India
74.3%
22.32%
2.68%
0.35%
0.2%
0.12%
Canada
67.06%
29.62%
2.02%
0.81%
0.19%
0.15%
Germany
78.38%
17.94%
2.16%
0.86%
0.29%
0.26%
3. Windows Experience Blog & Windows Insider Program
Windows Insider program and Windows Experience blog provides important insights into the latest features, update, and enhancements in the Windows ecosystem.
The Insider program keeps you informed about near-future improvements, allows you to be a part of beta testing, and lets you contribute to making Windows OS better, which thereby strengthens the connection between Microsoft and its user base.
4. Improved security features
The features like Device Guard, which only allows trusted apps to run on your device, and Credential Guard, which prevents hackers from accessing credentials even if your machine is compromised, make Windows 10 a highly secure operating system.
Windows Defender uses Machine Learning, the cloud, and behavior analysis to respond to emerging threats.
With features like BitLocker, Windows Hello, Secure boot, Core isolation, and Windows Passport, you get both end-user convenience and system security.
Disadvantages of Windows 10
Privacy concerns – As the operating system collects and shares the user’s personal data with Microsoft, a lot of users are concerned.
Comes with bloatware – A bunch of preinstalled apps and software, which you may or may not want, take up valuable storage space.
Automatic updates – The compulsory updates that OS used to push have been known to cause compatibility issues and have been reported to have slowed down PCs.
No feature updates – As the end of support is coming, there will be no feature updates, so there will be no new features to look for, potentially leaving the system stagnant.
Compatibility issues – Older programs and apps may not be compatible with Windows 10. Also, Windows 10 has a set of minimum system requirements for a computer to make it work properly.
What happens when Windows 10 support ends?
After October 14, 2025, devices running the Windows 10 OS will no longer receive security and quality updates, and users will no longer be able to contact the company for support.
And even though there’s some time before the operating system reaches the end of service, with no feature updates to look forward to, it will not be exciting anymore.
Backwards compatibility has been an important part of earlier Windows releases. And now, with the latest OS now fully adopted, users are asking if Windows 11 is backwards compatible.
If you also looking for the answer to this question before upgrading to Windows 11, this guide contains detailed answers to the questions you may have.
Can I run old software on Windows 11?
Like others before it, you can run old software on Windows 11. This is thanks to its backwards compatibility feature.
The backwards compatibility feature on Windows 11 is designed to cover any architectural differences that make it difficult for old software to run on modern operating systems.
It basically mimics the older OS versions’ environments, making the old software run properly. So, if you are wondering if you can run old apps or play legacy games on Windows 11, the answer is a resounding affirmation.
Below are some old apps we have tested on Windows 11:
1. Street Racing Hero
This is an old Windows 7 game that is played by numerous players. It lets you compete with the best drivers in a rough but interesting race.
We downloaded the old version and ran it on Windows 11 without issues.
2. Falkon browser
On the browser front, we have chosen one of the best browsers for old PCs in Falkon. This excellent browser works on Windows XP, Vista, and 7, and it worked well on Windows 11 too.
3. VLC media player
Last but certainly not least on our list of tested apps is an old version of the VLC media player meant for Windows 7. Again, in this case, Windows 11’s backward compatibility shined through.
Is Windows 11 compatible with all Windows 10 apps?
Windows 11 was built basically on the foundations of Windows 10. Hence, most Windows 10 apps work on Windows 11 with just a few exceptions.
Most users have successfully upgraded from Windows 10 to Windows 11 without needing to reinstall their apps. Even if you encounter minor issues, a simple app update should work.
However, if you encounter any compatibility issues, we will show you how to fix them in the next section of this guide.
How to fix compatibility issues on Windows 11?
1. Run the compatibility troubleshooter
Right-click the old game or app and select Properties.
Click the Compatibility tab at the top.
Now, click Run compatibility troubleshooter.
Choose the Troubleshoot program option.
From here, check the box for the problem you are facing and click the Next button.
Click the Test the program button to confirm if the recommended settings work for you, and click the Next button.
If it works, click Yes, save these settings for this program. If not, select Try again using different settings.
When you are done, click Next to save the settings.
If Windows 11 backwards compatibility is not working for your old program, the first thing to do is to run the Compatibility troubleshooter. This will diagnose the issue and recommend solutions for it.
Right-click the problematic app and choose the Properties option.
Select the Compatibility tab at the top.
Now, check the Run this program in compatibility mode for box.
Click the Compatibility mode dropdown and select your preferred OS.
Alternatively, you can go to the Settings section and check the box for some of the options there.
Finally, click the Apply button, followed by OK.
If you know the settings needed to take advantage of the Windows 11 backwards compatibility mode, you can apply them manually. After making these changes, they will remain in place till you alter them.
If these solutions do not work, check if an updated app version is available on Microsoft Store. Also, you can go to the manufacturer’s website to check if the app works on Windows 11.
What is Windows 11 not compatible with?
Windows 11 is compatible with a wide range of old and new software, unless stated otherwise. However, this backwards compatibility of Windows 11 does not apply to all hardware.
Microsoft has listed a set of hardware requirements that your PC must meet before you can use the OS. If your PC meets these requirements, Windows 11 will work on it, irrespective of how old it is.
If you are dealing with this PC can’t run Windows 11 error messages despite meeting the requirements, we have some useful fixes for you in the linked guide.
With this, we can end this comprehensive guide on whether Windows 11 is backwards compatible. So, if you are wondering if Windows 11 can run Windows 7 programs and older ones, rest assured that most of them will work on the latest OS.
Device encryption is an important part of any machine, including the Windows operating system. This feature has been around since the days of Windows Vista but has permanently been disabled out of the box.
However, there are rumblings of change on the latest OS, and some users wonder if Windows 11 is encrypted by default. Well, you are about to find that out in this detailed guide. Read on!
Does Windows 11 have encryption?
Windows 11 has two encryption modes: Device Encryption and BitLocker encryption. Device encryption (available on Windows 11 Home, Pro, Enterprise, and Education) helps encrypt all available drives on your device without exception.
On the other hand, BitLocker is only available on Windows 11, Pro, Enterprise, and Education. It also gives admins the option to choose the drives that should be encrypted.
Another advantage of BitLocker is that you can easily back up and recover your encryption key.
However, the two options offer full disk encryption technology that keeps your data safe.
Does Windows 11 have BitLocker encryption on by default?
Both Windows 11 Home and Pro versions usually support automatic device encryption by default. However, you need to sign in with your Microsoft account during the setup process to kick BitLocker on.
But this is not true for users who sign in with local accounts. Also, if your device does not meet the requirement for encryption, your device will not be encrypted by default.
Check this guide’s next section to know if your device is encrypted.
How do I know if encryption is enabled in Windows 11?
Press the Windows key + I to open the Settings app and select Privacy & security in the left pane.
If your device supports device encryption, you will find Device encryption as the third option from the top.
Now, click the Device encryption option to view your encryption status.
You can enable the feature if it is turned off to use the security feature
If your PC doesn’t support the feature, you won’t find the option there.
With this, you can check your Windows 11 encryption status and know if it is activated by default.
If you can’t find the feature, all hope is not lost, as you might still be able to use the BitLocker drive encryption option if you are on Windows 11 Pro.
There are various reasons you might have encryption disabled by default on your Windows 11 PC. The most common reason you might not find the device encryption option within your Settings app is the lack of support for Modern Standby.
This low-power state feature helps your PC carry out a series of processes, like system updates. Also, it is important to make your PC wake up instantly.
To find out more reasons you can’t find device encryption on Windows 11, follow the steps below:
Press the Windows key and type system info.
Select Run as administrator under System Information.
Now, scroll down and look for the Device Encryption Support option.
Next, you will find an option that reads: Reasons for failed automatic device encryption. Move your mouse over the text to read the full reason for the issue.
So, depending on the reason listed, you might be able to fix it. If the reason is not something you can fix, you can use BitLocker instead.
However, you have to be on Windows 11 Pro to use this feature.
Press the Windows key + R, type control, and click OK.
Next, select the System and Security option.
Now, click BitLocker Drive Encryption.
Finally, click the Turn on BitLocker option and follow the onscreen instructions to complete the process.
There you have it: everything you need to know about if your Windows 11 PC is encrypted by default. We have shown what you must do to encrypt your PC if it is not encrypted out of the box.
NotificationController.dll is one of the important system files that make apps functional on the Windows operating system. However, it is not without its troubles, with some users reporting a NotificationController missing error message.
If you are also dealing with this issue, this guide will show you how to fix it, irrespective of the cause.
Outdated PC: In some cases, this error message can be due to an outdated operating system. You can fix this by updating your PC.
Faulty system files: If the NotificationController.dll DLL file is missing on Windows 11, it might be because of corrupt system files. The solution to this is to repair and restore these files.
Recent changes made: Sometimes, this issue can be due to a recent change made to your PC. What you need to do in this case is to perform a system restore.
How can I fix the NotificationController.dll missing error?
1. Use a dedicated DLL fixer
System DLL files like NotificationController.dll are essential to how apps operate on your PC. So, you need to be careful when fixing issues concerning them.
To prevent further issues, we recommend using one of the best DLL repair tools to fix this file instead of downloading it from a third-party website.
2. Update your PC
Press the Windows key + I to launch the Settings app and select Windows Update in the left pane.
Next, click the Check for updates button in the right pane.
Finally, download and install the available updates, including the optional ones and restart your PC.
An outdated PC is prone to all sorts of issues and could cause this NotificationController.dll missing error. Hence, you need to ensure your PC is updated to the latest available version.
3. Reinstall the faulty app
Press the Windows key, type control, and click Control Panel.
Choose Uninstall a program under Programs.
Now, right-click the faulty program and select the Uninstall option.
Finally, go to the official website to reinstall the program.
Sometimes, the NotificationController.dll missing error message can be down to issues with the app you are trying to open. To fix this, you need to uninstall the app and reinstall it from the official source.
4. Run an SFC scan
Press the Windows + S key, type cmd, and select Run as administrator under Command Prompt.
Type the command below and press Enter to run it:sfc /scannow
Finally, wait for the command to finish running and restart your PC.
In some cases, the NotificationController.dll missing can be caused by broken or faulty system files. Running the command above will help repair and restore these files.
Press the Windows key + R, type rstrui.exe, and press Enter.
Click Next on the new page.
Now, choose your ideal restore point and click the Next button.
Finally, click Finish and follow the onscreen instructions to complete the process.
If the solutions above fail to fix the NotificationController.dll missing error, the last resort is to restore your PC to a point where everything is working well. This will undo the changes you might have made that are causing the issue
There you have everything you need to fix the NotificationController.dll missing issue. All you now need to do is to follow the instructions carefully, and things should be back to normal.
In the same vein, if you are facing other issues like adbwinapi.dll not found, check our detailed guide to fix it.
Feel free to let us know the solution that helped you solve the problem in the comments below.
Clr.dll is an integral DLL file closely associated with the .NET Framework. It is one of its essential building blocks and, as such, needs to be firing on all cylinders.
Unfortunately, users complain of a clr.dll missing error while launching apps on their PCs. In this guide, we will show you how to fix this error for good and help restore normalcy to your computer.
What is CLR DLL?
The clr.dll file, or Microsoft .NET Runtime Common Language Runtime – Workstation. It is the major component of the .NET Framework and is important in the effortless running of system apps.
And with the number of apps dependent on the dotnet Framework feature, many things will be affected if this DLL file is missing on your PC.
How can I fix the clr.dll missing error?
1. Use a dedicated DLL fixer
Clr.dll is one of the high-value DLL files that make things tick on the Windows operating system. It is essential to the effortless launching and running of apps and games.
Hence, you need to be careful when dealing with issues involving it. In this case, clr.dll is missing; we recommend fixing it with one of the best DLL repair tools.
2. Re-register the file
Press the Windows key, type cmd, and click Run as administrator under Command Prompt.
Type the command below and hit Enter: regsvr32 CLR.DLL
Finally, wait for the command to finish running and restart your PC.
Sometimes, a simple registration of the clr.dll file is all that is needed to get it working again. After completing the registration, the error message should now disappear.
Re-registering a service can be a common fix for other issues like CLR error 80004005; read this guide to know more.
3. Update your PC
Press the Windows key + I and choose Windows Update in the left pane.
Click the Check for updates button.
Finally, download and install the available updates, including the optional ones and restart your PC.
Sometimes, problems with clr.dll can be down to an outdated operating system. You only need to update and restart your PC to fix this.
4. Run an SFC scan
Press the Windows key, type cmd, and choose Run as administrator under Command Prompt.
Type the command below and hit Enter to run it: sfc /scannow
Finally, wait for the command to finish running and restart your PC.
One of the prominent reasons while DLL files go missing on Windows 10 or 11 is broken or faulty system files. You need to repair these files by running the command above and restarting your PC.
Press the Windows key + R, type rstrui.exe, and press Enter.
Click Next on the page that pops up.
Now, select your preferred restore point and click Next.
Finally, click the Finish button and follow the onscreen instructions to complete the process.
If you started noticing this clr.dll missing error after downloading an app or making some changes to your PC, the quickest way to fix it is to perform a system restore.
Next, unzip the downloaded file and move the clr.dll file to the path below on a 32-bit PC:C:\Windows\System32
If you are using a 64-bit PC, move it to the path below instead:C:\Windows\SysWOW64
Finally, restart your PC.
If you still get the clr.dll missing error, you might have to download the file from another website. While this is not advisable, it has proved effective for some users.
You only need to scan the file and ensure it is safe before installing it. Another option will be to copy the DLL file from another PC of the same architecture to the paths listed in the solution above.
We can now conclude this comprehensive guide on fixing the clr.dll missing issue. We believe you should be able to fix the problem with the info provided therein.
If you are dealing with other DLL problems like opencl.dll missing, check our detailed guide to fix it.
Feel free to let us know the solution that helped you solve the problem in the comments below.
Microsoft has announced that will be dropping support for its Microsoft-branded accessories, that is, mice, keyboards, and webcams. This marks the end of an era, with the company first debuting its first branded mouse in 1983 coupled up with Word and Notepad.
This shouldn’t be misconstrued to mean that Microsoft won’t be manufacturing accessories entirely. While speaking to The Verge, Senior communications manager at Microsoft, Dan Laycock indicated that the company is shifting its focus to Surface-branded PC accessories.
Dan Laycock further added:
Going forward, we are focusing on our Windows PC accessories portfolio under the Surface brand. We will continue to offer a range of Surface branded PC Accessories — including mice, keyboards, pens, docks, adaptive accessories, and more. Existing Microsoft branded PC accessories like mice, keyboards, and webcams will continue to be sold in existing markets at existing sell-in prices while supplies last.
A report by Nikkei had earlier indicated that Microsoft was planning to do away with the Surface accessories. However, this isn’t the case. Microsoft will be laying more emphasis on the Surface brand and doing away with Microsoft-branded accessories instead.
While it is clear that Microsoft still intends to continue making sales of its mice and keyboard accessories under the Surface brand, the company intentionally left out webcams.
Surface is a premium Microsoft brand, and most of the products that are part of the Surface Lineup are significantly pricey. It’s not yet clear if this shift by Microsoft will have any implications on the price point of these accessories. As it stands, the Microsoft Modern Webcam is the only available option when it comes to the webcam category, and it currently goes for around $800.
The default folders in your Windows PC usually include Documents, Pictures, Music, Videos, Desktop, and Downloads which are located on the C drive.
And while these folders make it easy for the user to navigate through the operating system and find what they are looking for, over time, as more items continue to be included in the folders, the disk space starts running out.
In turn, your Windows PC to become slower especially if your device is running on limited storage space. We’re all acquainted with how stressful and mind-boggling it is to use a slow device.
An easy fix for this issue would be to change locations for default folders in your Windows PC. There are several reasons that can cause you to change the location of these folders:
Poor performance – If your device keeps on crashing or isn’t booting up well, it means that your drive C’s storage space has been overwhelmed, thus impacting the device’s performance negatively.
Clean install – moving your default folders off the C drive makes it easier to perform a clean install (for example, to install a Windows Insider build from an ISO). Move your folders, wipe the C drive, perform a clean install, and then point your folders to your new locations from the new installation.
Backup – Moving your folders to another location could be a great way of creating a backup for your important files and documents.
In this guide, we’ll show you how to change locations for default folders in Windows. Here’s what you need to do:
Change locations for default folders via File Explorer
Launch the File Explorer, click on This PC, and select Device and Drivers.
Select the new drive location and head to the new location where you’d prefer to move your default folders to.
Create a new folder and name it.
Next, press the Windows + R keys to launch the Run dialog box.
Key in the following command to launch the location with the user account default folders: %HOMEPATH%
Now, right-click on the folder you’d like to move to another location and select Properties.
Click on the Location tab, click the Move button, and select the folder in the new location.
Finally, click on the Select Folder button, select Apply, and click on the Yes button.
Change locations for default folders via Windows Settings
You can also use the Windows settings to easily change the default location for folders and files in Windows 11. Here’s how:
Head to the Windows Settings, click on Systems, and select Storage.
Under the storage management category, click on the Advanced storage settings dropdown menu, and select where new content is saved.
Select the new save location and click on Apply save the changes.
Change locations for default folders via the Registry Editor
Alternatively, you can use the Registry Editor to change locations for default folders. Here’s how to do it:
Launch the Run dialog box by pressing Windows + R keys, then type regedit.
Navigate through this path: HKEY_CURRENT_USER\SOFTWARE\Microsoft\Windows\CurrentVersion\Explorer\User Shell Folders
Right-click on the file that you’d one to move to another location.
Next, in the Value data section of the Edit String window of your PC, enter the new location or path and click on OK.
You’ll need to restart your Windows PC for the changes made to be applied.
Bonus tip
How to restore default folders location in Windows
Launch the File Explorer and head to the current set default folder location.
Click on the folder and select the Properties option.
Click on the Location tab, and select the Restore Default button.
Finally, click on the Yes button to restore the folder to its original location.
Save on space by changing locations for default folders
Hopefully, with these methods, you’ve been able to change locations for default folders. This will not only help you save up on space and generally improve the performance of your device but also promote equal disk partition.
This will also help you prevent booting problems. Be sure to let us know which method worked for you in the comments below.
Libwinpthread-1.dll is one of the essential DLL files that keeps your PC running effortlessly. Unfortunately, the file can go missing sometimes, leading to the Libwinpthread-1.dll not found issue.
While the error can be pretty frustrating, it is not the most difficult to fix, as shown in this detailed guide.
Outdated driver: In some cases, this issue can be caused by one or two outdated drivers on your PC. The solution to this is to update your drivers to the latest version.
Faulty app: Another potential cause of this issue is problems with the app giving the error. You need to uninstall the app and reinstall it to solve this.
1. Use a dedicated DLL fixer
Libwinpthread-1.dll is another one of the many non-system DLL files installed by the program that needs it. A downside of these files is a persistent compatibility problem, leading to various error messages like this one.
Fortunately, you can rectify this with the help of a dedicated DLL repair tool. With this tool, you can correct all compatibility issues between your PC and any third-party DLL file without stress.
2. Reinstall the faulty app
Press the Windows key, type control, and select the Control Panel option.
Click the Uninstall a program option under the Programs section.
Next, right-click the faulty app, click Uninstall, and follow the onscreen instructions to complete the removal process.
Finally, go to the official website to reinstall the app.
In some cases, the libwinpthread-1.dll not found error message can occur because of issues with the app showing the message. To fix this quickly, you need to reinstall the faulty app from official sources.
3. Update drivers
Press the Windows key + R, type devmgmt.msc, and click OK.
Double-click the section you want to update drivers for and right-click the device under it.
Now, choose the Update driver option.
Finally, select Search automatically for drivers and install any available updates.
Some users have reported that the libwinpthread-1.dll issue can sometimes be caused by outdated drivers. Hence, you need to update all your PC drivers.
While you can always do this manually, we recommend using an automatic driver updater in Outbyte Driver Updater to complete this task.
This is because you might need to update many drivers, and having to repeat the steps above will be stressful and time-consuming. This solution will scan for all outdated drivers and update them from its enormous database.
Press the Windows key + R, type rstrui.exe, and click OK.
Click Next on the page that pops up.
Now, select your preferred restore point and click Next.
Finally, click the Finish button and follow the onscreen instructions to complete the process.
Sometimes, this issue can be caused by recent changes to your PC. You need to restore your PC to a point when everything is working perfectly to fix this.
Go to a reliable third-party website like DLL files.com.
Click the Download link.
Next, unzip the downloaded file and move the libwinpthread-1.dll file to the path below on a 32-bit PC:C:\Windows\System32
If you are using a 64-bit PC, move it to the path below instead:C:\Windows\SysWOW64
Finally, restart your PC.
If, for some reason, you still can’t fix the libwinpthread-1.dll not found issue after applying the solutions above, you need to download the file from a third-party website.
Note that you need to scan the file to be sure it is safe from viruses. Also, if pasting the DLL file in your system folder fails to solve the problem, you can paste it into the game or app folder as specified in the error message.
We have reached the end of this comprehensive guide on fixing the libwinpthread-1.dll not found error. You should now be able to get past the error provided you follow the steps carefully.