A new program by Microsoft called Xbox Game Pass friend referral is finally here. Now, members of Xbox Game Pass Ultimate and PC Game Pass invite up to five friends for a free 14-day trial of PC Game Pass.
Here’s the catch: those invited users must be new to the Game Pass before redeeming their free trial.
PC Game Pass lets you discover and play a curated library of hundreds of high-quality PC games from great developers around the world, including games like Forza Horizon 5, Sea of Thieves, and more. With new games added all the time, there’s always something new to play.
The announcement arrived shortly after Microsoft’s hotly-anticipated game, Redfall, hit the stores. Albeit mixed reactions from players and critics alike, Game Pass members can play for free, so it’s not always a bad thing.
If you’re curious about how to invite your friends for a free Xbox Game Pass through referral, make sure to first subscribe to the Pass and then follow these steps.
How to invite friends for free Xbox Game Pass through referral?
1. Open the Xbox App on Windows.
2. Click the Give PC Game Pass button and list the emails of friends you want to invite (up to 5).
3. Or, you can also log in via Xbox.com and find Friend Referral invitations there.
However, here’s another catch: participating in this offer also means that the new user can not use other promos, which sometimes come with accessories.
And, recently, Redmond officials have also scrapped the $1 trial offers for Xbox Game Pass Ultimate and PC Game Pass back in March 2023, so this seems like a viable substitute.
Of course, your friends can end the subscription at any time, and we have a great guide on how to cancel Xbox Game Pass subscription on PC that they shouldn’t miss.
Have you tried the Xbox Game Pass with your friends through a referral? Let us know in the comments!
The creator economy is here, and video creation is becoming a critical skill. But video editing is not simple, and the fact that there are paying jobs for that skill is reason enough to understand.
So, what are we, regular people, supposed to do when we want to edit a video with stunning results?
Truth be told, there are a lot of video editing software on the market that get the job done, and just a few of them can help us achieve that in minutes without complicated instructions.
One of the best apps for the task at hand is Wondershare Filmora 12, a fresh new smart software that takes video editing to a new level of artistry, even for the most inexperienced users.
In this article, we will show you all its best features and explain how to use them to edit your video with excellent results.
What are the best features of Wondershare Filmora 12?
1. Backup & sync your assets
Filmora 12 stepped up in the asset management department. When you finish your creation, you can upload it to your social media accounts, like with many other editors.
However, with Filmora 12, you may also store it on your cloud accounts, and more importantly, you will have your own storage space: Filmora Workspace.
This way, all your projects will be available anywhere you start your Filmora app, whether it’s on your mobile, PC, or online.
2. Available on any platform
Do you enjoy editing your videos on your Android or iOS mobile right after you’ve shot a clip? You can do that with Filmora 12 because it has a dedicated app.
Then, you can continue the work on your Windows or Mac laptop or PC or you may just use your tablet because you enjoy dragging and dropping elements with your fingers.
And thanks to your own Filmora Workspace everything will be updated to the latest version whatever device you use.
3. Enhanced keyframe
Although with Filmora 12, you can create an astonishing video in just a couple of minutes, you can also go a lot further with the editing.
And that’s because Filmora 12 comes with a very complex keyframe that you can use to make a lot of advanced settings.
On the keyframe, you will find a lot of useful adjustments, such as filters and color correction, in addition to position, rotation, and scale.
Filmora 12’s interface is complex yet very friendly and intuitive, so anyone will be able to use it regardless of their video editing skills.
4. Create a mask for any object with Draw Mask
Video masking is a tool usually found in advanced video editors to remove objects from frames or highlight them.
Filmora 12 not only has that option, but it’s extremely easy to use. You may simply place shapes around the objects or use the pen tool to create the shape around them with pinpoint accuracy.
You can even draw curve segments with Bezier paths, just like in professional editing tools.
After you draw the mask, you may extend it, blur the object inside, or highlight it by inverting the mask.
How can I create a great video quickly with Filmora 12?
You will get an executable file and after it downloads, click on it and select Install.
Once the installation is done, hit the Start Now button to open the app.
Now, you have more options available, but if you want to create a video quickly, the perfect choice is to go for the Instant Mode.
Next, you have to choose a template to start your creation, and since we’ve got a funny pet clip, we’re going to select and see all Family templates. Of course, you can choose another one from over 115 available for free.
If you hover your mouse over a template, you will see an instant preview showing a few seconds of the clip. However, you also have a Preview button to see the entire template video.
We loved it so we clicked Use. After that, we have to log into our Wondershare account. If you don’t have one, you can create it in seconds by clicking on the Create account option or simply using your Google account to log it.
Once you log in, you will see a window where you upload your videos by clicking on the big + button.
You will have to upload at least 5 media items, then hit the Auto Create button and watch the magic happen.
Done! You now have a video with all the elements, including an opening, highlights, visual effects, and a nice finish. You can just hit the Export button to save it on your drive and share it with friends and loved ones.
There’s a lot more fun to be had with all the Filmora 12 features. You can change all the elements and customize every aspect of your clip, from text and titles to animations, effects, background, and a lot more.
For instance, from the Layer attributes, you will be able to select any element and change its style, appearance, orientation, and more.
From the bottom, you can control the timeline and frames and customize the music and effects. There are endless possibilities.
And from the left pane, you’re free to change the title style and the background music. There are lots of free options, or you can upload your own. Hey, maybe you’ve changed your mind about your video, no problem, select another template.
We’ve had lots of fun with Wondershare Filmora 12, and the best part is that, as you can see, it gives you the option to create a video in minutes with only a few clicks. And after, you can tinker and customize every aspect of your creation.
Filmora 12 has everything right there in one video editor, music, effects, templates, 2D animations, and lots of other elements to enhance your video and make it pop.
In the end, exporting the video only takes a couple of seconds, thanks to the video acceleration option that will use your GPU to speed up the process.
Windows updates come with security fixes and patches, but update issues such as the 0x80042001 error make it impossible for the process to execute successfully.
If you have just encountered the error, this article will guide you through the best solutions and show you the likely reasons you face the error.
Why am I getting the 0x80042001 update error?
From our users who have faced the error, we gather that any of the following may trigger it on your Windows 11 devices:
Corrupt system files – Most users with bad system files may face an error, especially if the corrupt files are vital to update files.
The solutions below should help you fix the error.
How do I fix the 0x80042001 Windows update error?
Before going into the main solutions, you should try these two workarounds:
Restart the device – After a restart, some of the problematic processes may shut down, and this will automatically fix the error.
Disable your antivirus – Some readers have observed that the antivirus may interfere with the update process. Disabling it while the process runs may fix it.
If you do not have success after the above pre-solutions, proceed to the more detailed steps below.
1. Run the update troubleshooter
Press Windows + I to open the Settings app.
On the right pane, click on Troubleshoot.
Select Other troubleshooters.
Click on the Run option for Windows update, then follow the prompts to complete the troubleshooting process.
When the troubleshooter completes execution, apply the recommendations and verify the 0x80042001 update error is fixed.
2. Reset Windows Update components
Press Windows + R, type cmd, and hit Ctrl + Shift + Enter.
Type the following scripts to stop Windows update components, hitting Enter after each one. net start wuauserv net stop cryptSvc net stop bits net stop msiserver
To rename the SoftwareDistribution and Catroot2 folders, simply type in the following scripts and press Enter after each one. ren C:\Windows\SoftwareDistribution SoftwareDistribution.old ren C:\Windows\System32\catroot2 Catroot2.old
Restart the stopped services by running the scripts below: net start wauserv net start cryptSvc net start bits net start msiserver
You may now restart the computer.
Finally, verify that the 0x80042001 Windows update error has been fixed.
Press Windows + R, type cmd, and hit Ctrl + Shift + Enter.
Input the script below and hit the Enter key. sfc /scannow
The process may take a while. Follow the onscreen instructions if any repair is needed, then verify it fixed the 0x80042001 error.
This Windows update error is relatively easy to fix and usually should take a few steps.
Also, note that these solutions have not been written in any particular order. So, starting with any fix that seems most applicable to your situation would be best.
Lastly, please comment below and let us know which solution did it for you.
If you have encountered the 0xc00d6d6f media error on your Windows 10/ 11 computer while opening media files via a media player, this guide can help!
We will cover all the available methods to fix the issue right after discussing the causes of the problem.
What causes the 0xc00d6d6f media error on Windows 10 & 11?
There could be various reasons for this media error; some of the common ones are mentioned here:
Corrupted system files – If your computer has corrupted system files, you might face many issues, including this one. You need to repair the system files to fix the problem.
The media player is damaged – If the app you are trying to open the media file is corrupted, this error might appear. Try reinstalling the app.
Outdated drivers – Video and sound drivers, if outdated, could stop media files from playing. To fix this, update the drivers.
Malware infection – Viruses on a computer can damage essential files, potentially leading to this issue. Run a malware scan to resolve the problem.
Bad Windows update – If you have installed a Windows update with bugs, it could interrupt normal operations. Try uninstalling the latest update.
Now you know what caused this issue, let us check out the fixes to resolve the issue.
How can I fix the 0xc00d6d6f media error on Windows 10 & 11?
Before engaging in advanced troubleshooting steps, you should consider performing the following checks:
Restart your computer and try to reopen the media.
Try using a different media player.
If these minor fixes didn’t help you, move to the detailed solutions mentioned below.
1. Run the Video Playback troubleshooter
1.1 Windows 11
Press Windows + I to open the Settings app.
Go to System, then click Troubleshoot.
Click Other troubleshooters.
Locate Video Playback and click Run.
Follow the onscreen instructions to complete the process.
1.2 Windows 10
Press Windows + I to open the Settings app.
Go to Update & security.
Select Troubleshoot, then click Additional troubleshooters.
Locate Video Playback and click Run the troubleshooter.
Follow the onscreen prompts to complete the process.
Type devmgmt.msc and click OK to open the Device Manager.
Go to Sound, video and game controllers, and expand it.
Right-click the driver and select Update driver from the context menu.
Click Search automatically for drivers.
Follow the onscreen instructions to complete the process.
If you don’t feel like going through this process, we got your back with an alternative method that can fix it.
There is a dedicated driver solution that can analyze your PC system, find all the outdated drivers, and update each one of them from its rich database with millions of versions.
So, these are the methods to fix the 0xc00d6d6f media error on your Windows 10/ 11 computer. If you have any questions or suggestions, feel free to mention them in the comments section below.
It’s apparent that while starting up a new business, a lot of elaborate measures need to be in place for it to be a successful and profitable venture. This includes beating the long sales cycles and complying with the regulatory measures put in place while simultaneously ensuring that the products in circulation meet the set standard.
As such, Microsoft has debuted the Microsoft for Startups Pegasus Program which is an extension of the Founders Hub platform. According to the company, the program will link startups with some of Microsoft’s top customers to help mitigate the issues highlighted above.
Essentially, through the program, Microsoft is able to link customers facing certain challenges in their businesses with startups that are providing services that will help mitigate these issues.
According to Microsoft, the new program will provide startups with extra support “by driving top-line revenue for those that have already achieved product-market fit in industries, including AI, healthcare, cybersecurity, and retail.”
Andy Pandharikar, the founder and CEO of Commerce.AI indicated that a lot of startups encounter a lot of issues when it comes to enterprise sales and further added that:
Working with Microsoft for Startups helps us understand how enterprise customers look at and purchase new innovative products, and through this program we have been able to close nearly $1 million in deals.
Per Microsoft statistics, via the Pegasus Program, over a hundred startups have already been linked with eligible enterprise customers while it’s still in pilot, which closely translates to $350,000.
Here are some of the perks that come with joining the program:
First up, startups will gain access to key industry players that will help them identify sales opportunities in their specific sector. The industry players also double up as trusted advisors for them.
Next up, startups will also have the chance to work closely with go-to-market experts from Microsoft. The expert will place them in an advantageous position where they’ll be able to access the best resources which will help them generate and develop lucrative deals.
Additionally, the program will grant startups access to Microsoft technology which includes a dedicated Cloud Solution Architect (CSA) “supporting their technical success, preferred access to Azure’s AI offerings, and up to $350,000 in technology credits spanning Azure (including Azure OpenAI Service), GitHub, and LinkedIn.”
Currently, Microsoft hasn’t opened up the program to everyone. The company only invites startups that are part of its Founders Hub community, particularly those building with its technology.
A blue screen of death is a Windows user’s nightmare. These random crashes come at the most unexpected times and often leave little to no clues. Recently readers have complained about the 0x000000c2 BSoD.
In this guide, we dive into it, exploring some of the most practical fixes and possible causes of the error.
Why am I getting the 0x000000c2 stop error?
From what we gather from our readers, any of the following may trigger the BSoD:
Driver-related problems – For most users, corrupted or outdated device drivers are at the core of this.
Virus or malware infection – Malware on a computer can corrupt files and generally hinder vital processes, which may lead to a BSoD.
Damaged system files – System files are crucial in adequately running many processes. When the files are corrupted, you may experience errors, including the BSoD.
Faulty hardware components -Some of our readers have also experienced the BSOD when elements such as the RAM or hard drive are faulty.
It would be best if you tried the solutions recommended below.
How do I fix the 0x000000C2 BSoD?
Before getting into more details solutions, you should consider the following:
Uninstalling problematic apps – These may be your antivirus, or for some users, it was the AMD Quick Stream Technology application. Uninstall these apps and see if the BSoD is fixed.
1. Repair damaged system files
Press and hold the Power button for 10 seconds, and once the manufacturer logo appears, press the Power button once more to force a complete shutdown. You may need to repeat this process a few times before the repair screen appears.
Choose Troubleshoot, then Advanced options.
Select Startup Repair.
Click on the Restart button.
Press F5 for Safe Mode with Networking.
Press Windows + R, type cmd, and hit Ctrl + Shift + Enter.
In the Command Prompt, type the script below and hit Enter. sfc /scannow
The script will search for bad system files, and you should follow any prompts given for it to fix them.
At the end of execution, restart your computer and verify the 0x000000c2 BSoD is fixed.
2. Update device drivers
To get into safe mode, follow the steps outlined in solution 1.
Right-click on the Start menu and select Device Manager.
If you come across a yellow badge, it means that the drivers are outdated. In such cases, you can expand the relevant category, right-click on the driver, and choose Update driver.
Select Search automatically for drivers.
Repeat the process for all drivers that need to be updated.
Alternatively, one helpful suggestion is to use tools like Outbyte Driver Updater that automatically update or repair drivers on your device. This may help in resolving any BSoD issues that you may be experiencing.
Boot into safe mode using the same process in solution 1.
Press Windows + R, type cmd, and hit Ctrl + Shift + Enter.
To execute the script, enter the command below in the Command Prompt and press Enter. Replace c with the appropriate drive letter for your Windows installation. chkdsk c: /f
If required, hit Y for the check to run at the next system restart, then restart the device.
The script will check and repair your device’s bad drive sectors.
You can now verify if it resolves the 0x000000c2 BSoD.
To get into safe mode, follow the steps outlined in solution 1.
Press Windows + R, type mdsched, and hit Ctrl + Shift + Enter.
Click Restart now and check for problems.
Your computer will automatically launch the Windows Memory Diagnostic Tool during the next startup. Please wait patiently until the process is finished.
And there you go. Any of the fixes above should work. So, we encourage you to start with what seems the most applicable since we have not made this list in any particular order.
Many Windows users complain about the Wpcap.dll not found error that appears while performing tasks like app installation, boot or shutdown, etc. Sometimes, the error may appear in numerous variations. However, this guide is dedicated to helping you fix it.
Alternatively, you can check our guide about how to install and fix missing DLL files on Windows PC.
Why is the Wpcap.dll not found?
Some factors that can cause the Wpcap.dll missing or not found error are:
Issues with the program – The DLL file may be inaccessible due to some underlying issues affecting the program trying to use it, making Wpcap.dll missing or not found.
DLL file has been deleted or misplaced – There is a possibility that the user mistakenly or intentionally deletes the DLL file from the system, causing it to be missing. Also, moving it to another location can make it not be found by the programs trying to access it.
These factors are liable to vary in different computers depending on the circumstances. Nonetheless, we’ll take you through how to fix the error and get your system working.
What can I do if the Wpcap.dll is not found?
1. Use a dedicated DLL repair tool
Wpcap.dll is a WinPcap software file developed by Riverbed Technology, Inc. The file not found error can cause issues with the programs using it, so it is vital to repair it. Unfortunately, it can be tasking for users who don’t have much knowledge about tech to repair DLL files.
However, you can employ dedicated DLL fixing tools to help. Hence, we recommend you use an effective DLL repair tool to resolve issues due to incompatibility of the third-party DLLs and the operating system.
More so, it’s easy to use and it doesn’t require prior knowledge or professional experience in tech. All you need to do is initiate the scanning process, and it’ll find and repair the missing file.
2. Reinstall Npcap or WinPcap
Left-click the Start menu, type the control panel, and launch it.
In the Control Panel, select Programs and Features.
Then, select Npcap software and click Uninstall. Follow the uninstaller prompts to remove it.
Now, go to the official download site to re-download Npcap: Windows Packet Capture Library.
Double-click the downloaded file and follow the installer prompts to install the app.
Once the application is reinstalled, all pending issues leading to the DLL missing error should be fixed. Also, older Windows versions should download WinPcap. The Ncpcap is meant for Windows 10/11 alone.
If you are unfamiliar with Amazon Luna, it is Amazon’s cloud gaming platform and a competitor to the likes of Xbox Cloud Gaming, Nvidia GeForce Now and PlayStation Plus. The game will be available for those with an Amazon Prime subscription as well as with an Amazon Luna+ subscription, which is currently $9.99 a month. A 7-day Amazon Luna+ trial is currently available. (Note that Fortnite is free-to-play on other platforms without the need for a paid subscription).
Amazon Entertainment Devices and Services vice president Daniel Rausch said of Fortnite’s Amazon Luna launch,
Fortnite has been the most requested game from Luna customers in the U.S. and we’re thrilled to bring the title to the service. We’re committed to making gaming more accessible and more affordable, without the need for expensive hardware…Whether it’s AAA titles, retro or classic games, racing games, or family-friendly party games you’re after—there is always something interesting to play on Luna.”
The release comes just in time for the latest update, 24.30, which released on May 2. The update brings with it a big Star Wars crossover event and more.
If you have encountered the Windows Update error 0xc190020e when trying to install Windows 10 feature update, this guide can help!
We will explore some of the expert-recommended fixes to get rid of the error right after discussing the causes.
What causes the Windows Update error 0xc190020e?
There could be several reasons for this update error; some of the common ones are mentioned here:
Low disk space – If your computer has insufficient disk space, Windows update may fail and present you with this error. Try removing the unwanted apps and files from your PC.
Multiple Windows updates in the queue – When several Windows updates are pending to be installed, the error could appear. Restart your computer and try again.
Corrupted update files – If the update files on your PC are damaged or infected, it could lead to this issue. Try repairing the system files using the SFC scan.
Malware infection – Viruses can damage important system files, causing various errors, including this one. Run a deep scan using an antivirus tool.
Now that you know the causes, let’s move to the actual solutions to fix the issue.
What can I do to fix the Windows Update error 0xc190020e?
Before engaging in advanced troubleshooting steps, you should consider performing the following checks:
Restart your computer.
Remove the external peripherals except for the mouse and keyboard.
If these minor fixes didn’t help you, check out the detailed steps mentioned below.
1. Use the Disk Cleanup tool
Press Windows + R to open the Run console.
Type cleanmgr and click OK to open the Disk Cleanup tool.
On the Disk Cleanup: Drive Selection window, select the system drive (usually it’s C:) and click OK.
Click Clean up system files.
On the Disk Cleanup: Drive Selection window, choose the system drive once again and click OK.
Select all the items under Files to delete and click OK.
Click Delete files.
All the unwanted temporary files, along with the old installation files, will be deleted.
2. Enable Storage Sense
Press Windows + I to open Settings.
Click System.
Go to Storage and check the Local Storage to know how much space you have left.
Toggle on the switch for Storage Sense.
Check all the options under Storage to know how much space is taken.
Click Temporary files.
Choose the options below and click Remove files.
The unwanted files will be removed from the computer, thereby retrieving space on your computer. By enabling Storage Sense, Windows ensures there is enough space for the PC to run at its best.
3. Disable Hibernate
Go to the search bar, type cmd, and click Run as administrator.
Copy and paste the following command to disable hibernate and hit Enter: powercfg.exe /hibernate off
Close the command prompt window and restart your PC to let the changes take effect.
4. Increase system disk space usage
Press Windows + R to open the Run console.
Type sysdm.cpl and click OK to open Advanced system settings.
Go to the System Protection tab and click Configure.
Under Disk Space Usage, move the slider to the right side, then click Apply, then OK.
Type the following command and press Enter: C:\$Windows.~BT
Select all the contents in the folder and click the Delete button.
6. Add AllowOSUpgrade as DWORD
Press Windows + R to open the Run dialog box.
Type regedit and click OK to open the Registry Editor.
Go to File, then click Export and save the .reg file to a desired location.
Navigate to this path: Computer\HKEY_LOCAL_MACHINE\SOFTWARE\Microsoft\Windows\CurrentVersion\WindowsUpdate\OSUpgrade
Select OSUpgrade and right-click it to select New, then DWORD (32-bit) Value.
Right-click the DWORD, select Rename and name it AllowOSUpgrade.
Double-click it and change the Value data to 1 and click OK.
Reboot your PC to confirm the changes.
7. Run SFC & DISM scans
Go to the search bar, type cmd, and click Run as administrator.
Type the following command to repair system files and press Enter: sfc/scannow
Wait for the scan to complete, then copy & paste the following command to repair the Windows OS image and hit Enter: DISM /Online /Cleanup-Image /Restorehealth
Restart your computer to let the changes take effect.
So, these are the methods to fix the Windows Update error 0xc190020e.
Microsoft has recently sent out a notice to IT Admins managing Microsoft 365 accounts that web links embedded in Outlook hosted emails will now open in the Microsoft Edge browser by default, and people are not happy.
Microsoft specific wording to Admins regarding the impending Outlook/Edge apocalypse reads, “Web links from Azure Active Directory (AAD) accounts and Microsoft (MSA) accounts in the Outlook for Windows app will open in Microsoft Edge in a single view showing the opened link side-by-side with the email it came from.”
What Microsoft leaves off its notice to admins is that this new behavior ignores users preferred browser settings that are set at the operating system level.
While the Reddit community that’s sharing Microsoft’s latest strong-arm tactic is quick to point out the company’s new policy harkens back to their previously shadowy anti-competitive behavior of past, it should be noted that the company is less than savory loophole to skirt obvious antitrust scrutiny this time around.
The new Outlook for Windows side-by-side policy doesn’t actually affect the default browser settings put in place by users, but is instead a “feature” of the mail client as a stand-alone app, and Microsoft has issued a statement to IT admins justifying the move as a way to “increase productivity.”
Microsoft’s statement to Tenant Managers via paulanrspezi on Reddit
The Verge is reporting that IT admins who manage 365 Enterprsie accounts will have 30-days from the time of being first notified, to make preparations for the new policy change where Microsoft will support exceptions that include altering the policy, meanwhile Microsoft 365 for business users will need to manually reset policy changes per associated device.
Couple this recent policy change with the company preparing to do the same thing with Teams as well, and you have many Windows and Office users left with the bitter taste of Microsoft’s seemingly unnecessary aggression in their mouths.
Previously, Microsoft declared it would “ensure user choices are respected” as it rolled out new approach to Settings deep link URL schemes app pinning in Windows 11, and while it’s technically doing so, this new policy ultimately feels like yet another unforced error by the company in attempting to get users behind Edge usage.
On its face, the new policy change will once again confuse the average Windows user who’s set their browser to alternative such as Chrome, Firefox or Opera but are presented with the Edge browser. The only saving grace to Microsoft’s heavy-handed approach is that it will have the Outlook message in a side-by-side view so the user can maybe draw a line from Outlook link to this previously unused browser.
Never the less, IT admins are upset and Microsoft will yet again make their lives unnecessarily complicated following their attempt to backtrack from another Edge-related kerfuffle with default settings in Windows and if they lose the goodwill of this audience, they’ll presumably have more than Edge adoption to worry about.
Did you get the error message the application was unable to start correctly (0xc0000022 Windows 11)? This must have happened while trying to launch specific applications.
We have researched this error, and in this guide, we show you some practical solutions and explore the main causes so that you may avoid repeating the problem.
What does error 0xc0000022 mean?
This error indicates that the app you tried to launch is not opening. Some error messages like Access Denied or The application failed to initialize properly may follow. The leading causes are the following:
Permission issues – For some users, the error occurs because they are logged in with an account that does not have the access level for the application.
Missing DLLs – DLLs are integral to running some apps; if they are missing, you cannot open associated programs.
Malware or virus infection – Malware makes your devices act unusually, including some application restrictions. We always recommend using the best antivirus.
How do I fix error code 0xc0000022?
Before exploring further, you should try the following workarounds:
Restart the computer – While this may be general, a reboot is often strong enough to kill problematic processes and resolve minor glitches.
Disable antivirus – You may also disable your firewall, as it may be blocking the app from opening.
Download the associated DLLs – If the error indicates a missing DLL, you should download the file and place it in the same directory as the problematic app.
If the above fails, please proceed to some more elaborate fixes.
1. Fix corrupt files
Press Windows + R, type cmd, and hit Ctrl + Shift + Enter.
Input the script below and hit Enter. sfc /scannow
Follow any instructions that may be presented to repair the bad system files.
Once the process is complete, confirm the 0xc0000022 error is resolved. Otherwise, in case the error persists after completing this process, go for a secured method.
Using efficient system repair software, it’s more likely to repair damaged Windows files due to its powerful technology and detection algorithm.
2. Correct permission issues
Right-click the problematic app and select Properties.
Click the Security tab and the Edit button.
Click on your user name and ensure it is given full rights to the application.
Try relaunching the application and verify the 0xc0000022 is resolved.
Click on any of the files that fit your system architecture.
Double-click the downloaded file and follow the wizard to install it, then verify if the error is resolved.
4. Run the program as an admin
Right-click on the program and select Properties.
Click on the Compatibility tab, select Run this program in compatibility mode for and choose an earlier OS version, tick the Run this program as an administrator checkbox, and hit Apply and OK.
Verify if the 0xc0000022 application error is fixed.
5. Perform a malware scan
Type Windows Security in the Search bar, and click on the relevant search result.
Now, click on Virus & threat protection.
Click on Scan options.
Select Full scan and click the Scan now button at the bottom.
The above are some of the best ways to fix your OS if you get the application was unable to start correctly 0xc0000022 Windows 11 error.
While all solutions may not work in every case, you should try what seems the most appropriate to your situation.
You may also further our guide on Windows 11 apps not opening, as we detail some important fixes that may apply to this error.
Lastly, do not forget to leave us a comment below and let us not what was effective for you.
The Xbox Games Showcase/Starfield Direct double feature has been officially announced via Xbox Wire. Each of these livestream events were separately announced previously for Sunday,June 11.
The double feature will begin at 10amPT with the Xbox Games Showcase. Like with previous XGS events, there will be plenty of Xbox and Xbox Game Pass related news in addition to first-looks at new upcoming games and more. The showcase will be followed up with an Xbox Games Showcase Extended stream on June 13th, at 10amPT.
Immediately following the June 11 showcase will be the Starfield Direct. This special event will take us inside Bethesda Game Studios to learn much more about one of the most highly anticipated games ever, with new gameplay footage and developer interviews.
When and where to watch
Airtimes for the June 11 double feature can be found below.
The livestream will be available in over 30 languages. Also, in-person FanFest events will be held in Los Angeles, Mexico City, São Paulo, Melbourne, and Warsaw. Head over to aka.ms/XboxFanFest to win for a chance to attend one of these FanFest events. Note that this is only open to for those 18 and up, and ends on May 9th, 2023. You can check out the official rules here.
Some of our readers complain about running into This application has failed to start because d3d11.dll was not found or missing error. The error can occur while playing games on your PC or while trying to launch an app. However, this article will discuss ways you can resolve the error.
Alternatively, you can go through our guide about how to install and fix missing DLL files on Windows computers.
Why is the D3d11.dll missing?
Some factors liable to be responsible for the D3d11.dll missing error are:
DLL Registration issues: Sometimes, the DLL files needed for an application to function properly may be wrongly registered into unsupported folders. Hence, you will need to re-register the DLL missing DLL file.
Issues with Microsoft DirectX software – You can see the DLL missing error if the DirectX version running on your Windows PC is outdated.
Nevertheless, we’ll take you through some detailed steps to help fix the D3d11.dll missing error as we go further.
What can I do if the D3d11.dll is missing?
Before proceeding with any advanced steps, go through the following:
Reinstall the program prompting the file missing error.
You can also download the latest patch of the app/software from its developers.
Go ahead with these fixes if you can’t resolve the error:
1. Repair the DDL file with a dedicated tool
The D3d11.dll missing or not found error can be fatal to the system’s functionality because it’s a Windows DLL file. It can affect the apps relying on it and result in errors, crashes, bugs, and lagging if inaccessible. However, you may find it hard to repair if you’re not tech-savvy.
Fortunately, you can use dedicated tools to resolve 100% of DLL file errors. So, we recommend you repair the D3d11.dll error with a DLL repair tool for PCs.
Moreover, the software is easy to use and requires no advanced knowledge. All you’re required to do is initiate the scan, which will fix the error automatically by repairing the missing file.
2. Re-register the DLL files
Left-click the Start menu, type cmd, and click Run as administrator.
Input the following command and press Enter: for %d in (*.dll) do regsvr32 -s %d
Wait for the process to complete and close your Command Prompt.
Once the process is successful, the DLL files will be correctly registered at the appropriate paths. Hence, they become accessible and resolve the error.
As the calendar slips for the Surface Duo teams to deliver even a security update for April, Duo specialists Zac Bowden and Shane Craig call into question the viability of Microsoft’s mobile ambitions in 2023 and beyond, while I simply call into question my own patience.
While Bowden, Craig and others remain restlessly optimistic about a potential successor to the Microsoft Surface Duo 2 possibly landing in 2024, I’ve gotten to the acceptance phase much quicker for the end of Microsoft’s foldable efforts than I did with their previous Windows Phone and Mobile ambitions.
Perhaps in large part due to the limited investment I’ve had with the Surface Duos when compared to the plethora of Windows-powered smartphones I ran through over a 10-year span, but the idea of a Surface Duo 3 is sounding more exhausting of a proposition with each passing month.
In Bowden’s latest update on the state of Surface Duo, he posts that not only has the teams working on the Duo been cut but they’ve also deprioritized development on the device to split time making Teams Rooms on Android a success. Seemingly as a result of the prioritization shuffle Microsoft Duo and Duo 2 owners are now left with simply getting late security updates, if at all. Furthermore, Microsoft may be holding on addressing long standing issues with the last big update to the devices with Android 12. as a result of being short-staffed.
Teams Rooms on Android is Microsoft’s attempt at becoming an AOSP vendor for device makers building Teams-powered conferencing devices like desk phones. Previously, OEMs built their own software for these devices and licensed the Teams integration, but now, Microsoft has full control of the OS from the ground up.
For whatever reason, Microsoft considers this effort more important than supporting the Surface Duo with new features and bug fixes, so work on Android for Surface Duo has slowed while the team focused on Teams Rooms on Android. That’s why Android 12L launched in October and has received pretty much no fixes or improvements since.
In addition to waiting on an updated piece of hardware from the Surface Duo team, it looks like customers will have to wait on software as well, with the company giving no commitment or even an indication that Android 14 will come to devices in 2023, leaving many to believe Microsoft may simply wait to release Android 14 with a new device at the end of 2024.
Beyond its logistical failings, it looks like Microsoft couldn’t hold their highly touted partnership with Google together, as the relationship frayed enough to clog the publishing pipes for Android 12 and 13 to Duo devices according to Bowden. The reasons for the deterioration of the Microsoft/Google partnership in mobile haven’t been made clear at this point, but couple struggling with the sole platform provider for your device as well as sidelining your own software development teams and the Surface Duo project is looking less and less likely as evolving third attempt from the company and more like a baggage-filled restart.
Which is why I’m ready for Microsoft to shelve the whole Surface Duo project and focus its efforts on the Microsoft Launcher in 2024. While I enjoy the sleek design acumen of the Surface team in most of their hardware efforts, there is nothing inherent to Microsoft’s business that needs to offer a Surface branded smartphone or mobile device in 2024, especially if it’s running Android.
With Microsoft’s rumored pivot to a single-screen foldable as well as a possible slab-style traditional smartphone option, the Surface mobile effort makes even less sense in 2024 than it did in 2019.
I won’t rehash all of the shortcomings Microsoft will have to overcome to even make a viable product next year, but in 2024, even if Microsoft manages to deliver a piece of hardware, its only differentiating benefits will be in software and price. Both software and price are two places an investment in the Microsoft Launcher could net the company some revenue wins in mobile that it hasn’t been able to replicate in close to a decade. There are over 50 million downloads of the Microsoft Launcher and another 10 million of SwiftKey listed in the Google Play Store, if just a fraction of those downloads came at a price, Microsoft might make more in revenue than it did over the past three years with the Surface Duo alone.
I say this as staunch fan of the Surface Duo, but Instead of sinking more R&D into perfecting foldable OLED displays to ultimately put out a sixth or seventh me-too device in a Surface Duo 3, Microsoft should invest that time and effort into the Microsoft Launcher and relaunching it as paid app that bridges the Windows OS aesthetic and feature set closer to that of Android. With Windows 11 moving further away from the stark flat minimalism design Windows 10 was put into a corner by Windows 8, it should be even easier for the Microsoft Launcher team to bring over current UI elements to Android that both feel natural but entirely Windows.
Bring over the new dock to the Launcher, iconography, typography, Action Center as a full replacement of Notification Shade, similarly designed Photos, Media Player, Calculator, Clock, Sound Recorder, Video Editor (Clipchamp), and Maps apps to fill out or replace stock apps on Android phones.
Aside from looks, merging Universal Clipboard, Windows Remote and tying Phone Link integration into the OS level of the apps on Windows could go a long way to giving Window users a superior experience to that of even MacOS and iOS, and one, some users may be willing to pay a certain amount for.
Microsoft seemingly already has the ingredients to make the Microsoft Launcher a need-to-have app but it hasn’t put them together in any meaningful way for users in the past four years. Adapting the layout of the Microsoft Launcher for both candy bar style phones and foldables should still net Microsoft the future in mobile it’s looking to capitalize on with offices tying devices to Microsoft Intune/Endpoint licenses.
With the possibility of having to shell out another lump sum of money for what will ostensibly be another test project for the Surface team, I find myself almost exhausted by that proposition. At this point, I’d wager there are Microsoft fans willing to put down a much smaller amount of money ($4 to $10) to get a polished Microsoft Launcher experience on their current or future devices that follows a Windows development cycle where applicable, on mobile.
Rather than trying to reinvent the wheel when it comes to managing the physical capacity of battery life, cooling, ARM development, processing power, camera technology, screen refresh rates, color accuracy and HDR support, port selections, IPS ratings, durability, component sourcing, channel distribution, inventory, and the other 101 headaches of supporting a physical device, focusing on the Microsoft Launcher should be the more appealing option the Surface team should want to pursue in 2024.
Last week, the United Kingdom’s Competition and Markets Authority took the wind out of Microsoft’s Activision merger sails with the conclusion to their anticompetitive investigation being a ‘no’ to the deal.
Microsoft was betting $68 billion dollars of its gaming future on getting all necessary regulatory approvals to acquire the single largest video game publisher in the industry, and on Wednesday of last week, the CMA flipped the gambling table and walked away citing concerns of “reduced innovation and less choice for UK gamers.”
Despite Microsoft’s attempts to assuage the CMA’s early concerns of Call of Duty exclusivity by inking several 10-year contracts with previously excluded platforms, the company fell short when the regulatory body pivoted its attention to cloud gaming.
We have concluded that the merger would result in the most powerful operator in the fast-developing market for cloud gaming, with a current market share of 60-70%, acquiring a portfolio of world-leading games with the incentive to withhold those games from competitors and substantially weaken competition in this important growing market.
While the CMA’s stated vexation is in the right place, it’s arguable that its conclusion could be based on the outsized misrepresentation of the state of cloud gaming in 2023 as well as its past and future.
The CMA partly concluded that a lack of access to Call of Duty is what doomed Google Stadia from emerging as a cloud gaming competitor to the likes of Microsoft, Sony, and Tencent. Unfortunately, it would seem the CMA seemingly ignoring the multitude of inept decisions by Stadia platform managers who overpriced games, lack of marketing, underwhelmed developers with porting tools, mismanaged first party studios and failed to make the necessary 3rd party deals with publishers to bring steady content to its cloud gaming service.
In addition to disregarding the investment structure of Google Stadia, the CMA also seems to conflate the idea of a large number in a relatively tiny market as justification for its concern of Microsoft acquiring Activision. Microsoft’s 60-70% market share of cloud gaming stands in comparison to the roughly 1% cloud gaming represents in the total gaming sector in both North America and Europe. The idea that cloud gaming is fast developing from 1% percent is a leap to a conclusion that is so far projected to bear itself out as competitors such as NVIDIA, Ubitus, Vortex, Google, Amazon, Intel, Happy Cloud, IBM, Valve, Razer, Sling Media, and more, enter and leave the market.
The CMA also holds the lofty notion that keeping Microsoft’s dollars away from Activision will prompt the publisher to enter the cloud gaming market as a neutral licensee of its games as a buy-to-play option, again, despite their being no evidence that the company plans to invest the necessary capital or resources to initiate and maintain such a storefront.
In relation to cloud gaming services, we consider that the evidence shows that the market would continue to grow, but we believe that at least some of these cloud gaming providers-especially those with a buy-to-play or bring-your-own-game offering-would have Activision’s most valuable games available on their platforms on the date of their release in the foreseeable future.
While Activision would not necessarily be on the hook for server costs, it would need to reinvest future profit from its current gaming line up to begin developing ports for any cloud platform it plans to offer its games on, which is partly what Microsoft attempted to circumvent with its 10-year contracts it’s been successfully signing with the same cloud platforms the CMA wants Activision to eventually offer its games to.
But enough about the past, where does Microsoft go from here?
Microsoft has stated that it plans to appeal the decision but most analysts and insiders have concluded that overturning the CMA’s decision is not likely. Admittedly, Microsoft got the CMA to previously correct some of its misstated numbers in its early assessment of the deal as well as pivot away from a Sony-led campaign to focus on exclusivity deals for games such as Call of Duty and World of Warcraft.
However, the company would need to prove to the Competition Appeals Tribunal (CAT) that the CMA acted “irrationally, illegally or with procedural impropriety,” to which there is no evidence.
Barring a miracle appeal, Microsoft needs to quicky pivot from owning Activision Blizzard full stop to owning the licensing of the company’s cloud and mobile future. If Microsoft doesn’t take its $68 billion dollars and bruised ego and go home to lick its wounds, the company should reallocate some of that money to gaining a structurally similar deal for Activision’s future cloud and mobile gaming future as it has with OpenAI.
While Activision and OpenAI are in two entirely different financial situations, the end result could be the same for Microsoft if it were to lease out a cloud infrastructure to Activision while gaining a licensing advantage for future gaming efforts. Microsoft invested $10 billion into OpenAI, and while not outright owning the company, the contractual structure of the deal gives Microsoft exclusivity as the cloud provider for the company and access to 75 percent of OpenAI’s profits until it secures its investment return.
If Microsoft and Activision manage to remain cozy business partners, the $3 billion release payout between the two companies, should the deal in fact die, could be a jump start to the next phase of their evolving cloud gaming future. With Microsoft investing some portion of its $68 billion dollar bid back into Activision, investors could recoup some of the $23 a share they lost upon the CMA’s decision, and give both companies an end-around the UK’s anticompetitive concerns.
A seemingly timed deal where Microsoft can provide its Game Pass customers access to Activision Blizard King’s publishing library on a plethora of devices that includes the introduction of a Microsoft mobile gaming app store while allowing ABK to maintain profit growth in the interim is still a win for Microsoft with investors greedy for large Azure contracts.
When the news about the CMAs decision landed, investors signaled a sigh of relief that Microsoft wouldn’t be splitting its attention from growing cloud services revenue to purse gaming but with a new investment and cloud exclusivity deal, the company could walk away achieving the best of both outcomes.
An OpenAI-like deal would also help to ease some of the rocky waters ahead for Microsoft’s gaming division as hardware sales stall and first party exclusives get delayed or receive poor reviews.
In addition to helping Microsoft continue to chart its cloud gaming course, a deal like OpenAI for Activision would presumably skirt the need for regulatory approval and circumvent a potentially lengthy appeals process that would undoubtedly hold up the company for forging ahead with any related efforts.
As it stands now, Microsoft is continuing to strike deals to bring certain Activision games to platforms they were not previously on, and if the company can restructure its cloud gaming ambitions for the moment, it’ll not only be able to keep those contracts in place but stay nimble enough to capitalize on any future curve balls thrown its way.
Not too long after announcing plans for the newer generation of Teams, Microsoft revamped its beloved teleconferencing app with a spatial audio feature.
The feature has arrived in Public Preview for several select insiders. Once toggled on, users of wired stereo headsets or built-in speakers position the voices of participants across the virtual meeting stage, providing a more realistic and engaging conversation.
With that being said, however, being an insider-only feature means that spatial audio on Microsoft Teams may still be far from reaching primetime, and isn’t available for wireless headphone users yet.
If you’re still curious about how to make it work, make sure to join Teams Public Preview and then follow these steps.
How to activate spatial audio on Microsoft Teams
Before joining a meeting
1. Select your headset/stereo
2. Go to Device settings pane on your right.
3. Turn on the Spatial audio toggle.
During the meeting
1. On the top right of your screen, click the triple dots More
2. Go to Settings ➜ Devices
3. Select your headset/stereo speakers
4. Turn on the Spatial audio toggle.
With that said, being an insider-only feature also means that you may experience a few hiccups here and there and you’re free to report them through the Feedback hub.
What do you think about the spatial audio feature on Microsoft Teams? Let us know in the comments!
Owned by JetBrains, dotPeek is a popular decompiling software that integrates into Visual Studio and facilitates the decompilation of all sorts of assembly files, including Dynamic Libraries or DLLs.
However, several of our readers have reported that they cannot access and decompile a .dll file using dotPeek as the DLL is not supported.
Why do I get the DLL not supported error in dotPeek?
If a DLL is flagged as not supported in the assembly list of dotPeek, it may be because of the following reasons:
App interference – Windows Defender and third-party antivirus often block the DLL for security reasons.
Virus attack – The presence of viruses and malicious programs on your PC is another reason DLLs go missing or are not supported.
Corrupt or missing system files – Faulty or corrupt system files induce a lot of DLL-related errors and can be the reason it is not supported by dotPeek.
Disk errors – A physically damaged hard drive and disk errors like bad sectors can also cause DLL-related issues.
App not installed correctly – If an app installation is not successful, the related DLL files will get corrupted and no longer readable.
If you are also struggling with the same issue, here are the proven ways of resolving the problem.
How do I fix the not supported error in dotPeek?
Before you jump to the complex solutions listed below, perform the following actions:
Uninstall the app to which the affected DLL belongs and then reinstall it.
If the problem still exists, employ the following fixes.
1. Use a dedicated DLL fixer
There are several reasons you encounter such an error in dotPeek, and troubleshooting such system-level issues is hard to tackle. Hence, you are recommended to employ a dedicated DLL fixer tool that is capable of fixing DLL-related errors without requiring your intervention.
2. Repair the system files
Press the Windows icon on the taskbar to bring up the Start menu, type cmd in the search bar on top and choose Run as administrator.
Click Yes on the User Action Control prompt to launch the Command Prompt with elevated permissions.
Type or paste the following command and press the Enter key to run the System File Checker scan. sfc /scannow
After the verification is 100% complete, type or copy-paste the following command and press the Enter key to execute it. DISM /Online /Cleanup-Image /RestoreHealth
The SFC and DISM tools will scan all the protected system files on your computer and replace the corrupt or modified system images with the cached version stored in a compressed folder.
After the repair is successful, you will no longer encounter the DLL not supported error in dotPeek, and you can decompile it successfully.
Use the Windows + I keyboard shortcut to bring up the Settings app.
Choose Privacy & security from the left navigation panel and then click the Windows security option located in the right section.
Next, select the Virus and threat protection option.
Click Manage settings present under the Virus and threat protection section.
Toggle Off the switch for the Real-time protection option.
Windows Defender and third-party antivirus often consider certain DLL files as a potential threat and restrict and block them on your computer. To prevent Windows Defender from doing so, you can disable the real-time protection feature of Windows Security before you launch the dotPeek application.
If you rely on third-party antivirus to stay protected, you can create an exception for the affected DLL file to let it bypass the restrictions.
4. Manually download a DLL
While we do not favor downloading software, apps, and DLLs from random online sources, if the error persists, you can manually download and replace the DLL file not supported in dotPeek with a legitimate version.
However, it is extremely necessary to proceed with caution and only download the files from trusted websites like dll_files.com, which house genuine DLLs and not malicious software masquerading as them.
After the download is successful, extract the DLL file from the ZIP or RAR archive, and then replace the DLL not supported by dotPeek with this version.
After performing these steps, restart your PC and re-launch the dotPeek app. You will no longer encounter the un-supported error when opening DLL files with dotPeek.
Those are the fixes that will prove effective when you are unable to decompile a DLL file as it is not supported in dotPeek.
In case you are unable to launch different apps on your computer because DLLs are missing, you can refer to this guide to find out the solutions.
Which of the fixes provided in this guide worked for you? Do let us know in the comments section below.
Some of our readers recently complained about the Nvcpl.dll error indicating the file is missing or not found. Because it is an essential system file of the Windows OS, it can affect the system’s performance. Hence, this article will go through the cause of the error and ways to resolve it.
Also, we have a detailed guide about missing DLL files and how to install & fix the errors on Windows 11.
Why is the nvcpl.dll missing?
Many factors can cause the Nvcpl.dll file to be missing on your PC. Some notable ones are:
Issues with recent system changes – Installing faulty Windows OS and driver updates can affect the functionality of the components running on the computer.
Issues with Nvidia Graphics card: Incompatibility issues from the Nvidia card, corrupt driver, change in the booting sequence and even BIOS-related problems could cause this error to prompt.
Uninstallation or installation of programs – The Nvcpl.dll file can become missing when you uninstall or remove programs that are responsible for it, causing them to go missing.
These causes may vary on different computers depending on the circumstances. Nonetheless, you can fix the problem by following the troubleshooting steps we’ll discuss as we go further into this guide.
Nvcpl.dll is the Nvidia Control Panel for your Nvidia-based graphics card. Missing its DLL files on the PC can cause massive problems with its functionality. Sadly, repairing the DLL file may be tasking if you’re not conversant with the tech environment.
Furthermore, trying to repair the file without a proper understanding can result in potential security concerns and breaches. So, we recommend you repair the Nvcpl.dll file using a DLL repair tool.
2. Uninstall and reinstall the Nvidia driver
Right-click the Start Menu and select Device Manager.
Expand the Display adapter, select your Nvidia driver, right-click it, and select Uninstall device.
Double-click the downloaded file and follow the installer prompts to re-install the driver.
This should fix incompatibility issues prompting the missing Nvidia DLL error. Also, you could attempt to uninstall the software that prompted the error and reinstall it after successfully installing the Nvidia device driver.
In conclusion, our readers may be interested in reading about the D3d9.dll file missing and how to fix it. Also, you can read about fixing Docagent.dll errors on your PC.
This isn’t the only problem with DLLs, and we covered what to do if cudart64_90.dll is missing in another article, so you might want to visit it.
Should you have further questions or suggestions, kindly drop them in the comments section.
The error 0x80040605 is one of the common issues on Windows PC. Some users get this error while trying to update their PCs, while some encounter it on Outlook.
Irrespective of where you are getting this error, the solutions in this guide will help you fix it quickly.
What is error 0x80040605?
The 0x80040605 error on Windows usually denotes an issue with the update components. Also, if you are facing the issue on a specific app, it might be due to app corruption.
Below are some of the causes of the error:
Outdated PC: Sometimes, this issue can be caused by an outdated operating system. You can fix it quickly by updating your PC.
Corrupt system files: Another cause of this problem is broken or missing system files. Restoring these files is the only way to get past the error.
Faulty app: In some cases, the error 0x80040605 can be down to a broken file. The solution to this is to repair the app.
How do I fix the Windows error 0x80040605?
1. Update your PC
Press the Windows key + I to open the Settings app and select Windows Update in the left pane.
Click the Check for updates button.
Finally, download and install available updates.
The first thing to do if you are getting error 0x80040605 on your PC is to check if there are pending Windows updates. If you find any, you need to download and install it and restart your PC.
Press the Windows key, type cmd, and select Run as administrator under Command Prompt.
Type the command below and hit Enter: sfc /scannow
Finally, wait for the command to finish running and restart your PC.
At times, the 0x80040605 error might be due to system file corruption. You can fix this by running an SFC scan to repair these files.
If this fails, you need to run a DISM scan first to restore the system image and run the System File Checker after.
Alternatively, you can use the practical tool suggested below to repair these faulty files. This top-notch solution will replace corrupt or missing files with the original version built from your PC cache.
With this, your PC will be restored to the healthy state it was before this issue.
3. Repair Outlook
Press the Windows key + R, type appwiz.cpl, and click OK.
Right-click your Microsoft Office package and select the Change option.
Now, tick the Online Repair radio button and click the Repair button.
Finally, follow the onscreen instructions to complete the process.
If you are getting the 0x80040605 error on Outlook when working with the Data Tab settings, it might be because of a faulty Microsoft Office installation. Repairing the Office package should solve the problem.
Press the Windows key + R, type services.msc, and click OK.
Right-click the Windows Update service and select Stop.
Now, press the Windows key + E and follow the path below: C:/Windows/SoftwareDistribution
Next, delete the content of the SoftwareDistribution folder.
Finally, go back to the Services window, as shown in Step 1, right-click the Windows Update service, and click Start.
Sometimes, a corrupt Windows update cache can cause the error 0x80040605. Clearing these files and restarting the Windows update service should do the trick.
5. Check System Environment Variables
If you are getting the 0x80040605 error while trying to install Windows Essentials 2012, it might be because the System Environment Variables have wrong values.
The default values should be TMP=%USERPROFILE%\AppData\Local\Temp and TEMP=%USERPROFILE%\AppData\Local\Temp.
If anything changes here, you can get this error. This is usually common for users using a RAM disk program that stores their temp folders.
Hence, you need to disable the RAM disk and log in to your Microsoft account to ensure that the temp environment variables have the right default values.
The 0x80040605 error can occur in different ways to disrupt your activities on your PC. Fortunately, it is an issue that can be easily fixed by following the solutions in this guide.
It’s important to pay attention to operating system market share to better understand technology trends and how users use their devices.
In today’s article, we’re going to take a closer look at the majority of operating systems and examine their worldwide market share over the years, so let’s get started.
How did operating system market share look over the years?
Computer market share
2009 – Absolute superiority of Windows
We’ll start our analysis in 2009; in that year, Windows completely dominated the desktop market share with 95.42%.
Windows XP was declining, dropping from 78.45% to 69.14% during that year. If you are unfamiliar with it, we have a great detailed guide on Windows XP and its features.
Windows Vista experienced slow growth, from 19.93% to 25.02% in October but started to decline after that.
It’s no surprise since Windows 7 was on the rise; by the end of the year, it had 6.59%.
Its main competitor, macOS had only 3.68%, with a slow rise by the end of the year. As for Linux, it had a negligible 0.64% of the market share.
2010 – Windows 7 is on the rise
The following year didn’t see much changes in worldwide market share, and Windows kept dominating it, and it held 92.42% by the end of that year.
macOS, on the other hand, experienced a rise in market share; by the end of the year, it had 6.25%. Regarding Linux, it had only 0.75% by the end of the year.
In 2010, Windows XP was still losing popularity, dropping from 67.69% down to 54.74% by the end of the year.
Windows Vista was on the decline, dropping from 22.53% to 16.76% that year. Windows 7 was taking the Windows market by storm, and it overtook Windows Vista in August 2010.
Although Windows 7 had only 8.93% at the beginning of the year, by the end it had 27.98%. Speaking of which, if you’re using Windows 7 in the current year, it’s a good idea to download all Windows 7 updates to keep your PC safe.
2011 – Windows 7 reigns supreme
Windows was on a slow decline in 2011, and its market share dropped from 92.02% to 90.29%. On the other hand, macOS was still on the rise, from 6.56% to 7.01% by the end of the year.
As for Linux, it only had 0.83% by the end of the year.
When looking at the detailed information regarding Windows market share, Windows XP was still declining, dropping from 53.01% to 40.35% by the end of the year.
Windows 7 was on the rise, and it overtook Windows XP as the most used Windows operating system by October. It rose from 30.08% to 47.23%.
As for Vista, it was on a decline, and it went down from 16.41% to 12.05% by the end of the year.
2012 – Windows market share is on the rise
In 2012 Windows’ market share rose from 89.62% to 91.22%. As for macOS, it had a few minor ups and downs, but by the end of the year, it had 7.69%.
As for Linux, it had only 0.88% and a negligible increase in market share.
On the Windows market, Windows 7 was dominating, and it jumped from 49.17% to 60.89% by the end of the year.
Windows XP was losing users, and it went down from 38.8% to 29.12% that year. Windows Vista also saw a decline from 11.66% to 7.73% that year.
This is the year Windows 8 was released, and by the end of the year, the new OS had just 2.02% of the market share. To learn more about it, we suggest reading our Windows 8 vs Windows 7 guide.
2013 – Windows 8.1 is released
Windows was declining in 2013, and its market share went down from 90.96% to 89.55%. During this time, macOS also experienced a minor decline from 7.95% to 7.83%.
Linux also saw growth during this year, and by the end, it had 1.13% of the market. This year a new contender appeared in Chrome OS, but it didn’t achieve any noticeable success.
On the Windows market, Windows 7 was still dominating, and it had a small increase in market share from 61.16% to 61.19%.
Windows XP was still on the decline, and it went from 28.05% to 22.1%. Vista had a similar fate and it went down from 7.61% to 4.8%.
Windows 8 didn’t turn out to be a success, but it had growth from 2.92% to 9.08%. It seems that Microsoft wasn’t pleased with the results, so they released a Windows 8.1 update that year. By the end of the year, Windows 8.1 had a 2.48% market share.
In 2014 Windows platform experienced ups and downs, and it went from 88.87% to 88.74% by the end of the year.
macOS had a similar fate, and it went from 8.35% to 8.67% that year. Linux, on the other hand, saw a rise in market share, and it had 1.39% by the end of the year.
As for Chrome OS, it still had a negligible presence on the market. If you’re not familiar with it, we have a great guide on how to install Chrome OS Flex on PC, so you might want to check it out.
Regarding the Windows market, Windows 7 saw a minor jump from 61.17% to 61.31% that year. Windows XP was on the decline, and it went down from 21.53% to 14.88%.
Windows 8 was on the decline as well, and in August Windows 8.1 overtook it. By the end of the year, Windows 8.1 jumped from 3.62% to 14.69%, and it was close to overtaking Windows XP for the first time.
2015 – Windows 10 dominates the market
2015 brought another drop in market share for Windows, and it went down from 88.19% to 84.89%. As for macOS its market share went up from 9.1% to 9.8% that year. MacOS achieved a record 10.51% in May of that year.
Linux had 1.48% by the end of the year, while Chrome OS still had an almost non-existent market share.
2015 was an exciting year for Microsoft operating systems, and Windows 7 was on the decline for the first time, going from 61.99% to 55.89%.
Windows XP was also on the decline dropping from 13.59% to 9.95%. Windows 8.1 had a slow growth until July but in the end, it dropped from 16.19% to 14.31%.
Windows 10 was released that year, and it took the Windows market by storm taking 13.98% of the market in just a few months after its release.
2016 – macOS sets a new record
2016 wasn’t a good year for Windows, and its market share dropped to 80.84% in October, but it recovered quickly. However, it dropped from 85.18% to 84.27% that year.
macOS was growing strong that year, and it went from 9.03% to 11% setting a new record. That year Linux had 1.57% while Chrome OS was still under 1%.
Windows 7 was still losing userbase, and it went from 54.78% to 47.74% that year. Windows 10 was on the rise and it jumped from 16.02% to 32.22%, doubling its market share.
Windows 8.1 and XP were declining, and the former went from 13.7% to 10%. Regarding XP it went from 9.36% to 5.93%.
2017 – Windows 10 to overtake Windows 7
Windows market share declined in 2017 yet again from 84.4% to 82.68%. Apple set a new record with macOS, and it went from 11.2% to 13.06%. Linux had 1.54%, and Chrome OS had slightly less than 1%.
Speaking of Linux, if you never tried it, you might want to consider using one of these Linux emulators for Windows.
On the Windows market, Windows 7 was declining from 47.46% to 41.89%. Windows 10 was on a path to overtake it, and it went from 32.84% to 41.69%.
Windows 8.1 was on a slow decline, from 9.65% to 9.16%, and Windows XP had about 3.6% by the end of the year.
2018 – Major drop in Windows market share
For Windows, 2018 was a particularly harsh year, and its market share went down from 82.68% to 76.17%. The operating system reached a record low with a 70.22% market share in November, but it has recovered quickly.
At the same time, macOS experienced a drop as well and it went from 12.8% to 12.33%. That year, Linux had 1.69% while Chrome OS went from 0.9% to 1.35% and set a new record.
Regarding Windows, Windows 10 set itself as a dominant operating system and it went from 42.78% to 52.36%.
Windows 7 was declining from 41.86% to 35.63% that year. Windows 8.1 also lost users, going from 8.72% to 6.95%.
2019 – macOS is on the rise
In 2019, Windows recovered from a previous drop, and it’s one year in which Windows market share grew. As for the exact numbers, the share went up from 75.47% to 77.65%.
macOS set another record going from 12.33% to 16.46%. As for Linux, it went up to 1.85%. Chrome OS saw a rise from 1.17% to 1.45%, after achieving a new peak in October of that year.
As for Microsoft operating systems, Windows 10 was on the rise from 53.18% to 65.4% while Windows 7 was on the decline. That year Windows 7 dropped from 35.05% to 26.79%. Regarding Windows 8.1, that year it finally went under 5%.
2020 – Windows 10 reigns supreme
Windows platform saw another decline in 2020, and its market share went down from 77.7% to 76.56%. Apple saw a minor increase from 17.04% to 17.1%. Keep in mind that during this period Apple reached its peak in April at 18.99%.
Linux had 1.93% that year while Chrome OS jumped from 1.52% to 1.72%.
Windows 10 was dominating the Windows market, and it got from 67.35% to 75.68% in a year. All other versions were on the decline and Windows 7 went from 24.9% to 18.03%.
2021 – Slight drop for Windows and macOS
2021 wasn’t a good year for most companies, and Windows got a drop from 76.26% to 73.72%. Apple followed the same trend, and macOS dropped from 16.91% to 15.33%.
During this time, Linux got to record 2.09% market share while Chrome OS went from 1.91% to 2.18%.
As for the Windows platform, Windows 10 rose from 77.47% to 82.49%. Windows 7 continued its decline from 16.81% to 12.91%.
Windows 11 was released near the end of the year, but it didn’t achieve any major success during that time, although sources claim that Windows 11 got 10% of the market share. To learn more about the new version, we suggest reading our Windows 11 in-depth review.
2022 – Windows 11 is on the rise
In 2022 Windows recovered from the previous year and went from 75.5% to 75.34% which is a negligible drop.
As for macOS, it went from 15.85% down to 14.66%. That year, Linux was on the rise, reaching 2.93% of the market share.
And lastly, Chrome OS went from 2.6% to 2.28%, a first-time drop for the system.
On the Windows platform, Windows 10 was on the decline for the first time, and it went down from 81.15% to 67.95%. If you’re planning to switch to a new version, be sure to read our Windows 11 vs Windows 10 guide for more information.
The same can be said for Windows 7, which went from 11.92% to 11.2%. If you’re still on Windows 7, we have a great guide on Windows 7 vs Windows 11, and why you should switch. Windows 11 was on the rise, and it went from 2.6% to 19.97% by the end of the year.
2023 – Windows is still on the decline
Windows was again declining in 2023, and by March it dropped from 74.14% to 69.4%. macOS saw a steady rise, and it went from 15.33% to 17.21%.
Regarding Linux, it is down from 2.91 % to 2.85% for the first time. Chrome OS was on the rise, and it went from 2.25% to 3.23% until March.
In 2023, Windows 10 is still the dominating OS, with 73.46% of the market share. Next up is Windows 11 with 20.95%. Lastly, there’s Windows 7 with 3.73%.
This is info until March, and we’re excited to see how the market share will change in the upcoming months.
In 2009, SymbianOS was a leading mobile operating system, but its market share begin to drop and in that year it went from 39.31% to 35.05%.
iOS was on the rise, however, its market share went from 35.56% to 32.05%. BlackBerry OS went from 0.95% to 9.69% that year alone. Android was also new, and it went from 0.66% to 4.07%.
2010 – Major drop in iOS
In 2010 SymbianOS was still the leading operating system. As for its market share, it went from 34.16% to 29.66%.
Next, an iOS encountered a surprising drop from 33.13% to 23.57%. BlackBerry OS was also getting a bigger share of the market, and it went from 10.28% to 18.04%
In 2011, we saw a surprising increase in Symbian OS, and its market share went from 30.25% to 33.46%. iOS suffered a decline, and it went from 25.02% to 22.71%. Android was on the rise, and it was on its way to surpass iOS.
As for its market share, it went from 14.61% to 21.83%. And lastly, BlackBerry OS declined from 15.03% to 7.78%.
2012 – The end of Symbian OS
The year 2012 saw the massive decline of Symbian OS, and during a single year, its market share dropped from 31.89% to 10.72%.
Android was rising, surpassing Symbian OS as the leading mobile OS. It went from 23.21% to 33.19%. iOS had a small decline, and it went down from 24.04% to 23.26%.
There was also a new competitor in the form of Series 40, and it went from 0% to 14.86% in less than a year.
2013 – Android dominates the mobile market
In 2013 Android continued to dominate the mobile market, and it went from 36.87% to 42.99%. iOS was on the decline, and it went from 25.85% to 21.82%.
Series 40 also had a small jump from 12.86% to 13.02%. Other mobile operating systems had less than 5% each.
2014 – Android takes more than half of the market
The following year didn’t bring any new changes, and rising Android popularity continued. Android jumped from 44.62% to 59.15% in that year. As for Android, you might be interested in the best Android emulators that let you run apps and games on your PC?
iOS saw some ups and downs; in the end, its market share dropped from 23.55% to 23.51%. Series 40 was on its way out, and its market share dropped from 11.7% to 5.76%. Other operating systems had less than 3% each.
2015 – Android on the rise
The same trends occurred in 2015, and Android continued to dominate the worldwide market. Its share went from 59.78% to 65.9% in a year.
iOS was on the decline, and it went down from 22.75% to 19.21%. Other operating systems had less than 3% each during 2015. As for iOS, did you know that you can run iOS apps and games on Windows? We have a great guide that will show you how to do it.
2016 – Android dominates the market
2016 continued the trend from the previous year. Android went from 66.28% to 71.97%, and it was dominating the market.
iOS had a minor decline, from 19.58% down to 18.89% on the global market.
2017 – Small rise for iOS
2017 was uneventful, and Android slightly jumped from 71.58% to 73.54%. iOS experienced some ups and downs, and it even reached 20.32% in August.
In the end, it just saw a minor increase from 19.73% to 19.91%.
2018 – Android takes 3/4 of the market
During 2018, Android continued its domination of the world market, and it went from 74.39% to 75.16% following a small drop in November.
iOS reached a new high point in November at 24.44%. Over the year, iOS share went from 19.64% to 21.98%. If you ever wanted to try iOS, there are many great iOS emulators for Windows.
2019 – iOS on the rise
This is the first year in which the Android market share declined. It went from 74.45% up to 76.67% and then it dropped to 74.13% by the end of the year.
On the other hand, iOS saw an increase, and it went from 22.85% to 24.79%.
2020 – iOS takes 1/4 of the market
2020 was followed by another decline in the Android market share, going from 74.3% to 72.48%. iOS increased its market share that year and peaked in April at 28.79%.
Over the year, its market share went from 24.76% to 26.91%.
2021 – Android on slow decline
The slow decline of Android continued in 2021, and its market share dropped from 71.93% to 70.01%.
iOS was still on the rise, and its market share rose from 27.47% to 29.24%.
2022 – Android on the rise again
After several years, Android’s market share rose from 69.74% to 72.37%.
iOS was on the decline, and it went down from 29.49% to 26.98%.
2023 – Minor drop for Android
In 2023 Android is on the decline again, and it went from 71.77% to 70.88% in March.
As for iOS, its numbers rose from 27.6% to 28.42% until March.
Tablet market share
2012 – Slow rise of Android
We start our analysis in 2012, and in August iOS was dominating the tablet market. Between August and the end of the year, iOS market share went from 85.61% to 79.71%.
As for Android, in August, it had 12.81%, and it rose to 18.81% by the end of the year.
2013 – iOS now controls less than 3/4 of the market
In 2013 iOS was on the decline, and its market share dropped from 76.74% to 73.77%. Android market share was on the rise from 20.16% to 22.59%.
There was also a tablet version of Linux in 2013 and by the end of the year, it had 2.67% of the market.
2014 – Android now holds more than 1/4 of the market
The decline of iOS continued in 2014, and Apple went from 73.77% to 68.25%. On the other hand, Android was on the rise, and it went from 22.34% to 27.96%.
As for Linux, it was on the decline, and it went from 3.02% to 2.56% in 2014.
2015 – Android on the rise
iOS decreased its market share in 2015, and it went from 66.57% to 66.38% which is a negligible loss. As for the Android, it rose from 29.29% to 31.65%.
If you’re a fan of Linux, we’re sad to say that its market share dropped from 2.61% to below 1% during a single year. Linux didn’t achieve any major success in the tablet market, but if you love Linux, you can always install Linux on a Surface Pro tablet.
2016 – Android now holds a third of the market
Not a lot has changed in 2016 in the tablet market share. iOS was still the leading operating system but on a small decline from 66.48% to 65.81%.
Android was on the rise and it went from 31.85% to 33.33% in a year. Windows also had a negligible presence on the tablet market, but in order to use it, you need to enable Tablet Mode on it.
2017 – Small rise for Android
The same trend continued in 2017, and iOS went from 66.15% to 64.46%. It’s worth mentioning that there was a small rise in November, with iOS reaching 66.9%.
As for its competitor, the downfall of iOS affected Android, and in July, Android reached its peak at 35.07%. As for the entire year, it went from 33.11% to 34.06%.
2018 – iOS strikes back
2018 was an exciting year for the tablet market, in which iOS increased its market share from 64.52% to 72.32%. It’s worth mentioning that in November of that year it had 74.62%.
Regarding Android, the success of iOS directly affected it, and it fell from 35% to 27.34%. Android market share went as low as 25.01% in November of that year.
2019 – iOS market share drops by 10%
Another shift was seen in 2019, and after a minor market share increase the iOS market share begin to drop. During that year, it had a surprising drop from 73.37% down to 63.11%.
This was good news for Android, since all of that market share went to it, and its numbers went from 26.32% to 36.65% in a year.
2020 – iOS continues to lose market share
After the massive changes in 2019, 2020 wasn’t as exciting, but the same trends continued. iOS lost some of its market share, and it went from 60.63% to 56.62%.
Like in the previous year, this positively affected Android, and its market share went up from 39.13% to 43.27%.
2021 – iOS holds its ground
2021 was uneventful; both platforms had minor ups and downs, directly mirroring one another. At the end of the year, the iOS market share shifted from 55.96% to 55.66%.
Regarding Android, its market share went up from 43.93% to 44.25%.
2022 – Android to overtake iOS?
In 2022, the market share was almost evenly split between the two platforms. Apple went from 54.73% down to 51.21%. It went low as 50.68% during October of that year.
On the Android side, there was a rise from 45.17% to 48.66%. Android peaked that year in October with 49.19% of the market share.
2023 – Is iOS on the rise again?
2023 is set to be an exciting year, in the first quarter, it seems Apple’s market share is on the rise. From January to March iOS market share went from 51.48% to 52.33%.
Regarding Android, it went from 48.38% down to 47.51%, and we can’t wait to see how the market will change by the end of the year.
Which OS has the largest market share?
Globally, the largest market share belongs to Android, and it currently has 38.89%, according to Statcounter’s worldwide statistics. As for desktop operating systems, Windows is still dominating, and it has 27.75%.
Interestingly, Android overtook Windows in April 2017, and it was a dominating operating system ever since. Seeing how many smartphones and Android devices are out there isn’t a surprise.
Which OS is most used in the USA?
The most popular operating system in the US is Windows at 32.42% of the market, according to Statcounter’s operating system stats for the US. As for the mobile market, it’s iOS with 23.41%.
What are the 3 most popular OS?
In the US, the top 3 operating systems are:
Windows – 30.48%
iOS – 25.81%
Android – 19.63%
As for the global market, the top 3 operating systems are the following:
Android – 41.48%
Windows – 28.32%
iOS – 17.31%
What percentage of computers are Windows vs Mac?
On the worldwide scale, Windows has 69.4%, and it’s on a slow decline. On the other hand, macOS has 17.21%, and it has been on the rise for years.
The situation is a bit different in the US, and while Windows has 56.02%, it has been declining for months now.
Regarding macOS, its market share is constantly rising in the US, and now it’s 30.41%. To learn more, we suggest reading our Windows 11 vs macOS and learning more about the differences between the two.
We hope this guide has answered all of your questions regarding the operating system market share.
All of the data was gathered by StatCounter, and while it’s the most used source, it measures pageviews and browsing activity, so the number of unique users might be slightly different depending on other sources.
As you can see, Android is the dominant operating system in the world, which isn’t a surprise, but for desktop computers, Windows is still the most used operating system.
The increase in operating systems creates a need to introduce new internet-connected devices, leading to more users connecting via them and excessive use of technology. Read this guide to know more.
What operating system do you use and why? Let us know in the comments below.
SSD or Solid State Drives are the latest entrants in the storage device ecosystem and offer a wide array of benefits over the existing options, primarily speed and performance. And when you get one, the first thought is to install Windows on a new SSD without USB.
Installing Windows on SSD helps significantly improve the PC’s performance since the critical system files and those responsible for booting the OS are read faster. So, we have the best options for those wondering how to install Windows on a new SSD.
Can I install Windows on SSD without USB?
Yes, you can install Windows on SSD without USB, or for that matter, even an HDD (Hard Disk Drive). This helps reduce the boot time in addition to helping load programs faster than ever. And that’s the main reason most users go for it!
The process is not as simple as you would imagine, and for seamless execution, using one or more third-party tools, both free and paid, is often the best option. But there are built-in methods for it. Let’s find out!
How do I install Windows on a new SSD without USB?
1. Install Windows using an ISO file
Tip
The steps listed here are for Windows 11 though the process remains similar for the previous iteration as well. Just head to the Windows 10 official page, download the Media Creation Tool, and get the ISO via it.
Go to Microsft’s official website, choose the required edition of the OS, and click on Download to get the Windows 11 ISO.
Choose the product language from the dropdown menu, and click Confirm.
Click on the provided link to start the download.
Now, right-click on the ISO file, and select Open with.
Choose Windows Explorer, and click OK.
Click Open in the confirmation prompt.
Run the setup.exe file.
Click on Change how Setup downloads updates. We are choosing the option for a quicker installation, though you could install the updates alongside.
Click on Not right now and then on Next.
Follow the on-screen instructions to install Windows.
This is the quickest way to install Windows on a new SSD without USB. The ISO file contains all the relevant information and files pertaining to the installation and will allow you to install Windows 10 on SSD without removing HDD.
Remember, this method works as an upgrade when installing a Windows iteration over a previously existing one, especially in cases where the SSD comes with Windows pre-installed. In case SSD doesn’t yet have the OS, go with the next solution.
2. Create a bootable partition on the hard disk
2.1 Creating a partition
Get the ISO file for Windows, as detailed earlier.
Connect the new SSD to the computer.
Press Windows + R to open Run, type diskmgmt.msc in the text field, and hit Enter.
Right-click on the SSD, and choose Shrink Volume on a partition with sufficient storage.
Now, enter 10240 (10 GB) in the text field, and click Shrink to proceed.
Next, right-click on the newly created partition and select New Simple Volume.
Follow the on-screen instructions to get the partition ready for storing files. Make sure to go with the default options.
Turn on the computer, open up Disk Management, right-click on the partition you created earlier, and choose Delete Volume.
Click Yes in the confirmation prompt.
Right-click on the partition beside it and select Extend Volume.
Enter the space for the volume you just deleted (10240 in our case), and complete the process.
Now, launch EasyBCD, go to Edit Boot Menu, select the entry you created earlier, and click Delete.
Click Yes in the prompt.
That’s it! Once done, you now have your computer in the previous state with the exception that Windows is now installed. This method is helpful to users wanting to install Windows to an SSD already connected to the PC when it has no data stored.
So if you were wondering how to install Windows on a new hard drive without a disk or USB, using a third-party tool like EasyBCD and creating another partition should do the job.
3. Clone the disk
If you don’t want to go with either of these methods, another option is to clone the disk. Here, the files available on the HDD or another disk with Windows installed will be transferred to the SSD in the same form. As a result, the SSD can now be used as the system drive.
You can easily move Windows to an SSD using a bunch of reliable cloning software. All these work well, though we recommend going with an unpaid option since the process is usually a one-time thing, and you, most likely, won’t have to install Windows on a new SSD without a USB.
You now know how to install Windows on a second SSD, both new and old. The process is simple and shouldn’t take more than a few hours.
Microsoft Intune provides robust features to help you manage your devices, including built-in compliance policies. Before you customize these policies, you can use the default policies to ensure that your company’s devices follow security and privacy requirements.
You may, however, run into a device compliance policy error code 0xfde9. This error occurs when you send a device compliance report in Intune, which returns a compliant status even though a compliance policy has not been set.
Let’s have a closer look at how to address this issue.
What happens if a device is not compliant with Intune?
If a user’s devices are not compliant, they will be unable to log into Office 365 services. This is an important aspect to consider when planning your compliance policies and procedures.
So, what is a compliance policy in Intune? In Intune, the compliance policies can be configured for a group of devices. These policies help ensure that devices and apps in your organization are configured to meet the set requirements.
You can choose from a predefined set of compliance policies or create your own. A device is compliant if it meets the policy requirements and non-compliant if it does not. When a device is non-compliant, it is subject to action from the administrator.
A non-compliant state can occur for a variety of reasons:
Minimum requirements – This is when the device doesn’t meet the requirements defined in your organization’s policy.
User compliance – If users who have enrolled their devices in Intune have not installed the required apps or made required changes to their device configuration, their devices may be non-compliant.
Other situations where a device may become non-compliant include:
The user may have uninstalled Intune and removed the previous management state from the device.
It’s possible that the user may have chosen to switch to another MDM system but did not complete all of the steps required before removing Intune from their device.
How do I change the default device compliance policy in Intune?
Before any advanced troubleshooting, check off the following:
When you create a policy, Intune creates an enforcement profile that contains settings that apply to your organization’s devices.
The profile specifies what needs to happen on each device that runs the policy, including whether it must install apps and software updates or contact Microsoft for more information.
This policy can be deployed to devices that are already non-compliant or may become non-compliant. You can also use policies to prevent devices from becoming non-compliant.
If you’re still experiencing issues and the error 0xfde9 is persistent, you can try resetting the non-compliant device. This will erase any prior configurations that may be causing issues.
You may also encounter another similar Intune policy error 0x87d101f4, so be sure to check out our detailed article on navigating such issues.
Let us know what solution has been able to fix this error for you in the comment section below.
When you see the term FAT, the first thing that should come to mind is the file system in your drives. File systems are designed to store and retrieve data from storage media. However, they, too, can throw BSoD errors.
If you are using a Windows-based operating system, the FAT file system (FAT32) is usually used to store data. This is because it can handle larger files faster than other file systems. So what causes the error 0x000000023? Let’s find out.
What is error code 0x00000023?
A file system error is a problem with the hard drive’s file system. This can cause files to become corrupted, inaccessible, or even lost.
In general terms, a system file error is any type of error that occurs while accessing the contents of a file or folder on a hard drive. These errors may occur due to hardware problems or software issues.
However, this specific error code 0x00000023 is caused by a damaged FAT file system. Other causes include:
Corrupt registry settings – Corrupt registry settings can also trigger a FAT file system error when they cause programs to start incorrectly or not at all.
Bad sectors – A bad sector on your hard drive can cause the FAT32 partition to become corrupt. When this happens, your computer may not be able to read all the data stored on your drive.
Improper formatting of the hard drive – If this process isn’t done correctly, there’s a chance that it will leave behind some bad sectors on your drive.
Damaged hardware – Hard drives don’t last forever. Eventually, they will fail completely and stop working altogether. If you’re using an older computer with an outdated hard drive, its days are likely numbered.
Virus infection – Viruses can infect all types of files on your computer and cause them not to work correctly. This could result in a FAT file system error message when you try to open them.
Incompatible software and hardware devices – Some programs use different versions of FAT, which can cause incompatibility issues if you try to use them on the same device.
How do I fix the FAT file system error?
A few things to ensure everything is in check include:
Disconnect all peripherals, restore only the necessary ones, and check if the issue persists.
Hit the Windows key, type cmd, and select Run as administrator.
Type the following command and press Enter to run it: msdt.exe -id DeviceDiagnostic
In the Hardware and Devices dialog that appears, click Next.
The tool will start scanning for any problems with your hardware and recommend a fix. After it is done, click on Apply this fix if any solutions are found.
Restart your PC and see if the error still occurs.
Conversely, although the built-in troubleshooter does a good job, it doesn’t always catch all the errors that may be present. That’s why we recommend using hardware diagnostic tools.
These tools save time, money, and frustration by providing detailed information about your computer’s hardware components.
They have a wide range of features and can help you benchmark your system so that you can see how much faster it is after installing new components or upgrading existing ones.
It is best to be prepared to avoid such surprises because your hard drive can fail at any time. For one, you can start by regularly undertaking a hard drive health test. This will allow you to monitor closely and avert risks such as losing your data.
Consider BSoD fixers, too, especially if you encounter errors of this kind often enough. They’ll come in handy when you don’t have the time to play guessing games on the root cause of your BSoD error.
Your feedback is important to us, so let us know of any other solutions we may have missed for this error in the comment section below.
Microsoft offers Windows 10 users a free upgrade to Windows 11, and if you haven’t upgraded already, now is a good time to do so. Most users are usually worried about the stability of an OS, especially when it is launched.
In this article, we look at the evolution of Windows 11 since its release, the major issues encountered so far, and its stability status. Is Windows 11 still worth it? Let’s find out, shall we?
Are there any issues with Windows 11?
Any man-made software is bound to experience bugs. In the history of all Windows releases, each version has had its share of issues, and Windows 11 is no exception. We’ve already covered in detail some of the common Windows 11 problems.
However, let’s touch base on a few of the most stubborn issues:
Unsupported hardware – Anyone whose PC doesn’t meet the system requirements for Windows 11 can not enjoy the OS in its full glory. That’s bad news for anyone who doesn’t want to spend hundreds or even thousands of dollars on a new computer just because they want to stay up-to-date with Windows 11.
Incompatibility issues – Windows 11 brings many new features and improvements, but there are some incompatibility issues with existing hardware and software. For instance, version 22H2 users are already facing issues with their Intel sound drivers, which brings up a blue screen.
Frequent crashes – Another big problem with Windows 11 is that it crashes frequently. Every few days, someone’s PC seems to be crashing because of a BSoD error or something else is wrong with their PC hardware or software. Whereas crashes have been happening in every other Windows version, it seems oddly frequent in Windows 11.
Is Windows 11 stable enough now?
Since the initial release of the OS, several builds have been released, each as an upgrade from the previous one.
The initial release of Windows 11 was a major milestone for the operating system. Microsoft has been working hard to ensure it is easy to use, productive, secure, and reliable.
The key features included:
Easy to use – Windows 11 has been designed with the user in mind, with a new Start menu with live tiles and a wide range of built-in apps, including Photos and Mail and the Action Center.
Productivity tools – The taskbar provides quick access to your favorite apps and files, while the new Start menu can be customized to include more commonly used programs.
Security features – Windows Defender helps protect you against viruses, spyware, and other threats on your PC or device by scanning it daily for software vulnerabilities. Microsoft Edge gives you an optimized browser experience with built-in tabs for all your favorite sites on your desktop. And Windows Hello allows you to sign into websites securely with just a touch or facial recognition scan.
So far, there have been two major builds since the release of Windows 11. 21H2 and 22H2. However, these are not the only builds that have brought impeccable OS changes.
This is currently the latest build that addresses several issues. As it is part of the 22H2 version, a lot of improvements have been noted, such as:
Users with Intel graphic cards will no longer get errors when they use the DirectX feature in their apps.
There is also enhanced security in terms of viewing protected content. When hovering the mouse over minimized windows, the contents could be displayed in preview, but this has since been addressed.
A new toggle control feature has also been added that prioritizes non-security features but is still critical for running your OS.
With the mention of the DirectX feature, it is important to touch base on Windows 11 as a gaming OS. So, Is Windows 11 stable for gaming?
While there are a few bugs with Windows 11 that need to be ironed out, Microsoft has made sure that it’s as stable as possible for gaming.
Some gamers have reported issues with certain games not running properly on Windows 11, but this is usually because of incompatibility issues between games and drivers rather than anything related to Windows itself.
TLS 1.3 version has been added to the Group Policy Editor as a new protocol. Whereas this is a great move to enhance security and a boost in speed from previous versions, such as TLS 1.2, you need to ensure your OS and system meet the compatibility metrics to take advantage of this protocol.
Another interesting addition but for those leveraging the new Bing Chat, a search button has been integrated into the Taskbar that will redirect you to the chat experience on the Edge browser.
Talking about AIs, we have compiled a list of the best AI software to use on your PC to enhance your productivity.
This is one of the most raved-about updates as the new updates are not things that the regular user would complain about, but now that they are here, they make life so much easier. So what are they?
The Quick Assist menu has been brought closer to you so you can get those PC issues fixed even faster.
Finally, the Task Manager can now support themes. Having themes in Windows 11 is great, but it can be annoying when it is only for select programs.
Also, in Windows 11, there are a lot of confirmation dialogs. While it is not bad, some users would prefer not to keep confirming such. Now, this build introduced the efficiency mode that eliminates the confirmation dialogs. Even better, you can turn it on or off whenever needed.
Everyone loves a good file manager, and with how things have been going for Windows 11 File Explorer, it seems it will be one for the books when reviewing it a few years from now.
Some notable changes in this build include:
An enhanced File Explorer. We’ve already shared all the cool things you didn’t know about File Explorer, and Microsoft keeps making the list longer. We’re not complaining, though. Now, you can pin important files for easy access.
Sharing has also been made easier with nearby sharing. You never really appreciate this feature until you need to transfer files from one desktop to another.
Version 21H1
Windows 11 version 21H2 is the launch version, so all the improvements started with this build. Some of the notable changes that came shipped with this version include:
The new, improved UI.
An integrated Microsoft Teams chat in the Taskbar.
Windows version with developers in mind. More apps are now allowed in the Microsoft Store. You can also enable Developer Mode on Windows 11 to allow the sideloading of apps. So, if you were wondering, Is Windows 11 stable for developers, there is your answer.
Hybrid work was also one of the new features introduced in this version, allowing organizations to work seamlessly.
Yes, and if only for one reason, it should be because Windows 11 offers many improvements over Windows 10 and previous versions of Windows, including better security and performance.
However, if you are an experienced user who needs more control over your system, you might prefer Linux or macOS. These operating systems are easier to customize and install software packages on.
MacOS and Linux are both fantastic operating systems. But when it comes to Windows, there are just some things that any other OS can’t match.
Windows has a larger selection of software available and can be used to run more programs than the macOS. But what makes Windows reign supreme is compatibility.
It is backward compatible and compatible with most hardware devices from other manufacturers. You can use almost any peripheral device with your PC without having trouble connecting the devices or installing drivers to make them work properly.
So, while other operating systems like macOS and Linux may offer more customizable and flexible options, Windows 11 takes the crown. Find out more in our macOS vs Windows comparison.
Its user-friendly interface, compatibility, and large user base make it a better choice. You’re more likely to find someone to help you troubleshoot a problem or answer questions about Windows than macOS and Linux.
On top of that, Microsoft recently released the first build, version 22H2, since the initial launch of Windows 11. We’ve already covered what’s new in our comparison article between 21H1 and 22H2.
But, in a nutshell, security has been beefed up, and more bug fixes that guarantee you an unmatched performance than ever before.
We’d love to hear your feedback if you’ve been using Windows 11. Would you say its stability has improved thus far? Let us know in the comment section below.
The TVAPP 00100 error is typically associated with the Xfinity streaming app or website. It often shows that there is some issue with the app’s authentication.
This error code means you cannot connect to the streaming service and has stranded a few users. So we will show you some practical ways of fixing it.
What does TVAPP 00101 mean?
If you encounter the TVAPP 00100 error on Xfinity, it is likely caused by a problem with the Xfinity Stream app or website. This error code can arise from various factors, such as:
Server issues – For most users, it may be a temporary issue with Xfinity’s servers or some server downtime.
Network connectivity issues – Internet connection is a primary cause of the error for many readers.
Subscription-related problems – If you have a problem with your Xfinity account or subscription, you may face the error.
Bad cache data – If you have a corrupted browser cache, you will likely get this error when connecting to the service.
VPN-related issues – The app may reject the connection if you use any proxy to connect to the service.
Let us introduce you to some easy solutions.
How do I fix the TVAPP 00100 error?
There are a few workarounds that may come in handy before trying anything more elaborate:
Check your connection – Ensure you are connected to a fast or wired network, as slow connections may trigger the error.
Restart your computer – Sometimes, a reboot will resolve minor bugs and permit you to use the service.
Wait it out – Before digging into other fixes, you may give it a moment, especially if the error is a serverside problem.
If you still have not resolved the problem, try any solutions below.
1. Clear the browser cache
Launch your browser (we use Chrome in this example).
Press Windows + Shift + Del to open the cache page.
Select a Time range, tick any of the checkboxes that may apply, and click Clear data.
Restart the browser and very if it fixed the TVAPP 00100 error.
2. Reset your DNS
Press Windows + R to launch the Run dialog.
Type cmd and hit Ctrl + Shift + Enter to open an elevated Command Prompt.
Type the scripts below one after the other, pressing Enter after each one. ipconfig /flushdns ipconfig /renew
Type the script below into the text field and hit Enter. ms-settings:network-proxy
Toggle off Automatically detect settings.
Scroll down to Manual proxy setup and Set up.
Toggle off Use a proxy server.
Verify if this resolves the TVAPP 00100 error.
If you have gone through these solutions, you should now be on your way to streaming on the Xfinity platform again. Still, on the errors, you may come across the Xfinity error 500, but be sure to check out our article on how to fix it.
These steps are straightforward, and we would like to know which fixed the error in your case.
The DUser.dll is a critical Windows component that ensures that Windows applications function correctly. If the file is missing, you’ll trigger a series of operational errors.
If you’re experiencing the DUser.dll error, this article will briefly discuss the causes and provide you with steps to help resolve the error.
What is the DUser.dll File?
The DUser.dll also known as a Windows DirectUser Engine file was published by Microsoft for the development of the Windows OS.
The DUser.dll file falls under the Win32 DLL file type category. The file is located in the path: C:\Windows\System32.
Why is the DUser.dll missing?
Here are some of the reasons why you’re experiencing the DUser.dll missing error:
Corrupt System Files – Windows comprises a series of files and applications that enable the OS to function correctly. Sometimes, some of these files can get corrupted due to actions of viruses, forced system shutdowns, etc. As a result, the files get corrupted, which leads to errors like the DUser.dll is missing.
Failed Application Installation – One of the common causes of errors in Windows-based applications is failed app Installations. If the app triggering the DUser.dll error wasn’t installed correctly, you’d experience errors like the DUser.dll is missing.
Virus and Malware – Viruses and Malware are one of the most common causes of errors in Windows PCs. Computers infected with viruses tend to malfunction depending on the virus type. Virus infection may be the reason for the missing DLL error.
What can I do if the DUser.dll is missing?
If you’re experiencing the DUser is missing error, here are a couple of ways you can resolve the error:
1. Apply a DLL Fixer
One of the best ways to resolve a missing DLL error is to apply an error-fixing tool. While you can opt to fix the error by troubleshooting, success won’t be guaranteed. You can also get stuck in a loop of trying a series of fixes simultaneously without getting a result.
However, if it comes down to it, a DLL repair tool should be your primary choice. For Microsoft DLL files, these tools guarantee a 100% success rate given the vast database that includes every Microsoft DLL ever released, including the Duser.dll.
2. Run the System File Checker Utility
Press the Windows key, type in CMD, and select Run as Administrator.
Click Yes to grant the app administrative access in the User Account Control window.
Once the command prompt opens, type the following and hit Enter: sfc /scannow
Wait till the scan is complete, and restart your PC to check if the error persists.
An SFC scan helps resolve Windows errors triggered by corrupt System files. DLL errors can often appear due to a series of corrupt system files. Running the scan will help identify and repair such files.
Sometimes, you can trigger the Windows Resource Protection error while attempting to run an SFC scan. Ensure you read our guide to resolve the error.
3. Scan for Malware
Press the Windows key, type in Windows Security, and hit Enter.
Click on Virus and Threat Protection and click on Scan Options.
Select the Full Scan option to check the entire system for viruses and malware and click Scan Now to initiate the scan.
Since lurking viruses or malware may be on your PC, performing a full scan will identify and remove them.
In case you need more efficient methods to scan your PC for risky malware, using a high-end antivirus is definitely the solution.
This antivirus software has enhanced detection rate and machine learning tools for finding any virus and removing it for good.
Press the Windows key, type Control Panel, and hit Enter.
Type Recovery, select Recovery, and click on Open System Restore.
In the Restore Files and Settings box, click Next.
In the next window, select the Restore Point to which you wish to restore your PC, and click Next.
Click on Finish and then click Finish to complete the system restore.
A System Restore will restore your PC to an earlier state where it was functional.
However, you’ll need to back up your system before running a System Restore because you’ll lose a few files and applications.
Resolving missing DLL errors in Windows is pretty much straightforward and swift. Errors like the DUser.dll is missing can be fixed by following our guide, even with no prior technical knowledge.
If you follow the article correctly, you should be able to resolve the missing DLL error in no time.
One of the most common and frustrating errors on Windows is a blue screen of death (BSoD). One such error is the 0x000000F5 error which is usually triggered by a lack of storage and memory on your PC.
A BSoD error will halt the functionality of your PC and for the most part, render the PC unusable. In this article, we’ll briefly discuss the BSoD 0x000000F5 error and its causes and provide the best ways to fix it quickly.
What causes the BSoD error 0x000000F5?
The following are some of the most common causes of the 0x000000F5 Blue Screen of Death error:
Incompatible Drivers – For every new device you install on your PC, e.g. Bluetooth, Graphics Card, External Controllers, etc., you’ll need to install their corresponding drivers. However, if the installed drivers are incompatible with your PC, errors like the 0x000000F5 will eventually pop up.
Insufficient Storage – Windows PCs require a minimum of 10GB of free space to function optimally. If your PC is running low on storage, you’ll experience occasional freezes, leading to crashes and a BSOD error.
Antivirus or Firewall Blocks – Sometimes, antivirus software unintentionally prevents certain applications and Windows features from functioning properly. Errors like the BSOD 0x000000F5 can be triggered if your antivirus or firewall blocks features required to run your PC.
Damaged Windows Registry – If the Windows Registry is damaged or contains incorrect entries, you’re bound to trigger a few errors.
How can I fix the BSoD error 0x000000F5?
If you’re experiencing the BSOD 0x000000F5 error, here are a couple of ways you can resolve the error:
1. Update drivers
Press the Windows key, type in Device Manager, and hit Enter.
Scroll through the list of Drivers, and check to see if there is a yellow alert symbol next to the option. Right-click on the driver, and select Update driver.
In the next window, click Search automatically for updated driver software, and follow the prompts to complete the update.
Once you’ve updated all the drivers, restart your PC and check if the error is resolved.
Regardless of the manual steps, you should know there is an alternative method to update your drivers entirely automatically.
Namely, we suggest you utilize Outbyte Driver Updater to quickly scan the OS and detect all old drivers and update them with their latest version.
Outbyte Driver Updater
Manage any device drivers on your PC with this all-in-one driver manager.
Press the Windows key, type cmd, and select Run as Administrator.
Then, click Yes in the User Account Control (UAC).
Now, type the following, and press Enter: chkdsk c: /f
The “c:” should be replaced with the letter drive where your OS is installed.
Wait until the process is complete, and restart your PC to check if the error is fixed.
The 0x000000F5 BSOD error can be triggered by a file system error or bad sectors in your disk. The CHKDSK command will check your disk for file errors and bad sectors.
5. Disable unnecessary Startup programs
Right-click on the Start menu and select Task Manager.
Navigate to the Startup tab to view the list of applications launched during startup. Click on any of the Programs, and select Disable in the right corner of the window.
Close the Task Manager, and restart your PC to check if the error is resolved.
The 0x000000F5 error is a popular Windows BSoD error that can be triggered due to a multitude of reasons. Resolving the error is quite simple, and requires no prior knowledge. By simply following our guide, you should be able to resolve the error in no time.
If you’ve experienced the 0x000000F5 error in the past and successfully fixed it using alternative solutions, you can let us know in the comments below.
While trying to launch or install applications, some Windows users have reported the internal error: callspawnserver: unexpected response: $0. Some users may manage to install the program, but crash shortly after launch.
In this article, we’ll briefly discuss the common causes of the error, and provide you with the best ways to help you fix the error.
What causes internal error: callspawnserver: unexpected response: $0?
The following are some of the reasons why you’re experiencing the internal error: callspawnserver: unexpected response: $0 error:
Poor Internet connection – The internal error: callspawnserver: unexpected response: $0 often indicates that the app you’re attempting to launch can’t access your internet connection. This might be due to network congestion, or poor Internet speed. If you have a poor internet connection, you’re bound to trigger this error.
Virus and Malware – Viruses and Malware are some of the most common causes of errors in Windows. Each virus acts in a specific manner but mostly aims to disrupt the normal functionality of your PC. A PC infected with a virus will tend to trigger a lot of errors.
Corrupt .NET Framework – The .NET framework is an important Windows component required to run applications. If the software is missing or corrupt, you’ll run into errors while trying to launch some apps.
Third-party app conflicts – In rare cases, Windows errors can be triggered due to conflicts between third-party apps. When these apps clash, they hinder the normal functionality of your PC and can trigger a series of Windows errors.
How can I fix internal error: callspawnserver: unexpected response: $0?
1. Update drivers
Press the Windows key, type in Device Manager, and hit Enter.
Scroll through the list of Drivers, and check to see if there is a yellow alert symbol next to the option. Right-click on the driver, and select Update driver.
In the next window, click Search automatically for updated driver software, and follow the prompts to complete the update.
Usually, the manual process of updating the PC drivers may not solve the problem due to incompatible driver versions or already installed drivers.
To bypass this, there is an alternative method you can use to scan your system for any outdated drivers and update them with the latest official version.
Outbyte Driver Updater
Keep your PC updated and free of errors using this complete driver application.
Scroll through the website to locate the Supported Versions section, and click on the .NET Framework link with the latest release date.
Then, click the Download .NET Framework (version) Runtime, and wait for the file to be downloaded completely. The (version) refers to the version number of the .NET Framework e.g 4.8.1.
Double-click on the download file and follow the onscreen instructions to complete the Installation.
Once the Installation is complete, restart your PC and check if the error is fixed.
The .NET framework is a Microsoft component utilized by Windows to run Windows-based applications. If the software is outdated or corrupted, you’ll find it hard to run applications.
Updating the framework is one of the best ways to resolve the internal error: callspawnserver: unexpected response: $0.
3. Install the Latest Version of Microsoft C++ Redistributable
Navigate to the Microsoft C++ Redistributable download page. Scroll through the website to locate the download links for your respective PC architecture.
Then, click on the Download link associated with your PC’s architecture, and wait for the file to be downloaded.
After the download is complete, click on the .exe file to run the Setup Wizard and follow the onscreen instructions to complete the installation.
Now, restart your PC to check if the error is fixed.
4. Scan for Viruses and Malware
Press the Windows key, type in Windows Security, and hit Enter.
In the next window, click on Virus & Threat Protection, and click Scan Options.
Then, select Full Scan and click the Scan Now button to initiate the virus scan.
Wait for the scan to complete, restart your PC and check if the error is fixed.
Viruses are some of the most common causes of Windows-based errors. This is because a PC infected with a virus tends to function abnormally depending on the type of virus affecting the system.
Press the Windows key + R, type in msconfig, and hit Enter to open the System Configuration window.
Select the Services tab. Check the box next to the Hide all Microsoft services box, then click on Disable all.
Navigate to the Startup tab, and click on Open Task Manager.
In the Task Manager window, right-click on every available entry, and select Disable. Close the Task Manager window.
While in the System Configuration window, navigate to the Boot tab, and check the box next to Safe Boot. Click Apply and click OK.
A clean boot is a troubleshooting technique that can help you identify and isolate errors with specific software on your PC.
The internal error: callspawnserver: unexpected response: $0 isn’t a common error among most Windows users but it’s pretty common to some gamers. Nevertheless, we hope these suggestions were able to help you resolve the error.
If you’ve experienced the error in the past, and successfully resolved it using alternative methods. We’d like to hear your suggestions in the comments.
Encountering a BSoD error can be a daunting experience for computer users. The abrupt system crash often leads to panic, and in this article, we will delve into the specifics of one such issue, the 0x00000044 error.
The error often comes with a message: MULTIPLE_IRP_COMPLETE_REQUESTS, and it may include additional information specific to your operating system or computer.
What causes the 0x00000044 BSoD error?
Any of the following factors may lead to the BSoD error:
Compatibility issues – If a certain software on your computer is not compatible with the OS, you may run into the error.
Failing hardware components – If you’re experiencing the 0x00000044 error, it’s possible that your hardware components, like your hard drive, RAM, or motherboard, are faulty.
Overclocking – If you overclock your system, it can result in stability problems that might cause BSoD errors.
Corrupted system files – If your system files are corrupted or damaged, it can result in various problems, such as BSoD errors.
Device driver issues – Your system may experience conflicts and errors due to outdated or corrupted device drivers that control various hardware components.
How can I fix the 0x00000044 BSoD error?
1. Resolve drive errors
Press and hold the Power button for 10 seconds, and once the manufacturer logo appears, press the Power button once more to force a complete shutdown. You may need to repeat this process a few times before the repair screen appears.
Choose Troubleshoot then Advanced options.
Select Startup Repair.
Click on the Restart button.
Press F5 for Safe Mode with Networking.
Press Windows + R, type cmd, and hit Ctrl + Shift + Enter.
In the Command Prompt, type the script below and hit Enter. chkdsk c: /f
You may need to hit Y for the check to run at the next system restart.
The script will check for bad sectors and repair them.
You can now verify if it resolves the 0x00000044 BSoD.
2. Repair damaged files
Boot into safe mode using the same process in solution 1.
Press Windows + R, type cmd, and hit Ctrl + Shift + Enter.
In the Command Prompt, type the script below and hit Enter. sfc /scannow
The script will search for bad system files and attempt to fix them.
At the end of execution, restart your computer and verify the BSoD is fixed.
To boot into safe mode, follow the same process mentioned in solution 1.
Right-click on the Start menu and select Device Manager.
Outdated drivers would typically have a yellow badge. Expand any category with this badge, right-click the driver, and select Update driver.
Select Search automatically for drivers.
Repeat the process for all outdated drivers.
In case the steps above don’t seem efficient or simply did not fix the issue, you may need another method.
It’s suggested to utilize task-oriented tools like Outbyte Driver Updater to automatically update or repair any drivers on your device and potentially resolve this BSoD issue.
Right-click on the executable file of a program suspected to trigger the BSoD and select Show more options.
Click on Troubleshoot compatibility.
Select Try recommended settings.
Click Test the program. Then verify if it still triggers the 0x00000044 BSoD.
5. Scan for malware
Type Windows Security in the Search bar, and click on the relevant search result.
Now, click on Virus & threat protection.
Click on Scan options.
Select Full scan and click the Scan now button at the bottom.
6. Update the OS
Press Windows + I to open the Settings app.
Click on Update & Security.
On the right pane, select Windows update, and on the left, click the Check for updates button.
Any of these solutions discussed would be effective enough to stop the 0x00000044 error.
It’s important to note that multiple factors could cause the error, so utilizing more than one solution from this guide may be necessary. For instance, a combination of virus scanning and file repair may be needed to fix the issue.
Lastly, please tell us in the comments section below which of the fixes was most effective.
GitHub Copilot X is an AI software designed to help improve efficiency and productivity while programming. It is a new and upgraded version of GitHub Copilot released in 2022.
This article will briefly discuss the GitHub Copilot X, its features, availability, and potential price predictions.
What are the new features of GitHub Copilot X?
1. AI Support for Pull Requests
GitHub Copilot X leverages the AI capabilities of Open AI’s GPT-4 model to provide developers with AI-generated pull requests on GitHub. This simplifies the process for Pull Requests and streamlines collaboration between developers.
AI-generated tags are automatically created based on the changes made to the code base. Copilot X eliminates the need for manually creating tags for each code change while also ensuring that pull requests are accurate and well informative.
2. GitHub Voice to Code
GitHub Voice is one of Copilot X’s groundbreaking features that allows developers to harness the full power of voice-to-code AI technology, providing them with a natural and more intuitive means of interacting with their code and tools.
Developers can issue verbal commands to the software using the natural language, and the command will get executed by Copilot X. Also, this feature eliminates the need for manual typing, thereby increasing the speed and efficiency of the development process.
3. GitHub Copilot Chat
Copilot X aims to revolutionize AI-assisted software development, offering a ChatGPT-like experience directly within a developer’s code editor.
Hence, this chat feature provides developers with vast resources, clear explanations, potential bug fixes, in-depth analysis, and many more.
4. AI-Generated Documentation Answers
One of the major problems developers face is finding the right information on a tool or feature using the documentation.
However, GitHub Copilot for Docs is an experimental tool to help developers find the information they need more quickly and efficiently.
Further, developers can utilize the chat interface to access responses to questions about documentation.
5. Copilot for Command Line(CLI)
GitHub Copilot CLI will improve the efficiency of developers by simplifying the process of composing commands and loops in the command line.
With the help of AI, developers save time by eliminating the need to manually search for the correct syntax. By just interacting with the inbuilt chat interface of Copilot X, you’ll get access to a complete list of all the correct commands and syntaxes you can use on the command line.
If you want to install and add GitHub Copilot to your favorite editor, Visual Studio, then follow this guide.
What are the pricing predictions?
When GitHub Copilot launched in 2022, Microsoft put the software price at $10 per month and $100 annually. However, as of writing this article, Microsoft hasn’t declared the price of the new and improved GitHub Copilot X.
While some users have speculated that they’ll get access to Copilot X if they have existing GitHub Copilot accounts, Microsoft has said otherwise.
An active or trial subscription to GitHub Copilot for Individuals or GitHub Copilot for Business does not guarantee access to the technical preview features introduced with GitHub Copilot X.
According to GitHub
This means users will have to purchase a brand new subscription plan to access GitHub Copilot X after its release.
GitHub Copilot was launched in 2022 and has overtaken the development world. However, GitHub has not provided a specific release date for the new and improved GitHub Copilot X.
As of writing this article, there is no information on the software’s release date. Github considers this a representation of their vision for the future rather than an available product offering of GitHub Copilot.
While there might be a release date yet, we expect to see some features available to the public over soon. To get early access to the features, you must sign up for the Copilot X waitlist.
With each passing day, developers are coming up with new and more efficient methods of learning and writing codes. GitHub’s Copilot X is about to take that to the next level.
Another great AI assistant available in the preview for Microsoft Security Copilot, explains Microsoft is all about adapting the latest technology to help people and enterprises.
Although GitHub hasn’t declared an official release date for the software, a couple of cool features will likely be available for those on the waitlist.
Sign up for the waitlist to access the Copilot X features early. Till you can always try using Copilot’s variant for organizations and enterprises, GitHub Copilot for Business; to know more, read this guide.
The Microsoft Store is a very useful part of the Windows ecosystem because it gives access to thousands of applications. However, issues like the 0x80d03801 error make it hard to use.
In this guide, we walk you through some of the most practical fixes for the Microsoft Store error and show you likely triggers so that you can avoid a future occurrence.
What is the 0x80d03801 Microsoft Store error?
This error may happen on the Windows 11 Store app, and it is often associated with app updates and downloads. Any of the following elements may lead to the error:
Cache issues – If the Windows Store cache is old or corrupted, users may face the challenge.
Internet connection – Some users have observed the problem when they have network connectivity issues.
Corrupt system files – System files are essential for the proper functioning of some processes, so when these files are corrupted, you may expect an update error.
You should be able to resolve it using any of the solutions we suggest below.
How can I fix the 0x80d03801 Store error?
Before we introduce the main solutions, you may want to try these quick workarounds:
Change your internet connection – If you are on a slow connection, consider changing the ISP or moving to a wired connection.
Log out and in – A simple re-login on the Xbox app and Microsoft Store is often good enough to clear minor glitches associated with the user account.
Restart the device – This is general but often effective since a restart may stop problematic processes that trigger the error.
After trying the above steps, if you do not succeed, proceed to some more elaborate fixes below.
1. Terminate and repair apps
Press Windows + I to open the Settings app.
On the left pane, click on Apps, then on the right, click on Installed apps.
Scroll down, click the 3 dots in front of the Microsoft Store, and select Advanced Options.
Scroll down, then one after the other, click on the buttons for Terminate, Repair, and Reset.
Verify if this worked, or perform the same steps for the Xbox app.
2. Clear the Microsoft Store cache
Press Windows + R, type cmd, and hit Ctrl + Shift + Enter to open the elevated Command Prompt.
Input the script below and hit Enter. wsreset.exe
This will briefly pop up a blank Command Prompt; then, you can verify if the error is fixed.
Click on the More icon at the bottom left, then click the Get updates button at the top right.
Once it is updated, verify if the 0x80d03801 error is resolved.
The above are the best solutions for the Windows Store error. We have not written them in any particular update, and we encourage you to try the most relevant fixes.
Lastly, keep in touch with us in the comments section and let us know what worked.
Microsoft’s Xbox Game Pass is a video game subscription service that gives players access to a changing selection of games from various publishers and other premium services. Users who report the 0x80073d13 error are not able to use this service.
We explore the error in this guide, offering possible causes and the most practical solution.
What does error code 0x80073d13 mean?
You may encounter this error when installing games or making simple Windows 11 Xbox Game Pass app updates. Any of the following elements often causes it:
Low storage – We have noticed that many users with insufficient disk space on the system drive may run into the error.
Disk format issues – Since Game Pass does not support exFAT or FAT32 disk formats, you will get the error if your disk is in these formats.
Installation issues – A user may face many installation issues, but when any of these happen on the Xbox Game Pass app, you may get the error.
How do I fix error code 0x80073d13?
Before you advance to some of the elaborate solutions we will offer, you may consider the following:
Restart the device – If a minor glitch causes the error, a reboot is often strong enough to stop the problematic process and resolve the error.
Reinstall the Xbox app – In most cases, this will work and save you the stress of further troubleshooting.
If these are inefficient in fixing the error, move on to more advanced fixes below.
1. Create a new partition
Right-click the Start icon and select Disk Management.
If you have an unallocated space, right-click on it and select New Simple Volume.
Click Next on the pop-up, and click Next on the following pop up as well.
Under Format this volume with the following settings, set File system to NTFS, set Allocation unit size to 4096, and click the Next button.
Launch your Xbox app, and click your user icon and select the Settings option.
Select the General tab, and under Change where this app installs games by default, use the dropdown to select the newly created drive volume.
Install games to this new volume and see if the 0x80073d13 Xbox Game Pass error is resolved.
2. Clean up the disk
Press Windows + R, type cleanmgr, and hit Enter.
Select the drive with your Xbox Game Pass installation and click OK.
Select all the items to be cleaned and click the Cleanup system files button.
Pick the drive you selected for cleanup and hit OK.
While some errors have been encountered for a long time, others are usually new, and a patch is released quickly to get things running. One such problem users recently reported is that a prelanding file downloaded by itself in Safari on Mac.
The problem appears when opening the Microsoft Office website and has been widely reported on business accounts.
For personal accounts, there have just been a few instances. Besides, users found the prelanding file downloaded by itself only on Safari. Let’s find out all about the problem!
What is prelanding?
From the technical viewpoint, prelanding is a one-page website that leads to the main or landing page. The primary factor to identify prelanding is its link to the main page.
The prelanding file downloading on Safari is 0 KB in size, and the source is listed as https://login.microsoftonline.com/https://admin.microsoft.com/prelanding, which points to Microsoft somewhere being linked to the whole situation.
What can I do if the Prelanding file is downloaded by itself in Safari?
1. Switch to another browser
As per available reports, the prelanding file is downloaded by itself only on Safari and no other browsers. So, we recommend you switch to Chrome or Firefox on your Mac device. Or you could check our recommendation for the best browsers for Mac and pick one from the list.
This is the simplest solution available, given the problem is still prevalent and a patch hasn’t been released yet.
2. Use the Personal Microsoft account
So far, we haven’t encountered many cases of users finding that the prelanding file downloaded automatically on personal accounts. It appears Microsoft Office business users more frequently encounter the problem.
So, if you have both business and personal accounts, switching to the latter may help.
3. Log out of the office account
If you find the prelanding file downloaded by itself simply by opening Safari, logging out of the Microsoft account should do the trick.
Microsoft Office online
This will at least prevent the problem from appearing while browsing the web and won’t allow the bug to hamper your experience. Here, we recommend you log in to Microsoft Office only when absolutely necessary until the problem is resolved.
4. Contact the support team
If you are fed up and want a quick resolution or an update on when things will run fine, it’s best to contact Microsoft support.
They could provide a timeline and any other relevant information required in this case. And since the problem is widely reported, it’s likely that the team is already working on it and will soon get things in order.
Can a file download without permission?
Yes, a website can download data to the user’s PC without explicit permission as long as the browser is not secure or the settings are misconfigured. That’s why experts recommend you always use a reliable and secure browser.
This usually happens on unreliable and shady websites where an action like closing an ad or popup can be construed as permission to download files. Though both browsers and operating systems offer protection against it, playing it safe is usually the best approach.
Before you leave, find the best security settings to keep your PC safe from malware and threats.
For any queries or to share what worked for you when the prelanding file was downloaded by itself, drop a comment below.
While Bitlocker is essential from a security point of view and encrypts data, most users don’t remember enabling the feature. And there are times when one may be required to enter the recovery key. Many users recently reported that the View BitLocker Keys option is stuck in a loading cycle.
The problem has been widespread, affecting users across the globe, and they are unable to boot Windows. Forums are filled with reports, with no viable solution in sight. Fret not! We did the hard work for you and found fixes that did the trick for others. Let’s find out!
Why is the BitLocker key not loading?
Here are the primary reasons the BitLocker key is not loading:
Issues with the Microsoft server: The most likely problem is an issue with the Microsoft server and its inability to retrieve the key. Remember, the issue is new and hasn’t been encountered previously by anyone.
Misconfigured account: Another possibility here is that the account is not configured properly, and, as a result, users are stuck in a loading cycle when clicking on the View BitLocker key option.
Problems with the Internet connection: Though rare, there’s also the possibility that the Internet connection is slow, leading to a prolonged loading cycle.
How do I fix View BitLocker Keys stuck in loading cycle?
Tip
We are continuously searching for more solutions and will keep updating the guide as they are found. If you are facing the error, bookmark the page and keep checking it every few days for recent developments.
Before we head to the slightly complex solutions, here are a few quick ones to try:
Try signing into the Microsoft servers using another browser.
If you have a VPN configured, make sure to disable it. In case your work entails using one, choose a reliable VPN for Windows.
For users who had the PC set up by an administrator, try checking with them for the BitLocker key. Though it’s stored by default in the Microsoft account, there’s also the option to print a physical copy.
In case none of these work, move to the solutions listed next.
1. Check the Azure portal
A simple solution for computers linked to an organization would be to look for the key in the Azure portal. If you have ever logged into the Active Directory domain, there’s a chance that the key might be stored there.
When you join the Active Directory domain, a copy of the key is automatically saved on the portal and can be accessed with administrative rights. Even if you don’t have the rights, get the administrator to check if you have View BitLocker Keys stuck in a loading cycle.
Check if the BitLocker recovery key is listed here.
When signing into the organization’s account doesn’t work, you can try logging in via the link provided here and check the BitLocker recovery key for all devices linked to that account.
Remember, you will lose all the data stored on the computer, and since it’s currently inaccessible, there’s no way to recover the files.
But before you proceed with the reinstall, we suggest waiting for a few days because Microsoft has acknowledged the problem, which should be rectified soon. If it’s not urgent, waiting it out is the best way, with no other possible solutions.
And to prevent the View BitLocker Keys stuck in loading cycle error from arising in the future, there’s always the option to disable BitLocker in Windows.
For any queries or to share what worked for you, drop a comment below.
A blue screen of death is very scary for a Windows user. It is a sudden crash that happens without warning. Some of these crashes come with the nvhda64v.sys error code.
In this article, we explore this NVIDIA-related error code, investigate the causes, and offer the most practical solutions.
What causes the nvhda64v.sys BSoD?
Varying elements, especially surrounding your drivers, may contribute to this computer issue. Below we introduce some of the top factors:
Incompatible or outdated NVIDIA audio driver – This is a primary reason for most users since the device will develop compatibility issues with these bad drivers.
Damaged or corrupted or nvhda64v.sys file – If this file associated with the NVIDIA High Definition Audio driver is bad, you may experience the error.
Conflicts with other drivers or software – It may also trigger the error if you have conflicting drivers on your computer.
How do I fix the Nvhda64v.sys BSoD?
1. Roll back updated Nvidia drivers
Press the Power button for 10 seconds; when it shows the manufacturer logo, press it again to force a shutdown. Repeat this a couple of times, and finally, let it enter the repair screen.
Choose Troubleshoot, then Advanced options.
Select Startup Repair.
Click on the Restart button.
Press F5 for Safe Mode with Networking.
When the computer boots into Safe Mode, right-click on the Start menu and select Device Manager.
Expand the Display adapters, right-click on the Nvidia driver, and select Properties.
Go to the Driver tab, then click the Roll Back Driver button.
Select a reason for rolling back and confirm your choice.
When the roll back is complete, restart the computer.
2. Reinstall Nvidia drivers
Boot into Safe Mode using the same steps from solution 1.
Boot into Safe Mode using the same steps from solution 1.
Press Windows + R, type CMD, and hit Ctrl + Shift + Enter.
Type the script below and hit Enter to begin execution.
Follow the instructions to repair any file errors found, and verify that the nvhda64v.sys BSoD is resolved.
4. Update the OS
Boot into Safe Mode using the same steps from solution 1.
Press Windows + I to open Settings.
On the left pane, click Windows update, then click the Check for updates button on the right.
If there are any updates, click Download & Install.
After the update, you may need to restart your computer and verify that it has fixed the nvhda64v.sys BSoD.
This blue screen of death should not scare you; as long as you can boot into Safe Mode with our shared steps, any of the solutions should resolve the problem.
Are you tired of your mundane and outdated Microsoft Edge browsing experience? Do you feel like there’s something missing from your browser that could make your life easier and more productive? Well, look no further! With the help of Awesome ChatGPT on GitHub, a curated list of awesome tools, demos, docs for ChatGPT, these Microsoft Edge extensions will undoubtedly enhance your browsing experience. These extensions, all available on GitHub, will make your life easier, faster, and more efficient. So, what are you waiting for? Follow this guide to enhance your Microsoft Edge browsing experience with these ChatGPT extensions on GitHub.
Enhance Microsoft Edge browsing experience with ChatGPT
Microsoft Edge is a powerful browser that has undergone significant changes in recent years. With the introduction of new extensions, the Edge browser is now more customizable than ever before. We have scoured the internet and found some Microsoft Edge extensions that will enhance your browsing experience. All of these extensions are available on GitHub, and they’re all free to download and use. The following extensions are user-friendly and easy to install, so you don’t have to worry about a complicated setup process.
Enhancing your Microsoft Edge browsing experience has never been easier, thanks to the power of ChatGPT and these seven extensions available on GitHub. Whether you want to block ads, improve your writing, or save articles for later, there’s an extension on this list that will help you achieve your goals. All of these extensions are easy to use, safe, and best of all, free. So what are you waiting for? Enhance your Microsoft Edge browsing experience by using these ChatGPT extensions on GitHub right now!



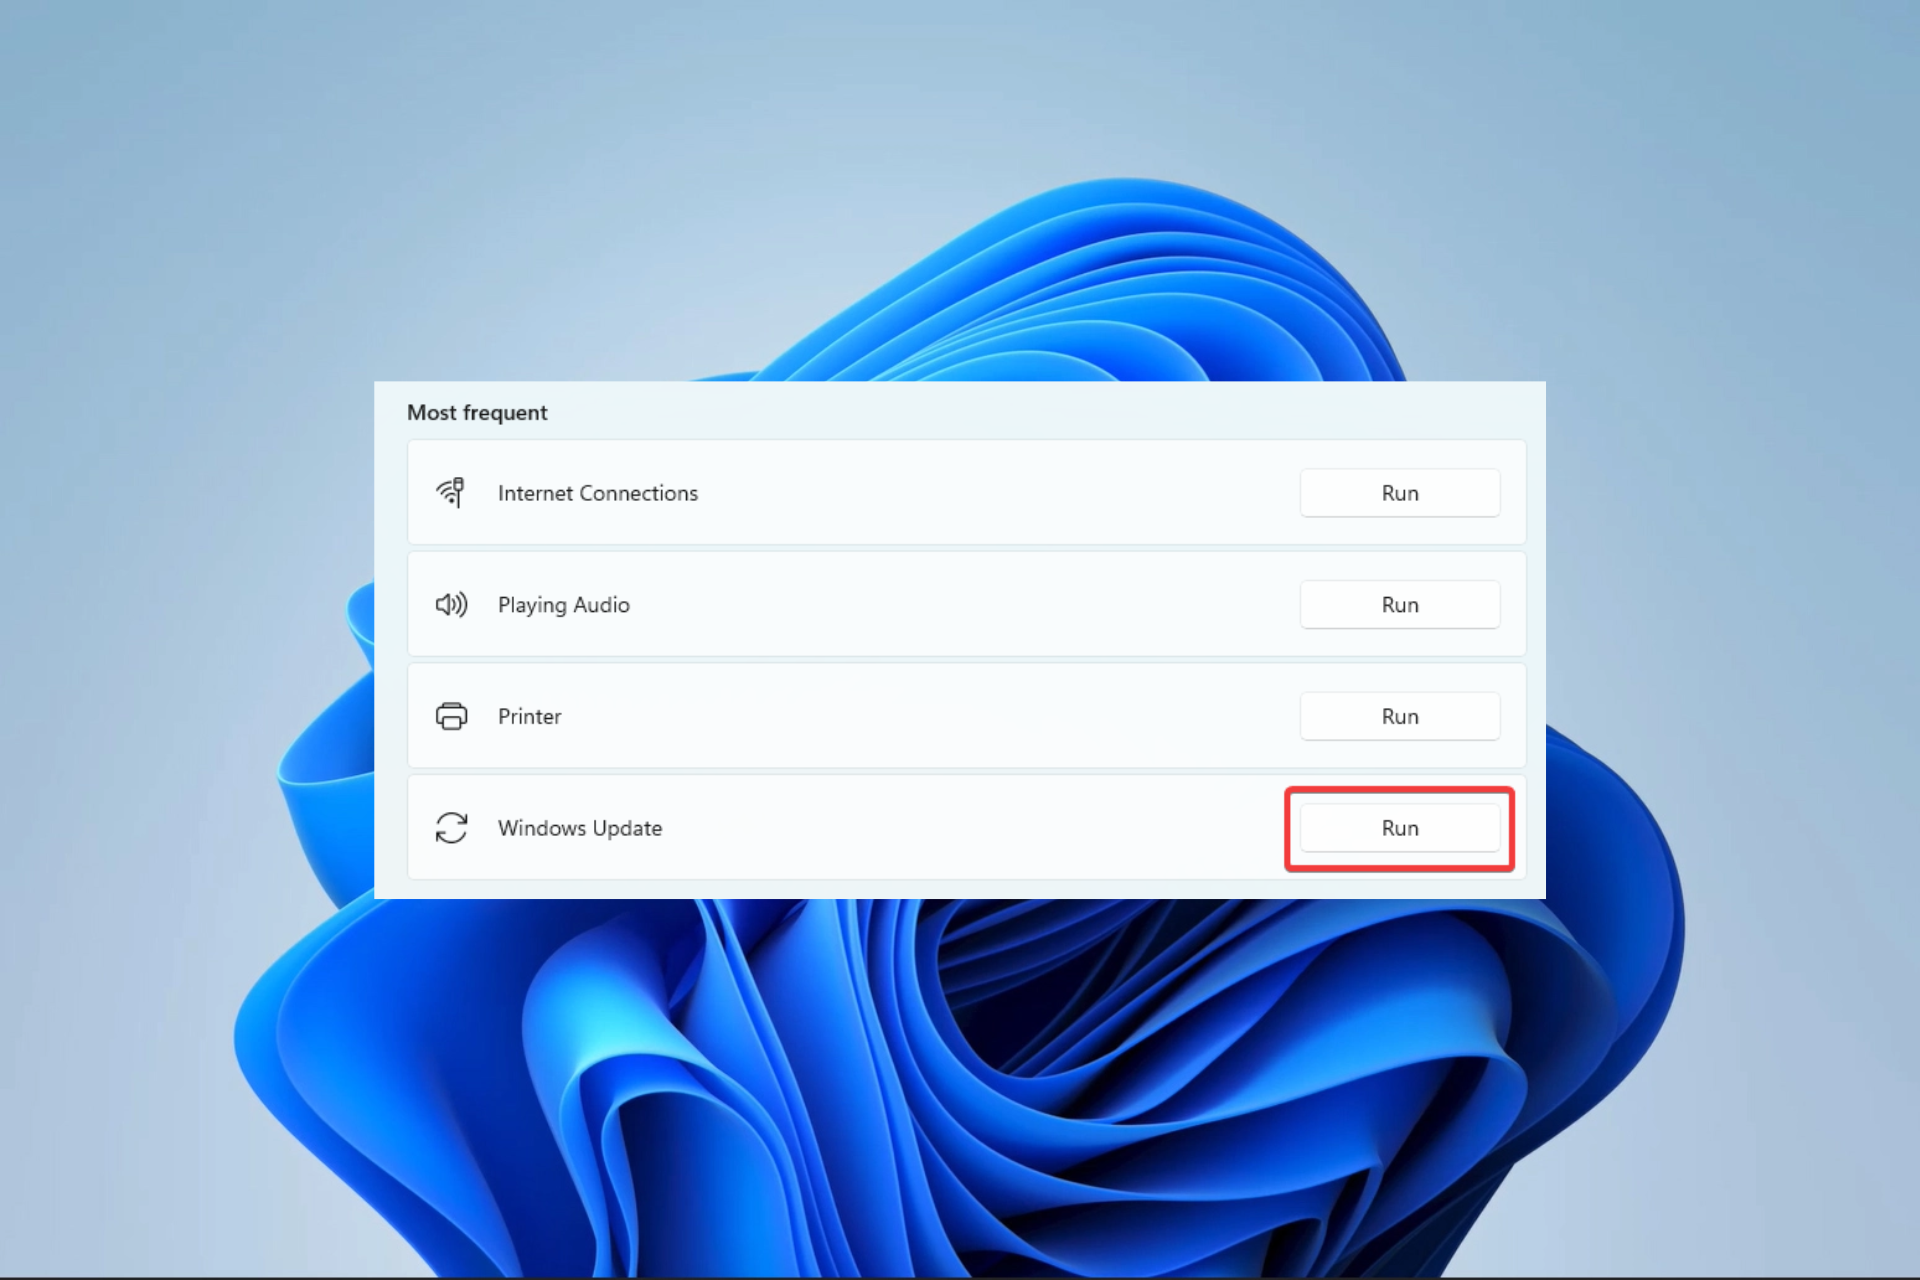
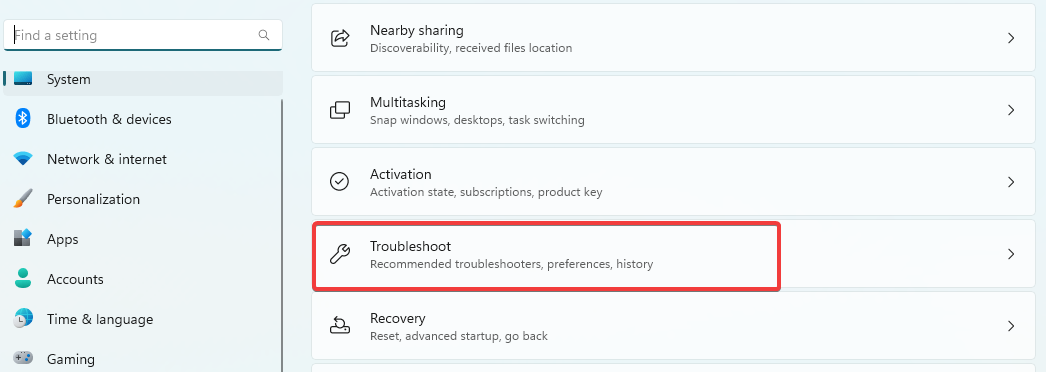
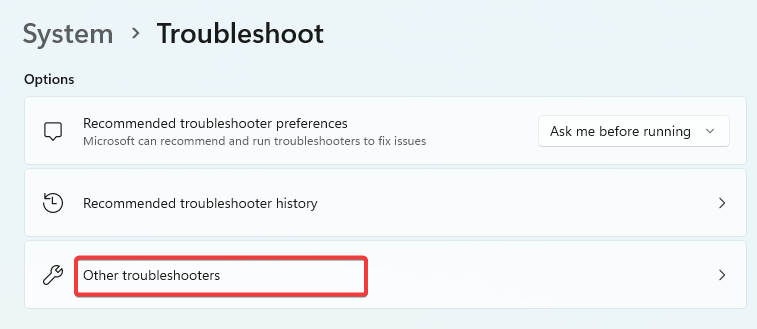
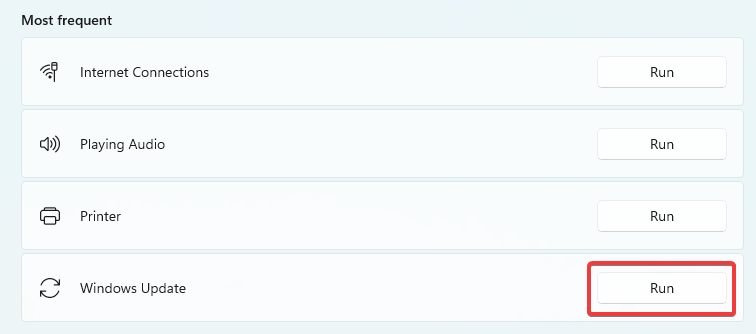
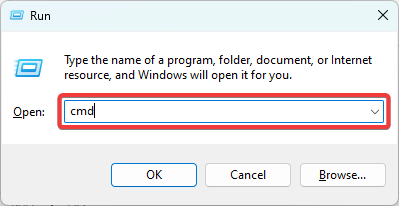


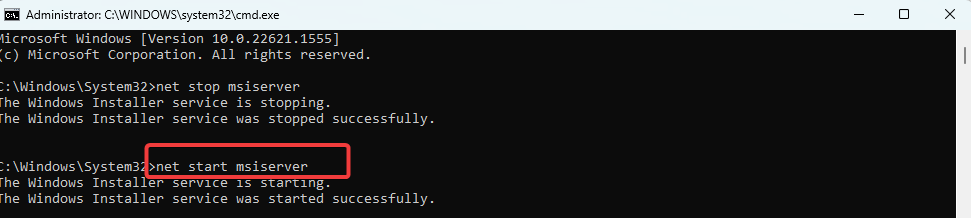




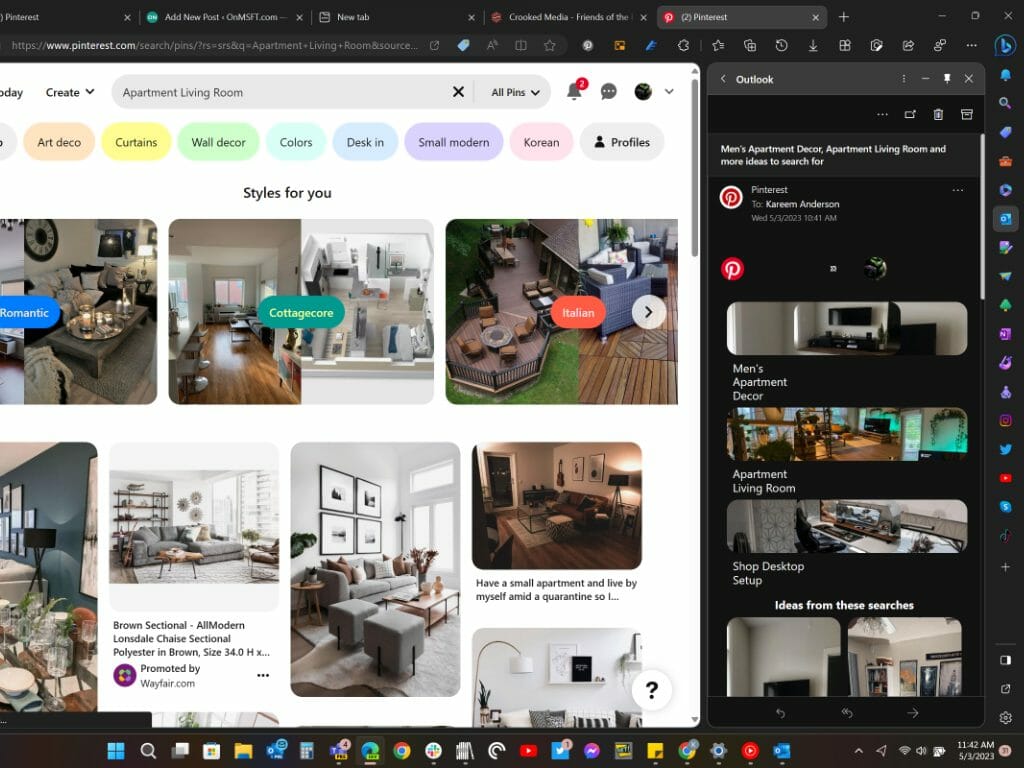














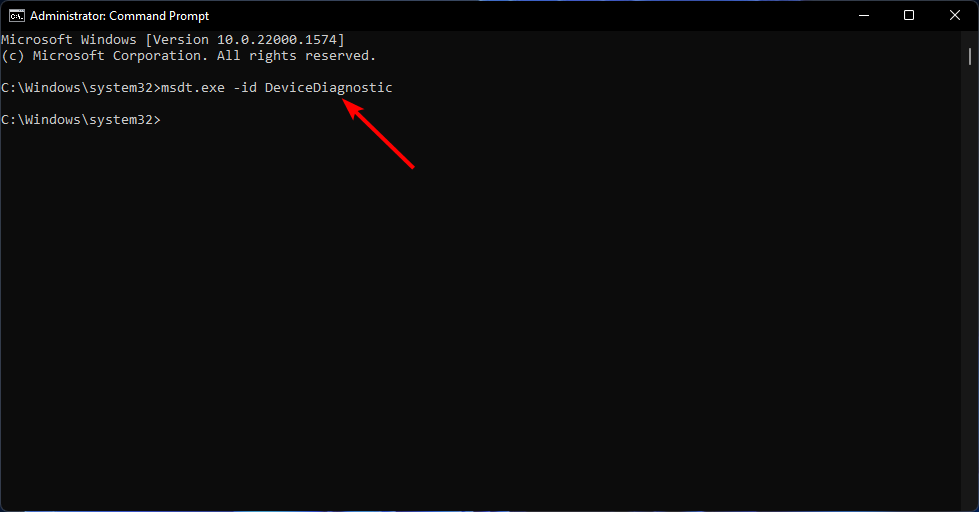
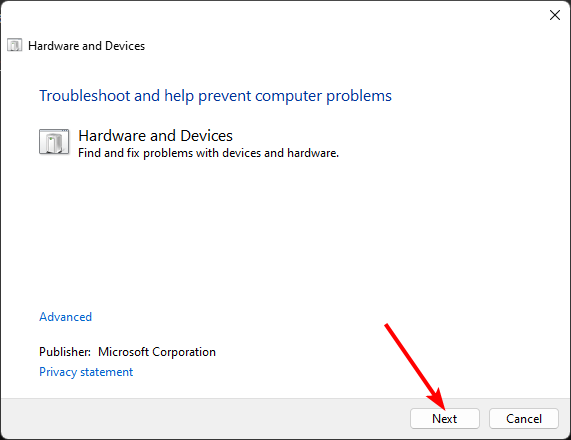


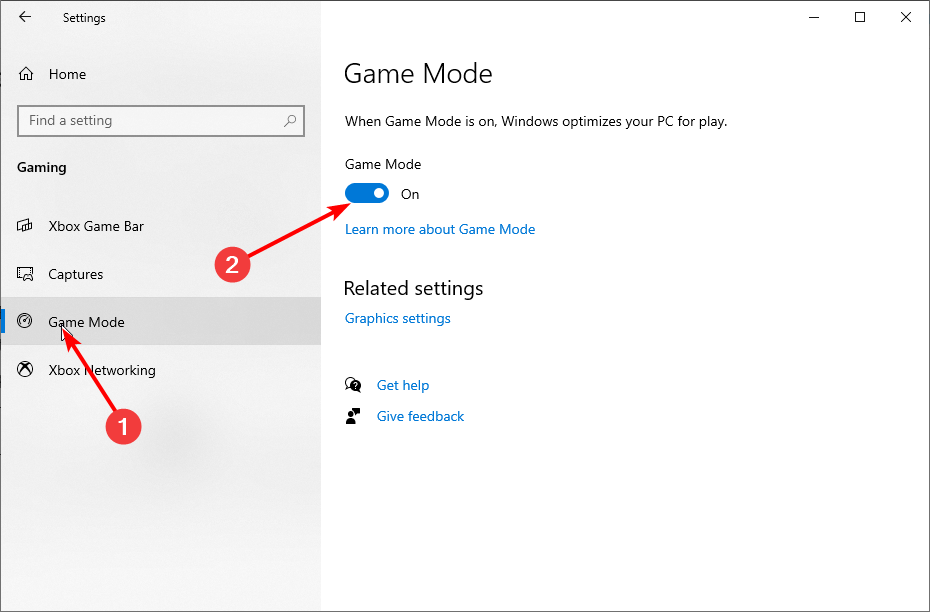


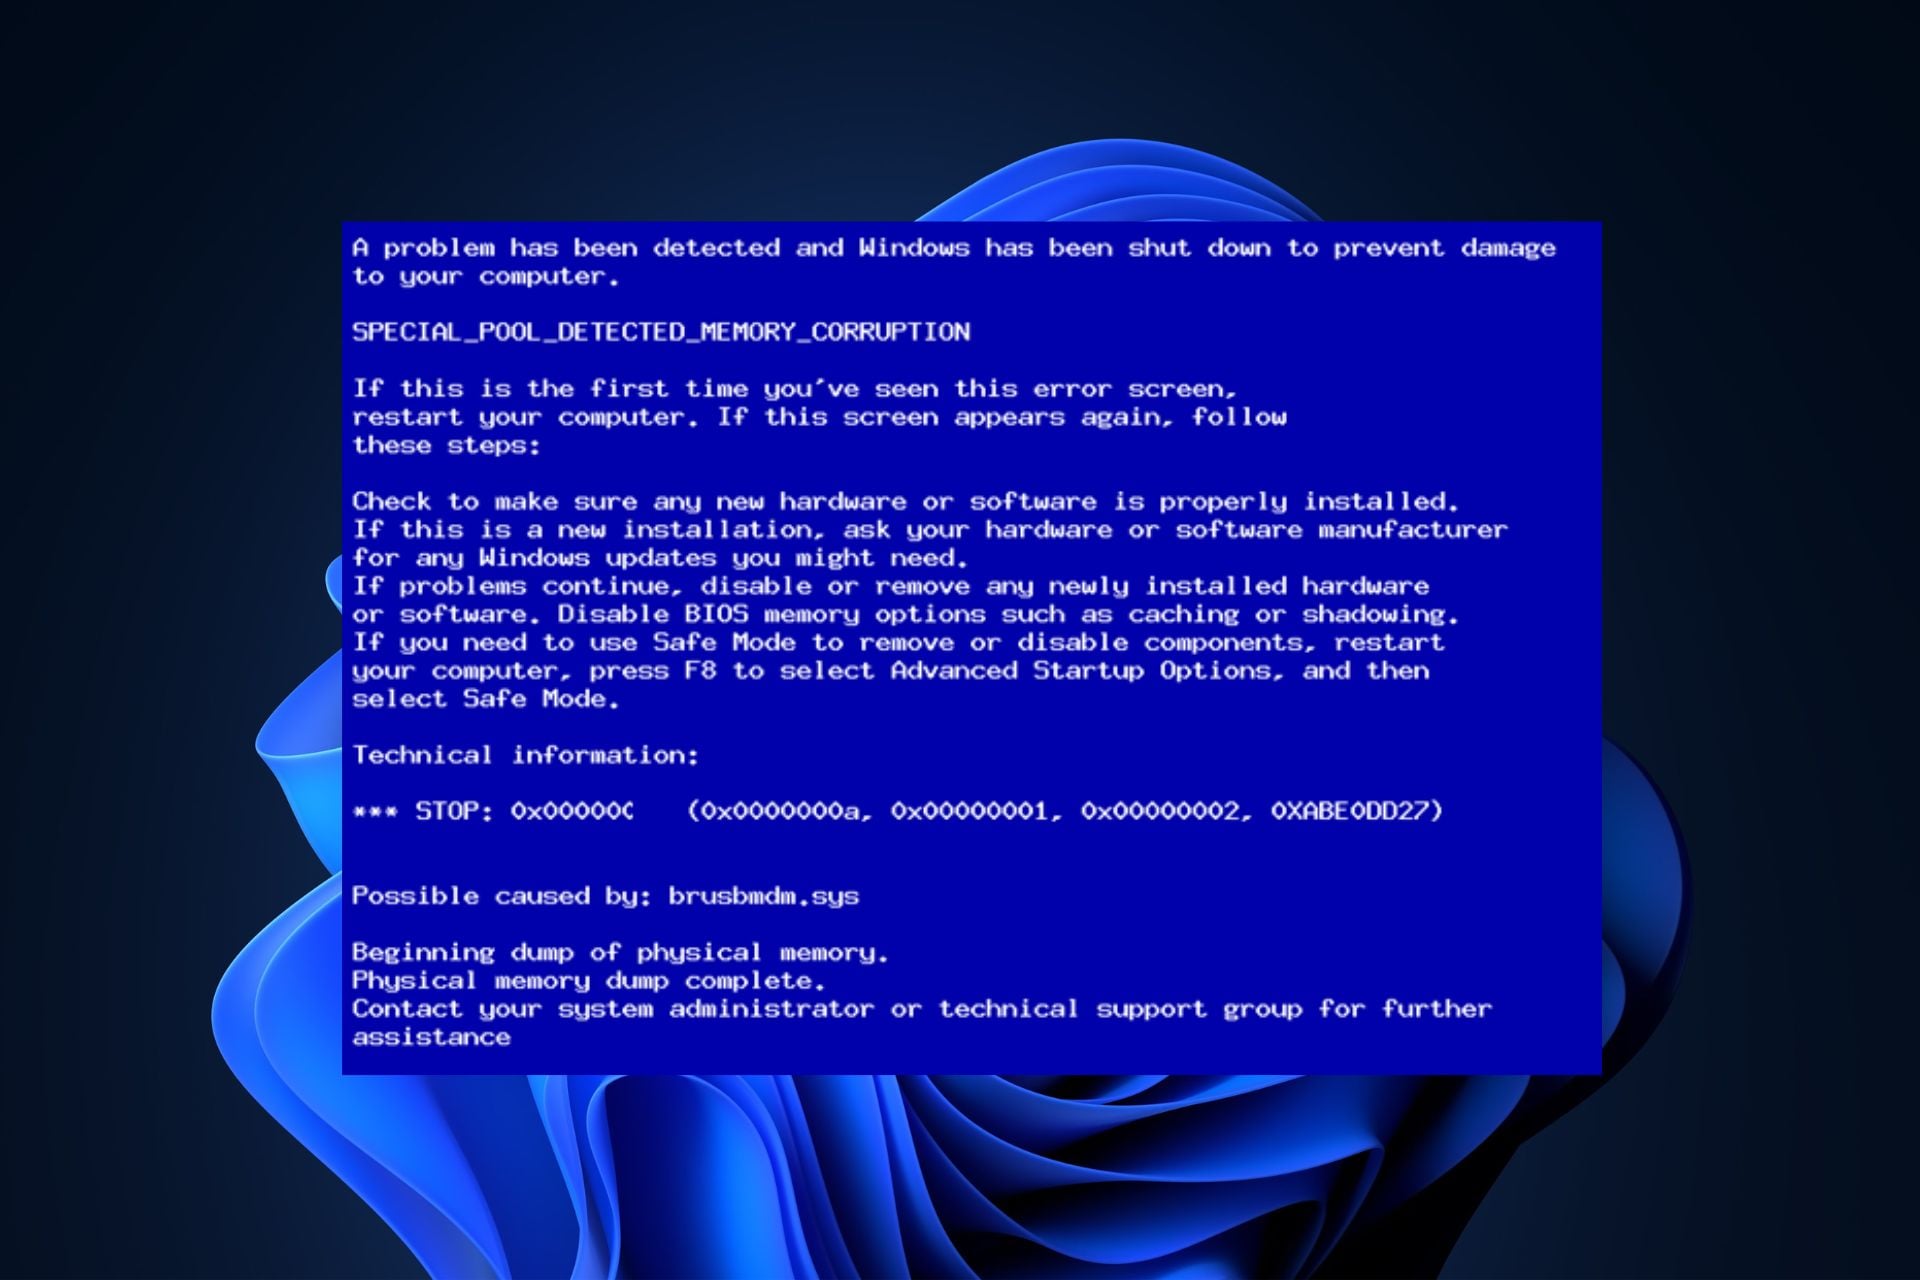










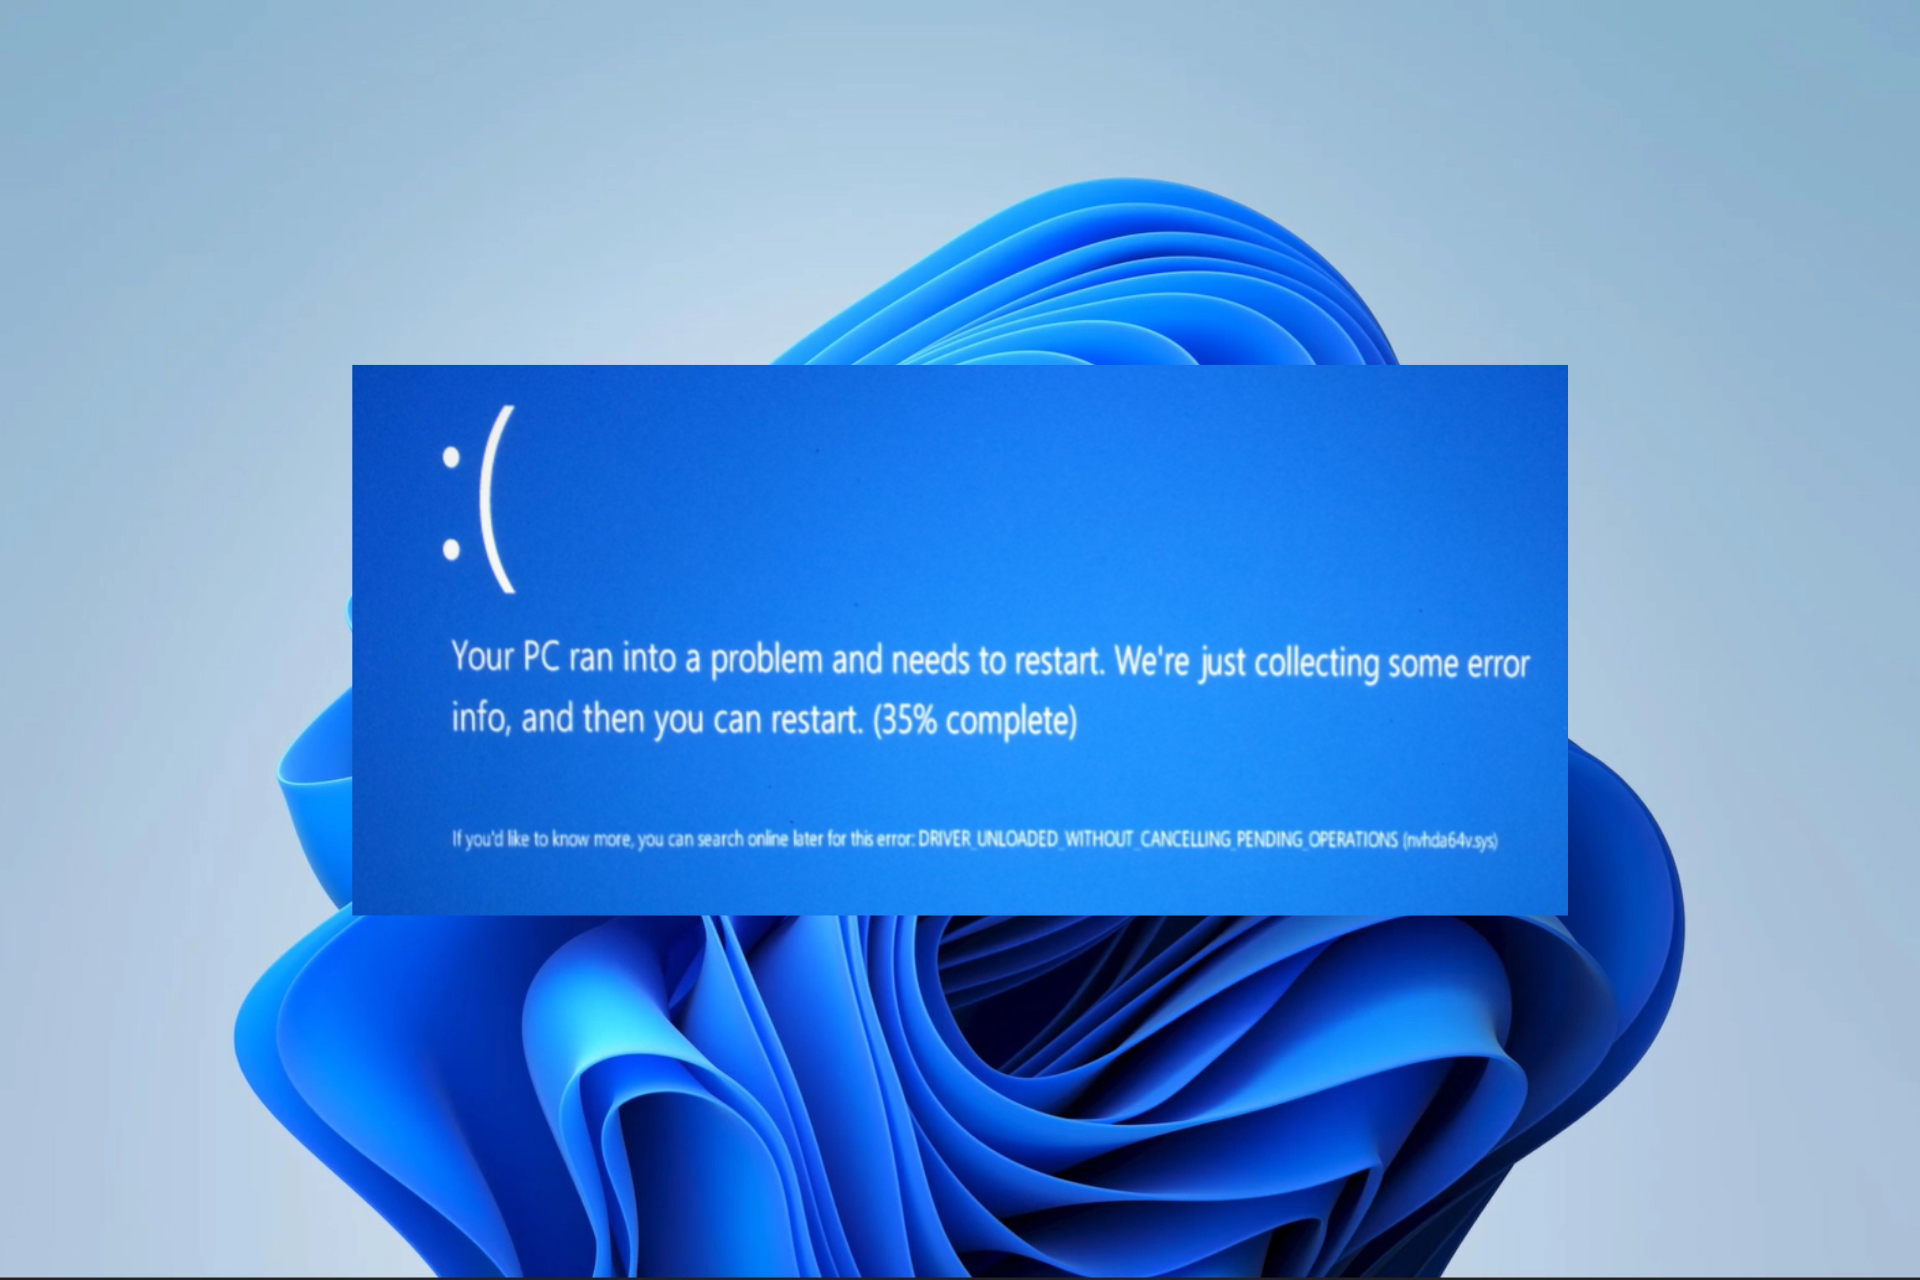


 Microsoft Edge is a powerful browser that has undergone significant changes in recent years. With the introduction of new extensions, the Edge browser is now more customizable than ever before. We have scoured the internet and found some Microsoft Edge extensions that will enhance your browsing experience. All of these extensions are available on GitHub, and they’re all free to download and use. The following extensions are user-friendly and easy to install, so you don’t have to worry about a complicated setup process.