Another month brings another set of updates and new Excel features and an announcement that the Natural Language Query improvements that have been promised are now generally available for both Mac and Windows operating systems.
Among the list of July 2022 updates Microsoft is noting that Excel for the web now supports search for fields in PivotTable field list. Users can now manually search for and select desired data to add to a pivot table via the Excel web app, which should help speed up sorting processes for millions.
Next up, Microsoft is testing the ability to control automatic data conversions in the Insider Beta channel for Excel.
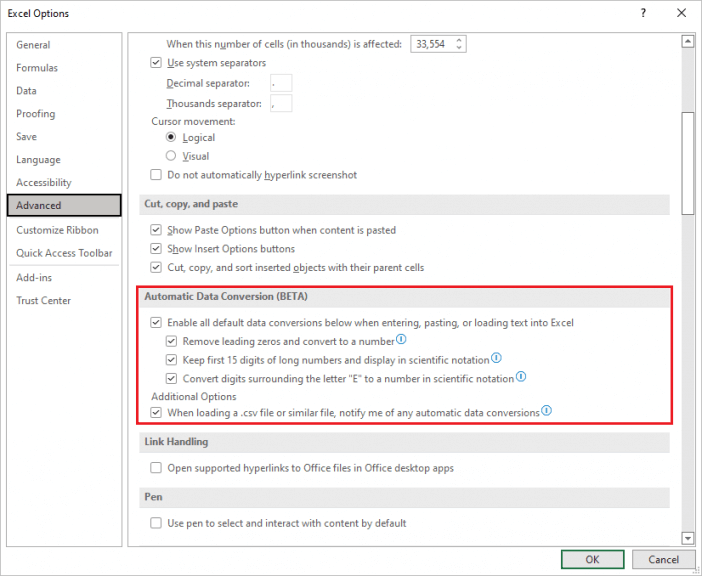
For those lucky enough to receive the improvement will now be met with additional settings to prevent specific types of data from being converted. In practice, users will need to enable the feature by going to File > Options > Advance> Automatic Data Conversion, and then choosing which conversions they would like to disable.
It’s not free for fall buffet of conversion options that can be disabled, but here are the handful of selections users can choose from:
Remove leading zeros from numerical text and convert to a number.
Truncate numerical data to 15 digits of precision and convert to a number that may be displayed in scientific notation, if needed.
Convert numerical data surrounding the letter “E” to a number displayed in scientific notation.
Since it’s an Insider release, there are some caveats to be noted, such as it being a Windows only roll out for now and known issues that include the Excel team working to bring support for disabling conversions during Macro executions as well as support for automatic conversion to dates.
As previously mentioned, Microsoft is rolling out Natural Language Query improvements for Windows and Mac users in the Current and Monthly Enterprise Channels.
What does it mean?
For anyone in those available channels they will now able to try asking Excel questions about specific patterns or insights in their own data with relatively natural sentencing like, “Show me insights for the Northwest region.”
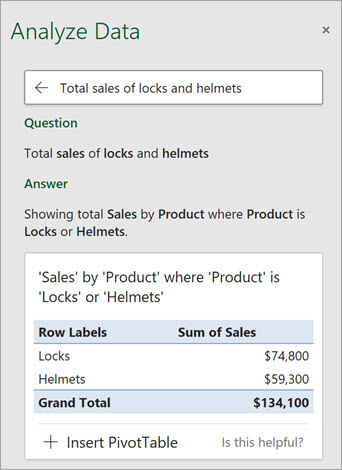
Excel will provide a list of suggested questions that users can modify to their own intent in the Analyze Data settings. To get to the new feature, users will need to select a data range > select the Analyze Data button on the Home tab.
To get additional data from a question, users will need to type in their query at the top of the Analyze Data settings pane and will then receive additional PivotTables, tables and charts.
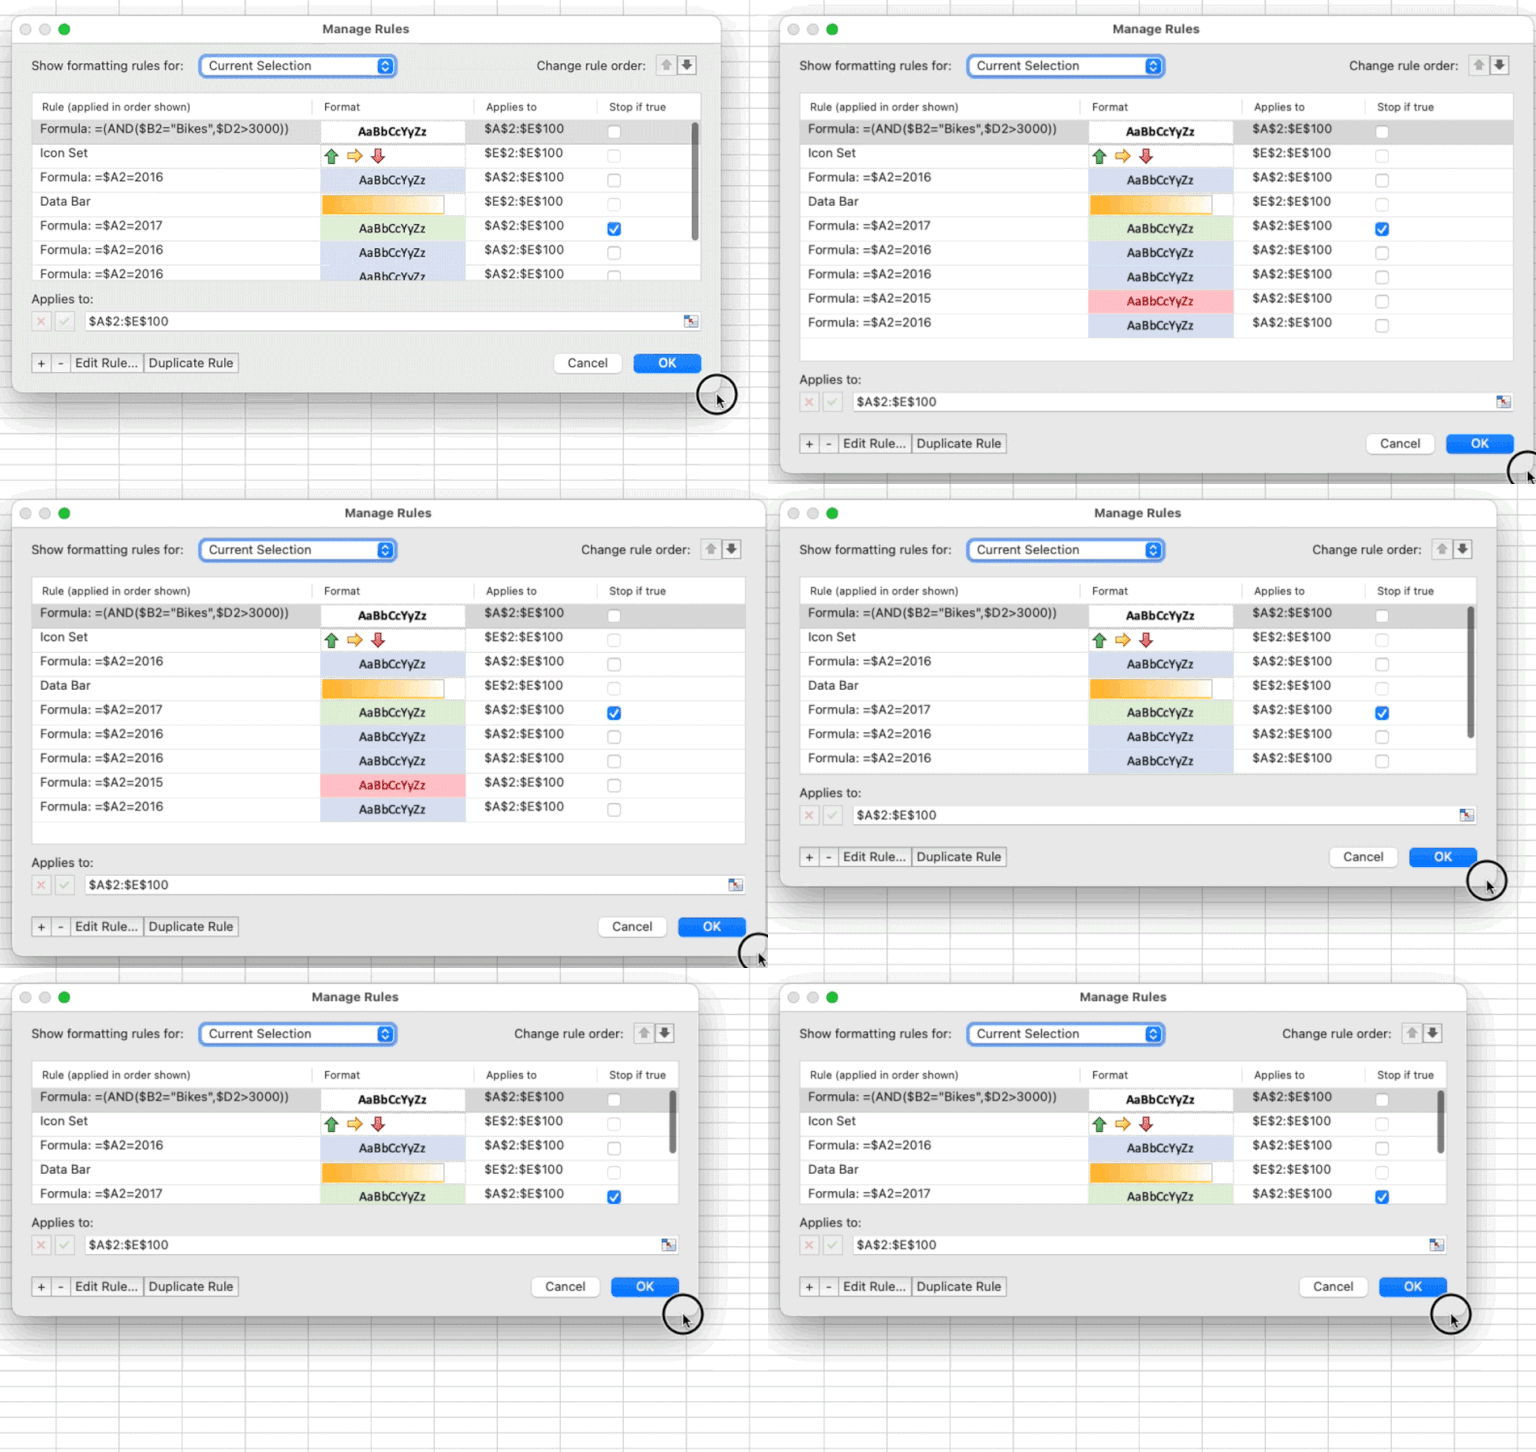
Fret not Mac users, there are couple of features that came down the pipe in July that included Resizable Conditional Formatting dialog boxes.
While a relatively minor update, it’s still a nice attention to detail improvement that’s a long time coming. Instead of selecting from the five conditional formatting rules, users can now freely resize the dialogue box to their specificities.
Unfortunately, the improvement is only for users of the Insider Beta channel. However, if you’re in the Insider Beta channel be on the lookout Version 16.64 and build number 22070600 or later.
To get information on which features are available to you or find which version of Excel you’re on, you can visit the Excel Features Flyer site.
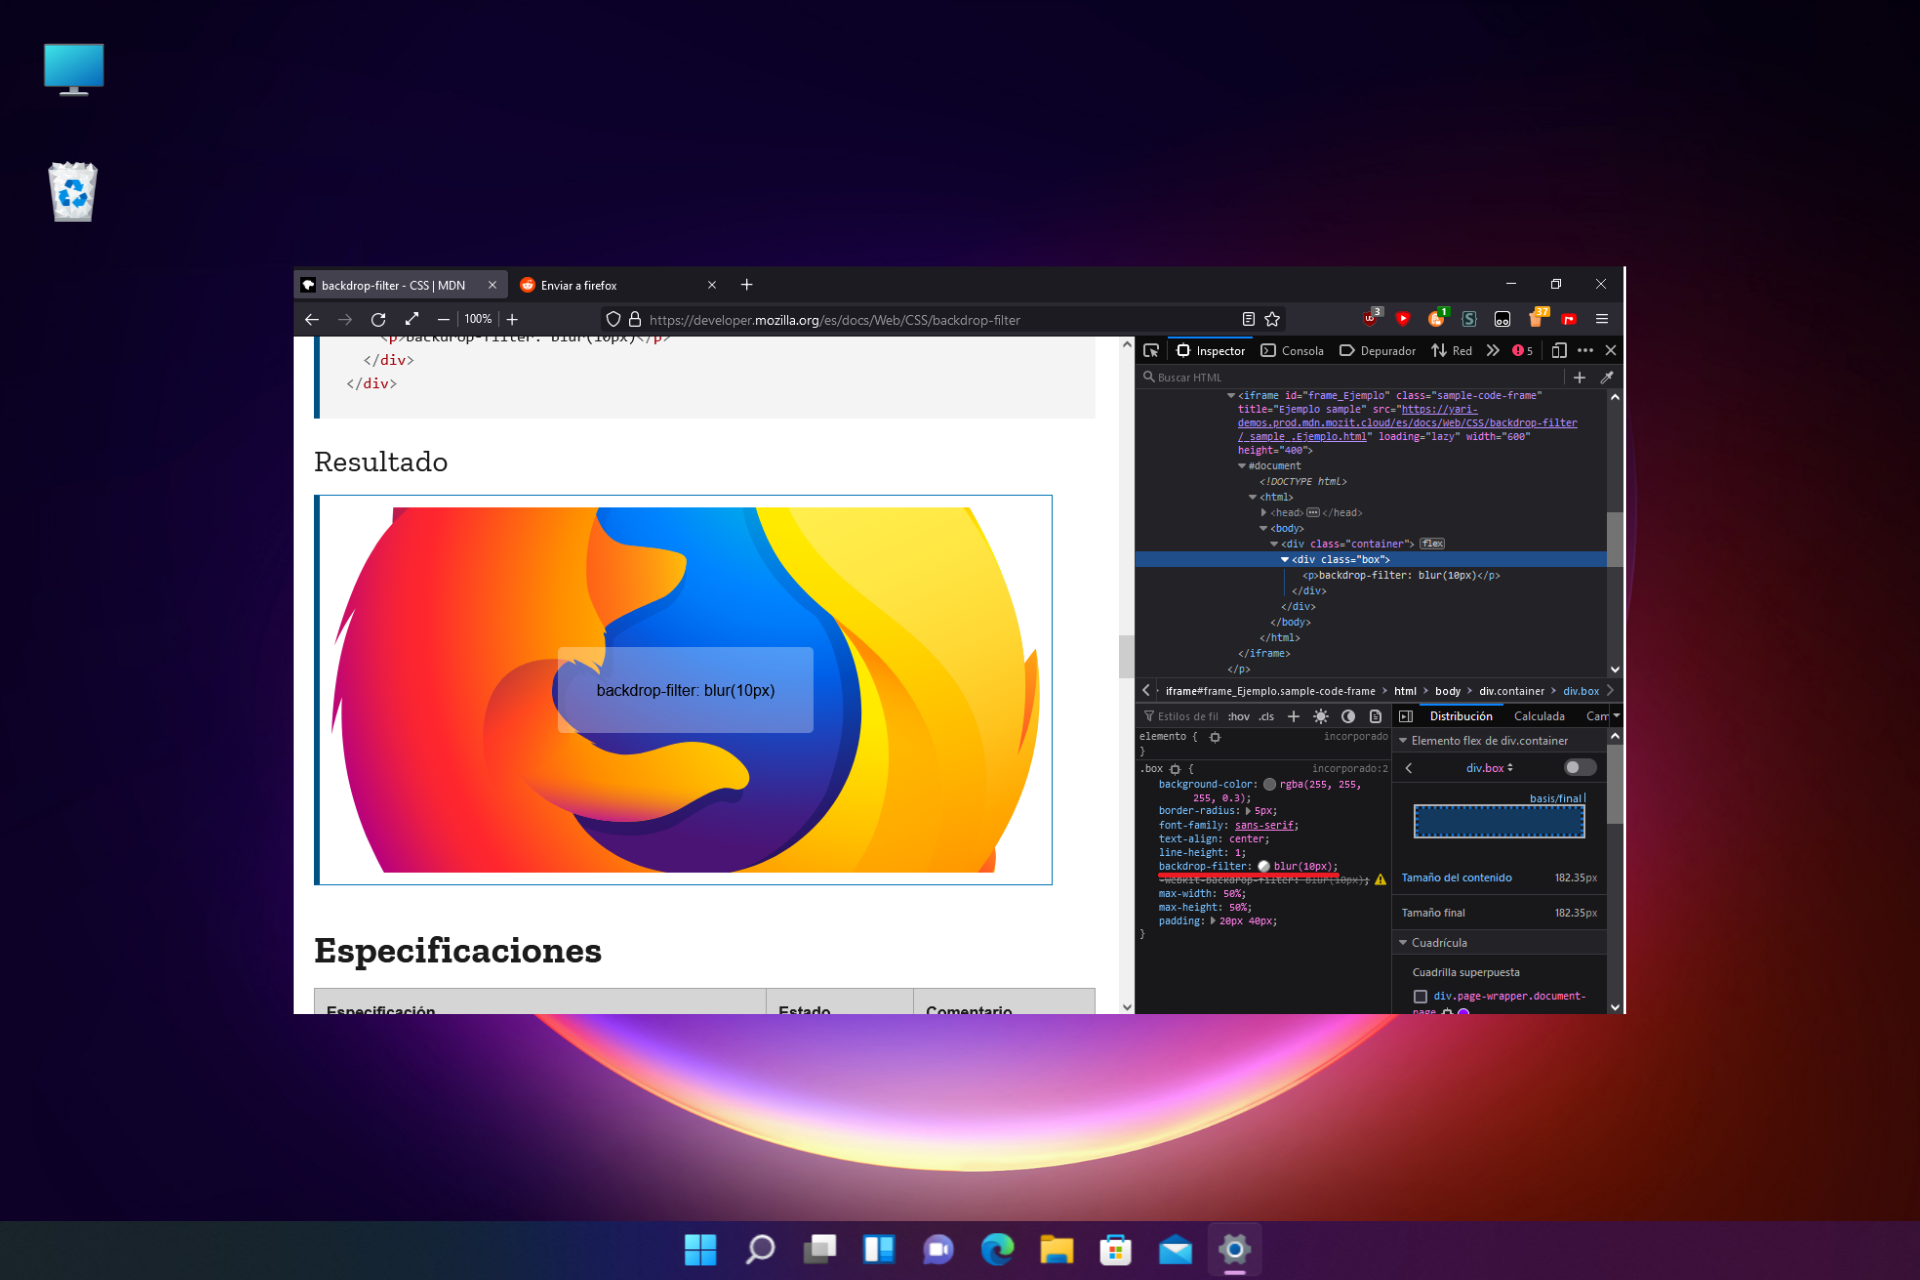
If your browser doesn’t fit the screen when you try to use split screen, keep reading. In most cases, when this happens, some (or all) of the elements on the web are stacked on top of each other.
Below, we’ll explore how to fix this so you can use your split screen without having to deal with these overlapping elements. Let’s get into it.
How to resize web pages to fit sceen
1. Manually modify the zoom level of every web page
In order to zoom in or out of the web page you’re trying to work on, you can press theCtrlkey on your keyboard and the +/– signs.
Another way to do this is to hold theCtrlkey and use the mouse scroll wheel to zoom in and out.
The shortcuts above should help you fix the web page not fitting screen issue on most browsers. If you need more keyboard shortcuts on Windows 10, you can check our detailed guide for the full list.
2. Change the default zoom-in/out value
2.1. Mozilla Firefox
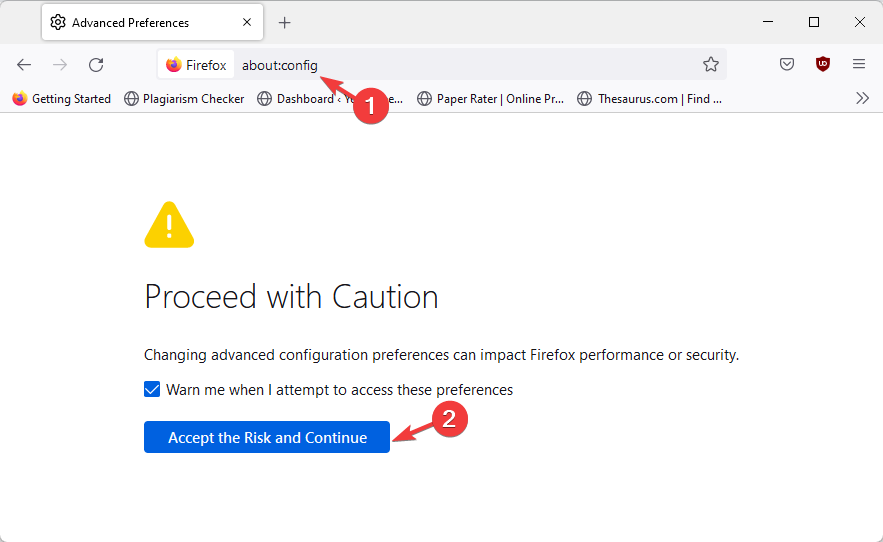
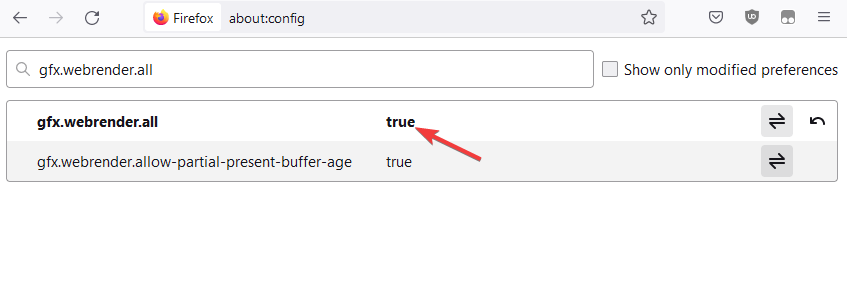
Open Firefox, type about:config in the address bar, and press Enter.
Click the Accept Risk and Continue button.
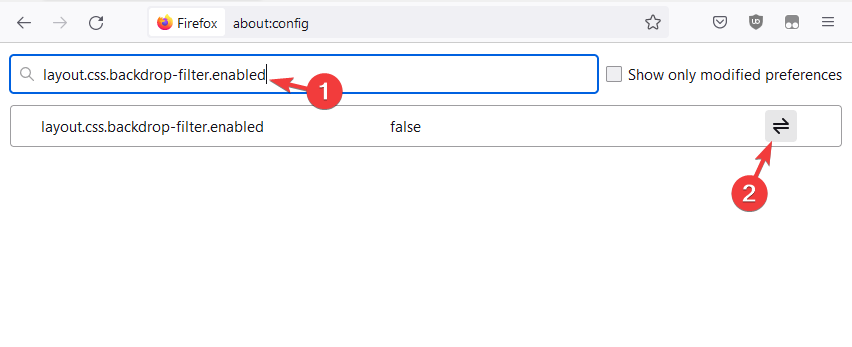
Search for layout.css.devPixelsPerPx in the search box.
Double-click on the preference and change the zoom value to your desired setting.
Finally, press the Enterkey.
If web pages do not fit your Firefox browser, adjusting the zoom preference should do the trick. Ensure to restart your browser to sync the changes.
2.2. Google Chrome
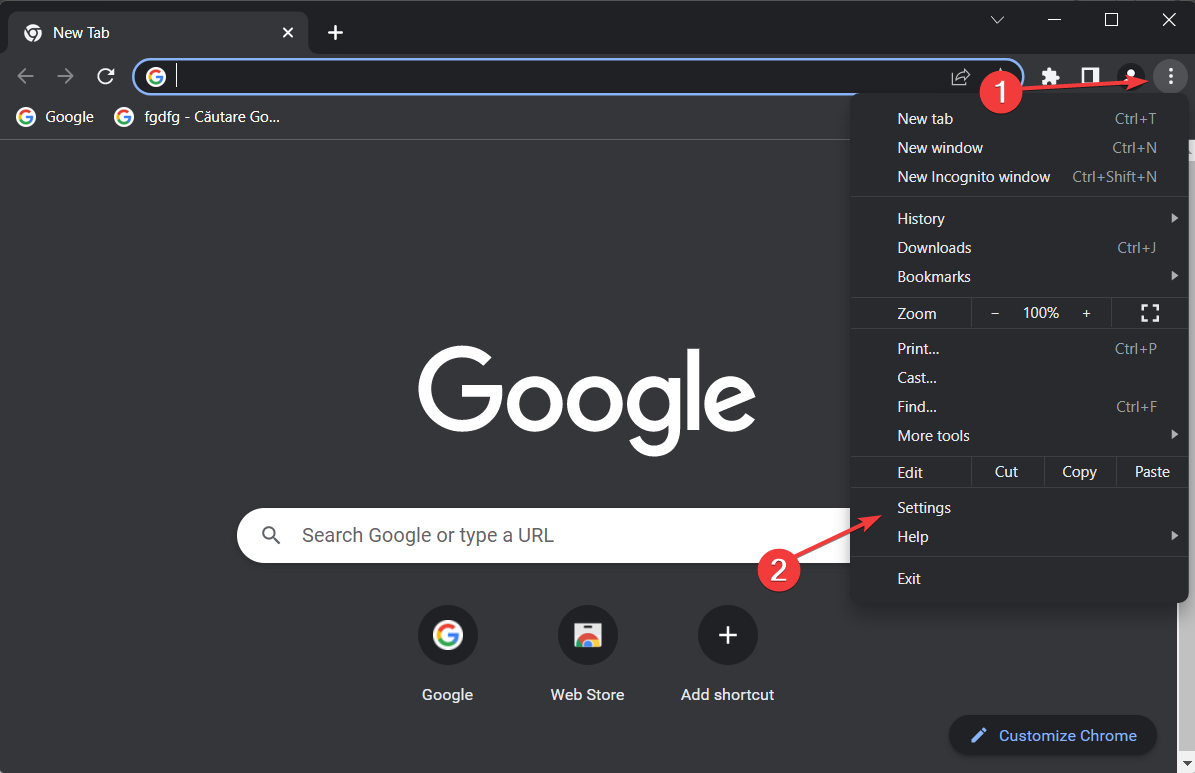
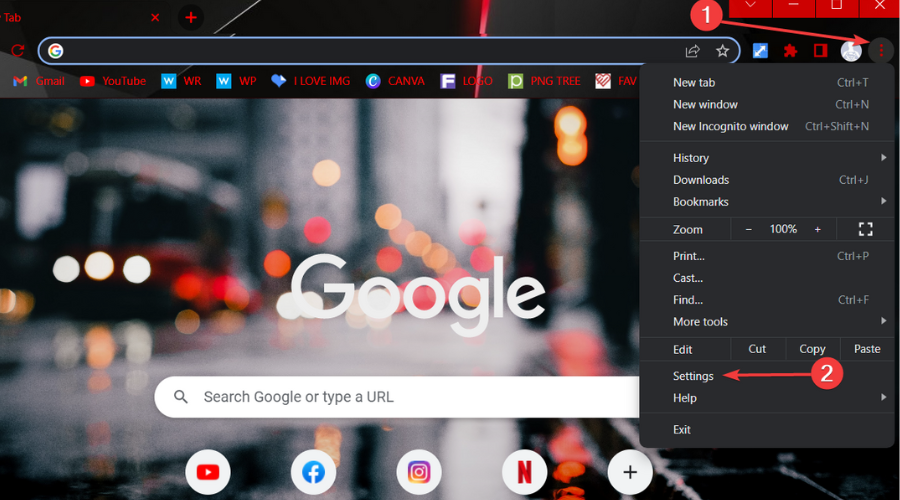
Open Chrome and click on the menu button (three vertical dots) in the top right corner.
Select Settings from the options.
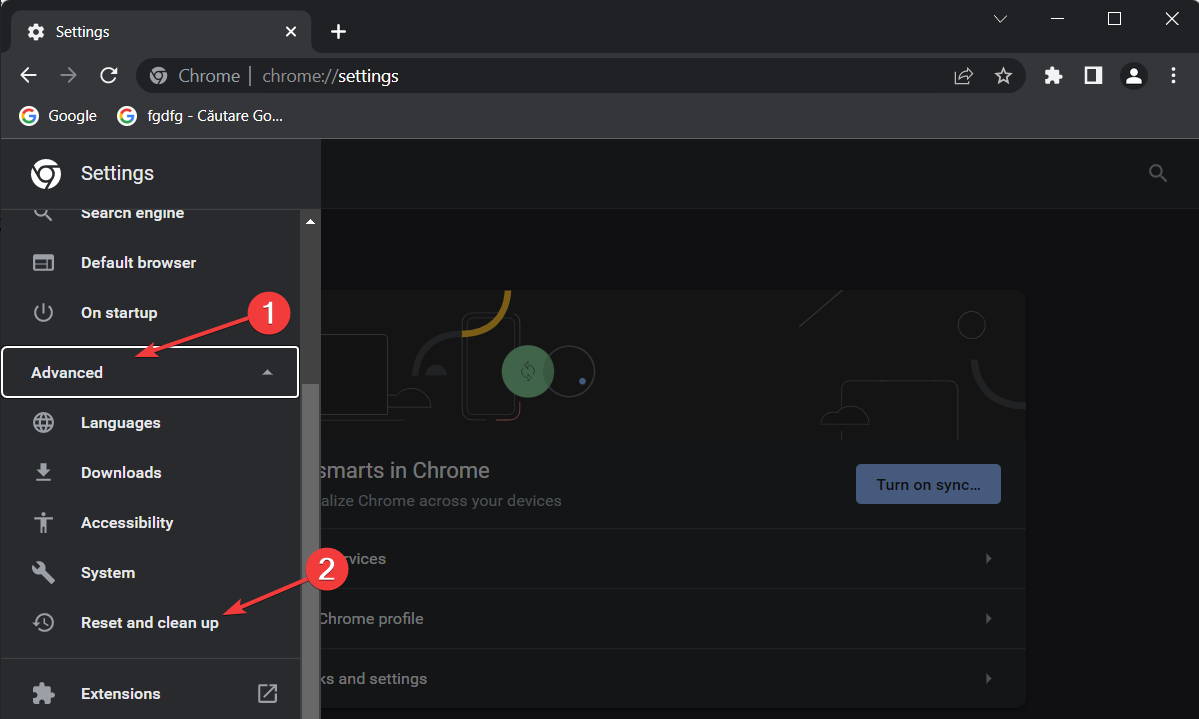
Click on Privacy and security in the left pane.
Select Site Settings.
Click on the Additional content settings option.
Choose the Zoom levels option.
Now, set the custom zoom levels for the sites you visit.
If your web page is not fitting the screen on Chrome, you can set the custom zoom level that will prompt it to fit on the preset value. The only downside is that you must repeat it for any website having the issue.
3. Use add-ons to set the automatic zoom for websites
3.1. Mozilla Firefox
Go to Mozilla’s official add-on library to download the Fixed Zoom extension.
Click the Add to Firefox button.
Click on Add again when prompted to complete the process.
Firefox allows you to autosize any web page on your browser to fit the screen with the help of an extension. With this, you don’t need to zoom the sites manually you visit again.
Click the Add Extension button and wait for the installation to finish.
Zoom from Microsoft Edge is another extension that allows you to zoom web pages to fit your screen. The installation process is easy, and the extension will be enabled automatically after.
Why does the web page not fit on the screen?
Web pages might not fit your screen because of problems with the page you are visiting. For example, if the page is not scalable, it won’t fit on different resolutions.
Another known cause of the issue is wrong browser settings or glitches within the browser. This is usually a temporary problem that can be fixed easily.
How do I fit a web page to exactly my screen size without scrolling?
As a developer, to fix your website to the exact screen size without scrolling, you need to set the width and height to 100 percent. Also, you should set the overflow to hidden.
With this, you should be able to fit your web page to screen perfectly.
This article explored some quick ways to customize the zoom levels for the sites you visit. You can do this either by using the keyboard shortcuts, modifying the browser settings, or using an add-on.
Microsoft Edge wants to be the replacer for the old Internet Explorer browser. Microsoft developed it for the Windows 10 OS and has been included in the latest iteration as well. But you might encounter issues with it, like the white screen in Microsoft Edge.
When you run, does Microsoft Edge open with a blank white or grey screen? Some users have stated that the browser opens with a grey or white screen, and then Edge crashes without any error message.
In other instances, blank pages might open randomly in Edge. These resolutions might fix things if the Microsoft Edge browser crashes with a blank white or grey screen.
What causes the White Screen of Death?
The White Screen of Death in Microsoft Edge or other display-related issues can be caused due to a bunch of reasons. We have listed the common ones below:
Installed extensions or plugins: Some extensions or plugins affect how Edge operates and lead to White Screen of Death.
Corrupt browsing data: Corrupt browser data, be it the cache of cookies, can trigger various problems in Edge.
Conflicting applications installed on the computer: You may find Microsoft Edge blank at the top of the page when conflicting applications are installed.
Outdated drivers: An outdated driver, especially the graphics driver, can often cause a Microsoft Edge black screen.
Misconfigured browser settings: Certain browser settings are also found to be the underlying cause behind Microsoft Edge’s white screen in Windows 11.
Improper installation of Microsoft Edge: If Microsoft Edge is not installed properly and some critical files are missing, it will lead to a blank page URL in Edge.
If you see a white screen on Microsoft Edge and it then closes, it could be due to any of these underlying causes. So, make sure you check for them all.
Why am I getting a Microsoft Edge blank screen?
The Microsoft Edge blank page problem stems from similar issues discussed earlier. It could be a blank white or blank grey screen.
The most common reason behind the issue is Hardware Acceleration. Users with the feature enabled reported issues with the browser, and disabling it seemed to fix things.
Why am I seeing a Microsoft Edge grey screen?
The Microsoft Edge grey screen generally appears when you open a tab that’s been idle for a while. The issue generally arises due to misconfigured browser settings.
Also, if you modified the flags in Edge, it could be responsible for the problem. So make sure to revert any changes to the flags made recently.
How do I fix the white, blank or grey screen on Microsoft Edge?
1. Run the Microsoft Store App Troubleshooter
Press Windows + I to launch Settings, and click on Troubleshoot on the right.
Click on Other troubleshooters.
Now, click the Run button next to the Windows Store Apps troubleshooter.
Follow the on-screen instructions to complete the process.
Troubleshooters are a great built-in tool in Windows that can help you fix several issues with your computer, installed programs, and connected devices. Once the troubleshooter is run, check if the Microsoft Edge white screen on startup problem is resolved.
2. Clear Edge’s browsing data
Press Ctrl + Shift + Del to open the Clear browsing data utility.
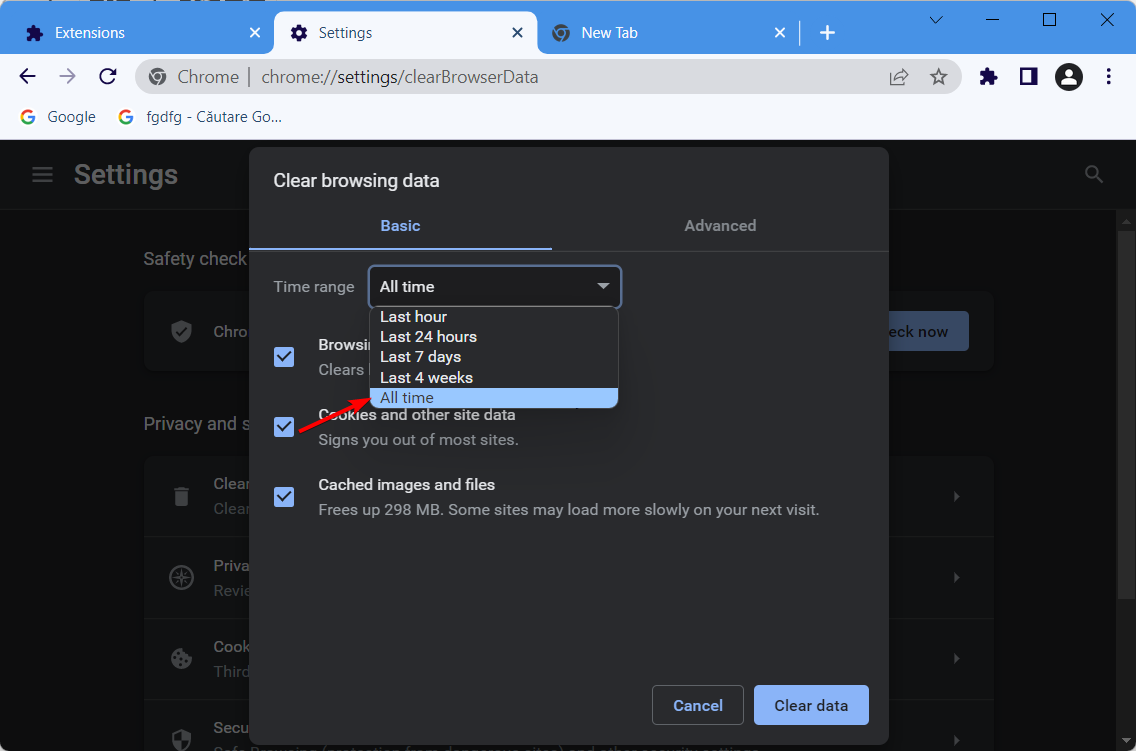
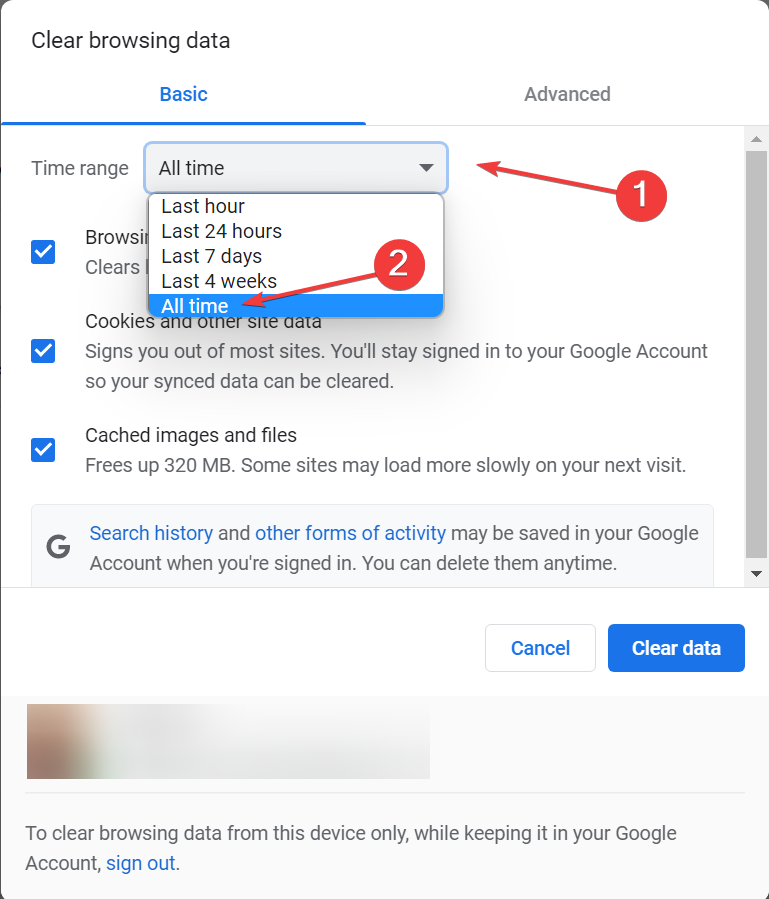
Click on the Time range dropdown menu, and select All time.
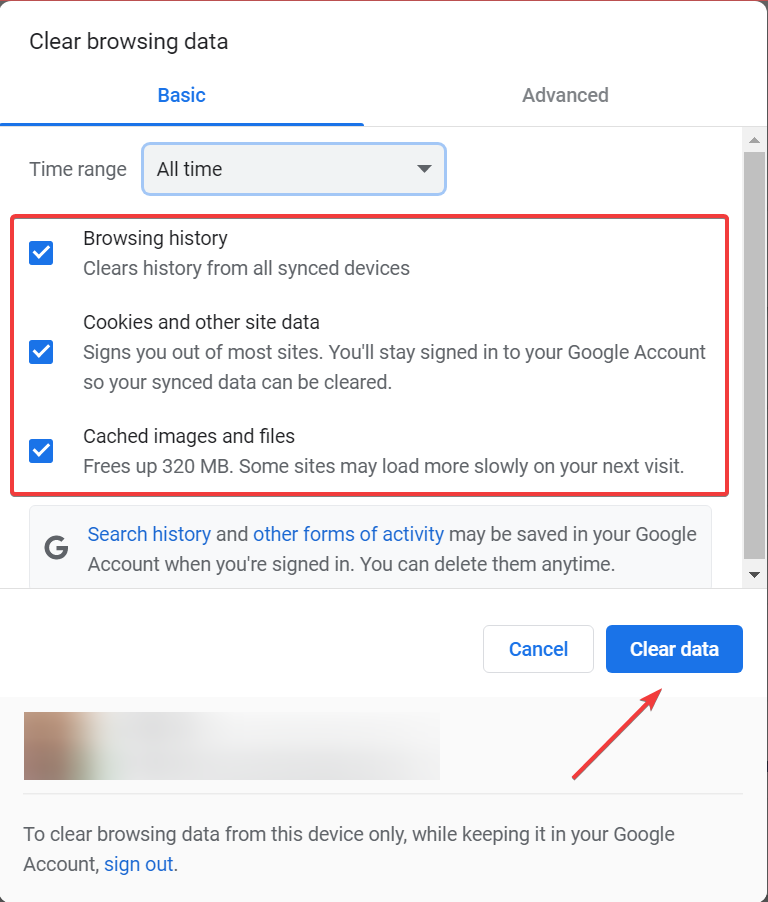
Select all the data category boxes, and click the Clear now button.
You should also delete the cache folder for Edge. You will find it usually in the C:Users\AppDataLocalMicrosoftEdgeUser Data folder. The browser started with default settings.
If the grey screen crash closes Edge before you can utilize the browser’s tools, you can still clear Edge’s data with a dedicated cleaner tool, that removes cookies and cache for you.
3. Reset the Edge browser
Press Windows + I to launch Settings, and select the Apps tabs from the left.
Next, click on Apps & features on the right.
Click on the ellipsis next to Microsoft Edge and select Modify.
Click Yes in the UAC that appears.
Now, click Repair.
The repair process will reinstall Edge, but it wouldn’t affect the configured settings or saved data. Also, make sure that you have an active Internet connection to complete the process. Once done, check if the Microsoft Edge white screen when printing problem is resolved.
4. Switch hardware acceleration off
Press Windows + R to open Run, enter inetcpl.cpl in the text field, and click OK.
Navigate to the Advanced tab.
Select the Use software rendering instead of GPU rendering option, and click on OK to save the changes.
Hardware Acceleration might provide smoother graphics rendering for pages, but switching it off can eliminate numerous browser crashes and even fix the Microsoft Edge blank grey screen.
If this resolves the Edge blank screen crash, see how keeping it disabled works for other apps. Also, if you encounter inetcpl.cpl errors, uninstall recent updates.
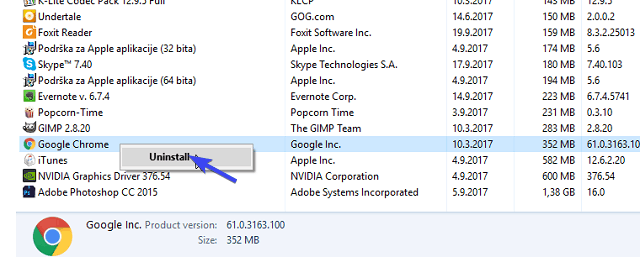
Press Windows + R to launch the Run command, type appwiz.cpl in the text field, and click OK.
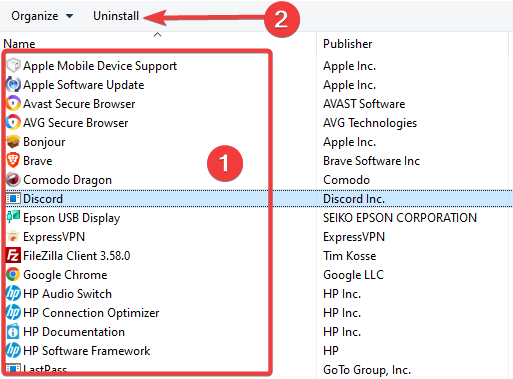
Select the IBM Trusteer Rapport software, and click the Uninstall button.
Follow the on-screen instructions to complete the process.
After uninstalling the software, the Microsoft Edge white screen not responding issue should be fixed. In case it persists, head to the last method.
6. Clear the app cache
Press Windows + E to open File Explorer, and navigate the following path where Username is the name for your account on the PC:C:UsersUsernameAppDataLocalMicrosoftEdgeUser DataDefaultCacheCache_Data
Press Ctrl + A to select all the files here, and then hit Delete.
Choose the appropriate response in case a confirmation prompt appears.
Once done, restart the computer and then launch the Microsoft Edge.
When you have Microsoft Edge white screen in Windows 10 or even other iterations of the OS, usually clearing the app cache does the trick. Also, you may try to clear the other cache files here located under different folder.
7. Roll Windows back
Press the Windows + R, type rstrui in the text box, and click OK.
Press the Next button to open a list of restore points.
Select a restore point that at least predates the most recent Windows update, and click Next.
Click Finish to confirm your selected restore point, and start the process.
We’re suggesting this because some users stated on forums that they experienced Microsoft Edge white screen after an update, which points to either changed settings or a bug in the latest version. The Microsoft Edge white screen problem will be fixed by the time the restore is complete.
How do I fix corrupted Microsoft Edge?
The best way to fix corrupted Microsoft Edge is to Repair it via the App settings, as discussed in the previous section. Or you could run an SFC (System File Checker) scan, which would take considerably longer.
One of our readers also suggested resetting the folders’ security descriptors icacls to fix this issue. To do that, run the following command after opening Command Prompt as an administrator: "C:Program Files (x86)Microsoft" /q /c /t /reset
And if these don’t work, reinstalling Edge is always possible. Make sure to use an effective uninstaller software to remove all residual Edge files before you go ahead and reinstall the browser.
To conclude, at least one of these solutions should fix white or gray screen crashes in Edge. In addition, running an anti-virus scan is always helpful.
Sometimes video is not playing in the Opera browser and that will prevent you from enjoying multimedia. However, there are few solutions that can fix this.
Why can’t Opera play video?
The most likely cause is your extensions or built-in adblocker and tracking protection. For many, hardware acceleration was the culprit.
What can I do if Opera One browser is not playing videos?
Before trying anything else, disable all extensions and check if that helps. If it does, find the problematic extension and remove it.
1. Disable adblocker
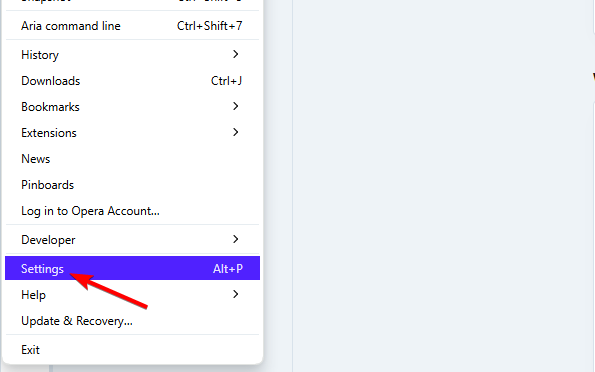
Click the Menu icon in the top left corner and choose Settings.
Locate and disable Block ads and surf the web up to three times faster and Block trackers.
Check if that solves the problem.
2. Disable hardware acceleration
Launch your Opera One browser and click on the icon at the top left corner to open the menu.
Select Settings from the drop-down menu.
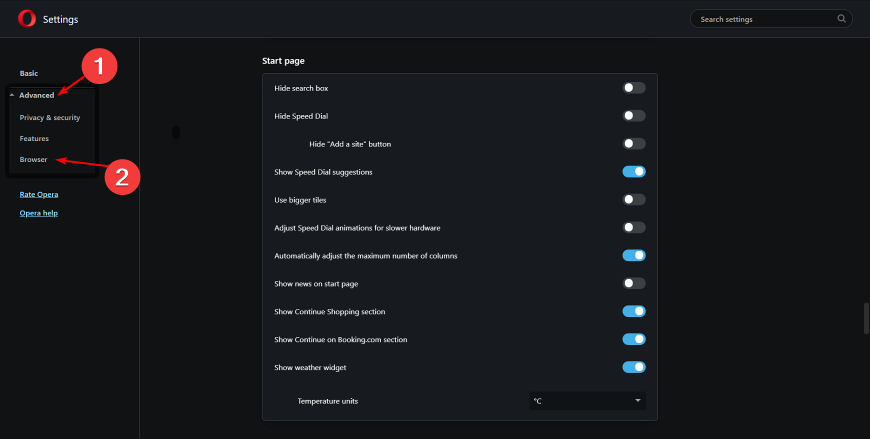
Click on Advanced, then hit Browser from the drop-down menu.
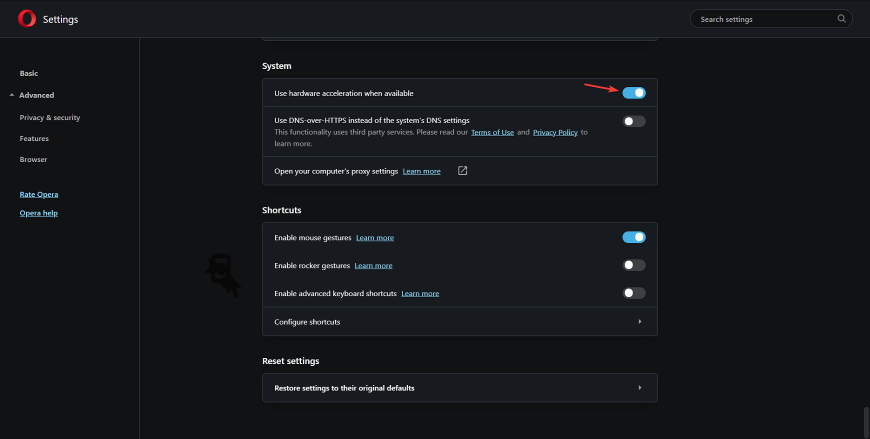
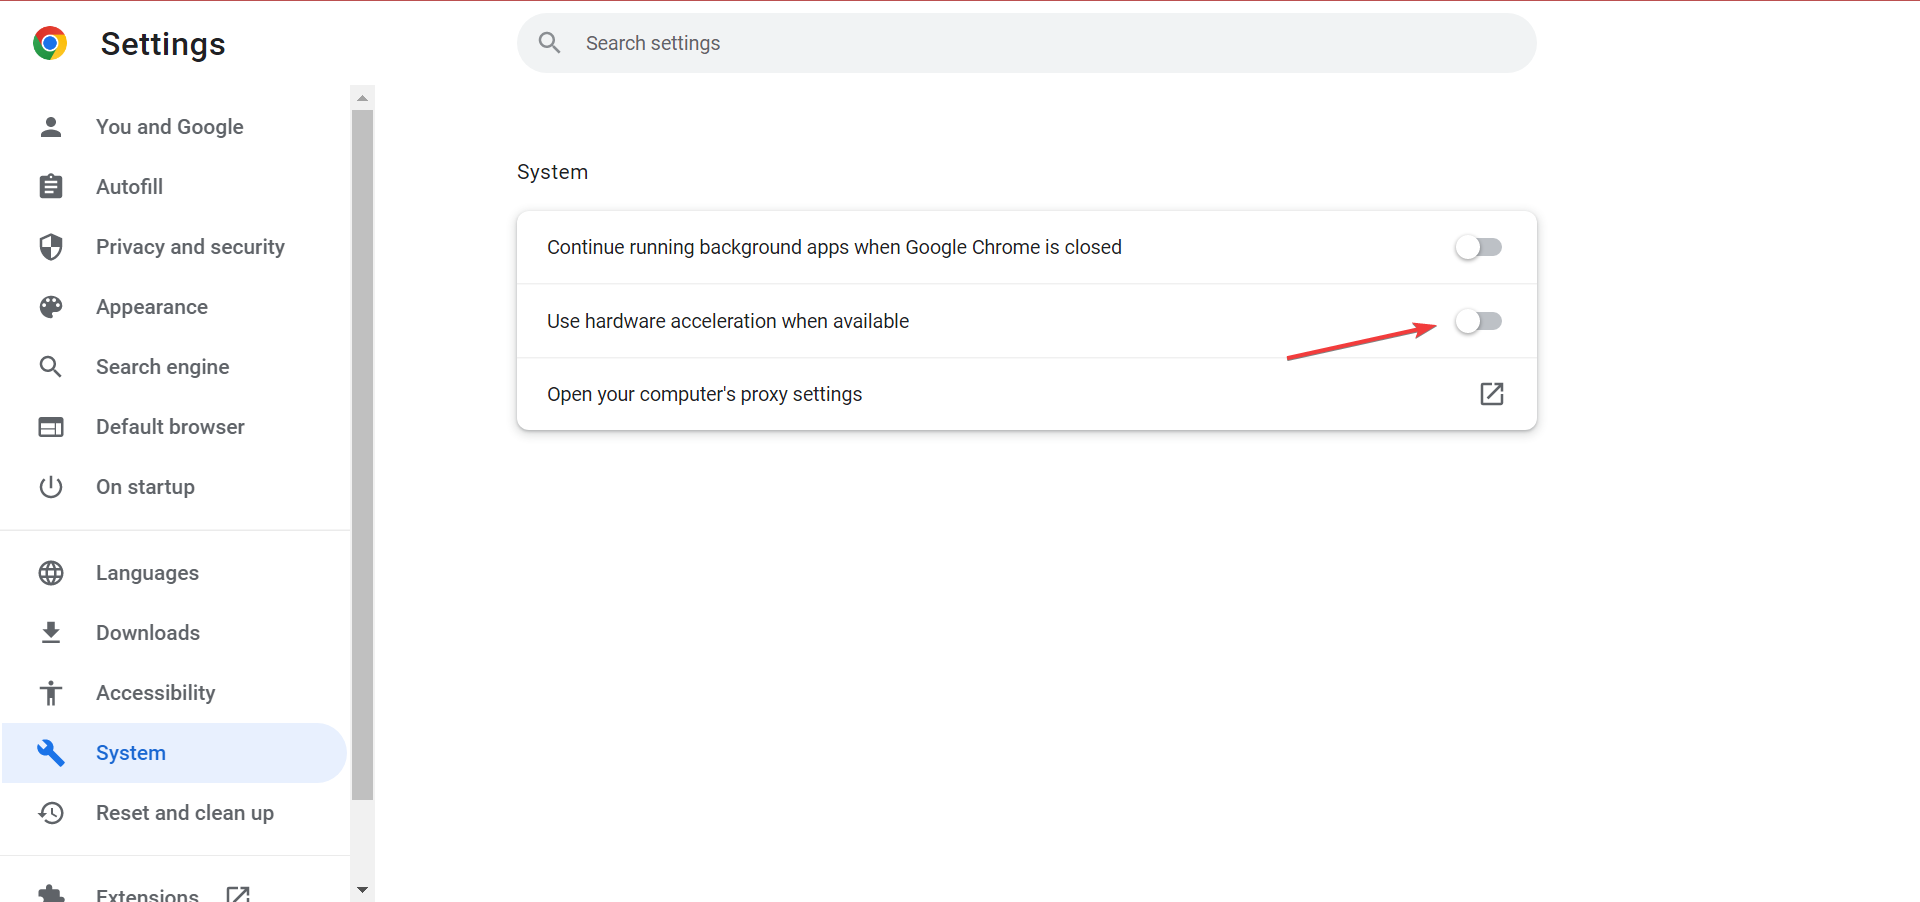
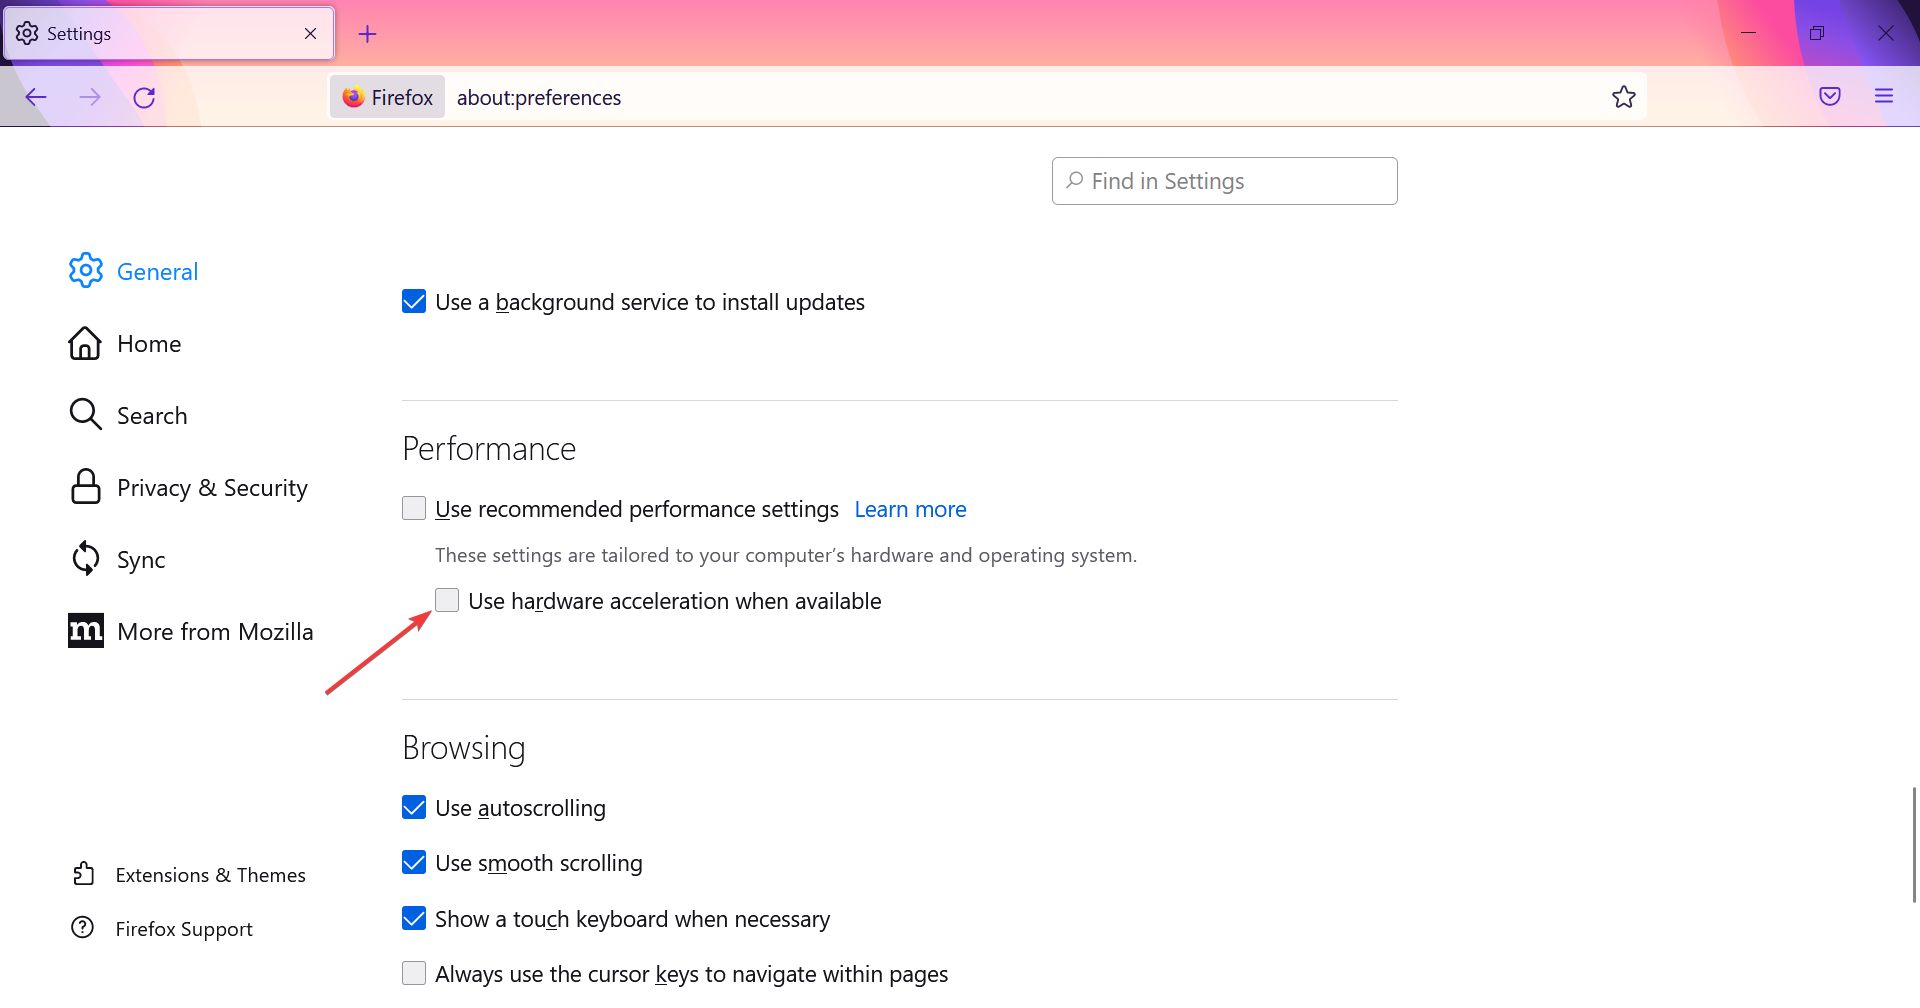
Scroll down and under System, toggle Use hardware acceleration when available off.
Hopefully, you have been able to apply one or more of our recommended fixes, and the problem with Opera not playing videos is now gone.
This isn’t the only issue you can encounter, many users reported browser can’t play this video message, but that can be easily fixed.
This isn’t the only video issue, and many reported that Opera GX mini player isn’t working, but we have a whole guide dedicated to this issue, so don’t miss it.
Speaking of online videos, Loomi by Opera was a streaming service, and we have a whole guide dedicated to it, so you might want to visit it.
Let us know what solution worked for you in the comment section below.
Emulators are a great way to experience old games on your PC, but did you know that there are certain emulators that work in your web browser?
That’s right, there are various emulators available online and you can run them right from your browser. In today’s article, we’ll show you how to do that.
How do I play emulators on my browser?
1. Visit emulator websites
Visit any emulator website.
Select the type of console you wish to emulate.
Choose the desired game and wait for it to load.
Once the game is loaded, you should be able to play it right from your browser.
You can easily emulate games in your browser, but for the best performance, it’s advised to use a gaming browser such as Opera GX.
This browser supports customization and you can choose between different themes, wallpapers, and highlight colors. There’s also Twitch integration, allowing you to keep a close eye on your favorite streamers.
The browser also has a GX Control feature that allows you to limit the number of resources your browser uses and ensure that other processes are running smoothly.
Opera GX also has a built-in adblocker which will come in handy if you’re playing games in your browser. As for security, there’s a free built-in VPN with unlimited bandwidth available.
Opera GX
Play timeless classics in an ultra-modern environment by turning the world’s best browser for gamers into a retro game emulator.
As a top IoT and video monitoring solutions provider, Hikvision needs a little introduction before we can jump into the list of the best web browser for Hikvision.
In order to watch your recording or simply access your IP cam, you need a browser and plug-in that can extract, parse and decode the signals issued by Hikvision devices.
And this is precisely where things turn sour. As you probably know, modern browsers have evolved tremendously, and they gradually ditched plugins in regard to their obsolete and security breach-prone nature.
Modern browsers’ almost unanimous decision to discontinue NPAPI support has marked a true turning point.
With Netscape Plugin Application Programming Interface interrupted, it has become harder and harder to find a browser that still supports Java applets, for instance. And the same goes for Hikvision.
How can I view Hikvision in my browser?
Launch your web browser on your desktop and type in the IP address of your device then press Enter.
Next, introduce your credentials to log in (username and password) then, enter the Configuration menu and go to the Network tab.
The precise options can differ according to your firmware version, but you should be able to locate the Platform Access section.
Complete the field, hit Enable and you’re all set.
As you can see, it’s no different than accessing your router’s configuration, for example. But the plugin revolution complicated things a bit.
So how can you access your Hikvision camera now? Is it still a browser that you can use for this specific task? Don’t worry, we got the right answers, and the very best web browser for Hikvision is listed right here.
If you’re looking for a modern, sleek, and performant browser, look no further than Opera One. You will have no problems at all running the latest versions of Hikvision firmware-based devices since they do not require any plugins.
As far as older versions are concerned, you can always explore Opera One’s extensive library and find the suitable tool for each task.
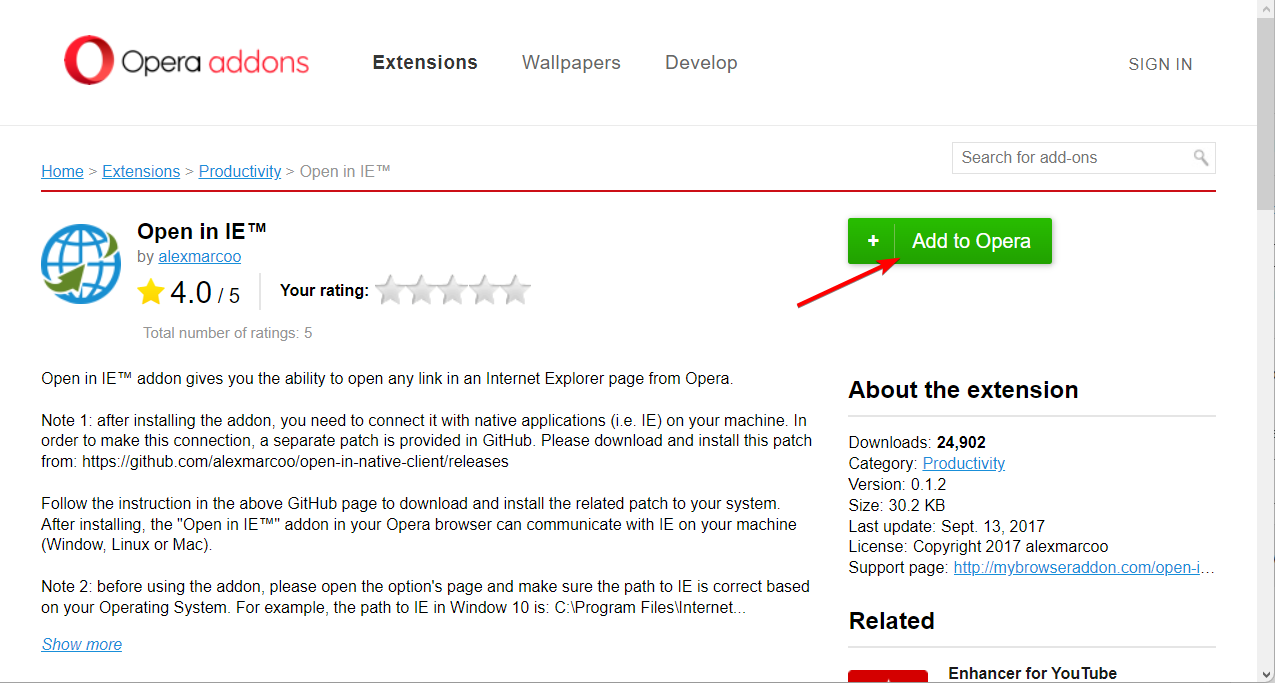
To do this, simply open your Opera One browser and navigate to the Open in IE extension then click on the Add to Opera One button.
One of the greatest things about it is that it fully supports Chrome extensions, thus you will be able to find everything you need quickly and effortlessly.
Opera One
Team up with Opera One and unleash the full potential of your IoT devices!
On June 15, 2022, Microsoft stopped providing support for Internet Explorer 11. If you visit a website that requires Internet Explorer 11, Microsoft Edge gives you the option to refresh the page using Internet Explorer mode.
Microsoft Edge is the preferred browser by Microsoft since it is the faster and more secure browser. The experience that you have come to know and love with Internet Explorer may be surpassed by Microsoft Edge thanks to improvements in security, privacy, performance, and ease of use.
Accessing the content of your Hikvision NVR/DVR or cameras is feasible through the usage of the Hikvision Internet Explorer alternative. After that, you will have access to the live view, the playback mode, the ability to download film, and other options.
How do I view the Hikvision camera in Microsoft Edge?
Make sure Edge is set as your default browser.
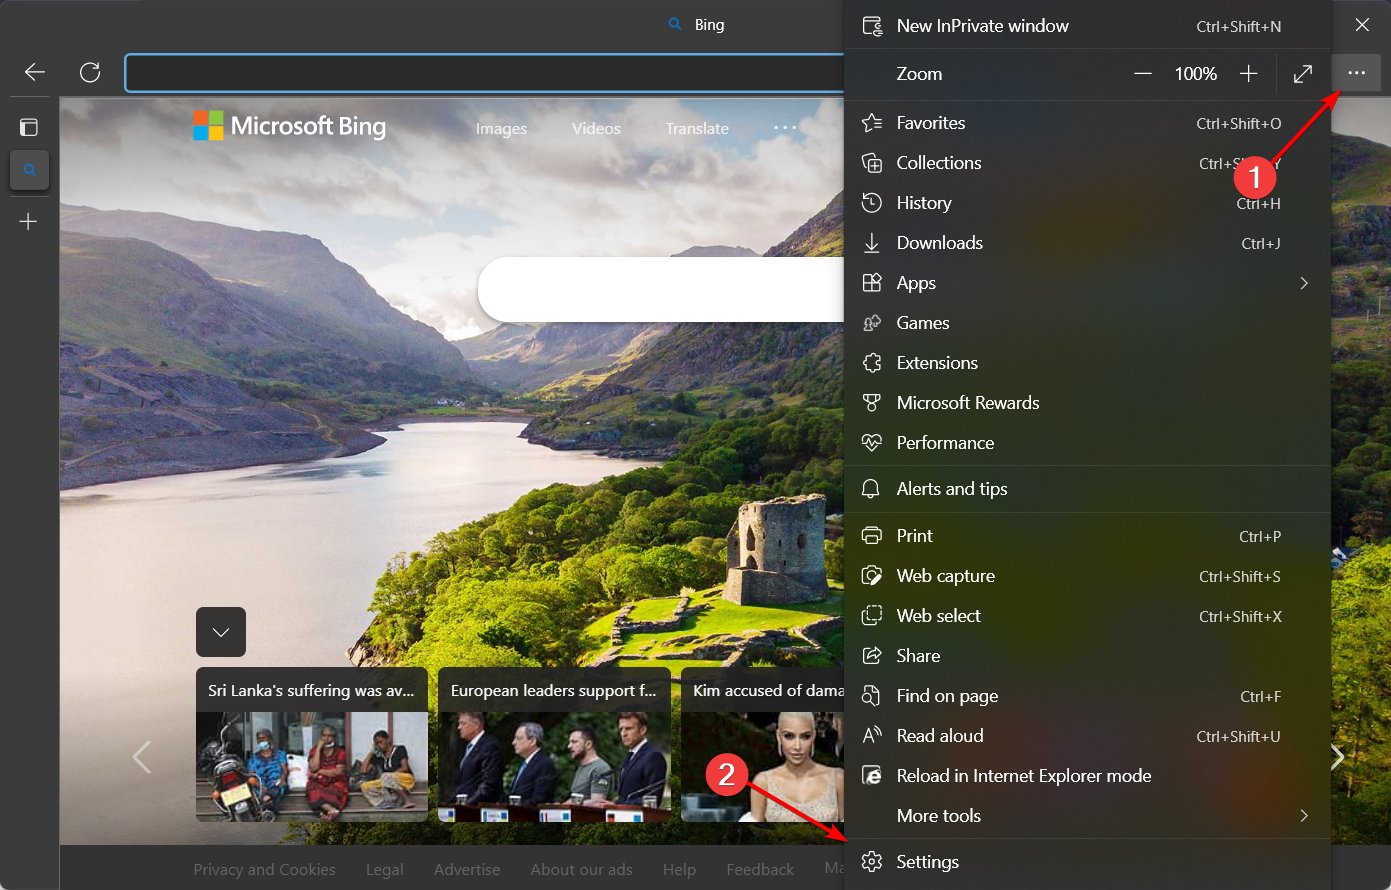
Open Edge then click the three-dot button and select Settings.
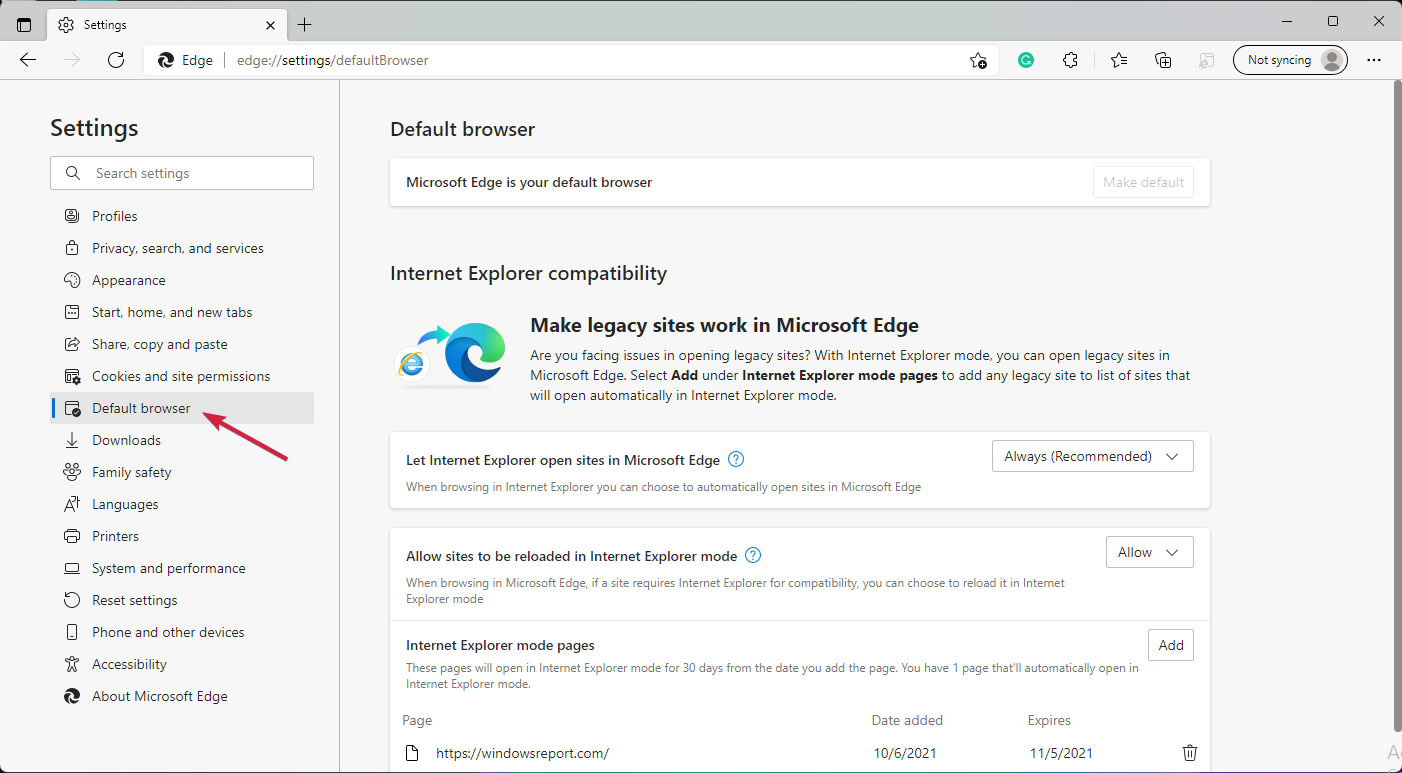
Now click on the Default browser section.
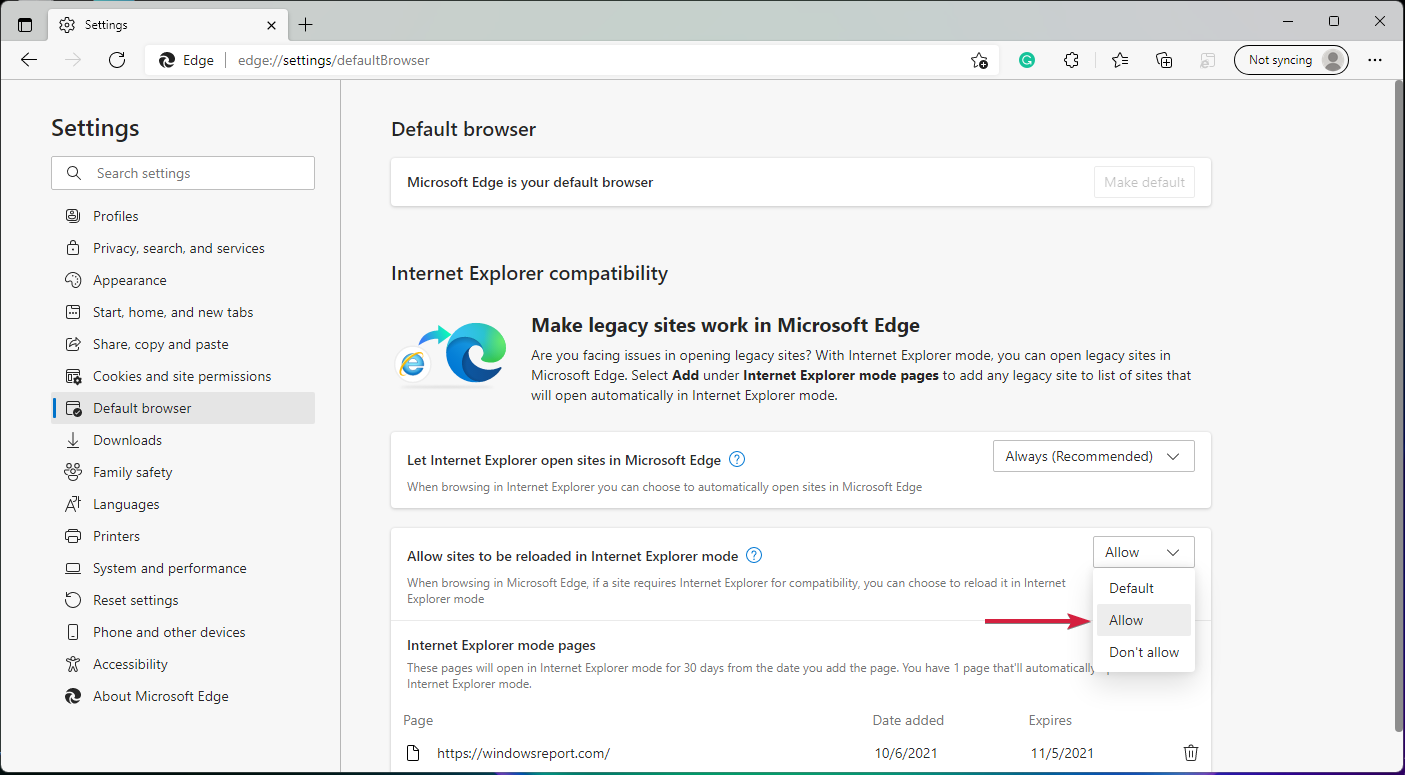
Tap the drop-down menu next to Allow sites to be reloaded in Internet Explorer mode and choose Allow.
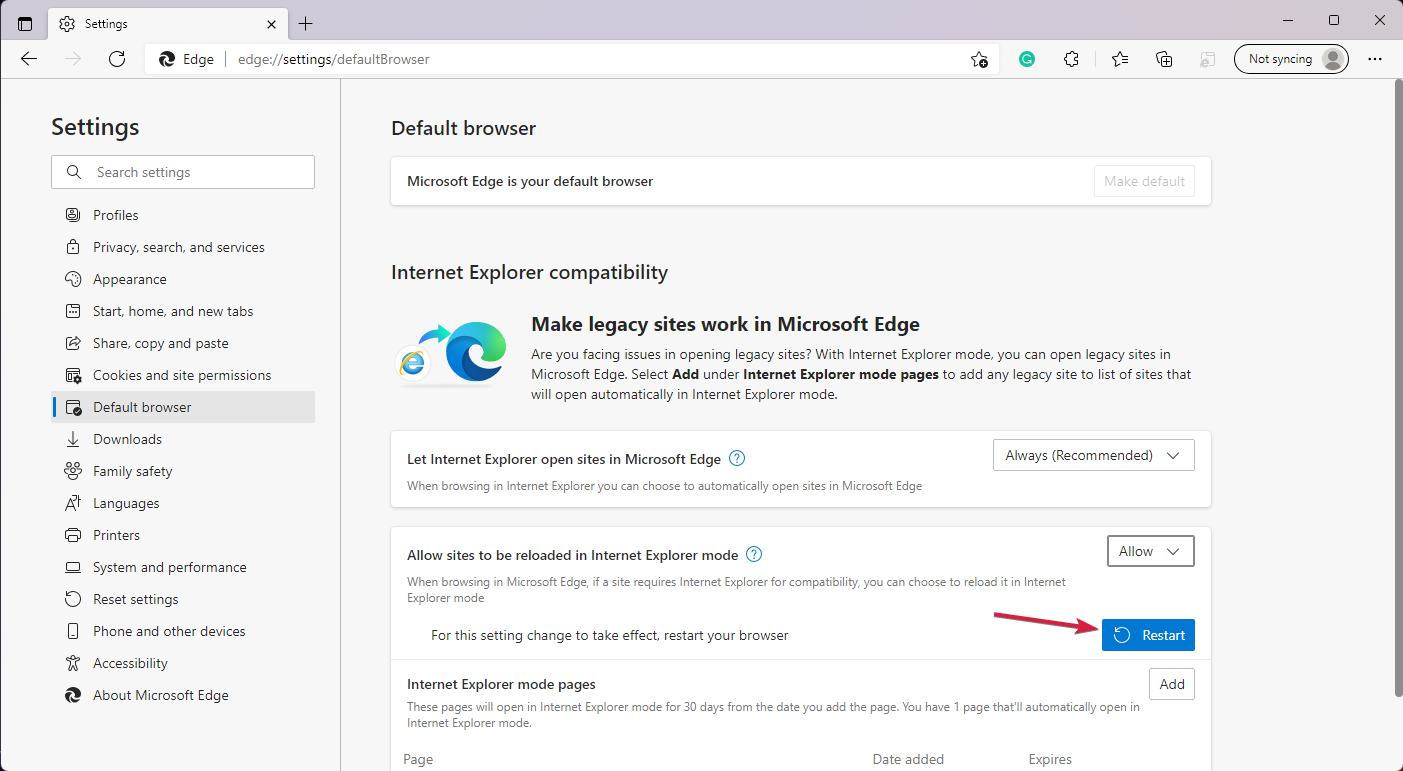
Lastly, click on the Restart button to apply the changes made.
Type the IP address of your Hikvision camera, this will prompt you to download the plug-in mentioned earlier.
Proceed with the installation, and you should be all set.
Does Hikvision work with Chrome? Starting with version 57, Chrome completely removed the plugin infrastructure. The famous chrome://plugins page was gone at around the same time Google said farewell to NPAPI.
As one would expect, many people are still very fond of this immensely popular browser and cannot bear to part ways simply because there is no more plugin support.
How can I open Hikvision in Chrome?
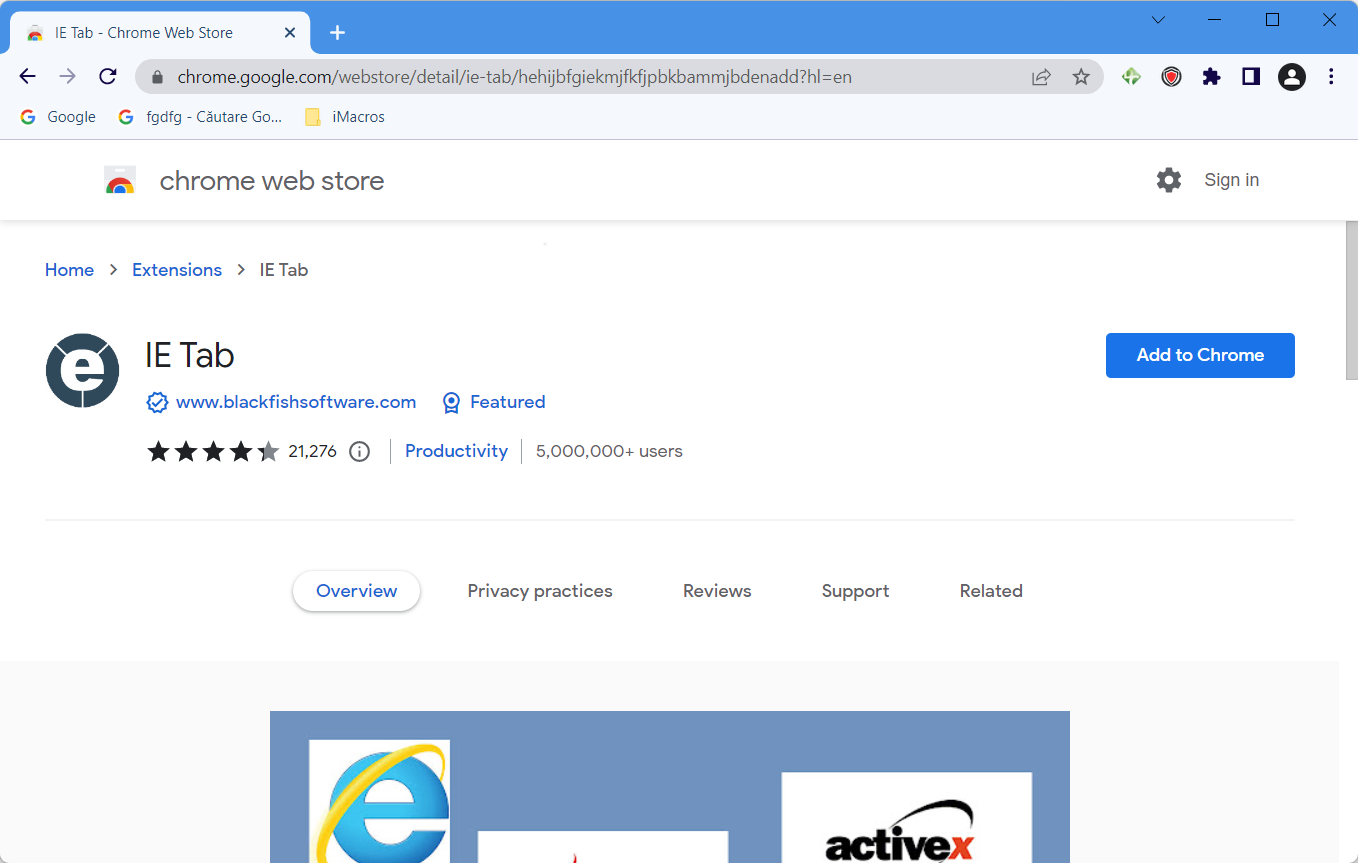
Open the Chrome Web Store and click the Add to Chrome button next to IE Tab, one of the best Hikvision browser plugin.
Restart your browser, type the IP address of your device and log in.
Chromium has gained a lot of momentum and we dare add, it’s for all the right reasons. Nevertheless, there are more than Chromium-based browsers out there and Firefox is a great alternative to consider.
This modern and well-optimized browser has come a long way since its early days and we salute its progress.
Firefox runs on its very own engine called Quantum, which is a tailored solution that guarantees enhanced efficiency for all your browser-based tasks.
How can I see Hikvision in Firefox?
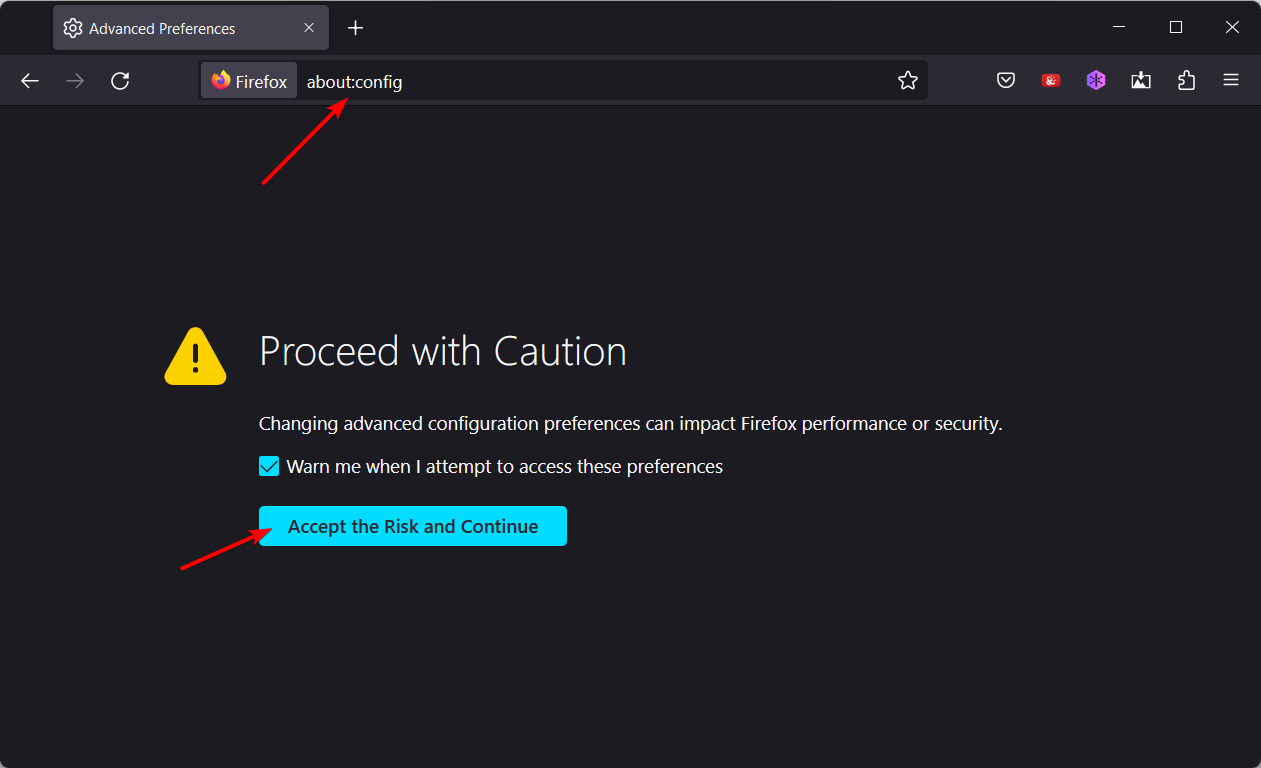
Open your Firefox browser and type the following in your address bar: about:config then click Accept the Risk and Continue.
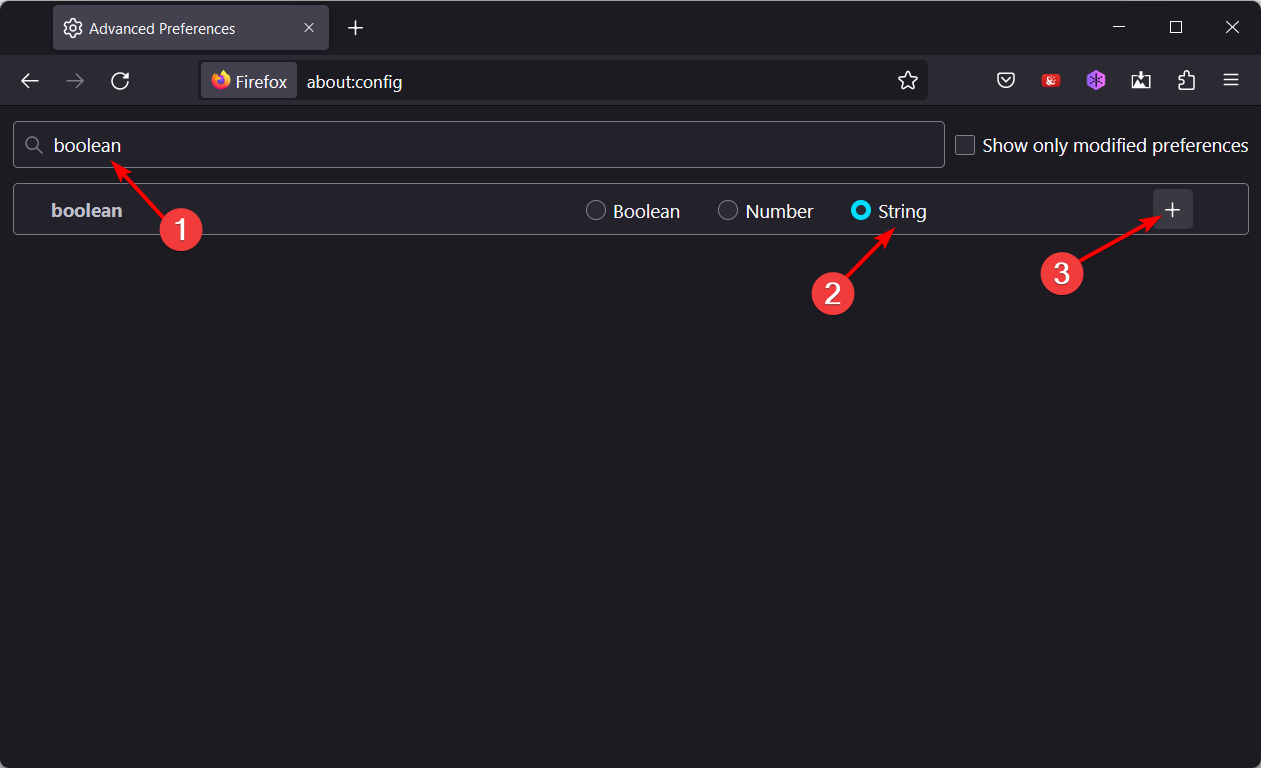
On the new window, type Boolean in the search field, check the String radius button, and press + icon to add it.
Next, enter the name of the plugin, reload the browser and you should be good to go.
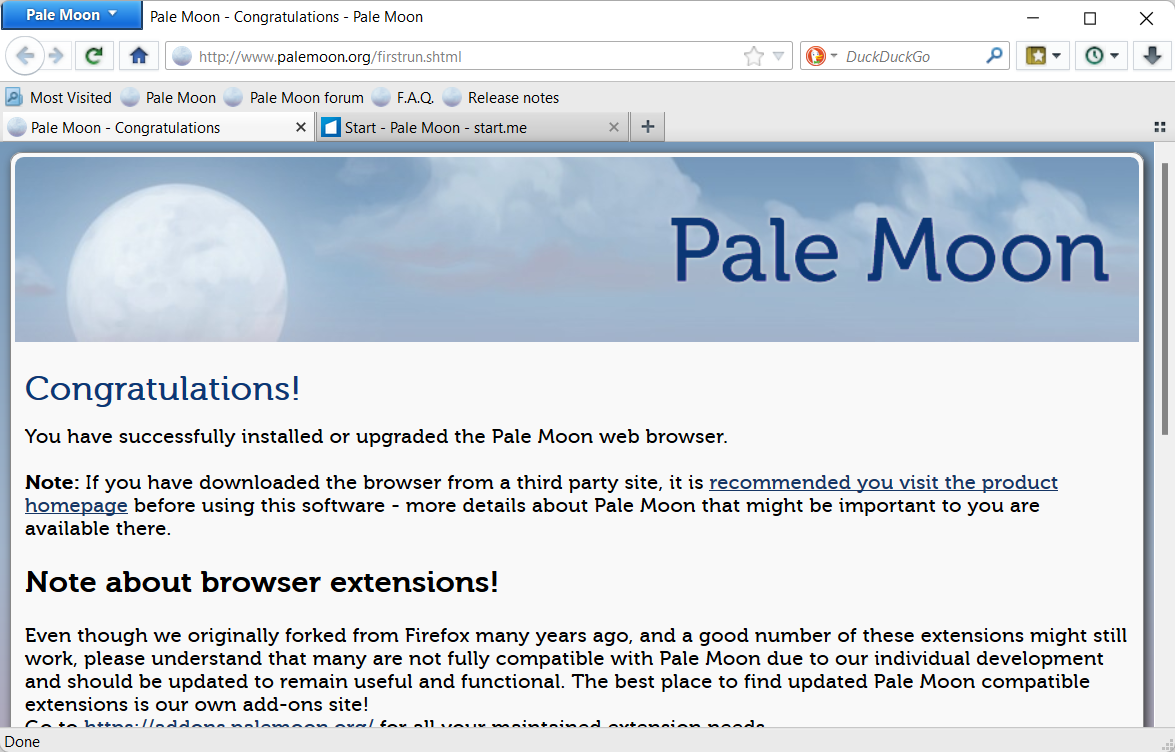
It may not look all shiny and new, and we agree its aesthetics could benefit from a make-over. Other than that, you will find Pale Moon quite surprising both in terms of performance and functionalities.
A fork of Firefox, the Pale Moon browser maintains support for legacy plugins. Thus, you will be able to access your Hikvision devices directly via Pale Moon with no additional steps.
Simply, install the browser, launch it and use it to introduce the IP address of your device. In other words, follow the regular authentication procedure.
Now, if you never had the plugin installed, Pale Moon will have no legacy to work upon. Don’t worry, it will ask you to download the plugin and reopen the browser, and that should be it!
How to fix your browser is not supported Hikvision error?
If you have an earlier version of the Hikvision system, then you will only be able to use it with Internet Explorer. However, as you probably well know, this web browser has been superseded by Edge, and Microsoft no longer provides support for Internet Explorer.
You may, however, rectify this problem by installing a plugin for your current browser, which will enable that browser to load URLs that are compatible with Internet Explorer.
On the other hand, Edge can be smoothly customized for Internet Explorer without the need for a plugin because of its extensibility.
In addition, Opera One distinguishes out from the competition since it comes with a wide choice of add-ons that can be installed on your own computer and used to make surfing more efficient.
For some users, getting Hikvision to work required a bit of tweaking, and you have to prepare for this scenario as well. Your camera’s firmware may need to be downgraded or upgraded, according to your particular situation.
Also, the latest firmware for Hikvision cams does not require any plug-in to work properly, so make sure you check that out as well.
Don’t hesitate to leave a comment in the section below and share your thoughts with us. Thanks for reading!
Pop-ups are small windows that open from a browser when you open a website page. Pop-up windows are often ads that pop out on website pages.
As such, some browsers include built-in pop-up blockers that stamp out pop-up ads. The Firefox browser includes a built-in pop-up blocker that provides a notification stating:
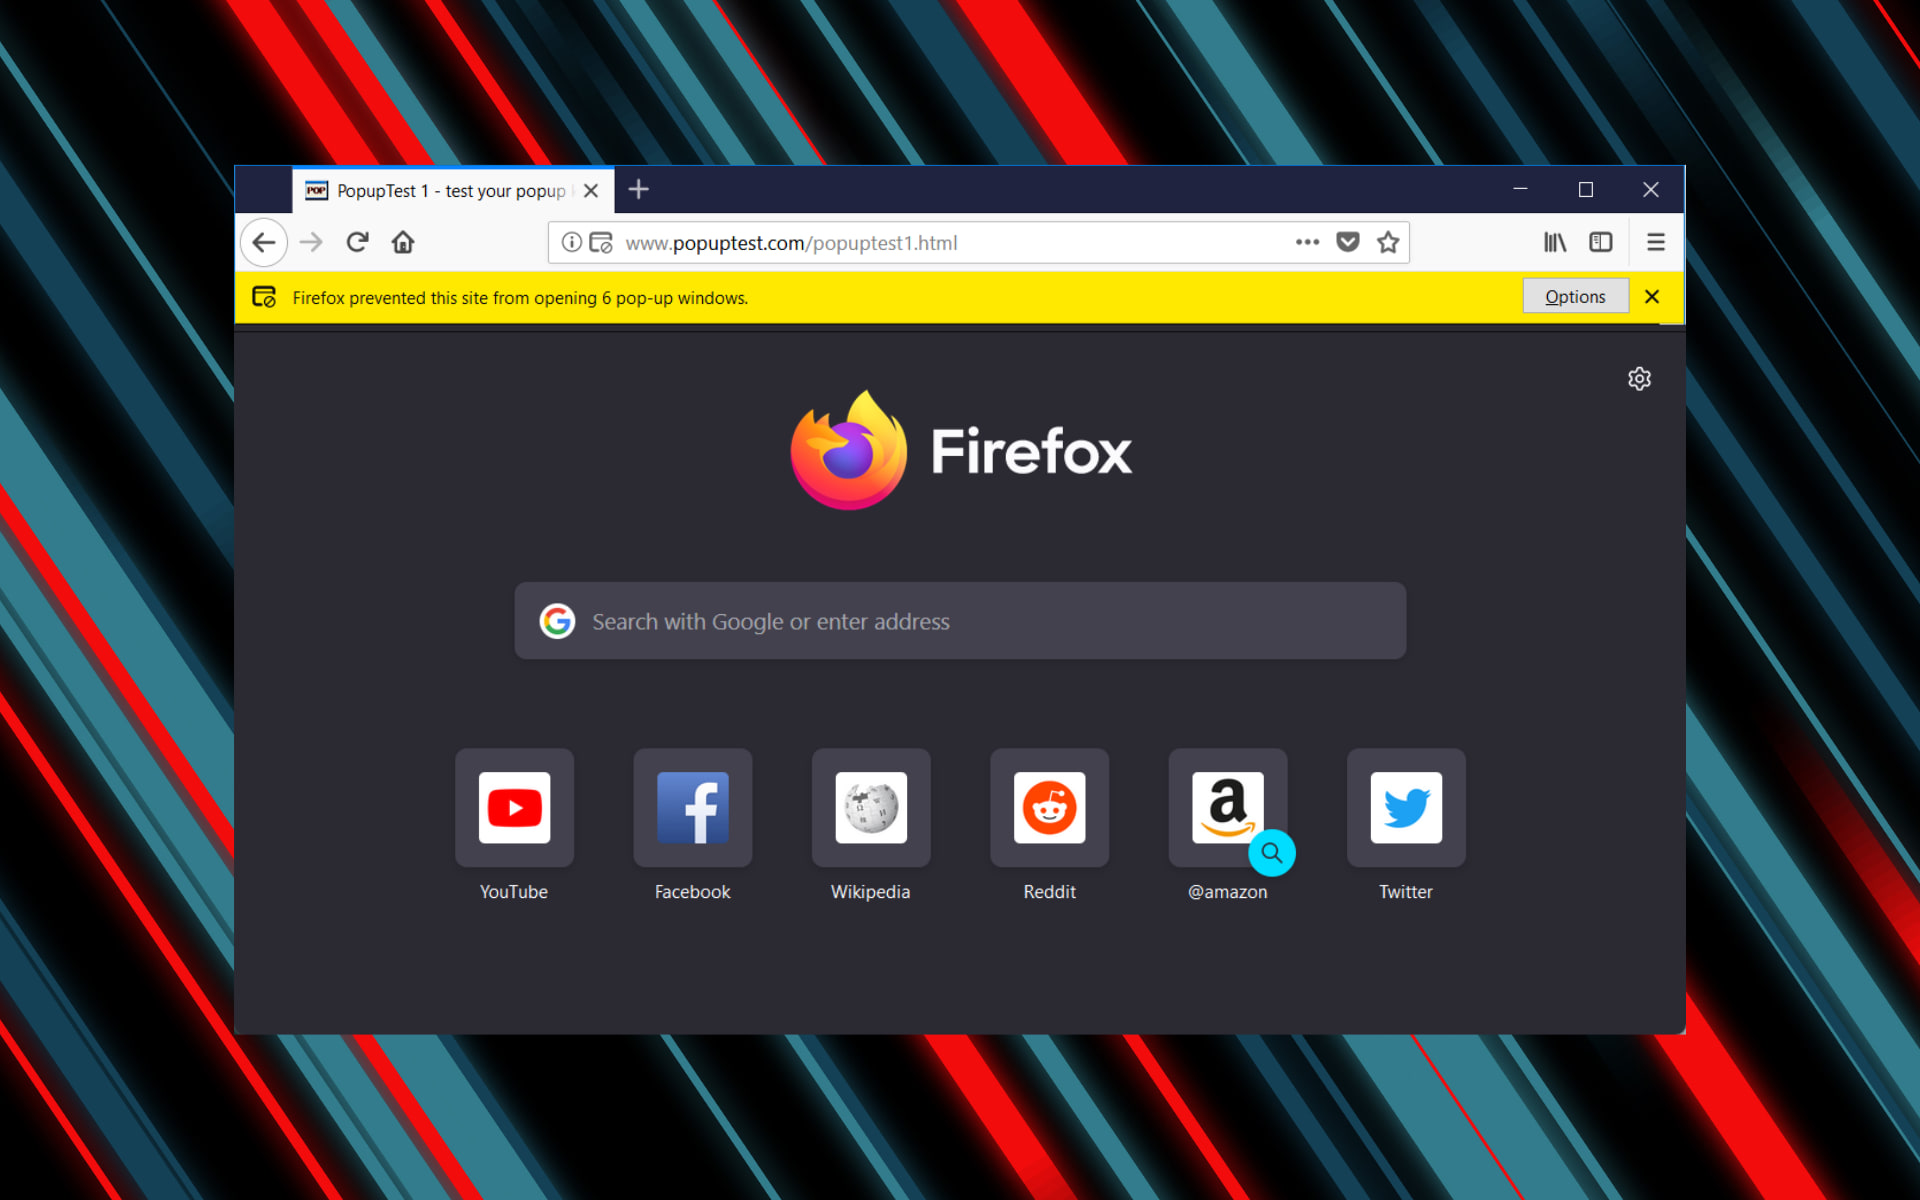
Firefox prevented this site from opening a pop-up window.
However, pop-up windows can also be a more essential addition to some websites. For example, banking sites utilize pop-up windows to provide further transaction details.
So, sometimes you might need pop-up windows to open. The solutions listed below are also useful if you encounter the following errors messages:
Firefox prevented this site from opening a pop-up window 68.01 – This issue is mostly encountered by those using Mozilla Firefox v.68.01
Firefox preventing from opening pop-up windows can’t open anything else – This happens when Firefox has difficulties opening up pretty much any kind of content.
Why is Firefox preventing pop-ups?
Don’t worry, the cause for this doesn’t involve you replacing your PC or buying another piece of expensive hardware or software.
It simply happens because of permission settings within the browser itself, or due to some addons or extensions getting in the way.
As soon as these are dealt with, you can start seeing annoying pop-up ads everywhere again, if that is truly what you want.
Before going through all of the solutions mentioned below, you should first consider whether or not it would be easier to just switch to a different browser.
That being said, if you do want to go ahead and do this, might as well use a reliable tool such as Opera One. Unlike Firefox, Opera One is Chromium-based, which has proven itself to be far more customizable, faster, and reliable.
This makes Opera One not just efficient at its job, but using it is a joy in itself since you can make the browser act as a hub of all the websites, tools, and shortcuts that you may ever need.
As for page loading issues, Opera One is very fast due to having a lot of already build in functions, like VPN, Ad blocker, social media and messaging apps, AI and many more.
Opera One
Offers many useful tools, low resource requirements, and a high level of customizing available.
Click the Open menu button to expand Firefox’s primary menu.
Select Options to open the tab shown directly below.
Click Privacy on the left of the tab, and then scroll down to the Block pop-up option.
Now deselect the Block pop-up setting.
Firefox includes a Block pop-up option that’s selected by default. You can deselect that setting to turn off the Firefox pop-up notification bar.
3. Add Websites to the Exceptions List
To do that, press the Block pop-up setting’s Exceptions button.
This will open the window shown directly below.
There, enter a website URL in the text box.
Press Allow to add it to the exceptions list.
Then press the Save Changes button to save the exceptions list.
To erase a site from the exceptions list, select it and press the Remove Website button.
Deselecting that option will fully turn off Firefox’s pop-up blocker. Alternatively, you can keep the pop-up blocker on but add some sites you need pop-ups for to an exceptions list.
4. Switch off Pop-up Blocker Extensions
Press the Open menu button at the top right of the browser.
Click Add-ons to open the tab shown directly below.
Click Extensions on the left of the tab to open an add-on list.
Then you can press the Disable buttons for extensions to switch them off.
Deselecting the Block pop-up does not always ensure that the pop-up windows open. Third-party pop-up blocker extensions can still block pop-ups in Firefox.
Thus, you might still need to switch off some Firefox extensions to enable pop-up windows.
5. Turn off third-party toolbar pop-up blockers
Third-party Firefox toolbars also block pop-up windows. The Google, AOL, and Yahoo browser toolbars are three that include pop-up blockers.
You don’t usually need to remove those toolbars to enable website pop-up windows. The toolbars usually include a pop-up button that you can press to turn their pop-up blockers on or off.
When you’ve turned off the pop-up blockers, a few pop-up ad windows will also probably open from Firefox.
So it’s probably better to add sites you need to retain pop-ups on to the exceptions list instead of switching the browser’s pop-up blocker off.
As we said, more often than not, a browser opening multiple popups was blocked due to a lack of user activation, which means you have to fiddle with the settings a bit.
Firefox prevented this site from opening a popup window JavaScript is one of the most common messages you will see when this is the case.
Keep in mind that a message such as Firefox window.open not working is as well a clear sign that pop-up ads won’t work due to extensions, addons, or lack of permission.
The solutions listed above will surely fix your window pop-up problems in Mozilla. Make sure to share with us any feedback regarding the subject in the comments section below.
Discord is a platform that supports video and voice calls, text messaging and media and file sending too. A great tool highly appreciated by many users is the soundboard for this app.
Picking the best application isn’t an easy task, and we have prepared a list of the best soundboards for Discord. Check out the next section for more information.
What are Discord soundboards and how they can help me?
If you haven’t used a soundboard before, remember that they are simple concepts. Imagine a board with a bunch of buttons on it. Each button plays a specific sound when pushed.
There can be actual hardware tied into a sound system or, in our case, an app that does the job.
In case you wonder why you should use a tool like this, keep in mind that you’re going to simplify your digital experience while playing your favorite games.
Right now, there aren’t any plug-and-play soundboards for Discord. All require installing a virtual audio device. Think of it as an app that acts as a microphone for the soundboard to speak into and have the sound come out in Discord.
How do I get a soundboard on Discord?
Well, first of all, you need to decide which software you are going to use for the job, which can be hard at times, which is why we made this article, especially for you.
After you made up your mind and installed said software, all you have to do is activate it from Discord, which is easy, as we are about to show you.
Remember that you can also get soundboards for Discord on Mac, and soundboards for Discord on Chromebook.
Download and install your soundboard software of choice from this list.
In Discord, access Settings.
Select Voice & Video, and then CABLE Output under Input device.
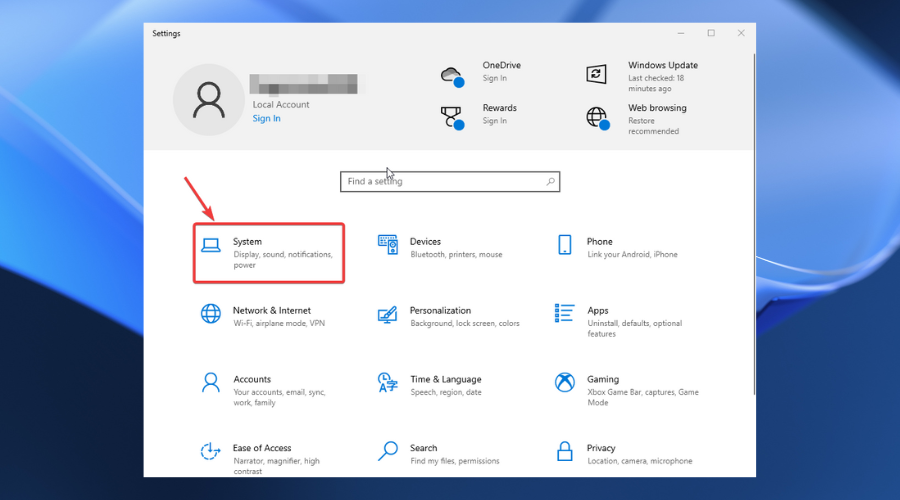
Press Win + I to access the system’s Settings, then select System.
Go to Sound, select your Microphone under Input., and then click on Device properties.
Select Additional device properties.
In the Listen category, select CABLE Output and check the Listen to this device box, then press Apply.
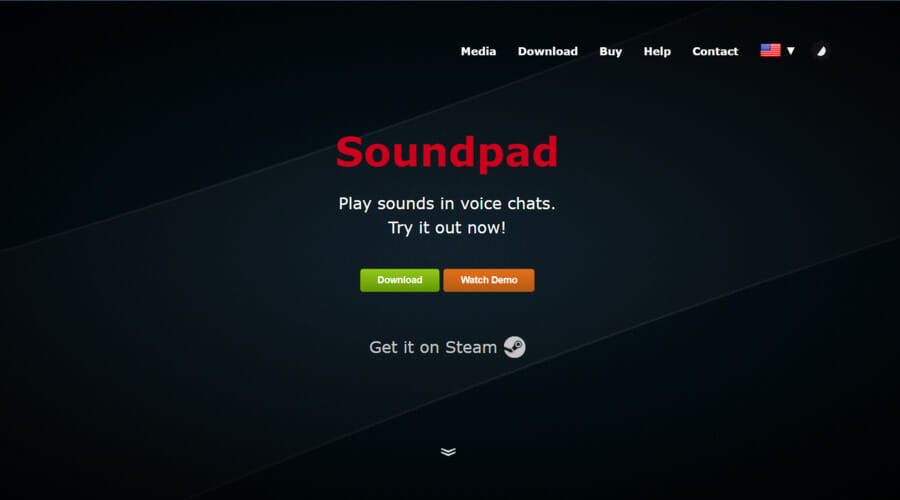
Soundpad is an awesome tool that allows you to play sounds on the microphone. Having multiple built-in features, it will offer you the best sound to microphone experience.
Compatible with any voice-related application, Soundpad is more than a top-quality soundboard for Discord. Thus, you can use it with other popular programs such as Skype, Battle.net, Dota 2, Teamspeak, and many more.
Its hotkeys can be easily set for each and every sound file and play them quickly while in-game.
If some of your sound files are quiet while others are too loud? The integrated volume normalization will equalize the volume, so it meets the volume of your voice.
In addition, Soundpad has a built-in sound recorder. It allows you to record what you hear. The integrated Editor helps you to cut the sounds quickly.
Chece these Soundpad’s best features:
Compatible with Skype, Battle.net, Dota 2, Teamspeak
A great soundboard for Discord, Voicemod contains lots of sound effects. Use them when you play popular games such as Minecraft, CS: GO, Fortnite, and others.
This software is also compatible with other programs such as Skype or TeamSpeak. Regardless of whether you are a gamer or a streamer, Voicemod will allow you to use and control your favorite sounds.
Feel free to choose from Voicemod’s rich gallery of sounds, effects, and songs. Also, you will always have to make new choices because this gallery is updated every month.
Voicemod’s meme soundboard comes preloaded with tons of existing sounds, songs, and effects, with more added monthly!
You can find Voicemod’s best features below:
Custom sound effects to tons of games and programs including CS:GO, Minecraft, Rust, Fortnite, Valorant, Among Us, Discord, Skype, TeamSpeak
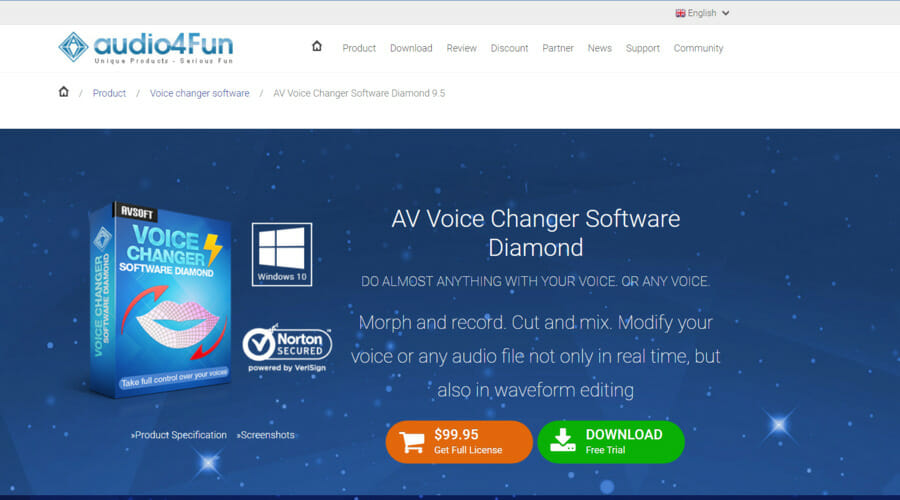
AV Voice Changer is professional software that allows you to modify and then easily access any characteristic of your voice. Based on the advanced virtual driver technology, AV Voice is compatible with the majority of VoIP programs.
You can also use this software for web chat applications or role-playing games. AV Voice Changer Software Diamond allows you to create files with natural voice qualities thanks to its industry-leading algorithms.
More than a tool allowing you to change your voice in real-time, AV Voice Changer creates a complete home audio workstation. Now, you possess all the tools necessary to create great recordings.
With this option, you’ll be able to mix parody voices to create a new parody voice. Voice mimicker will help you to mimic other people’s voices, imitate Hollywood stars and celebrities’ voices, and mix parody voices to create your own unique voices
These are the most important features of AV Voice Changer Software Diamond:
MorphVox Pro offers you a library filled with many free voices and free sound packs. It also allows you to add background sound when you talk. Use its ultra-quiet background cancellation feature to experiment with great voice-changing algorithms.
The MorphVox Pro is a software tool fully optimized for online games, offering you extra fun in your gaming experience.
Now you can use the voice of your favorite game character regardless of whether it is a giant, dwarf, or anything else.
This professional software contains digital and smart modes to offer you state-of-the-art noise reduction. MorphVox has a clever feature you can use anytime for voice, composed of analysis, comparison, and tuning.
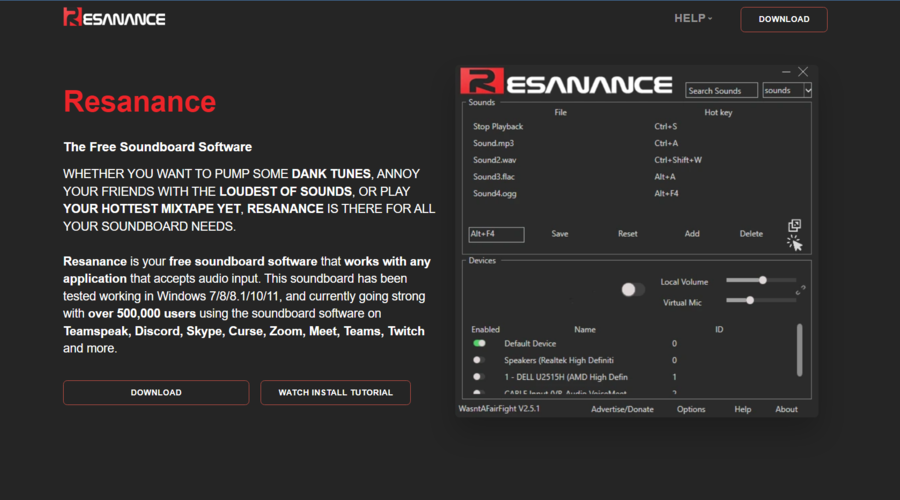
No matter if you seek amusing sound effects or the loudest sound, Resanance is very useful to use with Discord.
As this was the first platform this software was available for, you will also benefit from impeccable compatibility.
Resanance is a free soundboard for Discord, that allows a fast set-up and is also user-friendly. Users are free to set up hotkeys however they want and play simultaneously on multiple devices.
Resanance is also a game-friendly tool, as it works with all games. Its producers always perform updates according to their users’ suggestions.
Check out the most important attributes of Resanance:
As many sounds and hotkeys as you want
Can be played to multiple devices simultaniously
TTS Text to Speech soundboard
Control volume of sounds local and mic individually
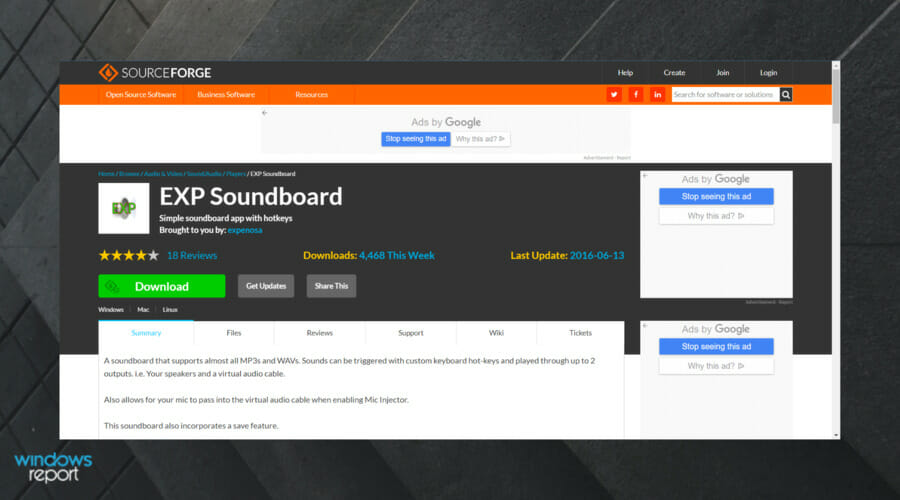
EXP Soundboard supports MP3 and WAV formats, and you can play sounds with custom-created keys. They will be rendered through two outputs: a virtual audio cable and your speakers.
With this soundboard for Discord, you can allow soundboards to be saved whenever you desire.
Also, this software includes a converter tool that allows you to change an audio file and convert it into a compatible one with your needs.
Also allows for your mic to pass into the virtual audio cable when enabling Mic Injector.
An application created for changing your voice, Clownfish Voice Changer is installed on the system level. This means that every application that uses audio capture devices such as microphones can use it.
In terms of compatibility, you can use Clownfish Voice Changer with Discord and other applications. You can also use it to modify your voice on Steam, Hangouts, Skype, Viber, Mumble, and others.
This application offers you an advanced music player with an enhanced playlist and audio controls supporting various media formats. Try out this app’s sound player with built-in management and sounds.
Also, do not forget that it is compatible with multiple operating systems: Windows Vista / 7 / 8 / 8.1 / 10 / 11.
Let’s take a look at Clownfish Voice Changer’s best features:
Works with Windows Vista / 7 / 8 / 8.1 / 10 / 11
A lot of voice effects: alien, clone, fast mutation, female pitch, etc.
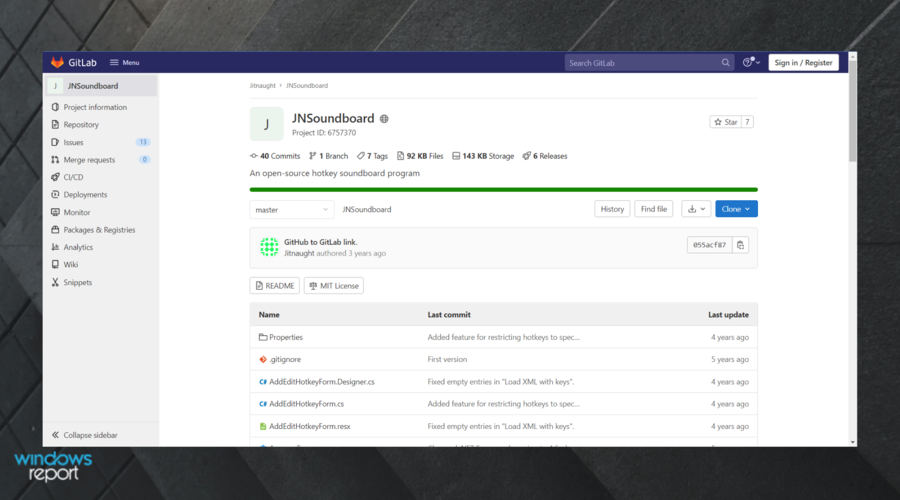
JN Soundboard is a useful soundboard for Discord that allows you to play sound files into a device of your choosing. Use it to play the following audio formats: MP3, WMA, WAV, AC3, and MP4A.
Use any sound device with this software and use its microphone loopback feature. As a user, you are free to use its keyboard versatility and add, remove, edit or clear any key combinations you desire.
Moreso, if you connect with a virtual audio cable, you can also utilize the text-to-speech feature. Connect any device to your computer and play audio just as you wish.
An interesting soundboard for Discord, Jingle Palette is an excellent tool for broadcast studios as well. Use this software for a good variety of formats or streams such as MP3, MPA, MP2, OGG, MP1, or WAV.
Play your favorite jingles from Jingle Palette’s rich gallery and organize them in the palette format with 30 jingles each.
Create awesome sounds for Discord using this software’s functions such as Touch Play, Automixing, and Autorepeating.
These are the most important features of Jingle Palette:
The soundboard for Discord is a useful tool that will definitely improve your user experience. This will also prove great if you are a gaming fan.
Soundpad, Voxal Voice Changer, AV Voice Changer, and MorphVox Pro are the tools that impressed us the most with their quality. The others are also among the best ones.
What soundboard do YouTubers use?
It shouldn’t come as a surprise, but the soundboard your favorite YouTuber uses is most likely in the list above. Why is that?
Because we picked the best for you, it’s only natural that other people, such as Twitch and YouTube streamers would choose the same quality products.
Wouldn’t be awesome if your favorite soundboard software would be the same one your favorite Internet person uses as well?
Depending on the streamer in question, you might see them modifying their sound with Voicemod or MorphVox. It really comes down to personal choice.
In order to improve your Discord experience, we recommend taking a look at the best Discord bots.
Thus, whether you are looking for the best soundboard for PC, the best soundboards for gaming, all the free soundboards for discord, or other virtual soundboards, you are in the right place.
If by any chance, you were thinking that you can use all the effects of a soundboard for Discord with no download, you were wrong, because the software is a must.
Read our previous section to discover which tool would be the best for your preferences and leave us a comment in our dedicated section. We are eager to know what product attracted you the most and why.
You wonder what browser comes out on top in a Vivaldi vs. Opera comparison. Well, here is all you should know.
Since the success of Google Chrome, many developers have switched to using the popular Chromium browser project.
This open-source browser project now powers some of the most popular desktop browsers, including Chrome and Edge. Opera and Vivaldi are the latest additions to this battle and promise to be more than just tools for browsing the web.
Opera is not a new name on the web. However, the more recent version based on Chromium is gaining traction among desktop users. Vivaldi, although six years old now, is relatively new. But, due to its unique features, it can compete with the Opera browser.
Both browsers try to offer more features, a highly customizable UI, and optimized system resource usage. Even though not as popular as their counterparts from Microsoft and Google, the new features are enticing, specifically for power users who do most of their work from the web browser.
Both browsers are frequently on our best browsers for Windows lists, so it’s not unusual to compare the two.
If you are considering switching to one of these browsers, this article should help. In this article, we have compared the two feature-rich browsers in terms of design, performance,
Which browser has a built-in VPN?
There are so many modern browsers, and many of them incorporate VPNs as part of their security and privacy. This feature is usually disabled by default in many of these browsers.
However, if you are looking for a browser with a built-in VPN, here are some you must consider:
Opera and Vivaldi are powered by the Blink rendering engine, which means you are most likely to find some similar bits, if not identical. The design language is one of those bits.
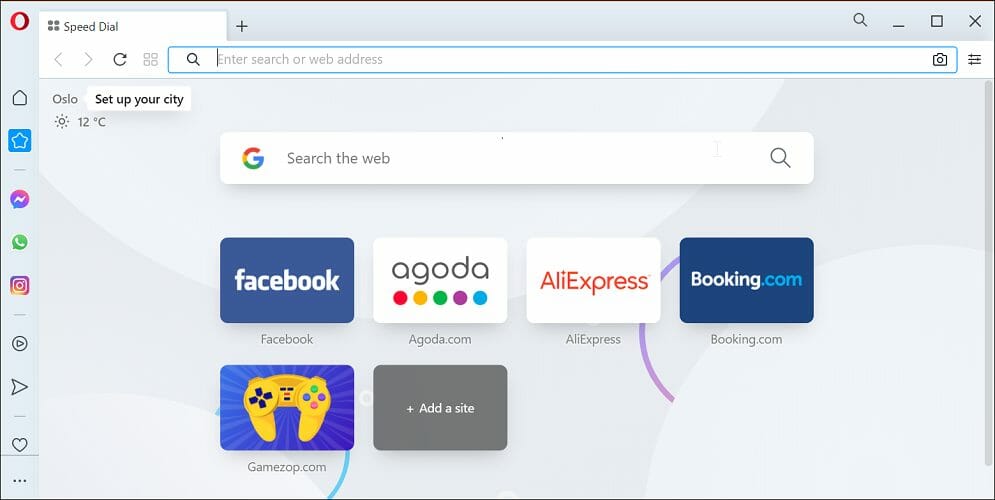
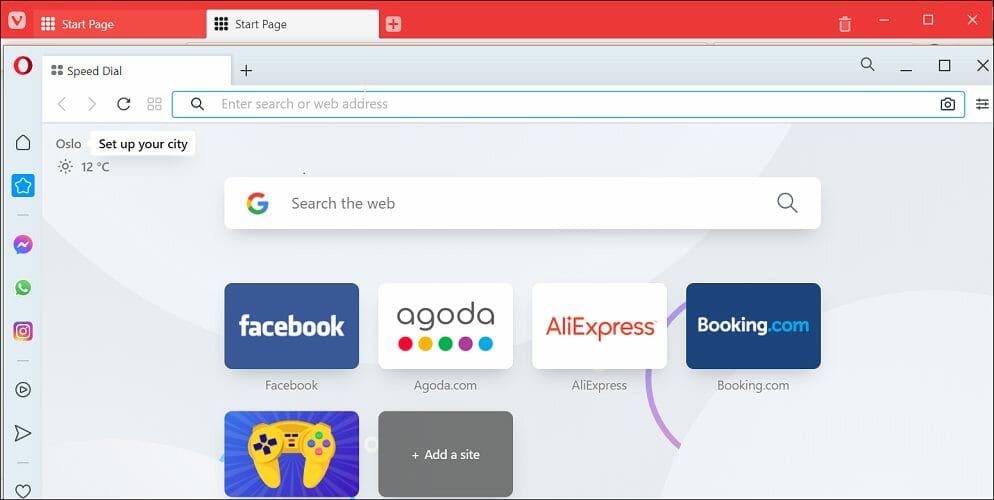
Opera, by default, uses a light theme that you can change from the personalization settings. On the other hand, Vivaldi has multiple themes on offer and uses a red theme right of the box.
You can download more themes for your favorite browser from the store. However, Vivaldi takes the personalization aspect of the browser a notch higher.
You can select one of the nine predefined themes in the Vivaldi themes tab.
Once you choose the theme, you can customize the background with wallpapers, change the image position, make a color adjustment, enable Razer Chroma and Philips Hue Integration, and even schedule themes to change automatically after a specified time.
Both browsers’ URLs and search bar are in the top left corner. Right-click on the tabs, and you will see the tab menu with more options than on other browsers.
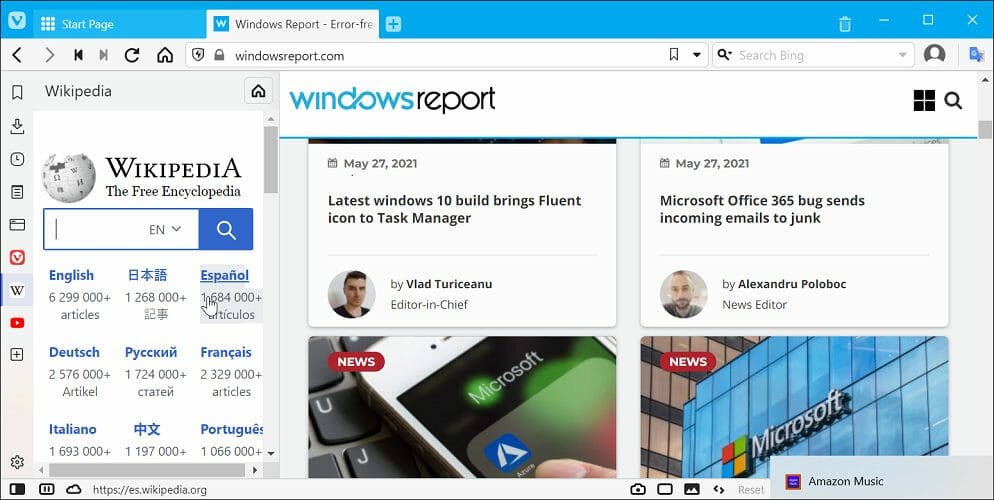
On Vivaldi, hovering over the open tabs will show a small preview window, making it easier to identify the correct tab when juggling multiple tabs.
If you have used Opera or Vivaldi before switching to another browser, you will notice a few differences in the layout, icons, and overall design. Another difference is the default search engine these browsers use.
While Opera has stuck with Google, Vivaldi uses Bing as the default search. Fortunately, you can change the search engine as per your preference in the search settings.
Opera vs Vivaldi performance overview
Since the same rendering engine underpins both browsers, you can expect them to perform similarly. Whether browsing the web page or streaming video, essential functions work smoothly on both browsers.
To compare the browser in-depth, we ran the browsers through some benchmarking websites to check their compatibility, speed, and performance.
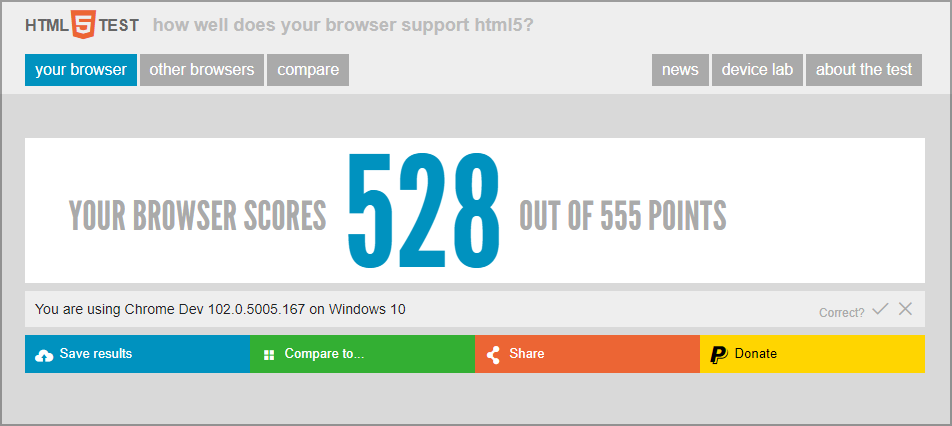
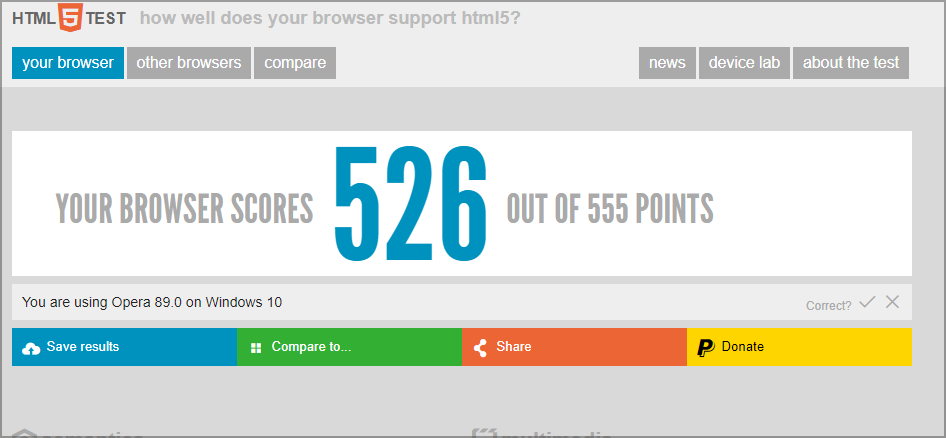
For our first test, we used the popular HTML5Test benchmarking website. It checks and scores the browser depending on how well the browser supports HTML5 in multiple categories.
Opera scored 526 out of 555, and Vivaldi scored slightly better at 528. The minor increment in Vivaldi’s test is negligible, as both browsers use HTML5 equally well.
For the next test, we used JetStream2, a popular JavaScript and WebAssembly benchmark suite that scores the browser depending on how fast it starts up, executes code, and runs smoothly. Here Opera browser narrowly beat Vivaldi after a rigorous test.
Similar patterns were seen with the Kraken benchmark, where Opera beat Vivaldi narrowly. However, in today’s use, you are unlikely to notice any difference in both browsers.
As for Opera vs Vivaldi RAM usage, while testing browsers on a single page, we determined that Opera used 330MB while Vivaldi used 200MB. This isn’t a major difference, and you probably won’t notice it on any modern PC.
What also helps is that Opera and Vivaldi come with a built-in ad blocker, which removes the need to add a third-party adblocker extension. We will cover more on this in the features section below.
Features
If you have only used Chrome and Edge recently, you will be surprised to see how Opera and Vivaldi have consciously decided to focus on better browser features.
These browsers are not just web browsing tools as they have consistently pushed to include more and more productivity features into their browser.
Ad Blocker
Both browsers have some identical features, such as the adblocker. However, even though you get a built-in ad blocker on both browsers, none have it enabled by default.
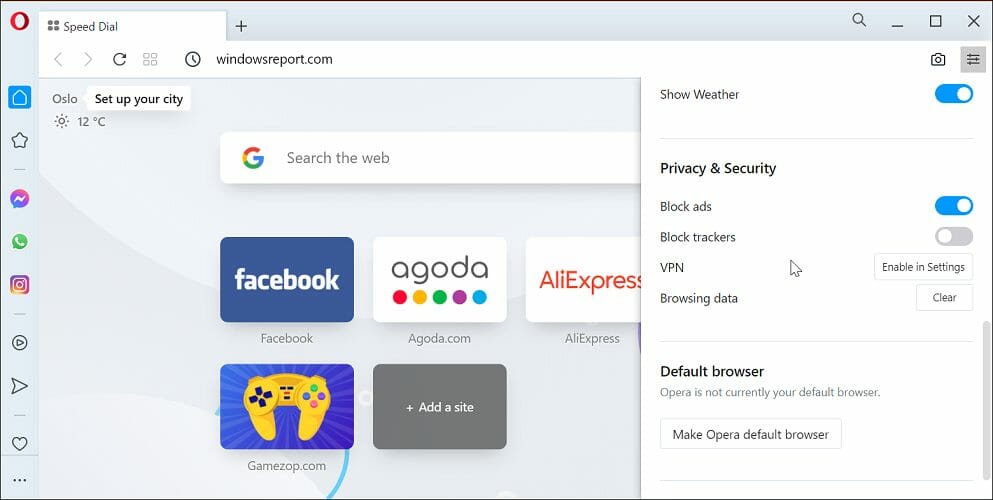
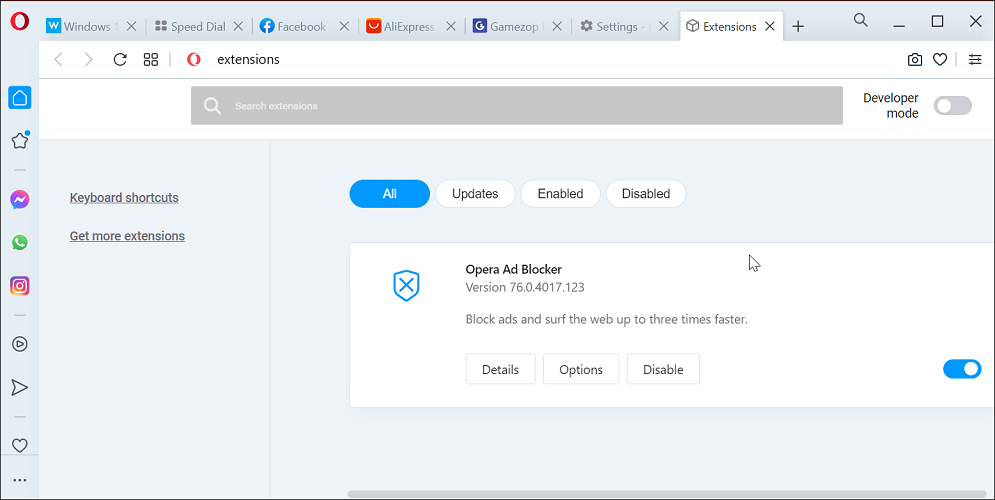
In Opera and Vivaldi, click the Shield icon to enable or disable the ad blocker for a current open webpage. To enable it for all the web pages on Opera, click the Easy Setup icon on the top right corner and enable an ad blocker under the Privacy and Security section.
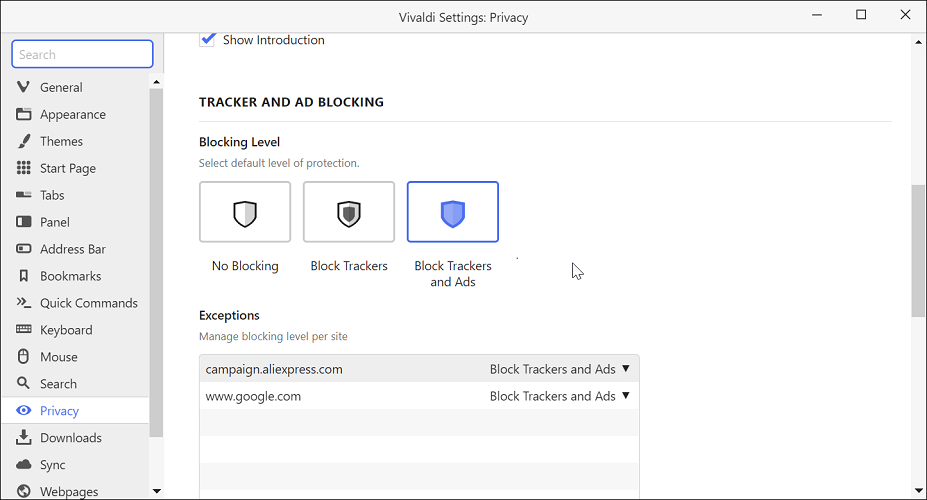
You need to go a little deeper to access these settings on Vivaldi. To enable the ad blocker, open Settings, go to Privacy, and choose Block Tracker and Ads option. You can block only the tracker and let the ads run.
Power users can also create an exception list to manage blocking levels per site in Vivaldi and Opera.
Sync
Switching from Chrome, Firefox, or Edge browser to Opera or Vivaldi is easy. To get started, you can import and sync all the data, including your password, URLs, bookmarks, history, and more.
Tab Management
Opera has the traditional tab manager where all the open tabs are stacked on the browser; however, Vivaldi has tab customization options like no other.
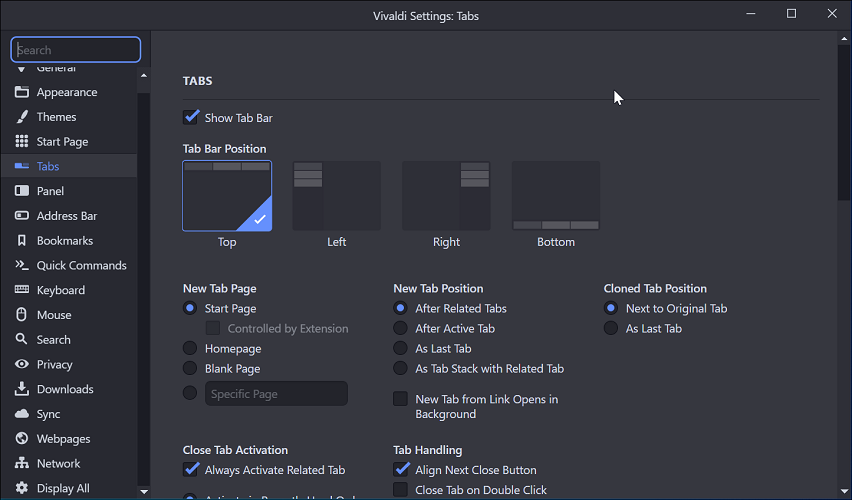
To start with, you can change the tab bar position by stacking the tabs on the left or right sidebar or at the bottom. You can also change the active tab minimum width, enable or disable popup thumbnails, detect page title notifications, customize the page load progress bar, and change new tab positions.
There is an option to change tab stacking to enable Two-Level stacking that allows tab grouping. This is a great way to organize the tabs on devices with smaller displays. In addition, clicking on the Trash icon on the toolbar will show you recently closed tabs that you can restore.
Then there is the Tile tabs option to view all your tabs on a split-screen. Excellent for research work as you don’t have to juggle between two tabs consistently to gather the information.
Vivaldi’s other tab management features include the option to search your open tabs, save tabs for later, hibernate tabs to reduce the load on your system resources, and more.
VPN and ad blocker
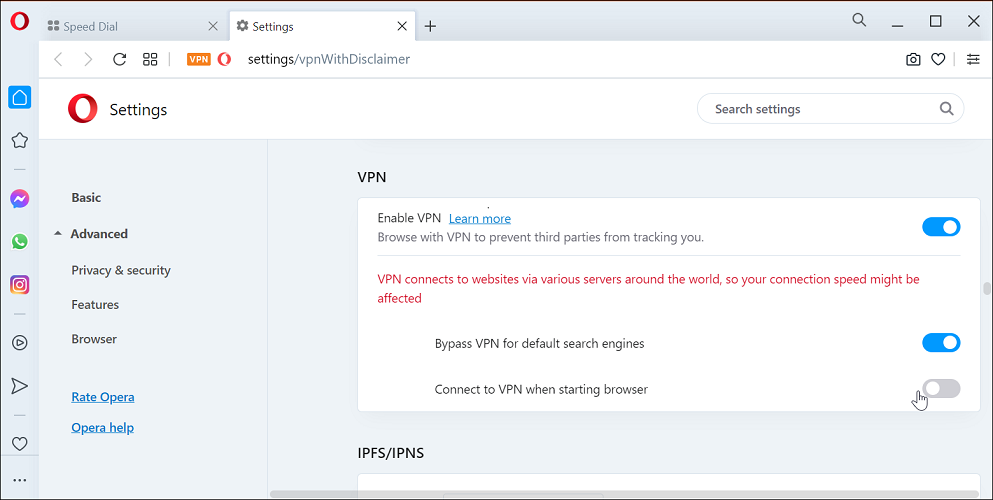
Opera has some features that Vivaldi doesn’t offer. One of them is the built-in VPN. It allows you to browse the web anonymously without being tracked by your internet service provider and unblock region-restricted websites.
Opera also offers a premium VPN that allows you to connect to over 3000 different servers in 30 countries around the world.
Ad blocker is available on both browsers. Although not enabled by default, you can easily enable it from the settings.
Additional features
You will find the ability to customize the basic keyboard shortcuts and the trackpad gesture on both browsers helpful. In addition, you create new hotkeys as per your preference to add speed dial, navigate, create bookmarks, clear history, and more.
Vivaldi has a dedicated tab to customize mouse gestures and keyboard shortcuts; You can reconfigure the gestures, adjust sensitivity, and enable rocker gestures.
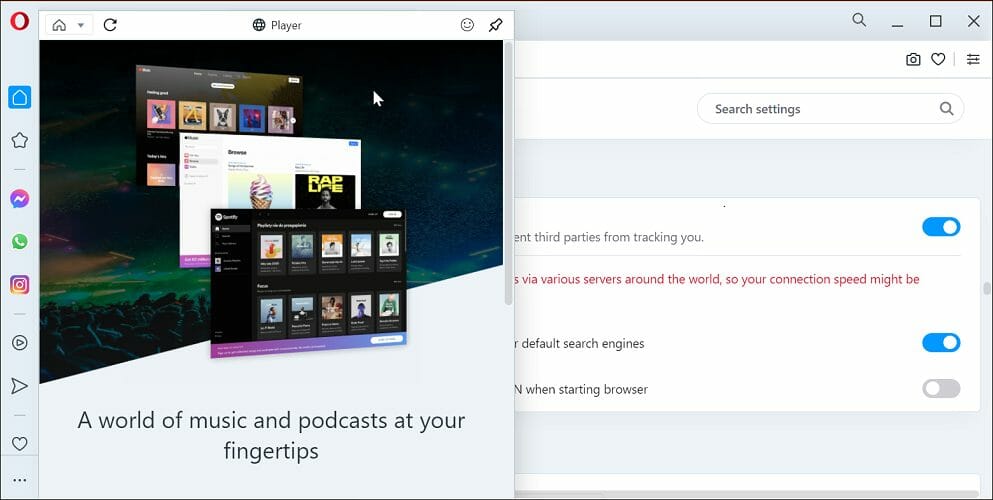
When you open Opera, you will notice a few apps stacked on the sidebar. It consists of integrated social media, streaming, and entertainment apps.
You can log in to Twitch, Reddit, Discord, stream audio from YouTube Music, Apple Music, and even chat on Facebook Messenger and WhatsApp directly from the web browser.
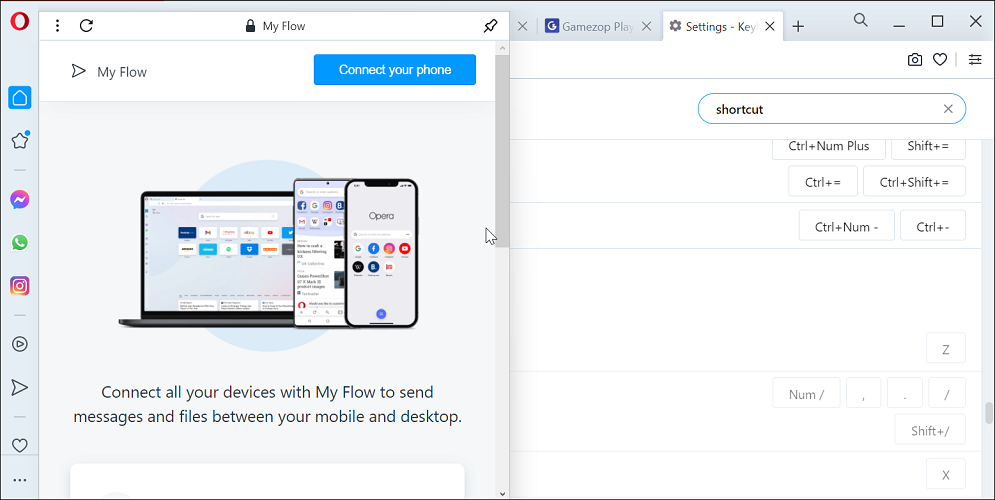
My Flow is another Opera exclusive that you can access from the side panel. It allows you to connect all your devices with My Flow to send messages and files between your mobile and desktop.
Of course, you must have the Opera browser installed on your Android or iOS smartphone to use the service. It’s a convenient feature for those who frequently switch between their smartphone and PCs.
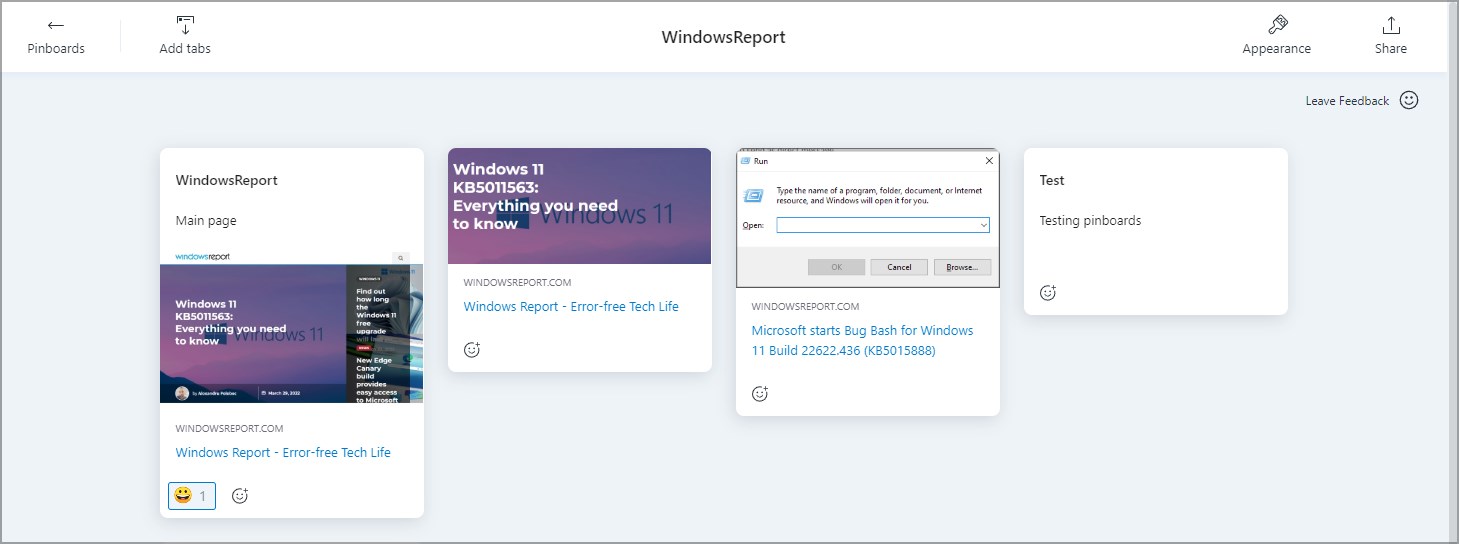
Opera also has Pinboards feature that allows you to save websites, notes, and screenshots for quick and easy access.
There are plenty of additional features Vivaldi offers that you will not find on Opera. Most of them are customization features that can improve your productivity.
The Quick Commands feature on Vivaldi allows you to execute commands with the F2 shortcut key. You can open calculators, bookmarks, notes, browsing history, extensions, and page actions.
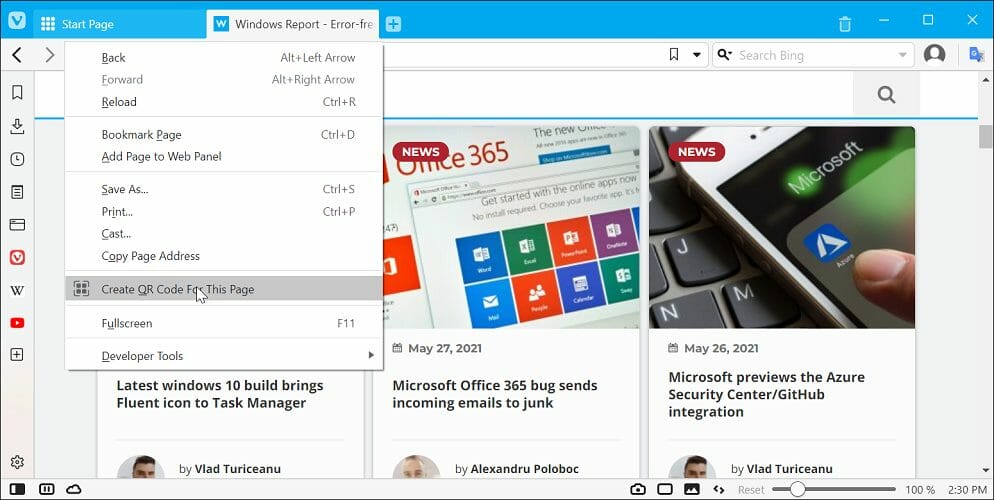
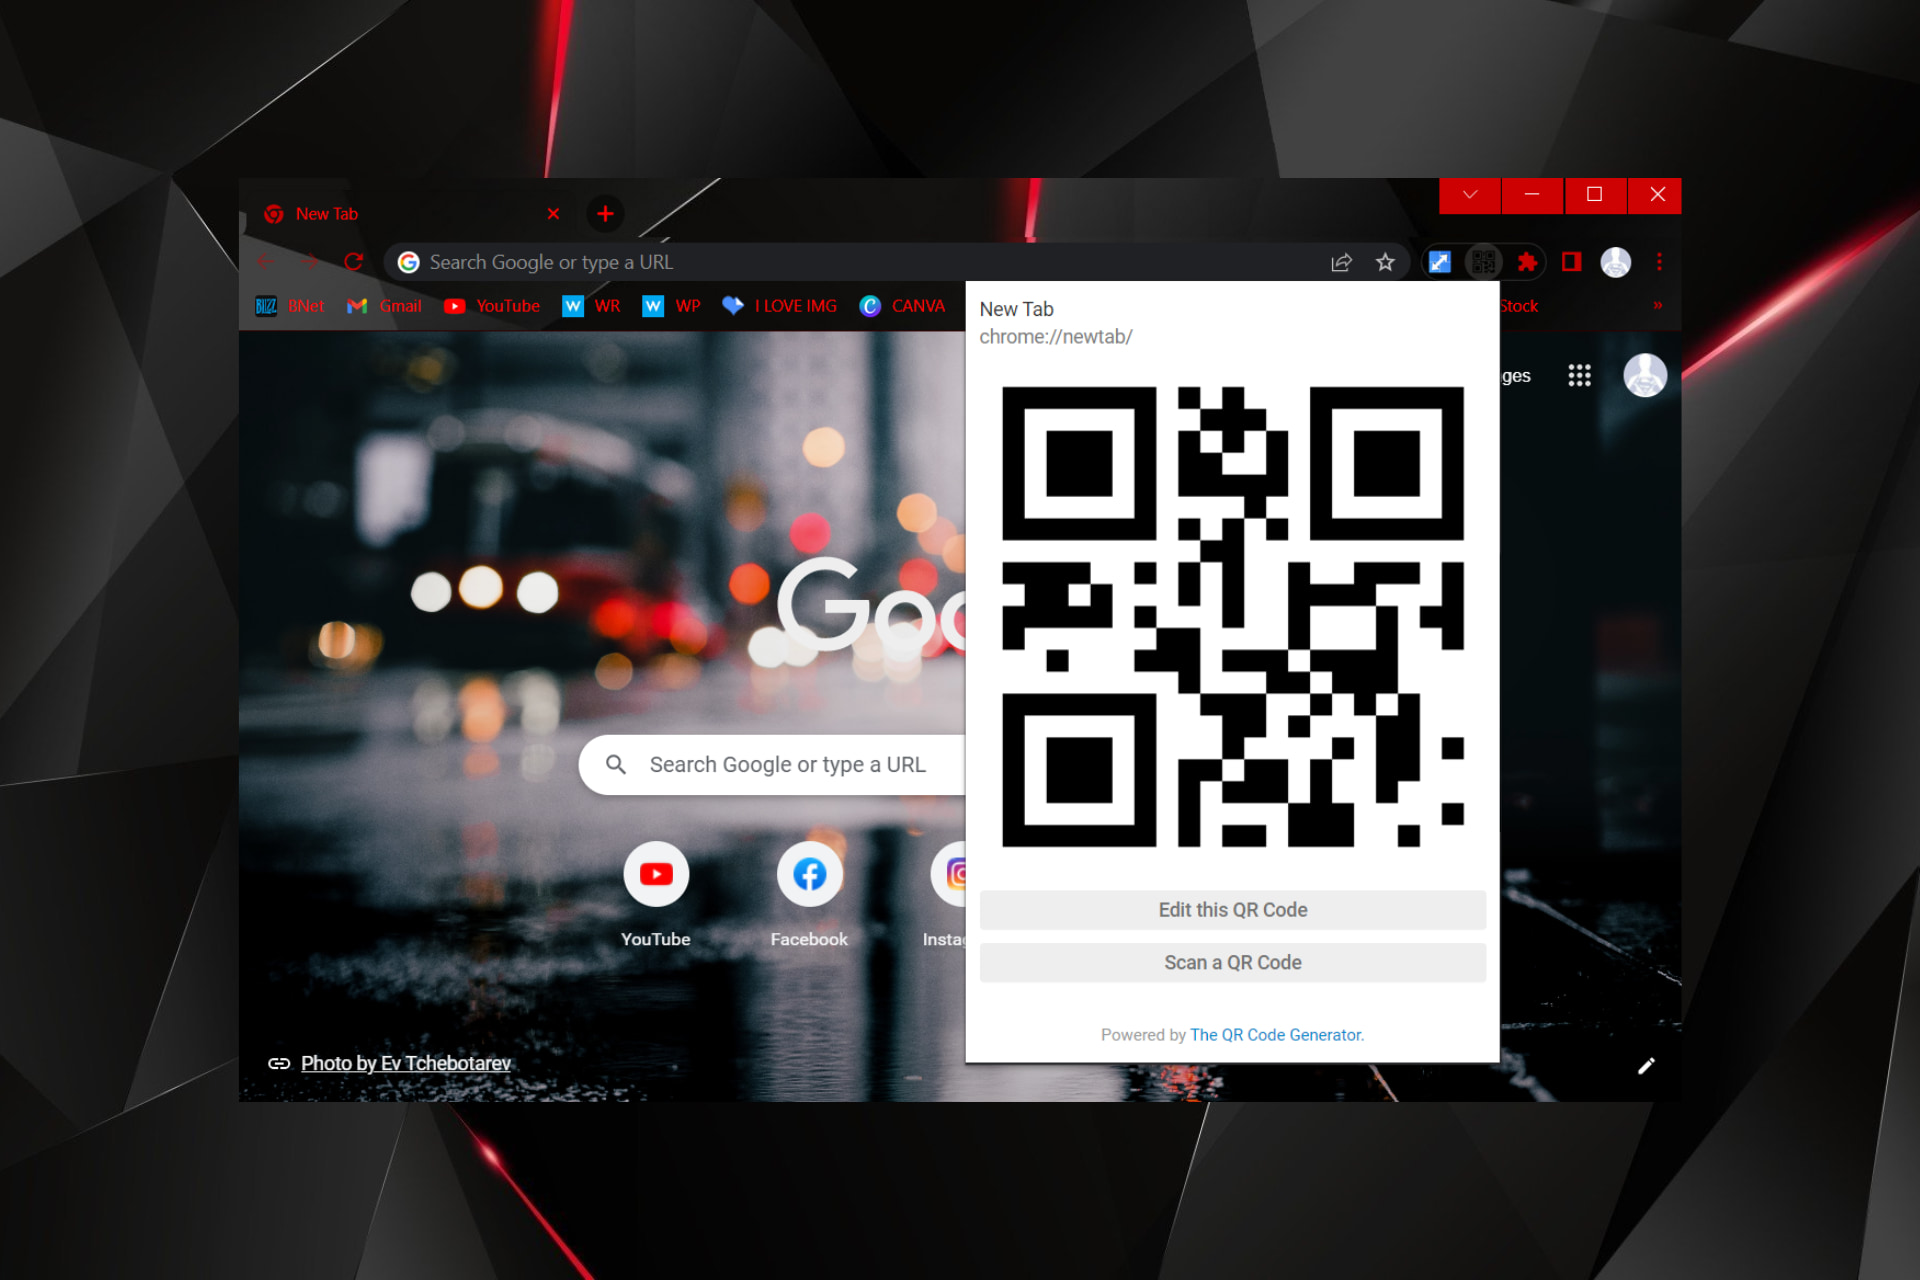
Another exciting feature of the Vivaldi browser is the ability to create a QR code for any web page. If you don’t want to spam people with links, create and download the QR code and send it to your contacts.
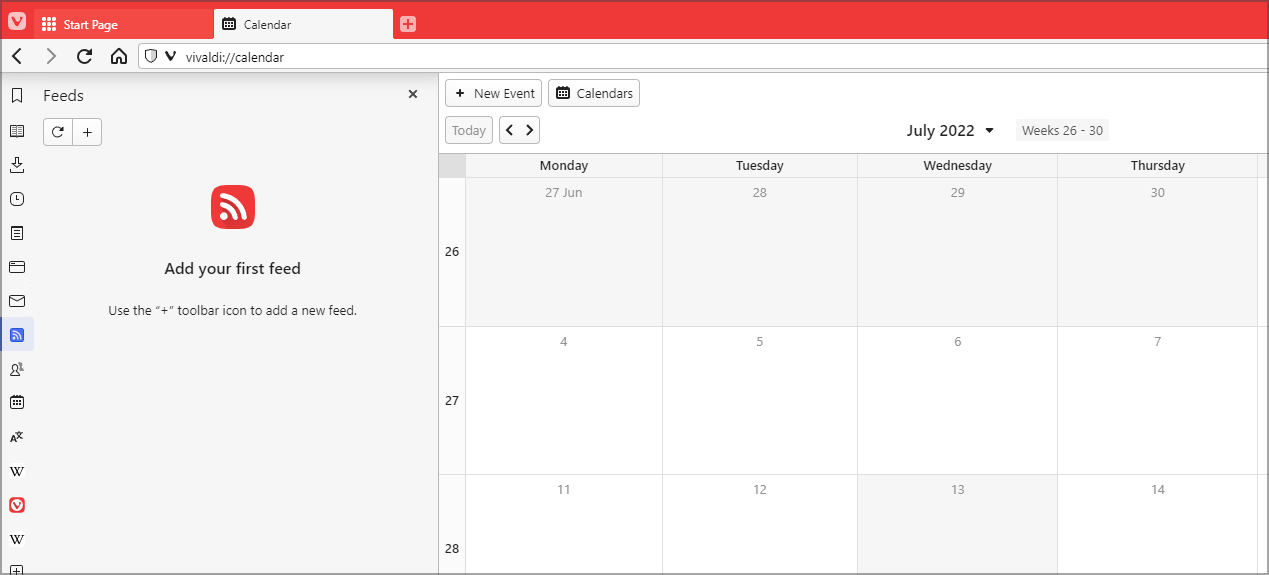
Vivaldi also has a couple of hidden features, including a built-in mail client, RSS reader and calendar. These features are disabled by default, but you can enable them from settings.
Cross Platform and Extension Support
Regardless of your browser, you can find them on all the major platforms. Vivaldi supports Windows, OSX, Linux, iOS, and Android platforms. Opera supports all these platforms and offers a version for feature phones.
Extension support and availability are other strengths of these browsers. Chrome Web Store was among the major reasons behind the success of Google’s browser. Chromium browsers like Opera and Vivaldi have access to almost all the Chrome Store extensions.
You can go to the Chrome Web Store on Vivaldi, search for an extension, and install it without any issues. However, Opera requires you to install a support extension to install and use Chrome Store extensions. Opera also has its extension store if you want more.
Opera vs Vivaldi privacy comparison
Privacy and security are one of the most important aspects of modern browsers. Opera may have an advantage over Vivaldi regarding privacy. These are among the only major browsers with a built-in ad blocker.
However, Opera also includes a built-in VPN client that you can use to browse the web without compromising sensitive information.
If having a VPN client is a prerequisite in a browser, Opera is a better choice. Besides the shiny features under the hood, most privacy settings remain the same. You can control the site settings and change tracker settings, but only Vivaldi offers three levels of tracking protection.
While we have made a detailed comparison between Opera and Vivaldi, it is nice to throw Chrome into the mix and see how they stack up, especially since Chrome is the most used browser.
To start with, Chrome beats these two browsers in expandability. If you have a feature you wish to include in your browser, Chrome probably already has a plugin for this.
However, Vivaldi and Opera stack pretty well in every other aspect. Also, since Vivaldi is built on the same engine as Chrome, it can use extensions from the Chrome store.
Google owns Chrome, and they have been notorious for data leaks, which also tilts the scale in favor of Opera and Vivaldi.
But of all, the most significant factor is resource use.
Chrome also lags on a Chrome vs. Vivaldi vs. Opera RAM comparison. So if you are looking for a lightweight browser to work on virtually every machine, you will want to stay clear of Chrome and instead work with Opera or Vivaldi.
In an Opera vs. Vivaldi battle, it is a matter of preference!
Opera and Vivaldi are excellent browsers and go neck to neck in performance, stability, security, and privacy options. While Opera offers a built-in VPN and integration with popular streaming, social media, and entertainment apps, Vivaldi is yet to consider these options.
However, Vivaldi is no slouch either, as it offers its unique side panel where you can add your favorite streaming services and any other website as a web app. Vivaldi’s most significant advantage is its extensive set of features unseen on any other browser.
Is Vivaldi browser better than Opera?
In terms of customization, Vivaldi is the most advanced browser that we used, so in that regard, it’s better than Opera. However, in terms of functionality, there are quite similar.
We would say that Opera offers more features that regular users might like, which makes it a better choice for the majority of users.
So which browser should you choose? Having many features doesn’t make the browser the better choice always.
If you want a browser with social media and streaming app integration, VPN, and a built-in ad blocker, Opera is a better choice. Take both the browsers for a spin to better understand which browser meets your requirement best.
This concludes this guide and the comparison between these two great browsers. If you liked this review, you should check out our Vivaldi vs. Opera GX vs. Brave review as well.
What is your browser of choice? Let us know in the comments section below.
We use web browsers on a daily basis to access the Internet, but sometimes certain issues with web browsers can appear. Users reported an err_connection_reset error on their Windows 10 & 11 PC, and today we’re going to show you how to fix this error.
Google Chrome is the only browser that will generate an error with the err_connection_reset code. On the other hand, you can get notifications that are quite similar in different browsers. For instance, Firefox will give you an error number that says The connection was reset.
Why am I getting Err_connection_reset?
THe err_connection_reset in Windows 10 or 11 happens whenever a user visits a website in a web browser that is unable to successfully establish a connection.
The connection is said to be reset when this occurs, which indicates that the server is unable to send data to your browser.
Thus, the majority of the time, this error indicates that there is a problem with your Internet connection, such as a problem with your browser cache or a firewall or antivirus program that is preventing the connection from being made to the distant server.
Note that the list of solutions below will address similar issues reported by our users. Some of them are the following:
Err_connection_reset in YouTube – The majority of the time, this is caused by an error in the setup of your internet settings or by something else that is preventing the connection from being made.
Err_connection_reset in Apache – The Apache HTTP Server software is a free and open-source web server that works across several platforms.
Err_connection_reset in WAMP – ERR CONNECTION RESET Error with WAMP. It is possible that the driver is the source of the problem if you are attempting to communicate with MySQL.
Err_connection_reset in IIS – Microsoft developed Internet Information Services, an extendable web server software, specifically for use with the Windows NT family of operating systems.
Err_connection_reset in Chrome in Windows 10 – Deleting your browser cache inside Chrome is one of the most effective solutions to this issue.
Err_connection_reset in Microsoft Edge – Yes, Edge can also meet err_connection_reset errors, fortunately, the solutions are similar in every browser.
Err_connection_reset in all browsersin Windows 10 – If all your browsers meet the same error message, then it is certain your browser is not at fault, but your computer or Internet connection.
Error_connection_reset (-101) – Rebooting the network equipment that links you to the internet is typically all that is required to rectify connection issues such as the 101 error.
Without further a do, let’s jump into the list of methods in which you can tackle this problem and fix it once and for all. Follow along!
Quick Tip:
Try browsing with Opera One, not just for the sake of a change, but also to benefit from a faster, lighter, and more reliable browser.
Opera One is free to install and use, and it comes with multiple exclusive features including an ad blocker, built-in messenger apps, customizable speed dials, customizable separate workspaces, and visual bookmarks.
Opera One
Remove errors by using an up-to-date browser packed with performance-oriented features!
How do you fix Err_connection_reset in Windows 10 & 11?
1. Disable your antivirus and firewall
Antivirus and firewall tools are extremely useful if you want to protect your PC from malicious users and malicious software. But sometimes, these applications can interfere with your web browser and cause err connection reset errors to appear.
One way to fix this problem is to temporarily disable your antivirus software or firewall and check if that solves the problem.
However, we’d rather recommend using an antivirus that has little to no impact on your PC while keeping you 100% protected.
Users reported that AppEx Networks Accelerator feature causes err_connection_reset error for AMD users, and according to them, you can fix this problem simply by disabling this feature.
To do that, open Network Connections window, right-click your network connection, and open its properties.
Look for AppEx Networks Accelerator option and disable it. If you can’t find this option, be sure to check the advanced options of your network adapter in order to disable this feature.
4. Use the netsh command
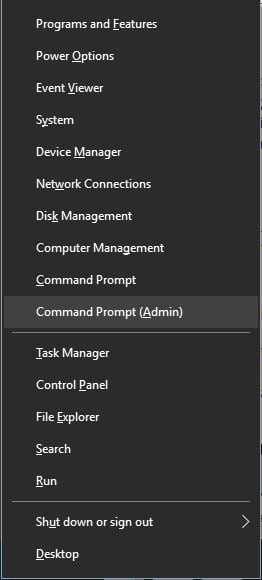
Open Command Prompt as administrator by pressing Windows + X and selecting Command Prompt (Admin).
Type the following command and press Enter: netsh winsock reset
After the command is successfully executed, close Command Prompt and restart your PC.
After your computer restarts, check if the problem is resolved.
In addition to netsh winsock reset command, some users are also suggesting running the following commands:
netsh interface ipv4 reset
netsh interface ipv6 reset
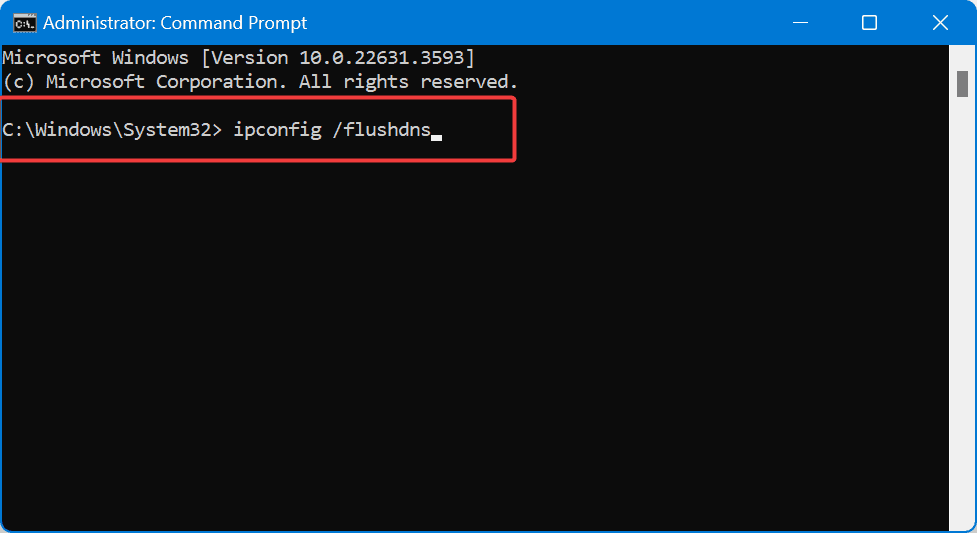
ipconfig /flushdns
5. Disable proxy
Type Internet Options in the Windows search bar and select the top result.
Go to the Connections tab and click LAN settings button.
In the Proxy section disable Use a proxy server for your LAN option. You can also disable the Automatically detect settings option. Click OK to save the changes made.
You can also disable proxy by using the Settings app. To do that, follow these steps:
Press Windows key + I to open the Settings app then go to the Network and Internet section and select the Proxy tab.
Disable the Automatically detect settings and Use a proxy server options.
After your proxy is disabled, err_connection_reset error should be completely resolved.
Keep in mind that using a proxy is useful if you want to protect your online privacy, but sometimes it can interfere with your web browser and cause the issue to appear.
6. Clear browsing cache
Open Chrome and use the following keyboard shortcut to access the Clear browsing data menu:Shift + Ctrl + Delete and select All time as the time range.
Checkmark the Cached images and files option, then click the Clear browsing data button and wait for your browser to remove the cache.
After the process is completed, restart your browser and check if the problem is resolved.
We showed you how to clear the browsing cache in Google Chrome, but the procedure should be quite similar in every other web browser.
Click the Menu button in your browser and choose Settings.
Locate Use a prediction service to load pages more quickly in the Privacy section and disable it.
After disabling this feature, restart your browser and check if the problem is resolved.
8. Restart your router and your PC
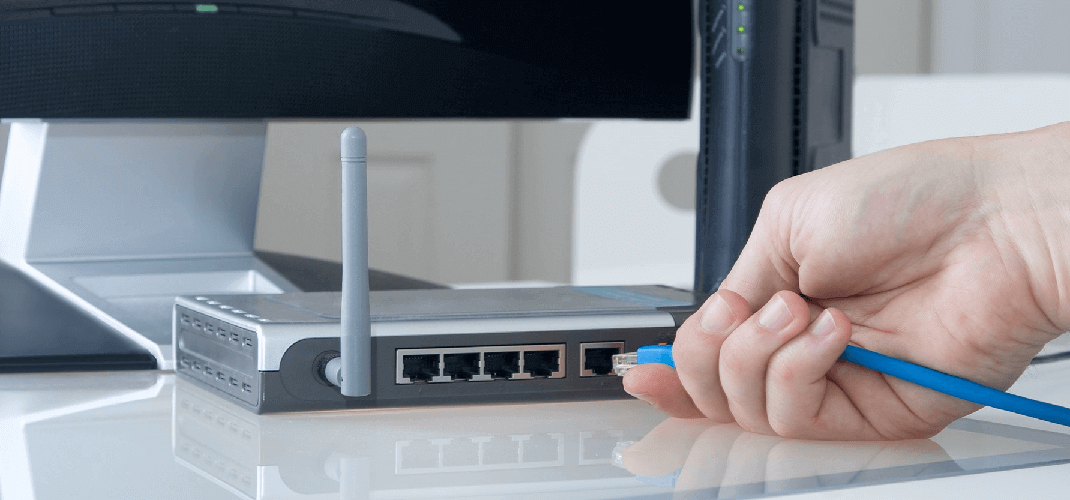
In some situations, this error can be caused by your router, and one of the fastest ways to fix this problem is to restart your router. To do that, simply press the power button on your router to turn it off.
Wait for a few seconds and press the power button once again to power on your router. After your router restarts, check if the problem is resolved. If the problem still persists, restart your PC and check if the error is fixed.
This is a simple solution, but it can help you fix The connection to the server was reset error.
9. Check your permissions
Open File Explore and go to the C drive then search for the Temp folder by typing its name inside the search bar then right-click it and choose Properties.
Go to the Security tab and click the Edit button.
Now click the Add button.
In the Enter the object names to select field enter your user name and click Check Names. If your user name is valid, click the OK button.
Your user profile will now be added to the Group or user names section. Select your user profile from the list and check Full control in the Allow column. After that, click Apply and OK to save changes.
After changing your permissions, this error should be completely resolved.
10. Run the network troubleshooter
Open the Network Connections window by typing its name inside the Windows Search function.
Locate your network connection, right-click it and choose Diagnose.
The troubleshooter will now scan your network connection and try to fix the problem.
Users reported that this error was caused by TCP network performance feature, but after running the network troubleshooter The connection was reset should be gone on Windows 10 or 11.
Open Settings and select Advanced settings. Now go to the Network section.
Locate and disable Scan encrypted connections feature.
Only users of Kaspersky Internet Security mentioned this solution. But even if you don’t use Kaspersky, be sure to check if your antivirus software has this feature available and disable it.
This is a simple solution, but it can help if you’re getting an err_connection_reset error in Opera One or in any other browser.
12. Disable TSL 1.1 in Chrome
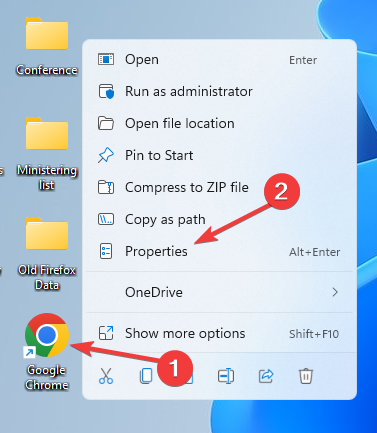
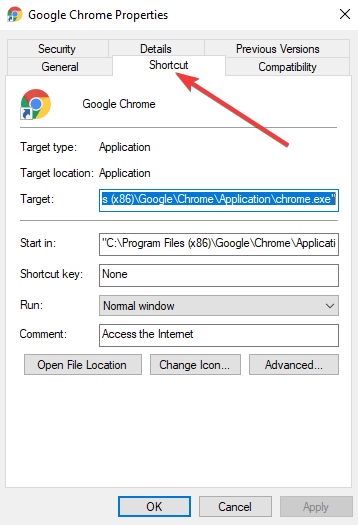
Close Chrome completely then locate the Chrome shortcut on your Desktop, right-click it and choose Properties.
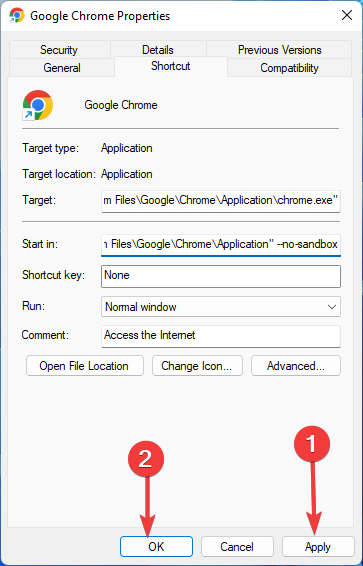
Go to the Shortcut tab and add –ssl-version-max=tls1 in the Target field, right after quotes.
Click Apply and OK to save changes.
Start Chrome again and check if the problem is resolved.
13. Disconnect your Ethernet switch
Sometimes your network equipment such as an Ethernet switch can cause this and many other errors to appear.
To fix this problem, users are suggesting removing your Ethernet switch and checking if that solves the issue.
If your Ethernet switch is the problem, you might want to check if it’s faulty and replace it.
It’s unknown how Java can cause this problem, but if you have Java installed, be sure to update it to the latest version and check if that fixes your problem.
15. Fix Windows Registry
If err_connection reset error appears, or a similar connection error, this might result from a corrupt Windows registry. Therefore, you need to fix your Windows registry.
You can do that by installing one of the many tools designed for this purpose, such as registry cleaners.
After scanning and fixing the registry, check if The connection to the server was reset error is still there.
How do I fix Err_connection_reset on YouTube?
1. Disable your extensions
Click the three dots menu in the top right corner of Chrome.
Select New Incognito Window and see whether the error still occurs. If it does, then the issues lie somewhere in your extensions.
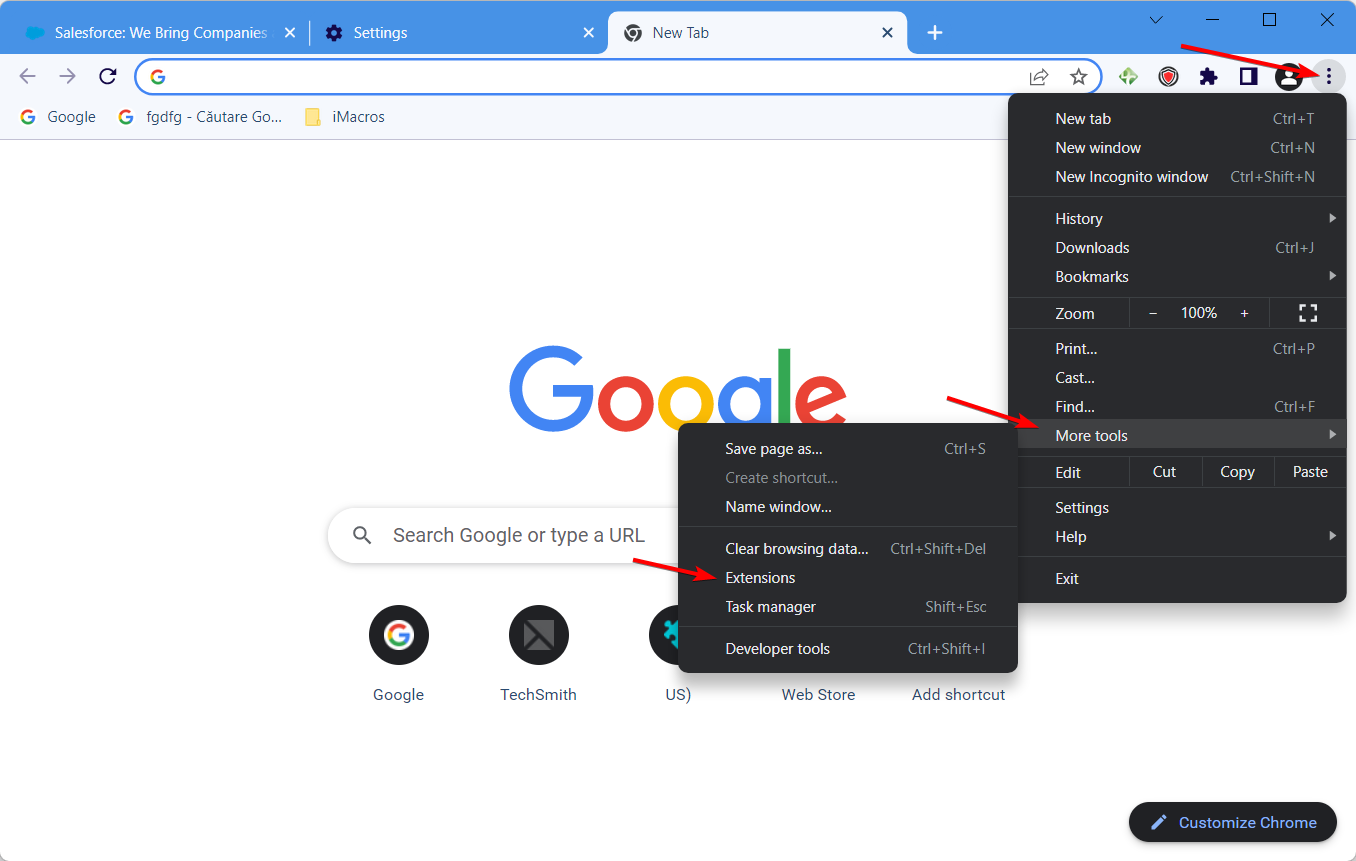
Click again the three-dot menu then go to More tools followed by Extensions.
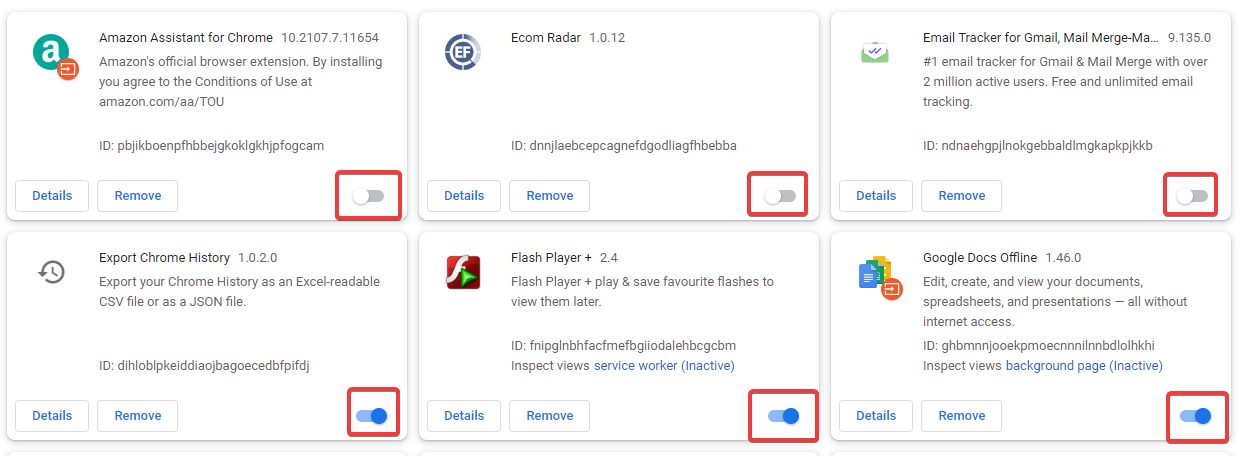
Turn off your extensions one by one by clicking the toggle button next to them and see when the error stops showing.
For this example we used Chrome, but the process is similar no matter the browser you’re using.
If disabling extensions fixes the problem, you should try enabling them one by one until you find the one that is causing this problem.
Users reported that the Google Mail Checker extension was causing the problem for them, but keep in mind that almost any extension can cause this problem to appear.
2. Replace your router
Err_connection_reset error can appear due to your router, especially if it becomes faulty.
Few users reported that they fixed this problem simply by replacing their router, so you might want to consider that.
How do I fix Err_connection_reset on Apache?
1. Change the php.ini configuration file
If you’re a web developer, you probably have Apache installed on your PC. This error can appear while using Apache, but you can easily fix it by changing the php.ini file.
Simply open the php.ini file and change use_only_cookies from 0 to 1. Save changes and check if the problem is resolved. Users are also suggesting setting use_strict_mode to 1 in your php.ini file, so you might want to try that as well.
2. Replace the .dll file
According to users, you can fix this problem simply by replacing C:/bin/libMySQL.dll with C:/PHP/libmysql.dll. After doing that, the problem should be resolved.
How do I fix Err_connection_reset on WAMP?
1. Turn off mod_socket
Users reported that you can easily fix this problem simply by turning off mod_socket in WAMP.
After doing that, your WAMP server should start working without any problems and the error will be resolved.
2. Edit the host’s file
Press the Windows key + S, enter notepad, right-click Notepad from the list of results and choose Run as administrator.
When Notepad opens, choose File then Open.
Navigate to the following folder: C:/Windows/System32/drivers/etc
In the bottom right corner change Text Documents (*.txt) to All files and select hosts file.
When the hosts file opens, locate # 127.0.0.1 localhost line and remove the #.
After you’re done, save changes, and check if the problem is resolved.
How do I fix Err_connection_reset on ISS
Repair ISS Express installation
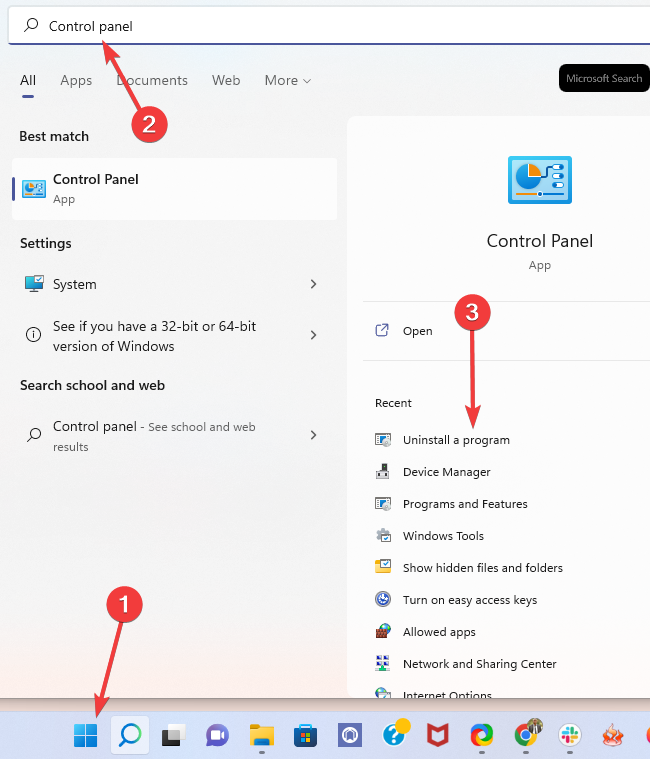
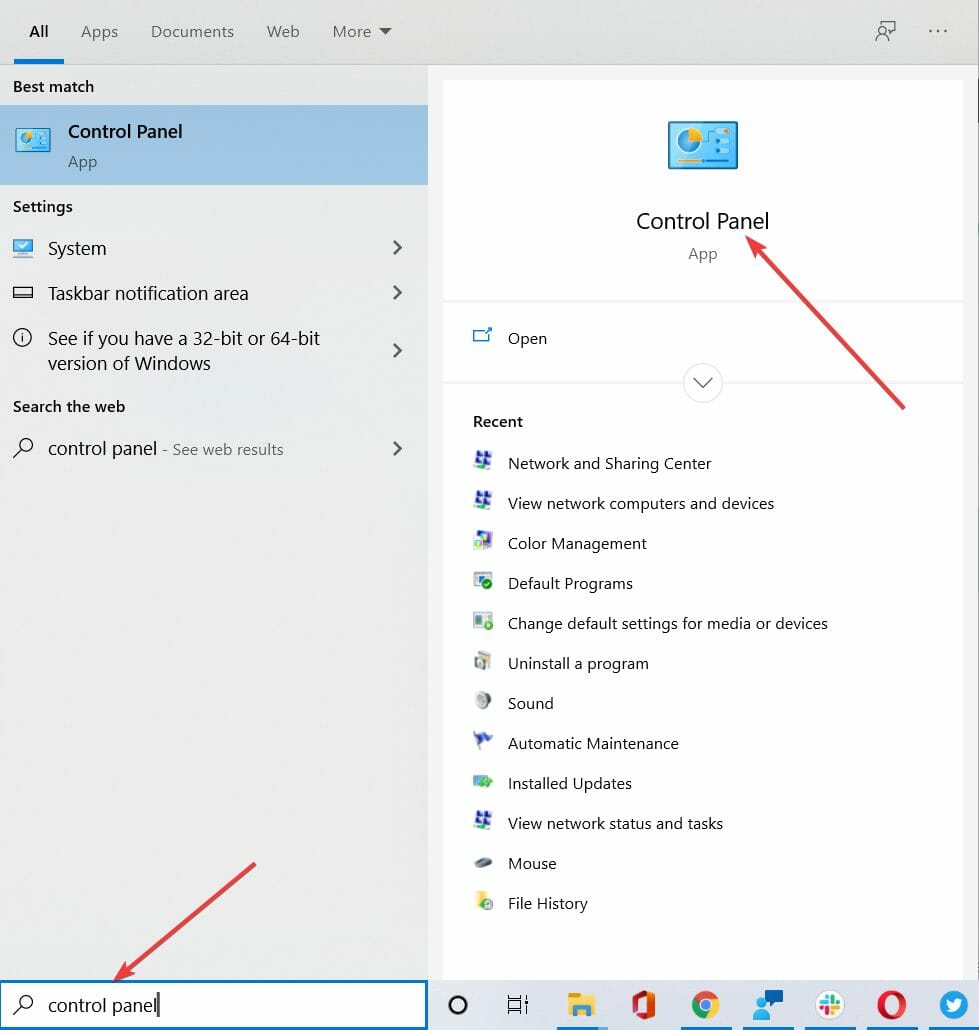
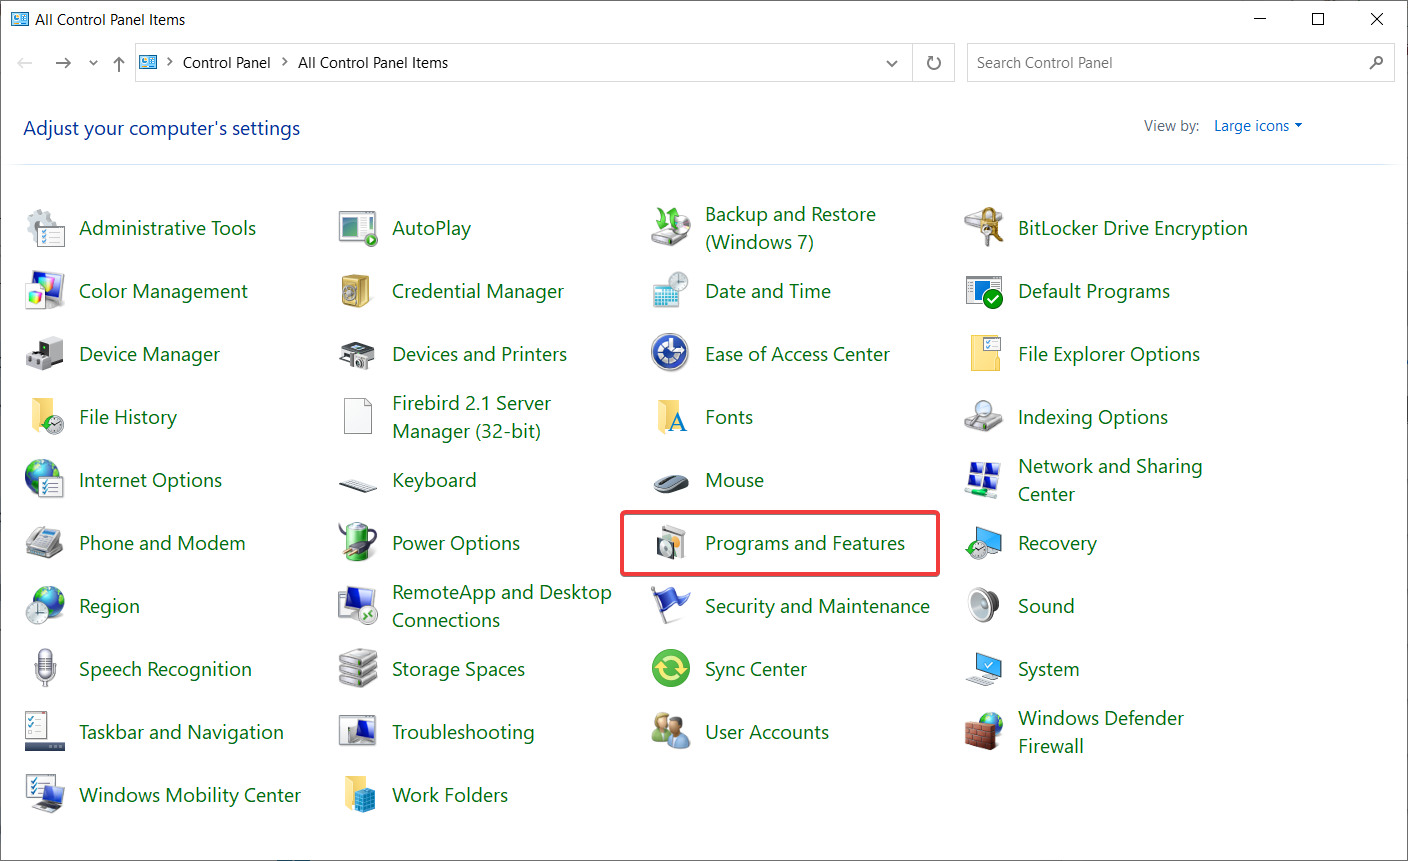
Open Control Panel and click Programs followed by Programs and Features option.
Select ISS Express. Choose the Repair option from the menu.
Follow the instructions to complete the repair process.
After the repair process is completed, this error should be resolved.
As seen, the Err_connection_reset error can interfere with your browsing experience and prevent you from running a local server. Hopefully, you managed to fix this problem by using one of our solutions.
For one reason or another, your computer or mobile phone’s browser(s) may be accessible to many users be it friends, family, and/or co-workers.
In this case, you might want to maintain a close watch on every activity or site visited on your browser by any third-party user.
Basically, all anyone needs to do is to clear/delete browsing history and close the browser, and their tracks would be covered. However, there have been significant upgrades to browser privacy over the years.
This has enabled proprietary users to keep track of the visited sites. So if you want to disable the delete browsing history option on your Chrome browser, you can now do that with no second thoughts.
How do I lock browsing history?
This continuously updated record of a user’s search history might be helpful to certain individuals, serving virtually as a digital archive for future generations. However, Google offers the option to apply additional safeguards to the activity of your account.
Even if you are already signed in to your Google account on the device you are using to access someone’s activity history, users now have the option to make it mandatory for others to provide a password before viewing this information. And requiring a password is a simple addition to make.
How do I set a password to delete Internet history?
Select the Require extra verification and select Save.
That’s it! Now a password will be required every time someone tries to view your activity.
Furthermore, we’ll be walking you through the process of preventing cookies and browser deletion history on Firefox, Chrome, and Edge.
Quick Tip:
If you are having a hard time with your current browser, try Opera One. It offers an impeccable user experience, allowing you to quickly set up the way it stores browsing history.
Not only that, but its add-on store has a dedicated History On/Off extension that will make the job even easier. The Opera One browser offers you a lot of build in features like Ad Blocker, VPN and even a Crypto Wallet.
Opera One
Take control over your browser with simple setup options and enjoy secure and fast web surfing!
1. Lock (Disable) the Clear Browsing History on Exit option
Open your Firefox browser and navigate to the Firefox icon at the top right corner, and then click on Settings.
Navigate to Privacy and Security and scroll down to the History section.
Under the Firefox will: drop-down, select Use custom settings for history option.
Uncheck the Always use private browsing mode box, then check the Remember my browsing and download history box, the Remember search and form history.
Save your privacy preferences by clicking OK at the bottom of your screen.
With the above-highlighted steps, you’ll be able to view every site visited by third-party users. However, users can still clear their browser history before exiting Firefox.
Nevertheless, you can make use of Firefox‘s about:config option to modify certain privacy functions, aimed at discouraging users from clearing browser history. Below is a configurative function for elongating browser history’s expiration period.
2. Use about:config to set a maximum number of pages to retain in history
Navigate to about:config on your Firefox browser by typing it inside the search box.
Search for Integer and select the String type then click the plus icon.
Input the code: places.history.expiration.max pages.
Input your desired number of pages and save changes.
With this, you can set maximum pages in the hundreds. Hence, you are able to retain your browser history for years.
NOTE
However, it should be noted that the about:config option is not limited to the above-outlined function. Basically, you can customize virtually all Firefox options with it.
Lastly, it is important to point out that there is no defined method to prevent users from deleting cookies and browser history on Firefox.
As such, to monitor web traffic, especially at work, you may have to adopt the services of a proxy server or you can simply password key sections (like the privacy section) of your browser. You can also use extensions and/or plugins.
First and foremost, you need to modify your privacy settings to save all cookies and data on your Chrome browser, and ensure you can access every information on your browser history. To do this, simply follow the steps below.
Open Chrome then click the three-dot menu followed by Settings.
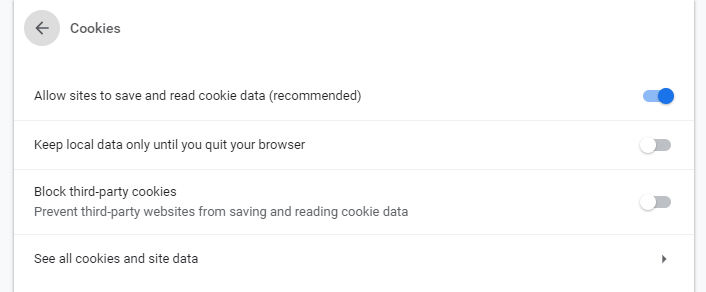
Select Privacy and security followed by Cookies and other site data.
Check Allow all cookies.
With the above steps, you’ll be able to view the history (sites visited) on your browser, provided the users fail to clear the browser history.
However, to ensure you keep abreast of sites visited via your browser, you may have to disable the delete browsing history option on your Chrome.
On the other hand, Google Chrome does not offer any straightforward method for disabling browser history.
This is unlike Internet Explorer, which offers a direct option to prevent users from deleting cookies and browser history.
Nevertheless, there are few options (hacks & tweaks) that have been tried in the past.
Under the Incognito Mode drop-down menu, select Disallow Incognito Mode.
Scroll down to the Browser History drop-down option and select Always save browser history.
This is relatively a rudimentary method, and any user with mid-level tech know-how would easily bypass it and clear the browser history. Nevertheless, you can also try the method below.
3. Blacklist History Frame& Clear Browser Data Frame
Note: This is also a function of Google Apps Admin Console
Under C-Panel, click on Device Management.
Select Chrome Management, then navigate to User Setting.
Locate URL Blacklist, under URL Blocking.
In the URL Blacklist boxes, enter the following chrome://settings/clearBrowserData/ chrome://settings-frame/clearBrowserData chrome://history-frame/ chrome://history/
Save the changes made.
This method has been proven to work on old Chrome versions, and it’s also more effective than trying to disable the delete browsing history option in Chrome with Registry.
With newer versions, however, users are easily able to work around it and successfully clear history. Moreover, it only works to disable the delete browsing history option on a Chromebook.
4. Use Google History Extension
Get the Full History Keeper extension and click Add to Chrome to install it.
Link it to your Chrome account and start saving up your history.
This records all sites visited via Chrome and you’ll be able to access browsing history, even after the user has cleared it.
Note: Setting Chrome to Incognito mode effectively renders this method useless. Also, if a user logs out of the Chrome account, he/she can easily clear his/her browser history, without leaving any trace.
Lastly, you can easily block any inappropriate site on your Chrome browser, especially with the use of OpenDNS (and a host of other tools). With this, no user will be able to access the blacklisted site(s) via Chrome on your PC.
Prevent users from deleting browsing history in Edge
1. Disable Clear Browsing Data on Exit on Edge
Launch Microsoft Edge then click on the three dots menu, followed by Settings.
Next, type delete in the search bar and select the Choose what to clear every time you close the browser option.
Uncheck the Browsing history tickbox.
Exit Microsoft Edge afterward.
Mozilla Firefox, Google Chrome, and Microsoft Edge, as emphasized above, do not provide clearly-defined options to prevent users from deleting cookies and browser history.
There are, however, various forms of hacks and tweaks, which, if properly implemented, would restrict or outrightly prevent third-party users from deleting browser history.
Some of these tweaks and hacks range from extending browser history expiration period to disabling default clearing of browser history on exit.
Bottom line, there is no clear-cut method for disabling delete browsing history on Mozilla Firefox, Google Chrome, and Microsoft Edge. The only browser that supports this function is Internet Explorer.
Hence, if you want to have unfettered access to your kids’ or employees’ browsing history, Internet Explorer is the ideal browser for you.
Does clearing history delete everything?
Your browser history is not simply a record of all of the websites that you have ever visited. Rather, it is much more than that. This history also includes cached files and cookies, as well as information about previous searches, autofill data, and other information.
If you want to delete everything, you will have to specifically select all the data and the time range when deleting your data.
It is only natural that you should sometimes erase your browsing history, as it ultimately contributes to a comprehensive and personal trace of your actions on the Internet.
However, wiping the history of your online activity from inside your web browser or operating system will not make the information completely vanish. In point of fact, these methods will simply remove references to your files.
Facebook is among the foremost social media where millions share and view videos. However, many have reported that Facebook videos won’t play on their PC.
This is a particularly common problem encountered by many and is easily fixable, given you can identify the underlying cause.
So, let’s find out why Facebook videos won’t play on the PC and the most effective solutions for the issue.
Why can’t I play videos on Facebook?
If you can view it, but the Facebook videos are not playing in Chrome or other browsers, you might have a slow Internet connection, causing all the trouble. It could be a problem with the ISP or the modem/router itself.
Also, if the browsing data is corrupt, Facebook videos won’t play on the PC. Besides, sometimes, the problem lies with Facebook, and you have no option but to wait for a few hours before the team identifies and resolves it.
How can I fix Facebook videos not playing in the browser?
1. Restart your browser
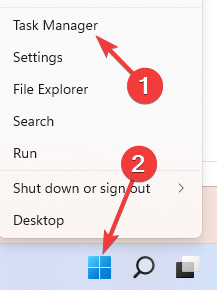
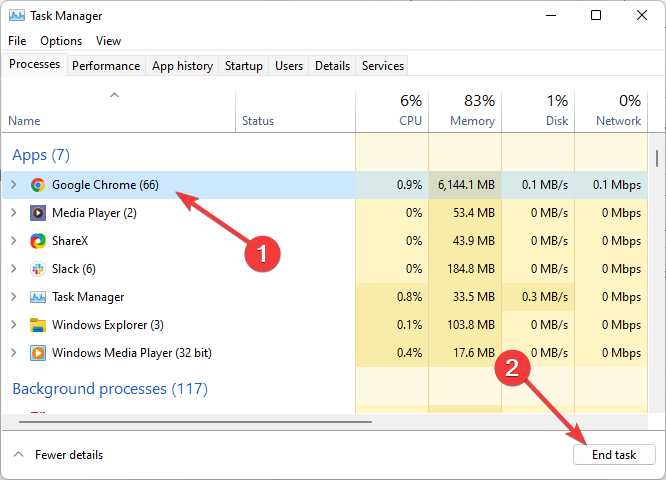
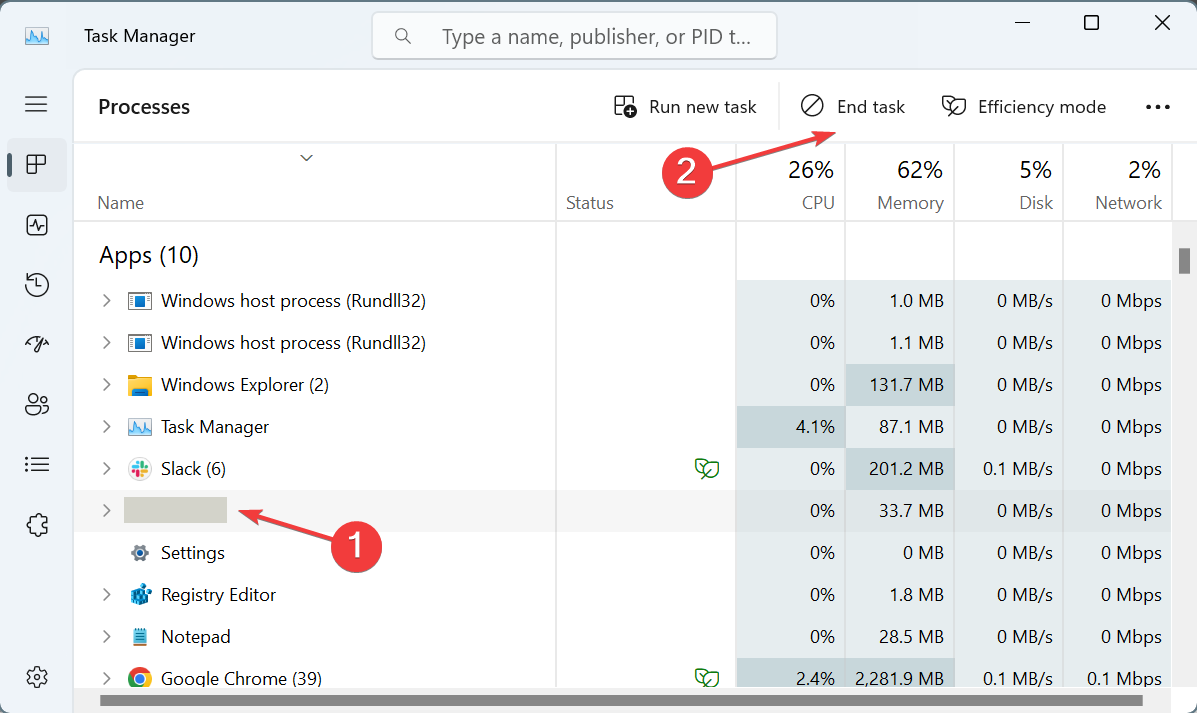
Sometimes Facebook videos don’t load correctly, which is something a simple browser relaunch can fix. So, try restarting your browser. Make sure that all the browser-related processes are terminated from the Task Manager.
If the Facebook videos still won’t play on the PC after restarting the browser, proceed with the potential fixes below.
2. Log out and back into Facebook
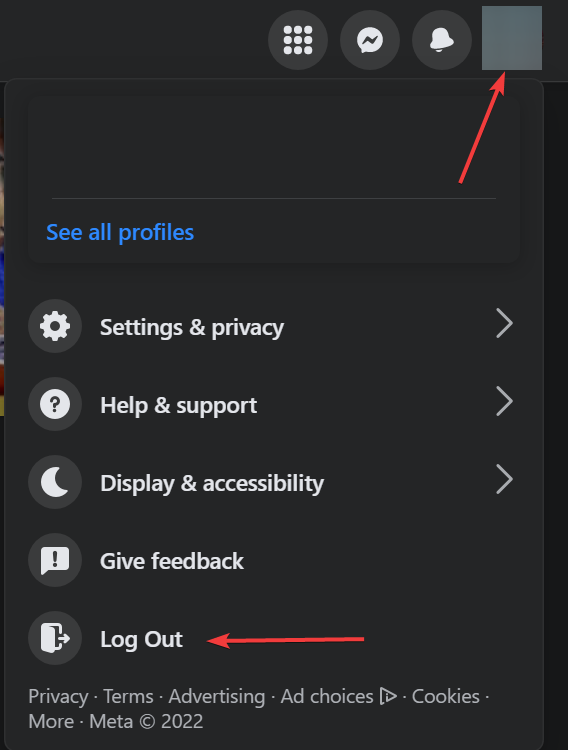
Click on the Profile icon at the top-right corner and select Log Out.
Now, re-enter the login credentials for Facebook to sign back in.
In many cases, simply re-logging into your account fixes things if Facebook videos look scrambled.
3. Clear cache and cookie browser data
Google Chrome
Press Ctrl + Shift + Delto open the choose Clear browsing data utility.
Click theTime range drop-down menu to select All time.
Now, tick all the three options here, and click the Clear data button.
Firefox
Press Ctrl + Shift + Del, and select Everything from the Time range to clear dropdown menu.
Now, tick all the checkboxes here, and click on OK.
Safari
Click the Safari menu at the top of the browser, and select the Preferences option.
Select the Show Developer checkbox on the Advanced tab.
Click the Develop menu, and select the Empty Caches option there.
To erase cookies, click Safari > Preferences.
Press the Manage Website Data button on the Privacy tab.
Then click the Remove All option.
Press the Done button to confirm.
Once done clearing the browsing data, check if Facebook still won’t play videos on PC. In case that’s true, head to the next method.
4. Reset browser
Google Chrome
Paste the following path in the address bar and hit Enter:chrome://settings/reset
Then click the Restore settings to their original defaults option.
Next, click the Reset settings button.
Firefox
Paste the following path in Firefox’s address bar and hit Enter:about:support
Click the Refresh Firefox button on the right.
Again, click Refresh Firefox in the confirmation prompt.
Once done, click on Finish in the wizard that appears to launch Firefox.
Safari
Safari doesn’t have an all-in-one reset option. It’s recommended that users select Safari > Preferences.
Then disable all browser extensions on the Advanced tab. Select the Websites tab to disable all plugins.
5. Install the latest browser version
Google Chrome
Click on the ellipsis near the top-right corner, hover the cursor over Help, and select About Google Chrome.
Wait for the browser to locate and download any available updates.
Firefox
Click on the hamburger icon near the top-right corner, and select Help from the menu.
Now, click on About Firefox.
If there’s an update available, wait for it to install, and then relaunch the browser.
Safari
Click the Apple icon button at the top left corner, and select the App Store option.
Navigate to the Updates tab, and if a newer version of Safari is listed here, download it.
Note: You can also update your browser by uninstalling it and downloading and installing the latest version from the browser’s website.
6. Disable hardware acceleration
Google Chrome
Paste the following path in Chrome’s address bar and hit Enter:chrome://settings/system
Disable the Use hardware acceleration when available setting.
Firefox
Launch Firefox, paste the following path in the address bar, and hit Enter:about:preferences
Scroll down and uncheck the Use recommended performance settings checkbox.
Then uncheck the Use hardware acceleration when available checkbox.
Note: Safari users can no longer configure hardware acceleration.
7. Restart your router
Turn off your desktop or laptop.
Unplug your router & modem.
Wait about a minute before plugging the modem back in.
Then, wait another minute before you plug the router box back in.
Wait two to three minutes before turning your laptop or desktop on.
If the previous methods didn’t work, restarting the router would fix things if Facebook won’t play videos on PC, and you should have things up and running.
You have found this article because you are faced with a corrupted Chrome profile, here is all you must know.
In the early 90s, at best, browsers were capable of opening ecstatic pages and rendering the bearest minimum in regards to data types. However, a lot has changed since then, and the evolution in browser tech has made it a more complex machine.
Now, even the more complex data types are rendered, and the streaming and gaming industry has seen good use for browsers.
That said, it is not without some downside, and users have occasionally encountered some tech errors, including corrupt profiles on Chrome.
This article tackles this issue and recommends the best fixes available.
After a Chrome profile error has occurred, your preferences cannot be read, and different things may trigger these profile issues. The main culprits include:
Google Chrome is corrupted and unreadable
An overly defensive antivirus application
Incompatible computer apps
Ad-filtering software or bugs in your user account
An out-of-date Chrome version or incompatible Chrome extensions
Also, note that when you have problems with a corrupted Chrome profile, it may be characterized by any of the following:
Your profile could not be opened correctly
Your profile cannot be used because it is from a newer Chrome version
Chrome opens, but your account or settings are not available
Chrome opens to a blank screen or closes itself immediately
These are indicative of a corrupt Chrome profile, or it can be corrupt settings or extensions added to Chrome to customize its appearance or enable it to do more.
Some common fallouts that come with a corrupt Chrome profile include problems running your browser, slow browser performance, freezing, and crashes.
Not to worry, we’ve got solutions that can fix corrupt Chrome profiles in Windows 10, 11, and Mac.
Quick Tip:
Opera One, for example, is a lightweight alternative that looks and feels just as sleek and modern as Google Chrome. More so, personal settings like bookmarks can be imported into Opera One after installation.
If you want to enjoy a lightning-fast web browser that features an astounding number of built-in tools, like VPN, Ad Blocker and even AI, but without the resource cost, go ahead and give Opera One a try.
Opera One
A lightweight browser in which you can import all of your personal info from Google Chrome.
Click the Menu button in the top right corner, choose More tools, and select Extensions.
A list of extensions will now appear. Disable all extensions by toggling the on/off switch.
Once you disable all extensions, restart your browser and check if the issue still appears.
If the issue is fixed, try activating programs individually or in groups. You may find and get rid of the troublesome extension by doing this.
Once you’ve identified the problematic extension, try removing it from your browser, keeping it disabled, or updating it to see if it resolves the issue.
2. Run the Chrome Cleanup tool
This is only for Windows computers. To do this, click Chrome Cleanup tool to download the tool. Once downloaded, run it and try opening Chrome again. If this doesn’t fix the corrupt Chrome profile, try resetting Chrome as explained in the next solution.
3. Reset Google Chrome
Open Chrome and choose Settings from the three-dot menu.
Select the Advanced settings, then click Reset and clean up on the left pane.
Click on Restore settings to their original defaults.
Finally, click the Reset settings button and wait for the process to end.
A Chrome profile reset may be your best bet if this reset does not work.
4. Remove all profiles
Open Chrome and dismiss error messages.
Click on the profile icon at the top right of the browser and select the Settings icon.
Click on the different profiles’ ellipses (3 vertical dots) and select delete.
Once you sign into Chrome, a profile is created. Removing it will also remove everything about it, like your saved passwords, bookmarks, and history. You can then rebuild your Chrome profile.
5. Remove the default user profile manually
Right-click Start and select Run.
In the Run box, type the path below and click Enter. C:\Users\afamo\AppData\Local\Google\Chrome\User Data\Default
Search for Web Data, right-click on it, and then select the delete icon.
Now launch the browser to see if the profile works correctly again.
To fix a corrupt Chrome profile, you may manually remove the default profile. This will also remove all the user settings.
6. Disable Sandbox mode
This can cause a corrupt Chrome profile error, so you need to disable the Sandbox mode to prevent the temporary suspension of some features in Chrome. To do this:
Right click Chrome icon on your desktop and select Properties.
Click the Shortcut tab.
Add this command at the end of the Target textbox: --no-sandbox
Click Apply and then clickOK.
7. Remove ad-filtering applications
Click the Start menu, type control, and select the Uninstall a program option.
From the list of programs, click on any ad-filter programs, then select the Uninstall option.
Now follow the wizard to uninstall the app.
8. Restart the Chrome process
Right-click on the Start menu and select Task Manager.
Click on the Google Chrome process and select the End Task button.
How do you fix something went wrong when opening your profile some features may be unavailable?
This is not an uncommon error when you update your browser; however, in most cases, what you are required to do is restart the browser.
If a simple restart does not work, restart the Chrome process using the same steps discussed in solution 8.
It would help if you also considered restarting the entire device. A restart is effective on Windows 10, 11, and Mac devices.
And there you have it. If you have read this far, we hope you have been able to fix any problems with your corrupted Chrome profile.
Most of the solutions we have discussed are easy to follow. And if one does not work for you, skip to the next solution. It would be best if you tried things like a repair or reset of Google Chrome as a last resort.
If the Google Chrome file or directory is corrupted and unreadable, you may have to uninstall it and reinstall the browser.
Were any of these solutions helpful? Let us know in the comments section below.
Outdated and glitchy displaydrivers can cause the Shadow of Tomb Raider game to crash. The Shadow of Tomb Raider, a problem has occurred with your displaydriver issue, is usually triggered due to a driver problem in Windows 10.
In most cases, updating the driver should help. If not, try disabling DirectX 12, or increasing the virtual memory can fix the error.
In this article, we explore a few troubleshooting steps to help you resolve the Shadow of Tomb Raider problem with displaydriver error in Windows computers.
Stick with us until the end of the article if you are in need of a Shadow of the Tomb Raider DX12 fix.
What causes display driver errors?
These types of errors are the worst, especially if you are a gamer, and they can happen as a result of multiple problems.
The most common reason for this is the fact that the display driver has become outdated and an update is in order.
It can also be caused by visual effects, or too many programs running in the background, that might be slowing your PC down.
Furthermore, if the GPU is taking more time than permitted to display graphics to your monitor, it could also lead to the same result.
How can I fix the Shadow of Tomb Raider display driver error?
1. Update drivers with third-party software
A professional tool will update drivers for your graphics card, Windows 10 hardware, printer, and other accessories connected to the computer.
These tools automatically scan for missing and outdated device drivers for your Nvidia GPU. You can update drivers individually or all at once depending on the requirement.
2. Update display driver manually
Press the Windows key + R.
Type device and then click on Device Manager.
Expand the Display Adapter category.
Right-click on your display driver and click Update Driver.
Select Search for update driver software automatically and wait for the update to install.
Click on Clean and restart. Make sure you have closed all the open programs.
DDU will uninstall the Nvidia driver and restart the computer.
After the computer restarts, open the Nvidia driver download page.
Download the driver older than the latest driver version.
Run the installer and complete the installation.
Once installed, relaunch Shadow of Tomb Raider and check if the displaydriver error is resolved.
Manually rollback the driver
Press the Windows key + R.
Type devmgmt.msc and click OK.
Expand the Display adapters
Right-click on your Nvidia GPU and select Properties.
Open the Driver.
Click the Roll Back Driverbutton and follow the on-screen instructions.
If the Rollback Driver button is greyed out, it means Windows doesn’t have a backup of any older driver that it can go back to.
4. Disable DirectX 12
Launch Shadow of Tomb Raider.
Open Settings.
Open DisplaySettings.
Under Display, select Off for DirectX12.
Save the changes and exit.
Relaunch the game and check if the error is resolved.
The newer version of Nvidia drivers can conflict and crash your game if you are using DirectX 12. However, if you disable DirectX 12, the crashes should stop.
That said, turning off DirectX 12 can negatively affect you as you may notice frame drops in city areas. If you see frame drops, it is better to roll back to a previous version of the Nvidia driver and keep DirectX 12 enabled.
Update Windows 10
Click Start and select Settings.
Go to Update & Security.
Open the WindowsUpdates.
Download and install the pending Windows updates.
You can fix the Shadow of Tomb Raider problem with the display driver by disabling DirectX 12 from the settings. If not, roll back the Nvidia GPU driver to fix the error.
How do I update display drivers?
This can be done through the display driver’s interface, in which case it will happen automatically, and you only have to press a button to make it happen.
The second way it can be done is manually, just as we illustrated in solution number 2. There’s also a lot of third-party software you can use to make this process a lot easier.
Issues can happen, and getting the Shadow of the Tomb Taider a problem occurred with your display driver error is not something out of the ordinary.
In fact, messages such as Shadow of the Tomb Raider no display adapter installed, or You are running an older version of your GPU display driver are a clear sign that a GPU update is mandatory.
Do let us know which method worked for you in the comments.
Many Windows users have experienced the NET::ERR_CERT_INVALID SSL error accompanied by the Attackers might be trying to steal your information message on Google Chrome.
This error prevents you from accessing websites that bring the browser to a stalemate.
We have compiled solutions that you can use to fix the NET::ERR_CERT_INVALID error problem. The following steps are also helpful if you need help with the following issues:
Chrome NET::ERR_CERT_INVALID
ERR_CERT_INVALID
NET::ERR_CERT_INVALID in Edge
NET::ERR_CERT_INVALID LocalHost
chrome ERR_CERT_INVALID
NET::ERR_CERT_INVALID on Cloudflare
NET::ERR_CERT_INVALID in MacOS
NET:ERR_CERT_Common_Name_INVALID
What is NET::ERR_CERT_INVALID?
The NET::ERR_CERT_INVALID error when opening a webpage indicates a problem with the website’s security certificate. Every time you visit a website, Chrome will verify its security certificate, and if one is unavailable or invalid, you will encounter an error.
It’s a security measure undertaken by Chrome and other browsers to ensure a safe browsing experience.
Also, the error could be due to the installed antivirus or firewall. Besides, if the date and time are set incorrectly, Chrome may throw the NET::ERR_CERT_INVALID error.
Quick Tip:
Both tools are made using the Chromium engine, but Opera One is much more private-oriented than Chrome, so you don’t have to worry about your virtual identity being compromised.
Additionally, Opera One is updated fairly frequently, sometimes every day, and you get to send the developers your error logs. And to stay at peace, the built-in VPN and ad-blocker keep attackers at bay.
Opera One
Keep attackers at bay with in-built privacy features and enjoy your daily browsing.
How do I fix the net err_cert_invalid solution errors on Chrome?
1. Change your Internet network
Some users were able to bypass the error by simply changing their Internet connection. If you used a public Wi-Fi network, disconnect it, and use another Internet connection such as a modem or private LAN to access the website.
Press Windows + I to launch Settings, and select the Time & language tab from the left.
Next, click on Date & time on the right.
Now, turn on the toggle for Set time automatically.
Close the window and restart your PC
After booting up your PC, launch Google Chrome and attempt to open the website again.
Incorrect date and time settings are potential reasons for the Your connection is not private NET::ERR_CERT_INVALID error. Setting the incorrect date and time lets the browser assume SSL certificates are outdated or expired.
3. Update Google Chrome
Paste the following path in the address bar and hit Enter:chrome://settings/help
Wait for Google Chrome to automatically check for updates and install them.
Restart your PC.
Also, you may be using an older Google Chrome version which could be responsible for the NET::ERR_CERT_INVALID error message. Update your browser to resolve this issue.
4. Reset the Google Chrome browser
Launch Chrome, paste the following path in the address bar, and hit Enter:chrome://settings/reset
Click on Restore settings to their original defaults.
Now, click on the Reset settings button.
Restart your PC afterward.
In addition to updating your web browser, you may consider resetting your web browser to its default settings. This process will eliminate invalid or injected browser settings causing the NET::ERR_CERT_INVALID error.
5. Disable Proxy server
Press Windows + R to launch Run, enter inetcpl.cpl in the text field, and then click OK.
Navigate to the Connections tab.
Click on the LAN settings button.
Tick the Automatically detect settings option, uncheck Use a proxy server for this connection, and then click OK to save the changes.
Again, click OK in the Internet Properties windows.
Another reason for the NET::ERR_CERT_INVALID error problem is because the proxy server is enabled. The website may not be accessible if the LAN connection is anonymous, i.e., in a proxy state.
6. Disable the antivirus
If you have a third-party antivirus or firewall installed on the PC, disable it to check if the NET::ERR_CERT_INVALID error is resolved. Many users reported that it was their antivirus or firewall blocking connection attempts to the website.
If you cannot find the option to disable the antivirus, head to its official website for the exact steps. These should be listed in the FAQ or Support section.
If the error is fixed, do not forget to remove the one on the computer and install a new reliable antivirus to keep your device safe.
7. Update Windows
Press Windows + I to launch Settings, and select Windows Update from the left.
Click on Check for updates on the right.
Now, if an update is listed after the scan, click on Download & install.
After the update process is complete, restart your Windows PC.
Finally, update your Windows OS so as to install the latest version. Frequent Microsoft updates can improve your PC’s stability and performance, especially the Google Chrome web browser.
How do I fix ERR_INVALID_DATE?
In this case, the best option would be to reset the browser. Though you might lose some data, this method has a higher likelihood of fixing things than any other.
If you don’t want to reset just yet, disable all the installed extensions, and if that fixes the error, enable them one at a time until you identify the problematic extension. Once done, remove it from the browser.
Besides, the methods listed earlier for the NET::ERR_CERT_INVALID error should work in this case, so do not forget to try them as well.
Today, we’ll show you a few methods to lower ping when playing in other regions. Accessing game servers from various places is great because it allows you to connect with players worldwide, try out exclusive content, and join friends across different locations.
However, higher ping in distant regions can cause frustrating lag, impacting your gaming experience.
Find below a few ways to reduce ping when playing online games:
Select a server located in the region you want to play in
A VPN can reduce ping, even in locations that are not exactly next door. It does so by routing your internet traffic through its optimized servers, potentially shortening the distance to game servers.
This can improve connection stability and speed, leading to smoother gaming sessions on games like Valorant, and Apex Legends.
ExpressVPN
Fully enjoy gaming sessions by lowering your ping with this professional VPN solution.
Select the game from the main screen’s dropdown menu
Toggle between automatic and manual server selection
Hit Next
Select the location you want to play the selected game in
Click Next once more
In the configuration menu, you can adjust Kill Ping startup behavior, disable your firewall, make the game skip its intro video when possible, and set Kill Ping to remember the last played game.
Kill Ping is a great tool with a quite intuitive, self-explanatory name. It does exactly what you’d expect a tool called Kill Ping to do: reduce ping and keep it at a minimum value.
Your ISP might be throttling your connection, in which case a VPN like ExpressVPN could greatly help you.
Poor connection speed values might also be caused by hardware components such as routers or modems. Thus, you could try restarting your modem/router and check if there’s any improvement.
If you’re using a WiFi connection, try switching to Ethernet, even just for a while, and see if you’re experiencing lower ping values.
Wired connections are much faster and more stable than their wireless counterparts. That doesn’t mean you shouldn’t fix your slow WiFi.
5. Flush DNS
Type CMD in the Search bar to open the command prompt.
Restart your PC and check if your ping value has improved for the region you’re trying to play in. Most of the time, a quick DNS flush can improve the overall quality and speed of your connection by fixing your DNS server issues.
6. Force-close other bandwidth-heavy apps
If you have additional apps or services running in the background, you might experience higher ping values. Especially if you prefer playing in other regions.
For that reason, you may want to close any programs, processes, or services that are hogging up the bandwidth. For instance, torrenting clients can be real bandwidth mongers.
It’s worth mentioning that some of these may not go away if asked nicely, so you might have to call in the good ol’ Task Manager.
7. Make sure everything’s up-to-date
Make sure to update these components and perform version checks on them regularly:
Your operating system
System drivers, especially GPU and network ones (you can use specialized driver updaters for this task)
Game files (make sure you also install the latest recommended patches, if necessary)
Gaming platform (for instance Steam, Origin, or uPlay)
Let us remind you that it’s not all about the location, but the importance of running up-to-date software on your PC is often overlooked. However, it’s not exactly uncommon or unheard of that outdated software could cause your ping to skyrocket.
Reducing ping on game servers requires tweaking
The best way to feign this when playing on foreign servers is by connecting to a VPN server from the same region as the game server.
ExitLag is designed to route your game traffic through the most efficient servers to keep latency low. Learn how to configure it properly in our step by step ExitLag guide.
Whether you choose a VPN, a GPN, or try your luck with manual troubleshooting, these methods are guaranteed to at least shave a few milliseconds from that nasty high ping value you’re struggling with.
To stay in touch with everything that’s happening in the gaming world, check out our Gaming section. At the same time, visit our VPN Troubleshooting Hub to discover more guides on various VPN issues.
A lot of users from all around the world rely on IPTV services to access their favorite TV content. However, most of these services are running illegally since they facilitate access to many channels at little or no cost.
Naturally, it was a matter of time before ISPs figured it out and blocked IPTV access. In the UK, for instance, there are some reports that during peak hours, ISP is blocking IPTV access completely.
Upon further investigation, Virgin Media seems to be blocking IPTV access, but not always. Virgin Media might block IPTV access during critical events, such as Premier League matches.
Due to a court order, several ISPs were compelled to restrict streaming football matches on set-top boxes, PCs, and other streaming devices. These ISPs are:
Sky Ireland
Eircom/Eir
Virgin Media
Vodafone
As a result, customers of the ISPs listed above started to complain about IPTV not working on Virgin Media so some users decided to use a VPN to watch IPTV, which got their VPN blocked by Virgin Media as well.
Is Virgin Media blocking IPTV in the UK? Long story short, IPTV is, more often than not, illegal. Many would argue that this type of service should be regulated and under strict surveillance to curb abuse.
However, IPTV is pretty much still alive and kicking, with a few exceptions. In some instances, or during important events, big names in the ISP industry block access to IPTV services altogether.
UK Internet users might find that not only IPTV football streams are restricted, but non-football channels, as well.
How to bypass Virgin Media IPTV blocking?
As with many other online content restrictions, the answer is using a VPN. VPNs re-route your web traffic, steering it away from hard blocks like firewalls or blacklists.
It might not be convenient, as using a VPN implies spending additional money for a subscription. Assuming you’ve decided to go with a premium, paid service, that is.
However, bypassing ISP blocks or throttling is not the only reason to consider a VPN.
These tools can circumvent geoblocking, reduce Virgin Media packet loss, and improve ping, let alone the fact that they keep your online privacy safe and secure your connection.
What are the best VPNs to get past Virgin Media block?
Private Internet Access is an excellent all-around VPN service brought to you by Kape Technologies.
It can help you bypass the Virgin Media IPTV block quickly; you just have to connect to a non-UK server and relaunch the service.
Private Internet Access is open-source software. This means that it is more secure due to the fact that they are able to fix issues and errors a lot faster.
It is very easy to use. Just download the app, create an account, pick a subscription plan, and connect in just one click.
To increase security and privacy even more, PIA also offers a built-in ad-blocker. Say goodbye to intrusive ads and trackers and improve browsing speed instead.
Other key features of Private Internet Access include:
Split tunneling
Torrenting Support
Killswitch
PIA is a subscription-based service with various plans available. You can try it for free for 30 days.
Private Internet Access
Virgin Media IPTV block and other content can be easily unlocked with this powerful VPN.
NordVPN is a trustworthy VPN solution brought to you by Tefincom & Co., S.A., that can help you bypass Virgin Media IPTV blocking.
If you suddenly discovered that your IPTV service no longer works, chances are that Premier League matches are airing.
You can surpass this issue and get high-speed traffic with unlimited bandwidth by connecting to one of NordVPN’s ultra-fast servers.
This VPN service has over 5,000 servers worldwide, which means you will be able to surpass any geo-restrictions and get an optimal connection regardless of where you are located.
NordVPN has a strict no-logs policy. No data about your activity or identity is collected or shared.
Moreover, it offers split-tunneling which you can use to connect to IPTV and surf on your local servers at the same time.
Other key features of NordVPN include:
CyberSec feature to block malware and ads
Browser extensions
No-leaks DNS
Compatible with all major platforms
NordVPN is a subscription-based service. You can try it for free for 30 days and see if it fulfills your needs.
NordVPN
Does Virgin Media restrict IPTV? Use NordVPN to bypass it.
Another viable option that helps you surpass restrictions and get seamless access to your favorite content is Surfshark.
This budget-friendly VPN service has a no-border mode that helps you surpass any geo-restrictions and access websites and platforms across the whole globe.
Surfshark is very secure. It uses IKEv2/IPsec protocols, along with AES-256-GCM encryption. Not only is your connection very private, but also very stable and fast.
If you want to prioritize the VPN traffic for a specific app, you can do that with the Bypasser feature. In this case, you can direct all your VPN traffic towards your streaming service while allowing other apps to connect locally.
This can significantly boost speed rates and allow you to enjoy high-quality video content.
Surfshark uses private DNS and leak protection on all of its servers. This and the kill switch feature ensure that your connection is always extremely secure.
Other key features of Surfshark include:
Strict no-logs policy
Changes your IP address
Open source VPN
Camouflage mode
Compatible with all devices
This well-rounded service is subscription-based, but you can try it out via a free trial. It is compatible with all major platforms and there is no limitation on how many devices you can connect.
Surfshark
Enjoy unlimited content at exceptional speed rates with this well-rounded VPN provider.
CyberGhost VPN is yet another great all-around VPN solution from Kape Technologies.
You can use it to keep your online privacy, secure your connection, circumvent geoblocking, improve your ping, or bypass network congestion.
Cyberghost VPN has a great server coverage of over 7,000 servers across 91 countries. This ensures great performance for any network, plus you can access content around the whole globe.
CyberGhost has streaming-optimized servers that are built to deliver top-level video quality.
This VPN is compatible with all major platforms, and you can connect to up to 7 devices simultaneously. You can also connect it to your router.
Other key features of Cyberghost VPN include:
Anti-threat add-ons
Built-in adblocker
Gaming servers
Support for torrenting
Cyberghost is a paid service. You can, however, try it for free. The trial version requires no card information.
CyberGhost VPN
IPTV blocked by Virgin Media? Use CyberGhost VPN to fix it.
ExpressVPN is a great choice to access real-time features while traveling overseas due to its fast connection speeds and exceptional online security features.
Remember that when accessing IPTV from another area, those long-distance connections will most likely be more sluggish as they search out that foreign video real-time features restrict access.
Express VPN is compatible with the most popular devices, so you can enjoy your favorite content on your desktop and mobile devices. You can also connect it to your TV, router, or game console.
To offer a secure and stable connection, Express VPN runs a private DNS of every server.
Along with that, it protects all traffic data with powerful AES-256 encryption.
Another useful benefit is that it has a built-in speed test. You can run it in just one click and see which is the fastest server for your network.
Other key features of ExpressVPN include:
Unlimited bandwidth
No-logs policy
Split tunneling
Network kill switch
ExpressVPN is a subscription-based service with multiple plans available. It has a 7-day free trial.
ExpressVPN
Bypass ISP throttling and enjoy Virgin Media without restrictions with ExpressVPN.
As far as bypassing Virgin Media IPTV restriction, CyberGhost VPN is as good as it gets. For this tool to work as intended, launch it, connect to a non-UK server, and enjoy IPTV as usual.
In order to bypass this annoying restriction, you have to launch NordVPN and connect to a non-UK server. Upon relaunching your IPTV service, you should discover that it works as intended.
However, you should consider that these blocks happened for a reason, and most IPTV services run on an illegal basis.
More so, most IPTVs ban VPN usage or proxy servers and suspend the accounts of VPN/proxy users permanently.
Last but not least, if you’re using IPTV from a box set (Kodi, for instance) or any other non-desktop device, you must install the VPN on that specific device.
Unfortunately, Virgin Media may block your streaming platforms in case it’s restricted in your current location.
This is the reason you would need undetectable VPN servers to route your internet traffic and bypass the restrictions of this Virgin Media ISP.
Alternatively, you could try deploying the VPN on your router and ensure that the streaming device is always connected to your router for this fix to work.
Chrome Canary is continuously developing, and new features are added every day. But despite the development team working hard, problems are still plaguing the browser. One of the more recent ones reported is that Chrome Canary is crashing in Windows.
More specifically, the latest version of Chrome Canary crashes constantly with the Aw snap! error on all sites when RendererCodeIntegrity is enabled.
The crash also happens in Incognito mode and creating a new profile doesn’t work. Furthermore, there seems to be a notification about crashing the UBlock extension.
Quick Tip:
If you keep having issues with Chrome Canary crashing on Windows 10, perhaps it would be best to switch to another browser. Opera One has its own Beta Browser that you can use to test new functionalities.
If you want a sneak peek at the features Opera One has in store for the final release, this is the version for you. Opera Beta is full of surprises, although it is still a work in progress until the functions are fully released.
Opera One
Take a sneak peek behind the curtains at how this awesome web app is made.
Chrome Canary introduces experimental features and is primarily meant for techies and browser enthusiasts. The updates here are not as refined as the stable version of Chrome and might lead to issues.
So, if the update installed last had a bug in it, Chrome Canary may start crashing on startup. Also, your antivirus may be conflicting with the functioning of the browser, and as a result, Chrome Canary keeps crashing.
Besides, if you started encountering the issue right after installation, there’s a chance that it didn’t go through properly. In which case you may consider reinstalling the browser, if Chrome Canary closes immediately.
Which is better Chrome or Chrome Canary?
You can’t really say that one is better than the other. The two browsers, Chrome and Chrome Canary, cater to different userbases.
While Chrome is for regular users who prefer well-polished updates, minimum lags and issues, Chrome Canary appeals to the audience that wants to try out the features in advance and doesn’t mind the performance-related problem.
So, identify which category you belong to and choose the appropriate browser.
How can I stop Chrome Canary from crashing?
1. Disable your antivirus
A possible cause of the problem could be the antivirus solution on an affected PC, but it isn’t yet fully confirmed. Nonetheless, if you have an antivirus solution installed, be sure to turn it off.
There’s always an option to disable the antivirus, located somewhere in the settings. If you can’t find it, head to the FAQ or Support section on the developer’s official website.
After disabling the antivirus, check if the Chrome Canary not working problem is resolved. If it is, get an effective and reliable antivirus, and remove the one currently installed. In case the issue persists, head to the next method.
2. Disable the code integrity
Press Windows + R to open the Run command dialog box.
Paste the following command in the text field, and click OK:Chrome.exe --disable-features=RendererCodeIntegrity
We have to mention that the workaround wasn’t successful for all users, but if you encounter the same problem, you can give it a try as it might help you get rid of the Aw snap! error.
3. Update the browser
Launch Chrome Canary, click on the ellipsis near the top-right, hover the cursor over Help, and select About Google Chrome from the menu.
Now, if an update is available, wait for it to download and install automatically.
Once done, restart the browser for the changes to come into effect.
As discussed earlier, there’s a chance of a new update causing issues with the browser, like the Chrome Canary STATUS_ACCESS_VIOLATION error. So, install the latest available version to fix things.
We hope that you managed to fix the Chrome Canary Error 11 and other issues with the browser using our solutions.
Some users have posted on numerous forums about a Chrome ERR_INCOMPLETE_CHUNKED_ENCODING page-loading issue.
When that issue arises, website pages hang or don’t load correctly with Google Chrome displaying blank pages. JavaScript and CSS files also get truncated, which generates web form submission issues.
That issue typically arises for users utilizing Google Chrome within client/server network environments with Apache server software. Those users spot the ERR_INCOMPLETE_CHUNKED_ENCODING error message within Chrome’s developer console.
Why am I getting err_incomplete_chunked_encoding in Chrome?
We’re glad you asked this question and, as always, we’re here to provide an elaborate and trustworthy answer.
This error code is raised when the user doesn’t receive the final 0-length chunk of a chunked transfer. When it happens, website pages hang or fail to load correctly, and Google Chrome displays a blank page.
Furthermore, JavaScript and CSS files are also truncated, creating issues with the web form submission.
It’s important to understand that this problem usually occurs with users using Google Chrome in a client or server network environment with Apache server software.
What does err_incomplete_chunked_encoding mean?
It means that the process you were undergoing could no longer function due to a problem with your network, proxy, web browser, anti-virus software, or something like that which is breaking a network connection to your site.
Quick Tip:
It’s fairly usual to have problems with your browser, but that’s why there are alternatives. Because it may be some time until the Chrome issue is resolved, consider keeping a backup browser, such as Opera One.
Most of the time, this great browser does not interfere with other applications, and the built-in proxy VPN may come in helpful in such conditions. Test Opera One and see if you can make the switch.
Opera One
The agony stops here, thanks to this Chrome’s best alternative.
How do I fix err_incomplete_chunked_encoding in Chrome?
1. Disable prefetching in Google Chrome
Open the Google Chrome browser the issue arises on.
Click the Customize and Control Google Chrome menu button on the far right of the browser’s URL toolbar.
Select Settings to open a tab that includes Chrome’s browser options.
Click Cookies and other sitedata to open further options.
Then scroll down to the Preload pages for faster browsing option shown directly below.
Toggle the Preload pages option off if it’s on.
Restart Chrome after turning off the Preload pages option.
2. Uninstall third-party antivirus software
To uninstall a third-party antivirus utility in Windows, right-click the Start button and select Run.
Type appwiz.cpl in Run’s text box, and press the Enter keyboard key.
Next, select the antivirus utility listed within the uninstall program list.
Click the Uninstall button to remove the antivirus software.
Select Yes on the uninstall software confirmation prompts.
Users have specifically confirmed that the ERR_INCOMPLETE_CHUNKED_ENCODING error can arise due to Avast, Kaspersky, and ESET antivirus software. So, you should certainly uninstall those publishers’ antivirus software if you have any one of them installed.
To check if the ERR_INCOMPLETE_CHUNKED_ENCODING issue is due to your third-party antivirus software, try disabling its real-time protection first. If disabling its real-time protection fixes the issue, uninstall the antivirus software.
Many antivirus utilities have removal tools you can download that will more thoroughly remove them than Windows’ default uninstaller. The ESET site includes a handy index of removal tool links for the bigger antivirus software.
3. Disable Chrome’s extensions
Click the Customize and Control Google Chrome button to open that browser’s menu.
Click More Tools to open that submenu.
Then select Extensions to open Chrome’s add-on tab.
To turn off an extension, click its blue toggle button.
Turn off all your Google Chrome extensions, and restart the browser.
4. Reset Google Chrome
Open the Customize and Control Google Chrome menu at the top right of that browser’s window.
Click Settings to open that tab in the browser.
Scroll all the way down to the Advanced button on the Settings tab.
Click Advanced to extend the options on the Settings tab.
Then scroll further down to the Restore settings to their original defaults option.
Click Restore settings to their original defaults to select that option.
Press the Reset settings button to provide confirmation.
Now you have troubleshooting solutions for errors such as err_incomplete_chunked_encoding 200, or failed to load resource: net::err_incomplete_chunked_encoding.
Situations such as this aren’t to be taken lightly and immediate actions are required for err_incomplete_chunked_encoding chrome.
The issue can come in many forms, displaying messages such as err_incomplete_chunked_encoding 500, or maybe err_incomplete_chunked_encoding chrome jsp.
There are other potential fixes for the ERR_INCOMPLETE_CHUNKED_ENCODING error.
However, the above resolutions are confirmed fixes that have resolved the issue for many users.
System File Checker (SFC) is a utility in Microsoft Windows that allows users to scan for and restore corruptions in Windows system files. This utility is available on all versions of Windows OS and is located in C:WindowsSystem32 folder.
This article will describe the following issues related to SFC tool:
The time required for SFC command scannow to repair important Windows files is usually from 5 to 15 minutes.
How can I run SFC scannow on Windows?
In the guides below you will find out how you can run an SFC scan on different Windows operating systems.
How to run SFC scan Windows 11
The SFC scan might resolve many system errors, including blue screen issues. On Windows 11, you can easily do this through any console command tool such as Command Prompt, Powershell and Windows Terminal. Here is how to use cmd for this:
1. Press the Windows and X keys to open the Power Menu.
2. Select Command Prompt (Admin) from the list and click on it.
3. Type the following command: sfc /scannow
4. Press Enter to execute the command.
5. Wait for the repair process to complete. This might take a while, so do not interrupt the process.
6. After the SFC scan is complete, Command Prompt might state, “Windows Resource Protection found corrupt files and successfully repaired them.” If that’s the case, restart Windows. If there are no errors, you can close the console.
How to run SFC scan using cmd on Windows 10
Press the Windows key + X to open the main menu.
Click Command Prompt (Admin) to open the Command Prompt as an administrator.
The repair process will now start. Don’t close Command Prompt or interrupt the repair process. The repair process can take a while, so wait patiently while it completes.
Restart Windows if CMD prompts you to, upon finishing the process. If there are no errors found, simply close the console.
When you cannot complete the SFC scan normally, you should initiate the same process from Safe Mode.
When the Windows 10 OS runs in Safe Mode all third-party apps, and the processes associated with such software will be stopped or deactivated.
Thus, if the SFC error was somehow related with a third party software, now you will be able to successfully perform the system scan.
Here is how you can reboot your device into Safe Mode right away:
Launch the Run engine on your Windows 10 device: press the Win+R keyboard keys together.
In the Run box type msconfig and click on OK.msconfig windows 10
From System Configuration switch to Boot tab.
Under Boot options select the Safe mode checkbox and also check Minimal from underneath.
Click OK and Apply.reboot safe mode windows 10
When prompted choose Restart.
Now your device will be automatically restarted into Safe Mode.
From there run the sfc /scannow command.
Most common System File Checker/SFC scannow errors
Although this process can automatically repair the most common Windows soft-related problems, in some situations, SFC itself might experience malfunctions.
Here are some of the most common issues that users reported:
Sfc /scannow stuck at verification, at beginning system scan – According to users, SFC scan can get stuck at verification or at the beginning of the scan. However, you might be able to fix the problem simply by replacing the corrupted files.
Sfc /scannow frozen Windows 10 – This is another issue that can appear with the SFC scan. To fix this issue, it’s advised to restore your PC using System Restore and check if that solves the problem.
Sfc scannow nothing happens – Couple of users reported that nothing happens while using SFC scan on their PC. If that’s the case, try using the DISM scan instead and check if that solves the issue.
Sfc scannow stops scanning – According to users, sometimes an SFC scan can stop completely on your PC. Fix the problem by checking out this guide.
Sfc scannow stops you must be an administrator – SFC scan requires administrative privileges in order to run, and if you’re having any issues with SFC, be sure that you’re using Command Prompt as an administrator.
We hope that you managed to run a SFC scan on your Windows OS using our solutions. To learn more about similar tools, we suggest reading our guide on the differences between CHKDSK, SFC, and DISM.
Let us know your thoughts and questions in the comments section below.
All the websites on the Internet operate from a server. Since WordPress launched in 2003 as a spin-off of a blogging application known as B2, things gradually improved. Creating a WordPress website is simple, and you can do it with web design software for WordPress.
Now a lot of enterprises use it for websites and eCommerce and they most certainly need a good enterprise hosting service.
The platform has evolved into a full-featured web content system for all kinds of websites. It has constantly increased in popularity because of the fact that it is free and open-source.
What is a WordPress hosting company?
WordPress hosting company is a special type of company that focuses exclusively on WordPress hosting. By doing so, it provides the best service for your website.
There are many great companies that focus on WordPress, and in this guide, we’re going to show you some of the best hosting providers.
Not only that, the platform is used by millions of people and entrepreneurs daily for businesses of all sizes.
Knowing all the advantages, let’s explore some of the best enterprise WordPress hosting services available right now on the market.
What are the best WordPress business hosting services?
BlueHost is an incredibly useful hosting service designed specifically for WordPress. The wide range of features found in this software makes it one of the best options on the market.
The host offers you a great range of different versions, each covering a good set of features designed for different tasks, so you’ll have no issues picking the right plan.
This service is particularly well suited if you have a WordPress-basted website because it also features a great website builder with free themes that will help you keep up with the design, not to mention the top-of-the-line cPanel and SSH access that allows you to manage your website seamlessly.
As you will see from the plan offerings below, even the lowest contract offers a lot of webspace on SSD storage thus ensuring ultra-fast access to your domain.
And if we’re talking about domains, you will get a free one for a year. In addition, you’ll get a free SSL certificate to start off with a bang and a low budget.
As for WordPress hosting plans, there are the following ones available:
BlueHost Basic – perfect for getting started:
Single website
50GB website space
Free Domain for one year
Free SSL
Secure install of WordPress
WordPress auto-updates
WP-CLI
cPanel and SSH access
BlueHost Plus – perfect for growing websites, it contains every feature of the Basic version, with some modifications:
Unlimited websites
Unmetered website space
Free domain for one year
Standard features of Basic – SSL, WordPress auto-update, etc.
WP Staging Environment
Spam protection
Free CDN Enabled
BlueHost Choice Plus – perfect for online stores – includes all the features found in the previous version and adds:
Unlimited websites
Unmetered website space
Free Domain for one year
1 Domain Privacy
Automated Backup
Standard features – SSL, secure install of WordPress,auto-updates, WP-CLI, etc.
Essential Features – WP Staging Environment, spam protection, etc.
The WordPress Pro version from Bluehost has a great range of useful features. They include unlimited websites, web storage, domains, and subdomains, and have no traffic limits. As a result, it’s perfect for all types of businesses.
This version of the software also contains the entire range of hosting options needed for creating a professional WordPress site. It is divided into 3 different versions, each catering to different users:
WP Pro Build:
Marketing Center – monitor and manage your marketing process easily
100 Free Premium Themes
Domain Privacy Protection
WP Pro Grow – contains everything in Build, and adds:
Business review tools – enable your visitors to leave feedback
Bluehost SEO Tools – built-in SEO tool that allows you to boost your Google rankings with real-time statistics
WP Pro Scale – contains everything in Grow, plus:
PayPal integration
Elastic Search – allows your customers to use a faster search engine
BlueHost
This awesome web hosting service was designed especially for WordPress and it has full compatibility with it.
LiquidWeb is not only a reliable hosting company but it comes with an exhaustive WordPress hosting infrastructure for your promising business.
First, this website hosting operates with user-focused features and it delivers a customizable and dedicated server with 100% uptime.
More on that, you can benefit from extensive server support due to trustworthy web infrastructure. There is a dedicated server hosting, cloud server support, and server clusters for multi-server businesses.
Regarding WordPress hosting, this solution comes to help you manage your online business. More exactly, you benefit from technical hosting and support 24/7 from hosting experts.
It is also beneficial to pick this service if you require fast-paced web infrastructure for lightspeed response time or automatic WordPress site updates.
Not only that, the customers always get helpful support from the hosting team with website maintenance, DDoS prevention tools, or malware scanning technology.
Managed WordPress:
Cloud infrastructure type
15 to 60 GB storage
Included PHP workers
SaaS easy control panel
5-minute setup time
Dedicated Server Hosting:
Effortless site migration
100% network uptime
Standard DDOS protection
pre-installed backup drive
Root-level access
VPS Hosting:
10 GBPS networks
Plesk and cPanel support
Cloudflare CDN
ServerSecure advanced web security
Root-access and integrated firewall
LiquidWeb
Administrate any enterprise WordPress website with the most secure hosting platform.
Hostgator offers a great range of features that allow you to set up, manage, and grow your business by using professional-level WordPress hosting.
Due to HostGator’s cloud architecture, this service allows you to reach faster processing speeds, by using multiple caching layers.
Whether you’re just starting or you have a flourishing business, this hosting service helps you create or migrate your website in seconds and keeps it safe.
This is achieved with an automatic malware removal feature, so your website will be truly safe.
And even with a basic plan, you will get unlimited storage space powered by SSD for very fast access.
This software can be controlled by an impressive WordPress Cloud Interface that was designed to be user-friendly. Therefore, you can back up your files automatically and is easily scalable to fit the needs of your company.
Starter Plan:
1 WordPress site allowed
Packages based on traffic demands – 100.000
Relative computer power – 2x
Can migrate one site
1 GB automated daily backups including file-level restore
Automatic malware removal
Unlimited storage space
$100 Google Adwords Credit
Free SSL
Standard Plan – includes all features of the Starter Plan, with some additional changes:
2 WordPress sites allowed
200.000 packages based on traffic demands
Can migrate up to 2 sites
2 GB automated backups with file-level restore
Business Plan – has all the features found in the Standard Plan and adds:
3 WordPress sites allowed
Up to 500.000 packages based on traffic needs
Relative computer power – 5x
Can migrate up to 3 sites
3 GB automated backups with file-level restore
HostGator
Even the lowest plan with this hosting service will provide the necessary features and tools to start your business.
Hostinger is a popular web service for WordPress hosting, cloud, or VPS hosting for businesses and online publications.
This user-confirmed solution is what business owners or content creators need to boost their websites with high-speed performance and a strong web environment.
Regardless of the website, either a blog or a portfolio website, Hostinger WordPress contains anything you could imagine to manage and grow your personal business.
For instance, there are multiple benefits for numerous websites built on WordPress such as weekly data backups, free professional email, or infinite bandwidth for uninterrupted web traffic.
You can also coordinate multiple websites using one hosting plan. More specifically, you have 100 website support and increased performance for each of them.
In terms of plugins, Hostinger is the greatest pick for your website. You have extremely useful plugins to upgrade your business like SEO, E-commerce, or an AI assistant to help you write content more efficiently.
Hostinger Premium plan:
Unlimited free SSL
Free domains
100 websites support
100 GB SSD storage
Free & automatic website migration
Standard WooCommerce optimization
Hostinger Business plan:
200 GB NVMe storage
Free email and data backups
100 websites
Free CDN (Content Delivery Network)
WordPress acceleration and automatic updates
Vulnerability scanner
Hostinger Cloud Startup plan:
300 websites support
200 GB storage
10x website performance
Unlimited bandwidth and free SSL
Advanced WooCommerce optimization
WordPress Litespeed & auto-updates
Hostinger
Scale up any WordPress enterprise website using industry-leading hosting and AI website builder.
A2 Hosting is a web hosting at first, and a handy partner when it comes to enterprise websites or online businesses.
First things first, if you’re launching a new website or looking for fast web performance, this solution has got you covered.
You have the Managed WordPress hosting service that contains all the help you need to manage an online business or publication. For instance, there is Jetpack support, theme management, and reliable web stability.
Another essential aspect of this hosting service is its lightning navigation and response time. Hence, you benefit from rock-hard security, optimized speed, and a simple website setup.
Even more, there are valuable features such as web page caching or browser caching, free SSL certificates, or onsite & office daily backups to always protect your business information.
In conclusion, you can expect high performance and uninterrupted stability for your business website in order to expand your vision and gain consistent revenue.
Managed WordPress hosting plan:
Unlimited websites hosting
250 NVMe or unlimited storage
Onsite and offsite daily backup
Management for multiple sites
Jetpack support
Daily malware scans
WordPress hosting plan:
Unlimited WP websites
Free SLL certificate
20x faster Turbo servers
Reliable site migration
Onsite & offsite premium backups
Jetpack backup license
WooCommerce hosting:
Instant site deployment
Traffic surge protection
Customizable product webpages
Order and billing automated processes
Flexible region-based payments
Mobile payment integrations
A2 Hosting
Have a go with A2 web services for a superior hosting experience!
WP Engine is an incredibly powerful managed WordPress hosting platform that provides you with the entire range of tools you need in order to create a professional-looking WordPress website.
This service gives you the power to offer your customers an incredible online experience that is perfectly designed to fit their needs, and also the needs of your company.
It features 36 StudioPress professional-looking themes with SEO features and extra security, thus allowing you to build a modern and safe website quickly.
Besides, if you already built yours, whatever the platform you’re using, feel free to migrate it to the WordPress engine with just a few clicks.
WP Engine is an all-encompassing software that contains 4 different services, each covering important sectors of owning an online site.
Creative Agility – allows you to manage your site and market your product/service fast:
36 StudioPress themes – easy-to-use professional-looking themes with built-in SEO capabilities and security
Auto-migration plug-in – allows you to easily migrate data from any other hosting platform to WP Engine
Serviced onboarding – dedicated technical and account management team that offers you a step-by-step induction into using WP Engine
Automatic WordPress core updates
Free CDN and SSL certificates – CDN allows you to increase the size of your site, and SSL keeps your transactions safe
Wide range of WordPress plugins
Enterprise Performance – features that make your site scalable and provide a secure digital experience for WordPress:
Amazon web services
Global data centers – United States, Europe, Africa, etc.
Multi-layered security measures
Fully-managed content delivery network (CDN)
PHP 7 and HTTP/2
Proprietary EverCache – uses powerful caches to reduce the strain on your site’s resources
Two-factor authentication
SSL traffic encryption
Actionable Intelligence – allows you to customize your online experience and also manages site traffic, and performance:
Get information from one dashboard – contains a visual dashboard that simplifies Google Analytics and offers performance, traffic, and other useful information
Speed performance tool – allows you to observe the influence that installed plugins have over performances
Coding supported – allows your IT and development teams to troubleshoot issues
Ecosystem Integration – gives you the tools you need to create new opportunities for your company:
Over 40.000 WordPress plugins that allow you to customize your site
Integrates perfectly with other platforms
Amazon Web Services and Google Cloud Platform integration
Great support team – over 14 specialists ready to help with any problem
Enterprise onboarding
24/7 support
WP engine also comes in a variety of licensing options, each bolstering different features tailored to different users:
WP Engine Startup – The most affordable. Perfect for less demanding users.
WP Engine Professional – Designed for growing businesses.
WP Engine Growth – This plan is intended for professionals. It’s also perfect for small agencies.
WP Engine Scale – For high-demanding users.
WP Engine
Enjoy an incredibly powerful WordPress manager and offer your customers an awesome online experience thanks to WP Engine.
AccuWebHosting is a great choice for a WordPress hosting service because it provides lots of different plans, full customization, and much more.
You will benefit from the best and most secure connection. As a result, none of your data will be stolen from your beloved website.
AccuWebHosting will provide a stable connection and fully manageable Linux and Windows hosting at high speeds because of fully SSD-powered storage.
If you select the most basic option below, you will only be able to host a single website but if you increase your budget spending a bit, you will benefit from Windows Server 2016 and 2012 OS hosting.
You will also be able to customize your resources. Lastly, there is a 7-day money-back guaranteed policy and a hassle-free cancellation policy. If you’re looking for the cheapest WordPress hosting, this might be the right choice for you.
Web hosting – the latest Microsoft Web tools:
Host 1 site
User-friendly control panel
Cloud-based plans available
VPS hosting – powered by SSD storage:
100% pure SSD storage Raid 6 setup
Windows server 2016, 2012 OS
Quick and intuitive setup
Reseller hosting – easy, profitable, and inexpensive:
SQL 2012 and Windows Server 2016/2012 hosting
A/C support for PHP and MySQL
One panel to control all domains
AccuWebHosting
Enjoy a plethora of price pans and customization options by choosing AccuWebHosting, a service perfect for WordPress.
iPage is another great option for hosting your business on WordPress because it offers a great range of features that will surely cover all your needs.
This software was designed to contain all possible features that allow customization of your WordPress site hand-selected themes, and pre-installed plugins. Therefore, it allows you to control your entire WP experience from one dashboard.
By teaming up with SiteLock, the hosting platform from iPage offers a deluxe security bundle and also includes a custom firewall.
If you’re going with one of the plans below, you will get a free domain and SSL certificate for one year.
It also offers great support, done by specially trained support agents. Here’s a brief description of what’s packed in each version:
WP Starter:
1VAT not included
Free 1 year domain registration
Unlimited storage
Unlimited bandwidth
Customized control panel
Pre-installed themes & plugins
WP Essential – contains all the features found in WP Starter, and adds:
WordPress expert support
Automatic malware removal
SiteLock professional security
iPage
Migrate your website quickly, customize it with free themes and keep it secure with this excellent service.
JustHost covers the entire range of needs for your company, offering a great list of useful features that allow you to create, manage, use, and customize all aspects of hosting.
Additionally, you’ll get important support for MySQL, PostgreSQL, CGI BIN, Python, Flash, DHTML, Shockwave, and many more.
And if you’re just starting, you gain access to an easy-to-use site builder. For instance, this allows you to simply drag and drop elements for instant results.
The fast management tools from the integrated cPanel will be there and you can use them to change all the options on your website accordingly with just a few clicks.
Here are some of the most notable features of JustHost:
Unlimited disk storage
Unlimited number of Websites
Drag and drop site builder
Free domain name registration for 1 year
Support for international domain names
Unlimited POP3 and IMAP Secure email support
cPanel account control panel
Secure Shell (SSH) access
1-Click WordPress install
Free scripts – social networking scripts, blog support, poll and survey software, project management scripts, etc.
CGI databases – MySQL, PostgreSQL, CGI BIN, Python, support for Flash, DHTML, Shockwave, etc.
JustHost Basic:
One website
50 GB website space
Unlimited bandwidth
Standard performance
Includes 1 domain, 5 parked domains, and 25 subdomains
5 Email accounts supported
100 MB/ account email storage
JustHost Plus – contains all the features found in the Basic version, with some changes:
10 websites
150 GB website space
Includes 1 domain, 20 parked domains, and 50 subdomains
100 Email accounts supported
500 MB/ account Email storage
Marketing offers ($150 worth)
Extras (worth $20/year)
1 SpamExperts
JustHost Prime – contains all the features found in Plus, and also adds:
Unlimited number of websites
Unlimited website space
Includes 1 domain, unlimited parked domains, unlimited subdomains
Unlimited number of Email accounts
Unlimited number of Email storage
Great value marketing offers (worth $200)
Over $65 worth of extra per year
1 domain privacy
Backup protection – CodeGuard Basic
JustHost Pro – contains all the features of Prime, but it also adds a high-performance server and dedicated IP, SSL certificates, domain privacy features, and site backup.
If you need Managed WordPress hosting powered by Amazon Web Services, then Nestify is the perfect choice for you. This means that you’ll get access to all AWS services including autoscaling, automatic failovers, and global CDN.
With automatic scaling, your website will remain online during traffic spikes. This is incredibly useful during sales campaigns or holiday seasons.
All plans include Amazon Cloudfront CDN, DDoS protection, and web application firewall for free. These features are available on all plans.
Speaking of features, all plans will also get Google page speed optimization, PPC Optimization, and Bot protection for free.
Nestify doesn’t have any page view or bandwidth limits, so it will be able to handle any amount of traffic without restrictions.
If you’re running a larger WooCommerce store, you’ll be pleased to hear that Nestify offers managed custom solutions with multiple databases and web servers. Lastly, there’s also 24×7 support by WooCommerce experts, if you encounter any problems.
Overall, Nestify is an amazing hosting service and a perfect choice for all your business projects.
Ionos offers a great range of features designed to make your WordPress experience easier to understand and use, faster than the average hosting site, and can also optimize your platform and offer great security features.
This software helps you get started by offering a WordPress assistant that guides you through the entire process from the setup of your site to customization options based on the purpose of your site.
Additionally, you can manage information and data because Ionos also has a great range of design templates and the possibility to install many useful plugins.
If you have Ionos installed on your computer, then this software will automatically update to the latest version of WordPress, to keep your site up to date with the latest features and options.
One of the best features of Ionos is its state-of-the-art infrastructure which is designed with the latest security technologies, offering advanced DDoS protection, malware, and other malicious attacks.
Ionos is powered by PHP and NGINX and also customized specifically for WordPress with 2GB guaranteed RAM and 360 Gbit/s fiber connectivity. As a result, it offers great speed and stability.
The entire range of databases is stored on your website using SSD technology, therefore your website will run smoother and faster, and can also increase your SEO scores on Google or other search engines.
Because 1&1 Ionos offers a great number of useful features, this program was released in 3 different versions, each with different features:
Ionos Essential – an all-inclusive pack that allows you to create and manage a WordPress page:
Allows 1 managed WP website
25 GB SSD storage
2 x 1 GB MySQL database
Up to 10 email accounts
Free Domain
Ionos Business – contains all features of Essential, more plugins, and offers better performance for larger websites:
Allows 2 managed WP website
100 GB SSD storage
10 x 1 GB MySQL databases
100 email accounts
Free Domain
Ionos Pro – has all the features of the Business edition, and adds:
Allows 5 managed WP website
200 GB SSD storage
50 x 1 GB MySQL databases
500 email accounts
SiteLock malware protection – enhanced protection against online threats
RailGun content delivery network – caches your website and distributes it to 62 data centers around the world and users receive data from the closest server, allowing you faster loading times
Yes, WordPress is the best CMS (Content Management System) for enterprises because it contains valuable tools such as UI flexibility, e-commerce stores, and cutting-edge domain security.
Is WordPress hosting free?
Reliable hosting isn’t free, and it usually comes with a monthly fee. So on the whole, there’s no free WordPress hosting.
There are companies that provide free hosting for your WordPress, but they don’t offer great support, speeds, and many other features that other companies do.
How can a good hosting service help grow my business?
If you want to better understand how WordPress hosting works, read on. There’s a variety of services available today and making a choice isn’t exactly simple.
➡ Outsourcing resources
Investing in a physical server costs a lot of money so it is a far better option to choose a web-hosting WordPress service that offers the same capabilities as a physical server would.
Plus, managing your own server can be a great deal of effort for your business to handle. It requires updates, servicing, and upgrades that are performed automatically by a hosting service.
➡ Manage more websites
Moreover, you can manage a great number of websites, at a fraction of the cost. Companies that offer hosting services lease their hosting space to you, based on your specific needs.
It’s a lot more convenient and efficient to hire a professional service for hosting than dealing with those aspects on-site.
➡ Conserve work power
Your IT manager is already handling the internal network and if you have a lot of endpoints scattered across many offices, that will be more than a handful.
By employing a hosting service, managing your websites will be a matter of simply controlling their features from a console and managing the upkeep. As a result, the entire process will be simplified.
In this article, we explored some options on the market that offer great hosting features for your business website.
We hope that you found the best one for your business because if you do, the results will come up really soon.
Keep in mind that for a business website, the most important aspects are security and upkeep, especially if you’re hosting client data and email accounts.
The software presented in this article covers all your needs, such as website creation with 1-click options, website management, and website customization with templates and plugins.
Hit the comments section below and tell us about your experience with your hosting service and help others choose the best one for their business.
Microsoft ended its last quarterly earnings report with a cautiously optimistic projection for FY22 Q4, warning that “adverse economic or market conditions that may harm our business,” could result in lower revenue for the quarter, and it seems things have caught up with the company.
Microsoft fell just shy of its projections for FY22 Q4, hauling in $51.9B in total revenue and $16.7B in net income on $20.5B in operating income. The diluted earnings per share for investors comes in at $2.23 which represents a 3% increase year over year.
This is the first time since 2016 Microsoft failed to meet or exceed its own earnings projections.
Ironically, much of Microsoft’s business was up for the quarter and even its revenue and net profit saw modest increases but the company projected just a bit higher and is now explaining its misses with the following reasonings:
Unfavorable foreign exchange rate movement within the quarter negatively impacted revenue and diluted earnings per share $(595) million and $(0.04), respectively. Additional details are provided in the Earnings Call Slides.
Extended production shutdowns in China that continued through May and a deteriorating PC market in June contributed to a negative impact on Windows OEM revenue of over $(300) million
Reductions in advertising spend contributed to a negative impact on LinkedIn as well as Search and news advertising revenue of over $(100) million
With the ongoing war in Ukraine, we made the decision to significantly scale down our operations in Russia. As a result, we recorded operating expenses of $126 million related to bad debt expense, asset impairments, and severance.
As part of a strategic realignment of our business groups, we recorded employee severance expenses of $113 million, excluding Russia
Here are Microsoft’s business highlights for the quarter
Productivity and Business Processes
Office Commercial products and cloud services revenue increased 9% driven by Office 365 Commercial revenue growth of 15%
Office Consumer products and cloud services revenue increased 9% and Microsoft 365 Consumer subscribers grew to 59.7 million
LinkedIn revenue increased 26%
Dynamics products and cloud services revenue increased 19% driven by Dynamics 365 revenue growth of 31%
Intelligent Cloud
Server products and cloud services revenue increased 22% driven by Azure and other cloud services revenue growth of 40%
More Personal Computing
Windows OEM revenue decreased 2%
Windows Commercial products and cloud services revenue increased 6%
Despite the doom-and-gloomish headlines, Microsoft managed to return $12.4B back to shareholders for the quarter through dividends and repurchases of stocks, which represents an increase on its buyback programs year over year.
Once again, Microsoft warns of increased cloud computing competition, potential government litigation and regulatory activity could pose disruption in next quarter for the company.
On the positive side, Microsoft’s search efforts continue to quietly improve, as the advertising business chalks up another 18% of growth year over year (missing the projected 20%), and that’s heading into the big Netflix partnership which see that revenue total increase over time.
There a several Harry Potter video games based on the series of the same name fantasy novels written by British author J.K. Rowling.
The initial game series was released by EA starting with 2001. There’s a game for each book in the series, with the final book having two separate games, though.
Apart from this official series, there were some other official individual games, developed by different publishers, based on the Harry Potter universe. To make things even better, there are online games based on this super fantasy novel.
In this guide, we have gathered the three best Harry Potter games you can easily play online, as we did with the best all-time browser games to play.
Quick Tip:
For the best gaming experience, we recommend usingOpera GXas the main browser since it brings a couple of exclusive features for gamers.
For sure, you will find the free ad blocker very useful, and the customizable themes and design are a delight. Not to mention that you can run other programs in the background as well, with a network limiter option.
Opera GX also comes with a built-in VPN service to secure your online activity, and even help you be anonymous.
Opera GX
Opera GX is a specialized gaming browser that also offers lightning speed internet browsing, all in one efficient and compact package.
There are various websites that offer free games online. You can play the best browser tower defense games, horror games, shooter games, and other types you can think of.
The only thing is that you might need to register free on some websites to play games, while some do not require registration.
What is the best browser for gaming?
To get the best gaming experience, you need to use a dedicated gaming browser. And your best option is Opera GX.
Opera GX is the first browser built specifically for gamers. It packs in features that allow you to get the maximum experience from your gaming sessions.
One of its endearing features is the GX control, which allows you to limit the resources your browser use. Also, with its Discord and Twitch integrations, you don’t need to switch apps to connect with your gaming community.
The Harry Potter games published by Electronic Arts were the first video games to take the Wizarding World into the gaming realm.
The series includes 9 games, one for each book in the official Harry Potter series, with 2 games for the last one, respectively.
All these Harry Potter games were developed to play on various consoles, from PlayStation to Xbox, Game Cube, or Wii, as well as online for PC and Mac.
The first two games, Harry Potter and the Philosopher’s Stone and Harry Potter and the Chamber of Secrets, are action-adventure types of games featuring puzzle-oriented gameplay.
With the third game, Harry Potter and the Prisoner of Azkaban the publishers turned towards the RPG genre. The gameplay is different on PC vs. PS2/Gamecube/Xbox.
How do you play them online?
The multiplayer feature was introduced only in the fourth game of the series, Harry Potter and the Goblet of Fire. Up to three players can join from the same console. This game plot closely follows the action in the book of the same name.
For the remaining three games, the developers dropped the multiplayer feature. Harry Potter and the Deathly Hallows part 1 and 2 are third-person shooter types of games, with rather negative reviews from game fans.
Ideally, you should start with the first game and continue with the rest until you finish the series. But, of course, you can buy any of the individual games on the official Playstation website.
Harry Potter: Hogwarts Mystery is one of the best free Harry Potter games you can play online. It was inspired by the Wizarding World and was released in 2018 for Android and iOS.
The game is free to download and play up to a certain point, after which you need to make in-app purchases to continue.
You have your own personal avatar – a student attending Hogwarts – that you can create and customize; you can learn spells, attend magic classes, embark on various quests with witches and wizards.
Note that the game is set before the action of the official Harry Potter series, but fans can still relate to the familiar universe.
Players have appreciated the interactive gameplay and the new universe but have complained about the slow unfolding of the story.
Harry Potter: Wizards Unite is augmented reality and location-based game released in 2019 for Android and iOS.
It comes in two game modes: single and multiplayer. Players must create their avatar on the world map, then choose their profession and their wizarding house.
The gameplay focuses on traveling around various Wizarding locations, exploring multiple challenges, and solving mysteries. Players can view the gameplay world through a smartphone.
Once again, the app is free to download and comes with in-app purchases.
The best online Harry Potter games help you enjoy the wizardry of the excellent fantasy book on your devices from just about anywhere. This list contains options for mobile devices and PC that you always access.
Are you looking for a list of the best browser horror games to play? Then, check our article for some interesting options to choose from.
Have you played one of these already? We’d like to hear your opinion, so give us your feedback in the comments below.
If you are looking for a way to fix Gmail autocomplete not working issue, go through this article to get the most effective solution.
Gmail’s Autocomplete feature enables users to select email addresses when they start typing something in the To field. Then, users can select an email address from a list of suggested contacts.
However, this handy feature might not always work for some users.
Why is Autocomplete not working?
There are various reasons that can cause trouble for the Gmail Autocomplete feature. It mostly includes the following:
Corrupted cache and cookies
Any of the active extensions on your browser
Outdated version of the browser
Problematic web browser
A problem from Google’s end
If you have any of these issues, Autocomplete feature of Gmail may fail to work properly. But, don’t worry, you can always solve this error.
How can I fix Gmail’s Autocomplete option?
1. Open Gmail in another browser
In some cases, Autocomplete might not work due to a browser issue. So, try utilizing Gmail in an alternative browser.
On this note, our recommendation would be to use the Opera One browser, with its multiple helpful features that can surely improve your workflow.
Switching from your current browser to Opera One is easy and takes only a couple of minutes.
After installing the browser using the button below, you can import website preferences and bookmarks with just one click, and you’re good to use Gmail right away.
With the Autofill option, you can automatically complete online common forms such as addresses, credit card information, or any other frequently used details.
To enable the Autofill feature:
Open Chrome.
Go to chrome://settings/autofill using the browser’s address bar.
UnderAutofill, choose the category you are interested in (Passwords, Payment methods, Addresses, etc.)
Turn on theSave and fill… option.
If you want Opera One to automatically fill in forms, click theAdd button to add an address or payment method. You can edit these details at any time by deleting or adjusting them.
Opera One
Try using Gmail in Opera and improve your workflow using the Autofill feature.
Enter the contact details in the Create new contact box.
Press the Save button. Then Autocomplete should suggest the contacts added when users start typing their email addresses in the To field.
This workaround applies to users who keep the I’ll add contacts myself option selected. They need to manually add contacts to their contact lists. It will solve Gmail contacts not showing when composing an email in Chrome or any other browsers.
4. Open Gmail in Chrome’s Guest mode
Open your browser.
Click on the profile icon and go to Guest mode.
Some Chrome users have said they’ve fixed Autocomplete not working by turning Chrome’s incognito or guest browsing mode on.
Type chrome://settings/ in the URL bar and press Enter.
Expand Advanced, click on Reset, clean up, and then Restore settings to their original defaults.
Click on Reset Settings.
6. Delete Gmail accounts from Apple devices
Go to Settings and tap on Mail.
Go to Account.
Then, delete the Gmail account you want.
Users utilizing their Gmail accounts on Apple devices might need to delete those accounts from the iPads or iPhones to fix Autocomplete.
The above resolutions might fix Gmail’s Autocomplete for some users. Note that Gmail’s Autocomplete has had bugs in the past, so on some occasions, users might need to wait for Google to fix Autocomplete issues.
If you configured the Firefox proxy settings to work with Burp, but it’s still not working, then fret not.
It is usually the incorrect Firefox proxy settings that prevent Burp to intercept while testing your website on localhost.
But if you come across proxy errors on Windows 11, you can refer to our detailed guide for some quick solutions.
Why is my Burp suite not working?
It could be possible that along with incorrect browser proxy settings, the IP address and port number also do not match as configured in a running Proxy listener.
For example, the Burp’s default settings with the IP address is 127.0.0.1 and port is 8080. But it may differ from your current configuration leading to the issue.
However, in this post, we have some quick solutions to help you fix the Burp suite proxy not working in the Firefox issue.
Quick Tip:
We feel that switching to a browser that fully supports Burp Suite proxy settings is now or never. Opera One’s built-in proxy VPN is a nice find for configuring Burp suite from outside your browser.
By ticking the Use proxy for local servers checkbox, you may define whether the proxy should be used for even local servers. Moreover, Opera One comes with a built-in AI.
Opera One
The advanced settings in this browser provide the setup for Burp Suite proxy settings.
How do I fix the Burp suite proxy that is not working in Firefox?
1. Check if the Burp proxy listener is active
Open Burp, navigate to the Proxy tab, and click onOptions.
Next, under Proxy Listeners, check if the entry with the interface value is set to 127.0.0.1:8080. Also, check if the box next to Running is check-marked.
If it’s not running, then click on the gear icon (Settings) on the top left and select Restoredefaults.
2. Enable the Firefox proxy settings
Launch Firefox, click on the three lines (menu), and select Settings.
Next, under the General section, go to the Network Settings section.
In the Connection Settings dialog, select Manual proxy configuration.
Enter 127.0.0.1 (default Proxy Listeners address for Burp,) in the HTTP Proxy field.
Next, enter 8080 (default Port) in the Port field. Then, check the box next to Also use this proxy for HTTPS.
Now, in the No proxy for field, delete anything that shows up. Then press OK to save changes and exit.
You have successfully turned on the proxy settings in Firefox and the Burp suite is ready for web testing.
Open the Burp suite, go to Proxy and then select the Intercept tab.
Next, click the Intercept is off button to turn it on.
Make sure that Burp is running, and then launch Firefox that’s configured for HTTP URL and not HTTPS.
Your browser should now wait for the request to complete. This is because Burp has intercepted the HTTP request that your browser is trying to send.
Now, in Burp, go to Proxy and then click on theIntercept tab again.
Here, you should see the intercepted HTTP request in the main panel. Click on Intercept is on to turn it off and the request will be released from Burp.
Now, return to your browser and you should now see the requested page loading as it would during normal browsing.
NOTE
Make sure you have checked that the proxy listener is active and have configured your chosen browser.
What can I do if the Burp suite CA certificate is not working?
To access the Burp suite URL and download the CA certificate, Burp should be running. Also, Firefox needs to be sending traffic through Burp’s proxy listener.
But if you have not already done that, you would first need to configure Firefox to work with Burp as shown above.
However, if you are still unable to download the Burp suite CA certificate, then you would first need to check if your proxy listener is active as explained above.
But, if it still does not work, you can try a different port as shown below;
Try a different port
Find a different port that is free and then in Burp, go to the Proxytab and click on Options.
In the Proxy Listeners panel, select the entry with 127.0.0.1:8080 and click Edit.
As the Edit proxy listener dialog opens, go to Bind to port, enter the number for the new port and click OK.
Now select the Running checkbox to activate the listener. You should now be able to access the Burp suite.
If selecting the checkbox doesn’t activate the listener, it means that the new port you entered may be blocked as well. In this case, so you can try another port.
You can now download and install the Burp CA certificate and since you have already configured the proxy settings in Firefox, you can continue using the suit for web security testing.
The Burp Suite is a great tool set for web developers to perform security testing for their web pages or web applications.
However, if the proxy is not set correctly in your browser, the suite may fail to work. That’s exactly why you should try the above solutions to fix the Burp suite proxy not working in the Firefox issue.
Want to apply a backdrop filter like blur or color filters to the background of your design in Firefox, but it’s not working?
Using the backdrop filter you can create some amazing background effects on your webpage, but the feature needs to be enabled in your browser to work.
But if the CSS is not working in Firefox and you are unable to customize the look of your website, you can follow the solutions in our detailed post.
Although enabling the property in Firefox may help you fix the backdrop filter not working issue, there could be other reasons behind the glitch as well.
Quick Tip:
Backdrop filters are fully supported in the recent versions of the Opera One browser. Opera One is one of the first browsers to support Cascading Style Sheets, and Firefox quickly followed.
Opera One is lighter, faster, and more stable than Mozilla Firefox, plus it includes a variety of add-ons to help you create background effects more efficiently. It also features a native AI.
Opera One
Full support for backdrop filters and a vast library of extensions for fancy customizations.
But if it’s a bug that you have not encountered previously and need expert assistance, you can file a bug report on their official issue tracker for technical support.
According to Firefox’s recommendation, you can also file a bug or defect on Github, ask support questions or get help with product troubleshooting.
How does the backdrop filter work?
The backdrop filter in Firefox is a CSS property that lets you add visual effects to your web page like blur or color filters to the background of the design.
Because the filter is added to the entire background of the design, the effect will be visible only when you make the design or its backdrop somewhat transparent.
You can also refer to the MDN Web Docs by the Mozilla developer support for the basics of how to apply a backdrop filter to your element.
However, if the backdrop filter is still not working in Firefox version 102.0, you may need to re-enable the preferences in config as explained above.
When it comes to destruction machines, nothing compares to the mighty power of a tank.
The roar of its canon, the whirr of its treads, and the thrum of its engine have become synonymous with doom and destruction, annihilating the enemy troops like terminators from the future on a mission to take over the earth.
For many gamers, there is nothing as exciting as having such raw power; blowing up rival tanks and helicopters on daring missions while conquering the battlefield on a military tank.
If you are looking for the ultimate best tank games, here is our list of the top-rated tank games for Windows 10 and Windows 11.
Can you play tanks online?
Yes, as a matter of fact, you can. If you are a tank aficionado, rest assured that there are software choices to support your passion online.
But, even though there are a lot of tank game choices out there, know that not all of them have online gameplay and you have to play them offline.
That being said, when you do find the game you like, all you need is a stable internet connection and the tactics needed to outsmart your opponent.
Among the most popular online tank games out there, we can mention:
World of Tanks
War Thunder
Valkyria Chronicles
Steel Armor: Blaze Of War
Arma 3
We have prepared a generous list for you, containing the best choices of both online and offline tank games, so that you can take your passion into the virtual world and wreak havoc.
Quick Tip:
Why not have a browser tailored exclusively for gaming needs? The Opera GX browser is one such browser; it includes the GX Corner, where you may play a variety of tank online games.
Furthermore, you may configure resource limiters for RAM and CPU to reduce latency and PC heating. Plus, if you have a team you can chat with them on Discord, which is integrated into the sidebar.
Opera GX
Be the coolest of them all and play tanks online on this gaming browser.
We’re glad you asked that question because the answer is yes, there is. Although many of the tank games out there offer a high degree of realism, some are better than others.
Among the most popular choices of highly-accurate tank simulators are World of Tanks and Steel Armor: Blaze of War.
What are the best tank games that you can play on PC?
The best way to engage in enormous tank battles is to go the free online MMO route – and that’s exactly whatWorld of Tanksis.
The game boasts of over 382 armored vehicles which are categorized according to the nations they belong to, which include Soviet Union, USA, and China among others.
The vehicles come in different types ranging from light and medium tanks for light battles to heavy tanks and tank destroyers for mass destruction.
Various battle modes exist and you can even customize your vehicles to suit your style. Since this game is not a simulator, control is very easy and anyone can play it.
TheWorld of Tanksgame is very popular and it holds the Guinness World Record for Most Players Online Simultaneously.
If you are on Windows 10 or you have a touch device, as well, we recommend you check out World of Tanks Blitz. And if you do install it, make sure to avoid many of thereported issues.
World of Tanks
Embark now on an epic online battle in this world-record free multiplayer game.
Set in World War II, Graviteam tactics is a squad-based tactical war game that focuses on the brutal tank combat battles across the rugged terrains of Europe.
The game has over 60 real-world vehicles from the Soviet Union, the UK, and Germany to play with. Not only are they heavily armored, but detailed and realistic too.
The destructible battlefields featured in this game give the player a real-like experience.
Houses can be collapsed, enemy defenses shattered, and you can even damage the enemy’s tanks to compromise their aiming mechanism.
This is one of the best tank games you can play if you enjoy explosions that leave craters on the ground and heavy war machines that damage the terrain.
Battlefield 4is one of the best multiplayer games and it comes with some meaty tank experiences.
Set in 2020, the game involves a war story between superpowers USA, Russia, and China and follows Sgt. Daniel Recker as he fights in favor of his country.
The environment is well selected for battle, featuring collapsible buildings and other structures to give the game a real-life experience.
Players can take the role of commander and gain tactical insight into the gameplay, as well as the power to launch commands and orders such as missile strikes.
Set in a fictitious continent resembling Europe around World War II, the Valkyria Chronicles highlights a continent divided into two and governed by two powers: the Empire and the Federation.
The empire’s mission is to invade and secure the precious natural resources of Gallia – a neutral country located between the two superpowers territories.
The armies of the Federation Seventh Platoon have to fight back against the invasion so as to unify the continent. You assume the role of Welkin Gunther – a commander of the Seventh Platoon and lead the soldiers to fight off the imperial forces.
War Thunder is another fantastic and free-to-play tank game inspired by World War II.
The game comes with a variety of aircraft and a fleet of armored vehicles so you can never run out of options.
Most of the tanks are from World War I but you will also find fleets from other significant conflicts such as the Spanish Civil War as well as tanks from the Soviet Union, Germany, and the USA.
In War Thunder, you can fight with other players either on land on in the air. There are various battle modes including arcade battles, realistic battles, and simulator battles.
The best thing about War Thunder is that you will be getting regular updates including new vehicles and maps. If you install the game, make sure to avoid many of the usual bugs by followingthis guide.
Steel Armor: Blaze of war is one of the most advanced tank simulators on the market today.
The game comes with two key parts: the tactical part which puts players right in the battlefield with a tank platoon to command, and the operational part which allows players to choose the battlefield, supply their units as well as repair and augment their vehicles.
You will love driving the phenomenal US M601A and the Soviet T-62 tanks, each crafted with sophisticated technology, cockpit, and crew to interact with.
Operations will take you from Iran to Afghanistan and other countries where you will fight real like battles.
Arma 3 is an MMO tactical shooter game that features realistic ground, air, and sea combat, as well as a large variety of vehicles and cutting-edge weapons.
The game allows players to play cooperatively with their squads to accomplish missions against highly competent AI or take on other squads in a variety of scenarios over long distances in the open-world terrain based on real-world Mediterranean islands.
Arma 3 is set in a dystopian future in 2035, so it comes with state-of-the-art weaponry. You will use the laser range finder to aim and hit the bad guys even if they hide in the dark.
The opportunity to steer these steel beasts is undoubtedly one of the most thrilling experiences for gamers.
While only a while ago these games were only available for PlayStation and Xbox consoles, with the advancement of technology, now they are also available for PC.
Thus, if you are looking for old tank games for PC, free tank games for PC, or simply tank simulator games, we can definitely help you out with that.
Remember that some tank games for PC are offline, while other tank games for PC are online, so it all depends on how you want your experience to be.
On that note, if your desire is to find a tank game for PC with multiplayer, you will surely find something you like in the list above.
Have you played any of these games? Let us hear your experiences in the comments section below.
The best browser for enterprise is vital to a company’s online activity and success. Having the right online tools will make business operations, communications, and public relations efforts easier.
Therefore, companies are careful about their choice of browser as well as the interface or features offered.
Factors that rank top as features for a business browser include security, extensions, privacy, speed, and mobile compatibility. This article considers some of the best browsers for enterprise operations to use today.
What are the factors you consider when choosing an enterprise browser?
Choosing a web browser for your company and ensuring that your business will thrive as a result is a challenging task.
That said, you will surely need a browser compatible with your critical Web-based enterprise applications, isn’t plagued with security issues, and can be easily supported by IT.
When searching for new enterprise browsers, the main keywords should definitely be performance, security, platform support, features, extensibility, standards support, and application compatibility.
Remember that a business will require a lot more from a browser, so selecting top browsers for office work will be done by following much more rigorous requirements.
One of the first things to note about Opera One is its speed technology for faster browsing using Opera Turbo Mode. Even with slow Internet connections, Opera One functions easily on your mobile or desktop.
Besides faster browsing, Opera One also includes a Virtual Private Network (VPN) to help secure your browsing experiences.
The browser also has Ad-blocker and other security features that protect you from hackers, phishing, malware, fraud, etc. Opera’s access to extensions and Add-ons gives users more tools for their business operations.
Plus, enjoy the customizable workflow and workspaces with instant messaging and social media apps like Twitter, Facebook, or Instagram to chat and stay in touch with the latest news without leaving your browser’s homepage
Let’s quickly look at its key features:
Fully customizable UI with themes, modes, sidebar display, and keyboard combo included
Turbo mode to further enhance speed
Integrated ad blocker to eliminate distractions, optimize web page loading times, and streamline your browsing experience
Integrated VPN tool to anonymize your browsing and unblock geo-restricted content
Integrated snapshot tool to capture your screen effortlessly
With all these features, Opera is surely the best enterprise browser.
Opera One
Utmost privacy for confidential data and top speed for even faster business ops.
This next browser has all the benefits you would need for enterprise browsing, especially regarding privacy and data tracking issues.
AVG browser offers you a simple UI and lots of support, including an ad-blocker, a Privacy Cleaner to erase browsing data, and one-click integration with antivirus protection.
More so, you’re secured against phishing attacks and complex cyber threats due to a VPN shield.
In addition, this business-suited browser can secure your navigation with HTTPS encryption, blocking tracking scripts and masking all digital fingerprints left behind.
Let’s quickly look at its key features:
Malicious websites protection to prevent virus infection or data theft
Adware security and built-in ad blocker for uninterrupted navigation
Integrated VPN connection
4x quicker navigation
AVG Secure Browser
Activate this enterprise browser today and encrypt your browsing for good.
Regarding enterprises, UR Browser is arguably one of the best browsers for enterprises due to its robust features. With a tool like UR Browser, businesses can enjoy secure transactions plus site unblocking features using VPN cover.
UR uses technological innovations to protect business operations online. UR innovations include Ninja Mode, HTTPS Redirect, AdControl, Anti-tracking, and Anti-fingerprinting to protect business operations online.
It offers three privacy levels depending on your business needs, making UR Browser the best web browser.
Let’s quickly look at its key features:
Includes Chrome extensions to enable the inclusion of add-ons and extensions required for safe and secure online operations
UR browser eats up fewer system resources when running
4 x faster download technology
It opens website pages with speed to save on business time
Compatible with most sites, operating systems, and devices
UR Browser
Grow your business with a fast and reliable top-range browsing solution!
Google Chrome – Customizable with thousands of extensions
Google Chrome enjoys one of the most popular support from organizations. With the decline in patronage for Internet Explorer, Google Chrome enjoys more market share.
It works on almost any device and platform with exceptional user-friendly features, privacy, security, and speed.
Google Chrome offers one of the best browsers for the enterprise when it concerns apps and extensions. Businesses can enjoy extensive business experiences with multiple apps and extension functionality/ add-ons.
Google Chrome offers excellent features and is double one of the best enterprise web browsers on the market.
Let’s quickly look at its key features:
Ad-blockers and LastPass Password Manager are the go-to tools used popularly by businesses
Google Chrome is a default browser for Android devices, which means ease of business operations
Clean, clutter-free User interface
With Chrome Enterprise, you enjoy more features, including third-party add-ons, over 100 auto-updating features, and apps with a business-focused Chrome app store
Also, Chrome’s two-step verification provides an additional layer of security. When the browser crashes or closes suddenly, the user still can access the last tab visited.
Chrome’s major drawback includes storing client data that might contain vital information or breach privacy.
Mozilla Firefox now offers more security and privacy to its users following several technological improvements. Hence, it would be safe to say Mozilla Firefox is one of the best browsers for the enterprise in regard to privacy via Firefox ESR version.
Its impressive private browsing feature helps keep business operations safe online. Businesses can keep their data secure from ad companies and other phishing activities using the Mozilla Firefox browser.
Another interesting feature of Mozilla Firefox is its compatibility among several devices, PC and mobile.
Mozilla Firefox is a great browser, and it’s one of the best web browsers for business.
With the re-launch of Chromium Edge, Microsoft is set to make a positive statement for business security.
Microsoft Edge synchronizes with Windows 10 and 11 to offer business and individual users excellent features. Edge offers one of the best browsers for enterprise security online against phishing URLs and malware.
Edge for Business, with a small briefcase icon, also incorporates the app extension features and the Chromium extension, allowing users to install add-ons for better functionality.
With its wide array of features, Microsoft Edge is one of the better enterprise web browsers, so be sure to try it.
Getting access to the best browser for the enterprise helps keep you in business and profitable.
Using Opera One with its all-encompassing features or any other browser mentioned above can help secure your business against losses or Public Relations issues.
We hope that our enterprise web browsers list will be of help to you when the time comes for you to select the best business browser.
Needless to say, picking the best browser for your business is one of the keys to success, so you don’t want to be careless with your decision.
What are you currently using? Share your experience with us by reaching the comments section below.
When attempting to use the Zoom application or join a room, you may encounter errors such as Zoom error code 1001.
The most likely cause of this error is that you have another Zoom account outside your current organization.
It is also possible that your email address is not recognized as belonging to your Zoom account. No matter the reason, you can solve this problem, and here’s how to do it.
How to update Zoom?
Before attempting the fix recommended in this article, ensure you have the most recent application update.
Launch the application, click on the profile, and select check for updates to update the app. The application will be updated to the latest version automatically.
Quick Tip:
Using a reliable browser like Opera is the most effective way to verify and update Zoom. If you’re experiencing trouble updating your app, log in through the browser and verify your account.
You can also save Zoom meetings to your speed dial and utilize the built-in proxy VPN service to create a secured environment for Zoom meetings, even on your phone.
Opera
Verify your account and update Zoom meetings through the Opera browser.
You should be prompted to validate your email address after signing in. Navigate to your mailbox, open the confirmation email, and choose Switch to the new account.
Your Zoom should now be entirely connected with the license of your corporation. Restart Zoom and verify that you have access to all platform functions.
2. Disable your antivirus
In the Start menu, type Windows Security, then select the Windows Security app from the search results.
Go to Virus & threat protection tab, and under Virus & threat protection settings, select Manage settings.
Turn off Real-time protection.
3. Reinstall Zoom
On Windows:
Search for Control Panel in the Start menu and select the first app.
Navigate to Programs and thenUninstall a program.
Locate Zoom, right-click and then click Uninstall.
When prompted to confirm that you want to uninstall this program, click Yes.
Try restarting your device to see if it resolves the problem. Check that you’ve chosen the right camera for Zoom.
Sometimes your computer will default to the incorrect camera, which you can adjust in a Zoom setting.
Additionally, antivirus software is known to cause problems on computers by interfering with your internet connection or preventing other programs and services from running properly.
You can temporarily disable your antivirus software to see if it is causing the Zoom error.
The main reason for this problem is the validation Zoom login error or disconnected email from your corporation license.
There is only one method to fix these issues as the cause is known, and there are threads about it on Zoom error code 1001 Reddit.
However, if the problems persist even after the fixes, restart your app or update it.
Zoom may also show this error as a poor network connection, but you still will be able to connect to the meeting but won’t be able to hear the voices.
Steam is the most popular gaming platform on desktop, but many users reported that the Steam browser isn’t working for them.
This can be a problem and prevent you from browsing the Steam store, but you might be able to fix that using one of our solutions.
Why is my browser not working on Steam?
To tell you the truth, the Steam browser has always been quite buggy, a tad slow, and a lot of times completely unresponsive over the years.
One of the main reasons why this is happening is that the Steam web browser’s cache has become corrupted.
In that case, the store might not load properly, which can lead to massive frustration among gamers, especially when time is of the essence.
How do I fix Steam if the web browser doesn’t work?
1. Access Steam from an alternative browser
All features available in the Steam Browser can be accessed from Steam’s website. You can use any browser for this purpose, but for the best results, we recommend using Opera GX.
Created for gamers especially, the browser has its own ad blocker that will block ads and tracking scripts and make pages load faster. For an extra layer of protection, there’s a free VPN with unlimited bandwidth.
The GX Control lets you set limits on how much RAM, CPU, and network usage your browser takes up.
This way you allow the browser to distribute your system’s resources evenly so that you don’t have to close any processes while playing a heavy-resource game.
And for sure you’ll find the GX Corner extremely useful to stay in touch with the gaming community and keep an eye on all the news and updates in the industry.
Opera GX
We all want an unparalleled gaming experience and a browser that is up to the task, which is why Opera GX was created.
Start it again and check if the issue is still there.
Users reported that this problem appears only in the Steam Beta client, so you might want to switch to the regular client in order to avoid this issue.
3. Remove HTML cache
Open File Explorer and navigate to:
C:Usersyour_usernameAppDataLocalSteamhtmlcache
Note: Go to View tab in File Explorer and check Hidden items if you can’t find the AppData directory.
Delete the contents of the HTML cache folder.
Now press Windows Key + R and run the command: steam://flushconfig
You can also delete the browser cache right from the Steam client by doing the following:
Go to Steam, thenSettings.
Navigate to Web Browser and select Delete Web Browser Cache.
Now restart Steam.
After doing that, check if the problem is still there.
4. Disable the DirectWrite feature
Open Steam and select Settings.
Select Interface, disable DirectWriteand press OK.
Restart Steam and check if the problem is resolved.
5. Use –no-cef-sandbox parameter
Locate your Steam shortcut, right-click it and choose Properties.
In the Target field add the following after the quotes:
-no-cef-sandbox
Now click on Apply and OK.
Start Steam and check if the problem is resolved.
Why is nothing on Steam loading?
Throughout the years, many Steam users have reported situations such as the Steam Store page not loading at all.
This can be the result of a slow Internet connection, the cache becoming corrupted, and so on. There are Steam users that go for years without experiencing such issues, or never do, but the problem is more common than you think.
But, as we’ve shown you, the way to go about it is simple and pretty straightforward, so there’s no need for real concern.
If you don’t know how to open the Steam browser, and you are dealing with problems such as the Steam in-game browser not working, try out this simple troubleshooting process.
Many users thought that the Steam browser is disabled, and fiddled with the Steam settings for the web browser, to no avail.
Now you know what to do if the Steam web browser keeps refreshing, or if the Steam web browser is black with no response.
Steam browser is a crucial component of Steam, but if the browser isn’t working, be sure to try all of our solutions.
If you’ve used another solution that worked, share it with us in the comments and we’ll take a look.
Some users have posted on Mozilla, Google, and Microsoft forums about their Chrome, Firefox, and Edge browsers opening multiple tabs by themselves.
Those users have said that new tabs keep on opening in their browsers automatically or when they click links.
Learn how to fix this with the steps below.
Why does my browser keep opening multiple windows?
This is not at all a good sign, and you should consider taking immediate safety measures. Know that browsers opening multiple tabs automatically is often due to malware or adware.
That being said, if this is the case, we strongly recommend that you rapidly check for adware, browser hijackers, and PUPs.
This is a serious matter and should be dealt with accordingly, as malware infestations can lead to severe security breaches and loss of data.
How do I stop multiple windows from opening in the browser?
1. Switch to a new browser
Aren’t you tired of the same old browsers? Here’s our recommendation. Use a browser that has been around for a long time, so that you benefit from all the experience over the years. The same one should have been redesigned and reborn, completely modern.
Don’t have one in mind? We do. It’s called Opera One. It’s based on the Chromium engine, with multiple personalization options and a lot of features that are quite useful while browsing.
For instance, you might have a lot of tabs opened. You can perform a search through all your open tabs.
Another scenario is that you encounter geo-restricted content while browsing. With Opera One, which comes with a built-in VPN, you can quickly enable it and get past the restriction easily.
How about increasing your productivity? Things such as My Flow and Workspaces have been designed specifically to help with many opened tabs and repetitive actions.
Opera One
Protection from adware with a built-in ad-blocker, AI prompts utilities, and fluid navigation.
Resetting browsers can also fix them by opening multiple tabs automatically, as that will turn off (or remove) their extensions, clear browsing data (which might include virus scripts), and restore them to their default settings. To reset Google Chrome, enter chrome://settings in the browser’s URL bar and press Return.
Click the Advanced button.
Then scroll down and click Restore settings to their original default configuration.
Some users might need to reinstall their browsers to fix the tabs keep opening error, which will fix corrupted installations. To do that, launch Run by pressing the Windows key + R hotkey.
Then users can open the uninstaller by entering appwiz.cpl in Run and clicking OK.
Select the browser to remove.
Click the Uninstall option.
Select the Yes option to provide further confirmation.
Then restart Windows after uninstalling the browser.
Download the latest version of the browser from its website. Then reinstall the browser.
4. Purge adware with a dedicated tool
Browsers opening multiple tabs automatically is often due to malware or adware. Therefore, scanning for adware with Malwarebytes can often fix browsers opening tabs automatically, so run the application.
Click the Scan button to check for adware, browser hijackers, and PUPs.
Using Malwarebytes provides you with two main benefits:
It can easily detect any installed malware and remove it. This applies even to rogue browser extensions that might have gotten themselves installed in Chrome or Firefox.
While running, because of the website protection module, this type of malware will not be able to install on your system again.
So you will not have to worry about these types of problems ever again.
This is a potential fix more specifically for Firefox users. Try adjusting content type settings by clicking Firefox’s Open menu button and selecting Options.
Then click the General tab.
Scroll to the Applications section.
Select content types listed there to choose alternative actions for them in the Actions column. Select the Always ask action for content types.
How do I know if my computer has malware?
Just like with a disease, there are certain symptoms that indicate a malware infection. First of all, your system will be significantly slower than usual.
Besides the fact that your screen will be full of useless and annoying ads, your system will constantly crash, you will always be low on disk space, and the browser’s settings will change.
Furthermore, your trusty antivirus software will stop working, giving you a false sense of security, and you will also lose access to files on your system.
There are other signs that could indicate the same thing as well, but these are the most obvious ones and you should prioritize dealing with the situation if you observe this.
Millions of people worldwide are dealing with dire situations where their data has been compromised, leading to loss of files, money, even identity theft, and much worse.
So, if you see your Chrome opening multiple tabs, or any other browser performing actions that lead to multiple windows opening uncontrollably, stop what you’re doing and eliminate the threat.
As we said, a browser opening multiple tabs is never a good sign and is by no means a mistake. It’s the number one sign that your system has been compromised.
However, after reading this guide, you will have the proper tools to combat this. Leave a comment below if you have any further questions regarding this delicate matter.
Virus infection isn’t exactly a common occurrence, but certain viruses can inflict strange behavior in both Windows 10/11 native and third-party applications.
One resilient virus is posing as quite a headache, even though it’s not a high-risk threat. Namely, users reported the same issue: my browser keeps opening random web pages!
Another similar behavior is that the browser keeps opening by itself in Windows 10/11. This can be quite an annoyance, but, with a little patience, you can resolve it.
In case you’re affected by this or a similar virus in your browser, make sure to check the solutions below. As an extra caution measure, you may also install an antivirus for browsing in Windows 10 and 11.
Why is my computer opening new tabs on its own?
This is not normal, so it should raise some flags. In fact, browsers opening multiple tabs automatically is often due to malware or adware.
That being said, scanning for adware will often fix browsers opening tabs automatically, so scanning for adware, browser hijackers, and PUPs should be your first priority.
How do I check for malware on my browser?
From your browser’s Settings section, you should be able to perform a software scan and determine if it has been compromised or not.
If the scan process indeed detects malware within the browser itself, you should have an option to remove it.
How do I stop random tabs from opening?
1. Scan for viruses
Click on the shield icon from the notification area to open Windows Security.
Select Virus & threat protection.
In the new window, click the Scan options button.
Check the Full scan option and hit the Scan now button to launch a full system malware scan.
On most occasions, this seemingly erratic behavior is caused by adware intruders. Most of the time, those nasty applications are mistakenly installed with other third-party programs.
So, the first option in this situation is to run a full scan with Windows Defender, the built-in antivirus from Windows as shown in the steps above.
The Microsoft tool is pretty effective, but it can turn out not to be powerful enough to eliminate this malware. In this case, we recommend installing a third-party antivirus with the latest technologies for identifying and eliminating any malware from your PC.
It will detect and get rid of this pesky virus in no time and it will ensure further protection for your system and even your webcam or router.
The life of a common user would be much harder without web browser extensions and some of them are irreplaceable on a daily basis.
As you are probably aware, extensions or add-ons are provided by third-party sources and offer browser improvements in various categories.
But the fact that the third-party sources provide users with extensions opens up a loophole, a chance for malicious software to install in the background and meddle with your browser.
There are many ways an adware extension can access your browser, but only a few ways to get rid of it.
If the previous step hasn’t helped you remove suspicious extensions, you’ll need to get your hands dirty and remove them manually.
Just navigate to Extensions or Add-ons (it varies) and remove every unknown or untrusted extension. Restart your browser and look for changes.
If that’s not enough and your tabs still open uncontrollably, continue with the steps below.
In the Windows Search bar, type control, and open Control Panel.
Select Programs and Features.
Find and uninstall all untrusted programs and restart your PC.
In addition to the integration through extensions, adware viruses can come in the form of alternative third-party software included in major programs.
Most of the time, users install them mistakenly without even seeing their activity or prompt. They tend to work in the background, so that shouldn’t come as a surprise.
Even though they are sneaky by nature, these virus-ridden applications are applications, nonetheless. So, in most cases, you’ll be able to locate them within the Programs list in the Control Panel.
From there, you can easily uninstall them and hope for a resolution. Follow the instructions above to remove the suspicious program from your system.
Furthermore, it’s advised to delete their remaining folders from the Program Files and AppData folders.
4. Remove malware directly from the browser
4.1. Chrome keeps opening new tabs (virus)
Open Chrome.
Click on the three dots located in the top right corner, then select Settings.
Select Reset and clean up.
Click on Clean up computer.
Press the Find button.
4.2. Firefox keeps opening new tabs/virus keeps opening new tabs
Open Firefox.
Click on the Menu button in the top right corner and select Help.
Click on Troubleshoot mode.
Press the Restart button.
Click on the Refresh Firefox button.
NOTE
Keep in mind that performing this action will remove your extensions and customizations, but you won’t lose essential information like bookmarks and passwords.
Now, you can run a third-party cleaning tool and remove the remaining files. You can do it manually in the Program Files (Program Files x86) and AppData folders.
Restart your PC.
Download the browser installation file and install it.
Check for changes and make sure that the problem is gone.
Finally, if you’re still stuck with the haunted browser and a pesky ghost virus that keeps opening your tabs erratically, the reinstallation of the browser itself is the next obvious step.
Now, the gravity of the problem insists on a more thorough approach than usual, so, in this case, you’ll need to clean all of the remaining leftovers that are not covered by the uninstaller.
Most users will turn to PC cleaning tools because they run dedicated scanners that are able to detect unnecessary files that are still on your PC.
With that, we can conclude the article. We hope that you found it helpful and informative and you managed to fix this issue with multiple windows opening uncontrollably in Windows 10.
What can I do if the browser keeps opening by itself in Windows 10?
Again, we’re going to say that, if you are going through this situation, it’s not a good sign at all and immediate actions are in order.
If your browser keeps opening by itself in Windows 10, that is more than a clear sign that your computer is infected with a virus.
We strongly recommend a full scan using Microsoft’s antivirus that comes with your OS. There’s a possibility that you will need help from our recommended third-party security tool.
Yes, you can get a virus opening random websites, and this can lead to multiple windows opening uncontrollably on Windows 10, and other operating systems as well.
In addition, make sure to take better care of third-party programs or add-ons, and don’t click on pop-ups and suspicious links.
Be careful because this thing can also happen at the office. Check out the best antiviruses for Windows Server to protect your company’s computers too.
What’s your experience with browser viruses and how do you usually deal with them? Tell us in the comments section below.
Many reported insufficient permissions messages in Opera GX and this error will prevent you from downloading certain files, so it’s important to know how to fix it properly.
Why am I getting failed insufficient permissions?
Your antivirus or browser security settings are the common culprit of this problem.
How do I fix Opera GX insufficient permissions error?
Before we do, check your antivirus for features such as Safe Files since they can prevent file download. Alternatively, temporarily disable your antivirus and check if that helps.
1. Use incognito mode
Open the Opera browser.
Click on the Operalogo at the top-left and select the New private window option. Alternatively, you can press Ctrl + Shift + N to open a new incognito window.
Visit the website.
Try downloading the file in private mode.
2. Disable extensions
Launch the Opera browser.
Click on the Opera logo.
Select Extensions > Extensions.
Disable all extensions and try downloading the file.
Toggle on Downloads folder access and Let apps access your downloads folder options.
4. Adjust site settings
Open Opera.
Click on the Opera logo at the top left.
Select Settings.
Click on Privacy & security from the left pane.
Select Site Settings.
Expand Additional Settings and select Insecure content.
Add the URL of the website you are trying to download files from under Allowed to show insecurecontent.
5. Disable Firewall
Open the Start menu.
Search for Windows Security and open it.
Click on Firewall & network protection from the side panel.
Select your network.
Toggle Microsoft Defender Firewall to off.
We hope that the above solutions helped you fix the Opera download insufficient permissions error. This isn’t the only download error, many reported Download failed, virus detected messages in Opera, but we have an entire guide dedicated to it.
QR (Quick Response) codes are a type of barcode data that users can scan with mobile devices to open website pages or connect with emails, phone numbers, and more besides.
QR codes are widely utilized in Japan, and they’re becoming increasingly prevalent in the West.
Google is now experimenting with a QR code generator for Chrome. Users have discovered a new QR code flag setting in Google’s browser.
There have also been reports of the Chrome QR code generator missing, but that is easily solvable.
Quick Tip:
Why waste your time with experimental features when you can load a QR extension in Opera One in no time?
To install a QR generator or reader in Opera One, access the extension store Type QR in the search box and choose an extension to your liking. Opera One also brings you a native AI if you need more help with your QR.
Opera One
Whether you’re looking for a QR code generator or any other add-on or extension, Opera is ready to deliver the best customizable options.
Click the QR Code Extension button shown directly below.
You can scan the code displayed with a mobile device.
Alternatively, click the Edit the QR Code button to open the page below.
Click the Save option, and select a file format for the image.
Enter a title for the image file.
Press the Save button. Thereafter, open the QR image to print it.
Click the Scan a QR code button on the extension to utilize a laptop or desktop webcam as a QR scanner. Then you can scan printed QR codes with a webcam.
How do I create a QR code for a URL in Chrome?
Open Chrome.
Click on the address bar and highlight the URL you want to turn into a QR code, and copy it.
Click on the QR code generator extension in the top right corner.
Select Edit this QR code.
Paste the copied URL and the extension will turn it into a QR code automatically.
What can I do if the QR code is not showing in Chrome?
In order to avoid being in such a predicament, or if you already are there, be sure to select Enabled on the drop-down menu for the Enable sharing page via QR Code setting.
You should also click the Relaunch button to restart the browser. Right-click a webpage and select the Generate QR code for the page option to open the Scan QR code box shown directly below
The QR Code Extension is just one of the numerous QR add-ons for that browser. Alternatively, you can enter website URLs into QR generator web apps, such as QR Code Generator.
With those extensions and apps, you can get QR codes for text, web URLs, MP3s, emails, image galleries, PDFs, and more besides.
So, whether you are using the QR code Chrome extension, or tweaking commands in chrome://flags/#sharing-qr-code-generator, now you know how to properly do it.
For an easy way to create a QR code for this page, use the Chrome built-in QR code generator as we showed you above.
For any other questions or suggestions, reach for the comments section below.
The Website Theme Manager is an Opera extension that empowers users to customize website appearances.
It facilitates adding, editing, or removing styles from website themes, including colors and fonts. Your customizations are conveniently stored for easy access.
How do I customize my Opera theme?
Click on the Preference button in the top-right corner of the screen.
Go to the Appearance tab, and choose any theme.
Scroll to the Start Page tab, then click on a wallpaper to use as your background display.
Opera offers extensive customization options. You can create themes with any image or detail on the Themes page. Plus, users can instantly switch themes after downloading new ones from the Opera theme store.
Selling game consoles is nothing new to Verizon, which has carried both PS5 and Xbox Series X|S stock in its online store. As of today (July 26) Verizon will get in on the Xbox All Access program.
For those not familiar with Xbox All Access, it is a monthly financing program in which qualifying customers can purchase a Series S console and Game Pass Ultimate for as low as $24.99 a month, for 24 months.
Really there doesn’t seem to be anything special about Verizon’s announcement. It is the same deal as with other retailers offering the Xbox All Access program. And as with most others, it will use Affirm to handle payments.
Verizon is now selling Xbox consoles as part of the Xbox All Access program. Xbox Series X / S consoles will be available, with prices starting at $24.99 a month for 24 months. Details: https://t.co/G49FIFoBuOpic.twitter.com/F2Vni4Gl2d
Verizon went pretty heavy on touting its 5G features in the announcement, stating,
Today’s announcement that we’re joining forces with Microsoft builds on Verizon’s promise of 5G growth and innovation across multiple platforms, including mobility, nationwide broadband and the most popular consumer offerings.
How exactly does 5G come into play here? According to Verizon’s announcement,
Thanks to Xbox Game Pass Ultimate, you can also take your favorite console games with you on-the-go. Whether you’re on vacation or commuting to work, Xbox Game Pass Ultimate and 5G Ultra Wideband can help you play your favorite Xbox titles from the cloud with ultra low latency and up to 10 times faster download speeds than Verizon 4G LTE, all on Verizon’s Mix & Match Unlimited plans. Pair your phone with your favorite controller or play with Xbox touch controls for supported games, and you are ready to jump in with the Xbox Game Pass app!
To be clear, there is no bundle being offered with Verizon service and Xbox All Access, nor is there an option to integrate billing.
The Verizon Xbox All Access deal will be available on verizon.com starting July 28. Discounts on Xbox accessories will also be available, such as $40 off Microsoft Xbox Stereo headsets and 50% off the Xbox Elite controller.