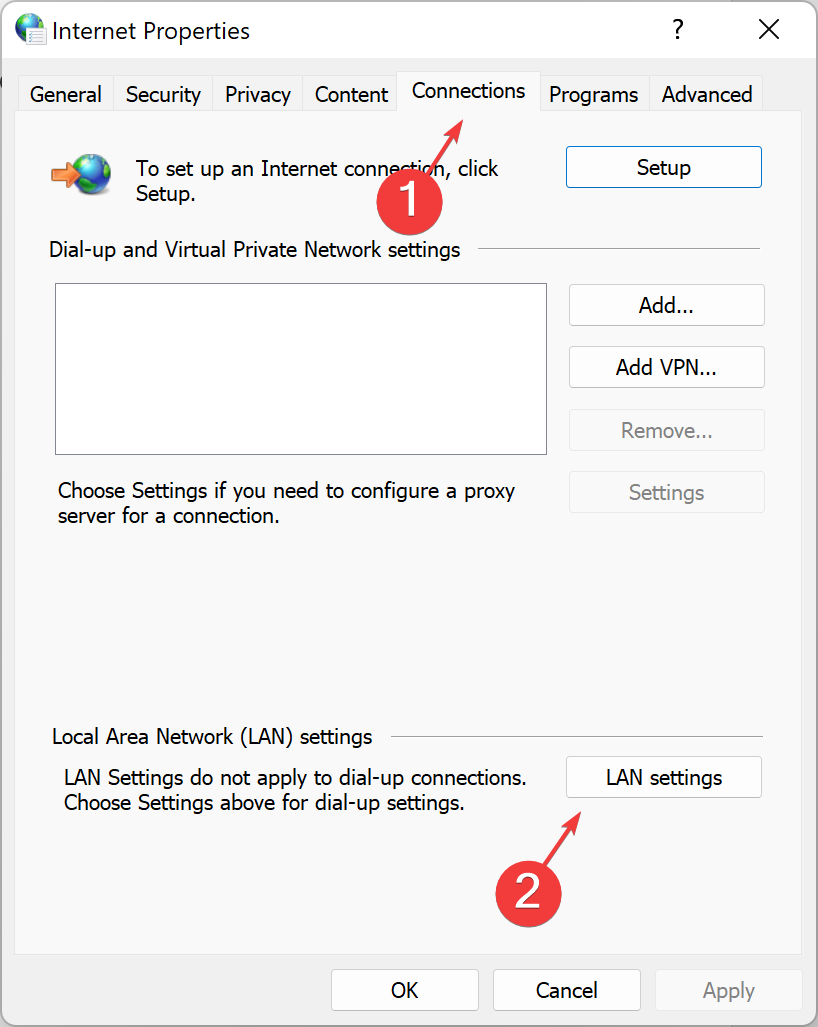
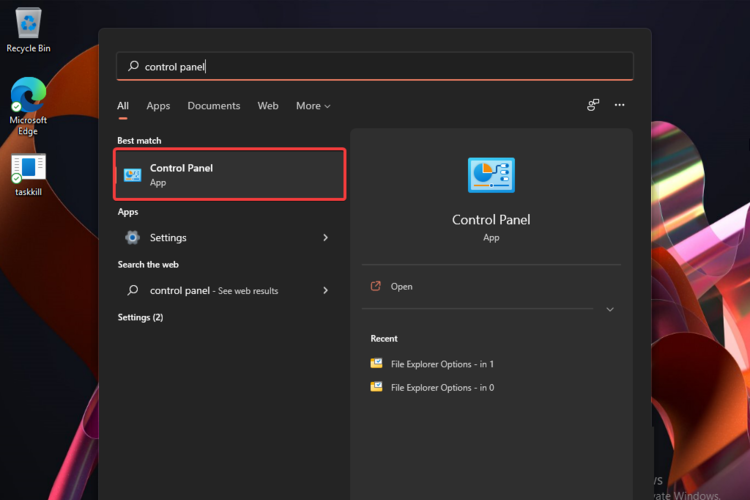
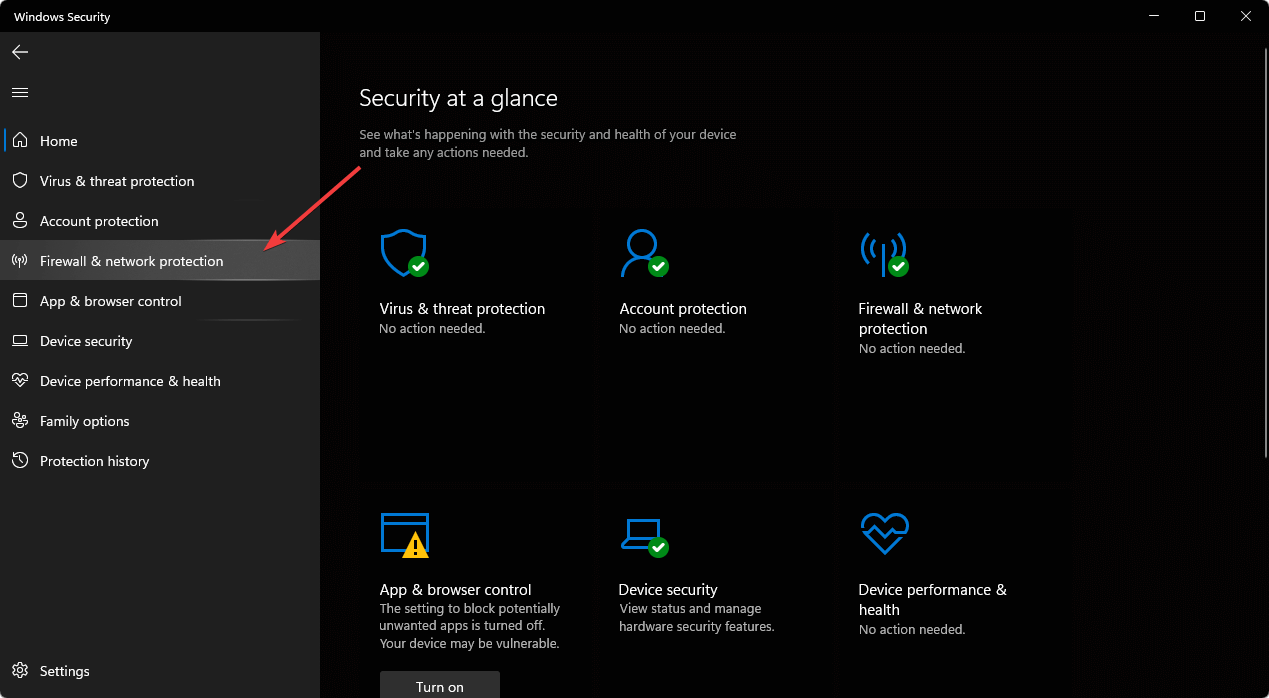
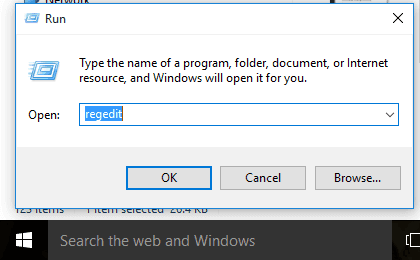
Packet loss in Rainbow Six Siege causes issues like rubberbanding, high ping, and disconnects, often due to network congestion.
High ping and jitter result from unstable connections, sometimes caused by ISP throttling. Follow the steps below to fix these connection issues and make R6 Siege run smooth:
How to fix packet loss in Rainbow Six Siege?
First, check the server status on Ubisoft’s official Rainbow Six Siege Status Page. Also, consider switching from WiFi to Ethernet.
Still having issues? Keep reading.
1. Update Network Drivers
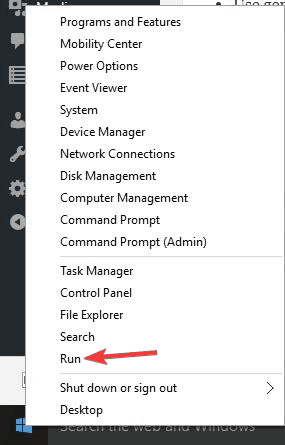
Press Windows + X and select Device Manager.
Expand the Network adapters section.
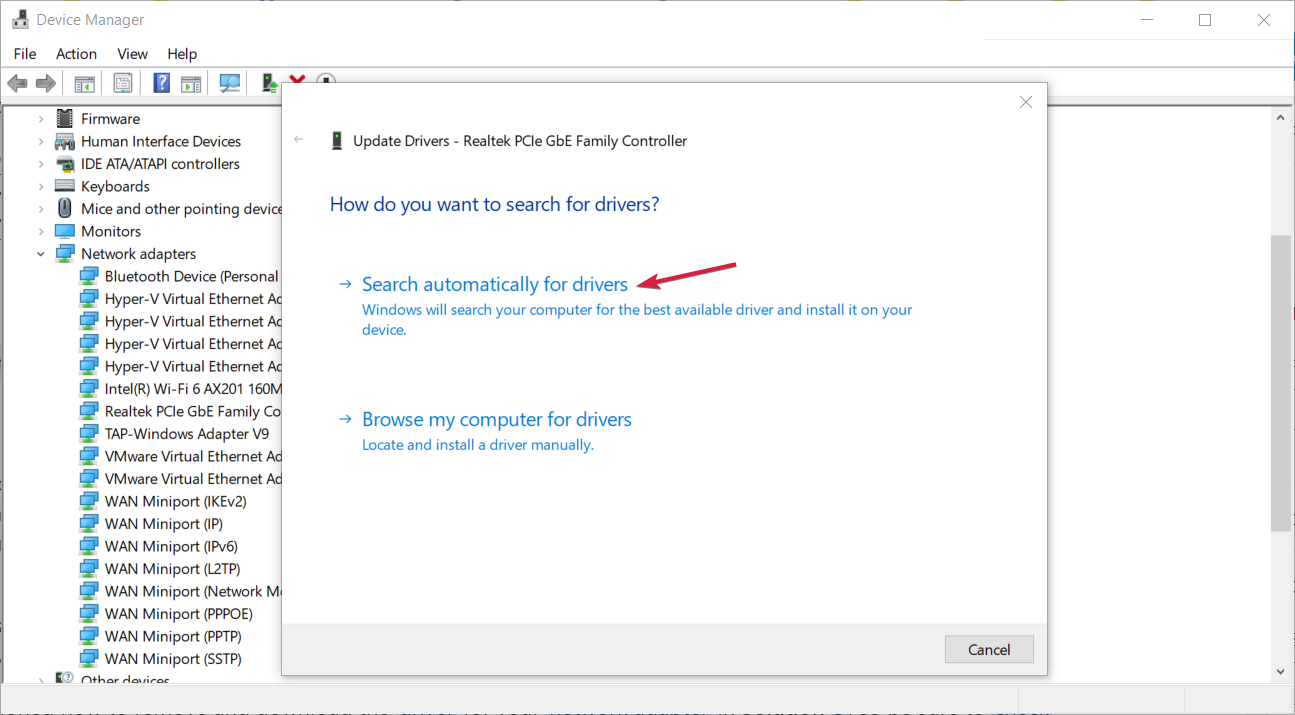
Right-click your active network adapter and select Update driver.
Choose Search automatically for drivers.
Restart your computer.
2. End Network-Intensive Processes
Press Ctrl + Shift + Esc to open Task Manager.
Click on the Network column to sort processes by network usage.
Right-click on any high-usage processes and select End task.
Close unnecessary background applications.
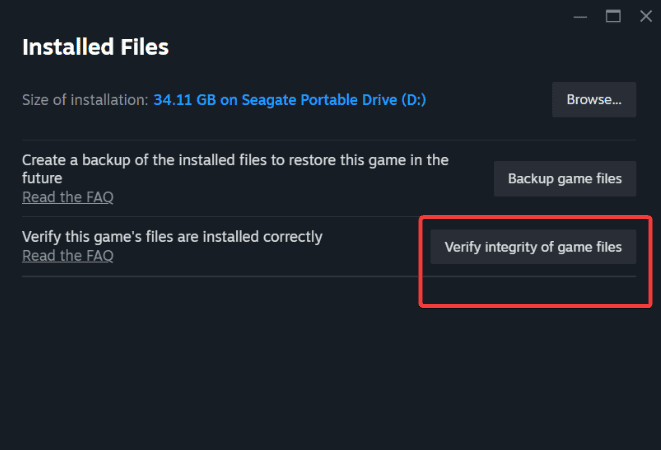
3. Verify the Integrity of Game Files
Open your game client (e.g., Steam, Uplay).
Navigate to your game library.
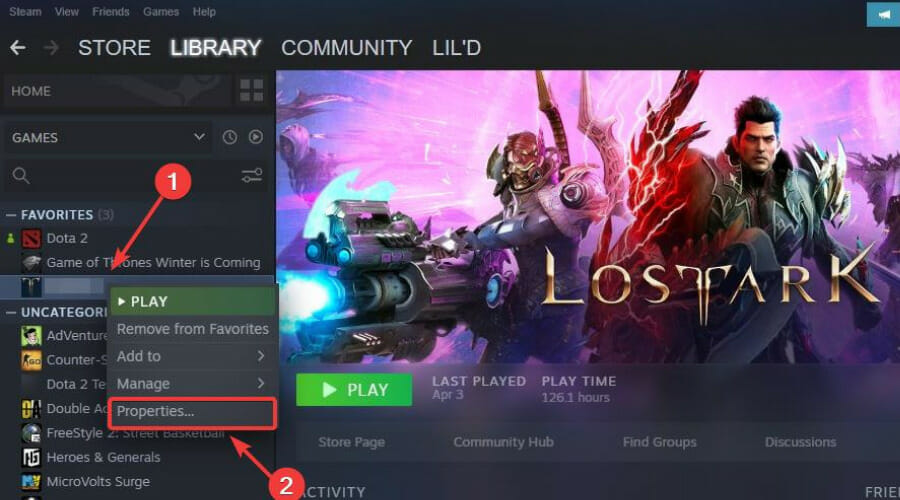
Right-click on Rainbow Six Siege and select Properties.
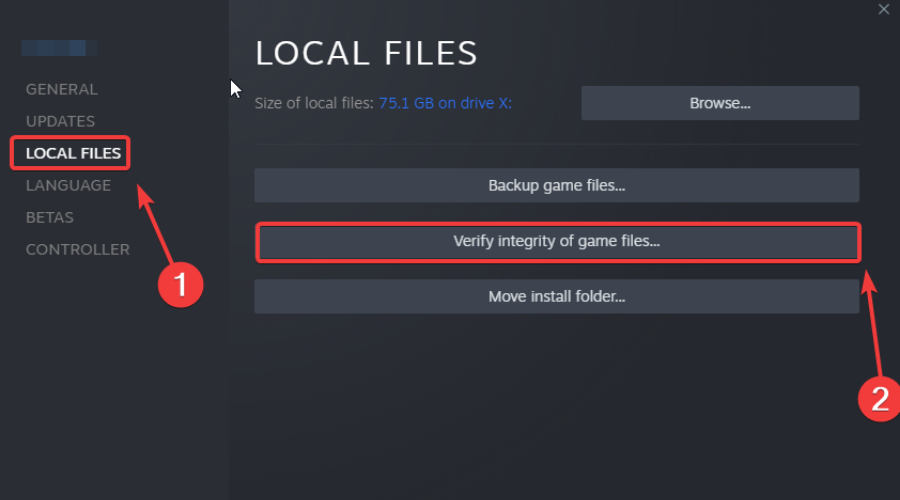
In Steam: Go to Local Files and click Verify integrity of game files.
In Uplay: Go to Games, select Rainbow Six Siege, click Properties, then Verify Files.
4. Flush DNS
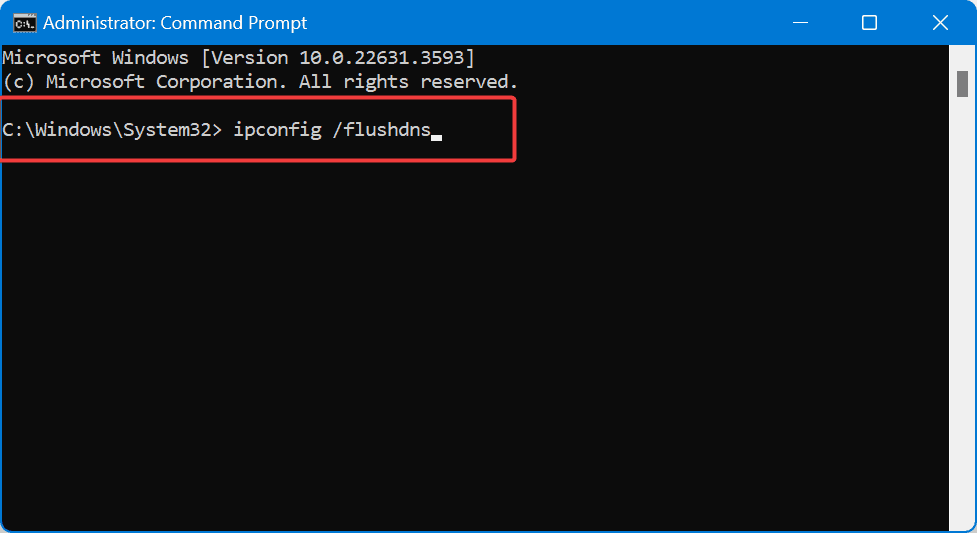
Press Windows + R, type cmd, and press Enter.
Type ipconfig /flushdns and press Enter.
Wait for the confirmation message.
Restart your computer.
5. Change the DNS Server Address
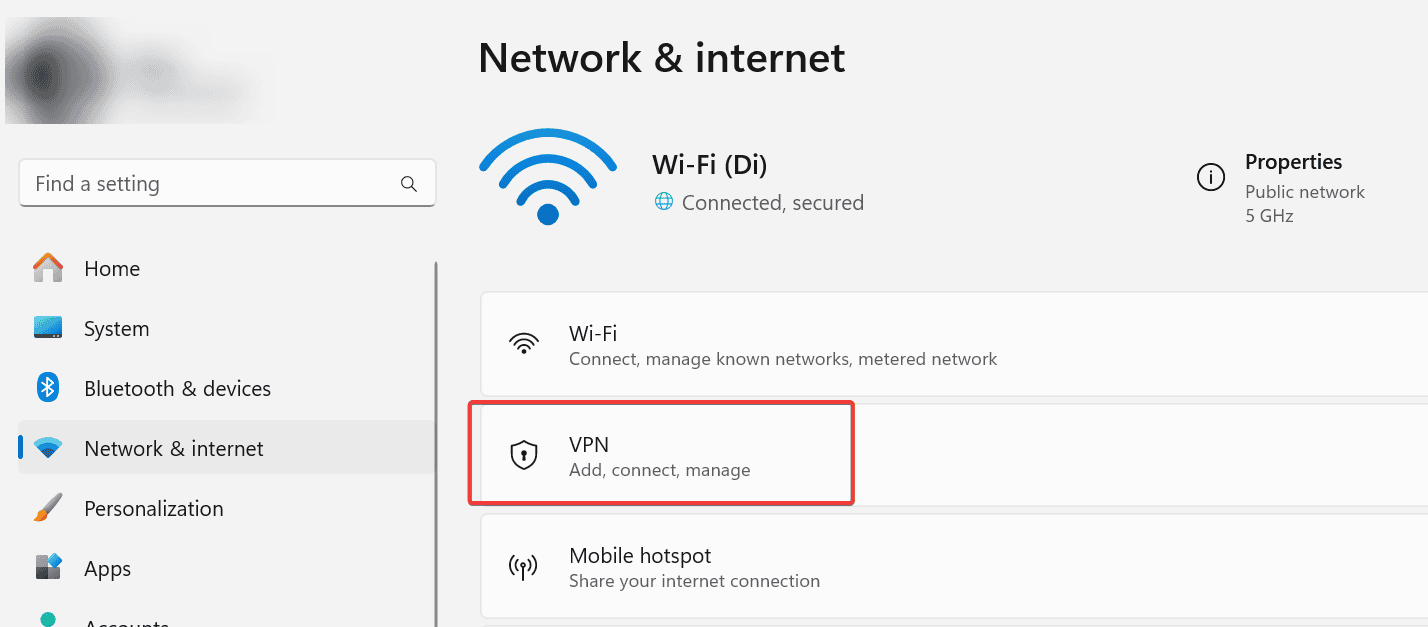
Press Windows + I to open Settings.
Go to Network & Internet.
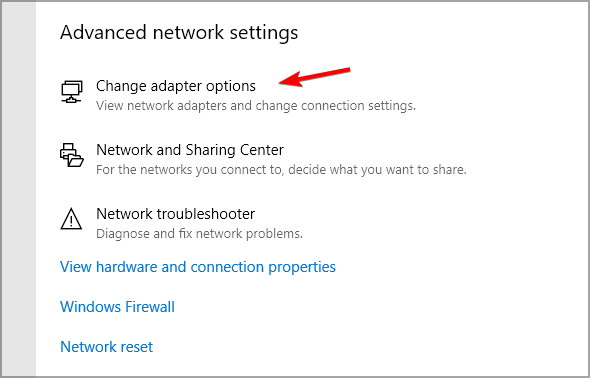
Click on Change adapter options under Status.
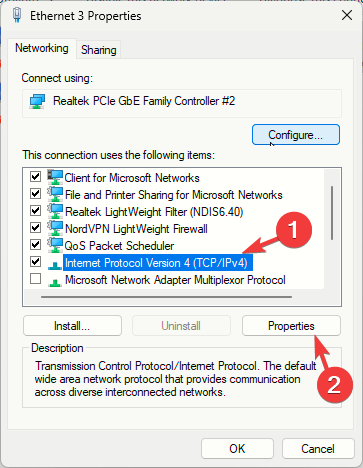
Right-click your active network connection and select Properties.
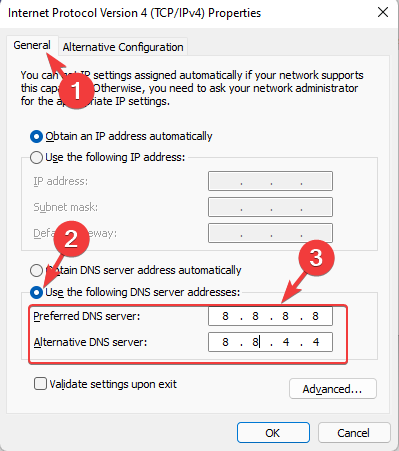
Select Internet Protocol Version 4 (TCP/IPv4) and click Properties.
Select Use the following DNS server addresses.
Enter 8.8.8.8 as the Preferred DNS server and 8.8.4.4 as the Alternate DNS server.
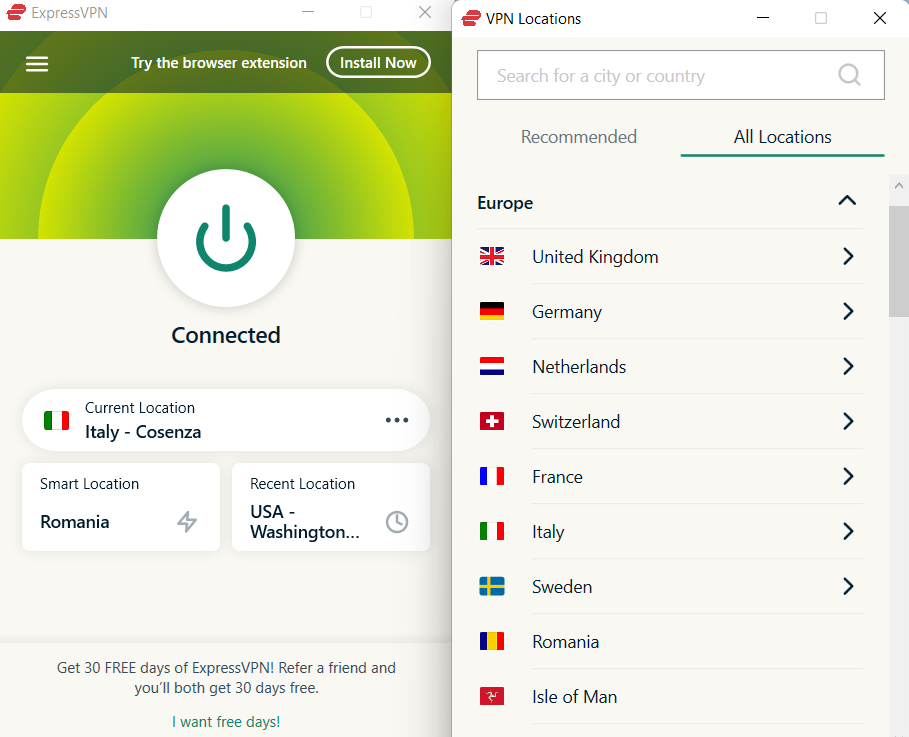
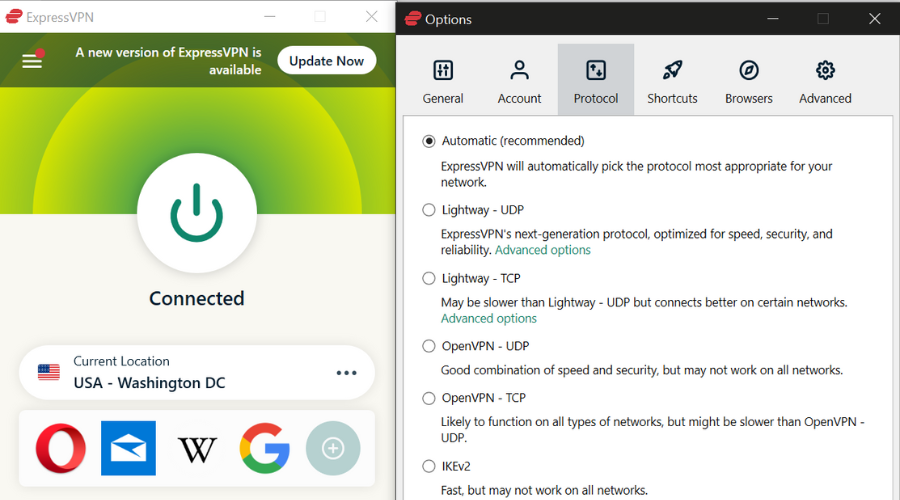
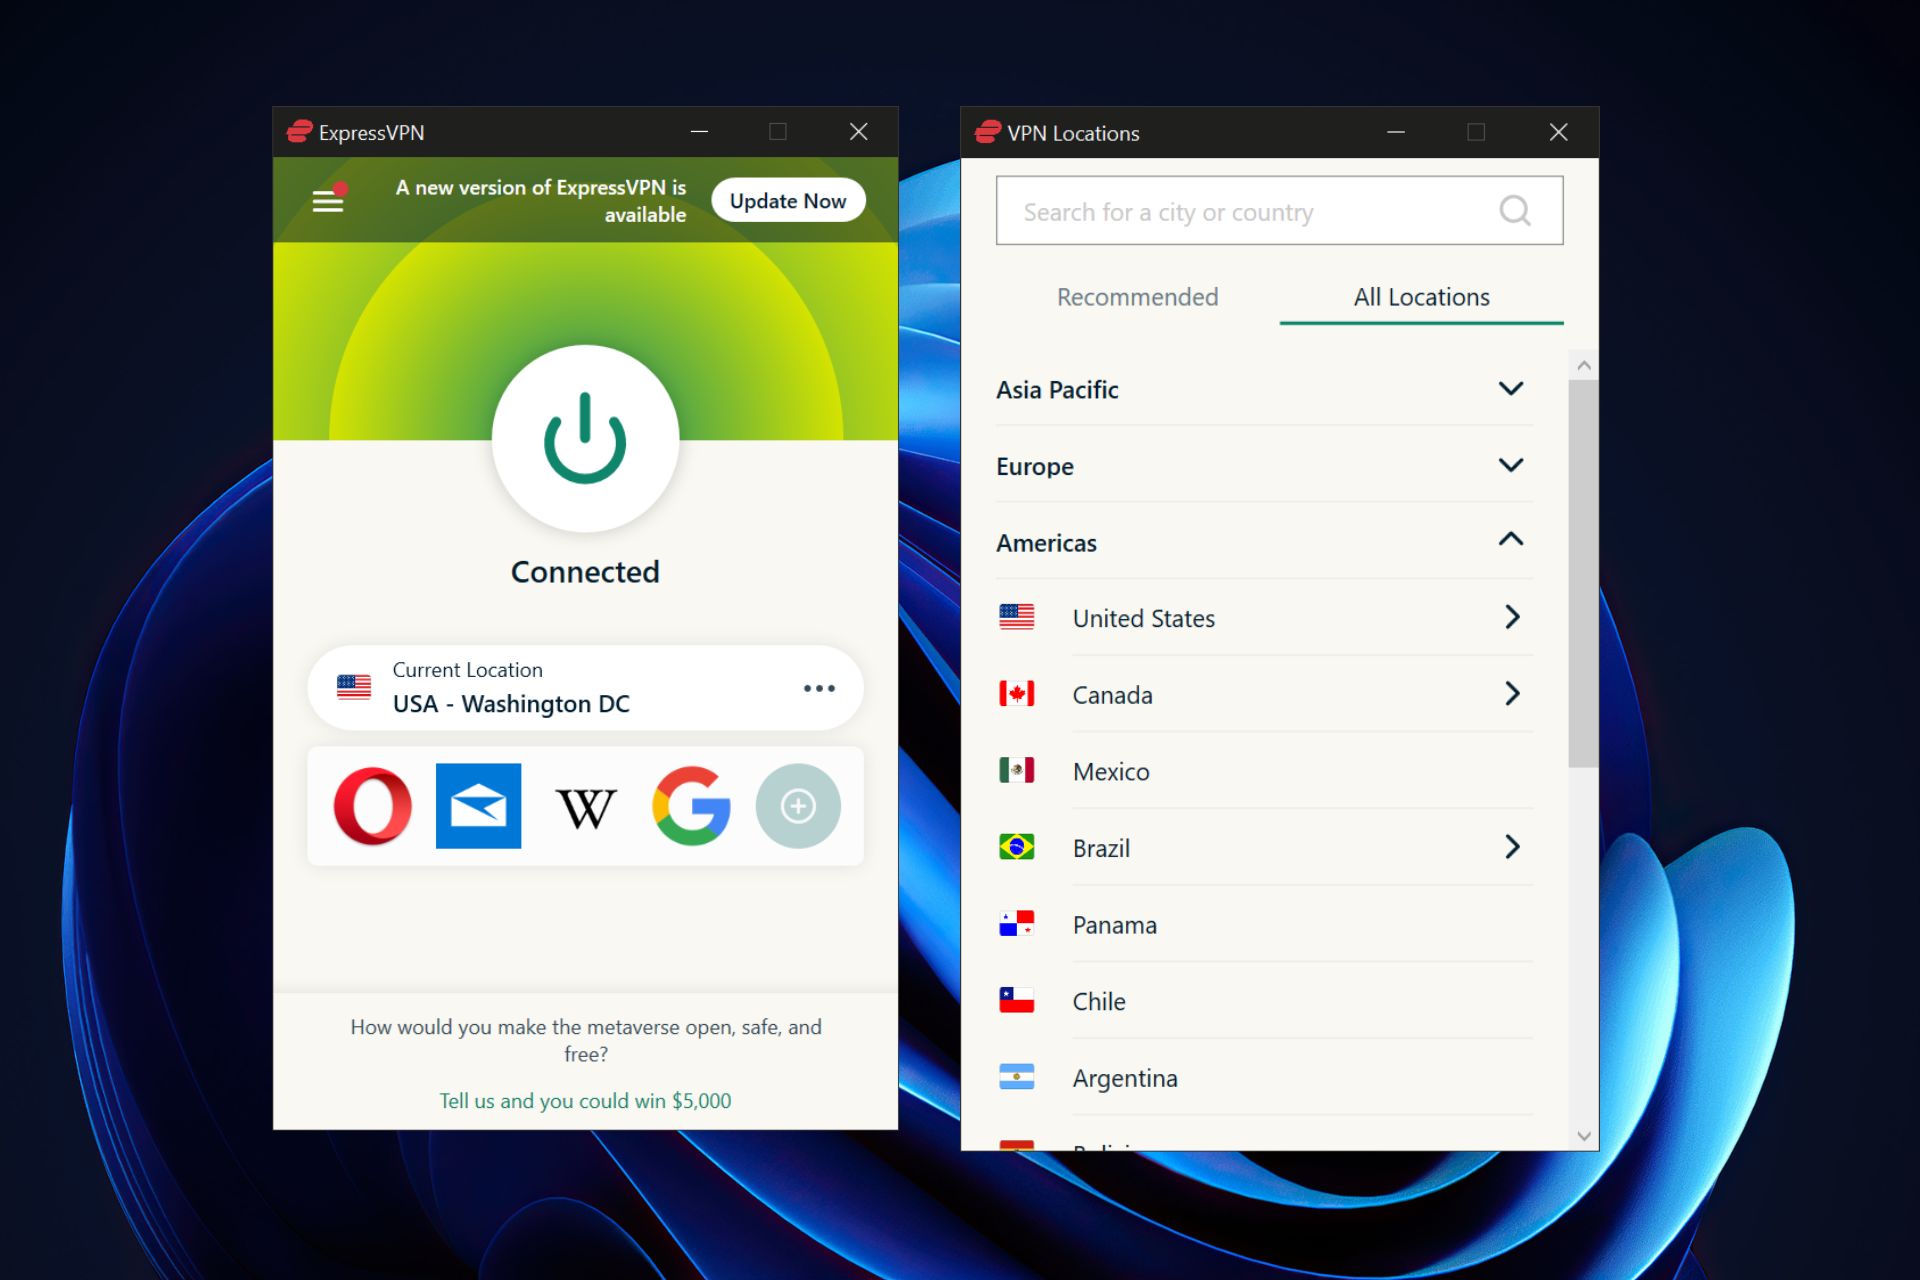
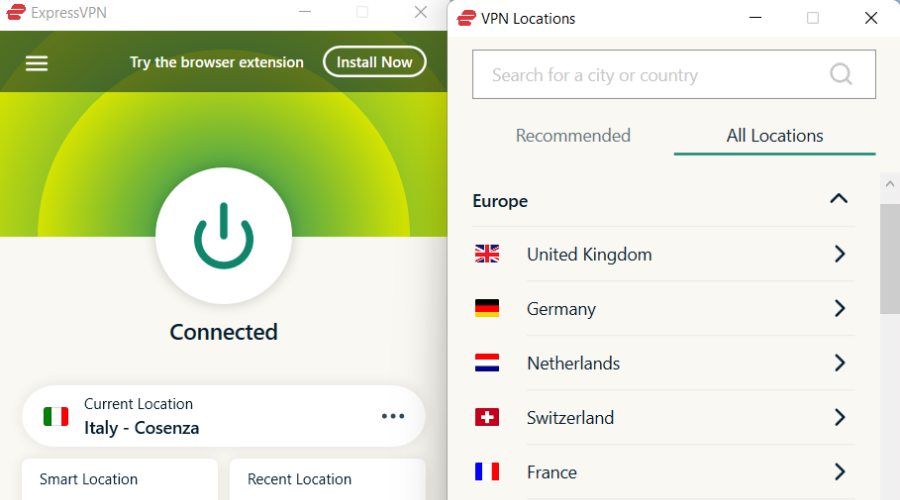
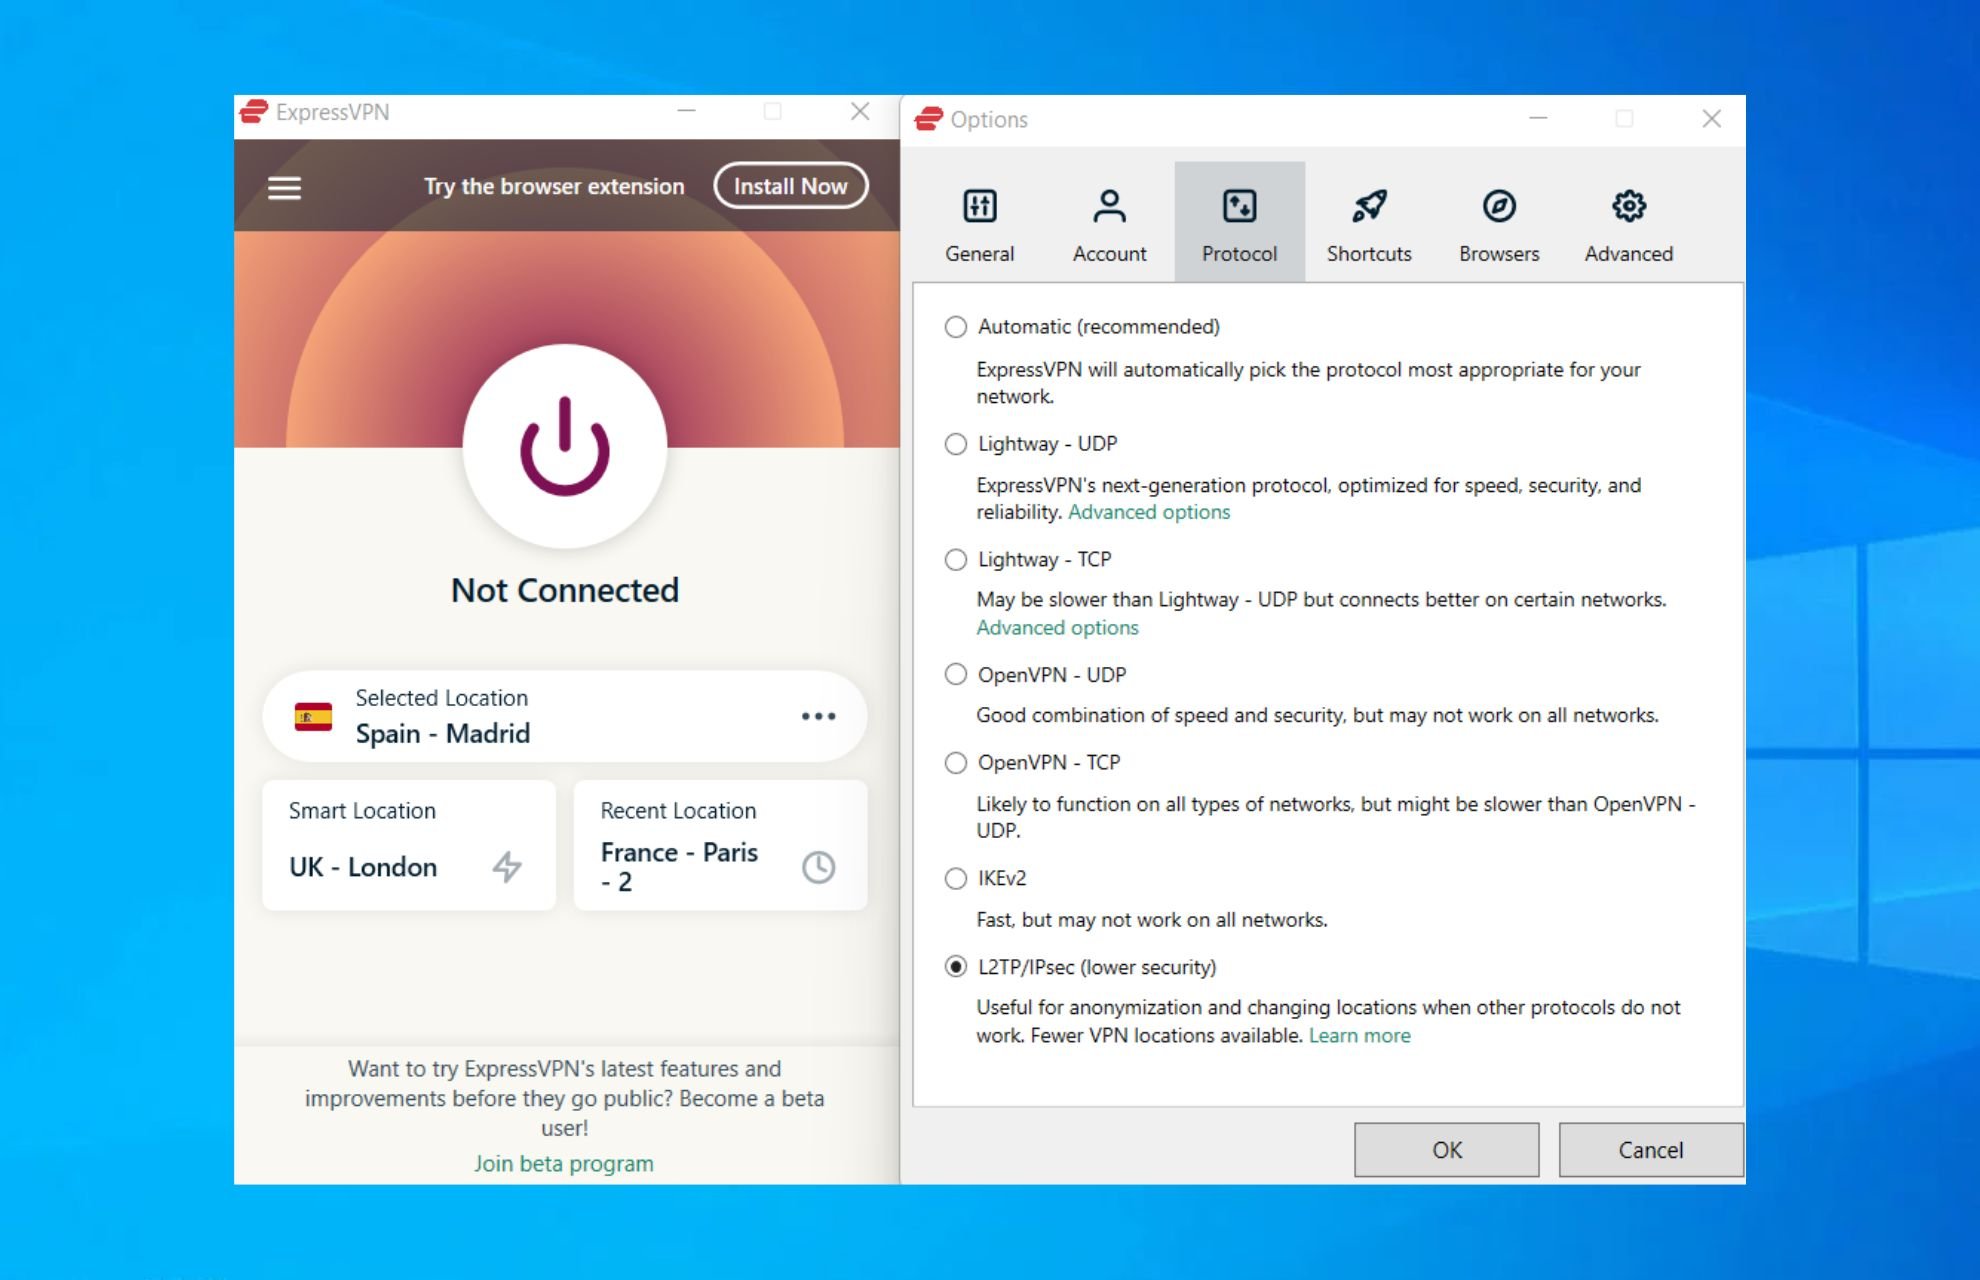
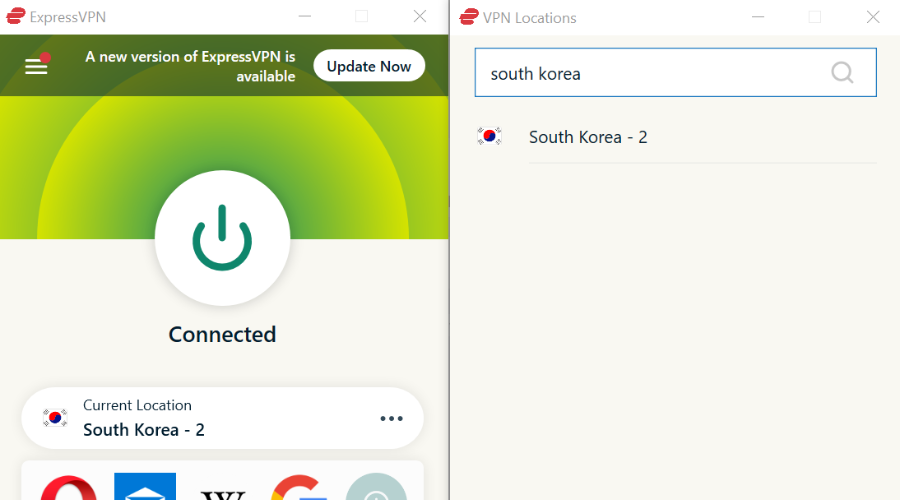
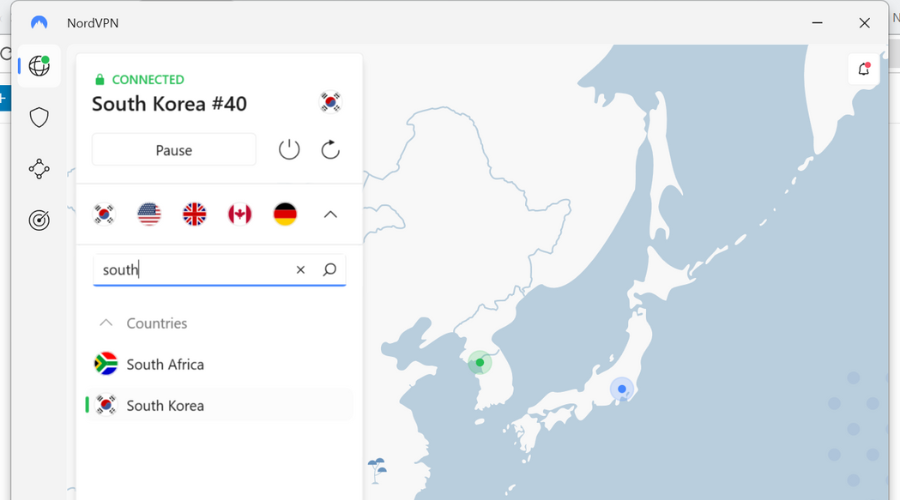
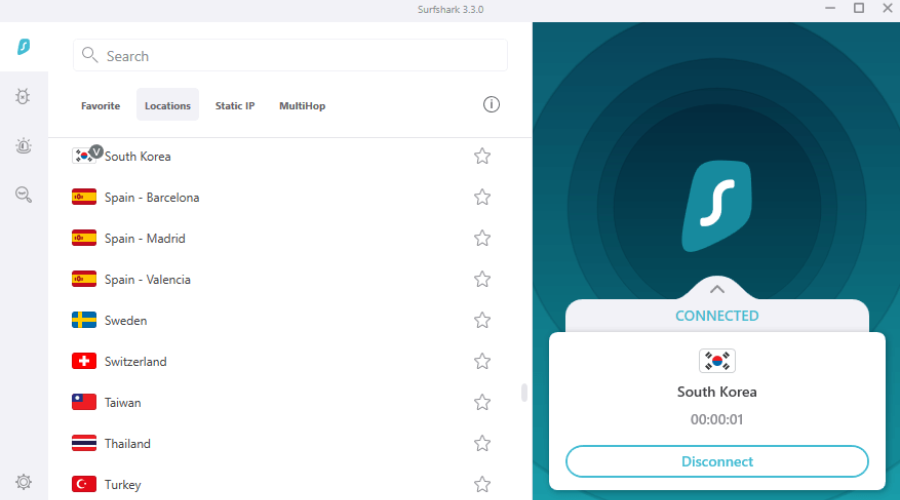
Connect to a Recommended Location offered by ExpressVPN.
Run Rainbow Six Siege.
Check if the problem still persists.
A VPN can reduce packet loss in Rainbow Six Siege by bypassing ISP throttling, reducing network congestion, optimizing routing paths, and enabling port forwarding for more efficient data flow.
ExpressVPN
Choose your server to play on and bypass network congestion in multiplayer mode for Rainbow Six Siege.
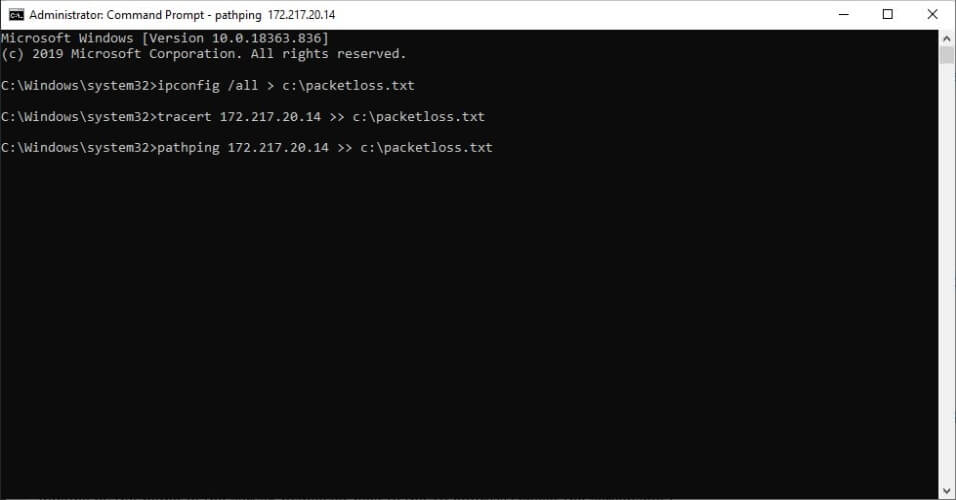
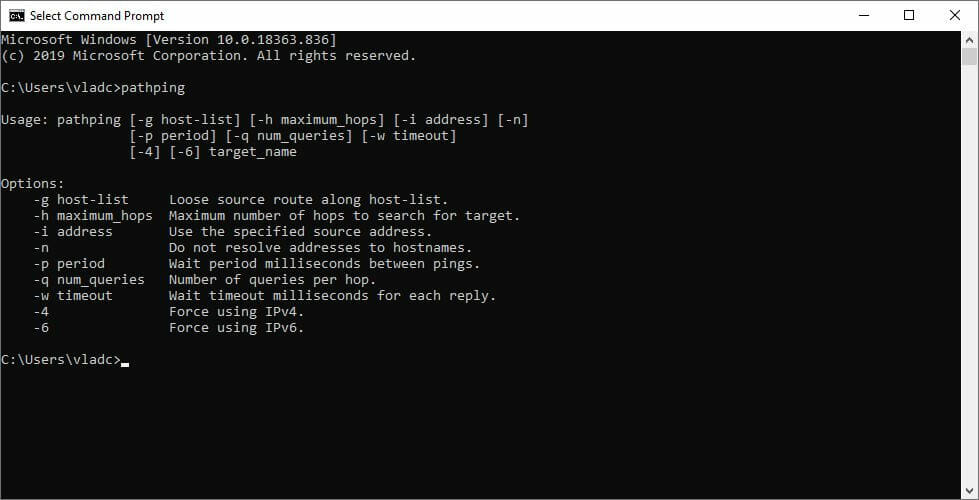
Type ping [target] -t > packetloss.txt (replace [target] with the IP address or domain) and press Enter.
Let the test run for several minutes.
Press Ctrl + C to stop the test.
Open packetloss.txt with a text editor.
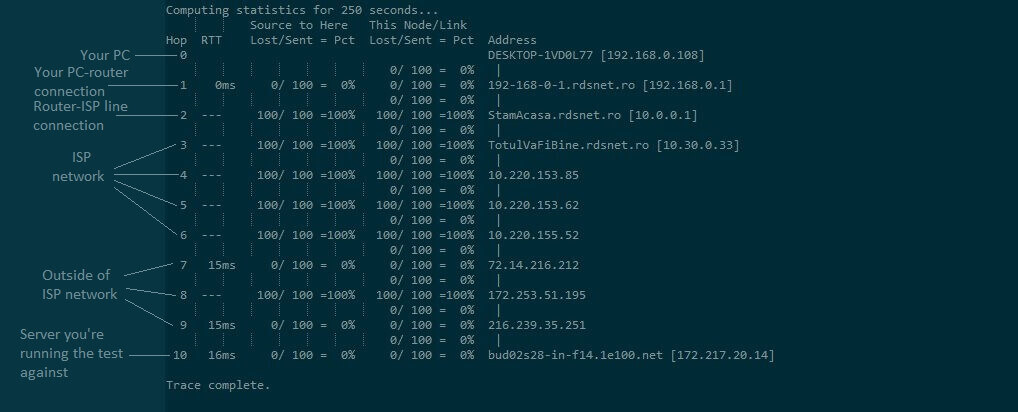
Look for “Request timed out” or high latency in the file.
If you see packet loss, check and fix your network equipment; if the issue persists, contact your ISP with the results or report the problem to game support.
Bottom line is, if you’re experiencing packet loss in Rainbow Six Siege, don’t sweat it. If you can afford the luxury of waiting it out, then do so. More often than not, the issue is caused by network congestion, which comes and goes. Also, a VPN works for the Rainbow Six Siege error code 10-0x00000.
Last but not least, try using a wired connection. Wi-Fi leaks packets more often than wired connections since it’s subject to a few additional factors that can cause it.
If you’re experiencing Left 4 Dead 2 lag, you can reduce it with a VPN to improve your multiplayer sessions.
Left 4 Dead 2 (L4D2) is a survival horror first-person shooter that takes place in the zombie apocalypse.
Although it has a single-player mode, the game is more popular due to its multiplayer version, where players can team up to fight off the zombie horde. It has PvP mode, too. You can play it on Windows, Mac, Linux, and Xbox 360. It’s available on Steam.
Unfortunately, many users have Left 4 Dead 2 lag and high ping, which interrupts their gameplay and may even lead to desynced actions, like accidentally getting killed.
A virtual private network solution is great for not only encrypting your network traffic and protecting your online privacy, but also for optimizing your Internet connection for gaming if you get a high ping. Plus, you can fix packet loss issues with a VPN.
How do I lower my ping in L4D2?
High ping happens, mostly, when your Internet network is not strong enough to support all the requirements of the game.
There are some things you can improve and tweak in order to maximize your connection’s potential.
➡️ Close background apps- especially those that use up the network and aren’t currently in use
➡️ Try using a wired connection – using Ethernet instead of Wi-Fi is a fix many gamers swear by, increasing network stability and speed
➡️ Tweak graphics settings – disabling unnecessary animations and transitions in your game and reducing the quality of your graphics, can really improve latency issues
These are some of the most common things you can do that are simple and do not require a lot of time and can be tried by pretty much any PC user.
➡️ Using a VPN is obviously a great choice because it gets rid of ISP throttling, bandwidth limitations, and server restrictions.
What are the best VPNs to fix Left 4 Dead 2 lag & ping?
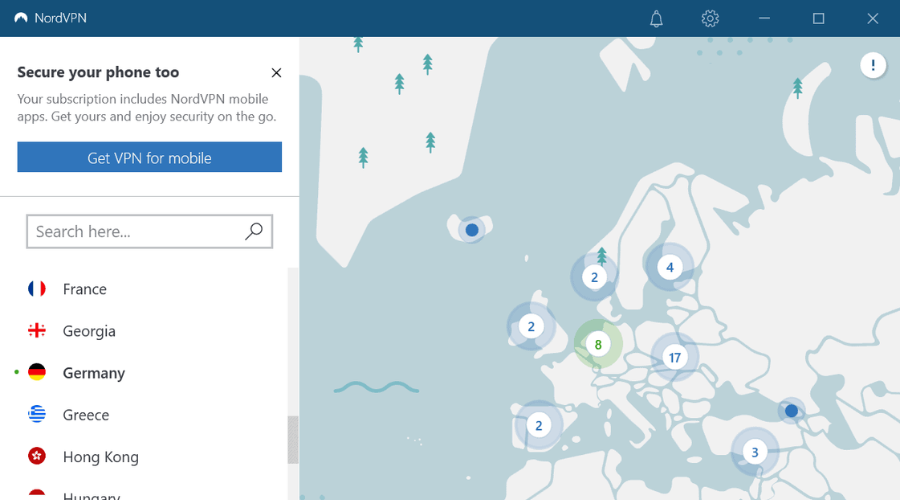
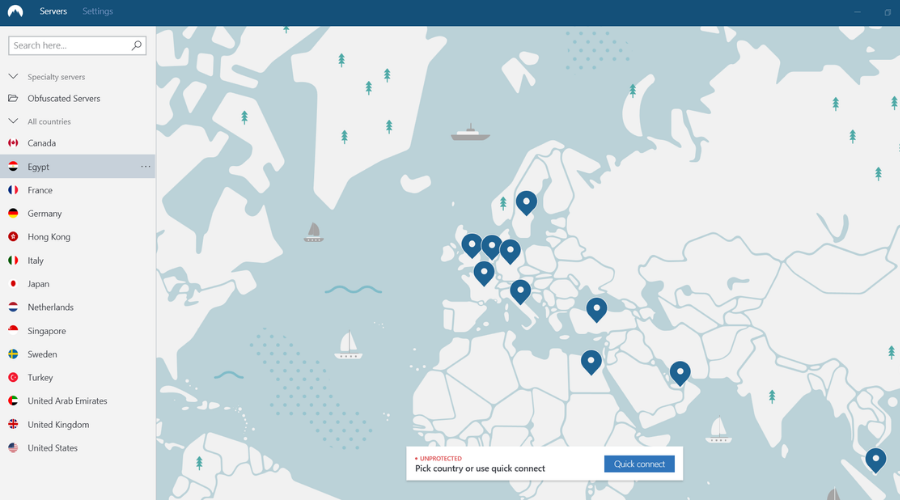
Another way to fix Left 4 Dead 2 laggy issues online in multiplayer mode is by using NordVPN.
Developed by Tefincom & Co., this service is ideal for bypassing geoblocks, especially since you can connect to obfuscated VPN servers that make it look like a regular HTTPS connection (in case your VPN connection is refused).
NordVPN gives you the possibility to access a wide range of VPN servers spread across the globe. You can also set up custom DNS servers to speed up your Internet connection and fix Left 4 Dead 2 high ping, as well as eliminate network congestion.
The tool uses the OpenVPN protocol to encrypt your network traffic and optimize your connection for gameplay. Plus, it has an integrated lock that turns off your VPN in case of connection drops.
What else you should know about NordVPN:
+5,400 VPN servers in 59 countries
Up to 6 device connections at the same time
Compatible with Windows, Mac, Linux, and Xbox 360
An excellent VPN for fixing Left 4 Dead 2 lag
30-day money-back guarantee (no free trial)
NordVPN
Don’t exit Left 4 Dead 2 because of high ping when you can easily fix it with this trustworthy VPN.
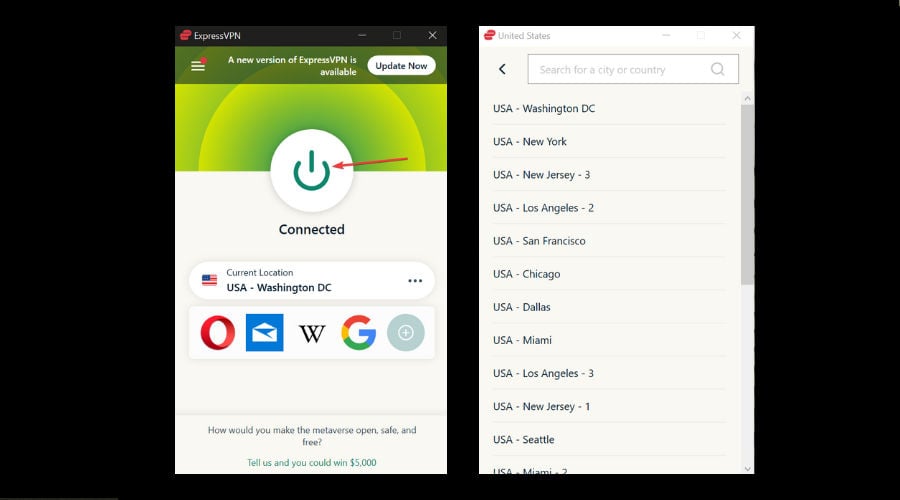
It’s no secret that ExpressVPN is many gamers’ VPN of choice, and that has solid reasoning. It’s very fast, secure, easy to set up, and can run in the background without interfering with your game.
ExpressVPN has thousands of speedy servers and if you get a plan, you’ll be able to connect to all of them without limitations. Data and bandwidth on ExpressVPN servers are unlimited.
It has servers in 94+ countries so you can get a fast connection on Left 4 Dead 2 regardless of your actual location. You can manually pick a server close to your game’s server, or let ExpressVPN auto-connect.
Other ways ExpressVPN can help online gaming and privacy include:
Compatible with all major operating systems
IP address masking
Unlocks geo-blocked content
Military-grade Encryption
Lightway protocol for fast speed
Split tunneling
ExpressVPN
Fix latency issues and get unlimited fast traffic with ExpressVPN!
To quickly eliminate Left 4 Dead 2 lag spikes, you can use Private Internet Access (PIA).
Made by Kape Technologies, PIA gives you access to a wide range of network servers so that you can reduce high ping in L4D2 and other games. It’s also a great solution for fixing packet loss.
PIA has static and dynamic IP addresses, port forwarding mode to open ports and host game servers, and private DNS servers to ensure your online privacy. It’s the best VPN for Left 4 Dead 2.
If you’re looking for a quick and easy Left 4 Dead 2 lag fix for PC, you can’t go wrong with CyberGhost VPN. Also owned by Kape Technologies, this tool comes with an extensive network of VPN servers optimized for gaming. And you can use it to fix Wi-Fi packet loss.
You can easily reduce Left 4 Dead 2 high ping using CyberGhost VPN, thanks to its high-speed VPN servers and security features tailor-made for gaming. For instance, you can create a whitelist or blacklist of games to route through the VPN while you can still directly access the web using other apps.
CyberGhost VPN has exclusive DNS servers and DNS leak protection. It can protect your Wi-Fi router from hackers as well as repair Xbox packet loss fast and easy.
What else you should know about CyberGhost VPN:
+6,400 VPN servers in 89 countries
Up to 7 connections at once
Can be installed on Windows, Mac, Linux, and Xbox 360
Works great against Left 4 Dead 2 multiplayer lag
Up to 45-day money-back guarantee (1-day free trial)
CyberGhost
Quickly fix Left 4 Dead 2 lag on your laptop, desktop or console using this reliable VPN.
Another great choice to increase Internet speed and fix latency issues in Left 4 Dead 2 is VyprVPN.
With 100+ server locations all around the globe, you’ll certainly be able to find at least some great matches for Left 4 Dead 2.
This VPN has a proven zero logs policy, along with unbreakable encryption. Your data stays completely anonymous and you get unlimited bandwidth without the risk of getting throttled.
Other impressive features of VyprVPN include:
DNS Leak protection
Split tunneling
Public Wi-Fi protection
Emergency killswitch
24/7 customer support
10 simultaneous connections
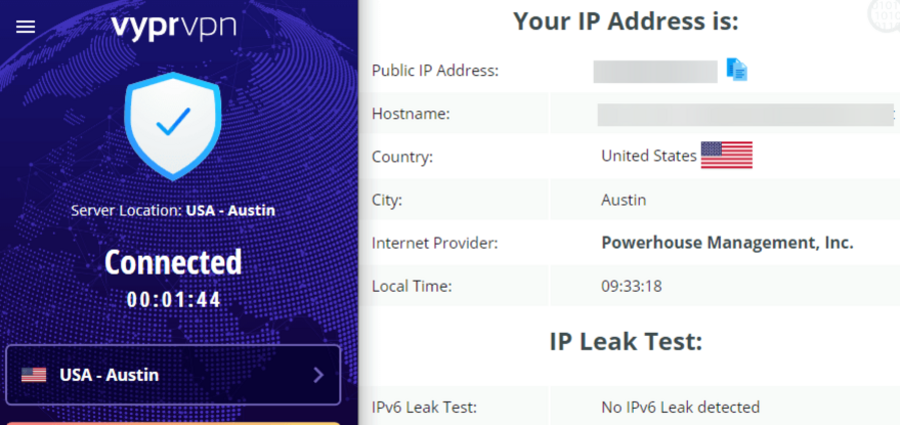
VyprVPN
Connect to VyprVPN to reduce ping and have seamless gaming sessions on L4D2!
In conclusion, if you’re experiencing high ping and lag issues while playing Left 4 Dead 2 with your friends in multiplayer mode, you can download and install a powerful VPN to minimize jitter and optimize your Internet connection for gaming.
Users complain about several issues with the Windows File Explorer on their computers. These errors appear to be of minor concern, but they can sometimes cause significant difficulties. Hence, users need to find practical solutions to the problems.
However, Windows File Explorer not showing folder size is one of the issues users complain about when using File Explorer. This problem prevents you from seeing the content size in your file or folders.
Furthermore, File Explorer problems like this may occur due to many reasons. Some causative factors are outdated operating systems, system startup issues, system errors, etc. The cause of the error may differ on different computers.
Fortunately, we have a list of efficient solutions you can use to fix the Windows File Explorer if it’s not showing folder size.
Why is the folder size not showing on Windows Explorer?
Outdated Windows: The effect of running an outdated operating system on your computer can’t be overstated. It impedes the performance of the applications running on your computer. However, outdated Windows means your PC does not have the updates and patches required to fix bugs and improve its performance. Hence, it can impact the way the Windows File Explorer works.
Disabling the Display file size information in the folder tips option: The Display file size information in the folder tip toggle is an option in File Explorer’s advanced settings. It prompts File Explorer to display file size whenever you check the folder information. However, not allowing this option can prevent Windows File Explorer from showing folder size.
File Explorer app issues: Many things can cause problems with File Explorer. A common factor affecting how File Explorer works is boot errors occurring while the PC is booting. It may prevent the Windows File Explorer from working.
The Windows’ sort folders by size option will help you sort your files according to their size. Hence, you’ll be able to see the file size. Follow the steps below to sort your folders by size:
Right-clicking on the body of the folder.
Click on Sortby from the drop-down, then select Size.
Likewise, users browse through File Explorer using the Windows search folders by size feature.
Conclusively, it may be beneficial for users to read about other File Explorer issues they may encounter.
Windows File Explorer not refreshing is an annoying problem users may experience when using File Explorer. However, File Explorer is expected to automatically detect and update files whenever you download or make changes on your computer.
The auto refresh process allows the File Explorer to update changes such as creating a new folder, deleting, renaming, or moving a file or folder on your computer.
So, if the File Explorer stops auto-refresh, it’ll prevent it from incorporating the changes you make in the app.
Outdated Windows: Users must understand that not keeping their computer’s operating system up-to-date makes it prone to many problems. It prevents your computer from accessing the patches and updates for fixing bugs that may affect it. So, outdated Windows affects how the system works and can impede the smooth functioning of your computer.
Issues with the PC: The PC may encounter numerous problems if a component isn’t functioning correctly. Sometimes, the computer develops faults that can’t be detected on the surface of operations but need troubleshooting. Issues like these can result in Windows 11 auto-refresh problems.
Boot/startup errors on your computer: How you power up your computer can determine how it functions. However, it may encounter errors during boot, preventing it from working as expected. Likewise, boot errors can cause the software to load halfway. It means it won’t be able to perform fully as it should.
File Explorer history: Windows File Explorer records previously modified files and folders. However, this history may become corrupt or stocked up, thus causing some problems with the way File Explorer works. So, File Explorer history can cause the Windows 11 auto refresh problem.
What can I do if File Explorer does not refresh automatically?
1. Update your Windows OS
Click the Start button.
Select Setting and click on Windows update.
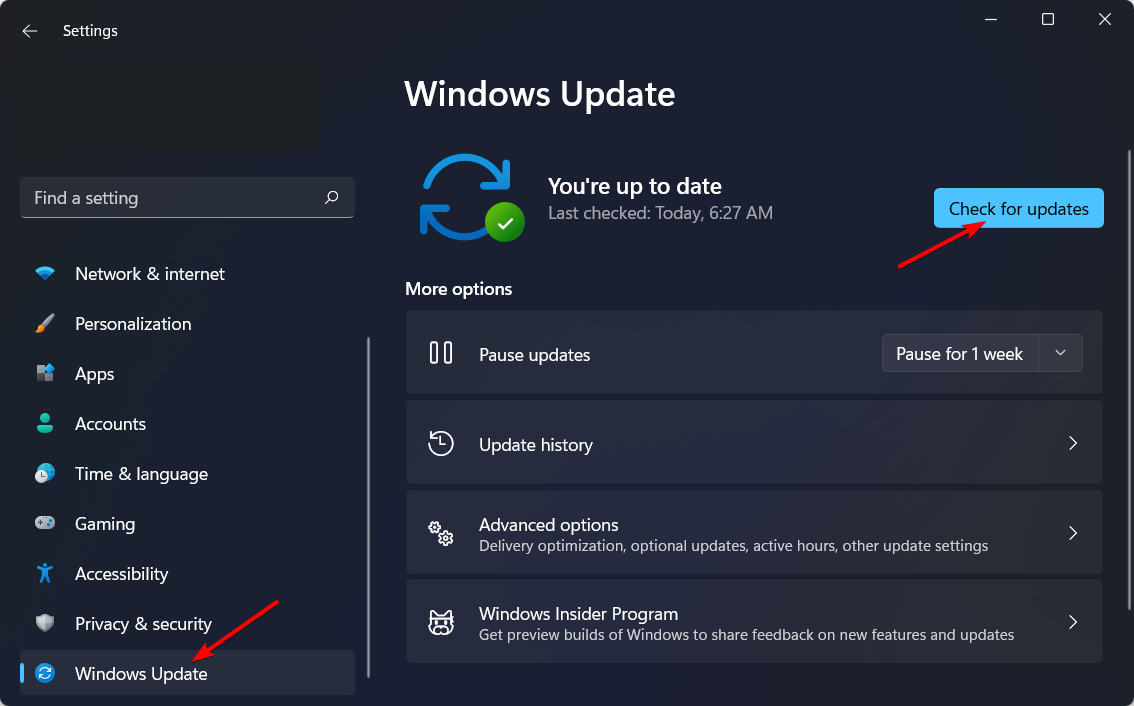
On the Windows update page, select Check for updates.
If there’s an update available, Windows will automatically search for it and install it. We recommend you restart your PC to check if the issue persists.
Press on Windows + R simultaneously to launch the Run window.
Type the following into the search space: devmgmt.msc, and click the OK button.
Click on Display adapters from the search results and select the driver from the drop-down.
Right-click and choose Update driver software and select Search automatically for drivers.
Restart your computer after the updating process is complete.
5. Create a new user profile
Press and hold down the Windows + Xkeys to open the quick menu.
Select File Explorer from the quick menu and click on the View tab.
Click on Options in the top-right corner of the screen and click the View option, then select Show hidden files, folders, and drives.
Uncheck the box for the Hide protected operating system files option, then click Yes to confirm the action.
Click OK.
Navigate to the following folder and click on the Old_Username profile:C: UsersOld_Username folder
Select all the files and folders in the Old_Username folder (except Ntuser.dat, Ntuser.dat.log, and Ntuser.ini) and press Ctrl + C to copy the selected folders.
Navigate to this folder and click on New_Username: C: UsersNew_Username
Press Ctrl + V to paste the files that you copied.
Restart your PC and log in with your default profile.
6. Clean File Explorer history
Open File Explorer and click on the three horizontal dots.
Right-click on Command Prompt and select Run as administrator.
Type the following and press Enter: netsh
Input the following in Command Prompt and hit Enter: winsock
Finally, type this and press Enter: reset
Why do I need to refresh Windows Explorer?
Refreshing the Window File Explorer allows you to verify the new changes in your files and folders. It updates and incorporates the changes you make into the computer.
Many users have reported that Silhouette Studio software is running slow on their Windows operating system.
This issue can be very frustrating, especially if you’re using many fonts and extensions, as this will slow down your PC even further.
This is how one Reddit user described the problem:
I was experiencing slow loading of files on my Silhouette Studio designer edition. Sometimes taking up to 1 hour or never loading the file. Even with a fresh windows installation.
In this article, we will explore some of the best-proven methods to deal with a slow Silhouette Studio and avoid encountering this problem in the future. Read on to find out more.
Why is Silhouette Studio so slow?
If you find Silhouette Studio lagging, the problem probably lies with the lack of free system resources. When there isn’t enough free storage or the RAM consumption is high, the software wouldn’t deliver the best performance.
Also, using an outdated graphics driver is a common underlying cause behind Silhouette Studio 4.4 problems. Besides, if the software has not been updated in a while or you are using it with misconfigured settings, Silhouette Studio would be running slow.
What can I do if Silhouette Studio software is running slow?
1. Update your graphics card drivers
Press Windows + X to open the Power User menu and select Device Manager.
Double-click on the Display adapters entry.
Right-clickon the graphics adapter and select Update driver.
Choose the option Search automatically for drivers.
After the update process is complete, verify if the issue persists with Silhouette.
Outdated drivers can be a significant reason why Silhouette Studio is running slow, and we highly advise you to update all the relevant drivers to prevent that.
Although you can do that manually, it’s usually best to use fully automated solutions such as Outbyte Driver Updater to keep all your drivers up to date.
Adobe Illustrator is a long-established leader when it comes to anything vector-related. So is the case for silhouettes; it allows you to create precise down to pixels vector files.
Like other products from Adobe, this tool is one the most reliable and stable regarding the performance and features available. Besides silhouettes, hundreds of features and plugins can be used to achieve any desired effect.
With the help of layers, pen, and anchor point tool, you can connect multiple points to form the desired shape, which you can then use to create things such as logos, and banners or integrate them into photos.
If you’re experiencing problems with Silhouette Studio 4.4 or newer, we suggest you consider Adobe Illustrator as an alternative.
Navigate to the Custom Clean tab, select the items you want to check under both Windows and Applications, and then click on Analyze.
After the scan is complete,click on Run Cleaner.
Open Silhouette Studio and check to see if the issue persists.
If you’re wondering why Silhouette Studio is so slow, your cache is usually the answer, and cleaning it should resolve the problem.
How do I reset my Silhouette Studio?
Click on the Edit menu at the top, and select Preferences.
Now, head to the Advanced tab, and click on Restore Factory Defaults.
Click Continue in the confirmation prompt that pops up.
That’s it! Within a few seconds, Silhouette Studio will reset to the factory defaults. All the settings and preferences will revert to the state where the software was first installed.
This article explored some of the best-proven methods to deal with your Silhouette Studio running slow on your Windows PC.
Using apps on your computer may require you to hide the cursor for better concentration and a clearer view. Likewise, a mouse cursor may block some part of the screen while playing games on your computer. Hence, most users want to know how to hide the mouse cursor on Windows 11.
Windows 11 has proven to be more advanced and intelligent than other versions of Windows. This is so because of some inbuilt features that help it perform tasks smoothly.
Hiding the mouse cursor on Windows 11 is possible, although many users don’t know how to hide it on their computers.
There are several ways to hide the mouse cursor on Windows 11 on your computer. Likewise, there are shortcuts that users can use to hide the mouse cursor.
Fortunately, this article will take you through all you need to know about hiding how to hide mouse cursors in games and apps. Also, we’ll teach you the Hide mouse cursor shortcut.
Why is my mouse cursor visible in some games?
Display driver issues: The outdated display driver is a common issue that can prompt the mouse cursor and make it visible in games. This issue will arise whenever the display driver doesn’t have the essential patches to help it fix bugs and run smoothly. Likewise, if the display driver isn’t working well, it can make it difficult for you to hide the mouse cursor on your computer.
Game loading in borderless Window display mode: The mouse cursor may appear in your game if the game is running in a borderless Window display mode. It indicates that the mouse cursor considers the games running on full screen but is not. Hence, the mouse cursor appears on the screen because it perceives it as a background process. Furthermore, the borderless window display mode causes the mouse to function in reverse.
Outdated mouse driver: There is a possibility that the mouse cursor appearing in your games is due to outdated mouse drivers. It prevents the mouse components that depend on it from performing smoothly.
Outdated Windows: Though it doesn’t seem like the culprit, in this case, outdated Windows can cause the mouse cursor to appear in some games. Generally, it impedes the performance of the computer.
How do I hide the mouse cursor in Windows 11?
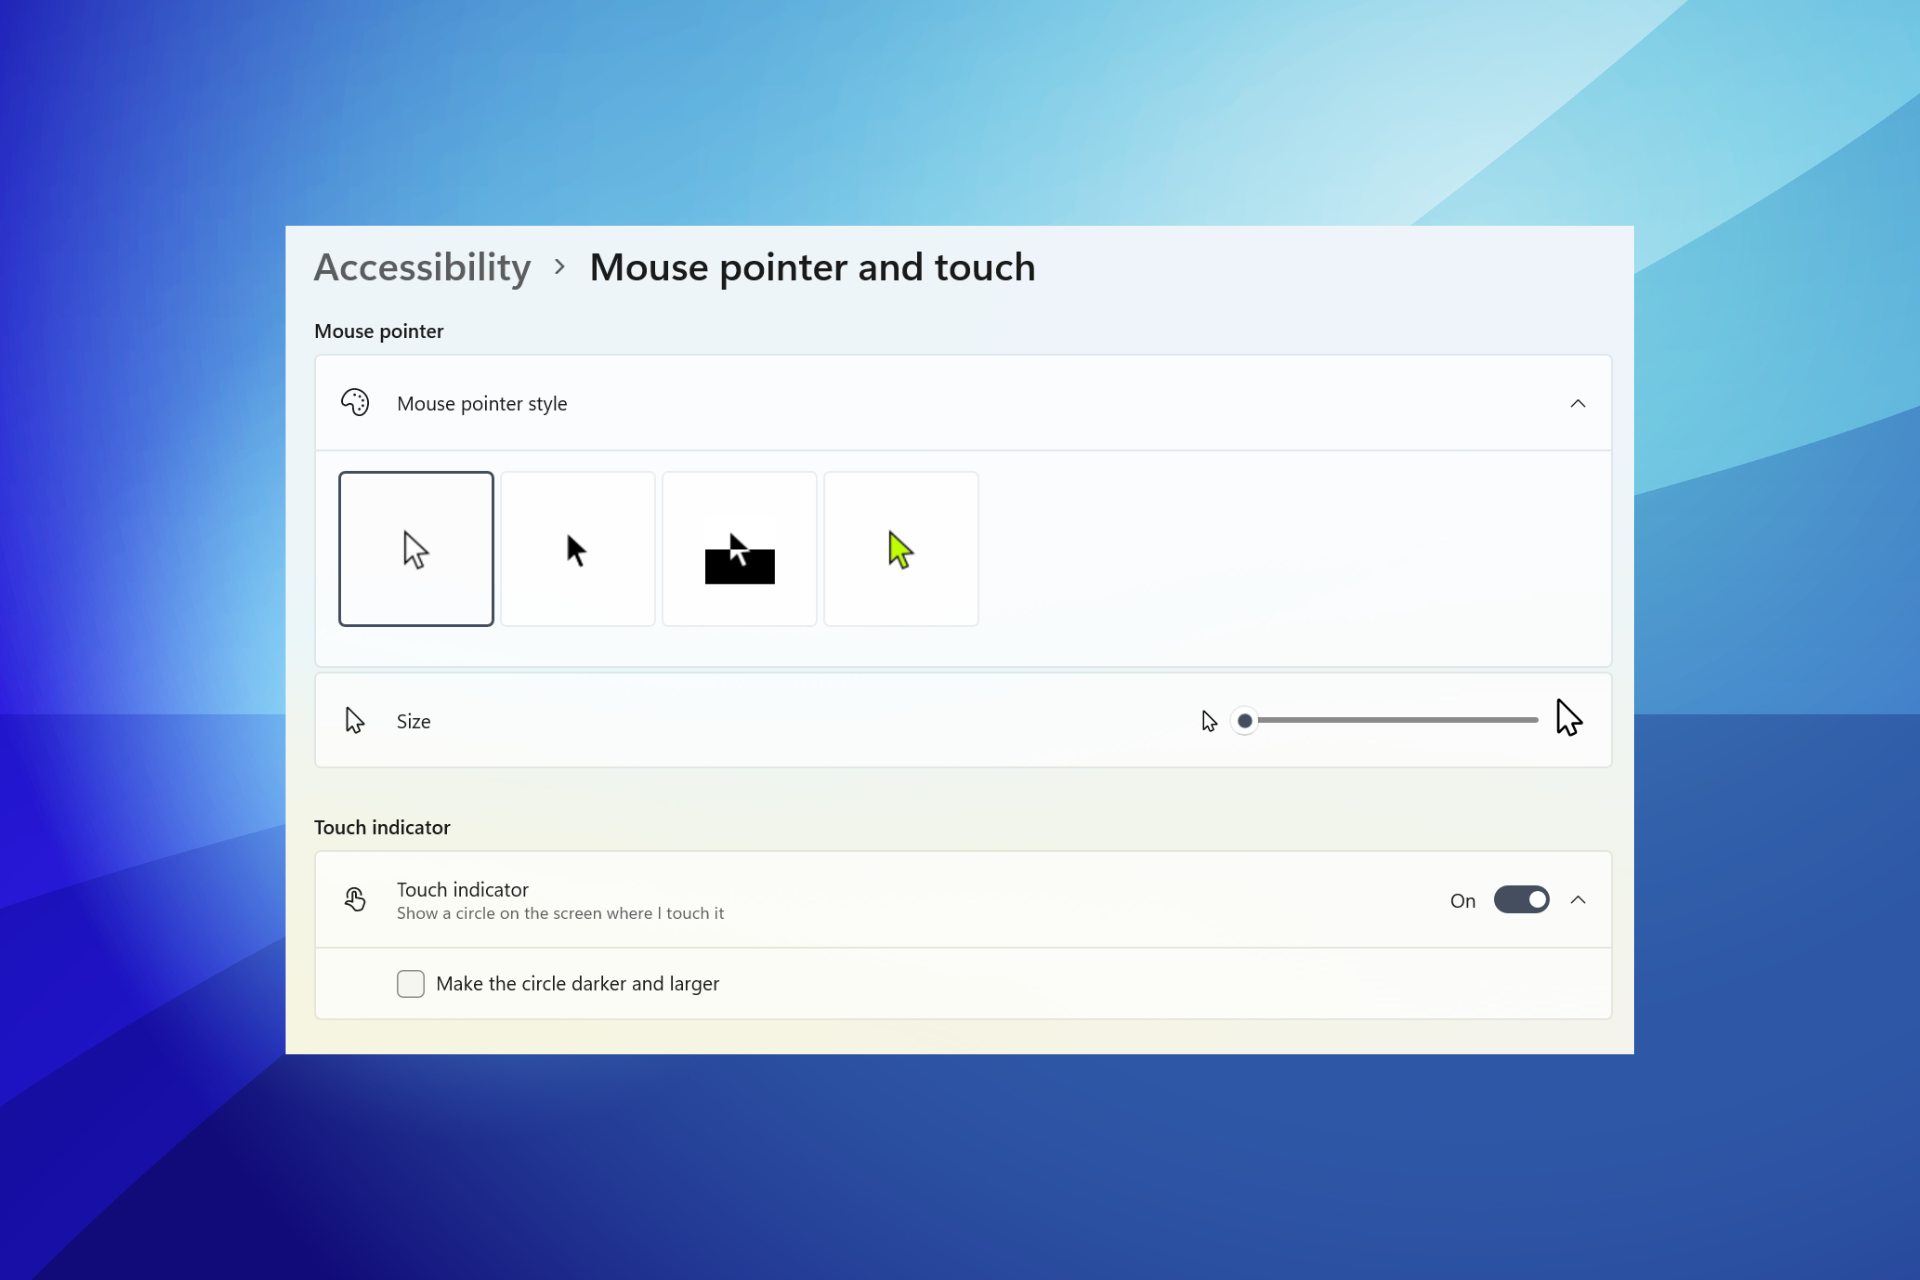
1. Adjus pointer settings
Click on the Start button and type in Pointer in the search space.
Select the Change the mouse pointer display or speed option from the search results.
Go to the Pointer Options window and check the Hide pointer while typing option.
Click on OK to save the changes.
Hiding the pointer while typing helps you glance at your full screen clearly without the mouse cursor interrupting your view.
Press the Windows + Xkeys simultaneously to open the Quick link menu.
Select the Control Panel and click on Mouse.
Navigate to the Pointer options tab.
In the Visibility tab, uncheck the box for the display pointer trails option.
Click on OK to save the changes.
3. Manually shift the cursor
The best way to hide the mouse cursor while playing games on your computer is by moving it to the top corner of your screen to keep it hidden. That way, it won’t interrupt or disturb your gaming activities. Likewise, the mouse cursor will remain hidden unless you move your mouse.
Nevertheless, users can read through our article about how to update the graphics display drivers on their computers. It can help fix any other mouse display issues.
Can I make the mouse pointer transparent?
Users can make mouse pointers transparent by toggling the On the hide pointer option in their computer settings. Also, users can do this by troubleshooting the Mouse properties in the Control Panel.
However, there are different modes you can set for your mouse cursor. It allows you to adjust the mouse cursor display to your taste. Hence, users can read through our article about how to set their cursor to dark mode in Windows 11.
There are a lot of us that use Adobe software, mostly because it offers a wide range of applications, for multiple purposes, and it’s pretty much reliable.
But don’t go thinking that adobe software never malfunctions or drives users crazy. In fact, there isn’t a day that goes by without someone pointing out yet another Adobe flaw.
In fact, apps such as Photoshop, Reade, or Illustrator display a lot of errors, and you came to the right website to fix them.
Also, if you are into design, discover which are the best brochure design software solutions. Now, let’s fix the Adobe Illustrator An unknown error has occurred when opening file situation.
Why does Adobe Illustrator keep saying an unknown error has occurred?
Users start seeing this error when they are trying to save the file they’ve been working on in the classic Ai format, which is specific for the Illustrator app.
After you finish your work and you are trying to save your work, the app will show the file as corrupted and display the above-mentioned error.
This happens even with the latest version of the app and was not listed as a known issue during the Patch Tuesday rollouts.
How do I fix an unknown error has occurred in Illustrator?
1. Unclutter the file
We are talking about Illustrator, a memory-depleting application, which means that the unessential elements present in your document can increase the size, which in turn will lead to file corruption.
So, we advise you to try to delete all the trash that is present in your current projects, such as the duplicated elements, sketches, and many others.
Doing so will significantly reduce the size of your file, making it less likely to be prone to errors when saving it to your device.
2. Save the file using a new name
Another easy solution for fixing your saving issue in Illustrator is to actually save the document with a fresh new name which will generate the same file with non-corrupted patterns, gradients, and fonts.
Why? Because using this process is the same as rebooting your system, which you can try since we’ve brought it into the discussion.
Remember how we keep saying that the simplest solutions work for what appear to be the most complicated problems?
Many Illustrator users said that, after they tried saving the file with a new name, the problem went away and they were able to continue work.
You can also try transferring the file in question to a new document, which is yet another proven solution for this issue.
Initially, you have to copy all the elements that you have inserted or used in your project, then paste them into a fresh new document.
Now, all you have to do is simply save the document and check if you can open and edit it again. That’s pretty much it.
How do I reset Illustrator preferences?
Really simple. Once you have opened Adobe Illustrator, all you need to do is press the Alt + Ctrl + Shift keys and the Preferences will be automatically reset.
Or, you can just go into the Illustrator app, choose Preferences from the menu, then hit the Reset preferences button.
Remember that, in case of unknown error in Illustrator, users also mentioned that other helpful tips can consist of turning off all layer visibility, or saving the file as an EPS.
Fix this problem quickly using the solutions above, because it’s a shame to spend so many hours on a project and, suddenly, Adobe Illustrator can’t save because of an unknown error.
So, next time you get the An unknown error has occurred message in Illustrator CC, you will know what to do.
Leave a comment below if this article has helped you fix this annoying Adobe Illustrator problem.
We can also help with changing languages in For Honor, just in case you need it. However, now, let’s fix the lag and stuttering, and show you how to increase FPS in For Honor.
Why does my FPS keep dropping suddenly in For Honor?
First of all, you will experience FPS issues when you are trying to run the game using visual/graphics settings that are above the recommended specs.
Also, you will see frequent FPS drops if your FPS is very close to the refresh rate, or even half of it when VSync is disabled.
Other factors that can contribute are:
Incorrect Power Plan
Xbox Game Bar
Non-essential Background Processes
Missing/Corrupted Game Files
Antivirus/Firewall Interference
Lack of Free Disk Space
Outdated Graphics Card Drivers
So, in order to avoid For Honor frame drops while cross-playing, or For Fonor stuttering, follow the guide below.
How do I turn on FPS in For Honor?
While playing For Honor, simply access Settings and click on the In-Game tab, where you will look for the In-game FPS counter, and click on the arrow.
Doing so will display a list of options that you can choose in which corner you prefer that your FPS counter will be displayed.
Why is my FPS capped?
If FPS is capped at 30, VSync is most likely set to double buffered, so please try to turn it off or switch to triple buffered.
FPS being capped at 60 means that VSync is most likely set to double or triple buffering. Again, try to turn VSync off to unlock your FPS.
And, if you notice that FPS is unstable and that your game is stuttering, VSync is most likely set to double buffered. Turn it off or switch to triple buffering.
How do I fix FPS drops in For Honor?
1. Check system requirements
It should go without saying, but you should really do this for every game out there that you’ve decided to buy, download, and install.
There’s no point in spending money on a title your PC isn’t strong enough to run. Of course, you can decide to upgrade your rig, but until then, make sure you look at the requirements.
Let’s have a closer look at the game’s requirements and you can decide for yourself if you can run it properly or not.
Making sure everything is as it should be can be considered a For Honor FPS boost, if done correctly.
Expand Display adapters, right-click the one you are using, and select Update driver.
Select Search automatically for drivers.
If it didn’t find any updates, you might want to use a specialized tool to search online automatically. It’s safer and faster, and if you aren’t used to manual updates, this is a perfect solution.
3. Verify game files integrity
Open Steam.
Right-click Naraka Bladepoint and select Properties.
Select the Local Files tab and click on the Verify integrity of game files.
4. Disable Xbox Game Bar overlay
Press Win + I to access Settings.
Select the Gaming tab, then click on Xbox Game Bar.
Disable the Xbox Game Bar overlay.
5. Allow For Honor through the Windows Firewall
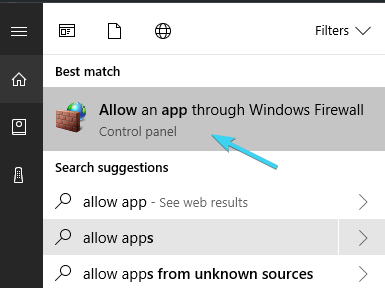
Press the Windows key, search for Firewall and select Open.
Click on Allow an app through Firewall.
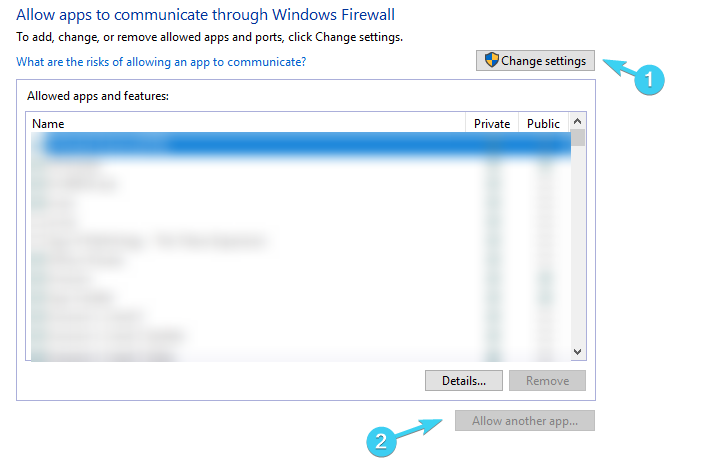
If For Honor isn’t in the list, select Change Settings, then Allow another app.
Click the Browse button, locate your game and press the Add button.
Now the game is allowed through the Firewall.
Launch it to see if it works properly now.
How can I make For Honor run better?
Be sure to keep your operating system up to date, just like the graphics card driver. Updated software will significantly improve the experience.
Also, any other programs running in the background can hinder gameplay, so think about that as well. But, most importantly, make sure your rig is strong enough for this game.
Overall, make sure not to put too much strain on your PC by running ten apps at the same time and prioritizing For Honor.
If you are experiencing For Honor FPS drops while using the controller, this guide is made for you. Don’t misunderstand, the For Honor PC FPS drops are a serious thing, and we will fix it.
We’ve also pointed out how to show FPS on For Honor, so you can keep count. Many users have also reported For Honor low FPS after patch, so keep that in mind as well.
Keeping your Windows up to date is one of the essential tasks you should do, but sometimes you might get stuck with Restart your computer to install important updates messages.
It turns out that important updates have never been installed in the first place, and you’re stuck with this message. But we have a few fixes to help you out.
How can I fix the Restart your computer to install important updates error? It’s possible that this issue occurs due to other applications so you might want to try performing a Clean Boot. If that doesn’t work, we have got a bunch of different solutions that will possibly help you resolve the error.
Why do I keep getting Restart your computer to install important updates message?
Here are some of the most common reasons that would trigger the Restart your computer to install important updates message.
The Windows registry key called RebootRequired might be corrupted.
The Windows Update tool itself is experiencing some issues.
There are some important system files missing.
Your PC is infected with viruses or malware.
Your Firewall is blocking the Windows Update service.
How do I fix Restart your computer to install important updates?
4. Run Deployment Image Servicing and Management Tool
From the Start Menu, open Command Prompt.
Execute the below command. DISM /Online /Cleanup-Image /RestoreHealth
Now, execute the below command. DISM /image:C: /cleanup-image /revertpendingactions
Restart your machine.
5. Check your Firewall
Open your Start Menu.
Type Windows Defender Firewall and open it.
Now, click on Allow an app or feature through Windows Firewall.
Click on the Change Settings.
Check the boxes next to the apps or programs you want to allow through the Windows Firewall.
Click OK to save your new settings.
How do you stop your computer from restarting to finish installing important updates?
1. Disable automatic reboot
Open the Start menu.
Type Task Scheduler and open it.
Locate Reboot in the Active Tasks section.
Double-click on it and select Disable.
2. Tweak Local Group Policy Editor
Open the Run dialogue by pressing Win + R keys.
Type gpedit.msc and open it.
Click on Computer Configuration.
Expand Administrative Templates.
Click on Windows Component.
Hit the Windows Update.
Double-click on No auto-restart with automatic installations of scheduled updates.
Select Enabled.
Click OK.
We hope that these solutions were of help to you and that you managed to fix Restart your computer to install important updates error. Feel free to let us know if any of our solutions were helpful to you.
Many reported that GeForce Experience is not detecting games, and this can be a major issue, so today we’re going to show you a couple of solutions that can fix this.
Why is my GeForce Experience not detecting games?
If the game isn’t showing, it’s probably not supported. Outdated drivers or issues with the app can also cause this.
What can I do if GeForce Experience is not finding games?
You maybe thought that this was only a myth, but the big day has finally come for all the Windows 11 fans out there.
Microsoft’s new OS is receiving its first major update in the form of the Windows 11 2022 Update, also known as Windows 11 version 22H2.
And, one of the most impactful changes of this version of the operating system is the fact that the Windows Update tool will finally go green.
Windows updates will consume energy smarter
Microsoft has recently detailed how it is making the Windows Update process a lot better and highlighted two key improvements that apply both to feature updates and monthly updates following the release of the Windows 11 2022 Update.
The company has emphasized that it has reduced significantly reduced the size of Windows updates which, in return, has resulted in faster installs.
Indeed, Microsoft claims that for some users, it actually reduced update sizes by up to 450MB in feature updates, which is great.
However, on the monthly cumulative update side, it says it reclaimed approximately 3x the update size (100s of MB) given back to the user.
The other improvement that Microsoft is making to Windows 11 updates is related to carbon footprints, since this should be our main focus.
Thus, Windows will attempt to update during times when there are a greater number of clean energy sources such as wind, solar, and hydro available.
This action should result in reduced carbon emissions as Windows PCs around the globe move away from energy sources based on fossil fuels, at least during the update process.
Windows 11 users can look for this update normally, by pressing Win + I to access Settings, and checking the Windows Update tab for it.
Windows 10 users, however, will have to first upgrade to the latest operating system first. To do so, use the PC Health Check app to check eligibility.
The Redmond-based tech company has once again emphasized that if your existing device is not eligible for Windows 11, you should stay on Windows 10 since it is supported until October 14, 2025.
You should know that the next feature update to Windows 10 is arriving next month in the form of version 22H2 as well.
Also, keep in mind that IT admins in commercial and education markets are advised to begin targeted deployments of Windows 11.
The Windows 11 2022 Update is available through regular commercial channels such as Windows Server Update Services (WSUS), Windows Update for Business (WUfB), and the Volume Licensing Service Center (VLSC).
Have you already installed this version of Windows 11? Share your experience with us in the comments section below.
This month’s Xbox update has released. As always, the Xbox team has found new ways to update the Xbox experience with several new improvements and added features. Let’s have a look at what is included in the September Update.
Customize the Xbox button color on your Xbox Elite Wireless Controller Series 2
You can now change the color of the Xbox button on your Xbox Elite Wireless Controller Series 2! Just go to the Xbox Accessories App on your Xbox or Windows PC with the controller connected, choose your profile, then select the color tab. There you can change the color and brightness of the Xbox button’s glow. If you don’t see this feature, try restarting your machine.
The Xbox Elite Wireless Controller Series 2 – Core in white also releases today!
Speaking of the Xbox Elite Wireless Controller Series 2, the “Core in white” version is now available. The controller comes with all the same features as others from the Series 2 Elite line: adjustable-tension thumbsticks, wrap-around rubberized grip, and shorter hair trigger locks, along with the new stylish color option. The complete component pack is also still available at $59.99 USD MSRP. The Xbox Elite Wireless Controller Series 2 – Core in white retails at $129.99.
Games and apps library overhaul
You may recall we mentioned that a new UI for the games library was being tested in the Xbox Insiders program Alpha Ring. The revamped games library is now available to the public with the Xbox September Update. The new tabbed interface provides a more streamlined view of all your games and apps, and is a much more intuitive system for finding things.
Other new features
Also with this new update, users can select different install locations for different types of games and apps on Xbox One and Series X|S consoles. Games that utilize next-gen optimization could be set to install directly to internal SSD storage, while games that don’t need the benefits of SSD could be stored to say, an external HDD by default, as an example.
Share captures with the Xbox Game Bar on Windows PC with a new feature that allows you to get a sharable link for you image and video captures. You can share to anywhere: SMS, Twitter, WhatsApp, Messenger, and more. Press Windows key + G on your keyboard or the Xbox button on your controller, and choose Copy link in the Game Bar gallery. The capture will be uploaded with a shareable link.
Party chat noise suppression—a feature that was implemented for Series X|S consoles earlier this month, now is available for Xbox One and Windows 10 and 11 PCs. And finally, you can now set up parties in the Xbox App with the new “Start Party” button. Find it in the Social Tab under the new Parties option. Create a new party or restart a prior one, and select which friends to invite.
As you can see, that was quite a lot of new features for Xbox in September. The user experience is always evolving, and it’s exciting to see cool new additions like these being added. Which of these new features has got stoked for gaming on Xbox? Try them out and let us know what you think in the comments section.
The PlayStation 4 controller is a great input device for retro gaming. It has many buttons, works well with most emulators, and feels comfortable in your hand. However, sometimes your PS4 controller will not work in RetroArch.
If you are a gamer and love to play retro games on your PS4, you must have downloaded RetroArch or any other front-end emulator.
RetroArch is a popular all-in-one emulator that can run on various systems, including Linux, Windows, MacOSX, and Android, and lets you play old games on your modern gaming system.
Why isn’t my controller working with RetroArch?
There are many reasons why your PS4 controller might not be working with RetroArch. Below are some common reasons:
Interference from other devices – If you are using a wireless connection, then it is likely that your controller may not be working properly with RetroArch. This problem is due to interference from other wireless devices in your vicinity, such as Bluetooth devices, Wi-Fi routers, etc.
Outdated firmware – Another common problem with controllers is that they run outdated firmware, which doesn’t support certain functions properly.
Incompatible controller – Ensure that your controller is compatible with RetroArch and able to work with the emulator. You can find out by looking at the controller compatibility list on the RetroArch website.
Wrong configuration – RetroArch can automatically detect and configure most controllers on most systems. However, there are some cases where you may need to configure your controller manually. It may not work if you don’t know how to set up your controller on RetroArch.
Outdated OS – If your controller doesn’t work with RetroArch, chances are it’s an issue with your computer. The controller may not be compatible with the OS version you’re using.
Faulty controller – Your controller might be broken or damaged. It may be broken if it won’t work with any other programs or games.
Now that you know the possible causes of your controller woes, below are some reliable solutions that can help you address the problem with your PS4 controller not working in RetroArch.
What can I do if my PS4 controller is not working in RetroArch?
Before we start making major changes, here are a few quick things you can do:
Your primary approach when the Retroarch PS5 controller is not working should be to connect it to another USB port. And make sure you are plugging it directly into the computer and not a USB hub. Also, you can try another computer just to be sure.
If you’re using RetroArch with a Bluetooth controller and it’s not working, try switching to a wired connection. Sometimes, wireless connections are weak due to other device interferences and perform poorly.
Uninstall all controllers from the PC, then plug them back in one at a time until the problematic one is found. Or you could have the PS4 controller connected while playing the game.
If these don’t work, move to the solutions listed next.
1. Update your drivers
Often, outdated or buggy drivers can cause issues with your controller. The latest drivers will have bug fixes and improvements that may help.
You can find the latest driver updates by updating your OS or downloading them directly from the manufacturer’s website.
2. Update controller firmware
You might already know that when you buy a controller, it has some default settings and features. These are only limited to basic functions and features, but not all of them.
However, when you update the firmware of your controller, then it will unlock more features that were not available earlier on your device and also increase its compatibility with RetroArch.
This may sound like an obvious solution, but it’s one of the most effective ones out there. You need to update your operating system when new updates are available to keep everything running smoothly.
You may miss out on bug fixes if you don’t update your system regularly. Then, there will be problems such as these when using RetroArch on your PS4.
4. Uninstall and reinstall RetroArch
If you’ve been using RetroArch for a while without getting any controller problems, updating it may be all that’s needed.
If the problems start after updating to a newer version, then it might be causing some issues with your PS4 controller not working properly. It’s possible that something went wrong during the installation process hence the need for a fresh install.
How do I connect my PS4 controller to RetroArch Android?
It’s no secret that Android has an impressive library of games, so gamers would want to connect their controllers to their Android devices.
You can easily connect your PS4 controller to your Android device using a Bluetooth connection. Next, you will have to download RetroArch for Android from the Google Play Store. You will be prompted to select a core acting as a console emulator.
At this stage, you need to consider how powerful your Android device is because lower-end and old devices running on old OS might struggle with compatibility issues and perform poorly.
Alternatively, you can opt for an Android emulator, given that Windows 11 now allows Android apps for a smoother transition.
If RetroArch is not working for you; it could be due to outdated drivers, error downloading cores, or corrupted RetroArch app, read this guide to learn more.
Let us know if you have solved the issue of the PS4 controller not working in RetroArch in the comment section below.
Follow the misadventures of the impulsive Cuphead and his easily swayed brother Mugman in this animated series based on the hit video game.
Starring: Tru Valentino, Frank Todaro, Wayne Brady
Based on the hit 2017 indie game from Studio MDHR, The Cuphead Show! is one of the most recent video game-to-television successes to come to us courtesy of Netflix. Like the game, The Cuphead Show has an aesthetic that is reminiscent of vintage “rubber-hose” animation a la the very early Disney days. The show has been well-received since its February 2022 release. Season 2 launched in August.
It is a loose adaptation of the game, and is geared more toward kids than veterans of the tough-as-nails run-and-gun platform-shooter. The show follows brothers Cuphead and Mugman—the same protagonists from the game. The pair has a knack for getting into trouble, especially with the Devil. The voice casting includes Tru Valentino (who also voiced Adam Gette in Psychonauts 2) as Cuphead. Veteran actor and voice actor Frank Todaro is both Mugman and Jerry. Grey DeLisle voices Ms. Chalice, Hilda Berg, Dorris and Emma. And Jim Conroy is Ollie Bulb, Jasper and Duke.
Ireland-based Lighthouse Studios handles the animation—and unlike the game’s hand-drawn animations, the show uses a variety of other methods in order to meet deadlines. American composer Ego Plum, perhaps best known for his work on Spongebob Squarepants, is responsible for the show’s music.
All images and synopsis information via netlix.com.
Season 1
Release year: 2022
Follow the misadventures of the impulsive Cuphead and his easily swayed brother Mugman in this animated series based on the hit video game.
1. Carn-Evil Cuphead convinces Mugman they should ditch their chores and head to the carnival, unaware it’s a front to collect souls.
2. Baby Bottle The brothers take care of a baby left at their front door. But with Elder Kettle gone and a strict warning to be good, it’s harder than they imagined.
3. Ribby & Croaks A squabbling Mugman and Cuphead sneak into a club to grab some ice cream after the boxing champs who own it steal their money.
4. Handle with Care After Mugman’s handle breaks off, the brothers visit a greedy shopkeeper and get creative while on the hunt for glue.
5. Roll the Dice All bets are off when Cuphead takes over Inkwell Isle’s No. 1 game show, much to the annoyance of its devious host King Dice and his devilish boss.
6. Ghosts Ain’t Real A spooky bunch of ghosts treat Cuphead and Mugman to a night of chills and thrills after trapping them inside a creepy graveyard.
7. Root Packed Cuphead and Mugman have to defend Elder Kettle’s precious vegetable garden after a rotten gang turns their yard into a party.
8. Sweater Off Dead Mugman knits a special sweater to keep Cuphead’s soul safe. Meanwhile, in the underworld, the Devil is throwing a party.
9. Sweater Off Next Time The Devil follows the brothers day after day, waiting for Cuphead to take off his sweater so he can collect his soul before Stickler finds out.
10. Dangerous Mugman Cuphead and a cowardly Mugman test their courage after Porkrind sends them on a dangerous errand that quickly gets out of hand.
11. Dirt Nap Elder Kettle overhears strange conversations between Cuphead and Mugman, then worries that the boys have menacing plans for him.
12. In Charm’s Way Trouble follows the brothers when Cuphead and Mugman get in over their heads upon meeting a free-spirited, street-smart new friend.
Season 2
Release year: 2022
Pirate adventures, giant peppermints, devilish pitchforks and more! Wherever Cuphead and Mugman go this season, fun and mischief are sure to follow.
1. Jailbroken Cuphead and Mugman are in the slammer after breaking into the cookie factory. Prison’s scary — but now they can’t decide whether to bust out or stay in!
2. Charmed & Dangerous Trouble comes a-knockin’ when Ms. Chalice turns up on Elder Kettle’s doorstep and turns on the charm. The question is: Can she be trusted?
3. A High Seas Adventure! The boys think they’re just “playing” pirate until they actually drift out to sea and get roped into a mission to reunite a captain and his sweetheart.
4. Another Brother After an argument with Mugman, Cuphead goes looking for another brother. But his reckless new sibling isn’t all he’s cracked up to be.
5. Sweet Temptation Cuphead’s self-control is put to the test when he discovers a sugary dreamland where he can eat all the sweets he wants… with a catch.
6. The I Scream Man All Mugman wants is a little peace and quiet while Cuphead and Elder Kettle are away. Enter the ice cream man — and his jaunty truck’s maddening jingle.
7. Piano Lesson
Mugman gets dangerously jealous when his snooty piano teacher taps Cuphead to compete for a $10,000 musical prize instead of him.
8. Release the Demons! Steaming mad and ready for revenge, the Devil summons his finest demons and sends them above ground on a mission to recapture Cuphead’s soul.
9. Dead Broke Ms. Chalice and the boys craft a perfect spooky scam: making money as ghost removers! But things get real when they pick a house that’s already haunted.
10. Rat’s All, Folks A crafty rat claims ownership of Elder Kettle’s cottage and all of its contents after a careless Cuphead and Mugman leave the door open.
11. Say Cheese Elder Kettle wants to snap a family portrait of him and his boys — and, boy, does he get it! Just not in the picture-perfect setting he was expecting.
12. Lost in the Woods Winter’s coming and there’s lots of work to do, but Cuphead doesn’t want to do any of it. Forget chopping wood — he’d rather launch rockets into the sky!
13. The Devil’s Pitchfork Cuphead and Mugman are giddy with power when they get their hands on the Devil’s pitchfork and make fiery mischief all over town.
Wrap up
If you are a fan of gorgeous animation and slapstick humor (and no, you don’t have to be 10 and under to belong to this category) you should definitely check this out if you haven’t already. Fans of the game should also give The Cuphead Show! a chance. Netflix initially ordered 36 episodes across three seasons, but with the show’s warm reception it is safe to say The Cuphead Show! will be around a little longer in one form or another.
Microsoft Edge has advanced rapidly in recent years, and it now has a variety of valuable integrations and features to offer users. One of these capabilities is to configure Internet Explorer integration mode, which many reported missing in the Group Policy.
The problem usually lies with the configured settings or Edge’s flags. And the solutions are rather quick and simple and shouldn’t take much time.
Here are some fixes that will most probably help you to enable IE mode in Edge.
What is Edge IE mode?
Microsoft has included a mode that allows users to quickly access the websites that their employer requires in a single browser. It is known as IE mode.
It allows users to access websites that are developed for Internet Explorer without actually installing the now discontinued browser. Also, to guarantee backward compatibility with existing enterprise apps and internal sites, Edge’s IE mode can be used.
Now let us get back to the question: how do I enable IE mode in Edge via group policy?
?️Quick Tip:
An encrypted privacy browser, such as Opera One, can help you get the most out of your work and personal browsing experiences. It’s fast, memory and battery efficient, and it includes an ad blocker and VPN to keep you safe.
Furthermore, when you switch internet browsers to Opera One, you will be prompted to import any data from your previous web browser. And it also features a native AI.
Opera One
Choose to use the Opera One browser so that you can browse more safely and securely.
Under the Need to download older builds and versions section, select the version, build, and platform of Microsoft Edge on your PC, and then click the Get Policy Filesoption.
Click the Accept & download button.
After the download is complete, right-click to extract the MicrosoftEdgePolicyTemplates.zip file. Click the Extracthere or Extract all and select your desired location. (you can use WinRAR or 7-Zip to extract the files)
Browse the following path inside the extracted MicrosoftEdgePolicyTemplates folder: windows\admx
Select the msedge.admx and msedgeupdate.admx files and right-click and select Copy.
Browse to the following path and paste the files there: C:\Windows\PolicyDefinitions
In the admx folder of step six, inside the MicrosoftEdgePolicyTemplates folder, open the language folder that represents your language.
Select the msedge.adml and msedgeupdate.adml files and copy.
Browse to the following path that matches your language: C:\Windows\PolicyDefinitions\en-US (Instead of en-US, you should select your language.)
Open your Edge browser, paste the following path into the address bar, and hit Enter:edge://flags/#edge-internet-explorer-integration
On the top, you should notice a line that says Enable IE Integration. Select IE Mode from the dropdown menu by clicking on the box next to that line.
On your desktop, create a shortcut for Edge.
Right-click on the icon and select Properties.
Add –ie-mode-test at the end of the Target text field after a space. Once done, click on Apply and then OK to save the changes.
Can I configure the Internet Explorer integration using the Registry?
You can certainly enable IE mode by changing the Registry values. However, this is not advised because any unwanted changes in the registry may cause system failure and result in BSOD.
The main cause of this problem is that the users have not downloaded the latest Microsoft Edge Policy Template.
With this file in the right place, the IE mode can be enabled both from the Settings and Edge Flags.
However, enabling it from the flags will provide you with other useful settings, most of which may be experimental, so be sure not to flip switches without enough information about the feature.
That’s how you can configure Internet Explorer integration if it’s missing in the Group Policy and access legacy websites.
If you’re playing Overwatch on PC, chances are you’re going to need a controller. Not only does it make things more convenient, but it also increases the precision of your movements. But what happens when your controller is acting up?
Overwatch is one of the best first-person shooter games with a wide variety of game modes that make it a cult favorite among gaming fanatics.
The most common causes of controller issues are loose or damaged USB cables. Make sure your controller is plugged into the correct port on your computer and that the cable is securely attached to both devices.
Does Overwatch on PC support controller?
Overwatch is a game that has been designed to accommodate cross-player platforms. It can be played with a mouse and keyboard, but it can still be enjoyed with a controller if you want. The game supports a wide variety of controllers.
Can you play Overwatch with a PS4 controller on a PC?
Aside from Blizzard controllers, you can also play Overwatch with other controllers. The PS4 controller is a great choice for PC gaming, as it has all the buttons and sticks you need, plus some extra features that make it even better.
It’s comfortable, it feels great to use, and it has a nice range of buttons and sticks that allow for more control than any other console.
Overwatch isn’t particularly picky about which third-party controllers you use with it. It just needs to be a controller that works with your version of OS.
How can I fix a PC controller if it is not working in Overwatch?
1. Switch USB ports
If you are using a wired controller, try switching to a different USB port. It could be that the particular port you are using is damaged or it’s a USB 3.0 port and you need to switch to a USB 2.0.
Many modern controllers use a USB 3.0 cable that may work fine in some games but not others. USB 3.0 ports are typically faster than their USB 2.0 counterparts but they are not always compatible with most gamepads.
Also, make sure that all cables are connected properly and securely so that they do not come loose.
2. Update your drivers
Incompatibilities always occur at the worst possible times. Most of them are caused by outdated or missing drivers and affect peripherals such as PC controllers and other external devices.
This issue is known to happen a lot to Overwatch players, that’s why we recommend updating all your drivers to their latest versions.
3. Run Bluetooth troubleshooter
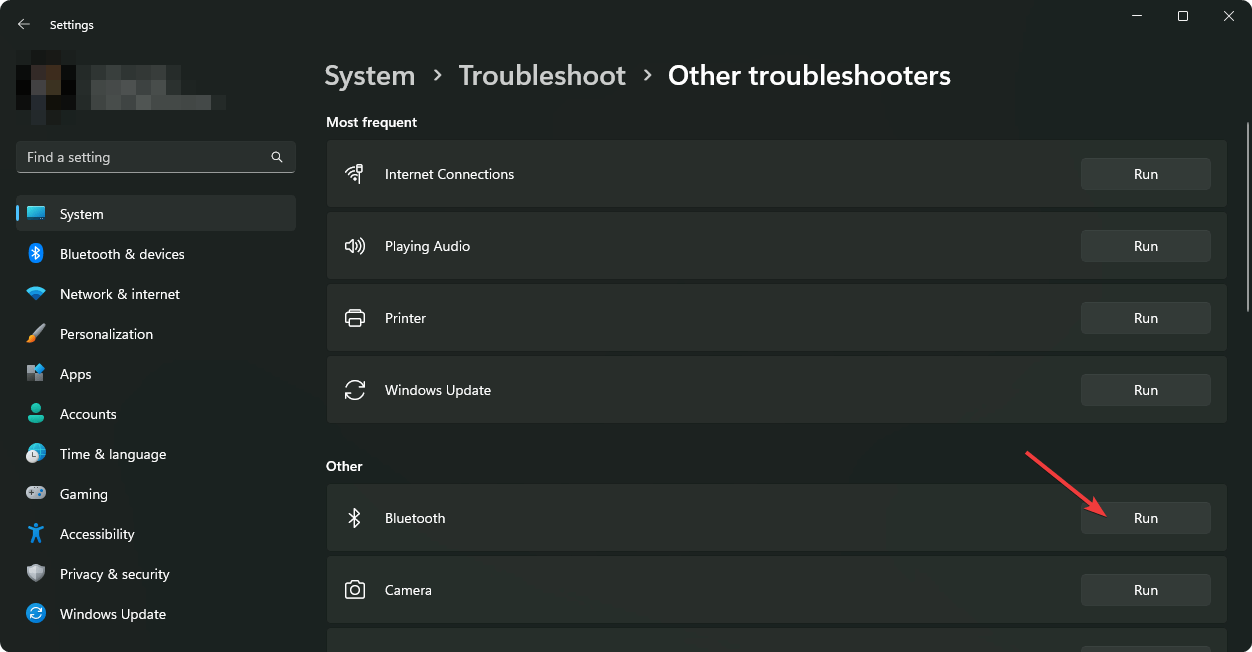
Press the Windows key then click on Settings.
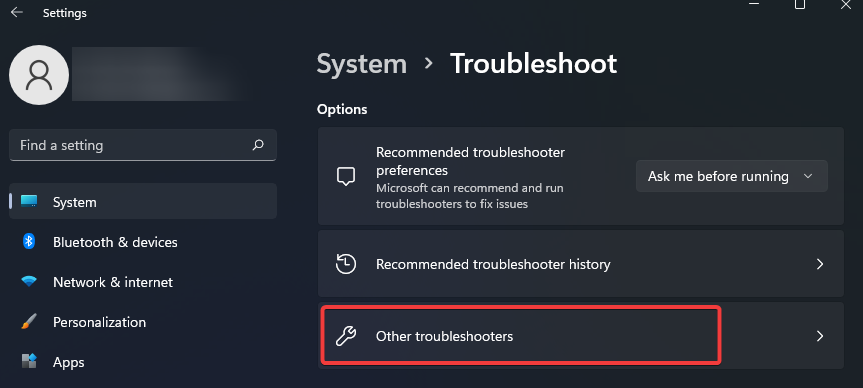
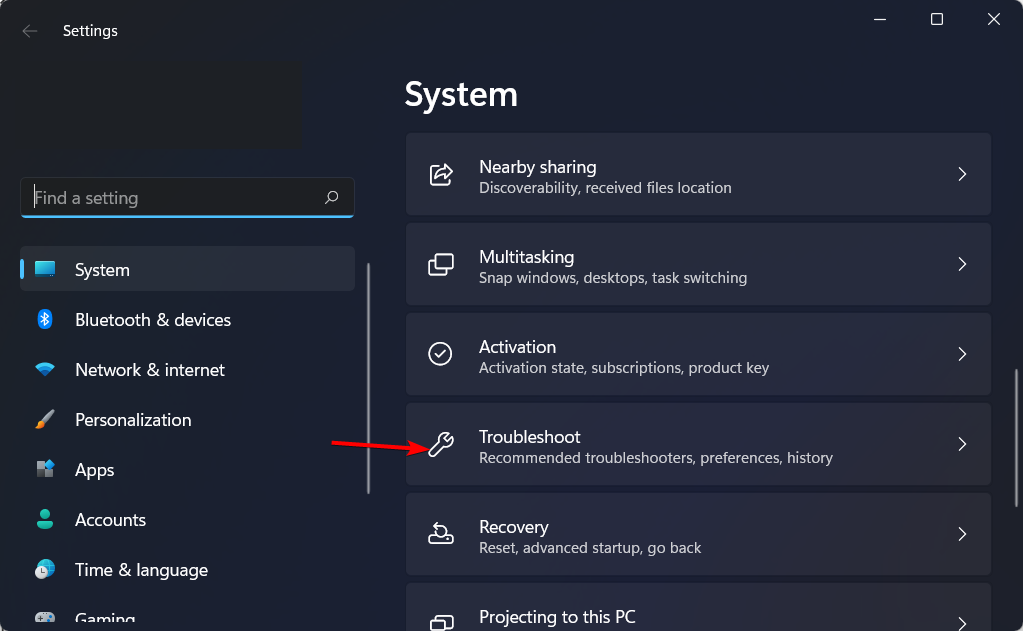
Select System on the left pane and click on Troubleshoot on the right pane.
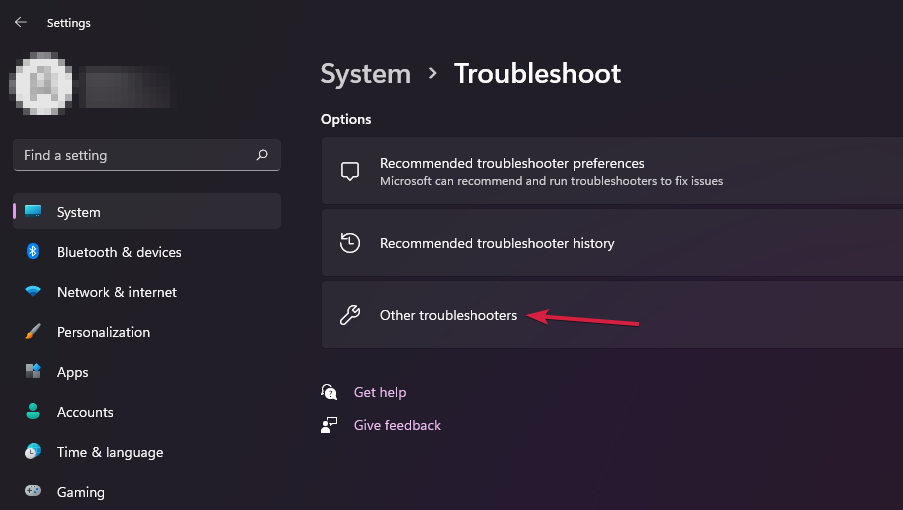
Click on Other troubleshooters.
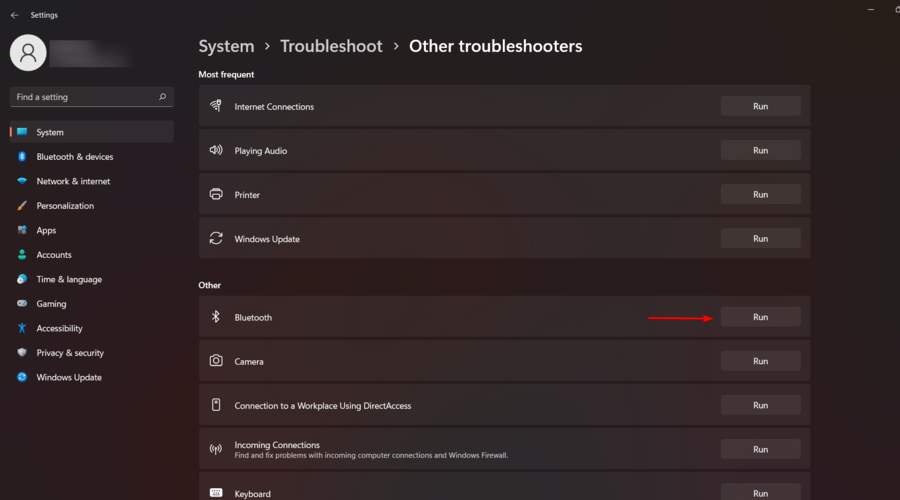
Navigate to Bluetooth and click on the Run button.
NOTE
This method only works for wireless controllers.
4. Change the sensitivity settings of your controller
If you are experiencing issues with your Overwatch game while using a PC controller then this issue can be resolved by changing the sensitivity settings of the controller itself. You might have set them too high or too low, which can affect your ability to aim.
The sensitivity setting determines how much input is required from you to make an action happen on screen. If it is too low or too high, you may have problems getting it to work on Overwatch.
If you’re running an older version of Windows, then it’s possible that it is causing an issue with your PC controller not working in Overwatch.
The latest software updates installed on your computer, especially those related to gaming peripherals like controllers and mice usually contain bug fixes and other improvements.
There could also be a chance that there’s some bug in one of these updates that are causing issues with your controller so you can also try and uninstall recent updates and check if the problem persists.
6. Disable USB Selective Suspend setting
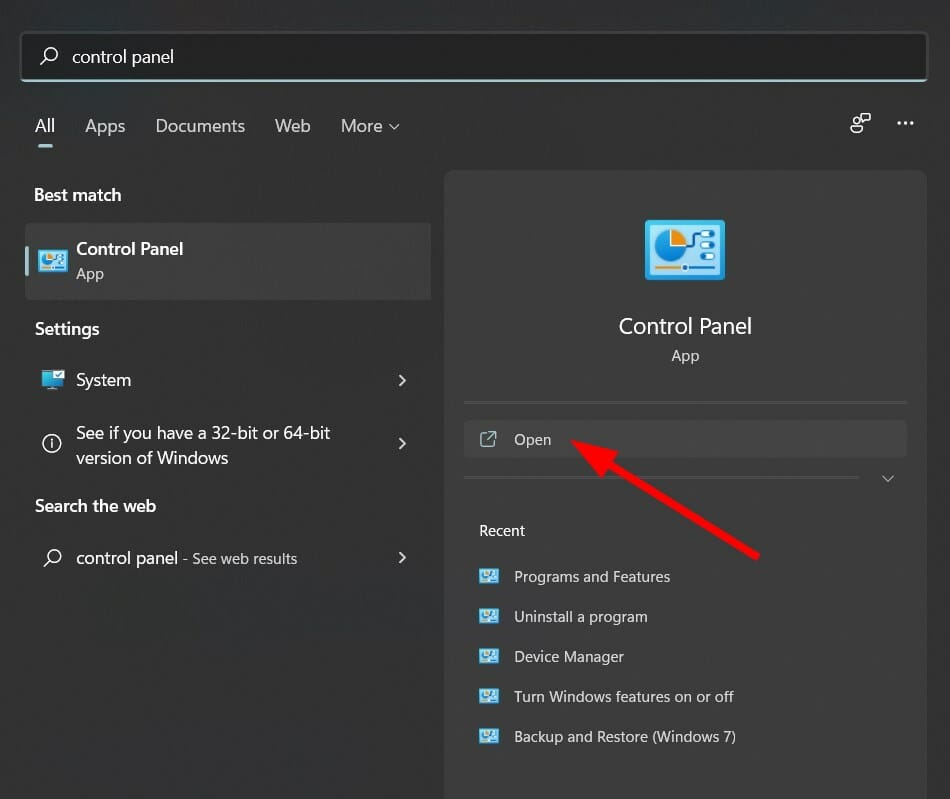
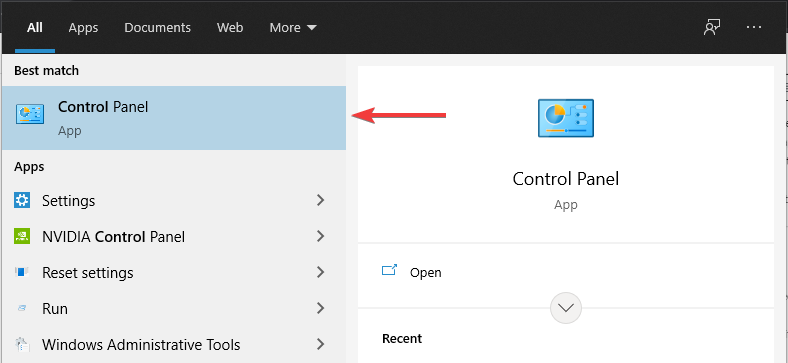
Hit the Windows key, type Control Panel in the search bar and click Open.
Type Power Options in the search bar and click to open.
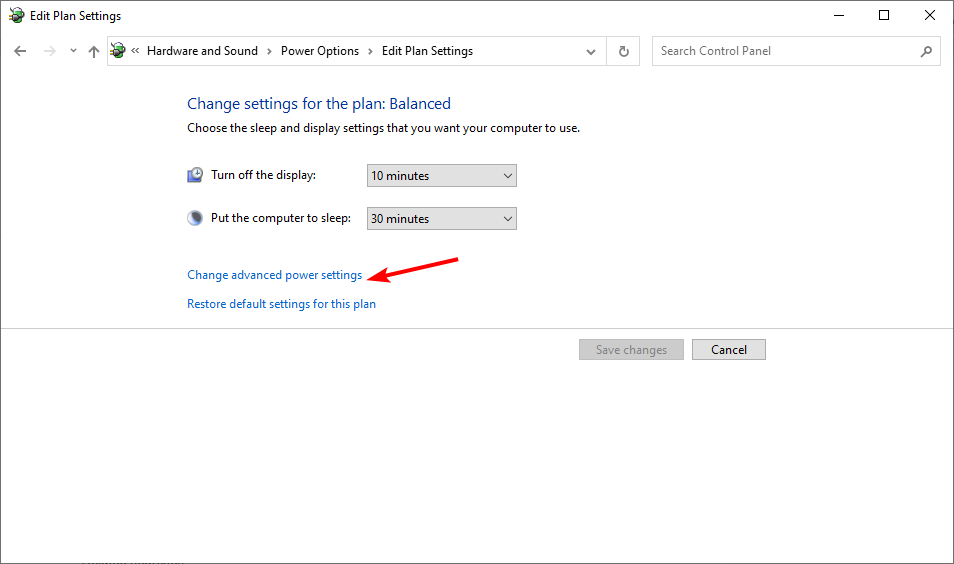
Select Change plan settings next to the Balanced (recommended) option.
Click on Change advanced power settings.
Expand USB setting then in the drop-down under USB selective suspend setting, click on Disabled then press Apply/OK to save changes.
How do I connect my PS5 controller to Overwatch PC?
If you have a PS5 controller and have been playing Overwatch on the PS4, you may be wondering how to use it on a PC. This is possible, but it requires some extra work to get everything set up.
You can use your PS5 controller with Overwatch on PC, but you’ll need to download a third-party app like DS4Windows.
As a precautionary action, downloading the DS4 emulator from unofficial websites could expose your PC to malware and viruses. It, therefore, follows that an antivirus program for your PS5 is a non-negotiable if you want to stay protected.
If you are looking for more variety, we have an excellent recommendation of the most responsive PC gaming controllers that will enhance your gaming experience.
Microsoft Docs (docs.microsoft.com) was introduced back in 2016 in place of Microsoft Developer Network and Microsoft TechNet, a move by Microsoft geared toward providing enterprise documentation support with key features such as estimated reading time, content and site navigation, friendly URLs, and more. It was later announced that developers could easily access all their documentation under one URL, thus enhancing navigation and introducing the ability for developers to contribute.
And now, Microsoft Docs will be transitioning on to Microsoft Learn. Users will now be navigating through learn.microsoft.com/docs rather than docs.microsoft.com to access documentation . Despite this shift, users will stil be able to make use of all the key features that were available on Microsoft Docs on Microsoft Learn. What’s more, you will also be able to access all the bookmarks that you had made previously.
According to Erin Rifkin from Microsoft, “We’ve brought together all the technical content, learning tools, and resources that Microsoft has to offer in the new Microsoft Learn product family. Microsoft Learn is designed to help you get the most value from Microsoft products and services, so you can make the most impact through the work you want to do. Whether you’re innovating or troubleshooting a problem, technology, and the skills you need to use it are now within reach.”
In the meantime, you can check out our expert guide that will help you get started with Microsoft Learn. Share your thoughts with us regarding the move below.
Is Bluetooth disappeared in Windows 11 leaving you unable to connect headphones, mice, or other wireless devices? This issue is common after updates, driver problems, or power settings conflicts.
In this guide, you’ll learn how to fix missing Bluetooth functionality step by step, whether the Bluetooth driver is missing from Device Manager or Windows 11 Bluetooth icon keeps disappearing from system tray.
If you’re still facing issues, check whether your specific Realtek Bluetooth 5.0 driver needs an update or reinstall by visiting this Realtek Bluetooth driver guide.
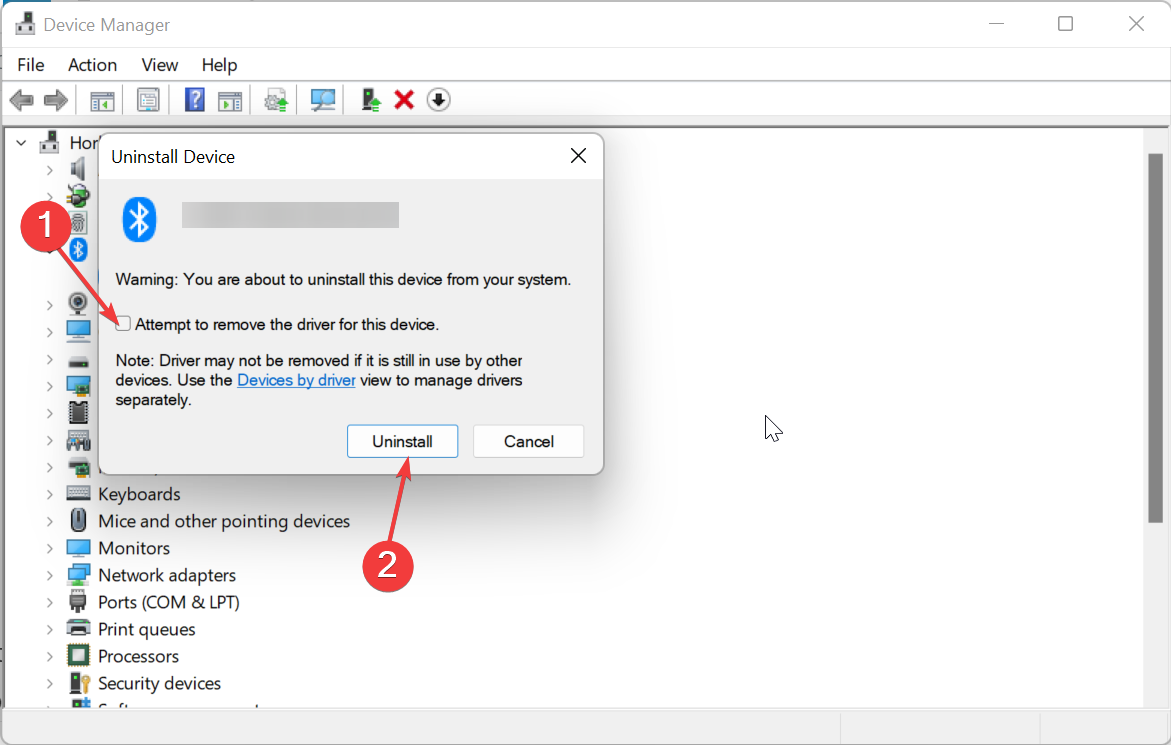
5. Reinstall Bluetooth Drivers
In Device Manager, right-click the Bluetooth device and uninstall it
If Bluetooth disappeared in Windows 11, don’t panic, it’s usually a driver or system setting issue, not hardware failure. Start by checking visibility in Device Manager, running the Bluetooth troubleshooter, and reinstalling or updating your drivers. In most cases, following these steps will restore full Bluetooth functionality in just a few minutes. For rare cases, BIOS settings or a full system reset may be necessary.
By taking a methodical approach, you can resolve missing Bluetooth problems and reconnect your devices without hassle.
FAQs
Why is my Bluetooth missing after a Windows 11 update?
Updates sometimes uninstall incompatible drivers. You may need to reinstall the original driver from your OEM or use Windows Update.
Can hardware failure cause Bluetooth to disappear?
Yes. If all software fixes fail and no adapter is detected, the internal module may be damaged.
Microsoft offers Game Pass, a subscription service that offers unlimited access to over 100 games you can play anywhere. This means you don’t need to buy the game separately for the Xbox and the PC.
However, some users have reported that they cannot install game pass games on PC. This appears to be a common issue and can be resolved with some tinkering with your PC and Microsoft account. Here’s one user’s say on the matter.
I recently added the Game Pass 14 day trial to my account. It’s pretty good and has decent games for it’s small price, though I can’t install any of the game included
There is more than one scenario, but the outcome remains invariably the same: you can’t install Game Pass games on a PC, and it’s frustrating. So let’s take a closer look.
Why can’t I install games from Xbox Game Pass on PC?
Here are some of the most common reasons you aren’t able to install the Xbox Game Pass on a PC.
You don’t have the right Game Pass.
Xbox Game Pass cache is causing the issue.
You don’t have the required permissions for Games.
Your PC isn’t updated to the latest available version.
The game itself is missing some important files.
You aren’t signed in to your Xbox app and the Game Pass with the same account.
What are the most common installation issues related to Game Pass?
Xbox Game Pass not downloading / Xbox Game Pass error downloading
What do I do if I can’t install Game Pass games on a PC?
1. Change the Region on your PC
Press Win + I to open Settings.
Select the Time & Language option from the left.
Click on Region under Timeand Language.
Click the drop-down menu for Country or Region and select one of the countries listed on the Game Pass supported country page here.
Reboot the computer (optional).
Launch the Microsoft Store and try to install the Game Pass Game.
Alternatively, you could also change the region of your PC by changing your VPN server. If you don’t own a VPN, we strongly recommend using one immediately.
Online privacy is getting increasingly complex, and VPN software performs a fantastic job of safeguarding you from digital surveillance, monitoring, data collecting, invasive advertising, and cyber criminals.
A VPN’s primary function is to provide a secure connection to the internet while also protecting your data by encrypting your traffic.
Thus, with a single click, the VPN hides your actual IP location and transforms it to another IP, making it appear to the browser as if you’re playing from that IP.
This means you can go ahead and game all you want and still maintain the VPN service active since lag will no longer be an issue. Connect to the VPN service; you won’t be sorry!
2. Server Error
If you are facing a problem with any game in Game Pass, the issue can be with the developers or the Microsoft Windows store.
At times, the server may get busy or down for maintenance. Developers usually update the users about any issue on their official media accounts like Twitter or the official developer website.
So make sure you check the official social media account of the developer to see if the game servers are down.
NOTE
Note: Buying your Xbox Game Pass from unauthorized retailers can also cause this issue. Always make sure you get a subscription from the official website only, where you can gain access to all of the Xbox Game Pass.
However, some users reported that Movavi Video Editor failed to export some files. The error can occur due to hardware acceleration problems as well.
If you are also troubled by this issue, here are some troubleshooting tips to fix Movavi video export issues on Windows 10, so keep reading.
Why won’t Movavi export my video?
After some research, we found some common reasons that would trigger the Movavi not exporting your video error.
You don’t have sufficient storage in the drive you are exporting the video.
You are using the wrong version of the Movavi Editor.
Some important files are missing from the Movavi Editor.
You have not installed the latest update for your graphics driver.
The dedicated GPU isn’t selected.
How can I fix the Movavi export problem?
1. Install Adobe Premiere Pro
While Movavi is an excellent video editing platform, if it’s causing you problems, the solution might be to switch to an industry-leading video editor like Adobe Premiere Pro.
Thousands of content creators and professionals use it from blockbuster movies to YouTube or home videos. Premiere Pro is a powerful tool that offers creators complete control over their videos.
Thanks to its seamless integration into the Creative Cloud, you can easily add resources from other programs like Photoshop, After Effects, or Illustrator (to name a few).
Check out some of its features:
On-the-go edits with the Premiere Rush mobile app
Automated editing with Adobe Sensei
VR support
Perfect color grading with Lumetri Color Tools
Adobe Premiere Pro
With Adobe Premiere Pro, you can easily edit video and audio from any source in 8K resolution.
Type devmgmt.msc and click OK to open the Device Manager.
Expand the Display adapter.
Right-click on Intel UHD Graphics and select Update Driver.
Select the Search automatically for updated driver software option.
Wait for Windows to download and install any updates available for the display adapter.
After the update is installed, reboot the system and check for any improvements.
If you have a dedicated GPU, update the GPU graphics driver from the Device Manager or use the GPU manufacturer’s proprietary software.
Often, this method will not find the latest driver from the manufacturer. If this happens, you should use an automated tool to find the update online, Outbyte Driver Updater.
Outbyte Driver Updater is specialized software that will scan your PC for outdated drivers and update all of them if possible. It has a database of over 18 million driver files to facilitate this process.
Right-click on the Desktop, and select NVIDIA Control Center.
Go to Manage 3D Settings, and select Program Settings.
Add videoeditor.exe manually and select High-Performance NVIDIA GPU as the preferred option.
Click OK to save the changes, and close the Control center.
For AMD (ATI) Users:
Right-click on the Desktop, and select Radeon (Catalyst) Control Center.
Click on Power, and select Switchable Graphics Application Settings.
Now add videoeditor.exe manually (make sure you add the correct module depending on the Movavi video editor suite installed).
Select High performance as the preferred adapter.
Click OK to save the preference, and close the Control Center.
If you are using an integrated Intel Graphic processor to render the video, try switching to the discrete graphics card installed in your system.
Once you have set the preferred graphics adapter to the dedicated GPU, try to export the video and check for any improvements.
5. Other solutions to try
Check the amount of free space on your hard drive. Make sure you change the output drive if the current drive is low on space.
If the files were added from a secondary device, ensure they are still connected until the video is exported.
Why does Movavi crash when exporting?
The encoder has stopped due to faulty drivers.
Your PC does not have sufficient free space to export the file.
The integrated GPU might be selected as your default graphics card, which cannot handle the export process.
The codec activation is rejected, restricting you from exporting videos in specific formats.
If you have applied stabilization to your video due to a lack of resources, the Movavi Editor cannot render the output.
Following this article’s steps should help you resolve the video export issues in Movavi Video Editor. Do let us know which solution worked for you in the comments.
Edge made its way to mobile through Android and iOS. The former is based on Blink, while the latter is powered by the WebKit browser engine. Diving deeper into the Microsoft ecosystem is worth considering if you are on Windows, as there is room for seamless integration across the devices. Like its computer counterpart, Edge on mobile has much to offer apart from a smooth surfing experience.
More features will make their way to the mobile browser with a roadmap for unifying into a single codebase. Here we take Microsoft Edge mobile for a test drive and try features worth including for everyday use.
Edge Mobile Tips and Tricks for Android & iOS
We explore the features from my point of view with the Android 12-based smartphone. The experience can be a tad different on iOS, while most features and core interfaces remain the same.
1. Change Page Layout
Taking inspiration from the desktop sibling, Edge on mobile lets you customize the homepage but with a limited number of options. It offers three profiles – focused, inspirational, and customized. Focused does as the name signifies, with prime emphasis on web browsing without any frills. You are greeted by a Microsoft logo on top of the address bar.
Inspirational shows image of the day, sourced from Bing, along with a news feed, accessible with a swipe-up. Customized layout lets users pick elements from focused and inspirational. The browser loads inspirational mode by default on the first-time launch. It can be changed in the following manner.
a. Tap the lever icon at the top-right corner, which will display three options.
b. Select the layout you want on the homepage. If you select the customized layout, you can pick out certain elements to show/hide on the homepage.
2. Real-world Camera Search
Google Lens has taken search engines into the real world by making anything searchable through the camera. Edge brings a basic version of it to the browser with its in-built search bar. Tap on the camera icon on the homepage and start scanning objects to get similar image results powered by Bing.
There is a bar-code scanner that scans QR and standard codes. Scan the barcode, and the retrieved text/information will be searched in the preferred search engine.
3. Dark Mode
The dark mode is becoming an option on devices and apps. It is a staple for power users who spend hours on the phone, lurking on Reddit, reading books, watching shows, etc. Edge mobile was set to white mode on installing it. Here is how you can change to dark mode on Edge mobile browser.
Head to the settings from the three-dots toolbar at the bottom. Now go to Appearance > Dark, which will immediately change the appearance to dark mode.
4. Screenshot
Taking screenshots has different methods, depending upon the manufacturer. Some use the shortcut of the power button + volume up/down, while few have finger gestures at specific places on the screen. Microsft Edge lets you take screenshots through the in-built feature.
There are two ways to take screenshots – the entire visible area and scrolling screenshots which lets users capture the required part of a long page.
Take a screenshot of the visible area of tab
a. Tap on the share button in the toolbar, located at the bottom.
b. Select the screenshot icon given at the left.
c. Save it in local storage or share it on social media or wirelessly to a nearby device.
Take a rolling screenshot of the select part of the tab
Note – On some smartphones, the option to take a rolling screenshot appears on Edge mobile when taken through the phone’s shortcut.
a. Select the second option from the left in the sharing toolbar
b. Use arrows on either side to cover more area of the tab. Scroll up and down to include additional areas; then use the arrows to add them to the screenshot.
c. Tap on the tick symbol to finalize the screenshot selection
d. Now, we will land in the saving section, just like the simple screenshot. You can save it locally, share it on social media apps, or delete it and take another screenshot.
5. Read Aloud
Web accessibility is being adopted by the internet, with open-source communities and tech giants leading from the front. Just like desktop, Edge also brings it to mobile in the Read Aloud mode, where all the content on a webpage is read by the AI-powered narrator.
It can read pages in hundreds of different languages, with two or more voice options. English has 14 different voices to choose from, accompanied by different accents. Enable it on a page in the following manner.
a. Open a web page you want to be read, and tap on the three-dots button to open the toolbar from the bottom.
b. Tap on Read Aloud, and the narrator will start reading in the detected language on the page.
c. Select the reading speed and voice by tapping on the accessibility icon at the top.
6. Immersive Reader Mode
Read a text-rich webpage without any distractions, with formatting and background of your choice. Enable immersive reader mode in Edge mobile by refreshing the page, swiping it down, or other gestures configured on your phone.
Tap on the Reader Mode icon to enable reading it on a stripped-down page. You can translate the page into another language, listen to it, and format the text according to your reading preference. There is also a dark mode that can be toggled via the reading menu.
7. Open a specific page on launch
Open a specific page on launching the browser. It differs from your homepage, which can be accessed through the toolbar. Sometimes we need to open a certain page daily, such as college or a work portal. Launch the browser, and it will load in the first available tab.
Enable this feature by going to Settings > General > Home Page > A specific page and entering a web address with or without HTTPS.
8. Add pages to the Collection
Collections are a simplified way of organizing shopping sites, articles, and web pages for accessing them later. They provide a rich thumbnail preview of the webpage instead of text lists in bookmarks or favorites.
Add a page to the collection by heading to the toolbar > Collections and tapping ” Add current page to collection.” Then choose a collection as the destination for the page.
9. Enable Do Not Track
Many websites track your information when you visit them. It can be a browser version, the IP address and even cookies in many cases, providing in-depth details of earlier visits.
You can hide your information by enabling the Do Not Track feature, offered by leading mobile browsers, including Microsoft Edge. Head to Settings > Privacy and security > Security and switch Do Not Track to ON.
The popular Deathloop video game is now available to play on Microsoft’s Xbox Series X family of consoles which currently includes the Xbox Series X and Xbox Series S.
The title is also available to play for free for Xbox Game Pass subscribers and has now been confirmed for Xbox Cloud Gaming which means that Xbox Game Pass Ultimate subscribers can also play Deathloop on their PC, smartphone, or compatible smart TV via the cloud.
To celebrate Deathloop’s debut on Xbox consoles, the game has received an update on PS5 and Windows that adds cross-platform player-versus-player matchmaking and a variety of new content for players to experience. This update is free for all players.
Are you looking for the best Oculus Quest VR drawing and painting apps or games? This article will give you the top 10 list of such items verified by our team.
Different people have different types of hobbies and preferences. For example, some of you may like drawing and sketching on digital devices. If you are one of them and want to dive into the madness of the VR world, you will love the Oculus Quest.
Though there are other powerful VR headsets, many people prefer this device more. This VR headset is powerful and can run standalone apps and VR games, including some drawing apps. But, the problem is many of these items cannot deliver an expected experience.
In this article, we will try to find out whether we can use the VR drawing app comfortably on Oculus Quest or not, including the relevant apps and games with many helpful details.
Is there a drawing game on Oculus?
This device has many native VR drawing apps and games. Even some browser-based VR games from third-party sources for Oculus Quest can help you draw anything you want.
Is Painting VR available on Oculus Quest?
Yes. Painting VR is available for Oculus Quest and Quest 2. If you were waiting for this masterpiece, you should no longer worry about this, as you can find it directly on the Quest Store. Else, there are other best apps in this category available for this VR headset.
What is the best VR drawing apps for Oculus Quest?
If you want to create 3D designs with a positive experience, apps like Gravity Sketch on Oculus Quest is one of the fascinating choices. It has become one of the industry’s top favorite VR painting and drawing applications.
This app is straightforward to use due to various toolsets with a smooth gesture experience. In addition, it has features that allow real-time collaboration for designers who need teamwork.
The Gravity Sketch is available on Oculus Quest and other popular VR platforms, smartphones, tabs, and computers. As a result, you can manage and access designs from your preferred platforms anytime.
Painting VR is a top-rated premium VR painting app in the industry. It is currently available on the Oculus Store for all Quest users. Unlike the Gravity Sketch, this one is a dedicated application where you can draw and paint only.
But, you can do these on canvas and other possible things in a virtual environment. The fantastic experience of painting on canvas in various backgrounds will give you joy you cannot ignore.
This app also helps to learn painting with color basics, composition, etc. In addition, this app will find all the essential tools and even virtual painting devices. Overall, Painting VR has become a new door for digital artists.
Though Color Space is a different type of painting application, many people still love it for a stimulating experience. This app allows users to explore other worlds and color them with their preferences.
For non-artist people, this app is perfect. Overall, the Color Space looks more like a video game. Users will have to enter a coloring book. After opening, different types of worlds will appear before you. However, these won’t have any color.
The Color Space users will have to put colors on every element in that world according to their preferences. If you dive into the coloring book, you won’t regret it. On the contrary, you will find it very enjoyable like most of its users.
The Quill is a VR illustration and animation tool in the Oculus store. The specialty of this app is its features that allow artists to create any characters and elements and animate them. Even though this app is mighty, you can try it free from the store.
Initially this application was first introduced by Facebook. Later, they discontinued its development and handed over it to Smoothstep. After making some changes, the new company has branded it as Quill by Smoothstep.
If you are a visual artist and want to create short or long animated stories in VR, you can try Quill right now. It’s directly available for Rift instead of Quest. However, to use it on Quest, you must follow additional steps using Oculus Link.
If you have a passion for street art, Kingspray Graffiti is the best VR game application you can find for Oculus Quest and Quest 2. Rather than a dedicated painting tool, this one is more like a Graffiti Simulator.
You can collaborate with other players in the virtual world of Kingspray Graffiti. You can customize your character in this game and start playing with the spray.
In this app, you will get places like city rooftops, trainyard, subway stations, etc., to show your ability. Overall, this app will help you develop your skills and bring your imagination into reality.
Silk Brush – The painting app accessible from the web browser
The Silk Brush is one of the best free VR painting games. Unlike other items mentioned in our list, this one is a web app. It means you cannot download it from the store. Instead, you will need to access it from a web browser.
Even though the Oculus Browser is powerful enough, Opera can be a better choice for accessing VR web apps or games like this one. We have a dedicated article on how to use Opera on Oculus Quest.
In the Silk Brush, you will get various tools to play with and bring your imagination into reality. It is more like the Tilt Brush from Google. You will have great fun anytime as this web app is free to access.
SculptVR – Create three-dimensional artworks more easily
The SculptVR is a superb creative VR application to create digital arts and elements easily. Instead of calling it a standalone painting app, we can take it as a 3D modeling application.
With this tool, you can easily create and modify the size and shapes of an element to make that look like something very different. The name suggests its purpose. If you love sculpting, this is an ideal application.
You also can collaborate with three more users on SculptVR for better teamwork. Overall, if you love to create digital assets and are curious to see what others are making, this is one of the perfect options for Oculus Quest users.
Open Brush – Expand your creativity with this immersive app
The Open Brush is a free dedicated VR painting application for Quest devices. Currently, it is in the beta stage. But, you can still get it without any problem.
The Open Brush is similar to the Silk Brush but is a native application. It has been created based on the source code of an old application, Tilt Brush.
You will find all the tools and features on Open Brush to draw and create your digital art with an excellent modern experience. Right now, you can see this app on Quest Store for free.
Vermillion – Learn painting and draw like a professional
There are very few dedicated VR painting applications like Vermillion. Even though it costs you a few bucks, it has already got its place in the community.
Like PaintingVR, you will also get various tools and items on this application to enhance your painting experience in your virtual world like a professional painter.
Unlike similar apps, you will get a floating web browser where you can search and learn painting and try newly discovered things in real time.
Vermillion allows you to do a painting from your convenient position, like seated, standing, or lying down. Overall, it is a fantastic drawing and painting app for Oculus Quest.
MultiBrush – The multiplayer implementation of a painting app
Based on the open-source code of Tilt Brush, MultiBrush is another excellent painting app for VR. Unlike Open Brush or Silk Brush, it is a dedicated multiplayer-focused painting game.
With regular updates, the developers are making it better and better. As a result, there are not so many things to say about the features as you already know about them, particularly the necessary things to create digital art conveniently.
Right now, MultiBrush is available as a paid application on Quest Store. However, if you need the multiplayer experience of Tilt Brush, you can consider using this app.
Yes. The original TiltBrush app is available on Oculus Store as a paid application. Even though Google has discontinued its developments, it still gets some security updates. However, it will no longer get new features.
The good thing is Google has made its code open source. As a result, various apps based on its codebase are available for Oculus Quest. Open Brush, MultiBrush, and even the web-based Silk Brush can be good examples.
Otherwise, some other apps or games are based on the TiltBrush and ported to the WebXR with extra tweaks. You can access them using the Oculus browser. Also, you can use any of the best Oculus browser alternatives for a better experience.
It is possible to use Google’s version of Tilt Brush from the store. Otherwise, you can try the alternatives if you want new features over the original ones from Google.
This article has showcased the most exciting VR painting and drawing apps or games for Oculus Quest. We have considered the popularity, development cycle, user experience, and relatedness to make this list.
If you have any opinions or have been using any of these or a different Oculus Quest VR drawing app, let us know your thoughts in the comment box.
It seems that VPNs quickly evolved from optional tools to a necessity for the majority of users. However, in the sea of available solutions, it’s hard to find the one that’ll provide you with a reliable service at reasonable speeds.
The sad truth about a VPN service is that it will most certainly slow down your connection. However, there are ways to speed it up in Windows 10, and we made sure to present them below.
Does Windows VPN slow down Internet?
Typically, when using a VPN you will see slightly lower speeds than you’d have without it. That is because the data is encrypted and routed through a server.
This makes your connection several orders of magnitude safer, but it will have a small impact on your speed.
That usually happens if your VPN server is located far away from your location or too many people are using it at the same time.
On the other hand, there are many instances when a VPN can actually increase Internet speed either for your entire connection or for certain websites/apps.
If your ISP is purposefully throttling your connection to a specific website, then by using a VPN you might see an improvement in the connection speed.
Why is my VPN connection so slow?
Bad connections when using a VPN are pretty common issues, and the main causes for them are linked to problems with your network, or internal VPN issues on their part. Some of the most common causes are:
Your Wi-Fi connection is too slow
The Internet settings on your device don’t match your VPN (DNS settings, ports, or protocols)
Too many people are connected to your VPN server at the same time
You are on a server that’s located too far away to hold a speedy connection
?️ What affects VPN speed?
VPN speed is affected by the number of servers available, how many users are connected to those servers, the distance between the VPN server and the user, your Internet settings, and (lastly) your device’s specs.
? Is VPN CPU intensive?
No, most VPN software is lightweight. They’re built to be able to run in the background without having a noticeable impact on resource usage.
⚡ What is the fastest VPN for Windows 10?
VPN connection speed is influenced by multiple factors, but your VPN having unlimited traffic and bandwidth, a large server network, and performance-oriented features are essential.
See below how a VPN can improve your speed, how to set it up, and our top recommendation that should work great on Windows 10 and on all major operating systems.
How do I speed up my VPN connection?
1. Use a different VPN
Sometimes no matter how much you try to speed up a VPN connection, you are limited by the number of servers available and your distance to them.
That’s why it is important to choose a VPN that has a presence in multiple countries and with multiple servers in each one.
ExpressVPN has exactly that. You can choose any of its over 4 0000 servers in more than 90 countries.
In addition to this, you can see directly from the main screen what latency you’ll have. You can also change your protocol, as ExpressVPN supports Lightway, OpenVPN, IkeV2 and L2TP/IPSec.
This can have a profound effect on your connection speed. Depending on what protocol and which server you use, you can expect to see speeds upwards of 100Mbps.
Keep in mind that the VPN connection speed is dependent on your internet connection. If your speed without a VPN connection is low, then no VPN can increase that.
ExpressVPN
Use ExpressVPN for lightning-fast and completely private connections!
We need you to be certain that VPN is indeed the reason why your connection is rather slow. Completely disable VPN and look for changes in speeds. If your bandwidth is still subpar speed-wise, make sure to try some of these steps and look for changes:
You can easily determine your current download/upload speeds (latency, too) by visiting Speedtest. Make sure to run the Speedtest with and without VPN in order to determine how much speeds you lose.
3. Try different servers
When you want to address slow bandwidth or crippling latency in regards to VPN, you’ll need to check servers. The latency particularly depends on the server location. The further the server is from your geo-location, the slower the speed will be. The data package needs to travel more and thus your bandwidth will substantially slow down and latency will reach critical levels.
The latter will certainly affect the online gaming experience so we advise you to stick with the closest server there is. By choosing a closer server, your latency will be reduced, therefore you can speed up your VPN connection if you don’t need to connect to a specific country.
Since it’s rather simple to switch between the servers, you can try it in combination with Speedtest to find out what’s the best-suited server for your current needs. In case you’re playing online games, stick with the closest one.
4. Check antivirus and firewall
In the Windows Search bar, type Allow app and open Allow an app through Windows Firewall.
Click on Change settings
Click on Allow another app
Browse for VPN in Program Files and add EXE file
Click Add
Let the VPN communicate through both the Public and Private network.
Click OK to confirm changes.
Antivirus (with its own firewall) and even Windows Firewall can disrupt VPN. The former tends to scan data packages and provide you with a secure network. That can take a toll on VPN speeds since the repetitive scans will slow down the overall performance of the VPN service.
Some recommend disabling antivirus temporarily, but we think that’s better to create an exception and move from there. You can find out how to do it in this article.
Furthermore, Windows native Firewall can block VPN permanently so make sure to create an exception for VPN for Firewall, too.
Speed-wise, this is the order of encryption/decryption protocols:
➡️ PPTP – fastest but outdated security standard
➡️ L2TP/IPSec – slow but with an above-average security standard.
➡️ OpenVPN – high security, above-average speeds. Probably the best protocol to use.
➡️ SSTP – slower than PPTP but faster than the rest. Mediocre protocol.
Encryption is a very important VPN segment for many users. It allows you to encrypt and decrypt all data you send and receive. However, there’s an inversely proportional thing about VPN encryptions.
Basically, the better (stronger) encryption – the slower connection. Some protocols that are deemed most secure can reduce connection speeds up to 10 times.
This isn’t a rule, but it mostly functions that way. So, what you can do, depending on how much security you need in regards to your activity and preferences, is to change the encryption protocol for one that’s less secure but less affects connection speeds.
Whilst we don’t encourage doing this, you might be able to speed up your VPN connection this way.
You can try every one of them individually and choose for yourself. Also, as we already stated, it depends on your preferences and activity. For avoiding geo-restrictions, you don’t need an advanced encryption protocol. On the other hand, for the majority of tasks, encryption is highly advised.
6. Upgrade the plan
We already distinguished the main differences between paid (premium) VPN solutions and the ones that come free of charge in this article. It’s understandable for a majority of VPN providers to offer premium speeds with premium plans.
So, if you’re decisive to use a VPN service and all its benefits, you’ll need to pay for it most of the time. There’s a reasonable suspicion that VPN providers even throttle your speeds in order to force you to turn to paid plans, which seems to be a successful business design.
This is the right time of year for acquiring a VPN, due to discounts. However, we recommend you give VPN suppliers with free plans a miss and go for a well-known company like ExpressVPN.
Windos 11 VPN is slow
Many users complain about having slow Internet when connecting to the Windows 10/11 built-in VPN. If you’re wondering how can you make it faster, first off, check your Wi-Fi.
Check your speed without the VPN connection. Then choose the closest server with the lowest latency and you should see an improvement.
Additionally, change your protocol as this will have a big impact on your speed and finally you can lower the encryption level.
Flushing your DNS or changing your DNS address can also help boost connection speed.
Finally, make sure to post your questions or alternative ways to speed up the VPN in the comments section below.
A proxy server diverts your network data to another computer before it reaches its intended destination.
It has multiple benefits, from changing your IP address and geo-location to accessing restricted content.
If you’re looking for a simple way to set global proxy options on your Windows 10 desktop, laptop, or tablet, we’re here to help.
Does Windows have a built-in proxy?
Yes, you have a Windows 10 proxy server integrated and you can set up a proxy using the Network and Internet menu.
This connection can increase your digital security when browsing risky websites and grant you access to region-blocked content.
How do I find my global proxy settings?
You can discover the proxy settings in a few steps by using only the Windows 10 settings panel. However, it’s not possible to use global proxy settings for all applications.
It’s possible to access Proxy Settings on your Windows and use the automatic proxy or set up a manual proxy with a different proxy IP address.
How do I set a global proxy in Windows?
1. Automatic proxy setup
If you have discussed with your ISP or system administrator about using proxy settings or a proxy setup on your Windows 10 PC, here’s what you have to do:
Click the Start button, type proxy, and select Proxy settings.
Turn on Automatically detect settings.
Or, if you have received a proxy URL, then enable Script Address, paste the URL, and click Save.
If you’re looking for a proxy server that will help you access blocked websites and unblock streaming content, you can look up free proxy server lists on Google.
Here’s how to set it up on your Windows 10 computer:
1. Go to proxy settings. 2. Turn on Use a proxy server. 3. Specify the Address and Port of the proxy server. 4. If you want to exclude certain websites from the proxy, write them down in the box below. 5. To exclude LAN addresses from the proxy, check the Don’t use the proxy server for local (intranet) addresses option. 6. Click Save.
2.2 Set proxy in windows cmd
Open the Command Prompt by typing cmd in the Start.
Select the Run as Administrator option.
Type the following command netsh winhttp show proxy
Search the Internet Option and go to the Connections tab.
A proxy server has low security and barely works as an Internet circumvention tool. It’s slow, and crowded because it’s used by thousands of other users like yourself, and won’t protect your online privacy.
If you’re a privacy-concerned individual, consider investing in a premium VPN service. Compared to a proxy server, a VPN has superior security and geo-blocking features.
Here are the exact steps for your Windows 10 laptop or desktop:
Follow the download instructions and install the software on Windows 10.
Launch the VPN client.
Press the big power button to connect.
We suggest using ExpressVPN because it’s the best in the business. It encrypts all data traffic flowing in and out of your PC.
That’s because the desktop client covers all Internet-enabled applications: web browsers, email clients, torrenting clients, Steam games, and everything else.
Plus, if you want to redirect your VPN traffic through a secondary location, you can configure a SOCKS5 proxy without having to resort to a separate software application.
In order to set up a script address for proxy on Windows 10, you should access the proxy settings. As discussed below, you can do this task from your settings.
It’s possible to simply type Proxy settings on the Start menu and select the Change proxy settings option that would appear in the results.
To recap, you can easily configure proxy settings on your Windows 10 computer in automatic or manual mode, without having to install any additional software.
However, unless you received explicit instructions from your ISP or system admin, you need to get old proxy connection details from somewhere else.
Instead, we suggest opting for a premium VPN like ExpressVPN. It’s built to protect your online privacy, defend your router from hackers, unblock streaming media that’s not available in your country, and more.
Microsoft Hyper-V is a hypervisor software that allows you to create and run virtual machines on your computer. VMs let you create independent instances of an OS that don’t affect your host PC.
It is also used for running non-Windows OSs on a computer without installing the respective systems or to test the same software solution on multiple operating systems.
Of course, there are plenty of options for virtualization software, but being native to Windows, Hyper-V is ideal for your Windows 11 operating system.
Hyper-V hardware requirements
As you probably anticipated, enabling and running Hyper-V in Windows 11 will require minimum hardware specifications. Take a look at the list below and discover them:
A 64-bit processor with second-level address translation (SLAT) – SLAT represents a technology used by Hyper-V whenever it is asked to retrieve data or instructions. In other words, it translates a virtual address to a corresponding physical address, which saves memory and reduces CPU time.
VM Monitor Mode Extensions
At least 4 GB of RAM – More memory will result in better running.
Virtualization support turned on in the BIOS (Basic Input/Output System) or UEFI (Unified Extensible Firmware Interface)
Some of these aspects coincide with the official Windows 11 specifications so make sure you check them to build a complete related perspective.
How can I enable Hyper-V in Windows 11?
1. Use the Control Panel
Hit the Windows key, then type Control Panel, and open it.
Click on Programs.
Select to Turn Windows features on or off.
Checkmark the Hyper-V option.
Expand it, then make sure both options are check-marked (If for some reason the second one can’t be selected as in the picture below, you’ll most likely need to enable hardware virtualization in your BIOS).
Click on OK.
You’ll have to reboot your PC, so click on the Restart now button.
Press on the Windows key, then click on All apps.
Look for Windows Tools, then select it.
Search for Hyper-V Manager, then double-click on it.
Now you’ll be able to use a virtual machine, as needed.
Before exploring its benefits, make sure Hyper-V is properly set up. You can follow this detailed tutorial on how to install Hyper-V on Windows Home to get started quickly.
2. Use Command Prompt
1. Hit the Windowskey to open the Windows search box.
2. Type cmd in the search box, right-click on the result and select Run as Administrator.
3. Input the following command, then press on Enter:DISM /Online /Enable-Feature /All /FeatureName:Microsoft-Hyper-V
4. The process will start to enable the Hyper-V feature and the status for it will be displayed in Command Prompt’s screen.
5. Once the operation is successfully completed, you will be asked to restart the Windows. To do it, just press the Y key.
6. After your computer restarts, you will find that Hyper-V has been enabled and can be accessed.
A fast and easy method to install and enable Hyper-V on your Windows 11 device is via the built-in command tool available on your PC.
Command Prompt allows you to use Hyper-V with a few commands. You only need to input them and then restart your PC to apply the changes.
3. Use PowerShell
Hit the Windows key, then type PowerShell, right-click on it, and select to Run as administrator.
Type the following command, then press Enter: Enable-WindowsOptionalFeature -Online -FeatureName Microsoft-Hyper-V -All
Your OS will restart the process to enable the Hyper-V feature.
Once the Hyper-V feature has been enabled, you will be asked to restart your PC. As in the Command Prompt option, press the Y key to do it.
NOTE
Since your OS will install necessary files and apps, keep in mind that the restart will take longer than usual.
If you change your mind and decide to disable Hyper-V on Windows 11, check out our dedicated article to find out how to do it.
If you think about installing Hyper-V in Windows 11, there are some interesting aspects you should consider. However, if you don’t have a clear reason to try it, the following list will offer a better perspective.
➡ Develops and tests apps, OSs, and upgrades
As mentioned before, Hyper-V allows you to easily create VMs, which remain separate from the rest of your system. Thus, it becomes the perfect environment for testing new apps.
You can also build a virtual lab to experiment with different operating systems. In these terms, you’ll be able to see how programs act without using more than one device. When your experiment is finished, you can delete the VM.
➡ Scales your IT infrastructure to accommodate larger workloads
VMs are much easier to manage than physical hardware and do not require acquisition costs. You can maximize your server use by allocating resources more effectively than with physical hardware alone.
➡ Improves business continuity
By creating VMS with Hyper-V you can reduce server downtime. And why is that? Because running workloads can be easily backed up and moved to another server without interruption.
Also, note that they can be automatically configured to restart those VMs affected by server failures.
➡ Saves or migrates data from a legacy system
Last, but not least, we can talk about saving and migrating data from a legacy system. Many companies maintain servers that support out-of-date hardware or software solutions because they want to preserve data.
Migrating business apps and content to a virtual machine frees up plenty of resources.
As you can see, some easy ways will support you in installing Windows 11 Hyper-V. We strongly recommend using them to get the best out of this Microsoft feature.
However, if you didn’t get the chance to try the latest OS versions, you can learn how to run Windows 11 on VM and test it to its limits.
Considering Windows 11 supports similar apps as the previous OS model, you can also explore alternative virtual machines for Windows 10.
For any other questions or opinions regarding this subject, feel free to comment in the section below.
Does your VPN constantly get disconnected? If so, it may be caused by your device, your operating system, or your connection type.
Another reason why your VPN isn’t connecting is the outdated version of your VPN. You may need to update the VPN software to its latest version and resolve it in minutes.
In order to resolve the issue, try the solutions below before connecting to your VPN again.
What does VPN not connected mean?
The most frequent situations in which you experience connectivity errors with your VPN include your VPN service being out of date or the network drivers’ old versions.
It can be as well because of the DNS cache that requires to be removed regularly from your system.
There are frequent VPN issues regarding connectivity presented in the following list:
Dew VPN unable to connect to the Internet – Dew VPN error code 131143
Can’t connect to VPN – the operation completed successfully
VPN works on phones but not on a laptop
Can’t connect to work VPN – VPN issues working from home
✅ Ensure you’re not connected to another VPN. Disconnect and close any other VPN programs you have before using your VPN.
✅ Check firewall and antivirus or anti-spyware programs as these may be affecting your connection. You can test this by disabling these programs, then reconnecting to your VPN. If disabling the programs resolves the issue, you’ll need to add your VPN as an exception before you enable them again.
✅ Connect to the server location nearest to your geographic location. If this fixes the connection issue, then the problem is with the server location you originally tried to connect to.
✅ If you cannot access even when disconnected from the VPN, check your internet connection.
✅ Check that you entered the correct user credentials – username and password for logins.
✅ Check your IP address for information such as your city or region (country) next to the location you selected.
If it shows a location near you, it means you’re not connected to a server location associated with your VPN, so try connecting again.
What can I do if my VPN won’t connect?
1. Change your VPN provider
One of the simplest solutions you have is to switch to a reliable VPN provider such as ExpressVPN
With thousands of servers all over the world, you can always change to a different one if you are having any issues.
Additionally, the 24/7 support staff is always there to help you diagnose and fix any connection issues you might encounter.
To ensure your complete satisfaction with the service, ExpressVPN is a risk-free choice, as they offer a 30-day money-back guarantee should you decide not to continue your subscription.
Plus, it has been thoroughly tested and almost all compatibility issues resolved, which means you can rest assured that it will work out of the box.
Here are some more features to look forward to once you start using it:
Speed test for quick VPN demonstration
Unlimited bandwidth
Protection for up to 5 devices at once
AES-256 encryption
3,000 servers in more than 90 countries
Cross-platform compatibility with mobile, PC Mac, smart TV, or router
ExpressVPN
Resolve VPN connection issues forever using this top-notch software with a stable connection.
Right-click the Date and Time display on the taskbar
Click Adjust date and time settings.
In the Date and Time tab, click Change date and time.
In the Date and Time Settings dialog box, update your time to the current date and time, then click OK.
If you need to change the time zone, click Change time zone and select your current time zone in the drop-down list, then click OK.
Restart your VPN and connect to a server location.
3. Change your VPN protocol
Usually, the VPN connection works better when using the TCP protocol instead of the UDP protocol. While your VPN is not connected to any server location, go to Options or Settings and find the Protocols tab or setting.
Most VPN clients will have this option set to Automatic. You can change this setting and select one of the protocols listed.
Keep in mind that your results might vary depending on which protocol you’ve selected, so if you have more than two, we recommend trying all of them to see which works best.
Select the protocol you want to use and click OK, then restart your VPN and connect to a server location.
In some cases, you might want to reboot your PC as well after you’ve changed your VPN protocol.
This problem occurs when the client and the server cannot establish a connection using the selected protocol.
5. Add an exception to your security program
Your firewall, antivirus, or anti-spyware program may block your VPN connection. You can test this by disabling these programs and then connecting to a server located on your VPN.
If you can connect, configure your firewall, antivirus, or anti-spyware program to allow your VPN to connect.
Depending on the security program you’re using, you may need to change the security level from High to Medium, grant an exception to your VPN or to UDP ports, or set it to Trust your VPN, then restart your VPN.
6. Re-install your VPN
If you’re unable to connect to a server location after restarting your VPN, reinstall it, then run the installation program again.
Right-click Start and select Run.
Type regedit and press Enter
You will now see the User Account Control dialog box.
Click Yes.
In the Registry Editor, under Computer, double-click on HKEY_LOCAL_MACHINE.
Under HKEY_LOCAL_MACHINE, double-click on SOFTWARE and then [your]VPN.
If you cannot find [your]VPN directly beneath SOFTWARE, go to SOFTWARE > Classes> [your]VPN.
Right-click on [your]VPN and then click Delete. After deletion, you should no longer see your VPNunder Wow6432Node.
7. Change your DNS
Rarely, not using one of your VPN’s default DNS servers will provide a smoother connection. To do this:
Open Network Connections settings by right-clicking Start and select Run.
Type ncpa.cpl and click OK.
In the Network connections window, find your usual connection, either LAN or Wireless network connection.
Right-click the connection and select Properties.
Set the DNS server addresses by double-clicking Internet Protocol Version 4 (IPv4) or just Internet Protocol.
Select Use the following DNS server addresses.
Type these Google DNS server addresses.
Preferred DNS server 8.8.8.8
Alternate DNS server 8.8.4.4
If Google DNS is blocked, try the following:
Neustar DNS Advantage (156.154.70.1 and 156.154.71.1) enter and press OK.
Level3 DNS (4.2.2.1 and 4.2.2.2) enter and press OK.
Once configured, flush old DNS entries as described in the next solution.
8. Flush your DNS
1. Click on the Start button on your taskbar or press the Windows key on your taskbar.
2. Type cmd in the search box that opened.
3. Right-click on the first result and select Run as Administrator.
4. The Command Prompt window will now open.
5. Type ipconfig /flushdns.
6. Press Enter to execute the command.
7. A confirmation that says: Windows IP Configuration Successfully flushed the DNS Resolver Cache will be displayed.
Flushing your DNS cache could solve your VPN connection errors. This will clear all IP and DNS records from your device.
After you flush your DNS, your computer automatically accesses your VPN’s DNS for the proper/correct entries.
9. Switch to a different network
Try using a different network, such as a public Wi-Fi connection (or a mobile connection if your device has the capability), to see if the connection problem is with your current Internet service.
If this is not an option, try to disable and enable your network interface, re-install the ethernet driver, and close any background network management software you have running.
10. Update your VPN app
Sign in to your VPN account.
Select Set Up Your VPN.
Select your device platform.
Select Download to download the latest version of your VPN for your device platform.
Set up and connect your VPN app.
Check that your internet connection is working without the VPN.
Change the VPN connection protocol.
Reboot your PC.
Flush your DNS.
Follow the rest of the steps from our guide to fix your VPN connection.
Can’t connect to a network drive on VPN? Here’s what to do:
If you have a remapping script that starts with your system, disable it and see if the mapped network drives can be accessed. Also, check if you have a firewall rule that prohibits you from connecting to the drive.
Conclusion
Depending on where the server is located, you can expect the connection to be made a bit slower. Additionally, ensure that your firewall is not blocking your VPN client and flush/renew your DNS.
More intuitive possibilities can also block your VPN connection, and that is a flawed Internet connection or wrong VPN configuration.
In addition, be sure that you’re using the right credentials for your VPN account, in case you have it installed on your router device.
We hope that our article helped you fix your VPN issues. If you have any questions, leave them in the comments section.
Connecting an external monitor to your computer allows you to have a second screen to split your computer through. However, several monitors have different features like screen resolution, screen refresh rate, and lots more.
These features may conflict with your computer’s performance in terms of display, sound, and hardware interaction.
Furthermore, users complain about mouse lagging on the second monitor. Likewise, users complain about the second monitor lagging on Windows 11 when connected.
However, many factors can be responsible for the mouse lag in external monitors, such as the second monitor’s screen refresh rate, outdated graphics card driver/Windows, and lots more. However, the causes of this problem may differ on different computers.
Hence, we’ll take you through some common factors that may cause the mouse lag in second monitors and how you can fix the issues.
Why is my mouse lagging on the second monitor?
Outdated graphics card driver: Using an outdated graphics driver on your computer can impact the performance of the second monitor. However, mouse lagging issues can occur if the graphics card driver lacks the essential updates to support components depending on it. It can cause mouse lag in games like Call of Duty Cold War and other programs displayed on the second screen.
Outdated Windows: Not updating your computer can prevent it from running smoothly. Windows updates help your computer download patches that help fix bugs and improve performance. So, outdated Windows may prompt issues with your display and interaction with the external monitor.
The secondmonitor’s screen refresh rate differs from the computer’s: Screen refresh rate indicates how many times per second the monitor updates with a new image display. However, users may encounter mouse lag on the second monitor if the second monitor’s screen refresh rate differs from your computer’s.
Faulty mouse connections: The mouse lag on the second monitor issue may occur if the mouse encounters an issue when connecting to the computer. Though it may not affect the computer, it can impact how the mouse interacts with the second monitor.
What can I do if my mouse is lagging on the second monitor?
1. Update the graphics driver
Press on Windows + R simultaneously to launch the Run window.
Type the following into the search space:devmgmt.msc, and click the OK button.
Click on the Display adapters from the search results, select the driver from the drop-down, and then right-click on it.
Click the Update driver software option, then select Search automatically for drivers.
Restart your computer after the updating process is complete. It’ll sync the changes and update. Also, it can fix the mouse lag in external monitors.
2. Update Windows
Click the Start button.
Select Setting and click on Windows update.
On the Windows update page, select Check for updates.
If there’s an update available, Windows will automatically search for it and install it. We recommend that you restart your computer. Check and see if the issue persists.
3. Change the second monitor’s screen refresh rate
Right-click on any space on the desktop and select Display settings.
Select the monitor experiencing the mouse lagging issue at the top of the screen.
Select Advanced display settings and click on Display adapter properties for your selected display number.
Navigate to the Monitor tab and go to Monitor settings.
Change the screen refresh rate to match the main screen’s refresh rate.
Click on Apply, then OK to save the changes.
Restart your computer and see if the mouse lagging issues on the second monitor persist. Mouse lag problems in 4K monitors are no exception to this.
Select Power from the drop-down and click on Restart.
Restarting your computer can fix any startup issues affecting mouse interaction with the second monitor.
5. Reconnect the mouse
Users can also disconnect the mouse and reconnect it to fix any connectivity problems that may affect the second monitor.
Sometimes, the mouse may develop faults, or the cable is loose. Hence, you need to pay close attention to this and reconnect it. If it is a wireless mouse, ensure the USB connector is still actively connected.
Can HDMI cause mouse lag?
Using the wrong HDMI input can cause issues with how the computer responds to the monitor. So, HDMI can cause mouse lag. Likewise, not using a stable or quality HDMI cable can cause issues.
Recently we’ve encountered some issues regarding torrents not downloading while using VPNs. While this is not exactly unheard of, VPNs should be surefire tools against torrenting privacy breaches.
In other words, using a VPN can hide torrenting activity. So it’s not exactly difficult to see why being unable to torrent while using VPNs becomes troublesome for many.
Do VPNs block torrents?
No. VPNs don’t block Torrents, but not all VPNs are configured to support torrenting.
It’s possible that your VPN doesn’t have enough data or fast enough servers, which can lead to bad connections on torrents.
So if you’re wondering whether a VPN slows down torrenting, the answer is yes, it is possible.
Given that your traffic has to be routed via multiple servers, your connection speed may suffer.
We recommend connecting to P2P-friendly servers or using your VPN’s automatic connection feature to find the fastest server for your location.
Should I use a VPN while torrenting?
It’s not mandatory, but it surely helps. It hides your activity, offers unlimited bandwidth (premium VPNs), and protects you against malicious attacks/data leak incidents.
Can ISP tell lif you are torrenting?
Yes. On regular traffic, your ISP can detect your online activity, which includes torrenting. Keep in mind that certain ISPs restrict torrenting, so you risk having you bandwidth throttled.
Do I need to hide my IP when torrenting?
Hiding your IP is advised. Even if you are using completely legal and safe torrents, there is still a risk of getting your data leaked. Hiding your IP also prevents restrictions and online tracking of all sorts.
Will a VPN prevent my ISP from seeing what I download?
Yes. If you use a VPN with powerful encryption, your ISP won’t be able to detect anything about your activity, including your torrenting activity, the websites you visit, or who you are.
How to download torrent with VPN?
If you’re in the situation we’ve described above and can’t seem to find a way to download torrents while using a VPN, here’s what you should do.
Connect to the server of your choice (nearby servers are usually faster).
Launch the torrent client.
Reliable services such as ExpressVPN can shield your Internet activity, including torrenting, from your ISP or other prying eyes.
ExpressVPN is an excellent VPN from Kape Technologies that features 24/7 live chat support.
It provides you with great privacy and security features so that you can engage in various online activities safely and anonymously. Torrenting is, of course, included among these activities.
On the other hand, neither ExpressVPN nor we endorse illegal activities such as torrenting pirated content. You shouldn’t treat VPNs as cloaking devices for unlawful behavior.
ExpressVPN
In need of a torrent-friendly VPN? ExpressVPN might be what you’re looking for.
You should always make sure to enable your VPN’s kill switch feature while torrenting.
The reason why you’d want to do that is fairly simple. Your VPN connection can be disrupted at any time and you’d have no clue it happened.
Your PC will default to its insecure connection and the torrent will keep downloading as nothing happened.
Now your entire traffic, including torrenting activity, is visible to your ISP.
The VPN’s kill switch detects whenever the VPN connection drops and cuts access to your default Internet connection. Thus, as long as the VPN client is running, you won’t be able to reconnect using your insecure connection.
Some VPNs go as far as installing system-wide kill switches, which remain active even if the VPN client crashes.
Ultimately, it’s up to you whether you want such a feature on your PC, but we strongly advise you to bite the bullet and enable it, if your VPN supports it.
3. Connect to a P2P server
Some VPNs had some legal trouble in regards to customers who would engage in P2P activities (ahem, torrenting), whether legal or illegal. Therefore, certain countries (USA included) have requested P2P traffic to be blocked.
In response, some VPN providers complied with the demand. This is not to be deemed as a violation of either freedom or privacy, but rather as a half-compromise.
You get to benefit from the same level of protection and privacy, but can’t engage in torrenting. Which is fair, since most VPNs have a ton of servers you can use instead of those who block P2P traffic.
So, to get back to the topic at hand: make sure your VPN supports P2P operations (torrenting) before purchasing a subscription and always choose P2P-enabled servers if they’re carefully reserved in the client’s server list.
4. Check for leaks
Even if you’re using a VPN, you might experience leaks. If your ISP has filters set to pick up on P2P traffic and restrict it, a leaking VPN can put you in a very tough spot.
You can easily check and determine whether your VPN leaks by using either one of these online services:
Not only will your ISP see through your VPN’s defenses, but you could also be sanctioned. You know, if your tracker website of choice is close to a bay. That place where pirates always swarm. Don’t make me say it.
You get the point. Steer away from shady websites, even if your VPN doesn’t leak. You might be surprised of your ISP’s creativity when it comes to picking up on your Internet activities, especially if they’re not on the right side of the law.
5. Disable IPv6
Head over to your Control Panel.
Open Network and Sharing Center.
Click the Change adapter settings button.
Right-click your active Internet connection.
Select Properties.
Make sure Internet Protocol Version 6 (TCP/IPv6) is disabled.
Click OK.
Most VPNs aren’t exactly ready to shield IPv6 traffic from your ISP. Thus, your connection could leak unprotected IPv6 data to your ISP, which might use it to restrict torrenting traffic.
Even if your VPN boasts IPv6 protection, you should take it with a grain of salt. Try disabling IPv6 support, reconnecting to a VPN server, then trying to restart your torrent client.
What VPN is best for torrenting?
All things considered, if you’re using a VPN client and can’t seem to use torrenting services, don’t panic just yet. First thing first, make sure your VPN supports torrenting traffic.
To get an optimal experience with the best BitTorrent security tools, make sure to get a VPN with unlimited traffic so you don’t run out and disconnect.
If it does, the problem might lie within your VPN/system configuration. Whether it’s a leaky VPN, a non-P2P server, or your system leaking IPv6 data to your ISP, these issues can be easily fixed.
Last, but not least, you should steer clear of shady torrenting websites.
TeamSpeak is a very popular VoIP choice for gamers all over the world. It allows you to connect to a chat room (channel) and communicate with other members of the room.
VoIP is the obvious choice when playing games. It’s just so much easier to speak in a microphone than type messages or switch apps to keep in touch.
Although you can use text chat on TeamSpeak, this program is mostly used with a microphone/headphones combo. It’s in its very name after all; it’s TeamSpeak, not TeamType.
But enough bad puns, we’re here to learn about one of the most annoying issues you can encounter in TeamSpeak: packet loss.
Not only TeamSpeak but also many other VoIP services such as Skype and Discord face this type of challenge.
What is packet loss in TeamSpeak?
Packet loss is the same regardless of where you encounter it. It occurs whenever data packets you send or receive don’t make it to their destination.
And truth be told, VoIP services have it worse than many other online services.
If, for instance, you lose a bunch of packets while browsing a website, the worst case scenario the website loads a bit slower. Or some images might not load at all, but that’s about it.
While playing online games or using VoIP services, packet loss is far more noticeable, since these rely on continuous streams of data.
Imagine this, you’re talking to someone on TeamSpeak and suddenly their voice cuts and crushes. You can’t make much of what you’re hearing. Seems familiar?
No? How about hearing any of these lines during your call?
I can’t hear you
Can you say that again?
Speak louder
I’m losing you
You’re cutting out
If so, you might’ve been experiencing packet loss. Additionally, you understand how annoying leaking packets can be, and why VoIP has it worse than many other services.
For TeamSpeak, packet loss seems to show up and cause all sorts of issues, and affect users of all types, regardless of the operating systems they use or their ISP:
TeamSpeak packet loss out
TS3 packet loss
TeamSpeak high packet loss
Linux TeamSpeak packet oss
Packet loss of teamspeak server
If you too have these sort of issues, you’ll have to check your connectivity and fix packet loss. Learn below how to check for packet loss and improve connection with dedicated tools (VPN) and manually.
How to check packet loss in TeamSpeak?
Jot down the IP address of the TeamSpeak server.
Launch CMD with administrator rights.
In CMD, type pathping x.x.x.x (replace x.x.x.x with the TeamSpeak server’s IP address)
Wait for the test to come to an end.
Notice the packet loss values for each hop.
Normally, the packet loss value should be as close to zero (0) as possible. More so, depending on the hop number, the packet loss is closer or farther away from you. Check the screenshot below.
As the hop number increases, the connection moves further away from you. Thus, the first hop is your PC, and the last one is the destination server (i.e. the TeamSpeak server).
Pathping is a tool that can help you run a traceroute on your connection and view ping/packet loss values for each hop along the way.
Knowing where packet loss occurs can help you find the best way to solve this issue.
How do I fix packet loss on TeamSpeak?
1. Try using a VPN
To fix packet loss, get a premium VPN like ExpressVPN because it has thousands of fast servers and no data limitations.
Check if the problem still persists or run the packet loss test again.
ExpressVPN is a great all-around VPN service brought to you by Kape Technologies.
It can help you not only bypass packet loss, but also increase your online privacy, secure your connection, and circumvent geoblocking.
However, note that this quick VPN fix isn’t bound to work every time. In fact, chances are it won’t work if the packet loss occurs on your side, or on the receiving server’s.
So if you’re wondering if VPN can fix packet loss, the answer is yes, you can you can use a VPN to improve packet loss, but only if the issue is caused by your ISP.
So if your ISP causes packet leaks by either throttling your bandwidth or having improper network routing, the VPN will help. To be frank, this is what happens most of the time.
ExpressVPN
Fix TeamSpeak packet loss with ExpressVPN’s fast and stable servers!
➡️ Switch to wired instead of Wi-Fi (Wi-Fi packet loss occurs more often)
➡️ Check and replace/repair/update/upgrade any faulty component on your network (PC, cables, router, drivers)
➡️ Call your ISP and ask them if they can do anything to fix the situation (if it’s on their side)
➡️ Contact the TeamSpeak server host and inform them of your findings
➡️ Restart your router and/or modem
➡️ Try connecting straight to your modem or home line
Usually, the main cause of packet loss is network congestion. The bad news is that you can’t do much about it if you lack network administrator privileges.
On the other hand, it’s good news if you’re not exactly tech-savvy since network congestion usually fixes itself. It only takes some time and patience on your side, if you can afford them.
The bottom line is that packet loss can be a real nuisance, especially when using VoIP services.
It can ruin all of your communication attempts by cutting your voice off, dropping the quality dramatically, or even ending the call.
TeamSpeak packet loss is often times it’s caused by network congestion and fixes itself after a while. However, that doesn’t mean you can’t do anything to improve packet loss.
If it’s the first time you experience this and wonder how to fix packet loss in TeamSpeak, you should note that more often than not it may fix itself, if it’s not recurring.
From using a VPN to restarting your router, and replacing your network cables, there are plenty of things to do to alleviate the packet leak situation.
Sometimes, Microsoft 365 just won’t work after updating your system and needs to be completely uninstalled. It was an issue in Windows 10, and it appears that some users are facing the same problem in Windows 11 too.
How do I uninstall MS Office from Windows 10/11?
1. Uninstall Microsoft 365 from Control Panel
1. Click on the Start button on the taskbar.
2. Type control panel in the search box and press Enter to open the app.
3. Under Programs, click on Uninstall a program.
4. Scroll down the list of installed apps on your PC until you locate Microsoft 365 in it.
5. Right-click on the Microsoft 365 app and select Uninstall from the list of options.
You can always try to uninstall Microsoft 365 from your Windows PC through the Windows Programs and Features tool in Control Panel.
It is a built-in tool that is perfectly safe to use, and represents the traditional method of removing programs from your device.
Locate the Microsoft 365 installation folder (which should be stored in C:\Program Files).
Now, simply right-click on the Microsoft 365 folder, and select Delete.
If the methods listed above didn’t work, you can try to uninstall Office manually.
But you have to be noted that the manual uninstalling Office from your computer is a very long and complex process, which could cause damage to your system if some step is performed incorrectly.
Small data units known as packets are sent and received when accessing the Internet or any other network.
Packet loss is the failure of one or more packets to reach their intended location and Sky Broadband packet loss is a common occurrence for many users.
This article describes some essential factors and a list of fixes for Sky Broadband packet loss. Then, we contrast the top network monitoring tools and discuss how they address the problem.
After that, you’ll be better positioned to spot the issues, prevent network outages, and guard against security concerns.
Why am I having packet loss on Sky Broadband?
Over private, wired networks, packet loss is less frequent, but it is very likely on long-distance Internet connections.
Each router decides where a packet should be forwarded to next under the IP philosophy of sending data packets across networks.
The transfer rate and path taken by the packet are not under the control of the transmitting machine. Overloaded network devices are the primary reason for packet loss on a network.
If switches and routers are unable to handle a data packet in time, they will drop it. Other significant sources of packet loss include broken equipment and bad wiring.
How do I fix packet loss on Sky Broadband?
1. Check the local network connections
Verify that every cable and port is placed and connected correctly.
If they are not connected correctly, connect them well.
Remove the modem or router from the power supply.
Wait at least 15 seconds and plug it back into the mains.
Wait for all of the panel lights on your cable modem to turn green and try again.
Additionally, if you’re using a wireless connection, try to move your device closer to the router removing any obstacles from the path.
We would also recommend trying to switch from the wireless connection to an Ethernet, cable connection if possible.
Also, if you’re connected to a wireless hotspot and there are many devices connected to the same access point, disconnect some of them so you can work with more bandwidth.
2. Use a VPN
A simple way to fix lag spikes fix and packet loss is to connect to a different server using a VPN. For this issue, we used ExpressVPN, one of the most trusted VPN providers
With ExpressVPN, hiding your IP address makes you untraceable. It also is safe to use a VPN, allowing you to browse the web without worrying about your data leaking.
By using a VPN you can gain access to geo-restricted content on any streaming platform. It only takes a few moments to connect to a different IP location to unlock all content.
ExpressVPN
Avoid any lag spikes and watch your favorites without any interruptions.
If you have upgraded your device to Windows 11, this solution will also work on the latest OS.
Right-click the Start button and select Device Manager from the list.
Click the Network adapters section to expand it, then right-click on your network adapter and select Update driver.
Click on Search automatically for drivers.
If there are any new drivers, the system will install them automatically.
Of course, if you have more than one network driver, apply the same procedure for those.
You may also try to uninstall the drivers completely by selecting Uninstall device on step 2, then restarting your device. That will force the system to install default drivers after restarting.
However, this procedure doesn’t work at all times and if the issue persists, you may want to consider a dedicated tool to automatically update your drivers.
4. Change your DNS servers
Click the Start button and Settings from the menu.
Next, select Network & Internet.
Click Change adapteroptions to open the Network Connections Control Panel applet.
Right-click your connection and select Properties from the menu.
Select Internet Protocol Version 4 (TCP/IPv4), and click the Properties button.
Next, select the Use the following DNS server addresses radio button.
Enter 8.8.8.8 within the Preferred DNS server box and 8.8.4.4 for the Alternative DNS server box.
Click the OK button on the Internet Protocol Version 4 window and close the window.
Open a browser and enter the address of your router. You should find that information in your router’s manual.
Look for a menu called Firmware update or Software update. You should find it under the Maintenance menu. This may be different for your router.
Check for updates and install them. The router will restart and the packet loss problem should be fixed.
6. Close programs that use the network
Right-click the Start button and select Task Manager.
Next, click the Network column within the Processes tab.
Select the processes with high network percentage figures for bandwidth utilization, and click End task to close them.
We’ve shown you how to proceed on Windows 10 but if you upgraded your OS, the solution will also work on Windows 11 seamlessly.
How do I test my packet loss?
Test for packet loss if your internet speeds are fast but you still see a lot of buffering or dropped streams.
Click the Windows start button, type Command Prompt, and then click on it to open the Command Prompt.
Type ping -n 100 your public IP address. For example, ping -n 100 197.XXX.XX.XXX and then press Enter.
Once finished, check the summary to see what percentage of packets were lost.
How can I improve my Sky Broadband quality?
The location of your hub has an impact on the speed of your internet. Keep your hub in a visible location; avoid placing it on the floor, behind the TV, or in a cupboard.
The more things you connect to your hub, the more bandwidth is used, which can slow you down.
App updates, device backups, and your smart home gadgets may continue using bandwidth in the background even when you aren’t using them.
In order to prevent them from consuming too much of your bandwidth while you’re attempting to browse, work, or play, consider disconnecting anything that isn’t necessary.
Packet loss and ping spikes can leave you frustrated especially when you are trying to do something important. Fortunately, this is an issue you can fix easily without any problems, as discussed above.
eBay is an exceptional e-commerce website for buyers and sellers all over the world. The platform is used by many people to sell or re-sell products.
A stealth account is an account that is not linked to your main account, meaning that it uses a different account name, different IP, and different browsers.
The use of a stealth account can be beneficial both for business purposes, as you could duplicate a good listing and make more money out of it, but also for security if for example you get banned on your main account.
However, not all VPNs are right for this role. For example, even though there are some reliable free VPN services out there, many of them have unclear privacy policies.
Can you sell on eBay with a VPN?
Yes, you can sell with a VPN on eBay. However, some users report that they got their accounts suspended due to using a VPN.
This will likely happen because the eBay algorithms will consider your activity “suspicious” and will automatically block your account, not because VPNs are forbidden by eBay.
The problem is however minor and fairly easy to overcome as soon as the platform further investigates your activity.
Developed by Tefincom & Co., NordVPN is a super-secure VPN that we think is the best option for eBay sellers since it has over 5,000 servers located in 60 countries.
You can easily create stealth accounts on any of the servers, and so have multiple shops each with their own IP address.
If you want to raise your security level, you can join the Tor anonymous network by connecting to Onion-over-VPN servers. Or, if you want to connect to a second VPN server, you can use the Double VPN feature.
NordVPN supports OpenVPN with 256-bit encryption and a kill switch. You can set up this VPN on all popular platforms.
NordVPN implements its own security package called Threat Protection. It blocks cyber threats before they get a chance to damage your system or steal your data.
NordVPN is compatible with all major devices, desktop, and mobile, meaning you can easily manage all your accounts even from your mobile platforms.
What else you should know about NordVPN:
No logs or leaks
6 simultaneous connections
24/7 live chat support
NordVPN is a premium service with three subscription plans available. Each plan includes a 30-day money-back guarantee.
NordVPN
Amp up the security level of your eBay seller account by turning to this trustworthy VPN.
Although ExpressVPN is the most expensive VPN on this list, it makes up for it by bringing excellent security features to the table, in addition to speedy VPN connections.
Created by Express VPN International LTD, the app has more than 3,000 VPN servers in 94 countries. It operates zero-knowledge DNS servers to preserve your anonymity.
Furthermore, ExpressVPN supports a kill switch and split-tunneling mode. It uses OpenVPN with 256-bit encryption to protect your data.
ExpressVPN uses its own secure and fast protocol that is designed to use fewer resources.
The online VPN community offers easy-to-understand guides on best practices when it comes to security so users can know exactly what to do to get the privacy they desire.
ExpressVPN can be installed on any device, including routers, smart TVs, and game consoles. You can check your device compatibility on their official website.
What else you should know about ExpressVPN:
No logs or leaks
5 simultaneous connections
24/7 live chat support
7-day free trial for Android and iOS
ExpressVPN offers its services under three different subscription plans. Each plan includes a 30-day money-back guarantee.
ExpressVPN
Improve your eBay experience using this super-secure VPN to protect your data.
Created by Kape Technologies, Private Internet Access (PIA) is ideal for eBay sellers, thanks to superior security features and high-speed VPN servers. It provides you with more than 3,300 servers from 48 distinct countries.
You can use PIA for safe shopping, whether you’re buying or selling on eBay since it uses 256-bit encryption AES with OpenVPN. Or you can switch to WireGuard if you prefer this protocol better.
Private Internet Access supports static and dynamic IP addresses, exclusive DNS servers and DNS leak protection, port forwarding, a kill switch, and split tunneling.
Private Internet Access is known to be a very secure application. Being open-source gives it the advantage of implementing new features and security updates way more quickly than other types of apps.
It is compatible with all major devices and it is very easy to get started with. Just sign up for an account, install the application and you’re good to go. You can connect to a private server at the press of a button.
PIA can be configured to automatically identify the best VPN option for your actual location, but you can also select your preferred server location yourself.
What else you should know about PIA:
No logs or leaks
10 simultaneous connections
24/7 live chat support
30-day money-back guarantee (no free trial)
Private Internet Access is a subscription-based service with three major plans available. It is compatible with all major devices, both mobile and desktop.
Private Internet Access
Protect your eBay account from hackers using this reliable VPN.
Owned by Surfshark LTD, Surfshark is a budget-friendly VPN for eBay sellers, ideal for those who aren’t willing to spend too much money on a virtual private network service.
You can use Surfshark to protect the devices of your entire family with OpenVPN and 256-bit AES military-grade encryption. It also features multi-hop VPN connections, obfuscation mode, split tunneling, and a kill switch.
The tool can be installed on all major platforms, including routers in OpenVPN manual configuration mode. It covers more than 1,700 VPN servers in over 63 countries, securing each of them with private DNS.
Surfshark users enjoy uninterrupted browsing with the help of fast-responding servers and the built-in adblocker.
Along with that, the VPN service also includes anti-tracking tools and fights against phishing attempts and malware.
Surfshark lets users connect to secure protocols such as IKEv2/IPsec on all their applications.
What else you should know about Surfshark:
No logs or leaks
Unlimited simultaneous connections
24/7 live chat and mail support
30-day money-back guarantee
7-day free trial for Android and iOS
Surfshark is compatible with all major devices and is available with a subscription. There are multiple plans available, and the mobile application has a free trial version.
Surfshark
Get this ultra-secure VPN on your device to protect your eBay account.
Also operated by Kape Technologies, CyberGhost VPN is the best free VPN for eBay sellers since it’s a premium virtual private network service that offers a free trial.
CyberGhost VPN has more than 6,500 VPN servers in 89 countries. You can quickly connect to the nearest location for the best possible speed, as well as use a trusted Wi-Fi network feature.
The app is compatible with all major platforms and even has OpenVPN manual configuration mode for routers. It also comes with split tunneling and a kill switch.
Cyberghost ensures high-speed browsing with unlimited bandwidth and good global server coverage.
Users are protected with private DNS and leak protection, and they can connect to secure protocols such as L2Tp-IPsec and PPTP.
This VPN service is compatible with all major platforms, including Windows, macOS, and Linux-operated devices. It also has applications for Android and iOS.
What else you should know about CyberGhost VPN:
No logs or leaks
7 simultaneous connections
24/7 live chat support
Up to 45-day money-back guarantee
1-day free trial for Windows and macOS
7-day free trial for Android and iOS
Cyberghost is a subscription-based service with 3 different plans available. It can be installed on any device, including routers and game consoles.
CyberGhost VPN
Encrypt all data traffic when using eBay as a seller thanks to this dependable VPN.
This e-commerce platform doesn’t forbid VPN usage so any seller can connect without issues. It is probable that eBay block you only if they detect your VPN connection.
Can eBay IP ban?
Yes, in case you’re discovered by the platform, your IP address may be banned. Anyway, this result is only possible with a low-end or free VPN that doesn’t encrypt the connection.
Why use eBay with a VPN?
VPNs protect your traffic data against third parties with fraudulent intentions.
They change your IP information and encrypt your activity, so no one can access any information about your transactions.
They secure your payments with multiple layers of encryption so no one can access sensitive information about your transactions, profit rates, or bank accounts.
How do I get around the eBay sellers’ ban?
It is clear by now that you can use a VPN and it gives you better security on eBay, so let’s see how to avoid getting banned:
Connect to other servers where eBay is available (the US or Europe).
Go to Ebay.com to connect to your account.
Hence, this simple process can greatly help you hide your location from many servers from other regions.
More exactly, you’ll avoid messages such as eBay account restricted from selling or eBay stealth account managed payments and cover your assets on this commerce website.
Are free VPNs good to use with eBay?
As previously mentioned, free VPN providers may have suspicious privacy policies. Aside from that, if you make sure they do not collect or sell your data, you can make some use of them on eBay.
However, they are generally not as reliable as premium VPNs because they place limitations on traffic and they have fewer servers available.
Free VPNs are typically not as fast as premium ones. Slowdowns happen especially when a larger number of users connect at the same time.
Can I get banned if I use a VPN for eBay?
eBay doesn’t have anti-VPN regulations, but there are some risks that come with VPN usage.
If the platform detects that you use eBay from a different location than that provided in your vendor information, it may suspend or ban your account for fraud.
To prevent this from happening, users can use double VPN (multi-hop) options to route traffic through 2 private servers.
You can pick a server pair that has the second server located in your actual area. This means that if detected, your IP will match your location information.
To sum up, if you’re an eBay seller, a VPN is a great help since you don’t have to worry about your banking info getting stolen by hackers. You just need to get equipped with the right VPN for the job.
Don’t hesitate to visit our eBay section to find out everything there is to know about this e-commerce platform.
That being said, you can return to our Corporate VPN Hub to see how else a VPN can improve your business.
Many Windows 10/11 users reported VPN error 789 which states the following message:
The L2TP connection attempt failed because the security layer encountered a processing error during initial negotiations with the remote computer
Keep reading to fix this error fast:
How do I fix the VPN error 789 on Windows 10 & 11?
1. Reset network adapter
Press the Windows key + X and select Device Manager.
Identify your network adapter and right-click on it then select Uninstall device.
Click on Uninstall to confirm.
Restart your computer. The device will reinstall and should reset it to default settings.
Refreshing the network adapter driver can make this problem go away quickly so make sure you try it out by performing the steps above.
2. Check the certificate
It is very important to ensure the correct certificate is used both on the client and the server side.
In case the two don’t match, you won’t be able to use the virtual private network. You might need to renew the certificate with your provider.
Press Windows + I and go to Settings > Network & Internet > VPN.
Click your VPN connection and select Advanced options.
If you are using a Pre Shared Key (PSK), ensure that the same PSK is configured on the client-side, and the VPN server machine.
3. Use a reliable VPN service
It is very likely that the root of this problem is that the servers you use are not very optimal for your connection. For this reason, it is recommended to use a top-level VPN service.
If you’re facing VPN Error 789, try ExpressVPN. It provides reliable performance, strong security, and easy setup. With servers in 105 countries including the US, UK, Canada, Australia, and Germany, you can easily find a stable connection.
ExpressVPN supports robust encryption and protocols essential for avoiding configuration errors. Regular updates ensure the latest fixes and security enhancements.
ExpressVPN
Overcome the VPN error 789 and enjoy secure and fast browsing across the whole globe.
Press the Windows key + R keyboard shortcut to start Run.
Type services.msc and press Enter or click OK.
Double-click the IKE and AuthIP IPSec Keying Modules service.
Set the Startup type to Automatic. If the service is running, click Stop and then Start. If it’s disabled, just click Start.
Find IPSec Policy Agent and double-click it.
Set the Startup type to Automatic. If the service is running, stop it and start it again. If it’s not running, start it.
Save the changes.
Restart your VPN service.
Once you have done all the steps above carefully, the VPN should work smoothly as the protocol settings have been reset to default.
If, however, it doesn’t work, you have to manually set the encryption method both for the server and the client-side, in order for them to be compatible.
In case you have a user-specific issue on your computer yet you still get the L2TP connection attempt failed error, you can also contact the customer care or tech support team for your specific VPN provider.
Right-click your VPN connection and select Properties.
Go to the Security tab and ensure the correct VPN type is selected (L2TP/IPsec with pre-shared key).
Why does VPN error 789 appear?
This error pops up when your system is not properly set up to connect to an L2TP server, thus the connection attempt fails even before you establish a connection with the server.
It is also linked to the incorrect configuration of your operating system like Windows 10 in this case. This generic error is thrown when the IPSec negotiation fails for the L2TP/IPSec connections.
Other possible causes include:
L2TP-based VPN client (or VPN server) is behind NAT
The wrong certificate or pre-shared key is set on the VPN server or client
A machine certificate or trusted root machine certificate is not present on the VPN server
Machine Certificate on VPN Server does not have Server Authentication as the EKU
Before trying any of these solutions, ensure that L2TP and IPSec pass-through options are enabled from your router.
If you configured your VPN service manually, then make sure you use the preshared key 12345678. If this doesn’t work, here are more solutions you can use to fix this problem on your PC.
Wrapping up
If the issue is still there, you can change your software completely. Just check our list including the best VPNs for Windows 10 and pick the one that suits your needs.
Do let us know if any of these solutions fixed VPN error 789 by leaving a comment in the section below.
Whether you’re simply visiting South Korea or are currently living there, keeping your online activities private and away from prying eyes should be a priority to you.
Currently, millions of South Koreans rely on VPN services to keep their online identity anonymous.
However, encrypting your connection and anonymizing your identity aren’t the only things a VPN can do for you.
It’s well-known that certain countries, including South Korea, apply Internet censorship. As a result, you can’t access certain websites or online services without proper tools.
A few examples of content that’s downright banned in South Korea are pro-North-Korea and pornography websites.
South Korea Internet censorship
Due to various acts, bills, legislation, and reforms, South Korea has undergone various stages of Internet censorship. A legal body was created and allowed to monitor the Internet, in order to identify and remove certain content easily.
Several foreign websites were blocked, and users who made unlawful statements were criminally prosecuted. Gradually, more and more websites were censored, and the ICEC (Internet Communications Ethics Committee) engaged in even more advanced monitoring.
One of the reasons behind these censorship actions was the increasing number of cyberbullying cases.
A few years later, the KCSC (Korea Communications Standards Commission) agency was created in order to replace the ICEC.
Subsequently, a law was passed that required websites with more than 100,000 visitors to force their users to register using their social security numbers and real, full names.
Nowadays, reportedly South Korea uses SNI (Server Name Indication) snooping to restrict HTTPS website access.
Are VPNs legal in South Korea?
To put it shortly, yes, you can use VPNs in South Korea as they’re 100% legal, so if you’re wondering if South Korea allows VPNs, the answer is yes.
This can come as a surprise, considering that South Korea has strict Internet laws and actively engages in heavy Internet censorship.
Ranging from blocking harmful, subversive content, the KCSC agency also monitors online messages and removes unlawful ones.
Allegedly, the KCSC agency is also allowed to suspend your right to post on the web for 30 days if a complaint is filed, so there’s that.
Do I need a VPN in South Korea?
If you’re within South Korea, your ISP might block your attempts to access certain websites or online services. Normally, all your web traffic goes through your ISP’s servers.
Your ISP can see and log everything you do online, which is not exactly ideal, considering that they can hand over the data they have on you if the need arises.
What a VPN does is grabs all your traffic and route it through its own set of private servers. Additionally, it encrypts all of your communications, so even if someone intercepts your connection, they can’t do much with the data they gather.
Last, but not least, a VPN changes your IP and spoofs your location, so that it appears you’re somewhere else.
When you connect to a VPN server, you get assigned a new IP address, and DNS, along with all the metadata that points to your virtual location.
So, to put it shortly, that’s what a VPN offers you: privacy, security, and block circumvention.
How do I get a Korean IP address?
If you live outside South Korea but would like to connect to a Korean IP address, your best bet is to use a VPN.
There are certain benefits that come with using a South Korean IP address, like being able to keep in touch with your local websites even when traveling abroad.
A VPN with South Korean servers can also allow users all around the world to access geo-locked content like Netflix and other similar platforms.
ExpressVPN has thousands of servers all around the world, covering 94 different countries, including South Korea.
It uses military-grade encryption and powerful and modern VPN protocols to make sure you can access South Korean platforms from abroad without being detected.
The VPN keeps no user activity logs and has a secure killswitch. These along with the encryption ensure your activity online stays private. Your South Korean ISP or anyone for that matter won’t be able to track you.
ExpressVPN
Encrypt traffic for unrestricted and private browsing in South Korea and beyond!
NordVPN ensures unbreakable encryption and privacy. It has 60 virtual server locations in South Korea, and 5500+ servers worldwide.
It gives you the possibility to browse both locally and internationally without being monitored in any way.
On top of that, NordVPN lets you add your own dedicated South Korean IP address to your plan. That will be only linked to your account and not used by other NordVPN subscribers.
NordVPN
Protect your private information and lift censorship with this reputable VPN for South Korea!
Surfshark lets you bypass online censorship by connecting to its encrypted servers located in 99 countries, including in South Korea, specifically in Seoul.
The VPN lets you get a dedicated IP as well and can help you access Korean content from home and when traveling, and also unlock international platforms like Netflix UK .
It uses AES-256-bit encryption and offers unlimited bandwidth. Surfshark can offer high-quality streaming on EBS TV, JTV, SBS TV, and HBO Asia, just to name a few.
Surfshark
Unlock restricted platforms, encrypt your data, and boost your connection with Surfshark VPN!
These VPNs have virtual servers, which means they are not physically located in South Korea. What this means for your privacy is that they don’t have to any internal South Korean Internet regulations.
Simply put, they can’t be forced to monitor you by the law. So your traffic is truly encrypted and not logged.
A VPN can also help you increase Internet speed and improve gaming quality by fixing common latency issues like high ping and lag.
Let us know which VPN you use in South Korea and what your experience with fighting online censorship has been so far.
Outlook not moving emails to a folder can disrupt how you organize messages. Sometimes, it’s the result of corrupted rules, unexpected sync issues, or restrictions that stop messages from being transferred. Errors like Outlook cannot move the items or cases where rules are not moving email to folder are common examples. In more severe situations, Outlook may refuse to move or even prevent folder changes altogether.
This guide explains the most likely reasons behind these problems and shows you effective ways to fix them.
Right-click the specific message you want to set a rule for in your message list.
Click on Message and select Rules.
Click on the From (sender) check box in the Create rule dialog box.
Then, choose your preferred folder to which messages from the sender will get moved, then click OK twice.
And the rules will be applied to your incoming messages. This should fix your Outlook not moving emails to folder rule.
2. Repair Corrupt PST Outlook File
Tip
Outlook has provoked some issues in the past, that’s why software specialized in Outlook repairs was created. Kernel for Outlook PST Repair is a tool that we hope will solve this issue.
It provides mailbox recovery with a complete structure like folders, inboxes, contacts, drafts, journals, etc. This tool will process all files and remove any existing corruption.
Start the Microsoft Outlook client and click on the File.
Click on Account Settings.
Click on the Data Files tab in the Account Settings window.
Highlight the Outlook data file (.PST), then click on Open File Location.
Right-click on the PST file, then click on Properties.
If your PST file has grown more extensive, you can repair it with an inbuilt utility known as Scanpst.exe.
Exit Outlook and check for Scanpst.exe in the specified Outlook location below: Outlook 2019: C:\Program Files (x86)\Microsoft Office\root\Office19Outlook 2016: C:\Program Files (x86)\Microsoft Office\root\OffiRepairOutlook 2013: C:\Program Files (x86)\Microsoft Office\Office15 Outlook 2010: C:\Program Files (x86)\Microsoft Office\Office14Outlook 2007: C:\Program Files (x86)\Microsoft Office\Office12
Open the exe file and click Browse to open the corrupt PST file.
To begin scanning, click on the Start button.
Click on Repair to fix the errors displayed.
After the Repair, launch Microsoft Outlook with the repaired PST file.
You can now open Outlook to check whether the error is fixed.
3. Create a new Outlook profile
Start the Microsoft Outlook client and click on the File.
Select Account Settings and then click on Manage Profiles.
Right-click to Show Profiles and click on Add button.
Set a new name for the Profile in the Profile name box, then click on the OK button to confirm.
You can now check if the outlook emails moved to folders still appear in the inbox.
Type in outlook.exe /cleanrules in the prompt and press Enter.
This should delete all your rules, even where you have overlapping rules. Then, you can set new rules.
5. Restart Outlook
Hold down the Ctrl and Altkeys together and press the Deletekey.
Click Task Manager on the new screen.
Right-click on Outlook in the list of running programs, then click on End Task to close Outlook.
Restart Outlook and check if the issue is fixed; if not, you can troubleshoot the Outlook client.
Press Windows + Rand enter outlook.exe /resetnavpane in the Run dialog box.
Press Enter to run Outlook.
You can work through any fixes above to know which works best for you.
6. Disable Conflicting Add-ins
Add-ins sometimes interfere with Outlook rules and folder actions.
Press Windows + R, type outlook.exe /safe, and press Enter.
Try moving an email to a folder. If it works, an add-in is the cause.
In Outlook, go to File > Options > Add-ins.
At the bottom, choose COM Add-ins > Go.
Uncheck suspicious add-ins and restart Outlook.
7. Check Folder Permissions
If Outlook cannot move the items or Outlook couldn’t move folder, permissions may be restricted.
Right-click the folder > Properties.
Select the Permissions tab.
Ensure your account has Owner or at least Editor rights.
Apply the changes and restart Outlook.
8. Clear the Sync Issues Folder
If Outlook does not move emails to folder consistently, sync logs may be bloated.
In the folder list, expand Sync Issues.
Right-click Conflicts, Local Failures, and Server Failures.
Choose Empty Folder for each.
Restart Outlook and test moving messages again.
9. Rebuild the OST File
A damaged OST often prevents smooth email movement between folders.
Close Outlook.
Navigate to %localappdata%\Microsoft\Outlook.
Locate the .ost file for your account and rename it (e.g., old.ost).
Reopen Outlook — it will generate a fresh file automatically.
10. Update Outlook and Windows
Outdated versions can cause Outlook rules not moving email to folder or messages failing to transfer.
In Outlook, go to File > Office Account > Update Options > Update Now.
Run Windows Update from Settings to install the latest patches.
Restart your device and test again.
Why are my Outlook folders not syncing?
This could result from poor internet connectivity or some other reasons that the content and folders in Outlook do not get updated automatically.
Hence, it will prevent Outlook from syncing the folder. Also, if the OST files are corrupt, the offline works may not sync with the other folders when the connection is turned on.
These are the best fixes for Outlook not moving emails to folder problems. Once the steps highlighted have been followed, all your emails should sync without hassles.
You can also check our detailed guide on fixing disappearing emails if you find some of your emails are missing on Outlook.