Are you looking for the best software to format SD cards on Windows 10 PC? Windows Report team has come up with the best programs ideal for this purpose.
It can be frustrating when trying to format your corrupted memory card, using the default PC recovery and it displays a format error message. You don’t need to worry anymore as we have highlighted in this post software which is proven to give the best results in formatting SD cards.
By using the right tools in order to repair damaged SD cards represents a secure way to keep your data intact. There are suitable functionalities for most of the issues regarding external storage drives.
Hence, if you strongly need specialized support to get back valuable data, you can rely on their efficiency to save every file from your SD cards, USB flash drives, or other storage devices.
In addition, any of this software can as well fix your SD card problems such as formatting, recovery, and repairing your SD card.
This free-format tool is similar to EaseUS Partition Master as it enables you to format the hard disk, partitions, and SD card for free. The software has a user-friendly interface that allows users to delete or initialize SD card drives or partitions properly.
However, this tool can only format SD cards to the FAT32 system file format. Notwithstanding it is still a good tool to have on your Windows 10 PC.
Furthermore, with such an effective program you can recover precious data from any SD card, in various data loss situations. For example, formatted SD cards data loss, corrupted SD cards, accidental deletion, virus infection, etc.
Needless to say, your information will be recovered in no time and with the same quality and you will rejoice in deleted files like photos, videos, or other files.
To conclude, this solution is a fit for anyone who lost important files and strongly needs to get them back from a variety of storage devices.
Disk Drill
This free data recovery software brings back lost files, documents, or media files from your corrupted SD cards.
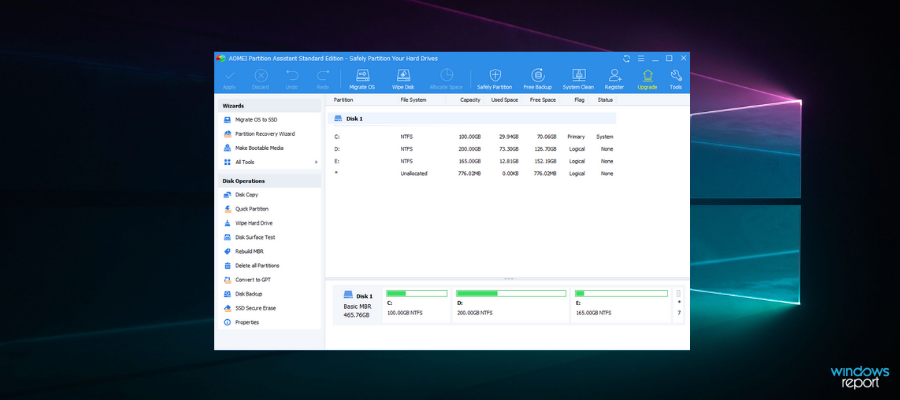
Aomei Partition Assistant is a professional solution that incorporates a lot of useful drive management tools that allow you to resize/move partitions, merge partitions, split and format partitions, and even migrate an OS to an SSD or HDD.
Obviously, we’re interested in formatting partitions and this solution will format your SD cards with great speed and accuracy. Formating them will also help you quickly delete all data on the card and re-arrange a partition as it is empty.
With this tool, you can also easily transform the partition to NTFS or FAT32. It’s recommended to choose the NTFS file system as it has more advantages but some applications only support FAT32.
Once you get this set of amazing tools, you will discover that you can do a lot more than formatting the SD cards on hand.
More so, this program can offer ample partition data management so any user can recover their disk storage. Thus you can always fix SD cards issues and format them accordingly using this software.
With this being said, you can definitely grant this partition assistant due to its disk partition tools and whole capabilities to manage your storage safely.
Aomei Partition Assistant
Aomei Partition Assistant is not only a fast and reliable way of formatting your SD cards but it’s a great drive management solution.
This software is a very handy tool as it allows you to format any memory card completely without any error message. Also, the USB tool supports all types of memory cards from SD cards, micro SD cards, and other USB drives.
Meanwhile, this tool can also format all SD card file system types from FAT32, exFAT, and NTFS. Hence, there is no issue of incomplete formatting as the tool completely formats all media files and restores your SD card back to its original storage form.
However, the major downside of this tool is the lack of a partition feature and its limitation to just four file formats.
You can perform other tasks using this program and benefit from its storage formatting. Thus it’s possible to delete files on flash drives, remove any tracks of malicious software, fix partitions error, or scan drives for errors.
Another significant aspect is that it has been tested with thousands of flash drives and with various brands like SanDisk, Kingston, HP, Sony, Lexar, Toshiba, and much more.
This software that formats SD cards is a free disk formatting utility tool that has many features; you can easily format an internal disk, external disk, MMC card, USB flash drive, and most especially SD card. The tool has a simple and user-friendly interface that allows access to formatting options.
With its format function, when you format your SD card with this tool it formats completely and leaves no original SD drive data while fixing your SD card problems.
However, this tool doesn’t support SD Card encrypted by the BitLocker To Go functionality of Windows. Hence, you can format an SD card after it has been unlocked. Otherwise, SD Memory Card Formatter is an excellent tool to have on your Windows 10 PC.
In addition, you can benefit from memory card formatting tools and repair multiple card types like SDHC memory cards or SDXC memory cards. Also, it’s recommended to use this tool instead of individual operating systems.
This way, you can get optimized support for your most valuable files. Plus you have a “protected area” for SD cards security purposes.
These format tools each have their major strengths which makes them handy to install on your Windows 10 computer. In addition, they also help you to partition your SD card drive and also fix related SD card issues as well.
However, the Windows Report team recommends that you backup important data on your SD card before formatting. If you have any experience using any of these tools we mentioned above, please leave a comment below.
Backing up files is essential, and it especially helps when Windows crash and you have to reinstall the OS. Losing personal files can lead to several problems, and it’s best to have a backup at all points. And to do that, there’s nothing better than computer-to-computer backup software.
The backup software tools developed of late are quite simple to operate, run in the background, and require minimal manual supervision. Choosing the right one will help secure all vital information and never lose it. So, let’s find out more about it!
What are the three types of backups?
Before we list the best Windows backup software, it’s imperative to understand the different types so that you can make an informed choice. Here are the three:
Full backup: All the data, files, and folders are backed up in one go, and it usually takes longer to complete, but restoring or recovering the data is relatively quicker and easier.
Differential backup: With a differential backup, only the files changed since the last backup are uploaded to the server. Here, the initial one is a full backup followed by regular instances of differential backup.
Incremental backup: This is often the most efficient backup and helps save considerable space. In incremental backups, only the changes made to the files since the last backup and recorded. A major drawback here is the slow restoring speed.
What is the best computer-to-computer backup software?
Acronis Cyber Protect Home Office is a well-known backup software that allows you to perform computer-to-computer backup. The Acronis backup software offers dual protection, so your data can be backed up to the cloud automatically.
It offers active disk cloning, allowing you to back up the system while using it. Backup scheduling is available, and there’s support for event-based backups.
Acronis Cyber Protect Home Office allows full image backups and supports file and folder backups. Besides, you have support for file synchronization and wireless local backup to network computers or NAS.
Another feature we must mention is built-in real-time antivirus protection and anti-ransomware protection. Acronis Cyber Protect Home Office is the best free backup software for Windows 10, though it’s a trial period.
You should know the program allows you to back up any data instantly and save it locally on another PC or on the Acronis cloud, therefore, making it a reliable solution.
Acronis Cyber Protect Home Office features:
Wireless local backup
File synchronization
Full image backups, active disk cloning, file, and folder backup
Backup scheduling
Antivirus and anti-ransomware protection
Acronis Cyber Protect Home Office
Acronis Cyber Protect Home Office is a backup software for professionals, and by using it you can easily create backups on other computers in your network.
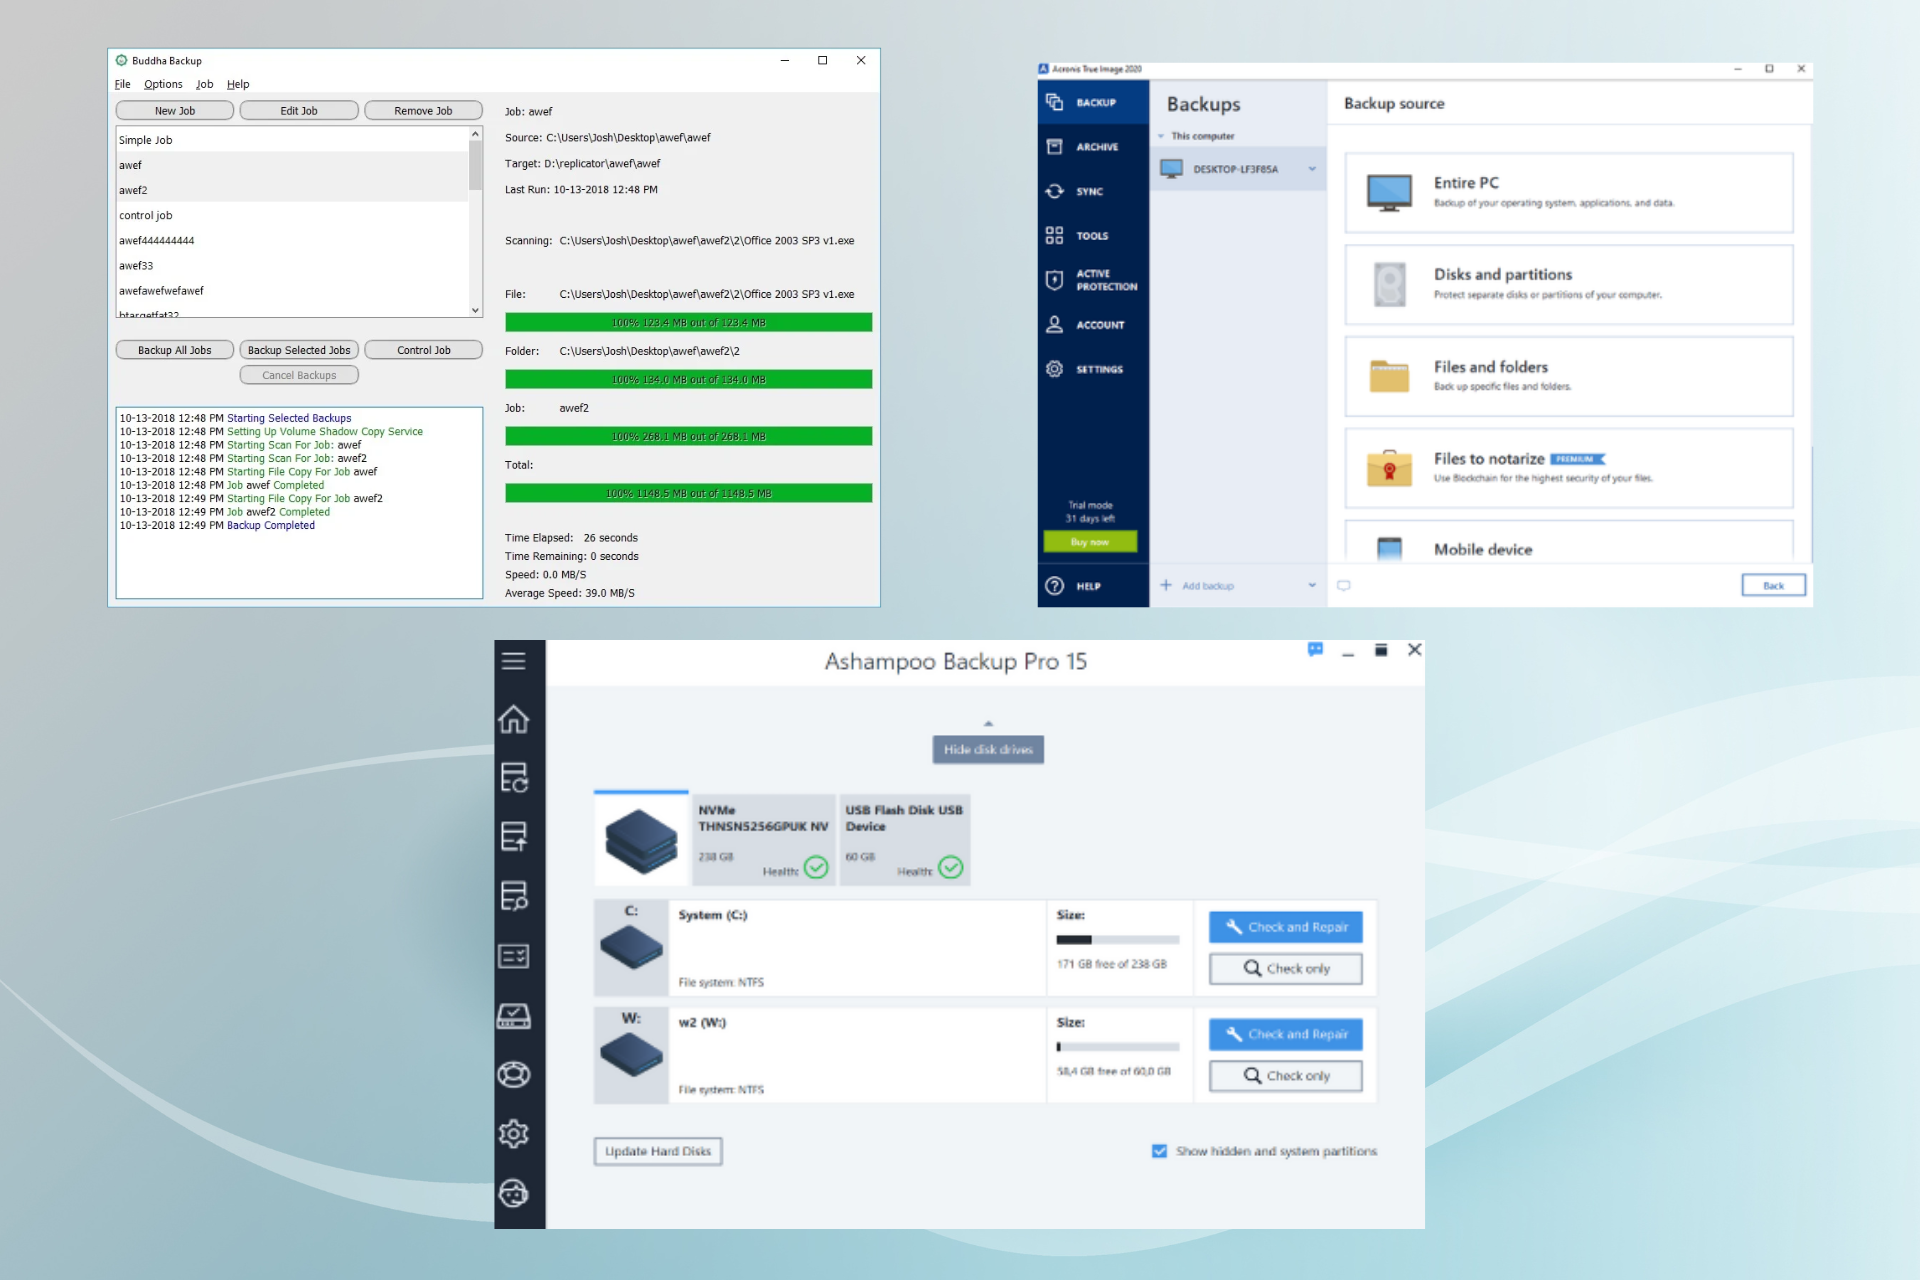
Buddha Backup is an easy-to-use backup solution that comes with various features which keep your data safe.
Backup options, including One-way and Two-way, ensure all your data is saved. The former copies data from one location to another.
The latter synchronizes files between two locations so all new or modified files are copied from one location to another, keeping both locations updated.
Buddha Backup offers automatic & continuous backup of your data and uses a backup scheduler to ensure your data is backed up regularly & automatically.
The Archive Backup feature keeps a copy of every file created or modified at each backup so that you have every file version.
You can recover and transfer data from a backup location to a new or restored device using Reverse and Recovery options, simplifying the process.
The Volume Shadow Copy Service enables you to back up files while host programs are still in use, so you don’t have to wait for the process to complete.
Buddha Backup features:
Remove old files from the archive backup folder using the Auto Purge feature
Shows which files have been backed up or synced for each backup or file sync operation
Simple setup and easy-to-use interface
Automatic backup system
Enables you to Control backup behavior and perform backups the way you want
Buddha Backup
Use industry-standard encryption and security protocols to protect your data in transit and at rest.
Aomei Backupper is another computer-to-computer backup software. The software supports system cloning, disk cloning, and partition/volume cloning. In addition to that, the software allows you to pick which files you want to restore.
Features such as automatic, full, incremental, and differential backup are also available. Using Aomei Backupper, you can back up files to local/external disks, flash drives, other computers in your network, NAS, and cloud storage.
Aomei Backupper is a great backup tool, and with its advanced options, it’s one of the most reliable computers to computer backup applications on the market. And the two-way sync and mirror sync options are available, so you’ll always have a perfect copy of your files.
Besides, you will benefit from the backup automation, and there’s no need to worry about storage because the Scheme feature automatically removes old backup files.
Aomei Backupper features:
Support for the system, disk, and partition cloning
Ability to perform automatic, full, incremental, and differential backups
Can back up data to external/local disks, other network computers, NAS, and cloud
Two-way sync and mirroring feature
Command-line support
Aomei Backupper
Aomei Backupper is a professional backup software that allows you to sync and back up your files to other computers.
If you’re looking for an effective computer to computer backup software, O&O DiskImage might be just what you need. The software allows you to back up your entire PC or individual files and folders, therefore, emerging as the perfect solution.
The software supports automatization, and you can easily schedule your backups. You can also view saved ISO files as a drive or create Windows boot media if needed.
O&O DiskImage supports incremental and differential backups, and you can easily store the backups to local and external disks, network drivers, or computers.
Besides, the software supports hot imaging to allow users to create backups while working on other tasks. And the best part, you have notification support available.
O&O DiskImage is one of the best backup software for Windows 11, and it will be a perfect choice for all basic and advanced users alike.
Additionally, the software creates a suitable data protection environment by cloning the entire system or certain files, thus confirming complete backup service.
Remember, with O&O DiskImage, you only have to perform critical data backups and will never lose any precious information.
O&O DiskImage features:
Ability to back up the entire system or individual files or folders
Email notifications
Support for incremental and differential backups
Can store backups on a local/external disk, network drives, and computer
Hot imaging support
O&O DiskImage
O&O DiskImage is a powerful backup software that lets you back up your computer to other network computers.
Another great computer-to-computer backup software for Windows worth mentioning is Ashampoo Backup Pro. The software has a friendly and intuitive interface, making it the perfect choice for regular users lacking technical expertise.
The application allows you to back up partitions and hard disks, the Windows system, and individual files and folders.
Regarding backups, you can create disk images, complete backups, incremental backups, and 1:1 file copies. There’s also support for automatic synchronization as well as versioning.
And, when it comes to storage, you can back up the data to local/external drives, online storage, NAS devices, and cloud storage services such as OneDrive, Dropbox, Google Drive, etc.
Ashampoo Backup Pro is powerful backup software, and thanks to the simple-to-use interface, it’s perfect for both first-time and advanced users.
Besides that, the software protects you from malware threats online using powerful antivirus tools. At the same time, it doesn’t consume much of your PC resources and works quietly in the background.
Ashampoo Backup Pro features:
Simple to use interface
Can back up partitions, hard drives, Windows system, individual files, and folders
Ability to create disk images, complete backups, incremental backups
Can store files on local/external drives, online storage, NAS, and the cloud
Versioning and automatic synchronization
Ashampoo Backup Pro
Ashampoo Backup Pro is a simple but powerful backup software that offers computer-to-computer network backup.
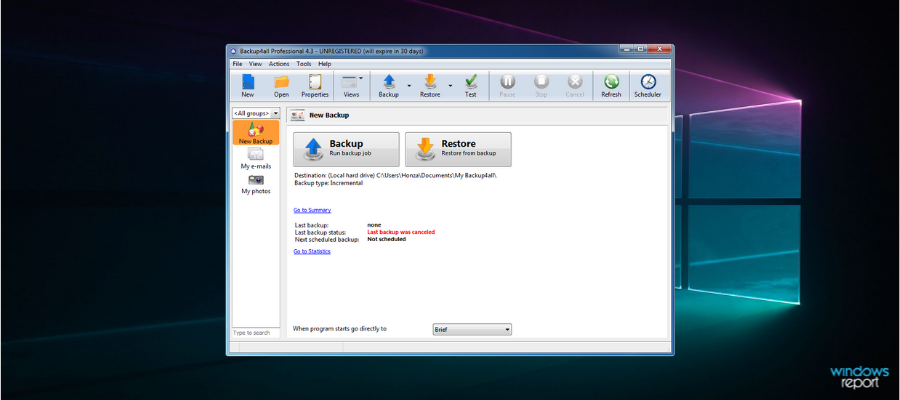
For those looking for free backup software, Backup4all will be a great option. It offers a free 30-day trial period and should therefore be the perfect choice for users still exploring their options.
Backup4all can back up individual files or folders, but it can also perform a full backup or mirror backup with and without compression. Of course, support for incremental or differential backup is also available.
The software offers AES 256-bit encryption, along with support for email notifications. You can also automate both backup and restore.
Regarding backup storage, you can store backups on local/external hard drives, on network computers, remotely via FTP, and in the cloud.
Overall, Backup4all is great backup software. But some features are only available in the Professional version, so keep that in mind.
Backup4all features:
Support for full, mirror, incremental, and differential backups
Ability to backup individual files or folders
AES 256-bit encryption
Email notifications
Can store files on local and external drives, network computers, FTP servers, and the cloud
We use SD cards in all sorts of devices, but what if your SD card is corrupted or damaged? If that’s the case, you’ll need to use software that can fix the corrupted SD card.
If your card is damaged, there might not be a way to fix it, but you can still extract and save your precious data, and today we’ll show you the best software for the job.
What is the best software to fix a corrupted SD card?
Another software that can help you fix a corrupted SD card and recover your data is Wondershare Recoverit. The software is quite simple to use and can recover files with a couple of clicks.
Simply select the desired drive, scan it, and try to recover as many files as you can from it. As for the recovery, the software can recover over 1000 different file types with ease.
Wondershare Recoverit also offers both quick and deep scans, depending on how fast you want to recover your files. A preview option is also available, so you can ensure that files aren’t damaged.
The software also supports filtering, so you can easily find specific files or file types. It’s also worth mentioning that you can recover files during scanning, so you don’t have to wait for the scan to finish.
Wondershare Recoverit is a great software that can help you fix and recover files from a corrupted SD card, so be sure to try it out.
In addition, the program can recover damaged videos by gathering and matching the fragments of corrupted video files. So you assure your ultra HD, 4K, or 8K videos instantly.
All in all, you should benefit from the recovery capability of this software and secure your data on over 2000 storage media devices.
Wondershare Recoverit features:
Incredibly simple to use
Ability to preview files before backing them up
Works with SD cards, hard drives, SSDs, memory cards, digital cameras, Windows and Mac computers
Can be used for partition and hard drive recovery
Supports over 1000 file types
Wondershare Recoverit
Get back all the crucial lost files in just a few moments using this proficient recovering tool.
If you want to fix a corrupted SD card and save your data, then you might want to consider using Stellar Photo Recovery. The software is simple to use, so you should be able to easily recover files.
As for supported file types, this application is designed for audio and video formats, and it works with JPEG, JPG, TIFF, BMP, GIF, CR2, ERF, RAF, K25, NEF, OV, MXF, AVI, ASF, WMV, MP4, and other formats.
In addition, Stellar Photo Recovery works with 4K, 6K, 8K, UHD, and 360-degree files, and it fully supports CFast, CompactFlash, and microSDHC/XC cards.
The software also supports deep scanning, so it can recover any file. In addition, it can be used to create an image of the selected media and create a sector-by-sector copy.
Overall, Stellar Photo Recovery is a great tool if you want to recover photos or videos from a corrupted SD card, so you might want to give it a try.
With all being said, you can already take action to get back crucial data from your SD storage card and rejoice in your favorite media files.
Stellar Photo Recovery features:
Optimized for photo and video recovery
Works with 4K, 6K, 8K, UHD, and 360-degree files
Supports CFast, CompactFlash, and microSDHC/XC cards
Can create an image file of the selected drive
Deep scan option
Stellar Photo Recovery
Stellar Photo Recovery is recovery software that can help you repair corrupt SD cards and recover lost files.
AOMEI Partition Assistant is another software that can be used to repair a corrupted SD card. This is a disk management software, but it can be used to partition and fix protentional problems with your SD card.
The software can be used to resize or move the selected partition or extend it. In addition, you can merge, split, create, delete, and format partitions.
With this kind of service, you can literally manage your partition in every way. For instance, splitting a large partition into two may help you to better organize your files.
AOMEI Partition Assistant can also be used to migrate your system to a new drive or clone entire disks and partitions in order to back up your files.
You can also create bootable disks, and Windows To Go drives, and it can convert MBR to GPT, as well as NTFS to FAT32 and vice versa without any file loss.
AOMEI Partition Assistant is a powerful disk management software, and although it’s not strictly designed for SD cards, it can be used to fix issues with them, so feel free to try it.
Therefore, you should consider such reliable software for its partition storage management tools. Plus, you ensure data security using disk cloning to be prepared for any accidents.
AOMEI Partition Assistant features:
Can be used to move, resize, split, create, format, and extend partitions
Works with all types of disks, including SD cards
Can be used to migrate the system to a new drive
Ability to clone disks and drives
Can convert MBR to GPT, NTFS to FAT32, and vice versa without file loss
AOMEI Partition Assistant
AOMEI Partition Assistant is a disk management software that can help you manage and format your SD card.
Disk Drill software is designed to recover deleted files from corrupted SD cards, and it works with brands such as SanDisk, Transcend, Toshiba, Lexar, Integral, SP®, PNY, Kingston, and many others.
The software also works with digital cameras, smartphones, USB drives, hard drives/SSDs, and PC and Mac computers.
The software can recover any type of file including video and audio files, images, documents, archives and many other file types. The software currently supports over 200+ different file types.
The application is simple to use, and it will scan your SD card and try to recover as many files as possible. Now you just need to select the files that you want to restore and that’s it.
Disk Drill is a simple but powerful recovery software, and it will surely come in handy if you’re dealing with a corrupted SD card.
What’s more, you’re secured regarding crucial business documents and private files, relying on powerful recovery tools in case of sudden missing data.
Hence it’s likely to get back multiple files formats and restore complete partitions on your PC, plus providing data backup for both professionals and home users.
Disk Drill features:
Simple to use
Works with SD cards, USB drives, hard drives, SSDs, PC and Mac computers
Can restore over 200 file types
Disk Drill
Choose this software to recover any type of storage data, and stay secured for your essential intel.
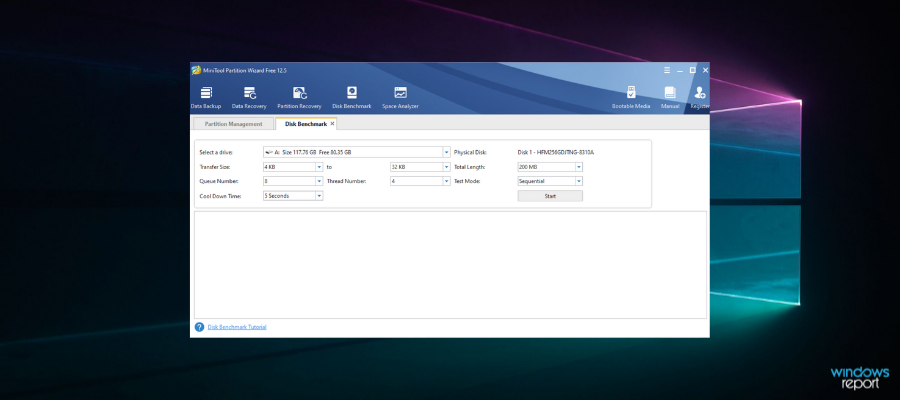
If you’re having problems with your SD card, MiniTool Partition Wizard might be able to help. This software allows you to easily manage your disks, so you can easily format your SD card.
Just like with any other disk management tool, you can create, delete, format, move, and resize partitions. If needed, you can also completely wipe a partition and prevent files from being recovered.
The software also offers full disk and partition copying, so you can copy an entire disk or SD card. Of course, the disk/partition checking feature is available as well, so you can check your drives.
The software also supports data recovery, and it will scan your drive and help you recover files, which can be useful for SD cards.
Overall, MiniTool Partition Wizard is great software, and even though it’s not specifically intended for SD cards, it can easily work with them as well.
In addition, you can manage disk partitions easily with this program, plus it’s possible to repartition your hard drive, split/move partition, or check system files.
All in all, you have complete control over your PC disk storage, and also fix damaged storage devices with partition management tools.
MiniTool Partition Wizard features:
Ability to create, delete, format, move and resize partitions
Full disk/partition cloning
Deep scanning and file recovery
Dynamic disk management
Disk checking feature
MiniTool Partition Wizard
Administrate your partitions and disk storage seamlessly on your PC with this useful partition manager.
If you need to learn more about data recovery, you can visit this dedicated Data recovery section at any time. Also, in case you are looking for more similar software, it’s possible to can find it in our Document management Hub.
Fixing a corrupted SD card isn’t an easy task, but with these tools, you should be able to fix it or at least recover your files from a corrupted SD card.
Keeping your private files and folders hidden from prying eyes is extremely important no matter if you’re holding records for your company, or just those pictures you’ve taken for your wedding.
Even though Windows 10 has a built-in feature that allows you to hide files and folders, it is not efficient as anybody with access to your computer can unhide the files easily.
Another downside of using this option to hide your folders is the fact that it doesn’t support FAT32 encryption, and it’s not available in the Home Edition of Windows 10.
In this article, we will explore some of the best software options on the market that can increase the security of your hidden folders to the next level, allowing you to even hide folders on a USB stick. Read on to find out more.
What’s the best software to hide folders on Windows 10?
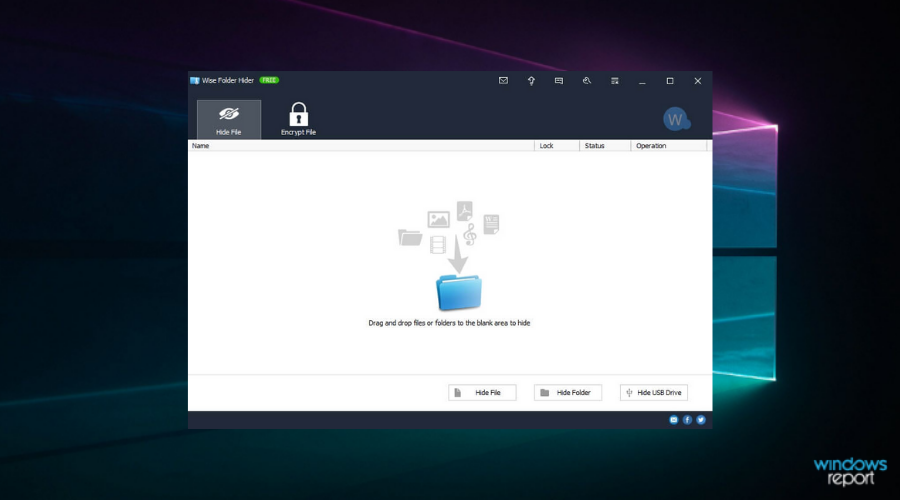
Wise Folder Hider is a great software that allows you to easily hide specific folders, photos, videos, and other personal data on your Windows 10 PC, and these options come completely free.
This software has a user-friendly interface that makes the entire process of hiding your valuables files easy but offers other useful features.
Here are some of its best features:
Ability to lock the software with a password
After hiding folders/files you can set a second-level password that assures nobody but you can get access
Can hide files and folders on USB drives
Easy editing for hidden and locked files – you can modify any part of the content without the need to reveal/unlock the item first
Automatically adds a Hide File/Folder to your context menu
The free version of this software allows you to use double password protection to hide files, folders, and USB drives.
The paid version of this software, Wise Folder Hider Pro includes all the features found in the free version, but it also has:
Encrypt files and folders
Automatically recover passwords
Automatic updates
Premium tech support
Wise Folder Hider
Secure all your sensitive files and folder from your PC or other devices with this Wise solution.
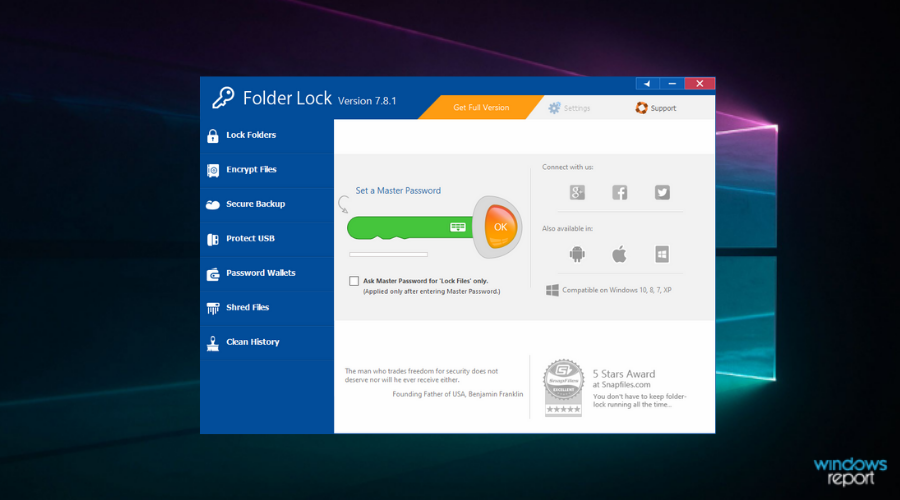
Highly praised by the industry, Folder Lock is one of the highest-rated and most thorough encryption software out there.
Folder Lock has many advanced security features for your folders; you can password protect your files and store them in an online backup account. Additionally, it has a complete set of data protection options that serve every security need you may have.
This is just one software that comprises 7 powerful tools meant to cover all kinds of data protection necessities: Lock Files, Encrypt Files, Secure Backup, Protect USB/CD, Make Wallets, Shred Files, and Clean History.
Folder Lock is available for Windows-operated PCs and on a mobile app for Android and iOS.
The software is a one-time purchase. They offer a free trial, so you can try it for a while and see how it works.
Among the most notable features, we include:
Advanced and very fast 256-bit AES Encryption
Drag and drop functionality to protect files easy and fast
The data is stored in a Server which can be shared among employees on a Network
Online Backup with end-to-end data encryption
Easily access locked items using drag and drop, you don’t need to unlock them every time you want to run them
Wallet Encryption
Backup, restore and sync files online and among different PCs
The online backup of your files is an especially useful and truly revolutionary feature of Folder Lock. You can sync your files among different PCs.
Folder Lock
Highly secure your data from folders with bullet-proof service provided by this trustful program.
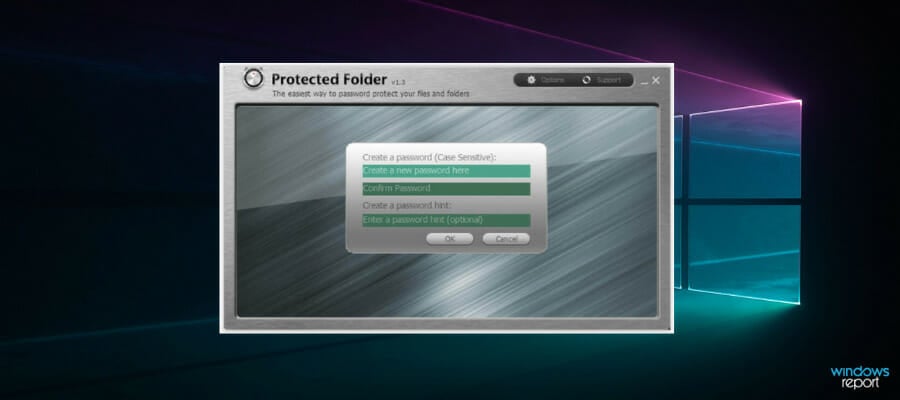
If in great need of a strong locker for folders of Windows 10, IObit offers industry-standard services to protect your files.
In order to secure confidential information from your PC, powerful folder security is highly recommended. Using software like this you shield your data through privacy protection mode.
Among the best features included by IObit in this tool is the Data Locker that lets users secure their folders from malicious attacks, keeping data safer in case of ransomware attacks.
Hence assuring PC information security with folder protection is indicated to stay secure in such a fast-paced information era.
Here are some useful features of IObit:
Powerful file protection tool using passwords
Enhanced protection mode to defend your data
Protected folder-optimized engine
New folder lock options
Data loss or leak protection
IObit Folder Protection
Your files and folder’s security comes first, thus choose this software for full protection of information.
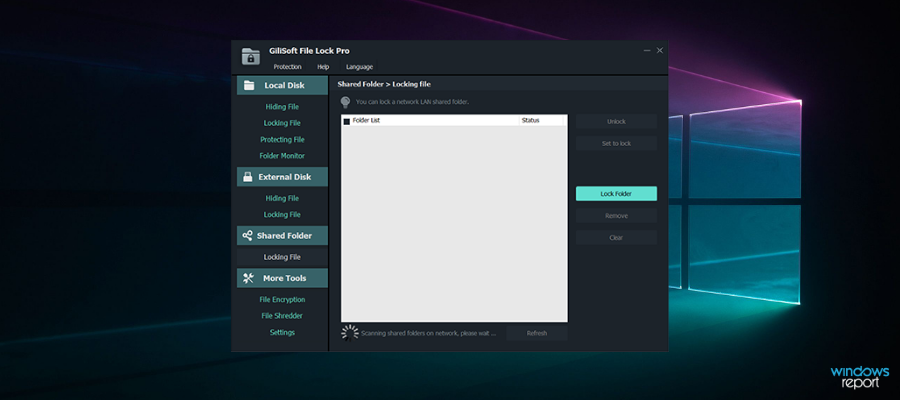
Gilisoft File Lock Pro is a great solution when it comes to file protection and security on your Windows OS computer.
Briefly, any file from your PC will get privacy with this software. Folders and files, USB drives, or LAN data are covered.
With rich features and performant functionality, this tool can provide useful support for anyone, regardless of status or activity nature.
Using this industry-standard tool you benefit from folders/drives hiding, protection for local drive files, folder monitoring, locking LAN shared folders, portable encryption, and so on.
The main idea is that Gilisoft has a full-rounded protection role for your PC data safety, thus you can rely on its services at any hour.
Here are some other features of Gilisoft File Lock Pro:
File Shredder to remove useless files
Self-protection mode
Locking files, folders or drives
Folders protection on local disk
Easy to use platform
Gilisoft File Lock Pro
Become entirely covered from information theft with this file locking software meant for everybody.
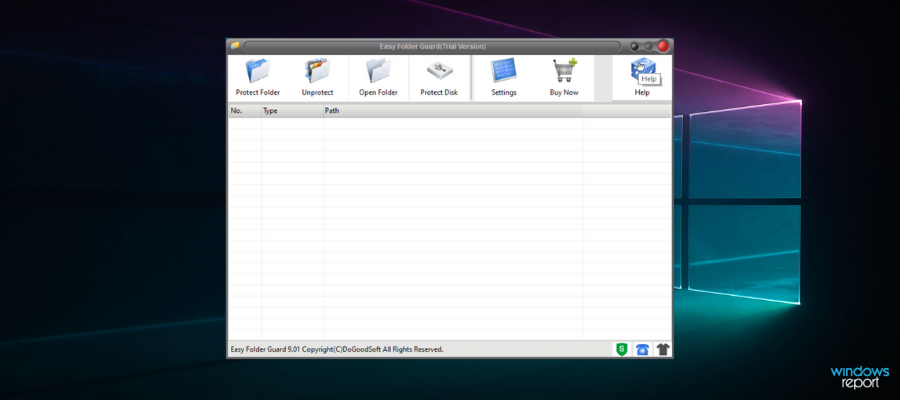
This particular software is a folder disguising and locking tool that can prevent others from accessing personal folders or files.
It’s worth checking this one because of its on-point functionality and very useful properties regarding file securing. For example, you can hide folders from your PC instantly without any traces, and keep them visible in the tool only.
You don’t need complex computing knowledge to use this tool, and every feature can be used with ease by any beginner.
Moreover, it’s possible to safely protect local disk data or USB drives in order to have more control over your PC ecosystem. Thus no one can see your sensitive or personal files within a few clicks.
Here are some other features of Easy Folder guard:
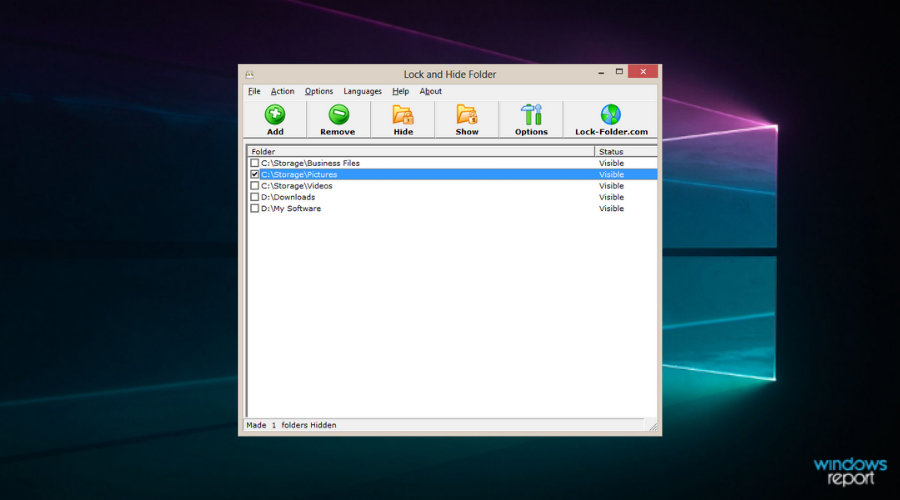
As the name suggests, Lock and Hide Folder is a great lightweight piece of software that allows you to effortlessly lock and then hide any folder on Windows 10 PC.
Using a tool like this gives you peace of mind that no matter what happens with your hard drive, the private information contained in your hidden and locked folders will always be safe.
One of the best features found in the Lock and Hide Folder is its ability to remove every link that shows that you’ve previously accessed the specific folder.
Beyond this, you can add a password to increase privacy even more, and can also run the software in stealth mode.
Using this mode means that no one using your computer will ever know that this software is installed.
Here are some other useful features found in this software:
Can hide an unlimited number of folders using 256-bit Blowfish Encryption
Can be set up so the software makes some files accessible and others not
The hidden folders are removed from Windows Explorer
Nobody can get access to your protected folders even if they try re-installing Windows, booting in Safe Mode
If the software is removed the folders still remain hidden
Isn’t available in Control Panel, thus making it hard to uninstall
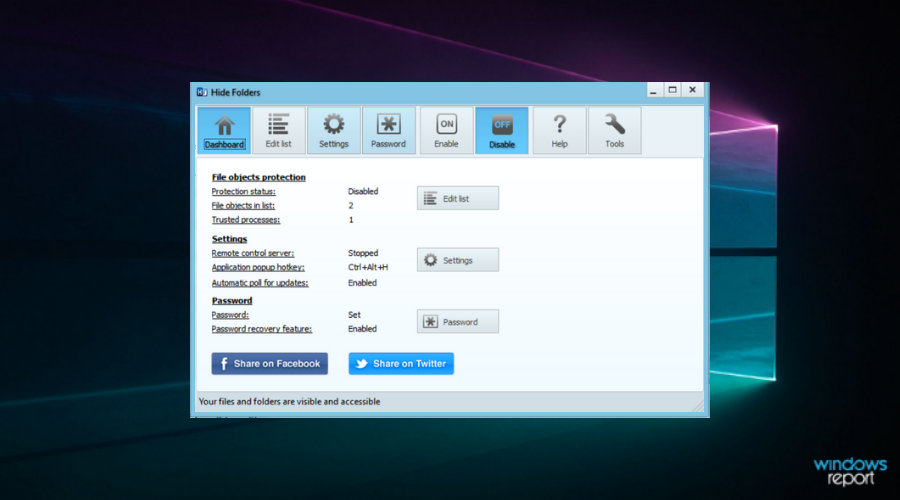
Hide Folders is another great software option that allows you easily keep your private folders hidden from any possible intrusion on your Windows 10 PC.
Because this software is released under GNU General Public License, this software is free for both personal and commercial use.
This software works by hiding specific folders that you choose to be hidden, and also allows you to set a password for opening up the Hide Folders app.
You can also choose to remove all traces of this software’s existence off your hard drive (from the programs menu).
Compared to the other software options we explored in this article, Hide Folders is a lot simpler in the way it was built, but still offers much better protection than the ‘Hide files’ option built into Windows 10.
Here are some of the best features found in Hide Folders:
Folders stay hidden even in Windows Safe Mode
Great user-friendly interface
No learning curve
Can hide an unlimited number of folders
If the program is uninstalled, that doesn’t reveal your folders
Folders can be revealed only after using the reset password
Anvi Folder Locker is extremely useful and provides you with a quick and easy way to understand and use software that can help you increase the level of your privacy. You can hide folders with just a few clicks but doesn’t offer any encryption features.
You can also set passwords for accessing specific files and folders, as well as add custom permissions to any file. This allows you to choose if a file can or can not be modified, destructed, or removed.
If you want to secure valuable files on your device and take your images or music everywhere you go, then rely on Anvi software to lock your most valued memories.
Here are some of the best features found in Anvi Folder Locker:
In this article, we explored some of the best software options that will help you hide and lock your folders. For extra security, you might want to encrypt files and folders on Windows 10 PC.
As we already established that the built-in ‘Hide Files’ option of Windows 10 is not very effective, using the tools we presented in this list will surely increase your computer’s security level.
Webcams allow us to easily communicate with our family and friends, interview people from another corner of the world and even do business.
Unfortunately, hackers can use the cameras integrated into our laptops and desktop computers to sneak into our own private world and capture highly sensitive images and videos. Spooky, isn’t it?
It’s not surprising that people such as NSA whistleblower Edward Snowden, FBI Director James Comey, and Facebook founder Mark Zuckerberg cover up their webcams to protect their privacy.
The question is: should we do the same? And what are our options to make our webcams more secure?
Close your laptop or shut down your PC when you are not using it.
Turn ON the Led notification light — some webcams come with LED notification lights that turn on when the camera is active. This makes it a lot easier to spot if someone is using the camera without your knowledge.
Change the default admin and password if you are using a standalone webcam.
Update your web camera’s firmware.
Use firewalls — here are some of the best firewalls that you can use on Windows 10.
Scan your PC regularly to detect and remove potential threats.
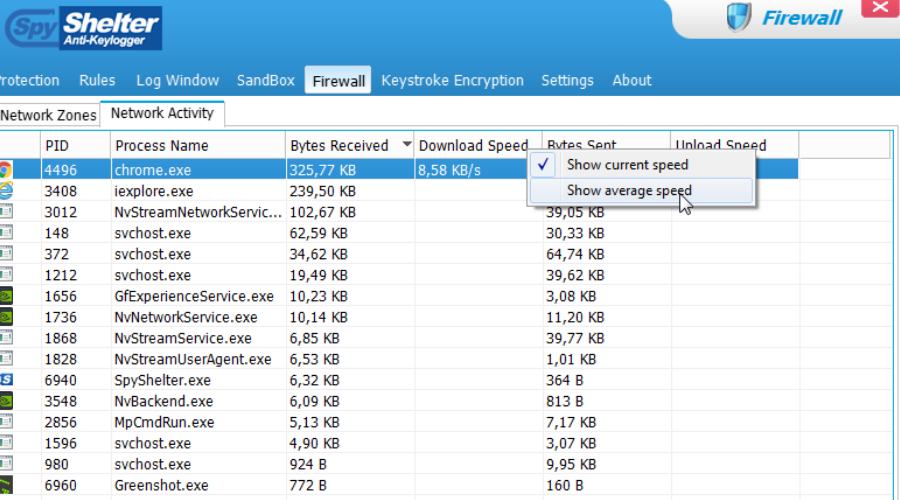
SpyShelter is currently the best anti-keylogger and web protection software. It can prevent custom or commercial keyloggers in real-time keeping your computer safe and clean.
As SpyShelter does not rely on any of the fingerprints databases, you will be safe from malware zero-day.
Even more, it understands how malware works and does not rely on any antivirus databases either.
No web scams or any other threat will put in danger your web camera usage. You can feel free to not physically cover it because it is not possible to have problems with that on Spy Shelter’s guard.
You will not feel any pressure on your PC resources while using them because SpyShelter is heavily optimized. You can do whatever you want – it will not slow down your system.
Spyshelter has a simple and intuitive user interface that lets users quickly access and set up their webcam security preferences.
Not only does it protect your webcam device, but it also secures other potentially vulnerable system components. It protects your clipboard, blocks suspicious screen capturing activities, and more.
Other key features of Spyshelter include:
Microphone protection
Webcam protection
Keystroke encryption
Spyshelter is a licensed product with multiple packages available, depending on the exact features you want to use and the number of devices you want to secure.
SpyShelter
SpyShelter is the most powerful webcam protection software you can find today. Don’t hesitate to give it a try!
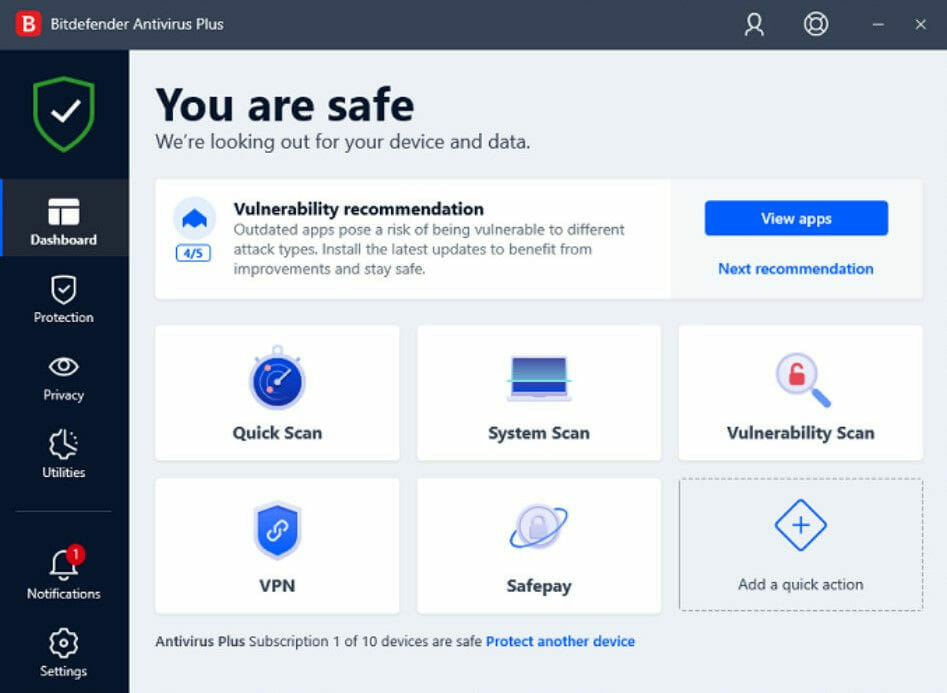
Bitdefender also includes a webcam antispy designed to counter any potential cyber-attacks involving your camera.
To be more precise, the Bitdefender Video & Audio Protection can keep you safe from any extortion attempts using sensitive data.
The Webcam Protection feature continuously monitors apps that try to access your camera and sends you a notification regarding any attempt to gain access to your camera.
Bitdefender is able to protect your whole system against other types of threats using multi-layered protection. It is a proactive type of security that combines several types of shields to leave no weak points.
The antivirus also includes a reliable VPN service that helps you hide your browsing data and protects your identity.
It has non-disturbing modes for gaming that temporarily deactivate any intrusive notifications when you are in-game or enjoying a movie.
Some Bitdefender key features you’ll most likely appreciate:
It can completely restrict access to the webcam
Sends notifications even when allowed applications try to connect
It blocks browsers’ access to the webcam
Popular apps considered dangerous by users are automatically set on Blocked
Useful Autopilot features included
Bitdefender is a subscription-based service with multiple plans available. It is compatible with Windows and macOS computers.
Bitdefender Antivirus Plus
Bitdefender will send you a notification when any untrusted app attempts to gain access to your camera.
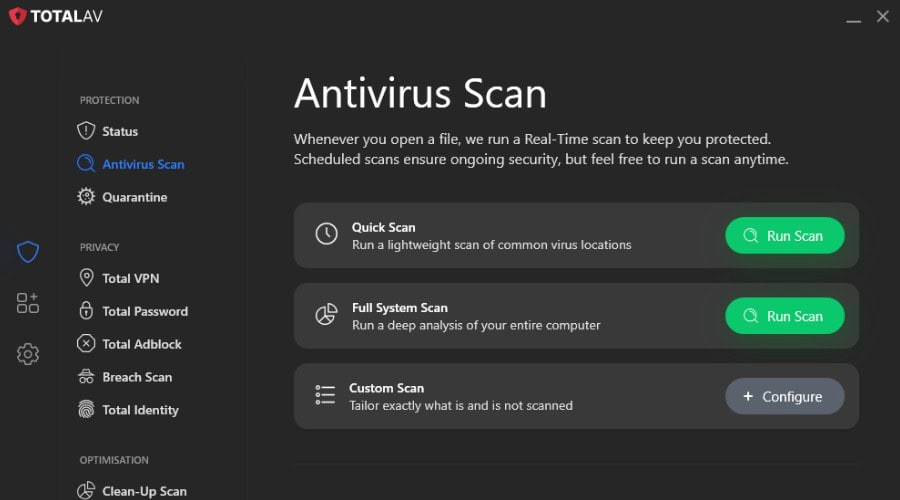
TotalAV does not have a dedicated webcam blocker, so it belongs on this list only as general protection against the malware that hijacks cameras in the first place. Real-time protection stops spyware and remote-access trojans from installing, WebShield blocks the sites that spread them, and downloads are scanned before they open.
The higher plans add a Safe Browsing VPN and a password vault, and one subscription covers Windows, Mac, Android and iOS.
Real-time protection against spyware and remote-access trojans
WebShield blocks malicious sites
Downloads scanned before they open
VPN and password vault in the higher plans
TotalAV
Block suspicious webcam access in real-time and keep track of all apps and processes that are allowed to use your webcam.
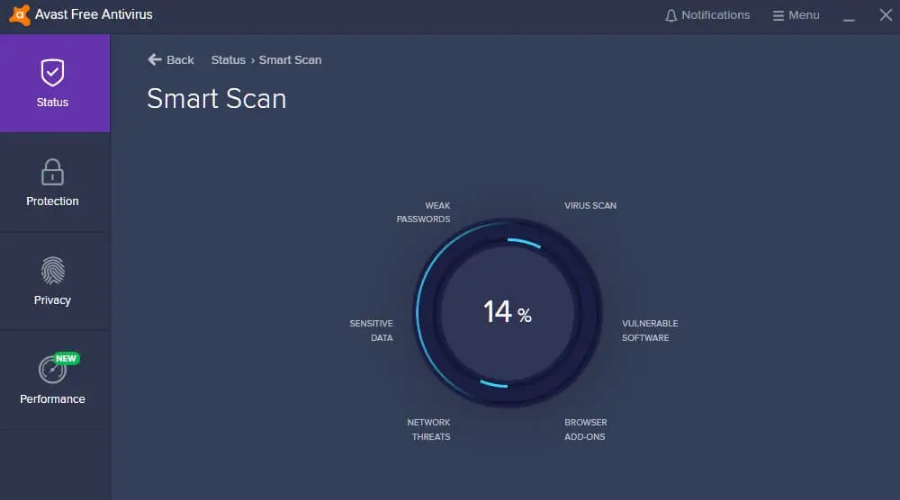
While Avast Antivirus isn’t a dedicated webcam security program, it does contain features that will help with that s well, besides the typical antivirus tools you might be expecting.
This feature is called Webcam Shield, and it prevents applications and malware from accessing your PC’s webcam without your consent, and will even notify you when attempts are made.
Thanks to this great feature, untrusted applications can not capture images or videos and send the content outside of your PC without you knowing.
Webcam Shield is enabled by default s webcam protection starts from the moment you install Avast ANtivirus.
The webcam security feature is available if you get the Avast One or Avast Premium security subscription plans.
Avast includes additional privacy features such as a built-in unlimited VPN with servers in over 50 locations around the world.
It also has anti-tracking features and a cleanup utility to remove cookies and optimize your PC.
It also uses multiple shields to block all sorts of viruses, ransomware, and malware.
Other key features of Avast include:
Strong firewall
Monitors account breaches
Automatic driver updates
Avast is compatible with Windows and macOS computers and also offers Android and iOS applications.
Avast Antivirus
This ultra-powerful antivirus tool also comes with a webcam protection feature called Webcam Shield to further ensure your privacy.
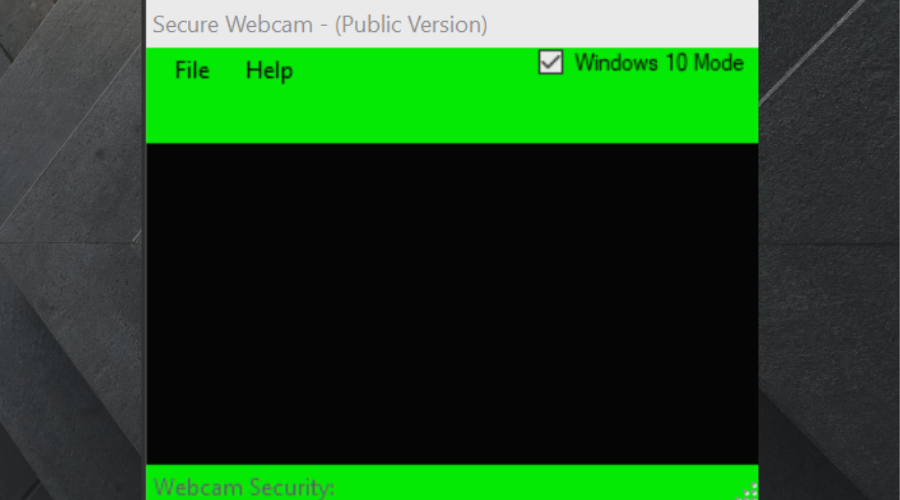
ShieldApps proposes a dedicated webcam and microphone protection to ensure no third party can have access to your webcam without permission.
This application lets users create their own set of rules regarding the apps or processes that can access the webcam.
Unknown or blocked third parties that try to use the camera will be automatically blocked.
The webcam footage will appear as a black screen for anyone that tries to open it without permission.
Additionally, the software also protects your microphone. Access to your audio ports is disabled. Whenever you want to actually use the microphone, just open the app and temporarily enable it.
The tool is a powerful extra layer of protection against privacy threats such as spyware. If a threat passes through your antivirus and tries to use your webcam or microphone, it will automatically get blocked by ShieldApps Webcam Blocker.
The tool provides real-time protection and you can let it run in the background without a worry because it is extremely lightweight and does not interfere with other apps on your system.
Other key features of ShieldApps Webcam Blocker include:
Easy to use
Clean user interface
Detects online webcam security threats
Quick enable/disable buttons
A ShieldApps Webcam Blocker 1-year license can protect up to 3 devices, depending on the package you decide to pick.
This tool will prevent hackers and watchdogs from secretly watching, listening to you, and recording your activityvia your webcamand your built-in PC microphone.
You can now protect your webcam privacy with just one click as the software offers you the possibility to prevent your webcam from hacking attempts coming from Internet predators,hackers,and more.
The tool will protect your vulnerable video and audio ports. The compatible operating systems are Windows 98/Me/NT/2000/XP/2003/Vista/7/8/10.
With this tool, you can select your default webcam applications from a list. All other attempts will get blocked.
Other key features of Webcam Protector include:
Easy enable/disable functions
Uses information from your webcam hardware drivers
Compatible with Windows OS starting with Windows 7
The software is light and can run in the background with no problem. You can check the UI and see whenever any suspicious activity is detected.
It is imperative that you don’t freak out because even if there is a possibility that your webcam could get hacked, it doesn’t necessarily mean that this is going to happen.
Dropbox is a great cloud storage service, but many users might have issues when working with it. So, if you need to add more protection to a file, by using a password, you’ve come to the right place.
This software is already created with multiple layers of protection so you can stay worry-free about your sensitive data.
By adding password protection, it helps make sure that only the people you want to access your files can access them. Before anyone can view or download a document, they will need to have the password you protected the document with.
Dropbox has its own built-in password setting option that is fairly easy to work with. However, if you want to truly secure your files, you can use a third-party tool to password-protect each file individually.
Before you share a link to a file or folder in your Dropbox, just set a password for the link so the recipient can only open it with the password you set.
Is Dropbox safe for confidential files?
Dropbox protects its data under the principle of multi-layered protection, meaning it combines multiple security methods to ensure secure and private file sharing.
They use powerful 256-bit AES encryption which is approved by cybersecurity experts around the world. It also employs secure network configuration and application-level controls.
That being said, we must mention that due to the fact that it is cloud-based, there is still a risk of your data getting leaked or altered. Even if you do your best to secure data, it may get leaked somewhere on the recipient’s end.
For maximum protection, we recommend you enable two-factor authentication and set up the editing rights of your files before sending them. Password protection is also a highly efficient security measure.
Can you password protect a dropbox folder?
Yes, Dropbox lets the sender add a password to their files and also set expiration dates for their passwords and shared links.
For maximum protection, however, we recommend you use a third-party password manager. These tools can help you generate strong passwords, test them to see if they’ve been subjected to any data breaching incidents, and securely store them for you.
There are also dedicated tools that help you secure individual files before sending them. This means that even if your Dropbox password is compromised, a hacker will not be able to access your data. It can be downloaded, but not opened without the correct password.
Select the Share option beside the name of the file or folder that you wish to share.
Click link settings.
Select only people with the password.
Go to Set a password and type in the password you wish to use to protect the shared link.
If you wish to set up an expiration date for the password you set, after which said folder will become inaccessible, set one here.
Click Save Settings.
You can now copy and paste the link to an email or send it to other users directly via Dropbox.
1.1 Use a dedicated third-party tool
Another way to password-protect your folder is to use a dedicated third-party tool. After testing most of the available tools, we would recommend that you give RoboForm a try.
With this powerful password management tool, you can generate passwords with strong security thanks to its powerful encryption.
RoboForm uses AES-256-bit encryption with PBKDF2 SHA-256 which supports two-factor authentication to access your account.
It also gives you an assessment of sharing logins securely with other users by simply entering the recipient’s email. Thus, you can benefit from all this for free and then continue with a subscription that suits your needs.
RoboForm
Generate strong passwords and keep them backed up and in sync with this tool.
2. Control file access by setting shared link expiration dates
Another thing you can do to secure your Dropbox files is to set an expiration date for them.
You can still have control over your files even after sending them. Follow the upcoming instructions to set an expiration date:
Log into your Dropbox account and find the folder in question.
Hover over the name of the folder and click the share icon.
It will open a prompt, select Settings.
You will see the Expiration option, toggle the button to On.
Set your expiration date and time.
Save the changes.
Now, these settings will be applied to your link so you can rest assured that your files won’t be available for longer than they need to.
By setting an expiration date for your shared links on dropbox.com or the mobile app, your recipients will be able to access only the shared link until it expires. After the expiration date, the link is disabled.
You can also disable downloads for a shared link to protect your work from being easily downloaded. Your recipients will be able to preview the file, but they won’t be able to download it to their computer.
Toggle Two-step verification to On. If you see Managed by single sign-on under the Security tab, your team uses single sign-on (SSO). This means you might not be able to use two-step verification with Dropbox.
Click Get started and re-enter your password.
Choose if you want to receive your security code by text message or mobile app.
Two-factor authentication is a very reliable extra security measure. It requires users to reconfirm their identity before allowing them to access their accounts.
This means that even if you enable it, even if your password is compromised, a hacker will not be able to connect to your account.
The access will only be granted after you complete the authentication steps by providing the code you receive via SMS or mobile app.
What’s the first thing you do in your browser when you fresh-install Windows? That’s right, you re-create your list of bookmarks.
We all have our favorite sites pinned to the bookmarks bar in a browser. Or, if we want to visit something later, we just create a bookmark for it.
Every browser has the ability to manage bookmarks. However, these options are mostly limited, as you usually have the ability just to add, and name your bookmarks, and that’s it.
Well, if you want to have better management of your saved sites, it’s a good idea to use some of the tools for managing browser bookmarks.
In this article, we gathered what we think are the best bookmark managers compatible with Windows-based browsers, so you can carefully consider each option, and choose the best one for you.
How do I organize my browser bookmarks?
You can use your built-in bookmark feature in your browser to save web pages and categorize them.
If you want to keep track of multiple web pages and manage your bookmarks more efficiently, a third-party bookmark manager is your best bet.
These tools include way more management and organization tools so you can create comprehensive bookmark collections that are easy to work with.
Noteworthy bookmark managers offer these sorts of benefits:
Structured folder and tagging tools
Easy-to-navigate interface for quick access
Support importing pre-existing bookmarks from your browser
Well-implemented privacy features and backup options
Quick Tip:
If you want a neat browser that gives you the freedom to customize your workspace in your own style, we suggest you try Opera One.
It is packed with very useful built-in functions to help you better organize, like AI, workspaces, tab islands, VPN and Ad blocker.
It is one of the fastest and most secure browsers in the market that will certainly make a great team with the bookmark management tools presented below.
Opera One
Customize your browsing experience and enjoy industry-leading privacy and performance features.
Next on our list is a bookmark manager that comprises strong organization tools within a simple and minimalistic user interface.
Webcull comes with a somewhat different approach in terms of organizing your bookmarks. With this app, you will store your links in stacks.
The reason why they use stacks is to allow users to save as many links as they like without the risk of running out of tagging or folding options.
Stacks can help with better structure and organization, allowing you to categorize and subcategorize your links more precisely and not risk ending up with a mess.
The app does not completely remove folders and tagging, but it tries to use them in a more efficient way.
Main folders are displayed as parallel stacks and all categories and subcategories (folders/subfolders) come under each stack.
Another nifty benefit of this service is that it is mobile-friendly, so you can sync and access your bookmarks from all your devices.
While it strives to help you get a perfect structure, Webcull also embodies an advanced search feature if you want to quickly find a link or folder.
You can search using tags and keywords. Either search your whole bookmark collection or select specific stacks.
Other key features of Webcull include:
Shareable stacks and collection
Password protect your URLs
Browser extensions
Multilayered encryption
Ad-free
With Webcull you can easily import pre-existing bookmarks as well as export your collection to a browser or third-party organization tool.
Raindrop.io is a feature-packed bookmarking tool that will help you save and manage everything you come across while browsing.
The tool lets you save whole pages, text content, pictures, music, videos, and more.
It gives you plenty of options when it comes to organizing your bookmarks. You can create folders and subfolders and customize them with your own titles, tags, and icons.
You can tag your bookmarks with pre-determined tags such as, but you can also classify them based on the format (articles, documents, images, videos, etc).
Not only can you save your favorite web pages, but you can also work on them directly from the app with powerful annotation tools.
So if you come across a useful article, you can easily highlight the most important points, add comments, and more.
Raindrop is compatible with cloud applications, so you can easily backup all your data on the platform of your choice.
Other key features of Raindrop include:
Nested collections
Tag merging
Customizable themes
Upload media and files
If you are interested in Raindrop, you can get a free version that is somewhat limited, but it’s a good place to start. It also has a premium version that offers more storage space and additional features.
Next up we have another modern tool that offers useful bookmark managing features under a modern and intuitive interface.
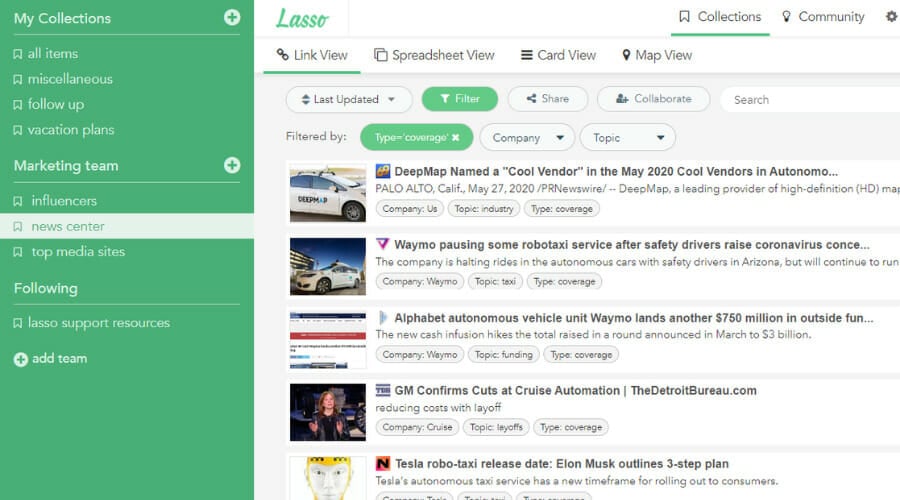
Lasso offers quick and easy solutions to save not only links but also screenshots. You can quickly add them to your dashboard with title, tagging, notes, and other info you may want to add.
The platform offers you multiple layouts in which you can view your content: link view, a spreadsheet view, card view, and map view.
Lasso also lets you set up landing pages for your bookmarks. This can help you curate content and share your favorite findings.
Lasso is a cloud-based bookmark organizer tool so you don’t have to worry about losing your data.
It is securely stored within the cloud, so regardless of what happens to your devices, your bookmarks stay intact.
Other key features of Lasso include:
Advanced search and filtering
Team and individual collaboration
Make public and private collections
Lasso is a subscription-based service. It’s suited for individual and team use and the prices vary depending on how many members will use the app.
Dewey Bookmarks is an extension for Google Chrome that brings better visualization to bookmark management in this browser.
The extension shows all your previously-saved bookmarks as cards, with additional transparency, so you can easily access and edit them. You can even add tags to your bookmarks, to easily access them later.
With Dewey Bookmarks, you can sort bookmarks by date, name, or web address. It also features a powerful search engine, allowing you to search for bookmarks by entering a title, or even the URL.
To manage a bookmark, simply hover over it with a mouse pointer, and it will show a pencil that allows you to rename the bookmark, add a tag to it, and more.
It also allows you to import bookmarks from other browsers into Chrome, so you can have all your saved pages in one place. The only thing you can’t do with Dewey Bookmarks is to change bookmarks’ default folder.
Other key features of Dewey Bookmarks include:
Generate screenshots of your bookmarks
Easy navigation
Advanced search option
The extension is available on Chrome only, but there’s a similar extension for Firefox called ViewMarks, that features similar options.
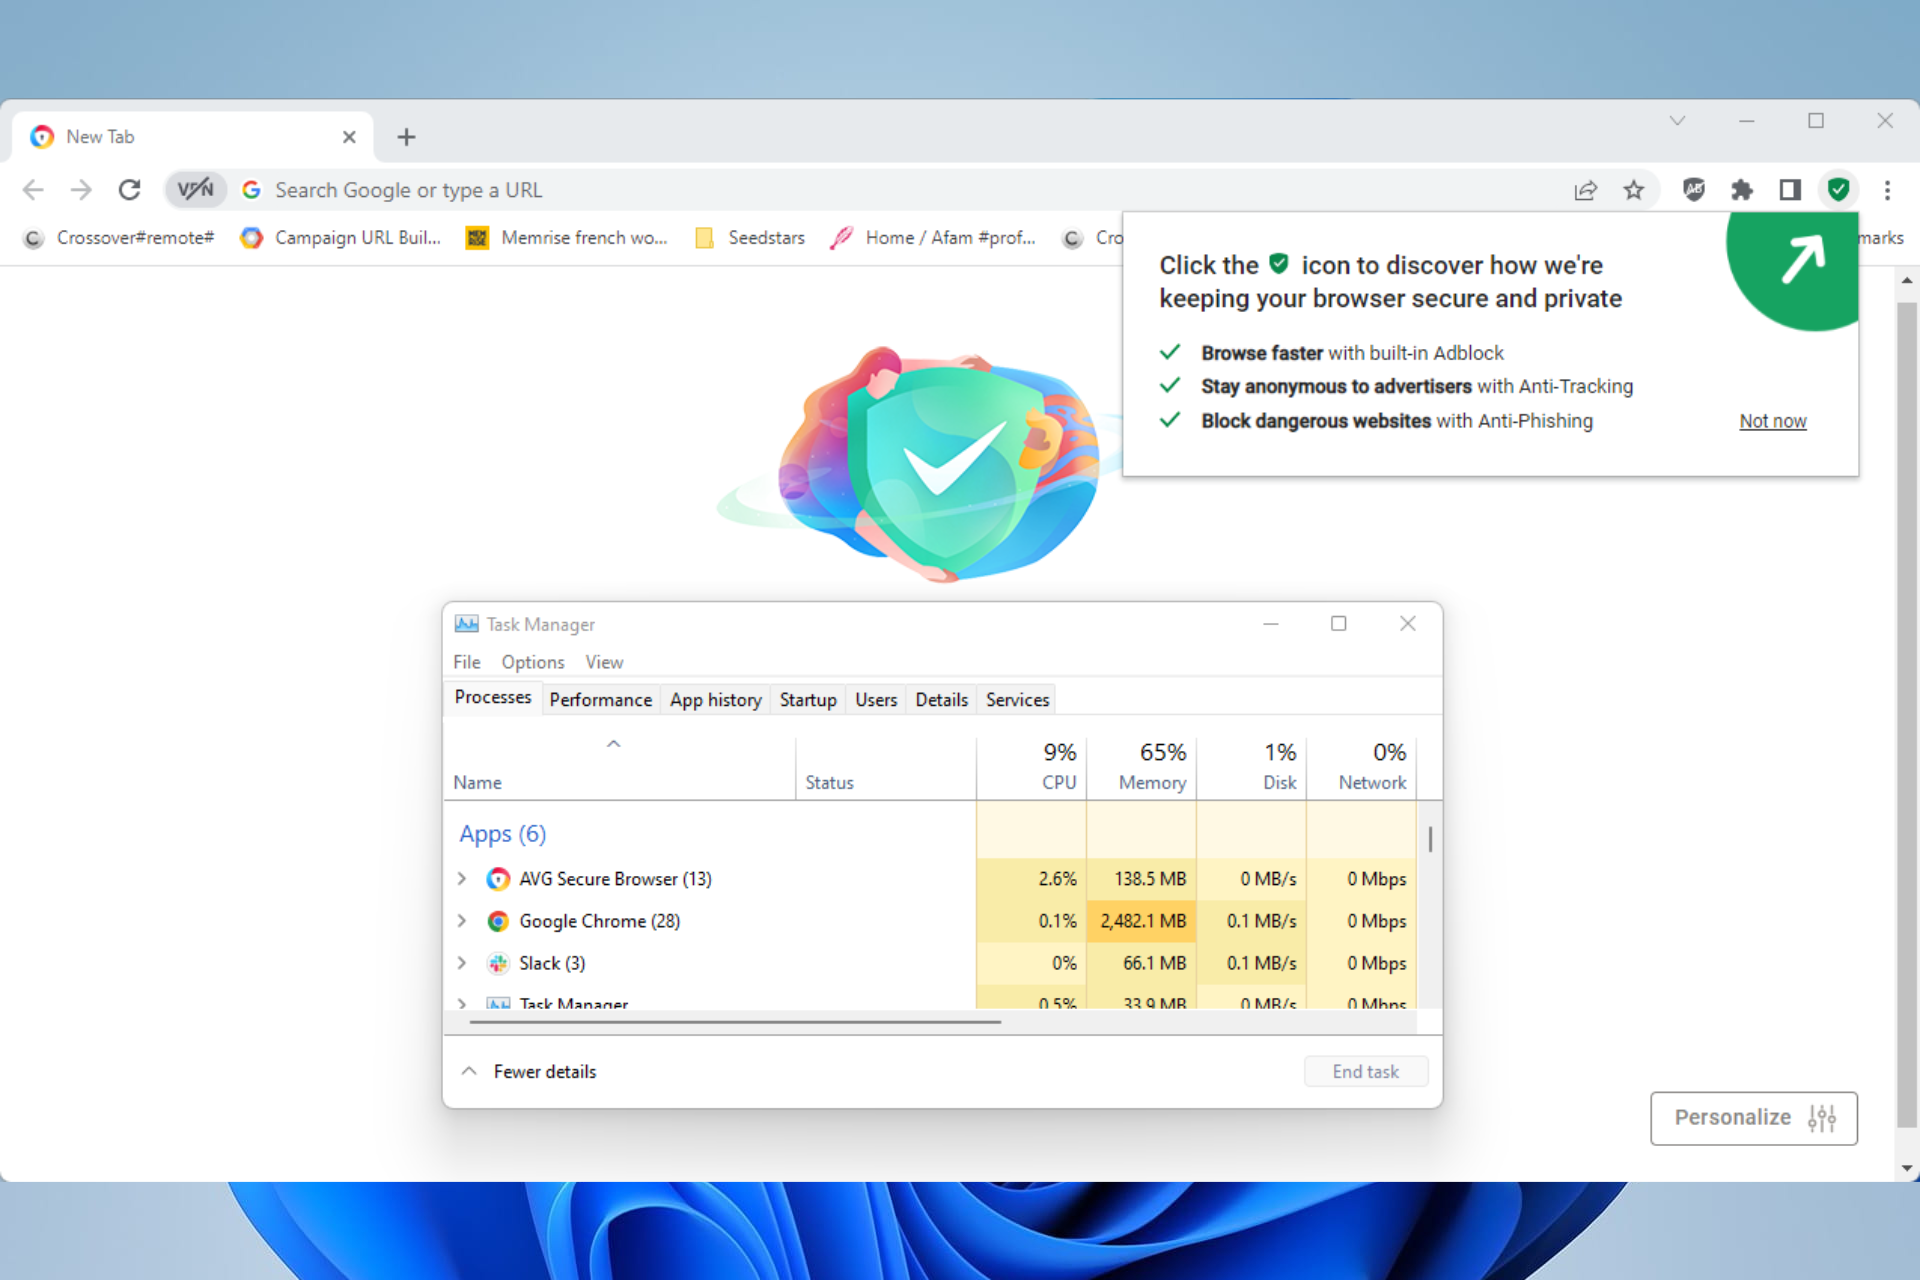
AVG browser earns its place in the list because it has a bookmark manager tool and other valuable customization benefits.
First, you can utilize this browser as a productivity tool and surf the web securely due to privacy enhancements.
More exactly, you can mask browsing traces with VPN and antivirus support, a privacy cleaner feature, or simply navigate with anti-tracking tools against cookies.
Other crucial benefits of this solution are the simple UI that uses fewer system resources, personalization elements like backgrounds or themes, and much more to go.
Other key features include:
Stealth mode for extra privacy
Password manager
Extensions guard
Anti-hack feature
AVG Secure Browser
Browse the web smoothly and organize bookmarks efficiently with this tool.
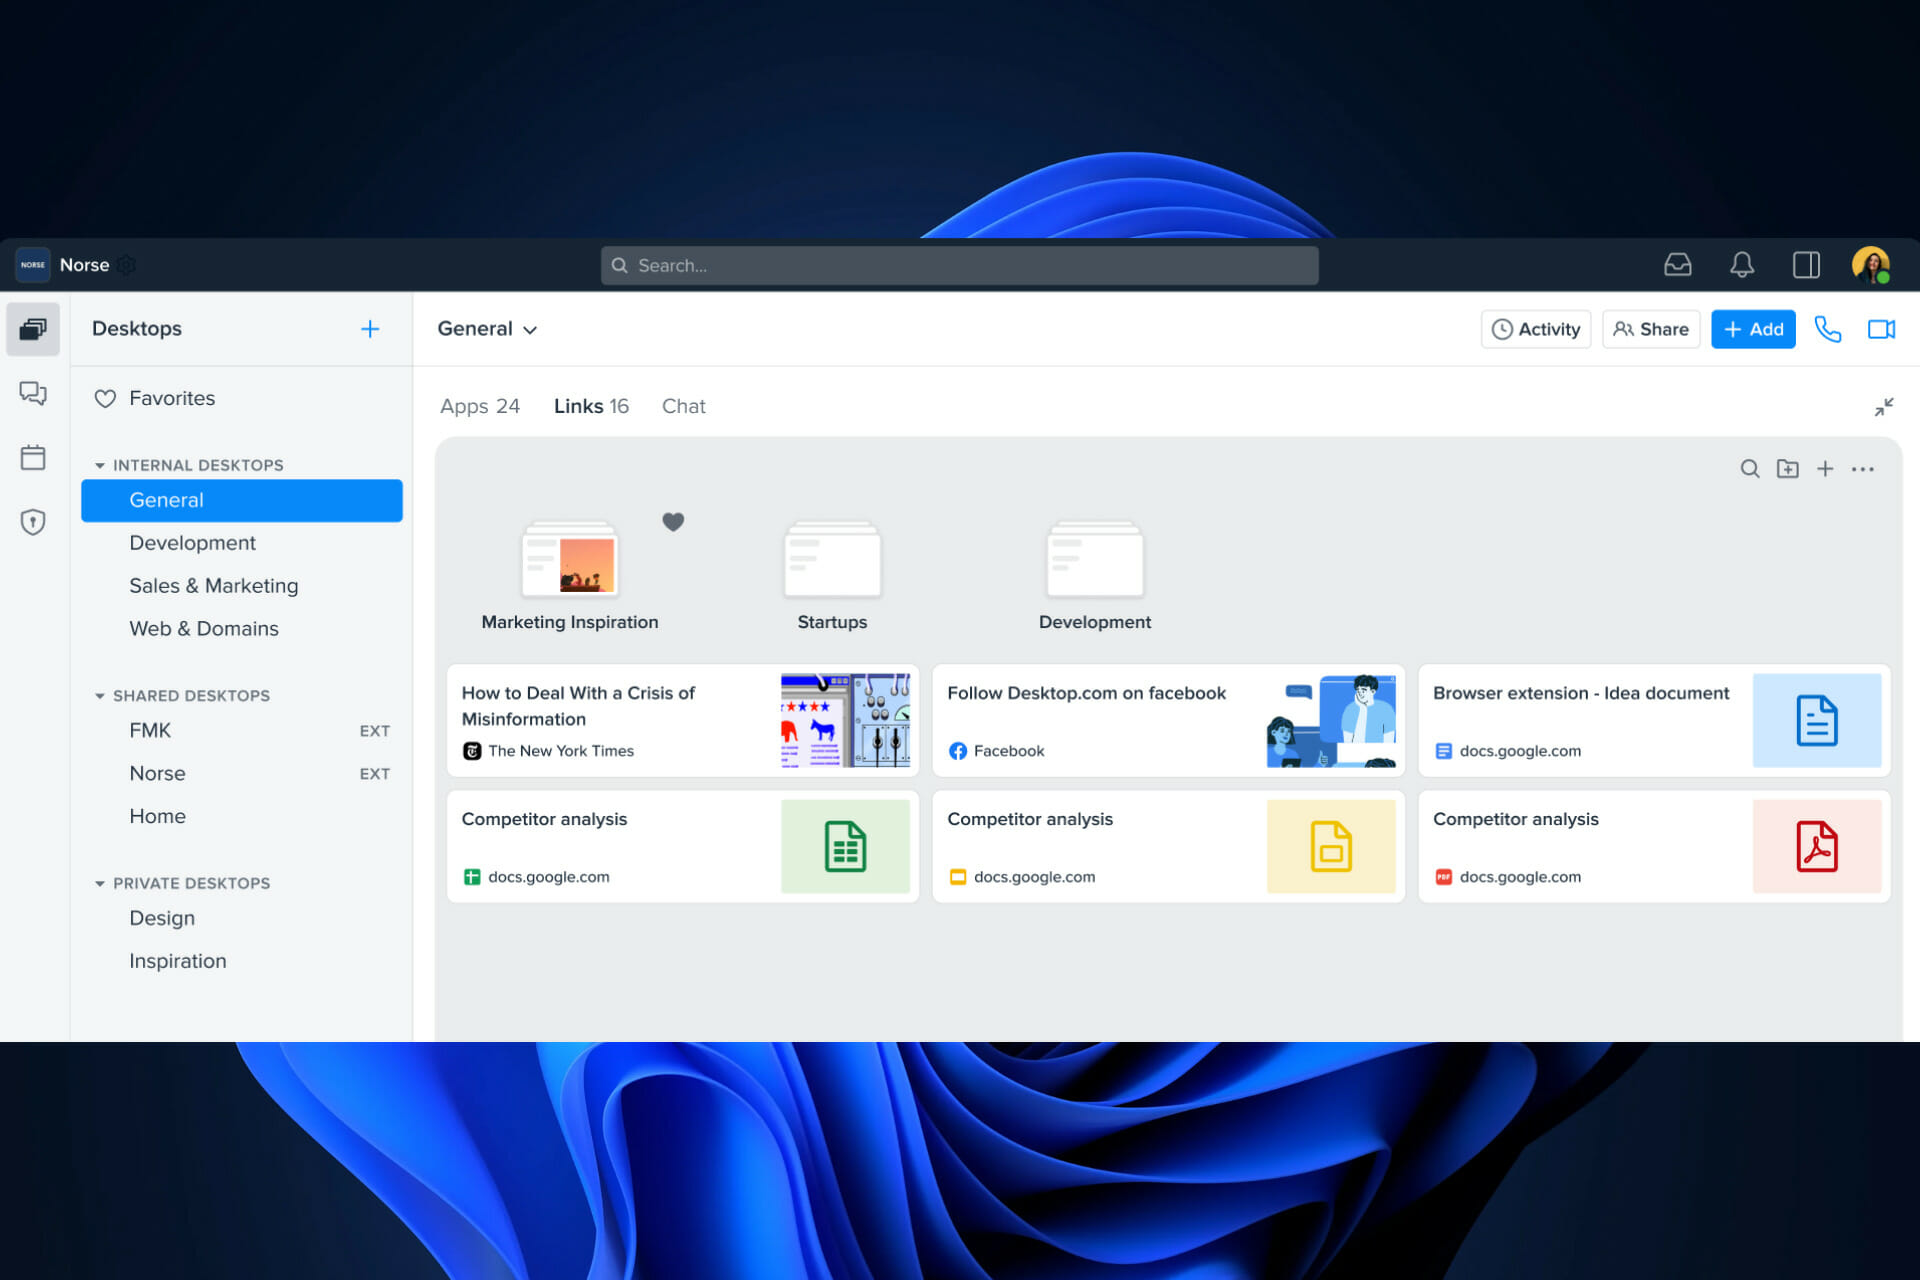
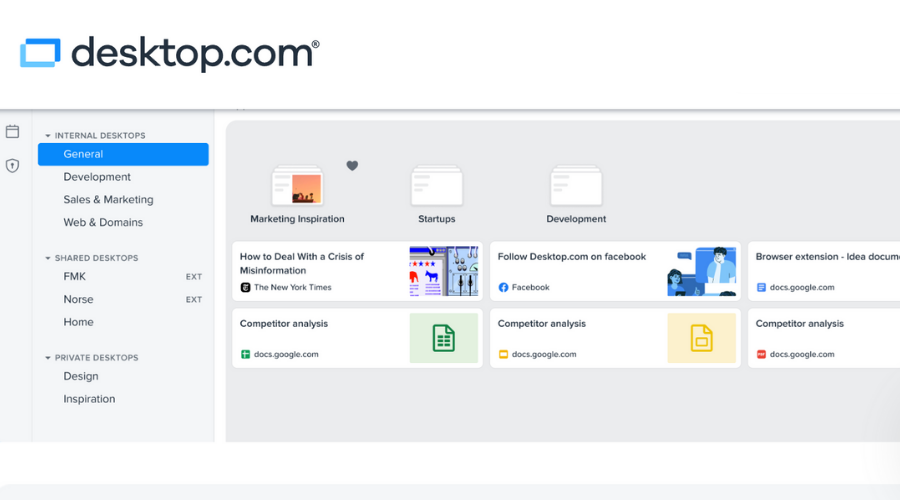
Providing tons of useful management and organization tools, as well as specialized collaboration features, Desktop.com is one of the industry-leading HQ platforms on the market.
This application is designed to serve all teams’ and individuals’ needs, being the software of choice for many noteworthy businesses. That being said, the platform offers tons of different features and designed plans from which you can choose.
The Bookmark Organizer on Desktop.com does certainly not disappoint. It lets users take full control of their saved links and websites.
Desktop.com lets you organize your bookmarks in your own style, giving you the possibility to create folders and add tags for your bookmarks.
This way, you can easily categorize and later on find your bookmarks in just a few clicks.
Desktop.com can be integrated into your browser, allowing you to quickly save links to your pre-existing bookmark folders.
Other key features of Desktop.com include:
Shareable bookmark folders and tags
Imports pre-existing bookmarks from your browser
Chat feature for teams
Password manager
Desktop.com has a free version as well as two paid plans. The free plan is suitable for small teams, while the other two cater to business and enterprise-level use.
Pocket is probably the most famous name on our list. Some people consider Pocket to be the best bookmarks manager, regardless of platform.
With Pocket, you can bookmark almost anything from your browser, including various major web browser extensions, mobile apps, web-based interfaces, and much more.
Perhaps the biggest advantage of Pocket is its cross-platform compatibility. Since it’s available on basically every major platform (except Windows 10 Mobile), it allows you to save bookmarks on one platform, and access them on another.
It even allows you to sort your bookmarks by categories, like Favorites, Articles, Images, etc. You can even add bookmarks to your Pocket account by sending an email to [email protected], with Subject as the title and the link in the body content.
Other key features of Pocket include:
Sort bookmarks by categories
Add tags to your bookmarks
Bookmark titles
Pocket is available on all major web browsers, including Google Chrome, Mozilla Firefox, and Microsoft Edge. You can also download the official Pocket app for Android, iOS, and Windows 10.
Bookmark OS is a web-based bookmark organizing and management tool that is highly compatible with any browser.
The tool provides a pleasant user experience, with a set of 10 beautiful themes that you can use to stylize your bookmark collection.
It is mainly based on folders and subfolders with a smart AI-powered folder suggestion. Whenever you save a bookmark, you automatically get a suggestion of the fitting folder for it.
Bookmark OS also makes it easy for you to visually identify your bookmarks as each folder icon will use a screenshot of the webpage saved within it.
Not only can you save individual links and pages, but you can also save all your tabs. If you work on a project and have multiple tabs open, you can save it as a “session” folder and easily reaccess them whenever you need to work on that particular task.
This saves you a lot of time and hassle, as you would otherwise have to always reopen each tab individually and maybe lose track of some of the information you need. Bookmark OS also integrates some task management tools that include to-do lists with due dates, reminders, and more. You can also opt to save certain bookmarks as tasks.
The app also provides some note-taking tools including a web clipper, code block saver, and more.
Other key features of Bookmark OS include:
Duplicate finder
Nested tasks
Easy navigation and folder search
Bookmark OS has a free version that lets you store a limited number of bookmarks. The pro version has more storage space and includes additional features such as a Dropbox integration, no size limit on files, or list view customization.
Evernote is another extremely popular tool, that you probably didn’t even know can be used for bookmarks management. Actually, Evernote is one of the most powerful bookmarks managers out there.
But, an increased number of options also means increased complexity, as this tool is not suitable for accessing your everyday bookmarks.
So for example, if you store your favorite news website that you visit every day, you’ll have to open a separate app, just to access the bookmark, which isn’t practical. What Evernote is good for using ‘research bookmarks’.
You can store an enormous number of bookmarks in Evernote, and access them any time you want.
For example, if you’re looking for a new smartphone, you can save all sites with offers to Evernote, and access them all at once, when you decide to order a smartphone. Evernote’s Web Clipper extension allows you to save whole pages or just a few parts to the note-taking app.
Speaking of saving entire pages, you can also save them as PDF, with this extension, so it can be used as some sort of bookmarking tool.
Diigo is another feature-rich bookmarking manager for your browser. Truth be told, it doesn’t have as attractive a user interface as some other tools from this list, but it’s still worth considering because of its features.
It is available as a browser extension, as well as a web interface. Diigo is compatible with the majority of browsers, including Google Chrome, Mozilla Firefox, Internet Explorer and Safari.
When you download the extension, you can easily add links to your profile through it. Just like Pocket, it also allows you to save bookmarks by email, using a custom email address.
Diigo can also be considered a social media tool, just like Delicious, so you can use it for discovering what others have shared.
It allows you to sort bookmarks by assigned tags, so you can use this method to better organize your saved stuff.
Other key features of Diigo include:
Add annotations to your bookmarks
Organize with tagging
Add sticky notes
Create customizable outlines to work more efficiently
Another great option of Diigo is the ability to add annotations to pages, so if you save a page just for a specific part of it, you’ll easily find what you’re looking for.
Diigo’s extension is available for free, but you can also download its app for iOS, Android and Mac.
Pinterest is arguably the most popular photo-sharing service in the world. You probably already heard of, or even use it, but we must place it on our list since its browser extension allows you to easily save any image you find online to your Pinterest profile.
In case you don’t know how this service works, we’ll quickly explain you. You go to the Pinterest website, create, and set up your account. After that, download the Pinterest extension for your browser, integrate it with your account, and you’re good to go.
Every time you place your mouse cursor over an image on any site, the Pin It button will appear, and you’ll be able to save that image simply by clicking on that button.
It will ask you to give your newly-saved image bookmark a name, and some additional info, and it will be stored in your library.
Other key features of Pinterest include:
Sort your bookmarks with tags
Filtering option
Private and public board options
As Pinterest is widely used all over the world, you can also browse through it, to discover amazing images and photos other people have shared.
The Pin It extension is available for free, and you can get it on any major browser.
As you probably know, Google is present in almost every branch of the IT industry. Therefore, it’s completely logical for Google to have its own bookmark manager for its own web browser.
That’s exactly what Chrome Bookmarks Manager is. Chrome Bookmarks Manager is a tool similar to Dewey, that allows you to easily manage your bookmarks in an appealing interface.
This tool also uses a card-based layout to show all your saved bookmarks. The interface is divided into two sections: the left pane, and the bookmarks space. From the right pane, you can access and manage all your bookmark folders.
It allows you to sort your bookmarks by categories, for easier management.
When it comes to the bookmarks area, it lists all stored bookmarks from the selected folder. You can further edit them, by changing name, adding notes, changing URL, or moving them to another category.
For new versions of Google Chrome, the Bookmarks Manager is pre-installed and you can easily access and manage it by typing chrome://bookmarks in the address bar.
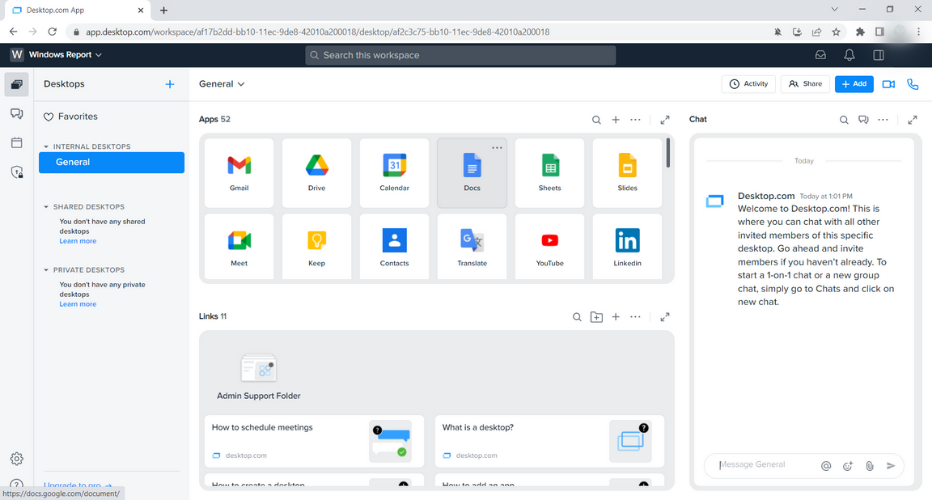
Desktop.com Workplace Software is a user-friendly solution for Windows 10 and 11 PCs that neatly organizes all of your web programs.
Furthermore, it works flawlessly with integrations in order to de-clutter your digital surroundings and boost your productivity.
In the secured online interface, you’ll discover all the apps, data, tools, and collaboration solutions you need to get the job done. In addition, this work platform is available at any time, from any location, and on any device.
Let’s see the great features of Desktop.com:
Unlimited desktops for web apps and links
Direct and group chats
Up to 4 members, unlimited guests
Audio and video calls for 5 participants
Multi-factor authentication
Password management
2 GB chat storage per member
Using an all-in-one desktop manager, you can organize, communicate, and manage access securely, allowing you to stay on top of projects and never miss important meetings.
If you acquire the paid version of Desktop. com, you will receive additional cross-platform chat, app integrations, subdomain and domain protection, priority online assistance, and 10 GB chat storage per member.
Organize your bookmarks by labeling them and organizing them into folders, and easily import all your bookmarks into Desktop.com and have relevant online apps auto-suggested for a quick setup.
Desktop.com is well known for reducing notification fatigue by storing everything in one place that unfolds from a single icon on your device and searching across all your content to quickly find anything you need.
8GadgetPack allows you to use the popular desktop gadgets on Windows 10. The tool was recently updated to work on Windows 10.
The latest version of the app, 8GadgetPack Version 29.0 also brings many bug fixes.
Most desktop gadgets work on the older versions of Windows. Although 8GadgetPack has been optimized for Microsoft’s newer OS, there are still some gadgets that are not yet compatible with the new versions.
If you don’t use all the gadgets included in the download package, you can simply delete all the extra gadgets.
Compatible with all Windows OS, including XP and Vista
Easy customizable
Plethora of gadgets
System control management
Organized functions
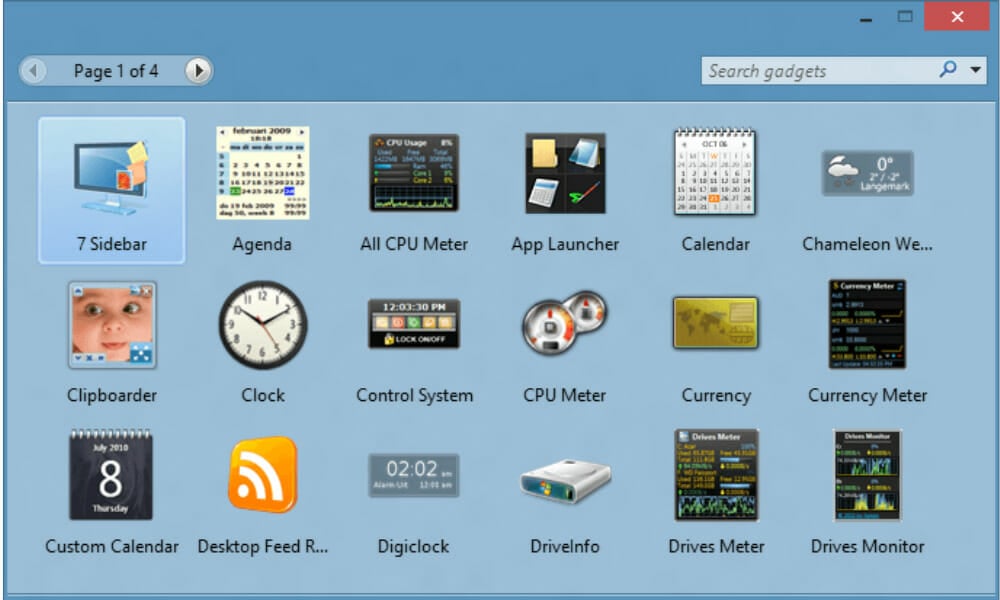
8GadgetPack includes the following gadgets: Agenda, Calendar, Clipboard, Clock, Control System, CPU Meter, Currency, Reminder, DriveInfo, Drives Meter
It also includes the Glassy CPU Monitor, Google Mail, Mail Checker, MiniRadio, Multi-Meter, My Weather, Network Monitor II, Picture Puzzle, Power Status, Slide Show, Sticky Notes Online, Volume Control, Weather, and Webradio Sidebar Gadget. As you can see, this software has many great desktop gadgets for Windows 10, so don’t hesitate to try it.
You can download 8GadgetPack from the app’s official website for free. Also, you can check out the video below for more information on how to install 8GadgetPack.
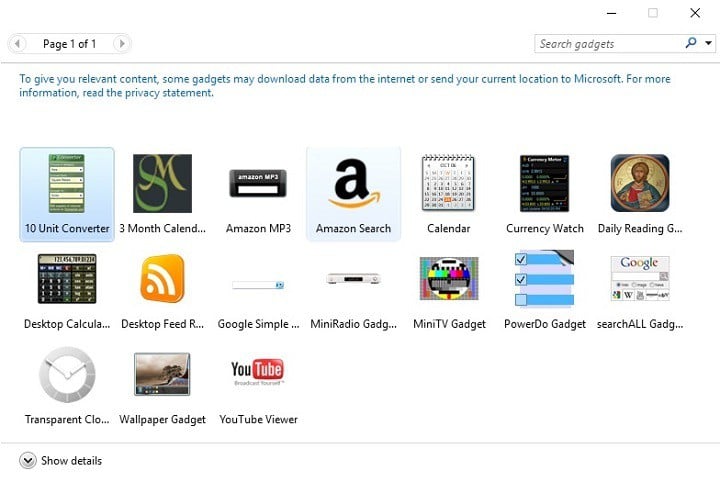
This tool allows you to download the desktop gadgets of your choice. First, you’ll need to download the Desktop Gadgets installer, and then you can pick the gadgets you want to install on your desktop.
The available gadgets are grouped into 19 categories, and each category includes various versions of the same gadget.
The differences are mainly related to app design. For example, you can choose between 10 Calendar versions and 10 Clock versions.
Unlike other gadget packs for Windows 10 and 11, Desktop Gadgets Revive not only adds gadgets to your desktop but also includes a Gadgets item in the desktop context menu and Control Panel, just as in Windows 7.
That is, you may open the Gadgets window fast by right-clicking on the desktop and selecting Gadgets.
Let’s see the great features of Gadgets Revived:
900 high-quality gadgets
Supports all Windows languages
Full Control Panel integration
Classic Shell menu
The full list of categories includes Battery, Calculator, Calendar, Christmas, Clock, Counters and Timers, Fun and Games, Mail and IM, Multimedia, Network, News and feeds, MusicRadio, TV, Recycle Bin, Search, Slideshow, System Information, System tools, Utility, Weather.
You can download Gadgets Revived from the app’s official website for free.
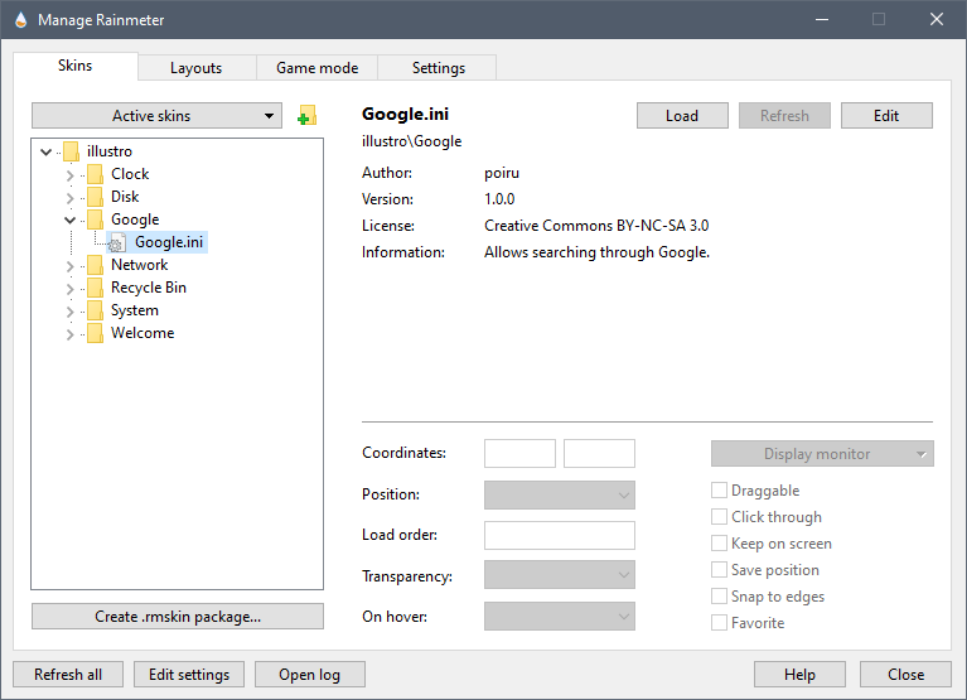
Rainmeter is a popular desktop customization tool for Windows. Its main advantage is the huge number of skins available and the ever-growing collection of apps rolled out by the dedicated Rainmeter community.
Rainmeter allows you to personalize your Windows desktop so that you can access useful information at a glance and keep an eye on your system’s performance.
The list of available gadgets is quite rich, including to-do lists, media players, weather information, CPU usage
Rainmeter shows configurable skins on your desktops, such as memory and battery status, RSS feeds, and weather predictions.
Let’s see the great features ofRainmeter:
Skins for RSS feeds, Gmail, Facebook
Small footprint 24K
Scripted source code
Large font size
Personalized graphics
Skin sharing community
Many skins are even functional they can capture your notes and to-do lists, launch your favorite programs, and manage your media player.
This works flawlessly while maintaining a clean, discreet interface that you can rearrange and adjust to your desire. Rainmeter is both a program and a set of tools to boost your imagination and creativity to give meaning to your PC.
Rainmeter version 4.3 was recently launched, bringing stability and performance improvements.
Rainmeter 4.0 is still in its beta version, and if you want to be sure the tool runs well on your system, you should install Rainmeter 3.3.2.
You can download Rainmeter from the app’s official website for free.
Win10 Widgets is a desktop customization app developed on Rainmeter’s structure.
This tool promises to take your desktop into the future, allowing you to quickly find the information you need using widgets such as weather, Wi-Fi, battery, music, and more.
Also, the network activity monitoring will definitely help, but if you want to keep it in check, try one of the best bandwidth monitors from our guide. It’s a simple tool, but it offers an abundance of desktop gadgets for Windows 10, so you might want to try it.
Let’s see the great features ofWin10 Widgets:
Engineer each widget
Emphasis on functional simplicity
Auto-location for weather
Easily selectable hard drives
Volume slider
Win10 Widgets works with any wallpaper, any screen size, and uses the Windows 10 accent color you created to adapt to the general design of your system.
As far as the updates are concerned, Win10 Widgets doesn’t have an auto-update system in place, which means you’ll need to regularly search for updates on the app’s website to make sure you’re running the latest version of the program.
The developer of Win10 Widgets states:
In an effort to improve desktops everywhere and expand the Rainmeter community, I wanted to make this project accessible to casual users that might not know what Rainmeter is or want to spend the hours it takes to cultivate a customized desktop. The idea is that an easy-to-use theme that looks like it’s part of Windows will appeal to people that might not ordinarily use Rainmeter.
You can download Win10 Widgets from the tool’s official website for free.
Gadgetarian is a tool that allows you to bring your favorite Windows 7 gadgets on Windows 10s desktop.
This app is very lightweight, and the installation process is very intuitive, you simply follow the on-screen instructions.
Once the installation is completed, you don’t need to restart your computer for the changes to take effect.
Right-click on your desktop to enable the context menu and select the Gadgets option to explore what this tool brings.
Let’s see the great features ofWin10 Widgets:
Adds gadget support on desktop
Gadgets are tested for safety
Enables the native gadget functions
Customizable
If you’re not satisfied with a particular desktop gadget, you can easily remove it.
Adding a gadget to your desktop is very easy, simply double-click the gadget of your choice, and it will appear on your desktop.
It is worth mentioning that Gadgetarian’s role is to enable the Windows native gadget functions, and it doesn’t affect the integrity of the operating system.
You can download Gadgetarian from Windows Live Gadgets for free.
There you go, in case you want to see those lively desktop gadgets back on your computer’s screen, you can use one of these six desktop gadget tools for Windows 10 and Windows 11.
Why are desktop gadgets no longer supported in Windows?
The majority of gadgets depended on ActiveX controls to perform their fundamental operations, therefore gadgets were granted access to whatever ActiveX controls were installed on the computer.
To keep gadgets working, Microsoft would have had to radically change how they functioned, which would have broken current gadgets and required them to be redone by their developers.
Fortunately, this resulted in the creation of third-party fantastic widgets and gadgets by creative developers who still enjoy gadgets and customized tools.
The benefit of utilizing such programs is that they provide a safe, malware-free environment in which you may let your creativity roam free and build anything your mind and heart desire.
When you choose a desktop gadget manager, you will need some basic information about these tools. We will answer such questions as:
Does it have too many gadgets?
Is this gadget manager tool spending too many resources on your PC?
Can you add external widgets to it?
Do you have to update it manually?
Can you customize it with skins?
Where can you download these desktop gadget tools from?
Do I really need Windows widgets?
Desktop Widgets and Gadgets apps and software have been around for a while. They include customizable tools, and a malware-free work environment, and are significantly more capable than standard Windows widgets.
On the screen, they may display the time, weather conditions, sticky notes, and other information. Widgets and Gadgets may be positioned anywhere on the desktop.
They can also be hidden in the background screen, freeing up space on your screen from symbols and images.
FAQs
Can I still use desktop gadgets on Windows 10?
Microsoft officially removed desktop gadgets after Windows 7 for security reasons. However, you can still use them in Windows 10 by installing third-party tools that safely reintroduce the feature.
What are the best apps to get desktop gadgets back?
Apps like 8GadgetPack, Desktop Gadgets Installer, and Win10 Widgets are popular and let you add clocks, weather, system monitors, and other widgets to your desktop easily.
Are third-party desktop gadgets safe to use?
Yes, as long as they come from trusted sources. Avoid downloading gadget packs from unknown websites, since malicious scripts can be disguised as gadgets.
Can I customize or move gadgets on my desktop?
Absolutely. Most third-party gadget tools let you resize, move, and change themes or transparency to match your desktop style.
Users who have upgraded to Windows 11 can also enjoy widgets more freely, as the system now allows you to use widgets without signing in, making access quicker and more convenient.
If you’ve already tried out some of them, tell us more about your experience in the comments section below.
It can be really frustrating when your Windows PC lags or runs slowly when playing games or doing resource-intensive tasks.
Your PC might have all the processing power to handle those tasks, but if some drivers fail to load, then you will experience multiple issues with your PC.
One such error is the Windows Driver Foundation missing issue. When this error pops up, you should know that some important system-related drivers failed to load on your Windows PC.
Since drivers are one of the most important components that let the hardware communicate with the PC, any issues with drivers can malfunction the hardware process.
Besides, if your PC is also throwing up Windows Driver Foundation missing errors, then this will also eat up a lot of resources and ultimately drain your device’s battery.
If you are also experiencing the Windows Driver Foundation issue, and looking for solutions for it, then you are in the right place.
Because in this guide, we will help you with a list of solutions, that have helped users resolve the problem. Let us check it out.
What is Windows Driver Foundation and the reasons for this issue?
Before we jump into the solutions to fix the Windows Driver Foundation missing problem, it is better to understand what it is and the reasons that are triggering the issue.
The Windows Driver Foundation is the former name of the Windows Driver Framework. When some important files go missing, you will see an error message Driver WUDFRd Failed to Load/Missing.
When this error message pops up, it indicates that there are some device drivers on your Windows PC that failed to load properly.
For most users experiencing this issue, the problem occurs after they have updated from an older version of Windows to a new version, let’s say Windows 10 to Windows 11.
Here are a few key reasons you might come across the Windows Driver Foundation missing error.
The device drivers aren’t compatible with the version of your Windows.
A third-party app is conflicting with device drivers.
Presence of corrupt temporary files.
Due to corrupt system files.
Windows Driver Foundation service isn’t running.
Wi-Fi drivers are not updated.
Your copy of Windows is missing some important system files.
Latest Windows updates aren’t installed.
The above are some of the most common reasons why you might experience the Windows Driver Foundation missing error.
Now that you have some knowledge about what the problem is and the reasons that are possibly triggering it, let us check out how you can resolve it.
How can I fix the Windows Driver Foundation missing error?
1. Restart your PC
Open the Start menu.
Click on Power.
Select Restart.
A simple restart can do wonders and is one of the most common solutions you will hear people suggest when you come across any device-related issues.
Restart allows your PC to take a quick reset and load all the important system files right from scratch, which might have been missed during the previous session.
Before trying anything extreme, we would suggest you restart your PC and see if this fixes the Windows Driver Foundation missing issue.
2. Check for latest Windows updates
Press the Win + I keys to open Settings.
Select Windows Update from the left pane.
Hit the Check for updates button.
Your PC will now check the system servers for a new update. If a new update is live, then it will prompt you to install it.
Microsoft pushes new updates that not only bring some new features but also include several bug fixes for the Windows OS.
It is highly recommended that you keep your Windows PC up-to-date so that you do not miss out on new features, the latest security patches, and bug fixes.
3. Run Windows Driver Foundation service
Press Win + R to open the Run command.
Type the below command and press Enter. services.msc
Locate Windows Driver Foundation service on the right side.
Right click on it and select Properties.
Set the Startup type to Automatic.
Hit the Apply button and press OK.
Restart your PC.
The Windows Driver Foundation is an important Windows service. If for some reason, it fails to load or run in the background, then you will come across Windows Driver Foundation missing error.
Using the above-mentioned steps, you can head over to the Windows Services menu, and enable the Windows Driver Foundation service for it to function properly and possibly cure the problem.
4. Update USB and Wi-Fi drivers
Press Win + R keys to open the Run dialogue.
Type the below command and press Enter. devmgmt.msc
Expand the Universal Serial Bus Controllers option.Right-click on the problematic USB device and select Update drivers.
Click on Search automtically for drivers option.
Similarly, expand the Network adaptors section and update the drivers for the problematic device.
Not only it is essential to have the latest version of Windows installed, but you should also keep all the device drivers installed on your PC, up to date.
Outdated drivers may be causing issues because they might not be compatible with the version of Windows OS installed.
While you can manually update the drivers for the devices on your PC, there is another easy way to do this.
You can make use of a trusted third-party tool called Outbyte Driver Updater. This tool helps you update all drivers installed on your PC, with a simple click.
Outbyte Driver Updater scans your PC for outdated drivers, shows you the result, and then updates all the drivers. Other features include fixing faulty or broken driver files, updating old device drivers, locating missing drivers, etc.
Type in the below command and press Enter. sfc/scannow
The System File Checker, or in short, the SFC scan command, checks your PC for all corrupt files, and if it finds missing or corrupt system files, it automatically repairs them.
Simply reboot your PC once the process is complete and see if this fixes the Windows Driver Foundation missing issue or not.
Alternatively, you can also use trusted third-party software that can easily resolve the issues triggered because of corrupt system files.
If system-related files get corrupted, your system may not function properly. For such scenarios, you can either go ahead through the process of reinstalling the operating system or repairing it or else opt for a file repair software and see if it resolves your problem or not.
7. Run System Maintenance troubleshooter
Open the Start menu.
Search for Control Panel and open it.
Select view by Large icons option.
Select Troubleshooting.
From the left pane, click on View all.
Locate System Maintenance.
Follow the on-screen prompts to run the system maintenance troubleshooter.
Restart your PC.
Whenever you come across any device-related or driver-related issue, we would suggest you run the Windows Troubleshooter.
This built-in tool comes with all the troubleshooting capabilities and can help you cure several driver-related problems, including the Windows Driver Foundation missing issue.
Let the troubleshooter run, and it will give you a report about what is causing the issue, and it will also prompt you to do the needful to fix the problem.
8. Perform clean boot
Press Win + R keys to open the Run command.
Execute the below command. msconfig
Under the General tab, click on Selective startup option.
Uncheck Load startup items option and check the Load system services option. Also, check the Use original boot configuration option.
Switch to the Services tab.
Click on Hide all Microsoft services.
Select Disable all.
Click Apply and hit OK.
Restart your PC.
Performing a clean boot starts your Windows PC with the minimal set of drivers that are required for the system to boot up.
Using this clean environment, you can easily determine if a background activity is interfering or causing conflicts on your PC with your game or program.
9. Clear the temporary folder
Press Win + R buttons to open the Run command.
Type %temp% and hit Enter.
Press Ctrl + A to select all files.
Press the Delete button your keyboard or right-click and select Delete.
10. Reset Windows
Press Win + I buttons to open Settings menu.
Select System from left side.
Scroll down on the right-side to select Recovery.
Under Recovery Options, click on the Reset PC button.
Choose the Keep my files option.
Select Cloud Download.
Click Next.
Choose Reset.
Your PC will undergo the process of reset after you have executed the above steps. Choosing the option to keep your files will reset only the system files. Once the process is complete, you will be able to locate your personal files.
Moreover, resetting your Windows 11 PC should be the last option if none of the above-mentioned solutions helped you solve the Windows Driver Foundation missing error.
Since Windows Driver Foundation is the former name of the Windows Driver Frameworks, you can also use the mentioned solutions in that post to possibly fix the problem.
We also tackled WudfRd failed to load error in one of our previous guides, so be sure to check it out for more solutions.
Let us know down below in the comments section, which method fixed the problem for you. If you applied a different solution that is not listed in this guide, you can share that with us.
Are you having trouble with the annoying watermark on the bottom right side of your Windows 11 screen? And you don’t know how to remove it? The Universal Watermark Disabler tool comes to your rescue.
The Universal Watermark Disabler for Windows 11 is a tool that can assist in removing the annoying watermark on the bottom-right side of the Windows screen that is interfering with your wallpaper and overall experience.
Without any further ado, let’s get started.
How do I remove the watermark from Windows 11?
1. Remove the watermark using Universal Watermark Disabler
Download the Universal Watermark Remover.
After it’s downloaded, right-click on the folder and select Extract all.
Choose the desired location, and click on Extract.
Open the extracted folder, then right-click on the UWD.exe file and choose Run as administrator.
In the UAC dialog box, click on Yes.
The Universal Watermark Disabler will launch. Click on Install to continue with the installation process.
Click Yes in the confirmation prompt.
After the software is installed, click OK to sign out of the user account.
When you sign back in, the Activate Windows watermark will be removed.
The simplest way to remove the Evaluation Copy watermark in Windows 11 is to use the Universal Watermark Disabler, a third-party freeware application that removes all kinds of watermarks.
But before you begin, we would request that you create a backup of all the data as you will be replacing the system files basebrd.dll.muiandshell32.dll.mui,and the process can sometimes cause instability.
Also, keep in mind that replacing system files regularly can cause your PC to break, so don’t make it a habit.
2. Remove watermark using the registry editor
Press Windows + R to open Run, type regedit, and hit Enter.
Click Yes in the UAC prompt.
In the address bar, paste the following path and hit Enter:Computer\HKEY_CURRENT_USER\Control Panel\Desktop
Locate and double-click on PaintDesktopVersion from the entries on the right.
Change the Value data to 0 and click on OK.
In case you don’t prefer using a third-party app like Universal Watermark Disabler in Windows 11, modifying the Registry will help. But make sure not to change any values other than what’s listed here.
Windows 11 keeps updating the date and time automatically, provided that it is not set to manual. It makes use of the time.windows.com server to fetch the exact date and time.
But there are several users, who have reported that for them, the date and time on their Windows 11 PCs aren’t updating automatically. And they haven’t set the settings to manual either.
Windows 11 users have reported that even after keeping the time and date change on automatic, the operating system is not updating the time.
Well, if you are one of those users, then you will face several issues with the software installed on your Windows 11 PC. In particular, the browser app will throw up multiple errors due to incorrect time and date.
This is not something new, and sometimes Windows can act strangely. The Windows Time Service may stop without any reason, and you will face Windows 11 not updating time error.
Thankfully, this guide is here to help you out, as we have listed some of the best and most effective solutions that have helped users fix the Windows 11 not updating time errors. Let us check them out.
What are the different ways of changing the date and time on Windows 11?
1. Using Command Prompt
Open the Start menu.
Search for Command Prompt and open it as an administrator.
Using the date format datedd/mm/yyyy, you can change the date of your PC.
For example, if you wish to change the date to 12/April/2022, in the above format, you need to type in 12/04/2022. Do note that the date format depends on the format that your PC is set with. If you have the date format as mm/dd/yyyy, then you need to type 04/12/2022. So, the command would be: date 12/04/2022 or date 04/12/2022
To change the time, use the format time HH:MM and press Enter.
To change the time to 10:30 AM, you need to enter time 10:30 in the above format. If you want to change the time to 10:30 PM, then you need to enter time 22:30. So, the command would be: time 10:30 or time 22:30.
Exit CMD.
2. Using Powershell
Open the Start menu.
Search for Windows Powershell and run it as an administrator.
Type the below command and press Enter to change the date and time in one go. Set-Date -Date "dd/mm/yyyy HH:MM AM" or Set-Date -Date "dd/mm/yyyy HH:MM PM"
Exit Windows Powershell.
While you might already be familiar with other methods of changing the date and time, i.e., from the taskbar widget panel or the control panel method, the two methods mentioned above add to the flexibility.
How can I fix Windows 11 not updating time error?
1. Check if time settings is set to manual
Press the Win + I keys to open the Settings menu.
Click on Time & language.
Select Date & time.
Make sure to toggle on the Set time automatically option, if it is not already selected.
If the Set time automatically option isn’t selected, then problematic third-party apps, viruses, or malware on your PC can tweak the manual time settings, only to cause you more trouble.
Because, incorrect time not only deprives you of receiving the latest updates, it will also cause several issues with your browser and the update of virus definitions.
2. Start Windows Time service
Press the Win + R keys to open the Run dialogue.
Type the below command and press Enter.services.msc
On the right side, search for the Windows Time service and double click on it.
Under Startup type, select Automatic.
Select the Start button.
Click Apply and OK to save changes.
Your Windows 11 PC makes use of the Windows Time service in order to keep the time and date up to date.
Sometimes, due to external factors, this service fails to operate or function correctly. This will ultimately result in issues such as Windows 11 not updating time error. Check if the service is running or not and if not, then enable it and see if this fixes the issue.
Change the time server from the Server drop-down menu.
Click on the Update now button.
Changing the time server has helped several users get their Windows 11 PCs to update the time. There are chances that the current time server you have selected is facing some issues. You can also give it a try and hopefully fix the issue.
4. Reset w32time.dll
Open the Start menu.
Search for Command Prompt and open it as an administrator.
Execute the below command. regsvr32 w32time.dll
Close the command prompt and restart your PC.
Using the above command, you are basically re-registering the w3time.dll file on your PC. Check if this fixes the issue or not.
5. Disable and enable Auto Time Zone Updater service
Press the Win + R keys to open the Run dialogue.
Type the below command and press Enter.services.msc
On the right side, search for the Auto Time Zone Updater and double click on it.
Double-click on it and under Startup type select Disabled.
Set the Service status as Stop.
Restart your PC.
6. Use Registry Editor
Press the Win + R keys to open the Run dialogue.
Type the below command and press Enter. regedit
Head over to the below path. HKEY_LOCAL_MACHINE\SYSTEM\CurrentControlSet
Locate ControlTimeZoneInformation in the left pane. If it does not exist already, then right-click on CurrentControlSet and create a new key.
Name this newly created key as ControlTimeZoneInformation.
On the right side, right-click on empty space and select New > Dword (64 bit).
Name it RealTimeIsUniversal.
Double click on RealTimeIsUniversal.
Change the Value data to 1.
Before you go ahead and tweak the registry settings of your PC, it is very important to take a backup of the default registry settings so that you can always revert back to the default settings in case things go south.
In order to take a backup, open the registry editor, and click on Files > Export. Select the location to save the registry editor backup and hit Save.
Type the below command and press Enter.sfc /scannow
Restart your PC.
If there are corrupt system files present on your PC, then it will interfere with the smooth functioning of all the system processes.
The System File Checker is an efficient Windows 11 tool that, alongside detecting corrupt files, also fixes them. All this is done automatically by executing a command.
Alternatively, there are reliable third-party tools, which will help you resolve several system-related issues triggered by corrupt system files.
What else can I do to fix Windows 11 not updating time error?
If none of the above-mentioned solutions helped you fix the problem, then there is a way, at least a temporary solution, that will help you have the correct date and time on your Windows 11 PC.
We are talking about setting the time and date manually on your Windows 11 PC. Here are the steps that you need to follow to set the time manually.
Press the Win + I keys to open the Settings menu.
Click on Time & language.
Choose the Date & time.
Toggle off the Set time automatically option, if it is on.
Click on the Change button for the Set the date and time manually option.
A new window will show up, where you can set the date and time manually.
Click the Change button after setting the correct date and time.
The above-mentioned solutions, along with the tip at the end, should be sufficient enough to help you resolve the Windows 11 not updating time issue.
However, in case nothing works, you can start afresh by either resetting your Windows 11 PC or reinstalling Windows 11 on your PC.
Let us know in the comments section which of the above methods helped you fix the error. Feel free to share any other solutions that helped you in the comments below.
Intel Rapid Storage Technology (RST) is essential for the smooth running of your PC. It provides a storage option to improve performance and reduce power consumption.
However, most users that have upgraded their Windows are complaining about the Intel RST not installing with the error message platform not supported.
This problem can be caused by many reasons but mostly, it is associated with driver versions incompatibility or Intel RST outdated driver.
This guide will provide some troubleshooting fixes to fix the Intel RST platform not supported error.
What can I do if I get the Intel RST platform not supported error?
1. Update your Intel RST driver
Press the Windows key + Xand choose Device Manager from the menu.
Locate Disk drivers and expand it.
Right-click on the hard drive that your Intel Rapid Storage Technology is running and press Update driver.
Choose search automatically for drivers and click to install the latest drivers, if found.
By updating the driver automatically, the platform not supported error should be fixed since the latest driver will be installed. However, if this did not work, try to install it manually.
An alternative to this is to download Outbyte Driver Updater to update all your drivers without going through the stress of individual updates like this again.
2. Uninstall the Intel RST driver
2.1 Uninstall driver
Press the Windows key + X and choose Device Manager from the menu.
Locate Disk drivers and expand it.
Right-click on the hard drive that your Intel Rapid Storage Technology is running and press Uninstall device.
Click Action on the device manager Toolbar and choose Scan for hardware changes.
2.2 Install the new driver
Go to the Intel RST download center and download the application with the setupRST.exe to download.
Launch the application and Run as administrator.
Go through the installation process for the latest Intel RST driver and user interface.
Restart PC to take effect by clicking on the Start button.
Press Windows key + Rand input service.msc. Then press OK..
Locate Intel(R) Rapid Storage Technology and open it.
in the General tab, click Startup type and choose Automatic.
Click Apply and then, OK.
Restart PC to take effect.
If the Intel RST service is manually configured, it may cause a problem. Thus, changing the startup service type can fix the problem.
Some users have made their research on the problem and discovered that a BIOS update can also be an effective solution. Hence, you can check out our article on how to easily update your BIOS.
This article has provided some effective quick fixes for your issue. If you wish to read more about intel related problems, we have an article on fixing the Intel Optane memory pinning error on Windows 10/11.
Do you have any questions or suggestions about this guide? we’d like to hear about them in the comment section below.
The internet is constantly growing and evolving, and with it comes cyber threats that are getting more and more advanced.
Millions of people are aware of their online security and having a Virtual Private Network (VPN) is quickly becoming essential for internet safety.
While the following VPNs offer paid pro or premium versions, they are free to download and either have free versions with data limits or offer money-back guarantees.
What are the best VPNs for Windows 11 that are free to download?
Private Internet Access (PIA) VPN is an open-source app that is free to download on Windows 11. PIA is one of the fastest VPNs and one of the most experienced, having been created over ten years ago.
In addition to being a great VPN service, PIA also includes a built-in ad and malware blocker, and split tunneling. It offers highly customizable settings so users can configure the VPN to their liking.
PIA does operate on a monthly subscription basis, but it is free to download and offers a 30-day money-back guarantee.
NordVPN is one of the most popular VPN services and for good reason. This VPN claims to be the fastest and offers double encryption for added security. It offers access to thousands of servers from all over the world and can be used on up to 6 devices at once.
While NordVPN is free to download, it is a subscription-based service. They do offer a 30-day money-back guarantee, so users get to give it a try before committing to a subscription.
Key features of NordVPN:
Offers top-notch security without sacrificing speed
Additional security features like double encryption
CyberGhost is another paid subscription VPN service, but it’s free to install and offers a 24h free trial. Using this VPN, users have access to over 35 streaming platforms.
CyberGhost includes air-tight data encryption, a kill switch, split tunneling, and an ad blocker. This VPN service has a strict no-logs policy and offers free extensions for Chromium-based browsers.
Avast One is an all-in-one platform for security, privacy, and performance. This program provides users with comprehensive management of their online and PC security. Avast One includes a virus scanner, VPN, and PC Speedup which optimizes computer performance.
Users can use these features, including the VPN, for free with the Essential package, however, the VPN has a weekly data limit.
Key features of Avast One:
All-in-one security platform
Free version
Central management of all privacy and performance functions
This VPN is free to download and offers a free version with a data limit of 10GB per month. Hide.me is a fast VPN with advanced security features, including a kill switch and no-logs policy.
Hide.me has over 2,000 servers across 46 countries and allows users to bypass geo-restrictions for streaming services and websites.
Avira Phantom VPN is another great VPN for Windows 11 that is free to use and download. This VPN service offers a Pro version that gives users unlimited data, but there is a free version with a data cap of 500 MB / month.
This VPN encrypts user data for maximum security and has DNS leak protection. Only the Pro version includes customer service and a kill switch. However, unlike other VPNs, there is no limit on how many devices users can connect to at once.
We hope this list helped you decide on what free to download VPN is best for your Windows 11 device. The VPN services on this list either offer free versions with limited data or money-back guarantee trials.
VPNs are an easy way to protect your privacy online. With cyber threats getting more advanced by the day, it’s important to keep your data safe. If your Windows 11 VPN is not working or is having issues, we have a guide on how to fix it.
Let us know in the comments what VPN you use for your devices.
Beginning on the 5th of October, 2021, Windows rolled out the latest version, 11, to Windows 10 users. The automatic update was made available over the air for many devices that met the hardware requirements, all with a single click.
Nevertheless, the OS rollout has been admittedly slow and remains unavailable for many users. The Windows 11 Installation Assistant is an alternative means of upgrading your OS. Available on the Microsoft official website, the tiny package, once launched, is supposed to guide users seamlessly through installing Windows 11.
Provided that your device meets the minimum requirements, everything should be a breeze.
However, many users have expressed discontent over the efficiency of the installation package. There were several reports, as early as two days after the official OS rollout, of the Windows 11 Assistant disappearing abruptly. Some users have even reported issues of data loss after installation.
If you’ve been experiencing this issue, fret not! You’re in the right place, and you’ll learn multiple methods to solve this issue.
What can I do if Windows 11 Installation Assistant disappears?
1. Check for the Windows 11 icon in the taskbar
Navigate to the system tray right beside the clock and click on it
Check the tray for the Windows 11 Installation Assistant icon.
Alternatively, you can check the arrow icon for apps running in the background in the taskbar.
After the page opens, navigate to Download and click on it.
Go to the downloaded file, right-click on it, and tap on Run as Administrator.
Open the newly installed app and click Get PC Health Check app.
Alternatively, you can download the PC Health Check app here
After installing it, open the app and click on Check Now
From here, you’ll be able to see whether your system is compatible with the new Windows.
There are many reasons why the Windows 11 Assistant can disappear after installation. The likely chances are that it’s running in the background. Here, all you have to do is to search for it.
Another quick fix is by restarting your computer. Simply rebooting is a time-reversed technique for bringing life and normalcy into a malfunctioning device and may serve you here, even if the chances of success are low.
Some users have tried to fix the issue by running the sfc scannow command into Windows PowerShell. For the most part, it doesn’t work, and the Windows 11 Installation Assistant keeps disappearing.
There may be driver issues with your device, causing disruptions in Windows 11. You should check out the system’s installer log files, as there might have been an issue with drivers.
Also, it could be because of network issues. Many users complaining about this problem have gotten fixes by simply resetting internet connectivity to routers, WiFi, or mobile internet.
Windows 11 is relatively new and is bound to have a couple of device-peculiar bugs. At present, it’s not available for all devices, which may be a reason why installation can be such a chore. If you’re having issues with the repeated disappearance of the Windows Installation Assistant, you may be better served by installing Windows more efficiently. If the installation procedure fails, this guide can help you troubleshoot.
We hope you’ve enjoyed reading our article. Apply the fixes recommended and give us feedback in the comments section below. We’d like to hear your thoughts.
If you have used Windows long enough there’s a possibility that you’ve encountered a hard disk error before.
One of these errors you might encounter includes a locked drive, which can annoy most users, but this guide should prove helpful.
This is usually a frustrating issue because, without proper technical help, you might lose important files.
While this issue is serious for Windows users, recovering your PC drive without losing your files and documents is possible.
NOTE
It is essential to have a backup plan to avoid losing data when something like this happens. Consider using EaseUS Todo Backup to keep your data safe at all times.
How do I reset my PC drive if it is locked?
1. Refresh your PC
Switch off your computer and install a boot disk or USB drive.
Switch it back on and press F12 or F8 to access the boot menu.
Click Next.
Select Repair your computer.
Once opened, click Troubleshoot.
Select Advanced options.
Click Refresh Your PC and follow the prompts.
Once finished, restart your computer and check if your hard disk is working again.
RSAT or Remote Server Administration Tools is a component that allows administrators to remotely manage the other computers running the same OS. But, if things are not right, you might not be able to install RSAT in Windows 11.
There are a bunch of errors that you encounter here, for instance, the RSAT installer encountered an error 0x8024001d. No matter the cause, there are a bunch of methods that prove effective in every situation.
So, if you couldn’t install RSAT in Windows 11 yet, execute the fixes listed in the next section.
What can I do if I couldn’t install RSAT in Windows 11?
NOTE
Remember that RSAT is only available for the Pro and Enterprise edition of Windows 11. If you are running the Home edition, first make the upgrade and then proceed with the installation.
1. Use the PowerShell command
Press Windows + S to launch the Search menu, enter Terminal in the text field, right-click on the relevant search result and select Run as administrator.
Click Yes on the UAC (User Account Control) prompt that pops up.
Now, paste the following command in PowerShell and hit Enter to install RSAT:Get-WindowsCapability -Name RSAT* -Online | Add-Windows Capability -Online
This is probably the quickest way to install RSAT but is not known to many. Also, the chances of encountering an error while installing RSAT in Windows 11 using PowerShell are minimum. So, make sure to try this method, and if it doesn’t work, head to the next one.
2. Modify the Registry
Press Windows + S to launch the Search menu, enter Services in the text field at the top, and click on the relevant search result.
Locate the Windows Update service, right-click on it, and select Stop from the context menu.
Now, press Windows + R to launch the Run command dialog box, type/paste regedit in the text field, and either click on OK or hit Enter to launch the Registry Editor.
Click Yes on the UAC prompt that appears.
Paste the following path in the address bar at the top, and hit Enter:HKEY_LOCAL_MACHINE\SOFTWARE\Policies\Microsoft\Windows\WindowsUpdate\AU
Double-click on the UseWUServer key.
Next, enter 0 under Value Data and click on OK to save the changes.
Once done, again go to the Services app, right-click on Windows Update, and select Start from the context menu.
Restart the computer for the changes to come into effect and check if you are able to install RSAT in Windows 11.
Press Windows + R to launch the Run command, type gpedit in the text field, and either click OK or hit Enter to launch the Local Group Policy Editor.
Now, double-click on Administrative Templates under Computer Configuration and then on System from the options under it.
Double-click on the Specify settings for optional component installation and component repair policy on the right.
Next, select Enabled from the top, tick the checkbox for Download repair content and optional features directly from Windows Update instead of Windows Server Update Services (WSUS), and then click on OK at the bottom to save the changes.
Once done, restart the computer for the changes to come into effect.
The three methods listed here should have helped you install RSAT in Windows 11, and prevented or bypassed any error.
Opera is a solid browser, but how does it compare to others? This comprehensive Opera vs Waterfox guide will take a closer look and analyze the similarities and differences between the two.
Opera vs Waterfox: Which one should you choose?
Supported platforms
As expected from a browser that has been around since 1995, Opera has a wide range of coverage. It is compatible with Windows, Mac, Linux, iPhone, iPad, and Android.
Waterfox, on the other hand, is only compatible with Windows, Mac, and Linux.
Though there was news of an Android compatible version in the works, it is safe to say it has stalled, and nothing is happening anymore.
Also, nothing is happening on the iOS front, with no plan to develop a compatible browser anytime soon.
With the ability to sync Opera browsers across platforms, it is without a doubt that Opera is the obvious choice when it comes down to supported platforms.
Design and Interface
Waterfox’s interface is identical to that of the Firefox Proton interface. It comes with empty buttons to be customized with links to your favorite websites. Just below the buttons is the recent activities tab.
Overall, its interface appears blank and boring, but it is purposely designed that way to allow you to customize it to your taste.
Opera’s interface is minimalistic and simple. Upon launching, you will be greeted by its signature speed dial page.
The speed dial page packs in buttons for some of the popular sites. It can be customized to save you the stress of typing the URL of your most visited sites.
The address bar, bookmarks, and tabs are located at the top of the page. On the left is the sidebar, which contains more buttons for integrations such as WhatsApp, Facebook Messenger, Twitter, and Instagram.
This sidebar is also fully customizable to suit your needs, among other wonderful features.
Performance
This is one of the strongest selling points of the Waterfox. It is a very fast browser boasting a better speed than Firefox. It does not use too much memory and CPU, freeing up vital resources for other activities.
Being a Chromium-based browser, Opera is no slouch on the speed front either. It boasts respectable numbers and does not experience any slowdowns.
There is also the Turbo feature that helps to trim data usage. This is especially useful for users who want to surf the web quickly without a fast broadband internet connection.
The only downside is that Opera uses a lot of RAM.
Features
Ad Blocker
With ads being a prominent part of the web in the 21st century, getting a browser that can block the sometimes-frustrating ads is a blessing.
Opera offers a strong ad blocker that gives you a smooth and ad-less browsing experience. Although this feature is not enabled by default, you can easily activate it in the settings.
Waterfox, on the other hand, does not have an ad-blocking feature. And with System 1 – an advertising company – being the majority shareholder of the browser, you shouldn’t expect an ads blocker anytime soon.
Opera incorporates a free VPN that allows you to browse the web anonymously. The VPN protects your identity and allows you to browse websites with location restrictions.
The Opera VPN is one of the best free VPNs you can ever use. Although being a free VPN, there are limitations. So, you can always get a paid VPN for added data security.
There is no VPN integration on Waterfox. If you need a VPN, you will need to get a paid one or other less secured free VPNs.
Extensions and integrations
Waterfox allows you to install extensions from Chrome, Firefox, and Opera stores. This gives you limitless options and allows you to use the browser for various functions.
Opera is a monster when it comes to extensions and integrations.
It currently has 126 integrations covering instant messaging sites like Facebook, Facebook Messenger, and WhatsApp; Social Media platforms like Twitter and Instagram; extensions from the Chrome web store; and a series of other far-reaching integrations.
In this aspect of comparison, Opera is just in a world of its own.
Privacy and Security
A whole lot of our data is used on our browsers. This makes privacy and security an integral part of any browser comparison.
Waterfox comes with the uBlock Origin, which is known as the gold standard for free, privacy-enhancing browser plugins. The uBlock Origin is a wide spectrum tracker blocker that prevents you from being tracked on the internet
Unlike Firefox, Waterfox has removed the data collection and use from its privacy and security section. With this, you can be sure that it does not collect, use, or share your data.
What’s more, Waterfox is updated frequently. This helps fix bugs and security issues and adds some exciting new features.
Opera, with its VPN, offers some level of privacy and security. There is also the ad-blocker that protects you from malicious links and ads.
What’s more, Opera incorporates the sandboxing security characteristics that stop codes from websites from entering your system. Add its fraud and malware protection feature, and you have a safe browser on your hands.
Why use Waterfox instead of Firefox?
Waterfox is advertised as a more ethical version of the Firefox browser, thanks to eliminating data collection. It also offers better performance than Firefox.
Is Waterfox more secure than Firefox?
Yes, it’s more secure since it’s doesn’t come with Pocket, Telemetry, and other data collection features.
Did Mozilla make Waterfox?
Waterfox was created as a fork of Firefox, so they share the core functionality, however, Waterfox isn’t created or maintained by Mozilla.
Who owns Waterfox?
It has been owned by the advertising company System1 since 2019, but since July 2023 it has been independent.
Opera vs Waterfox: Verdict
These two browsers are some of the best modern browsers currently available.
However, if you are left with just a single browser to choose from, we recommend Opera. This is because it has many features and properties that are unique to it.
It also suits so many use cases and gives you limitless options. What’s more, it thrives in the strong points of the Waterfox browser, and the same cannot be said the other way around.
From a general and specific-use suitability perspective, Opera is indeed the smart choice.
To learn how Opera compares to other browsers, don’t miss our Opera vs Brave guide as well as our Tor Browser vs Opera for more information.
You can also explore more lightweight and lesser known options in this guide to alternative browsers for Windows 11 to see how other choices compare in performance and features.
Issues with the webcam are common, and honestly, it’s easier to fix those with an external one. When the internal webcam stops working, you have a limited number of methods at your disposal. This problem is faced on Dell XPS 17 when the webcam stops working.
The issue generally arises due to an outdated or corrupt driver, or a conflicting app affecting the webcam. In some cases, it could also be a faulty camera, which would require repair or replacement.
So, before you go ahead and purchase an external webcam, try the methods here to fix the Dell XPS 17 L702X webcam not working issue.
What do I do if Dell XPS 17 webcam is not working?
1. Some basic checks
Whenever you are facing issues with the webcam, first verify if it’s limited to a single app or is system-wide. To do that, just check the camera app, and see if the webcam works fine there.
Camera app
If the problem is limited to a particular one, it could have to do with misconfigured app settings, and you should go with fixes specific to that app. For instance, issues with the webcam on Zoom are common, or even sometimes Skype is unable to detect a camera.
In case the Dell XPS 17 webcam is not working on every app and the problem is system-wide, the methods listed below could help.
2. Reinstall the drivers
Press Windows + S to launch the Search menu, enter Device Manager in the text field at the top, and click on the relevant search result.
Next, double-click on the Cameras entry here.
Right-click on the problematic webcam, and select Uninstall device from the context menu.
Click Uninstall in the confirmation prompt that pops up.
If the currently installed driver is corrupt, you will face the Dell XPS 17 camera not working issue. Simply reinstalling the driver should work here.
Also, several users reported that the webcam was listed under another entry instead of Cameras, so make sure to go through them all in the Device Manager.
Go to Dell’s Driver and Download page, identify your product using any of the identifiers listed here, or if you have previously searched for drivers, just click on your laptop on the right.
Now, click on the Check for Updates button next to Let Dell automatically find driver updates for you.
Once the scan is complete, click on the Show drivers option.
Next, make sure to tick the checkbox for the webcam drivers, and click on Download and Install at the top.
After the driver is installed, restart the computer for the changes to fully come into effect.
Once the computer restarts, check if the Dell XPS 17 webcam not working issue is fixed. Drivers are a critical piece of software and these should be updated from time to time for the effective functioning of the device.
There are various ways to update a driver, and it’s recommended that you try them all when installing the latest version.
Or, you could use a reliable third-party app to take care of the updates. We recommend Outbyte Driver Updater, a dedicated tool that will automatically install the latest version, when available, for all the drivers on the system.
Press Windows + I to launch Settings, and select the Apps tab from the navigation pane on the left.
Next, click on Apps & features on the right.
Locate the conflicting app, click on the ellipsis next to it, and select Uninstall from the context menu.
Again, click on Uninstall in that prompt that pops up.
Once done, restart the computer for the changes to fully come into effect.
In some cases, a third-party app or even an antivirus can cause the webcam to stop working. Here, all you have to do is identify and remove the conflicting app. But the real challenge is to find the app which is actually causing the trouble.
For that, just make a list of apps that were installed or updated around the same time you first encountered the error, remove them one at a time while restarting the computer after each, and verify if the Dell XPS 17 webcam starts working.
Once it starts working, the app removed last was causing the error. Just keep it uninstalled for a while and check the web or the manufacturer’s website for a resolution.
The methods listed here should have helped get the webcam up and running on your Dell XPS 17 laptop. In case the problem persists, you can perform a system restore.
Also, check some general troubleshooting methods if the webcam is not working on any other device.
If you have any queries or know of a fix that’s not been listed here, please drop a comment in the section below.
A handshake may be used to welcome someone or seal a deal with them in person, and the same is true for the Internet.
An SSL handshake occurs when devices on a network – such as a web server and a browser – discuss keys, encryption methods, and other parameters about their connection before agreeing to transmit data. During a handshake, browsers and servers may request to examine and validate each other’s SSL certificates.
It’s essential to understand an SSL handshake and how to resolve errors related to it, including the SSL code 1 error.
How can I fix an SSL code 1 handshake failed error?
1. Correct the date and time on your computer
Right-click on the date and time on your taskbar and select adjust date and time.
Under the date and time menu, toggle on the option to set time automatically.
Problems with the SSL handshake failing might be caused by an incorrect system time and date on your PC. SSL certificates have limited lifespans and become invalid when they expire.
If the time and date on your computer are incorrect, the certificates will always assume the time has elapsed. Even more, the same trick to set up the correct time and date on your PC is recommended to quickly fix the errors related to gws_rd=ssl parameter.
2. Add the website to your allow list
Launch Chrome, click on the ellipses button at the top right corner, and select the settings option.
Select privacy and security, then click on the option for site settings.
Scroll down and expand the Additional content option, then click on insecure content.
Click on the Add button in front of Allowed to show insecure content.
Input the URL and click add.
You should attempt this solution because it’s conceivable that your firewall is producing the SSL handshake failed error by blocking your inspection requests.
Note that adding a website to the allow list may expose you to malware, so you should only try it if you are sure that it does not contain viruses.
The handshake error is more common in Chrome, but using an alternative browser could help you avoid it.
While there a many to choose from, we recommend Opera One. It is built on Chromium and benefits from its extensive extension library. Opera One comes with the added advantage of a VPN that lets you choose servers between the Americas, Asia, and Europe.
It is also compatible across several platforms and will be a great option regardless of your device.
Under the Protocol Support menu, you can see whether the browser supports the latest SSL/TLS versions.
Note that if you’re experiencing SSL handshake failed errors and, after running this test, realize that your client (your device) and server don’t support the same SSL version, you’ll need to upgrade your browser.
TLS 1.2 is enabled by default in most recent major browsers like Google Chrome.
4.2 Update your browser
Launch Chrome, click on the ellipses button at the top right corner, select Help, then About Google Chrome.
If there is an update, it will start automatically, and you will have to click relaunch to complete the update.
Because an SSL handshake is a critical step in ensuring data security over the internet, this guide has shown steps to resolving your SSL handshake Code 1 error. This isn’t the only issue you’ll encounter, and we recently covered error during SSL handshake with remote server in a separate guide.
It has been a busy week for the .NET Team over at Microsoft. Not only are we getting Entity Framework 7 Preview 3, but now .NET 7 Preview 3 is hitting the shelves as well. It comes with some very much awaited features that we’ll dig into in a bit. Let’s get to it!
Native AOT
In a nutshell, Ahead of Time ( AOT ) Compilation builds everything upfront, to avoid needing to “JIT” when an app runs for the first time. For quite some time the team has been working tirelessly to bring proper Native Ahead-of-Time compilation to dotnet. While partial AOT has always been present, full “true” support was never there out of the box.
Jon Douglas Senior Program Manager from Microsoft gives us a bit of insight into what’s different.
Native AOT is similar to .NET’s existing AOT technologies, but it produces only native artifacts. In fact, the Native AOT runtime does not know how to read the .NET assembly file formats – everything is platform-native. The executable file format parsing is fully handled by the underlying operating system.
For more information on how Native AOT works and how to get started check out the official docs.
Write-Xor-Execute
We were told .NET 7 would focus on performance. With Preview 3 the team has been able to realize an improvement of ~15% to startup times with Write-Xor-Execute enabled. The change has improved performance even when Write-Xor-Execute is disabled, however the team found some regression problem which will be addressed in an upcoming release.
Upgrading from .NET 6
As we’ve discussed before, upgrading from .NET 6 to 7 should be straightforward and the chances of things breaking are slim, however not impossible.
Make sure you have a backup of your project before going forward, then open your project file and modify the target framework property.
<TargetFramework>net7.0</TargetFramework>
For more information on this latest release check out the official post from Microsoft. It also contains some very interesting information on roadmap items. Have you been tinkering with .NET 7 already? How has it worked out for you? Let us know in the comments below.
Earlier this year, there was an indication that the Microsoft Windows Team was on the verge of creating support for third-party widgets installation from the Microsoft Store. Well, it seems those plans might actually come to fruition. As spotted by Firecube on Twitter, a screenshot was shared highlighting that indeed the feature was well on its way in a widgets manifest update.
As such, this integration will help address the numerous complaints lodged by users concerning the Windows 11 unpopular widget pane. With that said, users will be able to put this feature to more use. Third-party widgets will allow you to curate this feature to meet your preference, as compared to the current arrangement where it provides you with the basics, that is, calendar, to-do list, weather, etc.
Microsoft only shared a glimpse of the feature during the recent Windows 11 event. The most notable enhancement spotted was the full-screen user interface, which is ideally supposed to accommodate the third-party widgets installations.
Did you know that Microsoft released yet another Insider Preview build for its latest operating system? Whatever the answer is, you will surely want to know more details about what’s new.
And, yes, we are about to share all this information with you in this article. This new build is for Insiders on both the Dev and Beta channels.
Build 22598 brings Windows Spotlight on the desktop by default for new installations, and there is also a new Media Player build, new ISOs, and more.
What new features did build 22598 bring to the table?
The latest build is starting to roll out with a new update to Media Player for Windows 11 (Version 11.2203.30.0), for Insidersin the Dev Channel.
Switch between two different views on the artist page when browsing your collection. One view shows you all the albums in a grid, while the other shows all the songs, grouped by album.
You now also have quick actions to albums, artists, videos, and playlists when you hover over them for quick selection and playback.
A handy context menu is available if you right-click on the now playing screen. From here you can open new files without navigating to another page.
A new video enhancements feature has been added as well, which allows you to adjust the brightness and contrast of your video.
Changes and Improvements
[General]
We are now offering new builds to Windows Insiders in China on Lenovo PCs starting with Build 22598. These users should connect to the internet for a minimum of 15 minutes to allow the Lenovo PC Manager to auto update to the latest version (version 5.0.0.3292 or later) to receive an important fix with the app.
We are trying out auto-launching of the Get Started app with some Windows Insiders after upgrade to help people get started with their PC.
[Windows Spotlight]
We are trying out Windows Spotlight on desktop is on by as the default background for new devices (clean installs using the ISO) and for upgrades where the background the Windows 11 default. We are trying this experience out with a limited number of Windows Insiders at first.
We are also trying out displaying 4K desktop backgrounds in Windows Spotlight. We are also trying this experience out with a limited number of Windows Insiders at first.
[Taskbar]
Updated the tooltip on the volume icon to tell you when you’re using spatial sound.
Fixes
[General]
Devices using Windows Information Protection (formerly EDP) policies can now access controlled data via protected apps such as Outlook, Word, Microsoft Edge, etc. as expected.
[Taskbar]
We fixed an issue where if you used keyboard focus on taskbar, hovers like previews would stay up during all taskbar interactions.
Fixed an issue that was causing taskbar badges to come back after explorer.exe crashes even if you had them turned off in Settings.
Made a fix for an issue where some mouse move events weren’t being passed to apps for icons in the system tray.
Fixed an issue where hovering over some app icons in the system tray wasn’t showing previews or tooltips.
App icons in the system tray should now be showing more reliably when opened again in this build.
Fixed an issue that was delaying or preventing the show hidden icons flyout from opening.
Fixed an issue where Chinese characters weren’t displaying in the taskbar calendar when the Lunar calendar was turned on.
Addressed an issue where the visual indicator around an app icon when sharing a window might not go away once you’d stopped sharing.
[Start menu]
We fixed a crash when selecting the More button in Start’s Recommended section.
Addressed an underlying issue which could lead to Start crashing on launch when invoked with a gesture.
Fixed an issue that was causing the buttons and labels in Start to be the wrong colors while using contrast themes.
Addressed an issue where if you swiped to scroll the contents of a folder in the pinned section of Start, it would unexpectedly close Start.
[File Explorer]
Addressed an issue which was causing the context menu to not render completely sometimes and be transparent.
[Input]
Improved the performance of launching the touch keyboard on the login screen.
Fixed an issue where if you had selected text with touch in certain apps like Settings, the backspace key in the touch keyboard would have to be tapped twice for it to delete.
Voice typing should no longer stop responding if you repeatedly press WIN + H.
Fixed an issue for people with a large number of input methods, where the currently selected one might not be in view when you opened the input switcher.
Fixed the link at the bottom of the Chinese (Simplified) IME appearance settings so it points to Settings > Personalization > Text Input.
Addressed an issue where the emoji panel’s background image and color might not be rendered correctly after using options in Settings > Personalization > Text Input.
[Settings]
Fixed an issue where high DPI options in the Compatibility tab of the properties for an executable weren’t working.
Narrator should now read the view options we added in Settings > Apps > Installed apps
[Windowing]
Returned the missing animation when pressing WIN + D or clicking the Show Desktop button.
We addressed an issue when using snap layouts with touch which could result in an acrylic sheet getting stuck on top of the window.
The thumbnails in Task View should no longer be inverted when using Hebrew or Arabic display languages.
Fixed an explorer.exe crash when invoking Task View.
If you have a lot of windows open, they should no longer become superimposed on top of Desktops in Task View.
Fixed an issue when using ALT + Tab with a screen reader, where if you ALT + Tabbed back to certain app windows, focus would be set to a pane within the window rather than the whole window.
Fixed an underlying issue where accented colored title bars (when enabled) for certain apps and File Explorer were only displaying when the windows were maximized.
Mitigated a rare issue that could lead to the system hanging when changing the resolution sometimes in certain games.
Addressed an issue causing white pixels in the corners of some apps when using dark mode.
Did some work to address an issue where certain app windows wouldn’t move to the expected area after selecting them using snap assist.
Fixed a glitch in the animation when using snap layouts at the top of the screen to snap windows.
[Live captions]
Fixed an issue where the very top of maximized apps (e.g., title bar window management buttons) couldn’t be reached with touch while live captions were positioned at the top.
Live captions will now tell you when it’s done downloading and ready to caption.
[Task Manager]
Mitigated an issue causing the Performance page CPU graph to be colored as if Show Kernel Times was enabled even though it wasn’t.
Did some work to further improve Task Manager reliability.
Added access key support for Run New Task (ALT + N), End Task (ALT + E), Efficiency Mode (ALT + V), and other buttons on each page. If you press ALT, the letters will display next to the button.
With a process selected, pressing the Delete key will now end the process like it used to.
CTRL + Tab and CTRL + Shift + Tab will now cycle through the pages in Task Manager.
Fixed an issue where the memory composition graph was blank instead of filed in with the appropriate color.
Mitigated an issue leading to the GPU graph on the performance tab not being displayed in some cases.
The icons in the status column of the Processes page are no longer touching the side of the column.
Fixed an issue where “Efficiency mode” was missing status column of the Users page.
[WSL]
Fixed an issue that would prevent WSL2 from mounting the host file system on ARM64.
[Other]
Fixed an issue from the previous flight where the acrylic might not extend across the entire login screen.
Fixed an issue that was causing the volume and brightness keys that appear when your use your hardware keys to be cut off in the middle.
Running powercfg /query should work now when launched from syswow64 or from a 32-bit process.
Fixed an apostrophe that wasn’t rendering correctly in the text when doing an offline scan from the Windows Security app.
Removed an extra “be” in the text describing Smart Account Control in the Windows Security app.
Fixed an issue for certain language which could lead to question marks being displayed in the place of some of the text when upgrading to a new build.
If you have increased the text size under Settings > Accessibility > Text Size and launch setup from a Windows ISO while booted into your currently installed OS, the text displayed in the setup window will now be increased to match your preferences.
Known issues
[General]
Windows Insiders running Windows 10 who join the Dev or Beta Channels to get the latest builds may encounter a download error code 0xc8000402 while trying to download the latest build. As a workaround, please join the Release Preview Channel first, install Windows 11 from there (Build 22000.xxxx), and then switch to the Dev or Beta Channel to receive the latest Insider Preview build. This issue is understood and will be fixed in an upcoming build.
We’re investigating reports that a few Insiders have been experiencing an issue where explorer.exe is crashing repeatedly in a loop in the latest builds and unable to successfully load. This build includes another fix that may help some Insiders who were experiencing this.
When opening Group Policy editor, an Administrative Template error will pop up. Click “Ok” to dismiss and continue using Group Policy editor normally.
[Taskbar]
The taskbar doesn’t always automatically collapse after launching an app or tapping outside of the expanded taskbar on 2-in-1 devices.
Some areas of the OS are not yet tracking the height of the expanded taskbar on 2-in-1 devices so you may see overlapping components.
[File Explorer]
Using context menu options in File Explorer or on the desktop for rename, copy, paste, and delete may cause explorer.exe to crash when the context menu dismisses. As a workaround if you are impacted you will need to use other methods for the desired action, for example, pressing F2 to rename a selected file or folder.
The option to “Add to Favorites” does not show when right-clicking on a file on Home. As a workaround, this option can be accessed by choosing “Show more options”.
[Widgets]
The widgets board may not open successfully when using the gesture from the side of the screen. If you are impacted, please tap the Widgets icon in the taskbar for now instead.
[Network]
We’re investigating reports from Insiders about internet connectivity issues when certain VPNs are connected.
[Live captions]
Certain apps in full screen (e.g., video players) prevent live captions from being visible.
Certain apps positioned near the top of the screen and closed before live captions is run will re-launch behind the live captions window positioned at top. Use the system menu (ALT + Spacebar) while the app has focus to move the app’s window further down.
Have you already installed and tested this build? Share your experience with us in the comments section below.
Productivity is at the heart of every professional or anyone running a business. For somebody who works online or whose work entails a significant amount of time on a browser, the Todoist Chrome extension is a beneficial tool.
It is a tool that helps you to organize and plan for tasks. You can add blogs to your reading list, save an item to your wishlist, plan your day, and once you are done with tasks, you can check them off right on the browser.
Working online comes with many distractions, and having an extension that keeps you organized and tracks your productivity is of the utmost importance. The great thing about having the Todoist Chrome extension is tailored for browser-related tasks.
Why does the Todoist Chrome extension stop working?
Chrome extensions can stop working for a number of reasons, and each scenario has its repair strategy. While you may not be able to pinpoint a specific cause initially, you can try out different fixes until one of them ultimately solves your problem.
One of the reasons why your Todoist Chrome extension is not working is because you have an outdated Chrome or Windows build version.
Editor’s tip
We recommend the Opera browser which has numerous tools in the addons store, easy to install and use. This browser with a full-fledged navigation experience with various built-in packages, improved resource consumption, and great design is used every day by 350 million people.
There is a particular version of Windows OS that has a security feature that inadvertently prevents the use of extensions, add-ins, and add-ons to improve the browser’s functionality. Ensure both your Windows and Chrome versions are up to date to ensure this doesn’t happen.
Another reason might be because the main Chrome process has a glitch, or it is hanging. This can be fixed by ending the Chrome process in the Task Manager and then restarting the Browser. Below are some methods to resolve issues with the Todoist Chrome extension.
How do I fix the Todoist Chrome extension not working?
1. Clear your cache
In the Chrome address bar, type chrome://settings, hit Enter, and then click Privacy and security.
Click Clear browsing data.
Set the Time range to All time, check Cookies and other site data, and finally click Clear data.
Type chrome://restart in the address bar and then hit Enter to restart Chrome.
The web cache can be the reason for Todoist Chrome extension not working issue. As a result, you must use an automated tool to clear your web browser cache and cookies.
CCleaner is a powerful full-featured PC optimization software that also includes a browser cleaner tool.
2. Reinstall the Todoist extension
Type chrome://extensions in the address bar hit Enter, and click on the Menu button.
Click Open Chrome Web Store, which will launch you into a new window.
Type todoist in the search bar, then click on Todoist for Chrome.
Click Remove from Chrome, then confirm by clicking Remove.
After the extension has been removed, click Add to Chrome, then confirm by clicking Add extension.
Type chrome://restart in the address bar and then hit Enter to restart Chrome.
3. Disable other extensions
Type chrome://extensions in the address bar then hit Enter.
Disable everything except for Todoist.
Type chrome://restart in the address bar and then hit Enter to restart Chrome.
4. Ending the Chrome process through the Task Manager
Press Ctrl + Shift + Esc on your keyboard to open up Task Manager.
Click on the Processes tab, right-click on Google Chrome and then click End Task.
Restart Chrome and check if the issue has been fixed.
Todoist has an app on all major platforms and a range of plugins and integrations.
For instance, if you need to sync due dates with another calendar like Outlook or Google Calendar, there are convenient buttons on the app to enable integrations coupled with a calendar link to connect to any other calendar that supports an external subscription feed.
By adding a plugin on Gmail or Outlook, you can turn emails into tasks, so you no longer forget to email back or go through an attachment. Learn how to fix Gmail does not load in Chrome if you find yourself in that predicament.
If you wish to create a list of companies or people you want to research on your browser, Todoist is available across multiple browsers to keep track of those online tasks like virtual sticky notes.
The part that makes Todoist such a great tool is the interoperability and effortless synchronizing.
Whether it is macOS, Windows, iOS, Android, Android wear, Apple watch, browser extensions, and web, a Todoist is available to make sure your productivity is optimized across the board. Some great list-making applications exist across a range of platforms, so do not hesitate to check out our list.
Tell us how you use Todoist and if the issues were fixed. Feel free to leave a comment below.
Some gamers reported errors when they downloaded several add-ons for games like World of Warcraft, Starcraft II, Diablo III, and Overwatch. Most of them use the Lua programming language, which uses scripts to add modules and content.
When gaming, users tend to install add-ons that help modify and change the game’s User interface. The majority of the add-ons get categorized according to the size, scope, and dependency on other plugins to provide more functionalities.
There are different types of add-ons that perform other functions like:
Boss mods to provide timer and warnings
Information displays show more information during gaming like stats, measurements, and distance.
Action bars to improve the game abilities
Unit frames to customize the display of group/team appearance.
Some users report different errors after installing the add-ons. It becomes annoying if you have a lot of reliance on the add-ons. This article will look at causes and ways of fixing the errors.
What are the causes of your add-ons experiencing a large number of errors?
There are several reasons why the error pops up when using the add-ons. Some of the potential causes of this error include:
Add-on malfunctioning-some of the add-ons can be corrupt due to bad code written by developers.
Corrupt add-on files-some add-ons consist of corrupt files that throw errors when gaming.
Use of custom variables-some gamers uses custom variables to support add-ons that no longer exist. It may lead to errors.
Outdated add-ons-some users install outdated or unsupported add-ons that might interfere with the gaming experience.
How can I fix add-ons experiencing a large number of errors?
1. Reset the interface
All the add-ons get saved in the Interface folder that also carries screenshots and cache. Resetting the interface folder removes all the corrupted files and code, making it hard for the game to function well.
When you delete the folder, the game automatically creates a new one when it launches.
You can do this by starting the task manager and seeing if the tasks are running, end them. Then back up the folder’s contents and delete it from the game directory. Try launching the game after that and installing all the add-ons you need afresh.
2. Make sure the add-ons are in the correct folder
When installing the add-ons, make sure they go to the sub-directory of the game folder. This makes it easier for the game to recognize the add-ons. Some people confuse the add-ons folder during installation, putting the add-ons in a different folder.
If you have the same issue, copy the add-ons from the wrong folder to the subdirectory of the game. Restart the computer to confirm if the error persists.
In some cases, if you download an add-on and it doesn’t show up in the game, it means it’s unsupported by the game.
3. Uninstall all the add-ons and confirm if you have a Cartographer add-on
Most outdated add-ons aren’t compatible with the game, producing the error. Uninstalling the add-ons depends on the documentation provided by the developer, where each has its own, and you have to follow it for it to be successful.
One common add-on with this issue is the Cartographer add-on which turns the Cartographer mode on. This add-on stopped receiving support from its developers, making it outdated and causing many problems during gaming.
After the uninstallation, reboot the game and see if the error still exists. If it still exists, try the other methods.
4. Reset the consoles variables
Confirm if you have any console variables in your game. If they exist, you have to reset and remove them. It mainly applies in cases where users install and run multiple add-ons that use different parameters, causing collisions with each other.
Many users report that when you open the game and run the following commands, the procedure resets all the custom variables and brings back the default variables:
/Console Cvar_reset
/console cvar_default
Sometimes you receive a Permission error when you run the two commands, ignore it and proceed with your process.
When doing this, you must understand that resetting removes all the existing add-ons, and you will have to reinstall everything afresh.
5. Reload the game interface
The majority of the error used to appear when someone launches the game. To avoid this, try reloading the game to ensure that add-ons that failed loading during the first launch get loaded, and the error disappears.
It is common for one of the add-ons to have an outdated code and doesn’t integrate well with the other add-ons. You can do it manually or type the following command in the chat box:/reload.
This issue mainly affects the latest versions of games, and it can also affect the earlier versions, but it’s rare.
6. Disable the error prompts
There are several commands you type in the chatbox that will help you in avoiding the error from the add-ons every time you launch the game.
You can type /console scriptErrors 0 in the chatbox after launching the game, and you will never see the errors again. If you change your mind, you can still enable them by typing /console scriptErrors 1 command in the chatbox.
There is another alternative where you can install BugSack and BugGrabber, and they will help you do the same step.
You will get most of the errors when you launch your game and get a notification of what the error entails. If you lack a way of getting the error, turn the game consoles on, or you can check through your console and get all the errors.
Once you know which add-ons have errors, you can use the above methods to get rid of them.
In the gaming world, you should be aware of and able to fix Lua errors from scripts, among many other errors.
Let us know which method fixed your error in the comments section.
Have you been encountering MetaMask not connecting to the Ledger problem? Go through this article to find the solutions along with some other helpful information.
Mertamask is a cryptocurrency wallet that can interact with the Ethereum blockchain. It has become very popular among crypto lovers, particularly the less technical users.
The Ledger is a device that acts as a crypto wallet. It can hold multiple currencies offline. You can easily connect the Ledger hardware with MetaMask.
However, sometimes, you may encounter MetaMask not connecting to the Ledger issue. That is enough to ruin your experience with that software crypto-wallet. When you face this type of problem, you may see similar messages to the following one.
The Ledger device was not connected. If you wish to connect your Ledger, please click ‘Continue’ again and approve HID connection.
But, if you take the proper steps, you can easily fix this type of Ledger connectivity issue with MetaMask. Before going through the troubleshooting methods, let’s know about a few more things.
What causes Ledger connectivity problem with MetaMask wallet?
Usually, MetaMask should not have any problem connecting to Ledger or any other hardware wallets. But, for some technical issues, errors may occur.
We have tried to find out what may cause such problems in most situations. After doing some deep research, we have found the following ones:
Incompatible version of the browser and extension
Not connecting the Ledger in the proper way
Outdated Ledger firmware
Outdated Ethereum app
Problematic browser
Moreover, there can be other technical issues that can produce Ledger connectivity issues with MetaMask. Fortunately, you can quickly get rid of it if you follow some tricks.
These troubleshooting methods are given below with clear instructions. Any of these should fix the problem.
How can I fix MetaMask not connecting to Ledger?
1. Update MetaMask extension
1.1 Update Chrome extensions
Open the Google Chrome.
Right-click on the MetaMask icon and go to extensions.
Click on Update.
1.2 Update the Firefox add-ons
Open the Mozilla Firefox browser.
Type the following address in the address bar and press enter. about:add-ons
Click on the gear icon and then select Check for updates.
2. Update browser
2.1 Update Chrome
Open Chrome again.
Click on three vertical dots on the top right corner and then go to Settings.
Click on About Chrome.
Google Chrome will check for the update and install automatically if it finds any newer versions available.
Relaunch Chrome.
2.2 Update Firefox
Click on three vertical lines and go to help.
Go to About Firefox.
Firefox will update itself automatically.
Some versions of specific browsers may have problems with the MetaMask. For example, Chrome 91 had broken Ledger support of this extension. Later an update fixed the bug. So, updating your browser also may work in your case.
Press Win+ I on the keyboard to open Windows settings.
Go to Apps.
Click on Apps & features.
Click on three vertical dots next to the browser name you want to uninstall and choose Uninstall.
3.2 Install the previous version of the browser
Now, try to find the older version of your browser to download. FileHippo and Softonic are two popular platforms where you can download the older version of any browser.
3.3 Disable automatic update
Open the start menu and type services.msc and press enter.
Right-click on Google Update Service (gupdate) and go to its properties.
Set the startup type to Disabled.
Click on Apply and then OK.
Do the same for Google Update Service (gupdatem).
Restart your computer.
4. Try in a different browser
Though you can use MetaMask in Firefox and any Chromium-based browsers, you may still face some problems. We recommend you to consider Opera One if you face MetaMask and Ledger connection problems on any other browsers.
Opera One is a chromium-based browser that supports Chrome extensions without any problem. Else, unlike many other browsers using the same rendering engine, Opera One can provide a very fast and reliable experience.
So, if other browsers on your computer show error with MetaMask Ledger connectivity, it will be wise to try this browser.
5. Close Ledger Live
Click on the MetaMask extension icon.
Click on Profile and go to Settings.
Go to Advanced.
Toggle off the Ledger Live.
Now try to connect the Ledger again.
6. Open the ETH app before connecting
Another working method to fix MetaMask not connecting to Ledger is opening the Ethereum (ETH) app before clicking connect on the MetaMask.
So, if you encounter the problem, try this technique and see if it helps or not.
7. Update the ETH app
Open the Ledger Live app on your computer.
Go to the Manager tab.
Connect the Ledger device.
You should see the ETH app in the Updates available section. If yes, click on the Update all button.
8. Update the Ledger device
Open the Ledger Live app like before and go to the Manager tab.
If the latest version of firmware is available, you will see it. In this case, click on Update firmware and go ahead.
Pressing both buttons will change the blind signing status and show it in the display.
After enabling blind signing, try to connect the Ledger with MetaMask again. You should not face the problem again.
10. Reset Metamask account
Go to the MetaMask settings as shown in method 3.
Click on Advanced.
Find and click on Reset Account.
Restart your browser.
If there is any problem with your account, it will fix MetaMask not connecting to the Ledger issue.
Is Ledger safe?
Yes. Ledger is a totally safe hardware wallet for cryptocurrency. In fact, you should use it to protect your currency with an extra layer of security.
A ledger device can securely store your cryptocurrency and protect them with your own private keys. It acts like a bank vault that you own, and only you have the access.
The private key remains on the Ledger only. So, there is no possibility that someone using the internet can have access to that key.
It has physical buttons which should be pressed to validate each request. As a result, your crypto transactions remain less vulnerable and get maximum security.
Besides, Ledger has desktop and mobile apps that are very convenient to use and give you a very secure and smooth experience.
The Ledger firmware and each app on this platform get regular updates that come with security improvements. As a result, you will always get the best protection if you update on a regular basis.
The above methods are the best ways to fix MetaMask not connecting to Ledger error. This article also gave you some other useful information. If you have an opinion on this, feel free to let us know in the comment box.
The Snipping Tool has changed, and many unsatisfied users want to return the old Snipping Tool to Windows 11.
This is easily achievable, and in today’s guide, we’ll show you the best ways to do that on your PC.
What happened to the Snipping Tool in Windows 11?
Windows 11 introduced a new Snipping Tool that works similarly to the Snip & Sketch tool. On Windows 10, those were two different tools, but in the latest version, they are combined into one.
How do I get the old Snipping Tool back on Windows 11?
1. Download old SnippingTool online
Download the Snipping Tool. Do keep in mind that you might get several popups on this page, so be sure to ignore them. You’ll also have to click the Download button several times.
Next, open the downloaded zip file.
Click on Extract all.
Choose the extract location, check Show extracted files when complete and click Extract.
Once done, just run the SnippingTool.exe.
We tested this solution and it worked for us, and since our antivirus didn’t report anything, we assume that the file is safe to use. If you don’t feel safe downloading files from third-party sources, go to the next solution.
2. Restore the Snipping Tool from the older Windows version
Create a new folder on your old PC and name it SnippingTool for example.
Go to C:\Windows\System32
Copy the SnippingTool.exe to the SnippingTool folder you created in Step 1
Next, go to C:\Windows\System32\en-US
Locate the SnippingTool.exe.mui and select the copy option.
Go to the SnippingTool folder from Step 1.
Inside of it, create a new folder called en-US.
Paste the SnippingTool.exe.mui into the en-US folder you just created.
Lastly, copy the SnippingTool folder from Step 1 to your Windows 11 PC.
Double-click on SnippingTool.exe to launch the Snipping Tool on your Windows 11 PC.
NOTE
You’ll need another Windows 10 or older PC to complete this step.
Microsoft Whiteboard is a great tool for collaborating with others on the same whiteboard in real-time. However, the app has its own set of issues. One such issue is that the Microsoft Whiteboard does not sync across devices.
With the Microsoft Whiteboard app, you can use your device to create a freeform canvas to capture and share your ideas with others. The app is available for Windows 11 and iOS devices.
If you have been facing this issue, then you are in the right place because today we will discuss possible ways to fix this issue.
There was a problem syncing Whiteboard Teams. Why is this happening?
Loss in connectivity – If your device loses connectivity during a sync operation, you may experience some lag time before your content is considered offline and becomes editable again. Once your device regains connectivity, the app will attempt to resume the sync operation.
Third-party cookies – Your browser may be blocking third-party cookies from Microsoft’s websites. These cookies are required for Whiteboard to function properly because they contain information about your session and the whiteboards you’ve created or joined. You need to allow third-party cookies from microsoft.com and office365.com.
Faulty device – The issue might be that your device is not syncing correctly. This could be due to a faulty device or a setting in the app. You can try switching to a different device and see if the problem persists.
Outdated app – Sometimes, the Microsoft Teams app or the Whiteboard app may be outdated. Simply log into the Microsoft Store and update your app.
Luckily, if you encounter any of the above issues, there are quick fixes you can try to get syncing working again.
What can I do to fix the Microsoft Whiteboard not syncing issue?
1. Reload the site
The problem may be your servers and your internet connection is unstable. Try reloading the site and try again.
2. Check file size
Sometimes, the file size may be the cause of the problem. Ensure your file does not exceed the recommended limit then try again.
If you are using Microsoft Whiteboard on the web, try clearing cache and cookies then see if the problem persists.
You can also use a third-party tool to get things done faster. CCleaner is a program that cleans your Windows computer in a couple of minutes. It removes unneeded temporary files, cookies, and other junk that can accumulate on your PC.
With the correct options selected you can set CCleaner to run automatically at Windows start-up or on a schedule. This is valuable for users that don’t know how to clean their computers manually or those that don’t have time to do so.
Toggle Turn Whiteboard on or off for your entire organization on.
We sure hope that after trying the above solutions, your Microsoft Whiteboard is syncing again. While you are here, you can also check out other whiteboards for teaching and learning
It isn’t uncommon for the printer to develop errors during use, just like other electronic devices. Hence, the reason you have to familiarize yourself with basic troubleshooting hacks.
Often, the problem displays an error message as windows/words cannot print due to a problem with the current printer setup. It could be either windows or words depending on the problem.
This problem is often associated with Microsoft Word and other Office applications. Although it could be caused by different reasons which include, the printer developing fault itself.
To troubleshoot this problem, this guide will provide some troubleshooting fixes with step-by-step instructions on how to fix it.
What can I do if I get a problem with the printer setup?
1. Reset Default Printer
Click the Windows button, type control panel, and click on the Control Panel from the search result.
Select Devices and Printers from the options displayed.
Randomly select any of the printers and right-click on it. Click to Set as Default Printer from the pop-up.
Then, select the original printer and right-click on it to Set as Default Printer back.
By changing the default printer, Windows will overwrite the previous entry which might be faulty for the default printer.
2. Uninstall and reinstall the printer driver
Click the Start button and select Settings.
Choose Devices and click on Printers & Scanners.
Select your printer and choose Remove device.
Click the Add a printer or scanner from the top. Once your printer has been detected, proceed with the installation. Then click Finish once the installation is complete.
If it fails to work after this, it could be an issue with the driver or the local printer’s connection. If you have connection issues with your printer, check this article on what can I do if the printer is not connecting to the PC.
Right-click the Start button and choose Device Manager from the list.
Scroll down and select Print queues or Printers. Right-click on your printer from the pop-up list and select Update Driver.
Select Search automatically for drivers.
If the system finds a new driver, it will be installed automatically. Then, proceed to restart your PC to effect the changes.
Drivers update is essential for the proper functioning of the printer on the OS. However, if the drivers couldn’t be updated, you may need to update them via a third-party app.
We strongly recommend you install Outbyte Driver Updater to get the latest drivers for your PC. It auto searches for the best and recommended updates for your drivers.
Close all running applications and search for cmd in the Start button search area.
Select Command Prompt from the result and Run as Administrator.
Input this code sfc/scannow and press Enter key. Then wait for the result after some minutes.
Type exit to close the prompt. If the Windows found corrupt or bad files, they will be repaired. Then Restart the PC.
This article has analyzed the best solutions tofix problems with the printer setup. However, if none of these worked for you, you can check out our article on fixing printer configuration problems.
We’d like to hear more from you about your experiences, so leave your suggestions or questions in the comment section below.
ExpressVPN is one of the most popular virtual private networks on the market. It has received a lot of positive feedback for its lightning-fast speeds, user-friendly service, and a firm commitment to protecting users’ privacy. Thus we will show you today how to install ExpressVPN on Windows 11.
Even if a VPN provider has a stellar reputation, we try to avoid blindly putting our trust in any company to protect our security and personal information. After all, we don’t always have a clear picture of what is going on behind the scenes.
We appreciate it when VPN providers embrace transparency and take concrete steps to earn our genuine trust in their products and services.
Follow along as we will first see whether ExpressVPN can be trusted, and then jump to the download and install process on Windows 11.
Can ExpressVPN be trusted?
Earlier this month, ExpressVPN released the findings of an independent security audit of their browser extension conducted by cybersecurity firm Cure53. They have also announced that the code for their browser extension will be made available for public use.
We’ll walk you through the findings of Cure53’s security audit of ExpressVPN’s browser extension and discuss what this means for you. Cure53 is a well-respected and reputable cybersecurity company, and we can say that with confidence.
The company has made significant strides in the direction of greater transparency. A new audit conducted by the accounting firm PwC between May and June of this year has been detailed in a recently released report.
PwC was also tasked with auditing the technology behind its TrustedServer feature, which was developed in partnership with Cisco. This was done to ensure that it operates in accordance with the claims made by ExpressVPN.
The findings of the audit demonstrate that ExpressVPN is genuinely committed to providing high levels of security, privacy, and anonymity.
Browser extensions are difficult to get right, but ExpressVPN’s extension provides users with all of the protection of a true VPN without the need to install any additional software.
ExpressVPN is sending a strong message to both VPN users and other VPN providers by making their browser extension code available for download. They are stating that trust and transparency should be the industry standard.
How can I download ExpressVPN on Windows 11?
Navigate to ExpressVPN’s website and hover over Products to choose the Windows icon. You will be redirected to the page which contains the ExpressVPN file for Windows 11.
Next, click on Download now to download the executable file. Save it to your Downloads folder and double-click on it to run it.
Once you run the installation file, choose the Sign-in option. Alternatively, you can sign in with an activation code if you already have one. You can create one on their website after you purchase one of their plans. Note that ExpressVPN has one of the lowest prices and best deals out there.
Next, choose Sign In with Email Sign-In Link, enter your email and choose Email My Sign-In Link.
Once you complete the setup, you can choose the location you want to be connected to. Pretty simple, isn’t it? This is how to download and install ExpressVPN on Windows 11. The company has made it as easy as possible for its users.
The most significant advantages of ExpressVPN are its enterprise security, value for money, and general usability, among other things. You can use it to access restricted websites and content from any location, while also increasing the security of your online accounts and transactions.
It protects your data and files from hackers who hide behind random IP addresses by encrypting them with 4096-bit CA-based encryption.
ExpressVPN provides you with access to more than 145 VPN locations in 94 different countries, allowing you to increase the speed of your device regardless of where you are located.
Express VPN
Increase your online security with one of the most powerful VPNs on the market!
Other virtual private networks (VPNs) do not include a built-in feature that protects you from surveillance and censorship. It also allows you to connect to Wi-Fi hotspots without having to worry about being tracked or monitored.
Aside from its security features, ExpressVPN also offers an advanced feature known as the Kill Switch, which can be used to automatically stop incoming and outgoing traffic if the VPN is disabled.
And lastly, it employs Zero-Knowledge DNS, which means that no DNS from third-party sources is used in the course of its operations. Users can connect to the network and carry out activities completely anonymously as a result of this.
If you need further assistance with the installation process, check out our post on what to do if ExpressVPN won’t launch.
In order to improve our future posts, leave us a comment in the section below and tell us what you think. Thanks for reading!
When facing issues with your Teredo Tunneling adapter, the first instinct in troubleshooting is to check your legacy hardware settings.
Most times, the solution is as simple as activating the adapter. However, sometimes you can’t find Teredo legacy hardware, and it takes a long time to figure things out.
Left unchecked, this issue will affect your system’s ability to communicate with other systems and consequently affect your workflow. It is a bit similar to when your Wi-Fi adapter stops working.
What does Microsoft Teredo Tunneling Adapter not in legacy hardware mean?
When triggered, this message implies that you are missing the Teredo Tunneling Pseudo-Interface. This situation is often started by any one of the following:
Problems with some settings – Improperly configured or disabled network adapter settings will often trigger the problem.
Malware – Especially when you do not use a good or reliable antivirus, you may have underlying malware problems that will trigger this issue.
Driver issues – This is often related to missing or outdated network adapter drivers.
Compatibility issues – The problem starts with some users installing unsupported or incompatible network hardware.
Registry issues – Mostly, this is related to bad registry entries or your corrupted system files.
We now explore some solutions to help rectify the problem.
How can I fix Teredo is not in legacy hardware error?
1. Use Windows Registry to modify TCPIPv6 parameters
Use the Windows + R buttons to start a run box.
In the dialogue box, type regedit and hit Enter to start the Windows Registry editor.
Once in the registry, follow this path: HKEY_LOCAL_MACHINE\SYSTEM\CurrentControlSet\services\TCPIP6\Parameters
Look for the DisabledComponents key, set the value to 0, then select OK.
Close the registry and restart your computer.
Start your device manager by clicking on Windows + R and typing devmgmt.msc, then hitting Enter.
Check to see if the Teredo Tunneling Adapter exists in the device manager by clicking the View button at the top and Show hidden devices.
You should see your Teredo Tunneling adapter without any warning signs next to it.
2. Uninstall all Teredo Tunneling Adapters & Interfaces
Start your device manager by clicking on Windows + R and typing devmgmt.msc, then hitting Enter.
In the device manager, right-click the Teredo Tunneling Pseudo-interface and select Uninstall driver.
When prompted, confirm your choice.
Ensure also to uninstall all the Microsoft Tunneling Adapters. They should be displayed with numbers at the end.
Restart your computer.
If you still have issues after reinstalling the adapter, consider solution 3.
Did something else work for you? Let us know in the comment section below. If you have trouble downloading the Teredo Tunneling adapter, follow this detailed guide.
Otherwise, these solutions should work on your Teredo Tunneling Adapter.
Virtual desktops are not a new concept in the Windows world. Creating a separate desktop in Windows 10 was a straightforward process, allowing you to have one desktop dedicated to one project and another for another, but users reported their Windows 11 multiple desktops is not working.
Or one desktop dedicated to your work and another dedicated to personal apps. Windows 11, on the other hand, has received an improvement.
It’s also possible to have a different wallpaper for each desktop, which makes it easier to distinguish one from another (as well as providing you with a different mood depending on what you’re using it for).
A number of other features make the use of virtual desktops simple and efficient, including the ability to share resources with other users.
It should be noted that some of these features were actually introduced in Windows 10, but when combined with the new features of Windows 11, they form a useful toolbox.
Follow along as we will show you what to do if Windows 11 multiple desktops is not working, right after we see what other productivity features the OS provides us with.
What are other Windows 11 productivity features?
When using snap layout, you can hover over the maximize button of an application to see different possible window positions for that application.
Examples of available options include a dual split-screen option, which would snap the window to half the display, and a four-way split-screen option, which would snap the window to one-quarter of the display, among others.
When you hover your cursor over one of the panels, you’ll notice that it turns blue, indicating that Windows is ready to move your window to that location in the panel. Simply click, and the window will snap into place, allowing you to resize it.
You can use this feature to quickly reorganize your screen and group windows together into groups of related windows.
In that vein, Snap group is a feature that allows you to group apps together within your snap layout. As soon as you’ve finished creating a layout, you can hover your mouse over the taskbar to reveal your newly created Snap group, which contains all of the apps you’ve organized in conjunction.
It is possible to switch between multiple layouts without having to restart your computer by minimizing or restoring the group. You can also switch between multiple layouts without having to restart your computer.
You can use this technique to move grouped windows out of the way when you don’t need them, but quickly bring them back when you do need them. Now, let’s move on to troubleshooting the Windows 11 multiple desktops not working error.
What can I do if Windows 11’s multiple displays feature isn’t working?
1. Update Windows
Open Settings and navigate to Windows Update from the left menu.
Here, click on the blue button that either says Check for new updates or Install now and wait for the process to complete.
Windows updates are designed to fix bugs and issues that have arisen. Despite the fact that they are not responsible for security vulnerabilities, they may have an impact on the stability of your operating system or simply be irritating.
Finally, but certainly not least, Windows Updates can include both new features and fixes for previously reported issues, as well as security measures that need to be applied in order to keep your computer safe.
Open Settings and go to the Windows Update section from the left-side menu, followed by Advanced options on the right side.
Now go to Optional updates and select all the boxes you are provided then click on Download and Install.
Note that you can opt for an automatic driver updating solution. These tools perform a quick scan of you system in which they identify the drivers that need to be updated and prompt you to download them.
Thus you will be able to save time and avoid future driver-related errors that might pop up due to an irregular driver update routine.
3. Sign in and out
Click on the Start icon from your Taskbar then right-click on the account icon.
Next, choose to Sign out then log in back again with your account. Make sure to also reboot your computer. This will allow you to start from a blank slate and apply the changes made.
Your Microsoft account enables you to manage everything from a single location. Keep track of your subscriptions and order history, organize the digital lives of your family, update your privacy and security settings, track the health and safety of your devices, and earn rewards.
You would need a Microsoft account if you have other devices such as a Windows smartphone or an Xbox because it would allow you to access unified apps and games.
What are Windows 11’s performance gains?
When compared to Windows 10, Windows 11 has the potential to improve the overall performance of your computer by a significant amount.
In a YouTube video, Microsoft discussed the performance enhancements and optimizations that are included in Windows 11.
As a whole, the performance improvements in it are largely due to changes in the way the newer operating system handles system processes, which are typically visible when you open Task Manager.
The OS performs a significant amount of memory management work in order to favor the app windows that are currently open and running in the background.
This should ensure that they receive more CPU power than they would otherwise receive from other system resources.
Microsoft demonstrated this by showing how the Excel app in Windows 11 opens quickly even when the CPU is running at 90 percent of its maximum capacity, despite the fact that the CPU is extremely busy.
Other performance improvements in Windows 11 are related to the way your computer wakes up from sleep and manages standby time.
In comparison to Windows 10, Microsoft stated that in Windows 11, your RAM can remain energized while the PC is in sleep mode, allowing it to have power while the rest of the computer does not. This will allow your computer to wake up to 25 percent faster when it is in sleep mode.
Spotify is one of the most popular online music platforms, it covers all genres, has a sleek design and it’s easy to use.
But the big downside is that it all happens online. Without an Internet connection, you’re stuck with what you have in your storage.
When there’s a will, there’s a way and that is where Pazu Spotify Converter springs into action to help you grab all your favorite tunes and store them wherever you want.
And you don’t even need to have a Premium Spotify account to do that so you’re good to go even with the free one.
We’ve tested the software and we’re happy to give you a rundown of its best features and how to use it in just a few steps.
How can Pazu Spotify Converter help me download Spotify music?
With a free account on Spotify, Pazu Spotify Converter will log in, and then on, it’s just about selecting and downloading the favorite songs in M4A, MP3, AAC, FLAC, WAV, and AIFF formats.
Of course, after getting the songs in a designated location on your drive, you can transfer them to your favorite players or devices, including the mobile you take with you when running.
You don’t even need to install the Spotify app because the tool can log into your account from any PC, wherever you are.
What are the best features of Pazu Spotify Converter?
1. Built-in Spotify web player
Forget about the Spotify app because the Pazu Spotify Converter has a built-in web player.
That means, it’s just like opening the Spotify account on a browser or the app but this time, you can download and convert any song.
Think of it as a tiny browser that can access your music account and is able to get all your songs for any offline usage.
2. High-quality downloads
Not only that you download any of your songs, but with Pazy Spotify Converter you get them at top quality.
You can save the songs as WAV and FLAC but even for MP3, you can set up the sampling up to 320kbps.
That means quality-wise that the tool will grab the songs as the original copies and you can’t get better than that.
3. Keep original ID3 tags & metadata
Most common audio grabbing tools out there just download the songs and if you want to organize them afterward, you will have to do that manually.
The tool from Pazu will get the songs together with ID3 tag information, including title, artist, album, genre, year, etc.
Moreover, you will already have them organized in the History screen with all the criteria you need and play them seamlessly.
After getting the file, run it, select the destination folder, and select Install.
In a few seconds, the installation will be over so just hit the Finish button to start the app.
Now, hit the Login button from the top-right corner of the window.
In the next window, you just need to log into your Spotify account with either the social network account, the Google account, or your distinct credentials.
Next, if you bought the tool, click on the Key button to register it.
Just enter the code you received when you purchased the product and hit the Register button.
Now, click on the Settings cogwheel from the top-right corner to select the output format.
On Auto mode, it will save the file in M4A format. For MP3 and AAC, you can also set the output quality, depending on the song. You may also change the output folder, the title, and the organizing criteria.
Next, close the window, open your playlist and click on the Add to list button from the side.
On the top-right, you will see a smart button that is very helpful because toggling will not show you the songs you already converter. Now, check all the songs you want to convert and hit the Convert button from the bottom-right corner.
The only thing left to do is to sit and wait or do anything you want until the app converts the songs you’ve selected.
After that, with a single click on the Folder icon of any song, you will open the location in a File Manager window.
And after it’s done, you can click the History button from the top-right corner and see all your conversions organized by date, artist, and album.
You also have the option to sort your output files and even play or delete them with a single click.
What can be any easier than that?! Grabbing any songs from Spotify with top-quality audio rendering is simply a piece of cake.
Of course, the more songs you select and convert, the longer it will take, but you don’t need to stay with your eyes pinned on the screen because the process is completely automatic.
You can get as many songs as you want and leave your PC to do this overnight because within the Settings, you can program it to put the computer to sleep when it finishes.
As for the price, Pazu Spotify Converter is only $14.95/month. Of course, paying for the whole year upfront will save you a lot of money and there’s also a $99.95 price for a lifetime license option.
The tool also has a Mac version so hit the link below to get the right version for your system.
There are plenty of online music grabbers out there in different forms but from our experience, they don’t work on any songs and they can be very shady.
In other words, installing an add-on on your browser will not always do the job and you might be risking some serious consequences.
With Pazu Spotify Converter, everything worked incredibly smooth and easy. We’re confident that anyone can use it without any kind of introduction and training.
Getting the songs with their ID3 tags and artwork and top-quality audio was like magic, with an automatic process.
In this piece we’ll show you how to enable Ping on Windows 11 and all the steps you have to take in case it’s not working.
Ping, short for Packet Internet or Inter-Network Groper, is used to test and confirm if a particular IP address exists and measure the response time of that IP address.
Ping is also used for troubleshooting purposes to ensure that a client computer that the user is attempting to contact is up and running. All operating systems, such as Windows, Linux, and macOS, use ping.
Let’s see how you can enable it.
How to enable Ping in Windows 11 + troubleshooting
We’ll show you the exact steps for enabling ping, along with tips on diagnosing network issues, understanding ping results, and optimizing your connection for smoother performance.
1. Enable IPCM through Windows Defender
Click on Start.
Search for Windows Defender Firewall.
Click on Advanced Settings.
Right-click on Inbound Rules in the left pane and select New Rule.
Click on Custom in the New Inbound Rule window.
Click on Next.
Select All Programs in the Does this rule apply to all programs or specific programs? Page.
Now click on Next.
Select ICMPv4 in the Protocol type drop-down menu that is under To which ports and protocol does this rule apply? Page.
Click on Customize.
Click on Specific ICMP types in the Customize ICMP Settings window.
Enable Echo request In the ICMP types list.
Click on Ok.
Now click on Next in which ports and protocol does this rule apply?
Now select the radio button to Any IP address for both Which local IP addresses does this rule apply to? And Which remote IP addresses does this rule apply to?
And to create an ICMPv6 rule, repeat the same steps, but in To which ports and protocols does this rule apply? Click on the Protocol type and select ICMPv6.
If you’re having any issues after this step, keep reading.
2. Try the Network Adapter Troubleshooter
Click on the Start menu and search for Settings.
Click on System.
On the right windows, scroll down and select Troubleshoot and then Other Troubleshoot.
Select Internet Connection and then click on the Run.
Wait for the troubleshooter to diagnose the problem.
Restart your PC.
If the troubleshooter didn’t fix the issue, you can try the below solutions.
3. Check your Antivirus
If you can’t ping computers on your network, your antivirus may be at fault. Check its settings to ensure it allows ping.
You can also reset the settings to default or temporarily disable the antivirus to see if that resolves the issue.
Should disabling the antivirus fix the problem, consider switching to a more user-friendly solution like TotalAV, which offers robust protection features without complicating your network settings.
If you are not satisfied with your existing antivirus software and want a more robust and feature-rich antivirus software, you can try TotalAV.
4. Turn off IPv4 and IPv6 Using Command Prompt
To disable IPv4 and IPv6 using the command prompt, follow the below steps:
Click on the Start menu.
Search for the command promptand click on Run as administrator.
Type the following command into the command prompts.
netsh int ipv6 isatap set state disabled
netsh int ipv6 6to4 set state disabled
netsh interface teredo set state disable
Now restart your computer.
Now confirm if the problem has been resolved and if you can ping commands properly.
Under Programs and Features click on Uninstall a program.
Find applications that can be blocking HTTP traffic.
Click on Uninstall.
Once uninstalled, restart your computer and test if everything is fixed.
6. Confirm if your PC is a member of the same domain
Click on the start button and search for View advanced system settings.
Click on the tab called Computer name and click on Change.
Confirm if your computer is a member of the same domain, and click on Ok.
7. Disable VPN
VPNs have become an integral tool that we use in our day-to-day life for various purposes, be it for entertainment, work, or any other reason. VPNs play an important part in our lives.
There is a high probability that your Windows 11 not responding to ping is because of your VPN. Try disabling the VPN, restart your computer, and confirm if your Windows 11 is responding to ping now.
Is it safe to enable ICMP?
Generally, the network administrator considers the Internet Control Message Protocol (ICMP) a security threat, and it is recommended to keep it blocked at the firewall. While ICMP is notoriously known for its security risk, you can still allow some ICMP traffic and it is safe.
On your Windows 11 computer, it is safe to allow Type 3 and Type 4 ICMP traffic. To send out the ping request, Type 8 OUT and Type 0 IN must be allowed.
The word Ping comes from sonar terminology, where a sound wave (pulse) is let out and listens for an echo (ping) in return. The greater the interval, the greater the distance to an object.
The same principle is also used in networking. By pinging, you can determine if your internet connection is working properly, see if there is any network congestion, resolve any latency issues, and also find out if the server is down.
Windows 11 and previous Windows versions have been found to fail to respond to ping, and this is not uncommon with Windows.
Although it is unclear why a Windows computer can stop responding to ping, with the fixes we provided above, you should be able to fix this.
Let us know your experience solving this, as we would love to hear from you!
Some people have found Windows 11 to be bloated with a lot of unnecessary files and apps that only slow down the OS. At least to these people as Windows 11 does come with genuinely great apps.
Gamers have also found that, because of the perceived Windows 11 bloat, a lot of their games don’t run as well as they should. So, people took the Windows 11 ISO file from Microsoft and created their own version.
This guide will show some of the best custom ISO files for Windows 11. Across the internet, many of them are compact and easy on the hardware.
What are the best custom ISO files for Windows 11?
Ghost Spectre Superlite is a custom Windows 11 version focused on speed and performance. It removes resource-heavy features like OneDrive, Windows Defender, and NFC.
Benchmarks show smoother gameplay in demanding titles like Cyberpunk 2077, thanks to reduced bloat.
We like its focus on performance but caution: losing security features may leave some users feeling exposed. Still, it’s a fantastic choice for power users seeking peak efficiency.
ReviOS is built for gamers and power users, cutting excess baggage like typing personalization, UAC, and unnecessary services.
It balances minimalism and functionality by keeping essentials like Xbox Game Bar and optional updates. We especially enjoy the Workspace feature for post-installation tweaks, making it feel personal and efficient.
Though lighter than Windows 11, you’ll want an antivirus since Defender’s out. Overall, ReviOS delivers solid customization and seamless gaming.
Phoenix Lite OS removes unnecessary features but stands out by bypassing TPM and Secure Boot, broadening compatibility.
Versions like Ultra-Lite retain basics like Microsoft Store and pre-install useful frameworks. What caught our attention is its efficiency: reworked Bluetooth support and pre-installed tools make it ready to go.
While it lacks Hyper-V, its stripped-down design keeps functionality intact. Perfect for older or underpowered hardware.
Are there other things I should know about Windows 11 ISO files?
TPM is a major factor holding back Windows 11 installation on computers. Fortunately, there is a way to do this beyond buying a special microchip. It may require you to modify the ISO file or the Registry Editor.
It may also interest you to learn how to create a bootable USB drive for Windows 11. The process will require you to download the Rufus software to complete this. The process is easy to do. Just make sure your computer can run Windows 11 beforehand.
All these systems have their benefits, and we featured them in our latest article on the best Windows for older laptop guide, so don’t miss it.
Feel free to leave a comment below if you have any questions on other Windows 11 apps. Also, leave comments about guides that you’d like to see or information on other Windows 11 features or list guides.
We pretty much all know how important backing up our files really is. Whether we’re talking about important company documents or your favorite family pictures, all personal possessions are important.
Sometimes, stuff happens without us having any control over it and we always run the risk of our devices malfunctioning or getting destroyed, resulting in us losing all stored data.
So, having a backup of all your existing content is crucial if you don’t want to take that risk and end up in a situation where recovering everything is simply impossible.
That’s why Microsoft created One Drive, and that’s why so many people use it. Storing data in the cloud is one of the best and safe ways to keep your personal cyber-possessions.
If you are a Windows 11 user, you surely know by now that the default homepage of File Explorer is now called Home.
The name Quick access has been repurposed for the pinned/frequent folders section and Pinned files are now called Favorites, in order to align with Office and OneDrive.
Setting One Drive up on your Windows 11 device is actually easier than you might think and we’re about to show you how to do just that.
How can I set up my File Explorer One Drive?
Click to open the fly-out taskbar menu and click on One Drive.
Click on the Sign-in button.
Press the Create an account button if you don’t have one already, or input your email address and press the Sign in button.
Type in your password and click the Sign in button.
If you agree with the selected One Drive folder press Next, or select Change folder to choose a new one.
In File Explorer, click the One Drive dropdown located under Home.
Now you can access all your One Drive content directly from its File Explorer dedicated section.
Also, recent and pinned files displayed in Home are now searchable using the search box in File Explorer even if they are not local files, so you can find Office files recently shared with you.
For a detailed walkthrough of the sign in screens and options, see our guide on how to login to OneDrive.
That’s pretty much all you have to do in order to sync up your One Drive on your Windows 11 device, making it a lot easier to access what you need, really fast.
Let us know if you had any trouble completing this process in the dedicated comments section below.