How to Fix SSD Freezing on Windows 11: A Step-by-Step Guide

SSD works faster than HDD and allows smoother operation on Windows. However, it is not free from issues. For example, some users have complained that their SSD keeps freezing on Windows 11 for no reason. It can be frustrating but don’t worry; it is fixable.

Here, in this guide, we will talk about all the expert-recommended fixes to resolve the problem right after discussing the causes of its occurrence.

What causes the SSD keeps freezing on Windows 11 issue?

There could be various possible reasons for SSD freezes issue; some of the popular ones are: 

  • SSD connected to the wrong port – If the SSD port to which you have connected is SATA2 instead of SATA 3. This means your SSD might not be working to its full potential. Hence the issue.
  • AHCI disabled – If Advanced Host Controller Interface (AHCI) is not enabled, your SSD might be able to work correctly and use SATA advantages.
  • Bad sector on hard disk – If any sector on your SSD is corrupt or damaged, you might experience slow performance while using SSD.
  • Bugs in Windows update – If the issue started just after updating your Windows, then the update might have bugs. This could cause slow computer issues and SSD performance issues.

What can I do if the SSD keeps freezing on Windows 11?

Before diving into troubleshooting methods, make sure you go through these preliminary checks: 

  • Check if the SSD is connected to the SATA 3 port.
  • Replug the SSD.
  • Check if the BIOS is up to date.
  • Make sure you have KB5007262 and KB5008353 updates installed 

1. Enable AHCI

1.1 Confirm if it is disabled

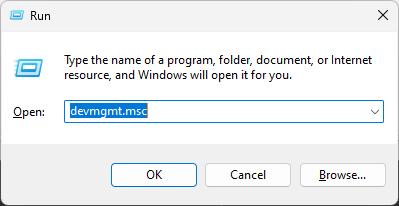
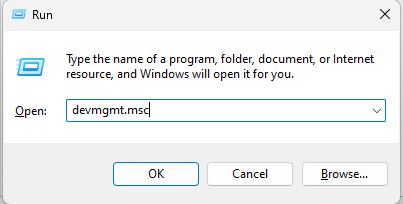
  1. Press Windows + R to open the Run window. DEVICE MANAGER - SSD crashing
  2. Type devmgmt.msc and press Enter to open Device Manager. 
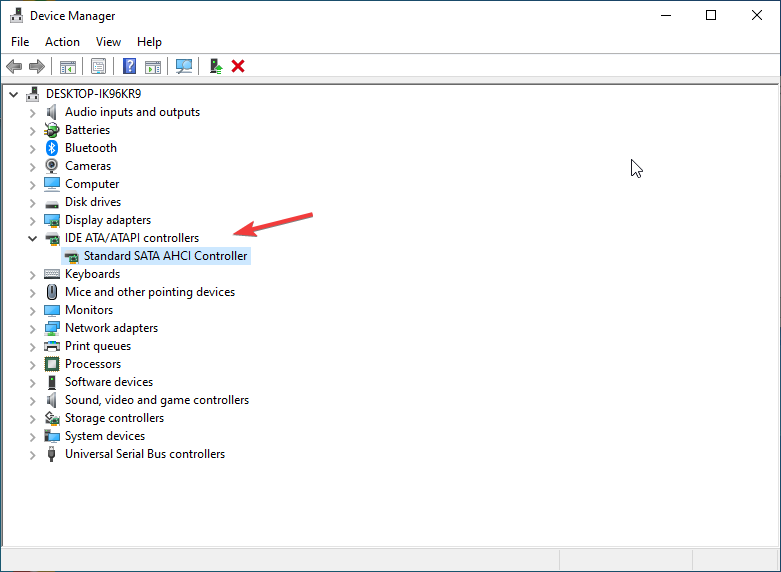
  3. Go to IDE ATA/ATAPI controllers section, and check for AHCI. If present, then you don’t need to proceed. If not, move ahead. AHCI - ssd freezing windows 11

1.2 Make changes in Registry Editor

Tip icon Tip
Before making changes to any registry entry, please take a backup. For that, go to File, then click Export. Next, save the .reg file at the desired location. To import it, go to File, then click Import. 
  1. Press Windows + R to open the Run consoleREGEDIT RUN COMMAND
  2. Type Regedit and press. Enter to open Registry Editor.
  3. Follow this path: Computer\HKEY_LOCAL_MACHINE\SYSTEM\CurrentControlSet\Services\iaStorV
  4. Locate, double-click DWORD Start, and change the Value data to 0. Click OK.START - ssd freezing windows 11
  5. Follow this path: Computer\HKEY_LOCAL_MACHINE\SYSTEM\CurrentControlSet\Services\iaStorV\StartOverride
  6. Double-click the DWord 0, modify the Value data to 0 and click OK.Starrtoveride
  7. Now navigate to this path: Computer\HKEY_LOCAL_MACHINE\SYSTEM\CurrentControlSet\Services\storahci
  8. First, Double-click the DWORD Start, change the Value data to 0 and click OK.Start Storahci
  9. Now go to the StartOverride key, double click DWORD 0 to modify its Value data to 0, and click OK.Startoveride Storachci 

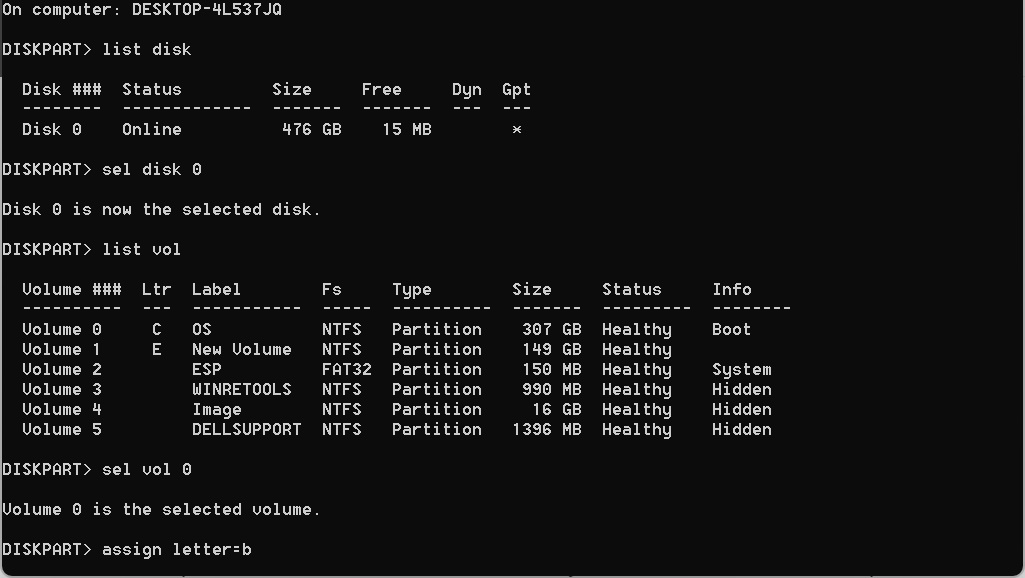
1.3 Makes changes in BIOS

  1. Press Windows + I to open Settings. 
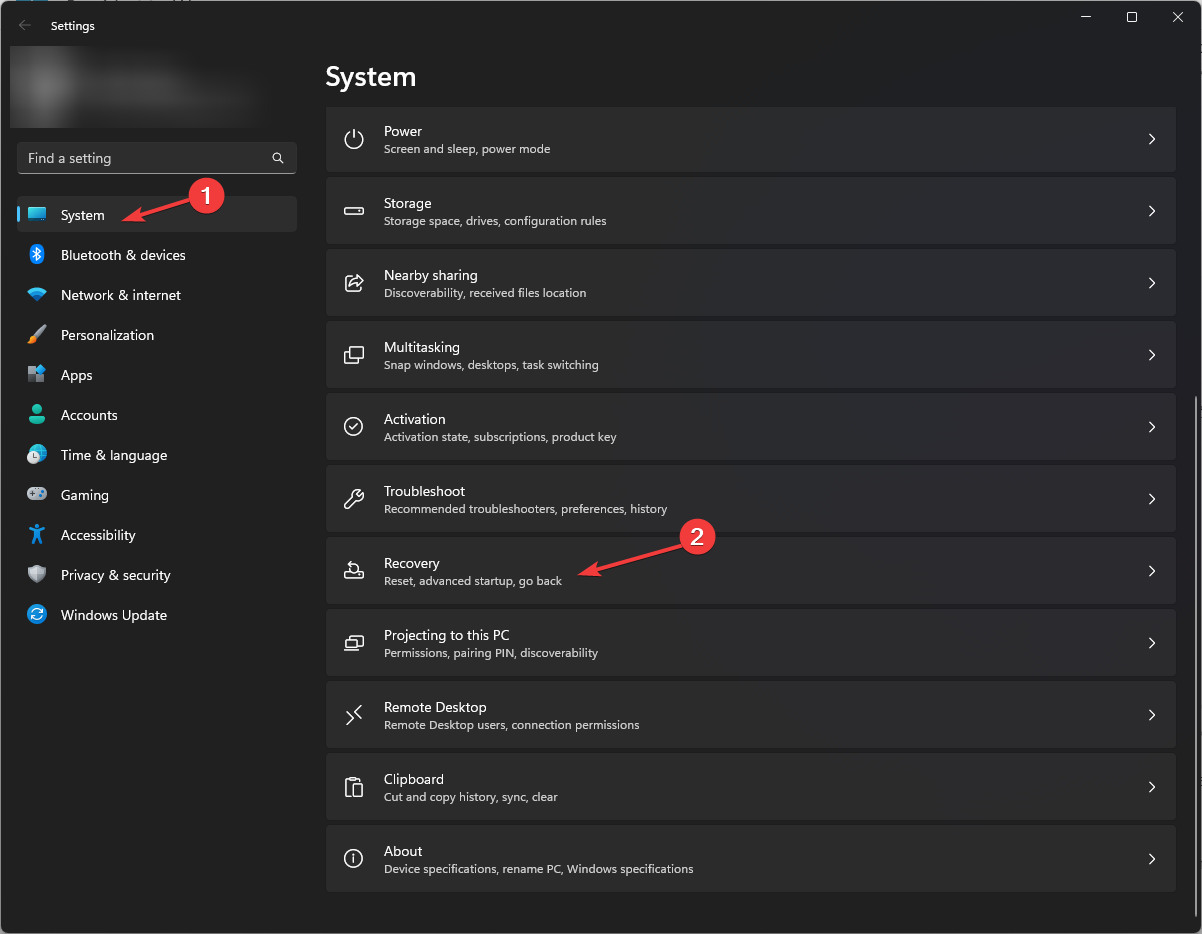
  2. Go to System, then click Recovery.System-Recovery-Windows-11 
  3. Now next to Advanced startup, click Restart now. Recovery Advanced Startup-Recovery Advanced Startup -ssd freezing windows 11
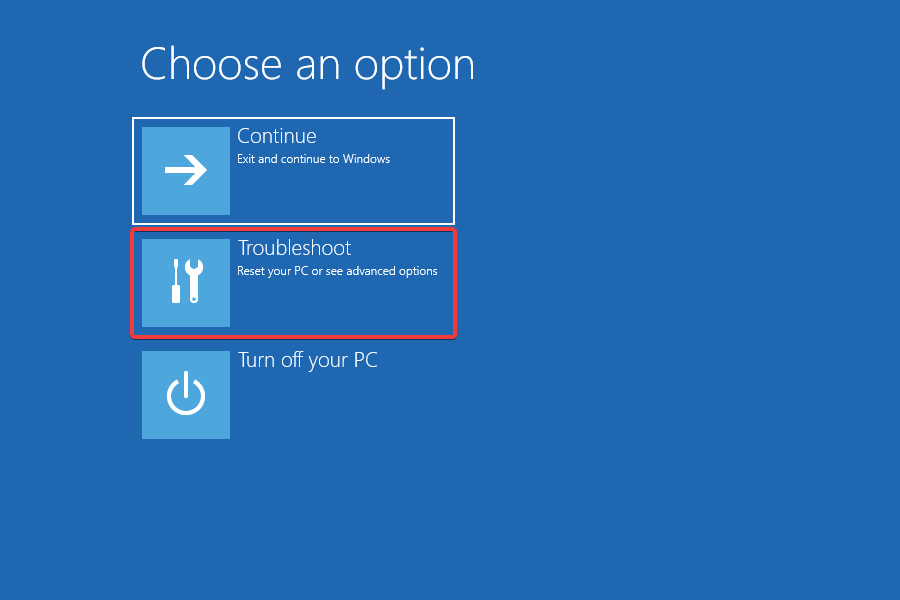
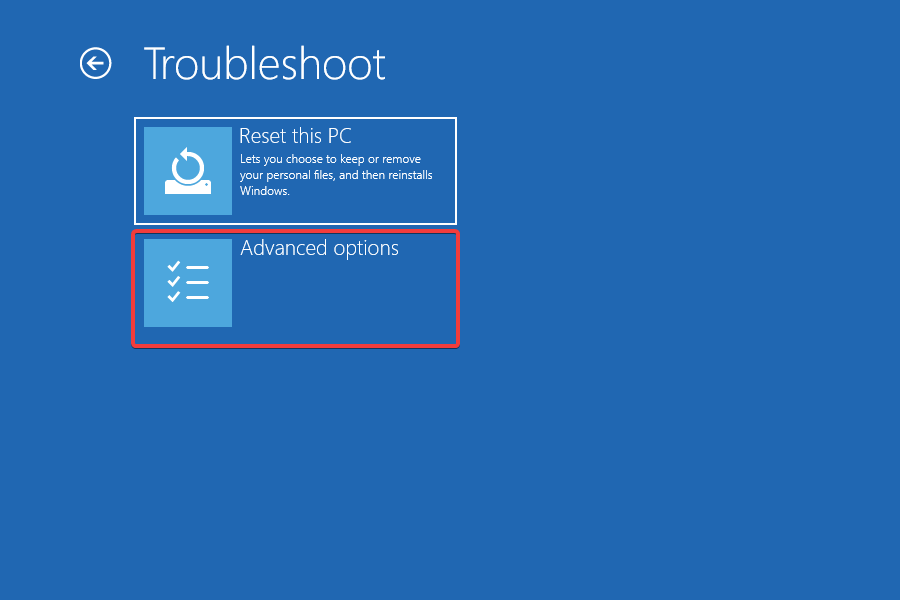
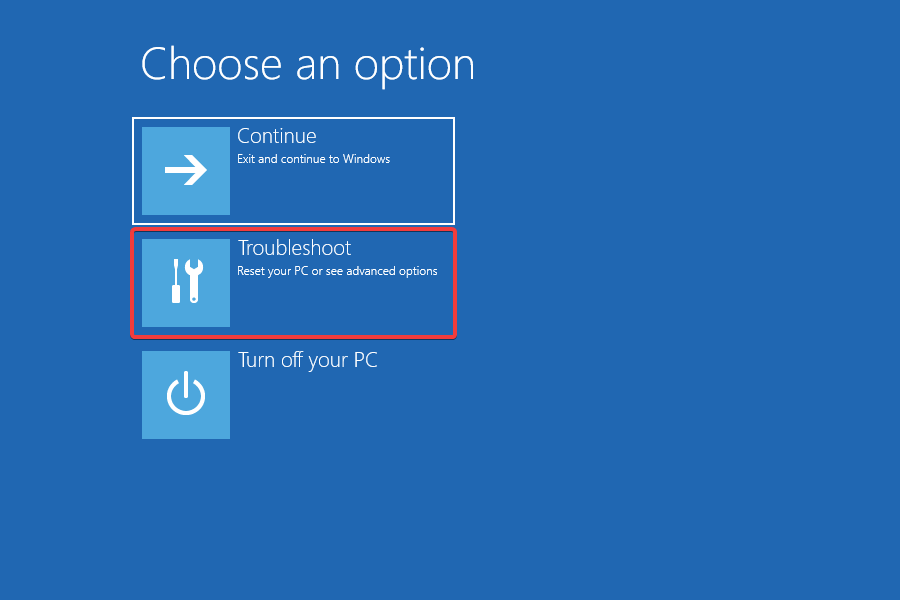
  4. From the Choose an option, click TroubleshootChoose an option - Troubleshoot
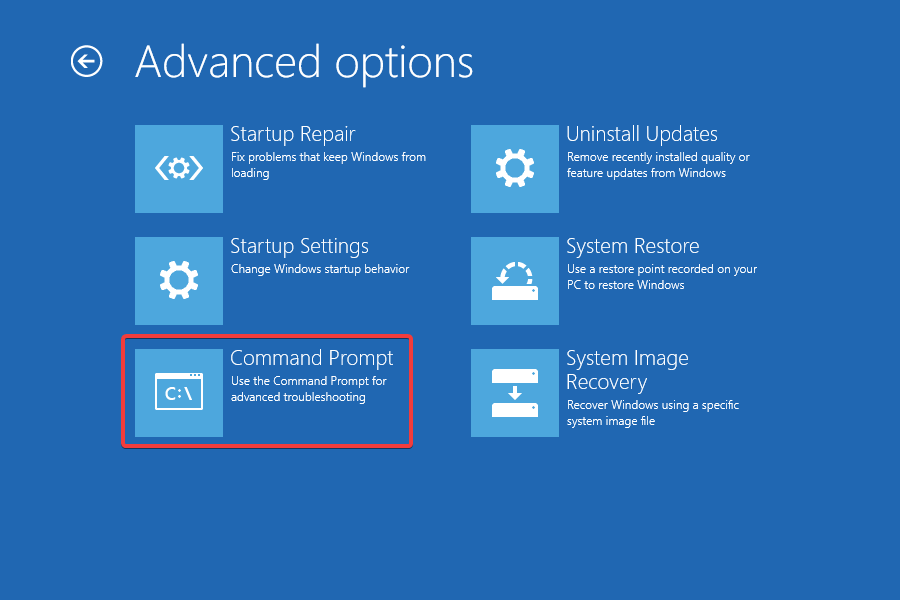
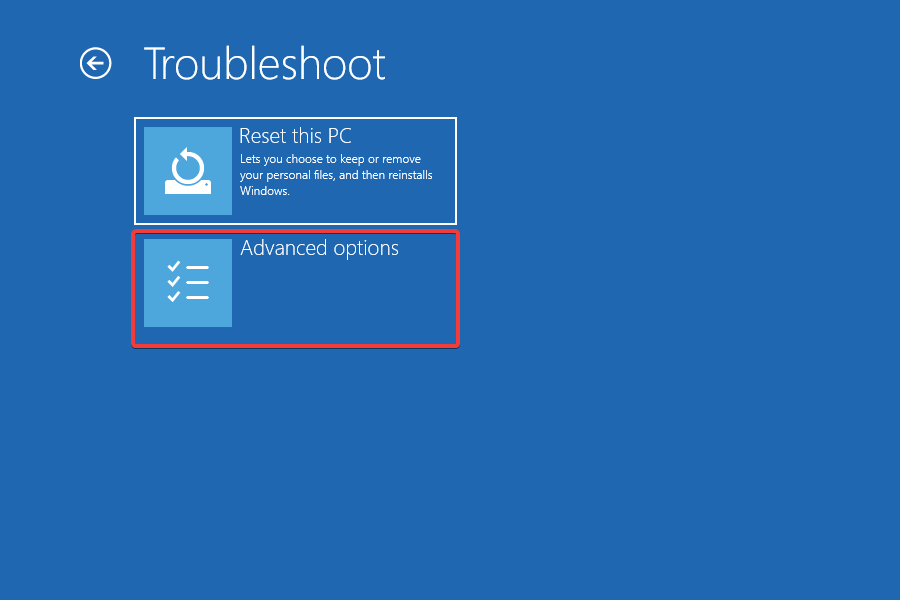
  5. Select Advanced Options.Advanced options -ssd freezing windows 11
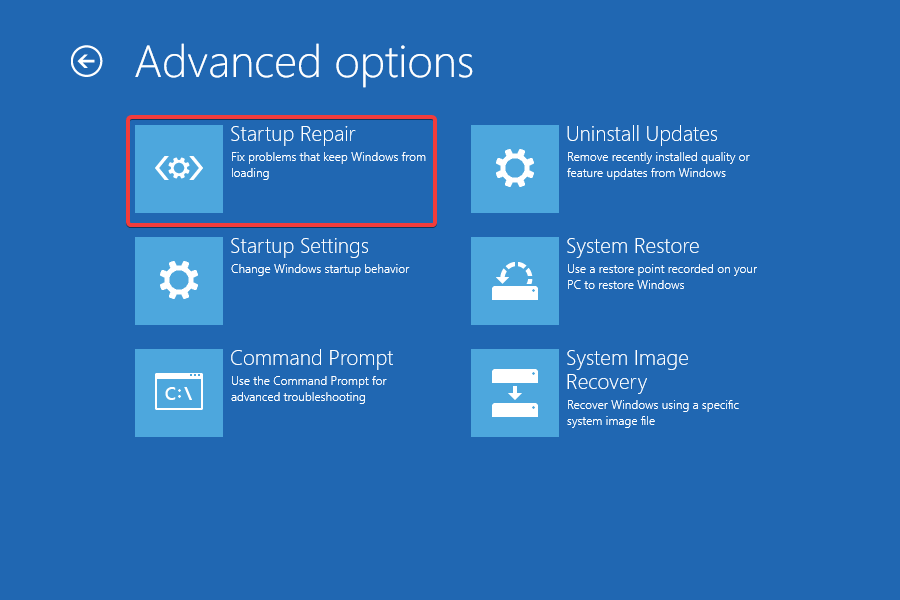
  6. Now choose UEFI firmware settings and click Restart. UEFI 2 -adb reboot bootloader not working
  7. The computer will restart, and you will get options to choose from. First, select the appropriate option to enter BIOS. 
  8. Locate Storage Confirguration.
  9. Select Configure SATA as AHCI. 
  10. Go to Exit, and select the Save and exit option. 

2. Check if your SSD is 4K aligned

  1. Press Windows + R to open the Run console.msinfo32 -ssd freezing windows 11
  2. Type msinfo32 and press Enter to open the System information. 
  3. Go to System Summary, locate, and double-click Components. 
  4. Choose Storage, then click Disks. 
  5. From the right pane, locate Partition Starting Offset and check its Value. The value should be divisible by 4096 to be 4K aligned. MSINFO -ssd freezing windows 11
  6. If not, then you need to align it manually. For example, you might have to format and reassign partitions, or you can use a third-party tool to help you with that. 

3. Repair bad sectors 

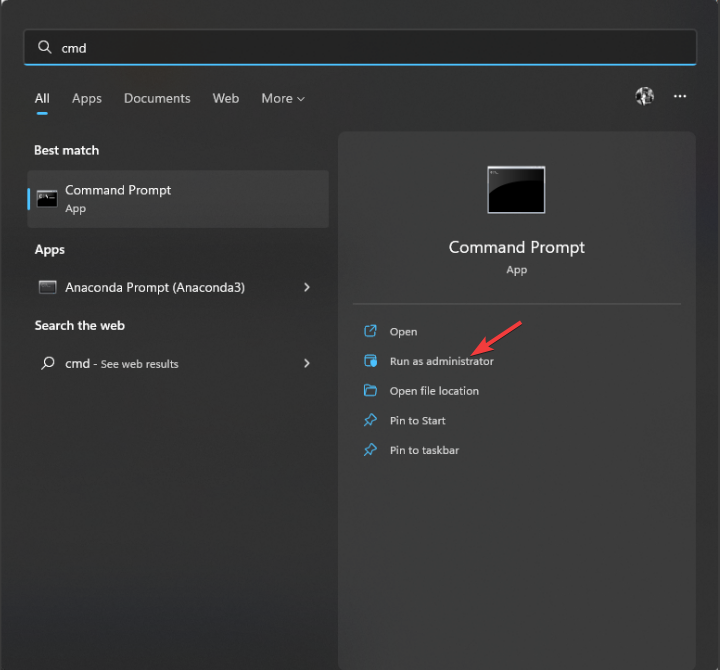
  1. Press the Windows key, type CMD, and click Run as administrator. DOS COmmand Prompt -ssd freezing windows 11
  2. Copy and paste the following commands and replace E with the drive letter you want to scan, and press Enter after every command: chkdsk /f E chkdsk /r E
  3. Repeat this for all the drives to fix the bad sectors.

Is the Windows 11 SSD freezing issue resolved? 

Microsoft released a few updates to address the Windows 11 SSD freezing issue. The tech giant first released KB5007262 in 2021 to resolve the SSD performance issues.

However, some of the problems after were still left unaddressed, which later were resolved with KB5008353. This update also fixed 30 more topics related to performance and other reported cases. 

So, these are some methods you can use to fix the SSD freezing issue on Windows 11. If nothing has worked for you, it is advised to take a backup of your drive, format it and reinstall Windows 11 to fix the issue. 

Please let us know in the comments section below if you have any questions or concerns related to the SSD freezing up.

What is CompatTelRunner.exe & Should I Disable it?

Windows users may sometimes notice some strange files on their computers. Usually, these files go undetected until they impact your computer negatively.

High CPU usage is usually the most common tell-tale sign. In this article, we’re going to talk about the CompatTelRunner.exe file.

We’ll tell what this file is and how it affects your computer, so don’t hesitate to keep on reading.

What is CompatTelRunner.exe?

The CompatTelRunner.exe file is a Microsoft Compatibility Telemetry file located in the C:WindowsSystem32 folder.

Microsoft uses Telemetry to collect system data in order to keep Windows devices secure and improve the quality of its services.

The CompatTelRunner.exe file is also used to upgrade your system to the latest OS version and install the latest updates.

How to disable CompatTelRunner.exe?

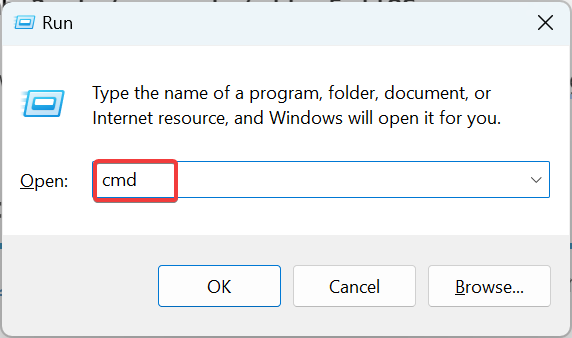
1. Disable it from Task Scheduler

  1. Start Task Scheduler.
  2. Go to Task Scheduler Library > Microsoft > Windows > Application Experience.task scheduler application experience CompatTelRunner.exe
  3. Disable all three tasks in that folder.
  4. Go to Ask Scheduler Library > Microsoft > Windows > Customer Experience Improvement Program.
  5. Disable all three tasks in that folder.

For all versions of Windows, start by removing it from the Task Scheduler as above explained. If Task Scheduler won’t run on your PC, you should read our easy solutions guide.

2. Tweak the Registry

  1. Start Registry Editor (regedit.exe) as Administrator.
  2. Go to
    • HKEY_LOCAL_MACHINESOFTWAREMicrosoftWindows NTCurrentVersionAppCompatFlagsTelemetryController
      telementry controller registry editor CompatTelRunner.exe
  3. Rename the entry from TelemetryController to TelemetryControllerX.
  4. Restart your PC.

Then for Windows 10, you need to kill CompatTelRunner.exe from the registry. If Registry Editor doesn’t open, check this detailed article to see how to fix it.

3. Run SFC

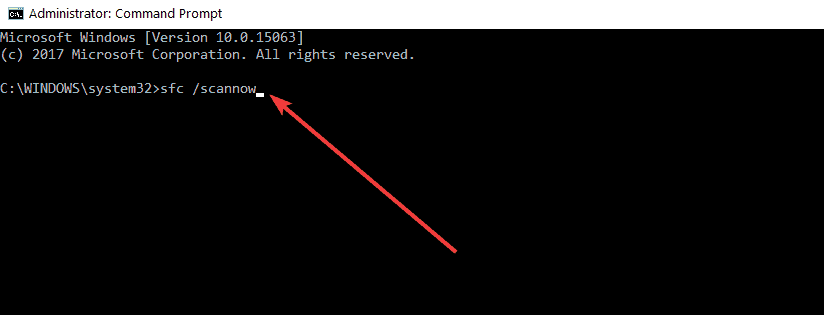
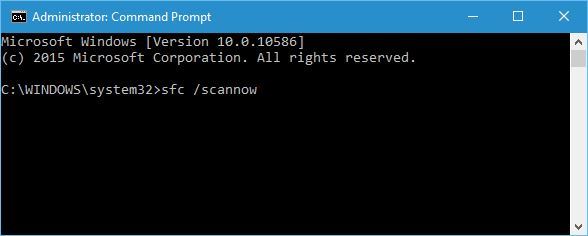
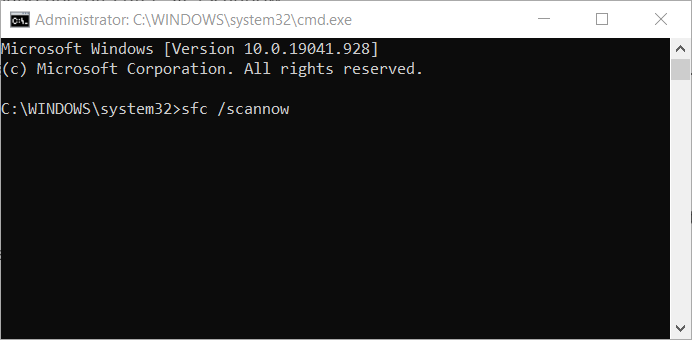
  1. Launch Command Prompt (Admin) as an administrator.
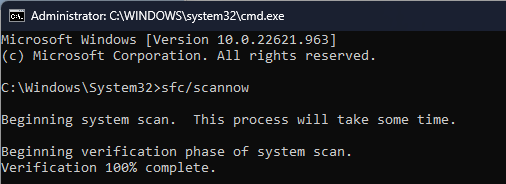
  2. Enter sfc /scannow and hit Enter.SFC scan command prompt CompatTelRunner.exe
  3. Wait until the repair process is completed (this may take a while).

This command helps you to fix system file issues by replacing missing or corrupted files. Follow the steps above to launch the scan.

4. Clean boot your PC

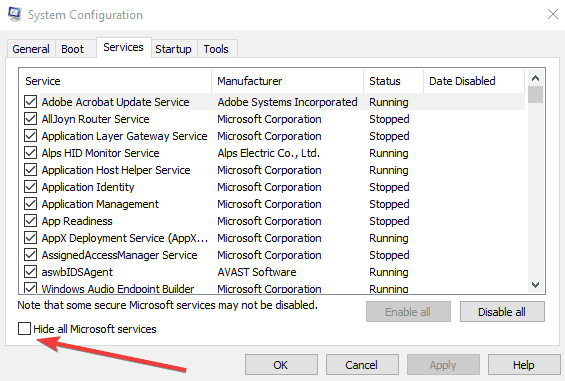
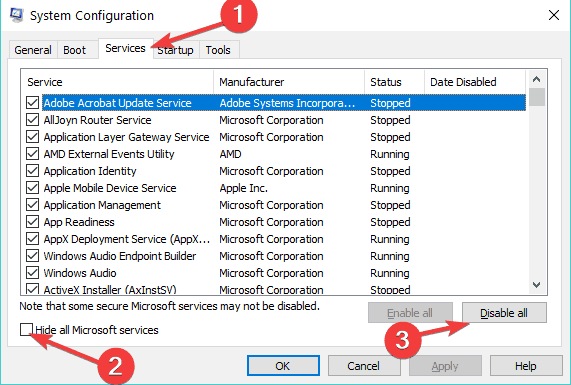
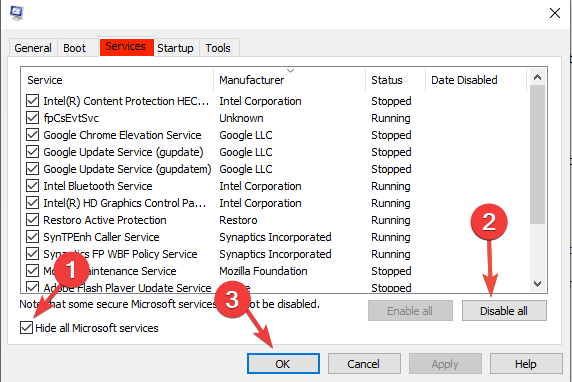
  1. Navigate to Start > type msconfig > press Enter.
  2. Go to System Configuration, and click on the Services tab.
  3. Check the Hide all Microsoft services check box, and click Disable all.hide all microsoft services CompatTelRunner.exe
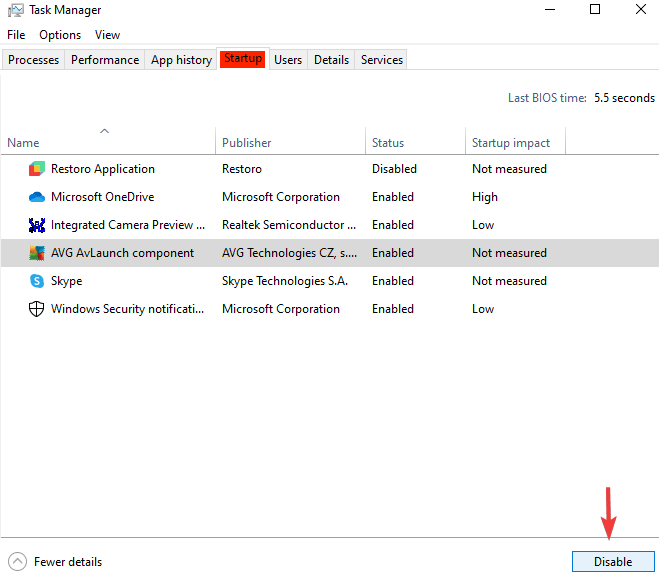
  4. Go to the Startup tab, and open Task Manager.
  5. Select each startup item, and click Disable.disable startup programs CompatTelRunner.exe
  6. Close Task Manager, and restart your PC.

Clean booting your device allows you to start your machine using only a minimum set of drivers and programs to avoid software compatibility issues.

However, the catch is that you’ll need to do this every time Windows installs new updates on your machine.

Have you applied the above procedures? Let us know if any of them worked for you by using the comments area below.

Best VPNs With Free Trial [No Credit Card Required]

VPNs are an increasingly popular tool for modern internet users. They encrypt your traffic to protect your privacy, let you get around network restrictions, and unblock content intended for certain countries.

If it’s your first foray into the world of VPNs, you probably want to test a few out before making a purchase. The catch? As you’ve likely realized, many VPN services ask for billing details upfront. 

Even worse, review sites are packed with misleading info that fails to mention whether a free trial requires a credit card or another payment method. 

That’s why we’ve compiled a list of legitimate try-before-you-buy offers. These are free trials that let you download the VPN app and use it without any kind of commitment.

Best VPNs with free trial and no credit card requirements

To make the list, VPNs have to offer a genuine free trial that doesn’t need payment information. The trial must also offer enough features to be comparable to the premium version, so you can really test if it’s for you. 

Alternatively, you’ll find some good free forever plans that have many of the same features found in premium ones. 

CyberGhost – 24-hour free trial with no limitations

cyberghost all server locations

Not only is CyberGhost one of the best all-around VPNs, but it also offers an unrestricted free trial for 24 hours.

Simply download the Windows or macOS app, click Start Free Trial after launching, and it’s yours for a day. 

This means you get access to all 9400+ servers in some 91 countries. The capacity to unblock any geo-restricted content anywhere in the world is at your fingertips.

What’s more, CyberGhost has hundreds of optimized servers for specific tasks, including gaming, torrenting, and streaming.

For example, if you’re in the United States but want to access the Australian Netflix library, there’s a server just for that.

You can also get free trials on Android for 3 days and iOS for 7 days, but billing info is required upfront. However, if you cancel before the final day, you won’t be charged.

CyberGhost top features:

  • Dedicated IP addresses
  • Pick and choose which URLs and apps to encrypt
  • Automatic kill switch and advanced leak prevention
  • 45-day money-back guarantee

CyberGhost

Enjoy an unrestricted 24-hour free trial and a 45-day money-back guarantee with CyberGhost.

Hide.me – 5-day free trial and a free forever plan

hide.me vpn free trial activated

Hide.me currently offers the best of both worlds – a full 5-day free trial to test drive its premium plan and a whole separate free plan with 5 locations. 

To unlock this offer, simply go to the website and proceed with a free account, then once your email is confirmed a button will appear asking you to try the premium service – no credit card needed.

Now you can enjoy all the features until the date displayed.

You get over 2,000 individual servers in 77 countries. Its architecture is fast enough to handle 4K streaming and P2P file sharing. It also supports up to 10 devices at once.

Once the trial expires, you can easily revert to the free forever plan, with servers in the Netherlands, Germany, Canada, and the West and East coasts of the United States. You get 10GB of data a month.

Hide.me additional features:

  • Dedicated IP addresses
  • Zero logs policy
  • Multihop to connect through 2 VPN servers
  • IPv6 and DNS leak prevention

Hide.me

Access a 5-day trial or enjoy Hide.me’s free-forever plan without any obligations.

HideIPVPN – full 3-day free trial

hideipvpn connected to netherlands server

To enable the HideIPVPN free trial, you must click the trial link on the website and provide your email address. You’ll then get an email with an automated username and password to log in on the desktop or mobile app.

HideIPVPN is a simple and user-friendly service with 23 servers, spanning 11 countries. 

These are:

The United States, UK, Canada, Poland, Netherlands, Germany, France, Lithuania, Luxemburg, Singapore, and Australia. 

It can easily bypass geo-restrictions, so if there’s a service you want to access in any of these countries, it’s well worth using the free trial.

The VPN has some great features, including a fully customizable kill switch. This lets you choose specific apps to freeze if the VPN connection drops, rather than halting everything. 

Other HideIPVPN features:

  • DNS leak prevention
  • Choose from 5 protocols, including OpenVPN
  • Smart Connect to the fastest server
  • Sort server locations by speed

HideIPVPN

Get a test drive for 3 full days and enjoy HideIPVPN’s user-friendly service risk-free.

Bitdefender VPN – 7 days free on mobile with 200MB data

bitdefenter vpn free trial 7 days left

The Bitdefender VPN offers a reasonable middle-ground when it comes to its free trial policy. While you’re limited to 200MB a day in data, it genuinely has no commitment, so you’re never at risk of being charged.

Of course, 200MB is not enough to stream or game for any length of time. However, it’s enough to test its capabilities on your favorite services, so you know whether to purchase a premium plan.

To get started, download the app via Google Play or the Apple App Store. Then provide your email address and tap Start 7 days Trial. That’s it.

All other features are available, including an automatic kill switch and split tunneling. It has servers in over 50 countries, with multiple choices in the US, UK, and Canada.

Our only criticism is that you can’t access the free trial on a desktop.

What else to know about Bitdefender VPN free trial:

  • Free ad blocker with anti-tracking
  • Choose your VPN protocol manually
  • Set to auto-connect on public Wi-Fi
  • Easily upgrade in-app

Bitdefender VPN

Give BitdefenderVPN a go for 3 full days on mobile – no commitment required.

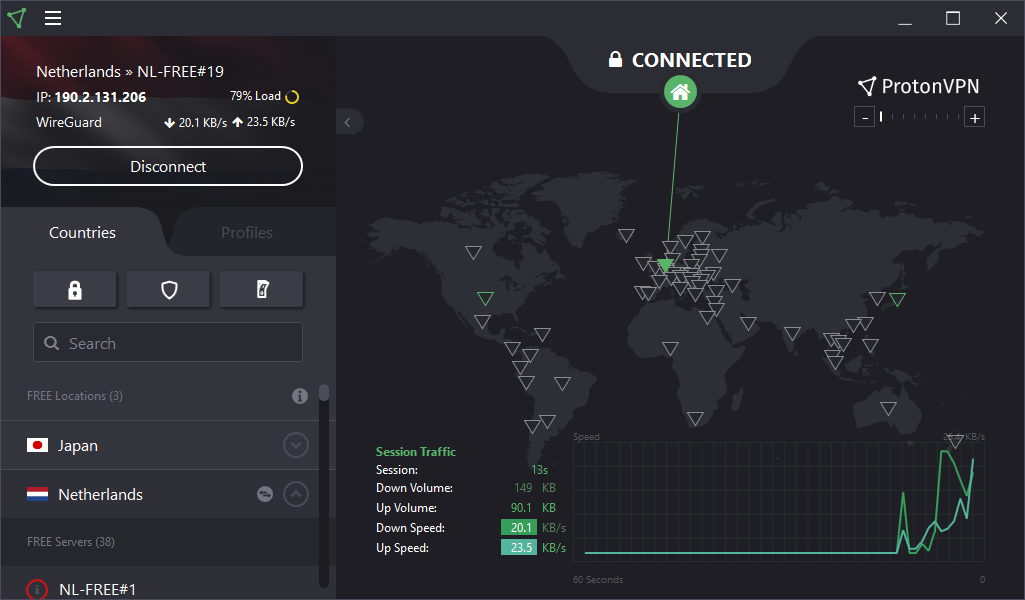
ProtonVPN – unlimited free data in 3 countries

ProtonVPN conected to free netherlands server

ProtonVPN recently dropped its 7-day free trial, but its free forever plan gives you a good indication as to what’s available, with a 1-device limit.

Unlike most free VPNs, you get unlimited data and access to all the important VPN features. 

This includes an automatic kill switch and other leak prevention measures, split tunneling for choosing what to encrypt and what should get a regular connection, and your choice of protocol.

It also has a useful Accelerator feature, which automatically moves you to a faster server in the same country.

Proton is generous enough to provide hundreds of free servers. The only downside is these are all in the United States, Japan, or the Netherlands. You’ll have to look elsewhere to unblock content in other countries.

However, if you like the free plan, the premium covers 60 different countries. 

Premium ProtonVPN features:

  • Over 1,400 individual servers
  • 30-day money-back guarantee
  • 10 simultaneous connections
  • Malware and ad blocker

ProtonVPN

Give ProtonVPN a test drive for as long as you like with its fully-functional free-forever plan.

Windscribe – 70 free servers with 10GB data

windscribe vpn connected to washington dc server

Winscribe is well known for its high-performance free plan. This gives you access to all VPN features and 10GB of data per month. 

If you want absolute anonymity, you can register without an email address and get 2GB of data a month. Confirm an email address and this is instantly boosted to the 10GB advertised.

The data is more than enough to test the VPN, even if you won’t get away with prolonged streaming and high-bandwidth tasks.

Windscribe covers 70 countries and the detail for each server is excellent. You can view if it’s overloaded with users, the server latency, and whether it’s suitable for P2P file sharing.

The free plan works on all mobile and desktop apps.

What else you get with Windscribe:

  • Kill switch and split tunneling.
  • Use its DNS or enter your own
  • Stealth protocol for hiding VPN usage
  • MAC address spoofing

⇒ Get Windscribe

Pros and cons of using a free trial VPN

As you can see, there are some common benefits and drawbacks to using a VPN with a risk-free trial.

Pros:

  • Never risk being charged or exposing your financial information.
  • Test a good number of features before committing.
  • Never get locked into one particular VPN provider.
  • Some features are free forever.

Cons:

  • Some features might not be available, so you have to trust they work well.
  • Data restrictions mean you really only get to test the service, not use it to your full desire.
  • Free servers can be slower, congested, and not a fair representation of premium servers.
  • Not every top-tier VPN offers a real free trial, so you could be missing out without realizing it.

Ultimately, if you’re new to VPNs, choosing a no-obligation free trial is a good way to familiarize yourself with how they work. 

How to sign up for a free trial VPN without a credit card

Signing up for a VPN free trial with no credit card required is a simple process. Most services that offer the feature will actively tell you. Furthermore, you’ll only need to verify an email address, if even that.

Here’s how to sign up to CyberGhost’s 24-hour free trial:

  1. Google or go directly to the current free trial page at: https://www.cyberghostvpn.com/en_US/vpn-free-trial
cyberghost vpn start your free trial
  1. Click Start Free Trial and the Windows or macOS app will automatically download.
  1. Install the app and create an account with your email address.
  1. You’ll now be automatically enrolled in the free trial for 24 hours.

Once the trial has expired, the app will lock down and prompt you to sign up for a premium plan.

Conclusion

It can be frustrating when you search for VPN free trial with no credit card requirements, only to find misleading reviews or providers hiding their real free trial policy.

Fortunately, we found some good VPNs like CyberGhost, Hide.me, and HideIPVPN, that offer legitimate free trials. These include all servers and features, with no data limitations.

Moreover, it’s surprising to learn there are also a lot of good free plans that never require payment and come with GBs of available data.

Whether you’re new to VPNs or looking for something different, now you have lots of options to try.

FAQ

How can I get ExpressVPN free trial without a credit card?

ExpressVPN offers a legitimate 7-day free trial for mobile users. Simply download the app on Android or iOS, and when you first launch it, click Start Free Trial.

Unfortunately, it’s not a risk-free trial because you must provide billing information in advance. However, you can use Paypal or your network provider billing, rather than entering your credit card information.

Moreover, you can cancel at any time during the 7 days, and you won’t be charged. ExpressVPN will notify you 2 days in advance of being billed, which is a safe time to cancel the trial.

What VPN has the longest free trial?

The longest no-obligation free trial for a good-quality premium VPN is 5 days, offered by Hide.me.

While Bitdefender offers 7 days, this is hindered by a 200MB-a-day data limit.

Some other providers have a free-forever service, such as Windscribe and ProtonVPN. However, these are restricted in terms of servers and data allowances.

Can I get a VPN for just 1 month?

Yes, you can purchase a VPN for just one month. In fact, all good VPN services provide a rolling monthly plan without any long-term commitment.

This means you’re not obligated to subscribe for longer than a month and you can only pay for one month at a time.

However, you must still cancel your subscription before the second month is billed. You usually do this within your account page on the VPN provider’s website or app.

The option is sometimes worded as “turn off automatic billing” rather than canceling your subscription. Both methods will stop payments and the service. Most will also let you resume in the future without re-registering.

Note: Make sure to cancel at least 24 hours before the billing date, or else you may still be charged. Many providers will still continue the service right until the minute it’s due to renew.

Posted in VPN

How to Fix Amazon Fire TV Stick no Signal / Not Working

The Amazon Fire Stick is a handy little device that lets you essentially turn any old TV (as long as it has an HDMI port) into a Smart TV. However, like every other electronic device, it is not free from problems, as some users report that Firestick is showing no signal.

This issue can be frustrating, as it renders the device useless for some time. Fortunately, it is not the most difficult problem to solve, and we will show you how to do it in the ensuing sections of this guide.

Why is my Firestick saying no signal?

Below are some of the causes of the Firestick no signal issue:

  • Faulty HDMI and ports: The first thing to check If you are troubled by the Amazon Fire TV no signal issue is your HDMI cable and the ports. If any of these are faulty, you might need to replace them.
  • Internet connection issues: Another cause is a weak or unstable internet connection. The solution here is to try to connect to a different network or check the strength of your network on another device.
  • Issues with Firestick: In some cases, your device might encounter some glitches. You might need to reboot or reset Firestick to get past the no signal issue.

How do I get rid of the No Signal message on my TV?

1. Check the HMDI cables and Ports

amazon fire stick no signal hdmi
  • Make sure the HDMI cable is firmly connected to the Port and that it isn’t cut or scraped
  • If the HDMI cable is connected correctly, try using a different Port
  • Try using the original HDMI cable the Amazon Fire Stick came with
  • If all Ports are fully functional, try using the HDMI that has Pin 13 removed
  • Try using a power converter box

2. Consider doing an Amazon Power Stick “Reboot”

  1. Turn off the TV and remove the HDMI stick from the HDMI Port
  2. Disconnect the Amazon Fire Stick from its power source, and wait for around 10 minutes
  3. Turn on your TV
  4. Reconnect the Amazon Fire Stick
  5. Press a random button on the Amazon Fire Stick remote and keep it pressed for a few seconds before moving on

3. Check to see if the screen resolution is adequate

amazon fire stick no signal resolutions

Incorrect or un-adaptive resolution may also affect the streaming with the Amazon Fire Stick.

As such, try to modify the screen resolution as per your Amazon Fire Stick’s compatibility.

  1. Press Up and Rewind on your Amazon Fire Stick remote.
  2. Choose Use current resolution.

4. Check your Internet connection

amazon fire stick no signal internet
  • Check whether your Internet connection is working or not. If not, contact your ISP.
  • Move your Amazon Fire Stick closer to the Router.
  • Have the Amazon Fire Stick hardwired directly to the router or modem.
    • For this, you will need an Amazon Ethernet Adapter for Amazon Fire TV devices.
  • Perform a power cycle on the modem or router.
  • Switch the channels if you have a dual-band router.
  • Reset the Amazon Fire Stick to its factory settings, and connect to your network again.

5. Check the input source

  1. Press the Input (can also Source) button on your TV remote.
  2. Now, go through your input options to know the one your Firestick is connected to.

In some cases, the Firestick, no signal for the current input device issue, might occur because you are checking the wrong input source. You need to go through all the input channels on your TV to be sure.

6. Check the power source

Sometimes, this no-signal issue might be because the power equipment you use for your Firestick can not serve it well. This happens if the cable or adapter is not the original one that came with your device.

If you don’t have the original power set, you might need to order another one. Also, you should check your cable and adapter for any physical damage.

This is because any wear or tear on your power equipment can make them malfunction, leading to different issues.

7. Check HDCP compatibility

Another factor that can cause this issue is HDCP compatibility. HDCP is a feature introduced in modern TVs that puts a limitation on the rate at which digital content can be distributed illegally.

However, this feature is not available on older TVs. This can be the cause of the Firestick no signal error on TV. Unfortunately, the surest fix to this is to get a newer PC that is HDCP compatible.

Another option is to use an HDMI splitter which has a fallback mode. However, it must be noted that you should never use the HDMI splitter to distribute or private any digital content.

Finally, this option is not set in stone to work, but it has worked for some users. So, you should try it too.

With this, we can safely conclude this detailed guide on how to fix the Firestick no signal issue on Samsung TV and other products.

If Amazon Firestick does not load the home screen, check our detailed guide to fix the issue quickly.

Feel free to let us know the solution that helped you fix this issue in the comments below.

How to Fix Bellsouth.net Email Login Problems: 8 Quick Ways

Outlook is a great email client, but many users reported that Bellsouth email is not working in Outlook. This can be a problem, but there’s a way to fix this issue.

Many users have Bellsouth email, but some users reported issues while using Bellsouth email and Outlook. Speaking of issues, here are some common problems that users reported:

  • Bellsouth email login problems, authentication error – Sometimes you might not be able to login to the Bellsouth email. If this happens, you might have to change your password and create a secure mail key.
  • Bellsouth email not sending emails – If Bellsouth email isn’t sending mail in Outlook, the issue is probably your email configuration. Simply configure the email again and check if the necessary information is correct.
  • Bellsouth email won’t work – If Bellsouth email won’t work at all with Outlook, you might want to try using webmail or different email client as a temporary solution.

How to fix Bellsouth.net email not working problem?

Solution 1 – Change your password and create a secure mail key

If Bellsouth email is not working in Outlook, you might be able to solve the problem simply by changing your password. This issue can occur with some legacy accounts, and in order to fix this issue, it’s advised to visit Bellsouth’s website and change your password.

After changing the password, check if the problem is still there. If the problem is still appears, you might want to try creating a secure mail key. This is basically a password that you’ll use only for Outlook. Using secure mail key is a great method if you want to ensure that your email stays safe from malicious users.

To create a secure mail key, do the following:

  1. Go to your Bellsouth profile page and click on Sign-in info.
  2. Now select the email account that you want to create a secure mail key for.
  3. Scroll down to the Secure mail key section and choose Manage secure mail key.
  4. Now select Add secure mail key option.
  5. If you want, you can enter the name for your security key in order to recognize it better. This isn’t mandatory, but it might come helpful in the future.
  6. Now select Create secure mail key. Click Copy secure mail key to clipboard.
  7. Click OK.

Now you just have to go to Outlook and replace your password with the secure mail key. After doing that, check if the problem is still there.

Solution 2 – Check your antivirus


In some cases, it’s possible that your Bellsouth email isn’t working in Outlook due to your antivirus. Your antivirus or firewall can sometimes prevent your email client from working properly, and that can cause this error to appear.

However, you can fix this issue simply by adding Outlook to the list of exclusions in your firewall or antivirus. In case the problem is still there, you might want to try disabling certain antivirus features or disable your antivirus altogether.

If disabling the antivirus doesn’t help, your next step would be to completely remove your antivirus. If you’re concerned about your safety, you should be protected by Windows Defender, so there’s no need to worry.

Once you remove your antivirus, check if the problem is still there. If the issue doesn’t reappear, this might be a perfect time to consider switching to a different antivirus solution.

There are many great antivirus tools on the market, but if you want an antivirus that won’t interfere with your email client, you should definitely try TotalAV.

⇒ Get TotalAV

Solution 3 – Make sure that your account is properly configured

If your Bellsouth email is not working with Outlook, the problem might be because your account wasn’t properly configured. To fix this, you just need to locate your account and make the necessary changes.

We’re going to show you how to properly add and configure a Bellsouth account, but if you already have a Bellsouth account, you just need to modify it slightly. To add a Bellsouth account in Outlook, you just need to do the following:

  1. Open Outlook and go to File > Add Account.
  2. Select Manual setup or additional server types and click Next.
  3. Now select POP or IMAP and click Next.
  4. Now you’ll be asked to enter your display name and email address.
  5. After doing that, you need to enter server information. If you’re using a POP3 account, enter inbound.att.net and outbound.att.net for Incoming and Outgoing servers respectively.Enter your login information and click More Settings. Now go to the Advanced tab and set Incoming server port number to 995. Set Outgoing server port to 465. Save changes.If you’re using IMAP account, set Incoming and Outgoing servers to imap.mail.att.net and smtp.mail.att.net respectively. As for the port numbers, use 993 for Incoming and 465 or 587 for Outgoing server.
  6. If you want, you can click the Test Account Settings button and check if your configuration is correct.

After configuring your account, the problem should be resolved and everything should start working again.

Solution 4 – Just wait it out

In some cases, it’s possible that this is a server-side issue. If that’s the case, there’s not much you can do until Bellsouth fixes the problem on their own.

If you’re having issues with Bellsouth and Outlook, you can contact Bellsouth and they’ll let you know if the problem is caused by their servers or by your client.

Solution 5 – Repair your Outlook profile

Sometimes your Bellsouth email is not working in Outlook because your Outlook profile is corrupted. This can occur for various reasons, but you can fix this issue by doing the following:

  1. In Outlook, go to the File tab and choose Info.
  2. Select Account and then Account Settings.
  3. Change Folder to Outlook Data File, then Inbox.

After doing that, save changes and check if the problem is resolved.

Solution 6 – Forward emails from Bellsouth email to Outlook email

If you aren’t receiving Bellsouth emails in Outlook, you might be able to fix this problem simply by setting all your emails to be forwarded from Bellsouth email to Outlook email.

This is just a workaround, but until you find a permanent solution, this workaround might work for you. To forward your emails, be sure to access Bellsouth’s server and set up email forwarding to the desired email account.

Solution 7 – Use webmail

If you’re having problems with Bellsouth email and Outlook, you might be able to temporarily solve the problem by using webmail. Many email services offer webmail, and if you’re having problems with Outlook, we suggest to temporarily switching to webmail

This isn’t the best solution, but it’s a decent workaround until you find a permanent solution.

Solution 8 – Switch to a different email client

Sometimes Bellsouth email will not work in Outlook, and if you can’t fix the problem on your own, perhaps you should switch to a different email client.

There are many great email clients on the market, and you can always try using Mail app in Windows 10.

However, if you want something that offers a bit more features, Mailbird might be just what you need.

Mailbird is a resourceful email client that provides both individual and professional level email management tools.

It has a unified email box where you can access all your email accounts. It comes with handy filtering and organizing features that can save you plenty of time.

On top of that, the transition should be seamless, as Mailbird has a very easy-to-use interface. If you are familiar with the way Outlook works, then using this alternative should be really easy for you.

This article will also help you fix the following issues:

  • Bellsouth email not working
  • Bellsouth email login problems
  • Bellsouth.net email login problems
  • My bellsouth email stopped working
  • Bellsouth email problems today
  • Can’t login to bellsouth email
  • Bellsouth email issues

If Bellsouth email is not working in Outlook, the problem can be your configuration, so be sure to try all of the solutions from our article and let us know if our solutions helped you with this problem.

For more information on Bellsouth, visit our Bellsouth section.

Are you looking for another e-mail client? We have the Most Useful Guides For Email Clients just for you.

Access Is Denied 0x80070005 [Solved]

Are you trying to rename, delete, move, or copy a certain folder from your Windows 10 device, but you can’t? If you received the Access is denied error 0x80070005, and you don’t know how to fix it, you are in the right place.

We will show you how to quickly fix this system problem with the help of the following troubleshooting steps.

What does the 0x80070005 access denied error mean?

As outlined, the problem occurs when you try to rename, copy, move, or delete certain folders. Usually, the 0x80070005 Access is denied error code pops up when you try to make changes within system files.

So, the error code is a security warning that tells you this: you don’t have the right to remove, rename or move/copy that certain folder or file.

In this case, the issue can be easily fixed if you switch to the administrator account. However, if you have admin privileges and you are still experiencing the same problem, you must apply additional troubleshooting steps.

If you also have issues with the default save location that couldn’t be set, the highlighted guide will provide the right solutions to fix it.

The goal is to solve any possible errors that might cause folders or files related to malfunctions. And here is how you can do that.

How do I fix the access is denied 0x80070005 error?

1. Gain administrator rights

  1. Right-click on the folder or file that you want to change / modify.
  2. Choose Properties from the list that will be displayed.
  3. From Properties, switch to Security tab.files security settings windows 10
  4. Look for the Group or user section.
  5. If you don’t have ownership rights for this folder choose the Advanced option.
  6. Select the Owner field located under Advanced Security Settings and pick Change.
  7. The User or Group window will be displayed.
  8. From there, click on Advanced.
  9. Type your username and click on Check Names in order to display the list of available accounts.change file permissions
  10. Select your account and click on OK.
  11. In the end check Replace owner on sub containers and objects.
  12. Click OK and Apply all the changes.

The first thing you should try is to gain admin rights within the folder you want to modify.

2. Use Microsoft’s File and Folder Troubleshooter

You need to scan for problems related to system files and folders. Also, if there are such problems, you need to fix them immediately. Well, this process can be completed automatically by using a default troubleshooting process supported and offered by Microsoft.

I am talking about the Filer and Folder Troubleshooter service, which can be initiated from this page.

3. Run SFC

  1. Right-click on the Windows Start icon and select Command Prompt (admin).
  2. Elevated command prompt window will be opened on your computer.
  3. There, type sfc /scannow and press Enter.sfc scannow
  4. Wait while the system tries to find and repair possible Windows 10 system errors.

Another way in which you can fix system errors is by using another troubleshooter featured by default on your Windows 10 system. So if the above-explained steps aren’t helpful, you should start an SFC scan.

4. Update Group Policy Settings

  1. First, open an elevated cmd window
  2. In the cmd window type gpupdate /force and press Enter.
  3. When done, close the cmd window.
  4. Reboot your computer and see if this solution helped you.

If Group Policy Settings were recently changed, you might end up experiencing the 0x80007005 Access is denied error code.

As you noticed, some files can be modified only if you have administrator rights. Moreover, if there are problems within the Windows 10 system your access to folders and files might be restricted, and you can get the 0x80007005 Access is denied code error.

The steps listed above should help you fix these problems right away. However, if you cannot manage to address the issues, try to give us further details to help us better understand why you cannot modify your folders and files.

The same error code can also come up on the Microsoft Store or via Windows Update. If you get the 0x80070005 Microsoft Store or 0x80070005 Windows Update errors instead, check out our dedicated guides for more help.

Let us know which steps helped you fix this issue by leaving us a message in the comments section below.

16 Best Image Compression Software [2026 Guide]

We store images on our hard drives and online, but in order to save space, we sometimes need to make them occupy less. What can be better than using dedicated image compression software to shrink down photos without compromising on quality?

If you’re uploading your images online and if you have limited online storage, image compression is even more important. We reckon there is no shortage of tools that promise to do just that.

Nevertheless, the compression technique implies a certain degree of loss when it comes to clarity. So, we only focus on resizer programs that will not affect quality.

Here’s a quick preview of our favorite picks:

  • ? Adobe Photoshop – Best image compression software without losing quality
  • ? WinZip – Excellent choice for reducing email attachments
  • ? Pixillion – Top-notch JPEG compression software
  • NX Power Lite Desktop – Easily adjust the ratio between quality & compression
  • FILEminimizer – Scan specific folders or the entire hard drive
  • Caesium Image Compressor – Best picture compression software free download
  • JPEGmini – Lossless compression software

Compressing your images is fairly simple, and today we’re going to show you some of the best image compressor software options. You can use them on Windows 10, Windows 11, and prior versions.

Best picture compression software for PC

Adobe Photoshop – Best image compression software

If you want the very best photo compression software, Adobe Photoshop is well suited for the job. The world’s greatest imaging and graphic design software lets you crop, retouch, combine, and compress photos with ease.

Photoshop is professional and gives new dimensions to the art of photography. So, you may only imagine how well it covers basics such as image compression.

One of its most interesting features is that you may work with unlimited layers and masks. Moreover, chances are you’ll love its slick interface.

You can choose from several workspace layouts or feel free to create your own custom layout of panels and windows.

The bottom line, it shouldn’t take too long to get used to Adobe Photoshop. Even if you’re a newbie, once you understand how the application works, it’s so much fun to use.

Other key features include:

  • A rich set of tools for professional mobile and web design
  • Various effects can be easily applied to layers
  • 3D design capability to make your work stand out
  • Fast Edit features that are essential for professional work
  • It’s extremely versatile, so it works with other Adobe apps like Illustrator and InDesign

Adobe Photoshop

If you’re looking for the best photo compression software for Windows 10, then try out Adobe Photoshop!
Free trial Visit website

WinZip – Excellent for reducing email files

get WinZip

We’ve compiled a list of the best compression software tools for Windows 10, so WinZip clearly deserves a spot here.

Since Zip files reduce email attachment size, do not hesitate to give them a try. Moreover, do note that it provides splitting of files according to the media and advanced file-sharing options.

WinZip also comes with a highly responsive interface for all devices you may own, so you won’t encounter any issues while using it.

Great key features brought by WinZip to the table:

  • It protects files with strong banking-level encryption
  • cloud support is a bonus that you’ll most likely find useful
  • Integration with Microsoft Office
  • Instant sharing
  • Image format converter

WinZip

If you want great image compression software, this is clearly a reliable choice!
Check price Visit website

Pixillion – Top-notch JPEG compression

try out Pixillion

Another comprehensive photo compression software for Windows 10 we want to cover is Pixillion.

Use this tool to convert to a variety of target formats, including JPEG, JPG, PDF, PNG, GIF, BMP, ICO, SVG, TGA, TIF, PGF, RAW, RAF, WMF, EMF, DNG, CR2, and many more.

You may actually convert or compress thousands of photos at a time with batch conversion and get them ready for posting on the web or displaying on your smartphone, without loss of quality and detail.

Besides the one-click process of converting files, Pixillion allows you to easily add text captions or different kinds of watermarks to your images.

Furthermore, you have the option to resize them until they’re perfect. That’s why this professional tool is the one-stop solution for all your image editing and image conversion requirements. Give it a try!

Pixillion

Pixillion helps you compress thousands of photos at a time and there is no format it cannot handle.
Check price Visit website

NXPower Lite Desktop – Quality & Compression adjustment

get NX Power Lite Desktop

NXPowerLite Desktop 8 shrinks your JPEG, PNG, TIFF, JPG, and other popular image formats but also your Word, Excel, or PowerPoint documents.

Files remain in their original format and there is no need to unzip them before using them. It also allows you to customize the balance between quality and compression ratio, which is a very useful feature for images.

It’s a user-friendly tool: just select the file you need to minimize, choose a compression level, and click the Optimize button.

You can also optimize file size from within Windows Explorer and Microsoft Office programs, or choose to automatically optimize email attachments as they are sent.

You can use NXPowerLite Desktop for free but if you need to have access to more sophisticated features to accomplish your work – you can buy the full version.

⇒ Get NXPower Lite Desktop

FILEminimizer – Specific folders or hard drive scan

get FILEminimizer

FILEminimizer Pictures is a simple free application and image compressor for Windows. The first thing that you’ll notice when you start this application is its simple and a bit outdated interface.

In order to compress your images, you just need to find them and add them to the application.

There’s a useful feature available that will scan certain folders, or even an entire hard drive and allow you to add pictures to the FILEminimizer Pictures tool.

Regarding the configuration, you can choose between three presets or you can set the custom level of compression. You can also choose an output directory or add suffixes or prefixes to compressed images.

This is a simple tool for image compression, and its biggest flaw is an outdated user interface. Speaking of the user interface, there’s no preview window, so you won’t see any changes until you compress your images.

FILEminimizer Pictures is a simple tool, and if its outdated user interface isn’t a problem for you, be sure to try it out.

⇒  Get FILEminimizer Premium Version

Caesium Image Compressor – Free photo compression tool

get Caesium Image Compressor

Caesium Image Compressor is an open-source image compressor. In order to compress your images, you simply need to add them to the application and set the desired options.

If you want, you can also add entire folders directly to Caesium Image Compressor. The user interface is split into three columns.

The first column is Compression Options and from there you can set the image quality. You can also choose between several formats such as JPG, PNG, and BMP.

Unfortunately, you can’t change image quality for PNG or BMP images. If you want, you can use the same quality for all images on your list.

The next column is in charge of resizing. From there you can set an absolute or relatively new size for your images.

If you want, you can also apply the same settings for all images on the list. Of course, there’s an option available that will let you keep your aspect ratio.

The last column is in charge of the output folder. You can set a different output folder for your compressed images or keep them in the same folder.

If you want, you can also add a suffix to your images so you can easily distinguish them.

Even though this is a simple application, it has its share of flaws. In order to see a new size, compression ratio, and quality of the image, you’ll have to check the list of files.

We have to mention that the list can be sometimes sluggish, so it can take about five or more seconds for data to update. You can force data to update by clicking the Set Quality button if you don’t want to wait.

Even though there’s a side-by-side comparison, the compressed image preview won’t update automatically unless you click the Preview button, which is also a flaw in our opinion.

Caesium Image Compressor is a great application for image compression. This tool is simple to use and it has all the basic options available.

Unfortunately, some users might be turned away by some of its minor flaws. We have to mention that a portable version is also available, so you can run this app without installing it on your PC.

⇒ Get Caesium Image Compressor

JPEGmini – Lossless compression software

get JPEGmini

JPEGmini is a lossless image compressor, and according to its developers, this tool can reduce the file size of your pictures up to 5 times.

All your pictures will keep their original format and they will suffer almost no quality loss during compression.

We have to mention that this tool is rather simple, and all that you have to do is to add your images to it, and it will automatically compress them.

Keep in mind that by default JPEGmini overwrites the original images with compressed ones, so be sure to change your settings first.

Speaking of settings, we have to say that JPEGmini offers few settings. There’s no quality slider, so you’ll have to rely on the application algorithm to figure out the best quality settings for your images.

The application does a good job, so you’ll hardly notice any visual changes after compressing your images. In addition to compression, you can resize the images or set a specific output folder for compressed images.

JPEGmini is a simple application that allows you to resize your JPEG images without any configuration. This application will be perfect for primary users, especially with its visually appealing and simple user interface.

If you want more advanced options, you’ll have to use a different application. We also have to mention that JPEGmini is available as a free trial.

The free version allows you to compress up to 20 images per day, which should be enough for basic users.

⇒ Get JPEGmini

FileOptimizer – Nifty photo compressor app

get FileOptimizer

FileOptimizer is another free tool that can optimize your images. This application was originally designed for compressing all sorts of files, but you can also use it to compress your images.

FileOptimizer comes with a humble user interface, and in order to optimize your images, you just need to add them to the tool. Regarding compression, you can choose between several compression levels.

We have to warn you that by default this application moves original files to Recycle Bin and replaces them with compressed files. Of course, you can turn this option off if you want.

There’s no preview window or any advanced settings, which can be a flaw for some users. During the compression process, you’ll see the original size and optimized size of each file, which is rather useful.

This tool isn’t optimized for image compression, but if you want to compress your images and other files, this tool can be useful.

This application is available in a portable format, so you can run it on your PC without installing it.

⇒ Get FileOptimizer

Mass Image Compressor – Preview & file size information

get Mass Image Compressor

Mass Image Compressor is another free image compression software. Unlike other tools on our list, this one is designed to compress entire image folders.

In fact, you can’t add single images to this app, so you’ll have to organize images that you want to compress.

After selecting the desired folder, you should be able to change options such as image quality and image size.

You can choose between fixed width or set a percent-based width for your images. In addition to changing quality and size, you can also change the image format to JPEG or PNG or keep the same file format.

You can also save compressed images to a specific directory, or you can overwrite the original images. Mass Image Compressor comes with a preview window that lets you see a sample image.

This is a useful feature, but unfortunately, there’s no way to toggle between different images, which is a flaw in our opinion. In addition to the image preview, there’s also information regarding the file size next to it.

This is a simple application for image compression, but unfortunately, this tool isn’t designed for single images.

You can’t add individual images to the application, and you can’t see previews or compression results for individual images which can be a problem for some users.

Overall, if you have multiple photos that you want to compress, this tool will be perfect for it.

⇒ Get Mass Image Compressor

PNGGauntlet – PNG-focused photo compressor

get PNGGauntlet

PNGGauntlet is an image compression software optimized for PNG files. The application allows you to convert other file formats such as JPG, GIF, TIFF, and BMP to PNG.

Unfortunately, you won’t be able to save images to JPG or any other format except PNG. This tool uses PNGOUT, OptiPNG, and DelfOpt to compress your images, and you can configure each of them individually.

Just like with many other tools on our list, you can choose an output directory or overwrite original files. Unfortunately, there’s no preview window available, which is another flaw in this application.

PNGGauntlet is a great application if you want to optimize PNG files, but if you have your images stored in any other file format, we suggest that you try a different app.

⇒ Get PNGGauntlet

RIOT – Color quantization & encoding

get RIOT

RIOT stands for Radical Image Optimizer, and this is another free image compression tool. This tool is lightweight, but it offers advanced features, so it can be used by both basic and advanced users alike.

Regarding file support, this tool allows you to optimize JPEG, GIF, and PNG images. The tool comes with two panes that will show you the original and optimized image.

RIOT comes with an in-place compare feature that will temporarily replace the original image in the preview pane with the compressed one so you can examine the changes in a single pane.

The tool allows you to change the image quality of JPEG images, but it also allows you to choose different encoding options.

If you want, you can also perform image adjustments and change brightness, contrast, gamma, and other settings.

You can also rotate or flip your image if you need to. There’s a resample option available, and you can use it to resize the image using 6 different resampling filters.

During resampling, you can set the desired width or height in pixels or percents and choose to keep the aspect ratio if you want.

Regarding PNG images, you can change the color reduction profile or choose the number of colors manually. In addition, you can change the compression, and color quantization, or use external optimizers.

As for GIF images, you can choose color reduction presets or reduce the number of colors manually. You can also add images to RIOT directly from the clipboard, which is useful.

RIOT also comes with a useful option that lets you compress the image to the desired size in KB. There’s also support for batch optimization, so you can quickly edit and compress multiple images at the same time.

One thing that we don’t like about batch optimization is the lack of ability to set the desired quality. There’s also no preview window for batch optimization, which can be a problem for some users.

Despite those minor flaws, this is still one of the best image compression tools on our list.

⇒ Get RIOT

JPEG Compressor – Detail quality equalizer

get JPEG Compressor

JPEG Compressor is probably the most advanced image compression software on our list. This application comes with a cluttered user interface that might confuse basic users.

If you want to quickly compress an image, simply choose one of the presets on the left. You can choose between original, lossless, and other compression modes.

The app allows you to customize compression in great detail, and you can change Luma and Chroma compression values.

There’s also a Detail Quality Equalizer that you can use to fine-tune your image. You can also change values such as Unsharp Masking, Luma Equalizing, and many others.

If you want, you can crop or resize your image but you can also change color balance, saturation, or brightness along with other settings.

You can even set the desired size in KB for your image, and it will be automatically optimized.

JPEG Compressor allows you to create profiles that you can use to batch edit your images. Batch editing allows you to save compressed images in a specific folder or add prefixes or suffixes to them.

JPEG Compressor is the most advanced image compression tool, and the number of settings that you can change is daunting.

This tool isn’t designed for basic users, but if you want to fine-tune your images and create custom profiles for batch compression, this is the perfect tool for you.

We have to mention that this tool isn’t free, but you can download it and try it free of charge.

⇒ Get JPEG Compressor

PhotoRazor – Prefixes for saving specific images

get PhotoRazor

PhotoRazor is another simple image compression software. This tool comes with a simple design and features, therefore it’s perfect for basic users.

To use this tool, simply select the folder with images that you want to compress. After doing that, you need to select the desired size and image quality.

We have to mention that PhotoRazor has limited options when it comes to image compression and resizing, but those options will be enough for basic users.

It’s worth mentioning that you can preview each image individually and see how compression will affect it. In addition to the preview, you can also see the estimated file size.

All your images are saved in a dedicated folder, and you can even add prefixes to compressed images. You can also select which images you want to compress, so you’re not forced to compress an entire image folder.

PhotoRazor is a simple tool with simple features, and if you’re a basic user, this tool will be perfect for all your needs.

⇒ Get PhotoRazor

Jpeg Resampler – Precise width & height

get Jpeg Resampler

Jpeg Resampler is an advanced image compression tool. This tool comes with a humble user interface, but it makes up for it with its features.

Before you can use this tool, you need to select the source file or directory and desired output directory. This tool allows you to make many adjustments to your pictures.

For example, you can compress the image and convert it to a different format right from Jpeg Resampler 2010. Of course, you can resample the picture to a specific size in KB.

If you want, you can resize the picture by using pixels or percent values. You can even set the size of the larger side or the exact width or height.

You can choose between several resampling filters and you can add various effects. If you wish, you can even change the color format or save your presets for later use.

Of course, you can change the image quality and all sorts of advanced options. You can even set custom names for compressed images.

You can also see all your images along with the necessary information, but you can’t see how will your image look after compression.

In addition, there’s no estimated file size available before the compression. Jpeg Resampler offers many great features, but it has some user interface flaws.

If you don’t mind the lack of image and size preview, this app could be useful to you.

⇒ Get Jpeg Resampler

FastStone Photo Resizer – Joggle with different formats

get FastStone Photo Resizer

FastStone Photo Resizer is a free tool for image compression. After you select the desired images, you can choose between several different formats. If you want, you can also set a different output folder.

This tool allows you to change all sorts of options regarding image quality, but you can also change other settings. You can crop images, resize them, and make all sorts of adjustments.

You can even set custom names for all your compressed images. If you want, you can even save your presets and use them later.

Before compressing your images you can also preview them and see how will compression affects them. In addition to the individual image preview, you can see the estimated size as well.

FastStone Photo Resizer is an amazing tool, and it offers all features that both basic and advanced users need.

The only flaw of this tool might be its complexity, so it might take you a few tries to get the desired results. This might not be the simplest tool on our list, but it’s definitely one of the best.

⇒ Get FastStone Photo Resizer

Light Image Resizer – Custom images destinations

get Light Image Resizer

Light Image Resizer is available as a free trial, and this image compression software will allow you to compress up to 100 images in the free version.

The application comes with a simple interface and you just have to add your images or image directories and set the desired preset.

You can also set custom to resize options, different actions, and custom destinations for compressed images. Regarding advanced options, you can adjust the image quality or set a specific size for your images.

Changing image format and filter is extremely easy with this tool. If you want, you can also set custom names for compressed images. If needed, you can also make adjustments and add certain effects to your images.

After you set the desired parameters, you can preview your images. You can preview individual images and see how the compression will affect them.

Of course, you can also see the estimated file size of each image before you compress it.

Light Image Resizer is a simple yet powerful tool that has all the necessary options for image compression. This is a great tool, but unfortunately, it’s not available for free, so you’ll have to obtain a license.

⇒ Get Light Image Resizer

If you’re looking for powerful and free image compression software, our recommendation is FastStone Photo Resizer.

This software has all the advanced features, and it’s also free, but it might take you a bit to get used to it. If you want something more user-friendly but just as powerful, we suggest that you try the RIOT tool.

How to Download & Install Microsoft InfoPath: Quick Guide

Over the years we saw all sorts of great tools from Microsoft. Many of these tools have a big number of users and fans worldwide, but unfortunately, some of these tools had to be discontinued.

One of these tools is Microsoft InfoPath, and today we’re going to show you how to install it on Windows 10.

What is Microsoft InfoPath?

Microsoft InfoPath is software designed for creating and filling electronic forms without writing code, in a cost-effective way.

This application comes with “what you see is what you get” from the designer. It allows you to quickly add input fields, text boxes, buttons, and other elements.

How to install Microsoft InfoPath on Windows 10?

If you wish to download and install Microsoft InfoPath on Windows 10, you can do that by following these steps:

  1. Go to Microsoft InfoPath download page.
  2. Click the Download button.
    microsoft-infopath-download
  3. Check the version you want to download. If you have a 64-bit version of Windows we advise that you download the 64-bit version of InfoPath. Once you select the version you want click the Next button.
    microsoft-infopath-version-choose
  4. Wait for the InfoPath to download.
  5. When the download is completed, locate the setup file and double click it.
    microsoft-infopath-setup-file
  6. Read the license agreement, check the I accept the terms of this agreement and click Continue.
    microsoft-infopath-agree-continue
  7. Now you can choose between express installation and customized installation. If you want to install Microsoft InfoPath to a different directory or choose what components you want to install, click the Customize button. If you want to install the software to the default directory click the Install Now button.
    microsoft-infopath-install-now
  8. Wait until Microsoft InfoPath installs.
    microsoft-infopath-installing
  9. Once the setup is completed, click the Close button.
    microsoft-infopath-completed

After completing the setup, you can start the application by following these steps:

  1. Double click the InfoPath Designer 2013 shortcut.
    microsoft-infopath-info-path-designer
  2. You’ll be asked to install the updates for Office and other Microsoft software. Choose any of these options and click Accept.
    microsoft-infopath-first-things
  3. Now you’ll be offered to register InfoPath 2013. This program is available as a free trial for 30 days. If you want to use a full version you need to activate it online.
    microsoft-infopath-activate
  4. After activation InfoPath Designer should start. You’ll have the option to choose from several available templates.
    microsoft-infopath-main-screen
  5. After choosing the template, you’ll be able to customize it anyway you want.
    microsoft-infopath-main-screen-2

Microsoft InfoPath works great with Windows 10. However, keep in mind that this isn’t free software. Therefore, be sure to activate it as soon as you can.

This application was on the Microsoft Office programs list, but even if it’s discontinued, you can still download it. and use it.

If you have any other questions, don’t hesitate to leave them in the comments section below.

Can’t Find Snipping Tool [Missing]: How To Restore It

The Windows 10 Snipping Tool is a utility for capturing screenshots. You can usually open it by entering ‘Snipping Tool‘ in the Cortana search box.

However, not all users can always find the Snipping Tool via the Windows 10 search box. This is how you can open the Snipping Tool if Window search tool doesn’t find it for you.


What can I do if my Snipping Tool is missing?


1. Rebuild the Search Index

  1. Press the Windows key + R keyboard shortcut.
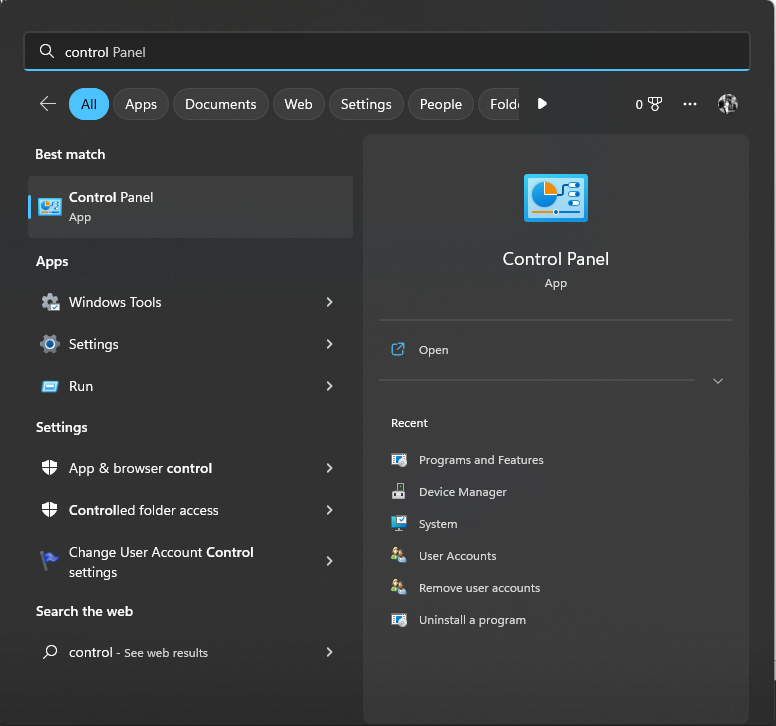
  2. Then enter ‘Control Panel’ in Run’s Open text box, and press the OK button.
  3. Click Indexing Options to open the window in the snapshot directly below.
  4. Press the Advanced button to open the Index Settings tab below.
  5. Then press the Rebuild button and click OK.

The Windows 10 search index is disabled on some laptops and notebooks with SSD storage. Does your laptop include SSD storage?

If so, that might be why the search tool doesn’t find the Snipping Tool. Rebuilding the search index will then be a probable resolution.


2. Open the Snipping Tool with Run

However, you don’t always have to search for the Snipping Tool to open it. There are various ways that you can open the Snipping Tool.

For example, you can open it with Run. Press the Windows key + R hotkey to open Run, enter snippingtool in the text box and then press the OK button.


3. Add a Snipping Tool shortcut to the Windows 10 desktop

  1. First, right-click the desktop and select New > Shortcut.
  2. Then enter in the text box shown directly below.
    • C:\\Windows\System32\SnippingTool.exe
  3. Press the Next button.
  4. Press the Finish button to add the shortcut to desktop.
  5. Thereafter, you can add the Snipping Tool shortcut to the Start menu or taskbar. To add it to Start menu, right-click the shortcut and select Pin to Start.
  6. To add the shortcut the taskbar, you can right-click it and select Pin to taskbar.

Alternatively, you can add a Snipping Tool shortcut to the Windows desktop. Then you can open the Snipping Tool with its desktop shortcut instead.


4. Open the Snipping Tool From its System32 Folder

  1. Press the File Explorer button on the Windows 10 taskbar
  2. Open this folder in File Explorer:
  3. C:/Windows/System32
  4. Click Snipping Tool in the System32 folder to open it from there.

5. Enable the Snipping Tool in the Group Policy Editor

  1. Press the Windows key + X hotkey.
  2. Then select to open the Run accessory from the Win + X menu.
  3. Enter Gpedit.msc in Run’s Open text box, and press the OK button.
  4. Then click User Configuration > Administrative Templates > Windows Components > Tablet PC > Accessories on the left of the Group Policy Editor window.
  5. You’ll see a Do not allow Snipping Tool to run option on the right of the window. Select the Do not allow Snipping Tool to run option to open its window.
  6. Then click Disabled if Enabled is currently selected.
  7. Press the Apply and OK buttons to confirm the new setting.

Note that the Group Policy Editor in Windows 10 Pro and Enterprise includes a Do not allow Snipping Tool to run option. As such, the Snipping Tool doesn’t run with that option selected. This is how you can check if that option is configured to enabled in Win 10 Pro and Enterprise.


What are some Snipping Tool alternatives?

Remember that there are plenty of third-party software alternatives to the Snipping Tool, such as Share X, Greenshot, Lightshot and Screenshot Captor.

Some of those third-party screen capture tools also include more options for capturing and annotating screenshots than the Snipping Tool. This software guide provides further details for some of the best Windows 10 screen capture utilities.

Snipaste is one alternative to the Snipping Tool that’s worth noting. That’s a freeware screen capture tool which automatically captures UI elements on software windows.

Snipaste users can select Line strip, Marker pen, Pencil, Arrow and Text annotation options on its toolbar.

Snipaste also includes plenty of customization options and hotkeys that you can utilize the software with. You can add that program to Windows 10/8/7 by pressing the 32-bit or 64-bit button on this webpage.

So you don’t really need the Snipping Tool even if you can’t find it in Win 10.


By following this guide, you should be able to make use of the Snipping Tool in Windows 10 once more.

Know of another way to access the tool? Let us know by leaving some feedback in the section below, and we’ll be sure to update the article.

Orbi Router Troubleshooting Guide [Internet, Wi-Fi]

The Netgear Orbi is a fast and reliable router that has had Frave reviews. Yet, users can still encounter Orbi network connection issues.

Some users have said on Netgear’s forum that Orbi keeps going offline with regularity. Users can also encounter issues when they try to install the router.

How can I fix Orbi connectivity issues?

1. Run the Internet Connections troubleshooter

  1. Press the Windows key + S keyboard shortcut for the search utility.
  2. Type internet connections into the search box.
  3. Then click Find and fix network problems to open the window in the shot directly below.
     Internet Connections troubleshooter orbi connection issues
  4. Click Advanced to open more options.
  5. Select the Run as administrator option.
  6. Click the Apply repairs automatically option to select it.
  7. Press the Next button.

2. Power cycle your PC and the Orbi network

  1. First, turn off your desktop or laptop (and other devices connected with it) and unplug it.
  2. Then unplug your Orbi router and its modem, and wait for a few minutes.
    An Oribi router Internet Connections
  3. First, plug the modem back in.
  4. When the modem has restarted, plug the router back in.
  5. Thereafter, plug your PC back in.

3. Factory reset the router

  1. First, find a small paperclip.
  2. Unwind the paperclip.
  3. With the Orbi router on, insert the paperclip into the small hole for its Reset button.
    An Orbi router orbi connection issues
  4. Press the Reset button with the paperclip until the Orbi starts blinking.

    Note: Resetting the router will erase all the router’s personalized settings. Users might also need to reinstall Orbi software after resetting its router.


4. Check if your network adapter is enabled

  1. Right-click the Start button and select Run.
  2. Input ncpa.cpl in Run and click OK to open the Network Connections applet.
    Network Connections applet orbi connection issues
  3. If the network adapter for Orbi is disabled, right-click that adapter to open the context menu.
  4. Select the Enabled option.

5. Renew for the network adapter IP address

  1. Launch Run by pressing the Windows key and R simultaneously.
  2. Enter cmd in the Open box and click OK to start the Command Prompt.
  3. Type in this command and press Enter: ipconfig /release
    ipconfig/release command orbi connection issues
  4. Next, input this command: ipconfig /renew
  5. Press Enter to initiate the ipconfig command. Thereafter, a new IP address will be assigned.

6. Use an Ethernet cable

Ethernet cable orbi connection issues

If you have an Ethernet cable, connect it with your Orbi router. Plug the Ethernet cable into your PC and then an Ethernet port on the router.

Those resolutions can potentially resolve numerous Orbi connectivity issues. If the above resolutions aren’t enough, however, you can still contact the toll-free Orbi Helpline at 1-855-869-7373 (USA/CA).

Alongside a good connection, if you are a privacy-conscious user of the internet, you should definitely consider getting a VPN on your router.

How To Add Data Labels In Power BI: Step-By-Step Guide

Adding data labels is one of the most basic functions in Power BI. As you well know, the visualizing of data is one of the most important features of this tool.

However, using this option is not as easy as one might believe.

Users want to know how to show all data labels on their charts. One user reported the following:

I want to have a visual with all the data labels displaying count and percentage both. I guess only pie-chart and donut chart shows both % and count but the problem is that somehow some data labels (for smaller values) are still missing and I am unable to see all the data labels for pie chart. I have already selected  “All detail labels” in Label style  i.e. the full details option of data labels in pie-chart.

So, the OP wants to add a visual with all the data labels because some labels are still missing. Fortunately, there is a simple solution to this problem.

Today we will show you how to add data labels in Power BI in a few easy steps.

How can I add data labels in Power BI?

  1. Go to the Format pane.
  2. Select Detail labels function.power bi data labels
  3. Go to Label position.
  4. Change from Outside to Inside.
  5. Switch on the Overflow Text function.power bi label position

Keep in mind that selecting Inside in Label Position could make the chart very cluttered in some cases.


So, adding data labels in your charts is pretty easy, but the steps to do that are not always as obvious as they seem.

Also, it is worth mentioning that the solution above is available for pie charts and donut charts. For other types of charts, the steps may vary.

Still, the method described above is the heart of the matter when it comes to adding data labels in Power BI.

Just adapt the solution to your project and there you go: your data visuals are now top-notch!

Did you find our method useful? How do you use data labels in Power BI? Do let us know in the comments section below!

Some Content In This Message Has Been Blocked: Fix

If most of your office work evolves around your email, organizing your messages is crucial. With no filters applied, not only will you get a lot of unwanted messages, but you can also miss some important information.

By default, email filtering is applied by any email client, according to certain anti-spam protocols, to protect the end-user.

Consequently, users can sometimes receive emails with the following warning:

Some content in this message has been blocked because the sender isn’t in your safe-senders list or Attachment pictures and links in this message have been blocked because the sender isn’t in your safe-senders list.

If you trust the sender, to view the full content of the message, you just have to whitelist their email address. Read on to find out how to do it.


How do I get rid of the some content in this message has been blocked error?

1. In Outlooksafe senders list outloook

  1. On the Home > Delete >  Junk > Junk E-mail Options.
  2. On the Safe Senders tab > check the Automatically add people I e-mail to the Safe Senders List box.
  3. Or, you add emails one by one, by selecting them/domain name > Add > OK.

2. In Gmailsafe senders list gmail

  1. Open the Settings menu (in the right upper corner).
  2. Go to the Filter and Blocked Addresses tab.
  3. Select the email address or addresses that you want to unblock.
  4. Similarly, you can create a filter for safe domains or addresses using the Create a filter option, and send them to your Inbox.

3. In Yahoo!create safe sender list yahoo

  1. From the drop-down menu next to your name (upper right-hand corner) select Settings.
  2. Go to Filter > Add new filter > in the To/CC box put the email address that you want to unblock.
  3. Leave the Inbox as the default folder where you want messages to be sent.

We’ve looked at a few ways to filter your emails and stay more productive in your day-to-day activity. As soon as you whitelist an email, you will no longer encounter the some content in this message has been blocked error message.

Speaking of blocked content, we wrote about You have been blocked from originating in Messages, so that guide might interest you as well.

If you have any comments regarding this subject, please use the dedicated section below.


Fix: Amazon Fire Stick Won’t Download & Install Apps

Many Amazon Fire TV owners reported that Amazon Fire Stick is not installing apps. This is a significant problem since you won’t be able to access any content.

However, there’s a way to deal with this error once and for all, and today, we’ll show you how to do it.

What to do if Amazon Fire Stick isn’t installing apps?

1. Check your 1-Click ordering settings

  1. Log in to your Amazon account.
  2. Now go to the 1-Click Settings page.
  3. Make sure that 1-Click Ordering is enabled.
  4. If your location isn’t correct, be sure to change it accordingly.
  5. Save changes and check if the problem is resolved.

2. Make sure that 1-Click Setup is configured

  1. Go to your Amazon account.
  2. Head over to Content and devices > Preferences.
  3. If the 1-Click setup isn’t selected, be sure to add the necessary details and check if that helps.

In addition, try accessing this page for your local version of Amazon.

Several users reported fixing the problem simply by visiting the regional Amazon website.

After following the instructions above, they were asked to transfer their digital content to the regional version.

After doing so, the issue was resolved.

3. Try downloading the applications from Amazon’s website

This is a simple workaround, but it might help if you can’t install apps on Amazon Fire Stick.

  1. Go to Amazon’s Appstore website in your browser.
  2. Select Fire TV from the Device Type section in the left pane.
    device type fire TV amazon fire stick not installing apps
  3. Select the app you want to download.
  4. Set Deliver to your Amazon Fire TV device and click Get app.

In most cases, you won’t be able to install apps on Amazon Fire Stick because your 1-Click settings aren’t correct, but after adjusting them, the problem should be gone.

Some readers had problems with ITVX not working on Firestick as well, but the highlighted guide will provide the solutions to fix it.

If you found this article helpful, please let us know by leaving a comment below.

My Printer Prints Red Instead of Black: Why & How to Fix

At times your printer may start printing in red even if you want to print a black and white document. This issue mostly occurs if the color cartridge has run out of ink and needs replacement. Several users took the Microsoft community forum and Reddit community to explain the issue.

Why is my printing coming out RED instead of  BLACK or  BLUE???????????  I have an Epsom C88 printer, and have
neverhad this kind of problem before.  I changed my black cartridge and that did not make any difference.

Follow the below-given steps to fix this printer issue.

Why is my printer printing red and how to fix it?

1. Reset the Printer

  1. Make sure the printer is turned on.
  2. With the printer turned on, disconnect the power cord from the printer.
  3. Now remove the power cord from the wall outlet as well.
  4. Wait for a minute or two.my printer prints red instead of black
  5. Plug the power cord back to the wall outlet.
  6. Plug the power cord back to your printer.
  7. Start the printer and print a test page. Check if the issue is resolved. Make sure you wait until the printer is silent to proceed with the print job.

2. Replace the Ink Cartridge

  1. If your printer cartridge is low on ink, it will create issues with the print quality.
  2. For some users replacing the Cyan ink cartridge has helped them resolve the red printing issue.
  3. So, open the printer toner and check if any of the cartridges are running low on ink. You can also check Low Ink from the Control Panel of the printer.my printer prints red instead of black
  4. Press the Setup button (wrench icon) on the Printer.
  5. In the Setup Menu, press the down arrow button to select the Tools option.
  6. Press the OK button to select the option.
  7. Press the down arrow button and select “Display Estimated Ink Levels“. Press OK.
  8. The printer will now display the ink level on the control panel. If any of the cartridges are low on ink, you may need to replace them to fix the problem.

3. Clean the Printheads

  1. Load a clean white paper in the input tray. Make sure it is loaded properly.
  2. On the Control Panel of your printer, press the Setup key (wrench icon) and select Tools using the down arrow button. Press OK to select the option.my printer prints red instead of black
  3. Press the arrow down button again and select “Clean Printhead” option. Use the OK button to select the option.
  4. Now the printer will initiate the printhead cleaning process. Wait for the process to complete. The printer will print a test page report to check if the issue is resolved.

4.  Clean All the Cartridges

my printer prints red instead of black
  1. Remove all the cartridges from the printer one by one and clean the head a couple of times.
  2. Reinsert the cartridges and try to print again. Check if the issue is resolved and you are able to print in Black again.

Remote Desktop Keeps Freezing On Windows 11: 5 Fixes

In this article, we’ll look at how to fix Remote Desktop freezing on Windows 11, an issue many users have reported after upgrading to version 22H2. Sessions freeze, devices fail to connect, or connections drop unexpectedly.

There’s a known bug behind this, and while there’s no official fix yet, there are a few reliable workarounds. We’ll walk you through the most effective ones below.

What can I do if the remote desktop freezes on Windows 11?

1. Use the Task Manager

  1. Press Ctrl + Shift + Esc to open the Task Manager.
  2. Go to the Processes tab from the left pane.
    End task -remote desktop keeps freezing windows 11
  3. Navigate the mstsc.exe process and right-click on it to select End Task.

2. Use the Command Prompt

  1. Press the Windows key, type CMD and click Run as administrator.
    DOS COmmand Prompt -change password on Remote Desktop
  2. Copy and paste the following command and press Enter: reg add "HKLM\software\policies\microsoft\windows nt\Terminal Services\Client" /v fClientDisableUDP /d 1 /t REG_DWORD
  3. Close Command Prompt and restart your computer.

3. Use the Group Policy Editor

  1. Press Windows + R to open the Run console.
    GPEDIT - Go back -remote desktop keeps freezing windows 11
  2. Type gpedit.msc and press Enter to open Group Policy Editor.
  3. Navigate to this path: Computer Configuration > Administrative templates > Windows components > Remote Desktop Services > Remote Desktop Connection client
    CLIENT -remote desktop keeps freezing windows 11
  4. Double-click on Turn Off UDP On Client and select Enabled.
    Enabled
  5. Click Apply and OK. 
  6. Restart your computer to confirm the changes.

4. Use the Registry Editor

  1. Press Windows + R to open the Run window.
    REGEDIT RUN COMMAND
  2. Type regedit and press Enter to open Registry Editor.
  3. Follow this path: HKEY_LOCAL_MACHINE\SOFTWARE\Policies\Microsoft\WindowsNT\Terminal Services\Client
    DWORD -remote desktop keeps freezing windows 11
  4. Go to the right pane, right-click and click New. Next, select DWORD (32-bit) value.
  5. Rename the key as fClientDisableUDP and double-click on it.
  6. Set Value data to 1 and select Base as Decimal.
    Fclient
  7. Reboot your PC and check if the remote connection is working.

5. Rollback to the previous version 

  1. Press Windows + I to open Settings.
  2. Go to System, then click Recovery.
    System-Recovery-Windows-11
  3. Under Go Back, click the Go back button.
    Go back -remote desktop keeps freezing windows 11
  4. Follow the on-screen prompts to complete the process.

What causes the remote desktop keeps freezing on Windows 11?

There could be various reasons for this bug that causes remote desktops not to connect on Windows 11, some of the popular ones are: 

  • Firewall issues –  If firewall issues are on your computer, it could affect your Remote Desktop Protocol, hence crashing the Remote Desktop app.
  • Connectivity issues – If the internet connection is not stable, then the Remote Desktop app might freeze due to network failure.
  • DNS issues – If your computer has misconfigured DNS settings, then those settings cause the Remote Desktop app to freeze or misbehave

So, these are some workarounds that you can use to fix the remote desktop that keeps freezing windows 11 issues. Try them and let us know which worked for you in the comments below. 

Searching for Dota 2 Game Coordinator Error: Why & How to Fix

Dota 2 is a great game, but many users reported that they are unable to search for a match due to Searching for Dota 2 game coordinator error.

If you encounter this problem, you would not be able to participate in any online match. In fact, more and more people have reported that the Dota 2 Game Coordinator just gets stuck while loading.

In some of these cases, the reason for the issue was that the Game Coordinator was updating, or that the Steam servers were offline.

There are also situations in which the issue might be coming from your own PC.

In this article, we will explore some of the best options for dealing with the Dota 2 Searching for Game Coordinator issue. Read on to find out more.

How do I fix Dota 2 Search Coordinator?

1. Have a practice match with bots

  1. Open up Steam, and run DotA 2.
  2. On the top of your screen, you should see the Searching for the DotA 2 game coordinator message.
  3. Click on the Play DotA 2 button found at the bottom right side of your screen.
  4. After clicking Play, choose the option Practice with bots, and then select Solo game mode.
  5. Click on Start Bot Match, and choose any hero you want to play with.
  6. Play for 5 to 10 minutes with the bots, and then press the Menu button > Disconnect.
  7. Once you return to the main screen of the game, check if the error is still there.

2. Try playing as a Learner

  1. Open up Steam, and run DotA 2.
  2. Click on the Learn tab found at the top of your screen.
  3. Play the tutorial for 5 to 10 minutes.
  4. Disconnect from the game and check if the Searching for the DotA 2 game coordinator error is still there.

3. Use specialized software

As we mentioned above, the culprits responsible for the Dota 2 Coordinator problem are diverse and they can be located on the game servers just as they can hide close to home.

If you suspect your Internet connection is likely to cause this error, it might be a good idea to get specialized help. In fact, you could use a specialized tool to optimize your game connection date.

In some sort, this resembles a VPN, but we are actually talking about a more gaming-oriented solution. This is a Gamers Private Network also known as a GPN.

A GPN works to improve your game connection data by selecting an optimized traffic path. As a result, you will enjoy a better gaming experience overall with lower ping rates, fewer lost packets, and less latency.

A better server route can also correct error such as the Dota 2 searching for Game Coordinator and generelly strenghten your connection.

As opposed to VPNs, a GPN does not encrypt or modify traffic, nor does it unblock geo-restricted content. Instead, it focuses on game traffic only.

WTFast

Eliminate latency, errors, jitter, and more with your very own gaming-focused private network.
Free trial Visit Website

4. Play in Arcade mode

  1. Open up Steam, and run DotA 2.
  2. Click on Arcade mode at the top of your screen.
  3. Wait for a few seconds so the game loads a number of games, and then click Play on any one of them.
  4. Play for 5-10 minutes.
  5. Disconnect from the game by using the Menu button.

Now check if the Searching for DotA 2 game coordinator message is still there.

5. Check your game files for integrity

  1. Open your Steam client, and click Library at the top of your screen.
  2. Search for DotA 2 in the games list, right-click on it, and select Properties.
    properties searching for the dota 2 game coordinator
  3. In the Properties window, click on the Local Files tab, and then click on Verify Integrity of Game Files.
    verify integrity dota 2 game coordinator
  4. Navigate to Settings, found at the top left side of your screen inside the Steam menu.
  5. Click on the Downloads tab.
  6. Click on the Steam library folders option.
  7. A pop-up window will appear that will show you all the recorded library information.
  8. Right-click on the folder found there and hit Repair Library Folder.
  9. Restart Steam and check if the error has dissipated.

6. Change the default download region in Steam settings

  1. Open Steam, and click on Settings.
  2. Choose Downloads, and then under Download Region, click on the drop-down list and choose a different location.
    download region
  3. Restart Steam and check if the Searching for the DotA 2 game coordinator message is still there.

There you go, these are some of our solutions that might be able to help you with Searching for the DotA 2 game coordinator error.

Feel free to let us know if this article helped you by using the comments section below.

Disable Auto Arrange on Windows 11 [Simplest Steps to do it]

One fascinating thing about Windows is how customizable it is. Unlike other operating systems like Mac OS or Linux, Windows has features that make it the best.

Windows allows users to access unlimited display settings and adjustments to help them create a visually appealing display for their computers. Nonetheless, the Windows 11 Auto arrange icons display feature is optional, and you can rearrange your folder and files as you wish.

Windows 11 auto arranges icons by default. However, users can choose to disable the feature and manually toggle the icon arrangement. Likewise, Windows allows you to change icon images and titles.

Furthermore, Windows automatically sorts new folders/files alphabetically to ensure easy access and orderliness. Although it is a built-in feature, users can decide to disable it and set their preferred interface display order.

Hence, this article will discuss how to set your display icon arrangement to a specific type manually. Also, we’ll see how to change icons on Windows 11 from the default display.

Why are my desktop icons automatically arranged?

  • Default settings for Windows: Windows automatically sets icons, files, and folders to be arranged in alphabetical order by default. Hence, all your files will align and go by the directives of the default icons arrangement. So, the Windows 11 Auto arrange icons problem is not a permanent issue. However, Windows has other icon arrangement orders that users can choose. Hence, users can manually position the icons.
  • Screen resolution: Different screen resolutions come with various display settings. Hence, changing your screen resolution will change your icon arrangement settings to fit into the default icon arrangement of the new screen size. Also, switching to another monitor can cause Windows 11 to auto arrange icons. It is because the length and width of the previous monitor can differ from the new one. Hence, Windows will automatically arrange icons to fit the new screen.
  • Outdated graphics card driver: This can affect your computer’s display and result in the Windows 11 auto arrange icons problem. This will prevent users from accessing some display settings, and adjusting the default icon arrangement will be challenging.
  • Outdated Windows: Outdated Windows can be responsible for countless issues with the computer. The computer cannot repair or fix the bugs affecting it. Likewise, it doesn’t have access to the new patches and updates to help it function smoothly, and this can cause the Windows 11 Auto arrange icons problem.

How do I align apps in Windows 11?

Enable align icons to the grid

  1. Right-click on any space on your computer screen.
  2. Click on View from the options.
  3. Select the Align icon to grid option.

It will check the align icon option and immediately align apps in Windows 11. Alternatively, you can manually drag and drop the icons to align them as highlighted below:

  1. Click on the app icon you want to align.
  2. Drag it to the preferred aligned space.

Although this is stressful compared to enabling the align icons to grid option. However, it is also a valuable alternative to placing desktop icons anywhere on Windows 11.

How do I disable Auto arrange icons in Windows 11?

  1. Right-click on any space on your computer screen.
  2. Click on View from the options.
  3. Go to Auto arrange icons and check the option to enable it.
  4. Likewise, uncheck the Auto arrange icons option to disable it.
  5. Restart your computer to allow the changes to sync correctly with the computer.

Nonetheless, the above solution may not be enough to turn off auto arrange icons on Windows. Hence, we’ll recommend that you update graphics card drivers and the Windows OS.

How do I stop auto-sorting files and folders?

Disable Auto arrange in folders

  1. Launch File Explorer on your computer.
  2. Right-click on any space inside the folders and select View.
  3. Uncheck the Auto arrange option.

It will stop the auto sorting of files and folders on Windows. Also, it allows users to use the drag and drop option to move files and folders to the desired spot.

Moreover, users can encounter many difficulties with the Windows display settings and icon arrangement. Hence, we recommend that you check and read through our article about how to fix drag and drop issues in Windows 10/11.

In conclusion, you may find it beneficial to know how to manage the Windows 11 taskbar on multiple monitors.

Kindly leave your suggestions and questions in the comments section, we’d like to hear from you.

Can’t Move Icons On Desktop: 5 Easy Fixes To Try

Some Windows users reported that they can’t move icons on the Desktop on their PC. This is a small but annoying problem, but today we’re going to show you how to fix it once and for all.

What can I do when I can’t move icons on Desktop?

To fix the issue, open the Folder options window and restore the default settings. If that doesn’t solve the problem, restart Windows Explorer from Task Manager.

You can also try changing the arrangement options for icons as a potential solution.

1. Restore Folder options

If you can’t move icons on desktop on your PC, be sure to check your Folder options.

  1. From your Start Menu, open Control Panel.
  2. Now click on Appearance and Personalization > File Explorer Options.
    reset folder options can't move icons on desktop
  3. In the General tab click on Restore Defaults.
  4. Now in the View tab, click on Reset Folders, followed by clicking on Restore Defaults.
  5. Now click on Apply, then click on OK.
  6. Restart your machine.

2. Auto-arrange icons

For this, we’re going to try out the simplest method to solve your icon-related issue.

  1. Firstly, you’re going to right-click on your Desktop.
  2. Now click on View.
    context menu view can't move icons on desktop
  3. Check or uncheck Auto-arrange icons.
  4. Once again click on View.
  5. Now select Align icons to grid.

3. Check your graphics card

In the event that your icons get rearranged every time you exit a program, you could be dealing with a faulty graphics card. We advise you to update your graphics card drivers. To do this, simply visit your graphics card manufacturer’s website and download the latest drivers for your model.

If this sounds too complicated, you can also use a third-party tool to update all outdated drivers with just a few clicks.

⇒ Get Outbyte Driver Updater

4. Restart Windows Explorer

Sometimes a glitch with Windows Explorer can make you unable to move icons on your Desktop. To fix this problem, do the following:

  1. Press Ctrl + Shift + Esc to open your Task Manager.
  2. In the Process tab section click on Show Processes From All Users, now select the Windows Explorer and right-click on it.
  3. Now select Restart.restart windows explorer can't move icons on desktop

5. Run check disk in Command Prompt

Sometimes this issue is caused by corrupted files. To fix it, you just need to do the following:

  1. Start Command Prompt as administrator.
  2. Type chkdsk /f X: and press Enter (replace X with the letter that represents your hard drive partition).
    chkdsk command prompt can't move icons on desktop
  3. Wait for the scan to finish. If asked to schedule a scan, press Y and restart your PC.

We hope that these fixes were helpful and that you can now move your Desktop icons without problems. If you found any of these solutions helpful, feel free to leave us a comment below.

3 Easy Ways to Fix the UEFI Boot Problems in Windows

Windows 10 and 11 boot problems might be quite annoying since the troubleshooting process is usually complex. And instead of taking out the time to fix UEFI boot issues, most users reinstall the OS.

But that leads to a loss of data. So, why take that route when a simpler, more viable alternative is already available? Let’s find out about UEFI and how to fix issues with it.

What is UEFI?

UEFI, or Unified Extensible Firmware Interface, is a protocol that replaces the popular BIOS with new software. UEFI offers vital benefits such as improved security measures, faster startup time, support for disks larger than 2 TB, and more. Before proceeding, check which BIOS mode your computer just to be sure.

A broken UEFI means that you have a broken bootloader, in which case you won’t be able to reboot or power on your Windows device.

Therefore, fixing UEFI boot problems is essential, especially if you want to use your device without having to reinstall the Windows OS.

How can I fix Windows UEFI boot problems?

1. Convert GPT to MBR

Note icon NOTE
This method only works when the PC is working and connected to the Internet. If you can’t turn on the computer, head to the next solution.
  1. Press Windows + R to open Run, type cmd, and press Ctrl + Shift + Enter.cmd
  2. Click Yes in the UAC prompt.
  3. Now, paste the following two commands one at a time, and hit Enter after each:mbr2gpt /validate /allowFullOS mbr2gpt /convert /allowFullOSconvert MBR to GPT

Once done, the primary partition will change from MBR to GPT, which will fix a range of problems with UEFI, including boot issues.

2.  Use Diskpart and recreate Boot Configuration Data

  1. Create a bootable Windows USB for the iteration on another PC using Rufus or another similar tool, and plug it into the affected computer.
  2. Now turn on the PC and boot it from the connected drive.
  3. Once the Windows setup loads, proceed with the initial steps and then click on Repair your computer when the option appears.repair your computer
  4. Now, choose Troubleshoot.troubleshoot to fix UEFI boot
  5. Click on Advanced options.advanced options
  6. Select Command Prompt from the options listed here.command prompt
  7. Now, paste the following command and hit Enter:Diskpart
  8. Find out on which disk you have installed Windows by executing the following command:list diskdiskpart
  9. Usually, the Windows system is installed on disk 0. If not, change the following command to select the system disk accordingly to the number of your disk:sel disk 0
  10. Next, execute the following command to view the partitions:list vollist volume to fix UEFI boot
  11. The UEFI partition should be a FAT32 file system. To select the UEFI partition, execute the following command while replacing X with the correct volume number:sel vol X
  12. Finally, paste the following command and hit Enter to assign a new letter to the selected volume:assign letter=bassign letter
  13. Now, run the following command to leave Diskpart: exit
  14. Finally, execute the following three commands individually to fix the Boot Record and recreate the Boot Configuration Data:cd /d b:EFIMicrosoftBoot bootrec /fixboot ren BCD BCD.old bcdboot c:Windows /l en-us /s b: /f ALL

That’s it! You should now be able to boot Windows normally without running into any trouble with the UEFI.

3. Run Startup Repair

  1. Plug in the bootable drive you created earlier, boot it and choose the Repair your computer option.
  2. Select Troubleshoot.troubleshoot
  3. Click on Advanced options.advanced options
  4. Now, select Startup Repair.startup repair to fix UEFI boot
  5. Select your account.account
  6. Enter the password for the chosen account and click Continue to start the repair process.enter password

A more straightforward way to fix UEFI boot issues is to run Startup Repair, a built-in option in Windows to eliminate issues preventing the OS from loading. It should be the preferred option for not-so-tech-savvy users.

By now, you should have fixed UEFI boot errors and problems, and these shouldn’t reappear. You can always refer to this article and execute the same steps even if they do. Some of these solutions may even help when the screen reads, Your VAIO failed to start Windows.

While you are at it, also find ways to reduce the boot time in Windows.

Tell us which fix worked for you in the comments section below.

How to Fix Self-Signed Certificate in Certificate Chain Error

For some time now, developers encountered a SELF_SIGNED_CERT_IN_CHAIN error during installing and publishing packages in certain applications and developer tools such as Node.js, npm, or Git.

Until a few years ago, when npm for instance announced that they would no longer support self-signed certificates.

This means that the certificate verification process was no longer automatic. So developers now have to set up their application to see the self-signed certificates.


How do I fix self-signed certificate in the certificate chain?

self signed certificate in certificate chain

Depending on the tool you’re using, there are a few recommendations. Some are risky, some are safe. One thing is clear, though: you should not attempt to disable the certification verification process altogether.

For Node.js

You can insert an environment variable to allow untrusted certificates using the following command at the beginning of the code:

process.env['NODE_TLS_REJECT_UNAUTHORIZED'] = 0;

This is risky and it’s not recommended to be used in production. Alternatively, use npm config set strict-ssl=false if you have to do this for many applications and you want to save repeating the process.

Users also suggest upgrading your version of Node, to fixes any existing bugs and vulnerabilities.


For npm

The recommended solution is, again, to upgrade your version of npm running one of the following:

npm install npm -g --ca=null 

npm update npm -g

Or,  tell your current version of npm to use known registrars, and after installing, stop using them:

npm config set ca ""
npm install npm -g
npm config delete ca

Some users mentioned that they only switched the registry URL from https to http:

npm config set registry="https://registry.npmjs.org/"

We hope that one of these suggestions helped you fix the problem. Should you have any recommendations, please use the comments section below.


[wl_navigator]

How to Get Outlook Notifications For Subfolders

In Outlook, by default, you get notifications for any email that lands in your inbox. However, you don’t get notifications for emails coming to your subfolders. However, with a few tweaks, you can get notified for them too. 

This guide will discuss step-by-step instructions to get Outlook alerts for subfolders so you never miss an important email. Let’s get started!

How can I get outlook notifications for subfolders?

There are a few prerequisites that you should be aware of before setting up Outlook notifications for specific subfolders:

  1. You need to have the Microsoft Outlook desktop app installed on your computer or have access to OWA.
  2. You should have an active email account configured in Outlook.
  3. Must have primary Outlook navigation and locate and access the relevant settings and options in the Outlook application.

Once you have gone through the checks, follow the instructions step by step to get this done:

1. Outlook Desktop app

  1. Open Outlook.
  2. Go to the folders in the email account and under the Home tab. 
  3. Now under Move, click Rule, then select Manage Rules and Alerts. 
    Rules - outlook notifications for subfolders
  4. On the Rules and Alerts window, go to the Email Rules tab and click New Rule.
    New Rule
  5. On the Rules Wizard page, click Apply rule on messages I receive or click Check messages when they arrive. 
    Apply rules
  6. Now, click Next.
  7. On the next page, do nothing, click Next and proceed. 
    Next
  8. Click Yes on the following prompt. 
    Yes
  9. On the Rules Wizard dialog box, place a checkmark beside the display a Desktop Alert. 
  10. Click OK in the onscreen prompt box, then click Next and Finish.
    Create alert
  11. Again click OK on the Rules and Alerts window to finish the process.

Need to confirm that messages were opened as well as alerted? Set up a read receipt in Outlook to track opens.

2. Outlook Web app (OWA)

Tip icon Tip
If you don’t have an Outlook desktop app, you can also create a rule on OWA. This is not the direct way of getting notifications on OWA; it is the workaround.
  1. On the OWA, locate the Settings gear icon and click on View all Outlook settings.
    Outlook settings -outlook notifications for subfolders
  2. In the Settings window, go to the Mail tab and click on the Rules option.
  3. On the Rules window, click the Add new rule button.
    Mail rules add rule
  4. In the Add a new rule window, give the rule a name and specify the conditions to which the rule applies. For instance, you can use the law only for messages from a specific sender or with a particular subject. Once you are finished defining the conditions, click Save.
  5. In the next window, select the Move, copy, or delete action and click Add action.
    Windows
  6. From the Add action window, select the Move the message to different folder option and click Choose folder.
  7. On the Choose folder window, please navigate to the subfolder you want to receive notifications for and select it. Then click Save.
  8. Click Save to create the rule.

If you are also facing notification issues on mobile, check this guide on Outlook notifications not working on iPhone.

So, you need to follow these steps to get Outlook notifications for subfolders. If you are stuck somewhere while working on Outlook notifications for folders, feel free to mention your questions or concerns in the comments section below. We will be more than happy to help!

Missing Proofing Tools In Microsoft Word: 4 Ways To Fix It

When editing a document in Microsoft Word, you may encounter the Missing proofing tools error. The full error reads – Missing proofing tools. This document contains text in <language of the text>, which isn’t being proofed. You may be able to get proofing tools for this language.

This error can occur due to mismatched language settings, missing proofing tools, incorrect default language, or compatibility issues.

Here’s how you fix it:

How do I fix the missing proofing tools Microsoft Word error?

1. Change the proofing language manually

  1. Launch Microsoft Word on your computer and open the document with the error.
  2. Press Ctrl + A to select all the text in the document.
  3. Open the Review tab from the toolbar.review tab word
  4. Click the Language drop-down button.language option ms word
  5. Go to Language and choose Set Proofing Language.
  6. Select your preferred language from the new Language window.
  7. Click the Set as Default button if you want to set the language as default for all the documents.language option ms word
  8. Click OK to apply the changes.

Manually changing the document and proofing language seems to have fixed the error for many users. However, make sure to select the correct document language from the language settings to prevent errors in the future.

2. Install the Proofing Tools 2016

  1. Open the Microsoft Office Proofing Tools 2016.
  2. On the download center page, select the language.
  3. Click the Download button to proceed.
  4. Select the 32-bit/64-bit version of proofing tools, depending on your OS edition.
  5. Click Next.
  6. Run the installer and follow on-screen instructions to install the proofing tools for Office 2016.

Note: It is important to install a 32-bit proofing tool for 32-bit Windows systems and 64-bit for 64-bit systems. The tool otherwise may not work correctly.

Once installed, relaunch Microsoft Office and check if the error is resolved. 

3. Use a dedicated repair tool

If you’re facing issues with Microsoft Word files, Stellar Word Repair can help. It offers a straightforward solution for fixing corrupt .doc and .docx files. 

The tool restores text, images, fonts, and hyperlinks without altering the original content. It can address issues like missing proofing tools errors and provides multiple recovery options, including a free preview of recoverable data.

⇒ Get Stellar Word Repair

4. Repair Word installation

  1. Press the Windows key + R to open Run.
  2. Type control and click OK.
  3. In Control Panel, go to Programs and click on Programs and Features.programs and features cp
  4. Select Microsoft Word from the list of installed apps.
  5. Click on Change and then click Yes when prompted by UAC.change office
  6. Select Quick Repair and then click on the Repair button. Wait for the repair to complete and restart Office. If the error persists, perform Online Repair.
  7. Make sure your computer is connected to the Internet and choose Online Repair.
  8. Click the Repair button to proceed. The repair process will take longer but will fix all issues with your Microsoft Office installation.

After the repair process is complete, restart Office and check if the Missing proofing tools error is resolved.

The Missing proofing tools in Microsoft Word error can occur due to Word document in corruption or issues with Office installation.

Fortunately, you can fix this error by repairing the Word document or changing language preferences.

iCloud Sync Pending / Not Syncing: 7 Quick Fixes

Apple iCloud is a popular cloud storage service, but many Windows 10 and Windows 11 users reported that iCloud drive is not syncing.

This can be a big problem, and in today’s article, we’ll show you how to fix this issue.

How can I fix the iCloud Sync Pending issue?

1. Enable iCloud for Windows

  1. You will need to specifically log in to the iCloud for Windows app for your information to be synced across all devices.
  2. However, prior to that, you are required to set up iCloud on all Apple devices you have and log in at each instance of the app on each device.
  3. It’s only after you are done with the above steps that you need to log in at iCloud for Windows app.
  4. After logging in, you’re good to go. Check if the data is getting synced across devices.

2. Sign out and log in again with iCloud for Windows

Sign out and sign in again if Windows 10 iCloud drive not syncing
  1. Launch iCloud for Windows.
  2. Click on the Sign out button at the bottom right corner to log out of the service.
  3. Close the application and relaunch the same again.
  4. Enter your Apple ID to sign back into iCloud.
  5. As before, select the features and content that you want to sync.

3. Update the iCloud for Windows app

update icloud icloud drive not syncing
  1. Launch Store app on your PC.
  2. Click on the three horizontal dots at the top right corner and select Downloads and updates.
  3. Check if there is an update available for iCloud for Windows.
  4. If yes, click on the downward facing arrow to download and install the update.


4. Update Windows PC

Update your PC if Windows 10 iCloud drive not syncing
  1. Click on Start > Setting > Update & Security.
  2. Click on the Check for updates button.
  3. Download the updates if any are available.

5. Check available storage space on iCloud

Check storage space if Windows 10 iCloud drive not syncing
  1. Ensure there is enough storage space available on iCloud Drive.
  2. For that, go to Settings > [your name] > iCloud on your iPhone (or for that matter, any iCloud compatible Apple device).
  3. There will be syncing issues if there isn’t space available to host all files that you want to upload to iCloud.

6. Uninstall and reinstall iCloud for Windows

Uninstall iCloud for Windows and reinstall again if Windows 10 icloud drive not syncing
  1. Click on Start > Settings > Apps.
  2. Select iCloud for Windows from the list of apps installed on your Windows device.
  3. Click on the Uninstall button.
  4. Once the app is removed, install it again and check if the iCloud sync pending error is still there.

7. Change to a specific password for iCloud for Windows app

  1. Apple recommends having a separate password for each of its services.
  2. This not only allows for better security, but there are also fewer chances of system conflicts arising when using cross-platform apps such as iCloud that operates across iOS, Mac and Windows operating systems.
  3. To change password, visit the Apple site here.
  4. Generate a password specifically for iCloud and use the same to log in to your cloud account via iPad, iPhone, and Windows devices.

There you have it, a comprehensive list of things to do if you get the iCloud sync pending error message on your PC.

Telegram Download Stuck: Could Not Be Completed [FIX]

If your Telegram download is stuck or an error reading file download could not be completed sounds familiar, you may want to stick around. We’ll explain how to fix and prevent this issue.

In most cases, stuck downloads in Telegram happen when you enable battery saving mode, your hard drive is full or the file size is too big, and your internet is too slow. No matter the cause, here’s how to fix it:

What to do if a file cannot be downloaded in Telegram?

Start by testing the speed of your connection. If your internet is down, contact your ISP. If it’s up and running, but you still have no success with Telegram, keep reading:

1. Make sure Connection settings are set to default

  1. Enter Settings and scroll to the bottom.
  2. Look for the option saying Connection settings: default (use TCP) and click on it.
  3. Then, click on OK without making any further changes and check if file downloading works again.

2. Check file size

If your video, image, or other types of files exceed 4 GB (or if you try to batch download files whose combined size goes beyond this value), Telegram won’t be able to complete your file download.

To check file size: open the chat, and look at the file’s preview. The size should be displayed next to the file’s name. Alternatively, tap the three dots and select Details.

A quick tip: consider checking the file size. Despite any appearances, it might not even be a Telegram glitch, but your disk could be full.

3. Turn off the Battery saver or customize this mode

  1. Open the Settings app.
  2. Go to System, then Battery.
  3. Click on Battery saver and toggle the button Off.
  4. Alternatively, you exclude Telegram from the battery optimization plan. Simply look in the list of apps and make sure the switch next to it is set to Never or Off.
  5. Now, restart your device and try downloading anything from Telegram.

4. Update or reinstall Telegram for desktop

If you’re wondering why Telegram is not downloading on your PC, it can be because you missed some updates or you simply don’t have the latest version.

If you installed the Telegram app from the Microsoft Store, simply open the dedicated app and go to Settings. Check for any available updates and download them accordingly.

Alternatively, you can also try to uninstall and reinstall Telegram Desktop from the official address and also change the download location on your PC.

So, that’s how to solve the problem of not being able to finish a file download in Telegram.

In case these methods do not work appropriately to troubleshoot the issue, remember that Telegram users can often download large files even when encountering the issue on small-size files.

It’s hard to establish a pattern of behavior, yet you might give it a go as well.

Know any other workarounds for the issue? Share them with us in the comments section below.

PUBG Black Screen on Launch: Try Our 10 Quick Solutions

Looking at its current ratings will give you a good idea about what’s going on with PUBG. Long story short, this is a great battle royale shooter, but it has many issues and bugs. And one of the most common is the black screen on launch in PUBG.

A black screen can be quite challenging in the sea of issues plaguing gamers, making reboot necessary. For the affected users, it appears either on launch or while waiting for the matchmaker queue.

How can I fix the black screen on launch on PUBG?

Before trying any advanced solutions, here’s what you can do:

  • We recommended updating the game. Just open the Steam desktop client, and the update queue will start. After that, restart your PC and try starting the game again.
  • You can try to change some things in router/modem settings that might help you at least lessen the black screen crashes at startup. The first is QoS or Quality of Service, which allows users to set priority applications in bandwidth usage. Setting PUBG as a priority might reduce the gravity of the issue.
  • The second thing you might want to check is port forwarding, which demands more effort, as the procedure differs depending on your router/modem model or version. You can check the manufacturer’s website for the exact steps.

1. Run the game through Steam

  1. Right-click Steam and open Properties.
  2. Select the Compatibility tab.
  3. Check the Run this program as an administrator box and click OK to save the changes.pubg black screen on launch

Even though you can run the game from the desktop shortcut, we still recommend using Steam. If you acquired PUBG via the Steam Store, we suggest using the desktop client to start it.

For some peculiar reason, this seems to work for some users, and the startup black screen or freezing on the title screen is gone. On a side note, we encourage you to run Steam with administrative permissions.

2. Delete the contents of the Movies folder

  1. Press Windows + E to open File Explorer, paste the following path in the address bar, and hit Enter.fix pubg black screen on launch
  2. Now, press Ctrl + A to select all the files here, and hit the Del key.
  3. Choose the appropriate response in case a confirmation prompt appears.

Once done, reopen Steam, and the black screen shouldn’t appear when you launch PUBG.

3. Remove custom launch options

  1. Open Steam and then navigate to the Library tab.
  2. Right-click on PUBG and choose Properties.
  3. Choose “SET LAUNCH OPTIONS…” and delete all inputs.pubg black screen on launch
  4. Confirm changes and restart Steam.
  5. Start the game.

If you’ve made any changes in the Steam configuration concerning the launch options, make sure to disable all of them. Some of them might work in your favor, but for the sake of establishing a blank slate, you’ll need to remove them for the time being.

4. Disable background programs

  1. Press Ctrl + Shift + Esc to open Task Manager, and navigate to the Startup apps tab.task manager
  2. Select all applications listed here individually, and click on Disable at the top.disable to fix pubg black screen on launch
  3. Once done, restart your PC.

The impact certain background applications can have on the game was already proven. So, we recommend performing a clean boot, with only system resources running in the background.

In addition, some users advised uninstalling apps, including the GeForce Experience utility.

5. Reinstall GPU drivers

When it comes to in-game issues and Windows 10, we can’t sleep on the GPU drivers. It becomes imperative to find the perfectly suited drivers for your GPU, even for premium graphics cards.

Windows 10 pushes generic drivers, and more times than not, they work as intended. But we still recommend navigating to the official OEM’s support site and downloading the latest driver version. If one fails, try installing an alternative.

Here’s where to find the drivers for major manufacturers:

After that, you can block the installation of generic drivers provided by Windows Update. Also, we recommend installing redistributables and updating DirectX. You can even use dedicated driver updater software to find the latest driver versions automatically.

6. Delete configuration settings and verify the game’s integrity

  1. Copy-paste %localappdata% in Windows Search and press Enter.
  2. Locate the “TslGameSavedConfig” directory.
  3. Delete the WindowsNoEditor file.

Restoring the game configuration to its default settings might help, as well. Some users copied the configuration files from other users who haven’t experienced crashes.

This will hardly work since it’s not likely that you have the same system configuration as the next user. Rather, you’ll need to delete the configuration settings and configure everything again in the in-game settings.

Once done, the next step is to verify the integrity of the game files. Like all other files, the game files tend to get corrupted or incomplete. With this operation, you’ll restore them to their proper values.

  1. Open Steam‘s Library.
  2. Right-click on PUBG and open Properties.
  3. Choose the LOCAL FILES tab.
  4. Click on the VERIFY THE INTEGRITY OF GAME FILES option.pubg black screen on launch

7. Update Windows 10

  1. Type Update in the Windows Search bar and select Check for updates.check for updates
  2. Check for updates and install them.
  3. Restart your PC.

Windows 10 updates are rarely the cause of gaming issues, especially minor ones. However, having the latest patch for Windows might be valuable. Users reported issues with Ryzen CPUs, and the resolution was presented in a timely update.

8. Add exceptions for Windows Firewall and antivirus

  1. Press Windows + S to open the Search bar, type Allow and select Allow an app through Windows Firewall.
  2. Click on the ”Change settings” button.pubg black screen on launch
  3. Find your Steam and PUBG on the list and check the box beside them. Also, make sure that both Public and Private networks are enabled.
  4. Confirm changes and restart your PC.

Allowing the game to communicate freely is of utmost importance. Saying that this is the main reason for the black screen is a far-fetched claim, but it won’t cost you anything to try it.

Firstly, if you have any third-party antivirus solution with a built-in firewall, we urge you to disable it. After that, you can add an exception for Windows-native Firewall.

Allowing the game to communicate freely on your computer is important to avoid other issues like PUBG anti-cheat error, check out this guide to learn more.

9. Disable integrated graphics in dual-GPU configurations

In case you have a dual-GPU configuration, with one integrated and one dedicated graphics card, disabling the integrated one might help you overcome the error at hand.

This can be done in various ways, but the best approach would be to disable integrated GPU from its own control panel.

Some users recommended uninstalling it in Device Manager, but this can cause additional issues, so avoiding this approach is a good idea.

Instead, navigate to Device Manager, expand the Display Adapters section, and disable the integrated graphics. Restart your PC, and you should be good to go.

10. Reinstall the game

  1. Type control in the Windows Search bar and open the Control Panel.pubg black screen on launch
  2. Click Uninstall a program.pubg black screen on launch
  3. Remove PUBG.
  4. In Windows Search, type %localappdata% and press Enter.
  5. Delete the TslGame folder.
  6. Now, navigate to the following location in File Explorer: C:\Program Files (x86)\Common Files\BattlEye 
  7. Now, delete the BEService_pubg.exe file.
  8. Once done with all, open Steam and reinstall PUBG.

Finally, the only thing that comes to mind is reinstalling the PUBG on your PC. If PUBG, as the case has shown, worked just fine and suddenly a black screen on launch started appearing, the reinstallation might be a resolution.

Once you have fixed this, we recommend deploying the best settings for improved gaming performance to eliminate various issues.

On that note, we can wrap it up. Tell us whether the steps mentioned above helped you in the comments section below.

Fix: Amazon Fire Stick Settings Menu Not Loading [3 Ways]

If the menu on Amazon Fire Stick isn’t loading, that can be a major problem since you won’t be able to access anything.

Although this issue might seem alarming, there’s a way to fix it, and today we’ll show you how to do it easily.

What to do if Amazon Fire Stick isn’t loading the Home menu?

1. Restart your device

restart the device amazon fire stick menu not loading
  1. Press and hold the Select and Play/Pause buttons for five seconds on your remote.
  2. Once your device restarts, check if the issue is still there.

This might be just a temporary glitch; to fix it, you need to restart your Amazon Fire Stick.

2. Install ES File Explorer and uninstall applications

uninstall applications amazon fire stick menu not loading
  1. Install ES File Explorer and go to Apps.
  2. Select each app that has Amazon icon on it and select Uninstall.
  3. You should see a message saying Do you want to replace this app with the factory version.
  4. Select OK.
  5. After doing that for all apps, restart the Fire Stick and check if the problem is resolved.

Few users claim that this method worked for them, so you might want to try it. Some users also suggest removing all apps you haven’t used, so try that as well.

3. Reset Amazon Fire Stick to default

reset amazon fire TV to default amazon fire stick menu not loading
  1. Press and hold the Select + Right + Back + Reverse buttons for 10 seconds. If that doesn’t work, press and hold Back and the Right side of the navigation circle.
  2. You’ll be asked to confirm the factory reset. Select the appropriate option.

If the Fire Stick menu isn’t loading, perhaps resetting Fire Stick to default will fix the problem.

Some users are suggesting selecting the No thanks option when setting up your Fire Stick to avoid the issue in the future.

There you go, a quick and easy guide on how to fix menu problems on Amazon Fire Stick. All you need to do now is to follow the instructions therein, and the issue should disappear.

If you are having sound issues on Amazon Fire Stick, check our detailed guide to fix it for good.

If you found this guide useful, let us know in the comments below.

Disney Plus Black/Blue/Green Screen Errors: 5 Easy Fixes

Disney Plus, a popular streaming service, works like a charm until the screen gets stuck with a solid black, blue, or green color. Here, when a user logs in, it’s just a plain black screen without any titles or options listed.

But fret not! We have identified all the underlying causes and the solutions for each, which will be presented in the following sections. So keep reading to find out how to get things up and running when Disney Plus has a black screen.

Why am I getting a black screen on Disney Plus?

Here are a few reasons you are encountering the issue:

  • Server outage: In most cases, it’s an outage at Disney’s end that causes the problem. But if the issue persists or others are not experiencing it, it might be something else to blame.
  • Using a VPN: A reliable VPN, though quite helpful in a lot of ways, can affect the connection parameters and lead to a black screen on Disney Plus.
  • Issues with the connection settings: Oftentimes, an incorrect DNS server or misconfigured connection settings can trigger the issue.
  • Corrupt browsing data: The browser cache and cookies, after getting accumulated over time, can become corrupt and trigger a range of problems accessing specific websites.

How can I fix Disney Plus black/blue/green screen?

Before we try the slightly complex solutions, here are a few quick tricks that will come in handy:

  • Restart the computer and the modem/router. For the latter, unplug it from the power source and plug it back in after at least a minute.
  • If you are using a VPN to establish a connection, disable it, and verify whether the problem is resolved.
  • Make sure that Disney Plus is not down. To check, use Downdetector. In case others, too, are experiencing the problem, it’s likely a server outage, and things should be resolved within a few hours.

If none of these work, the solutions listed next surely will.

1. Disable Hardware Acceleration

Note icon NOTE
The steps listed here are for Google Chrome. In case you use another browser, the process should be similar. For the exact steps, search the web or head to the Support/FAQ section on the browser’s official website.
  1. Launch the browser, click on the ellipsis near the top-right, and choose Settings.settings
  2. Now, navigate to the System tab from the left, and disable the toggle for Use hardware acceleration when available.disable to fix Disney Plus black screen

Once done, relaunch the browser and verify if the Disney Plus black screen still remains. In that case, head to the next solution.

2. Disable Bandwidth Saver on the device

Certain devices come with a Bandwidth Saver option to help minimize data usage, but it often proves counterproductive and messes up the experience. Disabling it did the trick for many users.

As pointed out by one of our readers, Roku TV users can easily fix things by disabling the Bandwidth Saver feature in the Network settings. Here’s how:

  1. Press the Home button on the remote, choose Settings, and then Network.
  2. In the sub-menu that appears, choose Bandwidth saver and turn it off.disable bandwidth saver to fix Disney Plus black screen

That’s it! Once done, your Roku TV (or even another smart TV with the feature) should not display a black screen on Disney Plus anymore.

3. Change the DNS server

  1. Press Windows + R to open Run, type ncpa.cpl in the text field, and hit Enter.ncpa.cpl
  2. Now, right-click on the active network adapter, and choose Properties.properties
  3. Next, select Internet Protocol Version 4 (TCP/IPv4) and click on Properties.properties
  4. Select the Use the following DNS server addresses option, enter the following in the two fields, and click OK to save the changes:
    • Preferred DNS server: 8.8.8.8
    • Alternate DNS server: 8.8.4.4change DNS server to fix Disney Plus black screen
  5. Again, click OK on the previous Window for the changes to apply and restart the computer.

You can also change the DNS server on a TV. Though the steps are different, those can be found on the manufacturer’s official website.

4. Clear browsing data

  1. Launch your browser and press Ctrl + Shift + Del (shortcut works on Chrome, Edge, and Opera but not Firefox) to open the Clear browsing data tab.
  2. Select the Cookies and other site data and Cached images and files option, and then click on the Clear data button. Just make sure All time is selected from the Time range dropdown menu.clear data to fix Disney Plus black screen

Once the data is all wiped out, relaunch the browser, and verify whether the Disney Plus black screen problem is resolved. Because if not, there’s only one viable option left.

5. Switch to another browser

In case the problem persists, or you are encountering it while streaming Disney Plus content via a third-party application, it could be the browser to blame.

Several users reported the issue with Google Chrome, but as soon as they switched to Opera, things started to work fine because it has a built-in adblocker and a free VPN which makes your browsing experience faster and more secure.

That’s it! With the black, blue, and green screen problem on Disney Plus solved you can start watching your favorite shows once again.

Also, do not forget to check our simple tips to eliminate buffering on Disney Plus. And if you’re experiencing repeated crashes, our guide on troubleshooting Disney Plus crashes provides helpful steps for a smoother viewing experience.

Before you go, don’t miss our guide on what to do if Disney Plus plays only audio without video, for more solutions.

If you have any other queries or know of a solution that’s not listed here, drop a comment in the section below.

How to Install Exchange Online PowerShell Module in Windows 11?

Whether you want to manage a mailbox, distribution groups, calendar & contact items, or permissions, the Exchange Online PowerShell module is helpful.

Installing the Exchange Online PowerShell module in Windows 11 is a simple process that includes a few steps. 

Here, this blog will walk you through the steps to install it on your Windows. Let’s get started!  

What can I do to install Exchange Online PowerShell Module in Windows 11?

Before engaging in advanced troubleshooting steps, you should consider performing the following checks:

  • An Exchange Online account to connect and manage via the Exchange PowerShell module.
  • If you are running PowerShell on a version of Windows older than Windows 8 or Windows Server 2012, you need to install the Windows Management Framework 3.0 or later from the Microsoft website.
  • You must log in with administrator rights to install and run commands.
  • Also, ensure you have a reliable internet connection.

1. Set Execution Policy

Tip icon Tip
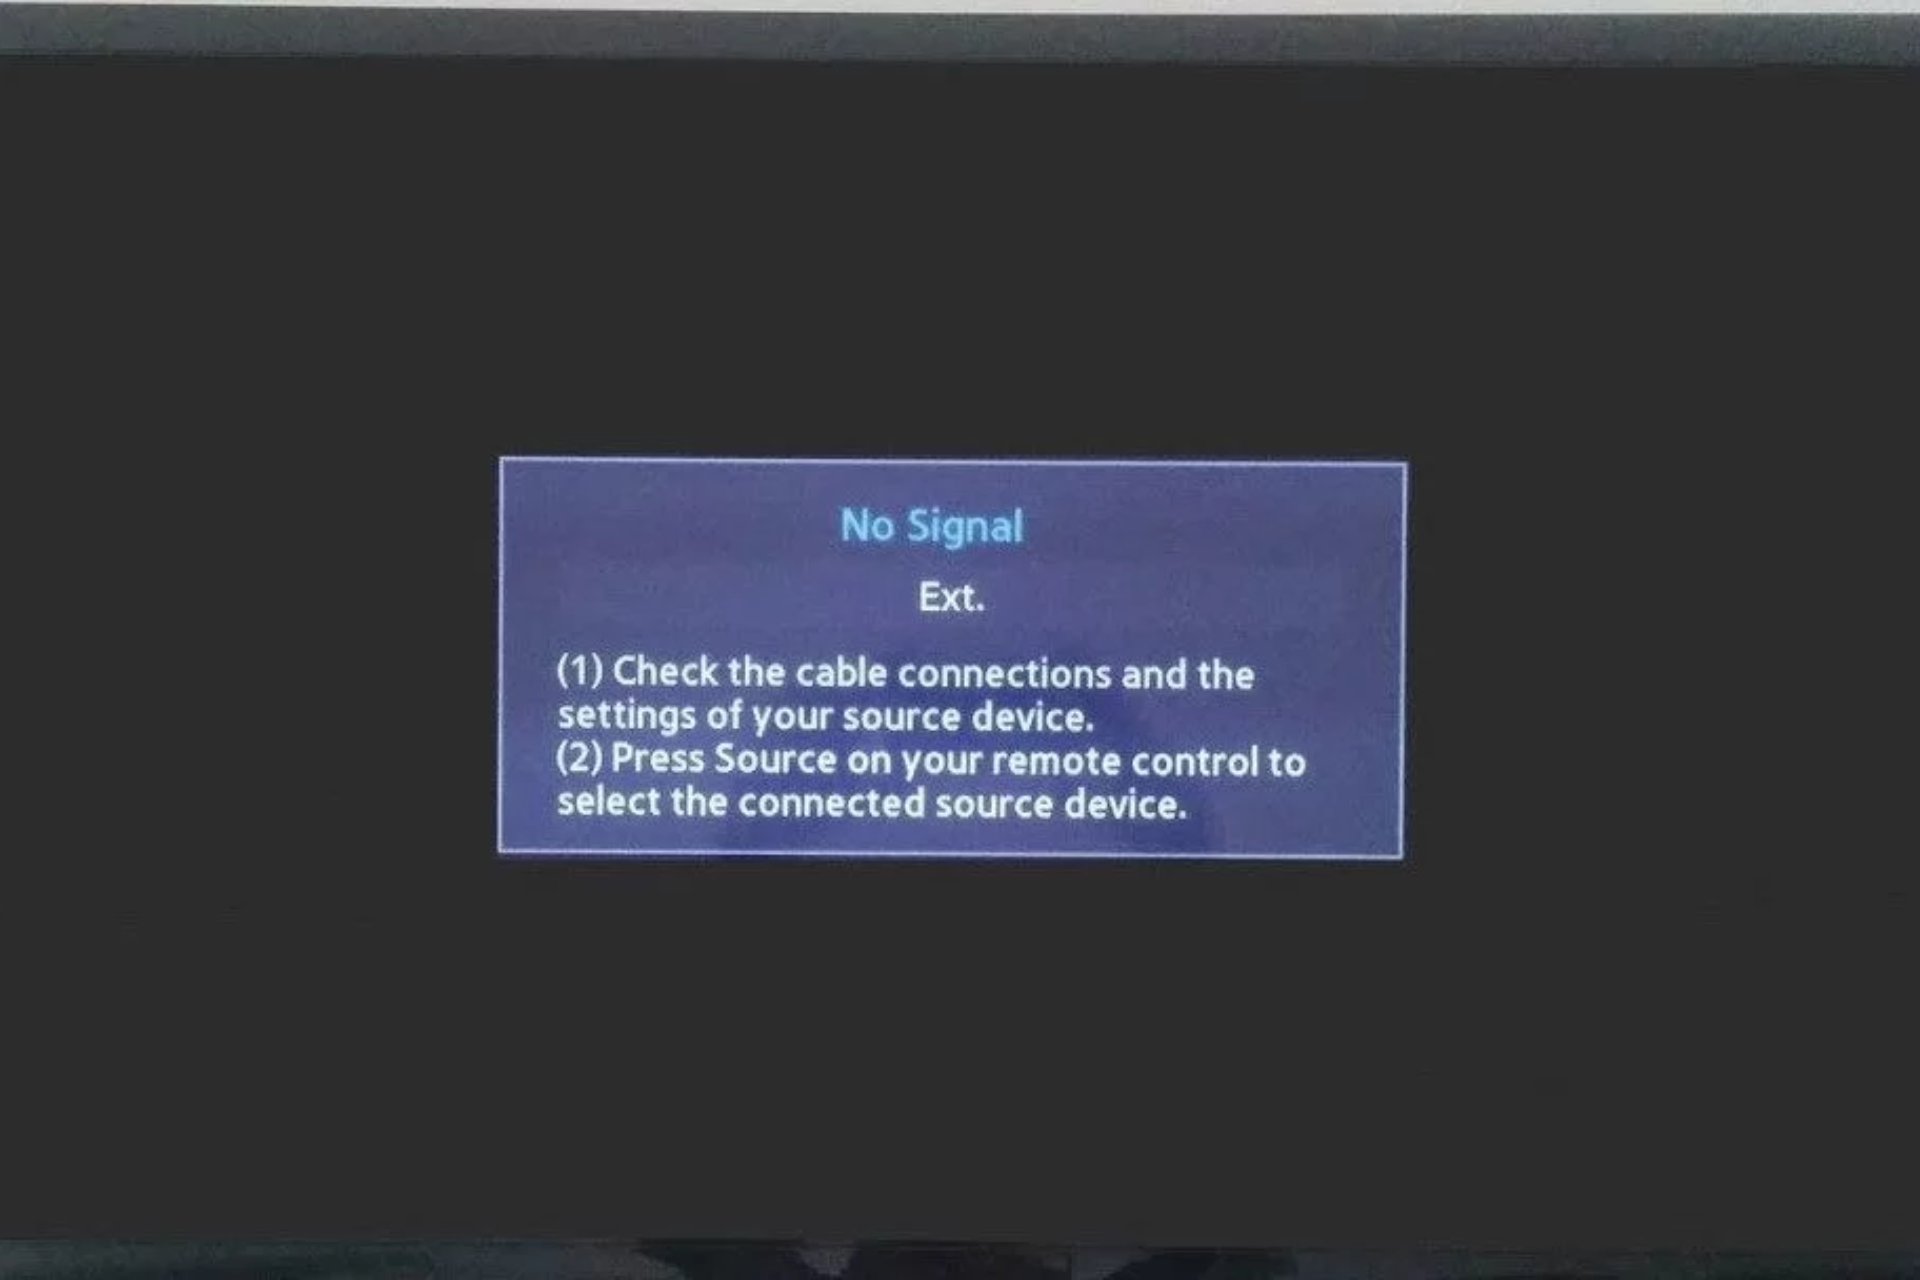
You cannot install or download scripts in PowerShell without permission. You must set some execution policies allowing us to install external scripts.
  1. Press the Windows key, type PowerShell, and click Run as administrator.Powershell -Powershell -install exchange online powershell module
  2. Type the following command to set the execution policy for PowerShell and press Enter: Set-ExecutionPolicy RemoteSignedSet-ExecutionPolicy RemoteSigned -install exchange online powershell module
  3. Type Y to press Enter to change the execution policy.

2. Install PowerShellGet module

  1. Type the following command to install the PowerShellGet and press Enter: Install-Module PowershellGet -Forcepowershell_Install-Module PowershellGet -Force-install exchange online powershell module
  2. If you get to install the NuGet provider, press Y and then Enter.
  3. Copy and paste the following command to modify the execution policy: Get-ExecutionPolicy
  4. To get the list of installed modules, use the get module cmdlet: Get-Module PowerShellGetGet-Module PowerShellGet

3. Install Exchange Online PowerShell Module

  1. Copy and paste the following command press Enter: Install-Module -Name ExchangeOnlineManagementWindowsTerminal-Install-Module-Name-ExchangeOnlineManagement-Force
  2. If prompted, press Y and then Enter.

So, these are the steps you need to follow to install the Exchange Online PowerShell module. If you want to know how to connect Exchange Online PowerShell module, check out this here.

Installing & Connecting to Exchange Online are the initial steps to set up DKIM for Microsoft 365 for your domain; read this guide to learn more.

Try them, and if you have any concerns or questions, please mention them in the comments below. We are here to help! 

Office 365 Slowing Down Computer: 4 Ways To Fix It

Users have reported an Office 365 slow performance on their PCs, to the point where the PC’s are lagging hard.

The Microsoft 365 suite is among the first services that you want to install on your computer, besides web browsers and a decent antivirus program.

If you think that it is the features of the suite that are causing the slowdown, see these simple steps below to fix the Office 365 slowing down computer issue.

What causes computer slowdown?

Computer slowdown can be caused by a large variety of system-related problems, among them an outdated operating system, certain antivirus features, low disk memory, or background processes that use a lot of resources.

Sometimes, the slowdown can be caused by corrupted files that got into the system upon downloading or installing certain programs. It can happen even when working on a brand new computer or in a freshly installed operating system.


How can I prevent Office 365 from slowing down my computer?

1. Make sure to meet system requirements

Although sometimes ignored, system requirements are almost the basic detail when we’re expecting a program to perform at its best. So keep your operating system updated and performant.

For instance, the Microsoft 365 suite needs the latest Windows 10 OS on a PC/laptop or one of the three latest versions of macOS, for a Mac.

Memory space should be at least 2 Gb RAM for 32-bit Windows or 4 Gb RAM for 64-bit Windows/ Mac. And the available hard disk space should be 4 Gb for PCs and 10 Gb for Macs.

Once you’ve made enough room for the bundle apps to function and you’ve updated the system, computer performance should improve.


2. Check for the latest updates

  1. Open the Start menu > Settings app > Update & Security.DirectX 12 reinstall
  2. Click Check for updates.can I DirectX 12

Usually, Windows is updated automatically. But if any updates are missing, after the process is finished, your computer should resume normal functioning.


3. Check for conflicting programs

  1. Type System Configuration in the taskbar and select Run as administrator.
  2. On the Services tab, select Hide all Microsoft services, and then select Disable for all.fix directx installation
  3. On the Startup tab, open Task Manager, and Disable all items.
  4. Close the Task Manager and click OK in the System Configuration window.
  5. Restart your device and reopen one of the Microsoft 365 programs to see if this helped.

A clean boot shows if any other installed program is interfering with the Microsoft 365 features so that you uninstall it or manage its functions.

Afterward, set your device to boot normally by opening the System Configuration as shown previously, and in the General tab, check Normal startup, then OK.

The Office 365 slowing down computer issue should be gone. If not, try out our last solution as well.


4. Disable Hardware Graphic Acceleration

  1. Start any Office program.
  2. In the File tab, click Options.
  3. In the Options dialog box, click Advanced.
  4. Click to select the Disable hardware graphics acceleration checkbox.

To sum up, Microsoft 365 apps should not slow down your computer if installed correctly and if the minimum system requirements are met.

Nevertheless, if none of the above solutions solves the problem, check out this detailed article about how to tackle computer slowdown in general.

Let us know which of the solutions above helped you fix the Office 365 slow performance issue on your PC in the comments section below.

Fix: Unable to Update the Password, Value Doesn’t Meet The Length

If you’re getting the Unable to update the password. the value provided for the new password does not meet the length, you’re in the right place. We’ll show you below a few different ways to fix it:

How to fix “Unable to update the password” error in Windows:

1. Wait for 24 hours and try again

If you get Unable to update the password message, this could be due to certain policies on your PC. Some systems allow you to change your password every 24 hours.

The simplest solution, in this case, is to wait for 24 hours and then try to change the password again.

2. Change the Minimum password age policy

  1. Press Windows key + R and enter gpedit.msc. Now press Enter or click OK.
    Windows 10 password doesn't meet complexity requirements
  2. When Local Group Policy Editor opens, in the left pane, navigate to Computer Configuration > Windows Settings > Security Settings > Account Policies > Password Policy. In the right pane, locate the Minimum password age policy and double-click it.
    Unable to update the password. The value provided as the current password is incorrect
  3. Set the Password can be changed immediately to 0 days. Now, click Apply and OK to save changes.
    Unable to update the password the value provided Server 2012

3. Check the password strength

In order to set a password, it must meet certain criteria. Having a strong password is important since it will prevent malicious users from cracking it. As for the password requirements, these are the necessary requirements:

  • At least six characters in length.
  • Contain uppercase characters.
  • Contain lowercase characters.
  • Contain numeric characters.
  • Contain non-alphabetic characters.

4. Disable password complexity requirements

  1. Open Group Policy Editor.
  2. In the left pane, navigate to Computer Configuration > Windows Settings > Security Settings > Account Policies > Password Policy.
  3. In the right pane, double-click the Password must meet complexity requirements option.
    Unable to change password does not meet complexity requirements
  4. Set this policy to Disabled and click Apply and OK to save changes.
    Unable to update password for computer account

As previously mentioned, sometimes Unable to update the password message can appear if the password doesn’t meet the security standards. Group Policy settings enforce this policy; if you want, you can easily disable it.

5. Make sure that the Change password at the next logon option is enabled

  1. Press Windows key + R and enter lusrmgr.msc. Now, press Enter or click OK.
    Windows 10 password doesn't meet complexity requirements
  2. From the left pane, select Users. In the right pane, double-click the account whose password you wish to change.
    Unable to update the password. The value provided as the current password is incorrect
  3. Uncheck Password never expires option.
  4. Now, check User must change password at next logon.
  5. FInally, click Apply and OK to save changes.
    Unable to update the password the value provided Server 2012

To be on the safe side, make sure that you can access Safe Mode or have a different administrative account available that you can use to disable this feature if anything goes wrong.

6. Try changing the password from Command Prompt

  1. Press Windows key + X and select Command Prompt (Admin) from the list. If Command Prompt isn’t available, you and also use PowerShell (Admin).
    Unable to update the password the value provided Server 2012
  2. Type the command below (replace User_name with the appropriate username) and press Enter to run it: net user User_name *
  3. Now you’ll be asked to enter the new password twice.
    Unable to change password does not meet complexity requirements

7. Install the latest updates

  1. Press the Windows key + I to open the Settings app and select Update & Security.
    Unable to update password for computer account
  2. Click the Check for updates button. Windows will now check for available updates and download them in the background.
    Unable to update the password. The value provided as the current password is incorrect

Unable to update the password message can be annoying, but your security policy usually causes this message. To fix the problem, ensure your password matches the security criteria or disable certain security policies.

In the same vein, if your computer won’t let you type your password, check our detailed guide to restore normal service on your PC.

Feel free to let us know the solution that helped you fix this issue in the comments below.

Windows Defender Won’t Update: 5 Quick Fixes

A good number of Windows 10 users have raised concerns that Windows Defender won’t update on their computers.

Most of these queries have to do with Windows Defender failing to update virus definitions, and this usually happens when their internet connection is good.

Sometimes even the Windows Update feature is affected as it fails to update the system.

While using Windows Defender, you may receive a message with regards to definition updates when opening the service, or when you try to check for updates and it says they cannot be checked, downloaded, or installed.

If you’re experiencing the Windows Defender update failed issue, try the solutions listed below to resolve the issue.

What can I do if Windows Defender won’t update?

Before getting into more detailed explanations, let’s get through a couple of basic checks and steps to perform:

  • Check if you have other security software installed, as these will turn off Windows Defender and disable its updates; uninstall your current anti-malware software
  • Check for updates in Windows Defender Update Interface and try Windows Update if it failed; to do this, click the shield icon in the notification area, select Virus & threat protection, and then click on Check for updates
  • Install all updates that may be pending and restart your computer, then try the Windows Defender update again; set Windows Defender to automatically get updates (it gets this as part of Windows Updates)
  • Run the Windows Update troubleshooter

If your computer is part of a company network, or it is managed by an admin, they’ll configure updates through local network drives or set policies to update after approval. Check with your network admin first.

1. Try out a different antivirus solution

When Windows Defender fails to meet your expectations, it’s time to consider using an alternative. Well, if you want to forget all about update errors, then try the solution below.

This professional antivirus does its job in the background and always keeps you safe from computer viruses, malware, ransomware, and identity theft.

Moreover, rest assured that it’s easy to install on your computer and straightforward to use, having no pointless features that could clutter the interface.

TotalAV

Windows Defender won’t update? TotalAV is the antivirus solution you should use instead!
Free Trial Visit Website

2. Manually install update definitions

  1. Go to the Windows security portal.
  2. Follow the instructions to download and install the definition updates.
  3. If you cannot install manually or still get update errors, there are other things hindering it so contact Microsoft tech support for further assistance.

Microsoft usually delivers updates through Windows Update, Automatic Updates, or Windows Server Update Service (WSUS).

In some cases, Windows Defender won’t update because of problems with these services. In this case, update the definitions manually, as described above.

If you were able to install updates manually, the issue is caused by a Windows Update problem. We gave an excellent list of tools that will help you solve Windows Update issues.

3. Verify that you have all required Windows Update files

  1. Open the Windows Update website.
  2. Install all recommended updates.
  3. Review the Windowsupdate.log file for error messages by clicking Start, then type %windir%windowsupdate.login in the Search box, and then press Enter.
  4. Go to Windows Help and How-to web page and enter the keywords describing the problem from the log file you found.

Usually, all the needed updates will come right to your PC but sometimes, if they are blocked for some reason, you won’t see them. Perform the steps below to make sure you’re up-to-date.

4. Set Windows Defender service as automatic

  1. Press the Windows key + R keyboard shortcut to start Run.
  2. Type services.msc and press Enter.
  3. Right-click Windows Defender antivirus service.Windows Defender won’t update
  4. Click Properties.
  5. Ensure that Service Status is running.Windows Defender won’t update
  6. Ensure Startup type is Automatic (if not, select Startup type as automatic and click Start).Windows Defender won’t update
  7. Click Apply then click OK.

If Windows Defender service won’t start, check out this detailed guide to fix the problem in no time.

5. Run an SFC Scan

  1. Click Start.
  2. Type cmd in the search box.
  3. Click on Run as Administrator to start Command Prompt as administrator.
  4. Type sfc/scannow and press Enter.

This will check whether there are corrupted system files that prevent the default antivirus from updating.

What is Windows Defender?

Windows Defender is the default, pre-installed antimalware software built into Windows 10 OS, to protect users from malware.

This includes adware, viruses, worms, Trojans, Rootkit, Backdoor, ransomware, and spyware, among other emerging threats.

In this case, the service should work well in the background notifying users of any detected malware or when something is wrong.

In some cases, however, you may come across issues such as this, when Windows Defender is not updating, or the update fails.

How can I update Windows Defender?

Usually, there are three ways to update it:

  • From the Windows Defender Update Interface
  • From Windows Update
  • From Manual Download via the Microsoft Malware Protection Center (MMPC) website

We’ve written extensively about its problems before, and we have an excellent guide on how to fix Windows Defender issues. Don’t hesitate to take a closer look too.

Let us know if any of these solutions worked when the Windows Defender update failed. Just leave a comment in the section below.

Microsoft Authenticator Wrong Code: How to Fix It In Windows 11?

Microsoft Authenticator sending wrong codes is a well-known issue as many users have complained, including Microsoft sending a 5-digit code instead of an 8-digit code, a 6-digit code instead of an 8-digit code, and more. Thankfully, there are a set of solutions available.

Here, in this guide, we will discuss some expert-tested methods to fix the issue right after discussing some of the causes of its occurrence.

What causes the Microsoft Authenticator wrong code error?

There could be various reasons for Microsoft sending the wrong pin; some of the popular ones are mentioned below: 

  • Incorrect date and time – If your Android or iOS phone shows a different time from your computer or the website you are trying to log in to, this error could occur. 
  • Passwordless account and Two-step verification enabled – You need to check if a Passwordless history and two-step verification are enabled for your account. 
  • Outdated app – If your Microsoft Authenticator app is obsolete, you might face this issue. You need to update your app from App Store or Google Play Store.

What can I do to fix the Microsoft Authenticator’s wrong code error?

1. Turn on the Automatic date and time

  1. On your Android device, go to Settings.
  2. Tap Additional Settings.Additional Settings -microsoft authenticator wrong code
  3. Click Date & Time.Date and time
  4. Turn on the Automatic date and time.Automatic date and time

2. Re-add accounts on the Microsoft Authenticator app

2.1 Remove all the accounts

  1. Launch the Microsoft Authenticator app.
  2. Tap on the Microsoft account.MFA account -microsoft authenticator wrong code
  3. Click on the Settings icon on the next page.Settings MA
  4. Tap on Remove account to remove.Remove account MA

2.2 Add the accounts

  1. Login to Microsoft account.MA MY PROFILE -   		 microsoft authenticator wrong code
  2. On the top of the page, click My Microsoft account.
  3. Go to the Security tab. Security Tab
  4. On the next page, click Other ways to sign in.Other ways to sign in
  5. Click Use my password.Use my password - Microsoft
  6. Enter your password and click Sign in.Enter password
  7. Click Advanced security options.Security
  8. Tap on Add a new way to sign in or verify.Add a new user
  9. Click Use an app. Use an app -microsoft authenticator wrong code
  10. Set up the Microsoft Authenticator app on your device
  11. On the next window on your computer, click Next.microsoft authenticator app
  12. Open Microsoft Authenticator on your phone. Click + to add an account.Add account
  13. Now, click Other.Other Google Facebook
  14. Click Scan the QR code on your computer.

3. Disable 2FA Authentication

  1. Go to your Microsoft account. 
  2. From the top-right corner, click My Microsoft account.
  3. Go to the Security tab. Then, on the next page, click Other ways to sign in.
  4. Click Use my password.
  5. Click Advanced security options.Turn 2FA -microsoft authenticator wrong code
  6. Under Additional security, click Turn OFF for Two-step verification.

4. Update Microsoft Authenticator

  1. Go to Google Play Store. Go to the top-right corner and click Profile.Profile -   		 microsoft authenticator wrong code
  2. Tap on Manage Apps & Device.Manage apps and device
  3. Now you will see the Overview tab; go to All apps up to date.All apps up to date
  4. You will find a list of apps, locate Microsoft Authenticator, and Update it if available.Update all

You can also review this guide to Google Authenticator for Windows to compare alternatives that rely on the same TOTP standard and help maintain reliable account security.

So, these are some ways to fix Microsoft Authenticator sending the wrong code. To learn more about this tool and how it works, we have a great guide on how to download the Microsoft Authenticator app.

If these steps do not solve the problem, you can check this detailed guide on how to fix Microsoft Authenticator app not working for more solutions.

Try them and let us know which method worked for you in the comments below.

Windows Memory Diagnostic Tool Stuck: Quick Fixes

Windows 10 and older systems come with a Windows memory diagnostic tool to verify and test the RAM. When launched, it will check the RAM for any issues while working on your system.

Unfortunately, some users have reported the Windows memory diagnostic tool stuck problems after running the tool.

How long should a Windows Memory Diagnostic take?

The Windows Memory Diagnostic tool in extended mode can take anywhere from 15 minutes to 20+ hours, depending on the RAM size.

When run in extended mode, Windows Memory diagnostics can take a couple of hours to finish the testing process. Also, the Windows Memory Diagnostic tool is known to get stuck at 1% and 21% progression for hours.

However, if the tool is stuck for an entire day or more than 10 hours, this problem can be due to a system glitch.

In this article, we have listed a few troubleshooting steps to help you resolve the Windows memory diagnostic tool stuck/frozen issue on your Windows system.

How can I fix the Windows Memory Diagnostic tool stuck issue?

1. Wait for the tool to complete the process

windows memory diagnostic tool stuck

When run in extended mode, the Windows Memory Diagnostic tool can take more than 8 hours to complete the process. At times the tool may get stuck at 21%, 88%, 89%, and 90% progression for hours. You may see no progress for more than 4 hours as well.

However, this is normal with the Windows Memory Diagnostic tool. Unless the tool is stuck at 21% for an entire day, you can let the tool run a few hours and let the process complete without any interruption. 

If the tool has been stuck for more than a day without any progression, you may try other troubleshooting steps listed in this article.


2. Run the tool after performing a clean boot

windows memory diagnostic tool stuck
  1. Press the Windows key + R to open Run.
  2. Type msconfig.msc and click OK. This will open the System Configuration window.
  3. In the System Configuration window, open the Services tab.
  4. Check Hide all Microsoft services box. This will hide all the Microsoft Windows services required by the system.
  5. Next, click the Disable All button.
  6. Click Apply to save the changes.
  7. Right-click on the Taskbar and select Task Manager.
  8. In Task Manager, open the Startup tab.

    windows memory diagnostic tool stuck
  9. Select all the services one by one and click the Disable button. Make sure you have disabled all the services under the Startup tab.
  10. Close Task Manager, and in the System Configuration window, click OK.
  11. Restart your computer.
  12. Your system will start in Clean Boot mode. 
  13. Rerun Windows Memory Diagnostic tool and check if the issue is resolved.

If third-party software prevents the Windows Memory Diagnostic tool from completing the test, then running the tool in Clean Boot mode should help. In Clean Boot mode, Windows starts with a minimal set of drivers and startup programs, allowing you to determine if a background program is interfering with other programs.


3. Test with MemTest86

windows memory diagnostic tool stuck
  1. Make sure you have a working USB Drive to use as a bootable drive. Make sure the drive is empty, as
  2. Download MemTest86 from the website.
  3. Right-click on the downloaded folder and select Extract All.
  4. Click on Extract.
  5. Connect your USB drive to the computer.
  6. From the recently extracted folder, run the imageUSB.exe file.
  7. Make sure your connected drive is detected in the ImageUSB window and click on the Write button.
  8. Once done, click the Exit button to close the ImageUSB tool.
  9. Next, shut down your computer. Insert the USB flash and restart the system.

In most cases, the tool will automatically run after restart. If your system fails to boot from the USB flash drive, change the boot priority drive by changing the BIOS setting. 

Using the Memtest86 will help you determine if the issue is with your RAM or Windows Memory Diagnostic tool. If the test completes without any error, run the diagnostic tool again to check for any improvements.

It is common for the Windows Memory Diagnostic Tool to get stuck at 21% or 29% without any progression for hours.

However, if the tool is frozen for more than 20 hours, try these troubleshooting tips to fix the problem.

Let us know in the comments section below which solution helped you solve the Windows Memory Diagnostic Tool stuck issue on your PC, to help out other fellow users.

100% Disk Usage on Windows 11? Why & How to Fix it

Encountering 100% disk usage on Windows 11 could result in a slow computer. In addition, some processes could take up resources, preventing the PC from functioning correctly. Many users have complained about this after upgrading to Windows 11. However, it can be fixed in no time.

Here we will discuss some troubleshooting tweaks to speed up the computer and reduce disk usage. Also, we will shed light on the reasons for its occurrence.

What causes 100% disk usage on Windows 11?

There could be several reasons for high disk usage on Windows 11; we have mentioned some of the popular ones here:

  • Running many programs at once – If you have a lot of programs running simultaneously on your computer, then they could be using up your disk resources, causing the issue.
  • Background programs – If you have unnecessary programs running in the background, they use up disk resources even if you are not using them actively.
  • Your computer is infected – If your computer has malware or viruses, it could cause your disk usage to spike, as it may be running processes and using up resources.
  • Corrupted or outdated drivers – If your computer has damaged or obsolete drivers, they could cause your computer to run slow and cause performance issues, including high disk usage.
  • Insufficient disk space – If your computer doesn’t have space, then it won’t be able to perform simple functions, which may cause the issue
  • Indexing or other Windows functions – If the indexing services like Windows Search are running on your computer, it might cause the issue.

How do I reduce disk usage in Windows 11?

Before engaging in advanced troubleshooting steps, you should consider performing the following checks:

1. Disable the indexing services

  1. Press Windows + R to open the Run window.
    Services -100 disk usage windows 11
  2. Type services.msc and press Enter to open Services.
  3. On the Services window, locate and double-click SysMain.
    SYSMAIN
  4. Select the Startup type as Disabled and Services status as Stop. Click Apply and OK.
    SYSMAIN Prop
  5. Now locate and double-click Connected User Experiences and Telemetry.
    Connected User experience and telemetry
  6. Choose the Startup type as Disabled and click the Stop button for Services status. Click Apply and OK.
    DIsabled user expeirence
  7. Go to Windows Search, and double-click it.
    Windows search
  8. Select Disabled next to Startup type and click the Stop button under Service status. Click Apply and OK.
    Windows search properties

In some cases, the WSAPPX process can also trigger high disk activity. Check out the full guide on WSAPPX high disk usage for additional ways to lower resource consumption and improve system performance.

2. Reset Virtual Memory

  1. Press Windows + R to open the Run window.
    sysdm.cpl 2 -100 disk usage windows 11
  2. Type sysdm.cpl and press Enter to open System Properties.
  3. On the System Properties window, go to the Advanced tab.
  4. Go to Performance and click Settings.
    Performance Settings
  5. On Performance Options, go to the Advanced tab under Virtual memory and click Change.
    Advanced -100 disk usage windows 11
  6. Uncheck Automatically manage paging file size for all drives and select Custom size.
  7. From the Total paging file size for all drives, copy the Recommended size. Input it in the Initial size (MB) field, and in the Maximum size field, enter the 1.5x times your RAM size.
    Virtual memory
  8. Click Set and OK.

3. Use the Command Prompt

3.1 Perform CHKDSK

  1. Press the Windows key, type CMD and click Run as administrator.
    DOS COmmand Prompt -100 disk usage windows 11
  2. Type the following command and press Enter: chkdsk /r C:
  3. Wait for the process to complete, and type Y to restart your computer.

3.2 Run the SFC & DISM scan

  1. Open the Command Prompt with admin rights by following the step mentioned above.
  2. Copy and paste the following command and press Enter: sfc/scannow
    CMD sfc scan 100 disk usage windows 11
  3. Once it is complete, type the following command and press Enter: Dism.exe /Online /Cleanup-Image /Restorehealth
    Restore health
  4. Once the process is complete, restart your computer.

4. Fix the StorAHCI.sys driver

4.1 Check the driver

  1. Press Windows + R to open the Run console.
    Device Manager RUN COMMAND
  2. Type devmgmt.msc and press Enter to open Device Manager.
  3. Locate IDE ATA/ATAPI Controllers, then double-click Standard SATA AHCI Controller.
    Device Manager - SATA AHCI
  4. On the Standard SATA AHCI Controller Properties window, switch to the Driver tab and click Driver Details.
  5. Check if there is storahci.sys file and click OK. Now the properties window, go to the Details tab.
    Driver tabs -100 disk usage windows 11
  6. Choose the Device instance path from the dropdown under Property. Then, note down the name that appears under Value.
    VAN

4.2 Make changes in Registry Editor

  1. Now fire up the Run window again, type regedit, and press Enter to open Registry Editor.
  2. Navigate to the path and replace the VEN_10EC&DEV_8168&SUBSYS_892C103C&REV_15\01000000684CE00000 with the value that you noted down from the Details tab: Computer\HKEY_LOCAL_MACHINE\SYSTEM\CurrentControlSet\Enum\PCI\VEN_10EC&DEV_8168&SUBSYS_892C103C&REV_15\01000000684CE00000\Device Parameters\Interrupt Management\MessageSignaledInterruptProperties
    regedit_MSISupported -100 disk usage windows 11
  3. Double-click MSISupported DWORD and change its Value data to 0. Then, for Base, choose Hexadecimal.
  4. Click OK and close the Registry Editor. Restart your PC.

5. Disable scheduled defragmentation

  1. Press the Windows key; type defragment, select Defragment and Optimize Drives. Click Open.
    Defragment - 100 disk usage windows 11
  2. Click Change settings.
    Change settings Optimize drives
  3. Remove the checkmark for Run on a schedule (recommended) and click OK to disable scheduled defragmentation on your Windows computer.
    Run a schedule

6. Disable background apps

  1. Press Windows + I to open Settings.
  2. Go to Accounts, and click Sign-in options.
    Accounts sign-in optons -100 disk usage windows 11
  3. Toggle off Automatically save my restartable apps and restart them when I sign back in option.
    Automatically save my
  4. Go to Apps, and click Installed apps.
    Apps installed apps -100 disk usage windows 11
  5. Click on the three dots icon next to the apps you wish to disable from running in the background.
  6. Click Advanced options.
    Advanced options
  7. Under Background apps permissions, select Never from the dropdown.
    Background apps permissions
  8. Do this for all the apps you don’t want to run in the background.

7. Restore plan options

  1. Press the Windows key, type Control Panel and click Open.
    Control Panel
  2. Select View by Large icons and click Power options.
    Power options -100 disk usage windows 11
  3. Click Change plan settings.
    Change plan settings
  4. Now click Change advanced power settings.
    Change power settings
  5. Click Restore plan defaults. Click Apply and OK.
    Restore plan

So, you need to follow these steps to fix the 100% disk usage on Windows 11. If nothing has worked for you, we advise you to perform a clean install of Windows to resolve the issue.

If you have any concerns or questions about the issue, feel free to mention that in the comments section below.

OneDrive Destination Folder Access Denied: 8 Fixes

OneDrive is one of the most used storage solutions, but many reported OneDrive Destination folder access denied message.

This can be a problem since it will prevent you from accessing your files and using OneDrive properly.

This message can be problematic since it will prevent you from accessing OneDrive files, but if you want to fix this issue, we advise you to try some of our solutions below.

Why is OneDrive saying access denied?

If you’re getting Access denied message in OneDrive, there might be several causes for it:

  • Antivirus software – Some antivirus applications block access to certain files or folders to protect them. Changing your settings can fix this.
  • Permissions – Sometimes, your settings can cause this issue to appear. To fix it, you need to take ownership of a file or change its settings.

How can I fix the OneDrive Destination Folder Access Denied issue?

1. Check your antivirus

Sometimes, the OneDrive Access denied error message can appear due to your antivirus. Some third-party antivirus can sometimes block access to certain directories to protect your PC.

However, this feature can cause problems with OneDrive, so it’s advised that you disable it.

If that doesn’t work, you might want to disable other antivirus features. Alternatively, you might want to disable your antivirus completely. In the worst-case scenario, you might have to remove your antivirus.

If removing the antivirus solves the issue, this might be a perfect time to consider switching to a different antivirus solution.

Many great antivirus tools on the market don’t interfere with other apps on your PC. Thankfully, the best options available include up-to-date threat databases and integrated VPNs to protect your device.

You should look for a Windows 10 compatible antivirus that uses fewer resources while keeping your system protected in real time.

2. Clear the browser cache

  1. Click the Menu icon in the top-right corner and select Settings from the menu.
  2. The settings tab will appear. Scroll all the way down and click Advanced.
    onedrive access denied error
  3. Now click the Clear browsing data.
    onedrive access denied error
  4. Set Time range to All time. Now click the Clear data button.
    onedrive access denied error

Sometimes OneDrive Access denied message can appear due to your browser cache. Your cache files can get corrupted, and that can cause this error message to appear.

Since there’s no way to repair damaged cache files, the best method to fix this issue is to clear your cache.

3. Check the permissions

If certain users are getting OneDrive Access denied does not have permissions to access this resource upload failed, the problem might be the lack of permissions.

To fix this issue, it’s advised that you check if your files and folders are shared properly with users.

Be sure to check the list of users you share your files with, and make sure that everything is in order. In addition, you might want to change your sharing settings and make your files public.

This isn’t the best method, especially if you’re using OneDrive to store sensitive documents, but it’s a solid troubleshooting method to check if the security permissions are the problem.

4. Take ownership of the problematic file

  1. Locate the directory that you can’t access, right-click it and choose Properties from the menu.
    onedrive access denied error
  2. Go to Security tab and click the Advanced button.
    onedrive access denied error
  3. In the Owner section on the top, click Change.
    onedrive access denied error
  4. Enter your username and click the Check Names button. If everything is in order, click OK to save changes.
    onedrive access denied error
  5. Now check Replace owner on subcointainers and objects and click Apply and OK to save changes.
    onedrive access denied error

After making these changes, you’ll have full ownership over the problematic directory and the OneDrive destination folder access denied message will be gone.

Change ownership using the command line

  1. Press Windows key + X to open Win + X menu and choose Command Prompt (Admin) or Powershell (Admin).
    onedrive access denied error
  2. Now enter the following commands:

takeown /f “C:\WindowsReport” /r /d y

icacls "C:\WindowsReport" /grant %username%:F /t /q

Of course, be sure to enter the correct location of the directory you want to access.

Although this method is a lot faster, it requires you to enter the exact location of the directory you’re trying to access, so be sure to double-check everything before running this command.

As you can see, Microsoft OneDrive Access is denied contact your administrator message is caused by lack of permissions, but you can easily fix that.

5. Assign Full control to your user account

  1. Locate the directory you’re trying to access, right-click it and choose Properties from the menu.
  2. Navigate to the Security tab and click Edit.
    onedrive access denied error
  3. Now click the Add button.
    onedrive access denied error
  4. Enter the name of the user account that you want to use to access this directory, click Check Names and OK.
  5. Select the desired account, and make sure that you check Full control in Allow column.
  6. Next, click Apply and OK to save changes.
    onedrive access denied error

After doing that, you should have full control over the selected directory, and everything will start working again.

If you keep getting OneDrive Access denied error message on your PC, the problem might be the lack of Full control privileges.

In order to protect your files from unauthorized access, you can assign different privileges to different users.

6. Make sure that the file isn’t encrypted

In some rare instances, OneDrive Access denied error message can appear due to file encryption.

Encrypting your files is a great way to protect your privacy, but sometimes you won’t be able to access certain files if they are encrypted.

To fix this problem, you need first to decrypt the files and then try to access them.

7. Create a new administrator account

  1. Open the Settings app. You can do that quickly by using Windows Key + I shortcut.
  2. When the Settings app opens, go to the Accounts section.
    onedrive access denied error
  3. Select Family & other people from the left pane.
  4. Click on Add someone else to this PC.
    onedrive access denied error
  5. Choose I don’t have this person’s sign-in information.
    onedrive access denied error
  6. Now click on Add a user without a Microsoft account.
    onedrive access denied error
  7. Enter the username for the new account and click Next.
    onedrive access denied error

After creating a new user account, you need to change it from regular to the Administrator account. To do that, follow these steps:

  1. In the Settings app go to Accounts and select Family & other people.
  2. Locate the account that you want to promote to Administrator, select it, and click Change account type.
    onedrive access denied error
  3. Set Account type to Administrator and click OK.
    onedrive access denied error

After doing that, switch to the new administrator account and try to access this directory again.

OneDrive Access denied error messages can prevent you from accessing your files, and the issue is usually caused by a lack of privileges, but you should be able to fix that problem using one of our solutions.

8. Try alternative backup storage software

Our last solution goes in recommending you use pCloud as a backup storage tool. This tool has some fantastic features and will bring you a lot of value.

It comes with generous storage space, trash recovery, and automatic sync across multiple devices.

Moreover, with pCloud, you’ll have access to built-in video and audio players, including video streaming.

The file management options are also available, and you can perform actions such as data recovery, remote upload, or even the feature that will allow recovering accounts that have more than 30 days.

⇒ Get pCloud

We hope you fix the OneDrive destination folder access denied issue on your PC using our solutions.

If you’re still having problems, perhaps our guide on OneDrive access issues might be able to help you.

Let us know which one worked for you in the comments section below.

Fix Adobe After Effects Not Using GPU on PC: 5 Tested Solutions

For some users, Adobe After Effects might cause slow rendering and this usually happens when After Effects cannot use GPU as expected.

The most common cause for this issue is that the Use Graphics Processor option is disabled, so Adobe After Effects won’t use the GPU. Other issues include an unsupported GPU or graphics card or a corrupted or incompatible driver. Also, if the Composition settings are not set to use the GPU, you might face the problem. Ensure you have the Advanced 3D option enabled.

What can I do if Adobe After Effects is not using the GPU?

1. Enable GPU in After Effects

  1. Open Adobe After Effects. Go to File.
  2. Click Project Settings. Go to General.Project Settings - after effects not using gpu
  3. Under Video Rendering and Playback tab, and from the dropdown for Renderer option, select Mercury GPU Acceleration.Mercury GPU
  4. Click OK and click Save.
  5. Press Ctrl + Shift + Esc to open Task Manager.
  6. Locate and right-click the After Effects app and select End Task.

2. Update the graphics driver

  1. Press Windows + R to open the Run console.Device Manager RUN COMMAND
  2. Type devmgmt.msc and press Enter to open Device Manager.
  3. Navigate and click on Display adapters. Next, right-click your graphics drivers and select Update driver.Graphics Driver-After effects not using GPU
  4. On the next window, click Search automatically for drivers.Search automatically for drivers
  5. Follow the prompts to complete.

3. Change Composition Settings

  1. Launch Adobe After Effects. Go to Composition.
  2. Under Composition Settings, go to 3D Renderer.
  3. Also, set Ray-traced 3D. 3d Rendere - After effects not using GPU
  4. Click OK.

4. Add your GPU name to the RayTraced file

  1. Right-click the Adobe After Effects app and select Open file location.
  2. On the next window, locate the raytracer_supported_cards file.
  3. Open the file and check if you can find your graphics card name.
  4. You need to add it manually if you don’t find it there. Then, copy the raytracer_supported_cards file from the folder to the desktop.
  5. To know the graphics card name, press Windows + R to open the Run box.dxdiag
  6. Type dxdiag, and press Enter to open DirectX Diagnostic Tool.
  7. Switch to the Display tab, and note the name next to Chip Type.DXDIAG 1
  8. Open the raytracer_supported_cards and write the name as it appears on the DirectX Diagnostic Tool.
  9. Click File and choose Save. 
  10. Now copy this file, navigate to the Adobe After Effects file location and paste it there. It will ask you to replace it and click Yes.

5. Update Adobe After Effects

  1. Launch the Creative Cloud Desktop app. 
  2. Go to Apps, then click Updates.
  3. Locate and click Check for updates. Updates -after effects not using gpu
  4. If the update is available for After Effects, click Update.

So, these are steps you need to take if Adobe After Effects is not using GPU to render. Try them and let us know which worked for you in the comments below.