Roblox Error Code 0: How to Fix Authentication Failed Issues

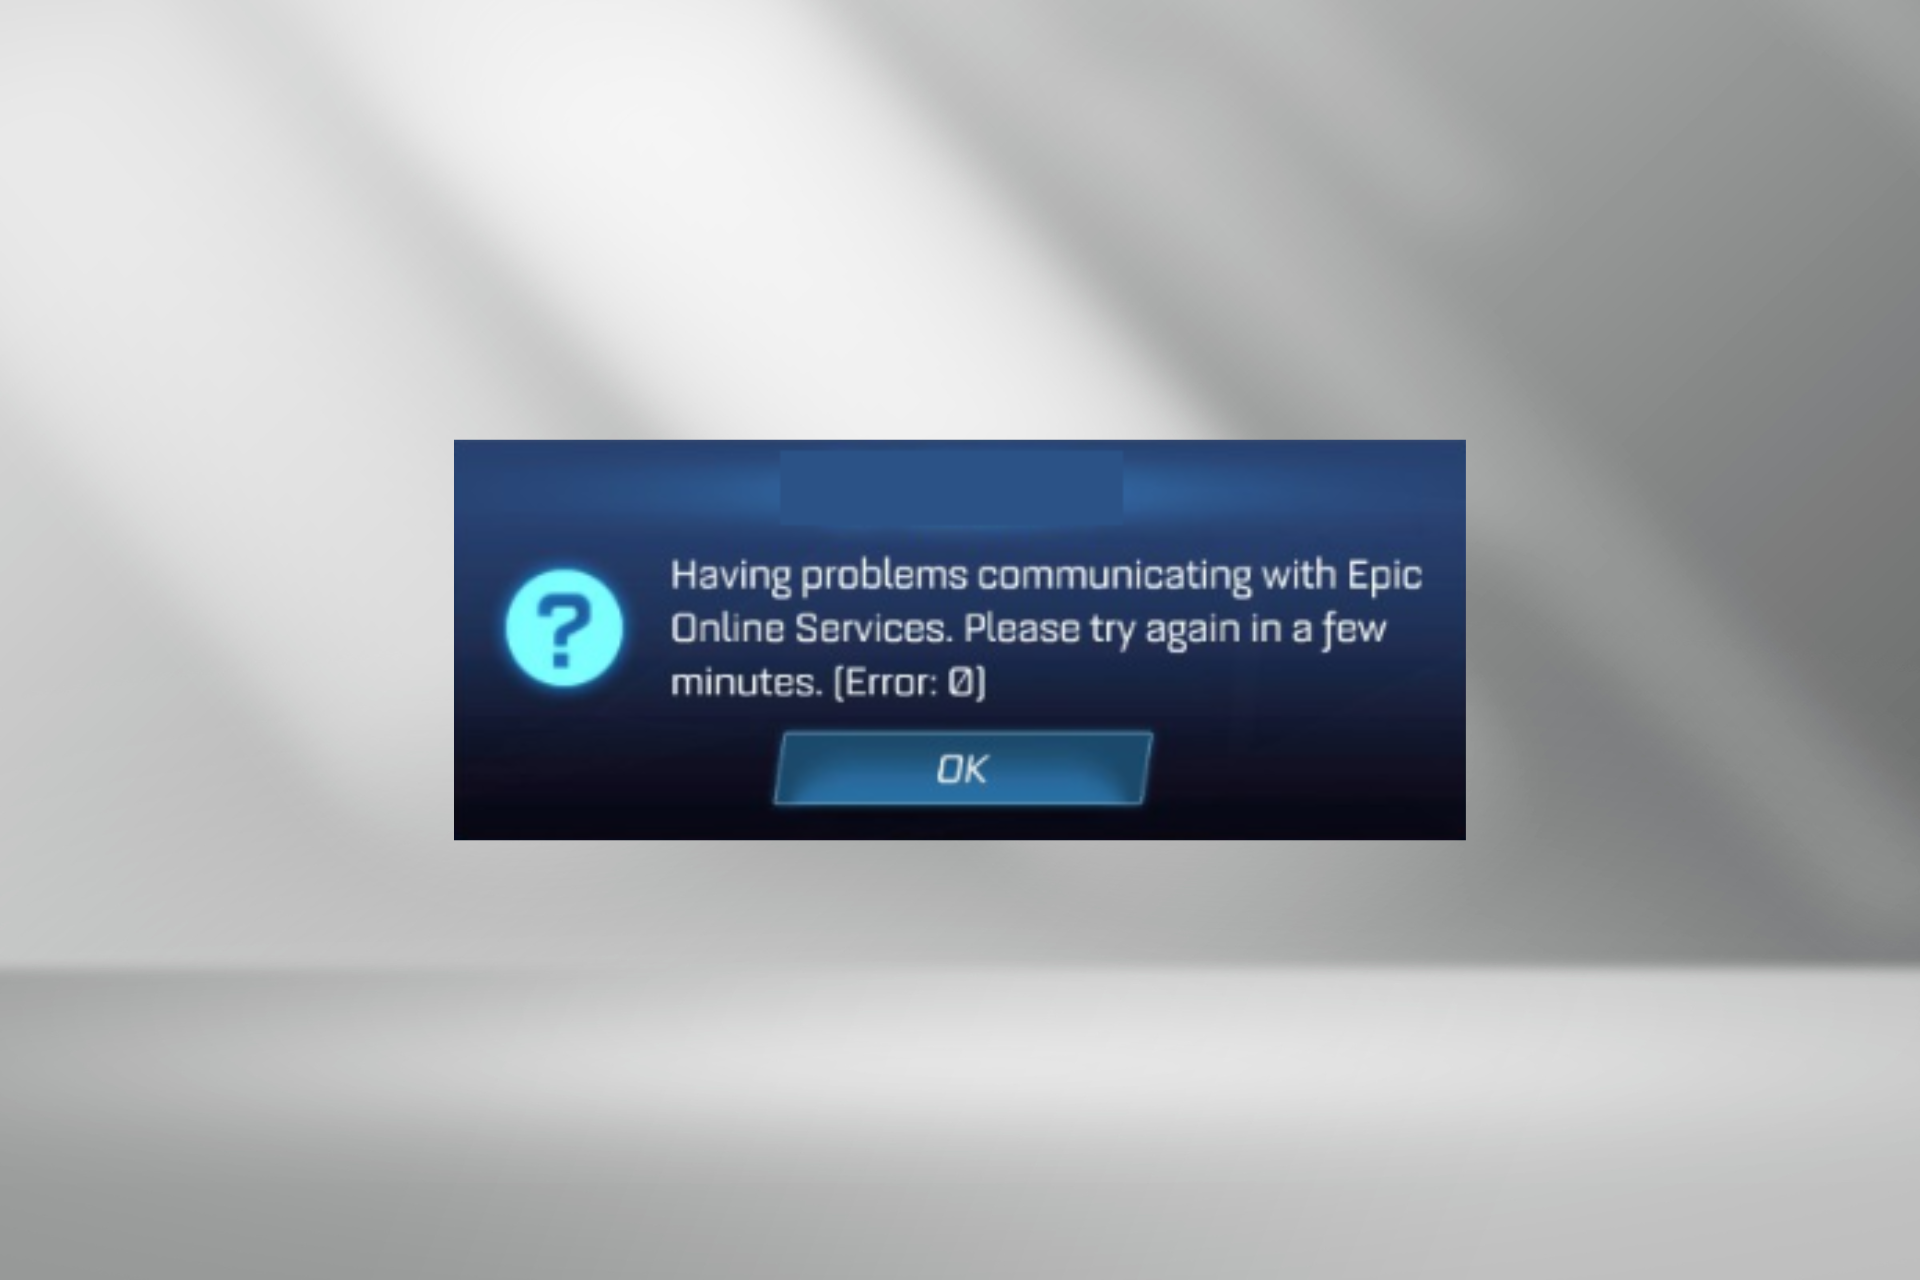
If you have encountered the Authentication Failed message with an error code 0 on the Roblox app or while using Roblox.com, this guide can help!

This problem may be caused by an outdated Roblox app or a pending Windows update. The culprits might also be corrupted app data or cache on the browser. Finally, the Roblox server might be down or under maintenance.

How can I fix error code 0 on Roblox?

First, check if your local connection is stable, and turn off the VPN if you’re using one. If you’re playing in the browser, try another one to see if that is to blame.

1. Delete the browser cache (Works if you use a browser)

  1. Open your preferred browser. Here, we are using the Chrome browser to show you the steps.
  2. Click the three dots icon from the top right corner, and select Settings from the drop-down list.Settings CHrome -Error Code 0 on Roblox
  3. Select the Privacy & security option, then click Clear browsing data.Privacy & security
  4. For Time range, select All time from the drop-down menu, then place a checkmark next to Cookies and other site data, & Cached images and files.Clear browsing data
  5. Click Clear data, then restart your browser.

Deleting the browser cookies and cache can also help you fix the common error code 279 and Privacy error on Roblox; read these guides to know more.

2. Clear the app cache

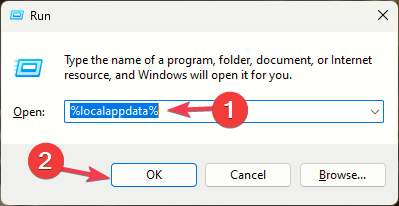
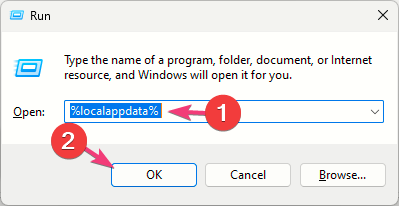
  1. Press Windows + R to open the Run window.explorer_local appdata - error code 0 on Roblox
  2. Type %localappdata% and click OK to open the Local folder in the AppData directory.
  3. Locate and select the Roblox folder, then click the Delete icon to remove the data.
  4. Launch the Roblox app and sign in to your Roblox account to check if the issue persists.

Clearing app cache can help you fix similar issues like error code 403; to learn about other solutions, read this guide.

3. Change your browser security settings

  1. Open your preferred browser. Here, we are using the Chrome browser to show you the steps.
  2. Click the three dots icon from the top right corner, and select Settings from the drop-down list.Settings CHrome -Error Code 0 on Roblox
  3. Select the Privacy & security option, then click Security.Security - error code 0 on Roblox
  4. Under the Safe Browsing option, select the radio button next to the Standard protection option.chrome_Enhanced protection

Activating this feature protects your browser against malware, phishing, and other web threats to provide you safer online experience. It might be useful to fix related issues like Roblox not working in Chrome.

4. Repair/reset the app

  1. Press Windows + I to open the Settings app.
  2. Go to Apps, then click Installed apps.Apps, installed apps - error code 0 on roblox
  3. Locate the Roblox app from the list, click the three dots icon, and choose Advanced options.Advanced options error 0 on roblox
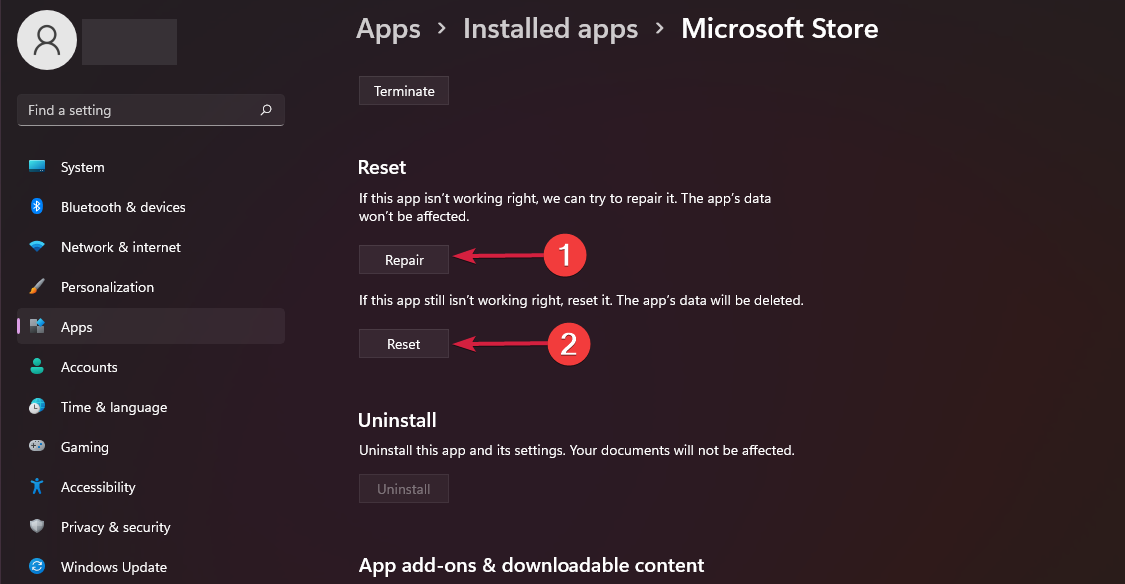
  4. Under Reset, click the Repair button and check if the issue persists.Repair app

If it does, repeat Steps 1 to 3, and follow the steps:

  1. Under the Reset category, click the Reset button to delete your app data.Reset - error code 0 on roblox
  2. Press the Windows key, type store, and click Open.Microsoft Store - error 0 on Roblox
  3. On the Microsoft Store window, go to Library, locate Roblox from the list of apps, and click Update if available.Get updates - error 0 on Roblox
  4. Once done, relaunch the app, and you will be prompted to sign in.

This should make the error go away and also fix related issues like Roblox not launching.

5. Change the DNS server to public DNS

  1. Press Windows + R to open the Run dialog box.NCPA run command 1 - error  0 on Roblox
  2. Type ncpa.cpl and click OK to open the Network Connections.
  3. Go to the active connection, right-click it, and select Properties.Network Connection properties
  4. From This connection uses the following items box, choose Internet Protocol Version 4 (TCP/IP), then select Properties.Internet Protocol Version 4(TCPIPv4) Properties
  5. Select the radio button next to the Use the following DNS server addresses option.
  6. For the Preferred DNS server option, type 8.8.8.8, and Alternate DNS server, type 8.8.4.4.DNS server
  7. Click OK, then OK to save the changes.

Changing DNS to public DNS servers can enhance the reliability of DNS services. Restart your computer and try to access the website now.

6. Reset the network connection

  1. Press Windows + I to open the Settings app.
  2. Go to Network & internet, and select Advanced network settings.Network & Internet - error code 0 on Roblox
  3. Under More settings, select Network reset.Network Reset
  4. On the next screen, click the Reset now button.Network Reset now
  5. Click Yes to confirm.

These steps reinstall network adapters and set other network components back to their default settings. This is a drastic step as you need to sign in to your known networks using the credentials again, so keep the passwords handy.

7. Using the ipconfig commands

  1. Press the Windows key, type cmd, and click Run as administrator.CMD elevated - error code 0  on Roblox
  2. Type the following command to clear the stale DNS entries and press Enter: ipconfig /flushdnsFlush DNS error code 0  on Roblox
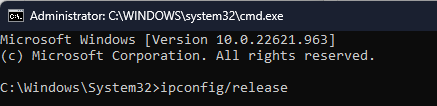
  3. Copy & paste the following commands to release the current IP address lease for all network interfaces on your PC & request a new IP address lease from the DHCP server, then hit Enter after every command:Ipconfig release
    • ipconfig /release
      ipconfig /renew
  4. To reset the Winsock to its default state, type the following command and press Enter: netsh winsock reset
  5. Copy & paste the following commands to reset TCP/IP stack, IPv4, & IPV6 settings on the network interface and TCP settings, then hit Enter after every command:
    • netsh int ip reset
      netsh interface ipv4 reset
      netsh interface ipv6 reset
      netsh interface tcp reset

8. Reinstall the app

  1. Press Windows + I to open the Settings app.
  2. Go to Apps, then Installed apps.Apps, installed apps - error code 0 on roblox
  3. Locate Roblox, click the three dots icon, and select Uninstall.
  4. Click Uninstall to confirm the action
  5. Press the Windows key, type store, and click Open.Microsoft Store - error 0 on Roblox
  6. Search for Roblox and click Install; wait for the process to complete.Install Roblox

Reinstalling the app is a common fix for this error message and others like Roblox error code E01 or This experience cannot be visited.

To prevent the error code 0 on Roblox, ensure you don’t have a proxy enabled and avoid using a VPN.

Also, check the server status to determine whether it is a server issue. If it is not, try clearing the app cache, deleting browser cookies, repairing the app, or changing the DNS server.

If none of these fixes worked for you, it could be something else; you must contact the Roblox customer support team and explain the issue, & the steps you tried for further help.

In case you have other questions or suggestions on the subject, feel free to mention them in the comments section below.

iFit Review: Is it Worth the Subscription?

Remote working has taken center stage in our lives ever since the Covid-19 pandemic and we’re continuously scummaging the Internet on ways to remain active. If this sounds like you, we have taken the time to review the iFit app and help you achieve your dream body and keep a healthy lifestyle.

Is there a free version of iFit?

For 30 days, you get to explore all that the iFit app has to offer. You’ll get access to all workouts and other features to see if it meets your needs. Once the 30-day grace period elapses, you’ll require an active subscription to continue using the app.

What are some of iFit’s features?

Overview of the iFit app

iFit is a popular fitness app that works with compatible home gym equipment to provide on-demand and live workout classes. It works with experts across various fitness disciplines to lead dynamic and motivating workouts.

1. Famous trainers that guide and motivate

The iFit app has a handful of trainers to choose from. The personal trainers create tailored workouts for virtual training. What’s more, the app allows you to choose a workout based on your goal, such as fat loss or muscle building, and then choose a trainer who will guide you through the workout.

Unlike most of the fitness apps available, the workouts are standardized for everyone and there’s really no interaction. Everyone is different and your trainer greatly contributes to your overall results. If you have a high affinity towards a trainer and how they conduct their sessions, you can lean more towards them.

The overall effect is that you will maintain consistency which is pretty hard to do if you don’t like your trainer.

2. Curated workouts for different groups

The iFit app is designed with a few different audiences in mind: those who are looking for a fitness program to help them get started, those who have been exercising for years but want to challenge their body, and those who have specific goals like losing weight or building muscle.

Further, even pregnant women’s needs have been factored into the app and they have their own personalized workouts.

3. Challenges to spice things up

For those of you who like to test your strength, there are lots of challenges for extra accountability. The challenges are curated by a number of trainers and if successful, you will earn a digital trophy.

Your achievements can be found in the Trophy Case section where you can track your progress so far. This is great for motivation because some people rarely take stock of how far they’ve come and can easily lose the motivation to work out if they don’t remember how far they’ve come.

4. Progress tracker

With each workout you put in, it is registered in your calendar. It’s like depositing in a bank as each milestone is registered here. You can view your workout history and set goals. However, for a workout to count, you must go past one minute and you can continue later.

With this information, you can study the trends and see if there’s a particular workout you are enjoying, which trainer you’re relating best to, and your average workout time. This data can be helpful in creating a workout schedule that you can stick to and develop a healthy workout routine.

5. Group workout

iFit allows you to add up to four secondary users to your membership. You can send out invites to your friends with whom you’d like to work out with and once they join, they’ll have access to the same features just as you.

Working out alone can get lonely at times and it’s easier to fall off the bender. However, when working out as a group, you keep each other on your toes and are accountable. Plus, given that it’s a subscription-based app, you need to make sure you’re getting your money’s worth.

6. Integration with third-party apps

Although iFit is complete on its own with its workout logs, it also allows you to sync data from third-party apps like Google Fit and Strava.

With modern-day technology, data is extremely important and you can easily lose it. You can never have too much data across multiple platforms.

7. iFit merch

As you work out, there’s no harm in getting cool gear to upgrade your look. You can access the entire library of products available in the store. This includes T-shirts, hoodies, and other products that are reasonably priced.

For as low as $12, you can get apparel branded fits to elevate your look.

8. Pairing to iFit equipment

If you have an iFit-compatible treadmill, elliptical trainer, or any other equipment, you can pair it with your phone so that your speed and distance are accurately tracked on the app.

You can use it to adjust the resistance and speed of the workout, as well as see what exercises are coming up next.

What are the pros and cons of using the iFit app?

Advantages

  • Intuitive interface – The interface is easy to understand, even for beginners. The app is straightforward and you can easily navigate to your workouts.
  • Wide range of workouts – It comes with a variety of workouts that are suited for every fitness level and taste. It’s almost impossible to get bored of your routine.
  • Flexibility with your workouts – You can easily create your own workout plan based on your goals and schedule.
  • Available on a wide range of devices – You can access the iFit app on your TV, Roku device, smartphone, and iFit-enabled devices.
  • Meal plans and recipes – A good fitness routine must include a healthy diet. The iFit app also has trainers well-versed in diets who share recipes and different ways to cook your meals.

Cons

  • Buggy app – The app is plagued by glitches. While using this app, we encountered one error and it crashed at least twice. Luckily, a restart fixed this issue.
  • Costly – A $12 monthly subscription may not be viable in the long run since not everyone can afford it.
  • Unskippable workouts – While on the app, you cannot skip any workouts you find undesirable or unable to do.
  • Workout equipment – The app only connects with iFit devices. If you have equipment from another company, it can be hard to track your progress.

Is iFit the best fitness app?

While the iFit app isn’t going to replace your full-size gym, it’s the perfect complement for those who aren’t able to get to the gym regularly. Plus, you can connect with other users in the community to make it feel like you belong somewhere.

Overall, it is a great resource for all things fitness especially if you’re looking to streamline your weight-loss journey. Whether you’re a beginner or an advanced user, there are plenty of features on iFit that can be useful for building a healthier lifestyle.

As far as how it compares to other apps, you can check our comprehensive review of the Ballstrike app and choose which one suits you best. For cross-platform fitness apps, we also have a wider range of apps lined up for you.

And since fitness goes hand in hand with diet, we also have the best nutrition plan software that will see you check off your goals in no time.

Have you tried the iFit app? What are your thoughts and would you renew your subscription? Let us know in the comment section below.

Windows Hello fingerprint login bypassed by security researchers

Security researchers have managed to bypass the Windows Hello fingerprint authentication measure. Researchers at New York-based Blackwing Intelligence were apparently able to circumvent fingerprint authentication on Dell, Lenovo and Microsoft laptops by exploiting a flaw in fingerprint sensors, particularly those from top manufacturers Goodix, Synaptics and ELAN.

Over on its site Blackwing Intelligence published a post detailing how it was able to employ a USB-based MitM (“Man in the Middle”) attack to bypass Windows Hello authentication and gain access to a device. The findings were presented at last month’s Microsoft BlueHat conference. At present it’s unclear how Microsoft will go about fixing the issue.

Microsoft has been pushing biometric authentication measures for some time, and reported in 2020 that as many as almost 85 percent of laptop users on Windows were using Windows Hello to sign in to Windows 10 (taking into account simple PIN-authenticated logins).

Though touted as a more secure way to protect Windows devices, biometric login measures like fingerprint scanning and facial recognition are not foolproof, as Blackwing Intelligence’s BlueHat presentation displayed. A few years back Cyberark Labs was able to provide a proof of concept showing how Windows Hello face recognition technology could be bypassed, again with the use of a custom USB loaded with a photo of the target’s face. Microsoft was later able to fix this vulnerability.

Still, biometric authentication features are becoming more prevalent, including on Windows devices.

Fix: Please Update Your Device Settings to Accept Media Files

Windows 11 allows you to transfer media from your phone to your PC but sometimes, if your configurations are incorrect, you may get the Please update your device settings to accept media files error.

Luckily, WindowsReport experts have experienced this error firsthand and bring you our tried and tested solutions.

Why is my device not accepting file transfers?

How do I fix Please update your device settings to accept media files error?

1. Update your device’s software

1.1 Windows OS

  1. Hit the Windows key and click on Settings.settings windows 11
  2. Click on Windows Update then select Check for updates.check-updates-w11 windows 11 blue screen
  3. If available, Download and install.download and install option in the settings

1.2 Phone OS

  1. Locate Settings on your device. (We’ll be using the Samsung model for this step).
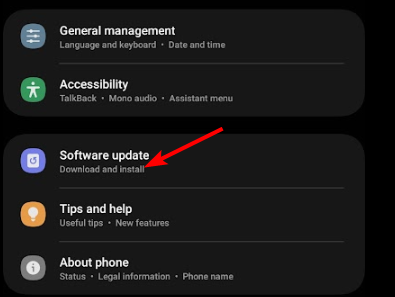
  2. Go to Software update.
  3. Tap on Download and install.
  4. Wait for the update to finish installing if available, and retry your transaction.

Updating the OS also helps with Google Play error code 492.

2. Enable USB debugging

  1. On your phone, navigate to Settings.
  2. Scroll down and select About phone.
  3. Select Software information.
  4. Tap on Build number 7 times to enable Developer mode.
  5. Go back to Developer options and enable USB debugging.

This setting lets your phone communicate with the computer and transfer files over a USB connection, especially in cases where Windows does not recognize your phone. iPhone users should unlock their devices and then retry.

3. Update USB drivers

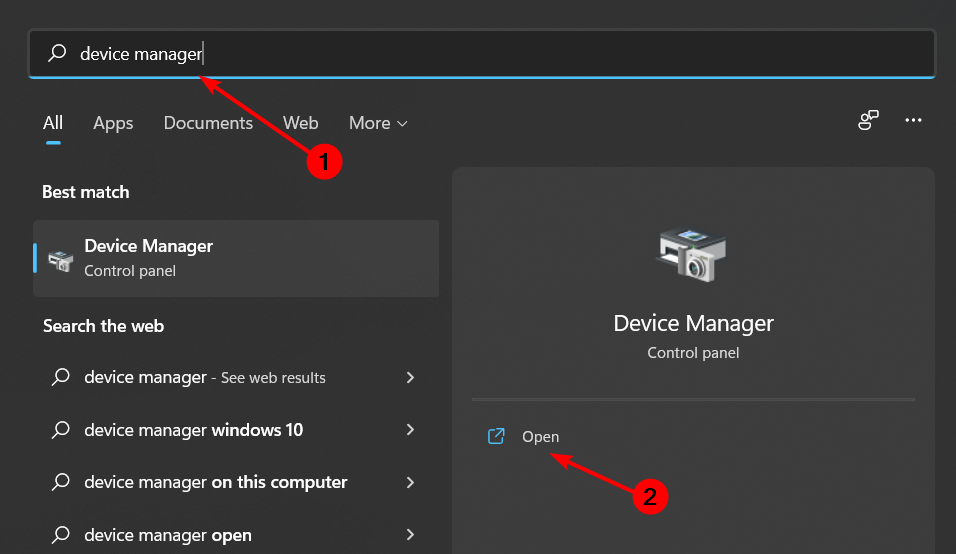
  1. Hit the Windows key, type Device Manager in the search bar and click Open.device manager w11
  2. Next, click View and Show hidden devices.
  3. Double-click Universal Serial Bus controllers to expand that category.
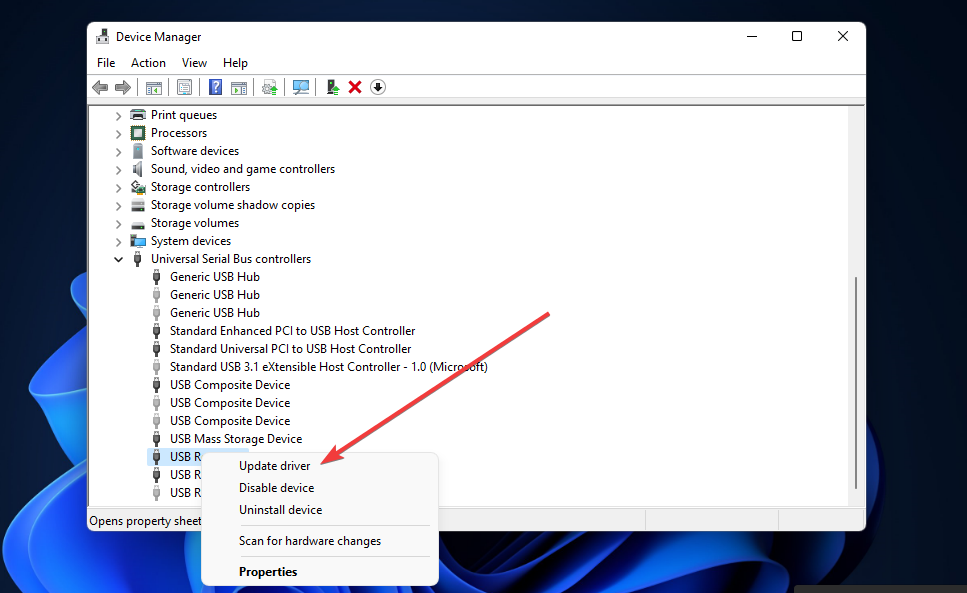
  4. Right-click on your USB device to select its Update driver option.
    Update driver option windows 11 not recognizing usb
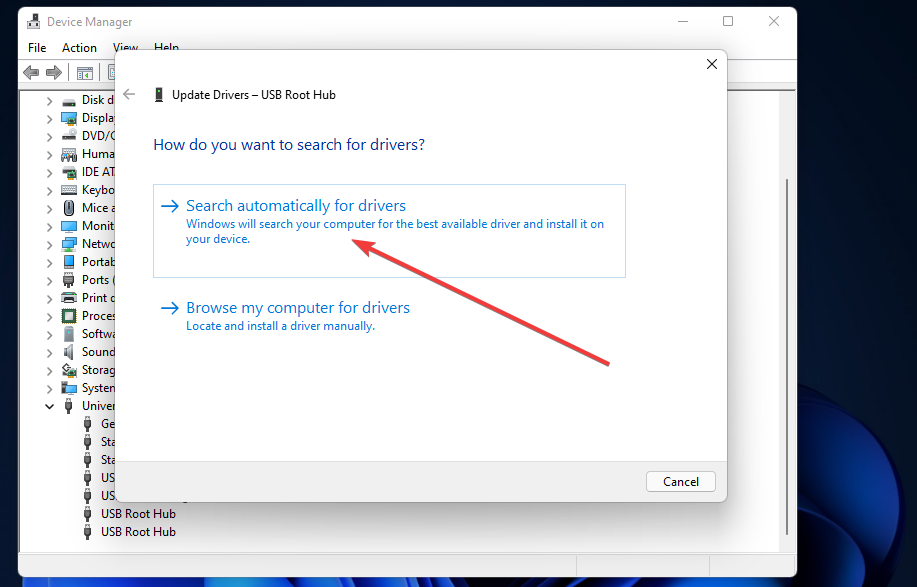
  5. Select Search automatically for drivers in the Update Drivers window that opens.
    Search automatically for drivers option windows 11 not recognizing usb
  6. Repeat steps four and five for all USB Root Hub and Generic USB Hub controller devices listed.

You can always opt for specialized software to help you with driver maintenance. Fortect Driver Updater is great at this task, as it will allow you to scan and replace all your outdated drivers in one go. Plus, this tool can be set up for long-term maintenance and automatic driver updates in the future.

⇒ Get Fortect Driver Updater

4. Reinstall your USB drivers

  1. Insert your USB drive into your desktop or laptop.
  2. Hit the Windows key, type Device Manager in the search bar and click Open.device manager w11
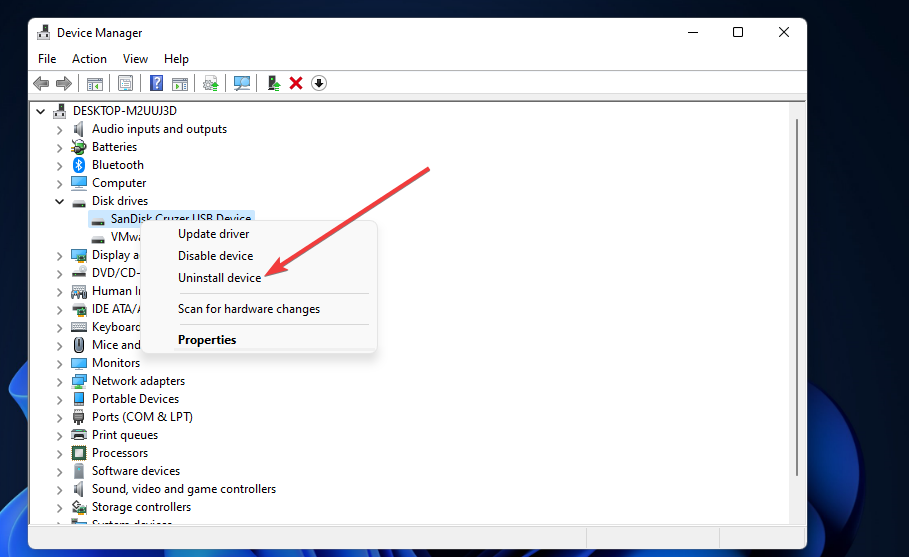
  3. Next, right-click the USB drive for which you need to fix to select Uninstall device.
    The Uninstall device option windows 11 not recognizing usb
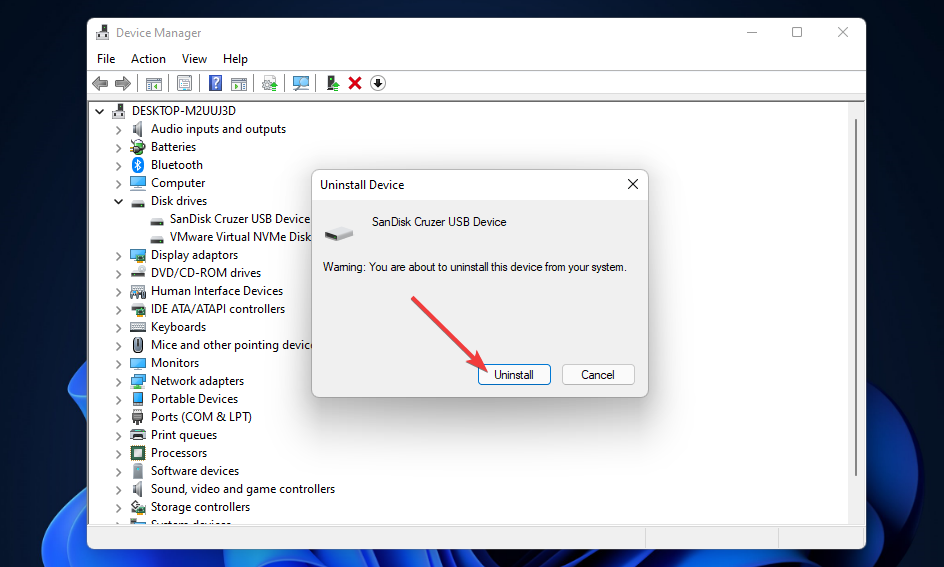
  4. Click the Uninstall button on the confirmation window that opens.
    Uninstall button windows 11 not recognizing usb
  5. Thereafter, unplug your USB device from the PC.
  6. Wait about one or two minutes, restart your PC, and then connect the USB drive again and see if the Please update your device settings to accept media files error persists.

5. Run a virus check

  1. Press the Windows key, search Windows Security, and click Open.
  2. Select Virus & threat protection.
  3. Next, press Quick scan under Current threats.
  4. If you don’t find any threats, proceed to perform a full scan by clicking on Scan options just below Quick scan.Scan options
  5. Click on Full scan, then Scan now to perform a deep scan of your PC.Full Scan Scan Now
  6. Wait for the process to finish and restart your system.

6. Perform DISM and SFC scans

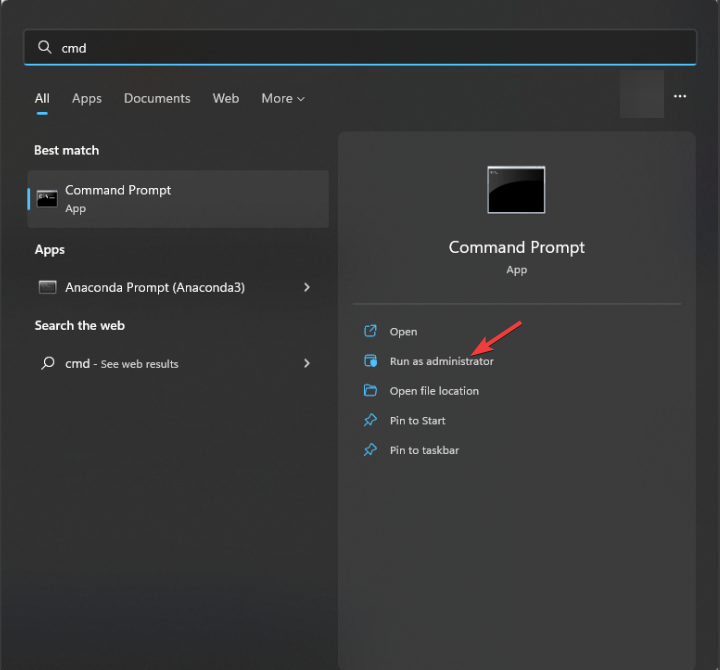
  1. Hit the Start Menu icon, type cmd in the search bar, and click Run as administrator.cmd-run-admin-w11 unexpected kernel mode trap windows 11
  2. Type the following commands and press Enter after each one:DISM.exe /Online /Cleanup-Image /Restorehealth sfc /scannow

7. Run the CHKDSK command on your phone’s SD card

  1. Insert your SD card on your PC.
  2. Right-click on the Start button, type cmd and click on Run as administrator to open the Command Prompt.
  3. Type in the following command prompt and press Enter. chkdsk D:/f/r/x
  4. The letter D refers to the drive letter you want to repair.
  5. Close the Command Prompt and check if the issue persists.

8. Repair your SD card

If your SD card is damaged or has data corruption, you’ll need to address these issues first to access and transfer any files from it.

You can attempt to repair the SD card and try the transfer again. If it doesn’t work, you may have to format it. If you have a backup of the files, you can restore them then retry the transfer.

9. Format your phone’s SD card

  1. Press the Windows + E key to open the Windows File Explorer.
  2. Select This PC, right-click on the SD card drive, and select Format from the context menu.
  3. Select the file system with NTFS or FAT32 for 32GB cards and exFAT for 64GB and click on Start.

If the SD card was corrupted, we recommend using software to format corrupted SD cards for better drive management.

10. Perform a System Restore

  1. Press the Windows key, type Control Panel, and click Open.control-panel-search fallout new vegas runtime error
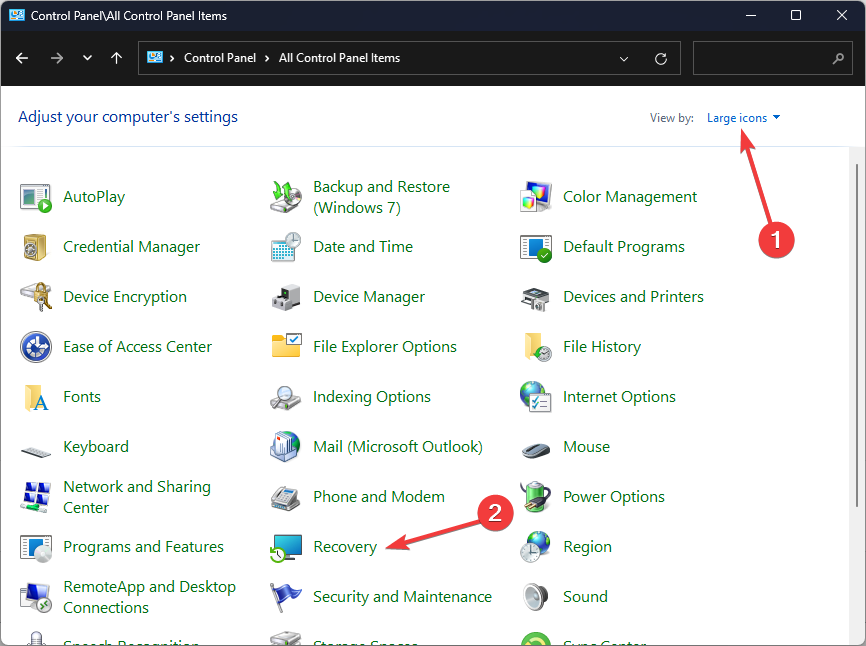
  2. Select Large icons as View by and click Recovery.Recovery Control Panel Advrcntr6.dll
  3. Click Open System Restore.Open system restore
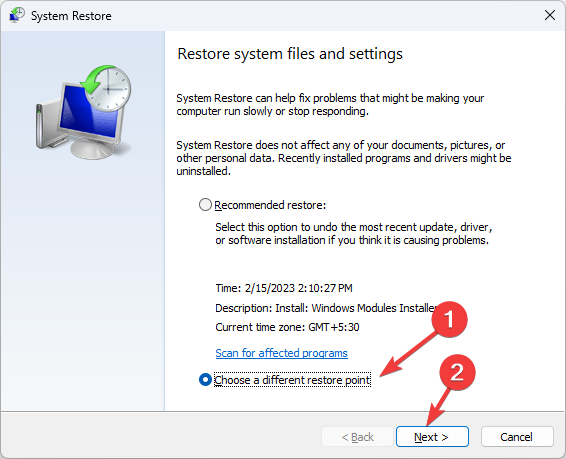
  4. Select Choose a different restore point and click Next.Next Choose a different restore point
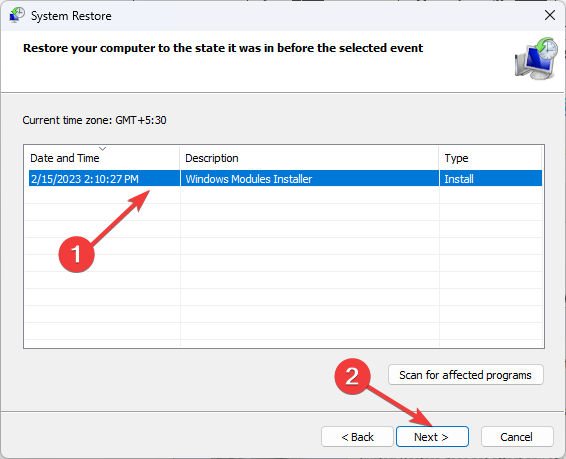
  5. Now select the restore point and click Next. Choose a point
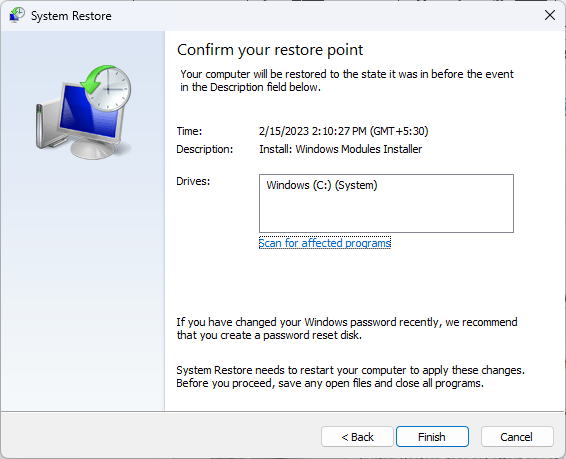
  6. Click Finish to restore the previous settings, and Windows will restart.Finish Restore point

A system restore can help return your PC to an earlier time when things were working well. If there were any configuration settings you may be unaware of that are causing the please update your device settings to accept media files error, this should fix it.

No less important, you can also:

  • Switch between the different USB ports on your PC and check for any improvements.
  • Try using another device and cable to ascertain whether it’s an isolated problem.
  • Restart your devices and try again.

Tips to ensure a successful file transfer between your phone and PC

One of the most important things to consider when transferring files between your phone and PC is the type of connection you’re using. Some methods are better suited to certain file types, while others are more reliable than others.

Finally, consider wireless transfer of photos, videos, and other media from your phone to your PC instead of a wired USB connection. Just make sure both devices are on the same Wi-Fi network. You can also use third-party software to transfer files.

And if you’re looking for quick ways to fix Please Insert The External Storage Media and Press OK error, rest assured that this guide covers all of them.

That’s all we had for this article, but if you have another method you applied for this same error but are missing from our list, drop us a line below.

Future Windows versions might offer multi-cross-device experiences compatible with other operating systems

Multi-cross device experiences are the new norm in the tech world, with Samsung, and more recently, Qualcomm, paving new ways to seamlessly integrate all devices for a meaningful and modern interaction across all devices.

Samsung has the Galaxy Connected Experience, which integrates Samsung mobile phones, with Samsung laptops, smartwatches, tablets, and many other devices.

Apps such as Quick Share, which eases the process of sharing files between Samsung devices only recently became compatible with non-Samsung Windows 11 laptops.

On the other hand, thanks to our trusted sources, we found out that Qualcomm will debut a similar MDE experience by launching Snapdragon Seamless, which will integrate all of the Qualcomm-based OEM devices on the market, no matter their OS.

To put into perspective, smartphones, laptops, VR/AR headsets (including the new Meta Quest 3, which is a Qualcomm-hardware-based device), headphones, smartwatches, smart glasses, and even cars could be connected to offer or allow a plethora of new abilities.

We’re talking about Nearby presence, Display extensions, Screen sharing, Fast pair, Camera continuity, Find my device, and many other similar capabilities. All between these devices.

As the MDE concept takes hold, we’ve got good reasons to believe Microsoft is considering approaching and implementing it on the next Windows versions. According to a new patent filed recently by the Redmond-based tech giant, a new technology called Cross-device application discovery and control might be added to the Windows operating systems in the future.

What would a Windows MDE look like?

The patent describes an MDE technology that can be implemented on Windows (but also any other operating system) with the goal of discovering and controlling applications across multiple devices with different operating systems.

Cross device application discovery and control can also be enabled across devices with different operating systems. For example, a first device may be configured to run on a WINDOWS operating system, and it may perform cross device application discovery and control communication with a second device configured to run on a LINUX, ANDROID operating system, an iOS operating system, or another operating system.

The technology would work the same way the current multi-device experiences do: it would detect and activate applications on remote devices.windows mde

For example, someone could watch a movie on an Android device, and as soon as they come across a location that has a Windows laptop, the technology would automatically send an activation message to the Windows laptop, asking it for permission to play the movie on it.

Currently, multi-device experiences, such as Samsung’s Galaxy Connected Experience, lack a certain multi-operating system integration. Qualcomm is set to change this by making its Snapdragon Seamless a multi-device, multi-operating system experience.

Microsoft might want to try it too, and if this patent offers any clue, is that the Redmond-based tech giant will do it eventually. The patent gives us an idea of just how many operating systems can be integrated, including Microsoft Windows, Windows Phone, QNX, IBM z/OS, Linux, Android, iOS, OS X, and NetBSD, but any other operating system could be part of the experience.

The Windows MDE technology would also allow connection to computer-readable media, I/O, and network interfaces, which would enable remote control.

If we’re thinking about the multitude of Microsoft products, and devices, such as experience will most probably be explored in future Windows. As the Redmond-based tech giant places all the bets on AI, it wouldn’t be surprising if the multi-cross multi-device Microsoft launches also have AI capabilities.

Even though we don’t know for sure, the patent is a clear sign that Microsoft is taking steps to develop such technology. Could it arrive on Windows 12? Who knows, but we might just get it.

You can read the entire document for the patent here.

What is an Overflow Error? [Examples and Fixes]

Though its instances have reduced significantly in the last decade, overflow errors continue to trouble developers. There are several types of overflow errors, but the core idea behind each remains the same.

An overflow error appears when the application/system is unable to handle data due to restrictions or memory issues. For data type overflow errors, the situation arises when the configured data type is made to process data outside its scope.

What is the reason for overflow error?

An overflow error is usually encountered in the development phase of an application before the codes are polished. The probable causes include malware, improper data type, incorrect calculation, incompatibility (between the device and OS/application), running out of memory, or calling too many nested processes.

How do I fix an overflow error?

Fixing an overflow error requires identifying the underlying cause first because the solutions differ for each. Here are a few instances and types of such errors along with the fixes:

  • Arithmetic Overflow Error in MySQL: You will need to convert the value, alter the entire column, or replace the count with count_big.
  • VBA overflow error in Excel: Check the data type and make sure the assigned value falls within the permissible range.
  • Stack overflow error: You will have to ensure that the function doesn’t call recursively without an exit condition.
  • Buffer overflow error: Make sure the program doesn’t write more than the permissible data to the buffer.
  • Overflow (Visual Basic Run-time): As per Microsoft’s official document, ensure the output value falls within the specified range.
  • Malware or virus triggering the error: Scan the program files and the device with a reliable antivirus solution to identify and quarantine/remove any malware.

What happens when there is an overflow error?

Overflow errors typically crash the program altogether, especially the stack one, due to low free memory. Subsequently, you may witness a spike in RAM consumption. Also, it may result in data corruption.

Sometimes, only an error message shows up, or the program outputs incorrect results. In rare cases, the error may diminish the program’s and device’s security and privacy.

How do I prevent overflow errors?

  • Check the input and output: Your primary approach should be to ensure that input yields results that fall within the configured data types.
  • Use appropriate data types: If the data type is not large enough, switch to another one. For instance, use 64-bit instead of 32-bit.
  • Implement automatic checks: Make sure you have checks in place to identify whether the input or output doesn’t conform to the range and terminate the operation instead of crashing the program altogether.
  • Inspect the code: It’s imperative to regularly inspect the code, identify vulnerabilities, and eliminate them.
  • Upgrade the system: Often, when incompatibility is the underlying cause, upgrading the hardware will prevent overflow errors from appearing.

Now that you know what an overflow error is, examples of each, and the fixes, solving one won’t be a problem. Remember, this is just a brief overview to get you up to speed with the concept. To fix one, a more nuanced approach will be required!

Before you leave, read about the stack-based buffer overflow error in Windows for a deeper understanding.

For any queries or to share how you managed to get rid of the error, drop a comment below.

OpenAI’s drama comes to an end, as Microsoft shares a note reassuring the AI partnership

It’s safe to say Sam Altam is here to stay. Yes, it’s a silly introduction, but the whole OpenAI situation with the board firing the CEO, Sam Altman, has been a bit silly.

If you’re not aware of the situation, although we doubt it, as it was the talk of every newspaper, tech-focused or not, Sam Altman, OpenAI’s CEO, was fired on Friday, and in less than a week he returned to his position.

From Friday until earlier today, however, a lot happened: Microsoft offered Altman a CEO position at a new AI lab inside the company, then over 700 OpenAI employees threatened to leave to company if Altman wouldn’t come back as CEO, then OpenAI regretted the action, even though it named a new interim CEO, and so on.

The whole situation was more silly than bizarre, and it kept the tech world on edge. Things weren’t this interesting ever since Musk turned Twitter into X. Why? Because the reason for Altman’s firing was also uncertain. OpenAI’s board said that the CEO’s behavior caused them to lose their trust in his abilities to lead, but the overall support of over 700 OpenAI employees says differently.

Microsoft is on the same page. The Redmond-based tech giant reassured that its AI partnership with OpenAI will continue, regardless of who is leading the company, while also supporting Altman’s departure at the same time, by offering him a new CEO position at a new AI lab within the company.

And today, Microsoft shared a lengthy note to all of its employees, reassuring the partnership once again, and trusting Sam Altman as the CEO of the company. It’s worth mentioning that Microsoft is one of OpenAI’s biggest investors, so the company backing up Altman, despite the board firing him, means that the Redmond-based tech giant has good reasons to do so.

Here’s what Microsoft has to say about the OpenAI – Sam Altman situation

The folks over at The Verge have access to the internal memo Microsoft sent to its employees and the Redmond-based tech giant has a lot to say about the situation. However, one thing is clear: the Microsoft-OpenAI partnership goes on.

As you’ve likely seen by now, OpenAl has appointed a new board of directors. Sam Altman and Greg Brockman have agreed to return to OpenAl with Sam as CEO. The events of the past few days have been uncertain for our colleagues at OpenAl, and of intense interest to many others. Throughout, nothing has changed or wavered about our resolve and focus to deliver the world’s best Al technology platforms and products to our customers and partners. We will continue to support our colleagues at OpenAl and the phenomenal work they’ve been doing alongside us in service of that mission. As we have for these past 4+ years, we look forward to continuing our work with Sam and his team.

Despite the potential of the past few days to distract us, both Microsoft and OpenAl scientists and engineers have been working with undiminished urgency. Since Friday, Azure has deployed new Al compute, our newly formed MSR Al Frontiers organization published their new cutting-edge research Orca 2, and OpenAl continued to ship product like the new voice features in ChatGPT that rolled out yesterday. Any of these things alone would have been the accomplishment of a quarter for normal teams. Three such achievements in a week, with a major US holiday and with a huge amount of noise surrounding us, speaks volumes to the commitment, focus, and sense of urgency that everyone has. It is both humbling and inspiring to be part of such an amazing team at Microsoft, and to have the privilege of working with the team at OpenAl.

On behalf of the SLT [senior leadership team], thank you all for your resolve, and to the huge number of people who went above and beyond over the past few days to help in so many ways: we are enormously grateful.OpenAI Microsoft

Microsoft

Satya Nadella, Microsoft CEO, also had something to say on the situation, as he posted on X:

This week, many of us will pause to celebrate the Thanksgiving holiday in the US, and I want to take a moment to say a big thank you to each of you for your hard work and contributions to our company. The pace of innovation that you have driven has been remarkable, especially during a time of so much continued hardship and uncertainty in the world. But technology, including Al, is only a tool. It’s a means, not an end. And, ultimately, our end is our mission to empower people and organizations all over the planet — one individual, one community, one country at a time. At the end of the day, the greatest privilege of my job is working with people who are driven by mission. There is no better example of this than this past 5 days, when I saw people across the company remaining focused on our mission and serving our customers and partners, stepping up to help in every way possible. This is what I’m especially thankful for going into the Thanksgiving holiday. I am deeply grateful for what you do every day and the difference it makes in the world. I feel lucky to count all of you as colleagues. To those who celebrate, have a great Thanksgiving

Satya Nadella

As many have written about the topic, there is a lot to consider and take from this situation: what will happen to the new CEO position Altman already has at Microsoft? Will that AI lab come to fruition one way or the other? Why has Microsoft backed Altman despite a board of directors agreeing that his behavior was not the best one for OpenAI? And we can question and question, but we won’t find any answer anytime soon.

For now, though, OpenAI has a new board of directors, and Altman & Co. are back. The AI development must go on. As for the drama, it’s best to leave it in the past, and in time, maybe we’ll get to find out what really happened.

Fix: Your Connection is Not Private Error on Roblox

If you are not able to access the Roblox website and get the Your connection is not private error, this guide can help.

We will discuss probable causes and offer WR-expert-tested solutions to fix the privacy error on Roblox quickly.

What causes the privacy error on Roblox?

  • Weak internet connection.
  • Corrupted browser cache.

How can I fix the privacy error on Roblox?

Before moving to the advanced troubleshooting steps to fix the Your connection is not private error while accessing Roblox, here are a few things you should try:

  • Verify if you have a stable internet connection, double-check the URL, then reload the page and check the Roblox server status.
  • Restart your computer or router to refresh the connection, try a different browser & disable VPN if using.
  • Ensure you click Allow on pop-ups for Roblox.com.

1. Clear the browser cache & cookies

  1. Launch your preferred browser, here we are using Google Chrome.
  2. Click the three dots and select Settings from the drop-down menu.Settings CHrome - privacy error on Chrome
  3. Click the Privacy and security from the left pane, and click Clear browsing data.Settings 2 - Privacy & Security
  4. Next, for the Time range, choose All time from the drop-down list, then select Cookies and other site data and Cached images and files.Clear data
  5. Click Clear data.

Clearing the browser data can help you fix the common issue There was a problem with your request Roblox and error code 0; read the guides to learn about it.

2. Change the DNS server to Public DNS

  1. Press the Windows key, type control panel, and click Open.
  2. Select Category for View by and click Network and Internet.
  3. Click Network and Sharing Center.
  4. Select Change adapter settings from the left pane.
  5. Right-click the active connection and select Properties.Network Connection properties - Roblox privacy error
  6. Select Internet Protocol Version 4 (TCP/IPv4) and click the Properties button.
  7. Now, select the radio button next to Use the following DNS server addresses.
  8. For the Preferred DNS server, type 8.8.8.8, and the Alternate DNS server, type 8.8.4.4.
  9. Click OK, then OK again, to save the changes.

Changing DNS to public DNS servers can enhance the reliability of DNS services. Start your computer and try to access the website now.

3.  Configure Roblox Privacy settings

  1. Launch the preferred browser or a different browser, and navigate to the official Roblox website.
  2. Login to your Roblox account.
  3. Go to the top-right corner, click the gear icon, then select Settings.Gear icon - Settings - Privacy error on Roblox
  4. Next, go to Privacy and ensure the Account restrictions are disabled option is toggled on.chrome_Account restrictons are disabled - Privacy error on Roblox
  5. Scroll down to the option Who can text chat with me option and choose Everyone.chrome_rEveryone
  6. Click Save to confirm the changes.

4. Run the ipconfig command

  1. Press the Windows key, type cmd, and click Run as administrator.CMD elevated - Privacy error on  Roblox
  2. Type the following commands to release the current IP address lease for all network interfaces on your PC & request a new IP address lease from the DHCP server, then hit Enter after every command:Ipconfig release -privacy error on Roblox
    • ipconfig /release
      ipconfig /renew
  3. To flush DNS, copy & paste the following command to clear and reset the DNS content and hit Enter: ipconfig /flushdnsFlush DNS

5. Change the browser security settings

  1. Launch your preferred browser, here we are using Google Chrome.
  2. Click the three dots and select Settings from the drop-down menu.Settings CHrome - Privacy error on Roblox
  3. Select the Privacy and security section, and click Security.Security - privacy error on Roblox
  4. Under Safe Browsing, select Standard Protection and follow the on-screen instructions to complete the process.chrome_Standard protection

Enabling the feature helps you protect against malware, phishing, and other web threats to provide a safer online experience.

6. Reset your browser

  1. Launch your preferred browser, here we are using Google Chrome.
  2. Click the three dots and select Settings from the drop-down menu.Settings CHrome - Privacy error on Roblox
  3. Select Reset settings from the left pane, and click Restore settings to their original defaults.reset 1
  4. Click the Reset settings option.Reset 2 - privacy error on Roblox

Resetting the browser can help you fix the Roblox won’t work in Google Chrome issue; read this guide to learn more.

To avoid the Privacy error on Roblox, ensure you have a stable network connection and clear the cookies and cache of the browser from time to time.

Also, changing the DNS server to a Public DNS can help you get a fast web browsing experience and reduce the technical issues disrupting the connection.

Some users also encountered Roblox freezing and crashing issues on the computer, but we tackled this problem in a separate guide.

Did we miss a step that helped you fix the Your connection is not private error message? Don’t hesitate to mention it in the comments section below. We will add it to the list!

Solved: Error Validating Credentials in ChatGPT

ChatGPT’s error validating credentials cuts across the board for both free and Plus members. This error is thrown when a user attempts to generate queries or load chat history. Such errors are not new so here’s how WindowsReport experts were able to resolve the issue.

How do I fix the error validating credentials in ChatGPT?

Begin with the following preliminary checks:

  • Verify the server status if it’s down and try again at a later time when the server isn’t overcrowded.
  • Check your internet connection and ensure it’s not a ChatGPT network error.
  • Try with another browser or device and see if the issue persists.

1. Clear cache and cookies 

1.1 Android app

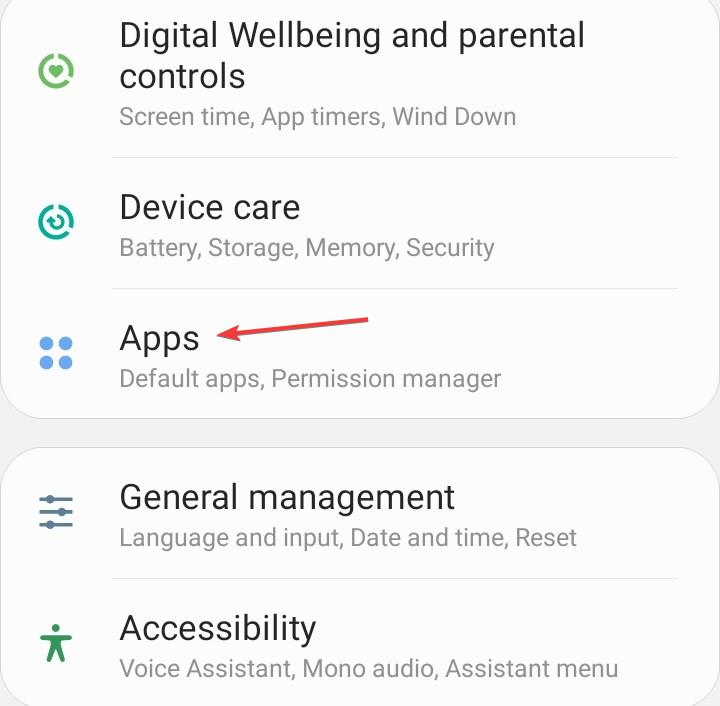
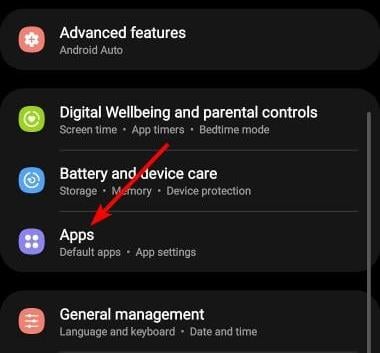
  1. Open the Settings app on your Android device, and select Apps.apps
  2. Choose ChatGPT from the list of applications.
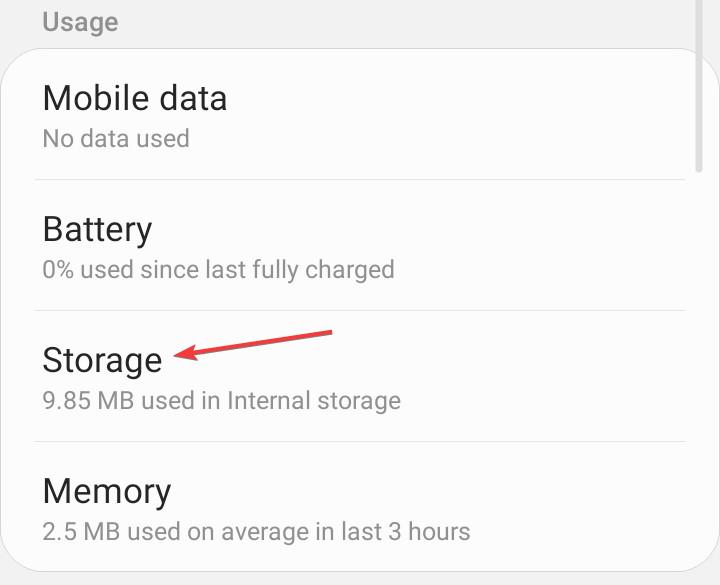
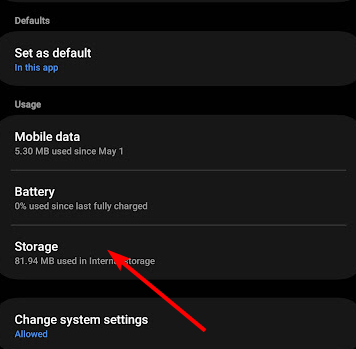
  3. Tap on Storage.storage
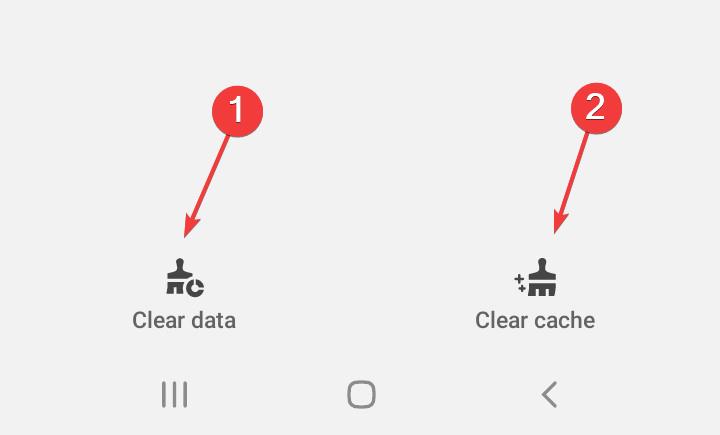
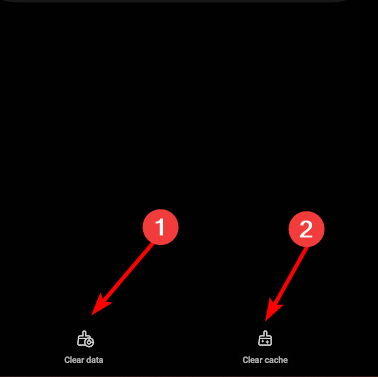
  4. Tap on Clear data and then on Clear cache.clear cache to fix error code 14 disney plus
  5. Open the ChatGPT app again and check for improvements.

1.2 Browser

  1. For this step, we shall be using the Chrome browser.
  2. Launch your Chrome browser and click the three vertical ellipses in the top right corner.
  3. Select Settings.Settings CHrome
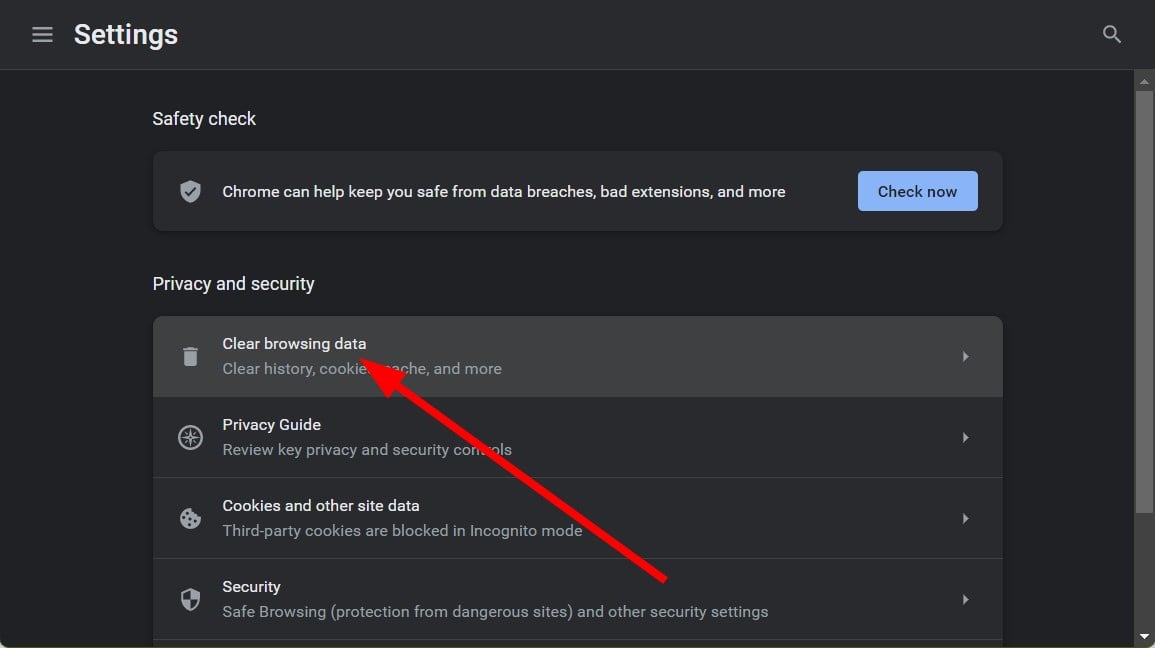
  4. Click on Privacy and security, then select Clear browsing data.
  5. Check Cookies and other site data and Cached images and files, then hit Clear data.Clear data

2. Use an incognito browser tab

You could try using an incognito browser tab, which will clear out the cookies and cache on your computer. Then close all your other browser tabs and open a new tab, log into ChatGPT, and see if it works now.

If that doesn’t get rid of the error validating credentials issue, try clearing your cache and cookies again or resetting your browser and then restarting your computer.

3. Enable/disable your VPN

  1. Press the Windows key and select Settings.settings windows 11
  2. Next, select Network & internet and click on VPN in the right-side menu.
  3. Select the VPN connection you want to disable, click on the drop-down and select Remove.remove VPN

ChatGPT is still unavailable in some locations so if you were using a VPN to access the service, the connection may have been broken so try disabling and enabling it again. Alternatively, you can try out another VPN especially if you were using a free one since they aren’t as reliable.

4. Contact support

If none of these suggestions help, you may need to contact support for assistance. You may find the team is already aware that ChatGPT is not working and are on top of things working on a fix. You only have to wait and try later.

While you wait, there’s no reason your work should stall because there’s a handful of other ChatGPT alternatives.

We acknowledge how resourceful users can be when it comes to quick fixes or temporary workarounds. So, if you have one up your sleeve that could resolve this issue, we welcome you to share your thoughts in the comment section below.

Exclusive: First images with Samsung’s Galaxy Book 4 laptops

Samsung is refreshing its Book family of laptops for 2024 with new features and a healthy spec bump to go against the likes of Microsoft and Apple in the light-and-portable space. We’ve already been the first to share full specs for the new Galaxy Book 4, Galaxy Book 4 360, Galaxy Book 4 360 Pro, Galaxy Book 4 Pro, and Galaxy Book 4 Ultra.

Thanks to our trusted source, we’ve also got the first images with the new laptops. Let’s go through the highlights: the entire lineup will come with Intel processors ranging from a Core 5 in the Galaxy Book 4 to a Core 9 CPU in the Book Ultra. Except for the base model, all the others will have an AMOLED display and Bluetooth v5.3.

All the laptops share the same I/O with one USB 3.2, two Thunderbolt 4 ports, one HDMI, a MicroSD card reader, and a headphone/mic combo.

In the graphics department, the Book 4 and Book 4 360 will come with Intel Graphics, Book 4 PRO and Book 4 360 PRO with Intel Arc Graphics, and finally, the Galaxy Book 4 Ultra with an NVIDIA GeForce 4070. All models come with Windows 11 from the box.

The design resembles the Book 3 lineup, with a few small incremental changes. We don’t have any new info on the materials, but judging the weight difference from last year’s devices, they’re most likely the same.

As expected, the Book 4 360 and 360 PRO maintain the 360-degree hinge and pen support, making them ideal for creative workflows and business meetings on the go. The anti-reflective display coating will also make them easier to use in well-light environments.

While there’s no pricing info, we suspect the base models will come at around the same price as last year’s lineup. The Galaxy Book 4 Ultra’s bigger battery, faster RAM, and dedicated GPU might indicate a price increase, but we’ll find out more about that at the official unveiling just a few months away.

How to Turn Off Auto Brightness on Webcam

The auto brightness feature for the webcam often proves detrimental, especially when the light conditions are not ambient or your hand often covers the face, and it’s recommended to turn it off for crisp video quality.

But the problem is that Windows doesn’t have a built-in option to disable the webcam’s automatic brightness. So, to adjust the camera brightness or turn it off altogether, you will have to rely on third-party options.

Why does my webcam keep dimming?

The webcam output is often dim due to poor lighting conditions or when the surroundings contrast your face and body. A quick trick is to focus a lamp or another light source towards the point of interest.

How do I turn off auto brightness on my webcam?

1. Use FFMPEG, a command-line tool

1.1 Install FFMPEG

  1. Go to FFMPEG’s official website, select the Windows icon, and click on Windows builds by BtbN.windows builds
  2. On the GitHub page, download the version that best matches the system architecture.ffmped to turn off auto brightness on webcam
  3. Right-click on the downloaded folder and select Extract All from the context menu.
  4. Go with the default extraction path or click the Browse button to set another one, and then click Extract.extract

1.2 Identify your webcam

  1. Once extracted, look through the contents and open the bin folder.bin
  2. Next, type cmd in the address bar and hit Enter.cmd
  3. Paste the following command in the terminal window and hit Enter: ffmpeg -list_devices true -f dshow -i dummy -hide_banner
  4. Identify the webcam for which you want to disable auto brightness from the list of devices that appear.identify to turn off auto brightness on webcam

1.3 Turn off auto brightness

  1. Once you identify the webcam, execute the following command while replacing Device with the actual camera name: ffmpeg -f dshow -show_video_device_dialog true -i video="Device"camera properties
  2. Untick the checkbox for Auto next to both Brightness and Contrast in the Video Proc Amp tab.turn off auto brightness on webcam
  3. Now, go to the Camera Control tab, untick the Auto checkbox for Exposure, and click Apply and OK to save the changes.composure

Downloading FFMPEG and turning off auto brightness for the webcam is the easiest solution, and it works across devices and manufacturers. However, a few settings may be greyed out, and you cannot configure these for the built-in or external camera.

2. Use the webcam’s dedicated software

Some manufacturers offer a dedicated utility to manage the camera’s video output and turn on or off auto-brightness, exposure and white balance. The three may automatically change the brightness. For Logitech webcams, you have the Logitech Tune software.

To turn off auto-brightness in Logitech webcams, install the Logitech Tune app > go to the Color adjustment section > head to the Adjustments tab > turn off the toggle for Auto exposure and Auto white balance. Besides, you can configure the brightness and other video settings as well.

Logitech Tune

Similarly, download the dedicated software for your camera and seamlessly turn off auto brightness. In case there isn’t one available, you can go with the first method. And if there, too, the option is greyed out, make sure there is sufficient light and the camera won’t auto-adjust the brightness.

Tip icon Tip
If a specific video conferencing app auto-adjusts brightness while others work fine, you may consider switching to a more reliable video conferencing software. Because here, the problem lies with the app and not your webcam’s functioning.

Also, updating the camera driver may sometimes introduce the functionality if it’s presently missing. So, it’s recommended that you always run the latest version. Besides, you must know how to configure other camera settings in Windows 11 for the desired video output.

For any queries or to share how you managed to turn off auto brightness on the webcam, drop a comment below.

Grindr Registration Error: How to Fix it

There is no doubt about it — the gay hookup app Grindr is popular but a registration error can strike at any time. Grindr has a lot of controversy surrounding it but outside of this issue, it is a man-made program that glitches at times so here’s the rundown on how to go about it.

Why is Grindr verification not working?

  • You’re in a location where the Grindr app is banned due to government restrictions.
  • You are trying to create a new account with an already registered email address.
  • Your internet connection is unstable.
  • You’re trying to register via a third-party app where you’re not logged in.

How do I fix the Grindr registration error?

A few basic workarounds to start off the troubleshooting process include:

  • Check for an app and OS update and ensure you enter your login credentials correctly.
  • Test your internet speeds with another app to verify it’s working.
  • Check the Grindr server status for any outages, restart your device, and try again.

1. Force stop the app

  1. Tap on settings on your phone.
  2. Next, tap on Apps.
  3. Find the Grindr app and tap on it.
  4. Tap on Force stop at the bottom then reopen the app.

2. Clear cache

2.1 Browser cache

  1. For this step, we shall be using the Chrome browser.
  2. Launch your Chrome browser and click the three vertical ellipses in the top right corner.
  3. Select Settings.Settings CHrome
  4. Click on Privacy and security, then select Clear browsing data.
  5. Check Cookies and other site data and Cached images and files, then hit Clear data.Clear data

2.2 App cache

  1. Tap on settings on your phone.
  2. Next, tap on Apps.
  3. Find the Grindr app and tap on it.
  4. Scroll down and select Storage.
  5. Tap on Clear data and Clear cache, then try again.

3. Allow Grindr permissions

On the Grindr registration page, there’s an option to sign in with third-party apps like Facebook or your Apple ID. If you’ve enabled two-factor authentication on these apps, you’ll first be required to sign in and give permission for Grindr to complete registration.

If you don’t accept the request, your Grindr registration will not go through and you’ll be stuck at this stage.

4. Enable/disable your VPN

  1. Press the Windows key and select Settings.settings windows 11
  2. Next, select Network & internet and click on VPN in the right-side menu.
  3. Select the VPN connection you want to disable, click on the drop-down and select Remove.remove VPN

Grindr is a location-based social network that allows you to meet other people in your area so if you’re having trouble with registration, you’re probably in a restricted area. The same fix applies for the Bumble not available in your country error.

You can also use a VPN that is good at masking your IP address if the free ones prove to be unreliable.

5. Try other registration methods

If you’re having trouble registering say with your email address, try another way like the third-party apps or via a browser. Some users had issues because they moved the app to a secure folder after downloading it which interferes with a successful registration.

If the app files ended up in the wrong folder, you can reinstall Grindr and try registration again.

6. Submit a request to customer support

The servers may be down or overloaded with other users who are also trying to sign up at the same time. This can happen at any time, but it’s more likely to occur when Grindr has just been released in a new country.

If you’re having trouble signing up and this is the case, try again later. However, if the registration error is persistent at different times of the day, you can submit a request to the Grindr team for troubleshooting.

You’ll need to provide details such as your location, a screenshot of the error, the type of device you’re using and your method of registration.

Unfortunately, dating apps, especially those facing backlash or surrounded by controversies have more than the usual share of hiccups. You can try using another equally good app like Tinder on your browser and see if you get matched with someone.

And should you run into the Tinder error 5000, trust that we’ve got your back with our quick fixes. For any additional troubleshooting that may have served you, share with us in the comment section below.

Microsoft Store Error Code 0xC002001B [Fixed]

The Microsoft Store error code 0xC002001B is encountered while installing or updating apps and is reported on all iterations of Windows. It may affect all apps or a few.

The error was more prominent on Windows 10, and upgrading to Windows 11 did the trick for many. But don’t do it just yet! There are other confirmed solutions available.

What causes the Microsoft Store error code 0xC002001B?

The error code 0xC002001B highlights a corrupt Microsoft Store cache, issues with the system files, a bug in the installed version of the OS, or a problem with the current user profile.

How do I fix Microsoft Store error code 0xC002001B?

Before we start with the slightly complex solutions, try these quick ones first:

  • Check for any pending Windows updates and install them.
  • Make sure you have set the correct date and time on the PC.
  • If facing issues with Microsoft Intune (Company Portal), make sure your network is not blocking Microsoft Store’s access. Whitelisting MS Store in Zscaler did the trick for many.

1. Download the KB5015020 patch manually (Windows 10)

  1. Go to Microsoft Update Catalog and click the Download link next to the KB5015020 version and architecture that matches the present installation.update
  2. Once done, double-click the downloaded MSU file.
  3. Wait for the setup to load and follow the on-screen instructions to complete the installation process.setup to fix Microsoft Store error code 0xC002001B

The KB5015020 cumulative update for Windows 10, version 22H2, fixed the Microsoft Store error code 0xC002001B for most. But remember, it doesn’t work on Windows 11.

2. Clear the cache and run the critical services

  1. Press Windows + R to open Run, type wsreset.exe in the text field, and hit Enter.wsreset.exe
  2. Next, press Windows + E to open File Explorer, navigate the following path or paste it in the address bar, and hit Enter: C:\Windows\SoftwareDistribution\Downloadpath
  3. Press Ctrl + A to select all the files and then hit Delete to clear them.delete files to fix Microsoft Store error code 0xC002001B
  4. Choose the appropriate response in case a confirmation prompt appears.
  5. Now, press Windows + S to open Search, type Services in the search bar, and click the relevant search result.
  6. Right-click on the Microsoft Store Install Service, and select Properties from the context menu.properties
  7. Select Automatic from the Startup type dropdown menu, and click the Start button to run the service.run service to fix Microsoft Store error code 0xC002001B
  8. Finally, click Apply and OK to save the changes.

3. Repair the corrupt system files

  1. Press Windows + R to open Run, type cmd, and hit Ctrl + Shift + Enter.cmd
  2. Click Yes in the UAC prompt.
  3. Paste the following DISM commands individually and hit Enter after each: DISM /Online /Cleanup-Image /CheckHealth DISM /Online /Cleanup-Image /ScanHealth DISM /Online /Cleanup-Image /RestoreHealth
  4. Now, execute this command for the SFC scan: sfc /scannowsfc scan to fix Microsoft Store error code 0xC002001B
  5. Finally, restart the computer for the changes to apply.

When the corrupted system files are to blame for Microsoft Store error code 0xC002001B, the DISM commands and SFC scan will repair/replace all these with their cached copy.

When handling system files it is always recommended to be careful and if possible use specialized software. These tools can automate the process and you don’t have to worry about doing anything wrong.

4. Re-register Microsoft Store

  1. Press Windows + R to open Run, type powershell, and hit Ctrl + Shift + Enter.powershell
  2. Click Yes in the prompt that appears.
  3. Paste the following command and hit Enter: Get-AppXPackage -AllUsers | Foreach {Add-AppxPackage -DisableDevelopmentMode -Register "$($_.InstallLocation)\AppXManifest.xml"}re-register to fix Microsoft Store error code 0xC002001B
  4. Once done, reboot the PC and check for improvements.

Re-registering Microsoft Store also helps with error code 0x80131500 in Windows 10.

5. Uninstall recent Windows updates

  1. Press Windows + I to open Settings, go to Windows Update from the left pane, and click on Update history.update history
  2. Scroll down to the bottom and click on Uninstall updates.
  3. Click the Uninstall button next to the recently downloaded update.uninstall to fix Microsoft Store error code 0xC002001B
  4. Again, click Uninstall in the confirmation prompt.
  5. Restart the computer adn check for improvements.
  6. If the code: 0xC002001B in Windows 11 persists, uninstall a few more recent updates until the culprit is found.

Several users pointed out that installing KB5013942 triggered ClipSVC errors in the Event Viewer and led to Microsoft Store error code 0xC002001B in Windows 10. And uninstalling the update worked!

6. Perform an in-place upgrade

  1. Go to Microsoft’s official website, choose the product language and OS edition, and then download the Windows 11 ISO.ISO
  2. Double-click the ISO file, and click Open in the prompt.
  3. Run the setup.exe file.setup.exe
  4. Click Yes in the UAC prompt.
  5. Click Next to proceed.next
  6. Read the license terms and click Accept.
  7. Verify that the setup reads, Keep personal files and apps, and click on Install.in-place upgrade to fix Microsoft Store error code 0xC002001B

An in-place upgrade takes a few hours but is a viable alternative to reinstalling Windows 11 since you don’t lose the data and installed apps. Also, if you are running the previous iteration, it’s just as easy to perform a repair upgrade on Windows 10.

7. Create a new user account

  1. Press Windows + R to open Run, type netplwiz in the text field, and click OK.
  2. Click the Add button.add
  3. Click on Sign in without a Microsoft account.
  4. Now, click the Local account button.local account to fix Microsoft Store error code 0xC002001B
  5. Choose a username and password (optional), and complete the account creation.username
  6. Next, select the new account from the list, and click Properties.properties
  7. Go to the Group Membership tab, select Administrator, and click OK to save the changes.
  8. Finally, log in to the new user account, and the error shouldn’t appear anymore

If the previous solutions didn’t help fix Microsoft Store error code 0xC002001B, the last option is to create a new local user account. Also, it’s vital that you make the account an administrator for maximum privileges.

To move data between accounts, use an external USB storage device, while you can always access apps from the other account.

Tip icon Tip
If you are on Windows 10 and the solutions listed here have not worked, it’s time to consider upgrading to Windows 11. This has helped 7 out of 10 users faced with the error.

Issues with the Microsoft Store usually arise due to buggy updates or slight misconfiguration at your end. And it’s easy to get things up and running! If you see any other errors, check our list of all Microsoft Store errors and their solutions.

And do not forget to discover some quick tips to speed up Microsoft Store downloads.

For any queries or to share what worked for you, drop a comment below.

How to Fix The Microsoft Store Error 0x00000005

If you can’t access the Microsoft Store and run into The thing you are looking for isn’t here with an error code 0x00000005 whenever you launch it, this guide can help! We will discuss the probable causes and offer WR expert-tested solutions to fix the issue in no time.

What causes the Microsoft Store error 0x00000005?

  • Corrupted or missing system files.
  • Outdated Microsoft Store app.

How can I fix the Microsoft Store error 0x00000005?

Before we go to the advanced fixes to get rid of the error 0x00000005, here are a few preliminary checks you should do:

  • Restart your computer and router to refresh the connection.
  • Ensure there are no pending Windows updates, and check the Date & time are set correctly as per your region.

1. Run the Windows Store Apps troubleshooter

  1. Press Windows + I to open the Settings app.
  2. Go to System, then select Troubleshoot.troubleshoot -microsoft store error 0x00000005
  3. Click Other troubleshooters.Other troubleshooters
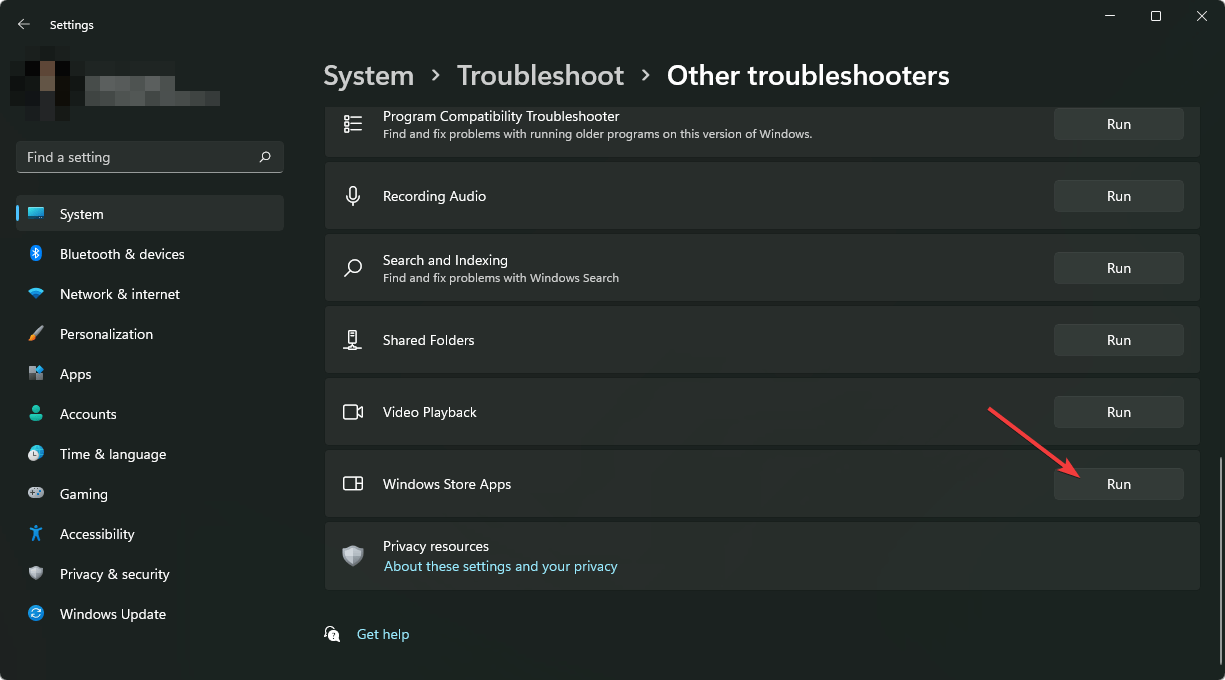
  4. Locate the Windows Store Apps option and click Run. Follow the on-screen instructions to complete the process.Windows store app

The Windows Store Apps troubleshooter can help you fix a lot of issues related to Microsoft Store apps, like 0xc03F300D; read this guide to learn more about the solutions.

2. Clear the store cache using the WSRESET command

  1. Press Windows + R to open the Run dialog box.explorer_wsreset.exe -microsoft store error 0x00000005
  2. Type wsreset.exe and click OK to reset the Windows store.
  3. The store will open and close, indicating the store cache has been reset. Try to open the Microsoft Store app and check if the issue persists.

Clearing the store cache can also help you fix other Windows Store app issues like Microsoft Store not working; read this guide to learn more.

3. Repair/reset Microsoft Store

  1. Press Windows + I to open the Settings app.
  2. Go to Apps, then select Installed apps.Apps, installed apps - microsoft store error 0x00000005
  3. Under Related settings, click System Components.Under Related settings, click System Components.
  4. Locate the Microsoft Store, click the three dots icon, and select Advanced options.Advanced options -microsoft store error 0x00000005
  5. Click the Repair button.Repair the app
  6. If the issue still exists, follow steps 1 to 4, then click Reset.Reset the app

4. Run SFC & DISM scans

  1. Press the Windows key, type cmd, and click Run as administrator.CMD elevated
  2. Copy & paste the following command to restore damaged system files and hit Enter: sfc /scannow SFCSCANNOW CMD
  3. Type the following command to repair the Windows image files and press Enter: Dism /Online /Cleanup-Image /RestoreHealthRestore health -microsoft store error 0x00000005
  4. Reboot your computer to save the changes.

Repairing the system files can help you fix other issues like Windows Store doesn’t open; if you want to learn about other solutions to deal with it, you can use a dedicated repair tool. It scans your system thoroughly and replaces all corrupt files with healthy versions from its extensive vault.

5. Enable TLS

  1. Press Windows + R to open the Run dialog box.explorer_inetcpl.cpl - microsoft store error 0x00000005
  2. Type inetcpl.cpl and click OK to open the Internet Properties.
  3. Go to the Advanced tab, place a checkmark next to Use TLS 1.0, Use TLS 1.1, Use TLS 1.2, and Use TLS 1.3.rundll32_enable TLS - Microsoft Store Error 0x00000005
  4. Click Apply and OK to save the changes.

6. Re-register the app

  1. Press the Windows key, type powershell, and click Run as administrator.Powershell 2 - microsoft store error 0x00000005
  2. Type the following command to re-register the app for the current user account and hit Enter: Get-AppXPackage *Microsoft.WindowsStore* | Foreach {Add-AppxPackage -DisableDevelopmentMode -Register "$($_.InstallLocation)\AppXManifest.xml"}powershell_re-register the app for the current user account
  3. Copy & paste the following command to re-register the app for all user accounts and press Enter: Get-AppxPackage -AllUsers *WindowsStore* | Foreach {Add-AppxPackage -DisableDevelopmentMode -Register "$($_.InstallLocation)\AppXManifest.xml"}powershell_re-register the app for all user accounts
  4. Restart your computer to let the changes take effect.

7. Create a new user account

  1. Press Windows + I to open the Settings app.
  2. Go to Accounts, then click Other users.Apps - Other users -microsoft store error 0x00000005
  3. Click Add account.Add other user
  4. Select I don’t have this person’s sign-in information.Microsoft Sign -in
  5. Click Add a user without a Microsoft account.Add a user without Microsoft account
  6. Enter the username and credentials for the user account, then click Next.Create a user
  7. Follow the on-screen instructions to complete the setup.

Once done, logout of the current user and use the new user account details to login and use your computer.

8. Reinstall the Microsoft Store

  1. Press the Windows key, type powershell, and click Run as administrator.Powershell 2 - microsoft store error 0x00000005
  2. Type the following command to remove the app for all user accounts and hit Enter: Get-AppxPackage -allusers *WindowsStore* | Remove-AppxPackage Remove package - microsoft store error 0x00000005
  3. Reboot your computer.
  4. Once your system restarts, open PowerShell with administrator rights, then copy & paste the following to install the app for all user accounts and press Enter: Get-AppxPackage -allusers *WindowsStore* | Foreach {Add-AppxPackage -DisableDevelopmentMode -Register “$($_.InstallLocation)\AppXManifest.xml”}Reinstall all users

In case the error doesn’t seem to budge, it could be because your system files are corrupted beyond repair; you need to reset your Windows computer.

To avoid any Microsoft Store-related errors, ensure your Windows operating system is up-to-date and reset the cache of the Microsoft Store app periodically.

If none of the methods don’t work for you, you must contact Windows Store Support, explain the issue & fixes tried for further assistance.

Did we miss a step that helped you? Don’t hesitate to mention it in the comments section below. We will happily add it to the list.

Virgin Error Code V53: How to Fix it

The Virgin Media Error Code V53 affects the Virgin TV V6 and TiVo boxes and may appear on some or all channels. It was first reported on December 2, 2021, when thousands lost their TV signal as well as Internet connectivity.

The error has since been a regular issue, often affecting individual users. The message reads, The channel is currently unavailable, check the TV guide to see if it is off-air. If the channel is not off-air, please reboot the box and try again.

What is Virgin Media Error Code (V53)?

When encountered on specific channels, the error highlights that the channel is unavailable. For across channels, it’s usually a problem with the Virgin servers. Only rarely does it have to do with an issue at the user’s end.

How do I fix Virgin Error Code V53?

Before we start with the slightly complex changes, try these quick ones:

  • Check the Virgin Media service status on the official website or use a real-time monitoring service like Downdetector. In case of server issues, wait for a few hours.
  • Make sure the cables are properly connected, and there’s no interference with the signals.
  • Switch to another channel and verify whether all are affected. In most cases, only a few channels threw the Error Code V53, while others worked fine. Also, restart the Virgin TV V6 or TiVo box.

1. Reset the box to defaults

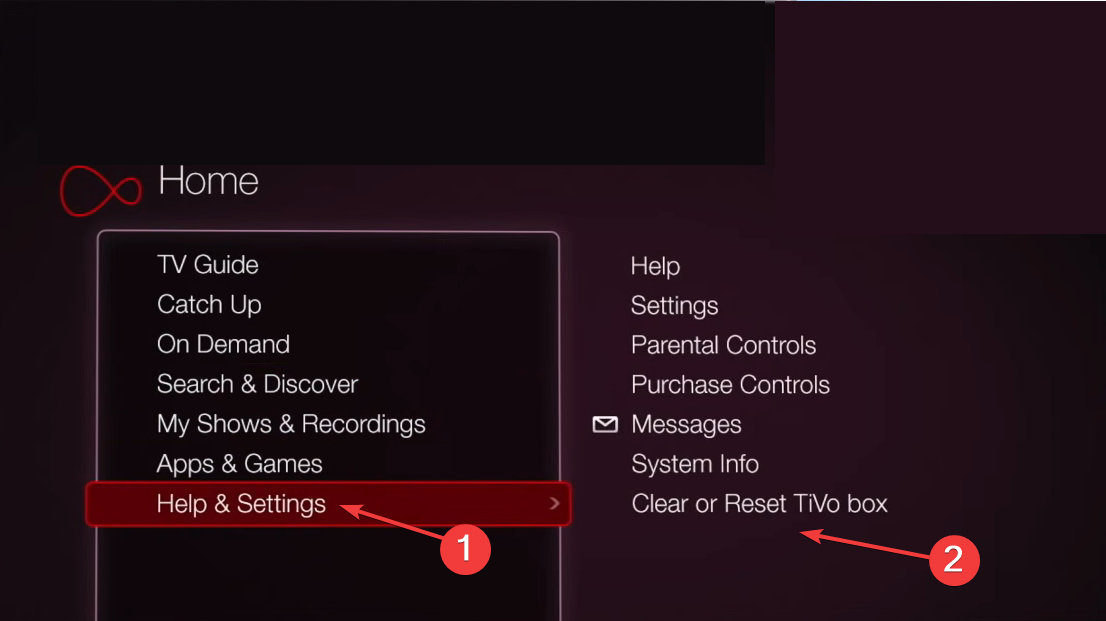
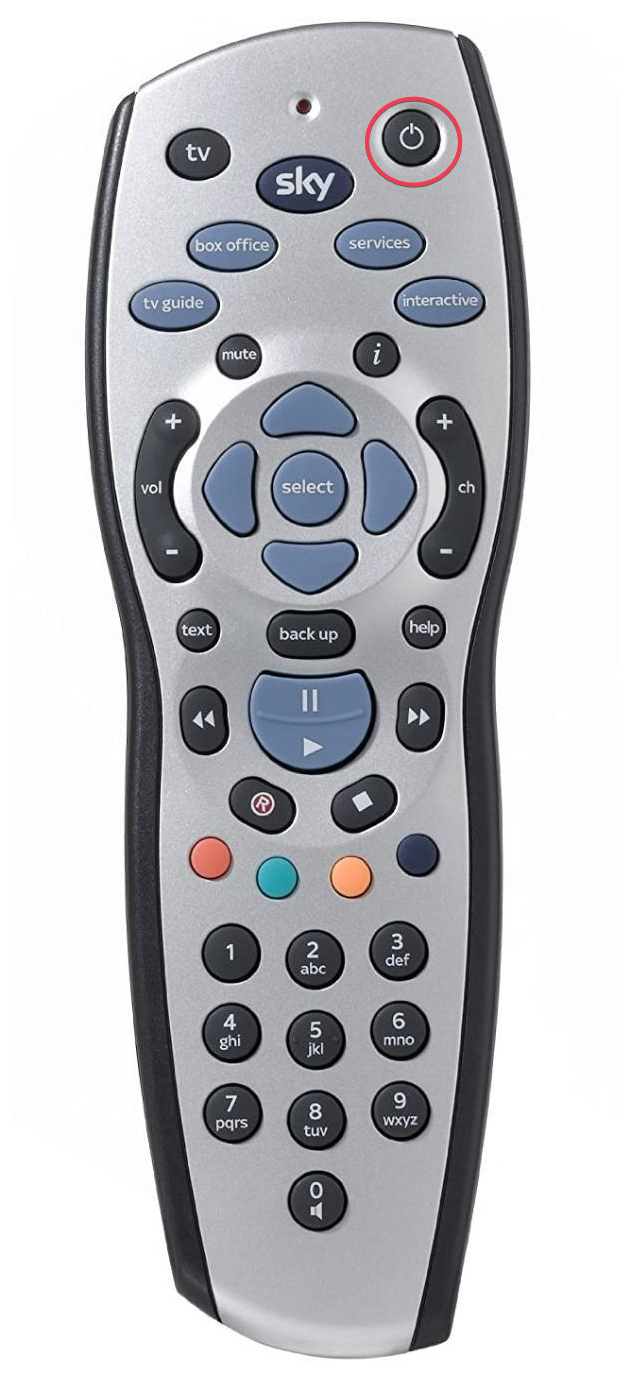
  1. Press the Home button at the top of your remote.
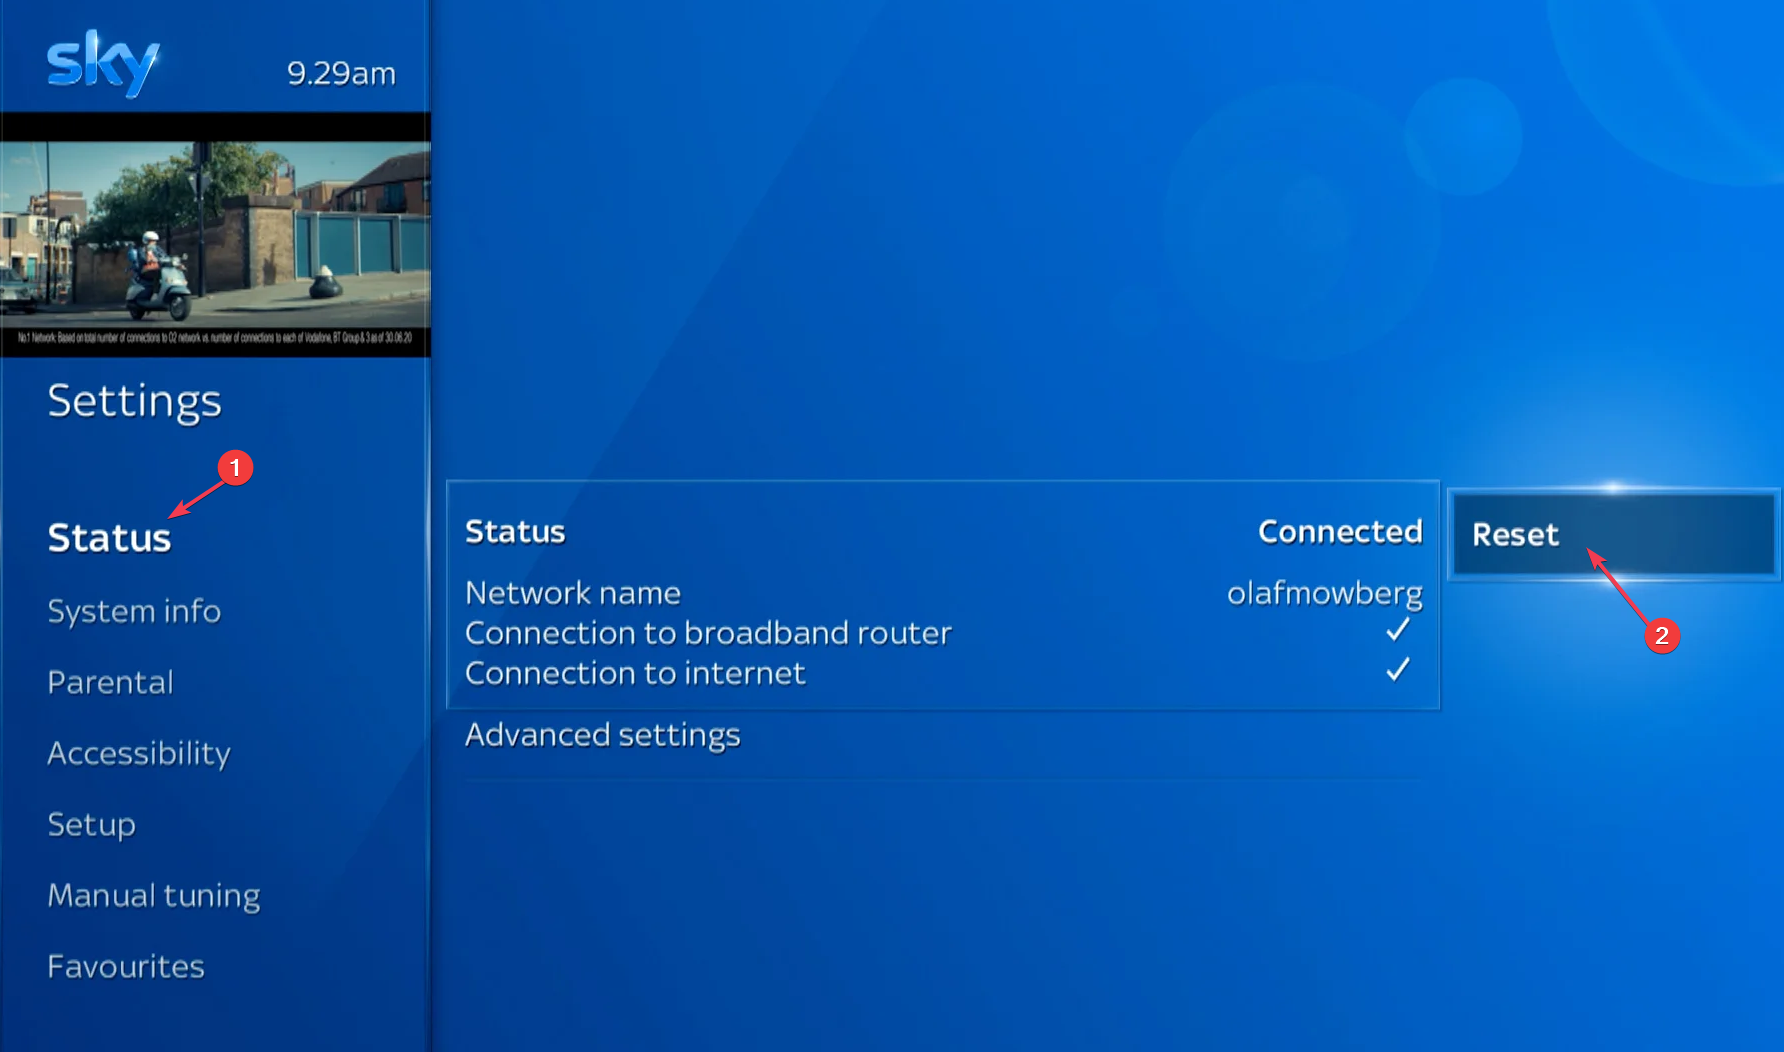
  2. Go to Help & Settings from the left pane, and then select Clear or Reset TiVo box on the right.reset
  3. Now, select the full reset (Erase Everything) option and follow the instructions to complete the process.
  4. Once done, reboot the device and check for improvements.

If you are getting the Virgin Media Error Code V53 on TV due to a misconfiguration at your end, perform a factory reset. Make sure to do that only after you have verified that the connections are in order.

2. Contact Virgin support

When nothing else works, the last option is to contact Virgin support. Their support page is extensive, listing solutions for all error codes.

And if that doesn’t help, you can always connect with a live agent over the phone. Besides, you can post the query in the Virgin community and wait for a response.

As you see, there’s not much to do at your end when faced with the Virgin Media Error Code V53, be it on BBC, Sky, or across channels.

Also, some of the solutions for Virgin Media Error Code w02 may work in this case. So, make sure to give them a try if the problem remains unresolved.

For any queries or to share more solutions with us, drop a comment below.

How to Fix the cURL Error 28: Connection Timed Out?

Though WordPress is a reliable Content Management System, sometimes, it can throw you unexpected errors like cURL error 28 to disrupt your workflow.

In this guide, we will discuss probable causes and offer recommended solutions by WR experts to resolve the issue quickly.

What is the cURL error 28 in WordPress?

cURL (Client URL) handles API requests that enable your site to access & transmit data to its server and corresponding database; if the process takes time, you might see this error. The main reasons are:

  • WordPress firewall interference
  • Faulty DNS server or WordPress plugin.
  • The hosting provider has put a low timeout limit on your server.

How can I fix the cURL error 28?

Before proceeding to the advanced fixes to resolve the cURL error 28, here are a few preliminary checks you should do:

  • Ensure your hosting server uses the latest cURL library, PHP, and OpenSSL.
  • Try using a different browser.

1. Disable the WordPress Firewall

If you use a WordPress firewall or any other security plugin, deactivate it temporarily. Follow these steps to do so:

  1. Login to your WordPress admin page.Deactivate the plugin
  2. Go to Plugins, locate the firewall or security plugin, and click Deactivate.

Next, check the WordPress health report page to see if the issue persists. If it has fixed the issue, check your WordPress firewall to understand what API requests have been blocked.

2. Deactivate all the WordPress plugins

  1. Login to your WordPress admin page.
  2. Go to Plugins, then click the Installed Plugins option.
  3. Place a checkmark next to Plugin to select all the Plugins.Deactivate Plugins at once -cURL Error 28
  4. Now select Deactivate from the drop-down menu.

3. Change the DNS server

  1. Press Windows + R to open the Run window.NCPA run command -cURL error code 28
  2. Type ncpa.cpl and click OK to open the Network Connections.
  3. Right-click the active connection and click Properties.Network Connection properties
  4. From This connection uses the following items box, select Internet Protocol Version 4 (TCP/IPv4), then choose Properties.Internet Protocol Version 4(TCPIPv4) Properties
  5. Select the radio button next to Use the following DNS server addresses.
  6. For the Preferred DNS server, type 8.8.8.8 and for the Alternate DNS server, type 8.8.4.4.DNS server
  7. Click OK, then OK to save the changes.

Changing the DNS server to a public DNS can help you fix the This site can’t be reached issue; read this to learn more about it.

4. Clear the browser cache

  1. Open the preferred browser; here, we are using Google Chrome to demonstrate the steps.
  2. Click the three dots icon and select Settings.Settings CHrome -cURL error code 28
  3. Go to Privacy & security, then select Clear browsing data.Clear browsing data
  4. For Time range, select All time from the drop-down list, then place a checkmark next to Cookies and other site data, and Cache images and files.Settings4 - Clear data
  5. Click Clear data.

5. Check the SSL configuration

  1. Go to Qualys SSL Labs test.chrome_SSL Server Test - cURL error code 28
  2. Next, insert your URL page and click Submit.

The tool will run a few tests and show you if there are any misconfigurations in the SSL installation. You need to reinstall the SSL and get help from your SSL vendor.

Reinstalling the SSL certificate can also help you fix the security issues on your WordPress websites; read this to learn the other solutions.

6. Check your server limits and cURL version

  1. On the Dashboard page, select Tools.Site Health, then Info -cURL error code 28
  2. Click Site Health, then Info.
  3. Next, select Server to check the limits.

In case nothing worked for you, you need to contact your hosting company and explain the issue & fixes you tried for further help.

To conclude, to fix the cURL error 28, you need to disable the WordPress Firewall temporarily and check what API requests are blocked.

You can also try clearing the browser cache, changing the DNS server to a public one and testing the server limits to eliminate the problem.

For other common WordPress hosting issues, like the White Screen of Death error, read this guide to learn more.

If you have questions or suggestions about the subject, don’t hesitate to mention them in the comments section below.

Error Code 1 in BF1: How to Fix it on PSN, Xbox, and PC?

Many users complained that while playing BF1 on PlayStation, they couldn’t join any rented servers and encountered the error message: An unknown error occurred. Error code: 1

In this guide, we will discuss the common reasons and offer tested solutions recommended by WR experts to eliminate the problem.

Why does error code 1 occur on BF1?

  • A bug in the game or server is having problems.
  • Tried changing servers during the game
  • You might be banned from a server for a reason.

How can I fix error code 1 on BF1?

Before proceeding to the actual solutions to get rid of error code 1 on BF1, go through the following:

  • Check the server status of the game and your gaming consoles.
  • Try accessing the game with the server browser or join your friend directly from Origin.
  • The quickest way would be to enter a quick match, exit it, and restart the game.

1. Restart your device

PlayStation

  1. Press & hold the PS button on your PSN controller and choose Power.PSN button - error code 1 on BF1
  2. Select Turn Off PS4/5 or Restart PS4/5. Ensure you don’t choose Enter Rest Mode; it doesn’t completely turn off your device.
  3. Once you restart your PlayStation, try the same thing that caused the error to check if it persists.

Xbox

  1. Press & hold the Power button on the console until it is turned off.press the Xbox console button - error code 1 on BF1
  2. Unplug the power wire from the console and the socket. Wait for a minute.
  3. Now plug the wire back in and power on the console.

If you are playing the game on your computer, save all your work and restart it; once it boots up, check if the issue persists.

2. Clear the device cache

PlayStation

  1. Press and hold the Power button on the console and keep holding it till you hear two beeps.Power button -
  2. Remove the power cord from the back of your gaming console.
  3. Wait for 30 seconds to 1 minute, then reconnect the power cord to the console and socket.
  4. Now press the Power button again to turn it back on; this will clear the cache.

Xbox

  1. Press the Xbox or Guide button on your Xbox controller, go to Settings, then choose System Settings.Controller Xbox one - Guide button
  2. Select Storage.
  3. Highlight a storage device and press the Y button on your controller to launch Device Options.Y button to enter the Device options
  4. Select Clear System Cache.
  5. Click Yes to confirm the action.
  6. Once done, press the Guide button on the controller to return to Xbox home.

No matter which storage device you choose for the process, these steps will clear the cache for all your storage devices.

Windows PC

  1. Press the Windows + R to open the Run dialog box.Cleanmgr Run command
  2. Type cleanmgr and click OK to open the DiskCleanup window.
  3. Select the system drive from the drop-down menu, usually, it is C, then click OK.Select DISK C
  4. Click Clean up system files.Clean up error code 1 BF1
  5. Select the drive again and click OK.
  6. Place a checkmark next to all the items under Files to delete and click OK.Disk cleanup
  7. Click Delete Files to remove all the device cache.Delete Files -  error code 1 on BF1

Clearing disk space, updating drivers, and repairing corrupted files can help you fix issues like BattleField 3 not launching on Windows 10/11; read this guide to learn more.

3. Login to another account

Another workaround to avoid this error is to abandon the account throwing you the error and create a new account or use a different account. This should fix the issue and you could be able to play the game without problems.

If nothing worked for you, you must contact Epic Games customer support and explain the issue & fixes you tried for further assistance.

If you want to learn about common issues you might face while playing Battlefield 1, read this guide. And we have even more tips for fixing server connection issues in Battlefield 1, so just take a closer look in case you need further help.

Did we miss a step that helped you? Don’t hesitate to mention it in the comments section below. We will happily add it to the list.

How to Fix Error Code MR106 on Sky Q Mini?

If you have encountered error code MR106 on Sky Q Mini, this guide can help. We will explore the probable causes and offer expert-recommended fixes to help you overcome the problem.

What causes the error code MR106 on Sky Q Mini?

  • Unstable internet connection.
  • Sky Q has connectivity problems.

How can I fix the error code MR106 on Sky Q Mini?

Before proceeding with any steps to fix the error code MR106, go through the following preliminary checks:

  • Keep the Sky Mini and Sky Q box away from other electronic devices to avoid interference.
  • Ensure you have a stable internet connection.

1. Hard reset your router

  1. Power off your router and remove all the cables carefully from it.
  2. Wait for 30 seconds, then replug all the cables.
  3. Plug the power cable into the Power outlet, then turn on the router.

These steps can help you restore the connectivity and fix the issues. If you are still facing the problem, keep the Sky Mini closer to the router and use an ethernet cable to access the internet.

2. Reset the Sky Mini device

  1. First, Press the Standby button on your Sky Q remote, then switch off and unplug the main Q box from the power.Standby button - error code MR106 on Sky Q Mini
  2. Wait 30 seconds, plug the cable back in, and switch your Sky Q box.
  3. You will see on-screen instructions now; wait for them to disappear and let the front LED turn to an Amber color.
  4. Again, wait 30 seconds, then press the Home button on your Sky Q remote or the Standby button on the Sky Q box.Stanbdby button - Standby button - error code MR106 on Sky Q Mini
  5. The device will take 5 minutes to completely come back up and running.
  6. Repeat the same steps to reboot the Sky Mini.

Rebooting the Sky Q or Mini device can help you fix the Sky on Demand not working issue; read this to learn about it in detail.

3. Reset your network settings

  1. Press the Home button on the Sky Q remote and select Settings.
  2. Choose Setup, then Network.
  3. Next, highlight Status, then select Reset from the right side.Reset Network - error code MR106 on Sky Q Mini
  4. You will be prompted to press the WPS button on the main Q box (not the Mini).

If you are using Sky Broadband and your Wi-Fi router is nearer to the Mini than the Main box, press the WPS button on the router instead of the Sky Q box.

To conclude, the Sky error MR106 is a connectivity error, so make sure your internet is working fine, try to keep the Sky box away from other electronic devices, and use an ethernet cable for a better internet connection.

Speaking of connectivity issues, using a weak internet could also cause issues like Sky Mini not working; read this guide to learn more about it.

Did we miss a step that helped you fix the issue? Don’t hesitate to mention it in the comments section below. We will happily add it to the list.

How to Fix BIOS ID Check Error Message

A BIOS ID check error is a common problem that occurs when your system fails to detect the motherboard while installing your OS or updating the BIOS.

Often, your computer hardware configuration does not match the requirements of Windows, or your BIOS is corrupted.

This can also happen if you change your motherboard and/or processor without updating the BIOS first or overclocking your system. Here’s how to fix it:

What can I do to fix the BIOS ID check error?

If you get this error, start by removing all storage devices such as USB drivers and external hard drives. Also, check for pending updates and make sure there are no loose connections between the power supply and your PC’s components.

Should you not have succeded after doing all of these, try the more advanced steps below:

1. Reset BIOS and reinstall it

Note icon NOTE
You might need to start your PC in Safe Mode for these steps.

1.1 Reset BIOS

  1. Restart your computer and repeatedly press ESC/F1/F2/F8 or F10 during the startup to get into the BIOS menu.
  2. Hit the Windows + I keys to open the Settings app and click on System>Recovery>Advanced startup. Go to Troubleshoot > Advanced Options > UEFI Firmware Settings and click on Restart.
  3. Once you are in the BIOS menu, press F9 to open the Load Default Options dialogue box.
  4. Select Yes using the arrow keys to reset BIOS settings to factory default.
  5. Exit and restart the computer and check for any improvements.

Resetting your BIOS to default settings can also help you fix issues like removing your BIOS password on Windows 11; read this guide to learn more.

1.2 Check the BIOS version

  1. Open the Start menu by pressing the Windows key.
  2. Type System Information and open the top result.
  3. Locate BIOS Version/Date section on the right side.

1.3 Update BIOS

  1. The process of updating BIOS will differ depending on your motherboard. For this step, we shall be updating the HP motherboard.
  2. Navigate to the HP driver and software download website.
  3. Choose laptop or desktop, depending on the type of computer you’re using.
  4. Enter your exact serial number or your exact computer model.
  5. Select your OS and OS version, then click Submit.
  6. Click on All drivers and then expand BIOS to see available updates.
  7. Click the download icon.
  8. Install the .exe file, following the on-screen instructions.
  9. Restart your PC.

The BIOS update should include all the latest drivers and firmware available for your system. It might also resolve any compatibility issues between the CPU and motherboard that you may be experiencing.

If you have upgraded your motherboard, make sure that the new motherboard has the same model number as the old one. This was one of the biggest issues as users ended up downloading the wrong version. Pay particular attention to the manufacturer, model, and revision.

2. Flash or update BIOS from a bootable USB

  1. Using another computer or laptop, visit your motherboard’s or computer’s manufacturer’s website and look for a support page.
  2. They should have your motherboard or laptop model listed. In our example, we go to the HP website and type our motherboard model.
  3. Then download the BIOS file.
  4. If the downloaded file is a ZIP file, extract the contents.
  5. Look for the BIOS file in the contents of the unzipped file and make a note of where this BIOS file is located.
  6. Before beginning the BIOS flash process, save the BIOS file to an external device like a USB drive.
  7. Boot your faulty computer after ensuring that it is plugged in or that your laptop is completely charged and plugged in.
  8. Enter the BIOS screen by pressing the key specified by the manufacturer’s instructions for a BIOS update as soon as the computer starts. F1, F2, Delete, F8, Esc, or another key could be used.
  9. Start the update process based on your computer’s model once you’re on the BIOS panel. (To complete the upgrade, you may need to look at different tutorials on the manufacturer’s website.)
  10. The BIOS flash can take anywhere from a few minutes to several hours, and your system will restart after the BIOS update is completed.

3. Use a BIOS updater utility

  1. Disable your firewall temporarily as it may flag off this program as malware and prevent it from installing or making any changes on your PC.
  2. Navigate to your browser and download the HP Support Assistant.
  3. Open the HP Support Assistant. and log in with your account or continue as a guest.
  4. Right under your device picture, you will find an Updates option.
    hp support assistant interface
  5. Click on it to check if you are up-to-date or have any pending updates.
    hp support assistant update check
  6. If you see a new BIOS update available, click Download and install.
  7. Wait for the Support Assistant to finish the job and close the application.

These programs are often made by companies that manufacture motherboards. This means they can address a wide range of issues like the BIOS ID check error.

Note icon NOTE
HP Support Assistant only works with HP motherboards, so if you have one from another manufacturer, be sure to check their website to see whether they have a BIOS updater program as well.

4. Reset CMOS

  1. Shut down your PC completely.
  2. Unplug the power cord and remove the battery if it’s a laptop.
  3. Hold the power button for 60 seconds to completely discharge your PC.
  4. Open the PC case and touch a metal surface to discharge your static electricity.
  5. Remove the CMOS battery; it should be a 3V standard flat wristwatch battery.pc error code 0xc000000 CMOS battery
  6. Please wait for a few minutes and place it again carefully.
  7. Power On your PC and look for changes.

CMOS is like a backup battery for your computer’s BIOS. If power is lost suddenly, the CMOS may become corrupt and it cannot keep track of these things and your computer will not start.

Some contain batteries that must be removed from the motherboard before they can be replaced or recharged, while for others, simply disconnecting from their power source will reset the CMOS.

5. Change your BIOS boot mode

  1. Enter BIOS Setup with the corresponding key on the screen.
  2. Look for the Secure Boot option. In most situations, it will be under the Boot or Security tabs, though the location will change based on your PC.
  3. Change BIOS from Legacy to UEFI.
  4. Enable Secure Boot in user mode (UEFI).
  5. Press the Save & Exit corespondent key on the screen, and you are done.

UEFI replaced the old BIOS system in PCs. It is more secure and reliable than legacy BIOS and also has a faster start-up time than its counterpart.

6. Upgrade your motherboard

Finally, if you’ve tried all the above but the BIOS ID check error is persistent, you may have to upgrade your motherboard. With time, your hardware will give in and succumb to wear and tear or become damaged due to a power surge or some other reason.

Unfortunately, this isn’t always as easy as it sounds. The first issue is that not all motherboards are compatible with your specific PC model but if you look hard enough, you’ll find a perfect match.

Tips to ensure successful BIOS ID verification

  • Check for any prerequisites for updating your system’s BIOS before downloading the files to ensure your system passes the compatibility test.
  • Use a reliable source for your BIOS files. Avoid third-party vendors as they often have not tested the BIOS for compatibility with your system.
  • Make sure that you download only the version of the BIOS that matches your computer’s model number.
  • Always update your firmware regularly. This will ensure that any vulnerabilities are patched before attackers can exploit them.

Unfortunately, you may successfully get rid of the check ID error but your PC might fail to boot after a BIOS update. This should not be alarming as the steps above can remedy the problem, particularly by flashing your BIOS.

In another scenario, your PC may automatically go to the BIOS menu instead of booting up normally, but this too is an easy fix.

We hope we have comprehensively examined the different ways to fix this error message. There are more causes than those listed above, but they can usually be broken down into some of the categories mentioned.

If you have had any trouble with a BIOS ID check error, feel free to tell us about it in the comments below and how to bypass it.

Bing Chat Plugins are now live in Microsoft Edge’s sidebar

Recently, Microsoft made the Unified Store available in Edge Canary to add Bing Chat Plugins to the browser. Copilot, powered by Bing Chat, now comes with the Bing Search plugin included and enabled by default. This suggests that more Chat Plugins from Microsoft and third-party providers may soon be available for users to install and use from the Edge Sidebar.

Microsoft first announced Bing Chat plugins at the Build 2023 event. Some announced plugins available in Edge Canary include Shop, KAYAK, Klarna Shopping, Wolfram, Zillow, Redfin, OpenTable, InstaCart, and Wolfram Alpha, and you can temporarily add these plugins to Edge from the sidebar.

How to install Bing Chat Plugins in Edge browser

Microsoft Edge has a dedicated Unified Store that allows users to seamlessly install and manage apps, sites, and Chat Plugins. You can install the plugins from the sidebar by clicking the customize option (+ sign) or visiting the unified store in the Edge browser address bar edge://hub-app-store/.

While we can install the plugins, they are not fully activated or ready to use. The Try now button for each plugin remains inactive.

Copilot in Microsoft Edge gets Bing Search plugin

Copilot, powered by Bing Chat in the Edge Sidebar, started emphasizing the availability of Plugins and suggests that you can use them to find restaurant reservations, flights, and more.

While the installed plugins are unavailable, Edge has the Bing Search Plugin automatically enabled by default. You can enable or disable the search plugin when using Bing Chat in the sidebar. Disabling the Search plugin prompts Copilot to start a new topic and activate a search.

Taking into account the fact that the plugins are present, we suspect that it won’t be long until they’ll also be available for general use. This means that you’ll get a lot more from your searches and the entire process will be a lot more dynamic. But what’s your take on the new plugins? Share your thoughts in the comments section below.

Rocket League Error 0: How to Fix it on Xbox, PS and PC

The Rock League Error 0 recently appeared for several users across devices, including Xbox, PlayStation, and PC. The error message reads, Having trouble communicating with Epic Online Services. Please try again in a few minutes.

You may also see the Checking Privileges message, followed by the error code. Nevertheless, the game fails to load, and restarting the device doesn’t work for most users.

What is Error 0 in Rocket League?

The error highlights a connection issue between the device and the game servers and appears for the following reasons:

  • Incorrect date or time set on the device
  • Corrupted game saves
  • Misconfigured network settings
  • Rocket League servers are facing downtime

How do I fix Rocket League Error 0?

Before we start with the slightly complex solutions, here are a few quick ones to try:

  • Check Epic Games’ status on the official website or use a real-time monitoring service like Downdetector to identify server downtimes or maintenance schedules.
  • Restart the device or connect to another network, one without any restrictions.
  • Make sure you don’t have an inactive Epic Games account. Sign in to the Epic Games Store to verify that.
Tip icon Tip
Unless specifically mentioned, the solutions listed below will work across devices: Xbox, PS4, PS5, or PC. And though we will walk you through the steps on a Windows PC, the equivalent changes on a console will do the trick!

1. Delete the SaveData folder

  1. Press Windows + E to open File Explorer, and navigate the following path or paste it in the address bar and hit Enter: Documents\My Games\Rocket League\TAGamepath
  2. Right-click on the SaveData folder, and select Delete from the context menu.
  3. Relaunch the game and check for improvements.

While deleting the SaveData folder helped 4 out of 5 users fix Rocket League’s Error 0, it will lose in-game progress since these files are saved locally. But if cloud synchronization is enabled, simply download the Steam’s backup game save files again.

2. Set the correct date and time

  1. Press Windows + I to open Settings, go to the Time & language tab from the left pane, and click on Date & time.Date & time
  2. Now, enable the toggle for both Set time zone automatically and Set time automatically.set time to fix rocket league error 0
  3. If the time doesn’t appear correctly, disable the toggle for both and choose the correct time zone from the dropdown menu.time zone
  4. Click the Change button next to Set the time and time manually.
  5. Set the correct date and time, and click Change. change time to fix rocket league error 0
  6. Finally, enable the toggle for Adjust for daylight saving time automatically if that’s the case in your region.day light saving

Another approach when you see Having trouble communicating with Epic Online Services is to change the date and time manually. Similarly, change the date and time on the console for the Rocket League Error 0 on PS4 and Xbox.

3. Change the NAT type

  1. Open the router settings via the IP address using a web browser. It’s usually listed on the back panel of the router.
  2. Head to the Advanced Network tab, and then go to the Advanced section.
  3. Now, tick or untick the checkbox for Enable UPnP, depending on whether it’s presently disabled or enabled respectively.UPnP to fix rocket league error 0
  4. Save the changes, and check for improvements.

For some users, changing the setting from strict NAT type on Xbox did the trick when faced with Rocket League Error 0.

4. Disable cloud synchronization (Steam)

  1. Launch the Steam app, click the Steam menu near the top left, and select Settings from the flyout menu.steam settings
  2. Go to the Cloud tab, and turn off the toggle for Enable Steam Cloud.disable steam cloud to fix rocket league error 0

5. Reinstall the game

  1. Press Windows + R to open Run, type appwiz.cpl in the field, and hit Enter.appwiz.cpl
  2. Select Rocket League from the list of apps, and click the Uninstall button.uninstall to fix rocket league error 0
  3. Follow the on-screen instructions to complete the process.
  4. Now, restart the device, then download the game from an official source.

If removing the game doesn’t work on the first attempt, consider using an effective software uninstaller tool to get rid of any leftover files, Registry entries, and configured settings.

This should fix Rocket League Error 0. In the unlikely scenario that the problem persists, the last option is to contact Rocket League support. They should either share a timeline in case it’s a server issue or provide a resolution if it’s an in-game problem.

Remember, server downtimes are the reason behind several problems, including Rocket League Error 68. And some solutions for that may work in this case.

If you want to improve your gameplay on Rocket League, you must know the best camera settings to get a competitive edge; read this guide for details.

For any queries or to share more solutions with us, comment below.

Roku Error 014.30: How to Fix it

Streaming on Roku is great, but not so much with an error 014.30 when it fails to connect to your home network. It’s worse when other apps or devices have no problem, but fret not, as we were able to get to the bottom of this problem and bring you this comprehensive guide.

Causes of Roku error 014.30:

  • There is a problem with your ISP connection, such as a service outage or network maintenance.
  • The Roku device has been configured incorrectly, or the settings have become corrupted.
  • Other devices are using up the bandwidth on your home network.
  • Something is wrong with your router or network settings.

How do I fix error code 014.30 on Roku?

A few basic troubleshooting steps to get you started include:

  • Ensure your router is turned on and connected to the internet, then connect an Ethernet cable.
  • Try with another connection if available, or check with your ISP for any issues.
  • Power cycle your router, re-add Roku to your network, and ensure it’s not an HDCP Roku error that is blocking unauthorized content then restart your device.

1. Restart Roku

  1. Press the Home button on your Roku remote.
  2. Select Settings.roku connected to Wi-Fi but not working restart
  3. Choose System.roku connected to W-fi but not working system
  4. Select System Restart.roku connected to wi-fi but not working system restart
  5. Finally, choose Restart.restart roku

2. Switch to a faster GHz band

  1. Hit the Windows key, type Device Manager in the search bar, and click Open.
  2. Navigate to Network adapters and double-click to expand.
  3. Right-click on your network adapter and select Properties.
  4. Click on the Advanced tab and locate the Preferred Band.
  5. In the Value drop-down menu, select Prefer 5GHz band then hit Enter.
  6. Restart your PC.

Error 014.30 on Roku can happen when your wireless signal isn’t strong enough, so we recommend switching to a faster frequency. Also, connecting your device directly to your modem/router with an Ethernet cable will help bridge the gap where your wireless connection fails.

3. Remove bandwidth limits

  1. Hit the Windows key and select Settings.settings windows 11
  2. Click on Network & internet on the left pane.
  3. On your current Wi-Fi connection, click on Data usage.
  4. Select Enter limit.
  5. Under Set data limit, check the Unlimited box, then click Save.

If your ISP has set bandwidth limits, this can cause problems with streaming services and may report an error code similar to this one when you try to use more than your allotted amount.

4. Reset your network

  1. Click on the Start Menu icon and click on Settings.settings windows 11
  2. Navigate to Network & internet.
  3. Select Advanced network settings.going advanced network settings win11
  4. Click on Network reset.Network Reset 1
  5. Next, hit the Reset now button.Network Reset now

5. Factory reset Roku

  1. Press the Home button on the Roku remote.
  2. Go to Settings.
  3. Select System.
  4. Select Advanced system settings.
  5. Choose Factory reset.
  6. Select Factory reset everything and follow the on-screen instructions.

6. Change your network’s SSID

  1. Press the Windows key + R, type regedit, then click OK.Regedit RUN COMMAND (2) - directx error mw3
  2. Navigate to the following key in the left pane: HKEY_LOCAL_MACHINE\SOFTWARE\Microsoft\Windows NT\CurrentVersion\NetworkList\Profiles
  3. Go through all subkeys (they are all labeled with random numbers and letters) under the Profiles key until you find the key that has ProfileName set as the name of your network.
  4. In the right pane double click the ProfileName in order to change its value.
  5. Change the value data to the desired name of your network connection.
  6. Close the Registry Editor and restart your PC.

If you have recently changed the name of your wireless router or had problems with your router, then this could be the cause of the issue. This is because Roku uses a list of predefined names to connect to the Internet, and if one of these names is not found, it will not work correctly.

7. Renew your IP address

  1. Press the Windows key,  type cmd in the search bar, and click Open.
  2. Enter the following command: ipconfig/release
  3. Wait for the command to be executed and enter the next one: ip/renew
  4. Close the Command Prompt and verify if the error is still there.

In some cases, even with a good and stable internet connection, you’ll find that Roku is connected to Wi-Fi but not working. This could imply that the error 014.30 is caused by incorrect configuration settings on your router or your ISP has changed or updated its IP addresses.

If, at this point, you’re still struggling with the error, there’s a high possibility that your firestick is faulty. However, before you are quick to purchase a new one, give it time and try it in a few days. Some users were hasty in throwing away theirs, but the new one was still plagued with the same error.

Connection errors are awful as you may also be unable to screen mirror your Roku. If so, consider using Roku on a browser and see if it works. Sometimes, the error code 014.30 is app-related and will be resolved later. This can be a temporary solution as you wait for official updates.

We also have a guide that explains what is Cloud Path error authorization, so visit it if you have additional problems.

We’d like your thoughts on this error if you’ve experienced it. Leave your comments below on what solutions worked for you.

Disney Error Code 43: How to Fix it

Streaming errors on Disney Plus are uncommon, but when you encounter one like Error Code 43, things are tricky to troubleshoot. The reason, there’s no relevant information provided in the message,

The error message reads, We’re sorry, but we cannot play the video you requested. Please try again. If the problem persists, visit the Disney+ Help Center (Error Code 43).

What is Error Code 43 on Disney Plus?

The error code highlights a connection issue between the device and the Disney Plus servers. It also appears due to billing problems or when content is not available in your region. Besides, the device’s network settings could be to blame when all shows throw the error.

How do I fix error 43 on Disney Plus?

Before we start with the slightly complex solutions, try these quick ones:

  • Use a third-party service like Downdetector to identify any server downtime. In this case, wait for a few hours and then try again.
  • Make sure you are using a device compatible with Disney Plus. Remember, you may face issues on Chromecast (Gen 1).
  • Switch to another network, preferably a wired connection or mobile data, or try accessing the content on a different device. Also, re-login to the Disney+ account.
Tip icon Tip
The solutions listed here are for a Windows PC when Disney + is downloaded from the Microsoft Store, though the idea remains the same across devices. So, if you get Error Code 43 on a mobile phone, Xbox, or Amazon Firestick, amongst others, apply the equivalent measures.

1. Connect via a reliable VPN

When faced with Disney Plus Error Code 43, your primary approach should be to use an effective VPN solution. These will reroute the connection through another IP, eliminating any regional server issues.

Remember, it’s critical to use a reliable VPN, or you might come across other errors like Disney Plus Error Code 73.

For watching streaming platforms it is recommended to use a VPN with great connection speed and a large number of servers, in case you want to bypass some geo-restrictions.

ExpressVPN is great for this task, not only because it ticks both those requirements but also comes with enhanced security features, so you won’t have to worry about your online privacy.

ExpressVPN

Watch your favorite Disney Plus error-free from anywhere with this powerful tool.
Check Price Visit Website

2. Check your billing status

Often, issues with the Disney Plus billing or an in-process payment status can trigger Error Code 43. If you recently subscribed to the streaming service, wait for 24 hours or so. Remember, 3 out of 5 times, it was issues with the billing to blame.

Besides, you can check the payment status on the payment platform, say PayPal, or your credit card’s digital statement, and make sure the payment has gone through. In case the payment failed previously, use a different method.

Several Disney Plus errors, for instance, Error Code 9, arise due to billing issues.

3. Update the Disney Plus app

  1. Launch the Microsoft Store, and click the Library icon at the bottom-left corner.library
  2. Click the Get Updates button.
  3. If a newer version of Disney Plus appears, wait for it to install automatically or click the Update button.uodate to fix disney error code 43

For Android devices, you will have to check the Google Play Store and, for iOS devices, the Apple App Store for updates.

4. Reset the network settings

  1. Press Windows + I to open Settings, go to Network & Internet from the navigation pane, and click on Advanced network settings.advanced network
  2. Now, click on Network reset.
  3. Click the Reset now button.reset to fix disney error code 43
  4. Finally, click Yes in the confirmation prompt.

Resetting the network settings will eliminate any trivial misconfiguration at your end, triggering the Disney Plus Error Code 43.

5. Change the DNS server

  1. Press Windows + R to open Run, type ncpa.cpl in the text field, and hit Enter.ncpa.cpl
  2. Right-click on the active network adapter, and select Properties from the context menu.properties
  3. Choose Internet Protocol Version 4 (TCP/IPv4), and click the Properties button.
  4. Select the Use the following DNS server addresses option, and enter the following in the fields underneath:
    • Preferred DNS server: 8.8.8.8
    • Alternate DNS server: 8.8.4.4change DNS to fix disney error code 43
  5. Click OK to save the changes, and check for improvements.

While we went with Google’s public DNS, there’s always the option to set the fastest DNS server near you for higher speed. Changing the DNS server also helps with Disney Plus Error Code 92.

6. Reinstall the Disney+ app

  1. Press Windows + I to open Settings, go to the Apps tab from the left pane, and click on Installed apps.
  2. Locate Disney+ from the list of apps, click the ellipsis next to it, and select Uninstall.uninstall to fix disney error code 43
  3. Again, click Uninstall in the confirmation prompt.
  4. Restart the device, then reinstall Disney+ from the Microsoft Store and check for improvements.

7. Contact the Disney Plus support

When nothing else works against Error Code 43, the last option is to contact Disney Plus support, as stated in the error message.

Disney Plus provides both an option to chat with the support agent or talk to one over call, though these may vary with region.

By now, you should have fixed Disney Plus Error Code 43. Remember, on a mobile phone or streaming device, you can also clear the app cache and data instead of deleting it right away. And, do make sure that the content is available in your region.

Before you leave, discover some quick tips to increase the Internet speed on your PC and significantly improve the streaming experience.

For any queries or to share what worked for you, drop a comment below.

How to Fix BlueStacks Error Code 2004?

If you encountered the BlueStacks error 2004 Something went wrong, Installation Failed message while trying to install a game or app, this guide can help!

We will discuss the probable causes and offer the WR experts-tested solutions to fix the error and get BlueStacks up and running.

What causes the BlueStacks error 2004?

  • BlueStacks software is outdated, or Virtualization on your PC is disabled.
  • Windows OS or drivers are outdated, or your PC doesn’t meet the requirements.
  • Antivirus interference.

How do I fix the BlueStacks error code 2004?

Before we go to the advanced fixes to get rid of BlueStacks Something went wrong with error code 2004; here are a few preliminary checks you should do:

  • Ensure your Windows operating system is up to date with the latest version, and check the system requirements for the app.
  • Restart your computer and router to refresh the connection.
  • Check if you have a stable internet connection & end unwanted processes in the background.

1. Set the app to run as an administrator

  1. Press the Windows key, type Bluestacks and click Open file location.Open file location - BlueStacks error code 2004
  2. Locate the HD-Player.exe from the folder, and then choose Properties.Select Properties
  3. Go to the Compatibility tab, and place a checkmark next to Run this program in compatibility mode for, then choose Windows 8 from the drop-down menu.explorer_Run as admin
  4. Now go to Settings, and place a checkmark next to Run this program as an administrator & Disable fullscreen optimizations.
  5. Click Apply, then OK to save the changes.

2. Enable Virtualization

  1. Press Windows + I to open Settings.
  2. Click System, then choose Recovery.System - recovery
  3. Locate Advanced startup and click the Restart now button.Recovery Advanced Startup
  4. On the Choose an option screen, select Troubleshoot.Choose an option - Troubleshoot
  5. Click Advanced options.Troubleshoot WITH AO selected
  6. Choose UEFI Firmware Settings.UEFI 2
  7. Click Restart to enter the BIOS setup.

Once in BIOS mode, the steps to enable virtualization can vary depending on the device manufacturer. Here, we are using HP computer to demonstrate the steps:

  1. Use the arrow keys on your keyboard to go to the Configuration tab, then press Enter to select it.
  2. Now select Virtualization Technology.Enable Virtualization - BlueStacks error code 2004
  3. Choose Enable.
  4. Press F10 to save the changes and exit the BIOS setup.

Next, you need to turn on the virtual machine platform in Windows; follow these steps to do so:

  1. Press the Windows key, type windows features, select Turn Windows features on or off and click Open.Windows features Open - Error code 2004 Bluestacks
  2. On the Windows Features window, place a checkmark next to Virtual Machine Platform.OptionalFeatures
  3. Make sure Hyper V, Windows Hypervisor Platform, Windows Subsystem for Linux, and Windows Sandbox are also selected.
  4. Click OK and restart your PC when prompted.

3. Run the Disk Cleanup tool to recover space

  1. Press the Windows + R to open the Run window.Cleanmgr Run command -0BlueStacks Error Code 2004
  2. Type cleanmgr and click OK to open the DiskCleanup window.
  3. Select the system drive, usually it is C, then click OK.DISK C
  4. Click Clean up system files.Clean up system files
  5. Select the drive again and click OK.
  6. Place a checkmark next to all the items under Files to delete and click OK.
  7. Click Delete Files to complete the action.Delete Files

4. Check for updates

  1. Press the Windows key, type bluestacks and click Open.
  2. Click the Settings menu.HD-Player_Select Settings - BlueStacks error code 2004
  3. Go to the About option from the left pane.
  4. Next, click the Check for updates button. If you see any update, download & install it by following the on-screen instructions.HD-PlayerCheck for updates

5. Update the graphics driver

  1. Press Windows + R to open the Run dialog box.Device Manager Run command
  2. Type devmgmt.msc and click OK to open the Device Manager app.
  3. Go to Display adapters and click it to expand.
  4. Right-click the driver and select Update driver.Graphics Driver update -Update driver 2 -pBlueStacks Error Code 2004
  5. Click Search automatically for drivers.Update driver 2 -BlueStacks Error Code 2004
  6. Follow the onscreen instructions to complete the process.

Using the updated version of the graphics driver and BlueStacks app can help you fix issues like BlueStacks not opening; read this guide to learn more about it.

6. Run SFC & DISM scans

  1. Press the Windows key, type cmd and click Run as administrator.CMD elevated -BlueStacks Error Code 2004
  2. Type the following command to replace the corrupted files and press Enter: sfc / scannowSFCSCANNOW CMD
  3. Wait for the command to be executed, then copy & paste the following command and hit Enter: Dism /Online /Cleanup-Image /RestoreHealthRestore health
  4. Restart your computer to save the changes.

7. Reinstall the app (Last resort)

  1. Press Windows + I to open the Settings app.
  2. Go to Apps, then select Installed apps.Apps - Installed apps BlueStacks Error Code 2004
  3. Locate BlueStacks, click the three dots icon, and select Uninstall.Uninstall the app
  4. Click Uninstall again to confirm.Confirm uninstall
  5. Now press Windows + E to open the Windows File Explorer window.
  6. Navigate to the following paths one by one:
    • C:\Program Files (x86)\BlueStacks
      C:\ProgramData\BlueStacks
      C:\ProgramData\BlueStacks\Setup
  7. Press Ctrl + A to select all the content in the folder and click the Delete icon.

Deleting the leftover files is always recommended to ensure the app in question is completely uninstalled, and it can also prevent issues like BlueStacks is already installed error.

Restart your computer and follow these steps to reinstall BlueStacks:

  1. Go to the official website of BlueStacks and click Download Bluestacks 10.DOwnloAD bLUESTACKS - BlueStacks Error Code 2004
  2. Double-click the installation file and click Install now.BlueStacksInstaller_iNSTALL NOW
  3. Follow the on-screen instructions to complete the installation process, then check if you see the same error.

In case you face any issues while installing the BlueStacks app on your Windows 11 PC, we suggest you check out this guide.

If none of the fixes worked for you, you must contact the BlueStacks customer support team and explain to them the issue & the fixes you tried for further assistance.

As the error code 2004 can appear due to low disk space or an outdated app, you must ensure you have enough space in the system drive and Bluestacks app is updated to the latest version.

Also, make sure you check if the app is blocked by Windows Firewall; read this guide to learn about it in detail.

If you have any questions or suggestions about the subject, feel free to mention them in the comments section below.

5 Best Animal Crossing PC Mods to Get For Your Emulator

If you have a Switch emulator on your PC, it is easy to mod your favorite games, and today we’re going to show you the best Animal Crossing PC mods that you can install.

These mods bring various quality-of-life improvements, new items, and features, so it’s no wonder that users want to install them. To learn more, keep on reading.

Can you mod Animal Crossing on PC?

Yes, the game can be modded easily on a PC as long as you have the right emulator and a PC that can emulate the game.

What are the best Animal Crossing PC mods?

Increased Items stack – Carry more items

When it comes to items, there’s a limit on how many items you can carry at a given time. When it comes to stacks, you can have your item stacks of 10, 30, or 50. This mod changes that and it increases the stack size to 99 for all items.

This allows you to carry more items while exploring, and it makes the game more enjoyable since there’s less backtracking and inventory management.

The mod also allows you to eat or trade insects, fish, or seafood, which might come in handy to some users. In addition, with this mod, you can also store DIY items, trees, and bushes in the house.

Overall, this is a great mod that will improve the quality of life while playing, so be sure to download it.

Other great features:

  • Increases the stack size to 99.
  • Allows you to eat or trade fish, insects, and seafood.
  • Ability to store DIY items, trees, and bushes inside the house.

⇒ Get Increased Items stack

Tutorial Skip Mod – Start a new game instantly

If you’re already familiar with the game mechanics and you just want to get back to the game, then this Tutorial Skip Mod is just what you need. With it, you can bypass most of the introductory sequence.

It takes less than 3 minutes to start a new game since the intro video is removed as well as certain dialogs and crafting tutorials.

It’s important to mention that this mod unlocks the progression features, including the 40-item inventory, all Nook Phone Apps, all terraforming abilities, Home Designer DLC mode, and all DLC customization abilities.

Overall, it’s a great mod for veterans who want to start a new game quickly, so if you fall into that category, be sure to give this mod a try.

Other great features:

  • Lets you start a new game more quickly.
  • It takes less than 3 minutes to start a game.
  • Removes intro videos, dialogs, and crafting tutorials.
  • Unlocks various progression features.

⇒ Get Tutorial Skip Mod

Mystery Tour Island+ – Better chance to visit all islands

The game has several mystic islands that you can visit, and each island has its unique features. However, you access these islands randomly, and you have a higher chance of visiting certain islands.

This mod tries to fix that issue and it adjusts how the system works by giving you more equal chance to visit all islands. On top of that, it also brings some new islands, including Rare Flower Islands, Big Fish Islands, and May Day Tour Island.

Lastly, the mod enables one unreleased island and it adds two new island variations. If you’re looking for a mod that is designed to make this content more accessible, then this is the mod for you.

Other great features:

  • Gives you an equal chance to visit all islands.
  • Includes new islands.
  • Adds one unreleased island.
  • Comes with two new island variations.

⇒ Get Mystery Tour Island+

No more NMTs – No more grinding for NMTs

If you’re a fan of Mystery Island, you know that it requires NMTs to access, and obtaining them can be tedious for players who just want to enjoy the game.

With this mod, you won’t ever need to buy NMTs anymore and you can visit the Mystery Island any time you want. When you come to talk to Orville, he will react as if you have the ticket and it will let you through.

This is a small mod, but it’s a welcome improvement especially if you don’t want to grind NMTs, and you just want to explore and enjoy. If that’s the case, go ahead and download this mod.

Other great features:

  • Gives you an unlimited number of NMTs
  • Lets you enjoy the endgame without any hassle or grinding.

⇒ Get No more NMTs

Unbreakable (golden) Tools – Make tools indestructible

Are you tired of your tools breaking in the game? Well, this mode addresses this issue and it allows you to keep using your tools indefinitely.

The developer of this mode intended for the golden tools to be indestructible, however, you can make any tool type unbreakable. Alternatively, you can set the game so that only flimsy tools can break.

This is a useful mod, but it might change how the game plays by removing the tool’s durability. If you’re tired of constantly having to replace your tools, be sure to install this mod.

Other great features:

  • Makes golden tools indestructible.
  • It can make only flimsy tools breakable.
  • Ability to make all tools unbreakable.

⇒ Get Unbreakable (golden) Tools

Can modding ACNH get you banned?

Modding the game is against Nintendo’s policy, and if you choose to mod it, your Nintendo account might get banned. To minimize the risks, don’t go online on your account if you choose to modify the game in any way.

We hope that you managed to find the right Animal Crossing New Horizons PC mods for your Switch emulator. We prefer utility mods, and the ones that remove game limitations are the most useful in our opinion.

In case you’re not familiar with emulation, we have a great guide on how to play Animal Crossing on PC without Switch, so don’t miss it.

You might encounter some issues, and many reported that Animal Crossing is not compatible with BlueStacks. This isn’t the only issue, and we covered Animal Crossing not connecting to the Internet in a separate guide, so you should check it out.

What are your favorite mods? Let us know in the comments below!

How to enable automatic optional Windows updates for Windows 10 devices

Just as Windows 11 received the new policy a while ago, which enables optional Windows updates for Windows 11 devices, Windows 10 gets the same treatment, and the road to enable this option is pretty much the same.

The new policy is coming to Windows 10 this month, as part of November 2023’s optional updates to Windows Update for business customers.

Just as with any other optional Windows updates, these updates include non-security features that are not mandatory for Windows 10 devices, but they could improve the experience of using Windows 10. The new policy includes 3 choices for optional Windows 10 updates.

Business customers can go with:

  • Automatically receive optional updates (including CFRs). Select this option for devices to get the latest optional non-security updates, including gradual feature rollouts. There is no change to feature update offering.
  • Automatically receive optional updates. Select this option for devices to only get the latest optional non-security updates. They won’t automatically receive gradual feature rollouts. There is no change to feature update offering.
  • Users can select what optional updates to receive. Select this option to allow users to set their own preferences with respect to optional non-security updates. There is no change to feature update offering.

Users can choose one of the three, that best suits their needs. Below, you’ll find a small guide on how to enable optional updates.

Here’s how to enable automatic optional updates in Windows 10

  1. Press the Windows key + R to open to Run command.
  2. Type in gpedit.msc and then click OK, or press Enter.
  3. Here, you should take the following path: Computer Configuration > Administrative Templates > Windows Components > Windows Update > Manage updates offered from Windows Update. It should look like this.enable optional updates windows 11
  4. Open the new Enable Optional Updates policy, select the Enabled toggle, and select the Automatically receive optional updates (including CFRs). Then click on Apply and then OK.

As you can see, we’ve chosen the option to automatically receive optional updates, but for greater control over these kinds of updates, you can also select the Users can select which optional updates to receive option.

Windows will then present you with a list displaying the optional updates, which you can choose from.

OpenAI is in danger, as more than 500 employees threaten to quit unless Sam Altman comes back

The tech world has been taken by surprise over the last few days, as OpenAI’s CEO, Sam Altman, was fired by the company’s board, just a few weeks after the company’s first-ever OpenAI Dev Days event.

The announcement, made on November 17th, sees OpenAI wanting to transition to a new leadership, after the board decided Altman was entirely candid with them in his position, concluding that they no longer trust him to lead OpenAI, according to the company’s press release.

Mr. Altman’s departure follows a deliberative review process by the board, which concluded that he was not consistently candid in his communications with the board, hindering its ability to exercise its responsibilities. The board no longer has confidence in his ability to continue leading OpenAI.

OpenAI

OpenAI’s CTO, Mira Murati was then appointed as the new interim CEO, following Altman’s departure. Altman, on the other hand, posted on X (formerly known as Twitter), saying that he was grateful to work with talented people, and would let the world know what’s next.

i loved my time at openai. it was transformative for me personally, and hopefully the world a little bit. most of all i loved working with such talented people. will have more to say about what’s next later.

Sam Altman

However, it didn’t take long for Microsoft to step in, as the Redmond-based tech giant announced that it is hiring Altman to lead a new AI department within the company, according to Microsoft’s CEO, Satya Nadella.

And we’re extremely excited to share the news that Sam Altman and Greg Brockman, together with colleagues, will be joining Microsoft to lead a new advanced AI research team. We look forward to moving quickly to provide them with the resources needed for their success.

Satya Nadella, Microsoft

Hundreds of employees threaten to quit OpenAI unless Sam Altman comes back

As Altman has already found a new place in Microsoft to continue working on AI development, his former colleagues back at OpenAI are now threatening to leave the company if the board is not changed and Altman doesn’t come back as CEO.

In a letter published by Wired, the employees are suggesting they may quit and join Altman’s new venture at Microsoft, in a move that would leave OpenAI in a precarious state.

Let’s not forget that OpenAI is the world’s leading AI company, and its product, ChatGPT, has gone on to become the most popular AI tool in less than a year since it was launched. While the press release for Altman’s departure does not reveal any information on the reasoning behind the firing, other than a lack of trust, Microsoft has been hit by the news, with the company’s stock price being impacted.

Over the weekend, a suite of very volatile decisions followed: OpenAI reconsidered its decision and wanted Altman back (which makes us believe Microsoft intervened), however, Altman was later announced to have been hired by the Redmond-based tech giant. The reason: well, AI development, of course, but also to get the stock price back on track. And it worked, according to a new report by The New York Times.

OpenAI in danger?

The new letter signed by more than 500 OpenAI employees mentions the possibility of these employees resigning and joining Altman’s new division at Microsoft. The Redmond-based tech giant might get its own internal OpenAI, which could seriously threaten the position of OpenAI on the market.

If we’re taking a closer look, it all makes sense: Microsoft has been at the forefront of AI ever since the concept got popular, and the company has been releasing lots of AI features to its products, including its now famous Copilot, which was released on Windows 11 and Windows 10 recently.sam altman OpenAI

It’s still very early to conclude the fate of OpenAI, as Sam Altman might return as its CEO once again, indeed. A new board? Less likely. OpenAI in danger? Well, it could be. Microsoft still wants to honor its partnership with the company, with Satya Nadella saying that the Redmond-based giant is committed to working together to advance AI development.

We remain committed to our partnership with OpenAI and have confidence in our product roadmap, our ability to continue to innovate with everything we announced at Microsoft Ignite, and in continuing to support our customers and partners. We look forward to getting to know Emmett Shear and OAI’s new leadership team and working with them.

Satya Nadella, Microsoft

We’ll have to see what happens, but either way, it won’t end well for OpenAI, unless the company makes decisions everyone agrees upon.

Here’s the letter, per Wired.

To the Board of Directors at OpenAI,

OpenAI is the world’s leading AI company. We, the employees of OpenAI, have developed the best models and pushed the field to new frontiers. Our work on AI safety and governance shapes global norms. The products we built are used by millions of people around the world. Until now, the company we work for and cherish has never been in a stronger position.

The process through which you terminated Sam Altman and removed Greg Brockman from the board has jeopardized all of this work and undermined our mission and company. Your conduct has made it clear you did not have the competence to oversee OpenAI.

When we all unexpectedly learned of your decision, the leadership team of OpenAI acted swiftly to stabilize the company. They carefully listened to your concerns and tried to cooperate with you on all grounds. Despite many requests for specific facts for your allegations, you have never provided any written evidence. They also increasingly realized you were not capable of carrying out your duties, and were negotiating in bad faith.

The leadership team suggested that the most stabilizing path forward – the one that would best serve our mission, company, stakeholders, employees and the public – would be for you to resign and put in place a qualified board that could lead the company forward in stability.

Leadership worked with you around the clock to find a mutually agreeable outcome. Yet within two days of your initial decision, you again replaced interim CEO Mira Murati against the best interests of the company. You also informed the leadership team that allowing the company to be destroyed “would be consistent with the mission.”

Your actions have made it obvious that you are incapable of overseeing OpenAI. We are unable to work for or with people that lack competence, judgement and care for our mission and employees. We, the undersigned, may choose to resign from OpenAI and join the newly announced Microsoft subsidiary run by Sam Altman and Greg Brockman. Microsoft has assured us that there are positions for all OpenAI employees at this new subsidiary should we choose to join. We will take this step imminently, unless all current board members resign, and the board appoints two new lead independent directors, such as Bret Taylor and Will Hurd, and reinstates Sam Altman and Greg Brockman.

What do you make of this situation?

Fix: Power Automate Network Error

We can all agree on the convenience automation software brings into our lives, so when the Windows 11 Power Automate app throws the network error, tasks can become a huge burden to bear.

If network issues are anything to go by, they’re quite easy to fix, so keep reading to find out how we dealt with this issue.

What is the Power Automate network error?

It means that Power Automate cannot communicate with the server, which prevents you from saving your changes or accessing it on your web browser. Your antivirus program may be blocking the software from connecting to the Web or some problematic extensions are interfering with the connection.

How do I fix Power Automate’s network error?

Jumpstart your troubleshooting journey with these basic steps:

  • Check for app updates as well as browser updates and ensure your device meets the system requirements to run Power Automate.
  • Verify that you have a working and stable internet connection.
  • Try another browser and restart your device.

1. Check the Service Health

  1. Navigate to your browser and log in to the Microsoft Admin Center.
  2. Go to the About admin roles Service health>Health > Service health.
  3. Look for Power Automate and check any advisories linked to it.

If there are any alerts or issues related to your Power Automate service, you can resolve them by following the instructions given in the alert messages.

Also, ensure to check the integrated service for server status updates. For instance, if you’re using Power Automate with Microsoft Teams, check whether Teams is down.

2. Run the connection troubleshooters

2.1 Run the Network adapter troubleshooter

  1. Hit the Windows key and click on Settings.settings windows 11
  2. Click on System, then select Troubleshoot.Open system troubleshooter
  3. Select Other troubleshooters.other troubleshooters
  4. Locate the Network Adapter troubleshooter and click on the Run button next to it.Network Adapter Run IPv6 No Internet Access

2.2 Run the Internet Connections troubleshooter

  1. Hit the Windows key and click on Settings.settings windows 11
  2. Go to System, and click Troubleshoot.System - Troubleshoot wifi keeps disconnecting windows 11
  3. Now click Other troubleshooters. Other troubleshooters
  4. Locate Internet connections, and click Run. 
  5. Follow the onscreen prompts to complete the process.  

3. Disable the firewall temporarily

  1. Hit the Start menu icon, type Windows Security in the search bar, and click Open.
  2. Click on Firewall & network protection, then select Public network.league of legends black screen after champion select
  3. Locate Microsoft Defender Firewall and toggle the off button.turning off Microsoft Defender Firewall Windows

If the network error disappears with your firewall disabled, you may have to whitelist Power Automate to prevent a repeat of this issue.

4. Delete cache

4.1 System cache

  1. Hit the Windows key, then click on the Settings menu.settings windows 11
  2. From the left window pane, select System, then, from the right window side, navigate to Storage.
  3. Wait for your OS to scan and assess the temporary cache files stored on your system then click on the Temporary files option.
  4. Scroll down, then select the files that you want to delete, and click on the Remove files button.
  5. In the pop-up window, click on Continue to complete the process.
  6. Now, your selected files are deleted.

4.2 Browser cache

  1. For this step, we shall be using the Chrome browser.
  2. Launch your Chrome browser and click the three vertical ellipses in the top right corner.
  3. Select Settings.Settings CHrome
  4. Click on Privacy and security, then select Clear browsing data.
  5. Check Cookies and other site data and Cached images and files, then hit Clear data.Clear data

Cache files may accumulate over time and become corrupted. This can affect how certain apps work, so clearing them will allow you to free up disk space as well as recreate new files.

5. Disable browser extensions

  1. Open your Chrome browser, click the ellipsis near the top right, hover the cursor over Extensions, and then select Manage Extensions from the flyout menu.manage extensions
  2. Disable the toggle for all the extensions listed here.disable
  3. If the Power Automate Network error message disappears, re-enable the extensions one at a time, wait for the error to reappear, and as soon as it does, the extensions enabled last is the problematic one.
  4. Finally, click the Remove button under that extension and confirm the change.remove

Adblockers and tracking extensions topped the list for this network error. Privacy Badger was particularly notorious, so you may want to restrict these add-ons or switch to Incognito mode whenever you’re using Power Automate.

6. Reinstall the Power Automate app

  1. Hit the Windows key and click on Settings.settings windows 11
  2. Select Apps, then click on Apps & features.
  3. Search for the Power Automate app, click on the three ellipses, and select Uninstall.
  4. Confirm uninstallation in the next prompt.
  5. Go to the Microsoft Store, search for the Power Automate app, and click Install.

As essential as Power Automate is in automating tasks in Windows 11, a network error halts any activity. If it were any other, you could probably get away by recreating the workflow in case you made a mistake in your initial setup.

We admit that it is a fairly complex app, so you might need a little in-depth explanation on how to navigate and use Power Automate.

And if you’re having trouble getting past the network error, you can try your luck with other automation software. There are a handful of options out there, and you’re bound to find one that works for you without a lot of technical know-how.

Were you able to get past the network error? Let us know in the comment section below.

Posted in Fix

8 Ways to Fix Amazon Prime Error Code 7136

Nothing worse than selecting a video to watch on Amazon Prime Video, but it fails to play because of the error code 7136. Most of these streaming errors are internet-related, but we’ve covered all bases to ensure you get a solution for this issue.

How do I fix Amazon Prime error code 7136?

Begin with the following basic checkpoints before proceeding with the slightly advanced solutions:

  • Check your internet connection speeds, restart your router, and connect to an Ethernet cable if available.
  • Update your Amazon Prime Video app, log out, then back in and retry.
  • Try on another device, such as your Android phone, Firestick, or Xbox, and see if the issue persists.

1. Force stop Amazon Prime

  1. On your TV, find your Settings.
  2. Go to Apps and select Prime Video.
  3. Select Force stop.

2. Clear app cache

2.1 TV app

  1. On your TV, find your Settings.
  2. Go to Apps and select Prime Video.
  3. Scroll down and hit Clear data and Clear cache.

2.2 Windows app

  1. Hit the Windows key and click on Settings.settings windows 11
  2. Click on Apps on the left pane then Apps & features on the right pane.
  3. Locate the Prime Video app, click on the three vertical ellipses, and select Advanced options.going advanced options microsoft store
  4. Click on Repair.
  5. Go back and click on Reset if the repair option failed.

2.3 Android app

  1. Open the Settings app on your Android device, and select Apps.apps
  2. Choose Prime Video from the list of applications.
  3. Tap on Storage.storage
  4. Tap on Clear data and then on Clear cache.clear cache to fix error code 14 disney plus

3. Check for your device’s firmware updates

3.1 Android TV

  1. For this solution, we shall be using the TCL model.
  2. On your TV, find your Settings.
  3. Go to System.
  4. Click on About then select Software update.
  5. Select Network update and click on System update.
  6. Now click on Check Update. Your system will scan for any available updates.
  7. You’ll either start downloading updates or get a message that your TV is already up to date.

3.2 Android phone

  1. Locate Settings on your device. (We’ll be using the Samsung model for this step).
  2. Go to Software update.
  3. Tap on Download and install.
  4. Wait for the update to finish installing if available, and retry your video.

If you’re on a Windows, Roku, or Xbox device, check for updates and ensure you update your browser if on the web version.

4. Uninstall recent app update

  1. On your TV, find your Settings.
  2. Go to Apps and select Prime Video.
  3. Select Uninstall updates.

If the Amazon Prime Video error code 7136 started after an app update, it is possible that it was a problematic one. Uninstalling the updates will revert to the previous version, where everything was working fine.

5. Turn off your VPN

  1. Press the Windows key and select Settings.settings windows 11
  2. Next, select Network & internet and click on VPN in the right-side menu.
  3. Select the VPN connection you want to disable, click on the drop-down and select Remove.remove VPN

If you’re constantly facing issues with your restricted content, you might need a reliable VPN that can unlock Amazon Prime videos.

6. Disable Proxy 

  1. Press the Start Menu icon and select Settings.settings windows 11
  2. Click on Network & Internet on the left pane, then scroll down and click Proxy on the right pane.Network proxy settings
  3. Select Edit next to Use a proxy server option in the Manual proxy setup section, toggle off Use a proxy server and click on Save.Disable proxy server

7. Reinstall Prime Video

Depending on the device you’re using, uninstall the Amazon Prime Video, then reinstall it. This can help clear any temporary issues causing the error code 7136 or other issues, such as an out-of-sync audio video.

8. Contact Customer service

Should the above steps fail, get in touch with Amazon Prime’s customer service team. You’ll be taken through the general questions before they narrow down to your issue to verify whether it’s isolated or widespread.

If none of these solutions seem to work, consider using the web version. Sometimes, Amazon Prime Video is not working on Roku but works on other devices or platforms.

Even on browsers, sometimes Amazon Prime fails to work on Chrome. Still, no need to tire as they’re a handful of web browsers that work well with Amazon Prime.

That’s all we had for this article, but if you have any other solutions that worked for you but are not mentioned here, don’t hesitate to let us know in the comment section below.

How to Fix the Error Code 502 on Epic Games

If you have encountered a Bad gateway with an error code 502 message on the Epic Games launcher stopping you from downloading a game, this guide can help! We will explain the probable causes and offer WR experts-recommended solutions to unblock the access.

What causes the error code 502?

  • Weak internet connection.
  • Server facing downtime

How can I fix the error code 502 on Epic Games?

Before performing any steps to fix the error code 502 on Epic Games, restart your PC & router to refresh the connection, disable VPN if using one, and check Epic Games server status to see if everything is up and running.

1. Force close the app

  1. Press Ctrl + Shift + Esc to launch Task Manager.
  2. Go to the Processes tab, locate Epic Games Launcher and other related processes, right-click it, and select End task.End task - Fix the Error Code 502 on Epic Games
  3. Now go to the Epic Games Launcher shortcut and double-click it to open.

Closing the app forcefully using Task Manager could be the first step to fixing the game launcher if it is not loading properly; read this guide to learn more.

This problem is quite similar to the Error.com.epicgames.mcpprofilegroup.connection_failure, another connection issue with Epic Games that can be fixed using related methods.

2. Change the Language to System Default

  1. Press the Windows key, type epic games launcher, and click Open.EpicGamesLauncher - Fix the Error Code 502 on Epic Games
  2. Click your Profile icon and select Settings.Settings - Epic Games Launcher
  3. Look for Language and select the System Default option; as my system language is set to English -US, the option looks like System Default- English United States.System Default
  4. Close Epic Games Launcher.
  5. Right-click on the Epic Games Launcher and select Run as administrator.Epic Games Launcher - Run as administrator

3. Disable the Windows Firewall

  1. Press the Windows key, type the control panel, and click Open.Control Panel start menu - Fix the Error Code 502 on Epic Games
  2. Select Category as View by and click System and Security.System and security - Fix the Error Code 502 on Epic Games
  3. Click Windows Defender Firewall.Windows Defender -Fix the Error Code 502 on Epic Games
  4. Select the Turn Windows Defender Firewall on or off option.explorer_Turn off Defender
  5. Place a checkmark next to Turn off Windows Defender Firewall (not recommended) for both Private and Public network settings, and click OK to save the changes.explorer_Turn off Windows Defender

4. Change the DNS server addresses to Google DNS

  1. Press Windows + R to open the Run dialog box.NCPA run command  -Error Code 502 on Epic Games
  2. Type ncpa.cpl and click OK to open the Network Connections window.
  3. Right-click the network connection and select Properties.Network Connection properties - Error Code 502 on Epic Games?
  4. From the Properties window, select Internet Protocol Version 4 (TCP/IP) and click the Properties button.Internet Protocol Version 4(TCPIPv4) Properties
  5. Select the radio button next to the Use the DNS server addresses option.
  6. Now, for the Preferred DNS server, type 8.8.8.8, and the Alternate DNS server, type 8.8.4.4.
  7. Click OK, then OK to confirm the changes.DNS server

5. Unblock the network ports

  1. Press the Windows key, type cmd, and click Run as administrator.CMD elevated - Fix the Error Code 502 on Epic Games
  2. Type the following command and hit Enter: ipconfigcmd_ipconfig - Fix the Error Code 502 on Epic Games
  3. Locate Default Gateway and IPv4 and make a note of these details.
  4. Launch your preferred browser, and type in the Default gateway in the address bar.
  5. Type in the username and password for your router, which is usually admin and password, or you can check the back of the router to be sure.
  6. Go to Services, then Firewall, and click the Port Forwarding page.
  7. Click Enable next to Port Forwarding.chrome_Port Forwarding - Error Code 502 on Epic Games
  8. Next, you need to enter the ports and port ranges below with the correct protocol and local IP of which you took note of – 80 (TCP/UDP), 433 (TCP), 443 (TCP), 3478 (TCP/UDP), 3479 (TCP/UDP), 5060 (TCP/UDP), 5062 (TCP/UDP), 5222 (TCP), 6250 (TCP/UDP), & 12000-65000 (TCP/UDP).
  9. Click Apply Changes.

If Epic Games Launcher throws you other errors, it is best to reinstall it; however, sometimes, you might not be able to uninstall the app; read this guide to learn how to deal with that.

6. Edit the Engine.ini file

  1. Press Windows + R to open the Run dialog box.explorer_localappdata - Fix the Error Code 502 on Epic Games
  2. Type %localappdata% and click OK to open the Local folder in the Appdata directory.
  3. Locate the EpicGamesLauncher folder, go to this path: Saved\Config\Windowsexplorer_save the engine.ini
  4. Locate and double-click the Engine.ini to open the Notepad, and add these lines to the file: Notepad_Engine.ini - Error Code 502 on Epic Games
    [HTTP]
    HttpTimeout=10
    HttpConnectionTimeout=10
    HttpReceiveTimeout=10
    HttpSendTimeout=10

    [Portal.BuildPatch]
    ChunkDownloads=3
    ChunkRetries=20
    RetryTime=0.5
  5. Press Ctrl + S to save the changes.

Remember that to avoid getting connection errors, you must keep your Epic Games Launcher app updated, check if you have a stable internet connection, and make sure the Firewall is not blocking access.

Speaking of Firewall permissions, if you are facing something went wrong while launching Epic Games Launcher, it could be Firewall interference.

Of other like errors, Notion also has an error 502, so do check out our article on how to bypass it.

If you have any questions or suggestions, please feel free to mention them in the comments section below. We’ll be happy to help!

How to Fix The DirectX Error on Modern Warfare 3?

Many users have complained about getting the DirectX error while playing Call of Duty: Modern Warfare, a popular first-person shooter game.

In this guide, we will discuss the probable causes and explain various WR experts-tested solutions to ensure you access the game without interruption.

What causes the DirectX error on MW3?

  • Outdated graphics driver.
  • Corrupted game files or cache files.
  • Unstable internet connection.

How do I fix the DirectX error on Modern Warfare 3?

Before we go to the advanced fixes to resolve the DirectX error on MW3, here are a few preliminary checks you should do:

  • Restart your computer & router to refresh the connection.
  • If using a PC, check the cabinet to ensure the GPU is properly seated.
  • Make sure your Windows OS is updated to the latest version.

1. Update the DirectX tool

  1. Press Windows + R to open the Run window.explorer_DXDIAG - directx error mw3
  2. Type dxdiag and click OK to open the DirectX Diagnostic Tool.
  3. Go to the System tab and locate the DirectX Version; it should be the latest one, i.e., DirectX12.dxdiag_check the version
  4. If not, download DirectX and double-click the installation file to install the updated version.

2. Verify the integrity of game files

  1. Press the Windows key, type steam, and click Open.Steam Open -directx error mw3
  2. Go to Library, locate the game, right-click it, and choose Properties.lIBRARY - pROPERTIES
  3. Click the Installed files option from the left pane, and click the Verify integrity of game files.steamwebhelper_Verify integrity of game files
  4. Once done, the files would be repaired if found corrupted.

3. Update the driver

  1. Press Windows + R to open the Run dialog box.explorer_DXDIAG - directx error mw3
  2. Type dxdiag and click OK to open the DirectX Diagnostic Tool.
  3. Go to the Display tab; under Device, you will see the graphics driver name and manufacturer.dxdiag_Device -  directx error mw3
  4. Visit the manufacturer’s website; it could be Intel, Nvidia, or AMD, and go to the driver download page.
  5. Locate the graphics card driver’s latest version and click Download.chrome_Download the driver
  6. Double-click the executable file and follow the on-screen instructions to install the latest driver.
  7. Restart your computer to let the changes take effect.

Updating your device drivers can help prevent other issues while playing Call of Duty, such as mouse lag; read this guide to learn more.

Updating your drivers can be done much more easily by using dedicated software, such as Outbyte Driver Updater. This tool allows you to scan and replace any broken or outdated driver within just a few minutes.

⇒ Get Outbyte Driver Updater

4. Edit a registry entry

  1. Press Windows + R to open the Run window.Regedit RUN COMMAND (2) - directx error mw3
  2. Type regedit and click OK to open the Registry Editor.
  3. Go to File, then click Export. Save the .reg file to an accessible location on your computer, preferably on the Desktop.fILE - EXPORT
  4. Navigate to this path: Computer\HKEY_CLASSES_ROOT\PROTOCOLS\Filter\text/xml
  5. Right-click the text/xml from the left pane and select Delete from the context menu.Delete TEXTXML - directx error mw3
  6. Click OK to confirm the action.
  7. Close Registry Editor and reboot your computer to save the changes.

5. Modify the graphics preferences

  1. Press Windows + I to open the Settings app.
  2. Go to System, then click Display.System - Display - directx error mw3
  3. Next, click Graphics.Graphics
  4. Locate the game from the list, click it, then select Options.Click Options
  5. Click the radio button next to High Performance, then click Save.High Performance

6. Reset the in-game settings

  1. Press Windows + E to open the File Explorer window.
  2. Go to Documents, locate, and double-click the Call of Duty folder to open it.Delete the folder - directx error mw3
  3. Next, locate the Players folder, select it, and click the Delete icon to remove it.

7. Run SFC & DISM scans

  1. Press the Windows key, type cmd in the search bar, and click Run as administrator.CMD elevated -directx error mw3
  2. Type the following command to repair the corrupted files on Windows, and hit Enter:sfc / scannowSFCSCANNOW CMD
  3. Wait for the process to complete, then copy & paste the following command and press Enter:Dism /Online /Cleanup-Image /RestoreHealthRestore health
  4. Restart your computer to let the changes take effect.

8. Disable the Steam overlay

  1. Press the Windows key, type steam, and click Open.Steam Open -directx error mw3
  2. Click Steam from the top-left corner and select Settings from the drop-down menu.Settings - Steam - directx error mw3
  3. Under Steam Settings, go to In Game, toggle off the switch next to Enable the Steam Overlay while in-game.steamwebhelper_In gsme - Display overlay

You can also try disabling the overlay of Steam, Battle.net, or Nvidia to fix the DirectX error and others like the Warzone Dev error 5523.

If nothing has worked for you and you face other performance issues on your computer, you need to reinstall Windows to fix the problem.

Remember to avoid any performance issues while playing MW3; ensure you have the recommended DirectX version, the latest graphics driver, the game set to high performance, and your computer shouldn’t have corrupted files.

If Modern Warfare Remastered is not launching for you, check the system requirements and ensure your computer is not overheated and drivers are updated.

Did we miss a step that helped you fix the DirectX error on MW3? Don’t hesitate to mention it in the comments section below. We will happily add it to the list.

How to Fix the PlayStation Error NP-31805-7

If you encounter PlayStation error NP-31805-7 when trying to upload saved data to the cloud, it can leave you frustrated.

In this guide, we will discuss the probable causes and offer expert-recommended fixes to resolve the issue in no time.

What causes the PlayStation Error NP-31805-7?

  • The server is facing downtime.
  • A weak or unstable internet connection.

How can I fix the PlayStation Error NP-31805-7?

Before we go to the advanced fixes to resolve the PSN error NP-31805-7, here are a few preliminary checks you should do:

  • Check the PSN server status; if it is under maintenance or facing downtime, it might also trigger the WS-117178-5 PS5 error.
  • Restart your PlayStation and switch to a wired connection.
  • Delete all the failed upload data notifications.

1. Reset the network connection

  1. Go to Settings from the home screen.
  2. Click System, then select System Software.
  3. Choose Reset Options, and select Restore Default Settings.Reset the network settings - playstation error np-31805-7
  4. You will be prompted to enter the passcode (the default code is 0000 if you haven’t changed it).
  5. Click Restore.

2. Switch to Google DNS

  1. Go to Settings.
  2. Select Network, then click Set up Internet Connection.
  3. Select Wi-Fi, then choose Custom (select the Network and enter its credentials)
  4. Next, set these settings:
    • IP Address Settings – Automatic
    • DHCP Host Name – leave it blank
    • DNS Settings – Manual
  5. Enter the Primary DNS – 8.8.8.8 and Alternate DNS– 8.8.4.4, then click OK.Switch to Googe DNS - PlayStation Error NP-31805-7
  6. Also, choose Automatic for MTU Settings and select Test Internet Connection.

3. Change the WiFi band from Automatic to 5 Gigahertz

  1. Go to Settings.
  2. Select Network.Network -PlayStation Error NP-31805-7
  3. Wait for the initial scan to complete, and click the Options button from the Controller to get the Advanced menu.Options - PS4
  4. Under Wi-Fi frequency bands, choose 5GHz.
  5. Your PSN will scan for Wi-Fi networks again on the 5GHz band; once you see the network listed, select it, enter the credentials, and follow the on-screen instructions to complete the steps.

4. Upload the Save files to Cloud manually

  1. Locate the game’s files that you suspect might be causing PS4 Error NP-31805-7.
  2. Go to the Options button on the controller, from Advanced options, choose the Upload/Download option, and get the saved file list.
  3. Choose every file from the recently saved list and transfer or copy them manually to the Cloud.

Remember that you might be unable to upload your data and get this error if you have a slow internet connection or the PSN server is down.

So, the best way to fix it is using the wired connection, resetting the network, or ensuring the PlayStation server is up and running.

These steps can also help you get rid of the Can’t sign in the PlayStation Network error; we suggest you check out this guide to learn more.

If nothing worked for you, we suggest you contact PSN customer support, explain the issue & fixes tried for further assistance.

In case you want to try out your favorite PSN games on a Windows PC, read this guide to learn the detailed steps.

Did we miss a step that helped you fix the PlayStation error NP-31805-7? Don’t hesitate to mention it in the comments section below. We will happily add it to the list.

Here’s how you can build your AI on your local device with Windows AI Studio

Microsoft made some important announcements at the Microsoft Ignite conference, in Seattle. With a heavy focus on AI, the Redmond-based tech giant announced Microsoft Copilot Studio, which will allow users to create, publish, and similarly monetize their Copilots to OpenAI’s GPTs.

The event also unveiled Microsoft’s first chips, the Microsoft Azure Maia AI Accelerator, and the Microsoft Azure Cobalt CPU, both coming in 2024, and the Azure text-to-speech avatars, which are very useful tools to have, except for the fact that they’re still uncanny.

However, as all the bets are placed on AI, Microsoft also announced the release of the Windows AI Studio, a brand new platform that will allow developers, or any other Windows user, to build their own AI models locally, on a Windows-running device.

Today we are excited to announce Windows AI Studio, a new AI experience to help enterprises and developers jumpstart local AI development and deployment on Windows.

Microsoft

The Windows AI Studio will provide a list of state-of-the-art (SOTA) models including Llama 2-7B, Mistral-7B, Falcon-7B, and Stable Diffusion XL, that will be added to the platform in future updates, so it’s safe to say users will have all they need to build their own AI on a local Windows machine.

How can users build AI models with Windows AI Studio?

Microsoft hasn’t revealed too much just yet, and the Redmond-based tech giant said that the users will get a glimpse of the studio in the following weeks, as a VS Code extension, but the company promises that we’ll be able to build generative AI models ourselves.

Windows AI Studio simplifies generative AI app development by bringing together cutting-edge AI development tools and models from Azure AI Studio and other catalogs like Hugging Face, enabling developers to fine-tune, customize and deploy state-of-the-art small language models, or SLMs, for local use in their Windows apps.

Microsoft

The company also presented a roadmap for developing AI models on Windows AI Studio:

  1. Windows AI Studio: AI Studio will be extended to Windows through VS Code
  2. Model Selection: Curated list of models coming from HuggingFace and Azure
  3. Fine-tuning: Utilize QLoRA through Olive to generate a quantized model with low-rank adapters.
  4. Model evaluation: Model-validation for the fine-tune task.
  5. Model optimization: Onyx conversion and post-finetune optimization through Olive.
  6. Model integration: Deploy into application for inference through ORT.

Here’s how the Windows AI Studio looks as a VS extension:

It’s worth mentioning that Windows AI Studio might not be a friendly platform, as this new experience is aimed at IT developers who are passionate about AI.

So, if you’re not into software development, you should try the new Microsoft Copilot Studio instead, which lets you build personalized Copilots using natural language.

How to Fix The Formula Parse Error On Google Sheets

If you are stuck with the Formula parse error while working on a workbook in Google Sheets, this guide can help!

We will explore the meaning of this error and offer different ways to avoid or fix this generic error message in no time.

What does the Formula parse error mean?

The Formula parse error occurs when Google Sheets cannot fulfill the formula request, returning an error message. It could happen due to:

  • Typos or mathematical mistakes.
  • Incorrect or incomplete syntax or unexpected value type

How can I fix the common Formula parse error in Google Sheets?

1. #ERROR! – The entry doesn’t make sense

#ERROR! - The entry doesn't make sense - Formula Parse error

The #ERROR! message means Google Sheets can’t interpret the formula as it doesn’t make sense; check the red triangle in the right-hand corner of the cell to get more information.

To fix it, check these things:

  1. Check the cell that contains your formula for important operators between cell references, parameters, or values, like commas or quotation marks.
  2. Ensure the number of opening brackets matches the closing brackets numbers.
  3. Remove the currency sign from the formula.

Also, when you start typing the formula, Google Sheets suggests the correct one, and you get to see the variable you need and how the formula will work, so use it instead of typing.

2. #REF! error – The reference doesn’t exist

#REF! error - The reference doesn't exist - Forumla Parse error

Google Sheets throws you the #REF! error when a reference doesn’t exist or a sheet that contains it is deleted.

First, check the formula for all the references to ensure you have selected the correct ones. If not, replace all the invalid ones.

However, if a reference is missing from the sheet, you can review the previous versions of a file in Google Sheets for reference; you can launch the older version to check if removing the reference was the last action you performed.

If that’s the case, you can press Ctrl + Z to reverse the action. Alternatively, you can replace the previous iterations of the file with the current one.

3. #N/A error – The item was not found

  #N/A error - The item was not found - Forumla Parse error Google Sheets

If a formula doesn’t find what it looks for, Google Sheets throws you a #N/A error. For example, if you are using the VLOOKUP/HLOOKUP function to search for a value in the table, and it doesn’t exist in the table, you will get the error.

To fix it, check these things:

  1. Check the red triangle in the cell, indicating the error, to understand the cause of the error.
  2. Once you have determined the issue, whether it is the wrong spelling or missing value, make the changes until you get rid of the problem.

4. #NAME? error – Applying a label incorrectly

#NAME? error - Applying a label incorrectly

Google Sheets displays this error if you have used an incorrect spelling or invalid name in a formula. For example, if you have a category with the name Due Dates but used Due Date in the formula, you will get the error.

To fix it, follow these steps:

  1. Click the red triangle on the cell that displays the error to get additional information.
  2. In case there is a word misspelled, correct the spelling. However, if that’s not the case, go to the formula’s section with the word.
  3. Add or remove quotes around the word and check if the issue persists.

In case you are facing issues with #NAME! error on Microsoft Excel, there could be many things to check; read this guide to learn about it!

5. #DIV/0! error – You are trying to divide by zero

#DIV/0! error - You are trying to divide by zero

#DIV/0! error appears when you try to divide a value by zero. If you have done it mistakenly, you can remove the zero from the denominator.

However, if a formula applied to the sheet is the culprit, use the IF operator to tell the operation to perform division only if the number is larger than 0.

You can also get this error while using the Average formula, so to fix it, check the range selected and make the changes accordingly.

6. #NUM! error – The number is too large to display

#NUM! error - The number is too large to display  Forumla Parse error Google Sheets

If you enter invalid numeric values in a formula or have a result that has a value that is beyond the capability of Google Sheets to calculate or display, you see #NUM! error.

To fix it, double-check the calculations to ensure you have not included negative integers or invalid values in the formula.

7. #VALUE! error – The invalid item type

#VALUE! error - The invalid item type

Google Sheets throws you the #VALUE error if the formula gets the wrong data type as an input or you have spaces in empty cells.

To fix it, follow these steps:

  1. Click the red triangle on the cell that displays the error to get additional info.
  2. Once you have figured it out, go to the cell with the formula, check which parameter is causing the issue, and change the data type to the relevant one.

If you are stuck with the #VALUE! error on Microsoft Excel, we have a great guide with tips that might interest you.

Tips to avoid the Formula parse error in Google Sheets

  • Review your formulas for typos and missing commas, brackets, or misspelled words or functions.
  • Function in Google Sheets are case-sensitive, so use them as they are.
  • Make sure you have opened and closed all the parenthesis or brackets in the formula.
  • Check the number and order of arguments for every function you use, as each function has a specific requirement for the number & type of arguments.
  • If you are working with text or strings, they should also be enclosed within the quotation marks.
  • Use the IFError function to deal with potential issues in the formula, or use the function wizard to get help on building formulas as you go.
  • Ensure you put in the correct data type, as some formulas take numerical value, while others take data string or text value to work.

Keep these little tips in mind and keep the wrong syntax and cell references to disrupt your entire sheet on Google Sheets.

If you often work with graphs and want the objective representation of your data to observe any differences in measurements, you must add error bars to the sheet; read this guide to know how!

Did our post help you fix the problem? Feel free to mention your experience, or you can ask questions or leave your suggestions in the comments section below.

Fix: Viber Error System Temporary Failure

Any app can suffer from system glitches, but when it’s a communication app widely used like Viber, and you get a system temporary failure, you’ll need to address it immediately.

As always, WindowsReport experts were able to get to the root of the problem and present you our findings below.

How do I fix the Viber error system temporary failure?

Kickstart your troubleshooting with these preliminary steps:

  • Check the Viber server status for any downtime or maintenance schedules.
  • Close down all background programs and processes, update the Viber app and your OS then relaunch it.
  • Try accessing Viber on web and see if the issue persists.

1. Run the Windows Store Apps troubleshooter

  1. Hit the Windows key and click on Settings.settings windows 11
  2. Click on System and select Troubleshoot.Open system troubleshooter
  3. Navigate to Other troubleshooters.other troubleshooters
  4. Click the Run option for the Windows Store Apps troubleshooter.clicking run windows store apps troubleshooter

2. Delete app cache

2.1 Windows app

  1. Hit the Windows key and click on Settings.settings windows 11
  2. Click on Apps on the left pane then Apps & features on the right pane.
  3. Locate the Viber app, click on the three vertical ellipses, and select Advanced options.going advanced options microsoft store
  4. Click on Repair.
  5. Go back and click on Reset if the repair option failed.

2.2 Android app

  1. Open the Settings app on your Android device, and select Apps.apps
  2. Choose Viber from the list of applications.
  3. Tap on Storage.storage
  4. Tap on Clear data and then on Clear cache.clear cache to fix error code 14 disney plus
  5. Open the Viber app again and check for improvements.

While built-up cache can be helpful in maintaining a database, over time, it can get corrupted. This in turn can lead to Viber not sending messages.

3. Reinstall Viber

3.1 Android app

  1. Navigate to your phone, and locate Viber.
  2. Long press and select Uninstall.
  3. Go to Google Play Store and Install it again.

3.2 Windows app

  1. Hit the Windows key, type Control Panel in the search bar, and click Open. control-panel-search fallout new vegas runtime error
  2. Navigate to Uninstall a program under Programs.going uninstall program control panel
  3. Locate Viber, click Uninstall at the top of the menu, and then press OK.
  4. Restart your computer, then go to the Viber download page to install the latest version available for your computer.

Problems with Viber not installing can be resolved by a fresh install and resolve errors like the system temporary failure.

4. Rollback to a previous app version

Sometimes, app updates can cause problems. If you’ve reinstalled the app but the system temporary failure message is persistent, you can download a previous version that worked well.

You may not find the older version on the official Viber site so you’ll have to rely on third-party sites. If you choose to go with this route, ensure you have a comprehensive antivirus solution as you can’t be 100% sure the app is malware-free.

Remember, Viber can be hacked so you’re better off safe than sorry.

5. Contact support

If you are getting the Viber error system temporary failure message and you have already tried to restart your device, then there is nothing else you can do except to wait for the issue to be resolved by the app developers.

Some problems are beyond your control and all you can do is report the issue to the Viber team and wait for feedback.

Still, there’s a handful of other messaging apps similar to Viber that you can try out. You may actually find you like them and make a switch.

That’s all we had for this article but if you have anything else you’d like to share, please leave a comment down below.

Chrome’s Memory Saver Mode gets smarter at discarding tabs

Google introduces a new mode called “Probabilistic Memory Saver Mode” to improve Chrome’s Memory Saver feature. This mode makes intelligent decisions on which tabs to discard and which to keep, thereby reducing the time it takes to reload discarded tabs.
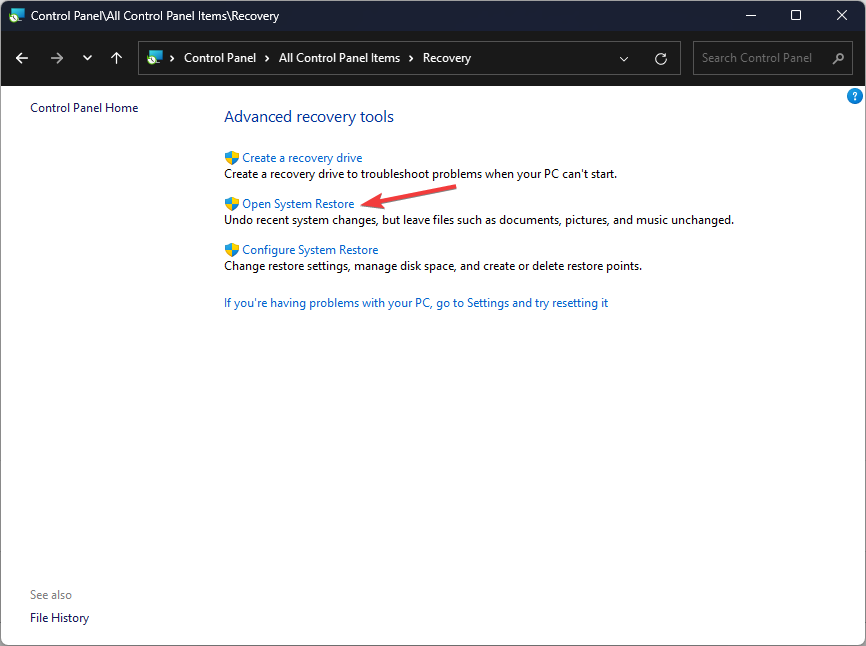
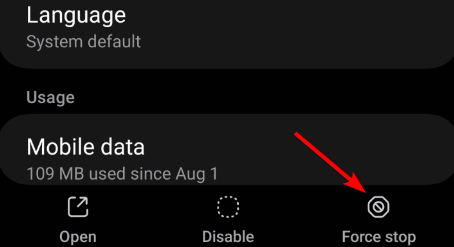
Memory Saver is a feature in Chrome that optimizes memory usage by freeing up memory from background tabs and allocating it to active tabs. Google’s data indicates that users revisit Memory Saver tabs within 24 hours about 60% of the time. Google aims to improve this statistic by making better decisions on which tabs to discard with the Probabilistic mode.

Chrome’s new Probabilistic Memory Saver Mode

The Probabilistic mode uses probability distributions to estimate the likelihood of a tab being revisited based on observations about the tab’s state. It discards tabs that are less likely to be revisited and retains those that are more likely to be revisited.

Google is testing this new feature in Chrome 121. Users can enable the feature from the chrome://flags page. The feature flag has three states:

Enabled: The feature is enabled and works normally.
Enabled Simulative: The feature is enabled but does not discard any tabs. It only simulates the discarding process and logs the results.
Enabled Active: The feature is enabled and discards tabs aggressively. It only keeps the most likely tabs to be revisited.

Development of new components: For Probabilistic mode, there are several other ongoing development efforts to improve Chrome’s Memory Saver feature. These include the development of new components such as TabPageDecorator, TabRevisitTracker, and ProbabilisticMemorySaverPolicy. These components indicate a focus on smarter tab management, especially in terms of deciding which tabs to discard and when.

Enahnced tracking and estimation: There’s also an enhanced tracking and estimation system in place, with the implementation of components like TabRevisitTracker and ProactiveDiscardEvaluator. These components suggest an approach to more accurately track user tab usage patterns and predict tab revisits.

Testing and refinement: Various commits indicate ongoing testing and refinement, such as adjustments to the time histograms and additions like TabConnectednessDecorator. The introduction of flag indicates progress towards user-end testing and potential future integration into mainstream Chrome versions.

In summary, Chrome is focusing on using probability-based methods to manage tabs, which is a complex but effective way to optimize memory. The updates show major progress in how Chrome can save memory by smartly deciding which tabs to discard, based on user habits and probability calculations.

Do you use the Memory Saver?Have you found it useful? Let us know your thoughts in the comments below.