Seeing The action couldn’t be completed Skype error? Fix it

Skype for Business offers excellent collaboration tools for teams to communicate within the organization. However, when sending a message outside the organization using Skype for Business, you may encounter the error Action couldn’t be completed, please try again later.

This is an old error, and there seems to be no definitive fix for the issue. Several users have reported this error in the Microsoft community.

I recently installed Skype for business and I cannot talk to people outside my organization.
When I type a message, I receive: “the action couldn’t be completed. please try again later.” – I’ve tried from OWA and from the application.

In this article, we show you how to troubleshoot the action couldn’t be completed error for Skype for Business.


Steps to fix the action couldn’t be completed, please try again later error

1. Setup admin center for external messages

the action couldn’t be completed, please try again later

  1. If you have the admins rights to Office 365, make sure you have set up Skype for Business for the external message.
  2. Go to Admin Center and select Settings.
  3. Go to Apps and select Skype for Business.
  4. Now check the options for External.
  5. Relaunch Skype and check if the error is resolved.

Turn off External access.

  1. To fix this issue, Microsoft recommends the users to turn off and on External Access in the admin centre.
  2. Login to Skype for Business Admin Center.
  3. Go to Organization > External Communications.
  4. Disable the Extnerla access and wait for 30 minutes.
  5. Again open the external access and turn it on.
  6. According to Microsoft, it takes 24-48 hours for the change of external communication to take effect.

2. Check for certificate issues

the action couldn’t be completed, please try again later

  1. Even though certificates are not used for Skype, it can still impact the services.
  2. Check if the certificate validation is failing due to a certificate having multiple trusted certification paths to root CAs.
  3. As a workaround, you can disable the certificate from the certification path that you don’t want to use.
  4. You can read more about the disabling/deleting certificate at the Microsoft Support site.

3. Delete Skype sign-in info

the action couldn’t be completed, please try again later

  1. If the issue persists, try deleting sing-in info from your Skype for Business app.
  2. Launch Skype for Business app on your computer.
  3. On the login screen, click on the “Delete my sign-in info” link.
  4. This will delete all the information related to Skype for Business from your computer.
  5. Relaunch Skype for Business and login with your credentials.

4. Install pending updates

the action couldn’t be completed, please try again later

  1. If this issue has affected all the Skype for Business users, it is possible that Microsoft may release a hotfix via updates.
  2. Click on Start and select Settings.
  3. Go to Updates and Security.
  4. Check if any new updates are available. Download and install the update to fix “the action couldn’t be completed” error.

5. Reinstall Skype for Business

the action couldn’t be completed, please try again later

  1. If the issue persists, try reinstalling Skype for Business.
  2. Press Windows Key + R to open Run.
  3. Type appwiz.cpl click OK.
  4. Select “Skype for Business” and click on Uninstall.
  5. Once uninstalled, restart the computer.
  6. You can download the fresh installer from the official website.

The action couldn’t be completed, please try again later error can occur due to permission issues or corrupt installation.

Follow the steps in the article to fix the action couldn’t be completed, please try again later Skype for Business error.

[wl_navigator]

Is the calling feature disabled on Skype? Fix it in 5 steps

Skype for Business, as well as the standard Skype app, offers voice and video calling features. However, at times the feature may stop working with the calling feature is disabled error.

Multiple users have reported a similar error in the Microsoft community explaining the problem.

Bought office 365 & skype for business package. There is no dial pad when i click on the dial pad icon, if I paste a known overseas number in & choose the handset icon it does nothing, if i choose the calling card i go to a screen that says this feature is disabled contact your support group

If you are also troubled by this issue, here are a couple of troubleshooting to help you fix Skype the calling feature is a disabled error in Windows.


Troubleshoot the calling feature is disabled Skype error

1. Ask Office 365 admin to enable Skype Calling

the calling feature is disabled

  1. To make calls from your Skype for Business app, the Office 365 admin should enable skype calling feature for your account.
  2. If you are the admin, make sure the feature is enabled for your account.
  3. If you are not the admin, contact your Office 365 admin and ask them to enable the feature.
  4. Make sure you have the required license to use the calling feature in Skype for Business.

How to migrate from Skype for Business to Microsoft Teams


2. Run Windows apps troubleshooter

the calling feature is disabled

  1. You can run the Windows apps troubleshooter to fix issues with Microsoft Store apps.
  2. Click on Start and select Settings.
  3. Go to Update and Security.
  4. Click on the Troubleshoot tab.
  5. Scroll down to Windows  Store Apps and click on it.
  6. Click on the “Run the Troubleshooter” button.
  7. Windows troubleshooter will scan the system for any issues and recommend fixes accordingly.
  8. Apply the suggested fixes and check if the calling feature is working again.

3. Update Skype app

the calling feature is disabled

  1. Try updating the Skype app to the latest version to see if that helps.
  2. Open the Microsoft Store and search for Skype.
  3. You will see the Update button if a newer version of the app is available.
  4. Click on Update and install the app.
  5. Restart your computer. Open the Skype app and check for any improvements.

4. Disable Windows Defender firewall

Skype calling disabled

  1. If you haven’t already tried disabling Windows Firewall to check for possible connection blocking.
  2. Click on Start and select Settings.
  3. Go to Updates and Security.
  4. Click on Windows Security.
  5. Scroll down and click on Firewall and network protection.
  6. Click on your currently active network.
  7. Toggle the switch under “Windows Defender Firewall”.
  8. Also, disable any third-party Firewall that is installed/running on your computer.
  9. Relaunch Skype and check if the issue is resolved.
  10. Make sure you enable Firewall again after the calling feature is disabled issue is fixed.

5. Reinstall Skype

Skype calling disabled

  1. If the issue persists, try uninstalling and reinstalling Skype for Windows.
  2. Click on Start and select Settings.
  3. Go to Apps.
  4. Search for Skype and click on it.
  5. Click on Uninstall and confirm the action.

If you are a Skype for Business user, make sure you have the required license to make calls. For the standard version of Skype, follow the steps in this article to fix The calling feature is disabled error.

You can also learn about direct routing on Teams if you ever plan to switch platforms.

[wl_navigator]

Users complain about black screen issues on Windows 10 May Update

Just like all the previous feature updates, Windows 10 black screen problems are present in Windows 10 May 2019 Update as well.

Some of you may encounter this bug shortly after installing the latest OS update. The black screen bug leaves users in a miserable condition with no display, no sound and no icons on their screen.

If you run into a black screen with a cursor or a spinning circle, rest assured, this is a known issue and a fix will be released soon.

Meanwhile, let’s discuss how we can fix the black screen issue today.

Steps to fix black screen problems Windows 10 v1903

There are multiple reasons that can be a potential cause of this issue. The problem can be with a previous update you installed, your graphics card driver, or any internal components.

Microsoft published a complete troubleshooting guide that you can use to fix the black screen bug.

If you are still experiencing the same problem, you can roll back to a previous version.

If you are still thinking about download Windows 10 May 2019 Update, get ready to deal with plenty of issues. We’re sure Microsoft’s engineers are already aware of many of the issues affecting this release.

Keep in mind that you have the option to pause updates for up to 35 days. This is the safest approach as Microsoft will most likely fix all the major bugs affecting the OS in the coming weeks.

All in all, it is safer to stay away from the May 2019 Update until Microsoft has fixed all these issues.

The CPU has been disabled by the guest operating system [EXPERT FIX]

Those of you trying to run a virtual engine in a VMware Workstation sometimes get a The CPU has been disabled by the guest operating system  error. Notable causes of this error include inappropriate configuration of the VT feature (in BIOS), system corruption, incompatible CPU setup, disc configuration issues, and outdated VMware version among others.

The solutions presented below require a little knowledge of working with virtual machines or tinkering with system settings.

How do I fix the CPU has been disabled error?

  1. Reset the virtual machine
  2. Enable virtualization in BIOS
  3. Mask CPU ID
  4. Create another guest engine in VMware Workstation

1. Reset the virtual machine

Not to disregard the system-recommended solution, we’ll be adopting this method as the first solution in this tutorial. The CPU has been disabled by the guest operating system error-message is aptly accompanied by a system-recommended solution, which reads Power off or reset the virtual machine.

Therefore, as the first line of action, try and power off or reset the workstation, and check if it resolves the issue.

If this fails, you can try and run the next troubleshooting technique to fix the error.

2. Enable virtualization in BIOS

  1. On your PC’s startup window, click on the F2 button/BIOS function key (repeatedly) to open BIOS (typically tagged SETUP).
  2. In the BIOS settings window, go to the Security tab.bios advanced options
  3. Select System Security.
  4. Enable Virtual Technology (VTx/VTd).
  5. Apply changes.
  6. Restart computer.

Once this is done, check if the error is fixed in your virtual machine workstation. If it remains unfixed, there is probably another factor(s) in play, in which case, you can try the next solution.

3. Mask CPU ID

  1. Download and install a powerful note editor (like Notepad++) on your PC.
  2. Launch the editor.
  3. Open your VMware workstation and set the VM’s ISO image State to Powered Off.
  4. Select the guest (virtual) engine, locate and click on Edit virtual machine settings.
  5. Navigate to the Hardware pane, locate and select Hard Disk (SCSI).
  6. Copy the Disk file path (at the top of the right-hand pane).
  7. Close the program and launch Windows Explorer (or File Explorer).
  8. Go under the VM’s file location, and check the File name extensions checkbox (Windows 10 only).
  9. On the displayed options, locate and right-click the file with the .vmx extension.
  10. Select Edit (with) Notepad++.
  11. Type the following at the bottom of the code file: cpuid.1.eax = “0000:0000:0000:0001:0000:0110:1010:0101.
  12. Apply changes and exit the program.
  13. Restart PC.

Relaunch your VM workstation and check if the issue is resolved. If not, you can try the next and final solution.

In such a case, the error might be associated with a security function, which disables an unverified/unsupported processor. This is common where the virtual engines are not compatible with each other, especially in their build (architecture). When this happens, with a disabled processor, the ISO image (of the VM) will not be recognized by the system.

masking the CPU identification tag can bypass this irregularity/inadequacy. Unfortunately, the VMware workstation lacks the graphical interface to run the masking procedure.

Nevertheless, reconfiguring the virtual machine‘s code file in a text editor, as shown above, might work.

4. Create another guest engine in VMware Workstation

  1. Launch the workstation; locate and click on Home
  2. On the displayed options, select Create a New Virtual Machine (the first option).
  3. In the next window, click on the Installer disc image file (iso) option, and tap the Browse option under it. This will load the image.
  4. Click Next at the base of the window.
  5. In the next window, fill in your details and click Next.
  6. Under the Virtual Machine window, fill in the boxes as appropriate.
  7. Click Next > Finish.
  8. Restart PC and check if the issue is resolved.

If, after trying the four techniques in this tutorial, the issue remains unsolved, you can as well consider third-party software that will help you out.

Hence, to create a virtual machine easily without spending too much time and effort, simply choose a suitable tool from the best virtual machines for Windows 10.

We hope that you managed to fix the error, though. Tell us which solution worked for you.

How to fix Windows 10 May Update error 0x80200056

Microsoft has a long history of Windows 10 updates and the company is still working to improve their stability. Windows 10 updates often create problems for most of the users.

That is why we decided to start a series of error guides to help our readers fix them as quickly as possible.

Since you’re reading this guide, you must have encountered error 0x80200056 once during the installation of Windows 10. Some Windows 10 users came across this bug while installing Windows 10 May 2019 Update (version 1903).

What causes error 0x80200056?

This error can occur due to a variety of reasons. Microsoft asks its users not to restart their systems during the upgrade process.

However, some users accidentally restart their PCs and this situation can lead to the error 0x80200056. Some conflicting third party software installed on your system can be a potential cause of this bug.

The third-party software often prevents the upgrade. Furthermore, incorrect Date and Time Settings and corrupted/damaged registry files are some other causes that trigger error 0x80200056.

As a matter of fact, all of these issues can trigger 0x80200056 errors that can eventually disrupt the Windows 10 upgrade process.

In this article, we are quickly going to discuss how you can fix Windows 10 error 0x80200056 for good.

Steps to fix Windows 10 error 0x80200056

A common cause of the 0x80200056 error is that you have accidentally restarted your Windows 10 machine while you were upgrading your system.

If that is the case, don’t worry, it is not a major issue. All you need to do is to run the Windows 10 setup again.

However, if the problem still persists, you can move on to the next step.

Run the Windows Update Troubleshooter

Alternatively, you can also resolve this issue with the help of the Windows Update troubleshooter. This solution works for both monthly updates as well as a new OS version.

Did you ever encounter this error? Let us know in the comments section below.

RELATED ARTICLES YOU NEED TO CHECK OUT:

Windows 7 users claim May updates cause severe antivirus issues

The May 2019 Patch Tuesday updates for Windows 7 PCs are not playing well with some third-party antivirus solutions.

We all remember the time when Windows 10 updates messed up third-party antivirus programs. However, the bug is back again to target Windows 7 devices.

Sophos recently released a security alert that warns users about the issues created by KB4499164 and KB4499175. Microsoft rolled out both of these updates on Patch Tuesday.

Users who are running Sophos Central Endpoint Standard/Advanced and Sophos Endpoint Security and Control on Windows Server 2008 R2 or Windows 7 machines are the ones most affected by this problem. 

The UK based security company Sophos explains that:

We have had a few customers reporting that following on from the Microsoft Windows 14th May patches they are experiencing a hang on boot where the machines appear to get stuck on ‘Configuring 30 percent’. 

The company confirmed that it is collaborating with Microsoft to fix the bug. Surprisingly, Microsoft didn’t acknowledge the bug on their KB page.

It seems that two of these updates are causing issues for Avira, Sophos, Avast, and ArcaBit.

Avast users are reporting that the latest round of updates are affecting Windows 7 machines with a free version of Avast antivirus programs. 

It is interesting to see how Microsoft is going to address these security issues. This may turn out to be a major setback for the tech giant who is already dealing with Windows 10 May 2019 Update bugs.

RELATED ARTICLES YOU NEED TO CHECK OUT:

Printer Not Working After Power Outage: How to Fix it

At times when there is a power outage, you might experience printer problems, or it may not be working afterward. If you’ve ever fallen victim to this and are looking for a way out, you just caught a break!

While printer not working is common, users are still perplexed when the printer goes offline after a power outage. The reason, they believe the device is damaged and will need a costly repair. That’s generally not the case. Keep reading to find out!

How do I get my printer to work again?

1. Reset the wireless router or modem

Note icon NOTE
This method is only applicable to printers that are connected via a wireless network.

If your printer is connected to your PC via a wireless connection, a power outage is likely to disrupt the connection and send the printer offline. When this happens, you can try restarting the wireless router by unplugging the cable and then replugging it after a few minutes.

By resetting the router, the network reboots, and your printer should now be back online. If this procedure cannot resolve the issue, you can try the next solution.

2. Reconfigure network settings

Note icon NOTE
This troubleshooting method is exclusive to wireless HP printers.
  1. Locate the control panel of the printer.
  2. On the dashboard, locate and click on Network Setup.
  3. Tap on the Restore Network Settings, and confirm the change.
  4. Print a configuration page and check if the settings have been restored to default and then restart the printer.
  5. Again, open the printer’s Control Panel.
  6. Navigate to the Settings menu.
  7. Click on the Wireless option.wireless to fix printer not working after power outage
  8. In the next window, tap the Wi-Fi Protected Setup option or the Wireless Setup Wizard.
  9. Follow the instructions to finish up the process.

At times, there could be issues with your network settings, which could have been reconfigured without your knowledge. This is especially common if there are multiple users on the printer.

To resolve this, simply restore the network settings back to default and then try reconnecting the printer to your wireless network. Once done, reconnect it to your home/office wireless network, and verify whether the printer is now working after the power outage.

3. Disable SNMP Protocol

  1. Open Control Panel.
    control panel how to fix printer after power outage
  2. Select Devices and Printers.
  3. Locate the printer and right-click on it.
  4. Click on Printer properties.printer properties how to fix printer after power outage
  5. In the next window, click on the Ports.
  6. Click on Configure Port.configure port how to fix printer after power outage
  7. Locate and uncheck the SNMP Status Enabled
  8. Click OK to apply changes.
  9. Exit program.

If you have printer problems after the power outage, perhaps disabling the SNMP protocol will help. Once SNMP is disabled, check whether the printer is back online, and see if it now works normally.

There you go! These are our solutions that can help you fix things when the printer is not working after a power outage.

Also, for a seamless printing experience, download an effective printer management software for Windows.

Feel free to try all of our solutions and let us know in the comment box which solution worked for you.

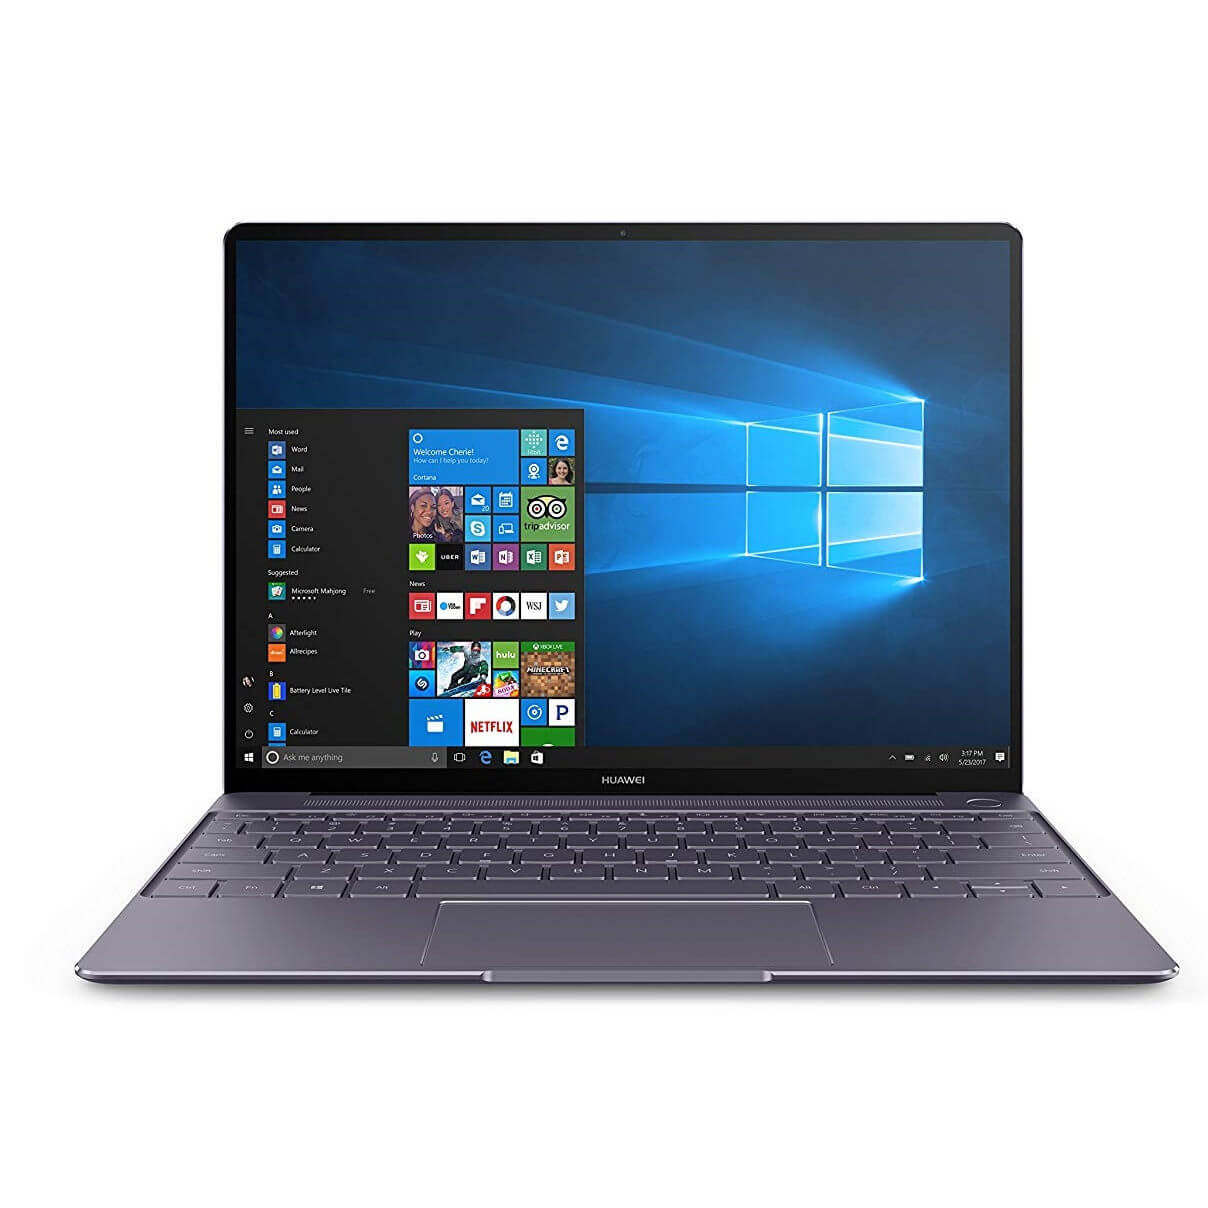
Bad news: Microsoft removes Huawei laptops from its online store

We all know about the current US crackdown on Huawei products. Many big names are now abandoning collaborations with Chinese companies.

Microsoft is not behind in this race and recently removed Huawei laptops from the Microsoft Store.

Many users spotted that the company removed the MateBook X Pro. As a matter of fact, users found no results when they searched for Huawei hardware. Some recent reports suggest that Microsoft has also banned MateBook X Pro from its online store.

Moreover, the tech giant may also ban server solutions from Huawei. Right now, the company is allowed to release software updates to Android smartphones for an extended period of 90-days.

This news was disappointing for the Huawei fans but others seem to be happy about this decision.

Excellent. China and Huawei need to stop meddling and stealing US trade secrets. I’m happy with this development. China has been allowed to get away with this stuff for too long.

Interestingly, a Reddit user came up with the idea of selling Huawei laptops without pre-installed Windows operating system.

However, many users may not be interested in a laptop without an operating system.

Some Reddit users mentioned that there are many open source OS options on the market. Huawei can go with any of them, but the company still faces a ban from hardware manufacturers. 

Windows is not the major problem for Huawei laptop lineup, as there are always open source OS options. The biggest issue for Huawei laptop lineup is the prohibited access to hardware components from intel, AMD, Nvidia etc.

It remains to be seen how Huawei handles this complicated situation.

RELATED ARTICLES YOU NEED TO CHECK OUT:

How to fix common Transport Fever issues

Transport Fever is a railroad­-focused tycoon game that challenges players to build up a thriving transport company. Gamers need to construct stations, airports, harbors and makes money by connecting areas requiring transport services.

The game allows you to experience 150 years of transportation history. As you meet the people’s transport needs and supply industries with freight, you can use the subsequent economic growth to build up a transport empire.

As it happens with every newly launched game, Transport Fever is also affected by many bugs. The good news is that most of these issues can easily be fixed.

Urban Games, Transport Fever’s developer, listed a series of workarounds for the most common game issues that players may encounter.

What can I do if Transport Fever doesn’t run properly on my Windows 10 PC? The quickest fix is to install the latest GPU drivers. In most cases, an old or faulty GPU driver can trigger some issues. If that doesn’t work, check to see if your computer meets the minimum requirements, and then set the dedicated GPU as default.

For more info on how to do that, check the guide below.

Workarounds for common Transport Fever bugs

fix transport fever bugs windows 10


1. Wrong game language

  1. In the Steam client, go to the games library.
  2. Right-click Transport Fever in the list.
  3. Under Properties > select Language tab.
  4. Choose your preferred language.

2. The game crashes at startup or during initialization of a new game

Most likely, this issue can be solved by installing the latest graphics card drivers. Use the links below to install the latest drivers:

-READ ALSO: How to update outdated drivers in Windows 10


3. The game doesn’t work on your laptop

If you are using a laptop with two graphics cards, select the more powerful card as the primary device in the graphics card settings.

This also applies to laptops with integrated and dedicated graphics. Go into your GPU setting and select the dedicated one.


4. You see black textures

This bug may be caused by third-party software. Deactivate any of these programs before starting the game. In addition, on some systems with Intel graphics, the following hotfix has proved to work:

  • Extract the content of this zip file.
  • Overwrite the existing base_config.lua file which is located in this folder: C:Program Files (x86)SteamsteamappscommonTransport Feverresconfig

5. The main menu is not or only partially visible

Press ALT-ENTER to switch from full screen to window mode. The window mode will then display the main menu and you can adjust the settings.


6. The mouse cursor movement is restricted

  1. Close the game > Right click on Transport Fever in the Steam library
  2. Under local files, click “Browse local files” to go to the installation directory.
  3. Right click TransportFever.exe > select Properties.
  4. Under the Compatibility tab, check “Disable display scaling on high DPI settings“.
  5. Under Windows 10, go to System > Screen and set the size of text and apps to 100%.

7. The main menu is gray

This happens when you are signed in to your Steam client, but the internet connection is unavailable. Restore the internet connection or launch Steam in offline mode before starting the game.


8. The message  “OpenGL context creation failed” appears on the screen

This means that your graphics card or driver doesn’t meet the system requirements to run the game (support for OpenGL 3.2 is needed). If your graphics card meets the minimal system requirements, install the latest graphics card drivers and this should solve the issue.


There are still many issues that Urban Games needs to solve in order to offer a smooth gaming experience. Apart from the bugs listed above, Transport Fever gamers also complain about the following issues:

  • the game uses too much RAM. One player reports that the game used 4.7 GB of RAM out of 8 GB. It appears that the longer gamers play, the worse this situation gets.
  • many users complain they’re stuck at 30 FPS.
  • once the map finishes loading, a bright white screen appears.

Have you played Transport Fever? Tell us more about your gaming experience in the comments section below.

[wl_navigator]

Office 2013 Not Working on Windows 10: How to Repair it

Microsoft Office is a fantastic tool, but many reported that Office 2013 is not working on Windows 10. This can be a problem, especially if you purchased the software, and it’s not working properly.

Of course, you can get Office for Windows 11 for free, but nevertheless, it’s essential to fix these issues if you want to use it, and today we’re going to show you how to do it.

Why my Microsoft Office 2013 is not working?

  • Your date or time isn’t correctly set on Windows, and that’s causing issues with Office.
  • The installation might be damaged or corrupted.
  • Office suite might be outdated, which can lead to various problems.
  • Your Office installation might not be properly activated.
  • Add-ins and settings in Office software can cause problems such as this one.

How do I get Office 2013 to work on Windows 10?

1. You can’t find Office applications

1. Open an existing document

  1. Try to find an existing document in the format that you want.
  2. When you find that kind of file, right click on it and select Pin this program to taskbar.

  3. This operation will create a shortcut to that program on the start bar so you can easily start it.

2. Create a new document

  1. Right-click on any empty spot from your desktop.
  2. Move the cursor on the New category and it will open a list of all the document types that can be created. The Microsoft Office programs should be on that list. Choose one of them.
  3. A new file should appear on your desktop. Double-click to open it.
  4. Once the app has opened, right-click on the taskbar and select the Pin this program to taskbar option to create a shortcut of this program on the taskbar.

3. Create a shortcut

  1. Click on Start menu/File Explorer.
  2. Go to the folder where is installed the Office suite.
    For 32-bit Windows: C:\Program Files (x86)\Microsoft Office\root\Office13
    For 64-bit Windows: C:\Program Files\Microsoft Office\root\Office13
  3. In that folder, you will find every program of the Office suite (WINWORD,EXCEL, POWERPNT, ONENOTE, OUTLOOK,MSPUB, or MSACCESS). Right click on the program you were looking for and select Create shortcut.
  4. An error will appear that informs you that Windows cannot create a shortcut in that folder but allows you to create a shortcut on the desktop. Click on the Yes button.
  5. Check if the desktop shortcut exists and works.

2. Cannot print after upgrading to Windows 10

Reinstall the printer

  1. Make sure the printer is connected to your PC and turned on.
  2. If it doesn’t work, maybe you need to install a new driver.
  3. Open the Control Panel and choose Devices and Printers.office 2013 repair on windows 10
  4. Select your printer and click on the Remove device button from the upper menu.
  5. Reinstall your printer. If Windows does not find automatically a new driver you can check on the official site of the printer manufacturer and download the latest driver for your device.

3. Check your system date and time

  1. Click on the date and time from the bottom-right corner of your screen.
  2. Click on the Date and Time.windows 10 fix office 2013
  3. Select Set time automatically or Set time zone automatically. If you cannot set the time zone automatically, you have to select manually the zone where you live. Make sure your local time zone is shown in Time zone.
  4. Try to reactivate the license by clicking on the Reactivate button (if it is on a visible banner) or go to File and then to Account. Lastly, click Activate Product and try to reactivate it manually.

In case your computer clock is behind, we have a special guide that can help you fix it.

How to solve License or product activation errors?

1. Product deactivated

1. Renew your subscription or Subscription expired error
  1. Click the option to activate the license in the error box that appears.
  2. Follow the instructions on the screen.
  3. Once the process is done, Office should start working.
2. Product deactivated error
  1. To renew the subscription for the first time, click on Buy button and follow the steps for subscription renewal.
  2. If you already bought a cd-key for Office 2013, click on the Enter Key button and write your activation code in the dialog box.
  3. To connect your PC to an activated subscription account, click on Sign In button and enter the credentials for the account.

If you decide that you do not like the subscription method, you can always buy a static license for Microsoft Office 2013 that will never expire.

3. Couldn’t Verify Subscription error

Office must be connected to the internet to make the license test once a month. If your computer was not connected to the internet for more than a month, the test could not be done.

All you have to do is establish a connection to the Internet and start one of the Office programs. After that, the error will disappear.

2. Error code 0x80070005:

  1. Open any Office program.
  2. Go to File / Account.
  3. Click on Update Options button (under the Product Information button) and then click on Update Now.

To complete the configuration you must run Office as Administrator. Here is how you do this:

  1. Make sure that all Office programs are closed.
  2. Click on the Start menu button from the lower-left corner of your screen.repair excel 2013 on windows 10
  3. Type Word 2013 (this is just an example, you can type the name of any Office product) in the search box.
  4. Right-click on the Word icon.
  5. Click on the Run as Administrator.
  6. Select Yes to allow Office to run as administrator.
  7. Try to reactivate the license by clicking on the Reactivate button (if it is on a visible banner) or go to File / Account / Activate Product and try to reactivate it manually.

In case nothing happens when you use Run as administrator, we have a special guide that can help you with that.

3. Error code 0x8004FC12

1. Make sure your Windows is up to date
  1. Download this tool from the Microsoft official website.
  2. After downloading, open the installer.
  3. Click on Run to begin the configuration. You need to be an administrator to start this process.
  4. Read the License Terms and Agreement, and if you accept those conditions, click on the Accept button. If you do not accept the terms, the installation cannot continue.
  5. On the What do you want to do? page select Upgrade this PC now and then click on the Next button.
  6. This tool will start downloading and then installing the latest version of Windows 10 with all it’s bug fixes.
  7. After the configuration, reboot your PC to close all the unnecessary processes and try to run any Microsoft Office product again.
2. Add Net Local Group
  1. Open Start menu.
  2. In search box type Command Prompt.
  3. Right click on the Command Prompt icon and select Run as Administrator. This will open the console.how to fix office 2013
  4. Type these commands in this order, and after every command press Enter.
    net localgroup Administrators localservice /add
    fsutil resource setautoreset true C:
    netsh int ip reset resetlog.txt

After you have entered all these commands, reboot your system and try to activate the Office again.

How to fix Outlook 2013 errors?

1. Outlook stuck at Processing and crashes

  1. Press Windows key + R.
  2. Type outlook.exe /safe
  3. Press Enter.
  4. This will open Outlook. Close it and then start it normally.

Many reported that Outlook only starts in the Safe Mode, but that can be easily fixed by using the solutions from this guide.

2. Outlook 2013 Mail does not open in Control Panel

1. Update Microsoft Office
  1. Open any Office program.
  2. Go to File / Account.
  3. Click on the Update Options button (under the Product Information button) and then click on Update Now.

It is possible that the automatic update function to be disabled. To enable this feature, click on the Enable updates button from the Update Options section.

If you cannot update Microsoft Office by the method specified above, you can work around the issue by using one of these solutions.

2. Start Outlook with the Choose Profile dialog box
  1. Make sure that you have no Outlook running process.
  2. Open Run dialog box by pressing the Windows key + R.
  3. Run the following command outlook.exe /profiles
3. Revert Office 2013 Click-to-Run installation to an earlier version
  1. Close all Microsoft Office processes.
  2. You must open the Command Prompt as administrator. To do this, open the Start menu, type cmd in the search box. Right click on the Command Prompt icon and then click on the Run as administrator.solve office 2013 issues on windows 10
  3. In the command Prompt dialog box type the following command:
    For 32-bit Windows version: cd %programfiles%\Microsoft Office 15\Client X86
    For 64-bit Windows version: cd %programfiles%\Microsoft Office 15\Client X64
  4. After that, type OfficeC2RClient.exe /update user updatetoversion=15.0.4823.1004
  5. A repair dialog box will appear. Click on the Online Repair.

  6. Click on the Repair button and then click on Repair.
  7. After this process is complete, you can start Microsoft Outlook.
  8. Click on the File button from the upper-left corner of the screen.
  9. Click on the Office Account.
  10. From the Product Information column, select Update Options and click on the Disable Updates button to keep the suite in this version.

How to solve Word 2013 errors?

1. Numbering lists in Persian, Arabic, Hindi and Hebrew error

1. Numbering for that language is not included
  1. Click on the File menu from the upper-left corner.
  2. Click on the Options category and then click on Advanced to open the advanced options.
  3. Under the Show document content, next to Numeral, select one of those 4 languages and your problem should disappear.
2. Use a table to improvise a numbered list
  1. If you have to work with mixed content (Arabic and Hindi) you can create a two column table.
  2. On the first column type the left-to-right Arabic numbers and on the second column type the content for every point of the list.
  3. It is a backup method that you should not use in official documents.

2. Word 2013 crashes caused by the Office Compatibility Pack

Uninstall Office Compatibility Pack
  1. In the Windows search box, type Control Panel and hit Enter.how to repair office 2013 on windows 10
  2. Click on Add or Remove Programs.
  3. This will open a dialog box with a list of all currently installed programs. From that list select Compatibility Pack for the 2007 Office system and then click on Remove.
  4. A new dialog box will appear where you will be asked if you are sure you want to remove this program from your system. Click on Yes or OK.

How to fix Excel 2013 errors

1. XLA and XLAM files with .XLS are not opening outside the protected view

1. Unblock the access for individual files you know are safe
  1. Right click on the file icon and select Properties.
  2. Open the General tab from the upper menu and click on the Unblock.

  3. Click OK to finish the configuration.

This method will create an exception for that file and you can open it without problems.

2. You can use the existing Trusted Locations of Excel 2013
  1. Click on the File button from the upper-left corner of your screen.
  2. Click on Options / Trust Center / Trust Center Settings.
  3. You will find a category called Trusted Locations and if you click on that category it will open a list with all the predefined trusted locations and with the possibility to Add a new location… .
  4. Click on the Add new location… button and type the path to your file.
  5. Close Microsoft Excel and open your file.

2. This file does not have a program associated with it

Perform a repair
  1. In the Windows search box, type Control Panel and hit Enter.fix excel 2013
  2. In Control Panel, select Programs.repair excel 2013 on windows 10
  3. A dialog box will appear with a list of your computer’s installed programs.
  4. Select the Office product you want to repair from that list and choose.
  5. Choose the Quick Repair option and then choose Repair.

If none of these methods helped you, we strongly recommend you contact the Microsoft Support Department.

If Office 2013 is not working on Windows 10, one of these solutions should surely help you fix it. In case you’re having additional problems, our couldn’t repair Office guide should be able to help you.

Don’t forget to leave any other questions in the comments section below, and we’ll be sure to take a look.

Install KB4499177 if you want to fix icon loading issues

Microsoft 7rolled out a new cumulative update for Windows Server 2016 and Windows 10 version 1607. This recent release bumps the current version of OS to 14393.2999.

Windows 10 cumulative update KB4499177 fixes a bunch of issues introduced by the previous Windows 10 updates.

Notably, Microsoft stopped releasing updates for the Home and Pro versions of Anniversary Update.

Furthermore, Microsoft no longer supports Windows 10 Education, Enterprise, and IoT Enterprise editions. 

Therefore, this release targets those PCs that are a part of LTSC.

KB4499177 major fixes and improvements

The official changelog states KB4499177 brings the following improvements and bug fixes.

Time zone information Update

KB4499177 addresses an issue with time zone information for Morocco and Palestinian Authority.

Microsoft Office bug fixed

Microsoft released KB4499177 to fix an issue with Microsoft Office and some other apps. Previously, these applications used to prompt for a password due to the change in user account password.

 FTP control sessions issues resolved

Microsoft updated the wininet.dll file to resolve File Transfer Protocol control sessions issues. Some previous builds introduced a bug that was believed to recreate FTP control sessions.

New icon files loading issues

Finally, Windows 10 users reported that their OS is experiencing problems while loading some icon files with bad format. Microsoft fixed this issue in KB4499177.

KB4499177 known issues

Just like all other releases, KB4499177 brings some issues known issues as well. Microsoft acknowledged the fact that the cluster service may fail to launch. The bug appears when more than 14 characters are set as the Minimum Password Length.

Moreover, a weird bug may hit devices powered by Windows Server 2016 with Hyper-V enabled. The issue occurs in the case when you reboot your system after upgrading your system.

In this case, you may encounter error 0xC0210000 and enter Bitlocker recovery mode.

RELATED ARTICLES YOU NEED TO CHECK OUT:

Windows 10 Version History

Windows 10 version history is important to mark the evolution of this OS. Let’s look at the list of Windows 10 versions released and then understand the concept behind them.

Windows 10 versions: a brief history

VersionAvailability dateLatest revision dateEnd of service
22H222H2 UpdateOct 18, 2022Oct 10, 2023Oct 14, 2025
21H2November 2021 UpdateNov 16, 2021Oct 10, 2023June 14, 2024
20H2November 2020 UpdateNov 10, 2020May 10, 2022May 9, 2023
2004May 2020 UpdateMay 27, 2020Dec 14, 2021Dec 14, 2021
1909November UpdateNov 12, 2019May 11, 2021May 10, 2022
1903May 2019 UpdateMay 21, 2019December 8, 2020
1809October 2018 UpdateNovember 13, 2018May 12, 2020May 11, 2021
1803April 2018 UpdateApril 30, 2018November 12, 2019November 10, 2020
1709Fall Creators UpdateOctober 17, 2017April 9, 2019April 14, 2020
1703Creators UpdateApril 5, 2017October 9, 2018October 8, 2019
1607Anniversary UpdateAugust 2, 2016April 10, 2018October 13, 2026
1511Threshold 2November 10, 2015October 10, 2017October 10, 2017
1507Threshold 1July 29, 2015May 9, 2017May 9, 2017

How many versions of Windows 10 are there?

Windows 10 has 13 versions or releases and we won’t see any new ones since Microsoft plans to retire it completely in 2025.

If you’re asking how many Windows 10 editions are there, the answer is 5: Home, Pro, Enterprise, Education, and Windows 10 S. You could also consider Windows Phone which later became Windows 10 Mobile.

What is the most recent version of Windows 10?

According to Microsoft, the last and final version of Windows 10 is 22H2, which will reach the end of servicing on October 14, 2025.

Like any other version, Windows 22H2 has its share of bugs but our Windows Report software team has found solutions for all of them.

If you didn’t get it yet, here’s our guide on how to install Windows 10 22H2 using various methods.

What is the best Windows 10 version?

The best Windows 10 version is usually the latest because it introduces new features and fixes a lot of bugs and security issues.

Some would say that the updates also change the experience, the appearance, and some functionalities but most of them proved to be a step forward. The best Windows 10 version is an ongoing topic but as old Windows 10 versions reach the end of support, we need to update the OS to keep it secure.

Will Microsoft end the support for older Windows 10 versions?

Well, of course. Each version has a lifecycle and it is supported by Microsoft for an 18-month period after the release date. It is worth mentioning that this period is available for Windows 10 Home, Pro, and Pro for Workstation editions.

The date for the end of support is different for Windows 10 Enterprise and Education editions.

Also, with Windows 10, there are two release types: feature updates, released twice a year, and quality updates (builds) that offer security and reliability fixes at least once a month.

For a better understanding of Windows 10 version lifecycle, check out this timeline with the availability of each version release.

You can also see the full breakdown on the Windows 10 update history page.

How do I get Windows 10 updates?

  • Local update – Go to Settings > Update & Security and click on the Check for updates button.
  • Use the Update Assistant tool – Go to the Windows 10 download page and click on Update now. You will download Update Assistant which will automatically install all the latest updates for your system.
  • Manual version download – If you’re looking for a specific update or version of Windows 10, head over to Microsoft Update Catalog and search for Windows 10.

Windows 10 can be provided via three servicing channels. This concept allows users to have greater control over which feature updates and quality updates are installed in Windows 10.

These channels are the General Availability Channel, Windows Insider Program for Business, and the Long Term Servicing Channel and for all these, you can use the Windows Server Update Services (WSUS).

Of course, the most important in this list is the General Availability Channel which delivers updates for all the regular Windows 10 users.

Windows Insider Program offers the opportunity to test and provide feedback on various features. With Semi-Annual Channel, users can choose when to deploy updates. Long Term Servicing Channel is designed for specialized devices, such as medical equipment or ATM machines.

Windows 10 Version 1709

Windows 10 Fall Creators Update was finalised in October 2017, six months after Windows 10 version 1703. The end of service was on April 2019. These two releases from 2017, v1703 and v1709, confirmed the biannual cadence for Microsoft that was kept in 2018 and will be kept moving forward.

Latest builds released for Windows 10 version 1709

KB numberVersion (OS Build)Release dateNotes
KB4580328OS Build 16299.2166
October 13, 2020Cumulative update
KB4577041OS Build 16299.2107September 8, 2020Cumulative update
KB4571741OS Build 16299.2045
August 11, 2020Cumulative update
KB4565508OS Build 16299.1992
July 14, 2020Cumulative update
KB4561602OS Build 16299.1932
June 9, 2020Cumulative update
KB4556812OS Build 16299.1868May 12, 2020Cumulative update
KB4550927OS Build 16299.1806April 14, 2020Cumulative update
KB4540681 16299.1747March 10, 2020Cumulative update
KB4537789 16299.1686February 11, 2020Cumulative update
KB4534276 16299.1625January 14, 2020Cumulative update
KB453071416299.1565December 10, 2019Cumulative update
KB4525241 16299.1508November 12, 2019Cumulative update
KB4520006 16299.1481October 15, 2019Cumulative update
KB452000416299.1451October 8, 2019Cumulative update
KB4524150 16299.1421October 3, 2019Cumulative update
KB4516071 16299.1420September 24, 2019Cumulative update
KB452201216299.1392September 23, 2019Cumulative update
KB4516066 16299.1387September 10, 2019Cumulative update
KB4512494 16299.1365August 16, 2019Cumulative update
KB4512516 16299.1331August 13, 2019Cumulative update
KB4507465 16299.1296July 16, 2019Cumulative update
KB4507455 16299.1268July 9, 2019Cumulative update
KB4509477 16299.1239June 26, 2019Cumulative update
KB4503281 16299.1237June 18, 2019Cumulative update
KB4503284 16299.1217June 11, 2019Cumulative update
KB449914716299.1182May 28, 2019Cumulative update
KB450506216299.1150May 19, 2019Fixes uk.gov website issues
KB449917916299.1146May 14, 2019Cumulative update
KB449344016299.1127April 25, 2019Cumulative update
KB449344115254.562April 9, 2019Cumulative update
KB448989016299.1059 March 19, 2019Cumulative update
KB448988616299.1029March 12, 2019Solves the “Error 1309” issue
KB448702116299.1004February 19, 2019Cumulative update
KB448699616299.967February 12, 2019Cumulative update
KB448096716299.936January 15, 2019Cumulative update
KB448097816299.904January 8, 2019Addresses an issue that affects PowerShell
KB448323216299.847December 19, 2018Security update to Internet Explorer
KB447132916299.846December 11, 2018Cumulative update
KB446768116299.820 November 27, 2018Cumulative update
KB446768616299.785November 13, 2018Cumulative update

What is new on Windows 10 Fall Creators Update?

Moreover, the Fall Creators Update brought a lot of new important features, such as the launch of Fluent Design that transformed many interface components.

Other features helped enhancing productivity, including the returning of OneDrive Placeholders.

Also, this was the last version released for Windows 10 Mobile.

Best new features in Windows 10 version 1709

Excepting the aforementioned new features, here are the most notable changes:

  • Ability to pin websites to the taskbar and many other useful features in Microsoft Edge.
  • You can launch  Windows Store apps from startup.
  • Users have more control over the updates, as they now can limit bandwidth.
  • Launch of Windows People Bar that allows you to have your favorite contacts on taskbar.
  • Styluses for navigating through the operating system.
  • Phone can be integrated in Windows 10 with a new “Phone” section in the Settings.
  • Every device with a camera has augumented reality viewer.
  • Protection against ransomware with Windows Defender.
  • SwiftKey with touch keyboard gesture typing.

[wl_faceted_search]

Windows 10 Version 1703

Also named Windows 10 Creators Update and known under the code-name of Redstone 2,  this version of Windows 10 was released in April 2017. The end of service for it was in October 2018. Find out more about Windows 10 version history.

Latest builds in Windows 10 v1703

KB numberVersion (OS Build)Release dateNotes
KB5000812OS Build 15063.2679March 9, 2021Security Updates
KB4601330OS Build 15063.2642February 9, 2021Security Updates
KB4599208OS Build 15063.2614January 12, 2021Security Update
KB4592473OS Build 15063.2584
December 8, 2020Security Update
KB4586782OS Build 15063.2554November 10, 2020Cumulative update
KB4580370OS Build 15063.2525
October 13, 2020Cumulative update
KB4577021OS Build 15063.2500
September 8, 2020Cumulative update
KB4571689 OS Build 15063.2467
August 11, 2020Cumulative update
KB4565499OS Build 15063.2439
July 14, 2020Cumulative update
KB4561605OS Build 15063.2409
June 9, 2020Cumulative update
KB4556804OS Build 15063.2375
May 12, 2020Cumulative update
KB4550939OS Build 15063.2346April 14, 2020Cumulative update
KB4540705 OS Build 15063.2313March 10, 2020Cumulative update
KB4537765 OS Build 15063.2284February 11, 2020Cumulative update
KB4534296 OS Build 15063.2254January 14, 2020Cumulative update
KB453071115063.2224December 10, 2019Cumulative update
KB4525245 15063.2172November 12, 2019Cumulative update
KB4520010 15063.2108October 8, 2019Cumulative update
KB4524151 15063.2079October 3, 2019Cumulative update
KB4516059 15063.2078September 24, 2019Cumulative update
KB4516068 15063.2045September 10, 2019Cumulative update
KB4512507 15063.1988August 13, 2019Cumulative update
KB450745015063.1928July 9, 2019Cumulative update
KB4503279 15063.1868June 11, 2019Cumulative update
KB449916215063.1839May 28, 2019Cumulative update
KB450505515063.1808May 19, 2019Fixes uk.gov website issues
KB449918115063.1805May 14, 2019Cumulative update
KB4502112 15063.1785May 2, 2019Cumulative update
KB449343615063.1784April 25, 2019Cumulative update
KB449347415063.1746April 9, 2019Cumulative update
KB448988815063.1716March 19, 2019Cumulative update
KB448987115063.1689March 12, 2019Fixes “Error 1309”
KB448701115063.1659February 19, 2019Cumulative update
KB448702015063.1631February 12, 2019Cumulative update
KB448095915063.1596January 15, 2019Cumulative update
KB448097315063.1563January 8, 2019Addresses an issue that affects PowerShell
KB448323015063.1508December 19, 2018Security update to Internet Explorer
KB447132715063.1506December 11, 2018Cumulative update
KB446769915063.1478November 27, 2018Cumulative update

Windows 10, version 1703 has reached end of service for all editions. In order to continue receiving security and quality updates, upgrade to the latest version of Windows 10. In case you encounter upgrade issues, check this guide.

Windows 10 Creators Update features

As the name said it, the Creators Update marked the launch of a new content for creators such as 3D modellers and digital artists.

The new apps included in Version 1703 are tools such as Paint 3D and 3D Viewer.

What else Windows 10 version 1703 brings new?

But the features don’t stop here. The desktop functionality was enhanced with the adding of Night Light mode and new Cortana capabilities.

Other notable changes:

  • New and better design for Windows Defender interface.
  • Your PC is locked automatically when you don’t use it with the help of Dynamic Look.
  • Better notifications – it includes more information, such as progress bars.
  • Night Light was reduced to a blue light output.
  • You can boost your PC gaming performance with Game Mode.
  • Edge improvoements, including the ability to set tabs aside and a new tab preview bar.
  • You can now block installations of desktop apps.
  • Storage Sense will help you to automatically free disk space.
  • You can install themes from the Windows Store.
  • As always, minor fixes for the system.

[wl_faceted_search title=”FIND OUT MORE ON CREATORS UPDATE”]

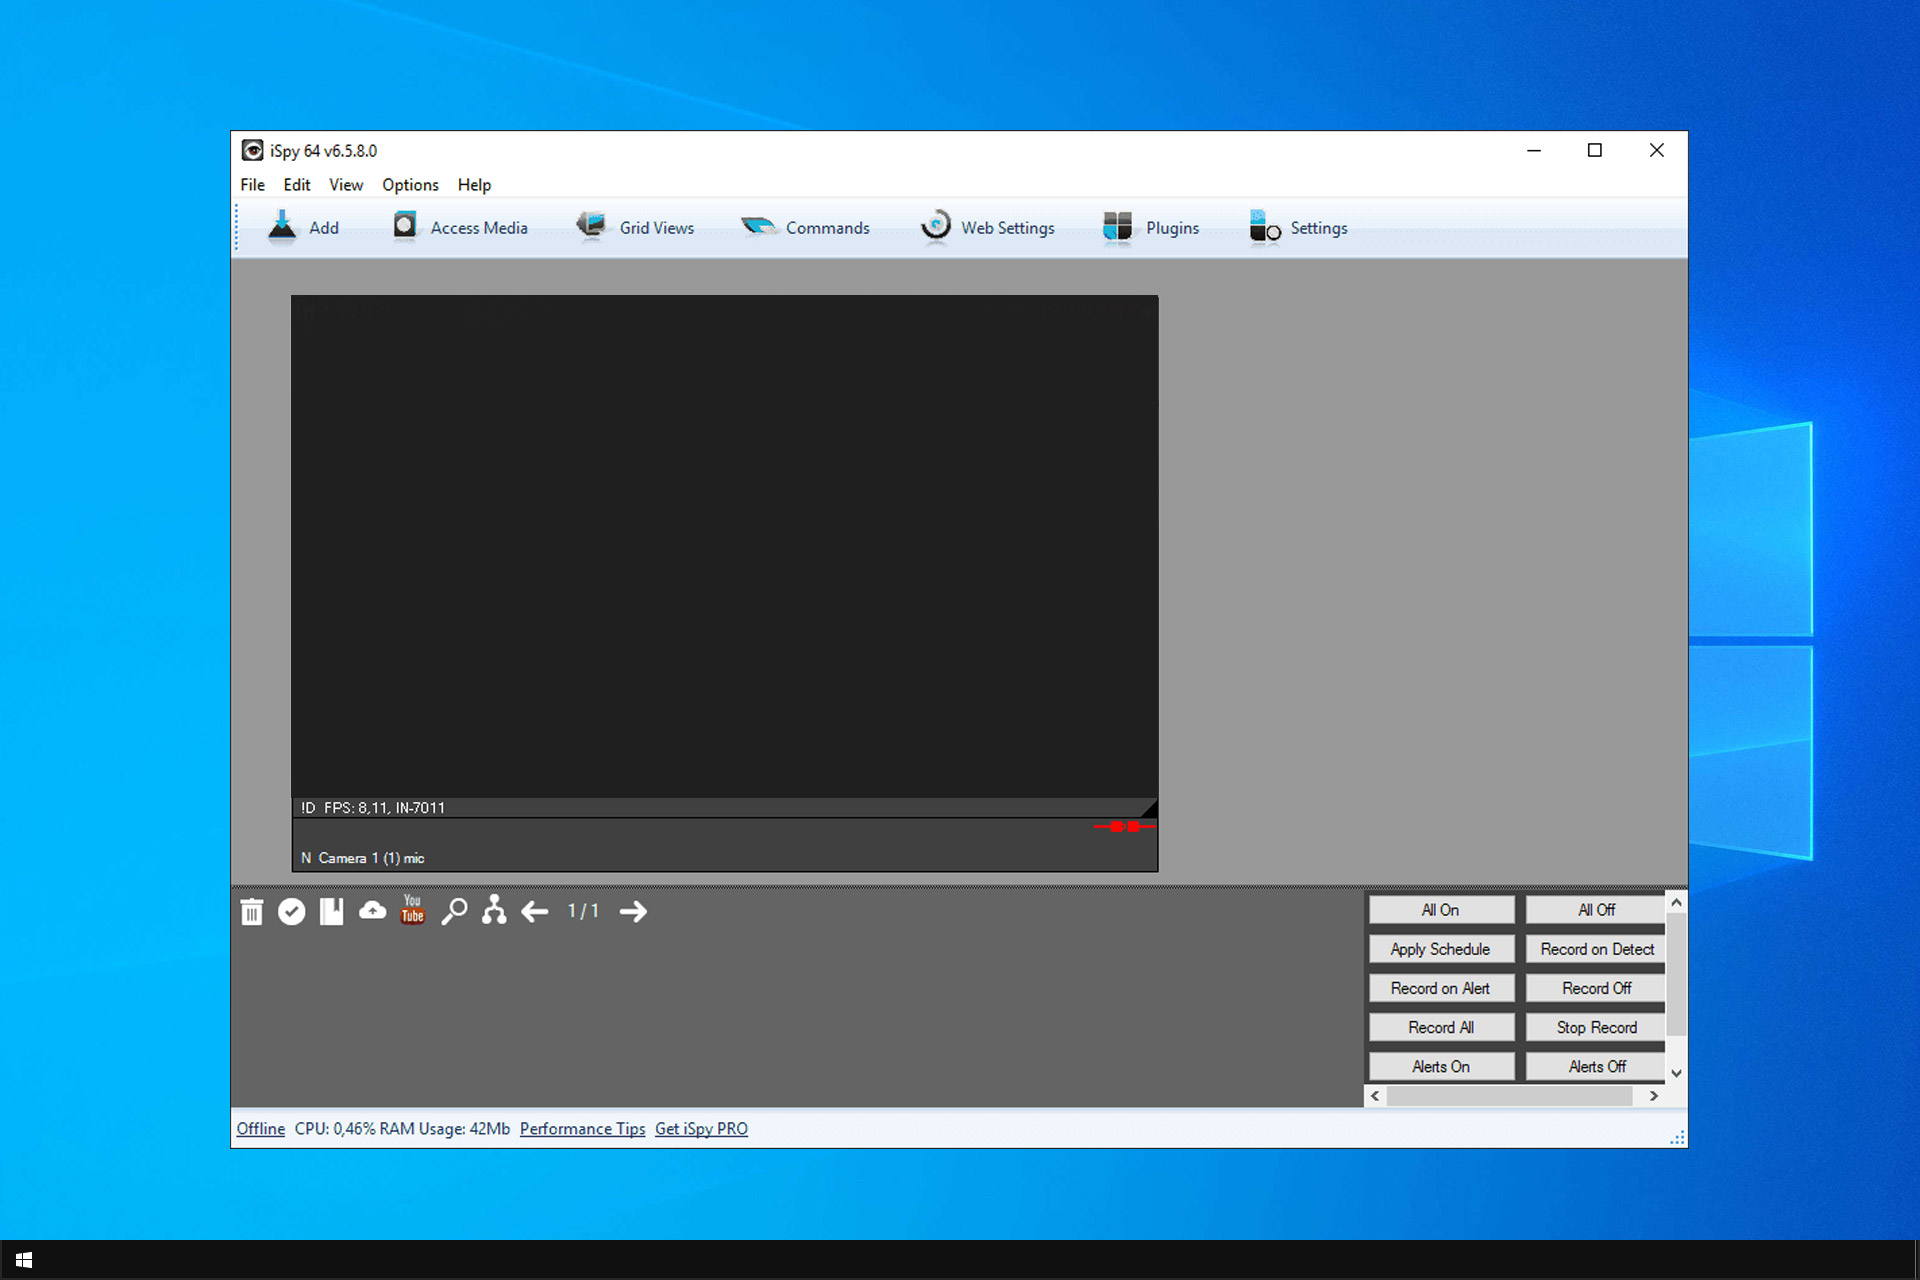
iSpy is Not Working: 5 Ways to Fix it

iSpy is a popular open-source video surveillance software; however, many reported that iSpy is not working properly on their PC.

This can be a major security risk, and it can leave your home without any surveillance, but luckily, there are ways to fix this problem.

Is iSpy a real app?

iSpy is a legitimate open-source video surveillance application that supports a wide array of cameras. It comes with several monthly plans that offer different features.

There is also a free plan, but it offers limited functionality.

What do I do if iSpy is not working?

Before we start fixing this issue, there are a few general checks that you need to perform.

  • Ensure that iSpy software is up to date. Many reported that updating the software fixed the issue for them, so try that.
  • Make sure your cameras are fully compatible with iSpy software. Alternatively, you can use JPG snapshots with iSpy or switch to different software.
  • Delete any duplicated cameras from the iSpy software since they can cause various conflicts.
  • In some cases, reverting to an older version of iSpy can help with these issues.

1. Change the I Frame Interval

  1. Open the Remote Config window and locate I Frame Interval setting.
  2. Two instances should be available, one in Main Stream and the other in Sub Stream.
  3. The default value for I Frame Interval should be 100, but you need to change it to 2.
  4. After doing that, save the changes and check if the problem is resolved.

2. Disable the TitleBar Buttons feature

  1. Open iSpy software and navigate to Settings.
  2. Locate the TitleBar buttons feature and disable it.
  3. Save changes.

This should help you if iSpy is not working with VLC software.

3. Make sure that you have .NET Framework installed

  1. Visit .NET Framework download page.
  2. Select the version you want to download.
  3. Click on Download .NET Framework Runtime.
  4. Once the NET Framework is downloaded, run the setup to install it.

Keep in mind that you’ll have to install multiple versions until you find the one that works on your PC.

4. Download the latest Windows Updates

  1. Open the Settings app.
  2. Go to Update & Security section.

  3. In the Windows Update tab click the Check for updates button.

  4. If any updates are available, they will be downloaded in the background. Once Windows 10 finishes the download, you’ll be asked to install the updates.

After installing the latest updates for Windows 10, check if problems with iSpy are resolved.

 5. Uninstall VLC

  1. Open the Settings app and go to Apps.
  2. Locate VLC on the list, select it, and click Uninstall.
  3. Follow the instructions on the screen.

Once the application is removed, check if the problem is gone.

iSpy is a great video surveillance tool, but it has its share of issues. In case you’re looking for something more simplistic, we have a great list of webcam security camera software that you might want to check.

What solution did you use to fix this problem? Share it with us in the comments section below.

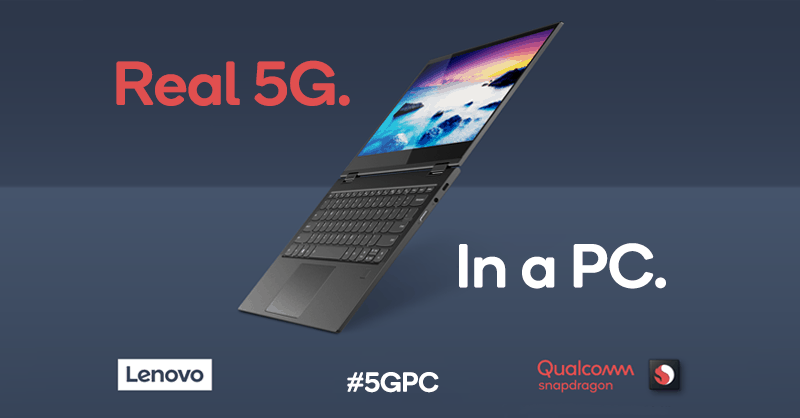
Qualcomm and Lenovo announce Project Limitless, the world’s first 5G PC powered by a Snapdragon 8cx SoC

The biggest chip makers and PC manufacturers are all present at the annual Computex PC expo in Taipei this week, and Qualcomm and Lenovo already made a big announcement with “Project Limitless.” Both companies are collaborating on the world’s first 5G PC powered by Qualcomm’s Snapdragon 8cx SoC, the company’s latest premium chip for Always Connected PCs that was announced back in December.

We don’t have many hardware details about Project Limitless for now, except that it will leverage the Snapdragon 8cx 5G platform including Qualcomm’s X55 5G modem, which should deliver peak download speeds of up to 2.5 Gbp. Qualcomm also promises “extreme multitasking performance” with its 7nm chip, and the chip maker published a series of video today to showcase popular desktop apps like Outlook, Excel and Photoshop running faster on Snapdragon 8cX systems compared to PCs with chips from “competitors” (read: Intel and AMD)

The first generation of Always Connected PCs powered by Qualcomm chips didn’t really shake up the PC market, but this could all change once the Snapdragon 8cx can deliver both multi-day battery life and the kind of performance you can expect from traditional x86 chips. Qualcomm announced back in February that its new Snapdragon 8cx 5G PC platform would be coming to Always Connected PCs later this year, but the chip maker is saying today that Project Limitless won’t be ready until early 2020. This isn’t really surprising as 5G networks will only launch in select areas this year, with mobile carriers expected to expand their 5G investments in 2020.

Windows can’t install Bluetooth peripheral device [EXPERT TIP]

Bluetooth peripherals are great, especially if you don’t like dealing with wires, but many Windows 10 users reported Windows was unable to install Bluetooth peripheral device message on their PC. So what is this error message and how can we fix it?

What can I do if Windows won’t install Bluetooth peripheral device? This issue is usually caused by drivers, so the first thing you need to do is to update your Bluetooth drivers. You can do that automatically or manually from the Device Manager. If your Bluetooth drivers aren’t the problem, try updating other drivers to fix this issue.

What to do if Windows wasn’t able to install Bluetooth peripheral device?

  1. Manually update Bluetooth driver
  2. Automatically update Bluetooth driver
  3. Update alternative drivers

1. Manually update Bluetooth driver

If you’re getting Windows was unable to install Bluetooth peripheral device message, perhaps the best solution would be to manually update your Bluetooth drivers. Follow these steps:

  1. Open the Run dialog box by pressing Windows Key + R.
  2. In the dialog box, type in devmgmt.msc, and click OK. This will open the Device Manager.devmgmt.msc windows was unable to install bluetooth peripheral device
  3. On the Device Manager window, locate the Other Drivers section and expand it.device manager windows was unable to install bluetooth peripheral device
  4. On the expanded list, locate and right-click on the Bluetooth Peripheral Device.
  5. Select Update driver.update driver windows was unable to install bluetooth peripheral device
  6. On the next window, select the Browse my computer for driver software.
  7. Select Let me pick from a list of device drivers on my computer.
  8. On the displayed list, locate Bluetooth Radios and click on it.
  9. Navigate to the Manufacturer tab, and select Microsoft Corporation on the list of options.
  10. On the Model tab (by the right), select Windows Mobile-based device support.
  11. Click Next to proceed. Now click Finish.
  12. Close program and restart the computer.

2. Automatically update Bluetooth driver

You can also automatically update your Bluetooth driver in order to fix Windows unable to install Bluetooth peripheral device error.

While the manual process provides you with a detailed update, the automatic process is faster, more convenient and generally more efficient.

To update Bluetooth Driver automatically, follow these steps:

  1. Open the Device Manager.
  2. On the Device Manager’s window, locate and click on Other Drivers section.
  3. If the drivers are hidden, click on View > Show hidden devices.show hidden devices windows was unable to install bluetooth peripheral device
  4. On the expanded menu, you’ll see a list of Bluetooth Peripheral Device drivers.
  5. Right-click on each of the drivers and select Update driver.
  6. In the next window, select the Search automatically for updated driverssearch automatically for updated driver software windows was unable to install bluetooth peripheral device
  7. Wait while Windows searches and installs the necessary drivers automatically.

Once this is done, check to see if the driver is successfully installed. This issue should now be resolved.

Alternatively, you can use a third-party tool to automatically update all your drivers with just a couple of clicks.

⇒ Get Fortect Driver Updater

3. Update alternative drivers

Windows was unable to install Bluetooth peripheral device message can sometimes appear if other drivers on your system are out of date. To fix this, just do the following:

  1. Open Device Manager.
  2. Expand Other Devices, right-click on Bluetooth Peripheral Device.
  3. Select Update Driver Software > Browse my computer for driver software.
  4. Click on the Let me pick from a list of device drivers on my computer option.
  5. Locate and select Ports (COM & LPT) > Next.
  6. On the Manufacturer tab, select Microsoft.
  7. On the other (Model) tab, select Standard Serial over Bluetooth link > Next > Finish.
  8. Exit program and restart the computer.

This article has outlined three possible solutions for the Windows was unable to install Bluetooth peripheral device error. Feel free to try all of our solutions and let us know if they worked for you in the comments section below.

Settings App crashes and then disappears in Windows 10 v1903

Many Reddit users encountered various issues with the Settings App after installing the Windows 10 v1903 Update.

One user reported that the Settings App crashed and disappears after installing version 1903:

I rolled back to 1809. Every time I clicked on “Apps” in Settings, the Settings app would just crash and disappear. Homegroups are still mentioned in menus, despite the feature being removed from Windows 10 over a year ago. Most animations are buggy and horrible.

Unfortunately, the OP didn’t find a way to solve the problem and he reverted back to the previous version of Windows 10.

Also, he didn’t provide other important information that might help us to pin point the root-cause of the problem. He didn’t mention that kind of Windows 10 device is using.

As the user mentions, there are also some additional bugs in the package which are pretty severe. They affect UI animations making the Settings App useless because it just crashes and disappears when users click on it.

For now, the quickest solution is to simply revert the operating system back to Windows 10 v1809.

Hopefully, Microsoft will soon provide a fix for this issue. The Settings app is one of the most important features of Windows 10 and users depend on it.

Until Microsoft rolls out the hotfix for the Settings App, you can check out the troubleshooting guides listed below. Hopefully, some of the solutions listed there might solve your problem:

Have you encounter a similar problem with Windows 10 May 2019 Update? Let us know in the comment section below.

Microsoft news recap: New extension for Chrome and Firefox, silence on Huawei ban, and more

Microsoft news recap is a weekly feature highlighting the top Microsoft news stories of the past week. Sit back, grab some coffee, and enjoy the read!

Microsoft remains silent on Huawei ban, but removes them from cloud products page

As US tech companies continue to place considerable distance between themselves and Chinese tech company Huawei, Microsoft has removed the company from its Cloud Server Catalogs, but has remained silent on whether they have pulled their licence for Huawei to use the Windows operating system.

Xbox app gets new messaging UI and more on iOS and Android

The Xbox app on iOS and Android has received a major update that provides a new UI for the messaging functionality, bringing across the Message Requests feature brought to the Xbox One console recently.

New Chrome and Firefox extensions from Microsoft bring hardware isolation technology to more browsers

Microsoft has developed a new extension for its browser competitors, Chrome and Firefox, bringing enhanced security by adding hardware-based isolation technology that is available natively on Microsoft Edge.

GitHub introduces Sponsors, a way for open source developers to get paid, with Matching Funds up to $5,000

To help developers of open source projects receive monetary contributions, GitHub has introduced a new feature called Sponsors. As the name suggests, it allows those with a GitHub account to sponsor projects.

That’s it for this week. We will be back next week with more Microsoft news.

Internet connection sharing error 1053 [FIXED by EXPERTS]

Many users have reported Internet connection sharing error 1053 when trying to start the Internet Connection Sharing services (ICS).

After our research regarding this error message, we concluded that the issue is found in the Service Control Manager. Because of the fact that when a service is started, it first needs to go through the Service Control Manager, if the response time takes longer than 30 seconds, the error occurs.

How can I fix Internet connection sharing error 1053 error? To fix this error, you need to locate ServicePipeTimeout value in your registry and manually set its value to 120000. If this DWORD isn’t available, you’ll have to create it on your own.

How to fix The service did not respond to the start request error?

Edit your registry

Note: This fix will require you to manipulate the Windows registry. Please make sure to create a System Restore point first, and then follow the steps presented here closely to avoid any mistakes.

  1. Press Windows + R keys on your keyboard, type regedit in the Run dialog, and click OK.regedit Internet connection sharing error 1053
  2. By using the folder-tree found on the left side of Registry Editor, navigate to:
    HKEY_LOCAL_MACHINE\SYSTEM\CurrentControlSet\Control.
  3. Select the Control folder on the left, and in the right pane right-click the empty space and choose New > DWORD (32-bit) Value.new dword
  4. Name the newly created DWORD as ServicesPipeTimeout.
  5. Double-click the ServicePipeTimeout DWORD.
  6. This will open up a small window that looks like this.dword properties Internet sharing error 1053
  7. Make sure to select Decimal, and set the value data to 120000.dword value data Internet connection sharing error 1053
  8. Next, you will need to click OK, close the Registry Editor, and restart your PC.

That’s it! Your Internet Connection Sharing should be working fine after a restart of your computer.

In this article, we explored the best and fastest way to tackle the Internet connection sharing error 1053 message on Windows 10. Please make sure to back up your system before attempting to change any values in your system’s Registry Editor in order to avoid any possible issues.

Connection sharing problems can lead to We can’t set up mobile hotspot error, but we have a guide that tackles this issue.

Feel free to let us know if this guide helped solve your issue by using the comment section below.

READ ALSO:

OGG playback issues are the norm on Windows 10 May Update

According to some Reddit users, Windows 10 v1903 caused problems for .ogg extension files. In other words, they can’t play .ogg files on their computers after installing the latest updates.

Here’s how one user describes this annoying issue:

Any .ogg file takes up to minute to move/delete, as if it cannot be parsed properly; Letting it play in Groove/any other compatible player only works as long as you don’t look at the metadata, then it hangs. However, latest VLC version, 3.0.6, hangs at opening OGG files now (here is a report of it happening on 1H19 Win10 build with VLC 3.0.4).

This user says that the .ogg files have been broken, and none of these problems appeared in the previous Windows 10 version.

User cannot even move, delete or analyze .ogg files properly, and playing thesem is extremely difficult.

Another user reports that he tested an .ogg file without any problems, both in Groove and VLC Media Player:

I grabbed a test ogg file and couldn’t reproduce it. Tested with Groove player and VLC (the desktop version). Also right clicked and viewed metadata in explorer without issue. Maybe it is a character set issue….

But this method didn’t work for the OP, as he later stated:

VLC opened it… after significant delay (and it had orange seeking bar during it). Some setting is definitely not right now.

So, the issue might be with some settings that the OP has on his Windows 10 PC. Apparently, there is no fix for this problem just yet.

Have you encounter similar problems? Let us know in the comment section below.

RELATED POSTS:

Incorrect name appearing in Skype for Business [QUICK FIX]

Some users have reported incorrect name appearing in the Skype Business address book. This can become very frustrating, especially if your Skype address book has to contain a large number of contacts for your company.

In this article, we will explore the best method to solve this issue once and for all. Read on to find out how.

How to fix Incorrect name in Skype for Business? To fix this problem, you need to remove proxy addresses from your Address Book. To do that, download the Lync Resource Kit from Microsoft and change the value of ProxyAddresses entry to ProxyAddresses- Tel Only.

Here’s how to fix the Skype Business incorrect name issue

Remove proxy addresses from the Address Book

In order to be able to access the proxy addresses, you will need to download the Lync 2010 Resource Kit from Microsoft.

  1. After downloading Lync 2010 Resource Kit from Microsoft, install it like you normally would and follow the on-screen instructions.
  2. Inside the resource kit, you will find a tool called ABSConfig.
  3. You will need to run ABSConfig tool on your Front End server that deals with the address book service (Default location is: C:>Program Files>Microsoft Lync Server 2010>ResKit)
  4. Now simply drag the column named AD Attribute Name and drop it in proxyAddresses (usually found at the bottom of the list)
  5. Modify the Type to Attribute to ProxyAddresses- Tel Only.proxyaddresses Incorrect name appearing Skype
  6. Click on Apply Changes found at the bottom of the screen
  7. Next, you will need to open up Lync Server Management Shell and use the Update-CSuserDatabase -verbose command to refresh the user database and re-sync it with the server.
  8. Next, you will want to re-generate the address book. In order to do so, use the command update-CSAddressbook -verbose.
  9. That’s it. Following these steps will solve the issue with Skype address book

In this article, we explored a quick fix for the annoying problem of not being able to find the proper contacts in your Skype Business address book. Please make sure to follow the steps presented in this article closely, in order to avoid any issues.

Make sure to let us know if this method helped you by using the comment section below.

READ ALSO:

New Narrator command gives you a summary of the webpage you’re on

The Windows 10 May 2019 Update is here but that doesn’t mean the Redmond giant stopped thinking about how to further improve the OS.

A new OS version is scheduled for release this fall. Let’s see that new features we can expect to get.

Well, Microsoft is planning to introduce some major changes to the Narrator app in Windows 10 20H1.

If you’re an Insider, you can already try out the new features. Narrator came with major accessibility improvements in the latest Windows 10 20H1 builds.

Indeed, most of these new features are related to Windows 10’s screen reader application. Microsoft improved how Narrator works in Google Chrome. 

The company has always focused on offering different built-in accessibility features in all versions of Windows. These features specifically help disabled users.  However, some of these features come in handy for regular users as well. 

Windows Narrator is one of those features that was initially introduced for visually impaired users. This screen-reading tool reads interface elements and text displayed on your screen. It can even describe the images on the screen and supports 35 different languages. 

Let’s have a quick look at how Microsoft improved Narrator app.

Narrator generates a summary of a web page

Microsoft introduced a new command in the tool that allows Windows 10 users to generate a summary of an entire webpage you are currently reading. You can simply hit Narrator + S to highlight hyperlinks, headings and landmarks.

Improved data table reading

The narrator can now efficiently read data tables. When the Narrator navigates within a column or row, it no longer repeats header information.

Earlier this year, Microsoft announced a bunch of features for Narrator app. The company eliminated the need to download language packages and stated that users can now download more voices. Microsoft also added the option to switch between main actions on Narrator Home.

RELATED ARTICLES YOU NEED TO CHECK OUT:

Windows 10 May Update breaks ICH6, ICH9 QEMU/VIRTIO devices

Many Reddit users reported that the newest Windows 10 update causes problems for ICH6 and ICH9 QEMU/VIRTIO devices.

Here’s how one user describes this problem:

For those using VFIO/VIRTIO and running this a a guest OS. It appears that the latest version of the HD Audio driver has broken audio completely. Will report back after some troubleshooting.
UPDATE: After about an hour of troubleshooting, it appears that ICH6 and ICH9 QEMU/VIRTIO devices are completely non-functional. Only workaround (for me) is to revert to emulated Realtek/Intel AC97. Fortunately this actually netted me a performance improvement.

As the OP states, this is a severe issue — the latest audio driver after the update is breaking the audio completely.

The user does come with an explanation and some kind of solution. It seems that ICH6 and ICH9 QEMU/VIRTIO devices cannot function properly on the new Windows 10 version.

As a result, the only way to make the audio work again was to revert to Realtek/Intel AC97.

Generally, audio drivers are prone to be affected by Windows 10 updates, and this case is no different.

Also, there aren’t so many workarounds to solve this type of issues, and Microsoft has yet to come up with a solution or an explanation for this particular problem.

Have you experienced any issues with your drivers after the recent Windows 10 update?

Let us know in the comment section below.

RELATED POSTS:

Windows v1903 crashes the Add/Remove Apps module [FIX]

Windows 10 May 2019 Update apparently causes various issues for many users.

It seems that after installing the update, many users experienced an issue regarding the Add/Remove Apps option. Apparently, when accessed, the Add/Remove Apps module crashes, leaving users hopeless.

This system issue could be caused by corrupted files or reccurring system conflicts.

Attempt to fix this issue by following the solutions listed below.

How to stop the Add/Remove Apps module from crashing

  1. Run the System File Checker
  2. Make changes through PowerShell
  3. Use DISM commands in the Command Prompt
  4. Perform a System Restore

1. Run the System File Checker

The System File Checker detects are restores files that cause apps to crash.

Performing a file check requires you to access the the Command Prompt as admin and input the command sfc /scannow – pressing Enter afterwards.

2. Make changes through PowerShell

Some users reported fixing the issue through PowerShell. Open PoweShell (Admin) and input the following command, then hit Enter:

Get-AppXPackage | Foreach {Add-AppxPackage -DisableDevelopmentMode -Register “$($_.InstallLocation)AppXManifest.xml”}

3. Use DISM commands in the Command Prompt

In attempt to fix this issue we recommend that you input the following commands in the Command Prompt (Admin):

Dism /Online /Cleanup-Image /CheckHealth

Dism /Online /Cleanup-Image /ScanHealth

Dism /Online /Cleanup-Image /RestoreHealth

Press Enter after each command, then close the Command Prompt to see if it fixed the issue.

4. Perform a System Restore

Bring your system to a previous working state by performing a System Restore.

Use the Reset this PC option located in the Update & Recovery Settings > Recovery > Get started.Reset Windwos 10 PC - Get Started

Hopefully one of our solutions helped you fix the issue. If you liked this article, leave a comment in the comment section below.

RELATED POSTS:

Windows 10 May Update still installs bloatware and pointless services

Many Windows 10 users reported encountering a specific inconvenience after downloading Windows 10 May 2019 Update.

Apparently, Windows version 1903 installs back deleted bloatware and enables back certain unnecessary Windows Services.

The added bloatware and enabled services become annoying, as they slow down the computer.

Deleting bloatware and disabling the services that are not needed is an easy, but rather boring task.

If you’re wondering what to uninstall and disable in order to make your computer run smoothly, we made a list that you should follow.

Steps to uninstall bloatware in Windows 10 v1903

  1. Uninstall Windows bloatware
  2. Disable unnecessary Windows Services

1. Uninstall Windows bloatware

Bloatware takes up storage space, uses up system memory and some apps could even cause system infections.

Getting rid of apps that you don’t use requires you to access the Windows Settings, then go to Update & Security > Recovery > Learn how to start fresh with a clean installation of Windows. Afterwards, follow the on-screen instructions.

Unnecessary apps that we recommend that you uninstall are: 3D Viewer, Calendar, Candy Crush Saga, Disney Magic Kingdoms, Groove Music, Mail, Movies & TV, Paint 3D, Snip & Sketch, Sticky Notes, Voice Recorder.

If you realize that you need some of the deleted apps afterwards, don’t worry. You can install them back from the Microsoft Store.

2. Disable unnecessary Windows Services

Windows Services usually slow down your computer using memory resources. Some of the services are not needed for the proper running of the system, therefore they should not be active.

In order to disable services, you need to access the Services tab through the Run box. Type service.msc in the Run box and hit Enter.

Next you need to find the pointless services that your system runs, double click on them and change the Startup type to Disabled or to Manual.

We found that the following services don’t have much use and you should disable them or set to manual: AdobeLM Service, Application Management – manual, Cryptographic Services – manual, Distributed Transaction Service – manual, Error Reporting Service, Help and Support, IMAPI CD-Burning COM Service – manual, Indexing Service, InstallDriver Table Manager, IPSEC Services – manual, MS Software Shadow Copy Provider – manual, NT LM Security Support Provider, Portable Media Serial Number Service – manual, Remote Procedure Call Locator – manual, Remote Registry, Routing and Remote Access – manual, Security Accounts Manager, Security Center, Smart Card, Telnet – manual, Universal Plug and Play Device Host – manual, User Privilege Service – manual.

Hopefully, this quick guide helped you to get rid of unwanted apps and services. If you liked this article, leave a comment in the comment section.

RELATED POSTS:

Windows 10 May Update breaks Wi-Fi on old Qualcomm drivers

Users reported on Reddit that Windows 10 v1903 sometimes causes loss of Wi-Fi connectivity. For example, one user indicated that this problem may appear on older computers:

Some older computers may experience loss of Wi-Fi connectivity due to an outdated Qualcomm driver. An updated Wi-Fi driver should be available from your device manufacturer (OEM).
To safeguard your upgrade experience, we have applied a hold on devices with this Qualcomm driver from being offered Windows 10, version 1903, until the updated driver is installed.

So, the issue as described here by Qualcomm appears because the device and/or its drivers are outdated. Rest assured, this issue does not occur because there is an inherent problem in this respect with the recent Windows 10, version 1903.

Therefore, you need to first install the latest version of the driver, and only then install the update.

Unfortunately, this solution may not work for all users.

Wi-Fi connectivity issues after Windows v1903

The OP added that the driver was updated to the latest driver found, but still encountered some issues:

my wifi connected like for 2 minutes and then i couldn’t open anything on any browser or spotify or check for updates or anything. But it said I had internet access, weird.

The issues appear to be related to some driver settings, and not to the internet connection itself. In any case, Microsoft has yet to offer an official explanation for this problem.

Have you encountered any issues with your Qualcomm driver after the recent Windows 10 update? Let us know in the comment section below.

RELATED POSTS:

Fix 0x8007007e Windows Update error like a PRO

The error 0x8007007e usually occurs while trying to download Windows updates. This can be a big problem and leave your system vulnerable and out of date, so today we’re going to show you how to fix it once and for all.

How can I fix 0x8007007e error on Windows 10? This error usually occurs if there are any problems with Windows Update services. To fix it, you need to start Command Prompt and restart these services. If that doesn’t work, try disabling all startup services and applications, or try turning off your antivirus protection temporarily.

How to fix 0x8007007e Windows Update error?

  1. Restart Windows Update components
  2. Perform a Clean boot
  3. Disable third-party Antivirus

1. Restart Windows Update components

To fix the 0x8007007e Windows update error, you need to restart Cryptographic, NMSI Installer, BITS, and Windows Update Services, and several other required services. You can do that by following these steps:

  1. First, press down the Windows Key and hold X key. Click on the Command Prompt (Admin).
    command prompt 0x8007007e Windows Update error
  2. Run the following commands one by one:
    • net stop wuauserv
    • net stop cryptSvc
    • net stop bits
    • net stop msiserve
    • C:\Windows\SoftwareDistribution SoftwareDistribution.ol
    •  C:\Windows\System32\catroot2 Catroot2.old
    • net start wuauserv
    • net start cryptSvc
    • net start bits
    • net start msiserver
  3. Lastly, Close the Command Prompt.

2. Perform a Clean boot

If that solution didn’t work well for you, try performing a Clean boot. Performing a clean boot will help you determine if the issue is caused by a third-party service or software.

  1. First, press down the Windows key together with the R key.
  2. Now type msconfig and hit Enter.msconfig 0x8007007e Windows Update error
  3. Then click on the Services tab.services 0x8007007e Windows Update error
  4. Check on Hide All Microsoft Services and click on Disable All.disable all 0x8007007e Windows Update error
  5. Now click the Startup tab and click Open Task Manager.
  6. Disable all tasks in Task Manager.

Restart your PC and check if the issue is still there.

3. Disable third-party antivirus

In some instances, error 0x8007007e is caused by your antivirus, so in order to fix the issue, you might have to temporarily disable it. If disabling the antivirus doesn’t help, you might have to remove your antivirus and then reinstall it.

If your antivirus is the problem, you might want to consider switching to a different antivirus solution. You can discover multiple security programs that highly defend your system.

To have complete protection without affecting other operating system services, we recommend using a powerful and lightweight solution TotalAV.

There you go, three simple-to-follow solutions. Be sure to try all of these solutions and let us know if they helped you fix the 0x8007007e Windows update error.

Getting everything ready for you on Windows 10/11 [FIXED]

Windows 10 v1903 brought along the error message Getting everything ready for you for some people.

This is the case for one user who the following message on Reddit:

Cannot boot Windows 10 after formatting and installing through USB drive. Gets stuck in the “Getting everything ready for you” window… What can I do? Switch to Linux? (1st time with this kind of issues, at every new release I format and reinstall everything without any issue… with this build no luck this time)

The OP didn’t offer any further details about the type of the computer used or what solutions he tried to solve the issue.

We know that this is a new problem for users and the previous Windows 10 versions installed without any incidents.

According to Microsoft, a computer stuck at “Getting everything ready for you” might show the signs for missing or corrupted files.

So, if it is possible, they recommend booting the computer in safe mode.

You can also perform a system restore. You can choose a restore point that will bring the computer to a time where it worked fine (prior to the Windows 10 v1903 install).

Also, to solve the corrupted files issue, open Command Prompt. Press Windows Key + R on your keyboard, type “cmd” and click OK.

command prompt

Once the command prompt opened, type sfc /scannow. This will scan and replace files with a cached copy of those files.

commpand prompt corrupted files

This method should solve the issue next time you try to install Windows 10 v1903.

Is your computer stuck at “Getting everything ready for you”? How did you fix this issue? Let us know in the comment section below.

RELATED ARTICLES:

Do you want to fix Bluetooth bugs on Windows 10 May Update?

After updating to Windows 10 v1903, many users encountered issues with their Bluetooth devices. These problems have to do with connecting or even discovering Bluetooth devices.

In this regard, Microsoft identified compatibility issues caused by older driver versions for Bluetooth from Qualcomm and Realtek.

Also, Microsoft put a hold on Windows 10 v1903 update for computers that have devices with old driver versions. The hold stands until they are updated.

As a result, the May 2019 Update won’t be offered to these devices.

Fix Bluetooth connectivity issues on Windows 10 v1803

Still, even if you already decided to upgrade to Windows 10 v1903, Microsoft recommends that you verify if new drivers are available.

So, as a workaround to the issue, check to see if an updated driver is available for install. In this respect, keep in mind that you should install Realtek drivers above the version 1.5.1011.0 and Qualcomm drivers the version 10.0.1.11.

In case a driver update is necessary, download and install the newest version. If you are not sure how to do that, check our guide on how to update outdated drivers.

Also, Microsoft suggests that you shouldn’t attempt to update manually with the Media Creation Tool or with the Update button until the latest version of the driver has been installed.

Have you encounter Bluetooth issues after Windows 10 v1903 update? Let us know in the comment section below.

RELATED ARTICLES:

KB4497934 removes Loudness Equalization from audio settings

Many Windows 10 users reported that after the installing of KB4497934 (OS Build OS 17763.529), the Loudness Equalization feature is nowhere to be found.

He described the following issue:

I installed the  KB4497934 update today. Now, I can’t find how to get into the Loudness Equalization. When I right click the speaker icon in the system tray, “Playback devices” has disappeared from the menu. I want to equalize the sound at the same level when I’m streaming radio stations instead of constantly having to turn the volume up and down. Is the Loudness Equalization feature gone?

Probably, the user refers to this option from Speaker Properties. Also, it look like this is an important feature for some.

speaker properties sound

What happened with Loudness Equalization?

Like the OP said, it is possible that the Loudness Equalization was removed. Hopefully, it was moved to another subcategory of Speaker Properties.

In case you weren’t familiar with this feature, our Adjusting audio settings: Loudness Equalization on Windows 10 guide has all the information you need.

Microsoft likes to make changes in Windows settings and menus and sometimes forgets to inform Windows 10 users about them.

Also, keep in mind that menu and settings configuration depend on the sound software you installed on your PC. This feature is not available on all PCs, as another user well stated in a reply to the original post.

However, for the time being, Microsoft has yet to come with a solution or an explanation for the issue.

Have you encountered similar problems after installing KB4497934 in Windows 10? Let us know in the comment section below.

RELATED ARTICLES:

KB4497934 lets you decide when to install feature updates

We’re back with another piece of good news for Windows 10 users. Update KB4497934 (OS Build OS 17763.529) is here and it brings important changes that will make your Windows 10 experience more pleasant.

With KB4497934, Microsoft introduced a functionality that allows you to decide when to install a feature update.

So, this offers you more control over the updates you want to install or not. Also, the feature updates will now have a separate module on the Windows Update page.

This could be the most important feature, but Microsoft didn’t stop here, as we can see on KB4497934’s support page.

It is worth mentioning that the update also solved the issue that caused screen sharing to fail in Skype, Microsoft Teams and Skype for Business. This was an annoying bug that you don’t need to worry about it anymore.

What else is new in Windows 10 KB4497934?

Generally, the latest update brought a lot of improvements for different features, as Microsoft stated:

  • Addresses an issue that may cause Microsoft Edge to hide annotations added to a PDF file, such as inked notes, highlights, and comments.
  • Addresses an issue that prevents NumLock from working properly in a Remote Assistance session when the Remote Assistance window gains and loses focus.
  • Addresses an issue that disconnects a remote desktop session when you lock the session using a third-party credential provider.

KB4497934 known bugs

Also, not everything is perfect with update KB4497934. Microsoft reported that you may encounter issues using PXE (Preboot Execution Environment) when starting a device from a WDS (Windows Deployment Services) server.

Rename or other operation that you perfom on files and folders may fail with the error “STATUS_BAD_IMPERSONATION_LEVEL (0xC00000A5)”.

You may encounter “Your printer has experienced an unexpected configuration problem. 0x80070007e” error when you try to print from Microsoft Edge or other UWP (Universal Windows Platform) application.

What do you think about the update KB4497934? Did you encounter any additional issues after installing it? Let us know in the comment section below.

RELATED ARTICLES:

Windows 10 v1903 breaks network drivers, fixing them is not easy

With the Windows 10 May Update, there came a series of bugs and issues that are hard to digest for some. Microsoft is working on solving all of them, but in the meantime users are facing serious problems.

One of them is the lack of internet connection after updating to v1903. Although the company already resolved some connection problems, others remain.

One user describes the problem as follows:

I’ve just updated my PC to the latest Windows update using the Update Assistant. It was working ok, but now my router says that Ethernet is not connected and I can’t browse the Internet anymore. Anyone else with that? (Realtek onboard)

This is not the only Realtek bug the update brings, but it’s one that remains unresolved. The other big Realtek issue that Microsoft acknowledged is with card readers that prevented the installation of the update.

  • READ ALSO: Windows 10 v1903 brings BSoD errors for many

Driver issues can break your Internet connection

To confirm that the problem is triggered by the update itself, and not just from your router, disabling and re-enabling it from the adapter options could do the trick.

If the router is fine, than the problem has much deeper roots and it’s most likely triggered by the Windows 10 v1903 code.

Update your drivers

A possible cause could be the pushing of DCH versions of drivers through the new update. An incompatibility issue or an overlap of the different driver versions can be the root this problem.

Go to Device Manager and update your drivers. If that doesn’t change anything, uninstall the old driver, go to the manufacturer’s website and download the latest Ethernet drivers and install them.

Alternatively, you can opt for a third-party software that scans your device and automatically downloads the most relevant drivers in order to optimize your OS.

If you didn’t update to v1903, be sure to read all the info available and find the known bugs and issues.

Have you encountered a similar problem with Windows 10 May update? How did you solve it?

Leave the answer in the comments section below along with any other questions you might have.

[wl_navigator]

Fix Windows 10 May Update error 0x800F0922 in 3 quick steps

Users reported that the latest Windows 10 May Update often triggers error 0x800F0922. This error appears when the download process failed to complete.

Also, it can mean that the System Reserved partition space is low, and the system fails to connect to the Windows Update server.

Therefore, here is a guide with few quick solutions on how to solve this issue.

Is there a way to fix error 0x800F0922?

Solution 1 – Extend the System Reserved Partition

If there is not enough space in the System Reserved Partition, then the error 0x800F0922 will appear when you try to update Windows 10.

You can quickly fix the issue by extending this partition with a third party software. Check out this guide to see what tools you can use to that purpose.

Solution 2 – Run SFC Scan and DSIM

If error 0x800F0922 appears when you try to update to Windows 10 v1903, it can be because your files are corrupted.

So, it is recommended that you perform a SFC scan. If you don’t know how, just follow the steps below.

Type cmd in the Search box, right-click and select “Run as an administrator”.

cmd administrator search

When the Command Prompt is opened, type sfc /scannow and press Enter.

administrator command prompt scannnow

If this doesn’t solve the problem, you can try with a DSIM scan. Type in the Command Prompt console DSIM.exe /Online /Cleanup-image /Scanhealth and press Enter.

command prompt scanhealth windows 10

Then, type DSIM.exe  /Online /Cleanup-image /Restorehealth and press Enter.

command prompt restorehealth windows 10

This method will help you restore the corrupted files. Close the program and restart the computer. After that, try updating your device.

Solution 3 – Disable the VPN Connection

For those of you who have this kind of software, it is possible that the Windows 10 update error is caused by your VPN connection.

So, disconnect from your network and disable the VPN software. Try again to download the updates and then enable your VPN.

Were these solution helpful? Let us know in the comment section below.

RELATED ARTICLES:

WhatsApp Issues on Windows: Best Fixes That You Can Use

WhatsApp is a popular messaging client, but it also has its problems. Therefore, today, we’re going to show you how to fix various WhatsApp issues on Windows.

We already covered WhatsApp Web not working problem in one of our previous guides, so be sure to check it as well.

In today’s guide, we will focus on several other issues, so let’s get started, shall we?

Why is WhatsApp not working?

There are several reasons why WhatsApp isn’t working properly on your PC:

  • Connection issues – If there’s an issue with your network, WhatsApp won’t be able to work properly.
  • Browser issues – Many reported that WhatsApp Web isn’t working in Firefox. If that happens, changing the browser might help.
  • Damaged installation – The software won’t work correctly if the installation is damaged. Reinstall it to fix the problem.

How can I fix WhatsApp issues?

WhatsApp on PC is very slow on Windows 10

If you’re using WhatsApp in your web browser, try switching to a different one. Users reported that using Chrome or Firefox helped improve their performance in WhatsApp.

When you’re running the Windows WhatsApp version, start by closing other apps first and check your internet connection.

Restarting your app and your PC are also very good options to start with in this situation.

WhatsApp not installing on Windows 10

Reinstall the software

  1. Press Windows key + X and choose Apps and features.
  2. Locate WhatsApp on the list and click Uninstall.
  3. Follow the instructions to remove it.
  4. Once you uninstall the application, press the Windows key + S and type store. Select Microsoft Store from the list.
  5. Search for WhatsApp. Once you find it, click Install and follow the instructions on the screen.

This can also help with WhatsApp needs to restart because of a problem error.

You should also consider running WhatsApp directly from the browser. While some browsers like Opera have it preinstalled, you can run it on any browser by visiting the web app website.

WhatsApp notification problem

Check your notification settings

  1. Press Windows key + S and enter notifications. Select Notifications & actions settings.
  2. Locate WhatsApp on the list.
  3. Make sure that notifications for WhatsApp are enabled.

WhatsApp not sending messages

Check your connection and other settings

  • Restart your device – Sometimes, a quick restart can fix this issue.
  • Make sure that your account is verified – If your account hasn’t been verified properly, you won’t be able to send messages.
  • The contact hasn’t been saved properly – In case the contact you’re trying to message isn’t saved properly, you won’t be able to send messages.
  • The receiver blocked you – It’s possible that the other person blocked you, and that’s why you can’t send messages anymore.

WhatsApp not updating automatically

WhatsApp should update automatically, but sometimes you receive an error message that states Couldn’t Update Automatically.

If you hit the Update button, you will be redirected to download the updated version and that will work.

That’s it for now. Hope that one of our solutions worked, and now you can enjoy WhatsApp on your Windows 10 PC. If you’re interested in disabling your end-to-end encryption security feature, check out how to go about it in our expert article.

Keep in mind that these issues can appear on Windows 11 as well, and we already covered some of them in our WhatsApp Desktop not opening on Windows 11 guide.

We also have a guide on how to find WhatsApp storage location on Windows 11, so don’t miss it for more information.

If you have any other questions or suggestions, don’t hesitate to leave them in the comments section below and we’ll be sure to check them out.

Microsoft shares more on Project xCloud in advance of E3

Microsoft is sharing more details about its Project xCloud game streaming service ahead of E3 next month. Two months ago, Google made a big move by unveiling its new Stadia service at the Game Developers Conference, but so far only three games have been confirmed for Stadia including Assassin’s Creed Odyssey and the upcoming Doom Eternal.

It will be a big challenge for Google to convince developers to ports their game to Stadia and its Linux-based infrastructure, and this is precisely where Microsoft’s Project xCloud service should have a big advantage. Indeed, Project xCloud will leverage existing Xbox One S hardware, which means that it’s already compatible with three generation of Xbox games if you take into account backward compatible Xbox 360 and original Xbox games.

In a blog post on Xbox Wire, Kareem Choudhry, Corporate Vice President – Gaming Cloud at Microsoft highlighted today that more than 5,000 Xbox games in total are ready to run on Project xCloud.

Project xCloud has the technical capability to stream more than 3,500 games, without any changes or modifications required by a developer. In other words, developers will be able to dramatically scale their existing games across devices, with no additional development, no additional code base maintenance and no separate updates. When a developer updates the Xbox One version of their title, those updates will also apply to all versions available on Project xCloud without any additional work.

There are currently more than 1,900 games in development for Xbox One, all of which could run on Project xCloud. Developers creating those games continue working normally – building with the tools they have – while we do the work to make their games accessible to the broadest set of players possible.

The ability for Project xCloud to run almost any Xbox game already seems to be a killer feature, and Microsoft will also leverage its worldwide Azure infrastructure to make sure that the service works great in the most important gaming markets. “We’ve already deployed our custom Project xCloud blades to datacenters across 13 Azure regions with an initial emphasis on proximity to key game development centers in North America, Asia and Europe,” explained Choudhry. “This is just the beginning of our buildout, with our ultimate goal of supporting gamers in Azure regions around the world,” he added.

As Microsoft is planning to kick off public trials later this year, Microsoft employees can already test an alpha version of Project xCloud at home, and Choudhry also said today that select developers such as Capcom and Paradox Interactive can already test their games on Project xCloud. Following the Google Stadia reveal, Xbox head Phil Spencer promised to “go big” at E3 this year, so make sure to add Microsoft’s press briefing on 1PM PT / 4 PM ET to your agenda.