Dynamic Link Libraries (DLLs) are a fundamental block of an operating system or application, and in this article, we turn our focus to lightshot.dll.
We will explore all there is to know about this file and show you the best ways to download it on your computer.
What is lightshot.dll?
This DLL is linked to the Lightshot screenshot application, and it helps ensure it runs well on your computer. It performs the following functions:
Capture screen – Screen capturing is the base function of the tool, and the lightshot.dll manages it. You can also use it on Chrome.
Language localization – It helps the application to be used in different languages.
Customization or hotkeys – It allows hotkeys to trigger processes like capture on the application.
Image recognition – The DLL allows the app to extract text from images through image recognition.
Save and edit – It manages the process that allows users to save captured images to a local device or storage.
If you are missing the DLL, let us explore how to download it.
How do I download lightshot.dll?
1. Use a specialized DLL tool
Specialized DLL tools are often the best way to repair or download these files. While there are many options, you should use only trusted tools carefully.
Double-click on the downloaded file to begin the installation, and follow the prompts from the wizard.
When the installation is complete, you will have the DLL also installed on your computer.
This app download is the surest way of downloading lightshot.dll because the DLL is not a stand-alone application but is bundled with the Lightshot screenshot application.
And there you go. Any of the solutions listed in this article should suffice. Remember that specialized tools will not just download the files but help fix DLL errors.
We like to hear from you, so let us know which method is your favorite in the comments. Also, please tell us if you have any new ways of downloading this DLL file.
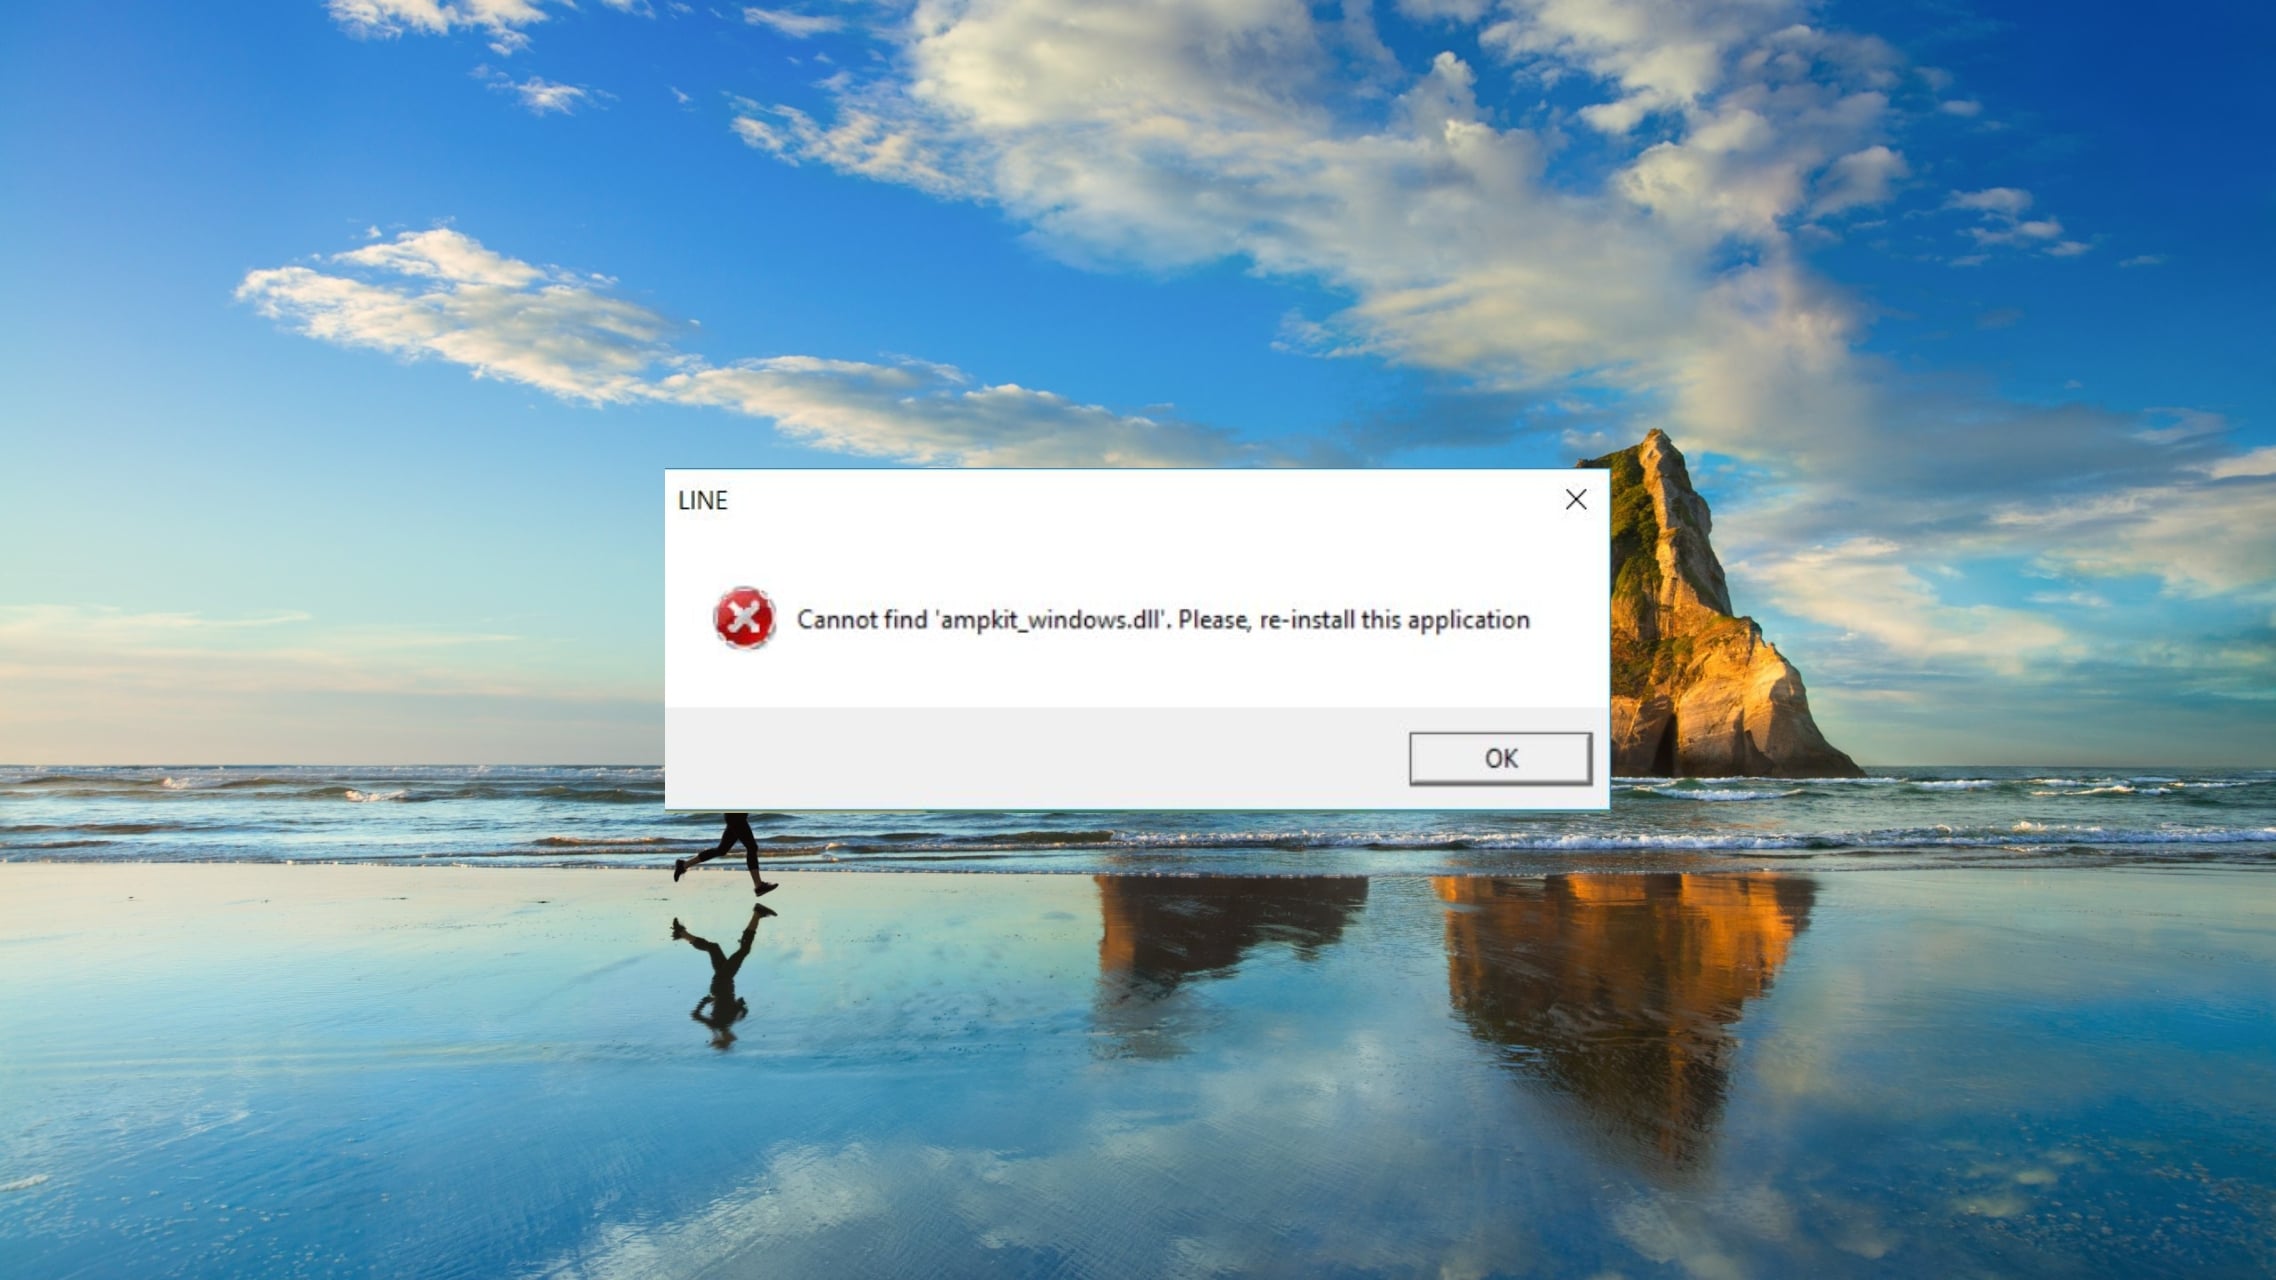
DLL or Dynamic Link Library files are a set of instructions necessary for various important system and program functions to work properly. The ampkit_windows.dll missing error is one of the most common Windows 10 DLL file missing errors that you will come across.
In this guide, we will discuss the ampkit_windows.dll file, whether it is important, and all the effective solutions that will help you resolve the ampkit_windows.dll missing problem. Let us get right into it.
What is ampkit_windows.dll?
After digging up the internet, we discovered that the ampkit_windows.dll file is related to the LINE messaging application. This third-party DLL file throws such an error in case the LINE app gets corrupt or is outdated.
This error message or DLL go also get corrupt because of missing or corrupt system files, the presence of virus or malware, problematic app installation, and others.
Here are a few of the common ampkit_windows.dll error messages that you can come across:
The program can’t start because AMPKIT_WINDOWS.DLL is missing from your computer
Error loading AMPKIT_WINDOWS.DLL. The specified module could not be found
There was a problem starting AMPKIT_WINDOWS.DLL
AMPKIT_WINDOWS.DLL could not be located
Cannot register AMPKIT_WINDOWS.DLL
Let us now take a look at the solutions that will help you resolve the ampkit_windows.dll missing error.
How can I fix the ampkit_windows.dll error?
1. Use a specialized tool
You will come across multiple DLL error messages, including ampkit_windows.dll is missing an error message on your Windows PC.
While for some, there are direct solutions available to resolve them, for others, you have to brainstorm yourself to fix the issue. It isn’t possible to search the internet and jot down the solutions to fix such sticky problems.
For that scenario, we would suggest you make use of one of the best DLL repair tools and fix DLL errors automatically.
2. Perform a virus scan
To open the Start menu press the Win key on your keyboard.
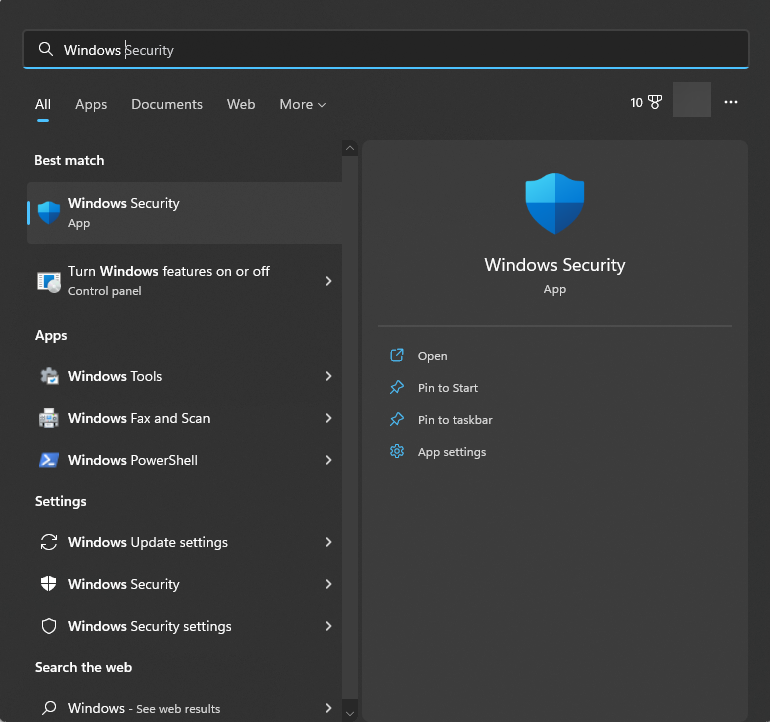
Search for Windows Security and open it.
Click on Virus & threat protection.
Click on Quick Scan.
Also, you select the Scan options and click on Full scan for an in-depth scan.
Apply the fixes to remove viruses and malware.
Restart your PC.
Chances are that your PC is infected by a virus or malware that has caused several files, including the ampkit_windows.dll file to get corrupt. You can scan your PC using the built-in scanning tool, Windows Security.
However, if Windows Security didn’t help much, we suggest you pick one antivirus among some of the best antivirus tools to keep your PC safe.
Type the below command and press Enter. regsvr32 AMPKIT_WINDOWS.DLL
The DLL file will be registered.
Restart your PC for the changes to take effect.
Often the app DLL gets unregistered because of a third-party app conflict of installation error. You can try re-regsitering the DLL file and check if this resolves the issue or not.
4. Fix corrupt system files
Press the Win key to open the Start menu.
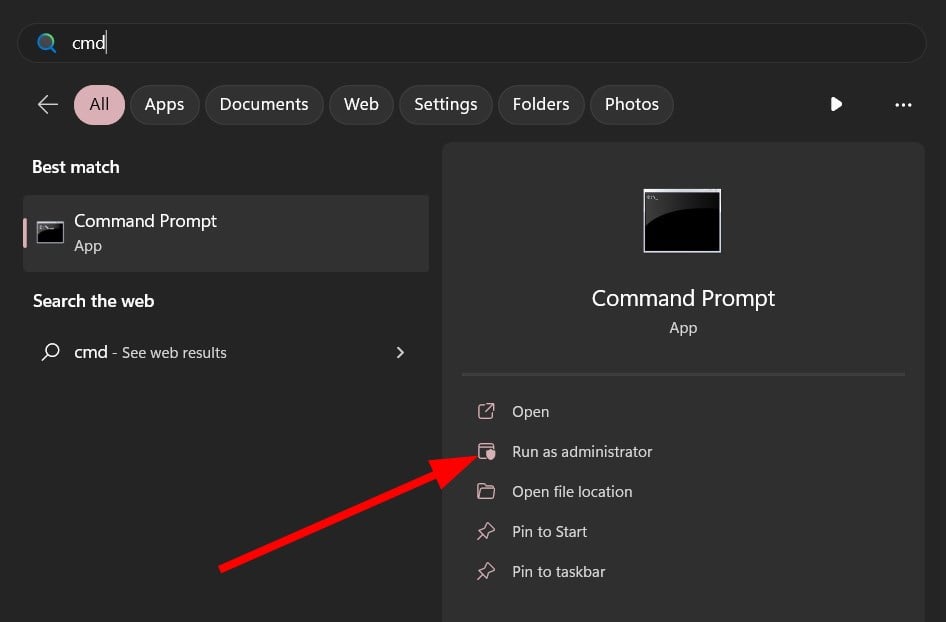
Open the command prompt as an admin.
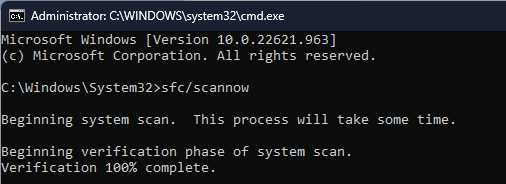
Type the below command and press Enter. sfc /scannow
Let SFC scan diagnose and fix corrupt files.
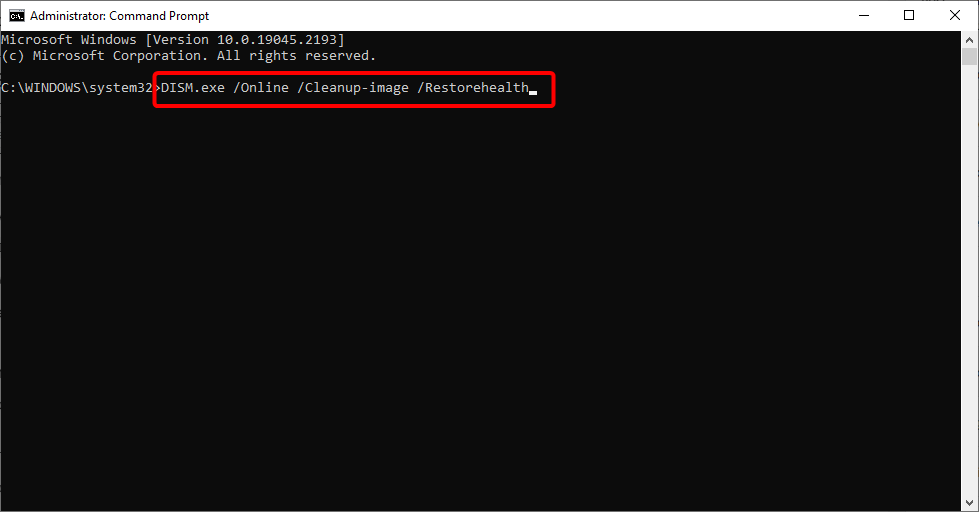
Type the below commands and press Enter after each one. DISM.exe /Online /Cleanup-image /ScanhealthDISM.exe /Online /Cleanup-image /RestorehealthDISM.exe /online /cleanup-image /startcomponentcleanup
After the process completes, restart your PC.
Fixing corrupt system files can automatically help you resolve multiple issues related to your PC. For that purpose, we would suggest you to run the SFC Scan and DISM commands and check if this fixes the ampkit_windows.dll missing error.
Since this ampkit_windows.dll file is associated with the third-party app called LINE, we would suggest you to try resintalling the program and check if this resolves the issue or not.
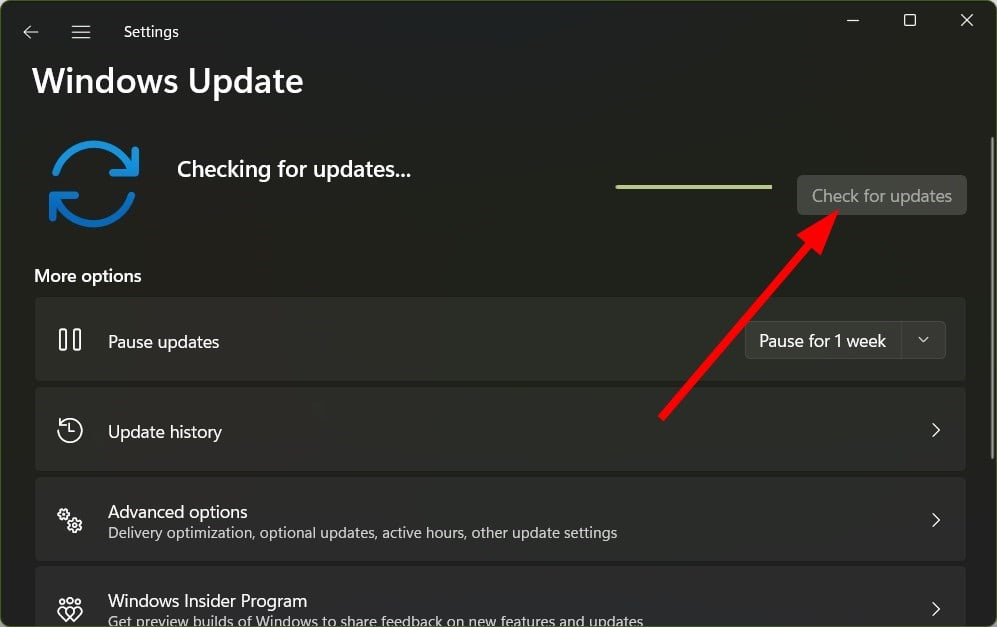
6. Install the latest Windows updates
Press the Win + I keys to open the Settings menu.
Click on Windows Update on the left pane.
Select the Check for updates button.
Your system will look for a new update.
If there is a pending update, click on the Download & Install button.
Restart your PC.
To fix other petty issues, that could be caused because of underlying problems related to the OS, you should make sure that you are running the latest Windows version on your PC.
That is it from us in this guide. You can check out our guide that explains in detail various solutions to resolve the DLL missing on Windows 11 problem.
Feel free to let us know in the comments below which one of the above solutions resolved the ampkit_windows.dll missing error on your Windows PC.
Mscories.dll is a DLL (Dynamic Link Library) file associated with the Microsoft Net Framework. It is an essential file for the smooth functioning of Windows OS. It was introduced with the Windows Vista operating system in 2006.
There are several reasons why the Mscories.dll file can go corrupt and give you multiple error messages. We have compiled a list of solutions to help you fix the problem related to the Mscories.dll file. Let us get right into it.
What is Mscories.dll?
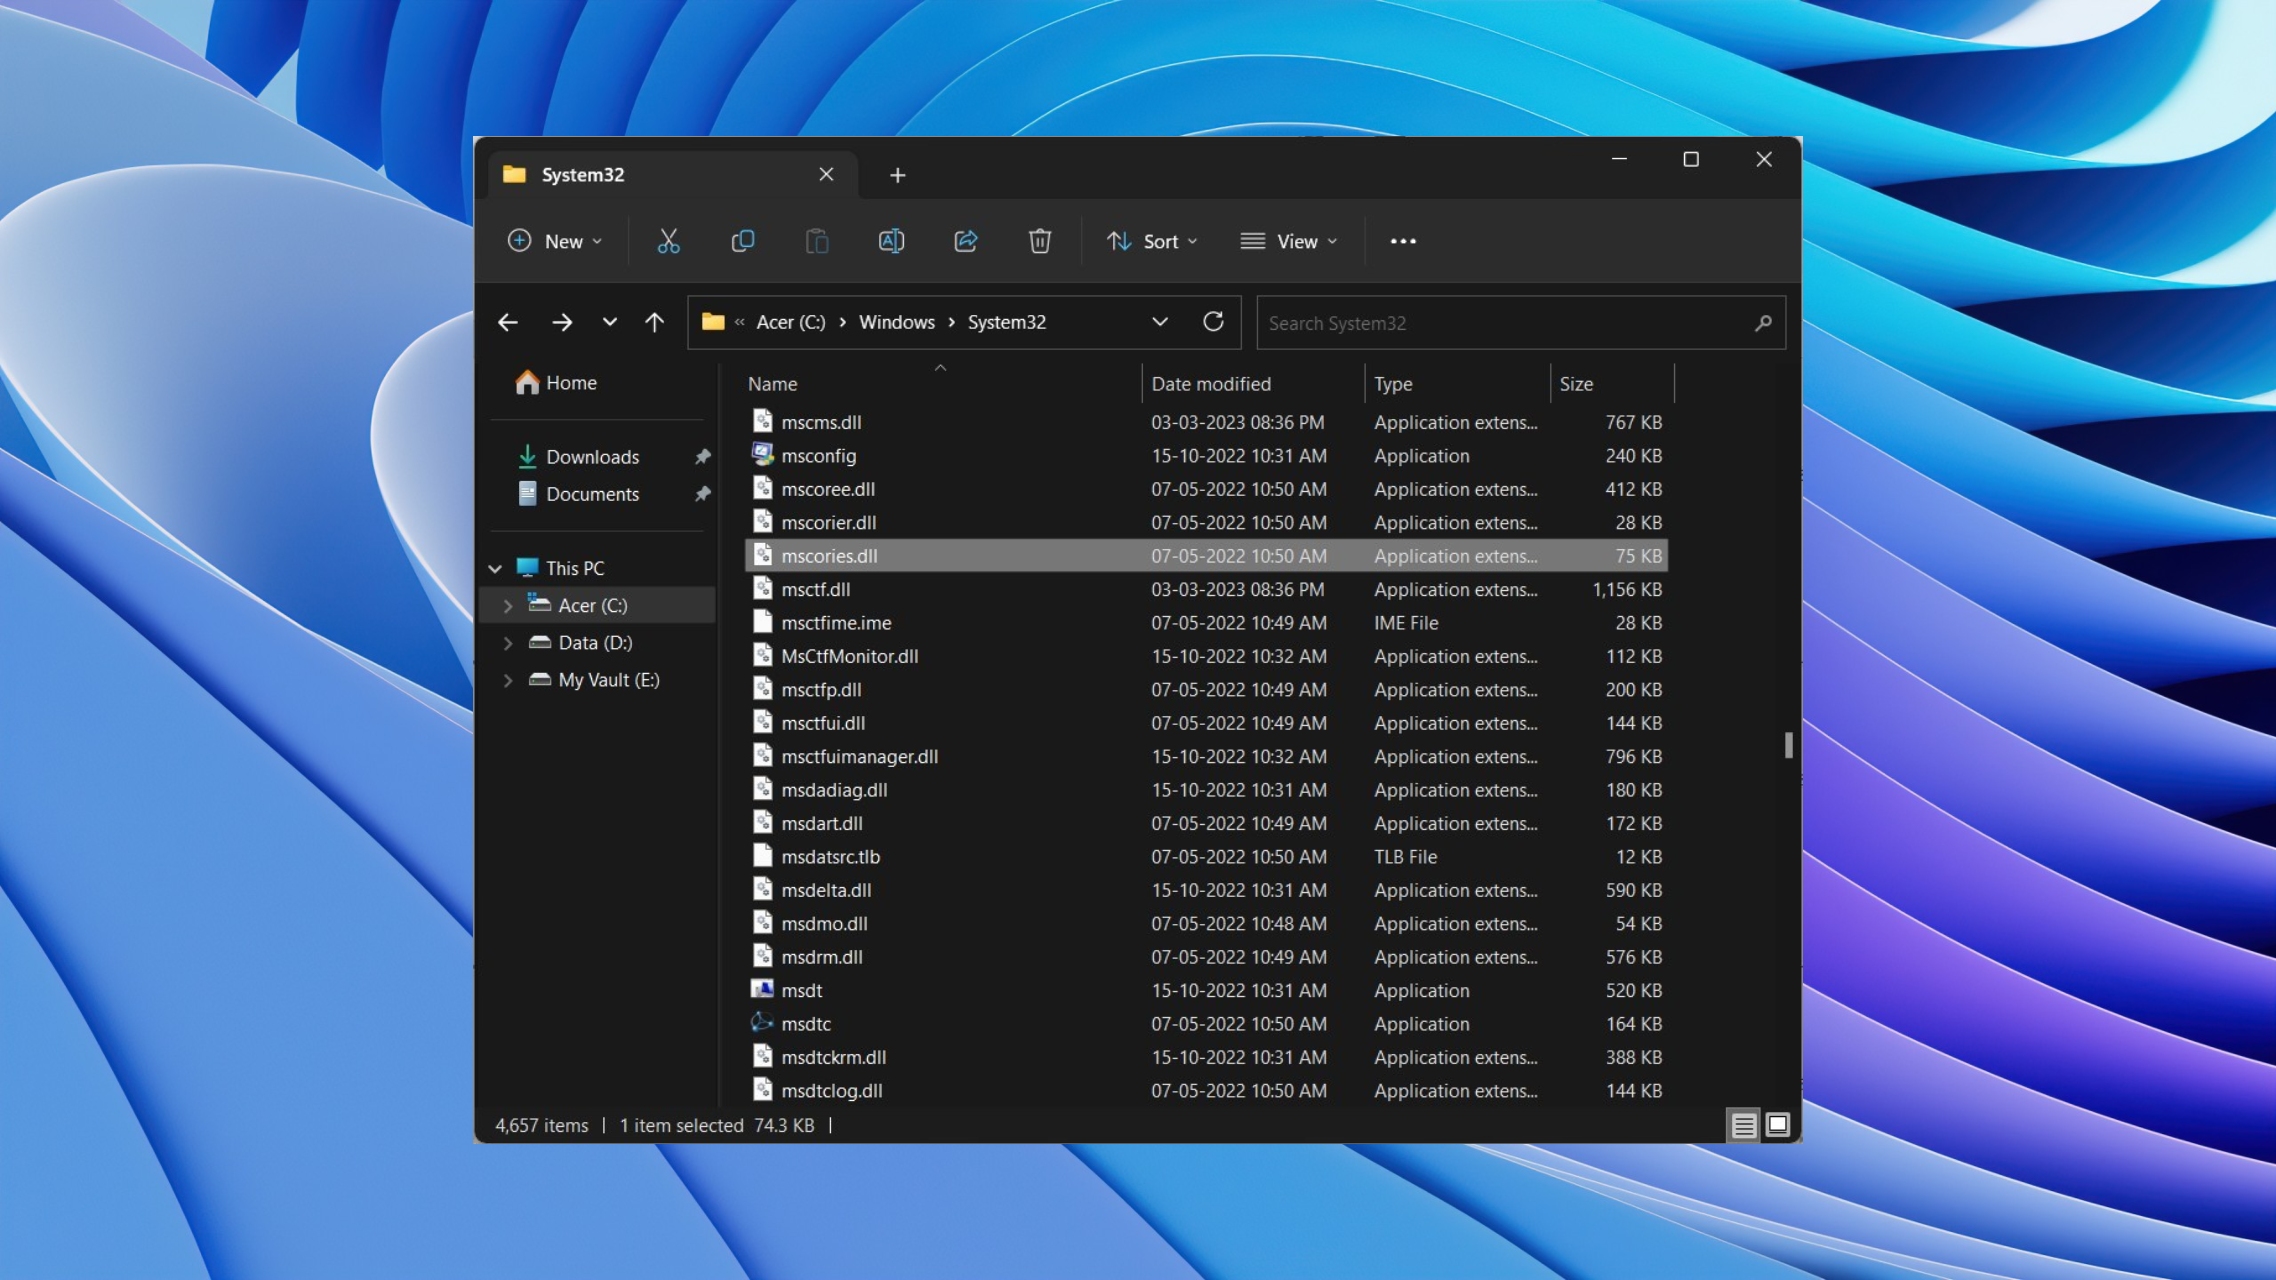
The Mscories.dll is a Microsoft .Net Framework file, the legal publisher of which is Microsoft. You will find this file inside the C:\WINDOWS\system32\ folder.
If this file is corrupt, then the programs associated with the Microsoft NET Framework will have problems and can malfunction. This DLL file runs in the background when a program associated with it is executed.
Some of the most common errors that you will come across associated with Mscories.dll are listed below:
Access Violation at address – mscories.dll.
Mscories.dll could not be found.
Cannot register mscories.dll.
Failed to load mscories.dll.
The application has failed to start because mscories.dll was not found.
The file mscories.dll is missing or corrupt.
This application failed to start because mscories.dll was not found. Re-installing the application may fix this problem.
How can I fix Mscories.dll missing error?
1. Use a dedicated DLL fixing tool
Mscories.dll file is a Microsoft NET Framework system file responsible for running programs associated with the NET Framework.
All the Microsoft NET Framework files fall under the Win32.dll file category. If this fails or goes corrupt, then you will come across multiple issues.
To fix such system files, we recommend you use one of the best DLL repair tools to repair this issue in seconds.
2. Run the system file checker
Press the Win key to open the Start menu.
Run the command prompt as an admin.
Type the below command and press Enter. sfc /scannow
Wait for the SFC scan to diagnose and fix corrupt files.
Type the below commands and press Enter after each one.DISM.exe /Online /Cleanup-image /ScanhealthDISM.exe /Online /Cleanup-image /RestorehealthDISM.exe /online /cleanup-image /startcomponentcleanup
Let the process complete.
Restart your PC.
Using the built-in SFC and DISM commands will help you fix all the corrupt files on your PC and also errors such as Mscories.dll is missing. We suggest you fix the corrupt system files on your PC and check whether this resolves the issue.
DLL errors are caused mainly because of damage or corrupt registry keys. Although tweaking registry settings isn’t advised unless you know what you are doing, some dedicated tools will help you fix the registry errors.
Also, you can hit the Scan options button and select Full scan for an in-depth scan.
Apply the prompted fixes to remove viruses and malware.
Restart your PC.
Viruses or malware can damage important system files and cause various issues, including Mscories.dll missing error. We suggest you perform a virus scan on your PC and remove any underlying viruses or malware.
In case Windows Security didn’t help, you can take a look at some of the best antivirus tools that you can use to remove the virus from your PC.
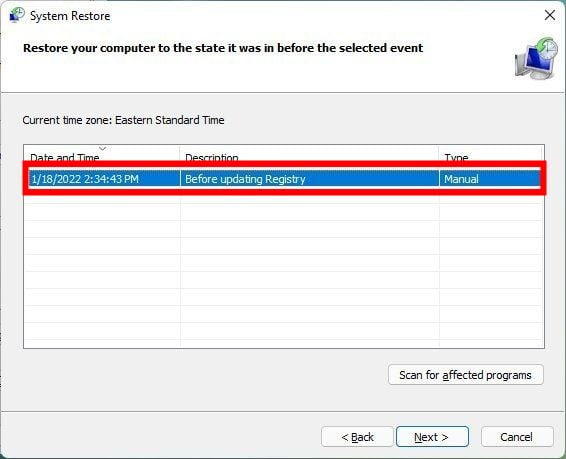
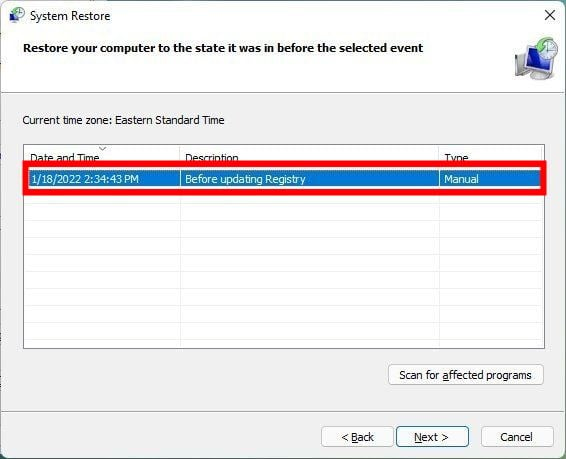
5. Perform a system restore
Press the Win key to open the Start menu.
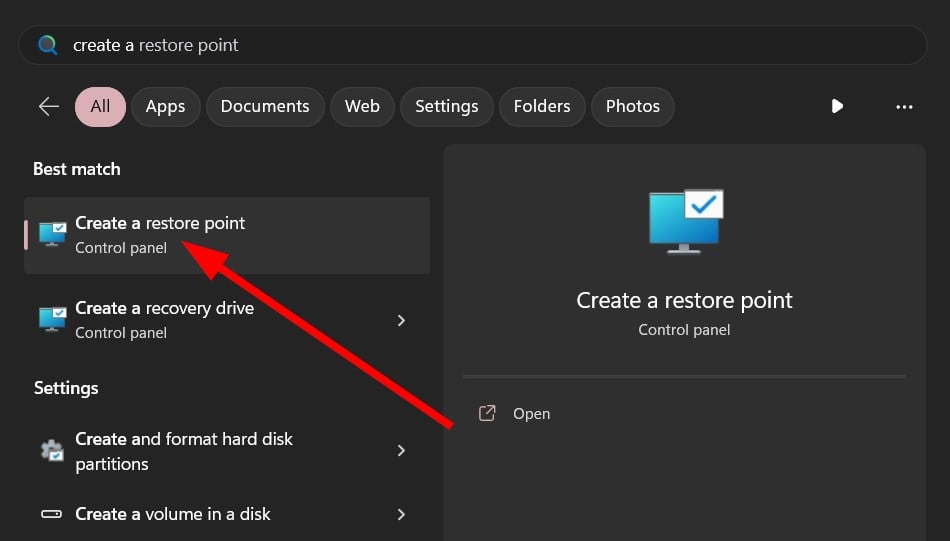
Open the create a restore point Start menu entry.
Click on System Restore.
Select Next.
Select the restore point.
Click on Next.
Click Finish.
You will be able to restore your PC to a previous restore point, only if you have created a restore point on your PC. If you are not sure how to do that, we would suggest you check out our guide that explains how to create a system restore point on your PC.
That is it from us in this guide. You can check out our guide on how to fix DLL files missing on Windows 10 with some easy-to-follow steps.
For users facing the same error on Windows 11, we have a guide that explains the solutions to resolve the DLL files missing on Windows 11.
Let us know in the comments below which one of the above solutions resolved the Mscories.dll missing error on your PC.
After months or even years of wait, Edge’s Workspaces has finally arrived on the limited public preview. That means officials at Microsoft are ready to roll it out for general users in the next weeks.
Talks about this feature have been going on since at least 2021 when the experimental feature arrived on the Canary channel for the first time. Then, at the 2022 Ignite conference in October, Redmond officials revealed it in front of devs and IT professionals.
Although only some users have access to this feature, as it is still experimental, the idea behind this feature is to allow users to have a more organized control of the tabs, being able to create tab groups and organize them while opening them. Very practical for multitaskers with wide-view or multiple monitors.
As noted from the company’s roadmap in an April 2023 entry, this feature will roll out in June.
Edge Workspaces provides a way for customers to organize their browsing tasks into dedicated windows. Edge Workspaces lets users share a set of browser tabs so working groups can view the same websites and latest working files in one place and stay on the same page. Each Edge Workspace contains its own sets of tabs and favorites, all created and curated by the user and their collaborators. Edge Workspaces are automatically saved and kept up to date.
So, how can I activate it, you may ask? Well, since it’s an insider-only feature, Microsoft is only previewing Edge Workspaces on several select insiders, but you can still test your luck and download Edge Canary. Here’s how.
3. Once the download is finished, double-click on the app to install it.
4. Finish the installation
5. If Microsoft selects your device to test this feature out, you’ll see the feature on the upper left of your screen.
What can you do with Edge’s Workspace feature?
Now that you have downloaded the testing environment and you have enabled the workspace function, let’s have a look at how you can use it.
The first thing you will need to do is click on the available icon, next to the vertical tabs. From here, the next thing is to click on Create new Workspace option and name the workspace you want to create.
After you click on the Create New Workspace option you will see that you can customize it, by giving it a name and a color. Considering you you have more than one workspace created this is a useful option.
You can create as many workspaces as you need, and once you click on one of them it will be displayed side by side, opening in a different Window. Moreover, for each Workspace you have created, the same Vertical tab features will apply, allowing you to better organize your work.
Each time you click on your created Workspace, it will open in a separate window allowing you to easily switch between projects from the workspace panel.
What do you think about this new feature that Microsoft Edge is planning on implementing in the near future? We would love to hear your thoughts on the matter, so don’t hesitate to leave us a comment.
Microsoft has agreed to stop bundling its popular teleconference app, Teams, with the Office 365 subscription. The move was taken following rival Slack’s complaint to antitrust regulators and to prevent an official probe by the EU.
As initially noted by Financial Times, Slack complained in 2020 that Redmond officials are unfair and anti-competitive by practicing bundling, as companies willing to buy 365 must also opt for Teams at that time.
Although there’s no word from Microsoft’s camp about how it’ll unfold, the decision is likely final and we’ll update you on how to opt-out from getting Teams when purchasing an Office 365 subscription. This also means that you may have to pay a little more to get Teams, as it won’t be included in your Office 365 subscription plan.
Slack raised a complaint at a time when there was a rapid increase in the trend of working from home. The pandemic led to a surge in the usage of communication apps like Teams and Slack, which resulted in a massive opportunity worth billions of dollars, as more users and organizations began adopting remote working tools.
This would be Microsoft’s first antitrust probe since 2008 when the EU accused the tech giant of being anti-competitive by pushing Windows users to download Internet Explorer through a bundle, resulting in a $561 million fine in 2013.
How much does Microsoft price the Office and Teams bundling?
The subscription price for Microsoft Office 365 apps varies for personal, business, enterprise, and education uses.
For personal and family plans, Redmond officials price the subscription at $99.99/year for up to six people and 6 TB of cloud storage. The app includes Word, Excel, PowerPoint, Outlook, OneDrive, Editor, Defender, Teams, OneNote, and more.
Additionally, Microsoft has also launched its AI-powered Copilot assistant for all Office 365 apps. While there aren’t official words from the tech giant about its pricing plan or release date yet, the feature has been tested internally on several select insiders.
What do you think about Microsoft’s decision to stop bundling Teams with Office 365 subscription plans? Let us know in the comments!
The Shell32.dll is a system-related DLL responsible for many essential functions within the Windows operating system. Notably, the Shell32.dll file is connected to several other DLL files, so it is pretty important, and the Shell32.dll error requires your attention.
Luckily, we have compiled a list of solutions that have helped several users resolve the Shell32.dll error issue at their end. This is one of the most common DLL missing errors on Windows 10 PCs. Follow the guide to fix the problem.
How can I fix the Shell32.dll missing error?
1. Use a specialized tool
Since the Shell32.dll file is an important Windows system-related DLL, you need to replace it inside the Windows system folder.
However, that isn’t a viable choice for users who aren’t that professional because any wrong move could corrupt the OS or brick their PCs. In such a case, we suggest you use one of the best DLL fixing tools.
2. Register the DLL
Open the Start menu by pressing the Win key.
Open Command Prompt as an admin.
Type the below command and press Enter. regsvr32 SHELL32.DLL
This will register the Shell32.dll file on your PC.
Chances are, because of a third-party application or program, the Shell32.dll file was unregistered or replaced. You can apply the above command, re-register the Shell32.dll file, and fix the error associated with the DLL file.
Type the below command and press Enter. sfc /scannow
Wait for the SFC scan to fix corrupt files.
Type the below commands and press Enter after each one. DISM.exe /Online /Cleanup-image /ScanhealthDISM.exe /Online /Cleanup-image /RestorehealthDISM.exe /online /cleanup-image /startcomponentcleanup
Wait for the process to complete.
Restart your PC.
Corrupt system files are often the reason behind several DLL file errors on your Windows 11 PC. You can easily resolve it by using the SFC and DISM commands.
This solution was suggested by one user on the Microsoft forums and has helped several users resolve the Shell32.dll was not found or Shell32.dll is missing error.
4. Repair the damaged registry key
Damaged registry keys can also cause the Shell32.dll was not found error. Because residual files can often conflict with the important files and cause multiple issues on your PC.
So, we suggest you look at our guide, which lists some of the best registry cleaners for Windows 10. Our experts have tested all the listed registry cleaners to provide you with the correct information about the tools.
For Windows 11 users, we also have a similar guide that lists some of the best registry cleaning tools that you can opt for to fix Shell32.dll errors.
5. Scan your PC for virus
Open the Start menu by pressing the Win key.
Open Windows Security.
Click on Virus & threat protection.
Select Quick Scan.
Alternatively, you can also click on Scan options and select Full scan for an in-depth scan.
Apply the prompted fixes to remove the virus or malware from your PC.
Restart your PC.
If your PC is infected with a virus or malware, then not only will you come across Shell32.dll not found or associated with errors, but your PC performance will also go down.
You should run a scan frequently to check if your PC is protected. We have a list of some of the best antivirus tools to use to safeguard your PC.
Keep in mind that the Shell32.dll file is a critical Windows OS DLL file that ensures that other related DLLs work smoothly without any issues.
The primary function of this DLL file is to open and handle web pages and other files on the PC. It manages the Windows Shell API (Application Programming Interface) functions.
You will come across several error messages related to the Shell32.dll file. Some of these are listed below:
Shell32.dll Not Found
This application failed to start because shell32.dll was not found. Re-installing the application may fix this problem.
Cannot find [location]\shell32.dll
The file shell32.dll is missing.
Cannot start [program name]. A required component is missing: shell32.dll. Please install [program name] again.
Cannot register Shell32.dll.
The Shell32.dll file is missing, or the Shell32.dll not found error could be caused by a corrupt registry, corrupt system files, malware or virus infection, incorrect installation, etc.
That is it from us in this guide. For users facing the DLL missing error on Windows 11, you can refer to the solutions in our guide to quickly resolve the problem.
Microsoft’s third quarter earnings report for its fiscal year 2023 is a mixed bag for the company as its post revenue of $52.9 billion with a net income of $18.3 billion representing a 7 and 9 percent increase year over year respectively, while also marking some noteworthy declines in Windows OEM, devices and Xbox revenue.
An ongoing slump in the PC market marks another three months of declining revenue for Microsoft and its OEM partners. With the PC market down around 30 percent of what it was last year, and already being down from the heights it gained during the pandemic, Microsoft’s More Personal Computing business was hit the hardest by the latest trajectory.
Microsoft reported that the More Personal Computing businesses brought in $13.3 billion in revenue which represents a 9 percent decrease year over year. Some of the main offenders in the MPC business portfolio include Windows OEM licensing being down by 28 percent year over year as well as the Devices tallying a 30 percent revenue decrease. It should be noted that Microsoft sought to bundle its HoloLens business under its Devices division last quarter and shuttered much of the development for its Mixed Reality headset subsequently.
Microsoft’s Xbox efforts also weighed on the MPC business report with its own hardware revenue decline of 30 percent, some of which the company attributes to supply constraints in 2023.
On the flipside, Microsoft reported better than expected growth in its cloud services business with Azure tracking $22.1 billion for the quarter, a 16 percent increase year over year. Azure, under the server products and cloud services label saw a 25 percent revenue increase specifically for Microsoft.
Microsoft’s Productivity and Business Processes division also raked in $17.5 billion for the quarter, an 11 percent increase for the company with Officer Commercial products leading the pack with its own 13 percent revenue increase year over year.
For more details and context, below are the investors notes:
Revenue in Productivity and Business Processes was $17.5 billion and increased 11% (up 15% in constant currency), with the following business highlights:
Office Commercial products and cloud services revenue increased 13% (up 17% in constant currency) driven by Office 365 Commercial revenue growth of 14% (up 18% in constant currency)
Office Consumer products and cloud services revenue increased 1% (up 4% in constant currency) and Microsoft 365 Consumer subscribers grew to 65.4 million
LinkedIn revenue increased 8% (up 10% in constant currency)
Dynamics products and cloud services revenue increased 17% (up 21% in constant currency) driven by Dynamics 365 revenue growth of 25% (up 29% in constant currency)
Revenue in Intelligent Cloud was $22.1 billion and increased 16% (up 19% in constant currency), with the following business highlights:
Server products and cloud services revenue increased 17% (up 21% in constant currency) driven by Azure and other cloud services revenue growth of 27% (up 31% in constant currency)
Revenue in More Personal Computing was $13.3 billion and decreased 9% (down 7% in constant currency), with the following business highlights:
Windows OEM revenue decreased 28%
Devices revenue decreased 30% (down 26% in constant currency)
Windows Commercial products and cloud services revenue increased 14% (up 18% in constant currency)
Xbox content and services revenue increased 3% (up 5% in constant currency)
Search and news advertising revenue excluding traffic acquisition costs increased 10% (up 13% in constant currency)
Microsoft returned $9.7 billion to shareholders in the form of share repurchases and dividends in the third quarter of fiscal year 2023.
Microsoft also made note of some of its product releases and other highlights for the quarter that include Smart Store Anlytics, Microsoft Sustainability Manager, Viva Goals and Power BI integration, Azure Virtual Desktop Insights at Scale, The Windows 365 app, Jupyter Notebooks and Python scripts in Teams Assignments, Generative AI in LinkedIn, GitHub Copilot X, Bing AI chat bot and a whole host of new features for Teams.
Microsoft will speak to investors later today on its earnings call in regards to continue shedding of jobs, upcoming CMA regulatory review conclusion, future plans for AI and more.
For many years, if you wanted an enterprise-level .NET development tool, Visual Studio was your only choice. However, later the landscape changed, and there are multiple other tools such as Visual Studio Code, MonoDevelop, JetBrains Rider, etc.
In this guide, we will give you a detailed comparison between Visual Studio vs JetBrains Rider. We will list all the differences and similarities (if any) between the two IDE tools and let you decide which is best suited for you. Let us get right into it.
Visual Studio vs Rider: What are they?
1. Visual Studio
Visual Studio was the first IDE tool that was introduced by Microsoft. It allowed the developers to build, edit, and debug code.
Visual Studio is primarily used to develop Windows, mobile, and desktop apps. But it also supports other languages such as C#, C, C++, Python, F#, .NET, HTML, CSS, JavaScript, and others. The support for Java was removed in 2017.
It comes with cross-platform support and can be used on Windows and Mac. You can choose among the three variants Microsoft offers for Visual Studio: Community, Professional, and Enterprise. The Visual Studio Community version is free to use.
2. JetBrains Rider
You can work on NET Framework, new cross-platform NET Core, and even Mono-based projects using JetBrains Rider. It is a new player compared to Microsoft Visual Studio.
An advantage that Rider has over Visual Studio is that you can not only run JetBrains Rider on Windows and Mac but on Linux as well.
Rider boats over 2200 live code inspections, is fast, lets you edit and debug codes, and supports multiple languages such as C#, VB.NET, JavaScript, TypeScript, XAML, XML, HTML, CSS, SCSS, JSON, SQL, and more.
It supports plugins developed by the IntelliJ platform and ReSharper, and you can also install additional plugins to enhance its features.
Comparison between Visual Studio vs JetBrains Rider
1. Features
Regarding plugins and extensions, Visual Studio has an advantage over JetBrains Rider. It got an edge, thanks to its availability for over 20 years.
Visual Studio supports a wide range of extensions that can help you expand its feature list and automate the coding process.
JetBrains Rider also comes bundled with a bunch of plugins to enhance your coding experience. You can also install various plugins and extensions from the repository.
However, given that Microsoft’s Visual Studio has been around for way longer, in terms of features, Visual Studio beats JetBrains Rider hands down.
Verdict: Visual Studio
2. Compatibility and integration
The next point in our Visual Studio vs Rider comparison is compatibility and integration. Speaking of Visual Studio, you can run it on Windows and Mac.
However, JetBrains Rider takes a step ahead, and you can install it even on Linux apart from Windows and Mac. Also, Visual Studio comes with better integration support with Git repositories, third-party ORMs, etc.
Rider also supports similar integration to Visual Studio but comes with multiple advantages such as supports Git, Azure DevOps, Mercurial, Perforce, SVN clients, repo history view, history view for a file or text selection, and more.
So, in terms of integration and compatibility, JetBrains Rider beats Microsoft’s Visual Studio.
Verdict: JetBrains Rider
3. Code debugging
MIcrosoft Visual Studio can detect issues with a limited number of languages. On the other hand, JetBrains Rider supports multiple languages and has a wide range of code analyses.
Visual Studio has over 800 configurable code inspections, while Rider has over 1600 code inspections. Both have design-time error-highlighting features for all supported languages.
Notably, Visual Studio can fix 400+ issues automatically, whereas JetBrains Rider can fix more than 2000 code issues automatically.
JetBrains Rider has additional features including solution-wide warning, integrated JSLint, ESLint, and TSLint support, code annotations, and more. Rider has one advantage it can analyze the code even in SQL queries in C# and other supported languages.
Rider’s user experience is way better compared to Visual Studio. The main advantage is that Rider’s UI is clean, intuitive, and fast, and gives you color scheme options, keyboard bindings, and much more.
Rider’s UI allows you to collapse any window you are working on giving you a clean experience. This in turn awards Rider to have a better performance.
Visual Studio takes a lot of time to compile codes, whereas Rider gets the job done faster. Visual Studio users have often highlighted freezing issues when dealing with solutions that have many projects.
The load time of Rider is also pretty fast compared to Visual Studio, which could be of great advantage for coders. Rider also comes with faster incremental build allowing you to build projects quickly.
Verdict: JetBrains Rider
5. Search Features
Speaking of another comparison in our Visual Studio vs Rider guide, the global search is pretty slow in Visual Studio.
Rider searches are lightning fast and give you results in mere seconds. Rider displays the names of the files in short format, and thanks to its clean UI, the presentation looks great.
On the other hand, the Visual Studio search results appear inside the command line tool, which could be pretty overkill for users as they are already spending their time in the same environment.
Verdict: JetBrains Rider
6. Other features
Rider comes with the power of ReSharper, making the refactoring a breeze. There are other features such as dotPeek, which works as a disassembler, dotTrace helps in tracing applications in execution, and dotMemory gets the job of profiling memory for applications in execution.
Visual Studio comes with IntelliSense, which has many reactors, but Rider has more. With all the advanced features, Rider lets you convert the entire code into meaningful logical aspects.
Rider can also generate GitHub Gists directly within the IDE and has better code navigation support.
Verdict: Rider
7. Pricing
Rider has a price advantage in that you can get the ReSharper + Rider for a much lesser price than the full version of Visual Studio.
However, Visual Studio offers you a free version to test the waters known as the Community variant. It is free to use and gives you almost all the features (of course, some are limited).
But the fact is that Rider doesn’t even give you a free option. You have to pay for it to use it. There is a 30-day free trial, but you aren’t getting a full-fledged no-nonsense free version.
Verdict: Visual Studio
Visual Studio vs JetBrains Rider: Result
Using an IDE tool depends on your requirements and what makes you feel better about coding. Rider has a lot of advantages and has won most of the categories that we have compared in this Visual Studio vs Rider guide.
If you want to develop Windows apps, have access to a plethora of extensions, and need more templates, then Visual Studio should be your choice.
However, if you are someone that, apart from advanced coding capabilities and want a tool that is suitable for the development of apps in other languages, then Rider should be your choice.
All in all, in terms of preference, you go and lean over either, however, in terms of capabilities and advanced features, JetBrains Rider is our pick.
Opera Software, now at 35 million downloads strong, has just launched Opera One. The new, Chromium-based browser is set to replace the flagship Opera for all Windows, MacOS, and Linux devices with modular design, smooth UI experience, full AI integration on the sidebar, and tab islands.
Joanna Czajka, Opera’s product director, says that the new browser is designed to bring a new, flowing experience for multi-tasking users with a more powerful and feature-rich interface open for a generative AI-based future – like the hotly-anticipated DALL-E-powered Bing Image Creator.
Tab Islands are a natural way of arranging your tabs into contextual groups without disturbing your flow. They make it easy to keep tabs that relate to each other in groups that you can open and collapse as needed. This makes browsing with many tabs more efficient, allowing for a more pleasant, liquid browsing experience.
Later this year, Opera One will replace the Opera flagship browser on all Windows, macOS, and Linux devices. But, if you’re not familiar with this browser, check our review of Opera.
So, why should we be excited about Opera One, you may ask?
What’s new in Opera One?
The new Opera One revolutionizes how users engage with their browsers through modular design, providing a smooth and seamless navigation experience that is easier to understand and use.
This design could enable users to customize their browsing experience by selecting and organizing specific features or modules. This could include bookmarking tools, extensions, themes, and more, all of which could be easily added or removed as needed.
Ultimately, a more intuitive and customizable browsing experience could lead to increased user satisfaction and productivity, which brings us to a smoother UI experience and cleaner, decluttered look.
On the sidebar, Opera One boasts ChatGPT, ChatSonic, and other AI features on both the sidebar and address bar. Opera’s updates in early 2023 that, included the addition of generative AI features into the browser, have paved the way for this new, redesigned browser.
In the future, Opera will morph to become fully modular, making the browser UI more intuitive and functional.
Opera One is the first instance of our smart, modular design within Opera. It marks the beginning of a chain of innovation, including Opera’s own AI engine to be shipped in the coming months. The web just got smarter and faster with generative AI. With Opera One, we are ready to embrace and lead that change.
With the so-called Tab Islands feature, you can say goodbye to the hassles of jumping between tabs. It keeps related tabs to each other with clear and distinguishable UX, separated by colors and clear island borders. As you browse more and more, the browser will learn to put them together without forcing it.
Are you excited about Opera One? Let us know in the comments!
Our readers have reported coming across the api-ms-win-core-libraryloader-l1-1-1.dll error when they are trying to upgrade their PC. This usually happens when a user tries to upgrade from Windows 7 to Windows 10. You will experience this error when upgrading to Windows 10 as well.
In this guide, we have listed down some of the most effective solutions that have helped users resolve the api-ms-win-core-libraryloader-l1-1-1.dll is missing or api-ms-win-core-libraryloader-l1-1-1.dll was not found error. Let us take a dive into it.
What is the api-ms-win-core-libraryloader-l1-1-1.dll file?
The api-ms-win-core-libraryloader-l1-1-1.dll file is a DLL file provided by Microsoft for Windows 7, Windows 8, and older operating systems.
This DLL file contains components that are responsible for the OS to run properly. Although the api-ms-win-core-libraryloader-l1-1-1.dll was not found error is faced when you upgrade your PC from Windows 7 to Windows 10, it isn’t limited to that.
Users have reported coming across this issue even when they try to run or open a program on their Windows 7 PC. However, most of the error is thrown at you when you use the Windows update assistant.
Here are a few of the error messages related to the api-ms-win-core-libraryloader-l1-1-1.dll file:
The program can’t start because api-ms-win-core-libraryloader-l1-1-1.dll is missing from your computer. Try reinstalling the program to fix this problem.
api-ms-win-core-libraryloader-l1-1-1.dll is either not designed to run on Windows, or it contains an error.
The code execution cannot proceed because api-ms-win-core-libraryloader-l1-1-1.dll was not found
There was a problem starting api-ms-win-core-libraryloader-l1-1-1.dll. The specified module could not be found
Error loading api-ms-win-core-libraryloader-l1-1-1.dll. The specified module could not be found.
These error messages may seem pretty long, but they aren’t that useful and do not provide information on what to look for to fix this problem.
How can I fix the api-ms-win-core-libraryloader-l1-1-1.dll was not found error?
1. Use a specialized fixer
The api-ms-win-core-libraryloader-l1-1-1.dll is a system DLL file that, when corrupt or missing, can cause several issues and prevent users from upgrading their PCs.
In such cases, our advice would be to use one of the best dedicated DLL repair tools. The software will help you fix system-related DLL issues 100%.
2. Copy and paste the wimgapi.dll
Open File Manager by pressing the Win + E keys.
Navigate to the below path and press Enter. C:\Windows\System32\wimgapi.dll
Copy the wimgapi.dll file.
Go to the below location and press Enter. C:\Windows10Upgrade\
Paste the wimgapi.dll file into the above location.
Try updating your PC.
On Reddit user suggested that copying the wimgapi.dll file will help you fix the api-ms-win-core-libraryloader-l1-1-1.dll was not found error on your PC.
Users have also suggested that installing the latest supported version of the Microsoft Visual Studio C++ has also helped them resolve the api-ms-win-core-libraryloader-l1-1-1.dll was not found on Windows 10 problem.
4. Install the latest Windows updates
Press the Win + I keys to open the Settings menu.
Click on Update& Security.
Click on Windows Update.
Select the Check for updates button.
If there is a pending update, hit the Download & Install button.
Restart your PC.
Installing the latest Windows update ensures that your PC has all the latest files, including the latest DLLs, and the bug fixes that might be causing the api-ms-win-core-libraryloader-l1-1-1.dll was not found on Windows 10 error.
Wait for the program to finish setting up your PC for an upgrade.
Follow the on-screen steps to update your PC.
One Reddit user suggested upgrading the Windows 7 PC to Windows 10 using the Windows Update Assistant. This has worked wonders for users, and they were able to resolve the api-ms-win-core-libraryloader-l1-1-1.dll was not found on Windows 10 error.
That is it from us in this guide. If you are facing DLL missing on Windows 11 issue, we suggest you refer to our dedicated guide that will help you fix the issue in no time.
Feel free to drop a comment below, and let us know which one of the above solutions resolved the api-ms-win-core-libraryloader-l1-1-1.dll was not found on Windows 10 error.
The wing32.dll not found error pops up when you run an old game on your newer PC with Windows 10 or Windows 11 installed.
Notably, the wing32.dll file is a component of the WinG library, a predecessor of DirectX. This is DLL file is included with old games or apps to run the GUI on your PC.
In case this file goes missing or there is some conflict you will face the wing32.dll not found error. Thankfully, this guide lists some solutions that will help resolve the error at hand. Let us check out the solutions.
What is wing32.dll?
Wing32.dll file is a WinG file that helped load graphics user interface on DOS in Windows XP and older OS. You will face the wing32.dll not found error when you are running an old game or program that requires this file to execute.
This is not a rare DLL problem, but a common one especially when running old games in newer OS without compatibility.
Since newer OSs come with DirectX this file isn’t available within Windows OS. Hence, if this DLL file is missing in Windows 10, then you can apply the solution mentioned below.
A bunch of error messages that you could come across related to wing32.dll are listed below:
Wing32.dll Not Found
This application failed to start because wing32.dll was not found. Re-installing the application may fix this problem
Cannot find [location]\wing32.dll
The file wing32.dll is missing
Cannot start [program name]. A required component is missing: wing32.dll. Please install [program name] again
How can I fix the wing32.dl not found error?
1. Use a dedicated tool
The wing32.dl not found error won’t usually pop up when running compatible games or programs with modern Windows OSs.
It will cause issues when you are running an older game. Even though this is because of a third-party app, there are several dedicated DLL repair tools that can help you resolve the problem.
2. Run the game in compatibility mode
Right-click on the game icon and select Properties from the context menu.
Switch to the Compatibility tab.
Check the box for Run this program in compatibility mode.
Select the Windows XP version from the drop-down.
Click on OK.
Restart your Program.
When you use the compatibility mode, Windows will make an environment that will simulate that you are running an old version of the OS, and the game will run without any issues.
This solution was suggested by a user on the official Microsoft forums and has helped users resolve the problem on their Windows PC.
You can also click on Scan options and select Full scan for an in-depth scan.
Apply the prompted fixes to remove the virus.
Restart your PC.
Some users have also reportedly fixed the wing32.dll not found or wing32.dll missing on Windows 10 error by removing a hidden virus on their PCs.
While you can use Windows Security, we would suggest you make use of a dedicated third-party antivirus tool for an in-depth scan and better outcome.
4. Copy and paste the file into the game folder
Since you are getting the wing32.dll not found error, chances are that the file is missing from the game folder, which is why it fails to load.
In such a case, we suggest you open the game installation files (available on the game’s CD or DVD), locate the wing32.dll file, and copy it. Then open the game folder where you have installed it on your PC and paste the wing32.dll file inside it.
Try running the game, and it should possibly run without any issues since the file now is available to execute.
That is it from us in this guide. Several readers facing DLL missing on Windows 11 issues can resolve the problem by reading our guide and applying the solutions.
Do let us know in the comments below which one of the above solutions resolved the wing32.dll not found on Windows 10 or wing32.dll not found on Windows 11 error.
If you are facing the d3drm.dll not found or d3drm.dll missing error, then you should understand that this error is because of some underlying error within the DirectX software. So, this is a system-related issue and is also one of the most common Windows 10 DLL missing errors.
And for those solutions, you can go through this guide and understand what the d3drm.dll is and how you can resolve the d3drm.dll not found error. This error may pop up when you try to launch a program, especially games. Let us get right into it.
What is d3drm.dll?
DirectX software contains a bunch of DLL files, and you will encounter multiple issues with it in case these DLL files are missing or corrupt.
The d3drm.dll file is bundled within the DirectX program and is executed when you run a game or app that utilizes the DirectX software.
There are different d3drm.dll error messages that you will come across, some of which are listed below:
The file d3drm.dll is missing
D3drm.DLL Not Found
File d3drm.dll not found
D3drm.dll not found. Reinstalling might help fix this.
D3drm.dll is not loaded.
How can I fix the d3drm.dll not found error?
1. Use a specialized DLL fixer
The d3drm.dll files are associated with the DirectX program. So, it is a system-related issue as DirectX is bundled with modern Windows OS such as Windows 10 and 11.
To fix such system-related DLL issues, you should use the best DLL fixing tools. You will ease the process of fixing DLL problems and fix them 100%. guaranteed.
2. Install the latest DirectX
2.1. Update Windows
Open Windows Settings by pressing the Win + I keys.
Select Windows Update.
Click on the Check for updates button.
If there is a new update available, click on Download & Install.
Restart your PC.
If you have Windows 10 or 11 installed on your PC, then you do not require to install or update DirectX manually. The latest version of DirectX is installed and is bundled with the latest Windows update.
However, if you are running an older version or still want to check for the update manually, follow the steps below.
Right-click on the game or app icon and select Properties.
Switch to the Compatibility tab.
Check the box for Run this program in compatibility mode.
Select an older version of Windows from the drop-down.
Click on Apply and OK.
Restart your PC and relaunch the game.
Affected users have also reported that running the problematic app or game that throws the d3drm.dll not found error in compatibility mode helped them resolve the issue.
4. Update the graphics driver
Open the Start menu by pressing the Win key.
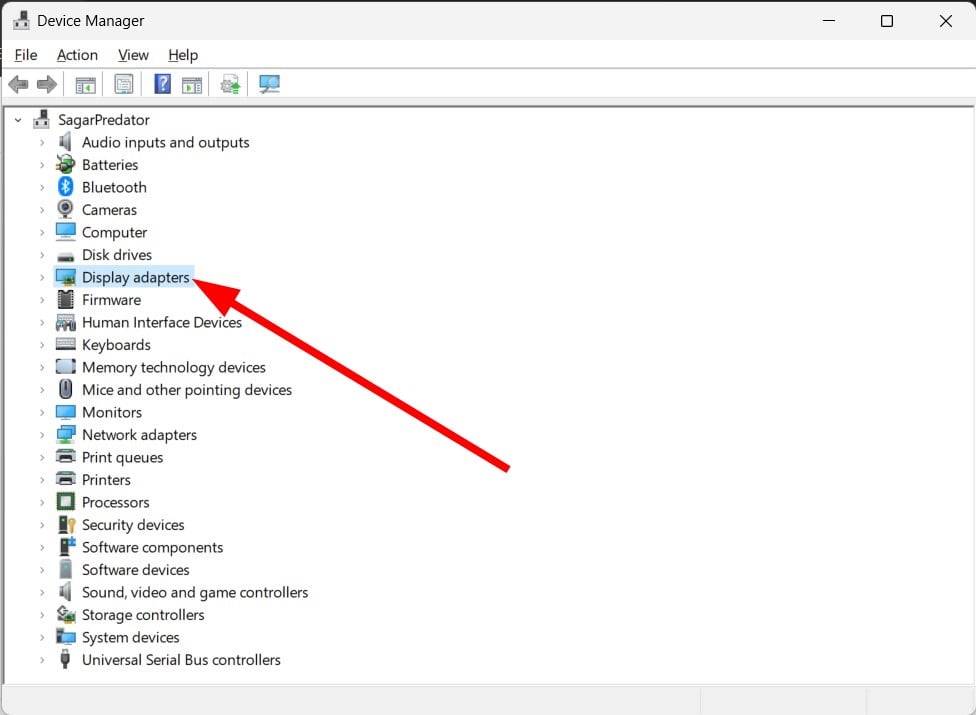
Open Device Manager.
Expand the Display adapters section.
Double-click on your GPU.
Switch to the Driver tab.
Select the Update driver option.
Choose Search automatically for drivers option.
Install the latest update.
Restart your PC.
You should check that you have the latest graphics driver version installed on your PC. This ensures you have the best features and bug fixes on your PC related to GPU.
If your drivers are obsolete and need updating, we got you. There is a solution specifically designed to update your drivers fully automatically.
Using the tool below, you will manage all drivers more efficiently and avoid various system issues.
In case you are getting the d3drm.dll error when running a game, note that often game package comes bundled with the required set of DLLs that facilitates the game operation on your PC.
You can copy the d3drm.dll file from your game package and paste it inside your system folder and then launch the app or game and check if this fixes the d3drm.dll missing or d3drm.dll not found error.
6. Perform a quick virus scan
Press the Win key to open the Start menu.
Open Windows Security.
Select Virus & threat protection.
Click on Quick Scan.
You can also click on Scan options and select Full scan for an in-depth scan.
Apply the prompted fixes and remove the virus.
Restart your PC.
Often viruses or malware can corrupt important system files, including DLLs, and cause issues such as the d3drm.dll not found error. You should perform a virus scan and check whether this is the problem’s root cause.
Do note that Windows Security is a nice built-in Windows tool. However, it isn’t as effective as other tools in such cases. So, we would suggest you make use of any dedicated third-party antivirus tool to keep your PC protected.
That is it from us in this guide. You can read our dedicated guide on how to easily resolve the missing DLL files on Windows 11.
Feel free to drop a comment below, which one of the above solutions fixed your problem of the d3drm.dll not found error.
In case you didn’t know, a few days back, the Redmond tech giant announced the availability of Windows LAPS (Local Administrator Password Solution) via the month’s Patch Tuesday.
The feature is available on Windows 10, Windows 11, and also various versions of the Windows Server operating systems.
However, since its release, Microsoft has confirmed interoperability issues with legacy LAPS, so you better keep that in mind if you haven’t yet installed the update bundle.
Speaking of system-breaking bugs, note that the Windows 11 LSA bug was fixed with kernel-mode hardware stack protection.
Patch Tuesday brings LAPS legacy issues to Windows 10&11
In other words, when legacy LAPS (MSI package) is installed on machines with the latest Patch Tuesday updates installed, both legacy, as well as the new Windows LAPs break.
Usually, an event log ID 10031 or 10032 is produced with the message LAPS blocked an external request that tried to modify the password of the current managed account.
At first, Redmond developers and security experts were quick to release a quick workaround for this annoying bug.
Thus, if you installed the legacy LAPS GPO CSE on a machine patched with the April 11, 2023 security update and an applied legacy LAPS policy, both Windows LAPS and legacy LAPS would break.
Symptoms included Windows LAPS event log IDs 10031 and 10032, as well as legacy LAPS event ID 6, and everyone was waiting on a fix for this issue.
The only temporary solution was to either uninstall legacy LAPS, or delete all registry values under the HKLM\Software\Microsoft\Windows\CurrentVersion\LAPS\State registry key.
Microsoft also specified that, if you apply a legacy LAPS policy to a device patched with the April 11, 2023 update, Windows LAPS will immediately enforce\honor the legacy LAPS policy.
The company also explained that this may be disruptive, for example if done during OS deployment workflow.
Users were also informed that disabling legacy LAPS emulation mode may also be used to prevent those issues.
Now, however, a senior Microsoft exec has announced that the the issue will be corrected in the next release for each of the affected operating systems.
Fixes for the LAPS MSI issue will be available in the next releases for each affected OS. Thanks for your patience! https://t.co/UFYhccxpHi
All that’s left now is to actually wait for Microsoft to finish work on this fix patch andrelease it via the next cumulative update batch.
Until then, make sure you steer clear of this area, just to avoid any unpleasant situations. Comment below if you had to deal with this annoying issue.
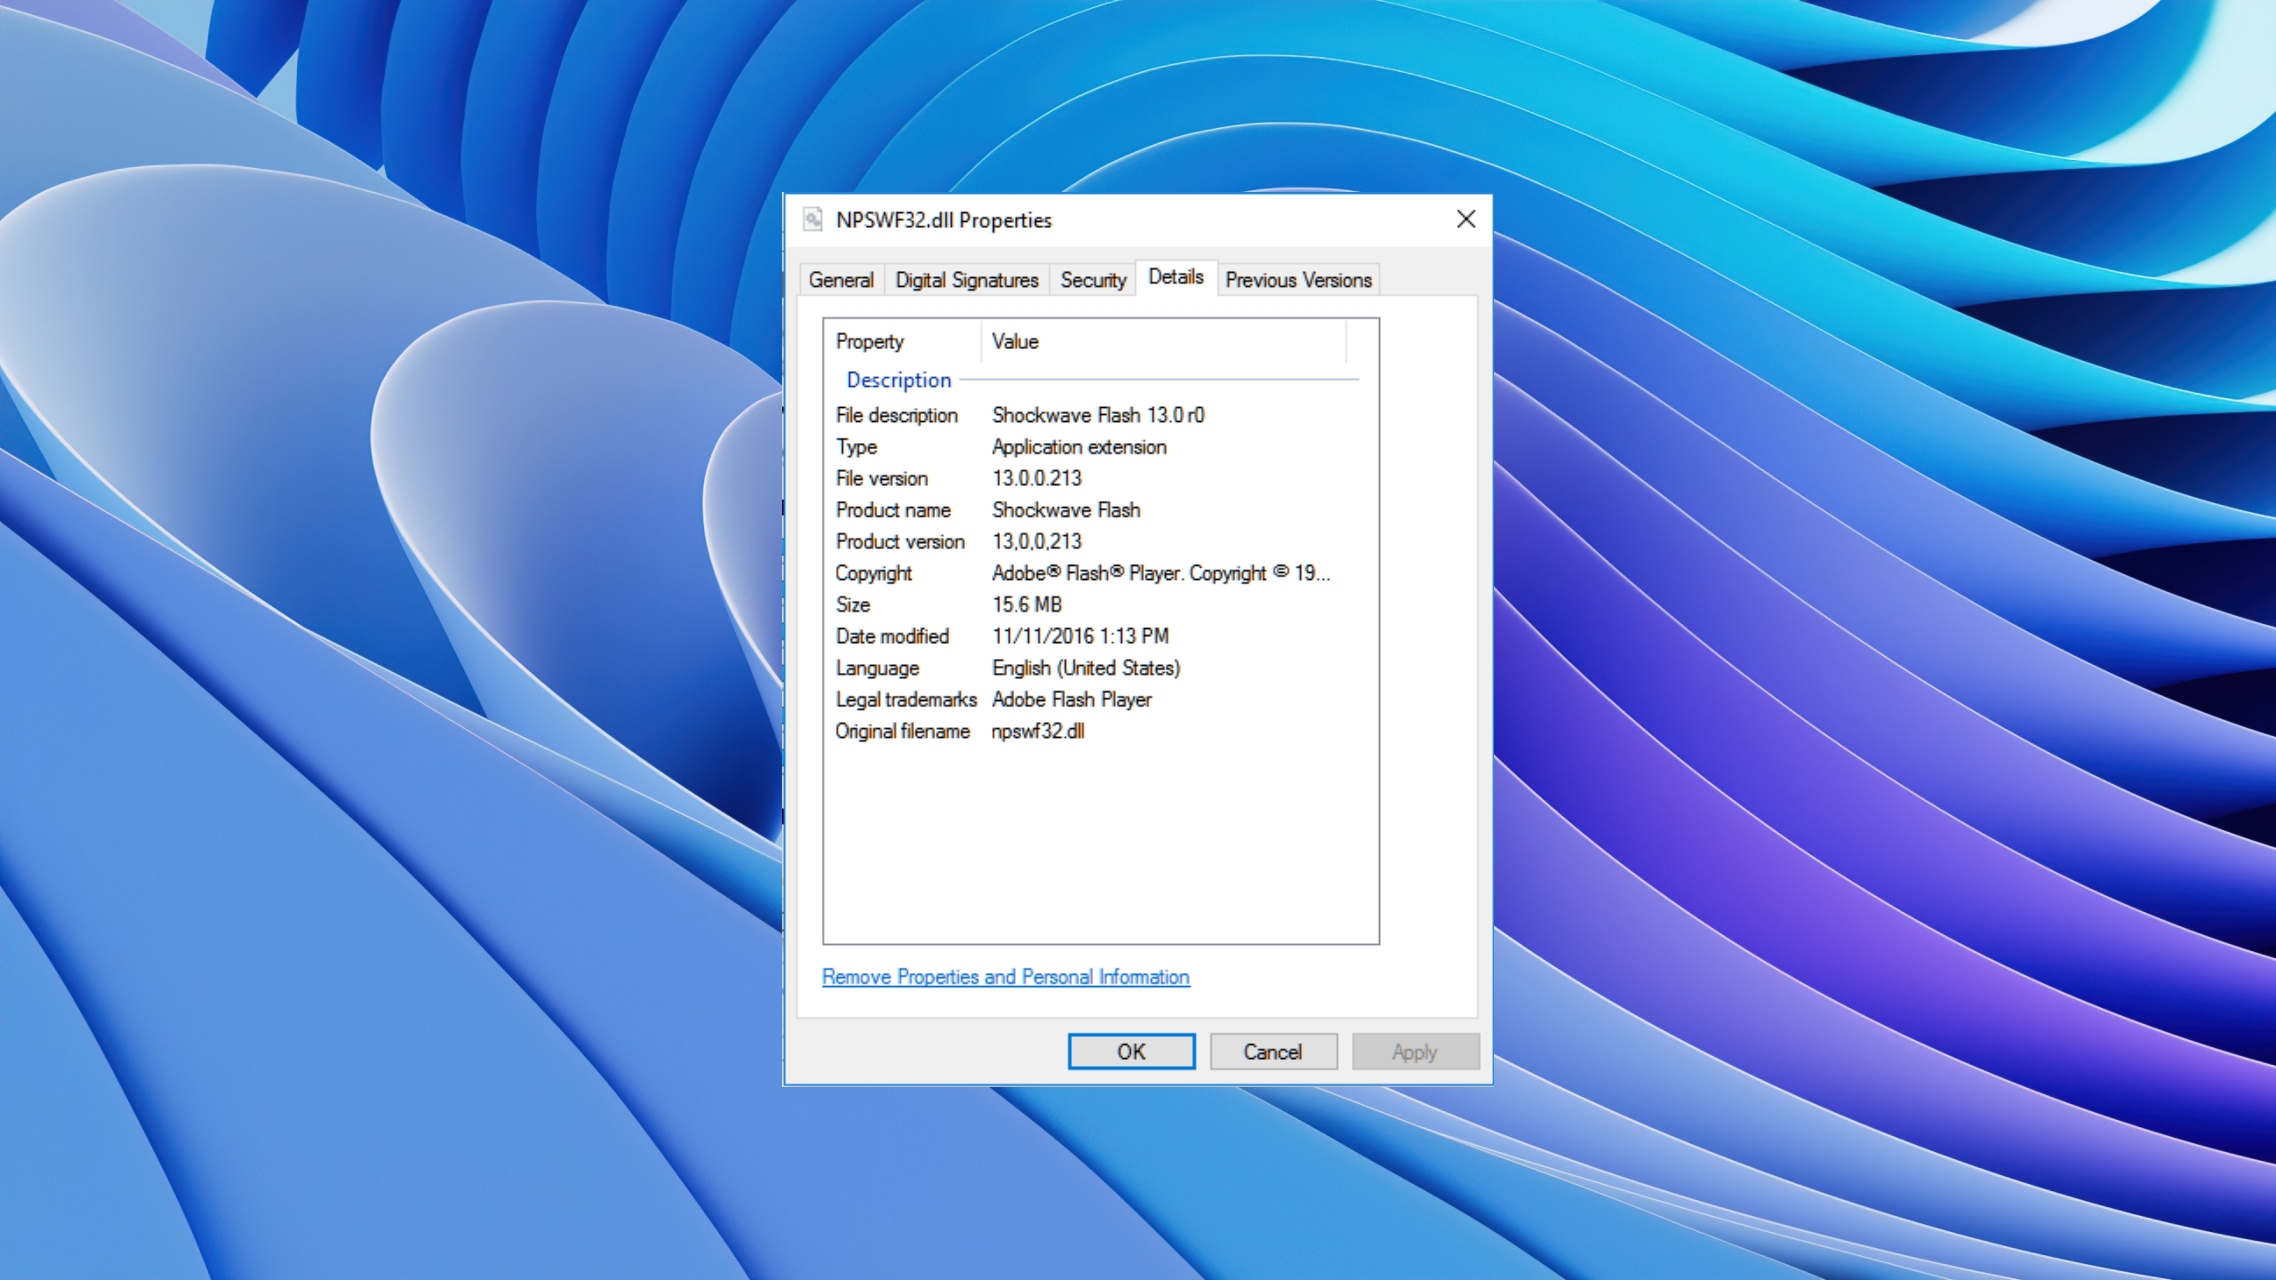
If you use Adobe programs or browsers such as Mozilla or Opera, then you will come across an Npswf32.dll missing error. This file helps control the various Flash website designs and contents and is currently published by Mozilla, Opera Software, and Adobe Systems incorporated.
While you are at it, we have a guide that will help you fix missing DLL files on Windows 10 issue by running a few commands. Since this is a third-party DLL error, there are a few solutions that you can apply and resolve the Npswf32.dll missing error.
What is Npswf32.dll?
Npswf32.dll is a third-party program DLL error. When you open any Adobe program on your PC, the contents of the Npswf32.dll will be executed.
In case the Npswf32.dll files are corrupt or missing, you will come across the Npswf32.dll missing or Npswf32.dll not found error.
Now, the Npswf32.dll file could get corrupted for various reasons, including corrupt app files, corrupt system files, virus or malware infection, etc.
Here are some of the most common error messages related to the Npswf32.dll file you will come across:
The program can’t start because Npswf32.dll is missing from your computer.
Npswf32.dll Missing.
The Npswf32.dll Not Found.
Npswf32.dll is missing from your computer. Try reinstalling the program to fix this problem.
This application has failed to start because Npswf32.dll was not found. Reinstalling the application may fix this problem.
How can I fix Npswf32.dll error?
1. Use a dedicated DLL fixer
Since we have already explained that the Npswf32.dll missing or Npswf32.dll not found error is because of a third-party program related to Adobe, Mozilla, and Opera, you might need to download the program again to fix this issue.
However, it isn’t a viable option to reinstall the program every time as it takes up a lot of time and is a bit annoying.
So, for cases when you come across such DLL files missing errors, you should use a dedicated DLL repair tool.
Such software is pretty easy to use and not only helps fix missing or corrupt system-related DLL files but also DLL files related to third-party programs. You can also use a DLL fixer to fix several other system-related problems.
2. Use SFC and DISM commands
Open the Start menu by pressing the Win key.
Open the command prompt as an admin.
Type the below command and press Enter. sfc /scannow
Let the process fix the corrupt system files.
Type the below commands and press Enter after each one of them. DISM /Online /Cleanup-Image /ScanHealthDISM /Online /Cleanup-Image /RestoreHealth
Often incompatibility to read the DLL files between the system and the third-party program can cause multiple issues. Also, if there is an underlying issue with the system, then could for a good reason cause the program to misbehave.
In such a case, we would suggest you run the SFC Scan and the DISM tools to fix the system errors and possibly resolve the Npswf32.dll missing error.
Open Windows Settings by pressing the Win + I keys.
Click on Windows Update.
Hit the Check for updates button.
If there is a new update available, click on Download & Install.
Restart your PC.
Some software requires the latest version of Windows updates installed on your PC. In case they don’t find it, they will have incompatibility issues. In such a case, we would advise you to keep your PC updated with the latest update.
Latest Windows updates not only give you access to the new features but also brings the latest bug fixes and security definition patches, that can protect your PC against modern viruses.
4. Perform a virus scan
Open the Start menu by pressing the Win key.
Open Windows Security.
Click on Virus & threat protection.
Select Quick Scan.
You can also click on Scan options and select Full scan for an in-depth scan.
Apply the prompted fixes and remove the virus.
Restart your PC.
You should check your PC for viruses or malware, as they can easily corrupt all the necessary files and cause multiple issues.
Microsoft has instituted a fresh bug bounty initiative that acknowledges and incentivizes security researchers and ethical hackers for identifying and disclosing security gaps in its Bing search engine, which includes the newly inaugurated Bing Chat AI search chatbot. The program’s purpose is to strengthen the security and dependability of Bing as it becomes increasingly reliant on AI technology.
What is Microsoft’s bug bounty program?
The bug bounty program provides security researchers and ethical hackers with an opportunity to identify potential vulnerabilities in computer programs or websites. These experts are incentivized with handsome rewards for successfully identifying security gaps. Once a flaw, commonly known as a ‘bug,’ is identified, the researcher must report it to Microsoft to receive their bounty.
Individuals seeking to participate in the latest expansion of the bug bounty program for the new Bing platform are required to submit a thorough report via the general submission list and select Bing from the list of available products. The submission should include the bug’s type, the version that contains it, any updates that may have been installed, specific configurations needed to replicate it, and step-by-step instructions for reproducing the issue during the first installation. All submissions must adhere to the Microsoft Bounty Terms and Conditions and conform to the Microsoft Cloud Bounty Program Scope. Following submission, Microsoft will evaluate the eligibility and assign it to engineers for review. If deemed appropriate, a bounty will be rewarded.
OpenAI too offers the bug bounty program
Growing apprehensions highlight that cyber-attackers may focus on exploiting AI by identifying vulnerabilities in models to harm users. Microsoft’s thriving partner, OpenAI, has launched its own bug bounty program for ChatGPT to alleviate such concerns. Interested parties can evaluate ChatGPT by accessing https://bugcrowd.com/openai, which provides guidance on how to compile a bug report. The program offers a maximum reward of $20,000, while the minimum reward is set at $100 as per the reward structure.
Windows installation, while easy, is not usually straightforward. And one of the prominent errors users report is Windows cannot install required files, accompanied by error code 0x8007025d.
This issue usually occurs when users try to perform a clean installation of their OS. Thankfully, it is not an issue without a fix, and we will show you how to get rid of it in this guide.
What is error code 0x8007025d?
The error code 0x8007025d is a stop code that usually shows up while users are performing a clean install of the operating system via USB. This error also occurs while updating Windows PC.
While there are a series of potential causes for this error, below are some of the common ones:
Faulty memory: One of the most prominent causes of this error is faulty or wrongly partitioned memory. The solution to this is to reduce the memory size and format it.
Faulty USB: If error code 0x8007025d is shown while trying to clean install Windows 10, it might be because of a corrupt USB flash drive or cable. You need to change the flash drive or cable, as the case may be.
Corrupt update cache: Sometimes, the error code can be due to a faulty cache. Clearing these junk files should do the trick here.
How do I fix the error code 0x8007025d?
Before proceeding to the fixes in this section, below are some basic troubleshooting steps to try:
Should this fail to fix the error, you can now explore the solutions below:
1. Run memory diagnostics
Power off your computer and power it on again. Shut it down forcibly (by pressing and holding the power button) when the manufacturer’s logo shows up. Repeat this twice to bring up the Advanced Startup page.
Select the Troubleshoot option.
Now, select Advanced options.
Choose the UEFI Firmware Settings option.
Next, click the Restart option.
When your PC restarts and boots into BIOS, select the Diagnostics option.
Finally, choose Memory Test, hit the Enter button, and wait for the diagnosis to complete.
In some cases, this error 0x8007025d can occur due to problems with your RAM. The solution to this is to run the memory diagnostic tool.
2. Reduce SSD or HDD size and format it
Repeat steps 1 to 5 in solution 1 above.
Click the Boot or System Configuration tab and select Boot Options.
Now, enable the Legacy support option.
Click the Yes option to confirm the action and select Exit on the next page.
On the Boot Manager page, select the USB hard drive (UEFI) option.
Next, select your OS version.
On the Windows Setup dialog, choose the custom option.
Now, click the Apply option, and click the Format button on the next page to format the new and primary partitions.
Finally, click the Next option and wait for the process to complete.
Sometimes, the 0x8007025d error can be caused by excessive space available on the partition you want to install Windows on. This extra space can get corrupted, leading to this error message.
The solution is to reduce the space and format your drive.
3. Disable antivirus
Press the Windows key, type virus, and select Virus & threat protection.
Now, click the Manage settings.
Toggle the switch for Real-time protection backward to disable it.
Finally, if you are using a third-party antivirus, right-click it, and select Disable or a corresponding option.
Some users have reported that the 0x8007025d error can be due to problems with their antivirus software. Disabling your antivirus software temporarily should do the trick here.
Press the Windows key + I and select Troubleshoot in the right pane.
Click the Other troubleshooters option.
Finally, click the Run button before the Windows Update option.
If you get the 0x8007025d error while trying to update your PC, it might be due to minor issues. Running the Windows Update troubleshooter should help diagnose and fix the issue.
With this, we can conclude this comprehensive guide on fixing the Windows cannot install required files issue on Windows 11 and 10. You should be able to get past the issue with problems by following the steps carefully.
.NET Framework is one of the many important optional Windows features that users can decide to install or not. However, installing these features is not usually straightforward, with users reporting a frustrating error code 0x800f0954.
While this error can be due to various factors, it is not the most difficult to fix, as shown in this comprehensive guide.
What is error code 0x800f0954 installing .NET Framework 3.5 on Windows 11 or 10?
The error code 0x800f0954 shows up if your PC cannot get through to the Windows Update server while you are trying to install an optional update.
Below are some of the potential causes of this issue:
Wrong settings: In some cases, this issue can be due to the Download repair content and optional features directly from the Windows Update setting on the Group Policy editor. You need to ensure this feature is enabled to bypass this error code.
Corrupt CBS log: This problem can sometimes occur because of a corrupt log file on your PC. You need to clean these junk files and try the installation of the optional feature again.
How do I fix error 0x800f0954?
1. Bypass Windows Update server
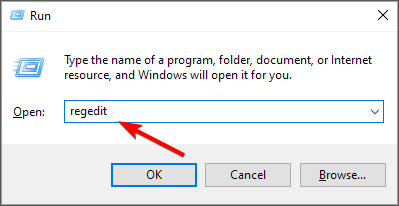
Press the Windows key + R, type regedit, and click OK.
Navigate to the path below in the left pane: HKEY_LOCAL_MACHINE\SOFTWARE\Policies\Microsoft\Windows\WindowsUpdate\AU
Now, double-click the UseWUServer option in the right pane. If the WindowsUpdate option does not exist as in the path above, follow these steps to create it:
Right-click the Windows key in the left pane, select New > Key, and name the newly created password WindowsUpdate
Now, right-click the just create WindowsUpdate key, choose New > Key, and name the newly created password AU
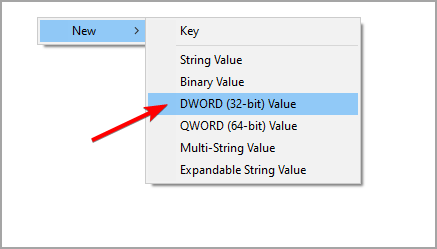
Next, right-click on the space on the right pane with the AU key selected, select New > String Value, and name the just-created string UseWUServer. Now, double-click on UseWUServer
Set its Value data to 0 and click the OK button.
Finally, restart your PC and check if you can install the optional updates.
That is how to fix the error code 0x800f0954 on Windows 10 or 11 using the registry. This solution will only help you bypass the Windows Update server.
2. Use PowerShell
Press the Windows key + S, type powershell, and select Run as administrator under Windows PowerShell.
Copy and paste the command below and hit Enter to run it: Add-WindowsCapability –Online -Name NetFx3~~~~ –Source D:\sources\sxs
Finally, restart your PC and try to install .NET Framework 3.5 again.
Sometimes, the error 0x800f0954 can be due to minor compatibility issues on your PC. The solution is to run the command above to clear these glitches.
3. Use the Group Policy editor to bypass WSUS
Press the Windows key + R, type gpedit.msc, and click OK.
Navigate to the path below in the left pane: Computer Configuration\Administrative Templates\System
Now, double-click Specify settings for optional component installation and component repair in the right pane.
Next, tick the Enabled button.
Check the box for Download repair content and optional features directly from Windows Update instead of Windows Server Update Services (WSUS).
Finally, click the Apply button, followed by OK.
Another effective solution to fix the 0x800f0954 error while trying to install optional features on your PC is to make changes to your Group Policy editor.
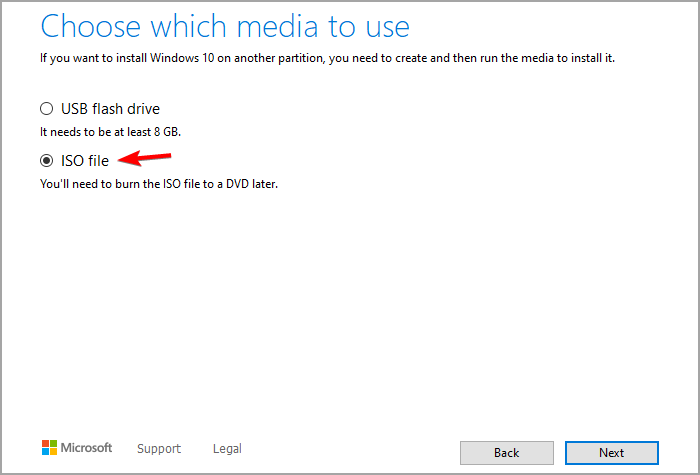
Now, double-click the ISO file to mount it. Note the drive letter of your drive or DVD.
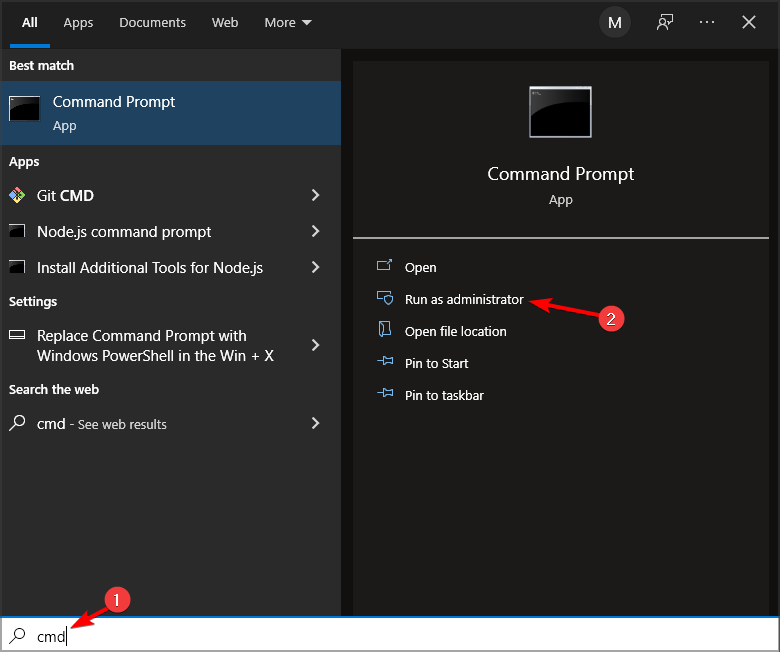
Press the Windows key, type cmd, and click Run as administrator under Command Prompt.
Next, copy and paste the command (replace X with your drive letter) below and hit Enter: dism /online /enable-feature /featurename:NetFX3 /Source:X:\sources\sxs /LimitAccess
Finally, wait for the command to finish running and restart your PC.
If you are still getting the 0x800f0954 error while trying to install optional features on your PC, you can try to use a Windows ISO file to complete the task.
5. Clean the CBS log
Press the Windows key + E to open File Explorer and navigate to the path below: C:\Windows\Logs\CBS
Double-click the CBS folder and delete its content.
Press the Windows key + S, type cmd, and choose Run as administrator under Command Prompt.
Now, type the command below and hit Enter to run it: Dism.exe /online /enable-feature /featurename:NetFX3 /source:C:\
Finally, wait for the command to finish running and try to install .NET Framework again.
If you got the 0x800f0954 error while using DISM restorehealth command, it might be because of a corrupt CBS log file. You need to clear this file to fix this issue.
We have reached the end of this detailed guide on the 0x800f0954 error. If you want to know how to repair a corrupt .NET Framework, check our detailed guide to do it effortlessly.
Feel free to let us know the solution that helped you fix this issue in the comments below.
The Lenovo ThinkPad P16 G1 is marketed as a mobile workstation, and the 2.9kg/ 6.5lbs laptop definitely stretches that notion, but offers a modern design with enough performance to almost negate its bulky portability.
4Wh battery, supports Rapid Charge (charge up to 80% in 1hr) with 170W and 230W AC adapter
What’s in the box
Discrete Trusted Platform Module (dTPM) 2.0, Smart Power On fingerprint reader integrated with power button (match-on-chip), Tile® ready, Webcam privacy shutter, Kensington lock slot, Secured-core
Look and feel
Red piping.
The first thing that will stand out to most users will mostly likely be the red piping that adorns the back venting grill of the Lenovo P16 G1 which gives this new enterprise workstation a gamer-like look and feel. Lenovo typically adds a few splashes of red to their ThinkPad devices be it a red nipple cursor, red light hidden within the logo or other subtle implementations, and with the P16 G1 the red piping on the back adds yet another area where Lenovo is looking to expand its accenting.
The other noticeable design change to the P16 last year was a new slate grey color finish that livens up the device from its previous matte black option. The “Storm Grey” still comes with the traditional velvety coating of most ThinkPad lineups but because of the color choice, fingerprint grease is much harder to detect from normal use.
Lenovo also rounded the back and bottom corners of the P16 G1 last year making it nicer to hold in the hand when picking it up to transport.
Despite feeling like a tank in hand, the P16 does use a fiber glass plastic to coat the magnesium frame of the P16 to reduce what weight it can.
Lenovo has thinned out the bezels that surround its new display as well as encased the area in a magnesium roll cage for additional stability and rigidity over the previous P15 and P17 models.
Lenovo continues to equip its laptops with a manual shutter on its FHD IR camera paired with a standard microphone array for decent in-a-pinch video conferencing situations.
As for the functional design of the laptop, the P16 unfortunately brings over similar venting issues as with many performance PCs which grate the bottom of the laptop to help push out excess air. Despite a bit of lift from the rubber bumpers on the bottom the air and head being expelled from the laptop doesn’t always feel efficient or pleasant when using the workstation on anything other than a desk. Admittedly, the tank like build of the P16 also doesn’t inspire a lot of mobility use for the average customer.
As far as ports go, the P16 has the full suite of connectivity to offer with USB-C thunderbolt, USB-A, smart card, nano Sim, (relatively slow) SD card reader, full HDMI and headphone/mic combo. The only port to get cut between previous models and the latest device is the ethernet port, which could be an issue for a few customers who regularly look to have secure wired connections when doing onsite work for outside partners or businesses.
Lastly, the P16 offers up to four different screen options, all with bumped up specs that support Dolby Vision and Adobe calibrations. OnMSFT.com was given the OLED model with boosted brightness and HDR support.
Performance
The performance of the ThinkPad P16 is CPU heavy despite having a dedicated Nvidia RTX A2000 GPU placed inside. The 12th Gen Intel Core processor placed inside punches above its weight in most benchmarking and in less GPU intensive programs. The core distribution involving 24 threads hyperthreading in the HX55 series does a great job of keeping processes in memory state snappy and responsive at most times.
When comparing the P16 to similarly built workstations, the P16 outperforms the Dell Precision 7670 regularly in tasks as well as ThinkPad X1 Extreme, if customers were looking to stay within brands. As with most workstations, the P16 performs best when connected to a power supply and can lose up to 20% of its performance when unplugged, along with battery life.
When switching over to GPU intensive tasks such as virtualization, simulations, machine learning, video editing or engineering, the onboard Nvidia RTX A2000 performs at entry-levels, putting it nicely.
Perhaps, due to hyper-caution implemented with the Lenovo Vantage OS modulating software, the GPU ceiling performs at a much lower ceiling and executes cycles much slower than current on-the-shelves devices. The GPU in the P16 isn’t bad per say, but when considering the improved thermals in the P16 and large enough chassis, it’s a shame Lenovo doesn’t seem bothered to squeeze more performance out of its GPU choice.
Summary
In real world usage however, the P16 typically runs circles around my data processing-heavy workload. Even Office 365, with its ever-increasing GPU dependence, outperformed other slimmer laptops I’ve tested.
Thanks in part to the ECC SSD onboard switching between cold apps and recent ones was smooth, there wasn’t a time that CPU-led processes ever bottlenecked, and for the most part, GPU tasks performed admirably.
However, the choice of an Nvidia RTZ A2000 seems to be a compromise I can’t figure out. Perhaps it has to do with the wattage choice and power consumption architecture or pricing but the A2000 is already a somewhat problematic GPU and to stuff it into a portable workstation such as the P16 remains a headscratcher.
For all other computer related tasks, the P16 is good. Watching videos on the new OLED screen was a pleasure and gaming non-4K content was also a decent experience as long as the titles were developed relatively recently.
At best, the P16 becomes the new large screen-sweet spot for mobile workstations for Lenovo as it handles data processing like a champ, however, at worst, an employee’s computational may become capped to specific tasks depsite easy access to memory expansion. Moving from exporting macro-heavy Excel reports and analysis to experimenting with virtualization or machine learning models will require two devices instead of the one P16.
The error message The program can’t start because D3dx9_38.dll is missing from your computer something that a lot of our readers have come across. This error basically pops up when you are trying to launch a game or an application.
This is one of the common DLL file missing errors that you will come across on your Windows 10 or 11 PC. Thankfully, in this guide, we have a bunch of solutions that will help you fix the D3dx9_38.dll missing or D3dx9_38.dll not found error. Let us check out the solutions.
What is D3dx9_38.dll missing error?
After some research, we found out that the D3dx9_38.dll is a Windows DLL associated with DirectX, a built-in Windows program. Here are a few reasons that can trigger this problem:
The DirectX version is outdated: Chances are that the DirectX version on your Windows PC isn’t the latest one, which is why you are getting this error.
The game/app has some issues: If you are not getting the D3dx9_38.dll error with any other app or game, but with a specific game or app, then the problem is with the game or app.
System files corruption: System files if corrupt, can cause other programs on your PC to misbehave or malfunction.
Latest Windows Updates aren’t installed: Your PC isn’t running the latest Windows update version, which might have brought a fix for this issue.
Let us now go through the solutions to resolve the D3dx9_38.dll missing error.
Follow the on-screen prompts to install the latest version of DirectX on your PC.
Restart your PC.
If you are running Windows 7 or older versions of the OS, you can use the Direct X End-User Runtime Web Installer, get the latest DirectX version, and get rid of the D3dx9_38.dll was not found or D3dx9_38.dll missing error.
However, to efficiently repair this issue on any Windows PC, you can use a dedicated DLL fixer. Using these tools, you can 100% restore corrupt or missing DLL files automatically, replace older files with the latest version, and much more.
2. Install the latest Windows update
Press the Win + I keys to open the Settings menu.
Click on Windows Update on the right pane.
Click on Check for updates.
If a new update is available, hit the Download & Install button.
For the latest version of Windows OS, a new version of DirectX comes bundled with the latest Windows updates.
So, ensure you have the latest Windows update installed on your PC to avoid getting the D3dx9_38.dll was not found or D3dx9_38.dll missing error.
If you are facing the D3dx9_38.dll missing on Windows 10 or d3dx9_38.dll was not found an error with a particular program, then it could be because of an underlying problem. Simply reinstall the program and check if this fixes the issue or not.
4. Run the SFC Scan and DISM
Press the Win key to open the Start menu.
Open Command Prompt as an admin.
Type the below command and press Enter. sfc /scannow
Wait for the process to complete.
Type the below commands and press Enter after each one. Dism /Online /Cleanup-Image /CheckHealthDism /Online /Cleanup-Image /ScanHealthDism /Online /Cleanup-Image /RestoreHealth
Often corrupt or missing system files can cause multiple issues on your PC. In such a case running the SFC and DISM commands can help you resolve such problems.
Alternatively, you can use the system repair solution above to detect all your Windows issues including missing DLL files, and repair them efficiently.
5. Install the latest Microsoft Visual C++ Redistributable
Follow the on-screen steps to install it on your PC.
Restart your PC.
Well, that is it from us in this guide. If you are facing DLL missing error on your Windows 11 PC, then you can refer to the solutions mentioned in our guide to resolve the problem.
Many of our readers have reported coming across the Synapse.dll error. We have properly explained in our guide what this error is and how you can resolve it.
Let us know in the comments below which one of the above solutions fixed the d3dx9_38.dll is missing on Windows 10, or d3dx9_38.dll was not found error.
The sqlite3.dll not found or missing is one of the frustrating errors, as many programs depend on the DLL file. This error can be caused by different factors ranging from malware infection to interference from other apps.
Irrespective of the cause of this error, we will show you how to fix it in this detailed guide.
What is the Sqlite3 DLL?
Sqlite3.dll is also known as SQLite, one of the most popular SQL database engines. This engine is depended on by many apps and programs that need a database.
When you install any software that requires SQLite, its installation will bring the sqlite3.dll file into action on startup. So, if this DLL file is missing, the apps dependent on it will not start.
How do I fix the sqlite3.dll missing error?
1. Use a dedicated DLL fixer
Sqlite3.dll is, without a doubt, important to running many popular apps. It is integral to the operation of your Windows PC, and it is not advisable to get such a file from another source.
Hence, to fix issues concerning the DLL file, we recommend repairing it using one of the best DLL fixers. This excellent tool will 100% fix the sqlite3.dll file since it is a system file and ensure you never face errors with it again.
Open File Explorer, right-click the downloaded file and choose Extract files.
Now, select the location to extract the file and follow the onscreen instruction to complete the process.
Next, double-click the new Autoruns folder and launch the Autoruns.exe file.
When the Startup contents of the Everything list are completely loaded, press Ctrl + F and type sqlite3.dll.
Click the Find Next button.
Now, right-click the highlighted file and select Delete. You can check the description and location of the program using the file, too, to be sure you are no more using it. If it is a trusted app, you can leave it and click Find Next again.
Finally, repeat steps 6 and 7 until you no longer have any adbwinapi.dll entries.
If you dealing with the sqlite3.dll missing error message on startup, it might be because of the incomplete removal of a program related to the file. To fix this, you need to use Autorun to remove the leftover files.
3. Perform a clean boot
Press the Windows key + R, type msconfig, and click OK.
Select the Services tab at the top, check the box for Hide all Microsoft services, and click the Disable all button.
Now, click the Startup tab and select Open Task Manager.
Right-click each of the apps there and select Disable.
Finally, go back to the System Configuration window and click the Apply button followed by OK.
If you are getting the sqlite3.dll missing error on startup, it might be because of issues with a startup app. You need to perform a clean boot and check if the issue persists.
Press the Windows key, type virus, and select the Virus & threat protection option.
Choose Scan options.
Now, select your preferred scan option and click Scan now.
At times, issues with sqlite3.dll can occur because of activities of malware on your PC. You need to perform a full malware scan to fix this.
Another option is to use excellent antivirus software in TotalAV to remove even the most hidden malware on your PC.
This software scans all corners of your PC for viruses and removes any traces of malware before they can cause problems.
5. Perform a system restore
Press the Windows key + R, type rstrui.exe, and click OK.
Click Next on the page that pops up.
Now, select the ideal restore point and click Next.
Finally, click the Finish button and follow the onscreen instructions to complete the process.
If you started getting the sqlite3.dll error message after making some changes to your PC, you need to restore your PC to a point where everything was working okay.
There you have it: everything you need to fix the sqlite3.dll missing or not found error message. We believe you should now be able to fix the issue without much fuss.
Ssleay32.dll is an integral part of the OpenSSL Toolkit. However, some users are complaining that this DLL file is missing on their PCs for some reason.
This can be caused by the corruption of the OpenSSL Shared Library and, in some cases, the complete removal of the tool. This guide will show you how to solve this problem and restore the file.
What is ssleay32 DLL used for?
Ssleay32.dll, or OpenSSL Shared Library, is part of the OpenSSL Toolkit. It plays an important role in the smooth launching and running of some Windows programs.
How can I fix ssleay32.dll if it is missing or not found?
1. Use a dedicated DLL fixer
Ssleay32.dll, like other DLL files, can encounter different types of problems. However, all hope is not lost, as you can still fix and restore it.
The best option here is to use a dedicated DLL fixer. These tools are pretty easy to use and repair your DLL files without much input from you.
And with Ssleay32.dll being a system file, you should rest assured that this tool will fix it 100%.
2. Reinstall the faulty app
Press the Windows key + R, type control, and click OK.
Click Uninstall a program under the Programs section.
Now, right-click the problematic app and choose the Uninstall option.
Finally, go to the official website to reinstall the program or use the original installation disk.
Sometimes, the ssleay32.dll not found or missing error message can be caused by a corrupt app. The solution to this is to reinstall the faulty app from official sources.
If you got the app via an installation disk, reinstall it using the original version from the developer.
3. Update your PC
Press the Windows key + I and select Windows Update in the left pane.
Click the Check for updates button.
Finally, download and install all available updates, including the optional ones and restart your PC.
Sometimes, you might get the ssleay32.dll not found or missing error because of an outdated operating system. What you need to do here is to install the latest update on your PC.
Press the Windows + S key, type cmd, and select Run as administrator under Command Prompt.
Type the command below and press Enter to run it:sfc /scannow
Finally, wait for the command to finish running and restart your PC.
In some cases, the ssleay32.dll is not found issue can be caused by broken or faulty system files. Repairing and restoring these files should solve this.
5. Scan for malware
Press the Windows key, type virus, and select the Virus & threat protection option.
Choose Scan options.
Now, select your preferred scan option and click Scan now.
Some users have reported that ssleay32.dll errors can occur because of activities of malware. What you need to do here is to scan and eliminate viruses on your PC.
Alternatively, you can use a top-notch antivirus in TotalAV to eliminate even the most troublesome virus on your PC.
This software scans all corners of your PC for viruses and removes any traces of malware before they can cause problems.
Go to a reliable third-party website like DLL files.com.
Click the Download link.
Next, unzip the downloaded file and move the rgss202j.dll file to the path below on a 32-bit PC:C:\Windows\System32
If you are using a 64-bit PC, move it to the path below instead:C:\Windows\SysWOW64
Finally, restart your PC.
If the ssleay32.dll not found issue persists after applying the fixes in this guide, you can try downloading the file from another website.
However, we recommend scanning the file to be sure it is free from malware.
With this, we can conclude this detailed guide on fixing the ssleay32.dll not found or missing issue. You now have all the required info needed to get past the error and only need to follow the steps carefully.
In the same vein, if you are facing a similar issue in Zlib1.dll not found, check our detailed guide to fix it.
Feel free to let us know the solution that helped you solve the problem in the comments below.
Adbwinapi is one of the important components of the Android Debug Bridge program. While this file works well most time, some users are complaining of an adbwinapi.dll not found error while trying to unlock the bootloader on their phones.
This can be frustrating, as it stops the app from launching. Fortunately, this guide contains quick ways to restore this DLL file if it is missing on your PC.
What is the use of adbwinapi DLL?
The adbwinapi.dll file comes with the Android Debug Bridge tool by default. It is consistently used in the process of unlocking most Android smartphones.
How can I get adbwinapi.dll back if it is missing?
1. Use a dedicated DLL repair tool
As mentioned, adbwinapi.dll comes with the Android Debug Bridge package by default. So, it is not one of the core Windows DLL files but an important third-party file.
In most cases, issues with third-party DLL files are due to incompatibility with your PC. You can fix this using one of the best DLL repair tools.
Open File Explorer, right-click the downloaded file and select Extract All.
Now, choose the location to extract the file and follow the onscreen instruction to complete the process.
Next, open the new Autoruns folder and launch the Autoruns.exe file.
When the Startup contents of the Everything list are completely loaded, press Ctrl + F and type adbwinapi.dll.
Click the Find Next button.
Now, right-click the highlighted file and select Delete. You can check the description and location of the program using the file, too, to be sure you are no more using it.
Finally, repeat steps 6 and 7 until you no longer have any adbwinapi.dll entries.
If you are getting the adbwinapi.dll not found or missing error message on startup, it might be because of incomplete removal of the software related to the file. The solution to this is to use Autorun to remove the leftover files.
Launch File Explorer and navigate to the installation folder following the path below: C:\Android\SDK\Platform tools
Now, copy each of the following files:
adb.exe
AdbWinApi.dll
fastboot.exe
Finally, paste the files into the folder containing the files you need to unlock your smartphone.
If you are getting the adbwinapi.dll not found or missing error while trying to unlock your mobile phone, it might be because the unlocked folder does not contain the required files.
You can fix this by copying them from the Android SDK installation folder.
Press the Windows key + R, type control panel, and hit Enter.
Click the Uninstall a program option under the Programs section.
Now, right-click the Android SDK app and choose Uninstall.
Finally, go to the official website shown in the solution above to reinstall the program.
Sometimes, the adbwinapi.dll not found error message can occur due to a faulty or corrupt Android SDK app. The best way to fix this is to reinstall it from the official source.
5. Perform a system restore
Press the Windows key + R, type rstrui.exe, and press Enter.
Click Next on the following page.
Now, choose your preferred restore point and click the Next button.
Finally, click Finish and follow the onscreen instructions to complete the process.
If you still can’t solve the adbwinapi.dll not found error, you might need to restore your PC to a point where everything works well. This will eliminate the changes you might have made to your PC, causing the issue
We have reached the end of this detailed guide on fixing the adbwinapi.dll not found issue. You now have all the required info to fix the issue and only need to follow the steps carefully.
Similarly, if you are dealing with another DLL problem like Zlib1.dll not found, check our detailed guide to fix it.
Feel free to let us know the solution that helped you solve the problem in the comments below.
DLL errors are common on Windows PCs due to the rate at which the files are used. One of the frequent ones reported by users is the opencl.dll not found error, preventing them from launching some apps.
Opencl.dll, or OpenCL Client DLL, is an integral part of OpenCL ICD (Installable Client Driver). Many apps and games require it for effortless launching and running.
So, if anything happens to this crucial DLL file, it will affect some important programs negatively.
How can I fix the opencl.dll not found error?
1. Use a dedicated DLL fixer
Opencl.dll is among the essential files that make launching and running apps and games effortless on Windows PCs. It is a system file, so any change must be well thought out to prevent further issues.
Hence, we recommend using one of the best DLL repair tools to fix this file instead of downloading it from a third-party website. To improve things, this excellent software will 100% restore the opencl.dll file since it is a Windows DLL file.
2. Update drivers
Press the Windows key + X and select Device Manager.
Double-click the section you want to update drivers for and right-click the device under it.
Now, select the Update driver option.
Finally, choose Search automatically for drivers and install any available updates.
The opencl.dll file has much to do with your drivers, and any issue with it might be related to an outdated driver. Hence, it is recommended to update all your PC drivers.
While you can always update your drivers manually following the steps above or via the manufacturer’s website, the undisputed best option is to use an automatic driver updater for this task.
3. Reinstall the faulty app
Press the Windows key + S, type control, and click Control Panel.
Choose Uninstall a program under the Programs heading.
Now, right-click the app giving the error and select the Uninstall option.
Finally, go to the official website to reinstall the program or use the original installation disk.
Sometimes, the opencl.dll not found error message can appear because of issues with the app you are trying to open. You might need to reinstall the app from the official source to fix this. This also helps with the Cannot load library DevIl.dll error.
4. Update your PC
Press the Windows key + I to open the Settings app and select Windows Update in the left pane.
Now, click the Check for updates button.
Finally, download and install the available updates, including the optional ones and restart your PC.
Issues opencl.dll can sometimes be caused by an outdated operating system. Downloading and installing the latest Windows patches is the best way around this.
Go to a reliable third-party website like DLL files.com.
Click the Download link.
Next, unzip the downloaded file and move the opencl.dll file to the path below on a 32-bit PC:C:\Windows\System32
If you are using a 64-bit PC, move it to the path below instead:C:\Windows\SysWOW64
Finally, restart your PC.
Last but certainly not least, on our list of fixes for the opencl.dll not found issue is downloading the DLL file from a third-party website. This is the least preferred option, but it has proved effective, and you should try it, too.
However, ensure you scan the downloaded file for its safety.
There, you have everything you need to fix the opencl.dll issue for good. With the information in this guide, you should never be troubled by this issue again.
Bad news for Xbox users. After a few days of its disappearance, Microsoft confirmed that they have indeed removed the ability to share Xbox clips to Twitter from Xbox One and Xbox Series X/S consoles.
Here’s what Xbox said in a tweet replying to a user’s complaint about the absence of Twitter’s share button,
We have had to disable the ability to share game uploads to Twitter directly from the console and Game Bar on Windows. You can still share your favorite moments to Twitter via the Xbox app for Android and iOS.
If you’re not familiar with what’s been going on, Twitter, now under Elon Musk’s leadership, had just rolled out a new API paywall pricing plan back in March 2023 that could cost Microsoft at least $42.000 a month. While Redmond officials haven’t confirmed the main reason for Twitter’s disappearance from its beloved console, many suspected that this could be the reason.
The pricing plans start from $100 per month for smaller creators with a limit of 3,000 tweets per month at the user level.
The good news is, Microsoft didn’t completely kick Twitter off its system. As mentioned, the tech giant further said that users can still share their clips via the third-party Xbox mobile app for Android and iOS devices.
So, how do I share Xbox clips on Twitter, then, you may ask? If you relate to this question, here’s what you can do.
How to share Xbox clips on Twitter.
1. Download the Xbox companion app. Depending on your mobile, you can download it through iOS App Store or Android Play Store.
2. Press the Xbox button on your controller, then go to Capture & share ➜ Recent captures.
3. Select the clip that you want, then click Upload to the Xbox network ➜ Upload.
4. On the Xbox app on your phone, go to My Library ➜ Captures.
5. Click on the clip, then hit Share. The clip will be downloaded automatically and you can upload it on Twitter.
As you may also remember not too long ago, Microsoft has also discontinued its assistance for Twitter on its advertising platforms, so it seems like the headbutting between these two tech giants isn’t stopping any time soon.
If you’re looking for tips to fix your Xbox One that won’t load games, we’ve also prepared a set of guides you can try
What do you think about Xbox removing the Twitter share button from its consoles? Do you find these tips helpful? Let us know in the comments!
Microsoft SharePoint is a document management tool companies use to keep track of their files. As good as it may be, the software is unfortunately prone to errors. For example, it’ll suddenly stop working.
And in other scenarios, it won’t export files to Microsoft Excel. For this guide, we will examine and recommend what you can do when SharePoint claims a column name doesn’t exist in its database.
Why is my column not showing in the SharePoint list?
It’s certainly not because of malware. The reason why a column name won’t appear is usually due to some configuration problem within the
You don’t have the right permissions –Similar to being unable to edit Web Part, double-check your SharePoint to see if you have the correct site permissions.
SharePoint isn’t syncing with Windows 11 –Try installing the latest versions of your Microsoft Office apps. You may also need to tweak the registry a bit.
How can I fix this SharePoint error?
Because this error is very specific, there aren’t many ways to fix it. Still, the existing methods have proven successful if the user reports are anything to go by:
Ensure the name in the column doesn’t have any parentheses or brackets.
Double-check to see if there are any carriage returns in the column heading cells
Remove numbers and special characters from column names
1. Check the column name
In SharePoint, click the gear icon in the upper right-hand corner. Select List Settings in the drop-down menu.
Scroll down and click the column that doesn’t work. Selecting it will allow you to edit it.
In the Column Name box, make sure the name you see matches the internal name you can find in the URL after “Field=”.
If they’re different, change the name in the Column Name box to match the one in the URL.
If the names are already the same, retype the name from scratch.
Type “notepad” into the Windows 11 Search bar. Click the entry that appears to launch the Notepad.
Go to SharePoint and copy the name of the problematic column. Paste the name into the Notepad window.
If there are quotation marks around the name, delete them. Copy and paste the newly edited name into the SharePoint column.
If all else fails, contact your workplace’s network administrator to see if they can help with a malfunctioning SharePoint. It may interest you to know there are ways to enhance SharePoint.
DLL files are vital processes needed by applications or web browser extensions due to their capacity to store computer code, data, and resources. Sechost.dll is one of the many known DLL files.
Some of our readers have requested to know what the file is and how to download it on their Windows PC. This article will provide you with the information needed regarding the Sechost.dll file.
What is the Sechost.dll?
Sechost.dll is a Dynamic Link Library file that is a core component of the Microsoft Windows operating system. It is responsible for managing and implementing various security-related functions in Windows, including handling processes related to the Windows Security Center service.
One of the primary functions of Sechost.dll is to provide a secure environment for running Windows services—background processes that run without user interaction and are critical to the functioning of the OS.
Another important function of Sechost.dll is to manage the communication between Windows services and the Service Control Manager (SCM).
If any issue arises with the file, it can result in a range of problems, including issues with security-related functions and the stability of the operating system as a whole.
How can I download the Sechost.dll on my PC?
Before you proceed to download the file on your computer, you should consider performing the following preliminary checks:
Confirm your Windows System version (32 or 64-bit).
Check System32 (32-bit) or SysWOW64 (64-bit) folder to know if the Sechost.dll file is present on your PC or not.
Having confirmed the above checks and if you can’t find the Sechost.dll file on your PC, follow the methods below to download the file.
1. Use a third-party DLL fixer
As earlier stated, issues with the Sechost.dll will cause big problems for your PC. Hence, you need to repair or download the file again. However, countless third-party websites are offering this file and it may be unsafe to try them.
To stay safe, it’s better to use DLL repair tools like the one below. This kind of software can fix 100% of issues you have with missing or corrupted Windows files.
Once it detects any threats during the scan, it removes them in no time, leaving you with a fully optimized computer. This will solve most of your DLL errors and restore your Windows computer to its previous state.
2. Reset your Computer
Press the Windows + I keys to open Settings.
Click on the System option and choose Recovery from the left pane.
Click the Get Started button under the Reset PC.
Choose to Keep my files and wait for the process to complete.
Once the process is complete, the Sechost.dll file should have been restored to your computer. The above procedure is similar to a clean reinstall, but it will save you some time and preserve your data from the system partition.
And that’s it on how to download Sechost.dll files. You can try any of the methods provided above.
For further assistance, you can explore our detailed guide on how to fix DLL files missing in Windows and learn what causes it.
If you have any questions or suggestions, or possibly another method to use for downloading the Sechost.dll file, you can use the comments section below.
Some of our readers have recently reported that they encounter the error code 0xC0070057 when they attempt to sign in to some of the Microsoft Office applications.
If you are experiencing similar issues and don’t know what causes it and what fix to apply, do not worry. We have gathered information about the 0xC0070057 error code and how to fix it.
What causes the office app sign-in error 0xC0070057?
There can be several reasons why you are finding it difficult to sign in to the Microsoft Office apps due to error code 0xC0070057. Below are five possible reasons behind this issue:
Corrupt credentials – Some users reported that they encounter the error code 0xC0070057 because their login credentials were corrupt.
Signed into multiple accounts – If you have multiple Microsoft accounts or you’re logged into more at a time, this may trigger the sign-in 0xC0070057 error. So, try signing out of all Microsoft accounts, clear the cache and cookies, and then sign in again.
Internet connectivity issues – If your internet connection is poor, it can also cause the sign-in error 0xC0070057 in Office apps. Ensure that you are connected to a stable Internet, then try signing in again.
Outdated Office app – An outdated Office app version can cause sign-in errors due to incompatibility issues. To fix this, ensure that you have the latest version of the Office app installed.
Now that you know some of the potential reasons behind the office app sign-in error 0xC0070057, let’s proceed to how to fix the issue.
How can I fix the error 0xC0070057?
Before trying any of the proven fixes for the office app sign-in error 0xC0070057, users should ensure they perform the following preparatory checks:
Make sure you are not signed in on more than the approved devices.
If after attempting the above checks, you still require further assistance on how to fix the issue, you can explore the advanced solutions below.
1. Reconnect your Microsoft Account
Press the Windows + I keys to open the Settings app.
From the list, click on Accounts and select Access work or school on the left pane.
Check if your account is already connected on the right side of the Window.
If not, click on the Connect button.
However, if it is connected, then try to disconnect and reconnect.
Restart your PC and then try to sign in to the Office app.
Several users claim the error was fixed when they try to reconnect the Microsoft Office account in Windows Settings app. If this doesn’t work for you, try the next fix.
2. Delete the Credentials file in the AppData folder
Press the Windows + E keys to open File Explorer.
Navigate to the following path: C:\Users\username\AppData\Local\Packages (change the Username to the name of your user account).
In the Packages folder, locate Microsoft.AAD.BrokerPlugin_cw5n1h2txyew and right-click on it. Select Delete from the context menu and restart your PC.
Deleting the credentials file will not cause further problems since the file is not critical to making the application run. Now try to sign in and see if the error is fixed. If not, try the next solution.
3. Use the Registry Editor
Press the Windows + R keys to open the Run dialog box. Type regedit in the text field and press Enter.
Once the Registry Editor window opens navigate to the following path: HKEY_Current_User\Software\Microsoft\Office\16.0\Common\Identity
On the right side of the window, right-click anywhere and select New, then DWORD (32-bit) Value, and rename to DisableAADWAM.
Double-click on DisableAADWAM and under Value data, enter 1.
Now, repeat steps 3-4 to create two more values; DisableADALatopWAMOverride and EnableADAL.
After resetting their values to 1, close Windows Registry and restart your PC.
This method involves creating some Registry keys. To that effect, ensure that you back up your Registry Editor before proceeding to be on the safer side.
If you’re experiencing this issue due to Registry malfunctions, we confidently suggest a system repair tool that can repair registry issues automatically.
4. Perform a System Restore
Press the Windows + S keys and type System restore in the Search box. Choose Create a restore point from the menu.
Select System Properties and click on the System Restore button.
Click on Next.
Now, select the desired restore point and click on the Next button.
Follow the on-screen instructions to complete the restoration process.
If none of the above methods works for you, the Windows System Restore should fix the issue by reverting your computer to a period before the Sign-in error 0xC0070057.
And that’s it on how to fix the Office app sign-in error code 0xC0070057. Hopefully one of the fixes provided has helped you to fix the issue.
Generative AIs have effectively taken over the world by storm. Tools like ChatGPT can create massive amounts of content for free.
But there’s a slight problem with these tools. They’re not available across the globe either because a country blocked access or the developers just haven’t gotten around to expanding support.
Where is Microsoft Image Creator available?
Since Microsoft’s Image Creator is based on OpenAI’s DALLE 2 AI, it offers the same level of access. Most countries have access to the tool, with a few exceptions like Russia, Cuba, and Iran.
Go to Tor’s browser website and click Download for Windows. Run the file to install it and open it.
Close the Tor browser. Go to C:\Users\[USERNAME]\Desktop\Tor Browser on File Explorer. Replace [USERNAME] with your own.
Open the following folders in this order: Browser,TorBrowser, Data, and Tor.
Double-click torrc. Select Notepad in the popup window.
Enter the following commands: EntryNodes {us} StrictNodes 1ExitNodes {us} StrictNodes 1
You can add countries besides the United States to torrc. Go to ISO’s Online Browsing Platform, select Country Codes, and hit Search.
Search for other Alpha-2 codes for countries you want to use on Tor, like FR for France.
Add that Alpha-2 code to torrc. Click File, then select Save.
Launch the Tor browser, go to any website, and click the lock icon in the address bar. You can see which countries Tor is connected to in the small window.
You may be asking what’s the difference between Bing AI and ChatGPT 4 because they’re based on the same tech. The main difference is Bing’s version is better optimized for searching for specific data.
There are a variety of VoIP apps out there, like WhatsApp for mobile, but on Windows 11, the best ones are arguably Discord and Skype. But the question is: which is the best for you?
Is Skype better than Discord?
Skype and Discord are two excellent choices with different strong points, suitable for differing purposes. They both boast many adhering features and share some things in common.
However, there are still some distinctive features, and we put them at loggerheads in the next section of this guide.
Skype vs Discord: Comparison
Skype
Discord
Can schedule meetings and calls
Can’t schedule meetings or calls,
Only supports one username at a time
You can give yourself a unique nickname on each server
Supports group audio calls of up to 100 people
Voice channels can support up to 100 people
Supports live streaming
Supports live streaming
Requires sending out a link for joining calls
Can join calls by selecting the channel
Has limited customization options
Has a wide assortment of customization options
Doesn’t support custom emojis
Supports custom emojis with Nitro plan
Skype premium adds voicemail, SMS texts, and calls outside of the app
Discord Nitro adds HD video streaming, Server Boosts, and more customization tools
File size limited to 300 MB
File size limited to 500 MB
All communications are encrypted
Voice chats are encrypted, but text chats are stored on company servers
Now, let’s compare Skype and Discord and see how they stack up against each other.
1. Features
Discord has a better set of features by far. It’s very easy to enter a Discord server, and it has the tools to foster a close-knit community. And in those servers, you can create multiple channels. Skype can’t do this.
Inviting people over is more cumbersome on Skype since you have to generate a link to enter a chat. With Discord, the link is for the server. Any chats can be entered just by selecting them.
Discord Nitro adds premium features like HD Video Streaming plus Server Boosts to enhance a stream’s audio quality to 384Kbps and increase the audience size.
Skype’s premium features are pretty lackluster. Users gain the ability to send SMS texts to non-Skype users and make calls to a landline phone.
The increased resource consumption can be caused by being a part of many Discord servers. This can eat up the CPU, especially if you are in the habit of uploading large-sized files.
Note that Discord devs recently upgraded its file size limit to 25MB. This pales in comparison to Skype’s 300MB free upload size. However, that amount can be boosted to 500MB on Discord with Nitro.
Discord’s user interface can be pretty intimidating. At first, it’s pretty simple as you don’t have much to deal with. But as you enter more servers and communities, things get complex.
Suddenly, you have a ton of notifications flying at you daily from multiple servers wanting your attention. You can get rid of them anytime, although the tool isn’t obvious.
Skype is much cleaner in comparison. Discord’s customization options, however, are better, allowing users to create an experience all their own such as allowing different themes.
Skype vs Discord: Verdict
If you have a business or prefer its simplicity, Skype is the better piece of software and the one you should go with. However, that simplicity comes at the cost of having fewer tools.
If you want a communications app for anything else, Discord is the superior software.
It has better features, privacy, and a sophisticated interface. Skype’s major benefits are its interface, free 300MB file upload size, and it doesn’t cause your CPU to dip in performance.
There are also other communication apps out there that don’t require an internet connection. If there are comparisons you’d like to see, tell us your suggestions in the comments.
Your PC security should be your priority, but many users reported Kernel-mode hardware-enforced stack protection is off message in Windows Defender.
This message can leave your PC vulnerable to malware attacks, so you must fix this problem as soon as possible.
Luckily, there are ways to solve this issue, and in today’s guide, we will show you the best way to fix this.
What is kernel mode hardware-enforced stack protection?
This feature is associated with Local Security Authority Protection, and it’s designed to protect sensitive information, such as your login credentials or encryption keys.
Using this feature, your computer will block untrusted code from running in kernel mode and keep your PC safe.
How can I fix Kernel-mode hardware-enforced stack protection is off error?
Before we start fixing this issue, you might want to do the following:
Update BIOS – It’s suggested to update BIOS. To fix this error, you need to have BIOS that supports Control-flow Enforcement Technology (CET).
1. Modify the registry
Press Windows key + R and enter regedit. Press Enter.
Once the Registry Editor opens, navigate to the following path: HKEY_LOCAL_MACHINE\SYSTEM\CurrentControlSet\Control\Session Manager\Memory Management
In the right pane, locate FeatureSettingsOverride and double-click it.
If it’s not available, right-click the right pane, choose New, and then select DWORD (32-bit Value). Name the new value FeatureSettingsOverride and double-click it.
Now change its Value data to 9 and save changes.
Close Registry Editor and restart your PC.
The KSHSP will now be enabled. If it’s not, do the following:
Open search and enter cmd. Now select Run as administrator to start Command Prompt.
Enter the following command: bcdedit /set {current} nx AlwaysOn
After doing that, this feature should be enabled.
NOTE
Keep in mind that this solution requires you to install a version of BIOS that supports CET.
2. Uninstall the GameGuard and other anti-cheat software
Press Windows key + X and choose Apps and features.
Locate the software that you want to uninstall and click the Uninstall button.
Follow the instructions on the screen to complete the process.
According to users, the issue is GameGuard software that comes with Phantasy Star Online 2. After uninstalling the game, the issue should be gone.
Keep in mind that other anti-cheat applications can cause this issue. Users reported it with Valorant and Vanguard, but after removing the game, the issue was gone.
Click on Download Now in Create Windows 10 installation media section.
Once the software is downloaded, run it.
Accept the terms of service.
Choose the Create installation media (USB flash drive, DVD, or ISO file) for another PC and click Next.
Make sure the settings match your architecture and language and click Next.
Choose the ISO file and click Next.
Set the save location and wait for the software to download it.
Perform the upgrade
Once the ISO file is downloaded, double-click to mount it.
A new window will appear. Double-click the setup file to run the installation.
Follow the instructions on the screen.
Once you reach Choose what to keep screen, make sure you select Keep Windows settings, personal files, and apps. If this option isn’t available, you’ll lose installed applications and files from the system drive if you proceed.
The installation process will now start.
After the installation is finished, check if the problem is resolved.
These are just some methods that can fix the Kernel-mode Hardware-enforced Stack Protection is off. Your device may be vulnerable error.
If the problem persists, perhaps you should consider using a third-party antivirus. Many great antivirus solutions for Windows offer better protection than Windows Defender.
Did we miss a solution that worked for you? If so, let us know in the comments section below.
Windows 11 Moment 2 (KB5022913 update) is here, but some users have reported that it’s been plagued by problems upon starting up.
Long story short, the update blocks explorer.exe to run, resulting in some devices with third-party UI customizations, like ExplorerPatcher and StartAllBack, not booting up. Microsoft has acknowledged the problem and posted a dire warning on Windows 11 22H2 health issues page.
“These types of apps often use unsupported methods to achieve their customization and as a result can have unintended results on your Windows device. We are presently investigating and will provide more information when it is available. If you are using any third-party UI customization app and encounter any issues, you will need to contact customer support for the developer of the app you are using.”
However, Redmond officials have just recently addressed on the Windows release health page that this issue has been externally addressed, as both ExplorerPatcher and StartAllBack have released a version that lists this issue as resolved.
But, if you still encounter this issue after installing KB5023774, here are a few workarounds you may be able to try.
So, how do we fix it, if there’s anything to be done?
Can I fix startup issues in KB5022913?
Well, there are a few workarounds you can do.
Logically, since this affects devices with third-party UI customization apps, you can uninstall them before installing the KB5022913 update.
Or, better yet, if you’re a StartAllBack user, update to the latest version (v.3.5.6 or later).
If not, you can also opt not to install the KB5022913 update instead.
What other feature does KB5022913 bring?
[Highlights]
New!This update improves the search box experience on the taskbar. As you type in the search box, search results now appear in the search flyout box. You can also change the search experience you want for your taskbar by going to Settings > Personalization > Taskbar. For commercial customers, this update adds a new policy for IT administrators to manage how the search box on the taskbar appears in your organization. For more information, see Customizing search on the Windows 11 taskbar.
New!You can now access Windows Studio effects directly from quick settings on the taskbar for devices that have a supported neural processing unit (NPU). This makes it quick and easy to turn on and configure camera effects. These effects include Background blur, Eye contact, Automatic framing, and Audio effects (Voice focus). You can still access these effects in the Settings pages.
New!This update makes it easier to get help if you are having PC issues. You can now find Quick Assist in the Start menu’s All apps list.
New!This update introduces a touch-optimized taskbar for 2-in-1 devices that you can use as a tablet. There are two states of this taskbar: collapsed and expanded. To switch between the two states, swipe up and down on the bottom of your screen. When collapsed in tablet mode, the taskbar recedes to give you more screen space and keeps you from accidentally opening the taskbar. When expanded in tablet mode, the taskbar is optimized to be easier to use with touch. Your taskbar will automatically change to this optimized version when you disconnect or fold back the keyboard.This feature only works on devices that can be used as tablets and is on by default. To change that, go to Settings > Personalization > Taskbar > Taskbar behaviors. The setting is called “Optimize taskbar for touch interactions when this device is used as a tablet.” If your company manages Windows updates for your device, this feature will be off by default. Administrators can turn it on using the new commercial control for continuous innovation.
New!This update provides enhanced support for braille devices. They will continue working while you switch between Microsoft Narrator and third-party screen readers. Narrator will automatically change braille drivers. For more information, see Chapter 8: Using Narrator with braille.
New!This update also adds support for new braille displays and new braille input and output languages in Narrator. Some of the new braille displays include the APH Chameleon, the APH Mantis Q40, the NLS eReader, and many more. For more information, see Chapter 8: Using Narrator with braille.
New!Windows now provides energy recommendations. If you use them, they can help to improve the energy efficiency of your PC and reduce your carbon footprint. Go to Settings > System > Power & Battery > Energy Recommendations.
New!For devices that are joined to Azure Active Directory (AAD), Windows now provides AI-powered recommended content on your Start menu. On the Start menu, you will find content to help you to prepare for meetings, quickly access files you’re collaborating on, and more.
New!This update enhances the system tray. All icons will have a rounded focus and hover treatment in the lower right, including the “Show hidden icons” flyout menu. You can move icons to rearrange them in the “Show hidden icons” flyout menu or move icons to the taskbar.
New!This update makes voice access more flexible and supports interaction with more user interface (UI) controls. For example, voice now interacts with controls that contain:
Names that have numbers, such as “Click 5”
Names without whitespaces between them, such as “click PivotTable” or “click PivotChart”
Names that have special characters, such as Bluetooth & devices (“click Bluetooth and devices”) or Dial – up (“click dial hyphen up”)
New!Voice now supports spin controls, thumb controls, and split buttons. You interact with these controls by using the “click” command or number overlays. This update also addresses issues that affect snapping commands that snap a window left or right. Commands that move the cursor in a text box now run instantly.
New!This update also provides voice scrolling enhancements. You can use voice to scroll to the extreme left and right on a page. You can also use continuous scrolling to the left or right like what is already present for vertical scrolling. For more information about the new voice access commands, see Voice access command list.
New!This update makes enhancements to Task Manager. These include:
Filtering—You can now filter processes using the binary name, PID, or publisher name. The filter also applies when you switch between pages. The keyboard shortcut is ALT+F.
More theme options—You can now choose a theme for Task Manager that is different from the Windows theme. Also, all dialogs, except for Run new task and the Properties dialog, now support themes. The dialogs will use app-specific themes or the Windows theme.
Efficiency mode—You can now opt out of confirmation dialogs when you turn on Efficiency mode.
This update addresses an issue that affects the Color filters setting. When you select Inverted, the system sets it to Grayscale instead.
This update addresses an issue that affects IE mode. The text on the status bar is not always visible.
This update addresses an issue that displays a blue screen during video playback. This occurs after you set high dynamic range (HDR) on your display.
This update addresses an issue that might affect the touch keyboard and the PIN entry keyboard. You might not be able to use them to enter text when you sign in to your device.
This update addresses an issue that affects which folders appear in the Browse for Folder picker.
This update addresses an issue that affects File Explorer. When you use Shift+Tab or Shift+F6, the input focus does not move.
This update addresses an issue that affects the user interface (UI). The volume up and volume down commands from a Bluetooth keyboard do not display.
This update addresses an issue that affects Xbox subscribers. If you buy an Xbox subscription using the “Redeem code” option, the Xbox subscription card does not appear on the Settings Accounts page. This issue occurs when recurring billing is off.
[Improvements]
This non-security update includes quality improvements. When you install this KB:
New! This update adds the new Tamil Anjal keyboard for the Tamil language. To add it, make sure Tamil (Singapore), Tamil (Malaysia), Tamil (Sri Lanka), or Tamil (India) appears in Settings > Time & Language > Language & Region. Select the ellipses (…) next to the language. Select Language Options. Add Tamil Anjal (QWERTY) to the list of keyboards.
This update improves the reliability of Windows after you install an update.
This update affects the United Mexican States. This update supports the government’s daylight saving time change order for 2023.
This update addresses a date information issue. It affects the format of dates sent between Windows and some versions of the Heimdal Kerberos library.
This update addresses compatibility issues that affect some printers. These printers use Windows Graphical Device Interface (GDI) printer drivers. These drivers do not completely adhere to GDI specifications.
This update addresses an issue that affects the software keyboard. It does not appear in the Out-of-Box Experience (OOBE) after a Push-button reset (factory reset). This type of reset requires an external keyboard to be attached to provide credentials.
This update addresses an issue that affects AppV. It stops file names from having the correct letter case (uppercase or lowercase).
This update addresses an issue that affects Microsoft Edge. The issue removes conflicting policies for Microsoft Edge. This occurs when you set the MDMWinsOverGPFlag in a Microsoft Intune tenant and Intune detects a policy conflict.
This update addresses an issue that affects provisioning packages. They fail to apply in certain circumstances when elevation is required.
This update addresses an issue that affects Azure Active Directory (Azure AD). Using a provisioning package for bulk provisioning fails.
This update addresses an issue that affects Universal Print’s Configuration Service Provider (CSP). A command prompt window appears when you install a printer.
This update addresses a reliability issue that occurs when you use Task View.
This update addresses an issue that might affect lsass.exe. It might stop responding. This occurs when it sends a Lightweight Directory Access Protocol (LDAP) query to a domain controller that has a very large LDAP filter.
This update addresses an issue that affects the Local Security Authority Subsystem Service (LSASS). LSASS might stop responding. This occurs after you run Sysprep on a domain-joined machine.
This update addresses an issue that affects copying from a network to a local drive. Copying is slower than expected for some users.
This update addresses an issue that affects parity virtual disks. Using Server Manager to create them fails.
If you installed earlier updates, only the new updates contained in this package will be downloaded and installed on your device.
Have you downloaded this update and experienced the same hassle? Let us know in the comment!
Microsoft has done a great job in introducing some great new features in Windows 11 that weren’t available in previous versions of its operating system. However, this doesn’t exclude it from the usual bugs Windows PCs commonly face.
These problems are frustrating for users and can make their computers slow, unresponsive, or unstable. Some are easily fixable, and some need a little patience. Find out some of the biggest irks in Windows 11 below.
Are there any problems with Windows 11?
Windows 11 is no longer a new operating system. We’re close to hitting the two-year mark since its release, and so far, it has been a rollercoaster of good and bad.
Even though Microsoft has made significant improvements to its OS over the years, there’s still no escaping that its products are complex and difficult to build. As a result, some bugs will inevitably slip through the cracks.
Since it has been out for a while now, Microsoft has had ample time to iron out the kinks and bugs in the system. However, there are still some issues that users run into daily.
Being the latest iteration from Microsoft, it will obviously be ranked as one of the best OSes yet. Still, Windows 11 is not a perfect product. Like any new software release, it has its fair share of problems and bugs.
This should, however, not be cause for alarm as its predecessors have faced similar issues with hardware, performance, and security, among others.
Luckily, most of the early bugs are usually ironed out as Windows 11 updates roll out on a regular basis. However, if these updates don’t address your issues and you’re still experiencing one or two issues, here are some common issues and how to fix them.
What are the biggest issues with Windows 11?
1. Restarting issues
Some users have reported that their PCs keep rebooting after installing Windows 11. This can happen if your PC doesn’t have enough RAM or doesn’t have the right drivers for your hardware.
Some of these issues can be fixed by uninstalling or reinstalling a particular program or app. But if your problem isn’t solved by doing this, you may have to turn to Microsoft for help.
In other cases, the PC won’t restart at all. An easy fix would be to restartin Safe Mode and load only essential services and drivers. This will allow you to isolate the issue. If it doesn’t work, you may have to reset your PC.
2. Wi-Fi connectivity issues
Some users have complained about the Wi-Fi connection dropping randomly or failing to connect automatically. The problem occurs when you connect to a new Wi-Fi network, but there is no internet connectivity after that.
This issue can be resolved by rebooting your PC with an Ethernet cable plugged in. You should also ensure that your router is working properly without issues like firmware updates or firewall settings causing this issue.
The Blue Screen of Death is a common Windows 11 problem that can be caused by any number of issues. The BSOD is a very serious error. It means that your computer has stopped working properly and may need repair.
This occurs when a driver stops responding or an application crashes, causing Windows to stop working until you restart your computer. You can usually solve this problem by updating drivers or reinstalling software that may be causing the problem.
If an app isn’t working correctly after you update to Windows 11, it could be because of old software or hardware drivers. You can update the drivers or reinstall the app.
5. Slow boot time
You may notice that your computer takes longer than usual to boot up after installing Windows 11. This is because Microsoft has integrated more features into the operating system, and it needs more time to load them all.
In addition, Windows 11 has a faster boot time than previous versions of Windows, thanks to a feature called Fast Startup. However, if you’re using a traditional hard drive, it could take longer for your computer to boot up than on previous Windows versions.
Windows Update is one of the most useful features in Windows 11, as it keeps your computer updated with all the latest security patches and software updates.
However, there are times when Windows Update fails to work properly, leaving you stuck with an outdated version of Windows that is now exposed to vulnerabilities. This could be because your hardware and software are incompatible.
It is a known fact that some users have upgraded to Windows 11 despite their devices not meeting the minimum system requirements. While this may work, you may miss some updates or errors because of compatibility issues.
If your computer is having trouble installing updates, we’ve probably covered the update error, so be sure to check that out.
The update fails and gets stuck because of incomplete update files
7. Bluetooth problems
Bluetooth is one of the most important features in any device today, and it’s an essential part of Windows 11.
Windows 11 has some new Bluetooth capabilities, including the ability to send files from your PC to another device, but it also has some issues.
Some people have reported that their Bluetooth connection is not working, others say it is slow or lagging, while others say it won’t connect at all.
Bluetooth problems can be caused by several things. For example, if you have a new computer with an old Bluetooth adapter, it might not work as well as it should.
Most of these Bluetooth issues can be fixed by checking your Bluetooth adapter’s compatibility and updating your Bluetooth drivers.
This is when you try removing a Bluetooth device, but all attempts fail
8. Overheating
Many people have reported overheating issues with their computers after upgrading to Windows 11.
This problem can affect any version of Windows, but it seems people are having more problems with this issue after upgrading to Windows 11 than before.
A cooling pad or fan is the best way to tackle this problem. You can also check your computer’s temperature to see if it is too high and needs cooling.
9. Slow performance
If your computer feels sluggish or slow, it can be frustrating. Although any version of Windows can experience this issue, with Windows 11, it’s more of a slap in the face, given all the improvements.
The main reason behind the slow performance is usually an outdated operating system, hardware issues, or other factors such as malware or viruses slowing down your computer’s performance.
Some users have reported that their computers are freezing or crashing when they try to use certain apps or websites. If your device freezes or crashes regularly while using Windows 11, there may be an issue with your hardware or software configuration.
This issue may occur when you try to open certain programs or apps on your device. Your device may freeze or crash during the process of opening these apps.
If this happens, you should check the system requirements of the program you’re trying to open. It’s unlikely that it will work properly on your computer if there are any compatibility issues.
You may also need to run a memory test and ensure that your RAM is compatible with Windows 11. In most cases, you may have to upgrade your RAM or extend space in your hard drive for your computer to handle Windows 11 without any problems.
11. Software compatibility issues
One problem with Windows 11 is that some programs won’t work with it yet. You might get an error message that this app can’t run on your PC because it’s incompatible with the new operating system.
It could be because the developer hasn’t updated their software yet or because Windows 11 has changed something fundamental about how apps work with your computer.
If you’re having trouble installing or running your favorite apps on Windows 11, try installing them from the Microsoft Store.
Alternatively, try reinstalling them from scratch using the latest release version available from their official websites rather than automatic updates.
12. Battery life issues
Battery life is one of the biggest complaints about Windows 11, with many users reporting that their devices are draining faster than normal.
Windows 11 is a very powerful OS with additional features. Of course, the battery consumption will not be similar to its predecessors. However, if your laptop is draining its battery faster than normal, it could be because of a problem with Windows 11.
Also, if you have an older laptop or PC and aren’t using a new battery or adapter, you could see significantly shorter battery life. It may be worth it to check your battery health just to make sure everything is working optimally.
13. High CPU usage
One of the most common problems with Windows 11 is high CPU usage. When this happens, it’s usually because an application or process is using too much of your computer’s CPU resources and causing other programs to slow down or freeze.
This can happen when your PC starts running low on memory or trying to run multiple processes at once.
If you notice high CPU usage on your PC, try closing out all open programs and see if that helps reduce the load on your machine’s processor.
If this doesn’t fix the issue, there may be another problem at hand, like malware or another software issue, that needs your attention before you can return to normal speeds.
14. Sound problems
A number of users have reported sound problems after upgrading to Windows 11. This includes no sound coming from their speakers or headphones. While this is usually an easy fix, you may need to do some troubleshooting to get your audio back up and running.
If you’re having trouble hearing anything from your computer, it could be due to a handful of different issues. First, check your sound settings to ensure they’re not muted or turned down too low.
If you’ve noticed that some of your icons are no longer showing up in the taskbar or on your desktop, it’s not because they’re gone for good. Icons disappearing can be caused by many reasons so it’s hard to pinpoint one reason for this issue.
It could be an issue with your antivirus or third-party programs installed on your computer that is conflicting with Windows 11, or maybe you have disabled some settings in Windows 11 that were required to display icons properly.
What are the odds that shutting down your PC may also be a problem? This one seems like an easy fix at first glance, after all, it just takes some time for the computer to shut down properly.
Most of the time, it is because there are still programs or processes running in the background preventing the computer from shutting down. First, ensure all applications are closed before attempting to shut down your computer.
If your PC takes five minutes or more to shut down when you press the power button in the Start menu or on your keyboard, it could be due to a problem with how Windows handles powering off Windows 11.
You need to adjust your power settings to get a balance of efficiency and performance. This will hopefully solve your PC not shutting down issue.
17. Log-in problems
No one expects to be locked out of their devices when they try to log in to Windows. Of course, you can always do away with passwords, but it is not recommended when using a shared computer.
If you’ve upgraded to Windows 11 and the login screen is not showing, it could be an issue with your user profile. A corrupt user profile can occur due to many reasons, so you should first check if you can sign in as another user.
It could also be due to corrupt or damaged registry keys or files. If you’re having trouble logging in with a local account instead of a Microsoft account, double-check that you’re entering the correct username and password information.
18. Invalid product key errors
Most users have reported an invalid product key error message while trying to download or activate Windows 11.
If you try to activate your copy of Windows 11 using the built-in Activation Troubleshooter, it will tell you that your product key is not working or is invalid. This happens when you try to use an invalid license key from an older version of Windows to activate Windows 11.
Recent and significant hardware changes may also play a huge role, so check out our detailed list of activation errors and learn how to navigate such issues.
19. Windows 11 problems with games
Gaming on Windows 11 can be hit or miss. Some games will run fine, while others will crash or freeze up during play. If you want to make sure you don’t experience this issue, try the following:
Ensure that all your drivers are up-to-date – This will ensure that your graphics card and sound cards are working properly and there aren’t any issues with older software versions.
Check for updates for the game itself – Many games have their own update systems, so if there are any bugs in the software, this should fix it.
Disable antivirus software – Antivirus programs and firewalls can often interfere with how well your game runs. Make sure all antivirus programs are disabled before starting a game or application so they don’t conflict with each other.
This error occurs when your version of Windows is not updated to receive the features
What is the disadvantage of Windows 11?
With most software, advantages and disadvantages are a grey area, given that every user is different. What may seem like an advantage could be a disadvantage to the next person.
Below are just some of the irks that most users can agree could have been improved on:
Limited support for older devices – Windows 11 doesn’t support older hardware as much as its predecessor did. If you have an older PC and want to upgrade to Windows 11, then there are chances that certain apps won’t work on your device after the upgrade.
Stringent system requirements – The minimum requirements for Windows 11 are pretty high, which means that some older computers might not be able to run this version of Windows. You may have to get a new PC that meets these requirements.
Resource-intensive – Windows 11 is a resource-intensive operating system. With each update, the need for more memory and processing power to run Windows 11 is becoming more evident.
Interface overhaul – While this may not be a disadvantage for some users, the Windows 11 interface can be confusing. This can take some getting used to for longtime users.
Can I go back to Windows 10 from Windows 11?
Yes, you can revert to your old version of Windows. If you’ve been using Windows 11 for a while, you might wonder why anyone would want to downgrade from such a great operating system.
Windows 11 is the most popular operating system, and with good reason. It’s more secure than its predecessors, less annoying, and has the desired features.
But if you’re running Windows 11 on older hardware or don’t like the new look, you might consider switching back to Windows 10.
In conclusion, Microsoft has made great strides toward creating a reliable system. It performs better and doesn’t require as much maintenance as previous operating systems.
There are certainly bugs, and some are frustrating. But, when you look at it as a whole, the benefits far outweigh the negatives.
While we can’t assure your PC will run without a hitch, you can work through each of the most common problems above on your own to prevent more complicated issues.
Feel free to let us know of any other Windows 11 problem that seems to be making a regular occurrence but is not mentioned here. You can also learn how to resolve another common bug like ASSIGN_DRIVE_LETTERS_FAILED.
The number of CPU cores that Windows 11 supports is critical for anyone who uses the OS daily. This is because the more CPU cores your PC has, the more tasks it can handle at once, and the faster those tasks will be completed.
Windows has traditionally used a single-threaded model for most tasks, which usually results in high CPU usage. But with newer OSes, Microsoft has been moving toward a multi-threaded model. So, how do you check the number of cores you have? Let’s see below.
Does Windows 11 support multi-CPU?
The first thing to address is what’s a core. A core is the central processing unit (CPU) of a computer. It performs all the calculations and controls the operation of the entire computer.
Think of a core as another brain. It performs another task simultaneously as your main CPU does another. If a PC has multi-cores, each core can run its own process, or multiple cores can work together to perform one task more quickly.
Windows 11 supports multi-CPUs and hyper-threading. This means you can use multiple CPUs simultaneously to improve your performance. This brings us to the next question, how many cores does Windows 11 support?
Single core – Some computers have single-core processors designed for light computing tasks like email and web surfing. These processors can handle only one task at once.
Dual-core – Dual-core processors have two processing units that can run multiple programs together at the same time. This makes them great for everyday tasks like web browsing, word processing, and watching videos.
Quad-core – Quad-core processors have four processing units that can run multiple programs simultaneously without slowing down other processes in the background. This means you can stream music while you browse Facebook or check your email while you watch YouTube videos. Quad-core processors are typically used in powerful laptops and desktops that require lots of heavy lifting from their processors to get work done quickly.
Octa-coreand others – These processors contain eight chips that can each run instructions at the same time. Deca-core processors contain 10 chips that can each run instructions at the same time.
How many cores do I need?
If you want to buy a new PC or upgrade your current one, it’s important to know what kind of tasks you will use it for.
It all depends on what you want to do with your computer and how many tasks you’re running at once. If you’re running a single application, such as a web browser or a word processor, then one core will be enough to handle all of its tasks.
But if you run multiple applications simultaneously, such as listening to music while playing a game, then more cores are better because they keep everything running smoothly without slowing down your system.
Still, the different core types don’t necessarily mean faster performance. They mean your computer isn’t limited by how fast one core can go when there are multiple cores available to do work.
To understand this concept better, see our complete guide on what CPU cores are and how they work, including how they affect your computer’s multitasking and speed.
How do I check the number of cores in my Windows 11 PC?
Before you proceed to the more detailed steps on how to check your CPU cores, most manufacturer websites list the number of cores on their CPUs. All you have to do is check your PC’s model number, and the number of cores should be listed alongside it.
If not, proceed to the following solutions to determine how many cores are in your Windows PC.
1. Use Task Manager
Hit the Windows key, type Task Manager in the search bar, and click Open.
Navigate to the Performance tab and click on CPU.
You will see your PC’s information, including the number of cores listed.
Click on the Search icon on the taskbar, type Powershell in the search bar, and click Run as administrator.
Click Yes if the UAC prompt appears.
Type in the following command and press Enter: WMIC CPU Get NumberOfCores
The number of cores will be listed once the command finishes.
5. Use third-party software
There are many ways to check how many cores you have installed on your computer. If the above proves to be lengthy or complicated, you can opt for third-party software.
These apps display detailed information about your computer’s hardware and software, including the number of cores in your processor. Our top choice would have to be the PRTG Network Monitor.
Now that you know how to check the number of cores in your Windows 11, you’re probably considering upgrading to a CPU with more cores.
However, before you jump the gun, we’d like to point out that the number of cores in a CPU doesn’t directly affect performance.
Instead, it increases the amount of work that can be done at once because each core can handle its own task independently.
This prevents your processor from becoming overloaded and slowing down your whole system.
The speed and performance of your PC depend on other factors, so you may find a single-core processor is faster and more efficient than a quad-core in some cases.
With this in mind, it’s worth considering whether your current PC has enough power for what you want to do before buying anything new.
You can also allocate more CPU to a process, especially if it is resource-intensive, to increase efficiency.
And with that, we conclude this article. Hopefully, this has provided much-needed insight into how cores work, how you can check the number of cores, and what to look for when purchasing a new PC.
In the comment section below, let us know how many cores you have on your PC and your general PC performance.
And, since we’re talking about Windows 11, know that you now can diagnose network problems on Windows 11’s taskbar.
Now, another major issue has been apparently dealt with, since Microsoft posted an interesting article on its official page.
Microsoft comes with PowerShell scripts for multiple flaws
In case you didn’t know, last month Microsoft issued PowerShell scripts for automating WinRE updates to address BitLocker bypass security vulnerability.
The Redmond-based tech company has released new PowerShell scripts again, and we’re about to take a closer look at them.
This time, however, they are for multiple different speculative execution side-channel attack CPU vulnerabilities on Windows 11 and Windows 10.
To better understand, remember that one of these includes the memory mapped IO (MMIO) flaw which received newly updated patches recently on Windows 10 and Server.
The above-mentioned scripts are meant to help verify the status of mitigations of these vulnerabilities. Or, at least that’s what Microsoft claims.
According to Redmond, to help you verify the status of speculative execution side-channel mitigations, it published a PowerShell script (SpeculationControl) that can run on your devices.
You will find a lot more information and useful tricks by visiting Microsoft’s official website. There is a lot more Microsoft hasn’t shared yet, so we are still waiting on updates.
In the meantime, be sure to check out the April 2023 Patch Tuesday release. This month’s update pack consists of 97 patches that address various vulnerabilities.
In case you are experiencing similar issues and you don’t seem to know why it is happening or how to get your Windows Security icon back, don’t worry. This post is for you.
Why is the Windows security icon missing?
There are several reasons why the Windows Security icon may be missing from your computer’s taskbar or system tray. Below are five possible causes:
Windows Security is disabled – The major reason behind the Windows Security icon missing error is that the feature is disabled. To fix this issue, you can turn on Windows Security by using the Windows Settings app.
Outdated Windows version – If you’re running an outdated version of Windows, it is possible that the Windows Security icon is missing due to compatibility issues. To fix this, you can update your operating system to the latest version.
Conflicting third-party antivirus software – If you’re using third-party antivirus software, it is possible that it is conflicting with the Windows Security icon. You can try disabling the third-party antivirus temporarily and check if the problem is fixed.
Group Policy settings – If your computer is managed by a system administrator, it is possible that Group Policy settings have disabled the Windows Security icon.
Now that you know some of the potential reasons behind the Windows Security icon missing error, the next section will provide you with simplified steps on how to get it back on your Windows taskbar.
What can I do if the Windows Security icon is missing?
Before trying any of the advanced solutions provided in this article, you should consider performing the following preliminary checks;
Restart your PC and check if the Windows Security icon is back.
Having confirmed the above checks, if the problem persists, you can explore the advanced solutions provided below to get the Windows Security icon back.
1. Show the Windows Security icon on Taskbar
Press the Windows + I keys to open the Settings app.
On the left pane, click on Personalization and click on Taskbar on the right pane.
In the Taskbar settings, locate the Other system tray icons option and expand it.
From the list of apps under the option, toggle On the button for the Windows Security notification icon to make it appear on Taskbar.
Close the Settings app and restart your PC.
Now, check whether the issue of the Windows Security icon missing is fixed or not. If not, try the next fix.
2. Enable the Windows Security icon at Startup
Press the Windows + I keys to open the Settings app.
On the left pane, click on Apps and then click on Startup on the right pane.
Now, turn On the Windows Security notification icon to make it appear on Startup.
Restart your computer for the changes to take effect.
If you try enabling the Windows Security notification icon on your Taskbar but it’s not showing, you can set it to appear on Startup. If this doesn’t work, try the next fix.
Press the Windows key to open the Start menu. Type Command Prompt in the Windows search bar and click on Run as administrator on the right pane.
Type the following command in the dialog box and press Enter: reg add "HKLM\SOFTWARE\Microsoft\Windows\CurrentVersion\Run" /v SecurityHealth /d "%windir%\system32\SecurityHealthSystray.exe" /t REG_SZ /f
Wait for the process to complete and restart your computer.
The Windows Security notification icon should launch automatically whenever you log in to your account.
4. Enable the Windows Security icon in Local Group Policy Editor
Press the Windows + R keys to open the Run dialog box. Type gpedit.msc and press Enter.
In the Local Group Policy Editor window, navigate to the following path: Computer Configuration\Administrative Templates\Windows Components\Windows Security\Systray
On the right pane of Systray in the Local Group Policy Editor, double-click on the Hide Windows Security Systray policy to edit it.
Select Enabled and click OK.
Close the Local Group Policy Editor and restart your computer.
And that’s it on how to get the Windows Security icon missing back if it is missing. If you have further questions or suggestions on this guide, kindly drop them in the comments section.