Horizon Forbidden West: Can’t examine carcass [Fixed]

It’s time to talk about Gorilla Games’ new Horizon Forbidden West title and the problems that came with it ever since the official launch.

We’ve already shown you what to do if the game isn’t working, how to transfer saves from PS4 to PS5, and fix bugs like not being able to drop down from ledges.

Now, we’re about to tackle another frustrating bug that players reported, which is not being able to examine a machine’s carcass during a quest.

Don’t be alarmed and don’t throw your controller at the TV, as we’re about to show you a quick workaround that will allow you to get past this quest.

How can I fix not being able to examine the carcass?

Many Forbidden West gamers reported that, during the tutorial mission, which is a quest called Reach for the Stars, there’s an objective to examine the machine carcass.

This carcass is on the edge of a river and the main quest marker is there to indicate that it’s where the game intends for players to go.

However, once someone approaches it, there’s absolutely no way to interact with it, thus no way of advancing the story.

Here’s how you can restore game functionality and complete this quest without exiting the game:

  1. Pause the game and select Restart from save.restart from save
  2. Press X to confirm the action.confirm action
  3. Walk back to the quest marker.horizon quest
  4. Inspect the machine’s carcass using the triangle button.examine machine carcass

Once you’ve completed the steps in our guide, you should be able to continue the mission as normal.

That is how you solve this annoying glitch and move on with your game, forgetting that this nasty business ever affected your gameplay.

Has this guide been of help to you? Let us know in the dedicated comments section below.

Best Windows 11 Version for Gaming [Simple Choice]

We are still in awe of the robust Windows 11 operating system. For dedicated Windows 10 users, it is another step in the right direction. There is almost no learning curve, and the user experience is aided by the flexibility it gives for customization.

Users can choose to buy or install from a range of Windows 11 editions, including Home and Pro editions. The former is built for the consumer user, while the latter contains extra security and networking features and the capacity for joining a domain.

You might wonder which Windows 11 editions would serve you better with this premise in mind.

This article explores this subject from a gamer’s perspective and helps you understand the best windows 11 edition for gaming.

Is Windows 11 better than other Windows editions for gaming?

If you have played games on windows 10 and are unsure if an upgrade to Windows 11 will serve you any better, you should not delay. Windows 11 is the gamer’s OS.

It is optimized for new gaming technology initially seen only on Xbox consoles and does away with some of the baggage from earlier Windows editions. An improved Game Mode from Windows10 has made it the OS for every gamer, among other features.

These improvements will add significant and subtle differences to the gameplay experience.

Windows 11 Home vs Windows 11 Pro : which is best for gaming?

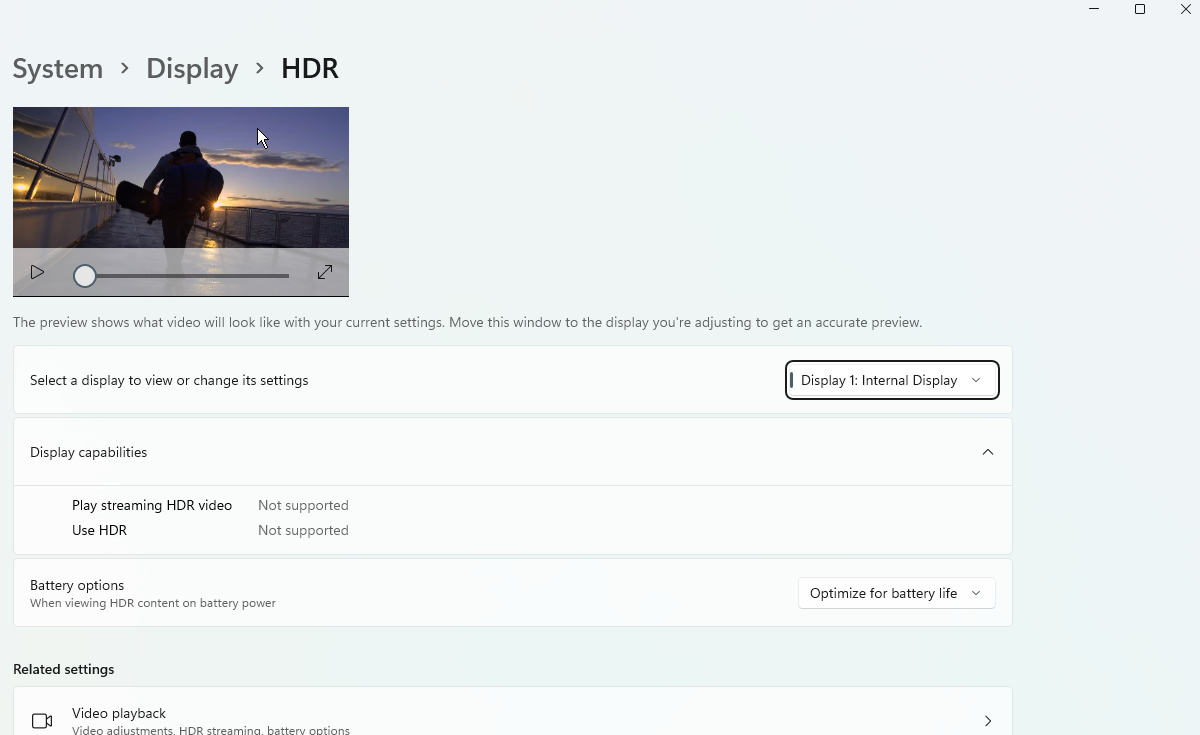
Auto HDR makes a difference

best windows 11 edition for gaming

Auto HDR is a Windows 11-only function that can presently be found in Microsoft’s Xbox Series X/S consoles.

By extending the spectrum of color and luminance, Auto HDR increases color and detail for a more engaging and authentic scene.

It accomplishes this by making images appear more detailed, deepening shadows, and boosting brightness, such as sun rays.

In Windows 11, games that operate on DirectX 11 and DirectX 12 are supported by Auto HDR.

This Auto HDR is a feature present in the Home and Pro versions of Windows 11.

DirectStorage is the newest addition

DirectStorage is a huge game-changing feature of Windows 11 since it streamlines game data processing and speeds up game loading times.

On the surface, it may not appear to be a particularly noteworthy feature, but load times apply to the game itself and asset loading and cutscenes in open-world settings.

DirectStorage can achieve this because it uses state-of-the-art storage hardware like NVMe SSDs, to decrease CPU burden by loading assets directly from the PC’s graphics card.

This technology boosts performance during gameplay and optimizes the multitasking process more effective when playing games. This is great for individuals who stream or use several monitors.

Users on both the Home and Pro versions of Windows 11 will have this feature.

Read more about DirectStorage for windows 11 on our Windows 11 DirectStorage API guide.

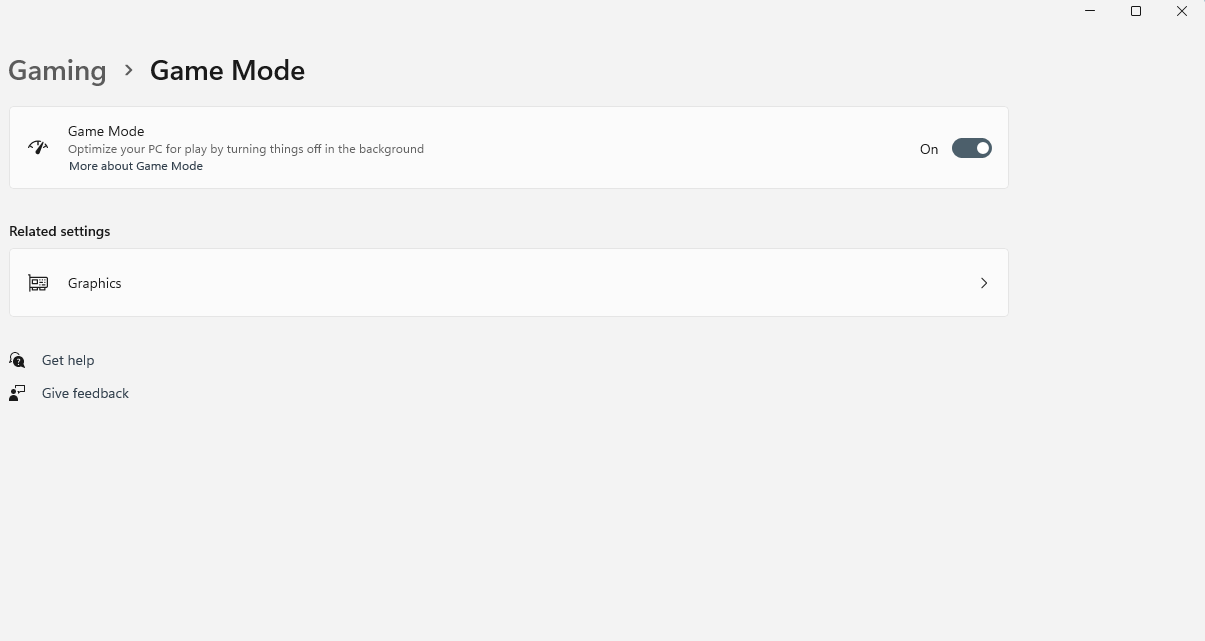
Game Mode – a must-have for gamers

best windows 11 edition for gaming

This feature isn’t new to the Windows OS. It was also available in Windows 10. When people play games with Game Mode activated, they get an enhanced gaming experience.

Game Mode in Windows 11 has received a significant update and works better than it did with the Windows 10 OS.

The feature limits background activity during gameplay by preventing Windows Updates from installing drivers and sending notifications.

The game receives additional resources to increase frame rate stability; as a result, individuals playing on outdated hardware may profit from more memory allocation.

This feature also exists on both Home and Pro versions of Windows 11.

CPU differences

The minimum installation system requirements for Windows 11 Home and Pro versions are the same.

Users of the Windows 11 Pro OS will be able to use several CPU sockets to support two CPUs with up to a 128 CPU core count. On the other hand, Windows Home is limited to a single CPU with 64 cores.

However, with the new DirectStorage and an upgraded Game Mode feature, a single CPU’s limit should have little bearing on gamers since resource management is optimized during gameplay.

RAM has a great impact on gaming

If you enjoy bragging about how much RAM your gaming computer has, you should like that Windows 11 is not deficient in this department. Windows 11 Home will support up to 128GB, while Windows 11 Pro will support up to 2TB.

For gaming, 128GB is more than sufficient, and there’s no reason to go higher if you’re only going to play games on your computer.

Security options are an optional plus

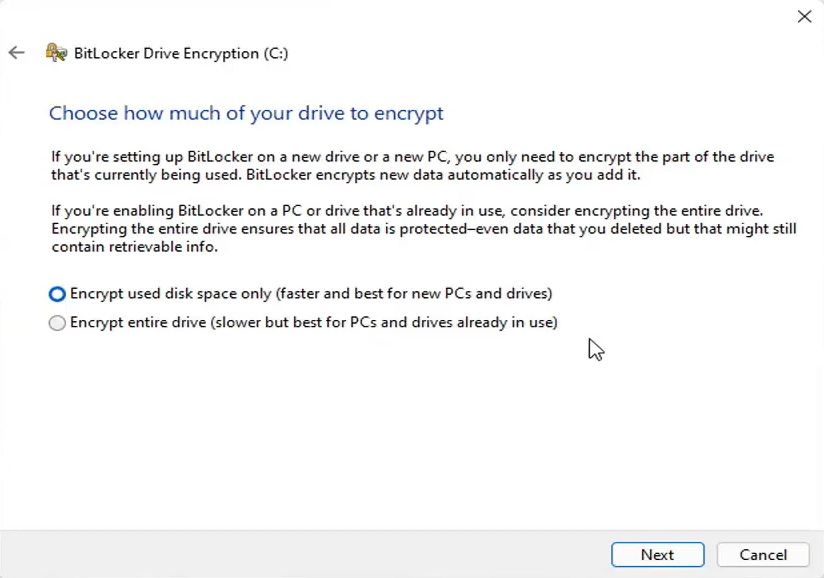
best windows 11 edition for gaming

Windows 11 Pro comes with improved security thanks to its BitLocker encryption feature.

These additional levels of security, while pleasant, are unnecessary for gamers, and reliable antivirus software and VPN will lessen the danger of computer breaches or hacks.

Regular updates are necessary

As a gamer, if you are counting on updates for an improved gaming experience with certain games, what edition should you lean towards?

What you must note is that updates are made as much as there is a need, many times to fix bugs and issues reported.

With that in mind, you must understand that there are no regular intervals for Microsoft updates. Both the Pro and Home editions will get updates as the situation demands, and it is impossible to estimate which will end up getting more game-centered updates.

Price is an important thing to consider

If you previously had Windows 10, then an upgrade to Windows 11 Home is free as long as you meet the minimum system requirements for installation. On the other hand, Windows 11 Pro is paid even if you upgrade from Windows 10.

A Windows 11 Pro OS is great if you need all the additional features businesses would require. On the Pro, you would expect better security, more CPU optimization, and more primary storage.

When considering an OS strictly for its gaming features, Windows 11 Home is the better option. It includes all the enhanced gaming functions at no extra cost.

You can read our guide to learn more about 11+ best new features in Windows 11.

Bitlocker an Internal Error Was Detected on Windows 11 [Fix]

BitLocker is a built-in feature in Windows which encrypts all the files and data on the drive. And, just like the other features, it too is prone to errors. In this guide, we will tell you how to fix the various BitLocker errors in Windows 11.

Though, do remember that the BitLocker feature is not available for the Home edition of Windows 11, and you can only use it on the Pro edition. But, certain 2-in-1 laptops and tablets offer the Device Encryption feature, which is similar to BitLocker.

So, if you are having trouble with BitLocker and encountering errors in Windows 11, read the following sections to find out the solutions.

How is BitLocker helpful to users in Windows 11?

As already stated, BitLocker encrypts the hard drive, and protects it from any kind of intrusion or data breach. But, you will need to have a TPM (Trusted Platform Module) chip for BitLocker to work and fully encrypt the drive.

Also, since it’s a native Windows feature, there’s no additional cost involved and you can have it up and running without shelling an extra penny.

But if you are willing to shell a couple of bucks, there’s an amazing tool, Folder Lock, that does a lot more than just encrypt files and keeps your system more secure than ever.

Besides, BitLocker doesn’t affect the system performance considerably and will continue to run without hogging the resources. So, even if your computer has low RAM, having BitLocker set up shouldn’t be a problem.

Now that you have a basic understanding of it, let’s see how you can fix the various BitLocker errors in Windows 11.

How do I fix BitLocker errors in Windows 11?

1. Uninstall problematic updates

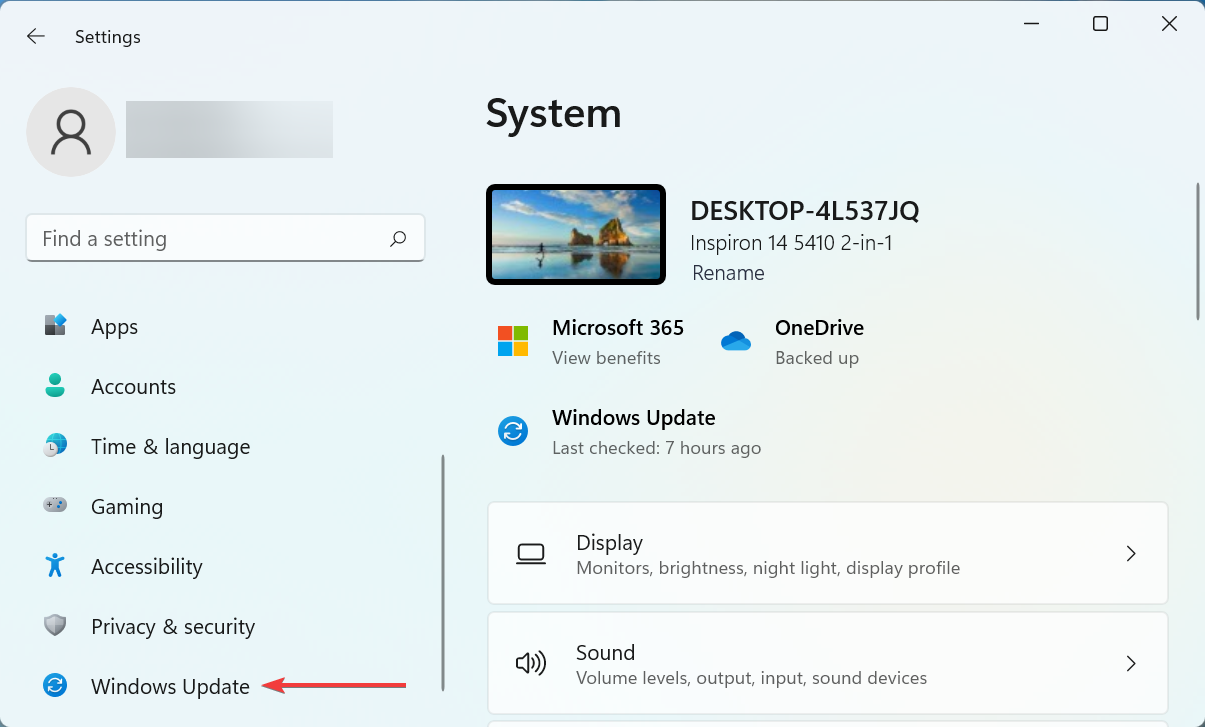
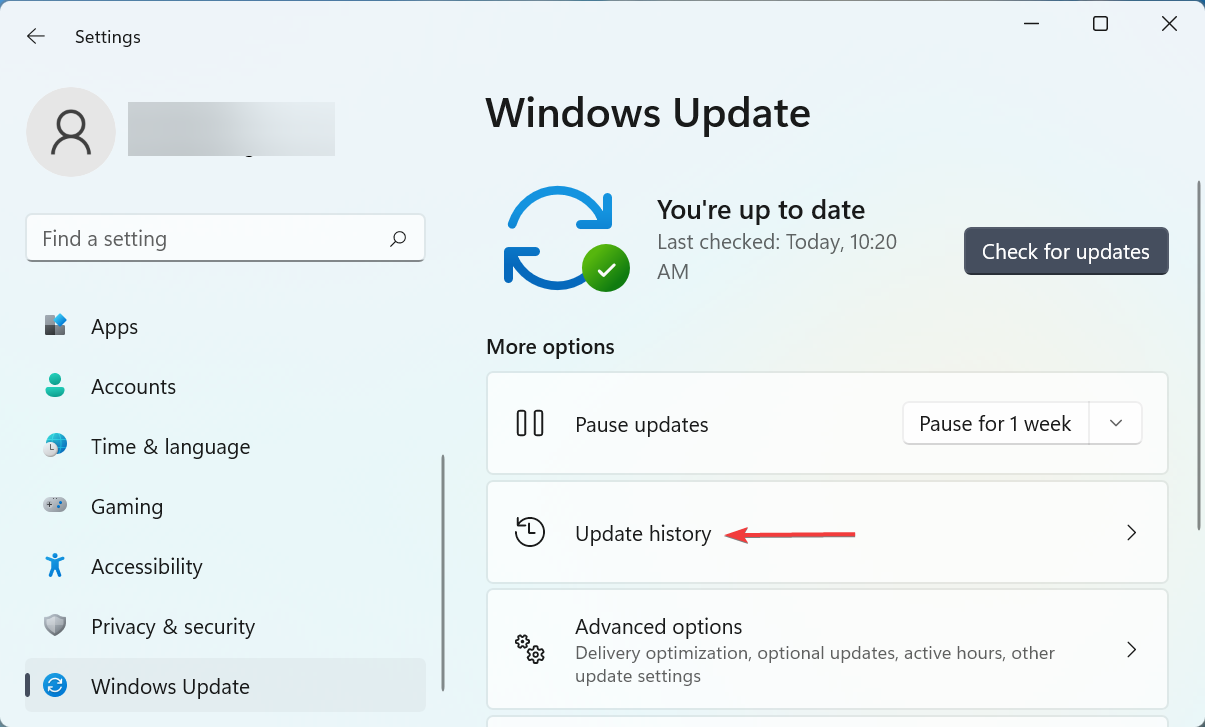
  1. Press Windows + I to launch the Settings app, and select Windows Update from the tabs on the left.Windows Update to fix bitlocker error windows 11
  2. Next, click on Update history on the right.Update history
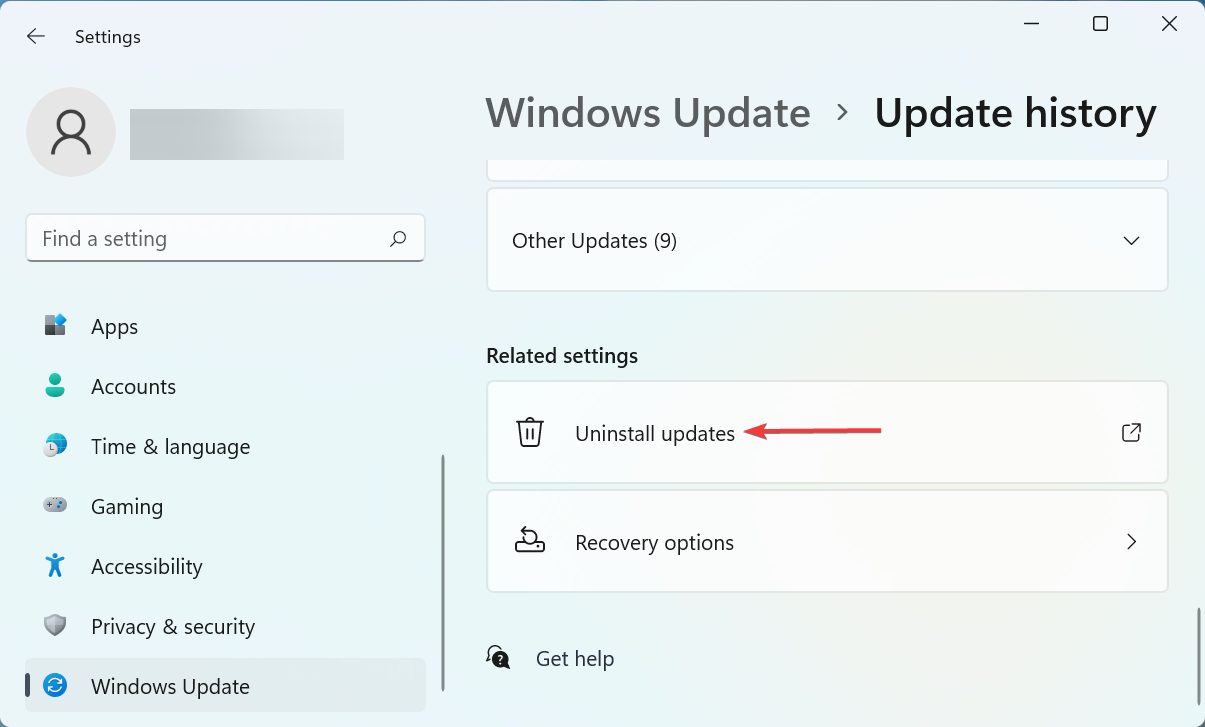
  3. Now, scroll down to the bottom and click on Uninstall updates under Related settings.Uninstall updates to fix bitlocker error windows 11
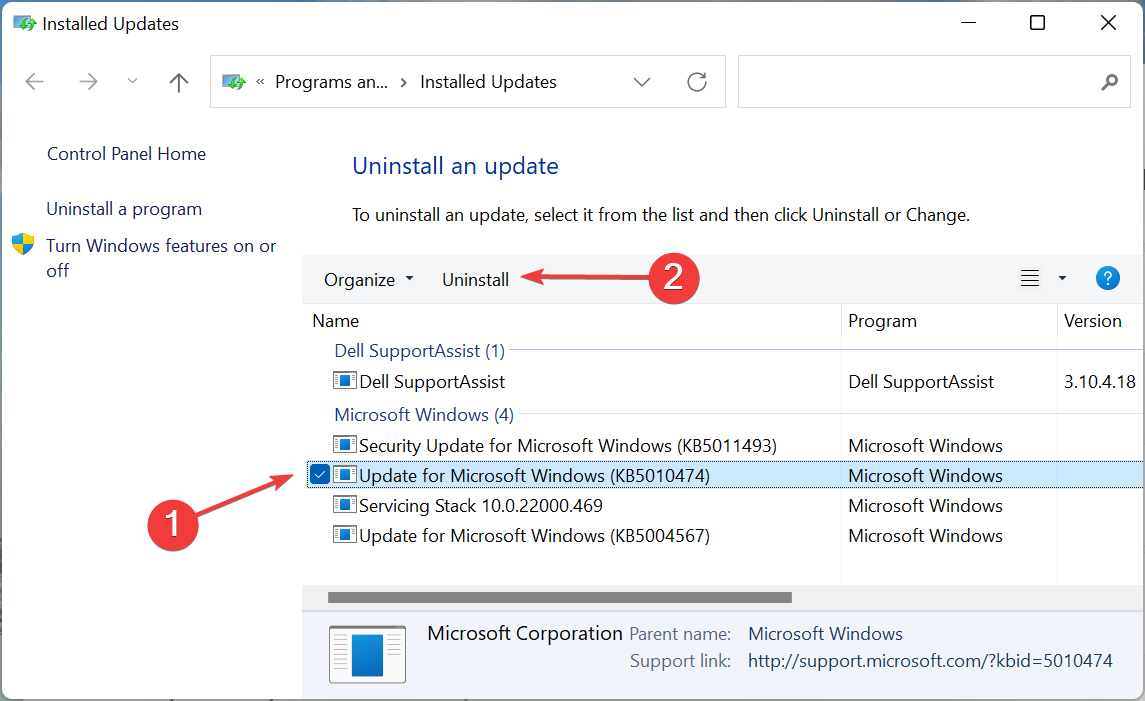
  4. Select the problematic update, and click Uninstall at the top.Uninstall
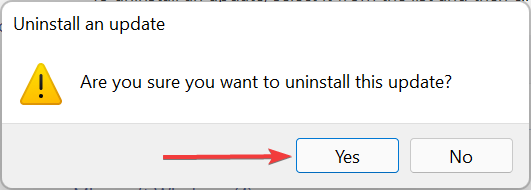
  5. Click Yes in the confirmation prompt that pops up.Yes

If you started encountering errors with Bitlocker in Windows 11 after installing a particular update, it could very well be a bug in it. In this case, it’s best that you uninstall the last update for a smooth experience, and once there’s a newer version available, go for it.

2. Disable Fast Startup

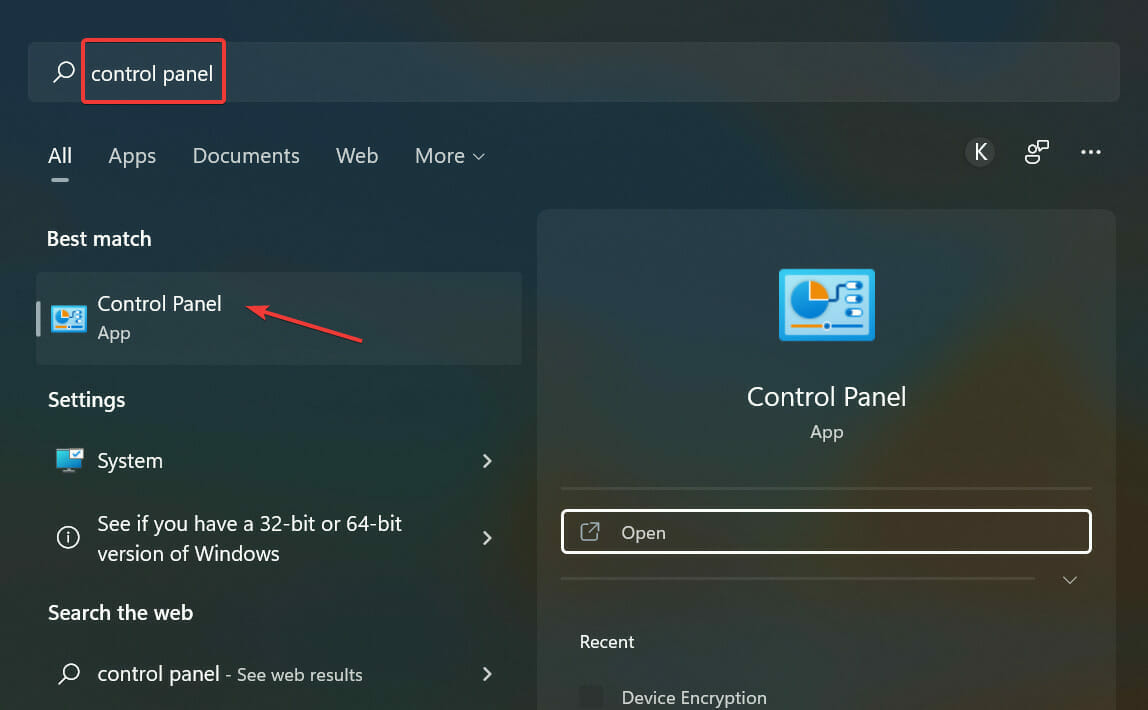
  1. Press Windows + S to launch the Search menu, enter Control Panel in the text field, and click on the relevant search result that appears.Control Panel
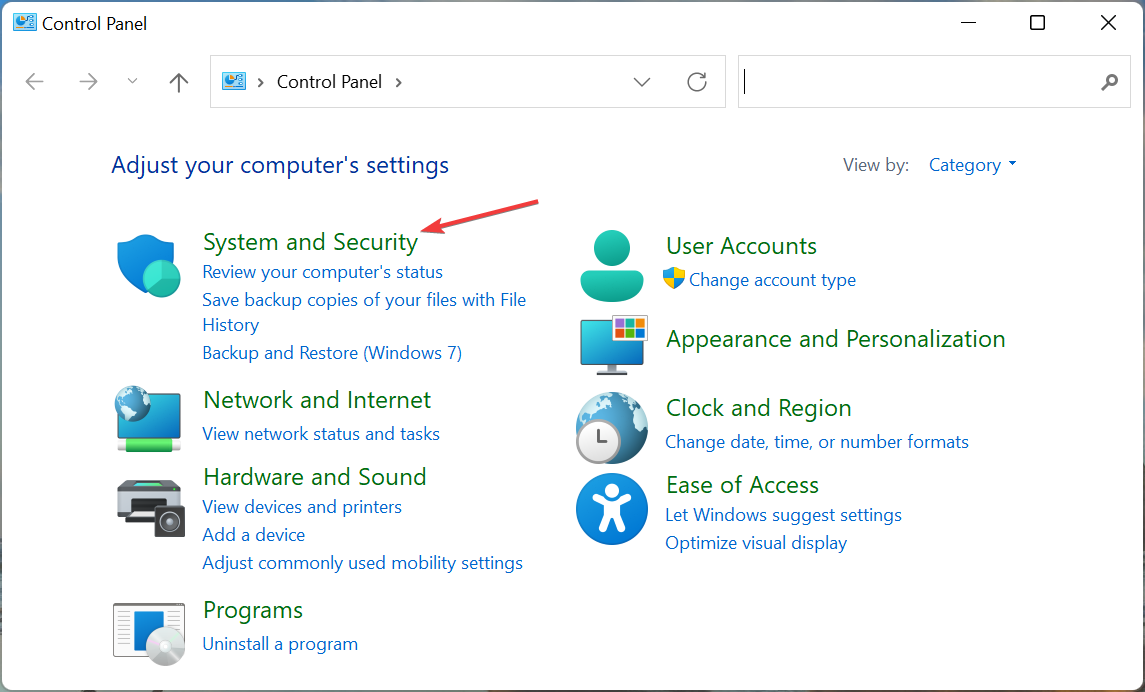
  2. Now, click System and Security from the six options here.System and Security to fix bitlocker error windows 11
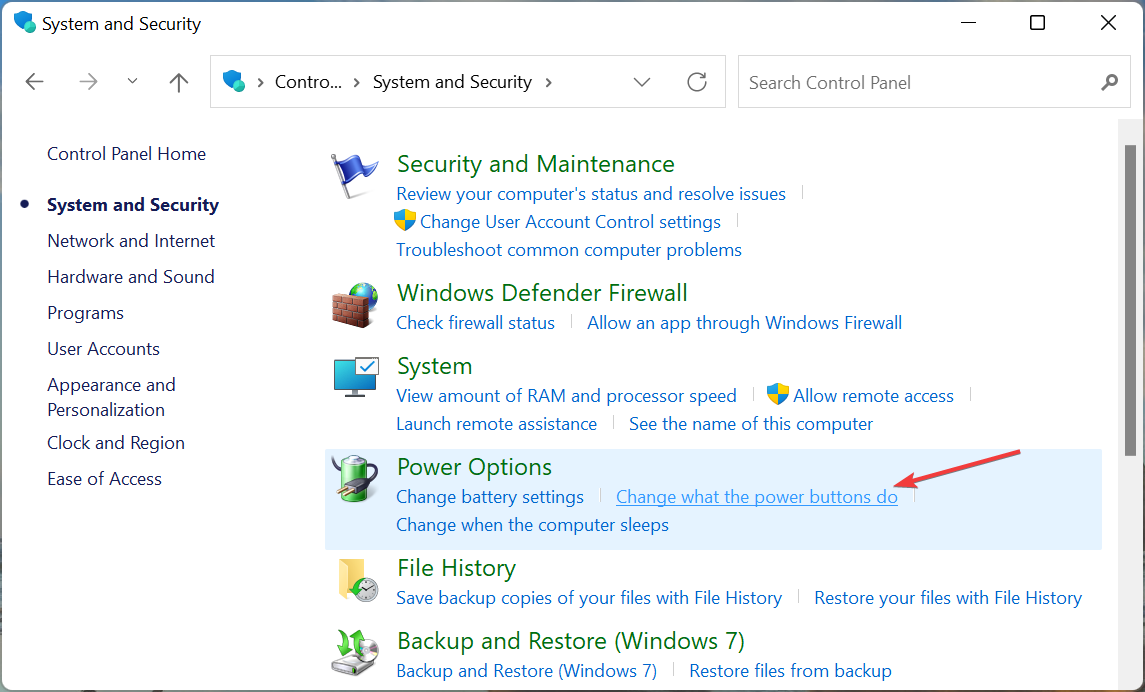
  3. Click on Change what the power buttons do option.Change what the power buttons do
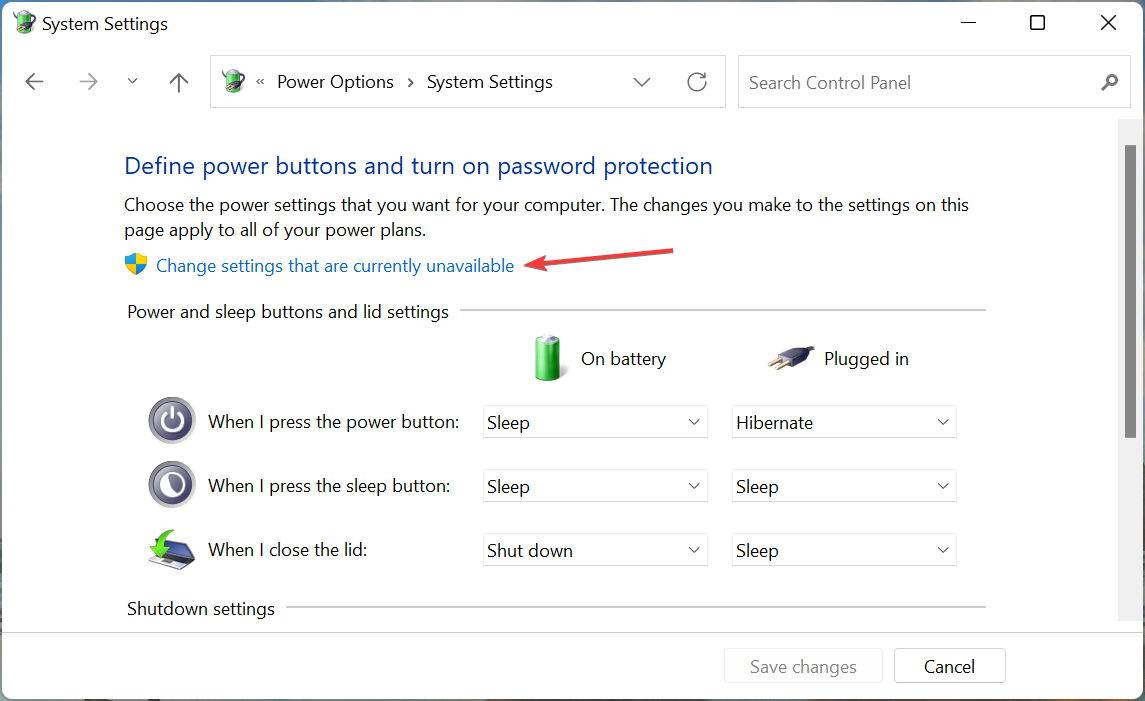
  4. Next, click on Change settings that are currently unavailable near the top.Change settings that are currently unavailable to fix bitlocker error windows 11
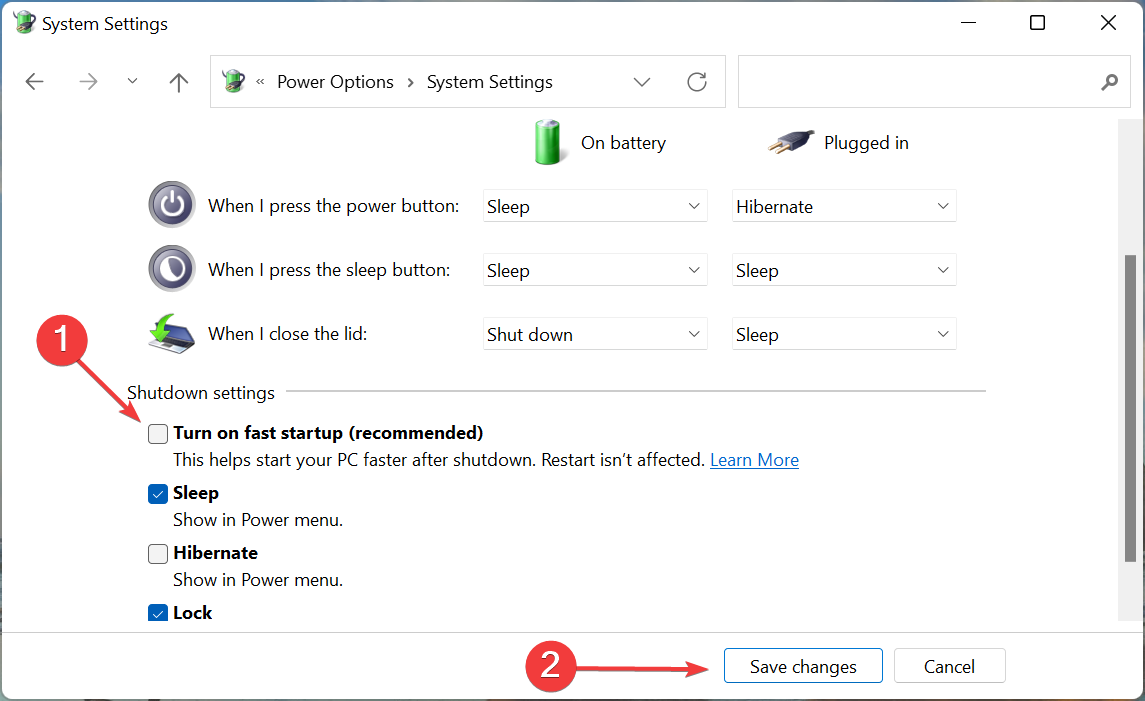
  5. Finally, untick the checkbox for Turn on fast startup (recommended), and click on Save changes at the bottom.Disable fast startup

Fast Startup is a feature in Windows that reduces the boot time. However, it’s often found to mess up with the other features or drivers and lead to a bunch of errors. So, disable it, and check if the BitLocker error in Windows 11 is resolved.

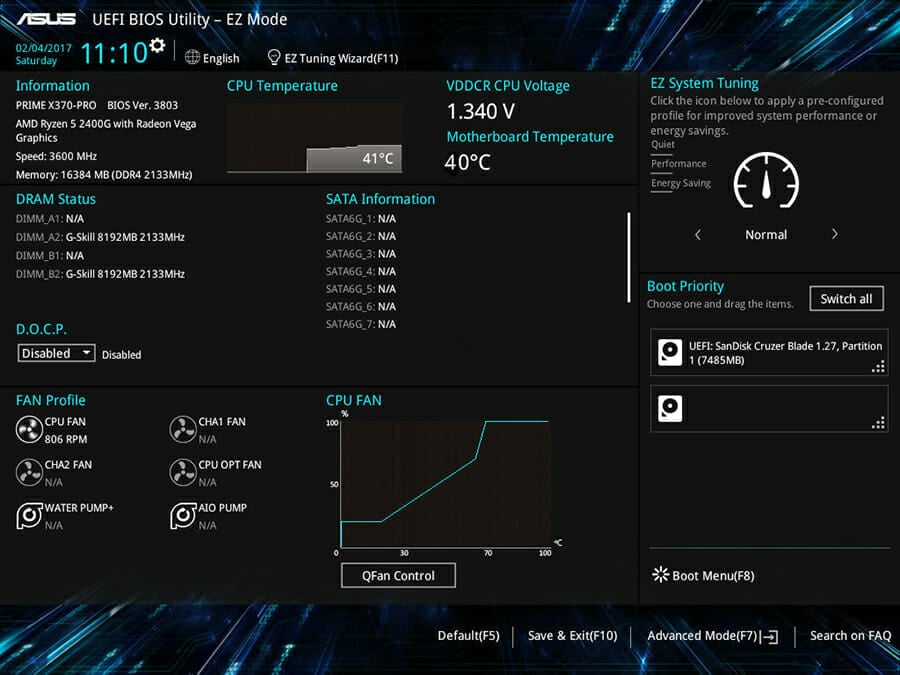
3. Update the BIOS

BIOS or Boot Input/Output System is responsible for letting Windows take over when you turn on the computer. It’s one of the most important components, and issues with it can cause severe problems, if not dealt with right away.

One of the simplest ways to ensure that it works as expected is to update the BIOS. Now, the update process itself is tricky, and we wouldn’t recommend you to do it if you don’t understand the intricacies involved.

BIOS in ASUS device

A minor lapse here could leave your computer useless, but it’s also imperative to mention that updating the BIOS solves a bunch of errors. So, if you are unable to do it on your own, get in touch with someone who can to fix the various Bitlocker errors in Windows 11.

4. Disable BitLocker in Windows 11

If nothing else works, you are left with no option but to disable Bitlocker in Windows 11. Though this will leave your drive relatively unsafe, it’s better than not being able to use the PC at all.

There are various ways to disable BitLocker. If you are able to boot Windows 11, go with the Control Panel method. In case you are unable to load the OS, you can always disable it by accessing Command Prompt from the Recovery Environment (RE).

How can I find the BitLocker recovery key in Windows 11?

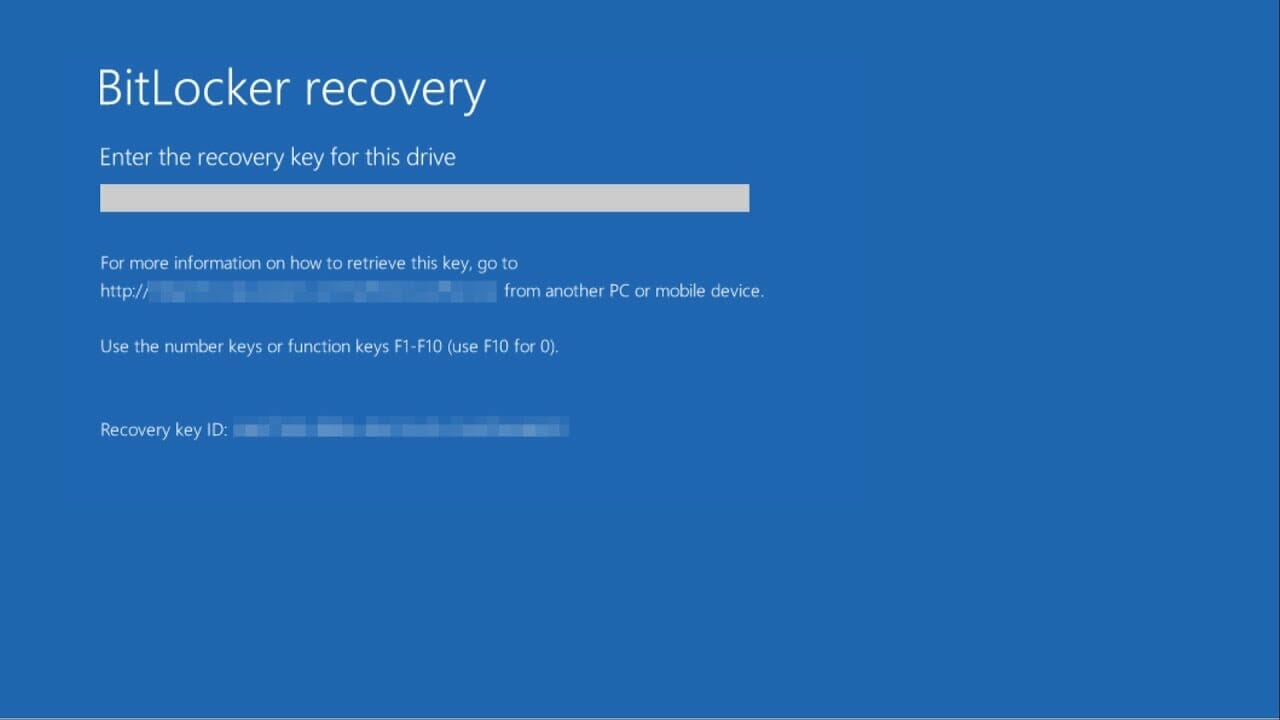
  1. If you are asked to enter the BitLocker recovery key, you can get it from your Microsoft account.BitLocker recovery
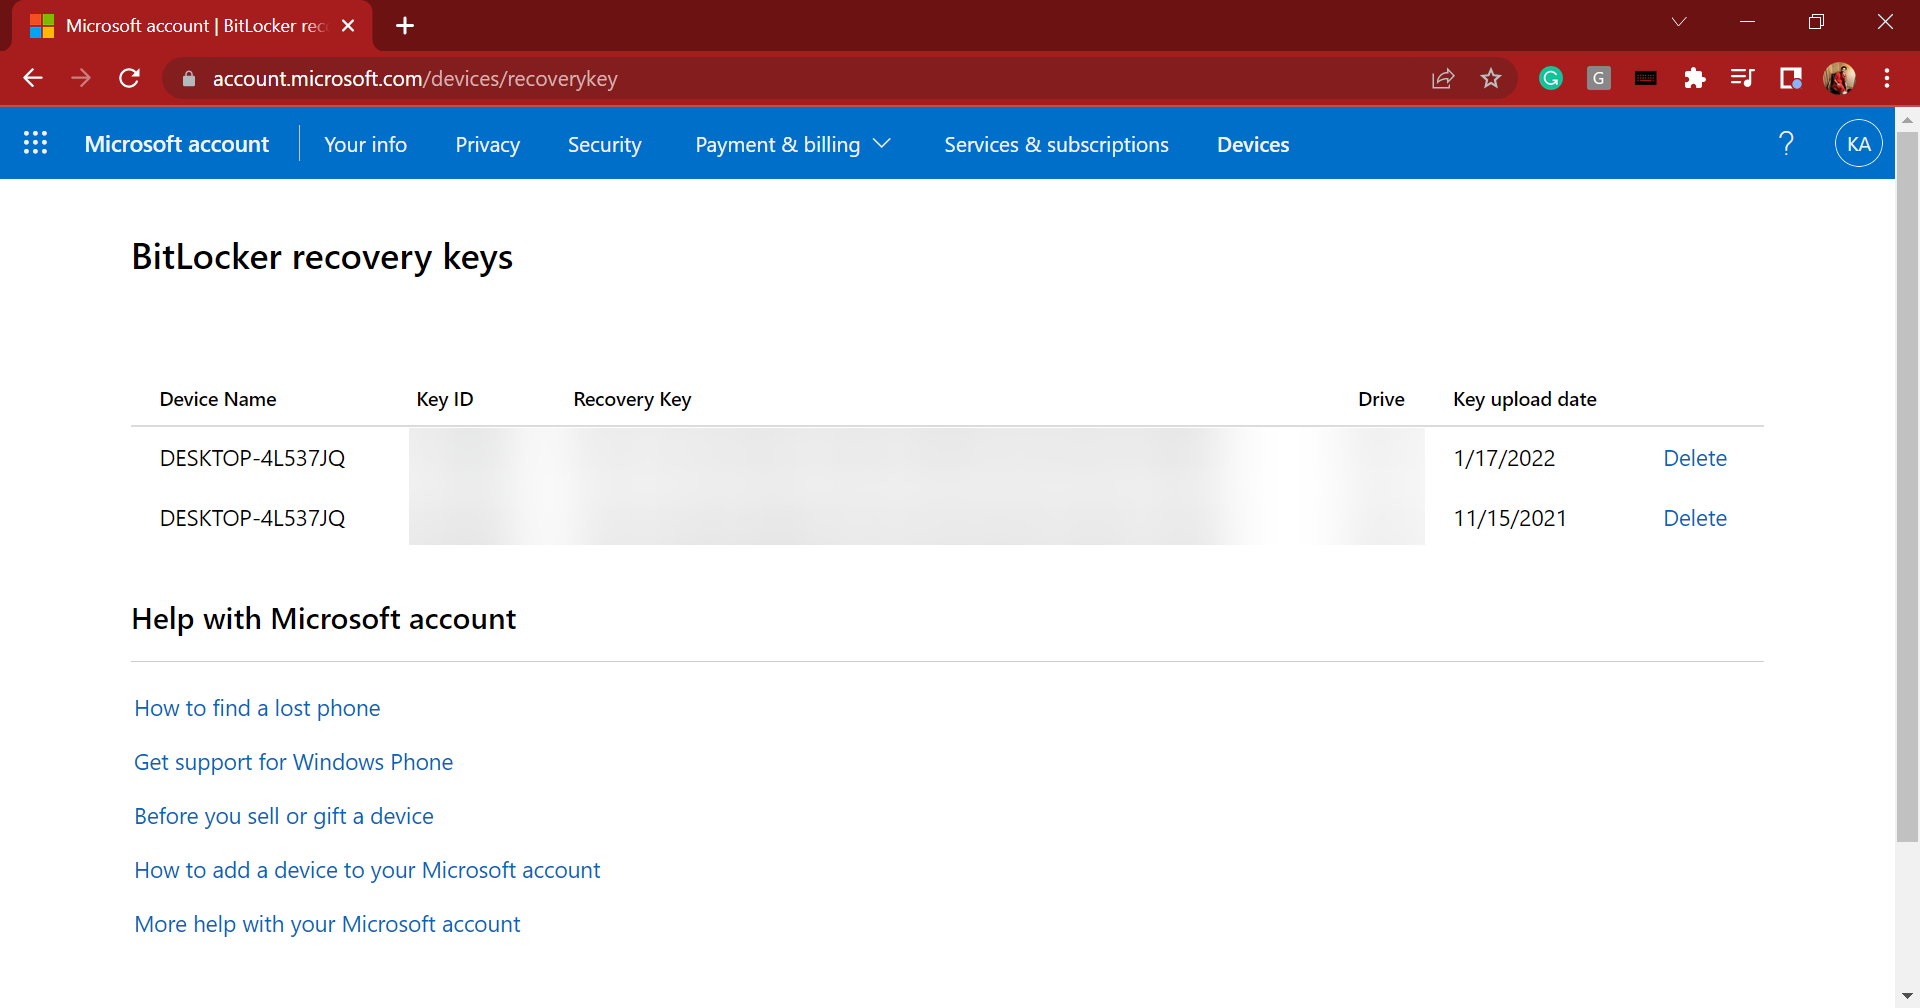
  2. To find out the BitLocker key, find another PC with a working Internet connection, go to your Microsoft account’s recovery key section, sign in if prompted, and copy the key listed under the Recovery Key column.copy key to fix bitlocker error in Windows 11
  3. Once done, enter this key and you should be able to sign in.

The BitLocker recovery key is a pretty long one, and if it has been somehow misplaced, you can easily access it from the Microsoft account.

However, if you end up entering the wrong pin or key, way too many times, it would take TPM to a locked state. In which case, you will have to wait for 2 hours before you get another chance to re-enter the recovery key.

If you decided to disable BitLocker, make sure to use the other highly-effective security features in Windows 11 to keep your system secure.

Also, if your PC does not support BitLocker, as is the case with the Windows 11 Home edition, there are several other third-party data encryption software that you can use.

Tell us which fix worked and the error you were facing in the comments section below.

GoG Galaxy not launching /opening /not connected [Full Fix]

GOG Galaxy is the client software for GOG that’s comparable to Steam. This is game launcher software with which users can download titles from GOG.COM and organize game libraries. With GOG Galaxy, you can import and organize games across platforms.

However, users have reported a few issues for GOG Galaxy on its support forum. Some GOG Galaxy users encounter connection issues, while others can’t open the client software or launch games from it. Check out some of the resolutions below if you need to fix GOG Galaxy not launching games, opening, or connecting.

Why does GOG Galaxy crashes on launch?

If GOG games won’t launch, it’s possible that the installation is damaged thus causing the application to crash.

Corrupted installation can also cause blurry text in GoG Galaxy among other issues, so you might want to consider reinstalling the software.

Keep in mind that it’s advised to store GOG games on backup drive if you’re planning to reinstall the software.

What can I do if GOG Galaxy is not working?

GOG Galaxy not connected

Reset network adapter

  1. Click the Type here to search button.
  2. Input cmd in the search box.
  3. Next, right-click Command Prompt and select the Run as administrator option to open an elevated CP window.
  4. Then type netsh winsock reset, and press the Enter key.
    netsch winsock command gog galaxy not opening, not connected
  5. Close the Command Prompt when the reset Winsock is done.
  6. Thereafter, restart Windows.

Disable antivirus utilities

GOG Galaxy not connected errors for certain games, such as Gwent, can arise due to third-party antivirus utilities.

If a GOG connection error occurs when you try to play a certain game, try disabling your antivirus software.

To do so, right-click the system tray icon for your antivirus software and select a disable or turn off option of some kind. Select to disable the third-party antivirus software for at least an hour if you can.

Avast shield control settings gog galaxy not opening, not connected

Alternatively, try whitelisting a couple of GOG Galaxy folders in your antivirus software. Whitelist the GalaxyClient and GOG.com folders.

Certain antivirus applications can prevent you from running GOG Galaxy, and to avoid this issue, it’s advised to switch to a more reliable antivirus software, such as TotalAV for example.

This software will give you full protection against malware, ransomware and other online threats. Thanks to the built-in firewall, only the approved applications and services will be able to access the web.

It’s important to mention that the software has a Gamer Mode so it won’t interfere with your gaming sessions at all.

⇒ TotalAV

GOG Galaxy not opening

  1. Enable DirectPlay to kick-start the software.
  2. Enter appwiz.cpl in Run, and select the OK option. (Turn on DirectPlay)
  3. Click Turn Windows features on or off to open the window in the snapshot directly below.
    Windows Features window gog galaxy not opening, not connected
  4. Click Legacy components to expand that category.
  5. Select the DirectPlay option.
  6. Click the OK button.

GOG Galaxy not launching

GOG Galaxy verify repair not working

Launch games outside GOG Galaxy
  1. Open File Explorer.
  2. Open the GOG game data folder.
  3. Then click the EXE file for the game you can’t open from the GOG Galaxy client software.
Disable the Run this program as administrator option for games
  1. Open the File Explorer’s window.
  2. Open the installation folder for the game that doesn’t launch.
  3. Right-click the game’s EXE to select Properties.
  4. Select the Compatibility tab in the snapshot directly below.
    Compatibility tab gog galaxy not opening, not connected
  5. Deselect the Run this program as an administrator checkbox.
  6. Click the Apply option.
  7. Press the OK button.

So, that’s how you can fix GOG Galaxy not opening, launching games, or connecting. If you still need further resolutions, check out the GOG Support Center from which you can submit support requests.


[wl_navigator]

Horizon Forbidden West is not working [Quick guide]

As you probably already know, Horizon Forbidden West is out now. It is available to play on your PlayStation, where you’ll find a post-apocalyptic masterpiece open world.

However, like any other program or game, this one might generate specific issues, like not launching or crashing.

Keep in mind that there are many reasons that explain why Horizon Forbidden West is not working on your PlayStation 4 or 5.

The most common one is related to insufficient disk space, which can generate serious problems on consoles, like any other device or computer.

Plus, it could be possible that your PS becomes corrupted or doesn’t have the latest update installed.

Now, let’s see what quick processes you can follow if Horizon Forbidden West is not working as you expected.

What can I do if Horizon Forbidden West is not working?

1. Update your console and game

1.1 Console

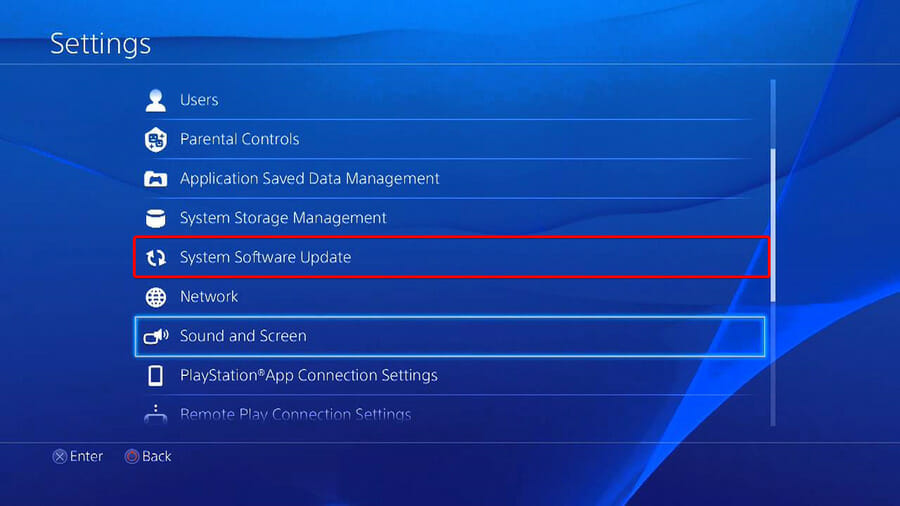
  1. For PS4, you’ll have to go to the Settings. Then to System Software Update, and your system will automatically scan for updates.
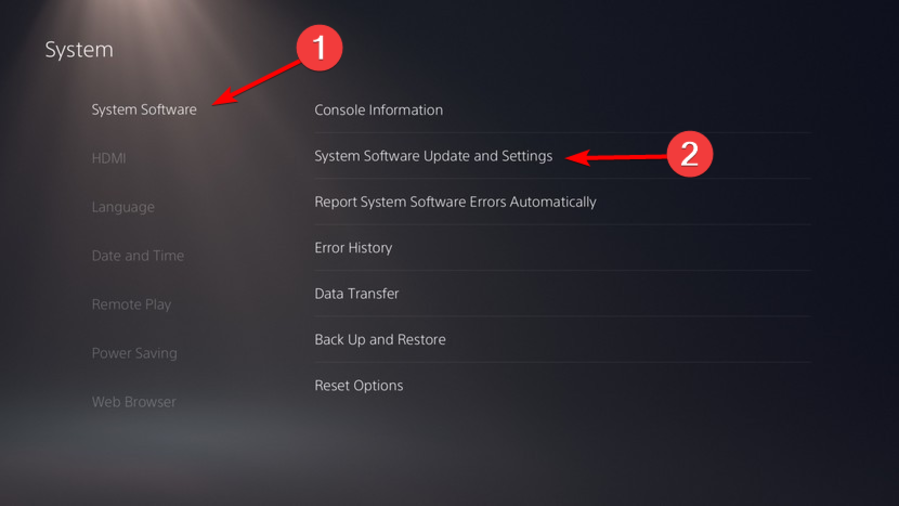
  2. For PS5, you’ll need to open Settings, then navigate to System.
  3. Then, choose the System Software option, and go across to System Software Update and Settings.
  4. Now, click on Update System Software, then on Update Using Internet.

1.2 Game

  1. Find the Horizon West icon on the Home Screen.
  2. Press the Options button on your controller (3 lines).
  3. Choose to Check for Updates.

Do not forget that if you don’t have the latest software update installed on your device, then there could be a bug or corruption causing crashes with Horizon Forbidden.

2. Check disk space and clear the system cache

2.1 PS4

  1. Completely power off your console, then wait at least 60 seconds.
  2. Power back on and try launching the game.

2.2 PS5

  1. Completely turn off your console.
  2. Now, press and hold the the power button.
  3. After you hear the second beep release the button to get into the Safe Mode.
  4. Plug your controller into using the cable.
  5. Go down and choose to Clear Cache and Rebuild Database.
  6. Click on Clear System Software cache, then on OK.

3. Rebuild the database

  1. Completely power off your console.
  2. Press and hold the power button.
  3. Release the button after you hear the second beep.
  4. For PS4, you’ll need to connect your controller via USB, then choose to Rebuild Database.
  5. For PS5, you’ll now boot into Safe Mode. Plug your controller in with the cable, then go down and select Clear Cache and Rebuild Database.
  6. After that, click on Rebuild Database, then on OK.

As you can see, even if Horizon Forbidden West might sometimes seem like not working, not launching, or crashing, the above processes are the best you can try.

If you’re wondering if it’s possible to run Horizon Forbidden West Cross-Play and Co-Op, we recommend checking a detailed guide on this subject.

Are you facing additional related questions? Make sure you leave a comment in the section below and we’re going to reply as soon as possible.

Fix: Minimum specifications/requirements not met on Steam

Steam is a dominant gaming client, however, many users reported a pesky error that appears especially in connection with the Sunset Overdrive game.

Apparently, Steam thinks that the system does not meet minimum requirements. Obvisously, this is not always the case, which makes the case even more puzzling and frustrating.

Your system might meet the minimum requirements or even exceed them, but this doesn’t stop the Steam client from giving out this error.

Where can I encounter this error and what to expect?

  • The most common one is Sunset Overdrive, but others can be impacted as well (Sunset Overdrive error minimum requirements)
  • Witcher (The Witcher Enhanced edition minimum requirements not met, GPU does not meet minimum requirements DirectX 11 Witcher 3, Witcher 1 system requirements not met)
  • New World minimum requirements error or minspec failure
  • System specification requirements not met Metro Exodus
  • Your GPU is below the minimum requirements (Please verify that your system meets the minimum requirements)

However, we have a list of fixes that could work for you, so let’s get started.

How to fix Minimum requirements not met Steam error?

  1. Enable/disable Steam Overlay
  2. Edit the registry
  3. Run Steam in Compatibility Mode
  4. Verify game files
  5. Reinstall your game

1. Enable/disable Steam Overlay

  1. Open Steam and head on over to Settings.
  2. Click the In-Game tab.
  3. Check Enable Steam Overlay while in-game.
    steam overlay steam error minimum requirements not met
  4. Go to the Library.
  5. Right-click on your game of choice and select Properties.
  6. Under the General tab also make sure to check or uncheck the Enable Steam Overlay while in-game.

2. Edit the registry

To fix Minimum system requirements not met error, sometimes you need to modify your registry. You can do that by following these steps:

  1. Press Windows Key + R, enter regedit and press Enter.
    regedit minimum requirements not met
  2. Locate the  Computer\HKEY_LOCAL_MACHINE\SOFTWARE\
    Wow6432Node\Microsoft\
    Direct3D\Drivers
    and change the SoftwareOnly from 1 to 0.
  3. Now go to Computer\HKEY_LOCAL_MACHINE\SOFTWARE\
    Wow6432Node\Microsoft\
    DirectDraw
    and change the EmulationOnly value to 0.
  4. Reboot your machine.

3. Run Steam in Compatibility Mode

In the event that you’re still facing this error, we recommend you trying to run Steam in Compatibility Mode. To do so, follow these steps:

  1. Locate your Steam installation directory.
  2. Now, right-click on Steam.exe, and choose Properties.
    properties steam error minimum requirements not met
  3. Next, click on the Compatibility tab.
  4. Check Run this program in compatibility mode for and select an older version of Windows. Click Apply and OK to save changes.
    run this program in compatibility mode minimum requirements not met

Now check if the problem is resolved.

4. Verify game files

In some rare occurrences, verifying local files can fix Minimum system requirements not met error. To do this follow these steps:

  1. Open up the Steam window.
  2. Click the Library to open the game collection.
  3. Then right-click on your game and select Properties.
    steam properties steam error minimum requirements not met
  4. Press the Verify integrity of game files.
    verify integrity of game files steam error minimum requirements not met

5. Reinstall your game

Sometimes when everything else fails, the best solution is to reinstall your game. To do that, follow these steps:

  1. For this, just launch Steam and right-click on your game.
  2. Next, you’re going to choose Properties and select Local Files.
  3. Click on Uninstall, and once the game is uninstalled, click on Browse Local Files and delete the remaining file. The last step is reinstalling your game.

Additional tips:

Even if the cause is a simple error, always keep in mind to verify the minimum system requirements for any game or app you wish to run through Steam.

When in doubt, run Steam with Administrator rights, and see if that helps.

There you go, five simple solutions that can help you fix Minimum system requirements not met error Steam error. Feel free to try all of our solutions and let us know in the comments section if they worked for you.

3 Best Deals For Monitors With Speakers

Having a monitor with speakers has its advantages, and if you have a such device you won’t need to purchase speakers or headphones.

Monitors with built-in speakers have become extremely popular, especially among those who enjoy interactive activities like gaming or who need to hold online meetings at work.

In this article, we want to have a quick look at the best monitors with integrated speakers currently available on the market.

Note: All the prices and offers in this article are subject to change, so be sure to check the official product page to get the latest deal. If the product or offer you’re looking for is no longer available, you can try to find it on its official manufacturer page or get another one from our list.

What is the best PC monitor with built-in speakers to buy?

LG 32UN500-W

  • Supports 4K videos for a high-quality visual experience
  • Slick design
  • HDR 10 compatible and AMD FreeSync
  • Image lacking brightness

The 32-inch monitor from LG comes with a UHD resolution of 3840 x 2160 pixels that can support 4K videos and offers a DCI-P3 90% Color Gamut.

You can use it for gaming or streaming movies because this monitor is HDR 10 compatible. The device also offers AMD FreeSync technology for excellent image quality.

You’ll absolutely enjoy the 3-Side Virtually Borderless Design and the excellent sound quality from MAXXAUDIO stereo speakers.

Philips 328E1CA

  • HDMI 2.0 (x2), DisplayPort 1.2
  • Ultra Wide-Color Technology for amazing visuals
  • 4ms panel and Adaptive-Sync technology for easy control
  • VA panel slow refresh rate

Phillips introduces a curved UHD monitor with a 32-inch display that supports 4 K videos for that crystal clear immersing image that can offer a great experience if you’re a movie buff.

You’ll definitely appreciate the VA panel with Philips Ultra Wide-Color technology that provides 120% sRGB and 97.8% NTSC color gamut with over a billion colors.

Use the low Blue mode, whenever you feel your eyes are tired and you want some protection from the screen while also enjoying your favorite TV show.

Dell P2418HZm

  • Clear images from any angle thanks to the Full HD resolution
  • Filtering of harmful blue light emissions
  • Extensive connectivity
  • Needs an HDMI cable

With a 24-inch display, Dell brings a monitor that incorporates two 5W integrated speakers and a 2MP Full HD infrared sensor camera so you can use it for work meetings but also for some nice relaxation afterward.

Thanks to the Ultra HD screen and the anti-glare, flicker-free screen with ComfortView you can also enjoy gaming because your eyes are protected while benefiting from the great visuals.

This monitor also provides easy and versatile connectivity and it’s compatible with VGA, DP, HDMI, USB3.0, and USB 2.0 ports.

Monitors with speakers are a great way to delight yourself in fantastic images and impeccably clear audio quality. Most of them are designed to bring entertainment right into your home and transform your living space into a small cinema.

There are also monitors that were created to respond to complex office job requirements and in this regard, a multi-functional quality monitor is also a sign of professionalism.

We’d like to hear about your experience and you can also tell us your recommendations so don’t shy away from the comment section below.

Can’t drop down in Horizon Forbidden West? Here’s what you can do [Fix]

No matter how much we love a certain game, or how good and experienced the studio that created it is, in reality, no games are free of bugs, crashes, or other glitches.

Even though most of the time we only have to deal with minor issues, that don’t necessarily ruin or prevent gameplay, there are cases in which playing is simply not worth it.

The same goes for Gorilla Games’ latest title, Horizon Forbidden West. Zero Dawn’s sequel came with quite a few bugs that drove players that bought the game absolutely crazy.

And since we’re talking about Forbidden West, be sure to check out current bugs, how to cross-play the game, or how to transfer your saves from a PlayStation 4 to a PlayStation 5.

Today we’re going to tackle a bug that prevents players from dropping down from ledges or other props. Even though there isn’t an official fix patch in sight yet, we got a neat workaround for you.

What can I do if I can’t drop down in Horizon Forbidden West?

Forbidden West will, of course, feature some of the core mechanics established in Zero Dawn, which help Aloy quickly traverse some tricky areas on the map.

If you are in need of some assistance, you can head over to the Visual tab of the Settings menu and switch on the Climbing Annotations.

This setting will display the yellow lines on a surface which Aloy can grab onto. Climbing up or down is pretty simple, as players will need to locate these yellow lines and x marks to plan their path.

Similarly, the game will automatically prompt when Aloy is close to a ledge, and players can drop down by pressing the Square button.

How can I turn on Climbing Annotations?

  1. Pause the game and open Settings.forbidden west settings
  2. Navigate to the Visual tab and switch Climbing Annotations to On.climbing annotations

However, players have been reporting not being able to drop down from ledges in Horizon Forbidden West, without any apparent explanation or reason.

Three is no clear solution to this annoying and game-breaking bug, except for one workaround that has proved to work in multiple cases.

I switched square and circle and I had the same issue, when I switched the controls back to default it worked.

Thus, if you encounter the same bug, head on over to the Settings menu and perform some control tweaks before returning to the game.

How can I fix not being able to drop down?

  1. Pause your game and open Settings.forbidden west settings
  2. Navigate to Button layout and customization.button layout and customization
  3. Set Full Controller Preset to Custom and press Edit Preset.custom preset forbidden west
  4. Switch Square and Circle controls between them and revert to default.change controls

Has this guide been helpful to you? Let us about your experience in the dedicated comments section below.

Horizon Forbidden West Cross-Play and Co-Op: Is it possible?

For a real gamer, few things compare to the sweet feeling of trying out a new game that you’ve been expecting for some time.

The feeling is the same regardless of the platform you choose to play on, but today we’re going to focus on PlayStation and their exclusive Horizon Forbidden West title.

And, if you are a fan of this Guerilla Games title, you’ve surely also enjoyed its prequel, Horizon Zero Dawn, which is now also available for PC players on Steam.

Not many know this, but Zero Dawn was reportedly intended to be a co-op game when the development process first started.

However, due to the hardware limitation issues encountered at the time, Guerilla Games made the hard decision to scrap the idea.

But what about Forbidden West? Have developers completely changed their minds and actually allowed features such as co-op and cross-play into the game?

Can you cross-play Horizon Forbidden West?

Before we get into this, we’d like to let you know that if you are looking to transfer your PS4 Forbidden West save to a PS5, the process is fairly simple and we can assist you with it.

As much as we hate disappointing you, unfortunately, Guerilla Games have not confirmed if Horizon Forbidden West will include online multiplayer, local co-op, or cross-play in the future.

Yes, that means that this feature is not available for Horizon Forbidden West. So, if that’s something you were counting on, you might want to rethink your strategy.

For the time being, at least, the new Horizon title does not support local couch or online Co-op & PVP Multiplayer modes.

Furthermore, Cross Play, Cross Gen Play, and Cross Progression are not included in Horizon Forbidden West either.

However, it’s entirely possible that these highly-requested features could be included in the future. That being said, even the game’s official PlayStation Store listing says Offline Play Enabled and 1 Player.

The most plausible explanation would be that the developers were still unable to include some form of co-op or cross-play due to hardware limitations on the PlayStation 4.

We will keep an eye open for any new details that could surface about the topic at hand and keep you updated as any developments arise.

Also, be sure to keep an eye out for the Horizon Forbidden West bugs and how you can fix them if you encountered them while playing.

Have you discovered any annoying new bugs while playing Horizon Forbidden West? Share your experience with us in the comments section below.

Video Memory Management Internal: Causes & How to Fix

Your computer may occasionally crash suddenly, resulting in a blue screen of death. You’ve come to the right place if you’re also receiving the video memory management internal Windows 11 error.

Video memory management internal errors can occur in a variety of situations. Corrupt system files, a faulty graphics card driver, and faulty RAM are all probable culprits.


Follow along as we will show you how to avoid future Blue Screens of Death from occurring, and then jump into the list of methods to fix the error.

How can I prevent a BSoD?

If you use your computer long enough, you will most likely encounter the infamous Blue Screen of Death, the error screen that Windows displays before resuming when a significant problem arises. There could be various causes for the blue screen, but a few stand out as the most likely culprits.

A hardware malfunction, whether it’s your memory card, hard drive, keyboard, monitor, video card, or any other piece of hardware in your computer, is one of the most common causes of BSoDs. They typically occur when new hardware is installed but the incorrect drivers are not.

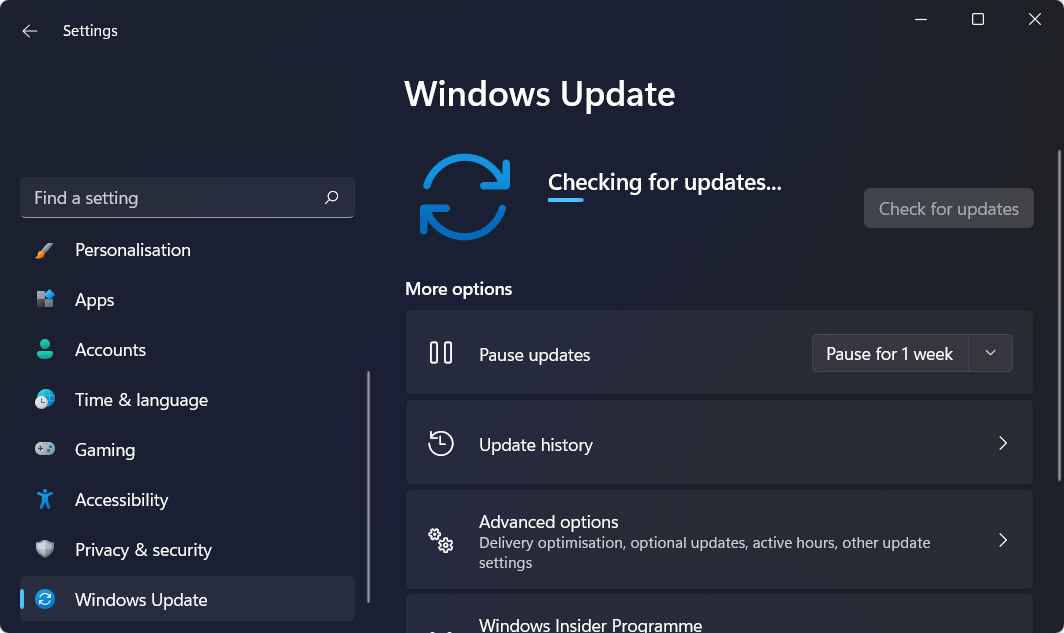
check for updates video memory management internal windows 11

Recently installed software that is incompatible with your computer can also result in the dreaded error screen. If you recently installed software and are now experiencing BSoDs, you should first try uninstalling the software.

Another effective technique is to keep all software and hardware drivers up to date. Drivers are frequently updated, but if you do not apply them, they can become unstable and cause your system to crash.

Furthermore, you can keep an eye on your computer for anything that can trigger the dreaded blue screen by using an antivirus tool to scan for malware on a regular basis.

We have been using TotalAV as our trusted antivirus and antimalware software tool, thus we recommend it to our readers as well. It will detect and prevent all the threats that come in contact with your PC from taking any action.

How can I fix the memory management error in Windows 11?

1. Update your drivers

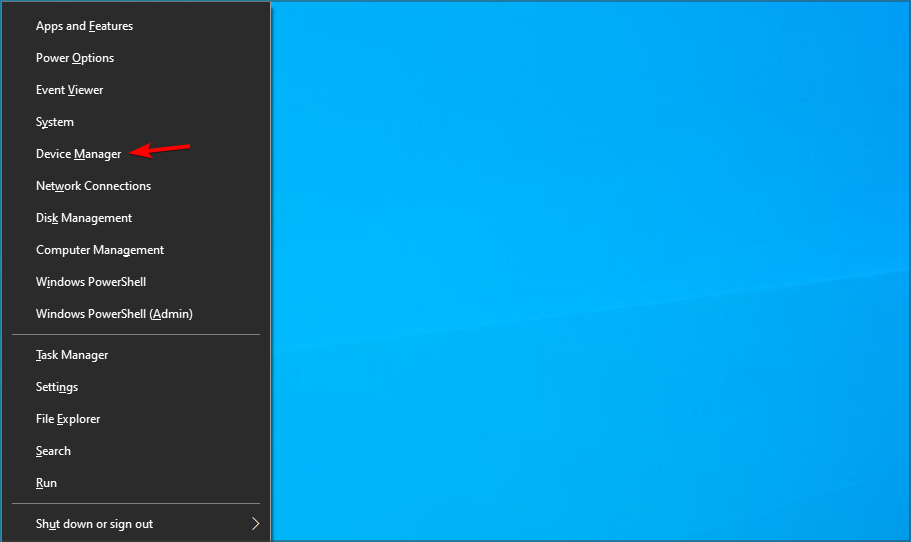
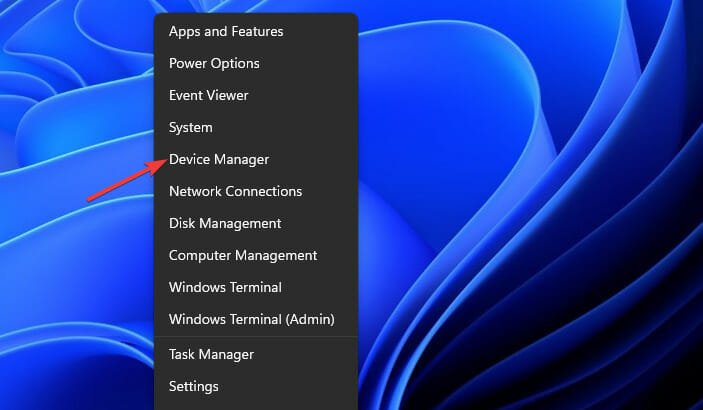
  1. Right-click on the Start icon from your Taskbar and choose Device Manager.device-man windows 11 error system thread exception not handled
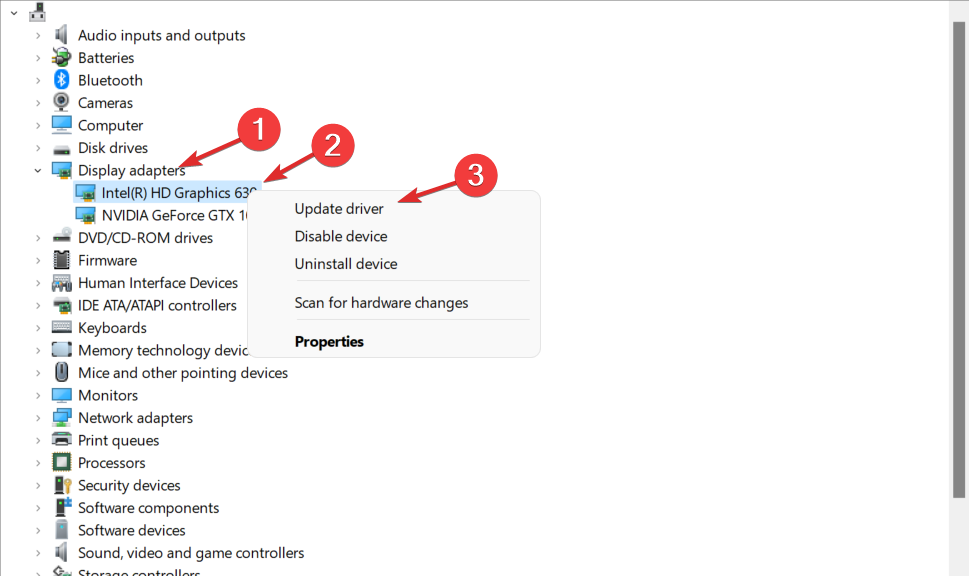
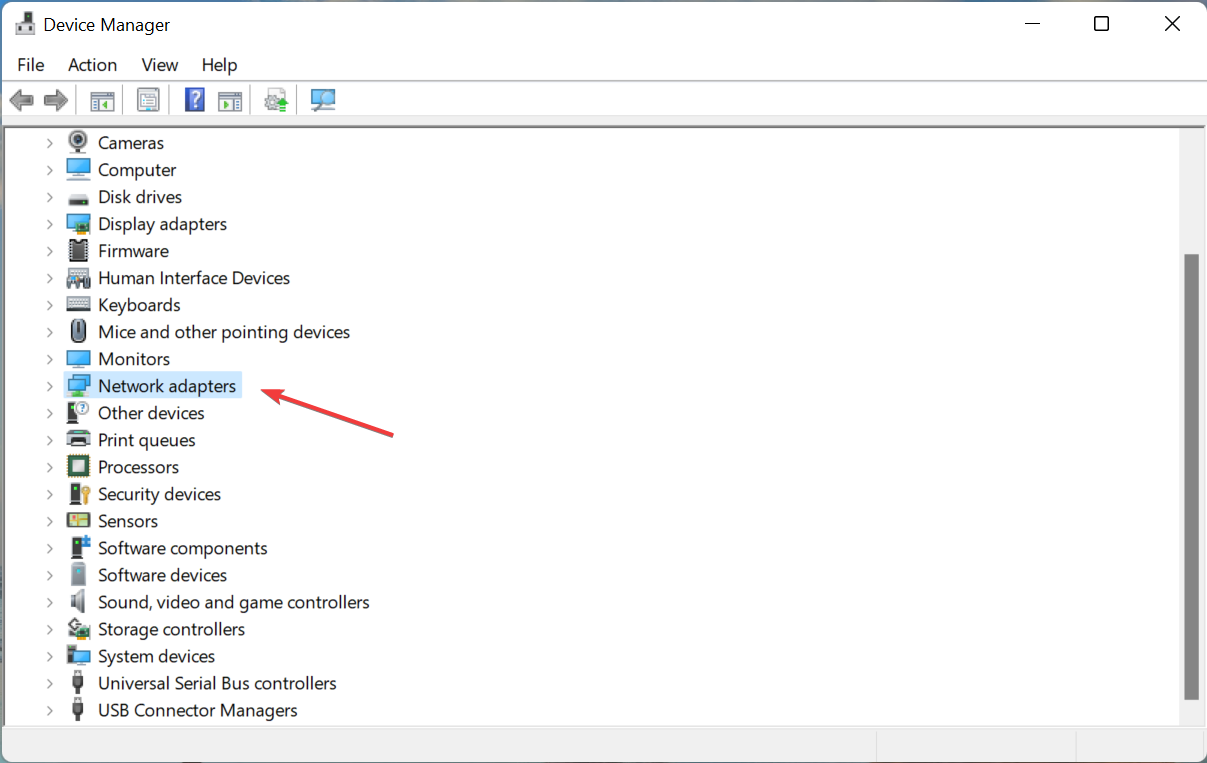
  2. Now expand the Display adapters section and right-click each driver you get to choose Update driver. update-graphics-driver video memory management internal windows 11

Outbyte Driver Updater is a lightweight software solution designed for users who wish to keep their PC running well without wasting time opening the Device Manager or visiting each manufacturer’s website to manually download every single driver.

Thus, we always recommend it to our users in order to keep their computers up and running at all times. The video memory management internal Windows 11 error could have been avoided if faulty drivers were the cause and they were treated earlier, by yourself or Outbyte Driver Updater.

⇒ Get Outbyte Driver Updater

2. Run in compatibility mode

  1. Right-click on the application that you wish to run and choose Properties.properties-app video memory management internal windows 11
  2. Now, navigate to the Compatibility tab and check the box next to Run this program in compatibility mode for: and choose Windows 8.run-compatibility-mode video memory management internal windows 11
  3. Click Apply and OK in order to apply the changes made. That’s it! You should now be able to run the application without being thrown into a BSoD.

3. Repair corrupted system files

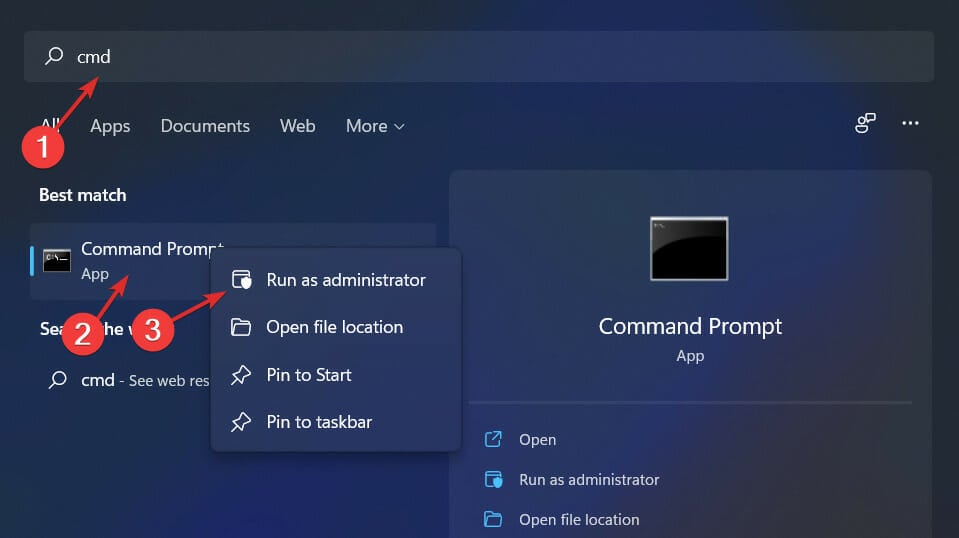
  1. Open Command Prompt as an administrator.cmd-search windows 11 error system thread exception not handled
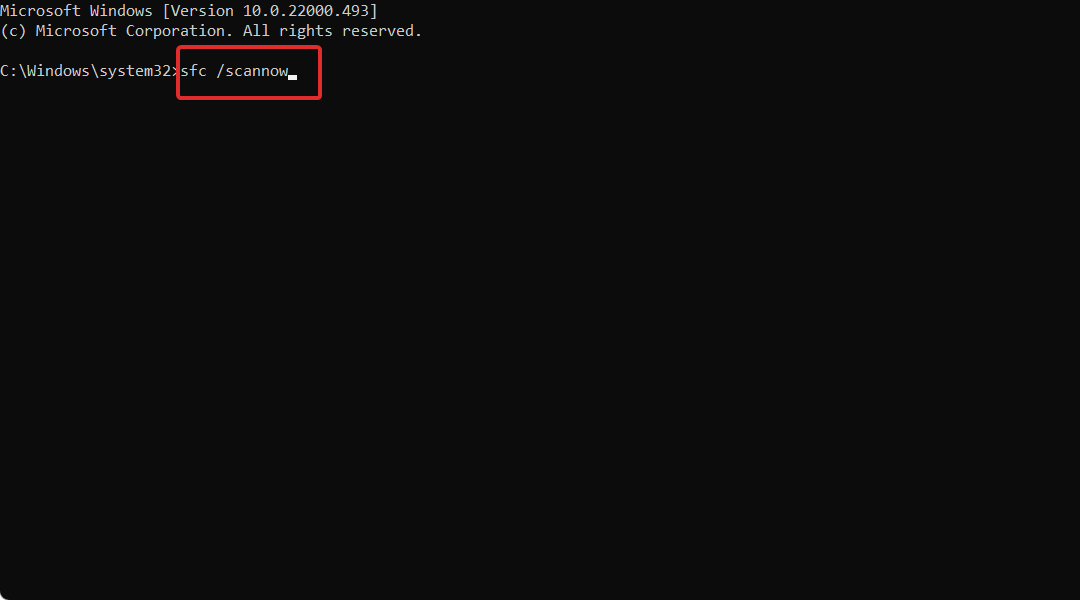
  2. Now type or paste the following command to start repairing your system files: sfc /scannowsfc-scannow windows 11 error system thread exception not handled

The SFC scan is always a good solution to try when you face a BSoD or other internal issues. It will catch any small discrepancies between your files and fix them right away.

4. Reset Windows

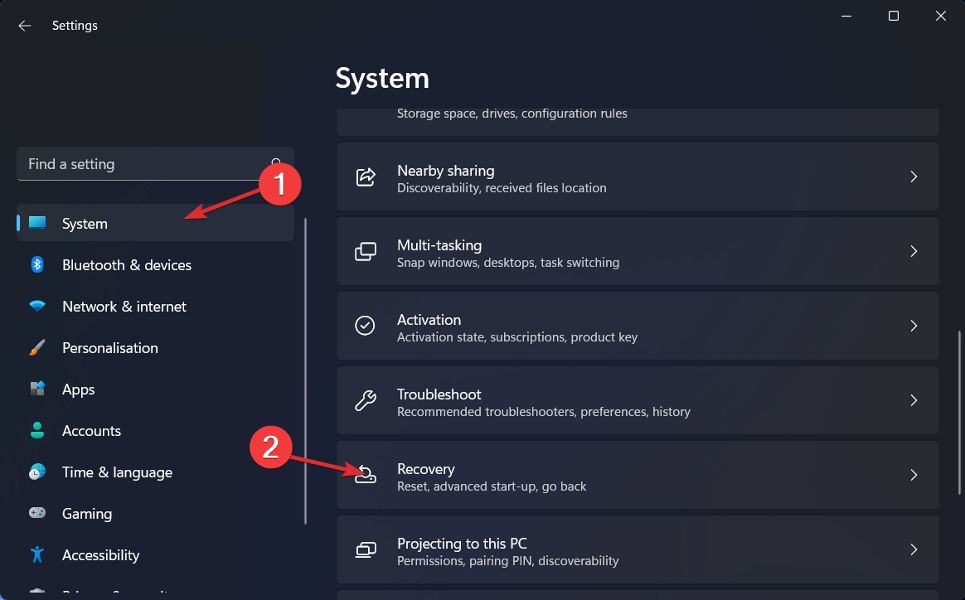
  1. Open Settings and navigate to System followed by Recovery.system-recovery video memory management internal windows 11
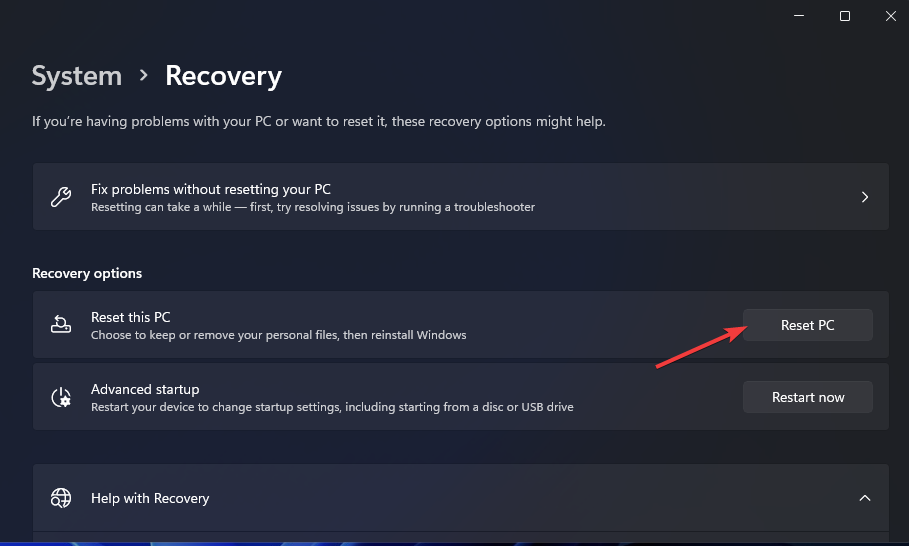
  2. Now, scroll down and click on the Reset PC button.reset-pc video memory management internal windows 11
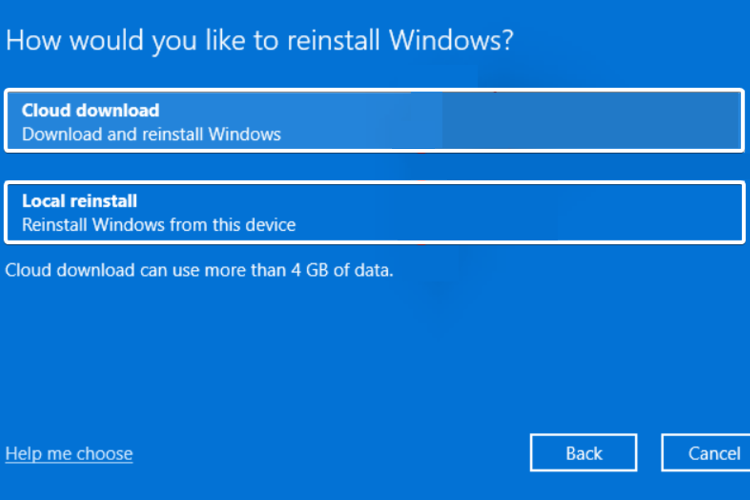
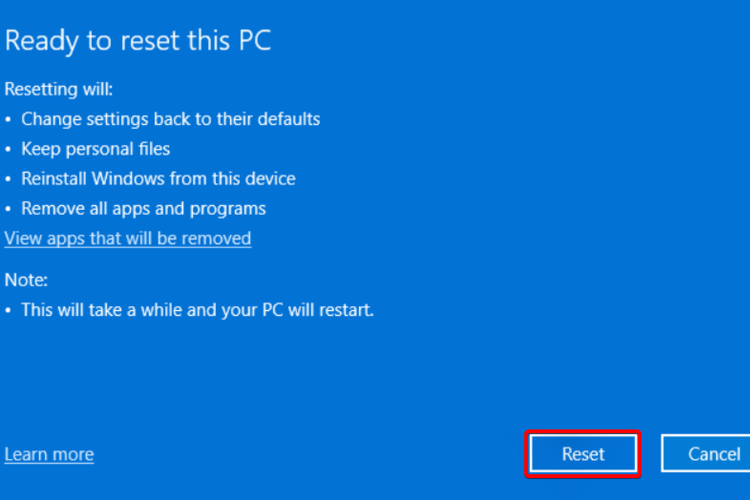
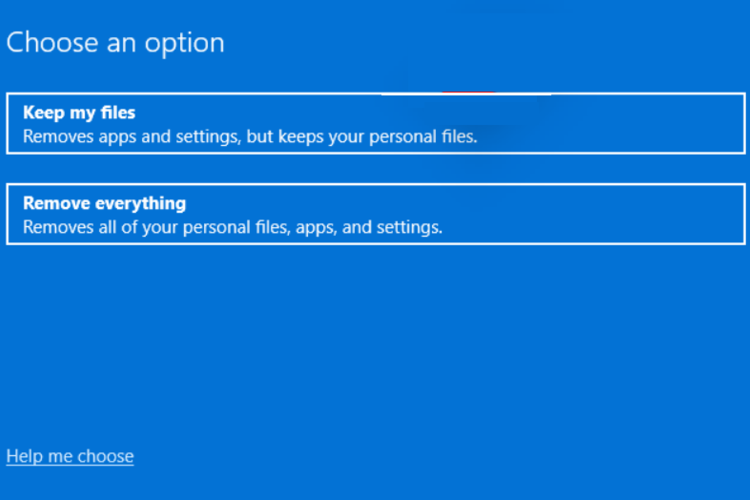
  3. Lastly, choose whether to keep your files or delete them along the way.KEEP-my-files video memory management internal windows 11

For more information on the error at hand and other solutions to apply, check out our post on how to fix video memory management internal errors in Windows 10/11.

Alternatively, you can take a look at our guide on what to do if you get a BSoD error. Don’t miss out on it since it might help you prevent future blue screens of death from occurring.

Was this guide helpful? Tell us in the comments section below as well as whether you have more solutions in mind.

Fix: MSI Driver and App Center not working

Keeping your drivers up to date is important, and some devices have their own specialized software that keeps the drivers updated at all times.

However, many users reported that MSI Driver and App Center is not working for them. This can be a problem since you won’t be able to update your drivers at all.

There’s a way to fix this issue, and in today’s guide, we’re going to show you a couple of simple solutions that you can use to fix this problem.

How can I fix MSI driver and App Center error 403?

Users can encounter various issues while installing this software, and many reported that MSI driver and software setup is stuck. This can negatively impact your installation and cause issues in the future.

This isn’t the only issue and if MSI driver CD isn’t working on your PC, your installation will get corrupted and result in one or more problems.

Even if you’re having these problems, there are ways to install MSI motherboard drivers with a couple of alternative methods.

What do I do if MSI Driver and App Center is not working?

1. Make sure you’re using the latest version

If you’re getting Failed to download message in MSI Driver and App Center, make sure that you have the latest version installed.

Software glitches and incompatibilities can cause this and many other errors, therefore, it’s important to keep the software up to date at all times. Once the software is updated, check if the problem is still there.

2. Install the latest Windows updates

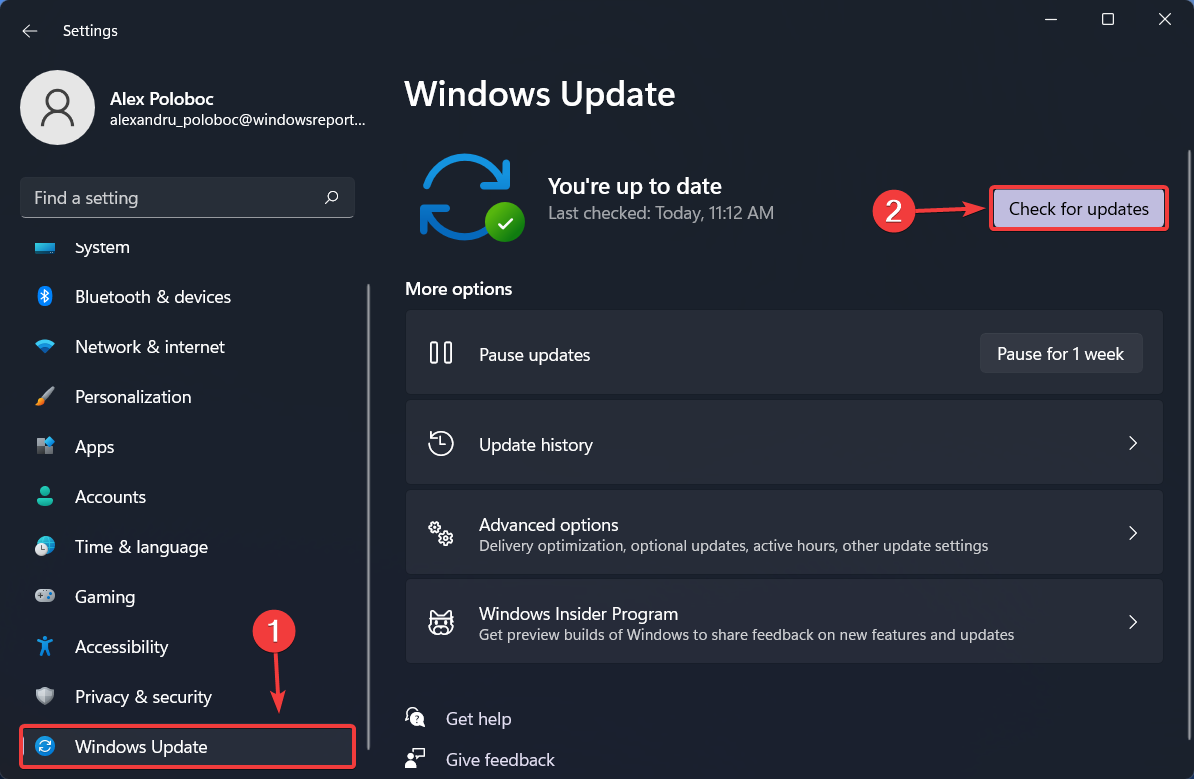
  1. Press Windows Key + I to open the Settings app.
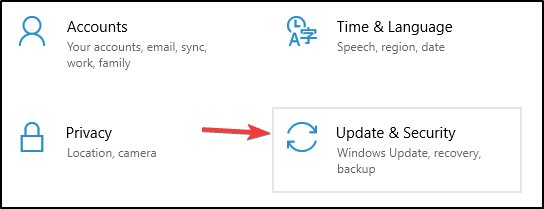
  2. Navigate to the Update & Security section.
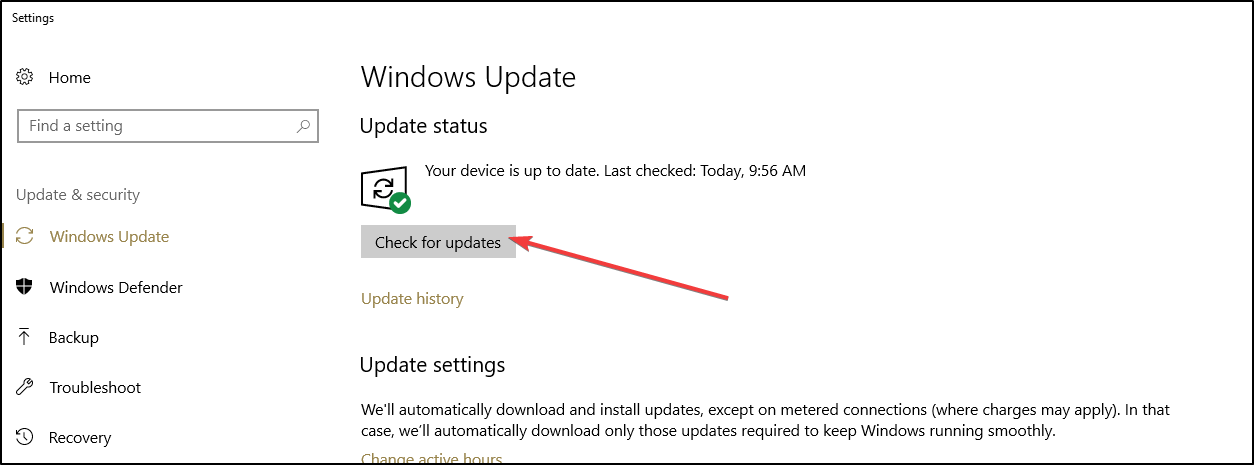
  3. Click the Check for updates button.
  4. Wait for Windows to download and install the missing updates.

If you’re getting The remote server returned an error message in MSI Driver and App Center, be sure to try this solution.

Installing the latest Windows updates can sometimes help fix the compatibility issues between Windows and other software, so make sure that your Windows is up to date.

3. Use a third-party software tool

If the MSI software isn’t working, you can always use third-party driver updater software. These applications will scan your PC and allow you to update all your drivers with just a single click.

Since these types of applications are fully automated, updating your drivers and finding the corrupted ones is faster and easier than ever before.

4. Remove problematic updates

  1. Open the Settings app and go to the Update & Security section.
  2. Navigate to View update history.
  3. Select Uninstall updates.
  4. Remove any recently installed updates.

After doing that, check if the problem is still there. Keep in mind that Windows will try to install these updates again, so be sure to block automatic updates from installing.

5. Install the drivers manually

  1. Visit MSI Driver download page.
  2. Select the category of your product from the list.
  3. Once you find the model, click on Search.
  4. Go to the Driver tab and expand the desired driver category.

If all the previous solutions failed to fix the problem, perhaps the best option would be to manually download and install your drivers.

Many users reported that downloading the drivers from the MSI website is a solid alternative, especially if you’re getting Download file is damaged message in MSI Driver and App Center.

For detailed instructions, we suggest that you check our how to install MSI motherboard drivers without a CD guide.

If your MSI Driver and App Center is not working, you won’t be able to update your drivers, but as you can see, there are several solutions available.

Did you manage to fix this issue on your own? Share your solution with us in the comments section below.

Exception Code 0xe0434352 Error: 5 Simple Methods to use

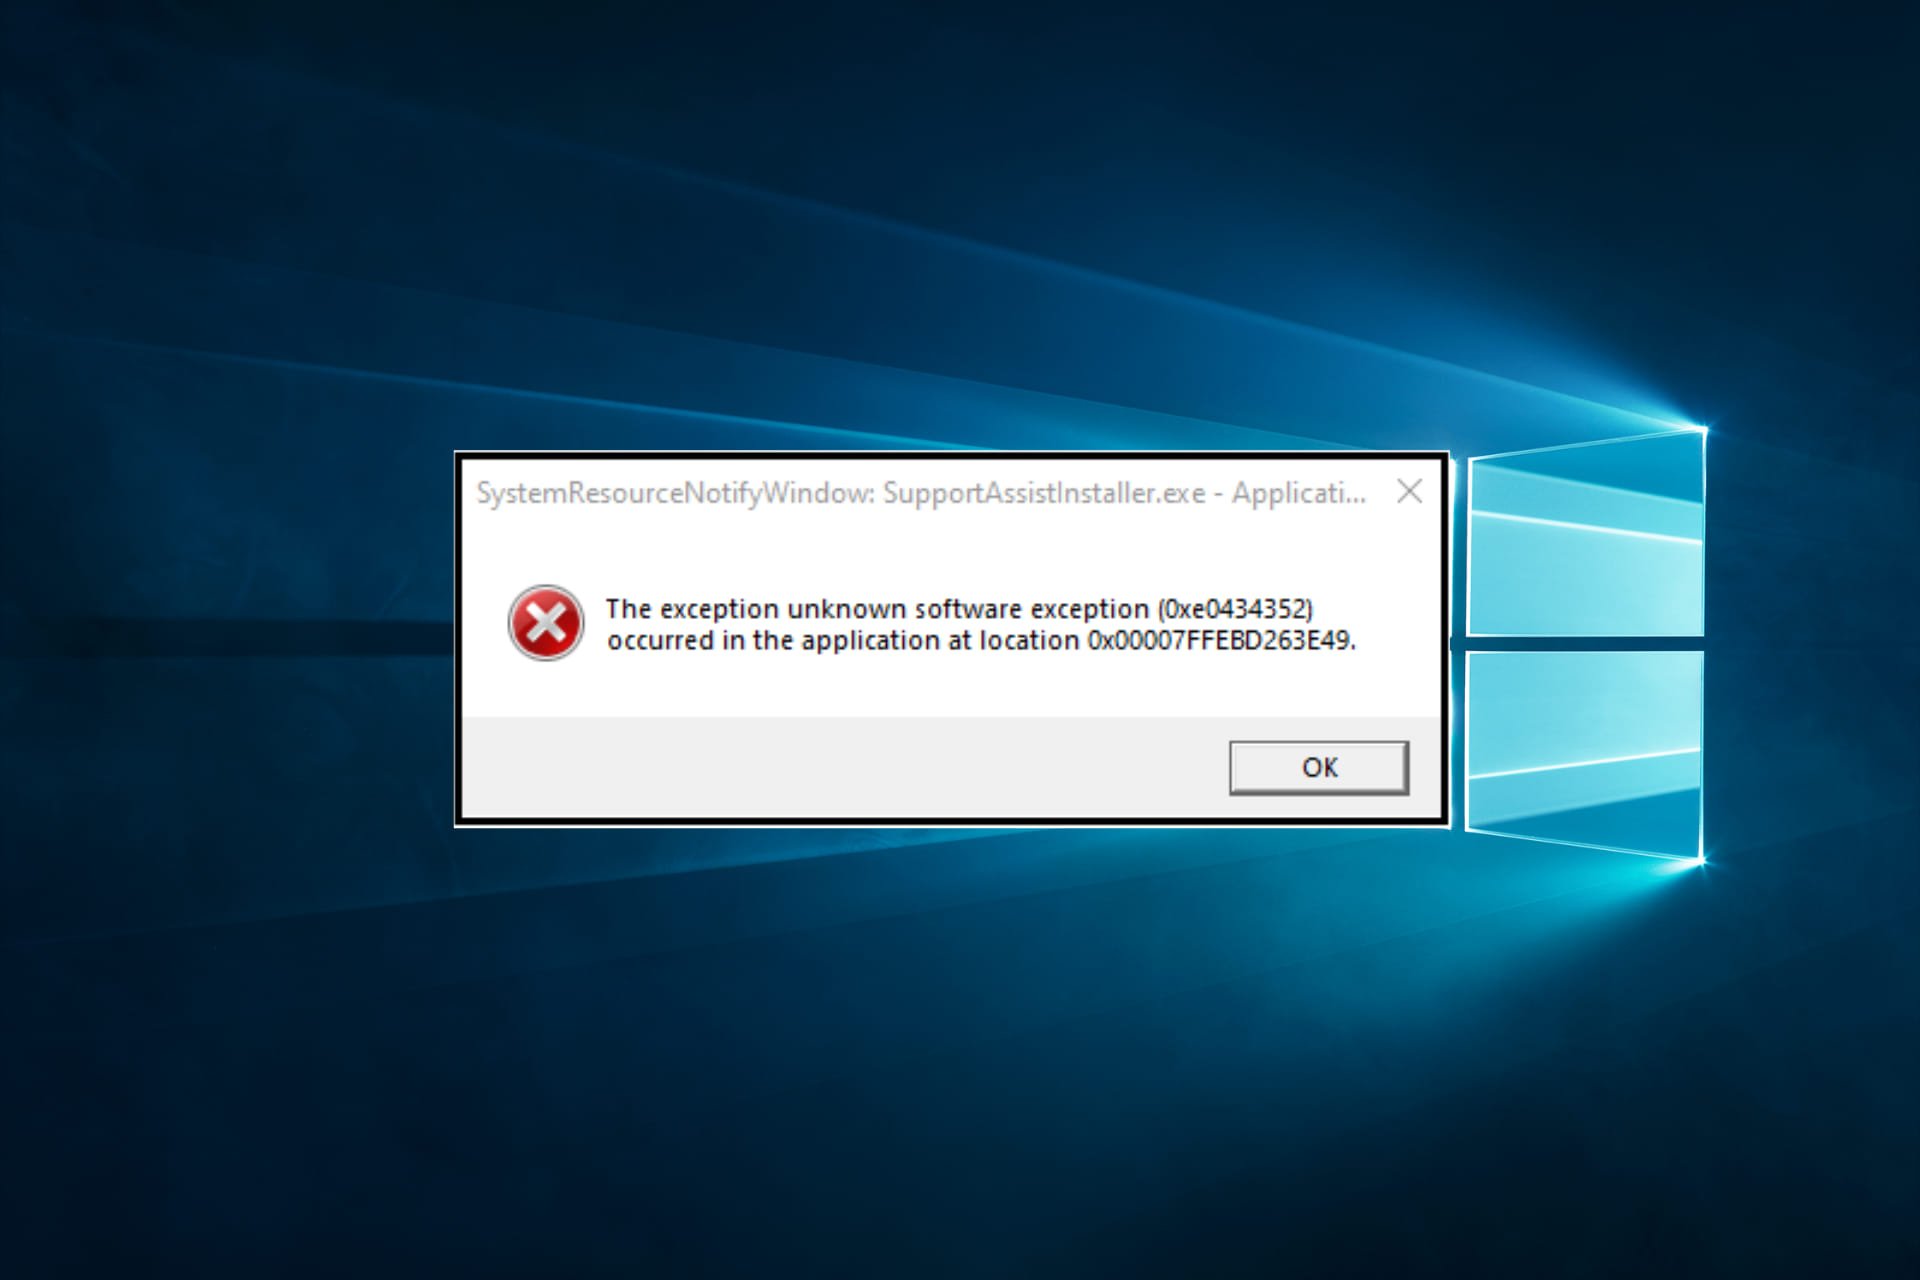
Numerous users have posted about the application error 0xe0434352 on Microsoft’s support forum. That error can arise on Windows when users shut down or try to start specific software.

One user stated in a forum post:

When trying to open applications in my PC, I receive the following notification: the exception unknown software exception (0xe0434352) occurred in the application at location 0x74de812f.

There can be a few factors behind that error, but there are also a few potential fixes.

What does exception code 0xe0434352 mean?

Many users have reported this error, which often shows a problem with your .NET Framework. It can be traced to different causes like:

  • Windows Registry problems – Registry files are significant, and when there are changes or corruption, users may experience the exception code 0xe0434352.
  • Corrupt system files – When system files are corrupt, many programs will cease to function normally, triggering a few errors on your devising, including this 0xe0434352 error.
  • Bad hardware components – When faulty, your hard disk or RAM may also trigger the error.
  • Malware or virus – Even though antivirus systems are essential, there are chances that you have one that is not very compatible with your OS or devices, which will cause system errors.
  • Corrupt or outdated drivers – Drivers are essential in connecting hardware and software, and corrupted drivers are a primary source of system errors.

The exception error 0xe06d7363 has also been widely reported and is similar to this error. Also, these errors are just a variation of the Exception Access Violation Error, but they are easily fixable as long you know how to do it.

How can I fix error 0xe0434352?

1. Update the display driver

  1. Download and install Fortect Driver Updater.
  2. Set up the tool and launch it. It will start scanning immediately.
  3. You’ll get a complete list of the software that is out of date.
  4. Update the necessary drivers (you can do it for each driver in turn or use a bulk update option).

Fortect Driver Updater

You don’t need expert tech knowledge to get rid of application errors, so keep your drivers updated with this tool.
Free Trial Visit Website


2. Clean boot Windows

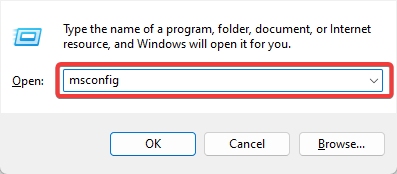
  1. Press Windows + R, type msconfig, and hit Enter.
    0xe0434352
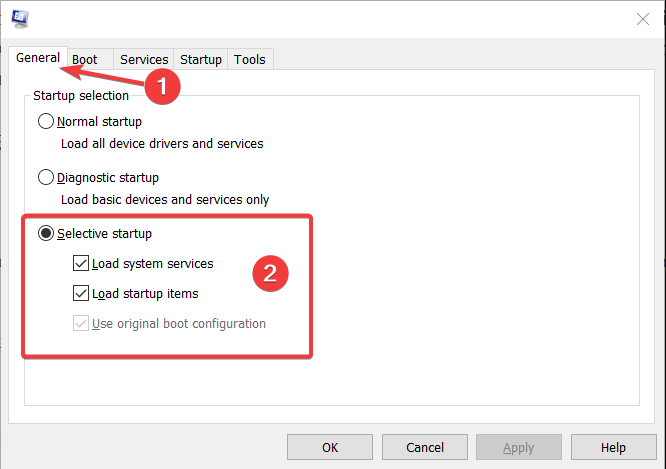
  2. Click Selective startup on the General tab. Next, select the Load system services and Use original boot configuration checkboxes. If it’s not selected, then deselect the Load startup items setting.
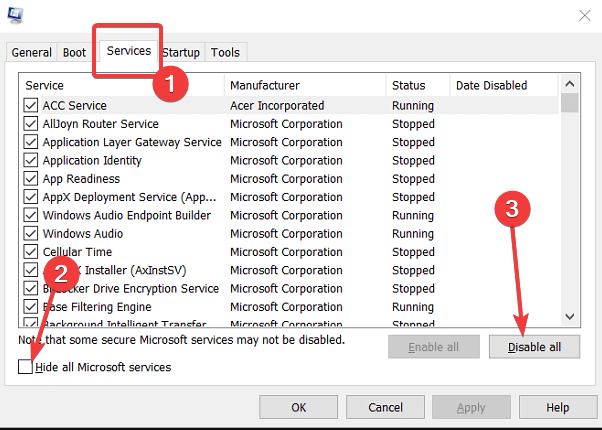
  3. Click Hide all Microsoft services to select that option on the Services tab, and press Disable all0xe0434352
  4. Select Apply and OK to exit.
  5. Click Restart on the dialog box that opens.

Clean booting Windows to ensure no conflicting third-party programs or services.

If that resolves the 0xe0434352 issue, you’ll need to figure out what third-party program or service generates the error.

3. Run a system file scan

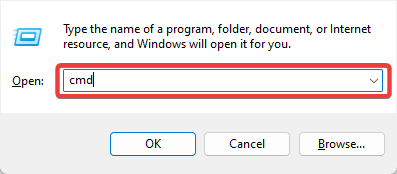
  1. Press Windows + R, input cmd in Run, and press the Ctrl + Shift + Enter hotkey.
    0xe0434352
  2. Click Yes on the UAC prompt.
  3. Run the Deployment Image Servicing utility by entering the following command and pressing Enter: DISM.exe /Online /Cleanup-image /Restorehealth
  4. After that, input the command below and hit Enter.
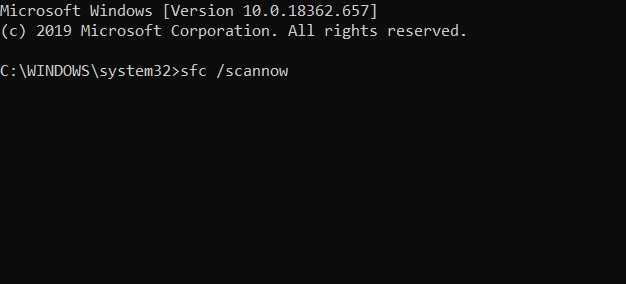
    sfc /scannow
    Sfc /scannow command Application Error 0xe0434352 on Windows
  5. Restart Windows if the Command Prompt tells you that the scan repaired files.

4. Repair .NET Framework

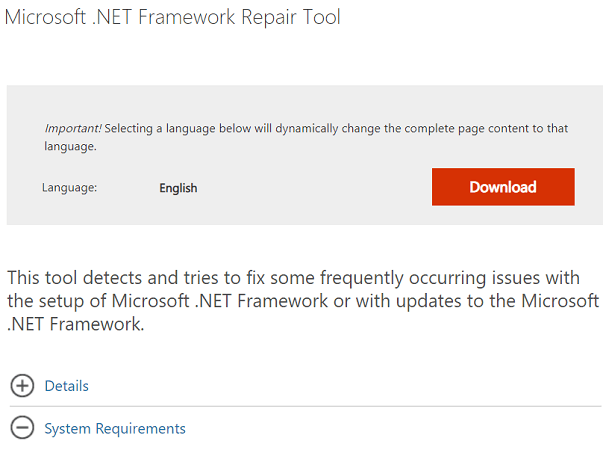
  1. Open the .NET Framework Repair Tool page in a browser.
  2. Click Download on that page.
    Download button for .NET Framework Repair Application Error 0xe0434352 on Windows
  3. Select the NetFxRepairTool.exe check box.
  4. Click the Next button.
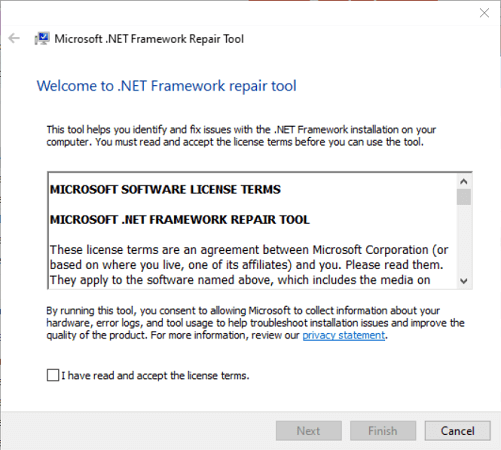
  5. Open the downloaded .NET Framework Repair Tool, and click Next to initiate the utility.Microsoft .NET Framework Repair Tool Application Error 0xe0434352 on Windows
  6. Click Next again to apply any suggested fixes.
  7. Press the Finish button.
  8. Restart the Windows platform.

5. Run a CHKDSK scan

  1. Press Windows + R, input cmd in Run, and press the Ctrl + Shift + Enter hotkey.0xe0434352
  2. Input the script below and hit Enter.
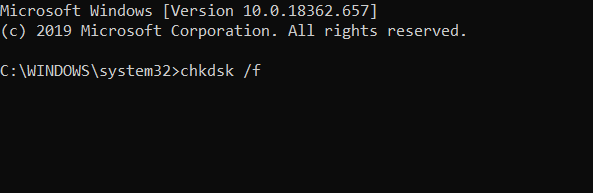
    chkdsk /f
    chkdsk /f command Application Error 0xe0434352 on Windows
  3. Restart Windows after the scan is complete.

Those resolutions have fixed error 0xe0434352 for some users. Restoring Windows earlier with System Restore might also fix the issue.

A repair install (or reinstall) of Windows can be a final resort if no other potential fixes resolve the error – but hopefully, you won’t get that far.

If you know of another solution to this error, leave us a message in the comments section below.

How to fix Horizon Forbidden West bugs, issues, and glitches

Developed by Guerrilla Games, Horizon Forbidden West has just been released and users already claimed how impressive it is, but like any other program, it can generate several bugs.

Even if it’s an open-world single-player masterpiece with a well-optimized environment, it seems like Horizon Forbidden West developers highlighted potential bugs, crashes, and issues.

Fortunately, there aren’t many problems you should consider. In these terms, fixes haven’t stopped appearing so that we can deliver the best solutions to get rid of the most annoying bugs you can encounter.

We’ve compiled a useful list in this matter, and if you’re a beginner, you don’t have to panic! There are just a few simple steps you should follow.

How can I fix the most common Horizon Forbidden West bugs?

1. Shimmering textures and blurred textures on Photo mode

Shimmering Textures are extremely rare, as just a few players have faced it until now. However, it is still possible to encounter it while running the game on your own PC.

In this case, users claimed that the anti-aliasing feature is not working as expected, regardless of the resolution.

As some people described, this happens on both the performance and resolution modes.

The Blurred Textures on Photo Mode doesn’t seem like a pretty common problem, but some users have reported that the photo mode is showing blurred textures.

According to worldwide players, you risk facing this issue if you change the portrait pose for Aloy in the photo mode.

After switching the portrait pose, you’ll notice that Aloy has a blur effect alongside the hair and body.

Even if the causes of this error are still unclear, developers managed to fix these issues.

As they claimed, to get rid of them, you should definitely consider restarting the game once for the fix to download, and a second time for the fix to activate.

2. Aloy doesn’t interact with machine remains

To quickly fix this issue, you should restart the game twice or reload your saving file and walk slowly alongside your companion.

This first problem seems to be one of the most popular Horizon Forbidden West bugs.

In the first instance, this problem was only related to the PS4 Pro devices, but now PS5 gamers also confirmed encountering it.

According to worldwide people, at the moment of reaching the first machine’s remains, Aloy will not interact with it no matter what. As a consequence, your progress will be hindered.

Don’t forget that this issue happens if your companion gets left behind if you get to the machine too quickly.

3. Fidelity Mode bad visuals

3.1 PS4

  1. Go to Settings.
  2. Navigate to Sound and Screen.
  3. Here, in the Video Output Settings window, you can calibrate the features according to your needs.

3.2 PS5

  1. Navigate to Settings.
  2. Go to Screen and Video.
  3. In the Video Output section, adjust the settings you need, especially the Color ones.

Some players have reported bad visual looks in the Fidelity mode, but how does this issue exactly display?

As one user claimed, the screen saturation changes depending on if the camera is moving or static and it can determine the screen looks washed out.

Thus, you can try to calibrate your display color profiles as we showed you in the steps listed above.

The interesting thing about this Horizon Forbidden West bug is that it doesn’t occur when switching to performance mode.

What’s weird is that this issue does not happen if you switch to performance mode. Matter of fact, it is persistent and happens every time you start the game.

In conclusion, these are the most popular Horizon Forbidden West bugs that are made public by developers.

As you can see, all of them can be fixed in a matter of time, so you won’t consume time by solving them.

For any additional related questions, feel free to use our dedicated comment section listed below.

Transferring your PS4 Horizon Forbidden West save to PS5 is easy [Guide]

If you ask PlayStation players what they are up to these days, they’re probably busy enjoying new titles such as Elden Ring, or Horizon Forbidden West.

Ever since tasting the success that Horizon Zero Dawn had, creators knew they had something really special and that a sequel would be more than welcome.

But not everyone has managed to get their hands on a PlayStation 5 just yet, so many gamers are still enjoying this new title on their PS4.

Those that did, and have already started the game on PS4, would now like to transfer their saved games to the new generation console, if possible.

We’re here to tell you that it is possible, and we are going to show you how to do just that in the following guide that we’ve prepared especially for you.

How can I cross gen transfer my Forbidden West saved game?

Luckily for us, game creators have made it relatively easy to transfer saved games from PS4 to PS5 in Horizon Forbidden West.

This will only take a few minutes of your time but it is totally worth it if you want to savor every moment you spend in your new favorite game.

There are two methods you can use, depending if you still have your old PlayStation 4 console or not. If you don’t, the process can be done with a USB drive.

1. How to transfer if you still have your PS4

On your PS4:

  1. On the PS4, access Settings.
  2. Select Application Data Management.
  3. Go to Saved Data in System Storage.
  4. Select Horizon Forbidden West.
  5. Press Yes in order to upload your save file.
  6. Select Upload to Online Storage.

On your PS5

  1. On your PS5, access Settings.
  2. Go to Saved Data (PS4).
  3. Select Cloud Storage, and then Horizon Forbidden West.
  4. Press Download to Console Storage.
  5. Launch the Horizon Forbidden West game.
  6. Select Import Game From PlayStation 4.
  7. Pick the save file you want to use your PS5.

This is pretty much the entire process you have to go through if you kept your PS4 when acquiring the new generation PS5.

However, if you decided to sell it, or gift it to someone, here’s how you can accomplish the same thing without the need for the older console.

2 How to transfer with a USB drive

On your PS4

  1. Connect a USB storage device to your PS4.
  2. Access Settings.
  3. Go to Application Saved Data Management.
  4. Select Saved Data in System Storage.
  5. Allow system to Copy to USB Storage Device.
  6. Select the Horizon Forbidden West save file.
  7. Transfer save to the connected USB drive.

On your PS5

  1. Access Settings on your PS5.
  2. Select Saved Data and Game/App Settings.
  3. Go to Saved Data (PS4).
  4. Select USB Drive.
  5. Click Copy to Console Storage.
  6. Launch Horizon Forbidden West.
  7. Select Import Game From PS4.
  8. Select the save file you want to use on your PS5.

Once you’ve successfully completed the process, you can enjoy some quality gameplay on your new, state-of-the-art console.

Remember that this is still a PlayStation exclusive, but it will surely become available for PC players later on, just like Horizon Zero Dawn, which is now on Steam.

Also, be sure to keep an eye out for the Horizon Forbidden West bugs and how you can fix them if you encountered them while playing.

Has this guide been useful to you? Let us know in the comments section below.

7 Best Free Antivirus for Windows 11 to Download in 2026

There are plenty of paid antivirus apps out there that offer top-of-the-line protection. But what if you’re on a budget and you can’t afford to pay for a recurring subscription for an antivirus?

This guide will show the best antivirus software available for free. Some of these do have a premium version that you can purchase for extra features, but are unnecessary as you’ll still get great protection.

What are the best free antivirus software for Windows 11?

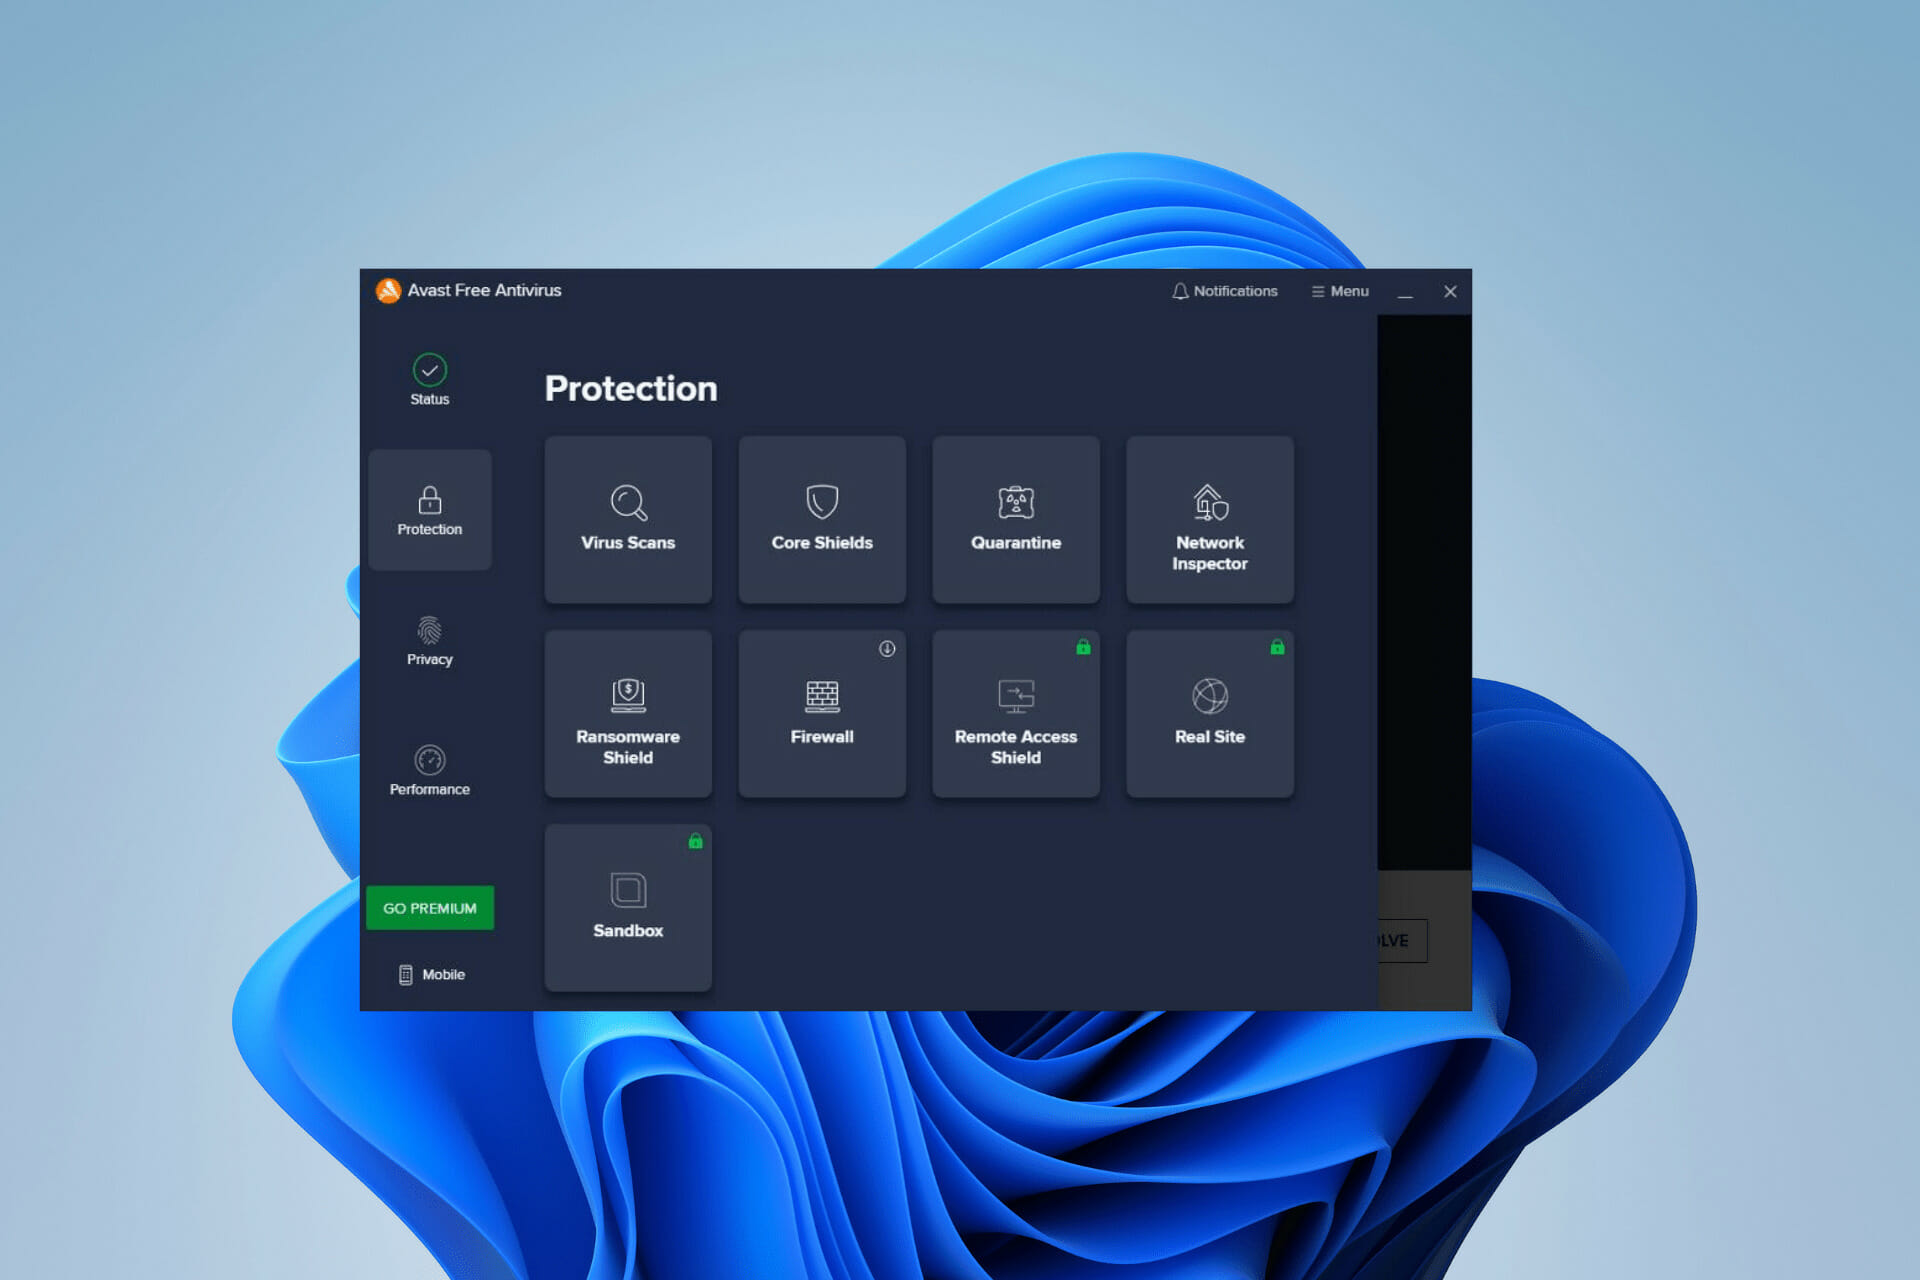
Avast – Multiple layers of protection

Avast Antivirus provides all of the most important protection features that you’ll need for Windows 11. It offers real-time protection against malware of all kinds, viruses, ransomware, spyware, and more.

The app will clean out anything it considers to be junk and clean up other areas on your computer.

Other features include a PC Speedup to better system performance and a Targeted Scan to sift through certain files.

Avast Free Antivirus

Avast Free Antivirus

Increase your security and PC performance with this powerful antivirus!
Download Free

Bitdefender – Tailored security level

Next up is the free edition of BitDefender. It offers real-time monitoring for viruses, malware, and ransomware attacks. Real-time monitoring is something you will see a lot of in anti-virus software and is a highly sought-after feature.

The security level is tailored to your needs. Bitdefender will give you suggestions on you should protect your computer based on its needs. It figures this out when you perform an assessment scan. Afterward, it will recommend the changes.

Bitdefender Free

Bitdefender Free

Get real-time monitoring against all threats from this powerful, up-to-date antivirus.

Avira Free Security – Protection against crypto mining

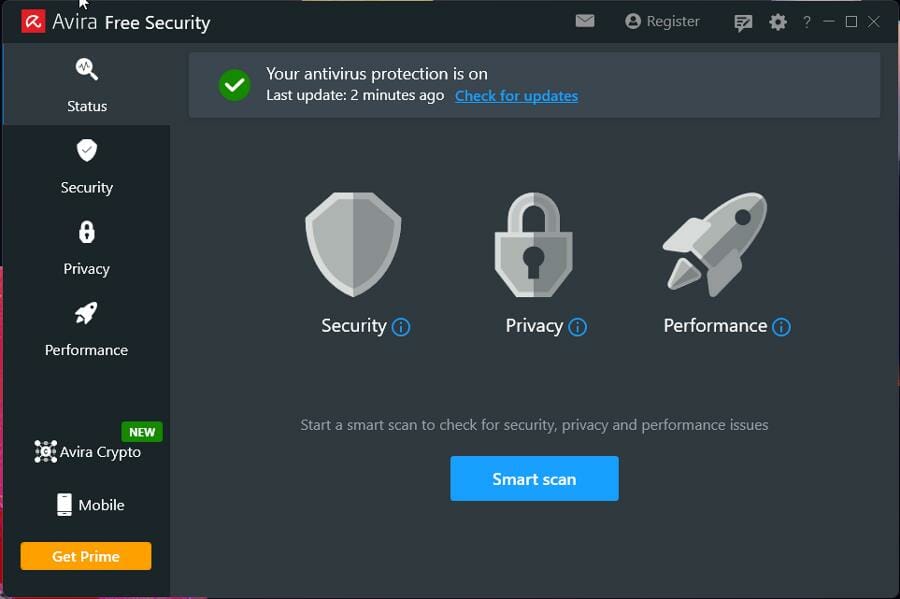
Avira Free Security is another popular computer protection software. It’s similar in form and factor to Avast. It has a similar user interface and the same type of real-time protection against viruses and malware.

Its virus detection feature is updated frequently so Avira is up to date on the latest changes in malware.

And just like Avast, it’s lightweight so it won’t take up a lot of computer resources, leaving the rest of your apps free to run without lag or slowdown. There are also versions for Android, iOS, and Mac laptops.

Avira Free Security

Avira Free Security

Rest assured that your PC will be fully protected by this light and easy-to-use antivirus.
Download Free

Panda Free Antivirus – Up to date with cybersecurity news

Panda Free Antivirus houses many of the same features and lightweight construction that are seen in many antivirus software. It isn’t a resource hog and you can use other apps while it scans.

Also, it will force you to install the Opera web browser onto your computer. Opera isn’t malicious or anything, but it’s extra bloat that you don’t want or need. It can be easily uninstalled, however.

Scanning is permanent and will constantly provide security for however long you’re on your Windows 11 computer. An interesting feature is a news feed at the bottom of the window that informs you of the latest events in cyber security.

Panda Free Antivirus

Panda Free Antivirus

Use your PC without worrying about viruses, spyware, rootkits or online fraud.
Download Free

Kaspersky Free – Low system usage

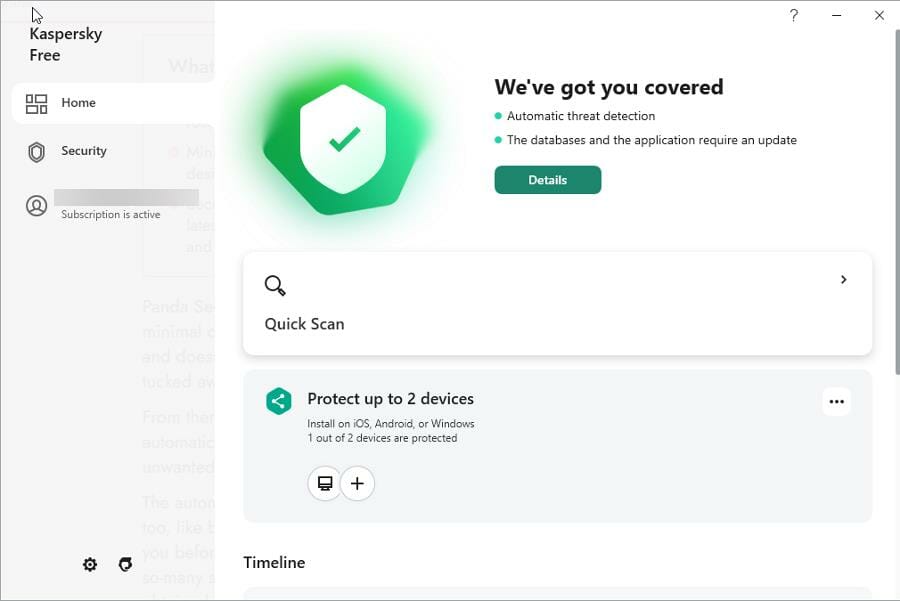
Kaspersky Free is a straightforward antivirus app that is one of the easiest on CPUs thanks to how well optimized it is. If you have a machine that’s low on resources, Kaspersky is recommended, it is also one of the best antiviruses for Windows 10.

The software has a unique feature called Self-Defense, which prevents anybody from changing or deleting the app’s registry items and installation files.

All you need to run Kaspersky is 1.5 GB of free space, 2 GB of memory, and a 1 GHz processor. The company behind the antivirus also has a full suite of other protection apps you can try out.

Kaspersky

Kaspersky

Let Kaspersky conduct full PC scans and protect you in real-time against all types of online and offline threats!
Download Free

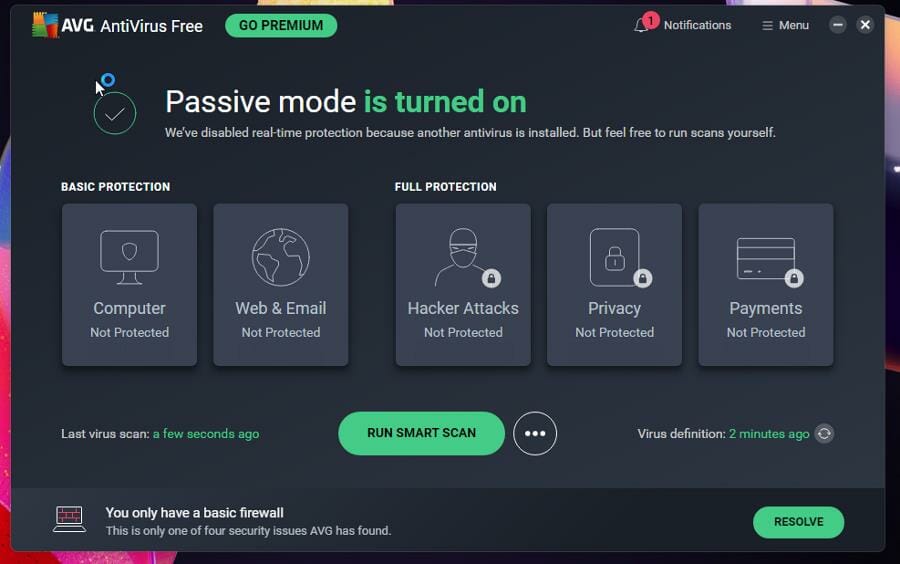
AVG Antivirus – Clean and easy to use interface

AVG Antivirus offers a user-friendly interface that is both clean and intuitive. With this antivirus software, you can conveniently access scanning features without having to navigate through complex menus.

The scanning feature is customizable in that you can choose what you want the antivirus to scan as well as schedule when they will happen. It can also detect rootkits to ensure no one has unauthorized access.

AVG boasts six layers of security and it doesn’t slow down computers in the slightest. Unique to this software is Email Shield, which alerts and blocks any strange links, phishing scams.

AVG Free Download

AVG Free Download

Detect and remove all threats in just a few clicks, scan removable media and browse securely with AVG!
Download Free

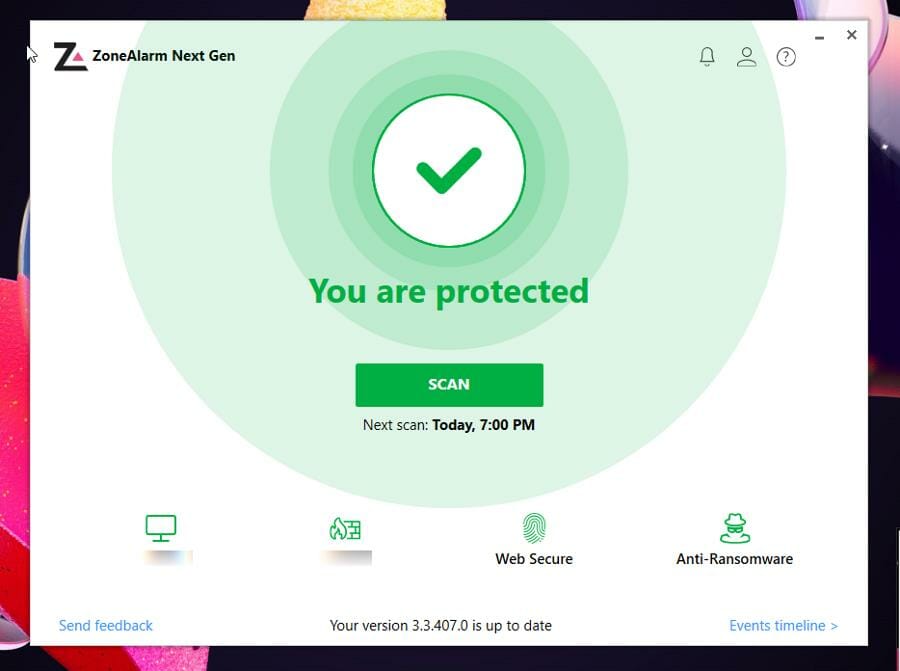
ZoneAlarm Free Antivirus – Unique scan modes for firewall

ZoneAlarm is originally known for providing software and cyber security to businesses. Well, now it’s taking what it learned from that field and applying it to a new consumer base.

Like the other apps, ZoneAlarm has active real-time protection against the usual viruses, malware, spyware, and other types of harmful software. Unique to this app, however, is the inclusion of a firewall.

Its firewall is customizable and you can configure to block public server and VPN protocols. It can also filter IP traffic and turn on ARP protection. With the firewall, you can create unique scan modes to suit your needs.

⇒ Get ZoneAlarm Free Antivirus

Feel free to leave a comment below if you have any questions on other Windows 11 apps. Also, leave comments about reviews that you’d like to see or information on other Windows 11 features.

Microsoft source codes for Bing and Cortana stolen by the LAPSU$ group

Supposedly, this hack is actually linked to the LAPSU$ group, which also conducted attacks on major companies such as Nvidia, Samsung, and Vodafone.

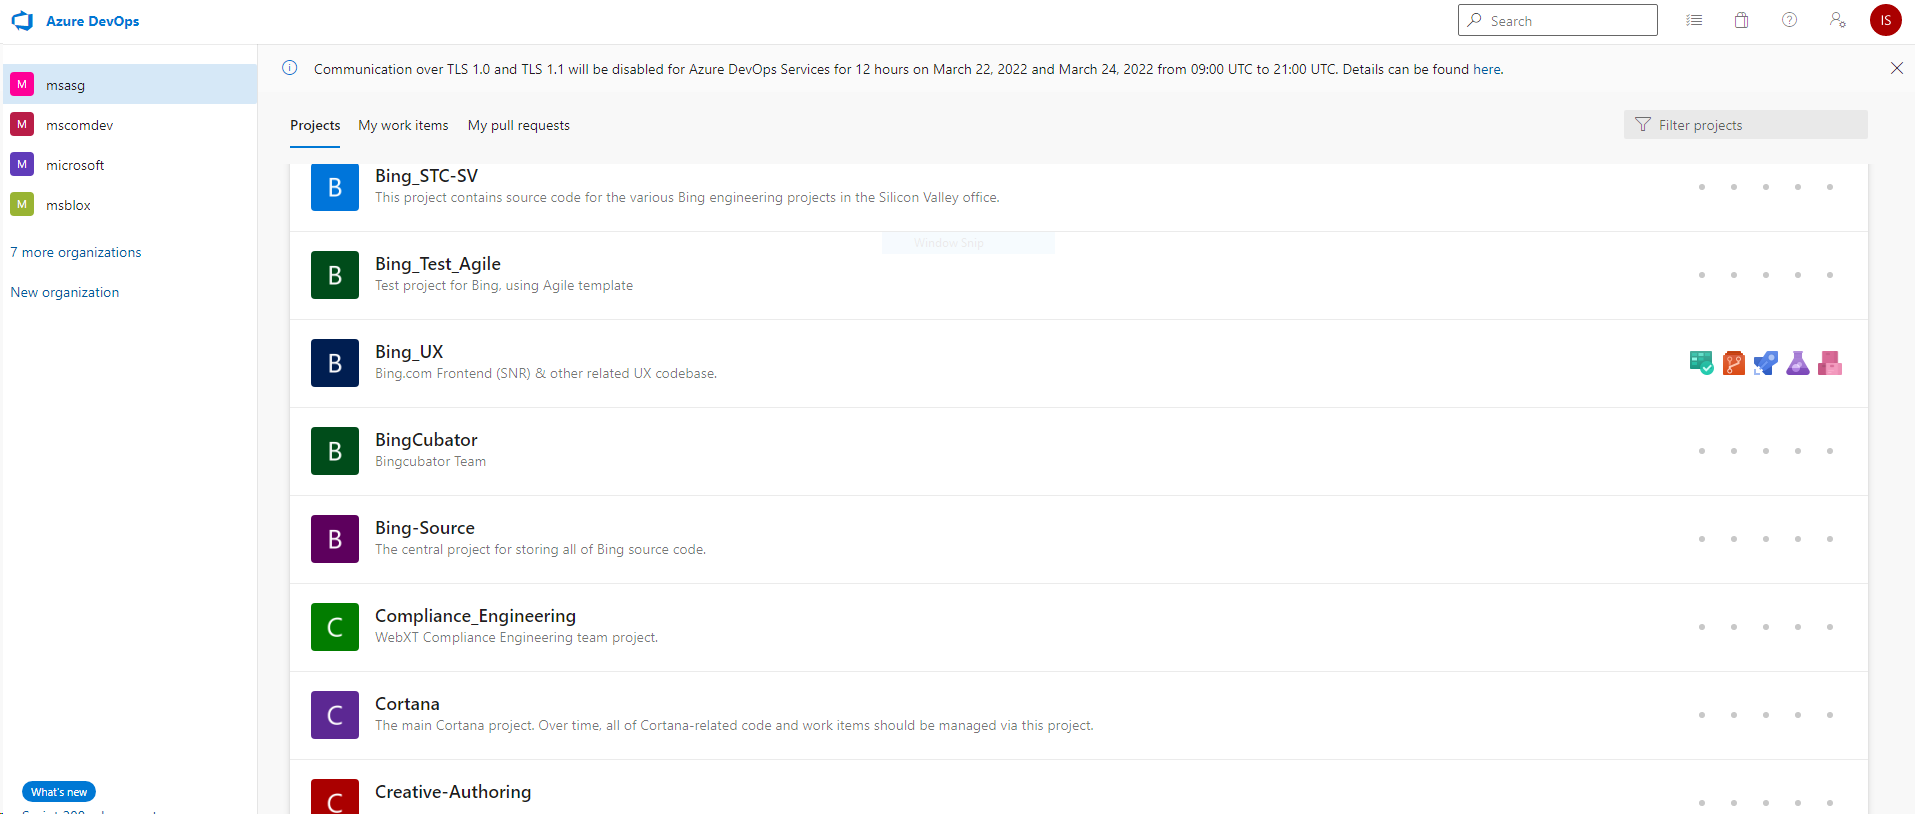
Evidence of what transpired was published on Twitter, in the form of screenshots showing a Telegram conversation and what appears to be an internal folder listing of Microsoft source code repositories.

The above-mentioned pictures indicate that the cybercriminals downloaded source codes of Cortana and several Bing services.

https://twitter.com/ZeroLogon/status/1505408208059383809

Microsoft unable to protect its own source code

UPDATE: Microsoft confirms the attack and says that the LAPSU$ group has expanded its scope in recent times to target a large number of corporate and individual entities all across the globe.

It normally utilizes phone-based social engineering, SIM-swapping, and bribing employees to gain access to multi-factor authentication (MFA) systems and internal systems.

Some of their other methods also include deploying password stealers, analyzing public code repositories to spot rogue credentials, and purchasing credentials from criminal forums.


You can think of the LAPSU$ group as a bit different because, unlike most such groups, this one tries to get a ransom for downloaded data from the companies that it attacked.

LAPSU$ may have downloaded the source code from what appears to be Bing, Bing Maps, and Cortana.

It is unclear at this point whether the full source codes have been downloaded by the attackers, and whether other Microsoft applications or services are included in the dump.

As source codes may contain valuable information, they can be analyzed for security vulnerabilities that other malicious third parties could exploit.

Also possible is that these source codes include valuable items such as code signing certificates, access tokens, or API keys, which can also be leveraged.

That being said, the Redmond-based tech giant has a development policy in place that actually stops the inclusion of such items.

After learning of what had just transpired, Redmond officials had this to say about it:

The search terms used by the actor indicate the expected focus on attempting to find secrets. Our development policy prohibits secrets in code and we run automated tools to verify compliance.

Even though the evidence is pretty compelling, there is still a lot of uncertainty as to what really happened between Microsoft and LAPSU$.

However, looking back and judging purely based on the hacking group’s track record, it is likely that the reported hack did actually occur.

The question of whether the downloaded data is valuable enough to get a ransom from Microsoft for not publishing it on the Internet is open for debate.

What is your opinion on the matter? Share your thoughts with us in the comments section below.

CoD: Warzone Pacific is stuck on fetching online profiles

In case you missed it, keep in mind that there’s a new Call of Duty title in town, that has its sights on the battle royale crown.

Call of Duty: Warzone is new, free-to-play, and perfectly integrates massively multiplayer manhunt.

Even if this game provides tons of interesting features, that will let you enjoy a unique experience, it seems like Warzone Pacific might sometimes get stuck on fetching online profiles.

In order to get a better perspective of our today’s issue, make sure you take a look at how one user describes it on one of the most popular forums:

So, my last Warzone match was 11/13 and I haven’t launched the game since Cold War release. I also got the Xbox series X and wanted to try Warzone on it, but after installing Modern Warfare, I was stuck on Fetching Online Profile.

Tried to completely uninstall and reinstall last night, still stuck on fetching online profile. I plugged back in my Xbox one x to try on the old console, still stuck on fetching online profile.

Only thing I can think of is I did change my username when cold war launched, so maybe there is a bug if you change your activision username then go back to try and launch modern warfare?

But other than that I have no clue why I’m stuck on fetching online profile. I have also tried manual DNS settings, no luck. Anyone have any advice?

Now, let’s see what you can quickly do if you also same this annoying issue.

What can I do if Warzone Pacific is stuck on fetching online profiles?

1. Rebuild your Warzone database on PS4 and clear cache on Xbox

1.1 PlayStation

  1. Turn off your PlayStation.
  2. Go to the Safe Mode (hold the power button until you hear two beep sounds).
  3. Connect your device and from the options go to Rebuild Database and press on X.

PlayStation makes use of rebuilding the database to clear any junk from the system memory and get it fixed if it has become laggy.

Rebuilding a database will recognize your hard drive making performance much more optimized, so Warzone Pacific won’t be stuck on fetching online profiles.

1.2 Xbox

  1. On your device, hold down the power button until the system shuts down completely.
  2. Now, unplug the power cord, then wait a few minutes.
  3. Once enough time has passed, you can reconnect your power cable and turn on the console.
  4. You cache should now be cleared, and you should be good to go.

2. Update your graphics drivers

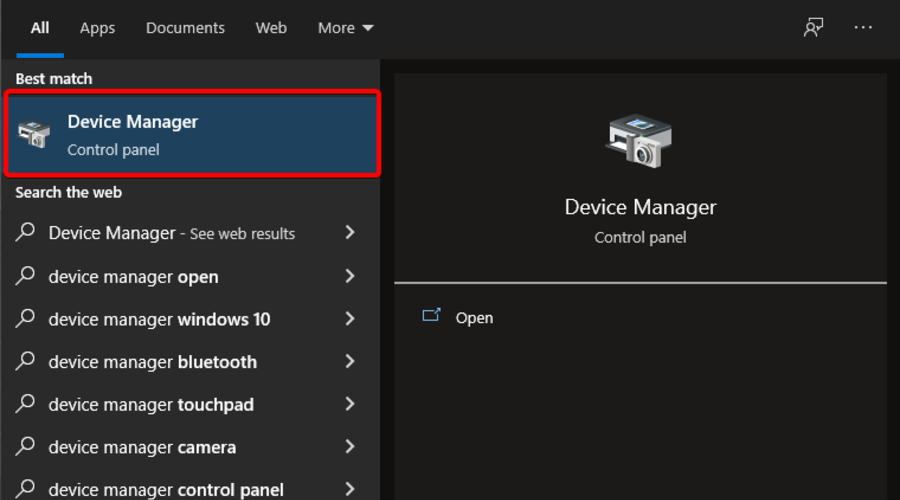
  1. Press on the Windows key, type Device Manager, then click on the first result.
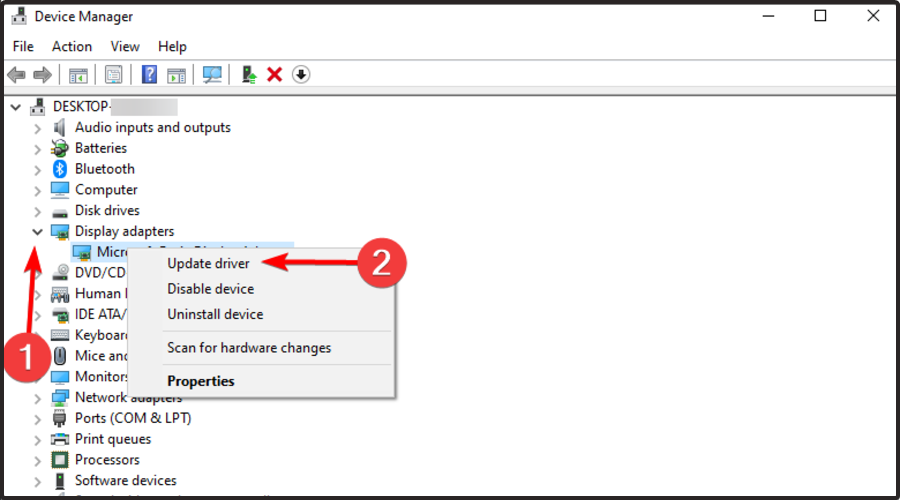
  2. Expand the Display adapters section, then click on the related option, and choose to Update driver.
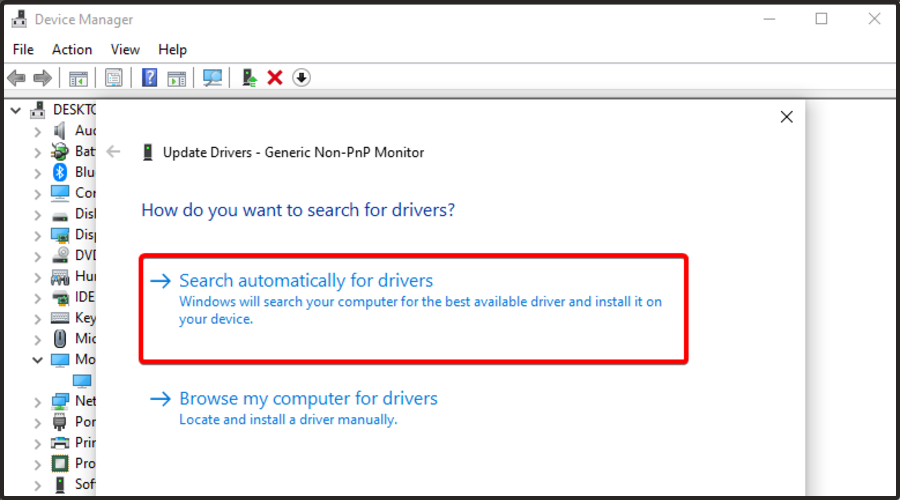
  3. Choose to Search automatically for drivers.
  4. Your system will search for any available solutions and you’ll be notified accordingly.
  5. If there are no drivers available to update, it means that the component is already up to date.
  6. Try the same steps for all your graphic drivers.

Because we understand how important is your priceless time, we strongly recommend updating your drivers in an automatic way.

In these terms, Outbyte Driver Updater is the best tool you can try. First of all, keep in mind that it performs automatic scans and updates through your entire system.

Outbyte Driver Updater carefully identifies missing or outdated drivers and looks for your drivers against a vast database of over 18 million driver files.

Plus, it lets you back up and saves your PC drivers into a compressed zip file. Because sometimes drivers’ updates can be harmful, this is a pretty cool feature you should give a try.

⇒ Get Outbyte Driver Updater

So, here you are, with two of the most efficient and quickest solutions you can try if Warzone Pacific is stuck on fetching online profiles.

Keep in mind that some users reported that Warzone Pacific gets stuck on the loading screen. It seems to be a pretty common error, and if you ever face it, feel free to use some helpful fixes.

Anytime you face additional related questions or curiosities, do not hesitate to use the comment section listed below.

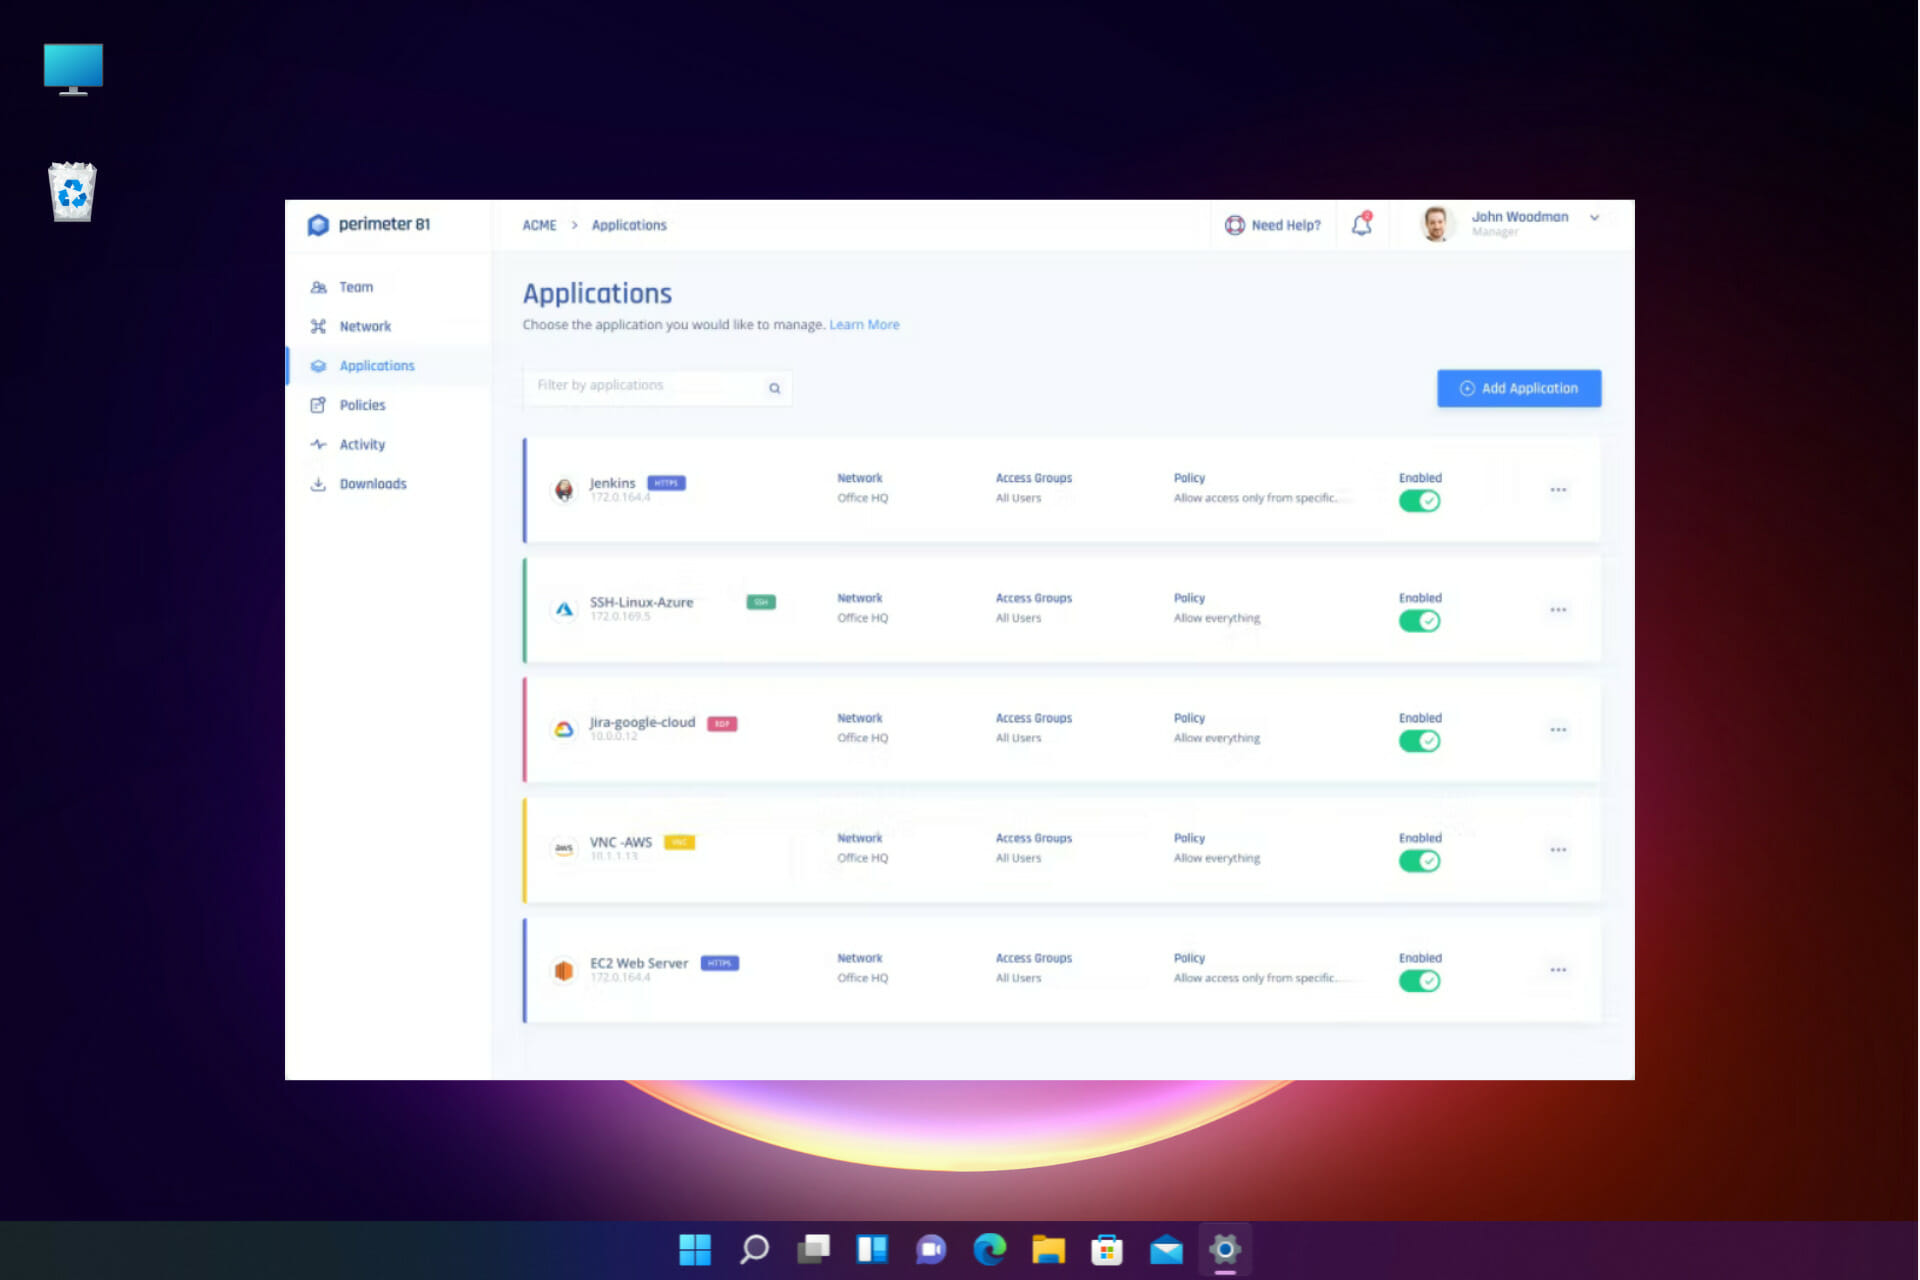
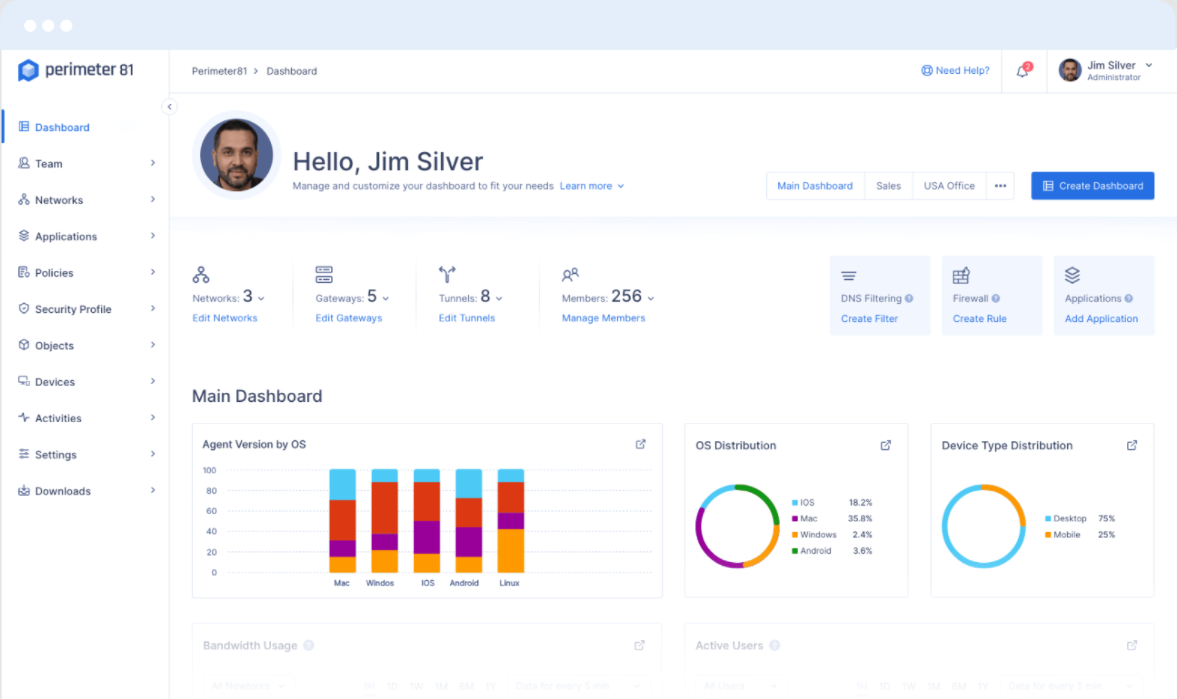
Perimeter 81: A Simple Remote Access Solution To Use

In an era where work from home has become an anchor point of the economy, it’s never been more important that companies maintain rigorous cybersecurity every step of the way.

Imagine you could provide employees with seamless, secure, remote access to your corporate network or shared resources anywhere in the world, at any time.

And all that without the need for oodles of complicated tech and overly difficult networks. Always-on VPN offers a key component in achieving that dream.

Many people have only experienced VPNs as something gamers use, and it’s common to perceive it as some complex, jargon-packed environment only those working in IT could utilize.

Many modern, intuitive solutions exist to help streamline companies’ use of VPNs, however, while still enabling staff to concentrate on their core work.

Today we take a look at Perimeter 81 and how it can enhance business cybersecurity as well as work functionality.

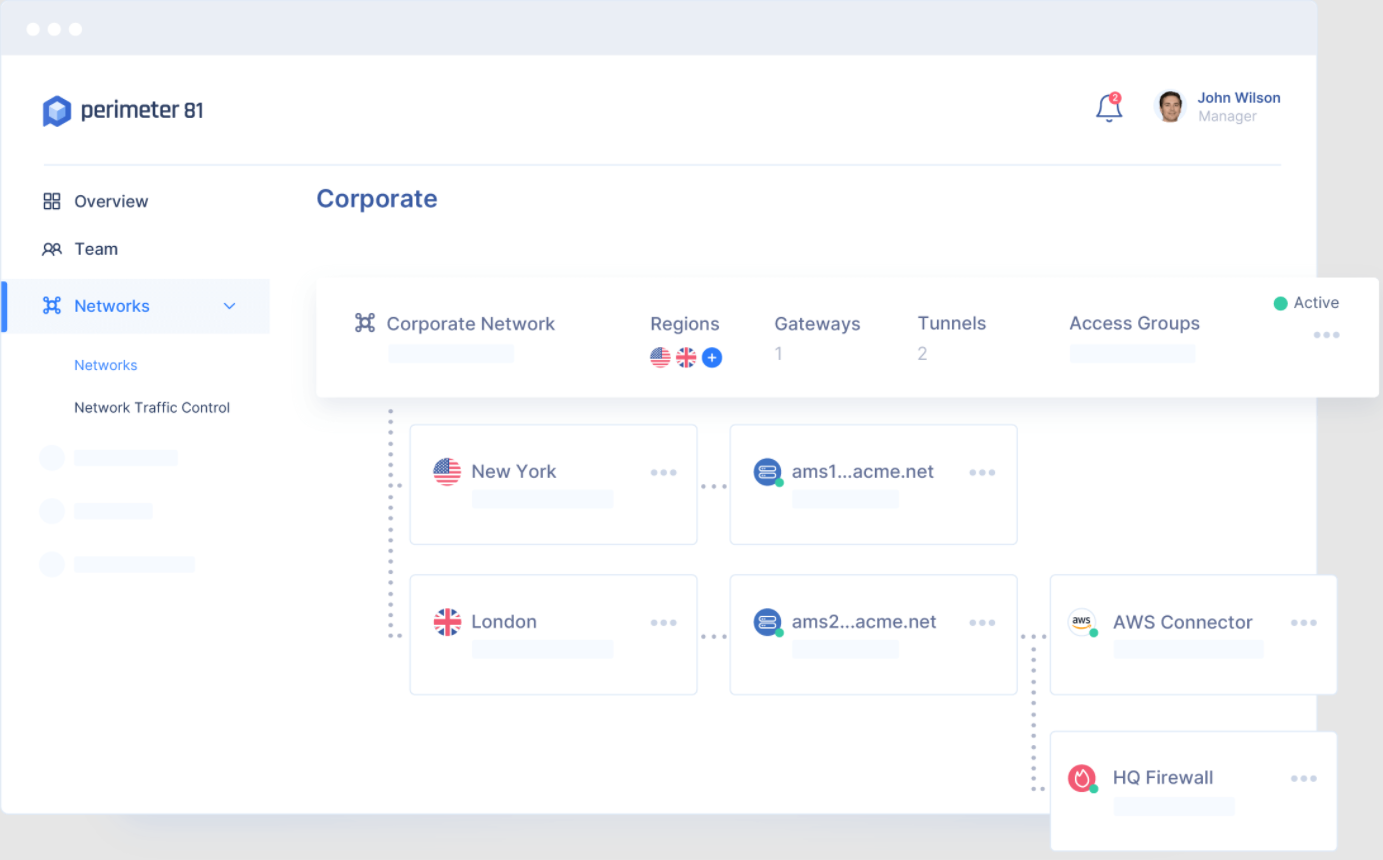
What is Perimeter 81 and how can it help you?

Remote access VPNs like Perimeter 81 allow employees to access company data and infrastructure in the cloud but using a fully secured connection that cuts down on cybersecurity risk.

The user experience is as if they’re in the office, using local servers. This allows a great balance of security and user experience. 

Until recently, most network securities was physical and site-centric, unable to adapt easily to remote working.

Cloud environments and SaaS services were either inaccessible unless in the office, or non-existent.

In the fast shift to work from home, this amounted to vulnerability to cyber attacks over unsecured home connections, while still failing to support staff and allow access to key work resources.

Perimeter 81 offers instant deployment, unified management, and 360-degree visibility to ensure a fast, safe, scalable product that enhances security and helps staff work productively too.

Perimeter 81

Take the full benefit from this cloud-based VPN privacy that ensures data security for anyone.
Check price Visit website

What are the key features of Perimeter 81?

1. Data Encryption

Through top-end encryption and tunneling, Perimeter 81 ensures transmitted data is safe, no matter where or what device sends it. Only authorized connections are allowed

2. Cloud security

Access point security into the network is a key concern of using cloud solutions. Perimeter 81 helps secure access on top of the cloud environment, enhancing security.

3. Safe, fully remote access

Despite these top-end security features, Perimeter 81 allows employees to connect across a range of devices and locations, at any time of the day.

As a remote access always-on VPN, employees can securely access the company’s private network and share data safely, even on public networks.

How can I use Perimeter 81?

Deploying the software will look a little different, organization dependant. However, here’s a rough look at the steps to use Perimeter 81:

1. Establish the management platform on the cloud

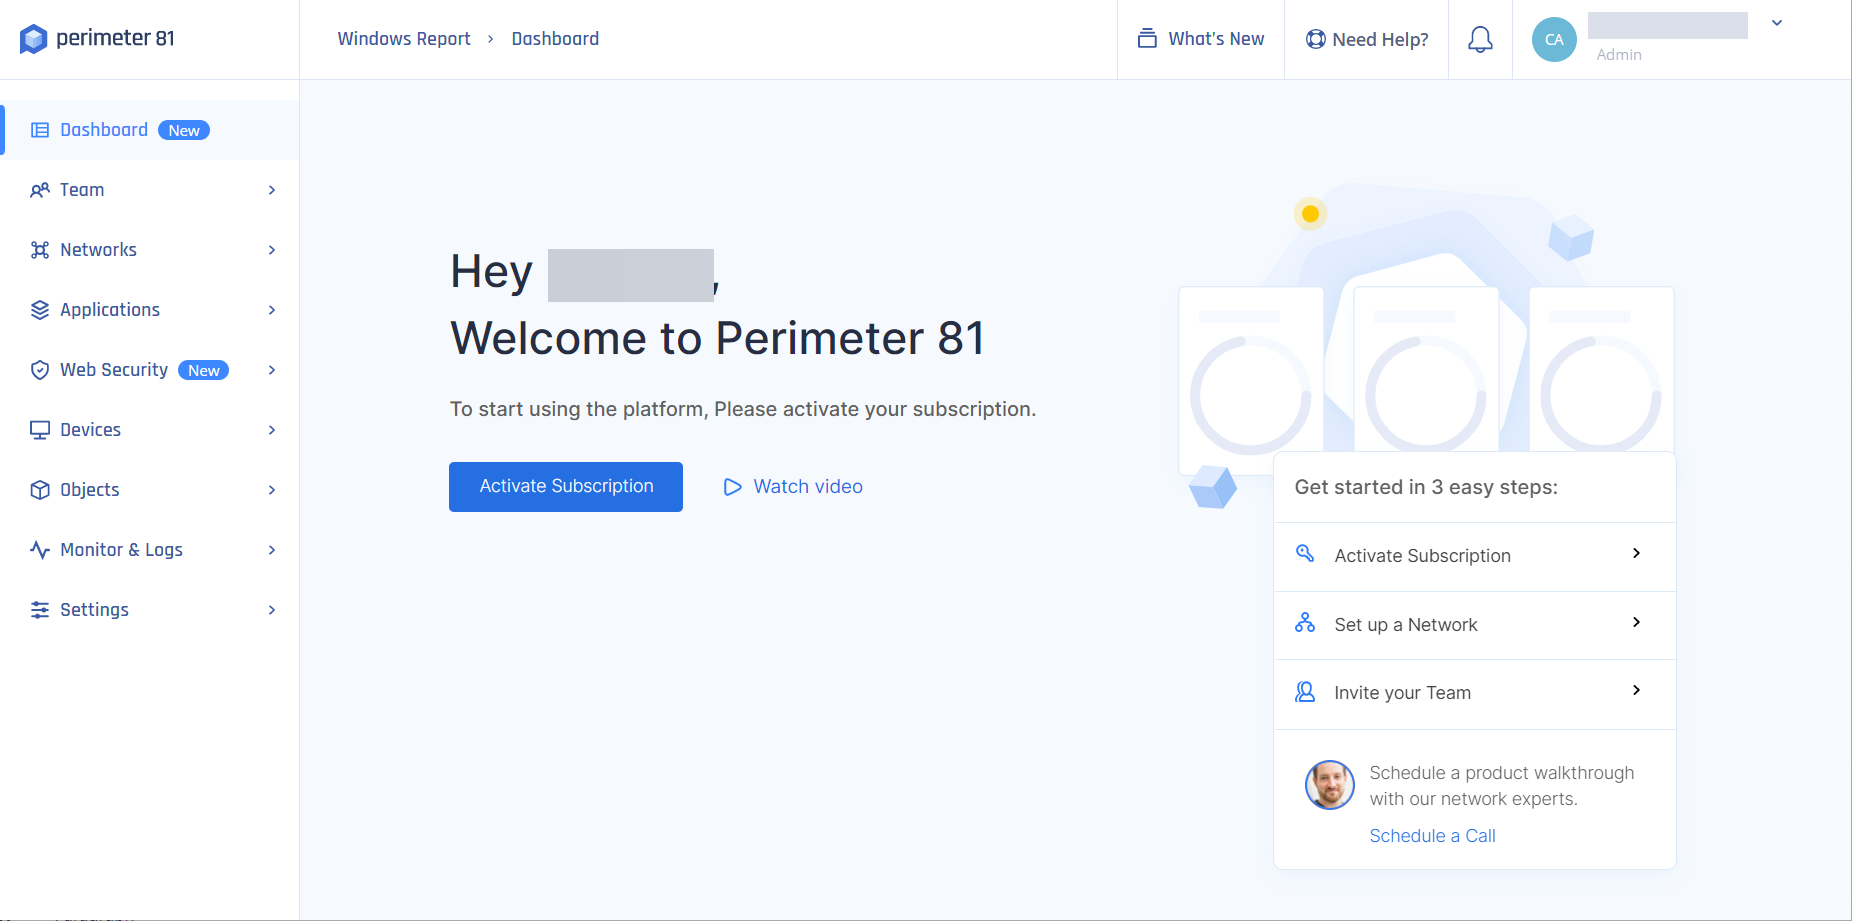
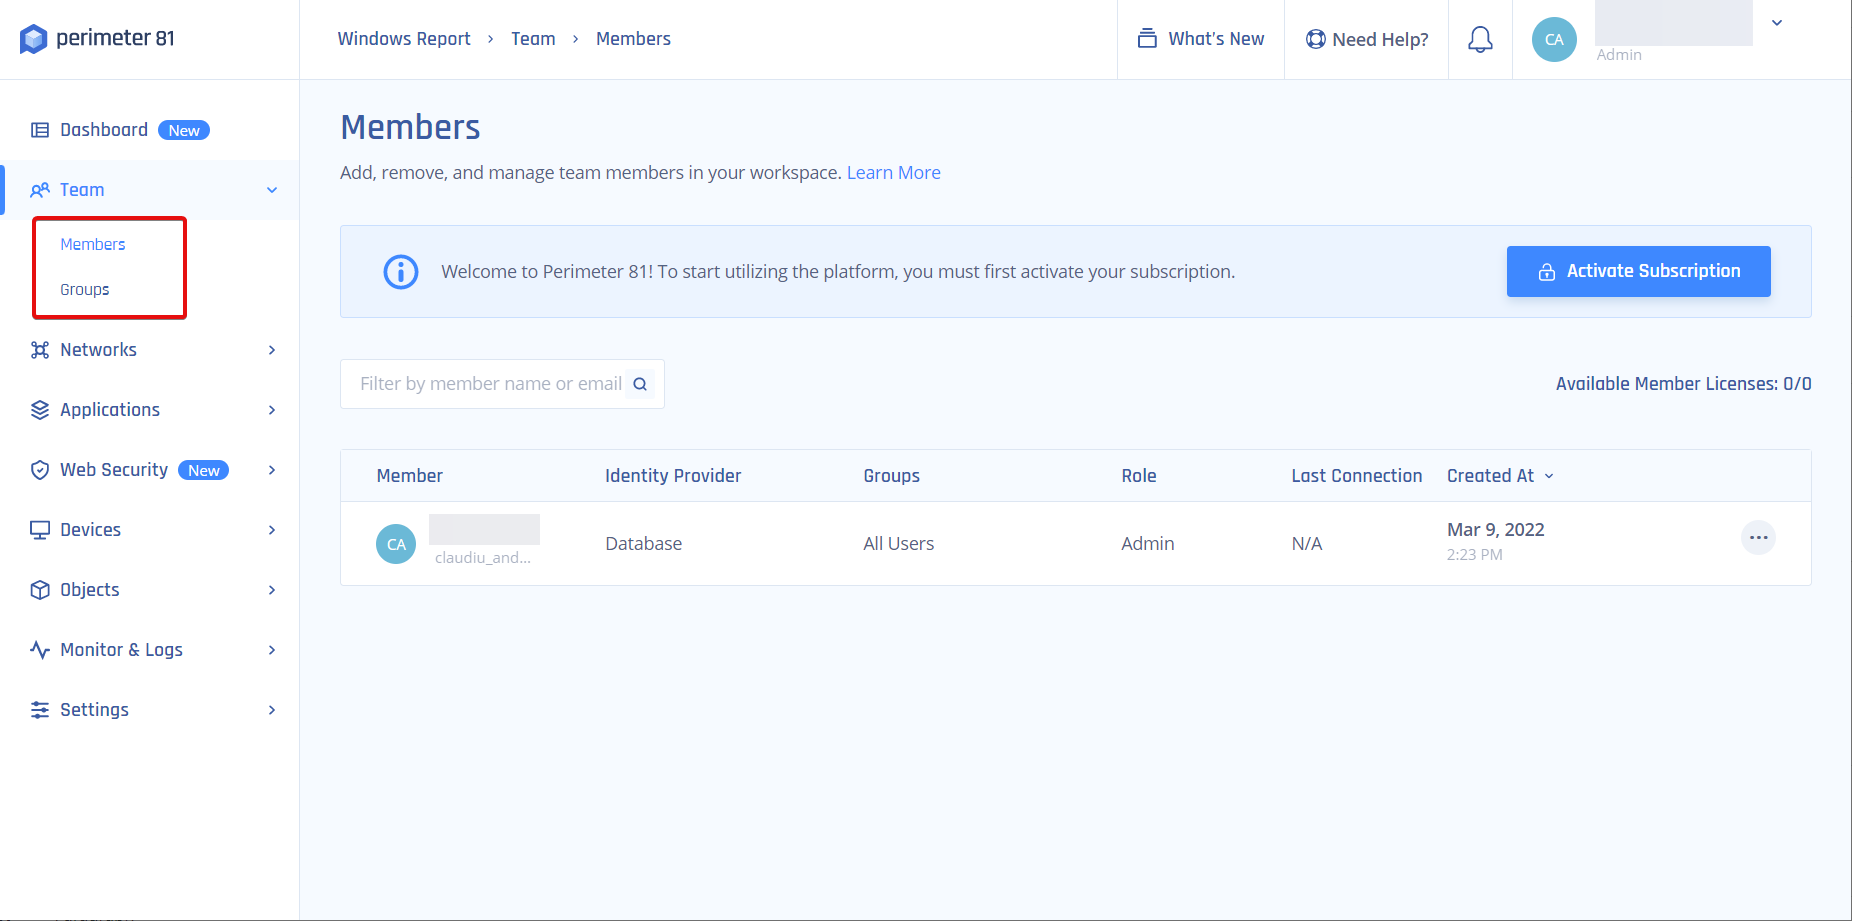
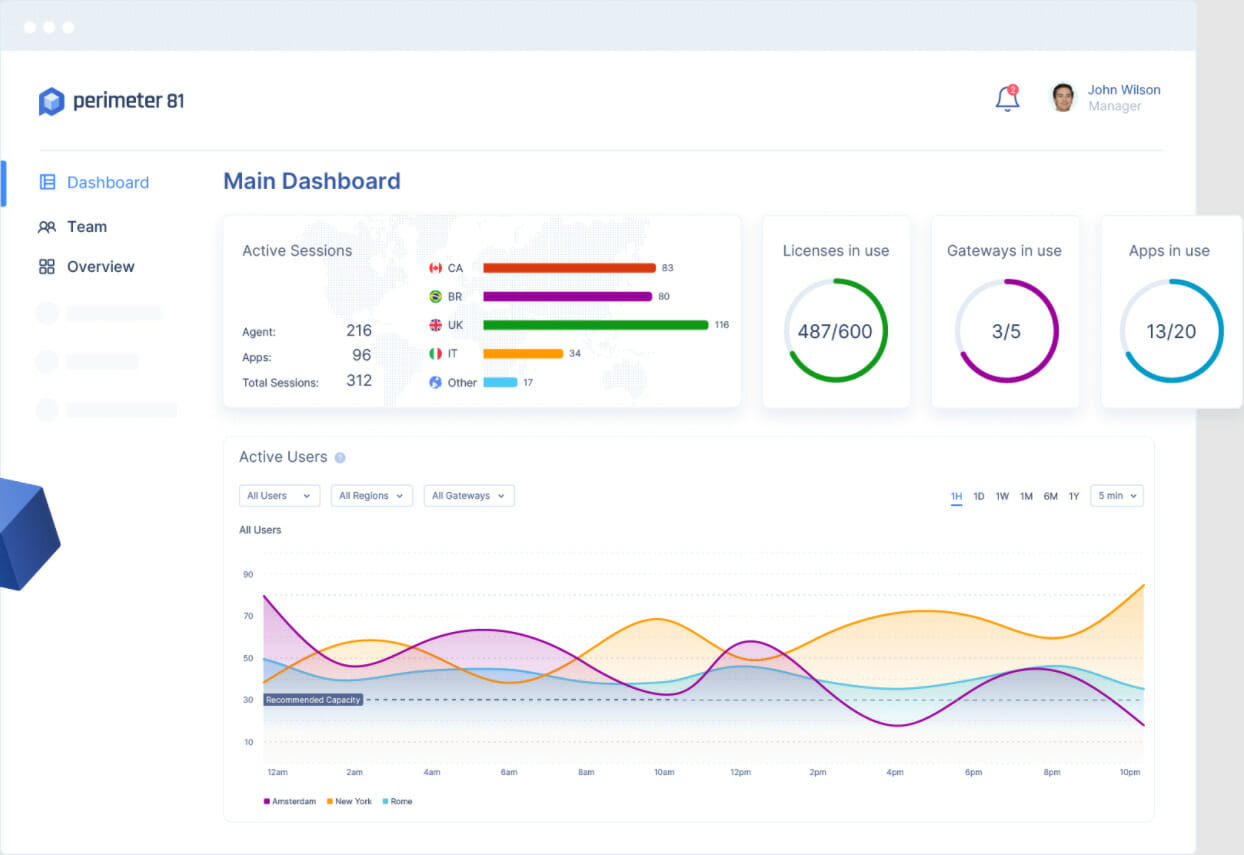
Here, your dedicated IT personnel will manage the team, setting networks and permissions. They can also monitor network activity here.

The overall interface is intuitive, and Single sign-on integrations, two-factor authentication, and mobile support are built-in and customizable to suit the organization.

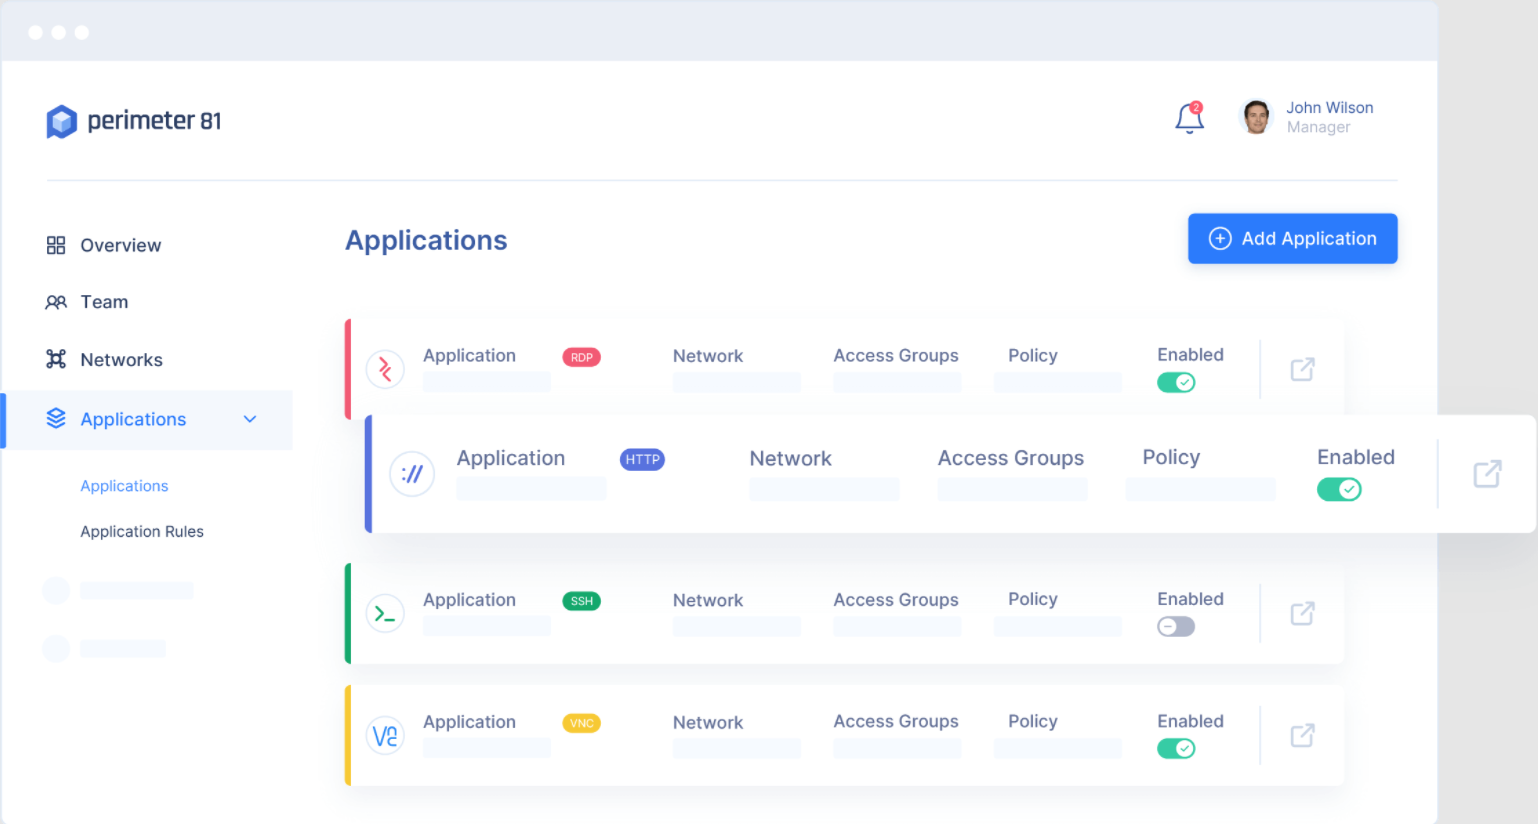
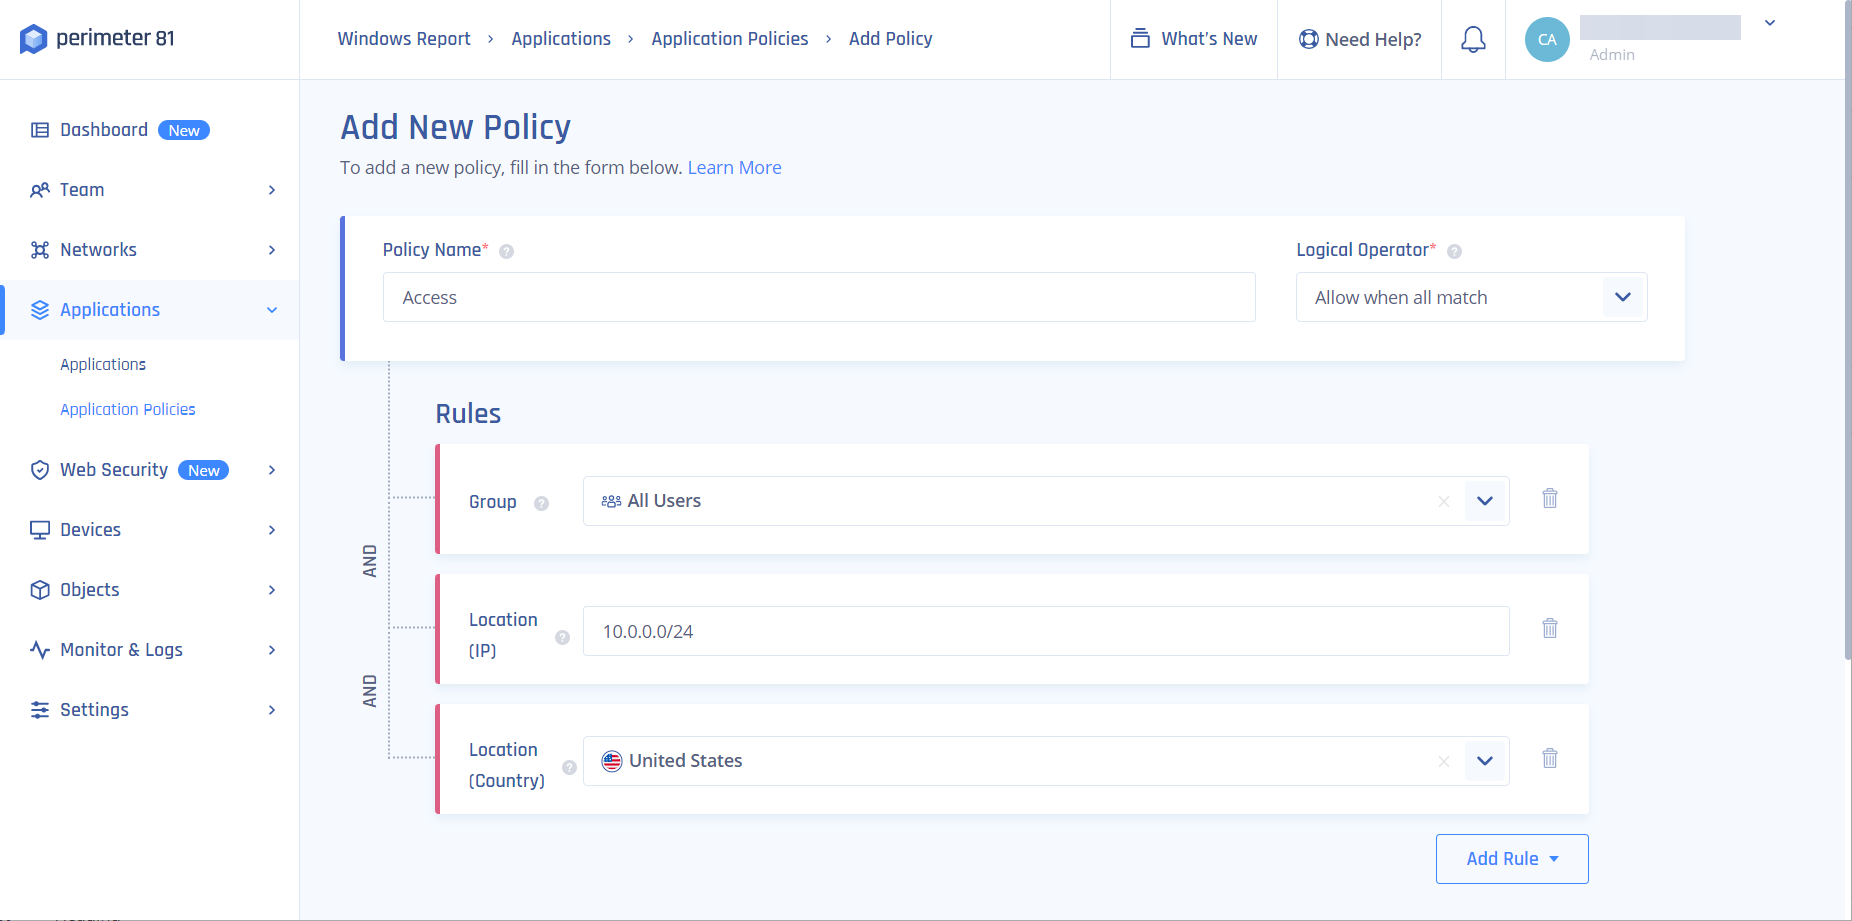
2. Set up the networks and permissions

Now a multi-tenant cloud is established with segmented permissions controlling who can get access to what across several networks. These can interconnect.

Think either a central office with native firewalls or a full cloud service with IP whitelisting.

3. Create agents

The agent modules are installed on the mobile or PC devices that employees use. This leaves them able to access any local or cloud network, with security in place, in one click no matter where they are.

4. Agentless application access

User trust and device policy validation run automatically to authorize the employees before allowing them access in a secure session.

The sessions will be recorded and monitored if you chose this setup in step 1 and can be fully audited. Applications are isolated from the network and use Zero Trust guidelines.

With Perimeter 81 in place, you can leverage the power of an always-on VPN to help safeguard critical company data, without hampering your user experience or slowing down productivity.

⇒ Get Perimeter 81

You might also be interested in our list including the best remote access tools with session recording options.

If you already used Perimeter 81, share your experience in the comments section below.

Elden Ring doesn’t close? Here’s what you can do

It is no longer a surprise that Elden Ring is one of the masterpieces when it comes to video gameplay. It includes elements like combat, horseback, riding, crafting, and so on.

Despite all of its one-of-a-kind features, it seems like Elden Ring doesn’t close properly, and this is what one user had to say about this situation:

I am not sure if this is a thing with anyone else as I have tried to search for a solution and all Google is giving me is crashes for the game.

Literally the opposite that I was searching for lol, so i figured I try to see if anyone on here is having the problem when you close the game its not closing out properly and is still open in the background in Task Manager.

Plus, from what worldwide users describe, you can’t force the closing process either. However, it may be worth trying to close all the related processes from Task Manager.

If you notice that the process is not closing in Task Manager, you can always check some easy solutions to fix it.

It is not an uncommon error, so if you’re facing the same issue, do not panic! You are not alone and this guide will show you how to quit the Elden Ring game, so make sure you read it completely.

What can I do if Elden Ring doesn’t close?

1. Reboot your PC

  1. From the bottom-left corner of your Windows Taskbar, click on the Windows icon.
  2. Now, select the Power icon, then choose to Restart the computer.
  3. Wait until it is rebooted, then try to open Elden Ring via the desktop shortcut.
  4. According to some Steam users, in the first instance, the gaming platform will probably say that the game is still running.
  5. After that, it seems like something happens and Elden Ring realizes it is supposed to be closed, then stops running a few seconds later.

2. Reinstall the game

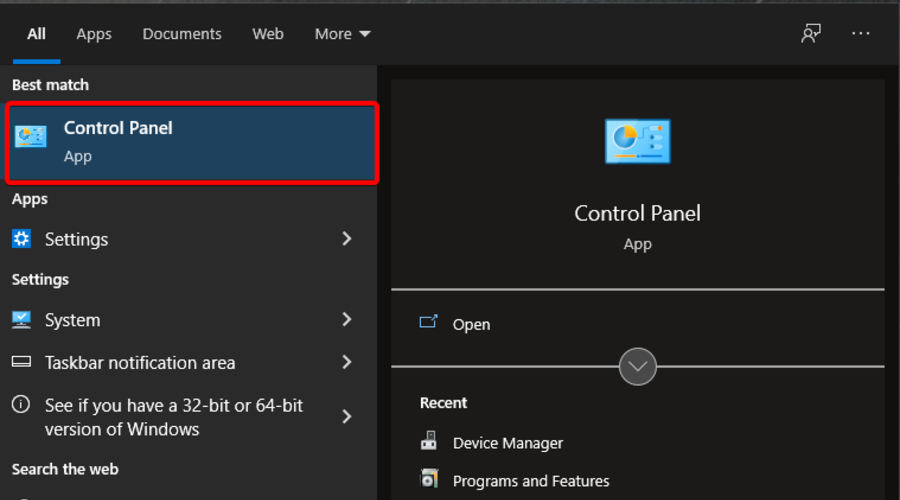
  1. Hit the Windows key, type Control Panel, then open the first result.
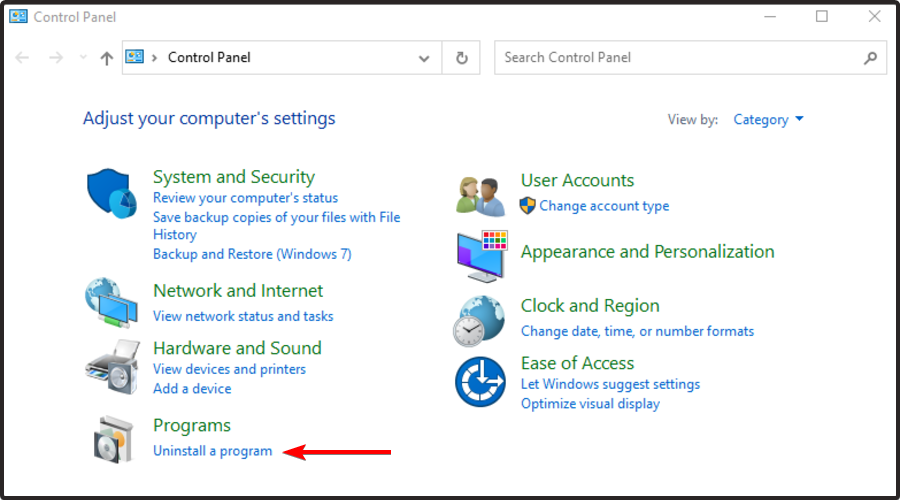
  2. Choose to Uninstall a program.
  3. In the opened list, search for Elden Ring.
  4. Click on it, then choose to Uninstall it (Just like we show you with Chrome in the example below).
  5. Now, navigate to the Steam official page.
  6. Search for Elden Ring and download the game.
  7. Follow the on-screen instructions to reinstall it.
  8. Run Elden Ring, then try to close it, and check if the issue persists.

Of course, in order to make sure that you’ve completely removed the game from your system, you should definitely try a specialized tool, like CCleaner.

With this kind of software, you’ll be able to automatically clean leftovers of uninstalled programs, even those left by other uninstallers.

Plus, it monitors all changes made to the system during program installation and reverts them when uninstalling.

So, this option won’t consume your precious time and will also ensure an impressive uninstall process.

For now, it seems like these are the only two workarounds that will help if Elden Ring doesn’t close. Until we come up with more fixes, we strongly recommend trying these presented below.

Playing your favorite game with your friends is incredible, but it seems like Elden Ring multiplayer is sometimes not working. If you ever face this issue, feel free to check some useful solutions to get rid of this annoying problem.

Was this guide helpful for your situation? Make sure you share the related experience by leaving a comment in the dedicated section below.

AirPods Microphone Not Working on Windows 11 [Fix]

It is possible that your AirPods microphone will cease operating on Windows from time to time. Thus, today’s topic is how to fix Windows 11 AirPods microphone issues.

Furthermore, it can be a significant problem, especially if you are required to participate in video meetings on a frequent basis if the audio works but the microphone doesn’t.

Let’s have a look at how you can resolve this aggravating problem as quickly as possible, right after we see whether AirPods are compatible with Windows or not, since this was one of your most asked questions. Follow along!

Are AirPods compatible with Windows?

AirPods are designed to function smoothly with iPhones and other Apple devices, but you can use Bluetooth to pair and connect them to any Windows 11 PC.

Additionally, your AirPods can remember your Windows 11 computer, your iPhone, and other devices, letting you switch between them whenever you choose and however you want.

add device windows 11 airpods microphone

It is necessary to turn your Bluetooth on and pair your AirPods with your Windows 11 computer in order to make the connection. From that point forward, they will remember the PC, allowing you to rejoin whenever you wish to.

When you open the case in close proximity to your iPhone, AirPods will instantly connect to your phone, and if your Mac detects your AirPods, you’ll receive an automatic popup prompting you to connect to your phone.

The process of using AirPods with a Windows 11 PC is a little more involved, but it’s simple to re-establish a connection and continue to use them with your computer whenever you choose.

How can I fix AirPods microphone issues in Windows 11?

1. Unpair your device and pair it again

  1. Navigate to Settings and click on Bluetooth & devices from the left side.bluetooth-devices windows 11 airpods microphone
  2. Locate your AirPods device, click on the three dot icon and choose Remove device. In our case, we don’t have the device connected, thus we show cased with the mouse input.remove-device windows 11 airpods microphone
  3. Now pair your AirPods again as you have previously done it and test them to see if the microphone works.add-device windows 11 airpods microphone

This is the simplest solution you can try and surprisingly, it works! Problems, including the Windows 11 AirPods microphone issues, regarding your peripherals, can be easily fixed if you don’t skip this seemingly useless solution.

For cases where only one earbud has issues, you can also follow this detailed guide on why one AirPod is not working to resolve sound or connectivity problems.

2. Update drivers

When it comes to keeping your PC in peak operating condition, there are lightweight driver updating solutions designed specifically for individuals who don’t want to waste time completing procedures such as opening the Device Manager or visiting each manufacturer’s website to download updates.

3. Allow microphone access

  1. Open Settings and navigate to Privacy & security followed by Microphone, as we have shown below.privacy-mic windows 11 airpods microphone
  2. Next, make sure that the toggle next to the Let apps access your microphone option is turned on.let-apps windows 11 airpods microphone

In the Let apps access your microphone section, you can uncheck the boxes next to the apps that you don’t want access to your microphone, or check the ones that you want to have it.

4. Run the Recording Audio troubleshooter

  1. Press the Windows key + I to open the Settings app. Next, navigate to System followed by Troubleshoot, as we have shown below.system-troubleshoot-option windows 11 airpods microphone
  2. After you are inside the Troubleshoot menu, click on Other trouble-shooters.other-troubleshooter-option windows 11 airpods microphone
  3. Next, scroll down until you meet the Recording Audio troubleshooter and click Run next to it.recording-audio windows 11 airpods microphone

After it has completed searching for faults, the troubleshooter will reveal the precise bug that occurred as well as instructions on how to fix it. Keep in mind to carefully read and adhere to the instructions displayed on your computer screen.

For more information and further solutions to the error at hand, take a look at our post on AirPods not working in Windows 11. There you will find supplementary troubleshooting methods.

Alternatively, check out our guide on what to do if the AirPods microphone is not working on Mac and Windows 10/11. And don’t forget that you are not the only one experiencing this issue.

Lastly, you might find it helpful to read our article on how to fix headphones not working in Windows 11, in case you encounter audio output problems as well.

Leave us a comment in the section below and tell us what you think about our guides. We will read all of your messages and try to improve our future posts. Thanks for reading!

New mystery Xbox hardware could come out this year

In a recent episode of the XboxEra podcast (ht PX), one of the hosts mentioned that he’d heard talk of Microsoft releasing a new type of Xbox-branded hardware sometime before the end of 2022. That is, if there’s no delays caused by a pandemic or international conflict.

Curiously, the host, Nick Baker, describes the Xbox hardware as being something rather different than what most would expect.

“I’m saying it should be this year,” Baker said in the podcast episode. “Xbox currently has some hardware to show, that they’re going to show, that falls into a different bucket than people are probably expecting.”

Baker then follows up the above statement by clarifying that he knows exactly what the hardware is but that he isn’t allowed to say any more.

The full episode can be listened to online here. The above quote happens around the 1:47:00 mark.

So, what could this mystery Xbox hardware be?

Given that a new iteration of an Xbox console or controller would be pretty predictable, this product is likely something else such as an Xbox streaming stick for TVs for Xbox Cloud Gaming or maybe even an Xbox-branded TV. Of course, both of these product types are kind of expected too for those that have been following the evolution of Xbox Cloud Gaming news over the past year or so.

Could it be an Xbox VR headset? Maybe. Microsoft will need to catch up to Sony in regards to this genre of console gaming eventually. However, just last year, Microsoft did officially state that VR wasn’t a focus for them.

Perhaps a Kinect sensor? This would definitely be unexpected given how Microsoft dumped the Xbox One Kinect rather dramatically during the last console generation. However, Microsoft has also developed a new Kinect sensor for developers since then and has also worked with Sky to enable motion gaming and voice commands with a sensor for Sky Glass TV which is essentially a repurposed Xbox One Kinect.

There’s also a rather large market for home exercise services now compared to when Xbox Fitness launched with Xbox One several years ago. Some new services, such as Pelaton, even use motion-tracking. If Microsoft brought back the Kinect alongside a new version of Xbox Fitness, it could actually do a lot better than it did before.

How about a portable Xbox console for playing games on the go? Perhaps a cheap model with minimal hardware that’s designed purely for Xbox Cloud Gaming? Maybe.

What do you think about this Xbox rumor? Do you think it’s legit? What type of new Xbox hardware do you think Microsoft is planning? Let us know in the comments below and then follow us on Twitter and Facebook for more Xbox news.

You can now enter to win one of the strangest Xbox Series S console and controllers yet

There have been tons of cool custom Xbox consoles in the past, but now you have a chance to enter win one of the strangest ones yet. That’s because Microsoft’s Xbox and Paramount Pictures have teamed up to celebrate the release of Sonic the Hedgehog 2 by giving fans the chance to win a Sonic-themed Xbox Series S.

The most unique part of the console is definitely the controller. Coming in Sonic Blue and Knuckles Red, the controllers are texturized to match the bristly texture of hedgehogs in the wild.  The console itself, meanwhile, sports a golden portal ring, comes in black and has Sonic and Knuckle’s pictures on it.

If you want to win, you can by retweeting the official Xbox sweepstakes tweet and including the hashtag #XboxSonic2Sweepstakes. If you’re in the US, you also can redeem Microsoft Rewards points. towards it, too. While you’re at it, you can check out the  Sonic the Hedgehog Minecraft DLC in the Minecraft Marketplace. You also can check out other Sonic content on the Microsoft Store.

Error Code 0x0: 4 Easy Solutions to Permanently Fix it

There are all sorts of errors that you can encounter when upgrading, but today we’re going to focus on Windows 10 upgrade error code 0x0.

This error will prevent you from upgrading, and you’ll also miss new and exciting features. Luckily, there are ways to fix this error, and in today’s guide, we will show you the best methods you can use to fix this issue.

What does error code 0x0 mean?

In most cases, these errors appear because your installation is damaged. However, there are multiple reasons for this issue to occur. Below are some of the notable causes:

  • Antivirus interference: Sometimes, the Windows could not update the installation files error code 0x0 because your antivirus software is blocking it. You need to disable or uninstall the security software to solve the problem.
  • Faulty graphics driver: Another potential cause of this issue is an outdated or broken display driver. Reinstalling or updating your driver to the latest version should do the trick.
  • Corrupt system files: In some cases, this error code can show up because of broken or missing system files. The best thing to do here is to repair these files.

How can I fix error code 0x0 in Windows 10?

1. Remove your antivirus software

  1. Press the Windows key + I to open the Settings app.
  2. Navigate to the Apps section.
  3. Select your antivirus software and click on Uninstall.
  4. Follow the instructions on the screen to complete the process.
  5. Once the software is removed, try to perform the upgrade again.

Users reported issues with McAfee and Avast, so be sure to remove them. Speaking of which, we have a helpful guide on how to completely remove McAfee, so be sure to check it out.

2. Use the DISM command

  1. Press Windows key + X and select Windows PowerShell (Admin).
  2. When the PowerShell opens, run the following commands:
    DISM /Online /Cleanup-Image /CheckHealth
    DISM /Online /Cleanup-Image /ScanHealth
    DISM /Online /Cleanup-Image /RestoreHealth

The first two commands will scan your installation for any damage, and the last will perform the repair. Running all three commands is unnecessary, so you can only run the last one.

If you’re unfamiliar with it, you should read our guide on how to use DISM to repair your installation.

3. Remove your graphics card drivers and restart the Function Discovery Resource Publication service

  1. Press Windows key + X and choose Device Manager from the list.
  2. Locate your graphics card driver on the list, right-click it, and choose Uninstall device.
  3. Check Delete the driver software for this device and click on Uninstall.

If you want to uninstall your drivers completely, you might want to use specialized software such as DDU. To learn more, read our guide on how to use Display Driver Uninstaller.

Outdated or corrupted drivers can cause issues such as this one. Therefore, you must update them regularly. However, doing this manually can be tedious, especially if you need to update multiple drivers.

However, tools such as Outbyte Driver Updater can make this process much faster by scanning your system and automatically updating all your drivers.

⇒ Get Outbyte Driver Updater

Now let’s disable the required service by doing the following:

  1. Press Windows key + R and enter services.msc. Press Enter.
  2. Locate Function Discovery Resource Publication and double-click it.
  3. If the service is running, click the Stop button.
  4. Now wait for a couple of moments and enable the service again.

After doing that, try to upgrade once again. You can also try keeping the Function Discovery Resource Publication disabled or enabled and check if that helps.

4. Perform an in-place upgrade

  1. Go to the Windows 10 download page.
  2. In the Create Windows 10 installation media section, click on the Download tool now.
  3. After the download is finished, run the program.
  4. Accept the terms of service and follow the instructions on the screen.
  5. Be sure to select Upgrade this PC now.
  6. When your reach the Ready to install screen, make sure that the option to Keep files is selected. If not, click on Change what to keep and change it.
  7. Start the process and wait for it to finish. Keep in mind that the process can last more than an hour.

After completing the process, you must try to perform the upgrade again. By doing an in-place upgrade, you’ll repair your installation, and hopefully, you’ll be able to upgrade as well.

Error code 0x0 during Windows 10 upgrade can be problematic and usually occurs if a particular service or software interferes with the upgrade process.

In case the problem is still there, you might want to read our guide on what to do if you can’t upgrade to the latest Windows 10 version.

Did you find an alternative solution to this problem? If so, share it with us in the comments section below.

Microsoft leaks new Sun Valley 2 information ahead of the big update

Remember when we first talked about Sun Valley, last summer? Back then, everyone was under the impression that it would be a system makeover for Windows 10.

Much has happened since then and what was first believed to be the Sun Valley project, actually turned out to be Microsoft’s latest operating system, Windows 11.

Windows 11 Sun Valley 2, or SV2, is the codename of the updated OS that the tech giant is about to reveal as version 22H2.

Some preview builds that dropped recently revealed some potential new features that Windows 11’s first big update will bring to the table.

Sun Valley 2 is almost ready for release

The Redmond-based tech company accidentally uploaded a page on Feedback Hub which confirms the Sun Valley 2 codename and the new features coming to the Windows Settings app.

From what we can understand so far, this update will focus on core design principles, improvements to existing features, and also add a few new additions.

However, the page was taken down after the company actually realized that it had prematurely shared unintended information with the public.

Thus, Microsoft quickly removed all of the SV2 and March 15th (build 22579) references from the post, leaving only general details that don’t really give away anything.

Reports circulating in Redmond circles also suggest that the Sun Valley 2 update has reached the last stage of development with most features already present in the preview builds but they’re simply hidden.

How can I test the Windows 11 22H2 before its launch?

There only is one answer to that question. All the testing that is being done ahead of the official release will be conducted through the Insider program.

Actually, the Dev Channel was the first place that Sun Valley started to appear, with build 2200, which was first released in November 2021.

Before any of the above-mentioned changes make it to the Beta Channel Insiders, they first have to go through the Dev Channel, so that is an excellent place to start.

Closer to launch, Windows 11 22H2 will hit the Release Preview Channel which is the most stable of all in the Insider Program and builds released to this channel are supported by Microsoft.

When is Sun Valley 2 going to be released?

As far as an official release date for Windows 11 version 22H2 (Sun Valley 2) goes, Microsoft made no such mention so far.

And, judging by the response the company had when it accidentally made SV2 references, any release plans they have will also remain a secret.

That being said, the feature update is expected to launch in late summer, or it could also launch in October like previous Windows 10 feature updates.

Have you spotted any other 22H2 specific features while testing Dev Channel Insider builds? Share your experience with us in the comments section below.

How to get out of the Elden Ring Infinite Death Loop

Elden Ring is a masterpiece that allows you to enjoy incredible experiences through its interactive open-world set.

However, you should know that there’s currently a hack going around players, that can cause serious issues while game-playing.

In this manner, keep in mind that Elden Ring Hackers can enter and crush your games, and then send you into recursive loops, known as Infinite Death Loop.

How does this process work exactly? Hackers are doing the rounds whereby invaders will alter your save files in some way, causing you to enter a permanent, instant death loop.

As cyber-attacks are more and more frequent lately, today’s subject can be a pretty common issue.

Even if it might seem minor, the Infinite Death Loop can definitely stop you from having the Elden Ring experience that you deserve.

Now, let’s see what you can do to get rid of this annoying situation.

How can I get rid of Elden Ring Infinite Death Loop?

  1. According to some users, every time your game loads, you’ll get a split second before your game death, and you must use it to press Alt + F4.
  2. This will close the game and allow you more time when you re-log back in to open your map.
  3. Now, re-login.
  4. Open your map using whatever key it’s bound to.
  5. Press the button that opens the list of available Sites of Grace (Triangle on PS5, Y on Xbox).
  6. Spam your confirm button (X on PS5, A on Xbox).

If you perform the process correctly, you should safely teleport to a Site of Grace.

Of course, it is also important to prevent this kind of situation. Thus, we strongly recommend avoiding online play and backing up your saves, just in case the hacks get more sophisticated.

Note icon NOTE
Note that the Elden Ring saves are usually located in the following location: C:/Users/[name]/AppData/Roaming/EldenRing

That being said, we hope that our guide helped you to get rid of the Elden Ring Infinite Death Loop. As you can see, the solutions are pretty simple and seemed to work great in several cases.

Plus, in order to get the best out of this game, we strongly recommend checking how to improve graphics & visuals in Elden Ring.

In case you encounter any additional questions regarding today’s subject, make sure you leave a comment in the section below.

Can’t Install Windows 11 Even Though I Meet Requirements [Fix]

If you want to install Windows 11 and get hit by other demands that the system requirements since you meet them. Then the issue is around the installation media and other peripherals.

Microsoft came up with a new set of hardware specifications on the new operating system to improve security and reduce the chances of cyberattacks.

This article will look at how to solve various issues users face when trying to install the new Windows 11 operating system.

What makes Windows 11 fail to install after meeting the system specifications?

Several reasons can prevent the Windows 11 installation even if your PC meets the new system specifications:

  • Corrupt Windows 11 ISO file
  • Drivers are outdated when doing upgrades from Windows 10 to Windows 11
  • External drives connected to the computer
  • Improper configuration of installation media
  • Problems with the hard disk and its partition
  • Wrong format of the hard disk

How can I fix Windows 11 requirements met but can’t install?

1. Change the disk partitions from MBR to GPT

Note icon NOTE
Note: Before starting this procedure, backup all the needed information from your drives as a precautionary method.
  1. Click the Windows Start button, type cmd, and select Run as administrator to start Command Prompt with full privileges.
  2. Type DiskPart on the command line and press Enter.
  3. Next type list volume to display all the partitions and their details like labels, file system, size, status, info, etc.
  4. Type select volume (number of the disk) and press Enter to choose the drive where you want to install Windows 11.
  5. Type list partition and press Enter to show all the partitions in the selected volume. It will show the section, size, type, and offset.
  6. Type detail partition to confirm more details about the section and its health status. You will need all this information to check the disks after the conversion to confirm if they were converted from MBR to GPT.
  7. Exit the DiskPart by typing exit.
  8. Click the Start button, type cmd, and click on Run as administrator from the results, just like you did on the first step.
  9. Type the following command and hit Enter to convert the disk from MBR to GPT: mbr2gpt /convert /disk:0

MBR to GPT most applies for those doing upgrades from Windows 10 to Windows 11. It involves the use of MBR2GPT.exe, located in the Windows\System32 folder.

2. Uninstall and update all the drivers and other peripherals

  1. Go to Start, type device manager, and click the app from the results.
  2. Check for the Display UHD adapters.
  3. Right-click and select Uninstall device.
  4. Repeat steps 2 and 3 for USB drivers. Perform the same process to the other drivers you suspect they bring the issue.
  5. Restart the computer to apply the changes. Try installing Windows 11 again.

Updating drivers can be instrumental, especially when booting from a USB hard drive. If you have outdated USB drivers, it is hard for the computer to read or detect any USB you insert on the PC.

Manually updating the drivers could be problematic if you install the incorrect ones. This could harm your gadget in an almost irreversible way. 

Outbyte Driver Updater is a program that not only downloads and installs drivers, but also troubleshoots, backs up, and restores them.

⇒ Get Outbyte Driver Updater

3. Install Windows using a different USB drive or media

It may fail when installing due to a bad USB drive, or the CD you use has issues. Try changing the USB drive or the CD when creating the installation media. 

A fresh Windows 11 install may be a great idea but make sure to back up all your data before you format any drives.

4. Check the hard disk health for any hard drive errors

4.1 Use the chkdsk command 

  1. Go to the Start icon, type cmd, and click on Run as administrator.
  2. Type chkdsk and hit Enter to start the basic scan.
  3. After the check is over, run this on the command line to fix the errors and try installing the Windows again: chkdsk /f /r

4.2 Use the WMIC command

  1. Click the Start button, type cmd and click on Run as administrator to start Command Prompt.
  2. Type wmic and hit Enter.
  3. After it runs successfully, run diskdrive get status to see the status of the hard disk.

4.3 Use the scannow command

  1. Go to the Windows Start button, type cmd and choose Run as administrator.
  2. Type this command and press Enter: sfc /scannow
  3. Let the process reach 100% so that you can analyze any errors present in the hard disk. If there are no errors, then the hard disk is good.

4.4 Use the Defragment tool

  1. Go to the Search box, search for Defragment and Optimizes and open it.
  2. Select the drive you want to optimize. This will remove all the fragmented files and ensure it’s well optimized.

Most of these commands check the hard disk to see if there are any issues and if it finds any, it will let you know the status of the disk.

5. Disconnect any external USB devices

Having external drives connected to the computer can affect the installation of Windows 11. It may prompt Windows to choose the USB drive not meant for installation.

Therefore, try to unplug all USB peripherals, except for the ones necessary to perform the installation before beginning the process.

6. Download the correct Windows 11 ISO file

Having a faulty or corrupt ISO can lead to the installation of Windows 11 fail. To avoid this scenario, download the ISO from the official Microsofts website.

 It is genuinely free, and you can trust it to be free from phishing codes that can lead to malware attacks or installation failure. 

After downloading the new ISO, try creating another installation media and perform a clean installation of Windows 11.

What next after fixing the issues?

Despite meeting the system requirements, most of the issues that block Windows 11 from going through come from the installation media, Windows 11 bugs, and computer issues.

Once you confirm and fix the issues, you perform another new installation of Windows.

The issue occurs on computers that support all the system requirements, but the installation of Windows 11 fails. Microsoft stated that they are aware of the problem and are working on fixing the issue.

It also advised users to report any more errors they face when using Windows 11 through the Feedback Hub.

We hope our articles have helped you solve the issue, and you are enjoying the features of Windows 11.

Let us know which solution worked for you and if you still face any issues, drop us a comment below.

BIOS Recognizes SSD But Won’t Boot: How to Fix It

If your BIOS recognizes the SSD but your PC still won’t boot, the issue isn’t hardware, it’s the boot process. A wrong boot mode, missing bootloader, or misconfigured boot order is usually to blame. This often happens after cloning a drive or reinstalling Windows.

Below are fixes that actually work, whether you’re dealing with UEFI, Legacy, or something in between.

What do I do if BIOS recognizes SSD but won’t boot?

1. Check the boot prioirity order

  1. Enter BIOS settings.
    (The way to do it depends on your model, but usually, you’ll have to repeatedly press F2 or Del). Check your manufacturer’s manual to be sure.
  2. Look for a menu labeled Boot, Boot Priority Order, Boot Settings, or something similar.boot tab in bios settings
  3. Locate your SSD in the list. It’s usually listed as the hardware’s brand name or model number.
  4. Move it to the top of the boot order list.
  5. Save changes and exit BIOS.
  6. Try to boot your PC again. It should attempt to boot from the SSD.

If your  PC ignores boot order , consider checking if the boot media is working or removing the CMOS battery.

2. Change boot mode

  1. Start your PC and enter BIOS.
    windows 10 bios
  2. Locate the Boot settings, and select UEFI or Legacy, based on how your OS was installed. If you’re not sure, you can try both. Once you select the correct option, your system should boot.

The exact location of the Boot settings depends on your device. To be sure, check your motherboard manual for detailed instructions.

3. Update BIOS

  1. Download the latest BIOS for your motherboard.
  2. Use the downloaded file to flash your BIOS to the latest version.

Keep in mind that the BIOS update is an advanced procedure that can damage your motherboard, so be sure to follow the instructions from the motherboard manual in order to avoid damaging your motherboard.

4. Reset BIOS to default

  1. Restart your PC and enter BIOS settings.
  2. Locate the Exit or Exit/Save Changes section
  3. Find the Load Setup Defaults and select it.load setup defaults bios
  4. Confirm you want to load the default BIOS settings.

5. Unplug all SATA devices except for the one connected to SSD

  1. Shut down the computer and unplug it.
  2. Open the case and disconnect all other SATA drives except for the SSD.
  3. Reboot the computer and check if it boots from the SSD.

Removing all SATA cables besides the SSD may force your computer to recognize it as the primary boot device. The PC should start properly as no other device will interfere with the boot process.

6. Reset Windows

  1. On another computer, create a Windows Installation drive.
  2. Insert the drive into the non-booting computer.
  3. Restart the computer and enter BIOS settings.
  4. Set the boot order to prioritize booting from installation media.
  5. Save and exit BIOS. Now your computer should boot from the installation media.
  6. Choose your language.
  7. Click on Reset your computer.
  8. In the Advanced Settings menu, select Troubleshoot.troubleshoot option windows
  9. Click Reset this PC.select reset this pc
  10. Pick the Keep my files option to save all files on the computer or the Remove everything option if you want to delete all files. Make sure you have a backup if you go with the latter.windows reset options
  11. Follow the on-screen instructions to complete the process.

We recommend this option because it gives you the possibility to keep your files. However, if the SSD not booting issue persists, consider backing up your files and performing a clean install.

7. Remove the System Reserved partition from the other drive

Note icon NOTE
This process will cause you to lose all your files from the hard drive, so be sure to back them up. Use this method only if other solutions aren’t able to fix your problem.
  1. Boot to Windows.
  2. Now press Windows Key + X and choose Disk Management.
    disk management bios recognizes ssd but won't boot
  3. Try to locate the System Reserved partition on the old hard drive and try to remove it.
  4. If that doesn’t work, you’ll have to format the hard drive. To do this, right-click the hard drive and choose Format.
    format drive bios recognizes ssd but won't boot
  5. Follow the instructions on the screen to complete the format process.

If your PC won’t exit BIOS, fails to start after a BIOS update, or automatically boots into BIOS, these guides can help you troubleshoot each problem: PC won’t exit BIOS, PC won’t start after BIOS update, and PC automatically goes to BIOS.

Not being able to use your new SSD can be a problem, but we hope that after reading this article you managed to fix all SSD booting issues on your PC.

For more suggestions or other questions regarding this topic, please access the comments section below.

How to Fix Windows Activation Error 0x87e10bc6 on Windows 11

The Windows 11 activation error 0x87e10bc6 issue arises for some users when they try to activate the platform with a product key via Settings. When that issue occurs, the Activation tab in Settings displays the following error message:

Something prevented us from communicating with our activation servers. Wait a few minutes and then try again. Error code: 0x87e10bc6.

That particular activation error can arise because of a firewall blocking connectivity with Microsoft’s activation server. As a result, users can’t activate Windows 11 with their product keys when that error arises.

Unfortunately, even Windows 10 users have been plagued by the same issue in the past, so being prepared to deal with this issue can make a huge difference.

How can I fix the Windows 11 activation error 0x87e10bc6?

1. Try activating Windows 11 again a few days later

It might just be the case that the activation error 0x87e10bc6 is due to a Microsoft activation server issue. The server could be temporarily down.

In this case, you might need to wait a day or two before you can activate Windows 11. If the issue persists after a few days, apply the resolutions below.

2. Run the activation troubleshooter

  1. Click Windows 11’s Start button and choose Settings.
    Settings app windows 11 activation error 0x87e10bc6
  2. Select Activation on the System tab.
    Activation navigation option windows 11 activation error 0x87e10bc6
  3. Then click Activation state to expand it.
    Activation state windows 11 activation error 0x87e10bc6
  4. Press the Troubleshoot button.
  5. Wait for the troubleshooter to scan, and select the Apply this fix option.

3. Use a third-party system repair tool

Some third-party system repair tools might provide a solution for activation error 0x87e10bc6. These tools come with powerful features that allow them to perform in-depth scans of your computer in order to properly identify the issue.

Once identified, the app will either fix the problem or download fresh genuine system files to replace the corrupted ones.

4. Use the Command Prompt

  1. Click the taskbar button with the magnifying glass icon.
    The magnifying glass icon windows 11 activation error 0x87e10bc6
  2. Enter the keyword cmd in the search box, right-click the Command Prompt search result, and select Run as administrator.
    The Run as administrator option windows 11 activation error 0x87e10bc6
  3. Then type in this command and hit Enter: slmgr /ipk *Product Key*
    The slmgr command windows 11 activation error 0x87e10bc6
  4. Next, input the following and press Return: slmgr /ato
  5. Click OK on the Windows Script Host dialog box that opens.
  6. Restart your desktop or laptop by selecting Power > Restart from the Start menu.
Note icon NOTE
You’ll need to replace *Product Key* in the command specified above with an actual activation key.

5. Temporarily disable the Windows Defender Firewall

  1. Open the search tool, and enter Windows Defender Firewall in its search box.
  2. Click Windows Defender Firewall to open its Control Panel applet.
  3. Then click Turn Windows Defender Firewall on or off to bring up those options.
    Turn Windows Defender Firewall on or off windows 11 activation error 0x87e10bc6
  4. Select the Turn off Windows Defender Firewall options shown directly below.
    The Turn off Windows Defender Firewall option windows 11 activation error 0x87e10bc6
  5. Press the OK button to apply settings. Then try activating Windows 11 again.

6. Uninstall third-party firewall software

  1. First, press the Windows + X key combination for opening the Power User menu.
  2. Select the Run shortcut.
    The Run option windows 11 activation error 0x87e10bc6
  3. Input this text and click OK to open Programs and Features: appwiz.cpl
    The appwiz.cpl command windows 11 activation error 0x87e10bc6
  4. Select any third-party firewall software listed in the Programs and Features applet.
    The Programs and Features applet  windows 11 activation error 0x87e10bc6
  5. Click the Uninstall option and Yes to remove the firewall software.
  6. Restart your PC, and try activating Windows 11 again.

You can also uninstall software and erase all leftover debris with third-party uninstaller tools like IObit Uninstaller. IObit Uninstaller is a freeware software that packs in more options and features for removing software than Windows 11’s default uninstaller applet.

Note icon NOTE
Note that third-party antivirus software can also include firewalls. So, it’s recommended that you uninstall third-party antivirus utilities as well.

7. Restore your OS to a previous point

  1. Open Run as covered in the first couple of steps of the previous resolution.
  2. To open System Restore, input this command and click OK: rstrui
  3. Select Choose a different restore point if that option is available, and click Next to continue.
    The System Restore tool windows 11 activation error 0x87e10bc6
  4. Choose the oldest restore point you can and click Next.
    Restore points windows 11 activation error 0x87e10bc6
  5. Press the Finish button.
    Finish button windows 11 activation error 0x87e10bc6
Note icon NOTE
Restoring Windows 11 to an earlier time will remove software installed before that date. You can check what software a chosen restore point affects by clicking Scan for affected programs within System Restore.

Do I need to activate Windows 11?

It’s not essential to activate Windows 11 to continue utilizing it. However, there are some restrictions applied when Windows 11 hasn’t been activated. You’ll notice an Activate Windows watermark on the desktop and regular activation notifications for one thing.

The most notable restriction is that Windows 11’s Personalization settings are grayed out when it’s not activated.

Therefore, you can’t customize the platform with any of the settings on the Personalization tab. That tab includes options for changing themes, colors, and desktop wallpaper among others.

If you’re not bothered about that, however, you don’t need to fix Windows 11 activation error 0x87e10bc6. Nevertheless, you might still be able to fix that error in Windows 11 with some of these potential resolutions.

Can I activate Windows 11 by phone instead?

There is an offline phone method for activating Windows 11. You can select to activate Windows by phone via Settings as outlined on Microsoft’s Product activation webpage. Alternatively, enter slui.exe 4 in Run’s window and click the OK button.

In the Windows Activation window that opens, you’ll need to select a location in the drop-down menu. Then the window will display some toll-free numbers to call for activating Windows. Note down the numbers needed there to activate the platform offline.

However, you shouldn’t need to activate Windows 11 via phone if your PC is connected to the internet. Try applying all the potential resolutions for error 0x87e10bc6 above first. The fixes in our Can’t activate your copy of the Windows 11 guide might also help resolve that issue.

We also covered activation error 0xc004f069 in one of our older guides, so don’t miss it.

You can discuss Windows 11 activation error 0x87e10bc6 in the comments section below. Feel free to add any questions or even share any other error 0x87e10bc6 resolutions there.

How to Fix Windows 11 Miracast not Working [Step-by-Step]

If Miracast isn’t working on your Windows 11 PC, don’t worry, it’s usually fixable. Common solutions include adjusting your connection settings, updating network drivers, and configuring your Wi-Fi adapter. We’ll walk you through each step below.

Miracast issues often stem from outdated drivers, compatibility problems, or Windows Firewall settings. Here’s how to troubleshoot and get it working again.

What can I do if Miracast is not working in Windows 11?

1. Connect both devices to the same Wi-Fi

  1. Click on the Wi-Fi icon on the bottom-right toolbar.
  2. Tap on the Wi-Fi button.wifi settings
  3. Connect to your Wi-Fi network.
  4. Now connect the other device to this same Wi-Fi network.

Miracast works only if you connect your Windows 11 PC as well as the supported display to the same Wi-Fi network.

Follow the above steps to connect your Windows 11 PC to the Wi-Fi network, and make sure to connect the other device to the same network. You can now check if this fixes the Miracast not working error or not.

2. Update network drivers

  1. Right click on the Start menu icon.
  2. Select Device Manager.device-manager
  3. Expand the Network adapters section.Network adapters
  4. Right click on your Wi-Fi adapter and choose Update driver.Network adapters udate driver
  5. Select Search automatically for drivers.Search automatically for drivers

Windows will start looking for newly available network drivers and, if available, will prompt you to install the latest one.

This method is helpful if you see that the NdisVersion of your PC is outdated. Simply following the above steps will update your network driver and possibly fix the Miracast Windows 11 not working issue.

You can always rely on a dedicated driver updater tool for all your driver-related needs. This software scans for all outdated drivers shows you the result and prompts you to install all the updates.

You can fix errors such as faulty or broken driver files, update old device drivers, locate missing drivers, and much more with these tools.

3. Uninstall Wi-Fi adapter

  1. Right click on the Start menu icon.
  2. Select Device Manager.device-manager
  3. Expand the Network adapters section.Network adapters
  4. Right click on your Wi-Fi adapter and choose Uninstall device.Uninstalling Network Adapter to fix L2TP VPN not working
  5. Click Uninstall again to confirm the action.
  6. After uninstalling, below the menu bar, select Scan for hardware changes.action device manager
  7. Windows will start searching for the missing drivers.
  8. Close the Device Manager and check if this fixes the issue.

Reinstalling the Wi-Fi adapter will help fix several errors that could pop up, potentially because of missing or corrupted files.

There are chances that a file was missed during the previous installation or it got corrupted for some reason.

Hence, reinstalling the Wi-Fi adapter lets you eliminate those two possibilities, and maybe it will also help you fix the Miracast Windows 11 not working issue as well.

4. Run the troubleshooter

  1. Press Win + I keys together to open Windows Settings.
  2. Select System.
  3. Scroll down and select Troubleshoot.system-troubleshoot windows 11 error after update
  4. Choose Other troubleshooter.other-troubleshooters windows 11 error after update
  5. Click Run next to the Internet Connections.internet connection troubleshooter

Windows 11, just like other versions of Windows, comes with an in-built troubleshooter that helps fix different problems related to your PC.

You can try running the connection troubleshooter in order to fix the problem with your network adapter and possibly fix the Miracast not working on your Windows 11 PC.

5. Configure Windows Firewall

  1. Press Win + I buttons to open Windows Settings.
  2. Select Privacy & Security from the left pane.privacy and security
  3. Click on Windows Security on the right side.windows-security-choice minecraft not installing windows 11
  4. Select Firewall & network protection option.firewall and network protection
  5. Click on the Public network (active) profile.public network
  6. Toggle off the switch for Microsoft Defender Firewall.turn off defender
  7. Press Win + R to open the Run dialogue.
  8. Type control and hit Enter.control
  9. Select Windows Defender Firewall.windows firewall
  10. From the left side select Allow an app or feature through Windows Defender Firewall.allow app
  11. Click on the Change Settings button in the top-right corner.change settings
  12. Locate Wireless Display and then check the Private and Public box.wireless display
  13. Now, locate the Connect app and check the Private and Public box.connect
  14. Click OK to save the changes.

6. Change Wireless Mode selection value

  1. Press Win + R to open the Run dialogue.
  2. Type the below command and hit Enter: devmgmt.mscdevice manager
  3. Expand Network adapters.Device manager Network Adapters
  4. Right click on your Wi-Fi adapter and select Properties.network adapter
  5. Select the Advanced tab.advanced
  6. Under Property, select 802.11 Wireless Mode.
  7. Click the drop-down for Value.
  8. Set it to Dual Band.advanced value
  9. Click OK to save changes.

7. Update Windows

  1. Press Win + I buttons to open Windows Settings.
  2. Select Windows Update from the left-pane.
  3. Click on Check for updates button.check for updates

8. Reset Windows 11

  1. Press Win + I buttons to open Windows Settings.
  2. Click on Recovery from the right-side.recovery-page how to enter recovery mode windows 11
  3. Under Recovery options, press the Reset PC button.reset
  4. Select the type of factory reset your want to perform.type of reset
  5. Choose the option how you would like to reinstall Windows.install windows
  6. Click Next.next
  7. Hit the Reset button.reset

You should reset your PC only if the above-mentioned methods did not fix the job for you. This is one of the different ways via which you can reset your PC.

During the process, your PC will restart several times. But there is nothing to worry about as it is a part of the reset process.

How to check if your PC supports Miracast

Before you go ahead and look at the solutions to fix the Miracast Windows 11 not working error, let us first check if your PC supports Miracast or not.

1. Check via Windows shortcut

All you need to do is simply press the Win + P button to open up the Wireless Display Settings. If you receive a message indicating that your device supports a wireless display, your PC does not support Miracast.

miracast windows 11 not working

However, there is a pretty good chance that your Windows 11 computer won’t support Miracast. If you have an old PC without a Bluetooth card for Bluetooth services, then you will get this error.

2. Verify the NDIS driver

  1. Click on the Start menu.
  2. Search for Windows PowerShell and open it.windows powershell
  3. Type in the below command and press Enter:Get-netadapter|select Name, ndisversionndis miracast compatibility

If the NdisVersion for Wi-Fi reads 6.30 or above, then your system is compatible with Miracast. Also, you can update the driver to the latest version to fix this error.

But if you still get an error on your Windows 11 PC that says Miracast isn’t working, then this may be due to external factors.

It could be because of a Wi-Fi issue or an incorrect Wi-Fi configuration. There is a chance that a third-party app is conflicting with the mirroring app, or there is a display driver issue.

Fortunately, this guide helps you troubleshoot all the issues and should help you solve the Miracast Windows 11 not working issue.

Third-party screen projectors

Screen mirroring lets you project your phone or tablet to your PC, but Windows’ built-in option isn’t always the best. Here are some better alternatives:

  • ApowerMirror
    • Mirrors Chromecast-compatible devices
    • Supports mouse/keyboard input
    • Fullscreen mode, screenshots, and phone notifications
  • Reflector
    • Screencast multiple devices at once
    • Auto layout adjustment
    • Supports Miracast, screen recording, live streaming
  • Mobizen
    • Mirrors Android to Windows 11
    • File transfers, screen recording, app control via mouse/keyboard
    • Connect via USB, Wi-Fi, or LTE

Explore more screen mirroring apps to find what works best for you. If you want to learn how to set up the screen Mirroring app check our quick guides: Download and install Miracast on Windows 10, and Download and install Miracast on Windows 11

Fix: Red X sound icon in Windows 10/11 [Full Guide]

If you get a red X sound icon in the lower right corner of your screen in Windows 10, then this is the tutorial you should read.

Many users have issues with the red x volume icon in their system right after they upgraded to Windows 10.

The red X sound icon usually appears in Windows 10 when either you have a hardware issue or your speakers are not working. Let’s see what other users had to say about this anomaly.

Where and when does this error occur?

  • Red cross on speaker icon Windows 10 and Windows 7
  • Red X on volume icon Windows 10
  • HP laptop red X on sound icon (but other laptop brands can also be impacted)
  • Red X no audio output device is installed (A variation of this error message states that no sound output devices were found and this can be seen even in the latest OS to be launched by Microsoft, Windows 11).

In most cases, there is a software malfunction after an update of the operating system due to the fact that not all the drivers you had are compatible with the operating system you newly installed on your device.

How do I fix the volume icon red X in Windows 10?

  1. Check audio drivers
  2. Check compatibility in Device Manager
  3. Check physical connection
  4. Adjust system volume

1. Check audio drivers

  1. Go on the manufacturer’s website and see if the driver for your audio card is compatible with the Windows 10 operating system.
  2. If the driver is not compatible you will need to download the latest version of the driver for Windows 10 and install it to your system.

If you don’t want to manually download the necessary drivers, you can always use a specialized driver updating tool that will automatically download and install the missing drivers for you.

2. Check compatibility in Device Manager

Before we go to the software part of this red x volume icon we will first have to check if your hardware is operating in the necessary parameters.

  1. Press Win + X and select the Device Manager
  2. Go to Audio inputs and outputs
  3. Right-click your speaker and select Properties
  4. Go to the General tab and look under Device status where you will see whether the device is running properly or not

3. Check physical connection

  1. Check if you have made the proper connections to the speakers and the audio system.
  2. Check the wiring from the speakers to the Windows 10 device.
  3. Check the HDMI cable if you have one on the audio system.
  4. If you have a USB connection to the audio system you will need to check if it is plugged correctly to the device.

4. Adjust system volume

  1. Check and see if your audio system is plugged into the power socket and if it is lighting up.
  2. Check and see if your audio system has the volume to a minimum or disabled completely.
  3. Move the mouse pointer to the lower right side of the screen to open the Charms bar.
  4. In the Charms bar you will need to left click or tap on the “Search” feature.
  5. Type in the Search feature Adjust system volume and wait for the search to finish.
  6. Left click after the search on the Adjust system volume icon that appeared.
  7. In the new feature that you opened, you will need to increase the volume by moving the slider all the way to the upper side of the bar.
  8. Be sure you don’t have your Mute button enabled because this is very common in this situation.

5. Other sound issues and their fixes

For other audio issues, the fixes may be more complex as the issue may be other than the ones listed above. Some system errors or incompatibilities may give you the red x volume icon or simply sound not working.

If you have upgraded from Windows 10, or from 8.1 to 10, you might encounter these issues. For this, check the list of fixes below and see which one may solve your specific problem:

Don’t forget to let us know in the comment section if you fixed the issue and which solution helped you.

BitRAT malware bypasses Defender disguised as a Windows key verifier tool

What should be the number one priority when accessing the internet? If you guessed anything that had to do with shopping or games, you aren’t quite there yet.

In fact, security should be our number one priority when dealing with this everchanging, dangerous online world we currently live in.

You might want to know that security research firm ASEC has discovered a new malware campaign that disguises itself in the form of a Windows product key verification tool.

However, don’t be fooled by the official disguise, as that tool is in reality BitRAT malware or a remote access trojan.

Windows activation software can seriously infect your PC

ASEC uncovered the fact that this particular RAT is being distributed via Webhards which are online file-sharing services in Korea.

Although pirated and unofficial software is often known to infect devices with malware, people tend not to take such warnings seriously.

Needless to say, this drives malware creators to step up their game and keep a constant flow of malicious software coming to the masses.

To better explain how this works, the downloaded zip file W10DigitalActivation.exe contains the dreaded file but also carries a genuine Windows activation file too.

The W10DigitalActivation_msi file is apparently real while the other W10DigitalActivation_Temp file is the malware.

The moment an unsuspecting user runs the exe file, both the actual verification tool as well as the malware file are executed simultaneously.

Of course, this action will give said user the impression that everything is working as intended and there’s really nothing shady about the whole thing.

Then, the W10DigitalActivation_Temp.exe malware file goes on to download additional malicious files from the command and control (C&C) server and delivers them inside the Windows startup program folder via PowerShell.

Finally, BitRAT is installed as the Software_Reporter_Tool.exe file inside the %temp% folder and in Windows Defender.

The exclusion path for the Startup folder and exclusion process for the BitRAT are also added, in case you were wondering.

You can find out more details about this by checking the ASEC official report. Have you downloaded such a file and had to deal with this malware?

Be sure to share your experience with us in the dedicated comments section located just below.

Windows 11 Camera Settings: How to Access & Change Them

If you are setting up your workstation with your Windows 11 PC and want to change camera settings for a better video calling experience, then you are in the right place.

Unlike previous iterations, with Windows 11, Microsoft has included many settings that you can tweak and change based on your preference to get the best output from your Windows 11 PC. You may change the brightness contrast levels, set the rotation settings, enable or disable HDR for video, Eye contact for webcam settings, etc.

With Windows 11, Microsoft has added a dedicated camera page in the Settings app. Here, you will be able to change the camera settings and troubleshoot and fix problems with your webcam, if any issue exists.

There are some handy settings inside the camera settings page in Windows 11 that you can use to enhance your video calling experience. This is what we will be learning today in this guide. Let us check it out.

How do I change camera settings in Windows 11?

  1. Press Win + I to open the Settings page.
  2. Click on Bluetooth & devices.change camera settings windows 11 1
  3. On the right-side, select Camera.change camera settings windows 11 2
  4. Select your web camera.
  5. Here you will find different camera settings that you can change:
    – Brightness: Adjust the brightness slider to increase/decrease brightness levels for your webcam.brightness
    – Contrast: Adjust the contrast slider to increase/decrease contrast levels for your webcam.contrast
    – Video rotation: Select to rotate videos by 90-degree right, 90-degree left or 180-degree (upside down).video rotation
  6. If you think you have messed up the camera setting, then you can hit the Reset settings button next to Reset default camera settings option.reset settings
  7. To adjust camera privacy settings, click on Camera privacy settings.camera privacy settings
  8. Here you change settings for which apps have access to the camera.camera access

If you have an external webcam or an internal webcam that supports HDR and Eye contact features, then the options will be available to you.

How can I improve the webcam quality in Windows 11?

If video calling is a major part of the work that you do, then having the best possible video camera settings is necessary for you.

You can follow the above steps to adjust the brightness, contrast, video rotation, HDR, or Eye contact features on your webcam.

However, there are a few tips that can improve the overall quality of your video calling experience, some of which also involve adjusting external factors.

➡ Keep your video calling app up to date

If you use Google Meet, Slack, or any other video calling app, then make sure to keep it up to date.

Updated video calling apps not only bring stability and fix multiple bugs present in the app, but they sometimes also bring better features for the webcam.

➡ Adjust surrounding lighting conditions

Light is essential if you are looking for optimal image quality. As better photos and videos are captured in the best lighting conditions, indoors as well, ensure abundant light is coming inside your room for better video calling quality.

There is no need to have an expensive setup to improve the lighting conditions, but having a good light source is very important.

➡ Don’t have a cluttered background

You should avoid using a patterned or cluttered background, as you should be the center of attention, not your background.

Clean out the items in your background and keep it simple. Also, avoid keeping things that would reflect light in your background.

➡ Adjust the screen resolution

If your webcam generates a 720p output resolution, and you see a distorted image of yourself, you can try lowering your screen resolution for better quality.

Open the screen resolution page and lower the quality or match your webcam’s resolution to get the best image quality.

➡ Keep your graphics drivers up to date

You can use Outbyte Driver Updater software to update all the drivers on your Windows 11 PC. It is an excellent and simple tool that will scan for all outdated drivers, show you the result, and prompt you to install all the updates.

Instead of going over to every driver’s website and downloading them, you can use Outbyte Driver Updater to update all drivers on your PC.

These tips apply to the externally connected webcam and the integrated webcam that comes with your laptop. Also, if you regularly attend video calls, learn how to disable auto brightness on the webcam.

The webcam camera software also plays a significant role in getting the best output from your webcam. There are multiple webcam software packages that you can check out on the Internet.

What can I do to enable the camera in Windows 11?

1. Using Settings

  1. Press Win + I to open the Settings page.
  2. Click on Bluetooth & devices.change camera settings windows 11 1
  3. On the right-side, select Camera.change camera settings windows 11 2
  4. Usually, once you connect the camera, it will be automatically enabled.
  5. However, if it isn’t showing up, under the Disabled cameras section, hit the Enable button for your camera.change camera settings windows 11 3

2. Use Device Manager

  1. Right click on the Start menu icon.
  2. Select Device Manager.device-manager
  3. Expand Cameras section.
  4. Right-click on your camera and select Enable device option.change camera settings windows 11 4
  5. Click Yes.

While you may be fortunate enough that the webcam is running pretty smoothly, there are many users for whom the webcam does not work in Windows 11. Also, check how to fix a freezing camera in Windows.

In such a case, you can try giving all permissions, updating the camera driver, or resetting the camera app to fix the problem.

We also have a guide on the best Rocket League camera settings, so be sure to check it out if you’re a gamer.

Let us know in the comments below if this guide helped you with how to change camera settings in Windows 11 query.

Fix: Hypervisor is not running on Windows 10/11 [Full Guide]

Many users use virtualization, but sometimes they might encounter Hypervisor is not running message on their PC.

This message will prevent you from using virtualization, but in today’s article, we’ll show you how to properly tackle this issue.

Virtualization is a useful feature, but sometimes problems with it can occur. Speaking of virtualization issues, here are some common problems that users reported:

  • Hypervisor is not running Windows 10 Pro, BIOS – This problem can occur if virtualization isn’t enabled in BIOS, so be sure to find this feature and enable it.
  • Hypervisor launch has been disabled through the hypervisorlaunchtype bcdedit setting – Sometimes Hyper-V feature can be disabled, but you should be able to start it simply by running a single command in Command Prompt.
  • Hyper-V failed to start Hypervisor is not running – This problem can occur if your BIOS is out of date. To fix the issue, update your BIOS and check if that solves the problem.
  • Virtual machine error Hypervisor is not running – Sometimes this problem can occur due to problematic updates, and in order to fix the issue, it’s advised to find and remove these updates manually.
  • Hypervisor is not enabled, present, working – These are some common problems that can occur with Hyper-V, but you should be able to fix them using one of our solutions.

How do I fix the Hypervisor not running error on Windows 10?

  1. Make sure that virtualization is enabled in BIOS
  2. Update your BIOS
  3. Update the drivers to the latest version
  4. Reinstall HyperV feature
  5. Remove problematic updates
  6. Use bcdedit command
  7. Use DISM command
  8. Check if your CPU supports virtualization
  9. Use third-party applications

1. Make sure that virtualization is enabled in BIOS

If you’re getting Hypervisor is not running message, perhaps the problem is related to your BIOS settings. As you know, in order to use virtualization, this feature needs to be actually enabled in BIOS.

To check if virtualization is enabled, just enter BIOS and look for this feature.

How to enable virtualization in BIOS:

  1. Access your BIOS (If you need a hand, here’s how to enter BIOS on a Windows 7, 10 or 11 PC).
  2. Then, click on Advanced Mode, and go to the Advanced tab.
  3. Select CPU Configuration and set the Intel Virtualization Technology option (for Intel) or the SVM Mode (for AMD) to Enabled.
  4. Make sure you save the changes before you exit this screen.

That is how to enable Hyper-V Hypervisor in Windows 10. However, note that enabling virtualization can be different according to your CPU, PC model, chipset, and of course, motherboard.

To see how to properly access BIOS and find this feature, we advise you to check your motherboard manual for more information.

Once you enable this feature, go back to Windows and check if the problem is still there.

2. Update your BIOS

The problem with virtualization can be your BIOS, so if you’re getting the Hypervisor is not running message on your PC, the problem might be an outdated BIOS.

Several users reported that they fixed this problem by updating their BIOS to the latest version.

This is an advanced process, and if you don’t perform it properly you can cause permanent damage to your PC, so we advise you to be extra cautious.

We already wrote a short guide on how to flash your BIOS, but if you know how to properly update BIOS on your motherboard, check your motherboard manual for detailed information.

3. Update the drivers to the latest version

If you’re unable to use virtualization due to Hypervisor is not running message, perhaps the problem is related to your drivers.

If you want to update all drivers on your PC fasts, perhaps using a third-party driver updating solution might be the best choice.

4. Reinstall the HyperV feature

  1. In the Search bar type windows features, and choose Turn Windows features on or off from the list of results.
    windows features Hypervisor is not running
  2. Locate the HyperV feature and uncheck it. Now click OK to save changes. If you’re asked to restart your PC, be sure to do so.
    Hypervisor is not working hyper-v disable
  3. Once your PC restarts, go back to Windows Features window and enable the Hyper-V feature. You might be asked to restart your PC once again, so be sure to do that.

According to users, if you’re getting this error, perhaps there’s a glitch with HyperV feature.

Sometimes various Windows glitches can occur, but you can fix most problems with HyperV simply by reinstalling it.

Once your system restarts, the problem with Hyper-V should be resolved and everything will start working again.

In addition, the Task Manager can detect if it’s running on a physical or virtual machine. Under the Performance tab, the label Virtual machine: Yes is listed if a hypervisor has been detected.

Tip icon Tip
The best virtual machines for Windows 10 are VMware Workstation, VirtualBox, Hyper-V, and Citrix Hypervisor. For more information about each machine, check out our in-depth guide.

5. Remove problematic updates

  1. Press the Windows Key + I to open the Settings app.
  2. Navigate to the Update & Security section, and select View update history.
    update history Hypervisor is not running
  3. You should now see a list of recent updates. Pay attention to the recent updates and memorize them or write them down. Now click Uninstall updates.
    Hypervisor not running uninstall update
  4. List of recent updates will appear in the new window. To remove an update, double-click it and follow the instructions on the screen.
    remove updates Hypervisor

If the error started appearing recently, the problem might be a problematic Windows update.

As you know, Windows installs updates automatically, and if the problem started appearing recently, it’s possible that the update is causing it.

To fix the problem, it’s advised that you find the problematic update and remove it, by following our above steps.

Once the update is removed, check if the problem is resolved. You might have to repeat this step a couple of times before you find the update that is causing the problem.

Once you find the problematic update, be sure to write its name down.

Windows tends to install the missing updates automatically, so in order to prevent this problem from reappearing, we advise you to block this update from installing automatically.

6. Use the bcdedit command

  1. Press the Windows Key + X, and select Command Prompt (Admin) or PowerShell (Admin) from the menu.
    command prompt Hypervisor is not running
  2. When Command Prompt opens, run the following command: bcdedit /store c:BootBCD /set hypervisorlaunchtype Auto

After the command is executed, check if the problem with virtualization is resolved. Alternatively, you can also use the bcdedit /set hypervisorlaunchtype auto command.

If you’re having problems with virtualization, perhaps you can fix the problem simply by running a single command in Command Prompt.

7. Use the DISM command

  1. Start Command Prompt as an administrator.
  2. When Command Prompt starts, run this command: dism /online /enable-feature /featurename:Microsoft-Hyper-V -All

Sometimes you might get this error because certain components aren’t working properly. To fix this problem, it’s advised that you run the DISM command in order to enable the HyperV feature.

Once the command is executed, Hyper-V feature should be enabled and the problem with virtualization should be resolved.

8. Check if your CPU supports virtualization

In order to use native virtualization in Windows 10, it’s necessary that your processor supports certain features. If it doesn’t have these features, you won’t be able to use the built-in virtualization.

To see if your processor supports virtualization, you’ll need to check its specifications on the manufacturer’s website.

Alternatively, you can use third-party tools in check if your processor supports virtualization.

Many users reported that virtualization won’t work on their PC since the processor doesn’t support SLAT feature.

If your processor doesn’t support the necessary features, you might have to change it in order to use built-in virtualization.

9. Use third-party applications

If you didn’t manage to fix Hypervisor is not running error, perhaps you might want to try using a third-party solution as a workaround.

Even if your processor doesn’t support the virtualization features, you should be able to create a virtual machine in Windows using our recommendation software.

This tool specializes in virtualization, and it offers all the necessary features for both advanced and first-time users alike, so we strongly suggest that you try it out.

⇒ Get WMware Workstation 16

The hypervisor is not running error can cause problems, but we hope that you managed to fix it using one of our solutions. For more suggestions, please access the comments section below.


How To Map Network Drives Over VPN on Windows 10 & 11

Mapping network drives over VPN on Windows 10 is a great way to increase the security of your computer and network.

By protecting your data traffic with a VPN that supports strong VPN protocols with the highest possible levels of encryption, you can fend off hackers and ensure the integrity of your data.

There’s nothing elaborate about mapping network drives through VPN. In fact, you just have to connect to a VPN server before managing access settings to shared drives and folders in your local network.

Connected to VPN but cannot access network drives

This type of VPN error usually appears when there are connection issues on the VPN’s end, so the users can’t access the network drives.

Plus, your local network and the remote network need to use the same subnet so your VPN can access network drives.

You can take care of connection issues easily by using proficient VPN software that has thousands of servers globally and the latest encryption features.

How do I map network drives over VPN on Windows 10 & 11?

1. Connect to a VPN server

  1. Sign up for a PIA subscription.
  2. Download and install PIA on your PC.
  3. Launch PIA and press the big power button.
  4. You are now connected to a VPN server.

As a practical workaround, we utilized Private Internet Access to solve network drive connection issues and for the fastest network speed and privacy online.

We’re using PIA in our example because it’s the best VPN for Windows 10. The steps above are for downloading and installing the PIA desktop client.

Keep in mind that the VPN connection must protect the entire computer, so you can’t use anything lesser than that, not even a browser extension.

An alternative is to create a VPN connection in Windows 10 without installing anything after obtaining the PIA login credentials and a preferred server address from its website.

Check out how to set up an IPsec VPN client on Windows 10 using PIA connection details.

On the other hand, if you want to use the OpenVPN protocol, you need a third-party OpenVPN client since Windows 10 doesn’t have native support for OpenVPN.

It’s easier to set up the PIA desktop client since it uses OpenVPN by default (WireGuard is also an option).

In addition to an impressive network of VPN servers, PIA can connect you to the nearest server automatically to ensure the best speed.

Furthermore, you can use PIA to reduce your ping during gameplay. It comes bundled with split-tunneling mode, a kill switch, and exclusive DNS servers.

That being said, you can install PIA’s OpenVPN manual configuration mode on your router to share VPN access with all connected devices.

Private Internet Access

Choose PIA before mapping network drives to reduce risks and increase connection speed.
Check price Visit website

2. Map a network drive

  1. Make sure you’re connected to a VPN server.
  2. Turn on Network Discovery on your computer.
  3. Open the Windows 10 File Explorer (Win key + E).
  4. Go to This PC, select the Computer tab, and press Map Network Drive.
  5. Set Drive to a preferred drive letter that you will use to access the shared location.
  6. Press Browse next to Folder and select a shared drive or folder.
  7. Enable Reconnect at sign-in to ensure the location auto-reconnects at every Windows startup.
  8. Enable Connect using different credentials if you can’t access the shared location using your current Windows login info.
  9. Click Finish.

Although you would be tempted to disconnect from the VPN after mapping the network drive, it’s a good idea to leave it turned on at all times while staying connected to the Internet.

This ensures that you’ll always be protected from hackers and other possible attacks.

How do I map network drives over VPN on Windows 11?

Although the new OS is clearly more advanced and it has a lot of new interesting features, its core is still very similar to the one of Windows 10.

Therefore, you will see that all the solutions presented here, including using the PIA VPN, will work like a charm on Windows 11 as well.

The Map network drive option it’s a little less accessible in Windows 11

File Explorer has a slightly different design in Windows 11 so, as you can see from our screenshot above, to access the Map network drive option, you will find it by clicking on the three-dot button from the top.

But that’s where the differences end because all the other steps presented in our solutions are still the same.

In conclusion, it’s an excellent idea and a wise move to connect to a VPN server before mapping network drives in Windows 10 and 11.

This way, you can reduce the risks of getting hacked and compromising your sensitive data.

We hope that our guide helped you map a network drive while using a VPN and now, your shared location is safe and secure.

You might also be interested in our list including the best file-sharing tools & software for Windows 10/11 because it’s another way of sending your files safely.

For any questions or suggestions, feel free to use the comments section below and we will get back to you as soon as possible.

Yup, just another servicing pipeline test as Windows 11 Dev Channel bumps to 22579.100

Ho hum. Microsoft released another in its long list of “servicing pipeline” Insider build updates today, this time to the Windows 11 Dev Channel. Here’s the updated announcement (via Neowin):

UPDATE 3/22: We are starting to roll out Cumulative Update Build 22579.100 (KB5013192). This update does not include anything new and is designed to test our servicing pipeline for builds in the Dev Channel.

If you need some practice downloading and installing new builds for no reason, have at it.

Windows Defender Offline Scan Not Working: 6 Ways to Fix It

Many users reported that the Windows Defender offline scan is not working. it could be due to a Windows bug, corrupt system files, conflicts with third-party apps, or missing administrative permissions.

Here’s how to fix these issues:

How can I fix Windows Defender scanning problems?

Check out this quick video tutorial. For more details and advanced fixes, read the steps below.

1. Perform the scan via PowerShell

  1. Press Windows + R to open Run, type powerhshell, and hit Ctrl + Shift + Enter.powershell
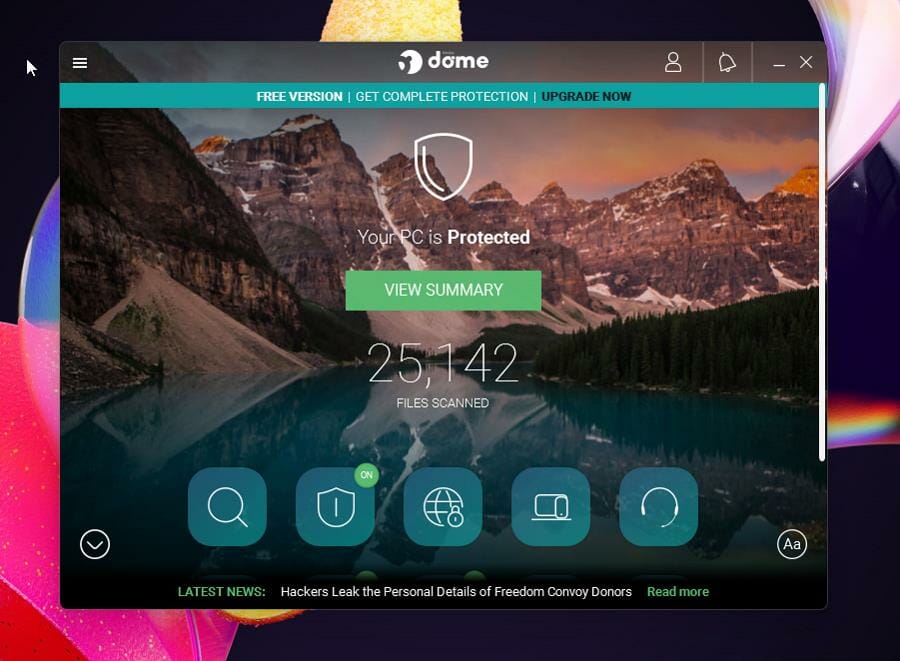
  2. Click Yes in the UAC prompt.
  3. Now, paste the following command and hit Enter to run the Windows Defender Offline Scan:Start-MpWDOScancommand to fix windows defender offline scan not working

Oftentimes, while the Offline Scan wouldn’t start from Windows Defender, executing the dedicated command in PowerShell would get it to run.

2. Run the Windows Update troubleshooter

  1. Press Windows + I to open Settings, and click on Update & Security.update & security
  2. Choose Troubleshoot from the navigation pane, and click on Additional troubleshooters on the right.additional troubleshooter
  3. Now, select Windows Update and click the Run the troubleshooter button.troubleshooter to fix windows defender offline scan not working
  4. Wait for the troubleshooter to run, identify and eliminate problems.troubleshooter

A few users reported that it was a problem with Windows Update that led to the Windows Defender Offline Scan not working, and running the dedicated troubleshooter got things working perfectly.

3. Use a third-party antivirus

If you still can’t fix the problem with Windows Defender, you might want to consider switching to a third-party antivirus.

A good alternative is ESET HOME Security Essential. It offers browsing protection, online banking security, anti ransomware protection.

Further, it stops spyware and malware at bay, thanks to its real-time protection.

For added security, you can separately install ESET SysInspector for offline diagnostics. It works without an internet connection, helping you troubleshoot issues such as malware, outdated drivers, and suspicious network connections.

ESET HOME Security Essential

Keep your computer safe and secure all the time with one of the most reliable antivirus solutions.
Free Trial Visit Website

4. Run the DISM and SFC scan

  1. Press Windows + S to open the Search menu, type Command Prompt in the text field, and click on Run as administrator.command prompt
  2. Click Yes in the prompt.
  3. Paste the following three commands individually and hit Enter after each:DISM /Online /Cleanup-Image /CheckHealth DISM /Online /Cleanup-Image /ScanHealth DISM /Online /Cleanup-Image /RestoreHealth
  4. Once done, run the following command for the SFC scan:sfc /scannowsfc scan to fix windows defender offline scan not working

The DISM (Deployment Image Servicing and Management) tool and SFC (System File Checker) scan are two effective built-in options to fix corrupt system files, which might be the reason Windows Defender Offline Scan is not working.

5. Perform an in-place upgrade

  1. Go to Microsoft’s official website, and click the Download tool now button to get the Windows 10 Media Creation Tool.download tool now
  2. Run the setup, click Yes in the prompt, and let it get things ready.setup
  3. Click Accept to agree to Microsoft’s license terms and agreements.accept
  4. Choose Upgrade this PC now, and click on Next to continue.upgrade this PC now to fix windows defender offline scan not working
  5. Wait for the download to complete and let setup install Windows 10.in-place upgrade to fix windows defender offline scan not working

An in-place upgrade is the best option when the Windows Defender Offline Scan is not working or even for other intricate issues where you can’t identify the underlying cause.

The best part is you don’t lose any files or apps, though we do recommend you create a backup beforehand in case things go wrong.

6. Create a new user account

  1. Press Windows + R to open Run, type netplwiz in the text field, and hit Enter.netplwiz
  2. Click on the button Add to create a new account.add account to fix windows defender offline scan not working
  3. Now, click on Sign in without a Microsoft account (not recommended).sign in without a microsoft account
  4. Choose Local Account.local account to fix windows defender offline scan not working
  5. Fill out all the fields, the username, password, and a hint for the latter, and then click Next.details
  6. After you get an account creation confirmation, click on Finish.finish
  7. Choose the account you just created and click Properties.properties
  8. Navigate to the Group Membership tab, select Administrator, and click OK to save the changes.set as administrator to fix windows defender offline scan not working
  9. Again, click OK for the changes to come into effect.

That’s it! If the previous solutions didn’t work, creating a new local user account should do the trick.

If you still find Windows Defender Offline Scan not working, reinstall Windows 10 as a last resort. We also have a guide on how to fix Windows Defender Scans folder access denied message, so don’t miss it.

Before you leave, do check the best antivirus for Windows 10 for all-around protection against malware or online threats.

Tell us which fix worked for you in the comments section below.