Your online security is important and, speaking of which, many users reported Cox browser alert while browsing the web.
This message can be a bit alarming, and in today’s article, we’re going to show you how to get rid of it, so keep reading.
Many users may assume that Cox alerts are browser hijacking threats or malware that infected their PC.
This is the reason you might need practical methods to block these alerts from Cox regarding unimportant promotions or news.
What are Cox alerts?
First of all, let us say that, when you receive a Cox browser alert during a web browsing session, you are definitely not dealing with a phishing attempt.
We said that because a lot of users have actually reached this conclusion after getting the above-mentioned alert, but it is not the case.
In fact, Cox browser alerts are used to inform Cox Internet customers on a range of topics, such as details about the account.
How do I get rid of Cox notifications?
We just told you what these notifications are, and now you surely want to know how to get rid of these pesky notifications.
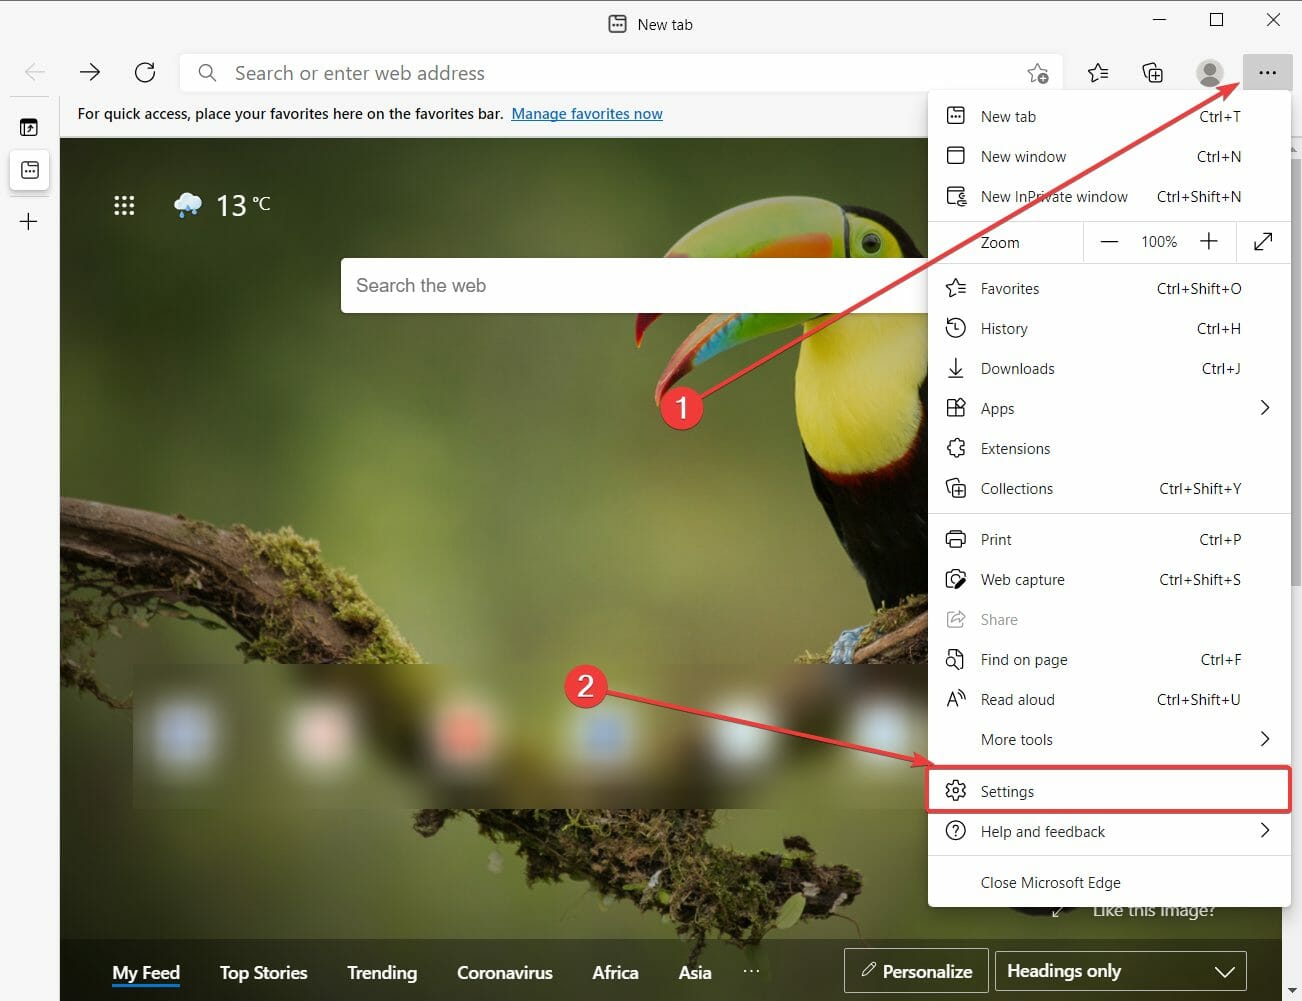
In order to close the alert, all you have to do is click the X in the upper right corner of the above-mentioned alert.
However, before you do, make sure that you have read and understood the alert, while also reviewing the support links, and taking the requested action to avoid future alerts or issues.
Quick Tip:
An alternative that will fix Cox browser notification alerts is to switch to a different browser such as Opera One. It has a built-in ad blocker, so it can deal with advertisements such as these out of the box.
Opera One, in addition, comes with a free unlimited VPN that should help you with this problem as well. This great browser is also light on your resources, and you can use it or organize your tabs into workspaces and tab islands.
Opera One
To bypass errors and ads, there is no doubt that these features will take care of them.
The developers have stated in the past they don’t want that to be a part of their software, so the answer is going to be no.
Cox does not collect the individual web browsing history of our customers and has absolutely no plans to do so whatsoever.
How can I fix the Cox browser alert?
1. Use a VPN
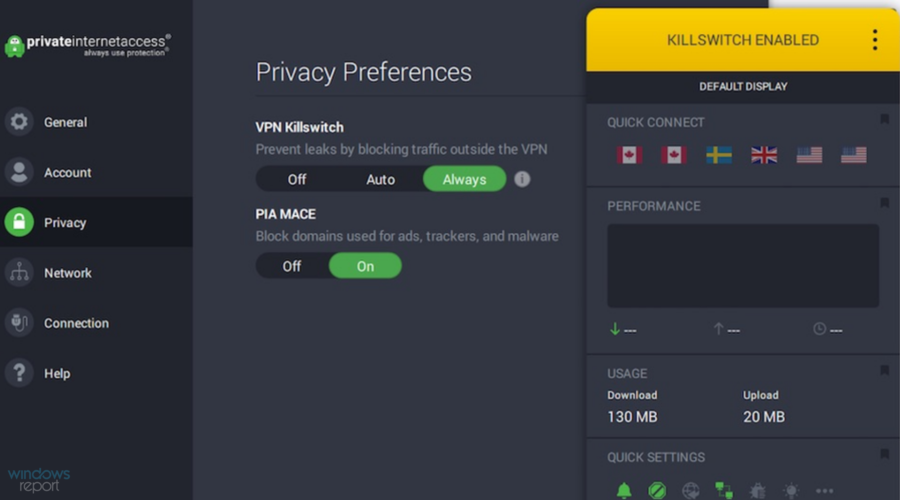
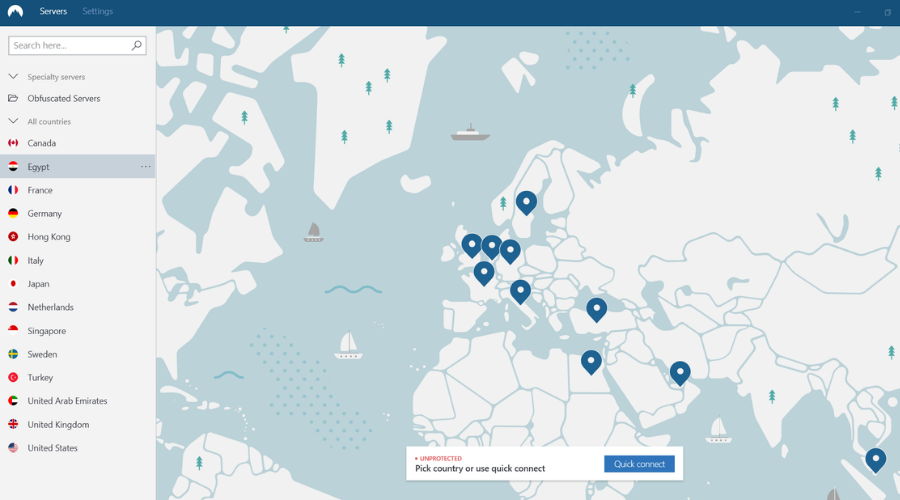
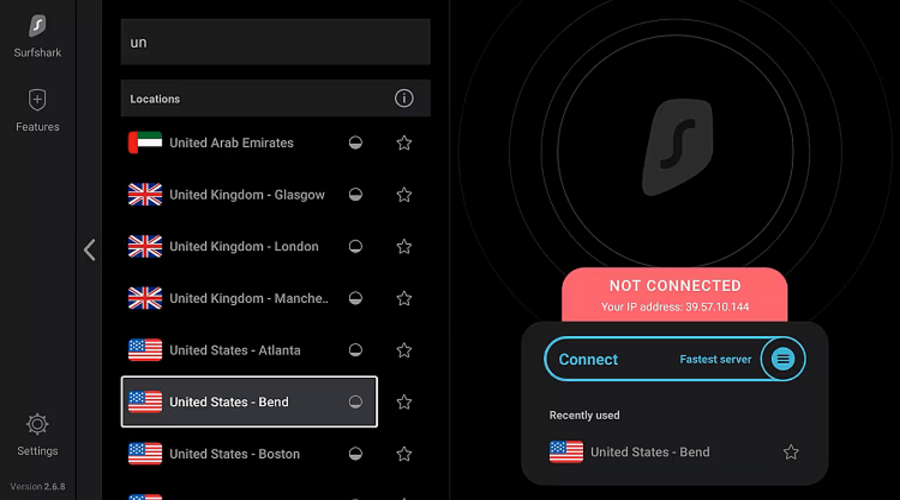
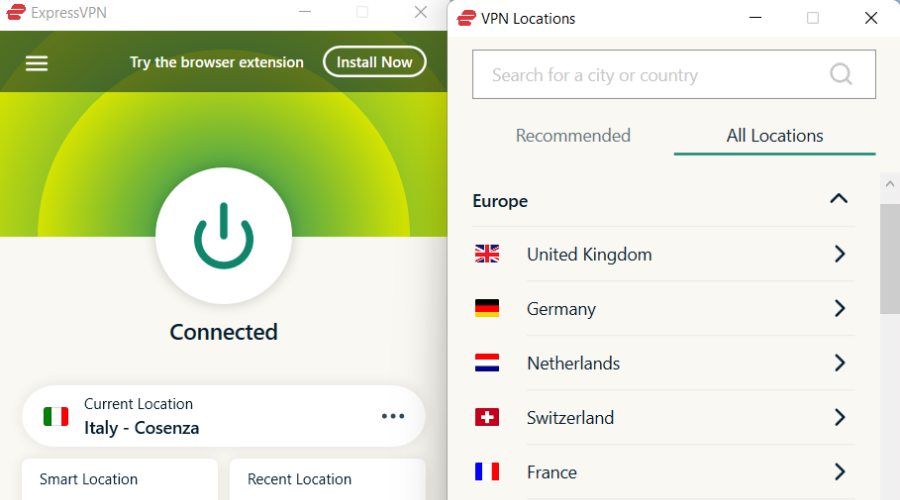
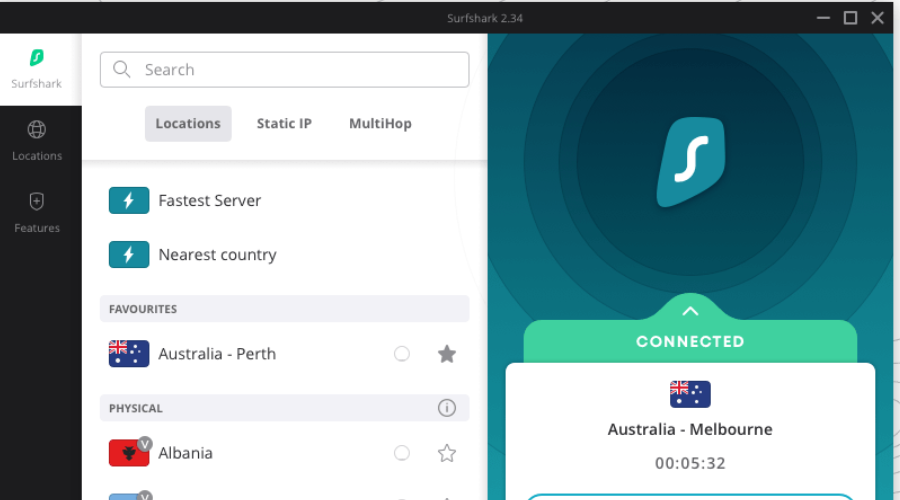
Several users suggested that using a VPN can help you get rid of Cox browser alerts and eliminate any distractions while you navigate online.
What bothers the most clients of Cox is the recurring pop-up messages regarding promotions or news that appear instantly.
These alerts can disturb the users from personal tasks on the web or give the impression of a virus threat.
Hence, having an efficient VPN can hide your IP address and block tracking ads or pop-up alerts on the Cox browser.
2. Use an ad blocker for your browser
In most cases, these alerts are cleverly disguised advertisements. To get rid of Cox browser alerts, we suggest that you install an ad blocker extension for your browser.
That is all you need to know about Cox alerts and what to do whenever you get them on your device. Remember that Cox alerts can appear immediately after login.
Another approach to this message is to just ignore it. It’s usually an advertisement for Cox services, so you can safely close it and forget about it.
Browsing the internet is something we all do at least once a day, and we enjoy doing it without bumping into any difficulties or interruptions. However, there are many errors you can encounter while surfing the internet on your browser.
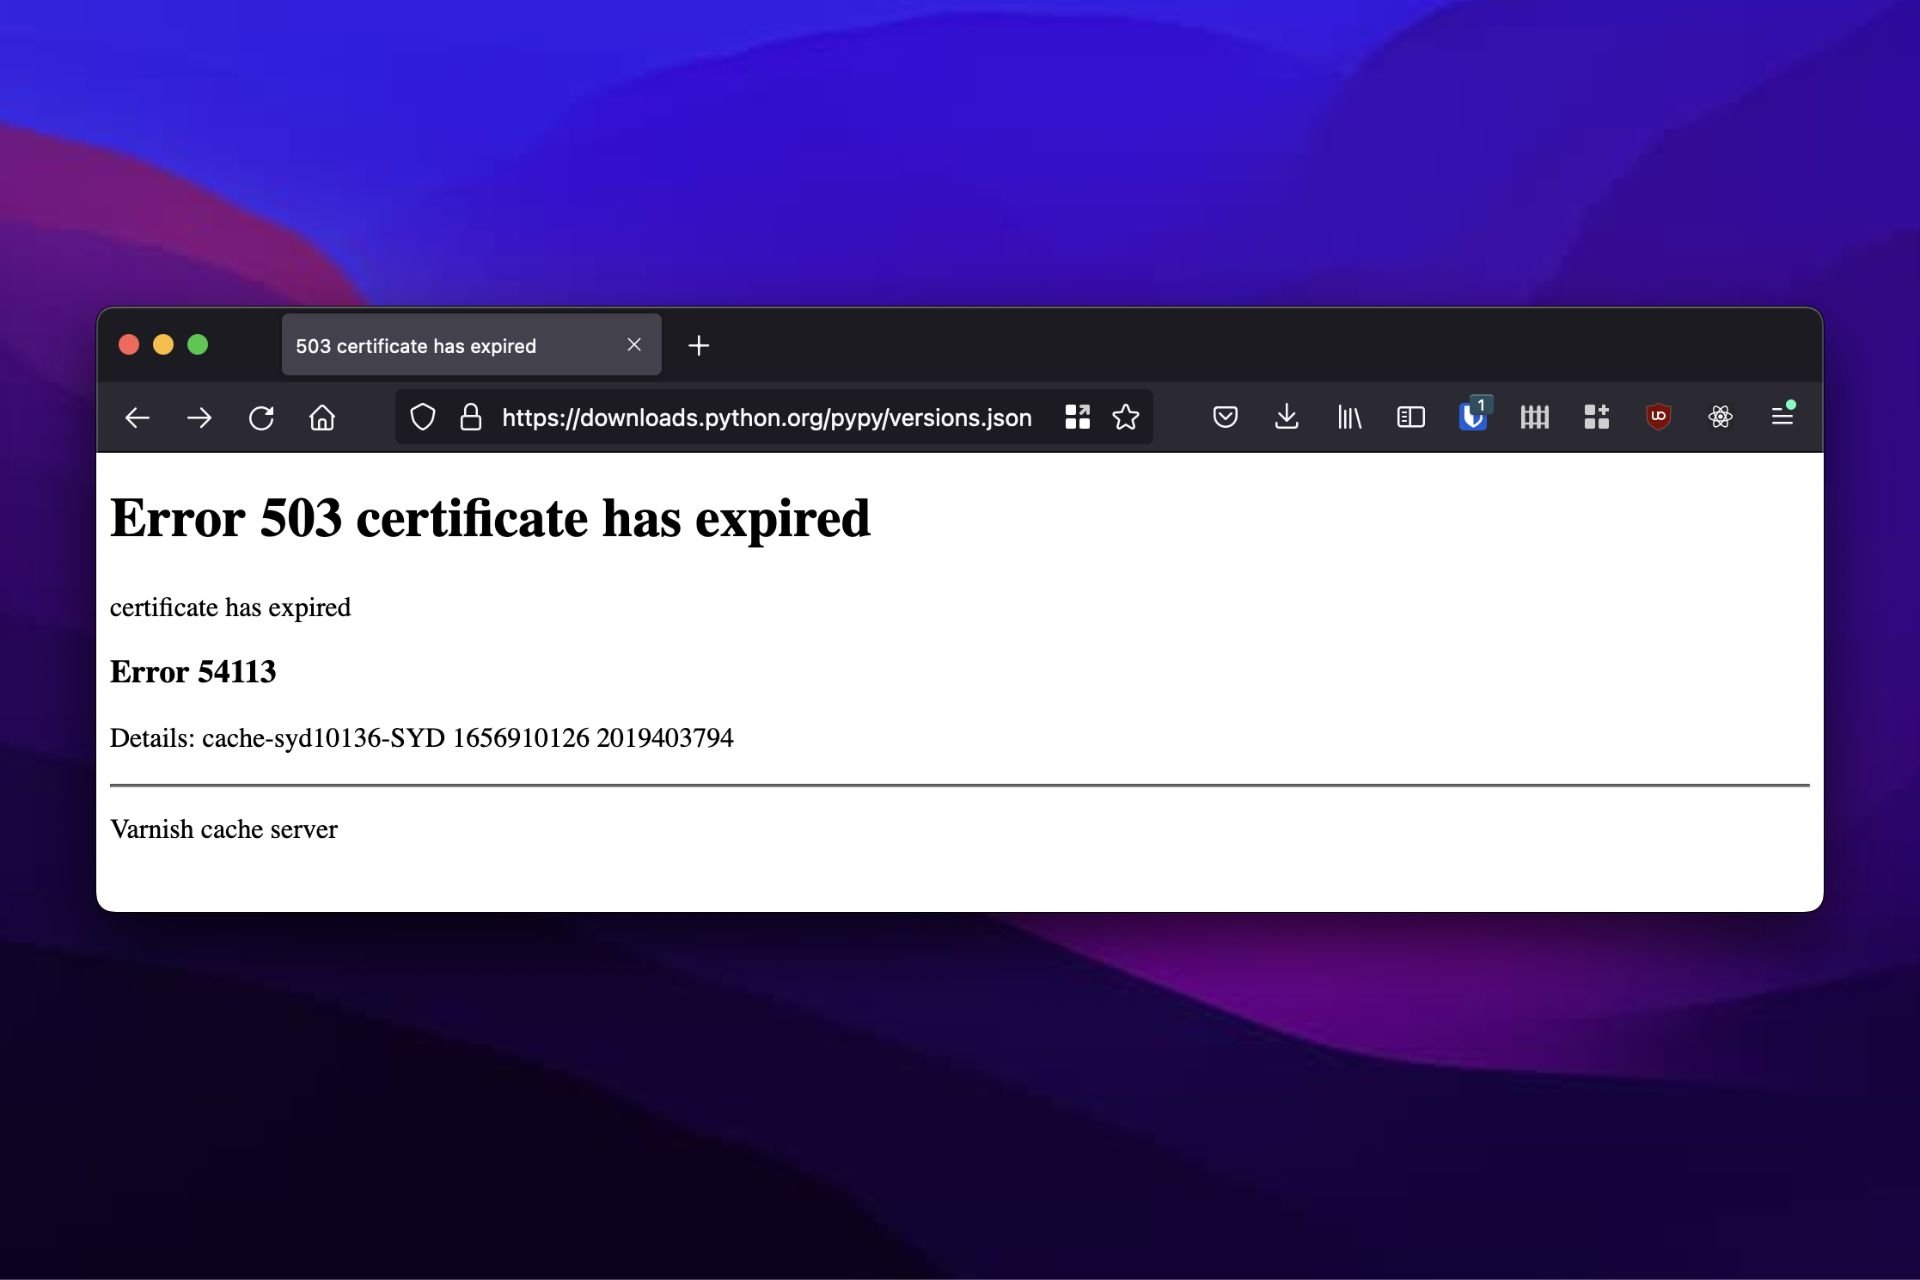
Common error users complain about is the Error 503 certificate has expired. It means the browser is having difficulties validating the server you’re connecting with. However, this error can occur for various reasons like old/corrupt cookies and caches, invalid certificates, and many more.
What does the Error 503 certificate has expired mean?
For the browser to be able to load websites, it needs to authenticate its SSL certificate and run the SSL handshake.
However, if there are any issues with the website’s certificate, it can prompt the Error 503 certificate has expired. Hence, the browser won’t be able to authenticate the certificate and cause an Error 503 certificate has expired in Chrome.
What causes a 503 error?
Browser cookies and caches: Caches and cookies are data the browser collects from your browsing activities to help you load the websites faster subsequently. However, this data can become old or corrupt and, as a result, cause difficulties with the browser accessing some websites.
Incorrect date and time: When your device’s date and time are not correct, it can cause some issues with the browser authenticating SSL certificates. It means that incorrect dates and times can impede the expiry details of the certificate on your device.
Expired SSL certificate: SSL certificate expiry date helps keep your website in check. Depending on your certificate, how long it lasts can vary. However, users can encounter a 503 Certificate has expired Ticketmaster error if the website’s expired SSL certificate.
Quick Tip:
Install the Opera One browser if you want to learn more about a site’s security certificate. The issuer of the certificate, the type of certificate, and whether the issuer is legitimate will be seen in Opera One.
Opera One has already created procedures and processes for Extended Validation certification and is on the cutting edge of standard compliance. Also, this browser brings you free VPN and AI integration.
Opera One
Verify the integrity of SSL certificates and manage them securely in this privacy-oriented browser.
Renewing the SSL certificate keeps your website recognizable, and the browser can authenticate your certificate.
However, you can contact your certificate authority for renewal or visit sites like Let’s Encrypt to generate a free valid certificate.
2. Clear your browser’s cache and cookies
Launch the Chrome browser.
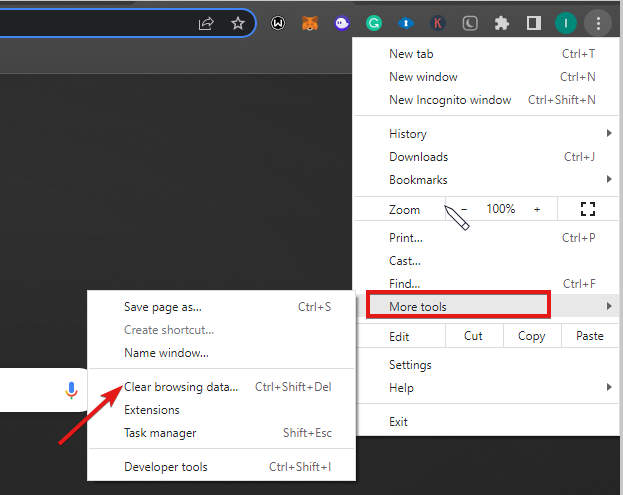
Click the Menu button.
Select More Tools, then click Clear browsing data.
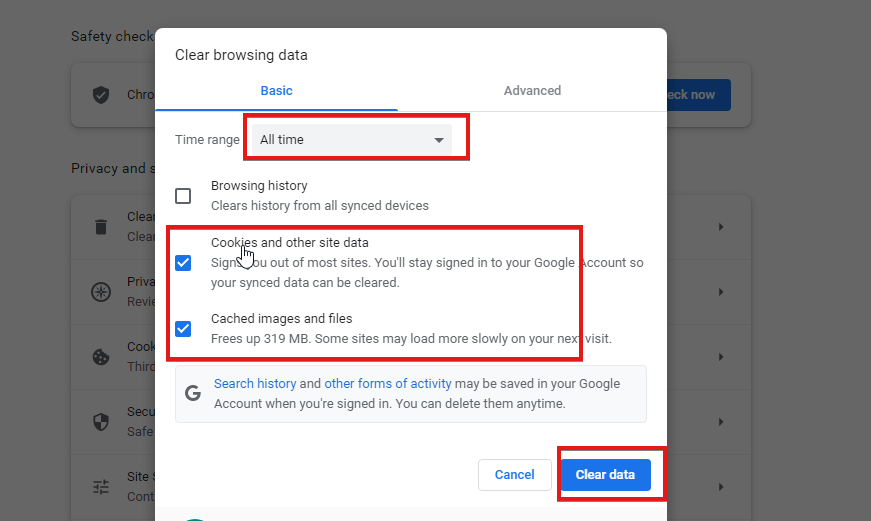
Choose a time range for the data to be cleared (to delete everything, select All time).
Check the boxes for Cookies and other site data and Cached images and files.
Click Clear data.
After completing the process, restart your browser and check if the error persists. Clearing browsing data could also fix similar issues like the 503 Backend Fetch Failed Varnish cache server; read this guide to learn the solutions.
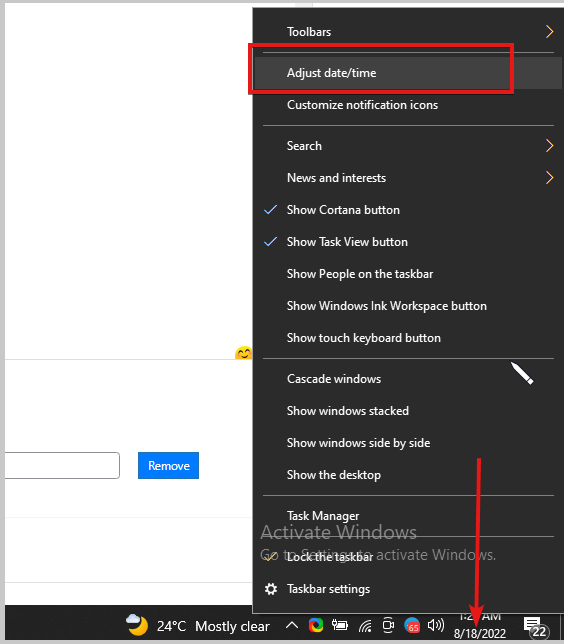
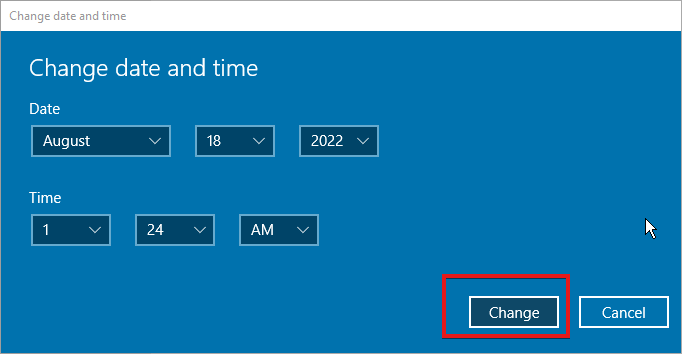
Right-click the date and time in the Taskbar, then select Adjust date/time.
Toggle off the set time zone automatically and click on Change.
Set the time & date and click Change to effect the new time.
Resetting your device time and date to your correct geo zone can help fix the 503 error. However, it will help the browser recognize the correct date in correlation to the certificates.
Microsoft news recap is a weekly feature highlighting the top Microsoft news stories of the past week. Sit back, grab some coffee, and enjoy the read!
Xbox Cloud Gaming to add mouse and keyboard controls soon
A new filter has been added to the Xbox app on Windows that allows filtering of games by keyboard and mouse support, a sign that Microsoft could be getting closer to launching keyboard and mouse support on Xbox Cloud Gaming.
Microsoft lowers Teams Rooms pricing, offers free (with device) Basic Tier
Microsoft is shaking up its Teams Rooms pricing structure, with the addition of a Basic tier which is included for free with purchase of a device, as well as replacing Teams Rooms Standard and Premium with Teams Rooms Pro, which will be priced at $40 per month.
Sensitive Microsoft login credentials leak on GitHub
Peripheral Component Interconnect (PCI) is a computer bus used to connect hardware devices to your PC in a standardized format. However, users have reported errors with PCI Simple Communications Controller, keep reading to find a solution.
The PCI slots on a computer are for devices like graphics cards and internet modems. In order for these devices to operate properly, they need a driver installed to control them.
What is PCI Simple Communications Controller?
The PCI Simple Communications Controller is used with PCI devices like modems, USB devices, graphics cards, etc to ensure they run properly. This PCI Simple Communications Controller is commonly used with devices that are not compatible with standardized ports and drivers.
However, there are reports that the PCI device is not recognized on the PC and is usually indicated by a yellow flag next to it in the Device Manager. Try the solutions below to fix this issue.
How do I fix PCI Communications Controller driver error in Windows?
1. Update the driver
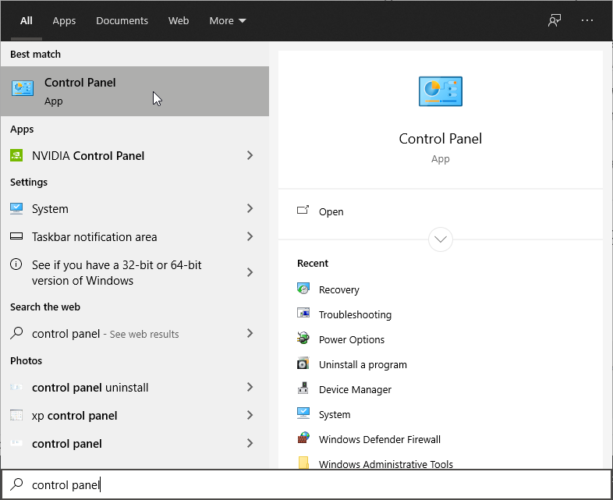
Click on Start and search Control Panel and hit Enter.
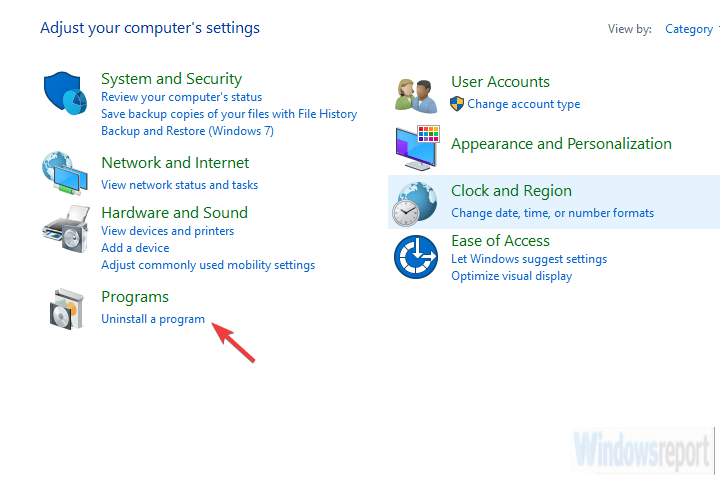
Select Hardware and Sound.
Under Devices and Printers, click on Device Manager.
Locate the device under Other devices then right-click on the device and select Properties.
Under General, select Update Driver.
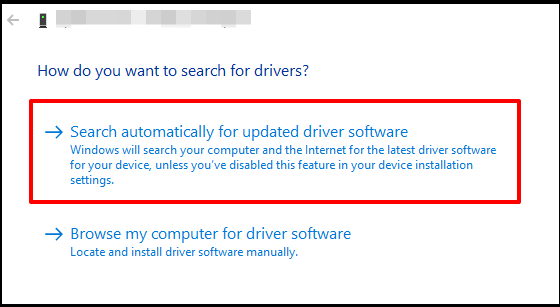
In the pop-up, click Search automatically for updated driver software.
If the driver for your PCI Simple Communications Controller has not been updated, then issues may arise. Follow the above steps to check for any driver updates.
2. Via third-party driver updater
When updating drivers it is always a good idea to employ the help of professional driver updating software in order to minimize the risk to your computer.
With a driver updater, you can use the scanning functionality in order to check up on your PC’s drivers and make sure they’re always under control. For example, you can set it to run automatic scans every time your computer restarts. This way, you’ll ensure that your drivers are up-to-date at all times.
3. Locate and install the corresponding driver
Click on Start and search Control Panel and hit Enter.
Select Hardware and Sound.
Under Devices and Printers, click on Device Manager.
Locate the device under Other devices then right-click on the device and select Properties.
Click on the Details tab and under Property, change it to Hardware Ids.
Select the longest hardware id from the list of values and right-click it then click Copy.
Open your browser and paste the hardware id into the search bar.
Follow the instructions to download the driver.
If one of your PCI devices does not have a driver installed for it, then an error will likely occur. Usually, this error appears in Device Manager and will tell users to install a corresponding driver. Users can search and install the correct driver to their Windows 10 or 11 online.
Websites like PCI Lookup will make the process of locating a drive a lot easier.
How do I find drivers for PCI Simple Communications Controller?
Click on Start and search Control Panel and hit Enter.
Select Hardware and Sound.
Under Devices and Printers, click onDevice Manager.
Locate PCI Simple Communications Controller under Other devices then right-click on the device and select Properties.
Click on the Details tab and under Property, change it to Hardware Ids.
These are the driver IDs for your PCI Simple Communications Controller. The longest value is usually the one you want to use if searching for the driver online.
Users can also find the driver of their PC has a motherboard driver disc. Inserting the CD will allow users to install any chipset drivers. The chipset allows Windows OS to locate devices built into the motherboard. The motherboard driver disc will also update any drivers that need it.
We hope one of the above solutions helped you fix any PCI Simple Communications Controller errors. If you’re having issues with unknown devices in your Device Manager, we have a guide for that as well.
Let us know in the comments below which solution worked for you or if you have a suggestion for a different solution.
Solar Smash is a popular simulation game developed by Paradyme Games. Users must strategize to destroy planets in this realistic simulator. Here are our solutions on how to download Solar Smash on Windows 10 or 11.
One of the most impressive features of Solar Smash is the graphics, which include visuals from NASA making it one of the most realistic space simulators.
Is there a PC version of Solar Smash?
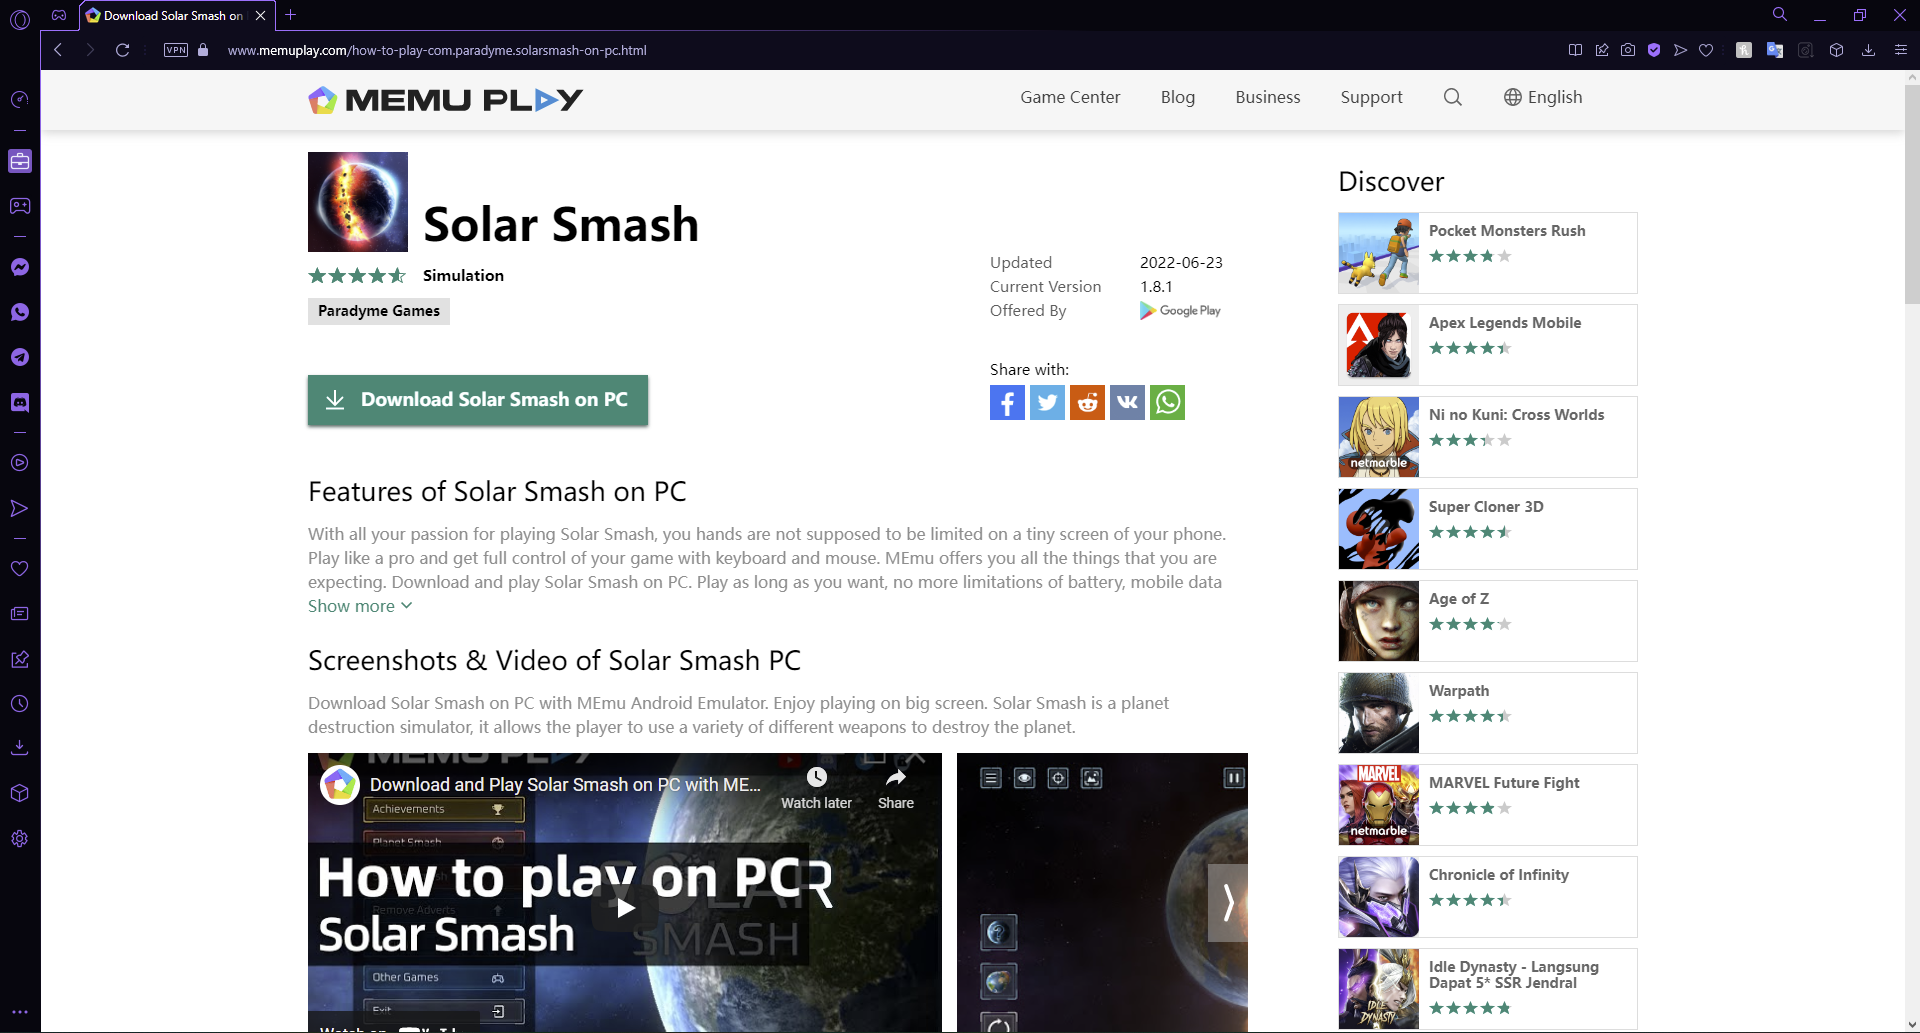
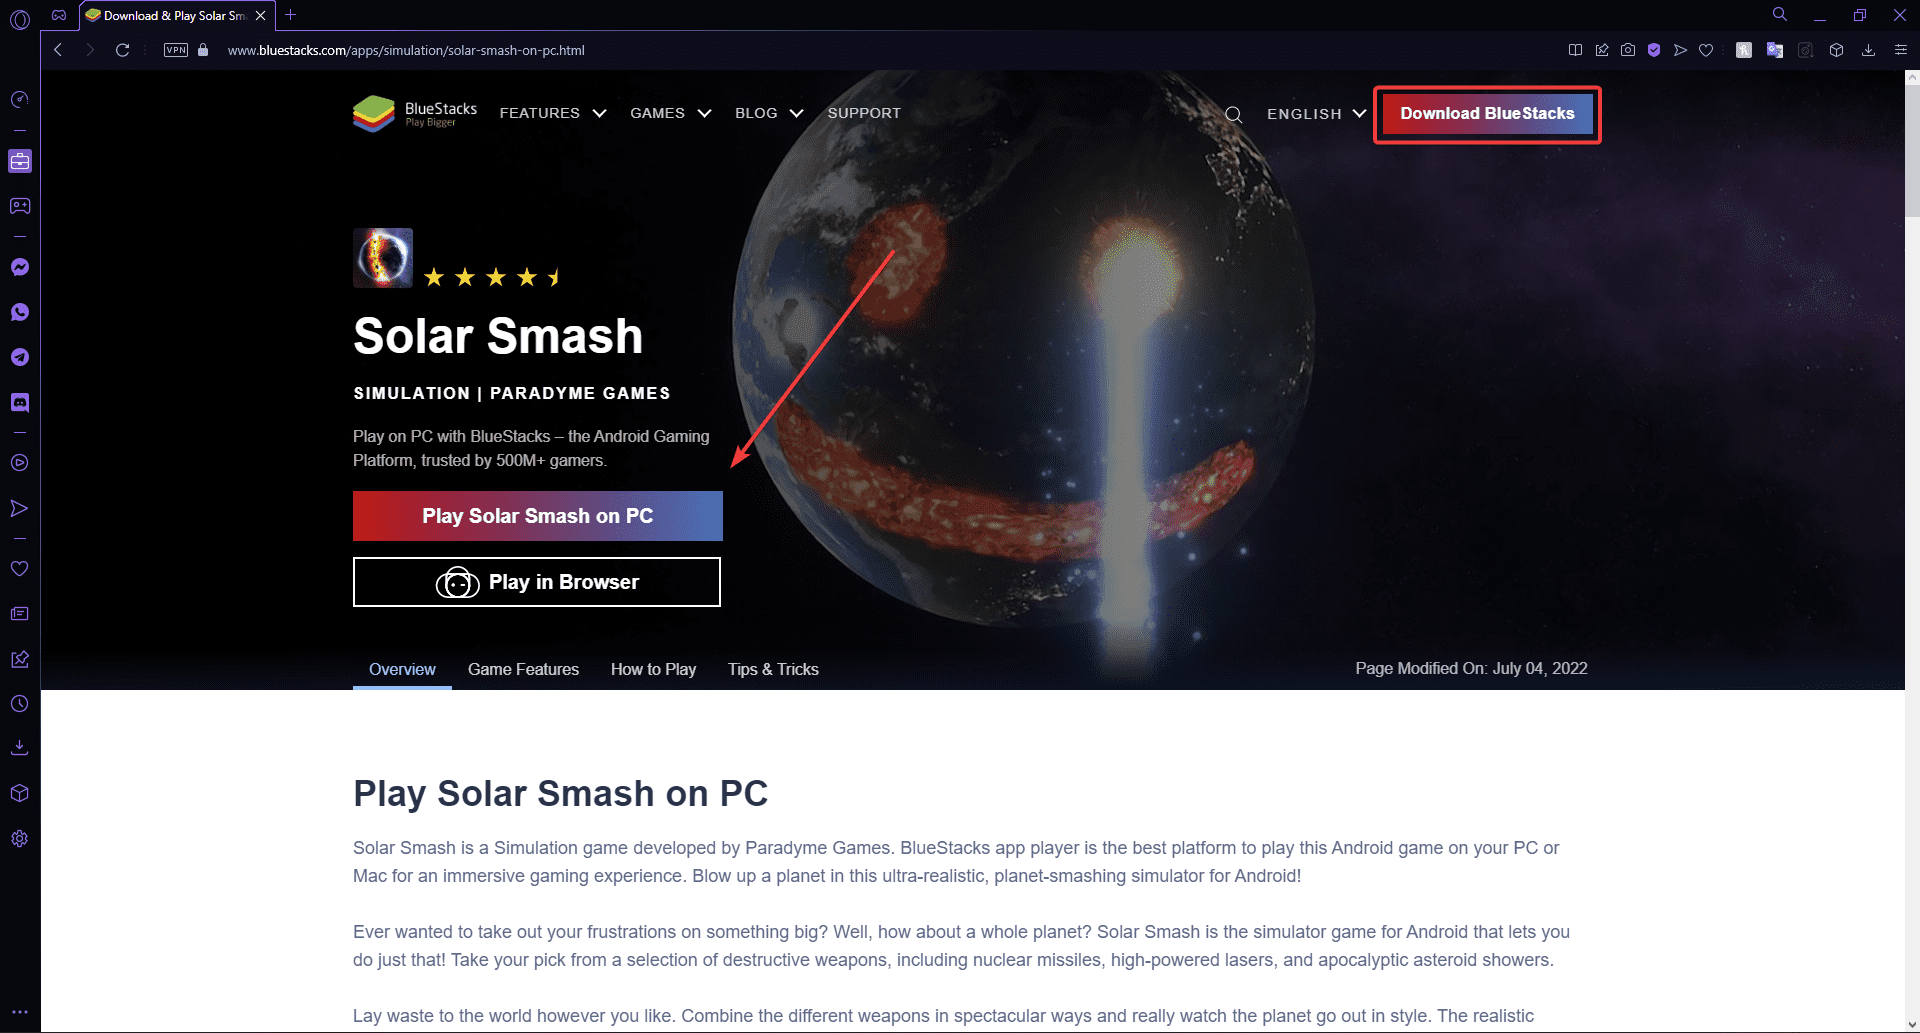
Solar Smash is available for Android and iOS mobile devices. While there is no designated PC version, users can play using a mobile emulator on their PC. With third-party emulators like BlueStacks or MEmu, users can download and play Solar Smash on Windows 10 or 11.
Quick Tip:
You may play Solar Smash in the Opera GX browser after installing the Android emulator on your PC. Using a dedicated browser for games you have advantages like the RAM and CPU limiters.
Connect your Google account to the emulator and install the Opera GX browser from the URL below and open the browser using the emulator. Using Opera GX will immensely impact your gaming sessions.
Opera GX
Play Solar Smash on your PC in the browser designed for gamers’ needs.
Go to BlueStacks or a mobile emulator site of your choosing.
Search for Solar Smash then click on Download.
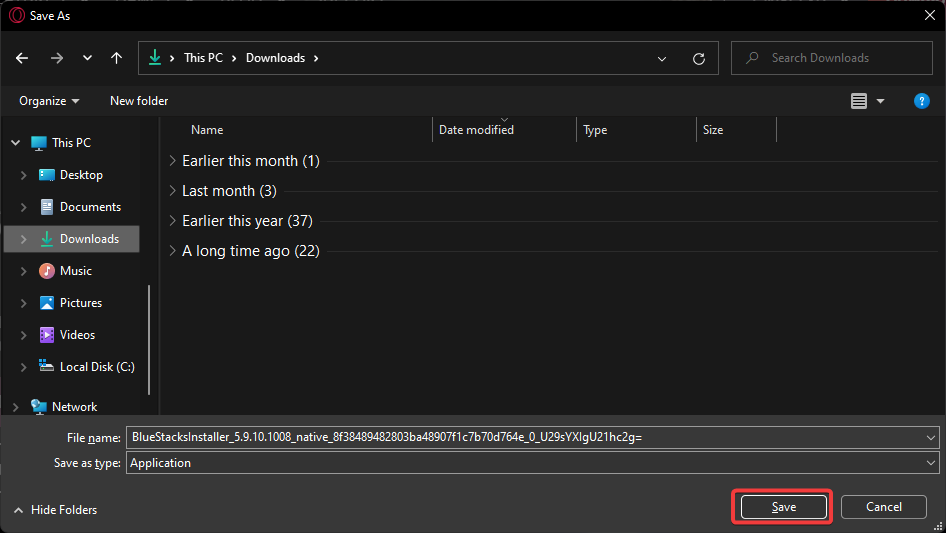
Save the installer to a location on your PC.
Open the installer and click Install now then wait for Solar Smash to download to the emulator.
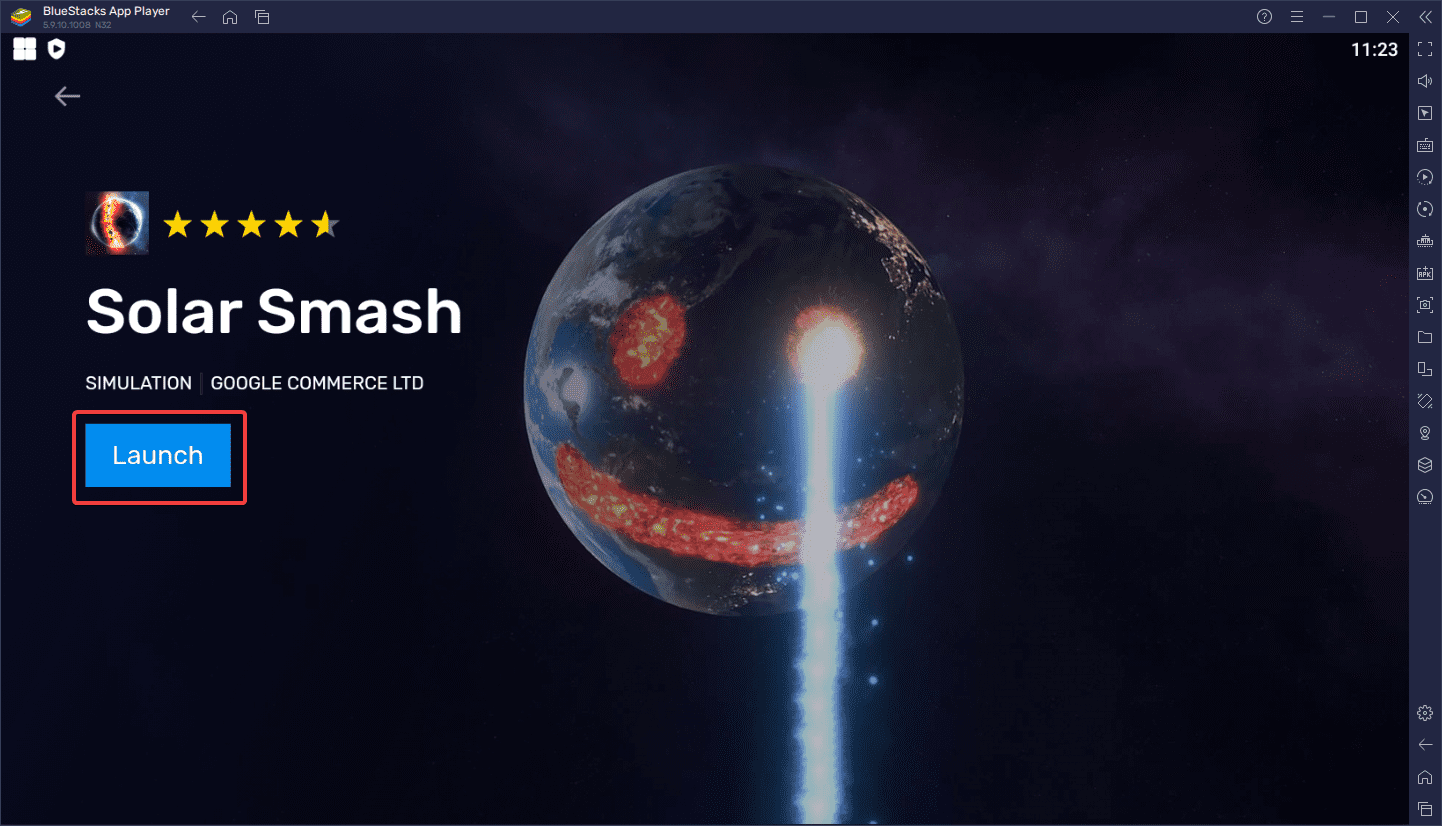
Click on Launch to begin playing Solar Smash from your Windows 10 or 11.
Mobile emulators like BlueStacks allow users to play games that are normally only available for Android and iOS devices on their PC. Playing using a mobile emulator provides users with the best gaming experience as they have access to PC power and controls.
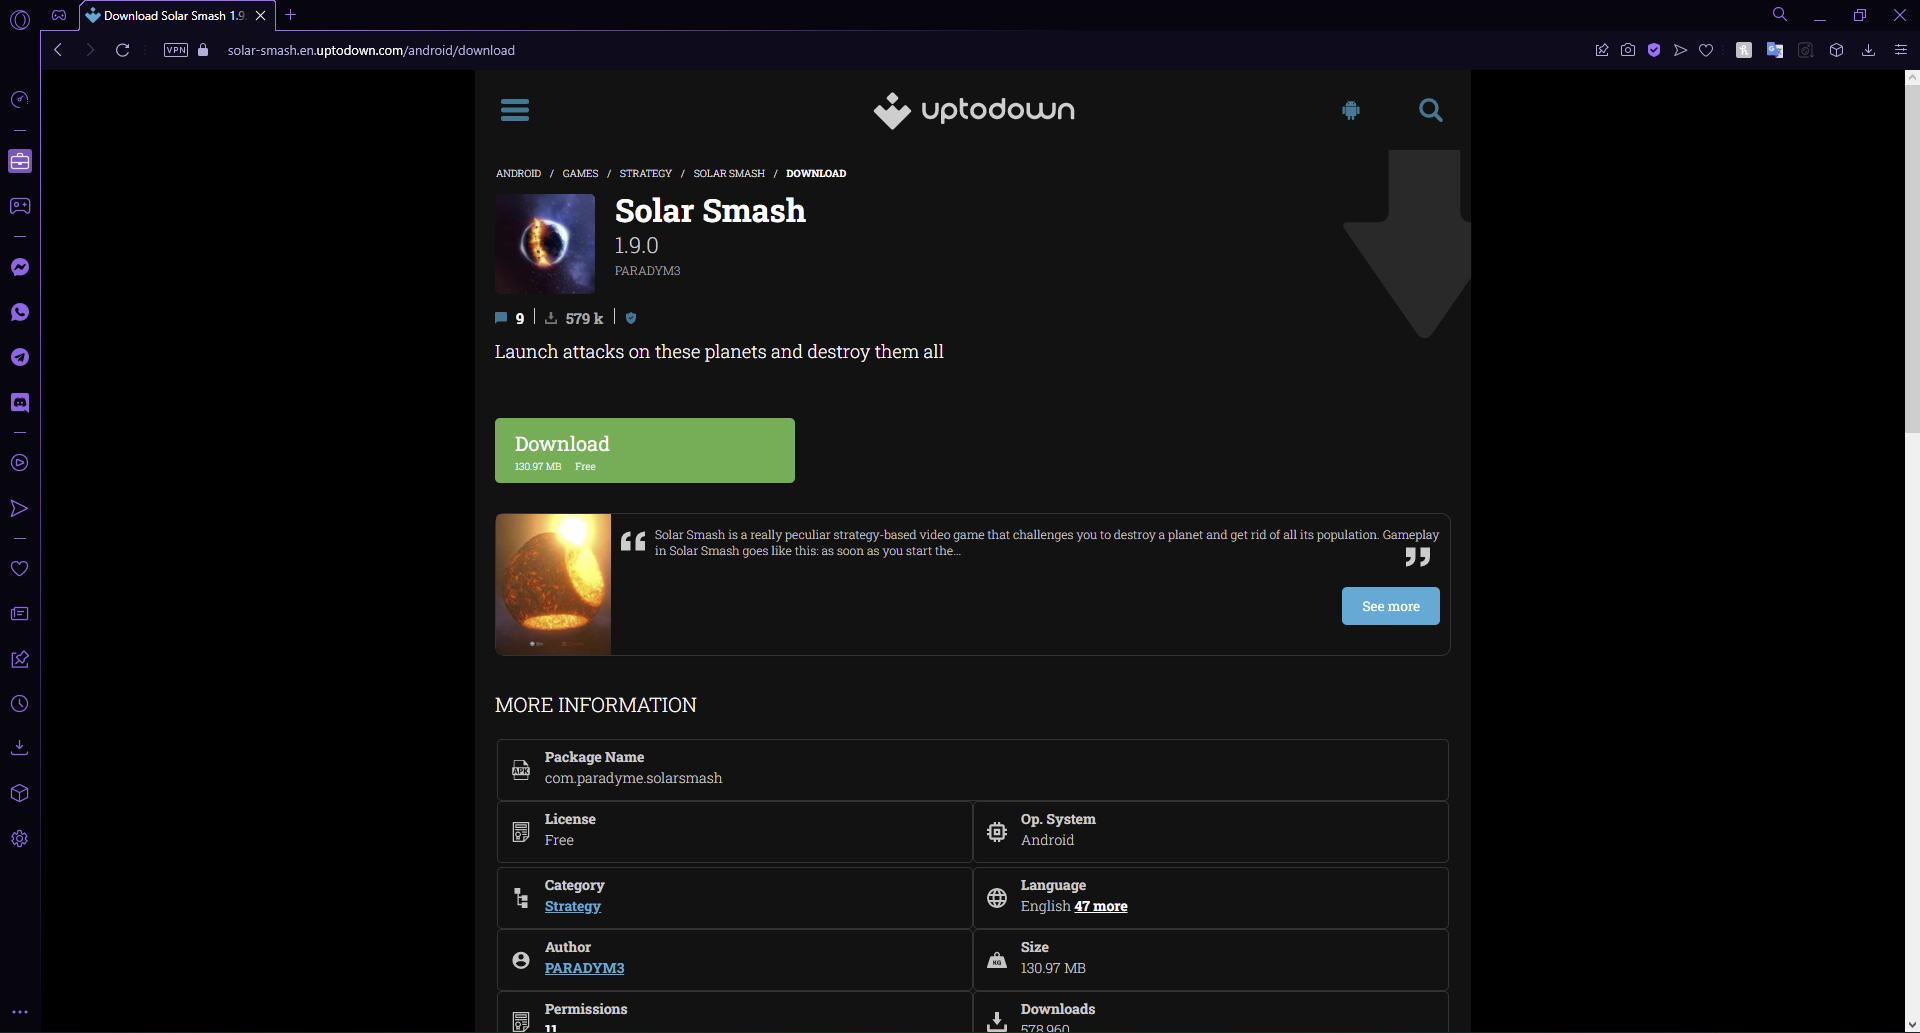
Some websites offer a downloadable Solar Smash that is compatible with Windows 10 or 11. Users can download the package right to their PC and begin playing.
However, always double-check a site can be trusted before downloading anything from it. Do some research before installing anything from an unfamiliar site. There are many websites out there that will inform you if a site is safe or not.
How do you download the Solar Smash update?
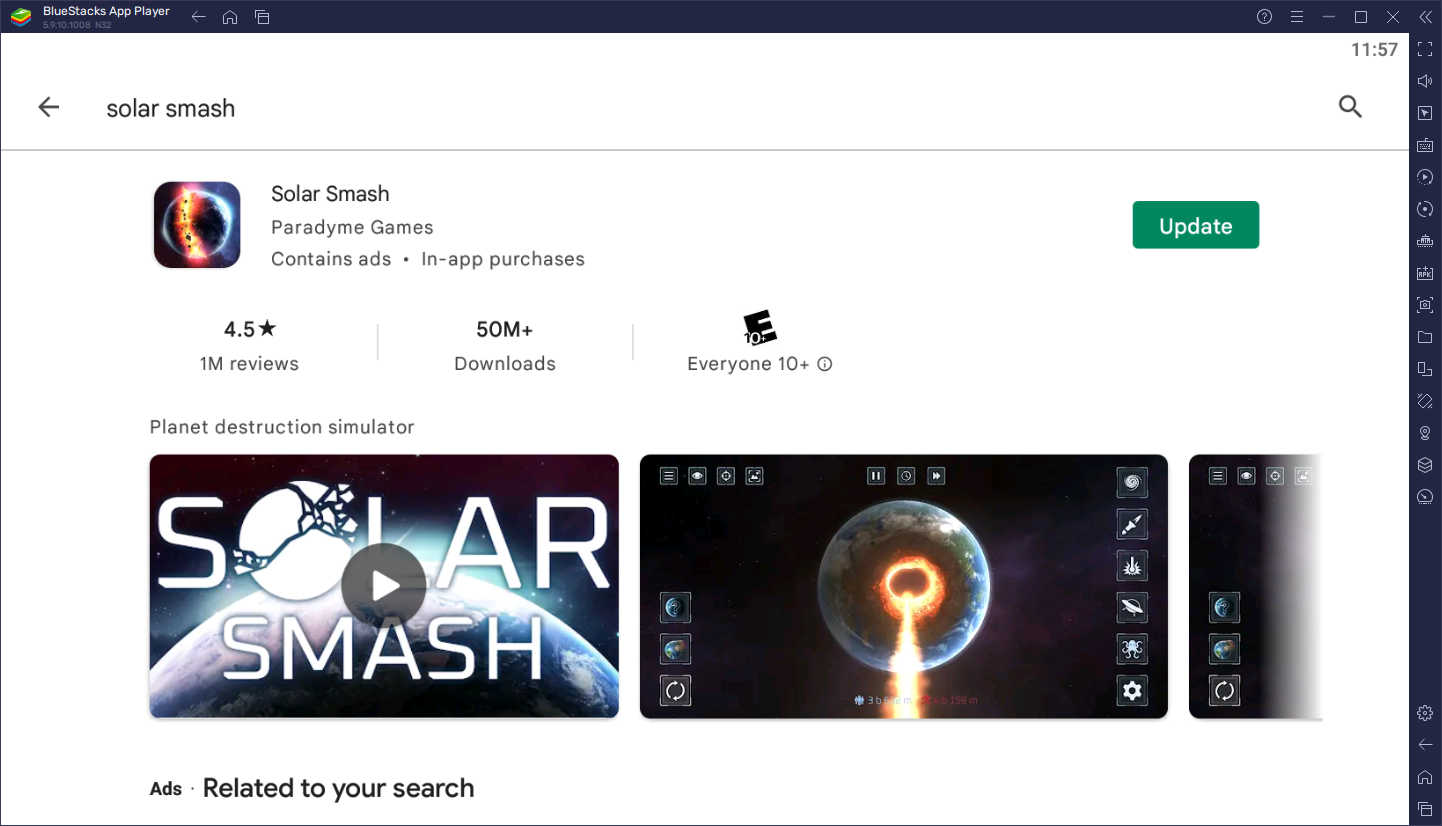
On Android and iOS, Solar Smash will automatically update if you use the app often. However, on PC, you will need a mobile emulator to update Solar Smash. Most emulators offer access to the Google Play Store, where you can check and update any apps installed on the emulator.
However, if you have the Google Play Store on the emulator set to back up to Google Drive, then all app data and device data will be synced. So if you play Solar Smash on your mobile device, your progress will be synced with the Solar Smash in the emulator on your PC.
Hopefully, one of the above solutions helped you download Solar Smash on your Windows 10 or 11. Let us know in the comments what you think of Solar Smash and what your favorite space simulator game is.
Low FPS on Red Dead Redemption 2 is a nagging issue on all GPUs and many players have been taking to forums to discuss it and find a fix.
Red Dead Redemption 2 is an extremely popular action-adventure game that has been around since 2018 and still going strong.
The best part about it is when you play the Red Dead Redemption 2 in snow or create your own dog.
But, if you are facing an online packet loss on RDR2, you can refer to our detailed guide here for a quick fix.
Why is my RDR2 FPS suddenly so low?
While the primary reason for a sudden drop in the RDR2 FPS is outdated graphics drivers, there are other reasons also that affect the frames:
Too many applications running in the background
Visual settings are using up most of your CPU
Unnecessary startup services
The graphics card settings are not set correctly
Incorrect power plan settings
Pending Windows updates
A lot of Temp files and junk
So, whether you are facing a low FPS issue on Red Dead Redemption 2 with RTX 3090, or if the game stutters, you can follow the below solutions for a fix.
How do I fix low FPS in Red Dead Redemption 2?
1. Update your drivers
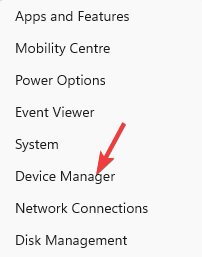
To manually update your Graphic Card Driver, right-click the Start button and select Device Manager from the list.
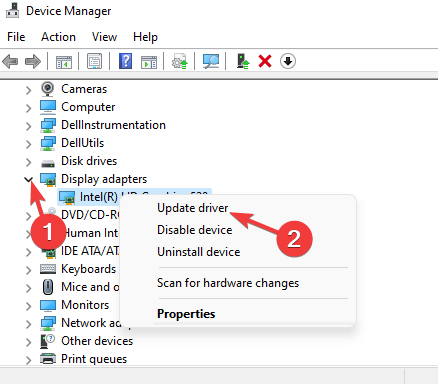
The find Display adapters option and click to expand it, then right-click your GPU adapter and select Update driver.
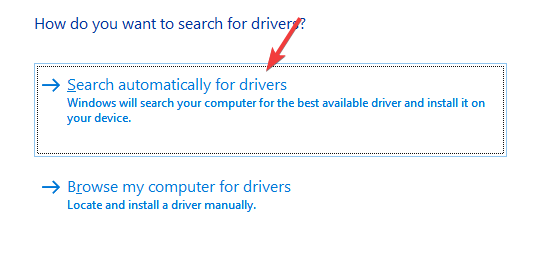
After that, select the first option, Search automatically for drivers.
If you already visited the manufacturer’s website and you downloaded the correct driver, you can also select the second option and indicate the location of the driver when prompted.
If Windows doesn’t find an update or a solution to regain your missing FPS, you can try using a third-party software that specializes in driver updates.
Since one outdated driver can really mess up your computer efficiency, a tool we use is Outbyte Driver Updater. Created to optimize and repair your computer, will verify every driver you have and find the latest update. Not only, but it will also repair any damaged drivers or replace them if needed.
Specifically created for this, if it solves the low FPS in Red Dead Redemption 2, it might even give you some extra in-game performance because all your drivers will be up to date and your system will be optimized.
Outbyte Driver Updater
Gain the missing FPS by maintaining your system updated and optimized.
This is also applicable for low FPS issues on Red Dead Redemption 2 with an RTX 3070.
3. Change power plan
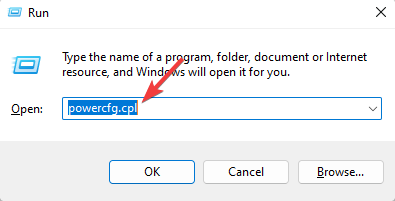
Press the Win + R keys together to launch the Run console.
Type powercgf.cpl in the search bar and hit Enter.
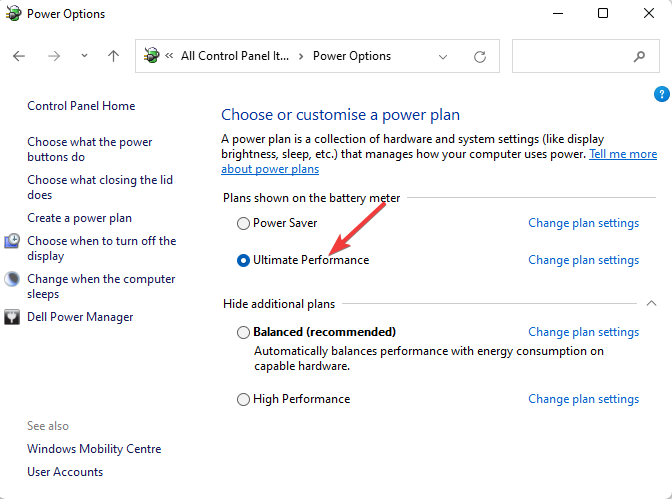
This will open the Power Options window in Control Panel. Here, select Ultimate Performance.
This should help you fix the low FPS issue on Red Dead Redemption 2 and make it stable.
4. Change graphics card settings
If you are using Nvidia’s 10 and 20 series and the similar AMD equivalents, you can switch off certain settings and modify others to run RDR2 smoothly on a PC as below:
Far Shadow Quality: Low
Long Shadows: off
Shadow Quality: Medium or Low
MSAA: off
FXAA: 4x or 8x
Unlocked Volumetric Raymarch Resolution: off
But, if you are using a lower model of the Nvidia and AMD graphics cards, then to get the best performance, try running the game on 720p and low settings.
So, if you are facing a low FPS issue on Red Dead Redemption 2 in towns, changing the graphics card settings can help boost the frames.
How can I make RDR2 run smoother on a PC?
While the above solutions will help you fix the low FPS issue on Red Dead Redemption 2, they will also make the RDR2 run smoother on your PC.
However, you can also enhance the visual settings as explained below:
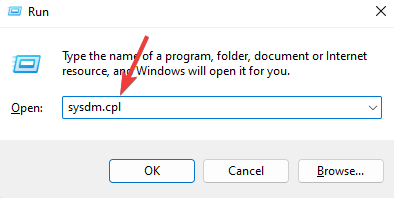
Press the Win + R keys at the same time to open the Run console.
In the search box, type sysdm.cpl and hit Enter.
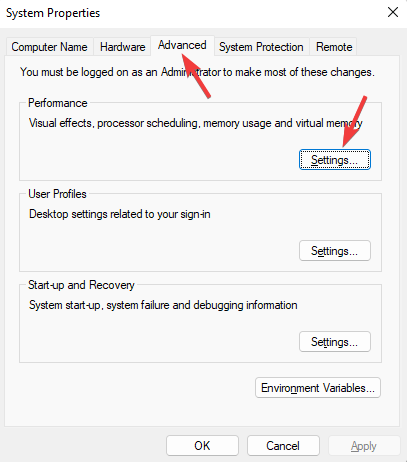
Now, in the System Properties dialog, select the Advanced tab.
Under Performance, click on Settings.
This will open the Performance Options window.
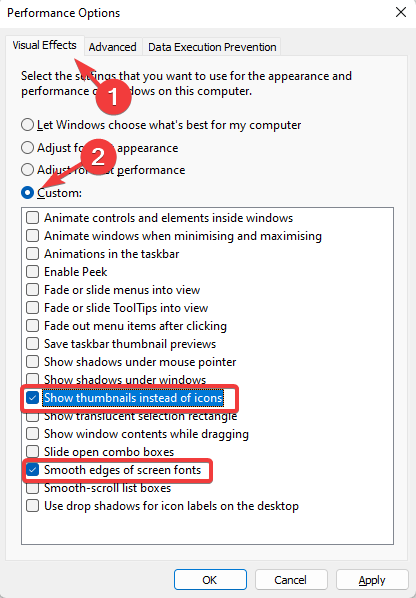
Now, under Visual Effects, select Custom and check only the options, Show Thumbnails instead of Icons, and Smooth Edges of Screen Fonts.
This method is also applicable in case you face a low FPS issue with RDR2 after an update.
Does the RAM affect FPS?
RAM indeed helps to increase the FPS to a certain extent because it increases the overall speed of your computer by increasing its storage capacity.
Also, a lot of games only use up a specific amount of RAM, so if you have a higher RAM capacity, the rest will be of no use.
For example, if you have 8GB RAM, and your game is 4GB, the remaining 4GB will be a waste (that is, if you specifically upgraded the RAM for the game).
While RAM is important for the FPS, it’s also important to have a faster GPU, but if not, then your game FPS may still suffer.
Some users prefer using an offline installer for Microsoft Edge since it allows them to install the browser without having an active Internet connection. In today’s guide, we’ll show you how to get it on your PC.
Twitch is a streaming service based in the USA that mainly focuses on streaming all kinds of videos. This includes streaming gaming videos.
Most users can upload their videos while playing the game. Some just use Twitch to view others playing the games. The subsidiary of Amazon, called Twitch Interactive, operates this Twitch service.
Many Twitch users have experienced an issue while trying to access the Twitch service with an error code of 788078d4 on their PC or on a console like Xbox. Some users are also facing issues with browsing videos on Twitch in Chrome or Firefox.
What does error 788078d4 mean on Twitch?
Users who are facing the error code 788078d4 on their PC or Xbox, have trouble accessing the videos. This error code on Twitch means that users are unable to browse and stream any videos.
Why do I keep getting error 788078d4 on Twitch?
We researched a lot about Twitch’s error code and found a few reasons why this is happening, which are listed below:
An issue with the Twitch app: The problem might be with the Twitch app, which could be outdated. The Twitch app might have been interrupted while installing it on the system.
Disabled 2FA (2 Factor-Authentication): Twitch actually ensures that all the users have enabled the 2FA process to secure the user accounts from getting hacked.
Unverified Twitch account: The Twitch service identifies all the accounts that are unverified and throws an error code of 788078d4 which stops the users from streaming the videos.
Status of Twitch Server: Sometimes the Twitch server receives a load of requests at a time. This might have caused the Twitch server to go down.
How do I fix error code 788078d4 on Twitch?
1. Uninstall and install the Twitch Studio app
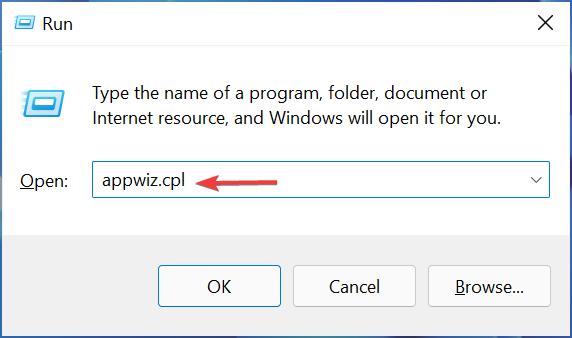
Open the Run command box by pressing the Windows and R keys together.
Type appwiz.cpl in the run box and press the Enter key.
In the Programs and Features window, locate the Twitch Studio from the list of programs.
Select the Twitch Studio and click Uninstall which is on the top of the programs list.
Follow all the onscreen instructions to successfully uninstall the Twitch Studio app.
After it is uninstalled, close the Programs and Features window.
Click Download under Desktop apps to download the Twitch Studio beta app.
At last, click Download Now to download the Twitch Studio Beta app.
Go to the Downloads folder on the system and double-click on the Twitch studio setup file.
Finish installing the Twitch Studio app on the system successfully by performing the onscreen instructions.
2. Verify your Twitch account
Open the Twitch website and log in with your Twitch account credentials.
Go to the account icon on the top right corner of the Twitch webpage.
Select Settings from the list and this opens the settings webpage.
Click the Security and Privacy tab on top and see the Contact section under it.
If the account is unverified, click Resend Email on the right side.
This pops up a verification window.
Now go to your email inbox and open the mail sent by Twitch.
Copy the verification code and enter it into the verification window.
After the verification is finished, it will show Verified in the Contact section of the Security and Privacy tab.
Check if the user can stream the videos without any errors.
3. Enable 2FA (2 Factor-Authentication)
Go to the Twitch webpage and sign in with your Twitch account details.
Open the Settings page by clicking on the user profile icon on the top right and then clicking Settings from the list.
Click the Security and Privacy tab and scroll down to the Security section.
Click Set Up Two-Factor Authentication to start the enabling process.
In the Two-Factor Authentication pop-up window, click Enable 2FA.
Follow all the onscreen instructions from here and complete the procedure.
This enables the 2FA (2 Factor-Authentication) for your Twitch account.
Some Twitch users found out that this problem might be caused by an internet connection issue. There might be some issues with the Twitch server. So, please wait for a few hours if the server is down.
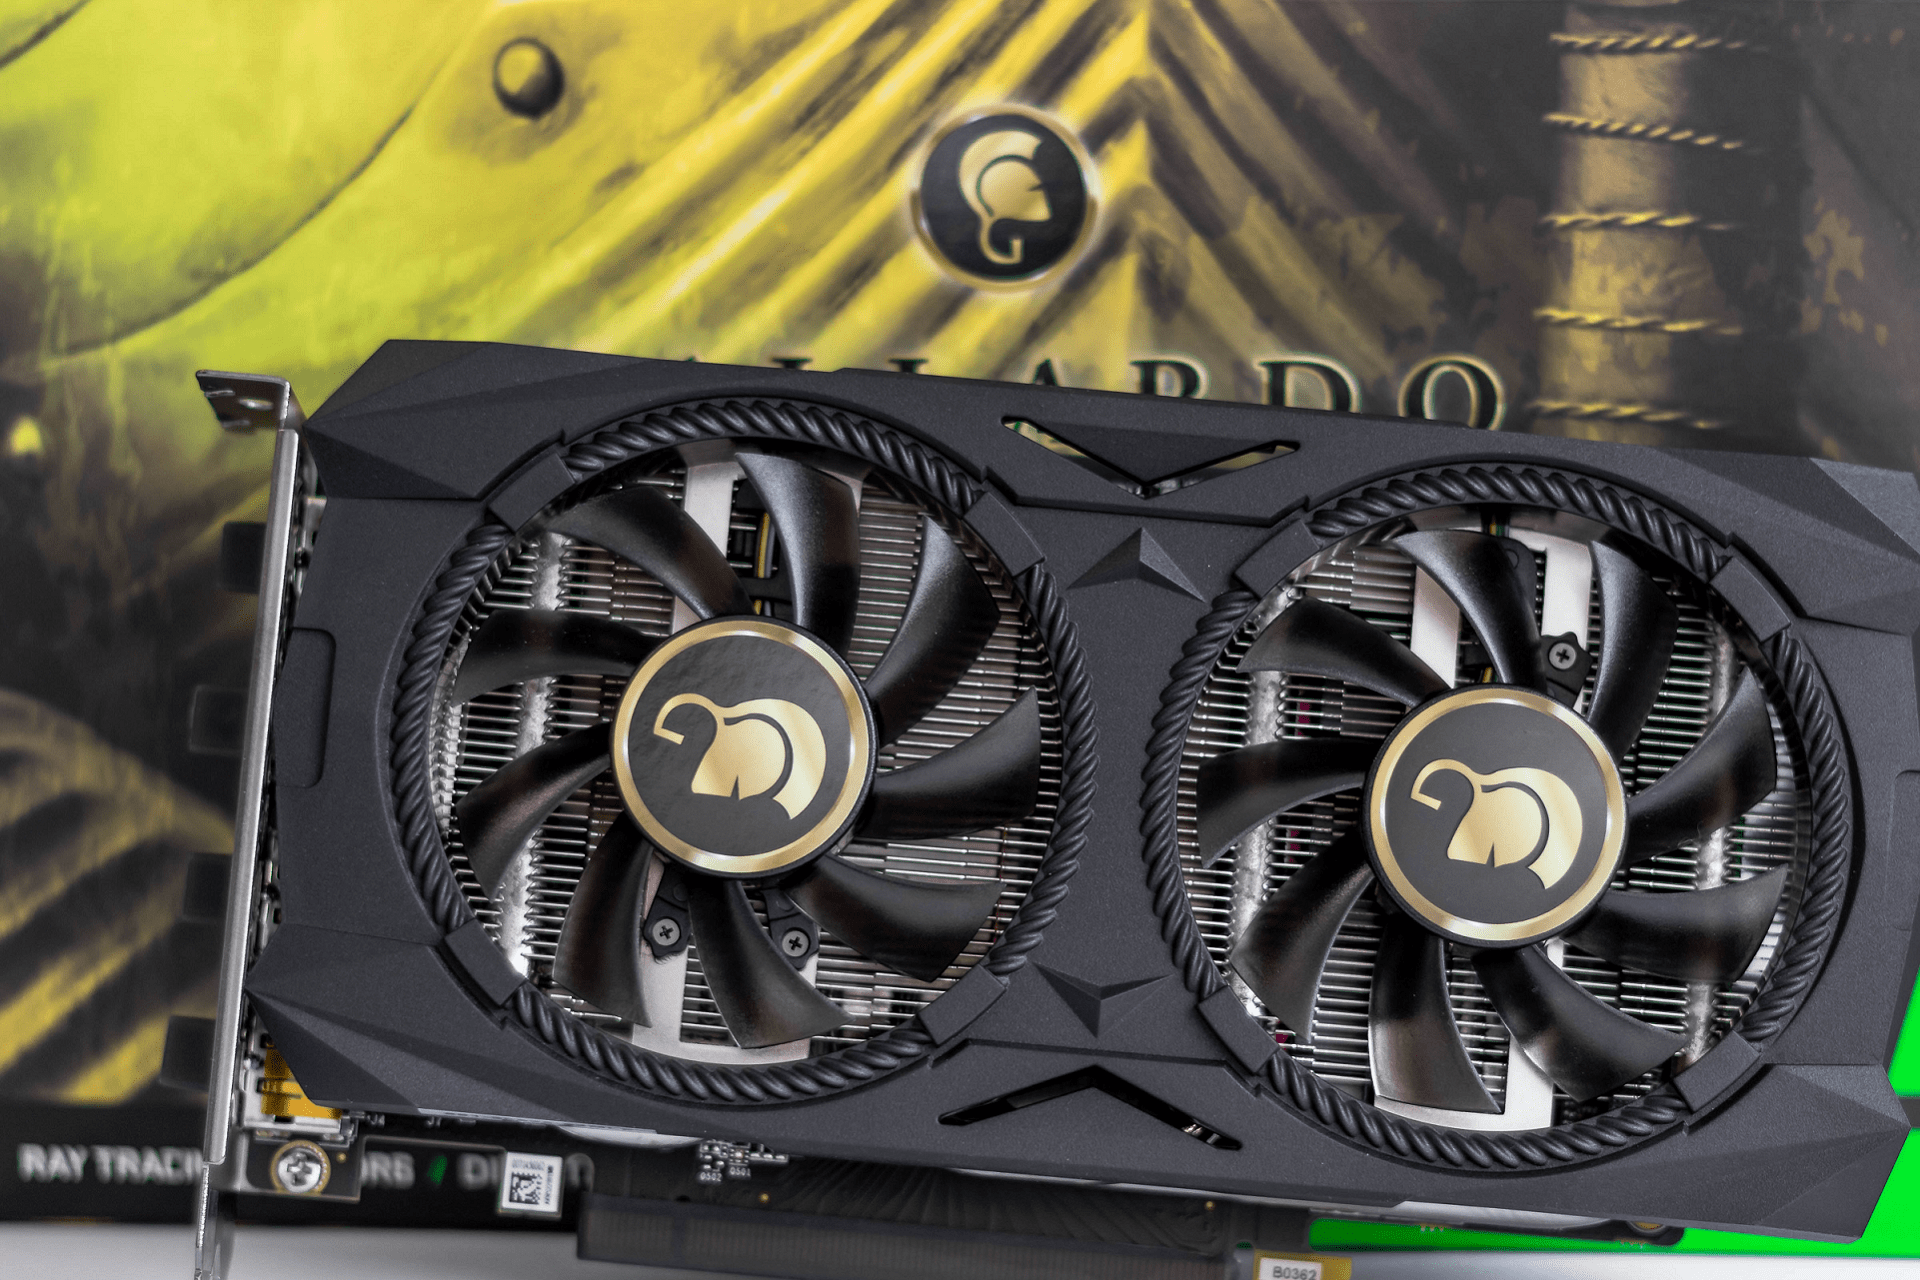
Your Windows PC will get hot when you play games on it. For that reason, GPUs (graphical processing units otherwise known as graphics cards) have fans to cool down PCs.
Therefore, your GPU’s fans are important to temperature control on your PC. Correctly working GPU fans ensure PCs don’t overheat.
Some users have reported an issue whereby graphics cards’ fans repeatedly start and then stop spinning every few seconds.
One of our readers told us that the GPU fan of his PC started spinning and stopping repeatedly and erratically when he was browsing the Internet.
Have you noticed the same thing happening on your Windows 11/10 desktop PC? If so, this is how you can fix GPU fans that repeatedly start and stop spinning.
Why does my GPU fan stop spinning?
Users have said loose RAM sticks can cause the fans to repeatedly start and then stop spinning. Those users resolved the issue by removing and reinserting their RAM modules.
A faulty or loose CMOS battery can also cause this GPU fan issue. Some users have resolved the error by removing the CMOS batteries from their PCs and reinserting them.
Are GPU fans always supposed to spin?
The fans only start spinning when GPUs reach certain temperatures. The temperature threshold for fans to start spinning can vary, but 50-55 degrees Celsius is a common mark.
Nor is it always entirely unusual for GPU fans to start and then stop spinning. GPU fans usually spin and then stop on startup soon after turning on a PC.
How do I fix GPU fans that spin and then stop?
1. Run the Hardware and devices troubleshooter
To view the search tool, press S while holding the Windows key.
Input the CMD search phrase, and select Command Prompt in the search tool.
Bring up the hardware troubleshooter by inputting the following command and pressing Enter: msdt.exe -id DeviceDiagnostic
Click Advanced, then select Apply repairs automatically in the troubleshooter’s window.
Then click Next, and select Apply this fix for any proposed resolutions.
2. Update the driver for your GPU
A computer cannot handle video cards, computer programs, sound cards, or other hardware; they must be managed by a driver. You may manually update drivers if you are completely familiar with the drivers your PC requires, but the optimal result is when using software designed for this purpose.
However, there are other methods for updating graphics drivers. Have a look at our how to update the graphics drivers guide for further details.
To update outdated or faulty GPU drivers, you can utilize Outbyte Driver Updater. This tool will scan your PC and display device drivers that need updating. Then you can select to update your graphics driver from there.
A solution like Outbyte Driver Updater not only downloads and installs drivers, but also manages them by troubleshooting, backing up, and restoring them.
Outbyte Driver Updater
Extensive library of drivers for any PC, with troubleshooting and updating options.
Do not perform this step if opening the case voids the warranty of your PC.
Open your desktop’s case (PC must be turned off and unplugged first). Some desktops have covers you can slide off, but you may need to unscrew the casing to open it.
Look for a small, lithium CMOS battery on the motherboard like the one shown directly below.
Remove the CMOS battery from the PC.
Then fully reinsert the battery to ensure it’s not loose in any way.
If your PC’s system time clock is always a bit inaccurate, you may need to replace a faulty CMOS battery.
Make sure your graphics card’s cable connections are fully plugged in. To do that, you’ll need to open up the desktop PC.
Then check the GPU’s PCIe cables aren’t loose in any way. Check all GPU cables are fully pushed in.
5. Reinstall and clean the RAM modules
Make sure your PC is turned off, and remove the power cable.
Open the PC’s case to look inside.
Remove the RAM modules.
Clean the RAM sticks by blowing the dust away. You can also clean the contacts on the RAM sticks with moistened (damp) cotton swab.
Leave the RAM modules out to fully dry if you clean them with moistened cotton.
Then fully reinsert the RAM sticks into the PC.
Close the PC’s case and plug it in.
How do I know if my GPU is failing?
Graphical issues and BSOD errors are tell-tell signs of a failing GPU. Do you often see screen tearing, strange coloring, or visual stuttering when playing games? If so, there could be something up with your PC’s GPU.
Can dust affect graphics cards?
Yes, lots of dust can have an impact on a graphics card’s cooling. GPU fans can even stop spinning when clogged with dust. So, we also recommend cleaning your graphics card’s fans.
Your PC may overheat when its GPU fans aren’t working right. So, users should not overlook any issue with their graphics cards’ fans starting and stopping repetitively.
Users have resolved that issue with resolutions outlined in this guide. If those resolutions don’t fix your GPU’s fans, consider sending your PC to a reputable computer repair service.
For any other questions or suggestions, don’t hesitate to use our comments section below.
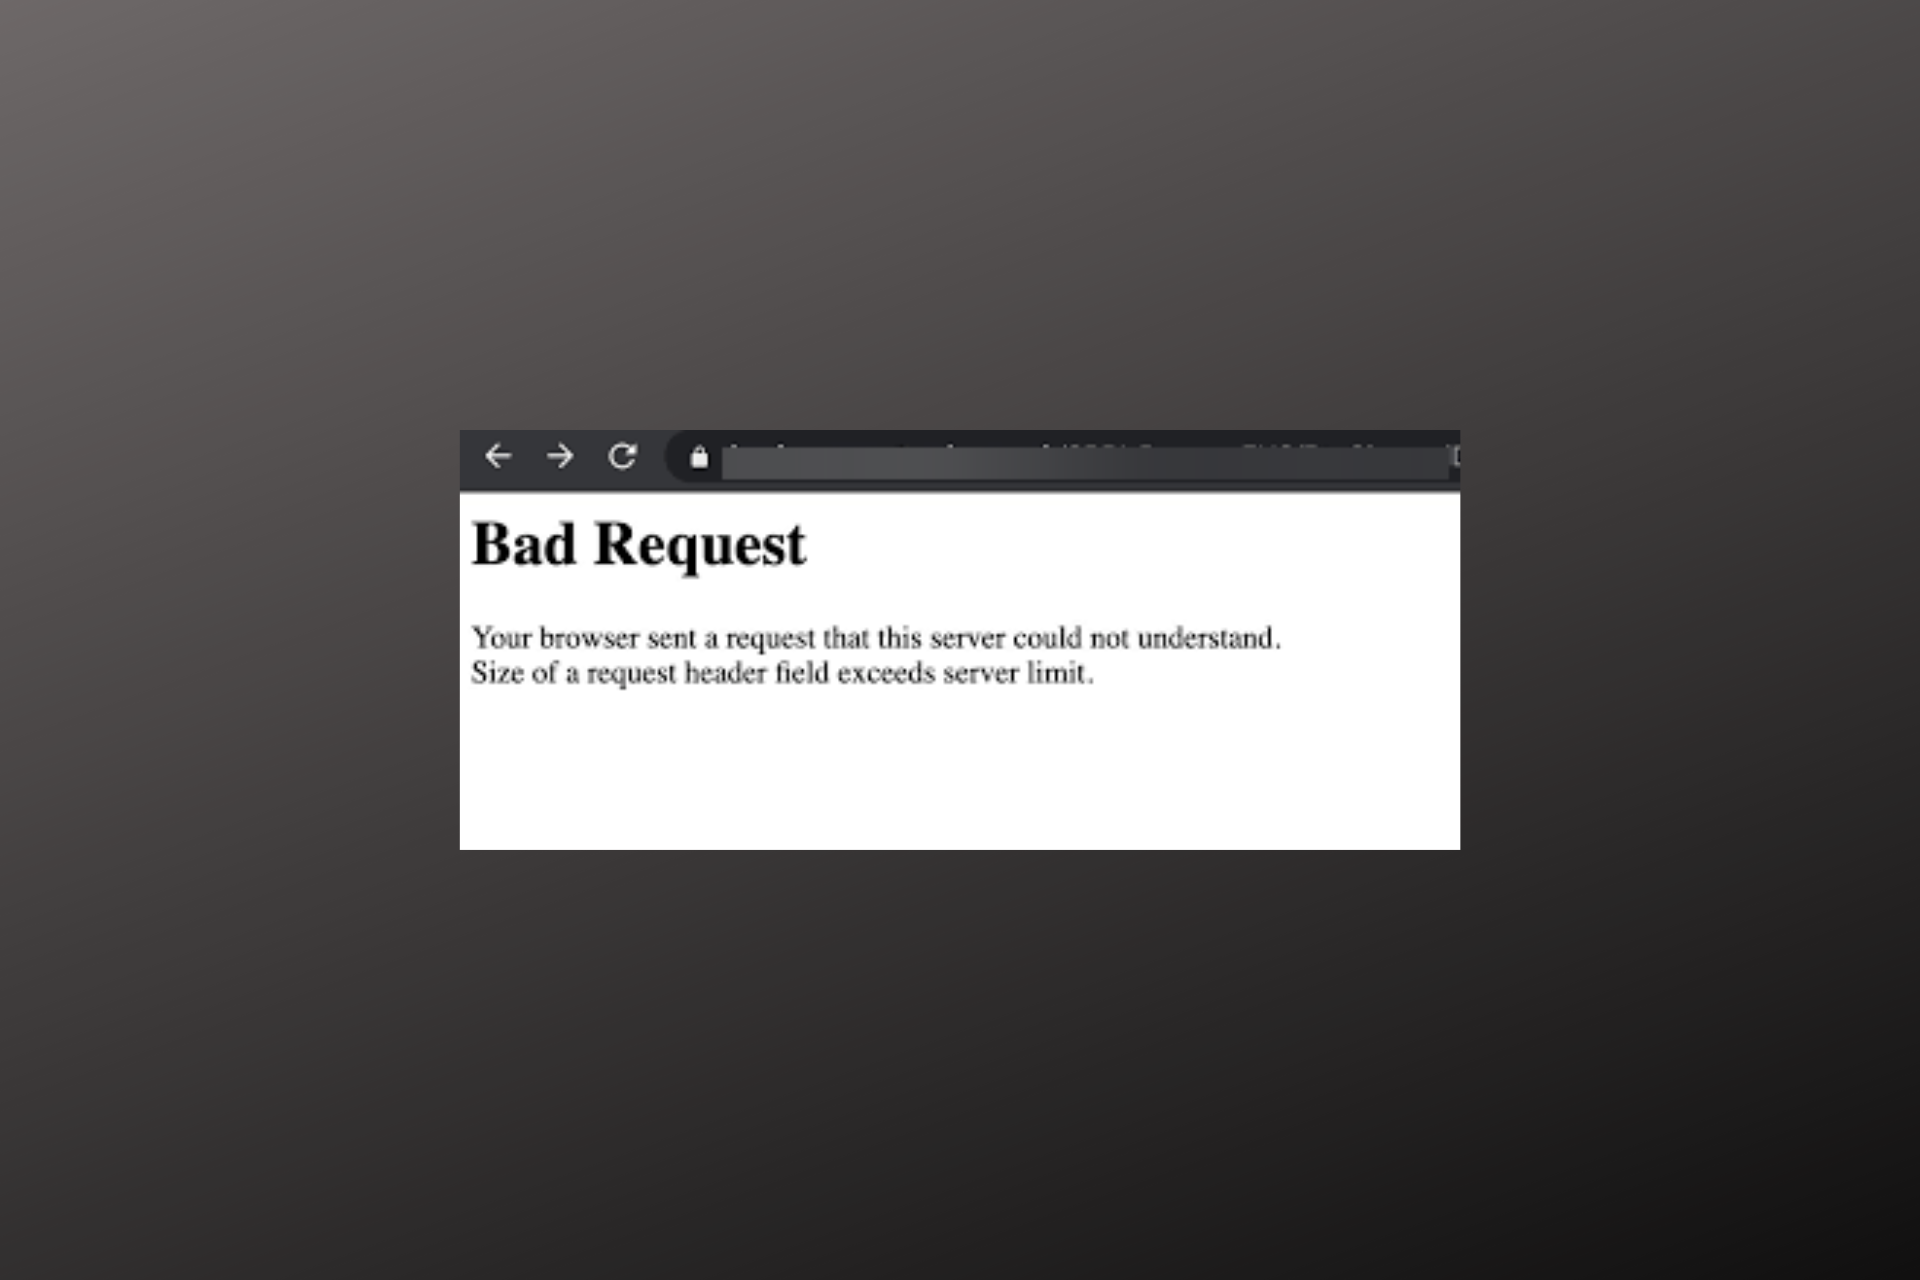
Did you just see the error message, your browser sent a request that this server could not understand. Size of a request header field exceeds the server limit?
Nothing to worry about since this is a common issue, and it often shows up when the server recognizes this as a generic client error.
Fortunately, we have a few workarounds for you that will help you to get rid of the Bad Request 400 error on your browsers.
Why does my browser keep saying bad requests?
There are quite a few reasons why you may encounter the 400 Bad Request error that is not specific to any particular browser or OS (operating system), such as:
Incorrectly typed URL, malformed syntax, or a URL with forbidden characters
Corrupted browser cache & cookies
DNS data stored locally is not in sync with the registered DNS information
File size too large
Server-side issues
Before you proceed, make sure you check the submitted URL for any syntax error or if there’s an extra character like a % symbol, etc.
For a wrong URL, you can use a free online tool like the URL Decoder/Encoder to correct the domain name.
Below, we have listed some of the potential solutions that can help you fix the issue if the size of a request header field exceeds the server limit on Chrome/Edge/Safari/Firefox.
Quick Tip:
Even though some of the fixes work perfectly, you might encounter a situation where your only option is to switch to another browser like Opera One.
With Opera One, you ensure your data privacy with a free VPN and also surf the web worry-free with an Ad blocker and VPN. Besides, with integrated messaging apps and AI you will never be out of the loop.
Opera One
A lightweight and simple browser that features all the user needs.
How do you fix a bad request your browser sent a request that this server could not understand?
1. Remove browser cookies
If using Chrome, launch the browser and click on the three dots on the top right.
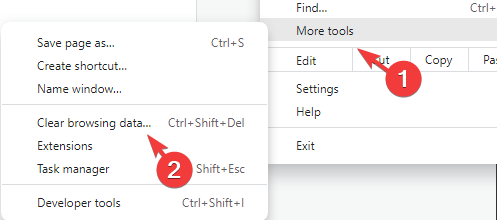
Click on More tools in the menu and then select Clear browsing data.
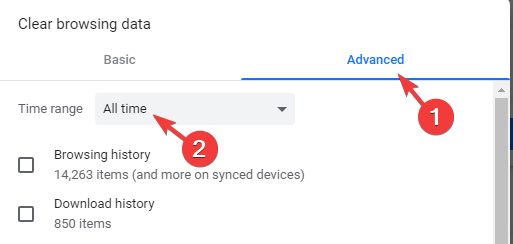
Next, go to the Advanced tab and select All time from the drop-down next to the Time range.
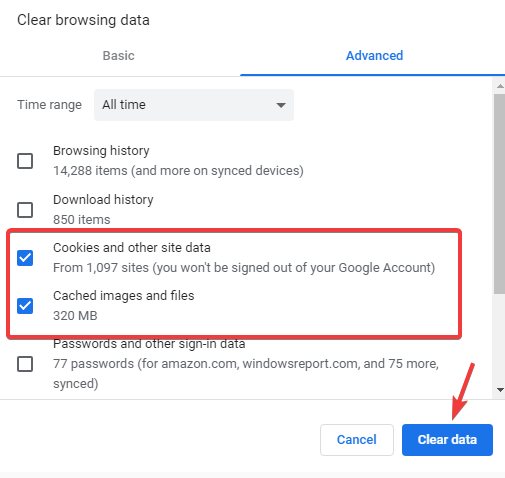
Now, check the box next to Cookies and other site data, and Cached images and files.
Press the Clear data button below.
Now, restart Chrome and visit the problem website. You should not encounterthe error, 400 bad request your browser sent a request that this server could not understand again.
You can also remove cookies for Firefox, Edge, or Safari in a similar manner.
2. Disable the browser extensions
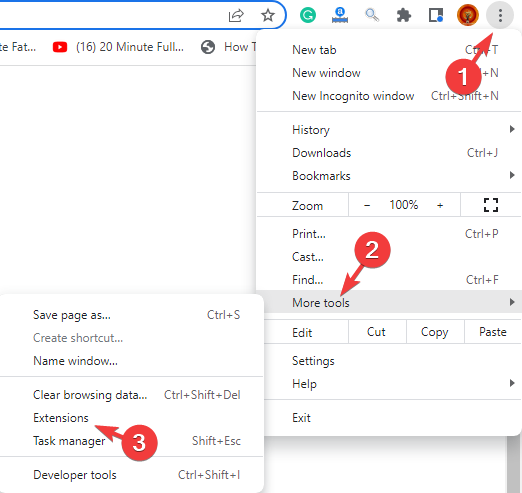
Open the browser you are using, for example, Chrome, and click on the three dots on the upper right.
Next, click on More tools and then select Extensions.
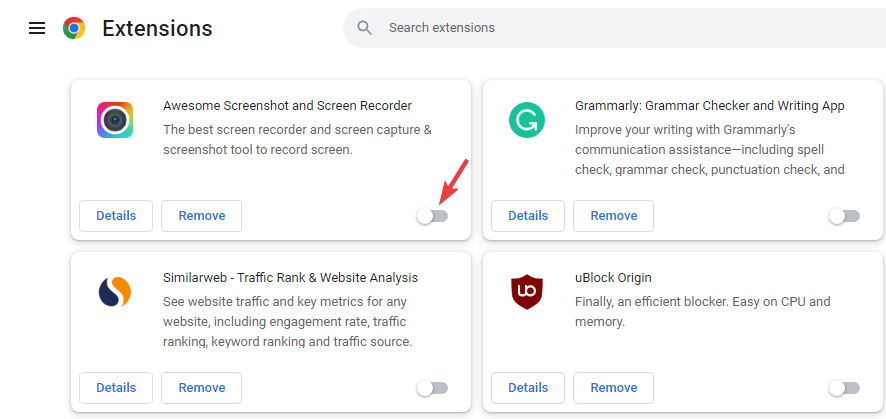
In the Chrome extensions window, disable all extensions.
Now, relaunch the browser and check if the Bad Request error is resolved.
3. Flush the DNS cache
3.1 Clear DNS cache for Windows
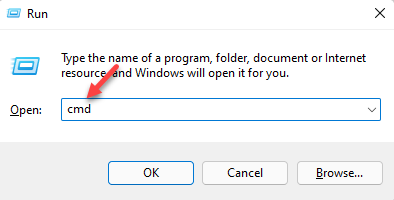
Press the Win + R keys simultaneously to launch the Run console.
Type cmd and press the Ctrl + Shift + Enter keys together to open the elevated Command Prompt window.
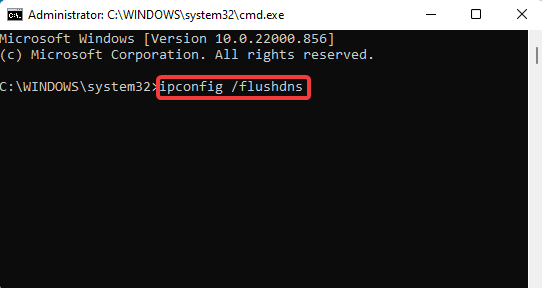
Now, run the below command in the Command Prompt (Admin) window and hit Enter: ipconfig /flushdns
Once you see the success message, exit Command Prompt and check the website if the error still appears. This method is also applicable to all other browsers.
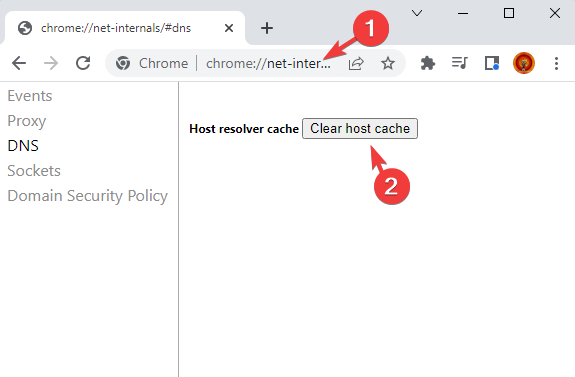
If using Google Chrome, navigate to the below path: chrome://net-internals/#dns
In the new page that opens, on the right, click on Clear host cache next to Host resolver cache.
Likewise, you can remove the cache for other browsers also.
Once done, try visiting the problem website, and the error message, your browser sent a request that this server could not understand. Size of a request header field that exceeds server limit should not show again.
What does the size of a request header field exceeding the server limit mean?
Usually, a very large Cookie triggers this error, and so the request header field exceeds the decided limit for the Web Server.
In this case, since you are on the client side (website/browser), simply clearing the cache of your web browser should fix the issue.
At the same time, check that the file size does not exceed the server file size limit, and trigger the size of a request header field exceeds server limit error on Chrome/Edge/Safari/Firefox.
But if you encounter an error like this website is not accessible, then you can follow our detailed guide for solutions.
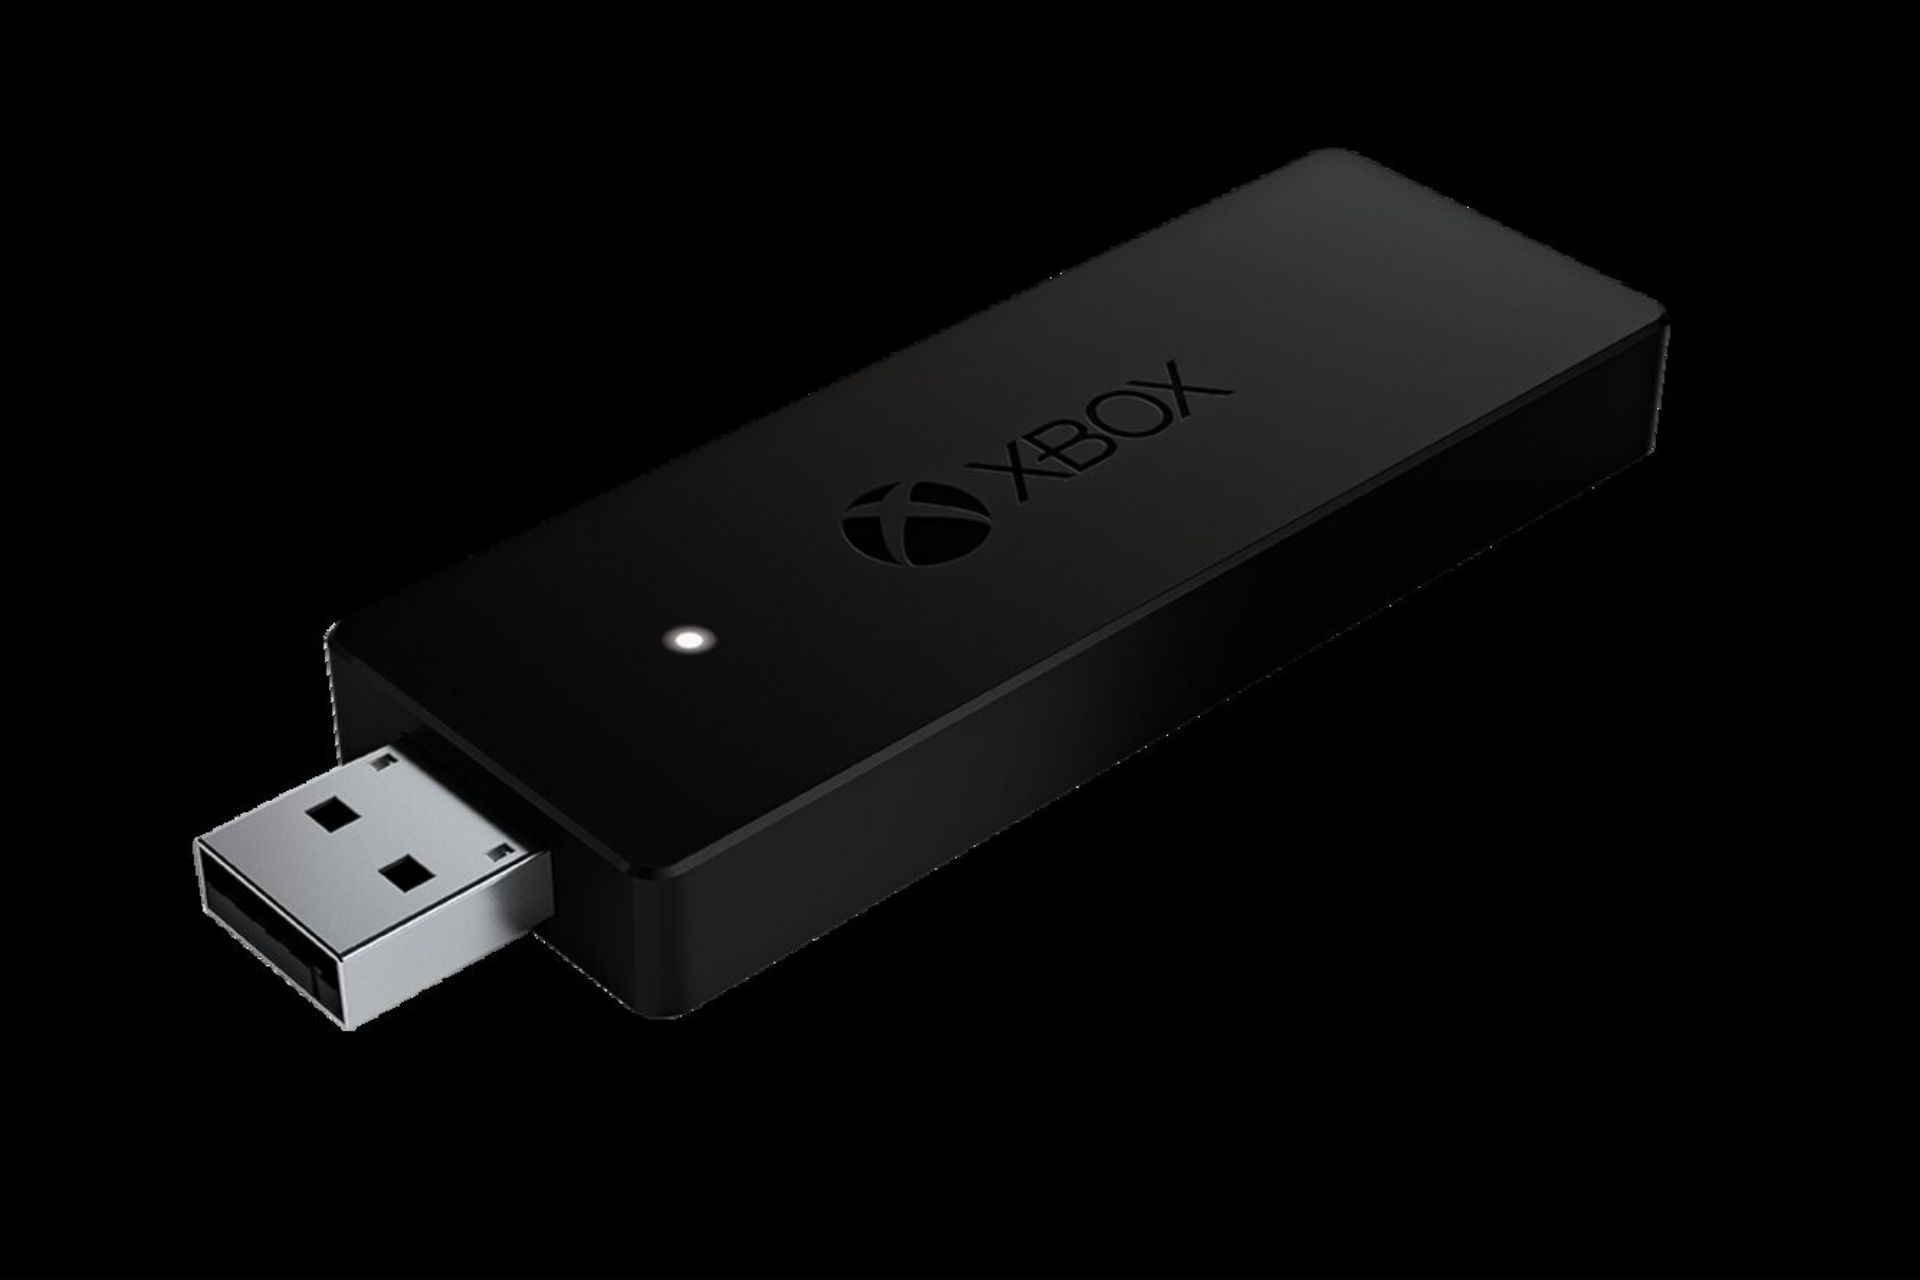
However, the Xbox wireless adapter allows you to play PC games on Windows 11 with Xbox wireless controllers. A typical issue users report is the box wireless adapter Windows 11 not working, which means users cannot connect with controllers.
The wireless adapter serves as a connecting point between your computer and your controllers. However, users complain that using the Xbox wireless adapter with Windows 11 is difficult.
Fortunately, there are ways around the Xbox adapter issues. Hence, we’ll discuss setting up your Xbox wireless adapter on Windows 11.
Is the Xbox Wireless Adapter compatible with Windows 11?
The release of Windows 11 brought many new features, including improved gaming features for the Xbox. However, the Xbox wireless adapter driver supports Windows 11 and works appropriately. However, despite its compatibility, most users don’t know how to set it up.
How do I connect my Xbox Wireless Adapter to my Windows 11 PC?
Power on your computer.
Ensure your computer is updated and runs on the latest Windows 11.
Click on the Wi-Fi button in the bottom right corner of the screen and connect to the internet.
Plug in the Xbox wireless adapter into a USB 2.0/3.0 port.
Windows will automatically install the adapter because the drivers needed for the adapter are inbuilt on Windows 10/11.
After the installation, you can connect up to 8 Xbox controllers simultaneously without difficulties. Note that the procedure is different for Windows devices below Windows 10/11.
Why can’t I connect my Xbox controller to my Windows 11 PC?
Outdated or incompatible controller driver: It can be challenging to connect the Xbox controller to Windows 11 if the controller drivers are obsolete or incompatible with Windows 11. However, updating the Xbox controller drivers on your computer will help it connect smoothly to controllers. Also, downloading and installing Xbox controller drivers compatible with Windows 11 can help fix the problem.
Corrupt Xbox Accessory App: When the Xbox accessory app is corrupt or outdated, it can cause issues with the connection between the computer and the controller. The Xbox accessory app is responsible for smoothly running the controller on Windows 11.
Faulty computer booting: Another thing that can prevent the controller from connecting with a Windows 11 PC is a faulty boot. It occurs if the computer runs into some issues while powering up. The problems can affect several components of the computer.
However, there are many Xbox controllers that you can buy to enjoy your gaming activities. So, we recommend you check our article about the best Xbox controllers you can buy. But before you buy one, try calibrating the Xbox controller to eliminate any performance issues.
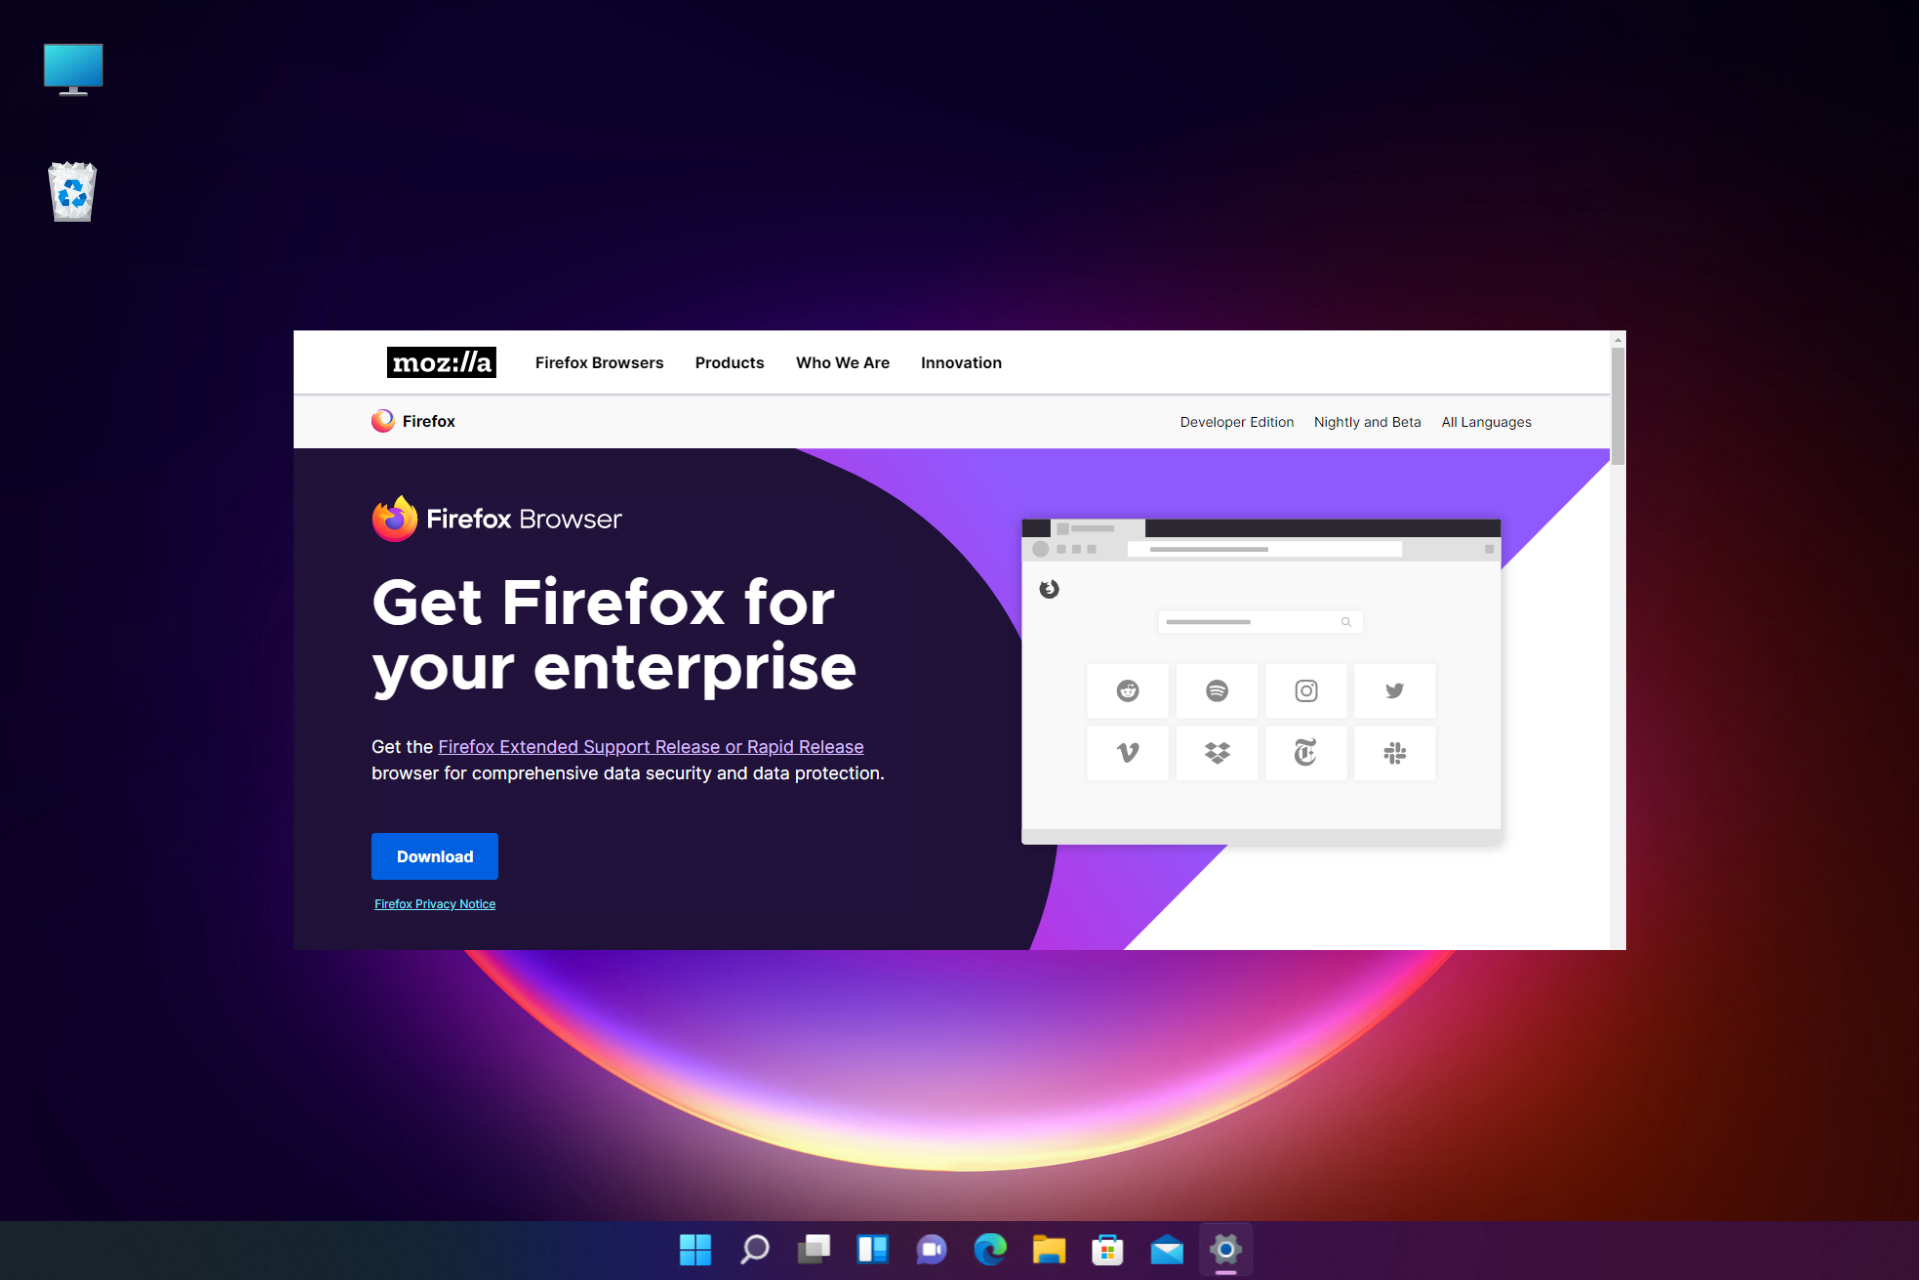
If you want to download and install Firefox for your enterprise on Windows 10 & 11 OS, this post is just for you, at the right time.
You can choose to get either the Rapid release or the Extended Support Release (ESR) version. However, you can be assured of its excellent data security and data protection.
Before we move on to the download process, let’s understand a little more about Firefox for the enterprise.
What is Firefox for Enterprise?
Firefox Enterprise offers multiple software solutions developed by Mozilla and each of these serves individual Enterprise needs.
When you club all of these software solutions together, they make up Firefox Enterprise.
You can either select the Firefox Rapid Release channel (most popular) or the Firefox Extended Support Release channel (ESR) based on your requirement.
Is Firefox free for Enterprise?
While the corporation offers its enterprise customers a free basic version of Firefox (including the release and ESR), users also have an option to pay $10 per installation for a premium service.
The non-profit organization, Mozilla started offering this new premium service for enterprise customers in 2019 starting at $10 per user.
However, the status of the premium service for enterprise customers is not currently known.
What is the latest version of Mozilla Firefox ESR?
The latest version of Firefox ESR is 102.1.0esr, which was first offered to ESR channel users on July 26, 2022.
You can download the latest versions for Windows 32-bit and 64-bit (MSI), Windows ARM64/AArch64, macOS, and also for Linux 32/64 bit.
Quick Tip:
Opera One has partnered with Google to help you grow your multi-location enterprise. If you simply want to use the web app, the free Opera One browser has a set of integrated sidebar utilities for easy access.
Opera for Business provides management services, social media management, and a customized set of advertising services across the inventory of Opera One, Google, and Facebook.
Opera One
Try Opera for Business, or use the web app for a more organized workspace, workflow, and user profiles.
With Firefox ESR, you can now find out compatibility issues with 3rd party applications, log in to your Microsoft work or school account with single sign-on, and more.
Now that you have successfully downloaded and installed the Firefox Enterprise version, you can now enjoy all of its awesome features along with an automatic upgrade to the next version.
Today we’ll show you how to fix error ELI-900 that shows up while you try to connect to the Spectrum TV app. The full error reads We’re sorry, something didn’t work quite right. please try again later. reference code: eli-9001.
It could very much be a Spectrum server issue. But it might also happen when you enter a wrong password or have an unstable internet connection. Follow the steps below to get it fixed fast:
How do I fix Spectrum Error ELI-9000?
1. Check your Internet connection
Therefore, we suggest checking your Internet connection by first restarting the Wi-Fi router and then reconnecting your device to the Wi-Fi.
If you are using an Ethernet cable connection, unplug the cable and after waiting for a few seconds, plug it back again.
Even after this if you are facing any connectivity issues, please contact your Internet service provider and check if there is an issue on their part.
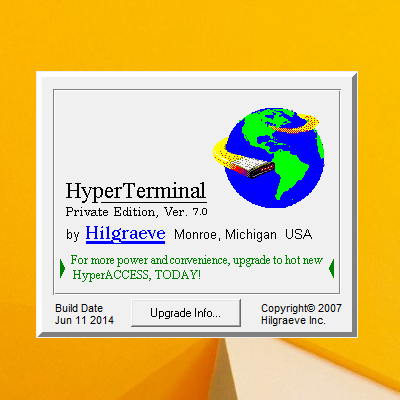
Even though Microsoft ended support for HyperTerminal a long time ago, Hilgraeve is still making the app.
In today’s guide, we’ll show you how to download and install HyperTerminal on your Windows 10 or 11 PC.
Let’s get right to it.
How do I download HyperTerminal?
1. Get the HyperTerminal file from Windows XP
If you have access to an active Windows XP PC, you can find the files as listed below:
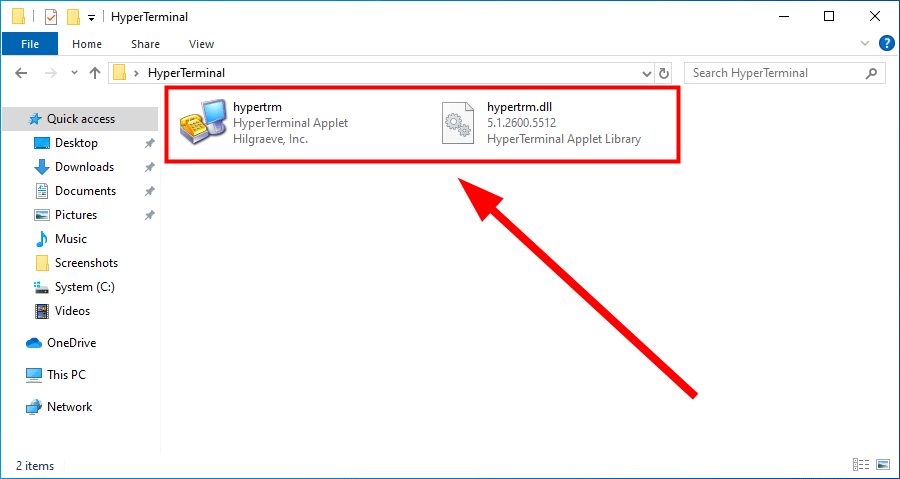
hypertrm.exe: If you have access to an active Windows XP installation, you could find this executable file inside the below-mentioned folder address: C:\Program Files\Windows NT\
hypertrm.dll: This dynamic link library file can be found inside the below folder path: C:\WINDOWS\system32\
Also, if you have a CD that contains Windows XP installation files, this would do the trick. All you need to do is copy two important HyperTerminal files and paste them on whichever version of Windows OS you are running on your target PC.
Once you get to these two files, copy and pastethem into a new folder on your Windows 7,10, or 11 PC.
You need to ensure that both files are inside the same location and folder.
After you have copied, all you need to do is run the executable file and enjoy.
You can also go in for the HyperTerminal Private Edition, which is the latest iteration of the program by the developers, Hillgraeve, themselves.
It will cost you $69.99. Also, you can get the HyperTerminal Private Edition free trial version in order to check if that is what you are looking for or if you would like to stick with the Windows XP version.
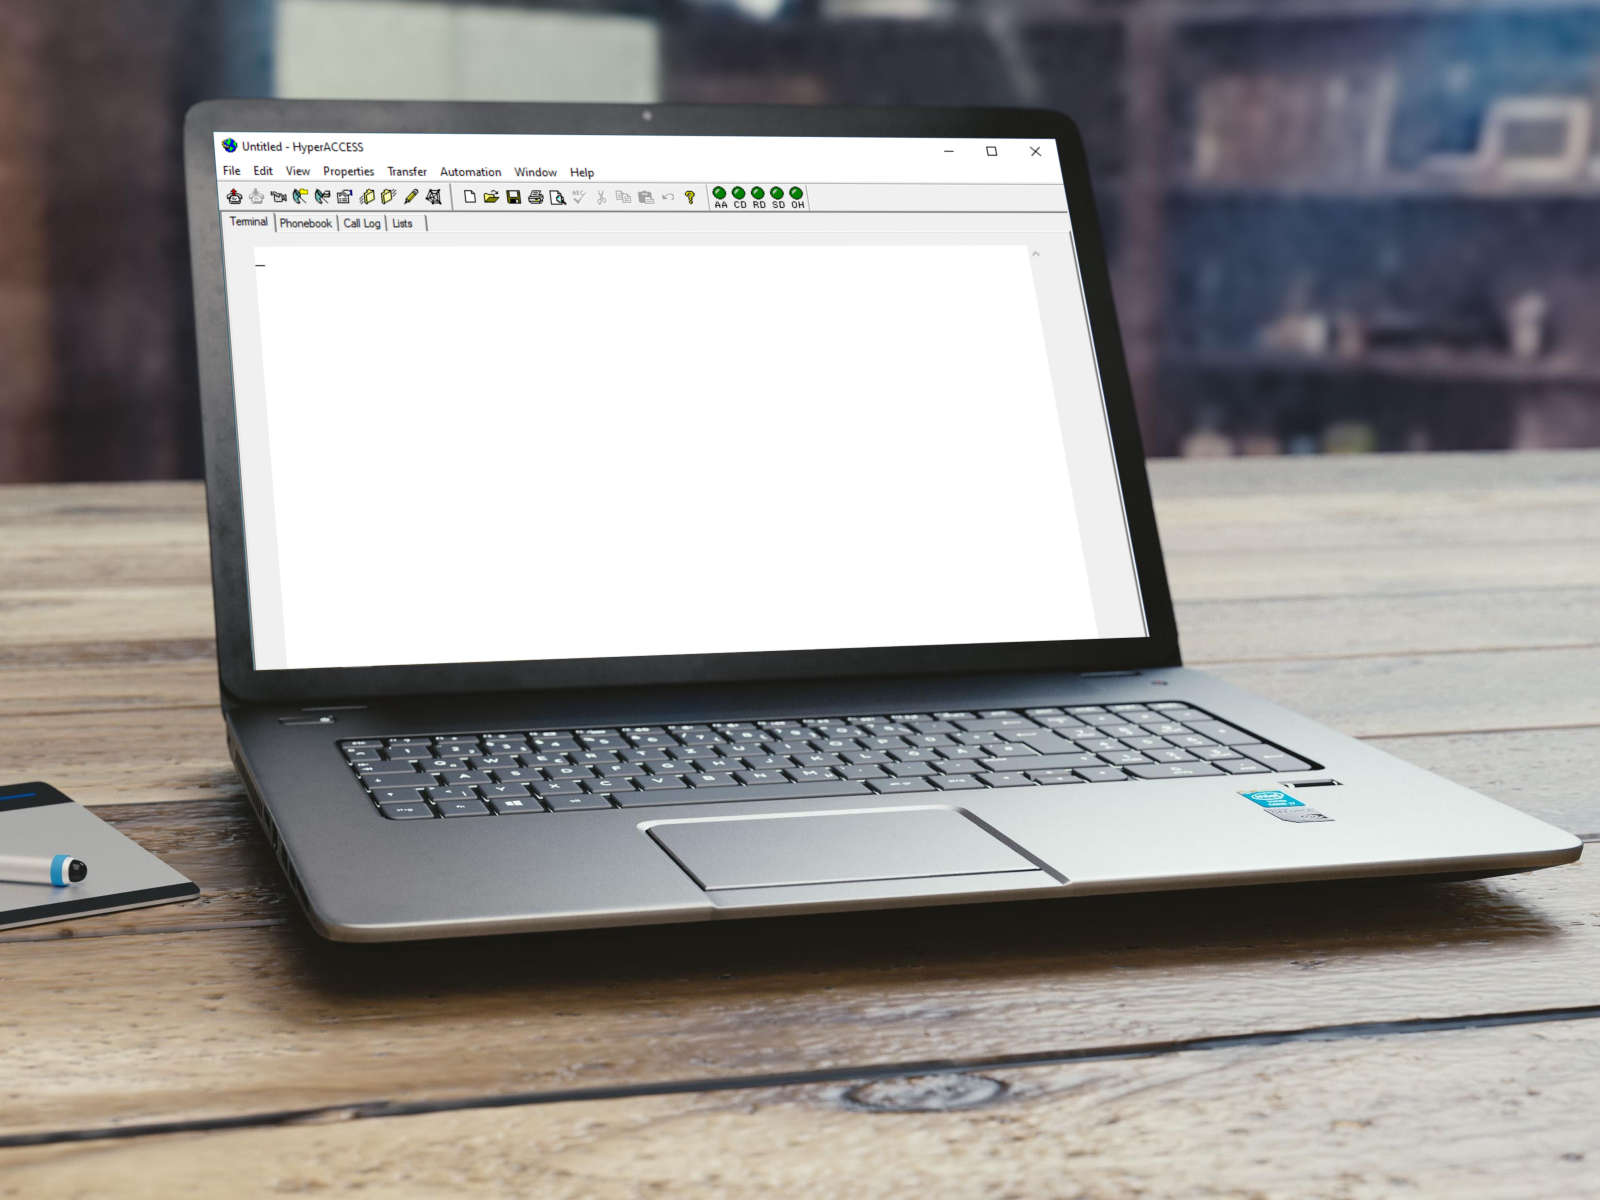
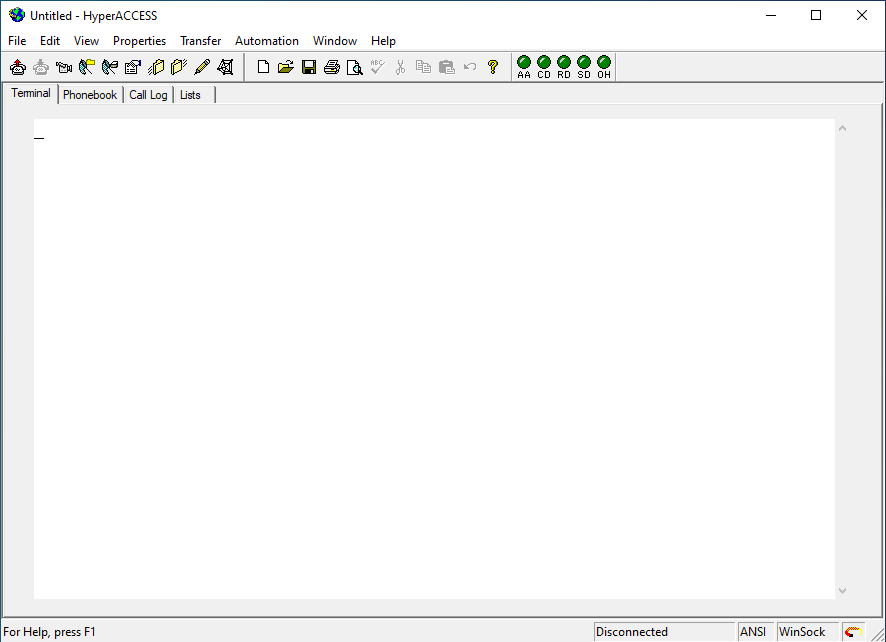
You can also download the advanced version or successor to HyperTerminal, the HyperACCESS from the official website.
It has a very steep price of $169.99. HyperACCESS contains some powerful features, such as additional terminal emulators, customization, and robust scripting capabilities.
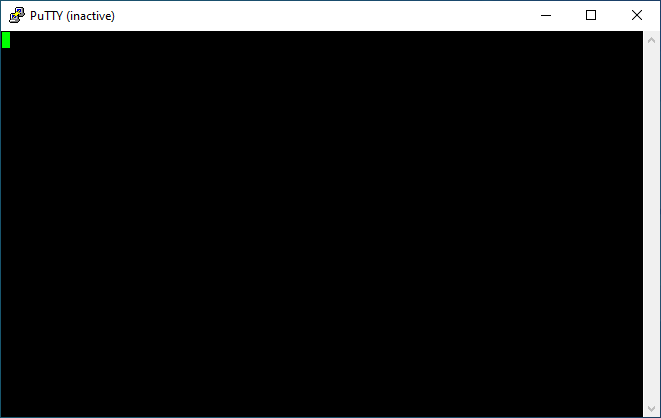
If you do not want to spend hundreds of dollars to download HyperTerminal on Windows 10, you can go for PuTTY.
PuTTY is the best alternative to HyperTerminal on modern PCs. It is free and open-source, which brings the combination of Telnet and SSH abilities. It is originally developed by Simon Tatham.
However, in order to use PuTTY, you need to have a COM port on your PC. If you have that, then you can enjoy the features of PuTTY that offer a simplified design interface.
While HyperTerminal is no longer built into Windows, you can still get the HyperTerminal Private Edition from the official Hillgrove website, or alternatively, copy the necessary files from a Windows XP installation.
Both allow you to continue using HyperTerminal’s functionality on newer systems. You can also use an alternative tool instead, such as PuTTy. If you have any more questions, leave them in the comments.
There are several tools users can deploy for their business and achieve work speed and improvement. However, Chrome Enterprise is one of the best solutions for businesses, and it is a subsidiary browser of Google. Hence, we’ll discuss how to proceed with Chrome Enterprise download and installation on your computer.
Google Chrome Enterprise is a business-focused browser that offers many features and tools that help you manage and take control of your business.
Furthermore, Chrome Enterprise is a cloud-based tool that helps you manage your enterprise. It comes with more sophisticated & reliable security and control features. Likewise, Google Chrome Enterprise has the functionality of a normal Chrome browser and scales into tools needed for managing businesses.
Furthermore, the Chrome Enterprise comes with a high-speed security system that is fit for big organizations. Unlike Google Chrome, Chrome Enterprise focuses on the business aspect of our life rather than the regular day-to-day use of browsers.
It offers features to help businesses make good decisions and discover business solutions. However, Chrome Enterprise is also a browser, but it doesn’t dispute the reliability and productivity level Google Chrome can guarantee.
Hence, users should understand that what makes the difference is what they are both deployed for.
Quick Tip:
As for a business, some aspects of a browser can make a difference. A browser like Opera One creates workspaces so the users can manage their work with ease.
Social connections are critical for a business, that’s why Opera One integrates apps like Twitter, WhatsApp right into the browser. Also, it comes with built-in Ad blocker, VPN and AI.
Opera One
Maintain your business connected with social apps integrated into the Opera One sidebar.
Google Chrome Enterprise and Google Chrome are not two different browsers, each with its peculiar features.
However, the two products are the same but differ based on what they are deployed to do. Chrome Enterprise is a business-focused tool that combines the features of a normal browser and a business manager.
The Chrome browser is a day-to-day browser that you use for surfing the internet with high speed and security. Some notable features of the Chrome Enterprise are Microsoft Active Directory, Chrome OS extensions, Flexible fleet management, and other business tools.
Also, it offers a reliable kiosk mode. However, Chrome Enterprise is different from the Chrome browser. Likewise, the Chrome Enterprise vs
Chrome topic doesn’t necessarily mean one is inferior or better. The two products are browsers but with different goals.
Is there a Chrome MSl?
There is a Chrome version for MSI. Users can download the installer to be able to install Chrome. However, the product version for the Chrome MSI differs from the regular Chrome browser. Moreso, users can get Chrome Enterprise download on MSI.
Is Chrome for Enterprise free?
Chrome Enterprise offers countless features as one of the best business management tools. However, helping large enterprises with business management doesn’t come free with Chrome enterprise. Hence, the product has a yearly subscription of $50, implying that it is not free.
Click on download and wait. (The browser will automatically download on your device)
Select the Manage Policies and download the two files also.
How do I install Chrome Enterprise?
Install Chrome as local admin, copy the configuration\admx files and the language en-us folders to the local directory: C:\Windows\PolicyDefinitions\
Proceed to Set policiesfor the Google Enterprise file before deploying it.
Install the downloaded files and update their configurations.
Deploy and test the Chrome Enterprise.
To test the browser safely without risking the entire organization’s data and system, we recommend the test is done on a small group. It will help you know if the configuration is set correctly.
The Google Chrome Enterprise is a business-focused browser. Hence, it differs from the conventional Chrome browser everyone uses. However, Chrome Enterprise is a tool for medium and large organizations.
Likewise, businesses and corporations make use of Google Chrome Enterprise. It helps the organization enjoy cloud service that maintains work management and reduces maintenance stress. Also, it guarantees a high level of security for data and workers and creates a flexible work environment.
Nonetheless, organizations/businesses looking to make work efficiency and security tight can deploy the Google Chrome Enterprise.
What is the difference between the Chromebook Enterprise upgrade and Chrome Enterprise?
The Chrome Enterprise upgrade and Chrome Enterprise only have one thing that differentiates them from each other.
However, the Chromebook Enterprise upgrade allows you to manage your device remotely safely. It refers to the gadgets designed to help organizations use Chrome Enterprise.
Meanwhile, Chrome Enterprise is a tool for managing user devices and the workforce. Hence, the main difference is that Chrome Enterprise works for the benefit of the Chromebook Enterprise. It means that Chrome Enterprise is intended to be integrated into the Chromebook Enterprise.
Nonetheless, there are some other browsers that users can use with Enterprise. Hence, you can refer to our article about the best browsers for enterprises that we ranked based on speed and security.
Amazon is one of the world’s largest shopping platforms, making it a perfect place for scammers to reach many people. However, scams are rampant nowadays. They often come in different formats.
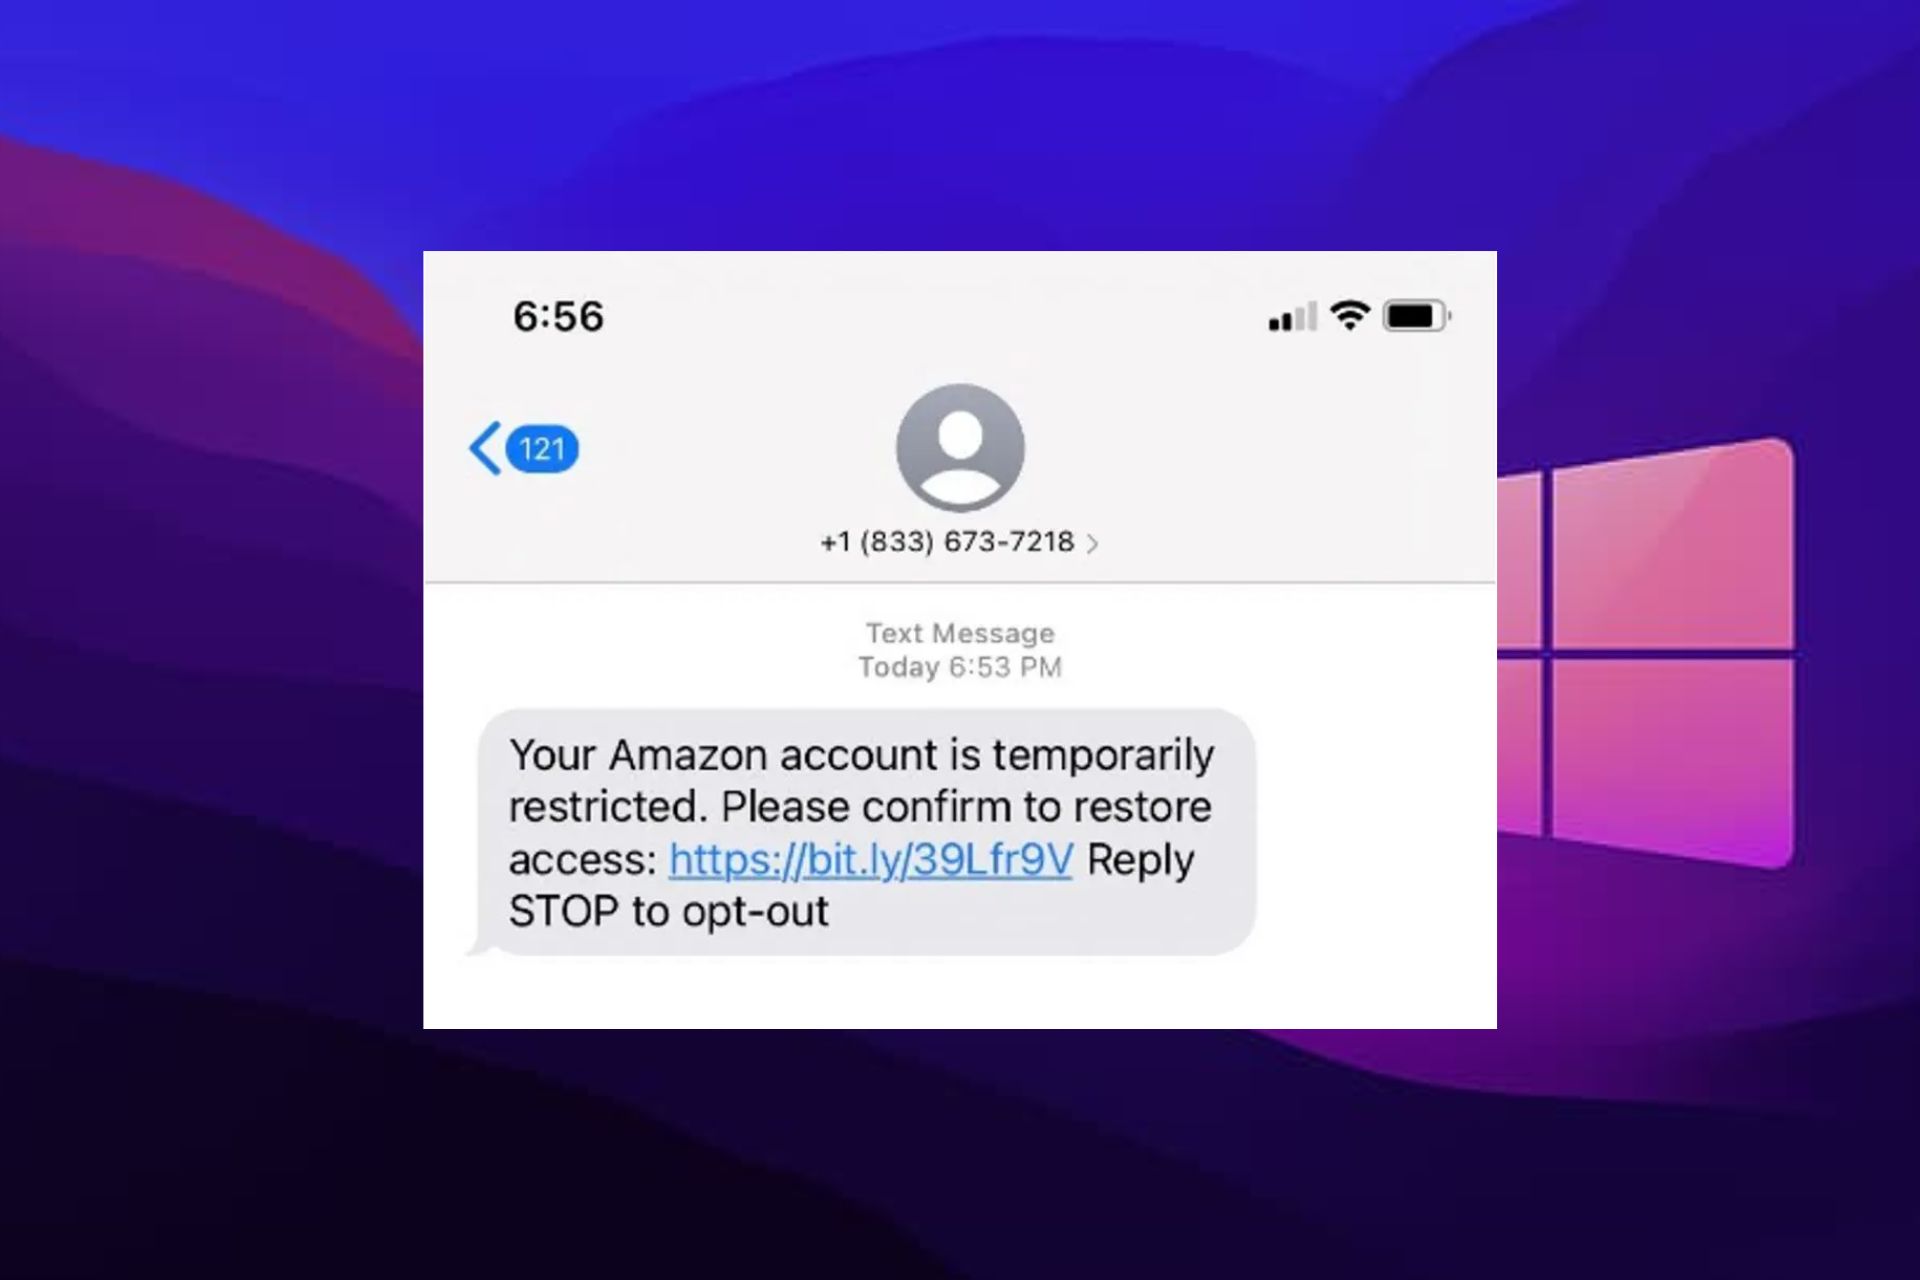
An example is the Amazon security scam text, which involves the scammer sending a deceitful text to a user. The scammers send these messages disguised as an Amazon agent to intrude into your account or steal your personal information.
However, the Amazon security scam has been around for years, yet some people still fall for it. Hence, we have put together this article to discuss the Amazon security scam text and how not to be a victim.
Why am I getting an Amazon security alert?
Amazon can send you a security alert if your account has a new or suspicious activity. Likewise, you can get an alert to notify you about the security changes in your account. However, swindlers use these texts to rip people off their money and information.
Nonetheless, users should understand that Amazon rarely sends these messages. Peradventure, you get a text stating that it’s from Amazon; there is always something suspicious about such texts.
Can you get scammed opening a text message?
Opening a text alone doesn’t get you scammed. The actions you take after seeing the content of the message can cost you a lot. However, clicking on links from such texts can expose you to the trap of the scammer. Likewise, some links contain malware that can create loopholes in your security.
How do I stop fake Amazon text messages?
Block the phone numbers and email messaging you
Launch the messaging app on your phone.
Click on the text message from the number you want to block.
Click on the contact icon at the top of the screen, then select Info.
Scroll down, select Block this caller, and then click on Block Contact.
Blocking the contact will prevent it from being able to text or reach your phone. However, repeat the process for every suspicious scam text because some scammers use multiple numbers.
Typographical errors: Amazon is a world-class shopping platform with countless customers. However, texts from Amazon don’t contain typos and are always well-arranged. Hence, watch out for errors in the message to ensure reliability.
Contains wrong links: We don’t recommend you click the links in messages until you’re sure of their source. Scammers insert links in their text disguised as the official Amazon website. Users should note that Amazon’s official website has a dot before it, e.g., .amazon.com.
How do I protect myself against Amazon security scams?
Report suspicious texts or activities: There is no permanent way of preventing scam texts and attempts. Hence, you can protect yourself by reporting phishing. It will help you verify the legitimacy of such information.
Keep your account information to yourself: Scammers can access it if you don’t secure it properly. So, don’t give your information out to unknown authorities. Likewise, try not to access your Amazon account on other people’s devices as much as possible. Note that Amazon will never ask for your account details or personal information.
Check link credibility before accessing: Checking the credibility of the links from emails or alerts before clicking can protect you from Amazon security scams.
Furthermore, we recommend that users only contact Amazon agents on the official website, not through texts or emails.
In conclusion, you can encounter many other issues with Amazon, like the Amazon checkout Rewards Points not showing up. Also, reading through our article about the Amazon app release for Windows 10 is advisable.
Please leave your questions and suggestions below in the comments section. We’d like to hear from you.
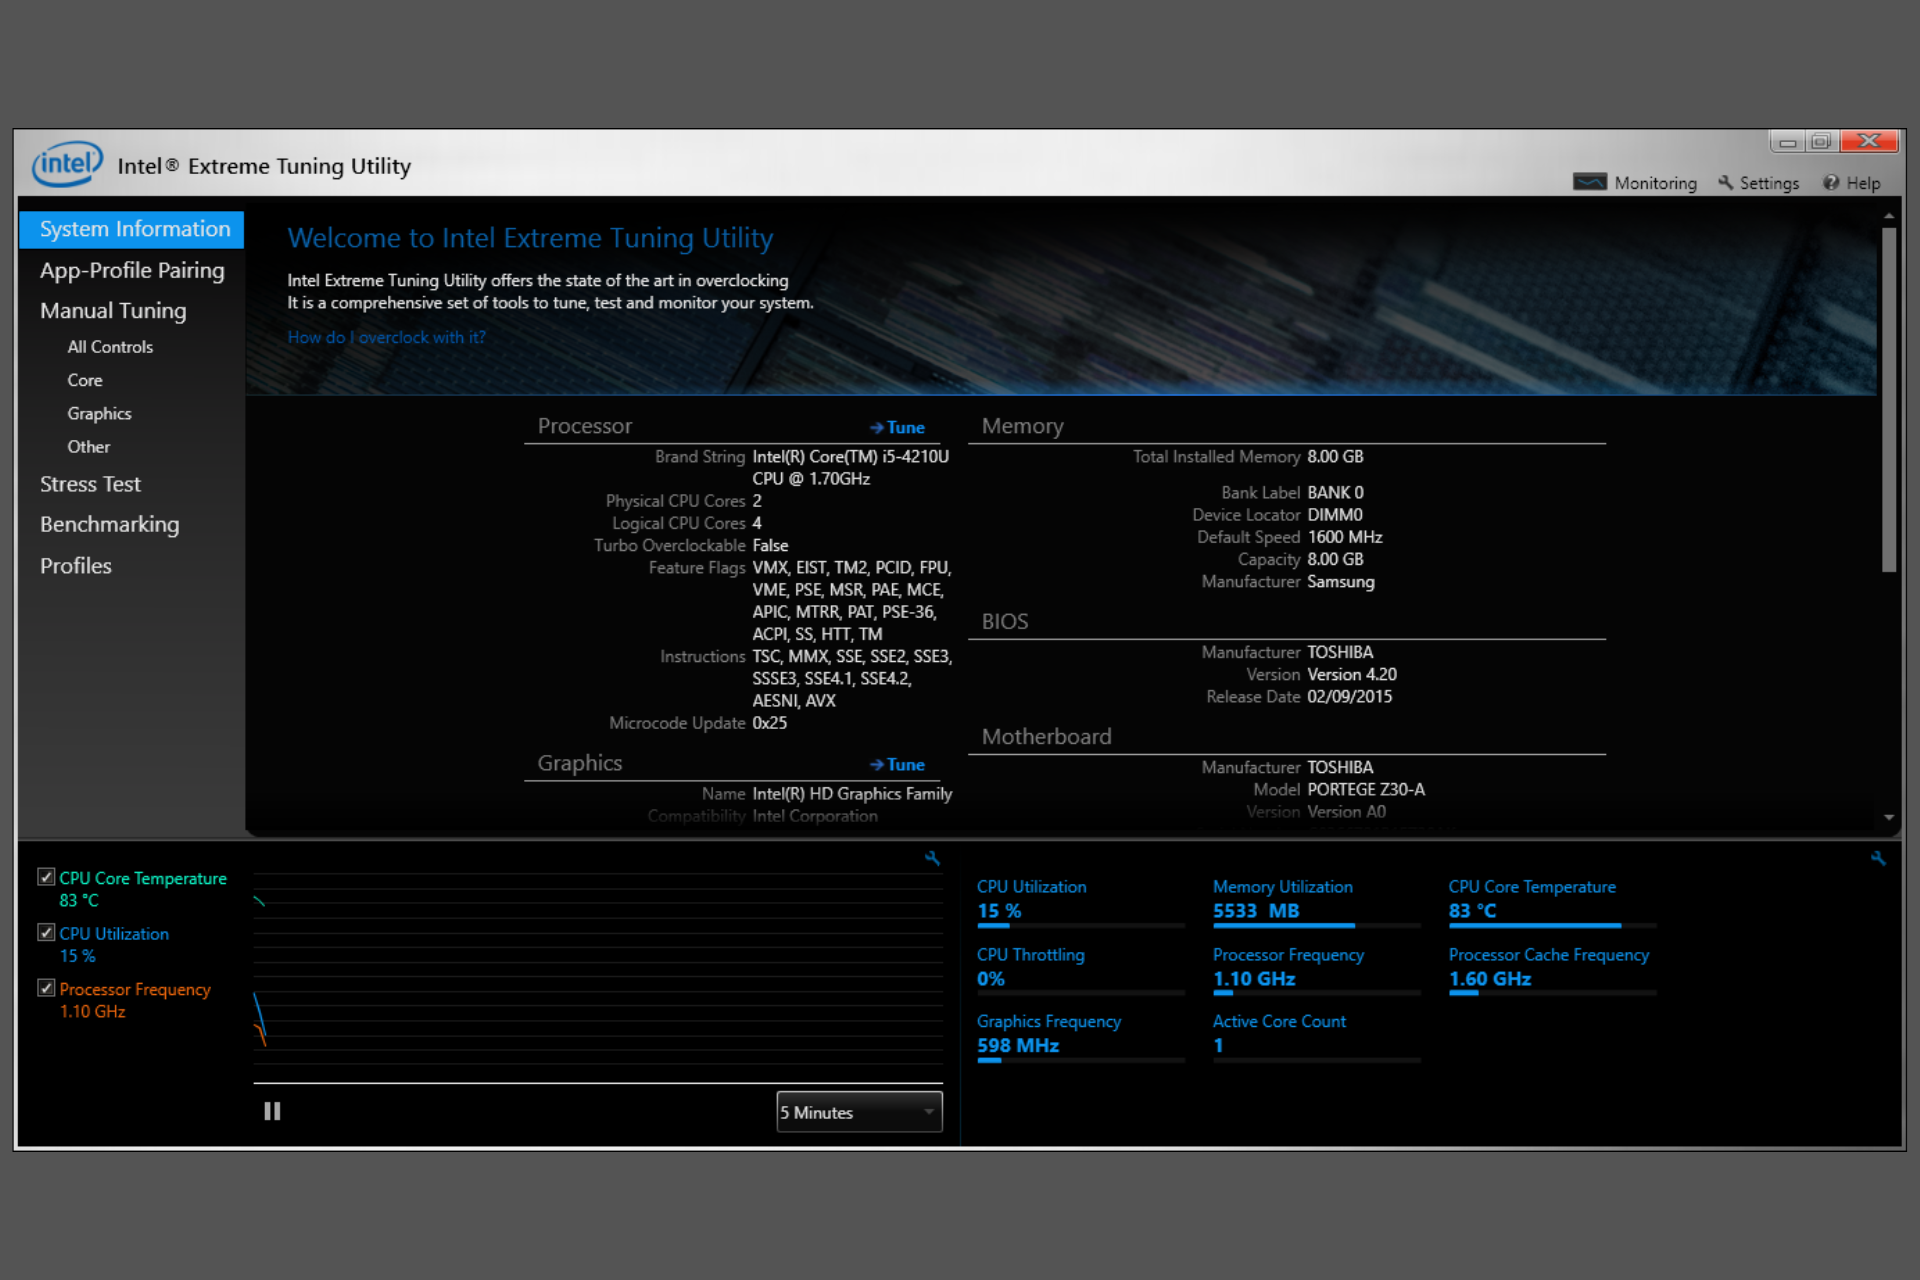
One of the advantages of having your computer is that you can tweak it to get more performance from its hardware through different methods. One way of doing this is overclocking your computer using the Intel Extreme Tuning Utility (Intel XTU).
Even though some people might manually overclock their computers, it involves a lot of work and might consume a lot of time.
Using the Intel Extreme Tuning Utility is always the best option. This is because the tool does everything for you, ensuring that chances of human error are eliminated.
However, when using this tool to overclock your PC, you need to look at a variety of things. Some of them include understanding the risks of PC overclocking and minimizing them.
You should also ensure that your PC has an excellent cooling system. This is because overclocking means the CPU gets more powerful, leading to more heat generation.
What is Intel Extreme Tuning Utility?
The Intel Extreme Tuning Utility is an application used for performance tuning in Windows machines.
It can be used by experienced and non-experienced Windows users to overclock, stress, and monitor a computer.
This application comes with a beautifully designed interface with outstanding capabilities to enhance its user experience and simplify the performance tuning of computers.
What does Intel Extreme Tuning Utility do?
Intel Extreme Tuning Utility is an application used for overclocking computers. Overclocking is the process through which Windows users increase the frequency of their CPUs beyond the frequency decided by the CPUs’ manufacturers.
When overclocking your CPU, you assume the responsibility for any instability with your computer. However, you should also be aware that the process might lead to your computer’s death.
How do I use Intel Extreme Tuning Utility?
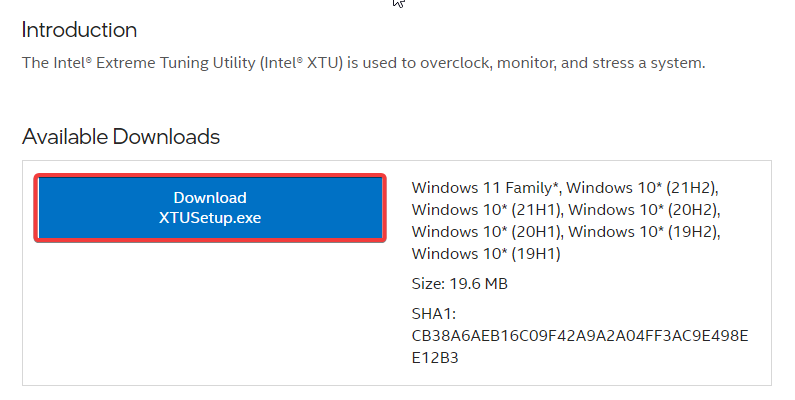
1. Download and install Intel Extreme Tuning Utility
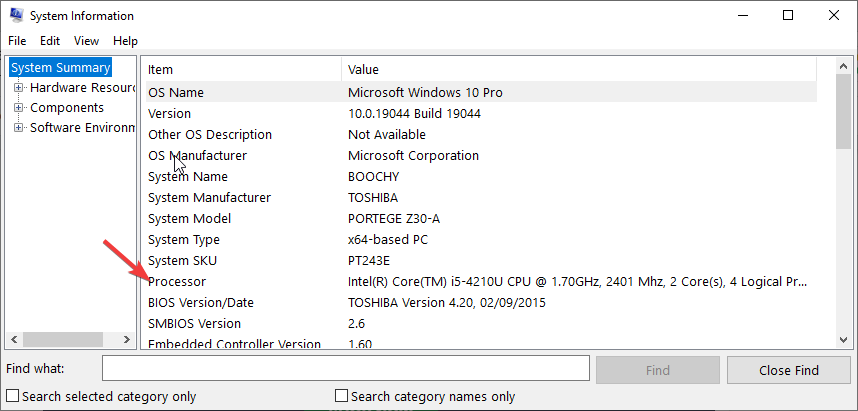
Identify your Intel processor to find out if the Intel Extreme Tuning Utility model you want to install supports it.
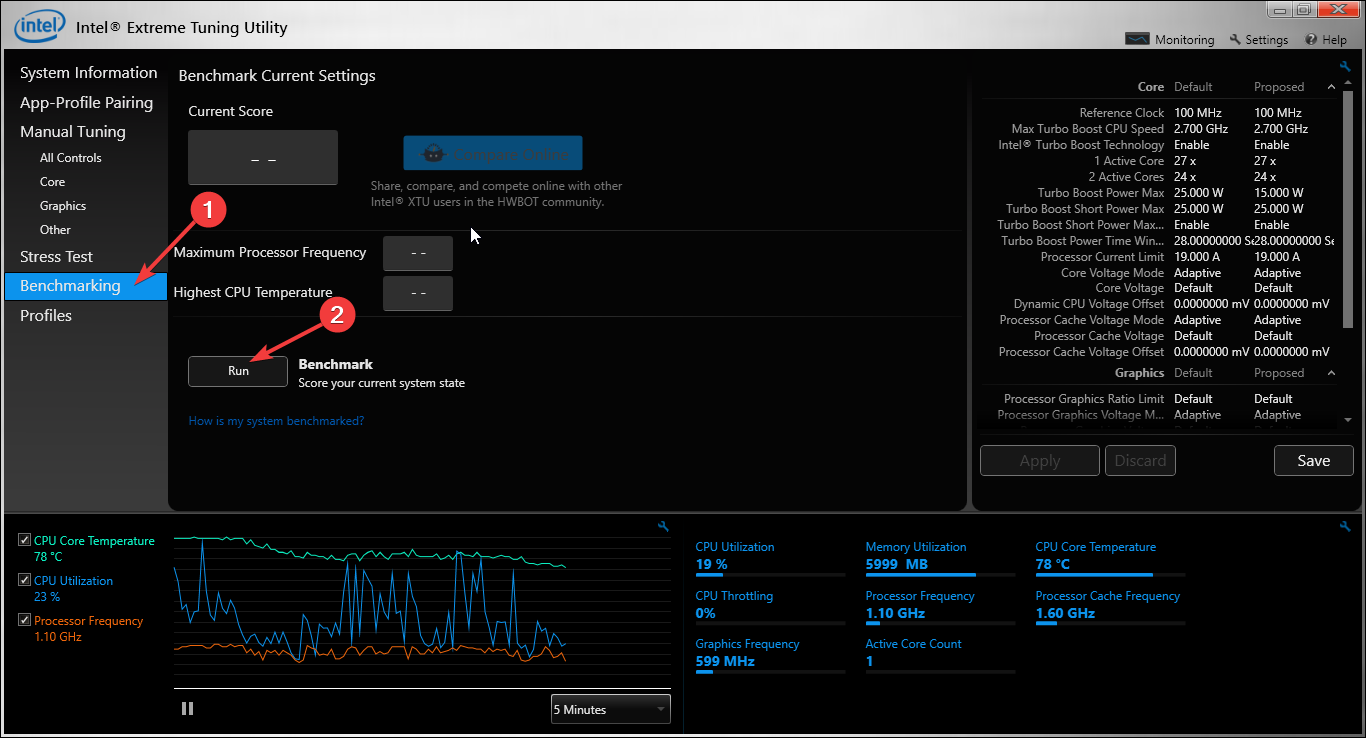
Launch Intel XTU and run a benchmark to see the overall performance of your computer before overclocking its CPU.
Click on the Benchmarking tab on the left-hand side menu of the application and then click on Run.
Repeat this process several times to get an average score to help you with a clearer picture of your computer’s performance.
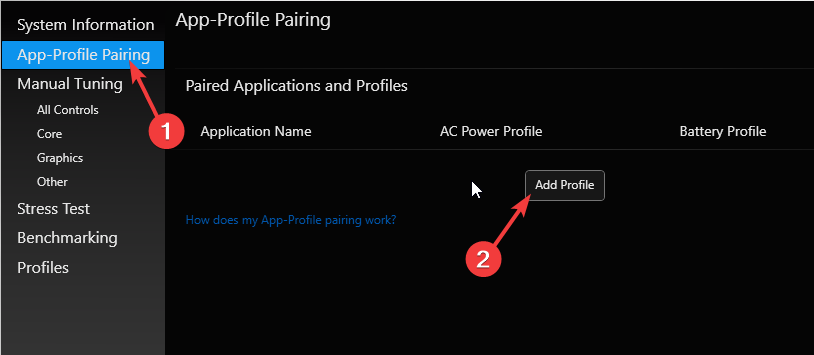
Click on App-Profile Pairing to create a profile that you will use any applications of your choice with your tuned PC.
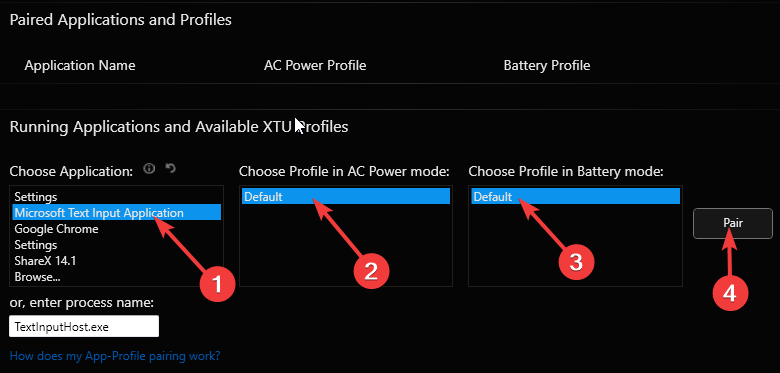
Choose the applications you want, a profile in AC Power mode and Battery mode, and then click on the Pair button.
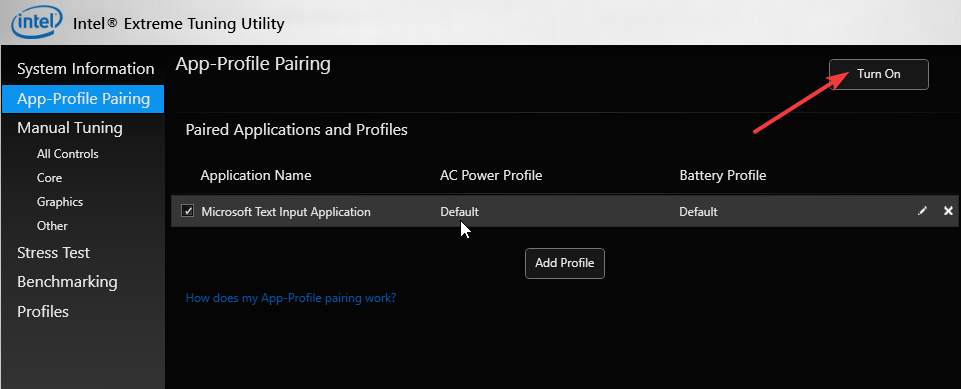
Click on the Turn On button at the top to use this profile.
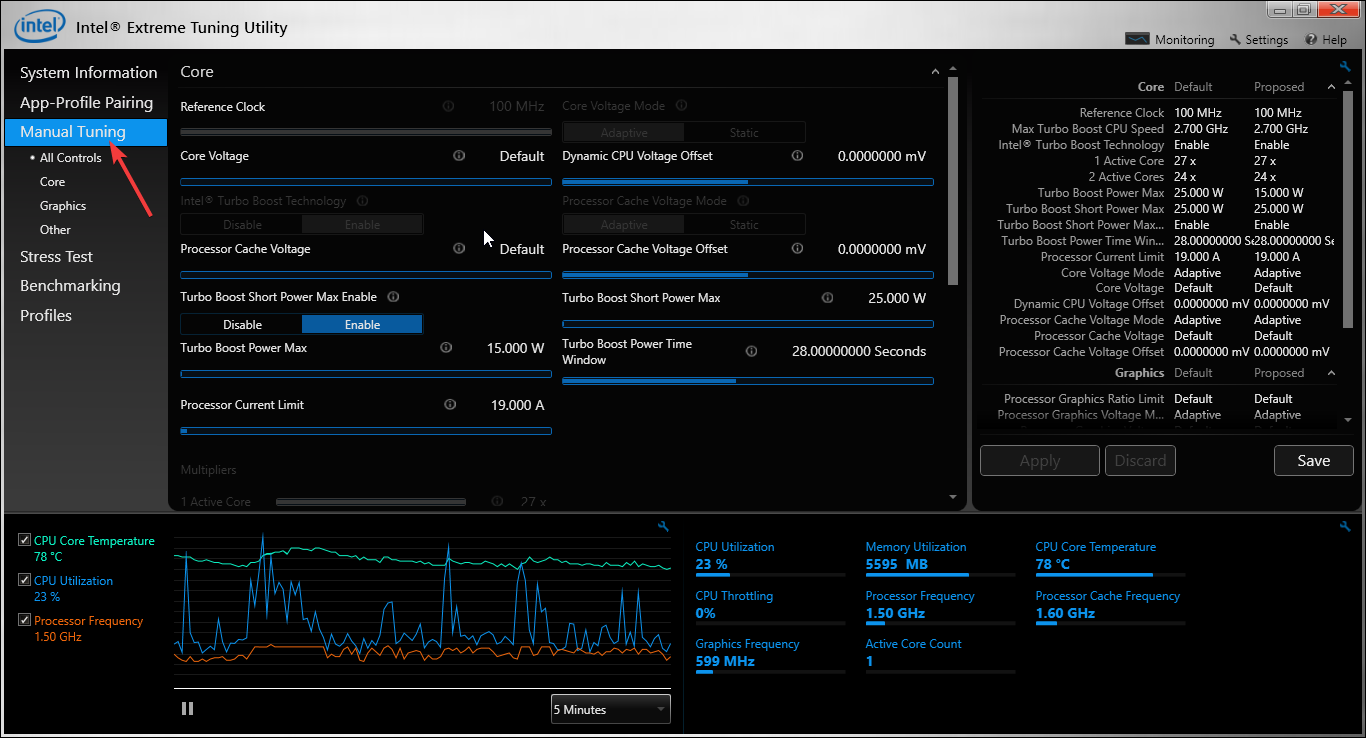
To manually overclock your CPU, click the Manual Tuning on the left-hand side menu.
Which is better, ThrottleStop or Intel XTU?
The Intel XTU and ThrottleStop are among the best applications for adjusting your computer’s performance, and they work well with most computers.
However, if you are looking for an application with a good interface and graphs showing the performance of your computer, then Intel XTU is an ideal choice.
ThrottleStop is the best application for those looking for efficiency when tuning their PCs. However, before choosing either, you must ensure that you have done some benchmarks.
This helps you to see how your PC performs. It can also determine the best application for your computer.
Performance tuning is essential, especially for people who have specific applications that demand good PC performance.
As you can see, you do not have to buy a new PC for applications that need good performance. Instead, you can use applications such as the Intel XTU to overclock your PC. This ensures that its performance meets your expectations.
Firefox is the go-to browser that almost everybody uses, and it is compatible with various platforms like Windows, Ubuntu, and Mac.
Mozilla Firefox is not only a browser but also a wonderful web developer tool. Many developers use Firefox for coding and testing webpages using the web developer tool.
Recently, several users have reported that they are unable to launch Firefox properly. The Firefox window throws an error window.
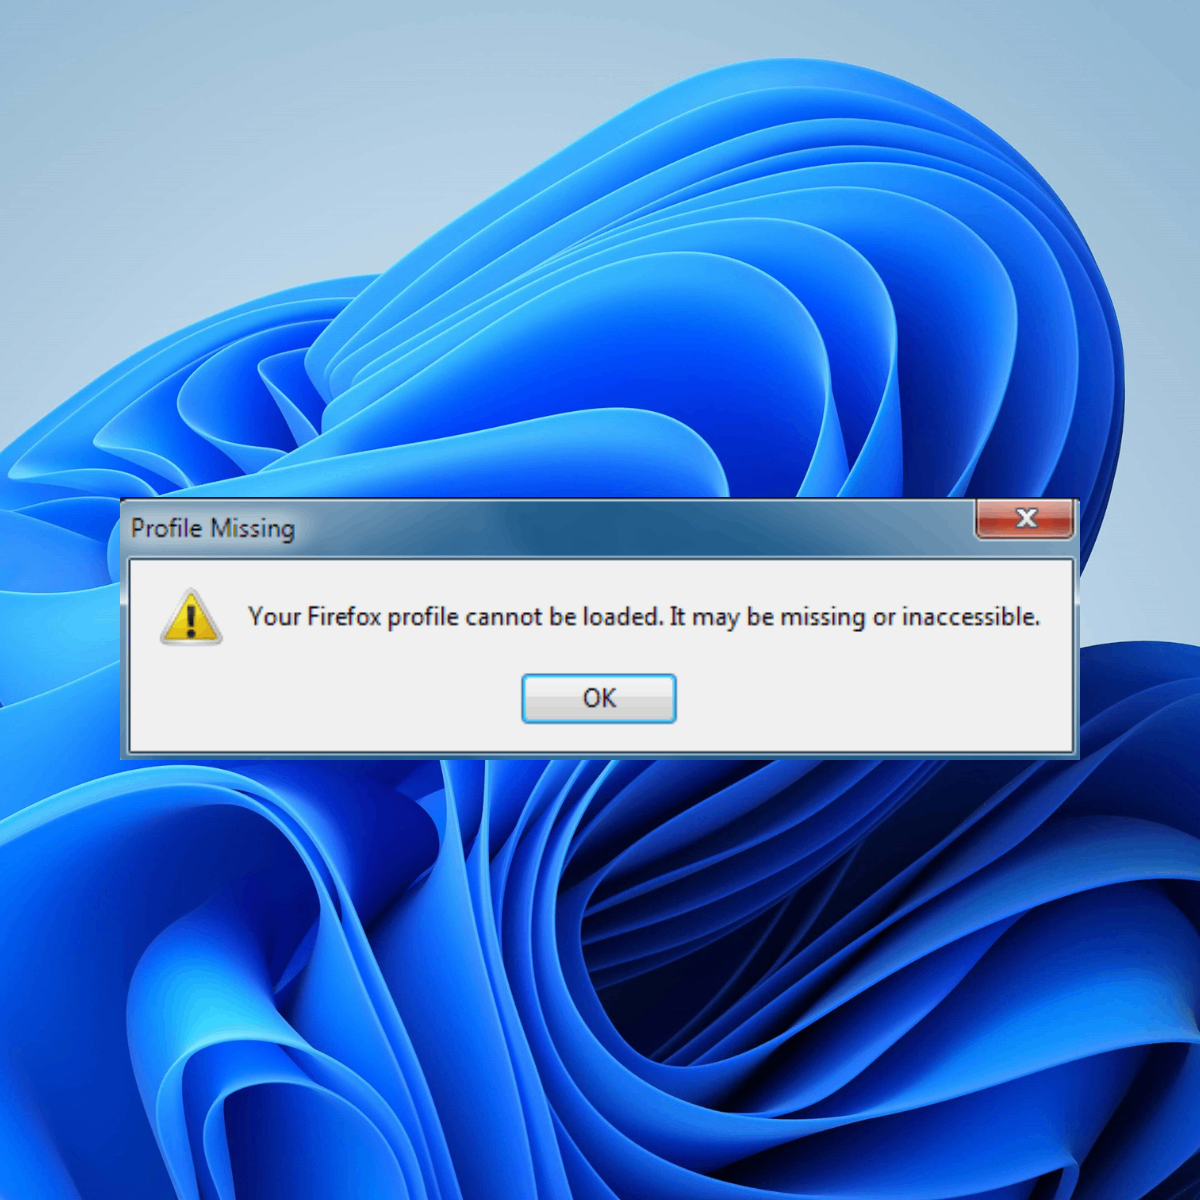
The error window said Your Firefox profile cannot be loaded. It may be missing or inaccessible.
Most users never create any Firefox profile, they simply use the default profile created by the browser.
Why is my Firefox profile not loading?
There are several causes for this error message while launching the Firefox browser on any device.
The Firefox profile has moved to a new location: A folder will be created in the system after installing the Firefox browser. This folder contains the information for the Firefox profile created by default and all other profiles created by the user.
Corrupted Firefox profile: If there is any virus attack on the system, some files will be corrupted. There is a chance that the Firefox profile must have been corrupted, which is causing this issue.
Firefox browser app problems: If the Firefox browser is interrupted when it is installing, it won’t be installed successfully. This creates a number of problems while using the browser.
Where is my Firefox profile?
When the users create the profile, it will be stored in the folder called Profiles. The Firefox browser’s default profile will also get stored in this folder.
The Profiles folder can be located at the following path: C:Users%username%AppDataRoamingMozillaFirefox
The users might have to change the view hidden items settings in order to open the AppData folder.
Some other Firefox users faced a Server Not Found error while accessing the Firefox browser on their system. If the Firefox browser is throwing the same error for you too, try these quick solutions given below in this article.
Quick Tip:
While the Firefox issue will be resolved, go to Opera One and enter your user Profile to continue browsing. Rather than creating everything by hand, you may use the Opera Profile Creator.
You may create workplaces, and profiles, manage sidebar chat integrations and keep every tab organized. This is also an smart and secure browser due to it’s built-in VPN and AI.
Opera One
Switch to Opera One and load your profile in this browser instead.
Click Download Firefox to start downloading the Firefox browser installer file.
Go to the Downloads folder and start the installation process by opening the Firefox installer file.
After successfully installing the Firefox browser, the error window will not appear again.
2. Delete the profiles.ini file from its default location.
Open the Run box by right-clicking on the Startbutton on the taskbar and clicking Run.
Type the following path in its textbox and press the Enter key: C:Users%username%AppDataRoamingMozillaFirefox
In the Firefox folder, delete the file called profiles.ini. Or you can even rename it to profiles.ini_old.
Now open the Firefox browser without any error message.
We also have a great guide on Firefox profile location that offers more information, so don’t miss it.
3. Create a new profile for Firefox
Press the Windows and R keys simultaneously.
Type firefox.exe -P and press Enter.
The Firefox Profile Manager window appears on the screen.
In the window, click Create Profile to open the create profile wizard.
To start creating the profile, click Next to proceed.
Next, you need to give this profile a name and click Finish.
This creates a profile for the Firefox browser.
Finally, select the newly created profile from the profile list and click Start Firefox at the bottom.
This opens the Firefox browser using the newly created profile without any issues.
Why does Firefox ask me to create a new profile?
Unlike other web browsers, Firefox browsers need a profile to run the browser on any system. Usually, it operates using a simple default profile if the user hasn’t created any profile.
Sometimes, the Firefox browser is downgraded in the system suddenly. This creates a problem since the profile created in the higher version of Firefox will not work and it will ask the user to create a new profile. Creating a new profile might cost you all the saved bookmarks and other data.
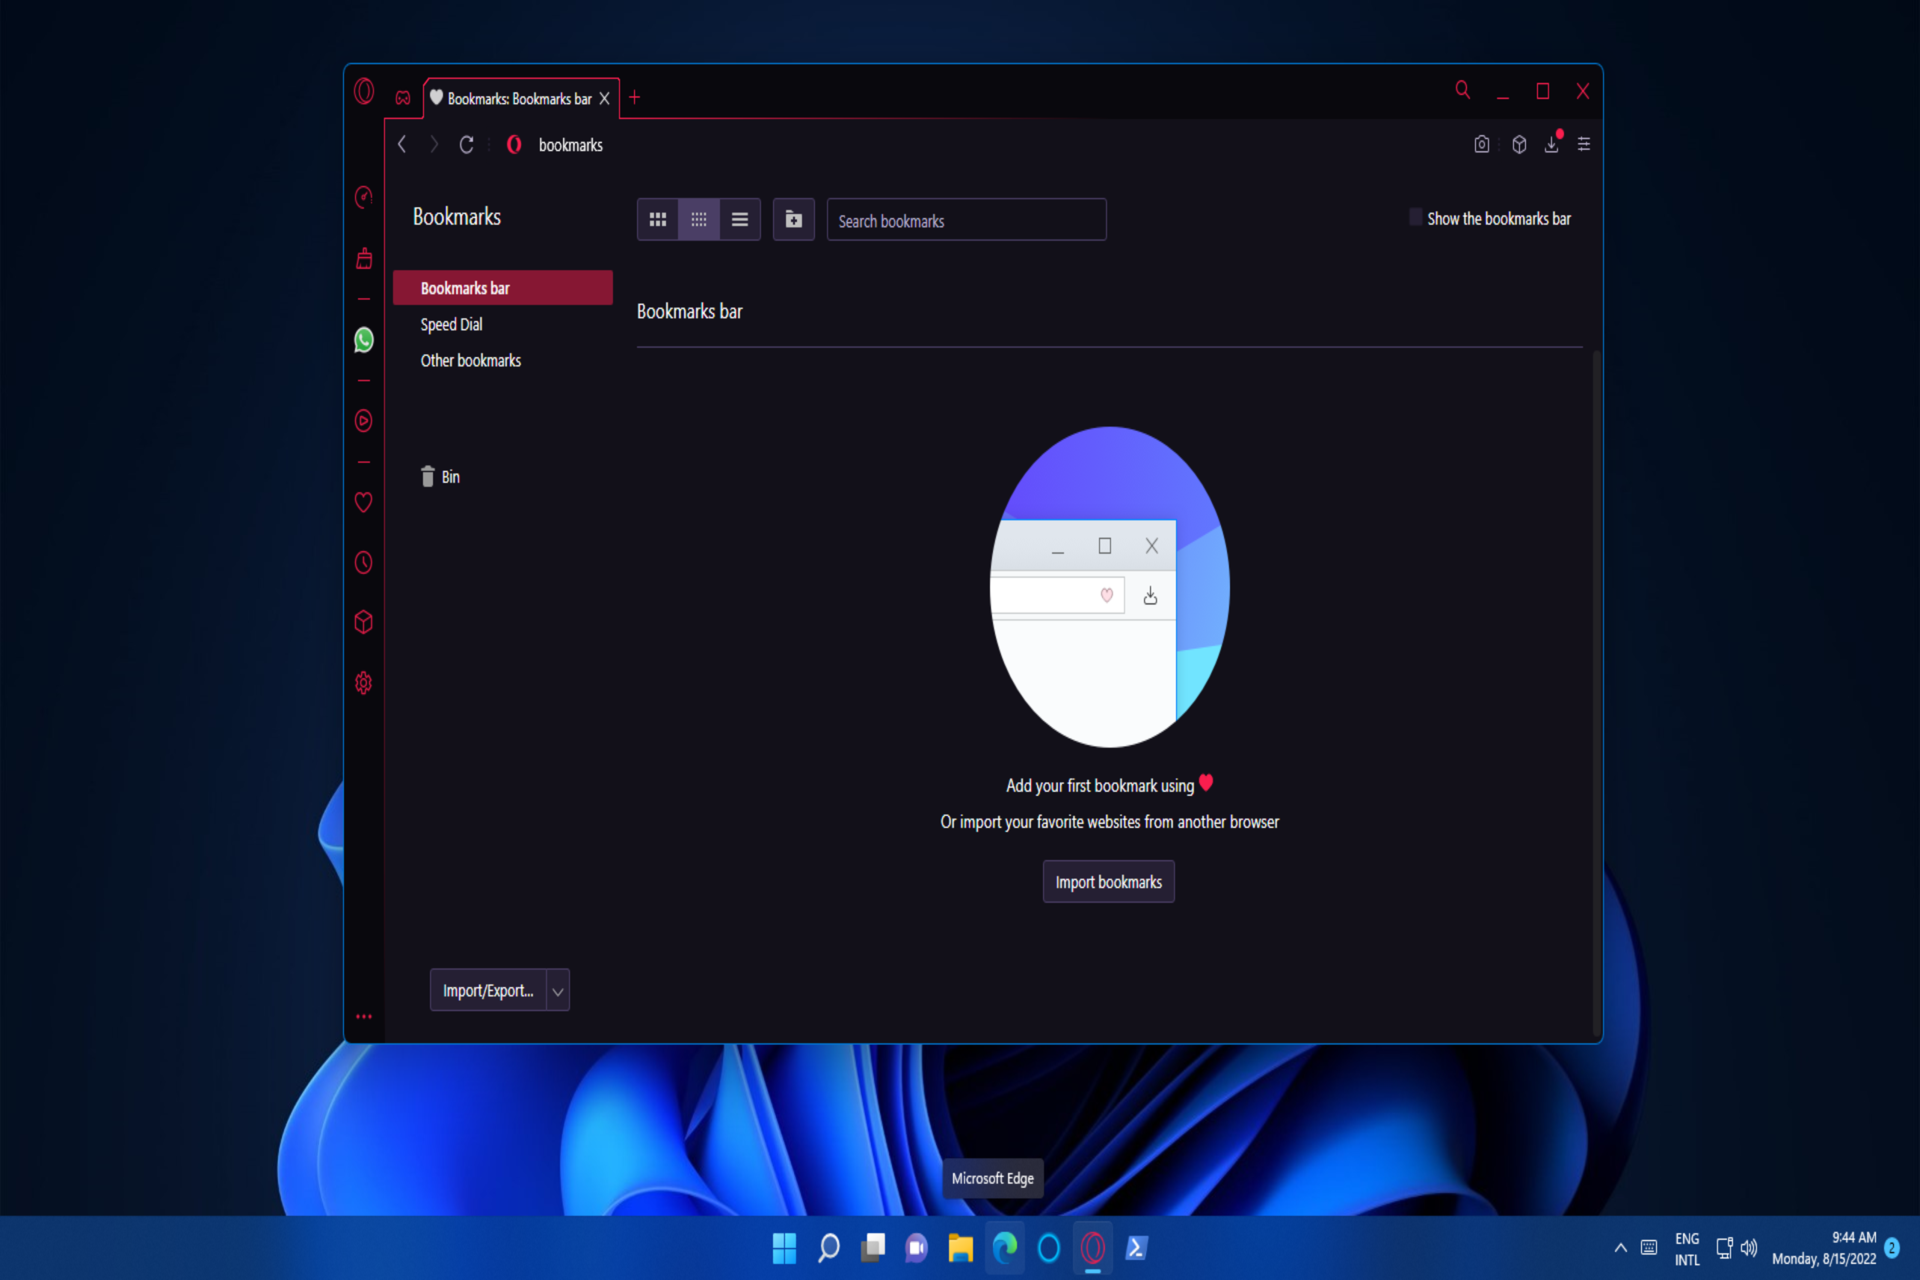
If your Opera GX bookmarks are not showing, you won’t be able to access your saved websites, and this can be a problem. Luckily, this can be easily fixed.
What can I do if Opera GX bookmarks are not showing?
Before we start, make sure that Opera GX is up to date since bugs can cause this problem.
1. Check Opera GX’s Trash Bin
Enter opera://bookmarks in the Opera’s GX address bar, and hit the Return button.
Click the Bin icon.
If you see any deleted bookmarks there, click the Select (tick) icons for them.
Left-click one of the selected bookmarks and hold the mouse button.
Then drag them back into your bookmark folder to restore them.
If there aren’t any deleted bookmarks in the trash, you may still be able to restore backup copies of them by renaming Bookmarks and Bookmarks.bak files.
To do so, open this folder path: C:\Users\<user folder name>\AppData\Roaming\Opera Software\Opera GX Stable
Right-click the Bookmarks and Bookmarks.bak files there to select Rename. Change Bookmarks to Bookmarks.old and the Bookmarks.bak file to Bookmarks (delete its BAK extension).
2. Reset Opera GX
Press Opera GX’s Alt + P hotkey.
Select Advanced to expand Opera GX’s Settings tab.
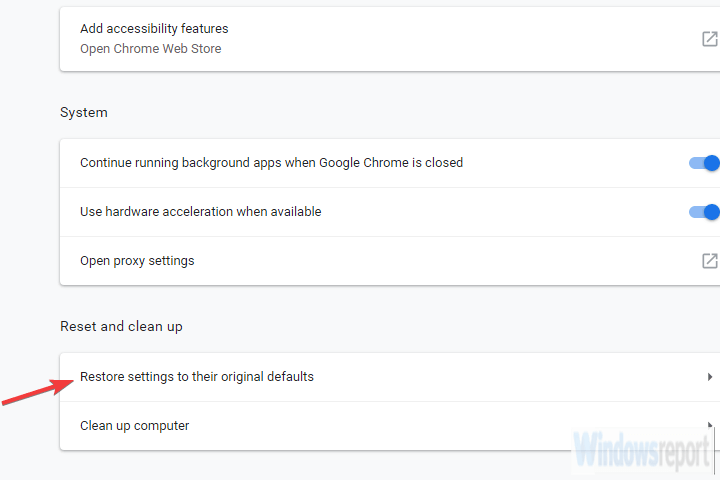
Scroll right down to the very bottom of the tab to click Restore settings to their originaldefaults.
Open the Power User menu in Windows 11/10, and select its Run option.
Type this text in Run and select OK: appwiz.cpl
Select the Opera GX browser, and click Uninstall for it.
Then press the Re-install option (don’t select the Delete my Opera data option).
How do I extract bookmarks from Opera GX?
Open Opera and navigate to opera://bookmarks
Select Import/Export button and choose Export bookmarks.
Next, select the desired destination and the file name.
Then you can select to import the bookmarks.html file whenever you need to restore missing bookmarks in Opera.
There aren’t many confirmed potential fixes for bookmarks not showing in Opera GX. Reinstalling or resetting Opera GX will most likely resolve bugs affecting the browser.
Where are my bookmarks in Opera GX?
The bookmarks bar isn’t enabled by default in Opera GX, but you can enable it by doing the following:
Open Opera GX, click the Menu icon in the top left and choose Settings.
Scroll to Appearance and enable the Show boomarks bar.
The bookmarks bar will now appear.
If you might have accidentally deleted bookmarks, try applying the first resolution. You may be able to find missing bookmarks in the trash or restore a recent backup of them by renaming Bookmarks.bak.
To learn more about this feature, we have a great guide on how to manage bookmarks in Opera, so don’t miss it.
For more basic information our guide on Opera browser favorites will give you all the necessary information.
Have you found another resolution for fixing Opera GX bookmarks not showing? If you have, we would love to hear about it in the comments section below.
However, if your PC display is running at 60Hz FPS, you can increase your RuneScape Background FPS settings to 60Hz or higher for an enhanced gaming experience.
Before we move over to the troubleshooting methods, let us understand why you face low FPS issues on RuneScape.
Why am I getting low FPS in RuneScape?
If your RuneScape game has slowed down and you see low FPS (frames per second), it means that your machine does not have enough memory to run it properly.
Some of the other common reasons why RuneScape may suffer from low FPS are:
Graphics card issue
Outdated graphics drivers
Old CPU
Limited system memory (RAM)
At the same time, you should check if your PC meets the minimum specifications to run the game as below:
Device
Specifications
Windows
CPU: Intel i3+/AMD @ 2.4+ GHz GPU: GeForce 400x, Intel HD 4x, AMD Radeon 7xxx + RAM: 4GB Minimum 8GB of storage space available for the NXT cache
Mac
CPU: Intel i3+ @ 2.4+ GHz GPU: AMD Radeon 7xxx + RAM: 4GB Minimum 8GB of storage space available for the NXT cache Recommended Mac 2011+
Old School RuneScape (Mobile)
Android Oreo 8.0 or above iOS 13 or later RAM: 2GB Minimum 120MB of free storage space
RuneScape Mobile
Android Oreo 8.0 or above iOS 13 or later RAM: 2GB 3.5GB – 5GB of free storage space
But, if you are still facing the same low FPS issue or if your RuneScape is stuttering, we are here to help.
So, follow this post to fix the RuneScape frame rate issues and boost the FPS using the below solutions.
How do I fix my low FPS on RuneScape?
1. Change your graphics settings
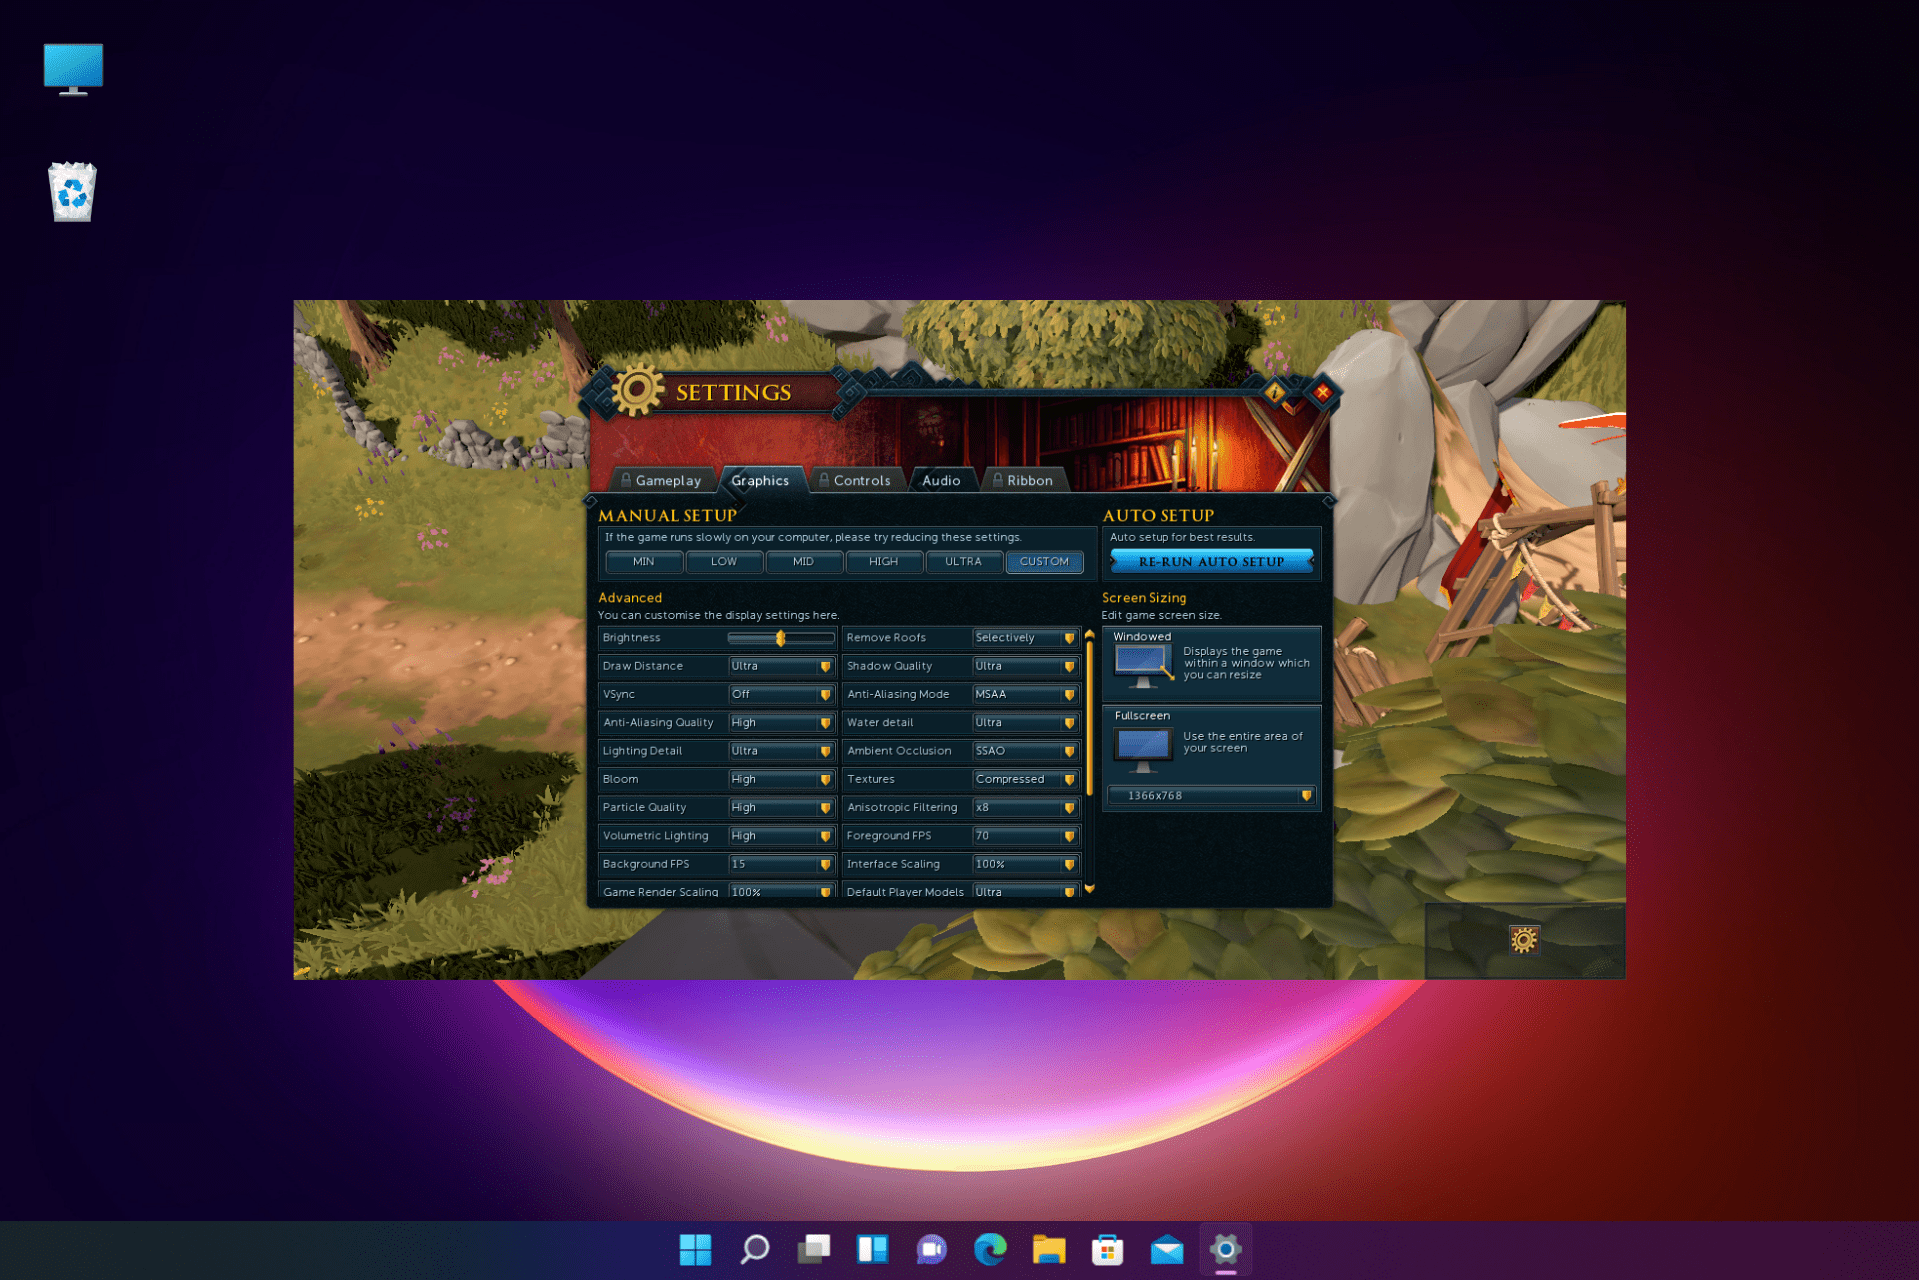
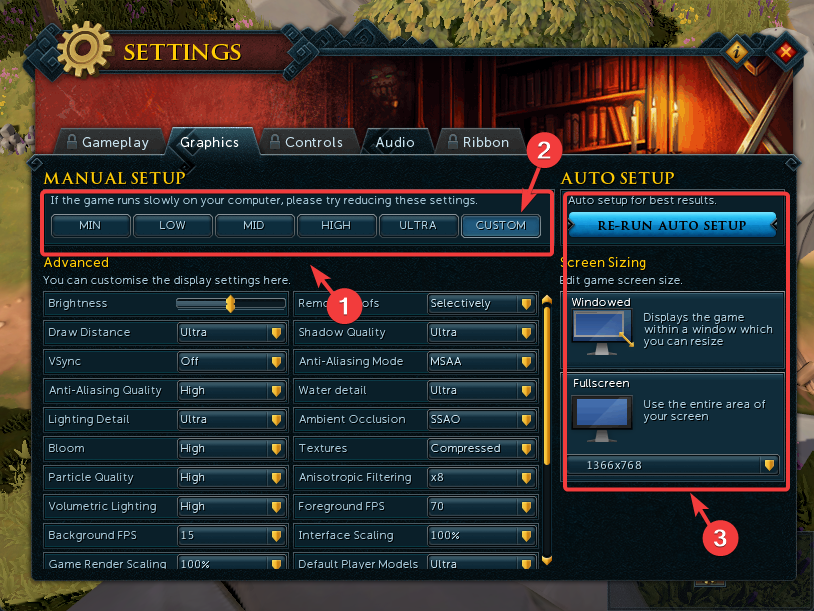
Launch RuneScape and click on the gear icon on the bottom right.
In the Options Menu window, click on Settings.
Next, select the Graphics tab and you can now edit the settings like the Game models, Light effects, etc.
You can also change the graphic modes to, for example, Min, Low, Mid, High, Ultra or Custom, or resize the screen on the right.
You have now successfully changed the graphics settings and increased the RuneScape FPS.
2. Update your graphics driver
Right-click on Start and select Device Manager.
Now, expand the Display adapters section, right-click on the device and select Update driver.
Next, in the Update Drivers window, click on Search automatically for drivers.
Windows will now start looking up for any latest drivers automatically and finish the installation accordingly.
Once you have updated the graphics drivers, the low frame rate issue in RuneScape should be resolved.
3. Clear your cache
While RuneScape is loading, click on the gear icon on the bottom left.
As the Options dialog opens, go to Cache Folder and click on the three dots next to it.
You will be redirected to the Jagex folder and open the RuneScape folder.
Next locate the cache folder, select all files and hit Delete.
Once you have cleared the cache, the graphical texture and fix the Runescape frame rate issues.
While the default cache folder path is %ProgramData%\Jagex\RuneScape, it may sometimes change. So, if you do not find the Cache folder in the default location, you can also look for it in the locations below: C:\%UserProfile%\jagexcache\runescape\LIVE ORC:\.jagex_cache_32
How do you check FPS in Old School RuneScape?
For example, if you are playing Old School RuneScape on Steam, you can follow the below methods to check FPS:
Open Steam, click on its menu on the top left, and select Settings.
In the Settings window, click on In-Game on the left.
Now, on the right, go to the In-game FPS counter and select your choice from the drop-down. For example, Top-right.
Next, check the box next to the High contrast color option.
Now when you run the game, you should see the FPS counter on the top-right or the position you selected.
How do I check my FPS on RuneScape 3?
While you can follow the above method, you can also follow the below steps to check FPS on RuneScape 3:
Open RuneScape 3 and press the Alt +` keys on your keyboard.
This will launch the command console from the top left.
Now, type displayfps and press Enter.
You will now see the FPS counter on the upper end of the game screen.
Looking for the right browser for your cricutting needs? This article is for you! Here, we’ll show you some of the best browser options for Cricut Design Space.
Cricut is an intelligent cutting machine that can take inputs or commands from a computer and create near-perfect physical cuts/designs/artworks that reflect the given orders.
Put aptly, Cricut allows you to create exceptional cuts and shapes of objects by implementing designs prepared via its Design Space app, hosted on a computer system.
However, only a handful of browsers support Cricut’s Design Space platform, and we’ll be bringing you the best of these browsers in this article.
Can you use Cricut Design Space without downloading it?
It was possible to use Cricut web in the past, but this has changed since the service stopped its support for the Design Space web experience at design.cricut.com.
You no more need a Cricut Design Space online login but will have to update to the brand-new Design Space for Desktop, a program for Mac and Windows computers that is quicker, more dependable, and more powerful.
We will, however, show you the best browsers that have worked in the past, as these are still excellent browser options for online design.
Opera One is a powerful and versatile browser that supports all Windows OS versions. The browser is highly customizable and flexible, and this made it an excellent choice for Cricut users.
If privacy is one of your primary concerns online, Opera One offers you peace of mind.
The browser has a built-in VPN for enhanced privacy, an ad blocker to block all those annoying ads and load webpages faster, data sync across your devices, and more.
Opera One also features many built-in communication tools, such as integrated messengers (WhatsApp and Facebook Messenger) that allow you to stay in touch with your friends without switching apps.
Besides, with Opera, you can customize the interface with all the necessary shortcuts, themes, and bookmarks to help you stay focused on your work.
Important features:
Sidebar extensions
Messenger integration
Native VPN integration
Opera One
It helps you stay focused on your Cricut projects by creating your workspace and having all the necessary features handy.
UR Browser is one of the most widely used browsers on desktop and mobile platforms. And it stands out as one of the few supported on Cricut.
UR Browser is the official browser from AdaptiveBee, with extended support for Windows PCs, Android smartphones/tablets, iOS devices, and other major desktop & mobile operating systems.
Hence, it provided the flexibility of making Cricut designs on several platforms.
Furthermore, UR Browser is safe, secure, and fast. It hosts a highly customizable interface, making it ideal for project designing – the forte of Cricut.
The browser offers a standard security and privacy protection set up to ensure that designs and work projects on different services are protected from unsolicited access on the web.
Nevertheless, UR Browser was not just a supported browser for Cricut but arguably the best browser for Cricut.
This is simply because of the browser’s relative flexibility, ease of use, user-friendliness, and swift loading speed, making it a suitable browser for creating Cricut cuts and designs.
Important features:
Ad blocking
No complicated settings
Invisible tracker blocker,
UR Browser
Use UR Browser to eliminate the ads, trackers, and cookies and bring your project designs to life in no time.
Mozilla Firefox is no doubt the perfect alternative to UR Browser. It is seen by many as the best desktop browser and was certainly one of the best browsers for Cricut.
Firefox, like UR Browser, hosts extended support for all major operating systems (both mobile and desktop), making it suitable for the flexible work demand of a project designer.
The browser is uniquely fast and offers a standard security/privacy protection feature, which ensures that your designs are safe on the web.
It can conceal your browsing history and designs from third-party users.
Mozilla hosts a customizable interface, which can be configured to let you do just about anything on the web. This was especially important for creating superb designs/cuts with Cricut.
Edge is the latest browser from Microsoft, specially designed for Windows 10 and 11 PCs, and is one of the few browsers Cricut supported.
It is the advanced replacement of Internet Explorer, which, unlike Edge, did not support Cricut.
Microsoft Edge hosts a more advanced GUI; this made it ideal for creating designs on Cricut’s Design Space.
Furthermore, the browser offers users an organized printing setup and 4K Ultra-High-Definition support. This can be used to design HD artistic designs using any other service like Cricut’s Design Space.
Though originally built for Windows, the browser is now supported on iPhone and Android operating systems.
Chrome is an obvious inclusion in this list and is the most prominent browser name in the market, and this tag is well deserved.
It was among the few browsers that supported the Cricut web platform, and as you may guess, it remains an excellent option for many other design services.
We love Chrome, especially because of its extension library that allows you to add new features that are not natively included in the browser.
The downside is that it is resource intensive, but you should have no issues with a proper modern computer.
The main differences are in the features that they offer. So, for example, the Desktop app offers a Print then cut feature. This feature is only present in the iOS app and not in the Android app.
Some features specific to the desktop version are Pattern fills, Templates, Link Physical Cartridges, Curve text, Knife Blade cutting, Offset, and Project Collections.
However, in the mobile version, you have the unique features of Smart Guides, SnapMat, 3D layer visualization, and Photo Canvas.
Based on these features, you can pick and choose what your preferred device for Cricut should be.
We must remind you that Cricut no longer supports the web service; you will have to download a desktop or mobile app. However, these browsers listed were the best browser options for Cricut design space and are excellent options for other design services you may try out.
If you have any comments or suggestions on this topic, feel free to reach us using the dedicated section.
You got your hands on the premium Dell XPS 13 laptop and just as you want to connect it to your TV using Miracast, you realize it’s not working.
Miracast is a popular way to share the screen with your Smart TV, but it can sometimes behave strangely, even with devices that support the technology.
At the same time, the Dell XPS 13, just like its antecedents, comes with built-in support for the screen casting feature.
If you are using Windows 10/11 on your Dell XPS 13 laptop, it becomes easier to use Miracast on the device as shown below:
Attach your Miracast adapter to your TV or display.
Switch on the TV and select Miracast as the input.
Now, turn on your the Dell XPS 13 laptop, and press the Win + I keys simultaneously to open Windows Settings.
Click on System on the left and on the right, click on Display.
Now, on the right, scroll down to Multiple display and click on it.
Here, go to Connect to a wireless display and press Connect.
Windows will start check for Available displays. Select the receiver and Windows will now configure autimatically.
Press the Win + P keys together to open the available display list and now, choose from the enabled display options.
Once done, you can now cast the Dell XPS 13 laptop screen to your Smart TV using Miracast.
What can I do if Miracast is not working on my Dell XPS 13?
1. Update outdated drivers on Dell XPS 13
Press the Win + R keys simultaneously to launch the Run console.
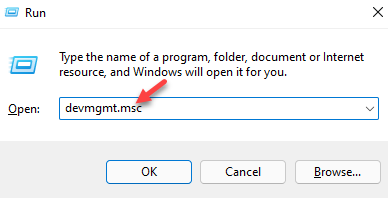
Type Devmgmt.msc in the search bar and hit Enter.
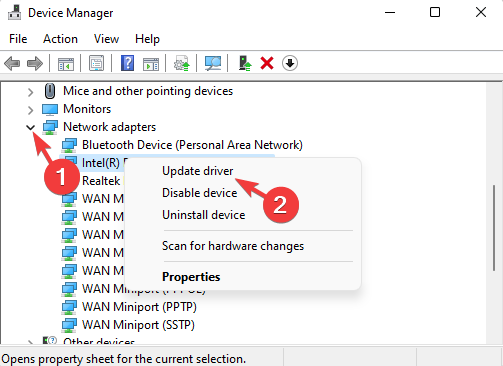
Expand the Display adapters section, right-click on the device, and select Update driver.
In the Update Drivers window, click on Search automatically for drivers.
Windows will now start searching for the latest drivers and if any are available, will install them automatically.
Similarly, you can expand the Network adapters section and repeat steps 3 to 5 to update the wireless drivers as well.
Assuming that you successfully updated the drivers, you can try connecting your Dell XPS 13 to your Smart TV through Miracast with no problems.
If the Windows didn’t update them for you, we recommend you try Outbyte Driver Updater, a software that will automatically do that for you.
Outbyte Driver Updater will go through all your drivers and check if they are outdated or broken in any way. After that, if possible, it will update or repair all of them with just a click. A simple way to avoid connecting issues like this one.
Outbyte Driver Updater
This tool will optimize every driver you have as well as the system performance.
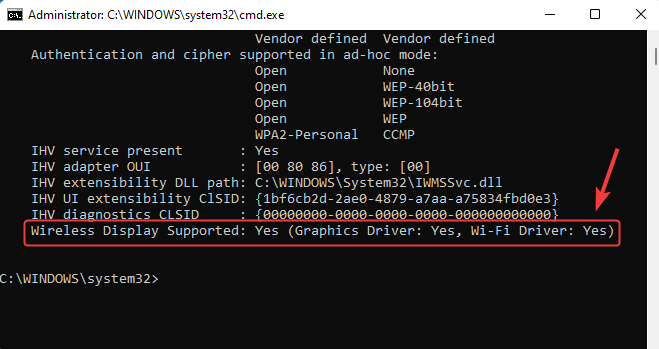
The first question to answer would be, does Dell support Miracast? For a Dell PC, you must ensure that it’s compatible with Intel Wireless Display (WiDi).
This is because the Dell hardware needs the Intel WiDi feature to support Miracast.
Therefore, to use Miracast on Dell computers, it’s essential for the imaging device and the client system to be compatible with WiDi.
For the WiDi technology to function properly, it needs a set of compatible hardware, drivers, and software such as wireless and graphics drivers based on each supported OS.
What else can prevent my Dell laptop connect through Miracast?
At the same time, make sure that you are not using a 3rd party graphic cards like Nvidia or AMD, since that may prevent Miracast to work.
Also note that Miracast uses Wi-Fi Direct, which means, it connects straight from the laptop to the TV when both the devices are in closer proximity.
So, even if the PC and TV are using the same Wi-Fi network, but your PC is not closer to the TV, Miracast will not work.
Besides, if you are using a 3rd party graphics card, you would need to remove it, because WiDi works only with the integrated Intel video card.
Alternatively, you can replace the wireless card or update the BIOS if you have not recently. Updating the BIOS card may help fix the issue when Miracast and Wi-Fi are not working at the same time.
It is no longer a surprise that the latest Microsoft OS allows performing various actions to personalize the digital environment according to your own needs.
In today’s article, you’ll discover how to add a website to the taskbar in Windows 11 easily. No matter what network browser you’re using, we prepared some methods applicable to all the popular ones.
Fortunately, the process is pretty similar from one browser to another. It will only take a few seconds, so you won’t waste time doing it.
Before getting into the main subject, check out why you should add websites to the Windows 11 taskbar.
Why should I pin a website to Windows 11’s Taskbar?
To save much more of your precious time, having quick access to frequently used or hard-to-remember websites is always a great idea.
In case there are network pages that you need to open, adding them to your Windows 11 taskbar regularly will not require an actual search.
And why is that? Because you’ll not have to look for websites in browser history or constantly keep them open.
In addition, keep in mind that Windows 11 allows you to add websites from multiple browsers, so you’ll have plenty of options you can choose from.
To find out how it works, make sure you read this article entirely.
How can I add a website to the taskbar in Windows 11?
1. Pin a Chrome website to the taskbar
1. Launch Google Chrome on your PC.
2. Navigate to the website you want to add.
3. While on that website, click on the three vertical dots in the top right corner of the screen. These are a shortcut for the Settings and moreoptions menu.
4. When the menu opens, hover the cursor over the More tools option, then choose Create shortcut.
5. Now, you can choose the name of your website, by typing it in the indicated box. You can leave the name empty if you want. It is not necessary to give the shortcut a name, but it helps you easily recognize the website later on.
6. Once you’re done with the changes, click on Pin.
7. The Chrome website will now be added to yourWindows 11 taskbar.
If you are a Google Chrome user, you can easily add a website to the taskbar via the app’s built-in Settings. All you need to do is open the website you want to pin and create a shortcut for it, that will be placed on the taskbar.
2. Add a Microsoft Edge website to the taskbar
In Microsoft Edge, navigate to the website you want, go to Settings and more options, marked as three vertical dots.
Hover the cursor over More tools, then click on Pin to taskbar.
Choose a name for your website, then click on Pin.
You’ll now have the desired website pinned to Windows 11 taskbar.
Microsoft Edge comes as the default browser in the latest OS design. However, it seems like some users are not so happy with using it, and a few also decided on more drastic measures.
Click the Windows key, then type Firefox, right-click on the result, and choose to Open file location.
Now, in the file location, right-click on Firefox, then select Show more options.
Choose to Create shortcut.
In the pop-up dialog box, click on Yes. Windows will automatically create a shortcut, placed on your desktop.
Navigate to your desktop, right-click on the created shortcut, then select Properties.
Click on the Shortcut tab, then enter the desired website URL.
Select OK to save the changes.
Now, you have the shortcut for your desired Firefox website.
Right-click on it, then choose to Pin to taskbar.
4. Add an Opera website to the taskbar
Click on the Windows icon, search for Opera, right-click on it, and choose to Open file location.
There, right-click on Opera, then choose to Show more options.
Hover the cursor on the Send to option, and choose Desktop (create shortcut).
Now, go to the created shortcut, right-click on it, then select Properties.
Navigate to the Shortcut tab, enter the needed URL.
Click on OK to save the changes.
Right-click again on the created shortcut from your desktop, then choose to Pin to taskbar.
Can I remove pinned websites from Windows 11’s taskbar?
In case you change your mind and want to remove the added websites from your Windows 11 taskbar, it is extremely simple, taking only a few seconds.
To easily do it, right-click on the undesired website, then choose to Unpin from the taskbar. Repeat it for each pinned network page you need.
However, you can’t pin all the items to the Taskbar using the same steps. In case you want to a batch file to the Taskbar on Windows 11 to access repetitive tasks without any hassle, you need to use a workaround. To learn more, read this guide.
Which is the most popular web browser?
And because we talked about multiple browsers that can be used to add websites to the Windows 11 taskbar, let’s see some statistics that reflect which is the most popular.
As you can see, Google Chrome is by far the most used web browser, indicating more than half of the entire network traffic.
In a distant second place, we can find Safari, with 17%. Even if the study set Microsoft Edge and Internet Explorer usage into one figure, we’d highly recommend not using the latter anymore. These registered 5.6% of the total results.
The last-placed web browsers are Firefox and Opera, with a percentage of 4.1%, respectively 1.5%.
As mentioned before, Microsoft Edge is the default browser in Windows 11. If you have other preferences, you can always change that. If you’re not sure which one you should try, check out these Windows 11 browsers that are highly customizable.
Call of Duty: Modern Warfare it’s held in high regard by the gaming community as being one of the best Call of Duty games since Black Ops III.
It’s both the sixteenth installment of the CoD series and a reboot for the MW (Modern Warfare) series. CoD: Modern Warfare is set in a realistic, modern environment, as its name subtly hints.
You can enjoy the game in both single-player and multiplayer modes. It also has a Special Ops game mode that lets you cooperate with other players on missions that act as a follow-up for the campaign ones.
However, multiplayer enthusiasts really dug into CoD: Modern Warfare’s online modes.
The game embraced a tactical approach that enables players to breach doors, encourages them to explore the map, and even lets them remove the HUD.
The game also features a battle royale mode that’s called Call of Duty: Warzone, where 150 players seek to be the last player/team standing. In Warzone, you can either play solo or in teams of 3 to 4 players.
Why is my CoD packet loss so high?
Generally speaking, packet loss may happen to anyone at some point due to a number of reasons. So it can be caused by your Internet provider or other PC settings.
More exactly, you have high packet loss on CoD gameplay if your network connection is unstable, you have outdated drivers, or hardware issues on the router.
Another valid cause can be related to your WiFi connection, in case there are too many users and the network is congested.
CoD: Modern Warfare packet loss symbol
CoD: Modern Warfare has a bunch of screen indicators that can come in handy while you’re in the game. A quick glance at the side of your screen and you’ll know right away whether there’s something wrong or not.
Note that the main cause of packet loss is usually network congestion. Therefore, if you can afford it, you might want to wait for it to fix itself, as it usually does.
CoD: Modern Warfare also displays icons for server performance, high latency, latency variation (jitter), low FPS, game health icons Modern Warfare, and refresh rate.
What do the 3 squares mean in Modern Warfare?
Essentially, 3 orange squares in Modern Warfare mean that you have packet loss while playing the game.
The Modern Warfare connection symbols also referred to as packet burst, signal that you’re experiencing packet loss.
This means that some packets you send or receive never make it to their destination.
If you check the warning icons guide, you’ll see that packet loss belongs in the Client category. This means that the leak is likely on your side, or somewhere in between you and the game server.
How can I fix the packet loss in CoD: Modern Warfare?
Note: VPNs can improve packet loss, but it doesn’t work every time. Basically, it only works if your ISP is the one causing the packet loss by either having an improperly routed network or throttling your bandwidth.
2. Troubleshoot your connection manually
Run a packet loss test using pathping.
Note the hop where the packet loss occurs.
Depending on your findings, take the corresponding action from this list:
Check and repair/replace/update/upgrade any software/hardware components on your end (PC, router, cables).
Call your ISP and inform them if there’s something wrong on their side.
Contact CoD: Modern Warfare’s support crew if the problem seems to be on their end.
The bottom line is that you can usually fix packet loss in CoD: Modern Warfare. More often than not it’s caused by network congestion and fixes itself. All it needs is time and a bit of patience.
However, if you don’t have the luxury of time and patience, you can try out one of our suggestions to fix it. Sometimes using a VPN can improve ping and packet loss.
If using a VPN doesn’t help, keeping your home network in top shape is always a good practice, and not only for packet loss, but for speed, and overall stability, as well.
Lastly, if you want to better your gameplay, simply start by ruling out Packet Loss.
More so, visit our Gaming Hub as well to discover more reviews, news, guides, and tips & tricks.
When you open software, a configuration window might occasionally open. However, some MS Office users get stuck with a configuration dialog box that opens every time they launch one of the suite’s applications.
The configuration window states Please wait while Windows configures Microsoft Office.
The software still opens, but the configuration window keeps on popping up whenever some Microsoft Office users launch the applications. Consequently, the applications don’t launch especially quickly.
This configuration dialog box error pertains to various Office versions. This is how you can get rid of that configuration window if it keeps on opening when you launch MS Office software.
How can I fix Updating Office, please wait a moment error?
You’re used to getting the very best out of this family of client software and services developed by Microsoft. However, Microsoft Office configuration issues appear quite often.
Instead of imaging the worst-case scenario, we’d suggest wasting no more time and downloading the Stellar Repair Toolkit.
This handy all-purpose utility is known to easily repair corrupt Microsoft Office documents – Word, Excel, PowerPoint, and even PDF files.
It really doesn’t matter if they are damaged due to improper system shutdown, compression errors, or virus attacks. The result is guaranteed and you’ll be able to launch the suite’s applications once again.
Stellar Repair Toolkit
Looking for a way to solve MS Office configuration issues? There’s no better choice than Stellar Repair Toolkit!
5. Press theChangebutton, and then clickYesto confirm.
6. Select theRepairoption and clickContinue.
7. For MS Office 2016, select the more thoroughOnline Repairoption, and then clickRepair.
8. Wait for the repairing process to finish.
9. Check if the issue persists.
Repairing corrupted MS Office installations might get rid of the configuration dialog box. To do this, you need to navigate to the Programs and Features menu and manually set up a repairing process for the app.
3. Open the Microsoft Easy Fix 50780 Tool
There’s a Microsoft Easy Fix 50780 tool specifically for fixing configuration windows that keep on opening for MS Office 2010 applications.
This tool probably won’t be much good for the latest Office versions, but it might get rid of the configuration window for Office 2010 applications.
Click the Download button on this Microsoft Easy Fix page to save the tool to Windows. Then you can open that tool’s easy fix wizard to fix the configuration window.
Input appwiz.cpl in Run’s text box, and click the OK button.
Click Turn Windows features on or off to open the window in the snapshot directly below.
Then select the Windows Search option if it’s not currently checked, and press the OK button. Note that Windows 10’s Windows Features window doesn’t include that setting.
It might the case that you’re running a 32-bit version of MS Office on a 64-bit platform. If so, a Microsoft Office 64-bits Components window will pop up when you launch the applications.
If that’s the configuration dialog box that is opening, activate Windows Search in Windows 10 as described above.
5. Enter Registry Keys in Run
Some Microsoft Office users have resolved the Windows configuration dialog box error by adding new keys to the registry. You can do that with Run instead of the Registry Editor.
So open Run with the Windows key + R hotkey, and separately enter the following registry keys in Run’s text box:
Each registry key is for one of five Office suites. Note that the MS Office version number in the registry keys above (15.0) is for MS Office 2013.
You will need to modify that number for alternative versions of the Office suite. For example, the version number for MS Office 2010 is 14.0.
So, you would enter the following key for Word 2010: reg add HKCUSoftwareMicrosoftOffice14.0WordOptions /v NoReReg /t REG_DWORD /d 1
MS Office 2016 users will need to change the version number to 16.0.
6. Switch Off MS Office Add-ins
Open an MS Office application.
Click File and select Options to open a settings window.
Select the Add-ins tab to open a list of add-ins.
Select COM Add-ins from the drop-down menu.
Press the Go button to open the COM Add-ins window.
Now deselect all the selected add-ins listed there.
Press the OK button on the COM Add-ins window.
Close and reopen Microsoft Office.
The Windows configuration dialog box might keep on opening because of third-party Office add-ins. To see if that’s the case, disable all your MS Office add-ins.
You can switch Office 2016’s add-ins off as described above.
To achieve a world-class experience, we also encourage you to bookmark our Microsoft Office Hub.
These were a few resolutions that might obliterate a stuck Windows configuration dialog box for MS Office or help to solve the Updating Office, please wait a moment error.
Office software should eventually launch a whole lot quicker. Let us know if this happened to you as well in the comments area below.
ReferenceError: browser is not defined is a common issue in many popular browsers. It occurs when the browser isn’t properly referenced in the code for web design or testing.
Below, we’ll walk you through step-by-step instructions on how to fix this error for good.
How can I fix the browser not defined error?
1. Update your browser
Click on the browser menu located in either the top left or right corner and select Help.
Click About.
Here your browser will automatically check for any updates. If there is an update, click Update.
If your browser is out of date, then issues may arise in the console. Regularly check for updates in your browser to avoid any future issues.
Click on the browser menu located in either the top left or right corner and select Settings.
Select Extensions or Addons.
Go through and toggle each extension off.
Users report that disabling add-ons like Ad-block has solved the problem. Disabling all of your extensions may fix the issue
3. Change the namespace
If you’re running into the ReferenceError: browser is not defined in Google Chrome, then you will need to change the namespace with callbacks from browser.* to chrome.* for cross-compatibility. You can do this by manually changing the namespace and callbacks to chrome.* which will work in both Chrome and Firefox.
Users can also use a shim or polyfill to convert the browser.* namespace to chrome.* with callbacks for Chrome. One shim to use is WebExtension which offers a lightweight polyfill library WebExtension APIs in Chrome.
4. Try another browser
If all else fails, consider using a different browser.
There are several causes of browser errors, but we noticed minimized issues in the Opera One browser. Switch to Opera One with all of your saved data from your existing browser and test the connection.
A browser’s undefined failure might be caused by an outdated version of the browser, but not in Opera. It is constantly updated and is known to be one of the most stable browsers out there.
Opera One
Switch to this error-free browser and benefit from AI assistance, free VPN, adblockers, and much more!
The ReferenceError: browser not defined occurs when there is a reference to a non-existent browser somewhere in the code when trying to create an extension. Declare the browser in reference or make sure it’s accessible in the script.
The browser variable declared within a function is not available outside of that function which could lead to the error. Defining the browser outside of the scope of function will make it accessible. Another possible cause could be a misspelling of the browser global variable.
Here are some variations of the error for browsers:
browser is not defined in Firefox
referenceerror: browser is not defined in Chrome
For other platforms:
browser not defined in JavaScript
browser not defined reactjs
referenceerror: browser is not defined webdriverio
browser is not defined adblock
browser is not defined puppeteer
referenceerror: browser is not defined mocha
We hope one of the above solutions helped you fix the browser is not defined. error. If you’re looking for recommendations for the best browsers for developers, we have a guide for that. Let us know in the comments which solution worked for you or if you have a suggestion for a different solution.
Need to tweak your hardware settings? BIOS is where it happens. In Windows 11, changing BIOS settings lets you adjust boot options, enable virtualization, or manage system performance.
This guide shows you exactly how to access and modify BIOS settings – step by step. Whether you’re troubleshooting or optimizing your PC, we’ll make it simple.
1. Access BIOS using the shortcut key during the booting process
While your system boots, keep pressing the Del key.
Windows will now boot to BIOS.
This is the easiest way to access BIOS, but it’s not universal. Some motherboards use a different key, and you can do two things to find the right key.
During the boot, look for the message saying Press Key to enter setup or any similar message. In most cases, pressing this key will allow you to enter BIOS.
Check your motherboard manual and find the shortcut key.
You can find the correct shortcut for your hardware by checking this guide on how to get the BIOS key, which helps you confirm the exact key your PC uses.
2. Enter BIOS using the Settings app
1. Click the Start icon in the Taskbar.
2. Now select the Settings app from the menu that opened.
3. Go to the Recovery options.
4. In the Advanced startup section, click on Restart now.
5. SelectRestart now to confirm.
6. Go to the Troubleshoot center.
7. Select Advanced options.
8. Now select UEFI Firmware Settings.
9. Finally, click Restart to confirm.
10. After the restart, Windows should boot directly to BIOS. From there, you can make all the BIOS changes you want.
There is a method to enter BIOS on Windows 11 without having to use a keyboard shortcut. Instead, you can access BIOS via Settings.
When should I update my BIOS?
You should only update your BIOS if you have a clear reason to do so. If your PC is working fine, there’s no need to install the latest version. Most BIOS updates fix specific bugs or add support for newer hardware like CPUs. So, unless you’re upgrading components or dealing with hardware issues that the update addresses, it’s better to leave it alone. Keep in mind that updating the BIOS carries some risk. If the process fails, your PC might not boot anymore. Only proceed with an update if it’s absolutely necessary.
What is the difference between BIOS and UEFI?
BIOS and UEFI are both firmware interfaces that help your PC start up, but UEFI is the modern replacement for BIOS. While BIOS is stored on a chip and has a basic interface, UEFI lives on a dedicated partition and often includes a graphical UI with mouse support. UEFI also enables faster boot times, Secure Boot, TPM integration, and support for larger drives. Most modern systems use UEFI by default, even though they may still refer to it as BIOS in settings.
Dead by Daylight is a survival horror game that you can play on Windows PC, Xbox One, PlayStation 4, Nintendo Switch, Android, and iOS.
You can play as a killer and hunt down four survivors, or become one of the survivors and try to escape an area without getting caught by the killer.
What makes Dead by Daylight special is that the survivors don’t have any weapons, so they can’t eliminate the killer.
Instead, they can use gear like bandages to patch up wounds, or a flashlight to blind the killer long enough to make a run for it.
The game incorporates famous fictional killers, such as Michael Myers from Halloween, Leatherface from The Texas Chainsaw Massacre, or Freddy Krueger from A Nightmare on Elm Street. New killers are added with each DLC.
Dead by Daylight has dedicated servers in several regions, including the US, South America, Europe, and the Asia Pacific.
However, many users occasionally have trouble playing the game due to high ping. It also depends on how the 5 players are matched in each session.
Still, you can significantly improve your ping with a VPN app. By connecting to a VPN server that’s in the same region as the Dead by Daylight server, you can eliminate lags and enhance your gaming experience.
How to reduce ping in Dead by Daylight?
Any gamer needs high performance on survival games like this one to keep up with other players, so getting rid of high ping is a must.
To reduce your ping level and improve game performance, consider these practical tips:
Change your DNS servers
Use the right ports on your router
Connect to faster servers on your VPN
Close any background apps on your system
Try an Ethernet cable connection
Hence, focus your actions on these potential causes and apply them in order to eliminate laggy performance in this incredible game.
Surfshark is a complete VPN alternative that can provide increased digital privacy with its server network, and boost gaming results on Dead by Deadlight
This VPN offers multiple benefits to ensure great privacy online with useful tools that guard you against online dangers, malware, or data theft.
For instance, the CleanWeb tool will help you stay unknown while navigating online and stop any ads or trackers.
More so, you have functionalities that assure access to awesome content or games around the world due to NoBorders Mode which hides your location in seconds.
Other key features of Surfshark include:
Private DNS leak security
Camouflage mode for total privacy
No log data monitoring
Latest data encryption type
IKEv2/IPsec protocols
Surfshark
Enjoy your gameplay using this VPN with fast servers and great anonymity tools.
Can you get banned for using a VPN on Dead by Daylight?
Using a VPN connection on Dead by Daylight is not prohibited by the developer. However, you can get banned if you try to purchase the game from other regions.
It actually depends on what actions you’re performing using a VPN. If you just need to increase your speed or use servers in different locations, you’re good to go.
Also, be aware that some VPNs can be detected much easier and block your servers. To avoid this, be sure to use professional software like the ones described below.
In conclusion, if you’re having trouble when trying to play Dead by Daylight due to high ping, make sure to use one of the VPN solutions we described above to lower ping and improve your gaming experience.
File Explorer is one of the most essential utilities in all Windows platforms. Microsoft has given Explorer a revamp in Windows 11. File Explorer’s redesigned user interface gives it a new look and feel. But for many users, File Explorer is slow in Windows 11.
One user told us about the fact that using arrow keys to navigate in Explorer leads to lag, just as when selecting items. He even reinstalled Windows 11 using a pen drive.
Why is File Explorer so laggy in Windows 11?
With its fancy new UI, the revamped File Explorer has caused a memory leak issue in Windows 11. A memory leak occurs when an app doesn’t release unneeded RAM. Consequently, File Explorer’s RAM utilization can get very high, which causes lag.
Microsoft is aware of File Explorer’s memory leak bug. The command bar is doing unnecessary calculations when navigating to folders, causing this decrease in performance.
This is also believed to be the root cause of performance issues when using drag to select files, as well as using the arrow keys to navigate in specific folders.
The command bar Microsoft refers to is what has replaced File Explorer’s old ribbon tabs. Thus, that new UI feature in Explorer is the primary culprit for the memory leak.
However, File Explorer acting slow is not a novelty, as this used to be a problem on Windows 10 as well. To fix the lagging, give some of these potential resolutions a try.
How do I fix slow File Explorer in Windows 11?
1. Press File Explorer’s hotkey
First, try going full-screen with File Explorer instead of utilizing it in a smaller window. To do so, press the F11 hotkey. When you do that, you’ll notice the command bar isn’t visible in that mode.
With the command bar gone, Explorer might not be so laggy.
2. Update Windows 11
Click Start on the taskbar.
Select the Setting app pinned to the Start menu.
Click Windows Update on the left side of Settings.
Press the Check for updates button to download and install new patch updates.
If a new Windows 11 build is available, update the platform to the latest version.
If Windows 11 File Explorer is slow after an update, there should be a patch for it in the subsequent version, and installing the latest updates should do.
3. Close superfluous apps and background processes
Press the magnifying glass taskbar button, which opens the search box.
Type Task Manager in the search box.
Click on Task Manager in the search results.
Select the Processes tab.
Next, select and press the End task button for all programs listed under apps.
Then look through and select unneeded third-party processes listed under Background processes. Click the End task button to close them.
2. TypeTask Managerin the search box to find the tool.
3. Click on the first result to openTask Manager.
4. Locate Windows Explorer in the list of apps.
5. Right click on it, then press the Restart button from the context menu.
6. Wait for a few moments while it restarts.
7. Check if the app works normally now. If the lags persists, try another solution.
If your File Explorer app is lagging, you should try restarting it via Task Manager. A reset is likely to solve the app’s issues and ensure its proper functionality. To do so, you need to restart Windows Explorer, which includes File Explorer.
5. Disable Quick Access
First, press the folder taskbar button for opening File Explorer.
Then click the See more button.
Select Options on the menu.
Choose the This PC option on the Open File Explorer to drop-down menu.
Uncheck the Show recently used files in Quick access checkbox.
Deselect the checkbox for the Show frequently used folders in Quick access option.
Also, click the Clear option.
Select Apply to save the new settings.
Then click OK to exit Folder Options.
When Windows 11 File Explorer is slow to open, disabling Quick Access should do the trick.
Can I restore classic File Explorer in Windows 11?
If you prefer the old tabbed File Explorer, you can restore it in Windows 11. To do so, you’ll need to make a relatively straightforward registry tweak. This is how you can restore classic File Explorer by editing the registry:
First, bring up Windows 11’s search utility.
Input the keyword Registry Editor in the search box.
Select Registry Editor to open its window.
Next, browse to this registry key location: HKEY_LOCAL_MACHINE\SOFTWARE\Microsoft\Windows\CurrentVersion\Shell Extensions
Right-click Shell Extensions to select New, then Key.
Enter Blocked for the key’s name.
Select the new Blocked key.
Right-click a space on the right side of the Registry Editor to select New, then String Value.
Enter {e2bf9676-5f8f-435c-97eb-11607a5bedf7} to be the new string’s name.
Thereafter, close the Registry Editor.
Select the Power and Restart Start menu options. After restarting, open classic File Explorer.
As restoring the old File Explorer removes the command bar, this might be another potential resolution for fixing the lag. However, it’s more of a workaround than a solution for users who prefer Windows 11’s revamped File Explorer.
Remember that Windows 11 is a new OS. Therefore, it’s not surprising that it has a few bugs like the group by option being greyed out that Microsoft needs to iron out.
The big M has already released one update that’s supposed to address File Explorer lagging in Windows 11, and there might be more. Make sure you keep Windows 11 up to date.
As File Explorer lag usually arises because of memory leaks, some of the resolutions in our guide on how to fix memory leaks in Windows 10 might also help resolve this issue. Although that’s a Windows 10 guide, you can still apply many of its suggested fixes in Windows 11.
Although not necessarily guaranteed to work for all users, the resolutions above are worth a try. Users who have found other ways to solve File Explorer lagging issues in Windows 11 are welcome to share their resolutions in the comments below.
As you probably already noticed, on your Windows 11 PC, you might have many different audio output options to choose from.
Whether there are devices hooked up, such as speakers, headphones, headsets, or otherwise, you can switch between them and decide which one you want as your default one.
In this article, we will show you how to do so, just in case you will need this knowledge in the future.
How can I change my default speakers on Windows 11?
1. Change the default Speakers via Settings
Default speakers can be easily changed from the Sound Settings menu on your Windows 11 device. The changes you make in this menu apply to all the apps on your computer.
1. PressWindows key + I at the same time on your keyboard.
2. The Settings menu will open.
3. Select System, and then click on Sound.
4. Click the Choose where to play sound button, to extend the section.
5. Select the device you want to use as default, from the list of available ones.
6. Exit theSettingsmenu and the changes will be applied.
Of course, all this process will take place in the Settings menu, as you most likely guessed. However, don’t be discouraged because this is not at all a daunting task and will only take up a few minutes of your time.
These changes will be applied system-wide, for absolutely all apps. However, also keep in mind that certain applications may be customized to override this setting and choose a different output device.
This method doesn’t involve installing any third-party software or downloading any Microsoft add-ons, but only using the options page.
Before adjusting your speakers, you can quickly open Sound Settings in Windows 11 to access all available audio output devices from one place.
2. Set a default sound output without using the Settings app
We would like to bring to your attention the fact that there is even a quicker way to perform these changes, without having to go through Settings.
Here’s what you need to do:
From the bottom right corner of your taskbar, click on the Sound button.
Once the tray opens, click on the tiny arrow located next to the volume control.
Select your defaut output device and close this menu.
Maybe most of the time you are comfortable with your laptop speakers but will need to switch to your Bluetooth speaker and crank the music a bit louder.
From now on, when the need to change your default output method for sound arises, you will be prepared to face this challenge and perform this task in less than a minute.
Artists working in the entertainment industry always look for different ways to improve and streamline their workflows in a bid to reduce rendering times.
However, they sometimes come across errors such as this effect requires GPU acceleration, especially when working with Adobe applications such as Premier Pro and After Effects.
So, what do you do when you get this error and your computer does not have GPU acceleration? GPU acceleration uses your computer’s Graphics Processing Unit to increase rendering speeds. Video editors understand that this acceleration is required for some effects to work well.
Fortunately, you can take certain measures to fix this error and continue working on your video. Let us explore some of the fixes for this error. But before then…
What does it mean when it says This effect requires GPU acceleration?
GPU acceleration can be defined as the process that uses your computer’s GPU (Graphics Processing Unit) to improve the speed at which videos are rendered.
Some effects cannot work well without this acceleration. You can use GPU acceleration for different tasks, key among them 3D rendering, video encoding, and video decoding, among others.
It, therefore, means that the certain effect that you are applying to the content you are working on requires the use of your computer’s GPU for it to be successful.
For instance, when working on projects that require things like color correction, you might have to enable GPU acceleration for the process to be completed successfully.
How do I fix This effect requires GPU acceleration?
1. Enable GPU Acceleration
Run Adobe Premier Pro and then click on Files on the top left side and select Project Settings.
Click on General from the extended drop-down menu.
Click on the drop-down menu, Renderer, under the Video Renderer and Playback section.
Select Mercury Playback Engine GPU Acceleration.
Click OK to save the changes.
2. Update Windows graphics drivers
Right-click the Windows Start button and select Device Manager.
Expand the Display adapters option from the list of device drivers.
Right-click on your graphics drivers and select Update driver.
Choose to let Windows find a driver for you automatically or manually seek a fresh driver file on your machine.
Follow the on-screen instructions to install the driver update and then restart your computer.
The easier and more time efficient solution is to use Outbyte Driver Updater to automatically identify the most recent version of the driver and have it downloaded for you.
This intuitive tool will show the list of all the newest or missing drivers and will let you choose the one that you need to bring up to date.
Outbyte Driver Updater
Use this software and never let your drivers get old again.
Understanding GPU accelerated effects requires you to first understand what GPU accelerated computing is.
It is the use of the Computer Processing Unit (CPU) and Graphics Processing Unit (GPU) to enable faster operations and high quality.
Therefore, GPU accelerated effects are effects that require the use of the GPU and CPU for them to be rendered well and at fast speeds.
Without acceleration, you might notice your computer getting slow when working with these effects.
How do I enable GPU acceleration?
Enabling GPU acceleration depends on the application that you are using. For instance, if you are using Adobe Premier Pro, you can enable GPU acceleration by going to File, selecting Project Settings, then choosing General, and then picking a renderer.
GPU acceleration is important, especially when working in the video production industry. However, you can face challenges and errors that might cause frustration.
Some of these errors, such as this effect requires GPU acceleration error can be fixed easily following the steps discussed above.
For any other questions or suggestions, don’t hesitate to let us know in the comments section below.
Some said it’s the best Windows version yet, and some said they’re waiting for the final version to make a decision, but everyone was looking to find out more about its features and how to enjoy it.
One of the things users are curious about when it comes to Windows 11 is how exactly to hide the Recycle Bin from their desktops.
To make things easier for those who need a little customization here and there, today we’ll show you how to keep your desktop clean and hide the Recycle Bin icon.
What is the purpose of the Recycle Bin?
The Recycle Bin is a location where deleted items such as folders and even shortcuts are temporarily stored. It occupies a predetermined amount of storage space on your computer’s hard disk, but you can adjust some settings to your needs.
You can delete unwanted files manually or with the help of your keyboard. Moreover, there are some excellent Recycle Bin cleaners worthy of your attention.
How to remove Recycle Bin from Desktop in Windows 11
1. Use the Settings app
1. Press the Windows + I keys at the same time to open the Settings app.
2. Select the Personalization option from the menu on the left.
3. Click on Themes.
4. Go to Desktop icon settings.
5. A window containing desktop icons will open.
6. From this window, unselect the checkbox next to the Recycle Bin to hide it.
7. Now click on Apply and OK to save the changes.
The easiest method to hide the Recycle Bin icon is via Settings. From the Desktop Icon Settings, you can choose which icons to be visible on the desktop. All you need to do is uncheck the box for Recycle Bin, and it will be removed from your desktop.
Open the Desktop Icon Settings window by presssing Windows + R keys and typing the following command: desk.cpl ,,5
This simple command will open the Desktop Icon Settings interface.
As before, uncheck the Recycle Bin option.
Click on Apply, then OK to save the settings.
Note that while here, you can customize your desktop to your liking. Those who want to have a clean desktop can hide all desktop icons. As for others who want everything on display, they can choose to do so just by following the steps above.
Windows is one of the most used OS, but it’s also the primary target for hackers and viruses. The main goal of the viruses is to steal your private info (Passwords, Credit Cards, etc.)
Hackers are an unscrupulous bunch, and they prey on the uninformed. Like phone scammers, they’ll find a way to get your sensitive data and rob you of your belongings, identity, and whatnot.
That’s exactly the deal with the Windows detected ZEUS Virus prompt some users see on their web browsers.
In this article, we will explain how to remove this malicious software and how to recognize threats like this below.
What is Zeus.2022 Trojan?
If you’re prompted with the Windows detected ZEUS Virus message, you can be certain there’s no such thing as a ZEUS Virus. Your PC might be infected, but not as the message prompt puts it.
This is just trickery by adware you’ve mistakenly installed on your PC. These kinds of browser hijackers are not uncommon in the current state of the internet.
The only way this adware can hurt you is if you comply to give some sensitive data in order to resolve it to the cybercriminal who developed it. Don’t do it.
Adware is almost always not a real danger, and the problems start only when users panic and call support or provide the hacker with credentials of any sort.
Hence, what you need to do is follow a cleanup procedure, which we’re about to explain below.
How to remove Zeus Virus from Windows 10?
1. Uninstall from Control Panel
In the Search bar, typeControl, and openControl Panel.
From the Category view, select Uninstall a program.
Navigate to one (or multiple) suspicious and untrusted programs.
Right-click on a program and uninstall it.
Restart your PC.
Let’s start the whole cleanup procedure by inspecting the list of installed programs. The peculiar, unrecognized applications are ones you should pay attention to.
They are usually installed by mistake, hidden within some installers, or directly added to your browser as add-ons. We call them PUPs (Potentially Unwanted Programs).
2. Type Windows security in the search bar that opens and click on the result to open the Windows Security Settings menu.
3. Navigate to the Virus & threat protection section.
4. Choose Scan options.
5. Select Windows Defender Offline Scan from the list of options.
6. Before you click on Save now, make sure that you save everything you’re doing as this mode will restart the PC.
7. Click Scan now to begin scanning your PC for malware. This process can take a while.
If you are getting the Virus.2022 Torjan alert, you should check for possible malware infection on your PC. You can use the Windows 10 built-in security, Windows Defender. It is free and you already have it.
However, Windows Security offers only basic protection and doesn’t always detect advanced malware.
Just to make sure there’s no malicious intrusion at hand, we suggest going for a deep scan with a dedicated antivirus solution, that can detect malware before they infect your PC.
We recommend you use a modern antivirus that can detect and remove adware, browser hijacks, and other unwanted computer viruses.
TotalAV
You can rely on TotalAV for advanced security and in-depth protection solutions.
PUPs hijack your browser, replace your default search engine, and redirect your traffic to suspicious websites. Or, in this case, prompt you with the Windows detected ZEUS Virus message.
These usually require specific tools that deal with unwanted programs. At the core of the problem, we probably have an unwanted program and we most certainly want it removed.
Plus, such helpful tools can help to detect PUP sources efficiently to prevent downloading potential dangerous software on your system.
Hence if you notice that your PC starts acting strange all of a sudden, with pop-up ads or opening new tabs, then you certainly need the above programs.
4. Reset the browser settings
Chrome
Open Chrome.
Click on the 3-dot menu and open Settings.
Scroll down and open Advanced.
Scroll to the bottom and click Restore settings to their original defaults.
Click Reset.
Firefox
Open Mozilla Firefox.
Click on the 3-line menu and open Help.
Open More Troubleshootinginformation.
Click Refresh Firefox.
Edge
Open Edge.
Click on the 3-dot menu and open Settings.
Choose Clear Browsing data and then Choose what to clear.
Click Show more and check all the boxes.
Click Clear and restart Edge.
Finally, the browser settings that were changed once the infection occurred won’t be restored. You need to reset your browser to factory settings by hand.
If you don’t do it, the default search engine and the possible malicious add-on will continue working. And we don’t want that.
In addition, make sure to clear all locally cached files, as some of them might be corrupted. The reinstallation might be your safest bet, but the factory reset should do the job for now.
With that said, we can conclude this article. If you still have issues with the Windows detected ZEUS Virus prompt, repeat all steps and consider reinstalling the browser.
When you need to know if your PC can run certain software or if a new component will be compatible with your system, check your computer specifications.
You can find data about your CPU, RAM, operating system version or type, or even the system or device IDs.
For instance, to know for sure if your PC can run a software solution, check its system requirements and confront them with your configuration.
What are the main computer specs that I can find?
Whether you want to know the system tech specs to check the software or hardware compatibility, or you’re just curious, we listed a few criteria about the system’s components in the order of their importance.
➡ CPU – When it comes to the processor, you need data like the maker and model, the operating frequency, the number of cores, and logical processors.
➡ RAM – You can find the actual amount but in the System Information app you will also see data about the available memory and the virtual memory.
➡ Disks – The size of the disk may be easy to find even from the drive properties but when it comes to the number, type of the partitions, and the space allocated to them, you will have to consult a system information tool.
➡ Display – You can always check the monitor details, resolution, and frequency of the display from the display settings but you might also want to get info about the adapter and its amount of memory, or even the driver and its version, the I/O Port address or its IRQ channel.
These are only a fraction of the information you may need to verify compatibility or get some data in order to help you troubleshoot a component. Here’s how you can get relevant data on all specs right away:
How can I find my computer specifications on Windows 11?
1. Via System Properties
1. Press the Windows key + E to start File Manager.
2. Right-click on This PC from the left pane and select Properties from the menu.
3. In the menu that opened, you can find two sections: Device specifications and Windows specifications.
4. You can see all the PC specs in here. The technical specifications include the CPU data, the amount of RAM, device and product ID, the system type and information about the version and build of your OS.
5. You can copy the data to your clipboard by clicking on the corresponding Copy button in the window and then pasting it in a document file or on a troubleshooting page.
6. After you finish, close the window.
A great method to check your PC specs is to navigate to the About menu via Settings. In that menu you will can find device specifications, as well as Windows specifications.
2. Use the Settings app
Click the Windows button and select the Settings app.
Select the System section from the left pane and then choose the About option from the bottom right.
In the next window you will find exactly the same data as the one from our previous solution.
3. Use Command Prompt
Press the Windows key + R to start Run.
Type cmd and press Enter or click OK.
Now type the following command and press Enter to run it: systeminfo
You will see a list with all the specifications of your system. Just scroll up to see all the necessary data.
Listing the technical specifications with Command Prompt offers a lot more data about your system than the previous methods.
For instance, you will be able to learn about the latest KB fixes installed lately and your PC’s Wi-Fi and Bluetooth modules.
4. Use the System Information app
Press the Windows key + R to start Run.
Type msinfo32 and press Enter or click OK.
This will open the System Information app with a plethora of data about your system.
The System Summary is just a part of the information here available so you can pick any category on the list, from the left pane, to see more data on the right pane.
5. Use Windows PowerShell
Right-click the Windows button and select Windows Terminal (Admin) from the list of options.
Type the following command and press Enter to run it: Get-ComputerInfo
The system will analyze the info and you will receive a lot of information about your PC, including the BIOS version.
The Get-ComputerInfo command from PowerShell will get you much more information than the ones you get with Command Prompt, including details about the OS and your network.
How do I check my RAM on Windows 11?
Press the Windows + R shortcut to start Run.
Type msinfo32 and press Enter or click the OK button.
In the next window, you can check the physical memory and the available memory from the right pane.
After checking your RAM amount available on your system we will try to answer some common questions that you might have on this subject.
➡ How much RAM do you actually need? – It depends on the applications you need to run on your Windows 11 PC. If you want to play one of the latest action games without any problems, you will need at least 16 GB. On the other hand, for regular office tasks, you will be fine with just 8 GB.
➡ Will more RAM speed up my computer? – Certainly, yes! If you are used to multitasking or even if you open more tabs in a browser, you will definitely see an improvement with an increase of 2 GB or 4 GB.
➡ Is it better to have more RAM or storage? – When it comes to PC resources, more is better. However, if you don’t feel that the system is slow or you don’t run any demanding applications, you don’t need to invest in more RAM. You could take a look at our article on how to speed up your PC instead.
So, it’s possible to see that again until the final release for the public, although we don’t expect these changes to be drastic.
Let’s recap the main tech specs you’ll need if you want to run Windows 11:
CPU: At least a 2 core processor with minimum 1 GHz frequency
RAM: Minimum 4 GB
Storage space: At least 64 GB
Firmware: UEFI
Security: TPM 2.0 required and UEFI Secure Boot
Display: HD resolution (720p), 9-inch minimum, 8 bits per color channel
Graphics: DirectX 12 API, WDDM 2.0
Connectivity: Bluetooth (excluding desktop PC), Wi-Fi or Ethernet connection
Digitizer: Precision Touchpad (if touchpad is present)
Buttons: Volume buttons and the power button must be present
Ports: USB ports (at least one), video output needed
By using the methods provided in our guide, you will find out all that and a lot more. Or you could use a dedicated app called WhyNotWindows11 that will show you exactly if you can run Windows 11.
After you download and run it, your system will be analyzed and you will receive a chart like the one above. If all the squares are green, you are good to go.
Anyway, now that you know how to assess your system with the tools provided by the Windows system, you will be ready.
The fourth method offers a lot more information about your system than any of the others, and the data is very well structured, so you can always find the data you are looking for.
However, if you’re looking for basic information, any of the other solutions will provide enough to go with.
CrossFire is an online free tactical FPS (First-Person Shooter) from Z8Games that is enjoyed by hundreds of millions of players worldwide.
As a player, you can assume the role of a mercenary company, either the Global Risk or the Black List, and fight the other party.
There are multiple game modes, and most of them can handle a roster of up to 16 players. So each team can have a maximum count of 8 players.
There are some play modes such as Zombie and Wave, where special conditions apply.
If you play for a while, you can progress in your military rank. You start off as a trainee, and depending on your skill you can promote your character all the way up to Marshall.
You can also customize your appearance and equipment.
Can I use VPN in CrossFire?
Yes, you can use a VPN in CrossFire. In fact, a VPN can contribute to better speed, prevent phishing attempts, and hide your private data on gaming servers.
Strong VPNs can hide your location and help you bypass geo-blocks on CrossFire so you can play even from unsupported countries.
For that, we recommend using a premium VPN with good encryption and additional privacy features like double VPN/multi-hop or obfuscated servers.
What are the best VPN apps to play CrossFire?
?Private Internet Access – huge server network covering all regions where CrossFire is available
NordVPN – advanced anti-detection features to play CrossFire in blocked countries or on restricted networks
ExpressVPN – lightning-fast speeds to lower ping and get amazing FPS in CrossFire
Surfshark – Budget-friendly option with tons of servers in countries where CrossFire is supported
CyberGhost VPN – high-speed servers and easy-to-use apps to quickly configure for better CrossFire gameplay
Private Internet Access (PIA) is an excellent VPN service brought to you by Kape Technologies. It passed all of our security, speed, and reliability tests with flying colors, which makes it suitable for a wide range of situations.
It boasts a wide server network, which plays a huge role in circumventing geo-blocks.
Additionally, thanks to its lightning-fast servers, you can enjoy CrossFire without annoying high latency (lag) issues.
Private Internet Access users can benefit from unlimited bandwidth, thus enjoying a fast connection at all times.
The VPN is able to bypass restrictions making sure your traffic data go undetected so there’s no risk of ISP throttling.
What you need to know about PIA:
Boasts over 3,200 secure VPN servers spread in 66 locations, in 46 countries
Fast servers to help you eliminate high ping issues
Lets you connect up to 10 devices from the same subscription/account
Private Internet Access is available under multiple subscription plans. All plans include a 30-day money-back guarantee.
Private Internet Access
Want to explore more servers on CrossFire? PIA can do that and improve ping at the same time.
NordVPN is another great choice as it strives to offer access to fast responding servers while keeping a very secure connection.
This VPN uses its own type of WireGuard protocol that is built to provide high-speed rates. After lots of testing, the VPN is proven to be able to provide a download speed of over 4 000 Mbps and upload speeds that surpass 6 000 Mbps.
So, if you decide to give a try to this VPN, you are all set when it comes to speed rates. Not only does it provide servers with great speed potential, but it also helps fight against ISP restrictions.
NordVPN combines multiple features including powerful AES 256-bit encryption, double VPN (routing traffic through 2 private servers), and obfuscated servers to make sure your activity stays completely anonymous.
What this means is that your ISP will not get any information about the amount of data you use when you are connected to the VPN, thus not being able to throttle your traffic.
Other key features of NordVPN include:
Strict no logs policy
Connect up to 6 devices
Private DNS
Multi-factor authentication
Split tunneling
NordVPN is a subscription-based VPN service with multiple plans available. All new users can benefit from a 30-day money-back guarantee.
Nord VPN
Say goodbye to ping and lag in Crossfire and connect to fast and secure servers across the world.
ExpressVPN is another reliable VPN that you can use for unrestricted and lag-free sessions on Crossfire.
The VPN client offers users access to thousands of fast servers from 94 different countries. You will certainly find a good server for your unique location.
ExpressVPN masks your IP address and gives you a virtual one from a location of your choice.
This way you will be able to bypass blocks on Crossfire as it will appear as if you connect from a supported country.
The VPN users TrustedServer technology meaning they don’t write any data on the hard drives, on top of their strict zero logs policy.
With the split tunneling feature, you can select which apps on your device use VPN and which ones use regular traffic.
This can come in handy when you want to reduce ping and lag in games. You can prioritize all VPN traffic to Crossfire.
Other key features of ExpressVPN include:
Network Killswitch
DNS protection and private DNS
Military-grade encryption
Lightway protocol
Threat manager
ExpressVPN
Improve in-game speed and protect data with ExpressVPN!
Another great Kape Technologies-signed product, CyberGhost VPN also offers you great ping reduction and block-bypassing capabilities. It provides you with airtight security and doesn’t log any sensitive information about you.
Thus, you can safely use it outside of CrossFire, as well.
Due to CrossFire being available only in specific countries, a service such as CyberGhost VPN can help you explore a wider selection of servers effortlessly.
More so, thanks to CyberGhost VPN’s fast servers, you can experience the game at blazing speeds. It’s one of the fastest VPN apps.
Cyberghost includes advanced security features such as DNS security, powerful encryption, and a secure killswitch to make sure your privacy is protected on all fronts.
What you need to know about CyberGhost VPN:
Has more than 6,400 secure servers in 89 countries
Lets you connect up to 7 devices to the same account
Fast servers to help you improve ping
Helps you circumvent geo-restrictions
CyberGhost VPN is subscription-based. Each subscription plan includes a 45-day money-back guarantee in case you are not satisfied with the product.
CyberGhost VPN
Curb your ping issues and eliminate geo-restrictions in CrossFire with CyberGhost VPN.
Yes, you can play CrossFire in the US. The game is available to play in the United States without any restrictions.
There are however locations where the game is no longer supported. Regions where the game is blocked include South Korea, Japan, Taiwan, and Iran.
More so, some users encounter bothersome ping issues while playing the game.
In this situation, VPN software can be quite useful. VPNs can improve ping and circumvent geo-restrictions like the one described above without significant effort.
What does the CrossFire data transmission not stable error mean?
The data transmission is not stable error could mean one of two things: either your connection is bad and you have high ping, or the CrossFire servers are down.
The first one you can fix if you use one of the VPNs recommended above. However, if the issue is with their servers, you’ll just have to wait it out.
Wrap up
To wrap it up, even if you can probably play CrossFire unhampered without a VPN, there’s still room for improvement. Using any of the VPN services we’ve suggested can upgrade your playing experience.
Because nowadays gaming platforms try to block VPNs, it may be difficult to find a good option. But if you use the tools we recommend you can fix Crossfire’s high ping even in 2023.
More so, our suggestions are great all-round services. Therefore, even if you’re done playing CrossFire, you can still count on them to keep your connection private and secure, away from prying eyes.
CloudMosa’s mission is to enhance the performance of devices worldwide via cloud computing and make them universally useful and incredibly powerful.
CloudMosa’s Puffin browser is a lightweight, cloud-based browser that uses remote servers to help users download and render web pages extremely fast without overusing their local resources.
Puffin was only available on iOS and Android, but it turns out that slower PCs could also benefit from this cloud-based boost.
As a result, CloudMosa brought the browser to the Windows platform as well.
Can you download Puffin Browser for PC?
Puffin Browser is only available for desktop devices. You can easily download it for your Windows PC from the official website.
However, it is only compatible with Windows 7 (SPI) and Windows 10. Also, it has a Mac version for Macbook users. For other operating systems, you might have to consider another browser.
Is Puffin still available?
Puffin Browser is available for download from the official website and other third-party sites. But, for the safety of your PC, you should only download it from the official website.
How can I download and install Puffin Browser?
1. Download Puffin and enjoy faster browsing on slow PCs
Click the downloaded installer and follow the simple onscreen instruction to complete the installation.
The Puffin browser is similar to Opera Mini, using the servers to pre-process and compress web pages.
Thanks to remote rendering, it won’t leave any traces on your PC. All the traffic from the Puffin app to the Puffin server is securely encrypted, making it safe to use even on public Wi-Fi networks.
Puffin’s JavaScript engine and cloud computing services and technology use servers to achieve loading times up to five times faster.
This allows you to save up to 90% of your bandwidth compared to any other regular web browser.
Puffin browser managed to reach more than 80 million users, and it’s currently the top utility application in the App Store in 58 countries, including France, the United Kingdom, Japan, Italy, South Kore, and more.
The company hopes that it be as successful for PCs running Windows as well.
Even if there were some security concerns about Flash, you wouldn’t have to worry about them when you’re using Puffin, according to CloudMosa.
The Puffin browser is more of a desktop rather than a store application, and it’s currently available on Windows 10 and prior versions.
CloudMosa announced that Puffin Browser would support Flash beyond 2020. Also, it will provide a Puffin Flash Store to help the educators using the plugin a better experience.
However, it is important to note that Flash contents are no more safe as they are no more receiving security updates. So, you should be wary of them.
With this, we can say you have all the information needed to download and install the Puffin Browser on your PC. We can only wish you good luck from here.
Do you need an in-depth Puffin Browser review? Then, check our guide on the topic to know about its security and all other important details.
Feel free to let us know in the comments below if you encountered any problems while installing the browser.