20 Of The Most Expensive Steam Games In 2026 [Worth It?]

Launched back in 2003, Steam has become a behemoth. Moreover, they have a wide range of game categories for everyone, from free to some of the most expensive games on Steam.

It hosts over 50,000+ games from various developers and is unshakable in the industry. 

If you ask, why is Steam simply so popular? The answer is that they have a vast library of games; they offer mod support; you can add non-steam games to your library; backup your game saves on cloud and external storage devices; and more.

Plus, Steam doesn’t only sell games; it also sells both paid and free software, like a wallpaper engine, particle effects creator program, parametric image editor, and so much more!

But the question is, what are the most expensive games on Steam? Let’s find out!

What are the most expensive items on Steam?

Even though the list we compiled is nowhere near holding all of the most expensive items found on Steam, it will still provide you with helpful information.

  1. Genuine Gilded Edge | Dota 2 – $706
  2. Shattered Greatsword | Dota 2 – $599-$1024
  3. Genuine Imperial Flame Swords Pack | Dota 2 – $1471
  4. M9 Bayonet | Lore |CS:GO – $1,682.99
  5. Sticker | compLexity Gaming (Holo) | Katowice 2014 | CS:GO – $1,720
  6. Sticker | kennyS (Gold) | Boston 2018 | CS:GO – $1,749.18
  7. Skeleton Knife | Crimson Web | CS:GO – $1,778.91
  8. Driver Gloves | Overtake | CS:GO – $1,780.58
  9. Souvenir AUG | Contractor – $1800
  10. StatTrak™ M9 Bayonet | Autotronic – $1800
  11. Sticker | 3DMAX (Holo) | Katowice 2014 – CS:GO, $1,850.20
  12. AWP | The Prince | CS:GO – $1,850.20
  13. AK-47 | Wild Lotus | CS:GO – $1,873.40
  14. The Olive Branch – Pan | PUBG – $1,873.40

Now that we covered the most expensive items found on Steam in 2022, let’s move on to the essential element: the most costly games found on Steam this year.

What are the most expensive games on Steam in 2022?

Ascent Free-Roaming VR Experience – $999.00

An image that shows the player shooting a creature

The Ascent Free-Roaming VR Experience is undeniably the most expensive game on Steam. However, it offers one of the most immersive and premium V.R. experiences, where up to five players, including you (1+4), will have to remove the infestation from the FuriCorp research facility.

With additional hardware such as a bodysuit and an omnidirectional treadmill, you can include special effects in your gameplay by having it give haptic feedback and shake the floor.

You can play in multiplayer mode as well as a single-player mode.

This game costs $999.00, which sounds surreal, but provided the experience the game offers, it’s up to the individual to determine if they want to experience this unique experience or want to pass.

This game doesn’t provide any DLC content.

⇒ Get Ascent Free-Roaming VR Experience

Strata Spaces V.R. – Professional Edition Upgrade – $995.00
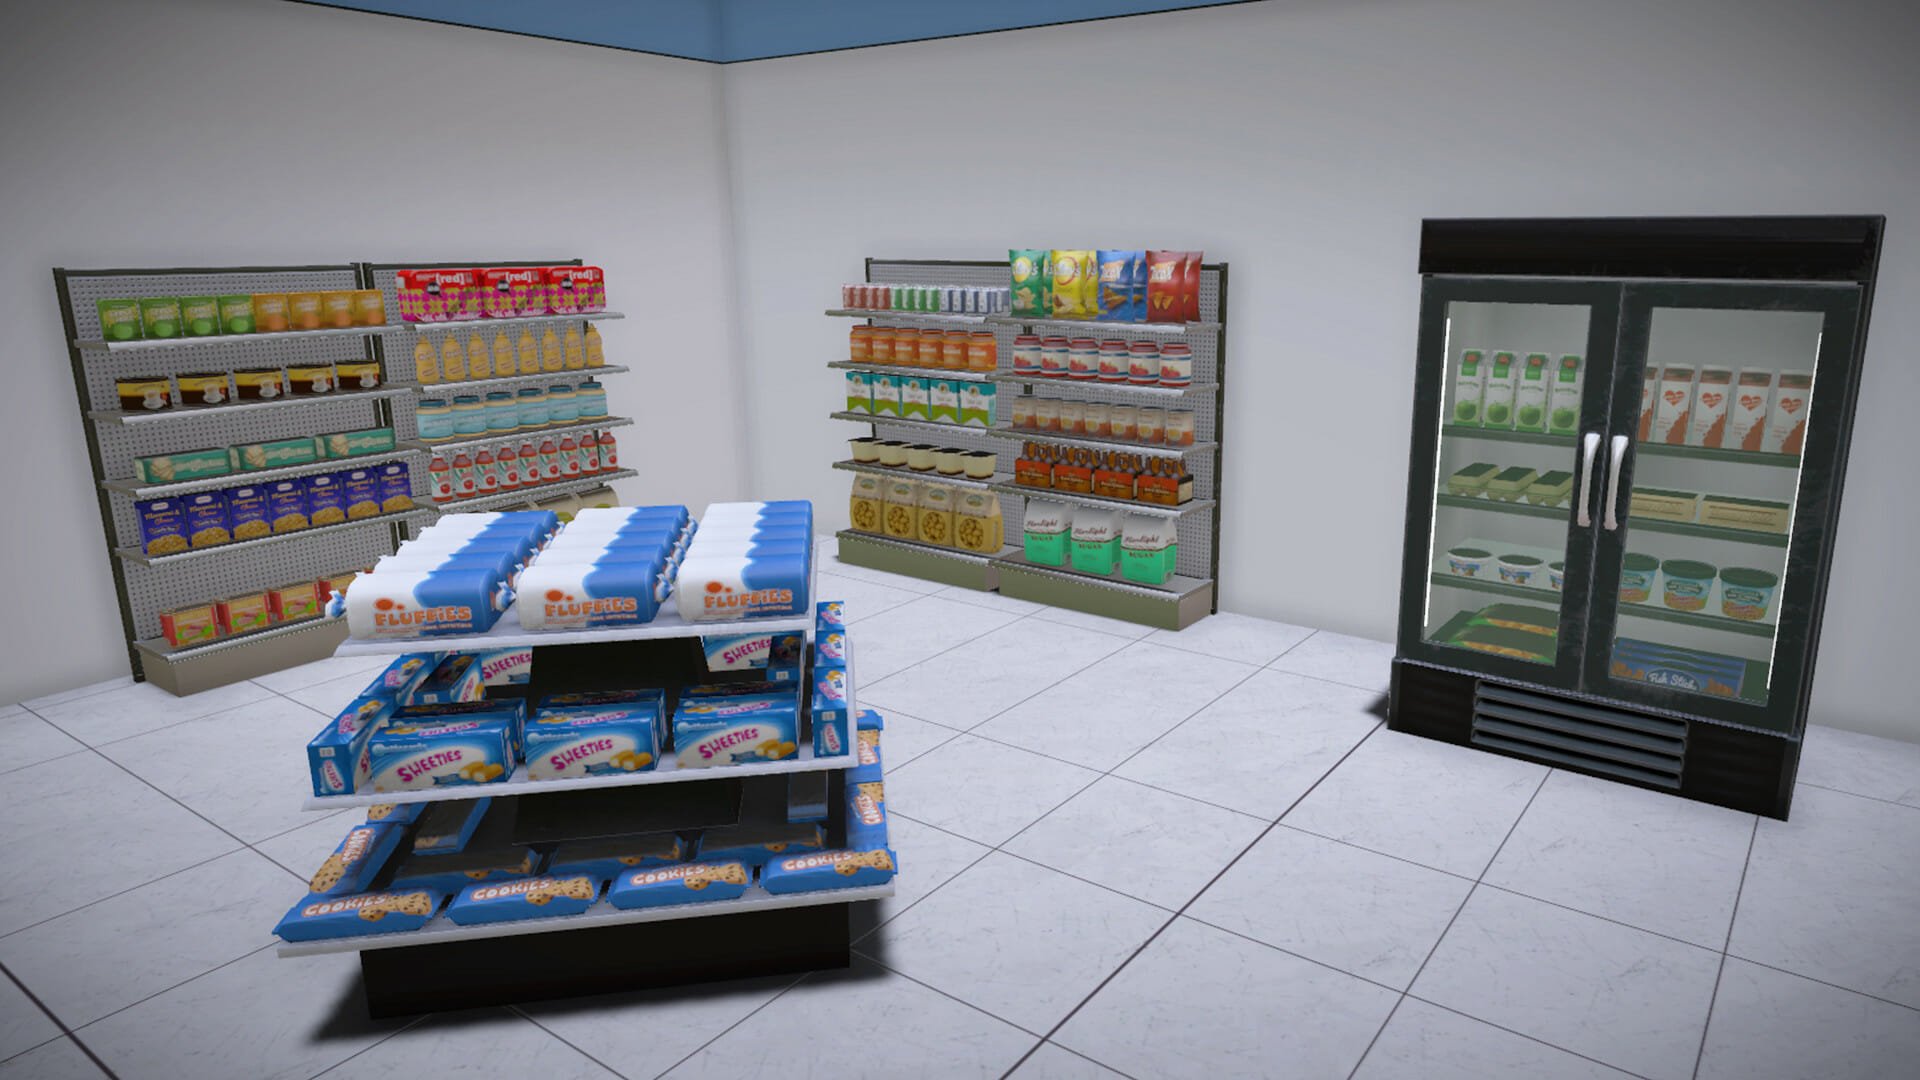
An image that is designed like a grocery shop

Strata Spaces V.R. is an immersive V.R. game that launched in October 2017. This app is aimed at designers and modelers who are in the world of designing and are passionate about it. 

Strata Spaces V.R. allows the designers and the modelers to play around with the digital world by creating structures, interior designing, and more.

Strata Spaces V.R. allows the designers and the modelers to bring their creativity to life.

This game has DLC content.

⇒ Get Strata Spaces V.R. – Professional Edition Upgrade

Sharecare YOU VR Pro – $269.99
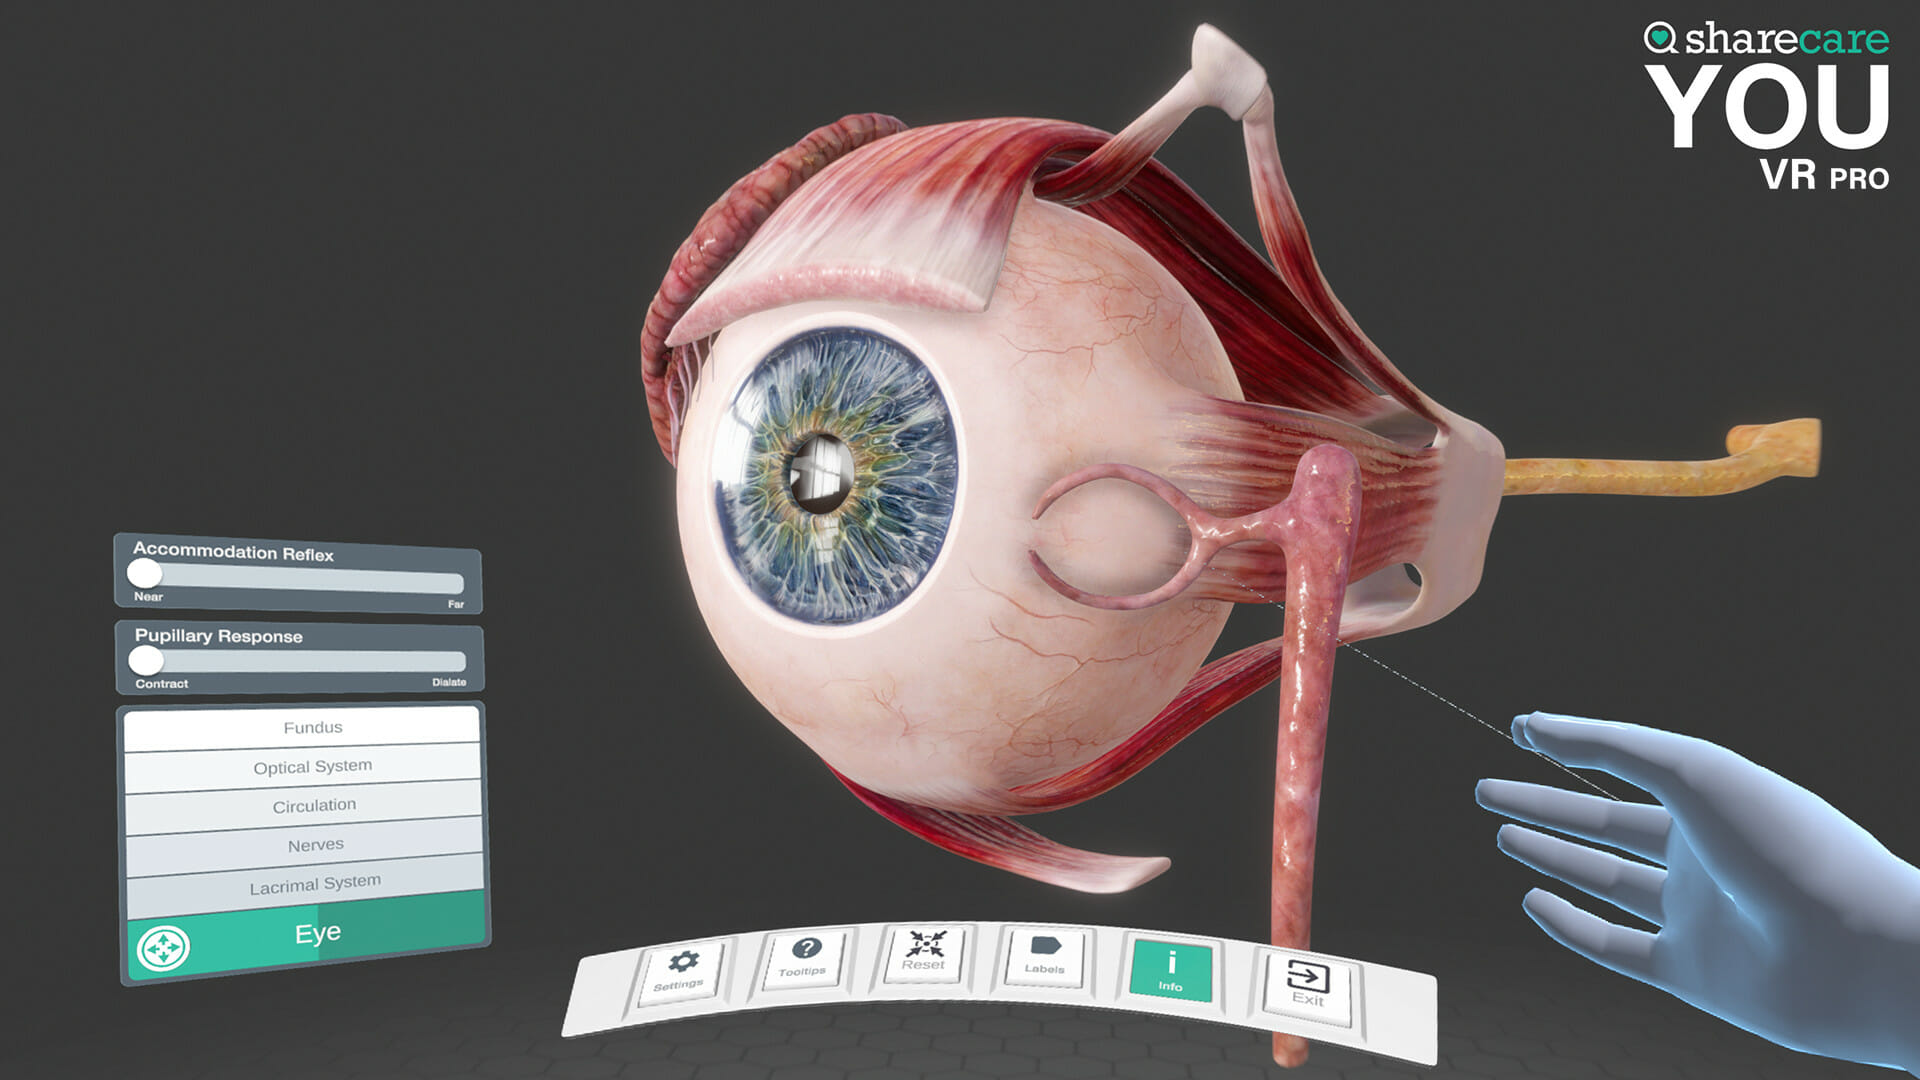
An interactive image where the player looks at the human eye in detail

Sharecare YOU VR Pro is another V.R. app on today’s list. This app is a fully immersive human body simulation that allows anyone passionate about medicine and the human body to explore.

With a single button press, you can dive deeper, learn about an organ, and visualize its functioning in 360 degrees.

This application has even more features where you can learn more about the body and physiology by simulating diseases.

This V.R. application is built for medical students who aspire to be physicians or anyone in general.

This game comes with the option of DLC content.

⇒ Get Sharecare YOU VR Pro

Super Fight – $199.99

An image where the player is fighting two bad guys

The Super Fight is priced at almost $200, and this fighting game is popular amongst gamers for all the wrong reasons.

Firstly, the price tag! Unfortunately, most users have found that they were cheated, as this game offers only one level, and the background feels like a static jpg photo.

It is unknown why it is priced so exorbitantly, but if you are a Richie-rich and want to build a collection of owning the most expensive games on Steam, this one deserves to be on the list.

This game doesn’t come with any DLC content.

⇒ Get Super Fight

Fight – $199.99

The player is shooting the ground

Fight is a first-person shooter (F.P.S.) game published by a Chinese company called Rongyou. It’s the only game this company has so far produced and is priced at $199.99. 

There are three reviews on this game, with two users recommending it and one not suggesting it. 

The game looks rather dull, and the asking price can be too much for regular folks, except if you are a collector or want to try your hands on this game.

The answer is no if you’re wondering if this game has any DLC content.

⇒ Get Fight

The Island of Dr. Yepstein – $199.99

The player is looking for the enemy

The Island of Dr. Yepstein is a first-person action shooter game. The story takes place on a mysterious island where you kill the enemies and solve its secrets.

A 12-year-old made this game. And the reviews on Steam are split into two camps, where a few players say it’s an excellent game, but the other half disagree.

Also, this game is a non-DLC content game priced at an exorbitant price of $199.99.

⇒ Get The Island of Dr. Yepstein

Virtual Orator– $199.99

An image of a meeting room with people having a meeting in it

Do you have glossophobia? Meaning, are you afraid of public speaking? Or having trouble speaking correctly? Then the Virtual Orator is for you!

It creates a V.R. experience that helps people overcome their glossophobia or helps them with their speech. 

You can change the crowd size, behavior, and more by adjusting the game’s settings. Start with small crowd size and gradually increase it when you think you can handle it.

This game is fantastic for people with speech challenges, but it costs a steep $199.99, and that can be expensive for most unless you genuinely want to overcome your challenges and conquer them.

This game doesn’t have any DLC content.

⇒ Get Virtual Orator

Run Thief – $199.99

A man is running away in the darkest of night

Just as the name of the game sounds, you play as a thief in the game. You steal a plot against the emperor and are on the run, hence the name Run Thief.

The entire game revolves around you avoiding all of the traps that have been set for you. It has the potential to be a fantastic game, but the graphics are inadequate for the $199.99 asking price.

The game has two reviews in total, and both are voted as not recommended; plus, this game doesn’t come with any DLC content.

⇒ Get Run Thief

W.H.A.L.E. – $199.99

The main menu of the game W.H.A.L.E.

W.H.A.L.E. is an educational V.R. game for Water and Hydrogeological Analysis Laboratories Enterprise, and players learn about sustainable water development in this game.

Unfortunately, this game has no user reviews on Steam at the time of writing this article, although it was launched in October of 2019.

Plus, this game doesn’t have any DLC content.

⇒ Get W.H.A.L.E.

Z.L.M. Crafter – $199.99

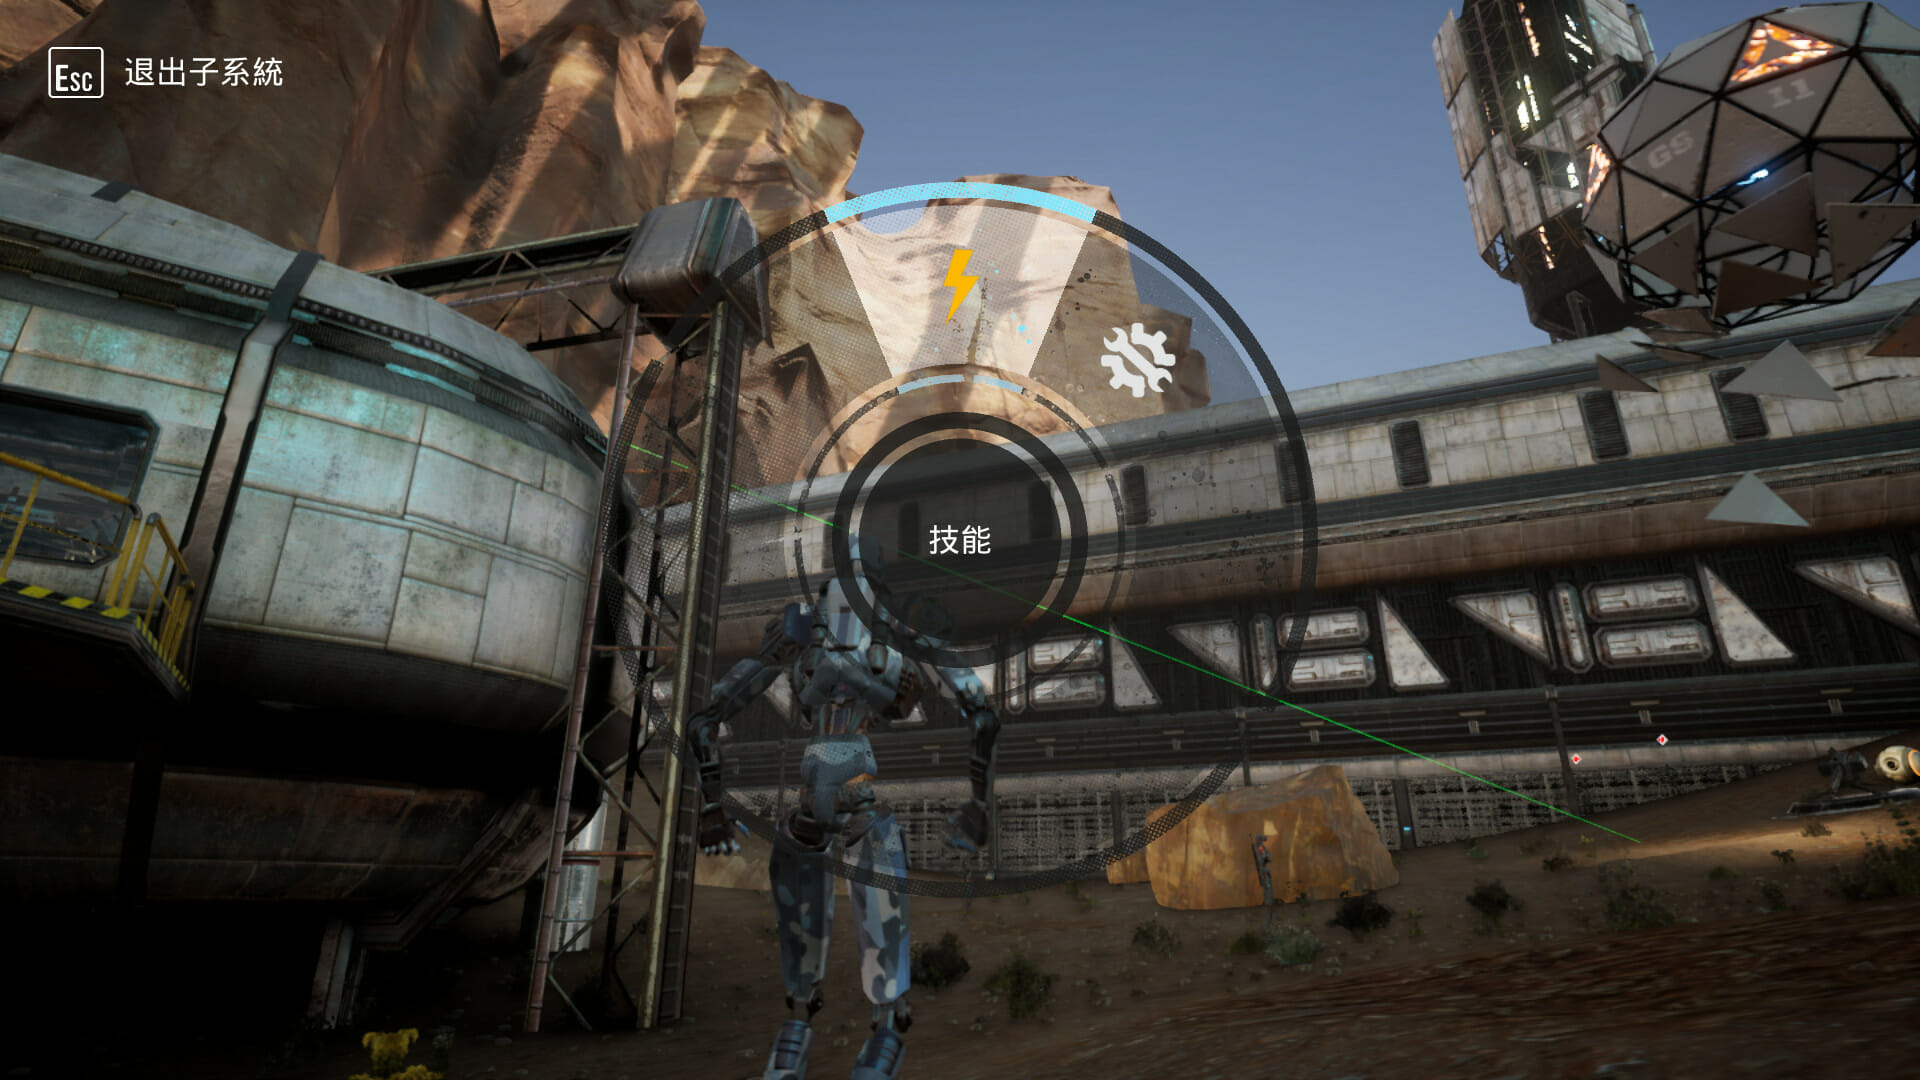
A robot is running in an industrial area

Z.L.M. Crafter is an RPG game where you are a scientist whose name is Lachlan Lawrence, but who wakes up as a robot one day.

When you wake up as a robot, your only mission is to stay alive, explore, and decode the mysteries. If you die, you can restart, but every time the details won’t be the same as the first time.

If you like games where everything is not the same as last, and the details keep changing, then this one is definitely for you.

And no, this game doesn’t have any DLC content.

⇒ Get Z.L.M. Crafter

Arcade Drift – $199.99

A photo of a car drifting in the game Arcade Drift

Arcade Drift is an early access indie racing game launched in June of 2021.

Currently, three cars and five maps are available to try out, with more in the pipeline once the full version of the game launches.

This game has six reviews in total, with five positive ones, where one user said that it’s a pretty good game and the graphics are excellent for an early access game, and it doesn’t have any DLC content for the same reason.

Is the price justified? It’s on you to make the call to purchase this game or not to purchase it.

⇒ Get Arcade Drift

Earthquake escape – $199.99

A boy crouches to protect himself from an earthquake

The Earthquake escape is a simulation game, and the gameplay is unique, where you play as a boy who is left alone at home and has to move to a safe place in case of an earthquake.

The graphics look okay for this kind of game, and there is only one review available, which is a positive review, where the user mentions that they previously bought the same game for $500 and marked the study as Recommended.

Also, this game doesn’t come with any DLC content.

⇒ Get Earthquake escape

1000 Stages: Adventure!!! – $149.99

A photo of 1000 Stages: Adventure!!! gameplay

1000 Stages: Adventure!!! It is an indie game that was launched way back in 2018.

This game nowhere looks like it’s one of the most expensive Steam games, but it surprisingly has that price tag. Also, the user reviews for this game are mostly positive.

⇒ Get 1000 Stages: Adventure!!!

marriedbook ? – $149.99
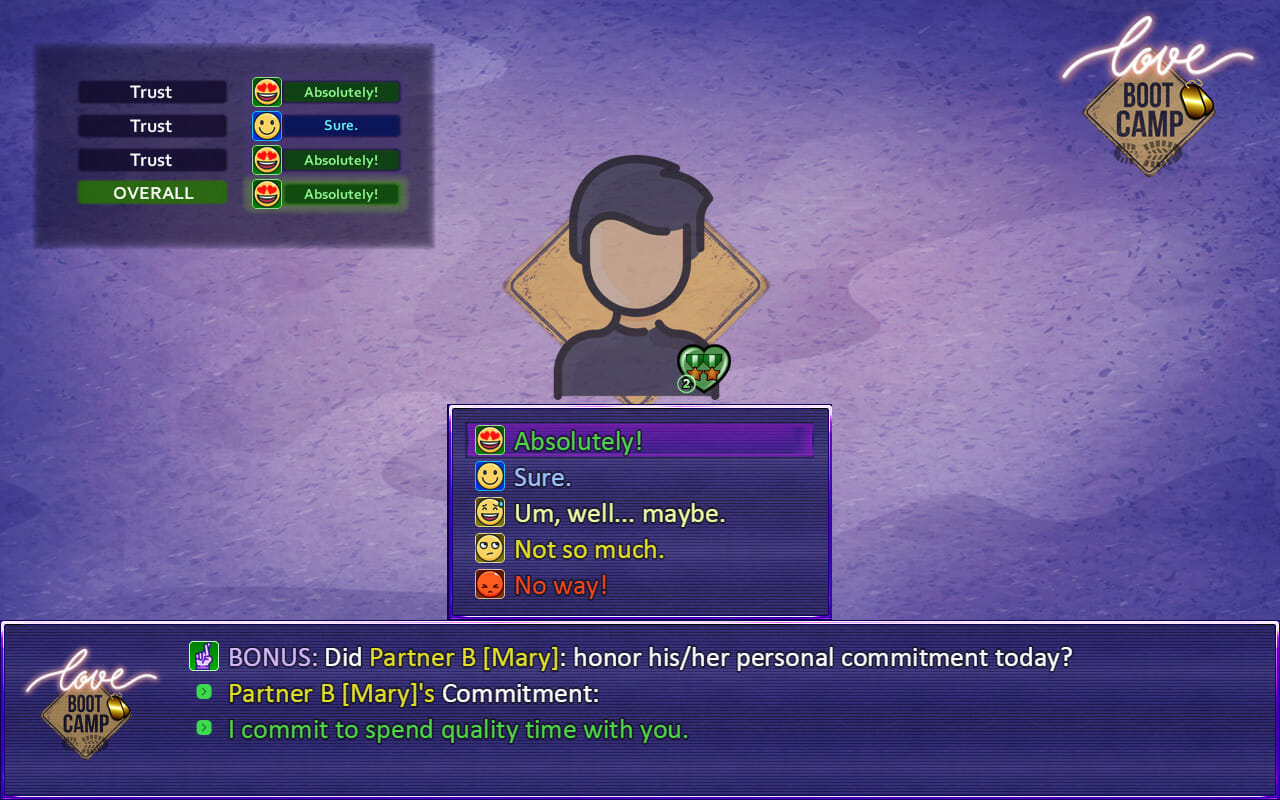
Setting commitments in the game marriedbook

Marriedbook is an early access game for all couples, and it encourages you to form an intimate bond with your spouse and promotes the idea of teamwork and its importance. 

The game also offers unique couple activities to bring them closer and help them understand each other better.

This game is available for Windows users that use XP up to Windows 10, and the recommended spec to run this game is Core 2 Duo 1.8 GHz or higher and 4 G.B. of RAM.

⇒ Get marriedbook ?

VR-CPR – $119.99

A man is performing CPR in the game

VR-CPR is all about providing C.P.R. in V.R. The graphics are impressive, but the price tag, which is $119.99 for this game, can be questionable for most.

When writing this article, there were no reviews for this game.

⇒ Get VR-CPR

Atelier Ryza 2: Lost Legends & The Secret Fairy Ultimate Edition– $109.99

A feature image of the game Atelier Ryza 2

Atelier Ryza 2: Lost Legends & The Secret Fairy is an RPG game developed and published by the Japanese company KOEI TECMO GAMES CO., L.T.D.

This game is the sequel to Atelier Ryza: Ever Darkness & the Secret Hideout; the story starts three years after the prequel and is about how Ryza and her friends reunite and face new challenges.

For a price of $109.99, this game comes with Atelier Ryza 2: Lost Legends & the Secret Fairy Digital Deluxe Edition and a season pass with 12 DLCs that have been launched in stages since March 2021.

Plus, this game has DLC content that you can download.

⇒ Get ATELIER RYZA 2: LOST LEGENDS & THE SECRET FAIRY ULTIMATE EDITION

Emission V.R. – $99.99
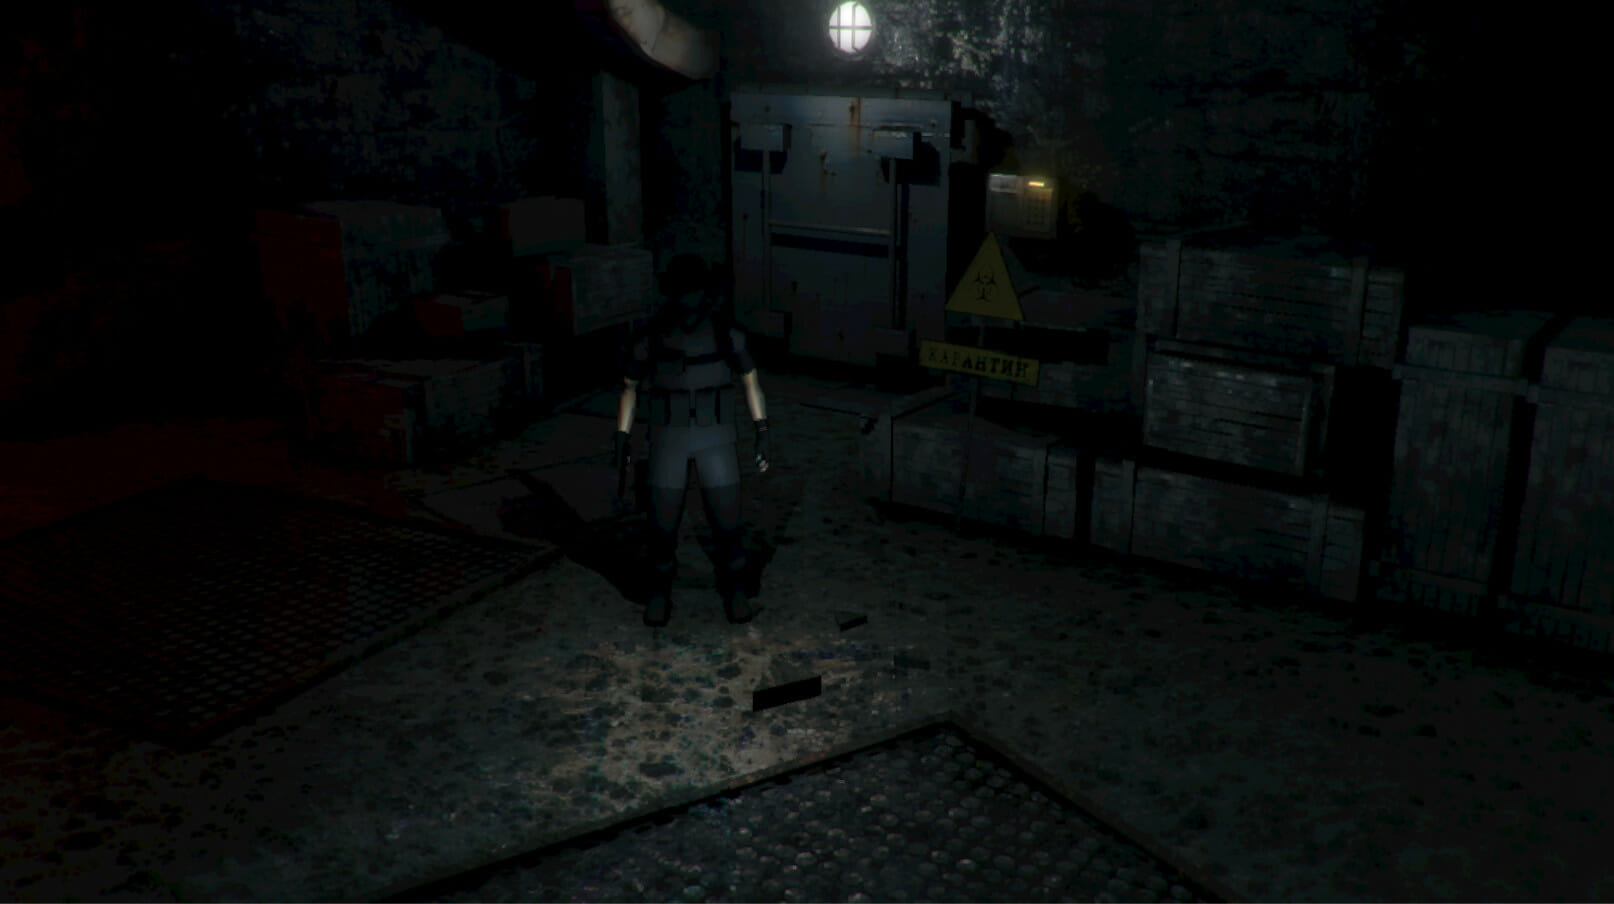
A man is standing near an entrance of the lab

Emission V.R. is an action game where a virus leaks from a secret lab that turns people into zombies.

This is a survival horror game where you must enter the lab and destroy all the evidence while confronting the zombies.

The game mostly has a negative feedback on Steam and is downvoted as Not Recommended.

⇒ Get Emission V.R.

Call of Duty: Ghosts – Digital Hardened Edition – $99.99

A soldier is petting his dog

It is impossible to talk about games and not mention Call of Duty. The Digital Hardened Edition of Call of Duty: Ghosts offers exclusive digital content, such as a season pass, player card, official Call of Duty: Ghosts soundtrack, and more.

The Digital Hardened Edition of the Call of Duty Ghosts has mixed reviews, and it can be purchased for $99.99

⇒ Get Call of Duty: Ghosts – Digital Hardened Edition

DYNASTY WARRIORS 9 COMPLETE EDITION – $84.99

A feature image of Dynasty Warriors complete edition

The Dynasty Warriors are based on the Chinese novel of the same name that talks about three kingdoms called the Romance of the Three Kingdoms.

It is an open-world RPG game where you and your army invade and protect other kingdoms’ invasions.

Overall, the game is okay, but it is repetitive, just like the previous Dynasty Warriors games, but the price for the complete edition is a good deal to grab, and it also has DLC content for download.

⇒ Get DYNASTY WARRIORS 9 COMPLETE EDITION

DARK SOULS III DELUXE EDITION – $84.98

A feature image of Dark Souls 3 Deluxe Edition

Dark Soul is a gory action-adventure that even won an award at Gamescom 2015 for the Best RPG category.

The Deluxe Edition of the game, on sale for $84.98, includes a complete game and a season pass. It also comes with DLC content.

⇒ Get DARK SOULS III DELUXE EDITION

The season pass unlocks new maps, enemies, weapons, bosses, and more.

Most of the games mentioned in today’s most expensive games on the Steam list can feel like outright rip-offs for what they offer. But there are quite a few games that can be a solid deal.

Let us know what games you will be buying from this list.

How Many Computers Are In The World? [Up-to-Date Stats]

It isn’t easy to imagine a modern-day world without computers. But unfortunately, society has become so indebted to these machines that we are constantly afraid of computers suddenly failing. Because of this fear, we’re fiercely protective of them.

How often have you looked for ways to fix your phone after being damaged? Or how about the sense of rage when your computer runs slow? People have grown so emotionally attached.

With how much we depend on these devices, one can’t help but wonder just how many computers there are in the world? There could be millions, if not billions, of computers worldwide, and that’s what this resource guide aims to answer.

This resource guide will answer just how computers are in the world, give some other helpful tidbits of information, and ponder what the future will hold.

Computer history: a short timeline

Before we answer the main question, it would be a good idea to give a brief overview of computer history. But first, what is a computer? People use them daily but most probably can’t answer what they are.

A computer is a machine that processes information according to a set of instructions. With that concept in mind, you can argue that old abacuses from ancient times. They were used for calculating mathematics.

Then there were analog computers that processed information using some physical properties, like the weight of an input, temperature, and other forms of pressure.

But of course, the first thing that comes to mind when you hear ‘computer’ is programmable, digital computers. The first of this kind of machine is ENIAC or Electronic Numerical Integrator and Computer, built in 1945.

Credit: Encyclopedia Britannica

ENIAC was massive. It took up the 50-foot by 30-foot basement of the Moore School of Electrical Engineering at the University of Pennsylvania.

According to Encyclopedia Britannica, its purpose was to calculate firing tables for artillery as ENIAC was built in the middle of World War II. Back then, the keyboard wasn’t invented, so it took instructions via plugboards.

So you have a giant machine with wires coming out every which way that you would have to take out and plug into another hole to tell ENIAC what to do. For the time being, it was incredibly fast, especially when other devices required paper cards.

If you had to enter a new problem, you’d have to rewire the entire thing. Plus, ENIAC was never turned off and generated immense heat, so it required its air conditioning system.

Adjusting for inflation, it cost the United State Government well over $6 million to construct and used its calculations to build the first hydrogen bomb.

After the war ended, people began to refine computers and make them much more manageable. The first transistors were invented in the early 1950s to replace the giant tubes that old computers such as ENIAC had.

Now there were tiny switches in computers that controlled electrical signals. Things proceeded to get smaller with the invention of the integrated circuit, or microchips as they were later called, in the 1950s.

Credit: Brian Kostiuk/Unsplash

Then those microchips proceed to get smaller and more potent with the creation of silicon semiconductors and microprocessors. Eventually, room-size computers become small enough to put into your home.

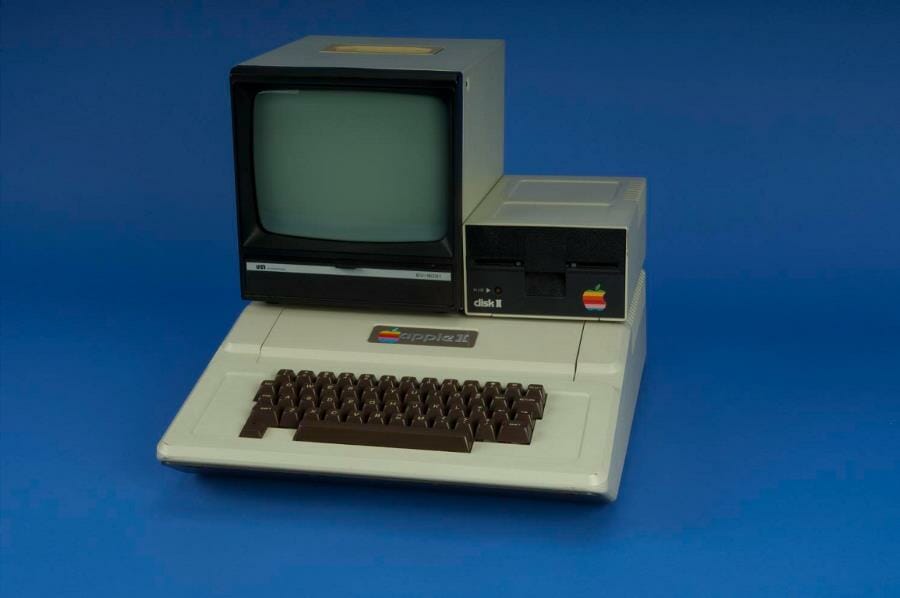
The world sees the creation of PCs, and some of the biggest computer companies come from this brief period. Companies like Commodore and Apple come out with their earliest machines, like the Apple II.

Credit: National Museum of American History – Behring Center/Smithsonian.edu

Then there’s a shift with portability being a primary focus. The first laptops came out in the 1980s, putting batteries into computers so people could take them anywhere.

Although, those old laptops had very tiny screens compared to today. New condensing tech advancements make computers more efficient and even smaller.

Those powerful microchips move on to the telephone to become the first iPhone and Android devices in the early 2000s. Tablets soon came after and, alongside smartphones, became the most dominant computing device in the world.

Credit: Josh Sorenson/Pexels

Microchips undergo another significant change with SoCs (system on a chip) that put most, in some cases, of the most critical parts of a computer into something barely more significant than a coin.

Modern computers have drastically evolved and changed so much in one century than most other inventions in the past.

How many types of computers are there?

It all depends on how you classify a computer and define precisely what it is. Many different types of computers do things vastly and come in various sizes.

There are two main classes of computers: one is based on application, and the other is on size. Of course, there is some overlap between the two classes, but that’s pretty much the basics.

The first classification, as an Application, can be thought of as what a computer can do and how they work. There are types under this class: analog, digital, and hybrid.

Analog computers are a strange bunch because, on the surface, they don’t look like computers. As briefly mentioned, analog computers work on physical inputs – things that can be measured, not numbers.

Credit: Jay R/Unsplash

This includes voltmeters, thermometers, the speedometer on your car, and even the analog clock you see in schools. Analog computers take information from the world and show that data in a way people can understand.

You know how fast your car goes by looking at the speedometer or how bad your fever is with a thermometer. Digital computers are what most people think of. PCs, Macs, laptops, Chromebooks, smartphones, all these are digital computers.

They work on data usually expressed in binary code or letters and then process that information at high speed. Hybrid computers, as the name suggests, combine the two.

These machines take information from the outside world and digitize it into code that a computer can read to turn into a legible form. Think of a gas pump, for example.

It measures the quantity of gasoline left in a pump and feeds that information to the people inside. Various medical devices are also hybrid computers.

Credit: Maxim Tolchinskiy/Unsplash

A heart monitor measures the patient’s heartbeat and displays that data on its screen. X-ray machines scan a person’s body and digitize what it sees on a computer screen.

The other classification is based on size. For this class, all the machines are considered to be digital computers.

The bigger the computer in this class is, the more it can do. There are five types: PCs, Workstations, Minicomputers, Mainframe, and Supercomputers.

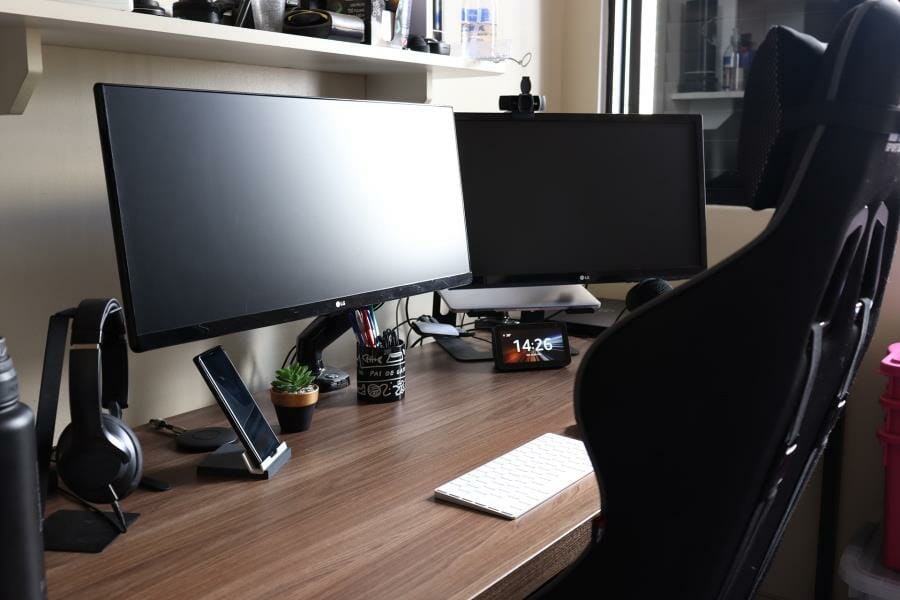
Personal computers are exactly what you think it is; machines that do a general-purpose job are explicitly designed to be used by one person. Construction is simple too.

Credit: Sigmund/Unsplash

You have a CPU, memory hardware, input via keyboard and mouse, and outputs from a screen or speakers: Macs, desktops, video game consoles, tablets, and more. Almost everyone has one in their pocket in the form of a smartphone.

Next are Workstations, computers built with a specific purpose, usually technical or scientific. Think of something like video game development or engineering, which is pretty powerful.

Credit: Douglas Lopes/Unsplash

Workstations are usually better performing than PCs, but that line is often blurred with so many powerful consumer-level parts. Still, however, these machines have lightning-fast CPUs and SSDs with a ton of space on them.

In animation, they may be used to render a movie overnight or for data analysis in other industries. Then there are minicomputers, which have an admittedly confusing name.

Don’t confuse minicomputers with PCs, as they are entirely different things. They’re more like small servers. Minicomputers have all of the features that a giant mainframe would have but on a smaller scale.

These machines are a type of multi-user computer that a business may use for inventory management or accounting. For example, you may see minicomputers supporting up to 200 users simultaneously and doing the calculations for all these people.

Compared to mainframe computers, minicomputers are much slower, with lower processing power and less storage space, which is fine if they don’t have to handle a lot of information simultaneously.

These machines are great for small businesses, but if you’re a large company like Google, you will need something much bigger and more powerful. And those are mainframe computers.

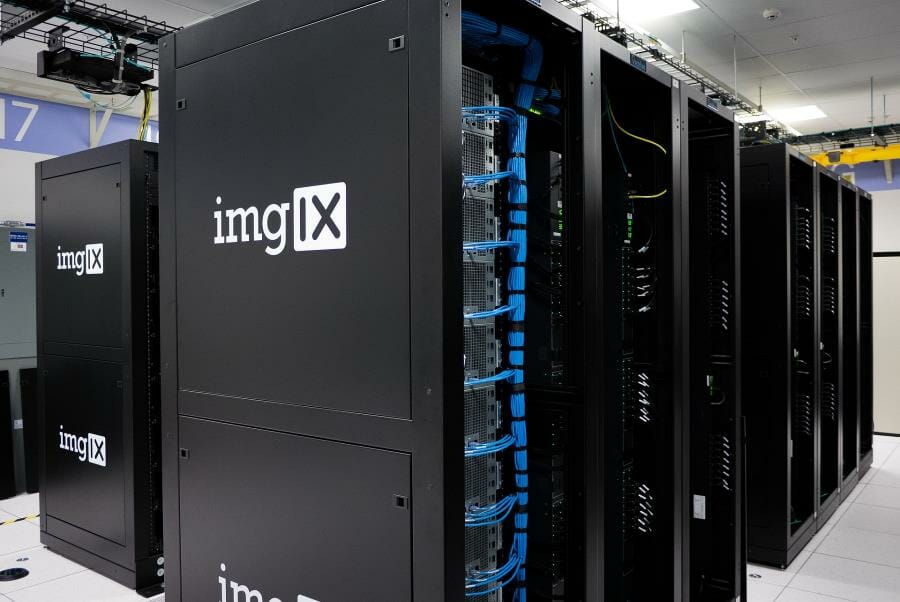
Credit: imgix/Unsplash

Mainframe computers are those big towers with racks in a giant room at a data center. These machines are made up of smaller computers that can perform as servers for a video, for example.

If you play a game like World of Warcraft, this is what you’re connecting to. However, don’t misunderstand and assume that mainframe computers are only for video games. They have a lot of usage.

Telecommunication companies or banking institutions use mainframes to process a massive amount of data quickly. And you better believe these gigantic machines are expensive to build and maintain.

Mainframes have fantastic performance and an enormous amount of storage inside of them. Because these machines are crucial to a business function, they last a long time. Planned obsolescence is not a thing with them.

And as you can imagine, these types of computers aren’t meant for everyday consumers, not that they would be able to use them anyway. Speaking of which, the final computer type is the world-famous supercomputer.

Credit: RIKEN Center for Computational Science

Supercomputers are those giant towers of multiple systems working together for a singular purpose. They’re the fastest processing power, designed to handle trillions of data in a few seconds.

Computers are used to analyze data from space probes or make weather forecasts. In addition, governments worldwide use these behemoths to help in nuclear research and for their spy agencies to break down data.

Machines of this magnitude are costly, with the low end being several thousand of dollars. But it’s not unheard of to learn about supercomputers costing many millions of dollars. Governments are more than willing to foot the bill.

The data obtained from this is invaluable. The world’s fastest supercomputer changes almost yearly, as even the slightest tweaks can make a massive difference.

The current fastest is the Supercomputer Fugaku at the RIKEN Center for Computational Science located in Kobe, Japan. It has over seven million processing cores and over five million GB of memory.

The Japanese government paid around $1 billion to build the Fugaku. It’s a marvel of human engineering.

How many computers are sold each year?

Computer sales fluctuate yearly due to various circumstances, and to keep things simple, this section will be using shipping information from the IDC or the International Data Corporation.

The IDC is significant market research, tech analysis, and consulting firm for the technology industry. They provide information from around the world to help IT professionals and corporations make technological decisions.

The IDC is one of the best sources for sales figures, so they’ll be referred to. And there will be two separate sections: one on traditional computers and the other on smartphones.

In 2022 there were 286.2 million units shipped, a 16.2 percent decrease. This can be attributed to the global recession, increased inflation, and high interested rates.

The pandemic is another factor, and many users purchased new PCs during it, so there was no incentive for them to purchase a new computer after it.

As for the most sold brands, almost all brands shipped fewer units than the previous year, except for Apple, which got a small increase.

On top of the list is Lenovo, with 68 million shipped units in 2022, however with a 16.9% decrease compared to the previous year.

Next is HP, with 55.3 million units and a surprising 25.3% drop in sales. Dell shipped 49.8 million units worldwide which is 16.1% less than the previous year.

Apple sold 28.6 million units, and it shipped 2.5% compared to the previous year. Next, there’s ASUS, with 20.6 million units and a drop of 5.7%. Lastly, there’s Acer, with 18.7 million devices sold and a 22.9% decrease in sales.

As for other brands, their combined sales are around 70.1 million, 17.8% less than the previous year.

As for the smartphone market, the number of shipments looks slightly different according to IDC.

Samsung sold 260.9 million units, currently holding 21.6% of the market. This is a 4.1% drop in sales from the previous year.

Next is Apple, with 226.4 million units sold and a 4.0% decrease in sales. As for market share, Apple holds about 18.8%.

Xiaomi shipped 153.1 million units, and it has suffered a 19.8 decrease in sales. However, the brand still holds 12.7% of the market.

Next is OPPO, with 103.3 million shipped devices. That’s 22.7% less than the previous year, but OPPO holds 8.6% of the market despite the lower sales.

Lastly, there’s Vivo, with 99.0 million units sold in 2022. The company achieved 22.8% fewer sales than in the previous year, and it still holds 8.2% of the market.

As for other brands combined, they sold 362.7 million units which is 9.1% less than in 2021. Currently, other brands hold 30.1% of the market.

How many computers are there worldwide?

Over two billion as of 2007. This number is provided by Worldometer, a real-time statistic website that includes information on various topics, like economics and media.

And this information has been collected from the IDC and other research organizations like Forrester Research and Gartner Dataquest. Forrester states that most of the two billion computers are being actively used.

Remember that this number has drastically increased over the years, and it’s impossible to give a correct estimate.

According to the predictions, the global shipments of PCs and tablets will be around 403.1 million units in 2023. This is a significant drop from December 2022, which estimated the shipment of 429.5 million units.

The reason for this is the declining demand and challenging macroeconomic conditions. This means that the shipping rate will be lower than in 2019; however, the recovery is expected in 2024.

This coincides with the release of Windows 11 and the end of support for Windows 10, so it’s likely to see more shipments as users upgrade their hardware for the new operating system.

Do keep in mind that this estimate involves only personal computers and not servers, workstations, etc.

Now, if you take mobile device users, that number jumps dramatically. According to information collected by BankMyCell, there are 7.26 billion mobile phone users worldwide, or 91.54 percent of the global population.

This includes both smartphones and regular mobile phones. Of the two types, there are more smartphones with 6.64 billion users.

It’s estimated that the number of mobile phones will increase to 7.33 billion, while the number of smartphones will go up to 6.92 billion in 2023.

What percentage of the world has computers?

The number of users depends on what is considered a user, so it’s not easy to determine how many computer users are in the world. Owning a computer may not make you a user if you aren’t connected to the Internet. It’s entirely possible that someone could own a computer and never connect to the internet.

They could use it to run calculations. Supercomputers aren’t connected to the internet of things, so would the people who run them be considered users? Again, it depends on your look at things.

Statista revealed how many households worldwide have a computer at home, and it’s about half of the global population at 47.1 percent. People in developed countries are likelier to have not than those in still developing countries.

But that still doesn’t the question of who is using these computers. After all, you can have a computer and never use it. The best metric to decide who can be considered a user has an internet connection.

Using this metric, there are 5.16 billion Internet users worldwide, making up around 64.4 percent of the global population. This finding comes from DataReportal, a website similar to Worldometer in that it tracks global trends.

DataReportal also reveals some interesting tidbits, like the fact that the average user spends around seven hours using the internet, and the number of people on there is steadily growing.

From 2022 to 2023, the total Internet users increased by 100 million. This is a grow just under 2% making it a bit slower compared to the few years prior.

Credit: Creative Christians/Unsplash

It really cannot be understated how the advent of smartphones and mobility changed the game’s name. Those high numbers have only been possible thanks to mobile devices.

What will computers be like in the future?

It’s difficult to say what computers will be like in the future, but there are clues. The biggest one, of course, is the ever-increasing push toward making stronger and faster mobile devices for consumers.

There may also be a stronger emphasis on wearable computers. Headsets and virtual reality devices are improving yearly as tech companies work out the kinks.

Imagine a world where you see real-time information displayed in front of you. Google did something similar with its Glasses device from years back, but now imagine not needing a pair of those glasses.

Wearable computers can be helpful in an assembly line or for maintenance specialists as they can keep their full attention on the task and still access important information.

Credit: Jessica Lewis/Unsplash

Smartphones will still be a thing but will have better processing. If anything, mobile devices will become further integrated. Augmented reality is the wave of the future.

Supercomputers will reach new heights as well. There are still many mysteries about space and the problems plaguing the health of humanity that need to be solved. With improved quantum computing, scientists might discover a new medical field.

If not a new scientific field, quantum computing may discover a new drug or better predict natural disasters. Or perhaps the field of artificial intelligence will continue massive growth.

What if the world could have an AI straight from a science fiction movie? Inklings of this exist in Siri and Cortana, who is named after the AI character from the Halo video game series.

It may seem farfetched, but many things do at first glance. But that doesn’t mean classical computers like desktops will go away. In a world with so many digital communication methods, pen and paper still exist.

Physical options will always have a place in the world. The future of computers will be exciting to see unfold. However, the increasing number of devices has also raised the number of electronic equipment discarded; check the latest e-waste statistics and the importance of proper disposal of a product.

Also, check the latest technology addiction statistics so that you know how important it is to use devices responsibly.

Avast Antivirus Error Occurred During the Uninstallation: 7 Useful Fixes

Avast Antivirus is known to have compatibility issues with Windows 10. Therefore, some users need to uninstall that utility because of those compatibility issues.

However, an Error occurs during uninstallation error can arise for some users when they try to uninstall Avast Antivirus.

Why can’t I uninstall Avast Antivirus?

There are various potential factors behind Avast Antivirus uninstall errors. Those factors can be more general or pertain to the Avast Antivirus utility.

These are the more probable causes for Avast Antivirus uninstall issues:

  • Avast Antivirus settings: Certain selected settings in the antivirus utility can stop it from uninstalling
  • Problems with the Windows uninstaller: There might be a more general issue with Windows’ uninstaller utility
  • Background processes: Third-party processes might be interfering with the uninstall process
  • Registry key corruption: Corrupted registry keys can block users from removing specific software

Let’s move on to the details of this issue, and discuss the methods that will resolve it once and for all.

How can I resolve an Avast Antivirus uninstall error?

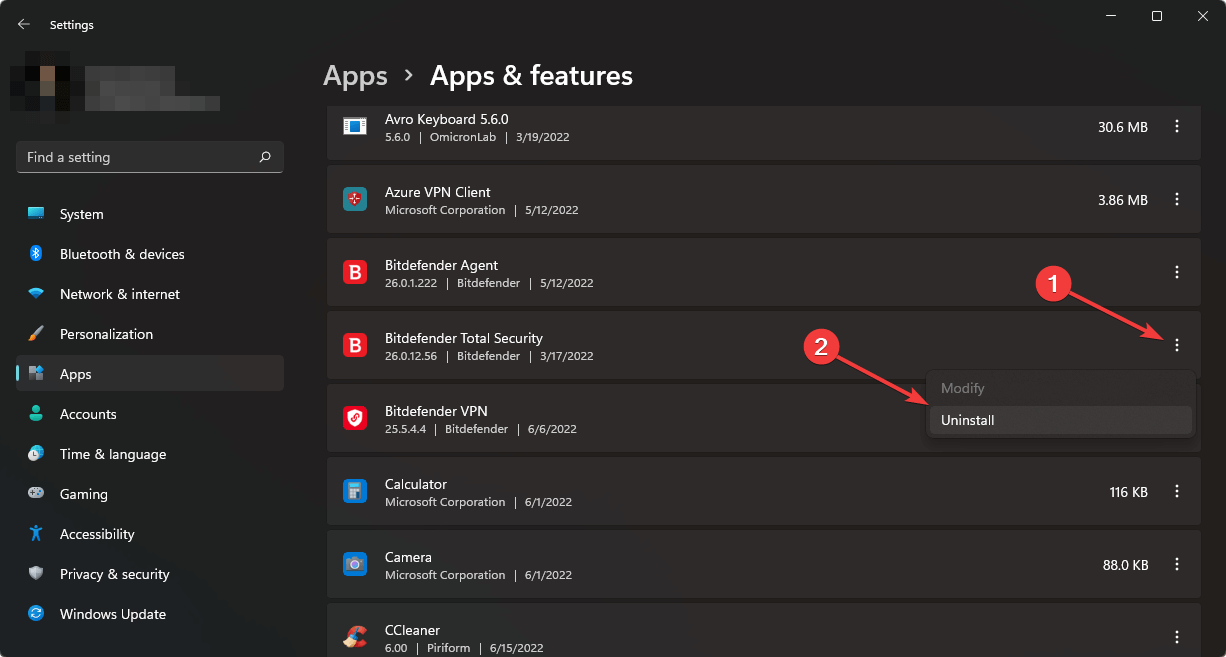
1. Uninstall Avast Antivirus with a cleaning tool

If you can’t remove Avast Antivirus with the default Windows uninstaller, consider utilizing third-party cleanup software.

A good pick for this issue would be CCleaner because it can delete or uninstall any applications on your PC.

It’s possible to perform easy uninstallations without errors for any software in your system, including Avast Antivirus.

More than this, you have a custom cleaning tool that can be used to erase temporary files left in your drive after uninstalling the antivirus.

Other useful CCleaner features

  • Erase all the accumulated browsing data from cookies and cache
  • Run PC health checks for a good system maintenance
  • Registry cleaner to erase unused files from the registry
  • Software updater feature to upgrade all your programs with 1 click

⇒ Get CCleaner

2. Uninstall Avast Antivirus with Avast Clear

Avast Clear is a utility designed specifically for uninstalling Avast software. So, that’s one of the best tools for uninstalling Avast Antivirus. It’s recommended that users utilize Avast Clear when the standard removal method via the Programs and Features applet fails.

When downloading and installing Avast Clear, right-click that program’s EXE and select the Run as administrator option. Next, select the Yes option on the dialog prompt that recommends running the utility in safe mode. Then click Yes again to confirm.

Avast Clear utility avast error occurred during uninstallation

When you’re in safe mode, launch the Avast Clear utility. Next, select the Uninstall option to remove the software. Then click Restart computer to erase the remaining leftovers.

⇒ Get Avast Clear

3. Uninstall Avast Antivirus with the Command Prompt

  1. Click the search box on Windows 10’s taskbar (or the magnifying glass button).
  2. Input cmd to find the Command Prompt.
  3. Select the Run as administrator option for the Command Prompt to open it with elevated rights.
  4. First, input this command and press Enter: wmic
    WMIC command avast error occurred during uninstallation
  5. Next, type in the following command and press Return: product get name
  6. Input this command and press Enter to execute: product where name="Avast Free Antivirus" call uninstall
    uninstall command avast error occurred during uninstallation
  7. Press the Y and Enter keys to confirm.

Note: If you’re not utilizing Avast Antivirus Free edition, don’t enter that title within the uninstall command. Enter the product name specified for your Avast Antivirus software within the product name list for the uninstall command.

4. Run the Microsoft Program Install and Uninstall troubleshooter

  1. Open Microsoft’s Program Install and Uninstall troubleshooter page in your browser.
  2. Click the Download troubleshooter button there.
  3. Next, open File Explorer.
  4. Open the folder that includes the Program Install and Uninstall troubleshooter.
  5. Click MicrosoftProgram_Install_and_Uninstall.meta.diagcab to open the window shown directly below.
    The Program Install and Uninstall troubleshooter avast error occurred during uninstallation
  6. Then click Advanced and select the Apply repairs automatically checkbox.
  7. Select the Uninstalling option.
    Uninstalling option avast error occurred during uninstallation
  8. Next, choose Avast Antivirus in the program list.
  9. Then click the Next button.

5. Disable the Self-defending setting

  1. Open the Avast Antivirus window.
  2. Click Menu at the top right of Avast Antivirus.
  3. Select General on the left of Avast Antivirus.
  4. Click Troubleshooting, and scroll down to the bottom of that tab.
    Open old settings option avast error occurred during uninstallation
  5. Next, click Open old settings.
  6. Select the Troubleshooting tab shown directly below.
    The Enable Avast self-defense module option avast error occurred during uninstallation
  7. Finally, deselect the Enable Avast self-defense module option if it’s selected.
  8. Click the Yes option to confirm further.

6. Try uninstalling Avast Antivirus in Safe Mode

  1. Open Windows 10’s Start menu.
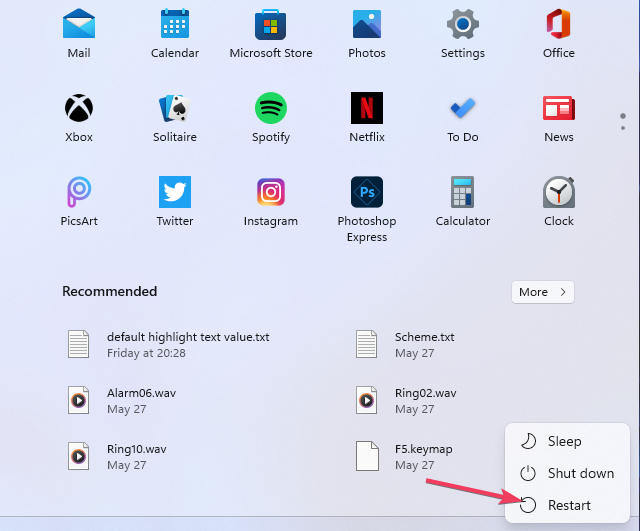
  2. Next, click the Power button.
  3. Select Restart while pressing down the Shift key.
  4. Click Troubleshoot on the blue menu that appears.
    Troubleshoot option avast error occurred during uninstallation
  5. Then select Advanced options and Startup Settings.
  6. Next, click the Restart button.
  7. Press the F5 key to select the Enable Safe Mode with Networking option.
    Startup Setttings menu avast error occurred during uninstallation
  8. Press the Windows key + R hotkey when you’re in safe mode.
  9. Type this command within the Open box: appwiz.cpl
    The Programs and Features applet avast error occurred during uninstallation
  10. Click the OK option.
  11. Select Avast Antivirus in Programs and Features, and click the Uninstall option for it.

7. Repair Avast Antivirus

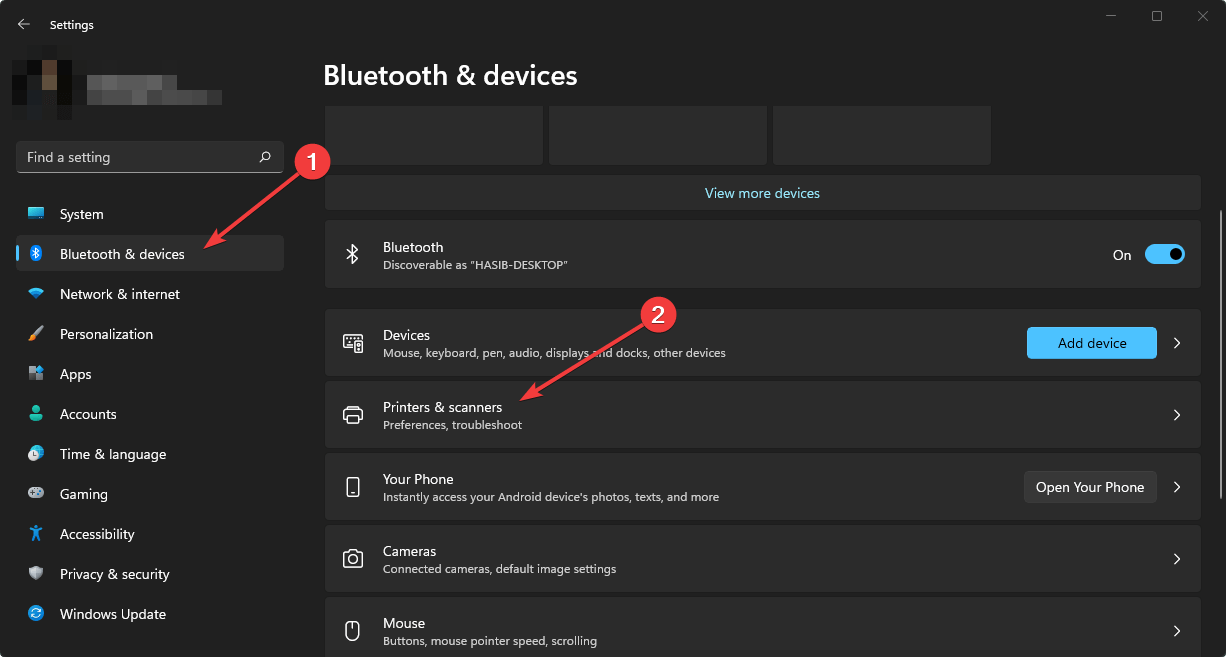
  1. Right-click the Start button to select Apps and Features.
    Apps & features tab avast error occurred during uninstallation
  2. Next, select Avast Antivirus in the Apps & Features tab.
  3. Click the Uninstall button.
  4. Select the Repair option in the window that opens.
    Repair button avast error occurred during uninstallation
  5. Click the Yes option to confirm the repair.
  6. Select the Done button when the repair is complete.
  7. After that, restart Windows.
  8. Try uninstalling Avast Antivirus after the restart.

Who to contact for further potential resolutions

Contact Avast Support for other potential resolutions. To do that, open the Avast Support web form page in a browser. Then fill out the details on the web form, and press the Submit request button.

Alternatively, you can post about your issue on the Avast support forum. You’ll need to register and then log in to that forum. Forum agents there might be able to help you fix the uninstall error for your Avast Antivirus software.

In most cases, the potential resolutions above will likely resolve the Error occurred during uninstallation issue for Avast Antivirus. Some of the solutions in our Windows uninstaller is not working guide might also be useful for fixing this issue.

Ark Single Player Settings Not Saving: 4 Effective Fixes

ARK: Survival Evolved is an action-adventure game for which players sometimes need to configure graphical and audio settings.

However, that game doesn’t save single-layer settings for some players. Instead, ARK’s settings reset after players restart the game.

How come ARK’s single-player settings keep resetting?

There are two significant causes for games not saving settings. One of those causes is read-only file and folder attribute settings. When specific game configuration files are read-only, matches can’t edit them as required.

Antivirus utilities are another significant factor behind game settings not saving. Both Windows Security and third-party antivirus software can incorporate features that block games from changing required configuration files for saving options. Consequently, game settings players try to adjust keep resetting.

So, it’s often the case that ARK’s options keep resetting because of specific files’ attribute settings or antivirus utilities. Some players have confirmed they’ve needed to change the attribute options for specific ARK files to resolve the issue. These are some potential fixes for ARK not saving settings.

1. Check the game.ini and gameusersettings.ini attribute settings

  1. Launch File Explorer by clicking its folder taskbar button.
  2. Next, open this default Steam folder path in File Explorer: Steam/Steamapps/common/ARK/ShooterGame/Saved/Config/WindowsNoEditor
    WindowsNoEditor folder ark single player settings not saving
  3. Right-click the GameUserSettings.ini file and select Properties.
  4. Now uncheck (deselect) the file’s Read-only attribute option if selected.
    The Read-only setting ark single player settings not saving
  5. Click Apply to save the new attribute settings.
  6. Press the OK button to close the window.
  7. Right-click the Game.ini file in the WindowsNoEditor folder to select its Properties option.
  8. Is the Read-only setting selected for the Game.ini file? If so, click the Read-only checkbox to deselect it.
  9. Select the Apply option to save the settings.
  10. Then click OK to exit.

2. Check if Ark’s installation folder is set to Read-only

  1. Bring up File Explorer’s window.
  2. Open Steam’s game installation folder in File Explorer. The default Steam installation folder path for ARK is: C:\Program Files (x86)\Steam\steamapps\common
  3. Right-click ARK’s installation folder and select its Properties option.
  4. Deselect a selected Read-only (only applies to files in this folder) option.
    A folder's Read-only option ark single player settings not saving
  5. Click the Apply option.
  6. Select OK to close the window.

3. Turn off antivirus utilities

  1. Click Windows Security’s shield system tray icon.
  2. Select the Virus and threat protection tab in Windows Security.
    Virus & threat protection tab ark single player settings not saving
  3. Click Manage settings to open the options in the screenshot directly below.
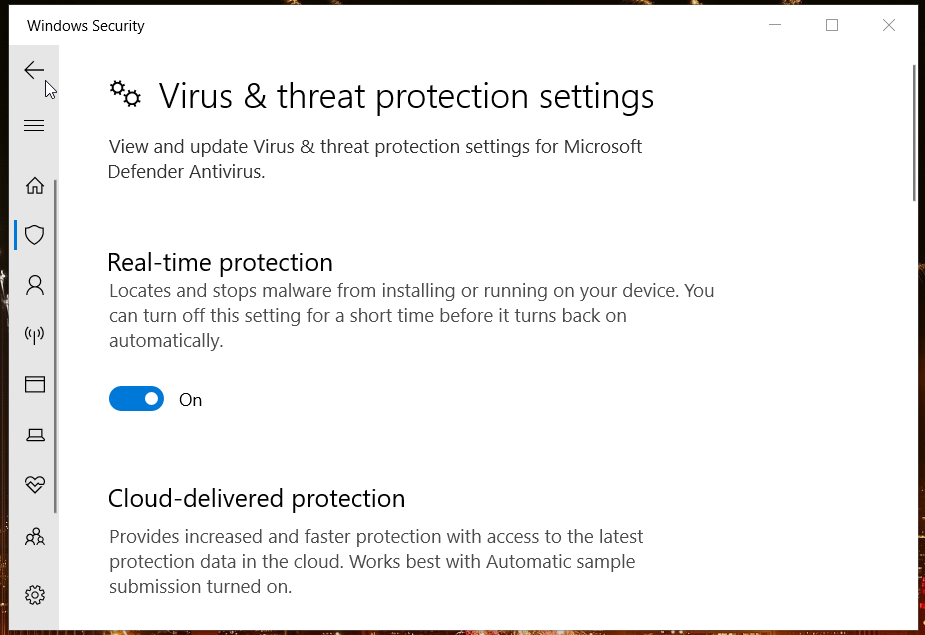
  4. Toggle off the Real-time protection option.
    Real-time protection option ark single player settings not saving
  5. After that, try adjusting ARK game settings with Windows Security disabled.

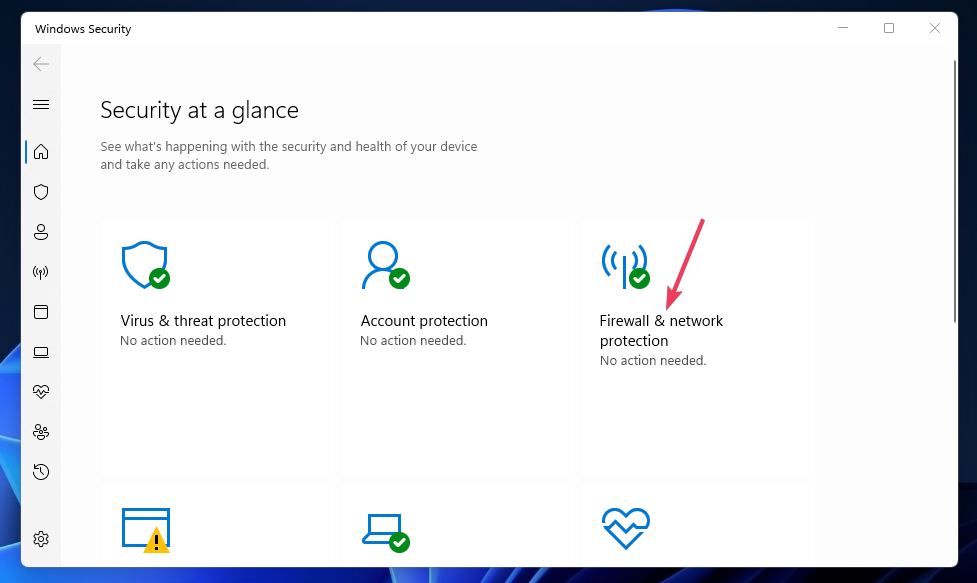
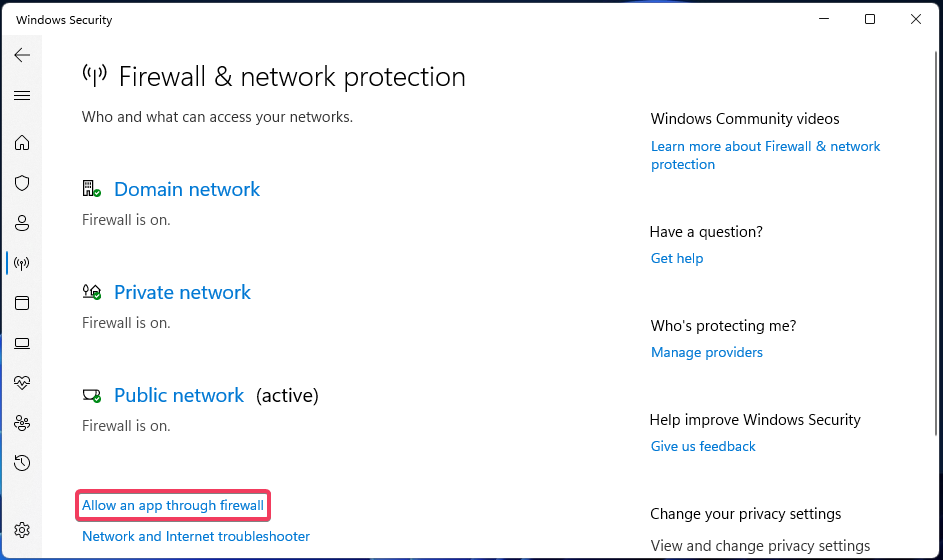
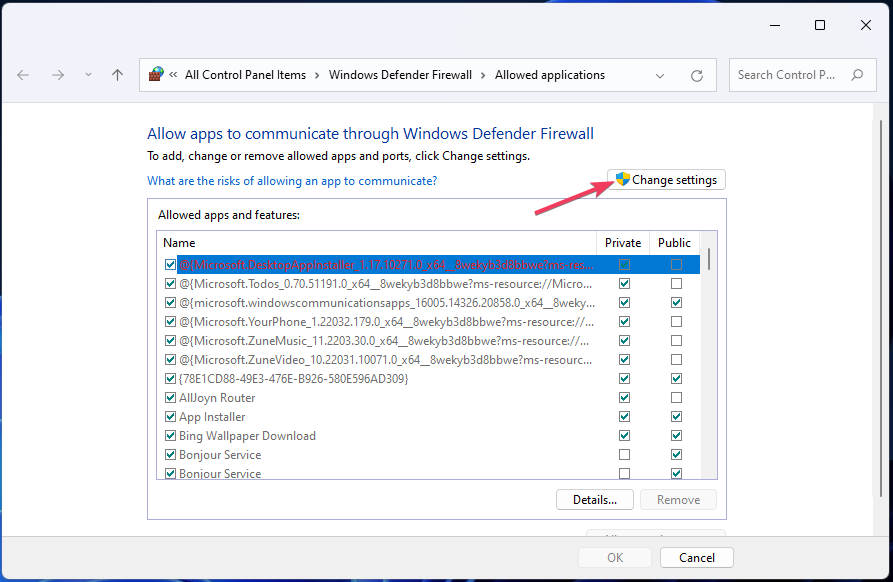
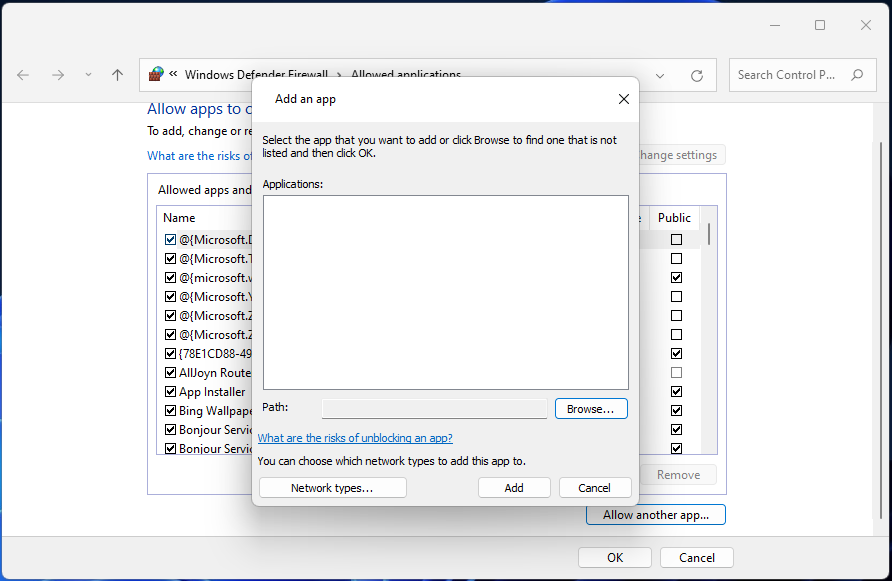
Users with third-party antivirus software installed should disable them. You can usually turn off most antivirus utilities’ by right-clicking their system tray icons and selecting disable shield settings. Select temporarily disable your antivirus utility for an hour, and then try saving ARK game settings again.

Note: Controlled folder access is a more specific Windows Security feature that blocks games’ saving their settings. You can disable Controlled folder access by clicking Manage Ransomware on Windows Security’s Virus & threat protection tab. Then toggle off the Controlled folder access option.

4. Clean-boot Windows 10

  1. Open Run’s window by right-clicking the Start button and selecting Run.
  2. Type in this Run command: msconfig
  3. Click OK to open the MSConfig tool.
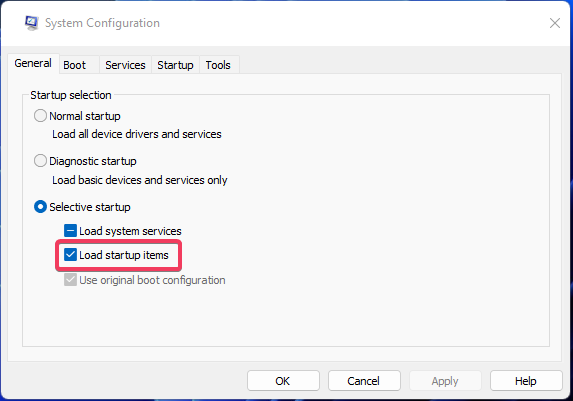
  4. Now select the Selective startup radio button.
  5. Next, uncheck the selected Load selective startup checkbox.
  6. Instead, select the Load system services and Use the original boot configuration checkboxes if they’re not already selected.
    Selective startup radio button ark single player settings not saving
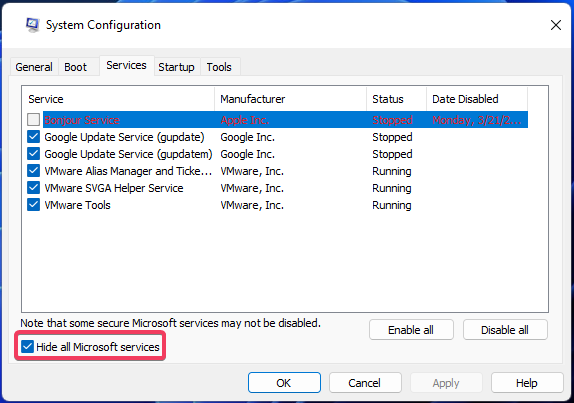
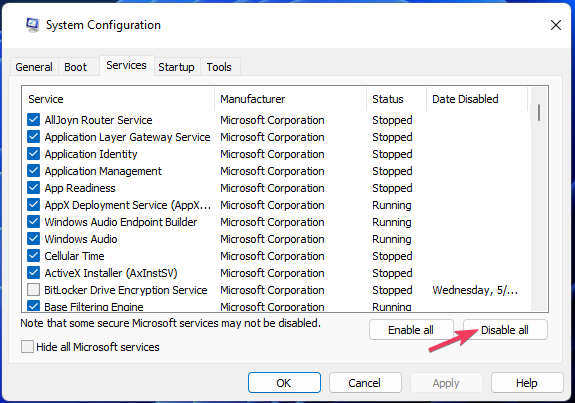
  7. Click the Hide all Microsoft services checkbox to select it on the Services tab.
    Services tab ark single player settings not saving
  8. Press the Disable all button.
  9. Select the Apply and OK options.
  10. After that, click Restart on the dialog box.

Who to contact for more troubleshooting guidance

You can send a support ticket to ARK’s customer support for more potential resolutions. To do that, sign in to your ARK account from the game’s customer support page. Then you can click the Submit a Request option to fill out a ticket.

However, give the resolutions above a try first before submitting a support ticket. There’s a good chance one of them will fix ARK’s settings not saving. Then, with that issue resolved, you can configure the game’s single-player settings as required.

Deathloop Stuck on Loading Screen? 3 Ways to Get Out of it

Deathloop, a first-person shooter game released in 2021, has received a tremendous response from the gaming community. However, many users reported that Deathloop crashes on their PC every once in a while.

For some users, Deathloop crashed at startup and they couldn’t play the game altogether. Here, the problem could lie with the game, Steam (if used to play Deathloop), or the computer itself.

In case Deathloop crashes on the PC have become more frequent, try the solutions presented in the following sections.

Why is Deathloop not loading?

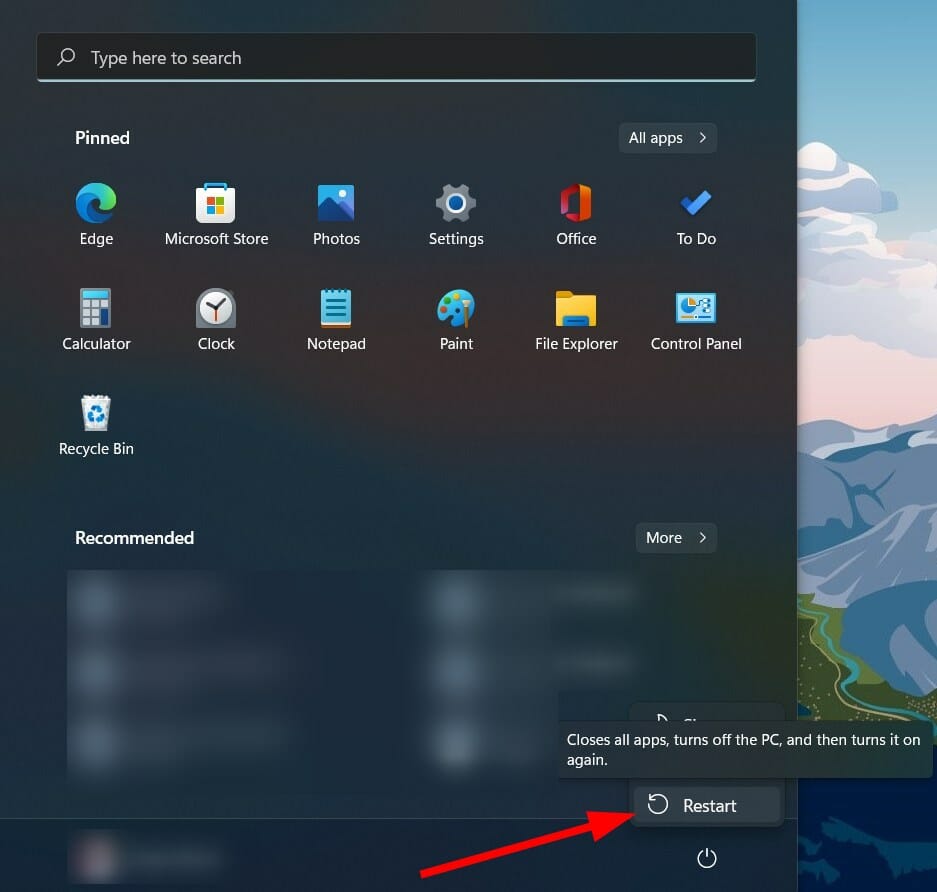
If you see that Deathloop is stuck on the loading screen on your computer, chances are that your PC doesn’t meet the minimum requirements for the game. Also, it could be a conflicting application behind the issue. For most users, simply restarting the computer did the trick here.

Some other Deathlop errors include:

  • Deathloop DirectX 12 error
  • Deathloop crashing 0xc0000005 error
  • Void Engine error in Deathloop

How do I fix a Steam game that keeps crashing on startup?

There are various ways to fix a Steam game that crashes instantly but verifying the integrity of game files worked for most. Also, you can install the latest version of Steam and the game.

If there’s a third-party antivirus installed on the PC, disable it since these are known to lead to Deathloop and other game crashes in Windows 11.

How do I fix Deathloop crashes?

1. Run as administrator

  1. Locate the Steam or Deathloop launcher, right-click on it, and select Properties. The Steam launcher is stored at the following location:C:\Program Files (x86)\SteamProperties
  2. Navigate to the Compatibility tab from the top.Compatibility tab to fix deathloop crashes pc
  3. Now, tick the checkbox for Run this program as an administrator, and click on OK to save the changes.Run this program as an administrator

Often, programs need certain permission to run, and the app may crash in their absence. So, run Steam and/or the game as administrator and check if it fixes the Deathloop crashes issue on your PC.

2. Verify integrity of game files

  1. Launch Steam, and go to the Library.Library
  2. Right-click on Deathloop near the left, and select Properties.Properties to fix deathloop crashes pc
  3. Navigate to the Local Files tab.Local files
  4. Click on Verify integrity of game files.Verify integrity of game files to fix deathloop crashes pc
  5. Wait for the process to complete.

If it’s a problem with Deathloop itself, Steam offers a built-in option to verify the game files, and replace the corrupt ones. Once done, Deathloop crashes should stop on your PC.

3. Update the graphics driver

  1. Press Windows + S to launch the Search menu, type Device Manager, and open it.Device manager
  2. Double-click on the Display adapters entry.Display adapters
  3. Right-click on the graphics adapter, and select Update driver.Update driver to fix deathloop crashes pc
  4. Next, select Search automatically for drivers.Search automatically for drivers

Once the driver is updated, things should work fine, and Deathloop wouldn’t crash on your PC anymore. In case this method doesn’t work, you can try other ways to update the graphics driver in Windows 11.

If Windows fails to identify drivers, or you simply want to speed up the process, use Outbyte Driver Updater. This driver software keeps track of all new releases and is able to quickly download and install them for you.

Is Deathloop a demanding game?

Deathloop is a demanding game when it comes to the GPU, while the CPU requirements are quite similar to the other games. An average PC will be able to run Deathloop, but the graphics, frame rate, and speed won’t be optimal.

So, make sure that your computer meets the recommended requirements for the best gaming experience.

How many GigaBytes is Deathloop?

Deathloop requires at least 30 GB of free storage in order to install and optimally run. However, we recommend that you have more free storage to prevent the PC from slowing down after installing Deathloop.

Can you play Deathloop offline?

The director of Deathloop has confirmed that the game can be played offline. All you have to do is switch to a single-player mode where you will play with the AI, instead of the multi-player mode where you play with others.

Can you play Deathloop with 8GB RAM?

The minimum system requirements for Deathloop state 12 GB RAM while the recommended settings require 16 GB RAM. Though you might be able to run the game after making certain tweaks, we wouldn’t recommend that.

That’s about it! Deathloop shouldn’t crash anymore on your PC. In case it still does, you can try other ways to fix issues with Steam games.

Also, find out the common Steam error codes and the effective solutions for them.

Tell us which fix worked for you in the comments section below.

How to Configure Your Browser For Visual Effects in Google Meet

Google Meet has been making steady improvements over the years. It is easy to use and versatile.

However, users are starting to complain about the inability to use this feature. This guide will take you through practical and simple ways to fix the issue and help you get back to applying effects on Google Meet.

How do I enable visual effects?

➡ Before the call 

  1. Open Google Meet on your browser and click select a meeting.
  2. Click Apply visual effects in the bottom right corner.
    join now this browser doesn't support visual effects 
  3. Make the necessary changes.
  4. Select Join Now.

➡ During the call

  1. Click the more button (three vertical dots) at the bottom of the page.
  2. Select Apply visual effects.
    apply visual effects browser doesn't support
  3. Make the necessary changes with the tools available.
    choose

What can I do if my browser won’t apply visual effects?

1. This browser doesn’t support visual effects Firefox

  1. Open Firefox and click the menu button at the top right corner.
  2. Select the Help option.
    menu firefox
  3. Choose the Troubleshoot Mode… option.
    troubleshoot support visual effects browser doesn't
  4. Click the Restart button when prompted.
    restart

Before applying any fix for this browser that doesn’t support visual effects error on Firefox, you need to ensure you are running the latest version.

After that, you should try using visual effects for Google Meet with all Firefox extensions and add-ons disabled. This fix helps you restart your browser without these plugins and themes.

2. This browser doesn’t support visual effects Safari

While Safari is a supported browser for Google Meet, it doesn’t meet the requirements for visual effects. Your only option, in this case, is to switch to a supported chromium-browser like Opera One. 

However, you must ensure you use the 64-bit version and have hardware acceleration enabled. This is because Google Meet can’t provide visual effects in a 32-bit browser.

3. Can’t apply visual effects on Google Meet

There are various reasons you can’t apply visual effects on Google Meet. And this is primarily down to your browser or PC not having the required features as stated by Google.

Below are the requirements to apply visual effects on your browser:

  • A browser with background, styles, and immersive effect support: Chrome version 91 and above on Windows, Mac, or Linux, Edge (Chromium) 91 upward for Windows and Mac, Version 91 or above on Chromebook.
  • Activation of Hardware acceleration.
  • A 64-bit operating system. 
  • A browser that supports WebGL. You can check the WebGL Report site to know if your browser is supported.

With these requirements, using the latest Chrome version is safe to avoid error messages like something went wrong, and the visual effects cannot be applied.

Finally, if you use a school, company, or other managed account on Google Meet, the meeting Admin can stop you from using visual effects.

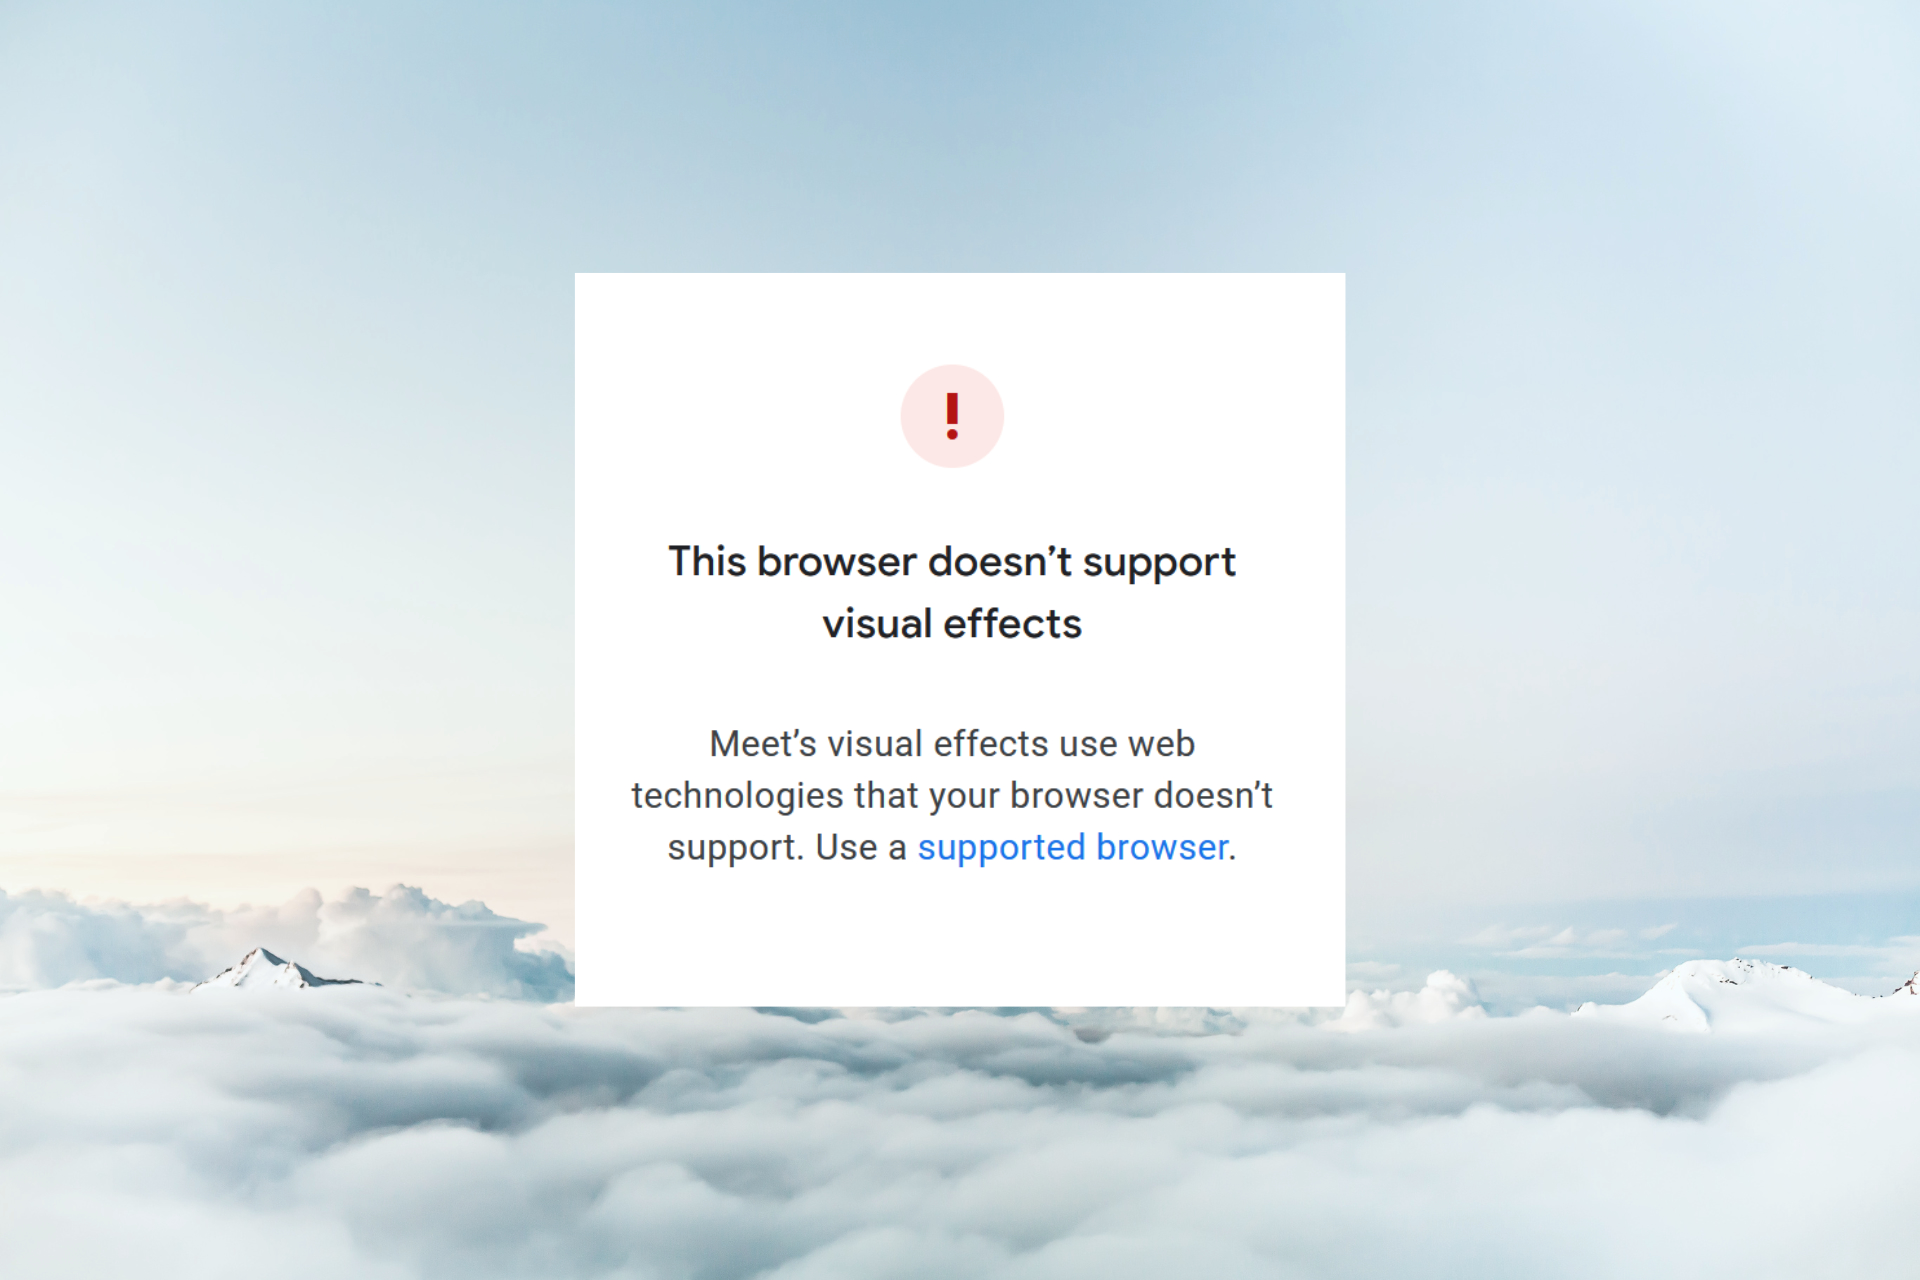
This browser doesn’t support visual effects issues is not usually down to an error on your browser. Instead, it is usually just about your browser’s compatibility and can be fixed quickly, as shown.

Once you fix this problem, you’ll be able to use countless free backgrounds on Google Meet.

Do you want to know how to connect the meeting room system to Google Meet? Then check our detailed guide on the steps to follow to get it done fast.

Let us know the fix that helped you resolve the issue on your browser in the comments below.

GPU Scaling vs Display Scaling: Which One Should I Use?

Scaling is a feature we use on our PC daily, but many users want to know more about GPU scaling vs display scaling.

While this feature is useful, it has been reported that some apps won’t respond to scaling changes, but we covered that issue in a separate guide.

Today we’re going to focus on different types of scaling and help you learn more about it, so let’s get started, shall we?

GPU scaling vs display scaling, which one is better?

What is GPU scaling?

  • GPU scaling is a feature on your graphics card.
  • It adjusts the resolution of a game so it can match your monitor’s aspect ratio.
  • It’s available on both Nvidia and AMD graphics cards.
  • Older games without widescreen support usually use this feature.

What are different GPU scaling modes?

  • Maintain aspect ratio – In this mode, the game will maintain its original aspect ratio while the excess space is filled with black bars.
  • Full-screen or scale – With this mode, the image will get stretched to fill the whole screen. This will often produce poor results.

Does GPU scaling affect performance?

Yes, GPU scaling can negatively affect your performance. However, the performance change is negligible, and you probably won’t even notice it.

This means you can keep this feature enabled in the background and not worry about it.

Should I turn on GPU scaling?

  • Enable this feature only when playing older titles.
  • Depending on the results, you might need to disable it.
  • Keep it in Maintain aspect ratio mode if you want the game to look best.
  • Some performance drops might appear due to this feature.

What is display scaling?

  • It’s a native Windows feature.
  • Using it you can make text and visual elements larger.
  • It’s used when working on high-resolution displays.
  • Users with poor eyesight can also use it.

What does display scaling mean?

Display scaling means how much should each pixel on the screen be enlarged. The value is represented in percent.

Regarding the maximum value, it’s set at 175%, but you can also configure it on your own as well.

Does display scaling reduce quality?

No, this feature won’t reduce the quality of video games or videos.

It’s intended to increase the size of UI elements so they are easier to read, and it doesn’t affect multimedia.

Does display scaling affect games?

As previously stated, this feature affects only the visual interface and won’t affect your games in any way.

Some games can recognize this feature and adjust the size of UI elements accordingly to display scaling settings.

GPU or display scaling, which should I use?

The answer is you should use both since each has certain benefits over another. Let’s go over the benefits of GPU scaling:

  • It works with older games.
  • Fully supported by AMD and Nvidia graphics cards.
  • Easy to use.
  • Intended for older games that don’t use a modern aspect ratio.

On the other hand, we have display scaling:

  • Available natively in Windows.
  • Easy to configure.
  • Affects only visual elements in Windows.
  • Recommended to use on high-resolution displays.

Both features have their differences and different uses. If you’re a gamer, you might use GPU scaling, but remember that certain games might not look as good when using this feature.

Display scaling isn’t intended for games, and it should be used if your PC is using a high resolution and you can see visual elements such as buttons and/or text clearly.

We hope that this guide helped you learn everything there is to know about GPU and display scaling. Also, visit our article on how to fix AMD GPU scaling issues if you find yourself in this situation.

Are you using any of these features? If so, let us know in the comments below.

How to Fix the Not Enough Memory Error in Path of Exile

Path of exile is an action video game by Grinding Gear Games. It has millions of players across the world.

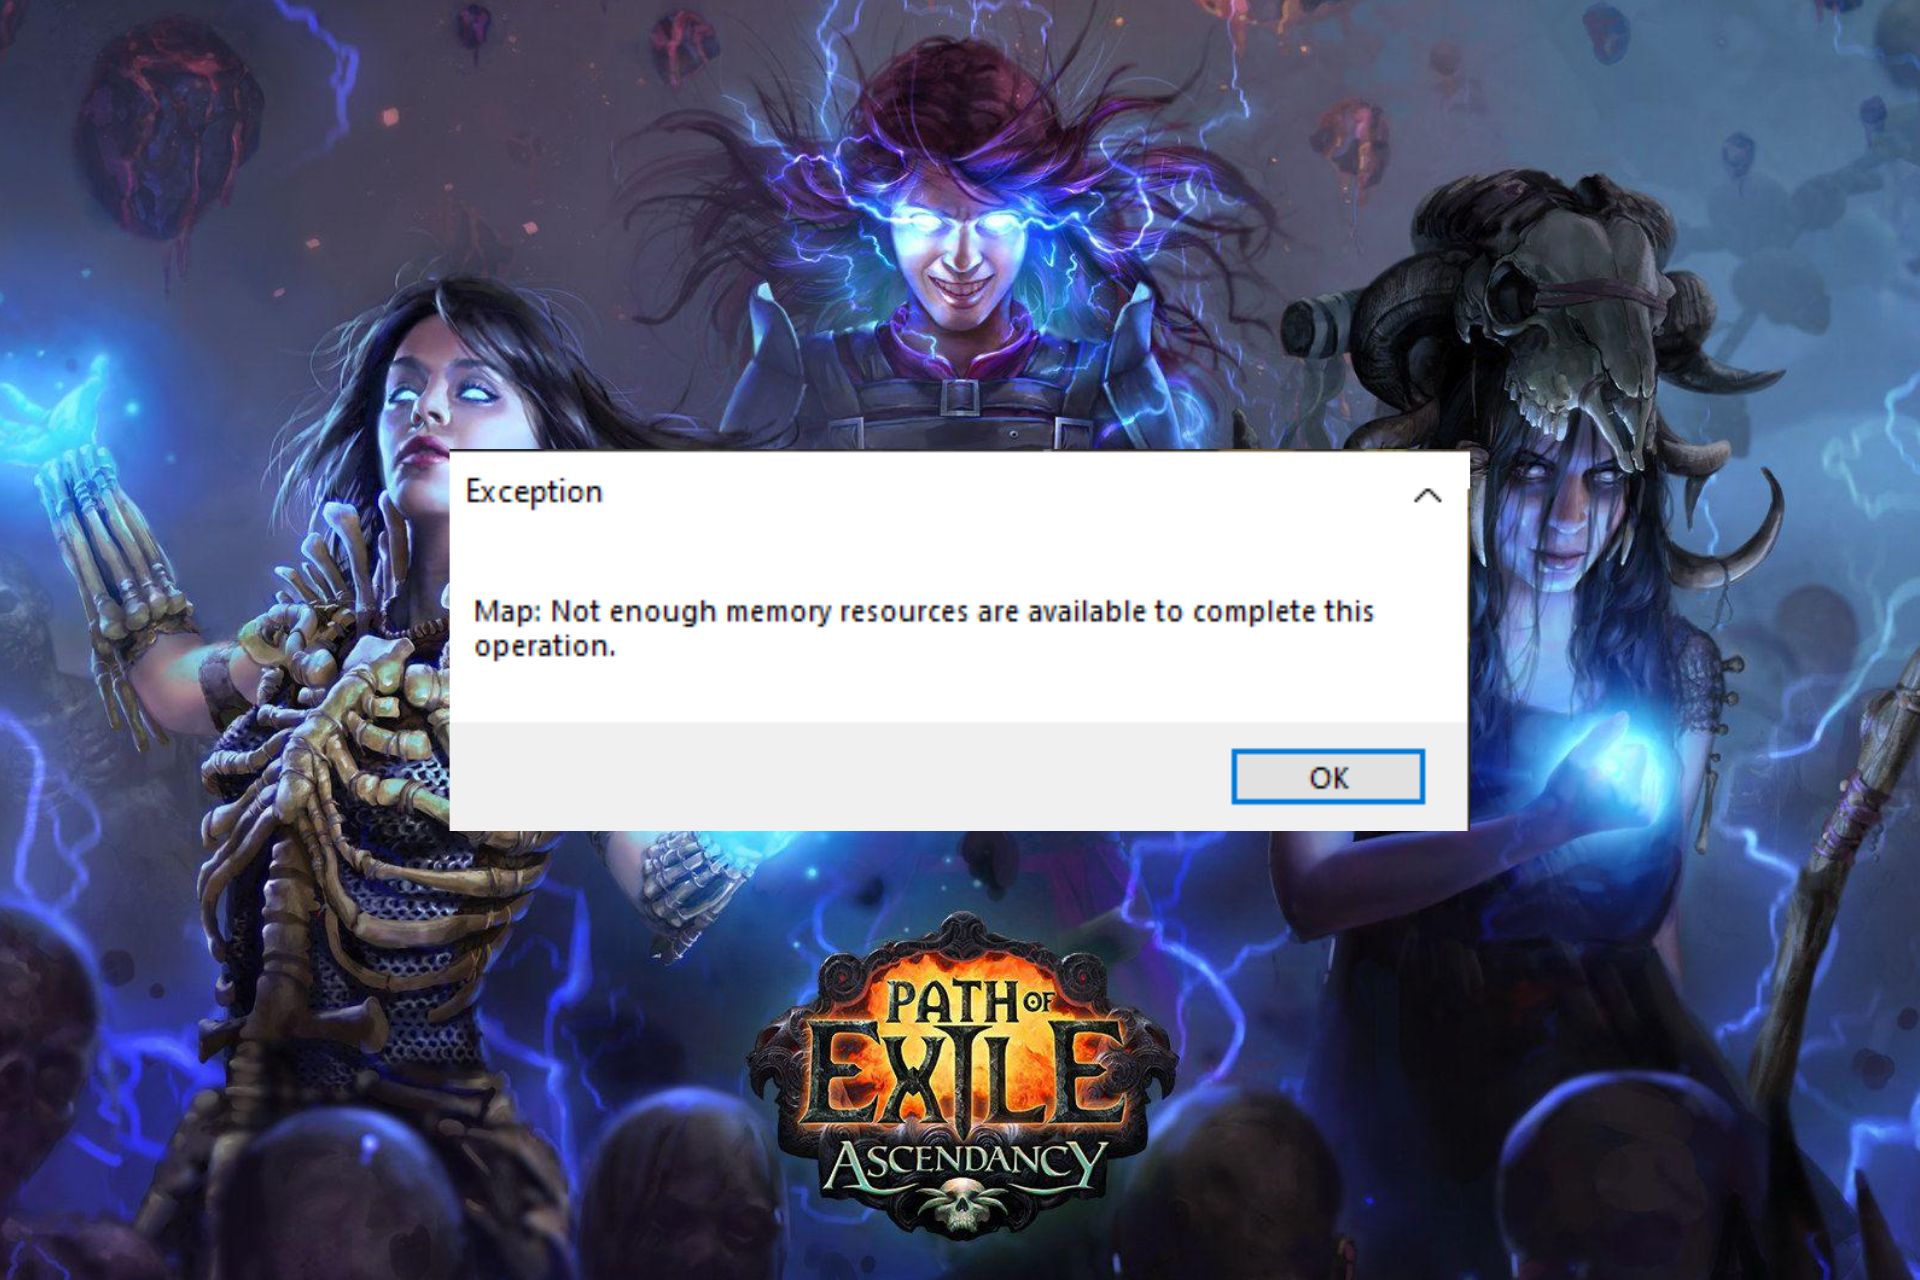
However, Path of exile’s popularity doesn’t mean it doesn’t have shortcomings. One of the errors players encounter with the game is the Path of Exile, not enough memory error.

Nonetheless, Path of Exile is a top-rated game. Over time, Grinding gear game developers release new update patches to fix the bugs they discover in the game.

In this article, we’ll discuss the ‘not enough memory error in the Path of exile and solutions for it.

What is the most common Path of Exile errors?

  • The Path of Exile Timeout Error: You have to log in again to the game. This usually occurs when players are trying to log in, and for some reason, Path of Exile sends an error message.
  • The Path of Exile failed to connect to instance error: this error occurs when players try some new features or actions in the game. However, when the error pops up, it is not straightforward to know what is wrong with the game. So, you need to understand more about it.
  • Path of Exile if it’s Not Recognizing Your Graphics Card: It affects the game’s graphics and how it relates to the different gaming interfaces. Manually setting up a graphic card for Path of Exile can fix this error.
  • Path of Exile packet loss: this can occur due to network issues or a problem from the new patch.
  • Path of Exile unable to connect to patching server: sometimes, the Path of Exile can encounter some issues with patching. It is when this error pops up.

These are some of the most common Path of Exile errors players encounter in the game. You can get easy fixes for them in the links above.

How can I fix the not enough memory error in Path of Exile?

1. End unnecessary programs

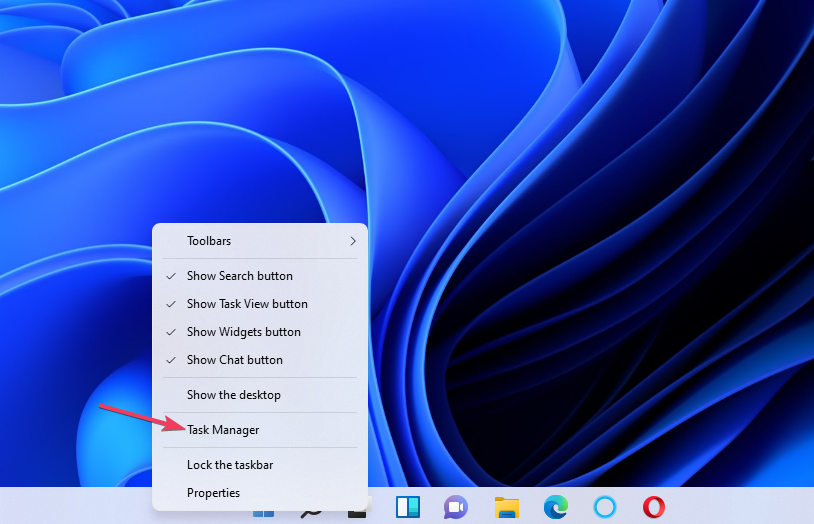
  1. Press the Windows key, input task manager, and launch it.
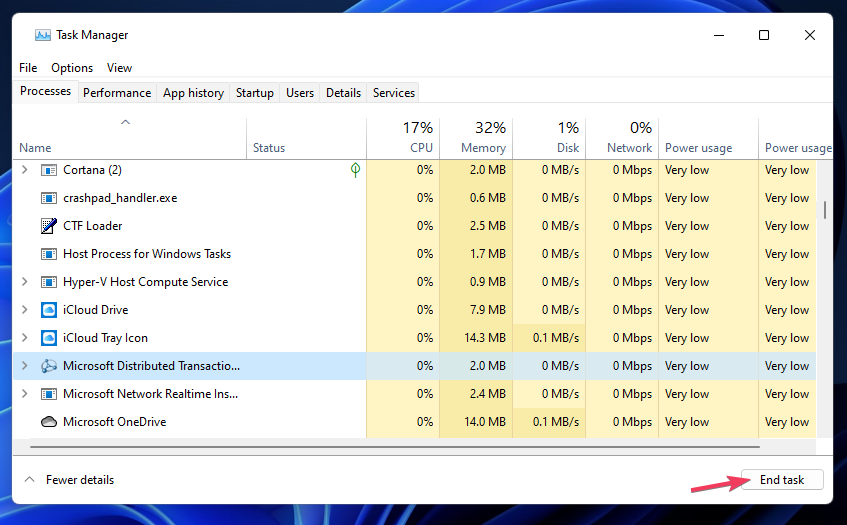
  2. Select the CPU and Memory usage in the task manager.
  3. Click on the applications consuming the space and select End task.
  4. Restart your computer and launch the game.

2. Increase Virtual memory

  1. Press the Windows key, input advanced system settings, and launch it.
  2. On the right side of the screen, select Settings and click the Advanced button.
  3. Click on Change and turn off the Automatically manage paging file size for all drives box.
  4. Select your C drive, click the options button in front of Customize and type 4096.
  5. Click Set and Ok to save changes. Restart your computer.

We hope these solutions work perfectly for you. Visit our page for further updates and answers to your Patch of Exile errors.

To learn how to make Path of Exile load faster, click the link above to check out our detailed guide on the topic.

How to Fix the Envelope Not Accessible Error on DocuSign

Encountering the DocuSign envelope not being accessible when you want to use it isn’t new. Most users have complained about this error.

It can be annoying to receive an electronic signature document through DocuSign and cannot open it because it changes DocuSign envelope statuses to unavailable.

This error usually occurs when the sender is correcting the earlier sent documents. It restricts the recipient from accessing it until the sender is through with it and then resends.

However, we will go through what you can do to fix the envelope not an accessible error on DocuSign.

?️Quick Tip:

Avoid this problem by using Adobe Acrobat, which allows you to safeguard numerous documents by embedding them in a PDF envelope. Encrypting envelopes prevents unauthorized users from accessing the contents, while certifying them provides evidence of provenance.

Authorized receivers can open the envelope and extract the files to examine them, eliminating the possibility of a dispute if someone want to edit a previously transmitted document.

⇒ Get Adobe Acrobat

Why can’t DocuSign make envelopes?

  • Can’t create an envelope because my New button is missing error – People encounter this error while trying to make an envelope on DocuSign. There is a possibility that the user can only view envelopes and not a sender.
  • Do not have the option to create a new envelope on my drop-down error – This error indicates that the user cannot create or send envelopes to a recipient. When you don’t have the ‘Create a new document’ option in your drop-down, you can’t use it.
  • Unable to create the envelope when using a template error – You encounter this error when you try to make an envelope while using a template. It can occur due to different reasons. It means that something is wrong with the account or the template properties.
  • Can’t create document error – There is no create button on the screen. This can happen for different reasons.

Can you access a DocuSign with an envelope ID?

You need a DocuSign account to be able to access a DocuSign. It ensures that you are on the viewer’s list for the envelope. However, you can create a temporary account to open the envelope or a standard one.

How can I fix the envelope not accessible error on DocuSign?

  1. Contact the envelope sender to save the changes and attempt to reaccess the envelope.
  2. Ask your DocuSign administrator to update the signing group. This is because you may not be on the signers’ list.
  3. Contact your account administrator to resend or create a new envelope if the error persists.

The error codes are not hard to fix especially when following the solutions for the Docusign envelope not accessible error.

You can also learn to install DocuSign for Windows 10/11 for electronic signatures.

3 Ways to Fix your Logitech k780 Keyboard When it’s Not Working

The Logitech keyboard is one of the best in the market. In addition, it is the first to state the amount of climate-warming carbon used in its products.

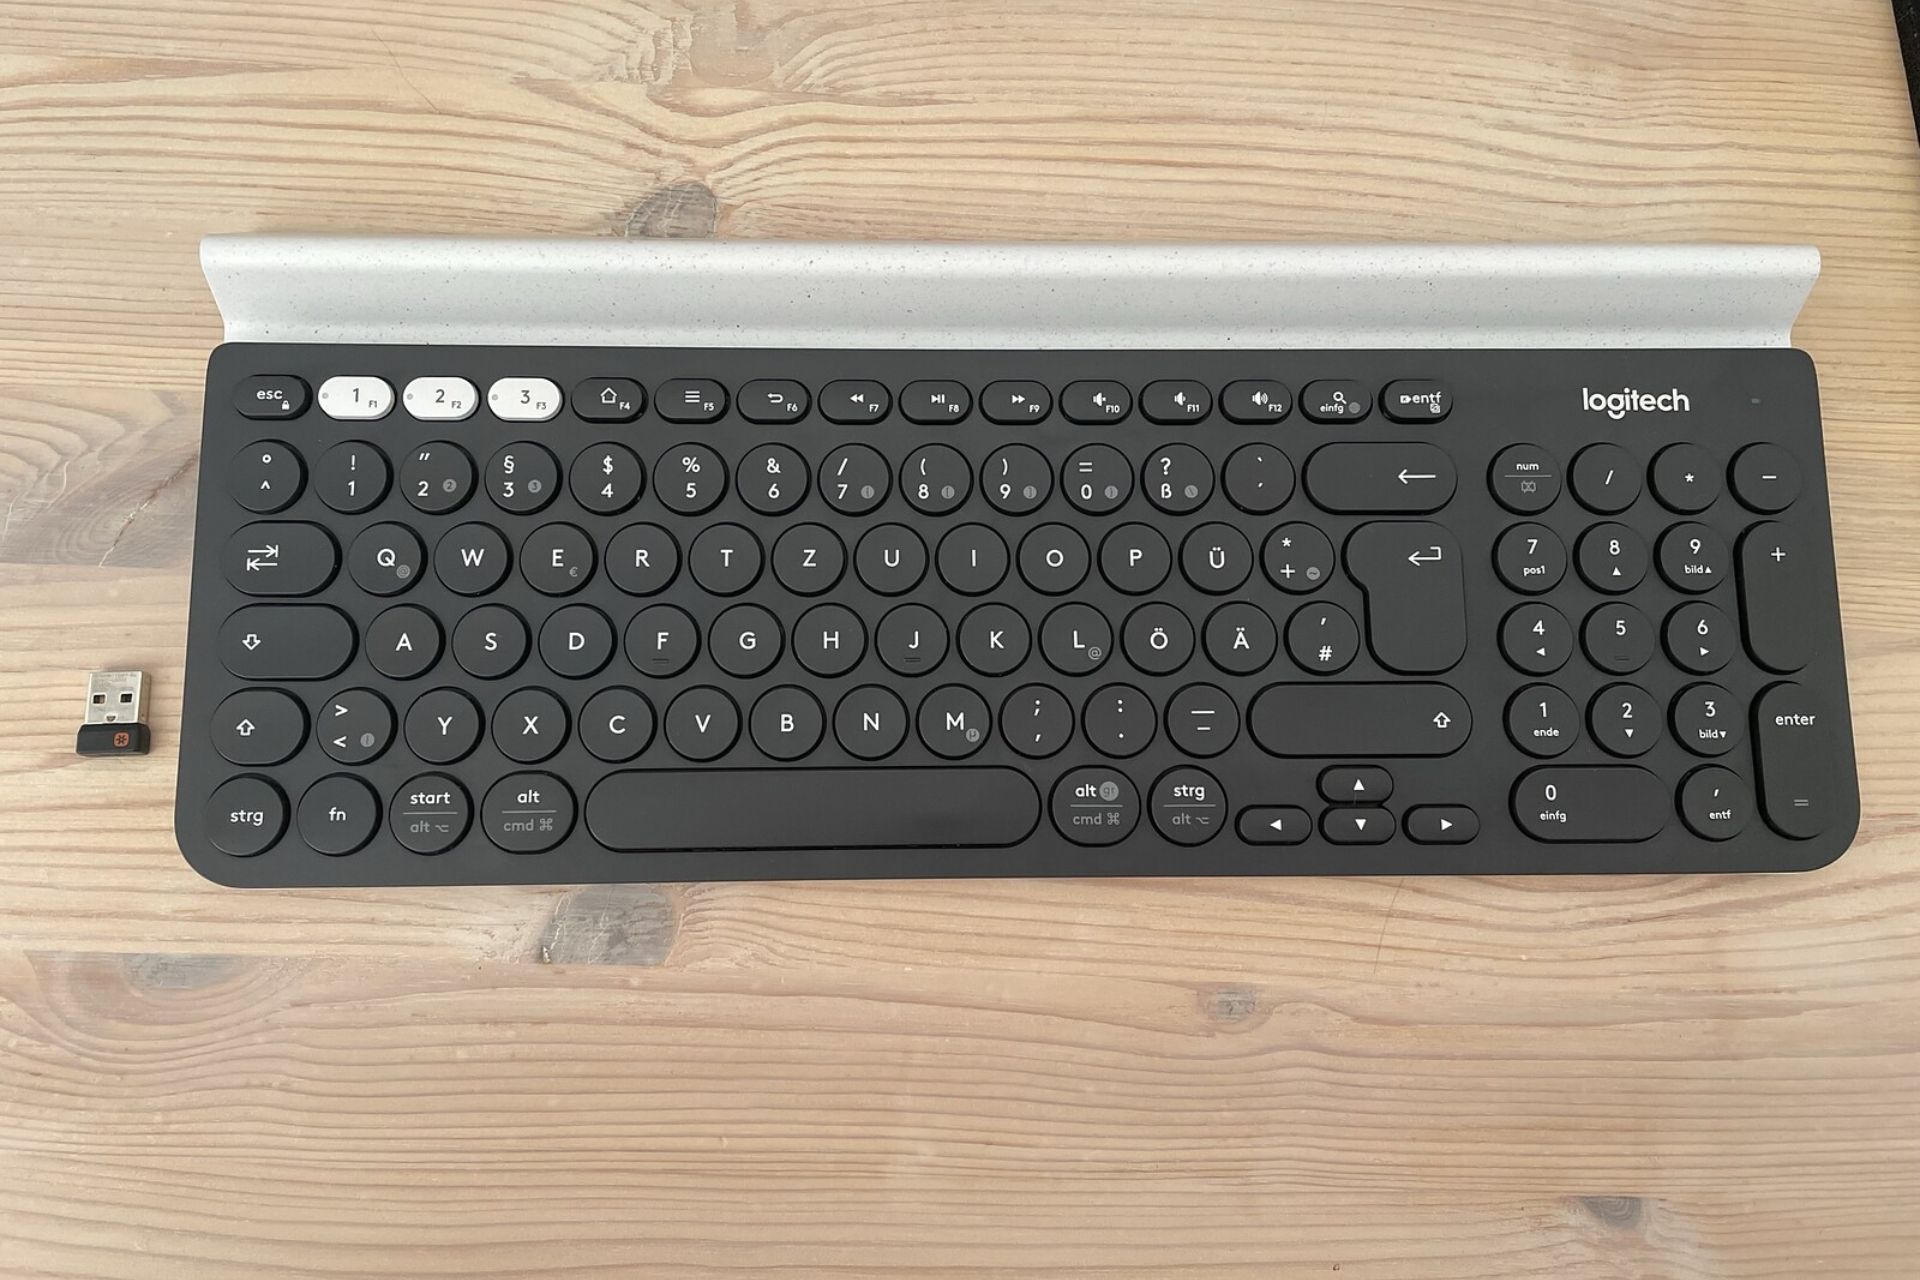
However, there are some shortcomings you can come across when using the Logitech keyboards. An example is the Logitech k780 not working.

Moreover, this doesn’t mean it is not as good as it claims to be. This article will address the common issues of Logitech wireless keyboard and their causes.

Also, we’ll provide fixes for the issues and other issues you may encounter with Logitech.

Why is my Logitech wireless keyboard not working?

  • The Logitech wireless keyboard connection problem – It is possible that the Logitech keyboard gets stuck or stops working because of issues with the connection.
  • Function keys not working – It can happen because you have tampered with the keyboard function settings or configurations.
  • Keyboard getting stuck or not working – This issue can occur when you have outdated drivers. Also, when your PC does not have the requirements for the Logitech keyboard, it causes issues. This can lead to errors like Logitech k780 keys not working.
  • Logitech battery not working – Some users complain that the Logitech keyboard suddenly becomes unresponsive and doesn’t last long. This can be because of a bad battery or low battery health.
  • Logitech receiver issues – The receiver issue occurs when it is not functioning properly. This will result in an error like the Logitech k780 unifying receiver not working.

Where is the reset button on a Logitech keyboard?

On the Logitech wireless keyboard, the reset button is under the keyboard. It is unconventional, but it works just fine.

What can I do if the Logitech k780 keyboard isn’t working?

1. Update Logitech keyboard driver

  1. Press the Windows key, input Device Manager, and launch it.
  2. Locate Keyboards and click to expand.
  3. Select Logitech keyboard and click Update driver.
  4. Click the search automatically for the drivers to update the driver.
  5. After the search is complete, install the latest and restart your computer.

Check that you have the most recent versions of your drivers. There are third-party programs, such as Outbyte Driver Updater, that can do this automatically for you.

Installing, repairing, and backing up your keyboard drivers in case you make future changes is critical to avoiding performance issues with your PC.

But this is a task for a professional tool if you feel in need you can use one to save some time and you are not an avid technician. With a few clicks, Outbyte Driver Updater will scan your PC’s hardware and peripherals for potential driver updates, and install them accordingly.

⇒ Get Outbyte Driver Updater

2. Uninstall conflicting applications

  1. Launch the Run command by pressing the Windows + R keys.
  2. Input appwiz.cpl in the search box and press Enter.
  3. Select the app conflicting with the Logitech keyboard and uninstall it
  4. Click Yes to initiate uninstall.

3. Disable the Filter Keys feature

  1. Press the Windows + I keys to launch the Settings app.
  2. Select Ease of Access and click on the keyboards.
  3. Tap the switch at the front of the Filter keys option to turn it off.

These are the quick fixes for the Logitech k780 not working problem. However, you must update your keyboard driver to avoid similar errors like Logitech k780 stopped working and Logitech k780 paired but not working.

You can check our guide for more effective solutions on how to fix Logitech Keyboard not working problems.

You can also check for solutions for Bluetooth keyboard issues using this link.

How to Fix the Specified CGI Application Encountered an Error

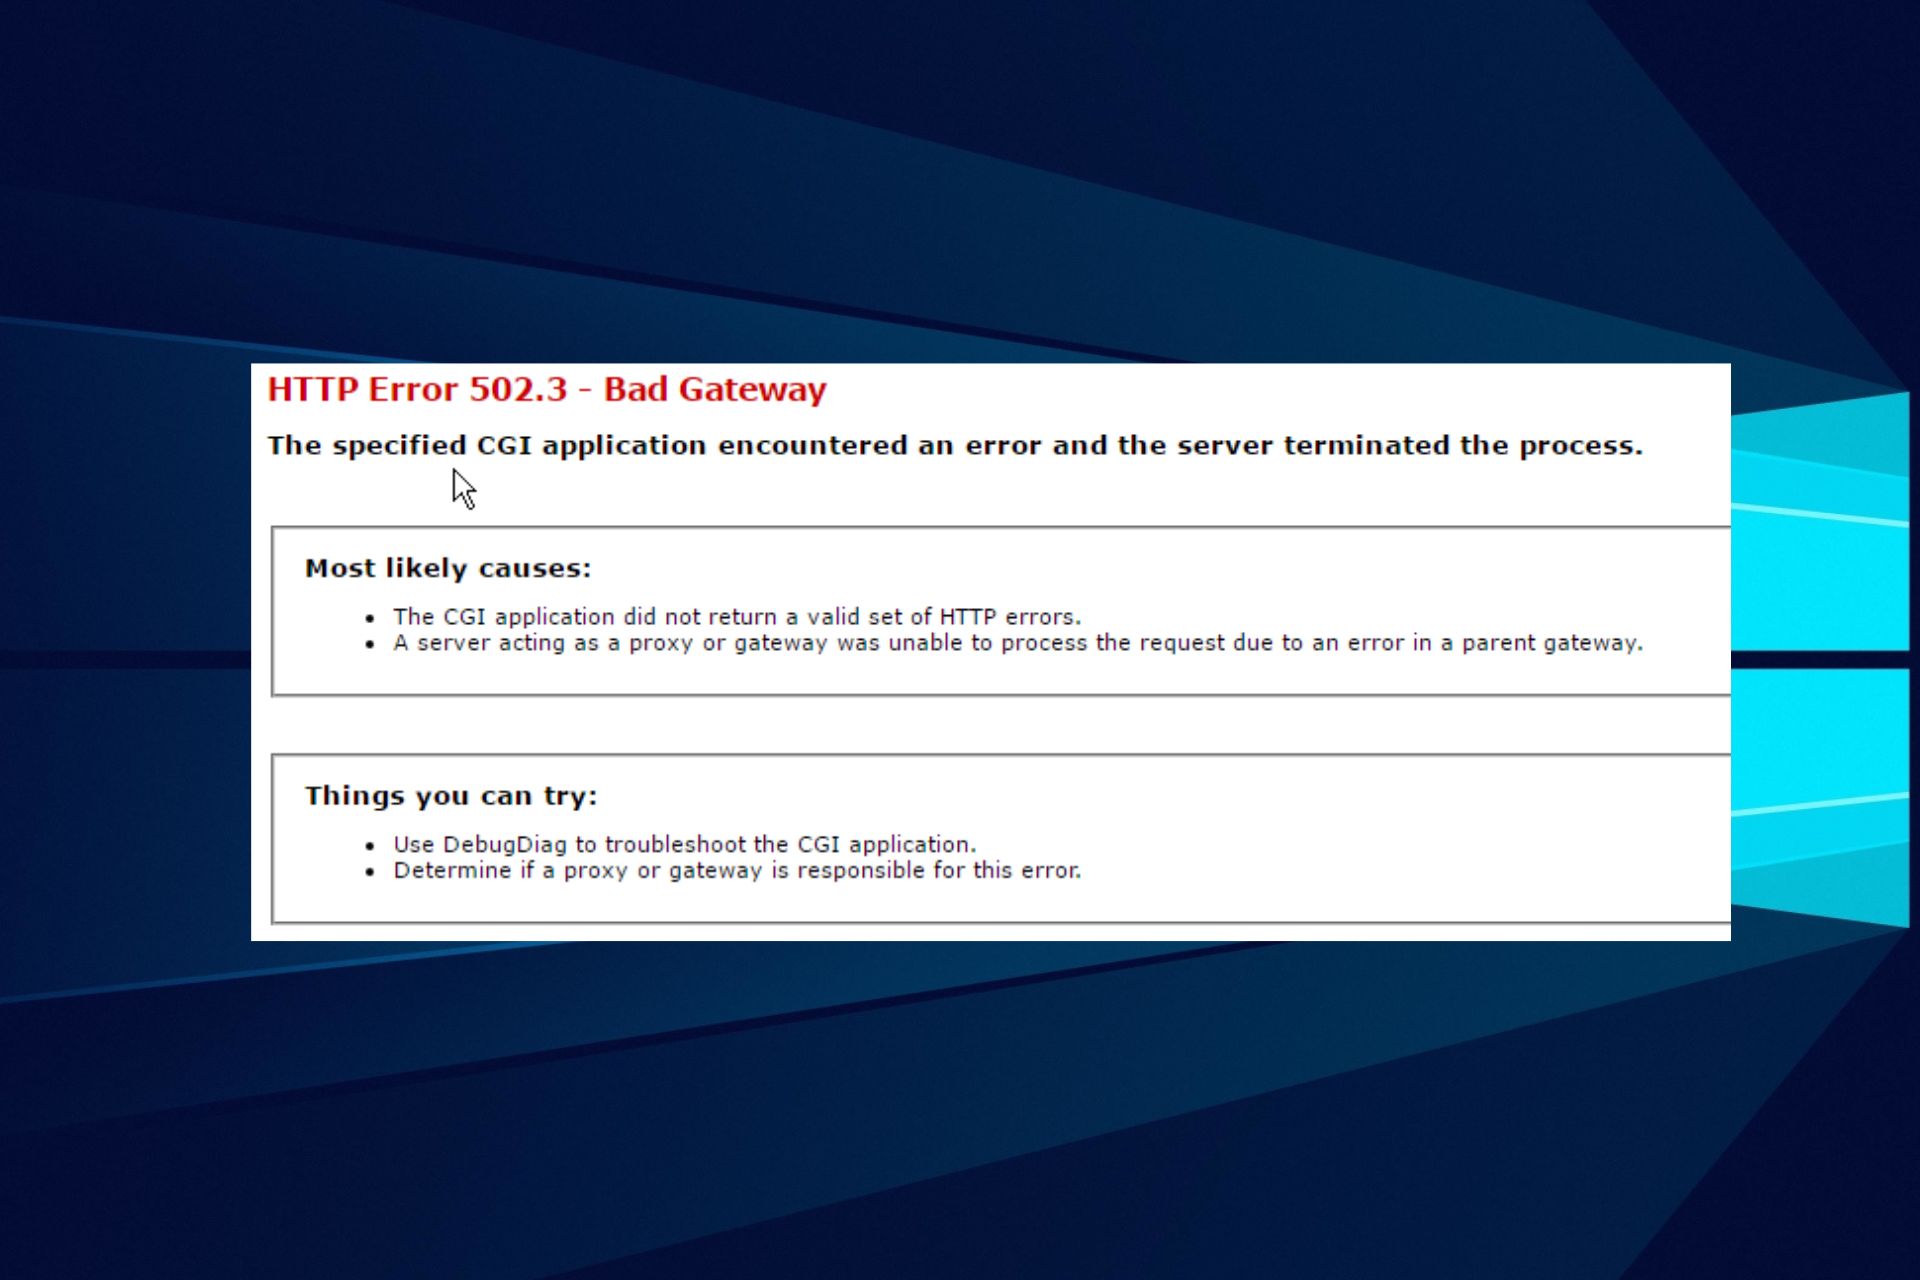
A prominent Azure error is the specified CGI application encountered a mistake, and the server terminated the process.

However, this is known as a timeout error. It means that the ASP.NET that is hosting the app has stopped responding.

When the Azure web app takes so long to load, you can get the azure app service CGI error. Complaints from some users show that the azure app can suddenly crash and respond with an error message.

Hosting Net Core on Azure is easy, but some issues plague it. However, the most common issue is with the versions, so you must keep it updated. This can help with the specified CGI application encountered an error problem.

What is the CGI application error?

This error can occur due to different circumstances. The CGI application error occurs when the CGI script does not get a response quickly enough from the web engine. The error pops up if you load the command for too long on the web browser with no response.

Also, the CGI application error can occur due to missing UseIISIntegration in the startup code of the web host builder. The need for IISIntegration is because Azure web apps run on it. However, a missing Azure app service certificate can trigger the Azure app service CGI error.

How can I fix the specified CGI application that encountered an error?

1. Configure an Auto-heal option

  1. Go to Azure’s main portal and select the particular app service.
  2. Click on the search bar for the Diagnose and solve problems option.
  3. Click the Diagnostic tools option and select the Auto-Heal option and custom auto-heal rules.
  4. Save the configuration and restart your app.

Configuring Auto-heal will help it collect data and trace where the error is. This will, however, support the auto-heal fix of the issue.

2. UseIISIntegration() on the WebHostBuilder

Because Azure web apps operate on IISIntegration, it is necessary to include it in the web host builder. Include the code below:

public static void Main(string[] args)

{

    var host = new WebHostBuilder()

        .UseContentRoot(Directory.GetCurrentDirectory())

        .UseKestrel()

        .UseIISIntegration() // Necessary for Azure.

        .UseStartup<Program>()

        .Build();

     host.Run();

}

Also, using another browser can help decipher what the issue is. For example, browsers with the TLS/SSL certificates like Google Chrome can be an excellent alternative.

Try if “the specified CGI application encountered an error and the server terminated the process in Chrome pops up. Feel free to check our page for more intriguing details about the Azure web app errors.

What is Spectrum Error Gen-1016, and How to Easily Fix it

Like other streaming apps online, the Spectrum TV app has errors plaguing it. A common one is spectrum error gen-1016. It can be annoying to encounter errors when you are trying to watch some movies with your friends.

However, the Spectrum error gen-1016 occurs when the Spectrum TV app cannot connect with the DVR. As a result, it prevents the app from launching on the TV.

There are other Spectrum app error codes that you can encounter. Don’t panic because this article will take you through what they are. Also, we will guide you through how to fix these errors in no time.

What are the Spectrum error codes?

  • Error Code WLI-1010: This error code indicates that you have input the wrong Spectrum login details. It means either the username or the password is incorrect.
  • Error Code WLC-1006: This error code means that the show you want to watch is unavailable over the internet. Some shows or channels are available only for your Home Wi-Fi.
  • Error Code  WLI-1027: You will need to type your login details again because of some login issues. So, you manually input the correct login parameters.
  • Error Code WLI-9000: Whenever you encounter this error code, the show you want to see is unavailable. The solution is to try again later or select another show to watch.
  • Error CodeWLP-1035: This error code means you should choose a different program or try again later.
  • Error Code WLP-999: This error code indicates that you try again after a few minutes.
  • Error Code WVP-999: It means that you should try again later
  • Error Code WUC-1002: It means unavailable; try again later
  • Error Code WPC-1005: This error code means you should log in to Spectrum using an Admin account. Parental control restrictions usually prompt it.
  • Error Code WVP-3305: This code means you must try again after a few minutes.

What does Spectrum code gen-1016 mean?

Spectrum error Gen-1016 indicates that the Spectrum TV app can’t open the app TV because it is not connected to the DVR. Code gen-1016 references DVR (digital video recorder) issues.

How can I fix the Spectrum error gen-1016?

  1. The first thing to do whenever you encounter any problems with Spectrum is to restart.
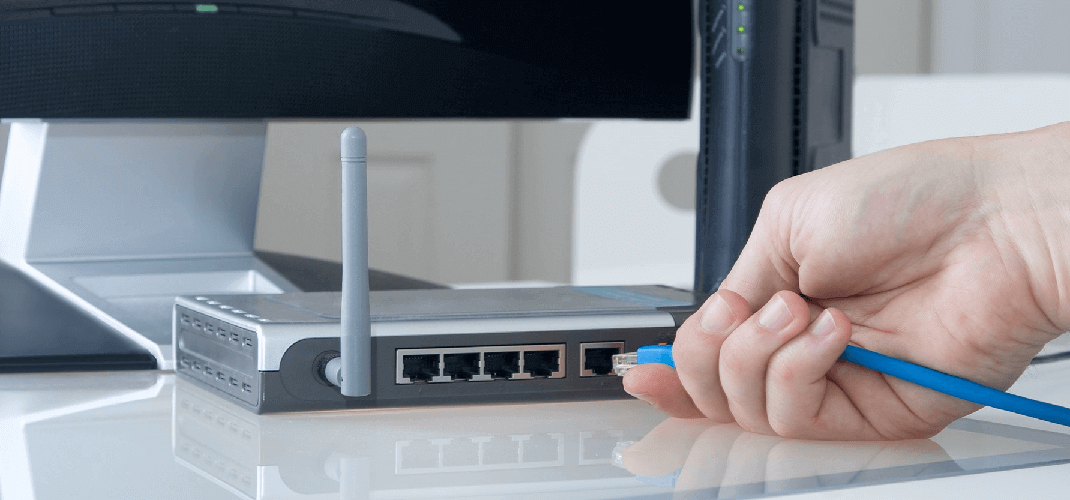
  2. Reset the cable connections.
  3. Get a new DVR at a nearby Spectrum store.
  4. You can also press the On-demand button on your remote.

As stated earlier, you can fix most Spectrum errors by restarting your Spectrum cable. Another common problem is  Spectrum error code RLC-1000 on Roku, and you can fix it using our guide.

What are Browser Attacks & How to Avoid them [20 Different Types]

There are countless browser attack types these days, and it isn’t uncommon for anyone to encounter them. Understanding what constitutes these attacks might be worthwhile considering the high cybercrime rates.

Usually, most browser attack types are geared toward exploiting vulnerabilities in the browser to gain information. This information can then be diverted or infected with malicious malware to cause data breaches or loss.

However, there are several ways of preventing these browser attacks. Today, we’ll go through the preventive measures and means of checking. However, before diving into this, let’s examine the popular types of web browser attackers that are common.

What is a browser attack?

In a browser attack, attackers find and take advantage of the security weaknesses in a browser or software. It can lead to the loss of valuable information and also money.

These attacks can make your PC and stored data vulnerable to editing, deletion, and even copying by third parties. This, in turn, can cause havoc in your personal life, as sensitive information like credit card details might be saved in the attacked browser.

Preventing this from happening will ensure that you can use your device on any browser without worrying about your data being stolen or copied.

Before we reach that part of our journey, let’s first look at what shape browser attacks take in day-to-day life.

What are the different types of web attacks?

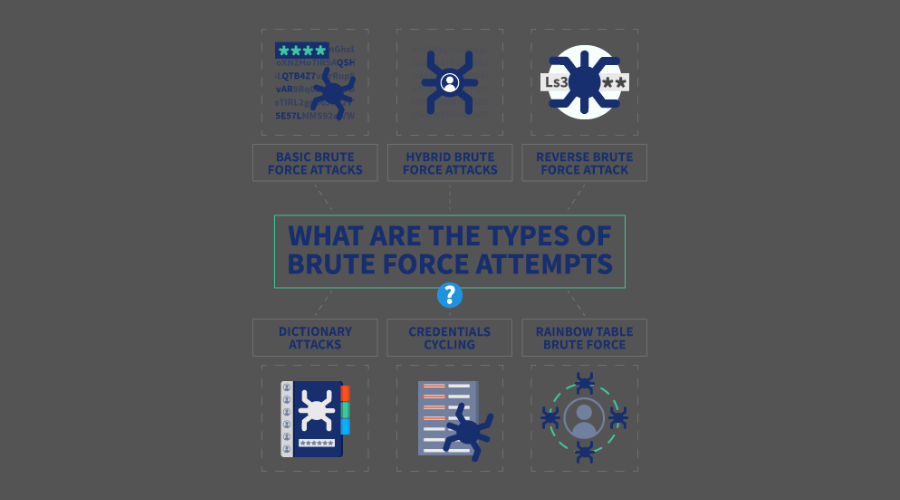
1. What is a brute force attack?

It is a method of hacking that is very straightforward, and it is one of the simplest. The whole concept of brute force attack is trial and error.

The assailant forms passwords and login credentials by guessing. However, cracking passwords and encryption codes with brute force can take a long time.

It happens because the assailant needs to try countless probabilities before gaining access. Sometimes, it can be a futile effort to use the brute force attack, depending on how logical the password is.

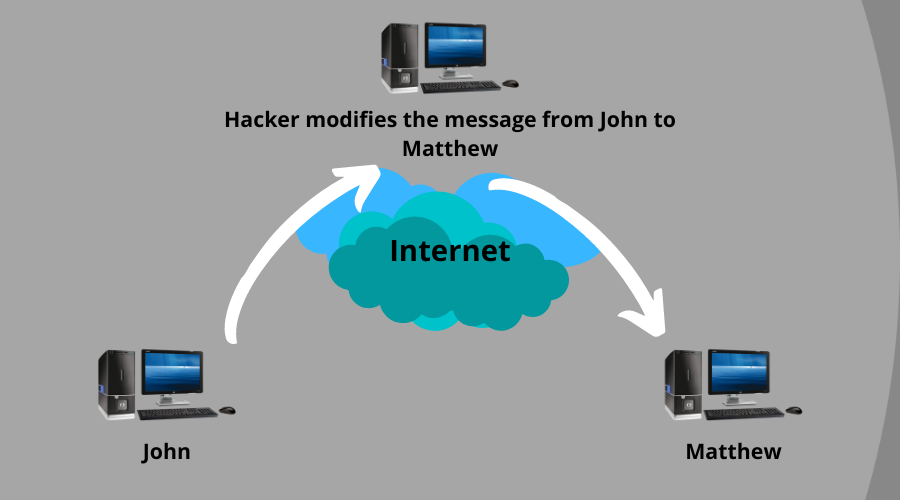
2. What are active attacks?

An active attack happens when an infiltrator changes the data sent to the target. This attack uses compromise to deceive that target into believing he’s got the information.

However, the assailant interferes with the system or network by sending in new data or editing the target data.

An active attack can sometimes employ an attack known as a passive attack. This attack takes precedence over an active attack. It involves gathering information about the hacking, known as spying.

Also, hackers edit packet header addresses to redirect messages to their desired link. It gives them access to information going to someone else, such as account details and credentials.

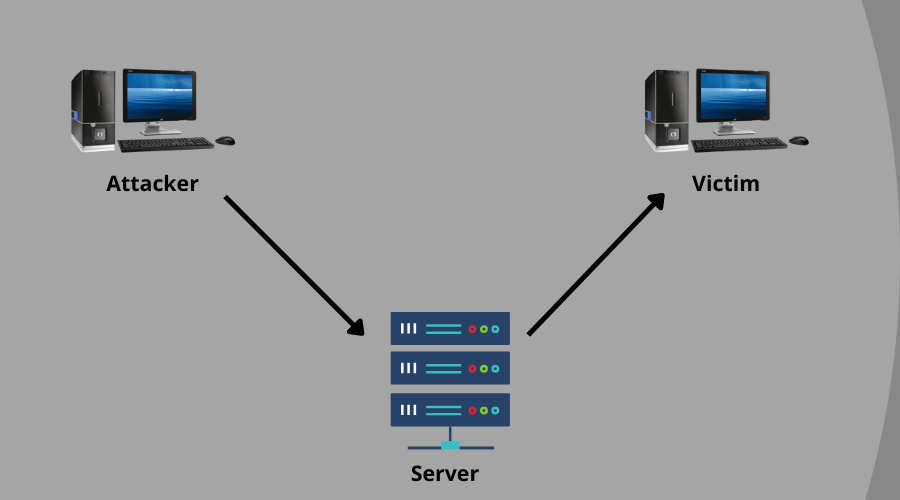
3. What is a spoofing attack?

A spoofing attack occurs when an infiltrator pretends to be another person to have access to someone else’s data. This attack steals classified information, data, files, money, etc.

However, the victims must fall for the fake information for a spoofing attack. In short, spoofing is when a cyberattacker impersonates another person by sending simulated data for illegal access. 

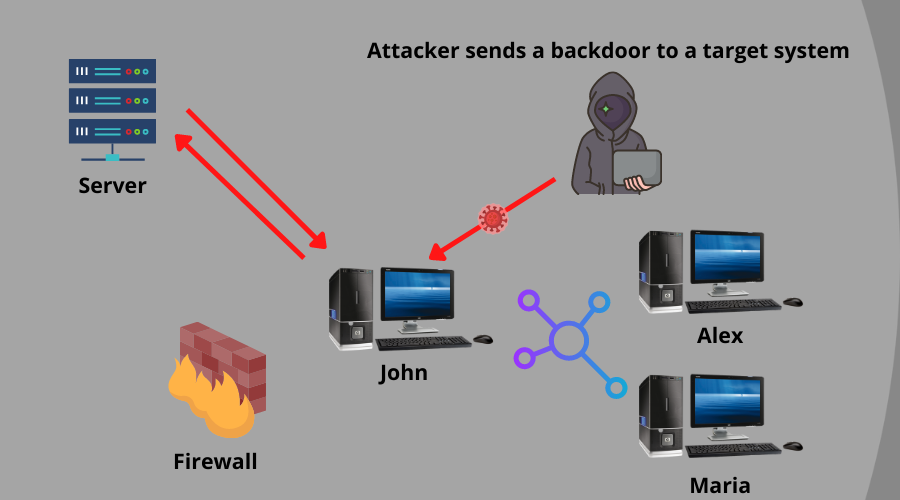
4. What is a backdoor attack?

A backdoor attack is when an attacker uses external agents like viruses or malware to penetrate the root of a system. Then, it targets the core parts of your system or application, like servers. Why they do this is to be able to bypass every security measure.

However, the concept is attacking the backdoor or backend will give you access to every other door before it. After the backdoor attack is successful, the infiltrators can control the whole system.

Malware like spyware, ransomware, and crypto-jacking are tools for this kind of attack. When malware is in the system or application, it will be possible for the attacker to break the security protocols.

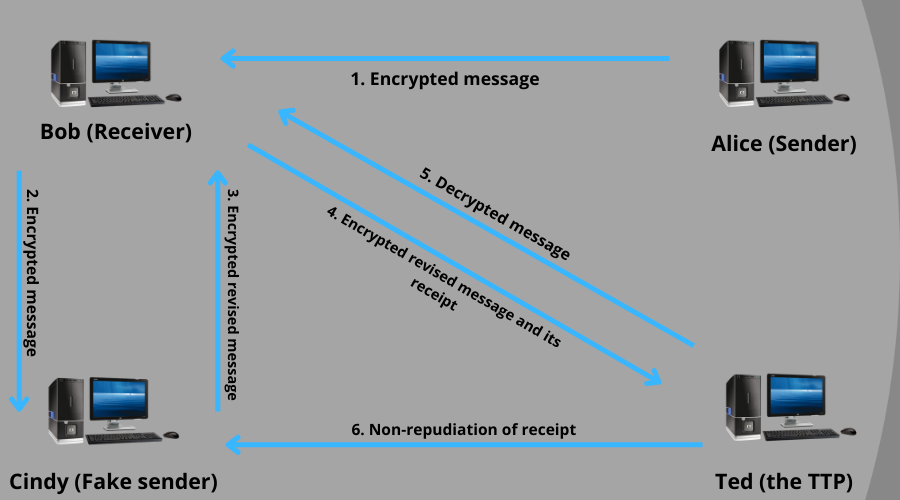
5. What is a repudiation attack?

This type of attack occurs when a user denies performing a transaction. The user can deny that he is unaware of any action or transaction. Therefore, it is necessary to have a defense system that tracks and records all user activities.

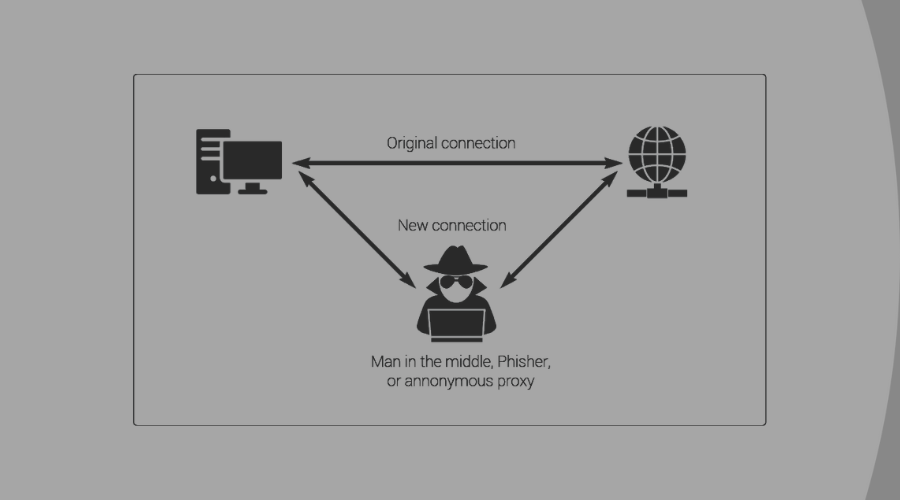
6. What is a Man-in-the-middle attack?

An example of a Man-In-The-Middle Attack is using public Wi-Fi. Assuming you connect to Wi-Fi and a hacker hacks the Wi-Fi, he can send malware to the connected targets.

As the name implies, this kind of attack is not direct. Instead, it comes between the client and the server like a middle-man. It is common for sites with no encryption on their data to travel from the client to the server.

Furthermore, it gives access to the attacker to read login credentials, documents, and bank details. The Secure Sockets Layer (SSL) certificate blocks this kind of attack.

7. What is cross-site scripting (XSS)?

This attack targets the users who visit any website already infected with malware. The attacker infects the website with malicious code, then creeps into the site’s visitors system. This code allows the attacker to access the site and change website contents for criminal intentions.

8. What is a malicious browser plugins attack?

Plug-ins are small applications you download on your browser to add more features. If a malicious plug-in gets into your browser, it can go through your history and password chain. That’s why questions like whether BTRoblox is safe should always be on top of your mind before installation.

9. What is a broken authentication attack?

This type of attack hijacks user login sessions after a broken authentication session.

10. What is a SQL injection attack?

The hacker injects malicious codes into the server and waits for a victim to execute the code on their browser. It is a simple way for hackers to steal valuable data from your system.

11. What is a DNS Poisoning attack?

When a DNS Poisoning attack is injected into your browser, it’ll get redirected to a compromised website.

12. What are Social Engineering attacks?

This type of attack uses deceptive means to trick the user into performing actions that’ll be dangerous for them. An example is spamming and phishing. This method often focuses on presenting too much to be real opportunities as bait.

13. What is a botnet attack?

This type of attack uses devices you pair with your computer to get into your browser. Also, it gives them access to your whole system.

14. What is a path traversal attack?

Hackers inject disturbing patterns into the web server, giving them access to user credentials and databases. It aims to access files and directories stored outside the web root folder.

15. What is a local file inclusion attack?

This type of attack forces the browser to run a specific injected file that has been laced in the local file.

In case the assault is effective, it will disclose touchy data and, in severe cases, can prompt XSS and remote code execution.

16. What is an OS command injection attack?

This browser attack type deals with injecting an operating system OS command into the server. The server runs the user browser, so it is vulnerable, and the attacker can hijack the system.

17. What is a lightweight directory access protocol (LDAP) attack?

This kind of software authorizes anyone to access the data in the system. However, if a hacker injects such software, he’ll be able to reach the data.

18. What is an Insecure Direct Object References (IDOR) attack?

It is a browser attack-type of access control vulnerability that arises when an application uses user-supplied input to access objects directly via the browser. This involves the attacker manipulating the URL to gain access to the data on the server.

19. What is security misconfiguration?

There will be loopholes when developers make mistakes or omit some necessary changes. This security misconfiguration makes the browser vulnerable. Hence, it can leave the browser open to various attack types.

20. What is a Missing Function-Level Access Control attack?

Attackers exploit the weakness, which is the missing function. This kind of Missing Function Level Access Control gives the attacker access to classified data. Also, it allows them to exploit tasks that are not available to an ordinary user.

What are some measures you can take to help prevent web attacks?

➡ Always use strong passwords

It will be hard to infiltrate your data if you protect it with a strong password that intruders cannot decipher. The use of multiple characters, upper and lower case alphabets and numbers should be employed.

Another effective solution is the use of multifactor authentication. MFA allows you to protect your account with more authentication methods. So, peradventure a hacker cracks your password, and your account will demand additional proof.

➡ Make use of a random session key.

This kind of security allows you to generate new passwords and IDs for every session attempt. A random session key works like a token software that generates a new password for every transaction or login.

It will prevent intruders from accessing the previous session with the last login credentials. Additionally, this measure contains the session replay active attack.

➡ Use an Anti-Exploit Program

Anti-Exploit Programs protect your web browsers and software from misbehaving or giving room for threats. In addition, they strengthen the security system of your browser to fight the browser attacks trying to get in.

However, anti-exploit programs prevent external interference with your browser. These programs are good to run alongside an antivirus for more security.

➡ Be cautious of browser extensions

There are tools you can download on your browser for more productive features. However, some browser extensions can be malicious and dangerous for your browsers.

Carefully investigate the extensions you want to install on your browser to avoid detrimental effects.

➡ Use a 64-bit Web Browser

Browsers like Google Chrome and Microsoft Edge operate on 64-bit. They have strong protection and resilience against browser attacks. The 64-bit version web browser has an advanced security system preventing attacks.

➡ Install an Antivirus

Antivirus can help detect malicious activity and also prevent intruders into your system. Depending on how deep the security of the antivirus software goes, it contains software from penetrating your device.

Antivirus software will scan your device to detect malware and select them. There are lots of Antivirus software out there. Go to our page for the best antivirus for you.

➡ Keep your system updated

Browsers and software are always vulnerable one way or the other. It is why developers make updates to fix the loopholes in the previous version.

However, when your software is not up-to-date, it leaves room for attacks to penetrate your system. Hackers sneak through these vulnerabilities to exploit your data and access your account. Employ patch management software to keep your applications up to date.

➡ Use Wi-Fi security

Almost everybody in this present age connects to Wi-Fi every day. Unfortunately, it is dangerous because hackers can tap into the network. However, a security code on your Wi-Fi will prevent unauthorized persons from joining it.

What are the different types of web application attacks?

1. Injection Attacks

This type of web application attack affects the server’s database. The hacker will insert malicious code into the server, get access to user inputs and credentials, and allow modifications.

2. Fuzzing

Fuzzing is a type of attack that uses fuzz testing to find the vulnerability of the software. To find these loopholes, hackers input several corrupted data into the software to crash. Then, they use a fuzzer to detect where the loopholes are. These loopholes are the entry points for hackers to exploit the software.

3. Distributed Denial-of-Service (DDoS)

This type of web application attack temporarily renders the site inaccessible or offline. When you enter countless numbers of requests to the server at once, it will crash or become unavailable.

However, the DDoS attack does not inject malware into the system. Instead, it confuses the security system, giving the hacker time to exploit the software.

4. Using unverified code

Almost every piece of code has a backdoor that makes it vulnerable. If this is not well secured, a hacker can inject malicious code into it. Peradventure, such infected code is incorporated into your site, it will serve as an entry for attack.

5. Phishing

Phishing is a web application attack where a hacker pretends to be someone else. It is to get the victim to share important information and data. Assailants use spoofed emails to lure victims into the trap of sharing valuable information.

Preventive measures for web application attacks

  • Always take your time to investigate emails and messages before replying or even opening them.
  • Before implementing any code into your application, make sure your developers check. If there is a third-party code in the piece of code, remove it.
  • Install a Secure Sockets Layer (SSL) certificate on your site. The SSL will encrypt data transfer from the client to the server and vice versa.
  • Use a Content Delivery Network (CDN). It monitors and balances the traffic and load that goes through sites.
  • Install an Antivirus on your system to scan, detect, and delete malicious data.

Hackers are coming up with new ideas for infiltrating applications and software daily. So, you need to keep your security system up to date.

Browser attacks all have one thing in common, and it is the fact that they find weaknesses in software. Apps like Ungoogled Chromium are susceptible to such attacks.

These weaknesses give them access to exploit your system and steal valuable data. Following the measures mentioned above can help prevent web attacks.

If you want to know about the best antivirus software for your devices, we have an article about that. Also, you can check our page for details on the best anti-exploit tools to protect your browser from attacks.

Likewise, you can check our website for more browser attacks related issues and easy fixes for them.

Microsoft news recap: Milburo acquisition, casual games could be coming to Microsoft Teams, and more

Microsoft news recap is a weekly feature highlighting the top Microsoft news stories of the past week. Sit back, grab some coffee, and enjoy the read!

Microsoft Teams reportedly working on adding casual games

According to a new report, Microsoft is working on bringing casual games into Microsoft Teams, with the aim being to allow meeting participants to play against each other.

microsoft-teams-feature-image

Microsoft announces Viva Sales, connecting Microsoft 365 with sales CRMs

Viva Sales is Microsoft’s latest tool, aiming to connect Microsoft 365 with sales CRMs. It has three core themes which, essentially, target Microsoft’s rival, Salesforce.

  • As sellers are working, they can tag customers in Outlook, Teams or Office applications like Excel, and Viva Sales will automatically capture it as a customer record, layered with all relevant data about the customer.
  • Real-time customer insights provide a deeper understanding of where each customer is in their purchase journey, and how to guide the relationship.
  • Viva Sales is using Context IQ, announced last fall, to ensure relevant content is connected across Microsoft apps and services — like Dynamics 365 and Microsoft
    365 — so sellers save time and stay in the flow of work.

Microsoft announces Viva Sales, connecting Microsoft 365 with sales CRMs - OnMSFT.com - June 16, 2022

Microsoft acquires Milburo to bolster foreign threat detection and response solutions

Microsoft has entered into an agreement to acquire Milburo, a specialist in foreign threat and research detection. The aim of the acquisition is to help bolster foreign threat detection and response solutions, backed up by Microsoft’s plan to roll the company into its Customer Security and trust organisation.

Microsoft-Cyber-Security

That’s it for this week. We will be back next week with more Microsoft news.

5 Best VPNs For Microsoft Surface & Surface Pro

Windows is the most used operating system across the globe. With its latest iteration, Windows 11, the operating system has become better than ever.

While there are advanced security features available in Windows 11, taking extra precautions to safeguard our data doesn’t hurt.

Using a VPN while surfing the internet makes more sense now than ever. There are various kinds of viruses and malware that could enter your PC from the internet, with or without your input.

In such a case making use of a VPN not only keeps your internet presence hidden but also gives you an extra protection layer when you are online.

In this guide, we will give you a list of some of the best VPN apps for Microsoft Surface. The Surface is Microsoft’s range of premium laptops that run the same version of Windows as other PCs, making it vulnerable to the same dangers online. Let us check out the guide.

Does the Microsoft Surface have a VPN?

Now you might wonder whether the Microsoft Surface or Surface Pro laptops come with a built-in VPN app or service?

To answer this, first understand that the Microsoft Surface or Surface Pro laptop, for that matter, runs on the Windows OS, probably the latest Windows 11 OS.

And technically, Windows 11 does come with an in-built VPN service. But there is a big caveat. Although you may see VPN listed under Network & Internet settings, it only lets you add a VPN connection.

Which are the best VPNs for the Microsoft Surface or Surface Pro?

Private Internet Access (PIA) – fastest server locations

private-internet-access

PIA or Private Internet Access is a nicely packaged VPN app you can download for your Microsoft Surface or Surface Pro.

Using this VPN, you can hide your IP address, change your geolocation, unblock restricted websites, and more.

Some notable features of PIA include a no-logging policy, 24×7 live chat support, a 30-day money-back guarantee, no IP/DNS/WebRTC leaks, etc. It also offers unlimited bandwidth throttling and ten simultaneous connections.

The speeds of private internet access servers are decent and reliable. In addition, you get access to security measures such as OpenVPN and WireGuard, and the opportunity to choose the encryption level.

SmartDNS is the latest addition to PIA and would benefit users who want to unblock websites quickly.

What else you should consider PIA for:

  • 3000+ VPN servers in 84 countries
  • 10 connections at once
  • Advanced split-tunneling
  • Ad and malware blocking

Private Internet Access

Have complete privacy on your Microsoft Surface gadgets using the fastest VPN server connection.
Check price Visit website

NordVPN – the most reliable digital security

best vpn for microsoft surface

NordVPN is an extremely popular and widely used VPN app across the globe. It offers a no-log policy, high-end data security features, and ultra-fast servers.

Though it does not offer a free version, there is a 30-day free trial that is enough for you to understand the features and advantages of NordVPN.

The interface of NordVPN is nice and lets you connect to your desired VPN server with one click. There are some unique features such as a Double VPN that routes your internet traffic via two servers.

You can connect up to 6 devices to one account, and it offers 24/7 support. One of the best privacy offers is that it has a no-log policy that is audited annually by PwC and that it can unblock restricted websites and streaming services.

It used to offer a Favorite servers bookmark, which is now gone, but the interface, overall, is pretty easy to use and understand.

Some of the notable features of NordVPN are:

  • Unlimited bandwidth support
  • Options such as a Kill Switch, auto-connection, quick connect, and more
  • 5600+ servers in 60 countries
  • Connect up to 6 devices in one account

NordVPN

Connect to any servers in a flash and safeguard your Surface Pro device with this market-leading VPN software.
Check price Visit website

ExpressVPN – cutting-edge privacy tools

Next up on our list of best VPNs for Microsoft Surface list includes ExpressVPN. It is a trustworthy VPN app that has server locations in 94 countries.

The interface of ExpressVPN is intuitive. There is a big ON/OFF switch that will give you a pretty easy-to-use vibe. You can switch between locations by using the Choose Location button.

ExpressVPN is available for almost every device and offers 24×7 live chat support for troubleshooting problems. Another feature is that you can control the VPN using browser extensions.

It comes with advanced features such as split tunneling, allowing you unrestricted torrenting, kill switch, private DNS; AES-256 encryption, no-log policy, and more.

Here are the key features of ExpressVPN:

  • No-log policy
  • Kill Switch and split tunneling features
  • Servers in 90+ countries
  • Access to proprietary Lightway protocol for better speed and stability

ExpressVPN

Utilize the advanced technology from this VPN tool for digital privacy on your Microsoft Surface device.
Check price Visit website

Surfshark – most convenient VPN security

Surfshark VPN provides high-grade security for your online presence. With over 3000 servers in 65 countries, Surfshark VPN has grown to be a widely used VPN.

If you are not sure about the features, then you can make use of the 30-day trial that it offers. It comes with a kill switch, disconnecting your internet when your device loses connection to the VPN.

The interface is quite impressive, and you will love the ease with which you can operate it. The security protocols that Surfshark offers are OpenVPN, IKEv2, and WireGuard.

Surfshark VPN offers high-speed internet, multi-hop and split tunneling blocks ads and malware keeps your searches private, unblocks streaming websites, and more.

Key features of Surfshark VPN include:

  • Features such as kill switch, split tunneling, etc
  • 3000 servers in 65 countries
  • High-grade online security

Surfshark

Take advantage of efficient VPN support and navigate on the open internet on your Surface device.
Check price Visit website

CyberGhost – the widest VPN servers coverage

CyberGhost

CyberGhost VPN is another popular option that you can opt-in for your Microsoft Surface or Surface Pro laptop. It offers 7,900+ VPN servers across 91 countries, which is quite impressive.

Some of the notable features include the option to one-click connect, fast and stable servers, unlimited torrenting, etc. You can check if CyberGhost is the one VPN you are looking for or not, by taking the 45-day money-back guarantee offer.

The only issue is that in order to add a new device, you need to de-register the device on the website, rather than simply logging out of the app.

CyberGhost VPN also comes with ad-blocking, Wi-Fi protection, a kill switch to protect your data when your PC disconnects from the VPN, and a no-log policy.

Below are some of the key features of CyberGhost VPN:

  • Offers 256-AES encryption
  • Built-in Kill Switch, ad-blocking, Wi-Fi protection, etc.
  • Over 7,900 servers in over 91 countries.

CyberGhost

Surf the internet without content restrictions and have advanced encryption or anonymity on your PC.
Check price Visit website

How do I set up a VPN on my Microsoft Surface?

  1. Right-click on the Start menu.
  2. Select Settings.best vpn for microsoft surface
  3. Click on Network & Internet from the left pane.best vpn for microsoft surface
  4. Select VPN.
  5. Click on Add VPN.
  6. Now you have to enter the following details:
    • VPN provider
    • Connection name
    • Server name or address
    • VPN type
    • Type of sign-in info
  7. Click on Save.
  8. You can edit additional settings such as proxy, VPN connection, etc. by heading over to Advanced options.

Alternatively, if you do not want to go through the hassle mentioned, you can simply choose any one of the VPN apps listed above to safeguard your internet presence.

Let us know in the comments below which one of the VPN services you chose for your Microsoft Surface or Surface Pro.

OkCupid General Authentication Error: 5 Ways to Fix

Facing OkCupid General Authentication errors? You’re not alone. Multiple users report not being able to log into the OkCupid platform as the app always shows this error.

Today, we’ll show you a few easy ways to fix it. Follow the steps below.

How can I fix OkCupid’s general authentication error?

1. Restart your device

➡ Smartphone

  1. Press the Power button.
  2. Select Restart.
  3. After waiting for 10 seconds, power on your phone.

➡ PC

  1. Open the Start menu.
  2. Click on the Power button.
  3. Select Restart from the pop-up menu.restart-PC windows 11 scanner not detected error

Restarting your device will load up all the essential system files required for the device to work correctly from scratch, which might have been missed during the previous session.

2. Check if your account is banned

If you violate OkCupid policies and conditions, your account will be banned without prior notice.

Since OkCupid deals with a lot of personal information and allows you to showcase yourself and interact with others, there are some strict guidelines in place.

Note that Okcupid actually bans your IP address. If you want to get back to using it, you just have to access it with a different IP, and the simplest way to do that is with a VPN.

If you are able to connect, it is very possible that you have been banned. You can continue using Opera One’s VPN, but if you think this is a mistake on their part, contact the customer support team.

⇒ Get Opera One

3. Update the app

  1. Open Play Store.
  2. Tap on your Profile icon.
  3. Select Manage apps & devices.
  4. Click on See recent updates.
  5. Check if there is a new update waiting to be installed for OkCupid or not. If yes, install it and see if it fixes the issue.

4. Reset your password

There are chances that the credentials that you are using to log in to OkCupid might be wrong. So, we would advise you to check your password.

If you have forgotten your password, then you can very easily reset your password. Moreover, if you have set up more than one login method for OkCupid, you can also try them.

5. Check server status

Several issues are frequently encountered not at your end but the end of the platform.

Although there is a different error message, it won’t hurt you to visit this website and check the server status. If there is a problem, then this website will show you exactly that.

Why does OkCupid show a general authentication error?

OkCupid is an excellent platform to find the one you are looking for or simply a mate for your lonely life. However, the app throws a fair share of bugs and glitches that hamper a smooth user experience.

For some OkCupid users, this problem shows up when they try to log in to the platform. The app loads after entering their credentials and shows a general authentication error.

However, when you try to send a message, you will come across a general authentication error message. If it sounds tricky, worry no more as the below solutions should help you fix it.

What else can I do to resolve fix OkCupid errors?

Suppose you are unfortunate, and none of the above solutions helped you fix the OkCupid general authentication problem. In that case, you can try the below tips and possibly try to resolve the issue.

  • If clearing the app cache doesn’t work, we suggest you uninstall and reinstall the OkCupid app on your smartphone.
  • If the app is troubling you, you can use the browser and open the mobile browser version of the platform. This trick has helped several users.
  • Finally, if nothing works, you can try contacting OkCupid support by dropping a mail at [email protected] and resolving your query.
  • You can also try logging in after disabling any VPN you might be using to hide your internet presence.

Let us know which solutions helped you fix the general authentication problem on the OkCupid platform in the comments section.

What is Valorant Error Code 0 and how to Quickly Fix it

The Valorant first-person shooter for Windows is a fun multiplayer game where you can connect. However, Valorant connectivity issues can arise for some players when they try to log in.

Error code 0 is among Valorant’s more common connectivity error messages. When Valorant’s code 0 error arises, players see this error message:

Valorant has encountered a connection error. Please relaunch the client to reconnect. Error Code 0.

Consequently, players can’t play Valorant whenever that error 0 message pops up. Are you another player who needs to fix error code 0? If you are, try applying the Valorant error code 0 fixes below.

Why do I keep getting van 0?

Valorant error code 0 is categorized as a connectivity issue. So, you might be getting it because of some router issue. A quick router restart might be all that’s needed in some cases.

However, this particular error is linked with Valorant’s Riot Vanguard anti-cheat software. Error code 0 can arise due to Vanguard installation issues or firewalls blocking the anti-cheat software.

How do I fix Valorant error code 0?

1. Restart your internet modem router

  1. Unplug your modem router’s power cable.
    A router valorant error code 0
  2. Wait about one to two minutes.
  3. Reconnect the modem router by plugging it back in.
  4. Wait until your modem router’s connection lights are back on.

2. Restart the Riot Client

  1. Click an area of your taskbar with the right mouse button and select a Task Manager option on the menu.
    Task Manager option valorant error code 0
  2. Select Processes to view that tab’s options.
  3. Then select the Riot Client process within Task Manager.
  4. Click End task to close the selected process.
  5. Restart the Riot Client in Windows, and try playing Valorant again.

3. Set Up a Firewall Exception for Riot Vanguard

  1. Click the Windows Security icon within the system tray area of your taskbar.
  2. Select Firewall & network protection on the Home tab.
  3. Click Allow an app through firewall to open an Allowed apps window.
  4. Select Change settings so that you configure the app permissions.
  5. Press the Allow another app button to open the window shown directly below.
  6. Click Browse to navigate to this folder: C:\Program Files\Riot Vanguard
  7. Select the VGC file in the Riot Vanguard folder.
  8. Click Open and Add to add the Vanguard app.
  9. Select the Public and Private checkboxes for Vanguard user-mode service within the Allowed apps window.
  10. Then click OK to exit the Allowed app.

4. Set Windows to Clean Boot

  1. Click the Type here to search the taskbar icon (or box in Windows 10).
  2. Enter MSConfig to search for the System Configuration tool.
    System Configuration search valorant error code 0
  3. Click System Configuration to open it.
  4. Next, remove the tick from the Load startup items checkbox by clicking that option.
    Load startup items checkbox valorant error code 0
  5. Select Hide all Microsoft services on System Configuration’s Services tab.
    Hide all Microsoft services checkbox valorant error code 0
  6. To exclude remaining services from the startup, click Disable all.
    The Disable all button valorant error code 0
  7. Click System Configuration’s Apply and OK buttons.
  8. Select Restart on the prompt to clean-boot Windows.
  9. Launch Valorant to play the game.

5. Reinstall Riot Vanguard

5.1 Enter delete commands

  1. Open up the Windows search tool and input Command Prompt within the text box.
  2. Select the Run as administrator option.
    Run as administrator option valorant error code 0
  3. Type in this command and hit Enter: sc delete vgc
    sc delete vgc command valorant error code 0
  4. Then input this delete command and press Return to execute: sc delete vgk
    sc delete vgk command valorant error code 0
  5. Exit the Command Prompt.

5.2 Delete the Riot Vanguard folder and reinstall

  1. Click Start and the Power option. Select Restart from there.
    Restart option
  2. Open this folder in File Explorer: C:\Program Files
  3. Right-click Riot Vanguard to select Delete.
    Delete button valorant error code 0
  4. Then start the Riot Client (with admin rights), which will automatically reinstall Riot Vanguard.
  5. Select Quit on the Vanguard not initialized message that appears.
  6. Finally, restart your Windows 11/10 desktop or laptop.

What are the most common Valorant errors?

Error code 0 is just one of the numerous issues Valorant players must fix. The Riot Games site includes a big list of other error codes for that game. These are some of the more common Valorant errors:

  • Error code 31: Failed to get player name information
  • Error code 62: NoGamepodsToPingFailure
  • Error code 43: A system has timed out.
  • Error code 81: Service Start Failed
  • Error code 57: PlayerAffinityInitFailure
  • Error code 7: Couldn’t connect to session service

You can contact the game’s help service from the Support page on the Riot Games website if you’re still encountering issues.

If you have networking errors, don’t miss our Valorant could not enter matchmaking guide for more solutions.

We also have a guide on VAN 1067 on Windows 10, so don’t miss it for more solutions.

Feel free to raise questions about Valorant error code 0 in the comments section.

5 Best Browsers That Are Heavily Protected Against Malware

Browsers have come a long way since the early 90s. Back in the day, they were constrained and offered little in the form of functionality and customizations.

However, the modern browser has evolved a big deal. You can now be served virtually all data and media types using a browser. Unfortunately, this growth also exposes you to a broader spectrum of malware.

Hence, a modern browser should have features that keep you safe while on the internet.

These best browsers for speed and security will be excellent choices for any Windows 11 user.

Can you get malware from browsing?

Yes, you can get malware from browsing. Any exposure to the internet could be an opportunity for malware to creep into your device.

best browser against malware

It would help if you also were mindful of the links you click while browsing because some could be backdoors to some malicious program. For instance, users found OneLaunch got installed this way.

How do I remove malware from my browser?

You should download a trusted antivirus, scan your device, and accept all the antivirus recommendations. At the end of this process, all viruses should have been removed.

What are the best browsers against malware?

Opera One – Most inbuilt integrations

With so many integrations packed in one browser, it may seem like a sitting duck for malware attacks; however, the Opera One browser goes some extra mile to ensure you can safely browse the internet.

Firstly, it integrates VPN. Even though this is very limited compared to many full-scale VPNs on the market, it gives you adequate IP masking and ensures your identity is always hidden.

Additionally, since many of the features you need are integrated into the browser, it reduces the chance of downloading infected malware from third-party software vendors.

Its incredible features offer you a robust Private browsing mode that ensures you are not tracked or do not leave footprints behind.

Additional features:

  • Workspaces and Tab Islands
  • built-in AI and modular AI-ready design
  • Ad blocker and VPN

⇒ Get Opera One

AVG Secure Browser – Quick anti-malware integration

On launch, you’ll note how similar it appears to Chrome, which is unsurprising given that both use the Chromium engine.

AVG Browser strives to improve your security with distinctive functions like an anti-tracking tool, privacy cleaner to remove browsing data, or stealth mode.

It contains all the privacy and security functions in its toolbar, and you can activate them with a single click. As a result, it will be the most private browser this year.

⇒ Get AVG Secure Browser

Google Chrome – Most expandable

Chrome is undoubtedly the internet’s most used browser, but its success comes with the consequence of being constantly attacked, which makes other web browsers seem safer than Chrome.

However, it has a substantial development staff, making it one of the most adaptive browsers. As a result, you’ll be able to use it with practically any anti-malware program without worrying about compatibility difficulties.

We love it because it is a fast browser with modifications and features that make the web browser flexible to the demands of the person.

Additional features:

  • Password check
  • Incognito browsing mode
  • Expansive extension library

⇒ Get Google Chrome

Firefox – Best privacy browser

best browser against malware

This browser has risen from its ruins thanks to a complete rewrite of its code base and is now on par with Google Chrome in terms of performance.

Mozilla is the most significant internet browser for security and has a lot of flexibility.

The browser remains relevant by releasing updates regularly and adding new functionality like password-less logins and automated ad tracker detection and blocking.

Additional features:

  • Unified search/address bar
  • Enhanced tracking protection
  • Private browsing mode

⇒ Get Firefox

Safari – Safestfor Mac users

best browser against malware

Including the Safari browser in this list is a no-brainer, and Mac users will nearly always choose it as their preferred browser and the safest alternative for a good reason.

To begin with, it is a market leader in terms of online privacy, thanks to key features such as intelligent tracking avoidance and its privacy report.

In addition, the Privacy Report provides details on how your internet privacy is safeguarded. As a result, you’ll get a selection of site trackers that your browser will not allow to profile you.

Finally, if you lose your credentials, its password manager will come in handy to save and manage your information.

Additional features:

  • Text Copying and Quick Sharing
  • Tab Management
  • Bookmark Management

⇒ Get Safari

Does resetting the browser remove malware?

When a browser is reset, it returns to how it was initially meant to be. This means your search engines and home page return to the default settings. But more importantly, it clears cookies and disables extensions that may have introduced malware to the browser.

Remember that none of these replace antivirus but may offer customization needed to improve your security. If you’re not happy with the integrated browser antiviruses, you can opt for browser antivirus extensions.

Remember that these best browsers for enterprises may be an excellent pick for more organization and scaling.

Let us know in the comments which of these are your favorites.

5 Best Browsers For Adobe Connect

If you plan to use Adobe Connect, you are probably wondering what the best browser is or which browser will be most compatible. Let us explore this with you in this article.

Browsers have evolved a lot since their creation; from being able to display a few static pages, they can now render about every data type.

With this evolution, there has also been a growth in compatibility among different vendors and tools.

The Adobe Connect suite is one such tool. This suite is priceless for presentation, web conferencing, remote training, and desktop sharing, and it can easily integrate with some of the best modern browsers.

Before using Adobe Connect, you should unblock the Flash player on your browser.

Can you use Adobe Connect in a browser?

Yes, it is possible to use this suite in your browser. However, you will need Adobe Flash installed and enabled in your browser to use Adobe connect.

If Flash is not enabled or not installed, you will be required to start the meeting on the app.

What browsers work with Adobe Connect?

There are a few browsers that are compatible with Adobe Connect. The following stand out:

  • Opera One
  • Google Chrome
  • Firefox
  • Safari
  • Internet Explorer

What are the best browsers compatible with Adobe Connect?

Opera One – Most customizable

Opera One has been running on the Chromium engine since 2013, indicating that you can improve the user experience by adding web addons from its extensive library.

That said, installing and enabling Adobe Flash may be one with to get the best out of Opera One. With this installation, you will be able to get the most out of Adobe Connect and enjoy features like screen sharing, conferencing, etc.

We prefer the browser because it’s one of the few that includes an inbuilt VPN, allowing you to mask your IP address as necessary.

Additional features:

  • Native AI and modular AI-ready design
  • Workspaces and Tab Islands
  • Ad blocker and tracking blocking

⇒ Get Opera One

Google Chrome – Most expandable

Chrome is a sophisticated web browser that rivals Microsoft Edge and other new browsers.

Like many other browsers, Chrome does not come with Adobe Connect compatibility out of the box, so you’ll need to install and enable Flash first.

Furthermore, we love Chrome because it has a user-friendly interface, is secure, fast, and adheres to industry standards.

Additional features:

  • Website tabs manager
  • Visual Browser History
  • Browser memory use

⇒ Get Google Chrome

Firefox – Best for privacy

best browser for adobe connect

Thanks to a complete redesign of its code base, this browser has come back to become a force in the browser niche and now compares with other big names. 

Just like with many browsers on our list, you will need a flash installation on the browser before it works with Adobe Connect. 

In addition, we love it because it is about the most secure internet browser available, with a wide range of features.

Additional features:

  • Enhanced tracking protection
  • Page actions menu
  • New tab page

⇒ Get Firefox

Safari – Best for Mac users

best browser for adobe connect

This list also includes the Safari browser. The rest is a breeze after you’ve gotten beyond activating Flash. As a result, you can use Adobe Connect to its full potential.

Aside from that, Safari has a few more endearing features.

For starters, it is the leader in the online privacy market, thanks to crucial functions like privacy reporting and intelligent tracking avoidance.

Additional features:

  • Bookmark Management
  • Tab Management
  • Text Copying and Quick Sharing

⇒ Get Safari

Internet Explorer – Most adaptable for Adobe Connect

best browser for adobe connect

Internet Explorer is the only web browser on our list that natively supports Adobe Flash. So, even though it is becoming obsolete, it is still a viable option for Adobe Connect.

For Adobe Connect to work on Internet Explorer, you must disable ActiveX and enable Adobe Flash. With this setting in place, you can connect to meetings, screen share, and perform other activities using the suite.

Additional features:

  • Unlimited tabs
  • Inline video
  • Synced favorites and tabs

⇒ Get Internet Explorer

How to use Adobe Connect?

The tool has three main components:

  1. The Application bar is at the top.
  2. The stage is below.
  3. The layout panel is to the far right.

The meeting menu can be used to Record Sessions, Manage Access & Entry, Invite Participants, etc.

best browser for adobe connect

You will also have a Pods menu. Where you can add new pods, carry out Q & A, take notes, or run polls.

best browser for adobe connect

Finally, on the Applications bar, you can control the volume, turn on or off your mic, and your video. You will also be able to run Adobe Connect tests.

best browser for adobe connect

The Adobe Connect tool is comparable to other devices like Zoom and Goto webinar. However, it is a complete suite, and you can get the most out of any of the browsers mentioned in this guide.

While we have limited this list to 5, you could use any top browsers that support Flash to connect to Adobe Connect.

AirPods Won’t Connect to PC: 10 Valuable Methods to Fix it

Apple AirPods are Bluetooth earbuds you can utilize with Windows 10 PCs. However, users have reported on Microsoft’s forum that they can’t connect paired AirPods with Windows 10.

When they try to connect them, the AirPods don’t connect or disconnect very quickly.

One user said this:

I haven’t had any problems connecting to my work laptop ever since I got my AirPods at Christmas. But starting this week, they won’t stay connected anymore. I can pair them up and see them on my PC, but when I click connect, it goes Connecting, Connected, and back to Paired all within 10 seconds, and then stays disconnected.

How come my paired AirPods won’t connect to the PC?

There are a few potential reasons (causes) for paired AirPods devices not connecting with Windows PCs. First, the issue can arise because of specific enabled Windows 10 features. For example, the Swift Pair and Fast Startup features are two that can generate Bluetooth device connection issues.

Some users have cited power settings as another factor behind AirPods not connecting with PCs. Those users have been able to resolve the issue by changing their PCs’ power options in Windows 10. Alternatively, disabling network adapter power management can also fix this issue.

Buggy Windows updates can also cause paired AirPods to stop connecting with PCs. It has been confirmed that Windows updates for Edge can cause the issue. Some users have said they’ve needed to roll back (remove) new updates that generated the problem.

Or there might be some issue with your PC’s Bluetooth adapter driver. For example, connectivity issues might arise if your PC’s installed Bluetooth driver is old, missing, or faulty. Updating your PC’s Bluetooth adapter driver might fix such issues.

As there are varied causes for AirPods not connecting with Windows 10 PCs, there are numerous potential fixes. So if you need to fix a paired AirPods device not connecting with a Windows 10 PC, give these possible resolutions a try.

How can I fix paired Airpods that won’t connect to a PC?

1. Run the Bluetooth troubleshooter

  1. Click the Windows 10 Start button and select Settings on the menu.
  2. Select Update & Security and the Troubleshoot tab.
  3. Click Additional troubleshooters in Settings to bring up the window shown directly below.
    Troubleshoot tab airpods won't connect to
  4. Select the Bluetooth troubleshooter listed there.
    Run the troubleshooter button airpods won't connect to
  5. Press the Run the troubleshooter button to launch the Bluetooth troubleshooter. Then let that troubleshooter weave its magic.
Note icon NOTE
The Hardware and Devices troubleshooter can also come in handy for resolving this issue. You can find that troubleshooter by entering the keyword msdt.exe -id DeviceDiagnostic within Windows 10’s search box. Then click msdt.exe -id DeviceDiagnostic to open the troubleshooter.

2. Restart the Bluetooth service

  1. Bring up Type here to search by pressing its Windows + S hotkey.
  2. Enter the search keyword Bluetooth in the text box.
  3. Click Bluetooth and other devices in the search results to open the options in the snapshot directly below.
    Bluetooth option airpods won't connect to
  4. Click the Bluetooth option to turn it off, and wait and minute or two.
  5. Then click the Bluetooth setting again to turn it back on.
Note icon NOTE
Users should also click More Bluetooth options on the right side of the Bluetooth and other devices tab to check the discovery setting. Make sure you have the Allow devices to find this PC checkbox selected. Then click Apply and OK on the Bluetooth Settings window.

3. Select your AirPods to be the default playback device

  1. Right-click the speaker icon in the system tray to select the Sounds option.
  2. Then select the Playback tab shown directly below.
    Playback tab airpods won't connect to
  3. Right-click your AirPods headphones and select the Set as Default Device option.
  4. Press the Apply button.
  5. Click OK to close the Sound window.

4. Disable Bluetooth on mobile devices

Apple mobile device airpods won't connect to

Disabling conflicting Bluetooth mobile devices might also help some users resolve the issue. To do so on an Apple iOS phone or tablet, tap Bluetooth in Settings and toggle off the Bluetooth option.

On an Android mobile, swipe down from the top of the screen to tap the Bluetooth button.

5. Disable the Swift Pair Feature

  1. First, press the Windows key + I at the same time.
  2. Click Devices to open a Bluetooth & other devices tab.
  3. Scroll down that tab to the Swift Pair option shown directly below.
    The Swift Pair option airpods won't connect to
  4. Deselect the Show notifications to connect using Swift Pair checkbox if it’s selected.

6. Select a balanced power plan

  1. First, click the search box (or its magnifying glass icon) on the taskbar.
  2. Next, enter the keyword power & sleep in the search box.
  3. Now click Power & sleep settings to open the options shown directly below.
    Power & sleep options airpods won't connect to
  4. Click Additional power settings to open the Control Panel applet in the screenshot below.
    The Power Options applet airpods won't connect to
  5. If your PC is configured to a power saver or high-performance custom plan, select the Balanced (recommended) plan there.
Note icon NOTE
Alternatively, you can set up a new balanced custom plan by clicking Create a power plan. Then select the Balanced option. Finally, click Next and Create to add the new plan.

It’s also recommended that you deselect (disable) the Turn on fast startup option via the Power Options applet.

To do so, click Choose what the power buttons do in Power Options. Then click Change settings that are currently unavailable, and deselect the Turn on fast startup checkbox.

The Turn on fast startup option airpods won't connect to pc

7. Update your PC’s Bluetooth driver

  1. Press the Windows + X keys simultaneously, and select Device Manager on the menu that opens.
  2. Next, double-click Bluetooth to extend that category.
  3. Right-click your PC’s Bluetooth adapter to select an Update driver option.
    Update Drivers window airpods won't connect to
  4. Click Search automatically for drivers within the Update drivers utility.

Note: There might still be a newer update driver available even if the Update Driver tool determines the best one for your PC is installed. So, you might need to scan your PC with third-party driver updater software like Outbyte Driver Updater. That utility will list all devices on your PC with outdated drivers.

⇒ Get Outbyte Driver Updater

8. Remove any greyed-out Bluetooth devices

  1. Open Device Manager’s window as outlined in the previous resolution.
  2. Click the View menu.
  3. Select the Show hidden devices option.
    Device Manager window airpods won't connect to
  4. Double-click Bluetooth to expand the category.
  5. Right-click greyed-out devices listed there to select Uninstall device.
    An Uninstall Device window airpods won't connect to
  6. Click Uninstall on confirmation prompts.

Note: It’s also recommended to uninstall multiple instances of AirPods devices listed within the Bluetooth category, whether greyed out or not.

9. Edit the registry

Note icon NOTE
It’s recommended to back up the registry or set up a system restore point before trying this resolution.
  1. Bring up Windows 10’s search utility.
  2. Type Registry Editor in the search box.
  3. Click the Run as administrator option for the Registry Editor search result.
  4. Now open this key within the Registry Editor window: Computer\HKEY_LOCAL_MACHINE\SYSTEM\ControlSet001\Control\Class\{e0cbf06c-cd8b-4647-bb8a-263b43f0f974}\0000
  5. Select the 0000 registry key.
    The 0000 key airpods won't connect to
  6. Right-click a space on the right side of the Registry Editor window to select New > String Value.
  7. Enter PnPCapabilities as the new string’s title, and press the Return key.
    PnPCapabibilities string airpods won't connect to
  8. Double-click the PnPCapabilities string to open the window shown directly below.
    Edit String window airpods won't connect to
  9. Then input 24 within the Value data box.
  10. Click OK to exit the Edit String window.
  11. After that, click Power and Restart on the Start menu.

10. Uninstall recent Windows 10 updates

  1. Press the Windows keyboard key and S to bring up the search text box.
  2. Type update within the search text box.
  3. Next, click the Check for updates to the Windows Update tab.
    The Windows Update tab in Settings airpods won't connect to
  4. Select View update history to open a list of updates.
  5. Then click the Uninstall updates option.
    The Installed Updates applet airpods won't connect to
  6. Select Windows 10’s most recent update, and click the Uninstall option for it.
  7. Press the Yes button to confirm.

Who to contact for more potential fixes

Microsoft’s support service is the best to contact about Windows 10 issues. You can reach that service by clicking Get support on the Contact Microsoft Support page.

Enter a description in the text box, and click the Get Help button. Then you can press a Contact Support button.

Alternatively, you can ask the Microsoft community instead. To do so, click Ask a question on the Windows forum. Then you can post a question about the issue you need to fix on that forum.

Those are some of the resolutions users have confirmed can fix paired AirPods not connecting with Windows 10 PCs. So, there’s a good chance those fixes will resolve that issue for most users.

System Reserved Partition: What is it & How to Create One in Windows 11

Sometimes, you might be forced to do a fresh install of a Windows Operating System. When this happens with Windows 7, 8, 10, or 11, the operating system partitions the disk at the beginning of the hard drive. This partition is known as the System Reserved Partition.

After the partition is created, the remaining space of the hard drive is used to create the system drive and then install the operating system.

Opening the My Computer folder after installation does not show you the System Reserved Partition. This is because this partition is not assigned any letter.

What is the system reserved partition?

The System Reserved Partition is a Windows OS partition created before the system partition (or the C: drive) during a fresh install of Windows 7, 8, 10, and 11. The partition is not assigned any drive letter.

System Reserved Partition

Functions of the System Reserved Partition include;

  • Holding the Boot Configuration Database, Boot Manager Code, and Windows Recovery Environment.
  • Keeps space for startup files such as the BitLocker Drive Encryption for those who want to encrypt their systems using BitLocker.

Where is the system reserved partition located?

The System Reserved Partition is located on the hard drive where Windows OS is installed, but before the system partition or the C: drive. You can, however, hide the system reserved partition.

How do I access my system reserved drive?

As discussed above, the System Reserved Partition is not assigned any letter like other partitions. Therefore, you cannot locate it by visiting the My Computer folder. However, you access the System Reserved Drive using disk management tools or the Disk Management option in Windows OS.

How do I create a System Reserved Partition in Windows 11?

  1. Install Windows 11 on a clean disk. You can only create a System Reserved Partition by installing Windows 11 on a clean disk. This is known as a fresh or clean install of Windows 11.windows 11 install

What is the System Reserved Partition used for?

The System Reserved Partition is used for the following;

  • BCD file and Boot Manager: After starting your computer, the Boot Manager reads the data stored in the BCD (Boot Configuration Data). It then starts the OS from the C drive (system drive). Without the System Reserved Partition, you cannot start your computer and might get BCD errors.
  • Drive encryption startup files: Some people encrypt their systems with BitLocker. When you do this, Windows is started using the files stored in the unencrypted System Reserved Partition. The system drive is then decrypted for a successful boot.

Is it OK to delete the System Reserved Partition?

You should not delete the System Reserved Partition. If you do, you might get issues with the Windows OS not booting. 

This is because you might have lost some boot files or OS information if you delete the partition. So, it is not okay to delete the System Reserved Partition. You can, however, update the System Reserved Partition.

How do I remove System Reserved Drive in Windows 11?

The System Reserved Partition plays a vital role when Windows 11 is booting. It is, therefore, advisable not to delete it. 

However, suppose it does not contain any boot components. In that case, you can delete it using Windows disk management tools such as the Tenorshare Partition Manager since it cannot be deleted via Windows Disk Management.

How to Fix Error 422 on Twitch and Get The Channel Info Again

Twitch is a popular streaming platform with millions of users where people get to broadcast their activities. It allows the live broadcast of video games, sports, and other activities.

However, some errors still plague the platform, like Twitch error 422 and others.

Nonetheless, with these errors, the platform is still growing. For example, it allows live streaming and chats where the content owner interacts with streamers. Also, people use Streamlab for multiple streams across platforms like Twitch.

Streamlabs is a streaming platform people use with Twitch and some other platforms. It has lots of features to make your streaming experience a great one.

Quick Tip:

When everything else fails, having a browser that is favorable to streamers may be a better option. Opera GX is a fully optimized browser for streamers and gamers.

The Twitch integration in the Opera GX sidebar appears instantly, allowing you to view the channels you follow and receive notifications when someone goes live. 

Opera GX

You may watch streams on top of other tabs with video pop out, and never miss out on any Twitch announcements.

This article will teach you how to fix Twitch error 422.

How do I connect Twitch to Streamlabs?

  1. Go to Streamlabs’ official website and download the Streamlabs OBS.
  2. Choose the Install location for Streamlabs and click the install button at the bottom right corner.
  3. After the installation, launch Streamlabs OBS, and on the bottom left-hand corner, click the settings button.
  4. Click Streams from the options to prompt the Stream destinations page.
  5. On the page, go to Twitch and click the connect button. It will take you to the Twitch login page.
  6. On the Twitch login page, input your login parameters and click Login.

How to fix the fetching your channel information error?

1. Sign out and sign in to your Streamlabs account

  1. Go to Twitch’s official website on your browser and sign in with your linked account with Streamlabs.
  2. Click the settings button.
  3. Click the Access connection option, then other connections, and click the Disconnect button.
  4. After disconnecting Streamlabs, go back to Streamlabs and connect your Twitch account again.

2. Clear Twitch cookie in your browser

  1. Launch Chrome browser.
  2. Click the menu icon on the right side corner of the screen and settings from the menu.
  3. Select Content settings and click Privacy.
  4. On the privacy page, click on Cookies and select See all cookies and site data.
  5. Type the name of the website and click the remove all button.
  6. Click Yes to confirm the action.

You must have a Twitch account to connect it with Streamlabs. First, however, you should clear Twitch cookies in the browser that your Twitch account is.

You can encounter some issues on Twitch, like Twitch Leecher errors. Check our website for solutions. Also, you can check for easy fixes for problems relating to Twitch and Streamlabs.

How to fix HP Printer Errors in Windows 10/11’s Device Manager

Are you encountering a device manager error for an HP printer? You may be looking for some practical steps to try. This article will help you with some troubleshooting ways to solve this problem.

HP printer users often talk about some common errors. Most of them are easy to fix. However, the mistake in the Windows Device Manager is slightly different.

This type of problem appears with an error code or throws you a message indicating something is wrong. A manual scan on the device manager may not find the HP printer either.

If you are interested, look at the solution for a related problem: HP Printer missing printhead error.

Usually, HP printer users often see the unknown device or device unavailable or any similar things on the device manager. Users may see messages like the HP printer device not attached, USB driver error, or unwanted texts.

You will need to follow some special steps to solve this issue. We have already found the solution to install the HP printer driver without error and fix our device manager problem. Before knowing that, let’s learn about our topic a bit more.

What is a Device Manager error?

Device manager errors are some problems that Windows operating system shows with either an error message or numerical codes on the device manager or while installing driver software. For example, code 1, code 3, code 10, etc.

HP printer users often get this type of error. Each of the error codes and message indicates a different thing. But, the solutions are primarily similar when you want to fix them.

How do I fix HP printer driver Error?

1. Uninstall the printer software

  1. Disconnect your printer.
  2. Press Win + I to go to Windows Settings.
  3. Go to Apps and click on Apps & features.going apps & features Microsoft windows 11
  4. Search for the HP printer software.
  5. Click on the three vertical dots and choose Uninstall.uninstalling hp printer software windows 11

2. Uninstall the driver

  1. Open the Start Menu, type device manager, and hit enter to open it.opening device manager windows 11
  2. Find the HP printer, right-click on it and choose Uninstall device.uninstalling HP Printer driver windows
  3. Check Attempt to remove the driver for this device and click on Uninstall.

To make sure these changes don’t cause any additional problems, you can create a driver backup before uninstalling. The simplest and quickest way to do so is with the help of a dedicated tool like Outbyte Driver Updater.

3. Delete HP printers

  1. Press Win + I to open Windows Settings.
  2. Go to Bluetooth & devices and then Printers & scanners.going printers and scanners windows 11 settings
  3. Click on the available HP printer.clicking on HP printer Windows 11 settings
  4. Next, click on Remove.removing hp printer windows 11 settings
  5. Do this for other HP printers one by one, if there are any.
  6. Restart your computer.

4. Delete temporary files

  1. Press Win + R to open the Run dialog box.
  2. Type the following command and hit enter. %temp%temp command run windows
  3. Now, delete everything from the temp folder.local temp folder windows 11

5. Fix Registry

  1. Download software like CCleaner.
  2. Install and open it.
  3. Click on Registry and then on Scan for issues.scan for issues registry ccleaner
  4. Click on Review selected issues.clicking review selected issues ccleaner
  5. Then, if it asks for backup, do it or ignore it.
  6. Fix the Registry.

6. Install the HP printer again

  1. Go to this page for HP’s official driver software.
  2. Download the appropriate printer software.downloading hp printer software driver
  3. Install it on your computer again.
  4. During installation, if the process prompts you to connect the printer, connect it with your PC.
Note icon NOTE
When you connect an HP printer, if it says something like USB device error or printer not attached or device error detected or even HP printer device unavailable, connect it on a different USB port. Then, continue the installation process.

These are the necessary steps to fix the device manager error HP printer. However, you may know other better solutions. In that case, let us know in the comment box.

POE Error Fix: Failed Writing Received Data to Disk/Application

POE can encounter several common errors: the failed writing received data to disk/application error. These errors can occur because of hardware or software malfunctions.

However, you can encounter this error message while doing various things on POE. For instance, users complain that this error occurs while trying to update POE. Also, not having the correct hashes in your content.ggpk file can cause this error.

Reporting this error to the game developers is one option that can take a while. Hence, we have put together some solutions to help you fix this error and some others.

What time is the POE update?

There was a POE update on the 13th of May 2022 6:00 PM (GMT+1). This update is the Path of Exile Sentinel 3.18. However, the Grinding Gear Games made this patch to adjust the user complaints about the game.

How big is a POE patch update?

Usually, the POE patch update is around 8Gb upwards, depending on the update.

How can I fix failed writing received data to disk/application?

1. Try patching POE through Steam

  1. Launch the Steam client on your computer and log in with your credentials.
  2. At the top of the screen, select the Library tab.
  3. Click on Path of Exile from the Library drop-down.
  4. Click update.

Although Steam can take a while to update, it is a good alternative for crashing downloads. Steam requires a good network connection for it to run smoothly. Thus, it will fix the Path of Exile patch connection failure.

2. Download the updated file 

  1. Go to the POE forum to check for the torrent file (if any are available).
  2. Use a trusted torrent client to run the torrent file.
  3. After the download is complete, copy the Grinding Gear package file to your POE install folder.
  4. Start the installation.

An outdated game file can be the reason for the failed writing of received data to disk/application error. Hence, by updating the game, the problem should be fixed.

3. Connect to a VPN

  1. Install a trusted VPN on your device.
  2. Launch it and input your login parameters.
  3. Please set it to a server from a different region.
  4. Launch POE installer setup follow the onscreen instruction.
  5. Try patching POE and see if the error persists.

A Virtual Private Network can help you resolve the patch update download issues. Hence, we recommend Private Internet Access (PIA) as the best option for this scenario.

Moreover, you can run a pack check to verify that your content.ggpk files are of correct hashes.

Keep trying all the fixes till you find the solution to failed writing received data to disk/application that works for you. Also, Path of Exile crash is a frequent error in POE, and here’s the solution.

However, you can check our page for more information about other issues you can encounter with POE.

3 Quick Ways to Fix Error Code 8018 in Dead by Daylight

Dead by Daylight (dbd) is a popular multiplayer horror game for Windows and consoles. Yet, that game does have numerous connectivity errors that disconnect players.

Error code 8018 is among Dead by Daylight’s connection issues that players have reported. For example, one player said that dbd issue is as follows on Reddit:

I’m connected to the internet, but when I load up my game it (dbd) says, Cannot connect to online services. Please try again later. Error code: 8018.

The 8018 error usually arises when players try to sign in to dbd. It’s a pretty annoying connection error when it persists, but there aren’t that many confirmed fixes.

What are the most common Dead by Daylight error codes?

Error 8018 isn’t the only connectivity issue players have reported for Dead by Daylight. These are some of the other similar dbd error codes that blight the game.

  • Error code 8012
  • Error code 8013
  • Error code 8001
  • Error code 8014

Those errors can often be server-related ones. Therefore, players should check the server status for dbd when such errors arise.

To check if there’s a general server outage, open the Dead by Daylight page on DownDetector. If user reports there indicate a current server issue for dbd, you’ll need to wait for the developer to sort it out.

DBD's Downdetector page dbd-error-code-8018

If DownDetector doesn’t highlight any Dead by Daylight server issue, try applying some potential resolutions for error 8018. You might be able to fix the dbd error 8018 with these resolutions.

How do I fix connection error 8018 on Dead by Daylight?

1. Run Steam or Epic Games as an administrator

  1. Right-click the Steam or Epic Games desktop shortcut you launch gaming clients to select Properties.
    Properties option dbd error code 8018
  2. Select Compatibility to view the options on that tab.
  3. Click Run this program as an administrator to select the checkbox for that setting.
    Run this program as an administrator option dbd error code 8018
  4. To save the new compatibility option, click Apply.
    The Apply button dbd error code 8018
  5. Select OK to exit.
  6. Then launch Dead by Daylight from the Epic Games or Steam gaming client you have installed.

2. Power cycle your router/modem

To power cycle, a router that includes a built-in modem, unplug it for about one minute. Then plug the router back in. Finally, wait at least a few minutes for the connection lights to come on.

A router dbd error code 8018

You’ll need to unplug both if you have a separate router and modem. Wait a minute, and then plug the modem in before the router.

3. Disable firewalls and third-party antivirus software

  1. Press down the Windows key combined with S.
  2. To find the Control Panel’s WDF applet, enter Windows Defender Firewall in the search tool.
    Windows Defender Firewall search dbd error code 8018
  3. Click Windows Defender Firewall to view that applet’s options.
  4. Select the Turn Windows Defender Firewall on or off navigation option highlighted below.
    Allow an app or feature through Windows Defender Firewall option dbd error code 8018
  5. Click the Turn off Windows Defender Firewall options for public and private networking, and select OK to confirm.
    The Turn off firewall option dbd error code 8018
  6. Launch Dead by Daylights to see if you can play it ok.

If you’ve installed a third-party firewall or antivirus software, disable them with their built-in options. You’ll probably be able to find options to disable on their settings tabs or context menus.

Why is dbd disconnecting me?

Dead by Daylights often disconnects players because of internet connection issues. Restarting your router/modem as discussed for the first resolution can feasibly resolve such matters.

Firewall and third-party antivirus software blocks are other possible causes for dbd’s connection errors. For that reason, we recommend players try disabling firewalls and antivirus shields before launching Dead by Daylight.

Can you get banned for disconnecting dbd?

Yes, some players had said they’d been banned after getting disconnected from dbd matches (even when they didn’t choose to disconnect). The game imposes short, temporary disconnection penalties.

So, it doesn’t make much difference whether players choose to disconnect from competitive dbd matches. There are, however, various ban time penalty levels.

Those possible resolutions might resolve dbd error code 8018 for some players. Sometimes, however, you might need to reattempt to connect multiple times or try again later.

However, if the issue continues, you can contact the game’s support service from Dead by Daylight’s support page. Click the Submit a Request option on that page to contact support.

Windows Audio Service Keeps Stopping? 4 Ways to Fix It

Windows 11’s audio service is a significant one that manages the sound for software. Unfortunately, when that service crashes, the sound stops working in Windows 11.

Some users have reported an Audio service not responding error that occurs when the audio service has crashed.

When the audio service crashes, a red X on the speaker icon highlights a sound issue. Is the same thing happening on your PC? If so, the Windows 11 resolutions below might fix your sound.

How do I enable the Windows Audio service in Windows 11?

Before you try applying the resolutions below, you must first check whether the Windows Audio service is enabled. If that service is disabled, that’s probably why you do not hear any sound in Windows 11.

You can enable, disable, and restart various Windows services with the Services tool. In addition, that utility includes multiple configuration options for assistance. For example, this is how you can allow Windows to Audio.

  1. To view the Power user menu, press Windows + X.
  2. Select Run, and input this command in that accessory’s Open box: services.msc
    The OK button windows audio service crashing windows 11
  3. Click OK to view the Services utility.
  4. Next, double-click the Windows Audio service.
  5. Finally, select the Automatic option within the Startup menu if the service is set to Disabled.
    Windows Audio service windows audio service crashing windows 11
  6. Click Start to run the service.
  7. It’s also recommended that you check the Windows Audio Endpoint Builder service is enabled and running as outlined in the steps above.

If you find those services are already running, try restarting them. Right-click Windows Audio or Windows Audio Endpoint Builder to select their Restart options.

How do I fix the Audio Service in Windows 11?

1. Run localservice and networkservice commands

  1. Press the Windows key, and type cmd in the search box on the Start menu.
  2. Open an elevated Command Prompt app by right-clicking the matching search result and choosing Run as administrator.
    Run as administrator option windows audio service crashing windows 11
  3. Input the following network service command and press the Enter button: net localgroup Administrators /add networkservice
    Add localservice command windows audio service crashing windows 11
  4. Run this local service command: net localgroup Administrators /add localservice
    Add networkservice command windows audio service crashing windows 11
  5. Close Command Prompt after executing the specified commands.
  6. Press the Alt + F4 key combo, and select Restart on the drop-down menu.
  1. Start the Services app as previously outlined for enabling the Windows Audio service.
  2. Find and double-click the RPC Endpoint Mapper service.
    RPC Endpoint Manager windows audio service crashing windows 11
  3. Set that service’s startup to Automatic from the drop-down menu.
  4. Click Start in the service window if RPC Endpoint Mapper isn’t running.
    The Start button windows audio service crashing windows 11
  5. Repeat the previous three steps for the DCOM Server Process Launcher and Remote Procedure Call (RPC).
  6. Restart the Windows 11 PC after changing settings for those services.

3. Restart audio services

  1. Go the Services app.
  2. Locate the Windows Audio service. windows audio services
  3. Right-click on it and select Restart.

4. Install the default sound drivers

4.1 Disable automatic Windows driver updates

  1. Type advanced system settings within the search text box on your Start menu.
  2. Click View advanced system settings to bring up the System Properties window.
  3. Then press the Device Installation Settings button on the Hardware tab.
    The Device Installation Settings option windows audio service crashing windows 11
  4. Select the No option, and click Save changes to apply.The No option windows audio service crashing windows 11

4.2 Install a default audio driver

  1. Next, press Start with your right mouse button and select to open Device Manager.
    Device Manager option windows audio service crashing windows 11
  2. Click the small arrow for Sound, video, and game controllers to extend that category.
  3. Right-click the listed sound device on your computer to select an Uninstall device context menu option.
    The Uninstall device option windows audio service crashing windows 11
  4. Select the Delete the driver for this device option on the confirmation window.
  5. Then click the Uninstall button to give the go-ahead.
    The Uninstall option windows audio service crashing windows 11
  6. After uninstalling your PC’s sound driver, click the Action menu.
  7. Select the Scan for hardware changes menu option to reinstall a default audio driver for your PC.
    Scan for hardware changes option windows audio service crashing windows 11
  8. Restart Windows 11 as a final step.

Alternatively, if Device Manager can’t find a new driver or if you want a quicker process, consider using a dedicated driver updater such as Fortect’s.

It can automatically fetch the newest drivers from a rich online database and avoid the risks of constant sound malfunctions on your computer.

You can therefore solve Audio service errors automatically and recover the sound on your PC as we speak.

⇒ Get Fortect Driver Updater

Why is my audio not working after Windows 11 update?

The Windows audio can stop working after users receive new Windows 11 updates because of system changes applied by those updates. For example, an update might use a change that breaks the audio service.

You can undo Windows 11 update changes by restoring the platform to an earlier date with System Restore. It might provide a solution if that utility includes a restore point that predates the audio service crashing on your PC. This is how to roll Windows 11 back to a restore point.

  1. Open Windows 11’s file and app search tool, and type rstrui in its text box.
  2. Click rstrui to bring up System Restore.
  3. Select Next to look through the available restore points.
    System Restore windows audio service crashing windows 11
  4. Choose a restore point that predates the audio service issue on your PC if you can.
    A restore point windows audio service crashing windows 11
  5. Select the Next option again, and click Finish to roll back the OS.
    The Finish option windows audio service crashing windows 11

How do I force the Windows Audio service to start?

You should be able to start the Windows Audio via the Services tool. However, you can also force that service to begin via an elevated Command Prompt like this.

  1. Open Command Prompt with admin rights as covered within resolution one.
  2. To force start the service, type this text in the Prompt: net start audiosrv
    The net start command windows audio service crashing windows 11
  3. Press Enter to run the start command.

A crashed audio service is something you can’t ignore in Windows 11. The resolutions above are widely confirmed ones that will likely fix a crashed audio service on your Windows 11 PC.

If you still need to fix the audio service after applying those resolutions, we recommend you run a system file scan. For the last resort, try resetting Windows 11 as outlined in our guide.

In the comments below, you can add any questions about fixing Windows 11’s audio service. Also, feel free to share any other possible fixes that might resolve the same sound issue.

Viber VoIP Number Error: 3 Easy Ways to Fix it Today

Viber is popular because it is a free call and instant messaging app. Nonetheless, issues like Viber VoIP number errors plague the app, preventing users from getting through the Viber activation process.

Viber frowns at spamming, and as such, they have stopped VoIP numbers from being accepted for activations. This is a big issue as some users rely on VoIP numbers.

Fortunately, there are ways to fix these issues and other problems you can encounter while using Viber.

How can I register my number on Viber?

  1. Install Viber on your phone.
  2. On the welcome screen, click continue.
  3. On the registration page, input your phone number (without the first zero).
  4. Then, you will receive a code through either text or automated calls.
  5. After inputting the code, you’ll be directed to the profile interface and fill it up with your information.

After doing this, your number registration is complete, and you can freely access the app.

How can I activate Viber without a QR code?

  1. Click camera doesn’t work on the QR code page, and you’ll be sent an activation link.
  2. Copy the link, and send it to yourself.
  3. Open the message with a phone using Viber.
  4. Then, click the link and open It.

How can I fix Viber if the activation fails?

1. Update your Viber app

  1. Go to Google Playstore and search for Viber.
  2. Click on it and press the Update button.

2. Contact Viber Support

  1. Go to the official Viber site, scroll down and click Contact Us.
  2. Fill in the information and request access to an account.

It should be noted that this process is strictly at the mercy of Viber. Therefore, there are no guarantees that your request will be granted.

3. Configure Viber settings

  1. Launch the Viber app and go to settings.
  2. Locate the Viber Local Number option, then click on it.
  3. Select your preferred country & area code, then input the VoIP number to start receiving calls.

Indeed, this will solve the Viber VoIP number error, and you will be able to register.

Can I use Viber without a SIM?

Yes, you can register on Viber with a sim. Register Viber with a VoIP (Voice Over Internet Protocol) number. However, it would be best if you made some changes to your Viber app before it can work.

The above fixes will solve the Viber VoIP number error issues. In addition, you should check our page for solutions to some Viber-related other problems.

7 Tips on How to Stream Disney Plus on Discord Without Issues

Have you wondered about how to stream Disney Plus on Discord before? Although Discord is an instant messaging app. But it redefines what is achievable with a social media and messaging app.

Discord can be utilized for various reasons, but one of the most popular functions besides chatting is streaming videos online. Many streaming services and industry giants such as Netflix and Prime Video are available to stream on Discord via screen sharing.

This is beneficial since you can’t always have the chance to have a watch party with your friends. Hence, knowing how to stream Disney Plus with friends will help you and your friends watch the same content together.

So, this guide will provide information on the best tips to ensure a hiccup-free streaming experience on Discord.

Are you allowed to stream Disney Plus on Discord?

It is not legal to stream Disney Plus on Discord. This is because most apps do not allow you to use the screen share function while using a streaming app service.

However, this does not mean streaming Disney Plus on Discord is impossible. So, you can only gain access without the express permission of either Discord or Disney Plus.

How can I stream Disney Plus on Discord?

➡ PC

1. Turn off hardware acceleration in the Discord app

  1. Go to the official Discord site, download the app and install it on your PC.
  2. Launch Discord and click on the settings button after your username.User settings to fix discord mic not working windows 11
  3. In settings, select the Advanced option.
  4. Toggle off the Hardware acceleration option.
  5. Then, click OK to save the changes.

2. Turn off hardware acceleration in Chrome

  1. Press the Windows key, search for Chrome, and launch it.
  2. Click the three dots in the top right-hand corner to go to settings.
  3. Then, click the Advanced options dropdown.
  4. Select system, then toggle off the Use hardware acceleration when available option.
  5. Log onto your discord account and try it out.

By doing this, you can bypass the DRM (Digital rights management)streaming restrictions. This process is the only way to stream Disney Plus on Discord Chrome.

Alternatively, for Opera One and other browsers, you can check below for your steps.

3. Disable hardware acceleration in Opera One

  1. Launch Opera One browser and go to Settings.
  2. In settings, scroll down and select the Advanced settings option.
  3. Then, turn off Hardware Acceleration when available.
  4. Click Okay to save the changes you have made.

4. Configure Discord to add your browser as a game

  1. Open your browser, go to the Disney plus website, and sign in to your Disney plus account.
  2. Click the search space to find the movie you’d like to see.
  3. Open the Discord app, scroll to the bottom of the page, and select discord settings.User Settings
  4. Click the Activity Status button on the left lane of the screen, then click Add it.
  5. Select the window where Disney plus is open, then add it as a game.
  6. Then choose a server to share your streams with.

By adding your preferred browser to Discord, it becomes accessible and recognized. Hence, the streaming restrictions will be bypassed.

5. Launch your stream 

  1. Open the Discord app.
  2. Click the monitor icon against your listed browser added earlier.
  3. Then, set the stream preferences.
  4. Click Go live.
  5. Ask your friends to join your channel, then go back to your browser and play some videos.

These are the steps to stream Disney Plus on Discord with Opera One and Chrome using a Windows PC. However, for Mac OS users, you can try out the fix below as an alternative if you find the steps above the complex.

6. Set up Discord to stream Disney Plus

  1. Open the Discord app and sign in to your account.
  2. Then, click the user settings button next to your username.User Settings
  3. In settings, tap the Voice and Video option to stream Disney plus on Discord with sound.
  4. Select screen share, then click the install button at the bottom of the page.
  5. Afterward, exit the setting page. Then, click the screen button above your username.
  6. Then, select the Disney plus player and Go live.

➡ Mobile

  1. Launch the Disney Plus official app.
  2. Search for the movie or show you want to stream using the Search bar.
  3. Tap on the GroupWatch icon, which is right next to the download button.
  4. Tap on the Invite button, and share the invite link with your friends.
  5. The ones that have accepted the invite will join your stream.
  6.  Tap on the Start Stream button.

Many users are complaining about a black screen when trying to stream on mobile. The leading cause is that they didn’t search for the movie. Rather, they shared a film already on the Continue Watching list.

How do I share Disney Plus on Discord without a black screen?

One issue plaguing streaming Disney plus in Discord is getting the black screen. This black screen is a built-in feature found on other platforms like Netflix.

To fix this issue with the black screen, exit the full-screen mode.

  1. Press the Ctrl+Shift+F keys on your Windows keyboard.
  2. press the Cmd+F keys to leave the full-screen mode for Mac OS.
  3. Turn off Hardware Acceleration in Discord and browsers using the steps above.

We hope these tips will address your issues streaming Disney Plus on Discord. However, if your Disney Plus login is not working, check out our guide to fix it.

These methods work with other services, and we have a guide that explains how to stream Prime Video on Discord, so don’t miss it.

Also, we have an extensive troubleshooting guide for Disney Plus freezing or buffering issues. So, if your problem falls within the category, check that out too.

FIX Twitter: Nothing To See Here Error

When a platform doesn’t function the way it was built, it can be pretty frustrating. Twitter, one of the most used social media platforms, has been troubling users with nothing to see here error.

This error will not load any of your posts and sometimes does not let you log in to your profile. This issue has also been reported by PUBG and iPhone users. PUBG players using Twitter to log in can’t play the game because of Twitter anything to see here error.

The good thing about this problem is that it isn’t that big of a deal and often gets resolved on its own. But if you have been facing this error for some time, this guide will help you fix the problem.

What is Twitter Nothing to See Here error?

To put it in simple words, Twitter has nothing to see here error does not load any posts or tweets, either on the mobile app or on the desktop.

Moreover, you won’t be able to do anything, let alone post a tweet. The origin of this error isn’t explicitly known, but it could be because of a bug, server issues, outdated applications, etc.

How can I fix Twitter nothing to see here error?

1. Restart your device

➡ Smartphone

  1. Long press the Power button.
  2. Select Restart.
  3. After waiting for 10 seconds, power on your phone.

➡ PC

  1. Click on the Start menu.
  2. Select the Power button.
  3. Choose Restart from the menu.restart-PC windows 11 scanner not detected error

2. Update the Twitter app and browser

  1. Open Play Store.
  2. Tap on your Profile icon.
  3. Tap on Manage apps & devices.
  4. Select See recent updates.
  5. Check if there is a new Twitter app update waiting to be installed. If yes, install it and see if it fixes the issue.

You can also check if a new update is available for the browser you are using to access Twitter. Often, new updates bring bug fixes that could be causing the Twitter nothing to see here error.

3. Check Twitter servers

Twitter has an official website that shows you the server status. So if, even after multiple tries, you see nothing to see here error page, you can check out the website.

If Twitter’s servers are down, then there is nothing much that you can do from your end. All you can do is wait for the servers to go back up. You can also keep an eye on official Twitter announcements about the platform.

What can iPhone users do to fix the Twitter nothing to see here error?

While the above solutions are also applicable for iPhone users, below are some more methods that an Android, iPhone, or web user can apply and try to fix the problem.

  • Instead of using your Twitter username, we suggest you use your email address. Some users have reported that this sorted the issue out.
  • The following solution you can apply is clearing the Twitter app cache.
  • If you are experiencing an issue with a browser, you can try clearing the browser history and cache data.

You can try contacting Twitter support to troubleshoot the problem if nothing works. Let us know in the comments section below which one of the solutions helped you resolve the issue.

Hulu Error Code P-TS207: What is it & How to Fix it

Just like every other application, especially streaming platforms, coming across an error while streaming your favorite content on Hulu isn’t something new.

Users have complained about the Hulu error code P-TS207 for quite some time. The good news about this is that there are many different methods you can apply to fix this problem.

It could also appear if the app isn’t up to date, the network connection is poor, or because of a temporary glitch. Whatever the case, this guide is here to help you out. So let us check out the solutions.

What is Hulu error code P-TS207?

Hulu error code P-TS207 pops up when there is a playback error. This happens when you try to stream your favorite content on Hulu, but it fails to do so and ultimately shows the error code.

It has also been reported that Hulu error code P-TS207 can also pop up if streaming devices such as Amazon Firestick or Roku face streaming issues. The error has been reported most commonly by people using Roku devices.

How can I fix Hulu error code P-TS207?

1. Check the internet connection

One of the common reasons that are associated with people coming across Hulu error code P-TS207 is because of poor internet connection.

Hulu uses the internet connection at your place to stream online content. If your internet connection is bumpy or experiencing any issues, you won’t be able to stream content on Hulu.

In such a case, we would advise you to use websites such as Fast or Speedtest to find out about the internet speed.

2. Remove Hulu from other devices

  1. Login to your Hulu account.
  2. Click on Account.
  3. Under Watch Hulu on Your Devices section, select Manage devices.
  4. Remove all connected devices from your Hulu account by clicking the Remove button.

3. Check for the app update

Another reason you might come across Hulu error code P-TS207 could be because of outdated applications.

There might be a new update waiting to be installed. New updates often bring new features and, more importantly, bug fixes that could help you fix the error code.

Check if there is a new app update available. If yes, then install it and check if this helps you resolve the error or not.

4. Clear cached data (Bonus tip)

➡ For Roku

  1. Press the Home button five times on your remote.
  2. Press the Up button.
  3. Press the Rewind button two times.
  4. Finally, press the Fast Forward button two times.

➡ For smartphones

  1. Long press the Hulu app icon.
  2. Select App info.
  3. Tap on Storage.
  4. Hit the Clear Cache button.Hulu App error

What else can I do to fix the problem?

If none of those mentioned above helped you fix the problem, then you can follow the solutions below that could help you select the error code.

  • A simple restart can do wonders and can help you fix multiple issues.
  • You can also make use of the official Hulu Twitter handle and websites such as ServicesDown to know if the app is facing any technical or server issues or not. If that is the case, then there is nothing much you can do apart from waiting till the devs solve the problem at their end.
  • Also, you can reach out to Hulu support via Twitter or their official website and get help from the technical team.

Let us know in the comments below which one of the above methods helped you fix the Hulu error code P-TS207.

3 Ways to Fix Connection Error: VAN 152 on Valorant

Error: VAN 152 is another connection issue that occurs for Valorant. However, it’s not entirely like other, more standard connectivity issues that can arise for the game. Its error message states:

Valorant has encountered a connection error. Please relaunch the client to reconnect. Error Code: VAN 152.

Players who see that error message can’t play Valorant because of it. Are you one of those players? If you are, you might be able to fix that issue with possible error VAN 152 resolutions below.

What is VAN 152 Valorant error?

Error: VAN 152 is a Hardware ID (HWID) ban code primarily intended for cheating players. When Valorant detects cheating (typically because of disallowed apps), it throws up the VAN 152 error.

However, the VAN 152 error can still arise for Valorant players who haven’t knowingly done anything to cheat. These potential resolutions can resolve that error for players who haven’t cheated.

?️Quick Tip!
To regain access fast, connect to a VPN server. A good VPN like PIA will mask your IP address and change your virtual location so Valorant won’t be able to link your current connection to your former, blocked IP.

This reputable VPN can also help you reduce ping and lag and if your IP gets blocked again in the future, you can fix it by just switching to a different server (and there’s plenty to choose from).

⇒ Get Private Internet Access

How do you fix a VAN 152 ban?

1. Restart your Riot client software

  1. Start Task Manager by pressing Windows + X and selecting that utility from the menu.
    Task Manager valorant connection error van 152
  2. If it’s not selected already, click the Processes tab.
  3. Find Riot Client on the Processes tab.
  4. Right-click the Riot Client process to select End task.
    End task button valorant connection error van 152

2. Make sure the VGC startup is enabled

  1. Start the Run dialog (pressing Windows + R will open that accessory)
  2. To bring up the MSConfig utility, you’ll need to input this text in Run and press Enter: MSConfig
  3. Click Services to have a look at that tab.
    Hide all Microsoft services option valorant connection error van 152
  4. Select the VGC checkbox if that startup service is disabled.
  5. Press Apply to save the new service setting.
    Apply option valorant connection error van 152
  6. Click OK > Restart (on the dialog box window) to apply the changes.
    The Restart button valorant connection error van 152
  7. Start Valorant to see if the VAN 152 error is fixed.

3. Troubleshoot the Riot client software

  1. Open the Riot Games > Riot Client folder in File Explorer. If you have a Valorant shortcut on the desktop, you can right-click it and select Open file location to reach that folder.
  2. Right-click Riot Client services and select Troubleshoot compatibility.
    Troubleshoot compatibility option valorant connection error van 152
  3. Select Troubleshoot program in the troubleshooter.
    Troubleshoot program option valorant connection error van 152
  4. Next, select The program requires additional permissions checkbox.
    The program requires additional permissions checkbox valorant connection error van 152
  5. Click Next to press the Test the program button.
    The Test the program button valorant connection error van 152
  6. Select Next again.
  7. Finally, select the Yes, save the settings for this program option.
  8. Close the troubleshooter, and press the Alt + F4 keyboard shortcut to select Restart.

How long is the Valorant HWID ban?

If you’ve tried to cheat when playing Valorant, you’re out of luck with the VAN 152 error. You’ll have to wait up to four months for the temporary HWID 152 error ban to end.

However, players who haven’t tried to cheat Valorant might be able to resolve the VAN 152 error with the possible fixes above. So give them a try if you’re sure you’ve not done anything to cheat.

Speaking of Valorant errors, we have guides for VAN error 1067 on Windows 10, as well as VAN error 1067 on Windows 11, so don’t miss them.

If you’re convinced the VAN 152 error isn’t your fault and the resolutions above don’t work, consider discussing that issue with Riot Support. You can submit a ticket from this Support page.

3 Ways To Fix Safari When the Server Stopped Responding

The Safari browser is one of the most sophisticated internet access options; however, people have sometimes encountered the problem where Safari could not open the page because the server stopped responding.

While tech always requires troubleshooting from time to time, many users of this browser love it because it has a good privacy and security rating.

Additionally, Safari’s integration capabilities are a significant plus. It seamlessly syncs across your Apple devices and allows for a seamless in-browser Apple Pay integration.

In this article, we will be looking at its nonresponding issue and recommending the best fixes.

While it is an Apple browser, Windows users can also download and install the Safari browser.

Quick Tip:

When Safari fails, there is a place for backup and alternatives, such as a secure browser like Opera One, which may help you have a better connection.

Opera’s VPN is fast and can keep up with a fast internet connection as well as secure public Wi-Fi. You may also import all of your Safari stored items, such as bookmarks and passwords.

Opera One

Leave server errors behind and switch to this cross-platform browser for Mac devices.

What does it mean when Safari says the server stopped responding?

Safari cannot open the website because the server cannot be found, as stated in the introduction, a common issue that Safari users encounter. It is not, however, without reason.

Here are some of the reasons:

  • Internet access is limited.
  • An incorrect website address or a URL, including misspellings and command mistakes
  • A filled cache needing cleaning
  • An outdated browser
  • Issues with the Domain Name Server (DNS)

Regardless of the course, the fixes discussed below should help you get back on track using your Safari browser.

Let’s get to it.

What to do when Safari could not open the page because the server stopped responding?

1. Verify you have a working internet

The first step is to examine your internet connection to ensure it is operational and enabled. This is true even if the server stopped responding on iPhone 13, Macs, iPads, and pretty much anything else.

If the device or PC is not connected to a working internet, you will get a message that reads Safari Can’t Open the Page every time.

First, ensure you have a working and adequate internet connection; this is frequently the cause of problems. Also, you can try loading other websites or using different internet services to verify this. 

2. Verify you have the correct address

  1. Click on the address bar and confirm the URL entered.
    safari could not open the page because the server stopped responding
  2. If it is not correct, edit it, and hit Enter.

Another cause of the error message –  Safari could not open the page because the server stopped responding – is an incorrectly typed URL.

You may repair this by double-checking the URL to ensure it is correctly entered.

The page may not open due to a minor issue such as missing a letter or a symbol. So, manually type in the URL and see if the page loads this time.

3. Clear the browser cache

  1. Open the Safari browser.
  2. Select the Safari menu at the top left corner, and from the options, select Preferences.
    safari could not open the page because the server stopped responding
  3. Click on the Privacy option and the Manage Website Data option.
    safari could not open the page because the server stopped responding
  4. At the bottom of the displayed pop-up, select Remove All.
  5. Click done, relaunch the browser, and see if the issue is fixed.

Suppose the error persists after you’ve checked your URL and the internet connection; the issue may be with your browser. For example, your browser’s cache may be complete, and data from previously visited sites are conflicting. 

A third-party cookie cleaner might save you a lot of time and hassle in erasing conflicting cookies saved locally on your PC. For example, the Intelligent Cookie Scan function of CCleaner allows you to add websites whose cookies you want to keep to the Cookies to keep list.

It helps prevent the loss of necessary login settings for sites such as Facebook, Yahoo, Gmail, Twitter, and others. In addition, registering this Intelligent Cookie Scan function may record the activities performed on a specific site on a browser.

⇒ Get CCleaner

If Safari could not open the page because the server stopped responding to iPad or iPhone, these fixes would still work even though the UI would differ.

This is one of the few errors you will face using the Safari browser. We have not given these fixes in any particular order but recommend you double-check your internet connection before venturing to other remedies.

We hope you find the fixes discussed in this helpful article. Please let us know in the comments.

Apex Legends Not Saving Settings: Fix it in 6 Steps (Origin Fixes)

Apex Legends is one of the foremost battle royale shoot ‘em ups for Windows. However, numerous players have reported on EA’s forum that Apex Legends’ doesn’t save selected game settings.

Consequently, that game’s settings reset every time those players restart Apex Legends.

How come Apex Legends sometimes doesn’t save settings?

Read-only file attribute settings are one of the most widely cited causes for Apex Legends not saving settings. When specific Apex Legends configuration files are read-only, the game can’t edit those files to save changes. However, players have confirmed they’ve fixed the issue by deselecting Read-only options.

It’s not entirely uncommon for antivirus utilities to interfere (block) games, saving new configuration settings. For example, Windows Security’s Controlled folder access feature can block games from making changes to required configuration files.

Aside from that, issues can also arise for Apex players trying to save settings with Origin cloud storage enabled. For example, that cloud storage feature can fail to upload newly configured game settings. In which case, disabling Origin cloud storage and running ipconfig network commands can help.

How can I fix Apex Legends not saving game settings?

1. Deselect the Read-only setting for the videoconfig file

  1. First, click the folder taskbar button to launch File Explorer.
  2. Open this folder path: C:\Users\{username}\Saved Games\Respawn\Apex\local
  3. Right-click the videoconfig file in that folder and select Properties to bring up the window shown directly below.
    The Read-only option apex legends not saving settings
  4. Uncheck the Read-only option attribute checkbox for the file.
  5. Click Apply to save the new attribute setting.
  6. Select OK to exit videoconfig’s properties window.

2. Check the attribute settings for the profile file

  1. Open File Explorer in Windows.
  2. Go to this folder location in File Explorer: C:/Users/username/Saved Games/Respawn/Apex/Profile
  3. Right-click the profile file there to select its Properties option.
    The profile file apex legends not saving settings
  4. Deselect the Read-only setting if its checkbox is checked.
  5. Click Apply and OK to apply the new file attribute settings.

3. Delete the video_settings_saved_quite file

  1. Bring up the File Explorer window on your desktop or laptop.
  2. Next, browse to this folder path: C:\Program Files (x86)\Origin Games\Apex\cfg
  3. Select the video_settings_saved_quit file in that folder.
  4. Then, click the Home tab shown directly below.
    Delete button apex legends not saving settings
  5. Press the Delete button there to erase the selected video_settings_saved_quit file.

Note: The path specified above is a default installation one. If you haven’t installed Apex Legends with its default Origin path, you’ll need to open a different directory for the game’s cfg folder.

4. Disable Windows Security and third-party antivirus software

  1. First, look for and click the Windows Security system tray icon on the right side of the taskbar.
  2. Next, click the Virus & threat protection tab.
  3. Click Manage settings to open the Real-time protection option shown directly below.
    The Real-time protection option apex legends not saving settings
  4. Toggle off the Real-time protection setting.
  5. After that, try changing and saving Apex Legend’s game settings with Windows Security disabled.

Players who have installed third-party antivirus software should disable those utilities. Most antivirus utilities include disabling shield options on their system tray icons’ context menus. So, right-click your antivirus utility’s system tray icon to look for and select a disable setting on its context menu.

Note: It’s recommended players turn antivirus utilities back on after changing Apex Legend game settings as required.

5. Flush the DNS

  1. Click the Windows 10 taskbar’s search box or magnifying glass icon.
  2. Enter the keyword cmd to find the Command Prompt.

  3. Right-click Command Prompt and select Run as administrator to open that tool with elevated rights.
  4. Input these separate commands in the specified order (press Enter after each one):
    ipconfig /flushdns
    ipconfig /registerdns
    ipconfig /release
    ipconfig /renew
    netsh winsock reset

    The flush DNS command apex legends not saving settings
  5. After that, close the Command Prompt.

6. Disable cloud storage saves in Origin

  1. Open the Origin game client window.
  2. Click the Origin menu.
    Origin menu apex legends not saving settings
  3. Select Application Settings to open further options.
  4. Then click the Install and Saves tab shown directly below.
    Installs & Saves tab apex legends not saving settings
  5. Turn off the Saves option for cloud storage.

Who to contact for further troubleshooting guidance

If you still need additional potential fixes for Apex Legends not saving, open the EA Help page for that game in a web browser. Sign in to your EA account from there. Then click the Contact Us button on that webpage to get in touch with EA’s support service about the issue.

The EA Community forum might also be able to help some players fix Apex Legends Settings not saving. Players with EA accounts can post new topics on that forum. Go to the Apex Legends section of that forum to add a troubleshooting post about the game not saving settings.

However, there’s a good chance the potential resolutions above will fix Apex Legends not saving settings. The first and second resolutions are especially widely confirmed ones. So, give those possible fixes a try.

How to Get Rid of Your organization is Switching to Edge Popup

Have you seen the message your organization is switching to Microsoft Edge on your PC? This article has an explanation and a solution.

The problem we are focusing on may appear on any type of Windows computer, including the personal computers if these are under the same organization domain or if there is something wrong.

Screenshot your organization is switching to microsoft edge

For some users, the error message may appear randomly while using their PC, even if the Microsoft Edge is not opened. It happens because the Microsoft edge process is active in the background. So, you may want to stop MS Edge from opening on Startup.

However, this issue may be related to another problem: Your browser is managed by your organization. If you want to get rid of your organization is switching to Edge popup, you will need to get rid of the organization control entirely.

If you try to do so, you may end up encountering the following messages:

Microsoft edge updates are managed by your organization.

This setting is managed by your organization.

You may know that this problem is similar to another error: Some settings are managed by your organization. But, the solutions are different.

Why does it say my browser is managed by your organization?

It mostly happens when a third-party software or organization interferes with your web browser.

Screenshot: Microsoft Edge is managed by your organization

You can go to edge://management using the Edge address bar to see if your browser is managed by something or not.

If it is an office PC, it is normal as computers under the same domain are controlled by the IT department of that organization.

Fortunately, you can easily resolve this issue by yourself and gain full control of your browser, notably the Microsoft Edge.

There are several methods to do it. You can find them in the next part of this post.

Quick Tip:
Switching to a different browser might help you remove this issue. The notifications appear when using IE, Firefox, or Chrome, so we suggest you try a reputable alternative like Opera.

It’s one of the leading browsers, with a complete set of features that will make the transition smooth. It offers solutions for private browsing, bookmarking, customized setups, tons of extensions, and more.

⇒ Get Opera

How do I get rid of Edge managed by an organization?

1. Modify Internet Explorer compatibility on Edge [Quick Fix]

  1. Open Microsoft Edge.
  2. Click on three horizontal dots and go to its Settings.going microsoft edge settings
  3. Click on the Default browser from the left sidebar and Set Let Internet Explorer open sites in Microsoft Edge to Never. disable internet explorer open microsoft edge

It will fix your organization is switching to the Edge popup issue. However, for the real solution, follow the other methods.

2. Correct your security programs settings

  1. Open your Antivirus program.
  2. Go to its Firewall or any similar settings.
  3. Find the Activate browser extensions and uncheck and save it.unchecking browser extension antivirus settings

Different antivirus programs have different options. You will need to figure it out by yourself.

3. Uninstall the security program

  1. Press Win + I on the keyboard to open Windows Settings.
  2. Go to Apps and click on Apps & features.going apps & features Microsoft windows 11
  3. Find your AV program there.
  4. Click on the three vertical dots and click on Uninstall.uninstalling antivirus windows 11

Apply this method if you cannot figure out what to change on your security program settings.

4. Modify Windows Registry

  1. Open the Start Menu, type regedit, and hit enter to Open Windows Registry Editor.opening registry editor windows
  2. Go to HKEY_LOCAL_MACHINE.
  3. Then expand Software.expanding software windows registry editor
  4. Go to Policies.
  5. Navigate to Microsoft.

  6. Right-click on Edge and Export it for backup.exporting edge policy registry windows
  7. Now, right-click on it again and choose Delete.deleting edge policy registry windows
  8. Restart your computer.

It will solve the problem Edge is managed by an organization.

What if the problem still annoys you randomly by showing the unwanted popup? In this case, you may consider disabling the Microsoft Edge and start using a different browser.

If you know any other methods that can help, please feel free to let us know in the comment box.

3 Ways To Easily Fix Bulbapedia Error 503

You have probably experienced Bulbapedia not loading images, or you may have seen a message like error 503 backend fetch failed Bulbapedia.

This is one of the most common errors that can be fixed quickly with some simple steps.

We’ll take you through three solutions you can try on your own if you encounter this problem. So read this to find out more.

What does the 503 error mean?

The Bulbapedia 503 error is a server-side error that occurs when the server cannot handle the request due to a temporary overload or maintenance.

Several factors can cause this error:

  • The server is experiencing a high volume of traffic and cannot handle the requests.
  • Maintenance on the server causes it to be temporarily unavailable.
  • The server is experiencing an issue with its database. Additionally, another service it relies on may be unable to process requests at this time.

How do I fix Error 503?

1. Check if the servers are down

  1. Go to Is It Down Right Now?bulbapedia error 503
  2. Enter the URL of the website you’re trying to access. If it doesn’t work, then the issue is with the servers. You’ll have to wait until they’re sorted out.

2. Restart your server or web host

  1. Press Ctrl + Alt + Del to open the Task Manager. Click More details.
  2. In the following window, click File, then choose Run new task.
  3. Another smaller window will appear. In the blank field, type cmd.exe, ensure you’ve checked the box labeled create the task with administrator privileges, and click OK.
  4. This will open a Command Prompt window. Type shutdown -r to restart the server or WebHost.

3. Fix corrupted files with the DISM tool

  1. Search Windows PowerShell and Run as administrator.
  2. Type the command below and hit Enter: DISM /Online /Cleanup-Image /RestoreHealth.
  3. Allow the process to complete, then restart your computer.

Once you’ve fixed the corrupted files, the Error 503 message should disappear. However, if you’re still seeing the error, there’s likely another issue with your site that you’ll need to investigate.

So, if you encounter the Bulbapedia not working error, don’t panic. It may just be a glitch you can solve following the steps outlined above.

For more fixes and solutions to similar issues, check out our website. Then, go through the vast catalog of resources to get the help you need.

Posted in Fix

Office 365 VPN: 5 Best to Pick From [Real-World Tested]

On its own, Microsoft 365 is a very secure platform. However, it never hurts to reinforce the security using a VPN.

Considering how fast online threats are advancing, using a VPN is one of the safest bets for Microsoft 365.

Simply put, it’s better to prevent potential threats even if they never happen than to be caught off-guard. So let’s look at the five best VPNs for Microsoft 365 in 2022.

Does Microsoft 365 have a VPN?

If you’re looking for a way to secure your connection and encrypt your data, you might be wondering if Microsoft 365 has a VPN service. Unfortunately, the answer is no, but some alternatives may suit your needs.

One option is to use a VPN client, which will allow you to connect to your organization’s network from a remote location and provide you with an encrypted connection. Make sure to weigh the pros and cons of each before deciding.

➡ Do you need a VPN with Microsoft 365?

The answer to this question depends on how you plan to use Microsoft 365 and your specific needs. For example, suppose you need access to your email and other Office 365 services while away from the office, then a VPN is unnecessary. However, a VPN would be beneficial if you need to connect to your company network or share files securely.

➡ How secure is Office 365?

Office 365 is one of the most secure cloud-based productivity suites available. It features industry-leading security technologies and compliance programs that help protect your data and keep it safe from malicious attacks. Office 365 also provides comprehensive privacy controls that let you choose how your data is used and shared.

Which are the best VPNs for Microsoft 365?

NordVPN – Most secure

NordVPN is one of the best vpn for microsoft 365

When choosing a VPN for Microsoft 365, NordVPN is an ideal option. This is because NordVPN offers many features that make it perfect for use with Microsoft 365.

For example, NordVPN has military-grade encryption that helps to keep your data safe and secure. In addition, NordVPN also provides a strict no-logs policy, which means that your data will never be stored or monitored.

Furthermore, NordVPN is one of the few VPNs that offer a double VPN feature, which adds an extra layer of protection to your data. Lastly, NordVPN has a kill switch feature that will prevent your data from leaking if the VPN connection is lost.

Pros

  • Highly secure VPN
  • Strict no-logs policy
  • Compatible with devices that support Microsoft 365
  • Great user interface

Cons

  • NordVPN is a bit more expensive than other VPNs on the market.
  • It does not have a dedicated app for Microsoft 365.

NordVPN

Use NordVPN to access your Microsoft 365 through a highly secure and leak-free network.
Check price Visit website

ExpressVPN – The best performance

best vpn for microsoft 365

ExpressVPN is another excellent VPN service that is not only compatible with Microsoft 365 but also packs several features that make it the perfect fit for businesses and individuals.

Some notable attributes include the military-grade encryption that keeps your data safe and secure. The service also offers a strict no-logs policy, ensuring your data is never stored or monitored. In case you get hacked, there will be nothing to be used against you.

Furthermore, ExpressVPN has over 3,000 servers in 160 locations worldwide, so you can always find a fast and reliable connection. Finally, ExpressVPN has a dedicated app for Windows 10, making it easy to set up and use.

Pros

  • Your data is highly secure and protected from cyber threats
  • You can access Microsoft 365 applications from anywhere in the world
  • The service is easy to use and set up

Cons

  • It’s the most expensive VPN around
  • The service does not offer a free trial

ExpressVPN

Get la lightning-fast connection whilst protecting all your Microsoft 365 data.
Free trial Visit website

Surfshark – Budget-friendly

best vpn for microsoft 365

If you’re looking for a VPN that’s ideal for Microsoft 365, Surfshark is an excellent option. It offers features that make it perfect for use with Microsoft 365. Some features that make Surfshark a superb choice for Microsoft 365 include its ability to unblock restricted content, high speed, and low latency.

Surfshark also packs tight security and privacy. These come in the form of a kill switch, DNS leak protection, and military-grade encryption that ensures your data is always protected.

But the stand-out feature is Surfshark’s unlimited simultaneous device connections. With this, a vast team can use the same subscription to set up multiple Microsoft 365 accounts without paying an extra dime.

Pros

  • Reliable security and privacy features
  • Exceptional speeds and outstanding performance
  • Unlimited device connections for teams
  • Cheapest VPN around

Cons

  • Cheap as it may be, you need a paid subscription to unlock its full benefits.
  • Compatible with Windows but lacks an app dedicated to Microsoft 365

Surfshark

Establish a secure connection for all your devices and use Microsoft 365 on all platforms supported, risk-free!
Check price Visit website

CyberGhost – Most extensive server network

CyberGhost is one of the best vpn for microsoft 365

CyberGhost is yet another excellent alternative for Microsoft 365 users. It has been around for many years now, and over that time, it has improved its features greatly, pushing itself to the top among the most popular VPNs.

CyberGhost offers some features that make it perfect for Microsoft 365. It has one of the largest server networks, ideal for using Microsoft 365 even in regions where it’s banned.

CyberGhost also packs the industry-standard AES-256 bit encryption, which encrypts all traffic, protecting sensitive data from being intercepted.

The no-logs policy ensures that no one can track your use of the platform, no matter how advanced their hacking may be.

Pros

  • Offers military-grade encryption
  • It has a strict no-logs policy
  • It is easy to use and has a user-friendly interface
  • It offers fast speeds and unlimited bandwidth
  • Has an extensive network of servers

Cons

  • It is slightly more expensive than some other VPN providers

CyberGhost

Keep a secure workflow with this highly secure VPN that encrypts your traffic, securing all your Microsoft 365 projects.
Free trial Visit website

Private Internet Access (PIA) – Best privacy features

PIA is one of the best vpn for microsoft 365

Lastly, we have Private Internet Access. It’s a popular VPN service that is known for its privacy-focused features. PIA is an excellent option for Microsoft 365 users looking for a reliable and affordable VPN solution.

Here are some other attributes that make PIA perfect for Microsoft 365. PIA offers military-grade encryption that is perfect for protecting sensitive data. It also has a strict no-logs policy, which means that your data will never be stored or monitored. So not even the government has the power to get this information.

Furthermore, PIA provides fast speeds and unlimited bandwidth, making it ideal for bandwidth-intensive activities involving Microsoft apps. And finally, PIA supports multiple devices so that you can use it on all of your devices, with up to 10 simultaneous device connections possible.

Pros

  • Fast speeds and outstanding performance
  • Compatible with many Windows devices that support Microsoft 365
  • Allows up to 10 device connections
  • Reliable security

Cons

  • You have to pay to utilize its full potential

Private Internet Access

Make sure you browse privately and use a secure network when working on your docs, spreadsheets, or hosting meetings with your team!
Check price Visit website

What is the best VPN on Microsoft Store?

Many great VPNs are available on Microsoft Store, but the best one is NordVPN. NordVPN is a reliable and affordable VPN service that offers the following:

  • High-speed connections and superior security features.
  • A strict no-logging policy ensures your information is never stored or shared with any third party.
  • NordVPN has a user-friendly interface and offers a 30-day money-back guarantee, making it the perfect choice for those who want to protect their online privacy when using Microsoft 365.

How do I use a VPN with Microsoft Office?

  1. Launch NordVPN on your PC.
  2. Connect to a server of your choice. We recommend choosing Specialty servers for optimal performance.
  3. Open Microsoft Office and start using it securely.

That’s how easy it is to use a VPN with Microsoft 365. However, there are a lot more things you can achieve with the right VPN, and that’s why you must take your time choosing the best VPN for Office 365.