Microsoft Build 2019 Overview: Clouds, AI Services and Open Ecosystems

The winds of change have arrived and the days of reporting solely on Windows and Office developments are becoming few and far between for Microsoft observers, journalists, and fans.

Over the past few years, Microsoft has seemingly been drawing developer attention away from what used to be its mainstay business products to investments in future endeavors and at this year’s Microsoft developer’s conference BUILD 2019, the company is full steam ahead with a cloud and open ecosystem focus and Windows in the rear view.

With over 6,000 attendees covering 200,000 square feet of conference area consisting of 2,600 customers and partners  and 500 student-age-developers, Microsoft is taking the time this week to cover, among other things, Microsoft education Cloud ecosystem, Microsoft 365 Platform, AI Services, evolved developer toolkits, Power Apps, Blockchain technology and more.

At some point over the past 18 months, Microsoft has covered in great lengths the above list of technologies but will be putting an emphasis on how developers can use the tools to create cross-platform future-leaning economies at scale.

Other notable areas of interest for Microsoft developers this year appear to be adding convenience to the world of IoT with more Plug and Play modeling language and utilizing Azure IoT Edge integration with Kubernetes clusters to intelligently manage scale and spikes in demand.

Beyond just offering its own custom services and tools, Microsoft is also making a concerted effort to envelop OSS and an Open Ecosystem.

Microsoft has already stated its plans to open source its Q# compiler and quantum simulators as a way to make Quantum computing development more transparent and accessible. In addition to giving developers more access to quantum computing technologies, Microsoft is also planning to bring academic institutions that leverage OSS into the fold with its sharing of Q#.

As it is a developer conference, a focus on the evolution of developer tools is also on display with advancements in Visual Studios as its mixes subscriptions with GitHub Enterprise, adds more code support to its IntelliCode platform and Code Remote development extensions. Microsoft also hinted at .NET 5 arriving in 2020 with a .NET Core 3.0 preview 5 rolling out this month.

With much of the focus on how developers can create ecosystems around Microsoft’s new and updated technologies, the company has also set aside some time to discuss protection of these new tools as well as protecting democracies in which they thrive.

On the heels of the 2018 mid-term election and just a year out from the 2020 Presidential election, Microsoft is plunging itself into the arbiter role of election safeguard by offering campaigns and developers new tools to thwart attempts at election tampering.

A new ElectionGuard SDK should be rolling out to developers via open source channels as well as Microsoft CampaignGuard.


There will be much to cover in the comings days, but it seems Microsoft’s tangential focus on Windows continues to wane while the future of Azure, IoT, AI, and even blockchain are becoming bright stars in the company’s portfolio.

Shipments of official Xbox Hooded Union suits (onesies) have apparently been cancelled

Apparently, the official Xbox Hooded Union onesies are being cancelled and no longer shipped out to customers. As noted in a tweet, William Bailey posted his displeasure with a screenshot of an email he received from the Microsoft Store regarding the issue.

Personally, I had a similar issue. I pre-ordered the Xbox Hooded Union Onesie, but never received the item. Microsoft Store said the Xbox Hooded Union Onesie was shipped out to me, however I never received a tracking number, just a confirmation that the item was delivered. Upon further inspection, Microsoft found that no item was actually shipped to me and refunded me my purchase amount. Interestingly enough, you can find the item available through Ebay for double the purchase price.

Microsoft has yet to make an official comment on the matter, but it is frustrating to see how Microsoft dropped the ball on an item like this. Major Nelson touted these suits as being a must-have for Xbox fans, but I imagine many other customers faced similar situations when ordering this item.

What is CryptnetUrlCache directory and how do I remove it?

This tutorial is designed to get you enlightened on what the CryptnetUrlCache is all about. Is it a security threat? What purpose does it serve? How can I remove it? We will be providing credible answers to all these and more in this guide. Read on!

What do I need to know about CryptnetUrlCache?


What is CryptnetUrlCache on Windows 10?

what is CryptnetUrlCache how to remove it

CryptnetUrlCache is a folder associated with the storage of information or files that are automatically acquired (often without your knowledge) from the Internet.

Basically, while navigating through various sites on the Internet, your computer automatically scraps off certain information from these sites, usually to improve your browsing experience. These sets of information are in varying degrees and types and are thus stored in various folders. One of such folders is CryptnetUrlCache.

CryptnetCache can be found on your computer in the following directory: %USERPROFILE% > AppData > LocalLow > Microsoft. With the cryptic nature of this folder, it is widely viewed as a security risk.

Hence, one of the commonly asked questions concerning this folder is: does it pose a security risk? We’ll be providing an answer to this question in the subsection below.

UR Browser CryptnetUrlCache

If you’re concerned that CryptnetUrlCache might host some malicious content, you might want to consider switching to a more secure browser. UR Browser blocks third-party cookies and invisible trackers, so you can rest assured that no malicious cache files will be stored on your PC or in CryptnetUrlCache directory.


Is CrytnetUrlCache a malware or ransomware?

This claim – that CryptnetUrlCache is a malicious folder – is strengthened by the fact certain security programs often fail to detect it while running full system scans. For some reason, the folder is able to hide from the searchlight of certain third-party scanners, including standard security programs like AVG and the likes.

However, if you’ve discovered this folder on your PC, and an AV scan does not reveal it, you can run a manual scan on the folder itself, to check for malicious content. In most cases, you would find no trace of ransomware, malware or any form of malicious content.

In a nutshell, the CryptnetUrlCache is NOT ransomware, neither is it a virus or bug. And, in the event that you notice any malicious content, it is probably introduced by a third-party tool and not the CryptnetUrlCache directory.

While the folder has been ascertained as safe and secure, the question now is: what purpose does it serve?


What purpose does CryptnetUrlCache serve?

The folder location of CryptnetUrlCache indicates a certain level of confidence, regarding the safety of the folder. As a cryptic folder, it is designed to improve and protect access to certain websites on the Internet. This is especially related to websites that are encrypted with the SSL protocol or other encryption protocols.

The folder is usually associated with computers that use Internet Explorer and Google Chrome to navigate the Internet; although it is encountered on virtually all PCs, including those running different browsers.

Essentially, the CryptnetUrlCache folder is there to store certain sets of information that have the role to protect the access on the Internet. It does not contain any sensitive file that can compromise system functionality.


How do I remove CryptnetUrlCache?

Despite the fact that CryptnetUrlCache poses no threat to your computer, many computer users still want to remove this directory. If you fall within this category, you can easily remove the folder, without having to worry about any form of file loss or damage.

However, it is important to note that removing this folder might expose you to certain irregularities and attacks, especially if you perform online transactions frequently. To remove CryptnetUrlCache from your PC follow the step-by-step guidelines below:

  1. Open the Run dialog box by pressing Windows Key + R keys.
  2. Type the folder’s path:
    %USERPROFILE%\AppData\LocalLow\Microsoft
    run window CryptnetUrlCache

    and click on OK.

  3. On the displayed window, find and right-click on the CryptnetUrlCache folder.
  4. Select Delete on the list of options.
    CryptnetUrlCache folder delete
  5. In the pop-up confirmation window, confirm the action to erase the folder from your PC.

The CryptnetUrlCache folder, as described in this article, is not a security threat to Windows 10 (or any other Windows version). In fact, it is more of a “security-enhancer”, reinforcing your security and improving accessibility on the Internet.

However, if you feel the need to remove this folder, we have outlined a short guide for you, to safely remove it.

READ ALSO:

What to do if you can’t add a user to friends list on Xbox?

Xbox allows you to add your friends on Xbox Live to play together. However, some Xbox users have reported that they are unable to add friends on Xbox Live.

Whenever the user tries to add a friend on Xbox live the Sorry, we can’t add this friend at the moment. Try again later. You want to check your privacy settings error is displayed.

In this guide, we take a look at the best fixes to resolve this error for Xbox users.

Can’t add a friend to Friends list on Xbox? Here’s the fix

  1. Check your Internet Connection
  2. Add Friends Online
  3. Check for Active Gold Membership
  4. Check Privacy Setting for Child Account
  5. Perform a Power Cycle
  6. Reset Xbox Console

1. Check your Internet Connection

A slow internet connection can cause some issues with your console and may result in an error while performing actions like adding friends etc.

Slow-loading

If you have a slowinternet connection and using a Wi-Fi connection, try to connect using a wired internet connection. Another way to check if the error is due to a slow internet connection is to try and add friends online through the Xbox website. Check the second solution to know how to do it.


2. Add Friends Online

Microsoft allows you to add friends to your Xbox Live account online in case you are unable to add a friend through the app. Here is how to do it.

  1. Launch the browser on your Xbox console or PC.
  2. Go to Xbox.com and sign in with your Xbox credential.
  3. Select your Profile (gamerpic) and select Friends.
    Xbox Online Add friends
  4. In the Search box, type the Gamertag (of your friend) and hit enter. Make sure the gamertag’s spelling and spacing are correct.
  5. From the search result, select Add friend to add the person’s gamertag to your friend list.

That’s it. Now login to your Xbox Live account and check your friend list. The friend should be added to your friend list successfully.


3. Check for Active Gold Membership

Xbox Live Gold

To play multiplayer games online, an Xbox user needs to have an active Gold membership tied to their account.

You can check whether you have an active Gold membership or if it is expired by logging into your Xbox Live account.


4. Check Privacy Setting for Child Account

If you have a child account or the friend has a child account with age restrictions, you may not be able to add a friend to your Xbox live account.

To fix this, sign into your adult Xbox account and change the privacy setting. Here is how to do it:

  1. On your Xbox console, sign into your Adult account.
  2. Press the Xbox button on your controller to open the guide.
  3. Go to System > Settings and click on Account.Xbox Live Privacy
  4. Under Privacy & online safety, select Xbox Live Privacy.
  5. Here you can either select a default profile or customize the settings as per your settings.
  6. Click on view details and customize to make the necessary changes to the privacy setting.

5. Perform a Power Cycle

You can perform a power cycle to fix common problems on your Xbox One console. The process does not erase any of your game data.

  1. Press the Xbox button on your controller to open the guide.
  2. Select Settings and then choose Restart Console.
  3. Select Yes to confirm the restart.Restart xbox

Alternatively, if you can’t access the guide by pressing the Xbox button, press and hold the Power button on the Console until the console is turned off.

If your Xbox friend list disappeared, we have a quick fixing guide for you.


6. Reset Xbox Console

As a last resort, you can try to hard reset your Xbox console to fix this issue on your device. Resetting the device to factory default can help you fix major problems with the device.  Here is how to do it:

  1. Press the Xbox button on your controller to open the guide.
  2. Select System > Settings.
  3. Select System > Console Info.
    Xbox Reset
  4. Select Reset Console option. Here you have two reset options:
  • Select Reset and keep my games and apps – This option will reset the setting but will not delete game data. Try this option first and if that does not work, go with Reset Everything option.
  • Select Reset and Remove everything – Selecting this option will reset the console to factory setting and will delete all the stored data including accounts, saved games, setting and home Xbox associations — your game data although will stored on the cloud and can be restored after the reset is complete.

The resetting process may take some time, so wait for it to reset normally and the Console will restart after it is reset to factory default. Sign in using your Xbox account and check if the error is resolved.

RELATED STORIES YOU SHOULD CHECK:

Windows 10 news recap: Windows Lite may not be announced until 2020, Facebook is working on a faster Messenger app for Windows, and more

Welcome back to our Windows 10 news recap, where we go over the top stories of the past week in the world of Microsoft’s flagship operating system.

MSN apps will be retired on Windows 8.1 next month

Next month, Microsoft’s MSN apps on Windows 8 and 8.1 will be deprecated. After 3rd June 2019, the MSN News app will not function on Windows 8 and 8.1 devices, according to a notification.

Windows 10 Your Phone app can now save photos on your PC and display contacts pictures

Those making use of Microsoft’s Windows 10 app to link their phone to their PC can now save photos on their PC and display contact pictures, thanks to a new update to the Your Phone app. The update is initially available for Windows Insiders.

Windows Lite reportedly may not be publicly announced until 2020

Microsoft’s new lightweight operating system, Windows Lite, that is reportedly aimed at competing with the rise of Google’s Chromebook offering, apparently won’t be publicly announced at Build this year, and may not be announced until 2020.

Laptops on a table

Facebook is building a new faster, smaller Messenger app for Windows and MacOS

As Facebook works to improve its platform as a whole following a number of privacy scandals, the company is now working on a new app for Windows and MacOS, the company is expected to launch a new faster, smaller app for Messenger.

That’s it for this week – we’ll be back next week with more Windows 10 news.

Microsoft news recap: HoloLens 2 Development Edition announced, Outlook hackers stole Bitcoin and other cryptocurrencies from users, and more

Microsoft news recap is a weekly feature highlighting the top Microsoft news stories of the past week. Sit back, grab some coffee, and enjoy the read!

Microsoft announces HoloLens 2 Development Edition: $3500 or $99/mo, includes Azure credits and Unity trial offers

The HoloLens 2 Development Edition has been announced, along with pricing and finance details. The price for Microsoft’s mixed reality headset will set you back $3500, whilst it can also be purchased for $99/mo. It’s available in a bundle that brings $500 in Azure credit, 3-month trial of Unity Pro, amongst other goodies.

Outlook hackers stole Bitcoin and other cryptocurrencies from users

Following the recent security blunder affecting Outlook.com, where hackers were able to view certain details of emails from users’ accounts, has come at a cost to some users. According to a report, multiple victims have had cryptocurrencies, such as Bitcoin, stolen from them as a result of the attack on Microsoft’s web-based email service.

Microsoft’s Office apps are getting new privacy controls

Microsoft is set to make it easier for users to control what data is collected by Microsoft’s suite of Office apps. New privacy controls will allow users to enable or disable certain bits of data from being collected, however, some data which is required for running the service will still be collected, such as diagnostic data.

Xbox’s xCloud streaming service reaches “takehome” milestone

Microsoft’s cloud game streaming service, xCloud, is taking strides in getting closer to being publicly available later this year. According to Microsoft’s Head of Xbox, Phil Spencer, xCloud has now reached its “takehome” milestone, meaning that it can now be used by employees and the general public outside of Microsoft, such as at their home addresses.

That’s it for this week. We’ll be back next week with more Microsoft news.

Here’s how to disable GameBarPresenceWriter.exe once and for all

In this article, we are going to be looking into what GameBarPresenceWriter.exe is about, and how you can safely disable it on your PC.

Basically, we will be showing you what the .exe file does on your system, as well as how to turn off its function, if and when required.

What is GameBarPresenceWriter.exe?

GameBarPresenceWriter.exe is an executable file that is associated with the Xbox app and Game Bar. While this feature can be useful, the GameBarPresenceWriter.exe (Game Box) feature can cause certain problems and use more resources that it should.

Furthermore, various degrees and types of errors have been recorded with regards to this feature. And despite its relative importance, most people find it too cumbersome or not cost-effective to use.

Hence, they prefer to disable it while running Xbox games on their PCs.

To assist you in disabling this feature, we have come up with a set of solutions, any of which can easily be employed to safely disable GameBarPresenceWriter.exe, and thus allow you to run Xbox games at optimum capacity, while also conserving your resources.

How to get rid of GameBarPresenceWriter?

There are several methods that can be employed to disable this function on Windows PCs. However, we will be limiting our article to only three that have been proven, beyond doubt, to be effective in safely disabling GameBarPresenceWriter.exe.

These methods have been described in the three subsequent subsections.

  1. Disable Xbox DVR
  2. Disable it in Settings
  3. Disable via regedit

1. Disable Xbox DVR

As emphasized above, GameBarPresenceWriter.exe is a built-in feature of the Xbox app. And there is a simple and straightforward avenue to disable it directly on the app.

To do this, follow the guidelines below:

  1. Go to Start and then type Xbox.
  2. From the list of options, click on Xbox to launch the gaming app.gamebarpresencewriter exe xbox app
  3. In the  Xbox window, navigate to the lower left-hand side; locate and click on the Settings icon.xbox app settings gamebarpresencewriter exe
  4. On the Settings window, locate and click on Game DVR.
  5. Uncheck the Record game clips and screenshots using Game DVR.share clips and screenshots gamebarpresencewriter exe
  6. Exit program and restart your PC.

This process should disable GameBarPresenceWriter.exe. If you feel this process is too cumbersome or in the event that it could not resolve the issue, you can try the next method.


2. Disable it in Settings

To disable the Game Bar function in Settings, and any issues with GameBarPresenceWriter.exe, do the following:

  1. Press the Windows key.
  2. In the lower left position, locate the Settings icon and click on it.settings icon gamebarpresencewriter exe
  3. On the Settings window, locate and select Gaming > Game bar.gamebarpresencewriter exe
  4. Uncheck the Record games clips, screenshots and broadcast using the Game bar.gamebarpresencewriter exe
  5. Exit and restart PC.

Once this is done, you can then run your Xbox game(s) to see if the GameBarPresenceWriter.exe has been disabled.

If the feature remains enabled, you can try the next method to disable it.


3. Disable via regedit

You can also disable the GameBarPresenceWriter.exe (and other related functions) using the Registry Editor (Regedit). To do this, follow the steps below:

  1. Open the Run dialog box: press Windows Key + R.
  2. In the box, type in regedit and press Enter.gamebarpresencewriter exe regedit
  3. On the displayed window (Registry Editor), locate the entry:
    • HKEY_CURRENT_USER\SOFTWARE\Microsoft\Windows\CurrentVersion\GameDVR
  4. Locate the key: AppCaptureEnabled, and set its value to 0 (off).gamebarpresencewriter exe GameDVR
  5. Locate the key: GameDVR_Enabled, and set its value to 0 (off).
  6. Click on OK.
  7. Exit program and restart PC.

In rare cases, where none of the solutions outlined herein could disable the GameBoxPresenceWriter.exe, you might have to uninstall and reinstall the Xbox app.

There you go, these are just a few solutions that might help you fix the problems with GameBarPresenceWriter.exe. Be sure to let us know if you found our solutions helpful.

READ ALSO:

Connection to Google is Temporarily Unavailable on my PC [2026 Fix]

Google Apps Sync errors do occur, preventing users from connecting to Google servers. Usually, when this issue occurs, the following error message pops on the screen: Connection to Google is temporarily unavailable.

It is worth mentioning that this error often prevents Outlook from connecting to the servers, even when having a working internet connection.

To fix this common issue, we share a series of solutions below. This is a general troubleshooting guide you can use whenever you get this error, irrespective of the programs it affects.

What to do if Google connection is temporarily unavailable?

1. Restart Outlook/Reboot computer

As simple as it may sound, restarting Outlook and rebooting your computer could solve your issue.

First, close Outlook, re-open it, and see if it works. If this does not work, restart Windows and try opening Outlook again.

2. Make sure Date & Time is accurate

Making sure that your date and time are correct is imperative. Inaccurate date and time settings may mess up the internet encryption mechanisms.

To change Date & Time, follow these simple steps:

  • Press R + the Windows key at the same time
  • Type timedate.cpl in the Run box
  • In the Date and Time window that pops up, first click the button under Set the time automatically off, if you initially had it on
  • Click under the Change the date and time section > Change
  • If the date and time are not correct, modify the settings
  • Click OK > Apply > OK

3. Enable contact sharing in the Google Apps control panel

To enable contact sharing, follow these steps:

  • Go to the Google Apps control panel > Settings > click Contacts on the left side
  • Click Enable contact sharing > Save changes

4. Disable antivirus and firewall

Your firewall or antivirus tools could be the culprits behind Google Apps Sync‘s inability to connect to the servers.

Different antiviruses have different way of being turned off. You should be able to find the way of disabling your antivirus easily though.

To disable the firewall, you need to follow the next steps:

  • Press the Start button > open Control Panel
  • Click System and Security > Click Windows Firewall / Windows Defender Firewall
windows firewall
  • In the left side, select Turn Windows Firewall on or off
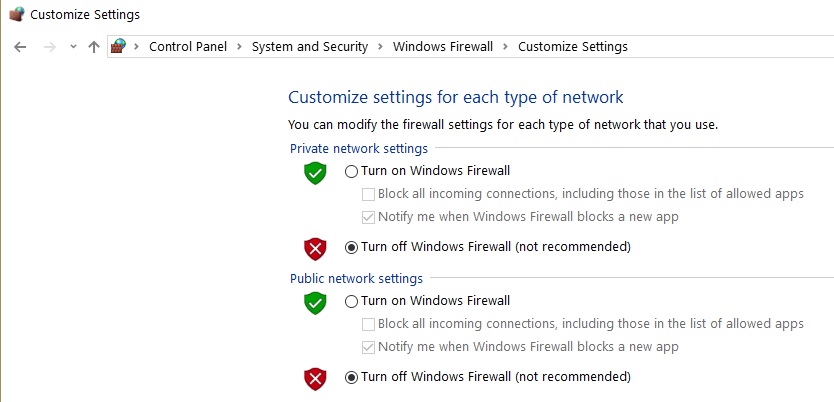
  • Select Turn off Windows Firewall (not recommended) > Click OK
turn off windows firewall pc

Check to see if Outlook can connect to the servers now. If it still does not work, we recommend you turn the antivirus and the Windows Firewall back on.

We hope that our solutions proved helpful. If this guide helped you out, or you have other solutions to fix this error, please leave us a comment in the comment section below.

PC can’t be upgraded although you are enrolled in the Insider Program [FIX]

Upgrading to the new built of Windows 10 isn’t always simple, and many users reported This PC can’t be upgraded to Windows 10. Although you are enrolled in the Windows Insider Program this device isn’t yet eligible for this build error message.

Not the most ideal of circumstances and the causes might vary from machine to machine. But we have a few solutions that might help you. So let’s begin, shall we?

My device isn’t yet eligible for new Windows 10 builds

  1. Uninstall BattlEye
  2. Use the Troubleshooter Tool
  3. Free up disk space
  4. Update drivers
  5. Check your Firewall

1. Uninstall BattlEye

We know that BattlEye is an anti-cheat solution used in various multi-player games. It is used by game developers to keep the game fair and competitive, but it can also lead to This PC can’t be upgraded to Windows 10 error.

The best solution would be to temporarily uninstall it, and get back to it when you’re done with the update. To uninstall BattlEye follow these steps:

  1. Open Control Panel.
  2. Now click on Programs and Features.
    programs and features This PC can't be upgraded to Windows 10
  3. Select BattlEye and uninstall it.

Additionally, you can try deleting the BattlEye folder:

  1. Close all the games you’re running;
  2. Then, go to C: > Program Files (x86) > Steam > steamapps > common and delete the BattlEye folder.

Another method you can use to uninstall BattlEye is to use efficient uninstaller software. These programs will remove the desired application, along with all of its files and registry entries, thus ensuring that the application is completely removed from your PC.

Consequently, you can rely on uninstaller tools to completely remove unwanted programs or automatically erase leftover files from your PC.

2. Use the Troubleshooter Tool

If you’re still having a tough time with This PC can’t be upgraded to Windows 10 error, you might want to run the built-in troubleshooter.

  1. Open the Settings app and go to the Update & Security section.
  2. Select Troubleshoot from the left pane.
  3. In the right pane, select Windows Update and click Run the troubleshooter button.
    windows update troubleshoot This PC can't be upgraded to Windows 10

Follow the instructions on the screen to complete the troubleshooting process.

3. Free up disk space

You can free up some space by removing any unnecessary files. This can sometimes help with the This PC can’t be upgraded to Windows 10 error. To free up space, follow these steps:

  1. Open your Start Menu, and then select Settings.
  2. Now click on System, and then Storage.
  3. In Storage sense, select Free up space now.
    free up space can't upgrade to Windows 10
  4. Windows will take a few moments to determine what files and apps are taking up the most space on your machine.
  5. Now you can select all the items you want to delete, and then select Remove files.

4. Update drivers

This PC can’t be upgraded to Windows 10 error can appear if you have some drivers that are not up to date. To fix this, follow these steps:

  1. Open Device Manager.
  2. Now expand the category with the hardware you want to update.
  3. Right-click the device, and select Update driver.
    update driver
  4. Click the Search automatically for updated driver software.
    search automatically for driver software This PC can't be upgraded to Windows 10 Insiders program

Additionally, you can download the latest drivers using third-party tools. By using this tool, you can automatically update all your drivers with just a couple of clicks.

⇒ Get Fortect Driver Updater

5. Check your Firewall

You can temporarily disable your Windows Firewall if it’s causing any connections issues. This solution can help in issues related to driver updates. To add any program to a whitelist, follow these steps:

  1. Open Control Panel.
  2. Click on Windows Firewall.
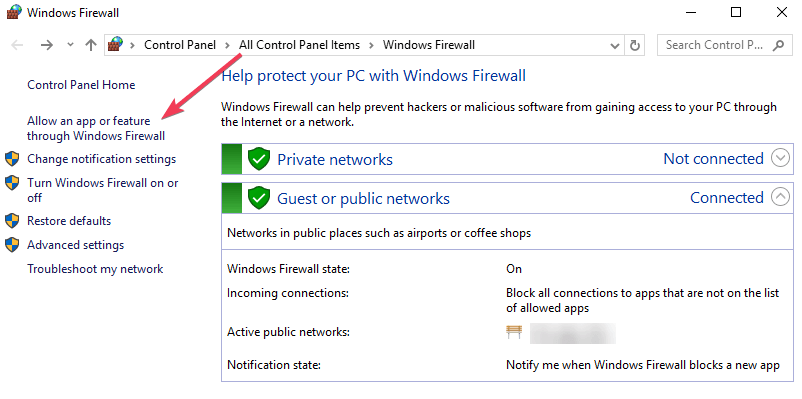
  3. Now, click on Allow an app or feature through Windows Firewall.
    allow app through firewall This PC can't be upgraded to Windows 10
  4. Now, the Allowed App windows will open.
  5. Click on the Change Settings button.
    change settings This PC can't be upgraded to Windows 10
  6. Check the boxes next to the apps or programs you want to allow through Windows Firewall or network connections.
  7. Click to save your new settings.

We hope that these solutions were able to help you fix This PC can’t be upgraded to Windows 10. Although you are enrolled in the Windows Insider Program this device isn’t yet eligible for this build error. In the meantime let us know what other issues you’re facing with the newest Windows update.

The printer driver package could not be installed [Fix]

You’ve gotten your hands on a new printer, but The printer driver package could not be installed error just keeps showing up.

There are many causes for this error, be it a faulty port, or incorrect driver management, but there’s a way to fix this problem. So let’s get to work, shall we?

What to do if I can’t install printer driver on Windows 10?

  1. Disable Spooler Service
  2. Change printer port
  3. Reinstall drivers
  4. Use a different machine

1. Disable Spooler Service

The Spooler Service is responsible for the management of processes that have been sent to the printer. This feature works just fine in most cases, but if there’s a problem with it, you might get The printer driver package could not be installed error. You can fix that by doing the following:

  1. In your Start Menu, open the Run box.
  2. Now type services.msc and press Enter.
    services The printer driver package could not be installed
  3. Now look for the Spooler Service in the list, and double click on it.
  4. Once the Properties tab is open, click on Stop, and then press OK.

After doing that, wait for a few moments and start the service again.

2. Change printer port

If you’re using a USB connection, chances are that some of your ports might be unresponsive. We suggest you try using a different port for your printer in order to fix The printer driver package could not be installed error. To do this, follow these steps:

  1. In the Start Menu select the Control Panel.
  2. Next, select Devices and Printers.
    devices and printers The printer driver package could not be installed
  3. In the top area of the window, select Add a Printer.
  4. Select Add a Local Printer.
  5. In the Choose a Printer Port section, now select Use an existing port.
  6. In the drop-down menu, select the USB001.
  7. Click the Next button.
  8. In the Manufacturers section, select your printer manufacturer.
  9. In the Printers section, look for your printer model and select it.

3. Reinstall drivers

This solution can sometimes help with The printer driver package could not be installed error. In order to reinstall the driver, simply follow these steps:

  1. Open your Control Panel.
  2. Click on Hardware and Sound.
  3. Select Printers.
  4. Right-click on the printer whose driver you need to install, and then select Run as administrator.
  5. Click on Properties.
  6. Now click on Advanced.
  7. Click on the New Driver tab, and then follow the onscreen instructions to install the driver.

If you wish to uninstall it, follow these steps:

  1. In the Start Menu, open up your Run box.
  2. Type devmgmt.msc and press Enter.
  3. Look for your printer and click on Uninstall Device.
    uninstall device The printer driver package could not be installed
  4. Restart your machine.

Another way to install printer drivers is to use a third-party application. By using this tool you can easily update all your drivers automatically with just a couple of clicks.

⇒ Get Fortect Driver Updater

4. Use a different machine

Try running the printer on a different machine, so you can narrow down the culprit. If The printer driver package could not be installed error appears on other PC as well, it’s possible that your printer is faulty.

We hope that these fixes were of help. In the meantime, let us know in the comment section down below on what type of printers do you use at the moment.

What to do if Windows was unable to format Micro SD card

This tutorial brings you a comprehensive guide on how to fix the Windows was unable to format the Micro SD error. At times, while trying to format Micro SD on your PC, the operation continuously fails. If this happens, what do you do? We have a solution for you in this tutorial. Read on!

How can I fix Windows was unable to complete the format SD card error?

  1. Force-format Micro SD
  2. Format Micro SD using Disk Management
  3. Fix and Format Micro SD using Command Prompt [CMD]

1. Force-format Micro SD

Windows PC, by default, automatically formats any Micro SD that is inserted in it (via a card reader). On certain occasions, you might get Windows was unable to format the Micro SD error. And to format such SD card, you might have to run the process manually.

To force format (manually format) Micro SD, follow the guidelines below:

  1. Insert your Micro SD card.
  2. Navigate to My Computer.
  3. On the displayed window, locate the Removable icon associated with the Micro SD.this PC windows was unable to format micro sd
  4. Right-click on the Micro SD icon and select Format.format drive windows was unable to format micro sd
  5. Under the Format Type drop-down menu select Quick or Full (for a complete format).start format can't format micro sd
  6. In the second drop-down menu, select Off.
  7. Click OK to finish up the format process.

This process typically takes a few minutes or even seconds, depending on the size of the Micro SD card.

If the “manual format” could not resolve the error, it is recommended you try the built-in Windows solution (Windows Disk Management), to fix the error and format the card.


2. Format Micro SD using Disk Management

This is an inbuilt solution (on Windows PCs), specially designed to serve as the first line of action for fixing Windows was unable to format the Micro SD error. To run this tool, follow the guidelines below:

  1. Insert the Micro SD card,
  2. On your PC’s desktop window, right-click on the Start icon and then select Disk Management.disk management windows was unable to format micro sd
  3. In the Disk Management window, locate the Micro SD icon (Removable storage).
  4. Right-click on the Micro SD and select Format.format disk windows was unable to format micro sd
  5. Select a file system and follow the on-screen commands to finish up the process.

In the event of more severe damage, the Disk Management tool might be ineffective in resolving the issue. If such happens, we recommend you try the next solution.


3. Fix and Format Micro SD using Command Prompt [CMD]

Formatting corrupt or damaged external storage media is basically done using the Disk Management tool. However, if and when this fails, the more advanced Command Prompt solution is often employed. To format Micro SD via the CMD, run the Command Prompt as outlined below:

  1. Insert the Micro SD card.
  2. Start the Command Prompt as administrator.
  3. Type in diskpart in the designated box and click Enter.diskpart can't format micro sd
  4. Type list disk to bring up all the disks/removable drives on your system (all disks are listed with numbers).list disk windows was unable to format micro sd
  5. Locate the number associated with the Micro SD and type in the corresponding number: select disk X and click the Enter button. Replace the X with the number that represents your disk. Be extra cautious and be sure to select the correct disk. If you select the wrong disk, you’ll cause permanent data loss, so be extra cautious.
  6. Type in clean and click Enter.
  7. Type in create primary partition and press Enter.
  8. Type in format fs: FAT32 and press Enter.
  9. Exit the program to finish up the process.

Note: This procedure is somewhat technical, and might not be ideal for less advanced users. Nevertheless, it is an effective solution for formatting Micro SD and other external storage media.

If Windows was unable to format the Micro SD error, the above-outlined procedures are the recommended solutions for you, provided the damage is not too severe or physical.

In case of physical damage and/or severe corruption, the ultimate solution might be to replace the Micro SD.

READ ALSO:

Windows 7 users still not ready to upgrade to Windows 10

The recent April 2019 report by NetMarketShare revealed that Windows 7 users are not giving up on their favourite operating system.

The latest figures show that only 0.09% of Windows 7 users upgraded to Windows 10 after Microsoft officially announced the end of support deadline.

As a quick reminder, Microsoft is all set to end official support for Windows 7 in just around 8 months’ time. The company will no longer release security updates and patches after January 2020.

The tech giant is trying very hard to upgrade to convince its users to make the transition to Windows 10. However, despite all its efforts, the market share of Windows 10 increased from 43.62% to only 44.10%. 

Windows 7 is very popular in the business environment

However, it should be noticed that there are thousands of businesses around the world that are still operating on a Windows 7 environment.

Upgrading to Windows 10 overnight is not a feasible option for them. Alternatively, they will have to pay thousands of dollars to receive extended security updates beyond that period.

As a matter of fact, the upgrade is crucial for them to avoid malicious attacks.

A similar situation was faced by Windows XP users back in 2017. Although Microsoft ended official support for the OS, it had to release an update after a devastating WannaCry malware attack.

This time, Microsoft wants to avoid falling into the same trap again. The tech giant is highly encouraging its users to upgrade to the latest version of Windows.

Interestingly, if you have a Microsoft 365 Business license, you can enjoy a free upgrade to Windows 10.

Upgrade your PC ASAP

Apparently, Windows 7 users are not yet ready to give up on their OS. The upgrade is a real mess for large organisations that are comfortable on a Windows 7 environment.

Furthermore, individual Windows 7 users find it as extremely simple and user-friendly. Windows 10 can turn out to be a nightmare for some of them. Many users want to avoid the bugs that come along with Windows 10.

However, the upgrade seems to be a viable option if we dive deep into the details. You can not afford to lose your sensitive information just because of your favorite operating system.

Once Windows 7 retires, more and more attackers will try to take advantage of the situation. Therefore, it is highly recommended that you should plan to take the leap as soon as possible.

RELATED ARTICLES YOU NEED TO CHECK OUT:

The Password for This Account Has Expired: 2 Fixes

Is your user account expired on Windows 10? In this guide, we’ll be showing you what to do if and when you see, The password for this account has expired in Windows 10.

Basically, a local user account on Windows 10 is accompanied by a password, which, by default, is designed to expire after a specific period of time (usually 30 days).

When this happens, you would have to change or reset your password to regain access to your PC. And for convenience, you can even set your password to Never expire.

However, if a user account expires, what do you do? We’ll be bringing you some proven solutions in this article.

How do I fix an expired Windows password?

1. Disable password expiration

1.1 Via Local Users and Groups

  1. On the desktop window, press Windows + R to open the Run dialog box.
  2. Enter lusrmgr.msc and press Enter to open the Local Users and Groups Manager.lusrmgr.msc user account expired windows 10
  3. Locate and select Users.
  4. Click on the user account you want to disable its password expiration.
  5. On the Properties window of the selected user account, go to the General.
  6. Locate the Password never expires option and check the box next to it.
    password never expires user account expired
  7. Save changes and restart the PC.

1.2 Via Command Prompt

  1. Open the Start menu and select All Apps.
  2. Go under Windows System and click on it (to expand it).
  3. On the displayed options, right-click on Command Prompt.
  4. Select Run as administrator.run as administrator user account expired windows 10
  5. In the Command Prompt, type the following command and hit Enter: wmic UserAccount where Name='username' set PasswordExpires=Falsewmic user account user account expired windows 10
  6. Once you get a confirmation, you are all set!

This action will ensure the user account‘s password is never expired and you shouldn’t receive The password for this account has expired error anymore.

2. Disable user account expiration

  1. Open the Start menu.
  2. Locate and then select Administrative Tools.
  3. On the displayed window, select Active Directory Users and Computers.
  4. Locate and expand your user account (domain) name.
  5. Go under the Users tab, and then right-click on the user name.
  6. On the list of options, select Properties.
  7. Navigate to the Account tab, and select Never under Account Expires.
  8. Click Apply and then OK.
  9. Exit the window.

While password expiration requires you only to reset/change the password to access your PC, user account expiration wholly restricts your access. Once this process is complete, your user account can now run unhindered (without expiring).

If your user account is expired, you might have some issues logging in to your user account and using your PC. But you should be able to fix The password for this account has expired by using one of these solutions.

Before you leave, do check the best password recovery tools and get one today!

Tell us which fix worked for you in the comments section below.

How to change offline Outlook Data File (.ost) location in Microsoft Outlook on Windows 10

If you tried to change the location of the offline Outlook Data File (.ost) in Microsoft Outlook, you have seen that the browse button is disabled.

This is due to the deprecation of the classic offline mode in Outlook, which is an online mode connection to Microsoft Exchange Server.

This is what happens when you try to do something offline using a tool designed for online use.

But the good news is that there is a fix for this.

Users have also described this issue on Microsoft’s forum:

My current default location for my OST file is C:Users…*** Email address is removed for privacy ***
I have been trying to change the location to D:Users…*** Email address is removed for privacy ***, but nothing I try seems to work.
In Outlook, I go to change the location of the data file, but it doesn’t allow me to edit or change the file. […]
How can I change the location in which outlook points to the data file for my email? It is pulling the emails off of the exchange server, but caching them to my OST file on my local C drive, instead of my other local D drive?

Here’s how to change the location of the offline Outlook Data File:

1. Create a new Outlook Profile and change the location of the .ost file

  1. Go to Control Panel > type mail to search for the Mail item > open it.
  2. Click on Show Profiles > click Add and type a name for the profile > click OK.
  3. Click on Next and wait for the setup to complete.account settings mail change offline Outlook Data File (.ost) location
  4. Select the Change account settings check case > click on Next.
  5. In the Server Settings windows, select More Settings.add account mail change offline Outlook Data File location
  6. In the Microsoft Exchange Windows, click on the Advanced tab and then on Outlook Data File Settings.account server settings mail change offline Outlook Data File location
  7. In the new windows that appears on the screen, click on Browse and then on Open.
  8. Click on Finish to complete the email account setup.
  9. Return to the profile list >Control Panel > type mail to search for the Mail item > open it> Click Show Profiles.
  10. Select the optimized profile> check the Always use this profile box > click OK.

 Need to sync your files? Here’s the best software to help you with that!


2. Change the location via the ForceOSTPath registry entry

We suggest you to back up the registry before you change the settings. If you modify the registry incorrectly, you can use the back up to restore the registry.

If you also want to monitor registry changes, this tool can help you.

  1. Type regedit in the search box > click OK.
  2. Locate the following registry subkey: HKEY_CURRENT_USERSoftwareMicrosoftOfficexx.0Outlook
    ( xx.0 represents your Office version (14.0 = Office 2010).outlook registry editor mail how to change offline Outlook Data File location
  3. Right-click Outlook > New > click on Expandable String Value.
    expandable string value registry editor change offline Outlook Data File (.ost) location
  4.  Type ForceOSTPath> press Enter.
  5. Right-click ForceOSTPath, and then click on Modify.
  6. In the Value data box, type the path where you want to store the .ost file (C:MyOSTfiles) > click OK. edit string registry mail change offline Outlook Data File location
  7. Remove and re-add your account. Setting the Registry value does not affect existing accounts. You can also use Microsoft FixIt tool if you don’t want to use the regedit path.

If the following solutions were helpful, please let us know in the comment section below.

RELATED STORIES YOU NEED TO CHECK OUT:

How to delete all data from a Surface tablet or PC

If you want to sell your Surface device, you’ll probably want to wipe its hard drive. Microsoft has you covered on that one as it recently released a new tool that will help you do just that.

The tool is called Surface Data Eraser and is developed by Microsoft. Surface Data Eraser is available for free, and you can download it from Microsoft’s site. But you need to keep in mind that this tool isn’t compatible with all Surface devices.

Only newer ones — the Surface Pro 2, Surface 3 and Surface 3 LTE, Surface Pro 3 , 4, 5, 6 and Surface Book — are compatible with Surface Data Eraser. It won’t work on the Surface RT, Surface 2, and Surface Pro.

How to use Surface Data Eraser

Before you can use Surface Data Eraser to completely clean your Surface device, you need to set it up first (just like you do with Windows 10 itself). Here’s what you need to do:

  1. Download Surface Data Eraser from Microsoft’s official download center.
  2. Install Surface Data Eraser on your device.
  3. Plug in a USB stick with at least 4GB of storage.
  4. Start Microsoft Surface Data Eraser, and click Build to begin the media creation process.
  5. Click Start when the Guidance screen shows up.erase surface data
  6. Choose the USB drive you want to install Surface Data Eraser on, and click Start.erase surface data 1
  7. Wait for the process to finish.
  8. Once the creation process is done, you’ll be notified, and you can close the creation tool.

Now that you’ve created the installation media, you can use the tool to wipe your Surface’s hard drive. Here’s how to delete all data from your surface with Surface Data Eraser:

  1. Plug in the bootable Microsoft Surface Data Eraser USB stick into your Surface device.
  2. Ensure your system firmware is set to boot to USB.
    • Turn off your Surface device.
    • Press and hold the Volume Up button.
    • Press and release the Power button.
    • Release the Volume Up button.)
  3. A SoftwareLicenseTerms text file will show up. Close the file and type accept into the Command prompt to accept the terms.erase surface data 2
  4. Now, enter one of the following commands and press Enter.
    • S to start Data Erase – Select this option to begin the data erase process. You will have a chance to confirm in the next step.
    • D to perform Diskpart – Select this option to use diskpart.exe to manage partitions on your disk.
    • X to shut device down – Select this option to perform no action and shut down the device.erase surface data 3
  5. Once the process is done, type S, and press Enter to restart your device.

After running this tool, all the data from your Surface device will be deleted. If you have some questions about the tool or the process of deleting the data, you can let us know in the comments section below or you can visit Microsoft’s official TechNet page for more details.

[wl_navigator]

How to send and receive SMS text in Windows 10 [QUICK GUIDE]

When you were young, rocking your brand new Windows XP, you probably wanted to send SMS texts from your computer, at least once.

Well, Microsoft finally fulfilled your old wish in Windows 10. You’re now able to actually send text messages from your computer, courtesy of Windows 10‘s virtual assistant, Cortana.

With Cortana, you can easily send text messages from your computer to anyone in your contacts list. So, if you need to send a message quickly, but you’re not by your phone, just let Cortana do the job for you.

Note: This ability came with the Threshold 2 update fromWindows 10 . Therefore, you need to run at least that version of the system to be able to send SMS messages from your computer.

How can I send and receive text messages with Cortana in Windows 10?

This option currently works with Windows 10 Mobile devices only. Although Microsoft constantly works on improving Cortana for Android, we don’t know when this feature will arrive to Google’s OS.

First thing you need to do to be able to receive and send messages from your Windows 10 computer is to make sure you connect your devices.

To make sure you PC and Windows 10 Mobile devices are connected, do the following (of course, we assume you already set up Cortana on both devices):

  1. Open Cortana on your Windows 10 PC
  2. Expand the hamburger menu, and go to Settings
  3. Make sure ‘Send notifications between devices’ is enabledsend sms cortana windows 10
  4. Now, open Cortana on your Windows 10 Mobile device
  5. Go to Notebook > Settings
  6. Make sure ‘Send phone notifications’ is enabled

Cortana disappears when you click on it? Let’s solve this weird problem with the help of this amazing guide.


Once you make sure your devices are connected, you’re good to start sending and receiving text messages from your Windows 10 PC. Cortana send text sms

Let’s start with receiving messages.

When your Windows 10 devices are connected, you will automatically receive notifications about a missed call or a received SMS message from your Windows 10 Mobile phone to your Windows 10 PC.

Microsoft introduced this ability with some of the previous Windows 10 Preview builds.

Once you receive a notification about the text message you received on your phone, you can reply directly from that notification banner. Just hit ‘Reply’ button.

Sending messages is as easy as receiving them. Here’s how to send text messages from your Windows 10 computer with Cortana:

  1. If ‘Hey Cortana’ is enabled, just say “Hey Cortana, send a message to..”
  2. She will automatically open the window where you can customize your message (write text, add recipients,…)
  3. If you don’t have ‘Hey Cortana’ feature enabled, just open Cortana, and write ‘send text message‘
  4. The same window will open, and you’ll be able to customize your messagesend sms messages cortana windows 10
  5. Once you click Send, Cortana will connect with your phone, and a message will be sent

Need more options? Check out these software tools that allow you to send SMS messages from your Windows 10 PC!


There you go, sending text messages from your computer have never been easier.

Just keep in mind that you can only send text messages to contacts in your People app, as you can’t add recipient’s number manually, so make sure a person you’re sending a message to is in your contacts list.

We hope that this article was helpful, and that sending messages now appears easier for you. If you have any comments or questions, just let us know in the comments below.

READ ALSO:

Useful Keyboard Shortcuts in Windows 10

Windows 10 has been available for some time, and users are getting quite familiar with it and most of its features.

Speaking of which, if you’re an advanced user you probably use keyboard shortcuts on daily basis, and speaking of shortcuts.

windows 10 keyboard shortcuts

Today we want to show you some of the most useful Windows 10 keyboard shortcuts.

Windows 10 Keyboard Shortcuts You Need to Know

  1. Window snapping
  2. Virtual desktops
  3. Task View and Window management
  4. Cortana and settings
  5. Command prompt
  6. Navigation
  7. Some advanced shortcuts

Window snapping

Just like Windows 7, Windows 10 supports window snapping, but with Windows 10 you can snap windows in 2×2 grid by using your mouse, or by using the following keyboard shortcuts:

  • Windows Key + Left arrow key – Snap current window to the left side.
  • Windows Key + Right arrow key – Snap current window the the right side.
  • Windows Key + Up arrow key – Snap current window to the top.
  • Windows Key + Down arrow key – Snap current window to the bottom.

Virtual desktops

Windows 10 brings support for virtual desktops, so if you want to keep your workspace neat and organized you might want to use some of these shortcuts:

  1. Windows Key+Ctrl+D — creates a new virtual desktop.
  2. Windows Key+Ctrl+Left — go to virtual desktop to the left.
  3. Windows Key+Ctrl+Right — go to virtual desktop to the right.
  4. Windows Key+Ctrl+F4 — close the current virtual desktop.

Task View and Window management

Windows Key + Tab – opens a new Task View interface that shows you all current windows on this virtual desktop. There are also virtual desktops available on the bottom of the screen so you can easily switch.

One great thing about this shortcut is that you only have to press it once, there’s no need to hold the buttons down.

Alt+Tab – This keyboard shortcut has been present for a long time, and it works the same in Windows 10, but unlike Windows Key + Tab, it allows you to switch through all windows on all virtual desktops.

Cortana and settings

  • Windows Key+Q — open Cortana for voice input.
  • Windows Key+S — open Cortana for typed input.
  • Windows Key+I — open up the Windows 10 settings.
  • Windows Key+A — open up Windows 10 notifications, also known as Action Center.
  • Windows Key+X — open the Start button context menu that let’s you access some advanced features.

Command prompt

Command Prompt just got support for keyboard shortcuts in Windows 10, but before you use them make sure that you’ve enabled them.

To enable shortcuts in Command Prompt right click the Command Prompt and choose Properties.

Go to Options tab and uncheck Use legacy console, enable Ctrl key shortcuts and two text section options.

CHECK OUT: Fix Bluetooth Keyboard Problems in Windows 10

As for the shortcuts, the following are available:

  • Shift+Left — select text to the left of the cursor.
  • Shift+Right — select text to the left of the cursor.
  • Ctrl+Shift+Left (or Right) — select blocks of text instead of just characters at a time.
  • Ctrl+C — copy selected text.
  • Ctrl+V — paste the selected.
  • Ctrl+A — select all text after the prompt.

All of these shortcuts are available in text editors, but they are now available in Command Prompt for the first time.

Navigation

Most of these are available in older versions of Windows, but they are also present in Windows 10, so we’ll mention them as well in case you’re not familiar with them:

  • Windows Key+, — temporarily hide windows to show desktop for a moment.
  • Windows Key+D — minimize all windows and go to the desktop.
  • Ctrl+Shift+M — restore all minimized windows.
  • Windows Key+Home — minimize all windows except the one you’re using.
  • Windows Key+L — lock your PC and go to the lock screen.
  • Windows Key+E — open File Explorer.
  • Alt+Up — go up one level in File Explorer.
  • Alt+Left — go to the previous folder in File Explorer.
  • Alt+Right — go to the next folder in File Explorer.
  • Alt+F4 — close the current window.
  • Windows Key+Shift+Left (or Right) — move a window to another display.
  • Windows Key+T — cycle through taskbar items. In addition, you can press Enter while doing this to launch an application.
  • Windows Key+Any Number Key — open app from your taskbar. For example Windows Key + 1 will open first item on your taskbar.

Some advanced shortcuts

  • Ctrl+Shift+Esc — open the Task Manager.
  • Windows Key+R — open the Run dialog box.
  • Shift+Delete — delete files without sending them to Recycle Bin first.
  • Alt+Enter — show the properties of the selected file.
  • Windows Key+U — open the Ease of Access Center.
  • Windows Key+Space — switch input language and keyboard.
  • Windows Key+PrtScr — take a screenshot of your desktop and save it to Pictures folder.


Using Windows 11 instead? Grab the full cheat sheet for Snap layouts, virtual desktops, Task View, screenshots, and more here: Windows 11 keyboard shortcuts.

READ ALSO: 

Arc Touch Bluetooth Mouse Windows App: Manage Your Mouse Settings

In case you didn’t know, there’s a dedicated Windows app on the Microsoft Store called Arc Touch Bluetooth Mouse that allows owners of Arc Touch Bluetooth Mouse and Arc Touch Mouse Surface Edition to manage the settings of their devices.
Arc Touch Bluetooth Mouse and Arc Touch Mouse Surface Edition app
With Microsoft’s official ‘Arc Touch Bluetooth Mouse‘ app for Windows 10 devices, user can get configuration settings for Arc Touch Bluetooth Mouse and Arc Touch Mouse Surface Edition.

Manage settings of your Microsoft Mouse with this Windows app

Manage settings with Arc Touch Mouse App

You should know that this app is designed for Windows 8.1+, so it will not work with Windows 7 or previous versions. Being available for quite a while on the Store, the app allows user to perform the following:

  • Flick to scroll quickly (on/off)
  • Tap to page up / page down (on/off)
  • Vibration/sound (on/off)
  • Intensity of vibration/sound
  • Flip scrolling direction (on/off)
  • Reassign middle tap

The app is available in the following languages – English (United States), Chinese (China), German (Germany), Spanish (Spain), Japanese (Japan), French (France), Russian (Russia), French (Canada), Finnish (Finland), Italian (Italy), Korean (Korea), Dutch (Netherlands), Norwegian (Bokmål) (Norway), Portuguese (Portugal), Swedish (Sweden), Chinese (Taiwan), Thai (Thailand) and can be downloaded for free from the Microsoft Store.

The Arc Touch Bluetooth Mouse app is a free software and you can download it from this official link. It’s designed for Windows 10 but will also work on mobile devices.

The latest version of the software includes general bug fixes, bug fix for Windows 10 Creators Update and now Middle tap can be reassigned to Windows 10 commands and customized key combinations. 

Although the app is still getting updates, many users complain about not connecting properly their Arc Mouse, bugs, bluetooth connection or lack of feature support.

That’s why we, along other users, are recommending to download Microsoft Mouse and Keyboard Center. This app seems to be more stable and useful, and  it can offer the same functionality as the Arc Touch Bluetooth Mouse app and more.

That’s about it. Hope that this was helpful. If you have any more questions or you want to share your experience with Arc Touch Bluetooth Mouse Windows App, feel free to do so in the comments section below.

[wl_navigator]

Ghost Recon Wildlands is free to play on Xbox One this weekend just in time for Operation Oracle

The Ghost Recon Wildlands video game will be free to play on Xbox One consoles for all Xbox Live Gold subscribers this weekend from 10:01 a.m. PDT on May 2nd through to 10:00 a.m. PDT on May 6th.

This free play promotional campaign comes just in time for the launch of the new free Operation Oracle content which is now available to all owners of the game regardless of their Gold status. This new content adds fresh story content that can be played either solo or with up to three other players online.

As with previous free play promotions, Xbox Live Gold subscribers will be able to download the Ghost Recon Wildlands and play it in full as if they owned it outright. All progress will save to the cloud and can be continued on from at a later date during another free play promotion or if they choose to buy it.

Note, the game is currently selling with a 70% discount on Xbox One for just $15 so now’s a good a time as any to pick it up.

Are you going to play Ghost Recon Wildlands this weekend and are you looking forward to the Operation Oracle content? Share your thoughts with the community in the comments below and then follow us on Pinterest for more Xbox gaming content.

Numerous Telltale Games titles delisted from Xbox 360, Xbox One, and Windows 10 stores

The gaming sleuths over at TA have discovered that a variety of video games have been delisted from the Xbox 360, Xbox One, and Windows 10 platforms last month with the majority of them being Telltale Games related.

Game of Thrones: A Telltale Games Series appears to have been delisted from the Xbox 360 and Xbox One stores while Minecraft: Story Mode – A Telltale Games Series has been removed from Xbox One and Windows 10.

Minecraft: Story Mode – Season Two has also been removed from Xbox 360, Xbox One, and Windows 10 while The Walking Dead Collection – The Telltale Series is now absent from Xbox One and Windows 10 stores. The Windows 10 versions of The Walking Dead: Season Two, The Walking Dead: A New Frontier, and The Walking Dead: Michonne have also been taken down.

According to the post on TA, the availability of content relating to these Telltale Games titles is a bit convoluted. Usually when a game is delisted, those who have purchased it digitally before the delisting can still download it or play it via a physical disk copy. However, it appears that some of the episodes for the above games, which aren’t included on some of the disk versions, are unavailable for download. There seems to be very little rhyme or reason behind which episodes are unavailable and which ones still are.

Other video game delistings include WWE 2K15 on Xbox 360, WWE 2K15 and WWE 2K16 on Xbox 360 and Xbox One, and WWE 2K17 on Xbox One. Zombie Apocalypse has also been removed from Xbox Live Arcade as has Ninja Gaiden II from the Xbox 360 marketplace.

Interestingly, the Xbox 360’s Ninja Gaiden III was just given Xbox One backwards compatibility yesterday which suggests that that title isn’t going anywhere anytime soon despite its predecessor going the way of the dodo. A massive Telltale Games The Walking Dead Collectors Pack was also recently announced for a future release so that particular franchise isn’t completely dying despite these delistings of many of its titles.

Are you surprised by any of these delistings and are you affected by them? Share your thoughts with the community in the comments below and then follow us on Pinterest for more Xbox gaming content.

Download KB4501835 to fix incorrect time issues

Microsoft released a new cumulative update. Windows 10 v1809 KB4501835 brings various changes to Windows 10 computers and upgrades the OS to version 17763.439.

The company says that KB4501835 mainly focuses on quality improvements.

KB4501835  improvements and fixes

KB4501835 incorporates the following key improvements and fixes.

  • Addresses an issue that prevents the CALDATETIME structure from handling more than four Japanese Eras.
  • Updates the NLS registry to support the new Japanese Era. 
  • Addresses an issue that causes the DateTimePicker to display the date incorrectly in the Japanese date format.
  • Addresses an issue that causes the Date and Time Settings control to cache old Eras and prevents the control from refreshing when the time enters the new Japanese Era.
  • Updates fonts to support the new Japanese Era.
  • Addresses an issue that prevents an input method editor (IME) from supporting the new Japanese Era character.

You can access the complete change log on the official Microsoft website.

KB4501835 bugs

Microsoft also highlighted some known issues that the users might come across after installing this update.

Some of these known issues include:

  • The Preboot Execution Environment (PXE) may fail to start a device from a Windows Deployment Services (WDS) server configured to use Variable Window Extension. This means that the WDS server connection might terminate while downloading the image.
  • Certain operations run on files or folders that are on a Cluster Shared Volume (CSV) may fail with the error, STATUS_BAD_IMPERSONATION_LEVEL (0xC00000A5).

Besides the officially highlighted issues, users encountered other issues as well. Many users reported they haven’t received the new update yet.

I am on Windows 10, version 1809. I have not received May 1, 2019—KB4501835 (OS Build 17763.439) yet. Why I have not received it?

Keep in mind that the update just started rolling out. Most likely, it may take some time before it becomes available in all the regions.

Microsoft strongly recommends to install the latest servicing stack update (SSU) before installing KB4501835.

If you are facing any issue after installing the update, let us know in the comments below.

RELATED STORIES TO CHECK OUT:

Windows 10 20H1 build 18890 fixes slow desktop response issues

Microsoft released Windows 10 Insider Preview Build 18890 (20H1) to Fast Ring Insiders. This build is a follow-up to last week’s build 18885.

Imparting the information about this new build, Dona Sarkar communicated:

Hello Windows Insiders, today we are releasing Windows 10 Insider Preview Build 18890 (20H1) to Windows Insiders in the Fast ring. […] Last month, we moved the Fast ring forward to 20H1 and merged the small group of Insiders who opted-in to Skip Ahead back into the Fast ring, which means Insiders in the Fast ring and those who opted-in to Skip Ahead are receiving the same builds for now.

On a side note, build 18885 brought many improvements to Your Phone app and also extended language support for dictation.

On the other hand, Windows 10 build 18890 did not introduce any new features. It only added a few bug fixes and improvements.

At the same time, it removes the Friendly Dates feature that arrived with build 18272. The company confirmed that  Friendly Dates would not be part of the Windows 10 May 2019 Update and there is no hope for this feature’s return.

Windows 10 20H1 build 18890 changelog

Microsoft also listed the key fixes and improvements introduces in this new build:

  • We fixed a hang in the audio service when checking whether a machine was licensed to use spatial audio.
  • We fixed an issue that could result in the desktop being unexpectedly slow to refresh (if you right-click the desktop and select Refresh or press F5).
  • We fixed an issue resulting in not being able to access network shares if you booted into Safe Mode with Networking.
  • We fixed an issue where hardware keyboard text predictions wouldn’t appear (if enabled) when the es-US keyboard was active.
  • We fixed an issue that could result in cumulative updates potentially failing with error 0x800f0982 if a language pack update was happening at the same time.

Windows 10 build 18890 bugs

Since this build was released for testing purposes, expect to encounter various bugs and issues. For this reason, the company also shared the complete list of known issues that users might encounter after installing this build.

If you are part of the Windows 10 Insiders program, you can install this update by going to Settings and checking for updates.

Already install this build? Share your experience with us in the comments below.

RELATED STORIES TO CHECK OUT:

Get the latest Avira patches to fix Windows 10 update bugs

Avira recently rolled out an important patch to fix the bugs introduced by the recent April 2019 Patch Tuesday updates. The patch solved the update issues for both Windows 7 and Windows 10 users.

Microsoft already has a bad reputation as far as the Windows Updates are concerned. The company was still struggling to cope up with the bad image caused by Windows 10 October Update.

Unfortunately, the latest Patch Tuesday updates turned out to be another blow to Microsoft’s reputation. 

PCs running Avira failed to boot after update

Many Windows 10 users started reporting booting issues shortly after Microsoft rolled out the April 2019 updates. The company investigated the issues and confirmed that some antivirus products were triggering the problem.

The big M worked with Avira and identified the glitch that caused Windows PCs to become unresponsive after a reboot.

However, the bug only affected users running Avira Antivirus software on Windows 7 and 8.1. Microsoft immediately responded to the reports and temporarily blocked the Windows 10 May 2019 update on affected devices. 

No more update issues

Avira released an update to fix the issue once and for all. The security vendor confirmed that the issue also impacted Windows 10 users.

The company says that the update (KB4493509) will be automatically downloaded on your systems. Initially, most users uninstalled Windows 10 April 2019 Update after hearing about the issues.

Windows Insiders are currently testing the Windows 10 May 2019 Update. The new OS version is expected to land by the end of this month. Hopefully, we will be facing fewer issues this time around.

All Avira users out there! Let us know if you are still experiencing issues with the April 2019 Patch Tuesday updates. Comment below.

RELATED ARTICLES YOU NEED TO CHECK OUT:

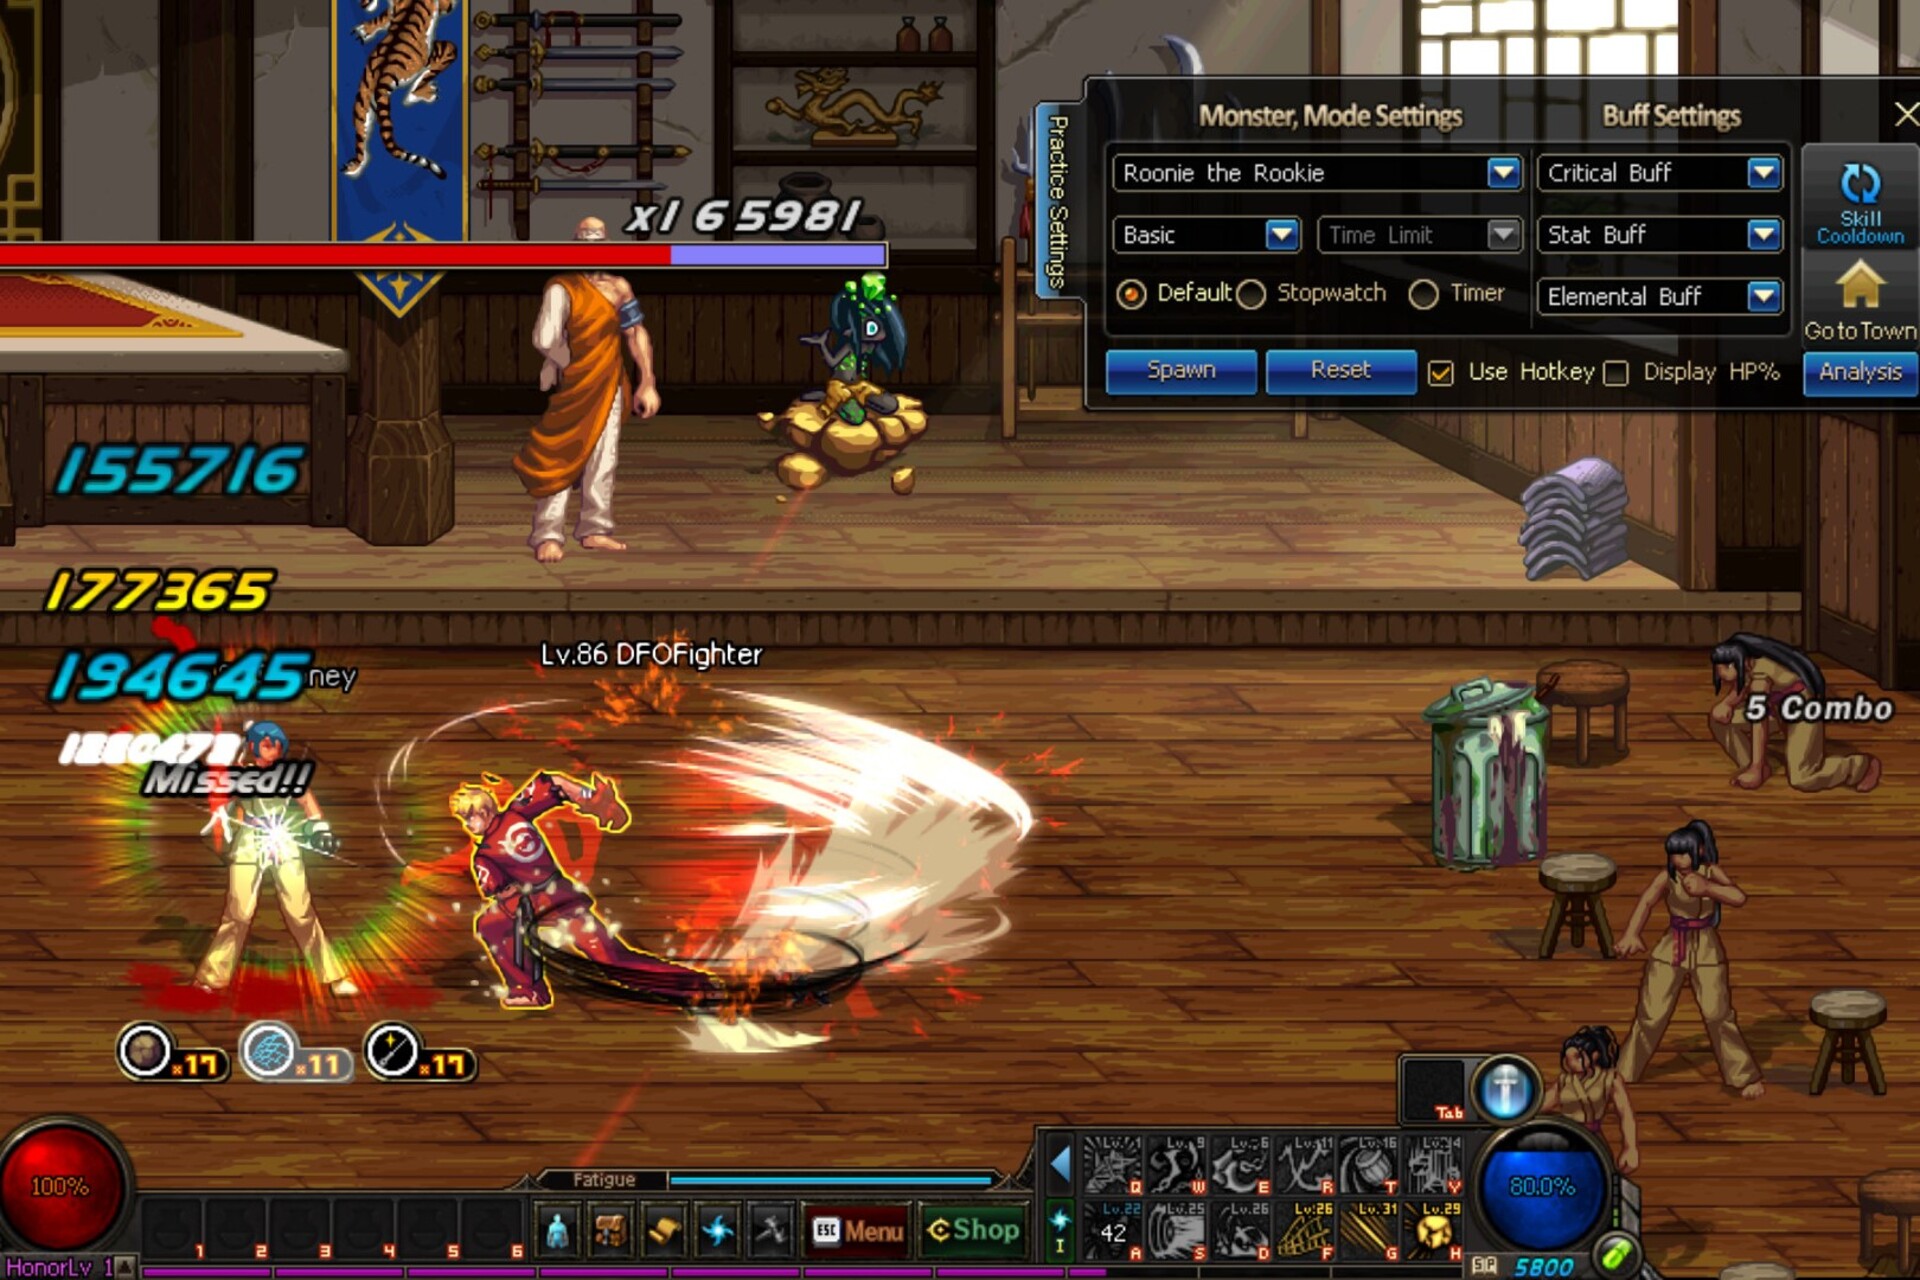
Dungeon Fighter Online Not Launching: 7 Solutions to Use

Dungeon Fighter Online is a popular role-playing game, first released in August 2005. The game has long been a favorite for many, but some users reported that Dungeon Fighter Online is not launching on their PC.

Many users report that the game crashes on launch, while for others, Dungeon Fighter Online shows a black and flickering screen. No matter the problem, we have solutions that will work in each case. Let’s find out!

Why is Dungeon Fighter Online not launching?

Here are a few reasons Dungeon Fighter Online is not launching:

  • PC not meeting the minimum game requirements: One of the primary reasons you can’t run Dungeon Fighter Online is that the PC doesn’t meet the minimum system requirements for the game.
  • Outdated drivers: If you have outdated drivers, primarily the one for the graphics adapter, it would lead to trouble launching or playing Dungeon Fighter Online and other games.
  • Corrupt cache: Corrupt game cache is also a likely underlying cause when the game won’t launch on Steam.
  • System language not supported: For some users, the language set on the system caused issues launching the game.
  • Third-party apps triggering conflicts: A third-party antivirus or firewall was also found to be the culprit in many cases, so you must check if the firewall is blocking the program.

What can I do if Dungeon Fighter online is not launching?

Before we head to the slightly complex solutions, here are a few quick ones to try:

  • Restart the computer and check whether the problem is resolved. When doing so, make sure to unplug it from the power source in case of a desktop or remove the battery for a laptop.
  • Check whether Dungeon Fighter Online is down. There is a section for announcements and maintenance schedules on the official website, so you can confirm it from there.
  • Make sure you are running the updated version of the game.
  • Check for slow Internet speed and take the necessary measures to increase it.

If these don’t work, move to the fixes listed next.

1. Terminate conflicting programs

  1. Press Ctrl + Shift + Esc to open the Task Manager, and locate all non-critical programs.task manager
  2. Select each individually and click on End task.terminate program to fix dungeon fighter online not launching
  3. While here, also terminate the Dungeon Fighter Online process as well.
  4. Once done, relaunch the game and check whether it now works.

In many cases, users reported that Dungeon Fighter Online was not launching because of a conflicting program that either prevented it from running or the game identified it as a kind of cheat software. Visual Studio is one such program, amongst many others.

If this works out, make sure to disable that particular startup program.

2. Update the graphics driver

  1. Press Windows + X to open the Power User menu, and select Device Manager from the list.device manager
  2. Expand the Display adapters entry, right-click on the graphics adapter, and choose Update driver.update driver to fix dungeon fighter online not launching
  3. Click on Search automatically for drivers and wait for the update to complete.search automatically for drivers

One of the solutions that worked for many users was updating the graphics driver when they had a Dungeon Fighter Online launcher crash. If Windows can’t find an update, you can always manually install the latest driver.

3. Change the system language

  1. Press Windows + S to open Search, type Control Panel, and click on the relevant search result.control panel
  2. Click on Clock and Region.clock and region
  3. Now, click on Region.Region
  4. Navigate to the Administrative tab, and click on Change system locale.change system locale to fix dungeon fighter online not launching
  5. Select English (United States) from the dropdown menu, and click OK.English to fix dungeon fighter online not launching
  6. Finally, click on Apply and OK to save the changes.

The system locale has also been the underlying factor that led to Dungeon Fighter Online not launching in Windows, and changing it to English (United States) should do the trick for most. You could also try the other languages here and check if the desired option works.

4. Run the app on integrated graphics

  1. Press Windows + I to open Settings, and click on System.system
  2. In the Display tab, click on Graphics settings on the right.graphics settings
  3. Now, with the Desktop app option selected, click on Dungeon Fighter Online, and choose Options.options
  4. Select High performance and click on Save.high performance to fix dungeon fighter online not launching

When you have both integrated and dedicated graphics available, chances are that Dungeon Fighter Online may have trouble choosing one and is not launching as a result. So, manually choose an adapter. Also, you could make the changes through the dedicated control panel for the card.

5. Add the game as an exception to your antivirus

  1. Type Windows Security in the Search bar, and click on the relevant search result.windows security
  2. Click on Virus and threat protection.virus & threat protection
  3. Click on Manage settings.manage settings
  4. Now, click on Add or remove exclusions.add or remove exlcusions
  5. Click Yes in the UAC prompt.
  6. Choose Add an exclusion and select Folder from the menu.add an exclusion to fix dungeon fighter online not launching
  7. Select the DFO folder from the following path, and click on Select Folder:C:\Program Files (x86)\Steam\steamapps\commonselect folder
  8. Again, click Add an exclusion, choose File, and this time, add both the Dungeon Fighter Online and Noeple launchers.launchers to fix Click Yes in the UAC prompt. Choose Add an exclusion and select Folder from the menu.
  9. Once done, restart the computer, launch the game, and verify whether the game now launches.

Many users claimed their antivirus conflicted with Dungeon Fighter Online, and it was not launching. In most cases, they were using BitDefender. So apart from the built-in Windows Security, make sure to add an exclusion or exception to the installed antivirus.

6. Clear the app cache (Steam Users)

  1. Press Windows + E to open File Explorer, paste the following path in the address bar, and hit Enter:C:\Program Files (x86)\Steam\appcachepath
  2. Press Ctrl + A to select all the files here and then hit Delete.delete cache to fix dungeon fighter online not launching
  3. Once done, relaunch Steam and run the game.

A corrupt cache is just as likely to cause issues launching Dungeon Fighter Online. You can easily delete the cache in Steam, and fix a range of errors with the installed games.

7. Change the Internet options

  1. Press Windows + S, type Internet Options, and click on the relevant result.internet options
  2. Navigate to the Security tab, and drag the Security level for this zone slider to the bottom, i.e., Medium.medium security to fix dungeon fighter online not launching
  3. Next, go to the Privacy tab, untick the checkbox for Turn on Pop-up Blocker, and click OK at the bottom.turn off popup blocker to fix dungeon fighter online not launching

If nothing else worked, modifying the Internet Options may do the trick when Dungeon Fighter Online is not launching or working. And by now, you should have the problem fixed.

Also, before you leave, check some quick tips and tricks to optimize your PC for gaming and get the best performance.

For any queries or to share another solution, comment in the section below.

How to Install Cortana Language Packs in Windows 10

If you’ve got Windows 10 installed on your computer, you will, without a doubt, spot Microsoft’s own voice’s existence – Cortana, which is basically a managed digital private secretary.

How do I install and use Cortana Language Packs in Windows 10?

So long as you are pleased to pick your online routines up, Cortana could be a device, with the capacity of doing internet searches, setting reminders, trying to find applications and publishing emails.

She is not restricted to that and she can do much more than these things. Cortana’s default language is British English.

She’s capable of talking and understanding different languages other than that also.

For each of the language she speaks, she’s capable of adjusting not only just the design of her talk and her speech.

Additionally, she provides intriguing information to the user, such as films, political activities, sports and sometimes even share trades.

As soon as the windows are turned on by you, you can notice Cortana there.

In this article today, we are going to help you with setting up Cortana in case if you haven’t yet. Read our guide to understanding all of the actions needed:

What Languages does Cortana comprehend?

Although Cortana will become more functional with new languages added to her knowledge, but for now, she’s capable talk and understand the below-listed languages:

  • American English
  • Italian
  • British English
  • German
  • French
  • Spanish
  • Mandarin Chinese
  • Many more languages

>>You can download language packs for Windows via Microsoft Store

Using Cortana on Windows 10: Check your language options

  • Some British customers (People of United Kingdom) are currently experiencing problems making Cortana to function. This may be an issue with presentation configurations. Make sure that the language configurations are set to UK before you begin to setup Microsoft’s electronic secretary.
  • To check on your language configurations, look for Region and Language option. Below you’ll have a choice to select the region. Make certain this really is set to UK or any other language, you like. Just below it, you will find choices for Languages.

cortana language pack settings

  • If British English isn’t there, you’ll have to include it as a language choice, first. To get this done, click ‘Add a language’, and select English (UK) from it and choose the download Language Pack and Speech option.

cortana language pack speech

  • This will get the pack installed for you. Using the British language that has been downloaded, go to the Time and Language panel and select the Speech Tab. Here you can change your default language to English (UK) that is used by your PC.

>>Here’s how to fix Windows 10 Language Pack error 0x800f0954

Setup Cortana and start using it

  • The very first time when you’re using the Windows 10 search option, you will find an option to turn Cortana on. . If you didn’t get, type the word ‘Cortana’ into the search box and select ‘I am in”.
  • You’ll be confronted with details about the information Cortana can gather after you’ve exposed the choice to show on Cortana. If you are uncomfortable with Microsoft gathering info on your checking history and area background, you have the choice to turn it off.cortana daddy


  • Cortana provides you an option to add your title along with customized interests.
  • It offers a short microphone calibration if you select the microphone icon that is found in the search bar.
  • After you’ve set the microphone up, Cortana is all set to use. But when you’d prefer to alter kind Cortana, go to the search bar and select the first result displaying, ‘Cortana and Search settings’.

>>Microsofts decouples Search and Cortana in Windows 10 v1901

Bonus Tip: Make Cortana react to ‘Hey Cortana’ in Windows 10

cortana search windows 10


  • Open the start menu and type “Cortana” and then click on the top most search result you get. Then select  “Talk to Cortana”.cortana settings windows 10


  • After reaching there, turn the slider to the other side beside the option saying, “Let Cortana respond when you say ‘Hey Cortana’”. You can even turn Cortana on and off here.hey cortana option

READ ALSO:

Fix: Clicker Heroes Problems On Windows 10/11

clicker heroes gameplay windows 10

Many people enjoy playing simple games on Windows 10, and one of these games is Clicker Heroes. This game is extremely popular, but it also has certain issues, and today we’re going to fix these issues on Windows 10.

How can I solve Clicker Hero issues on Windows 10?

  1. Clicker Heroes save problem
  2. Clicker Heroes can’t connect
  3. Clicker Heroes crash
  4. Clicker Heroes not loading
  5. Clicker Heroes black screen

Clicker Heroes save problem

Solution 1 – Disable Flash plugin in Chrome

It has been reported that Clicker Heroes has a saving problem when using Google Chrome, and not being able to save your progress can be a big problem.

In order to fix this problem, you can always switch to a different browser when playing Clicker Heroes, but that isn’t always the best solution, especially if you want to keep using only one browser.

Another solution is to disable Flash plugin in Chrome, and to do that, you need to follow these steps:

  1. Open Chrome and click the Menu button in the top right corner.
  2. Choose Settings from the menu.clicker heroes chrome settings
  3. When Settings window opens, scroll down and click on Advanced settings.clicker heroes chrome advanced settings
  4. In Privacy section click on Content settings button.clicker heroes chrome content settings
  5. Scroll down to Flash section and click on it.
  6. Uncheck the Ask first (recommended).clicker heroes chrome flash settings
  7. Restart Chrome and check if the problem is resolved.

If the problem still persists, you might want to temporarily switch to a different browser when playing Clicker Heroes.

Solution 2 – Delete Clicker Heroes session files from your computer

If you play Clicker Heroes on two different Steam accounts, sometimes you might access save game from another account, even if you’re not logged in to that account.

This is a strange problem, but you can fix it doing this:

  1. Make sure that Steam is closed.
  2. Press Windows Key + R and type %appdata%. Press Enter or click OK.
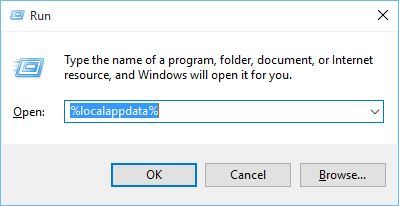
    localappdata-run
  3. When App Data folder opens, find com.playsaurus.clickerheroes AccountSO.sol folder. The folder name might be different on your computer, so keep that in mind.
  4. Delete that folder, or move it to Desktop so you can use it for backup.
  5. Start Steam and run Clicker Heroes again. Your save should be downloaded from the cloud.

Clicker Heroes can’t connect

Solution 1 – Use incognito tab

Players have reported that Clicker Heroes can’t connect to the server, and this is a big problem because you won’t be even able to play the game.

In order to fix this issue, some users are suggesting that you should start the game in incognito tab. To do that in Chrome, follow these steps:

  1. Click the More icon in the top right corner.
  2. From the menu choose New incognito window. In addition, you can open Incognito window by pressing Ctrl + Shift + N on your keyboard.clicker heroes chrome new incognito window
  3. When Incognito window opens, start the game and see if the issue is resolved.

Even if you don’t use Google Chrome, you can access Incognito mode / private browsing in any modern browser by following similar steps.

Solution 2 – Restart your browser

Sometimes these types of issues can be caused by your browser, and if Clicker Heroes can’t connect to the server, perhaps you just need to close your browser and start it again.

This is the simplest solution, but few users have reported that this solution has fixed their problems.

Solution 3 – Clear your cache

If Clicker Heroes can’t connect to the server, maybe the issue is caused by your browser cache, so you need to clear it.

Users have reported that issue was resolved after clearing cache in their browser, so let’s see how to clear cache in Google Chrome:

  1. Click More icon in the top right corner and choose Settings.
  2. In Settings tab click on Show advanced settings.
  3. Go to the Privacy section and click on Clear browsing data button.
  4. When Clear browsing data dialog opens, make sure to choose Advanced and Time range is set to All time. Check Cookies and other site data, Caches images and files and Hosted app data from the list.
  5. Click Clear browsing data button.
  6. Restart your browser and check if the issue is resolved.

We have shown you how to clear cache on Google Chrome, but the procedure is similar for all other modern browsers.

Clicker Heroes crash

Solution 1 – Start the game directly from Steam folder

Users have reported that Clicker Heroes crashes when they try to start it on their computer.

If you are getting Clicker Heroes has stopped working message while trying to start Clicker Heroes on Windows 10, you might need to start the game by running the game’s .exe file instead of launching it through Steam.

To do that, follow these steps:

  1. Make sure that Steam is closed.
  2. Go to Steam installation directory and open SteamApps folder. By default the location should be C:Program FilesSteamSteamApps.
  3. SteamApps folder contains all your Steam games, therefore you need to find Clicker Heroes folder in it. By default, Clicker Heroes should be located in SteamAppscommonClicker Heroes folder.
  4. Once you’ve found Clicker Heroes folder, open it and find Clicker Heroes .exe file. Run it, and the game should start without any problems.

Solution 2 – Disable or uninstall your antivirus software

Users have reported that Clicker Heroes sometimes crashes due to your antivirus or firewall software. In some cases, your antivirus can recognize Clicker Heroes as a harmful application, and this will cause Clicker Heroes to crash.

If you are experiencing crashes, you might want to temporarily disable your antivirus or firewall software in order to fix this problem.

In addition, make sure that you add Clicker Heroes to the list of exceptions in your antivirus and firewall application.

If that doesn’t help, you can temporarily remove your antivirus / firewall software.

Solution 3 – Run the game as administrator

If Clicker Heroes crashes on your PC, you could fix this issue by running it as administrator. To do that, follow these simple steps:

  1. Locate Clicker Heroes .exe file and right click it.
  2. Choose Run as administrator from the menu.
    run-as-administrator

Users have reported that this method is working for them, but you’ll have to repeat this process every time you want to play Clicker Heroes. If you want to make this process a bit more straightforward, do the following:

  1. Right click Clicker Heroes .exe file and choose Properties.
  2. Go to Compatibility tab.
  3. Make sure that you check Run this program as administrator.
    run-this-program-as-administrator
  4. Click Apply and OK to save the changes.

Now Clicker Heroes will always start with administrator privileges . If you launch Clicker Heroes through Steam, you can set Steam to run with administrator privileges by following the same steps.

Solution 4 – Turn off Steam overlay

If Clicker Heroes crashes on your PC, you might want to disable Steam Overlay. Steam Overlay is a useful feature, but in certain cases in can cause instability issues. To disable Steam Overlay, do the following:

  1. Start Steam.
  2. Click Steam > Settings.Steam app - settings
  3. In Settings window, choose In-Game option.
  4. Make sure that Enable the Steam Overlay while in-game option is not checked.
    steam-in-game
  5. Click OK to save changes.
  6. Restart Steam and try running the game again.

Clicker Heroes not loading

Solution 1 – Close all Steam processes using Task Manager

Users have reported that Clicker Heroes isn’t loading on their computer, and according to them, after clicking the game icon, nothing happens.

This is a strange problem, but it can be fixed by turning off Steam through Task Manager.

  1. If Steam is running, close it.
  2. Start Task Manager by pressing Ctrl + Shift + Esc on your keyboard.
  3. Locate all Steam related processes and close them one by one. To do that, just right click a process and choose End task from the menu.
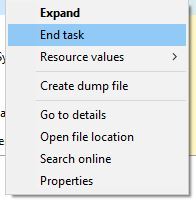
    end-task
  4. After you’ve ended all Steam processes, try launching the game again.

Solution 2 – Restart your computer

Sometimes Clicker Heroes can’t load if Steam update needs to be installed, and in order to fix that you just need to restart your computer.

After your computer restarts, run Steam again, let it install any updates and try to run Clicker Heroes again.

Solution 3 – Delete content_log.txt file

In rare cases, if Clicker Heroes crashes, you won’t be able to start it again, even if you restart your computer. This is a strange problem, but you can fix it by deleting the content log.

To do that, follow these steps:

  1. Open C:Program Files (x86)Steamlogs folder.
  2. Locate content_log.txt file and delete it.
  3. Start the game again.

Clicker Heroes black screen

Solution 1 – Launch the game using game’s .exe file

If you have issues with Clicker Heroes and black screen on Windows 10, you should try launching the game directly from its directory.

By default, installation directory should be C:Program FilesSteamSteamAppscommonClicker Heroes. Once you enter the game’s directory, just run game’s .exe file from there.

Solution 2 – Delete Clicker Heroes folder from AppData

Black screen issues with Clicker Heroes can be annoying, and if you’re having these issues, you might want to delete clicker Heroes folder from AppData folder. To do that, follow these steps:

  1. Press Windows Key + R and enter %appdata%. Press Enter or click OK.
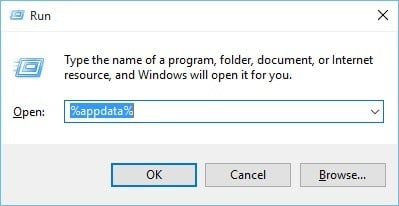
    appdata-run
  2. When AppData opens, find com.playsaurus.heroclicker folder and delete it.
  3. Try running the game again.

Solution 3 – Disable Steam Cloud and delete clickerHeroesSave.txt

If you are having Clicker Heroes black screen issues, you can try deleting clickerHeroesSave.txt file from your computer. To do that, do the following:

  1. Start Steam, and find Clicker Heroes in your library.
  2. Right click it and choose Properties.
    steam-properties
  3. Go to Updates tab and uncheck Enable Steam Cloud synchronization option.
    steam-cloud
  4. Now close Steam and go to Steam installation directory. By default it should be C:Program FilesSteam.
  5. After you’ve switched to Steam installation directory, go to userdata folder.
  6. Now you need to find clickerHeroesSave.txt. You can use the search bar in the top right corner.
    userdata-steam-search
  7. Right click clickerHeroesSave.txt from search results and choose Open file location.
  8. Create a copy of clickerHeroesSave.txt and save it on your Desktop, just in case. Now delete clickerHeroesSave.txt from its original folder.
  9. Go “up” one folder (you can press Alt key + Up arrow on your keyboard) and find remotecache.vdf file. Open that file with Notepad and change the Size variable to 0.
  10. Try running the game again. If your save games are missing, you can turn on Steam Cloud synchronisation or you can just copy clickerHeroesSave.txt to its original location.

It will also optimize your PC for maximum performance.

We have covered some of the common Clicker Heroes issues on Windows 10, and if you’re having any of these issues, make sure that you try out our solutions.

Don’t forget to share your experience with Clicker Heroes in the comments section below and tell us what solution worked for you.

Ninja Gaiden 3: Razor’s Edge and Trials Evolution are now backward compatible on Xbox One

Two new Xbox 360 games are now playable on Xbox One starting today. Ninja Gaiden 3: Razor’s Edge, an action-adventure hack and slash game released in 2012 is joining Ninja Garden Black and the recently added is the first title to join the Xbox One Backward Compatibility list. As a reminder, previous episodes Ninja Gaiden Black (an OG Xbox game) and its Xbox 360 sequel Ninja Gaiden 2 are already playable on Xbox One.

The other game that became backward compatible today is the racing game Trials Evolution. This one remains of the most critically acclaimed episodes in Ubisoft’s popular Trials series, though be aware that it may not be available to purchase in all regions on the Xbox marketplace.

The Xbox One Backward Compatibility list currently includes more than 500 Xbox 360 and OG Xbox games, and Microsoft keeps adding new titles at a regular pace. Some of these games are also enhanced for the Xbox One X with 4K graphics, which is a great way to breathe new life into some classics such as Gears of War 2, Fallout 3, or Red Dead Redemption. The full list of backward compatible games is available on Major Nelson’s website.

Stable Tor 6.0 browser released for Windows 10

Since we initially published this article, TOR Browser got a few more iterations and it currently resides at the stable version 8.0. Tor Browser 8.0 (based on Firefox 60 ESR) brings the following improvements and features:

  • New user onboarding
  • Improved bridge fetching
  • Better language support
  • A variety of bug fixes
  • Stability and minor UI design improvements.

You can find it here.


How about a browser that is as much privacy-oriented as it’s fast?

The TOR Browser and the whole TOR Project are based on privacy and online anonymity which is remarkable. However, TOR operates under some strict rules which can discourage not-so-tech-savvy users. That’s where UR Browser comes into play.

ur browser

UR Browser takes the best of the mainstream browsers (based on the well-known Chromium project) but takes it up a notch with a variety of privacy-oriented features. To put it plainly, it looks like Chrome but works as TOR to some extent, being the best of the two.

The built-in VPN will ensure your online signature is always hidden while multiple mods of privacy will ensure you’re not tracked or forcibly redirected to suspicious websites.

You can give UR Browser a try and learn for yourself. The download link is below.

Editor's recommendation
ur browser
  • Fast page loading
  • VPN-level privacy
  • Enhanced security
  • Built-in virus scanner


The Tor team finally released a stable version of its Tor web browser. The 6.0 edition adds code signing for Apple’s OSX, letting Mac users finally install Tor without going through Gatekeeper issues.

The Tor Browser is based off Firefox architecture and as such, the core Firefox build was updated to version 45-ESR. Furthermore, there are several similar updates, the most notable being OpenSSL, HTTPS-Everywhere, and Torbutton.

Just last month, Mozilla released Firefox 46 final alongside the Firefox 47 beta, so as it stands, the main Firefox base code is ahead of what Tor offers.

There’s also a new security layer added to Tor Browser 6.0. Now, when a user downloads a file, the browser checks the hash of the downloaded file along with its signature before finally applying the download.

And remember that long-standing DLL issue? The developers finally managed to release a fix for it, so now the browser should be much safer than before.

The release also features new privacy enhancements and disables features where we either did not have the time to write a proper fix or where we decided they are rather potentially harmful in a Tor Browser context.

Here’s what the Tor team had to say via a recent blog post:

On the security side this release makes sure that SHA1 certificate support is disabled and our updater is not only relying on the signature alone but is checking the hash of the downloaded update file as well before applying it. Moreover, we provide a fix for a Windows installer related DLL hijacking vulnerability.

As per usual with these type of releases, there is a long list of bug fixes and other important details for advanced users to comb through. We doubt the team managed to get rid of every issue, but from what we have seen from the release notes, over three dozen bugs have been addressed.

Microsoft also recently updated its Edge web browser Insiders, but users are still complaining of frequent crashes, so a fix should be inbound.

RELATED STORIES YOU NEED TO CHECK OUT:

Looking for an alternative to Internet Explorer? Download UC BrowserHD

Internet Explorer 11 in Windows 7 and Windows 8.1,  is a pretty great browser, but if you want to try out an alternative, then UC BrowserHD should be one of your first choices.

uc-browser-hd-windows-8-app-review

Microsoft Edge is also a terrific browser, but if you are interested in an alternative on Windows 10, have a look at UC BrowserHD. Although like in all other versions of Windows, Internet Explorer is also included in Windows 10, users still turn to other browsers to satisfy their web searching needs.

Also, there are some great alternatives on the Windows Store, and today, we’ll be talking about one of them.

The app in question is UC BrowserHD, developed by UCWeb Inc. for Windows 10, Windows 8.1 users that want a customizable internet browser that is both easy to use and free.

If you are interested in a good web browser for Windows 10, Windows 8.1, then give this app a try.

UC BrowserHD for Windows 10, Windows 8.1

Although the app has some nice features, it is still very simple to navigate and set up. After only 2-3 minutes you can see all that it can do and it will feel very natural to use it. Also, if you are used to IE10, then the bottom-placed address bar will not bother you at all.

In terms of features, the browser has pretty much all the features you’d like, starting with Google and other engines search from the main screen, access to bookmarks, settings, and downloads from the main address bar, incognito browsing and the possibility to download images or files.

UC BrowserHD for Windows 10

[UPDATE] The latest version maintains the high speed and low data consumption, adding new security features for a safe surfing experience. UC Browser is able to block potential sources of malware and viruses before they get the chance to load on your PC.


We strongly recommend a full-dedicated VPN tool for enhanced security and privacy. Get now CyberGhost VPN (currently 77% off ). It protects your PC from attacks while browsing, masks your IP address and blocks all unwanted access.


One issue with the downloading process that I noticed is the missing option to specify where to download files, but other than that, it handled pretty good downloading tasks.

One other issue that I had with the browser is the poor support for Flash, making YouTube videos pretty hard to see.

UC BrowserHD review

In terms of UI and customizability, the user has at his disposal a quick launch table with customizable tiles. It is very similar to Opera’s approach, but the developers have added some extra quick launch shortcuts, carefully categorized in the right of the screen.


Fast, secure, privacy-oriented browser for an enjoyable browsing

Now that small-market browsers are up there with the big guys, we can safely say that there are valid alternatives to Chrome, Firefox, or Edge. The one that comes to mind is UR Browser which is built-in on the Chromium base.


Being built on the Chromium Open Source project, it allows for all Chrome Web Store extensions to be installed. However, some built-in features, like Moods, VPN, and antivirus, take it a mile further. Forgot about browsers which hog on your resources and track your digital signature.

With UR Browser, you can rest assured that you’ll stay anonymous and secure, but not paying price for it with slow loading speeds. Check UR Browser now and see for yourself.

Editor's recommendation
ur browser
  • Fast page loading
  • VPN-level privacy
  • Enhanced security
  • Built-in virus scanner

Of course, if you’re inclined to learn more about UC BrowserHD first, continue reading below.


Overall, the UI looks good and it’s very responsive, but there is one single problem: I have used the app on a Windows 8, Windows 10 computer, therefore I do not have a touch interface, and the scrolling on the home screen is terrible with a mouse.

UC BrowserHD app review

The user has to click on the little “-” button in the lower right corner and from there, choose the category that he is interested in. Other than this, I can’t say I found anything wrong with the app, and I would use it for quite some time. It has proven to be very easy to use, the UI is intuitive and responsive and it presents itself with the excellent build quality. A definite winner!

RELATED ARTICLES TO CHECK OUT:

How to Record Live TV on Windows 10

Gone are the days when Windows came with a Media Center included right inside the OS.

When Windows 8 was released, Microsoft actually killed the inclusion of Windows Media Center inside the operating system by default.

But you could purchase a license or download Windows Media Center from Microsoft’s website in order to have it on your Windows 8 or Windows 8.1 PC.

When Windows 10 was initially released, you could install Windows Media Center on it but it was later killed by Microsoft.

According to them, Windows Media Center wasn’t really being used by many people altogether.

It was a great software to have in case you also had a TV tuner card installed in your PC.

You could watch and even record live TV using Windows Media Center. Now that Windows 10 doesn’t really have a Media Center, there are third party options that you can use. Read more below.

How you can watch and record live TV on Windows 10

  1. Using Xbox Game DVR
  2. With MediaPortal
  3. Using Kodi

Method 1 – Using Xbox Game DVR

record live tv windows 10 xbox game dvr

This is a new feature in Windows 10 that lets you capture games with the Xbox app that comes included.

You can start the Xbox app and enable Game DVR in order to start recording. Not just games, but you can record desktop, videos from a video player and more.

Follow the procedure to enable Xbox Game DVR.

  • Open Start Menu and type Xbox.
  • Open the first result that pops up and it will open in a new window.
  • If you already don’t have a Xbox account, you will be asked to create one.
  • After creating an account you will see the home of the app.

record live tv windows 10 xbox game dvr 2

  • You will need to setup the Game DVR which is a one time process.
  • After the Game DVR has been set-up, open the program that you use to watch TV.
  • You can press Windows Key + G in order to bring up the Game bar.
  • Once it is open, you can start recording what is being shown in the program and it will be saved once you stop it.

Read Also: How to use Windows 10 PC as TV tuner: 4 best apps to install

Method 2 – With MediaPortal

record live tv windows 10 mediaportal

MediaPortal used to be a project that was derived from another PVR application known as XBMC. But the developers of MediaPortal have now worked to develop it as a standalone program.

MediaPortal as a PVR program is able to do a lot of things. One of which is being able to interact with the TV tuner card if it is installed in the PC it is being used it.

You can use MediaPortal to record live TV after easily installing it on Windows 10.

record live tv windows 10 mediaportal 2

There are different ways that you can go through to start recording TV in MediaPortal. Take a look at the number-wise list below.

  1. While watching live TV, press R and it will start recording.
  2. You can press F9 key on your keyboard to bring up the Info menu and there will be an option to start recording.
  3. Check for the Record Now button on the TV Home screen and click it.
  4. You can also choose a show in the TV Guide and you can schedule the show for recording.

Method 3 – Using Kodi

record live tv windows 10 kodi

Kodi which was previously known as XBMC is one of the most used PVR programs. It can also be used on Windows 10.

The best thing about Kodi is the fact that you can make it more functional with the add-ons that you can install in it. To enable recording live TV using Kodi, follow these steps.

  • Open Kodi and follow System > Add-ons > PVR IPTV Simple Client > Enable.
  • After enabling, choose Configue on the same screen and set the following:
    • For General set Location to Remote Path (Internet address)
    • The Select M3U Play List URL and paste this link EXACTLY: https://pastebin.com/raw/26xMQVL8
  • You also need to turn off Cache m3u at local storage in General.
  • Now go back to your Kodi homescreen and choose System again.
  • Navigate to System > Live TV > General > Enabled.
  • You also need to go to System > Live TV > Playback and turn off Start playback minimised.
  • After than you will need to follow this Wiki page in order to setup recording.

You need to follow the Wiki because we can’t explain how it works because this depends on where you live.

Following it is easy so you won’t face any problems. These were some of the best ways to record live TV on Windows 10.

If you have any queries, you can get them cleared in the comments section below.

READ ALSO:

Fix Guild Wars 2 issues in Windows 10/11 with our easy steps

Guild Wars 2 is a popular massive multiplayer online game that was released in 2012, but it seems that this game has some issues with Windows 10, so let’s have a closer look at them.

It has been reported that this game suffers from frequent crashes and graphical glitches on Windows 10.

It can be quite annoying when you can’t enjoy your favourite game after investing so much time into it, so without further delay, let’s fix these Guild Wars 2 issues.fix Fix Guild Wars 2 Issues in Windows 10

How can I fix Guild Wars 2 problems in Windows 10?

  1. Disable Razer Synapse data tracking
  2. Reinstall DirectX
  3. Add -repair parameter
  4. Reinstall Nvidia drivers
  5. Change the game from fullscreen to borderless window mode
  6. Close EVGA PrecisionX 16
  7. Delete the local.dat file
  8. Switch to 64-bit beta client
  9. Change Anti-aliasing settings in Catalyst Control Center
  10. Disable certain in-game settings

Solution 1 – Disable Razer Synapse data tracking

There’s a Graphics Enhancement Mod for Guild Wars 2, also known as GEMFX, and it has been said that Guild Wars 2 crashes on launch when using this mod.

One of the options is to disable this mod, but if you’re using Razer Synapse you might want to disable data tracking. To uninstall Razer Synapse data tracking do the following:

  1. Go to C:ProgramData -> Razer -> Synapse -> ProductUpdates -> Uninstallers -> RzStats.
  2. Run the uninstaller from that folder and you should be able to remove Razer Synapse data tracking.
  3. Try running Guild Wars 2 again.

Solution 2 – Reinstall DirectX

There are reports regarding DirectX crash when using GEMFX mod. In order to fix this issue you need to download and install DirectX 9.0c. You can download all the files that you need from here.

Solution 3 – Add -repair parameter

Most of us enjoy our favourite games in full-screen mode, but it seems that this mode makes Guild Wars 2 freeze and crash.

In order to fix that, you need to add -repair parameter to the game by following these instructions:

  1. Find Guild Wars 2 shortcut and right click it. Choose Properties.
  2. Find the Target field. In the Target field there should be a path to the game’s installation directory. By default it should be: C:Program Files (x86)Guild Wars 2Gw2.exe, but it might be different on your computer.
  3. Now add -repair parameter after the quotes in the Target field. Your Target field should look like this: C:Program Files (x86)Guild Wars 2Gw2.exe -repair.
  4. Save the changes and start the game using the shortcut.
  5. After you start the game it will scan your game files for any missing or corrupted files and replace them. We have to warn you that this process might take a while, up to an hour, sometimes even more, so you’ll need to be patient.
  6. After the repair has been performed you can go and remove -repair parameter.

Solution 4 – Reinstall Nvidia drivers

There have been reports that Guild Wars 2 has some issues with Nvidia drivers on Windows 10, and the best solution in this case is to reinstall the drivers.

When you uninstall Nvidia drivers make sure that you restart your computer, and after installing latest Nvidia drivers make sure that you restart your computer again.

In certain cases, your system can operate better using older versions of drivers. As confirmed by our readers, you can try this solution to fix Guild Wars 2 issues. Make sure to stop automatic driver updates and download older Nvidia driver.

It’s crucial that you restart your computer after uninstalling and installing display drivers in order for this process to be successful.

Solution 5 – Change the game from fullscreen to borderless window mode

Another problem with Nvidia drivers is that sometimes the game minimises and crashes, and in order to fix that it’s suggested that you change your mode from full-screen to border-less window.

After changing the game mode from full-screen to border-less window, restart the game, and change it back to full-screen again.

Solution 6 – Close EVGA PrecisionX 16

EVGA PrecisionX 16 is a popular overclocking tool for Nvidia graphic cards, but despite its popularity, this tool can cause some graphical glitches with Guild Wars 2.

Users report that they have encountered invisible cursors and black box around the cursor, and the solution to these glitches is to close EVGA PrecisionX 16 software.

Solution 7 – Delete the local.dat file

Some users have complained that their game crashes giving them out of memory error. This issue has been reported on computers with 16GB or more of RAM, so it’s safe to assume that the issue isn’t caused by lack of memory.

After some research it was concluded that the main cause of these crashes is local.dat file that is created by the game. This file holds some game data, and due to constant patches sometimes the data can get corrupted, so it’s advised to delete this file.

To delete local.dat file follow these instructions:

  1. Open File Explorer
  2. Go to the following location:
    • %appdata%Guild Wars 2
  3. In there you should find local.dat file. Delete it.
  4. Start the game again.

After deleting local.dat you will have to change your graphic and sound settings because they will return to default values.

Solution 8 – Switch to 64-bit beta client

Constant crashes and out of memory errors are reported by the users, and game developers have advised switching to a 64-bit beta client.

According to them, 64-bit client utilises your memory better. Just go to the game’s website and download the 64-bit beta client and move it to the game installation directory.

You won’t have to download the game again, and you can continue where you left off.

Solution 9 – Change Anti-aliasing settings in Catalyst Control Center

It has been reported that Guild Wars 2 has its share of issues with Anti-aliasing settings, so if you use AMD card it’s advisable to change those settings in Catalyst Control Center.

  1. Go to Catalyst Control Center.
  2. Open the advanced view.
  3. Click the Gaming tab.
  4. In Gaming tab click 3D Applications Settings.
  5. Change the Anti-aliasing setting to Use Application settings.
  6. Click Apply to save the changes.

Solution 10 – Disable certain in-game settings

If you’re getting low performance and experiencing crashes, you might want to disable certain options in video settings.

Video options such as character animation and high-resolution textures can cause some issues on older computers, so make sure that you disable them.

Find out more about Guild Wars 2 crashes in this article:
How to fix Guild Wars 2 crashes on Windows 10.

Gamers in regions with unstable internet experienced lag issues and have been able to quickly solve them by using VPN.

We hope that our solutions were helpful and you can share useful opinions in the comments section below.

What other issues have you encountered in Guild Wars 2 and how did you manage to solve them?

[wl_navigator]

Outlook hackers stole Bitcoin and other cryptocurrencies from users

As it turns out, the fact that hackers were able to view the private emails of users of Microsoft’s free Outlook.com service wasn’t even the worst of the news. On top of it, they were also able to steal some cryptocurrencies from “multiple victims” according to a report from Motherboard (via CoinDesk).

One of the victims, Jevon Ritmeester, claims that he lost as much as one bitcoin (worth roughly $5,400 as of the time of this writing) to a hacker that gained access to his Kraken cryptocurrency exchange account. As he describes in his post on the Tweakers, the hackers seemed to have successfully reset his cryptocurrency exchange account password and then move all emails from it to the junk folder and have it automatically forwarded it to what appears to be the hacker’s email address.

Additionally, multiple users on Reddit have also reported loss of cryptocurrency, with one going by shinratechlabs reporting that he lost “25,000 in crypto,” not defining which currency. Another Redditor replied and stated that he lost as much as $5,000, with similar forwarding and deleting rules found in his email accounts as was seen in Ritmeester’s. Another user also said that he gave multiple warnings to Microsoft, and that “for nearly two months there was something major going on,” suggesting there was “complete ignorance on their part.”

Ritmeester told Motherboard that he intends to “at least file a police report,” previously citing that he thinks Microsoft is “trying to cover up and is not taking this seriously.” Feel free to shoot a comment below if you’ve seen something similar happen to you or someone else.

Windows 10 version 1809 gets minor patch to fix Japanese calendar bug, but you can only install it manually

Microsoft has quietly released a new optional patch for Windows 10 version 1809 yesterday, with the build 17763.439 (via ComputerWorld). This new cumulative update is a pretty minor one, though it includes nine different fixes to support the new Japanese Era and its associated calendar that began on May 1, 2019.

Here is the full list of quality improvements included in this new patch:

  • Addresses an issue that prevents the CALDATETIME structure from handling more than four Japanese Eras. For more information, see KB4469068.
  • Updates the NLS registry to support the new Japanese Era. For more information, see KB4469068.
  • Addresses an issue that causes the DateTimePicker to display the date incorrectly in the Japanese date format. For more information, see KB4469068.
  • Addresses an issue that causes the Date and Time Settings control to cache old Eras and prevents the control from refreshing when the time enters the new Japanese Era. For more information, see KB4469068.
  • Updates fonts to support the new Japanese Era. For more information, see KB4469068.
  • Addresses an issue that prevents an input method editor (IME) from supporting the new Japanese Era character. For more information, see KB4469068.
  • Addresses an issue that causes the Clock and Calendar flyout control to display the day of the week incorrectly mapped to a date in the month of the new Japanese Era. For more information, see KB4469068.
  • Adds alternative fonts for the new Japanese Era fonts. For more information, see KB4469068.
  • Enables Text-To-Speech (TTS) functionality to support new Japanese Era characters. For more information, see KB4469068.
  • Addresses an issue in Unified Write Filter (UWF) that prevents Hibernate Once/Resume Many (HORM) from working as expected on Unified Extensible Firmware Interface (UEFI) systems.

Interestingly, this optional update isn’t available on Windows Update yet. Microsoft noted that it’s only available through Windows Server Update Services (WSUS), and you can also get it from the Microsoft Update Catalog website. In case you decide to skip it, be aware you’ll still get all these fixes in the next Patch Tuesday Update, to be released on May 14.

Redesigned Skype icon appears in latest desktop Insider build

Microsoft is still in the process of rolling out redesigned icons for its most important apps such as the Office suite, Microsoft Teams, and OneDrive, and it appears Skype is next on the list. A slightly redesigned Skype icon is now available on the desktop for Skype Insiders, and you should see it after installing the preview build 8.45.76.24.

The new icon isn’t a significant departure from the previous icon, it’s actually very subtle compared to the Fluent Design refresh we’ve seen for the Office and OneDrive icons. Skype is a now very old brand, and it’s probably a good thing that the new icon will remain instantly recognisable by the majority of the userbase. Actually, it’s very likely that some users won’t notice the change at all.

As of this writing, the new icon is only live on the Skype Preview desktop app, but you can expect it to appear on mobile pretty soon. Let us know what you think about the redesigned icon in the comments below.

Windows update standalone installer stuck searching [Fixed]

If you are trying to search for updates using the Windows update standalone installer, you may encounter a never-ending search for the update. This can be caused by several reasons, and the issue has affected all the previous version of Windows including 7,8 and the latest Windows 10.

If you are facing a similar problem and the Windows update standalone installer is stuck at searching for update screen without any progress, here are a couple of fixes to resolve the same.

Fix Windows update standalone installer stuck at searching for updates

  1. Disable Automatic Updates (Windows 7/Windows 8)
  2. Update via WSUS Offline Updater (Windows 7 / 8)
  3. Run the Windows Update Troubleshooter  (Windows 10)
  4. Download Most Recent SSU
  5. Download Most Recent KB
  6. Fix Windows File Corruption

1. Disable Automatic Updates (Windows 7/Windows 8)

If you are using Windows 7, try to disable automatic Windows updates and then try to run the standalone installer. Here is how to do it.

  1. Type window update in the search box.
  2. Select Windows Update under Programs.
    Never check for update - Windows 7 - change settings
  3. From the Control Panel, click on Change Settings.
    Never check for update - Windows 7
  4. Click the drop-down menu under Important Updates and select “Never check for updates”.
  5. Click OK to apply the changes.
  6. Restart your computer and wait for the PC to boot normally. Run the standalone update installer and check for any improvements.

If you are still facing the same problem, do the following:

  1. Download KB4490628. Make sure you download the right version of the software depending on your OS edition and build. Run and install the SSU driver.
  2. Restart your PC.
  3. Go to Windows Update > Change Settings. Under Important Update, click the dropdown menu and select “Install updates automatically (recommended). Click OK to save the changes.
  4. Click on check for update and install any pending update.

2. Update via WSUS Offline Updater (Windows 7 / 8)

Alternatively, you can also use WSUS Offline updater, a small open source software utility to download missing updates from the Microsoft server automatically.

  1. Begin with downloading WSUS Offline Updater.  Make sure you download the most recent version of the tool from the page.
  2. Extract the wsusoffline.zip file.
  3. Run the UpdateGenerator.exe.
    WSUS Offline Update
  4. Check “Verify downloaded updates “ and “Include C++ Runtime Libraries and .Net Frameworks” boxes.
  5. Click on Start to download the missing updates.
  6. Once the downloading of updates is over, close UpdateGenerator.exe.
  7. Go to the wsusoffline folder again, and open Client folder.
    uninstallaerexe wsus offline update
  8. Double-click on Updateinstaller.exe.
  9. Check “Update C++ Runtime Libraries” box and click Start.

Wsus Offline Installer will start installing all the pending updates downloaded in the last phase. The update installation may take a few minutes to a few hours.


3. Run the Windows Update Troubleshooter  (Windows 10)

Microsoft allows you to download Windows Update troubleshooter. The troubleshooter scans the PCs for the update related problems and suggests solutions accordingly.

  1. Download Windows Update Troubleshooter.
  2. Run the Troubleshooter after the download is complete.
    Windows update troubleshooter
  3. Click on Next and follow the on-screen instructions in the wizard.

The troubleshooter will scan the system and suggest appropriate fixes to resolve the issue.


4. Download Most Recent SSU

If the troubleshooter failed to find and fix the problem, you can download and install the most recently SSU (Servicing Stack Update) from the Microsoft site.

Before downloading the SSU, make sure you know your system’s OS version and the edition. Here is how to determine whether you are using 32-bit or 64-bit Windows.

  1. Click on Start and open Settings.
  2. Go to System > About and System type.
    About System Windows 10
  3. Now go to SSU download and under Method 2, click on Microsoft Update Catalog.
  4. Download either 32-bit or 64-bit SSU update.
  5. Run the Servicing Stack Update by double-clicking on it.
    Windows Standalone Installer - Do you want to install update
  6. If everything goes right, it will scan your PC for pending update and prompt you to install the pending update.
  7. Click Yes to proceed with the installation.

Restart your PC and again check for any pending update.


5. Download Most Recent KB

If installing the most recent SSU did not resolve the problem, try downloading the most recent KB from the official Microsoft source.

  1. First, check your Windows edition by going to Start > Settings > System > About and System Type.
  2. Next, go to the Update history page.
    Download Most Recent KB - KB Number
  3. Find the most recent KB for your version of Windows 10. Note down the KB number for the most recent KB.
  4. Now go to Microsoft Update site and search for the KB number from the above step.
    Download Most Recent KB - KB download Page
  5. Download the most recent KB. After the download is complete, double-click on the KB to start the update.

6. Fix Windows File Corruption

If the issue still persists, you can run the System File Checker and Deployment Image Servicing and Management tool to fix the file corruption. Here is how to do it.

  1. Open Command Prompt as admin. To do this, type cmd in the search, right-click on Command Prompt and select Run as Administrator.
    Cmd as admin
  2. In the Command Prompt type, the following command and hit enter:
    DISM.exe /Online /Cleanup-image /RestorehealthRun DISM command - Windows Update fix
  3. Next, type this command and hit enter.
    Sfc /scannowrun Sfc scannow command - Windows update fix

Note: The first and the second command may take several minutes to complete the operation.

Once done, close the command prompt and restart your system.

After the restart, try to run the Windows Standalone installer or check for Windows update and check for any improvements.

RELATED STORIES YOU MAY LIKE:

Windows Was Unable to Complete the Format on CD [Fix]

Are you experiencing Windows was unable to complete the format with your CD? CD-RW is an advanced form of CD, which is designed in such a way that it can be read, erased, written, and rewritten.

At times, formatting CD-RW may be necessary, especially in the event of corruption, which prevents the CD-RW from loading correctly. In this case, formatting such a CD-RW might be the ultimate solution.

However, what happens if your PC cannot complete the formatting process? We’ll be providing you with several quick fixes in this article.

How do I fix Windows was unable to complete the format on a CD?

1. Format CD-RW

Note icon NOTE
Before you proceed, ensure the CD drive is compatible with CD-RW.
  1. Place the faulty CD-RW in your PC’s CD drive.
  2. Press Windows + E to open File Explorer, and go to This PC.
  3. Navigate to the CD-RW removable drive and click on it.
  4. Locate and click on Manage.
  5. Click on the Toolbar.
  6. Locate and select Format to open the format window.format menu windows was unable to complete the format cd rw
  7. Click on the File System drop-down, and select a disk format system, preferably UDF 2.01, UDF 2.50, or UDF 2.60 (for Windows 7 and newer versions)
  8. Now, click on Start.
  9. Click OK again on the pop-up window to complete the format process.

This would format CD-RW completely, without any form of hitch, provided there is no form of system error or corruption. However, if you are still getting the Windows was unable to complete the format error, you can attempt the next method outlined below.

2. Format CD-RW using Disk Management

  1. Insert the CD-RW into your PC’s DVD/CD drive.
  2. Open Control Panel, and select Administrative Tools.
  3. Click on Computer Management.
  4. On the displayed options, locate and select Disk Management.windows was unable to complete the format cd rw disk management
  5. Locate the removable storage medium (CD-RW) you want to format.
  6. Right-click on it and select Format.
  7. In case you have partitions on the disk drive, delete them before running the format.

By following the above-outlined steps, the CD-RW should now be completely formatted and should be accessible for storing data.

3. Erase CD-RW

  1. Insert the CD-RW (rewritable) disc into your system’s disk drive.
  2. Open File Explorer.
  3. On the Explorer’s window, click on the CD-RW icon.
  4. Navigate to the toolbar, and locate Erase this disc.this PC windows was unable to complete the format cd rw
  5. Follow the on-screen commands to complete the format process.

If the Windows was unable to complete the format error is still there, you can try to fix it using the Erase this disc option. This will wipe off the CD-RW completely.

This action will clear off all the files on the CD-RW, providing you with a clean/blank rewritable disk. To be on the safe side, it is recommended you back up important files on the disc before running the format/erase process.

The error occurs for several reasons, ranging from file corruption to disc damage but can be easily fixed with a quick or deep format.

Before you leave, do check some effective disc burning software and get one today!

In any case, we hope that our solutions were helpful to you.