Today we’ll explain everything you need to know about downloading, installing and updating your mouse drivers in Windows 11.
While PCs typically recognize mouses and install drivers automatically, it may not always go that way. If that’s the case, you’ll have to manually setup your drrvers, or your mouse will not work.
If that’s the situation you’re in, just follow the steps below.
How do I download & install mouse drivers in Windows 11?
1. From the manufacturer’s website
Visit your mouse manufacturer’s driver download page.
Choose your Mouse model.
Select Windows 11 from the Operating System list.
Now, download the mouse driver.
Open the installer file and install it on your computer.
Restart your PC.
Here, we have shown the steps for Razer mouse devices. However, these steps are similar for every other brand. If you want to install Microsoft mouse and keyboard drivers, you can visit this official driver download center.
2. Using Device Manager
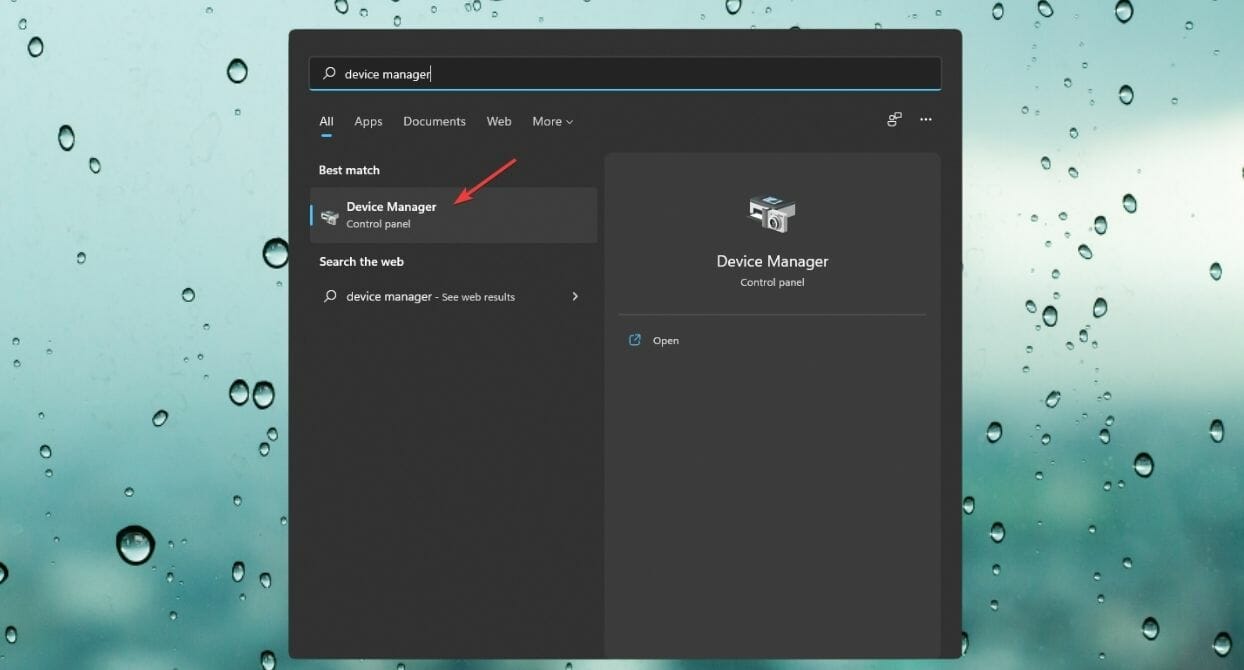
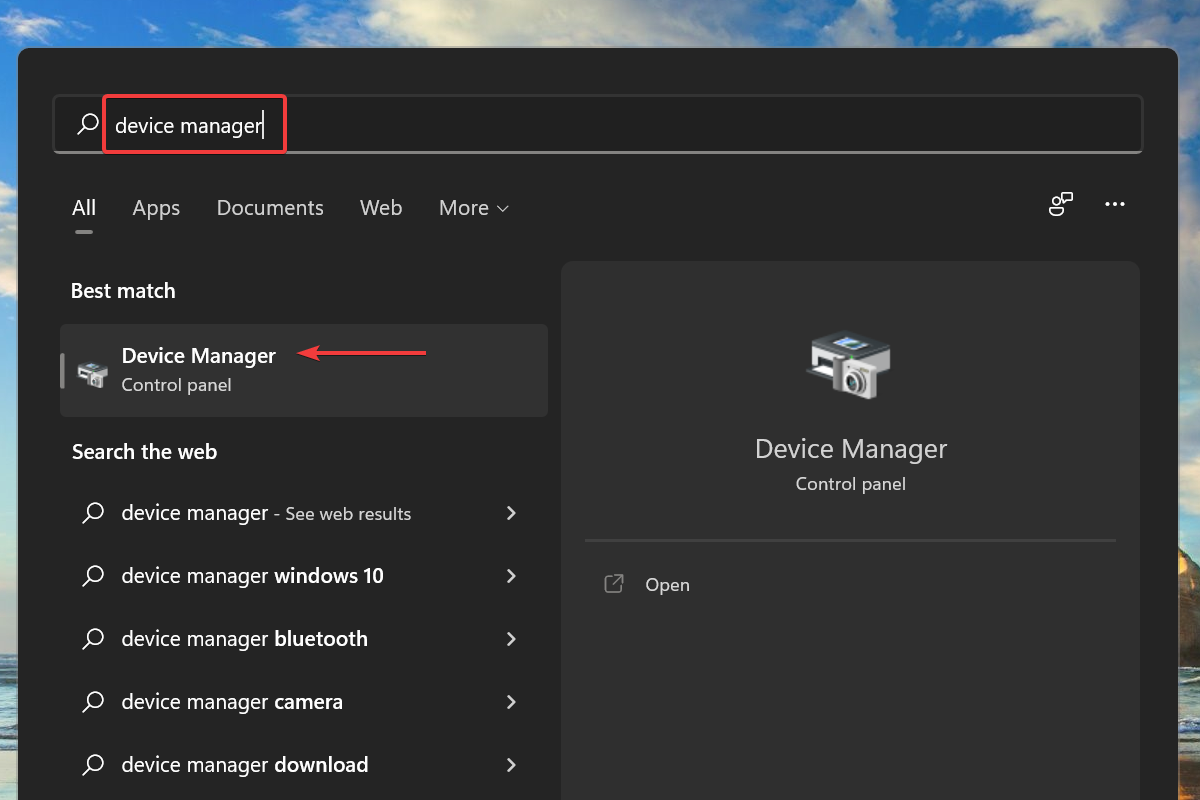
Open the Start Menu, type Device Manager, and hit Enter.
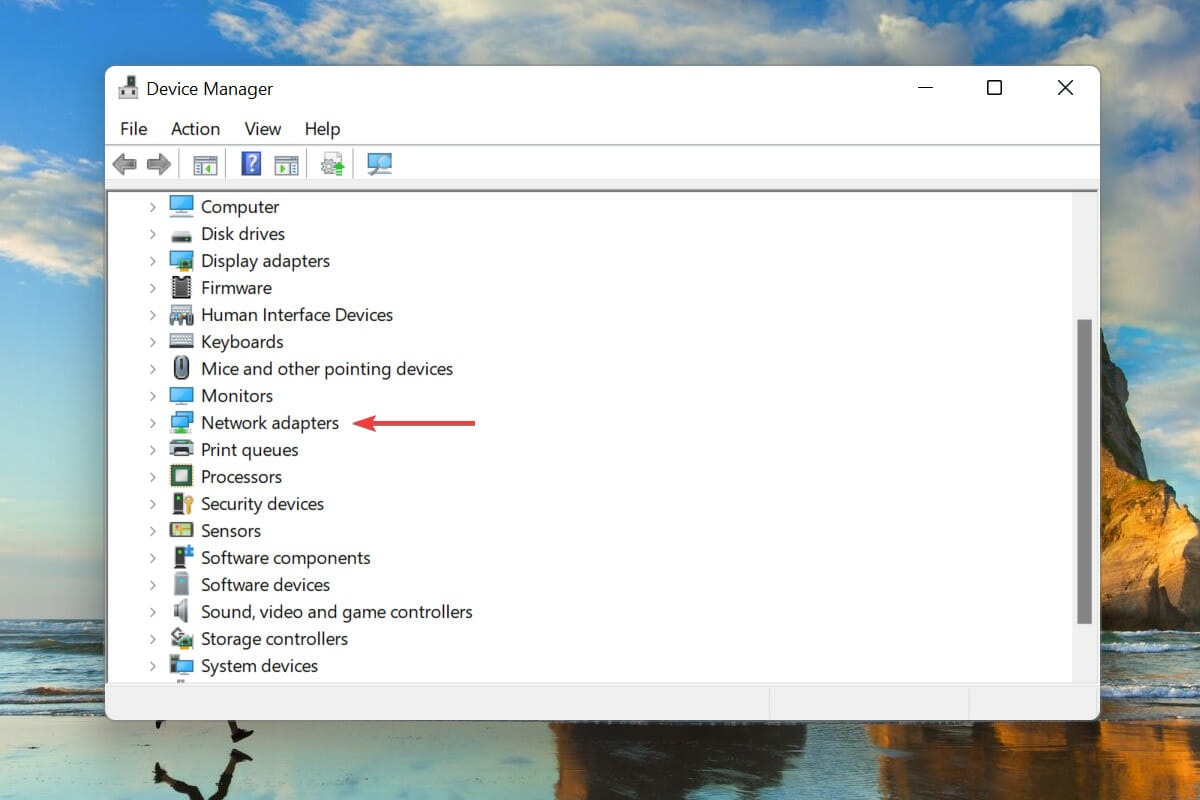
Now, find the mouse device with a yellow exclamation mark.
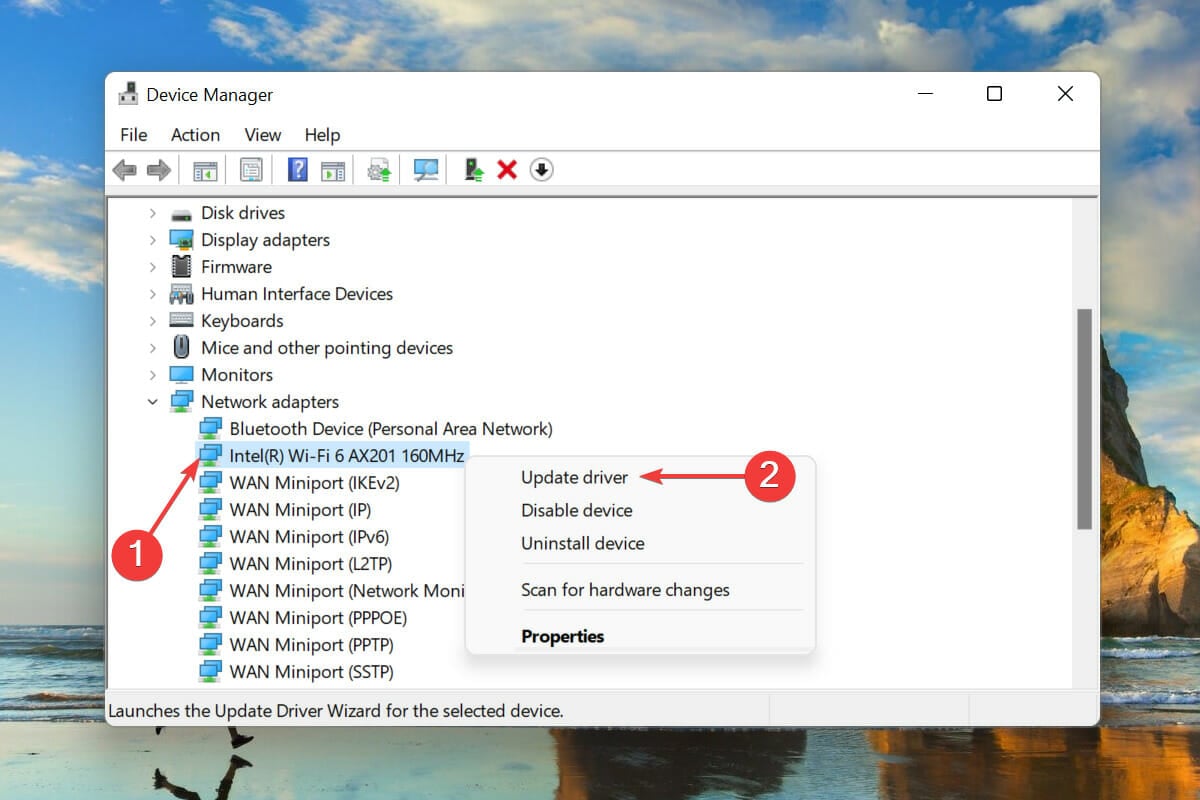
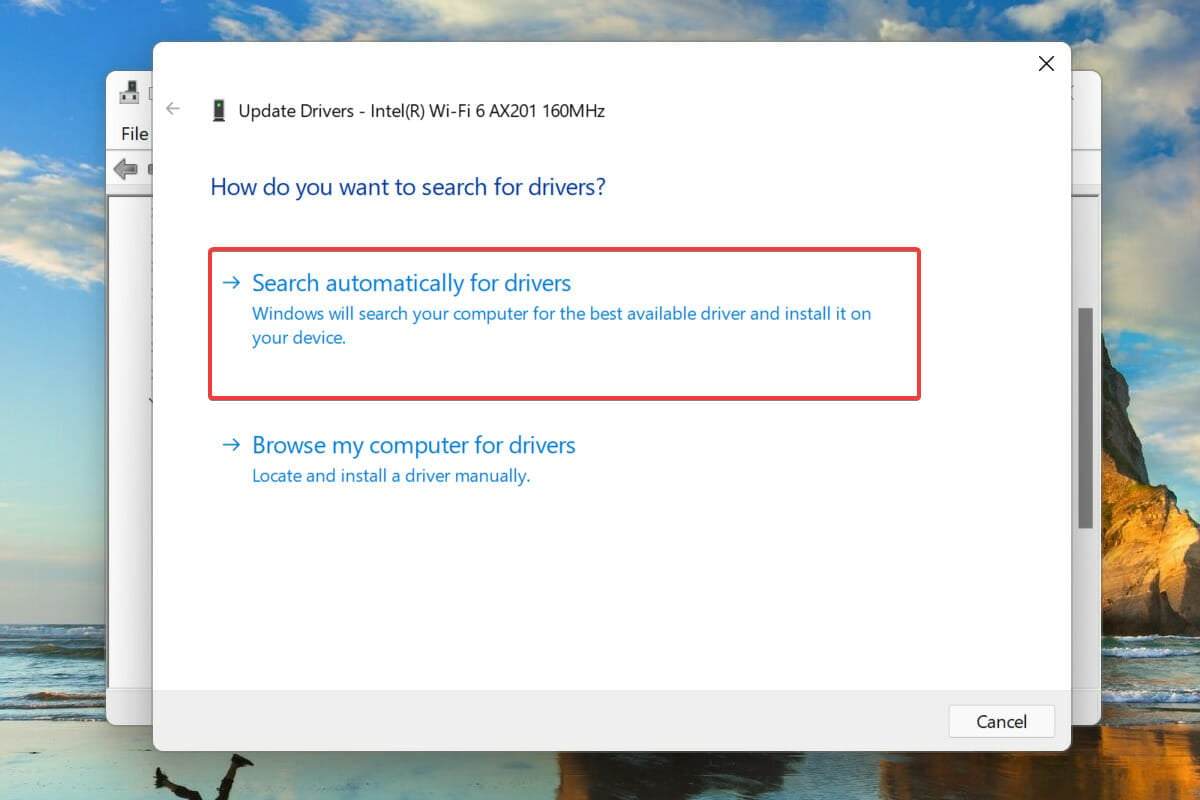
Right-click on it and choose Update driver.
Follow the on-screen steps.
3. Use a driver updater
If you want to get your mouse driver quickly on Windows 11, there is no better alternative than using third-party tools.
4. Windows Update
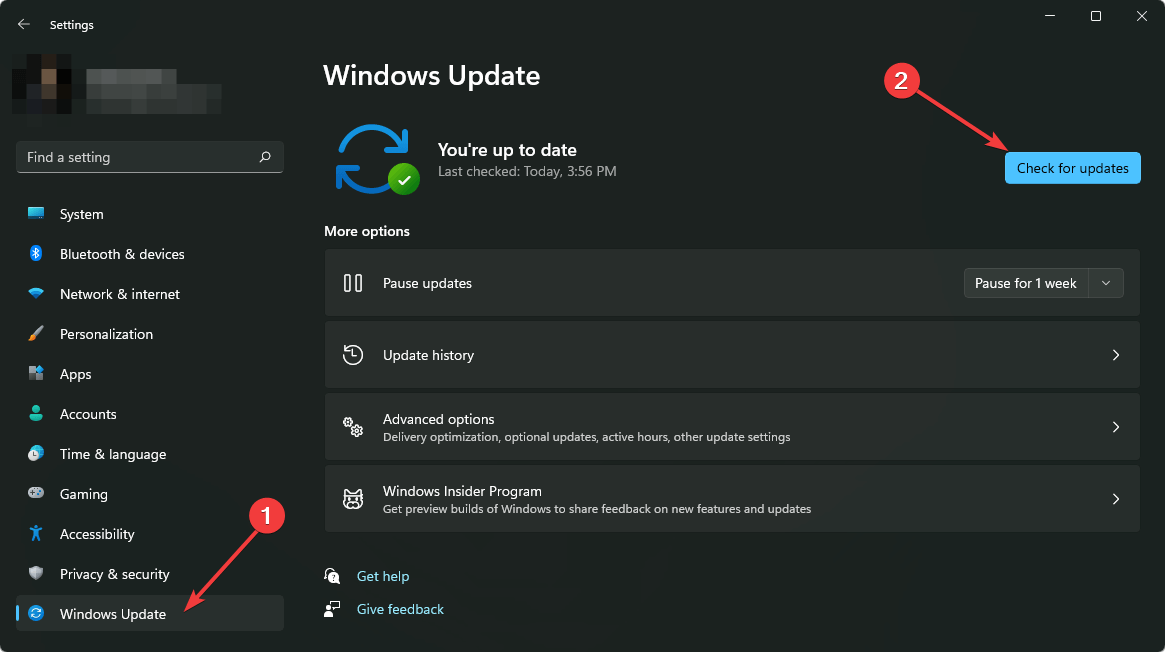
Press Win + I to open Settings.
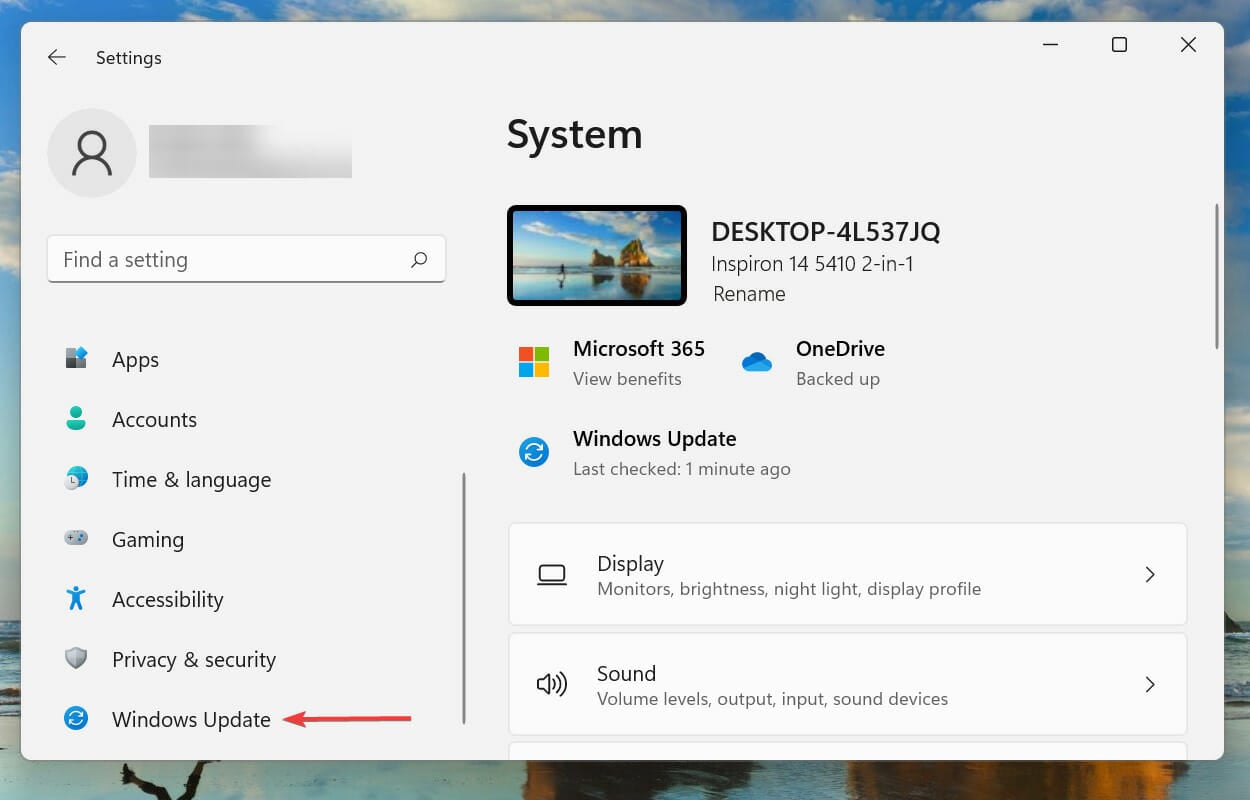
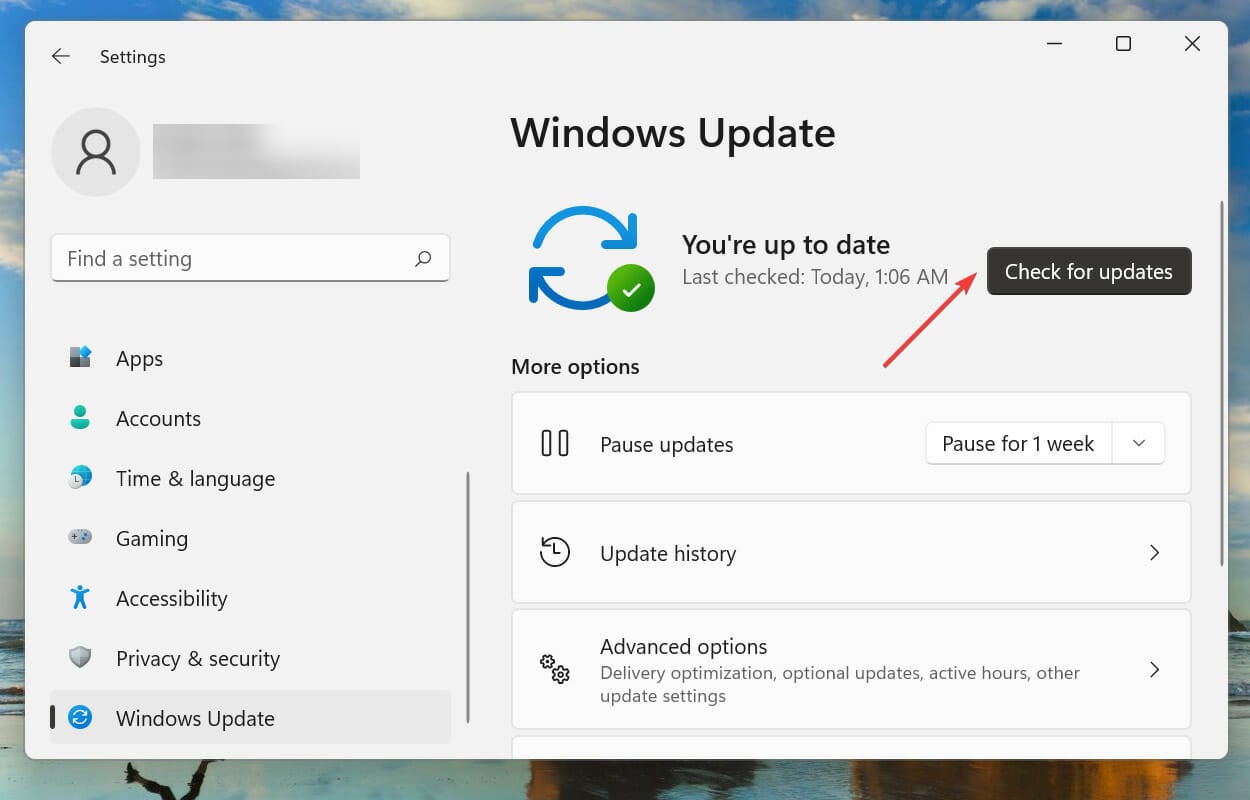
Go to Windows Update and click on Check for the update.
Click on Download/Install if there are any updates available.
Some drivers may be missing initially after installing Windows 11. But, with the Windows update, Microsoft will install all the missing mouse drivers except the unsupported ones.
How can I update my mouse driver?
1. Use Device Manager
Open Device Manager like before.
Find the mouse device you want to update.
Right-click on the device and choose Update driver.
Restart your computer if it is necessary to finish the process.
To update the mouse driver on Windows 11 and 10, you can try both methods. But, the second one is more convenient.
You should always keep your drivers up to date. It is because outdated drivers can cause a lot of problems on Windows, including the blue screen of death.
Find the mouse device, right-click on it and choose Uninstall device.
Check Attempt to remove the driver for this device and click on Uninstall.
Make sure you have a tracking pad or alternative supported mouse device. It is because if the mouse driver you have uninstalled is the only mouse you have and you don’t have another alternative input device, it will be a problem.
You may not be able to control your OS conveniently with a keyboard only. Windows 11 has built-in mouse drivers. If it works for your device, there will be no issue.
2. Uninstall any mouse software
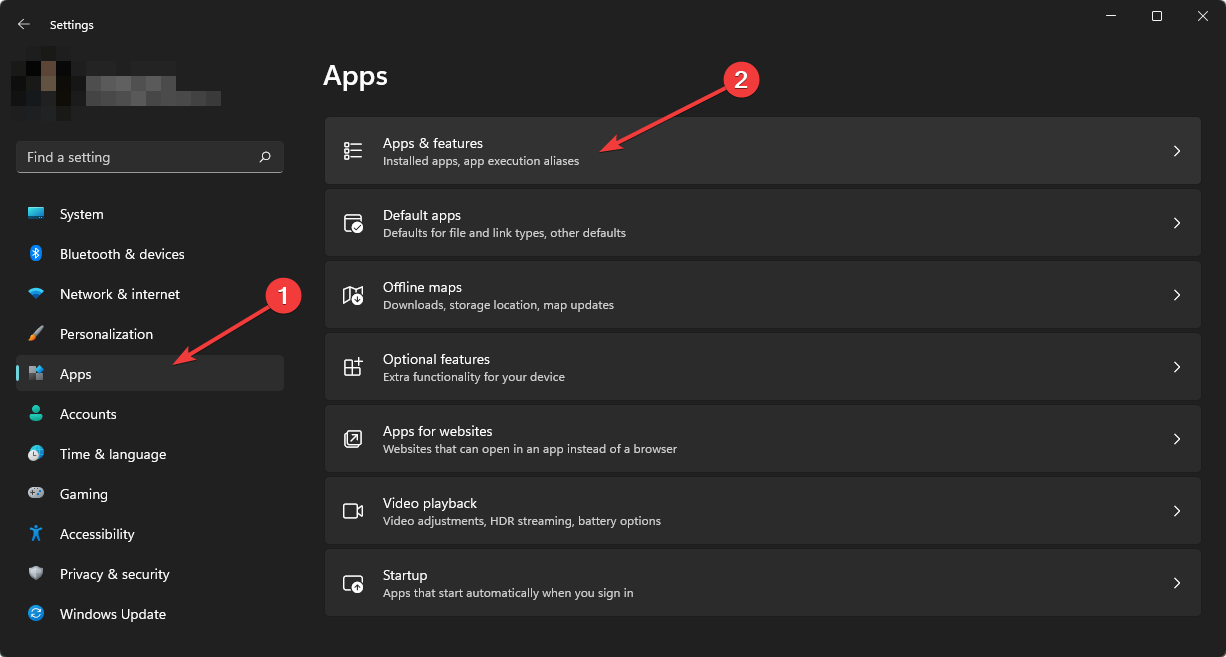
Press Win + I to open Windows 11 Settings.
Go to Apps and click on Apps & features.
Look for the mouse software.
Click on three vertical dots next to it and choose Uninstall.
Follow any on-screen steps to finish the process.
Please do it for any other mouse-related software or driver.
3. Install the driver again
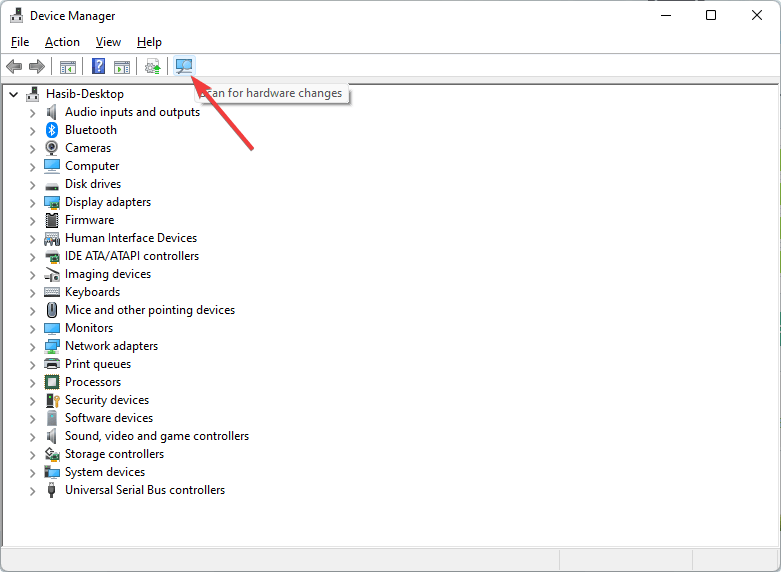
Open the Device Manager like before.
Click on the Scan for hardware changes button as shown in the screenshot.
Now, you should be able to find the missing device and install it.
Alternatively, you can manually download the driver or use an automated software, as shown above.
How do I find my mouse driver in Windows 11?
To find a mouse driver on Windows 11, you should visit the mouse manufacturer’s website and look for any compatible drivers.
Alternatively, from Windows Device Manager, it is also possible to search for such drivers. However, it may fail in many cases.
Overall, the best option is to rely on any decent third-party tool that can find any drivers automatically without any problem.
Summary
This article has explained the ways to update Windows 11 mouse driver. If you have any opinions or concerns, feel free to write them down in the comments box.
We are now in an age where storing things on your hard drive is no longer feasible. Cloud storage services are becoming better, faster, cheaper, and more secure, and more and more people are rushing toward them.
However, when you run out of cloud storage, you need a backup option. Read on to discover how to sync your OneDrive to an external HDD.
Can I back up OneDrive data to an external drive?
Many people have been wondering whether or not you can back up your OneDrive with an external hard drive to free up space.
The short answer would be yes, and this step-by-step guide will show just how you can do this.
How can I sync my OneDrive to my external hard drive?
You can sync OneDrive with an external HDD very easily via the app’s built-in settings. As long as the hard drive is connected to your PC or laptop, OneDrive will treat it as if it is just a regular part of your local storage.
1. Right-click the OneDrive icon in the System Tray.
2. Press on Settings.
3. Select Account.
4. Choose Unlink this PC.
5. Navigate to your original OneDrive sync folder. You can select the entire external hard drive for OneDrive to sync, just as long as your OneDrive subscription can handle all the necessary storage space.
6. Cut and paste the folder to your external hard drive.
7. Go back to the OneDrive set-up window.
8. Sign in with your account.
9. Select Change location to set your sync folder to be your external hard drive.
By following these steps, OneDrive should now be able to sync with that folder from within your external hard drive.
Syncing goes as with any other folder, although you should disable OneDrive when you first disconnect the external hard drive. This is because OneDrive will treat the missing files and folders as deleted, which may result in error messages.
What does OneDrive do?
One of the most extensive cloud storage services is Microsoft’s OneDrive, which is highly safe and reliable.
Microsoft’s cloud storage service is a massive convenience not only because it maintains your files synced across devices and backed up onto the internet but also because there’s so much more about OneDrive.
Nevertheless, depending on how much you store in it, your OneDrive folder could take up a lot of space. Of course, not everyone is such a big fan of cloud storage and still relies on the good old external hard drive as the go-to backup software.
In case you want to keep the files on cloud, you can copy files from the OneDrive account to another, read this guide to learn how.
Did you find this article helpful? Let us know what you think in the comments section below.
Gmail is one of the most popular webmail services, and if you use any of Google’s services, you probably have a Gmail account.
One problem when creating a new email account can be your old messages. If you have important emails that you want to keep, today we will show you how to import old emails into Gmail on Windows 10.
Quick Tip:
If importing your emails from one client to another is your priority, you might as well go for Mailbird since that is its specialty.
Besides being fast, modern, and reliable, Mailbird’s main selling point is its ability to automatically import the entire contents of an email account, allowing you to have them all under one UI.
Mailbird
If you need to import your Gmail emails into an email client, might as well do it using the based, namely Mailbird.
Gmail comes with a built-in option that allows you to import old emails from different email providers. It is called the Import mail and contacts feature and can be accessed via Gmail’s settings.
By using this feature, old emails from your old account will be forwarded to your new Gmail account automatically.
1. Open Gmail and log in to your new account.
2. Click the Gear icon in the top right corner and choose Settings.
3. Go to the Accounts and Import tab.
4. Click on the Import mail and contacts link.
5. Now sign in to your old email account by following the instructions on the screen.
6. If you did everything properly, you’ll see the Start import option as soon as you log in. Click on it to start the process.
Keep in mind that you should inform all your contacts that you won’t be using the old email address anymore.
2. Import old emails and forward all new ones to your Gmail account
Open your old Gmail account.
Click the Gear icon and choose Settings.
Navigate to Forwarding and POP/IMAP tab.
In the POP Download section select Enable POP for all mail.
Set When messages are accessed with POP to keep Gmail’s copy in the inbox.
Click Save Changes.
If you create a new Gmail account and you want to receive email messages that are sent to your old email account, you need to change a few settings.
This method works for both Gmail and third-party email accounts, but keep in mind that some email providers might not support this feature.
2.1. How to configure a Gmail account?
After changing these settings on your old account, you need to configure your new Gmail account. To do that, follow these steps:
Log in to your new Gmail account.
Click the Gear icon in the top right corner and choose Settings from the menu.
In the Check mail from other accounts section click on Add a mail account you own.
Enter the address of the old Gmail account and click Next.
Optional: If you use Gmail with your work or school account you might have to change POP Server to mail.domain.com and select Port 110.
Optional: You have several options available that you can use.
The first option is to Leave a copy of the retrieved message on the server.
You can keep this option unchecked because your other account controls this setting.
The next option is Always use a secure connection (SSL) when retrieving email.
This option will encrypt your connection thus making your email messages safe from malicious users.
Label incoming messages feature is designed to help you distinguish messages received on your old account.
Lastly, Archive incoming messages option will move all email messages received on your old account to the archive.
By enabling this option you won’t see any emails from your old account in your Inbox, so we recommend turning this feature off.
After you’re done, click Add Account button and your old account should be now connected with your new account.
After adding your old account, you’ll get a message asking whether you want to use your old email address or the new one to respond to emails from your old account.
As we already mentioned, this feature also works with third-party email providers, but you need to enable POP on your old email account to use it. After that, try to add your old email account using the above steps.
If you cannot add it, you might want to contact your old email provider and ask them if POP is supported on your account.
2.2. Can I stop receiving emails from my old account?
You can stop receiving new emails from your old account by changing a few settings. To do that, follow these steps:
Open your new Gmail account.
Click the Gear icon in the top right corner and choose Settings.
Navigate to the Accounts and Imports tab.
In the Check mail from other accounts section, locate your old email account and click Delete next to it.
Remember that deleting your old email account will only prevent new emails from being forwarded to your new account. Any old emails that you receive will remain on your account.
As you can see, this method is a bit complicated, but it allows you to use your old email account alongside your new Gmail account without any problems.
This is extremely useful if you want to keep using your old email account or if you didn’t notify all your contacts about the change of your email address.
2.3. How to import contacts from an old email account?
One flaw of this method is that it doesn’t allow you to import contacts from your old email account, but you can easily transfer contacts manually to Gmail. If you want to import contacts from another account, you need to do the following:
Open Google Contacts.
In the menu on the left click More and choose Import.
Select the desired method.
Log in to your old email and click Agree.
After the contacts are imported, click OK.
To import contacts from another Gmail account, you need to first export your contacts as a CSV file. To do that, follow these steps:
Make sure that you’re signed in to your old Gmail account.
Open old Google Contacts and choose More > Export.
Select All contacts and choose Google CSV format.
Select the save location for the .csv file and save it on your PC.
Log out of your old Gmail account.
Now you need to import those contacts to your new Gmail account. To do that follow these steps:
Log in to your new Gmail account and open old Google Contacts.
Choose More > Import.
Now click on Choose File button and locate the .csv file that you created.
If you use a desktop email client, such as Thunderbird, for your emails, you should know that all your emails are saved locally on your PC. If your email provider doesn’t offer webmail service, you can still import old emails from your desktop client.
You need to enable IMAP for your Gmail account and add Gmail to your email client. After doing that, simply select the emails that you want in your old email account and drag them to Gmail’s Inbox folder in your email client.
Remember that this process can take a while, depending on the number of email messages, so you must be patient. Be sure to unarchive emails, especially if you’re looking for old messages.
Elsewhere, if you use both Outlook and Gmail, you’ll find the GWSMO tool helpful in integrating both platforms.
We hope you found this guide helpful, but if you’re using AOL, there are simpler ways to use AOL Mail forwarding, and we have a guide dedicated to it, so don’t miss it.
One of the biggest problems when switching to a new email account is your emails, but as you can see, you can easily import old messages into Gmail by using any of our solutions.
Configure your virtual network in Azure in such a way that new VMs have your Domain Controller or Azure AD Domain Services (Azure AD DS) set as the DNS
Ensure that all Azure resources are in the same region
If you require seamless Single Sign-On, you will need AD FS or users will have to authenticate when gaining access to the Virtual Machine
Once all prerequisites have been met, you may begin setting up the Windows Virtual Desktop.
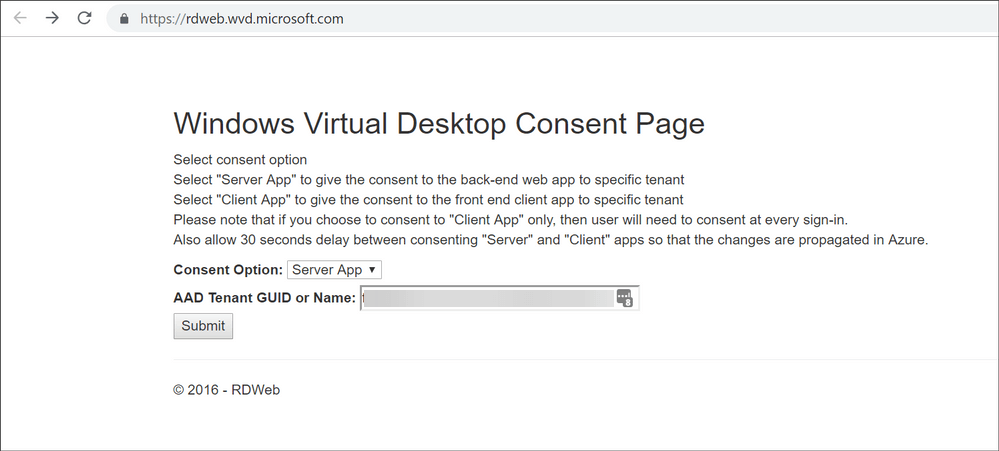
Change Consent Option to Client App and enter the same Azure AD tenant ID to the field for AAD Tenant GUID or Name.
Click Submit.
2. Assign the TenantCreator role to a user account
Log in to the Microsoft Azure Portal.
Go to Azure Active Directory from the left menu.
Click on Enterprise applications.
Search and select Windows Virtual Desktop.
Select Users and groups.
Select Add user, select Users and groups.
Choose the user you want to turn into a WVD tenant and hit Select, followed by Assign.
3. Create a WVD tenant
You will require two IDs:
Your Azure AD tenant ID.
Your Azure subscription ID.
You will then need to create a PowerShell script where you will need these two IDs.
4. Activate your first Virtual Desktop host pool
Configure basic settings
Configure the virtual machines
This includes specifying whether they are personal or pooled
Configure VM settings
Enter authentication details
Create the host pool
After the configurations are made, you will have your first WVD environment.
How do I connect to Virtual Desktop?
Once you are done creating your Windows Virtual Desktop host pool, you can download the client for Windows, or use the HTML5 client.
1. Connect to Virtual Desktop using the client
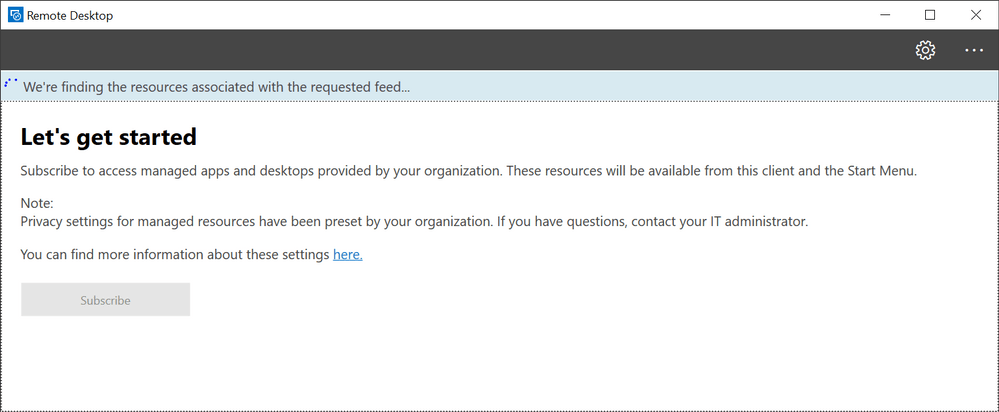
The first method of connecting to the Azure Virtual Desktop implies using the client for Windows. What you need to do is download the Windows Remote Desktop client and subscribe to the feed.
2. Connect to the Windows Virtual Desktop with the HTML5 client
Launch any browser that supports HTML5.
This works in both normal and incognito modes.
Visit the WVD Web App.
Log in using the information to which you assigned a full desktop session.
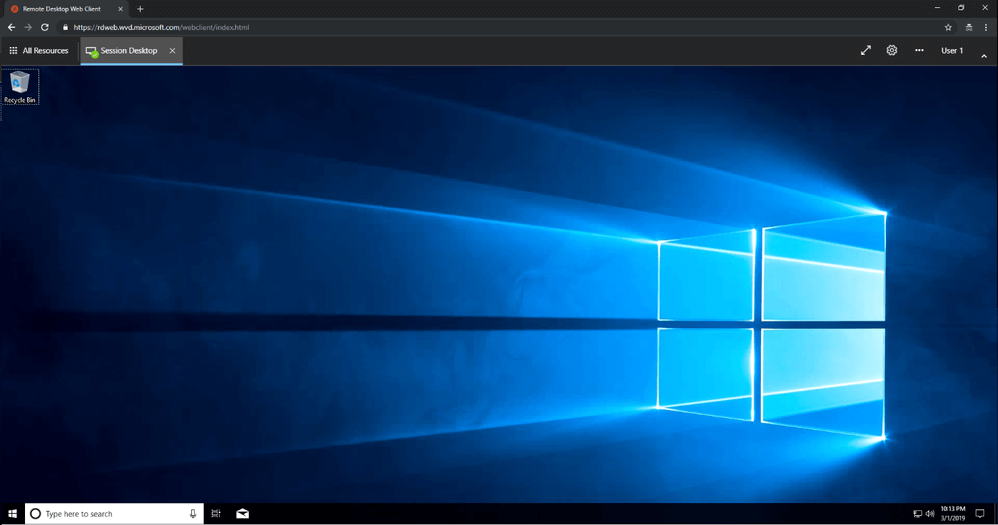
If you are successful in connecting to a Virtual Desktop using either the desktop or the HTML5 client, you should be able to see something similar to this:
If you have any other questions regarding how to use the Windows Virtual Desktop, let us know in the comments section below.
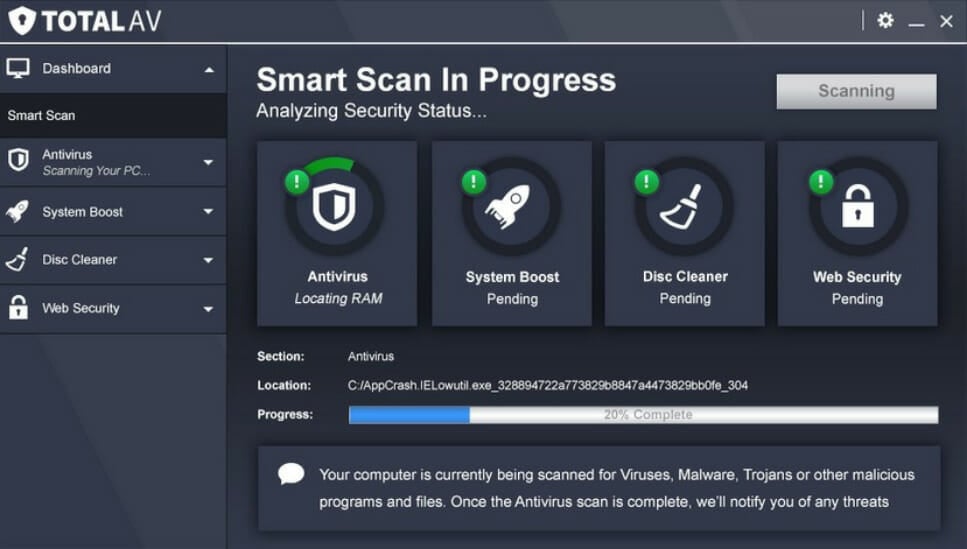
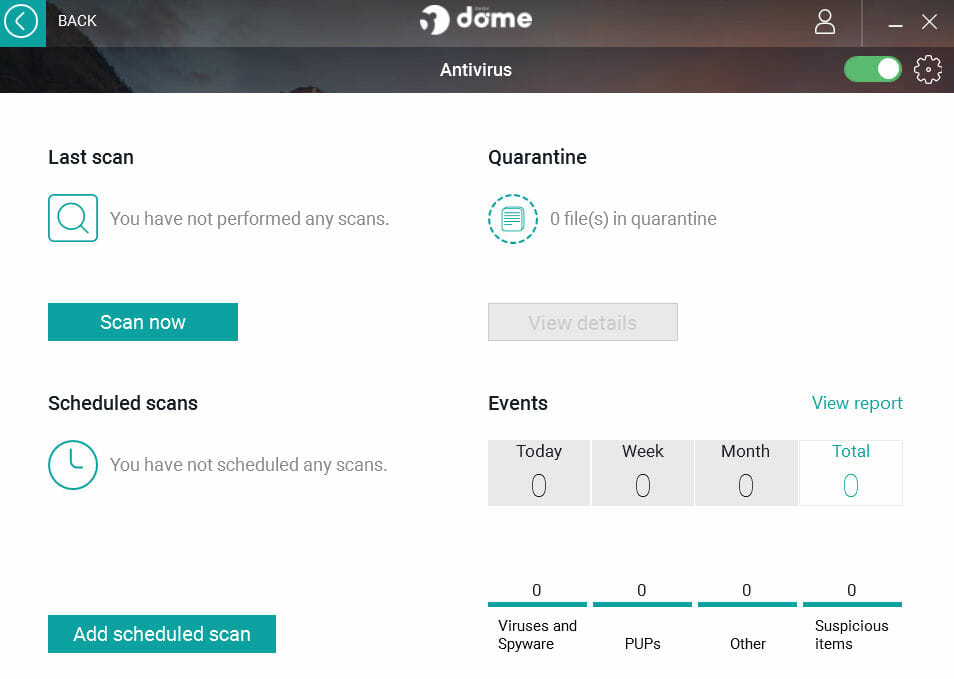
TotalAV offers one of the most feature-rich lifetime antivirus solutions. It provides extensive malware detection and tools like a VPN, disk cleaner, and browser protection.
The lifetime license gives you access to TotalAV’s Total Security package, which includes additional security features for a more comprehensive defense.
Other astonishing features you can benefit from:
Protection against Adware
Anti-Ransomware
Free up system space with Disk Cleaner
Web Shield extension
Eliminates viruses, trojans, and malware
TotalAV
Keep your PC safe with TotalAV’s powerful scanning features and lifetime license.
Bitdefender Antivirus Free is one of the best free antivirus solutions currently on the market, giving you an antivirus lifetime license.
It also gives you complete activity reports about blocked or fraudulent phishing attempts on your PC. That said, this is the most popular lifetime antivirus software out there.
Let’s see what a few of its key features are:
Good antivirus protection
Excellent anti-phishing features
Easy to install and use
Provides timelines of recent activities
Bitdefender Free
Protect your PC for life with Bitdefender’s award-winning malware detection.
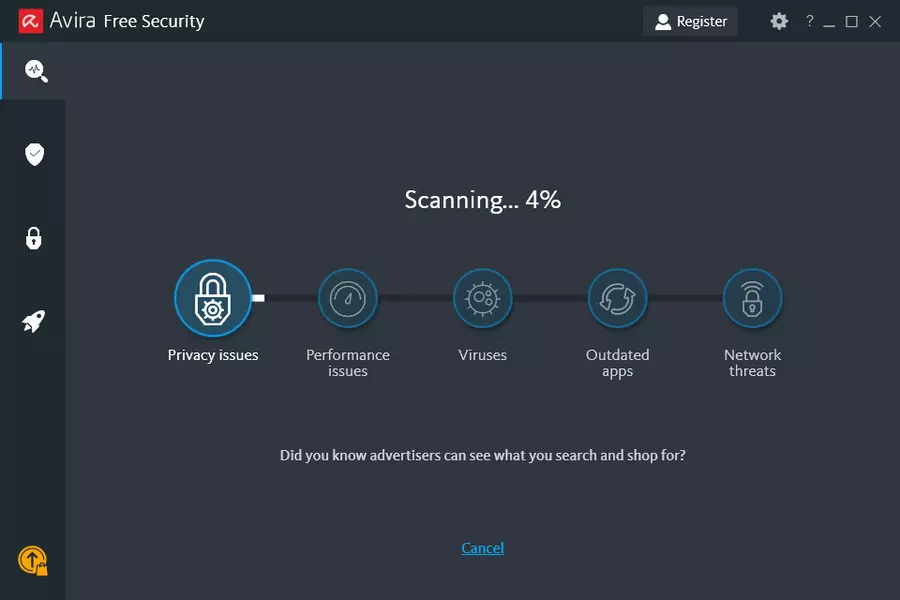
The Avira Free edition has great features with its on-demand scan and real-time protection. Avira Free user interface offers easy access to information and features.
It offers excellent browser protection, blocking phishing sites and dangerous downloads. The antivirus also includes system scanning for vulnerabilities and missing security patches.
Let’s go through some of its most important features:
Excellent in detection and elimination of malware
Good anti-phishing and web browser protection features
Blocks downloads from suspicious websites
Prevents exploit attacks by monitoring software security patches
Avira Antivirus Free
Stay safe with Avira’s robust malware defense and enjoy lifetime free protection.
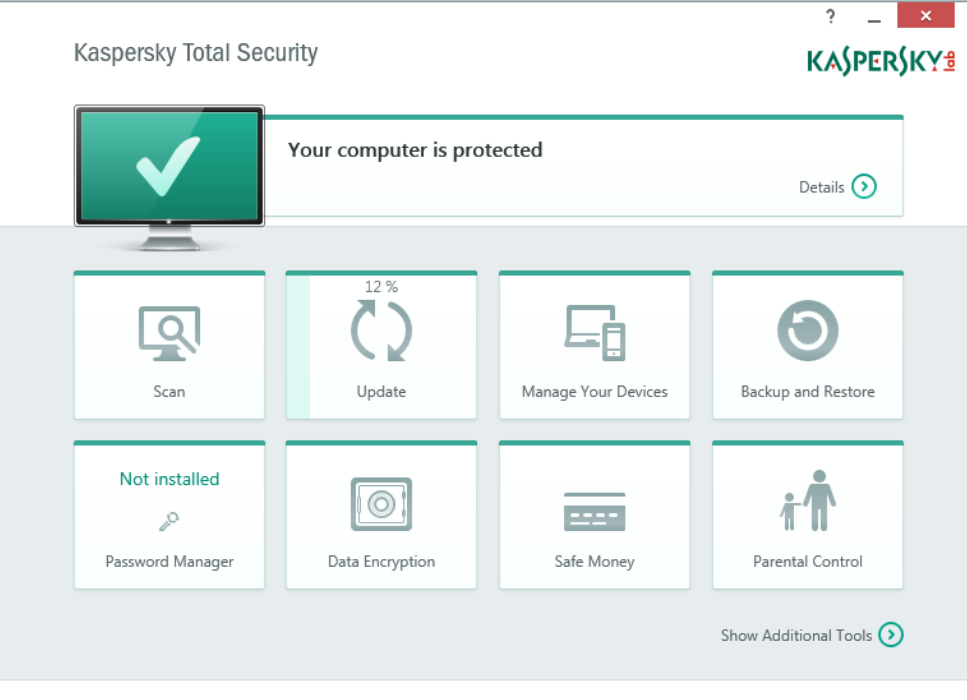
Kaspersky Security Cloud free edition gives the premium power of the antivirus minus a few bonus features available in the paid version.
While the paid version unlocks additional features, the free version is more than enough for personal use, giving you comprehensive defense for life without the need for a subscription. Key Features:
Let’s see some of its best characteristics:
Excellent detecting features
Takes only a few minutes to scan
Excellent anti-phishing feature
Toolbars available for Firefox, Chrome, and Internet Explorer
Kaspersky
Protect your PC with Kaspersky’s powerful malware detection and lifetime access.
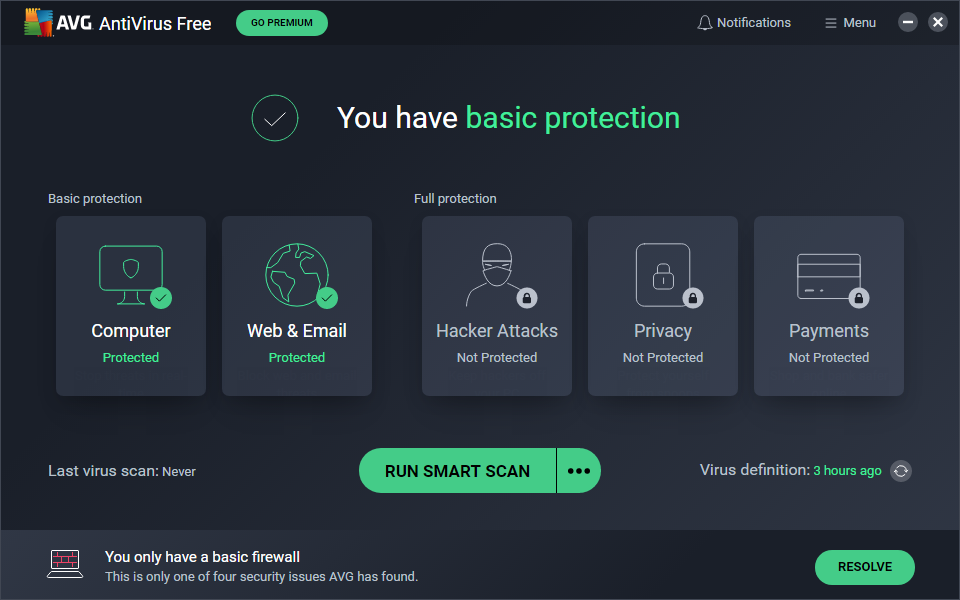
AVG blocks malicious software and threats from infecting your PC and deletes malware downloads before it is complete.
Upon installing the free antivirus, it opens into the main window with two panels. The Basic protection panel includes icons for web, email protection, and computer protection which are enabled.
Some of the best features of AVG Antivirus Free:
Good malware and virus detection
Good web browser protection feature
Full protection panel for private data and hacker attacks protection
If you are looking for a free antivirus that offers basic protection and gives many premium products, then Avast Free Antivirus is for you.
It provides solid malware and phishing protection, all without the need for a subscription. The lifetime free version of Avast is a great option for those who want reliable protection with extra features.
Let’s see some of its key features:
Excellent detection of malware and viruses
Good anti-phishing and Web browser protection features
Extra features like Wi-Fi Inspector and password management
Premium tools included the network security scanner, the password manager, and a secure browser
Avast
Unlock advanced protection for your PC with Avast’s lifetime-free antivirus.
Discord is more than a conventional VOIP chat application, it allows users to group topics into communities and channels, offering an easier way to keep the information straight.
Initially built for gamers, it has become a generally used platform for any category of users and communities alike.
What are Discord bots?
An important feature that makes the application great, is its bots. Bots are used to automatize some tasks on your Discord server like welcoming new users or adding different types of content.
Bots are a type of computer program, therefore, to create them from the base you would need some coding skills.
But because Discord is such a popular application, free tools were developed to help you add or make a bot without or with minimal coding knowledge.
Bots can help you do everything from automating ordinary tasks to start playing music across your server. In this article, we’ll present the steps for Bots On Discord.
2. Click on the Login button from the upper right side and use your discord account.
3. Press on the Authorize button.
4. Now, once you’re on the profile page, click on Bots on Discord to navigate to the main window.
5. Search for the bot you need in the search bar right below the welcome message.
6. For example, type music, then click on Search.
7. Scroll down, then find the one you need.
8. Once you observe it, click on Add to server.
9. Select the server where you wanna add the bot and hit Continue.
10. Click the Authorize button.
11. Here you have your bot ready to work.
The next thing you need to do is learn the commands and figure out how to customize your bot. You can do this by reading the FAQ links provided in the initial message.
Adding bots from different platforms should work almost the same as here with a few differences.
BotGhost makes the creation of a brand new Discord bot as easy as it can be. There is no coding knowledge required, all the settings are visual commands and on the go configuration. The app offers both the option to create and add an existing Discord bot.
In order to program a Discord bot without coding using BotGhost, you have to download the app, create your perfect bot, and then you can add it to your preferred server.
2. In the top-right corner of the window, click on Sign up and link your Discord account.
3. Click on the Authorize button.
4. Paste your token and hit Submit.
5. Configure your bot by adding available modules from your dashboard.
For example, let’s say you want to have it write a welcome message to your new users. To do that, you need to click on the Announcements module, hit the enable button, and configure it.
6. To add the newly created Discord bot to your server, click on the Invite link you see on the left side panel.
7. Select the server where you want to add the bot to, click on Authorize and that’s all. The bot will be available to use on the specific server.
2.2 Add an existing bot from Bot Ghost
Click on Bots from the upper menu.
Search for a specific name, use tags, or just scroll the list to find one.
Click on the Invite to Server button, select the server, click Authorize, and there you have a new bot.
It has never been easier for Discord admins to customize servers by using bots, even without any coding skills.
This will add value to channels and communities, and users will also have a great experience.
Don’t hesitate to add awesome features for your users by adding as many Discord bots as you need. Use this guide to do it simply, without having to learn any programming language.
To quickly enhance your Discord server with leveling and automation, check out this guide on adding Arcane Bot to Discord and start improving your community experience in minutes.
There are many variations of the dreaded error 503 that can appear while accessing websites. Users report receiving error 503 first byte timeout when using Fastly websites. Keep reading for 5 quick and easy ways to fix this issue.
Fastly is a content delivery network (CDN) service that provides edge computing services, security, cloud storage, and more for big-name companies. The service is designed to make viewing popular websites and businesses online run seamlessly and quickly.
Read on to find out how to solve error 503 first byte timeout. If you’re receiving HTTP Error 503: service is unavailable, we offer solutions for that as well.
What is error 503 first byte timeout?
Error 503 first a byte timeout error when a server or origin does not respond in time for the first-byte timeout. The first-byte timeout is set to 15 seconds by default, so if the server does not send a response in that time, then the error will occur.
Users mostly encounter this error on websites powered by Fastly, a cloud service platform for many eCommerce sites and companies. Some of these websites include Ticketmaster, PayPal, Github, and more.
How do I fix error 503 first byte timeout?
1. Use a different browser
Not every browser may be compatible with a Fastly site and as a result, may cause the error 503 first byte timeout. Fastly recommends using the latest versions of Google Chrome, Mozilla Firefox, and Apple Safari.
We suggest using Opera One Browser, which also operates with Fastly. Opera One can cache large files for more demanding downloads and optimized speed and performance. The browser also has a built-in VPN, ad-blocker, and AI for top-notch security while browsing.
Opera One
Try using Opera One Browser for a fast and secure browsing experience.
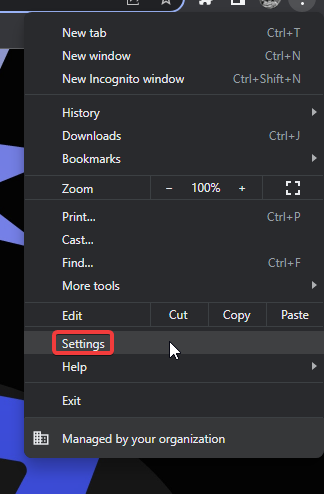
Open your browser and access the menu in the top right or left corner then select Settings.
Click on About.
Select Check for updates if your browser does not automatically check.
Update browser if available.
An outdated browser can lead to a number of issues and errors with any site, including error 503. Ensure that you’re using the latest version of your default browser by checking for any updates.
Open your browser and access the menu in the top right or left corner then select Settings.
Select Privacy & security.
Click Clear browsing data.
Ensure all data elements are checked then select Clear data.
If you haven’t cleared your browser data like its cache or history in a while then it may lead to issues. Clear the cache to get rid of any corrupted files and fix error 503 first byte timeout.
Search for your service using ID, name, or configuration then click Edit configuration.
On the Domains page, click on the Origins link.
Locate the host then select Advanced options.
Change the value next to First byte timeout in milliseconds then click Update.
Changing the first-byte timeout to a longer value will allow the origin or server more time for a response and thus fix error 503 first-byte timeout. If using a shield configuration, then the first-byte timeout should be set to at least 60 seconds.
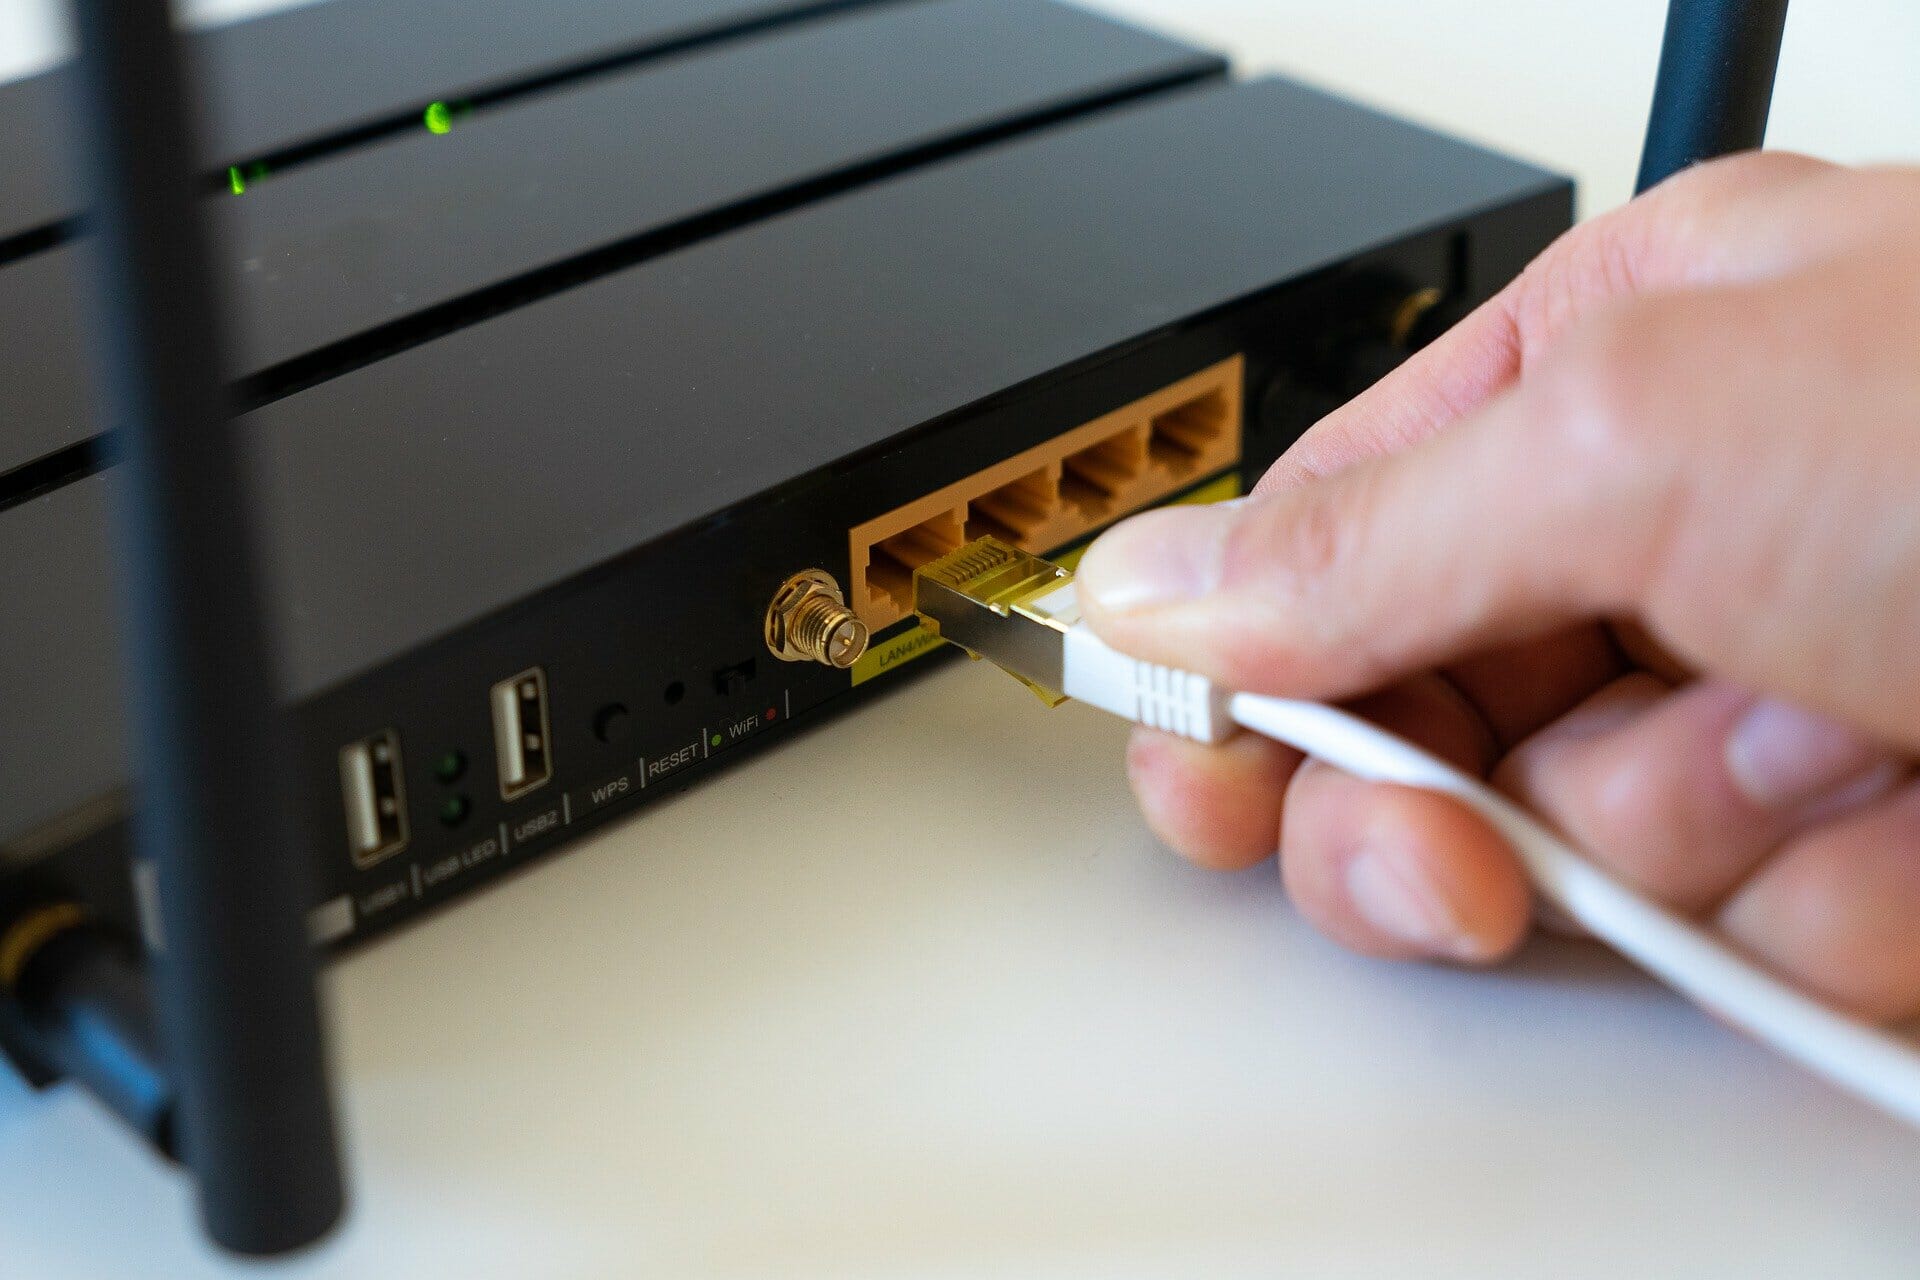
5. Restart your network
If error 503 persists after trying all of the above solutions, the problem may lie in your network connection. Try switching off all of your network devices and equipment and wait a few minutes, then turn it back on.
Doing this will help reconfigure the network and will communicate with your devices properly. If you’re having issues with your Windows 10 or 11 being unable to find a network, we offer a guide for that as well.
Hopefully, one of the above solutions helped you fix error 503 first byte timeout. Let us know in the comments which solution worked for you or if you have a suggestion for a different fix.
A certain amount of free storage space is required for Windows 10’s cumulative patch or feature updates. If there is not enough space, a window will pop up when users check for updates reading Windows needs more space to update.
The message window allows users to update Windows with an external storage flash drive. However, free C: drive space might still be required to update Windows, even with external flash storage.
An error like this, which prevents you from updating the OS, is a significant challenge, considering that you would be losing out on critical security patches in addition to regular feature updates.
So, let’s find out all about the Windows needs more to update error and the solutions to get rid of it.
What does the Windows needs more space to update error mean?
Microsoft recommends users have at least 64 GB of free storage to install Windows 11 and be able to download updates released in the future. There are similar storage recommendations for Windows 10 as well.
Microsoft releases regular updates to introduce features, security patches, and bug fixes. And all these will occupy some space on the computer.
So, if your laptop doesn’t have enough space to update, these can’t be installed, which is what the error indicates. The solution to it is straightforward, free up storage space on the computer!
Let’s find out how you can do that.
How do I fix the Windows needs more space to update error?
1. Check the Cleanup recommendations
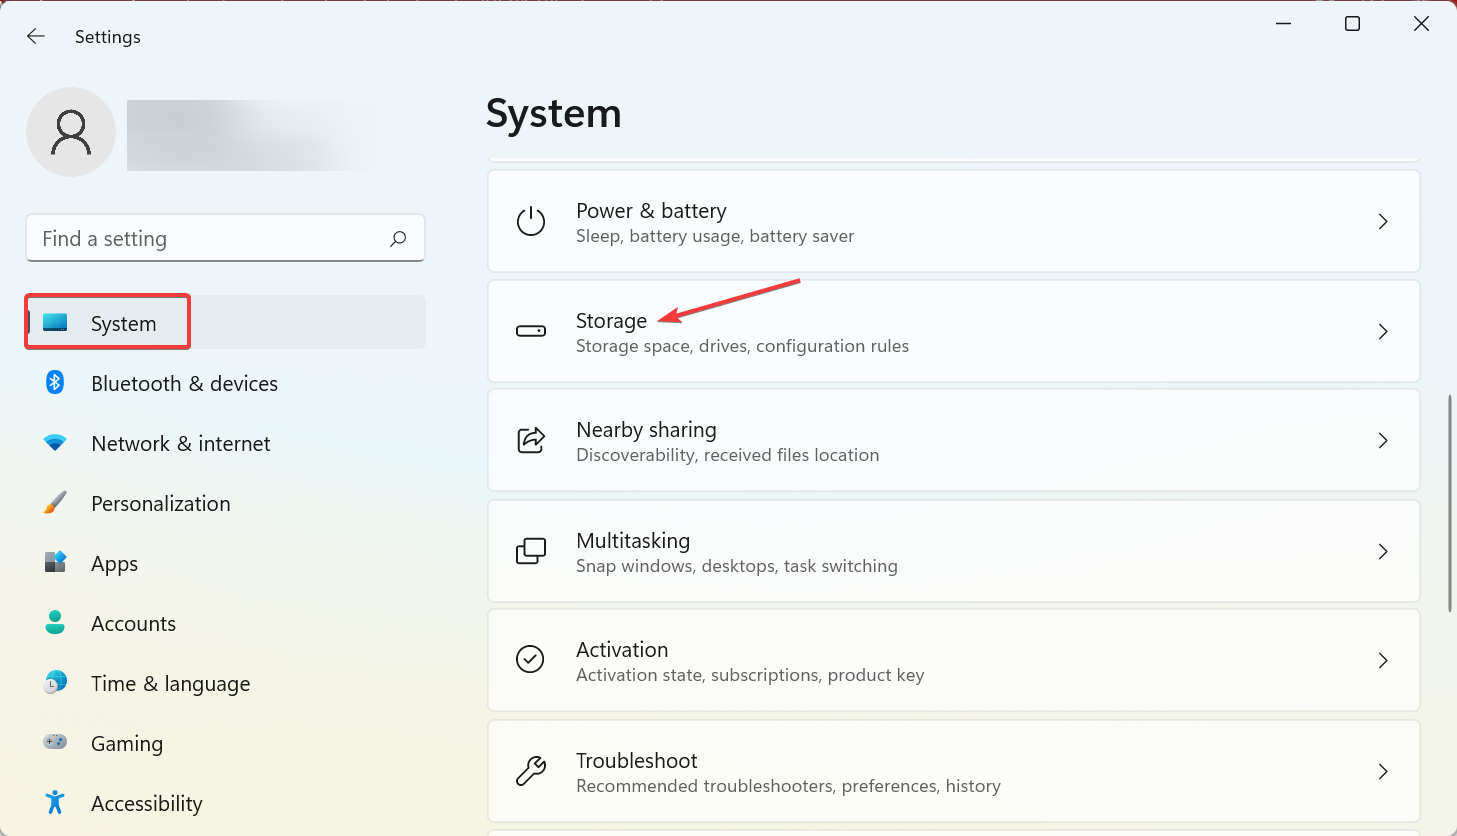
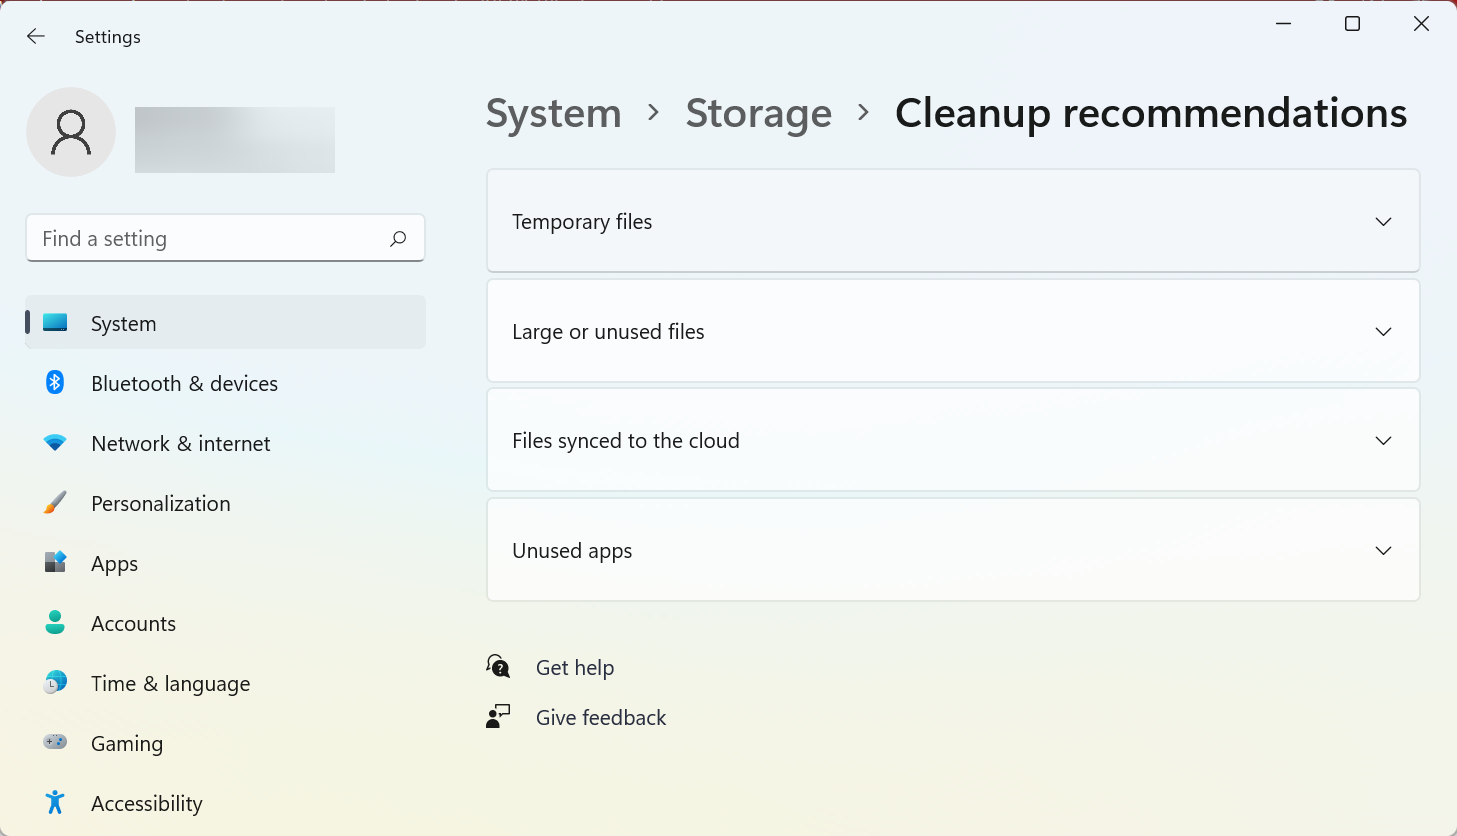
Press Windows + I to open the Settings app, and select Storage on the right in the System tab.
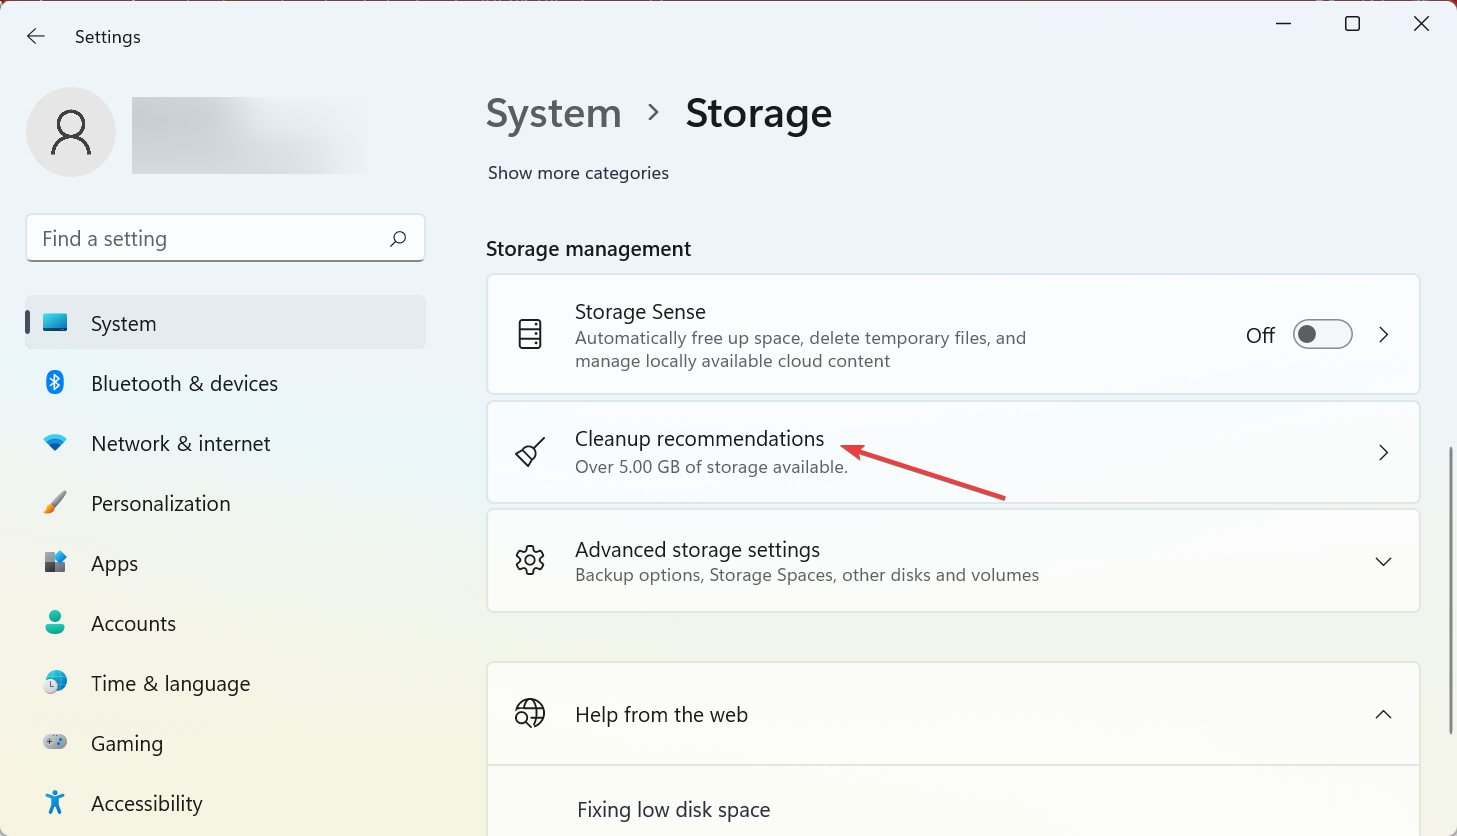
Now, click on Cleanup recommendations under Storage management.
You will now find several categories of files listed here. Choose any one.
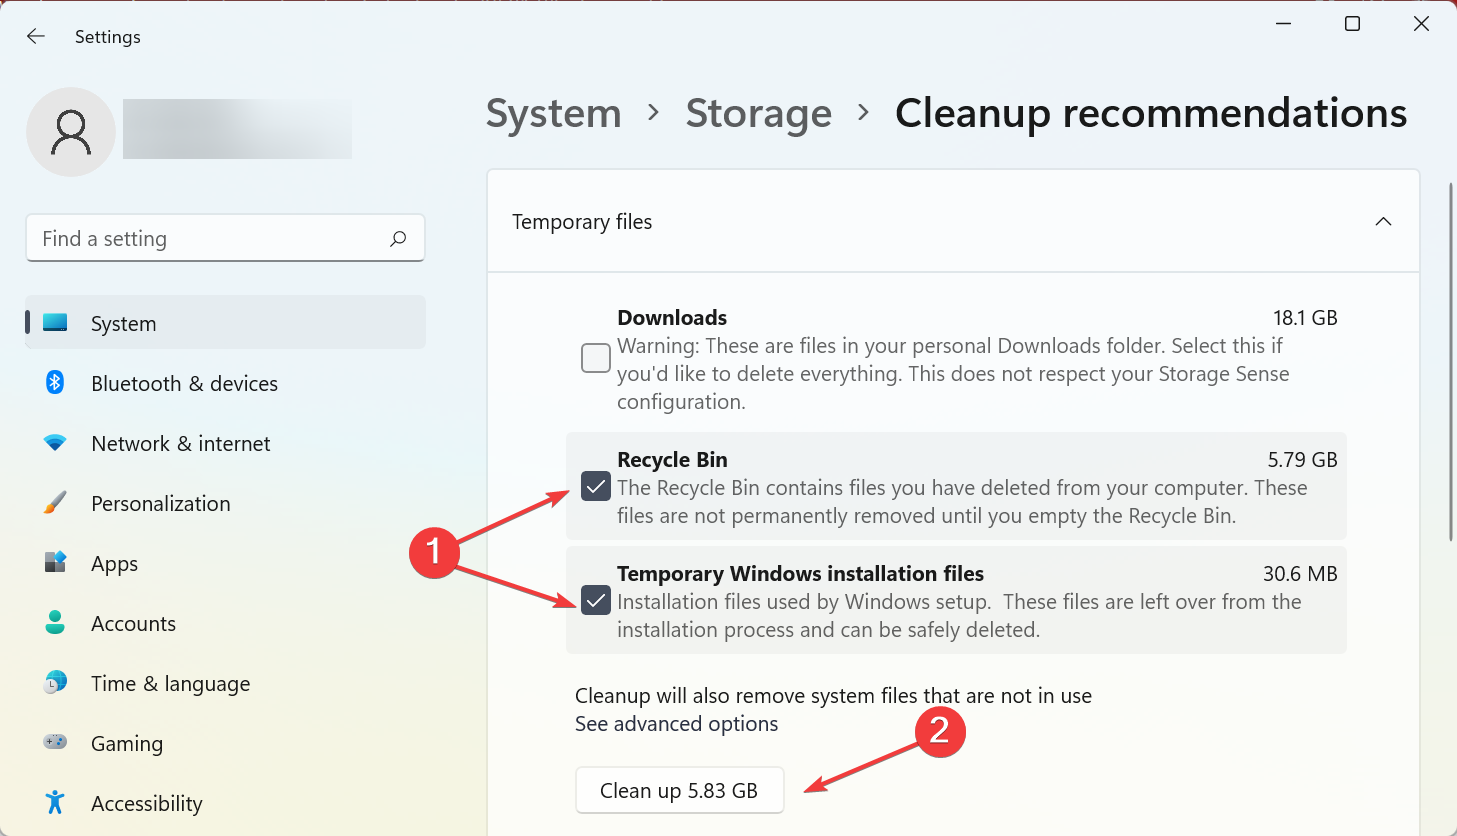
Select the files you want to delete and click the Clean up button.
You can similarly clear more storage space on the computer by removing other files recommended by the OS and removing the Windows that need more space to update error.
2. Uninstall software
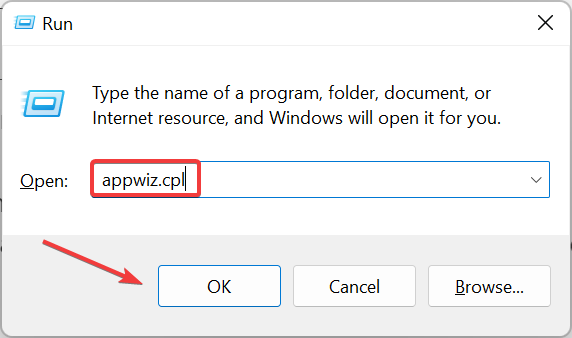
Press Windows + R to open Run, enter appwiz.cpl in the text field, and click OK to open Program and Features.
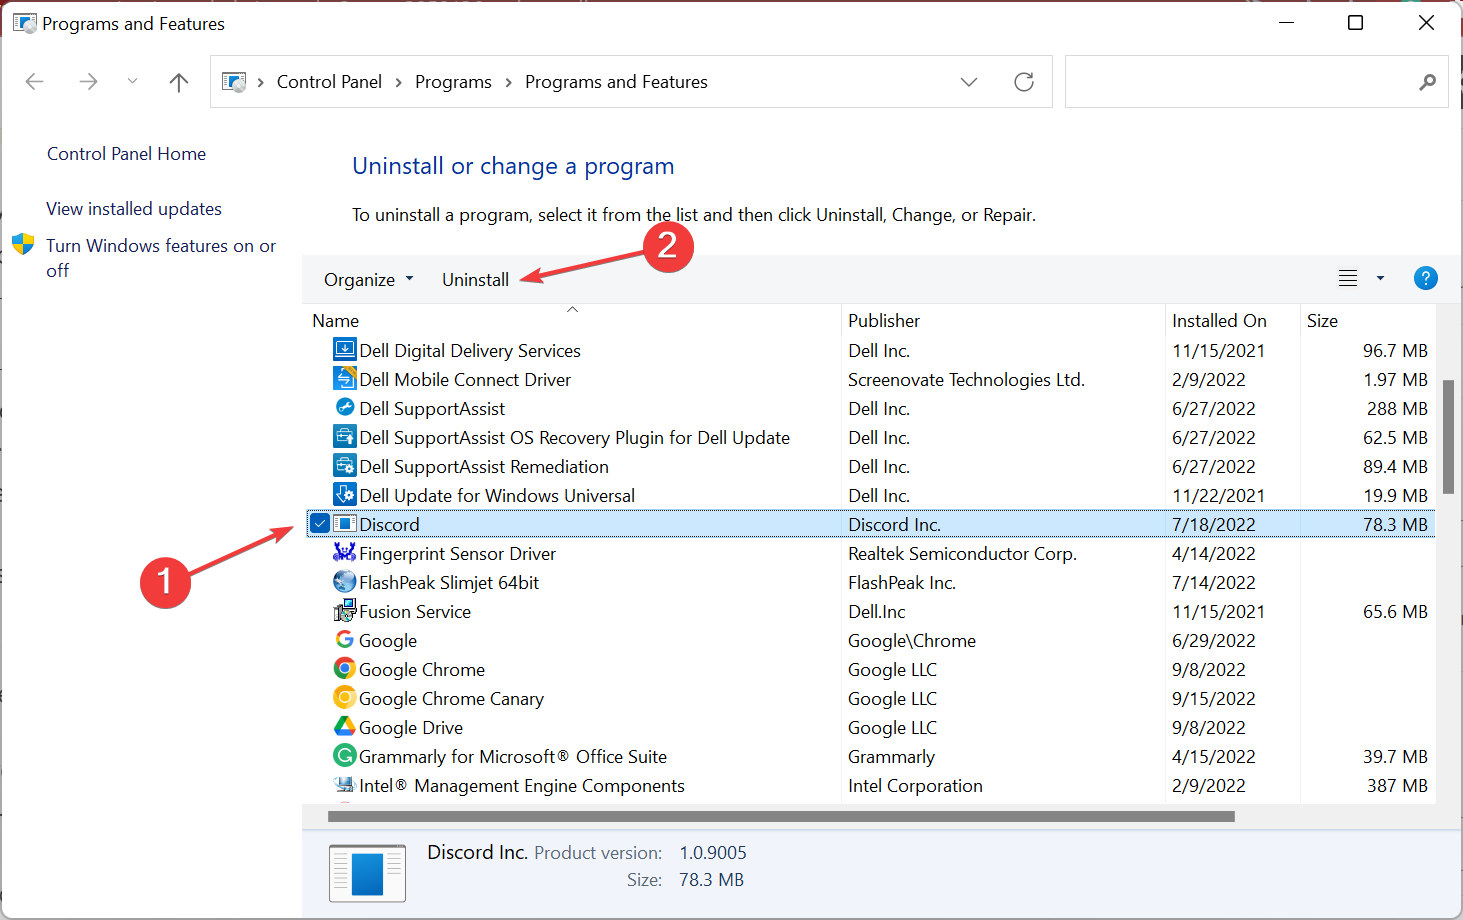
Choose the program that you want to remove and click on Uninstall.
Follow the on-screen instructions and choose the appropriate response to complete the process if prompted.
Uninstalling extra software that’s seldom utilized is perhaps the best way to free up HDD space for Windows updates, as programs and apps usually hog the most storage.
To free up valuable storage on your PC, the most reliable method is installing uninstall software that removes the programs and associated registry entries.
These efficient tools will offer automated support for uninstalling multiple programs at once after scanning your PC to find unused apps and other residual files that take storage.
Hence, you can save significant storage using automated help from the best uninstaller software available on the market.
Since you have to make sure that no roots remain when uninstalling a program, the best software we use is CCleaner. It was created to remove all junk and associated files to an app so your PC remains fast and lightweight.
CCleaner
There will be no leftovers or junk files left after uninstalling with this amazing tool.
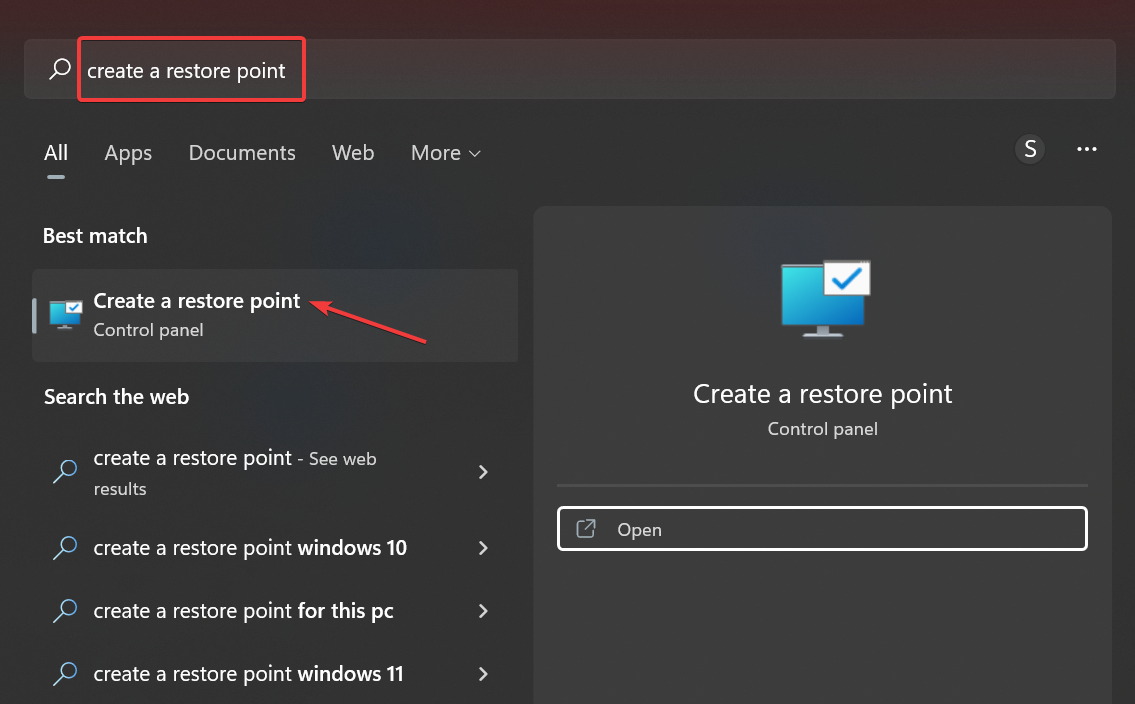
Press Windows + S to open the Search menu, create a restore point in the text field, and click on the relevant search result.
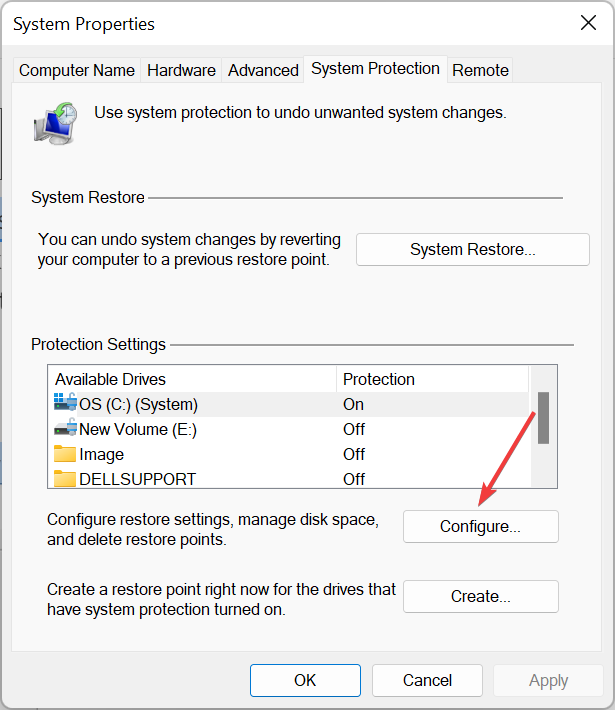
Now, choose the drive for which Protection is turned on, and click on the Configure button.
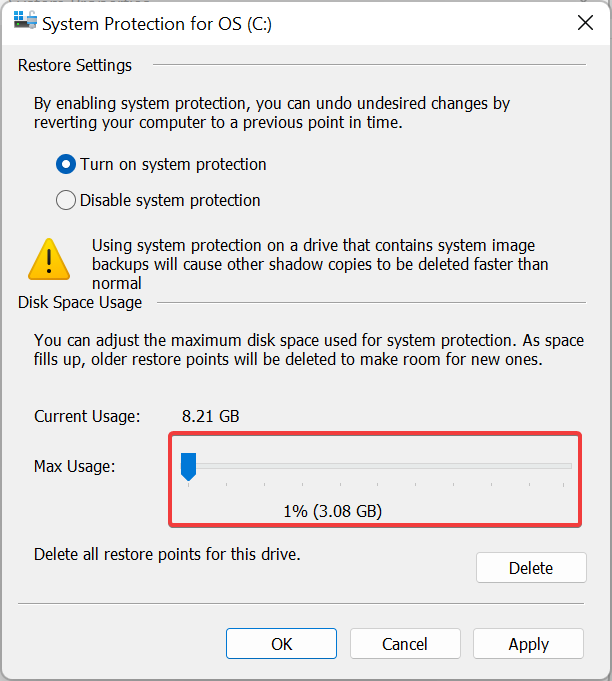
Now, drag the Max Usage slider to the extreme left, and click OK to save the changes.
Restore points take up considerable space on the drive, and if you are running out of it, the best option is to reconfigure the System Restore settings, and set it to consume lesser space.
When you are done with these three solutions, check for Windows Updates, and you will now be able to install the latest version.
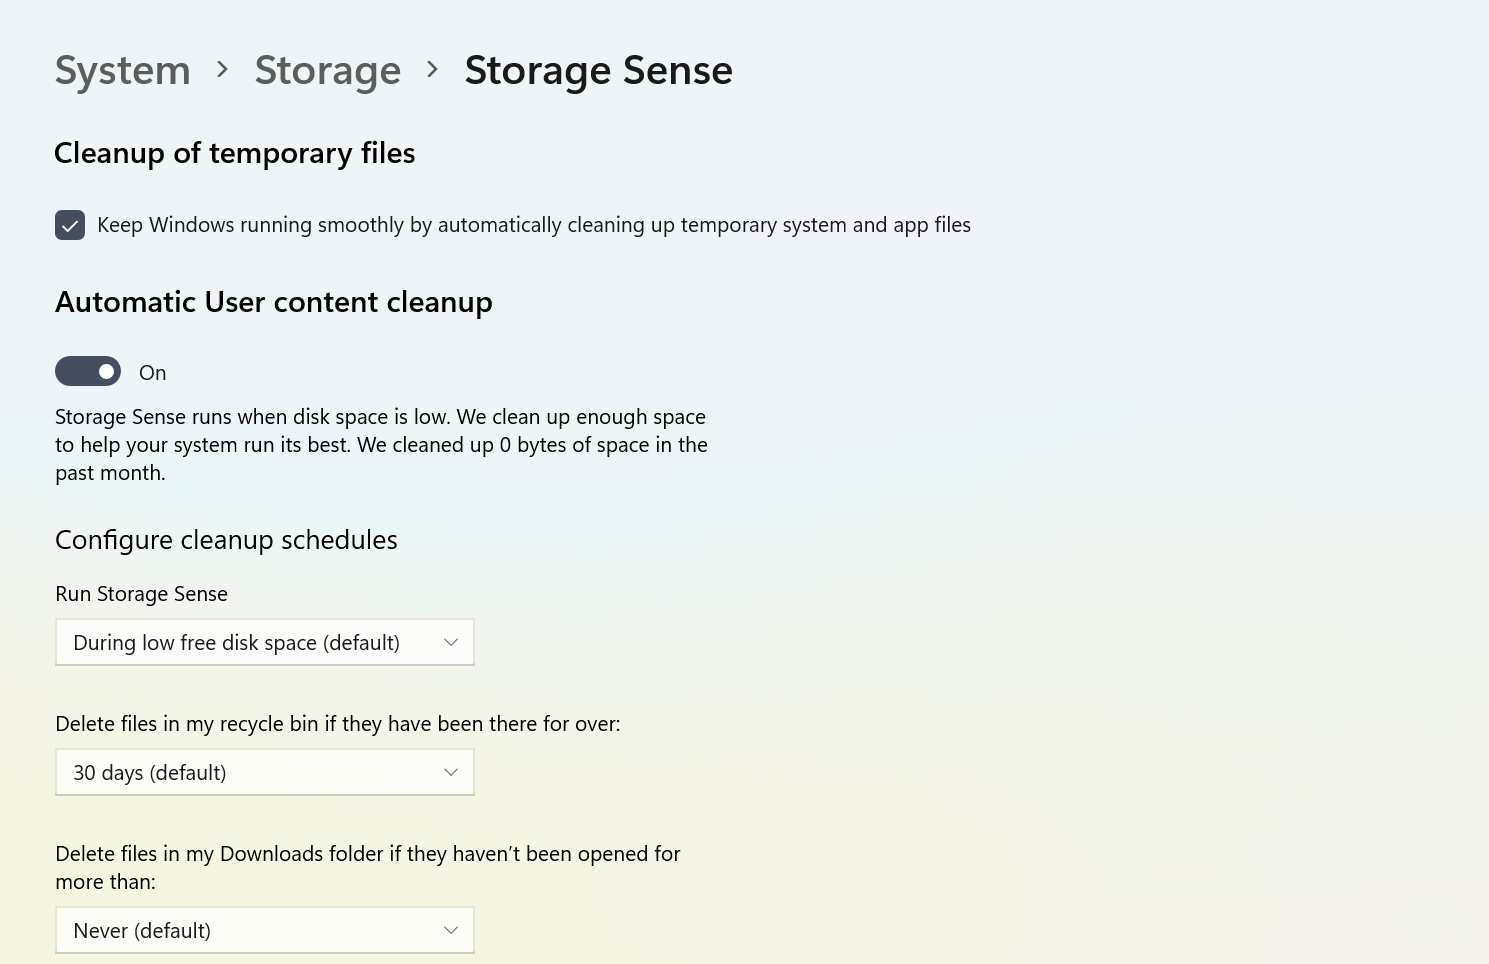
But, there’s another more straightforward option, Storage Sense, to automatically free up space. Storage Sense is a built-in feature in Windows accessible through Settings that helps users configure the cleanup frequency and choose the files to be cleared.
With Storage Sense set up, you don’t need to delete non-critical files to free up storage space manually. Instead, it’s all automatic.
There you go! These solutions should help you remove the insufficient space to update errors in Windows 10 and 11. If there is still not enough space on Windows, you will need an additional external drive to install the updates.
MTG Arena is a free-to-play digital collectible card game on the Windows platform. However, several users have reported an updating data error when trying to launch the game.
The full error reads:
Error updating data: check your connection and try again and usually occurs due to a wrong proxy configuration, restrictions by your ISP, or issues with the game servers.
Such a connection issue is pretty standard for this online game, so the message from above can appear when you start the game or add user data to log in.
The game is stuck on startup for many users and keeps getting the same connection issue. Different workarounds might resolve this persistent problem.
For some players, the issue isn’t necessarily related to their network connection, and they also suggest specific bugs might cause the problem.
If you are also troubled by this error, here are a couple of troubleshooting tips to help you resolve the MTG Arena error updating data in your Windows computer.
Why am I getting an MTG Arena error updating data?
After some research, we have deduced a list of possible reasons for triggering the MTG Arena error updating data problem.
There is something wrong with your proxy configuration.
The game server is experiencing some issues.
There is a problem with your internet connection.
You are using a VPN.
Your ISP applies restrictions.
Now that you know the most common reasons that could trigger this problem let us look at the solutions to fix MTG Arena error updating data.
How do I fix the MTG Arena error updating data?
1. Turn off the Windows proxy settings
Make sure MTG Arena is fully closed.
Press Windows + I to open Settings.
Open Network & Internet.
From the left pane, click on Proxy.
Toggle the switch under Automatically detect settings to disable the option.
Turn on the Use Setup Script option.
Scroll down to the Manual proxy setup section.
Disable Use a proxy server option and set it to Off.
Close Windows Settings.
Launch MTG Arena and check if the app can check for updates without any errors. Then, wait for the updates to download and install. Once installed, relaunch the app and check if the error is resolved.
2. Disable firewall and antivirus
Press Windows + I to open Settings.
Click on Network & Internet.
Open Windows Security.
Click on Firewall & network protection.
Click on your currently active network.
Toggle the switch to turn off Windows Defender Firewall.
Once disabled, launch MTG Arena and check if the error is resolved. If the issue persists, disable your antivirus temporarily.
If you installed a third-party antivirus, open its menu and look for the option to disable the protection for a few minutes or hours.
3. Use a VPN
Launch your VPN client.
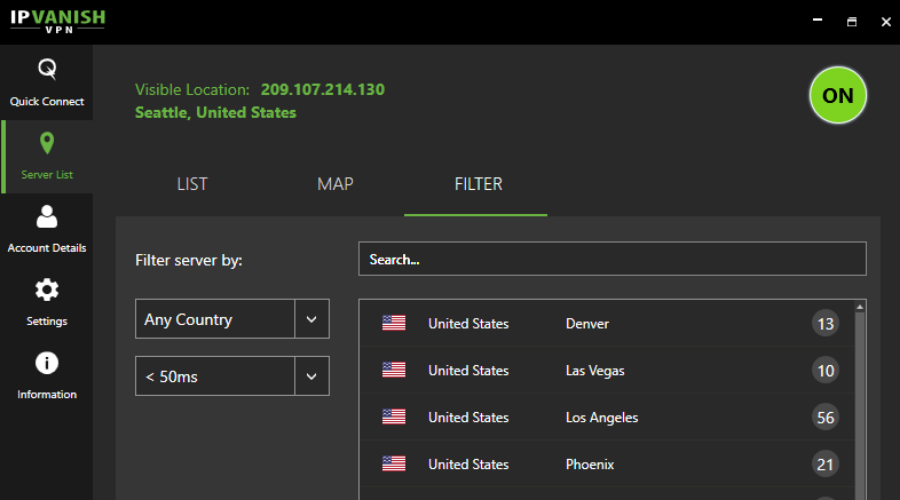
Connect to a different region’s server.
Launch MGT Arena and try to update the game.
If MTG Arena updates without any error, it is possible that the error occurs due to the restrictions placed by your ISP or the game server failing to establish a connection.
A VPN client usually helps you to bypass ISP and region-based restrictions on games and other content online.
Once downloaded, run the installer. Wait till the launcher is installed.
Launch Epic Games launcher, and search for MTG Arena.
Download and install MTG Arena.
Launch the game and check if the error is resolved.
If disabling the Windows proxy and enabling the VPN client didn’t work, install the Epic Games launcher, as MTG Arena is also available on the Epic Games store.
The MTG Arena error updating data can occur due to several reasons. To troubleshoot the error, try disabling the proxy settings and stop using a VPN client.
Open the default installation location on your PC for MTG Arena.
Launch the MTGALauncher.
If there is a new update available, it will start downloading.
Once complete, continue playing as your would.
This is the finish line, so we kindly recommend you follow the instructions from above to get through this MTG Arena gameplay trouble.
The provided solutions are verified and tested by different players with connection issues with the game, which has proved helpful. We also have a new guide on MTG Arena network error that you shouldn’t miss.
The Docking Station is a device that is used to connect the systems like laptops and desktops to other peripherals such as external monitors, keyboards, mice, etc.
When our readers attempted to connect their system to an external VGA display through the docking station, it was not working.
So they unplugged all of the wires from the system and docking station and attempted to rejoin them, but the problem persisted.
Why is the VGA monitor not working on docking station?
The factors that might be responsible for causing the problem discussed above in this article are listed below.
Outdated graphics driver – These types of problems occur when the graphics driver is out of date
Loosely connected wires – When the cable wires connecting the system to the docking station are not attached properly, a situation like this occurs
An out-of-date Windows system – When the Windows system is not updated for a long time, this might also lead to such issues
System requirements – There are some system requirements criteria that need to be met for the devices to work properly
Device faults – When there are any internal or external issues, the VGA monitor may not work correctly on the docking station
This article will provide you with the five best possible methods for resolving this issue.
How to fix the VGA monitor if it is not working on docking station?
1. Update the graphics driver
Right-click on the Start button and select Device Manager from the context menu.
In the Device Manager window, expand the Display adapters option from the list.
Next, right-click on the graphics card and choose Update driver from the context menu.
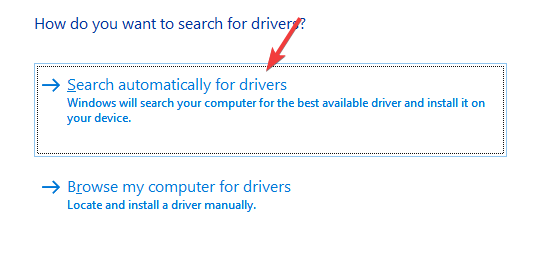
In the Update window, select the Search automatically for drivers option.
This will start looking for the latest driver updates available online and if any are found, it will update it.
After the graphics driver is updated, restart the system.
2. Reconnect the wires
When a system or other peripherals such as a mouse or keyboard fail to function, it may indicate that the cable used to link them to the system is either damaged or weakly attached.
As a result, we request our users to inspect the cables for damage and reconnect them after unplugging them from the system.
If any of the wires are broken or damaged, unfortunately, you will need to replace them before trying again.
Type ms-settings:windowsupdate in the Runbox and press the Enter key.
This opens the Windows Update page.
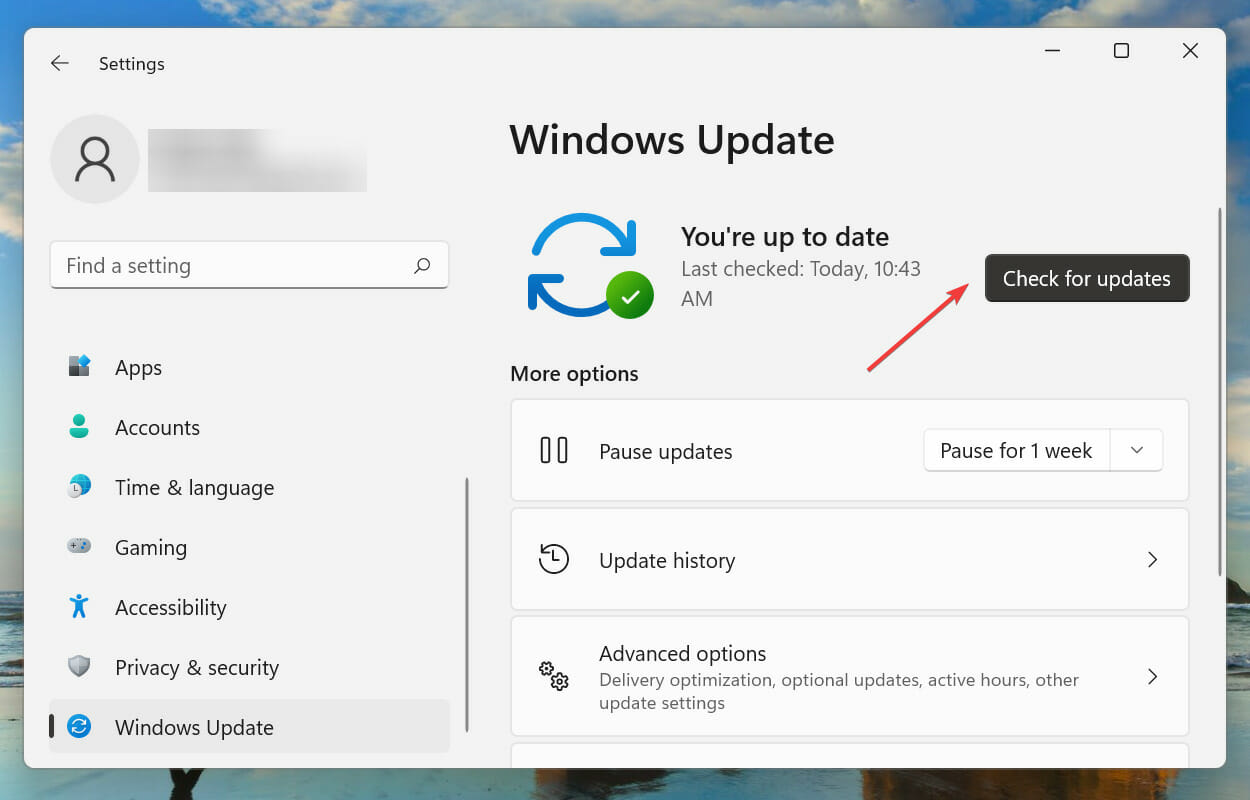
Click Check for updates button at the top right corner of the page.
This starts checking for any Windows updates available online.
If there are any, download and install them.
After that, restart the system.
4. Rollback a problematic update
Press the Windows key and type view your update history.
Then select the View your Update history system settings from the results page.
This opens the Update history page.
Scroll down to the Related settings section and click Uninstall updates.
If there are recent updates that were installed, they will be displayed here.
Click Uninstall on the updates that you want to uninstall from the system.
This will start uninstalling the updates from the system.
We usually recommend our readers to keep their systems updated at all times, but sometimes, a new patch can do more harm than good.
In this case, if the monitors stopped working on the docking station after a system update, it’s better to uninstall that update as shown in te solution above.
5. Physical damages
If there are any internal faults in the device or peripherals such as the keyboard, mouse, or monitors, this might be the reason why you are facing such issues with the system and device.
We recommend connecting the VGA monitor to another system via the docking station and seeing if this works.
If it still does not function when connected to another system, it is time to replace or repair the VGA monitor and try again.
Is VGA better than HDMI?
HDMI is always a better choice when compared to VGA because VGA still uses the older standard that carries only the video signal and not audio.
The HDMI cables offer better performance and are not prone to the interference of other unwanted signals.
HDMI is preferred by most gamers for a better experience and performance while playing heavy games.
Why do I get SSH permission denied message in Windows 11?
There could be a number of factors responsible for this error message, which are listed below:
Incorrect server – If you are trying to connect to some wrong server with its IP address, you might receive an access denied message on your system
Wrong password – Some users try to access the server using the wrong credentials
Too many SSH keys – When there are a large number of SSH keys present in the system, so the system may select the wrong one from among those accessible
SSH key permissions are too open – If the SSH key’s permissions are wide open and accessible to the majority of users in the system, the security purpose of employing the key may be jeopardized
If you are encountering this problem on your Windows 11 PC, this article will walk you through the five best solutions available, which are detailed below.
How do I bypass the SSH permission denied in Windows 11?
1. Check if you are connecting to the right server
This might sound silly, but many users tend to make this mistake and wonder why they are facing such an error message on their system.
When you are trying to connect to a server using the SSH key and the server address, you need to recheck the server address two to three times before trying to access it.
There might be a possibility of missing a few numbers or misplacing the numbers in the server address. So always confirm the server address before continuing.
2. Try to log in with a password
You can always try logging in to the server using the password method. But for this to work, you need to enable the Password Authentication feature.
If it is already enabled, then you can access the server using the following command line:
In the above command, you have to replace [email protected] with the actual server address and password with the real password.
If the PasswordAuthentication is disabled, first you need to enable it and then generate a new ssh key using the following command: ssh-keygen -R server.IP.address
You have to replace the server.IP.address with the real IP address of the server.
3. Add your SSH key to the VPS server
In this method, you are trying to add the SSH key created on the system to the VPS server. This can be done by first generating a new SSH key on the system using the following command: ssh-keygen -t rsa
Now you might have to add this SSH key to the server by following this command: ssh-copy-id [email protected]
Here, you have to change the server.ip.address to the actual server address value and execute the command.
Also, disable the Password authentication feature and edit the ssh_config file for changing the sole authentication method to SSH keys.
When there are too many SSH keys available in the system, it can choose any random SSH key and create such issues.
So, you can execute the following command for making it choose the SSH key provided by you in the command: ssh -i /users/user_name/.shh/id_rsa [email protected]
Before executing the command, you have to replace /users/user_name/.shh/id_rsa with the path of the SSH key you want to add and [email protected] with the actual values.
5. Change the permissions of your SSH key
Press the Windows key + F to launch File Explorer and open the folder where the SSH key is present.
Right-click on the SSH key and click Properties from the context menu.
Go to the Security tab and click Advanced at the bottom.
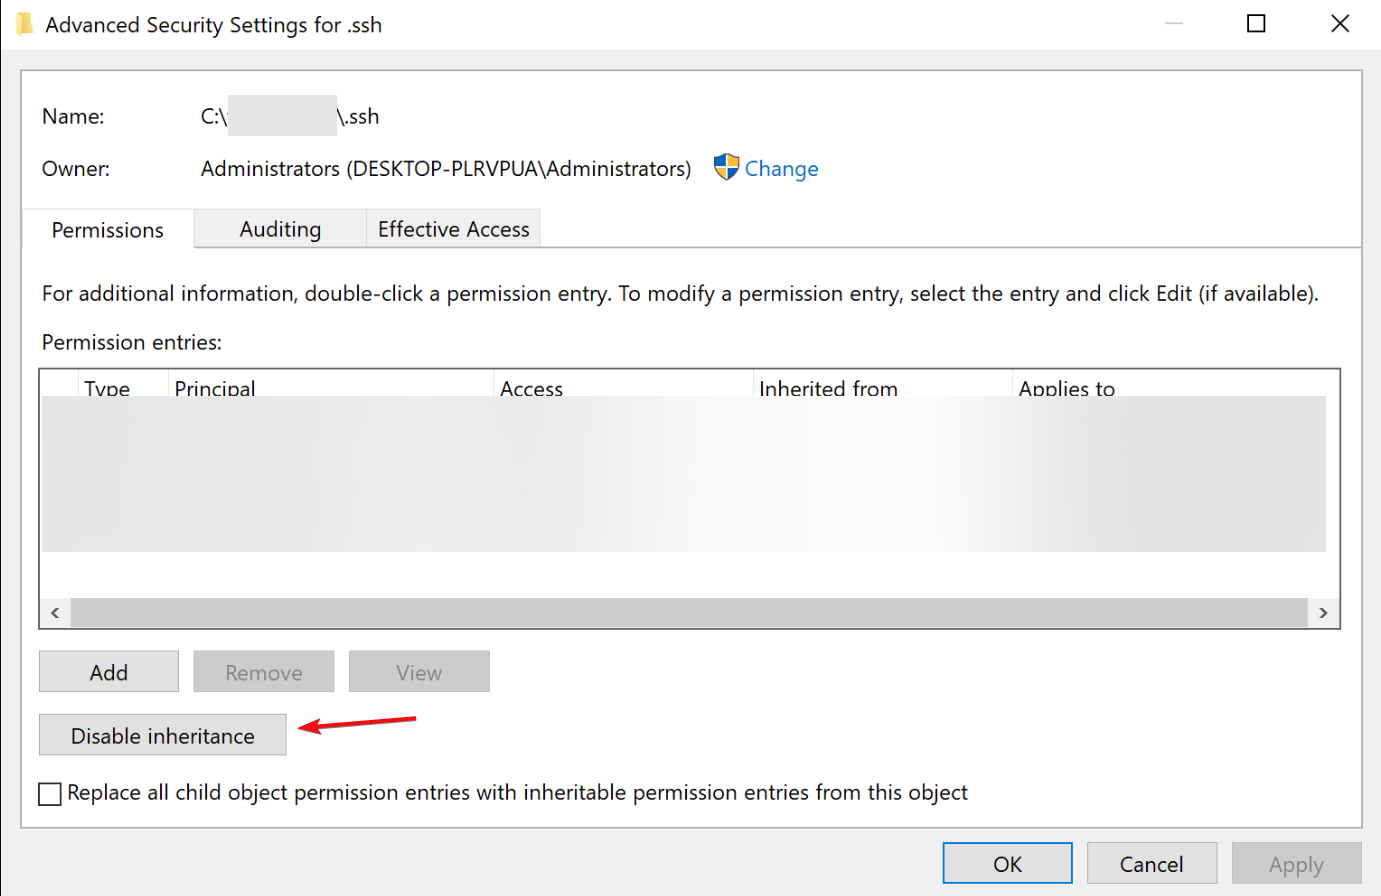
Now click Disable inheritance at the bottom and make sure Owner is your username only.
If the owner is somebody else, click Change and select your username.
After this, choose any other users from the Permission entries section and click Remove.
When done, click Apply and OK.
This will change the permissions to the SSH key.
Where are SSH keys stored in Windows?
All the SSH keys are stored on the system drive in the following folder (replace username with the actual name): C:\Users\username\.ssh
Of course, if your system drive has another letter, you should replace the letter in the path above with your own.
Hope this article was worth reading and was able to resolve the SSH Permission denied issue.
Our readers also complained that they encountered the Unable to establish host authenticity error. If you’re among them, read the highlighted guide for instructions to fix it.
You can read a clear explanation of modern SSH tools in this helpful guide on what OpenSSH is and how it improves secure remote access on Windows.
If you know any other possible solutions for this problem or would like to ask something about this problem, use the comments section below.
Before we start showing you how to take this awesome Microsoft device apart, please keep in mind that this is a complex project and you risk damaging your device if you don’t handle it properly.
But yes, Microsoft posted an interesting new video depicting the process of disassembling a Surface Go 2 laptop, so that you can repair it or replace parts.
However, before we begin, make sure you throw a quick look at the list of the best Windows 11 business laptops also classified by portability and storage.
Many of you are still using Windows 10, so a list of the best Windows 10 laptops, updated for 2022 and full of excellent choices.
Now, circling back to the Surface Go 2 laptop, let’s take a closer look at the instructions that came directly from the tech giant.
How do I disassemble my Microsoft Surface Go 2 laptop?
Removing everything and actually getting inside Microsoft’s Surface Laptop Go 2 requires unscrewing a bunch of screws and removing the keyboard deck.
After you have completed this challenge, you can go ahead and replace the battery without suffering the eternal pain of dealing with adhesive of any kind.
All you need to do is simply unscrew four PH00 screws, and the laptop’s battery is out. Microsoft did say it was making efforts towards teaching people to service themselves.
Below is the actual video posted by Microsoft, where you can see the exact process and replicate it, for the best and safest results.
The video itself is well made and it also shows you exactly what type of tools you are going to need for completing this delicate job.
The Surface Laptop Go 2 was designed to provide easy access to the removable SSD, Surface Connect port, speakers, fan, and IO.
You are probably also wondering about RAM, so we hate to disappoint you, but this is an area where you don’t have any control.
Unfortunately, RAM is non-user-upgradeable, so you better think twice about which config you should pick before buying this 12-inch Microsoft-designed laptop.
As you might know, the base specs come with only 4GB of RAM, an 128GB SSD, and the 11th Gen Intel Core i5 processor.
That being said, know that for another hundred bucks you will get you twice the RAM, and the most expensive option doubles both RAM and storage.
Now that you know this, you will have an easier and cheaper time fixing your Surface Go 2 laptop, should something ever happen to it.
Would you crack the laptop open and fix it yourself or still rely on professional services? Share your thoughts with us in the comments section below.
The uploader has not made this video available in your country is a common YouTube error that will prevent you from watching videos. Luckily, there are ways to fix that.
What does it mean The uploader has not made this video available in your country?
This kind of error message appears if the uploader chooses to publish the video only in specific regions. Usually, this happens because of licensing issues or uploader’s preferences.
What VPN works with YouTube (fix the uploader issue)?
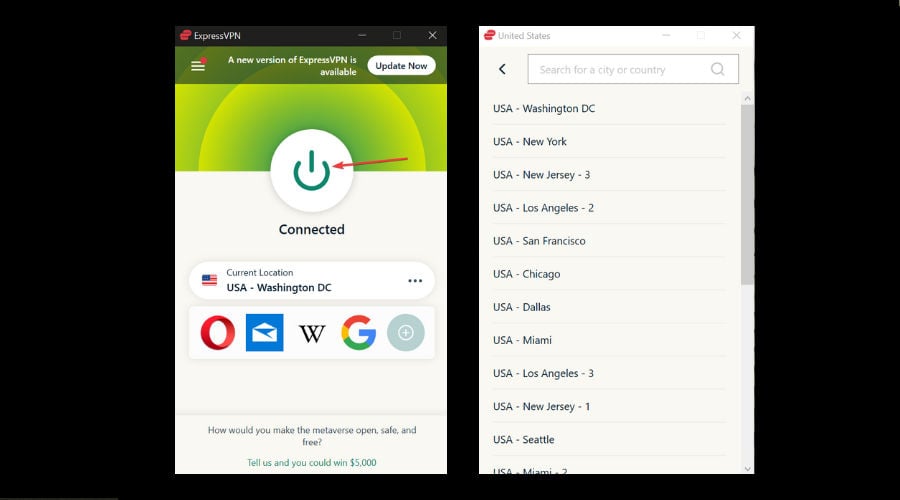
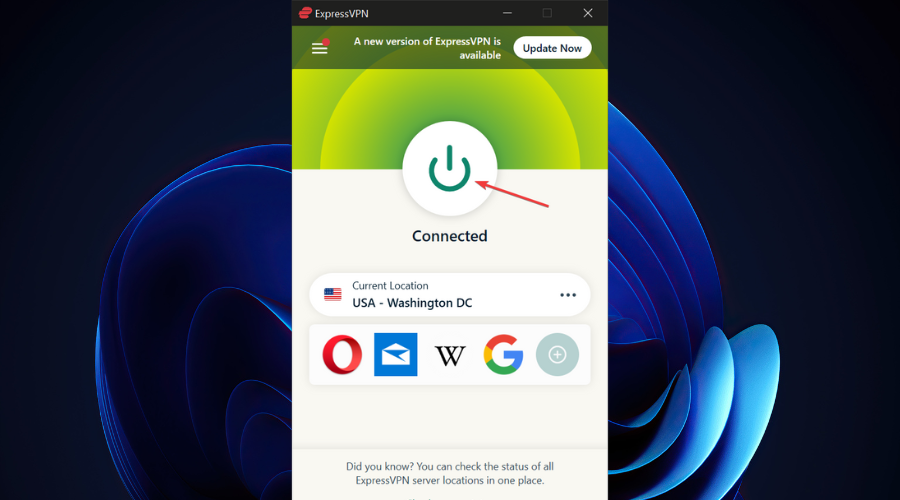
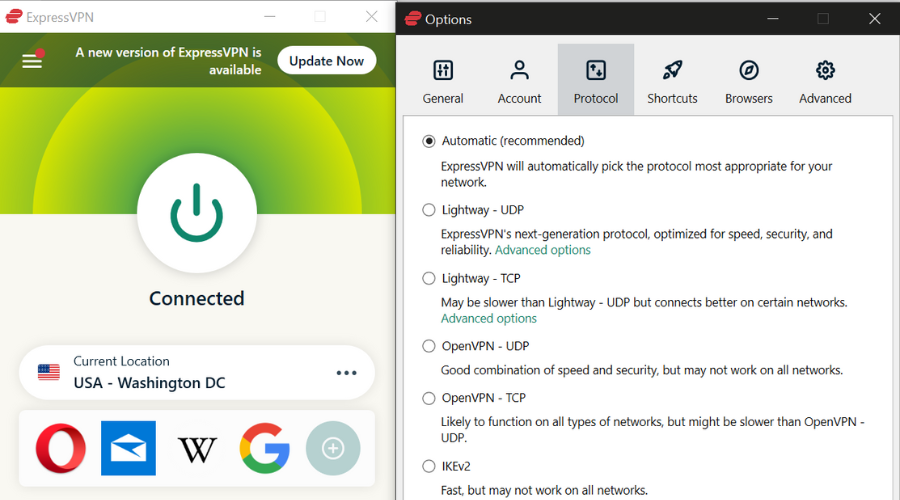
We used ExpressVPN in our example above because it’s the best VPN for unblocking YouTube. It’s operated by Kape Technologies and used to access blocked sites all over the world.
Express’s high-speed VPN servers and excellent security features make it the best VPN for YouTube. It uses OpenVPN to encrypt your data traffic without sacrificing your connection speed.
Plus, you can use a kill switch, exclusive DNS servers, static and dynamic IP addresses, along with split tunneling mode. You can install this VPN on all major platforms, including Windows, Mac, Linux, Android, and iOS.
More about ExpressVPN:
3,000 servers across 94 different regions
No logs or leaks
24/7 live expert support
5 simultaneous connections
30-day money-back guarantee (no free trial)
ExpressVPN
Use this fast and secure VPN to unblock YouTube in your country quickly and easily.
It is possible, indeed. If you’re watching YouTube daily, our video queries may be restricted.
This annoying issue may appear even when you’re connected to your VPN because the YouTube algorithms can see that. Also, it’s likely that your VPN proxy is detected on YouTube TV.
How do I bypass the video not available on YouTube?
Firstly, it’s possible to get access to unavailable content on YouTube or other streaming platforms with tunneling methods that redirect your traffic.
That means, more exactly, using a VPN connection or proxy servers that can tunnel your network and hide your IP address.
Then, you can appear in whatever country it’s required to watch videos unavailable in your country on YouTube.
In conclusion, you can use a powerful VPN like Private Internet Access to avoid geoblocks and bypass The uploader has not made this video available in your country error message on YouTube and watch any videos.
More so, visit our YouTube Troubleshooting Hub if you encounter more error messages on YouTube. Or join our Unblocking section to find out what other websites and services you can access with a VPN.
Application load error 65432 is a Steam message that pops up for some players when they try to launch Skyrim and other Bethesda games.
Consequently, users can’t play Skyrim when that error arises. However, some people have found resolutions for this issue at hand.
Read the detailed instructions for each suggested solution below and fix this annoying error quickly.
Why does the application load error 65432 appear on Steam?
Wrong privileges – Steam might generate several errors by accessing it with improper privileges. To get the best out of this app, ensure you always run it with admin privileges.
Game integrity is not up to date – Keep in mind that this issue might occur if the game has received several patches directly from the game’s update client. In this situation, you should verify the integrity of the related files.
Antivirus software is blocking the Steam app – Some antivirus programs might be too protective with your online activity. Thus, you might
Also, note that users who face application load error 65432 may encounter the following errors too:
Application load error 5:0000065434 in Steam – Because tons of users reported it, this seems to be one of the most common errors. Fortunately, we’ve prepared some helpful solutions to fix it quickly.
Steam.exe Bad Image error– According to some gamers, this can occur on Windows 10 and 11. If you face it, do not worry! Check our dedicated guide to solve it in a matter of time.
Steam game already running error – Even though the Steam client receives frequent updates and fixes, some of the issues keep popping up, like this one right here. For those who encounter it, you can always check some steps to get rid of it.
Application load error 65432 Creation Kit – Antivirus or third-party tools are the leading cause of this error.
Application load error 65432 Vortex – Like the previous error, you may need to disable your antivirus since it is a known trigger for this error.
Mod Organizer 2 Application load error – It’s a bug that prevents you from playing any Steam games once they have launched.
Rocket league application load error 65432 – Again, it can show if your games are being blocked by unofficial antivirus software.
Application load error p 65432 Skyrim – The most probable reason for the issue is that Steam downloaded an incomplete copy of the game.
Now that you’re aware of the most common causes of the Steam application load error 65432 let’s see what you can do to fix it in each of the above cases.
How can I fix the Steam Application load error 65432?
1. Run Steam as an Administrator
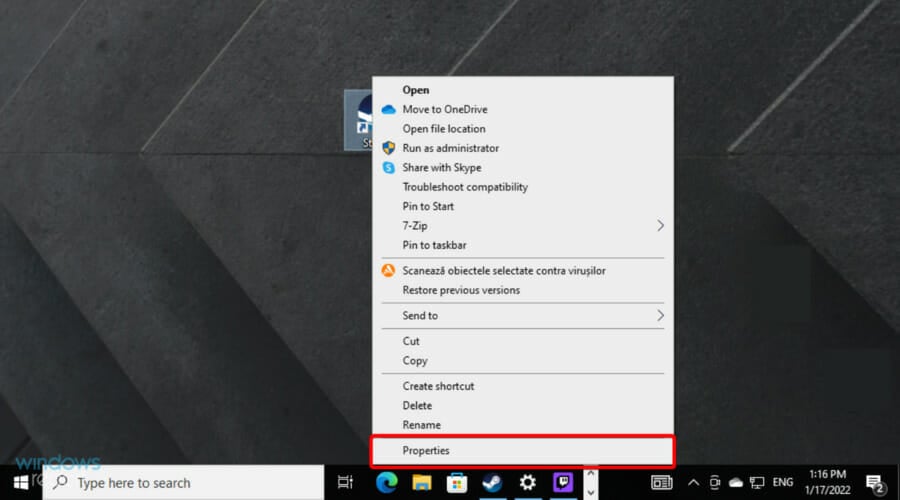
Right-click on the Steam icon you usually open the software with, then click on Properties.
Select the Compatibility tab shown directly below, then tick the Run this program as an administrator.
Click on the Apply button, then on OK to save the changes.
2. Reinstall Steam
From the Search bar, type Windows settings and click on it.
Select Apps from the settings options.
Then, right-click on Apps & features.
Next, find Steam under the App list.
On the right, click on the three dots and pick Uninstall.
If you want to make sure that no leftovers were left behind, we recommend using CCleaner. It performs a thorough scan and helps you remove any unnecessary files and other unwanted data that tend to pile up on your system.
Once you perform all these steps and successfully uninstall Steam, reinstall it from their official website and check if the impediment still occurs.
3. Verify the Integrity of the Game’s Files
Press the Windows key, search for Steam, then click on the app to open it.
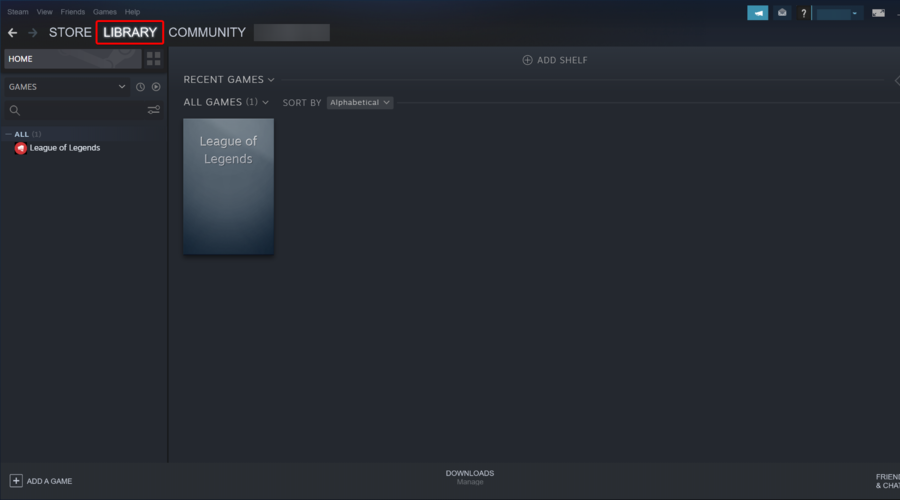
From the top menu of the window, click on Library.
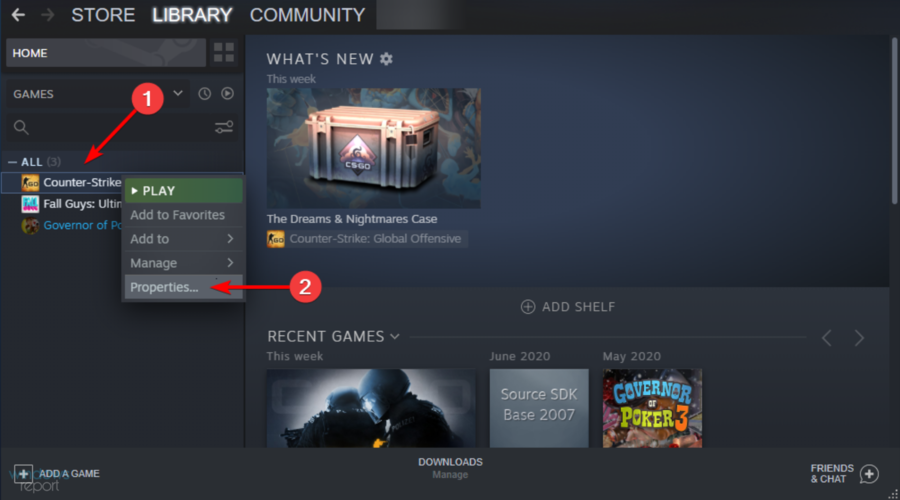
Right-click Skyrim or another game that the error arises for, and select Properties.
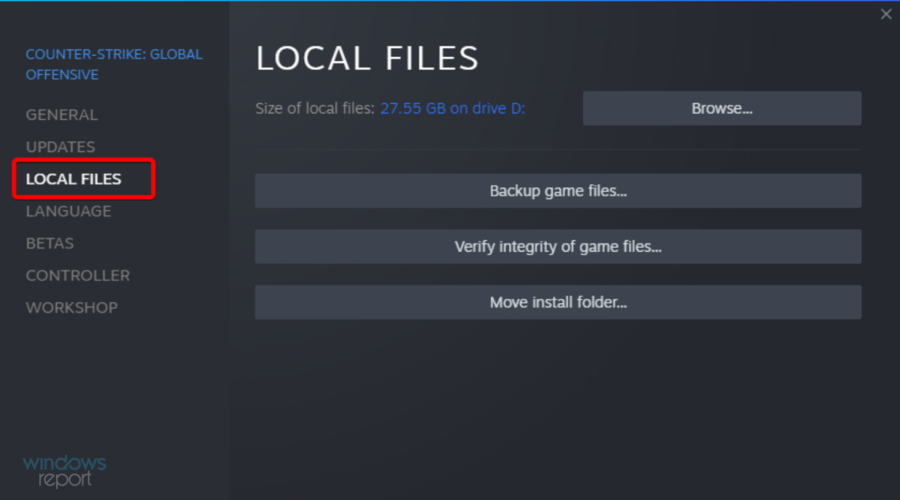
Click the Local Files tab on the window that opens.
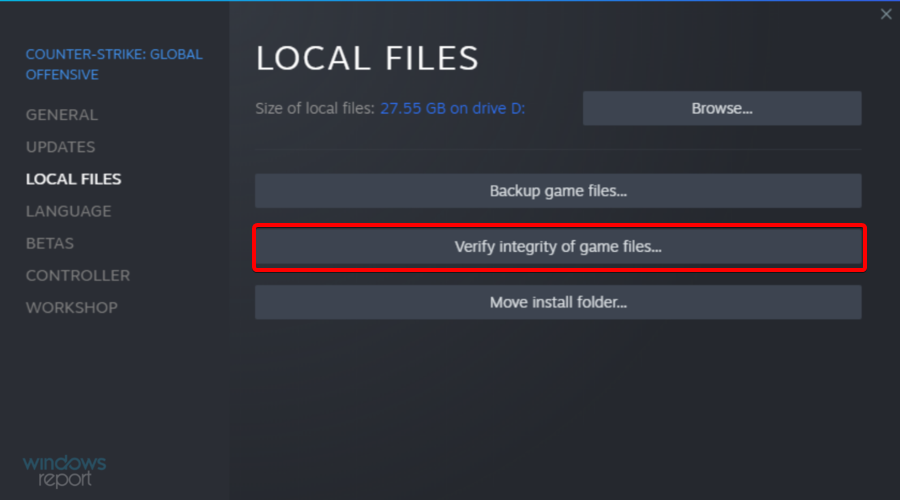
Then select the Verify Integrity of Game Files option.
Restart Steam after verifying the game files.
First, verify the integrity of Skyrim’s files to ensure those files aren’t corrupted in any way.
If you couldn’t get rid of the application load error 65432, make sure you keep on reading.
First, close Steam if it’s open by clicking on the X button from the window’s top-right corner.
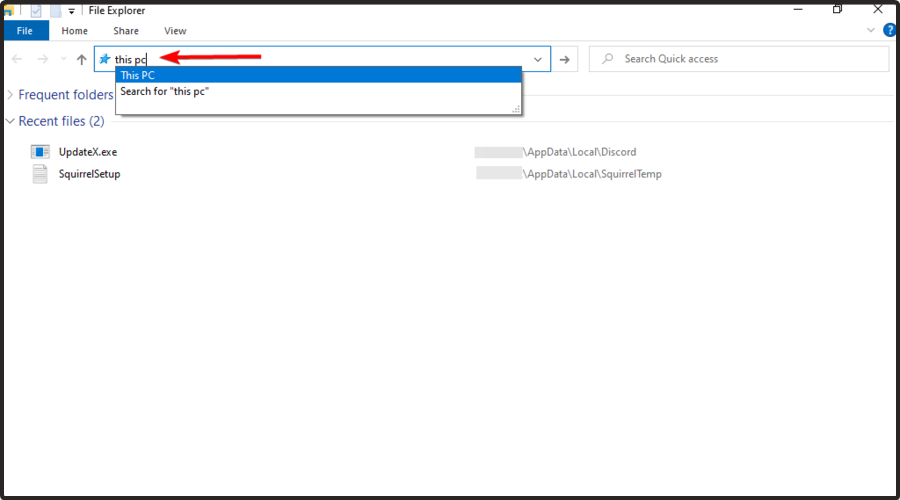
Now, use Windows + E to open File Explorer.
In the opened window, type This PC in the search bar.
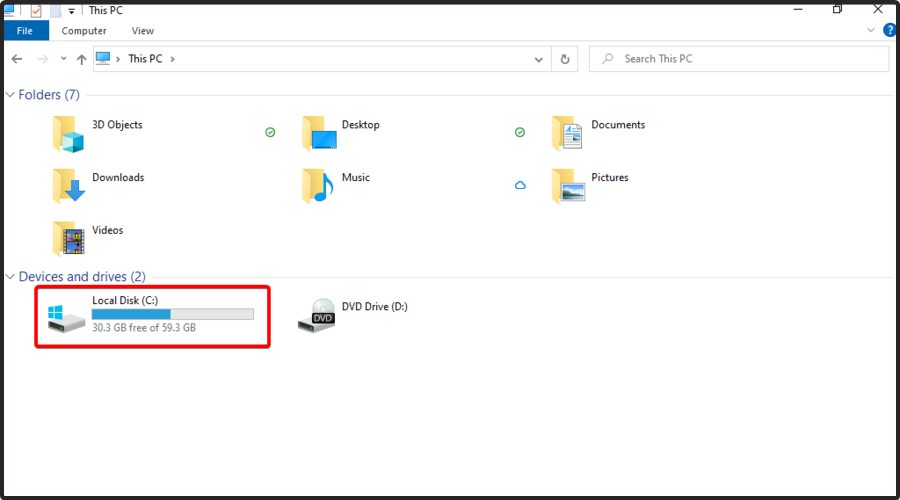
Go to Local Disk (C:).
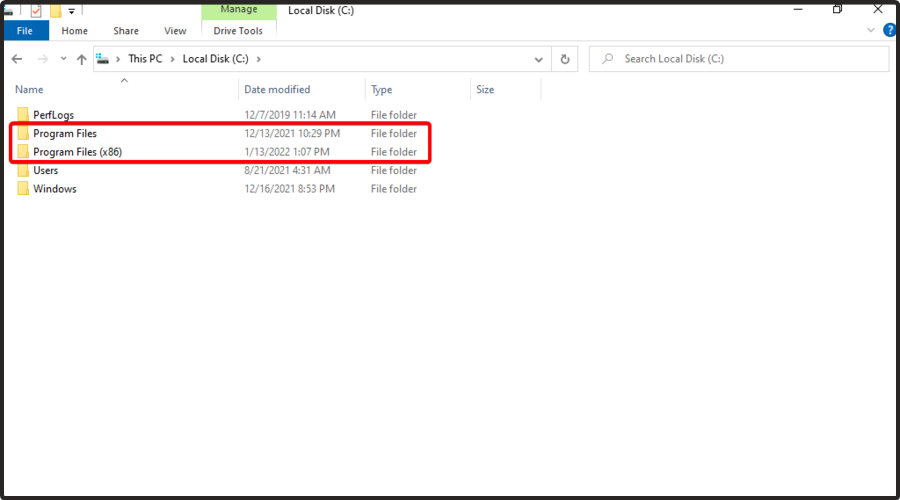
Then, navigate to Program Files or Program Files (x86).
Look for the Steam folder, then double-click on it.
After opening the Steam folder, select the ClientRegistry.blog file, then press the Delete key to erase it.
Many players have confirmed that deleting the ClientRegistry.blog file fixes the application load error 65432. So, that might be one of the best resolutions for it. Follow the guidelines below to delete the ClientRegistry.blog file.
5. Turn Off Antivirus Software
The application load error 65432 can also appear because third-party antivirus software is blocking your games.
Therefore, turning off third-party antivirus software before launching Steam might fix the issue. Right-click the antivirus utility’s system tray icon to open a context menu from which users can usually select a disable or turn off the option.
Most antivirus utilities also include exclusion lists that users can add software to. Thus, adding Steam and Skyrim to an antivirus software exclusion list might also fix application load error 65432.
Open the antivirus software and look for an exclusion tab within its settings. Then add the Steam and game folders to the exclusion list.
What happens to my games if I reinstall Steam?
Steam and the installed games will be removed from your computer during uninstalling.
To stop your games from being removed, you may relocate the steamapps folder outside of your Steam directory.
It’s okay to purge and reinstall after moving all of your games outside of the standard steamapps directory. All your games will return if you choose Add Library Folder once again and add the same directory after reinstallation.
That is as much as we will be sharing in this article. However, the above resolutions will probably fix the application load error 65432.
However, players who have fixed the same issue with alternative resolutions are welcome to share those fixes in the comment search below.
The NFL app error code 403 Forbidden is an indication that there is an issue with the server. It can also mean that users cannot see a specific webpage.
The server gets the request but refuses to allow it to be processed. The access is always denied and is connected to the application logic, such as insufficient resource rights.
Several users have reported the NFL app error playing content issue. You can read further into the article to know the complete details of NFL Error Code 403 Forbidden, including in Roku.
Why does my NFL app say 403 Forbidden?
The NFL network error code appears predominantly whenever you try to upload a graphic or, in most cases, when you make an invalid request.
There are still several reasons why you may come across the 403 Forbidden error, such as the following:
Missing index page: The NFL app error can appear if an index page is missing or misnamed, becoming unreachable.
Malware infection: Malware and virus infection could be another significant reason for the NFL app’s error playing content as it is capable of wiping out files, hereby rendering the server unresponsive.
Wrong IP Address: Entering a wrong IP address incontrovertibly means getting an NFL app error code 403 for forbidden.
New web page link: When users fail to acknowledge an update in the web page link, it can also result in getting the 403 Forbidden error code.
Quick Tip
Choosing a different browser can improve this contextual error. Opera One Browser is a reliable option that helps you browse more efficiently. It blocks popups and ads from distracting your activity and enables you to load pages much faster.
It also has a great Video Pop-up feature that can separate a video from a webpage. Opera One also has a modular AI-ready design to help better integrate its native AI and other AI technologies.
Opera One
Enhance your browsing performance with Opera’s various helpful characteristics.
How do I fix the 403 Forbidden error on my NFL app?
1. Refresh the page
For users with NFL on the browser, simply tap the refresh icon, which can be located either at the top of your page or check the menu.
If you use NFL on Roku or similar devices, close the app and relaunch it.
For users with NFL mobile app, close the app and relaunch it.
2. Check the URL
Locate the address bar at the top of your browser page.
Click on it to access the link.
Confirm that the URL is correctly entered.
If there is an issue, change the URL, press Enter + F5 or click reload icon to reload the page.
One of the common reasons for this error is in the URL. Ensure that your URL is in the correct URL extension, such as .com, .in, and.org.
If the problem affects your Fantasy companion specifically, follow our dedicated fixes in this NFL Fantasy Football app not working guide to clear cache, update the app, and check server status.
One of the most powerful cleaners on the market is CCleaner. It’s a tool that optimizes your PC by removing junk files, removing trackers on your PC, cleaning your registry, checking drivers, and more.
You can work through any of the fixes provided above as they are viable means of fixing your NFL app error code 403 Forbidden.
Editing the registry is a common fix for many Windows errors, and in this guide, we’ll explain how to reload/ update it without rebooting. Even though you may get a message that you have to restart, you can get around that.
This is what this article is all about: how to avoid the usual restart required after performing registry changes.
How can I reload the registry without rebooting my PC?
1. Restart the Windows Explorer process
Windows Explorer is the process that manages some essential Windows tools including the taskbar, various user interface features, and the desktop.
Restarting it sometimes helps save changes to the registry promptly. This means that you could be able to reload the registry without having to reboot your PC.
1. Press the Ctrl+Alt+Del keys on your keyboard at the same time.
2. The Task Manager application will start and you will be able to see all the current processes and services.
3. Navigate to the Processes tab.
4. Locate the Windows Explorer process in the list.
5. Right-click the process to open a menu and select Restart from it.
What to do if I don’t find the Windows explorer process?
If you find the explorer.exe is missing from the task manager, restore it to the running tasks manually by following the following procedure:
Press Ctrl+Alt+Del.
Under applications, click New Task.
Now type explorer.
Click OK.
This reintroduces the explorer.exe and the programs and utilities it manages to the task manager.
If you are sure that the changes you are making to the registry only affect a single program, you may enforce registry changes without a restart by restarting that specific program via Task Manager.
Simply stop and then restart the concerned application as soon as you are through with the amendments, and this should do the trick.
Press Ctrl+Alt+Del to start the Task Manager app.
Look for that particular program under Applications, select it, then click Restart.
Note that not all apps work this way and you may still be prompted to manually reboot to apply the changes for some of them.
We hope that you managed to find what you were looking for in our article. Let us know in the comments section below whether you succeeded in reloading the registry without having to reboot your PC.
Many reported AcroTray on their PC, and in today’s guide, we’re going to explore this file a bit further.
Join us, and learn if this file is dangerous and how to remove it.
What does AcroTray exe mean?
Adobe Acrobat Tray Icon is Adobe’s extension (or helper application) for converting documents to PDF files. It enables users to print PDFs directly from MS Office applications. It also keeps track of Acrobat updates.
How do you stop AcroTray?
1. Using the Task Manager
Right-click the Start menu and select the Task Manager option.
Select the Processes tab.
Find the AcroTray, right-click on it and select End task.
2. Using Services.msc
Click on the Start menu, type services, and select the Services app.
Search for Adobe Acrobat Update, double-click on it, change the Startup type to Manual, then click Apply and OK.
Search for Adobe Genuine Software Integrity, double-click on it, change the Startup type to Manual, then click Apply and OK.
The Acrotray service is not essential, but it is convenient if you need to perform functions like converting files to PDF.
The AcroTray (Adobe Acrobat Tray Icon) background process is a helper service and is only usually necessary when working on Adobe products.
You can halt the process when you do not need it, prevent AcroTray from running, or stop AcroTray from loading.
Is AcroTray EXE safe?
The actual AcroTray EXE is a legitimate Adobe Acrobat file and process. However, as it’s an EXE file, some malware programmers disguise their virus script as AcroTray EXE files.
If you haven’t installed Acrobat and noticed an AcroTray.exe process in Task Manager, you’ve probably discovered an AcroTray virus.
Do I need Adobe AcroTray at startup?
As mentioned, PDF document conversion is the primary function of the helper service. So, users who often convert documents to PDF format need AcroTray to start with Windows.
Is it OK to disable AcroTray?
Disabling the helper service could generate some document conversion issues. However, it’s somewhat extra to have a background helper application for users who don’t need to convert documents to PDF format.
Furthermore, AcroTray can slow down your system startup and consume RAM. Thus, some good reasons exist to disable AcroTray, and users who don’t need that helper application should consider disabling it.
There you have it. You can always use any solution to disable or stop the service when you do not need it.
Disabling it may be the right step, especially since it might still be an extra process for many users, even though it serves a critical Adobe Acrobat function.
Keep in mind that there are issues with this process, and many reported that Acrotray stopped working for them.
Lastly, an easy way to disable it is to uninstall Adobe Acrobat, which users can replace with numerous PDF software alternatives.
Are you constantly being summoned for remote desktop assistance? Or perhaps you are the one doing the asking?
Either way, the ability to see and control screens remotely can avoid confusion and also save time on both ends. Remote desktop or screen-sharing tools can help you do precisely that.
These are applications that allow users to stream their screens over the Internet and get remote support from any other user around the world.
How can a screen-sharing app help me?
The screen-sharing tools are very useful for users who want online repair support for their PC or who are working on a project in a team.
So, the best use for these pieces of software is for troubleshooting any problems remotely, without the need for physical presence.
Some of them offer the capability to work directly on a remote machine and that makes everything even more simple.
There are lots of such tools out there, but we have chosen the best desktop sharing apps that work well with Windows 10 & 11 – so let’s have a look at them.
What is the best screen share software for Windows 10/11?
Mikogo easily lets you make a group video chat or a web conference. With this tool, you can share your screen, text, or files. You can even pause or lock your session using the two buttons at the top.
This tool also allows you to log out after your session by checking the Create Session log check box. The speed is good and so is the interface.
Mikogo is also very easy to use and comes with a user-friendly interface with some animations. The better part is that this tool is available for download at no cost.
Some of the key features of Mikogo that you shouldn’t miss:
Saves your time with no downloads and no installation required
Access to remote keyboard and mouse control
Highlight your presentation with annotation tools, and record your active screen and VoIP calls
Send files up to 200MB to participants in the meeting and share files or applications with up to 25 participants in real-time
Available as a mobile app for iOS and Android
Mikogo
Use one of the best tool to assist your customers with remote keyboard and mouse control.
If you’re looking for a great screen-sharing app to help with your personal or work-related projects, look no further. SupRemo is more than enough for you.
It’s a cost-effective, secure, and reliable remote-control software with lots of customization options, flexible price plans, and cross-platform compatibility with Windows, macOS, iOS, Linux, and Android.
If you’re planning to use SupRemo just for non-professional and/or non-continuous use, know that it’ll be completely free.
However, if you’re part of a company that needs to use it for business purposes, you need to purchase one of the app’s plans.
Thankfully, all licenses allow unlimited installation to an infinite number of PCs. You can use your license on multiple systems since what really matters is the number of simultaneously connected devices.
There’s actually no limit on endpoints or seats where to install the license, and the software is really affordable, having starting prices as low as $6/month, as well as quarterly or annual plans depending on your needs.
SupRemo’s awesome team developed some powerful features that you shouldn’t miss out:
The Encrypted connection and Allowed ID will make sure your data stays safe
File transfer between the connected devices
Remote printing from both the remote-controlled PC and the local one
In-built Chat communication through instant messaging
Online Reports that monitors the connections made during the working days
Automatic updates to keep up with the latest patches and new additions
TeamViewer is a handy screen-sharing tool that is free for personal use and comes with a bevy of features. In addition to screen-sharing, you can also share video and audio with other participants.
The app works well with Windows 10 and older versions as well as with several other platforms including Linux, Mac, iPhone, iPad, and Android.
It is available in more than 30 languages. To get started, all you need to do is launch the TeamViewer and then supply your login credentials to the other user whom you want to connect with.
TeamViewer is a very convenient tool to use, and if you want to avoid sharing your entire desktop, you can opt to show only a section of the screen or just specific programs.
It also supports chat, file sharing, and whiteboard functionalities. After downloading the software, you will have your first session up and running in seconds.
Some of the best features of TeamViewer that you must take a note of:
Also available as a portable software
24/7 access to remote computers
The Host version can be deployed for an unlimited number of PCs and devices
Available on all major platforms and some major browsers
Remote support, IT management, web monitoring, and more
The app you probably use most of the time to video chat with your family, friends, and colleagues can also be used as a perfect screen-sharing tool.
In the past, a subscription was required in order to use the screen-sharing service, but later Skype dropped the subscription and opened up the feature to free accounts.
To share your screen, you will first need to make a video call or a voice call to one of your contacts, click the + button in the call window, and then select Share Screen.
The user on the other end will be able to see a live video of what’s on your screen. If you are using Skype for video chat and messaging, try out the app for screen-sharing purposes as well.
Some of the key features of Skype:
Make video calls with high-quality audio and HD video
Share presentations, holiday photos, and more on your screen during a live call along with screen-sharing capabilities
Record calls, note major points, and use real-time subtitles
Cost-effective international calling rates
Host a video or an audio meeting with up to 100 people
Join.Me is a useful tool that you can use to get your people together without actually getting them together in the physical sense.
You just have to share your screen instantly for everyone to see. It’s an impromptu meeting space that brings your team together without hassle.
This tool is a product of LogMeIn Inc, and was designed to work on Windows Vista, Windows XP, Windows 7, Windows 8, or Windows 10 and is compatible with 32 or 64-bit systems.
It’s very easy to use and comes with basic screen-sharing features, VoIP, and the capability to invite up to ten participants. The free version lets you share controls, use the mobile app, and transfer files.
Some of its wonderful key features include:
Join a mobile meeting for free and with optimized audio and video quality
Create and host delightful real-time webinars and also present pre-recorded events
Control what you want your participants to see, share work ideas, view, edit and modify documents in real-time, and share the screen with mobile devices, while your data is completely secured.
Get a toll-free number for your small business adding value and comfort for customers.
Make locals conference calls, as well as across the globe through VoIP and telephone.
ShowmyPC’s objective is to offer free and integrated collaboration tools for all users. The tool lives up to its promise as it offers an intuitive user interface perfect for chatting, sharing, and group meeting.
To use the tool, you are supposed to first download the software, once you launch it, you can create a password to send to all the other participants.
This free and open-source tool enables you to view and access another PC, screen, or desktop. ShowMyPc is very easy to use.
The user who wants to share their screen hits Show My PC Now and the user on the other end hits View Remote PC.
The tool generates a password that the user at the remote end will need to provide in order to access your PC. It also has a Chat Whiteboard feature where you can chat with the other participants.
Below are some of the main features of ShowMyPC:
Connect from your home, office, or a mobile device
Super easy to use, no need for installation
Share screen, get remote access, and host video meetings, using a two-step verification process
Along with in-app file transfer, also share files using the web-based shared folder, between multiple users
Easy integration with other products and services and blazing fast experience with the Web version
MingleView is a free peer-to-peer remote desktop sharing and control-based tool which allows for remote assistance and the hosting of online meetings with colleagues, friends, and families.
This tool is completely free, so you won’t be pestered with the annoying upgrade prompts every time you launch the software.
This is the first free tool to offer unlimited access to users to host or participate in meetings. It also offers an HD screen quality enabling users to have a lively experience.
MingleView works with all Windows versions and doesn’t require firewall configurations or port forwarding.
It comes with some compelling features as below:
AES-128-bit encryption for peer-to-peer mode and AES 256-bit encryption for server relay mode
Experience audio or video chats in high resolution across Windows and Android platforms
Stream games and movies on desktop and share screen in high resolution
AnyDesk is another solution for screen-sharing and remote desktop connections, no matter if it is used for IT support or personal use by anyone.
You can connect to a computer remotely, fast and secure. The distance is not important, you’ll enjoy a smooth remote desktop connection with imperceptible latency.
AnyDesk runs on all common platforms and operating systems available on the market. You can easily use it for Windows, Android, Mac, and more.
Furthermore, it is a highly secure app. It uses military-grade TLS technology to ensure your device is protected from unauthorized access.
Here are some of the primary features of AnyDesk:
Free for personal use
Works at 60fps and with minimum latency
Share desktop across all major platforms
Military-grade TLS 1.2 security, 256-bit AES, and Transport Encryption
The above list is by no means exhaustive. There are many screen-sharing tools available on the market today, but we feel that the ones mentioned above are the best in terms of usability and performance.
The Miracast wireless display standard enables users to mirror one device’s display to another device. For example, users can mirror their laptops’ display to desktop VDUs or TVs with Miracast enabled.
So, Miracast is a little like a wireless HDMI cable that users can connect devices with to project their displays.
However, a This device doesn’t support Miracast error message pops up for some users. Consequently, Miracast mirroring doesn’t work.
Why my device doesn’t support Miracast?
To use Miracast, your device needs to fulfill a set of essential requirements, which most of the new generation ones easily would.
Also, you need to have compatible graphics drivers, WDDM (Windows Display Driver Model) 1.3, and later. And most users who reported incompatibility found out that their graphics driver doesn’t support Miracast.
Besides, there’s also a possibility that the display you are trying to stream to, doesn’t support Miracast, which, too, can spoil the experience.
Where can I encounter this error and what to expect?
The full message reads This device doesn’t support receiving Miracast so you can’t project to it wirelessly
The device doesn’t support miracast Nvidia
All Windows versions can be impacted (Your device doesn’t support Miracast Windows 11, Windows 8.1 Miracast not supported, and of course Win 10)
Here are a few potential resolutions for fixing it. As a first step, you should double-check that your laptop or desktop really does support Miracast.
How can I fix This device doesn’t support Miracast error?
1. Update network drivers
You might need to update your network drivers to the latest ones to fix the Your PC or mobile device doesn’t support Miracast error.
You can use Device Manager to update your drivers. Open Device Manager from Search and will appear a list of all your hardware. You just need to click right on your network drivers and choose Update driver from the list of options.
If the network drivers are available, they will be automatically installed. If they aren’t, then your drivers are already up to date.
Now, this process can take some time, and it is not always finding the right driver for your PC. However, you can manually search through the manufacturer’s website or use a third-party tool. If you want a faster option for updating your drivers, we recommend you use a professional driver updating tool.
2. Check if your device supports Miracast
Press Windows + R to open the Run command, enter dxdiag in the text field, and click OK.
Then click the Save All Information button in the DirectX Diagnostic Tool window.
Choose the desired location to save the text field, and click Save.
Now, open the file, scroll down, locate Miracast, and if it reads Available, your device supports it, while if it says Not Available, it’s not compatible.
Also, scroll down to Miracast under Display Devices and verify if it’s supported by the graphics driver.
You now need to check network adapter’s compatibility. To do that, press Windows + S, enter Windows PowerShell in the text field, and click on the relevant search result.
Now, paste the following command and hit Enter:Get-netadapter|select Name, ndisversion
Verify if the NdisVersion listed here is above 6.30.
If you discover that the device doesn’t support Miracast, you will need a wireless display adapter. Microsoft’s Wireless Display Adapter is probably among the best ones for Windows devices.
3. Check if Wi-Fi is enabled on both devices
Press Windows + R to open Run, paste the following command in it, and click OK:ms-settings:network-wifi
Now turn on the Wi-Fi if it’s presently disabled.
You will also need to check if Wi-Fi is enabled on the other device. The exact steps to check that differ from one device to another, and the steps can be found on the manufacturer’s website.
Some users have stated that the Your PC or mobile device doesn’t support Miracast error arises even though they’re sure their devices meet the requirements for Miracast mirroring.
This is because having Wi-Fi enabled on both devices is a critical requirement. So, make sure of that and verify if the error is fixed.
4. Select auto for Wireless Mode Selection
Type Device Manager in the Search bar, and then click on the relevant search result.
Double-click the Network adapters category.
Right-click the wireless network adapter, and then select Properties.
Navigate to the Advanced tab, choose Wireless Mode Selection, and then select Auto from the Value dropdown menu.
Click on the OK button to save the changes.
Several users managed to fix The device doesn’t support Miracast error by modifying the network adapter’s properties. So you may as well give it a try if the previous methods didn’t work.
Press Windows + R to open Run, type devmgmt.msc, and click OK.
Expand the Network adapters category, right-click on the active adapter, and then select Uninstall device.
Tick the checkbox for Delete the driver software for this device, and click Uninstall in the confirmation prompt.
Restart the desktop or laptop after uninstalling the driver, and it will get re-installed automatically.
If none of the previous solutions have worked, it’s likely that the network drivers are corrupt, and reinstalling them would do the trick. Once done, The device doesn’t support Miracast error will be fixed.
How can I fix This device doesn’t support Miracast on Windows 11?
When encountering The device doesn’t support Miracast error in Windows 11, we first recommend trying solutions listed earlier since these remain the same on all recent iterations of the OS.
In addition to these, you may update the graphics driver if it’s incompatible. Other than that, disable any active VPN connections or proxy that you may have configured.
Also, uninstall apps that can modify the network connection or alter its parameters and settings.
What if my laptop doesn’t support Miracast?
If the problem lies with incompatibility, first try updating drivers or executing the other solutions here. In case none work, remember that Miracast is not the only streaming solution available. There are several others that you can give a try.
Chromecast, for instance, is a great streaming device that works across a wide array of devices. You can easily use Chromecast on the browser or configure your Windows 11 PC as a Chromecast. You may find other Miracast alternatives as well.
The fixes above would resolve the Your PC or mobile device doesn’t support Miracast for most users, and for the once that it doesn’t, incompatibility would be the underlying cause.
Let us discuss what to do when the Omegle camera is not working. Omegle is a chat website you can utilize with your laptop’s or desktop’s webcam, which allows you to meet random strangers from around the world.
However, some users have posted on support forums about the camera not working for Omegle’s video chat, which in turn doesn’t allow them to use the service as intended.
Many of those users have said Omegle displays this error message, Error with camera: Requested device not found.
Why is my Omegle camera not working?
The Requested device not founderror arises when the browser can’t detect your webcam.
This can be due to other apps utilizing the camera or firewalls blocking access to it, an issue with the browser you’re using, or an issue with the camera itself.
What are the most common Omegle camera errors?
Camera not found error – This error may be caused by missing drivers or hardware installation errors.
Omegle camera not working – In this case, the service may detect your camera, but it simply can not get it to work properly. You may see a black screen when the camera is turned on.
Omegle error with the camera – This could be a result of a range of problems. You may need to update or reinstall your drivers.
Error with the camera: Requested device not found in Omegle – This error may require that the camera is reinstalled, or it could also be an issue with the browser.
Quick Tip:
If you feel like your browser might be the reason for experiencing issues with Omegle, we recommend you skillful browser like Opera One.
This browser enables you to protect your privacy online by using the built-in free VPN service and offers incredibly fast loading speeds. Plus, you have quick access to all your social media accounts from the customizable sidebar.
Opera One
Surf online on this flexible browser and chat on Omegle without getting webcam errors.
To clear Google Chrome’s data, press the Ctrl + Shift + Del hotkey to open the Clear browsing data window.
Select All time on the Time Range drop-down menu.
Then select the options for Cookies and other site data, Cached images and files, and hit the Clear data button.
1.2 Mozilla Firefox
Launch the browser.
Click the menu button in Firefox.
Select the History option and click Clear recent history.
Tick the Browsing & Download History, Cookies, and Cache options, then click OK.
1.3 Microsoft Edge
Launch the browser.
Click the menu icon and select Settings.
On the right pane, select the Privacy, search and services menu, then click on the Choose what to clear option on the Clear browsing data section.
Then select the Cookies and other site data and Cached images and files options, then click the Clear button.
2. Update your camera’s driver
Press the Windows+ R key on your device to launch the Run box.
Type the path below and press Enter. devmgmt.msc
Expand the cameras category.
Right-click on the camera and select the Update Driver option.
Select Search automatically for updated drivers.
Wait until your Device Manager installs the latest camera drivers
If your Omegle camera is blocked in any way and cannot properly work, you should ensure your camera drivers are up to date.
Follow these steps to update your camera drivers manually. Alternatively, a more convenient solution would be to use a third-party tool.
Using specialized software allows you to resolve this issue quickly and ensures you won’t install a corrupted or outdated driver.
In this regard, we recommend Outbyte Driver Updater. To update your drivers with this software, open the UI and click the scan icon.
Wait for the process to complete and let the software automatically update and repair any faulty driver found. Reboot your PC and see if the issue is fixed.
1. Press theWindowskey +Sto open a search utility.
2. Type in firewall to search, and click Windows Defender Firewall to open that applet.
3. Click on Turn Windows Defender Firewall on or off on the left pane.
4. Select both Turn off Windows Defender Firewall radio buttons, and click OK.
5. Try utilizing your camera on Omegle with the firewall off.
Another solution you can try if your camera is not working with Omegle is uninstalling or temporarily disabling your antivirus. After that, you can try to use your Camera on Omegle to ensure that the antivirus utility is not blocking it.
If the camera works properly when the antivirus is not running, you can permanently uninstall it. If you want to keep the antivirus software, try disabling it by right-clicking the utility’s system tray icon and selecting a disable setting.
Click the Start menu, and click on theSettings app.
On the left pane, click on Privacy & Security, then scroll down and select Cameraon the right pane.
Under the Let apps access your camera, select the apps you want to give access to, and make sure you choose Microsoft Store.
How do I fix the grey screen on Omegle?
A grey screen is often caused when the camera can not be found or when it is not working for some reason. Therefore, you should use any of the fixes in this article to help resolve a grey screen issue.
Additionally, you may perform a simple restart before trying any more complex fixes. Restarts are an excellent way of forcing processes to shut down properly, and this may resolve many little computer problems.
So, there are a few potential resolutions for fixing the Omegle video chat webcam issue.
The above fixes are among the most widely confirmed resolutions to help you fix Omegle’s video chat for most users.
Feel free to share your experience with us by using the comment section below this guide.
The Internet has become a necessity of late, and we are connected to it for most of the day. You will require a stable Internet connection for work, social networking, or purchasing a product from an e-commerce website.
However, several users have reported encountering the Can’t connect to this network error in Windows 11.
This error prevents you from connecting to a network, which usually helps access the Internet. The worst part, it doesn’t mention what’s causing the problem, which makes the troubleshooting even more confusing.
Hence, before we head to the fixes, it’s imperative to look at the possible causes of the Windows 11 can’t connect to this network error.
What is causing the Windows 11 Can’t connect to this network error?
While there can be many of these, we have listed the common ones to help you get acquainted with the issue and save some time while troubleshooting.
Issues with the connection
Problems with the modem/router
Outdated or corrupt network driver
Misconfigured network settings
Running an older version of Windows 11
If you remember making any changes to the network settings in the recent past, try reverting to the previous one. In case that doesn’t help, follow the steps listed here to get rid of the Windows 11 can’t connect to this network error.
How can I fix the Can’t connect to this network Windows 11 error?
1. Some preliminary checks
Before we delve into many intricate fixes, it only makes sense to cross out the simpler ones initially.
1.1 Check if airplane mode is disabled
Click on the Quick Settings icon near the bottom-right of the desktop.
Verify if the Airplane mode is disabled. When the mode is disabled, the tile will be dark grey in color, similar to other enabled Quick Settings listed here.
Airplane mode basically cuts you off from any network. If the mode is turned on, you may encounter the Windows 11 can’t connect to this network error. Disable the mode and check if that fixes the problem.
1.2 Power off the modem/router
Like any other machine, the modem/router also needs rest for effective functioning. Though they are meant to run for days at a stretch, the internal components may heat up and cause issues.
To fix this, unplug the router/modem from the source, wait at least 10 minutes, and then replug it. Some come with internal batteries and continue to function even when disconnected, in which case, you will have to take out the batteries to turn off the modem/router completely.
1.3 Check if you can access the network on other devices
Another important aspect that often goes unnoticed is identifying whether the problem lies with the PC or the network itself. Hence, it’s recommended that you try connecting to the network using other devices.
If a connection is established on the other device, you can continue with the methods listed in the article, since the problem is limited to your PC.
1.4 Clean the ports and firmly replug the cable
Over prolonged use, there are chances of dust buildup in the ports, which may cause Windows 11 can’t connect to this network error. Though the dust buildup is usually minor, it’s recommended that you clean the ports.
To do that, unplug the cables, lightly blow air into the ports, and then firmly replug the cables. Now, check if you are able to establish a connection with the network you were earlier facing issues with.
2. Restart your Windows 11 PC
Navigate to the desktop and press Alt + F4 to launch the Shut Down Windows box.
Click on the What do you want the computer to do the dropdown menu and select Restart from the list of options.
Click on OK to restart the Windows 11 PC.
If you encounter issues with the system, a simple restart should be your primary approach. When you restart the computer, the OS is reloaded and any trivial or minor bug causing the can’t connect to this network Windows 11 error is eliminated.
3. Reconnect to the network
1. PressWindows+Ito launch theSettingsapp.
2. Select Network & Internet from the tabs listed in the navigation pane on the left.
3. Click on Wi-Fi.
4. Press on Manage known networks.
5. Next, click on the Forget button next to the network you are facing trouble connecting to.
6. Now, go back to the Wi-Fi settings and click on Show available networks.
7. Select the network and click on the Connect button. If required, enter the password for it.
The network connection settings may get corrupt or misconfigured over time, which can cause network connections errors. In this case, it’s best to forget the network and then reconnect to it to try to fix the can’t connect to this network Windows 11 error.
4. Update the network driver
Press Windows + S to launch the Search menu.
Enter Device Manager in the text field at the top, and click on the relevant search result that appears.
Double-click on the Network adapters entry to view the various devices listed under it.
Next, right-click on the Wi-Fi adapter, and select Update driver from the context menu.
Select Search automatically for drivers from the two options in the Update drivers window.
Windows will now search for the best available driver on the computer and install it for the Wi-Fi adapter.
The Device Manager method works as an offline update and only installs driver versions that already exist on the computer. If you haven’t downloaded any previously, it’s highly likely that the driver won’t be updated.
In this case, you can look for the latest driver version in Windows Update or manually download it from the manufacturer’s website.
Also, you can use a dedicated utility to update the drivers installed on your PC. We recommend using Outbyte Driver Updater, a third-party tool that automatically scans the web for a newer version and updates the installed drivers.
Select Windows Update from the tabs listed in the navigation pane on the left.
Next, click on Check for updates to scan for any available newer versions available for download.
6. Run the Network adapter troubleshooter
Press Windows + I to launch the Settings.
Click on Troubleshoot on the right in the System tab.
Click on Other troubleshooters.
Next, look for the Network adapter troubleshooter and click on the Run button next to it.
Choose the type of network adapter you are facing trouble with, and click on Next at the bottom.
Wait for the troubleshooting to complete. Choose the appropriate response when prompted and execute the recommendations listed at the end, if any.
The built-in troubleshooters offered by Microsoft are an easy way of resolving trivial and intricate Windows errors. Once it’s run, check if the issue is fixed.
7. Disable VPN
Press Windows + I to launch Settings.
Select Network & Internet tab from the navigation pane and click on VPN on the right.
Now, click on the currently added VPN.
Click on the Remove button.
Click on Confirm to approve the changes.
8. Reset network settings
Press Windows + I to launch Settings.
Select Network & Internet from the navigation pane, and click on Advanced network settings on the right.
Click on Network reset under More settings.
Now, click on the Reset now button.
Click Yes on the confirmation prompt that appears.
Before resetting the network settings, make sure you save any open files so as to avoid data loss since the computer would be restarted during the process.
If you are facing issues with the network, it’s recommended that you switch to Ethernet or wired networks. These are far more reliable than Wi-Fi networks, where the connections are wireless.
Though both have their sets of pros and cons, Ethernet offers higher reliability. Until a few years ago, Ethernet also trumped Wi-Fi in terms of speed, but with the advancements in technology, the latest generation routers offer a speed at par with Ethernet.
There’s also the option to enable eSIM on Windows 11 and use the cellular data network if the feature is available on your device.
If Windscribe is not connecting and displaying errors instead, follow the guidelines below.
We figured out why the VPN can get stuck on Connecting or is displaying messages like we’ve detected that your network settings may interfere with Windscribe.
Find below step-by-step instructions to make Windscribe work seamlessly:
What to do if Windscribe doesn’t connect?
1. Try another server
When a VPN isn’t working, it might be due to overloaded servers. Simply disconnect from the problematic server and connect to another one to resolve the issue:
Open Windscribe.
Click Locations to expand the server list.
Pick another country and double-click on it to connect.
2. Change protocols
Open Windscribe.
Click on the hamburger menu in the upper right corner.
Go to the Connection settings submenu.
Locate Connection Mode and change from Auto to Manual.
This will show you different protocol options. Switch to a different one and save your settings.
Try connecting to your VPN again.
Due to technical reasons, not all VPN protocols work in the same way. Sure, they encrypt your traffic and ultimately do the same thing more or less, but the way they do it is not identical.
That’s why if you notice that Windscribe is not connecting, switching protocols is a wise thing to do.
3. Reinstall Windscribe
As simple as it sounds, a reinstall can fix a lot of issues like corrupt files or outdated VPN versions.
After you uninstall Windscribe, it would be a good idea to make sure the associated TAP/TUN adapter driver is also uninstalled.
To do that, open Device Manager> Network Adapter>Locate Windsccribe WireGuard or something similar and select Uninstall.
Furthermore, instead of using the same installation kit you downloaded to your PC, you might want to visit Windscribe and download the latest installer version.
4. Flush your DNS
Your ISP-assigned DNS might be just a smidge restricted, which may result in various connectivity issues. It could also make Windscribe unable to connect. Just to get it out of the way, you should try switching to a free alternative, such as Google’s public DNS.
After, you should also perform a DNS flush. Now it’s not a must to flush your DNS (clear old DNS records), but it’s definitely recommended. Cached data build-ups, including DNS records, can get in the way and trigger connectivity issues.
If bad/outdated DNS information was what caused the error, Windscribe should connect and work without a hiccup after you change it.
1. Right-click yourStart menu.
2. SelectNetwork Connections.
3. Click theChange adapter optionsbutton.
4. Right-click your default Internet connection.
5. SelectProperties.
6. HighlightInternet Protocol Version 4 (TCP/IPv4).
7. Click thePropertiesbutton.
8. Toggle theUse the following DNS server addressesoption.
9. In thePreferredandAlternatefields type8.8.8.8, respectively8.8.4.4.
10. Click theOKbutton to confirm the changes you’ve done.
11. Now you should flush your DNS. To start off, press the Windows key to open the search box.
12. Type cmd in the search box and right-click on the result, then select Run as Administrator.
13. Type the commands below, each followed by the Enter key:
ipconfig /flushdns
ipconfig /registerdns
ipconfig /release
ipconfig /renew
netsh winsock reset
14. Restart your PC .
15. Once your PC is back alive, you should launch Windscribe and try connecting to one of its servers.
5. Check your antivirus
Security software like firewalls or antivirus can block Windscribe’s internet connection. Check and remove any rules in your firewall or antivirus that might be restricting Windscribe to ensure it works properly.
6. Use another VPN
If your Windscribe is not working and you cannot get it to connect under any circumstance, then you might want to change to a different VPN.
Vacation season is over at Microsoft, and conference and event season is gearing up. Along with Ignite, and a possible Surface Event, the company is also planning a number of other conferences, including the Microsoft Research Summit, sheduled to be held virtually on October 18-22. The event will bring together over 120 speakers from the research community at Microsoft, and partners and collaborators from industry, academia, and government.
Battlefield 4 is one of those games that became an instant hit upon its release. The online, first-person shooter fame is loved by millions of gamers across the globe.
Including those residing in countries such as the USA, UK, Australia, and interestingly, China, where the game is actually banned.
However, not all regions have BF4 servers that are close by to the gamers’ locations, which means the players will definitely experience issues when playing online, like lagging, or even rubberbanding when connecting to servers in distant locations.
Thankfully, all the lagging, distance, and geo-restriction issues can be circumvented with a good VPN for Battlefield 4, which allows the gamer to get a faster and more stable server response.
A VPN can reduce ping times for lag-free gaming, while letting you switch to the nearest locations for BF4 gaming servers, and protecting you from hackers, identity thieves, and online surveillance.
As you check out our top picks for the best VPN for Battlefield 4, be sure to consider the VPN provider’s network, speed, and quality of service.
Plus encryption and other security features so you can get only the best for your gameplay experience.
Can you play Battlefield 4 with a VPN?
Yes, you have the possibility to enjoy this shooter gameplay using a VPN that can unblock the game in restricted countries.
As a result, you need software with servers in available locations for Battlefield to get back your rights and play the game when you please.
You should choose a VPN with geo-restrictions tools for accessing any website or game from all regions with efficient encryption and traffic routing.
Does ping matter in Battlefield?
You can play Battlefield and use your high ping to your advantage, as you can see your opponents slower and eliminate them before they know it.
So, you may wonder how to use this to win more matches and what is a good ping for Battlefield.
According to users on Reddit, you can lose your matches on 1v1 if you have a low ping because the other players that have slow-motion actions will shoot you before even you even see it.
How do I lower my ping in Battlefield 4?
If you propose to reduce your ping while playing Battlefield, this is how you do it:
Choose high-speed servers where the game is available.
After connecting, it should look like this:
Play Battlefield with improved speed and performance.
Therefore, after connecting your VPN to fast and valid servers for this game, you won’t experience any high ping scores and enjoy every moment in the action.
Lags, latency, geo-restrictions – those are the things gamers’ nightmares are made of. But you can forget about them thanks to Private Internet Access.
Kape-owned PIA (the shortened formula for Private Internet Access) is a powerful, well-rounded VPN that will revolutionalize your BF 4 experience.
Boasting ultra-fast speeds and unlimited bandwidth, you will be able to slay your opponents before they can figure out what hit them.
Thanks to its powerful network, your ping will be lower and your overall gaming performance boosted.
But speed is just the tip of the iceberg. PIA relies on gateway servers spread across 44 countries around the globe, which guarantees no distance however big will stand between you and the BF4 servers.
You might have noticed that some features or content may be inaccessible. This can happen for various reasons starting with your geo-location and all the way to your ISP policy.
With PIA, there is no such thing as online censorship – you will be able to enjoy a truly liberated, full gaming experience with no geo-restrictions to hinder your gameplay and no ISP throttling.
You can as well connect to servers worldwide with 3395 + servers in many countries so you unblock any web content or games. Plus, reduce gaming latency with the highest speeds (no buffering or slow loading times)
When it comes to privacy and security, PIA is your best best. Boasting secure VPN tunnels for your traffic, IP cloaking, state-of-the-art encryption algorithms, and malware-blocking tools, you can be sure your protection is uncompromised.
In addition, it uses secure VPN Protocols (PPTP, OpenVPN, and L2TP/IPSec) and supports to up to 10 devices simultaneously.
Private Internet Access
Unblock geo-restricted BF4 content and eliminate gaming lags and latency with this VPN.
Games available on the internet, such as Battlefield 4, are a great way to spend your spare time, but, unfortunately, access to these games may be restricted not just in institutions, but also in countries.
Whether you’re a casual or experienced gamer, you may face problems accessing your favorite online game as you can be denied access, the most common reason being the negative impact of playing games – on productivity.
However, not many gamers agree with this, so they search for a way to access their favorite games online.
This is where NordVPN comes in handy, as it unblocks online games and gaming sites. When you connect to one of its VPN servers, your IP address is hidden and replaced, so your identity is protected as you play.
You also get an added layer of security on your internet traffic, with military-grade encryption so your communications are protected, and your private data is kept from prying eyes.
It also helps reduce lag and latency, protects against DDoS attacks, and never keeps logs of your activity.
NordVPN
NordVPN can reduce your ping and improve your packet loss in Battlefield 4.
ExpressVPN is known for being a high-quality service for online gaming, with its large server network in various locations, which gives gamers access to each other on a global scale.
It is compatible with Windows operating system, as well as other internet-supporting devices such as the Xbox console.
Among the benefits of using this Express VPN International Ltd. owned VPN for Battlefield 4 are its lightning-fast speeds, 99.9 percent uptime, and no buffering issues while you play your game.
It also offers 256-bit encryption, more than 1700 servers, DNS/IPv6 leak protection, and it is ideal for online games with the lowest ping time.
It may be a little bit pricey, but it is totally worth it, plus you get a 30-days money-back guarantee.
ExpressVPN
This VPN helps you reduce ping and packet loss in Battlefield 4 so you win all the time.
This is an excellent VPN for Battlefield 4, and online gaming generally, with a fast and simple, but also effective way of protecting you and your activities online, including your sensitive information, and privacy.
With more than 300 servers in over 20 countries, CyberGhost has advanced security features including NAT firewall, DNS leak, tracking protection, anti-fingerprinting, ad-blocker, antimalware, and antivirus.
Also, its kill switch feature protects your connection from dropping during unexpected interruptions. Other great features include its no-log policy, so your online activities aren’t recorded.
Benefits include high speeds, a huge server network, global coverage, multiple usages on up to 5 devices simultaneously, plus guaranteed security and encryption.
CyberGhost VPN
Looking for a VPN that works great with Battlefield 4? CyberGhost covers every network needs.
VyprVPN’s large network of servers and locations get you the fast speeds you need for enhancing your gaming experience.
Features include robust DDoS protection, an encryption system, over 700 ultra-fast servers across the globe, and it doesn’t rely on third-party hosting, instead, it owns and manages all its servers.
Your activity is protected with the zero-logs policy, plus its VyprDNS service defeats DNS censorship, and you can bypass any strict firewalls that block your connection.
This Golden Frog GmbH owned VPN for Battlefield 4 is reliable, fast, secure, and has lower ping times thus better gameplay overall.
With Chameleon technology, this VPN is able to defeat blocking, ISP throttling, and still remains an easy-to-use VPN for all your devices.
Vypr VPN
If you have ping and packet loss problems with Battlefield 4, Vypr will bite them all.
PureVPN has an extensive network server that supports services for online games such as Battlefield 4 and others. Specifically, it has over 300 servers in 45 countries, and strong security and anonymity.
It is compatible with Windows operating system, and other internet-enabled devices, such as Xbox One, on which you can set up the VPN to play Battlefield 4.
Among its benefits are the superfast speeds, and extreme online security using encryption protocols such as PPTP, L2TP, SSTP, OpenVPN, and IPSec.
More so, you have protection against DDoS attacks, which makes it one of the preferred VPNs for Battlefield 4.
PureVPN
Need a VPN to keep ping and packet loss low on Battlefield 4? Check out PureVPN.
With a proven record for the category, IPVanish is definitely a great VPN for Battlefield 4. It features over 130 servers in 47 countries, at a budget-friendly price, and works across all devices that support BF4, such as Xbox, or your gaming laptop.
IPVanish does away with buffering while you play online, has great speeds, and optimizes your gaming experience while lowering ping time, and ensuring DDoS protection to gamers.
Its benefits are derived from its features such as a large Tier 1 server network that is lightning fast, strong 256-bit encryption, and it works well with games with the lowest response time.
However, this StackPath, LLC-owned VPN is based in the US so it follows the local laws and regulations.
IPVanish
Want to improve your Battlefield 4 experience by lowering your ping? Try using IPVanish.
It’s not just a reason why you can be banned from this gameplay, so you need to be careful with their rules.
Hence, you can get kicked out from BF4 from factors like hacking attempts, bot detections, or VPN detection.
You may also face the PunkBuster error that appears if your firewall or antivirus interferes with the game. There are other ban messages reported by users and they look like this:
please disable VPN and rejoin Battlefield agency
BF4 banned from every server
BF4 vpn ban/kick
BF4 banned/kicked for vpn
Battlefield 4 ban check
Is there a VPN for Battlefield 4 that you use? Share with us by leaving a comment in the section below.
Search indexing was turned off message in Windows 11 can appear from time to time, and many users are wondering if this message negatively impacts their PC.
In today’s guide, we will take a closer look at the causes of this and show you the best ways you can use to fix this problem.
What is Search indexing was turned off message?
This message appears in the Windows Search, indicating that indexing isn’t enabled.
If that’s the case, the search feature won’t be able to find specific files, and its performance will be affected.
Besides a performance drop while searching, this message shouldn’t affect you.
What does indexing search do?
This feature indexes file properties, titles, contents, and paths, allowing you to find them via Windows Search. It’s worth mentioning that some built-in apps also rely on this feature to find files quickly.
What can I do if Search indexing is turned off message appears?
1. Make sure the Windows Search service is enabled
Press Windows + R to open Run, type services.msc in the text field, and click OK.
Next, double-click the Windows Search service.
Select Automatic on the Startup type drop-down menu.
If the service is not running, click on the Start button under Service status.
Finally, click OK to save the changes and exit the window.
Repeat the steps above to enable and start the Background Tasks Infrastructure Service and Remote Procedure Call services if required.
Once done, restart the computer.
NOTE
If Windows Service is already enabled and running, try right-clicking that service and selecting the Restart option instead.
When encountering the Search indexing was turned off message in Windows 11, you should first verify whether the Windows Search service is enabled. If it’s not, make sure to do that.
2. Run the Search and Indexing troubleshooter
Press the Windows key to open the Start menu, and then select Settings.
Next, click Troubleshoot on theSystem tab.
Select Other troubleshooters to proceed.
Click the Run button for the Search and Indexing troubleshooter.
Then select My problem isn’t listed above option in the troubleshooter, and click the Next button.
Enter a description for the issue in the text box, and click Next to continue.
You may also select the other options here in the troubleshooter and proceed with the on-screen instructions to turn on Search Indexing.
3. Rebuild the search index
Press Windows + S to open the Search menu, type windows search in the text field, and click on the Change how Windows searchers.
Then click the Advanced button.
Then click the Rebuild option.
Click OK to confirm.
Once done, restart the computer and verify if the Search indexing was turned off message disappears in Windows 11. If not, head to the next solution.
4. Clear the TxR folder
Press Windows + E to open the File Explorer, click on See more (ellipsis), and then select Options.
Navigate to the View tab, select the Show hidden files, folders and drivesradio button, and click OK.
Navigate to the following path or paste it into the address bar and hit Enter:C:\windows\system32\config\TxR
Select all the files in the TxR folder with BLF and REGTRANS-MS extensions, and click the Delete button.
5. Restore Windows 11 to a previous date
NOTE
Restoring Windows 11 to a previous time will delete programs installed after the restore point was created. To check what software a restore point removes, you can click the Scan for affected programs button in System Restore.
Press Windows + R to open Run, enter rstrui.exe in the text field, and click OK.
Select the Choose different restore point option, if it’s available, and click Next.
System Restore might include a Show more restore points checkbox. Select that checkbox if you can do so.
Now, select a restore point that predates the Search indexing was turned off error on your PC, and click Next.
Click Finish to initiate the system restoration.
System Restore is a handy built-in utility that aids in cases like these. It has helped a lot of users fix the Search indexing was turned off error in Windows 11. To utilize it to the fullest, we recommend creating a restore point when making changes to the computer.
6. Reset Windows 11
NOTE
This is a pretty drastic last-resort resolution that’s recommended only if nothing else works. You’ll need to reinstall all software that didn’t come preinstalled with your PC after resetting Windows.
Press Windows + I to open Settings, and select Recovery on the right in the System tab.
Click the Reset PC button.
Select the Keep my files option.
Next, select either the Cloud download or Local reinstall option (whichever you prefer), and similarly choose the other preferable options to complete the restore process.
After you have factory reset Windows 11, the Search indexing was turned off error in Windows 11 would be gone for good.
If this happens and your PC is affected, you might want to disable indexing temporarily.
Is it safe to disable search indexing?
Disabling search indexing is safe, but only if it’s causing problems on your PC. However, it will make searching a lot slower if you do so.
The potential resolutions here will likely fix the Search indexing was turned off error for most Windows 11 users. So, make sure you give them a try first. And with indexing turned on, you can now effectively search on Windows 11.
Using SharePoint is beneficial to your business or organization. It is well-structured and well-secured. Likewise, users need to have permission before making significant adjustments to the content.
However, implementing changes can be challenging if user authorization is not working in SharePoint. It can render the whole document manager inactive as users won’t be able to perform any tasks on it.
SharePoint is a document management tool that allows businesses or companies to manage documents, reports, archives, logs, and other critical business content involved in a company’s operations.
It aids professional business management by streamlining access to documents and data in the business.
However, users complain about numerous permission issues like SharePoint domain group permissions not working and SharePoint item level permissions not working.
Many things can be responsible for permissions not working on SharePoint. More so, the causes range from the incorrect configuration of the user administrator permission to browser permission issues or something else.
Why are SharePoint permissions not working?
User permission configuration issues: SharePoint has a hierarchy that controls how exposed access to the company’s database can be. So, if you’re not assigned permission to make changes, or your permission is revoked, the permission may not work on your end. Likewise, users with read-only access cannot make any changes. Hence, SharePoint site security allows the owner to have total control over the site, and members can make some changes. But users with visitor-level access can only read. Users may be interested in how to fix the SharePoint couldn’t add external users as a member issue in just a few steps.
Browser issues: SharePoint may encounter the browser or conflict with the browser settings. So, it can prompt lots of problems with its productivity. Also, browser cache and cookies may be culprits in the SharePoint read permissions not working. Caches and cookies are collected data to help the browser load sites faster and smoothly. However, they can become old or corrupt and cause difficulties with the site running on your browser. Also, you can read through our article about how to fix SharePoint if it constantly asks for a password while working on it.
Outdated browser: If your browser is not up to date, it can cause issues with SharePoint permissions. Outdated browsers lack security updates that help them work properly and can affect how to relate to sites.
Quick Tip:
Since the problem can most certainly be caused by the current browser, why not switch to another one?
Opera One has great features such as the Ad Blocker feature that protects your privacy and blocks any ads that may slower your browsing activity. Plus, it also feature it’s own built-in AI.
Opera One
Enjoy a better browsing experience with Opera One’s amazing features.
Click the Actions button and select Site Settings.
Click on Site Permissions below the Users and Permissions category.
Check the box for the group permission you wish to modify.
Navigate to the Permissions tab and tap Edit User Permissions, then check the box for the new permission level.
Click OK.
Resetting the user permission can help reassign access rights and fix SharePoint’s permission issues.
4. Switch to another browser
Another easy fix is using another browser to see if the issue persists. However, you can read through our handpicked list of the best browsers for SharePoint online.
5. Run the Check User Access Diagnostic
Admin users have access to run diagnostics to detect the problem with the user access. The diagnostics will verify the possible cause of the permissions not working issue. Admins can go to the Microsoft Admin diagnostics website for more information.
Can I check SharePoint user permissions?
Yes, you can check SharePoint user permissions on the site. Follow the steps below:
On the SharePoint site, click the Settings button.
Click Site Permissions and select Check Permissions.
Enter the username of the user whose permissions you want to check and click Check Now.
The above solutions are the most effective fixes that can be used to fix the SharePoint permissions not working problem. We advise you to follow the steps strictly for optimal results.
Hotstar is an online television service with over 100 million downloads from Indian media Giants STAR which launched in January 2015.
The service allows users to watch live and on-demand video content from their Windows PC, mobile phones, Xbox 360, Xbox One, and other platforms.
Furthermore, Hotstar contents are provided either free of cost or on a subscription basis. Premium contents are available only to premium membership holders.
However, even USA Hotstar subscribers abroad are restricted from streaming all Hotstar programs, due to geo-restriction. This is because they are not currently residing in India.
To access Hotstar while outside the allowed region, you will need to bypass their geo-restrictions this is where the use of VPN is needed.
How do I change my Hotstar region?
Hotstar automatically changes region based on your IP. If you want to watch content from a different country, you will have to use a VPN or proxy before accessing Hotstar.
If you have accessed the app in the past, we recommend logging out and clearing your browser’s cache before changing location.
This way there will be no interference between the information the website stored about you and your IPs location.
How can I use Hotstar outside India?
Get a reliable VPN. We recommend ExpressVPN because it has virtual servers in India.
Download and install the VPN on your device.
Launch the VPN and connect. Use the three dots next to Current Location to select the Indian server.
Open Disney Hotstar and log in with your credentials. Start streaming your favorite shows.
By connecting to a VPN server located in India, the platform will not be able to restrict you because it will appear as if you browse from inside the country.
Developed by Express VPN International Ltd., ExpressVPN is secured with 256-bit encryption and offers unlimited bandwidth and speed so that you can watch online streaming services in high definition.
This VPN is the best VPN to watch Hotstar abroad without any interruption. Choosing from thousands of secured servers, you will have access to preferred TV shows or movies without issues.
Key features of ExpressVPN include:
Unlimited server switching
IP address masking
256-bit AES encryption
High-end protection
Zero logs policy
24/7 customer support
If you are looking forward to watching your favorite programs through your Hotstar subscription but will be outside India when the series is on, ExpressVPN is your choice.
ExpressVPN
If you’re looking for a Hotstar-compatible VPN, you should check out ExpressVPN.
Developed by Kape Technologies, Private Internet Access is an incredibly popular VPN service that successfully keeps up with the market.
You cannot find a better option when you want Hotstar access. First of all, you’ll certainly appreciate that it’s one of the fastest VPNs at the moment.
This is possible as long as you can downgrade the security encryption from AES-256 to AES-128.
You may think that this is a bit outdated, but not if you apply AES-128 while you’re on a safe network and intend to stream videos without restrictions.
So, if you want to considerably increase speed, feel free to push the limit with no reservations. Moreover, this VPN takes privacy seriously.
Private Internet Access does not log any consumer data whatsoever and also offers the newer WireGuard protocol which uses a strong encryption suite.
Don’t hesitate to check out a few of its key features:
No logs policy, so rest assured that your data isn’t tracked or monitored
IP addresses change every time and are always assigned randomly
You may enjoy Hotstar, Netflix, and HBO GO with ease
Over 3200 servers in 46 countries and the numbers are growing
Excellent customer support
Private Internet Access
Private Internet Access is the best VPN for Hotstar. Now available at a major discount!
NordVPN offers a double encryption service to make your sensitive data effectively protected while navigating online.
With more than 5,400 servers in 59 countries worldwide, NordVPN gives unlimited speed and bandwidth, which enables you to stream Hotstar programs without hits or delays.
This protective software surely can increase your online privacy and bypass the geo-blocking policies in different countries, so you can enjoy the favored entertainment despite the local restrictions.
Key features of this Tefincom & Co., S.A. VPN include:
Automatic Kill switch
Access to 5462 servers
Double encryption
Automatic kill switch
Up to six simulation connections
Furthermore, NordVPN offers a 30-day refund period, which is enough time to fully test their VPN servers. This is a must-use for Hotstar users.
NordVPN
Enjoying Hotstar is a matter of seconds when using NordVPN! Get the best deal right away!
With Surfshark you have the perfect gateway to your favorite streaming content without local restrictions or censorship applied in different regions.
In the first place, this VPN tool will offer reliable security tools that help you to protect your identity and take control over your favorite digital content.
With powerful encryption of your online connection, it’s possible to hide your IP and choose from thousands of secure servers in order to surf on the web.
Another useful feature would be Cleanweb for preventing online trackers or adware in your browser. Plus, it provides malware or phishing attacks present anywhere.
Key features of Surfshark include:
Uncensored internet for great content
Unlimited devices with one subscription
Camouflage Mode for enhanced privacy
Private DNS and leak security
NoBorders Mode
A kill switch option
VPN secure protocos
Powerful AES-256 encryption
That being said, using such an exhaustive VPN service offers digital freedom and unrestricted content to watch your favorite movies or TV shows effortlessly.
Surfshark
Acquire your deserved rights for uncensored content for Hotstar in the US or anywhere in the world.
IPVanish is one of the most popular VPN providers out there. This VPN solution developed by StackPath, LLC is mainly known for its fast VPN server speeds.
Their no-logs kept policy means that you get to truly browse the web anonymously, to Geo-Locked Content.
Key features of IPVanish include:
Unlimited P2P Traffic
256-Bit AES Encryption
SOCKS5 web proxy
Unlimited P2P
Unlimited Bandwidth
Optimized for super speed
In addition, IPVanish uses OpenVPN and L2TP/IPsec VPN protocols. This affords users the ability to conduct their online activities safely and anonymously.
IPVanish
IPVanish can protect your privacy with minimum effort, and even works with Hotstar.
Considering Hotstar’s strict geo-blocking policy, you may not have the best of luck if you use a free VPN.
Free VPNs are usually easier to detect so you risk not being able to access the platform and get your VPN’s IP blocked.
How do I stop Hotstar from detecting VPN?
Use a good and reliable VPN with obfuscated servers and multi-hop features. Enable all privacy and securiy features that ensure the platform won’t be able to detect that you use a VPN.
Have you used any of these VPNs for Hotstar we mentioned above? Do share with us your experience by commenting below.
Streaming or playing videos on your devices is best when it is done smoothly without interruptions or breakages. Likewise, we all know how annoying it can be to wait for a while for videos to preload before your video starts playing.
Apple TV that keeps buffering is one of the most frustrating experiences users can encounter while trying to watch videos on the device.
Moreover, users complain that Apple TV keeps stopping during movie load. It can take a long time before play. It indicates that Apple TV is buffering.
Buffering refers to downloading a certain amount of data while streaming videos and audio over the internet before playing the music or movie. The video may take a while to load because it gathers preload data into a reserved memory space.
Furthermore, buffering is common with streaming platforms while using Apple TV to stream them.
Consequently, buffering can result in the video or stream channel freezing, preventing users from being able to watch.
It can prompt topics like Apple TV keeps buffering on Hulu, Apple TV keeps freezing on laptops, Apple TV keeps freezing on Roku, on Sky, on Firestick, and more.
You can also follow our FXNOW activate guide to ensure your FXNOW account and devices are set up correctly alongside your Apple TV streaming fixes.
Poor or unstable network connection – A poor network connection makes it buffer for a long time and can also keep Apple TV freezing on the laptop
Not enough bandwidth to stream the content – When many users are connected to the same network, it’ll reduce the amount of download bandwidth that goes through your device
Not enough memory space on your device – The Apple TV can constantly buffer if there is not enough space to store data
How do I stop my Apple TV from buffering?
1. Check your Internet connection and disconnect other devices
Performing a power cycle on your router is an excellent way to fix network-related issues that may be causing Apple TV constant buffering.
As said earlier, insufficient bandwidth to play videos can constantly make the Apple TV buffer.
So, we recommend you disconnect some devices that are not necessary from your network. It’ll help increase the bandwidth and help the Apple TV load faster.
Also, if you’re using a wireless source, make sure that your device is as close as possible to it, and that there are no obstructions between the two.
2. Unplug and replug your router/modem and Apple TV
Many of our readers said that they’ve managed to fix this problem with a simple disconnect of the devices from the mains.
So, unplug your router’s and/or modem’s power cable. Do the same with Apple TV and wait for 2-3 minutes, then reconnect them back.
3. Use a VPN
Another issue with Apple TV buffers and freezes is that the server that Apple is connected to may have a problem or be overloaded. A good solution is to use a VPN and connect to another server.
ExpressVPN is one of the most trusted VPN providers with server locations in 94 countries. Its interface makes it easy for anyone to connect to any server simply through a few clicks.
Plus, you can watch content that was previously inaccessible. A great new German TV series just launched with geo-restrictions. Simply connect your IP location to Germany and enjoy the series.
Using a VPN is completely safe and legal. Plus, it offers some amazing security features to protect your privacy when streaming your favorites.
Also, ExpressVPN is optimized for speed, so every connection will provide you with some of the highest speeds.
ExpressVPN
Enjoy content from any country right on your Apple TV without video buffering.
Choose Reset or Reset and Update from the available options.
After this, the Apple TV should stop buffering or freezing when used.
5. Update Windows
Click on the Start button.
Select Settings from the options.
Click on Windows Update and select Check for updates.
Windows will automatically search and download updates if there are any available. Updating Windows can help fix Apple TV that keeps freezing on the laptop.
Select the Restart option and press Enter on your remote.
The above steps apply to Apple TV (Apple 4K TV or Apple TV HD).
Another effective fix for the Apple TV keeps buffering issue is restarting your device. Regardless of the devices you are accessing the Apple TV from, performing a power cycle on it can help fix problems that are startup related.
However, users can turn off the device and unplug it from its power source, then plug it back in and turn it on again. It can fix Apple TV if it keeps freezing on LG TV.
How can I improve my Apple TV streaming?
One of the best ways to improve your Apple TV streaming is by keeping your software and device’s operating system up to date. It helps Apple TV load faster and more smoothly. Also, ensuring you have enough space on your device can allow it to store more data.
Playing Flash games online can be fun, especially when your Windows 10 browser comes with unique features to ensure. Unfortunately, this is not the case in more recent times, as the tech is no longer natively supported on browsers.
While this may seem to damper some of your favorite Flash games, you should know that there are workarounds to access Flash content on browsers.
Speed, stability, accessibility, and online safety must be considered when deciding which browser or tech to use, and we recommend against using Flash.
However, we will walk you through the best browser options if you must access Flash content or play Flash games.
How can I play Adobe Flash games in my browser?
As we initially mentioned, Flash is no longer supported; however, the workaround will be using browser extensions.
Many of these are very easy to install and use. They should be configured on your browser and ready to use in just a few clicks.
The best part is that for excellent gaming browsers like Opera GX, there are many options to try, and you will not be lacking in any Flash games.
What is the best browser I can use to play Flash games?
Opera GX is the number one choice for many gamers and an excellent browser for Flash games.
First, to enjoy your favorite flash games, you must download one of the many great Flash extensions from its Web Store.
Also, using this browser, you can restrict or control how many hardware resources will be used.
Doing this will ensure that your PC has all the resources needed to focus on other tasks.
Moreover, thanks to the Network Limiter available, the browser allows you to free bandwidth, if needed, for other tasks, such as downloads or streaming.
The Twitch integration is another highly appreciated feature by gamers since it will allow you to watch your favorite streamers and Twitch notifications.
Some Important features:
Video pop-out
Free VPN
Force dark pages
Opera GX
This reliable and dedicated gaming browser will make you forget pop-ups, interruptions, or buffering issues.
Chrome is a fast browser, making it a perfect choice for playing Flash games. The massive extension library stands out with this browser, where you will find many add-ons that allow you to play Flash games.
This popular web browser is highly optimized for multitasking and can handle many open tasks without a problem.
The browser’s built-in password manager is another helpful feature that will remove the burden of memorizing all the passwords.
Although Chrome is not a browser built specifically for gaming, it still offers impressive features that make it a perfect choice for gaming.
Firefox has a strong focus on privacy and transparency and can also handle Flash games if you use one of its several Flash extensions.
The browser has a video pop-out feature that allows you to watch your favorite stream in a separate window while focusing on other tasks.
The highly customizable interface and its compatibility with various platforms are great selling points for Firefox.
As mentioned above, thanks to the intense focus on security and privacy, you can rest assured that no advertising will interfere with your online games.
Vivaldi is another reliable browser that can handle Flash games perfectly while putting a great emphasis on your online privacy also. However, you will need to install some plugins before you can play Flash games.
This browser does not track or store your data which can offer a sense of security of knowing that your privacy is ensured.
Vivaldi has additional features that make task management easy and enjoyable, mainly when operating with multiple tabs.
In addition, Vivaldi also offers a split-screen feature which means that you can have two websites on a single page, displayed side by side.
Xbox Free Play Days is back with another round of games for Xbox Live Gold and Xbox Game Pass Ultimate subscribers. This time there are two games in the lineup: Diablo 3: Eternal Collection and Golf With Your Friends. These games will be available to play free from Thursday, September 15 through Sunday, September 18.
For most the highlight of this weekend’s lineup will be Diablo 3: Eternal Collection. Although Golf With Your Friends should not be overlooked as a sporty good time to have with friends. Learn more over on the Xbox Free Play Days FAQ page. And as a bonus, the games featured will be available at a discounted price as part of the Xbox Free Play Days event.
One of the most common issues streamers complain about while streaming is buffering. It makes it so complicated and annoying to watch videos without interruptions
. Users complain about the ESPN Plus buffering constantly and sometimes freezing. However, the ESPN Plus buffering issue is familiar to many streaming services like Apple TV, Disney Plus, and Netflix.
Furthermore, you can encounter buffering issues while using any streaming services, which can be due to many reasons.
The main culprit for the ESPN Plus constant buffering issues is a slow or lagging internet connection. Being an online subscription service, ESPN Plus requires a stable internet connection to stream content from its servers.
However, buffering occurs when your internet connection is not strong enough to keep up with the video streaming speeds.
It causes lag and makes the ESPN Plus buffer. Also, streaming platforms like ESPN Plus, HBO Max, and Apple TV may store preload data of the video you want to stream so that it can prompt buffering issues.
Nevertheless, the ESPN Plus buffering issue is an easy problem to get rid of and permanently fix.
Why does the ESPN Plus app keep buffering?
Slow and poor internet connection: The ESPN Plus buffering issue may occur due to a slow or lagging internet connection. The streaming activity requires a stable and fast network connection to deliver an enjoyable and smooth streaming experience. Also, having many devices connected to the same network can make it impossible for you to get enough bandwidth to load ESPN Plus. Hence, it can cause ESPN Plus buffering issues on Firestick and other streaming platforms.
Outdated graphics/audio drivers: Outdated drivers can cause issues with your streaming services. It can prompt several issues because your device doesn’t have the essential updates and patches to help fix bugs. So, it can be responsible for the ESPN app Chromecast buffering issues.
Outdated app/operating system: Running an outdated app can impede its productivity and cause many issues. So, outdated operating systems like Windows can affect how apps on the device work. Also, if the ESPN Plus app is outdated, it can cause a buffering issue.
How do I stop ESPN Plus from buffering?
1. Restart your device
The easiest way to fix ESPN Plus buffering issue is to restart your device. It can help fix any startup issues or malfunctions that may temporarily affect the device.
So, depending on your device model, we recommend you turn it off and unplug it from the power source. Plug it back after some minutes and turn it on to check if the issue persists.
You can use Device Manager to update your audio or graphic drivers. When you open it, you will see the list of all your hardware. To check for driver updates, right-click on it and choose Update driver from the list of options.
Then, you have two choices: either select the first option if you want the system to automatically search for a driver, or select the second one if you already downloaded a driver. If so, you will have to direct its location.
After that, if a driver update is available, it will automatically be installed. If it isn’t the case, your driver is already updated.
If you don’t want to update your drivers manually, then we recommend a specialized software. Outbyte Driver Updater can perform a thorough scan of your PC and then can find any driver that needs to be updated. After noticing the outdated drivers, it will download instantly the latest updates directly through its interface.
Outbyte Driver Updater
An amazing tool that helps you keep your device drivers updated all the time.
Performing a power cycle on your router is the best way to fix network-related issues that may affect your streaming services. It’ll relatively make your internet connection faster and prevent constant buffering.
4. Switch to another network connection
We recommend you switch to a wired cable connection if you’re having difficulties with your Wi-Fi connection. Likewise, you can switch to a Wireless network and see if you can fix the issue.
If the problem goes beyond ESPN Plus buffering and you also see login loops or provider errors, check our full ESPN not working troubleshooting guide for broader fixes.
5. Use a VPN
Using a reliable VPN service can boost your streaming experience. ExpressVPN allows you to stream or download your preferred content with unlimited bandwidth. You can access your apps anywhere in a more secure way.
It also has an amazing feature that helps you get ultra-fast speeds for better-quality videos without impediments.
With this VPN you can watch ESPN Plus privately without any blackouts or throttling. ISPs can intentionally slower your internet connection if they identify that you’re using a large amount of data.
ExpressVPN defeats throttling by protecting your online traffic from ISP so that it’s powerless to inspect your data usage.
ExpressVPN
Improve your streaming speeds and protection with the fastest VPN available.
Launch the Chrome browser on your computer and click the More button.
Select More Tools, then Clear browsing data.
Select the Advanced option.
Choose the time range you want to clear and check the boxes for Cookies and other site data & Cached images and files.
Click Clear data.
Close your browser and relaunch it when the process is complete. It applies only to users streaming on a browser.
How can I improve my ESPN streaming?
Closing unnecessary programs in the background can free up some bandwidth for ESPN streaming. Also, not having many tabs on your browser can improve your ESPN Plus streaming.
The latest update for Fallout 76 is out, bringing the Expeditions System to the game with the launch of season 10. For the first time in the game, players will get a chance to venture beyond the borders of Appalachia with the inclusion of a new area called “The Pitt.”
Players will now be able to lead Expeditions to The Pitt via Vertibird, with the first two missions available at launch: “Union Dues” and “From Ashes to Fire.” No doubt more will follow. And players will be able to gain legendary weapons and armor as well as they complete missions in The Pitt.
And while you’re journeying through the post-apocalyptic wastes of Fallout 76, don’t forget to drop by The Whitespring Refuge. Here you will be able to access Daily Quests and new rewards that can be purchased with earned Stamps.
The update also features a host of technical improvements, and so much more. Be sure to check out the official patch notes via the link at the beginning for further details.
Webcam Protection is a feature offered by 3rd party antivirus software that prevents any malicious apps to access the webcam on your PC without your permission.
Once you enable the Webcam Protection feature, it will make sure that no unreliable app can use the webcam to capture photos or videos and import the contents outside for malicious purposes.
In this post, we will guide you through the process on how to enable and use the Webcam Protection settings in a 3rd party antivirus, as well as how to protect your webcam on your Windows PC.
How do I enable & use Webcam Protection?
1. Use a 3rd party Webcam Protection Software
To begin with, it’s not a Windows feature, so, you cannot enable it on your OS. Instead, you would need a 3rd party antivirus to enable Webcam protection and improve security.
So, for example, if you are using a dedicated antivirus software like TotalAV, Bitdefender, SpyShelter, or Kaspersky Internet Security, etc., you can enable the built-in Webcam Protection feature to stay protected.
TotalAV
Enable webcam protection with TotalAV’s premium and reliable features.
1. Press theWin+Ikeys simultaneously on your PC to launch WindowsSettings.
2. On the left end of the Settings app, click on Privacy & security.
3. Now, on the right, scroll down, and under App permissions, click on Camera.
4. On the next screen, on the right, turn offCamera access.
5. You can also turn off Let apps access your camera.
6. Further, you can also disable the Let desktop apps access your camera option, as shown below.
Another way to ensure webcam protection is disabling your PC’s camera. Once you have disabled the camera via settings, webcam protection will prevent any unauthorized access to your device.
If you are wondering how to disable the webcam protection, then you can follow the same process as above and simply turn on the access in steps 4, 5, and 6.
However, if you are using software other than that mentioned in the post, you can visit your antivirus software company’s website for further assistance.
If you have any other queries related to the webcam, you can leave your query in the comments box below.
While each of these title have their own fans, the biggest two announcements are likely to be Ni no Kuni Wrath of the White Witch Remastered due to its passionate fanbase and Assassin’s Creed Odyssey thanks to the popularity of the Assassin’s Creed franchise and the recent announcement of Assassin’s Creed Mirage which is the next major entry.
During Xbox’s Tokyo Game Show 2022 presentation it was announced that the popular Deathloop video game would be coming to Microsoft’s Xbox Series X (and Xbox Series S) consoles next week on September 20th.
Deathloop will also be available to play via the Xbox Game Pass subscription service on the same day though, if the Microsoft Store page is accurate, support for Xbox Cloud Gaming hasn’t been added yet.
Deathloop originally launched on Windows PC and Sony’s PlayStation 5 console in 2021. The PS5 launch was always supposed to be a timed exclusive so it was only a matter of time before the game came to Xbox consoles.
Here’s the official game description and trailer:
DEATHLOOP is a next-gen first person shooter from Arkane Lyon, the award-winning studio behind Dishonored. In DEATHLOOP, two rival assassins are trapped in a mysterious timeloop on the island of Blackreef, doomed to repeat the same day for eternity. As Colt, the only chance for escape is to end the cycle by assassinating eight key targets before the day resets. Learn from each cycle – try new paths, gather intel, and find new weapons and abilities. Do whatever it takes to break the loop.
IF AT FIRST YOU DON’T SUCCEED… DIE, DIE AGAIN
Every new loop is an opportunity to change things up. Use the knowledge you gain from each attempt to change up your playstyle, stealthily sneaking through levels or barreling into the fight, guns-blazing. In each loop you’ll discover new secrets, gather intel on your targets as well as the island of Blackreef, and expand your arsenal. Armed with a host of otherworldly abilities and savage weaponry, you’ll utilize every tool at your command to execute takedowns that are as striking as they are devastating. Customize your loadout wisely to survive this deadly game of hunter vs hunted.
In other gaming news, the current season of Fortnite is set to end in a few days and things are really heating up.
The Microsoft Edge Canary app for Android devices updated this week (via GH) with a new feature called Edge Block Video Ads designed to block video ads within the mobile version of Microsoft’s web browser.
The Android Microsoft Edge app already features some ad blocking due to its integration of the free AdBlock Plus tool. Edge Block Video Ads is assumed to work in conjunction with AdBlock Plus’ ad blocking and will disable video ads that slip under the radar.
Edge Block Video Ads can be enabled within the Microsoft Edge Canary app via typing edge://flags in the address bar and then performing a search for videos.
If testing goes well in the Canary app, the feature will likely roll out to the regular Microsoft Edge Android app in the near future. It’s unclear if built-in video ad blocking is planned for the iOS or Windows version of Microsoft Edge though a number of ad blocking browser extensions, including AdBlock Plus, are already available to use on Windows.