Change File Type on Windows 10: 4 Quick Ways to Do It

The file extension of the respective item lets the operating system identify what type of file it is and what software is needed to open it.

Sometimes, you cannot open the file as the file format is incorrect. In that case, you need to change the file type.

This guide covers how to change the file extensions on your Windows 10 computer. Let’s get started!  

What can I do to change the file type on Windows 10? 

1. Use the Windows Explorer

  1. Press Windows + E to open File Explorer. 
  2. Go to the View tab, and click Options.
  3. Select the Change folder and search options.change file type windows 10 - Folder options
  4. In the Folder Options window, switch to the View tab.
  5. Remove the checkmark next to Hide extensions for known file types.
  6. Click Apply, then click OK. Folder options - change file type windows 10
  7. Go to the file you want to change the extension, right-click, and choose the Rename option. 
  8. Change the file extension with the new extension, then press Enter. 
  9. On the following prompt, select the Yes option. 

2. Online converters 

  1. Go to the online converter website, such as Zamzar.Zamzar - change file type windows 10
  2. Select the file, and drag it to upload the file.
  3. Choose the file type and click on Convert. 
  4. Once the file is converted, download it.

3. Use Save as feature 

  1. Some programs, such as MS Paint and MS Office, come with the Save As feature.
  2. Open a file, and go to the File menu.
  3. Select Save As. Save As PNG -change file type windows 10
  4. Choose the selected file type and save the file with a new name. 

4. Run the Ren command 

  1. Select the file for which you want to change the file format, press the Shift key and while holding the key, right-click on it to open Advanced options. 
  2. Click the Open PowerShell window here. Open PowerShell Window - Open PowerShell Window -change file type windows 10
  3. Copy and paste the following command and press Enter: ren filename.extension newfilename.newextension

So, these are methods you can follow to change file type on Windows 10. If there are questions or concerns about the topic, feel free to mention them in the comments below. 

Fix: This App Can’t Run on Your PC [Cisco ASDM Error]

If you are getting This App Can’t Run on your PC error while running the Cisco ASDM launcher file, then you are not alone. But don’t worry; it can be fixed with a few simple steps.

This guide will cover all possible solutions to fix this error right after discussing the probable causes.

What causes this app can’t run on your PC? 

There are several reasons for this error message to appear when running the Cisco ASDN launcher on a PC; some of the popular ones are: 

  • Incompatibility with the operating system: Cisco ASDM may not be compatible with the version of Windows or another operating system on your PC, hence the error message.
  • Minimum system requirements not met: Cisco ASDM may require a certain amount of RAM or a specific processor to run smoothly. If the system requirements are not met, you may get this message.
  • Java version outdated: The launcher file needs the latest version of Java to run, and if the version you have is outdated, the app will not run.
  • Corrupted installation: If Cisco ASDM may have become corrupted or damaged, it can prevent the app from running correctly. 

What can I do to fix this app can’t run on your PC error?

Before going into the detailed troubleshooting steps, please go through these preliminary checks: 

1. Make changes in launcher file properties

  1. Go to your ASA administrator web interface, and you will get a page like this to download the Cisco ASDM launcher. Cisco ASDM - this app can't run on your pc cisco asdm
  2. Click Install and sign in using an Administrator account.
  3. The file named dm-launcher.msi will be downloaded; double-click it to run.
  4. Follow the on-screen instructions to complete the installation.
  5. Go to the Start menu, locate the Cisco ASDM-IDM Launcher file, and right-click it to get the context menu. 
  6. Now, select the Open file location option.Open File location -this app can't run on your pc cisco asdm
  7. Next, right-click Cisco ASDM-IDM Launcher and choose Properties.
  8. On the Properties window, switch to the Shortcut tab.Change the target -this app can't run on your pc cisco asdm
  9. Locate Target and replace the context beside the field with the one mentioned below: C:\Windows\System32\wscript.exe invisible.vbs run.bat
  10. Now click Apply, then OK to complete the process.
  11. Next, locate the ASDM launcher shortcut on your desktop, right-click it, and select Properties. 
  12. Change the Target value here as well.

2. Enable User Account Control

  • This method might not work for everyone, especially users with the Windows Home version. Instead, go to the Start menu, and type Local Security Policy. From the Best match, select Local Security Policy and click Open.Local Group Policy -this app can't run on your pc cisco asdm
  • Go to Local Policies, then click Security Options.Security Options - this app can't run on your pc cisco asdm
  • Now, locate and double-click User Account Control from the right pane: Allow UIAccess applications to prompt for elevation without using the secure desktop.
  • Go to the Local Security Setting tab, and click Enabled.Enabled - this app can't run on your pc cisco asdm
  • Now click Apply and OK to save the changes.
  • Close Local Security Policy and restart your computer.

So, these are methods that you need to follow to get rid of This app can’t run on your PC error message. Try them and let us know what worked for you in the comments below.

FFXIV Unable to Download Patch Files: Why & How to Fix

Some Final Fantasy XIV players have posted on Square’s forum about an Unable to download patch files FFXIV error message. The issue pops up when they try to download patch updates for the game.

FFXIV doesn’t get updated when the mentioned error message appears. If you need to fix this error, take note of the potential resolutions below.

How can I fix the FFXIV patch files error?

1. Connect to a VPN server

Some users have fixed the Unable to download patch files error by utilizing a VPN when downloading.

We recommend Private Internet Access (PIA) for a few reasons:

  • Easy install
  • Instant access to hundreds of servers all over the world
  • Unlock not just gaming, but any media streaming content
  • Protect up to 10 devices with one subscription
  • 30-day money-back guarantee in case you’re not satisfied with the service
  • No logs policy – ultimate privacy;
  • Unlimited streaming bandwidth

Private Internet Access

Looking for a no-fuss download for the FFXIV patch you need? This VPN guarantees just that, plus top privacy for your online activity.
Check price Visit Website

2. Turn off your third-party antivirus software

Antivirus utility's context menu unable to download patch files ffxiv

First, try disabling any active third-party antivirus software installed. To do that, right-click the antivirus utility system tray icon on the right of the taskbar to select a disable/shut down option.

Alternatively, you can select to turn off the antivirus software for a specific period. Thereafter, try downloading the patch update with the antivirus shield disabled.

3. Turn off Windows Defender Firewall

  1. Press the Windows key, type firewall, and select Windows Defender Firewall.
    defender unable to download patch files ffxiv
  2. Click Turn Windows Defender on or off in the left pane.
    turn windows
  3. Now, tick the radio buttons for Turn off Windows Defender Firewall under Private and Public network settings.
  4. Next, click the OK button.
    turn off
  5. Finally, try downloading the required FFXIV patch files with Windows Defender Firewall off. Turn the firewall back on when you’ve updated the game.

4. Change your DNS Server to Google

  1. Press the Windows key + R, type ncpa.cpl, and click OK.
    ncpa unable to download patch files ffxiv
  2. Right-click your active network connection and select Properties.
    properties
  3. Now, select Internet Protocol Version 4 (TCP/IPv4) and click the Properties button.
    ipv4  unable to download patch files ffxiv
  4. Tick the Use the following DNS server addresses radio button.
  5. Input 8.8.8.8 as the Preferred DNS server value.
  6. Next, enter 8.8.4.4 in the Alternative DNS server box.
    use the
  7. Now, check the Validate settings upon exit box.
  8. Click OK to close the windows.
    validate
  9. If Google DNS doesn’t fix the issue, try entering the values 4.2.2.2. and 4.2.2.4 in the Preferred and Alternative DNS server boxes instead.
  10. Restart your laptop or desktop after changing the DNS.

5. Delete the 4e9a232b subfolder

  1. To open File Explorer, press the Windows key + E keys simultaneously.
  2. Click Documents on the left of File Explorer.
    documents unable to download patch files ffxiv
  3. From there, open this folder path in Explorer: My Games / Final Fantasy XIV A Realm Reborn / Downloads / Patch
  4. Then right-click the 4e9a232b subfolder and select Delete.
    delete
  5. Thereafter, try downloading the required patch files to update FFXIV with Steam in its offline mode.

Deleting FFXIV’s 4e9a232b subfolder is another potential fix for its Unable to download patch files error.

Those are possible resolutions for the Unable to download patch files error that might get FFXIV updated again. Make sure you follow them to the letter, and you should be able to force the download through.

If you want to know how to fix League of Legends patch issues, check our detailed guide to do it quickly.

Feel free to let us know the solution that helped you fix this issue in the comments below.

How to Solve Installation Stopped Xbox One [Simple Guide]

Some users reported that installation stopped on their Xbox One, and today we’ll show you how to fix this problem.

Xbox One allows you to install both applications and games on your console. Installing games on your hard drive has its benefits and will enable you to start your games faster.

Why does Installation Stop in Xbox One?

There are various reasons why an installation may stop on an Xbox One. Some common causes include the following:

  • Insufficient storage space – The installation process will stop unless the Xbox One has enough storage space.
  • Interrupted internet connection – If the internet connection is lost during installation, the installation will stop.
  • Corrupted game file – The installation will stop if the game file is corrupted or damaged.
  • Conflict with other apps or games – If another app or game runs in the background, it may cause a conflict and stop the installation process.
  • Hardware issues – If there are any issues with the Xbox One’s hardware, such as a damaged hard drive, the installation may stop.
  • Xbox Live service outage – The installation may stop if the Xbox Live service is down or experiencing issues.
  • Incorrect installation settings – If the installation settings are not configured correctly, the installation may stop.

How can I fix the Installation stopped Xbox One error?

1. Clear local saved games and try to reinstall the game

  1. Make sure that there’s no disc in the disc tray.
  2. Scroll left on the Home screen to open the Guide.
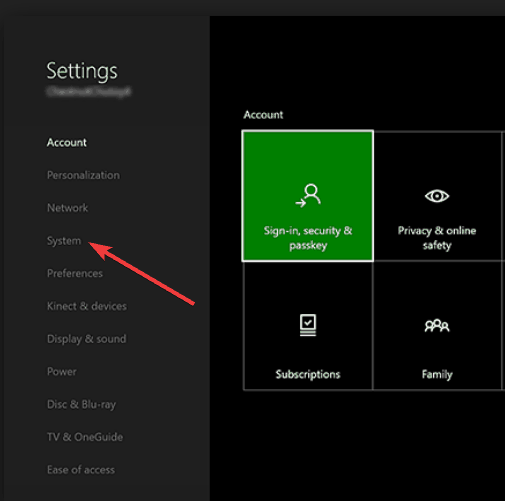
  3. Select Settings, then All Settings.
    installation stopped xbox one
  4. Choose System, then select Storage.
    xbox one system settings
  5. Now select Clear local saved games.
    installation stopped xbox one
  6. Choose Yes to confirm, then restart your console and try to install the game again.

Using this option, you’ll only delete the saved games stored locally on your console, but you can download them again from Xbox Live and continue where you left off.

2. Go offline and try to install the game

2.1 Go offline

  1. Scroll left on the Home screen to open the Guide.
  2. Select Settings, then All Settings.installation stopped xbox one
  3. Choose Network, then Network settings, then select the Go Offline option.
    installation stopped xbox one

2.2 Cancel the download

  1. Scroll right on the Home screen to open My games & apps, then select Queue.
    https://windowsreport.com/wp-content/uploads/2022/11/queue-1.png
  2. Highlight the game that you’re trying to install.
  3. Press the Menu button on the controller and select Cancel.

2.3 Restart console

  1. Eject the game disk.
  2. Scroll left on the Home screen to open the Guide. Alternatively, you can double-tap the Xbox button on your controller to open the Guide.
  3. Choose Settings, then select Restart console option and select Yes to confirm.

If your console is frozen, you can restart it simply by holding the power button on the front for 10 seconds. After your console restarts, insert the game disc and try to install it again.

2.3 Get the latest updates

  1. Scroll right on the Home screen and open My games & apps.
  2. Select Settings, then All Settings.
    installation stopped xbox one
  3. Choose Network and Network settings, then select Go online.

After going online, you need to download the latest updates for your game, and you’re good to go.

3. Check the status of Xbox Live services

  1. Visit the Xbox Live website, and click Sign in on the far right, top corner.
  2. Log into the service using your account.
  3. Click on Support at the top center of the website, and select Xbox status.

Sometimes to install games, you need to have access to Xbox Live. However, if Xbox Live is having some issues and its services aren’t running, you might encounter problems during the installation process.

Some installations require Xbox Live Core and Social and Gaming services to be running, and if those two services are down, you might encounter problems during the installation.

Unfortunately, this is a server-side issue, and you can only wait until Microsoft fixes this problem. However, you can check the status of Xbox Live services by visiting the Xbox website.

If you have slow performance on Xbox Live, this guide will help you restore it.

4. Make sure that you’re using the correct account

Sometimes you might encounter problems with your installation if you’re signed in with the wrong account.

All your games are tied to your Xbox account, and if you have multiple accounts on your console, you need to be sure that you’re signed in with an account you used to purchase this game.

Keep in mind that this solution only applies to digital downloads.

5. Make sure that you have enough storage space

5.1 Check your storage

  1. Tap the Xbox button on your controller and then go to the Notifications section.
  2. Check if there are any notifications regarding insufficient hard drive space.
  3. If that’s the case, you can add an external hard drive and install your games or free some space on your internal hard drive.

To delete items from your hard drive, you need to do the following:

5.2 Uninstall apps

  1. On the Home screen, press the Right Trigger and the A button to open My games & apps.
  2. Locate the game or app you want to delete and highlight, then press the Menu button on the controller and choose the Manage game or Manage app option.
    installation stopped xbox one
  3. Now select Internal Manage all, and click Uninstall all.
  4. You might have to repeat the process a few times until you free up the necessary space.

Xbox One games can be pretty significant, and to install them, you’ll need a lot of hard drive space. Sometimes this problem can occur if your hard drive doesn’t have enough room for you to install a specific game.

Usually, you’ll get a notification when you’re low on hard drive space, but if you missed the information, you could check it by following the steps above.

6. Check for system updates

  1. Tap the Xbox button to open the Guide.
  2. Select Settings, then All settings.
    installation stopped xbox one
  3. Now select System, then Console info & updates.
  4. If there’s an update available, it should appear at the bottom of the first column.

After downloading the latest update, try to install the game again.

Sometimes you might encounter problems with the installation if your console is out of date. To fix this issue, it’s advised that you check if there are any updates available for your console by following the steps above.

7. Install your game to the internal hard drive

Users reported that their installation stopped while trying to install the game on an external hard drive. Installing a game on an external hard drive is a great way to preserve your storage space, but unfortunately, specific errors can appear while trying to do that.

Users reported that they fixed this issue simply by installing the game to the internal hard drive and setting the download location for all new downloads to the internal hard drive.

After doing that, they could install their game without any problems.

8. Restore your Xbox to factory defaults

  1. Scroll left on the Home screen to open the Guide.
  2. Choose Settings, then All Settings.
    installation stopped xbox one
  3. Select System.
    xbox one system settings
  4. Choose Console info & updates.
  5. Now select Reset console.
    reset xbox one
  6. Select Reset and keep my games and apps. If this option doesn’t work, you’ll have to use the Reset and remove everything option (Remember this option will delete all your games, saved games, files, and apps, therefore, be sure to back up important files so you don’t have to download them again).

After the reset process is completed, try to install the game again, and the installation stops; Xbox One should disappear.

Remember that you should use factory reset as the last resort if all other solutions don’t work.

Sometimes, problems with installation can occur due to corrupted files, and one of the fastest ways to fix them is to perform a factory reset.

We must warn you that a factory reset can delete all your files from your console; therefore, be sure to back them up.

9. Uninstall and reinstall the game on your Xbox One

9.1 Uninstall the game

  1. Go to your Dashboard and navigate to My Games & Apps.
  2. Highlight the game you want to remove and press the Menu button on your controller.
  3. Select the Manage Game option from the menu.
    installation stopped xbox one
  4. Now you should be able to see how much space the game takes. Finally, select the Uninstall option to uninstall the game.

After removing the game from your Xbox, you need to reinstall it.

9.2 Reinstall the game

  1. Go to the My Games & Apps section.
  2. Locate the Ready to install section. This section lists all the games you own but don’t have installed.
  3. Select the game you want to install and wait for the installation to complete.

Some users are also suggesting that you should try refreshing your Dashboard before you delete and reinstall the game. We aren’t sure how refreshing the Dashboard solves the problem, but you can refresh it by holding the Left Trigger + Right Trigger + Y button combination.

10. Clean your Xbox One disc

If the installation stops while trying to install a game from a disc, it might be because your disc is damaged. If that’s the case, you might be able to fix the problem simply by cleaning your disc.

To do that, hold the disc by its side and make sure that you’re not touching its top or bottom surface. Then, use a clean, damp cloth and gently clean it from center to edges.

In addition, you can also take your disc to any store with a disc polishing machine and ask them to clean it.

If cleaning or polishing your disc doesn’t fix the issue, you might want to consider a replacement. However, before replacing your disc, you might want to try it on your friend’s console and see if it works without any problems.

If the installation stopped on your Xbox One still appears, contact the retailer and ask for a replacement.

11. Use Google DNS

  1. Press the Menu button on your controller and choose Settings.
  2. Select Network, then Advanced settings.
  3. Select DNS settings, then choose Manual.
  4. Now enter the first numbers below as Primary DNS and the second as Secondary DNS. You can also use OpenDNS by 208.67.222.222 as Primary DNS and 208.67.220.220 as Secondary DNS.
    8.8.8.8
    8.8.4.4
  5. After entering the DNS server addresses, press the B button on your controller to save changes. If everything is in order you’ll see an It’s all good message.

After switching to Google DNS or OpenDNS, check if the problem is resolved.

Sometimes installation can stop on your Xbox One due to DNS settings. Issues with your DNS can occur and cause this and many other errors to appear.

Users reported fixing this problem simply by using Google DNS or OpenDNS. However, to change your DNS settings on Xbox One, you need to follow the steps above.

12. Format your hard drive for games & apps

  1. Scroll left on the Home screen and opened the Guide.
  2. Select Settings, then All Settings. 
    installation stopped xbox one
  3. Choose System, then select Storage.
    xbox one system settings
  4. Select your storage device and choose the Format for games & apps option.
    installation stopped xbox one

Remember that not all external hard drives can store games and apps. To keep apps and games on your external hard drive, your campaign needs to have a capacity of 256GB or more and use a USB 3.0 connection.

If your drive doesn’t meet those requirements, you can only use it to store other files, such as music and videos.

Many users use an external hard drive to store games and apps, which is a great way to save space on your internal hard drive.

However, before using your external hard drive for games and apps, you must format it correctly. Formatting your hard drive will remove all files from it; therefore, be sure to back them up.

13. Connect the console to your modem

Many Xbox One users use a wireless connection to connect to the Internet. Wireless connection has advantages since it allows you to connect to the Internet without cables easily.

This is especially useful if you want to keep your room neat and cable-free.

Despite its simplicity, a wireless connection is prone to interference and data loss, sometimes preventing certain games from installing on Xbox One.

If you have problems with installation on Xbox One, you need to connect your Xbox One directly to your modem by using an Ethernet cable.

A few users reported that the installation stopped issue on their Xbox One was resolved for them after switching to a wired connection, so you might want to try that.

Installation stopped error can be a severe problem since it will prevent you from installing games, but you should be able to fix it by going offline and trying to install the game again. If that doesn’t work, try any other solution from this article.

Don’t forget to tell us in the comments section below what worked for you and if you found another way to solve the problem.

Google Drive Slowing Down Computer: 4 Quick Fixes

As you all know, Internet bandwidth is the new king in the smart digital age and every other app is vying for their share of the data transfer rate. No wonder, there also are situations where one app ends up being greedy and eats up most of the bandwidth, leaving others gasping for breath.

Case in point: Google Drive which has been found to reduce others to crawling speed till the time files are uploaded or downloaded to and from the cloud storage. However, that sure can be taken care of and justice meted out to the other apps with just a few simple steps. Here we go.

What can I do if Google Drive is slowing down my PC?

1. Restart Google Drive’s process

This is often the most basic preventive method used to solve many an issue. In this case, stopping Google Drive operations in your PC will bring to an end all that is causing your PC to slow down, including de-clogging the RAM. Here is how to stop Google Drive.

  1. Open Task Manager. You can do this by either pressing Alt + Ctrl + Del  and choosing Task Manager from the screen that appears or better still, press Ctrl + Shift + Esc to launch Task Manager directly.
  2. Locate and select googledrivesync.exe
  3. Click on End Process. This will stop instance of Google Drive running on your PC.

2. Restart Google Drive

This will make the cloud service to start again on your PC and should be working fine.

3. Manually limit Google Drive data transfer rate

Google Drive is known to use up the entire bandwidth, or the lion’s share of it to get about doing its job. That happens to be the primary reason why the cloud storage service has been found to cause Windows 10 to lag.

Here is how to limit the data transfer rate for Google Drive to use to free up bandwidth for other applications to use.

  1. Right click on Google Drive icon. It should be on the left of your taskbar itself.
  2. In the dialog box that opens, click on the three vertical dots at the top right corner and select Preferences.
  3. In the Preferences window that opens, click on the Advanced tab.
  4. Here, you will get to see the settings for both the upload and download rate.
  5. Select a rate depending on your internet plan that should leave enough bandwidth for other apps to operate comfortably.
  6. Click on Apply and there you are, you now have a set internet bandwidth limit for apps to act within.

4. Limit files to be uploaded

Another way to prevent Windows 10 to be bogged down by Google Drive is to ensure it is only the files that you need to be backed up in the cloud gets stored in Google Drive, and not your entire hard drive.

  1. So, the best thing to do here is to save all the files in a folder that you would like to store in Google Drive.
  2. Next, click on Google Drive.
  3. In the windows that opens, select the Overflow menu > Preferences.
  4. Check only those boxes next to Only sync some folders to this computer.google drive only sync some folders to this computer
  5. Select the folder that you’d like to sync to your Google Drive account.
  6. Click on Apply. This way, you will only be uploading those files that is needed and won’t be clogging the network unnecessarily. In fact, organising your files that needs to be uploaded can be a nice practice to preserve bandwidth each time.

Practicing the above steps should be enough to help your Windows 10 PC to retain its proficiency and speed irrespective of Google Drive getting about doing its job.

In fact, the above steps are more about taming Google Drive to act in a manner that other apps do not have to wait for internet bandwidth and restore a sort of order in your PC.

We hope you managed to fix the issue of Google Drive slowing down your PC. Let us know your thoughts in the comments section below.

Microsoft Store Error 0x800700005 [Solved]

The error code 0x800700005 sure is one of the most disturbing error messages regarding the Windows Store platform in Windows 10.

Fix 0x800700005 error message when trying to download and install apps (Windows 8.1)

The good news is that there are a few things that you can do to bypass this issue. Simply follow the tutorial below and you will successfully install your apps in the shortest time possible on your Windows 10 PC.

Follow the instructions below to check if you have the correct permissions for the folder where the application you are trying to install is stored.

You’ll also download and run some troubleshooting applications in order to automatically fix your system errors in Windows 10, and be able to download apps from the Windows Store.

How do I fix the error code 0x800700005?

1. Make sure you’ve got the correct permissions

  1. Open your File Explorer in Windows 10.
  2. Double click to open the Windows partition
    • Note: Usually the C:/ partition is the Windows partition.
  3. Double click or double tap on the Users folder to open it.
  4. Double click or double tap on the folder with your username.
  5. Select the AppData folder.
  6. From the AppData folder, double click or double-tap to open the Local folder.
    • In some cases, the Local folder is located in the Default.migrated folder.appdata local folder
  7. In the Local folder, you will need to find the Packages folder.
  8. After you found the Packages folder, right-click or hold tap on it.
  9. From the menu that appears, left click or tap on the Properties feature.
  10. Click or tap on the Security tab situated in the upper side of the window.
  11. In the Group or user names list check each username and be sure it has full permissions.
    • If a username does not have full permissions, you need to left-click on the Advanced button.
  12. In the Advanced window, check what usernames does not have full permissions and left click on the username.
  13. Click or tap on the Add button.
  14. Left-click or tap on the Select a principal link.
  15. Write Users under the Enter an object name to select topic.
  16. Next left-click or tap on the Check Names button.
  17. Under the Basic Permissions topic check the box next to Full Control.
  18. Left-click or tap on the Apply button.
  19. Left-click or tap on the OK button.
  20. Reboot your Operating System
  21. Check again to see if you still get the error message 0x800700005 while trying to download apps.

2. Run the Windows App Troubleshooter

  1. Left-click or tap on the link posted below to download the Windows App troubleshooter.
  2. Save the executable file to your Windows device.
  3. Right-click or hold tap on the executable file
  4. From the menu that appears left click or tap on the Run as Administrator.
  5. Follow the instructions on the screen to finish the troubleshooting process and reboot your PC.
  6. Check again if you still get the error message 0x800700005

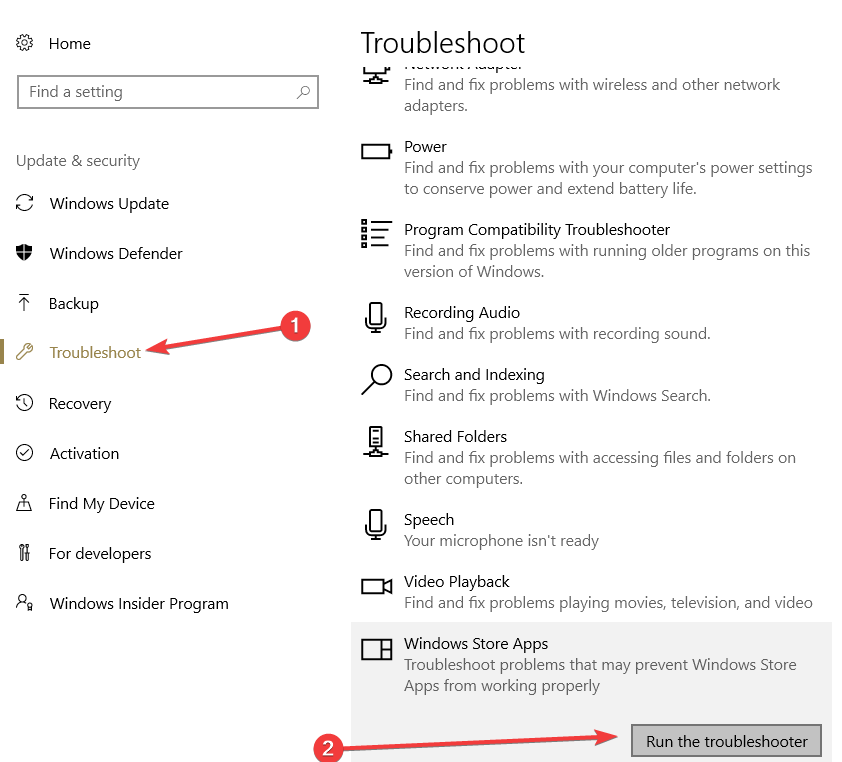
If you’re running Windows 10, you can also launch the Windows Store Apps Troubleshooter from the Settings page.

Navigate to Settings > Update & Security > Troubleshooter > locate and launch the troubleshooter, as shown in the screenshot below.

windows store apps troubleshooter

3. Reset your Windows Store app

  1. Open a Run window and enter the WSReset.exe command.
  2. Hit Enter, wait for a few seconds and then restart your computer.
reset windows store

One quick method to solve error 0x800700005 is to reset your Windows Store app. This tool is essential for downloading and installing other Windows Store apps.

In other words, if there is something wrong with the Windows Store App, you won’t be able to download new apps or update the ones you already installed.


4. Restart the Windows Update services

  1. Press Start
  2. Type in cmd to launch the Command Prompt
  3. When Command Prompt starts, run the following commands:
    • net stop wuauserv
    • net stop bits
    • rename C:WindowsSoftwareDistribution SoftwareDistribution.old
    • net start wuauserv
    • net start bits
  4. Open the Windows Store again and check if the problem is still there.

The Windows Store App depends on the Windows Update service to work properly. If the Windows Update Service is affected by various issues, this may also impact the Store app.


By following these steps, you should be able to quickly fix error code 0x800700005 in Windows 10 so that you can start downloading and installing your favorite apps from Store again.

If you do have any questions regarding this article, please write to us in the comments below and we will get back to you as soon as possible.

FIX: Microsoft Store error code 0x803fb107

Some users have posted on forums about a 0x803fb107 Microsoft Store error. That error arises for some users when they try to download games from the MS Store.

Error 0x803fb107 is primarily a Windows 10 issue that stops users from downloading games and other apps from Microsoft Store. However, users have fixed that error with the resolutions below.


How do I fix the MS Store 0x803fb107 error?

1. Sign out and back into to MS Store

  1. Click the Microsoft Store shortcut on the Start menu.
  2. Click the account button at the top right of the MS Store window.
    Profile button 0x803fb107 microsoft store
  3. Select your account.
  4. Click the Sign out option.
    Account window 0x803fb107 microsoft store
  5. Then click the account button again.
  6. Click Sign in, and then select the account.
  7. Click the Continue button.

2. Open the Windows Store App troubleshooter

  1. Press the Windows key + S hotkey.
  2. Enter the keyword troubleshoot in the search box.
  3. Then click Troubleshoot settings, which will open Settings as in the snapshot directly below.
    Troubleshoot tab 0x803fb107 microsoft store
  4. Select Windows Store Apps to click its Run the troubleshooter button.
    Windows Store Apps window 0x803fb107 microsoft store
  5. Click Apply this fix if the troubleshooter provides a potential resolution.

3. Reset the Microsoft Store cache via Command Prompt

  1. Press Start
  2. Click the Type here to search taskbar button.
  3. Input cmd to search for the Command Prompt
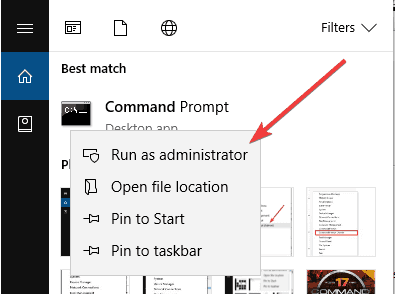
  4. Right-click Command Prompt to select the Run as administrator option.
  5. Enter wsreset.exe, and press the Return key.
    wsreset.exe command 0x803fb107 microsoft store
  6. Restart Windows 10 after resetting MS Store.

4. Reset Microsoft Store with PowerShell

  1. Open Windows 10’s search box.
  2. Type the keyword PowerShell in the search box.
  3. Right-click Windows PowerShell and select Run as administrator to open it with elevated user rights.
  4. Input the following command:
    • Get-AppXPackage -AllUsers -Name Microsoft.WindowsStore | Foreach {Add-AppxPackage -DisableDevelopmentMode -Register “$($_.InstallLocation)AppXManifest.xml” -Verbose}.
    • You can copy and paste that command into PowerShell with the Ctrl + C and Ctrl + V hotkeys.
      PowerShell window 0x803fb107 microsoft store
  5. Don’t forget to press Enter to initiate the command.
  6. Thereafter, reboot your desktop or laptop.

5. Reinstall Windows 10

  1. Open the search utility, and enter the keyword reset in the text box.
  2. Click Reset this PC to open Settings as shown directly below.
    Recovery tab 0x803fb107 microsoft store
  3. Press Get started button to open the Reset this PC window.Keep my files option 0x803fb107 microsoft store
  4. Select the Keep my files option.
  5. Press the Next button to proceed.
  6. Click Reset.

Note: This method has the highest chance of success in fixing your issue, but it will also result in the loss of all of your data. As such, create a backup before proceeding with this method.

Those resolutions have fixed error 0x803fb107 for numerous users. So, there’s a strong chance they’ll fix the same issue for you.

Let us know which of the above-mentioned methods worked best for you by leaving us a message in the comments section below.

Fix: DaVinci Resolve Keeps Crashing on Startup [5 Ways]

Blackmagic Design’s DaVinci Resolve is a popular free video editor available on multiple platforms. However, some users have reported the DaVinci Resolve keeps crashing issue when editing a video.

Unlike Adobe’s Premier Pro, the popular DaVinci Resolve video editor works better with a system that has a dedicated GPU. Lack of which can result in occasional crashes.

In this article, we explore a few troubleshooting steps to help you resolve the DaVinci Resolve crashing issues for good.

How can I fix DaVinci Resolve crashing on startup?

1. Change process priority

DaVinci resolve keeps crashing
  1. Make sure DaVinci Resolve is running.
  2. Right-click on the Taskbar and select Task Manager.
  3. Open the Details
  4. Scroll down and right-click on Resolve.exe.
  5. Go to Set Priority and select High.

That’s it. Try working on any of your projects and check if the problem is resolved. Note that you may have to set the Priority to High every time you restart DaVinci Resolve.

2. Install Nvidia Studio Driver

DaVinci resolve keeps crashing
  1. Launch Nvidia GeForce experience.
  2. Click the menu icon (three dots in the top right corner).
  3. Select Studio Driver.
  4. GeForce Experience will download and install the Nvidia Studio Driver.

If you already have the Studio Drivers installed, try performing a clean install.

DaVinci resolve keeps crashing
  1. Download and install the Display Driver Uninstaller.
  2. Run the tool and select the graphic card,
  3. Click on Clean and restart.
  4. Once uninstalled, download the latest version of NVIDA Studio Driver.
  5. Run the installer and install the necessary packages through custom installation.
  6. Restart the computer and relaunch DaVinci Resolve.

Nvidia Studio driver can also trigger DaVinci Resolve crashes. Try clean installing the drivers to fix the issues.

If you need to install this Nvidia driver correctly, without causing major issues, better try the dedicated update driver tool and efficiently install or update any drivers on your PC.

⇒ Get Outbyte Driver Updater

3. Which version of DaVinci resolve is best to avoid crashing?

Let’s begin with the most common reason for DaVinci Resolve crashing issues. DaVinci Resolve 15 was riddled with a few glitches and bugs that were causing frequent crashes.

These crashes also occurred on a system that had sufficient hardware to run the video editor. That said, installing the latest version, DaVinci Resolve 16, seems to have fixed many issues with the software.

Update DaVinci Resolve

DaVinci resolve keeps crashing on startup
  1. Launch the Resolve app.
  2. Click on DaVinci Resolve.
  3. Select Check for updates.
  4. Download and install any pending updates.

Once installed, relaunch the app and check if the crashing issue is resolved. If not, you may have to uninstall, then reinstall the latest version to fix the issue. Here’s how to do it.

DaVinci resolve keeps crashing on startup
  1. Press Windows key + R.
  2. Type appwiz.cpl and click OK.
  3. In Control Panel, select DaVinci Resolve.
  4. Click on Uninstall, and then confirm the action.
  5. Once uninstalled, download the latest version of DaVinci Resolve from here.
  6. Run the installer and check for any improvements.

4. Enable IGPU Multi-Monitoring

Davinci Resolve freezes
  1. Shut down your computer.
  2. Press the power button to restart the computer. When restarting, start pressing the Setup key (F2) on your keyboard to enter BIOS.
    Note: The setup key is usually displayed on the initial screen. Check the user manual for your Laptop or motherboard manual (in case of the desktop) to find the Setup key.
  3. In the BIOS menu, open the Advanced tab.
  4. Locate IGPU Multi-Monitoring and make sure it is enabled.
  5. Save the changes and exit.

5. Check for GPU compatibility

Disable integrated GPU

Davinci Resolve freezes
  1. Press the Windows key + R.
  2. Type devmgmt.msc and click OK.
  3. In Device Manager, expand the Display Adapter section.
  4. Right-click on your Integrated Intel GPU.
  5. Select Disable Device.
  6. Open DaVinci Resolve and check if you are still encountering crashes.

Upgrade GPU

As discussed earlier, DaVinci Resolve is a GPU-heavy application. It is recommended to have a decent dedicated graphics card installed for stable performance. If you only have an Intel Integrated GPU, time to consider upgrading to a dedicated GPU.

The DaVinci resolve keeps crashing issue usually occurs due to GPU driver incompatibility or a bug in the software itself. Follow the steps one by one to diagnose and fix the issues triggering crashes.

Error 0x803F700 in Microsoft Store [Solved]

Windows Store is slowly but steadily becoming the viable alternative to old-school programs in Windows 10.

Even though apps are moderately improved and overall usability enhanced, there are still errors that can corrupt the positive image. One of those errors frequently reoccurs and goes by the code 0x803F700.

Users who reported this error were unable to access, download, and install apps in Windows Store. Speaking of which, if you can’t install Windows Store apps, our general troubleshooting guide may help you.

We prepared a list of possible fixes for error 0x803F700 that should come in handy. If you have had issues with the above-mentioned error code, make sure to check the steps below.

How can I fix the error 0x803F700?

1. Run the Windows Troubleshooter

First things first. Troubleshooting with the firm presence of built-in tools is a great thing to start with. And, even though Windows 10 lacks some advanced features, it certainly does not lack troubleshooting tools. If you’re unable to access Windows Store and/or download apps while receiving a repetitive network error, make sure to run the responsible troubleshooter from the unified menu and look for changes.

If you’re not sure how to do it, the steps below should show you how:

  1. Open Start and click on the cog-like icon to open Settings.
  2. Open Update & security.
  3. Choose Troubleshoot.Windows 10 Error Code 0x803F700
  4. Scroll to the bottom and highlight the Windows Store Apps troubleshooter.
  5. Click on the ”Run the troubleshooter” button.

If the Windows native troubleshooter fell short, you should move on with the below-presented solutions. One should suffice.

2. Disable Windows Firewall and third-party antivirus temporarily

Now, even though disabling Windows security measures is highly unadvised in everyday use, you can make an exception from time to time. Namely, more than a few third-party antivirus solutions can occasionally block certain Windows features and prevent their execution.

For more information on the best antivirus software to install on Windows 10 without worrying about compatibility issues, check out this article.

Furthermore, Windows Firewall, the built-in protective barrier, can also, in the worst-case scenario, prevent affected applications from connecting to a network.

So, even though that’s a long shot, it will cost you nothing to temporarily disable Windows Firewall and third-party antivirus. In addition, you can do so with Windows Defender, too. If you’re not sure how to disable Windows Firewall in Windows 10, make sure to check the steps below:

  1. Type Firewall in the Windows Search bar and open Windows Firewall.
  2. Click on ”Turn Windows Firewall on or off” in the left pane.Windows 10 Error Code 0x803F700
  3. Disable Firewall for both Private and Public networks and confirm changes.
  4. Try running Windows Store apps again and look for the error.

If the issue is persistent and you’re still stuck with the same error, continue with the troubleshooting.

3. Reset Store cache

Windows Store is developed and presented just like the majority of other Windows 10 apps, with a few distinctive traits. You can’t reinstall it, at least not with a conventional approach. On the other hand, you can clear its cache easily. Windows Store stores all kinds of cache and preferences in order to speed up the loading time and improve the overall experience. However, once that data piles up, and it will gradually, Windows Store will suffer.

In order to address this, you should move to resetting Windows Store cache. That can be done with a simple command that summons the WSReset tool. After you run it, Store’s cache will be wiped and, hopefully, the error at hand resolved.

If you’re not sure how to run this tool, make sure to follow the below-enlisted steps:

  1. Press Windows key + S.
  2. In the Search bar, type WSReset.exe and press Enter.
  3. This should restart Windows Store and clear the cache.

READ ALSO: Fix: Windows Store Won’t Open after Windows 10 Upgrade

4. Update Windows Store

In the last couple of months, Windows Store changed a lot in many aspects, and overall stability is one of them. Mainly, Microsoft is making an effort to finally place Windows Store as a competitor in the market, and all indications are that it will with the Fall Creators Update. This, consequently, means that errors are more frequently addressed with timely updates.

So, if you’ve experienced this or similar errors, make sure to check for updates and, hopefully, resolve the issue at hand. In order to do so, follow these steps:

  1. Open the Windows Store app.
  2. Click on the 3-dot menu in the far right corner and open Downloads & updates.
  3. Click on the ”Get the updates” button.Windows 10 Error Code 0x803F700

5. Reset App Packages

For the majority of issues with third-party programs, users can turn to reinstallation as a viable solution. However, as you probably know, you can’t uninstall Windows Store. What you could do is to reset app packages and re-register the Windows Store.

This can be done within the PowerShell elevated command line. If you’re not sure how to do it, follow the instructions below:

  1. Type PowerShell in the Search bar, right-click and open PowerShell as an administrator.
  2. In the command line, copy-paste the following command and press Enter:
    • Get-AppXPackage -AllUsers | Foreach {Add-AppxPackage -DisableDevelopmentMode -Register “$($_.InstallLocation)\AppXManifest.xml”}
  3. Restart your PC.

6. Sign out and sign in again in Windows Store

Signing out and in again has done miracles for some users troubled by the Windows Store error at hand. For some awkward reasons, the Store just starts misbehaving and, in order to resolve the stall, you’ll need to sign out and sign in again with the same or alternative credentials.

Follow the instructions below to do so:

  1. Open the Windows Store app.
  2. Click on your account icon located in the upper right.
  3. Select the active account and click Sign Out.
  4. Now, click again on the account icon and choose to Sign In.Windows 10 Error Code 0x803F700
  5. Insert your credentials and sign in.
  6. Look for changes.

That should wrap it up. We hope you were able to resolve the Windows Store error 0x803F700 with one of these fixes.

In case you have any questions or alternative solutions, make sure to give us a shout in the comments section below.

From Field is Missing in Outlook: How to Restore It?

The From field in Outlook allows you to see from which email address you are sending an email. It is useful, especially when you have multiple accounts.

And if From field has disappeared in Outlook, it could create confusion and make it difficult to send emails using the correct email address. However, it is fixable.

This guide will explore the causes of this issue and the available fixes to restore the “From” field in Outlook. Let’s get started! 

What causes From field to be missing in Outlook?

There could be various reasons why From field might have disappeared from Outlook; some of the popular ones are: 

  • Faulty add-ins – Some add-ins you installed on Outlook, if faulty, could cause the From field to disappear. To fix it, you need to remove the add-ins one by one to check which was causing the issue.
  • Email Rules – Some email rules on Outlook might make From field disappear or hide. Check the email rules that you have set up in Outlook.
  • View settings – If the From field is hidden, you might not see From when composing emails. You need to check the settings to be sure.
  • Corrupted Outlook profile or data file – If the Outlook profile or data file is damaged or corrupt, it might cause different issues, such as From field disappearing.
  • Outdated Outlook – The older version of Outlook installed on your computer would make it run slowly and not add new features to the app; then, it could cause this issue.
  • Email account settings – If your email account is incorrectly configured or deactivated, you might not see the From field.

What can I do to fix From field disappearing in Outlook?

Before moving into detailed troubleshooting steps, please make sure you go through these preliminary checks: 

  • Check Manage Rules & Alerts and ensure no rules are causing the From field to disappear.
  • Double-check the Settings and make sure From field is selected in the current view.
  • Remove all the Add-ins one by one to check which is faulty.

1. Add another email account

  1. Launch Outlook.
  2. Go to File.File - FROM field disappearing in Outlook
  3. Click Add Account.Add account
  4. Enter the email address and click Connect.Outlook account connect
  5. If asked, enter the password for the email address and select OK.
  6. Now click Finish.

2. Add From button manually

  1. Click Compose to create a new email message.
  2. Choose Options. From selected  - FROM field disappearing in Outlook
  3. From the Show Fields group on the ribbon, select From.

3. Change your default email account

  1. Launch Outlook.
  2. Select File.File - FROM field disappearing in Outlook
  3. Go to Account or Office Account, and click Account Settings.Account Settings
  4. Select the account you want to use as default from the list of accounts on the Email tab.
  5. Click Set as default.
  6. Now click Close.

4. Update Outlook

  1. Go to File.
  2. Click Account.Update options - FROM field disappearing in Outlook
  3. Go to Office Updates, and click Update Options. 
  4. From the dropdown, select Update Now.
  1. Reinstall Microsoft Office 
  1. Press Windows + R to open the Run window.programs and features - FROM field disappearing in Outlook
  2. Type appwiz.cpl and hit OK to open Programs and Features.
  3. Select Microsoft Office and click Uninstall.Microsoft Office Uninstall
  4. Now sign in to your Microsoft account, click Profile, and select My Microsoft account.Microsoft Account - FROM field disappearing in Outlook
  5. Go to Services & Subscriptions.Services & Subscriptions
  6. Locate Microsoft Office and click Install.Install
  7. Follow the on-screen instructions to complete the process.

So, you can follow these steps to fix From field disappearing in Outlook issue. If nothing worked for you, it is advised to contact Microsoft Support for further assistance.

Please let us know in the comments section below if you have any questions or concerns about the issue.

Fix: Printer Keeps Printing 2 Pages Instead of 1

Is your printer always printing two copies whenever you send a document to print? Well, this can be attributed to your printer settings either from the printer or from the document settings you’re working from. Otherwise you’d have to check your printer’s drivers if the settings are fine.

Before you try some of the fixes below, check whether there are any changes you made to your printer, whether the issue persists when you make a copy from your printer, if you can print from a different application and still get the same results.

Here are some solutions you can use to try and resolve the problem and get your printing back in order.

What can I do if my printer prints twice in Windows 10?

  1. Change the number of copies from printer settings
  2. Uncheck Enable bidirectional support (for HP printers)
  3. Install the latest printer drivers
  4. Adjust number of copies from the document
  5. Reset Printing system
  6. Reinstall your printer

1. Change the number of copies from printer settings

  1. Click Start and select Control Panel.
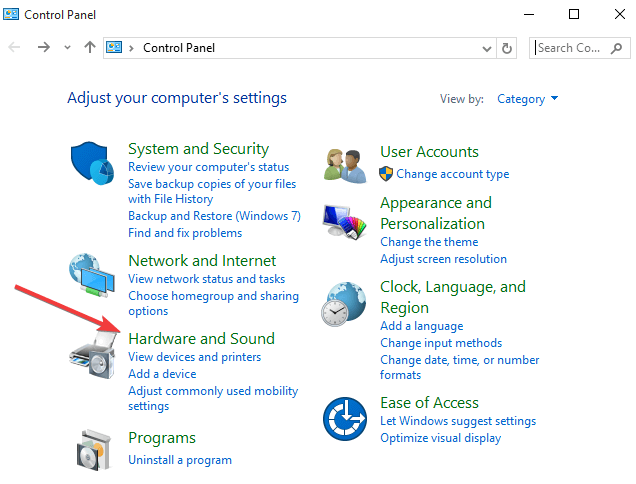
  2. Select Hardware and Sound.
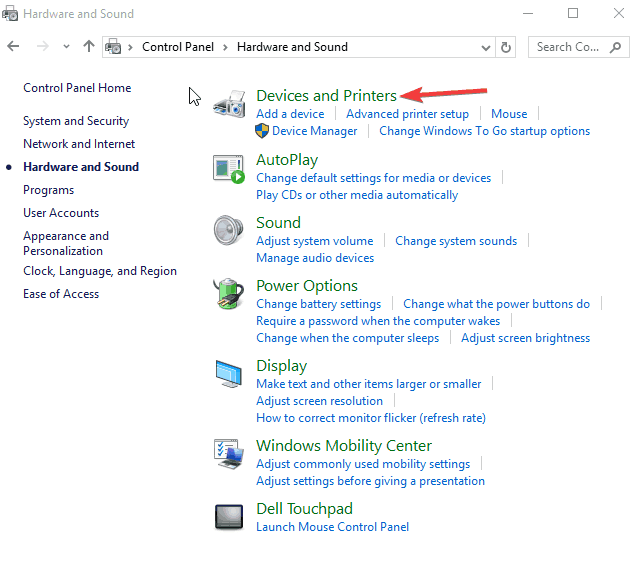
  3. Click Devices and Printers.HP LaserJet p1102w not printing USB
  4. Click printer properties.
  5. Select number of copies. If it is set to 2, change it to 1 and see if it helps.

2. Uncheck Enable bidirectional support (for HP printers)

  1. Click Start and select Control Panel.
  2. Select Hardware and Sound.
  3. Click Devices and Printers.
  4. Right-click your HP printer icon.
  5. Select Printer server properties.
  6. Select Ports.
  7. Uncheck enable bidirectional support.
  8. Click Apply.

3. Install the latest printer drivers

You can do this via the Add a Printer wizard. Here’s how:

  1. Click Start and select Control Panel.
  2. Select Hardware and Sound.
  3. Click Devices and Printers.
  4. Click Add a printer which opens a Choose a device or printer to add to this PC Click Next if you see your printer.
  5. If you don’t see your printer, click The printer I want isn’t listed and select Add a local printer or network printer with manual settings then click Next.
  6. Choose the port you want your printer to use then click Next.
  7. Click Windows Update then click the name of your printer in the Printers pane.
    • If it is on the list, click Next.
    • If it isn’t on the list, click back twice then go to Find a printer by other options.
  8. Select Add a printer using TCP/IP address or hostname and click next.
  9. Select Autodetect from Device type dropdown.
  10. Type your printer’s IP address and click Next.
  11. Wait for your computer to connect to your printer and click Next to install the printer driver.

4. Adjust number of copies from the document

Depending on the document you’re using, do the following to control the number of copies of your printed document in the application or software submitting the job to the printer:

Word document

  1. Click File
  2. Select Print
  3. Select Copies.
  4. Adjust the number of copies.

PDF document

  1. Click Printer icon.
  2. Click Copies.
  3. Adjust the number of copies.

Web page

  1. Click File.
  2. Select Print.
  3. Select Copies.
  4. Adjust the number of copies.

5. Reset Printing system

  1. Click Start and select control panel and select View by Large Icons.
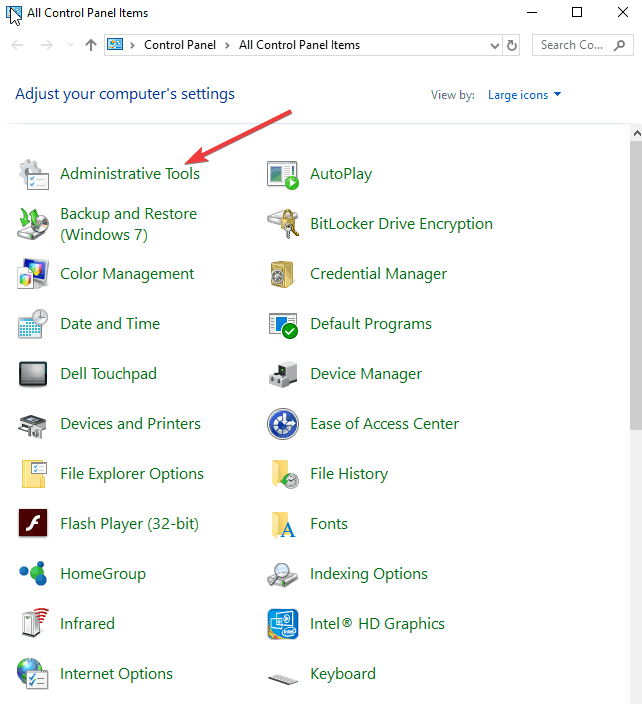
  2. Click Administrative tools.
  3. Click Print management.
  4. Click Print servers.
  5. Right-click on the empty space next to the name of the print server.
  6. Select Add/Remove servers.
  7. Click Remove All, and then click OK.

6. Reinstall your printer

  1. Click Start and select Control Panel.
  2. Click Programs.
  3. Right-click Start and select Device Manager.
  4. Check if your printer is listed there and delete it.
  5. Go to Control Panel.
  6. Select Hardware and Sound.
  7. Click Devices and Printers.
  8. Select any printer listed and check options on the top.
  9. Click Print Server properties.
  10. A popup will display, click the Drivers tab.
  11. Delete all printer drivers listed there.
  12. Restart your computer.
  13. Update the firmware from Control Panel.
    • For this, you have to be connected to your wireless network.
  14. Right-click Start and select Run.
  15. Type %temp% in the run box and click OK or press enter.
    • This brings up the temporary files folder.
    • Delete all files in the folder and restart your computer again.
  16. Download the latest full feature printer driver from your device manufacturer’s website and install it.

Many also reported that printer is printing even pages first, but we covered this issue in another guide.

Were you able to resolve the printer always prints 2 copies issue? Share your experience in the comments section below.

Can’t Install Fonts on Windows 10? Here’s What to Do

A great number of users have complained about the fact that their version of Windows 10 can’t install new fonts.

This issue can become extremely frustrating, as it can stop you from accessing the full capability of your PC.

What makes it even more annoying is the fact that encountering this issue doesn’t produce any sort of error message that you can troubleshoot with online help.

There can be a variety of reasons for encountering this problem. For this reason, in today’s guide, we will cover them all and give you suggestions about how to deal with each of them.

Read on to find out more.

What do I do if Windows 10 won’t let me install fonts

1. Check if the TTF file is corrupted

  1. Open the Windows Store.
  2. Search for fonts by using the search bar.
  3. Download the font you want to use.
  4. Try installing it.
  5. If it fails, it means that your original file was not corrupted, and other factors are at fault.
  6. Follow the next method.

If you’re trying to install a font file that has been corrupted in any way, Windows will not allow you to do so.

Sometimes files can become corrupted just by simply doing a restore of the data on your PC, or by a power outage during the update process of Windows.

This is a simple workaround, but it might come in handy if fonts are not installed on Windows 10 at all.

2. Use a dedicated tool

Adobe Fonts truly excels when it comes to giving access to unlimited fonts for word processing, print design, and more.

Firstly, you can enjoy a great library, with thousands of fonts included with your Creative Cloud subscription. As an avid Adobe user, you’re about to love this part too.

Well, activating fonts from Adobe Fonts is enough to make them all appear in the font menus of all your desktop applications, such as Illustrator, InDesign, Photoshop, and Microsoft Office.

Moreover, Adobe Fonts offers far more customization than other tools and has immense potential for both your personal and business projects.

The collection of Japanese fonts has countless filtering options to bring you closer to the desired results and all fonts can be used on mobile on iOS13.1 and newer apps that support Apple’s custom font APIs.

Last but not least, Creative Cloud will watch over those apps that are meant to run smoothly by constantly cleaning up all fonts that you don’t seem to be using.

Adobe Fonts offers some great features, and it’s a great solution if a specific font won’t install on Windows 10.

Adobe Fonts

If you’re working with fonts frequently, Adobe Fonts is the best choice for font management and installation.
Check price Visit website

3. Don’t install fonts from removable storage

Please make sure that you are not trying to install the font from a removable flash drive, or other storage media. This will more than likely cause the error mentioned above.

To avoid this problem, copy the files to your computer’s HDD and try installing the fonts again.

4. Copy the file and paste it

Even though this method doesn’t seem to make sense, some users have managed to solve this issue by simply copying the TTF file, and pasting it either into the same folder or into another folder.

If after trying this solution the desired font won’t install on Windows 10, you should move to the next solution.

5. Enable Windows Firewall

Again, we know how this method sounds. You might be thinking: What does the Windows Firewall have to do with fonts? We understand.

Even though we asked ourselves the same question, this method has proven useful in the case of a large number of users encountering the same issue as you did.

Try this method out and check to see if this fixes your problem.

In today’s guide, we discussed the best methods to apply if fonts are not installed on Windows 10.

Because we understand how important it is to be able to use different fonts to write and edit your texts, we tried to cover the entire range of possible causes for this problem.

Please feel free to let us know if you found this guide helpful. You can do so by simply using the comment section found below.

Antivirus Blocking Printer [Avast, AVG & More]: Quick Fix

Most regular Windows 10 users try to secure their systems with dedicated antivirus solutions. They can buy specialized programs, or built-in Microsoft security software, but the final goal is the same.

They all want to protect their personal data and files. But, what should you do when these security measures are messing up some of our usual devices?

There are situations that can get quite annoying such as when the antivirus is blocking the printing process or the printer itself. However, you need to know that the issue can be fixed.

And, when discussing the Antivirus is blocking the printing/printer situation, the problems can be addressed without the hassle by adding an antivirus exception or by creating a new Firewall rule.

More unprofessional solutions imply temporarily deactivating the antivirus software during the printing process or while you need to use the printer (locally or through a network).

But, that’s not really a solution as it implies repeating the same process each time you need to print something.

So, bottom line, what you need to do is to communicate with your security program and let it know which program/process can be trusted and which cannot.

Before following the troubleshooting methods from below make sure that the printer/printing problems are indeed caused by your antivirus.

Just disable your antivirus and resume the printing operation; if everything works without problems you can use the steps from below.

Otherwise, it might be another thing that stands behind the printing malfunctions. Assuming that it’s not, add an exception or to create a Firewall rule within your antivirus program.

Well, here is how you can complete these processes for some of the best security programs available for the Windows 10 platform.


What can I do if the antivirus is blocking my printer?

1. Bitdefender blocking printer

  1. Run Bitdefender on your PC, so double-click on its icon usually located in the system tray.
  2. Now, from the main user interface, click on the Protection icon.
  3. Next, click on the View Features link.add exclusions bitdefender
  4. Under the Firewall section, click on the Settings icon.
  5. Switch to Rules tab and click on Add for setting up a new Firewall exception.
  6. Now, choose the executable file for your printer in order to enable access for its functionality.
  7. Complete the other field by using on-screen prompts – if you are using a wireless printer, or if you want to print files over a network, enter the implied URL similar as you did for the executable file.
  8. Save your changes and then restart your Windows 10 system.

Bitdefender is an award-winning antivirus, protecting hundreds of millions of users worldwide. If your printer is blocked by it, just follow the above steps in order to resolve the issue.


2. Kaspersky blocking printer

  1. Bring up the Kaspersky main user interface.
  2. Navigate to Settings and from that field click on the Additional section.
  3. Within the right frame of the windows that will be displayed on your computer, select Threats and exclusions.add exclusion kaspersky
  4. Click on the Configure exclusion rules link.
  5. Just fill out the required fields and add an exclusion for your printer (locally or through a network).

This software tool has evolved for some time now, providing anti-malware solutions for both home environments and much larger business environments.

The interface is really simple to use, and you can set an exclusion rule if your printings are blocked by Kaspersky.

Sometimes this antivirus won’t update, leading to several issues. If this happens for you, check our dedicated guide in order to fix the problem.


3. Avast blocking printer

  1. Open Avast on your Windows 10 computer.
  2. Then, go to Protection.
  3. Under Protection, select the Firewall entry.
  4. Choose Application settings, located at the bottom of that screen.
  5. Next, initiate a new Firewall rule by choosing New application rule.set avast exclusion rule
  6. Just add the app you want to include in the Firewall exception list.
  7. Save everything and reboot your system in the end.

Avast is a great antivirus solution that has a free solution for those that need only basic home protection for their personal computers.

If you want to try out for free multiple antiviruses before deciding which one to keep, check our guide including the best free antiviruses for up to one year.


4. Avira blocking printer

  1. From Avira, you need to go to Menu followed by Configuration.Avira menu
  2. Then, you have to access the Internet Protection feature.
  3. From there you can pick up the Application rules entry.
  4. So, click on the Application rules link in order to bring the Firewall settings.
  5. Select Change parameters and under allowed programs list locate the printer app and enable it.

Avira is another freeware antivirus tool in the security landscape. The developer has improved the software a lot over the past year to be competitive enough.

There are also many freeware security tools. If you don’t know them yet, just head to our complete guide and discover their features.


5. AVG blocking printer

  1. Launch the AVG app and from its main interface click on the Firewall option (it should be the last entry).avg exclusion list
  2. Next, from Enhanced Firewall click on the Settings icon – it should be located at the bottom of that window.
  3. Choose Advanced Settings and from the left side click on set avast exclusion rule.
  4. Now, click on the Add button and fill up the on-screen form in order to add a new exclusion for your printer.
  5. Save your new settings and reboot.

AVG is among the best antiviruses that can stop viruses, spyware, malware, protecting your computer from any cyber threats you can think of.


6. Norton blocking printer

  1. Open the Norton app.Norton antivirus
  2. Go ahead and select Advanced options.
  3. The Firewall entry should be located in the left panel; select it.
  4. Click on the Settings icon from the Application Blocking row.
  5. Pick up Add application and set the executable file for your printer.
  6. Apply these settings and save everything.
  7. Done.

Norton does a fantastic job of updating their virus databases, with new updates being available almost daily. It also comes with a VPN and more great features.


7. Windows Defender blocking printer

  1. Open Windows Defender Security Center – in the Windows Search field (just click on the Cortana icon) type Windows Defender and launch the app with the same name.Windows Defender
  2. Select Virus & threat protection and navigate towards Virus & threat protection settings.
  3. From there you can choose Add or remove exclusions.
  4. You can now include your printer in the exclusion list which means that you can now successfully use your printer without any further issues.

Windows Defender is the built-in solution that is included in Windows 10. Basically, you can use only the Defender alone to protect your computer from viruses and other threats.


So, these are the steps that should be applied when the antivirus is blocking your printer or the printing process. If you are currently using a different program than the already discussed ones, don’t panic.

You should be able to use similar configuration steps for your own tool. However, we recommend you use any of these best antiviruses for Windows 10 in order to avoid compatibility issues.

In that respect, if you have further questions or if you need our further assistance don’t hesitate and get in touch with our team (you can do it by using the comments field from below).

Windows Store Code: 0x87AF0813 [Solved]

Microsoft Store is a great way to install a wide range of apps and some exciting games in Windows. But, many users reported encountering issues, usually the Microsoft Store Error Code: 0x87AF0813.

The error is seen while downloading new apps and updating the ones already installed. And it’s been encountered both by mobile and computer users running Windows. If you, too, are getting Windows Store Error Code: 0x87af0813, here’s all you need to know.

Why do I see the Microsoft Store Error Code: 0x87AF0813?

Here are a few reasons you might be encountering the error:

  • Corrupt store cache: In most cases, it’s a corrupt store cache that’s leading to issues updating or downloading apps from the Microsoft Store.
  • Issues with the system files: If the system files are corrupt or missing, Microsoft Store will throw errors.
  • Poor Internet connection: A slow Internet connection is another reason why users encounter the Microsoft Store Error Code: 0x87AF0813.
  • PC is out of storage: Many users reported that the reason they received the error was due to low storage space on the PC.

How do I fix Microsoft Store Error Code: 0x87AF0813?

Before trying the full-fledged solutions, here are a few tricks to get things running:

  • Check your Internet speed using a tool like Speedtest, and make sure it’s optimal. If not, take measures to increase the Internet speed.
  • Sign out of the Microsoft Store and then log back in using the same credentials.
  • If you have a third-party antivirus, firewall, or a similar security software installed on the computer, disable it, and verify whether the problem is resolved. These tools can often conflict with the download process in Microsoft Store.
  • Make sure you are running the latest version of Windows. In case there are any available updates, download them.

If these didn’t work, the solutions listed next should.

1. Reset the store cache

  1. Press Windows + S to open Run, type wsreset.exe in the text field, and hit Enter.wsreset.exe to fix Code: 0x87AF0813
  2. Now, wait for the reset process to complete.

2. Run the Windows Store Apps troubleshooter

  1. Press Windows + I to open Settings, and click on Troubleshoot in the System tab.troubleshoot
  2. Now, click on Other troubleshooters.other troubleshooters
  3. Locate Windows Store Apps, and click on the Run button next to it.Windows Store Apps troubleshooter to fix Code: 0x87AF0813
  4. Follow the on-screen instructions and choose the appropriate response when prompted to complete the troubleshooting process.instructions

Microsoft offers a bunch of a built-in troubleshooters to identify and eliminate issues in Windows. So run the Windows Store Apps troubleshooter, and verify whether it fixes Error Code: 0x87AF0813.

3. Run the DISM and SFC scan

  1. Press Windows + R to open Run, type cmd, and hit Ctrl + Shift + Enter.command prompt
  2. Click Yes in the UAC prompt.
  3. Now, paste the following commands one at a time and hit Enter after each to run the DISM tool:DISM /Online /Cleanup-Image /ScanHealth DISM /Online /Cleanup-Image /RestoreHealth
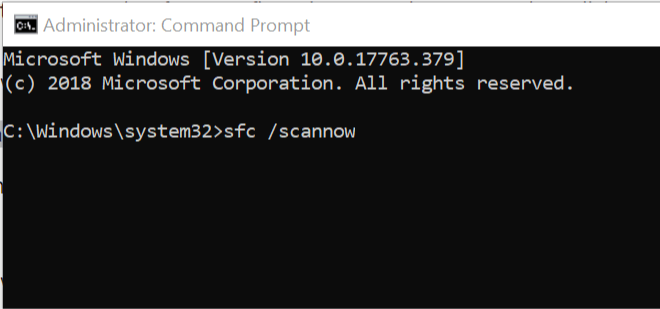
  4. Once done, execute the following command to run the SFC scan:sfc /scannowsfc scan to fix Code: 0x87AF0813

Corrupt system files are one of the prime reasons behind issues with the Microsoft Store and running the DISM tool, and the SFC scan has been found to fix problem in no time.

4. Clear storage space on the PC

If you find that the PC is running out of storage space, it’s time you clear up some. The best way to do that is to either run Disk Cleanup or configure Storage Sense to automatically delete unwanted files.

Disk Cleanup

Also, you could use a reliable third-party disk cleaning tool to free up storage space and fix the Microsoft Store Error Code: 0x87AF0813.

5. Change the region

  1. Press Windows + I to open Settings, choose Time & language from the left, and then click on Language & region.language and region
  2. Now, choose the United States from the dropdown menu next to Country or region.change region to United States to fix Code: 0x87AF0813

A few users managed to resolve issues by simply switching the region to the United States. It seems that some apps or features in Windows Store are not accessible to users in certain regions.

6. Re-register the Microsoft Store app

  1. Press Windows + S to open Search, type Windows PowerShell in the text field, right-click on the relevant search result, and choose Run as administrator.powershell
  2. Choose Yes in the UAC prompt that appears.
  3. Now, paste the following command and hit Enter:Get-AppXPackage -AllUsers | Foreach {Add-AppxPackage -DisableDevelopmentMode -Register “$($_.InstallLocation)AppXManifest.xml”}re-register store to fix Code: 0x87AF0813
  4. Wait for the process to complete.

Once done, the Microsoft Store wouldn’t throw the Error Code: 0x87AF0813 anymore, and you can download and update apps like before. In case nothing works, as a last resort, factory reset Windows, and it will get things running.

And now that you have Microsoft Store working, do check the best apps for Windows and get them today.

Tell us which fix worked for you in the comments section below.

Fix: Windows 10 Thinks Hard Drive / SSD is Removable

Some Windows 10 users have reported concerns over the system thinking that their hard drives or SSDs are removable. If you’re experiencing the same, this article will help you resolve the issue.

When Windows 10 thinks hard drive is removable, it could also show your external USB flash drive in the Disk Drive section. But what is happening there?

This behavior is known to be found in systems where the installed SATA AHCI driver is in conflict with the computer’s motherboard and/or BIOS. By default, Windows will install a generic SATA AHCI driver when you install the operating system so that it gives basic functionality across different products.

In this case, the best thing is to install the most current drivers, such as SATA related drivers. For Intel systems, this would be the Intel Rapid Storage Technology driver that handles AHCI functionalities, as AMD has its own AHCI driver. The problem at hand is manifested when your internal SATA HDDs or SSDs are displayed as removable media in your taskbar.

Here are solutions you can use when Windows 10 thinks hard drive is removable.

What to do if Windows 10 thinks hard drive is removable?

1. General troubleshooting

  1. Restart your computer
  2. Check for and install any available Windows updates

2. Update BIOS from device manufacturer

Check and install available BIOS updates, but if none exist, use the steps below to override how the inbox driver surfaces devices on specific ports:

  1. In the search bar, type CMD
  2. Right-click Command Prompt and select Run as administrator

  3. In the command prompt window, type the following command in press enter: devmgmt.msc
  4. Under Disk Drives, identify the SATA device you would like the inbox driver to consider internal
  5. Right-click and select Properties to open properties for the device.
  6. Note the bus number from the properties overview e.g. Bus Number 1
  7. Type the following command in the previously opened command prompt and press enter:
    exe add “HKLMSYSTEMCurrentControlSetServicesstorahciParametersDevice” /f /v TreatAsInternalPort /t REG_MULTI_SZ /d x

    (x corresponds to the Bus Number you noted in the previous step).

3. Use Registry Editor

Disclaimer: Before changing anything in the Registry Editor, back up your registry first.

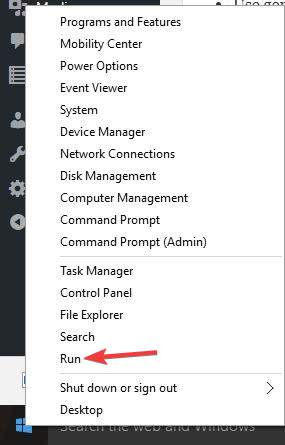
  1. Right-click Start and select Run

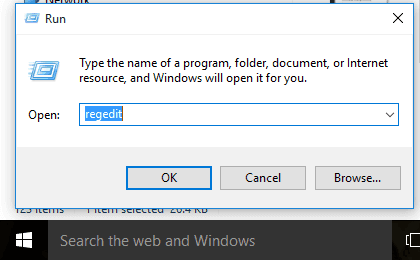
  2. Type regedit and press enter
    There is insufficient disk space to complete operation
  3. Find the following path:
    HKEY_LOCAL_MACHINESYSTEMCurrentControlSetservicesmsahci
  4. Create a new KEY called Controller0
  5. Inside Controller0, create another KEY called Channel0
  6. Inside Channel0, create a new DWORD called TreatAsInternalPort
  7. Set the value to 1. This will set the SATA port 0 (Drive C) to no longer show up in Safely remove hardware)
  8. Go back to the Controller0 folder
  9. Inside Controller0, create a new KEY called Channel1
  10. Inside Channel1, create a new DWORD called TreatAsInternalPort
  11. Set the value to 1 (this sets SATA port 1 (Drive D) to no longer show up in Safely Remove Hardware)
  12. Repeat this process until all internal SATA ports are set to be treated as internal. If you have 6 SATA ports, set Channel0 up to Channel5. If your motherboard has fewer SATA ports, remember to start at 0.
  13. Reboot to allow changes.

4. Modify in Device Manager

  1. Right-click Start and select Device Manager

  2. Find Disk Drives and double click on it
  3. Right-click the internal hard drive (HDD or SSD)
  4. Select Properties

  5. Go to Policies tab
  6. Check that Write caching on the device is enabled and that there is no optimize for quick removal enabled. This is related to how Windows 10 thinks hard drive is removable
  7. Update the driver to the latest chipset and AHCI/RAID

5. Check BIOS

Go into your BIOS and check if the SATA port to which your hard drive is connected to has the Hot Plug enabled. It could mean that your motherboard supports hot-swapping of hard drives, which you can disable the AHCI feature on your motherboard and it will disappear.

Here’s how to enter BIOS settings on your Windows 10 computer:

  1. Click Start and select Settings
  2. Select Update and Security
    Videos not playing on Windows 10
  3. Select Recovery on the left pane
    Windows Defender is not removing Trojan
  4. Click Restart Now under Advanced Startup
    Windows Defender is not removing Trojan
  5. Your computer will reboot to another menu. Click Troubleshoot.
  6. Click Advanced options.
  7. Select UEFI Firmware Settings.
  8. Click Restart. Your system will restart and take you to the BIOS. From here, check if the SATA port has Hot Plug enabled. Disable it if it is enabled.

Here’s what to do if you can’t hear your hard drive powering up.

6. User suggested solutions

Here are some additional solutions suggested by users on Microsoft’s forum:

  • Install or update SATA AHCI driver as you could be running on the generic Windows driver. Check your motherboard manufacturer’s website for a current Windows 10 driver. (Or laptop manufacturer’s website if this is a different rig than that in your specs). If there’s no Windows10 driver, then use the most recent one. If there’s no SATA/AHCI driver there, you can get one if you install the most current version of Intel Rapid Storage Technology Driver
  • Try using a different SATA port and also try plugging it with a different SATA cable. Go to your motherboard manufacturer’s website and make sure you have the latest SATA controller and chipset drivers for your model. Giving the BIOS reset a try might also be a good idea, it would get your BIOS settings back to factory defaults which could help with the proper detection of the HDD.
  • This is generic problem of windows 64 bit versions. Microsoft has yet to find and fix the issue. It is related to performance. 64 bit operations cannot cope up so 64bit operating system is patched to treat internal drive as portable removable drive. Install 32bit version of windows, as this issue is not there.
  • Tip for Windows 10 users: create a ‘Storage Pool’ through ‘Storage Spaces’. A Pool can exist of just 1 storage medium. That will integrate the removable storage to be seen as an internal drive.
  • It’s not a solution for your system drive. For that the best bet is to find the most recent driver. If that does not work for you might want to change your 3rd party AHCI/RAID controller driver to the ‘Generic SATA AHCI controller’ that was shipped with Windows 10.
  • In my case I had disks attached to a Marvell adapter show up as removable. After changing them to create an MS storage space instead of a Marvell mirrored drive, they appeared in the normal spot thus making them available to disk optimization too.

Did you know, you can change the serial number of a hard disk. And if you get the Unable to write to this disk in drive error, changing the file system will do!

Did any of these solutions help? Let us know in the comments section below.

6 Best Automatic Backup Software for Windows 10/11

Backing up your files should be your priority, but backing up files manually is a tedious task. However, there are many dedicated backup tools that can back up files automatically.

The market is filled with all sorts of backup software, so in order to help you choose the best one for you, today we’re going to show you the best automatic backup software.

What should I look for in automatic backup software?

Good backup software should have good storage space, a very well-implemented privacy policy, and also a full set of features.

The most important features to look for are multiple backup options, the possibility to create full disk backups, and single folder backups.

When it comes to automatic backups, you should look for software that lets you schedule the backup process in such a way that it won’t interfere with other important tasks.

What is the best automatic backup software?

Acronis Cyber Protect Home – Great for local backup

Acronis Cyber Protect is a well-known backup software and it can perform automatic backups to the cloud. The software also supports event backups so it can create backups automatically.

Of course, an extensive scheduling feature is available, so you can completely automate the backup process. Regarding backups, the software can perform full image backup and active disk cloning.

Of course, support for both incremental and differential backups is available as well. The software also offers file syncing and sharing, which will surely come in handy.

It’s important to mention that this backup software also has its own antivirus and anti-ransomware protection, so you can be sure that your backups are 100% malware-free.

Acronis Cyber Protect offers great features, and thanks to advanced scheduling, it’s one of the best automatic backup software on the market.

Acronis lets you back up specific files and folders if you do not want to create backups for your whole disk/system.

All your backups are stored in the cloud. This comes with stable, error-free restore options in case your device gets infected or you experience some sort of data loss.

Acronis Cyber Protect also can be triggered to create automatic backups in certain situations. When you plug in an external USB, a backup will automatically be created to protect you from potential viruses.

Acronis Cyber Protect key features:

  • Scheduling feature that allows you to automate the backup process
  • Support for event-based backups
  • Ability to create incremental and differential backups
  • Built-in antivirus and anti-ransomware protection
  • Automatic cloud backup

Acronis Cyber Protect is a subscription-based service with yearly charges. The pricing varies depending on the number of devices you want to back up.

Aomei Backupper – Simple and easy to use

Another great backup software that we have to mention is Aomei Backupper. The software can perform system, disk, partition, and file backups.

Aomei Backupper supports automatization, and you can easily schedule all your backups. For complete automatization, there’s support for event-triggered backups.

The software supports Hot Backup, so you can use your PC while the backup is being created. For advanced users, there’s command-line support, so you can start the backup process in a matter of seconds.

Regarding backup destination, the application can back up data to an external or local drive, NAS or network share, and to popular cloud storage services.

Aomei Backupper offers great features, and if you’re looking for automatic backup software, we suggest that you try it out.

AOMEI Backupper is compatible with Windows operating systems starting with Windows XP. It can also be used on Windows servers starting with Windows server 2003.

AOMEI Backuper is a licensed-based product. There are several editions available. Each edition of the software has a free trial option.

Here are a few of its key features:

  • Ability to perform system, disk, partition, and file/directory backup
  • Support for file syncing
  • Ability to automate backups with scheduling and event-triggered scheduling
  • Command-line support
  • Can back up data to external/local drives, DVDs, NAS, network share, or cloud storage

Handy Backup – Ideal for files and folders backup

Handy Backup is another automatic backup software for your PC. The software allows you to easily back up your files/folders or other documents.

Regarding storage, you can store files on both local and external drives. Remote storage is also available thanks to FTP, NAS, and cloud support.

The software allows you to schedule your backups and completely automate them. Speaking of backups, you should know that full, incremental, and differential backup is available.

Regarding security, the software has strong encryption available, so your data will remain safe. To save up disk space, there’s also a built-in compression feature.

Overall, Handy Backup is a simple-to-use tool and it’s a great backup software, so be sure to try it out.

Handy Backup has an easy and intuitive user interface. It allows you to back up all sorts of files, folders, databases, app data, and more in just a few clicks. It comes with two display modes: simple and advanced.

Handy Backup is licensed software and has two main versions. You can try any of them for free for 30 days.

Let’s go through some of its best features:

  • Ability to easily back up files/folders
  • Support for full, incremental, and differential backups
  • Ability to automate and schedule backups
  • ZIP compression and backup encryption
  • Email notifications

Handy Backup

Handy Backup is a simple to use but powerful backup software that allows you to create backups automatically.
Free trial Visit website

Ashampoo Backup Pro – Modern user interface

If you’re looking for automatic backup software, then Ashampoo Backup Pro might be just what you need. The software comes with a simple interface, and it’s quite easy to use.

The application has the ability to check your hard drive and the destination drive, and by doing so you’ll prevent potential file loss. Regarding the backup storage, you can store backups on local or external drives.

You can also back up your data to NAS or cloud storage, and any cloud storage that uses WebDAV is supported. As for the backup, you can back up your system drive, partitions, hard disks, and individual files.

It’s worth mentioning that software supports the creation of disk images, as well as 1:1 file copies. Of course, complete and incremental backup is available, as well as automatic synchronization.

Overall, Ashampoo Backup Pro is simple but powerful backup software, and you should definitely consider it.

Ashampoo Backup Pro is available in multiple languages.  It is licensed-based software that includes a free trial.

Ashampoo Backup Pro features:

  • Ability to back up system drives, partitions, disks, and individual files
  • Support for complete and incremental backups
  • Versioning and automatic synchronization
  • Can store backups on local/external drives, NAS, and cloud storage
  • Encryption, compression, and task scheduling

Ashampoo Backup Pro

Ashampoo Backup Pro is a simple to use backup software that can create backups automatically without interfering with your system.
Free trial Visit website

Backblaze – Good for NAS backup

Backblaze is a cloud-based backup solution that can create safe and secure backups for your computer data. It can also create server backups, NAS backups, Veeam Backups, and more.

Backblaze does not have a limitation on storage space. On top of that, the backup is done automatically and in real-time, without requiring any manual setups.

This backup solution comes with additional data loss prevention features, including multiple restore options. You can restore to previous versions of your system in case of data loss or ransomware.

A user with admin permission can restore to an older version of the system and all changes will be applied at the level of the whole organization.

On top of that, Backblaze comes with advanced SSL encryption. All files that are stored in the cloud are previously encrypted on your device.

On top of that, to access your data you need to provide your credentials (email and password). Backblaze also introduced a two-factor authentication feature with a 6-digit code. 

Backblaze is compatible with multiple workflow software from multiple fields, including Cyberduck or EditShare.

Backblaze is a subscription-based service. You can get different types of plans according to your specific needs. You get the option to pay monthly, yearly, or every two years.

Other key features include:

  • Can connect with NAS, SAN, MAM, and other similar storage devices
  • Fully customizable plans
  • Media library management features

⇒ Get Backblaze

Backup4all – Military-grade encryption

The last entry on our list is Backup4all. This software supports scheduling, so you can easily automate all your backups. In addition, you can also schedule backups according to certain computer events.

Regarding backup types, the software supports full, differential, incremental, and mirror backup. There’s also a smart backup option that will automatically choose the most suitable backup type for your needs.

As for storage, the software allows you to store backups on network drives, cloud storage, removable media, FTP servers, and network drives.

The software also offers AES 256-bit encryption so you can rest assured that your backups are completely safe.

Backup4all is a simple but powerful automatic backup software, but keep in mind that most features that we mentioned are available only in the Professional version.

Backup4all is licensed software. One license can be used on one device, but you can get a bundle package.

Backup4all key features:

  • Ability to schedule and automate backups
  • Full, incremental, differential, and mirror backup
  • Can store backups on local/external drives, FTP servers, and cloud storage
  • AES 256-bit encryption
  • Email notifications

⇒ Get Backup4all

Backup software is one of the best ways to back up your data, and if you’re looking for automatic backup software, we hope that the applications from our list will suit your needs.

Want to learn more about backup software? Our dedicated Backup Hub provides additional software suggestions, troubleshooting guides, as well as updates on what’s new in the industry.

Looking for more backup and data protection applications? You can find the best of them in our Data recovery Hub.

Fix: Windows 10 Freezes / Hangs After Login [8 Ways]

Besides some new great features and improvements, certain Windows 10 updates also bring more problems and headaches for its users.

For instance, many users reported that their Windows 10 OS freezes at login. More exactly, users were confronted with the following:

  • Windows 10 hanging before/after login screen;
  • Windows 10 freezing at Welcome screen;
  • Windows 10 stuck at login screen with spinning circle;
  • Windows 10 freezes on boot.

The most common causes for any of these errors are outdated hardware, certain, antivirus settings, interfering startup apps, or even problematic updates.

If you’ve encountered one of the instances mentioned above, check out the solutions below, trying them one by one until access to your OS is restored.

How do I fix Windows 10 freezing on login?

1. Try the Windows Troubleshooter

  1. Press Windows Key + S and select Control Panel from the list.
    Windows 10 hangs before login screen
  2. Navigate to Troubleshooting.
    Windows 10 freezes on Welcome screen
  3. Select View all from the menu.
    Windows 10 stuck at login screen with spinning circle
  4. Select System Maintenance from the list and follow the instructions on the screen to complete the troubleshooter.
    Windows 10 hangs after login

2.  Update your drivers and check their compatibility

If you’re using an older device, there’s a possibility that some of the drivers for your components are outdated or maybe not compatible with the latest version of Windows.

To determine if you’re using proper drivers, go to the Windows Update & Security center to see if there are any new updates for your system.

Also, you can manually check your drivers in Device Manager, or download them directly from the manufacturer’s site.

Although it seems unlikely, newer versions of drivers could also give you a headache. If that is the case, you should roll them back to the compatible version. To check if your new drivers are alright, do the following:

  1. Boot your Windows in Safe Mode.
  2. Go to Command Prompt and enter the following line:
    • mmc.exe C:Windowssystem32devmgmt.msc
      Windows 10 hangs before login screen
  3. Here, you should check the drivers for the following devices:
    • Audio card (shown under Sound, Video and Game Controllers in Device Manager)
    • WiFi/Network cards (shown under Network adapters)
    • Card reader
    • Video card (Display adapters)

Automatically update drivers

We also strongly recommend using a third-party driver updating tool that will help you with exactly the same thing.

The one reason why you should consider using a dedicated tool is to avoid permanent damage to your computer by manually downloading the wrong driver versions.

3. Check your antivirus

If your Windows 10 build freezes upon login, the problem might be your antivirus. To fix the issue, it’s advised to enter Safe Mode and check your antivirus configuration. In addition, you might want to prevent your antivirus from automatically starting with Windows.

If that doesn’t help, your last resort is to uninstall your antivirus. If you want to eliminate this kind of problem in the future, you might want to consider switching to a different antivirus solution.

The honest truth is that computer freezes and malfunctions are among the most common signs that your computer is infected. In certain circumstances, malware overwhelms your system by launching lots of background apps that use your computer’s memory and cause it to freeze.

It’s necessary to run a malware scan using the most appropriate antivirus solution if your computer still freezes after rebooting.

So you can rest assured that, when using a compatible antivirus, your system will stay healthy, and perfectly protected in real-time, with no negative impact on your device.

4. Check your startup programs

  1. Open Task Manager. You can do that by pressing Ctrl + Shift + Esc.
  2. Under the Startup tab, you’ll see all programs that start along with your system.
    Windows 10 hangs after login
  3. Disable all programs you don’t want to start on login by right-clicking on them and choosing Disable.
    Windows 10 freezes on boot

After disabling all startup applications, check if the problem still persists.

According to some users, sometimes the cause of this problem can be the preinstalled HP software.

Many computers come with preinstalled applications, and sometimes these applications can interfere with your operating system and cause it to freeze.

If you already know the problematic app, but can’t log in to Windows 10, access Safe Mode as shown before and try to remove the application from there.

Sometimes it’s necessary to remove all files and registry entries associated with a certain application in order to fix the problem.

Doing this manually can be hard, so it’s always better to use uninstaller software. It is perfect for this task since it removes all files associated with the problematic application automatically, so make sure you try it out.

5. Use System Restore

  1. Enter Safe Mode.
  2. Press Windows Key + S and enter system restore. Choose Create a restore point from the menu.
    Windows 10 freezes on Welcome screen
  3. Click on the System Restore button.
    Windows 10 stuck at login screen with spinning circle
  4. In the new window, click Next.
    Windows 10 freezes on Welcome screen
  5. If available, check Show more restore points option. Select the desired restore point and click Next.
    Windows 10 stuck at login screen with spinning circle
  6. Now follow the instructions on the screen to complete the restoration process.

If you can’t access Safe Mode due to this problem, you can restore Windows 10 from the advanced boot menu. To do that, follow these steps:

  1. Restart your PC a few times during the boot sequence.
  2. If done properly, you’ll see a list of three options. Select Troubleshoot > Advanced options > System Restore.
  3. Once you start System Restore, follow the instructions on the screen to restore your PC to its original state.

If you manage to fix your problem, it’s important to mention that you need to prevent the problematic update from installing.

Windows 10 automatically downloads the missing updates, but you can check this guide and learn how to block certain updates from installing. Once you block the problematic update, you shouldn’t have any future issues.

6. Disconnect unnecessary hardware

According to users, sometimes your hardware can cause this issue to appear. Many users reported that various USB devices such as external hard drives or USB Wi-Fi adapters can cause this issue to appear.

In this case, we advise you to disconnect all USB devices, except your keyboard and mouse and restart your PC. Your Windows 10 device should launch without any problems.

Keep in mind that you might have to disconnect all your USB devices every time you start your PC, which can be a bit of a hassle.

7. Install the missing updates from Safe Mode

  1. Enter Safe Mode as mentioned in the first solution.
  2. Press Windows Key + I to open the Settings app.
  3. Navigate to Windows Update section.
    Windows 10 freezes on boot
  4. Now click Check for updates button.
    Windows 10 hangs before login screen

Windows 10 will now check for available updates. If any updates are available, they will be installed in the background. Once the updates are installed, check if the problem still persists.

8. Allow users to log in automatically

  1. Enter Safe Mode, as shown before.
  2. Press Windows Key + R to open the Run dialog. Enter netplwiz and press Enter or click OK.
    Windows 10 freezes on boot
  3. Uncheck Users must enter a user name and password to use this computer. Now click on Apply and OK.
    Windows 10 hangs before login screen
  4. Enter your password twice and click OK to confirm.
    Windows 10 hangs after login

After doing that, restart your PC and check if you can log in automatically to your account. Keep in mind that enabling automatic log-in can reduce the security of your PC, especially if you’re sharing it with others.

That would be all. If you have any comments, suggestions, or maybe other solutions related to this topic, we would be grateful if you’d share them with us in the comments.

Whenever in doubt about specific Windows 10 solutions, be sure to check our Windows 10 Troubleshooting page.

For other similarly useful, and more general guides, go to the Windows 10 Hub.

Can I Close my Laptop While Updating? [Answered]

A lot of users have been complaining about how slow Windows updates are. Thus, a common practice for many is to just go on with their day when an update comes and leave it to download and install overnight.

However, laptop users don’t have it so easily, since they will usually be connected via Wi-Fi, so the download speed will be even slower, and they can’t close the screen without closing the laptop‘s lid.

The problem is that, as you may have noticed, laptops have a tendency to shut down when you close their lid.

What happens if I close my laptop lid during a Windows update?

In most cases, closing the lid of your laptop is not recommended. This is because it will most likely make the laptop shut down, and shutting down the laptop during a Windows update can lead to critical errors.

In fact, these could be so severe that you might not be able to perform the update again or even launch Windows appropriately for that matter.

don't turn off lid

However, if you manage to change certain energy settings in your laptop, then there shouldn’t be a problem. This involves changing the programmed action of what happens when you close the lid.

Your laptop can be programmed to do one of 5 things when closing the lid:

  • Do nothing – Updates will continue without any issues
  • Turn off display – Updates will continue without any issues
  • Sleep – Will not cause problems most of the times, but will suspend the update process
  • Hibernate – Will not cause problems most of the times, but will suspend the update process
  • Shut down – Will interrupt the update process, so do not close the lid in this situation

Thus, if your laptop is set to do nothing or just turn off the display when you close the lid, then you can go ahead without worrying. In all other cases, you should refrain from doing so.


Looking for a good Windows laptop? Check out our top picks!


What can I do to close the laptop lid when updating?

As mentioned above, you will need to access the Change what closing the lid does menu.

  1. Press Windows + R
  2. Type in control.exe
    • This will open the Control Panel
  3. Go to Hardware and Sound
  4. Select Power Options
  5. Click on Choose what closing the lid does
  6. Go to both the On battery and Plugged in options, and select either Do nothing or Turn off displayLaptop do nothing

By following these steps, you should be able to close the lid of your laptop at any time without hindering the Windows update process in any way.

Did you find our guide useful? Let us know in the comment section below, and well write even more useful guides.

RELATED ARTICLES YOU SHOULD CHECK OUT:

How to Print a JPEG / JPG File if Your Printer Won’t Let You

Printers support a wide range of file formats including image formats like .jpeg or .jpg.  However, some users have reported that their printer is not printing jpeg files anymore.

This is a common issue and can happen due to many reasons including a buggy print interface. This problem only happens when the user tries to print a jpg or jpeg file.

Why won’t my printer print jpegs?

1. Install all the system updates

The printing issue can sometimes appear if certain system updates are missing. For instance, it’s been reported that users were stuck with the printing problem until installing KB5001649.

It’s possible that this update is not presented in the dedicated list under Update & Security (whether in mandatory or optional updates).

In that case, if you have a 64-bit computer, try using this direct download link to force the update. Use Edge instead of Chrome to access or make other settings.

Also, restart your device after the installation process finishes to allow the system to get the updates in place. Afterward, try and print .jpeg files and see if the issue is gone.


  2.  Print from the Paint App

  1. Open File Explorer and navigate to the folder where the photo you want to print is saved.
  2. Right-click on the photo and select Open With.
  3. From the list of applications, select the MS Paint app.
  4. In the Paint app, click on File and select Print.
    Print JPEG files from MS Paint
  5. Check the printing options and click on the Print button.
  6. Now your printer should be able to print the .jpeg file without any issue.
  7. As you might have noticed, this is not a solution but a workaround. However, if you need to take a copy urgently or have only a couple of copies to take, this should work until you find a permanent solution.

We’ve written extensively on printing issues on Windows 10. Check out more guides.


3. Reset Printer

  1. Power on the printer if it is off.
  2. Wait until the printer is idle and silent before you proceed.
  3. With the printer powered on, turn off the power supply and disconnect the power cord from the wall outlet as well as from the printer.
  4. After a few minutes, reconnect the power cord back to the wall outlet.
  5. Reconnect the power cord to the printer.
  6. Turn on the printer and wait for the warm-up period to finish.
  7. Now check for any improvements.

If the issue persists, do the following:

  1. Press Windows Key + R to open Run.
  2. Type control and press OK to open Control Panel.
  3. Go to Programs > Programs and Features.
  4. Select your HP Printer and click Uninstall. 
  5. Follow the next set of steps.

Remove Printer from Windows 

  1. Type printers in the search bar and click on Printers and Scanners.
  2. Under Printers and Scanner section, click on your Printer and select Remove Device.
    Remove Printer from Windows 10 Settings
  3. When asked to confirm, click Yes.
  4. Close the Printer and Scanner window.
  5. Press Windows Key + R to open Run.
  6. Type printui.exe /s and press OK to open Printer Server Properties.
  7. Click on the Drivers tab.
    Printer Server Properties _ delete Driver
  8. Look for the problematic printer and click on Remove button. Click Yes if asked to confirm. Close the properties window.
  9. Restart the computer. After that, you need to visit the official website of your printer and download the latest version of the Printer software and install it. Check for any improvements.

Let us know if one of these solution has helped with the problem. Also, if you have further suggestions, don’t hesitate to share them in the comments section.

8 Best CGI Animation Software to Download [Free, Paid]

Both pro and rookie 3D artists know that having a natural artistic skill makes for half the battle. The other half is won using capable 3D modeling software to show your creative talent.

With so many choices out there, it can confuse which one is the best among the lot. CGI software tutted as best by professionals may not be the right choice for beginners and vice versa.

Fortunately, each computer-generated imagery software offers something different to cater to the needs of a diverse audience.

In this article, we have jotted down the best computer-generated imagery software to suit your needs.

Product name100% FreeFree trial/ Paid
Adobe After Effects❌✅
Autodesk Maya❌✅
Adobe Animate❌✅
Autodesk Fusion 360❌✅
Unity✅
Autodesk 3DS Max❌✅
Autodesk Mudbox❌✅
Daz Studio✅

What is the best CGI software for professional modeling?

  1. Adobe After Effects – Overall best CGI software
  2. Autodesk Maya – Vast collection of editing tools
  3. Adobe Animate – 2D new age animation
  4. Autodesk Fusion 360 – Special module for 3D
  5. Unity – Professional CGI software for designers
  6. Autodesk 3DS Max – 3D modelling and animation software
  7. Autodesk Mudbox – Powerful tool
  8. Daz Studio – User-friendly tool

Adobe After Effects – Greatest CGI resource

You can’t talk about CGI added in movies and videos without at least mentioning the king of video post-production: Adobe After Effects.

This professional video editing tool added the option of creating 3D models back in 2017, and this feature has since become a product staple.

Besides that, CGI needs to be paired with other special effects to look realistic and natural, and this is something that Adobe After Effects can handle just as well.

That said, if you already have a video created and cut, and all you need to add is a bit of movie magic, then Adobe After Effects is the product for you. This makes it one of the best CGI software for movies.

Despite the common conception that Adobe products are a subscription-based service, Adobe After Effects is included in the Creative Suite and can be tested for free during a 7-day trial.

Let’s quickly look at its key features:

  • Professional 3D modeling tools
  • Seamless integration of 3D models and effects into videos
  • File formats compatible with all major video editing tools
  • Works best when paired with Adobe Premiere Pro
  • Can be tested out during a 7-day trial period

Adobe After Effects

When it comes to professional 3D modeling, there’s no better visual effects software than Adobe After Effects.
Free trial Visit website

Autodesk Maya – 3D animation modeling

Autodesk Maya is being used by many of the leading VFX and animation studios due to its vast collection of tools on offer.

The latest version of Maya offers accelerated workflows and productivity with its improved user interface. Maya enables you to create stunning 3D sets with rig playback and manipulation features.

It can be used to create motion graphics for text, flying logos, 3D animation with general animation tools like toolsets for a keyframe, scripted animation, and 3D modeling with the ability to sculpt and shape models.

Arnold RenderView integration lets you view scene changes in real-time, including lightning, camera, etc.

Let’s quickly look at its key features:

  • Enhance the 3D models using brush-based grooming tools for accuracy in styling
  • UV editor interface and Clump Modifier
  • After Effect live link to work with Adobe program
  • Make changes in real-time along with Additional MASH toolsets

Autodesk Maya can be a bit overwhelming for beginners as it involves a learning curve. But, for those willing to invest time and money, Maya is among the best CGI software in the market.

Autodesk Maya

Bring your art to life with the best 3D modeling and animation software!
Free trial Visit website

Adobe Animate – 2D new age animation

An incredible pick for CGI animation is Adobe Animate because it gives you everything to make your stories stand out.

This solution offers you professional resources to create animated content for gaming, starting from funny characters to full scenes with your characters.

It’s possible to create any character exactly how you picture it, giving you sketches and 2D drawing tools for a complete experience.

Moreover, there are various expressions, movements, or avatar features that will impress the public with the right message.

Let’s quickly look at its key features:

  • Cartoons and animated banners
  • Assets design and coding
  • Publishing on mobile, desktop, or TV
  • Flexi bone tool & envelope deformer

Adobe Animate

Craft complex characters and make them authentic with this animation tool.
Check price Visit website

Autodesk Fusion 360 – Realistic animation & rendering

Fusion 360 is great for teamwork as it is a cloud-based 3D modeling tool that assists the design and engineering of products in a way that aligns with industry standards of aesthetics, form, fit, and function.

The software has many features, but it is fairly user-friendly, and it offers its users access to the Autodesk Academy Platform for free online courses that teach basic notions and more advanced features.

Fusion 360’s key features include:

  • Direct modeling for editing of imported geometry from non-native file formats
  • Creation of complex parametric surfaces
  • PCB design integration
  • Special module for 3D printing
  • Easy access to your work and through the cloud
  • Multiple users can work on the same project simultaneously
  • Aid in the creation of photo-realistic images of your mode by using the rendering feature

Autodesk Fusion 360 has both a free plan for noncommercial use and a Premium plan.

Autodesk Fusion 360

Collaborate and create complex CGI models with an easy-to-use, cloud-based tool.
Free trial Visit website

Unity – Immersive CGI for gaming

Unity is a professional-level software used by architects, game designers, and app designers. It has many features and integrates popular collaboration tools such as Discord, Slack, Webhook, or Jira.

The software can be used to create and edit animation and cinematic projects. You can use it to create your models and then integrate them into your project with advanced rendering features. You can animate your models and get instant previews of your final result.

Unity uses real-time 3D technology (RT3D) to create interactive content efficiently. This can create immersive realities like video games and engaging architectural or construction projects.

Other key features of Unity include:

  • Multiplayer game creation and hosting support
  • Support for mobile games
  • Allows you to create AR & VR content
  • Automated non-creative tasks

Unity is CGI software free to download for personal use on your PC and comes with various subscription plans.

Unity

Use Unity to create pro-level designs for games, architecture projects, cinematics, and more.
Check price Visit website

Autodesk 3DS Max – Suitable for beginners

3DS Max is a 3D modeling and animation software from the same house as Maya, but Autodesk has developed these tools for a different purpose.

While Maya offers exceptional animation capabilities, 3DS Max shines when creating massive worlds in games and engaging virtual reality experiences.

3DS Max enables you to create and define various environments and detailed characters, along with high-end rendering tools like Arnold, V-Ray, and Iray, to create stunning visuals for your project.

Let’s quickly look at its key features:

  • Compatible with other Autodesk software including Inventor, Revit, and Fusion 360, and other third-party applications like Unity and Unreal real-time engine to create video game animation
  • The user interface can be less intimidating for beginners as it comes with a huge library of different modifiers to make the modeling process easier
  • Autodesk 3DS comes at a cost and is made for professionals. For students, Autodesk offers a free version of the same for educational purposes

Autodesk 3DS Max

Industry-leading Autodesk 3DS Max is unparalleled when it comes to 3D modeling, animation, and rendering.
Free trial Visit website

Autodesk Mudbox – Animated painting tools

Yet another powerful tool from the Autodesk suite makes our list. This time, it’s the best 3D digital painting and sculpting software.

Mudbox is best suited to craft stunning characters and environments with sophisticated 3D geometry and textures.

In order to achieve these results, you get to enjoy an intuitive toolset, optimized workflows for efficiency, and seamless integration with tools such as Maya,3ds Max, Arnold, and more.

Let’s quickly look at its key features:

  • Digital sculpting tool for highly detailed 3D characters and environments
  • Paint directly on your 3D models across multiple channels
  • Artist-friendly, camera-based workflows
  • Create quality meshes from any asset
  • Smooth, brush-based workflows for polygons and textures

Autodesk Mudbox

Create realistic 3D characters with artist-friendly workflows.
Free trial Visit website

Daz Studio – Extensive character libraries

Another 3D modeling software offering powerful tools is Daz Studio. It is a 3D modeling, rendering, and animation software that focuses on creating homemade human-like realistic figures.

It is also among the user-friendly 3D modeling software that professionals and beginners use.

As for what can be done with Daz Studio, you can create 3D morphing, posting, and animation rendering using the GPU power to create photorealistic figures.

The Daz Studio also offers access to its library of contents, which includes pre-made items that can be morphed as per user needs. It might just be the best CGI software for beginners and professionals you can use.

Other key features of Daz Studio include:

  • Character presets to help you start
  • Extensive library of character wearables
  • Multiple backgrounds & surrounding objects
  • Huge addons shop (with free items included)

The project can also be converted and exported to Maya from Daz Studio. Daz Studio can be connected to the Daz Store to browse the available products and make purchases.

Daz3d Studio

Daz3d Studio

Generate realistic 3D models and animation with free and beginner-friendly software.

Do let us know your favorite tool or if you think we have left a deserving CGI software off the list in the comments.

Moreover, keep in mind that the previously mentioned CGI software tools may come in handy for all those looking for:

  • CGI apps – Finding your way amongst many industry-standard 3D modeling software tools is challenging. If you lack the time or patience to discover the best CGI app, Adobe After Effects is a safe bet
  • CGI animation programs – We have listed the greatest animation software tools for anime as well. Take some of them for a spin to find the best tool according to your requirement
  • CGI editor – Even if you’re new to Computer-Generated Imagery, video editing can be fun when using the best video optimizer software

No Sound After Installing Realtek Drivers: Fix

The importance of Realtek sound drivers is paramount. Nowadays they’re provided via Windows Update frequently with the rest of the updates. However, after one of those updates, recently, some users lost sound completely.

For that purpose, we enlisted the best-suited solutions that should help you address the issue of having no sound after installing Realtek drivers. If you’re unable to hear a thing after the latest driver update, make sure to check the solutions below.

How can I fix no sound after installing Realtek drivers?

1. Check the volume

Sometimes the most obvious solution is the best-suited solution. Namely, your system might mute System sounds or an individual device for no apparent reason.

Or, on the other hand, the latest update might have changed your sound preferences. Therefore, your first task is to open Volume Mixer and make sure nothing is muted.

You can do so by following these instructions:

  1. Right-click the Sound icon in the notification area.
  2. Open Volume Mixer.
  3. Inspect all active sound settings and unmute System sounds and Speakers.Realtek driver update no sound

2. Roll back drivers

Back in the days of Windows XP, drivers were quite an annoyance. These days, we can say with certainty that drivers are as easily installed as the rest of essential system features.

However, even though Windows Update provides users with timely driver updates, take generic GPU and sound drivers updates with a grain of salt.

In addition, you can get updates that are not really improving on the previous iteration, but rather causing issue after issue after issue.

In this case, your best bet is to roll back the sound driver, and there so, return it to previous working state.

  1. Right-click Start and open Device Manager.
  2. Navigate to Sound, video, and game controllers.
  3. Right-click the Realtek High Definition Audio and open Properties.
  4. Open Driver tab.
  5. Click Roll Back Driver.Realtek driver update no sound
  6. Wait until the procedure finishes and restart your PC.

3. Reinstall drivers

The generic sound driver provided by Windows Update, won’t suffice most of the time. Even though it’s Realtek. Don’t get us wrong, for some users, generic drivers can work great without any issues whatsoever.

However, others can experience sound clamor, stutters, or even the complete absence of sound.

So, only appropriate drivers are acceptable. And appropriate drivers are provided by the original equipment manufacturer and located on the official site.

Follow the instructions below to reinstall Sound device drivers:

  1. Right-click the Start button, and from the Power User menu, choose Device Manager.
  2. Navigate to Sound, video, and game controllers.
  3. Right-click on the Realtek High Definition Audio device and open Properties.
  4. Open Details tab.
  5. Choose HardwareId from the drop-down menu.
  6. Copy the first value, paste it in a browser of your choice and google it.Realtek driver update no sound issue
  7. Open the official site and download the corresponding Realtek driver.
  8. Install it and restart your PC.

In addition, you must know that updating drivers can be done easily by specialized software, with almost no effort on your part.

A dedicated driver update tool like Outbyte Driver Updater will surely install your drivers accordingly, without producing other risky malfunctions in the system. Plus, it will do it automatically from its driver database.

⇒ Get Outbyte Driver Updater

4. Check hardware

Once we’ve dealt with drivers, the problem should be resolved. However, if that’s not the case, you’ll need to inspect your hardware, too.

Make sure everything is properly plugged in, restart your PC and playback devices, and make sure to use the proper wall socket as a current source for speakers. In addition, double-check your sound card.

Finally, in order to determine the functionality of playback devices, try to connect them with an alternative PC. If everything works fine, you should continue with the steps below.

5. Reset Default Playback device

Due to frequent system changes in Windows 10, certain device preferences might change on their own. For example, your default playback device can change the default values and that can, consequently, result in sound issues.

What you’ll need to do is to restore the playback device to default settings.

Follow the instructions below to restore playback device to default settings and look for changes:

  1. Right-click the Sound icon in the notification area.
  2. Open Playback devices.
  3. Right-click on your preferred, default device and choose Properties.
  4. Open Advanced tab.
  5. Click on the Restore defaults and confirm changes.Realtek driver update no sound
  6. Restart your PC.

Thi should relieve you of the problem with no sound, and restore the playback device to a working state.

6. Run Windows troubleshooter

Finally, if none of the previous steps served you justice, there’s still one thing you should try. Namely, troubleshooting is vastly improved in Windows 10, and including sound issues troubleshooting.

There’s a special troubleshooting tool with the main purpose to resolve audio-related issues.

In order to run it, check the steps below:

  1. Press Windows key + I to open the Settings app.
  2. Choose Updates & security.
  3. Highlight Troubleshoot in the left pane.
  4. Choose Playing Audio Troubleshooter and click on the ”Run the troubleshooter” button.Realtek driver update no sound

Realtek sound drivers are the most widespread sound drivers and there’s a chance you’ll experience an issue like this one occasionally.


Most of the time, you should be able to restrain it with a few workarounds. We hope that the above-mentioned solutions helped you to restore the sound on your PC.

In any case, don’t forget to tell us about your experience with the Realtek drivers update ”No sound” error in the comments section below. We look forward to your feedback.

6 Best Windows 7 Backup Software [Free, Paid]

Having a backup of your Windows 7 computer allows you to keep your data safe.

The backups can be used to recover your whole system and or deleted data from your backup when an unexpected disaster strikes. The best Windows 7 backup software makes this task easier.

Why do I need a backup software?

Backup software creates safe copies of your data in case anything happens to your system.

Loss of data can happen due to unexpected hardware malfunctions, malware infections, software corruption, power failure, and other similar situations.

Even with recent upgrades available, many users still prefer to work on the Windows 7 operating system.

Thankfully, the OS is still supported by many major software providers, including backup utilities.

We explore the best Windows 7 backup software that you can use to create instant backups to your external hard drive or any other location of your choice.

Make sure to get a backup tool with powerful encryption so no one can access your data without permission.

We also recommend you get backup software that is lightweight and can run in the background without creating any performance problems in your system.

What are the best paid and free Windows 7 backup software?

Vembu Backup for Microsoft Windows – Best enterprise tool

If you’re looking for a tool to back up all your Windows workstations, including Windows 7 machines, Vembu Backup for Microsoft Windows is certainly the right choice.

The tool is extremely flexible because you may back up the entire Windows Server or Windows 7 machine or select the drives you need to cover.

At it comes to individual drives, Vembu Backup for Microsoft Windows supports MBR and GPT partitioned disks with a capacity larger than 2 TB of data.

And it can back up all the drives, no matter if they are Basic or Dynamic disks. The best part is that with this solution, you can always be sure about the integrity of your backups.

That’s because the app features Automated Backup Verification to check the data recoverability of the backup.

Vembu Backup for Microsoft Windows also comes with recovery options for entire machines including their operating systems, applications, and data.

It even provides application recovery for Microsoft Exchange, SQL Server, SharePoint, and Active Directory.

Although it’s an enterprise-level solution, the software has a free trial version you may test.

Let’s go through some of its best features:

  • Back-up for entire Windows Server or Windows workstations
  • Individual MBR and GPT partitioned disks backup support
  • Microsoft Exchange, SQL Server, SharePoint, and Active Directory application recovery
  • Built-in AES 256-bit industry grade encryption algorithm for backed-up data
  • Control the size of backup data with in-built compression

Vembu Backup for Microsoft Windows

Back up and recover all your Windows servers and workstations from a central console.
Free trial Visit website

Acronis Cyber Protect – Great for network devices

Acronis Cyber Protect Home Office (formerly True Image) is more than just a backup solution as it also comes with decent antimalware protection to protect your system from adware and malware.

The utility offers flexible backups that enable you to backup everything from full system images to individual files to internal and external storage devices.

With fast and reliable recovery, you can restore your entire system to the same or new hardware. Included disk cloning and an all-in-one recovery drive, end-to-end encryption features ensure you can recover and restore your data safely.

Acronis is capable of backing up and retrieving any type of file, including documents, audio media files, videos, pictures, applications, and more.

The tool lets you create cloud-to-cloud backups for all products included in Microsoft 365. This lets you safely and easily access documents, presentations, and emails without the risk of data loss.

Acronis Cyber Protect Home Office also features a decent antimalware feature including a full antivirus scan, enhanced behavioral detection, web filters, and videoconference protection.

Other key features of Acronis Cyber Protect Home Office include:

  • Non-stop automatic backups
  • Incremental and differential backups
  • Cleanup utility to free up disk space 
  • Memory card backup

Acronis Cyber Protect Home Office

Easily backup your Windows 7 system by trying this powerful software today!
Free trial Visit website

Paragon Hard Disk Manager – Ideal for customized backups

Paragon Hard Disk Manager offers a clean and easy-to-use interface to backup files, volumes, and disks entirely. If you select the OS partition you will get all the necessary boot partitions that can be used in case your operating system crashes.

You can define new strategies using custom backup parameters and select backup type, frequency scheduling, retention, scenario-based backup, and more.

Paragon Hard Disk Manager is compatible with Windows operating system, starting with Windows 7 and going up. It is fully compatible with Windows 11 as well.

The tool can also recover lost files and even entire hard disks. It can restore your files to their original location, create a new location, or even resize the files while restoring.

Along with the backups, it can also assist users in basic and advanced partition management. It can convert, create, format, hide, split/merge, redistribute free space on partitions, and more.

Another essential feature that can come in handy is that it can copy entire partitions and disks and assist you in migrating your operating system.

Paragon Hard Disk Manager also comes with a few additional features including a partition manager, drive copy, and disk wiper. If you want to upgrade your HDD to SSD, use the Live Transfer feature to clone your existing Windows installation to a new SSD.

Other key features of Paragon Hard Disk Manager include:

  • Email notifications
  • File transfer wizard
  • Boot corrector

PARAGON Hard Disk Manager

Use the powerful Hard Disk Manager from PARAGON to easily back up your Windows 7 PC.
Check price Visit website

Aomei Backupper – Simple and efficient

Aomei Backupper is a complete and easy-to-use Windows backup software featuring sync, restore, and cloning features for personal and home computers running Windows 7 and above.

Aomei Backupper supports all the advanced system cloning including UEFI, MBR, and customized clone. The smart backup strategy allows you to schedule differential backup to save time and space on your backup drive.

It also supports multiple cloning options including dynamic disk volume clone, copy, or backup to ensure data is safe. The automatic monitor feature checks in real-time for newly added, modified and deleted files and sync accordingly.

The tool is highly secure, letting you create password-protected backups.

Aomei can also help you backup and restore removable media storage, such as USB drives.

You can also use removable media as the destination of your backup. The tool supports USBs as well as CDs and DVDs.

Additionally, Aomei Backupper features some useful utilities. You can backup images, protect files with password encryption, split backup images, and multi-language support.

Other key features of Aomei Backupper include:

  • Command Line Backup
  • 256-bit SSL encryption
  • 90-day money-back guarantee
  • Compatible with all Windows versions starting with Windows XP

Aomei Backupper

This lightweight but powerful software enables you to easily create backups of your Windows 7 hard drives.
Check price Visit website

EaseUS Todo Backup – Good for email backup

Next up we have EaseUS Todo Backup which offers advanced backup solutions for personal and business-level use.

The tool automates the creation of regular backups and can send them on any platform you prefer, including disk, NAS device, tape, virtual machine, or a cloud service.

The backup software is light, so you can without worry set up regular backup schedules and let it run in the background. It won’t interfere with your system or cause any performance problems.

EaseUS Todo Backup can handle full system backups, but it can also work with specific folders or disks. Moreover, it can also back up and restore Outlook email files.

This backup service uses powerful end-to-end encryption and also lets you set up a password for your backup files.

The tool can also clone disks and help you migrate your operating system to an SSD or HDD. 

The backup software is compatible with Windows systems starting with Windows XP. It also supports Windows Server, MS SQL servers, and more. It is a premium tool with three major plans available.

Other key features of EaseUS Todo Backup include:

  • SQL/Exchange Backup and restore
  • Universal restore
  • P2V/Command line
  • Email notifications

EaseUS Todo Backup

Create Windows 7 backups for any storage platform or device and keep them secure with password protection.
Free trial Visit website

MiniTool Shadowmaker Pro – Perfect for system imaging

MinTool Shadowmaker Pro is a premium backup software with a simple interface that guides you through the process of defining a backup job through a wizard. You can define where do you want to store the backup, the files to backup, types of backup, and scheduling.

Once you have a backup job defined, you can run it manually or let the software take wheels and create backups as per schedule.

Shadowmaker lets you create a system image and restore it to a different computer. This can come in handy in case you experience severe issues with your machine, as you will be able to keep your files and applications and continue working as usual.

The tool offers support for disk space management with the help of the backup scheme feature.

It offers two data encryption methods to ensure all data is safe and private. Along with that, it also lets you create passwords for your backups.

Shadowmaker Pro can securely backup files from local drives and save them to USB and network locations. The backups can be stored either as standard zip files or exact copies of the source without compression.

Other key features of Minitool Shadowmaker include:

  • Universal restore
  • Command-line backup
  • Network booting
  • Remote computer management

MiniTool Shadowmaker Pro

The MiniTool Shadowmaker Pro will ensure that your Windows 7 is backed up at all times.
Free trial Visit website

With Windows not providing a solid backup option, third-party Windows 7 backup software offers easy-to-use backup and restore solutions to keep your data safe.

Make sure to explore all the software listed in this article to find the one that fits your requirements best.

You might also be interested in our guide on how to move Windows 7 backup files to another drive.

If you have any knowledge of any other efficient tools you have tried, let us know about them in the comments section below.

Windows Live Mail Not Working With Gmail: Fix

With Windows Live Mail still being a popular email client on the Windows platform, many Windows 10 users still rely on it on a day-to-day basis. Some of them have reported that they face a pretty common problem: Windows Live Mail is not working with Gmail.

Windows Live Mail provides great convenience and simplicity. These are some of the reasons why so many still use it on their PCs. However, these errors have a high impact on your experience.

The setup entries are correct, the username and password are both correct, but this keeps on happening. Keep on reading this article for detailed instructions to get rid of this annoying issue.

How can I fix Windows Live Mail not working with Gmail?

1. Enable the less-secure apps feature

enable less-secure apps

If a site doesn’t meet the latest security standards, remember that Google blocks anyone who’s trying to sign in to your account from it. You may have to check access to less secure apps in Gmail settings to allow older email clients to access Gmail servers.

Therefore, find your way into your Google Account page by clicking on your avatar on the top right of the screen after already logging in.

Scroll down and under Signing In, you’ll see access for less secure apps. In the next window turn the slide button from Off to On.

Then, wait a few minutes and check your Windows Live Mail. It’s an essential requirement for most desktop email clients and yours is no exception. So, connecting to Gmail should work like a breeze now.


2. Use App password for Two-Factor Authentication

Two-Factor Authentication

If you have enabled Two-Factor Authentication in your Google account, then the regular Gmail password won’t work in most email clients.

In that case, generate a so-called App password. This usually requires you to go to the sign-in page and enter your username and password like you normally do.

Then you’ll be asked to enter an extra access code. It could be a six-digit code or a prompt sent to you by Google via text or by email. That’s what you need to use in place of your real password in the field where you normally enter it in Window Live Mail Setup.


3. Delete and create the account back

how to disable antivirus

If this did not work, you can always turn to having your antivirus and/or firewall software temporarily disabled. After making the change, delete the account from Windows Live Mail. Restart Windows, then create the account once again.

Some users also confirmed solving this by making sure that IMAP is enabled in Gmail account settings, while others claim the problem has rectified itself without doing anything in that regard. What about you?

Tell us if and how you managed the problem of Windows Live Mail not working with Gmail in the comments section below and we’ll be sure to continue the talk.

How to Fix Hulu Corrupted Data Error on PS4 [Quick Guide]

Hulu’s streaming service is available on PlayStation 4. However, when using the app, some users have reported the Hulu loading error on PS4.

The error reads ‘The database is corrupted or corrupted data – cannot load the saved data because it is corrupted’.

The error indicates at a corrupted database that could be causing the error. You can fix the error by trying to rebuild the PS4 database.

In this article, we have listed a couple of troubleshooting steps to help you fix the Hulu loading error on PS4.

Hulu won’t load on PS4? Here’s the solution

1. Delete System Storage Data

Hulu won't load on PS4
  1. From your PlayStation home screen, open Settings.
  2. Go to Application Saved Data Management.
  3. Choose the Saved Data in System Storage option.
  4. Select Delete.
  5. Next, choose the Hulu Plus option.
  6. Select the Hulu Plus icon and then select Delete.

Clearing the System Storage Data for the Hulu app seems to have fixed the corrupted data error for many users.

After clearing the system storage data, you need to re-enter your email address and password to login to your Hulu app. But the message should disappear for good.


2. Perform a power cycle

Hulu won't load on PS4
  1. Press the power button on your PS4 console. The power indicator may blink a few times, and the system will shut down.
  2. Once turned off, disconnect the power cord from the wall outlet.
  3. Leave the device idle for a few minutes.
  4. Reconnect the power cable to the wall outlet.
  5. Press the power button to restart the console.
  6. Launch the Hulu app and check if the error is resolved.

Performing a power cycle usually fixes minor glitches that may stop the system from functioning normally. It also clears any cache issues that may cause the error.


3. Rebuild PS4 database

Hulu update error
  1. Press the power button on the front of the console to turn it off.
  2. Once turned off, press and hold the power button for about 7 seconds.
  3. Release the power button once you hear two beeps.
  4. Connect your DualShock 4 controller using a USB cable to the system.
  5. Once you have entered the Safe Mode, select the Rebuild Database option.

The database rebuilding process can take some time, so wait till is complete. Once done, open the Hulu app and check for any improvements.


4. Initialize PS4

Note: Initializing your PS4 will delete all the data stored in the system. Make sure to create a backup of your important data before proceeding.

Hulu won't load on PS4
  1. From the PlayStation home screen, open Settings.
  2. Go to Initialization.
  3. Initialize PS4.
  4. Select Quick.

If you are unable to access the PlayStation home screen, initialize the PS4 using Safe Mode.

Hulu update error
  1. Turn off the console by pressing the power button.
  2. Once powered off, press and hold the power button for about 7 seconds.
  3. Release the button once you hear two beeps.
  4. Connect your DualShock 4 controller using a USB cable to the system.
  5. From the Safe Mode, select Initialize.

The Hulu loading error on PS4 usually occurs due to data corruption or cache issue. You can resolve the issue by deleting the corrupted data. If the issue persists, proceed with system initialization to resolve the error.


[wl_navigator]

What is TrustedInstaller.exe and Should I Remove it?

Windows is one of the most popular operating systems in the world, but user and system errors can sometimes appear.

If you notice high CPU usage on your Windows 10 PC and the computer is slow to react to commands, or maybe the startup takes too long, a probable cause can be the TrustedInstaller.exe.

Is TrustedInstaller exe a virus?

services window what is trustedinstaller in windows 10

TrustedInstaller.exe is a process that belongs to Windows Modules Installer and one of the core components of the Windows Resource Protection. It’s included in every version of Windows since Vista.

trusted installer location trustedinstaller windows 10

Its main purpose is to install and modify Windows updates and other optional system components with a high impact on your computer. You can easily locate it in C:Windowsservicing and its size is usually around 100-200 KB.

Because TrustedInstaller is a legit Windows component, you don’t need to uninstall it or change it in any way. Most of the time you won’t even notice it.

Keep in mind that removing or modifying it in any way may cause some functions of Windows to simply stop working, and this could lead to bigger problems.

How do I fix TrustedInstaller?

Users are reporting that TrustedInstaller.exe is making their computers unusable. If you’re in this case as well, you’ll have to know that the process could be corrupted or even replaced by malware with the same name.

One way to find TrustedInstaller malware is to check your CPU load. You can easily check your CPU performance with InSpectre or any other similar tool. If TrustedInstaller.exe is using a high percentage of your PC’s resources at all times, that means that you may have been infected.

As a side note, the legitimate TrustedInstaller will also use a lot of resources, but only in the time of or after a Windows update.

Another way to pinpoint the malware is by checking the file location. As we mentioned already, the legit component of Windows is found in C:Windowsservicing. If the location is other than that, then it’s probable that you are dealing with malware.

The TrustedInstaller malware is very dangerous and can use your camera and microphone without your knowledge. If you suspect that hackers have access to your webcam, check out this webcam protection software and protect your privacy.

Replace TrustedInstaller with SFC scan

If you still can’t figure out if TrustedInstaller is a Windows process or a malware, we recommend starting with a System file check to make sure that your files are in order.

  1. In the Windows search box, type cmd. Right-click the first result and select Run as administrator.
  2. In the cmd window, type sfc /scannow , wait for the process to finish and then restart your computer.run Sfc scannow command trustedinstaller windows 10

This action will repair any corrupted files, including TrustedInstaller, and everything should work fine after that.

If TrustedInstaller is a malicious virus, it has to be removed right away. To do that, you’ll need some powerful malware removal tools such as Bitdefender to remove it.

We hope that the information regarding TrustedInstaller.exe helped you better understand what is it and how it functions. If you have any more questions, don’t hesitate to leave them in the comments section below.

7 Best Document Comparison Software [Free, Paid]

Programs that are able to compare documents obviously come in handy, and they can save you time and effort. The market is filled with such tools, and we picked the seven best tools to compare two documents.

We recommend you check out their extended set of features because they include other really handy functionalities. After checking them out, you can make an informed decision and pick the best program for comparing documents.

Best programs for comparing two documents

Soda PDF – Easy-to-use tools 

Soda PDF is a full-featured PDF creation and management software that allows you to edit, convert, e-sign, and compare documents.

The popular Acrobat alternative is accessible through any device with a web browser and comes in two editions. Both the Standard and Pro versions can be used to compare two documents.

The Review Module in Soda PDF lets you compare two documents, insert comments and add shapes like arrows or stars.

On the other hand, its ability to work from the cloud and on multiple devices can enhance productivity if several persons work on the same project. It is just one of the best PDF document comparison software you can use.

Here are other great features included in this tool:

  • Create PDFs from 300+ file formats in just a few clicks.
  • Convert PDF files to Word, PowerPoint, Excel, HTML, and image formats without losing information.
  • Scan a document and extract the text with the Optical Character Recognition (OCR) Module.
  • Protect your documents by adding 256-bit passwords, different permission levels, or a digital signature.       
  • Insert images, links, or even watermarks to your documents’ backgrounds via the Insert Module.

Soda PDF

Compare two documents using one of the best all-in-one solutions for your PDF needs!
Check price Visit Website

Adobe Acrobat Pro DC – Most used worldwild

Adobe Acrobat Pro DC document comparison software

Adobe Acrobat Pro DC is an excellent tool for comparing documents, especially PDF files. You can use this feature to compare two different documents or multiple versions of the same document.

Keeping track of all revisions can be difficult if several persons are working on the same document. With Acrobat Pro DC, you can quickly compare the text and other elements to spot the differences.

You can visualize the files side by side to better identify the changes. Alternatively, you can apply a series of filters so that Acrobat Pro DC highlights the changes regarding particular elements such as text, images, annotations, and more.

Adobe Acrobat Pro DC offers amazing features and is undoubtedly one of the best text document comparison software.

How to compare documents using Adobe Acrobat Pro DC

  1. Navigate to Tools
  2. Click on Compare Files
  3. In the left-hand pane, click on Select File to choose the file to compare
  4. Click on Select File this time in the right-hand pane to select the second document or the newer version of the same document
  5. Hit the Compare button to launch the comparison processadobe acrobat pro compare documents
  6. Select the Go to First Change option to review each difference individually.

Other great features:

  • Can create and edit PDF files
  • PDF conversion
  • Compare documents
  • Ability to sign PDFs
  • Text recognition

Adobe Acrobat Pro DC

Adobe Acrobat Pro DC is a powerful PDF editing software that allows you to compare any two documents easily.
Check price Visit Website

ABBYY FineReader – Intuitive interface

ABBYY FineReader document comparison software

Using this program, you can find the text differences between two document versions. This tool will eliminate the time-consuming line-by-line matching.

The Compare Documents feature can identify the changes between the document’s versions in various formats, including PDF, Word, and more.

The result can be saved in Word or PDF formats, and insignificant differences can be ignored and removed from the report before you finalize it.

ABBYY FineReader is simple and powerful, so it is one of the must-have word document comparison software that compares two text files.

This software allows you to detect all the differences in text between two versions of the same document in just a matter of seconds.

The software is incredibly intuitive, and you can compare texts productively. You can compare two versions of a text across different file formats, such as Microsoft Office files, PDFs, paper scans, and more. Of course, you will also be able to compare the same type of files.

Other great features:

  • With the help of ABBYY FineReader, you can enjoy comparing files that will save you time and effort.
  • ABBYY FineReader supports text comparison in 35 languages, and the program can detect a document’s language automatically.
  • There will not be any change left to go unnoticed.
  • The changes are highlighted in the two documents and will be displayed side by side, making them easy to notice.
  • Only the changes that affect the content meaning will be highlighted, and the irrelevant modifications will be excluded.

ABBYY FineReader

ABBYY FineReader is a document viewer that supports various file types, and it also comes with a powerful document comparison feature.
Check price Visit website

ExamDiff – Automatically detects file changes

ExamDiff document comparison software

This freeware visual file comparison tool can detect file changes more automatically.

The freeware is compatible with Windows and is ideal for file comparison. It is straightforward to use and comes with various functionalities that will turn out useful.

The software can compare two Word documents and highlight differences, but it requires a special plugin.

Check out the best features that are included in this software below:

  • Using this software, you can compare directories and binary files.
  • You can perform a three-way diff and merge and edit the files inside comparison panes.
  • You will get the ability to highlight diffs down the level of characters and words as well.
  • Ability to highlight syntax and ignore comments.
  • There will be no need to specify both filenames; you must enter a directory name for one of the files to be compared.
  • The software has an auto-pick feature in the Compare dialog box that can remember matching file pairs.
  • ExamDiff can automatically detect file changes and prompts the user to re-compare the files.
  • You can drop one or two files into the software’s window using a drag-and-drop function.
  • The program comes with a fully customizable file extension filter.

The adjustable pane splitter with smooth synchronized scrolling will be useful.

⇒ Get ExamDiff’s

WinMerge – Supports Microsoft Windows XP SP3 or newer

WinMerge document comparison software

WinMerge is an open-source differencing and merging tool for Windows. The program can compare folders and files and present the differences in a visual text format that is effortless to understand and handle.

It might fit in as the ideal legal document comparison software for lawyers.

Check out the best features that are included in this software below:

  • WinMerge supports Windows, and it comes with a tabbed interface.
  • The program compares the visual differencing and merging of text files.
  • This is a flexible editor with syntax highlighting, line numbers, and word wrap.
  • WinMerge is also able to show the differences between the two vertical panes.
  • The location pane shows a map of the files that are being compared.
  • The regular expression-based file filters allow excluding and including items.
  • Program is also able to compare one folder, and it can include all subfolders as well.
  • The results will be shared in a tree-style view.

Other essential features include shell integration, plugin support, a localizable interface, and an online manual.

⇒ Get WinMerge

Araxis Merge – Cross-platform licence

araxis merge document comparison software

Araxis Merge comes in two editions, and it’s important to note that only the professional version provides a three-way comparison, three-way merging, and all related features.

On the other hand, the standard edition is identical, but it works only with two documents. Nevertheless, it’s still a great program to compare two documents that is work checking out.

Check out more powerful functionalities that are included in this program:

  • A single license of the program will enable you to use both versions of Merge.
  • You will be able to compare huge files with the 64-bit version of the program, and you will also be able to take advantage of the massive amounts of memory that are available on the 64-bit systems.
  • You can identify removals, insertions, and changes between various source code versions, configuration files, text files, and web files.
  • You can also compare and merge changes in two updated file revisions with their common ancestor.
  • The program saves time by directly loading and comparing popular file formats.
  • You can copy text from other apps and paste it into a Merge text comparison window.

⇒ Get Araxis Merge

GroupDocs – Easy comparison

GroupDocs allows developers to seamlessly enhance their web, desktop, and mobile apps and display, annotate, convert, compare, design, and assemble documents.

Overall, it’s a great program that compares two text files, so consider it.

Check out the best features that are included in the GroupDocs products family:

  • You can get a different summary report by comparing two versions of the same document using the file comparison API in any cross-platform app.
  • GroupDocs Comparison for .NET targets Windows forms and apps based on .NET Framework 2.0 or later versions.
  • You can download a free trial of this program to see if it works for your needs.

⇒ Get GroupDocs

These are five of the best available options for programs that can compare two documents. No matter which one turns out to be your choice, you will be able to enjoy a vast set of useful features while comparing your documents.

Make sure to visit the software’s official website to analyze more details about the program’s features.

Fix: Server Denied POP3 Access for Username and Password

Gmail is perhaps the most popular email domain, but you may be unlucky to run into a couple of challenges, such as the server denied POP3 access for the given username and password problem. This is a POP3 Gmail error in your account, and with it, you won’t be able to receive emails.

If you’re experiencing this error, you know that it’s most likely caused by the POP3 forwarding feature. Several factors can cause the POP3 Gmail error, some of which include the following:

  • Two-factor authentication is enabled on the source account, but it’s not working. This problem is most prominent on accounts hosted on the Zoho domain.
  • POP forwarding is disabled on the source account.
  • Incorrect login information.
  • You’ve exceeded your POP data limit.

What does POP3 unable to fetch mail mean?

If you refresh your inbox and instead of receiving new mails, you get an error that says POP3: Unable to fetch mail, your POP3 server details are incorrect. In most cases, it’s caused by an incorrect username or password.

To fix this issue, open Gmail and navigate to Settings > Accounts > Check mail from other accounts. Here, modify your settings with the correct details.

server-denied-POP3-access-for-the-given-username-and-password-gmail-settings
server-denied-POP3-access-pop-forwarding-settings
pop-forwarding-settings-pop-download

How do I fix the server denied POP3 access issue?

1. Enable POP in the source account

  1. Log in to the source account (the account with the emails you want to access). In this guide, we’ll make use of Gmail.
  2. When you log in to the email account, click on the gear icon and select Settings and hit See all settings.
  3. Next, click on the Forwarding and POP/IMAP tab.
  4. You now have to Enable POP for all mail or Enable POP for mail that arrives from now on. Click on either of those options from the POP Downloadarea.
  5. POP is now active on your source account, and its options will be enabled. Select an option from the dropdown menu.
  6. Finally, save your settings by hitting the Save Changes button.

2. Force fetch emails to the destination account

  1. Sign out of the source email account completely and sign in to the destination account.
  2. Similar to the previous method, click on the gear icon at the top right-hand area of your screen and click on See all settings. You will now be taken to the settings page.
    see-all-gmail-settings-server-denied-POP3-access
  3. Here, navigate to the Accounts and Import tab.
  4. After that, go to Check mail from other accounts and hit Add a mail account. Clicking on Add a mail account triggers open a popup window.add-mail-account-gmail-account-error
  5. On this new window, type in the email address of the source account. Click on the Next Step >> when you’re done here.
  6. Next, input your account password and leave the settings as mail.google.com with port 995. Click on the Add Account button to proceed.
  7. After clicking on Add Account, if the server denied POP3 access for the given username and password message shows up, it means that the destination account is not trusted by the source account. Hence, follow the steps below to rectify it:
    1. Using the same web browser, sign out of the destination account and sign in to the source email account.
    2. Next, go to the Allow Access page and hit the Continue button. This action will help the source account trust the destination account by reducing its security for the next ten minutes.
    3. Now, log out of the source account and log in to the destination account. Next, click on Add Account like in step 7 above. This time around, the account will no longer return the POP3 Gmail error.

3. Use a device-specific password

  1. Sign in to your Zoho Mail account.gmail-pop3-error-zoho-mail-sign-in
  2. Next, go to the My Account button at the top of your screen to see the logged in Zoho Mail account.
  3. Here, click on Two Factor Authentication and choose Manage Application Specific Password.
  4. Next, type in the name of your device and your password. Hit the Generate button at the bottom of the screen to get a password.
  5. Using this newly generated password, access POP forwarding settings for the source account and confirm that the POP3 Gmail error has disappeared.

This solution is mainly for accounts hosted on the Zoho mail domain. With two-factor authentication enabled on your email account, your account password may no longer work for incoming email verification.


For all the scenarios where you get the server denied POP3 access for the given username and password error message, above are solutions that will work. I recommend that you attempt the solutions as they are listed here. However, Zoho Mail users may jump to the third troubleshooting solution to fix the problem.

Power BI Column Not Found / Can’t Find Column: Quick Fixes

While using the Power Bi desktop app you may face some issues with your data and file. One such error is related to Power Bi columns. Some of the most common Power Bi column errors include ” power bi can’t find column, power bi error sort by another column and power bi error column not found” as reported by several users in the Power Bi community forums.

I have categories that I want to sort. The data looks like this:To populate the sort order column, I wrote the following formula:
Then, I tried to use the “Sort by Column” tool to sort the Category column by the Sort Order column, but the following error message occured:

In this article, we have compiled a list of possible solutions to fix Power Bi columns error in Windows 10.

How can I fix Power BI column not found / can’t find errors?

1. Power Bi can’t find column

Power Bi can't find column


Check the Formula 

  1. If you are using DAX formulas for the column, you may want to review the formula again. Try the following.
  2. First, create a calculated column using the appropriate measures.  If it works fine with the expected result, try to create a measure using the same formula.
  3. If the error is showing, add Values () function and check again.
  4. This should help you resolve Power Bi can’t find column error.

Add aggregate Function

  1. If the columns don’t come up when you click on New Measures, this is due to a missing aggregate function.
  2. To get a column into a measure you need to apply an aggregate function to a column or call on another calculated measure.
  3. Apply the recommended changes and check if the error is resolved.

2. Power bi error sort by another column

Sort by Index Column

  1. You can try to fix sort by another column error with simple tweaks like this.
  2. Add an index in the Query Editor. So click on Edit Queries > Add Column and select Index Column.
    Power bi error sort by another column
  3. Click on Sort by Column and select Index.
  4. Check if the sort by another column error occurs again.

3.  Power Bi error column not found

Power Bi error column not found


Clear Data Source Cache 

  1. The power bi error column not found error can occur if the data source cache is corrupted. You can easily fix this by clearing data source cache in Power Bi.
  2. In Power Bi client, go to Data Source Settings.
  3. Now clear all permissions.
  4. Recapture the permission again.
  5. Try to load the source again and try to make the necessary changes.

Check for Extra Column or Space

  1. This error can also occur if the Excel file has column1 (extra column) or for extra space after column1.
  2. It is possible that when you use Excel file as a source, you may get additional null columns.
  3. To prevent his you can use Remove Other Columns option to keep the columns you want instead of tinkering with unwanted columns.

We hope you manage do fix your Power BI column not found errors using our guide. Let us know your thoughts in the comments section below.

Fix: Skyrim Black Screen on Startup / After Loading

Skyrim is still one of the most popular games today, besides the fact that it was released four years ago, and of course, a lot of people who play Skyrim switched to Windows 10.

However, some of them reported that Skyrim displays a screen issue and this problem usually occurs while they’re playing the game on their Windows 10.

So in this article, we’re going to analyze what are the best solutions to fixing this situation that most gamers have encountered.


How can I fix Skyrim black screen issues?

1. Close the game

  1. Press Alt + Tab to access the taskbar.
  2. Now click on the task button and create a Desktop.
  3. Open Task Manager on the second desktop and force-close Skyrim.
  4. Get back to the first desktop and it should be closed.

The first thing you should do if Skyrim SE displays a black screen on Windows 10 is to safely leave the game. Since you don’t see anything on the screen, follow the above instructions to get to your desktop.


2. Reboot your computer

After that just restart your computer and run the game again and it should work normally.

I tell you that because I played Skyrim on Windows 10 (on not such a powerful computer) for hours and I didn’t notice a single issue.

So Skyrim is completely compatible with Windows 10, and if Skyrim still generates a black screen after loading then the problem is not Windows 10-related and it’s a gaming error.


3. Update your video drivers

3.1. Use Windows Update

  1. Click Start.
  2. Type in Settings.
  3. Access the Update & Security option from the left panel, menu.
  4. In the Windows Update menu click Check for Updates.

You can also try other solutions like updating your graphics driver. GPU manufacturers roll out new driver versions as soon as a new game is out.

You can install the latest graphics driver updates by running Windows Update or you can get them directly from your GPU manufacturer’s website.

3.2. Give a try to a great tool

You can opt for updating your drivers automatically in order to fix the Skyrim black screen issue on startup.

This tool is able to scan your device right from installation and provide you with an accurate report of all the elements that need to be updated.

4. Reinstall DirectX

  1. Go to the official Microsoft download center.
  2. Go to the DirectX End-User Runtime Web Installer and click Download.
  3. Follow the setup wizard.
  4. Restart Windows 10.

Many gamers confirmed that re-installing DirectX fixed their in-game black screen problem. Simply access the official site and follow our instructions.


5. Set your GPU to high performance

  1.  Right-click on the desktop and select NVIDIA Control Panel.
  2.  From the NVIDIA Control Panel, select the Manage 3D settings.
  3. Click on the Power management mode drop down box and choose Prefer Maximum Performance.
  4.  Click Apply to apply the changes.

If you own an NVIDIA-powered computer, go ahead and change the preferred graphics processor settings from Auto-select to High performance.

Many players confirmed this quick workaround solved the issue they had with Skyrim displaying a black screen on startup.


6. Clean boot your computer

  1. Go to Start, type msconfig and hit Enter.
  2. Go to System Configuration then click Services,  check the Hide all Microsoft services check box and click Disable all.hide all microsoft services
  3. Go to the Startup tab and access Open Task Manager.
  4. Select each startup item click Disable, close Task Manager, restart the computer
disable startup programs

In-game black screen issues may occur if other programs are using too much computer power, leaving too little for your game.

You can quickly fix this by clean booting your machine so that it uses only a minimum set of drivers and programs.


Microsoft pays attention a lot to gaming in Windows 10, therefore the majority of newer games are compatible with the system, including Skyrim, as one of the most popular games of the past decade.

In this article we presented you with all the solutions that you can use for fixing the Skyrim black screen problem.

If you have any other Windows 10-related issues you can check for the solution in our Windows 10 Fix section.

6 Ways to Set up Automatic Backup on Windows 11

When files get lost, it can be quite a hassle to recover deleted files. If you have a Windows computer, then you’re probably aware of how important it is to have a sound backup system in place.

Thankfully, Windows has a built-in backup utility that makes creating backups manually or on a schedule easy.

Does Windows backup save all files?

Backup is an essential feature of any operating system. For Windows, it is a built-in tool. You can use it to back up your files and folders to another location. As Windows versions evolve, the feature may keep changing positions.

And to answer the question, yes, Windows backup can save all files, unlike File History. You can check a detailed File History vs Windows Backup review to learn about the differences.

Windows Backup is a great tool for protecting your computer from data loss. The tool allows you to back up your data on an external drive or network location so that if your computer crashes or gets damaged, you’ll be able to restore everything just as it was before.

However, you should never rely on your Windows backup tool to back up all of your data. It’s always a good idea to have additional backup software for any eventuality.

How do I automatically Backup files in Windows 11?

Before establishing an automatic backup, we also remind you that you can perform a manual backup of your data.

All you have to do is copy your important documents and pictures onto another storage device such as a CD DVD, or drive so that if anything happens to your computer, they won’t be lost forever.

You can use a flash drive or hard drive for this purpose and any external storage device that supports USB 2 or higher speeds for faster transfers. Then, if something happens, such as a virus or hard drive failure, you can use this copy to restore the original files.

1. Turn on automatic backup

  1. Hit the Windows key and select Settings.settings-option oops thre was an error
  2. Select Accounts on the left pane then click on Windows backup on the right pane.
  3. Now, select the preferred cloud storage (by default, it’s OneDrive) and turn on app and preferences backups.

2. Use File History

  1. Hit the Windows key, type Control Panel in the search bar and click Open.
  2. Select System and Security.system and security setting in control panel
  3. Navigate to File History.
  4. Click on Select drive on the left pane.
  5. Choose your preferred drive from the list and click OK.
  6. Hit the Turn on button to activate the tool.
  7. Now click on Run now to backup any files you have.

3. Use Windows backup

  1. Hit the Windows key, type Control Panel in the search bar and click Open.
  2. Select Backup and Restore (Windows 7) under System and Security.
  3. Click the Set up backup button.
  4. Select the Backup destination then click Next.
  5. Select one of the two backup options then click Next.
  6. Click on Change schedule and set up your preferred time then select Save settings and run backup.

4. Use a third-party tool

As you can see, it’s not that easy to set up and use the built-in Windows tools to back up your data.

It’s a lot easier to use a professional tool and we recommend AOMEI Backupper because we have tested it with excellent results. It can be used by anyone and you can make individual files and full system backups with ease.

If you’re not convinced, you may also find the best choice in our list of the best backup tools for Windows 11.

5. Use OneDrive

  1. Hit the Windows key and select Settings.settings-option oops thre was an error
  2. Select Accounts on the left pane then click on Windows backup on the right pane.
  3. Click on Set up syncing/Manage sync settings.
  4. Enter your credentials to login or Create account if you don’t have one.
  5. Select a folder to backup then click on Start backup.

6. Use System Image

  1. Hit the Windows key, type Control Panel in the search bar and click Open.
  2. Select Backup and Restore (Windows 7) under System and Security.
  3. Click on Create a system image on the left pane.
  4. Select your hard disk and click Next.
  5. Click Start backup.

How do I set up automatic backup on my external hard drive in Windows 11? 

File History is a feature that lets you automatically back up your files so that if anything goes wrong with them, you can restore them quickly and easily. 

It works by creating copies of your documents and saving them in a separate location — typically your OneDrive folder or an external drive. You can choose how often File History should run (daily, weekly, or monthly), and how many versions of each file it should keep.

To set up, follow the steps below:

  1. Plug in your external hard drive to your PC.
  2. Hit the Windows key and select Settings.settings-option oops thre was an error
  3. Select System then click on Storage.
  4. Click on Advanced storage settings under Storage management.
  5. Select Backup options.
  6. Now click on the Add a drive option under Back up using File History.
  7. Select your external drive and start the backup process.

And that’s how to automatically back up your files in Windows 11 using various methods. If you feel that you are running out of storage space, you can always delete app backup files which are usually just cache files.

Should you encounter a Windows 11 backup error, we also have a detailed guide on bypassing the issue. These tips might come in handy, especially if the Seagate Dashboard isn’t working.

If you want a solution that works on multiple platforms, don’t miss our latest guide on how to download IDrive for Windows.

Let us know in the comment section your preferred backup method and why.

Failure When Attempting To Copy Boot Files: Fix

Some users utilize the Bcdboot command-line utility within WinPE (Preinstallation Environment) to deploy Windows on PCs.

However, a “Failure when attempting to copy boot files” error aries for some users when they try to copy boot files. Consequently, users can’t deploy the Windows OS image when WinPE returns that error message.

How can Users Fix the Failure When Attempting to Copy Boot Files Error?

1. Copy Both UEFI and BIOS Files to the Disk

Some users have confirmed they’ve fixed the “Failure when attempting to copy boot files” error by copying both UEFI and BIOS files to disk. To do that, enter the ‘bcdboot c:\windows /s s: /f ALL’ command. The ALL at the end of that command ensures that both UEFI and BIOS files get copied.

bcdboot command failure when attempting to copy boot files

2. Set the System Partition As Active

  1. The “Failure when attempting to copy boot files” error can also be due to an inactive system partition. To fix that, users will need to insert a bootable USB flash drive into the laptop or desktop.
  2. Turn on the laptop or desktop.
  3. Click Repair your computer on the Windows Setup window.The Troubleshoot button failure when attempting to copy boot files
  4. Then select Troubleshoot and Advanced Options to open further options.
  5. Select Command Prompt to open the Prompt.
  6. Input ‘diskpart’ in the Command Prompt, and press the Return key.
  7. Enter ‘list disk’ and press Return to display a list of hard drives, which will probably include just one HDD.List disk failure when attempting to copy boot files
  8. Then enter ‘select disk 0’ and press Return if that’s the only hard drive listed. Users with more than one hard drive to select the one that includes the Windows install.
  9. Next, input ‘list partition’ and press Enter to display a list of drive partitions.list partition failure when attempting to copy boot files
  10. Thereafter, select the partition that includes the Windows installation. For example, enter ‘select partition 2’ if partition 2 includes Windows.
  11. Enter ‘active’ and press Return to set the selected partition as active.
  12. Then input ‘exit’ and press Enter to close the DiskPart utility.

Those are two resolutions that can fix the “Failure when attempting to copy boot files” error for users. Users who have fixed the same issue with other resolutions are welcome to share them below.

Fix: Age of Mythology Won’t Launch on Windows 10 & 11

Age of Mythology is certainly a hall of fame RTS classic, still very popular till this day. The only problem with this game is its outdated engine and lack of discontinued supporting software on Windows 10.

A lot of AoM aficionados have had a hard time running the game on the latest Windows platform, and there are various reasons for that.If you’re stuck with this error for some time, make sure to check our steps below.

How do I launch Age of Mythology on Windows 10?

1. Disable anti-malware protection

Antiviruses are programs designed to protect its users from viruses, spam, Trojans, zero-day attacks, adware, and more, without compromising system performance in the process. These software add a layer of protection, keeping your system safe and running at full capacity.

Most of them are easy to use, having an interactive and simple interface, making it really neat to have on any computer, never failing to deliver on its promises, protecting the data of pro and home users alike.

⇒ Get TotalAV

2. Run the game in the compatibility mode

  1. Right-click on the Age of Mythology shortcut and open Properties.
  2. Choose the Compatibility tab.
  3. Check the Run this program in compatibility mode for box and select Windows XP SP2 from the drop-down menu.
  4. Now, check the Run this program as an administrator box and confirm changes.
    age of mythology won't start windows 10
  5. Try starting the game and look for improvements.

Let’s start by running the game in compatibility mode. It’s not a novelty for Microsoft’s own games to have issues on newer iterations of the Windows platform.

This classic title is as old as 16 years, and it was developed for Windows XP. Thus, the issues occur on Windows 10, because it is missing certain, long ago discontinued, drivers that were used for piracy protection back in the days.

Some of you might’ve got the error informing you about that.

There’s only so much you can do if that’s the case, but we still gladly suggest running the game in the compatibility mode. It might help and it won’t cost, so give it a go.

3. Check GPU drivers with third-party software

We can say that these are rarely the problem, but need to be thorough with the troubleshooting. The majority of users who experienced issues with Age of Mythology on Windows 10, had no issues with other games.

Nonetheless, we still encourage you to double-check your GPU drivers. The generic driver, provided by Windows Update, won’t work occasionally with some games.

That’s why the best way to eliminate drivers from the list of possible culprits is acquiring them from the OEM’s support website.

In addition, you’ll get the latest version of the Control Panel, so you’ll be able to optimize your GPU better for individual games. And, with all we saw, Age of Mythology on Windows 10 starts successfully in the lowest-graphics settings.

Check one of these to get the latest GPU drivers:

Sometimes your drivers are not up-to-date, causing your system not to run properly, and that is why you should try a program that automatically scans your PC drivers for newer versions and updates them.

With this software, you will no longer need to worry about outdated software. The software will update all of your drivers, not only the GPU ones.

4. Enable DirectPlay

  1. In the Windows Search bar, type Turn Windows and open Turn Windows features on or off from the list of results.age of mythology won't start windows 10
  2. Navigate down and expand Legacy Components.
  3. Check the “DirectPlay” box and confirm changes.age of mythology won't start windows 10

Outdated games require certain Windows features a new game doesn’t need. That’s why a feature like DirectPlay is disabled by default, as Microsoft switched to Games for Windows Live.

This feature was part of the DirectX API and it was used to update games. However, for more than a decade it’s out of the picture.

Age of Mythology requires this feature enabled in order to work, so make sure to turn it on, by following the aforementioned steps.

5. Enforce the low resolution

  1. Right-click on the Age of Mythology desktop shortcut and open Properties.
  2. Under the Shortcut tab, look for the Target line.
  3. What you’ll need to do is copy-paste the following line at the end of the current entry: xres=640 yres=480age of mythology won't start windows 10
  4. Save changes and start the game.

The problem with the resolution is the most probable reason why Age of Mythology won’t start on Windows 10. Users who managed to start the game did that with the minimum resolution.

Later on, you can, of course, change the resolution in the in-game settings menu, but the important thing is to get past that initial screen.

There are variations on how to do it, but it seems that the most successful one requires a multi-step approach. We made sure to find out the explanation for the whole procedure and are bringing it here for you.

6. Start the system without background programs

  1. In the Windows Search bar, type msconfig and open System Configuration.
  2. Under the Services tab, check the Hide all Microsoft services box.
  3. Click Disable all to disable all active third-party services.
  4. Now, select the Startup tab and go to Task Manager.
  5. Prevent all programs from starting with the system and confirm changes.
  6. Restart your PC.

Some tech-savvy users suggested disabling all background programs and installing the legacy versions of DirectX and redistributables.

These two usually won’t pose a problem, but since we’re already deep in the precaution troubleshooting steps, we encourage you to follow them through.

First, we suggest downloading and installing older versions of DirectX and Visual Studio C++ redistributable. The game installation should include the setup files for all you need. After that, we recommend giving the clean boot a try.

7. Start the game in a windowed mode

  1. Right-click on the Age of Mythology desktop shortcut and open Properties.
  2. Under the Shortcut tab, look for the Target line.
  3. What you’ll need to do is copy-paste the following line at the end of the current entry: -windowedage of mythology won't start windows 10
  4. Save changes. 

Besides the enforced 640×480 resolution, some users managed to start the game only in the windowed mode. Now, the procedure is similar to the one with the resolution downgrade.

You’ll need to navigate to the shortcut and change the target section entries by adding an additional command. Likewise, you’re able to restore to a Fullscreen mode later on in the in-game settings menu.

8. Reinstall the game and use a non-CD version

  1. Backup saved games.
  2. Open Start, right-click on the Age of Mythology, and choose Uninstall.
  3. This will take you to Uninstall a program section in Control Panel. Remove the Age of Mythology and delete saved files.
  4. Restart your PC.
  5. Right-click on the installer and run it in compatibility mode for Windows XP (if available).
  6. Wait until the game installs and give it another shot.

That’s how you reinstall Age of Mythology on Windows 10.

Note: Reinstalling the game might help as well. Also, since the game requires the installation CD in order to run, we suggest using a virtual drive emulator of some kind.

Or relying on some other ways we can’t mention here due to its connection with pirated software.

Give the Extended Edition a try

Finally, if you’re still unable to start the game, in spite of all troubleshooting steps, we recommend trying the revamped edition of the beloved classic.

This game is optimized to work on Windows 10, and it seems that Microsoft doesn’t pay a lot of attention to the 16-years-old original game.

You can find and buy this game for cheap on Kinguin and it should bring the same experience as the classic game, with some improved graphics and a few new features.

⇒ Buy Age of Mythology Extended Edition

These solutions should help you get your game working, so u can finaly start praising the ancient gods and conquering new lands with your awesome civilization.

If you have additional questions or suggestions regarding the subject, feel free to tell us in the comments section below.

Fix: Synaptics Touchpad Not Working / Automatically Disabled

One of the most common issues with Windows 10 laptops is definitely the not working touchpad. You’re probably using Synaptics’ touchpad because Synaptics is the world’s most famous manufacturer of human interface solutions, but even Synaptics’ touchpads have their issue.

These issues could be caused by various factors, such as outdated drivers and conflicts with other software. In this article, we offer solutions for most of them.

What can I do if Synaptics touchpad is not working?

1. Disable the mouse from the Device Manager

  1. Press the Windows Logo and X keys on your keyboard.
  2. Click on Device Manager.
    Touchpad disabled automatically
  3. Search for the mouse device from the device list, right-click on it and select Disable.
    Synaptics touchpad disables itself
  4. Check if your touchpad device now works.

Sometimes your mouse is the one preventing the touchpad from working. Disable the mouse, and see if the touchpad works now. If the mouse isn’t the issue, try to clean the boot and check if there is any software on your computer that conflicts with the touchpad device.

2. Perform a Clean Boot

  1. Type msconfig in the search box, and then tap or click System Configuration.
    Synaptics touchpad keeps crashing
  2. On the Services tab of the System Configuration dialog box, tap or click to select the Hide all Microsoft services check box, and then tap or click Disable all.
    Touchpad disabled automatically
  3. On the Startup tab of the System Configuration dialog box, tap or click Open Task Manager.
    Touchpad disabled automatically
  4. List of startup applications will appear. Right-click each item on the list and choose Disable. Repeat this step until you disable all startup applications.
    Synaptics touchpad disables itself
  5. Close Task Manager and go back to the System Configuration window. Click Apply and OK and restart your PC. A clean boot helps to eliminate software conflicts and to determine what is causing the problem.
    Synaptics touchpad disable when mouse is plugged in

A Clean Boot helps you to determine if there are any software conflicting with the work of some of your devices. After performing a Clean Boot, check if your touchpad device is working properly.

If it works fine and without any distractions, the problem was probably caused by the conflict between the mouse drivers and the touchpad drivers, or due to the conflict with some other software.

To solve these conflicts, you need to update the drivers for both devices and check if that helps. To do that, follow next steps.

If you want to know how to add or remove startup apps on Windows 10, check out this simple guide.

3. Update the Drivers for the Touchpad device

3.1 Check the Windows updates for any latest driver updates

  1. Open the Settings app and go to Update & security section
    Synaptics touchpad disables itself
  2. From the Windows Update window, click on Check for Updates.
    Synaptics touchpad disable when mouse is plugged in
  3. You’ll receive a list of all recent updates, check and install all of them.

If you’re having trouble opening the Setting app, take a look at this article to solve the issue.

3.2 Try updating the drivers from the Device Manager.

  1. Open Device Manager.
  2. Search for the touchpad device from the device list, right-click on it and select Update driver.
    Synaptics touchpad not working
  3. Follow the on-screen instructions and complete the installation of the latest driver.
    •  If no driver updates are available, you may also search for the updated touchpad device drivers in the Drivers and DriverStore folders in the location C:WindowsSystem32 by selecting the option Browse my computer for Driver Software.

In case you’re unable to find any latest drivers on your computer, then go to Synaptics’ website and check for the latest touchpad drivers there. If they’re available, download and install them on your computer.

3.3 Update drivers automatically

If this method doesn’t work or you lack the computer skills to update/fix the drivers manually, we suggest you use dedicated driver updater software to do it automatically.

This type of tool will automate the whole process and assist you in downloading and updating the right version of drivers that best fits your needs.

⇒ Get Fortect Driver Updater

4. Make sure that you’re not disabling your touchpad

Most laptops come with a dedicated button that can disable your touchpad. To disable your touchpad, you have to press a certain keyboard key such as F5, for example.

If your touchpad is frequently disabled, be sure not to disable it by using this key. Alternatively, you can try to enable it by pressing this key. Many users reported that this solution fixed their problem, so be sure to try it out.

If your touchpad is disabled on the login screen in Windows 10, fix the issue quickly by following the simple steps in this guide.

5. Check your touchpad settings

  1. Press Windows Key + S and enter control panel. Select Control Panel from the list.
    Synaptics touchpad not working
  2. When the Control Panel opens, go to the Mouse section.
    Synaptics touchpad keeps crashing
  3. Now navigate to Device Settings tab.
  4. Select your touchpad from the list and click on the Settings button.
  5. Now locate the Tapping section and make sure that you disable Double tap to enable or disable touchpad option.

According to users, sometimes your touchpad settings can cause your Synaptics touchpad to become disabled. According to them, this touchpad supports a tapping gesture that can enable or disable your touchpad.

After doing that, save changes and check if that solves your issue. Many users claim that this solution works for them, so feel free to try it out.

6. Roll back to the older driver

  1. Open the Device Manager.
  2. Now locate your touchpad driver and double click it to open its properties.
  3. Navigate to the Driver tab and click the Roll Back Driver button.
    Synaptics touchpad has stopped working

Keep in mind that this option might not be available. If not, you’ll need to uninstall the driver and try using the default driver instead.

  1. In Device Manager locate your touchpad driver, right-click it and choose Uninstall device.
  2. Check Delete the driver software for this device option and click on Uninstall button.
    Synaptics touchpad keeps resetting
  3. Once the driver is uninstalled, click on Scan for hardware changes icon.
    Touchpad disabled automatically

Windows will now install the default driver.

If you’re having issues with your Synaptics touchpad on Windows 10, the problem might be related to your drivers. Although installing the latest drivers is advised, sometimes this issue can occur even if you’re using the latest drivers.

However, users are suggesting you try rolling back your drivers and see if that helps.

If the default driver works, you have to prevent Windows from updating it automatically. We already wrote a guide on how to prevent Windows from updating certain drivers, so be sure to try that.

If the default driver doesn’t work, go to your touchpad manufacturer’s website and download an older driver. Once you install the older driver, check if the problem persists.

7. Modify your registry

According to users, if your settings keep resetting, the problem might be related to your registry. However, you can easily fix that by doing the following:

  1. Press Windows Key + R to open the Run dialog.
  2. Enter regedit and press Enter or click OK.
    Synaptics touchpad disable when mouse is plugged in
  3. In the left pane, navigate to HKEY_LOCAL_MACHINESOFTWARESynapticsSynTPInstall key.
  4. In the right pane, double click the DeleteUserSettingOnUpgrade DWORD and change its value to 0.

If you’re having problems editing the registry, you may want to take a look at this amazing guide that will show you how to get past them.

After you save the changes, restart your PC and check if the issue reappears.

Problems with Synaptics touchpad driver can prevent you from using your laptop, and speaking of touchpad issues, users reported the following problems as well:

  • Touchpad disabled automatically
    • Many users reported that their touchpad becomes disabled automatically.
    • In most cases, the problem is caused by your settings or drivers.
    • This issue can affect almost any touchpad and not just Synaptics touchpads.
  • Synaptics touchpad disables itself
    • In some cases, Synaptics touchpad can disable itself for an unknown reason.
    • This might be because your touchpad software is disabled in system startup.
  • Synaptics touchpad disable when mouse is plugged in
    • Many users tend to disable their touchpad if they’re using a mouse.
    • In fact, your touchpad might be disabled automatically if you connect a mouse.
  • Synaptics touchpad not working, has stopped working
    • According to users, it seems that Synaptics touchpad suddenly stopped working.
    • If your touchpad isn’t working at all, try rolling back your drivers and see if that helps.
  • Synaptics touchpad keeps crashing, resetting
    • A few users reported that Synaptics touchpad keeps crashing or resetting on their PC.
    • Your touchpad settings or a problematic driver most likely causes this.

Following the steps in this guide should help you solve your issues with Synaptics touchpad device or any other touchpad device. Before you go, we suggest you visit our guide on SynReflash configuration for more information.

Unfortunately, this isn’t the only issue you can encounter, and many experienced Synaptics touchpad driver code 24, but we covered it in another guide.

This isn’t the only problem, and for many users, touchpad settings are missing on Windows 11, but we covered this issue in another guide.

If something didn’t work out or you have some alternate solutions, we would love to hear about them, so write them down in the comments section below.

Windows Cannot Format this Drive: How to Fix & Main Causes

No operating system is not free of quirks, and sometimes when your machine is slow, you may try to resolve the problem by formatting your hard disk. However, users sometimes get a Windows cannot format this drive prompt when trying to format their device.

This error can make you clueless about the next line of action. Thankfully, this issue can be fixed with a few tweaks, as shown in this guide.

How can I fix the Windows cannot format this drive, quit any disk utilities error?

1. Use the Diskpart command

  1. Press the Windows key, type cmd, and click Run as administrator under Command Prompt.
    cmd windows cannot format this drive
  2. Type the command below and hit Enter: diskpartdiskpart
  3. Now, type the following commands and press Enter after each: list disklist disk list volumelist volume windows cannot format this drive select volume<number>select volume windows cannot format this drive format
  4. Note that you need to replace the <number> in the third command with the correct one you need to format (we used 2 in our command).

One of the quickest methods to fix the Windows cannot format this drive error is to force the process through using the DiskPart command.

If you have a preferred file system you want to format your drive to, you can use the fs switch with the format command. An example is format fs=ntfs quick.

2. Hard Format using Disk Management

  1. Press the Windows key + R, type diskmgmt.msc, and press Enter.
    diskmgmt  windows cannot format this drive
  2. Right-click the drive you want to format and select the Format option.
    format
  3. If you get a prompt that The volume (Disk>#) is currently in use, click the Yes option to force the format of the volume.
  4. After clicking Yes, the storage disk will be formatted without further error messages.

Another effective solution to try if you are getting Windows cannot format this drive error is to use the Disk Management feature to complete the process.

With this second fix, we can conclude this guide. We believe you now have everything to fix. Windows cannot format this drive error.

If the solutions above fail to fix this issue, you must check your drive for physical damage. You can also check and fix bad sectors on your PC.

It might also help to read our guide on how to format an NVMe SSD on Windows 11 or convert exFAT to FAT32.

Feel free to let us know in the comments below the solution that helped you fix this issue.

This WiFi Uses An Older Security Standard: Quick Fixes

Some users who have updated Windows 10 with the May 2019 Update might have spotted a curious Wi-Fi notification at the bottom right of the desktop.

That notification states: “This Wi-Fi network uses an older security standard that’s being phased out. We recommend connecting to a different network.”

That notification tells some users that their Wi-Fi connections are utilizing antiquated encryption methods. The message pops up for users with Wi-Fi networks that are still utilizing the WEP and TKIP authentication protocols. Consequently, the notification informs some users that their net connections aren’t entirely secure.

How can I fix the WiFi uses an older security standard pop up?

1. Select a Newer Security Mode via the Router’s Admin Page

Users who spot an “isn’t secure” notification should select a newer encryption method, such as AES or WPA2, on their routers’ admin pages.

  1. To open a router’s admin page, users will need to get the IP address for it by pressing the Windows key + R keyboard shortcut.
  2. Enter ‘cmd’ in Run’s Open box, and click the OK option.
  3. Then input ‘ipconfig’ in the Command Prompt window that opens, and press the Enter key.
    ipconfig command this wifi network uses an older security standard
  4. Then note down the Default Gateway number. Alternatively, users can copy it to the clipboard by selecting the number and pressing the Ctrl + C hotkey.
  5. Paste the Default Gateway number in a browser’s URL bar by pressing the Ctrl + V hotkey, and press the Enter key. That should open a router admin page like the one shown directly below.A router admin page this wifi network uses an older security standard
  6. Next, enter the required login details to log in to the router admin page. The router’s instruction manual should include the login details for that page, and the router’s rating plate might also include those details.
  7. As router admin pages don’t have the same UI, specific instructions for selecting a new security mode can’t be provided. Look for a tab that includes Wi-Fi security settings on it.
  8. Then select a WPA2 or AES option, which a Security Mode drop-down menu might include.
  9. Select a Save or Apply option.

2. Get a New Router

Users who can’t select WPA2 or AES, or other more update security mode options, within their routers’ admin pages will need to get new routers to fix their unsecure Wi-Fi. There’s little point sticking with outdated routers that don’t support reasonably update encryption methods. So, get a replacement router that does support the latest encryption methods.

Wi-Fi Router this wifi network uses an older security standard

Microsoft has confirmed that it intends to stop supporting the WEP and TKIP protocols, which is why Windows 10 now displays an “isn’t secure” notification to some users.

Thus, users need to either change their current routers’ encryption settings or change their routers to ensure they can still browse the web when the big M terminates support for WEP and TKIP.

We hope you managed to get rid of the this WiFi network uses an older security standard pop up on your Windows device and fixed everything. Let us know how it went in the comments section below.

OneDrive Download Is Slow: 10 Quick Fixes

OneDrive is a solid cloud storage service but many users experienced slow OneDrive download speed on their PC. This can be a big problem, so in today’s article we’ll show you how to address this issue.

How can I fix a slow OneDrive download speed?


1. Check your antivirus

Using a good antivirus is important if you want to protect yourself from online threats, but despite the usefulness of antivirus tools, sometimes they can cause certain issues to occur. Your antivirus can interfere with other applications and in some cases it can cause slow OneDrive download.

To fix this issue, you need to make sure that OneDrive is allowed to go through your antivirus and firewall. In addition, you might want to try disabling certain antivirus features or disabling your antivirus altogether.

If that doesn’t work, your next step would be to remove your third-party antivirus. Several users reported that removing their antivirus fixed the problem for them, so you might want to try that.

If removing the antivirus solves the problem, your next step would be to switch to a different antivirus solution.

There are plenty of great alternatives and some of the best antivirus software available are actually really budget-friendly and don’t use too many system resources.

While Windows Defender is a well-performing protection tool, an extra layer of protection is always a good idea.

2. Remove other synchronization and backup software

Sometimes slow OneDrive download can occur because of other backup software on your PC. Other applications might try to back up the files that you’re currently trying to sync, and that can cause issues with OneDrive.

You can manually uninstall your backup software from Windows settings. You just have to open the panel by typing remove in the search bar, find your backup software and click uninstall.

However, many users report problems with this method because Windows settings can’t always fully remove stubborn software. This can prevent you from reinstalling your app or interfering with the functionality of your PC.

We recommend you try a dedicated third-party uninstaller software. These are specially created to delete any type of lingering app or file.

Uninstallers are completely safe, they use up-to-date technologies that can forcefully remove problematic apps, but don’t have any negative impact on your PC.

3. Reset OneDrive

  1. Press Windows Key + R to open the Run dialog.
  2. Now enter the following line, and press Enter or click OK.
    • %localappdata%MicrosoftOneDriveonedrive.exe /reset
      slow onedrive download

It might take a minute or two for OneDrive to reset on your PC, but once the application resets, check if the issue is still there.

If you’re having issues with slow OneDrive download, the problem might be the OneDrive application. Certain glitches can occur once in a while, and in order to fix them, it’s advised that you reset OneDrive.

This process won’t delete any of your files, but it will resync them, so it might take a while before all files are completely resynced.


4. Remove all files that are 0KB in size

According to users, sometimes certain files can cause slow OneDrive download issues. Supposedly this issue is caused by files that are 0KB in size, and in order to fix the issue, you’ll need to remove those files.

slow onedrive download

Finding all files that are 0KB in size isn’t that hard, and you just need to open your OneDrive directory and enter size: 0 in the search field in the top-right corner.

Now you should see all files that are 0KB in size. Delete those files and check if the problem is resolved. Before you remove those files, be sure to check if you actually need them.

If these files aren’t a part of your project or if they look unfamiliar to you, you can just delete them. Sometimes even small files can be a part of a work project, so be sure to double check all files before you remove them.


5. Unlink and sign back into OneDrive

  1. Right-click the OneDrive icon on your Taskbar and choose Settings from the menu.
    slow onedrive download
  2. Now go to the Account tab and click Unlink this PC.
    slow onedrive download
  3. A warning message will appear. Click the Unlink account button.
    slow onedrive download

Slow OneDrive download can be caused by certain glitches in OneDrive, and the simplest way to fix those glitches is to unlink your OneDrive account.

After doing that, you need to sign in back to OneDrive and resync all your files. This method might not be the most effective one, since you’ll remove online files and have to resync them again, so use this solution only if other solutions can’t fix the problem.


6. Restart File Explorer

  1. Press Ctrl + Shift + Esc to open Task Manager.
  2. Locate Windows Explorer on the list, right-click it and choose Restart from the menu.
    slow onedrive download

In some instances, slow OneDrive download speed can occur due to bugs on your system. However, these bugs are usually temporary, and you can fix the problem simply by restarting File Explorer.

After a couple of moments File Explorer will restart and your issue should be resolved. Keep in mind that this is just a workaround, so you might have to repeat it if the issue reappears.


7. Download files in batches

If you’re having issues with slow OneDrive download speed, the issue might be the number of files that you’re trying to sync. According to users, issues occurred after they tried to sync all of their files at once.

Although that should work, sometimes issues can occur, and you might experience reduced download speed.

To avoid this problem, users are suggesting to download your files in batches. Download 10-20+ files at once and check if the issue still appears.

If not, keep downloading files in batches until you download all your files. This isn’t the most straightforward solution, but it’s a decent workaround that might work for you, so be sure to try it out.


8. Disable Files On-Demand feature

  1. Open OneDrive settings. Uncheck Save space and download files as you use them.
    slow onedrive download
  2. A warning message will now appear. Click OK to save changes.
    slow onedrive download

OneDrive has Files On-Demand feature, and sometimes this feature can cause slow OneDrive download speeds. This is a quite useful feature since it allows you to download only files that you want to edit.

Thanks to this feature, you don’t have to store files on both your PC and the cloud. This is great if you want to save space on your PC, but sometimes there might be issues with this feature.

This feature can lead to slow download speed, and many users are suggesting to disable this feature. After disabling this feature, the problem with OneDrive should be completely resolved.


9. Disable Office integration

  1. Open OneDrive settings window.
  2. Go to the Office tab and disable all options.
    slow onedrive download

OneDrive has a useful feature that allows you to work on Microsoft Office files with other users. This is an incredibly useful feature, but it can sometimes cause slow OneDrive download speeds.

To fix the problem, some users are recommending to disable this feature altogether. After doing that, save changes and the issue should be completely resolved.


10. Make changes to Group Policy

  1. Press Windows Key + R and enter gpedit.msc. Press Enter or click OK.
    slow onedrive download
  2. In the left pane, navigate to User Configuration > Windows Settings. Right-click Policy-based QoS and choose Create new policy option.
    slow onedrive download
  3. Enter the name of your policy. Make sure that only Specify Outbound Throttle Rate option is checked. Set the value lower than your upload speed. Users are suggesting to use a value that is three times less than your current upload speed. Click Next.
    slow onedrive download
  4. Don’t change any settings in new windows, just keep clicking Next.

If you’re having issues with slow OneDrive download speed, you might be able to solve this problem by making changes to the Group Policy settings.

After creating the policy, restart your PC and check if the issue with OneDrive download slow speed is gone by now.