How to Print Email from Outlook Web & Desktop App

Not only does Outlook allow users to send, receive, and manage their emails, but like other email clients, it also allows them to print their emails to enhance productivity.

Printing emails from Outlook should be a simple task. However, some users may get lost in the menus and submenus.

In this comprehensive guide, we have demonstrated the step-by-step procedure to print email from Outlook web and desktop app.

Why can’t I print an email from Outlook?

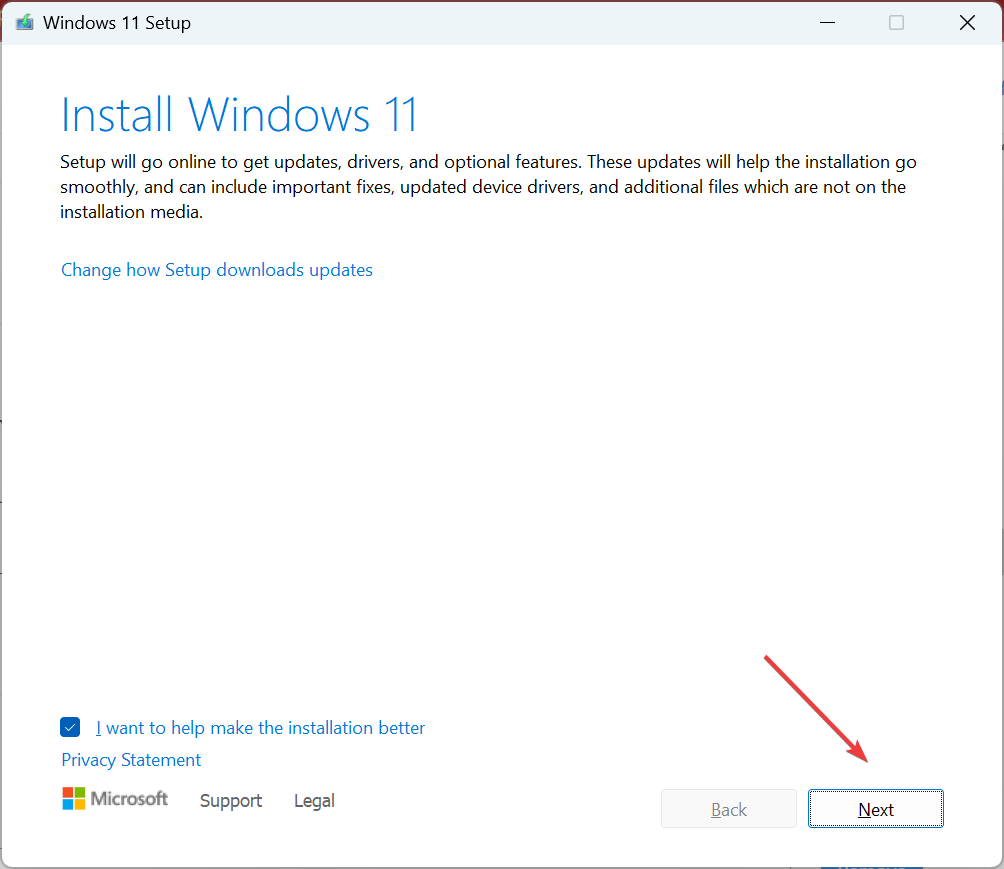
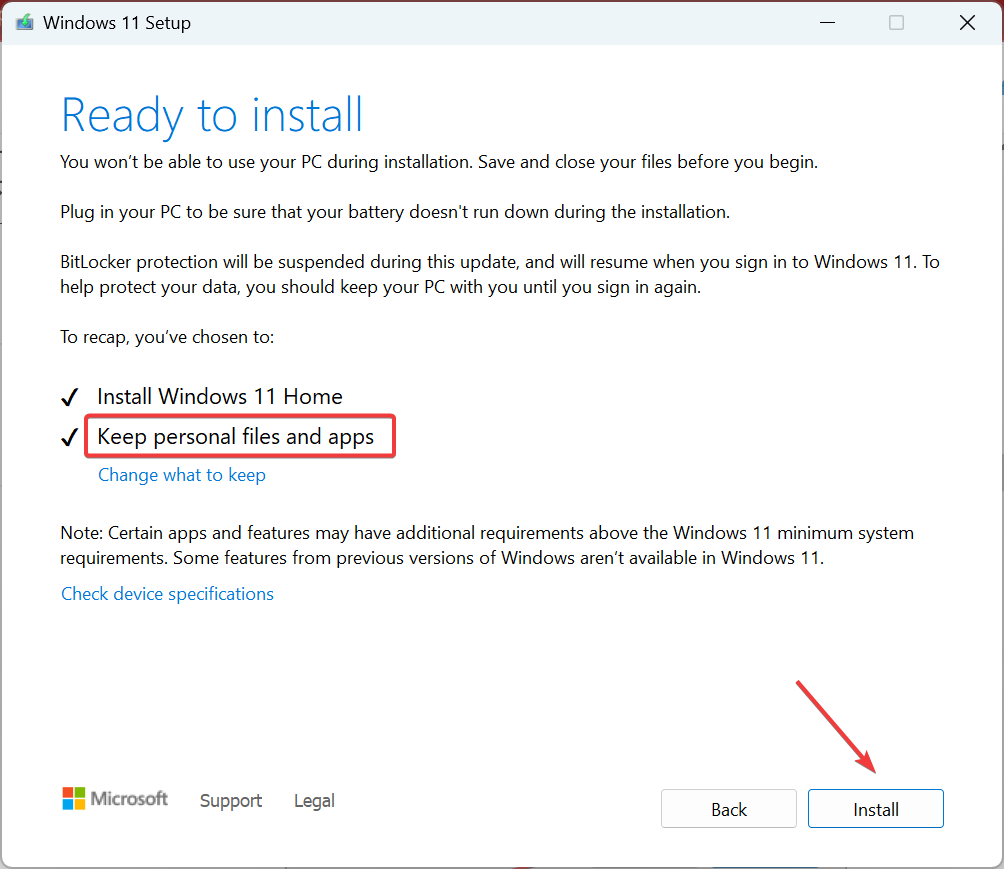
Before we proceed toward the detailed procedure, let’s address the issue for some of our readers who are experiencing difficulty in printing emails from the Outlook app. If you cannot print the emails, try the following solution to fix the issue.

Generally, you may need help printing emails from the Outlook app if the Outlprnt file is missing or corrupted.

Apart from the problematic Outlprnt file, there are some general reasons why you are struggling to carry out the print operation in Outlook.

How do I fix the email printing issues in Outlook?

Outlprnt is an essential Outlook file that stores the printer settings of Outlook. If this file becomes corrupt, it will not be able to access the file when printing the Outlook email messages.

To resolve the error, you need to rename the existing Outlprnt file such that Outlook creates a new one. Here is how to proceed:

  1. Exit the Outlook app.
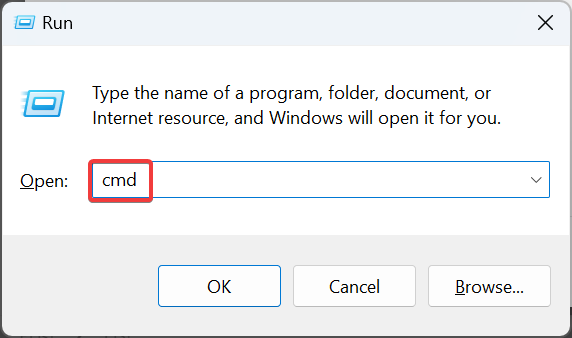
  2. Use the Windows + R shortcut to access the Run dialog box.
  3. Type or paste the following path and press OK to access the Outlook folder. %appdata%\Microsoft\Outlook
  4. Look for and right-click the Outlprint file and choose the Rename option from the context menu.
  5. Type the new name as outlprint.old and press the Enter key.
  6. Now, relaunch the Outlook app and try printing the email using the step-by-step process described below.

How do I print an email from Outlook?

1. Use the Outlook desktop app

  1. Launch the desktop version of Outlook on your Windows PC.
  2. Switch to the Home tab from the top menu bar and choose Inbox from the left navigation pane.
  3. Look for the email you want to print in the list of emails and click to open it.
  4. Now click the File option located on the top menu bar.
  5. Choose the Print option followed by the Print Options from the right pane to access the Print window.
  6. Click the drop-down menu next to Name and select the printer you wish to use at the moment.
  7. You can also specify the options like Print style, the Number of copies that you want to print, and the Page range.
  8. Once everything is set up, simply press the Print button at the bottom.

Your printing job will now be communicated to the specified printer, which begins printing the email with relevance to the settings you have configured.

2. Use the Outlook web app

  1. Access the Outlook web app using your preferred web browser.
  2. Provide your login credentials to sign in to your Outlook account.
  3. Switch to the Home tab from the top menu bar and select Inbox from the left navigation pane.
  4. Double-click to open the email you wish to print in a new web browser window.
  5. Now click the Menu icon (three-dots) in the top-right corner of the email interface to access the drop-down menu and choose the Print option.
  6. The email’s print preview will pop up on the screen. Look for and click the Print button on the top-left corner of the preview screen.
  7. This step will open the print dialog box in your web browser. Depending on your browser, the print options may occur on the right side of your screen or in a new window.
  8. In the print dialog, you can set the number of copies you wish to create, pick your preferred printer, and alter any other print settings if required.
  9. Once you have configured the printing options, click the Print button at the bottom of the print dialog.

Your web browser will not transfer the printing task to the selected printer. Wait for the printing operation to finish, so that you can now retrieve the hard copy of the email.

How to print emails with their attachments from Outlook?

  1. Launch the Outlook desktop app and switch to the Home tab.
  2. Go to Inbox from the left sidebar and open the email with attachments you wish to print.
  3. Now switch to the File tab from the top menu bar.  
  4. Click the Print option on the left followed by Print Options located on the right to access the Print dialog box.
  5. Choose the printer from the drop-down menu next to the Name option and set values like Print style, Number of copies, Page range, etc.
  6. Enable the checkbox under Print options to print the attached files. As written in the dialog box, you can only print the attachments will only be printed if you have selected the default printer.
  7. Press the Print button to initiate the printing of emails with attachments.

If you are unable to print PDF attachments from Outlook, refer to this guide for help.

How do I print email attachments in Outlook?

Unfortunately, Outlook does not provide a dedicated option to print only the files attached to the emails directly from the desktop or web app. However, there is a neat workaround.

  1. Launch the Outlook web or desktop app and sign in using the login credentials.
  2. Go to the Home tab and click to open the email having the attachments.
  3. Click the download arrow next to the attachment you wish to print and choose the Download option from the drop-down menu.
  4. After the file is downloaded, launch the File Explorer using the Windows + E shortcut.
  5. Navigate to the attachment you just downloaded and right-click it.
  6. Select the Open with option from the context menu and choose the appropriate program to print the attachment based on file type from the sub-menu. For instance, Choose Word for .docx and .doc files and Adobe Reader for .pdf files.

There you go! Learning how to print emails utilizing the Outlook Web and Desktop App can help you be more predictive and interact effectively in your organization. Also, many prefer printing Outlook contacts and keeping a hard copy handy.

In case you are unable to print the complete email from the Outlook client, refer to our guide to check out some useful solutions.

Please let us know in the comments section if you have any queries.

How to Rename Your Email in Outlook

Microsoft Outlook is a widely-used email client that offers countless features to simplify and organize your email. One such basic functionality is the ability to rename your emails.

This helps you update the name associated with your email address, personalizing the way your email address appears in the inbox of the email recipient.

If you are here, it means you are interested in renaming your email in Outlook. Don’t worry! This in-depth guide has got you covered!

Is renaming an email recommended?

Replacing the display name of your email with a meaningful one ensures that Outlook users easily recognize and navigate to your significant email in their inbox, which might have been lost among the tons of emails they receive every day.

Renaming your email is a straightforward process in Outlook. However, it’s crucial to note that renaming the display name of your email address does not change your username or email address.

Instead, it modifies how your name is displayed by Microsoft Outlook when others receive your emails via the same email address you’ve been using for years.

Additionally, if people save your contact information with some other name, they will continue to see that name in their Outlook contacts. However, when you send emails to them, the new name will be shown in the recipient’s inbox.

Keeping this aside, let’s check out the step-by-step procedure to readily change the display name of your email account in Outlook.

How do I rename an email in Outlook? 

Note icon NOTE
The step-by-step process described below to rename your email can be applied to Outlook 2019, Outlook 2016, Outlook 2013, and Outlook for Microsoft 365.
  1. Launch the Outlook desktop app on your Windows PC and click the File tab located in the top left corner. 
  2. Choose the Info option from the left sidebar and select Account Settings from the right section followed by Account Settings in the drop-down menu.
  3. In the Account Settings dialog box, select the email address for which you want to change the display name and select the Change option.
  4. In the POP Account Settings dialog box that opens, type in the display name you want to keep in the Your name text box.
  5. Press the Next button followed by Done in the next window to save your changes.

Now create a new email message and send it to yourself to test if your display name change worked. As soon as this email gets delivered to your inbox, the updated display name will appear in place of the previous one.

Renaming your account through the account settings ensures that the change applies to all the emails sent in the future.

How do I use the email account with the new display name?

  1. Switch to the Home tab from the top menu bar and choose the New Email option from the Outlook ribbon to access the email window.
  2. Next, switch to the Options tab from the top menu bar and choose From option in the Outlook ribbon. 
  3. Click the From field to reveal a drop-down menu and select the sender email account for which you modified the display name earlier.
  4. Now type in the email subject and body and hit the Send button to send the email to the recipient.

When the recipient will open the email you send with the renamed email, the display name you specified for that account appears in the From field.

Many of our readers have reported that they are unable to use the email account having a customized display name.

This problem usually arises when you have linked multiple email accounts to the Outlook app. Regardless of the email account set as default, you can effortlessly select the email address with the meaningful display name and send emails on the go directly from the composer screen.

How do I change the name of a file when attached to an email in Outlook?

  1. Launch the Outlook app and compose a new email having attachments.
  2. Now switch to the Messages tab from the top menu bar and select the Edit option from the EZDetach section of the top ribbon to view the Edit Attachments dialog box having the list of files attached to the email.
  3. Simply click the name of the attachment to enter the editable mode in the dialog box and type the new name. Hit the Enter key after each attachment name to save the changes.
  4. Click the OK to exit the Edit Attachments dialog box and view the email composer window. The name attachment name will replace the old one.

If you forgot to rename the files before attaching them to the email, do not worry! The EZDetach Microsoft Outlook add-in allows you to organize and rename attachments directly from within the app without deleting them.

That’s pretty much it! By following the easy steps outlined in this guide, you can rename your email in Outlook such that recipients view a meaningful name when they receive your emails.

Before you leave, you might want to check out the different ways you can easily resolve the error message – Outlook folders in your mailbox have name conflicts.

Please let us know in the comments section if you have any further queries.

Microsoft Store secretly introduces “System Component” badge to distinguish applications

As reported by Neowin, some Windows users have noticed an unexpected change in the Microsoft Store. A new badge labeled “System Component” has been added to distinguish these applications from others. This come after Microsoft Store recently announced AI Hub.

As visible in the tweet, the new indicator can be viewed by clicking the “Library” button in Microsoft Store. Some image and video file types and certain inbox applications may display a “System Components” badge that users cannot remove. It’s worth noting that the Windows Web Experienced Pack, which includes Windows Widgets and MSN News, still appears as a regular application.

Exploring the new indicator

Upon opening a particular listing, one will immediately notice a new indicator. However, upon clicking it, one will be directed to the “Top free apps” section, which includes various third-party software.

Why this change?

Apparently, since Microsoft Store serves as a platform for the company to update different Windows components, customers who aren’t tech-savvy might have difficulty understanding certain entries.

Microsoft plans to incorporate these badges into other sections of the system shortly. The latest test versions of the Start menu feature a “System” tag that highlights pre-installed applications. Although these badges may not be groundbreaking, they do enhance the user experience.

Netflix launches Game Controller App for playing games on TV

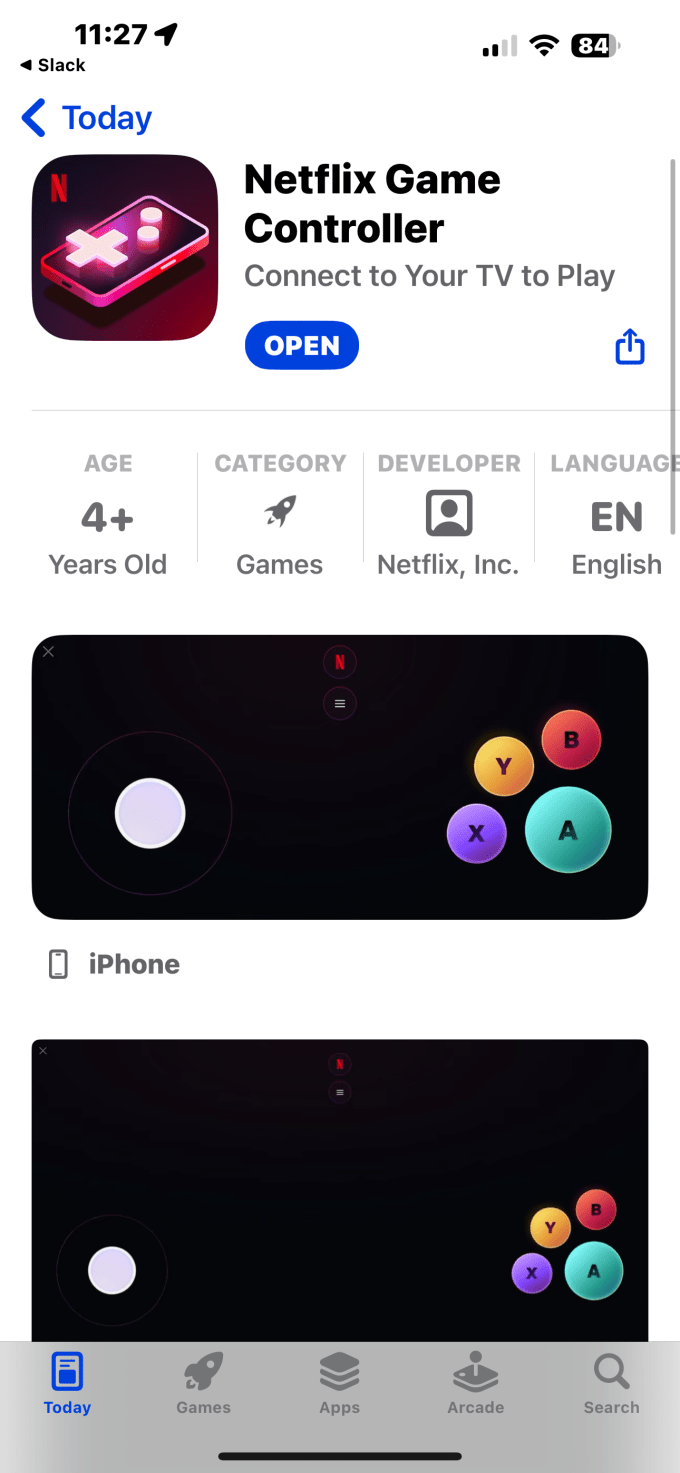
Earlier this year we reported that Netflix was testing a way for subscribers to play mobile games on the big screen using their phones as controllers. Now, it looks like streaming giant has taken that leap with the launch of a new mobile app.

The app is called “Netflix Game Controller” and has appeared in the Apple App Store, though it does not seem to be available in the Google Play Store at least at the time of this writing.

It’s unclear which games in the Netflix Games catalog might be compatible with the app, or if that will be a universal feature for all Netflix games. The app’s official description reads as follows:

“Coming soon to Netflix. Play games on your TV with the Netflix Game Controller. This Game Controller app pairs with your TV and allows you to play games on Netflix using your phone or mobile device.”

Netflix Games was launched in November 2021 as the company sought to diversify its offerings. It currently offers over 50 mobile game titles for members without additional fees to play. Netflix Games is expected to launch a cloud gaming service sometime in the not-too-distant future.

Via Whats-on-netflix.com. 

Not Enough Memory Error in DirectX 12: How to Fix It?

DirectX 12 is designed to provide graphics effects to Windows-based PC games at the same time, reducing CPU overhead and increasing GPU utilization. 

However, there have been several instances when DirectX causes the game to crash during the launch or in the middle of gameplay. If you are struggling with the same problem, go through this guide to discover the possible fixes.

What causes the not enough memory error in DirectX 12? 

Below are the potential reasons why the game is crashing due to the not enough memory error in DirectX 12: 

  • Hardware-related errors – As reported by users, physical damage to the motherboard or hard disk drive is known to cause this unfortunate error. 
  • Using an outdated game version – The DirectX 12 not enough memory error can also occur if you haven’t upgraded the game for a long time. 
  • Corrupt or outdated graphic drivers – In some cases, obsolete GPU drivers cause a lot of trouble during gaming sessions. 
  • Incorrect paging file size – If the page file settings are configured to be adjusted automatically, it can suddenly cause not enough memory error during the gameplay. 
  • Corrupt DirectX cache – Several readers mentioned that the DirectX cache files accumulated for a long time can get corrupted causing this error. 

Regardless of the reasons why DirectX 12 gives you not enough memory error, the solutions listed below will help you resolve it in no time. 

How do I fix the not enough memory error in DirectX 12? 

Before you implement the complex solutions listed a little later, try these simple workarounds: 

  • Check for hardware-related issues, such as the damage to motherboard, hard disk, and graphics card. 
  • Install the available game updates in which you are facing the error. 
  • Install all the outdated graphic driver updates. 

If these tricks did not fix the problem, move on to more advanced solutions listed below. 

1. Increase the paging file size

  1. Use the Windows + I shortcut to launch the Settings app. 
  2. Scroll down the System settings and choose About from the right section. directx 12 not enough memory
  3. Click Advanced system settings present in the Related links section. directx 12 not enough memory
  4. Switch to the Advanced tab of the System Properties window and press the Settings button under the Performance section. 
  5. Switch to the Advanced tab of the Performance Options box and hit the Change button. directx 12 not enough memory
  6. Disable the checkbox next to the Automatically manage paging file size for all drives option in the Virtual Memory properties box.
  7. Select the drive on which the problematic game is assigned. Enable the Custom option and type custom values in the Initial size and Maximum size text box. directx 12 not enough memory
  8. Press the Set button followed by OK.
  9. Exit the settings window and then relaunch the game once again. The not enough memory error will not bother you in DirectX 12. 

Misconfigured page file settings may create memory allocation problems causing the error in hand.

2. Add the game to Afterburner’s OSD exclusions

  1. Launch the MSI Afterburner program on Windows PC. 
  2. Click the Gear icon to access the MSI Afterburner’s properties window. directx 12 not enough memory
  3. Switch to the On-screen Display tab and click the More button at the bottom. directx 12 not enough memory
  4. Press and hold the Shift key and hit the Add button in green located on the bottom left of the RTSS window. 
  5. Add exclusion popup will appear on the screen. Choose the problematic games you want to add to the list and hit the OK button. directx 12 not enough memory
  6. Now exit the Afterburner app and try to launch the game once again. 

The Afterburner MSI will no longer show up on the screen, resolving the not enough memory error in DirectX 12. 

As mentioned on several forums, the not enough memory error usually occurs when the MSI Afterburner’s OSD is running with DirectX 12, causing the system to crash. Adding the affected game to the OSD exclusions will ensure that the OSD does not show up during the system launch. 

3. Delete the DirectX cache 

  1. Hit the Windows icon on the taskbar and type disk cleanup. Choose the Run as administrator option to access the Disk Cleanup tool with administrative privileges. directx 12 not enough memory
  2. Choose the C drive in the drop-down menu and press the OK button to continue. 
  3. In the Disk Cleanup window, uncheck all the checkboxes except the one next to DirectX Shader Cache and click OK. directx 12 not enough memory
  4. A confirmation popup will appear. Press the Delete Files button to complete the action. 

Corrupt DirectX cached data can also cause the DirectX 12 not enough memory error when launching the game. Deleting the shader cache using the built-in disk cleanup tool will force DirectX to build a new one, resolving the error. 

4. Run the Windows Memory Diagnostic tool 

  1. Use the Windows + R shortcut keys to launch the Run dialog box. 
  2. Type the following command in the text box, and hit the OK button to access the Memory Diagnostic tool. mdsched.exe directx 12 not enough memory
  3. Choose Restart now and check for problems (recommended) option from the popup window. directx 12 not enough memory

Your Windows PC will not restart and will diagnose potential memory problems such as memory leaks which might be the reason for the not enough memory error in DirectX 12. 

That’s it! Hopefully, you were able to resolve the not enough memory error in DirectX 12, which causes an abrupt game crash. 

You might be interested in resolving the error DirectX is not compatible with this version of Windows if it occurs after you upgrade Windows to the latest available version. 

Which of these methods worked in your case? Do let us know in the comments section below. 

Fix Your Computer’s Trusted Platform Module Has Malfunctioned

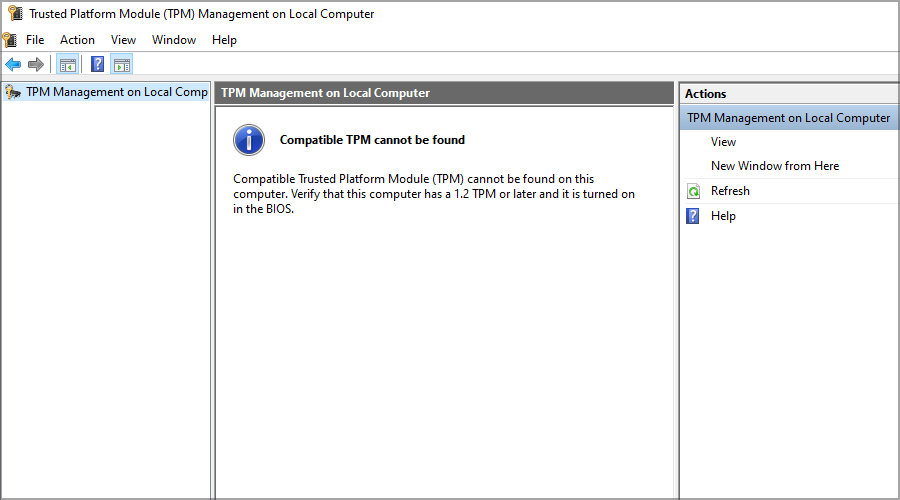
The Trusted Platform Module is used to protect your PC, but some users reported the error saying Your computer trusted platform has malfunctioned on their computer.

TPM is used to store your credentials securely, and if there’s an issue with this feature, you might not be able to log in to specific services.

In today’s article, we’ll show you how you can get rid of this inconvenience once and for all on your system.

What is Trusted Platform Module has malfunctioned?

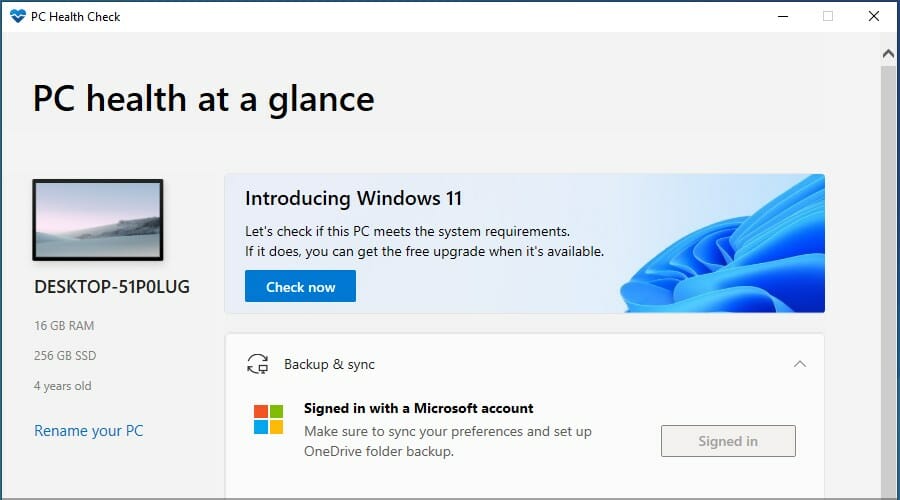
This error could be triggered by Microsoft’s new PC Health Check app, which allows you to check whether your PC is upgradeable to Windows 11 quickly.

We believe at least some of the quick tips below should fix the issue. However, remember that installed Windows components can also cause this problem.

What does TPM do?

TPM is a computer chip that stores your sensitive information, such as passwords, certificates, or encryption keys.

The feature also ensures that your bootloader isn’t tempered. By doing so, no malware will be able to run before Windows.

We suggest visiting our Windows 11 and TPM guide for in-depth information, or our article with a full comparison between Microsoft Pluton and TPM to see more differences and similarities.

How do I fix Trusted Platform Module has malfunctioned error code?

1. Switch TPM on or off

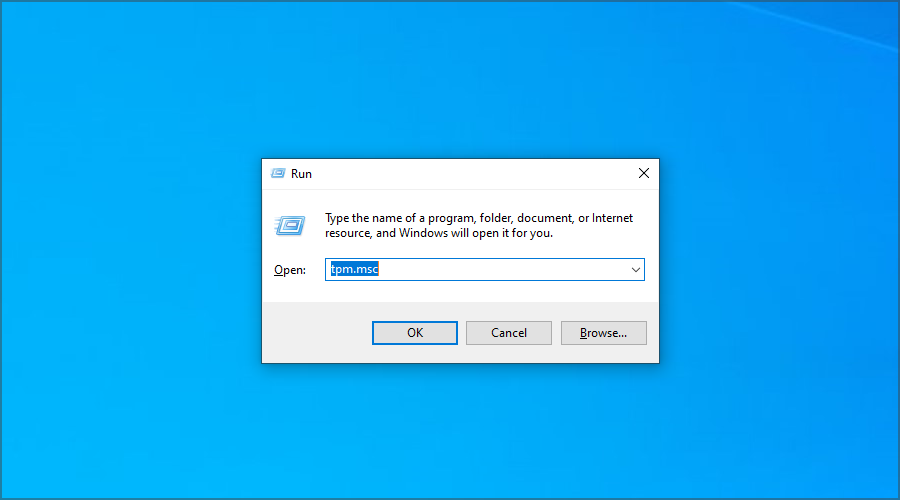
  1. Press Windows Key + R to open the Run window.
  2. Once the Run dialog opens, type tpm.msc in the box and press Enter.
  3. Click the Action panel, then select Turn TPM Off.
  4. Finally, restart your machine and check if Something went wrong your computer’s trusted platform module has malfunctioned error is solved.

2. Clear your TPM keys

    A highly potential method to resolve the Trusted Platform Module is to reset the chip to default settings from your Windows PC.

  1. 1. Press Windows Key + S and type defender. Locate Windows Security and click on it.

    computer-trusted-platform-malfunctioned
  2. 2. Select Device security, and then click on the Security processor details.

    computer-trusted-platform-malfunctioned
  3. 3. Click Security processor troubleshooting.

    computer-trusted-platform-malfunctioned
  4. 4. Next, click on Clear TPM.

    computer-trusted-platform-malfunctioned
  5. 5. Lastly, restart your machine after you’re done to fix the Your computer’s trusted platform module has malfunctioned in Windows 11 error.

The Your computer’s trusted platform module has malfunctioned error can occur in Teams, Outlook, and Office 365 and can have the following error codes: c0090030, 80090034, 80090030, 80090016.

3. Prepare your TPM

  1. Press Windows Key + R and enter tpm.msc. Now press Enter.
  2. Click on Prepare your TPM in the right side corner of the module window.
  3. Finally, confirm any dialogs and restart your PC once you’re done.

In most cases, you need to clear your TPM keys to solving this issue, but if that doesn’t work, you can try disabling specific Windows components.

Does enabling TPM delete files?

No, your files won’t be lost under any circumstances. The feature will only be activated, waiting for the program to use unless you deploy software that puts a key into your TPM.

What will happen if I reset the TPM?

Any produced keys associated with the TPM, as well as any data protected by those keys, may be lost if the TPM is reset. Therefore, any data that the TPM protects or encrypts should have a recovery and backup strategy.

Variations of your computer’s trusted platform module malfunction are found when the Outlook keyset does not exist, or encryption fails in Microsoft Office, Teams, or Outlook. It may be accompanied by the error code 80090016, 80090030, or 80284001.

For more potential solutions, check out our Keyset Does Not Exist error code 80090016 guide.

We hope that these solutions helped you fix Your computer trusted platform has malfunctioned error on your PC.

Microsoft Azure expands availability of OpenAI GPT-4 and GPT-35-Turbo models to more regions

Microsoft’s Azure AI infrastructure has made an expansion, offering OpenAI’s GPT-4 and GPT-35-Turbo models in various global regions. The service now covers regions like Australia East, Canada East, East United States 2, Japan East, and United Kingdom South.

The recently launched ND H100 v5 Virtual Machine series, featuring NVIDIA H100 Tensor Core GPUs and Quantum-2 InfiniBand networking, these virtual machines cater to complex AI workloads. This seems to be Microsoft’s response to the increasing complexities of AI applications.

The ND H100 v5 VMs include the following features:

  • Eight NVIDIA H100 Tensor Core GPUs and VMs offer faster AI performance.
  • 4th Gen Intel Xeon Scalable processors
  • NVIDIA Quantum-2 ConnectX-7 InfiniBand ensures networking at 400Gb/s per GPU.
  • PCIe Gen5 provides 64GB/s bandwidth per GPU for host-to-GPU performance.
  • VMs feature DDR5 memory for large datasets and high data transfer speeds.
  • Performance tests show up to 6x speedup in matrix operations using 8-bit FP8.
  • ND H100 v5 VMs, achieve 2x speedup in large language models.

Azure OpenAI Service has nearly tripled its customer base since the last update. The service currently serves over 11,000 customers, adding an average of 100 new customers daily this quarter.

Businesses can use GPT-4 for tasks like content generation, document intelligence, and customer service, potentially opening doors to innovation and transformation across various sectors. 

via MSPowerUser

How to Color Code Emails in Every Outlook Version

It goes without saying that emails have varying importance and priority levels. But, if all your emails appear the same, you are likely to miss one or two important ones in the crowd, especially if you have a lot of unread messages.

This is why it is important to know how to categorize some emails and add features that make them stand out on your list. In this guide, we will show you how to color code your emails in all Outlook versions to help ease your categorization process.

How do I color code an email sent to me?

You can color code emails sent to you on Outlook from the View tab in the ribbon. This allows you to easily distinguish between personal emails and those from Bcc and Cc.

Also, the Outlook email organization options available to you are not limited to color only, as you can also make some stand out with font size and type.

Can you highlight emails in Outlook?

Yes, you can surely highlight emails on Outlook with different colors. You can also group these emails by folders and make each one stand out with a unique color.

How do I color code emails in Outlook for Microsoft 365 and Outlook 2021?

  1. Launch Outlook and click the View tab at the top.
  2. Select the Current View option.
  3. Now, choose View Settings.
    view current  how to color code emails in outlook
  4. Click the Conditional Formatting feature.
    conditional formatting
  5. Next, click the Add button in the formatting dialog box, and enter a name for the new rule.
    add name
  6. Select Font. 
  7. Set the color and other categorization features of your choice, and click OK.
    color  how to color code emails in outlook
  8. From here, click Condition.
    condition
  9. Type the email address you want to add the color code to. To add more than one email address, make sure you separate them by semicolon (;).
  10. Click the OK button.
    type email
  11. To add color code to emails, based on the line your email address is, go back to step 7 and check the box for Where I am.
  12. Click the drop-down menu before Where I am, and select a suitable option there.
    where i am how to color code emails in outlook
  13. To apply these color category settings to other email folders on your message list, click the View tab and select Change View.
  14. Finally, click Apply Current View to Other Mail Folders and select the folders to add.
    apply current

If you are using Outlook 365 or the 2021 version, the process of adding color code to emails is pretty simple and straightforward.

Also, you have the option to customize the categorization further based on the type of email that is sent to you.

How can I color code emails in Outlook 2019 and Outlook 2016?

  1. Launch Outlook, click the View tab at the top, and select View Settings.
    view settings  how to color code emails in outlook
  2. Click the Conditional Formatting button.
    conditional 2019
  3. Next, click the Add button in the conditional formatting dialog box and enter your preferred name for the newly created formatting rule.
    add name  how to color code emails in outlook
  4. Click the Font button.
    font
  5. Now, change the font color, and click OK. You can also decide to change things like font size, effects, and style.
    option
  6. From here, click the Condition button and enter the email addresses (ensure to separate them with a semi-colon) you want to add.
  7. Tick the Where I am box and choose one of the available options to add color to an email based on your position on the To line in the email message.
  8. Click the OK button.
    where I am
  9. To apply these color category settings to other email folders, repeat steps 13 and 14 shown in 2021 Outlook above.

To add color code to emails in Outlook 2019 and 2016, you need to change the font color. This is unlike Outlook 2021, which allows you to choose a specific color to highlight the email.

Also, you can add the customization settings to other email folders. But if Outlook is not moving your emails to the desired folder, fix it with the solutions in our guide before proceeding.

How can I color code emails in Outlook 2010?

  1. Open Outlook, click the View tab and select View Settings.
  2. Click the Conditional Formatting button.
    conditional 10 how to color code emails in outlook
  3. Now, click the Add button in the formatting dialog box and enter a name for the rule.
  4. Next, click the Font button.
    font
  5. Choose a color, add other customization features, and click the OK button.
    option
  6. Click the Condition button.
    condition
  7. Add the email addresses you want to color code, and separate them with a semicolon.
  8. Next, click the Where I am box and choose an option from the drop-down list to add color based on your position on the To and the Cc line.
  9. Finally, click the OK button.

Color coding emails on Outlook 2010 are pretty much similar to the latest versions of the app. Just some little tweaks to the formatting rules, and you should be good to go.

With this, we can conclude this guide on how to color code emails on Outlook. We have provided step-by-step instructions on how to achieve this on just about every version of Outlook.

All you have to do now is to follow the detailed instructions, and you will be to color code messages and email categories with ease.

As an addendum, if your email folder is not sorting, you can restore order with the solutions in our guide.

Finally, if you need more customization options and need to change the Outlook theme, we have a guide for that too.

How to Deploy an Application in SCCM [Step-by-Step Guide]

Using SCCM or System Center Configuration Manager, you can deploy software to desktops, laptops, servers, and mobiles over a vast network. This helps in keeping all connected devices in synch with the latest software and updates.

In this guide, we will give you a detailed, step-by-step guide on deploying an application in SCCM. Learning this, you will be able to distribute apps to client devices in the network. Let us get right into it.

What is SCCM?

SCCM lets you deploy different Microsoft and other third-party applications to client machines connected to the network.

The main work of the SCCM, besides deploying applications, is to manage their respective licenses, create packages, and respond to end-user requests.

When some changes are done to an application, a new revision of the app package is created. You can deploy them to the client machines using SCCM and recover the previous versions later.

Deploying applications in SCCM involves a few of the below elements:

  • Application information – Provides a general overview of the application, such as the name, description, version, owner, and admin categories.
  • Application catalog – Gives you information on how the application is displayed when the client views it in the Application Catalog.
  • Deployment types – Contains the information required to install the application or software in the client machine.
  • Windows Installer – Helps populate various fields of the Create Deployment Type Wizard using the Windows Installer file.
  • Microsoft Application Virtualization – Helps detect application information and deployment types from the Microsoft Application Virtualization 4 manifest (.xml) file.
  • Windows Mobile Cabinet – Generates a deployment type from a Windows Mobile Cabinet (CAB) file.

Let us now take a look at how you can deploy an application in SCCM.

How to deploy an application in SCCM?

  1. Download any application and place the setup file inside the software folder.
  2. Launch the SCCM console.
  3. Select Software Library.
  4. Expand Application Manager and select Applications.
  5. Right-click on Applications and choose Create Application.
  6. Choose Automatically detect information about this application from the installation file option and choose the Type as Windows Installer (Native) and select the location of the file.
  7. Hit the Next button.
  8. Specify some details of the software.
  9. Check the box for Run installation program as 32-bit process on 64-bit clients.
  10. For the Install behavior drop-down, select Install for system if resource is device; otherwise install for user.
  11. Select Next to proceed.
  12. Confirm the software information and click on Next.
  13. The Application will be created, and after cross-checking click Close.
  14. The created application will now be visible under the Applications Management section inside the Application.
  15. Since we haven’t deployed it yet, you will see Deployments as 0. Once the deployment begins, you will see the count go up.
  16. Right-click on the application that you have created and select Deploy.
  17. Click on Browse and for the Collection drop-down, select All Systems.
  18. Click Next.
  19. To add Distribution Points, click on Add and add the points.
  20. On the next page, choose Action as Install and Purpose as Required.
  21. You can choose to specify the deployment time else distribute the content to the content servers by hitting the As soon as possible option.
  22. For the User notification drop-down, select Hide in Software Center and all notifications and click Next.
  23. Keep everything as it is on the next page and click Next twice.
  24. Once the process is complete, hit the Close button.
  25. After you have deployed the application, you will see 1 under the Deployment section in the SCCM manager.

The above steps will help you with your query on how to deploy an application in SCCM. You need to follow each step individually because skipping any of them will not let you accomplish the process.

You can head to the Monitoring section in the Admin console and select Deployments. Here you will be able to view the current status of each Deployment and also see successes and failures.

That is it from us in this guide. You can refer to the solutions in our detailed guide that will help you resolve the Account has been disabled. Please see your administrator error.

Feel free to drop a comment below if the above steps helped with your query on how to deploy an application in SCCM.

Here’s what Microsoft is doing to enhance IoT security

Amid concerns about the susceptibility of Internet of Things (IoT) devices to cyber threats, Microsoft has launched a strategy to fortify IoT security. This idea comes in response to a warning from the United States National Cybersecurity Strategy. They said that IoT devices aren’t protected well enough from cyber threats. Microsoft’s plan focuses on a new way of labeling smart devices for cybersecurity.

On July 18, 2023, the US government announced a labeling program for cybersecurity. This program helps people choose smart devices that are better protected against cyberattacks. The companies that make these devices need to ensure they are secure from when they’re made until they keep getting updates. Microsoft is offering Windows IoT, Azure Sphere, and Edge Secured-Core. These make it easier for devices to meet cybersecurity requirements.

Microsoft’s strategy underscores a Zero Trust model for IoT security, aligning with the new National Cybersecurity Strategy and the labeling program. In this model, every request and interaction is checked carefully to ensure nothing harmful gets through. A certification program called Edge Secured-Core also helps companies follow security rules when making devices.

Windows IoT has features like BitLocker encryption, Secure Boot, and other ways to prevent attacks. Microsoft is working to match its plans with the goals of the US National Cybersecurity Strategy so that IoT devices become safer.

How can I copy the List of Attendees from Outlook Meetings?

Sending meeting requests to people on Outlook is as easy as they come. It allows you to monitor attendee responses, among other benefits.

But what happens if you need to copy the list of attendees from one Outlook meeting to another to send a fresh meeting invitation? Well, this is very simple, and we will show you how to do it and more in this detailed guide.

How do I export meeting attendees to Excel?

Exporting meeting attendees to Excel is pretty simple and direct, as you only need to copy and paste the email addresses and the response status of the invitees.

However, you still need to filter and sort it. We will explain all of this in the next section of this guide.

How do I copy the attendee list from a team meeting?

1. Right-click to copy

  1. Launch Outlook and click the Calendar icon in the left pane.
  2. Click the date of the meeting you want to copy attendees from on the Calendar and double-click the meeting invite on the right side of the window.
    test  how to copy attendees from outlook meeting
  3. Now, click To field in the newly open meeting window.
  4. Press the Ctrl key + A to select all the attendees, and right-click the field.
  5. Finally, select the Copy option and paste the attendees into the new meeting where you need them.
    copy

If you want to copy only the list of meeting attendees from an Outlook meeting invite without their responses, you can do that by simply right-clicking the To field and pasting it into the meeting requests.

2. Use Copy Status to Clipboard

  1. Launch Outlook and open the original meeting you want to copy invitees from.
  2. Click the Tracking button.
  3. Now, select Copy Status to Clipboard.
    copy status
  4. Launch Excel and create a new worksheet.
  5. Next, select the A1 cell and press the Ctrl key + V to paste the attendees and their responses.
    a1
  6. From here, click the Data tab at the top.
  7. Click Filter, followed by the down arrow next to Response.
    data filter how to copy attendees from outlook meeting
  8. Choose the parameter to filter with from the responses (accepted, declined, or no response) and click OK. You should now have only the filtered attendees left.
  9. Finally, copy the attendees and paste them into the meeting invite you to need them for on Outlook.

If you need to copy attendees from an Outlook meeting invite based on their responses, this is the method to use. With this, you can see the meeting attendees to forward the follow-up email before sending it.

3. Copy with Outlook VBA

  1. Launch Outlook and press the Alt key + F11 to open the VBA editor.
  2. Click Insert at the top and select Module.
    insert module
  3. Now, copy and paste the code sample below there: Sub CopySpecificAttendees()
    Dim olSel As Selection
    Dim olItem As AppointmentItem
    Dim olAttendees As Recipients
    Dim obj As Object
    Dim strAddrs As String
    Dim DataObj As MSForms.DataObject
    Set DataObj = New MSForms.DataObject
    Set olSel = Outlook.Application.ActiveExplorer.Selection
    Set olItem = olSel.Item(1)
    Set olAttendees = olItem.Recipients
    For Each obj In olAttendees
    'To copy the attendees who have accepted the meeting request
    If obj.MeetingResponseStatus = olResponseAccepted Then
    'To copy who declined - "If olAttendee.MeetingResponseStatus = olResponseDeclined Then"
    'To copy who haven't respond - "If olAttendee.MeetingResponseStatus = olResponseNone" Then
    strAddrs = strAddrs & ";" & obj.Address
    DataObj.SetText strAddrs
    DataObj.PutInClipboard
    End If
    Next
    End Sub
    options copy  how to copy attendees from outlook meeting
  4. Then, return to the Outlook window and click the File tab.
  5. Next, select Options in the left pane.
    options how to copy attendees from outlook meeting
  6. Click Quick Access Toolbar.
  7. From here, click the Choose commands from the dropdown menu and select Macros.
  8. Select the macro.
    choose macro
  9. Click the Add button.
  10. Next, click the OK button to add it.
    add ok how to copy attendees from outlook meeting
  11. Now, go to your calendar and click the meeting to copy attendees.
  12. Click the macro icon at the top. This will help copy the appointment details.
  13. Finally, create the new meeting request, click the To field, and press Ctrl + V. The attendees will be pasted there automatically.

If you want a kind of automated method to copy attendees from your Outlook meeting invites, this is the go-to solution. You can always use the created macro to copy the meeting details and attendees at any time.

How to Print the Attendee List in Outlook

  1. Go to your Calendar on Outlook and open the meeting invite to print attendees from.
    calendar icon
  2. Now, click Tracking in the Meeting section.
  3. Select Copy Status to Clipboard from the context menu.
    copy status
  4. Next, open a new Word document and paste the list of attendees there.
  5. Finally, press Ctrl + P to print.

If there is ever a need to print your appointment details, including meeting invitees and responses, the steps above will help get the job done. 

We have reached the end of this detailed guide on how to copy meeting attendees on Outlook to a new request entirely. With the options above, you can copy all the attendees in a specific meeting request or select them based on their responses.

This will be especially useful if you ever need to forward your meeting invite as a reminder to a specific group of people. 

So, you should have no problems with your Outlook meeting scheduling and reminder with the information provided.

Sony begins beta testing PlayStation 5 cloud gaming with PS Plus Premium

Sony has rolled out beta testing of its cloud gaming service for a randomly selected group of PSN users. It was first announced back in June that cloud streaming would be coming to the PS Plus Premium tier eventually.

There has been no announcement on when the feature will fully launch for PS5 users, and at this point the service is still at an early stage development-wise.

Cloud gaming is one area where Sony has lagged behind competitor Xbox. Xbox Cloud Gaming, which is available with Xbox Game Pass Ultimate, features over 100 compatible titles including first-party AAA blockbusters like Forza Horizon 5, Halo Infinite, and more. Xbox Cloud Gaming makes compatible games available over a wide range of devices including Android and iOS mobile devices, Windows PCs, MacBooks and more.

Microsoft’s lead in the nascent cloud gaming market has been one of the main sticking points with regulators in its endeavor to acquire Activision Blizzard, and was cited by the CMA as the primary reason for its decision to block the deal in the United Kingdom.

Uk Cma Custom

Meanwhile, Sony looks to close the competitive gap in the cloud gaming market with what PlayStation CEO Jim Ryan called “quite aggressive plans” for that space.

Ryan added in those remarks, “We observe mobility in gaming habits to be an increasingly important trend, and the cloud will be fundamental to allowing us, or indeed anybody else, to exploit that trend.”

Via Videogameschronicle. 

Featured image via El Comercio Peru.

Microsoft take a major step in enhancing security measures with AI red teaming

Microsoft posted via their Microsoft Security blog that their AI Red Team is trying to build a future of safer AI. AI red teaming means that security teams pretend to be real-world attackers to find problems and make computer systems more secure. As AI became more significant, Microsoft started the AI Red Team in 2018. This team comprises experts from different fields who act like attackers to discover where AI systems might have issues.

Best practices are being shared to empower security teams:

  • Enabling them to proactively detect AI system failures.
  • Formulate defense-in-depth strategies.
  • Adapt security measures as generative AI evolves.

Here are insights that have influenced the formation of Microsoft’s AI Red Team initiative:

  • Extensive Exploration: AI red teaming looks at many aspects, checking security and Responsible AI issues to find potential problems.
  • Diverse Perspectives: AI red teaming doesn’t solely focus on detecting malicious activities; it also examines how AI systems can go wrong for regular users, not just attackers.
  • Continuous Evolution: AI technology is always advancing, so red teaming must consistently adapt to keep up with the changing ways AI is being used.
  • Repetitive Testing: Testing AI systems may yield different results each time due to the creative nature of AI. Therefore, conducting multiple rounds of testing is necessary to identify all possible issues.
  • Holistic Protection: Effective mitigation of AI-related failures requires employing various strategies, including specialized tools, and ensuring AI behaves appropriately in different conversational scenarios.

Microsoft recently celebrated the twenty year anniversary of Trustworthy Computing, but with AI “shaping up to be the most transformational technology of the 21st century,” there’s still lots of work to do.

What is Xbox Series X Digital and when it is coming out?

The Xbox console has been riding a wave of high popularity lately. The Microsoft console reportedly has over 5000 new games in development. Plus, Starfield will be on the console in less than a month. And even if Starfield is not enough to hype you up, the roadmap for Xbox looks exciting as well.

And let’s not forget the recent popularity this console has experienced. Right after Microsoft won the case against FTC, the Redmond-based tech giant fixed the old Call of Duty’s matchmaking servers. This caused a spike in sales for both old Call of Duty games and the Xbox Series S and X.

But Microsoft didn’t stop at that. The original Gears of War trilogy also got the same update on their servers, prompting the console once again to the top sales of that week. And to make it even sweeter for Xbox users everywhere, Phil Spencer, the head of Xbox, announced that the console is going to have a lot of Square Enix games from now. So, Final Fantasy fans everywhere, rejoice!

And it seems that Microsoft is also planning to release an Xbox Series X Digital soon, according to the XboxEra Podcast. So, if you weren’t happy about the Xbox console, you should be now.

Xbox Series X Digital: what we know so far

An Xbox Series X Digital is, according to its name, a digital-only Xbox X version. Currently, Xbox Series S exists as a digital-only console, but S is marketed to a different audience, the casual gamer who doesn’t really care about collecting video games disks or even playing old games.xbox series x digital

However, the Xbox Series X lacks a digital-only version. But this console, aimed at hardcore gamers, has everything to make it a good piece of hardware for even the most exigent of players.

On the XboxEra Podcast, host Shpeshal Nick says that Xbox Series X Digital will be coming out in 2025 along with other hardware from Microsoft. This version will have all the features of the current Xbox Series X minus the disk port.

So, you’ll be able to use Xbox Series X Digital the same way you would use Xbox Series S, but this console will also support 4K gaming and many other features.

For now, it’s safe to say, we’ll be waiting for 2025. How about you? Are you excited for this Xbox console? Let us know in the comments section below.

How to use the Unity extension for the Visual Studio Code

Are you a software developer who is using Visual Code Studio? Well, we’ve got some good news for you. Microsoft announced the Unity extension for the Visual Studio Code. While it’s only an initial preview, the tool is more than enough to build complex environments in Unity.

Today, we’re delighted to present the initial preview of the Unity extension for Visual Studio Code. This new extension, building upon the C# Dev Kit and C# extensions, gives you a comprehensive toolkit for your Unity development in Visual Studio Code across Windows, macOS, and Linux.

Microsoft

Microsoft hopes you’ll use the Unity extension together with Visual Studio Code to write and debug your Unity games. The Unity extension borrows familiar features from both Visual Studio and Visual Studio Tools and you’ll be able to develop games on any platform: desktop, mobile, or consoles.

While there are also a lot of extensions that you should have on your Studio Code, the Unity extension is quite performant and it comes with a lot of features.

Here’s how to use the Unity extension for the Visual Studio Code

First things first, you should download and install the extension on your device and your Visual Studio Code.

  • You should know that you’ll need Unity 2021, for this extension to work. The extension will automatically install all the extensions the Unity device depends on.
  • You’ll also need to make sure that your Visual Studio Editor package is upgraded to 2.0.20 version or above.
  • If your Visual Studio Editor is up to date, go to Unity’s preferences and set Visual Studio Code as Unity’s External C# editor.Unity extension  Visual Studio Code

You should know that this extension comes with some important features:

  • Edit your code with an AI-integrated tool: with features such as whole-line completions and starred suggestions.
  • Debug your Unity games: by pressing F5, a debug menu will pop-up and you can attach the menu to your Unity game to debug it when you need to.

For now, this extension is in the initial preview, and Microsoft suggests you should leave your feedback in order to improve with future updates. You’ll be able to do so by accessing the Help > Report Issue dialog menu. It will open up another tab, from where you should be able to select and personalize your feedback.

Will you use this extension? What do you think about it? Let us know.

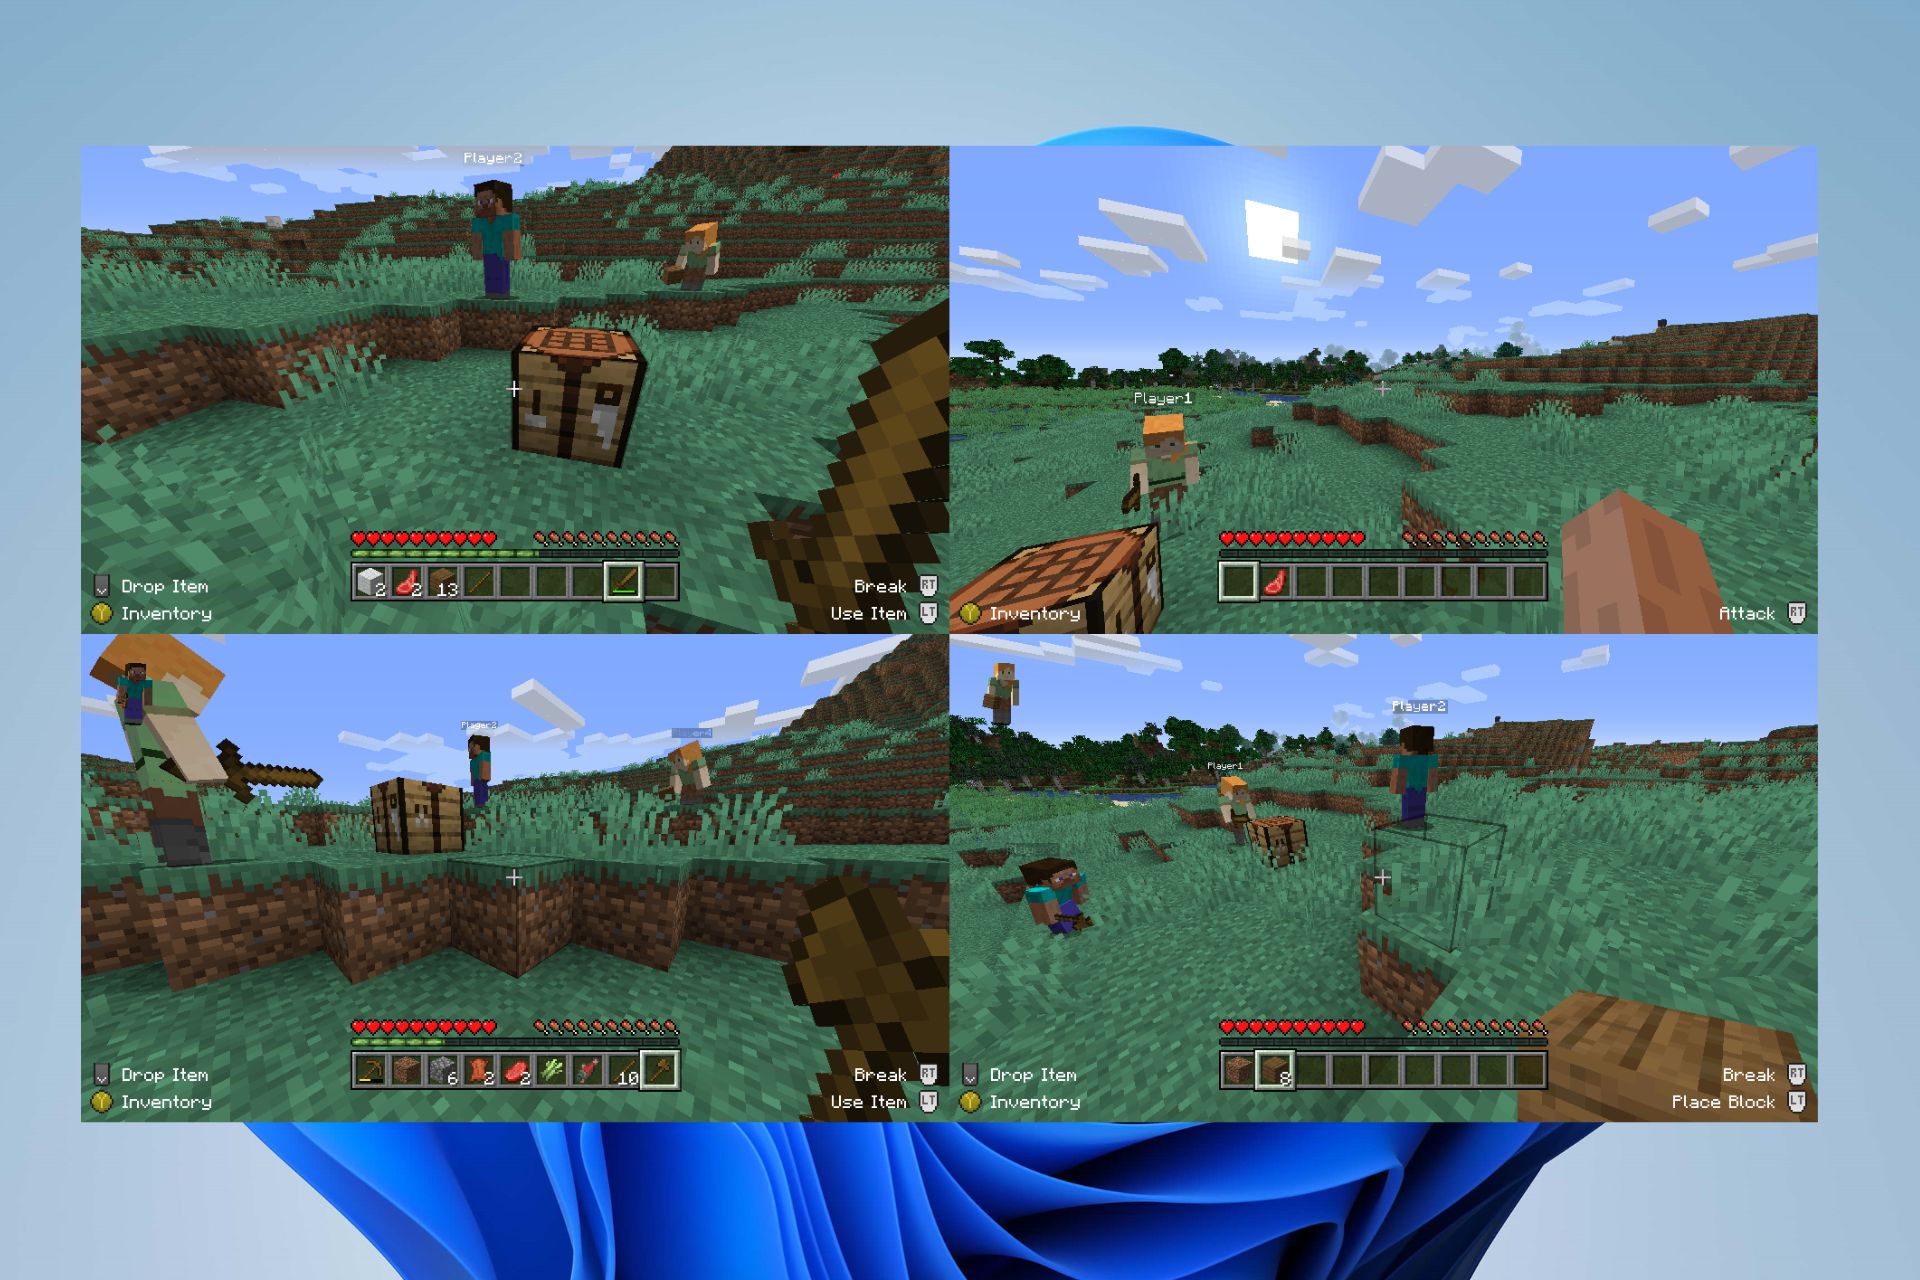
Minecraft not Allowing Split Screen? How to Activate it

Playing Minecraft in a split screen allows multiple players to run the game on the same platform or screen. Sadly, there’ve been several complaints about Minecraft not allowing split screen, preventing multiplayer.

Hence, the question remains: how to activate a split screen in Minecraft on my PC? Thus, this guide will discuss the steps and alternatives to enable the split screen.

Why is Minecraft not allowing split screen?

  • If the game or the platform’s software isn’t up to date, it might cause compatibility issues preventing split-screen functionality.
  • Your platform may be technically incapable to support split-screen gameplay due to hardware constraints.
  • Outdated Minecraft game bugs or glitches could interfere with the split-screen feature, causing it not to function.
  • Split-screen might be disabled in the game or console’s settings, inadvertently preventing its use.
  • Interference from other apps using the split screen feature on your device can impede the function from working on Minecraft.
  • Issues relating to graphics cards and devices can also impact the ability to play games on a split screen and cause Minecraft not to work.

Regardless, we have provided some detailed troubleshooting steps in the next section to help fix the split-screen problem in Minecraft.

How do I activate split screen on Minecraft?

Note icon NOTE
To activate the split screen and launch two Minecraft instances, install a MultiMC launcher. To do this, go through the steps below:
  1. Go to the MultiMC official website and download multiMC, then extract the executable.
  2. Run MultiMC and log in with your Mojang account (the same one you use for Minecraft).
  3. Create two(or more) instances by clicking the Add Instance option and ensure you input different names for them.
  4. If you have one Minecraft account, click on the first instance and tap the Launch Offline button.
  5. Then, set your username when prompted and repeat the process for the second instance.
  6. Select the first instance and click Launch if you have multiple Minecraft accounts. Then, switch the account in the top-right corner, then repeat the process for the second instance.

Create a single-player world and access the LAN option in the pause menu. Another player can then join by navigating to the multiplayer menu. Alternatively, you can connect to a server using different Minecraft accounts or an Offline server if you possess a single Minecraft account.

To set up the split screen, follow the steps below;

  1. Download the latest UniversalSplitScreen release zip from the releases page.
  2. Right-click on the downloaded file and select Extract all from the drop-down.
  3. Run the UniversalSplitScreen.exe to launch the software.
  4. Go to Options, select a Preset, and click Load.
    • For Minecraft 1.14.3 and higher, use the Minecraft 1.14.3 preset.
    • For versions 1.13 to 1.14.2, use Minecraft Alternate. If the split screen doesn’t work, try the other preset (after restarting the instances).
  5. Return to the current window tab, press Alt+tab into the first game, and set the mouse and keyboard.
  6. Repeat the above step for the second game.
  7. Click the Start or Stop option to split the screen for Minecraft.

The above steps will allow you to create a preset and use it to play Minecraft on a split screen with multiplayer.

Alternatively, you can go through our guide on ways to fix Minecraft Launcher not working on Windows 11.

Likewise, you can read our detailed guide on what to do if Minecraft login isn’t working on your PC.

Should you have further questions or suggestions, kindly drop them in the comments section.

What to Do When OBS Not Working with VPN + Best VPNs for It!

OBS, or Open Broadcaster Software, is a popular open-source software used for live-streaming and video recording. 

It enables users to capture and stream their desktops, webcams, and other sources to sites such as Twitch, YouTube, and Facebook. 

Many users, however, have encountered problems when using OBS when connected to a VPN.

You may experience issues with connectivity and streaming quality when using OBS with a VPN.

This might be due to latency issues connected to the quality of your VPN servers or network restrictions.

Connectivity issues or geo-blocking measures certain streaming services like Twitch have put in place can be another cause for your problems.

But do not worry, as you can deal with these issues in several ways.

How to fix OBS not working with VPN

When connecting to a VPN, your IP address is substituted with that of the VPN server you are connected to. This makes it appear that you are accessing the internet from a different location.

While this can be useful for bypassing geo-restrictions and accessing the contents that are unavailable in your country, it can also cause issues with streaming through OBS.

But there are several ways to go around these issues. Try the following solutions step by step:

1. Use split tunneling

expressvpn split tunneling feature

Split tunneling is a networking technology that allows users to transmit some of their internet traffic through a VPN while remaining connected to their regular network.

This might be beneficial for users who wish to play games or use streaming platforms that prohibit using VPN or require a local network connection.

It can also allow you to bypass Twitch’s geo-blocking while connecting OBS directly to your local network and avoiding any latency.

To utilize split tunneling with OBS, configure your VPN client to exclude the network adapter used by OBS to connect to the internet.

This allows OBS to utilize your normal network connection while enabling other apps to use the VPN connection.

The specific steps for setting up split tunneling will depend on your VPN client and network configuration. You may need to visit your VPN provider’s documentation or support resources to set up split tunneling.

2. Change the server

Using OBS to stream on Twitch, Youtube, or Facebook might prove to be a hard task as your access to these websites might be barred due to geo-blocking or your country’s censorship.

As Twitch and other streaming platforms tend to recognize and ban certain IP addresses associated with free VPNs or with an unusual number of connections, changing your server might resolve your issues.

To do so, follow these steps:

  1. Disconnect from the current VPN server.
  2. Open your VPN app and choose a different server location.
change server location on expressvpn
  1. Connect to the new server and check if Cox is working correctly.

3. Change your VPN provider

Buffering or other streaming difficulties might occur when a user connects to a VPN server experiencing excessive traffic or latency.

Similarly, if the VPN connection is unreliable or regularly fails, it might disrupt the streaming experience. 

These glitches might be frustrating when attempting to stream content using OBS. Using a premium VPN service optimized for streaming, such as CyberGhost, may fix all these problems at once.

To have a problem-free experience with OBS, follow these steps:

  1. Go to the CyberGhost VPN subscription page and purchase a subscription.
get a cyberghost subscription
  1. Download the app from the CyberGhost VPN download page for your device.
download cyberghost vpn
  1. Install the downloaded file and log into your account.
login to expressvpn
  1. Pick a server for the streaming list.
  1. Go to your OBS app and enjoy streaming.
obs app working after changing vpn

Does OBS block VPNs?

No, OBS doesn’t block VPNs. OBS itself takes no measures to ban users using VPNs or block any IP addresses related to VPN servers.

But certain sites available to steam on through OBS, like Twitch, use some measures to block VPNs to maintain the platform’s safety and avoid any legal issues. 

Keep in mind that if you are not experiencing any issues with those streamers, a free VPN still can cause you connection and latency issues, affecting the quality of your experience.

The optimum solution is to use a premium VPN service that utilizes innovative privacy measures to keep your VPN use hidden while giving you high-speed access to OBS.

How does OBS detect my VPN?

Many websites have VPN-blocking procedures in place, and OBS has it too.

These safeguards are put in place to prevent users from circumventing regional limits, gaining access to only available material in specific countries, and preserving the integrity of their services.

Here are some examples of how services restrict VPN usage:

  • IP Address Blocking: Blocking IP addresses linked with known VPN providers is one of the most prevalent methods that services prevent VPN usage.
    When users connect to a VPN server, their IP address is swapped with the VPN server’s IP address. Services can ban access from known VPN IP addresses by using databases of those IP addresses.
  • DNS Blocking: DNS blocking is the process of restricting access to specified domains or websites connected with VPN services. Users are unable to browse VPN websites or download VPN software as a result of this.
  • Blacklisting: Services frequently maintain a list of known VPN servers and prevent access to those servers.
  • Geolocation: Services can utilize geolocation data to determine a user’s location and prevent access if they are connecting to a VPN server in a different country.
  • Port Blocking: Some providers, such as OpenVPN or PPTP, may restrict specific VPN protocols’ ports. This basically blocks VPN usage by preventing VPN traffic from traveling over certain ports.
  • Account Suspension: Certain services may suspend or cancel user accounts if a VPN is detected.
  • Captcha Challenges: Some providers may utilize captcha challenges to ensure that users are not using a VPN. Captcha challenges demand users to solve puzzles or submit text to demonstrate that they are not a bot or using a VPN.

Although all these measures are put in place to keep users and the platform safe, they can be restrictive if you find yourself in a situation where you need to pass them.

If you are using a university or library network or if you are living in a country that has blocked access to some platforms connected to OBS, you need to use a VPN. 

But as using a VPN can bring on certain punitive measures, including account suspension or a significant drop in streaming quality, you must ensure your VPN usage is protected.

Using a premium VPN service can be the ultimate solution to all these tracking.

A Premium VPN’s advanced security and privacy features can keep you safe while giving you the best streaming quality possible.

Does OBS work with a VPN?

Yes, OBS works with VPN, but the quality of your experience highly depends on the kind of VPN you use. 

Using a premium VPN, such as CyberGhost, is essential for a lag-free and stable connection to OBS. 

Its cutting-edge security and privacy features, partnered with its split-tunneling feature, can give you all the tools you need to bypass the geo-blocking of streaming platforms like Twitch when using OBS.

Free VPNs do not give the same degree of protection and privacy as commercial VPNs, and they are prone to IP address blockage and speed drop-downs.

Premium VPNs, such as CyberGhost, provide top-level encryption, have a strict no-logs policy, quicker and more dependable connections, and other security measures to keep your online activities safe and secure. 

Free VPNs sometimes have sluggish and inconsistent connections, making it difficult to stream through OBS and other material without buffering or latency. 

Unlike a free VPN, a premium VPN may terminate an IP address blocked by Twitch and start a new one while staying one step ahead of Twitch’s banning. 

Investing in a premium VPN, like CyberGhost, ensures you can use OBS without any dropped frames while giving you access to streamers that may have blocking or geo-restrictions in your region.

Best VPNs for OBS

Choosing a premium VPN to access OBS is crucial for ensuring you have a lag-free experience while maintaining your online privacy and security.

Your premium VPN must have a split-tunneling feature and many fast and secure servers around the globe, optimized to give you the best streaming experience. 

The following is a list of the best premium VPNs for streaming through OBS:

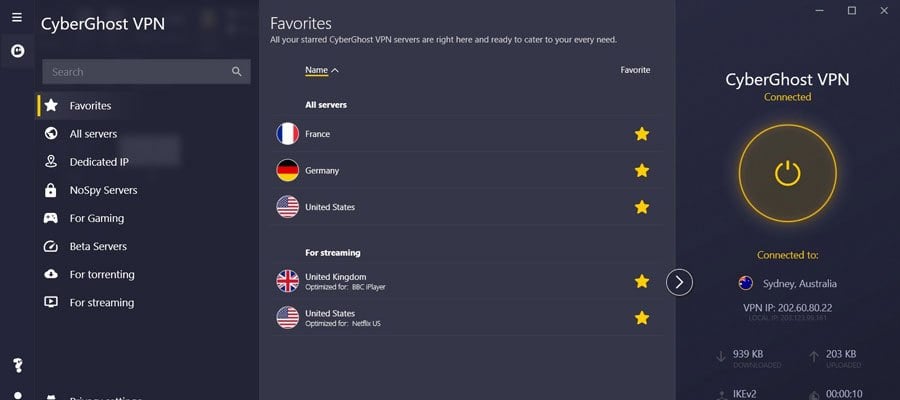
CyberGhost VPN

CyberGhost VPN is our opinion, the best VPN option for live streaming. It features a large network with over 6800 servers in 91 countries, allowing users to view material from all over the world.

On its desktop software, CyberGhost offers a split tunneling option labeled “exceptions” under the smart rules tab.

It provides the highest level of encryption, guaranteeing that all online activity is private and safe.

Furthermore, CyberGhost VPN adheres to a strict no-logs policy, which means that user data is never saved or shared with third parties.

It also has advanced features like ad blocking and virus prevention.

Overall, CyberGhost VPN is a reliable service for anybody wishing to safeguard their online privacy and access prohibited material.

✅ Pros

  • Optimized Servers for Streaming
  • More than 6800 servers in 91 countries, including the United Kingdom
  • 256-bit AES encryption
  • OpenVPN IKEv2 and WireGuard protocols
  • Strict no-logs policy

 ❌ Cons

  • Censored in certain countries like China
  • The ad blockers cannot block some ads and pop-ups

CyberGhost

Make the most of your OBS streaming with this reliable VPN!
Check price Visit website

ExpressVPN

ExpressVPN, With over 3,000 servers in 94 countries, is the ideal solution for anybody searching for a fast, secure, and dependable VPN service.

Moreover, this VPN offers an all-in-one solution for anybody wishing to safeguard their online privacy and security, with sophisticated features such as split tunneling and a kill switch.

ExpressVPN also employs industry-leading encryption to keep all online activities private and safe.

It also has a rigorous no-logs policy, meaning no user data is ever saved or shared with other parties. It also has advanced obfuscation that overcomes any blocking.

Because privacy and security are typically top concerns while utilizing a VPN, it includes cutting-edge security technology like AES-256 encryption.

✅ Pros

  • Supercharged servers in 94 countries worldwide, including the United Kingdom
  • User-friendly apps for Windows, Mac, Android, and iOS   
  • Next-gen Lightway protocol with better speeds and security   
  • No-logs policy keeps your data safe
  • Offers private DNS

❌ Cons

  • More expensive than rivals
  • Unavailable on Linux

ExpressVPN

Get secure, fast, and throttling-free streaming on OBS with ExpressVPN!
Check price Visit website

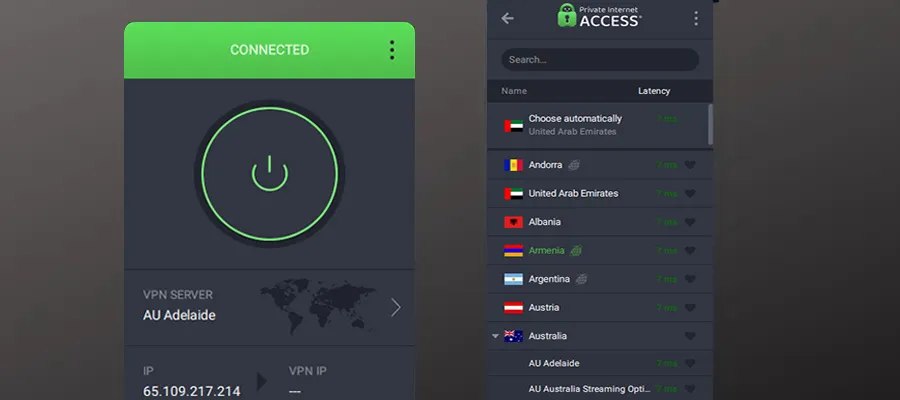
PIA VPN

pia user interface

PIA VPN, or Private Internet Access VPN, is an amazing solution for individuals who value privacy and security while streaming through OBS without any issues.

With over 35000 servers in 84 countries, PIA VPN provides a wide selection of alternatives for viewing material globally. 

Additionally, this VPN has an advanced split tunneling feature that will help you avoid any problems you might face using OBS.

PIA VPN also has ad and malware prevention and a kill switch. This VPN is an inexpensive and dependable option for anybody wishing to safeguard their online privacy and security. 

Because of its open-sourced and transparent architecture, anybody may inspect and test PIA VPN’s cutting-edge security features and no-logs policy.

✅ Pros

  • Extensive fleet of servers   
  • No-logs policy
  • Powerful ad blocker
  • Split tunneling

 ❌ Cons

  • A limited security protocol that only supports WireGuard and OpenVPN
  • Sub-par desktop client

PIA

Use PIA to bypass all restrictions and get amazing streaming quality on OBS!
Check price Visit website

Summary

Many OBS users experience not working with VPNs, facing connection issues, latency, and geo-blocking while trying to use the software to stream on different platforms, such as Twitch.

Using a premium VPN that has split-tunneling, advanced security and privacy features, and a large fleet of servers optimized for streaming can resolve all these issues at once. 

Fix: Chrome Pinned Tabs not Loading on Startup

Having to continue your browsing session from where you stopped is one of the features of the Chrome browser that aids productivity. However, several users have complained about issues with Chrome pinned tab loading on startup.

Hence, it is essential to find a way to set Chrome to keep pinned tabs and load them even when restarted. Thus, we will look at the causes of this error and how to fix Chrome pinned tabs not loading on startup.

Why are Chrome pinned tabs not loading on startup?

Here are some possible reasons why your Google Chrome browser pinned tab not loading on startup:

  • Stored cookies and cache from recently visited websites can conflict with Chrome performance, impeding pinned tab load at startup.
  • Corrupt Google Chrome user profiles due to incomplete app updates, hard disk issues, or malware attacks can stop pinned tabs from opening by default.
  • Issues with specific Chrome extensions can disrupt the borrower from opening pinned tabs.
  • Network connectivity errors like network congestion and slow and unstable networks can cause errors at startup.
  • Changing Google Chrome’s default settings can hinder pinned tabs from loading at startup.
  • Bug errors in Chrome browser software can affect the app’s performance causing the error to occur at startup.

Note that the errors listed above vary in different circumstances and PCs. Nonetheless, we will discuss explicit steps to resolve the error on your computer.

How do I get Chrome to open pinned tabs automatically on startup?

Before trying advanced steps to fix the error on your console, here’s what you can do:

  • Update the Chrome browser to download the one in the requirement for pinned tabs and fix bugs.
  • Check and fix network congestion issues in your PC.
  • Log in with another Chrome user account to check if the error is not with the user account.

Performing these preliminary checks will help you identify the root cause of the error on your Chrome browser before proceeding with the advanced fixes below.

1. Adjust Chrome settings

  1. Click the Windows icon, type Chrome, and press Enter.
  2. Click the Chrome menu and select Settings.
  3. Navigate to the Advanced option, and click on it to expand the advanced settings.
  4. Go to the System section and check if the Continue running background apps when Google Chrome is closed feature is enabled.

Adjusting the Chrome settings as stated above will allow Chrome to run in the background to open pinned tabs at startup.

2. Disable the tab discarding

  1. Click the Windows icon, type Chrome, and press Enter to open it.
  2. Copy and paste the following into the Chrome address search bar, and press Enter: chrome://flags
  3. Search for automatic tab-discarding on the new Windows and set the flag disabled.
  4. Copy and paste throttling in the search box, and press Enter.
  5. Find the setting labeled Throttle expensive background timers, and select the Disable button.
  6. Copy and paste parallel downloading in the search tab, press Enter, and click Enable.
  7. Click the Relaunch Now button on the bottom right corner of the window to restart Chrome.

The above steps prevent the browser from closing pinned tabs and will fix errors with pinned tabs not loading at startup.

3. Adjust Chrome startup settings

  1. Click the Windows icon, type Chrome, and press Enter.
  2. Click the Chrome menu and select Settings.
  3. Select On Startup and choose Continue where you left off.
  4. Then, close the browser and restart it.

The perk of this is that it enables Chrome to remain active despite closing it. Hence, the browser re-opens precisely how it was before closing. So, this should fix the Chrome pinned tabs not loading on startup.

4. Clear browsing data and cache

  1. Left-click the Start menu, type Chrome and launch it.
  2. Locate the Chrome menu, select More tools, and choose Clear browsing data.
  3. In the new window, select All Time under the time range, check the box for the three options, and click Clear data.
  4. Further, restart your browser and check if the pinned tabs are active.

In conclusion, you can read about easy ways to disable or enable tabs always on top in Chrome browser on your PC. Also, check our guide about pinning a website to Taskbar in Windows 11.

Further, should you have more questions or suggestions regarding this guide, kindly drop them in the comments section.

Microsoft denies permanent ban your Xbox Live account

Bad news for Xbox gamers everywhere: it seems that somehow you can get permanently banned on Xbox, even though you’re not breaking any rule. This was spotted by YouTuber GhillieMaster who covered the story of several players who got banned recently.

It seems some hackers can invite you to their party to play Xbox games together. And using a tool, which can bypass Microsoft and Xbox security settings, they can easily ban other players. Not only from the party group but also outside of it. This means that a lot of accounts can be compromised even if you decide to leave the group.

For now, it seems this issue originated in the GTA Online party groups, and there is little coverage on whether the bug happened with any other game or not. People get invited to these groups, and their accounts get banned very easily by the group’s admins, who may or may not be hackers, ultimately.

Microsoft has yet to come up with a statement on this problem, but the Xbox community is already pressing the Redmond-based tech giant to recognize and address this issue.

The fact that the appeals are being denied is the scariest part. Xbox needs to restore the account and bans should only ever be carried out by humans, not bots.

Here’s how hackers can get you permanently banned on Xbox Live

Let’s say you suddenly get an invitation to a party group to play GTA Online. You accept, and you get into the group. You play with this group for a while, and suddenly you find yourself banned. How? According to the GhillieMaster, a player experienced such a situation, and they couldn’t even get their accounts back.

Microsoft validates the bans as legitimate, and even if you try to reach them, it seems, it won’t fix anything.

These people, most likely hackers, are using a special tool that allows them to just ban accounts at their whim.perma banned xbox live

As you can see in the picture, a hacker can easily ban your account. This menu can somehow bypass the Xbox report cooldown, and it means Xbox gets flooded with reports about your account. This will ultimately get you banned.

A solution would be to completely avoid invites to party groups, especially from people that you don’t know. But it seems that even when you are outside of the party, they can still somehow target you with this menu. Ultimately, your whole account is at risk. And if you happen to have purchased a lot of games, then you won’t have access to them anymore.

Update: Microsoft denies the permanent ban on Xbox accounts

In a statement to The Verge, Microsoft says that there is no such thing as a permanent ban on Xbox, at least coming from their team.

Third party apps or tools cannot impact player enforcements, and no volume of inaccurate reports result in an enforcement, only reports that have been reviewed by the Xbox Safety Team and determined to be accurate and in violation of our Community Standards result in an enforcement action such as suspension or an account ban.

Microsoft

What do you think about this issue? Let us know in the comments section below.

How to Download the Outlook Address Book for Offline Use

The offline address book (OAB) feature allows a centralized repository for storing contact information on Outlook. Recently, we have received complaints regarding users not knowing how to download the Outlook Address book for offline use.

Consequently, you may be unable to access and save the content of the address book on your device. Hence, we will provide detailed steps discussing how to work around its download and where you can find it.

Why is Outlook not downloading the address book?

The following factors can cause this problem:

  • Issues with network connection, like poor or unstable network connection and network congestion on your PC, can prevent you from downloading it.
  • Outlook server outage or downtime can cause the computer not to connect with the host, restricting download.
  • Outlook email account setup can cause issues when downloading the address book.
  • Outlook downloading can timeout or fail if a sizable address book takes longer than expected.
  • Issues with the cache mode used by the Outlook offline address book can prevent it from downloading.
  • Misconfigured synchronization settings in Outlook might result in updating or downloading issues.
  • A damaged Outlook profile can hinder its ability to download.

The above-stated causes are random factors affecting downloads on your computer.

How do I download the address book from Outlook?

Via Account Settings

  1. Open Outlook on your PC, click File on the ribbon, and select Account Settings.
  2. Click on Download Address Book.
  3. In the pop-up dialog box, Click the Download changes since last Send/Receive box to check if not checked by default.
  4. Click the Choose address book drop-down arrow button and select the appropriate OAB you want to download.
  5. Click on OK and wait for it to download.

The procedure above will aid you to download an offline address book on your computer. Note that unchecking the Download changes since the last Send/Receive box will download the offline address book.

If you’re using iCloud, you can always seamlessly sync iCloud with Outlook.

Where can I find an Outlook address book?

You can find the Outlook offline address book in the following directory on your PC in File Explorer: C:\Users\%username%\AppData\Local\Microsoft\Outlook\Offline Address Books\

In conclusion, check our guide about ways to fix Outlook couldn’t set up your account on your PC. Also, feel free to read about how to fix Outlook PST cannot be found on Windows.

Feel free to leave your suggestions and questions in the comments section.

Outlook Calendar not Showing Holidays? Here’s How to Fix it

There is a high chance of missing out on essential plans when the Outlook calendar is not showing holidays or notifying you about them. This problem might affect your plans if you highly depend on this feature for work.

However, you have to understand the severity of the problem by finding the cause and making a way around it. Hence, this article will provide the steps for fixing the calendar not displaying holidays in Outlook.

Why are the holidays not showing in Outlook?

  • Problems with syncing Outlook calendars across devices or platforms might prevent holidays from appearing.
  • Outlook may not display holidays for your specific country by default, causing it to be unavailable in your calendar settings.
  • Outdated Outlook software versions or missing updates might be responsible for the calendar not displaying holiday issues.
  • If the holiday calendar subscription is not active, holidays won’t appear.
  • Incorrect time and date can also cause issues with the Outlook calendar.
  • Sometimes, if you’ve customized your calendar settings to exclude holidays, they won’t appear and seem missing.
  • Recent alterations or changes to the Outlook app may hinder the calendar from displaying holidays.
  • Issues with Outlook data, installation files, or compatibility problems might cause the calendar to malfunction or not show updates about upcoming holidays.

Regardless, you can resolve the problem by following the steps in the next section.

How can I get my calendar to show holidays on Outlook?

Before anything, apply the following:

  • Close and reopen the Outlook client or restart your computer to refresh the app calendar data.
  • Verify that your Outlook Calendar is properly synced across all your devices.
  • Ensure you’ve selected the correct country in your calendar settings to display holidays relevant to your location.
  • If you’re using third-party calendar apps or plugins, try disabling them temporarily to check if they’re causing conflicts.
  • Adjust the filters to include holidays if any filters that might hinder displaying holiday events are applied.
  • Set the correct Windows date and time and enable the internet sync to allow Outlook to use the settings. Read about changing the time and date on Windows 11.

If you still can’t fix the Outlook calendar not showing holidays, you can try the advanced solutions outlined below to see if it works:

1. Update the Outlook app

  1. Press Windows + R keys to open the Run dialog box, type outlook.exe/safe, then click Enter to start Outlook in Safe Mode.
  2. Click Yes on the Microsoft confirm prompt.
  3. Click on File, select Office account, and click the Office updates menu.
  4. Tap the Update Options button, then click Update Now from the drop-down to install pending updates on Outlook.
  5. Restart your PC and launch Outlook to see if the calendar starts showing holidays.

Installing updates will fix Outlook errors affecting and impeding the display of holidays in the Outlook calendar.

2. Clear Outlook cache

  1. Press Windows + R keys to open the Run dialog box, type %LOCALAPPDATA%\Microsoft\Outlook\, then click OK.
  2. Right-click the RoamCache folder, select Copy, then paste it into another folder.
  3. Double-click the RoamCache folder, select all the items in the folder, or press Ctrl + A, then press the Delete icon.
  4. Restart your PC and launch Outlook to check if the calendar issue persists.

Clearing the app data for Outlook on your PC will delete corrupt files causing issues with the calendar.

3. Repair Microsoft Office

  1. Press the Windows key, type control, and launch the Control panel.
  2. Select Uninstall a program under Programs.
  3. Locate Microsoft Office and select the Change option.
  4. Then. select Quick Repair from the new menu and click the Repair button.
  5. Restart your computer and try accessing Outlook to see if the calendar shows holidays.

Repairing Microsoft Office will fix underlying software issues affecting the app’s performance.

How to add holidays to your calendar in Outlook?

  1. Click File on the top-left corner and select Options.
  2. Click on Calendar.
  3. Under Calendar options, click Add Holidays.
  4. Check the box for each country whose holidays you want to add to your calendar, and then click OK.

These steps will create and add these holidays, and duplicates are created. Besides holidays, you can add other events to Outlook. You can do that by following steps from our how to import ICS file to Outlook guide.

Alternatively, you can go through our guide on what to do if Outlook crashes after Windows updates on your PC.

Likewise, we have a comprehensive article about fixing Outlook error 0x80070021 on Windows 11.

If you have further questions or suggestions, kindly drop them in the comments section.

What to Do if Your eBay Account Gets Hacked

Platforms being breached, data getting stolen, or personal details being put up for sale on the dark web have become a common occurrence of late. Every other month, we come across such news reports. And several eBay accounts, too, got hacked recently.

In May 2014, the eBay database was compromised, and personal details, including login credentials, date of birth, and mailing information, of 145 million users worldwide were reportedly stolen.

After such a massive breach, users were concerned and wanted to find the best action after an account was hacked. But can any eBay account be hacked? Does it require advanced tools to breach the security protocols set in place by eBay? Keep reading to find out!

Can an eBay account be hacked?

Yes, an eBay account can be hacked like any other. Though every platform has a secure framework, hackers somehow manage to identify vulnerabilities and hack into the database or individual accounts.

Around the same time the first massive breach was reported, an Egyptian security researcher, Yasser H. Ali, found a vulnerability that allowed hackers to reset the password for any of the accounts. While eBay addressed it shortly, we can’t negate the possibility of hacking altogether.

Hackers are getting more advanced by the day and are employing sophisticated measures to breach a company’s database. And it’s time companies keep up with it to secure critical user data.

How do I know that my eBay account is hacked?

Here are a few signs that will help detect a hacked eBay account:

  • Unusual purchase history: If you find orders or bids you never made, the eBay account is likely hacked. But before we jump to the conclusion, verify that you didn’t share the password with anyone.
  • Changes to personal information: Often, after gaining access to an individual account, hackers change the personal information that could be used for account recovery. Any changes to these indicate that the eBay account is compromised.
  • Payment notifications: Many users found out about the successful hacking attempt after they received a notification from PayPal or another payment option they had set up on eBay.

What can I do if the eBay account is hacked?

1. Change the login credentials if you still have access

Your primary approach when the eBay account is hacked should be to change the password. Of course, you would only be able to do it if the hacker already hasn’t got to that part. And don’t choose a password you already use on other websites.

Most hackers who want to make a few purchases from your account wouldn’t bother changing the login credentials. Therefore, the recovery is relatively easier. But when the hacking is part of an elaborate nexus, you will likely lose access to the eBay account.

2. Set another security question

Security questions, though meant for account recovery, can be used to hack into an eBay account. And if someone already had access to your account, they would know the answer to the security questions. This increases the likelihood of subsequent hacking attempts.

So, it’s recommended that you immediately change the security questions on eBay. All measures you take initially will go a long way in securing your account!

3. Temporarily block transactions on the cards

If you have any cards or other payment options set on eBay, it’s recommended to block them until you gain access to the account. Many users lost a significant amount after the hacker placed orders on eBay.

While you can always dispute the payment (also called a chargeback) with the bank, settling it takes time. So, the best option is to temporarily block transactions until the account is recovered and fully secure.

4. Contact eBay support

When nothing else works, the last option is to contact eBay support. They have an automated chat system in place, but you can reach out to an agent. During the process, you must verify your identity, and eBay will help recover the account.

Besides, they will cancel any orders, bids, or listings made through your account. Remember, account recovery via eBay may take slightly longer, but it helps prevent any major misuse of the hacked account.

5. Scan the device for malware

Once you have recovered the hacked account, it’s imperative to eliminate the underlying cause that triggered the problem in the first place. And usually, it’s malware to blame.

Experts recommend that you scan the device with a reliable antivirus solution. You can also download one on the mobile device in case eBay is installed there.

With these quick tricks and tips, you should be able to recover the hacked eBay account and secure the compromised device.

Before you leave, find out if you can be hacked via an Instagram DM.

For any queries or to share how you recovered the eBay account, comment below.

Windows Event Log Keeps Stopping? Here’s What to do

Many of us regularly check the event logs to identify any issues with the PC, find out what’s affecting the performance, or figure out the reasons for crashes. But when Windows Event Log keeps stopping, all this data won’t be collected.

The issue continues to plague all iterations of the OS, including Windows 10 and Windows 11. And in most cases, we found it to be a problem at the user’s end. If you, too, find the Windows Event Log service not starting, keep reading to find out all about it!

Why is Windows Event Log stopping?

Here are the primary reasons you find Windows Event Log not running:

  • Corrupt system files: When the system files are corrupt, critical processes and tasks are likely to stop functioning, including Windows Event Log.
  • Misconfigured registry: Event logs, like any other feature, have a dedicated section in the Registry, and a single misconfigured entry can break things.
  • Existing logs are corrupt: Often, users find the corrupt state of existing logs to be responsible when Windows Event Log keeps stopping.
  • Bug in Windows: A reported bug in Windows persistently killed the Event Viewer, and it was addressed in KB4501375.

What can I do if Windows Event Log keeps stopping?

Before we head to the slightly complex solutions, here are a few quick ones to try:

If none work, move to the fixes listed next.

1. Reconfigure the Windows Event Log service

  1. Press Windows + R to open Run, type services.msc in the text field, and hit Enter.
  2. Locate the Windows Event Log service, right-click on it, and select Properties.
  3. Select Automatic from the Startup type dropdown menu, click Start if the service is not running, then click OK to save the changes.automatic to fix windows event log keeps stopping

If Windows Event Log was not running earlier, it should not. In case the Windows Event Log keeps stopping, another problem triggers it. So, move to the next solution.

2. Take full permissions

  1. Press Windows + E to open File Explorer, and navigate the following path:C:\Windows\System32\winevt\
  2. Now, right-click on the Logs folder and select Properties.
  3. Go to the Security tab, and click on Advanced.advanced
  4. Click on Change.
  5. Enter your active profile name in the text field, click on Check names, and then on OK.check names to fix windows event log keeps stopping
  6. Tick the checkboxes for Replace owner on subcontainers and objects and Replace all child object permission entries with inheritable permission entries from this object, then click OK.permissions
  7. Click Yes in the confirmation prompt.
  8. Click on Edit.
  9. Now, click the Add button.add
  10. Again, enter the username you added previously, click on Check names, and then on OK.
  11. Finally, select the user, tick the checkboxes for all permissions, and click OK to save the changes.

When the current user or SYSTEM doesn’t have the necessary permissions to edit the Logs folder, there’s a chance the Windows Event Log keeps stopping. All you have to do is take full folder access.

3. Repair the corrupt system files

  1. Press Windows + R to open Run, type cmd, and hit Ctrl + Shift + Enter.cmd
  2. Click Yes in the UAC prompt.
  3. Paste the following commands individually and hit Enter after each to run the DISM tool:DISM /Online /Cleanup-Image /CheckHealth DISM /Online /Cleanup-Image /ScanHealth DISM /Online /Cleanup-Image /RestoreHealth
  4. Now, execute this command to run the SFC scan:sfc /scannowsfc scan to fix windows event log keeps stopping

When the corrupt system files are to blame, a quick fix is to run the DISM tool and SFC scan. Both help identify problematic system files and replace them with a cached copy stored on the PC.

As an alternative, we kindly suggest a user-centered PC troubleshooting solution designed to eliminate different Windows malfunctions including corrupted system files.

It’s not only more effective but it gives you a full-round scan for detecting damaged OS files, registry issues, or even BSOD errors.

4. Clear the existing logs

  1. Press Windows + E to open File Explorer, paste the following path in the address bar, and hit Enter:C:\Windows\System32\winevt\Logspath
  2. Now, press Ctrl + A to select all the files and then Delete to clear them.clear logs
  3. Choose the appropriate response in case a confirmation prompt appears.
  4. Finally, restart the computer.

If it’s the corrupt existing logs or cache to blame when Windows Event Log keeps stopping, clearing them all should do the trick!

5. Uninstall conflicting applications

  1. Press Windows + R to open Run, type appwiz.cpl in the text field, and click OK.
  2. Select any recently installed applications after which the problem first appeared, and click Uninstall.uninstall
  3. Follow the on-screen instructions to complete the process.

Third-party applications, especially security software or antiviruses, are known to change the settings, which leads to Windows Event Log stopping persistently.

6. Perform an in-place upgrade

Tip icon Tip
The steps listed here are for Windows 11. For those running the previous iteration, it’s just as easy to perform a repair upgrade in Windows 10.
  1. Go to Microsoft’s official website, choose the product language and OS edition, and then download the Windows 11 ISO.
  2. Open the ISO and run the setup.exe file.setup.exe
  3. Click Yes in the prompt.
  4. Click Next to proceed.next
  5. Now, click Accept to agree to the license terms.
  6. Finally, verify that the setup says, Keep personal files and apps, and click on Install.in-place upgrade to fix windows event log keeps stopping
  7. Wait for the in-place upgrade to complete. It may take 2-4 hours.

An in-place upgrade comes in as an effective troubleshooting measure when the Windows Event Log stops or even in the case of other critical OS-related issues. Besides, you don’t lose any files or apps in the process.

Before you leave, do not forget to check the best event log analyzer tools that provide detailed information, often more than Event Viewer, and effectively eliminate issues.

For any queries or to share more solutions with us, drop a comment below.

Microsoft postpones multi-account search in Outlook indefinitely

Microsoft has announced that Outlook’s multi-account search feature has been postponed indefinitely. This delay comes after the initial news generated by the feature’s announcement on July 24, ’23.

Previously, users were limited to searching one account at a time. The promised functionality would have enabled users to search their configured mailboxes, presenting a unified message list combining results from various accounts. This improvement could significantly enhance productivity and user experience.

However, an update on August 3, ’23, brought unexpected news. The feature with ID 151030, which had been on the roadmap for release, was suddenly put on hold indefinitely. The exact reasons behind this decision have not been disclosed, leaving users curious about the future of this sought-after feature.

Initially scheduled for rollout in July 2024, the multi-account search feature was expected to be accessible on various platforms, including the web, for users across the globe under the standard multi-tenant configuration and GCC.

As we, the Microsoft users, wait for further information, the indefinite postponement of the Multi-Account Search feature leaves us without the anticipated enhancement to our Outlook experience.

How to Download Only Headers in Outlook [Quick Steps]

In Outlook mail, you can download only the headers of your email messages. This can be useful if you have a slow connection and want to read messages quickly.

While this is a straightforward process, some users are having a problem downloading the headers option only, so we’ll look into it and offer possible solutions in this article.

What does download headers only mean in Outlook?

If you’re pressed for time but also want to keep tabs on all the activities in your life, you’ll need to enable the headers-only option in Outlook. This means that all your emails will only show the header first.

Once you’ve verified the email subject after downloading headers, you can proceed to full items. 

This option exists because many large attachments come with emails today, such as video files and large documents. 

These attachments can often be hundreds of megabytes and take several minutes to download completely, especially if you have slow Internet connection speeds.

Still, this is not the only reason you would need to enable the header option only in your Outlook mail. Other compelling reasons include:

  • Save time – Some emails with lots of files and other attachments can take forever to download. Enabling the Outlook headers only can help you save this time.
  • Save space – If you regularly receive huge files and lots of emails, your inbox can get full quickly, and soon enough, you’ll need to purchase more storage space to keep up. 
  • Avoid malware – If you receive a malicious email, you can almost always tell from the header that it is from an untrusted party. Enabling the headers option only ensures the contents of the email will not be automatically downloaded into your inbox, and you can avoid malicious files.
  • Save data – If you’re using Wi-Fi, you don’t have to worry about bandwidth, but if you’re using data especially roaming data, when in another location, your bandwidth can quickly get used up when downloading every email and its body.

How do I download email headers?

  1. Launch your Outlook email.
  2. Click on the Send/Receive option, and in the fly-out menu that appears, select Send/Receive Groups.
  3. A Send/Receive Group window will open. 
  4. Select the Accounts you wish to enable the Outlook headers only option and click on the Edit button.
  5. A new window will open listing your Outlook accounts. Check the Download headers only option.
  6. Ensure to select the Outlook folders you wish to download the headers only by checking them, then click OK.
  7. Repeat these steps if you have multiple accounts.

It is important to note that this option only exists on Outlook version 2013 and earlier and applies to only POP3 and ActiveSync protocols. Any version from 2010 has to be an IMAP to access this feature.

So if you’ve been wondering, How do I download only headers in Outlook IMAP? You can either go back to Outlook 2010 or switch to a POP3 account.

IMAP and POP3 are two different protocols for accessing email. They serve the same basic purpose of downloading messages from a mail server to your computer but in different ways.

Microsoft probably only allows this feature in POP3 because it is considered less buggy and more reliable than IMAP.

Downloading only headers in Outlook is a big save for most, if not all, people, given all its benefits. It’s especially useful if you get a lot of spam so that you don’t have to dig through tons of messages to find what you need to read.

This way, you can stay productive while keeping your inbox clutter-free.

We hope this article helped you learn how to download only email headers in Outlook. If you have any questions about the process, please leave a comment below; we’d be happy to help.

What is Razer Synapse & How to Properly Use it?

If you have bought a Razer laptop, you will see a Razer Synapse tool pre-installed on your computer. However, the Razer Synapse tool is also recommended to install when you purchase a Razer mouse or keyboard.

In this guide, we will share with you the details of the Razer Synapse program and how you can properly use it to enhance your productivity. Let us get right into it.

What is Razer Synapse?

Razer Synapse is a tool developed by Razer that will help you design and customize the functions of Razer devices, be it a laptop, keyboard, or mouse.

One of the main tasks of using a Razer Synapse tool is that it keeps your drivers related to Razer up to date. It installs the new driver automatically to keep the devices functioning at their best.

You can also sync or change the Razer RGB lightning based on your room’s theme or the mood of the movie or game you are playing. The scenarios are endless.

Which is the current version of Razer Synapse?

Notably, the latest version of Razer Synapse that you can download on your computer is the third version.

It will come preinstalled on many Razer computers, but for other devices, you need to download it separately. The first version of Razer Synapse was introduced back in 2011.

How to download and install Razer Synapse?

  1. Visit this official website and download Razer Synapse on your PC.
  2. Open the EXE file to begin the installation.
  3. Tick the boxes for the content that you would like to install and hit the Install button. Do note that as you select the content, beside the Install button you will see the download size required.
  4. Follow the on-screen steps to complete the installation.
  5. After the installation is complete, restart your computer to apply the changes.
  6. When your PC boots up, open the Start menu by pressing the Win key. Else, you can launch the Razer Synapse program using its desktop icon.
  7. If you are using it for the first time, you will be asked to create a free Razer account. You can sync your settings with this account across your other Razer devices.

We also have a great guide on how to download Razer Synapse, so don’t miss it for additional information.

How to use the Razer Synapse program?

When you launch the Razer Synapse software, you will see different options in the Dashboard. The program will automatically detect any Razer device connected to your PC.

If you are running it on a Razer PC, the program will show you an extra System section. From here, you will be able to control the different laptop features.

Here are the different sections in the Razer Synapse program and what they do:

  • Dashboard – You will see all of your connected Razer devices on this page, along with the modules you have installed.
  • Modules – From this section, you can go over the modules that you have installed to elevate the overall experience of using a Razer device. You can install other modules from this section.
  • Global Shortcuts – Global Shortcuts lets you bind keys on your Razer products to various functions.

Let us now take a look at the steps that you can take to configure your laptop and other Razer devices using the Synapse program.

1. Configure your laptop with Razer Synapse

When you hit the System section at the top (for Razer laptops), you will be able to tweak different features of your PC. Let us look at each one of them, one by one, below.

  • Keyboard bindings
    • You can bind different keys together to perform certain actions with a specific program.
    • You can also use Razer Hypershift to add a new Fn key. Using the Razer Hypershift key, you will be able to double the number of shortcuts you have in one place.
    • Binding a key is simple. Simply press the key and select the action from the menu that you would like to perform with that key.
  • Performance
    • In the Performance section, you can easily select between Balanced, Gaming, and Creator modes.
    • You will be able to tweak the fan speed by setting it to automatic or manual.
    • The Performance section also lets you change the screen refresh rate.
  • Lighting
    • Under the System Lighting section, you can change the brightness of the lights and illuminate the logo when plugged in or on the battery.
    • You can set the different lighting options, such as switching it off when the display is off or when the PC is in an idle state.
    • You can choose from the various lightning effects and the color to appear.

2. Configuring other devices

Let us take an example of configuring a mouse. When you hit the Mouse tab at the top, you will see multiple configuration options.

  • Customize section
    • Here you will be able to change what the mouse buttons do.
    • You will be able to save your settings for a particular profile as well.
    • You can also change whether you use the mouse left-handed or right-handed.
  • Performance section
    • You will be able to tweak the sensitivity settings and change the sensitivity stages between Stage 1 to Stage 5.
    • You have the option to tweak the Polling Rate, i.e., the frequency of data updates of the mouse.
    • Lets you access the Microsoft Mouse settings as well.

That is it from us in this guide. You will see different options when you connect a different Razer device and use it with the Synapse program.

If the Razer Synapse program is not opening, you can apply the solutions mentioned in our guide to resolve the problem.

You can also check out our guide that will help you resolve the problem where the Razer Synapse failed to start on Windows 11. This isn’t the only software with issues, and we wrote how Razer Cortex is crashing the PC for some users.

Let us know in the comments below if the above guide helped you understand what Razer Synapse is and how you can use it.

How to Fix Outlook Could not Create the Work File

Outlook could not create the work file error message, which is an annoying error users encounter. This error usually occurs if the Cache string value is not pointing to the valid directory in the registry.

What makes this error annoying is that it prevents you from accessing the Outlook app. Thankfully, there are surefire solutions that can help you eliminate the error, and we will detail them in this guide.

Why Outlook could not create the work file? 

Below are some of the causes of the Outlook could not create work file, check the temp environment variable error:

  • Wrong Cache string value: This error pops up if the cache string value is not pointing to a valid directory in the registry. You can fix this by changing the registry value in the Registry Editor, which, in turn, fixes the issue with your temporary files.
  • Issues with Office installation: Another cause of this Outlook work file issue is problems with your Office installation. You can fix this by repairing the package.

How can I fix the Outlook could not create work file error?

1. Edit the registry settings

  1. Press the Windows key + R, type regedit, and click OK to launch the Registry Editor.
    regedit outlook could not create work file
  2. Navigate to the path below in the left pane: HKEY_CURRENT_ USER \Software\Microsoft\Windows\CurrentVersion\Explorer\User Shell Folderspath
  3. Now, double-click the Cache key in the right pane.
    cache
  4. Next, change the Value data to the path below: %USERPROFILE%\AppData\Local\Microsoft\Windows\INetCache
  5. Finally, click the OK button and close the Registry Editor.
    value data outlook could not create work file

The first thing to do to fix Outlook could not create work file, check the temp environment variable error is to change the string value pointing to the wrong directory in the Registry Editor.

This should fix the issue with the Cache registry key and restore normalcy on Outlook.

2. Update Office

  1. Launch any Office app and click the File menu at the top.
  2. Select More and choose the Account option in the left pane.
    more account
  3. Now, click Update Options under the Product Information section.
  4. Finally, select Update Now from the Update Options drop-down menu and wait for the update process to complete.
    update now

 In some cases, Outlook could not create work file issue might be due to an outdated Office app. Updating Microsoft Office should eliminate the error.

Note that if you bought Microsoft Office from the Windows Store, you can install Office updates from there.

3. Repair Office

  1. Press the Windows key + S, type control in the search box, and select Control Panel.
    control panel outlook could not create work file
  2. Choose Uninstall a program under the Programs option.
    uninstall a
  3. Now, right-click Microsoft Office and select Change.
    change
  4. Tick the radio button for Online repair and click the Repair button.
    online repair outlook could not create work file
  5. Finally, follow the onscreen instructions to repair your Office files.

The Outlook could not create work file error might be due to problems with Microsoft Office. This is especially true if the issue affects other Office applications.

Following the steps above should help you fix this. This solution can also help you fix other issues like this is not a valid file name on Outlook.

Outlook could not create work file, check the temp environment variable error is a pretty frustrating issue that sometimes affects other Office apps like Microsoft Word.

However, you can fix this issue effortlessly with the solutions below. In the same vein, if your Outlook data file cannot be accessed, you can check our detailed guide to solve it.

Finally, if you are getting an Outlook PST cannot be found error, we have an article to help you fix that too.

Instagram Error Feedback Required: 3 Ways to Fix it

Instagram is undoubtedly one of the most-used social media platforms for interacting with friends, celebrities, and fans. However, it is not immune to the occasional issue, with some users complaining of the Instagram feedback required error.

This login error prevents you from gaining access to the app until it is cleared. Thankfully, fixing it is not difficult, as we will show in the ensuing sections of this article.

Why am I getting the feedback required error on Instagram?

The reasons for the Instagram feedback required error during login are within a close circle and not far-fetched. Below are some of them:

  • Unusual user activity – If you are performing activities, like post sharing, likes, and comments, at an unusually high rate, you are likely to get this error. Instagram servers might flag you as a bot.
  • Server issues – In some cases, this problem might be due to server downtime. You can only wait for it to be resolved before logging into your account.
  • Corrupt app data – If the Instagram app cache is corrupt, it might lead to this error. A quick way around this is to clear the app data.
  • Issues with the app installation – At times, the feedback required error can be down to problems with the Instagram app. Uninstalling the app and reinstalling it after some time should get rid of the error.

How do I fix the Instagram feedback required error?

Before proceeding to the more complex solutions in this section, try the following troubleshooting steps:

  • Check the Instagram server status
  • Wait it out, as it might be a temporary ban on your account
  • Use the web version of Instagram
  • Use a proxy or a VPN. If you are using one when this error occurs, deactivate them temporarily.
  • Change the network type

If the issues persist, proceed to the solutions below:

1. Clear the app data

1.1. On PC

  1. Press the Windows key + I and select Apps in the left pane.
  2. Choose Apps & features.
    apps and instagram feedback required error
  3. Now, click the three vertical dots before Instagram and select Advanced options.
    advanced options
  4. Finally, click the Reset button and wait for the process to complete.
    reset

1.2. On Android

  1. Launch the Settings app and click the Apps option.
    apps and instagram feedback required error
  2. Select Instagram.
    option
  3. Now, choose Storage.
    storage and instagram feedback required error
  4. Finally, tap the Clear data and Clear cache buttons.
    clear data

1.3. On iPhone

  1. Launch the Settings app and select General.
    general instagram error feedback required
  2. Choose iPhone Storage.
    iphone storage
  3. Now, tap Instagram.
    instagram
  4. Finally, tap the Offload App option and confirm the action to clear the data.
    offload app instagram error feedback required

Corrupt Instagram data might be the reason you are getting the feedback required error. Clearing the data, as shown above, should fix this issue effortlessly.

2. Update the app

2.1. On PC

  1. Click the Microsoft Store icon on your Taskbar.
  2. Click the Library option in the left pane.
    library
  3. Now, click the Get updates button.
    get updates
  4. Finally, click the Update button before Instagram.

2.2. On Android and iPhone

To update the Instagram app on Android and iPhone, you only need to go to Google Play Store and App Store respectively, search for Instagram, and click the Update button.

This should help you fix the Instagram feedback required error effortlessly.

3. Reinstall Intagram

  1. Press the Windows key + I and select Apps.
  2. Click Apps & features in the right pane.
    apps
  3. Now, click the three vertical dots before Instagram.
  4. Choose Uninstall and follow the onscreen instructions to complete the removal.
    uninstall and instagram feedback required error
  5. Finally, go to the Microsoft Store, search for Instagram, and click the Get button.

3.2. On Android

  1. Go to the Settings app and tap Apps.
    apss
  2. Select Instagram.
  3. Tap the Uninstall button and confirm the action.
    uninstall and instagram feedback required error
  4. Finally, go to Google Play Store, search for Instagram, and click the Install button.

3.3. On iPhone

  1. Go to Settings and select General.
    general uninstall
  2. Tap iPhone storage.
    iphone storage instagram error feedback required
  3. Choose Instagram.
  4. Now, select Delete App.
    delete app
  5. You can now go to the App Store to reinstall the app.

If everything you have tried failed to fix the Instagram feedback required login error, you might need to reinstall the app. However, according to some users, you need to wait for about 48 hours before reinstalling it to make it work.

With this, we can now conclude this detailed guide on how to fix the feedback required error on Instagram on the app and the web version. The error should now be history, provided you follow the steps above properly.

If you are dealing with other issues, like Instagram not working with WiFi, check our guide to fix that too.

Feel free to let us know the solution that helped you fix this issue in the comments below.

How to Fix A Disk Read Error Occurred in 4 Quick Steps

If you have been running into A disk read error occurred. Press Ctrl+Alt+Del to restart the error message on your computer, then you’re not alone. The error has been recurrent on Windows devices and can be fatal if not fixed earlier.

However, fixing a disk read can be challenging because several factors can cause the issue. Hence, we recommend you explore the solutions in this article.

What does a disk read error mean?

A disk read error occurred is an error message that occurs when the system encounters difficulty reading data from the hard drive or other storage media.

It indicates that the computer’s BIOS (Basic Input/Output System) or the operating system cannot read data from the hard disk, RAM module, or other storage media.

Additionally, a disk read error occurred is often accompanied by additional information, such as Press Ctrl+Alt+Del to restart. 

Keep in mind that this affects all types of drivers, and we have a great guide on how to fix an external hard drive error if you ever encounter one.

What causes a disk read error?

  • A failing or faulty hard drive, bad sectors, installation discs, damaged platters, or mechanical failures can prevent data from being read.
  • If the disk cable is incorrectly connected or damaged between the hard drive and motherboard, it can result in communication errors.
  • Incorrect default settings in the computer’s BIOS, such as boot order or hard drive configuration, corrupt BIOS can cause disk read errors.
  • In cases where the Master Boot Record, a crucial part of the boot process, becomes corrupt, the system might be unable to locate the OS.
  • Corrupted system files, software conflicts with hard drives or storage devices, or improper shutdowns due to power outages can cause the error.
  • Excessive fragmentation of the hard drive can slow down data retrieval and potentially cause the disk read error.
  • Issues relating to other hardware components, such as the motherboard, RAM, or CPU, could contribute to disk read errors.

Regardless, you can troubleshoot the error by following the detailed steps discussed in the next section.

How do I fix the disk read error?

We recommend you go through the following preliminary checks:

  • Unplug any faulty cable or USB/DVD drives connected to the computer and see if the error occurs.
  • Power cycle the computer to reload the drive and fix any glitches interfering with the system reading it.
  • Ensure all data and power cables connecting the hard drive to the motherboard are securely plugged in.
  • Run Windows built-in hardware diagnostics to troubleshoot hardware problems causing the disk read error.
  • Try the drive on another computer to see if it works. If the hard drive fails, you might need to replace it.

Proceed with the solutions below if the issue persists:

1. Run the check disk utility

  1. Left-click the Start button, type Command Prompt, and click the Run as administrator option.
  2. Click Yes on the User Account Control (UAC) prompt.
  3. Type the following command and press Enter: chkdsk C:/r/x
  4. Exit the Command Prompt and restart the PC to check if the disk read error persists.

Running the CHKDSK command allows the system to access all disks, read hidden partitions, and troubleshoot issues that may cause errors when reading them.

Check our guide if you experience chkdsk.exe running on every boot issue on Windows 11 for fixes to resolve it.

In case you’re not familiar with this tool, we have a great guide on how to scan with Disk Repair and fix various errors.

Keep in mind that repairing disk errors might take an hour, so be sure to remain patient.

2. Rebuild the Master Boot Record

  1. Boot your computer using a Windows installation USB or DVD to open the Windows Recovery Environment (WinE).
  2. Select your language preferences and click Next.
  3. On the next screen, click Repair your computer.
  4. Choose Troubleshoot and then select Advanced options.
  5. From the advanced options, select Command Prompt.
  6. In the Command Prompt, type the following command and press Enter: bootrec /fixmbr  bootrec /fixboot   bootrec /scanos   bootrec /rebuildbcd
  7. Restart your PC and check if you can fix the problem.

The above steps will rebuild and repair the Master Boot Record back to its default values. Further, you can read about what to do if the Bootrec /Fixboot access is denied on Windows PCs.

3. Reset BIOS

  1. Press the Windows + I to open the Settings app.
  2. Select the System and click on Recovery.
  3. Click Restart Now under Advanced startup.
  4. Tap on Troubleshoot and select Advanced options.
  5. Click on UEFI Firmware Settings, and click Restart. Your system will restart and load the BIOS.
  6. In BIOS Mode, find the Reset to default option and click on it to perform the resetting operation.

Resetting BIOS (Basic Input/Output System) will restore, allowing it to initialize and manage hardware components during startup according to the factory settings.

Note icon NOTE
Try the last option below if you can’t fix the problem with the steps above. However, we don’t recommend trying this option before any other as it has some drawbacks, like security vulnerabilities and others.

4. Disable secure boot in BIOS

  1. Repeat steps 1-5 from the above solution to open the UEFI Firmware Settings.
  2. Find the Secure Boot option in your BIOS menu, then set it to Disabled. (It is usually in either the Security tab, the Boot tab, or the Authentication tab).
  3. Save changes and close the Recovery window for the PC to reboot.

With Secure Boot disabled, your system will now allow booting from other devices, including those not signed with the manufacturer’s keys. It is helpful when troubleshooting boot issues and a disk read error.

Alternatively, you can go through our detailed guide on ways to fix the disk structure corrupted and unreadable error on Windows 11.

Likewise, you may be interested in what to do if you run into the Windows detected a hard disk problem error on your PC.

Should you have any questions or suggestions, kindly drop them in the comments section.

Minecraft Won’t Allow to Play Multiplayer? Here’s What to Do

If you have encountered the Multiplayer is disabled, Please check your Microsoft Account settings error message while trying to play Minecraft multiplayer; this guide can help!

We will talk about some of the expert-recommended solutions to fix Minecraft not allowing multiplayer right after discussing the causes.

Why is Minecraft not letting me play multiplayer?

There could be various reasons why you can’t access the Minecraft Multiplayer version; some of the common ones are mentioned here:

  • Minecraft server issue – If the Minecraft servers face downtime or are offline, you might experience this issue. Check the server status; if down, wait for a while.
  • Incompatible mods – The mods installed on your game will not let you join the server, thus causing this error. Turn off the mods and try again.
  • Misconfigured privacy settings – If the privacy settings for your Microsoft account are not configured correctly, you can’t access the multiplayer server.
  • Online subscription expired – You won’t be able to play Minecraft multiplayer if the online subscription has expired. You need to renew the subscription to access the online features.
  • DNS server error – The default DNS server settings of Windows could prevent you from using the Minecraft server. Try changing the DNS to Google DNS.

Now you know the causes of the issue, let us check out the detailed solutions to fix the issue.

How can I fix Minecraft not allowing multiplayer?

Before engaging in advanced troubleshooting steps, you should consider performing the following checks:

  • Ensure your internet connection is stable.
  • Verify if your Windows OS and Minecraft are up to date
  • Check the Minecraft server status.
  • Make sure your age is set to 18+ on your Microsoft account.
  • Turn off the antivirus software temporarily.
  • Verify the online subscription is active.
  • Try using a VPN.

Once done, move to detailed solutions to get rid of the problem.

1. Modify the Xbox profile settings

  1. Sign in to your Microsoft account.
  2. Click Xbox from the top menu.Xbox  option  Minecraft not allowing multiplayer
  3. Go to your profile picture and, click it, select Xbox profile.Xbox profile
  4. Next, click Privacy Settings.Click Privacy Settings
  5. It will prompt you to Verify your identity, choose any options, and proceed.Sign in verify your identity
  6. Next, enter the code sent and click Verify.Enter the code
  7. Under Privacy, select Everyone or Allow for all the options displayed and click Submit.Modify Privacy Settings  Minecraft not allowing multiplayer
  8. Next, go to the Xbox Series X|S, Xbox One, and Windows 10 devices Online Safety tab, select Allow for all the options and click Submit.Modify Privacy Settings  Minecraft not allowing multiplayer

Once done, close the window and relaunch Minecraft to check if the issue persists.

2. Launch the game without mods

  1. Press the Windows key, type minecraft and click Open to open Minecraft launcher.Minecraft launcher  Minecraft not allowing multiplayer
  2. Go to the Installations tab from the top menu.
  3. Click the New Installation option.
  4. Type in a name for the installation and, go to Version, select the latest release from the drop-down. If you are confused about which one to choose, like the one that starts with the word release.
  5. Click Create.Create a new installation
  6. Next, go to the Play tab and choose the installation you created to play.

This method only resolves the issue for Minecraft Java Edition.

3. Allow Minecraft through Windows Microsoft

  1. Press the Windows key, type windows security and click Open.
  2. Go to Firewall & network protection from the left pane, and click Allow an app through firewall.Firewall & network protection -  Allow an app through firewall.
  3. On the Allowed apps window, click Change settings.Change app
  4. Next, click Allow another app.
  5. Click Browse.Browse
  6. Navigate to program files, select Minecraft and click Add.
  7. Click Add again.
  8. The game will be added to the list; ensure you have placed a checkmark next to Public and Private and click OK.

4. Flush DNS

  1. Press the Windows key, type cmd and select Run as administrator to launch Command Prompt with admin privileges.CMD elevated Minecraft not allowing multiplayer
  2. Type the following command to clear the IP address and other DNS records and hit Enter: ipconfig /flushdnsipconfig /flushdns
  3. Once the command is executed successfully and you see a Successfully flushed the DNS Resolver Cache message, close the Command Prompt window.

5. Use Google DNS

  1. Press the Windows key, type control panel and click Open.Control Panel start menu Minecraft not allowing multiplayer
  2. Select Category from View by options and click Network and Internet. Category - Network and Internet
  3. Click Network and Sharing Center.Network and Sharing Center
  4. Click the Change adapter settings link.Change adapter settings
  5. Right-click the active connection and select Properties.Properties Network
  6. On the next window, select Internet Protocol Version 4 (TCP/IPv4) and click Properties.
  7. Select the Use the following DNS server addresses option.IPV4 Properties
  8. And for type 8.8.8.8 for the Preferred DNS server and 8.8.4.4 for the Alternate DNS server.Google DNS Minecraft not allowing multiplayer
  9. Click OK to confirm the changes.
  10. Click OK.

6. Reinstall the app

  1. Press Windows + R to open the Run dialog box.appwiz.cpl  - Minecraft not allowing multiplayer
  2. Type appwiz.cpl and click OK to open the Programs and Features window.
  3. Select Minecraft from the installed apps list and click Uninstall.Minecraft  Uninstall
  4. Follow the onscreen prompts to complete the process.
  5. Next, go to Minecraft’s official website and click Get Minecraft.Get Minecraft  - Minecraft not allowing multiplayer
  6. Follow the instructions to install a fresh copy of the game.

So, these are methods you can use to resolve Minecraft not allowing multiplayer issues on your computer and play the game online with your friends without interruption.

If Minecraft is not opening for you on Windows 11, we suggest you read this informative guide to regain access to the game. And if you’re having trouble accessing the marketplace, we also have a guide for that.

Please feel free to give us any information, tips, and your experience with the subject in the comments section below.

0x8019019a Error Code: How to Fix Your Mail App in 4 Steps

Since its last update, it is common to encounter an error code 0x8019019a while using the Mail app on Windows PCs. This problem makes it impossible to set up or sync Yahoo Mail using the Mail app.

Hence, the bothersome question remains for several users: how can I fix the Mail app error on my Windows PC? Thus, this article will discuss some fixes to resolve the 0x8019019a error.

What does code 0x8019019a mean?

Error code 0x8019019a usually occurs when setting up or syncing Yahoo Mail on a Windows device using the Mail app.

This error is associated with connectivity issues, often related to problems in establishing a secure connection between the Mail app and Yahoo’s servers.

What causes error code 0x8019019a?

  • Network congestion, and poor or unstable internet connection cause the error.
  • Security software or firewalls on your computer can block the Mail app’s connection to the internet or servers, resulting in the error.
  • An outdated Mail app or operating system can cause compatibility issues with Yahoo Mail’s servers.
  • Temporary server problems on the Mail client can prevent it from establishing a connection during setup.
  • Third-party apps or add-ons that interact with the Mail app might cause Yahoo Mail not to receive emails along with this error.
  • Corrupted data related to the Mail app might prompt the 0x8019019a error.
  • Incorrect or misconfigured proxy settings can hinder the Mail app’s connection to Yahoo’s servers.

Regardless of the causes, you can troubleshoot the error by trying the solutions in the next section.

How do I fix code 0x8019019a?

Before anything else, observe the following preliminary checks:

  • Restart the Mail app and the PC to refresh its processes and check if it works.
  • Power cycle your router/modem or connect to a stable internet network to fix network problems.
  • Double-check your Yahoo Mail account settings in the Mail app.
  • Temporarily disable any security software or firewall and attempt to set up your Yahoo Mail account again.
  • Update the Windows operating system to troubleshoot compatibility problems.
  • If you’re using a VPN, try temporarily disabling it and then attempt to set up your Yahoo Mail account.

1. Remove and re-add the Yahoo account

  1. Launch the Mail app and click on Accounts in the left pane of the window.
  2. Click on your Yahoo account and tap on the Delete Account option.
  3. Click the Delete button on the new prompt.
  4. Restart your PC and relaunch the Mail app.
  5. Add the Yahoo account to the Mail app and check if the 0x8019019a error is resolved.

Re-adding your account resolves account-related issues preventing the Mail app from running smoothly. Also, it helps refresh your account history.

2. Update the Mail app

  1. Left-click the Start button, type Mail, and select Share from the context menu.
  2. Microsoft Store will launch the Mail app page.
  3. Check if an update is available for the app. If there are updates available, click on the Update button.
  4. After the update, restart your computer, try adding your Yahoo account with the Mail app, and see if the issue is resolved.

Updating the Mail app will fix bugs from the outdated version causing the error and install patches for improving the app performance.

3. Generate a password and use Other Account POP, IMAP

  1. Open your web browser and enter Yahoo mail with your ID and password.
  2. In the top-right corner, click on your Profile and choose Account information.
  3. Select the Account Security option. Towards the bottom of the page, click on Manage app passwords.
  4. Select the Other app from the new drop-down menu.
  5. Click the Generate app password button to prompt Yahoo Mail to produce a 16-character password for your account. Copy the password to your clipboard.
  6. Open the Mail app on your computer, go to Settings, and then Manage accounts.
  7. Click the +Add account button and select Other accounts (POP, IMAP).
  8. Input your Yahoo email address and paste the 16 characters password you copied from Yahoo.
  9. Type your name and click Save.

Generating the 16 characters’ password allows you to resolve security problems causing the 0×8019019a error code. Check what to do if Yahoo Mail is not working in Chrome.

4. Reset the Mail app

  1. Press Windows + I key to open the Settings app.
  2. Click on Apps and select Installed apps.
  3. Then, locate the Mail and Calendar app. Click on the options, then click Advanced options.
  4. Click on the Reset button.
  5. Open the Mail app and check if the error persists.

Resetting the Mail client will troubleshoot settings and configurations interfering with its functionality.

Lastly, you may be interested in our comprehensive guide about how to fix the Mail app not working on Windows 11.

If you have further questions or suggestions, feel free to use the comments section.

Can Viber be Hacked? [Prevention Guide]

Viber is a popular instant messaging and VoIP platform which falls under the same category as WhatsApp. Though the former never really became a significant market player, its user base has steadily increased. But can Viber be hacked?

This question has troubled Viber users for a long time. And given the overreliance on a platform with over a billion registered users, questions will be raised on the safety and security aspects of Viber. Keep reading to find out all about it!

Is Viber safe?

We have had a few instances where users claimed that their Viber accounts were hacked or news portals publishing stories along the same lines. But, Viber denied these news reports through a tweet back in 2022.

Yet, we all know how companies initially take an aggressive stand regarding hacking reports, only to set up inquiries later on to verify the facts.

Coming to Viber, it, like any other platform, can be hacked. Experts have managed to identify loopholes in the Viber framework, and the reports of these tests have been published online.

In 2013, the Viber Support website was also defaced by hackers after an employee fell prey to a phishing email that exposed two systems. Viber, again, claimed that the user data wasn’t compromised in the breach and was in safe hands.

Besides, as per a report published in Forbes, installing Viber renders the device vulnerable and increases the likelihood of hacking. The report lists a wide array of apps, including some of the prominent names in the market.

How do I hack Viber?

We won’t give you any ideas on hacking Viber! However, some apps claim to bypass the security framework and access Viber messages when installed on the user’s mobile phone.

This is a long shot! You will have to purchase a paid subscription; there’s no guarantee it will work. You might lose a few bucks or, even worse, get in trouble with law enforcement, given that hacking is a legal offense.

How can I keep my Viber account safe?

1. Don’t sign into multiple devices

A simple tip to prevent your Viber account from being hacked is not to sign into every device. Limit Viber access to a single device and check all messages and multimedia on it.

The likelihood of your account being hacked, be it on any platform, is higher when the login credentials are stored on several devices. If one of these gets compromised, your data will be available to hackers!

2. Avoid using Viber on public networks

Public networks pose a major threat! Surprisingly, most users are unaware that their data and activity on a public network can be easily monitored. Besides, hackers can access their devices and steal login credentials.

Public networks, particularly those in cafes and restaurants, don’t have any advanced security protocols. Manipulating these is relatively easier; once that happens, every insecure device on the network is compromised.

If you have to access the Internet on a public network, ensure you are connected to a reliable VPN to mask critical details and activity, though it won’t help in every case.

3. Never open suspicious links

Phishing emails and links are a common trend that has emerged of late when it comes to hacking devices and accounts. Users receive a message from someone in the contact list (whose account is already hacked) with a link. These links work in two ways!

Either user will be redirected to a website that looks similar to the sign-in page, and when they enter the login credentials, it’s automatically registered in the hacker’s database.

In other cases, malware is downloaded on the device used to access the link, which can then read all the Viber messages and find the login credentials.

So, never open any links you are unsure of! If someone sends you one, contact them on another platform and verify whether they sent it or their Viber account is hacked.

4. Set up 2-FA

Viber offers 2-factor authentication to users, and it’s critical that you set it up. This way, even if the login credentials are compromised, hackers won’t be able to access your Viber account.

Every major platform now offers 2-FA, and experts call it a must in the war against cybercrime and hacking.

5. Regularly scan the device

We all have an antivirus on our PC, be it the built-in Windows Security on the Windows OS or another effective third-party solution. And these are just as critical on mobile devices!

With mobile phones becoming the primary device for many, their security becomes just as important. So, install effective security software on your phone and regularly scan the device.

If any threats are found, change the Viber login credentials and those for the other apps immediately!

With these tips and tricks, you can prevent your Viber account from being hacked. Also, you must download all Viber updates as soon as they are released because many contain patches for known bugs and vulnerabilities.

As such, you can avoid other system temporary failure errors that may creep up due to an outdated app.

Before you leave, find out all about QR codes and whether it’s possible to hack into a device using QR codes.

For any queries or to share more tips with us, comment below.

Download Did Not Complete in Excel: How to Fix This Error

Microsoft Excel is a powerful tool, but the thing is, you never stop learning when it comes to all the ins and outs. You’ll encounter new errors every now and then, such as download did not complete.

Most users claim this error appeared when they were refreshing their Power Query. Something may be wrong with your workbook, but let’s get down to the fixing part.

Why am I getting the download did not complete error in Excel?

Power Query is a data manipulation tool that comes with Excel and is especially important when dealing with a large data set. It has a lot of potential, but it can also create problems and errors.

The download did not complete is one of them, so below, we explore some of its possible causes:

  • Protected sheet – If you are trying to open a protected workbook created in an older version of Power Query for Excel, you may encounter this error.
  • Importing too much data – If you try importing too much data from one sheet to another, you may experience this error or the initialization of the data source failed. It could be due to memory or disk space issues.
  • Incorrect source location – If you have moved or copied the file to another location on your computer and then tried to open it in Power Query, you will get this error message.
  • Change in data structure – Power Query requires that your dataset must be in the exact same structure as when you created it. If there are any changes, you will need to update your query or get the download did not complete error.

How do I fix Power Query errors in Excel?

Check off the following basics before moving to the technical solutions: 

  • Ensure your Excel app is up-to-date.
  • Check that your PC is not low on memory.
  • Verify that there have been no changes in query and structure.
  • Try duplicating the query and see if the error persists.
  • Unprotect the sheet, then reprotect.

1. Disable background refresh

  1. Click on a cell in the workbook, then click on Data on the top taskbar menu.
  2. Under Queries and Connections, select Refresh All, then in the fly-out menu, select Connection Properties.
  3. A Query Properties window will pop up. Navigate to the Refresh control section and uncheck Enable background refresh.

Background refresh is a feature of Microsoft Power Query for Excel that allows you to keep your queries up to date even when you are working on other files. The only drawback is that this constant refreshing can sometimes revert data to its original form.

If you had made any changes, they will be lost. Disabling it will allow you to complete your query.

2. Repair MS Office

  1. Click on the Start Menu icon, type Control Panel in the search bar, and click Open. control-panel-search fallout new vegas runtime error
  2. Navigate to Uninstall a program under Programs.going uninstall program control panel
  3. Locate MS Office, click on it, and select Change.
  4. Select the Online Repair option and click on the Repair button.

This step could help resolve any issues with corruption on the Excel app. If it doesn’t work, you may have to reinstall the application.

While you’re still here, check out our other article on sharing violation error in Excel and find out how to bypass it.

And that sum’s up this article. However, this doesn’t have to end here, as you can get interactive in the comment section by sharing more ideas on this matter. Drop us a comment below for any additional thoughts.

Chrome Tab Casting is Not Working? 5 Ways to Fix it

Casting a Chrome tab to your TV or any other device is so easy to do. You can stream YouTube videos or anything else straight to your device without moving. That’s not all. You can also cast straight from your Windows 11 device to a TV. 

But what happens when casting doesn’t work? We get down to the bottom of this below and offer worthy solutions. 

Why is my Google Chrome browser casting not working? 

You may be facing issues with Chrome tab casting not working. Either the cast icon is not showing, or you can’t cast. It may be due to the following reasons:

  • Network issues – The connection between your computer and the device you are trying to cast from must be similar and fast enough to stream over Wi-Fi. Otherwise, your casting will keep getting interrupted if your connection keeps dropping.
  • Outdated browser – If your Google Chrome browser is not the latest version, casting may not work because of a compatibility issue between the two devices.
  • Faulty update – A browser update can sometimes be problematic and interfere with how features work.
  • Virus infection – You may be out of luck with getting the cast feature to work if a virus finds its way into your system. Such infections take control of your settings and alter how things work.
  • Unsupported device – If the device you want to connect to via cast does not have the feature or doesn’t support it, this might be the reason why the Chrome tab you’re trying to cast is not working.
  • Outdated firmware – If you’re trying to cast on your TV but can’t remember the last time you checked for any firmware updates, this could be the reason why you can’t cast a Chrome tab.
  • Conflicting software – If you’ve installed a third-party casting software or extension on your Chrome browser, it may override any other attempts to cast.

How do I force a tab to cast in Chrome?

Start with the following basic workarounds before moving on to the rest of the solutions:

  • Check whether your device meets the minimum system requirements for casting. 
  • Verify that both devices are connected to the same network.
  • Check whether someone else is casting and ask them to end their session before you try casting.
  • Ensure that your Wi-Fi network is working correctly and that it isn’t overloaded with other devices using it at the same time.
  • Check whether any bandwidth limits have been set as they may be the cause of the casting issue.
  • Ensure you have the latest version of Google Chrome installed on your computer.
  • Uninstall any conflicting software and disable similar extensions.
  • Update your Windows OS and TV firmware.
  • Try casting on another device to establish whether one of your devices is faulty.
  • Restart both devices.

1. Run the Internet connection troubleshooter

  1. Press the Windows key and click on Settings.settings windows 11
  2. Select System and click on Troubleshoot.Open system troubleshooter
  3. Click on Other troubleshooters.other troubleshooters
  4. Locate the Run button next to Internet Connections and wait for the results.

If you are casting to Chromecast with Google TV and the receiver does not respond or keeps disconnecting, rule out a remote issue. Use our Google TV remote not working guide to re pair or reset the remote, then try casting again.

2. Scan for viruses

2.0 Chrome

  1. Open your Chrome browser and click on the three vertical ellipses at the top right corner.
  2. Select Settings.Settings CHrome
  3. Next, click on Reset and cleanup, then select Cleanup computer on the right.
  4. Hit the Find button next to Find harmful software.
  5. Wait for the scan to finish and remove any recommended software.

2.1 System

  1. Press the Windows key, search Windows Security, and click Open.
  2. Select Virus & threat protection.
  3. Next, press Quick scan under Current threats.
  4. If you don’t find any threats, proceed to perform a full scan by clicking on Scan options just below Quick scan.Scan options
  5. Click on Full scan, then Scan now to perform a deep scan of your PC.Full Scan Scan Now
  6. Wait for the process to finish and restart your system.

If your system has been infected by a virus, a simple scan in Chrome won’t do it. You need to perform an in-depth scan using Windows built-in Windows Defender. Still, we recommend another overall scan with a more comprehensive third-party tool, such as TotalAV.

3. Clear cache and cookies 

  1. Launch your Chrome browser and click the three vertical ellipses in the top right corner.
  2. Select Settings.Settings CHrome
  3. Click on Privacy and security, then select Clear browsing data.
  4. Check Cookies and other site data and Cached images and files, then hit Clear data.Clear data

4. Reset your network

  1. Click on the Start Menu icon and click on Settings.settings windows 11
  2. Select the Network & internet tab from the ones listed in the navigation pane on the left.
  3. Click on Advanced network settings from the options listed on the right.going advanced network settings win11
  4. Next, click on Network reset under More settings.Network Reset 1
  5. Click on the Reset now button next to Network reset.Network Reset now

5. Reset your browser

  1. Open your Chrome browser and click on the three vertical ellipses at the top right corner.
  2. Select Settings.Settings CHrome
  3. Next, click on Reset and cleanup, then select Restore settings to their original defaults.
  4. Confirm Reset settings in the next dialog box.

At this point, if none of these methods have enabled you to cast your Chrome tab to another device, it is time to reinstall the browser.

Another worthy troubleshooting step to try is to rollback a few browser versions, especially if the Chrome tab casting not working issue started after you updated your browser.

That’s it for this article, but if you have any other solution that worked for you, we’re more than happy to hear it. Start us off in the comment section below.

Services Startup Type is Grayed Out? 3 Ways to Fix it

The service startup configuration determines how to initiate specific services on your Windows computer when booting up. Also, the startup type setting allows you to control how a service is either disabled, startup automatically, or manually.

However, startup service type grayed-out errors can be frustrating as it restricts your control over the startup service on your computer. Therefore, we will discuss what causes the error and walk you through three proven ways to fix it.

Why is my service Startup type greyed out?

  • System Policy settings the administrator imposes can hinder you from accessing specific configurations as the service startup type.
  • Windows Registry errors like incorrect or restricted permission can impede you from reconfiguring the service startup.
  • Already running service startups are usually locked on the Windows operating system to prevent changes while it remains active.
  • Third-party software interference or antivirus apps can restrict access to service settings to increase system security.
  • Specific Windows operating system services are protected to prevent unauthorized changes and maintain system stability and security.
  • Corrupt Windows operating system files cause a restriction to modifying specific settings like service startup.

Identifying the specific factors causing the error will aid with troubleshooting. Note that these factors vary on different PCs and circumstances. However, we will walk you through explicit steps to troubleshoot it.

How do I fix the service startup type grayed out?

Try the following before proceeding with the following advanced troubleshooting:

  • Switch to account user with administrator privilege.
  • Verify if the service is already running on your computer.
  • Run an SFC scan to check and fix Windows file integrity.
  • Restart your computer to close background apps, and refresh your System.
  • Check if there is a Group policy that can restrict modification if you are in a network environment.

Proceed with the following advanced troubleshooting if the error persists on your PC.

1. Run services as administrator

  1. Left-click the Windows icon and type Services.
  2. Then, click on Run as Administrator to open Windows services with administrator privilege.

Running the Windows Services.msc as administrator will give services administrator permission allowing you to modify the service startup.

2. Disable services temporarily

  1. Press the Windows key button, type Services, and select Run as administrator to open it.
  2. Then, navigate to the service you want to modify, right-click, and select Stop from the context menu.
  3. Further, go to the service you want to modify and check if the error is no more.

Disable service startup temporarily will stop locked running services that impede you from making changes.

Further, you can read our complete guide on what service.msc is how to open and use it on your computer.

3. Modify the service startup via Registry Editor

  1. Left-click the Windows icon, type Regedit, and press Enter to open the Windows Registry Editor.
  2. Copy and paste the following directory into the address bar and press Enter: HKEY_LOCAL_MACHINE\SYSTEM\CurrentControlSet\Services\ 
  3. On the left pane, navigate to the startup service you want to modify that grayed out and click on it.
  4. Then, right-click anywhere on the right side pane, click on New from the context menu, and select DWORD Value.
  5. Rename the DWORD Value to DelayedAutostart, double click on Start, and DelayedAutostart created.
  6. Further, set the following values to modify the service startup:
    • To Disable the service, set Start to 4 and DelayedAutostart to 0.
    • Manual startup, set Start to 3 and DelayedAutostart to 0.
    • Automatic startup, set Start to 2 and DelayedAutostart to 0.
    • For Automatic (Delayed Start), set Start to 2 and DelayedAutostart to 1.
  7. Close the Registry Editor, restart your device, and check if the error persists.

Note that the service startup will Display the right will display the modified option from the Registry Editor if grayed out in the startup type setting.

Further, check out our guide about how to fix disabled Registry editing by Administrator on Windows.

In conclusion, check our detailed guide about how to fix Windows can not start service on a local computer with easy steps.

Also, we have a complete guide on fixing Explorer.exe not starting on Windows startup on your PC. Before you go, you can check our guide on how to use services.msc to connect to another computer, so don’t miss it.

Rate Exceeded on Character Ai: How to Solve this Error

We have received several complaints regarding the Character AI rate exceeded error. This error prevents the platform from loading requests, rendering it unusable.

However, the rate exceeded error is not fatal but can be challenging to navigate and fix as it doesn’t have a specific cause. Fortunately, this article will outline some steps for resolving the error as you read through.

What causes the Character AI rate exceeded error?

Character AI may have certain restrictions on the number of requests or the speed at which requests can be made. It can vary per unit of time to ensure fair usage among all users and maintain the system’s stability.

Furthermore, a few factors may be responsible for the rate exceeded error while using Character AI. Some notable ones are below:

  • If you request an API at a rate higher than the specified limit, you can receive the rate exceeded error message as a response.
  • During peak usage, the API servers might experience heavy traffic from multiple users, leading to errors while processing requests.
  • Running multiple instances or threads making API calls can result in rate limits being reached faster.
  • A free trial or a limited plan with restricted API access can be responsible for reaching the rate limits sooner.
  • Server issues regarding the Character AI platform can cause the web app to malfunction and prompt the rate exceeded error.
  • The Character AI web app may not function as expected if its activities are impeded by extensions and plug-ins installed on your browser.

You should note that these factors are liable to vary depending on the circumstances of occurrence. Fortunately, you can resolve the problem by following the troubleshooting steps discussed in the next section of this article.

How do I resolve the rate exceeded error on Character AI?

Observe the following preliminary checks before advancing with any troubleshooting steps:

  • Close the Character AI web app, restart your browser, and relaunch it to see if the error persists.
  • Reboot your computer to resolve temporary glitches and processes interfering with the Character AI client’s performance.
  • Power cycle your modem or router to troubleshoot network-related issues or connect to a stable internet connection.
  • Limit the concurrent requests to stay within the rate limits if you run multiple threads making API calls simultaneously.
  • If you are on a free or a limited plan, consider upgrading to a plan that offers higher rate limits if your API usage demands it.
  • Try removing your browser extensions and see which is interfering with the AI web app.
  • Switch to another browser and check if it fixes the rate exceeded error that appears.
  • We recommend you check the server status to know if there are maintenance or server problems.

If the above steps can’t resolve the rate exceeded error while using Character AI, go ahead with the solutions below:

1. Clear your browser’s cache and cookies

  1. Launch Google Chrome, then click three dots to open the Menu. Click on More Tools and click on Clear browsing data.
  2. Choose a time range for the data to be cleared, then select All time to delete everything.
  3. Check the boxes for Cookies, other site data, and Cached images and files, then click Clear data.
  4. Restart the Chrome browser and check if Character AI starts working without running into the rate exceeded error.

Clearing browser caches and cookies will delete the corrupt files interfering with Character AI.

2. Logout and login your account

  1. Select your avatar or profile on the home page.
  2. Click on the Pencil icon to edit the profile in the new window.
  3. Navigate lower till you locate Logout, and click on it.
  4. Then, attempt to log in again.

Some users have claimed this solution worked for them. Hence, try this to gain faster access to the chatbot.

In addition, the simplest solution for the rate exceeded error is to wait until it is addressed officially. However, exceeding your rate on Character AI might be challenging to fix. So, you can contact Support for assistance.

Alternatively, you can review our detailed guide to discuss what to do if Character AI is not working. Besides, many users reported frequently encountering the Character AI network error, but our solutions will help!

We also have a guide on Internal server error 500 in Character AI, so don’t miss it for more information.

Should you have further questions or suggestions, kindly drop them in the comments section.