GlobalProtect may fail to connect if it doesn’t ask for your credentials.
Why does this happen?
Common causes include network congestion, firewalls, antivirus software, proxies, outdated clients, or misconfigured settings.
So, what can you do about it?
Below, you’ll find simple fixes like restarting the app, temporarily disabling firewalls or antivirus software that can cause GlobalProtect connection issues, closing background programs, and clearing browser cache.
1. Remove your MS account
Press Windows + I keys to open the Settings app.
Select Accounts from the menu and click on Email & accounts.
Select the email address you wish to remove, then click Remove.
Click Yes on the new prompt to confirm your actions.
Restart your PC and try to sign in to GlobalProtect to see if it prompts for credentials.
Several users have reported using the above steps to fix the GlobalProtect sign-in credentials not appearing. It will disconnect from your Microsoft account from Azure Active Directory, causing it to request on the new attempt.
2. Uninstall recently installed apps
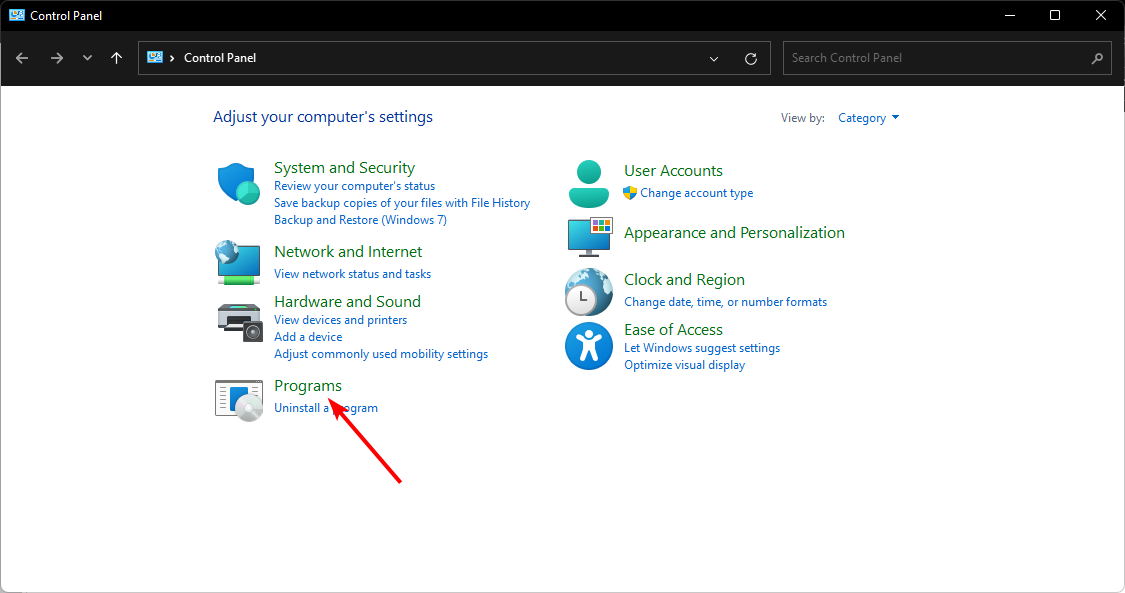
Click the Start button, type control panel, then press Enter.
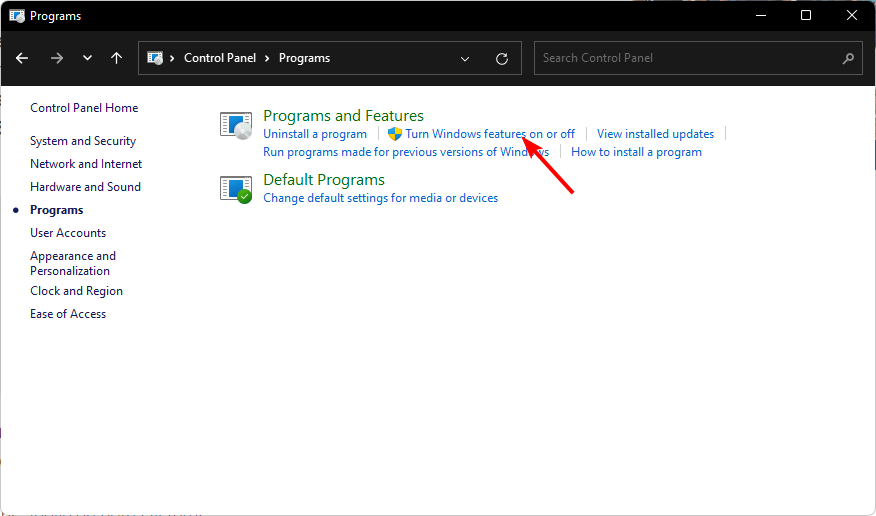
Click on Programs, go to the Programs and Features tab, and find the app from the list.
Select the app, and click Uninstall.
Follow the on-screen instructions to complete the uninstallation process.
Uninstalling the app will remove the credentials from GlobalProtect, allowing it to request credentials rather than taking other apps such as Outlook, and Visual Studio credentials.
In some cases, you might even have to remove and download GlobalProtect again to fix this issue.
3. Clear the GlobalProtect app cache
Close the GlobalProtect client.
Press the Windows + E keys to open File Explorer.
Go to the following directory path: C:\Program Files\Palo Alto Networks\GlobalProtect
In the GlobalProtect folder, select the Cache folder, right-click on it, and select Delete from the context menu.
Confirm the action when asked if you want to proceed with the action.
After deleting the cache folder, right-click the Recycle Bin icon on your desktop and select Empty Recycle Bin from the context menu.
Start the GlobalProtect client to recreate a new cache folder, then check if it shows the credentials prompt.
Clearing the GlobalProtect cache will remove corrupt app data in the folder and resolve any issue impeding the credential prompt.
Click the System tray button, and right-click the GlobalProtect (GP) client icon.
Select the Show Panel option from the context menu.
Click on the icon next to your username.
Click OK on the prompt asking if you want to clear the saved credentials from GlobalProtect.
The above steps will clear your saved credentials on GlobalProtect, allowing you to log onto the GlobalProtect VPN client with new credentials for a secure connection.
Although the VPN portal may encounter difficulties prompting credentials on the login screen, following the steps provided above, you should bypass the GlobalProtect pre-logon loop to get the sign-in prompt back.
Payday 2’s players complain about the game not working in VR mode, one of the common issues encountered. The issue makes it impossible to use Virtual Reality settings and accessories, such as motion controllers, grip buttons, etc., with the game.
Since most players are challenged with what to do when the Payday 2 VR is not working, this article will explore the steps for fixing the issue.
Why Payday 2 VR might not be working?
Outdated or incompatible graphics drivers, VR headset drivers, so to fix this issue, update your graphics drivers.
The VR setup might not meet the hardware specifications to run Payday 2 VR smoothly, causing motion sickness.
Issues with the Steam VR integration or settings can affect the game graphics and Payday 2 UI, prompting it to stop opening.
Other apps like antivirus software running in the background might interfere with Payday 2 VR, causing it to crash or malfunction when accessed.
If the VR firmware headset is outdated, it could lead to compatibility problems with the required hardware specs, causing the game to crash.
Other problems with the VR headset’s tracking or calibration may cause discomfort or misalignment, leading to Payday 2 VR not opening.
Some mods or add-ons might conflict with the VR version of Payday 2.
Network connectivity issues can affect the gameplay if the game relies on multiplayer features. You might be able to remedy this issue by using VPN with Payday 2.
Nonetheless, we’ll take you through some detailed steps for resolving the problem. Read about the best VR software for PC in 2023.
How do I fix Payday 2 VR if it’s not working?
Before proceeding with any advanced troubleshooting steps, you can go through these preliminary checks:
Restart Steam and your PC to resolve temporary issues causing the Payday 2 VR not to work.
Check both the game’s system requirements and your VR headset’s specifications to ensure your PC meets the minimum hardware requirements.
Verify that your VR headset and controllers are properly connected and functioning.
Update your VR headset’s software (SteamVR, Oculus software, etc.) to improve compatibility and fix issues.
If you have installed mods or add-ons for Payday 2, try disabling them to see if they are causing conflicts with the VR version of the game.
Update your graphics drivers and disable overlay to prevent interference with the game or VR experience.
Click the Download button to reinstall it and add the VR mode.
The game will start and close immediately, then restart the Steam client.
Go to the Games library, locate Payday 2, and click Play. It will give you the option to start the game in VR mode.
The above steps will resolve issues caused by game bugs causing the Virtual Reality DLC to uninstall or malfunction. It reinstalls a new VR copy and fixes the Payday 2 VR not launching.
2. Clear the Steam client’s download cache
Left-click the Start button, type Steam in the search bar, and open it.
Click the Steam Menu and select Settings.
Then, click on Downloads and click the Clear Download Cache.
Click OK until Steam prompts you to log in to your account.
After logging into your Steam account, check if the Payday 2 VR not opening persists.
Clearing your download cache will delete the corrupt update or download files that can cause issues with the Virtual Reality mode. However, this solution is also effective in the non-VR mode.
How do I enable VR in Payday 2?
1. Enable it in the DLC section on Steam
Navigate to the game’s Steam Store page and go to the Content for this game.
Click on See All to view all available DLCs.
Find the Payday 2 VR expansion and click on it to be redirected to the store page.
Click the Download button to add the game’s DLC.
Open the Steam client, and open the Steam library.
Find the Payday 2 game from the list, right-click on it, and select Properties.
Navigate to the DLC Section and ensure the box for the Payday 2 VR option is checked.
Follow any on-screen instructions to calibrate your VR headset and controllers, then click the Play button to launch the game.
From the available option, launch the game in Steam VR mode.
Once the game is running in VR mode, you can enjoy playing PAYDAY 2 with the immersive experience provided by your VR headset and controllers, which is not affordable to non-VR players.
The jump to virtual reality in video games has improved the immersion for players, especially in the first-person genre. Thus, Payday 2 follows suit in delivering quality VR mode but with minor hiccups sometimes.
With Payday 3 on the horizon for VR mode, learning how to troubleshoot it when it’s not working will be handy.
Call of Duty has been very popular recently, especially the old Call of Duty games. Microsoft recently fixed the servers, and now you can play online matches on old Call of Duty games with your friends again.
While they are best enjoyed on a PC, any Windows 11 device should support Call of Duty games. We’re talking about Steam Deck. If you play Call of Duty from there, it should be able to run smoothly and properly. You shouldn’t run into any issues.
However, it seems that sometimes the game crashes. Especially Call of Duty: Modern Warfare 2. It seems that if you play it on a Steam Deck, the game will crash unexpectedly, and the following message will appear:
It seems that Call of Duty: Modern Warfare 2 did not quit properly the last time it ran. Do you want to run the game in safe mode? This is recommended for most people. It will change your system settings but not your controls.
And then you are given the options of Yes, No, and Cancel.
If Call of Duty: Modern Warfare 2 has suddenly crashed while playing on Steam Deck, it means the game encounters an internal conflict and can’t pass it. Make sure your game is updated with the latest patches, but if that doesn’t work, let’s see the solutions.
Install Call of Duty: Modern Warfare 2 from Steam, instead of Battle.net
Go to the Call of Duty: Modern Warfare’s Steam Page.
Download the package of your choice.
Install and Play the game.
Several users noted that the Battle.net version of the Call of Duty: Modern Warfare 2 is somehow running into this issue, while the Steam version works properly. You might want to try the Steam version, even if you’re an Activision Blizzard fan.
Install Call of Duty: Modern Warfare 2 in the same drive partition as your Steam Deck’s Windows 11
If you want to keep playing Call of Duty: Modern Warfare 2 from your Battle.net account, then it seems you need to install the game in the same drive partition as your Steam Deck’s Windows 11.
To do that, just uninstall your Call of Duty game, then reinstall it again in the same partition as your Windows 11. You can easily do this inside your Battle.net platform.
Let us know if any of these solutions worked for you in the comments section below.
MSI Mystic Light is a lighting control software available standalone or within the Dragon Center that enables you to control the RGB lighting to enhance the gaming experience.
The software has quite popular. However, users have reported that MSI Mystic Light is not working on their Windows PCs, making it impossible to control the RGB lighting.
Why is the MSI Mystic Light not working?
It is very difficult to determine the exact reason for the problem. But, one of the following reasons may be its root cause:
Incompatible apps – Some resource-hungry third-party apps may interfere with the functioning of the MSI Mystic Light and may restrict it from working.
Conflicting BIOS settings – The RGB lighting settings in the system BIOS may conflict with those of the MSI Center app preventing MSI Mystic Light from working.
Outdated Dragon Center – Using an outdated version of the Dragon Center and MSI Center will cause performance issues like the one you are facing currently.
Corrupt Installation – Similarly, MSI Mystic Light may not be working because the installation procedure was interrupted somehow making it corrupt.
Regardless of the reasons for the non-functional MSI Mystic Light, you can troubleshoot the problem easily by employing the solutions given below.
How do I fix the MSI Mystic Light if it’s not working?
Before proceeding towards the solutions listed below, perform these preliminary steps:
Ensure that the hardware components, such as the motherboard and connectors, are inserted properly.
Check if any optional updates are available and install them as well.
If the MSI Mystic Light is still not functional, try the solutions given below.
1. Update the device drivers
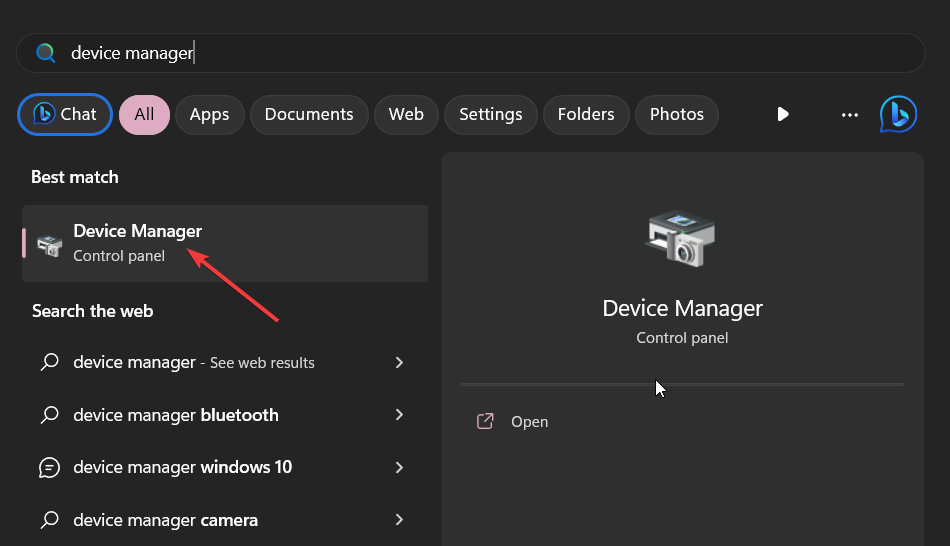
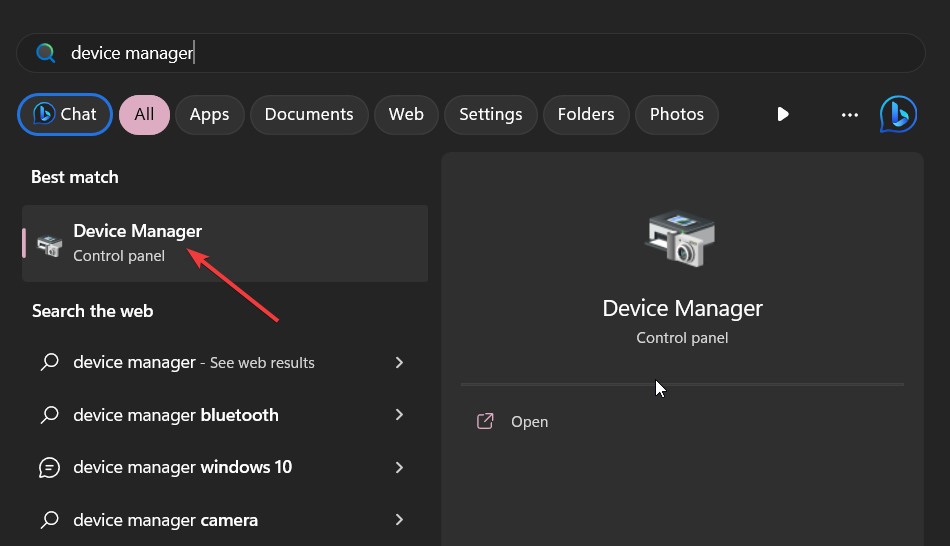
Use the Windows + X shortcut combination to launch the Quick Links menu and choose the Device Manager option.
Look for a warning sign next to the device category in the Device Manager window and expand it.
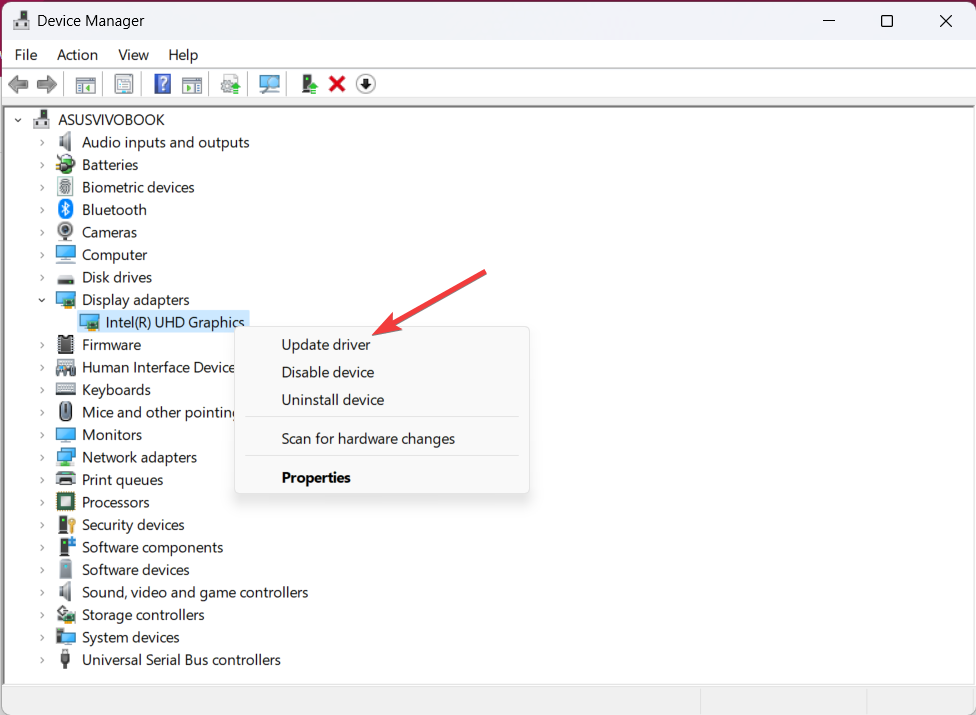
Right-click the outdated driver and choose the Update driver option from the context menu.
Choose Search automatically for the driver‘s option from the pop-up that appears.
Wait for Microsoft to look for available driver updates and install them automatically. Alternatively, you can also visit the manufacturer’s website to update the outdated drivers.
2. Update Dragon Center
Press the Windows key to launch the Start menu, type dragon center in the search box and choose the Run as administrator option from the context menu.
Select the Support icon located on the left navigation menu to access the Live Update menu.
Click the Scan button on the top right to look for any Dragon Center or Mystic Light updates.
If any update is listed, press the Install button next to them to initiate the download process.
After the download and installation are completed successfully, reboot your PC, and hopefully, MSI Mystic Light will now function flawlessly.
MSI regularly releases new updates for Dragon Center and Mystic Light with performance improvements and bug patches so try to keep it updated at all times.
Use the Windows + R shortcut to bring up the Run dialog box. Type the following command in the command box and hit Enter to access the System Configuration window: Msconfig
Uncheck the box preceding the Load startup items and enable the one for the Load system services option.
Now go to the Services tab and enable the checkbox for Hide all Microsoft services located on the bottom left.
Press the Disable All button and click Apply to save the changes.
Now exit the System Configuration window and reboot your PC normally. Upon restart, your PC will launch in the clean boot state.
In our extensive research, we discovered that the presence of conflicting apps and anti-cheat software causes resource starvation on your system hindering the working of MSI Mystic Light.
You can boot your PC in a clean state to determine if there is interference by some third-party apps.
If Mystic Light functions in the clean boot mode, re-enable each of these processes one by one to catch the problematic app. Once you identify the culprit you can easily uninstall them from your Windows PC.
4. Reset the RGB lighting settings
Restart your system, and as soon as the startup screen appears, hit the F2 key ( or any other BIOS key) to access the BIOS settings.
Go to the Advanced section and look for the LED Lighting option.
Disable the When the system is in working state and When the system is in sleep, hibernate or soft off state options.
Save the changes and then reboot your Windows PC.
Access the BIOS settings once again and enable both the options you disabled earlier.
Now reboot your Windows PC and check whether or not the MSI Mystic Light is working.
It is possible to use the Mystic Light feature if your motherboard has a different configuration. However, the RGB settings in the BIOS might conflict with those of the Dragon Center. Resetting the RGB settings in the BIOS should fix it.
There you go! The MSI Mystic Light should now be working on your Windows PC.
In case you are still struggling to make it work, you should uninstall Dragon Center from your system and then download the software from the official website and reinstall it.
If you have any further queries in this context feel free to drop us a message below.
Between Microsoft battling FTC for the right to buy Activision-Blizzard, July has been a month of changes for the Redmond-based tech giant. Microsoft Inspire 2023, which happened last week, also brought forward a lot of new products, partnerships, and updates from Microsoft.
We’re seeing AI in almost everything Microsoft-related, from Microsoft Store to Microsoft Teams and Windows 11. It’s safe to say AI is slowly changing everything.
There is one feature, specifically, which causes a lot of confusion. We’re talking about the Microsoft Authentication Broker feature which is present on the platform. One user, for example, found out that Microsoft Authentication Broker bypasses Multi-Factor Authentication. So what is Microsoft Authentication Broker?
What is Microsoft Authentication Broker?
Basically, Microsoft Authentication Broker is a token broker service that is used to enable SSOs, which is Single Sign-On. With the Single Sign-on option, you can practically log in to several related but independent software applications with a single ID.
Single Sign-on is the opposite of Multi-factor Authentication, that sort of authentication that requires you to take several steps to log in to an app.
And these Single Sign-ons are sometimes enabled by Microsoft Authentication Broker. You can find it on different devices such as:
Windows 10/11 devices: they have it built into the OS
Android devices use Microsoft Authenticator or Microsoft Company Portal
IOS/IpadOS uses Microsoft Authenticator
MacOS uses Company Portal with the MacSSO extension deployed
Microsoft Authentication Broker is used in Microsoft platforms, including Entra. It acts like an authority that certificates and validates the authentication of clients, including users and services.
What do you think about it? Is Multi-factor authentication preferable to it or not? Let us know in the comments section below.
If you are an advanced Windows user and want to know full details about a variety of events, including account logon and logoff activity, system information, warnings, etc., then you need to view the Microsoft Windows Event Viewer logs.
In this guide, we will explain to you all the steps that you need to understand how you can take a Windows event log backup and export the Windows event log on your PC. Let us check out the guide.
What is Microsoft Windows Event Viewer? With the Microsoft Windows Event Viewer, you can view a log of all application and system messages. These messages will include error information, warnings, account login/logoff information, etc.
How do I open Windows Event Viewer? Just type event viewer in the Search bar and select the Event Viewer app from the results.
You may also open Event Viewer by right-clicking the Windows button and selecting it from the context menu, or by typing eventvwr.msc into a Run console and press Enter.
This works on all the latest and previous versions of Windows OS. Let us now learn how you can perform Windows Event Viewer backup and export functions in the below segment.
How do I export or backup Windows Event log?
1. Export logs to CSV file
Press the Win key to open the Start menu.
Type Event Viewer and open the appropriate result.
Expand the Windows logs section.
Select the type of log you wish to be exported.
On the right side of the log to be exported, select Save all Events as… option.
In the Save as type drop-down select CSV (Comma Separated Value) (*CSV).
In the File name box, type the name of the file and save it in your preferred location.
Hit the Save button.
You can open this CSV file with Microsoft Excel and then troubleshoot the issues based on the information that you obtained from the Windows Event viewer.
Type Event Viewer and open the appropriate result.
Expand the Windows logs section.
Select the type of log you wish to be exported.
On the right side of the log to be exported, select Save all Events as… option.
In the Save as type drop-down select Event Files (*.evtx).
In the File name box, type the name of the file and save it in your preferred location.
Hit the Save button.
When you perform the above steps, it will backup the Windows Event Viewer log file in .evtx format and also create a folder called LocaleMetaData in the destination where you have saved the log file.
How can I open the CSV file in MS Excel and sort events by ID?
Launch Microsoft Excel.
Open the CSV file on it.
Choose Delimited on the first page of the Text Import Wizard.
Hit the Next button.
Select Comma and uncheck the Tab under the Delimiters option and click OK.
Under the Column data format box select General and select Finish to view the Windows Event Viewer log in MS Excel.
Click on the Event ID column to highlight the entire Event IDs.
Hit Data from the menu options.
Select Sort from the Data menu tab and select Expand the selection in the warning prompt that appears and click on Sort.
In the Sort by drop-down, select Event ID and specify the sort order available under the Order drop-down and click OK.
Following the above steps, you can easily back up and view the Windows Event Viewer log file sorted in the order of Event IDs. This will help you locate the problem that you are looking to troubleshoot quicker.
That is it from us in this guide. We have a guide that lists down some of the best Windows Event Log Viewer tools and also detailed steps on how you can use them.
Moreover, you can also check out the solutions to quickly resolve Event ID 4103. For more information on Event ID 800, we would suggest you apply the fixes mentioned in our guide to resolve it at your end.
Feel free to drop a comment below and let us know if you understood without any issues regarding how to backup the Windows log event on your computer.
Many users have reported that when they reboot their PCs, the Windows Settings reset to default and all of their personal files and settings are changed.
In this guide, we will show you multiple ways via which you can fix the Windows settings reset to default on reboot issue on your PC. Let us check out the solutions.
Does resetting Windows reset settings?
Resetting your PC helps you get your PC back to a state when everything was working normally. However, a reset is advised as a probable solution when nothing else seems to work.
When you reset your Windows PC, you get the option to perform a clean installation and update Windows while keeping most of your personal files and settings intact. So, resetting Windows does not reset settings, as long as you have selected the correct option.
Why is Windows resetting to the default setting on reboot?
We did some careful research and went through multiple user reports and have found some common reasons which is why Windows is resetting to the default settings after reboot.
Corrupt system files – In case your PC has corrupt system files or important system files are missing, you will come across multiple issues including the one at hand.
The user profile is corrupt – A third-party program or a background app can misbehave and corrupt the user profile causing such issues where the Windows settings are reset to default on reboot.
Startup issue – Some important startup files might be missing which is why all the settings and personal files are removed or reset on startup. Such cases require startup repair.
Presence of virus – Chances are your PC is infected with a virus or malware causing the Windows PC to malfunction.
Let us now check out the different solutions that will help you resolve the Windows settings reset to default on reboot problem.
How do I stop Windows from resetting to default settings on reboot?
1. Run SFC and DISM scans
Press the Win key to open the Start menu.
Type command prompt and open it as an administrator.
Type the below command and press Enter:sfc /scannow
The process will begin resolving the corrupt system files.
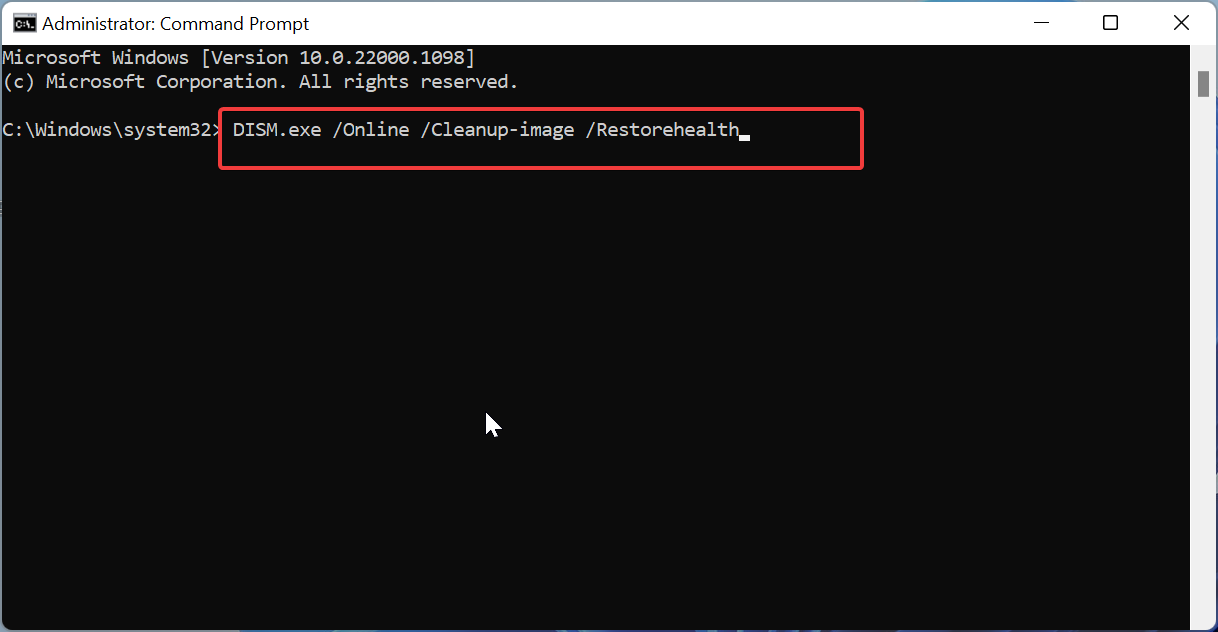
Type the below commands and press Enter after each one:Dism /Online /Cleanup-Image /CheckHealthDism /Online /Cleanup-Image /ScanHealthDism /Online /Cleanup-Image /RestoreHealth
Restart your computer.
If some important system files are corrupt or missing, your PC will not behave normally and cause several problems including Windows settings reset to default on reboot.
To open the Settings window, press the Win + I keys.
Select Recovery on the right side.
Hit the Restart now button next to Advanced startup.
When your PC reboots, select Troubleshoot.
Select Advanced options and click Startup repair.
Follow the on-screen steps to complete the automatic startup repair process.
Windows comes with a built-in startup repair tool that will help you resolve any issues related to startup. Often, we change some system settings because of which the problem of startup repair occurs.
Simply follow the above steps and run the automatic startup repair and check if this resolves the problem or not. In case the automatic repair doesn’t work, you can apply the solutions mentioned in our guide to fix the startup repair.
Navigate to the below path and press Enter. HKEY_LOCAL_MACHINE\SOFTWARE\Microsoft\Windows NT\CurrentVersion\ProfileList
In the ProfileList folder, you will see multiple profiles starting with S-1-5, which correspond to the different user accounts on your computer.
Identify the correct account by checking the ProfileImagePath key on the right side. If anyone of them matches your username, then it is your account with administrative privileges.
Open the RefCount and Statekeys and change the Value datafrom 1 to 0.
Click OK to save changes.
Reboot your PC and check if this resolves the Windows settings reset to default on reboot or not.
Follow the above steps and check if this fixes the startup repair issue that you have on your PC because of which all of your personal files and settings were reset to default.
4. Uninstall the recently installed updates
Press the Win + I keys to open the Settings menu.
Select Windows Update from the left pane.
Choose Update history.
Hit the Uninstall button next to the recently installed update. Select Uninstall again.
Restart your computer.
Chances are that there is an underlying bug in the latest Windows update that was causing the automatic reset issue on your PC and resetting all of your personal settings.
In such a case, we would suggest you uninstall the latest update and check if this fixes the Windows settings reset to default on reboot.
5. Clean Boot your PC
Press Win + R keys to open the Run dialogue.
Type msconfig and press Enter.
Switch to the Services tab.
Check the Hide all Microsoft services, and then select Disable all.
Select Apply to apply the changes.
Click on the Startup tab.
Hit the Open Task Manager link button.
For each enabled item, select Disable and close the Task Manager.
Restart your computer.
Check if the automatic reset issue happens in the clean boot state or not. If not, then there is a problem with the recently installed program. Simply uninstall the recently installed third-party program and check if this fixes the issue or not.
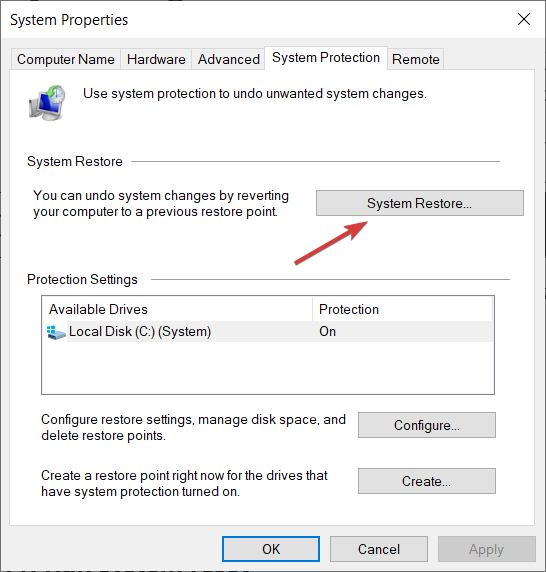
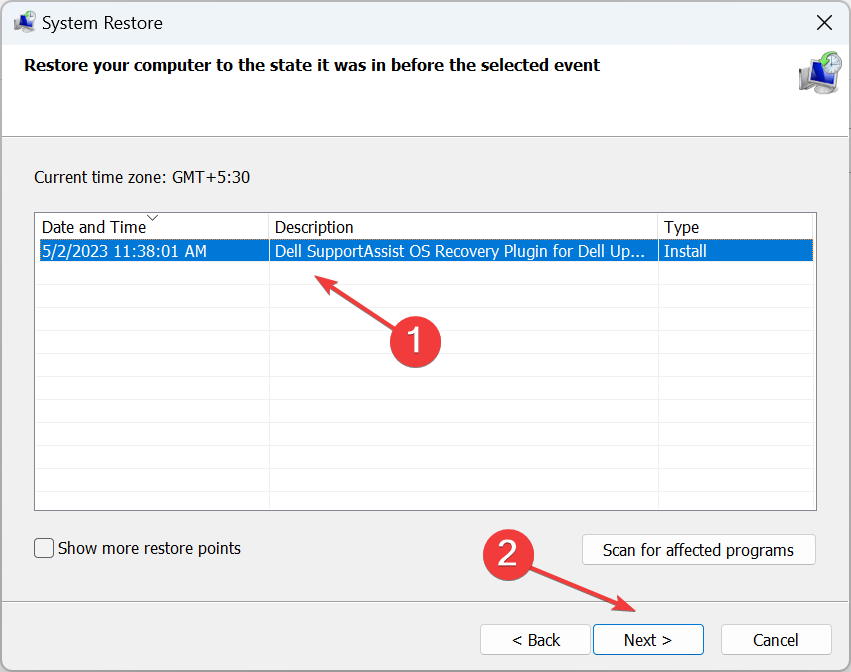
6. Perform System Restore
Press the Win key to open the Start menu.
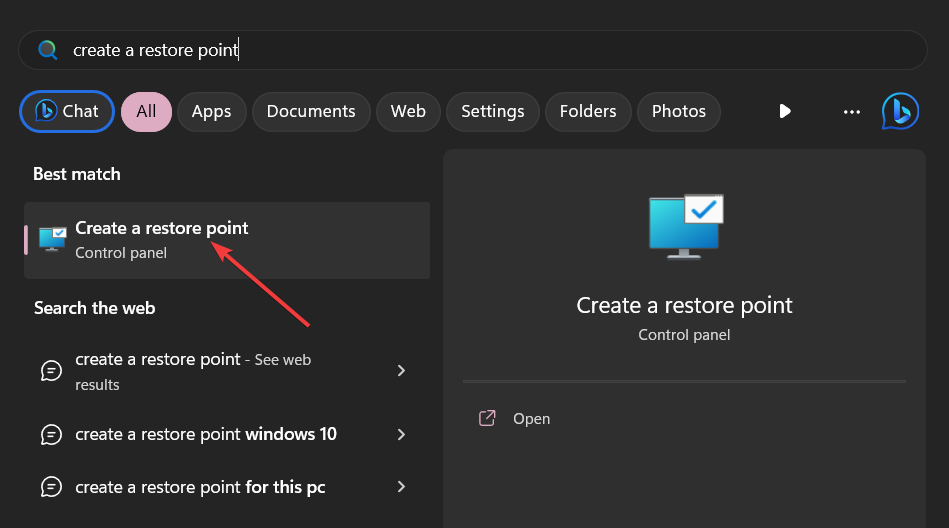
Type create a restore point and open the appropriate result.
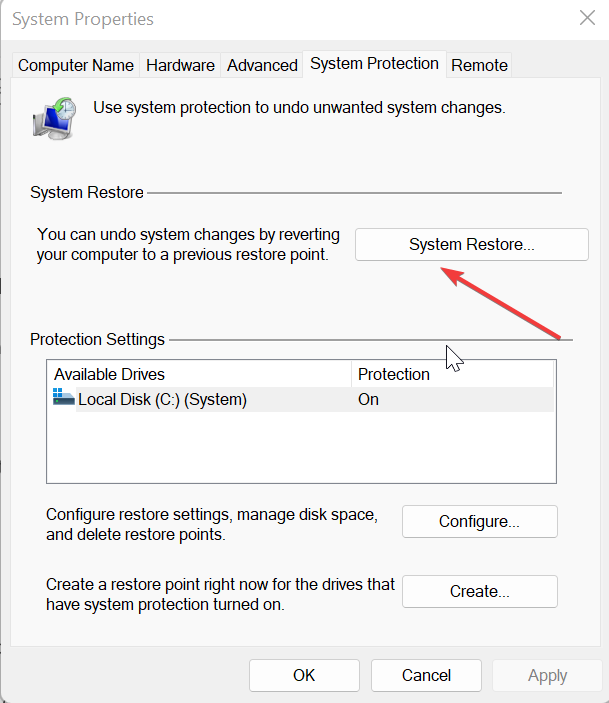
Click on the drive where you have installed the OS and click on System Restore.
Choose the restore point and click Next.
Click Finish to begin the restore process.
Try running the system restore to repair the startup process and fix the problem at your end. Note that the system restore process will work, only if you have a system restore point created on your PC. In order to do that, you can read the guide on how you can create a system restore point.
That is it from us in this guide. If your PC is stuck in a restart loop, then we would suggest you apply the suggested solutions in our dedicated guide to fix it.
In case your computer won’t restart, then we have listed 7 of the most effective solutions to resolve the problem.
Feel free to let us know in the comments below, which one of the above solutions resolved the problem for you.
If you click Shutdown and leave your PC in a hurry, expecting it to shut down automatically, Outlook may prevent your system from shutting down, and it would remain on until you get back, which can be annoying.
Force-closing the Outlook app and reopening it is the best way to resolve the problem when Outlook doesn’t fully close, freezes, becomes unresponsive, or shows errors.
Why is my Outlook not fully closing?
If Outlook is not closing properly, it’s probably due to add-ins or other integrated programs interfering with it. Some common causes include:
Background Processes: Outlook might have background processes or tasks running in the background, which can prevent it from fully closing.
Software Conflicts: Conflicts with other software or applications running on your computer can make Outlook freeze or not close properly.
Outlook Updates: Sometimes, updates or fixes for Outlook can introduce new bugs that affect how it shuts down.
Antivirus Software: Some antivirus programs might interact with Outlook and keep it running to ensure the security of your emails and attachments.
How do I force close Outlook?
Before attempting the various methods to force terminate the Outlook app, consider trying these quick workarounds:
Use the Shortcut: Press ALT + F4 keys simultaneously to force quit the app. It gives the program some time to close on its own, but keep in mind that it may take a few moments and won’t happen immediately.
Terminate the interrupting programs: Close the applications that might be preventing Outlook from closing properly, such as Fax software, virus scanners, synchronization software, Skype, or Anti-spam filters. By closing these apps, you can ensure that Outlook closes without interference.
Restart your PC: Restarting your PC will terminate Outlook and all its related processes. However, if some other important tasks are ongoing, and you don’t want to restart your PC in the middle of them, you can restart your PC if all other attempts to terminate Outlook fail.
1. Kill the Outlook processes in Task Manager
Press Ctrl + Shift + Esc shortcut keys to launch the Task Manager.
Go to the Details tab and locate the OUTLOOK.EXE process. Then, right-click on it and select End task.
When prompted by a dialog box, click End process to force kill the Outlook app.
But remember, forcing Outlook to close may lead to potential data loss or corruption, especially if you have unsaved changes in emails or other items.
2. Run the taskkill Command
On your desktop, right-click on an empty space and select New, then Shortcut.
Type the following command in the Type the location of the item field and click Next: taskkill /f /fi “status eq not responding”
Type a name for the shortcut and click Finish.
Now, you’ll have a shortcut on your desktop that executes the taskkill command.
Simply double-click the shortcut if the Outlook app fails to close.
After running the shortcut, Outlook should force close immediately.
Press Windows + R to open the Run command box, type cmd, and press Enter.
Type the following command to list all the running processes: tasklist
Under Image Name column, locate and confirm the name of the Outlook app process(es). It’s usually OUTLOOK.EXE or OUTLOOK.EXE*32.
Now, type the following command and press Enter, replacing OUTLOOK.EXE with the name of the process (if required): taskkill /IM OUTLOOK.EXE /f
Once the command is executed successfully, it will forcefully close the Outlook app.
If you are experiencing issues such as Outlook not closing or not responding, starting Outlook in Safe Mode can help troubleshoot problems with the app effectively.
Have you faced any issues while following these steps, or did you find a different way to force close the app? Please feel free to let us know in the comments section below.
Good news for all of you Bing Chat AI users. The beloved AI tool is finally available on Chrome and Safari, according to the latest reports. And the best part? It also comes with a Dark mode, so you’ll be able to use it however you like.
There were ways to get Bing Chat on other Internet browsers before, but the methods were unofficial, and a bit more complicated. But now, you can go to bing.com on your Chrome or Safari browser, and click on Chat. Bing will appear and then will integrate itself into your Google searches.
This follows a long period of time when Bing had not been available to any browser than Edge, and it would cause frustration, especially if you loved the tool, but not Edge. But those days are behind now, and you can freely use Bing Chat whenever you want.
However, you should know that there are limitations. Microsoft still wants you to use Bing Chat on Edge, and for now, it is discouraging you to use it on Chrome and Safari. We don’t know if the limitations are temporary or not.
Bing Chat AI limitations on Chrome
It seems that your prompts in Bing Chat AI on Chrome are limited to 2,000 characters (in Edge the limit is 4,000 characters, for example).
Even more, your whole conversation with Bing Chat AI on Chrome is limited to just 5 messages before it resets. In Edge, that limit is 30 messages before the conversation reset.
However, these limitations might be temporary, even if Microsoft hasn’t released an official statement on it just yet. As the tool has just been released on these browsers, maybe the limitations are intentional, but they could be expanded in future patches and updates.
Bing Chat AI is also set to compete with Google’s Bard AI. As you might know, Bard AI is currently available to use on other browsers as well, but unfortunately, the tool is not as popular as Bing Chat.
However, Google’s DeepMind AI is quickly catching up with Microsoft, meaning that Bard AI will also get some important improvements in the future. This means Bing Chat will have to become better, faster, and not limited if it wants to compete with Bard on the world’s most popular Internet browser.
But Bing AI also benefits from the huge AI research Microsoft is currently undergoing. The Redmond-based tech giant is keenly approaching AGI with its AI research. While it won’t happen in the next months, AGI will most likely happen sometime this decade. Specialists say it will solve a lot of humanity’s issues.
And of course, ultimately AI tools such as Bing Chat will greatly benefit from it too.
What do you think about it? Will you use Bing Chat AI on Chrome? Let us know in the comments section below.
With the advent of smartphones, capturing images to preserve your precious moments has become so easy. However, with thousands of photos stored on your PC, organizing them has become a challenge.
If you are looking for a way to sort your images by Name on your Windows 10 or 11 computer, this guide can help!
We will explore two methods using Windows utility tools, Windows File Explorer and Photos app, to get the job done.
How can I sort my photos by name on Windows?
1. Use the Windows File Explorer
1.1 Windows 11
Press Windows + E to open the Windows File Explorer. Go to the folder that contains images.
Now, go to Menu Bar, click Sort, and from the context menu, choose Name. By default, the photos will appear in alphabetical or numerical order.
Further, you can organize them in Ascending (photos’ name starting from letter A or number 1 will list first) or Descending (photos’ name starting from letter Z or the largest number in the folder will appear first) order. To do that, go to Sort, then select any of the two.
1.2 Windows 10
Press Windows + E to open the File Explorer.
Go to the folder that has pictures you want to sort.
Right-click the empty space, and from the context menu, select Name.
You can also organize them in Ascending and Descending order; for that, again, right-click the empty space, and choose any of the two.
Once you make a choice, your photos will be sorted by name in ascending order by default if not chosen otherwise.
If you are looking for a way to sort images by date, we recommend you check this guide to find the step-by-step instructions to get it done.
2. Use the Photos app
1.1 Windows 11
Press the Windows key, type photos and click Open.
Windows Photos app will open, and you will see the photos stored in your default folder, i.e., Pictures.
Photos app comes with options to change the source of photos. From the left pane, you can choose among OneDrive, iCloud, Favorites, Folders, and External Devices. Select the option for which you want to sort pictures.
Once done, click on the Upward-downward arrows icon and choose Name.
If you want to change the order of their appearance according to their name, click the upward-downward arrow icon again and choose Ascending or Descending.
As soon as you choose the option, the photos will be sorted and organized as per your preferences.
1.2 Windows 10
Press the Windows key, locate Photos, and click it to open.
Go to Albums, locate Sort by:, and choose Alphabetically.
This is how you can arrange photos on your Windows 10/11 computer by name in ascending or descending order.
How can I fix the Photos app not sorting images issue?
1. Run the troubleshooter
Press Windows + I to open the Settings app.
Go to System, then click Troubleshoot.
Click Other troubleshooters.
Locate Windows Store Apps and click Run.
Follow the onscreen instructions to complete the process.
2. Check for updates
Press the Windows key, type microsoft store, and click Open.
Click Library from the left pane to access installed apps.
Now click Get updates.
Locate Microsoft Photos from the result, and check if it has the Update option available. If yes, then click it and wait for the process to complete.
3. Reset/Repair the Photos app
Press Windows + I to open the Settings app.
Go to Apps, then click Installed apps.
Locate the Photos app, click the three dots, and select Advanced options.
Now navigate to Reset and click the Repair button and check if the issue persists.
If yes, go to Advanced options, navigate to Reset, and click the Reset button.
This will clear the app cache; once it is done, restart your computer and try to sort photos. If you are still not able to do that, wait for the Windows update, or try another photos organizer tool to arrange your photos collection.
So, these are methods you can follow to sort your photos by name on your Windows 10/11 PC. Use any of the methods and arrange your photos the way you like.
The battle of AIs is fascinating. Ever since Microsoft announced that it will implement AI in its products, including Windows 11, a lot of tech giants, including Meta, and Twitter wanted to be a part of it, one way or the other.
Microsoft has been at the forefront of AI right from the start and now the Redmond-based tech giant is surely integrating AI in everything Microsoft-related. For example, Microsoft Store is getting AI help, and it will be able to automatically summarize reviews for you. This way you won’t have to go through all of them.
Even more, Meta is already collaborating with Microsoft in an AI partnership, and their collaboration focuses on Llama 2, which is an open-source AI model with 70 billion parameters available. With it, you’ll be able to build and train your own AI model.
And now, it seems that OpenAI, the company behind the popular ChatGPT, is also coming with its own open-source large language model (LLM), codenamed G3PO, according to the latest reports.
OpenAI’s G3PO – what we know so far about this AI language
Firstly, G3PO is a codename for the LLM model developed by OpenAI. Apparently, the Microsoft x Meta AI partnership put a lot of pressure on the other tech players, Google and OpenAI including. Llama 2 will be open source, but it also comes with a commercial license, allowing anyone to utilize and profit from it.
OpenAI has been keen on releasing an open-source LLM for quite some time now, and it seems G3PO is finally that product. However, meanwhile, it will have to compete with Llama 2 and possibly other LLMs.
While the project has a codename, unfortunately, it doesn’t have a release date for now. It seems that OpenAI might be thinking about other endeavors. Recently, the company has established a group, Superalignment project, which wants to achieve AGI in 4 years from now.
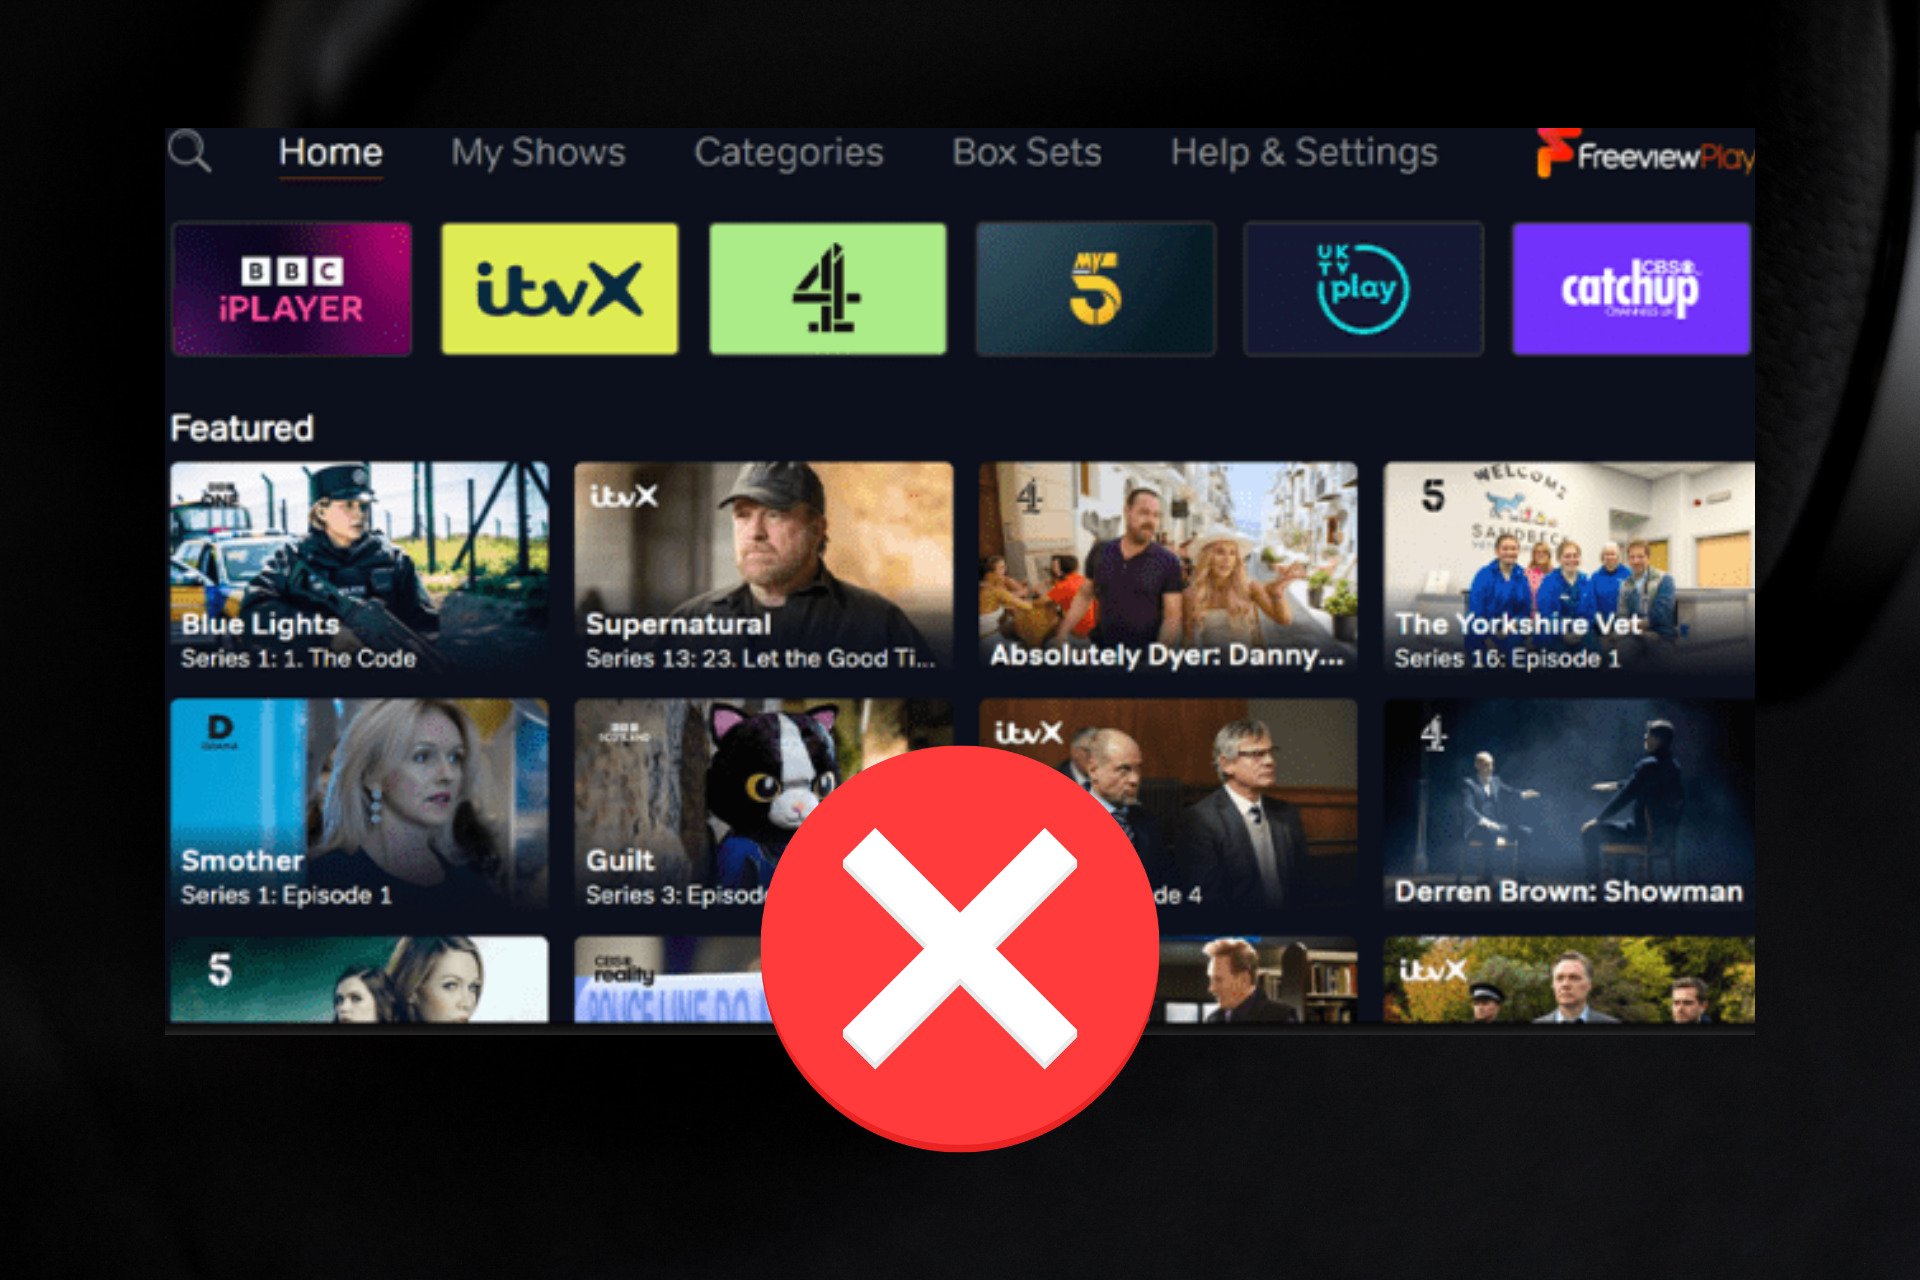
With a VPN, you can have access to Freeview Play content from outside the UK, but what if it’s not working?
If you can’t seem to open the content library and get errors on FreeView, you’re not alone. I’ve been there and figured out how to fix it.
So let’s get started. I’ll show you all you need to know to easily watch FreeView with VPN. By the end of this, you’ll be able to access its content abroad as if you were in the UK.
After that, I’ll also outline a quick overview of the best VPNs for it.
FreeView Play not working with VPN?
If you find that Freeview Play is not working when you’re connected to a VPN, try any of these five solutions to resolve the issue:
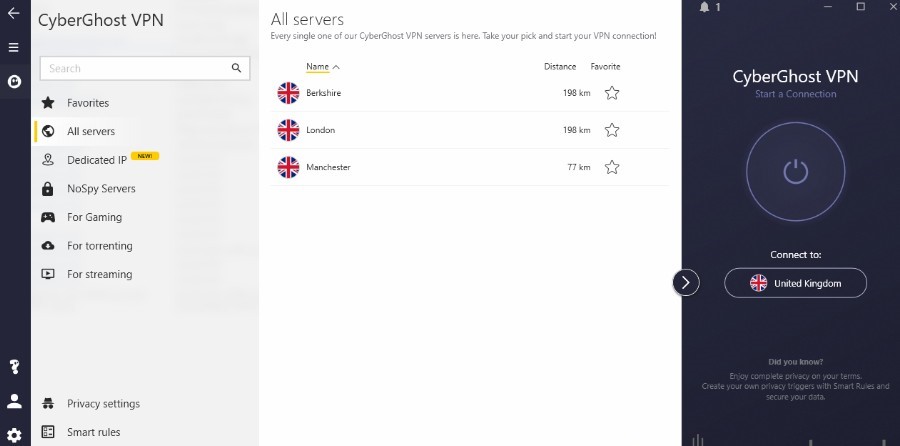
1. Switch to a different UK Server
Sometimes, the VPN server you’re connected to might be blocked by Freeview Play, or you’re connected to a server location where Freeview Play is not supported.
Whichever category you fall into, try switching to a different server in the UK.
This works because all servers have separate IP addresses, which might not be on Freeview Play’s blocklist.
Disconnect from the current VPN server by clicking on the power icon.
Choose another UK server from your VPN provider’s options.
Reconnect to the VPN using the new UK server.
Launch Freeview Play and check if it is now functioning properly.
You may need to try a few UK servers in different locations to find the best one that works for you.
NOTE
I used CyberGhost as an example, but following the same principle should give the same results, even if you use a different VPN service.
2. Clear your cached data
When you download Freeview Play on your device, it creates a cache saved on your device’s internal memory.
The cache stores some data and settings, which include your location. This is meant to improve your user experience, but it can also tamper with your VPN.
Luckily, clearing it is simple, quick and may fix the issue for good.
➡️ On TV
Follow the steps below to clear your device’s cache, using LG Smart TV as an example:
From your device’s home screen, go to Settings and select Device Preferences.
Select Storage from the list of options.
Select Internal Storage.
Scroll down the list to select Cached data.
Click okay, and then reconnect to a UK server on your VPN.
Open Freeview and start streaming your favorite show.
Note that some SmartTVs like FireStick only have options to clear the cache data individually for each app. In that case, you’ll need to clear the streaming app’s cached data only.
➡️ On mobile
If you are using a mobile phone to access Freeview Play, follow the steps below to clear your app cache data:
Open your Settings app.
Tap on Apps or Applications.
Find the Freeview Play app and tap on it.
Tap on Storage or Storage & Cache.
Tap on Clear cache.
Try reconnecting to your Freeview Play while connected to a UK server on your VPN.
3. Check your split-tunneling settings
Split tunneling is a technique that allows you to direct specific internet traffic through the VPN while allowing other traffic to access the internet directly, bypassing the VPN.
You can use it to ensure that Freeview Play traffic does not go through your regular internet connection, eliminating potential blocks from the streaming service.
Here is how to activate Split Tunnel for Freeview Play on CyberGhost:
Tap the gear icon for Settings.
Open the VPN tab.
Tap App Split Tunnel.
Ensure the mode is on Custom rules.
Now, look if Freeview Play’s box is checked. If it is not, check it.
Reconnect your VPN.
Enjoy streaming Freeview Play.
4. Reinstall your VPN
If your VPN app is corrupted or outdated, it may fail to hide your IP address or connect to your desired server.
A simple solution to try is to reinstall the app.
Here is how to do it on a Samsung Smart TV:
Press the Home button on your remote and scroll down to Apps.
Select settings on the top right corner of your screen.
Navigate to your VPN app, then select Delete.
In the new pop-up, select Yes.
Press the Return button on your remote, then select the Search icon to type in your VPN provider’s name.
Select your VPN provider and install it.
Log in with your credentials.
Connect to a UK Server and try streaming on Freeview Play again.
This will also update your app to the latest version, ensuring you have the latest security features, bug fixes, and improvements for a smoother and safer VPN experience.
5. Change your VPN provider
If Freeview Play is not working with VPN after trying the fixes above, switching to a different VPN provider is the last resort.
Some VPNs, especially free ones, may have DNS leaks or fewer servers that are often overloaded.
This can result in slower speeds and Railpay suspecting and blacklisting the server.
I recommend CyberGhost for its great speed and numerous UK servers.
On your Smart TV or app store, search for CyberGhost to download and install the app.
Open the app and accept the Terms and Conditions by clicking on Agree and Continue.
Log in with your credentials.
Search and select a UK server.
Click Okay to accept VPN connection request.
Once connected to the server, try streaming on Freeview Play again.
CyberGhost works best with Freeview Play. Nevertheless, remember to clear your app cookies before tying it out.
Does Freeview Play block VPNs?
Freeview Play doesn’t officially block VPN usage.
However, they might have measures in place to detect and restrict access from VPN IP addresses to comply with content licensing agreements.
This could be the reason why some VPN users face difficulties accessing Freeview Play.
How does Freeview Play detect my VPN?
Freeview Play may detect your VPN through several methods, including:
IP Address Blacklisting: Freeview Play might maintain a list of known VPN server IP addresses and block access from those addresses.
Deep Packet Inspection (DPI): Freeview Play could use DPI technology to analyze network packets and identify VPN traffic characteristics.
DNS Leaks: DNS leaks can occur when your device unintentionally reveals its actual location to Freeview Play servers, even when connected to a VPN.
WebRTC Vulnerabilities: WebRTC can sometimes bypass VPN connections, potentially revealing your actual IP address to Freeview Play.
Does Freeview Play work with a VPN?
Yes, Freeview Play works with a VPN if you use a reliable and reputable VPN service that can evade its blocks.
A good Freeview Play VPN will have an extensive network of servers in the UK, a fast and consistent performance, strong encryption and security features, and a user-friendly interface.
However, not all VPNs work with Freeview Play. Some VPNs are too slow, weak, or outdated to bypass Freeview Play’s blocks.
To save you the hassle of searching for a good enough VPN, I have compiled a list of the best Freeview Play VPNs in the next section.
Check them out!
Best VPNs for Freeview Play
In a bid to access Freeview Play from Nigeria, I tested several top VPNs, and I was able to compile a list of the five best ones.
My selection of these VPNs is based on the following set of criteria:
Works well with Freeview Play
Fast and reliable servers in the UK
High-quality streaming and no buffering
Unlimited bandwidth and data
Strong encryption and security
User-friendly apps and customer support
Money-back guarantee
Here are the tools I swear by:
CyberGhost VPN – overall best for streaming on Freeview Play
If you want to stream on Freeview Play hassle-free, CyberGhost VPN is the perfect choice.
With over 724 UK servers spread across London, Berkshire, and Manchester, you have plenty of options for high-speed connections.
It works wonders on FreeView Play. I’ve also tested it on other UK TV platforms such as BBC iPlayer and it did just as good of a job.
No need to worry about crowded servers! Enjoy unlimited bandwidth, fast VPN protocols like WireGuard®, and streaming-optimized servers with speeds up to 10 Gbps in busy locations.
This ensures uninterrupted streaming on Freeview Play.
Not only that, CyberGhost takes your online security seriously. With powerful 256-bit AES encryption, your sensitive data is safe from prying eyes and cybercriminals.
The Kill Switch feature blocks all traffic if you get disconnected, so your location remains hidden from Freeview Play.
Plus, you can connect up to 7 devices simultaneously with just one subscription.
Whether it’s Windows, macOS, Linux, Android, iOS, Android TV, or Amazon Fire TV Stick, CyberGhost’s user-friendly VPN apps have got you covered.
And if you ever need help, their friendly 24/7 Customer Support team is ready to assist you via live chat or email with guided walkthroughs.
Stream Freeview Play content with peace of mind using CyberGhost VPN!
Pros:
User-friendly apps with dedicated streaming profiles.
No-logs policy and strong encryption for enhanced privacy.
Specialized servers for various use cases, including streaming.
Cons:
Some servers may experience occasional slowdowns.
CyberGhost
Never miss out on your favorite shows & unblock FreeView Play with CyberGhost!
ExpressVPN – great streaming quality for Freeview Play
If you’re looking to bypass geo-restrictions on Freeview Play, ExpressVPN is an excellent choice.
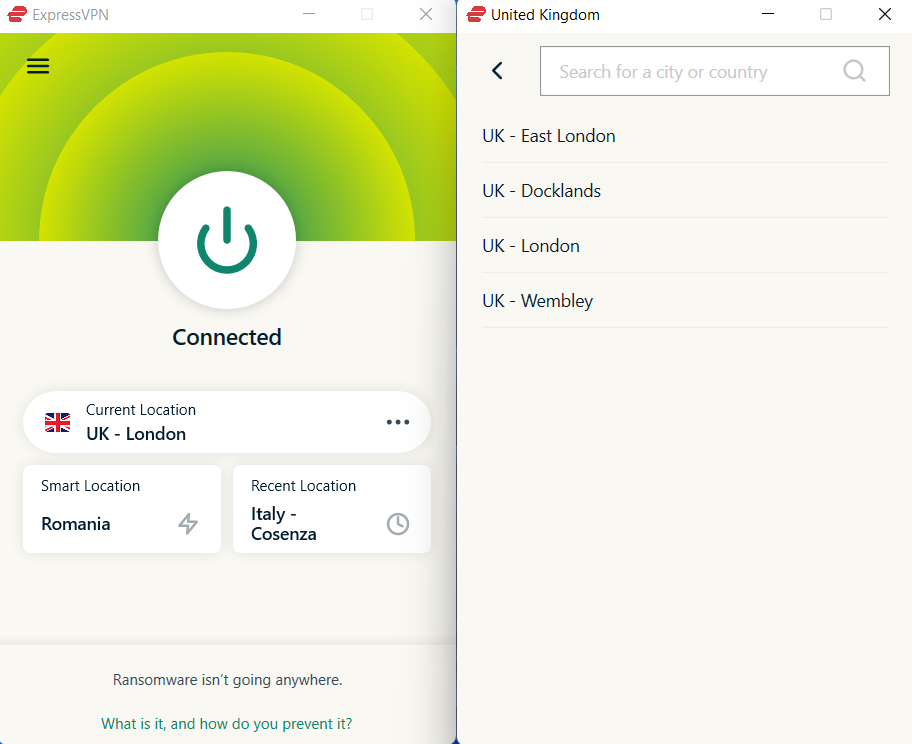
With servers in Docklands, London, Midlands, Wembley, and East London, you can always rely on finding a UK server to access your favorite content.
What sets ExpressVPN apart is its strong commitment to security. Utilizing robust 256-bit AES encryption and advanced leak protection, you can stream with confidence, knowing your connection is secure.
Moreover, ExpressVPN’s MediaStreameris a standout feature, allowing you to extend VPN protection to devices that don’t support native VPN connections.
Whether it’s smart TVs, gaming consoles, streaming media players, or other devices without VPN apps, ExpressVPN has you covered.
On top of that, ExpressVPN seamlessly works on popular devices such as Windows, Android, macOS, iOS, and Linux, ensuring a smooth and uninterrupted streaming experience.
Your privacy is of utmost importance to ExpressVPN, demonstrated by its strict no-logs policy and use of the TrustedServer feature, which wipes server data after each session.
To make it even more enticing, ExpressVPN offers a risk-free 30-day money-back guarantee. You can try it out and see if it suits your needs without any worries.
With ExpressVPN, streaming on Freeview Play becomes easy and worry-free, allowing you to enjoy your favorite shows without restrictions or privacy concerns.
Stream with peace of mind and unrestricted access to Freeview Play’s content library.
Pros:
Fast and consistent performance for seamless streaming.
User-friendly apps for various devices.
Excellent customer support with 24/7 live chat.
Cons:
Slightly more expensive compared to other VPNs.
ExpressVPN
Keep enjoying British TV packages on FreeView Play even abroad with this reliable VPN!
NordVPN – enough UK servers to unblock Freeview Play
NordVPN offers convenient access to more than 440 secure servers located in the UK, providing you with an effortless way to enjoy Freeview Play.
Its SmartPlay feature is designed to bypass geographical blocks on streaming platforms, which could come in handy for accessing Freeview Play.
Enjoy blazing-fast speeds and unlimited bandwidth with NordVPN, ensuring smooth HD or 4K streaming without interruptions on Freeview Play.
Regarding security and privacy, NordVPN has robust measures in place. It uses AES-256 encryption, a strong standard, to protect your data and identity.
The kill switch automatically disconnects your internet if the VPN connection drops, preventing any accidental data leaks, which is useful for other online activities.
For added security, NordVPN offers a Double VPN feature, routing your internet traffic through two separate servers to enhance your privacy.
NordVPN provides user-friendly apps for various platforms, including Windows, Mac, Android, iOS, and Linux, as well as compatibility with smart TVs, routers, and other devices, catering to other streaming services and online activities.
The best part is that NordVPN has a 30-day money-back guarantee, allowing you to try the service risk-free and explore its features and benefits.
While Freeview Play may not work with VPN services, NordVPN can still offer secure and uninterrupted streaming on platforms compatible with VPN usage.
Pros:
Extensive server network with specialty servers optimized for streaming.
Strong encryption and a strict no-logs policy for enhanced privacy.
User-friendly apps for multiple devices.
Double VPN and Onion over VPN features for extra security.
Cons:
Speeds can vary depending on the server.
NordVPN
Start streaming FreeView Play internationally with NordVPN!
Surfshark – 4K streaming quality at an affordable price
Surfshark is a fantastic option that offers excellent security at an affordable price, just $2.49 per month.
With about 212 servers in 4 different UK cities, you can easily access Freeview Play without any data restrictions or caps.
One of the standout features of Surfshark is its ability to provide unlimited data and unrestricted bandwidth, allowing you to connect multiple devices simultaneously.
You can stream on Freeview Play worry-free, enjoying your favorite shows and movies in high-definition or even 4K quality without interruptions.
To ensure your online security and privacy, Surfshark utilizes top-notch protocols like OpenVPN, IKEv2/IPsec, and WireGuard, all equipped with the robust AES-256-GCM algorithm.
This advanced encryption keeps your data safe and hidden from prying eyes while maintaining impressive connection speeds.
Surfshark also offers a kill switch feature that automatically cuts off your internet connection if the VPN connection drops. This ensures that your data remains private and your identity is always protected.
Additionally, Surfshark provides valuable features like CleanWeb, which blocks ads, trackers, and malware to give you a clean and uninterrupted streaming experience.
Setting up and using Surfshark is a breeze, with its user-friendly apps available for various platforms such as Windows, Mac, Android, iOS, and more.
With Surfshark, there’s no need to wait. Enjoy secure and private streaming with its impressive features and affordable pricing.
It’s a reliable choice for accessing Freeview Play and other streaming services while maintaining online privacy and security.
Pros:
Unlimited simultaneous connections on a single account.
CleanWeb feature to block ads, malware, and trackers.
MultiHop feature for added privacy.
Affordable pricing with a 30-day money-back guarantee.
Cons:
Smaller server network compared to other providers.
Surfshark
Enjoy FreeView Play no matter where you are using this reliable unblocking tool!
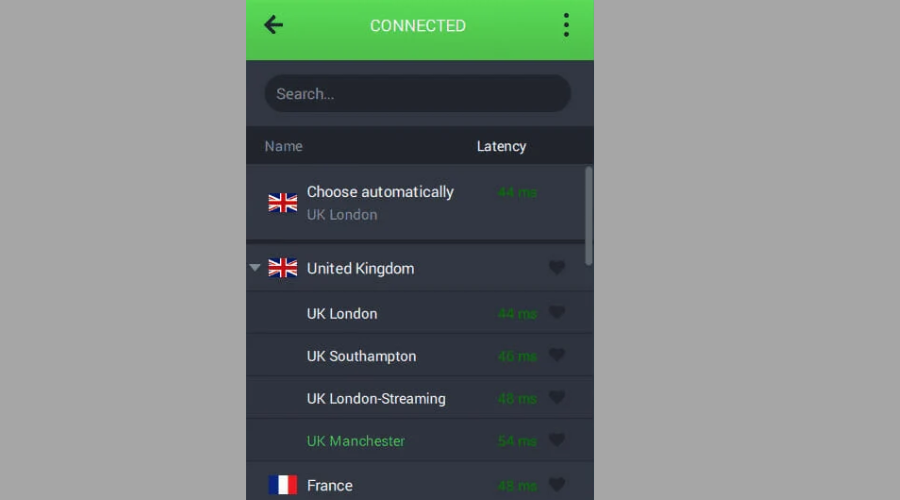
PIA offers lightning-fast speeds with a wide selection of servers in 3 UK cities, ensuring a smooth and seamless streaming experience in Freeview Play.
Thanks to its powerful 10 Gbps NextGen servers, you can say goodbye to frustrating lags, buffering, and freezing, even when streaming in 4K.
Enjoy unlimited bandwidth with PIA, allowing you to stream your favorite content on Freeview Play without worrying about data caps or restrictions.
PIA prioritizes your data security by employing strong encryption, giving you peace of mind during your streaming sessions.
You can choose between 128-bit or 256-bit AES encryption ciphers, adding an extra layer of security to protect your online activities from ISPs, third parties, and even Freeview Play.
PIA offers a Smart DNS feature for added convenience, allowing you to change your virtual location directly from your Smart TV.
While this feature doesn’t encrypt or redirect your data, it ensures that your connection speeds remain unaffected, making it a suitable option for accessing region-locked content.
Suppose you want to protect your entire network and all your devices. In that case, PIA provides the option to install the VPN directly on your router, extending its security benefits to all devices connected to the network.
With PIA, you can enjoy a seamless streaming experience on Freeview Play with lightning-fast speeds, unlimited bandwidth, and strong encryption to safeguard your online privacy and security.
Pros:
Strong commitment to user privacy with a strict no-logs policy.
Multiple security protocols and encryption options.
10 simultaneous connections on a single account.
Affordable pricing with a 30-day money-back guarantee.
Cons:
The interface may be less intuitive for beginners than other VPNs.
PIA
Access your favorite UK channels on FreeView using PIA’s strong UK servers!
If you’re facing issues with Freeview Play while using a VPN, don’t worry.
Following the solutions above and choosing the right VPN service, you can bypass the restrictions and enjoy uninterrupted streaming on Freeview Play.
Remember that the streaming landscape constantly evolves, so always check for the latest updates and workarounds. And for other like issues like the Freevee ITV-101 error, visit our guide for a detailed account on how to fix it.
Many users have reported that when they schedule to run a task on Windows Task Scheduler, they sometimes encounter the error message – The directory name is invalid.
The directory name is invalid error message in Task Scheduler typically occurs when the task you’re trying to run cannot find the directory or does not have permission to access it. This guide will walk you through easy fixes to resolve the error.
What does The directory name is invalid error in Task Scheduler mean?
The directory name is invalid is a type of runtime error that occurs when Task Scheduler tries to execute a scheduled task, but encounters a problem related to the directory path specified for the task.
It can occur due to various reasons. Below are some common causes for this problem:
Incorrect Path: The most common cause is an incorrect path specified in the task settings.
Spaces or Special Characters: If the path contains spaces or special characters, it must be enclosed in double quotes (“). Otherwise, Task Scheduler might interpret the path incorrectly.
Permissions: If you don’t have enough permission to access the folder or make changes to the directory, it can cause this error.
Antivirus/Firewall Interference: Sometimes, antivirus or firewall programs may prevent Task Scheduler from accessing certain directories.
How do I fix a directory name is invalid?
Before you try the below solutions, here are a few preliminary steps you can try:
Restart the PC: Restarting your computer sometimes resolves the invalid directory error.
Rename the .bat file to .cmd: If you are trying to run a .bat file in Task Scheduler, changing the file extension from .bat to .cmd might resolve the issue you were facing with the task.
Move the file to the physical drive: If you are attempting to run a file located on a mapped drive, move the file to a physical drive, and update the file path in the task accordingly.
Provide admin rights: Make sure that the user account running the task has the necessary permissions to access the file or directory.
1. Correct the Start-in path
Press the Windows key, type Task Scheduler and select the Task Scheduler app from the results.
Select the Task Scheduler Library on the left navigation panel.
Then, find the task that’s giving you the error. Right-click on it and select Properties.
Go to the Actions tab, select the action, and click the Edit button.
Now, remove the quotes (“) from the path in the Start in (optional) field, and then click OK.
Click OK again to save the changes.
After that, re-run the task again or wait for the next scheduled time, and it should work fine without the directory name is invalid error in Windows Task Scheduler.
Similarly, specifying a path in the Program/script field should be enclosed in double quotes if it contains any space or special character.
Also, when you modify the path in the Program/script field, remember to update the Start in field as well.
2. Change the directory permissions
Navigate to the directory specified in the task, right-click on it, and select Properties.
Switch to the Security tab and click Edit.
Next, select the user account and make sure the Full control box is checked.
Click Apply and OK to save the settings.
3. Run the chkdsk tool
Press the Windows key, type cmd, and select Run as administrator.
Type the following command and press Enter, making sure to replace C with the letter that corresponds to your hard drive partition: chkdsk C: /f /r
If you are prompted to schedule the scan on the next restart, type Y and press Enter.
Chkdsk will scan your hard drive partition for errors and repair any corrupted directories.
The Nvidia GeForce Now error code 0x800b1004 typically points to a problem with the game’s installation or an error in the connection between the user’s device and the GeForce Now servers.
In this guide, we will list some of the best solutions to help you resolve the Nvidia GeForce Now error message 0x800b1004. Let us check it out.
What can cause the Nvidia GeForce Now error 0x800b1004?
The Nvidia GeForce Now error message 0x800b1004 means there is a server issue or you do not have a stable internet connection.
Several reasons could trigger this problem with the cloud gaming service, some of which are listed below:
Unstable Internet connection – For playing games on a cloud gaming service, you should have a stable Internet connection.
Server status of GeForce Now – Chances are that the GeForce Now server is undergoing maintenance or there is a problem with the server. This also causes the GeForce NOW Error Code 0x800B0000.
Nvidia GeForce app issue – If you haven’t updated the Nvidia GeForce app then you will come across such issues as there could be an underlying bug within the app.
The antivirus program is interfering – There is a good chance that the antivirus or the firewall program is blocking the connection between your device and GeForce Now.
Outdated graphics driver – You should also make sure that you have an updated graphics driver installed on your PC to avoid such problems.
You are using a VPN service – The usage of a VPN to unblock geo-restricted content is also one of the main reasons for the error code 0x800b1004.
Let us now check out the solutions that will help resolve the Nvidia GeForce Now error code 0x800b1004.
How do I fix the GeForce Now error code 0x800b1004?
Before applying the advanced solutions, let us go through the simple solutions and hopefully resolve the problem at our end.
Make sure that you have a stable internet connection. If you have issues with your Wi-Fi, try using a wired connection.
Check if the Nvidia GeForce service status is OK. You can do that by heading over to the official server status website.
Try rebooting your PC, as it could be a temporary bug that is causing the GeForce Now error code 0x800b1004.
If you are using a VPN service or app, then you should disable it, as it could be causing the problem with the connection.
Now, let us shift to advanced solutions to resolve the problem.
1. Update the GeForce Now app
Launch the Nvidia GeForce Now app on your PC.
Click on the Drivers tab at the top of the window.
If there is a new update available then you will see a message A new Game Ready Driver is available. Click on the Download button.
Finish the installation by following the on-screen prompts.
Restart your computer.
Ensure you have the latest version of the GeForce Now app installed on your computer. This will ensure the bugs are fixed, and you have the latest features to enjoy.
2. Disable the Firewall
Open the Start menu by pressing the Win key.
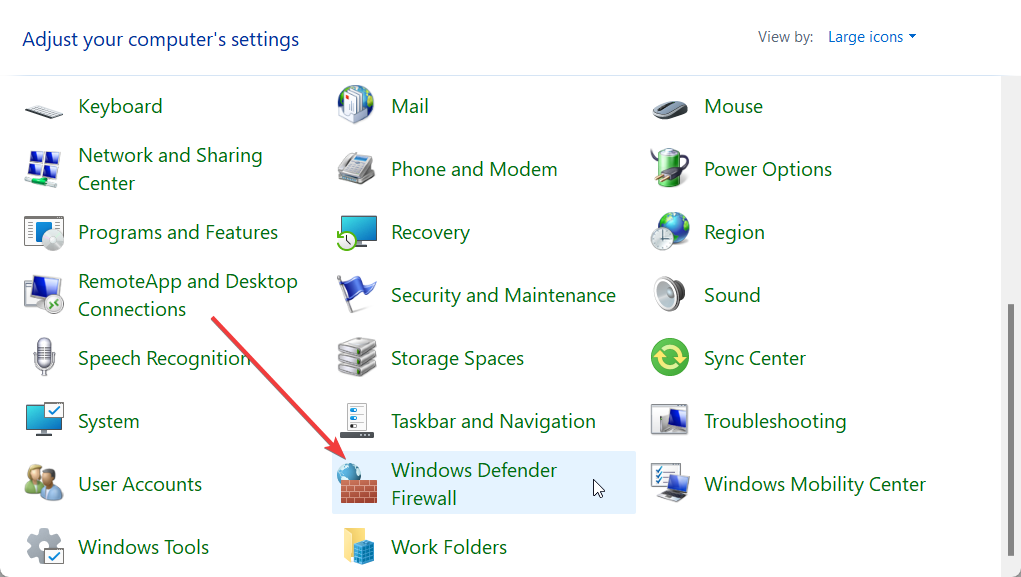
Select Control Panel.
Click on Windows Defender Firewall.
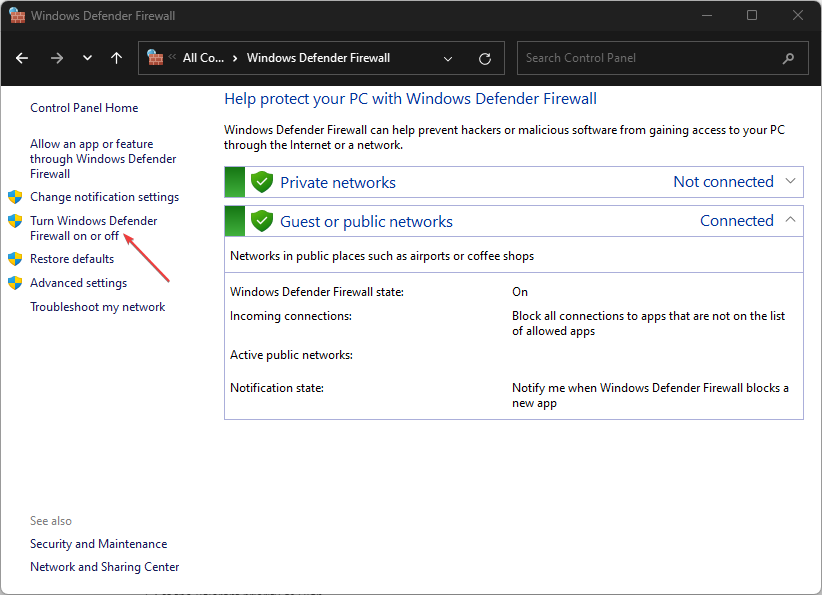
Click on Turn Windows Defender Firewall on or off option on the left pane.
Check the Turn off Windows Defender Firewall (not recommended) radio buttons for both Public and Private networks.
Click OK and restart your PC.
Windows Firewall is known to block certain programs as it may falsely detect them as a threat to your PC. You should disable the Firewall and then check if this resolves the GeForce Now error code 0x800b1004 or not.
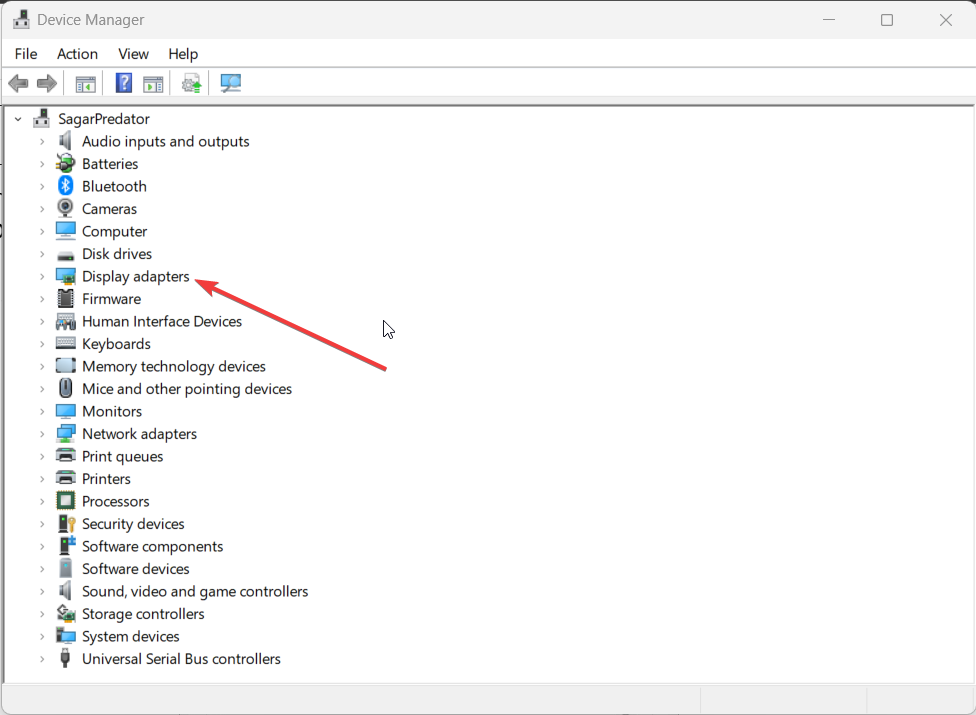
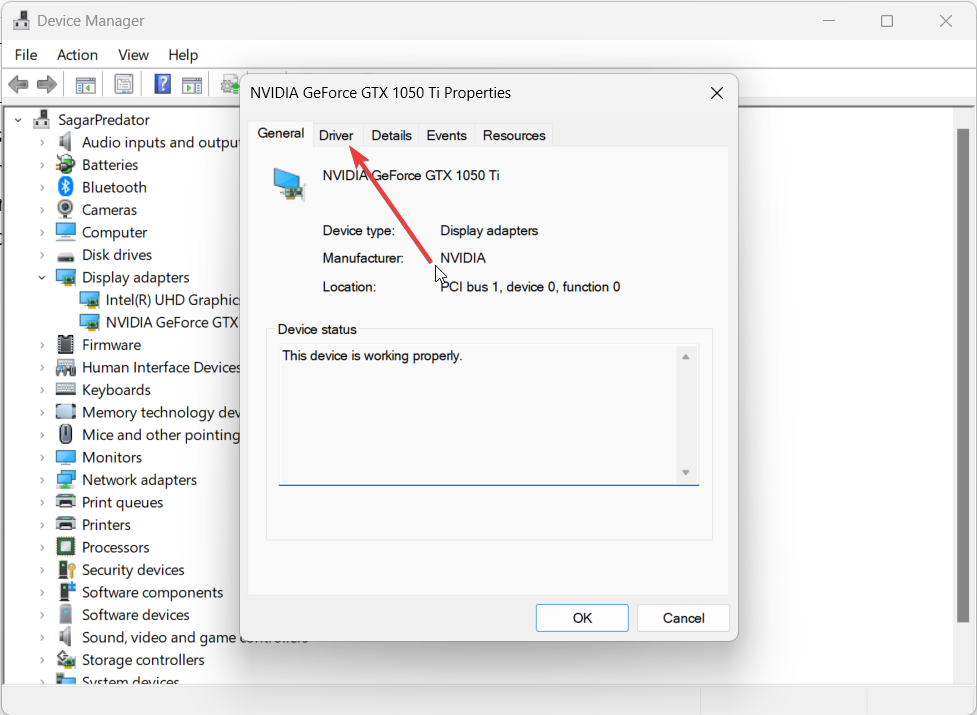
Double-click on your GPU to open it and switch to the Driver tab.
Select the Update driver option.
Select Search automatically for drivers option.
Install the latest drivers, and restart your computer.
Graphics drivers are an important part to play games from cloud streaming services on your PC. You should make sure that you have the latest version of the graphics drivers installed on your PC.
4. Change the server location
Open the GeForce Now app.
Click on the hamburger menu at the top left.
Select Settings.
Under the SERVER LOCATION section, select Auto from the drop-down menu.
If you feel that the server location that you are using on your Nvidia GeForce Now app is unreliable and you are facing connection issues, then we would suggest you change the server location to Auto and then check if this resolves the error code 0x800b1004 or not.
5. Flush the DNS cache
Press the Win key to open the Start menu.
Type Command Prompt and open it as an administrator.
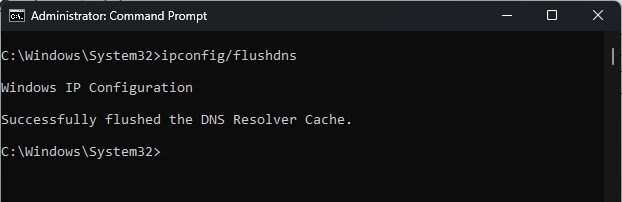
Type the below command and press Enter. ipconfig /flushdns
Restart your computer and launch GeForce Now.
After this, set up a wired connection or use your Wi-Fi to connect to the internet and then check if this resolves the issue or not.
Setting up your Windows development environment can be a time-consuming and cumbersome task. However, with the help of Windows 11 Dev Home, a machine configuration tool, you can streamline the process and get your PC ready for coding in no time.
Windows 11 Dev Home brings all your development environment setup tasks into one convenient place. Whether you’re setting up a new machine or onboarding new projects, this tool allows you to efficiently manage the entire process. Say goodbye to the fragmented and tedious steps involved in preparing your machine for development.
By using Windows 11 Dev Home, you can easily search for project requirements, clone repositories, and find specific versions of software and tools to install. It eliminates the hassle of managing multiple tool sign-ins and minimizes context switching, allowing you to reach productivity faster.
With Dev Home, you can focus on what you do best – developing.
Understanding the Importance of Windows 11 Dev Home
Efficient machine configuration is the cornerstone of a seamless development experience. By optimizing your system, you can significantly enhance your development workflow and reduce the chances of compatibility issues. Let’s explore the key areas to focus on during machine configuration.
Windows 11 Dev Home machine configuration tool handles everything you need to get your machine ready for coding. With multiple setup tools available, you can tailor the process to meet your specific development setup requirements.
Machine Configuration for Your Development Environment
Dev Home’s machine configuration tool handles everything you need to get your machine ready for coding. With multiple setup options available, you can tailor the process to your specific requirements. Here are the features available with Dev Home on Windows 11 and Windows 10.
End-to-End Setup
The end-to-end setup is perfect for a hassle-free experience. It installs applications, clones repositories, and sets up all the necessary requirements for your new development project. The intuitive graphical configuration interface guides you step-by-step, even suggesting popular developer tools or repositories linked to your GitHub account. Once you’ve made your selections, Dev Home takes care of the rest, leaving you with a fully functional environment.
Run a Configuration File for Existing Setup
If you prefer a reliable and repeatable setup process, you can use a WinGet Configuration file. This file consolidates all your machine setup and project onboarding tasks into one, simplifying the process. The YAML format, along with a JSON schema, leverages Windows Package Manager and PowerShell Desired State Configuration (DSC) Resource modules, ensuring a seamless setup every time. Before running a WinGet Configuration file, always verify its trustworthiness.
Clone Repositories with Ease
With Dev Home, you can effortlessly clone GitHub repositories onto your machine. Simply connect your credentials using the Dev Home GitHub extension, and you’re all set to clone repositories with just a few clicks.
Install Applications Conveniently
Dev Home also allows you to discover and install software applications quickly. Install them one at a time or let Dev Home handle several installations while you take a short break.
Set up a Dev Drive
For even better performance in development-focused scenarios, consider adding a Dev Drive. This storage volume utilizes ReFS and optimized security settings, ensuring a more efficient and productive environment.
Clone a GitHub Repo and Store It on a Dev Drive
Cloning GitHub repositories becomes more streamlined with Dev Home. Here’s how:
Select the desired repo(s) you wish to clone onto your machine.
Choose the storage drive where you want the repositories to be cloned.
If you haven’t set up a Dev Drive yet, Dev Home offers the option to create one. By checking the box to optimize workload performance with a Dev Drive, you can customize drive letter, name, size, and location of the dynamic VHDX for the Dev Drive. By default, the options are the next available drive letter, 50GB size, and creation at %userprofile%\DevDrives.
For those interested in creating their own Dev Home extension, head over to the Dev Home repository on GitHub. There, you’ll find comprehensive documentation to help you get started with building your extension.
Important Note
Please note that the Dev Drive feature is currently only available via the Windows 11 Insider program. To learn more about the Windows 11 Insider program, visit the official website.
Discover More with Dev Home
Dev Home simplifies and accelerates your Windows 11 development environment setup. By centralizing all the essential tasks, from cloning repositories to installing applications, it enables you to focus on coding and boosts your productivity. Embrace the efficiency of Dev Home and experience a seamless setup process like never before. Happy coding!
Epson Scan is a popular software with a large user base of Epson devices, given its excellent set of features. Yet, users encounter several serious Epson Scan issues. A common problem is when the Epson Scan 2 Professional mode is not working.
The problem can be caused by misconfigured settings or even a trivial bug, rendering the software ineffective to a large extent. So, let’s find out all about the issue.
Why is my Epson Scan 2 Professional mode not showing?
Professional mode allows total control of scanning settings. Scanning in Professional mode in Epson Scan 2 allows you to check the changes you make live in the preview image and to save your file into a .jpeg format automatically.
These are just some additional features you miss if your Professional mode isn’t working. The functionality might be malfunctioning due to any of the following reasons:
Recent update or outdated OS: Ironically, a recent OS update and an outdated Windows can result in the issue at hand. Some encountered the problem after a recent Windows 11 update, while others faced it when running an old version of Windows.
Outdated Epson software: If you’re not running the latest version of the Epson software, you might be missing some important features, including the Professional mode.
Missing or damaged scanner drivers: If the drivers aren’t up-to-date, missing, or damaged, this will most likely lead to the issue. Always make sure your drivers are updated to their latest version.
How do I get my Epson Scan 2 into Professional mode?
Before you dive into advanced troubleshooting, you can try these workarounds:
Ensure you have the latest version of the Epson software: Epson regularly releases updates to address bugs and compatibility issues. So, before anything else, ensuring you have the latest software version is important.
Restart the scanner and the computer: A simple restart might sometimes solve a temporary software glitch. If the issue isn’t persisting and has accidentally appeared, an easy solution like this might actually save you.
Check for software conflicts: Certain apps can occasionally interfere with Epson software, preventing the Professional mode from working correctly. Try to disable your trusted antivirus software or any third-party scanning programs installed on your PC to see if that resolves the issue.
If the software still isn’t functioning properly, here’s what you can try to enable Professional mode:
1. Update scanner drivers
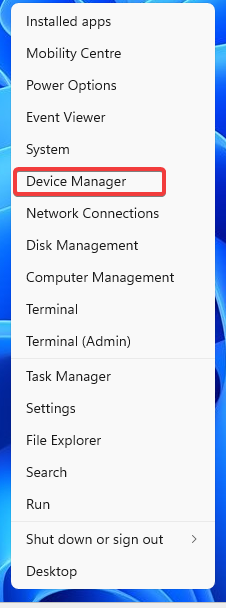
Press Windows + X key to open the pop-up menu. Choose Device Manager.
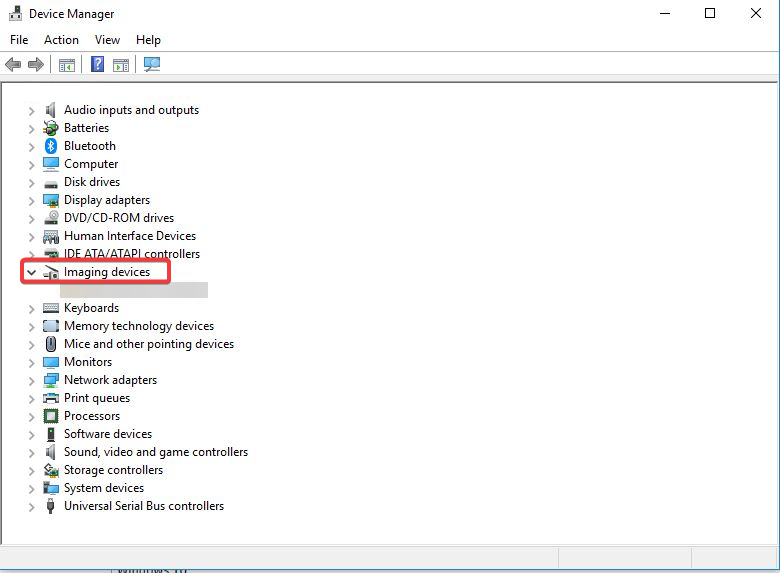
Double-click the Imaging Devices section.
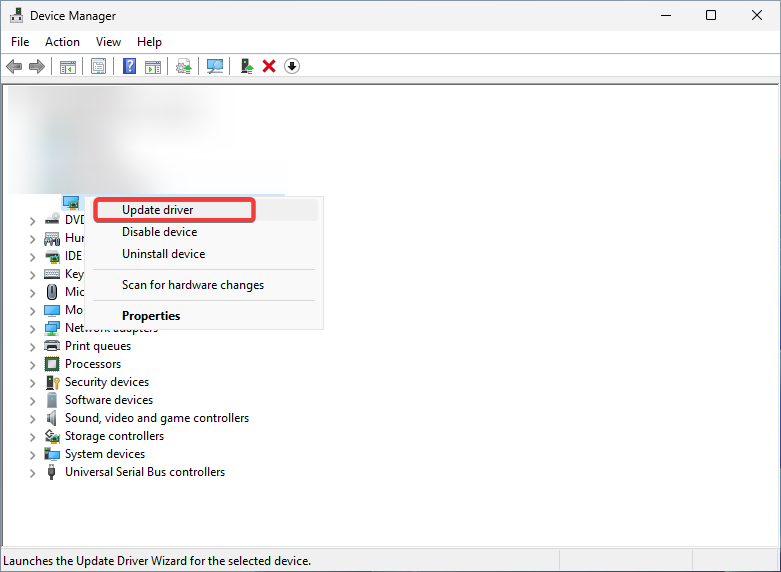
Right-click the device under it and select the Update Driver option.
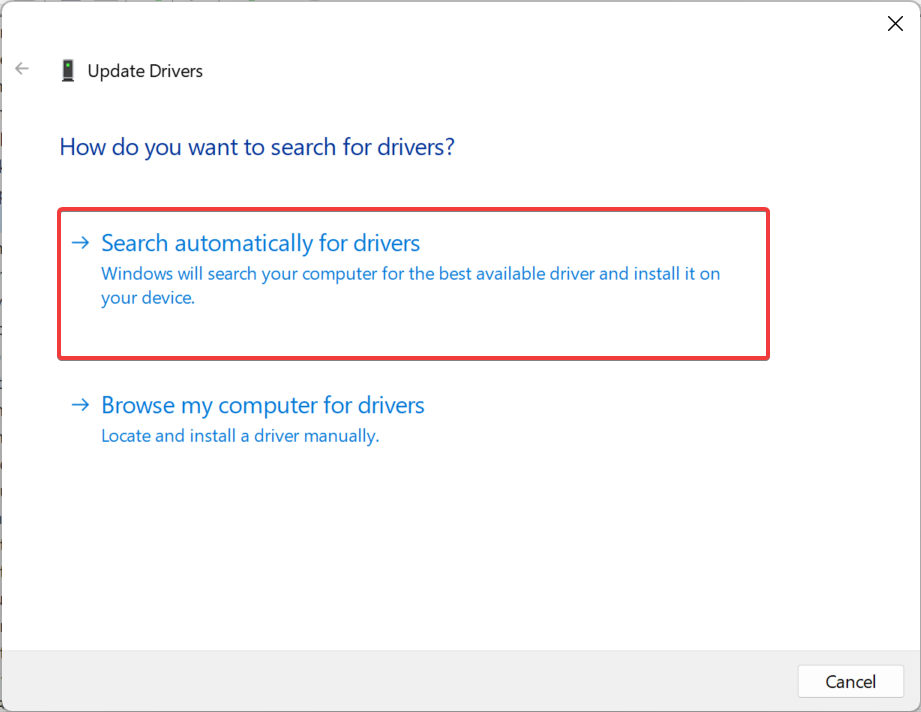
Choose Search automatically for drivers to install any available driver updates.
Restart your PC.
Usually, such issues are caused by either the software or problems with the scanner connected to it. The latter include faulty or missing drivers as a common culprit. Make sure your drivers are up-to-date to get rid of such issues.
Press Windows and type Epson into the search box. Open your Epson Scan software.
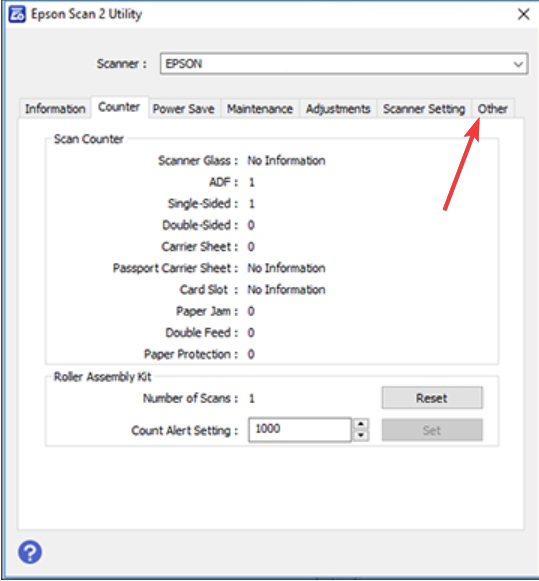
Choose the Other tab and click the Reset button.
Wait for the process to complete and restart your PC.
If updating your drivers didn’t work, you’ll need to troubleshoot the software itself. Resetting it will clear bugs or potential glitches that might lead to the Epson Scan 2 Professional mode not working error.
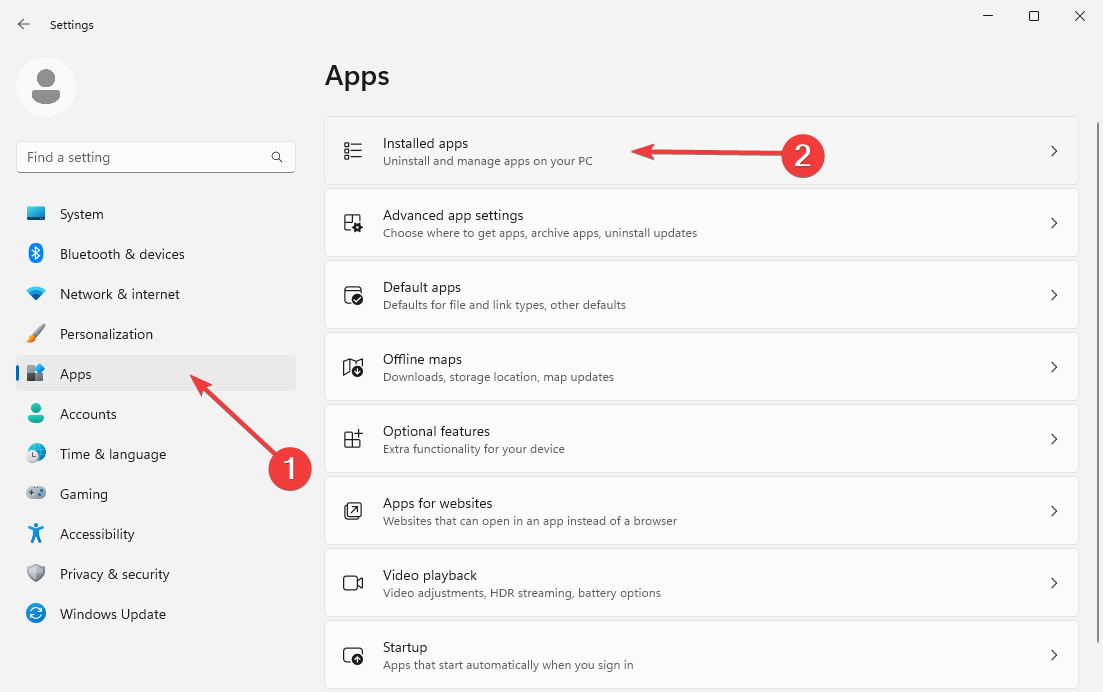
Hold Windows + I key to open Settings. Go to Apps and then Installed apps.
Locate the Epson Scan software in the list of apps below. Click on the three horizontal dots on the right and choose Uninstall.
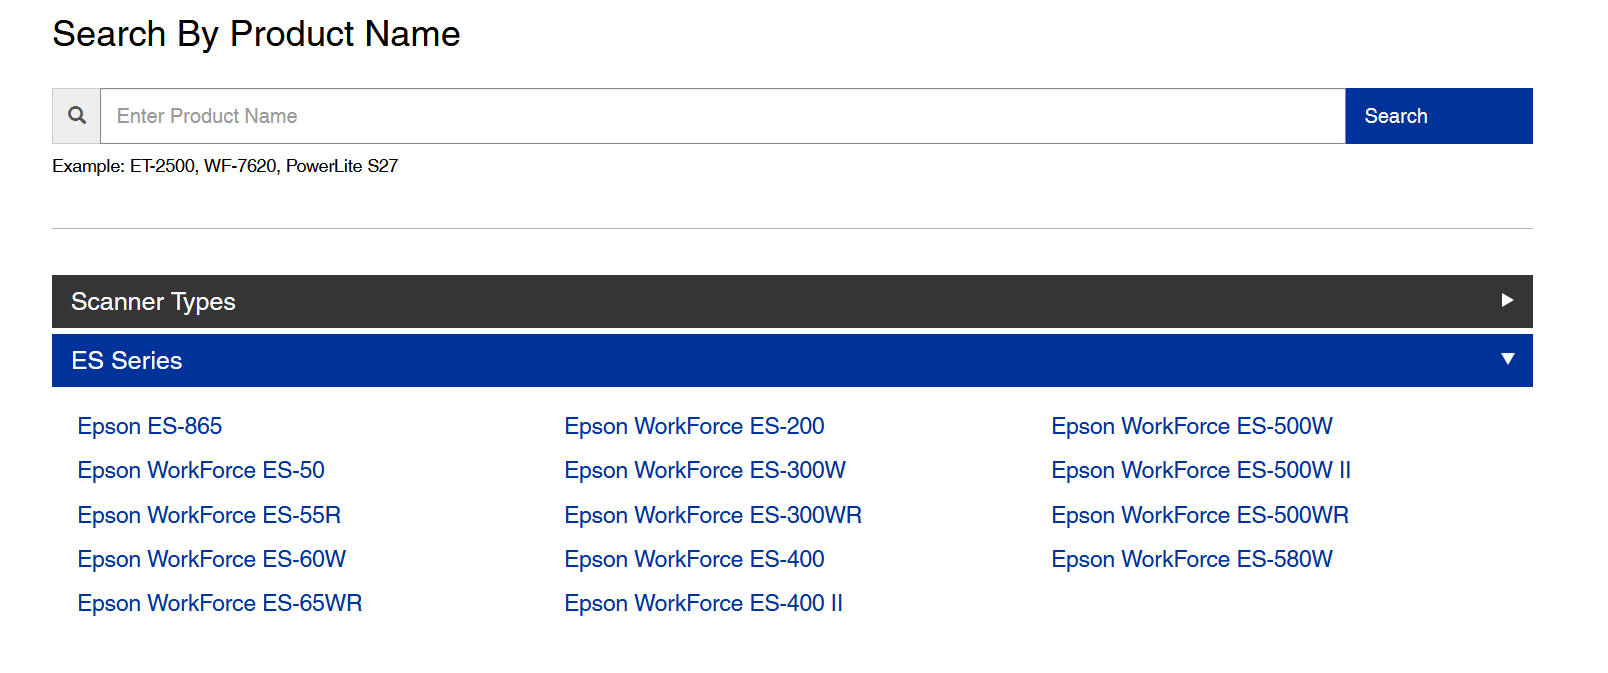
Follow the on-screen prompts to complete the removal process. Then visit the official Epson scanners web page.
Choose your scanner and then your specific model from the list.
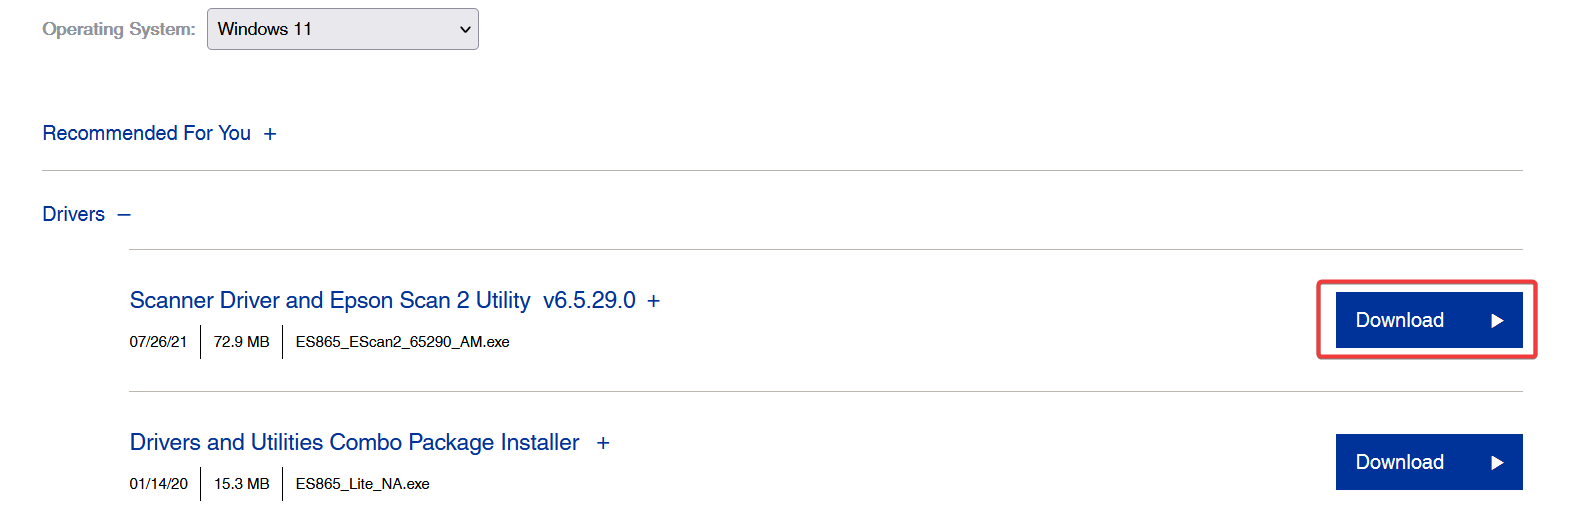
It’ll detect your OS version automatically. Open the Driver drop-down menu, choose the Scanner Driver and Epson Scan 2 Utility option, and click the blue Download button on the right.
Open the setup file and run the installation wizard. Follow the instructions to complete the process and then restart your PC.
The Read Aloud feature in Microsoft Word is a built-in feature as it lets you hear what you have written. This comes in handy when you have written lengthy documents.
However, there are several of our users that have reported coming across the Read Aloud not working in MS Word issue. In this guide, we will share with you the reasons along with the fixes that will help you resolve the problem.
Why is the Read Aloud function not working on Word?
After going through multiple user reports and forums, we have deduced a list of the most common reasons why the Read Aloud option is not working on Word for you.
The Office is outdated – Because of some underlying bugs in the current version of the Office, you are experiencing the Read Aloud function not working on the Word issue.
Volume levels are set to mute – You might have accidentally put the volume of your PC speaker to 0 which is why you aren’t getting the Read Aloud feature to work.
Temporary glitch – There might be a temporary glitch with Microsoft Word, which can be easily fixed by a simple restart.
Add-ins are problematic – Chances are that the recently added add-ins are the culprit and restrict the Read Aloud feature to work properly in Word.
The issue with the Word file – Some issues such as entire document corruption or incompatible file, etc. might be the reason the Read Aloud speech feature is not working for you in Word.
Let us now check out the solutions that will help you resolve the Read Aloud option is not working in Microsoft Word.
How do I get the Read Aloud function to work in Word?
Before applying the advanced solutions, we would suggest you try these simple fixes and check if this resolves the issue or not.
Restart the Microsoft Word program as it could be a temporary bug that is causing the Read Aloud issue.
Check if the volume in the Volume Mixer settings isn’t set to 0 or if it is muted.
Try restarting your computer and checking if it was a temporary issue or not.
Let us now go through the advanced solutions and fix this problem.
1. Install the latest MS Word update
Launch MS Word.
Click on the File option at the top of the Menu bar.
Select Account from the left pane.
Under Product information, choose the Update option and click on Update Now button.
Relaunch MS Word after the update completes and check if the issue persists or not.
You should make sure that you are running the latest version of MS Word and not the outdated version to avoid issues such as Read Aloud function not working.
2. Run the Microsoft Support and Recovery Assistant
Open the official website and download Microsoft Support and Recovery Assistant.
Extract the components of the ZIP file and double-click on the SaraSetup.EXE file to install the program.
The program will ask you to install Microsoft Support and Recovery Assistant. Select Install.
Click on I agree to accept the terms and agreements.
Select Office & Office Apps and click Next.
Choose your problem and hit Next.
The recovery assistant will diagnose the problem and fix it.
The Recovery Assistant is a great tool in case you are experiencing issues related to Microsoft products. Simply run the program as shown above and hopefully resolve the problem at your end.
3. Add the Read Aloud option
Launch MS Word.
Click on the File option at the top of the Menu bar.
Select Options from the left pane.
Click on the Customize Ribbon option on the left pane in the Word Options window.
Select Main Tabs from the Choose commands from the drop-down menu.
Double-click on Review under Main Tabs to expand it and select Speech.
Hit the Add button and click OK to add the Read Aloud function in the quick access toolbar.
Some users were unable to find the Read Aloud function let alone enable it. You might have accidentally removed it, which you can easily get back following the above steps.
4. Disable the add-ins
Press the Win + R keys to open the Run dialogue.
Type winword /safe and press Enter. If the MS Word Read Aloud feature works well, then there is some issue with the add-ins.
Click on the File option at the top of the Menu bar.
Select Options from the left pane.
Click on Add-ins from the left pane.
Hit the GO button for COM Add-ins.
Uncheck all the add-ins and click OK.
Restart MS Word and check if this resolves the issue or not.
Several users have reported that after disabling the add-ins on MS Word, they were able to resolve the Read Aloud feature not working issue.
Microsoft has taken a step in addressing the rising concern of IoT and OT device vulnerabilities by introducing firmware analysis in Microsoft Defender for IoT. With thousands of endpoints running outdated, unpatched SSH servers and the recent log4shell vulnerability discovery, organizations need improved visibility into their network devices.
The US National Cybersecurity Strategy, in a report released in March 2023, highlighted the IoT security threat as a strategic objective, underscoring the urgency to address the issue.
Lack of Visibility in IoT and OT Devices
Modern endpoint solutions provide insights into software inventories and vulnerabilities for IT devices. However, IoT and OT devices without an agent lack this visibility, acting as black boxes. Organizations remain unaware of crucial information like software levels, patches, vulnerabilities, and anomalies.
Introducing Firmware Analysis for Improved Security
Microsoft Defender for IoT introduces firmware analysis to bridge this visibility gap and enhance security for IoT and OT devices. The automated analysis examines binary firmware images, identifying potential vulnerabilities and weaknesses without requiring an endpoint agent.
How Firmware Analysis Works
Users access “Firmware analysis (preview)” in Defender for IoT to use the firmware analysis capability. By uploading an unencrypted Linux-based firmware image from the device vendor, the unpacked image undergoes thorough security analysis, revealing hidden threat vectors.
Key Insights from Firmware Analysis:
Software Packages and Vulnerabilities
The analysis creates an inventory of open-source packages akin to a Software Bill of Materials (SBOM). This helps manufacturers track components and detect vulnerabilities through published Common Vulnerabilities and Exposures (CVEs).
Analyzing Binaries
Firmware analysis assesses binary hardening beyond vulnerability identification. It checks code construction and adherence to security practices like Stack Canaries, measuring security hygiene and binary exploitation risks.
Weak Accounts and Crypto
Firmware analysis targets weak accounts (e.g., hardcoded usernames/passwords). Manufacturers improve firmware based on this info, while enterprises identify risky devices. It also locates embedded cryptographic material, alerting organizations to potential entry points for adversaries.
Microsoft Edge continues to evolve with new features. The latest enhancement involves opening up the Sidebar to extension developers, granting them the ability to create extensions tailored specifically for the Sidebar. This move is set to elevate the functionality of the Sidebar and offer users an even more seamless browsing experience.
The Microsoft Edge Sidebar has already undergone significant improvements since its initial introduction. Notably, the recent addition of Bing Chat AI at the top of the Sidebar has been a game-changer. Users can now easily interact with Bing AI and effortlessly integrate it into their daily workflows.
By allowing extension developers to work with the Edge Sidebar, Microsoft is paving the way for some truly useful functionality and enhancing productivity.
Here’s a glimpse of what developers will be able to do with the extensions:
Default Sidebar on Every Site: Developers will have the option to set a default sidebar that consistently displays specific content or extensions across all open tabs. These default settings will persist across sessions, ensuring a seamless experience for users. Sample code to implement this feature is readily available for developers to get started.
Sidebar Enablement on Specific Sites: Taking personalization to the next level, extension developers can make their creations open in the Sidebar exclusively on certain designated sites using sidepanel.setOptions(). This means users can enjoy a customized experience based on their preferred websites, enhancing efficiency and convenience.
Switching to a Different Sidebar: With the help of runtime.onInstalled(), developers can welcome their users with a dedicated sidebar upon installation or updates. As users navigate to different tabs, the extension can seamlessly transition to the main side panel, ensuring a smooth and personalized journey.
Microsoft emphasizes that the Sidebar page will offer the same level of flexibility as other extension pages. This means developers can load scripts, call APIs, and fully unleash their creative potential to craft unique and innovative extensions. The possibilities are endless, and this newfound freedom is sure to spark creativity and bring forth exciting new features.
Microsoft’s commitment to expanding its browser capabilities through extension support demonstrates its dedication to delivering a modern browsing experience for users. By encouraging developers to harness the power of the Sidebar, users can look forward to enhanced productivity, personalization, and convenience while exploring the web.
As the extension development community embraces this new opportunity, we can expect to see an influx of creative and practical extensions that will undoubtedly enrich the Microsoft Edge ecosystem.
Have you encountered the RESULT_CODE_KILLED_BAD_MESSAGE error code on Microsoft Edge? The error will prevent you from opening certain pages, but there are ways to fix it.
How to fix Microsoft Edge result_code_killed_bad_message error?
Before trying anything else, try disabling your antivirus. Users reported issues with Bitdefender, but other antivirus applications can cause the problem.
1. Clear browser cache and cookies
Launch Edge on your PC. Click on the three horizontal dots on the right to open its menu and choose Settings.
Go to Privacy, search, and services and click Choose what to clear under the Clear browsing data section.
Check the boxes next to Cookies and other site data and Cached images and files and select a time range – preferably All time. Confirm by clicking on Clear now.
Sometimes, cookies and cache data get damaged, which causes conflicts and leads to results_code_killed_bad_message errors.
2. Disable Edge extensions
Launch the Edge browser. Paste the following into the search box and click Enter: edge://extensions/
Disable each extension by toggling off the switch next to it.
Restart your browser to check if this resolves the issue.
3. Update Microsoft Edge
Open Edge on your computer. Click on the three-dot menu and go to Settings.
Choose About Microsoft Edge from the left-hand side. The browser will automatically check for updates and display your version. If the updating process is interrupted, you may have to help it by either clicking a blue Restart button to finish it or downloading the files manually.
Restart the browser.
Many reported this issue with the Canary version, but other versions can encounter this error.
Hopefully, these worked for you, and now you know how to fix your RESULT_CODE_KILLED_BAD_MESSAGE error code on Microsoft Edge. When nothing works, switch to an alternative browser.
Keep in mind that RESULT_CODE_KILLED_BAD_MESSAGE can affect Chrome, Brave, and other browsers, but even if you encounter it, you can apply similar steps to fix it.
As reported by Mint, Downdetector.com reported on Monday that Microsoft’s product suite, which includes popular applications like Word and Excel, experienced a significant outage, affecting over 15,000 users. This incident marks at least the third outage Microsoft services have encountered since the beginning of the year.
Specifically, Microsoft Outlook, a widely used email platform relied upon by numerous companies for smooth operations, was also affected by outage issues, as reported by Downdetector. Most reports indicated problems with Outlook, prompting frustrated users to convey their experiences on social media, with many expressing their inability to sign into or load their email accounts.
We’ve identified downstream impact for Microsoft Teams, SharePoint Online and OneDrive for Business. We’re providing full impact details and updates for those services via MO571683. Updates pertaining to Exchange and Outlook on the web will continue to be provided via EX571516.
— Microsoft 365 Status (@MSFT365Status) June 5, 2023
Addressing the situation, Microsoft acknowledged the issue through its Microsoft 365 Status account on Twitter, stating that they were actively investigating the problem with accessing Outlook on the web. Furthermore, they discovered a “downstream impact” on other services, such as Microsoft Teams, SharePoint Online, and OneDrive for Business.
However, the company later updated that it had successfully rolled back an update, improving service. They eventually confirmed that the impacted services had recovered.
This isn’t the first time such incidents have occurred. In February of the same year, Downdetector.com recorded over 2,000 incidents where people reported issues with Outlook, indicating that this has been a recurring problem for the platform.
The duplicate contact issue is still not completely resolved
As of the latest information on Microsoft’s service status page, both Outlook and Teams are still experiencing a duplicate contact list problem, initially reported on March 28.
The next update regarding this issue is scheduled for July 28.
Microsoft has stated that this problem is affecting users who synchronized their personal account device contacts with Microsoft Teams. However, they have implemented a long-term solution, and new synchronizations no longer result in duplicate contacts.
The company is working to complete a full cleanup process and apply it to the affected environment. They aim to have this process concluded by the end of August.
Adjustable-height desks are all the rage right now, and it’s really no wonder why. Between sitting all day or standing all day, neither presents the healthiest option—or most productive, for that matter. But why choose, especially when there are so many sit/stand desk solutions out there?
Flexispot has become one of the leaders in the kinetic furniture market. This California-based company has been around for awhile, and started making height-adjustable standing desks in 2015. In it’s About Us page Flexispot states,
With advanced design and technology, we make furniture that’s as seamless, sturdy, and eco-conscious as it is homey and comfortable.
Its products are made of 100% recyclable materials. Flexispot had the #1 top-rated standing desk according to TechRadar in both 2021 and 2022. That’s quite an impressive accolade…so how would its E7 height-adjustable desk stack up in your office space? Read on to find out.
Set up and assembly
Let’s get this out of the way up front: assembling the Flexispot E7 desk is ideally a two-person job. And that’s due to the weight of the main components alone. Or at least that was the case with the specific unit in this review, which came with Flexispot’s “Gaming Series” desktop option. (There are a ton of materials to choose from by the way, in a range of size options, all of which you can check out in this handy PDF).
The process itself isn’t anything too complicated, and should probably take less than an hour for most. The instructions that come with the desk are adequate if less-than-perfect, and there are videos available online like this one from Flexispot that should prove very helpful. If you do choose to tackle the assembly alone, it can be done—I did it solo, after all. Just be sure to eat your wheaties beforehand.
User experience
The upside of all that weight is that once you’ve got it all put together, this thing is rock-solid, and with a weight capacity of 355 lbs the Flexispot E7 can handle anything you can stack on it. In fact, if for some reason I got the urge to take a nap on the E7 as an adult male well over 200lbs., I’d be perfectly confident in doing so. Seriously, it’s that sturdy.
The LCD touch keypad is easy to use, and includes a child lock for safety purposes. It also had an embedded USB charging port. Users can program custom height presets to go from sitting to standing or vice versa with even greater ease. Raising or lowering the desk is done smoothly, so you won’t need to worry about toppling your desktop equipment or any of that. It’s also quiet, as in almost silent. The desk I received came with an outlet splitter to accommodate my various devices.
The verdict
DISCLAIMER: A sample unit was provided for an honest review
Cons
You may need help with the assembly
Pros
Fort Knox-worthy build quality and durability
Super-sturdy
Smooth, quiet height adjustment with easy controls
These sit/stand desks really are just the thing for making your work or play space really your own. It’s easy to recommend the Flexispot E7 as the centerpiece of your dream setup, especially as a sit/stand workstation. With unbeatable build quality and premium materials, easy to use LED touchscreen functionality, and a 15-year warranty on the frame and motor, you’d be hard-pressed to find a better offering than this. Check out this and other Flexispot products right here.
Microsoft Coffee is a story that has been around the Internet since 2021, and it is obviously about Microsoft. While the legitimacy of it is questionable, the idea is quite fascinating. It seems that in 1996, the Redmond-based tech giant released Microsoft Coffee, as a product intended to compete with Java.
Apparently, the whole set-up was in fact a prank, and Microsoft was not involved in it, but rather a group of people who wanted to have some fun. Microsoft Coffee boxes were then released in the local Seattle area, to shops, Walmarts, and so on.
According to the story, the local press, some local TV stations, and Radio stations covered the subject and presented it as news. Microsoft heard about it, and then proceed to collect and destroy all of the Microsoft Store.
The story on Microsoft Coffee – is it real or not?
Well, we may not know for sure, but this Reddit thread has brought forward some legitimate points when it comes to the validity of the story.
It seems that the website and the social network accounts for the Microsoft Coffee story were all created on April 1st, 2021. The creators even posted a video with an old video recording of the news covering the story back in 1996.
Even more, the website has a screenshot of a webpage of the time, covering and selling Microsoft Coffee as well.
The story of the prank is most likely false and the best point for this stance is the fact that there were no mentions of Microsoft Coffee prior to April 1st, 2021.
Plus, it seems that there is no other corroborating evidence anywhere on the internet regarding Microsoft Coffee. So this story started out as a prank, and it is ultimately a prank.
What do you think about it? Let us know in the comments section below.
Any Windows user has encountered a Windows update error at least more than once. Solving these errors can be easy to extremely hard. 0x80073BC3 seems to have joined the chat, and from the look of things, it is a complete headache.
Nonetheless, we always bring you solutions, which will be no different. Here are some of the top solutions as upvoted by users like you.
Why am I getting the error 0x80073BC3?
Windows update errors can be caused by anything. Unfortunately, it’s not always easy to tell the root cause of the problem. From the reports we gathered, most users who encountered the error 0x80073BC3 were trying to upgrade to a newer version of Windows.
In such cases, your hardware is almost always the problem, but below are other common causes:
Corrupt system files – Windows update files are part of the critical system files, so if they end up corrupt, you can be stuck trying to upgrade with no success.
Multiple system partitions – When your system creates other partitions during setup, Windows can confuse which system partition to use when updating. This will make the upgrade process fail because there’s a conflict in the correct drive to be used.
Insufficient space – A Windows upgrade process usually requires more space than the previous OS. The upgrade process will likely fail if you don’t have enough storage space.
How can I fix the 0x80073BC3 Windows update error?
A few checks to perform before moving to the technical solutions:
Disconnect all peripherals and only leave the mouse and keyboard.
Hit the Windows key, type Device Manager in the search bar, and click Open.
Navigate to Disk drives. If there is more than one hard disk, this may be causing the conflict.
Right-click on the non-essential drive and select Disable device.
Repeat this step for any other until you remain with the target drive.
5. Reset the Windows update components
Hit the Windows key, type cmd in the search bar, and click Run as administrator.
Type the following commands and press Enter after each one: net stop bitsnet stop wuauservnet stop appidsvcnet stop cryptsvcDel "%ALLUSERSPROFILE%\Application Data\Microsoft\Network\Downloader\*.*"rmdir %systemroot%\SoftwareDistribution /S /Qrmdir %systemroot%\system32\catroot2 /S /Qregsvr32.exe /s atl.dllregsvr32.exe /s urlmon.dllregsvr32.exe /s mshtml.dllnetsh winsock resetnetsh winsock reset proxynet start bitsnet start wuauservnet start appidsvcnet start cryptsv
There’s a common saying that says if it’s not broken, don’t fix it. In this case, if you’ve been using your Windows for a while with no issues, waiting for a few more days and trying the upgrade process again won’t hurt.
This is according to a few users who said waiting resolved their issues. One user on the Microsoft community platform had this to say:
After @ 3 weeks “SURPRISE!!!” Guess what free upgrade finally ran too compleation.
It may seem a little far-fetched, but Microsoft is intelligent and has several processes working in the background to ensure you get the right update for your device.
This may be the case for the users who said they tried the update after a few weeks, and it worked successfully.
You can learn more about data collection and how the devicecensus.exe process works to ensure you get the right build for your PC.
If waiting is not an option for you, we recommend trying out one of the Windows update repair tools. The beauty of these programs is they take away all the guesswork.
Instead of trying to figure out the cause of the error and then embarking on trial and error with different solutions, they go right into fixing the issue.
And that’s how to resolve the Windows update error 0x80073BC3. If you have any follow-up questions or a solution to add, drop us a comment below.
Windows Event Viewer logs all system activities and errors, enabling users to identify the cause of problems and troubleshoot them in time. However, several Windows 10 and 11 users reported the Event Viewer not working for reasons such as system file corruption, memory problems, etc.
This article, therefore, provides simplified steps for resolving the issue so you don’t miss important system health, performance, and security information.
What is the Event Viewer, and why is it not working?
There are various types of events: information, warning, error, and Security log. Irrespective, they all perform these functions in the Windows Event Viewer apart from the custom view access to PC activities:
Allows access and manage system events logs, errors, and other system information.
The Event Viewer also helps users to monitor and analyze system security in case of security breaches.
In addition, you are likely to encounter some of these errors: Event Log service is unavailable. Verify that the service is running; Access denied. You do not have sufficient privileges to access the event log; Error 1079. etc.
Now that you know what the Event Viewer does and some potential reasons why it may not work as outlined above, let’s proceed to the fixes.
What causes the Event Viewer not to work?
Some common and prominent issues that cause problems in Event Viewer are:
Problems with Event Viewer services – If services such as Event Log, Task Scheduler, and Windows Event Calendar are not working, it can affect the Event categories. However, restarting the services should restore functionality.
Event ID troubleshooting – You should be aware of standard Event IDs like 6008 (unexpected shutdown), 7031 (service termination), and 10016 (DCOM permissions issue) as they provide valuable information for troubleshooting system errors and identifying underlying causes.
Permission issues with Event Viewer – Access permission problems can prevent Event Viewer from functioning correctly. To resolve them, grant necessary permissions through the Local Security Policy or control panel.
System file corruption – If the log files become corrupted, it may fail to open or display events correctly. Hence, this will result in the Event Viewer’s malfunction.
Hardware failures – Issues like faulty storage devices, can negatively impact Event Viewer’s performance.
How do I fix Event Viewer not working?
Before anything else, kindly try these preliminary checks:
Perform a clean boot to identify any software conflicts that could cause the error event.
Press the Windows + I keys to open the Settings app.
Navigate to Accounts and click Other users.
Then, click on Add account.
In the Microsoft account window, click on I don’t have this person’s sign-in information and follow the on-screen instructions to create a new user account.
Open Event Viewer by searching for it in the Windows Start menu.
Navigate to the desired log category (Windows Logs or Applications and Services Logs) and select Properties.
In the Properties window, under the General tab, you will find the Log size, and adjust the overwriting options.
Set maximum log size or retention days if needed.
Click OK to save the changes.
Repeat for other log categories as desired.
By modifying the log settings, you can configure how logs overwrite events when they reach maximum size. Hence, protecting important events from getting lost due to log size limitations.
As stated earlier, it is essential to troubleshoot the issue to ensure consistency in events logging quickly. Although there may be several causes for this problem, following our guide should ease the troubleshooting process.
We all love Windows, but sometimes, we need to run other operating systems to test products or even for fun. WSL is one of the applications that allow users to run the Linux environment on Windows PCs without the need for a virtual machine.
The problem is you may run into a WslRegisterDistribution failed with error: 0x80370114 when installing WSL. We look in-depth at what this error means and how to resolve it.
What is error 0x80370114 Ubuntu for Windows?
If you’re getting this error while trying to run Ubuntu on Windows, it’s likely due to an issue with the Windows Subsystem for the Linux app itself. WSL is not your ordinary app. Installing it from the Microsoft Store is not enough.
You also need to enable other components that all work together to ensure you can run the app successfully. If its installation fails and brings up the WslRegisterDistribution failed with error: 0x80370114, it could mean one of the components is missing.
Still, that’s not the only reason. Others include:
Virus infection – If your PC has been infected with malware or adware, it could affect applications and delete some important files from the computer.
Outdated OS – To enjoy the features of WSL, your device must meet the minimum system requirements. This may be the issue if you’re on an earlier version of Windows. You can still install WSL on older versions, but it is quite the task.
Wrong OS version – If you don’t already know, WSL only supports 64-bit systems, so if you’re on a 32-bit system, this is why you’re getting the 0x80370114 error.
How do I fix error 0x80370114?
We recommend you start off with the following preliminary steps before any advanced solutions:
Repair or reset the WSL app to clear any corrupt cache.
1. Restart the vcompute service
Hit the Windows key, type Windows Security in the search bar, and click Open.
Navigate to App & Browser control.
Click on Exploit protection settings.
Navigate to the Program settings tab.
Find vmcompute.exe from the list and click to expand, then select Edit.
Scroll down to Control flow guard (CFG) and uncheck Override system settings.
Next, hit the Windows key, type Powershell in the search bar, and click Run as administrator.
Type in the following command and hit Enter: net start vmcompute
Restart your PC.
The Hyper-V Host Compute service is an essential part of the WSL. If it is disabled, blocked, or not running, you will encounter the 0x80370114 error.
It provides an environment where you can run both Windows and Linux commands. This is done using the hypervisor to create two virtual machines, one for Windows and one for Linux.
2. Disable Hyper-V
Right-click on the Start icon, then click on the Windows Terminal (Admin) option.
Now type or paste in the below command and press Enter to run it:DISM /Online /Disable-Feature:Microsoft-Hyper-V
Press the Windows key, search Windows Security, and click Open.
Select Virus & threat protection.
Next, press Quick scan under Current threats.
If you don’t find any threats, proceed to perform a full scan by clicking on Scan options just below Quick scan.
Click on Full scan, then Scan now to perform a deep scan of your PC.
Wait for the process to finish and restart your system.
For a better antivirus scan and protection, we also recommend a more sophisticated software such as TotalAV.
4. Enable Virtual Machine Platform
Hit the Windows key, type Control Panel in the search bar, and click Open.
Click on Programs.
Select Turn Windows features on or off.
Find the Virtual Machine Platform, check it, and hit OK.
During all the lengthy and complex steps, you may wonder why not just use a virtual machine instead of going through all these steps. While it is an option, the benefits of WSL are way too many to toss aside.
There are many reasons why you would choose WSL over a virtual machine:
Faster – WSL uses the Windows kernel, meaning it can run at native speed and does not require a full VM.
Simpler – You don’t need to manage VMs or worry about compatibility between your host and guest operating system.
More secure – Because WSL runs as an isolated process in user mode, it cannot modify the host system without explicit permission.
Flexibility – Another advantage is that you can use both Linux and Windows programs within the same environment without switching between them.
Hopefully, you’ve been able to fix the 0x80370114 on your PC. If none of these solutions bear fruit, you can try resetting your PC or a clean install.
That’s all we had for the 0x80370114 error, but if you have any additional thoughts on this topic, please leave a comment below.
You just changed your phone and are eager to retrieve your earlier messages on WhatsApp. There’s one problem, though. You get a message that WhatsApp couldn’t restore your chat history.
What could have gone wrong? It’s time to retrace your steps and see if there’s a chance to recover these messages because, let’s face it. Some are a matter of life and death, so here’s what to do.
Why can’t I restore my WhatsApp chat history?
Are you having issues restoring your WhatsApp chat history? What could be the problem? Here are some possible reasons:
Unofficial version – If you’re not using the official WhatsApp version, the chances of you getting your chat history are really slim. Modded versions such as GBWhatsApp don’t have the option to backup chats.
Your drive is full – If your chosen backup location is full, WhatsApp cannot restore your chat history because it wasn’t backed up in the first place.
Chats not synced – There’s a high possibility that you backed up your chats, but your drive failed to sync them. Therefore, when you try to restore them, it won’t work.
Wrong storage location – WhatsApp allows you to back up your data in various locations. Perhaps you’re trying to retrieve chats from a location you never backed them in.
How do I get my chat history back on WhatsApp?
A few basic checks to perform include:
If you’re using a modded WhatsApp version, you probably won’t have any chats to restore.
Double-check your phone number and ensure it matches the one you want to restore your chat history.
Ensure you’re signed in on your iCloud or Google Drive.
Restoring chat history can take up a lot of space, depending on the nature of your chats. If you have many videos, images, and voice notes, you will need enough storage space to accommodate all these files.
Depending on your phone model, you can clear any unnecessary files or uninstall apps you haven’t used to free up some storage space.
Some phones have an intelligent tool that lets you know when you’re running out of storage. Be sure to empty the recycle bin, too, so that no residual files remain behind.
2. Delete WhatsApp cache
Swipe down and click on the Settings icon.
Scroll down and select Apps.
Find the WhatsApp app and tap on it.
Tap on Storage.
Now tap on the Clear cache option at the bottom.
3. Check for phone firmware updates
For this step, we shall be using the Samsung model.
Swipe down and click on the Settings icon.
Scroll down and select Software update.
Tap on Download and install.
Your phone will check for any updates and if available, the download will begin.
Now go to the Google Play Store, search for WhatsApp, and tap on Install.
5. Reset your phone
For this step, we shall be using the Samsung model.
Swipe down and click on the Settings icon.
Scroll down and select General management.
Tap on Reset.
Select Reset all settings.
6. Use a third-party tool
If none of these methods work, you might need stronger reinforcement by introducing a third-party tool.
There is a lot of data recovery software available for Android phones. Still, we always recommend Dr.Fone. iPhone users have not been left behind, as we also have data recovery software for iOS.
The good thing about using Dr.Fone is that you can restore WhatsApp messages and attachments, deleted files, and, of course, recover the usual files, such as contacts, text messages, photos, videos, etc.
With that out of the way, you may want to check out our other articles on how to solve related issues. For instance, if WhatsApp web is not working on your PC, we have a remedy.
To leave us any feedback, drop a comment down below.
In this digital age, your smartphones have become an integral part of your lives, containing invaluable photos, important contacts, cherished memories, and essential data.
Losing this precious information due to accidental deletion, device damage, or software issues can be devastating. That’s where FoneTool comes to the rescue!
Its user-friendly interface and comprehensive features provide all iPhone users with a seamless backup and restore solution.
What does FoneTool by AOMEI offer?
1. Manages your iPhone data
FoneTool is an all-in-one iPhone data management tool that efficiently backs up, transfers, and manages data on your iPad, iPhone, or iPod Touch.
It offers two options to back up your data: Full Backup (backs up everything) and Selective Backup (selects data to back up).
You can transfer your iPhone data (including photos, videos, contacts, and music) to your computer or another iPhone. You can also view, manage, or delete data quickly before transferring it to other phones.
It even allows you to back up or transfer WhatsApp or WhatsApp Business data from or to your iPhone within a few steps.
2. Fast speed & easy to use
With an intuitive interface, FoneTool is easy to use and very fast in backing up or transferring data; it roughly takes up to 6 minutes to complete the task, wherein the traditional tools take more than 20 mins.
To prevent the risk of data loss due to various circumstances such as accidental deletion, device damage, or software problems, it is recommended to use dedicated software such as FoneTool, which can help you back up all important iPhone data.
Moreover, you can enable backup encryption to make an encrypted iPhone backup to protect it from being misused.
3. Control your data with ease
Apart from features to back up WhatsApp data and transfer complete data from your old iPhone to your new iPhone or your computer, it comes with an advanced toolkit, including:
HEIC Converter – FoneTool comes with HEIC Converter, which lets you convert iPhone images to PNG, JPG, or JPEG formats for free so that you can view or edit them on your computer.
Photo Deduplication – You can smartly detect and delete duplicate photos from your iPhone and Windows computer in a few simple steps to recover space.
Data Eraser – The tool helps you erase the data on the iPhone completely, making data irretrievable. You can either erase private data or erase all data.
Double-click the downloaded file, and run the setup.
Click Install to initiate the installation.
2. Backup your data
Launch FoneTool and connect your iPhone to your computer via a USB cable.
On your phone, tap Trust this computer and enter your passcode.
Go to Phone Backup and click on Selective Backup or Full Backup.
If you choose Selective Backup, you need to select the data type from the list on the next screen and click Start Backup.
For Full Backup, click Start Backup directly. You can also toggle on the switch for Enable Backup Encryption.
Next, click Backup Storage Path, to choose the path to save the backup file, and click Backup.
Enter the passcode on your iPhone if prompted and click OK to initiate the backup. Then, wait for the process to complete.
3. Transfer the data
Launch FoneTool and connect your iPhone to your computer via a USB cable.
On your phone, tap Trust this computer and enter your passcode.
Go to Phone Transfer, and you will see three options: iPhone to PC, PC to iPhone, and iPhone to iPhone. Select the suitable option and click Get Started. Here, we take the iPhone to PC mode as an example to demonstrate how the tool works.
Click the + icon to add files.
Next, select the type of file you want to transfer and click OK.
The selected items will appear in a list; click Start Transfer.
In this page, you can adjust the setting in Transfer Settings and then click Transfer.
The process might take some time to perform; click OK when finished.
4. Manage your WhatsApp chats
Launch FoneTool and connect your iPhone to your computer via a USB cable.
On your phone, tap Trust this computer and enter your passcode.
Go to WhatsApp Manager, then choose WhatsApp or WhatsApp Business.
Now select the Backup WhatsApp or Transfer WhatsApp option.
You will get the list of data that will be backed up. You can also toggle on the switch for Enable Backup Encryption.
Click Start Backup.
On the next screen, you will be informed about inputting the passcode on your iPhone before initiating the backup; click OK to proceed.
In addition, you can also use the Toolkit option to access Photo Deduplication, HEIC Converter, and Data Eraser features to manage your data on your iPhone and computer.
If you hurry up and download FoneTool right now, you will get the software and use it for one year for free!
In conclusion, FoneTool is the ultimate iPhone data transfer solution for effortless data protection. Its comprehensive features, user-friendly interface, and reliable performance make it a standout tool in the market.
With FoneTool, you can easily back up data from your old iPhone and transfer it to the new iPhone with a few simple steps.
The app’s intuitive interface makes it accessible to users of all levels, eliminating any confusion or potential errors.
It boasts a robust backup system that ensures the integrity and security of the user’s data. With regular updates and compatibility with the latest iPhone and iOS versions, FoneTool stays ahead of the curve and provides a seamless experience for its users.
So, make the smart choice and try FoneTool today – the ultimate iPhone data management tool that will revolutionize how you protect and manage your valuable data.
If you have questions or suggestions, please mention them in the comments section below.
Say goodbye to dull and lackluster images, and embrace a world where every pixel pops with captivating hues.
Whether you are a social media influencer, content creator, or simply someone who loves capturing beautiful moments, Filmora Video Editor can help you make your photos stand out from the crowd.
With Filmora Video Editor 12.3 Color Correction tool, your photos will undergo a dazzling transformation like never before.
From enhancing the richness of colors to adjusting the perfect balance of tones, this tool puts the power of professional-grade color correction right at your fingertips.
How can color correction by Filmora help enhance a video?
Color Correction by Filmora Video Editor is a powerful tool that can significantly enhance your videos in several ways:
Corrects color balance – Allows you to adjust the color balance of your video, ensuring that the overall tones are accurate and natural.
Enhances contrast and saturation – Helps boost your video’s contrast and saturation levels to make your visuals more vivid and impactful, adding depth and richness to your footage.
Fine-tuning exposure – Enables you to adjust the exposure levels, bringing out more detail in dark areas or toning down excessively bright spots, resulting in a visually appealing video.
Creating a consistent look – Lets you apply color grading and presets to your videos, ensuring a consistent look and feel throughout your footage.
Correcting white balance – Allows you to fix white balance issues, ensuring that whites appear truly white and accurately represent colors.
The tool can transform ordinary videos into visually stunning masterpieces. It allows you to correct imperfections, enhance the overall quality, and create a cohesive and engaging visual experience for your audience.
How can I use Filmora Video Editor to brighten my videos?
Locate the downloaded file, and double-click it to run it.
Click Install to initiate the installation and wait for the process to complete.
2. Use the color corrector
Launch the Filmora Video Editor.
Click on the link for Click here to import media and add a video clip, then drag and drop the clip into Filmora’s timeline.
Double-click the clip that you want to color correct and go to the Color tab.
You will see four modes of color correction:
Basic – Adjust LUT, Color, Light, Vignette, Color Match
HSL – Allows you to adjust Hue, Saturation, and Luminance
Curves – Adjust the tonal values of the image
Color Wheels – Allows you to adjust Highlights, Midtones, and Shadows
2.1 Basic mode
Let’s start with the Basic mode. Under Preset, you will find over 40 color presets to choose from to add warmth or temperature to your clip and make the color correction quickly. Select a color, then drag it to the timeline to apply it to the videos.
Then comes LUT (Look-up tables); there are a handful of presets that apply a specific color grading to your video clips, giving them a mood, style, or aesthetic. Simply go to the drop-down and select the theme. With a slider, you can choose the Strength you want for the desired effect. You can also import the industry-standard 3D LUT color projects by selecting the Load new LUT option from the drop-down menu.
Next is Color, which comes with five options; you can click the slider under them to adjust the settings and preview the results immediately.
Auto White Balance – Adjust the color accordingly or choose the eye dropper tool to select the white part of the clip to auto-balance a color.
Temperature – Reinforce the mood and feeling of a scene
Tint– Add tints of different hues to the image
Vibrance – Targets less saturated color
Saturation – Adjust all the colors in the image
Following Color, it is Light, which has seven options; drag the slider under them to adjust them and preview the results immediately.
Exposure – Lightens and darkens the color in the video, works best for over and under-exposed clips
Brightness – Brighten or darken the overall tone of the video
Contrast -Adjust the difference between the darkest & the lightest area
Other four options enhance the lighting in your video by manipulating the Highlights, Shadows, Whites, and Blacks.
Next up is Adjust, which has an option named Sharpen, used to enhance the sharpness of an image.
Following Adjust,Vignette has five options; drag the slider under them to adjust accordingly.
Amount – Drag the slider to make the video’s corner darker or lighter
Size – Increase the area of the video affected by the vignette
Roundness -Turn the vignette’s shape closer to a circle
Feather -Adjust the sharpness of the edges of the vignette
Exposure – Adjust the video’s exposure
Highlight – Choose whether the blurry edges of the vignette will be darker or brighter.
The last one is Color Match which helps you match the color of the current clip to the reference clip.
Once you are in the Color tab, switch to HSL mode. HSL is a short form of Hue, Saturation, and Luminance. You can adjust individual color ranges in your video.
There are three options:
Hue – Fine-tunes the purity of a specific color of the clip
Saturation – Changes the color vividness or purity of the color
Luminance – Changes the brightness of the color range
You can drag the slider from left to right to adjust them to brighten your videos.
2.3 Use Curves
Once you are in the Color tab, switch to Curves mode. You will see the fancy graph with a diagonal line representing your image’s current tonal values.
Click on the line to add the anchor points. Now drag the anchor points upward to compress the tonal value to increase the contrast and see the preview to understand the changes.
2.4 Use Color Wheels
Once you are in the Color tab, switch to Color Wheels mode.
It comes with three options:
Highlights – Brightest part of the image helps create an over or under-exposed image
Midtones -Works on the contrasts of the video
Shadows – Darkens pixels in the clip, decreasing the brightness of the shadow and bringing instant depth.
Once you make all the changes, you can click Save as Custom to save the edits as a Preset.
Name the Preset as per your liking, click OK, then go to the Preset option under Basic and apply it in your next video.
3. Add effects to your clip
To add effects to your video, click Effects from the top of the screen.
On the left side, you will see nine effects, including ones added by you and recommended. The other seven are Video Effects, Filter&LUT, Overlay, Audio Effects, NewBlue FX, Boris FX, and Filmstock.
You can go to any of them, click the drop-down menu to choose the options under them, go to the right pane, select the one you want & click the download icon.
Once downloaded, drag them to the timeline to apply them in the clip.
Filmora Video Editor
Transform your photos with precision and finesse – Unleash the power of the Filmora 12.3
You can also click the graph-like icon to access the Histogram, then make the changes related to tone and color to analyze the changes accurately. Also, it can save the changes as presets so you can use the settings for videos in the future.
Also, you can compare the changes to the original clip with the Side-by-Side view and Split View options.
So, this is how you can use Filmora Video Editor‘s advanced color correction tool to adjust the color and create stunning visuals that will captivate and impress your audience.
If you are a content creator, investing in Filmora 12.3 will save you time and ensure your photos stand out with vibrant and visually appealing results.
Don’t miss out on the opportunity to unlock the full potential of your photos. Get Filmora Video Editor today.
If you have questions or suggestions, please mention them in the comments section below.
When you have too many background processes running, it often affects the PC’s performance and tends to slow things down. But some are more problematic than others. music.ui.exe falls in this category!
For some users, it will trigger a high CPU usage, while others will find an increase in RAM consumption, both detrimental to the PC’s performance. Keep reading to find out all about the process and the solutions that work!
What are the signs that music.ui.exe is causing issues in Windows?
Here are the reasons you are facing issues with Music.UI.exe, the process linked to Music Player:
High CPU usage: While a CPU usage percentage under 10% shouldn’t be a problem, anything more than 25% due to the Music Library should be concerning. And in most cases, the CPU usage percentage was close to 50-60%.
App crashes: When the PC slows down due to increased disk usage or resource consumption, apps begin to crash. And music.ui.exe has been found to cause the problem.
PC is infected by malware: Though rarely the case, issues due to the music player process may be caused by malware disguised as Music.UI.exe. It has a fairly low-security risk rating, but you shouldn’t sit back before verifying the file location and scanning it with security software.
Where is the Music UI EXE file located?
The music.ui.exe file is linked to the Entertainment Platform created by Microsoft and is a part of the default OS installation. Groove Music or the Zune software often triggers the process and is stored in their dedicated directory under WindowsApps.
The file location for the Music Player process is (version may vary): C:\Program Files\WindowsApps\Microsoft.ZuneMusichttps://_10.18011.13411.0_x64__8wekyb3d8bbwe/
Though, you may have to secure full folder access to find and modify the executable file. And, while you are at it, check the Groove Music directory for the process when the Task Manager shows an increased CPU usage.
What replaced Groove Music?
After much anticipation, Microsoft replaced Groove Music with the all-time favorite Media Player. A recent Windows update will do the job, replacing the app on all Windows devices.
While it was initially supposed to affect only Windows 11 PCs, Microsoft now intends to replace Groove Music on Windows 10 as well, and it’s all underway!
What are the best solutions to fix common music.ui.exe problems?
Before we move to the slightly complex solutions, here are the quick ones:
Restart the computer.
If you keep terminating Groove Music and music.ui.exe and it’s still running in the Task Manager, many recommend letting the program run for a few minutes before killing it.
Scan the PC using a reliable antivirus tool. You should head to the file’s storage path and verify the file size. It is roughly in the range of 12-13 MB.
If none work, move to the fixes listed next.
1. Remove Groove Music from startup apps
Press Ctrl + Shift + Esc to open the Task Manager, and navigate to the Startup apps tab.
Select Groove Music from the list, and click on Disable at the bottom.
Removing Groove Music from the list of autostart programs, i.e., the ones launching when you boot Windows, should help when facing high disk or CPU usage due to Music.UI.exe.
2. Disable Groove Music from running in the background
Press Windows + I to open Settings, go to Apps from the navigation pane, and click on Installed apps.
Now, locate Groove Music, click on the ellipsis next to it, and select Advanced options.
Select Never from the Let this app run in the background dropdown menu.
Once done, restart the computer for the changes to come into effect.
Depending on which player you use on other devices, there’s always the option to switch to another program. Once you have uninstalled Groove Music, switch to Apple Music, YouTube Music, or one of the other popular media players.
This will not just fix any music.ui.exe errors but also ensure you can listen to your favorite music with more customizations in hand and enjoy a far better experience.
How can you safely and effectively disable music.ui.exe?
Yes, you can disable music.ui.exe as long as Groove Music is not the device’s primary or default music player. There’s no harm in terminating the process or uninstalling the program.
As per a user’s post, the process consumed 12% of the processor, which, when combined with the other programs on the PC, took up a whole chunk. And according to a leading website, the file’s technical security rating stands at 18%, all the more reasons to disable it!
More so, as per a reliable source, 35% of experts consider this file a threat, given that hackers often create malware that appears identical to music.ui.exe and shares the same name. And when a poll was done, 92% of users supported removing the file.
How can users prevent future issues with music.ui.exe?
Now that you know all about the process, it’s also imperative to understand how to prevent similar issues in the future. An ideal approach would be to uninstall the program to keep the built-in CPU usage under check and switch to an alternative like Apple Music or YouTube Music.
Remember, in most cases, you should be able to fix the problem in no time without any expert help. And if you uninstall the app, that eliminates the chances of encountering any future problems with music.ui.exe.
When we talk of background processes, it’s only a few that come to mind. Why is that? Probably because one of these had, at some point, caused an issue, maybe high CPU usage, or the process crashed altogether. One such is msosync.exe.
When faced with a problem like this, your primary approach should be to identify the file size of the executable files, check the file location, and verify whether the process poses a security threat. Keep reading to find these aspects about msosync.exe!
What is msosync.exe, and what is its functionality?
The process, msosync.exe, is linked to Microsoft Office and is primarily responsible for cache management. Its job is to ensure that users can quickly access Excel, Word, PowerPoint, and OneDrive files.
The software component does so by actively running in the background, collecting the required data, and creating a cache such that the file, when opened, quickly shows up, thus eliminating any extended loading period and ensuring faster viewing.
The original file path for msosync.exe is (X represents the version of Microsoft Office):C:\Program Files\Microsoft Office\OfficeX
But the file, with an exe file extension, has often been a source of a wide range of problems. For some users, it triggered error messages, a few found that Microsoft Word was not working, while others reported msosync.exe high CPU usage.
You may come across the msosync.exe System Error due to problems with the process.
Here are a few reasons you may face issues with msosync.exe:
Running an outdated product version: A common reason behind the msosync.exe Bad Image error is running an older version of Microsoft Office. New releases introduce features and eliminate such issues.
Missing or corrupt DLL files: Oftentimes, users had a particular DLL file listed as the source of the error. So, you should verify whether that particular DLL is corrupt or missing.
Bug in Microsoft Office or Windows: For a few users, it was a bug in the Windows Operating System or MS Office that led to issues with the cache files, causing the error.
Should I remove msosync.exe?
Ideally, you shouldn’t remove or disable msosync.exe in Windows. But if the process takes up a high CPU or there’s a corrupt file version, that could be a solution.
Though, your primary approach should be to identify any other suspicious files, and if any are found, maybe that’s causing problems with msosync.exe. A comprehensive approach will do wonders when troubleshooting issues with the client software, i.e., Microsoft Office.
How can I troubleshoot and resolve msosync.exe errors?
Before we start with the complex ones, here are a few quick solutions to try:
Restart the computer. Often a restart is all it takes to fix things with cache files when Word runs into an error.
Update Microsoft Office in case you are facing issues with msosync.exe due to corrupted or suspicious files.
Run a malware scan using a reliable antivirus to identify and eliminate a security threat.
If none helped, move to the wide range of fixes listed next.
1. Rename the msosync.exe file
Press Windows + E to open File Explorer, paste the following path (where X is the office version) in the address bar, and hit Enter: C:\Program Files\Microsoft Office\OfficeX
Locate the msosync.exe file, right-click on it, select Rename, and change it to something else. Keep it simple so that you can identify the file later on and revert the change if required. For instance, add old in the file name.
Once done, restart the computer for the changes to come into effect, and you shouldn’t face issues with the corrupt files anymore. By renaming the file, you prevent Microsoft Office from accessing it.
2. Kill the task in Task Scheduler
Press Windows + R to open Run, type taskschd.msc in the search box, and hit Enter.
Now, look for any Microsoft Office 15 Sync Maintenance entry here, right-click on it, and select Disable.
Once done, restart the computer for the changes to come into effect.
Many users found that the process was triggered by a sync task, and disabling it completely stopped msosync.exe. You may not find the task on a newer file version.
3. Download the missing DLL file
If you are facing an issue due to a missing DLL or file loss, it’s wise to download the missing DLL. While several websites claim to host DLLs, we recommend against these.
It’s best to either get the applicable version of the DLL from another PC running Windows or use an effective DLL repair software. The latter should be the preferred approach, given that it’s automatic and most tools have a vast database comprising every DLL out there.
4. Repair Microsoft Office
Press Windows + R to open Run, type appwiz.cpl in the search box, and hit Enter.
Now, locate Microsoft 365 from the list of programs, select it, and click Change.
Click Yes in the UAC prompt.
Choose Online Repair and click Next.
Again, click Repair to confirm the change adn start the process.
Make sure you are connected to the Internet before starting an online repair of Microsoft Office since it would download a wide range of files, both corrupt files and one critical to the functioning.
And once the process is complete, you should, in all likelihood, not face issues with msosync.exe.
Press Windows + I to open Settings, navigate to the Apps tab, and click on Installed apps.
Locate Microsoft OneDrive, click on the ellipsis next to it, and select Uninstall.
Again, click Uninstall in the confirmation prompt.
Follow the on-screen instructions to complete the process.
If the solutions listed earlier didn’t help, the last option is to uninstall OneDrive since it’s been found to trigger the msosync.exe process, which led to high CPU usage.
We don’t recommend removing msosync.exe unless you need to. A simpler alternative is to head to the file location and rename it instead. So, if things don’t work out, you can always revert the changes and get things up and running.
Besides, if you have decided to remove msosync.exe, delete the file or uninstall Microsoft Office. For the latter, we recommend using reliable uninstaller software to delete any leftover files and registry entries.
That’s all! You should now have the Windows operating system running without throwing errors or witnessing performance issues due to increased resource consumption.
To prevent such issues from arising in the future, regularly scan your PC for malware, make sure all DLL files are present and accessible, and that no operating system file is corrupt.
Visual Search in Chat uses OpenAI’s GPT-4 model. It allows users to submit images, whether captured personally or from other sources, and ask related questions to Bing Chat. The system comprehends the image context, interprets it, and provides answers to inquiries about it. For instance, users can inquire about the architecture of a building captured in a photo or seek lunch ideas based on the contents of their fridge.
The feature is now accessible on Bing.com for desktop, mobile apps, and Edge Sidebar. It will soon be accessible on Edge Mobile and is planned to be integrated into Bing Chat Enterprise.
Bing Chat Enterprise
In addition to Visual Search, Microsoft also launched Bing Chat Enterprise to cater to users who expressed interest in utilizing Bing Chat for professional purposes while ensuring data protection. The enterprise version offers commercial data protection to meet these demands.
Bing Chat Enterprise is now available at no extra cost for commercial customers licensed for Microsoft 365 E3, E5, Business Standard, and Business Premium. IT administrators with eligible licenses can enable Bing Chat Enterprise for their organization using instructions provided by Microsoft.
Like many others, if you rely on VPNs to watch your favorite shows for free outside Australia, you may have encountered issues of 7Plus not working with a VPN.
Most times, you get an error message saying there was a problem while connecting to 7plus or something like that.
Typically, these problems arise from server connection, cookie issues, or weak VPN use. But don’t worry. Here is this article for you.
I’ve compiled a list of fixes that have personally worked for me, and I’m confident they will work for you too.
Also, I tested several VPNs and recommend the best ones specifically for accessing 7Plus.
Be sure to check them out!
7plus not working with VPN? Try these fixes!
There are several reasons why your 7plus is not working with VPN. These include a wrong server connection, stored cookies, or a weak VPN.
Interestingly, some simple steps can solve the problem and get you back to streaming.
Here they are.
1. Switch to another Australian server
7plus may not work with some VPN servers due to blacklisted or overloaded servers, or IP leaks.
So, if you are a victim of any of this, the best fix is to switch to another Australian server on your VPN.
Here’s how to do that using ExpressVPN. However, the process is similar regardless of the provider.
Open the VPN app.
Disconnect from the current server.
Click on the Servers tab.
Search for the Australia region.
Choose a server from the list.
Click on the Connect button
Go to 7plus website and try streaming a movie again!
As you switch to another server in Australia, you’ll get a brand-new IP address that gives you a new identity for your streaming.
Now, here’s the key: Use a VPN that has many servers you can switch to.
2. Clear your browser cookies
Cookies are small files that websites store on your device to remember your preferences and settings.
However, they can also expose your real location. This can trigger 7plus’s geo-blocking mechanism and prevent you from accessing the service.
The simple fix is to clear them. Here’s how to do that in Chrome.
Open the browser you use for accessing 7plus
Access your browser’s settings by clicking on the three dots or lines in the top-right corner of your screen.
Click on Privacy & Security.
Select Clear Browsing Data.
Delete all cookies and other site data, then select Clear Data.
Launch the 7plus website again and try accessing its content.
Clearing your browser cookies helps delete any trace of your real IP online and reset your IP address to bypass any VPN blocks in place.
In addition to resolving your VPN issues with 7plus, clearing your cookies can improve your browsing speed and protect your privacy.
Although I use Chrome as an example, similar steps can be followed in other popular browsers such as Edge, Opera, or Firefox.
3. Update your VPN app
VPN providers frequently release updated versions of their apps to address bugs and improve efficiency.
If you’re experiencing issues with accessing 7plus through your VPN, it might be due to using an outdated app.
So, you can try updating your VPN app to fix this.
Some VPNs have the option in the app, while you may need to go on the official site and download the latest version for others. Check which is available for you.
Once the update is complete, try accessing 7plus again.
Fortunately, the majority of VPNs can automatically scan for the latest version and alert you when there is a new update available for download.
4. Check your Split tunneling feature
Split tunneling allows certain apps and websites to bypass the protected VPN tunnel and directly connect to the internet.
If you are using an Australia server but have excluded 7plus or the web browser you’re using to access its web platform from the VPN, the streaming service will still detect your real IP address.
As a result, your 7plus may not work with VPN.
Here’s how to fix that, using ExpressVPN as an example:
Tap on the hamburger icon and select options.
Go to General and click on Settings under Split Tunneling.
If ‘Do not allow selected apps to use the VPN’ is selected, remove 7plus or the browser you are using.
If ‘Only allow selected apps to use the VPN’ is checked, ensure you add 7plus or your streaming browser.
Reconnect to an Australian server location.
Stream 7plus with no restrictions.
5. Change your VPN
Streaming requires a fast and consistent connection, especially for HD or live content.
If your VPN is slowing down your internet speed or dropping out frequently, you might experience buffering, lagging, or freezing issues.
So, if all else fails, it might be time to switch to a better VPN provider.
I recommend ExpressVPN because you can choose from its multiple-server locations in Sydney, Melbourne, Adelaide, Brisbane, and Perth.
Install the ExpressVPN app on your computer and sign in with your credentials.
Search for an Australian server.
Select and connect.
Once connected to the server, open the 7plus website and start streaming.
Does 7plus block VPNs?
Yes, 7plus blocks VPNs as part of its geo-restriction policy.
So, if you try to access the platform from outside Australia with a blocked VPN, you will likely see an error message that says, Sorry, video is only available within Australia due to licensing restrictions.
This is because 7plus has licensing agreements that limit its content distribution to Australian viewers only.
How does 7plus detect my VPN?
One of the main ways that 7plus detects VPNs is by checking the IP addresses of its visitors.
If it finds an IP address that belongs to a known VPN server or there are too many connections originating from a single one, it will blacklist it and block access.
In addition, streaming platforms like 7plus can analyze the traffic patterns and behavior of incoming connections to identify characteristics commonly associated with VPN usage.
This includes encryption protocols, DNS requests, or IP ranges typically used by VPNs.
Also, leaks can occur when a VPN connection fails to properly route DNS requests, revealing the true IP address of the user.
Consequently, 7plus can monitor for these inconsistencies or anomalies and potentially identify VPN usage.
Does 7plus work with a VPN?
Yes, 7plus works with a VPN. However, it is only those that can bypass its geo-blocks and anti-VPN measures.
Weaker VPNs, especially free ones, struggle to bypass these blocks. This is likely the reason why your VPN is no longer working with 7plus.
On the other hand, premium VPNs such as ExpressVPN or PIA have measures or features to overcome these blocks.
Plus, they also offer a wide range of servers in Australia that you can switch to.
This helps you stay one step ahead of 7plus’ VPN blocking techniques, allowing you to enjoy your favorite shows anywhere in the world.
Moreover, to ensure you have enough options on VPNs that work 7plus, I’ve compiled a list of the best ones for you to consider. You can find them below!
Best VPNs for 7plus
As promised, I’ve tested dozens of the best VPNs for watching 7plus abroad and created a list of the best four.
All four were selected based on the following criteria:
ExpressVPN offers 3000+ VPN servers in 160+ locations. These include 7 servers located in Australia, which are fast and reliable.
I’ve tested all of these locations, and they work well. This means you can be sure you’ll have a server not overloaded by users.
ExpressVPN keeps you safe while streaming by using strong encryption and advanced leak protection.
It works on popular devices like Windows, Android, macOS, iOS, and Linux without any issues.
Also, it has The MediaStreamer feature, which lets you connect a VPN to devices that don’t natively support VPN connections.
These include smart TVs, gaming consoles, streaming media players, and other devices without VPN apps.
Whether you want to watch shows like “The Good Doctor” or movies like “Spider-Man: Homecoming,” ExpressVPN has reliable and secure protocols to ensure your streaming experience is smooth.
It also takes your privacy seriously with a no-logs policy and a TrustedServer feature that deletes server data after each session.
If you’re worried about the price, remember that although the monthly plan may cost a bit more, it’s worth it for the added security and convenience.
And if you’re not completely satisfied, ExpressVPN offers a 30-day money-back guarantee to try it out without any risk.
With ExpressVPN, streaming on 7plus becomes easy and worry-free, giving you peace of mind while you enjoy your favorite shows.
Pros:
Best leak protection on the market
Consistently fast and stable
Apps for all conceivable devices
Cons:
Not the cheapest
Its servers occasionally get blacklisted due to its popularity
Only five device connections at a time
ExpressVPN
Easily unblock 7play from anywhere with this error-free VPN!
PIA – Seamless 4K streaming without annoying delays
PIA is an excellent alternative to ExpressVPN. It offers lightning-fast speeds with a vast network of over 185 Australian servers in Sydney, Melbourne, and Perth.
Say goodbye to frustrating lags,buffering, and freezing thanks to its powerful 10 Gbps NextGen servers. And you can enjoy seamless 4K streaming without annoying delays.
Moreover, PIA provides unlimited bandwidth, so there are no restrictions on your data usage. Just stream as much as you want on 7plus without worrying about data caps or limitations.
What makes PIA even better is its strong encryption methods that keep your data secure.
You can choose between 128-bit or 256-bit AES encryption ciphers for an extra layer of privacy and security during your streaming sessions.
This ensures that your online activities cannot be tracked by ISPs, or third parties, guaranteeing your online privacy and security while streaming.
Also, PIA offers a Smart DNS feature that lets you change your virtual location directly from your Smart TV.
However, it won’t encrypt or redirect your data, which means that your connection speeds remain unaffected at all.
Alternatively, you can install the VPN directly on your router to safeguard your entire network.
With PIA, you can enjoy fast and uninterrupted streaming, unlimited data, and robust encryption for a secure and private streaming experience on 7plus.
Pros
Works with major streaming services
Excellent streaming speeds
Supports unlimited device connection
Cons:
Live chat isn’t very responsive
PIA
Say goodbye to errors and enjoy unlimited access to all 7plus content!
NordVPN has a wide network of over 190 servers in 5 locations across Australia, making it easy to find a server that works well with 7plus.
It has a SmartPlay feature, which helps bypass any geographical restrictions or content blocks on streaming platforms.
This means you can enjoy blazing-fast speeds and unlimited bandwidth, ensuring a smooth HD or 4K streaming experience without interruptions.
When it comes to security and privacy, it employs AES-256 encryption, a strong encryption standard, to protect your data and identity.
It also features a kill switch, which automatically cuts off your internet connection if the VPN connection drops, preventing any accidental data leaks.
Plus, you can enjoy additional security features such as Double VPN, where your internet traffic is routed through two separate servers for added privacy and security.
Moreover, NordVPN provides user-friendly apps for various platforms, including Windows, Mac, Android, iOS, and Linux. You can also use it on smart TVs, routers, and other devices.
The best part is it offers a 30-day money-back guarantee, allowing you to try the service risk-free.
Give it a go and experience secure and uninterrupted streaming on 7plus with NordVPN.
Pros:
Affordable monthly price
A high number of servers
Apps for Fire Stick and Android TV
Cons:
Servers are fast, but apps are often sluggish
Complicated when using router setup
NordVPN
Unlock 7plus from anywhere, hitch-free with NordVPN’s reliable servers!
Surfshark – Best protocols for secure and fast streaming
Surfshark has 91 servers in 5 Locations in Australia, so you can easily find at least one optimized for 7plus.
One of the standout features of Surfshark is that it offers unlimited data, unrestricted bandwidth, and the ability to connect as many devices as you want simultaneously.
This lets you stream on 7plus without worrying about data restrictions or caps. So, you can enjoy your favorite shows and movies in HD or even 4K quality.
When it comes to ensuring your online security and privacy, Surfshark uses the best protocols like OpenVPN, IKEv2/IPsec, and WireGuard, all equipped with the powerful AES-256-GCM algorithm.
That helps your data secure and hidden from prying eyes, and the best part is, it won’t slow you down – it’s even faster than using AES-256 alone!
This allows you to enjoy a robust encryption standard that keeps your data secure and protected from any potential threats, and the same is a fast connection.
Surfshark also offers a kill switch, which automatically cuts off your internet connection if the VPN connection drops, ensuring that your data remains private and your identity is protected.
You can also enjoy features such as CleanWeb, which blocks ads, trackers, and malware to provide a clean and uninterrupted streaming experience.
With Surfshark’s user-friendly apps available for various platforms like Windows, Mac, Android, iOS, and more, you can easily set up and use the VPN on your preferred devices.
Pros:
Connect unlimited devices
Excellent streaming speeds
Extra features like virus protection
Cons:
Inconsistent P2P performance
Surfshark
Make the most out of your streaming experience & bypass geo-blocks on 7plus!
Microsoft 365 Copilot is a sophisticated processing and orchestration engine that empowers users with AI-powered productivity capabilities. This seamless integration incorporates various components to deliver a comprehensive and efficient user experience. Let’s dive deeper into how Microsoft 365 Copilot works and the key components driving its powerful functionality. Here are the three key components to Microsoft 365 Copilot:
Large Language Models (LLMs)
Your Content in Microsoft Graph
Microsoft 365 Apps
Here, we’ll explore how these three components work together to provide a powerful and secure user experience. Officially, Microsoft 365 Copilot is designed for the Early Access Program, an invite-only paid preview program for commercial customers, but will be generally available to all Microsoft 365 subscribers soon. Keep in mind that these details are subject to change and likely will as Microsoft learns how to implement how Microsoft 365 Copilot works.
How Microsoft 365 Copilot works
Microsoft 365 Copilot offers intelligent features, functionality, and prompt capabilities to users within Microsoft 365 apps and other surfaces. Underlying this functionality, we find foundation models and proprietary Microsoft technologies that facilitate secure access, usage, and management of your business data.
A visual representation of how Microsoft 365 Copilot works (Microsoft)
The Microsoft 365 apps, such as Word, Excel, PowerPoint, Outlook, Teams, and Loop, collaborate seamlessly with Copilot to assist users in their specific tasks. For instance, in Word, Copilot aids users in creating, comprehending, and editing documents, while in other apps, it supports users within their unique contexts. Watch the video below for an overview of how Microsoft 365 Copilot works.
Chat functionality enables users to leverage cross-app intelligence, allowing for efficient work with multiple apps. These cross-app prompts access core training data from LLM, as well as the user’s business data and apps, to provide valuable information and insights. Copilot’s reach extends to various experiences, including Teams (chat), Bing, Microsoft Edge, and the Microsoft 365 app.
Leveraging Business Proprietary Data with Copilot
Copilot connects LLMs to customer business data, ensuring privacy and security at all stages. It accesses content and context through Microsoft Graph, generating responses anchored in the customer’s business content. This includes documents, emails, calendar events, chats, meetings, contacts, and other business data. By combining this content with the user’s working context, such as ongoing meetings or recent chat conversations, Copilot delivers accurate, relevant, and contextual responses.
Important: Customer data, including prompts, responses, and data accessed through Microsoft Graph, is not used to train the foundation LLMs that Copilot employs. Additionally, Copilot only uses organizational data accessible to individual users based on their permissions. Check out the major services and features in Microsoft Graph.
Microsoft 365 Copilot is committed to maintaining strict data security and privacy. The permissions model within your Microsoft 365 tenant ensures that data remains secure and does not inadvertently leak between users, groups, and tenants. The Semantic Index honors user identity-based access boundaries, guaranteeing that the grounding process only accesses content authorized for the current user.
Additionally, Microsoft implements multiple layers of protection to safeguard customer content, including rigorous physical security, background screening, and encryption strategies. Azure Active Directory authorization and role-based access control ensure logical isolation of customer content within each tenant.
Copilot’s commitment to data residency and sovereignty
Microsoft 365 Copilot ensures that LLM calls are routed to the closest data centers in the region to minimize latency. For European Union (EU) users, traffic stays within the EU Data Boundary to comply with regulations. Microsoft remains committed to fulfilling regulatory requirements as they evolve, with Copilot adhering to existing privacy and compliance obligations.
Additional Insights into Microsoft 365 Copilot
Microsoft 365 Copilot uses Azure OpenAI services for processing and GPT models, including GPT 4, to provide large language model capabilities. The privacy controls for connected experiences available with Microsoft 365 Apps do not apply to Microsoft 365 Copilot.
To access and use Copilot in Microsoft 365, certain prerequisites need to be met, including a Microsoft E3/E5 subscription plan and Azure Active Directory-based accounts. Preparing your organization with the right information for access controls and policies in place will optimize your experience with Copilot in Microsoft 365.
Microsoft 365 Copilot: Advancing AI-Powered Productivity
Microsoft 365 Copilot represents a groundbreaking advancement in AI-powered productivity, elevating businesses with robust data protection and security, all while upholding transparency and responsibility. Leveraging its powerful capabilities and strict adherence to compliance standards, Microsoft 365 Copilot is poised to revolutionize how organizations harness AI technologies, leading to unparalleled success and efficiency in their operations. Experience a new era of productivity with Microsoft 365 Copilot and witness firsthand how Microsoft 365 works seamlessly to transform your business landscape.
Several programs and background processes run on the computer to ensure optimal performance and execution of tasks. And even though they are critical, there’s no guarantee that one won’t malfunction. One of these is msmdsrv.exe!
The process often leads to an error message and crashes in Windows. Some users reported that msmdsrv.exe is using all the memory, and the PC is slowing down. Keep reading to find out how to fix the msmdsrv.exe Power BI error and other issues!
Understanding msmdsrv.exe and its role in Power BI
The executable file, msmdsrv.exe, is linked to the Microsoft SQL Server and plays an important role in the mining model. Also, it’s one of the critical program files. Disabling the process while working on Microsoft SQL Server is not recommended.
When the process runs, it points to a server instance of Microsoft SQL Server Analysis Services. And every such instance is independent of another.
The process is often run by Power BI, Microsoft’s interactive data visualization software. So, when the former malfunctions or you encounter other msmdsrv issues, Power BI won’t open, or Power BI throws an error.
Also, some users were wondering whether msmdsrv.exe poses any threat. Given that it’s a non-system process, we recommend checking the security risk rating, verifying the file location and size, and scanning it with a reliable antivirus security software.
The file size download value stands in the range of 2 to 14 MBs, and the file path is either of these two:C:\Program Files\Microsoft Analysis Services\BinC:\Program Files\Microsoft Power BI Desktop\Bin
Remember, there are several situations where the Analysis Services process triggers an error message, takes up a high physical memory, or leads to Registry errors, which call for immediate action!
How do I fix msmdsrv.exe errors?
Before we delve into the slightly trickier solutions, here are a few quick ones:
Restart the affected device.
Check the Case statements put into the Query folding. Some of these might cause a memory error. So, remove any that appear problematic.
1. Download the latest Visual C++ Redistributables
Go to Microsoft’s official website, and download the latest Microsoft Visual C++ Redistributables. We recommend you download them all.
Run the setup and follow the on-screen instructions to complete the process.
Once you have installed them all, restart the computer for the changes to come into effect.
A corrupt or missing Visual C++ Redistributable package can often trigger issues with Microsoft SQL Server Analysis Services and lead to a situation where msmdsrv.exe is not found. Downloading them all should get things running!
2. Increase the virtual memory
Press Windows + S to open Search, type View advanced system settings in the search box, and click the relevant search result.
Click the Settings button under Performance.
Go to the Advanced tab, and click on Change under Virtual memory.
Now, untick the checkbox for Automatically manage paging file size for all drives, select No paging file, and click on Set.
Choose Custom size and enter the values in the fields underneath using the following formula based on the available physical memory:
Initial size: 1.5 x Available memory (RAM) x 1024
Final size: 3 x Available memory (RAM) x 1024
For instance, if the available memory is 4 GB, the values become:
Initial size: 1.5 x 4 x 1024 = 6144 MB
Final size: 3 x 4 x 1024 = 12288 MB
Once done, click on OK to save the changes.
Though not exactly a solution, increasing the virtual memory does wonders when the physical memory is running out. Of course, it can’t replace RAM per se, nor can it deliver the same performance, but it does prevent programs from crashing when the memory consumption is high.
That’s it! Often reinstalling Power BI works when you witness the msmdsrv.exe high CPU error. This happens when program files are corrupt or missing, and reinstalling the software gets you a fresh copy of each.
You can use uninstaller software to eliminate any leftover files or registry entries to combat the problem effectively. Also, creating a periodic backup file should help recover data after a reinstall.
How do I fix msmdsrv.exe high memory usage?
When you see msmdsrv.exe using high memory, your primary approach should be to verify whether that’s in the average range. Anything in the range of 2-3 GBs is normal. But if the RAM consumption exceeds 8 GBs, it’s time to identify the underlying issue because there certainly is one.
High CPU usage due to Analysis Services or msmdsrv.exe is common, and it’s generally the autostart entries to blame. You could remove Power BI from the list of startup apps in case that’s the problematic program.
Besides, check the Case statements you added and ensure that none of these are leading to the issue when using Microsoft Power BI.
The msmdsrv.exe errors arise for various reasons, including missing common files or a corrupt file database. And once you have things running, it’s vital to ensure that the Case statements or the Visual C++ Redistributable packages no longer trigger the error.
Viatel Technology Group has revealed that they have introduced their latest innovation, a secure Artificial Intelligence (AI) tool called vAI for Microsoft Teams. The tool is designed to help privacy-conscious organizations stay agile and at the forefront of technological advancements.
Built on Microsoft’s Azure Open AI platform and integrated into existing Teams’ environments, vAI enables organizations to harness the transformative potential of Generative AI while ensuring the highest level of data security and compliance.
vAI is built on Microsoft Azure
Azure is the leading platform in security and compliance. With vAI, your critical information stays within your Azure domain for intelligenct data management. We champion the sanctity of your data, ensuring your AI applications uphold the highest security standards possible.
vAI is accessible through Microsoft Teams
Integrating vAI into your exisiting Teams environment streamlines the key applications in your organisation. This further promotes security as fewer applications mean fewer vulnerabilities, greater access control and enhanced user awareness.
Damien McCann, Chief Commercial Officer with Viatel Technology Group, emphasized the commitment to privacy and security, stating that the vAI solution empowers organizations to confidently embrace the AI revolution, as critical information remains protected within the customers’ Azure subscription.
Finian Nally, Head of Microsoft Cloud Solutions at Viatel Technology Group, highlighted the benefits of leveraging AI technology while safeguarding data. vAI allows organizations to enable their employees to utilize Generative AI effectively and securely, improving efficiency, driving innovation, and focusing on strategic growth initiatives.
Recently, Viatel acquired Sungard Availability’s Irish cloud business, marking its eighth successful acquisition since 2020. They won the ICT Company of the Year title at the Chamber Ireland InBUSINESS Awards.