How to view your phone photos in the File Explorer gallery

Microsoft has released Windows 11 Insider Preview Build 23471 to the Dev Channel and it comes with an important and exciting feature. You can soon view your phone photos in the File Explorer gallery.

The feature adds a new button in the Command Bar titled “Add Phone Photos” to allow you to easily access your phone’s gallery.

There are currently ways to do that. For Iphones, for example, you have several ways to do it, and for Android phones, you can try Google Photos to manage your phone gallery.

However, the newly added feature in the Insider Build 23471 lets you directly access your photos just with a few clicks. Follow along and we’ll show you how to do it.

Here’s how you can view your phone photos in the File Explorer gallery

  1. In the Gallery folder, head over to the Command Bar.
  2. You should see the newly added button Add Phone Photos; click on it.view phone photos file explorer
  3. Once you click it, it will open a URL with a QR code. Scan the QR code and you will then start the process of connecting your phone to your PC.

When the two devices are connected, you should be able to your phone photos in the File Explorer whenever you click on the new feature.

Files Explorer is getting a lot of updates, fixes, and changes on this Insider Preview Build. For example, you now have the ability to tear out and merge tabs in File Explorer. Other fixes focus on issues with accessibility when pressing certain commands wouldn’t work.

Microsoft has made sure File Explorer got everything it needed to function to make it work more seamlessly. Head over to the official release statement of this build to read more about the changes.

You’ll be able to see your phone photos in the new File Explorer Gallery

Microsoft released Windows 11 Insider Preview Build 22621.2048 and Build 22631.2048 (KB5028247) to the Beta Channel, and it’s coming with a brand new File Explorer Gallery, as you can see below.view phone photos file explorer

You’ll be able to access your most recent photos with it, aside from easily accessing your phone photos. If you OneDrive or Camera Roll Backup set on your phone, each photo you take will automatically appear at the top of the view.

Through the Collection dropdown, you can choose which folders are shown in the Gallery. You’ll also be able to easily use Gallery to insert photos into your emails, social media posts or even PowerPoint presentations.

What do you think about this new feature? Will you try it? Let us know in the comments section below.

Disk at 99% in Windows 10? You Can Fix It in 8 Steps

The disk is an integral part of the computer and is used to store files. High disk usage typically refers to a situation where a large part of the disk is being actively used by the PC to run programs and tasks. And problems appear when disk usage hits 99% in Windows 10.

Anything above 90% can affect the PC’s performance and significantly slow it down. Some even reported Windows 10 high disk usage on startup. No matter the case or when you face the problem, there are a few solutions that might help. Keep reading to find out!

Why is my disk running at 99 in Windows 10?

Here are a few reasons you are witnessing 99% disk usage in Windows:

  • Too many background processes: When several background processes are running, it’s bound to take up disk space and lead to poor performance.
  • Windows services consuming resources: For many users, the built-in Windows services led to high disk usage, and disabling these fixed 99% disk usage in Windows 10.
  • Startup programs: If too many programs are configured to load when you boot Windows, it may result in high disk usage on startup.
  • Issues with the disk: Oftentimes, problems with the disk, be that bad sectors or physical damage, can render certain space unusable, which leads to perforce-related errors.
  • Malware or virus infection: A system infected with malware or virus will also exhibit signs of a slowdown, and the Task Manager may show a high CPU usage in Windows 10.

How do I fix 99% disk usage in Windows 10?

Before we head to the slightly complex solutions, here are a few quick ones to try:

  • Restart the computer.
  • Verify whether a background process is active when the disk touches 99% in Windows 10. It’s often the Windows updates or automatic scans by the antivirus to blame.
  • Scan the PC for malware using the built-in Windows Security or a reliable antivirus solution.
  • Check for pending Windows updates and install them.
  • If the problem appeared recently, uninstalling the apps installed in the last couple of days should help.
  • Disable any third-party antivirus installed on the PC.
  • In case you see 100% disk usage in Windows 10 only while running certain programs, update them individually.

If none work, move to the fixes listed next.

1. Manually terminate programs

  1. Press Ctrl + Shift + Esc to open the Task Manager.
  2. Click the Disk option to list the processes in decreasing order of disk usage.disk
  3. Select the programs that consume the maximum disk individually, and click on End task.end task to fix windows 10 disk 99%

When terminating programs and processes, make sure not to kill a critical one, as it might affect the device’s functionality. For instance, if you terminate the process pertaining to audio, there will be no sound on the PC.

2. Disable non-critical services

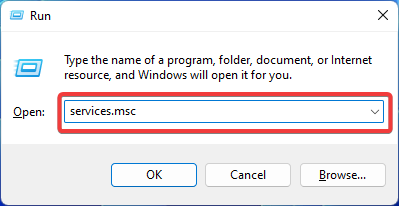
  1. Press Windows + R to open Run, type services.msc in the text field, and hit Enter.
  2. Locate the Sysmain service, right-click on it, and select Properties.sysmain
  3. Select Disabled from the Startup type dropdown menu, and then click on the Stop button.service
  4. Once done, click on Apply and OK to save the changes.
  5. Similarly, disable the following services as well:
    • Windows Update (disables automatic updates)
    • Windows Search (disables indexing, takes longer to search for apps and files)

Once done, restart the computer and verify whether the 99% disk usage in Windows 10 reduces to normal levels. And don’t look at the immediate effect. Rather, monitor it over an extended period for accurate results.

3. Turn off notifications and tips

  1. Press Windows + I to open Settings, and click on System.
  2. Go to the Notifications & actions tab, disable the toggle for Get notifications from apps and other senders, and then untick the checkbox for Get tips, tricks, and suggestions as you use Windows.disable notifications to fix windows 10 disk 99%

The notifications and Windows tips and tricks often result in increased CPU usage, sometimes as high as 99% in Windows 10. Disabling it did the trick for most users!

4. Run the CheckDisk utility

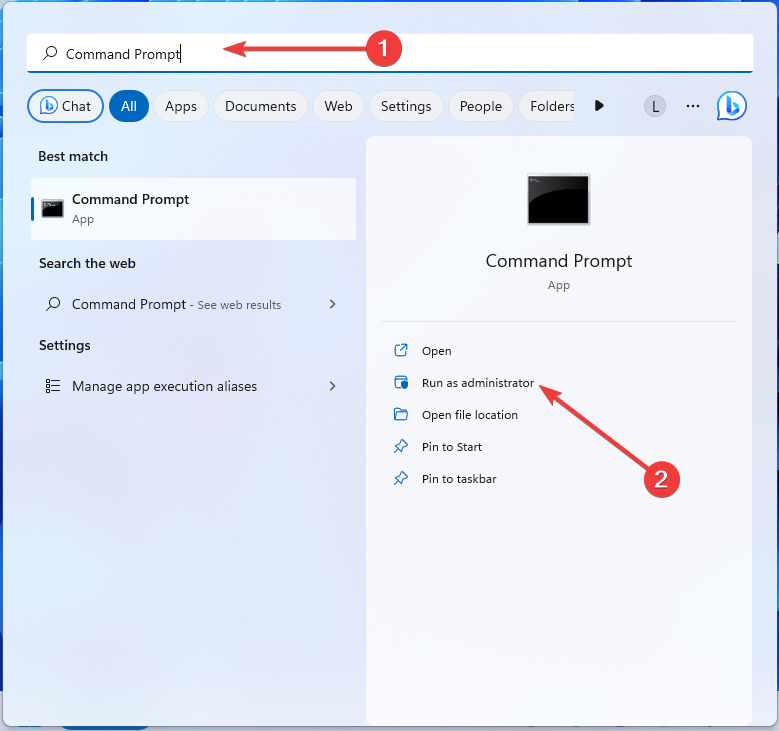
  1. Press Windows + S to open Search, type Command Prompt in the text field, and click on Run as administrator.command prompt
  2. Click Yes in the UAC prompt.
  3. Paste the following command and hit Enter:chkdsk /rcheck disk to fix windows 10 disk 99%
  4. Now, press Y and hit Enter to confirm running the scan the next time you reboot the PC.check disk
  5. Finally, restart the computer and let the utility kick in.

Check Disk is a built-in utility in Windows that helps fix errors that appear while scanning the disk and repairs corrupt sectors. Both may result in 100% disk usage even when nothing is running. So, it’s imperative that you run the Check Disk utility to fix disk issues.

5. Repair the corrupt system files

  1. Press Windows + R to open Run, type cmd, and hit Ctrl + Shift + Enter.cmd
  2. Click Yes in the prompt that appears.
  3. Paste the following commands individually and hit Enter after each:DISM /Online /Cleanup-Image /CheckHealth DISM /Online /Cleanup-Image /ScanHealth DISM /Online /Cleanup-Image /RestoreHealth
  4. Next, execute this command to run the SFC scan: sfc /scannowsfc scan to fix windows 10 disk 99%

Corrupt system files, too, may affect the functioning of the device and lead to 99% disk usage in Windows 10. In this case, the DISM commands and SFC scan should do the trick.

6. Perform a clean boot

  1. Type System Configuration in the Search bar, and click on the relevant search result.
  2. Navigate to the Services tab, tick the checkbox for Hide all Microsoft services, and click on Disable all.disable services
  3. Press Ctrl + Shift + Esc to open the Task Manager, and head to the Startup tab.
  4. Select the programs configured to load at startup individually, and click on Disable.disable startup apps to fix windows 10 disk 99%
  5. Go back to System Configuration, and click on Apply and OK to save the changes.
  6. Click Restart in the confirmation prompt that appears.

Once the PC restarts, check whether 99% disk usage in Windows 10 subsides. If it does, one of the disabled startup apps or services is the underlying cause.

Again, open System Configuration, enable them one at a time, restart the computer after each, and verify whether there’s an increase in disk usage.

As soon as you notice a change, the service/program enabled last is the culprit. So, have it disabled, at least for the time being, until an update is released.

7. Reset the virtual memory

  1. Press Windows + S to open Search, type View advanced system settings, and click on the relevant result.
  2. Click the Settings button under Performance.settings
  3. Navigate to the Advanced tab, and click on Change under Virtual Memory.change
  4. Tick the checkbox for Automatically manage paging file size for all drives, and then click OK to save the changes.automatically manage virtual memory to fix windows 10 disk 99%

While many recommend increasing the Virtual Memory, it’s often best to let Windows set the right size. Change it only when you are facing issues pertaining to performance or the RAM usage is high.

8. Perform an in-place upgrade

  1. Go to Microsoft’s official website and download the Media Creation Tool.
  2. Run the Windows 10 Setup and wait for things to get ready.
  3. Click Accept to agree to Microsoft’s license terms.accept
  4. Choose Upgrade this PC now, and click on Next to proceed.upgrade this PC to fix windows 10 disk 99%
  5. Wait for Windows to download and then follow the on-screen instructions to complete the in-place upgrade.

A repair upgrade is often used as a last resort but helps fix various issues with Windows. It replaces the current OS installation with a new one without affecting the stored data, installed apps, or configured settings.

Tip icon Tip
If none of the solutions listed here worked, it’s likely that the disk itself is faulty and needs to be replaced. However, before you do that, inspect it by a professional because a simple repair might get things up and running.

Now that you have fixed 99% or higher disk usage in Windows 10, check some quick tips to increase the data transfer speed on the PC.

For any queries or to share which solution worked for you, drop a comment below.

Facebook Error Code 2: What it Means & How to Fix it

Facebook error code 2 can be frustrating and prevent you from accessing or using the platform. In this guide, we will explore various methods to fix Facebook Error Code 2 and regain full access to the social media platform.

If you are looking for ways to fix a similar error, the error code 1 on Facebook, read this guide to find easy solutions.

What is error code 2 for Facebook login?

Facebook Error Code 2 is an error message that users may encounter when logging in to or accessing their accounts.

It typically occurs on iPhone, iPad, & Android devices and indicates a problem with your login credentials or a temporary issue with Facebook’s servers.

What causes the error code 2 on Facebook?

On an iPhone, Facebook error code 2 can occur due to various factors; some of the potential causes are:

  • Network connectivity issues – If your device cannot establish a stable connection to the internet, it can hinder the login process and trigger the error.
  • Outdated Facebook app – Using an outdated version of the Facebook app on your iPhone may result in compatibility issues and lead to error code 2.
  • Corrupted app data or cache – Over time, the app data and cache of the Facebook app on your device can become corrupted, which can cause login errors. Reinstall the Facebook app.
  • Facebook server issues – Sometimes, Facebook’s servers may experience temporary issues or maintenance, leading to login errors like this one. Check the server status to know if that’s the case.
  • Incorrect login credentials – If you enter the wrong login credentials, such as an incorrect email address or password, Facebook will not authenticate your account and display the error.

So, these are the causes of the issue; let us check out the detailed methods to fix it.

How do I fix error code 2 on Facebook?

Before engaging in advanced troubleshooting steps, you should consider performing the following checks:

  • Restart your phone or computer and router.
  • Relaunch the app on your iPhone.
  • Check the Facebook server status.
  • Verify you are connected to a stable internet connection.
  • Enable Airplane mode, then turn it off after 60 seconds.
  • Disable VPN (if applicable).
  • Switch from Wi-Fi to Cellular or vice versa.
  • Log out of your Facebook account from all devices.

Once done, move to the troubleshooting steps to eliminate this issue.

1. Reset the network settings

  1. On your iPhone, locate & tap Settings from the home screen.Settings Facebook error code 2
  2. Go to General.General
  3. Now tap Transfer or Reset iPhone.Transfer or reset
  4. Tap Reset.Reset
  5. From the pop-up menu, select Reset Network Settings.Reset Network Settings
  6. Enter your passcode to confirm the action.
  7. Click Reset Network Settings.Reset 2

2. Update the local time

  1. On your iPhone, locate & tap Settings from the home screen.Settings Facebook error code 2
  2. Go to General.General
  3. Tap Date and Time.Date and Time
  4. Toggle on the Set Automatically option to set the time on its own.Set time automatically

Once the time is updated, open the Facebook app to check if the issue is resolved.

3. Check for updates

  1. On your iPhone, locate & tap Settings from the home screen.Settings Facebook error code 2
  2. Go to General.General
  3. Click Software Update. iPhone will check for updates; if available, connect your iPhone to Wi-Fi and click Download & Install.
  4. Your device will restart to install the update.

4. Clear the browser cache (if using Facebook on the browser)

  1. Close all the apps on your iPhone. Locate and tap Settings.Settings Facebook error code 2
  2. Scroll down and locate Safari; tap it to open.Safari
  3. On the next page, tap Clear History and Website Data.Clear website data Facebook error code 2
  4. Select Clear History And Data from the prompt menu to confirm the action.

Now try to use Facebook and check if the issue persists.

5. Reinstall the Facebook app (iPhone)

  1. On the home screen, tap and hold Facebook to get options.
  2. Select Remove app.Remove Facebook error code 2
  3. Click the Delete App to confirm the changes.Delete App
  4. Again click Delete to remove the app data.Delete
  5. On the home screen, locate and tap App Store.App store
  6. Click the Search icon, type Facebook, and click the downward arrow to download the latest app version.Install  Facebook error code 2

So, these are methods that you can use to fix the error code 2 for Facebook login. If none of the above worked for you, contact Facebook Support for further assistance.

If you are facing similar issues, like the Facebook app not working, we recommend you check out this guide to find quick solutions.

Please feel free to give us any information, tips, and your experience with the subject in the comments section below.

Meta set to launch commercial AI model, aims to compete with OpenAI and Google in generative AI race

As reported by Financial Times, Meta is set to launch a commercial version of its AI model, entering the competitive field of generative AI development alongside Microsoft-backed OpenAI and Google. The software, fueled by large language models (LLMs), enables the creation of text, images, and code using extensive data training and computing power.

While Meta previously released its LLaMA language model exclusively to researchers, the forthcoming commercial version will offer broader accessibility and customization. Meta emphasizes that its LLMs are “open-source,” in contrast to the closed nature of competitors like OpenAI’s GPT-4.

This move comes as Silicon Valley tech giants vie for dominance in AI. Meta’s global affairs chief, Nick Clegg, extolled the benefits of an open-source approach, positioning Meta to catch up with rivals by allowing companies of all sizes to enhance the technology.

Despite Meta’s decade-long AI research, it lagged after the release of OpenAI’s ChatGPT, prompting a push to diminish OpenAI’s dominance. While Meta plans to monetize its AI model by charging enterprise customers for fine-tuning using proprietary data, there are no immediate plans for charging with the upcoming release.

Meta’s CEO, Mark Zuckerberg, aims to build a metaverse, investing over $10 billion annually. Meta established a generative AI unit led by Chief Product Officer Chris Cox to strengthen its AI focus. Executives hint at developing multiple AI chatbots across platforms like Instagram and WhatsApp, powered by Meta’s LLMs.

Open-source models allow for increased user adoption, leading to more data input and enhanced capabilities. They also enable bug detection and improvement in technology and security, addressing privacy and misinformation concerns. Providing free software can help corporations capture new markets.

However, open-source AI models present risks, including misuse by bad actors. Child safety groups report a rise in AI-generated child sexual abuse imagery. Meta’s previous AI model, BlenderBot 2, spread misinformation. Although BlenderBot 3 was improved, instances of false information generation remained.

Intellectual property and copyright pose regulatory and legal risks. Comedian Sarah Silverman filed a lawsuit against Meta and OpenAI, claiming her work was used to train models without consent. Meta’s VP of AI Research, Joelle Pineau, highlights that releasing something as open source doesn’t relinquish intellectual property rights.

Why this matters:

  • Meta’s commercial release of its open-source LLaMA LLM allows companies to freely adopt and profit from this AI model.
  • LLaMA is already a popular foundational model for many open-source LLMs, and now they can be used commercially.
  • Meta’s chief AI scientist, Yann LeCun, hints at significant changes coming with open-source platforms that are as good as closed ones.

Game-changing for Meta:

  • Open-source enables Meta to leverage the expertise of a vast developer community, driving rapid progress in AI development.
  • Fine-tuning open-source models is affordable and fast, offering cutting-edge techniques like LoRA.
  • The existing development of numerous open-source LLMs on LLaMA paves the way for widespread commercial use.

In conclusion, Meta’s upcoming commercial release positions it as a contender in the generative AI field. With an open-source approach, Meta aims to catch up with rivals and provide opportunities for businesses to enhance technology. However, risks associated with open-source AI models and legal considerations surrounding intellectual property persist.

Legal battle reveals potential arrival of Nintendo Switch successor in 2026

As reported by GameRant, according to a recent document emerging from the legal battle involving the Federal Trade Commission (FTC) and Microsoft, Nintendo might be releasing a successor to the Nintendo Switch in 2024. The original Nintendo Switch, which debuted in 2017, achieved great success; however, there has been a growing demand for a new system capable of handling modern games more effectively. It was also revealed in the same document that Microsoft expected ‘Xbox exclusives’ Starfield and Indiana Jones would sell 10m on PlayStation.

The Nintendo Switch played a pivotal role in revitalizing the esteemed reputation of the company, especially after the lackluster performance of its predecessor, the Wii U. With standout titles like Super Smash Bros. Infinite, The Legend of Zelda: Breath of the Wild, and Super Mario Odyssey, the console moved Nintendo, a veteran game developer, back into the forefront of the gaming industry. Despite doubts from competitors, Nintendo managed to regain its relevance. Now, it seems that Nintendo is poised to launch the successor to the Switch.

The document, titled “Defendants’ Proposed Post-Trial Findings of Fact and Conclusions of Law,” delves into facts, definitions, and pertinent details relevant to the FTC’s efforts to prevent Microsoft from acquiring Activision Blizzard. On page 92 of this 153-page document, an intriguing statement appears: “Nintendo is expected to release the successor to the Switch as early as next year.”

Defendants’ Proposed Post-Trial Findings of Fact and Conclusions of Law

This revelation could be a significant development, providing the first substantial confirmation of a new Nintendo console, which had previously been the subject of speculation. It is important to note that this information does not originate directly from Nintendo, so it should be cautiously approached. Nevertheless, considering Microsoft’s vested interest in monitoring Nintendo’s activities, given the competition between their respective consoles, it is plausible that the information disclosed in the document is accurate.

Fans have long been requesting an upgrade to address the relatively modest specifications of the Nintendo Switch, which often result in performance issues, particularly with more demanding games.

If the new console proves to be backward compatible with Switch games while offering significant performance improvements to ensure smoother gameplay across a broader range of titles and even potentially opening doors for high-performance games like Cyberpunk 2077 or Elden Ring to be ported to Nintendo, it would undoubtedly generate substantial interest and popularity among gamers.

Microsoft expected ‘Xbox exclusives’ Starfield and Indiana Jones would have sold 10m on PlayStation

As reported by Eurogamer, in a recent court document from the Microsoft-FTC trial revealed that prior to confirming their Xbox exclusivity, Microsoft had expected to sell over 10 million copies of Bethesda’s Starfield and MachineGames’ Indiana Jones game on PlayStation.

According to Microsoft Gaming CFO Tim Stuart’s testimony, even though they had projected significant sales for both games on PlayStation, Microsoft believed that any potential losses from making ZeniMax games exclusive could be offset by increased console sales through Game Pass.

Images of the document that came out in the FTC hearing are in the tweet below.

Meanwhile, Xbox Free Play Days are one till 16 July, and some amazing games are on the table.

Microsoft acquired ZeniMax, the parent company of Bethesda Softworks, in 2021. While games like Deathloop and Ghostwire: Tokyo were intended for PlayStation prior to the acquisition, all other ZeniMax projects, including the highly anticipated Starfield, were planned as Xbox exclusives.

Microsoft is close to finalizing a deal to purchase Activision Blizzard for nearly $69 billion. If the deal goes through, Microsoft will gain ownership of popular gaming franchises like Crash Bandicoot, Overwatch, World of Warcraft, and Call of Duty.

Regarding the exclusivity of Activision projects, it remains unclear how Microsoft will handle them once the acquisition is completed. However, Microsoft has previously stated that Call of Duty will continue to be available on PlayStation consoles even after the Activision deal closes.

As the gaming landscape continues to evolve, Microsoft’s strategic moves to secure exclusive titles and redefine platform boundaries are reshaping the industry dynamics, setting the stage for fierce competition among console manufacturers and shaping the choices available to gamers.

Fix: Internet Explorer is Not Downloading Chrome

Google Chrome is the go-to browser for the majority of users across the world. However, for that, you need to manually install Chrome on your Windows PC using Internet Explorer.

There are multiple users that have reported that Internet Explorer is not downloading Google Chrome on their PCs. In this guide, we will share with you some solutions that will help you fix the problem. Let us get right through it.

Why is Internet Explorer not downloading Google Chrome?

We did our research and after going through multiple user reports, we have deduced a list of the most common reasons why Internet Explorer is not downloading Google Chrome:

  • The security level is set to high – You might have accidentally set the Internet Explorer security settings to high which is why it is blocking the Chrome download.
  • File downloads are turned off – Some users might have by chance turned off the file downloading feature in Internet Explorer because of which they are coming across the error.
  • Some underlying problems with the browser – Chances are that the version of Internet Explorer that you are using is problematic and has a bug that is causing the problem.
  • The Chrome download link is problematic – Also, the link from where you are trying to download Google Chrome might be experiencing some issues.

Let us now apply the solutions and fix the problem of Internet Explorer not downloading Chrome on a Windows PC.

How can I download Google Chrome using Internet Explorer?

1. Lower the security level in Internet Explorer

  1. Press the Win key to open the Start menu.
  2. Open Control Panel.
  3. Click on Internet Options.
  4. Switch to the Security tab.
  5. Under the Security level for this zone section, lower the Allowed levels for this zone value to Medium.
  6. Hit the OK button to save changes and restart your computer.

Many users have reported that changing the security level for Internet Explorer to Medium has helped them resolve the problem, and they were able to download Google Chrome using IE.

Once you have lowered the security level, simply visit the Google Chrome download link and check if this resolves the problem for you or not. If not, then check out the next solution.

2. Turn on file downloads in Internet Explorer

  1. Press the Win key to open the Start menu.
  2. Open Control Panel.
  3. Click on Internet Options.
  4. Switch to the Security tab.
  5. Click on Custom Level.
  6. Scroll down to the Downloads section.
  7. Under File download, select Enable and hit OK to save the changes.
  8. In the prompt that pops up, click Yes.
  9. Click Apply and OK and reboot your PC.
  10. Visit the official website of Google Chrome download and check if this resolves the issue or not.

You should make sure that Internet Explorer is allowed to download software or apps from third-party websites. For that, you should follow the above steps and enable the File Download option and check if this resolves Internet Explorer not downloading Chrome problem.

3. Ensure necessary services are running

  1. Press the Win + R keys to open the Run dialogue.
  2. Type services.msc and press OK.
  3. Locate Background Intelligent Transfer Service and open it.
  4. Change the Startup type to Automatic.
  5. Ensure the Service status is Running.

Some people have reported that because the Bluetooth Intelligent Transfer Service wasn’t enabled on their PCs, Chrome wasn’t downloading using Internet Explorer. In other words, It allows you to install different programs from other devices and the Internet.

4. Clear browser cache and cookies

  1. Launch Internet Explorer.
  2. In the upper-right corner of Internet Explorer, click the Settings icon, then select Internet options.
  3. Click the Delete button in the Browsing history section.
  4. Check the box for Temporary Internet files and Cookies.
  5. Click Delete.

You should try clearing the browser cache and cookies of Internet Explorer and then try visiting the official website and downloading the Google Chrome browser.

5. Change the browser

If nothing works, then we would suggest you skip using Google Chrome and use a different browser. You will be glad to know that there are other browsers that are safer, feature-full, and faster than Google Chrome browsers available in the market.

For users who are confused about which browser they should opt for, we would suggest you check out our guide which lists some of the best browsers that you can choose in 2023.

That is it from us in this guide. You can check out our guide that will help you to turn on Google Chrome memory saver.

Feel free to drop a comment in the comments section below and let us know which one of the above solutions resolved the problem of Internet Explorer not downloading Chrome.

Microsoft rolls out Paint update with dark mode and enhanced zoom controls for Windows 11 Insiders

Microsoft has announced a new update for the Paint app on Windows 11, exclusively for Windows Insiders in the Canary and Dev Channels. The update, labeled version 11.2304.17.0, brings a range of changes and improvements expected to be well-received by the community.

In the other big news, Windows 11 Insider build 22631.2048, which is now available, introduces Gallery for File Explorer for Beta Channel Insiders.

One of the key features introduced in this new Paint app update is the support for dark mode in Paint. By default, the app will adapt to the system’s theme preferences. However, users now have the option to manually change this setting on the newly added settings page, providing them with greater customization control.

Screenshot 2023 07 14 At 7.14.15 Pm

In addition to dark mode, Microsoft has enhanced the zoom controls in Paint. Users will now enjoy increased flexibility and control over the view of their content on the canvas. While the classic presets are still available, the update introduces finer granularity increments on the zoom slider, allowing for more precise zooming. Users can even set a custom zoom value for even greater accuracy. Furthermore, a new “fit to screen” option has been introduced to optimize the zoom level to match the window size, enabling users to adjust their canvas quickly.

Screenshot 2023 07 14 At 7.14.39 Pm

To align with the new Windows 11 design, Microsoft has updated the “Image Properties” dialogues to match the app’s backdrop. Moreover, numerous accessibility and usability improvements have been implemented throughout the app, enhancing the overall user experience. The company has also focused on improving access key and keyboard shortcut support, aiming to boost accessibility and productivity for keyboard users.

Screenshot 2023 07 14 At 7.14.55 Pm

Windows Insiders can now look forward to exploring the latest features and improvements in the updated Paint app. With the introduction of dark mode, enhanced zoom controls, and various accessibility enhancements, it’s clear that. Microsoft aims to provide a more intuitive and user-friendly experience for Windows 11 users.

Microsoft lets clients know Windows 10 22H2 will be the final version

As part of its Windows client July 2023 roadmap, Microsoft is updating customers on the various operating system releases for the month that include Windows 11 23H2 being an enablement package and Windows 10 22H2 being the final version of the OS going forward.

Microsoft has repeatedly listed 2025 as the year Windows 10 stops receiving support from the company and as part of its client roadmap customers get some extra details regarding this finality. Clients still on Windows 10 will receive version 22H2 as their final version of Windows 10 and the end of support date is listed as October 14, 2025 “for all editions of that version.”

Microsoft also released a new Windows 10 Insider build for the Release Preview Channel, upping the version number to 19045.3269.

.For any company looking to make a last-ditch effort to transition to Windows 11, Microsoft also lists that there will be a Long-Term Servicing Channel (LTSC) made available for Windows 11 during the second half of 2024. As for everyone else, there will be an upcoming Windows 11 23H2 enablement package (eKB) that allows users on version 22H2 to update to version 23H2. The eKB can be rolled out through various Windows Services such as Windows Server Update Services, Windows Update for Business, and Windows Autopatch.

When making the transition, clients can reset their service lifecycle and extend their license for another three years for the following products:

  • Enterprise
  • Education
  • IoT Enterprise

Lastly, Windows 10 IoT Enterprise LTSC will remain available through Volume Licensing as opposed to its traditional direct licensing format.

Clients will be able to access their Windows 10 IoT LTSCs starting August 1, 2023. Microsoft recommends clients consider the longer 10-year lifecycle of Windows 10 for devices specifically used in IoT scenarios and the limitation on special devices purchased outside of the IoT LTSC license from other OEMs.

Threads vs Twitter: What’s the difference? [Comparison]

Threads is riding a very popular wave right now. Over 100 million users sign up in the first 5 days of its release. Even Windows users are hooked because they learned how to download it and use it on Windows 11. Scammers find it very easy to scam by stealing other people’s identities before they have the chance to claim their names there.

However, the app is not without controversy. For now, you can’t delete your Threads account without deleting your Instagram account. However, Meta is working on a feature that will allow you to do it. And it seems the app is a privacy nightmare because it asks for too much information.

This has made it impossible for Threads to be released in Europe, for now. The European legislation is very clear when it comes to digital privacy. And, it seems Threads is bound to share the market with Twitter. Some agree Threads will be the dominant app in this market.

However, some specialists agree that Threads might be offering too much, and while the app is still in its infancy, this would be the perfect time to correct it. By borrowing the best elements that the other social media platforms have and then addressing their limitations, experts think Threads might be that rare app that makes it.

And with this in mind, we’ve decided to make a comparison between Threads and Twitter, since the two social media platforms will most likely have begun a battle of domination that will last for months to come.

Threads vs Twitter

We’re taking a closer look at how specific features compare in Threads and Twitter. We’ve created this table below where we can better visualize the differences:

FeatureThreadsTwitter
Multiple accountsYesYes
Character limit500 280 – for unpaid users; 25000 – for paid users.
Video limit5 minutes2 minutes and 20 seconds
The following listDoesn’t showIt shows when you follow
Verification Yes, if you’re verified on Instagram$11 a month for mobile
Private account optionYesYes
Trending listIt doesn’t have oneIt has a trending list
Deleting accountsYes, but you’ll have to delete Instagram tooYes
Usage limitsNoneTemporarily
Feed optionMain threadTrending, chronological, followers, and people you follow
Post draftingNoYes
Editable postsNoPaid subscribers only
Direct messagesNoYes
Desktop optionsNo (but you can use it on Windows 11’s WSA)Yes
AdsNo (for now)Yes
HashtagsNoYes
Android/iOSBoth Both
NSFW content allowedNoNo

For now, one of the best things about Threads is that it doesn’t have Ads on its feed, though Meta will probably implement it in the following weeks.

Threads doesn’t have a Trending list, which is one of Twitter’s most popular features, because it revolves around what’s popular around the world, and it gives you an idea about what to post. And most importantly, it helps you engage in conversations.

This is what can Threads do better to surpass Twitter

There is, naturally, the conversation around which will win in the long run. Threads or Twitter? Twitter is still very much a product of the time, and it manages to become such a cultural platform every time something important is going on in the world. Twitter is also democratizing the conversation, meaning everyone can start it, theoretically.threads vs twitter

However, Twitter still doesn’t cater to the regular user. The platform is a broadcast one, and public persons with a large following will always start a conversation. So do the paying subscribers who are promoted in the feed. But the regular user can’t start a conversation at all.

Threads can take this part of Twitter, and focus on the regular user. This way, they will be far more motivated to use Threads for sharing news about their lives. The Meta app can even further democratize the conversation by giving regular users a more powerful voice than Twitter does.

Meta should do it now and position it as a worthy rival to Twitter’s stance on who can start a conversation. However, Threads should also allow for more options on the platform, while still retaining its policies.

A better feed for Threads?

Yes, definitely. For now, Threads’ feed feels overwhelming because it is. You have a lot of content from everyone regarding everything without an apparent filter.

It’s true, Threads is still in its infancy, so the algorithm will be updated in the following weeks, but Meta must update it. It must make it flow, according to what you want to see. So we’re talking about a curated feed, that will permanently adapt to your content choices.

We’ll keep this article updated, as Threads becomes more updated in the following weeks. However, we’d like to know what you think about it. Is Threads better than Twitter, or could it be better in the long run?

Let us know in the comments section below.

VXLAN vs VLAN: Differences, Advantages & Disadvantages

Knowingly or unknowingly we make use of virtual servers, networks, desktops, storage, etc., in our daily lives to enjoy the convenience of cost-saving, enhanced features, and security.

In this guide, we will discuss VXLAN Vs VLAN networks, and understand which one is better than the other. Let us get right into the guide.

What is VLAN?

VLAN is an acronym for Virtual Local Area Network. As the name suggests, with VLAN you can create a virtual network in your local area for computers to connect and group together locally.

LAN can be used in an office, school, or building, which can come under a single network. VLAN is an extension of the Ethernet protocol with an extra header.

With that extra header, VLAN gains the ability to tag traffic with a number from 1 to 4094 (called VLAN ID). Each device connected in its respected VLAN ID will be securely separate and can be communicated over a firewall.

You can basically group multiple devices together using VLAN that frequently communicate with each other. For example, you can create a VLAN for the HR department, marketing team, and finance team, all of them having different VLAN IDs.

Some of the highlights of VLAN over LAN are that it is created by one or more LANs, its latency is less, it is cost-effective, the network packet is sent over to a specific broadcast domain, etc.

There are three types of VLAN or Virtual Local Area Network:

  • Port-based VLAN – VLAN groups virtual local area networks by port, where a port can be configured manually to a member of VLAN.
  • Protocol-based VLAN – This type of VLAN uses the traffic-based protocol to define filtering criteria for untagged packets.
  • MAC-based VLAN – In this type of VLAN, the untagged packets are assigned virtual LAN allowing them to be classified based on their packet source address.

What is VXLAN?

VXLAN stands for Virtual eXtensible Local Area Network and is an extension of the VLAN. VXLAN is a tunneling technique that establishes a logical tunnel on the IP network between the source and destination and forwards the user-side packets through the tunnel.

It transmits layer 2 packets over Layer 3 network, which is ethernet over IP. VXLAN is used because of the limitation of VLAN where due to the 12-bit identifier you can only set up 4094 virtual networks.

Since VXLAN is a 24-bit identifier, you can set up around 16 million VXLAN IDs. The main purpose of VXLAN is to solve the issue of scalability.

Each physical server can set up multiple virtual servers with its own IP address and operating system. This lets you move a virtual machine from one physical server to another without affecting the user.

What are the differences between VLAN vs VXLAN?

VLANVXLAN
VLAN is Virtual Local Area Network.VXLAN is a Virtual eXtensible Local Area Network.
Scalable up to 4094 VLANs because of using a 12-bit identifier.Scalable up to 16 million VXLANS because of using a 24-bit identifier.
Layer 2 ethernet connectivity to all the endpoints.Layer 3 connectivity between each VXLAN tunnel endpoint.
Redundancy and loop avoidance are limited to ethernet-based solutions.Redundancy and loop avoidance are limited to whatever is supported by Layer 2 or Layer 3.

It cannot be natively extended over a Layer 3 network segment.VXLAN can be extended to whatever scalability the Layer 3 connectivity supports.
VLAN requires extra precaution and care and can be a bit frustrating to maintain in a large environment.With the proper configuration adding and extending VXLANs is relatively easy, even in very large environments.
Simple to configure and maintain in small networks.Manual configuration and maintenance are a bit challenging even in small networks.
It is less flexible in the multitenant environment.More flexible as compared to VLAN in multitenant environments.
Makes use of the VLAN tag on the Layer 2 frame for encapsulation.VXLAN uses MAC-in-UDP encapsulation to extend Layer2 segments across endpoints.
Since VLAN uses STP to block redundant paths, only half of the available paths are utilized.VXLAN uses an underlying Layer 3 protocol to use all the available parts making it more cost-effective.

What are the advantages and disadvantages of VXLAN and VLAN?

1. Advantages

1.1 VXLAN

  • Increases scalability because of using 24-bit identifiers in the virtualized cloud environments allowing you to create 16 million isolated networks
  • Runs over IP transport
  • Negates the need for STP (Spanning Tree Protocol)
  • Gives you access to a large of endpoints
  • Maintenance in a large environment is easy
  • Uses Layer 3 protocol to utilize all available routing protocols
  • Flexible and suitable for multitenant structure

1.2 VLAN

  • It reduces the size of the broadcast domain
  • VLAN is more cost-effective than LANs
  • VLAN gets you an additional layer of security
  • Easily manageable in small networks
  • You can logically group devices based on their function rather than by their location
  • VLAN lets you keep hosts separated
  • You do not require additional hardware or cabling

2. Disadvantages

2.1 VXLAN

  • Difficult to scale a centralized controller
  • Manual configuration in small networks is a bit difficult
  • Deployment of VXLAN is complicated

2.2 VLA

  • A packet leak from one VLAN can transfer over to another
  • Infection in one VLAN can carry over to another
  • Requires an additional router to control large networks
  • Cannot forward network traffic to other VLANs

Verdict: VLAN vs VXLAN

The main advantage of using VXLAN over VLAN is that it allows you to extend the overlay of the Layer 2 domain to the Layer 3 underlay network.

This basically eliminates the STP avoiding the redundant paths and utilizes all available paths. So, using VXLAN can help maximize the performance of the data center and reduce costs, especially in large environments.

You can deploy VXLAN via three methods:

  • Host-based VXLAN – In this, the VXLAN runs on the host, where a virtual switch can act as a VTEP encapsulating and decapsulating the data packets.
  • Gateway-based VXLAN – It is a hardware-based VXLAN, where the VTEP is within a switch or a router and is referred to as gateway VXLAN.
  • Hybrid VXLAN – This is a combination of the above two VXLANs, where some VTEPs are on the host while some are on hardware. In this, the traffic flows from the source VTEP to the destination VTEP, which could be both hardware or software.

So, VXLAN has several benefits, one of the highlights being it allows you to change either network without the need to change the other network. Moreover, it lets you easily upgrade the virtual network by shifting the virtual machines to another server.

That is it from us in this guide. You should check out our guide that explains how you can easily resolve the problem where the VLAN ID is missing in Windows.

We also have a guide that lists some of the best network switches for a small business, that are powerful, efficient, and lets you control your business the way you want.

Feel free to let us know in the comments below if you were able to understand the differences between VLAN vs VXLAN by reading this guide or not.

You’ll be able to report inappropriate voice chats on Xbox

Good news for Xbox users everywhere: Xbox has a voice reporting feature now, meaning that you’ll be able to report inappropriate voice chats on Xbox.

Microsoft is taking all the precautions to make the Xbox experience as good as it can be for everybody. After announcing that Xbox will be the home for over 5000 new games currently in development for the console, it seems that the Redmond-based tech giant wants to make sure everyone is safe playing them.

The new feature is going to be live starting this week, and it has backward compatibility with all the games released on the Xbox as a whole, so far, including Xbox 360. If these games offer multiplayer-voice chat, then you’ll be able to use this feature to report inappropriate voice chats.

The feature will be available in Xbox Series X/S and Xbox One, and you’ll be able to use it in any multiplayer voice chat. It will be available first in English-speaking countries: the US, Canada, Great Britain, Ireland, Australia, and New Zealand, and you can find the feature in the Xbox Insider Program. Additional languages will be added in time.

With reactive voice reporting, Xbox continues to help players feel protected. Empowering players with easy-to-use tools helps foster togetherness, while improving the greater health of the gaming community on Xbox. With measures like this in place, players can feel confident they are in a safe, welcoming environment. 

Stephen Balkam, CEO, Family Online Safety Institute

How does the Xbox voice reporting feature work?

The feature is built in such a way that it can be used without affecting your gameplay. When you notice inappropriate language, you can quickly record and the Xbox will save it into the device for 24 hours.

That’s more than enough time for you to choose if you’re going to report it or not. Microsoft agrees that you have full control over what you record and report. Clips will not be uploaded, they will only be saved until you are ready to deal with them.xbox voice reporting feature

If you choose not to report the clip, then it will be deleted automatically from your Xbox. If you choose to report it, Microsoft has updated the notification features, and it will let you know about what’s next.

Xbox users are already thrilled about this new feature.

As a woman online, I often find myself staying silent in online multiplayer to avoid abuse and harassment. I am excited for features like this that can help give people like me their voices back. Nobody should miss out on interaction with their fellow gamers because they are afraid to speak.

CamicaziBoss, Xbox Ambassador

What do you think about it? Let us know your thoughts and opinions on this in the comments section below.

SMART Status Bad Error: Main Causes & How to Fix it

Some of our readers have recently reported that they are stuck with the SMART status bad error but don’t know what triggered the error in their HDD and SSD or how to fix it.

In this article, we will take you through the leading causes of the error and how to resolve the issue to prevent potential data loss or drive failure.

What causes the SMART status bad error?

A variety of factors can cause the SMART status bad error. Below are some of the common reasons as reported by users:

  • Hardware failure – The SMART status bad error can occur due to physical issues with the hard drive or SSD.
  • Power supply issues – Some readers claim that they started getting the SMART status bad error due to an unstable power supply.
  • Bad sectors – When the SMART system detects many bad sectors, it may trigger the SMART status bad error.
  • Overheating issues – High temperatures can damage the components of a hard drive or SSD, leading to increased error rates and potential drive failure.

It is important to note that the specific cause of the SMART status bad error may vary depending on the individual situation. Sometimes, a drive can fail even if SMART does not report any errors.

How can I fix the SMART status bad error?

Consider performing the following checks to salvage what’s left of your drive:

Having confirmed the above checks, if you require further assistance, below are detailed instructions on how to fix the SMART status bad error. You will also need a bootable drive nearby to help you.

1. Disable the SMART system from BIOS

  1. Restart your PC and press F2, Del, Esc, or F10 (depending on the model of your PC) to access the BIOS/UEFI settings.
  2. Navigate to the Advanced Settings section and select SMART settings.
  3. Then, click on SMART self-test.
  4. The setting is enabled by default. Now, select the Disable option to turn off the SMART setting.

It’s important to note that disabling the SMART status bad error from the BIOS is not recommended by manufacturers and does not hinder drive failure.

However, you can disable this setting if you have your data backed up already or are not worried about the data on the drive.

2. Run the CHKDSK Utility

  1. Press the Start button, type cmd in the Search box, and choose Run as administrator.
  2. Next, type the following command (replace D with your drive letter) and press Enter to run it: chkdsk d: /r
  3. Follow the on-screen prompts to restart your PC.

However, if your Windows OS can no longer launch the desktop, you can use an installation disc or drive to boot it:

  1. Insert the installation DVD or USB, then click on Repair your computer.
  2. Now, click on Command Prompt.
  3. Next, type in the command and press Enter: chkdsk d: /r

The Check Disk Utility (CHKDSK) can be used to check and fix any bad sectors on your hard drive.

And that’s it on how to fix the SMART status bad error. However, if you receive a SMART status bad error, it is crucial to take it seriously and take appropriate action to safeguard your data.

Additionally, you can explore our detailed guide for tips to apply if Windows 10/11 cannot be installed on your Disk.

Finally, some readers have found our article on Windows 11 not recognizing SSD helpful. It might be worth a check for you too.

If you have any questions or suggestions, do not hesitate to use the comments section below.

Outlook View Not Showing Preview: Restore the Missing Reading Pane

When the Outlook view not showing preview, emails can only be opened in full instead of being displayed in the side pane. Many users describe this as the Outlook preview gone or the Outlook reading pane missing, especially after updates or layout changes. This guide explains why it happens and how to restore the preview function.

Why is Outlook view not showing preview?

This problem usually happens because of:

  • The Preview pane being disabled
  • Zoom levels set too high or too low
  • Unsupported email formats
  • Trust Center restrictions
  • Add-in interference

If you’ve already tried enabling the preview pane, tweaking Trust Center settings, disabling add-ins, or starting Outlook in Safe Mode, here are additional fixes to try.

What do I do if Outlook isn’t showing a preview?

Before attempting any of the advanced troubleshooting or settings tweaks provided below, you should consider performing the following preliminary checks:

  • Confirm if your preview pane has not been disabled.
  • Update your Outlook app.
  • Disable some of the installed add-ins or extensions to help identify if they are causing the issue.
  • Ensure that the email you’re trying to preview is supported for viewing by Outlook.

If the issue persists after these checks, work your way through any of the solutions provided below.

1. Enable the Outlook Preview pane

  1. Press the Windows key, type Outlook in the search box, and open it.
  2. Then, navigate to the View tab in the ribbon.
  3. Click on the Reading Pane or Preview pane option.
  4. Select the Right or Bottom option, depending on your desired position for displaying the Preview pane.

Enabling the reading pane should automatically allow you to preview emails. If this doesn’t work, try the fixes below.

2. Modify Trust Center settings

  1. Open the Outlook app, click on the File tab, and select Options from the left sidebar.
  2. In the Options window, click Trust Center and then choose Trust Center Settings.
  3. Further, click on Attachment Handling and uncheck Turn off Attachment Preview.
  4. Click on Attachment and Document Previewers and select all the options, then, click OK.
  5. Restart your Outlook app and check if you can preview attachments.

To overrule the possibility that Outlook is failing to preview attachments because the file previewer feature is disabled, try to enable it using the steps above.

 3. Disable Add-ins or Extensions

  1. In the Outlook app, click on the File tab in the ribbon, and select Options.
  2. From the options, click on Add-ins and click Go.
  3. Then, disable any suspicious or unnecessary add-ins by unchecking the corresponding boxes.
  4. Restart Outlook to see if the preview works.

Disabling these add-ins or extensions can help identify if they are causing the issue.

 4. Run Outlook in Safe Mode

  1. Close the Outlook app and press the Windows + R to open the Run dialog. Type outlook.exe /safe and press Enter.
  2. Then, Outlook will now start in Safe Mode.
  3. Check if the preview pane works correctly in safe mode.
  4. If it does, the issue may be related to an add-in or customization that needs further investigation.

Running Outlook in safe mode will enable such to run with minimal functionality. 

5. Reset the Current View Layout

  1. Open Outlook and go to the View tab.
  2. In the Current View group, click Reset View.
  3. Confirm the action when prompted.

This restores the default layout, which often resolves corrupted or altered view settings that hide the reading pane.

6. Adjust Reading Pane Options in Outlook Settings

  1. Click File > Options.
  2. Go to the Mail category.
  3. Scroll to the Outlook Panes section and click Reading Pane.
  4. Ensure Turn on Reading Pane is checked.

Incorrect pane options may prevent previews from appearing consistently.

7. Turn Off Compact Layout

  1. From the View tab, select View Settings.
  2. Click Other Settings.
  3. Uncheck Use compact layout under Reading Pane.
  4. Apply changes and check your inbox.

Compact mode can sometimes hide or reduce the visibility of the preview pane.

8. Repair Microsoft Office Installation

  1. Open Control Panel > Programs and Features.
  2. Select Microsoft Office, then click Change.
  3. Choose Quick Repair, or if the problem persists, try Online Repair.

Repairing the installation fixes broken program files that may block previews.

9. Reinstall Outlook

If none of the above steps help, uninstall Outlook completely and reinstall it. This ensures any damaged configuration files are replaced with fresh ones.

Wrap up

And that’s it on how to fix the Outlook view not showing the preview pane error. If the error persists after trying the above methods, try to reinstall your Outlook app.

There are also cases where a file cannot be previewed in Outlook. You can check our detailed guide on how to fix the error.

Also, if Outlook view changes itself, you can explore our guide on how to get it back quickly.

Should you have any questions or suggestions, please use the comments section below.

FAQ

Why is my Outlook preview gone?

It’s often caused by disabled preview pane settings, compact layouts, or corrupted Outlook files.

How do I get back the Outlook reading pane missing from my inbox?

Reset the view, adjust Reading Pane options under settings, or repair Office.

Can reinstalling Outlook fix the issue?

Yes, if corrupted program files are responsible, a reinstall often restores the missing preview pane.

Azure AD is now Microsoft Entra ID, but users aren’t happy

Big week for Microsoft users. Patch Tuesday it’s here, and it brought a lot of new features with it, including the VPN icon, voice commands, and the ability to quickly fix your computer. Plus, on the Canary Channel, you are able to fix your Windows 11 from Windows update. It will be out on live Windows servers soon.

However, this is not all. Starting this week, Microsoft has decided to change the name of Azure Active Directory to Microsoft Entra ID. So it means that Azure has a new name.

To unify the Microsoft Entra product family, reflect the progression to modern multicloud identity security, and simplify secure access experiences for all, we’re renaming Azure Active Directory (Azure AD) to Microsoft Entra ID.

Microsoft

No action is required from you, Microsoft says. You can continue to use the service without interruption. All existing deployments will continue to function as they do today without any action from you. However, not all users are happy with this. Many of them don’t want to learn the new names. And a lot of subreddits, such as the sysadmin, know what Azure AD stands for.

In MS’ defense, it is hard to name products when you have a stack as large as theirs. But sometimes, I just don’t get it. Azure AD as an extension of AD–a name that’s been around for 20+ years and a brand that is deeply respected–is just good marketing. I don’t understand this Entra BS. You’re sacrificing lineage with one of the most respected brands in this whole space. EVERYONE knows what AD stands for on this subreddit. Why give that up?

If it has to change, why not change it to Azure ID. Entra is a really weird word.

I’m tired of Microsoft’s changes. “Azure AD” just makes sense.

What are the new names coming to Azure AD?

Microsoft is emphasizing that only the names are changing, the services are still the same.azure active directory new name

All features and capabilities are still available in the product. Licensing, terms, service-level agreements, product certifications, support and pricing remain the same.

Starting on October 1st, 2023, display names for these services will change. Microsoft Entra ID Free, Microsoft Entra ID P1, and Microsoft Entra ID P2 will become the new names of the Azure Active Directory Services. Here is a list of the all new names coming to Azure, so you might start to learn them.

Old display name for service planNew display name for service plan
Azure Active Directory FreeMicrosoft Entra ID Free
Azure Active Directory Premium P1Microsoft Entra ID P1
Azure Active Directory Premium P2Microsoft Entra ID P2
Azure Active Directory for EducationMicrosoft Entra ID for the education
Old display name for product SKUNew display name for product SKU
Azure Active Directory Premium P1Microsoft Entra ID P1
Azure Active Directory Premium P1 for studentsMicrosoft Entra ID P1 for students
Azure Active Directory Premium P1 for facultyMicrosoft Entra ID P1 for faculty
Azure Active Directory Premium P1 for governmentMicrosoft Entra ID P1 for government
Azure Active Directory Premium P2Microsoft Entra ID P2
Azure Active Directory Premium P2 for studentsMicrosoft Entra ID P2 for students
Azure Active Directory Premium P2 for facultyMicrosoft Entra ID P2 for faculty
Azure Active Directory Premium P2 for governmentMicrosoft Entra ID P2 for government
Azure Active Directory F2Microsoft Entra ID F2

However, you should know that some of the names will stay the same.

The changes on all the platforms will happen gradually starting in October 2023, and they will be fully implemented everywhere before 2024.

What do you think about these new names? Is Microsoft doing the right thing? Let us know your opinion in the comments section below.

The Request Could Not be Performed Because of an I/O Device Error [Fix]

The request could not be performed because of an I/O device error. You’ve probably seen the dreaded message indicating a problem with your external drive, USB, hard drive, or similar. Don’t worry; as always, we’re here to help you.

Today, we’ll explore what causes the error and give you some effective solutions to quickly resolve it.

What does The request could not be performed because of an I/O device error mean?

The I/O (short for input/output) device error occurs when Windows can’t perform input/output operations while trying to access the drive. I/O actions can be reading or copying information, while the drive affected can be a hard drive, USB, CD/DVD, or any other storage medium.

Several factors may be responsible for an I/O device error, including:

  • Damaged hardware and/or USB port: The error can occur due to issues with the hardware itself, e.g., physical damage to the device or the PC’s USB ports, faulty cables, etc.
  • Incorrectly plugged-in storage device: Connection issues between your device and the PC can trigger the error.
  • Outdated drivers: Outdated or incompatible device drivers can interfere with proper data transfer, leading to an I/O device error.
  • Corrupted or missing system files: System files essential for I/O operations may become corrupted or go missing, causing errors during data transfers.
Tip icon Tip
Always use the Safely Remove Hardware option before unplugging a USB device to prevent data corruption.

Now that you know the most common causes behind the I/O device error, let’s move on to our trusted solutions:

How do I fix the request could not be performed because of an I/O device error?

Before trying any advanced fixes, do these preliminary checks:

  • Check connections and cables: Ensure that all cables connecting the device to your computer are securely plugged in and are working correctly. If you suspect a problem, you can try using another one.
  • Use a different USB slot: If you encounter an error with a USB device, try connecting it to a different USB port. Alternatively, you can try the hard drive on another computer.
  • Temporarily disable your antivirus: Sometimes, security software can mistakenly identify a legitimate device as a threat and block access to it, resulting in an I/O device error. Try temporarily disabling it to see if that helps, and remember to always use trusted antivirus software.

1. Update the device drivers

  1. Right-click on the Start icon and open Device Manager.io-device-error
  2. Locate your disk drivers, right-click on them, and select Update driver.update-drivers-io-device-error
  3. Choose Search automatically for updated driver software.io-device-error-drivers
  4. Do the same for all drivers under the Universal Serial Bus controllers option.io-device-error-usb-drivers
  5. Restart your PC for the changes to take effect.

Alternatively, you can update your drivers via Windows Update or manually by downloading drivers from your manufacturer’s website. To make things even easier, you can use automatic driver update software.

If you cannot update any faulty drivers or find any device with a yellow exclamation sign, try uninstalling them instead.

2. Run the hardware troubleshooter

  1. Press Windows + R key to open the Run dialog. Type the following command and press OK: msdt.exe -id DeviceDiagnosticio-device-error-troubleshoot
  2. This opens the Hardware and Devices troubleshooter. Click Next to initiate the process.hardware-device-troubleshoot-windows-11
  3. The tool will start a scan and recommend a fix if it detects any problems.io-device-error-hardware-scan
  4. Restart your PC.

Windows hardware and devices troubleshooter is a handy built-in tool to help you fix problems with your hardware and devices, e.g., peripherals, network connection, external drives, etc.

3. Change the drive letter

  1. Hold Windows + X key to open the pop-up menu and choose Disk Management from it.io-device-error-letter
  2. Right-click the disk you want to rename. Choose Change Drive Letter and Paths.io-device-error-change-disk-letter
  3. Click Change to open the pop-up window.request-not-performed-io-device-error
  4. Choose the letter you want from the list. Click OK.io-device-error-change-driver-letter
  5. Confirm by clicking OK in the dialogue box.

An incorrect drive letter can result in an I/O error. To fix this, you can try changing it.

Keep in mind that sometimes, the option to change it will be unavailable. This happens if your drive is uninitialized or you don’t have permission to execute such changes.

4. Repair disk errors

  1. Press the Windows key and type Command Prompt in the search box. Click on Run as administrator to open it.the request could not be performed because of an i/o device error fix
  2. Confirm by clicking Yes in the UAC message.
  3. Type in the following command and press Enter (here, E: is the drive letter, replace it with the letter of your affected device): chkdsk E: /f /r /xthe request could not be performed because of an i/o device error check disk
  4. Reboot your PC.

The chkdsk (Check Disk) is a Windows built-in error-checking tool to scan and fix issues with storage devices. You may also try running it in a clean boot.

If nothing else works, you can always format your hard drive. Though, know that if you choose this option, you’ll lose all your data on it. It might be a good idea to try a data recovery tool to recover the files from the device first.

Tip icon Tip
Remember to regularly back up your important files to avoid data loss in case of an I/O device error or any other hardware failure.

Encountering The request could not be performed because of an I/O device error can undoubtedly be frustrating. But, as you saw, it’s possible to resolve the issue with the right troubleshooting.

Did you manage to do it? Let us know in the comments which solution worked best for you.

Fix: RSAT Naming Information Cannot be Located

The RSAT naming information cannot be located error occurs when trying to access the Active Directory. This issue may occur if there is a problem with the domain controller (DC) computer or if you have recently disconnected from your network and are trying to reconnect.

Basically, it’s when the server cannot contact other DNS servers and resolve their names successfully. If you’ve come across this issue before, we delve into different ways on how to resolve it.

What does RSAT naming information cannot be located mean?

Remote Server Administration Tools or RSAT is a suite of tools in Windows that allows you to manage roles and features on servers remotely. 

For example, you can use them to:

  • Add or remove roles and features on remote servers
  • Change how roles are installed
  • Configure security settings
  • Install software updates, and manage event logs

The RSAT naming information cannot be located error message is one you may encounter when attempting to connect to an Active Directory domain controller.

This error indicates that the computer has not been added to the Active Directory Domain Services (AD DS) directory. 

Usually, it’s an issue with your network connection, but it could also indicate a problem with some of the services running on your computer.

The following conditions can cause this error:

  • You have not joined the computer to the domain or forest
  • Wrong DNS configuration
  • User account does not have permission to access the domain on the server
  • The computer account for the client computer does not have a name that is valid for its domain

Other variations of a similar problem that you may encounter include:

  • naming information cannot be located the user name or password is incorrect
  • naming information cannot be located because the logon attempt failed
  • naming information cannot be located because there is not enough space on the disk
  • naming information cannot be located because the target principal name is incorrect

What can I do if RSAT naming information cannot be located?

Try the following workarounds before moving on to the complex solutions:

  • Make sure that the DNS server is running and configured properly.
  • Check that there are no problems with your computer’s network connection or the DNS server.
  • Ensure that the computer account has been created and exists on the domain controller.
  • Verify that you have enabled Active Directory Users and Computers.
  • Check if any firewall rules or antivirus software block access to the Domain Controller.
  • If the server or client computers have multiple network adapters, verify they are connected to a physical network adapter.
  • Try restarting your server.
  • Restart your computer, especially if you had renamed your PC for the changes to take effect.

1. Restart the TCP/IP NetBIOS Helper service

  1. Hit the Windows + R keys to open the Run command.
  2. Type services.msc in the dialog box and hit Enter.run services.msc command
  3. Locate TCP/IP NetBIOS Helper service, right-click on it, and select Properties.
  4. Navigate to the Startup type, and in the drop-down menu, select Automatic.
  5. Click on Start, then hit Apply and OK to save changes.

2. Restart the Netlogon service

  1. Hit the Windows + R keys to open the Run command.
  2. Type services.msc in the dialog box and hit Enter.run services.msc command
  3. Locate Netlogon service, right-click on it, and select Properties.
  4. Navigate to the Startup type, and in the drop-down menu, select Automatic.
  5. Click on Start, then hit Apply and OK to save changes.

If you are getting this error, it is probably because of some missing or corrupt DNS records that caused the failure to return the domain controller list. Restarting the NetLogon service will attempt to re-register any missing Active Directory Domain Services components.

3. Reset network settings

  1. Click on the Start Menu icon and click on Settings.settings windows 11
  2. Select Network & internet from the navigation pane, and click on Advanced network settings on the right.
  3. Click on Network reset under More settings.Network Reset 1
  4. Now, click on the Reset now button.Network Reset now
  5. Click Yes on the confirmation prompt that appears.

4. Edit the Registry

  1. Hit the Windows + R keys to open the Run command.
  2. Type regedit in the dialog box and hit Enter.
  3. Navigate to the following location: HKEY_LOCAL_MACHINE\SYSTEM\CurrentControlSet\Services\Netlogon\Parameters
  4. In the right pane, find SysvolReady Flag, right-click on it, and select Modify.
  5. Enter 1 under the Value data, then hit OK.

That’s all we had for this article, and hopefully, the naming information that could not previously be located has been resolved.

While you’re still here, we’d like to direct you to another interesting article on how to export a list of Active Directory users in a group. This can be especially useful in auditing, so check that out.

For any additional thoughts or suggestions, leave a comment down below.

Windows 11 Screen Keeps Refreshing? Fix It in [8 Steps]

If you’ve been struggling with a screen that keeps refreshing on your Windows 11, interrupting your workflow, and causing annoyance, this guide can help!

We will discuss the root causes of the problem and provide you with a simple yet effective solution to overcome this issue.

Why does the Windows 11 screen keep refreshing?

There could be several factors that can contribute to the issue of a Windows 11 screen constantly refreshing. Here are some common reasons:

  • Outdated graphics driver – If the graphics driver is not functioning properly or doesn’t support the specific hardware or Windows 11, it can result in screen flickering or constant refreshes.
  • Software conflicts – Certain software applications or processes running in the background may interfere with the screen refresh rate, causing it to refresh continuously.
  • Corrupted system files – Damaged system files can cause all sorts of issues on your computer, including this one. Try running an SFC scan to fix the issue.
  • Malware infection – Malware or viruses can disrupt system processes, including those related to screen rendering, leading to screen refresh problems. Try running an antivirus tool.
  • Dynamic refresh rate – This feature can sometimes cause screen flickering or refreshing issues if it doesn’t work optimally with the hardware or software configuration.

Now that you know the probable causes, let us move to the troubleshooting methods to fix it accordingly.

What can I do if Windows 11 screen keeps refreshing?

Before engaging in advanced troubleshooting steps, you should consider performing the following checks:

Once you have gone through these, let us check out the detailed solutions.

1. Restart Windows File Explorer

  1. Press Shift +  Ctrl + Esc to open the Task Manager.Restart Windows Explorer Windows 11 Screen Keeps Refreshing
  2. Go to the Processes tab, locate, and right-click Windows Explorer. then select Restart.

If also the Taskbar is missing, it’s a clear sign that this issue is related to File Explorer, and restarting it should also fix the screen refreshing problem.

2. Run SFC & DISM scans

  1. Press the Windows key, type cmd, and click Run as administrator.CMD elevated Windows 11 Screen Keeps Refreshing
  2. Type the following command to repair system files and press Enter: sfc /scannowSFCSCANNOW CMD
  3. Wait for the command to execute; once done, copy & paste the following command to restore OS image files and hit Enter: Dism /Online /Cleanup-Image /RestoreHealthRestore health
  4. The process will complete in some time. Once done, restart your computer to let the changes take effect.

On the other hand, if you’re not sure about proceeding with the manual steps, we suggest you try a specialized repair app.

3. Disable the related services

  1. Press Windows + R to open the Run console.Services RUn command Windows 11 Screen Keeps Refreshing
  2. Type services.msc and click OK to open the Services app.
  3. Locate and double-click the Windows Error Reporting Service to open its Properties.Windows Error Reporting
  4. Go to Start-up type and select Disabled.
  5. Under Service status, ensure it says Stopped or click Stop.Service disabled
  6. Click Apply, then OK to confirm the changes.
  7. Now locate Problem Reports and Solutions Control Panel Support service and double-click it.
  8. Go to Start-up type and select Disabled.
  9. Under Service status, ensure it says Stopped or click Stop.Service disabled 2
  10. Click Apply, then OK to confirm the changes.

4. Update the graphics driver

  1. Press Windows + R to open the Run dialog box.Device Manager Run command Windows 11 Screen Keeps Refreshing?
  2. Type devmgmt.msc and click OK to open Device Manager.
  3. Go to Display adapters and click it to expand.
  4. Right-click the graphics driver and choose Update driver.Graphics Driver update
  5. Click Search automatically for drivers.Update driver 2
  6. Follow the onscreen instructions to complete the process.

You can also opt for an automatic driver updater to detect all outdated or malfunctioning drivers and select the latest updates within minutes.

⇒ Get Outbyte Driver Updater

5. Restart your computer in Safe Mode

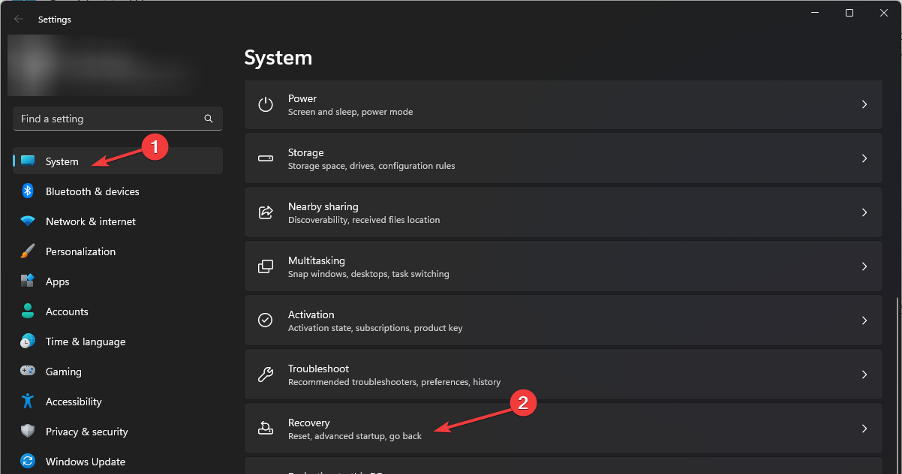
  1. Press Windows + I to open the Settings app.
  2. Go to System, then click Recovery.System - Recovery Windows 11 Windows 11 Screen Keeps Refreshing?
  3. Locate Advanced startup and click Restart.Recovery Advanced Startup
  4. The computer will reboot, and on the Choose an option page, select Troubleshoot.Choose an option - Troubleshoot
  5. Select Advanced options.Advanced options
  6. Now choose the Startup Settings option.Startup Settings
  7. Click Restart once your computer starts and choose the option for Enable Safe Mode.Enable safe mode

Now when your PC boots into safe mode, you can narrow down the reason for the issue so that you can fix the screen keeps refreshing problem.

6. Delete the icon and thumbnail cache

  1. Press the Windows key, type cmd, and click Run as administrator.CMD elevated Windows 11 Screen Keeps Refreshing
  2. Copy & paste the following command and hit Enter: cd %userprofile%\AppData\Local\Microsoft\Windows\Explorercmd_Windows 11 Screen Keeps Refreshing?
  3. Type the following command to see all the contents and press Enter: dir
  4. Copy & paste the following command to terminate Windows Explorer and hit Enter: taskkill /f /im explorer.exe
  5. Type the following command one by one and press Enter after every command:
    • attrib -h iconcache_*.db
      del /f iconcache_*.db
      attrib -h thumbcache_*.db
      del /f thumbcache_*.db
  6. Close the Command Prompt window.

7. Modify your desktop settings

  1. Press Windows + I to open the Settings app.
  2. Go to Personalization, and click Background.Background - Personalize Windows 11 Screen Keeps Refreshing?
  3. Go to Personalize your background; if your background is a picture, change it to Solid color from the drop-down.Solid color
  4. If it is Slideshow, for Change picture every,  select 1 day or 6 hoursChange picture every.

It would also help to check if the monitor refresh rate matches the performance of your monitor. Windows 11 also has a Dynamic Refresh Rate option that you can try to toggle on and off to see if it fixes the issue.

8. Tweak the Power Plan

  1. Press the Windows key, type control panel, and click Open.Control Panel start menu Windows 11 Screen Keeps Refreshing?
  2. Select Category for View as and click System and Security.System and security1
  3. Click Power options.Power options
  4. Now click High Performance.High Performance

By following the steps outlined here, you can troubleshoot and fix the problem of your Windows 11 screen repeatedly refreshing. If these steps didn’t work for you, you might have to perform a clean installation of Windows to fix it.

If you are facing similar issues, like the desktop keeps refreshing on Windows 10, we recommend you check out this informative guide to find easy solutions.

Please feel free to give us any information, tips, and your experience with the subject in the comments section below.

What is Wisptis.exe & Should You Disable it?

Many users have reported that the wisptis.exe process has caused problems for their OS, including consuming high memory. This begs the question of whether it’s safe to remove it because it’s a Windows component.

If you’ve also run into the same issue, keep reading for some effective solutions.

What does wisptis.exe do?

The wisptis.exe system file is an abbreviation for Windows Ink Services Platform Tablet Input Subsystem. It’s part of the Windows Ink Workplace, the service enabling handwriting on office and note-taking software.

The executable gets automatically installed along with any Microsoft Office, Adobe, or Journal viewer software.

Is wisptis.exe safe?

The wisptis.exe file is a legitimate Windows one. However, that doesn’t mean it can’t damage your computer. The problem with the file is that it remains active in the background even when no touch screen or pen input is available or used by the system.

This consumes many system resources, slows your CPU, and can even harm other software. So, while it might be safe to stay, as it’s a legitimate file, do you even need it on your PC?

Disabling it isn’t recommended for most users, especially touch screens and pen-enabled devices. The executable’s vital for the optimal performance and functionality of note-taking, drawing, or design apps.

However, if you do not own such a device or do not intend to use any pen input component, disabling the process might free up some valuable system resources and positively impact your PC performance.

You can terminate the wisptis.exe process from Task Manager, but this is just a temporary solution. Windows is set to automatically restore it every time you reopen an app that needs it or reboot your computer.

Scroll down below for some effective solutions to ensure that wisptis.exe remains disabled.

Tip icon Tip
Keep in mind that disabling it may render certain features of apps, such as Microsoft Office, Snipping Tool, and Adobe, unusable.

How can I stop wisptis.exe?

1. Disable the process from auto-start using Command Prompt

  1. Press Windows + S to open the Start menu. Search for Command Prompt and click on Run as administrator.wisptis.exe-remove
  2. A UAC (User Account Control) message will appear. Click Yes to confirm.
  3. Type in the following commands sequentially and press Enter after each one: %systemdrive% cd %windir%\system32 takeown /f wisptis.exe icacls wisptis.exe /deny “NT AUTHORITY\SYSTEM”:(RX)
  4. Restart your PC.

2. Disable the App-V client

  1. Press Windows + R to open the Run window, type services.msc into the search box, and press Enter.wisptis-exe-disable
  2. Navigate to the Microsoft App-V client and right-click on it. Open Properties.wisptis-app-v-disable
  3. In the General tab, find Startup type and choose Manual. Then, under the Service status option, select Stop.wisptis-exe-remove
  4. Click on Apply and then OK.
  5. Reboot your PC.

Keep in mind that if disabling the App-V client harms your computing experience, you can re-enable it by following the steps above, but this time choosing Automatic under Startup type, followed by another restart.

3. Use the Local Group Policy Editor

  1. Press Windows + R to open the Run dialog. Type gpedit.msc into the search box and press Enter.wisptis-remove
  2. Click on Computer Configuration on the left-hand side. Open Windows Settings and then choose Security Settings.wisptis-exe-remove-gpedit
  3. Find Software Restriction Policies and open it. Right-click Additional Rules, and choose New Path Rule.remove-wisptis-exe-gpedit
  4. Press Browse, find the location of the wisptis.exe process, and click OK. Then choose Disallowed from the drop-down menu under the Security level section.disable-wisptis-exe-lgpe
  5. Press Apply.

So that’s how you disable the wisptis.exe process. Additionally, you may disable the entire Windows Ink Workplace feature.

Did the above methods work for you? If you need further assistance or have any questions, kindly drop them in the comments section below.

How to Permanently Delete a Page in Word

Many users have complained about how difficult it’s been to delete a page in Microsoft Word. It makes it impossible for users to remove blank pages and clear unneeded document parts. However, this article will discuss some steps for fixing the problem.

Alternatively, you can go through our detailed guide about Word documents being blank when opened and some steps for fixing the issue.

Why can’t I delete one page in Word?

  • Word might consider section breaks or page breaks on the page you’re trying to delete as a separate section and prevent its deletion.
  • If the content on the page extends beyond the visible area, Word may not allow you to delete it.
  • Some protection settings enabled, such as Read-only or Password-protected, can prevent you from deleting pages.
  • If tables, images, shapes, or other objects are on the page, they can sometimes interfere with deletion.
  • Sometimes, Word might track changes or comments on the document, causing it to preserve those elements on the page and prevent its deletion.
  • The Word document might be corrupted or problematic due to transfer, leading to deletion issues. Check the best tool for fixing corrupt documents in Microsoft Word.

How do I completely delete a page in Word?

1. Delete a page manually

  1. Place your cursor at the beginning of the page you want to delete.
  2. Press and hold the Ctrl key on your keyboard.
  3. While holding the Ctrl key, press the Shift and right arrow keys simultaneously. This will select the entire page.
  4. Once the page is selected, press the Delete key on your keyboard. The entire page, including its content, should be deleted.

Alternatively, you can use the Backspace key instead of the Delete key to achieve the same result. Note that this method assumes no section breaks, page breaks, or other elements on the page that might prevent its deletion.

2. Turn off Track changes and delete the page from the Draft view

  1. Click the Review tab in the ribbon.
  2. Select Track Changes from the Tracking group. Then, select Track Changes from the drop-down menu to turn tracking off the feature.
  3. Click the View tab in the Ribbon and select Draft in the Views group.
  4. Tap on the page and or section break you want to delete.
  5. Press the Delete or Backspace button.
  6. Click the View tab in the Ribbon, then select Print Layout to return to the default view in Word.

The above steps will help you resolve difficulties in selecting and deleting a section or page break. Check our article about what to do if Microsoft Word has stopped working on your PC.

Need to deal with stubborn section breaks too? Here’s a full guide on how to remove a section break in Microsoft Word step by step.

3. Delete a page using the Navigation pane

  1. Click the View tab in the Ribbon.
  2. Select or check Navigation Pane in the Show group.
  3. Click Pages on the task pane that appears on the left with the Headings, Pages, and Results tabs to display all the pages in the document.
  4. Click the thumbnail of the page you want to delete in the Navigation pane.
  5. Press Delete or Backspace to remove the page.

The above steps will remove extra or blank pages using the navigation pane.

In addition, you may be interested in our article about how to fix errors Word experiences when opening the file on your PC.

Also, you can check our detailed article about how to remove watermarks in Word in a few steps.

How to repair your Windows 11 via Windows Update

The new Patch Tuesday updates are out on the live Windows 11 servers. It addresses 132 CVEs, and it brings about a lot of new features, such as the possibility to fix your PC by collecting the Live Kernel Memory file dump.

Voice commands and the VPN icon are also live with the update, and you can now see if your WI-FI connection is safe and secure.

Along with the Patch Tuesday updates, a new build is live in the Canary Channel of the Windows Insider Program as well. Build 25905 is out on the Channel, and it brings multiple new features, including some new ones from the Dev channel.

However, it seems that the Canary Channel is also allowing you to repair your Windows 11 directly via the Windows Update section. As spotted by Windows enthusiast, @XenoPanther, the feature is fully working on the Canary Channel version of Windows 11.

Here’s how you can repair your Windows 11 via Windows Update

The feature should appear and be enabled as soon as you install the latest Windows updates in the Canary version of Windows 11.

To repair your Windows 11 via Windows Update, you need to:

  1. Open Settings in your Search bar and click on it.
  2. Once you’re there, go to the Windows Update pane.
  3. You should now see the Fix problems using Windows Update feature.utl: threads vs twitter Title: threads vs twitter: What's the difference? [Comparison]
  4. Click on it, and a separate window will appear.
  5. Select OK, and let Windows 11 self-repair.repair windows via windows update

You can choose the automatically restart the device after the installation is complete. Basically, the feature reinstalls the current version of Windows 11 if a repair solution is available. You don’t have to worry, though, Your files, your documents, and your apps will be preserved.

However, since the current version of the Windows 11 is getting reinstalled, you’ll need to make sure your device is connected to a network and a power source. Windows 11 will get corrupted if its installation is interrupted.

This feature will prove to be extremely useful. especially when your Windows will experience problems in the future. Sure, there are a lot of solutions available, but it will be good to have a native repairing solution.

What do you think about this new feature? Are you excited about it? Let us know in the comments section below.

How to Use Your Phone as a Keyboard for Xbox

The Xbox console and app allow users to communicate with each other through text-based messaging. However, people have reported challenges with text entry speed and accuracy and limited customization with the on-screen keyboard. Thus, we will discuss using a phone as a keyboard for Xbox.

Also, check our detailed guide about fixing the Xbox Party not working on your PC.

How do I use my phone as a keyboard for Xbox?

Use the Xbox app

  1. Power up your Xbox game and press the View button on your controller to open the Options menu.
  2. Navigate to Settings and select Controller.
  3. Select Text Chat and assign a button on your controller to key bind it.
  4. Navigate back to Menus and keep your console on.
  5. Download the Xbox app from your store to your mobile phone and open it.
  6. Click the Console icon on the app’s left top corner of your mobile screen.
  7. Click the Connect button to link the app to your console. Subsequently, you can select whether you want it to auto-connect.

Can I use my phone as a keyboard for Xbox?

As you can see above, you can use your phone as a keyboard for Xbox by utilizing the Xbox app.

The app has a Remote Play feature, allowing you to connect your phone to your Xbox console and use it as a virtual keyboard for text input. This makes typing text a lot faster than using the on-screen keyboard.

Clicking on the assigned text console button after setup will open the Text Chat. Note that your mobile device should not be in black screen sleep mode, and the Xbox mobile app should be on the screen to establish a connection.

Check our guide on how to stop the Xbox controller from opening the virtual keyboard on the console. When linking devices, account access matters. Learn how to change email on Xbox so you can keep connections working without issues.

In conclusion, you can read about how to fix can’t send messages on Windows Xbox app or Xbox console. Also, we have a detailed guide about fixing your Xbox Game Bar if the mic is not working.

If you’re on PC, check our guide on how to use iPhone as a webcam on Windows 11 and get high-quality video. It’s also possible to use your PC mic on your phone or integrate the Apple Vision Pro into your Xbox for an upscaled display.

Should you have further questions or suggestions, kindly drop them in the comments section.

Insider Build 25905 is not available to ASUS motherboards

As you may know, Patch Tuesday updates are live on Windows 11 now. The package brought a lot of new features, and it addressed a lot of vulnerabilities. You’ll be able to fix your PC much faster now, with a new way to capture Live Kernel Memory dump files.

You’ll also be able to the VPN icon on your Wi-Fi network, so you can now know that your network is safe and secure. And voice commands are finally here as well. When it comes to security, the latest Patch Tuesday updates address 132 CVEs: 9 are Critical, 121 of them are listed as important, and 2 are advisories.

And since Patch Tuesday is out, there is a new build in the Canary Insider Program, as well. Insider Build 25905 has been released on the channel and it brings a lot of changes, improvements, and some new features.

However, there is a catch. The build is not offered to PCs and laptops with an ASUS motherboard. Microsoft has not elaborated on the matter, but it seems it’s a known issue. So for now, if you are in the Insider Program and your PC has an ASUS motherboard, Build 25905 is not available to you.

What is coming in Build 25905?

There are new features from the Dev Channel, including Dev Drive, Backup and Restore improvements (Windows Backup), Dynamic Lighting, the Windows App SDK version of File Explorer and Gallery, and many more.

The other new features coming in Build 25905 are:

  • Rust in the Windows Kernel – which offers advantages in reliability and security over traditional programs written in C/C++.
  • Support for Arm32 UWP applications is removed – and any installed Arm32 applications will no longer launch on your device.
  • New PostAuthenticationAction support – which will help you terminate individual processes in Windows LAPS.

Changes and Improvements

[Emoji]

  • With the update of our color font format to COLRv1, Windows is now able to display richer emoji with a 3D like appearance with support coming soon to some apps and browsers. These emoji use gradients to bring the design style that our customers have been asking for. The new emoji will bring more expression to your communications.build 25905

[Zune]

  • In celebration of Marvel Studio’s Guardians of the Galaxy Volume 3, we temporarily re-launched Zune.net last month. We also took the opportunity to fix an issue that was causing some challenges in getting the original Zune drivers to install in Windows 11 with this build in the Canary Channel. So now it should be easier to use your (totally unsupported and still discontinued) Zune on Windows 11. Over time, the fix will make its way through the Insider Channels and eventually to all Windows 11 customers. For fun, check out how Scott Hanselman brought a few Zunes back to life.

Known issues

  • [NEW] This build will not be offered to ASUS devices or PCs with ASUS motherboards.
  • [NEW] Ethernet-connected devices may lose network connectivity after updating to this build. Unplugging the ethernet cable and re-plugging the cable in should resolve the issue.

What do you think about this Build? Let us know in the comments section below.

Boot Menu Is Not Opening on Your Lenovo PC? Here’s What to Do

If you have a Lenovo PC, you may have encountered an issue where the boot menu is not opening. This can be very frustrating for users who are used to accessing the menu. 

There are various ways of opening the boot menu, but if all of them fail, you need to get to the root of the issue. Here’s what to do when you can’t open your boot menu.

Why is the Lenovo Boot menu not opening?

The boot menu is a very important feature on your Lenovo PC. It allows you to choose which operating system you want to start and allows you to repair the existing OS. 

If you’re having problems with the boot menu, you may not be able to access it and use its troubleshooting tools. This can be frustrating, especially if your computer keeps freezing or crashing unexpectedly.

Below are some reasons why this may happen:

  • No valid operating system installed – If you’re using Windows, but your computer doesn’t have an activated copy of Windows installed, you won’t be able to access the Boot Menu. 
  • Hardware compatibility issue – If you’ve recently made significant hardware changes, such as a motherboard or GPU, compatibility issues may arise.
  • Corrupt registry files – If you have recently installed any type of software or driver on your PC, then it could have corrupted some registry files. These corrupted registry files can cause an issue with how your PC boots up.
  • Incompatible firmware – If you recently upgraded your computer’s firmware or it’s been a while since you last upgraded, it’s possible that the firmware does not work with your Lenovo machine.
  • Corrupt BIOS – The BIOS is the software that controls how your computer boots up and runs. If you have a corrupt BIOS, it can cause problems with your computer not booting properly.
  • Power supply problem – The boot menu uses a lot of resources from your CPU and RAM, so if either of these components does not work properly due to insufficient power, then it will cause problems with the boot menu.

What to do if boot menu is not opening?

Start with the following preliminary checks before moving to the slightly technical steps:

  • Unplug all peripherals and leave only the mouse and keyboard.
  • Check that all cables are securely connected between all components of your computer and power supply.
  • If you are using a laptop, ensure your device is fully charged.
  • Try restarting your PC in Safe Mode to see if the problem persists.

1. Update BIOS

  1. Navigate to your browser and go to the Lenovo support site.
  2. Scroll down and click Drivers & Software under Support.How to update BIOS on Lenovo Windows 11
  3. Click on the Start menu, type cmd, and click Run as administrator.cmd-run-admin-w11 unexpected kernel mode trap windows 11
  4. Type wmic baseboard, get product, manufacturer, version, serial number, and press Enter.
  5. Enter your serial number from 4 above.
  6. Select your operating system.Choose your Operating system Lenovo support site
  7. Choose Drivers & Software and navigate to Manual Update.Manual Update: update BIOS on Lenovo Windows 11
  8. Expand the BIOS/UEFI option.Expand BIOS/UEFI
  9. Click on download once you find what you’re looking for.
  10. Once the file is done downloading, extract it and run it. Follow the onscreen instructions.
  11. Restart your computer after you’re done.

2. Reset BIOS

  1. Enter into your BIOS.
  2. Navigate to the Exit tab and click on Load Optimal Defaults.
  3. Click Yes in the next prompt and your BIOS will be reset.

Resetting your BIOS can fix some problems with your computer, such as a failed BIOS update or a corrupted BIOS.

3. Reset your PC

  1. Ensure you have created a backup of your files before this step.
  2. Hit the Windows key and select Settings.settings windows 11
  3. In the left window pane, select System, then click on Recovery on the right pane.
  4. Click on Reset PC from the right side.clicking reset PC win11 settings
  5. Choose the type of factory reset you need. You can keep your files or completely delete all the files, apps, and settings on the PC.
  6. Select the option you want to reinstall Windows: Cloud download or Local reinstall.
  7. Click on Next.
  8. Finally, press the Reset button.

If you have tried all the above methods and still failed to fix the problem, you may have to reinstall your copy of Windows.

That may sound too extreme for some users, so we recommend you take your device to a trusted technician. You can also contact Lenovo support for further guidance.

In other instances, you may find your PC immediately goes into BIOS whenever you startup. If this is an issue you have encountered, check out our recommended fixes.

That wraps up this article, but we’d love to get your feedback on this issue and any other thoughts related to this topic down below.

Fix: Gpedit Shutdown Script Not Running or Working

Gpedit script is a useful tool that you can use to automate tasks like shutting down your computer at a time specified by you. This can be very helpful for people who work on their computers for long hours and need to take a break.

Unfortunately, running scripts can be a hit or a miss. You can learn more about script errors in our detailed article. For now, let’s find out why this particular one is not running and how to resolve it.

Why is my Gpedit shutdown script not running?

If you have set up a Gpedit shutdown script that runs when you log off, it may not be running as expected. This could be due to several reasons:

  • The script has not been created or saved correctly – To run the script, it must exist in the correct folder location. If the file is stored in another directory, an error message will appear when you try to run the script. The default directory should be: C:\WINDOWS\System32\GroupPolicy\Machine\Scripts\Shutdown
  • Your computer belongs to an Active Directory domain – If your computer belongs to an Active Directory domain, you may need to check the security policy of the domain as an administrator may have locked it.
  • Your script is running under a different user account – If you’re running the Gpedit shutdown script with a different user account than the one shutting down the computer, it may not work. Gpedit shutdown script works by changing registry keys and values. If you have multiple users on your computer, you may have noticed separate registry hives for each user account hence why you need to be keen on the account you’re using.
  • Another program has taken over the shutdown process – This is a common problem and happens because there are some programs that will automatically run at startup or shutdown.
  • The policy isn’t being applied in time – In most cases, if a computer hasn’t rebooted yet after installing a policy update, it will not be processed until after the next reboot. 
  • Virus infection – If your computer has been infected with malware or another kind of virus, it may have modified some system files in such a way that they prevent Gpedit from running properly.

What can I do when my Windows shutdown script not running?

Before any complex solutions, try the following basic workarounds:

  • If the time on your computer is wrong, this could be causing your problem. Make sure that it is set correctly before continuing.
  • Ensure that no other programs are running that may interfere with your script running properly.
  • Make sure that the task has been scheduled in the Task Scheduler.
  • Double-check the script location and ensure it is in the shutdown folder.
  • Verify that the script is set to run under the correct user account with requisite administrative privileges and permissions.
  • Check whether your user profile is corrupt and repair it where necessary.
  • Restart your PC to see if any unfinished policies need to be applied.

1. Add the shutdown script manually 

  1. Hit the Windows + R keys to open the Run command.
  2. Type gpedit.msc in the dialog box and hit Enter.GPEDiT.msc -Windows Remediation Service Failed to Start?
  3. Navigate to the following location: User Configuration /Windows Settings /Scripts /Shutdown
  4. Double-click on Shutdown to open its Properties.
  5. Click on Add.
  6. Enter your script name. Alternatively, you can click on the Show Files to locate it in its folder.

2. Force restart the GPO

  1. Hit the Windows key, type cmd, and select Run as administrator.cmd-run-admin-w11 unexpected kernel mode trap windows 11
  2. Type in the following command and press Enter: GPupdate/force
  3. Reboot your PC.

3. Scan for viruses

  1. Click on the Start Menu icon, search Windows Security, and click Open.
  2. Select Virus & threat protection.
  3. Next, press Quick scan under Current threats.
  4. If you don’t find any threats, proceed to perform a full scan by clicking on Scan options just below Quick scan.Scan options
  5. Click on Full scan, then Scan now to perform a deep scan of your PC.Full Scan Scan Now
  6. Wait for the process to finish and restart your system.

It’s easy to forget how vulnerable Windows is and what damaging things malware can inflict on the computer. If the effects of the infection are beyond Windows Defender’s capabilities, you should try out a more comprehensive antivirus solution, such as TotalAV.

4. Reset Group Policy Editor

  1. Hit the Windows key, type cmd, and select Run as administrator.cmd-run-admin-w11 unexpected kernel mode trap windows 11
  2. Type in the following commands and press Enter after each one: RD /S /Q "%WinDir%\System32\GroupPolicyUsers" && RD /S /Q "%WinDir%\System32\GroupPolicy"gpupdate /force
  3. Restart your PC.

If none of these methods seem to do it for you, perhaps it’s time you tried out third-party applications. You can try out Group Policy Management tools to help you simplify the process.

We also have answers on what to do when your Group Policy keeps reverting, so be sure to check out our article on the same.

Do let us know if your shutdown script has succeeded after trying our recommended fixes.

How to Install & Use Video Speed Controller for Firefox

Having a video speed controller extension installed on browsers like Firefox enhances your video-watching experience. You have all the controls right at your fingertips. You can pause, reset playback speed, rewind or advance a video by 10 seconds, increase or decrease playback speed, and much more.

While browsers do offer some basic playback options, an extension unlocks more controls so that you could speed up your viewing experience.

An extension that simply goes by the name Video Speed Controller for Firefox takes care of all the playback controls. You can speed up a video in HTML5 or slow down using this extension.

A few YouTube bugs on Firefox can interfere with your watching experience, so it’s better to get rid of them in case you come across any errors.

Is the Video Speed Controller safe?

Yes, you can use and install the Video Speed Controller extension safely on your Firefox browser and change the video rate. The developers update the extension timely to keep vulnerabilities at bay.

By default, the extension is disabled on your private browsing windows, so it’s not problematic. You can allow private browsing if you’re comfortable in giving it access to your online activities. However, it’s not recommended.

Furthermore, Firefox comes with AV1 video decoding support as well to offer the best video-watching experience. It is worth mentioning that Firefox comes enriched with so many functionalities that you don’t have to rely on extensions always.

How do I use a Video Speed Controller on Firefox?

  1. Select the puzzle icon and open the Extension menu on Firefox. Alternatively, you can go to the Menu and click on Add-ons or simply press Cntrl+Shift+A. Then select Extensions from the sidebar.
    select puzzle icon Firefox
  2. Search for Video Speed Controller in the search bar
  3. Download the Video Speed Controller extension from Firefox Add-ons.
  4. Click on the Add to Firefox button to install the extension.
  5. Next, click on the Add button in the prompted window.
    click on Add button
  6. Afterward, click on the puzzle icon on the right side.
  7. Click on Video Speed Controller to open the extension.
  8. Here, see the shortcuts and other settings for the tool. With the help of these shortcuts, you’ll be able to make quick playback speed adjustments.
  9. Now, you can open a YouTube tab and select any video.
  10. The speed controller should appear in the top-right corner.
    Speed controller menu
  11. Press on the + button to increase the speed and on - to slow it down.

Thus, this is the full process of installing and using the speed-up extension of your Firefox browser. The experience goes smoothly and it offers you more freedom to control video rates on websites like YouTube, Facebook, or Twitch.

It is worth mentioning that the video playback controller extension doesn’t work on the sites like Twitter, Instagram, Vine, and more. The developers have disabled the extension on the mentioned websites. Also, the extension works for HTML5 audio and video. So, in case you’re unable to see controls showing up, chances are you’re viewing Flash content.

Also, you can customize playback options using Settings options. By default, the extension offers seven settings, but you can add more from the “Add New” button. You can add new options like Mute, set a new marker, and jump to a maker.

How do I speed up an embedded video in Firefox?

As you’ve seen, you can speed up videos using browser extensions on Firefox or other browsers. However, there is no default option to do it on embedded videos from all websites.

You might have seen videos on the web pages of websites. These are called embedded videos that are hosted somewhere else but are put on the webpage using HTML iframe tags. To speed up an embedded video in Firefox, you have to know basic HTML. You have to use iframe tags and a bit more to get the task done. You might encounter screen tearing issues when scrolling on these web pages, but the issue is resolvable on the Firefox browser.

So, while the extension works flawlessly on widely used sites like YouTube, it may not work on different websites that embed videos on their web pages.

Just install this extension and enjoy controls at your fingertips without interrupting your watching experience. For users that want to control the volume of individual tabs, don’t hesitate to give the Volume Master extension for Firefox a try.

Indian Computer Emergency Response Team (CERT-In) issues warning of critical vulnerability in Microsoft products, posing security risk

As reported by OdishaTV, a new security concern involving certain Microsoft products has been highlighted by the Indian Computer Emergency Response Team (CERT-In).

The recently discovered vulnerability affects Microsoft Office and Windows HTML, enabling potential attackers to execute code remotely without physical access.

The vulnerability, identified and reported by CERT-In, allows unauthorized individuals to exploit the system and gain control over the affected device. This poses a significant risk to data security, potentially exposing sensitive information.

Several versions of Microsoft products are affected by this vulnerability, including:

  • Windows 10 (x64-based, 32-bit, and 22H2 versions)
  • Windows 11 (22H2 and ARM64-based versions)
  • Windows Server 2022 and 2019
  • Windows 10 (Version 21H2 and 1809)
  • Microsoft Word (2013 Service Pack 1 and 2016 editions)
  • Microsoft Office LTSC 2021 and 2019
  • Windows Server 2012, 2008 R2, and 2008
  • Windows Server 2016
  • Windows 10 (Version 1607)
  • Windows Server 2012 R2
  • Microsoft Office 2019

The vulnerability within Microsoft Office and Windows HTML stems from inadequate validation of user-provided input during cross-protocol file navigation.

An attacker must persuade a victim to open a specifically crafted file to exploit this vulnerability. Through this weakness, the attacker can execute arbitrary code remotely, jeopardizing the security and reliability of the targeted system.

To mitigate the associated risks, CERT-In recommends the following crucial measures:

  1. Users who have Microsoft Defender for Office installed are already protected against attachments attempting to exploit this vulnerability.
  2. Enabling the “Block all Office applications from creating child processes” Attack Surface Reduction Rule is strongly advised, as it effectively thwarts the exploitation of this vulnerability.

For organizations unable to implement these protections, CERT-In suggests adding the following application names as REG_DWORD values, each with a data value of 1, to the designated registry key:

  • Excel.exe
  • Graph.exe
  • MSAccess.exe
  • MSPub.exe
  • PowerPoint.exe
  • Visio.exe
  • WinProj.exe
  • WinWord.exe

By following these recommendations, users, and organizations can proactively address the risks posed by the Microsoft Office and Windows HTML vulnerability, enhancing their overall security posture.

Play Assetto Corsa Competizione and three other games with Xbox Free Play Days

Xbox Free Play Days is back for another stacked weekend of games, with four offerings for Xbox Live Gold and Xbox Game Pass Ultimate. This week’s Xbox Free Play Days event will run from Thursday July 13 through Sunday July 16. Check out this week’s lineup below.

Assetto Corsa Competizione

Born from KUNOS Simulazioni’s long-term experience in recreating top-grade driving simulations, Assetto Corsa Competizione allows you to feel the real atmosphere of the GT3 championship, competing against official drivers, teams, cars & circuits reproduced in-game with the highest level of accuracy ever achieved on console.

CATAN – Console Edition

Play the official video game of CATAN on Console! Acquire resources, master new strategies, and build your settlements across a board that comes to life. Challenge friends in your living room or play against smart & dynamic AI to become the winning Catanian, then take these skills online with full cross-play compatibility!

Dragon Ball: The Breakers

The 5 super elite members of the Ginyu Force join as a new Raider from DRAGON BALL: THE BREAKERS Season 3!

Dende, King Kai, and Fortuneteller Baba enter the chaos as new Survivor Skins.

That’s not all! A new map, new transpheres, new customizable items, and other additional content are available from Season 3!

Can you escape from the Ginyu Force while they hunt you down with their overwhelming teamwork?

Serial Cleaner

Step into the polished shoes of The Cleaner, a professional crime scene cleaner for the mob. There’s no business like the cleaning business, and right now business is booming…

Sneak around crime scenes avoiding detection from the guarding cops as you vacuum up blood, hide bodies and remove evidence in this 70’s styled, fast paced, 2D action/stealth game.

Learn more about Xbox Free Play Days

Xbox Free Play Days is a perk that comes with having a membership of Xbox Live Gold or Xbox Game Pass Ultimate. Almost every week a new lineup of games are made available for subscribers to play free of charge. It’s a great way to find something new. You can learn more about the program by visiting the Xbox Free Play Days FAQ page.

Featured image via Xbox Wire. 

Steam Uninstalls Games Automatically? 4 Ways to Stop it

Steam is a popular gaming platform amongst Windows users owing to the ease of use it offers to download install and enjoy the game experience. 

Unfortunately, there have been several reports that several of the Steam games have suddenly been uninstalled and cannot be accessed from within the Steam app anymore. While the error is quite daunting in itself, it can be easily fixed in a few steps. 

Why Steam automatically uninstalled my games? 

Several of the Steam games on your Windows PC may no longer be accessible for the following reasons: 

  • Corrupt or broken game files – If the game files become corrupt for some reason (Steam error code 7), Steam cannot recognize them anymore and hence makes them uninstalled. 
  • The game files are present in a different location – There is a chance that the game in question is present in a different Steam library folder than the one Steam is accessing. 
  • Overreactive antivirus software – In several scenarios, a third-party antivirus may become too overreactive and may interfere with or even delete the game files citing security reasons. 
  • Power outage and abruptly closing the Steam app – During a sudden power outage or forced closing of the Steam app when the information is being written on the disk drive corrupts the game files and installation folder.

Now that you know why Steam seems to automatically uninstall your games, let’s check out what should be your course of action in this situation. 

How do I prevent Steam from uninstalling games automatically? 

1. Check the game files integrity

  1. Launch the Steam app on your Windows PC.
  2. Click the Library option at the top to view the list of games installed.
  3. Look for and right-click the game that appears as uninstalled and choose Properties from the context menu. 
  4. Next, select Local files from the left sidebar. 
  5. Click the Verify integrity of game files button and wait for the process to finish.

If the installation files of a game get deleted or corrupt, they may be considered uninstalled by the Steam app. Verifying the integrity of the game files will help determine if some files are missing and may also repair the broken files preventing Steam from uninstalling the games automatically from Windows. 

2. Add a new Steam library folder 

  1. Click the Steam option on the top menu bar and choose Settings from the drop-down menu. 
  2. Select Downloads from the left sidebar and click the Steam Library Folders button to access the list of current Steam library folders.
  3. Press the Add Library Folder button and select the folder in which all the installed games are located. 
  4. After you successfully add the new Steam library folder, check whether or not the Steam games uninstalling automatically are back.

If the games appearing as uninstalled are located in a different installation library/folder and not on the main Steam library, adding that Steam library folder to Steam will help fix the problem.

3. Modify the Appmanifest File

  1. Launch the File Explorer using the Windows + E shortcut and access the following location and note down the name of the problematic game folder. C:/ Program Files (x86)/ Steam/steamapps/common
  2. Navigate to the following folder of the Steam app using the following path and look for the appmanifest_(gameID).acf file in it. C: /Program Files or Program Files (x86)/Steam/steamapps/
  3. Right click the appmanifest_(gameID).acf file and select the Open with option followed by Notepad from the context menu. 
  4. Locate the installdir line in the file and replace the text you see there with the correct name of the game folder you copied from the common folder.
  5. Save the changes and reboot your Windows PC. 
  6. Now relaunch the Steam app and check whether the game that the game automatically uninstalled from Steam has reappeared. 

There are chances that a virus or malware may have altered or deleted the appmanifest files present in the Steam installation folder. Since the folder includes the location and path information of the games. 

4. Run the Game’s executable file from the Steam folder

  1. Launch the File Explorer using the Windows + E shortcut key and navigate to the following location by the following address path: Local Disk / Program Files (x86) / Steam/steamapps/common
  2. Look for the problematic game folder and then the name of the executable file similar to the game here. 
  3. Double-click the executable file to launch the game. If prompted that the game can only be launched via the Steam app, press OK. The game will then be available in the Steam library. 

Launching the uninstalled game directly from the file explorer has effectively resolved the issue for several Steam users. Hence, you should give it a try. 

We are hopeful that this troubleshooting guide has proved helpful in the situation when Steam automatically uninstalls the games such that you cannot access them. 

In case you are unable to access the Steam shared library as it is locked, refer to this guide for help.

In case you have any queries, do reach out to us in the comments section. 

Microsoft has moved into an 11-story mixed-use tower in Manhattan’s Union Square

According to the New York Post, after Bromley Companies completed its $100 million redevelopment in the Flatiron District near Union Square, Microsoft relocated to its new offices at 122 Fifth Ave.

Spanning across floors 6 to 10, Microsoft’s East Coast AdTech Hub occupies 150,000 square feet of the building. Additionally, the company enjoys exclusive access to a section of the newly constructed 13,200-square-foot rooftop terrace and the 5,500-square-foot Pavilion, featuring floor-to-ceiling wraparound glass. Microsoft boasts a private entrance on Fifth Avenue to enhance its presence.

Nicholas Haines, CEO of Bromley Companies, expressed his satisfaction: “122 Fifth Avenue has been a part of Bromley’s portfolio for nearly five decades, and witnessing the realization of our reimagined space is truly remarkable.”

“The comprehensive restoration, renovation, and expansion of 122 Fifth Avenue exemplify our shared dedication and regard for the urban landscape of this neighborhood,” commented David Burns, a principal at STUDIOS Architecture.

The STUDIOS team took charge of the design and architecture and navigated through the rigorous review process of the city’s Landmarks Preservation Commission. Burns emphasized the importance of seamlessly blending contemporary elements, contextual relevance, and historical sensitivity in completing the block, a goal both Bromley and STUDIOS shared.

To enhance accessibility, the building’s new primary entrance now resides at the base of an architecturally integrated, 11-story addition constructed on the site of a former parking lot on West 17th Street.

via CommercialSearch

Facebook Not Working on Chrome? 7 Ways to Quickly Fix It

Facebook is one of the most popular social media platforms, allowing users to connect with friends, share content, and stay updated on various topics.

However, it can be frustrating when Facebook fails to load or function properly on Google Chrome, one of the most widely used web browsers.

In this guide, we will explore practical ways to fix Facebook not working on Chrome and regain access to Facebook.

Why is Facebook not working on Chrome?

There could be several reasons why Facebook may not be opening in Google Chrome; some of the common ones are:

  • Accumulated cache & cookies – If you have cache and cookies accumulated, it might interfere with website functionality, hence the error. Try clearing them out and try again.
  • Disable extensions – Certain extensions or add-ons installed on Chrome might conflict with Facebook, causing the error. You need to disable extensions to fix it.
  • Poor internet connection – If the internet connection is not stable, you might be unable to access any website. Check your internet connection or talk to your ISP.
  • Outdated Chrome – An outdated version of Chrome may have compatibility issues with Facebook, causing the error. Try updating the browser.
  • Facebook server outage – If the servers are down, you might face all kinds of issues, including this one. Check the server status to ensure it is not the case.

Now that you know the reasons, let us move to the troubleshooting solutions.

What do I do if Facebook is not working on Chrome?

Before engaging in advanced troubleshooting steps, you should consider performing the following checks:

  • Restart your browser, then your computer.
  • Check the Facebook server status.
  • Try the Incognito mode by pressing the Ctrl + Shift + N key combination.
  • Try another browser.
  • Check your internet connection.

Once done, check out the detailed steps to fix the problem.

1. Restart Google Chrome

  1. Press Ctrl + Shift + Esc to open the Task Manager app.End task Facebook not working on Chrome
  2. Go to the Processes tab, locate, and right-click Google Chrome. Select Restart.

2. Update the browser

  1. Launch the Google Chrome browser. Click on three dots and select Settings.Settings CHrome Facebook not working on Chrome
  2. Now click About Chrome. The browser will start looking for updates. If available, let it update to the latest version.About Chrome
  3. Once updated, restart your browser and check if the site is working.

3. Clear Google Chrome cache

  1. Launch the Google Chrome browser.
  2. Click on three dots and select Settings.Settings CHrome Facebook not working on Chrome
  3. Now go to Privacy & Settings at the left pane, and click Clear browsing data.Clear browsing data Facebook not working on Chrome
  4. Select Browsing history, Cookies and other site data, and Cached images & files, and click Clear data.Clear data

Once the cache is cleared, restart Google Chrome and check if the site is working now.

4. Use the Google DNS in Chrome

  1. Launch the Google Chrome browser.Settings CHrome Facebook not working on Chrome
  2. Click on three dots and select Settings.
  3. Now go to Privacy & Settings at the left pane, and click the Security option.chrome_Security
  4. Under Use Secure DNS, select Google DNS.Google DNS
  5. Now retry accessing Facebook.

5. Disable extensions

  1. Launch the Google Chrome browser.Settings CHrome Facebook not working on Chrome
  2. Click on three dots and select Settings.
  3. Go to Extensions.Extensions chrome - Facebook not working on Chrome
  4. Now from the list of add-ons, click Remove for the ones you want to delete.Extensions Remove
  5. Restart the browser and check if the issue persists.

6. Flush the DNS cache

  1. Press the Windows key, type cmd, and click Run as administrator.CMD elevated Facebook not working on Chrome
  2. Type the following command and press Enter: ipconfig /flushdnsInconfig/flushdns
  3. Copy & paste the following command to reset Winsock and hit Enter: netsh winsock resetcmd_Winsock reset
  4. Once done, restart your computer.

7. Reset Settings

  1. Launch the Google Chrome browser.Settings CHrome Facebook not working on Chrome
  2. Click on three dots and select Settings.
  3. Now select Reset Settings.Reset
  4. Click Restore settings to the original defaults.Reset 2 Facebook not working on Chrome
  5. On the pop-up window, select Reset settings.

By following these methods, you can hopefully access Facebook on Chrome to enjoy a seamless browsing experience. If the issue continues, you may need to reach out to Facebook support for further assistance.

If Facebook is not working on your Firefox browser, we recommend you check out this informative guide to find the solutions to resolve the issue and get the site working. At times, the issue can be browser-related so you’ll find the switch account button is missing in Chrome but available in Firefox.

Our readers also complained about an error saying that you cannot post while the memory is loading. If you’re also experiencing it, hit the highlighted article for information.

Please feel free to give us any information, tips, and your experience with the subject in the comments section below.

Which Xbox should you buy for playing Starfield? [We answer]

It goes without saying that Starfield is easily the most anticipated game of the year. Microsoft presented Starfield as a Microsoft exclusive, meaning the game will only be available to Windows PCs and Xbox.

For the PC version, it seems that Starfield is not really heavy on the system, especially if you will play it on moderate settings. However, it requires a lot of space, and you should be ready for this when the game is out.

For the Xbox, however, things are a bit more complicated. If you wonder which Xbox you should buy to play Starfield, it all depends on how much you’re going to play. But you’re not the only one to ask.

However, if you’re not sure, then you’ve come to the right place because we will recommend you the right Xbox for Starfield.

You should also know that you can buy a Starfield for free, or even an Xbox for that matter, with Microsoft Rewards points. So if you’ve been saving up Microsoft Rewards points, this is the best time you can use them.

Which Xbox should I buy for playing Starfield?

The answer is: whichever you want, really. Both Xbox S and Xbox X are equipped to handle Starfield. The difference between Xbox Series S and Xbox Series X is that X is a bit more expensive and its target audience is hardcore gamers.which xbox for starfield

Series X is also capable of running games on 4K resolution TVs, so if there are games that rely on expansive visuals, and Starfield does so, then the game will look much better, and far more detailed. But that’s all. Keep in mind that somehow an Xbox Series X is more powerful, so it’s capable of running games at higher settings.

You should buy an Xbox X only if you’re going to use it to play other big games as well. And if you’re really a gamer, and you like your games on high settings, this is the right option.

On the other hand, Xbox Series S has the same processor as its big brother, but it’s not so buffed, so to speak. The console is aimed at casual gamers, the ones that game indeed, as a casual activity. However, Starfield will run on Xbox S, although you won’t be able to run it on 4K. And while you will be able to run at higher settings, it will be at lower FPS.

You should buy an Xbox S only if you know that you’re fine with playing Starfield on moderate settings. Plus, it’s less expensive than its big brother, so that’s also a big plus.

Now the choice is definitely yours. But let us know in the comments section below which did you choose.

RGB Controller is Not Working? How to Reset or Fix it

Many users have reported problems concerning their PC RGB controller not working. It makes adjusting the lighting and other features that depend on the controller’s functionality impossible. However, this article will discuss why the controller doesn’t work and how to resolve the issue.

Alternatively, you can check our review of the best RGB controller software in 2023.

Why is my PC RGB controller not working?

  • The RGB controller may not receive power, or the power supply might be faulty due to a faulty cable connection.
  • Connection issues between the RGB controller and the RGB components can cause it not to work.
  • The RGB controller might have specific features incompatible with the components you are using.
  • Your PC’s RGB controller not working can be due to outdated or incompatible software and firmware.
  • Incorrect settings and configuration issues relating to RGB effects, colors, or patterns.
  • Physical damage to the RGB controller, such as broken connectors or circuitry, can prevent proper functioning.

Can RGB fans work without a controller?

The fans will works, but without customization features. Here’s what you should know:

  • RGB fans have two main components: the fan and an RGB lighting system.
  • The fan component works independently of the RGB lighting system.
  • The RGB lighting on the fan will not be customizable without a controller, so you can’t change colors or effects.
  • It usually defaults to a standard color or effect, which might not suit your preferences.

What can I do if the PC RGB controller is not working?

Reset the controller

Note icon NOTE
The process for resetting an RGB fan controller can vary depending on the specific model and brand of the controller.
  1. Power off your computer or disconnect the RGB fan controller from the power source.
  2. Locate the Reset button on the RGB fan controller. The reset button is usually a small, recessed button that may require a pin or a small object to press.
  3. Press and hold the Reset button for several seconds (typically around 5 to 10 seconds). This action should reset the controller to its default settings.
  4. Release the Reset button.
  5. Reconnect the RGB fan controller to power or power on your computer.
  6. Check if the RGB fan controller has been reset and functioning correctly.

If the above steps don’t work, consult the user manual or documentation that came with your specific RGB fan controller. The manual should provide detailed instructions on resetting the controller or any specific steps required for your model.

In addition, we have a detailed guide on the best RGB motherboards for your PC and the specifications that make each one distinct.

Also, you may be interested in our review about the best fan speed controllers to buy in 2023.

Should you have further questions or suggestions regarding this guide, kindly drop them in the comments section.

Beware of the Instagram Threads scammers, they’re good

As you might know, there is a new social media platform in town. It’s called Threads, it’s a direct Twitter competitor, and it has come to dominate the market.

And so far, it seems that it’s on the right way. Instagram Threads has picked up over 100 million users in only 5 days, while traffic for Twitter drastically slowed down. Of course, there are talks about how Threads will take over Twitter, and the market as a whole. But the app it’s still in its infancy, so it’s very early to say it.

However, despite its popularity, Instagram Threads has some shortcomings. Apparently, you can’t delete your Threads account without deleting your Instagram profile as well. Even more, it seems Instagram Threads is also asking for too much personal information, which does not sit well with European legislation.

And to make matters worse, it seems that scammers are already crawling on the platform as well. So you need to be able to recognize them, ban or report them, and generally just stay away from them.

Instagram Threads scammers – are they dangerous?

Well, as we mentioned earlier Threads is still in its early days, so it will take a while for the platform to be full of scammers to the same level as Instagram, for example.

But with more than 100 million Threads accounts, be sure that there are a lot of scammers around too. And reportedly, they’re good, because they take advantage of Threads’ infancy to impersonate personalities and organizations.

For example, the financial services company Wombex Finance tweeted that there is already a Threads account pretending to be the company.instagram threads scammers

Please be aware that Wombex Finance DOES NOT have an account on the Threads platform. Any account claiming to be Wombex Finance on that platform is fraudulent and is operated by a scammer!

The NFT trader Jeffrey Huang, who goes by the name of Machi Big Brother, was also the victim of impersonation on Threads. He found out from one of his followers that apparently he’s already on Threads, despite him not making a Threads profile for Machi Big Brother.

https://twitter.com/machibigbrother/status/1676804961890611202?s=20

So it seems that Threads is the perfect ground for those scammers who want to impersonate public personalities and organizations who haven’t managed to set up their own Threads accounts.

If you plan on creating a Threads account, check to see if you’re not already there, especially if you have a large following already on Instagram or other platforms.

What do you think about this? Let us know in the comments section below.

Id@xbox game fest demo: Play over 50 game demos right now!

Good news for Xbox users out there. It’s summer and there is a lot of free time so you might want to check ID@Xbox Demo Fest out. It’s an event that takes place virtually on Xbox, from July 11 to July 17, and you can play over 50 game demos for free. This is another excellent way to see what games are coming to the Xbox. Remember that recently, Microsoft announced that over 5000 new games are in development for the platform.

And guess what? You can do it from the comfort of your own home, anytime between these two days. Demos are playable on the Xbox, and you can find them by going to the special ID@Xbox Demo Fest collection on the Xbox Store online and on the console.

You should be aware that the demos are an early look at the gameplay of these games. They might not fully represent the game, once it’s released. Some of them might even be available in your region, once they’re out. So this might be a good chance to get your hands and your mind on them.

Plus, it’s a good chance to see that other talented studios are out there. You might even find your next favorite video game here.

Here are all the 50 game demos that you can play at Id@xbox game fest demo

Remember that you can play these demos on your Xbox One, or your Xbox X/S. Will you play them? Let us know in the comments section below.

Payday 2 Crashing When Starting Heist? Fix it in 3 Steps

Recently, many users have complained about Payday 2 crashing when starting a heist. It can occur due to many factors affecting the game, which we’ll discuss. Also, this article will take you through some detailed steps for fixing Payday 2 crashing issues.
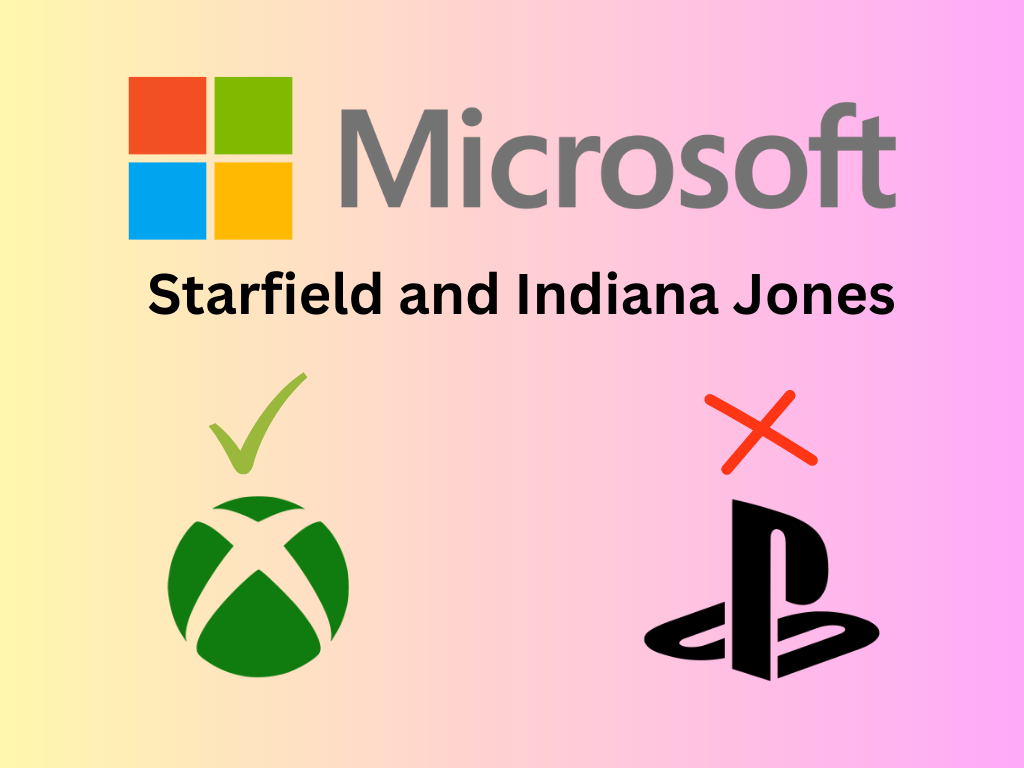
Alternatively, you can check one article about Payday 2 crashing on startup or not launching and ways to fix the problem on your Windows PC.

Why is Payday 2 crashing so much?

  • Mods, particularly outdated or incompatible ones, can conflict with the game’s codes or each other.
  • Missing or corrupted game files can cause crashes when certain assets or resources are required.
  • Outdated Payday 2 game clients may have specific bugs or glitches in their code that causes crashing.
  • Other applications running simultaneously with Payday 2 can conflict with the game.
  • Outdated or malfunctioning graphics card drivers can lead to crashes in Payday 2.
  • Payday 2 may crash due to insufficient resources to run the game smoothly if your system has limited RAM.

What can I do if Payday 2 is crashing when starting a heist?

Before attempting any troubleshooting steps for Payday 2 crashing when launching a heist, observe these preliminary checks:

  • Turn off apps running in the background and close other resource-intensive programs.
  • Ensure your computer meets the minimum system requirements for Payday 2.
  • Verify game integrity in Steam to check for issues with the game files.
  • Update your graphics card drivers to the latest drivers compatible with your system.
  • Lowering the game’s graphics settings can reduce the strain on your system and prevent crashes.

1. Run Payday 2 as an administrator

  1. Press the Windows + E keys to open File Explorer.
  2. Go to (If you have installed the game in a different location, navigate to that folder): C:\Program Files (x86)\Steam\steamapps\common\PAYDAY 2
  3. Locate the Payday 2 executable file, right-click, and select Run as administrator from the drop-down menu.
  4. Click Yes on the User Access Control (UAC) prompt for administrator permission to run the game.
  5. Launch the game and check if it crashes again when starting a heist.

Running Payday 2 as an administrator ensures the game has elevated privileges and can access system resources effectively. It is confirmed to fix crashes when launching heists in Payday 2.

Read about fixing the run as administrator option not working on Windows PCs.

2. Adjust the texture and shadow settings

  1. Launch the Payday 2 client on your PC and click the Options button at the bottom right corner of the main menu.
  2. Select the Video Settings tab.
  3. Locate the Texture Quality option under the Advanced Video Settings section, click the drop-down menu, and select Medium.
  4. Locate the Shadow Quality option and modify the slider or dropdown menu to the Medium option.
  5. Click Apply, then the OK button to save the changes.
  6. Close the Options menu and restart the game with the updated settings to fix the problem.

The above steps will optimize the graphical quality and performance of Payday 2 based on your system’s capabilities and preferences. Hence, it resolves the graphics issues causing Payday 2 to crash when starting the heist.

3. Disable mods

  1. Start the Payday 2 game and click on the Options button at the bottom right corner of the main menu.
  2. Select the Mod Menu tab to open the Mod Manager.
  3. Go through the list of installed mods, uncheck the box, or toggle off the switch for all the mods to disable them.
  4. Click Apply, then the OK button to save the changes.
  5. Close and restart Payday 2 to check if the issue persists.

If the crashes stop, you can enable the mods individually to identify the problematic mod causing the issue when starting heists.

You can also check our complete guide on how to fix Payday 2 mods not working on your PC.

Finally, go through our article for a detailed explanation of what to do if you experience Payday 2 packet loss during multiplayer.

If you have further questions or suggestions regarding this guide, kindly drop them in the comments section below.