If you use a VBA code in your workbook and get a runtime error 9: Subscript out of range, you are trying to reference an object not present in the current context in your Microsoft Excel workbook.
You’ll most likely run into this error when copying data between workbooks, so this is a reason to pay close attention to ensure you’re copying the right thing. Nonetheless, since the error has already occurred, here’s a quick-fix guide.
What is subscript error 9 in Excel?
When you receive the runtime error 9, you are trying to access a cell or range of cells through a subscript that is outside the range of cells defined in your formula.
In other words, you’re trying to get to a place in the worksheet that doesn’t exist. This can happen because of one or more of the following reasons:
Outdated Excel app – You may be using an old version of Excel that does not support certain features.
Invalid data type in cell – This can result from using invalid characters in a string or from entering an incorrect number. For instance, you can enter the letter O instead of the numerical value 0.
Corrupt workbook – If the workbook has been opened in Excel, then closed abruptly, it may end up corrupt hence causing the subscript error 9.
Incorrect syntax in the formula – This means that the formula cannot be evaluated correctly because it has been entered incorrectly or there is an error in the syntax of the formula.
Using cell references that do not exist – This error can occur if you are referencing cells that are outside the scope of the worksheet or if you are referencing an invalid cell address. It can also happen when copying code from one workbook into another.
Incorrectly typed formulas – One of the most common causes for this error is incorrectly typed formulas. For example, if you forget to include a closing parenthesis or bracket, Excel will return this error.
How do I fix Runtime error 9 subscript out of range?
Try the following basic checks before any advanced troubleshooting:
Clean up your workbook by checking for any errors in the formulas.
Make sure that all cells are referenced correctly in your formula.
1. Save the file in the Excel macro-enabled format
On the Excel file, navigate to File.
Select Options.
Click on Save, and under Save workbooks, select Excel Macro-Enabled Workbook (*.xlsm).
Macros are programs that are designed to automate tasks in Microsoft Office applications. When you run a macro, it will execute the actions that have been programmed into it.
However, the runtime error 9 may occur in Excel if you fail to save your file in the required format. XLSM files are used for storing macros and charts created using VBA in Excel.
This file type contains macros, which are programming instructions available to the user when they open the file and are required to work properly.
2. Enable macros
Launch MS Excel and click on File.
Select Options.
Click on Trust Center, then select Trust Center Settings.
Under Macro settings, check the Enable all macros box then hit OK.
When you enable macros, you permit to run the macro in its current state. This means the macro can access all the formulas and functions it needs to run properly.
In its disabled state, only the basic functionality is available, and the user must enter data manually hence why copying between workbooks presents this runtime error 9 in Excel.
Locate the problematic file, select it, and click on the drop-down icon next to Open.
Select Open and Repair.
In case this manual repair method fails to work, don’t fret. We have a list of advanced Excel repair tools that can easily do the job and repair a wide range of corruption issues.
And that’s a wrap for this article, but be sure to check out other related errors, such as the runtime error 7, and how to navigate such issues.
For any additional thoughts on this error, leave your comments down below.
Windows has many executable files, and one of them is dwwin.exe. Many users are confused and worried when an unknown application gives them an error, and that’s the case with this file.
The current issue at hand shares similarities with the previously tackled Winword.exe application error, as discussed in our previous guide.
To effectively tackle the problem at hand, it is imperative that we first analyze its root cause.
What is Dwwin?
The dwwin.exe file is an essential software component of the Dr. Watson Application Program Debugger, developed by Microsoft Corporation.
For several years, Microsoft has utilized the name dwwin.exe in their application program error reporting and handling software, so it’s a legitimate application.
How to fix the Dwwin.exe error?
1. Update your Windows software
Click the Windows Start button
In the search box, type Update and pressEnter.
In the Windows Update dialog box, click Check for updates.
If updates are available for download, click Install Updates.
Once you are done, reboot your PC.
2. Reinstall affected apps
On your home screen, click on Settings.
Scroll down to Apps and click on it; then, click Apps and Features.
Now click on the three dots at the far right and uninstall the app of your choice.
We sincerely hope that this guide has been of help in resolving your issue. As you can see, fixing this issue is simpler than you think.
Have you ever encountered an error message on your SSD showing RAW file system? In this article, we will explore why SSD drives become RAW and provide solutions for resolving this issue.
The issue at hand is similar to the problem discussed in our previous guide with detection error on SSD M.2.
We must delve into its fundamental origin to effectively tackle the matter at hand.
What Is SSD showing RAW file system?
There are many reasons why an SSD may become RAW, whether it occurs gradually over time due to modifications in the file systems. Let’s delve into some of these potential factors.
Inappropriate use –Neglecting your hard drive maintenance can result in errors. Factors such as physical impact, high temperatures, unexpected power fluctuations, and more can all cause damage to your drives.
Bad sector – When it comes to computing, a bad sector on a hard disk denotes a damaged storage unit area. Any data stored in that flawed sector will be lost, and the operating system will disregard it while accessing or examining that section.
File system errors –Have you ever come across a RAW drive? This type of drive lacks any file system and cannot be detected or read by Windows.
How to fix SSD showing RAW file system?
1. Diskpart command
On your home screen type cmd.
Now click and open the Command Prompt.
Enter and Run the Diskpart Commands below to see all the partitions on your system. This will also exhibit the RAW hard drive too. diskpart list disk select disk 1 list volume select volume 5 format fs=ntfs quick exit
2. Use chkdsk
Start CMD from Run.
Type h: and press Enter. Be sure to use the letter that matches your SSD.
Type the following and press Enter: chkdsk /f
We hope that this guide has helped resolve your issue. Tackling this problem is simpler than you may have first imagined.
If you encounter any additional obstacles, we suggest delving into our guide on SSD error 2100. This will provide you with similar solutions to your issue.
We highly value your input on the efficacy of the solution you have found. Please take a moment to leave a comment below and share your thoughts with us. Your feedback is greatly appreciated.
Microsoft Word and PowerPoint are some of the most used Office apps on the Windows operating system. However, users often encounter issues with them, with cached credentials have expired, one of the latest problems.
This error occurs when trying to save documents, and it keeps requesting users to log in when they are already signed in. If you are also facing this problem, this guide will show you how to clear the error easily.
What are cached credentials in Microsoft?
Cached credentials on Windows PC store a hash of your password locally. With respect to Microsoft Office, caching your credentials means storing the hash of your password for your Office apps.
Note that it does not in any way store your password. Only the hash is saved and is used to authenticate your login.
How do I fix my cached credentials if they have expired?
1. Sign out and sign in to Office apps
Launch PowerPoint, Word, or any Office app giving the error.
Click the File tab at the top.
Now, select Account in the left pane.
Finally, sign out, wait for some minutes, and sign back in.
Sometimes, the simplest fix is usually the most effective. And this has proved to be true for some users in fixing the cached credentials have expired error.
So, if you are facing this issue, the first thing to try is to sign in and out of the Office app giving the error.
2. Change the OneDrive setting
Right-click the OneDrive icon on your Taskbar.
Click the gear icon top right corner and select the Settings option.
Now, click the Office tab at the top.
Uncheck the box for Use Office 2016 to sync Office files I open and click the OK button.
Finally, exit your Office app and relaunch it.
Sometimes, the cached credentials have expired error might be due to sync issues on OneDrive. Fortunately, this can be fixed by disabling the use of your Office apps to sync files you open on OneDrive.
Note that the option to disable this feature differs with your Microsoft Office installation. In some cases, you might find Use Office to sync Office files I open, it is still the same.
Press the Windows key, type control, and select the Control Panel option.
Now, select the User Accounts option.
Choose Credential Manager from the options available.
Next, select Windows Credentials.
Choose Generic Credentials from the options.
Click the Remove button before all credentials related to Office.
Finally, launch your Office apps, sign in, and check if the problem persists.
If you are getting a prompt that the cached credentials have expired while trying to save an Office document, it might actually be the case in reality.
To solve the problem, you need to delete the cached credentials for your office apps and restart them.
4. Sync date and time
Press Windows + R, type control, and click OK.
Select Clock and Region in the right pane.
Now, choose Date and Time.
Select the Internet Time tab at the top and click the Change settings button.
Next, select another server if needed and click the Update now button to force it to sync immediately.
Now, check the Synchronize with an Internet time server box and click the OK button.
Click the OK button again in the Date and Time box.
From here, press the Windows key + R, type services.msc, and press Enter.
Double-click the Windows Time service to open its Properties.
Next, set its Startup type to Automatic and click the Start button.
Click the Apply button followed by OK to save the changes.
Finally, launch your Office app, sign in, and check if the problem persists.
According to some users, the cached credentials have expired error messages can sometimes be down to time syncing issues on your PC.
While this is usually rare, the solution above has proved effective for some people.
With this, we can now conclude this detailed guide solving the cached credentials have expired error. All you have to do now is to follow the steps above carefully, and the problem should be solved for good.
AHCI (Advanced Host Controller Interface) is a mode or protocol SATA (Serial ATA) controllers use. It helps improve the system’s performance with communication with storage devices. However, this guide will discuss what AHCI mode means and what it does.
AHCI (Advanced Host Controller Interface) is a mode or protocol used by SATA (Serial ATA) controllers to communicate with storage devices, such as hard drives and solid-state drives (SSDs). It was introduced as a replacement for the older IDE (Integrated Drive Electronics) mode.
Further, AHCI provides several advantages over IDE, including better performance and support for advanced features such as Native Command Queuing (NCQ) and hot-plugging. Here are some key features and benefits of AHCI:
Improved performance – AHCI allows faster data transfer rates and more efficient communication between the SATA controller and storage devices, improving overall system performance.
Native Command Queuing (NCQ) – NCQ is a feature supported by AHCI that enhances the performance of storage devices by optimizing the order in which commands are executed. It allows the storage device to handle multiple read and write requests simultaneously.
Hot-Plugging – AHCI supports hot-plugging, which means connecting or disconnecting SATA devices (such as hard drives or SSDs) while the computer is powered on without restarting the system.
TRIM Support – AHCI enables TRIM support for SSDs. It allows the SSD’s controller to optimize operations and maintain performance levels.
It’s worth noting that AHCI is the standard mode for modern SATA controllers and storage devices. However, some older systems may still be able to operate in IDE mode for compatibility reasons.
If you have a modern system and are using a SATA-based storage device, it is generally recommended to have AHCI mode enabled. Enabling it in the UEFI or BIOS settings allows it to take advantage of its features and performance benefits.
Should I use the ACHI mode?
Yes, if you have a modern system and are using a SATA-based storage device such as a hard drive or SSD, it is generally recommended to use AHCI (Advanced Host Controller Interface) mode.
However, it’s important to note that changing the storage mode from IDE to AHCI after installing the operating system can sometimes require additional steps. They include installing AHCI drivers and making changes to the system configuration.
Additionally, It is recommended to consult your motherboard or system documentation. Also, you can seek assistance from a knowledgeable technician before making any changes to the storage mode.
How can I enable ACHI mode in BIOS?
1. Enable AHCI via Registry Editor
Press Windows + R key to open the Run dialog box, type regedit, and press Enter to open Registry Editor.
Navigate to the following registry key: HKEY_LOCAL_MACHINE\SYSTEM\CurrentControlSet\Services\iaStorV
Select the iaStorV and double-click the Start value on the right pane. Change its value data to 0 and then click OK.
Navigate to the following key: HKEY_LOCAL_MACHINE\SYSTEM\CurrentControlSet\Services\iaStorAV\StartOverride
If the StartOverride key is absent, look for the following path: HKEY_LOCAL_MACHINE\SYSTEM\CurrentControlSet\Services\iaStorAVC
Select the StartOveride key.
Double-click on 0. If you have the iaStorAV key, change the value to 0. If you have the iaStorAVC key, set the value to 3.
Navigate to the following key: HKEY_LOCAL_MACHINE\SYSTEM\CurrentControlSet\Services\storahci
Double-click the Start key in the right pane and set its value data to 0.
2. Change it from BIOS
Shut down your system and power it on.
Tap the F2 key to boot to BIOS.
Go to System orHardware configuration.
Find the AHCI or SATA mode.
Enable AHCI or go to SATA mode and set it to AHCI.
Windows users report the Multimedia Audio Controller driver error appearing on their PCs randomly. Further, it is related to the audio device not being installed or faulty, preventing your system from communicating with the sound hardware. Hence, this guide will discuss how to fix it.
What causes Multimedia Audio Controller driver error?
Several factors can cause a multimedia audio controller driver error. Here are some common causes:
Missing or outdated driver – If the driver software for the multimedia audio controller is missing or outdated, it can result in a driver error.
Incompatible driver – Using a driver incompatible with your operating system or hardware can lead to errors.
Hardware issues – It could be a faulty audio card, loose connections, or other hardware malfunctions that prevent the driver from working correctly.
Corrupted driver files – Sometimes, the driver files can get corrupted for various reasons, like system crashes, malware infections, or improper installation. Further, it can result in errors when using the multimedia audio controller.
Conflicts with other drivers or software – Conflicts between drivers or software trying to access the same resources. Also, if incompatible software components interfere with the driver’s functioning, this error may pop up.
Regardless, you can follow the steps below in the article to fix it.
How can I fix the Multimedia Audio Controller driver error?
Apply these quick steps before trying any advanced troubleshooting steps:
Update Windows OS – The Windows update installs new updates and patches for fixing bugs. Thus, affecting your PC and resolving compatibility issues with its devices.
Turn off background apps – Turning off background apps prevents other apps from running in the background. This should resolve any interference with the multimedia audio controller driver.
If the above preliminary checks can’t resolve the issue, proceed with the fixes outlined below:
1. Update the driver
Press Windows + R keys to open the Run dialog box, type devmgmt.msc, and press Enter to open Device Manager.
Then, open the Sound, video, and game Controllers entry and find Multimedia Audio Controller. Further, Right-click it and select Update driver from the drop-down menu.
If it’s unavailable, expand Other devices, and you will find the Multimedia Audio Controller.
On the next screen, click onSearch automatically for updated driver software.
Then, exit the Device Manager and restart your PC to check if the error persists.
Updating the Multimedia Audio Controller driver will fix bugs and outdated components causing the error.
However, we suggest you use a certified solution for driver problems. The tool will surely detect outdated PC drivers and resolve problematic drivers in no time.
2. Manually uninstall the Multimedia Audio Controller driver
Press Windows + R keys to open the Run dialog box, type devmgmt.msc, and press Enter to open Device Manager.
Then, open the Sound, video, and game Controllers entry and find Multimedia Audio Controller. Right-click it and select Uninstall device from the drop-down menu.
If it’s unavailable, expand Other devices, and you will find the Multimedia Audio Controller.
Now, click Uninstall to confirm the uninstallation process.
Then, click on the Action tab and select Scan for hardware changes to allow Windows to reload the Multimedia Audio Controller.
Restart your PC to see if the error persists.
To sum up, reinstalling the driver will fix underlying issues affecting its functionality.
Users can run into Runtime error 3709 when setting a company as default in Microsoft FRx. It comes with an error message the connection cannot be used to perform this operation. It is either closed or invalid in this context. However, this article will take you through how to fix the error.
Runtime error 3709 typically occurs in the context of database applications when using ActiveX Data Objects (ADO) to interact with a database. Here are some common causes of this error:
Connection issues – This can include an incorrect or improperly formatted connection string, an invalid server address, or an inaccessible or offline database. It could also occur if there is a problem with the network connection.
SQL query problems – If the SQL query is invalid or contains errors, it can result in runtime error 3709. This may include syntax errors, misspelled table or column names, missing or incorrect parameters, or issues with the query logic.
Insufficient permissions – The error can occur if the user account or credentials connecting to the database do not have the necessary permissions to perform the requested operation.
Data provider issues – The data provider being used to connect to the database, such as the Microsoft OLE DB Provider for SQL Server, may have compatibility issues or be incorrectly installed.
Connection timeouts – If the connection to the database times out due to inactivity or if the connection timeout value is set too low, it can result in runtime error 3709. Adjusting the connection timeout value to a higher duration can help mitigate this issue.
The specific cause of runtime error 3709 can vary depending on the application, database, and programming language used. Nonetheless, we’ll discuss some basic steps to resolve the error.
How can I fix the runtime error 3709?
Before proceeding with any advanced steps, proceed with the following preliminary checks:
Check the connection string – Verify that the connection string used to connect to the database is correct. It should include the server address, database name, and authentication details.
Verify database connectivity – Ensure the database server is running and accessible from the machine where the code runs. Check the network connectivity and permissions to ensure the code can connect to the database.
Validate the SQL query – If an error occurs while executing an SQL query, review the query for any errors. Check for correct table and column names, proper syntax, and parameter usage.
Verify user permissions – Confirm that the user account or credentials you use to connect to the database have sufficient permissions to perform the required operations.
Update data provider or database driver – If you use a specific data provider or database driver, ensure you install it correctly. Consider updating or reinstalling the provider or driver to eliminate compatibility issues.
If the error persists after trying the above steps, go ahead with the fixes below:
1. Declare the reference properly
Open your code in the code editor.
Make sure that references are declared properly, like this, and save changes:Dim cn As ADODB.ConnectionSet cn = New ADODB.Connection
Save changes.
Also, you need to use the Recordset properly. To do this, follow the same steps as above and input your code as such:
Dim strSQL As New ADODB.Command
strSQL.ActiveConnection = cn
strSQL.CommandText = "SELECT * FROM Table1"
strSQL.CommandType = adCmdText
2. Check the SQL query
Open code in your editor.
Locate the SQL query.
Change the code from this input: strSQL = "SELECT * FROM [" & Worksheet & "$] Where Exhibitor = '" & strEntry & "'," & rsCon to strSQL = "SELECT * FROM [" & Worksheet & "$] Where Exhibitor = '" & strEntry & "'"
Installing programs on your PC is expected to be a smooth ride. You click download and install once the file is complete. However, for some users, they may be hit with the system administrator has set policies to prevent this installation message.
You might be wondering why this happens, but as you shall soon find out, certain types of policies can be enforced to regulate the installation of programs. Without further ado, here’s a comprehensive rundown of why this happens.
What does the system administrator has set policies to prevent this installation mean?
You’ll most likely run into this message displayed by the Windows Installer service, which is used to install or remove programs on Windows systems. Any attempt at downloading a program will bring up this error message.
Some of the reasons behind this issue include:
PC is part of a domain – It’s possible that the system administrator might have restricted the installation of programs on computers in their domain.
Untrusted source – The app may be from an untrusted developer, or it contains malware that would make your computer vulnerable if installed. Windows has built-in settings that restrict such installations.
Antivirus settings – If you have antivirus software on your computer, then it may have detected that a program is attempting to be installed on your computer and blocked it from doing so in order to protect your PC from any potential threats.
How do you turn off the system administrator has set policies to prevent this installation?
Ensure you meet the following requirements before moving on to the advanced solutions:
Verify that all prerequisites have been installed, including any service packs and software updates that may be required.
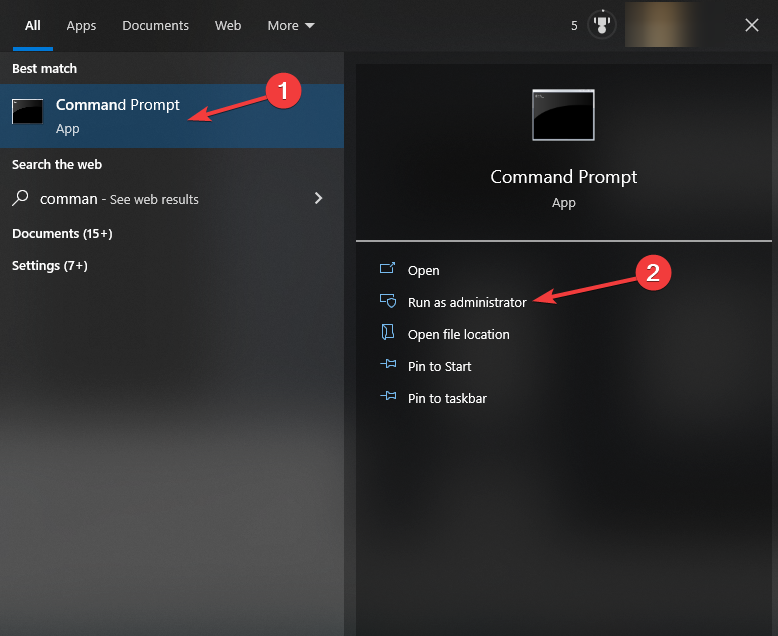
Hit the Windows key, type cmd in the search bar, and click Run as administrator.
Type in the following commands and hit Enter after each one: reg delete "HKLM\Software\Microsoft\Windows\CurrentVersion\Policies" /freg delete "HKLM\Software\Microsoft\WindowsSelfHost" /freg delete "HKLM\Software\Policies" /freg delete "HKLM\Software\WOW6432Node\Microsoft\Policies" /freg delete "HKLM\Software\WOW6432Node\Microsoft\Windows\CurrentVersion\Policies" /freg delete "HKLM\SOFTWARE\Policies\Microsoft\Windows Defender" /v DisableAntiSpywarereg delete "HKCU\Software\Microsoft\Windows\CurrentVersion\Policies" /freg delete "HKCU\Software\Microsoft\WindowsSelfHost" /freg delete "HKCU\Software\Policies" /freg delete "HKLM\Software\Microsoft\Policies" /f
Now restart your PC and try installing the program again.
Don’t worry if some of the commands fail, it just means that those policies don’t exist on your PC and you can proceed to the next.
7. Adjust security policies
Hit the Windows + R keys to open the Run command.
Type gpedit.msc in the dialog box and hit Enter.
Navigate to the following location: Computer Configuration /Administrative Templates / Windows Components / Windows Installer
Find Turn off Windows Installer and double-click on it.
In the pop-up window, check the Enabled box and select Never from the drop-down menu on Disable Windows Installer.
Click Apply and OK to effect the changes.
8. Edit the registry
Hit the Windows + R keys to open the Run command.
Type regedit in the dialog box and hit Enter.
Navigate to the following location: HKEY_LOCAL_MACHINE\Software\Policies\Microsoft\Windows\Installer
Find DisableMSI, double-click on it, and under Value data, set it to 0. If there is no Installer key or the DisableMSI, you can create them.
Remember to backup your registry or create a restore point before this step. You never know the results of making changes on your registry, so it’s best to have a safe point of return if it backfires.
You may also run into another similar issue where your IT administrator has limited access but worry not, as we have the right tips to help you bypass this restriction.
If any solution has helped help you bypass the system administrator has set policies to prevent this installation error, let us know in the comment section.
OXPS (Open XML Paper Specification) files are a popular format for storing electronic documents that preserve their formatting and layout, regardless of the software or device used to view them.
However, opening OXPS files in Windows 10 and 11 can be challenging, as these operating systems do not natively support this format.
We will explore both built-in solutions provided by Microsoft that can help you access and work with OXPS files seamlessly.
How can I open OXPS files in Windows 11?
Before engaging in advanced troubleshooting steps, you should consider performing the following checks:
To open OXPS files, you need an XPS viewer, which is not installed by default on your Windows computer. Follow any methods to install the XPS viewer on your Windows 10 or 11 computer.
1. Use the Settings app
Press Windows + I to open the Settings app.
Go to Apps.
Click Optional features from the right pane.
Now click Add an optional feature.
Search XPS viewer, select it, and click Next.
Click Install. Wait for the installation to complete, then restart your PC.
Now use XPS Viewer to open the OXPS files
2. Use the DISM command
Press the Windows key, type command prompt, and click Run as administrator.
Type the following command and press Enter: dism /Online /Add-Capability /CapabilityName:XPS.Viewer~~~~0.0.1.0
Let the installation be complete, then reboot your PC. Once your PC starts, launch XPS Viewer to open the OXPS files.
In case you are looking for a way to open and view the XML file, read this guide for step-by-step instructions.
Press the Windows key, type powershell, and click Run as administrator.
Copy & paste the following command and hit Enter: Get-WindowsCapability -Online |? {$_.Name -like "XPS" -and $_.State -eq "NotPresent"} | Add-WindowsCapability -Online
Wait for the process to complete, then reboot your computer. Once the PC boots up, launch the XPS Viewer to open the OXPS files.
So, these are methods to install XPS Viewer to view OXPS files on your Windows 11 computer.
Microsoft no longer supports these files; once you can access them, convert them into PDFs for future use.
How can I open OXPS files in Windows 10?
To open the OXPS files, you need to have a user account with admin rights on your Windows 10 computer, then follow the methods mentioned above for Windows 11.
Several readers encountered the error code 0x80180018 when they tried to add a second work or school account on their Windows PC. The error code generally denotes a communication problem with the server or a license-related issue.
In case the error code 0x80180018 is preventing you from successfully adding the work accounts, this guide will offer you the needed help.
What does the 0x80180018 error mean?
The 0x80180018 error occurs when you try to add multiple Office365 Business or Work accounts, signifying an error with your license and therefore restricting you from adding a second work or school account. The error code shows up regardless of the order you follow to add these accounts.
Additionally, the error code 0x80180018 may also show up when you try to set up or log into a brand-new company device, preventing your system from completing the setup process due to the lack of a mobility license.
According to the official Azure AD documentation, the error code 0x80180018 indicates an issue with the MDMLicense, which could be resolved by contacting the system administrator.
Having said that, let’s see the effective solutions to get past the error code and successfully add two work accounts on the same system.
How do I fix error 0x80180018 when adding two work accounts?
1. Create a local account
Use the Windows + I shortcut to launch the Settings app.
Switch to Accounts from the left sidebar and then select Other users (Family & other users in some versions) from the right section.
Next, press the Add account button present next to Add other user option.
On the next window that pops up, click I don’t have this person’s sign-in information.
Next, select the Add a user without a Microsoft account option.
Finally, on the next page, provide the username and confirm the password by entering it twice.
After you are logged into the local account you just created, perform the next step.
2. Add work and school account
Use the Windows + I shortcut to launch the Settings app.
Select Accounts from the left navigational panel and scroll down the Account settings in the right section and click the Access work or school option.
Press the Connect button located next to Add a work or school account option.
Provide the email on the next popup window that appears and press the Next button.
Now follow the step-by-step process to successfully sign into the first work or school account.
Once completed, repeat the same process to add the work or school account as well. Hopefully, you won’t encounter the 0x80180018 this time.
Select the Devices option listed under Device Management on the left navigational menu bar.
Scroll down and select the Enrollment device limit restrictions option.
Next, select the imposing restriction and click the Menu icon (three dots).
Select the Delete option from the sub-menu.
Imposing a restriction on new devices inhibits them from gaining access hence the 0x8010018 error. Removing these restrictions from the enrolled devices on Intune will help sign in to your work PC successfully.
2. Enable Enterprise mobility license
Visit the Microsoft 365 Admin Center on your preferred browser and enter the login credentials of the administrator account of your organization.
Click Users on the left navigation panel and then Active users from the expanded menu.
From the user list, click the user name to which you want to assign an Intune user license.
Switch to the Licenses and Apps tab in the user pane and expand the Licenses section.
Here, enable the checkbox preceding the Intune or Enterprise Mobility + Security license.
Press the Save changes button.
Enabling the Enterprise Mobility + Security license will provide the user account with the required permission to be able to use the service and enroll devices into management. Now the user can sign into the work PC without facing the mobile license-related error.
So, these are the methods you should implement to fix the error code 0x80180018, which appears when you sign into the work or school account.
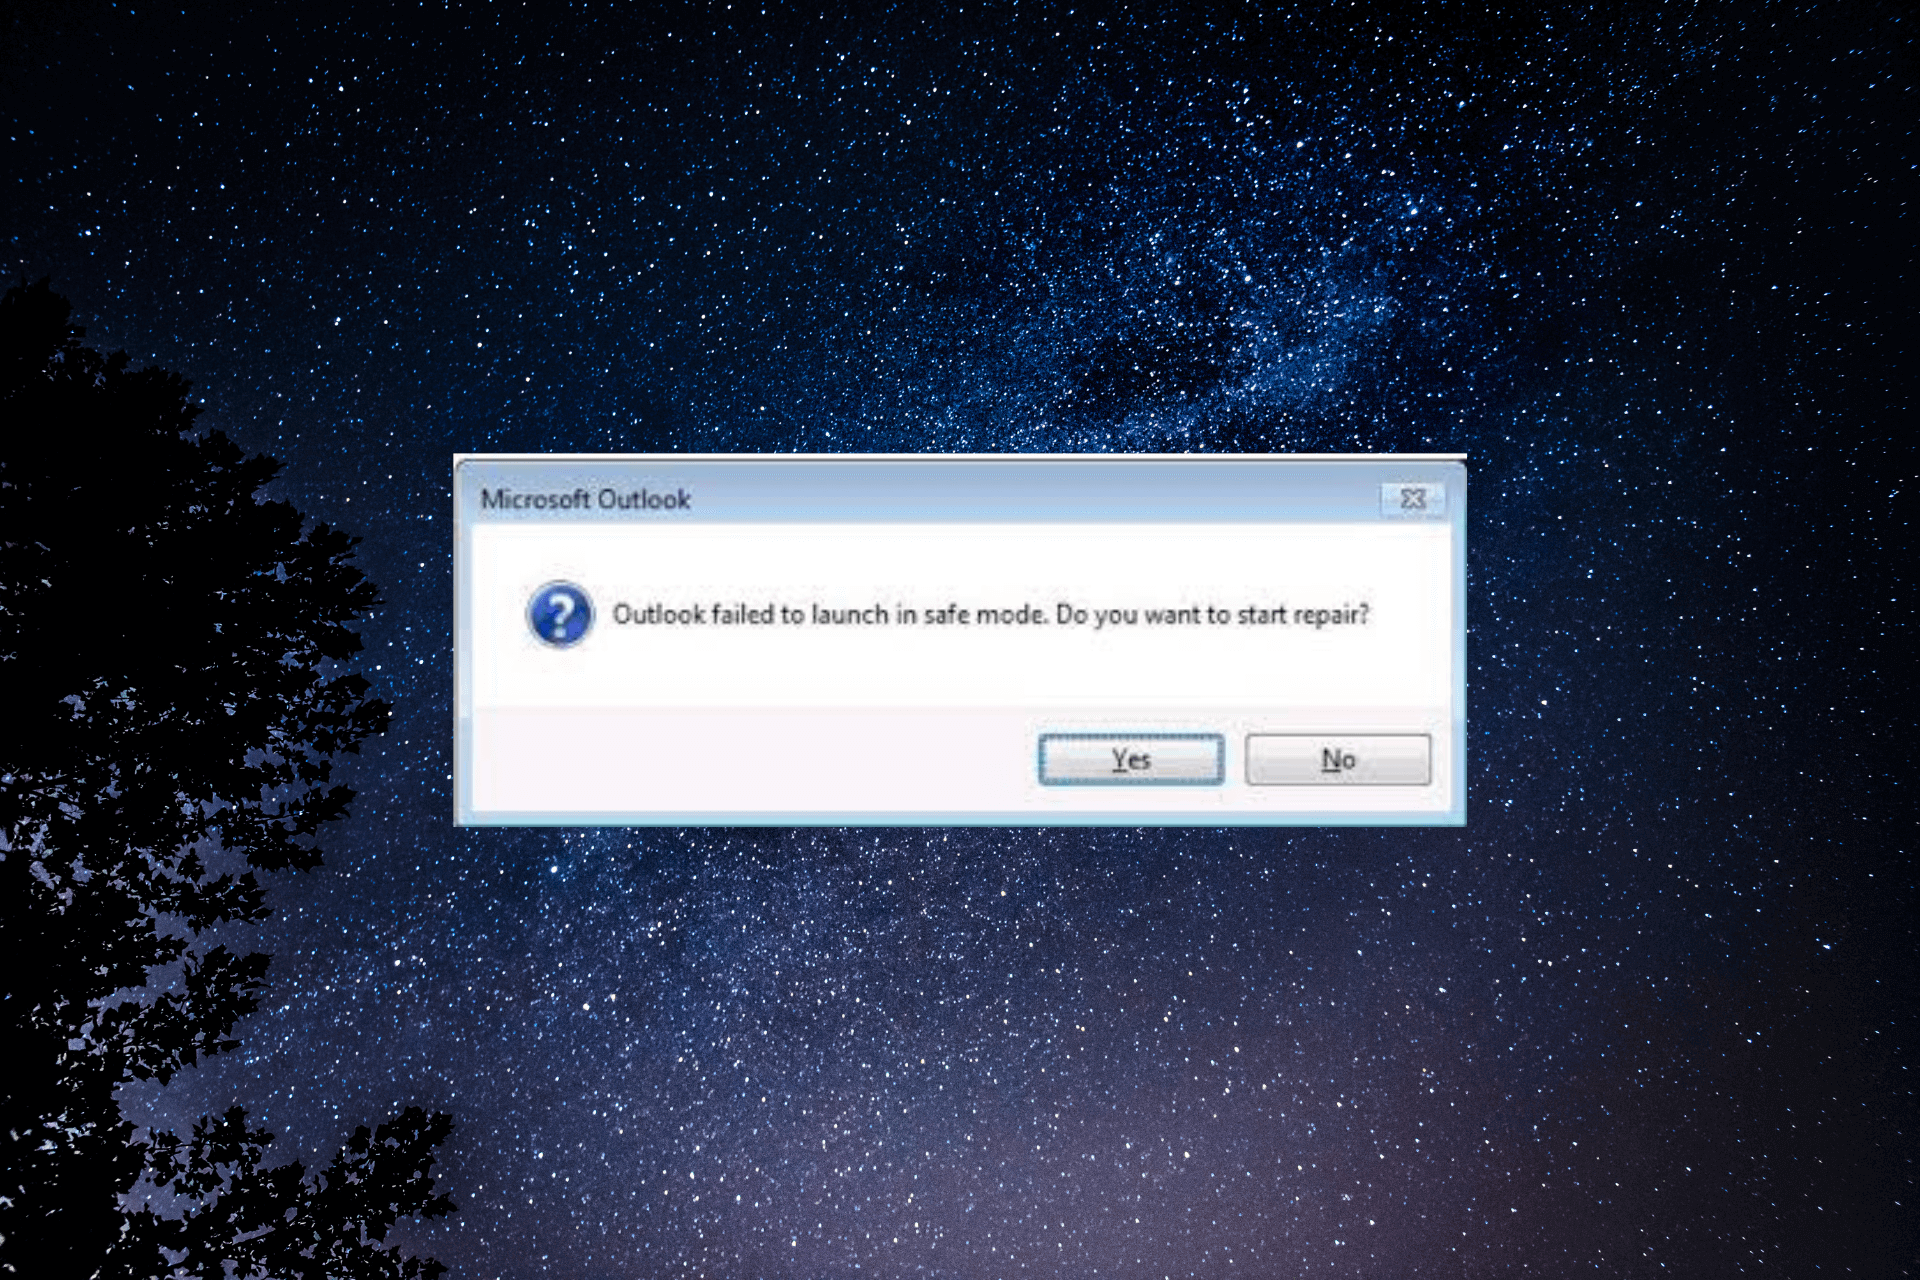
Microsoft Outlook is a widely used email and productivity application. However, there are instances where Outlook may encounter issues and fail to launch in safe mode.
In this guide, we’ll provide you with step-by-step instructions and expert tips to help you overcome the obstacles and get Outlook up and running smoothly in Safe Mode.
Why does Outlook fail to launch in safe mode?
There could be various reasons for this problem; some of the common ones are mentioned here:
Add-in conflicts – Outlook add-ins enhance functionality but may conflict with each other or with Outlook itself, causing the issue. Try disabling the add-ins.
Corrupt data files – This email app relies on data files such as PST and OST to store emails, contacts, and other data. If these become corrupted, they could cause this problem.
Outdated version of Office – Running outdated versions of Outlook or other software components can lead to compatibility issues, making it difficult for Outlook to launch in Safe Mode.
Profile issues – Corruption or issues with the Outlook user profile can prevent the application from starting in Safe Mode. You need to repair the corrupt profile to fix the issue.
Third-party antivirus software – The antivirus programs may interfere with Outlook’s ability to launch in Safe Mode. Try disabling the antivirus temporarily.
So, these are some of the factors contributing to this error; let us check out the solutions to resolve the issue.
How can I fix the Outlook failed to launch in safe mode issue?
Before engaging in advanced troubleshooting steps, you should consider performing the following checks:
Navigate to one of these paths according to your Outlook:
For Outlook 2021:  C:\Program Files\Microsoft Office\root\Office16
For Outlook 2019: C:\Program Files (x86)\Microsoft Office\root\Office16
For Outlook 2016: C:\Program Files (x86)\Microsoft Office\root\Office16
For Outlook 2013: C:\Program Files (x86)\Microsoft Office\Office15
For Outlook 2010: C:\Program Files (x86)\Microsoft Office\Office14
For Outlook 2007: C:\Program Files (x86)\Microsoft Office\Office12
Locate and double-click SCANPST.exe.
On the Microsoft Outlook Inbox Repair Tool window, locate the corrupted PST file.
Choose Start to initiate the scanning.
If the tool comes with errors, click Repair to fix the errors.
4. Disable the add-ins
Launch Outlook. Click Get Addins from the top right corner of the menu.
From the left pane, select My add-ins.
Locate the add-in to disable, click the three dots, and select Remove.
5. Restore Outlook to the previous version
Press the Windows key, type outlook, and click Open file location.
Right-click Outlook and select Properties.
Go to the Previous Versions tab, select the version you want to revert to, and click Restore.
If this doesn’t work for you, try performing a system restore to restore your computer to the selected version.
So, these are methods to follow to fix the Outlook failure to launch in safe mode & regain control of your Outlook experience and ensure uninterrupted productivity.
Managing appointments and staying organized are crucial in today’s fast-paced world. Microsoft Outlook, a popular email and calendar application, provides a range of features to help users stay on top of their schedules.
One handy capability is copying Outlook calendar appointments to another day, allowing for easy rescheduling and better time management.
In this guide, we will walk you through the step-by-step process of duplicating appointments in Outlook, empowering you to manage your calendar and keep your schedule in check effortlessly.
How can I copy an Outlook calendar appointment?
Before proceeding with any steps to copy the Outlook appointment to another day, go through the following preliminary checks
Double-check the date and time of the original appointment and ensure you choose the right details for the copied one. Pay attention to any time zone differences, if applicable.
If the original appointment is a recurring event, determine whether you want the copied one to be a regular or a one-time occurrence.
Check if the attendees of the original appointment need to be invited to the copied one.
Ensure the meeting room, equipment, or resources are available before making changes.
Once you have copied the appointment, ensure you have sent an invite to all attendees.
Considering these points, you can ensure that the copied appointments in Outlook are accurate, properly scheduled, and contain all the necessary details.
1. Use the copy-paste method
Press the Windows key, type outlook, and click Open.
Go to Calendar from the left pane.
Choose the appointment and press Ctrl + C.
Locate the day and time slot where you want to copy it and press Ctrl + V.
2. Use the Ctrl key
Launch the Outlook app. Go to Calendar from the left pane.
Locate and select the appointment from the calendar.
Press and hold the Ctrl key; now click and drag the appointment to the preferred date on Calendar.
Release the Ctrl key. If you want to move the appointment, you can avoid pressing the Ctrl key; just drag it from one place to another.
Open the Outlook app. Go to Calendar from the left pane.
Locate and select the appointment that you want to copy.
Now hold the right button of the mouse, and drag the appointment to the preferred date on the calendar.
Once there, release the mouse button, and choose Copy from the pop-up menu.
If you are looking for ways to know the creation date of an event on Outlook, you can follow this guide to know the tricks.
4. Use the Calendar view
NOTE
This method is for those who want to copy appointments from one calendar to another.
Open the Outlook app. Go to Calendar from the left pane.
From My Calendars, select the calendar that you want to copy.
Click View from the menu on the top, click the Change View dropdown, then click List.
You will get the list of appointments and meetings in the list view.
If you want to copy all, press Ctrl + A to select and then Ctrl + C to copy. If you’re going to choose one, click on it and then press Ctrl +C.
Come out of the List view, go to My Calendars, and select the Calendar you want to copy.
Go to View, then Change View, and choose List.
Press Ctrl + V to paste the events you copied from the default calendar.
5. Use the Move to Folder option
To move the appointment from one calendar to another, double-click the appointment.
Click File.
Select Move to Folder.
Choose the calendar to which you want to move it.
So, these are the methods to copy Outlook calendar appointments to another day which can help you duplicate an event for multiple days or adjust your plans, saving you time and effort.
If you are looking for a way to make your Outlook calendar private to ensure no one sees your meeting schedules or appointments, we advise you to check out this guide.
Please feel free to give us any information, tips, and your experience with the subject in the comments section below.
Whether you want to magnify text for easier readability or zoom out to view multiple applications simultaneously, having the ability to adjust your zoom level is essential.
In this guide, we will explore the six easiest ways to zoom in and out on a PC, providing simple and efficient methods for mastering this essential task.
How can I zoom in and out on PC?
1. Use the Settings app
Press Windows + I to open the Settings app.
Go to Accessibility, and select Magnifier.
Click the toggle switch next to Magnifier to turn it on.
Locate Zoom level, and click + sign to zoom in on the screen.
To zoom out, click the - sign to zoom out.
2. Use the Magnifier app
Press the Windows key, type magnifier, and click Open.
To zoom in, press Ctrl + Alt + Mouse wheel up. If you are using a laptop, you can press Ctrl + Alt and scroll up using two fingers on the touchpad to perform the action.
Press Ctrl + Alt + Mouse wheel down to zoom out. For the laptop, press Ctrl + Alt and scroll down using two of your fingers on the touchpad to do it.
5. Use the browser settings
Launch a browser. Here we are using Google Chrome.
Click the three dots and locate Zoom.
Now click the +/– button next to it to zoom in or zoom out the browser window.
Alternatively, you can press Ctrl + + to zoom in and Ctrl + - to zoom out within the window.
6. Tweak the display settings
Press Windows + I to open Settings.
Go to System, and click Display.
Under Scale & Layout, locate Scale; from the dropdown next to it, select the value to adjust the size of text, apps, and other items on your screen.
So, these are the methods to zoom in and out on a PC to enhance your computing experience greatly. Don’t forget to check out the touchpad gestures that will also allow you to zoom in and out.
Webcams have become an essential tool for communication, whether it’s video conferencing, online meetings, or live streaming. Ensuring that your webcam is functioning properly is crucial to guaranteeing a seamless and hassle-free experience.
In this guide, we will walk you through the process of testing your webcam on Windows 10, providing you with step-by-step instructions and recommended tools.
How can I test my webcam on Windows 10?
Before you move to the steps to test your microphone, let us consider performing these checks:
If you are testing an external one, verify the webcam cable and jack are working fine.
On the webcamtests.com wants to Use your camera prompt, click Allow.
Click Test my cam. You can choose a Webcam type if you are using a Wireless or USB webcam with your machine.
If the webcam is working, you can see yourself on the screen.
So, these are methods that you can use to test your webcam on your Windows 10 computer to make sure you’re always ready to connect and communicate effectively on your PC.
It’s not uncommon to accidentally remove an application from your PC, which is why many are wondering how to recover uninstalled programs on Windows 11.
There is a similar guide on how to recover deleted files on Windows 11 that sheds more light on this topic, so we advise you to check it out.
To tackle the problem, we must investigate and examine its underlying source.
Can you recover uninstalled programs?
If you accidentally delete important programs on your PC, you should know there’s a chance to restore them.
The process is simple and doesn’t require you to create a backup beforehand or use any third-party software.
How can I recover uninstalled programs on Windows 11?
Use System Restore
Click on the Search icon on the taskbar and type Control Panel, the moment Control Panel pops up in the search results, click on it, and the Control Panelwindow will open.
Click on the Control Panel’s search box and type recovery. Once the Recovery option appears, choose it.
Now click on the Open System Restore option.
Click on the Next option to open the available Restore Points.
Choose a Restore Point of your choice and click on the Scan for affected programs option.
Review the results and click on the Next button to proceed.
Click on the Finish button to conclude the restoration process.
Before you uninstall programs to free up storage space or improve your computer’s performance, it’s important to know that this may not be the best solution. It may not even provide a substantial amount of extra space or speed.
While using your computer, you probably encounter many computer processes. Some may even sound strange and unrelatable. That is the case for many users when they notice the User OOBE Broker process.
This guide will demystify it, telling you all you must know about the process and showing you the best way to disable it.
What is the User OOBE Broker process?
This is a Windows background process called User Out-of-Box Experience Broker, and it’s in charge of managing the user experience during a new Windows computer’s first setup. Additionally, it manages a few security and update-related duties.
How do I disable User OOBE Broker?
1. Disable the process in Settings
Press Windows + I to open the Settings app.
On the left pane, click System, then on the right, click the Notifications option.
Scroll down, expand Additional settings, and tick the checkbox for Show the Windows welcome experience after updates and when signed in to show what’s one and suggested.
2. Disable the process in Task Manager
Press Ctrl + Shift + Esc to open the Task Manager.
Click on the Details tab.
Search for the UserOOBEBroker.exe process, click on it, and click the End task button.
How does the OOBE broker work?
The OOBE Broker functions by interacting with other Windows services and processes. These interactions include creating user accounts, configuring security settings, installing updates, and running setup wizards.
Future Windows updates shouldn’t be negatively impacted by disabling User Oobe Broker. However, remember that some updates or significant system modifications could need the out-of-the-box experience to function and that deactivating it might obstruct such procedures.
Before you go, don’t forget to our What is useroobebroker.exe article for more information about this process.
We love entertaining your questions, so contact us using the comments section if you have additional questions about the process.
Many users complain about the inability to type in the Send to address field when sending mails. The problem is common on MacBooks and can be due to numerous reasons. However, this guide will discuss basic steps for fixing the issue.
The inability to type in the send to address field for a new mail can occur due to many factors. Some are:
Technical issues – There might be technical problems with the website or the browser you’re using, such as server issues or bugs from outdated browsers that prevent the input field from working.
Browser issues – Most users have complained they encountered the issue primarily on the Safari browser. This could mean an incompatibility between the website and the mail app you’re using, leading to issues with typing in specific fields.
These are just a few potential causes, which can vary depending on your context and platform. Nonetheless, we’ll take you through detailed fixes for fixing the problem.
What to do if I can’t type in send to address?
Before proceeding with any advanced troubleshooting steps, try the following preliminary checks:
Check for input focus – Ensure that the cursor or input focus is in the correct field. Click inside the Send to address field to ensure it is active and ready for input.
Refresh the page or browser – Sometimes, the issue can be temporarily resolved by refreshing the page or restarting the browser. Use the refresh button in your web browser or close and reopen the browser to see if the problem persists.
Sign out and sign in to your account – It will register your account on the device and resolve any account issues liable to cause the issue.
Test with a different browser or device – If you can successfully type in the Send to address field using an alternative browser like Chrome, the issue may be specific to Safari.
If you still can’t type in the send to field, go ahead with the fixes outlined below:
1. Use the open in new tab button
Launch Outlook for web.
Compose the message you want to send out, then click the arrow button next to the trash bin in the top right corner.
Clicking the button will pop it out into a new window, and you should click on the recipient fields.
The above steps should fix the problem. If it doesn’t, then you need to troubleshoot the browser.
2. Clear Safari’s history and data
Launch the Safari browser, click on the History menu, and select Clear History from the drop-down.
Choose the Time range as all history and click on Clear history.
Some users have claimed this solution worked for them. Hence, clearing the history will delete the corrupt files prompting the error.
Your Xbox One is more than a gaming console. Some users enjoy listening to music, but it now seems the error code 0xc00d11cd has become a nuisance. Numerous reports show that the error occurs when playing songs from an external hard drive.
If you’re in a similar predicament, stay with us as we help you figure out why this error occurs and how you can easily bypass it.
What is error code 0xC00D11CD?
This error code may appear on your Xbox One when you attempt to play music. What’s strange is that the same songs play perfectly when you play them on your Windows PC. This could lead to the conclusion that the issue is with the Xbox app and not your hard drive.
Still, let’s have a look at other causes of the error 0xc00d11cd:
Faulty drive – If you’ve been playing your music just fine but suddenly can’t, your drive may have become corrupted and needs to be replaced.
The drive is formatted incorrectly – If it doesn’t show up in Windows Explorer or on your desktop, it probably isn’t formatted correctly.
Wrong USB port – The USB cable should be plugged directly into your device’s open USB port, not through a USB hub. If too many devices are connected to one port, and it gets overloaded with traffic, it will not be able to recognize the new device.
Corrupt files – If you cannot play music from an external hard drive or flash drive, there might be some problems with the files themselves.
Wrong audio format – Most people do not know about the formats of audio files. You need to choose the right format for Xbox One.
How can I fix the error code 0xC00D11CD?
A few workarounds that could resolve this error include:
Although you can easily scan your HDD for malware using the built-in Windows security tool, sometimes, it may not do a thorough job. That’s why we recommend using a third-party external hard drive antivirus tool.
Dedicated antivirus programs are comprehensive and secure your data. Once the scan is complete, you can open your files with no hiccups.
2. Format your drive
Hit the Windows key, type cmd in the search bar, and click Run as administrator.
Type diskpart in the Command prompt window and press Enter.
Next, type list disk and press Enter. This will list all drives on your PC.
Type the following commands and press Enter after each one: Remember to replace X with the corresponding number matching the hard drive you wish to format. You can also replace ntfs with another file system such as fat32 if it matches with your drive: select disk Xcleancreate partition primary format fs=ntfs quick
Although this method usually works, it is easy to make a mistake, especially if you’re not tech-savvy. A good save will be to use partition format software. These are completely safe and do not require technical know-how.
Aside from these solutions, other users also recommended reinstalling the Xbox app, so if these two don’t work, try that. You can also get chatty with Xbox customer support. They may have an answer to this issue.
Another option that seemed to resolve the issue involves a clean install of Windows. Although this is very time-consuming and overhauls your system, it is worth a try if you’re down on your luck and nothing else is working.
You may also run into another similar error where Spotify is not working on Xbox, so feel free to check out our guide on resolving the issue.
That’s it from us, but we’re eager to hear about any other solutions not mentioned here but were a success for you. Let us know in the comment section below.
Runway Gen-2 is officially out in the world, and the engine is the perfect tool if you are a video-savvy producer. The tool uses AI to generate spectacular videos, fully-rendered and full of effects.
And since we’re also sort of creative with the work that we do, we’ve generated a whole stunning short film with it. And we’re going to show you how we did it.
We’re only telling you this: the result is an awesome piece of art done with minimal work, and rendered before our very eyes.
Follow along and we’ll show you.
Here’s what we did with Runway Gen-2
Using the Runway Gen-2 for the first time, you should know that the whole process is simple. Intuitive even.
You can actually use it to generate as many videos as you like until you find the one that suits your creative vision.
Naturally, we used Chat-GPT to generate a visual script with prompts for the video based on the following keywords: apocalyptic, shamanic, and futuristic.
The AI then generated a script of 100 seconds. With it, we headed back to the Runway Gen-2 with the script, and the AI did its job. In a matter of seconds, the video was real.
We copied each line of the script, and Runway-Gen 2 generated a video for each of these lines. The results exceeded what we expected, by far.
Of course, you have the liberty to process each video through your preferred video editor, but by itself the AI tool does a wonderful job.
Since the video was almost done, we only needed some music, and Ed, our colleague, composed some mystical-ethereal music for the film.
We added the music, and the result left us in awe.
However, the work this tool does on itself is stunning.
We’ll let you watch the video and decide for yourself, but be sure to let us your thoughts and opinions below in the comments section. We’re eager to know what you think about it.
In this guide, we will share with you a detailed guide on how you can download DirectX 9 on your Windows 10 and 11 computers. Let us check out the solutions.
What is DirectX 9?
DirectX 9, released by Microsoft in 2002, was originally designed for Windows 98 and Windows XP but is also supported by later versions of Windows.
Windows 10 and 11 come with DirectX preinstalled and updated automatically through Windows Update. There’s no need for separate installation.
Despite being an older version, DirectX 9 is still required by some programs and games. If it’s missing, you might see an error message like “The program can’t start because d3dx9_41.dll is missing.
How to download DirectX version 9.0 on Windows 10 & 11
Extract the contents of the ZIP file and click on the DirectX.sdk file.
Click Yes to accept the license terms and agreement.
Click on Browse and select the location where you would like to install DirectX 9 and click OK.
The installation will begin.
Click Finish once the installation completes and restart your PC.
Following the above steps, you will be able to download and install DirectX 9 on your Windows 10 and Windows 11 computer.
The process is identical for both OSes so you won’t have any problems if you have upgraded to the new Windows 11.
However, do note that there are multiple readers who claimed that they aren’t able to play the program or game even after installing DirectX 9 on their PC.
In such a scenario, there is one more feature that you need to enable on your computer to enjoy the DirectX 9-supported software or games on your PC, the details of which you will find in the next section.
Click on Turn Windows Features on or off from the left.
Open Legacy Components.
Tick Direct Play.
Click OK and restart your PC.
Once you have enabled this feature, you will be able to play the DirectX 9-supported games and programs on your Windows 10 or 11 PCs without any issues.
Is there a DirectX 9 offline installer?
There is no separate DirectX 9 offline installer, but the DirectX End-User Runtime Web Installer from Microsoft’s DirectX download page can be used offline.
All you have to do is download the installer. Afterward, you can add it to a USB drive or other portable media.
On the target computer, run the installer from the USB drive to complete the installation without needing an internet connection.
You should also check out our guide that will help you to reinstall DirectX on Windows 11. This could come in handy when you are coming across DirectX-related issues on your PC.
If you are getting the d3d8.dll missing or not found error, then do not worry, as you can easily resolve it by following the solutions in our guide.
Feel free to let us know in the comments below, if you found this guide helpful, or if you opted for a different way to download DirectX 9 on your computer.
There are multiple users that have reported that they are facing an error message You must be an administrator running a console session when running the SFC Scan utility.
In this guide, we will share with you some solutions that will help you resolve the You must be an administrator running a console session error message for good. Let us check out the solutions.
What causes You must be an administrator running a console session error?
Well, some of the main reasons for you to come across the You must be an administrator running a console session error are listed below:
Lacking admin rights: The error message itself says that you need to have admin rights before running the command on your PC, which you might not have.
Corrupt user’s account: Some issues with your user account can trigger this issue on your computer.
Virus infection: Also, some viruses can cause multiple issues on your PC, one of which is that You must be an administrator running a console session error.
Outdated Windows update: You might not have updated your PC for quite some time, and this issue might be because of an underlying bug.
Let us now take a look at the solutions that will help you resolve the You must be an administrator running a console session error.
How can I fix You must be an administrator running a console session error?
1. Run Command Prompt as an administrator
Press the Win key to open the Start menu.
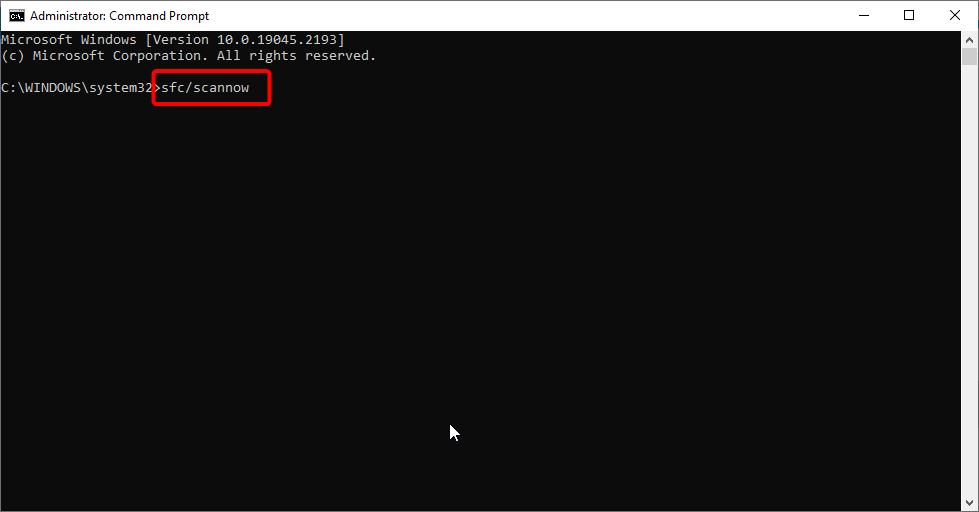
Type Command Prompt and click on the Run as administrator option.
Type the below command and press Enter. sfc /scannow
Since it is mentioned in the error that you are not running the command prompt as an admin, you are getting the problem.
Simply follow the above steps, run an elevated Command Prompt, and check if this fixes the You must be an administrator running a console session error or not.
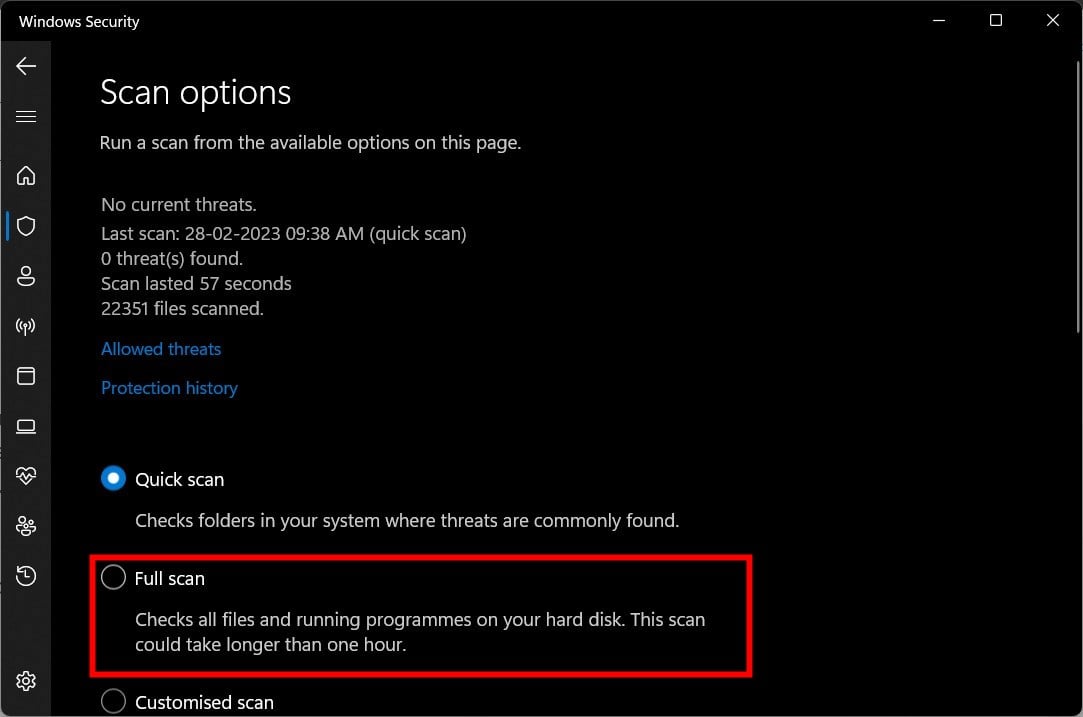
2. Run a virus scan
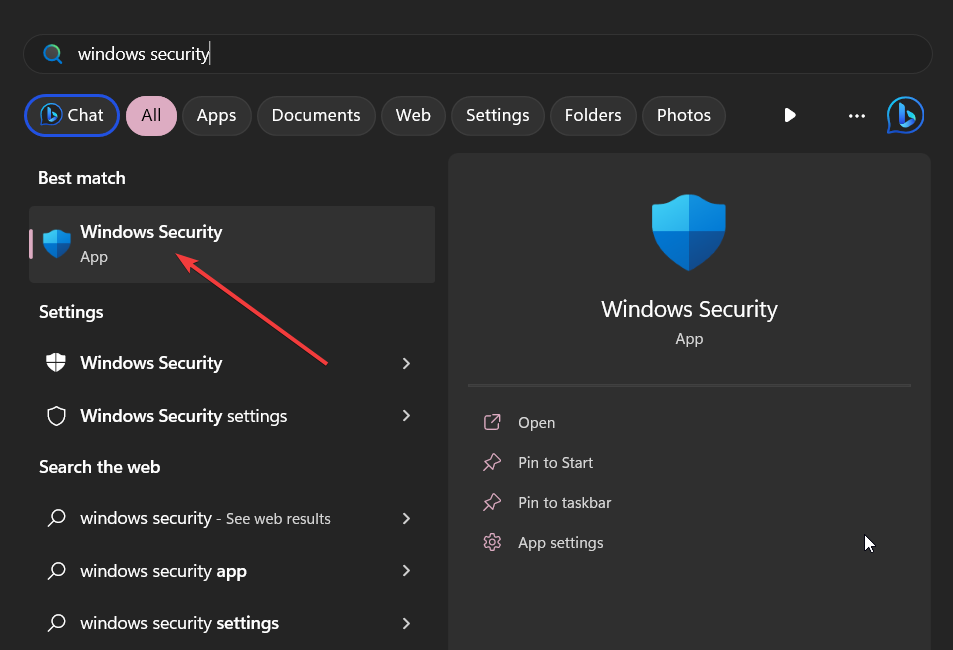
To launch the Start menu press the Win key.
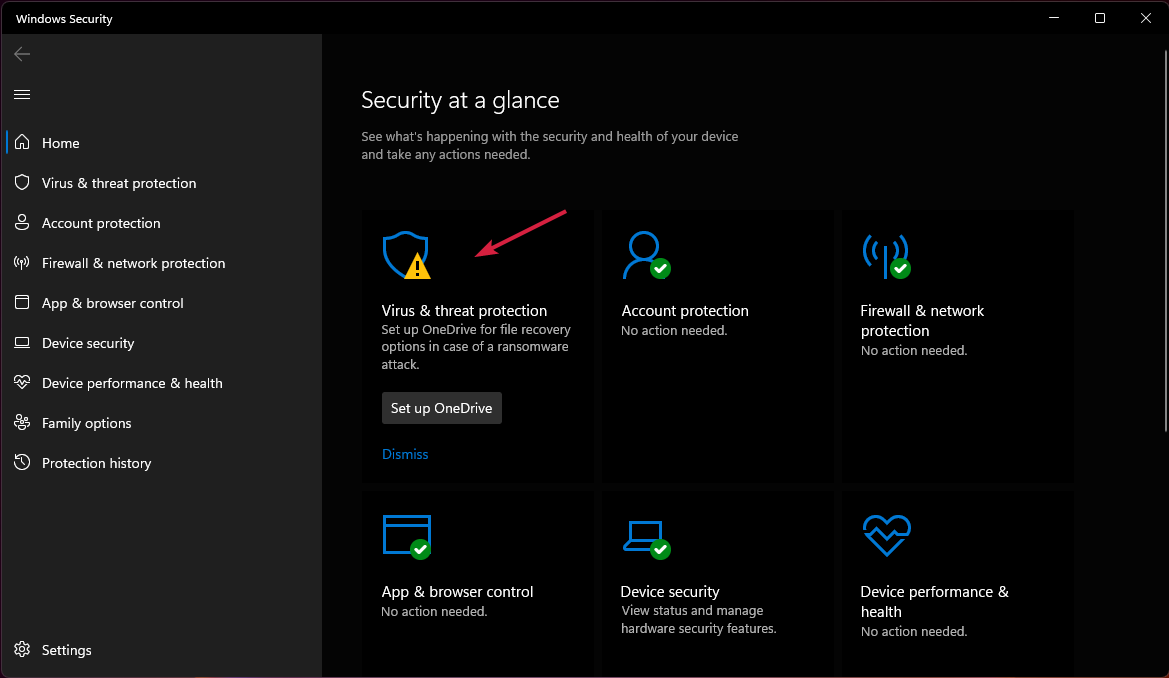
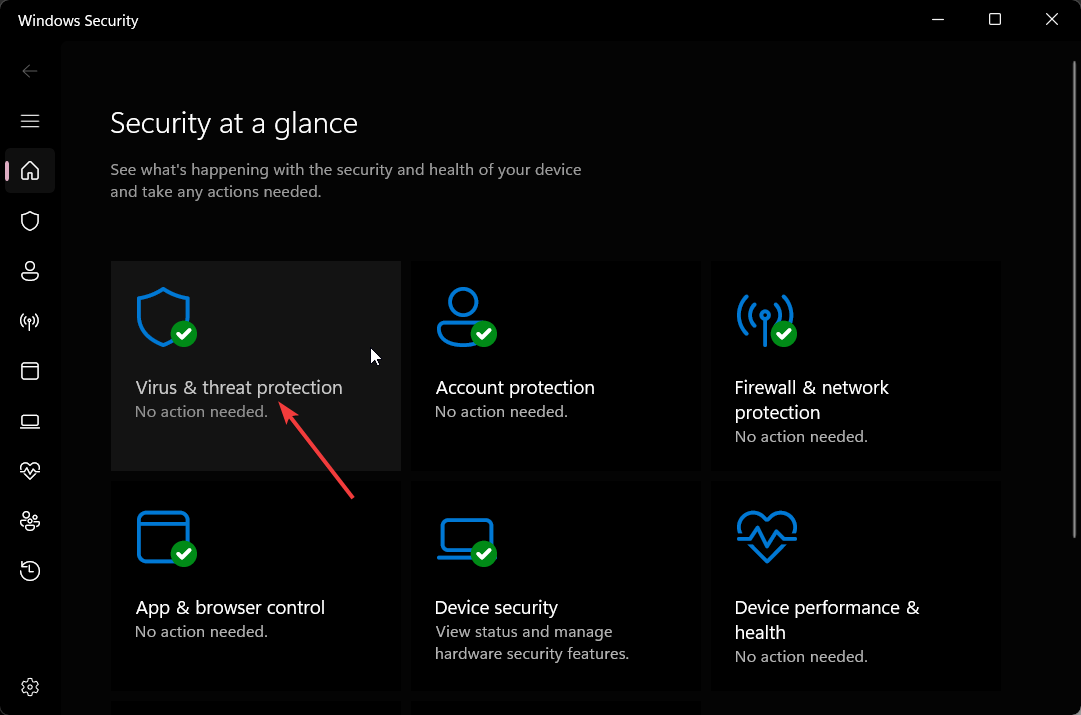
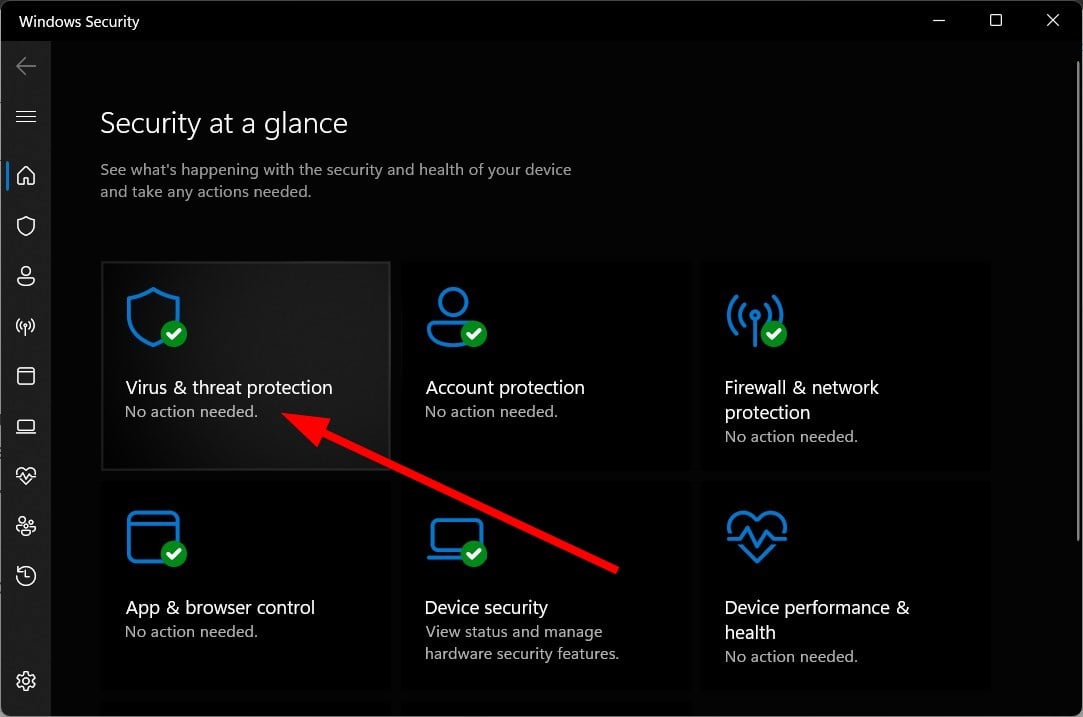
Type Windows security and open the appropriate result.
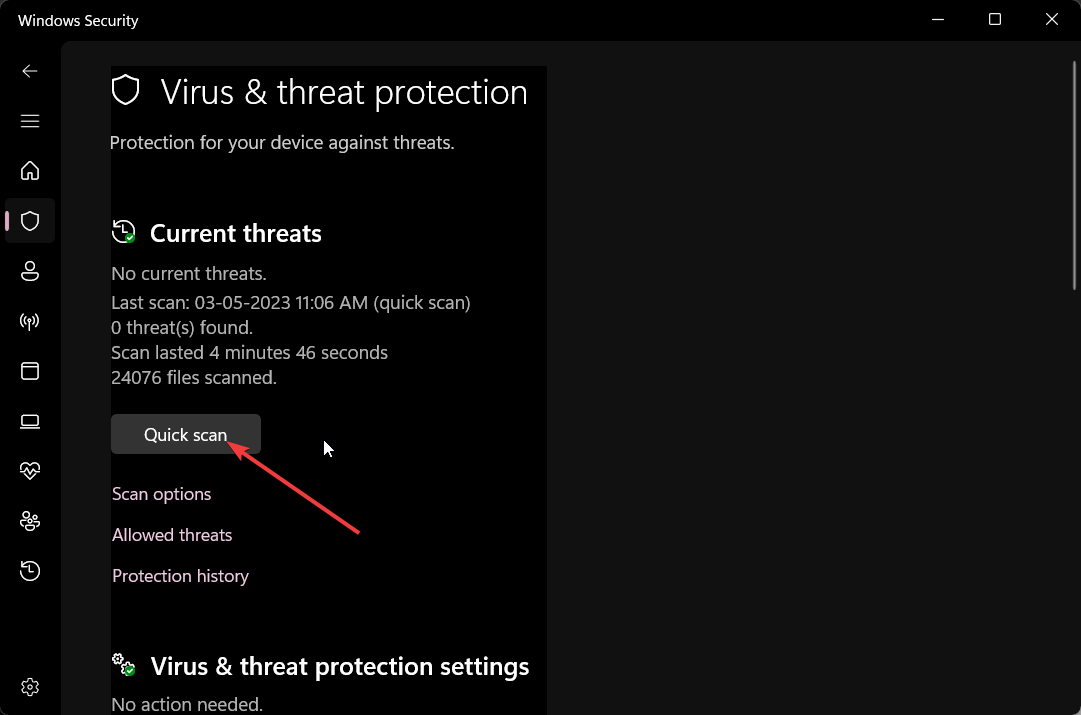
Click on Virus & threat protection.
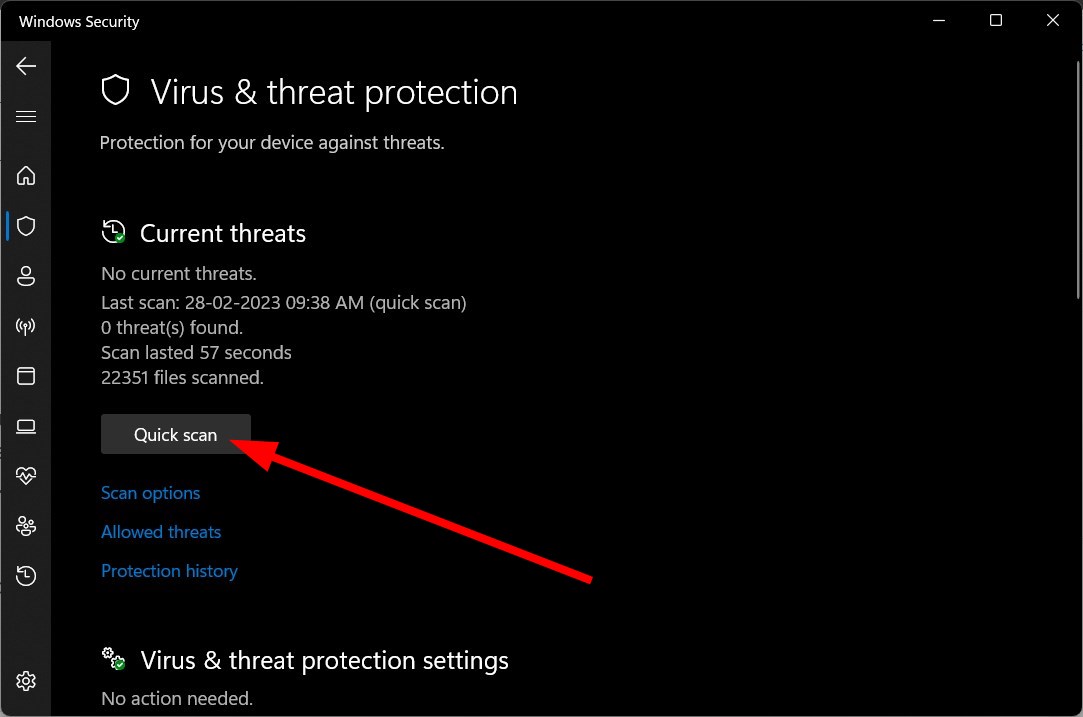
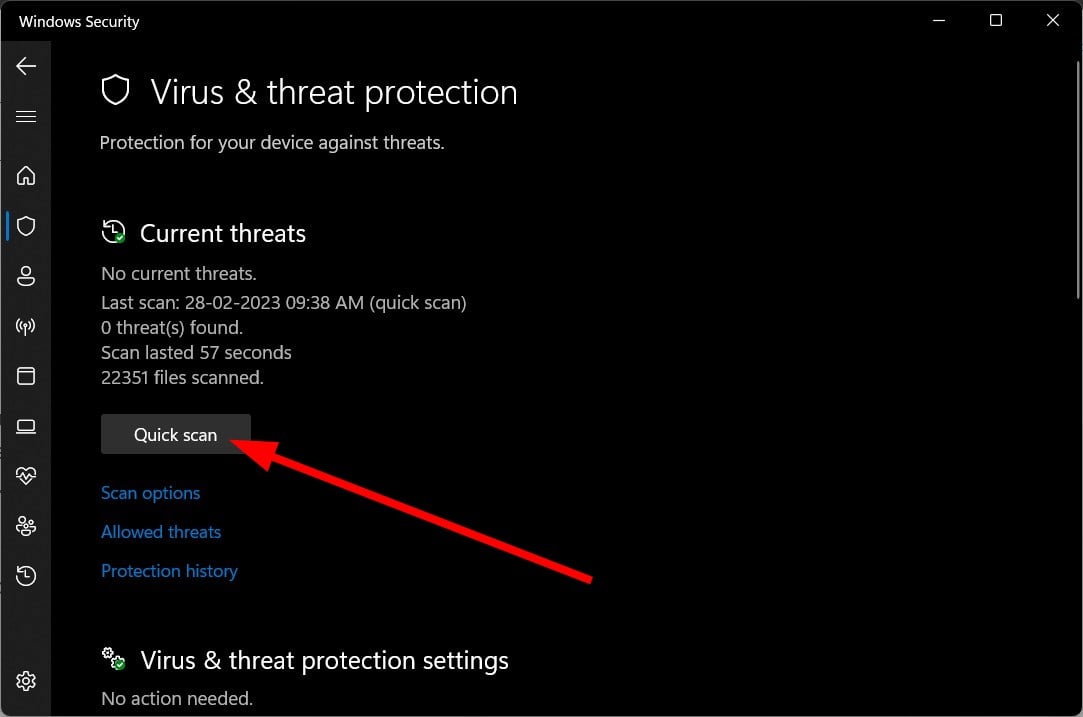
Click Quick Scan.
You can also select Scan options and choose Full scan for a deep scan.
Apply the fixes and remove the virus from your PC.
Chances are there is a sticky virus that is causing all sorts of administrator problems on your PC. You can scan your PC for viruses using the Windows Security tool.
However, most of the time, Windows Security isn’t as effective as dedicated antivirus software. In that case, you can look at our guide which gives you a compilation of some of the best antivirus software to protect your PC.
To open the Settings menu, press the Win + I keys.
Click on Accounts from the left pane.
Select Other users.
Click on Add account.
Select I don’t have this person’s sign-in information.
On the next page, select Add a user without a Microsoft account.
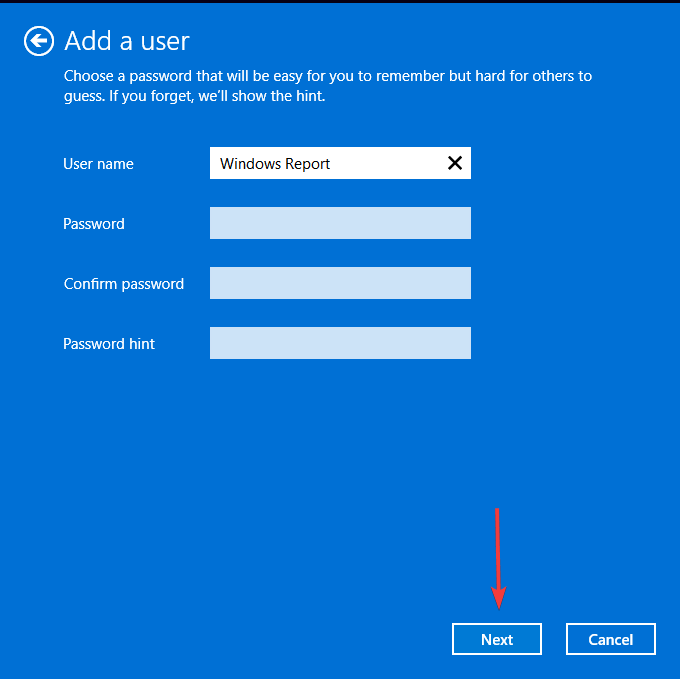
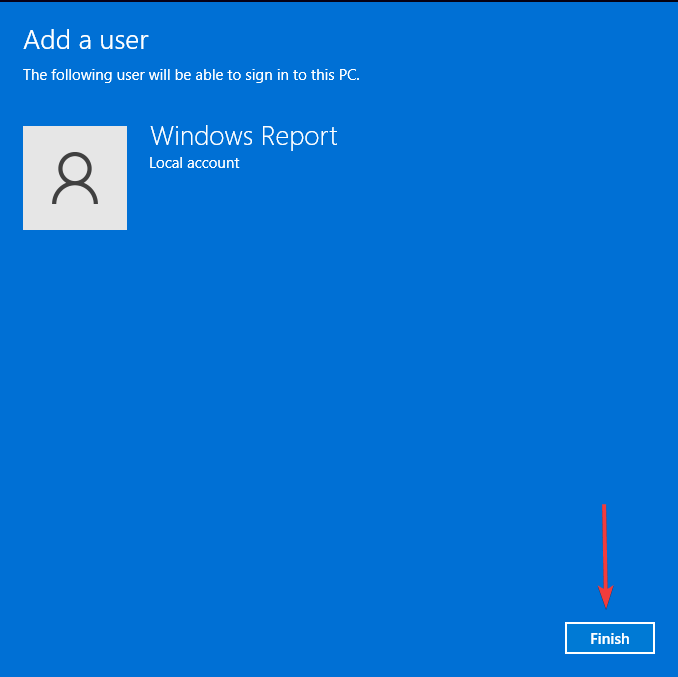
Enter the username, password, and other details, and click Next.
The account with which you are trying to run the command prompt might be having some underlying issues, which is why you are getting the You must be an administrator running a console session error.
In this condition, you should try creating a new account and check if this resolves the issue or not.
4. Perform a Windows Update
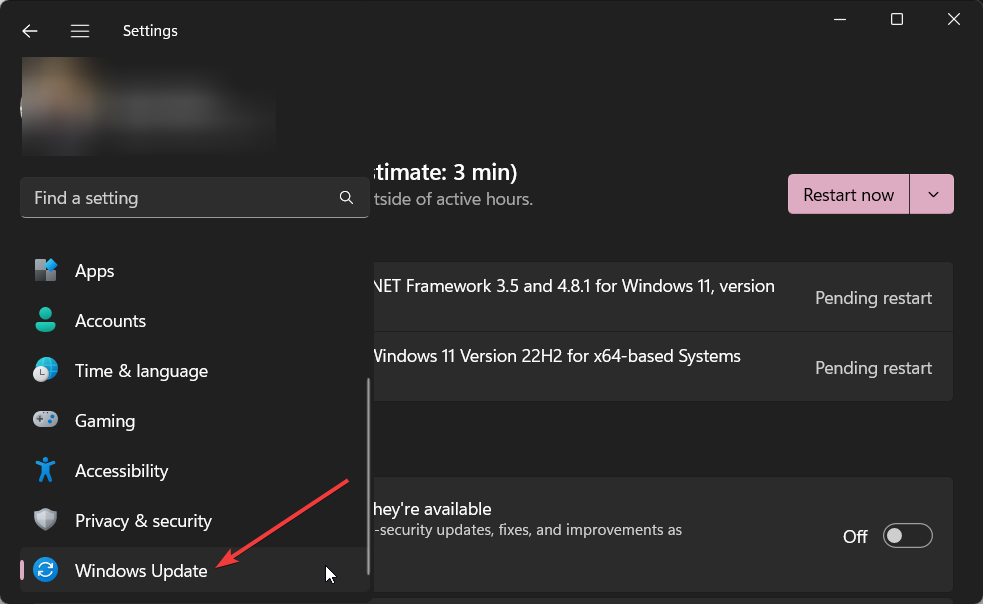
Press the Win + I keys to open the Settings menu.
Click on Windows Update on the left pane.
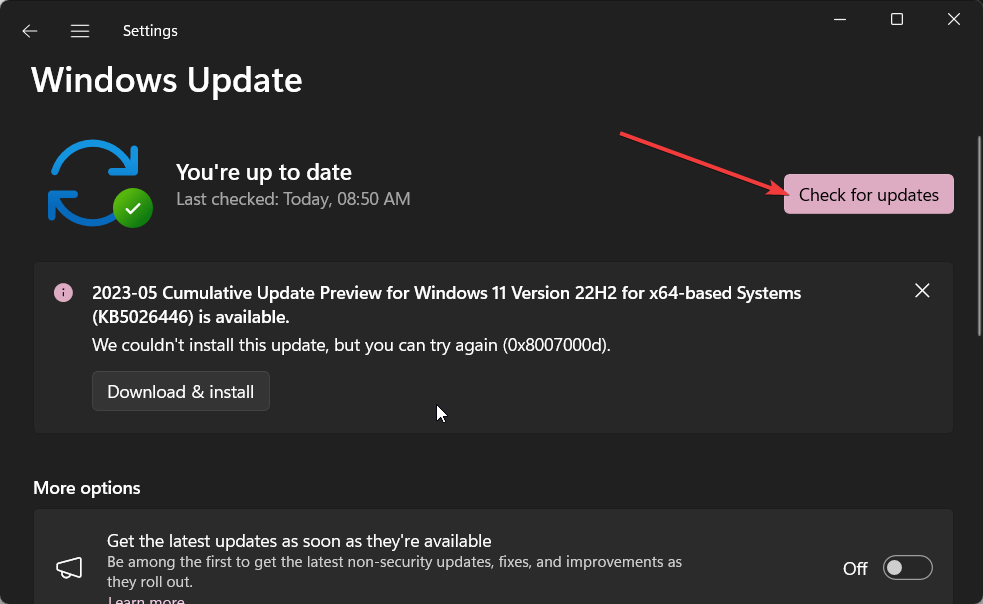
Click on the Check for updates option.
If there is a pending update, then hit the Download and install button.
Well, you should make sure that you are running the latest version of the update installed on your PC to avoid coming across certain glitches.
New updates not only bring new features, and improve stability and performance, but they also fix various underlying bugs, which could be causing the You must be an administrator running a console session error.
That is it from us in this guide. In case, the SFC Scannow is not working on your computer, then you can apply the solutions mentioned in our guide to resolve the issue.
We have also mentioned different ways that can help you fix the corrupt system files on your PC. You should know these tips as they can come handy if things go south.
Let us know in the comments below, which one of the above solutions fixed the You must be an administrator running a console session error.
You may get the error code 0x80040154 when attempting to launch specific Windows applications. This error is more common when launching Microsoft apps like Mail or Photos.
Numerous elements may contribute to this error. In this guide, we discuss these causes and offer some practical solutions to fix the error.
Why am I getting the 0x80040154 error when opening apps?
Corrupt system files – The functioning of your computer may suffer if system files are corrupted. Opening specific programs may result in problems like 0x80040154 as a result of this.
Outdated drivers – If your drivers are outdated, your computer’s functions may be affected, resulting in errors when opening specific programs.
Malfunctioning antivirus program – There are chances that a malfunctioning antivirus program can also cause the 0x80040154 error.
Missing or corrupted DLL file – It’s possible that the DLL file that the application you’re attempting to open depends on is missing. This can happen because of an incorrect installation, malware infestation, or unintentional deletion.
An outdated OS – Some apps may lose proper operation and trigger the error if you have ending updates.
What do I do if I get the 0x80040154 error?
First, we recommend you try these workarounds before further troubleshooting:
Download DLLs if indicated in the error message.
Run a virus scan to eliminate the chances of the problem due to malware infection.
Type cmd and hit Ctrl + Shift + Enter to open an elevated Command Prompt.
Type in the script below and hit Enter. sfc /scannow
Input in the scripts below, hitting Enter after each one. DISM /Online /Cleanup-Image /CheckHealth DISM /Online /Cleanup-Image /ScanHealth DISM /Online /Cleanup-Image /RestoreHealth
Finally, wait while the scan runs. In the end, restart the computer and verify if it fixes the 0x80040154 error.
If you need another way to scan your PC more in-depth and fix potentially corrupted files, you could also use an effective PC repair solution with enhanced technologies.
4. Repair the problematic applications
Press Windows + I to open the Settings app.
On the left pane, click Apps and select Installed Apps on the right.
Scroll to the problematic app, click its 3 dots, and select Advanced options.
Under the Reset category, click the Repair button, then click the Reset button.
Finally, reopen the application and see if it fixes its 0x80040154 error.
5. Update your drivers
Right-click the Start icon, and select Device Manager.
Expand the category relating to the problematic app, right-click the driver, and select Update driver.
Click on Search automatically for drivers.
Finally, follow the prompts to get the latest drivers.
If you have read this far, you should be able to open the problematic application. In rare situations, you may need to reset the OS, which may lead to some data loss.
And this is as much as we cover. Please contact us in the comments section and let us know which of the fixes have been effective for you.
Steam error code e84 is a common problem that almost everyone has encountered at least once while using the platform. The error message will appear on the screen, preventing you from accessing your account.
Similarly, we’ve touched base on the Steam error E20, so ensure you check out how to resolve it. In this article, we dig deeper and discover the main triggers of this error and how to bypass them.
What is the error code e84 on Steam?
This error can be frustrating as it may cause your game to stop working or even prevent you from logging into your Steam account altogether.
A few of the reasons behind this error include:
Outdated Steam client – Your Steam client may be outdated, causing a conflict with the platform’s functionality.
Network issues – This error often occurs when there are problems with your network connection. It could be a wide range of issues, from network congestion to bandwidth limits or interference.
Date and time settings – If your system clock is not up-to-date, your Steam client may experience some issues starting up. This also leads to Error Code E87.
VPN interference – If you’re using a VPN, your chosen server may have issues preventing you from logging in.
How do I fix the Steam website error?
Try the following workarounds before any complex troubleshooting:
Check your internet connection and ensure that you have an active connection.
Ensure your Steam client is up-to-date.
Switch from a wireless connection to an Ethernet cable if available.
You’ll be prompted to enter the email address or phone number connected to your account. Fill in the details, then click on I forgot my Steam Account name or password.
You’ll receive a verification code to your email address or phone number depending on the information you entered in 3 above.
Either click the link sent to you via email or enter the code sent to your phone number to verify your identity.
Next, click the Reset my password option and enter your new password.
This happens to be one of the most upvoted solutions for the error code e84 on Steam. According to this thread on the Steam community platform, most users claim to reset or changing their passwords was the breakthrough they needed.
Yes I’m from the beta client. I fixed the problem with changing my password to new one and changed it again. But the problem now it that the community market is banned from use for 1 week.
2. Edit the Steam shortcut
Find the Steam executable file in the following location: C:\Program Files (x86)\Steam
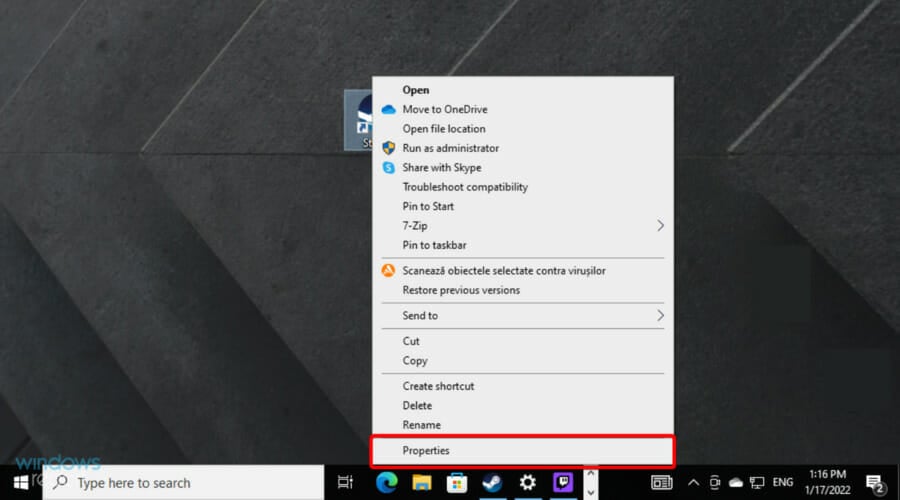
Right-click on it and select Properties.
Navigate to the Shortcut tab, and in the Target entry, type in -noreactlogin at the end.
Click on Apply, then OK to save changes.
This solution loads up the old Steam login screen, and you can sign in with no issues.
3. Clear browser cache
For this step, we shall be using the Chrome browser.
Launch your Chrome browser and click the three vertical ellipses in the top right corner.
Select Settings.
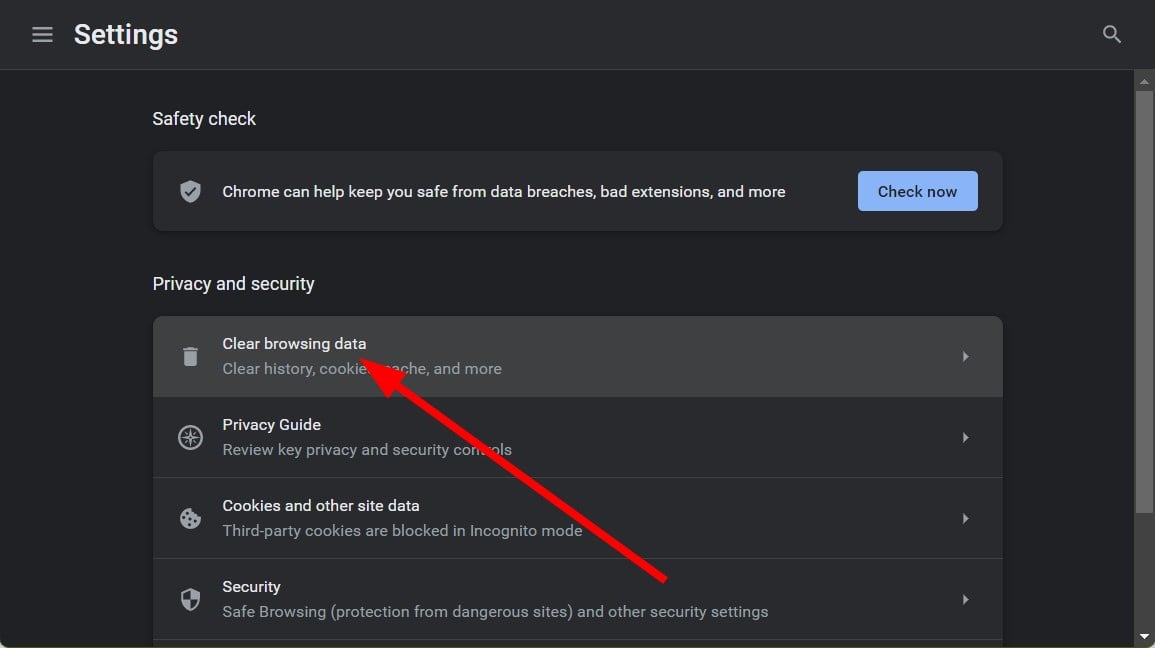
Click on Privacy and security, then select Clear browsing data.
Check Cookies and other site data and Cached images and files, then hit Clear data.
4. Disable VPN
Press the Windows key and select Settings.
Next, select Network & internet and click on VPN in the right-side menu.
Select the VPN connection you want to disable, click on the drop-down and select Remove.
In other instances, enabling the VPN could also help resolve the issue.
Left-click the Start button, input Steam in the search box, and select the Steam client from the search results.
Go to the SteamLibrary at the top of the screen and locate the game you want to run in compatibility mode.
Right-click the game title and select Properties from the drop-down.
Navigate to the Local Files tab, and click the Browse Local Files option.
Find the game’s executable file, right-click it, then select Properties from the drop-down.
Navigate to the Compatibility tab and check the box for Run this program in compatibility mode, then choose the operating system.
Click OK to save the changes, then Apply.
If all else fails, you may have to reinstall Steam. Other users have also gotten assistance by contacting Steam support, so before reinstalling the app, try reaching out.
A slow and underperforming PC could make carrying out simple tasks difficult. To avoid this, you must always keep your system optimized. To do that, you need an optimizer tool like Auslogics BoostSpeed.
This tool offers a range of features to enhance your computer’s performance and make it more stable. This guide will explore how the tool optimizes your machine after discussing its important features.
Why do I need optimization software?
Computers tend to get cluttered and slow down with use, meaning that your daily activities on your PC will start taking longer or get interrupted by various glitches. Nobody likes that!
To improve the performance and increase the reliability of your PC, you need a maintenance tool. Here are some advantages of using an optimizer:
Declutters & recovers space– Eliminates unnecessary files, cleans up clutter, and optimizes system settings to improve the computing experience.
Disk optimization – Analyzes storage and removes temporary files, duplicate files, and other unnecessary data, retrieving space on your hard drive.
Registry cleanup – Scans and cleans up invalid registry entries, improving system efficiency and reducing the likelihood of registry-related errors.
Regular maintenance – Allows you to schedule automated scans, ensuring that your computer remains in good shape without requiring manual intervention.
While optimization software offers significant benefits, choosing a trustworthy program, such as Auslogics BoostSpeed, is essential for maintaining optimal PC performance and security.
What are the best features of Auslogics BoostSpeed?
1. Offers easy one-click scan and repair
For busy users wanting to maintain their computer in good shape, BoostSpeed provides a one-click scan functionality allowing you to run comprehensive PC diagnostics with just one mouse click. The scanner checks for issues that could be resolved automatically without requiring input from the user. Hitting ‘Scan’ launches a full checkup of your PC looking for the following:
Unneeded files cluttering your disk space
Invalid registry entries and other items that might be reducing your system stability
Potential factors that might be reducing overall PC performance
Disk fragmentation that might reduce data access speed
Items that may potentially undermine your privacy
When the scan completes, simply click the ‘Resolve’ button to have BoostSpeed go through the detected issues and get them taken care of. If you’d like, you can review the scan results and uncheck any items you don’t want the program to process. While the main Scan & Repair feature provides essential maintenance assistance, BoostSpeed’s other tools and elements let you run even more in-depth cleanup and optimization.
2. Cleans up unwanted files & recovers space
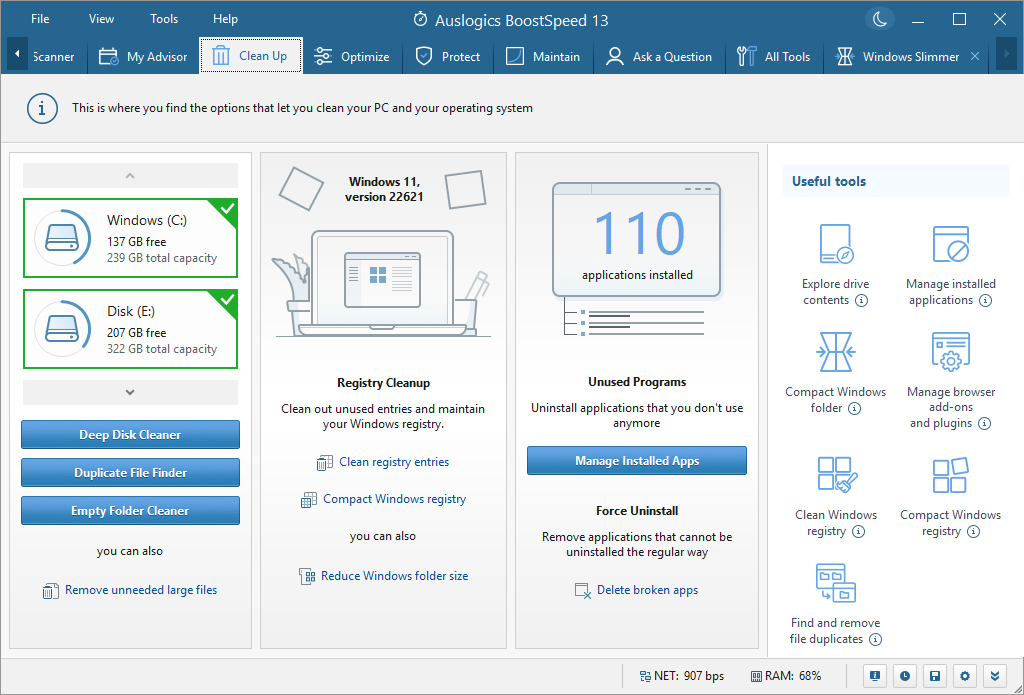
With the Cleanup feature, BoostSpeed allows you to choose a drive and run a disk cleaner to optimize the disk accordingly.
It also has the option to find & remove duplicate files, large files, and empty folders to retrieve space on your hard drive.
Moreover, this section allows you to remove unused registry entries and maintain the registry and stability of the device.
The tool also allows you to manage your installed applications on your computer. You can uninstall the redundant apps along with the leftover files with ease.
With the Windows Slimmer option, the tool can reduce the folder size to recover space on your Windows machine.
2. Optimizes your computer for better functionality
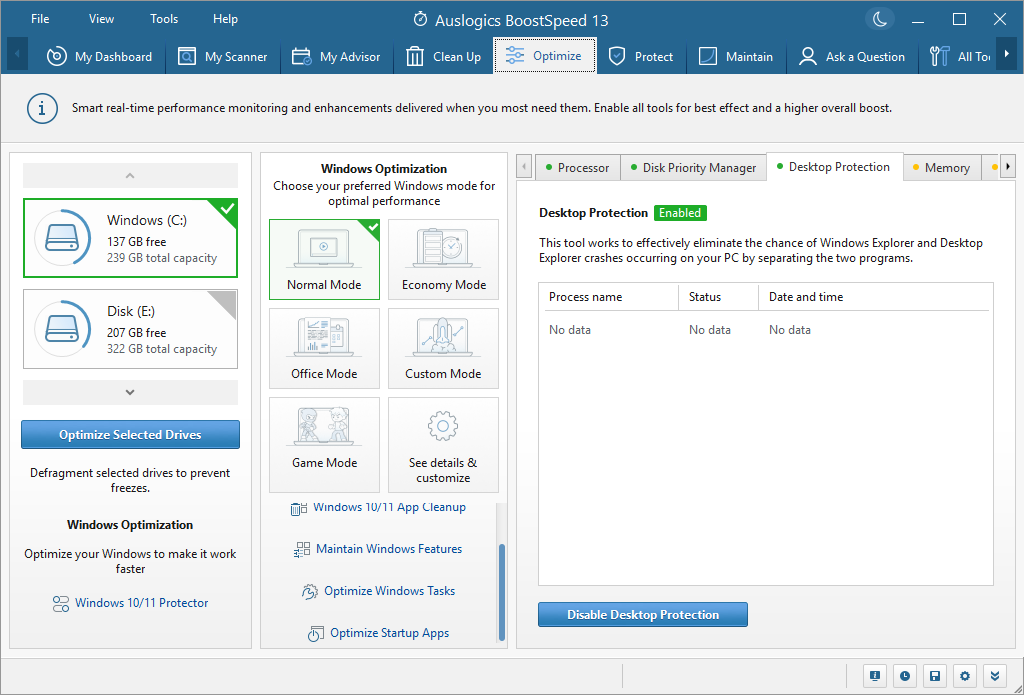
As the tool name suggests, it allows you to optimize the selected drive to make Windows run faster. Select the disk and click Optimize Selected Drives; it will run disk defragmentation to avoid freezes.
You can also enable the Auto Defragmentation feature so that the tool can optimize the SSD as soon as the fragmentation levels get high.
It has several modes to choose from per your computing needs, including Normal, Economy, Office, Custom, and Game, for optimal performance.
The tool monitors processor and PC memory usage and ensures optimal allocation, promoting the most effective processor usage and making your application launch faster.
BoostSpeed also monitors requests by applications to access data on disk and gives priority access to programs that the user currently uses.
3. Removes privacy traces
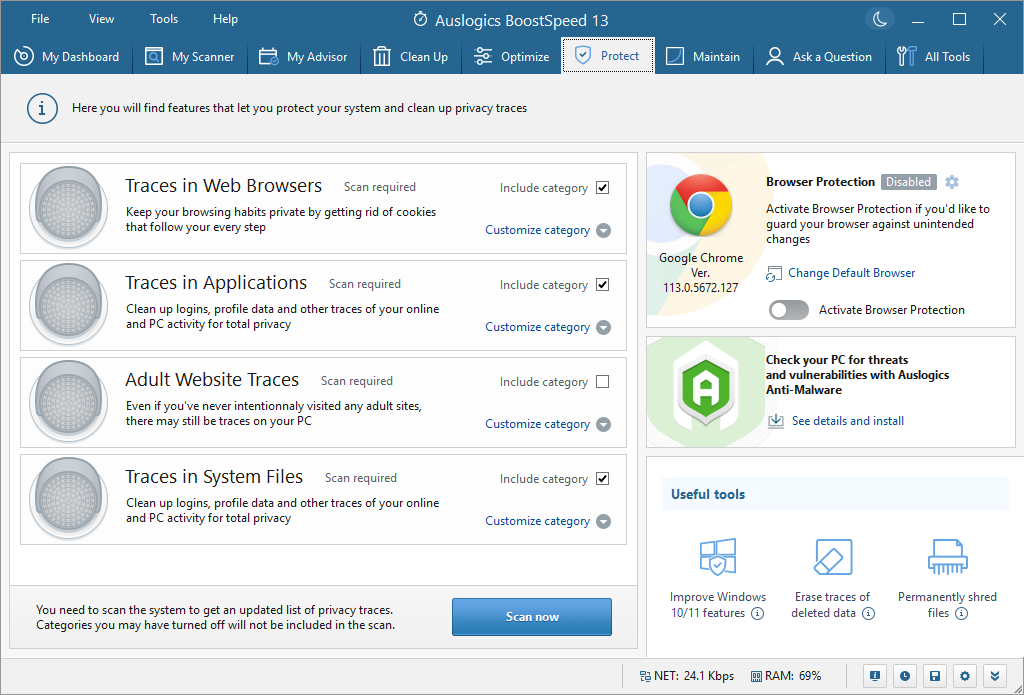
This section scans and removes the cookies and keeps your browsing habits private. It also cleans up logins, profile data, and other traces of your computer and online activity related to system files and installed apps.
The tool has a Browser Protection feature, protecting your browser from unwanted changes. It also gives you the option to change your default browser.
BoostSpeed can also help you securely delete files and folders so private information can’t be recovered.
Even after deleting files, it still takes some space on your PC until overwritten. With the Free Space Wiper option, the tool can permanently erase deleted files so they will not be restored.
The Windows 10/11 Protector prevents applications from displaying personalized ads & tracking your location and stops Cortana from storing personal information.
4. Maintains overall health
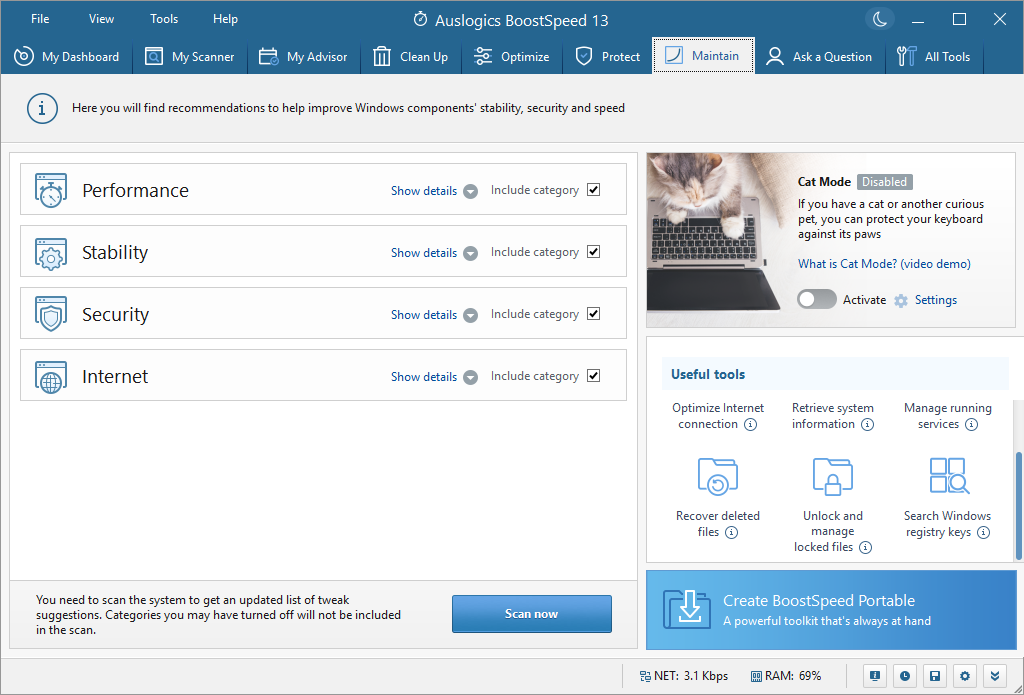
This tab provides options for improving Windows components’ stability, security, and speed. You can run a scan to know more. Once the results are displayed, examine and click Apply if needed.
If you have a pet, this feature is for you. The tool also comes with Cat Mode; enable it and protect your keyboard against its paws.
BoostSpeed also allows you to optimize your Internet connection, retrieve system information, manage running services, recover deleted files, and more.
The inbuilt file recovery option allows you to search for deleted files and restore them in a few clicks.
It also allows you to create a portable app of the tool to keep it with you wherever you go.
How can I use BoostSpeed to maintain a Windows PC?
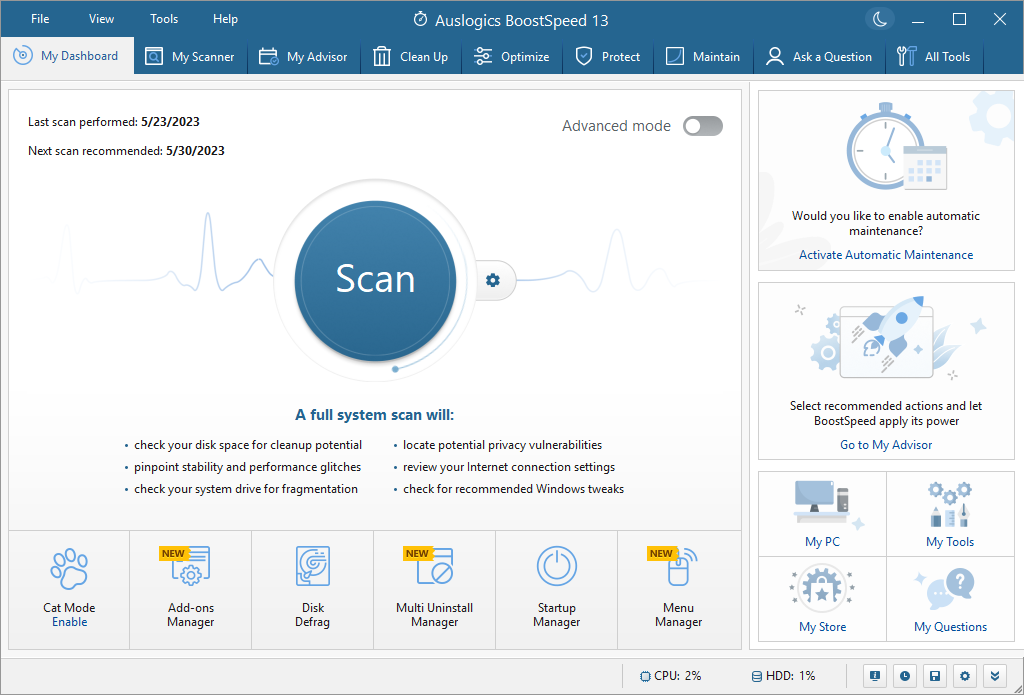
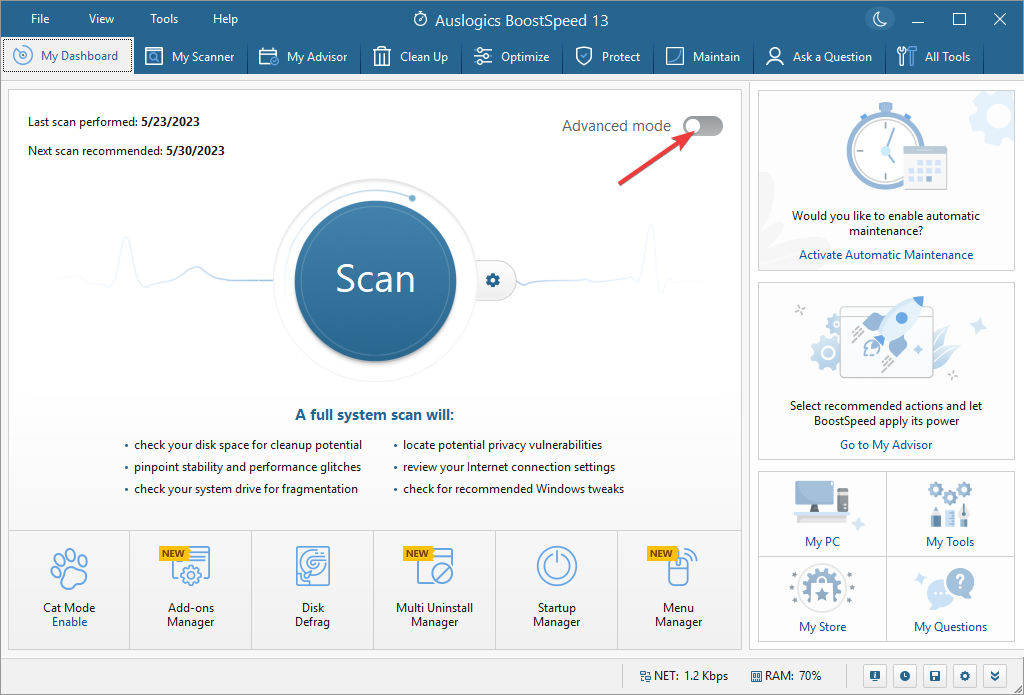
Once the tool is launched, you will be greeted with the My Dashboard screen; it gives you the option to switch between Basic and Advanced (advanced cleaning and optimization). There are several other tabs to choose from:
My Scanner – Lists all the areas you can scan, including Disk Space, Stability, Performance, and more.
My Advisor – Provides direction as per your optimization needs. Choose any option and click Scan now or Clean up now to optimize.
Clean up – Presents options to remove junk files, duplicate files, and empty folders on your hard drive.
Optimize – Allows you to optimize drives and perform processor optimization to boost PC performance.
Protect – Scans and removes the privacy traces in web browsers, applications, and system files. It also has the Browser protection mode to ensure no changes are made without permission.
Maintain – Gives recommendations to improve the Windows component’s stability, security, and speed.
Add-ons Manager – Allows you to manage extensions of all the browsers installed on your computer.
Ask a question – Enables you to get technical support for the app’s features right.
All Tools – Lists all the tools and features available within the BoostSpeed 13 app.
Choose any tabs and select tools to run customized scans for better results. If you cannot decide what to do, move to the next section.
3. Run a scan and optimize
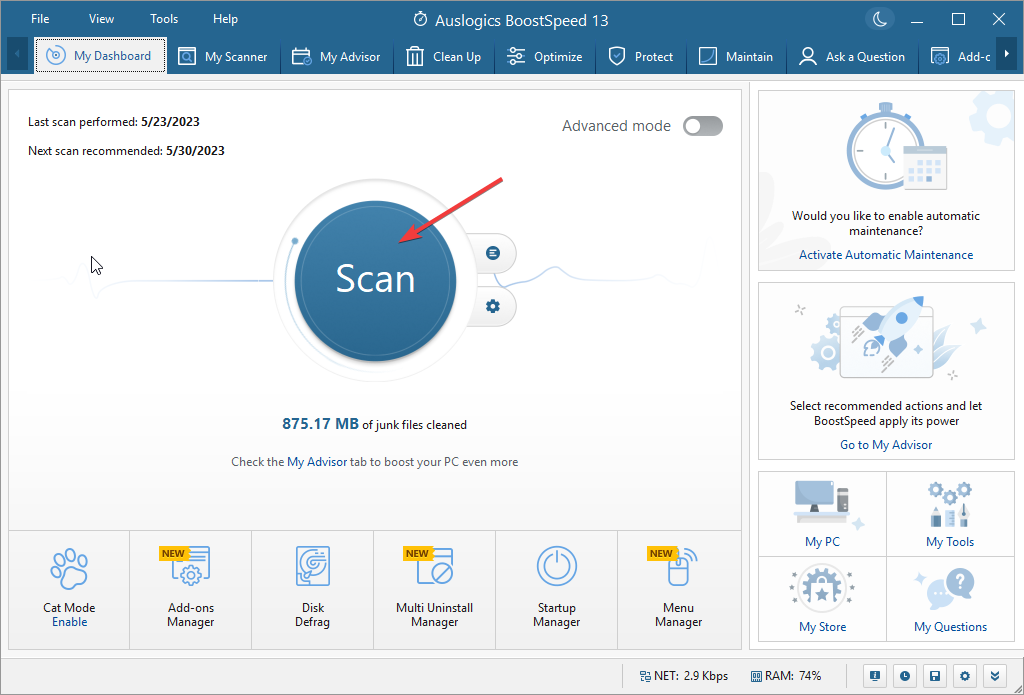
For first-time users, we recommend clicking the Scan button from the My Dashboard tab.
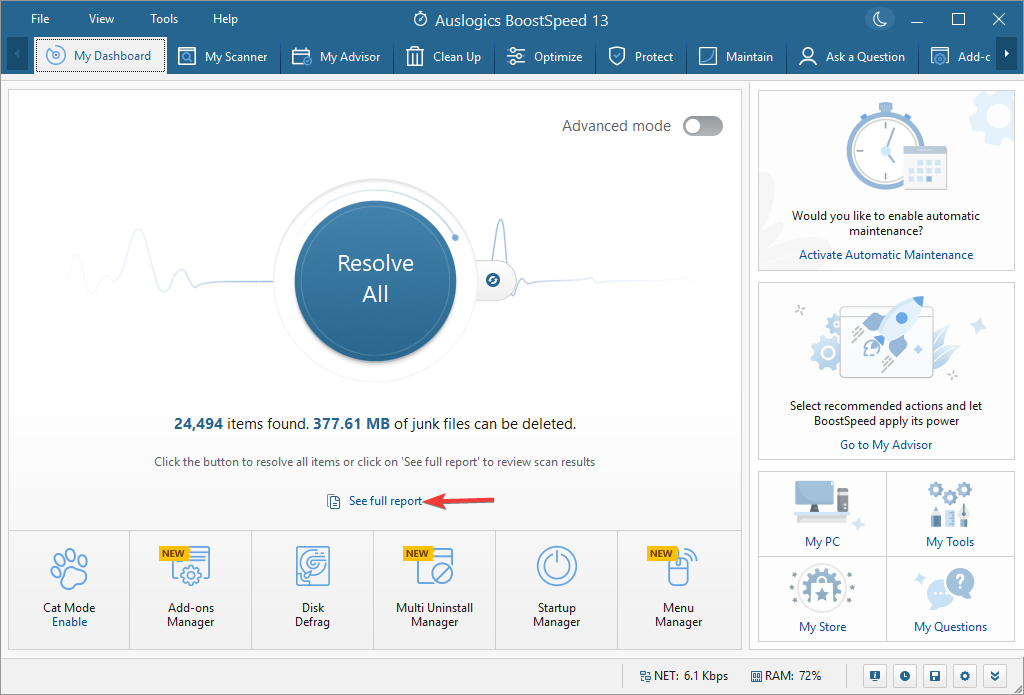
Once done, the tool will run a scan and show you a full report. Click See full report.
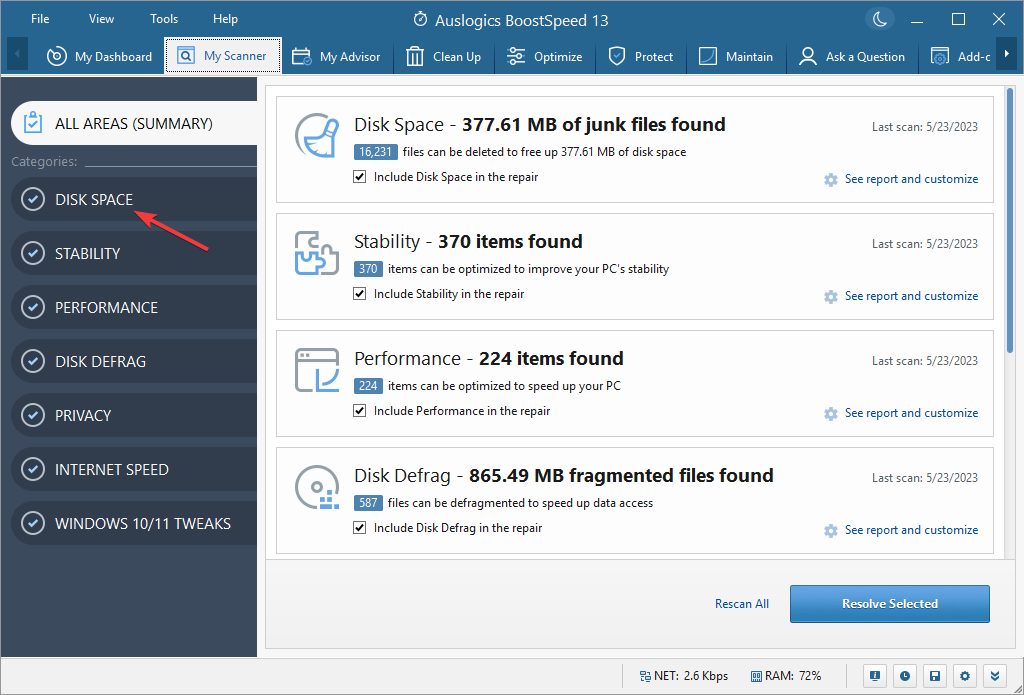
On the next page, the results will be divided into sections such as Disk Space, Stability, Performance, Disk Defrag, Privacy, Internet Speed, and more.
To see the detailed report on these sections, click the suitable option from the left pane.
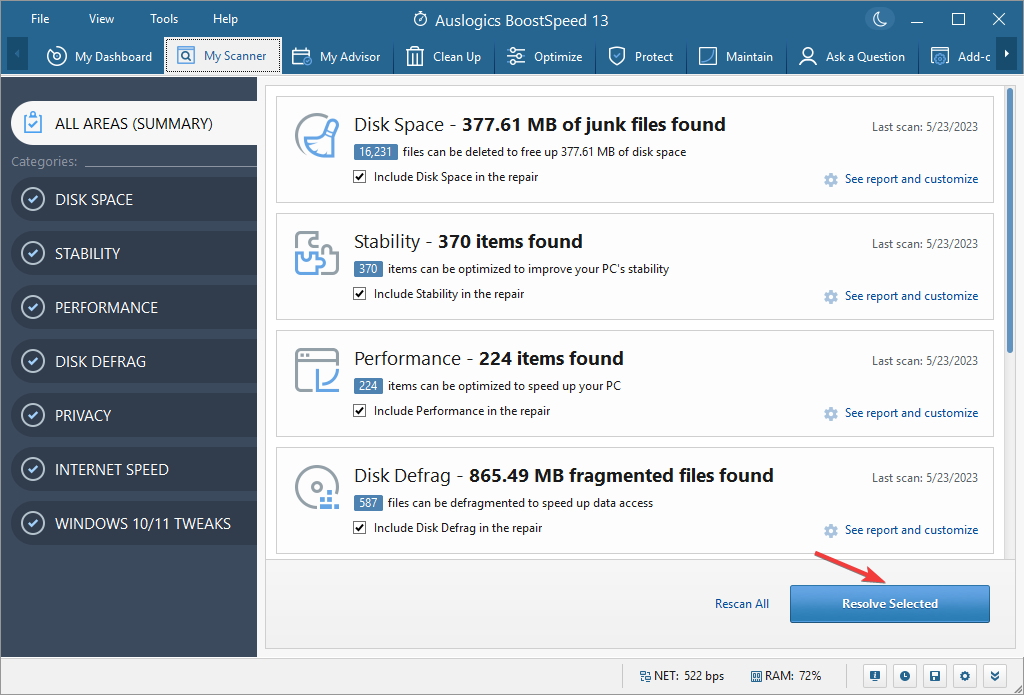
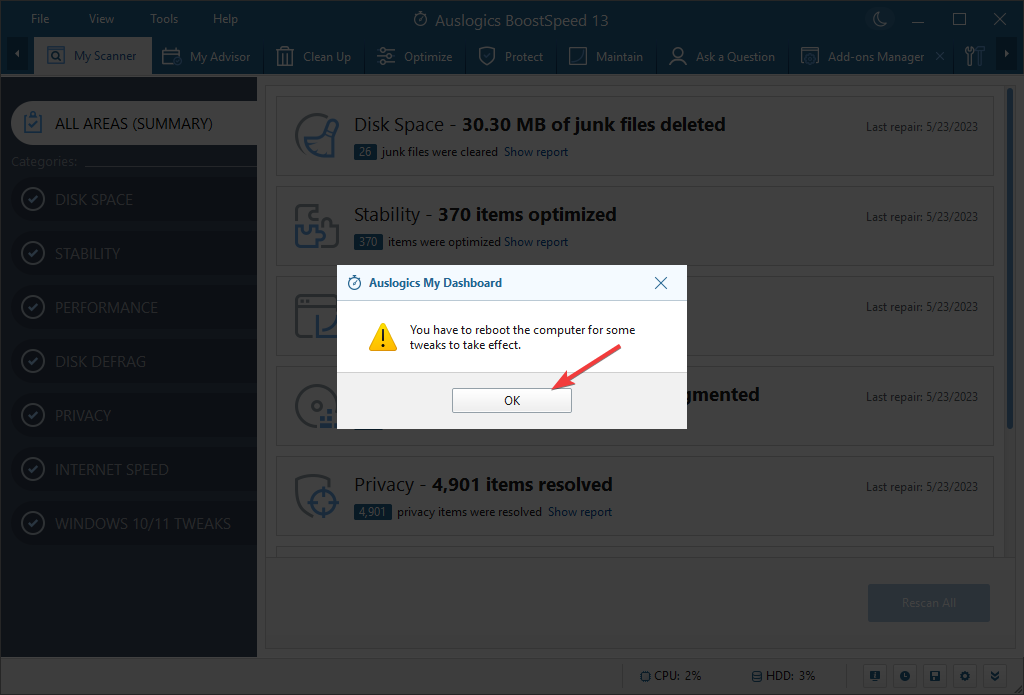
Once you have checked the details, you can click Resolve Selected.
It may ask you to close the app and browsers running on your computer. The optimization process may take some time, depending on the tasks. Once the work is complete, click OK.
Reboot your machine to let the changes take effect.
Auslogics BoostSpeed
Power up your PC for peak performance and more stability with BoostSpeed.
So, this is how you can use Auslogics BoostSpeed to boost your PC’s speed and performance, allowing you to unleash its full potential.
BoostSpeed offers comprehensive tools to optimize your Windows computer, from cleanup and disk defragmentation to registry cleaning and startup management.
The user-friendly interface and customizable options make it accessible to users of all technical levels. While using this app, we found it does everything it promises and highly recommend it to maintain your system health.
So, get BoostSpeed today to take your PC performance to new heights and get a faster, more responsive computing experience.
If you have any questions or suggestions, feel free to mention them in the comments section below.
Encountering a Page Fault in Nonpaged Area error on Windows 10 indicates a problem with your computer’s memory or drivers, causing system crashes or the infamous Blue Screen of Death (BSoD).
In this guide, we will explore various techniques and solutions to resolve this error on Windows 10 to ensure the stability and smooth functioning of your Windows 10 system.
Why the Page Fault in Nonpaged Area error occurs on Windows?
There could be various reasons for the error; some of the common ones are mentioned here:
Faulty or incompatible RAM – Problems with your computer’s RAM modules can trigger this error. Check for faulty hardware and improper installation of components on the motherboard.
Corrupted system files – If essential system files become corrupt or damaged, it can lead to this error. Try running an SFC scan to repair the system files.
Outdated or incompatible device drivers – Incompatible or outdated drivers, especially those related to disk drives, graphics cards, or network adapters, can cause conflicts and result in this issue.
Hardware issues – Faulty hardware components, such as a failing hard drive, faulty cables, or problematic peripherals, can contribute to this error.
Overclocking – If you have overclocked your CPU or RAM beyond stable limits, it can lead to memory-related errors, including this one.
Now that you know the causes, let’s dive in and troubleshoot this frustrating error together.
How can I fix Page Fault in Nonpaged Area error on Windows 10?
Before engaging in advanced troubleshooting steps, you should consider performing the following checks:
Check your PC’s RAM for dirt and debris and verify if they are properly seated.
Once you have conducted these checks, let us move on to the solutions to fix this problem.
1. Run SFC and DISM scans
Press the Windows key, type cmd, and click Run as administrator.
Type the following command to repair system files and hit Enter: sfc/scannow
Wait for the command to complete, then copy & paste the following command to repair Windows OS files and press Enter: Dism /Online /Cleanup-Image /RestoreHealth
Once the command is executed, restart your PC to let the changes take effect.
Using this Windows scan process may help you, but it’s not guaranteed it will solve the error altogether.
Hence, you can make sure to entirely diagnose and fix corrupted system files using a high-end system repair tool.
2. Check the disk
Press the Windows key, type cmd, and click Run as administrator.
Type the following command to check the disk & attempt to repair sectors on your hard drive and hit Enter: chkdsk /f /r
It scans your hard drive for corrupted files, repairs bugs, and cleans up disk space to maintain your computer’s health.
3. Update the device drivers
Press Windows + R to open the Run console.
Type devmgmt.msc and click OK to open the Device Manager.
Check all the critical drivers, such as graphics cards, network adapters, and device processors; here, we will demonstrate how to update drivers by using graphics cards.
Locate and Display adapters, right-click the driver, then select Update driver.
Click Search automatically for drivers.
Follow the onscreen instructions to complete the process.
Now check all the important device drivers to ensure all are updated and installed correctly.
If the manual process didn’t solve the Windows issue, you can better update the driver fully automatically with a dedicated driver app.
Press the Windows key, type windows memory diagnostic, and click Open.
Select Restart now and check for problems (recommended). Before choosing this option, ensure you have saved your work and closed all the other windows.
Your computer will restart, and the scan will initiate. It might take up to 20 minutes. Once done, the PC will restart again, and you can see the results once you log in.
If there are no errors listed after the scan, but the error persists, then try to restore Windows to the previous version or reset your PC. However, there are errors; chances are your RAM is faulty. Try unseating and cleaning the memory and other slots. If other hardware problems are detected, we have an expert guide on how you can navigate this issue.
So, these are methods you can follow to fix the Page Fault in Nonpaged Area error on Windows 10. If nothing has worked for you, then you might have to replace the hard disk on your machine, as it could be the sole reason for the error.
Please feel free to give us any information, tips, and your experience with the subject in the comments section below.
CVE-2023-29336 has caused a great deal of damage to all versions of Windows. The vulnerability has a CVSS score of 7.8, and it offers an elevation of privilege to whoever successfully exploits it. Basically, if your computer would be affected by this vulnerability, you could lose all access to it.
The vulnerability resides within Win32k.sys Windows component, which is an integral driver file in the operating system. This driver file provides the interface between the user-mode applications and the Windows graphical subsystem. From there, PCs can be easily exploited in attacks.
Microsoft addressed this CVE-2023-29336 vulnerability last month, with the release of May Patch Tuesday. And, to make matters urgent, the vulnerability was being actively exploited at the time of the release.
One month later, researchers from the cybersecurity Numen Cyber published an in-depth analysis of the CVE-2023-29336 vulnerability, along with a PoC (proof of concept) exploitation of it on Windows Server 2016.
You’re still at risk of a CVE-2023-29336 vulnerability attack if you’re not on Windows 11, 10
According to the research, exploiting this particular vulnerability is not really a challenging task. This means everybody with a bit of hacking talent can attack your computer. And if you’re not yet on Windows 11, or 10, who received critical updates, especially for this vulnerability, then you might be at significant risk.
Exploiting this particular vulnerability does not generally pose significant challenges. Apart from diligently exploring different methods to gain control over the first write operation using the reoccupied data from freed memory, there is typically no need for novel exploitation techniques.While there may have been some modifications, if this issue is not thoroughly addressed, it remains a security risk for older systems.
Numen Cyber
So, if you’re operating with sensible data on older Windows versions, you might want to update to either Windows 10 or 11. And if you’re afraid that you will lose your data while doing so, you should know that you can update to Windows 11 and keep your files.
The security firm also posted the code of the exploit on GitHub. If you’re interested to see the few hundred lines that have been destroying PCs for a while, take a look.
However, the Win32k.sys flaw which allows for the CVE-2023-29336 vulnerability to happen is non-exploitable on Windows 11.
But the older Windows versions are not so lucky. And maybe this research encourages others to get on Windows 11 as soon as possible.
What do you think about this vulnerability? Do you have any experience with it? Let us know in the comments section below.
We already shared the fact that Google is about to drop Drive support for older versions of Windows, such as 8, 8.1, and 10 32-bit.
Even though we’re about to talk about something else, we are still going to focus on Google and the Windows operating system.
Google has made major improvements to how passwords are stored inside Chrome recently, taking some of its best features from its mobile browser and applying them to the desktop.
Undoubtedly, the relationship between the Chrome browser and password managers has been a bit of a slippery slope, in terms of which app holds the keys to your digital life.
The Google company already offers to store your passwords within the Google Cloud, offering additional features such as trolling the deep web to ensure that they haven’t been leaked as part of a breach.
Today, Chrome is about to get some new key features. We’re looking at a quick shortcut to your passwords from the desktop, and the ability to import passwords stored elsewhere.
But wait, there’s more. Perhaps most importantly, we are getting the ability to use biometric identification to unlock your password vault on the desktop browser.
Furthermore, we’ll also be able to add notes to a password file, to identify a PIN or store other useful information.
This mentioned note will also be securely stored, with the same protections applied to the password. There’s even more good news, as the Password Checkup feature is also coming to iOS.
Let’s focus on the main improvement, which is biometric authentication. When using mobile devices, that generally means using a fingerprint scanner to unlock the password vault or identify yourself to an app.
On Windows PCs, Google will use whatever biometric methods are available, such as Windows Hello depth cameras.
Keep in mind that this is an optional feature, one that provides a powerful layer of security that takes little effort.
Another important detail here is that facial logins via Windows Hello can be wonky sometimes, as you shave or grow a beard, for example.
That being said, the main philosophy here is that if Windows Hello works for the Windows OS, it will work for Chrome as well.
Know that Google has also added a home option for managing passwords within Chrome, via the new Password Manager heading in your Chrome settings menu.
What are your thoughts and opinions on this topic? Be sure to let us know in the dedicated comments section below.
Want to experience the latest features and functionalities of Windows 11 on your Chromebook? While Chromebooks are designed to run Chrome OS, there are alternative methods to install Windows 11.
In this guide, we will explore quick ways to install Windows 11 on a Chromebook, allowing you to expand your operating system options and unlock the full potential of Microsoft’s latest OS.
If you want to install Chrome Flex on Windows 11, we suggest you check out this guide for detailed instructions.
How can I install Windows 11 on a Chromebook?
Before proceeding with any steps for installing the operating system, go through the following preliminary checks:
Make sure you are always connected to the internet.
Ensure that your device meets the minimum system requirements for running OS.
Back up all your important files and data on your machine.
Chromebook should support Kernel-based Virtual Machines. (applicable to 2nd method)
Should have at least 80GB of space in the Linux partition, as Windows 11 needs 64 GB of storage (applicable to 2nd method)
Download Windows 11 ISO file from the official website and copy it to a USB flash drive. (applicable to 1st method) or on the Chromebook (applicable to 2nd method)
A USB keyboard with functions key and mouse. (applicable to 1st method)
Once you have checked all these, let us check the steps to install Windows 11 on your Chromebook.
1. Direct Installation
Things you must know before proceeding with this method:
Installing Windows on Chromebook might get your device out of warranty.
Once the process is complete, you won’t be able to revert to ChromeOS.
All your data will be erased from your device, so if anything is important, back up first.
There is a slight possibility that the device may break down while flashing the firmware.
If you are OK with all these things, you can proceed with the steps mentioned. If not, then follow the next method to get it done.
1.1 Check the Chromebook compatibility & copy the code name
Once you have located your machine, make a note of your Chromebook Board Name, as it will be used in later stages.
If your device is supported, you can proceed with this method; otherwise, we advise you not to move as it could harm your machine.
1.2 Disable hardware write protection
Next, you need to disable hardware write protection on your Chromebook. The process may vary from one device to another. For older models, like the 2013 ones, you need to use the switch or the jumper to deactivate it.
On the newer models, like the ones in 2014 & 2017, you need to unscrew the back panel and remove a screw from the laptop’s motherboard. However, for the models after 2017, you can temporarily disable the CR-50 security chip by removing the battery and running the device on a power adapter.
1.3 Enter the developer mode
Press Esc + Refresh + Power buttons on your keyboard to enter the Recovery mode.
Press Ctrl + D and hit Enter when you see the screen. This will disable OS verification OFF after a restart.
Once restarted, press Ctrl + D to enter the Developer mode.
Before you paste the Terminal commands in the next section to install QEMU and Virtual Machine Manager, review how to copy and paste on Chromebook so you can move commands and settings accurately.
1.4 Flash new firmware to allow to boot of Windows
After going through the step-up process, open the Chrome tab, and press Ctrl + Alt + T to open crosh window.
Now type shell and hit Enter.
Copy & paste the following commands one by one and press Enter after every command:
This will download supporting files. Once done, you will see a screen with the information on your device. Check if Fw WP is Disabled, then from the options available, type 2 and hit Enter to initiate the Install/update UEFI Full ROM Firmware.
For the prompt, Do you wish to continue, type y to proceed and hit Enter.
If you see a prompt saying Create a backup copy of your stock firmware?, type n and press Enter.
It will now download the Full ROM firmware. Once the flashing is successful, press Enter to return to the main menu and turn off the computer.
1.5 Initiate the Windows installation
Plug in the USB flash drive with Windows 11 ISO and the USB mouse, and turn on your Chromebook.
If you see a command line screen, type exit and hit Enter.
Now use the arrow keys to select the boot menu and choose the USB drive to boot off.
On the Windows Setup screen, choose the Language to install, Time and currency format, Keyboard or input method, and click Next.
Click Install now.
If you don’t have access to the product key at the moment, select I don’t have a product key, and you can add it later.
1.6 Modify the registry entries
When you are on Select the operating system you want to install screen, press Shift + F10 to open Command Prompt.
Type regedit and press Enter to open Registry Editor.
Navigate to this path: Computer\HKEY_LOCAL_MACHINE\System\Setup
Right-click to get New, then choose Key. Name the key LabConfig.
Now select LabConfig, right-click to get New, then select DWORD (32-bit value). Name it BypassCPUCheck.
Create four more DWORDs using Step 5. Name them as BypassRAMCheck, BypassSecureBootCheck, BypassStorageCheck & BypassTPMCheck.
Double-click BypassCPUCheck and change the Value data to 1 and click OK.
Do the same for all the freshly created DWORD entries. Once done, close the Command Prompt and Registry Editor window.
On Select the operating system you want to install screen, choose the operating system, and click Next.
Select Custom: Install Windows only(advanced) on the next screen.
Remove all the partitions except Drive with Unallocated Space and click Next.
Once done, Windows will restart; you can remove the flash drive once the system is shut down and follow the on-screen instructions to complete the process.
1.7 Installing the drivers
Once the Windows setup is complete, login, open a browser, and go to the Coolstar website.
Go to Windows 10/11 OS, and click Install.
Now type the Board Name of the device you noted in Solution 1.
You can download the drivers listed here to complete. The critical ones are Visual C++ Redistributable, Chrome EC Driver, Keyboard Remappings, and Coolstar SST (cAVS) Audio.
Expand the ones you want to download, click the link, double-click the installer file, and follow the onscreen prompts to complete.
Click the Settings icon from the Quick Settings panel.
Now click Advanced in the left pane, and click Developers.
Once you are in the Developers menu, locate the Linux development environment (Beta) and click Turn on.
Click the Install button and follow the onscreen instructions to complete the process.
2.2 Set Up QEMU & Virtual Machine Manager
Go to the Linux apps folder in the App Launcher and select Terminal.
On the Terminal window, type the following command to update all the packages and dependencies and hit Enter: sudo apt update && sudo apt upgrade -y
Copy & paste the following command to install QEMU and Virtual Machine Manager and press Enter: sudo apt install qemu-kvm libvirt-clients libvirt-daemon-system bridge-utils virtinst libvirt-daemon virt-manager -y
Once completed, close the Terminal.
2.3 Install Windows 11
Open the App Launcher, go to the Linux apps folder, and click Virtual Machine Manager.
On the Virtual Machine Manager window, go to File, and select New Virtual Machine.
Select Local install media and click on Forward.
On Create a new virtual machine window, click Browse.
On the next window, click Browse Local.
Navigate to the path where your downloaded Windows 11 ISO file is stored and click Open.
Click Forward.
Next, for Memory, select 4096 (4GB) and select 4 for the CPU cores.
For Create a disk image for the virtual machine, select more than 65 GB for disk space and click Forward.
You can Rename the machine as Windows 11 and click Finish.
If you get a prompt saying, Virtual Network is not active, click Yes to continue.
Once done, Windows 11 will boot on your Chromebook. You will get the setup screen, follow the onscreen instructions and choose the options appropriate to your requirements.
So, these are ways to install Windows 11 on your Chromebook quickly. The first method is for those who want to use just Windows OS on their Chromebook. However, if you want to use both Chrome and Windows OS on your machine, you must go with Solution 2.
Confused about which method to choose? You can read this guide to know which OS to keep between Windows 11 & Chrome OS to make the selection easier.
Please feel free to give us any information, tips, and your experience with the subject in the comments section below.
However, if you think that stopped users from using these obsolete versions or even discourage them a bit, you are far from the truth.
In fact, a lot of people are still using the above-mentioned versions of Windows, despite the alarming security risks.
And, since that wasn’t enough to convince you to upgrade, we’re here to tell you that you are going to lose access to another service if you don’t.
Versions prior to Windows 10 64-bit won’t have Google Drive
If the lack of support and security updates haven’t yet compelled you to upgrade your operating system, Google’s now turning up the heat to get on to a modern OS.
Starting this summer, Google will be discontinuing support for its Windows 8, 8.1, and Windows 10 Google Drive apps.
That’s right! Not only Windows 8 and 8.1 users will have to consider upgrading. On the off chance you are still running Windows 10 32-bit, you will have to upgrade to the 64-bit version.
A new Google Drive support page warns users to upgrade to Windows 10 64-bit for uninterrupted service.
Please keep in mind that, while web access to Drive will still be available, sync will stop working in August. Considering everything, we strongly recommend an OS upgrade.
Even though there’s steep competition between Google and Microsoft, just know that other companies are doing the same.
For example, Mozilla is also ending Firefox support for Windows 7, 8, and 8.1. You might think that this isn’t that urgent, but your access to these services will be restricted.
Don’t worry, as upgrading to Windows 10 is pretty straightforward. Not to mention that if you already have a licensed copy, it won’t cost you anything.
Statistics show that a lot of users are still running obsolete operating systems such as Windows 7, 8, 8.1, or even the good old Windows XP.
That being said, you have to be aware of the implications that not upgrading comes with. you are exposing your PC to malicious third parties that can easily extract information from you.
More and more companies are going to start dropping support for their apps on these old operating systems, so that’s something to definitely consider.
You should also seriously consider upgrading to Windows 11, which is the latest Microsoft-designed OS out there.
Have you considered upgrading to a supported version of Windows 10? Share your experience with us in the comments section located below.
Many of our readers are confused about what is the au_.exe file that is showing up on their Task Manager. Some have noted that this is a virus, while some term this as a file not at all harmful.
In this guide, we will discuss what is au_.exe file and whether you should remove it from your Windows computer or not. Let us get right into it.
What is the au_.exe file?
According to multiple reports, the au_.exe file is a malicious program that belongs to the rogue anti-spyware program called SpyFalcon. It masks itself as an anti-spyware utility but in fact, it is a Trojan.
On the other hand, some have reported it as the scripting engine, which is bundled with the majority of applications. Such programs use AutoIt either during the installation or uninstallation. Some of the popular programs that use au_.exe are listed below:
Flash Player (or Flash Player ActiveX)
Adobe Reader
Google Calendar
Registry Helper
Mozilla Firefox
Yahoo Toolbar
Spotify
Dragon Age (PC game)
TeamViewer
Razer Synapse
Since this file packs a script that auto-starts the script engine, you will see it in your Task Manager. The au_.exe file is usually found inside the C: / Users / YourUserName / AppData / Local/Temp / ~nsu.tmp location.
Should I remove the au_.exe file?
We have mentioned the location where you will usually find the file. In case the file isn’t present in the above-mentioned location and is found somewhere else, then you are dealing with a threat. Let’s take a look at the solutions on how to remove the au_.exe file if you need to.
How can I remove the au_.exe file?
1. Uninstall the associated program
1.1 From the Start menu
To open the Start menu press the Win key.
Click on All apps at the top-right.
Locate the associated app on the list. (Usually the program is the Yahoo Toolbar)
Right-click on the app and select Uninstall.
The above method is a simple process of removing the program that brings the au_.exe file as a bundled package. There is another method to remove the app mentioned below.
1.2 Uninstall from Control Panel
Press the Win key to open the Start menu.
Open Control Panel.
Select Programs and Features.
Select the app and click on Uninstall at the top.
Follow the on-screen steps to remove the program from your PC.
You can also select Scan options and choose Full scan to perform a deep scan of your PC.
You should always run a virus scan on your PC frequently and make sure that your PC isn’t infected with a virus, malware, or trojan. For that, you can use the Windows Security in-built tool.
However, in most cases, Windows Security isn’t as effective as a dedicated antivirus program. For that scenario, we have listed down some of the best antivirus programs that you can opt for and safeguard your PC.
One of the most popular options we often recommend is the TotalAV program because of its robust scanning engine and advanced heuristics, which helps you identify and eliminate trojans and other malicious threats in a second.
Navigate to the culprit program’s folder and delete all the files inside the malicious program’s folder.
Press the Win + R keys to open the Run dialogue.
Type regedit and press Enter.
Search for any entries related to the culprit program in the HKEY_LOCAL_MACHINE and HKEY_CURRENT_USER.
Delete any entries related to the culprit program and restart your PC.
You can also remove the entire files of the infected program by deleting the remaining Registry entries of the files after deleting all the remains from the installed folder. Simply follow the steps and check if the au_.exe file was removed from your PC or not.
That is it from us in this guide. Many of our readers have asked whether they should remove the WinThruster.exe file or not. You can check our guide and get information about the WinThruster.exe file and how to remove it.
We also have a guide that explains what is the Recenv.exe file and whether you should remove it or not from your PC.
Feel free to share your views on this guide and let us know if you got some information related to au_.exe reading this guide or not.
The Windows 11 Insider program followed up on the “no blog post” Canary Channel release from June 7th and a servicing pipeline build on June 6th with another one today, this one again “designed to test our servicing pipeline,” and again with no new features worth mentioning in a Windows Insider blog post:
Another small servicing update for #WindowsInsiders in the Canary Channel – Build 25387.1200 is now available. This update does not include new content and is designed to test our servicing pipeline. ^JH
When initiating an FRx installation that directs to a network SysData directory, this error 52: Bad filename or number may occur. Other workstations can also encounter this error; however, it is not always the case.
Switching to a local SysData directory resolves the issue, and the error message is no longer received. The matter at hand resembles the Runtime Error 217, which we have addressed in a previous guide.
Before we take any steps to address the issue at hand, we must examine its underlying cause.
What is Microsoft Runtime error 52?
This error occurs in Visual Basic applications, and the most common causes are the following:
Invalid file name – In case the file name is invalid, the code won’t be able to run, and you’ll get this error.
Unspecified file – If the file isn’t specified properly or if it’s closed, you’ll get this error message.
Out-of-range file numbers – Sometimes, a code might generate numbers that aren’t valid, thus causing this error to occur.
How can I fix Runtime error 52: Bad filename or number?
Uninstalling apps clashing in the background might prove effective in handling this error. Also, a program called Worldox found in Excel, locate and delete it, then restart your program.
1. Reinstall runtime libraries
Click on the Windows icon and open Settings.
Now click on Apps, next onApps & Features.
Find and highlight the Microsoft Visual C++ Redistributable Package, now click Uninstall at the top of the list.
We trust that this guide has effectively resolved your problem. Should you encounter any additional obstacles, we suggest looking into runtime error R6025 for similar solutions.
Your feedback would be greatly appreciated, so please leave a comment below and inform us of the most effective solution you found.
The Windows operating system contains a process called PhoneExperienceHost.exe, which handles all phone-related features. This includes managing notifications for incoming calls and messages, as well as other functions that are related to phone usage.
This error can cause the Phone Link app notifications problems, as observed In the related article. To address the issue, we need to delve into the root cause of it.
What Is PhoneExperienceHost?
This Windows service facilitates seamless synchronization between your Android device and PC.
The background process responsible for this magic is PhoneExperienceHost.exe, which actively runs on your PC and notifies you as soon as a notification pops up on your phone.
How can I fix PhoneExperienceHost high CPU?
Update Phone app and Windows – To resolve any internal issues with the app on your Windows PC, update your phone app and Windows OS regularly.
1. Reset or repair the phone link app
Select Start, click on Settings.
Now locate Apps, and click on Apps & Features.
Click on the three dots next to the app you want to fix.
Select the Advanced options under the name of the app (some apps don’t have this option).
Choose Repair or Reset if it’s available.
2. Uninstall Phone link
Right-click on Start and Choose PowerShell (Admin).
When User Account Control pops up, just click Yes.
In the new window, copy and paste the following command and press Enter: get-appxpackage *Microsoft.YourPhone* | remove-appxpackage
Lastly, exit the PowerShell and restart your system.
Click on the Startup Apps tab in the left panel of Task Manager.
Choose the Phone Link app.
Click on the available Enable or Disable button on the command bar for what you want.
If you happen to stumble upon the PhoneExperienceHost.exe error, don’t worry too much – typically, there’s a simple solution that usually requires you to disable Phone Link on your PC.
Our team sincerely hopes that this guide has been helpful to you. However, if you discover another solution, we would love for you to share it without hesitation.
The Office 365 suite includes some of the most used apps like Word, Excel, PowerPoint, and Outlook. However, getting the best out of it may not always be feasible as a few users may experience slow performance in Office 365.
While the cause may not be the app itself, there are a few ways to get around it, and in this guide, we walk you through every one of them.
Why is my Office 365 running so slow?
Low memory or storage space – Applications in the suite use many computer resources and may bug if you do not have adequate space on your device.
Many add-ins installed – Office 365 applications can come with add-ins, making the installation heavier and more resource-intensive.
Slow Internet connection – The applications are cloud-based, requiring an Internet connection. If you are using a slow internet connection, it can slow down the performance of Office 365.
Bad Office 365 installation – There may be a problem with your Office 365 installation, causing it to run slowly.
How do I fix slow performance on Office 365?
Before any major tweaks, try the following workarounds:
Close unused apps since multiple open applications may mean more stress on your computer and reduced performance.
Update your drivers since outdated drivers are often attributed to bad computer performance.
You may also consider reinstalling Office 365, as that may save you the trouble of further troubleshooting.
Change your ISP or connect to a wired network to ensure bad internet is not triggering the slow performance.
After the pre-solutions, you may continue to more detailed fixes below:
1. Disable unused add-ins
Launch Microsoft 365 (Office), and open the application you want to disable add-ins for.
Click on File.
On the left pane, select Options.
Click on Add-ins under Manage, select COM Add-ins, then click the Go button.
Click on any unused Add-in and click the Remove button.
2. Run the disk cleanup tool
Press the Windows key, type clean, and select the Disk Cleanup tool.
Select the drive with your Office 365 installation and click OK.
Tick as many categories to delete as you want and hit OK.
Confirm your choice, and after they are deleted, verify it fixes the slow performance of Office 365.
Press that Windows key, type defrag and click the Defragment and Optimize Drives option.
Select the drive you need to defragment and click the Analyze button.
If the drive is fragmented, click the Optimize button to defragment it.
Now you may verify if it fixes the slow performance of Office 365.
Most of the factors that cause slow performance on Office 365 may be issues that need general computer housekeeping. You should also carry out an exhaustive virus scan, as malware may often affect the performance of computer programs.
You can also use Office 365 online if the app performs poorly on your device. And that is as far as we share in this guide.
Please let us know which solutions were most effective for you in the comments section.
Discord is a popular instant messaging application offering VoIP (Voice of Internet Protocol) and is used by millions worldwide. It’s a go-to choice for many, but issues with Discord are not uncommon. And now, some report that Inspect Element in Discord is not working.
While this isn’t as big a problem for many, others who like more control over the application and messages are having a tough time. It allowed users to view display pictures or modify the page layout. But you can still get Inspect Element back. Keep reading to find out how!
Once in, press Ctrl + Shift + I to open the browser’s inspect element tool and identify the code for the individual page components.
If Discord’s inspect element is not working, you can always head to a browser and use its built-in tool for the job. Remember that the changes won’t be saved and will vanish as soon as you refresh the page. The browser method can be used as a temporary measure.
2. Modify the settings.json file file
Press Ctrl + Shift + Esc to open the Task Manager, locate any Discord processes, right-click on them individually, and select End task.
Now, press Windows + E to open File Explorer, paste the following path in the address bar, and hit Enter:%appdata%/discord
Locate the settings.json file, double-click on it, and open it using a text editor, preferably Notepad.
Now, paste the following command in the same manner as shown in the screenshot:"DANGEROUS_ENABLE_DEVTOOLS_ONLY_ENABLE_IF_YOU_KNOW_WHAT_YOURE_DOING": true
Once done, press Ctrl + S to save the file.
Finally, launch Discord, press Ctrl + Shift + I, and the Inspect Element option will be available.
If things don’t work, make sure the command prior to the one we manually entered has a comma after it.
When Discord’s Inspect Element is not working, you could employ a quick workaround shared by the team to edit the settings.json file in a Reddit comment.
But while modifying the file, make sure you follow the steps as they are and do not make any changes other than the one listed here.
As stated earlier, the Inspect Element functionality has been disabled only in the stable version and continues to work in both Discord PTB and Discord Canary.
Remember, the two are relatively unstable versions and receive updates before these are pushed to regular users, which may sometimes introduce instability. But if you have made up your mind, head to the official download page, get the setup and install the desired one.
Discord PTB (Receives updates after Canary, generally stable)
Discord Canary (Receives updates first, could be unstable at times)
That’s it! If the Inspect Element functionality was not working in Discord, it should now go with the solutions presented earlier.
Keep in mind that the app developers have confirmed that they are removing the Inspect Element functionality in Discord for a very simple reason. It compromised accounts and proved a significant security threat if an untoward change was made.
So, the decision was made with the user’s security and privacy in mind. But if you are an avid tech enthusiast and understand the implications of the changes, all hope is not lost!
The good news is that the Inspect Element feature has been disabled only on the stable version of Discord. So, it remains on the alpha or beta testing versions, namely Discord Canary and Discord PTB.
Customizing your computer helps improve the user experience. However, there are times when you cannot make the required personalization. For instance, when the Screen Saver settings is greyed out.
A few readers complained about this, so we will show you the best steps to rectify the problem on your devices.
Why is my Screen Saver settings greyed out?
Group Policy issue – On computers managed by group policy, you may be unable to make certain customization changes, which may be why the setting is greyed out.
Disabled registry values – A value in the registry can also disable the Screen Saver settings, and an admin may have enabled it.
Corrupted screen saver file – Occasionally, users may get this issue if they have installed a corrupted screen saver file or if there is a problem with a corrupted user profile.
Driver issue: If you are using a third-party screen saver, there may be an issue with the driver for your graphics card.
How do I change my screensaver settings when greyed out?
First, we recommend you try these workarounds:
Ensure your computer is not in sleep mode, which disables the screen saver.
Ensure the screen saver is enabled when your computer is on battery power.
If you use a third-party screen saver, try a different one.
Update driver, especially for third-party applications.
However, if you still have no success, proceed to the detailed fixes below.
1. Update registry values
Press Windows + R to open Run.
Type regedit and hit Enter.
Navigate to the path below: HKEY_CURRENT_USER\Software\Policies\Microsoft\Windows\Control Panel
If you do not locate Control Panel, right-click on Windows and select New, then Key, and name it Control Panel.
Click on ScreenSaveActive (you may create the Dword key for Control Panel if it is absent) and change the value to 1.
2. Update Group Policy settings
Press Windows + R to open Run.
Type gpedit.msc and hit Enter.
Navigate User Configuration, Administrative Templates, Control Panel, and Personalization.
On the right pane, double-click Enable screen saver.
Select Enable, then hit Apply and OK buttons.
Lastly, verify if it fixes the greyed out Screen Saver settings.