Bad Activity Result In Discord: How To Fix Error Code 96?

Many users have complained that whenever they try to crop a picture to use it for a Profile pic on Discord, it shows unable to open file: bad activity result code 96, for request code: 800. And the same error comes up when cropping the server logo as well. Well, this can be annoying, but don’t worry, it can be fixed.

Here, we will walk you through steps to get rid of this error message on Discord right after discussing the reasons behind the issue.

What causes bad activity result error code 96?

There can be various reasons for the issue to occur. However, some of the most popular reasons for the issue are listed here: 

  • Multiple instances of changing profile picture – If you have tried changing your profile picture more than twice within a few minutes, you might see the error. Wait for 5-10 minutes to upload a new photo.
  • Slow internet connection – There might be a possibility that the process is not getting completed because your device can’t reach the server due to a flaky internet connection.

What can I do to fix bad activity result error code 96?

Before engaging in advanced troubleshooting steps, you should consider performing the following checks:

  • Update the Discord app and check for updates on your device
  • Use a different device to upload a photo
  • Restart your device and your router. This also helps against Discord Error 1105.
  • Turn on and off Airplane mode to reset the internet connection
  • Use an ethernet connection if you are using Discord on a computer

1. Delete the Discord photos folder (Android)

Tip icon Tip
The file manager on Android can be denoted by My Files, File Manager, or Files on different Android devices.
  1. Open the list of apps, locate and click My Files (File Manager).Files
  2. Locate the Photos folder, go to the Discord folder and delete it.Photos Folder- bad activity result code 96
  3. Open the Discord app and try to change your profile picture now.

2. Upload profile picture from Google Photos(Android)

  1. Go to Discord and try to change your picture.Google Photos
  2. When you get options to upload an image, select Google Photos.
  3. Select an image from Google Photos, crop it, and upload it.

3. Reinstall the Discord app (All devices)

3.1 On an Android phone

  1. On the home screen, locate Discord, and tap on App info.App info
  2. Go to Storage usage.Storage
  3. Tap on Clear data and Clear cache.Clear data and Clear cache
  4. Now, tap on Uninstall.Uninstall
  5. Go to Play Store and reinstall the app.

3.2 On iPhone

  1. Go to the home screen, and tap on the empty space until all the app icons start shaking.
  2. Tap on the Discord icon and select Delete app.Discord Delete App iPhone
  3. On the next prompt, select Delete. This deletes the app along with its data.Discord delete data
  4. Go to App Store and reinstall the app.

3.3 On Windows computer

  1. Press Windows + R to open the Run window.
  2. Type appwiz.cpl and press Enter.APPWIZ RUN COMMAND
  3. From the list of programs, select Discord, and click Uninstall.Uninstall Discord Bad Activity Result Error Code 96
  4. Follow the on-screen instructions to complete.

4. Contact the Support team

If nothing worked for you, contact the Discord support team. Explain to them everything you have done to resolve the problem; this will help them assist you better.

So, these are the workarounds you can do to fix bad activity result code 96 until Discord developers find a solution to the problem. Try them, and let us know what worked for you.

Oculus Link is Not Working: 5 Quick Ways to Fix It

Many users have complained Oculus Link is not working when trying to launch a VR game. If you face the same, you are in the right place. 

Here, we will discuss why the Oculus Link is not working and the potential fixes to get rid of the problem.

Why does my Oculus Link not work?

There are a few reasons for the Oculus link not working for Quest 2; some of the common ones are mentioned here: 

  • Outdated graphics or USB driver – The Oculus link might not work correctly if your computer has outdated drivers. Therefore it is advised to update your PC drivers.
  • Misconfigured resolution settings – The issue might occur if the resolution settings set are high. Try lowering the resolution.
  • Game overlay – Game overlay can also cause this issue; disable the in-game overlay on the graphics card app and try again.
  • Corrupted system files – If your computer files are corrupt, you might face issues. Use a repair tool to fix it.

What can I do to fix Oculus Link is not working?

Perform the following preparatory checks to ensure that the issue is not a result of fundamental problems which may require only subtle tweaks:

1. Update your device driver 

1.1 Use the Device Manager

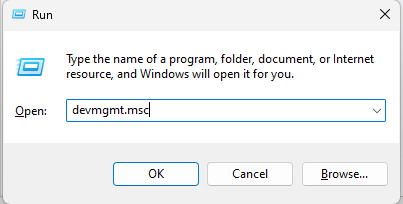
  1. Press Windows + R to open the Run window.
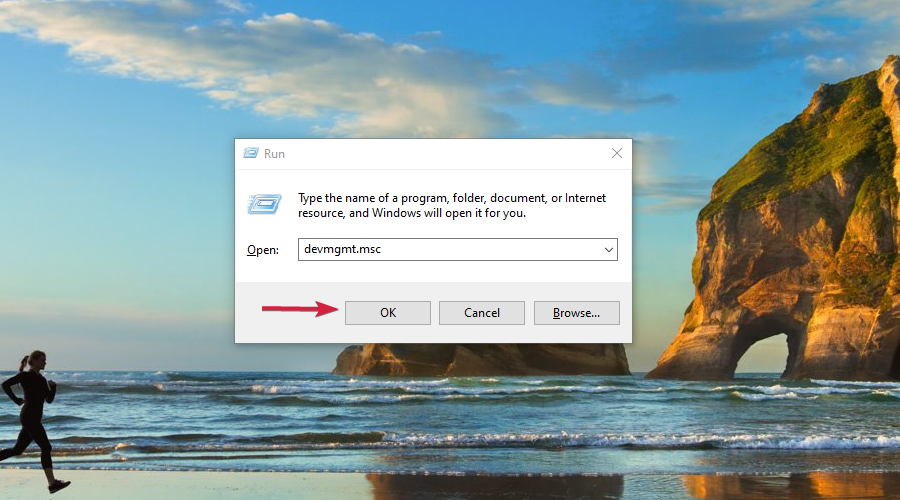
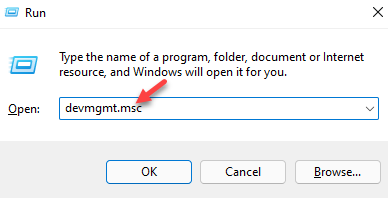
  2. Type devmgmt.msc and press Enter.Device Manager RUN COMMAND
  3. Locate Display adapters and expand them. 
  4. Now right-click on the graphics driver and select Update driver.Update driver -Oculus Link not working
  5. On the next screen, choose Search automatically for drivers.oculus link not working
  6. Follow the on-screen instructions to install.
  7. Repeat the same for USB drivers as well.

1.2 Use a third-party tool

Updating drivers manually can be time-consuming and not always fruitful. Therefore, it is suggested to use a driver updater tool like Outbyte Driver Updater. This driver updater can download and install all the outdated drivers in a few clicks. Here are steps to use it: 

2. Repair Oculus client

  1. Press Windows + E to open File Explorer.
  2. Follow this path: C:\Program Files\Oculus\OculusSetup.exe
  3. Right-click on the setup file and click Run as administrator. Oculus repair -oculus link is not working
  4. Now choose the Repair option and follow the on-screen prompts to complete.Repair

3. Modify visual settings

3.1 Reset graphics preferences 

  1. Launch the PC app.
  2. Locate Devices, then click Meta Quest and Touch.
  3. Under Advanced, click Graphics Preferences.Reset to Default - oculus link is not working
  4. Click Reset to Default.
  5. Click OK. To apply the changes, the headset and app will restart.

3.2  Reduce resolution

  1. Unplug Quest 2 from your PC.
  2. Press Windows + E to open File Explorer.
  3. Follow this path: C:\Program Files\Oculus\Support\oculus-diagnosticsOculusDebugTool -oculus link is not working
  4. Double-click on OculusDebugTool.exe.
  5. On the Oculus Debug tool, change the Encode Resolution Width setting to a recommended value by Oculus, i.e., between 2000-3000, depending on your graphics card.OculusDebugTool 2 -oculus link is not working

4. Disable the in-game overlay

  1. Launch the GeForce Experience app.
  2. Click Settings, then go to General.in-game overlay -oculus link is not working
  3. Toggle off the switch for IN-GAME OVERLAY.

5. Use the dedicated graphics card 

  1. Right-click on a space on the desktop.
  2. Select NVIDIA Control Panel.
  3. From the left pane, click 3D Settings to expand.
  4. Click Manage 3D settings.Program settings Oculus link not working
  5. Head to Program Settings, and choose the Oculus app from the drop-down.
  6. From the Global Settings tab, select High-performance NVIDIA processor.Global settings Oculus link not working

So, these are things you can try to fix the Oculus link not working issue. If nothing works for you, then it is suggested to contact Oculus support. Explain the situation and solutions you have tried so far for better assistance. 

If you have any questions or suggestions about the guide, feel free to let us know in the comments section below.

Best VPN for iPhone and PC to Have in 2026 [We Tested 8]

Today, we’ll look at the best VPN for PC and iPhone devices, focusing on those compatible with Windows and iOS.

Like most computer programs, a typical VPN has its system requirements. Thus, some VPNs are compatible with only laptops or smartphones.

It’s possible to utilize industry-leading VPNs made for jailbroken iPhone devices or laptops in just a few clicks.

Nevertheless, many durable VPNs are compatible with laptops (Windows and others) and mobile devices (iPhone, iPad, and Android).

This article reviews eight of the best VPNs for laptops and iPhone devices. Many of you might wonder: Can I have the same VPN on my Windows laptop and iPhone? The answer is yes; using multiple devices with a single VPN connection is possible, including a desktop PC or laptop and mobile devices like iPhone or Android.

Many privacy tools allow users to utilize multiple devices simultaneously and thus secure the entire home with one VPN subscription.

That said, many of the following VPNs for PCs are also effective as VPNs for iPhones. If your VPN is not working on your iPhone, this is a normal issue that also happens on a PC, so don’t worry; there is always a solution.

What are the best VPNs for iPhones and laptops?

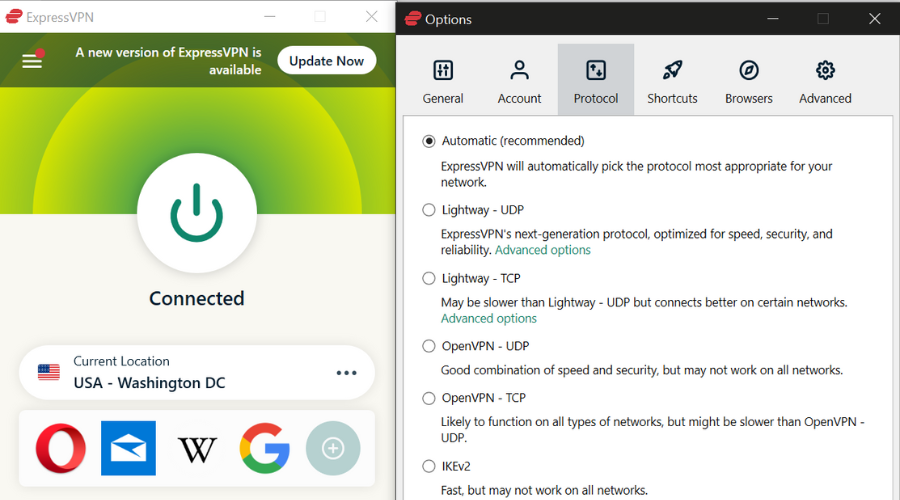
ExpressVPN – Best VPN for iPhones and laptops

ExpressVPN is widely regarded as the fastest and broadest VPN network in the industry. It has over 3000+ optimized servers in 160 cities (94 countries) worldwide.

When it comes to ease of use and system compatibility, ExpressVPN is, no doubt, one of the best VPNs available.

It is compatible with laptops and smartphones, routers, browser extensions (Chrome, Safari, and Firefox), and home gadgets like Smart TV, Apple TV, etc.

Also, this Express VPN International Ltd. VPN solution gives you the advantage of multiple simultaneous connections.

As such, whether you are running the VPN on your Windows 10 (laptop) or iPhone, you can easily connect both devices and enjoy an optimized browsing experience.

Other features of ExpressVPN include IPv6 leak protection, IP checker, split tunneling, internet kill switch, round-the-clock customer support, AES protocol, unlimited data, zero activity logging, and unrestrained server switching.

Lastly, ExpressVPN offers a 30-day refund policy on all subscriptions. The most popular (cheapest) monthly subscription plan is available at $8.32.

ExpressVPN

ExpressVPN has top-notch privacy protection, regardless of the device you use it on.
Check price Visit Website

NordVPN – Multilayered privacy for all devices

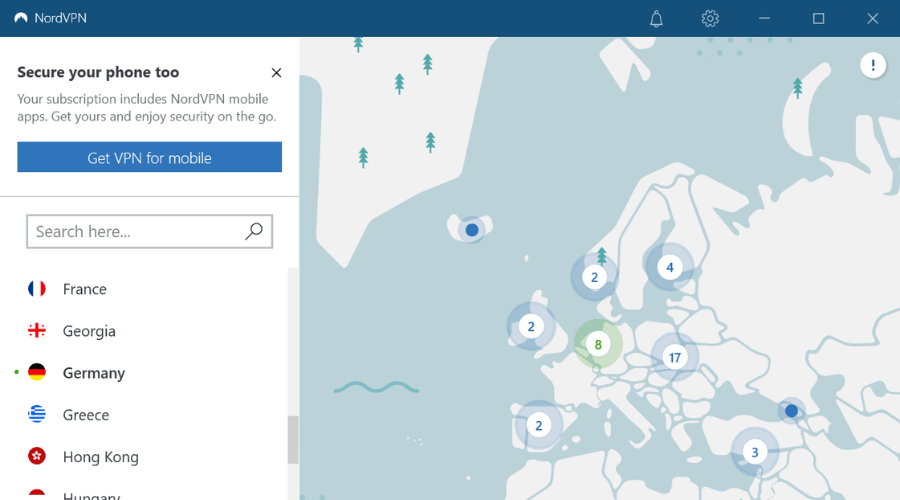
NordVPN is one of the industry’s most prominent Virtual Private Networks, compatible with Windows laptops and iPhones.

This VPN developed by Tefincom & Co., S.A. is especially known for its double encryption setup.

NordVPN hosts the 2048-bit SSL and the 256-bit AES encryption systems, which provide formidable security to connected PCs and/or smartphones.

Regarding the server network, NordVPN is arguably the best, with over 5400 servers in 59 countries worldwide.

Also, features like L2TP/IPsec security protocols, a kill switch, P2P traffic, dedicated IP addresses, and unlimited server switches constitute the other key features of NordVPN.

In addition, its flexibly designed, powerful set of features works perfectly on multiple OS platforms, namely Windows, iOS, and Android.

Also, it can support up to six connections at a time. So you can easily encrypt your mobile and desktop Internet connections, effectively masking your identity.

Not only that, NordVPN offers a 30-day refund policy, which enables users to cancel their subscriptions (within one month) and reclaim their money.

NordVPN

Getting enhanced privacy has never been easier! Get the best deal right away!
Check price Visit Website

Private Internet Access – Highest server speed for any device

Private Internet Access is best known for its relative ease of use, as it offers several easy-to-install apps for laptops (Windows, Mac, Linux) and mobile devices (iPhone, iPad, and Android).

This Kape Technologies VPN solution has no less than 35000 servers in 80+ countries across the globe.

You only need basic digital proficiency to download, install, and run the program on your system effectively.

Moreover, it allows you to connect unlimited devices with one subscription. So it will efficiently cover all your needs.

Private Internet Access, as the name implies, is primarily aimed at encrypting the Internet data of its users.

As such, it houses the standard AES encryption protocol (256-bit), which conveniently encrypts users’ Internet traffic. Even more, you have encrypted WiFi for improved security in public networks.

You also have advanced features that increase online privacy due to server switching, split tunneling tools, and P2P traffic.

There is also an Ad blocker utility that can block tracking scripts from your browser and eliminate unwanted ads.

Plus, you have multiple security protocols like L2TP and OpenVPN, no traffic logging, and unrestrained bandwidth.

You must also note that Private Internet Access offers a reasonably affordable price. Plus, it provides a 30-day money-back guarantee on all subscriptions, just in case you change your mind.

Private Internet Access

PIA is your top VPN choice for both iPhones and laptops.
Check price Visit Website

Surfshark – Price convenient VPN for unlimited devices

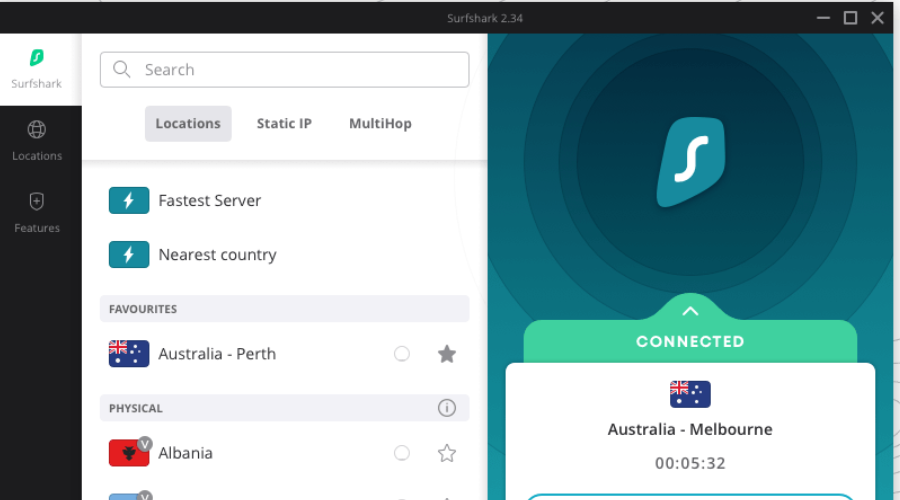
This Surfshark LTD VPN is compatible with iPhones and can be used to secure the connection established from your laptop.

Surfshark is a strong believer in keeping your data private. It uses military-grade AES 256-bit encryption and two of the best protocols, IKEv2 and OpenVPN.

While it is relatively new to space, many servers are available (1700+) in 63 countries.

It’s also optimized for speed, allowing you to enjoy your favorite streaming services.

Moreover, it is compatible with multiple platforms, and it offers connectivity with an unlimited number of devices.

Additionally, its strict no-logs policy ensures that your data stays private. There’s also a kill switch feature, which immediately shuts down your connection if the VPN service stops working.

If you need support, it’s available 24/7. Even more, with their money-back guarantee, you have 30 days to try the service for free.

Lastly, Surfshark has three pricing options with one of the lowest rates right now if you choose their 2-year plan.

Surfshark

Surfshark can protect your privacy regardless of the device you install it on. Check it out right now!
Check price Visit Website

Cyberghost – Unbeatable data encryption

CyberGhost is a popular VPN service provider headquartered in Romania. This VPN hosts some of the industry’s most advanced encryption and internet security tools.

CyberGhost has dedicated apps on Windows laptops, iOS smartphones (iPhone and iPad), and Android devices.

On top of that, CyberGhost offers its users a broad server network. It adds up to 9000+ servers in over 90 countries. In addition, there are about 3000 IP addresses on the VPN network.

Basic encryption features of CyberGhost include AES 256-bit encryption protocol, MD5 HMAC authentication, kill switch, DNS leak cover, unlimited bandwidth, and more.

These features ensure your privacy is adequately secure. CyberGhost can support up to seven connections at a time.

This means you can easily protect your laptop, iPhone (or Android), and up to seven other devices on a single CyberGhost account.

Lastly, regarding affordability, CyberGhost stands out as one of the cheapest VPN providers, with a 30-day money-back guarantee on every subscription.

CyberGhost VPN

Let this amazing VPN protect your iPhone and laptop. Don’t hesitate to claim the best deal!
Check price Visit Website

IPVanish – Latest VPN protocols for high-speed

IPVanish is one of the most suitable VPNs for laptops, iPhones (and other iOS). In fact, its free trial is available only to iPhone and iPad users.

IPVanish has been a Ziff Davis business since April 2019, after previously being developed by StackPath, LLC, which ceased operations in 2024. This VPN is built with a blend of speed and enhanced geo-encryption features.

IPVanish hosts over 2,400 servers in locations all over the world. This is aptly augmented by over 40,000 IPs (dedicated and shared) globally.

The VPN offers unlimited connections on a single network and hosts a set of powerful security/encryption and speed-enhancing features.

Some of these include a no-log policy, unrestricted P2P sharing, IPsec/OpenVPN security protocols, top-class customer support, and more. IPVanish also uses WireGuard, which is the latest high-speed protocol.

Additionally, IPVanish offers a 30-day money-back guarantee to all subscribers and is available at a convenient price.

IPVanish

Need state-of-the-art privacy protection on all your devices? IPVanish could take care of that.
Check price Visit Website

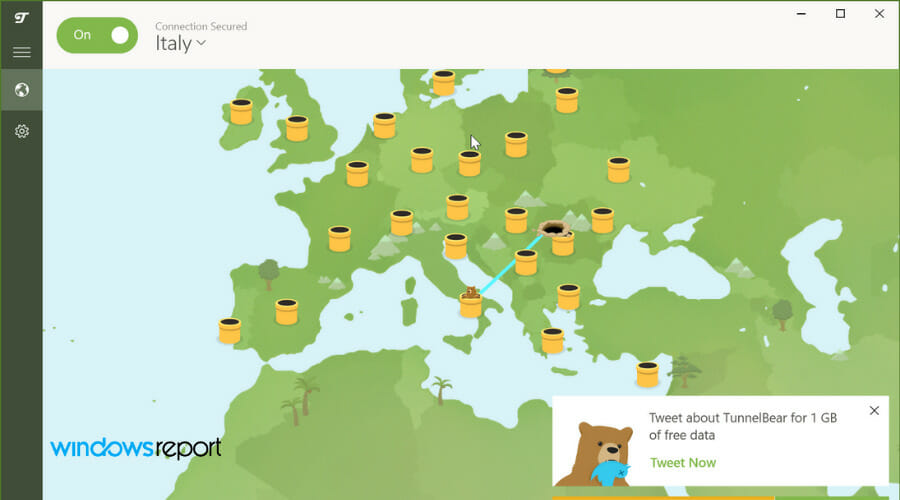
TunnelBear – Suitable for restrictions block

TunnelBear is one of the few VPN providers that offer free services to its users, albeit with limited functionality.

This McAfee, LLC VPN protects users’ privacy while improving their Internet experience with optimized connectivity.

TunnelBear is a user-friendly platform with multiple compatibilities across desktop/laptop (Windows & Mac OS) and mobile platforms (iOS and Android).

Also, it allows multiple simultaneous connections (up to five), on a single TunnelBear account.

Additionally, this VPN houses four sets of features – Privacy, Encryption, Performance, and Worldwide.

Overall, TunnelBear’s features include zero log policy, GhostBear, AES 256-bit encryption, 23 server locations, dedicated support, Vigilant Mode, optimized Internet speed, and more.

These features enable you to bypass any geo-restriction on censored websites easily. Also, the VPN is optimized for speed to enhance your Internet connectivity further.

Regarding pricing, you should note that TunnelBear offers a free version with limited features (e.g., limited bandwidth).

However, you must subscribe to a paid plan to improve performance and unlock the advanced features.

Available subscription plans include Unlimited and Teams, with various privacy benefits and responsive customer support.

TunnelBear

Are you looking for privacy protection on all your devices? Try TunnelBear.
Check price Visit Website

PureVPN – Advanced VPN tools and multi-logins

PureVPN is a leading VPN provider offering powerful features to bypass geo-blocked websites and censored content.

GZ Systems Limited owns this VPN with 2000+ servers in about 140 locations worldwide. This means that PureVPN has at least one server in every two countries.

Moreover, PureVPN, like other top VPN providers, has dedicated apps for laptops or desktops (Windows 10 and below) and smartphones (iPhone, iPad, and Android).

It is also equipped with some of the best obtainable security/privacy features in the VPN industry.

Some of these features include an inbuilt ad-blocker, AES 256-bit encryption, NAT Firewall, Onion over VPN, web (and app) filter, unlimited server switching, IPsec/L2TP support, and more.

PureVPN has a 7-day trial available. There is also a 31-day refund policy, which allows users to cancel their subscriptions and reclaim their money.

PureVPN

Do you need a VPN to protect your privacy on all your devices? Try PureVPN.
Check price Visit Website

Why should you have a VPN?

You should get a VPN connection for numerous reasons, especially when exposing financial or personal data online.

According to your web activities, a VPN can hide sensitive data from phishing threats or identity theft caused by unsecured websites or scams.

The main reasons to get a VPN that will safeguard your digital presence on any device are as follows:

? For laptops:

  • Avoid geo-restrictions for streaming or blocked content
  • Hide your real IP address to secure personal data
  • Improve internet speed with faster servers
  • Optimization for gaming performance

?For iPhone:

  • More convenient deals for app services
  • Improved security for online banking
  • Secure data from public Wi-Fi
  • Guaranteed access to region-unavailable apps

Also, a popular issue is that people can’t turn off their VPN on iPhones. The simplest solution is to delete the VPN profile on your iPhone and create a new one.

This list was compiled and ranked based on system compatibility (with Windows 10 and iPhone), server network/coverage, VPN speed, encryption protocols, affordability, and more.

You can, therefore, consider reliable VPNs for laptops on Windows 10 or other devices that require robust privacy on the web.

Have you heard of other VPNs that did not make our list of great VPNs for laptops and iPhone devices? Let us know in the comments section below.

Low Level Fatal Error In Games: 7 Ways to Fix It

Low Level Fatal Error occurs in many games, including Atomic Heart, Jedi Survivor, Dark and Darker, Mechwarrior 5, Borderlands 3, and many Unreal Engine titles.

In most cases, this issue is caused by corrupted or missing game files or problems with your graphics card driver. Game optimization software can also cause this issue.

Here’s how to fix it:

What can I do to fix LowLevelFatalError?

Before we try to fix this issue, try restarting your PC and reinstalling Visual C++ Redistributables. Also, disable any overlays or always keep your game up to date.

1. Verify the integrity of game files

  1. Launch the Steam app.
  2. On your Steam launcher, click Library.Steam Library
  3. Go to the game, right-click on it and select Properties.
  4. Locate and click Local Files from the left pane. Verify Integrity of games files
  5. Now click Verify integrity of game files.

2. Disable game optimization

  1. Click on Search and type GeForce experience.
  2. Click on the Gear icon.
  3. From the left pane, select Games.LowLevelFatalError - Automatically optimize newly added games
  4. Remove the checkmark beside Automatically optimize newly added games.

3. Update the graphics driver

  1. Press Windows + R to open the Run window.
  2. Type devmgmt.msc and press Enter to open Device Manager.Device Manager RUN COMMAND
  3. Go to Display adapters and expand it.
  4. Right-click on the NVIDIA GeForce and select Update driver. Update driver - Lowlevelfatal error
  5. On the next page, select Search automatically for drivers. Update driver 2
  6. Follow the on-screen instructions to complete the process. 

Suppose you don’t like performing this process manually. In that case, you can opt for a professional driver updating tool that can help you update your drivers automatically by scanning your PC for outdated drivers and locating the latest updates.

4. Run the game in Compatibility mode

  1. Right-click the game exe file and select Properties.Properties -LowLevelFatalError
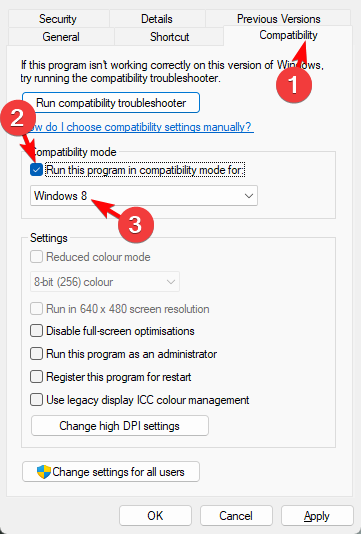
  2. Click the Compatibility tab.
  3. Under Compatibility mode, place a checkmark beside Run this program in compatibility mode for.
  4. Choose Windows 7 from the drop-down.Compatibility Mode
  5. Click Apply and then OK to save.
  6. Now launch the game and check.

5. Modify the Launch Options

  1. Open the Steam app.Steam Library
  2. Click Library, go to the game, right-click on it and click Properties.
  3. Go to General, click Set Launch options, and type -force -dx11Set launch options
  4. Click OK to save the changes.
  5. Click Close to close the Properties window.

6. Disable full screen optimization

  1. Right-click the game’s executable file.
  2. Select Properties from the dropdown menu.
  3. Go to the Compatibility tab.
  4. Check the box that says Disable Fullscreen Optimizations.disable fullscreen optimizations google chrome
  5. Click Apply.
  6. Click OK.

7. Disable background apps

  1. Press Ctrl + Shift + Esc to open Task Manager.
  2. Go to the Processes tab.processes tab in task manager
  3. Look for any apps using high CPU, memory, or disk.
  4. Right-click the unwanted app or process.
  5. Select End Task.

So, these are some of the fixes you can use to fix LowLevelFatalError on line 684, 197, 198, 671, or 4075 when launching a game. If nothing has worked for you, try reinstalling the game. 

Steam also suffers from similar issues, and we already wrote about fatal error: failed to connect with local Steam client, so be sure to check it out for additional solutions.

We also have a guide on Fatal error on Windows, as well as a guide on Fatal error exception in exception handler, so don’t miss them.

Many have experienced LowLevelFatalError in Avowed, but we have a guide that fixes it, so don’t miss it.

Please feel free to leave your comments in the section below if you have any questions or suggestions regarding the lowLevelFatalError.

The 20 Most Expensive Steam Trading Cards To Get Today

Steam trading cards are virtual card that only exists on your Steam profile. You cannot use it outside this gaming platform or turn it into any physical card.

These virtual cards can be earned by buying and playing games on Steam. While many of them are easy to earn, some are expensive and can be a reward for fantastic gameplay.

This guide will show you the most expensive Steam cards that you can look to earn or sell.

What is the most expensive trading card on Steam?

Ami (Foil Trading Card) has the highest pricing tag in the community market, making it the most expensive Steam trading card.

There are even more cards with similar pricing tags. If you wish to buy one or are just curious about the top list for this year, go through the next part of this article.

Top 20 most expensive Steam cards in 2022

Tip icon Tip
Note:
The prices of these trading cards vary with time and can drop or go higher depending on several factors. The costs for each item in this guide are the exact values at the time of writing.
Hence, don’t be surprised if you notice any remarkable price drop or surge.

The Skeleton (Foil) – $1,903.73

Though you will not find many 1-bit-styled games today, the Skeleton, a rare Steam trading card related to Death Crown, has been one of the most expensive in 2022.

This is a real-time strategy game where you will play as the Death itself and punish humanity.

Ami (Foil Trading Card) – $1926.14

ami

The Ami (Foil Trading Card) is the most expensive Steam trading card at this time of writing. This trading card is gotten from A Wild Catgirl Appears!

It involves Ami, who was picked up as a loner. She likes to draw but does not like meeting people. Hence, you have many challenging tasks to complete in the game.

Li Chengsong (Foil) – $1855.55

The Li Chengsong card is related to the game Chaos Galaxy. It’s a pixel art Galaxy total war game. You can select from 61 heroes and hundreds of warships and run the operation on a specific map.

How you will do in the game depends on your strategy. There are many complex tasks to complete to earn cards and rewards.

Bulldozer (Foil) – $1784.06

If you are a False Front game fan, you may want to own this rare Steam trading card. The game is free to play right now though there is a premium version.

But, its rare Bulldozer foil trading card has been one of the most expensive cards on the community market in 2022.

This cartoonish looked first-person shooter game has a lot of fun. While playing, you will get many rewards like the one listed in this article.

Tempest (Foil) – $1,688.61

This expensive Steam card is related to Ballistic Tanks, considered a fantastic Tank game. Tempest is not only the trading card from this title.

You can find other ones too. But not all the other ones are as expensive as this one.

USA! USA! (Foil) – $1,678.20

This expensive Steam trading card, USA! USA! has the tagline Make USA better. But, the name of the game behind this item is Jump to Die!!, where you will run your own company that helps people to commit suicide.

However, things are hard to accomplish here as zombies are on every corner. As a result, this trading card has been listed in the community market with a very high price tag though the actual worth is less than a dollar.

Fast Destroyer (Foil) – $1733.54

The Fast destroyer is an expensive Steam trading card related to the game Infinite Tanks. This game features modern combat vehicles, especially Tanks.

There are huge environments with realistic views that are very attractive. Moreover, you can play and complete single-player missions and enjoy the multiplayer mode.

Uranium Mine (Foil) – $1649.50

The Uranium mine is another exciting Steam trading card with a very high price tag. This item is related to Thousands of Years Later, an action game.

Here, you can make various weapons, gears, vehicles, and other things to protect your construction and survive. While playing, you can get some nifty badges and cards.

The Crystal Caverns (Foil) – $1,712.14

Expensive Steam Trading Card, The Crystal Carvens

The Crystal Caverns is one of the most expensive Steam trading cards in 2022. This foil trading card is related to an arcade game called Will of the Gods.

Here, players play as Gods, guide the followers, and punish the others who do not obey the other Gods.

Sumo Bot (Foil) – $1,662.45

Sumo Bot Steam Trading card expensive

The virtual reality game Pierhead Arcade 2 is an indie game where you can find many different arcade games. While playing, you can find many rewards, including trading cards.

However, the Sumo Bot is the most expensive in the community market. Therefore, you can spend a hefty price to get this Steam trading card.

Faceless (Foil) – $1685.38

The game behind this expensive Steam trading card, Faceless, is Warside. Even though the game is not available on the Steam store right now, the items related to it are available in the marketplace.

This trading card is infrequent and may not be worth the price the seller is asking for, but it is one of the fantastic items you can get from the community market.

Score Bonus (Foil) – $1552.55

Score Bonus Steam Trading card

The Score Bonus Steam trading card is one of the most expensive on the community market. Matris is the game behind this item which is an excellent puzzle game.

You can face various logic puzzles here and earn rewards by completing them smoothly, including cards.

Narcissu 3rd (Foil) – $1,637.22

Narcissu 3rd steam trading card

The Narcissu 3rd Steam trading card is another high-priced item available. The game Narcissu 10th Anniversary Anthology Project is behind this item.

This anime-styled story game is an exciting title for specific fans. As a reward, the gamer may get trading cards and other items.

Empire of the Dark Sun (Foil) – $1,599.00

Empire of the Dark Sun steam reward - trading card

Always loyal to the Emperor is the tagline for this expensive card related to the game Expect The Unexpected.

Empire of the Dark Sun is not worth the price the seller is asking for. But, it is still listed as one of the price Steam trading cards.

Expect The Unexpected is an Indie Strategy game where you will face many challenging tasks.

El Condor Pasa (Foil) – $1,430.60

El Condor Pasa (Foil) card

El Condor Pasa is one of the most expensive Steam trading cards available. However, even though it is not worth the seller’s price, it is still a very demanding and exciting item available on the marketplace.

Winning Post 8 2017 is the game related to this trading cart, a horse racing simulation game. You can play this game, explore the racing experience and earn cards.

Power Tower (Foil) – $1,349.49

Power Tower trading card

If you are a Tower Defense game fan, you may know about Thobax TD. This game grants many achievements and rewards.

Yet, its expensive trading card, Power Tower, is one of the most exciting items you can find in the market.

Fat Pig (Foil) – $1,231.45

Fat Pig trading card

The game Fat Chicken is behind this cool trading card, Fat Pig. You must fatten up farm animals for slaughter in this reverse tower defense game.

There are many exciting things to do in this game. But, one seller has featured the trading card we are talking about with far more than the price it may be worth. That sounds not so exciting. 

Cloud Hound (Foil) – $1,733.54

Cloud Hound trading card

The Cloud Hound is one of the most exciting items available in 2022. A puzzle adventure platformer game, So Many of Me, is related to this item.

This item was sold at an excellent price in the past. But, the current pricing is far from that, making it one of the most expensive Steam trading cards in 2022.

GIGN Riot Guard (Foil) – $1,230.58

GIGN Riot Guard steam trading card

GIGN Riot Guard is one of the exciting trading cards with a very high price tag. Though the actual worth may be around a dollar, the seller is still hoping for luck.

S.K.I.L.L. – SpS.K.I.L.L.e 2 game is no longer available as it was closed in 2019. However, its trading card is still available on the marketplace.

The Rogue (Foil) – $1,150.00

The Rogue steam trading card

The Rogue is another expensive Steam trading card from the game Reigning Cats. It is also a tower defense game with many challenges to test your love for cats.

This trading card had several sales in the past, which is far less than the current price.

There are many other expensive cards you can find on the community market. However, we have featured only the ones with at least a certain number of buy requests. It must be mentioned again that the pricing mentioned with each card may vary from time to time.

While still on the topic of cards and rewards, if you are looking to Refund a gift on Steam, check our guide for the detailed steps to follow.

If you have opinions about the costly cards, you can share them in the comment box.

Microsoft Store Games Keep Crashing? 14 Easy Fixes

Any gamer knows all too well the inconvenience and frustration that comes with a game crash. Users have reported that their Microsoft Store games keep crashing on their PCs.

For some of them, the Microsoft Store games are crashing on startup, whereas for others, they crash during game time.

To resolve the game crash problem, check first whether you can play any other games saved on your computer, then use these 14 solutions to troubleshoot.

If all your games are crashing on your PC, then we have another dedicated guide on how to fix that. Similarly, if your Microsoft Store crashes, read its dedicated article instead.

What can I do if my Microsoft Store games keep crashing?

1. Clear the Store Cache

  1. Right click Start
  2. Select Run
  3. Type wsreset.exe
  4. Press Enter
  5. Restart your computer and check if you can open Windows Store or other apps.

2. Update the video driver

Get in touch with the manufacturer of the video adapter so as to find out how to get the latest version of the video driver for your video adapter.

For more information on how to fix outdated graphics, check out this guide.

We strongly recommend updating drivers automatically and safely with a full-dedicated tool that will help you to avoid permanent damage to your PC by downloading and installing the wrong driver versions.

3. Register the Windows Store App again

Follow the instructions below to re-register:

  1. Click Start
  2. Go to the search field box
  3. Type cmdgame crash cmd
  4. Right click on Command Prompt
  5. Write this command on the command prompt window: powershell -ExecutionPolicy Unrestricted Add-AppxPackage -DisableDevelopmentMode -Register $Env:SystemRootWinStoreAppxManifest.xml
  6. Press Entergame crash cmd
  7. Check the displayed result
  8. If it processed successfully, type Exit
  9. Press Enter

4. Use the App Troubleshooter

  1. Right click Start
  2. Select Control Panel
  3. Go to the top right corner and change View by option to Large icons
  4. Click Troubleshootinglaptop battery drain sleep mode troubleshooting
  5. Click on View all option on the left panel
  6. Select Windows store Apps
  7. Follow the instructions to run the app troubleshooter

5. Check for the latest game update

Go to the respective website for the particular game that crashed and download the latest updates for it.


6. Perform a clean startup and configure startup options

Performing a clean boot for your computer reduces conflicts related to software that can bring up the root causes of the PC reset bluescreen error issue. These conflicts can be caused by applications and services that start up and run in the background whenever you start Windows normally.

In order to successfully perform a clean boot on Windows 10, you have to be logged on as the administrator, then follow these steps:

  1. Go to the search box
  2. Type msconfig
  3. Select System ConfigurationSystem configuration - Disable - Enable service1s
  4. Find Services tab
  5. Select Hide all Microsoft services box
  6. Click Disable all
  7. Go to Startup tabgame crash task manager
  8. Click Open Task Manager
  9. Close Task manager then click Ok
  10. Reboot your computer

Once your computer restarts, configure Selective Startup options using these steps:

  1. Go to System Configuration Utility dialog box
  2. Go to General tab and choose Selective Startup
  3. Uncheck the Load Startup items box
  4. Click Services tab
  5. Select Hide All Microsoft Services box
  6. Click Disable all
  7. Click Ok
  8. Restart if prompted to

After restart is complete, try to start the same game that crashed so as to check whether the game crash issue was resolved.

If the problem goes away after a restart, then the cause is a background program or service.

If the problem returns after the clean startup and configuration, the interference is a different issue altogether.

To determine what is causing the game crash problem, use these two steps:

  1. Start System Configuration Utility
  2. Enable half of the services items

How to start System Configuration Utility

  1. Click Start
  2. Go to the search field box
  3. Type msconfig
  4. Press Enter
  5. If prompted for an admin password, type it in. Otherwise click Continue to confirm

How to enable half of the services items

  1. Type msconfig
  2. Select System Configuration
  3. Find Services tab
  4. Select Hide all Microsoft services box
  5. Click to select half of the checkboxes under Services list
  6. Click Ok
  7. Restart your computer

If the game crash problem recurs after restarting, repeat step 1 and 2, but clear half of the check boxes in the Services list you had selected previously. If it still recurs after the second restart, click to clear half of the remaining check boxes under Services list.

If the game crash issue goes away after restarting, reverse the selected check boxes and repeat this until you identify the service that runs when the game crash occurs.

If the game crash doesn’t occur after restarting, repeat step 1 and 2 but select half of the cleared check boxes. If it still doesn’t occur, click to select half of the cleared boxes.

Repeat until you identify the service that runs when the game crash occurs.

If you find the service that causes the game crash, it is the problem item. In this case, contact the manufacturer of the specific program to determine if it can be resolved, or run System Configuration Utility then click to uncheck the box of the problem-causing service item.

If not, then the issue is with startup. In this case, enable half of the startup items as explained above, then click to clear the Hide All Microsoft Services box. Finally, repeat the steps above to clear check boxes for Startup list (not Service list).

How to return to normal startup mode

  1. Click Start
  2. Type msconfig in the search field box
  3. Press Enter
  4. Provide admin permissions or password
  5. Under General tab, click Normal Startup – load all device drivers and services
  6. Click Ok
  7. Restart if prompted to

7. Create a new user account

Here’s how to create a new user profile:

  1. Click Start
  2. Select Settings
  3. Select Accountscreate new user account
  4. Click Add someone else to this PC
  5. Fill in the form with the user name and password. Your new user account will be created.
  6. Restart your computer
  7. Login to the new account you just created

Try launching the game using the new account.

Note: some games require accounts with administrator privileges to run. In this case do the following to grant admin rights/privileges:

Here’s how to create a new user profile and give administrator privileges:

  1. Click on Change account type
  2. Click the drop down arrow and choose Administrator to set the account to administrator level
  3. Restart your computer
  4. Login to the new account you just created

Try launching the game using the new account.

If this fixes the problem, sign out of the new account and sign back in to your usual user account and check if the game crash problem is still there.

If it is, then the problem is your usual user account. Use the Fix It button to restore default security settings for the account, then check if it resolves the problem.

Otherwise, move your data from the problematic user account to the newly created user account in order to access it.


8. Change Compatibility settings

  1. Right click the game’s icon
  2. Click Properties
  3. Click Compatibility tabcompatibility mode minecraft won't start
  4. Select Run this program in compatibility mode for box
  5. Select the Windows version
  6. Click Ok

Note: this method may not work for newer games that need advanced features.


9. Temporarily disable sound card

  1. Right click Start
  2. Select Device Manager
  3. Right click the driver
  4. Click Disable
  5. Click Yes, then click Ok
  6. Restart and test the game

10. Update the sound driver

Get in touch with the manufacturer of the sound card so as to find out how to get the latest version of the sound driver for your sound card.

How to determine your sound card’s name and manufacturer

  1. Click Start
  2. Type dxdiag in the search field
  3. Press Enter
  4. Click Sound tab
  5. Under Device, locate the Name
  6. Under Drivers, locate Providerupdate sound drivers
  7. Click Exit

11. Remove and reinstall the game

Sometimes a game crash leads you to do the inevitable: removal of the entire game and all its components, then reinstalling it.

Here’s how to do it:

  • Perform a clean boot using the steps below:
    1. Go to the search box
    2. Type msconfig
    3. Select System Configuration
    4. Find Services tab
    5. Select Hide all Microsoft services box
    6. Click Disable allSystem configuration - Disable - Enable services
    7. Go to Startup tab
    8. Click Open Task Manager
    9. Close Task manager then click Ok
    10. Reboot your computer
  • Remove and reinstall the game using the steps for your version of Windows, by reinserting the game’s CD then following the instructions to complete installation.

If setup doesn’t start automatically, do the following:

  1. Click Start
  2. In the search box, type drive:setup.exe (drive is the letter of the CD/DVD drive)
  3. Press Enter
  4. Follow the on-screen instructions to complete installation.

12. Check Solution Center

Go to the Games for Windows Solution Center to find solutions that let you check product issues, error messages and troubleshooting tips. You can also find product help from discussion forums or a support professional, or technical product information such as contacts to reach support.


13. Scan your computer for viruses

If the game closes, generates an error or you experience a game crash when you start/launch, or while playing, your computer is infected by a virus.

If you already have an antivirus software, update it by installing the most recent signature files before performing a scan. Such signature files are released each month. Once you get it, scan your computer.

After the full scan is complete, repeat solution 11 to remove and reinstall the game.


14. Remove spyware and any other unwanted software programs

Follow these steps to run a scan for spyware and other unwanted software:

  1. Click Start
  2. Go to search field and type Windows Defender
  3. Select Windows Defender app from the search results
  4. Select Full Scan on the right hand side

Once cleaned up, follow Solution 11 to remove and reinstall the game.

What happens when my Microsoft Store games crash?

In order to understand how to resolve a game crash, you need to figure out where it stems from. Here are some symptoms of a game crash:

  • The game stops responding
  • The game just closes unexpectedly
  • The game windows is minimized and can’t be restored
  • You receive an error message saying the game has encountered a problem and needs to close, then a prompt to send the error report details

We hope one of these 14 solutions worked for you to fix the Microsoft Store games crashing on your computer. Let us know in the comments section.

Microsoft We’re Having Trouble Processing Your Payment: Fix

Even though it’s still trailing behind the competition, the Microsoft Store has more than a few nice exclusives. Purchasing games or applications closely resembles other similar services and everything is done in a matter of seconds.

However, some users willing to spend some bucks on a game or two had issues with finalizing the purchase.

Namely, they were met with the We’re having trouble processing your payment and we’d like to get it sorted out. Get more info. error message. A variation of it is We ran into a problem completing this purchase.

This error message has been reported by both PC and Xbox users, as seen on forums. Let’s find out how to fix it together.

How can I fix the Microsoft trouble processing payment issue?

1. Reset the Store’s cache

Let’s start with the simplest solution which usually works. Of course, if you’re certain that everything is properly configured and the error is completely uncalled for. Microsoft Store is far from flawless, and its plagued by a whole plethora of issues. However, the temporary stall might be the cause for the in-store purchasing error, as it’s the case for so many problems.

Microsoft Store is a native Windows 10 app and works in the background all the time. This leads to pilling up data which, consequently, might follow with an error. Because of that, we suggest resetting Microsoft Store’s cache.

If you’re not sure how to do it, follow the steps we provided below:

  1. Press Windows key + S to open Windows Search.
  2.  WSReset.exe and press Enter.we re having trouble processing your purchase
  3. Try purchasing the Store content again.

2. Log out and log in again

The second step is as obvious as they come. Nonetheless, an inexperienced user might panic and forget about it. Namely, if the system has issues with your active account, you might resolve this little stall by simply logging off and logging in again. Some users even advised logging with an alternative account and then going back to the original one.

Either way, this seemingly helped for the similar problem on Xbox Live. Since Microsoft Store is the same for all Microsoft devices, we can expect it to be a success on a Windows 10 PC as well.

3. Check your funds and re-establish a paying method

More times than not, the “We’re having trouble processing your purchase” error is a temporary occurrence. However, if the same message pop-ups every time you try purchasing something from the Store, there might be something else at hand. Firstly, we suggest checking your funds.

In addition, consider deleting you paying method (debit/credit card, PayPal, etc.) and establishing it again. This might take some time, but the paying method might get locked down due to a service error. You can do all of that, here.

4. Make sure region/time settings and pay account are properly set

As we go deeper into the possible causes list, it’s important that you come from a region which allows purchases. The rules for this vary, so there are some games or apps you’ll be able to obtain regardless of your geo-location. On the other hand, lot’s of games are not available globally, so make sure you’re able to get the game in the first place.

Also, you can change your region and time to match the account settings and payment options. Namely, your account credentials need to be set to the same location and ZIP code number as your debit/credit card. For example, you won’t be able to pay for a game with the foreign card.

5. Send the ticket to Microsoft Support

Finally, if none of the aforementioned solutions helped you address the “We’re having trouble processing your purchase” error, we suggest sending the ticket to Microsoft.

The support should be able to check what’s exactly causing the problem. You might need to send a few screenshots, but the whole effort won’t take you more than 15 minutes.

You can report your issues and send inquiries, here.

With that said, we can conclude this article on the the Microsoft we’re having trouble processing your payment issue. Hopefully, you’ve found it informative. In addition, make sure to share your thoughts and additional solutions in the comments section below.

You can test if the issue is fixed by checking your Microsoft Store order history, and we have a guide that will show you how to do that.

Task Host Window Preventing Shutdown: 7 Methods to Fix It

Some of our readers reported that the Task Host window is preventing a shutdown along with a Shut down anyway option. While clicking on it helped some, others again got the error on their subsequent attempts at performing a shutdown.

The Task Host window is not a virus, as often understood by many. This error is usually caused by a stuck OS update, or when a program is installing in the background. Certain running services and corrupt system files may also preventing a shut down.

Before we go to the slightly complex solutions, click the Shut down anyway button on the error prompt and check whether it appears again. For some, it was a one-off thing.

1. Run the Windows Update troubleshooter

  1. Press Windows + I to open Settings, and then choose Troubleshoot from the right in the System tab.troubleshoot
  2. Click on Other troubleshooters.other troubleshooters
  3. Now, click on Run next to the Windows Update entry to launch the troubleshooter.troubleshooter to fix task host window preventing shutdown
  4. Follow the on-screen instructions to identify and eliminate the problem.troubleshooter

In most cases, it was an issue with Windows Update that led to the Task Host window preventing shutdown. And the built-in troubleshooter did wonders by fixing things in no time.

2. Restart the Microsoft Store Install Service

  1. Press Windows + R to open Run, type services.msc in the text field, and hit Enter.services
  2. Locate the Microsoft Store Install Service, right-click on it, and then choose Restart.restart to fix task host window preventing shutdown
  3. Wait for the service to restart.restarting

The Task Host window preventing shutdown mistaken for a virus can also be due to issues with the Microsoft Store Install Service, and restarting it should get things up and running.

3. Disable startup apps and non-critical services

  1. Press Windows + R to open Run, type msconfig, and click OK.msconfig
  2. Head to the Services tab, tick the checkbox for Hide all Microsoft services, and then click on Disable all button.disable services
  3. Now, press Ctrl + Shift + Esc to open the Task Manager and go to the Startup apps tab.startup apps
  4. Select the apps that read Enabled under the Status column individually, and click on Disable at the top. Do it for all such apps.disable to fix task host window preventing shutdown

Once done, restart the computer, and verify whether the Task Host window is still preventing shutdown. In case it is, head to the next solution.

4. Run the DISM and SFC scan

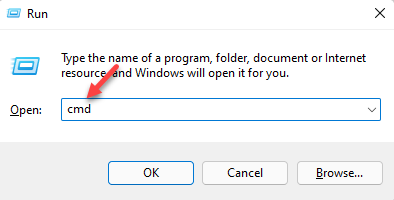
  1. Press Windows + R to open Run, type cmd, and hit Ctrl + Shift + Enter.cmd
  2. Click Yes in the UAC prompt.
  3. Paste the following three commands one at a time, and hit Enter after each:DISM /Online /Cleanup-Image /CheckHealth DISM /Online /Cleanup-Image /ScanHealth DISM /Online /Cleanup-Image /RestoreHealthdism to fix task host window preventing shutdown
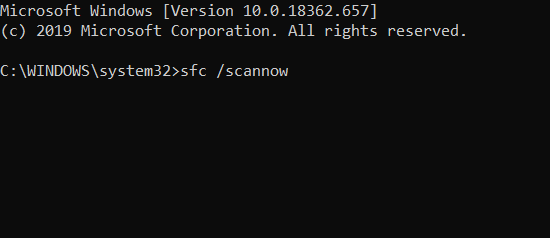
  4. Once done, execute the following command to run the SFC scan:sfc /scannowsfc scan to fix task host window preventing shutdown

In a few cases, users got the Task Host window preventing shutdown due to corrupt system files, and running the DISM tool and the SFC scan got things working. These two shouldn’t take more than half an hour to run under ideal conditions.

Another option for easily erasing corrupt files would be a dedicated repair tool. They have massive databases with healthy system files with which they can replace all malfunctioning files found on your PC.

5. Uninstall Windows updates

  1. Press Windows + I to open Settings, go to Windows Update from the navigation pane, and click on Update history.update history
  2. Scroll down to the bottom and click on Uninstall updates.uninstall updates to fix task host window preventing shutdown
  3. Now, click on Uninstall next to the update that was installed right before the error first appeared.uninstall to fix task host window preventing shutdown
  4. Again, click Uninstall in the confirmation prompt.confirm
  5. If the error persists, uninstall another recent update, and check again.

Many users who reported that the Task Host window is preventing shutdown fixed things by uninstalling a few problematic updates. For most, it was the last two, but it might be different for others.

6. Turn off Fast Startup

  1. Press Windows + S to open the Search menu, type Control Panel, and then click on the relevant search result.control panel
  2. Click on System and Security here.system and security to fix task host window preventing shutdown
  3. Now, choose Change what the power buttons do under Power Options.change what the power buttons do
  4. Click on Change settings that are currently unavailable.change settings that are currently unavailable
  5. Now, uncheck the box for Turn on fast startup (recommended) and click on Save changes.disable to fix task host window preventing shutdown
  6. Once done, restart the computer, and the error shouldn’t appear again.

7. Install the optional updates

  1. Press Windows + I to open the Settings app, navigate to Windows Update, and click on Advanced options.advanced options
  2. Now, click on Optional updates.optional updates
  3. Tick the checkboxes for all the available updates here, and click on Download & install.optional updates to fix task host window preventing shutdown

That’s it! If nothing has worked so far, installing the optional updates should fix things in case the Task Host window is preventing shutdown.

We also have a new guide on Error Fail Shutdown, so don’t miss it for more information.

For any queries or to share a solution that’s not listed here, drop a comment below.

10+ Best HoloLens Apps (Free Download From MS Store)

Microsoft HoloLens is the first self-contained, holographic computer that enables you to fully interact with your digital content and holograms.

This VR headset is a very powerful Windows 10 device that has opened the path for next-generation technology.

There are already tens of apps compatible with HoloLens. In this article, we’re going to list the best HoloLens and HoloLens 2 apps.

Don’t forget to keep an eye on the Windows Store because more apps soon come, as HoloLens is becoming more and more popular.

What are the best HoloLens apps right now?

HoloTour

HoloTour HoloLens app


HoloTour lets you explore the beauty and history of old Rome or uncover the hidden secrets of Machu Picchu.

Thanks to its unique combination of 360-degree video, spatial sound, and holographic scenery, you’ll believe that you’re really there. You can visit the world’s biggest cities with HoloTour.

Melissa, your personal tour guide, provides a fresh perspective on your surroundings, as well as interesting information.

She’ll help you learn interesting facts and uncover rich historical insights. You can use your gaze, gesture, and voice to naturally interact with the world around you.

HoloTour

HoloTour

Now is the perfect time for a virtual tour around the world’s most famous places, from the comfort of your home.

INSIGHT HEART

INSIGHT HEART HoloLens app

If you’re fascinated by the human body, we recommend that you try out INSIGHT HEART.

This is the first app from a planned series for the medical education of the future.

As its name suggests, this app guides you through the functions of the heart. You can actively engage in the learning process and control the heart by gesture or voice control. You can zoom, rotate and scale a high-resolution heart hologram.

INSIGHT HEART also shows impressive visual effects of myocardial infarction, arterial hypertension and atrial fibrillation.

All these highly detailed visual elements offer a better learning experience.

INSIGHT HEART

INSIGHT HEART

A must-have app for medical students and established professionals alike, that can change the future of medical education.

HoloBeam Tech

HoloBeam Tech HoloLens app

Sci-Fi is more real than ever thanks to HoloBeam Tech. Valorem, the company behind this impressive app, has managed to create an innovative telepresence technology that will definitely amaze you.

This holographic streaming technology captures the likeness of a person using a stereoscopic camera as 3D point cloud data.

The point cloud data is then streamed across the Internet. Microsoft HoloLens decodes and renders the holographic stream, providing a good representation of the sender’s likeness.

Although this demo may seem a bit rough for some users, we’re sure that Valorem will improve HoloBeam Tech’s image quality in the future.

HoloBeam Tech

HoloBeam Tech

Communicate in real-time with holographic representations of your piers via this revolutionary collaboration app.

HoloStudy Demo

HoloStudy Demo HoloLens app

HoloLens will definitely be one of the most popular learning supports in the future. This device has a huge educational potential and we’re sure more companies will exploit it in the future.

HoloStudy Demo offers is a series of geology, physics, chemistry, and biology lessons. You can set off on an incredible journey with virtual professors, to better understand the complexity of science.

Although this is only the demo version of the app, the information quality and the presentation manner will make you fall in love with this app.

HoloStudy Demo

HoloStudy Demo

Learn geology, physics, chemistry or biology with the help of virtual reality and see science from a completely different perspective.

Land of Dinosaurs

Land of Dinosaurs HoloLens app

Jurassic Park fans will definitely love this HoloLens app. Land of Dinosaurs is actually a portal that allows users to enter a time warp to 65 million years ago when dinosaurs ruled the earth.

You’ll meet the fierce Titanosaurus, the largest dinosaur that ever lived, as well as other impressive creatures.

The Land of Dinosaurs app is perfect for museums, schools or other educational institutions, or regular dinosaur fans. For more information, check out the video below:

Land of Dinosaurs

Land of Dinosaurs

A highly entertaining app that takes you beyond the fictional Jurassic Park experience, deep into the realm of long-gone creatures.

HoloFlight

HoloFlight HoloLens app


HoloFlight is another interesting HoloLens app from Valorem. It allows users to visualize real flight data in 3D as holograms.

You can walk around and explore various parts of the visualized flight space, and zoom in to see specific details, including the control tower’s point of view.

The app also offers an introductory tutorial when launched for the first time. You can open the tutorial at any time by saying Show Tutorial.

⇒ Download HoloFlight


Fragments

Fragments HoloLens game

This holographic game proves that HoloLens is also a powerful gaming tool. You’ll play the role of a  detective gifted with the unique ability to investigate crimes based on memories.

You’ll examine holographic crime scenes and gather clues blended into your reality.

Use your wits and sense of observation to solve the crimes and make the perpetrators pay for their deeds.

⇒ Download Fragments


TV Online Univ

TV Online Univ

As its name suggests, this is a cross-platform app that you can use to watch TV. Yes, you read that right.

You can now watch TV using your HoloLens headset. This was not even possible when Microsoft first launched the device.

Moreover, TV Online Univ is compatible with your Window 8.1 and Windows 10 computer, Windows phone, and Xbox One console. It supports Continuum as well.

The app also features a Live Tile that provides you with more information on the number of channels and upcoming events.

There is also a program guide that you can use to make sure you won’t miss your favorite TV shoes.

Other interesting features include:

  • Picture in Picture support — this means that you can view two channels simultaneously
  • DLNA/Miracast Send support
  • Full Cortana and OneDrive support
  • You can also record live content to watch later if you don’t have enough time.

⇒ Download TV Online Univ


Robo Raid

hololens robo raid game

Does Space Invaders ring any bell for you? If it does, then you’ll be more than happy to learn that there’s a modern VR version of this game — well, sort of.

It’s called Robo Raid. There are no space chickens involved in this game, but the principle remains the same.

As a player, you need to shoot and destroy waves of robots that are constantly attacking you with laser beams.

We’re sure that this mixed reality first-person shooter will impress you. Vicious robot invaders will break through your walls trying to shoot you.

Don’t sit still, otherwise, you’ll die. You’ll need to move constantly in order to avoid enemy fire.

You can use your gaze, gesture, and voice to attack and destroy the robots.

⇒ Download Robo Raid


My Notes

My Notes hololens

My Notes is now available on the HoloLens. This is perhaps the best note-taking app for the HoloLens.

It supports a series of useful features that help you to stay organized.

You can use it to create task lists, shopping lists, write down event details, and more. The best part is that you can then sync your note to OneDrive.

So, if you wrote down an important reminder using your HoloLens device, you can then access and edit it from your computer.

⇒ Download My Notes

Other interesting HoloLens apps

There are hundreds of HoloLens 1 and HoloLens 2 apps available in the Microsoft Store presently. Of course, we can’t cover all of them in this guide.

There are many more interesting apps worth your attention. Apart from the apps listed above, here’s what may also interest you:

  • Aircraft Explorer: Explore seven of the most common commercial aircraft.
  • HoloAnatomy: A tour of the Case Western Reserve University and Cleveland Clinic HoloAnatomy course.
  • 3dDraw for HoloLens: Draw with your hand in 3D and then walk around in what you have created. Speaking of 3D drawing, there’s another similar app that you can try. It’s called HoloBrush.
  • The Red Pill: This allows you to see the code behind the “real” world.
  • Holo Real Estate: This app allows you to view a property without being there. Basically, the app gives you a virtual tour of the house/ office that you’re interested in renting or buying. You can even perform an actual Life-Size Walk-Through the Home using a tag-a-long menu and voice commands.
  • Sort my stuff! With the help of this app, you can quickly create inventories of all the stuff you own. You can name the respective items, place them into a specific category, add a price tag and even a photo of it. You can also add a short description and then export the list to social media or other apps.
  • HoloBlocks is another fun app to try. You can build intricate structures using HoloLens blocks and then knock them down just for fun.

As you can see, the HoloLens app universe is pretty spectacular although the HoloLens is a relatively new device.

Taken into account its impressive capabilities, we’re sure that more and more developers will turn their attention to HoloLens in the near future.

If you’ve come across other interesting HoloLens apps, feel free to use the comment section below to tell us more about your experience.

This Needs To Be Installed On A System Drive [SOLVED]

Starting with Windows 8 we can use the Windows Store to download and install various apps, tools and programs on our devices. This feature works even better on the latest Windows 10 versions.

However, some problems might cause malfunctions within the Windows Store and you may end up facing problems when trying to download, update or install software from the Store.

And the most common error that’s reported by Windows 10 users is related to the ‘This product needs to be installed on your internal hard drive’ message. Shortly, at some point, Windows Store stops working correctly.

So, if you are reading these lines, then you most likely noticed this problem. Anyway, don’t panic as we are going to fix this issue right away.

How to fix the This product needs to be installed on a system drive error?

1. Repair the Windows 10 system

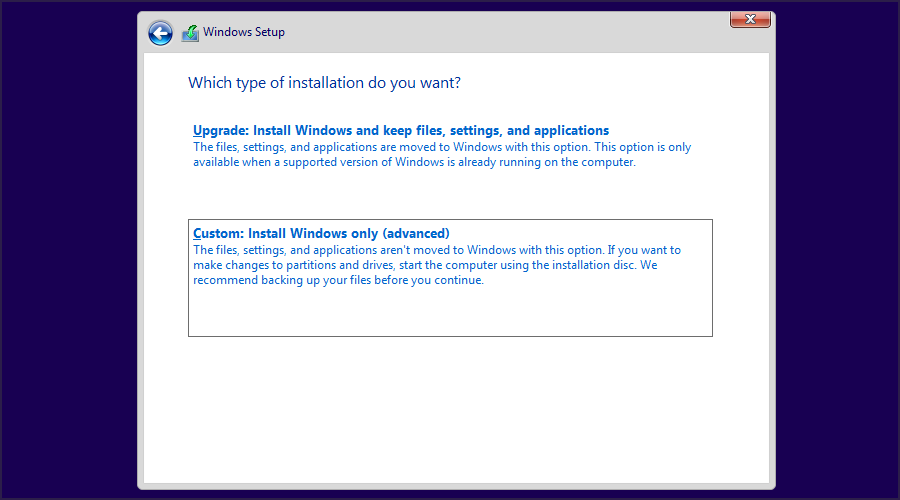
You can repair your system, without losing your data, by using an ISO file, with USB installation media, or by using the Media Creation Tool. Once you have the Windows 10 system files you need to run the Windows 10 Setup executable file. Make sure that when asked by the installation wizard you choose both Install Windows 10 and Keep personal files and apps.

From that point that follow on-screen prompts in order to complete the flashing process. When done, your Windows 10 system should run without any problems meaning that now Windows Store can be accessed without experiencing the ‘This product needs to be installed on your internal hard drive’ error message.

Should the Media Creation Tool fail to work, check out this article to troubleshoot the problems.

Alternatively, we recommend using third-party repair software that aims to fix Windows files that keep your PC from functioning properly.

These tools come with comprehensive databases of Windows system files and are able to detect whether you have faulty ones and quickly replace them.

On top of that, the software can fix your registry, DLL files, detect hardware problems, and tweak your system settings in order to minimize or remove them.

2. Check the default App location

The first thing to check is the location where Windows Store is installed. By default it should be on C drive – the ‘This product needs to be installed on your internal hard drive’ error message might refer exactly to this aspect; so:

  1. Press Win+I keyboard hotkeys in order to access System Settings.
  2. From the main panel click on System – Display, notifications, apps, power.‘This product needs to be installed on your internal hard drive
  3. From the System window click on Storage (it’s located on the left sidebar).
  4. Under Save locations every entry should point to C drive.‘This product needs to be installed on your internal hard drive
  5. Change these values if you get something different.
  6. Save your changes and try to use Windows Store again.

3. Uninstall the latest Windows 10 updates

A new update might cause this Windows Store malfunction. So, you can try to uninstall the latest update and check if the problem was related to this software. Here is how you can complete this troubleshooting solution:

  1. Right click on the Windows Start icon or press the Win+X hotkeys.
  2. From the list that’s displayed click on Programs & Features.
  3. Then, select View installed updates.‘This product needs to be installed on your internal hard drive
  4. Select the latest updates and choose Uninstall.
  5. If the Windows Store app is working properly make sure you block the update that was causing the issues, at least for a while (until Microsoft comes with a fix).

4. Clear Store cache

A certain app (default or third party) might be the cause why you get the ‘This product needs to be installed on your internal hard drive’ error when you access Windows Store. So, it’s time to clear cache for these apps:

For clearing default apps store cache

  1. Press Win+R keyboard keys and launch the Run box.
  2. There type WSReset.exe and click OK.
  3. The Windows Store and a cmd window will be displayed; Store cache will be automatically erased.

For clearing third party store cache

  1. Open a command prompt window – right click on the Windows Start icon and select ‘Command Prompt (Admin)’.‘This product needs to be installed on your internal hard drive
  2. In the cmd window type wmic useraccount get name,sid and press Enter.
  3. The command will return the SID for the user account that apps are not working.
  4. Now, press Win+R hotkeys and in the Run box enter regedit and click OK.
  5. From Registry Editor navigate towards HKEY_LOCAL_MACHINE -> SOFTWARE-> Microsoft-> Windows-> CurrentVersion-> Appx-> AppxAllUserStore
  6. From the left panel expand AppxAllUserStore and remove the SID entries that were displayed as not working before.
  7. Close everything and restart your computer.

5. Reinstall Windows apps

  1. Run an elevated cmd window on your device – right-click on the Windows Start icon and choose ‘Command Prompt (Admin).
  2. In the cmd window enter: Get-AppXPackage -AllUsers | Foreach {Add-AppxPackage -DisableDevelopmentMode -Register “$($_.InstallLocation)AppXManifest.xml”}.
  3. Execute this command and restart your Windows 10 device.

If you want to reinstall just a certain App, you will need to find its appxmanifest.xml file path. To do so:

  1. Open PowerShell as an administrator
  2. Enter this code: Get-AppxPackage -allusers | Select Name, PackageFullName
  3. Select the App you want to reinstall and double-click on its PackageFullName
  4. Copy/paste the string to your clipboard
  5. Go back to PowerShell
  6. Enter this code Add-AppxPackage -register “C:\Program Files\WindowsApps\PackageCodeName\appxmanifest.xml” -DisableDevelopmentMode
  7. Replace PackageCodeName with the string you copied
  8. Restart your PC

Conclusions

Of course, you can also include a system scan for checking if there are processes that aren’t running properly. This system scan can be done within an elevated command prompt by running the sfc /scannow command.

We hope that you now have a fully functional Windows Store platform. So, go ahead and download, update and install your favorite Windows 10 tools.

Windows 8 Store Not Working [SOLVED]

Windows 8 store not working? This can be an issue, especially if you tend to use the Universal apps a lot, but there’s more than one way to fix this problem.

Don’t worry too much though. With the simple tricks below you’ll be able to fix it:

What can I do if the Windows 8 Store is not working?

1. Create a new user account

  1. Open the Settings app.
  2. Navigate to Accounts section.
    accounts Windows Store won’t update
  3. Select Family & other people from the menu on the left. In the right pane click on Add someone else to this PC.
    add someone else to this PC Windows Store keeps crashing
  4. Click on I don’t have this person’s sign in information.
    I don't have this persons' sign-in information Windows 10 apps won't launch
  5. Choose Add a user without a Microsoft account.
    add a user without a Microsoft account How to reinstall Windows 10 Store
  6. Enter the desired user name and click on Next.
    user information Windows Store open and closes

Note: After creating a new user account check if the issue appears on the new account. If not, you might have to move your personal files to the new account and use it as your default account.

2. Check your antivirus

Sometimes antivirus apps can lead to this error, particularly McAfee and Avast. To figure out if that’s the problem, disable your antivirus temporarily and try opening the Windows 8 Store again.

If it now works, we recommend uninstalling it an replacing it with an antivirus with low CPU usage because these are generally less prone to cause errors.

3. Switch to a local account

  1. Open the Settings app and go to the Accounts section.
  2. Click on Sign in with a local account instead.
    sign in with a local account Windows 10 Store won't stay open
  3. Enter your account password and click on Next.
    account password Windows Store The server stumbled
  4. Enter the desired username and click on Next.
    new username Windows Store won’t download

4. Delete the LocalCache directory

  1. Navigate to the following directory: C:Usersuser_nameAppDataLocalPackagesMicrosoft.WindowsStore_8wekyb3d8bbweLocalCache
  2. You can do that by simply by pressing Windows Key + R and entering %appdata%.
    appdata run Windows Store keeps loading
  3. Select all files in the Local Cache directory and delete them.
    delete files Windows 10 apps won't launch

5. Use PowerShell

  1. Search for powershell right-click it and choose Run as administrator.
    powershell Windows 10 apps won't launch
  2. Enter the following command: PowerShell -ExecutionPolicy Unrestricted -Command "& {$manifest = (Get-AppxPackage Microsoft.WindowsStore).InstallLocation + 'AppxManifest.xml' ; Add-AppxPackage -DisableDevelopmentMode -Register $manifest}"

Note: If the previous command doesn’t work, you can try this command instead: Get-AppXPackage -AllUsers -Name Microsoft.WindowsStore | Foreach {Add-AppxPackage -DisableDevelopmentMode -Register "$($_.InstallLocation)AppXManifest.xml" -Verbose}

If you’re still using Windows 8, you might want to try running the following command: powershell -ExecutionPolicy Unrestricted Add-AppxPackage -DisableDevelopmentMode -Register $Env:SystemRootWinStoreAppxManifest.xml

6. Enable UAC

  1. Search for user and select Change User Account Control settings from the menu.
  2. Move the slider to the default position and click on OK to save changes.
    choose when to be notified Windows Store The server stumbled

Note: According to users, problems with Microsoft Store might be related to UAC. User Account Control is a security feature that prevents certain actions that require administrative privileges. Perhaps your Windows 8 Store is not working because of it.

This feature generates many security notifications, and this is the main reason why users tend to disable it.

7. Run the Microsoft Store Apps troubleshooter

  1. Open the Settings app and select the Update & security section.
    update and security How to reinstall Windows 10 Store
  2. In the left pane, select Troubleshoot. From the right pane select Microsoft Store Apps and click on Run the troubleshooter button.
    troubleshoot Windows Store open and closes
  3. Wait for the troubleshooter to finish.

8. Reset the Microsoft Store

  1. Go to Settings and click on Apps, then on Apps & Features.
  2. Locate the Microsoft Store app in the list and select it.
  3. Click on Advanced options as shown in the screenshot below.microsoft store app
  4. Click on the Reset option and restart your computer.reset microsoft store

Our last solution for the Windows Store not working on Windows 8 problem involves resetting the Store altogether. This should make it functional again.

Once you apply the steps above your Windows Store problem should be gone. Leave us your thoughts in the comments section below regarding the Windows 8 Store not working topic.

Steam Crashes When Uninstalling a Game: 3 Easy Solutions

Steam is one of the most popular clients, with thousands of exciting games. Some of these are free, while others require purchase, both prior and in-game. But several users reported that Steam crashes when uninstalling a game.

The issue is not new and has been present for quite a few years now. For some, it got fixed automatically, but many continue to report it even today. So, let’s find out how you can fix the problem.

Why does Steam crash when uninstalling a game?

Here are some of the reasons Steam crashes when removing a game:

  • Another game is updating the background – In some cases, users realized that a game was updated in the background while they were uninstalling another, which triggered the crash.
  • Issues with the Steam client – Some users reported issues with the client itself, which may also lead to Steam crashing when installing games.
  • Bug in the current version – Since many reported that the issue was fixed after installing Steam updates, it could be that there was a bug in the program that led to the error.

What can I do if Steam crashes when uninstalling a game?

Before we head to the slightly complex solutions, here are a few quick ones you can try:

  • Restart the computer and check if Steam still crashes when uninstalling a game.
  • Terminate all other programs on the computer while uninstalling the game since these might be conflicting with the process.

If these two don’t work, the solutions listed next surely will.

1. Launch Steam in offline mode

  1. Open Steam, click on the Steam menu near the top-left corner, and select Go Offline from the menu.go offline to fix steam crashes when uninstalling a game
  2. Now, click on Enter Offline Mode in the confirmation prompt.enter offline mode
  3. Next, navigate to the Library.library
  4. Right-click on the game that you were trying to remove earlier, hover the cursor over Manage, and choose Uninstall.remove to fix steam crashes when uninstalling a game
  5. The game should now uninstall successfully.
  6. Once done, again click on the Steam menu, and this time, choose Go Online.go online

This solution works on all Steam versions and allows users to uninstall games effectively. If Steam still crashes while uninstalling a game, head to the next solution.

2. Update the Steam Client Software

  1. Open the game client, click on the Steam menu, and select Check for Steam Client Updates.update to fix steam crashes when uninstalling a game
  2. Now, wait while Steam checks for updates and installs any available ones.checking for updates
  3. Once done, restart the computer for the changes to come into effect.

Though the game client automatically looks for updates by default at launch, there’s no harm in checking manually when Steam crashes while uninstalling a game.

3. Uninstall the game via Programs and Features

  1. Press Windows + R to open Run, type appwiz.cpl in the text field, and then hit Enter.appwiz.cpl
  2. Locate the game that couldn’t be uninstalled via Steam, select it, and click Uninstall.remove from programs and features to fix steam crashes when uninstalling a game
  3. Now, follow the on-screen instructions to complete the uninstall process.

This one is more of a workaround than a solution but is often highly effective at bypassing the problem if Steam crashes when uninstalling a game.

You can also uninstall Steam games with third-party uninstaller software. The best third-party uninstaller utilities will erase leftover files from uninstalled software the default Windows uninstaller might leave behind. Some third-party software removal tools include useful force uninstaller features.

⇒ Get IObit Uninstaller

After you have managed to fix the problem, do not forget to find out how to optimize your PC for gaming.

For any queries or to share a solution that we may have missed, use the comments section below.

Hot to Fix Microsoft Store if it Can’t Update

The Microsoft Store can’t update for some, and that problem is usually caused by app corruption or incorrect region settings. Here’s how to fix it quickly.

What can I do if the Microsoft Store won’t update?

1. Change The Region Settings

  1. Go to Start Menu and click on Control Panel
  2. In Control Panel, go to Region, and change your region under Formats drop-down menu
  3. Reboot your Microsoft Store and try to update it again

Maybe the Microsoft Store is not updating apps because you’re in the unsupported region or your region somehow changed from your actual one.

To solve the problem all you need to do is to change your Region Format in the Control Panel and your Microsoft Store app should be able to update again.

2. Repair the Microsoft Store app

If changing the region didn’t help, you can try with repairing your Store app in the Command Prompt. To do that, follow these steps:

  1. In the Search box, type cmd
  2. Right click on Command Prompt and choose Run as administrator
  3. In the command prompt, enter the following command:
    • PowerShell -ExecutionPolicy Unrestricted –Command “& {$manifest = (Get-AppxPackage Microsoft.WindowsStore).InstallLocation + ‘AppxManifest.xml’ ; Add-AppxPackage -DisableDevelopmentMode -Register $manifest}”

3. Use the Windows Store Apps troubleshooter

The next thing we’re going to try is running the built-in Store troubleshooter to make Microsoft Store update.

  1. Go to Settings.
  2. Navigate to Updates & Security > Troubleshoot.
  3. Click Windows Store Apps and choose Run the troubleshooter.Windows 10 Store update not working
  4. Wait for the troubleshooter to finish the process.
  5. Restart your PC.

4. Reset the Store

  1. Go to Search and type wsreset.
  2. Click WSReset.exe
  3. Wait for the process to finish and restart your computer.

Another widely used troubleshooting tool that’s tightly connected to the Windows Store is the WSReset command. You can use this command to reset the Store, and bring to its previous state, back when it had no issues updating.

You can also review a dedicated guide on fixing Microsoft Store stuck on Working during updates when resetting the Store does not resolve the issue.

5. Check the date and time

Some users reported that you can’t install Windows Store updates or any other updates if your date and time are wrong. So, make sure to get your time and date settings right before trying to update the Windows Store.

6. Reinstall a problematic app

If you have a problem with a certain app, it may block the entire Store and cause it to not update. So, go through all the apps installed on your computer, find and uninstall the troublesome one.

You can find the list of all the installed apps in Settings > Apps > Apps & features.

7. Perform the SFC scan

  1. Go to Search, type cmd, right-click Command Prompt, and go to Run as Administrator.
  2. Enter the following command, and press Enter on your keyboard: sfc/scannowWe can't seem to start the store update right now
  3. Wait for the process to finish.
  4. Restart your computer.

Another troubleshooting tool designed for dealing with various system errros within Windows, including the Windows Store, is the SFC scan. So, you can try and run this feature to resolve the problem with updating the Microsoft Store.

8. Update Windows / Delete updates

  1. Press Windows key + I to open the Settings app.
  2. Select Update & security.
  3. Click on View installed update history.Windows Store pardon the interruption
  4. Choose to Uninstall updates.
  5. Uninstall all recent updates and restart your PC.

Windows updates are crucial for the system’s functioning. So crucial that some updates even determin whether your system will work better, or become broken. Because of that, it takes installing just one Windows update to solve your problem. And that’s what we’re going to do now.

To check for new updates, simply go to Settings > Updates & Security, and check for updates. If a new update is available, the app will install it automatically.

But as I said, a broken update can also cause a handful of issues. So, if installing a new update didn’t sovle the problem, try with uninstalling the most recent update. Maybe you’ll get more lucky.

After you finish trying out all of these solutions, try to see if you can update the Store.

So, here are the solutions for Microsoft Store updating problems. After performing these solutions your Microsoft Store should be able to receive new updates on a regular basis.

If the Microsoft Store is stuck on Pending, click the highlighted link for the right solutions to fix it. We also have a helpful guide on how to fix Microsoft Store if it’s not downloading anything.

If you have any other questions, suggestions, or these workarounds somehow didn’t work for you and Microsoft Store still won’t update, please tell us in the comments section below.

How to Download KB2999226 for Windows 10/7 [Offline Installer]

Missing updates can be a problem, and one update that many reported missing is KB2999226. Sometimes Windows Update isn’t showing, and we already wrote about this issue in one of our previous guides.

In today’s guide we’re going to show you how to properly download this update on your PC, so let’s get started.

What is KB2999226?

This is an update intended for older operating systems that brings the following improvements:

  • Windows 10 Universal CRT – This update is intended for users that use game programming software and other development tools. With this update, older operating systems will be able to utilize Windows 10 Universal CRT functionality.

How do I download and install KB2999226 on Windows 10/7?

1. Use Windows Update

Windows 10

  1. Press the Windows key + I to open the Settings app. Next, go to Update & Security.
     
  2. If the update isn’t showing, click on Check for Updates.
  3. In case the update is still not listed, click on View optional updates and download it from there.
  4. Look for the update and select it to download it.

Windows 7

  1. Open Control Panel.
  2. Go to the System and Security section and then select Windows Update.
     
  3. Click on Check for updates.
  4. Wait for updates to install.

2. Download the update manually

Windows 7

  1. Open your browser and go to Microsoft download page.
  2. Locate the 64-bit or 32-bit version of Windows 7 and click Download the package now.
     
  3. Next, click on Download.
  4. Wait for the process to finish.
Note icon NOTE
A manual download for Windows 10 isn’t possible since the update isn’t available in this form for Windows 10.

We hope that you found this guide helpful and that you manage to install the update. For more information, be sure to read our guide on how to update Windows 10 offline.

Comment down and let us know how easy it was to install the KB2999226 following our guide.

Fix: Sorry This Profile Can’t Connect to Xbox Live on This Console

If you’re troubled by this error message: Sorry this profile can’t connect to Xbox Live on this console, we have a few solutions that can help you to resolve this.

Sometimes the issue appears due to your Gamertag. Moreover, like a computer, your Xbox contains a cache system that stores items such as gamer pictures, game updates, or system update installation packages. This could also cause hitches in your console’s performance sooner or later.

One way or another, it’s time to take action. Follow the steps given below to fix the problem in no time.

How to fix Sorry this profile can’t connect to Xbox Live on this console?

1. Delete your Gamertag and download your profile

Xbox gamertag
  1. To begin, launch a Backward Compatible title on your console.
  2. Press the View and Menu buttons simultaneously for a few seconds.
  3. Then, select Manage Storage.
  4. You will get a warning that you are leaving the game, so confirm your intention.
  5. Select Profiles.
  6. Look for your Gamertag next and delete it.
  7. Press B to back out of the screen and then press the same View and Menu buttons again to bring up the menu.
  8. You may see an option there to download the profile. Click on that and it will ask for your email and password.
  9. If you can’t find this option, select Sign In or press X on the controller.
  10. Finally, don’t forget to select Download Profile to download it once again to the console.

Sorry, this profile can’t connect to Xbox Live on this console is a message often related to your Gamertag in backward compatible games. The procedure above described shows you how to delete your Gamertag and redownload your profile.

Apply it as a first-line solution as this should resolve any issues you have with the profile connecting to Xbox Live.

2. Clear the cache of your console

  1. Firstly, hold down the Power button on the front right corner of your console until it turns off completely.
  2. Then, unplug the power brick from the back of the console.
  3. Press and hold the Power button on the Xbox several times to expel any remaining power and clear the cache.
  4. You may plug the power cable back in.
  5. Look at the power brick and wait for the AC adapter light to change from white to orange. When this happens, you may turn the Xbox back on.
  6. To confirm the cache clear was successful, load a game at your choice. The console should display that it is Syncing, which means it is synchronizing with your saved data from the onboard storage.

Note: This process works on all console versions, including the Xbox One original, Xbox One S, and Xbox One X.

Some users that were also struggling to resolve this problem have confirmed that they managed to fix it by clearing the cache. You can actually solve a lot of common problems with your Xbox by simply removing temporary files and data stored in the system cache during normal use.

This procedure is both fast and easy, and comes with only one small downside – it removes previously downloaded game updates, so you need to download them again the next time you play the game. That’s why it’s a good idea to apply the above steps before attempting a full factory reset.

3. Reset your Xbox to factory settings

reset console
  1. Press the Xbox button to open the guide.
  2. Then, access the Settings menu by pressing the gear-shaped icon.
  3. Choose System from the left panel.
  4. Select the Console info & updates section.
  5. Select Reset console.
  6. On the Reset your console? screen, you’ll see a few options to choose from. If you want to leave game and app data in place, then highlight Reset and keep my games & apps.
  7. To reset the system to factory defaults, highlight Reset and remove everything (recommended in this case).

If the previous procedures haven’t resolved the problem, your final move should be performing a factory reset. This procedure will successfully replace any corrupted data that might be responsible for the error message you’re seeing.

It may also fix issues related to your profile not completely downloading.

Resetting your console to factory settings isn’t difficult, but it’s a procedure that can’t be undone. That’s why we’re recommending to sign in and connect to Xbox Live if you want your data synced up.

If you have any other questions or suggestions for solving this Xbox Live connection problem, don’t hesitate to leave them in the comments section below.

Dell XPS 15 Speakers Not Working (No Sound): Fixed

Many users have been complaining about the sound issues in Dell XPS 15 speakers. For most, the Dell XPS 15 speakers are simply not working.

While the PC is rated highly, this flaw can be annoying because of the important role of sound in your computer use.

The problem might stem from multiple causes, and Realtek speakers are known to encounter sound problems, especially with audio drivers.

So to fix this issue, this article will be covering various solutions that can be used to troubleshoot Dell XPS 15 audio not working on Windows devices.

What can I do to fix Dell XPS 15 speakers not working?

1. Update audio drivers

  1. Press Windows Key + X and select Device Manager from the options listed.
  2. Find your audio drivers on the list, right-click it and choose Update drivers from the menu.
  3. Select Search automatically for updated driver software to scan for driver updates. If Windows finds any updates, it will automatically download them.
  4. Then Restart the PC to take effect.

Alternatively, it is advisable to install the latest drivers by downloading directly from Dell’s official site, we recommend using Outbyte Driver Updater for your driver update.

  1. Download Outbyte Driver Updater, and install it.
  2. Launch the application and scan for all faulty drivers.
  3. Then select the audio drivers from the listed options or you can update all the faulty drivers. 
  4. Wait for updated drivers to be installed.
  5. Restart your PC to take effect.

2. Change the default audio format

  1. Right-click the Volume icon in your Taskbar and click on sounds.
  2. Click on the Playback, choose your audio device, and click properties.sound playback properties - fix sound lenovo laptops
  3. Select the Advanced tab and change the Default sound format to any of the options in the dropdown, depending on your PC settings. Then click to test.default format sound - fix sound lenovo laptops
  4. Once any of the formats works, click Apply or OK to save the changes.

Changing the default audio format can help resolve the sound problem.

3. Check the audio settings

  1. Right-click the Volume icon in your Taskbar and click on sounds.
  2. Click on the Playback, and right-click on your speaker device. Then check Show Disabled Devices and Show Disconnected Devices. 
  3. Right-click on your speaker and select Enable. 
  4. . Proceed to click on Set Default to set the device as the default audio device. Then click OK.

4. Enable Automatic Windows Audio Service

  1. Press Windows key +R and input services.msc. Click on OK or press enter key. 
  2. Choose Windows Audio and double-click on it.windows audio service
  3. On the General tab, change the Startup type to Automatic, and click on Start.
  4. Click on Apply, then OK to save.

If the Windows service is not enabled, it could cause sound issues.

5. Check mute speakers

  1. Right-click the Volume icon in the Taskbar and select Open Volume Mixer.
  2. Turn up the Speakers and System Sound.Windows 10 no audio devices are installed

Often overlooked but the issue of no sound on your Dell XPS 15 might be because of the volume control.

Issues related to sound and speakers are rampant among Dell XPS 15 users. If you want additional information on how to fix laptop speakers not working, check out our best fixes.

Is your Dell XPS 15 speakers not working issue gone by now? Is sound working properly, finally?

We’d like to hear from you in the comment section on your experience using the solutions above. So, leave your questions and suggestions below.

How to Do a Clean Install of Windows 11: Full Download & Setup Guide

A clean install Windows 11 download is your best bet when things get sluggish, buggy, or bloated. It wipes the slate clean and puts a fresh, stable version of Windows back in place, without leftover junk or broken settings slowing you down.

Whether you’re upgrading, troubleshooting, or just want to start from scratch, a clean install can fix way more than a typical reset.

In this guide, we will show you how to reinstall Windows 11 using a USB media tool, just like we did with our guide on how to install Windows without losing your files.

How do I reinstall Windows 11 from an installation media?

1. Create a Windows 11 bootable drive

  1. Connect an 8-16GB flash drive to your PC.
  2. Visit the Rufus website and download the software.
  3. Once the software is downloaded, run it.
  4. Choose your USB flash drive and click on Select.
  5. Locate the Windows 11 ISO file.
  6. Now click on Start.
  7. You’ll be asked to confirm that you want to format the drive. Select OK.
  8. Wait for the process to finish.

If you want a truly minimal setup without third-party clutter, here’s how to install Windows 11 without bloatware.

2. Reinstall from the bootable flash drive

    If you need to reinstall the Windows 11 using USB flash drive, you can perform it efficiently with the guided steps from below.

  1. 1. Connect the bootable installation media USB flash drive to your PC.

  2. 2. Restart your PC and enter BIOS by pressing Del or F2 during the boot.

  3. 3. Set your flash drive as the default boot device and save changes.

    windows-11-reinstall
  4. 4. Press any key to enter setup when asked and click Next.

    windows-11-reinstall
  5. 5. Click on Install now to proceed.

    windows-11-reinstall
  6. 6. Enter your product key or choose I don’t have a product key.

  7. 7. Select the version that you want to install and click Next.

    windows-11-reinstall
  8. 8. Accept the terms of service and click Next.

    windows-11-reinstall
  9. 11. Select the Custom install option.

    windows-11-reinstall
  10. 12. Select the Primary drive and click Next. Double-check to make sure that you’ve selected the correct drive.

    windows-11-reinstall
  11. 13. Follow the instructions on the screen to complete the process.

If you weren’t able to access BIOS, do not hesitate to change the BIOS settings on Windows 11.

You can also install Windows 11 without a Microsoft account if you prefer setting up your PC with a local user.

Some users also want to skip online setup steps entirely. In that case, here’s how to install Windows 11 without an internet connection, which works well for offline or private environments.

And if your current PC doesn’t meet Microsoft’s strict requirements, don’t worry. You can still install Windows 11 24H2 on unsupported PCs using a few smart workarounds.

This method will move your files to a Windows.old directory, and your files won’t be deleted. If you want to remove everything, use the Format option before completing Step 11.

Keep in mind that you can use the Windows.old folder to restore your files. Do so as soon as possible because the files will be deleted automatically after 10 days.

If you weren’t able to access BIOS, do not hesitate to change the BIOS settings on Windows 11.

As you can see, performing a Windows 11 reinstall is pretty simple, and you can even do it without losing your files. For less experienced users, we suggest a Windows 11 factory reset since the process is simplified and will give you the same results.

Also, you can download the Windows 11 ISO file and use it to reinstall or upgrade to the latest OS.

Feel free to let us know if you encounter any problems while reinstalling Windows 11 in the comments below.

Best Router With Internal Antenna [Our Top Picks]

We use Wi-Fi networks on a daily basis, and to create a Wi-Fi network, you need to use a wireless router. There are different types of routers, but some users prefer a router with an internal antenna.

If you’re one of those users, you’re in luck because today, we’re going to show you the best router with an internal antenna that you can buy.

What is the best router with internal antenna?

Linksys E5600

  • Up to 1,000 square feet range
  • Dual-band
  • Supports more than 10 devices
  • Four internal antennas
  • Wi-Fi 5 support
  • The user interface doesn’t allow you to access certain settings

If you’re looking for a router with an internal antenna, then Linksys E5600 might be the perfect choice for you. This model has a range of up to 1,000 square feet and can support more than ten devices.

The device uses Wi-Fi 5 standard, and it can provide you with a 1.2Gbps transfer speed. Dual-band support is there, but there are also features like Parental Controls and Guest Access.

As for the available ports, there is a single WAN port and four LAN ports available. Regarding the antennas, the device has four internal antennas.

Linksys E5600 is a great router, and if you’re looking for a model with internal antennas, then this might be the right choice for you.

WAVLINK AC3200

  • Dual-band router
  • Up to 1,000Mbps on 2.4GHz, up to 2,167Mbps on 5GHz
  • One Gigabit WAN port and three Gigabit LAN ports
  • 8x5dBi omnidirectional antennas
  • MU-MIMO
  • Some users had issues setting up the router

WAVLINK AC3200 is a dual-band router, and it provides you with speeds up to 1,000Mbps on a 2.4GHz network and up to 2,167Mbps on a 5GHz network.

The device has a single Gigabit WAN port and three Gigabit LAN ports. Regarding the antennas, there are 8x5dBi Omni-directional internal antennas available.

As for additional features, there’s MU-MIMO technology support, parental control, and an LCD so you can see the status of your network.

WAVLINK AC3200 offers some great features, and it’s a perfect choice for a router in your home or office.

AZORES AX1500

  • Supports WiFi 6 802.11ax standard
  • Dual-band, up to 300Mbps on 2.4GHz, up to 1200Mbps on 5GHz
  • OFDMA and MU-MIMO support
  • Four Gigabit Ethernet ports
  • Easy setup with AZORES dedicated app
  • Signal strength can vary for some users

This is a dual-band router, and it supports speeds up to 300Mbps on 2.4GHz and up to 1200Mbs on 5GHz networks. The device also supports OFDMA and MU-MIMO for better connectivity.

The device has 4 Gigabit Ethernet ports and an automatic WAN detection, so it’s easy to set up. Speaking of setup, you can do that easily with AZORES mobile app.

As for the supported standards, the device supports Wi-Fi 6 (802.11ax) as well as IPv6. It’s also worth mentioning that the device supports Easy Mesh technology.

AZORES AX1500 is a solid router, and if you’re looking for a router with an internal antenna, this might be the right choice for you.

TP-Link TL-WR902AC

  • 433Mbps on 5GHz, 300Mbps on 2.4GHz
  • Two internal antennas
  • Single WAN/LAN port and USB 2.0 port
  • Four working modes
  • Support for 802.11ac standard
  • Just one USB port

TP-Link TL-WR902AC is a lightweight and compact router, so it’s perfect for traveling or a device that won’t take too much space.

The router supports 5GHz and 2.4GHz networks, and it can deliver transfer speeds up to 433Mbps and 300Mbps, respectively. As for the antennas, the device comes with two fixed internal antennas.

The device has a single WAN/LAN and USB 2.0 ports. As for working modes, there is a standard router mode, access point mode, client mode, and hotspot mode.

Overall, TP-Link TL-WR902AC is a simple and compact router, and if you need the most basic router with an internal antenna, then this model is what you are looking for.

D-Link DIR-850L

  • Up to 300Mbps on 2.4GHz network, up to 867 on 5GHz network
  • Gigabit WAN port, four Gigabit LAN ports
  • USB 2.0 port
  • DLNA support
  • mydlink app for network monitoring
  • Minor configuration issues for some users

We want to show you another great router with an internal antenna: D-Link DIR-850L. The router comes with six internal antennas, and it supports both 2.4GHz and 5GHz bands.

Regarding the speed, you can achieve up to 300Mbps on 2.4GHz and up to 867Mbps on the 5GHz band. As for wired connectivity, there’s one Gigabit Ethernet WAN port and four Gigabit LAN ports.

For file sharing, there’s a USB 2.0 port, DLNA support, and you can also monitor your home network using the dedicated mydlink app.

D-Link DIR-850L offers great features, so if you need a router with an internal antenna, be sure to consider this model.

Are there routers without an internal antenna?

Yes, there are also routers with external antennas. Only non-wireless routers don’t have antennas because they don’t send Wi-Fi to other devices. Basically, a Wi-Fi router requires an antenna by default.

If you prefer using a router with an internal antenna, be sure to consider any model from our guide.

You may also want to check our selection of the best routers for access point that may be useful in your selection.

What is your router of choice? Let us know in the comments section.

How we Fixed “The Person who Bought This Needs to Sign in” Xbox

Many reported The person who bought this needs to sign in a message on Xbox, and this error prevents users from playing games.

The issue affects both digital and physical games, but there are a few methods you can use to fix this error.

How can I fix the Person who bought this needs to sign in Xbox error?

1. Check the status of Xbox Live services

  1. Open your browser and check the status of Xbox Live Services.
  2. If any Xbox Live service is having issues, that is the likely cause of the error.

Problems with services are related to Xbox Live servers, so you’ll just have to wait for Microsoft to fix the issue on their end.

2. Restart your console

  1. Press and hold the Power button on your console for 10 seconds.
  2. Once the console turns off, disconnect it from the power outlet.
  3. Keep it disconnected for a minute or two.
  4. Connect it to the power outlet again and turn it back on.

3. Restart your router

  1. Locate the Power button on your router and press it once to turn the router off.
  2. Once the router is off, leave it like that for 30 seconds or so.
  3. Press the Power button again and wait for the router to boot.
  4. Once the router boots, check if the problem is still there.

4. Log out of your profile and log back in

  1. Open the Guide and select Sign in, then Switch profile.
  2. Now log out of your profile.
  3. Press the Xbox button again and choose Sign in.
  4. Select your account again and log in.

5. Set the console as the home console

  1. Make sure you’re signed in to the account that has the gaming license for the game you’re trying to run.
  2. Press the Xbox button to open the Guide and choose System.
  3. Navigate to Settings.
  4. Go to Personalization, then choose My Home Xbox.
  5. Now select Make this my home Xbox.
  6. Sign in with the account that’s giving you this error and check if the issue is still there.

There you go, a few quick and easy solutions that might help you with The person who bought this needs to sign in and Sign in with the account that purchased the game errors on your Xbox One.

Some worldwide users claimed that Xbox One can’t accept game invites, and if it’s happening to be in the same boat, make sure you follow some specialized steps to fix this kind of problem.

This isn’t the only issue you can encounter, and many reported that purchased games are not showing on Xbox One. We also have a guide on Oops not sure what happened there in the Xbox Store.

If you’re using physical discs, it’s possible that you’re dealing with a variation of the Xbox One 0x91d70000 error.

Are you facing any additional questions? Do not hesitate to share them with us by leaving a comment in the dedicated section below.

Fix: Windows 11 Bluetooth Mouse Keeps Disconnecting

Connecting a mouse to your computer allows you to extend the range and reachability of your PC or computer screen. Moreover, the users’ prominent issue is the Bluetooth mouse that keeps disconnecting in Windows 11.

Using external devices with your computer allows you to make the best of it. Hardware like mouse and keyboard gives you more features to use on your computer. However, users may encounter issues while using this hardware with the computer.

Furthermore, the Bluetooth mouse keeps losing connection on Windows 10/11 error may occur due to hardware issues, outdated driver issues, boot errors, and lots more.

However, the causes may differ in different mouse products like Logitech, Apple, or Dell Bluetooth mice.

Nonetheless, this article will discuss the causes and some fixes for the ‘Logitech/Dell/Apple Bluetooth mouse keeps disconnecting’ issue.

Why does my Bluetooth mouse keep disconnecting in Windows 11?

  • Computer boot error: Many things can go wrong while booting. Hence, it can make the computer act up and not function properly, resulting in the Windows 11 Bluetooth mouse keeps disconnecting issue. Furthermore, the computer can go through a faulty shutdown which may affect you whenever it comes up again. So, how you shut down and start your computer can affect its Bluetooth connection with the mouse.
  • Connection error between the mouse and the computer: When the mouse is not correctly connected to the computer, it can make the Bluetooth mouse keep disconnecting and reconnecting. Likewise, a wireless mouse can encounter some issues if it is connected to another device without being adequately disconnected from your computer,
  • Windows Power Management interference: Latest Windows computers come with an inbuilt Power management system that helps it disconnect or end tasks for programs that consume more power. However, the power management system can disconnect the mouse from your computer because it uses a noticeable amount of power.
  • Mouse driver issues: Mouse drivers may become corrupt or faulty. Hence, it can make the Bluetooth mouse keep losing connection to Windows 10/11.

Many other things may be responsible for the Windows 11 Bluetooth mouse’s keeps disconnecting issue. However, we recommend that users read through ways to fix Bluetooth mouse lag in Windows 11.

How do I stop my Bluetooth mouse from disconnecting in Windows 11?

1. Restart your computer

  1. Click Start on your screen.
  2. Select Power.
  3. Click on Restart and OK.

Restarting your computer will help fix any boot error that causes the Bluetooth mouse keeps disconnecting and reconnecting issues.

2. Update the mouse driver

  1. First, you need to press Windows + R at the same time to open the Run command windows.
  2. Now, in the Run command window, type devmgmt.msc and press OK.
  3. In this window, search for Mice and other pointing devices, click to expand it, find the mouse’s driver, right-click on it and select Update driver.update-mouse fps drops when moving mouse
  4. Lastly, select on Search automatically for updated driver software.mouse driver update

If this updating drivers manually seems to take too much time, you can always use an automated tool that scans your PC for outdated drivers and keeps them all up-to-date instantly.

3. Uninstall the mouse in the Device Manager

  1. Press Windows + R on your keyboard to open the Run command.
  2. Type in devmgmt. msc and press Enter to prompt the Device Manager.
  3. Select the Bluetooth mouse device and right-click on it.
  4. Click on Uninstall device and OK.

Uninstalling the Bluetooth mouse driver from your computer flushed the faulty files on it. However, restart your computer and try to connect the mouse. The computer will install the missing driver automatically.

4. Disable Windows Power Management

  1. Press Windows + R on your keyboard to open the Run command.
  2. Type in devmgmt.msc and press Enter to prompt the Device Manager.
  3. Select the Bluetooth mouse and double-click on it.
  4. Go to the Power Management tab and uncheck the Allow the computer to turn off this device to save power option.
  5. Click OK to save the changes.

We recommend that you restart your computer and see if the issue persists.

5. Update Windows

  1. Click on Start.
  2. Select Settings from the options.
  3. Click on Windows Update, then select Check for updates.

Windows will automatically search and download updates if there are any available.

Where can I find mouse settings in Windows 11?

  1. Press Windows + I simultaneously to prompt Settings.
  2. Select Bluetooth and devices.
  3. Click on Mouse. (Here, you’ll be able to access the mouse settings and adjust them to suit your needs)

However, we recommend you check our article regarding how to change mouse settings in Windows 11. It’ll help you toggle more features in your mouse settings.

Conclusively, there are lots of Bluetooth mouse products in the market that users can buy. However, users can read our guide on the best Bluetooth mice.

You can leave your suggestions and feedback in the comments section. We’d love to know if the article has helped you.

Windows 11 Won’t Install from USB: Why & How To Fix

If you’re having difficulty installing Windows 11 from a USB, it can be incredibly frustrating. Not many people know their way around computers, so this can be a daunting task. Unfortunately, this is a common problem that many users are trying to solve.

When installing Windows 11, it is important to be aware of the various risks and problems. For example, USB installation can be susceptible to errors and hardware malfunctions. Make sure you use an official Windows ISO file when installing from a USB stick.

Some possible reasons for a failed Windows OS installation using a USB stick include incompatible hardware, insufficient disk space, or a malfunctioning USB port. If none of those issues apply to you, the best solution is to use a different installation method.

The process can be overwhelming and frustrating, especially if you don’t know the necessary tricks. But don’t worry, this article will help with that. Read on to know more about the fixes.

Why can’t I install Windows 11 from USB?

There are several reasons why your Windows installation may have failed. The following are some of the most common ones:

  • One possible reason you can’t install Windows 11 from the USB stick is that your USB stick itself doesn’t work. Another possibility is that the USB may be corrupted or not formatted correctly.
  • If the UEFI settings are configured incorrectly, they can interfere with the installation. So, it’s wise to make sure that the settings are configured correctly before starting the installation process.
  • The Windows 11 installation on your PC requires quite a lot of space (at least 64 GB). If it doesn’t have enough free space, you can’t complete the procedure.
  • The problem might be due to your USB drive not being bootable.

Here are a few possible fixes that might help you get rid of this issue.

How to install Windows 11 on USB drive if it’s not working?

✅ Pre-checks:

✔️ Check for compatibility

Before installing Windows 11, please refer to the PC Health Check app to confirm that your device meets the minimum system requirement.

That being said, if you are on a laptop or desktop with good specs, chances are that you will enjoy the new release. The Windows release information status for known issues is also available for your reference.

✔️ Try a different USB port

Before proceeding, it is important to make sure the USB port you’re using is not broken. To ensure this, switch to a different USB port and try installing Windows 11 from the USB drive again to see if the issue resolves.

1. Check if your PC is configured to install Windows 11 from a USB

One of the best preparatory steps before installing Windows 11 is to plug in a USB and configure your computer to boot from it. This setting isn’t enabled by default, and you’ll need to manually set it up.

1️⃣ Firstly, reboot your computer. When the manufacturer’s logo appears, there are often some keys or a key combination that you can use. This will depend on the make and model of the PC. Refer to your PC manufacturer’s website for the same.

When pressing a special key, you’ll most likely see another prompt appear. It will show which key to press. For example, some common keys are F8 and F12. The options might differ based on the computer setup.

You’ll most likely see a menu that has options for different boot-up types. On the top-right corner, you’ll see an option that indicates which key is likely to trigger what. Therefore, pay close attention to the screen.

Upon pressing the key, find the option to access CD-ROM or DVD-ROM and make sure it’s enabled.

2. Free up space to install Windows 11

  1. Press Windows + X key and locate File Explorer.
  2. Navigate to My PC and verify the disk with the Windows label has at least 20 GB of free space.
  3. If not, it’s time to delete some files to free up space for Windows 11.

Windows 11 installations require a certain amount of free space on the storage drive. If enough space is not available, then the installation will be interrupted.

3. Update USB drivers

  1. Go to the Windows Search bar and type Device Manager. Hit Enter.
  2. In the Device Manager, locate the USB in question.
  3. Right-click the USB and select Update device.

At times, an outdated driver can prevent you from installing Windows 11 using a USB. Therefore, it is advisable to keep your drivers up to date to avoid any unpleasant experiences.

Searching for drivers on the web is time-consuming and frustrating. Outbyte Driver Updater is a great way to keep your computer up to date without spending hours researching the right drivers.

It works by scanning your computer and finding any outdated drivers; it then searches the web for updated drivers and installs them on your computer.

Outbyte Driver Updater

To fix USB installation issues with Windows 11, update the USB drivers automatically with this tool.
Free Trial Download Now

4. Create a different bootable USB

    If you didn’t repair the Windows 11 booting errors with the USB, then it might be a good idea to try with another flash drive.

  1. 1. Go to the Windows 11 download page on Microsoft’s website.


  2. 2. Navigate to Create Windows 11 Installation Media and click on Download now.

    windows-11-not-installing-from-usb
  3. 3. Accept applicable notices and license terms.

    indows-11-not-installing-from-usb
  4. 4. Plugin your USB drive.

  5. 5. Open the downloaded Windows 11 Media Creation Tool, follow the on-screen instructions to create a Windows 11 installation USB drive.

    windows-11-not-installing-from-usb
  6. 6. Having done this, restart your computer and navigate to the BIOS. And then set the USB media as the boot drive.

  7. 7. When you see the installation interface, click Next to proceed.

In the next window, you can reinstall/install Windows 11 by clicking the Install now button and following the on-screen instructions.

Most probably, this should fix the problem and you should be able to install Windows 11 on your PC. If it doesn’t, move on to the next resolution.

5. Try a different USB drive

If your USB drive is too old, it may not be compatible with your computer. You should, therefore, consider replacing it with a more up-to-date model. USB 1.0 or USB 2.0 drives, for example, are not suitable for being used as bootable USB drives these days.

6. Run Windows Troubleshooter

  1. Go to the Windows Search bar and type Troubleshoot settings. Hit Enter.
  2. Select the option, Other troubleshooters.
  3. Navigate to Windows Update and click on Run.

One of the most effective ways to determine what’s causing your problem is to run the Windows 11 troubleshooter. It can detect and try to fix some of the most common problems with the OS.

7. Check if the USB is formatted as FAT32

  1. Press Windows + X key simultaneously and choose File Explorer from the menu that appears.
  2. Next, locate My PC and expand it.
  3. Right-click the USB in question and select Properties.
  4. Navigate to the General tab and check whether the USB is formatted as FAT32 or not. As you can see in the screenshot below, the USB is formatted as NTFS.
  5. You can change the format to FAT32 by right-clicking the USB driver again. This time select the option Format.
  6. On the new window that pops up, select FAT32 format, and click Ok to proceed.

If you are going to reformat the USB stick, it’s a good idea to make a copy of the files you want to store on the USB. Once you’ve done that, reformatting the USB is pretty straightforward.

8. Enter the BIOS Configuration

  1. In the Windows Search bar, type Change advance startup options and hit Enter.
  2. Next, select restart now.
  3. Windows will now reboot your computer.
  4. Once your computer reboots, click on troubleshooting.
  5. Select Advanced options.
  6. Click on UEFI Firmware Settings.
  7. Then, click on the restart option to enter the BIOS configuration.

BIOS (stands for Basic Input Output System) is a type of firmware for computers. The principal job of a computer’s BIOS is to control the early stages of the startup process, such as ensuring that the Windows 11 operating system is successfully loaded into memory.

How can I create a Virtual machine (.ISO file) to install Windows 11?

You can create a Virtual machine (.ISO file) by visiting the Microsoft Website. Find the option Download Windows 11 Disk Image (ISO). Next, click on download and then follow the on-screen instructions.

Also, check our guide if Windows 11 installation has failed on your computer. If you want to try Windows 11 without installing it on your PC, we got you covered there too.

If you found this guide indeed helpful, do let us know in the comments section below.

Local Area Connection Doesn’t Have a Valid IP Configuration

Do you encounter an error that says Local area connection doesn’t have a valid IP configuration even if you have a stable internet connection?

You may often come across this error message when trying to run the troubleshooter through Windows. Besides, the error may also show up when you try to connect to ethernet or Wi-Fi.

What causes the local area connection doesn’t have a valid IP configuration?

The error means that the IP (Internet Protocol) address provided to the network adapter is wrong or invalid.

Some networking apps can alter the adapter’s default parameters, such as web browsers and VPN clients.

However, we can easily fix these changes by setting the values ourselves or performing a network reset. 

Why does my LAN not have a valid IP?

There are a few other reasons that may be causing this issue, which we have listed below.

  • Incorrect Winsock catalogs
  • Network services have not started.
  • Overheated routers
  • Outdated/corrupted network drivers

However, the local area connection doesn’t have a valid IP configuration error is not a great concern and can be fixed even with limited technical knowledge. 

But before you proceed, make sure that you restart your system because many users report that this method has helped them fix the issue.

How do I fix the local area connection doesn’t have a valid IP configuration?

1. Change your network adapter settings

  1. Press the Win + R keys simultaneously to launch the Run console.
  2. Type ncpa.cpl in the search box and hit Enter. run ncpa.cpl command
  3. In the Network Connections window, right-click on your internet adapter and select Properties. wifi properties
  4. Next, under the Networking tab, select Internet Protocol Version 4 (TCP/IPv4) and click on Properties below. select Internet Protocol Version 4 (TCP/IP4)
  5. Now, in the Properties dialog, under the General tab, select Use the following DNS server addresses.
  6. Here, add the below addresses in the respective fields: Preferred DNS: 1.1.1.1; Alternate DNS: 1.0.0.1. Press OK. add preferred and alternate DNS

Now try connecting your WiFi or Ethernet and check if the issue still persists.

2. Reset network and flush DNS

  1. Press the Win + R hotkey to open the Run console.
  2. Type cmd in the search bar and press the Ctrl + Shift + Enter keys together to open the elevated Command Prompt. open elevated command prompt by pressing Ctrl + Shift + Enter together
  3. In the Command Prompt (Admin) window, run the below commands one after another and hit Enter after each one:
    • netsh winsock reset catalog
      netsh int ipv4 reset reset.log
      netsh int ipv6 reset reset.log
      ipconfig /flushdns
      ipconfig /release
      ipconfig /renew
      ipconfig /registerdns
      reset network and flush dns
  4. Now, wait till the commands are successfully executed.

Once the process is over, restart your PC and check if the internet connectivity is back up and running.

3. Disable & enable the Internet adapter

  1. To open the Run console, press the Win + R keys together.
  2. Type in ncpa.cpl and hit Enter to open the Network Connections window. run ncpa.cpl command
  3. Now, right-click on the internet adapter and select Status. internet adapter status
  4. In the next dialog, click on Disable. disable network
  5. Now, wait some time, right-click on the internet adapter again and click on Enable. enable network

This should help you fix the Local area connection doesn’t have a valid IP configuration error.

4. Reset network

  1. Press the Win + I keys together to launch the Windows Settings app.
  2. Next, click on Network & internet on the left. Network & internet
  3. Now, navigate to the right, scroll down and click on Advanced network settings. Advanced network settings
  4. On the right, go to More settings and click on Network reset. network reset
  5. Now, on the next screen, go to Network reset, and click on Reset now. reset now
  6. Click on Yes to confirm and proceed.

Once the process is over, your PC will reboot automatically. You can then check if your ethernet or Wi-Fi is working properly.

5. Update/reinstall network adapter

Tip icon Editor’s tip

You can try a more efficient solution, such as Outbyte Driver Updater to ensure that your updated driver is compatible with your operating system. This tool can update not only your network adapter driver but all the outdated drivers as well.

5.1 Install your drivers in compatibility mode

  1. Visit the manufacturer’s website for the network adapter, download the driver, and save the installer on the desktop.
  2. Right-click on the installer and select Properties. installer properties
  3. In the Compatibility tab, go to Compatibility mode, select Run this program in compatibility mode for, and select Windows 8. Press Apply and OK.run this program in compatibility for

Now, run the installer and finish installing the network adapter drivers and this should help you fix the issue.
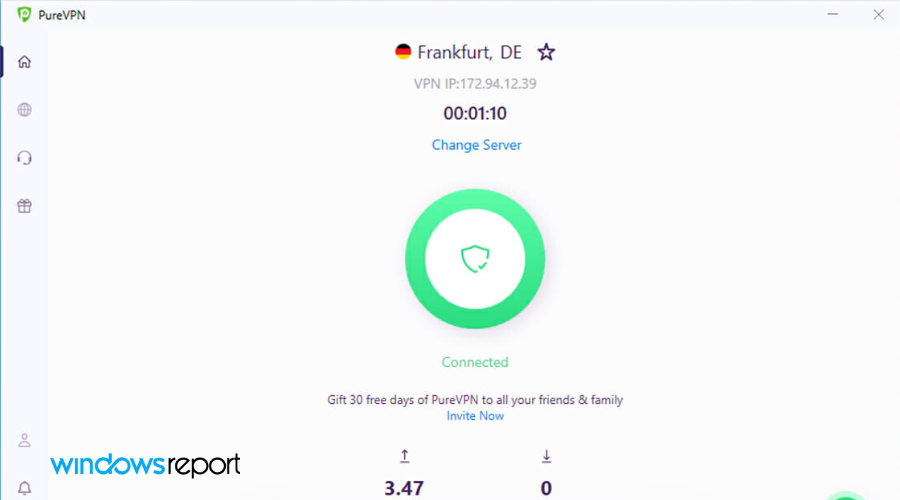
5.2 Reinstall the network adapter

  1. Press the Win + R keys together on your keyboard and the Run console opens.
  2. In the search bar, type devmgmt.msc and hit Enter. write devmgmt.msc in the run command and press enter
  3. Next, expand the Network adapters section, right-click on the device, and select Uninstall.uninstall Intel(R) Dual Band Wireless-AC 3160
  4. Click on Uninstall again in the prompt to confirm. confirm to uninstall
  5. Now, click on the Action tab at the top, and select Scan for hardware changes. Scan for hardware changes

Now, restart your PC and check if the LAN issue is resolved and you can access the Internet.

How do I assign an IP address to a local area connection?

Follow the below steps to assign a valid IP address to a local area connection network:

  1. Open the Run console by pressing the Win + R shortcut keys.
  2. In the search bar, type ncpa.cpl and hit Enter. run ncpa.cpl command
  3. As the Network Connections window opens, right-click on your network adapter and click on Properties.wifi properties
  4. On the next screen, under Networking, highlight Internet Protocol Version 4 (TCP/IPv4) and press the Properties button below. select Internet Protocol Version 4 (TCP/IP4)
  5. Next, in the Properties window, under General, select the radio button next to Use the following DNS IP address.
  6. Now, enter the below addresses in the respective fields: IP address: 192.168.1.50; Subnet mask: 255.255.0.0; Default gateway: 192.168.0.0enter IP adress
  7. Press OK to save changes.

Once done, check if the Local area connection doesn’t have a valid IP configuration issue is resolved.

Alternatively, you can update your BIOS to make sure that the built-in network adapter becomes fully compatible with your router or network hardware.

You can also visit the manufacturer’s website for your router to download & install the latest firmware and fix the local area connection doesn’t have a valid IP configuration issue.

But if it’s your Wi-Fi that doesn’t have a valid IP configuration on Windows 11, we have some effective methods for you to fix the issue.

Similarly, if you’re getting the Ethernet doesn’t have a valid IP configuration message, check out our dedicated guide.

We hope you managed to fix the Local area connection doesn’t have a valid IP configuration Windows 10 issue. If you have any other queries related to network adapter issues, you can let us know in the comments section below.

Best Cross Platform LAN Games To Play With Friends

Everything is better when done with your friends, and video games are no exception. While there are many online multiplayer games available for all the platforms, finding a decent collection of LAN party games is not an easy task.

Especially when your friends are not the biggest fan of the platform that you use.

Irrespective of whether your group uses Linux, Windows or MacOS systems, you should be able to host LAN parties with these cross-platform LAN games.

In this article, we take a look at the best cross-platform LAN games that you can play on your Windows, macOS, and Linux systems and relieve the moment of LAN parties before it becomes history.

Which are the best cross platform LAN games?

Xonotic

Xonotic
  • Price – Free
  • Supported Platform – Windows, macOS, and Linux

Xonotic is a free and fast arena shooter game which is addictive and the best game to start your new LAN party. It is completely free to download and play.

Xonotic offers an addictive first-person shooter style gameplay with a wide array of weapons to choose from combined with flexible game mechanics.

Your arsenal has over 9 core and 16 full weapons each with a primary and UT-like secondary firepower including Blaster, Shotgun, Machinegun, Mortar and more.

You can play the game in multiple modes including a normal game mode that offers similar arena shooter experience like other popular games like Deathmatch and Capture the Flag. Then there is a Nebal and Freeze Tag mode with multi-player race support.

Out of the box, Xonotic offers 25 official maps but you can get more community made maps with a single click, or you can create your own if you prefer using the map editor.

Other features in the game include integrated player statistics, customizable heads-up display to include all the information you need, and full customization option to use the game in a competitive environment with anti-cheat system and customizable servers.

Xonotic is an excellent first-person shooter game that is free to use and supports three major platforms.

Download Xonotic 

Warcraft III: Region of Chaos

Warcraft
  • Price – $29.99
  • Supported Platform – Windows and Mac

If fantasy themes and strategy games are your things, Warcraft III is one of the most popular games from Blizzard that is available for only two platforms, Windows and Mac. Warcraft offers both single player and a multiplayer pack that can be played over LAN.

The single player campaign story allows you to play as four mighty races. You can play as Night Elves, Orcs, Undead and Humans.

You can lead the forces into the battle and learn to cast spells, carry special items while advancing in the level. Players are given new quests (objectives) regularly to keep them on their toes.

Being a strategy-based game, Warcraft offers a map covered with black fog, which starts to clear as you advance in the game. The players can begin with building settlement and establish troops to protect it from the enemy attacks.

What’s more? You can expand your map with Warcraft Word Editor to design custom 3D Maps and creation mission with scripts for the unit, spells, etc.

Download Warcraft III 


Top 6 VoIP software for gaming you should use in 2019

XCOM 2

XCOM 2

  • Price – $33.38
  • Supported Platform – Mac, Windows and Linux OS

XCOM 2, the successor to the original XCOM is a popular cross-platform game that is available on Windows, Mac, and Linux systems through Steam.

You play the role of a resistant fighter using guerilla combat tactics to fight the new breed of enemy.  Each mission of the game offers new and unique challenges to take on with your friends and other online players.


For all of you who like adrenaline-driven tank combat, check our top tank games for PC and consoles.


In the single-player campaign mode, the players issue the command from the base to research and develop new weapons to fight the non-human enemies.

One of the highlights of XCOM 2 is its new random maps that take you on a new mission around the world from wildlands to the heart of alien-controlled cities.

Thanks to the open-ended gameplay mode that allows you to decide your target and counter enemy operations. You can also recruit fighters from five soldier classes, each with its own skill sets to create your strike force.

XCOM 2 is an excellent strategy game with some rave reviews and multi-player support. If you have played XCOM, there is no reason to miss XCOM 2.

XCOM 2

Warhammer 40,000: Dawn of War III

warhammer
  • Price – $20 approx.
  • Supported Platform – Windows, Mac and Linux OS

The latest iteration of Warhammer 40K comes with new story modes that show the planet under siege by the armies of Ork. This war game is a brutal battle between three warring factions.

Warhammer is a critically acclaimed game with an average score of 8/10 from the reviewers. You play as the main lead Gabriel Angelos, the commander of the Blood Raven with a big hammer.

Dawn of War 3 is a strategy-based war game that offers a better story than its predecessor. The full campaign is 17 missions long, and you can play all the three fractions (Space marines, Orks and Eldar) to complete the game.

You can play the game on LAN or join the army online to forge new alliances. Warhammer III offers all that you need from a war game including epic actions, elite collection squads, super destructive abilities, and a fully customizable army.

Download Warhammer III: Dawn of War

While the concept of LAN parties may not be as an intriguing as it was a decade ago (thanks to the online gaming community) it can still be a fun experience as you get to face your friends face to face and challenge them.

LAN parties are a fading trend, but the online gaming communities cannot beat the excitement and competitiveness offered by the traditional and evergreen LAN parties.

All the games listed in this article allow you to host your own LAN game party without having to worry about the system compatibility.

So, what cross platform LAN games are you playing today? Let us know your favorite game in the comments below.

20 Most Played Triple-A Titles on Xbox [Monthly Roundup]

Since its launch in 2001, the Xbox brand has seen continuous success and shows no sign of slowing down. It’s unique because it is the only American console in a world dominated by Sony and Nintendo.

Many American companies tried their luck in the video game industry, only for all of them to bite the dust and fade into obscurity. Finally, however, Microsoft hit the ground running as it had one of the best possible games.

The very first Xbox console had Halo: Combat Evolved as one of its first games, and it was, without a doubt, the star of the show. It was a revolutionary game whose effects are still felt to this day.

Halo was a massive success and has gone off to lead all of the Xbox consoles that came after as the main star, which the brand is most known for. And from we got exclusives like the Gears of War franchise and Forza.

And then we saw the release of the beloved Xbox 360 and the start of games like the Mass Effect series, Grand Theft Auto 5, the first iterations of the modern Call of Duty games, and so on.

We even saw Microsoft experiment with its consoles, such as the Kinect peripheral, during the time of the Xbox 360. After that, the brand expanded to PC with Xbox Game Pass.

The Xbox Game Pass is a gaming subscription service that provides a rotating catalog of games from various publishers and services. All you have to pay is a monthly subscription, and you get many games at your disposal.

What is Xbox’s most popular game?

Fortnite – Best team shoot ’em-up

According to Microsoft, the most popular game on the Xbox Series X is Fortnite. This isn’t all that surprising if you think about it. Fortnite has enjoyed consistent success ever since it came out in 2017.

The gameplay is fast and engaging, the graphics colorful and inviting, and tons of pop culture characters. For example, what other game has Darth Vader shot Spider-man, who is also shooting a guy in a fish mask?

No other game that is so jammed-packed with fantastic characters and gameplay modes that hold a massive amount of character comes to mind. And the best part is it’s free.

You don’t have to pay a single dollar to enjoy the game, but if you do, you’ll be able to enjoy it even more.

➡ Get Fortnite

Call of Duty: Modern Warfare – Most realistic battle engine

Next up on the list is Call of Duty: Modern Warfare, although it would probably be more accurate to call it Call of Duty: Warzone. Modern Warfare is part of a more extensive game package that includes two other games.

Even though there are multiple games, Modern Warfare is the most popular; the question is why? The multiplayer in this game is more organized than in the other entries. Cold War is much more fast-paced, and Warzone is a battle royale.

Modern Warfare is more systematic. The game is slower-paced because it focuses more on tactical gameplay than running and shooting. Players often camp while laying traps or hiding behind doors.

Gunfights are rare and much more impactful. The other games have you absorb bullets like a sponge. As a result, modern Warfare is more nerve-wracking than the others, which has translated to addictive gameplay.

➡ Get Call of Duty: Modern Warfare

Apex Legends – A great free-to-play shooter

Third place is Apex Legends, yet another free-to-play shooter like Fortnite. And just like the number one spot, it has similar fast-paced gameplay and bright, colorful graphics. So what’s the difference?

The gameplay in Apex Legends is more technical and has a higher skill ceiling. Fortnite is a casual game; anybody can pick it up, and it is pretty easy to master. It doesn’t have a high-skill ceiling.

Think of Apex Legends as a cross between Fortnite and Call of Duty. It’s a first-person shooter with various weapons, from pistols to sniper rifles and even a bow and arrow.

You can attach unique weapon mods that change the accuracy, ammo capacity, and power of a gun. Weapon skills also matter heavily; they can turn the tide in your favor.

Plus, Apex Legends has a set cast of heroes that you can choose from, who all have unique abilities to give the game its flavor.

➡ Get Apex Legends

ROBLOX – Extremely large open-world adventure game

The first non-shooter on this list is ROBLOX. Well, to be more accurate, it’s the first entry not to have FPS gameplay as its primary focus. Instead, ROBLOX is like Minecraft because it’s an enormous open-world game with many different modes.

You can race cars, break out of jail in a massive cops and robbers mode, create a theme park, adopt a pet, or hang out with friends. There are also shooting modes like a zombie apocalypse or battle royale modes. What sells ROBLOX is the amount of creativity it allows.

The modes don’t come from the developers themselves but rather from the fans. Players can take the time to create these modes and then upload them to ROBLOX.

The developers have some instructions that fans can follow if they want to try and make FPS modes for the game. ROBLOX is genuinely the ultimate sandbox game.

➡ Get ROBLOX

Grand Theft Auto V – Best open-world gangster game

Grand Theft Auto V is the juggernaut that doesn’t go away. It first came out on the Xbox 360, and people still play it. But, unfortunately, it’s gotten to the point gamers joke around and say that the developer Rockstar can’t count to six.

People also make fun of the number of platforms the title is on. However, the game has been out for almost a decade and still sees a consistent player base. It’s gotten to the point where it’s one of the most successful entertainment products of all time.

GTA 5 has made more money internationally than some movie franchises and TV shows. The funny thing is that the main story is often ignored, which is a shame because it’s excellent.

The main draw is multiplayer, centered around being a criminal and pulling off massive heists. You can buy fast cars, own huge houses, and do whatever you want.

➡ Get Grand Theft Auto V

Destiny 2 – Best eye-catching sci-fi shooter

Now we have the first of two sci-fi shooters, Destiny 2. Like many entries on this list, it’s a free-to-play game developed by the old Halo developer, Bungie.

It’s a bit strange game because it takes so many different elements from various games. First and foremost, it’s an MMORPG, meaning you can play with many other people with a set goal.

People come together to face off against raid bosses for valuable loots and weapons or fight each other in a player versus player mode. In addition, exploration was expanded upon in Destiny 2 compared to the first game.

The first game was pretty restrictive in what players could do. However, new content is consistently being rolled out that continues the story and adds more weapons.

Critics love it, players love it and show no signs of slowing down.

➡ Get Destiny 2

NBA 2K22 – Best basketball simulator

We’ve finally reached a game that has nothing to do with shooting gameplay. As you can tell, FPS games are top-rated on the Xbox Series X/S and Game Pass.

NBA 2K22 is the premier basketball game from 2K Games. You can play out your fantasy NBA career with the MyCareer mode and rise through the ranks of the NBA. If you’d rather be a manager, you can play MyGM or My League to be an executive.

The game claims it has the most competitive and immersive version of basketball in a 2K game. You can add skills that improve your dribbling, shooting, dunking, and blocking.

Later this year, a probable 2K23 will come out as this is a yearly franchise. Few changes happen between titles other than an up-to-date roster for the NBA.

➡ Get NBA 2K22

Rainbox Six: Siege – Great tactical shooter

Going back to the FPS game, we have Rainbow Six: Siege. This title takes what Modern Warfare does and takes it even further. It’s a tactical shooter, so it has an emphasis on strategy.

This isn’t a game where you go into a room with guns blazing. Instead, it heavily emphasizes cooperation between team members; you can only win if you work together.

Different modes in the game may have you try to defuse a bomb, rescue a hostage, or take control of an objective point. One team will be the attacker, and the other will be the defender.

Another big emphasis in the game is environmental destruction. You can shoot through walls or blast through them. Developers encourage players to blow up walls to get to their objectives.

It offers a new gameplay mechanic open to creativity.

➡ Get Rainbow Six: Siege

Elden Ring – Amazing open-world game with great quests

Elden Ring was a highly anticipated game that managed to deliver on the hype. But, unfortunately, that isn’t some most games can boast. The majority of developers make a lot of promises that they can’t keep and end up disappointing the players.

BANDAI NAMCO hit it out of the park with this one. So Elden Ring is an open-world RPG similar to the Dark Souls series. It’s a challenging game where a nameless knight goes out to harness the power of the Elden Ring.

Players must fight monsters, explore dungeons, and jump over considerable chasms in their quest. In addition, there are tons of different classes that you can build with unique gameplay mechanics.

The story is even written by George R.R. Martin, the same author behind the Game of Thrones series.

➡ Get Elden Ring

Minecraft – Amazing open-world creator

Now we have the family-friendly Minecraft. Microsoft bought the game some years back for an absurd amount of money and has seen continuous success.

It’s a bit like ROBLOX in that it’s an open-world game that theoretically allows you to do whatever you want. Minecraft does this, but it’s much more focused on its gameplay.

The game’s main objective is to explore a vast world, build anything that comes to mind, and compete with other players on multiplayer servers. No unique shooting modes or race tracks exist, but you can create a castle.

Plus, it has cross-play support, so you can play with friends on a PC while playing on the Xbox Series X. Finally, it has an extensive modding community that further enhances the game.

➡ Get Minecraft

Halo Infinite – Powerful multiplayer and singleplayer shooter

Now we have the premiere Xbox title and are the only one on this list that’s exclusive to the brand: Halo Infinite. But, of course, the Halo series is synonymous with the Xbox brand, so much so that it would have been strange not to include the game here.

The sixth mainline entry continues the story of the Reclaimer Saga Master Chief facing off against an alien threat known as the Banished on the ringworld called Zeta Halo.

What’s unique about Halo Infinite is that it’s the first entry to have its multiplayer mode separate from the main game, and have it be free-to-play. Unfortunately, the multiplayer came out before the main story annoyed some people.

They would’ve liked the complete package from the get-go, but still, players enjoyed the multiplayer. In addition, people praised the title’s gameplay, soundtrack, and graphics.

It has fallen off recently, but that’s probably low developer support. They’re probably cooking up something in the back.

➡ Get Halo Infinite

Hades – Engaging dungeon explorer game

Hades is the only indie game on this list and is highly beloved on Metacritic. It’s a rogue-like game, meaning you explore a procedurally generated dungeon.

Procedurally generated means that the game randomizes its rooms. The story has you trying to escape the realm of Hades, and it takes you multiple times to escape the underworld.

And every single time you escape, the rooms and enemies you encounter are different. In addition, the power-ups that drop change every single playthrough, so you never know what you’ll get.

One run, you may have thunder and fire, and then in the next, you have thunder and water. It’s a great way to keep the game fresh yet familiar.

➡ Get Hades

Forza Horizon 5 – Best racing game

Now we have the only racing game on this list with Forza Horizon 5. In the Halo series, Forza has been on Xbox consoles since the original console. There are two mainline titles: the Motorsport line and the Horizon line.

Forza Motorsport is a traditional racing game, while Horizon is an open-world title. The game takes place in Mexico and has stunning visuals that account for the country’s unique landscape.

It brings in new modes such as Events Lab, which lets players create customized races with unique rules and objectives. And there’s also Forza Link, a little AI assistant that tracks your progress and helps you find players.

➡ Get Forza Horizon 5

Rocket League – Amazing teamwork and reflexes game

Rocket League is the final game on the most popular titles for the Xbox Series X/S and Game Pass. Don’t let the cars fool you, thinking this is a racing game. It’s quite the opposite.

Rocket League is a weird form of arcade-style soccer where you crash into a giant soccer ball and try to score into a vast net. But as you can see, you see turbo-boosted cars instead of players.

It’s a silly game with bright colors everywhere and an excellent cartoon style. You can boost jump into the soccer ball or other players to stop them from getting a goal.

Like some of the older games on this list, it has enjoyed continuous success. It’s going through season six, bringing in new items and arenas.

➡ Get Rocket League

What were the most played games on other Xbox consoles?

According to sales figures, this section will break down the most played games on other Xbox consoles. Because, at this point, that’s all that’s available.

But because this guide has already talked about that game, it will be skipped here. So instead, the second and third places will be the focus.

1. PUBG: Battlegrounds – Battle your online friends with hundreds of weapons

Starting off the list the best-selling Xbox One game is PUBG: Battlegrounds. Short for PlayerUnknown’s Battlegrounds, PUBG was a battle royale game before the genre got popular.

One person initially created it, Brendan “PlayerUnknown” Greene, based on previous that he had created. A group of 100 players got thrown onto an island where people had to look for weapons to kill others to survive.

From that description, this was the inspiration for Fortnite. It even had a shrinking map size that forced players together. The game is still widely played worldwide and has a pretty big community in Asia.

This has led to PUBG hosting pretty random collaborations with various anime franchises. It’s weird, but it works.

➡ Get PUBG: Battlegrounds

2. Call of Duty: Black Ops III – Fight for survival in this immersive world

The other best-selling Xbox One game is (unsurprisingly) Call of Duty: Black Ops III. It’s a lot like any additional Call of Duty game. It’s an action-packed FPS shooter where you go around killing other players.

What was unique about this particular title was how silly it was. It took itself seriously on the surface, but if you look deep down, Black Ops III had some goofy modes.

For starters, the multiplayer had players equip cybernetic enhancement that allowed them to jump off the walls and fly briefly through the air on a jetpack.

And there’s the infamous Zombies mode where you had to fight off a horde of the undead in a suit. Of course, all of that still exists in modern entries, but Black Ops III took it to another level.

➡ Get Call of Duty: Black Ops III

3. Kinect Adventures – Get a workout while having fun

You have to wonder how many people reading this guide remember the Kinect on the Xbox 360. But, to give a brief history lesson, it was a massive success when the Nintendo Wii was launched.

From that, Sony and Microsoft tried to incorporate their version of motion control games on the PS3 and 360. However, However, However, However, However, However, However, However, However, However, However, However, Mircosoft was arguably more successful with its Kinect.

The Kinect was packaged in many Xbox 360 consoles, leading to its main game, Kinect Adventures, being incredibly successful. According to Microsoft, the Kinect sold 24 million copies.

The game itself has players surf through rapids, play a weird version of handball, and fly through space. Unfortunately, despite high sales, the Kinect died off quickly.

➡ Get Kinect Adventures

4. Call of Duty: Modern Warfare 3 – Finish immersive mission on a variety of realistic maps

This is the final Call of Duty entry on this list, and we’re ending it with Modern Warfare 3. It’s been repeated repeatedly, but it cannot be ignored; just influential Call of Duty was when it got a facelift.

It was no longer a slow-paced World War II shooter but now an action-packed game where many people could jump and shoot each other. Modern Warfare 3 didn’t change much from the previous installment but it improved things.

The Special Ops mode from 2 made a comeback with new features. It brought in Survival mode, where two players are thrown into an arena and must survive multiple waves of enemies.

It also brought back Zombie mode, a big hit in the previous game. Also, returning from Modern Warfare 2 were Team Defender and private matches. But, again, this game didn’t reinvent the wall; it just made it better.

➡ Get Call of Duty: Modern Warfare 3

5. Halo 2 – Immerse yourself in a virtual world like no other

Halo 2 was an enormous success for the original Xbox and was a console seller. You just had to buy an Xbox to get your hands on this game. People regard it as one of the best games of all time.

It was the most popular game on Xbox Live for a while and sold over 8 million copies in its lifetime. Halo 2 took what the original did and improved upon it significantly.

The story was grander; certain weapons could be dual-wielded, melee attacks were made more powerful, and you could steal vehicles. But, of course, these simple changes were mid-blowing back in those days.

The Covenant weapons got more of an identity as being able to pierce shields but tended to overheat. The multiplayer used matchmaking, which allowed you to choose the map and game type you like.

Then it searches out other players who want the same thing. What a fantastic g

➡ Get Halo 2

6. Grand Theft Auto Double Pack – Explore Vice City and have fun with the NPCs

The duo of Grand Theft Auto III and its prequel Grand Theft Auto: Vice City is closing out this list. They were packaged on the Xbox at the Rockstar Games Double Pack, which combined the two titles.

According to VGChartz, the double pack had a total of 2.49 million sales throughout its lifetime. These were massively popular video games for their time. GTA 3, in particular, revolutionized open-world games and brought the industry into a new era.

No longer were video games seen as a child’s plaything. Now games were telling more mature stories and showing violence on screen. This caused much controversy for the games but served as great marketing.

Word of mouth spread the infamy of these games and saw the start of popularity that continues today. Good luck with finding the old versions, however. Rockstar seems to prefer gamers to play the terrible remakes.

And good luck with finding a copy of the double pack. Unfortunately, it’s been out of print for a long time.

➡ Get the Grand Theft Auto Double Pack

Most played games on Xbox by region

Getting exact numbers on the most played Xbox Series X games is challenging. Developers and publishers are very tight-lipped about these sales numbers or how many people actively play.

They often mesh numbers from different platforms into one. The closest thing found was a Statista post on the most popular games on the Xbox Series X/S in the US as of November 2020.

These numbers are based on how many players had these games installed on their consoles. Also important to note is that these numbers have been rounded off.

Although sales numbers for the Xbox Series X/S in other regions are unknown, what is known are the other consoles. The website VGChartz has been gracious enough to keep detailed information about popular games.

➡ Xbox One

The most popular Xbox One game by total shipping numbers is Halo 5, with five million units shipped. These are the following entries for their respective region.

➡ Xbox 360

The most popular games in terms of total shipped are Kinect Adventures and Halo 3. Apart from those two, these are the five runner-ups.

➡ Original Xbox

Going by total units shipped, the most popular games on the original Xbox were Halo 2 (eight million), Project Gotham Racing (six million), and Halo: Combat Evolved (five million). These are the runners-up.

How can I view my most played games on Game Pass?

  1. Sign in to your Xbox account on your PC.
  2. Click on your profile picture on the next page and select Xbox Profile.
  3. Under your profile, select Achievement and then choose a game.
  4. Now, click on Achievements again and see how long you’ve played the game; therefore, you can find out which is your most played game.

If you are interested in knowing interesting facts, user-based and revenue statistics of Xbox, check out this guide.

Feel free to leave a comment below if you have any questions about these titles. Also, feel free to comment on guides you’d like to see.

Best LAN Simulator Software to Play LAN Games Online

We all love playing our favorite games, but things become much more interesting when we do it with our friends or family.

Normally, the only way to achieve a connection with one or more PCs would be to do it over a cabled LAN network.

With the latest advancements in computer tech, we can use specialized LAN emulators that allow you to create virtual LAN networks, that give your friends the power to connect to your PC through the internet.

Here are the top 5 best LAN simulator software that will make playing games with your friends easy.

What are the best LAN emulators for gaming?

LogMeIn Hamachi

LogMeIn Hamachi - games over virtual lan

LogMeIn Hamachi is one of the most popular software options on the market that allow you to play your favorite games with your friends by creating a virtual LAN connection.

This LAN emulator is very easy to set up and manage, and it gives you the power to create and manage all aspects of your virtual LAN network. The virtual networks created in this software are secured and can be managed from anywhere in the world.

By using this app you can create a private virtual network, allow access for your friends, and easily play multiplayer games without the need to be connected to the internet.

Here are some of the best features of LogMeIn Hamachi:

  • Manage and restore networks from anywhere on the planet
  • Centralized deployment of software – transfer virtual network client to new computers easily
  • Can be ran in the background to allows access even if the host is not online
  • Allows secure access to your network by using the LogMeIn Hamachi gateway
  • Can allows access of remote users with specific computers
  • Mesh networking
  • AES 256-bit encryption

Hamachi can be used free for 5 computers, the Standard edition allows 6-32 computers per network, the Premium edition allows 33-256 computers per network, and the Multi-Network allows unlimited numbers of users.

Even though Hamachi has great features included, some of the downsides of using this app is the limit of the free version to 5 clients per network (including host), and the fact that users have reported having lag issues.

⇒ Get LogMeIn Hamachi

ZeroTier

ZeroTier - playing games over virtual LAN

ZeroTier is one of the best Hamachi alternatives that allows you to create your own virtual LAN network and play LAN games online with your friends.

This software is open source and also contains free Android and iOS apps. ZeroTier is actually a combination between a VPN (virtual private network), SDN (software-defined networking), and SD-WAN, under one single friendly looking user interface. It is a great choice for a LAN simulator.

Because of it’s easy to set up process, ZeroTier is one of the simplest but most advanced softare that can create virtual LAN networks easily, offers great speeds, and works very well both for gaming and other VLAN features.

ZeroTier was released in 4 different versions, each with it’s own capabilities.

  • ZeroTier Free: Community support, GPL license, support for up to 100 devices.
  • ZeroTier Basic contains all features of the Free version and adds ticketed support and an unlimited number of devices supported.
  • ZeroTier Professional contains all the features found in the previous versions and adds support with higher priority than the Basic version
  • ZeroTier Enterprise offers the highest level of priority support, non-GPL product embedding license, and Live priority chat with their support team.

⇒ Get ZeroTier

GameRanger

GameRanger - play games over virtual lan

GameRanger is another great software option that allows you to play more than 700 games and demos with your friends and other online opponents.

This software has a great set of features like instant messaging, player profiles, can create lists of friends, ranking features, and also allows you to communicate with your game buddies through voice while playing.

Even though the number of features found in GameRanger is not as vast as the other software options we presented in this article, this app offers the best security level and stability on the market.

It is worth noting that software options like Hamachi allow you to play any LAN games, while GameRanger only allows you to play the supported games. You can find a full list of supported games here.

How to install GameRanger on your Windows 10 PC:

  1. Download the .exe file and navigate on your computer to the download location
  2. Right-click on GameRanger.exe , and choose ‘Troubleshoot Compatibility’ and wait for the service to finish processing
  3. Click on ‘Try Recommended Settings’ – in my case the recommended compatibility mode was Windows Vista (SP2)
  4. Click on ‘Test the program’, and that will run the installer like you normally would

⇒ Get GameRanger

DynVPN

DynVPN - games over virtual lan

DynVPN is another great software option that allows you to easily create and manage your own virtual private network. This software has a great network virtualization platform called NetVirt.

After you’ve logged into the DynVPN dashboard, you can see an overview of your entire network and can manage access by using the peer-to-peer encrypted channels.

This software is fully encrypted with AES256-SHA, and for even more security, all the private networks you created have a unique CA (certificate authority).

You can use this software to allow employees access to the resources of your company, can secure embedded devices, allows you to set up a networking security camera, and gives you the power to play games over LAN or Internet while also offering virtual business networking solutions.

If you want to know how to get started using this software, you can find a good range of step-by-step guidance following the link below.

⇒ Get DynVPN

Radmin VPN

Radmin VPN - games over virtual Lan

Radmin VPN is another great software option for creating virtual private networks on which you can play an unlimited number of games.

Because of the speed at which this software operates, it feels like you are playing games on your local LAN network.

This software can reach speeds of up to 100Mbps and also offers a great secure VPN tunnel. This feature encrypts your network and maintains the security of all network nodes.

Here are some of the most notable features of Radmin VPN:

  • Easy to set up and manage for users with all proficiency levels
  • Can play network games over Internet-Play at the same speeds as a LAN game would reach
  • Can create and network teams distributed across the globe (can connect to remote PCs hidden behind firewalls)

⇒ Get Radmin VPN

Why should I use a LAN emulator?

Because of the big popularity of games that support local multiplayer, using virtual LAN software gives you many other benefits, like advanced IP protection, the ability to share files, video streaming, and much more.

We also have articles on the best LAN monitoring software and the best VPN for LAN gaming that you can check out for more tools.

The LAN emulator options we presented in this article will surely cover all your virtual-LAN gaming experience needs, and they also offer useful additional features.

We would love to find out if you have any other LAN simulator suggestions for playing games on virtual LAN. Feel free to let us know what your experience was like and what your favorite software option is.

FIX: Saints Row IV Freezing and Crashing on Windows 10

Is Saint Row 4 crashing/freezing during gameplay mode? Saint Row 4 is an astounding adventure game, and it’s in high demand. But despite this popularity, many gamers have been found reporting Saints Row IV crashing/freezing experience.

This article will lay down methods and steps to improve gaming experience and prevent future crashes and freezing experience.

How to fix Saints Row 4 crashing and freezing on PC?

1. Check system specs

There is a recommended specification-grade your computer should have for you to get the best experience while playing. If your computer does not meet the required specification you will always get Saints Row 4 crashing/freezing.

  • Hard Disk: 70GB and above
  • Version: Windows 7 (64-bit)
  • Graphics Card: AMD Radeon 5850 or GTX 260 (GeForce)
  • RAM: 4GB and above.
  • CPU: Intel Core (2 Quad Q9300)  or AMD Phenom 9850

Saints Row 4 can work on systems with lower specifications. However, for you to enjoy the best experience, you need to meet the above specs, to prevent crashes.

2. Switch Threaded Optimization off to stop Saints Row 4 crashing/freezing

  1. Right-click on your desktop to display the menu.
  2.  Click the NVIDIA Control Panel.Saints-Row-4-crash-freeze-threaded-optimization-off
  3. Select the Manage 3D Settings link on the left-hand pane.fix-Saints-Row-4-crash-manage-3d-settings
  4. Next, select the Program Settings tab.
  5. Click the Add button.fix-Saints-Row-4-crash-freeze-turn-threaded-optimization-off
  6. Choose browse and add the folder in the following path.C:Program Files (x86)SteamsteamappscommonSaints Row IV
  7. Continue by disabling the Threaded Optimization feature.Saints-Row-4-crash-off-threaded-optimization
  8. Finally, click Apply, save the new settings , and exit. Saints-Row-4-crash-freeze-apply-optimization-settings

3. Verify the Integrity of Game Cachefix-Saints-Row-4-crash-verify-game-cache

  1. Click the Steam icon on your Desktop to open it.
  2. Sign in with details you used for Steam account registration.
  3. Right-click on the Saints Row icon, and select properties option when the Game Library displays.
  4. Select the Local Files tab.
  5. Select Verify integrity of game cache to complete the process.

In some cases, it might take a while to complete the verification process, you have to be patient.

4. Update Drivers

You will experience freezes like this whenever your graphic drivers are not updated.

To run an update, simply go to your graphics card manufacturer site (AMD/ATI or GeForce), and install the current driver version.

These solutions will fix Saints Row IV crashing/freezing. However, if you still experience Saints Row 4 crashing/freezing, you can also try reinstalling the game itself if none of the methods above work.

5. Verify Conflicts with Windows Security Features

  1. Press the Windows Key simultaneously with R key to open the Run dialogue box.
  2. Input sysdm.cpl in the textbox displayed.
  3. Proceed by pressing OK.fix-Saints-Row-4-crash-verify-conflicts-with-windows-security
  4. Click the Advanced tab when System Properties dialogue opens.Saints-Row-4-crash-verify-conflicts-with-windows-security
  5. Under the Performance options tab select settings options.
  6. Continue by clicking the Data Execution Prevention tab.
    fix-Saints-Row-4-crash-data-execution-prevention
  7. Click Turn on DEP for all programs and services.Saints-Row-4-crash-verify-windows-security
  8. Select the Add button.fix-Saints-Row-4-crash-verify-conflicts-with-windows-security Include the launcher file located here:
    C:Program Files (x86)SteamsteamappscommonSaints Row IVSaintsRowIV.exe
  9. Select OK | OK to confirm your new settings.

6. Reinstall Microsoft DirectX to resolve Saints Row 4 crashing/freezing

For this method, we will be using the Command prompt to reinstall DirectX in order to avoid Saints Row 4 crashing/freezing.

  1. Close all open programs on your desktop.
  2. Press the Windows button on your computer, and type cmd in the search bar.
  3. Right-click on the returned search result, and choose Run as administrator.Saints-Row-4-crashing-reinstall-directX
  4. Type in these commands below in the given order, and Press ENTER after typing each command.
    cd C:Program Files (x86)SteamsteamappscommonSaints RowIV_CommonRedistDirectXJun2010DXSETUP.EXE
  5. After code input, Reinstall The DirectX after setup program for Microsoft DirectX initiates.
  6. Finally, restart your computer to complete the process.

7. Review the Registry Privileges

  1. Press Windows Key + R  to open the Run dialogue box.
  2. Next, type regedit inside the input box.Saints-Row-4-Crash-review-registry-privileges
  3. Click OK  to launch the Registry Editor.
  4. Locate the subkey, when the Registry Editor opens:
  5. HKEY_CURRENT_USERSOFTWAREVALVE
  6. Next, Right-click on VALVE subkey, and select Permissions in the context menu.
  7. Check the Allow box for the options below.
    • Special permissions
    • Read
    • Full Controlfix-saints-row-4-crashing-review-privileges
  8. Click Apply and select OK. Close the Registry Editor.saints-row-4-crashing-review-privileges

[wl_navigator]

How to Fix Windows Update Error 0x8007043c

Error 0x8007043c arises for some users when they try to install Windows updates. In one Microsoft forum post, a user said:

In trying to install the Windows 10 update, it takes forever; and then at the 99% level, I get a failed message with Error Code 0x8007043c.

There aren’t that many confirmed fixes for issues like This service cannot be started in safe mode 0x8007043c, Failed to connect to server error 0x8007043c, or other latest Windows 10 update issues. However, these are some of the potential fixes for error 0x8007043c that are worth a shot.

How do I fix the Windows update error 0x8007043c?

1. Open the Windows Update troubleshooter

The Windows Update troubleshooter could resolve the issue if the OS is trying to install an update that isn’t compatible with the platform version.

  1. To launch that troubleshooter, open Windows 10’s search box by clicking Type here to search.
  2. Input troubleshoot in the Type here to search box.
  3. Click Troubleshoot settings to open Settings as in the image directly below.
    Troubleshoot tab Windows Update Error 0x8007043c
  4. Select Windows Update there, and click the Run the troubleshooter option for it.
    Windows Update troubleshooter Windows Update Error 0x8007043c
  5. Click Apply this Fix if the troubleshooter provides a resolution.

2.Run an antivirus scan

  1. An antivirus scan might help fix error 0x8007043c for some users. To initiate an antivirus scan, click the Settings button on the Start menu.
    Settings button Windows Update Error 0x8007043c
  2. Select Update & Security, and then click Windows Security on the left of Settings.
  3. Press the Open Windows Security button.
    Windows Security tab Windows Update Error 0x8007043c
  4. Select Virus and threat protection on the left of the window.
  5. Press the Quick scan button.
  6. Alternatively, click Scan options and the Full scan option.
  7. Users with third-party antivirus software will need to initiate scans with those utilities.

Need a solid antivirus tool? Check out this article for the best ones on the market!

3. Scan system files

Corrupted system files can be another factor behind error 0x8007043c, which the System File Checker can repair.

  1. To initiate an SFC scan, enter the keyword cmd in Windows 10’s search utility.
  2. Right-click Command Prompt in the search utility and select Run as administrator.
  3. Before initiating the SFC scan, enter DISM /Online /Cleanup-Image /RestoreHealth in the Command Prompt.
    • Then press the Enter keyboard key.
  4. Next, input sfc /scannow in the Command Prompt’s window.
    • Press Return to initiate the scan.
      sfc /scannow command Windows Update Error 0x8007043c
  5. Please wait for the SFC scan to weave its magic. Restart Windows when it’s done.

4. Turn off third-party antivirus utilities

Third-party antivirus software might be blocking your Windows updates. To remedy that, right-click an antivirus icon in your system tray to open its context menu.

Then you can usually select some kind of disable option to turn off the antivirus utility with. If the antivirus utility happens to have a firewall component, like the one shown directly below, disable that as well.

Try updating Windows with the antivirus utility disabled. Some users might need to completely uninstall their antivirus software to stop them from blocking Windows updates.

Norton antivirus context menu Windows Update Error 0x8007043c

The resolutions above are among the most likely fixes for Windows Update error x8007043c. However, they might not fix the issue for all users. Some users might need to refresh Windows with a repair install or the Reset this PC utility to fix error x8007043c.

If you know of any other method to fix this issue that we may have missed out on, let us know by leaving us a message in the comments section below.

How to Find Inbuilt Games in Windows 10: Quick & Easy Ways

Taking into consideration that modern games are quite large in size, you probably want to choose where to store them.

The default location is on the system partition, which is lower in size. That’s the proper reason to re-assign the location for games downloaded via Microsoft Store.

So in this article, we’ll explain where does Microsoft store install games and how to change the location.

How can I find my Windows 10 games?

All games are, by default, stored in C:Program FilesWindows Apps. But, the thing is, this folder is both hidden and it requires strict administrative permission in order to access it.

That’s why we’ll explain how to change ownership of the given folder and how to move the game installations to an alternative HDD partition.

Quick tip

The majority of players acquire their games from different sources. But since cross-platform gaming is a thing now and there are some Microsoft exclusives, many games turn to this source.

If you don’t know where your downloaded Microsoft games go, you can use Copernic Desktop Search. It will find your files for you in the myriad of entries stored on your hard drive.

Copernic is an award-winning search tool for PC, that scans the system for specified files. It is compatible with 119 file types, text included. Autocad of Photoshop files can also be searched using this program.

Copernic Desktop Search

Copernic Desktop Search

Finding your files and documents is super easy with this precise, award-winning tool.
Free trial Visit website

    How to access the Windows Apps folder in Windows 10

    1. Navigate to C:Program Files.
  1. 2. Select View in the Menu and check the Hidden items box.

  2. 3. Right-click on the Windows Apps folder and open Properties.

  3. 4. Choose Security and then click on Advanced.

    where are my windows 10 games stored
  4. 5. Under the Owner, click Change.

  5. 6. Enter the registered email related to your Microsoft account you use to sign in to Windows 10.

  6. 7. Check the Replace owner on subcontainers and objects box and apply changes.

  7. 8. Now, click on your account in the list and select Edit.

  8. 9. Check the Full Control box and there you have it.

    where are my windows 10 games stored

We won’t recommend changing anything within the given folder, but you can, at least, delete the associated files when the app or game is uninstalled.

This can come in handy if you need to clear some space. Also, once you move the installation to an alternate partition, you don’t want any leftover files from the previous installation.

How to change the default location for future game and app installations

  1. Press Windows key + I to open Settings.
  2. Open Apps.where are my windows 10 games stored
  3. Select the game you want to move and click Move.

Furthermore, what you can do is change the default location for the new games and apps you install in the future. This way, you’ll reduce the storage consumption on the system drive.

Also, and maybe of even greater importance, if your system goes awry, you’ll get to keep the games instead of them evaporating after the clean system reinstall.

Follow these instructions to do it:

  1. Press Windows key + I to open Settings.
  2. Choose System.
  3. Select Storage.
  4. Click on the Change where new content is saved.where are my windows 10 games stored
  5. Under apps, select an alternate partition.where are my windows 10 games stored

If you’re looking to change the default location for other files on Windows 10 or older, see this comprehensive guide.

Hopefully, you found where microsoft store install games in this article. Don’t forget to post your questions or suggestions on this topic in the comments section below.

Low FPS Until Restart: Fix it With These 4 Methods

The frame rate for games is essential, as it can make or mar users’ gaming experience. However, some users report that they get a low FPS on games after powering their PC until they restart it.

While this issue might not be the frame rate problem, it can still be frustrating. This guide will show you the easy steps to fix the problem and restore normalcy to your system.

Why is my FPS dropping so low all of a sudden?

Various factors can be causing the low FPS issue on your PC until you restart it. Below are some of the prevalent causes:

  • Outdated or faulty driver: If your computer lags until you restart it, it might be because of an outdated or faulty graphics driver. You need to reinstall or update the driver to fix this for good.
  • Wrong power setting: Sometimes, the fast startup feature can cause your games to run slowly until you restart your PC. Disabling this feature has solved this problem for many users and should do the trick for you.

How can I fix low FPS issues?

1. Update your graphics card driver

  1. Press the Windows key + X and select Device Manager.
    device manager low fps until restart
  2. Double-click Display adapters to expand it and right-click your graphics card.
  3. Now, select the Update driver option.
    update driver
  4. Finally, choose Search automatically for drivers.
    search auto

Your graphics card drivers are essential for the smooth running of your games. If you are experiencing a low FPS until your restart your PC, it might be because your drivers are outdated.

If you cannot update the driver from the Device Manager, you can go to the graphics card manufacturer’s website to download the latest version of the driver.

Alternatively, you might consider updating your drivers automatically using a dedicated program in Outbyte Driver Updater.

It automatically identifies each device on your computer and matches it with the latest driver versions from an extensive online database.

Outbyte Driver Updater

Use this great app to find the correct and newest updates for all your drivers.
Free Trial Download now

2. Reinstall the graphics card driver

  1. Press the Windows key + X and select the Device Manager option.
    device manager low fps until restart
  2. Expand the Display adapters option and right-click the device there.
  3. Now, select the Uninstall device option.
    uninstall device
  4. Finally, check the box for Delete the driver software for this device, click the Uninstall button, and restart your PC.
    uninstall button low fps until restart

Another effective fix for the low FPS until the restart issue is to reinstall your graphics card drivers. You can use DDU to uninstall the driver to make sure you effectively remove the driver.

Finally, if this does not work, you can enable Safe Mode and repeat the process.

3. Disable Fast Startup

  1. Press the Windows key, type power plan, and select Choose a power plan.
    choose power
  2. Select Choose what the power buttons do in the left pane.
    choose what low fps until restart
  3. Now, click the Change settings that are currently unavailable option.
    change settings
  4. Finally, uncheck the box for Turn on Fast Startup and click the Save changes button.
    turn on

The Fast Startup feature helps to increase your startup time by ensuring that your PC does not shut down completely. This helps retain some of the information on your RAM and other components.

However, it can be why you have a low FPS on your games until you restart your PC, as reported by some users. So, you need to disable the feature to get past the problem.

4. Optimize system resources for games

  1. Right-click the Taskbar and select Task Manager.
    task  low fps until restart
  2. Now, right-click the superfluous background processes under the Processes tab and click End task.
    end task
  3. Click the Startup tab at the top and right-click each process there.
  4. Finally, select the Disable option and check if you still get the low FPS.
    disable low fps until restart

Because of the startup processes and apps, you might sometimes get a low FPS on your games until you restart your PC. The quickest way around this is to disable these processes.

You can also maximize system resources with game booster software. For a better gaming experience, we recommend you use a professional game optimizer program.

It will focus your computer resources and processes on the game without overclocking your hardware. It includes optimization features and various tools for defragging your game folders.

Those are a few remedies that might ensure your desktop’s or laptop’s FPS always remains at a standard frame rate.

Also, you can check out our article on how to boost your FPS to get a peak gaming experience.

Feel free to let us know if you have any suggestions or questions in the comments below.

How to Scan IP Addresses on Local Network & 5 Best Tools [2026]

Scanning the LAN for IP addresses is extremely important, especially if you are an admin and want to analyze all the devices connected to the network.

Admins usually prefer to have access to shared folders and the control to automatically shut down the PC, remotely.

There is more than one way to scan the LAN for IP addresses and in this segment, we will walk you through some of the best means to do so.

How can I scan IP addresses on a Local Network?

1. Perform a cmd IP scan

  1. Type Cmd in the Start menu search bar.
  2. Type ipconfig.
  3. Ping this machine IP address by punching in the following command ping 192.168.x.xxx
  4. In the next step type arp -a.

This is the simplest method that allows you to scan the LAN using the cmd IP scan. Although this method is a bit crude, it doesn’t require any additional software.

2. Scan an IP address third-party software

PRTG Network Monitor

One alternative way that can help you keep track of your entire LAN and WAN is by using a dedicated tool, such as PRTG Network Monitor.

You can monitor the bandwidth, all your workstations, routers, and servers as well. You can use this tool as a portable network scanner and check your network right away, in just a few minutes, from any device.

The tool is able to scan network segments by pinging defined IP ranges and this way PRTG will recognize a broad range of devices and systems in an automatic manner, and it will create sensors from predefined device templates.

PRTG Network Monitor also allows you to create maps and web pages with up-to-date monitoring data.

The software is perfect for managing the network, and it’s one of the best ways to scan for IP range on Windows, so be sure to try it out.

Other great features:

  • Bandwidth monitoring
  • Database monitoring
  • Ability to monitor entire LAN network
  • SNMP support
PRTG Network Monitor

PRTG Network Monitor

PRTG Network Monitor is advanced network monitoring software that will easily scan for IP addresses in your LAN network.
Free trial Visit website

Angry IP Scanner

Presuming that you want to see the IP addresses that are being used in a particular subnet its tools like Angry IP Scanner will come in handy.

Angry IP Scanner will help you scan a range of IP addresses and will also fetch advanced details regarding the connections.

Users can customize their queries and can import the same in CSV, TXT, XML, and even IP-Port list files.

The Angry IP Scanner is a freeware and it is extensible with many data fetchers whilst offering a command-line interface. This program is best suited for network administrators across both small and large enterprises.

Using this tool is simple, and it’s a perfect choice if you need to scan a network for IP addresses on Windows 10.

⇒ Get Angry IP Scanner

SolarWinds IP Tracker

SolarWinds is yet another IP address tracker utility that can be used to access to scan the IP range on Windows 10.

SolarWinds lets you track an unlimited number of IP addresses without the need for complex configurations.

Once a new subnet is added along with the name and addresses the application will generate the list of all the IP addresses on the LAN.

SolarWinds also comes with a feature that lets you filter the IP addresses by checking out the user or the reserved ones. The program also allows users to see the last time an IP address was used.

⇒ Get SolarWinds IP Tracker

Advanced IP Scanner

The best part of the Advanced IP Scanner is its simple and straightforward utility. The Advanced IP Scanner can locate all the devices connected to both your wireless and wired local network.

It’s particularly useful if you want to get a list of devices connected to your Wi-Fi network.

Advanced IP Scanner also offers a remote PC shutdown feature that will allow admins to shut down the PCs on the network. Furthermore, it also supports the Wake-on-LAN standard that lets you start the system remotely by sending wake-up packets.

The results tab mentions Status, name, IP, Manufacturer, and MAC address of all the systems connected to the network.

Furthermore one could also populate important statistics including DNS and Response time.

⇒ Get Advanced IP Scanner

NetCrunch

Every single device that gets connected to a network has some kind of IP address, and a good network monitoring tool knows how to blacklist or permit certain IP addresses from gaining access to a network.

Well, NetCrunch is one such tool, providing you with an entire host of server monitoring tools, including the ability to decide who can access it, and view everything that goes in and out.

This includes the ability to scan devices for their IP addresses and manage them in the sense that you decide which IP can connect to the network, and what is the access level and the privileges of the IP addresses that are connected to the network.

Based on this, you can grant or restrict access to data, regulate the use of bandwidth, and more.

You can scan your network for new nodes simply by IP Network (starting IP address/network mask), and NetCrunch will perform an IP-address sweep, accurately identifying each device and service running on them.

Depending on your monitoring requirements, you can specify a filter strategy that will only identify or add the devices of interest. 

You can also perform discovery via Active Directory or add a list of nodes to NetCrunch from a CSV file.

⇒ Get NetCrunch

As you can obviously tell, these tools vary in terms of features, and which one is best for you is highly dependent on the level at which you want to manage your LAN.

Why do I need to scan IP addresses?

IP addresses are part of layer 3 in the OSI network and are necessary for Inter-VLAN communication. In essence, every layer 3 device will be needing an IP address.

The IP address is also required if you are configuring DHCP snooping and some of the other advanced features.

FAQs

How can I scan IP addresses on a local network?

You can use Command Prompt with commands like ipconfig, ping, and arp -a to scan IPs manually. For more detailed results, third-party tools like PRTG Network Monitor or Angry IP Scanner are recommended.

What is the easiest tool to scan a LAN for IP addresses?

Advanced IP Scanner is one of the easiest tools. It quickly lists all devices connected to your wired or wireless network and even allows remote shutdown or Wake-on-LAN.

Why do admins need to scan IP addresses?

Scanning IP addresses helps admins identify all devices connected to the network, monitor bandwidth usage, manage permissions, and detect unauthorized connections.

Is there a free IP scanner for Windows 10/11?

Yes. Angry IP Scanner, Capsa Free, and Advanced IP Scanner are free options that provide quick scans and exportable results without requiring advanced configuration.

These are the best methods that you can use to scan IP addresses on LAN network. What tools or methods do you use? Let us know in the comments below.

If you have any more tricks or suggestions, feel free to discuss them. Please let us know about your experience if you decide to try or already have input on any of these methods or third-party tools.

Razer Mouse not Working: Fix it With 5 Simple Solutions

A few highly rated Razer mice are designed specifically for Windows gaming. However, despite their reliability, Razer mice might still not work as expected for some users.

This can have devastating effects on your gaming experience. However, it is an issue you can fix quickly by following the steps in this guide.

Why is my Razer mouse not working?

Below are some of the reasons your Razer mouse is not working:

  • Outdated PC: If your wired or wireless Razer mouse is not working, it might be because your PC is outdated. You need to update your PC to the latest version and install any available updates to fix this.
  • Faulty drivers: Sometimes, your Razer mouse might not work when plugged in because of outdated or faulty mouse drivers. Reinstalling or updating your drivers should fix the issue here.
  • Wrong power setting: At times, your power setting might be causing this issue with your mouse. The solution is to disable the power management feature for your USB ports.

What are common Razer mouse problems?

Below are some of the Razer mouse problems faced by users:

  • Razer mouse won’t move: The pointer is not moving or keeps glitching. It might be a driver problem.
  • Razer mouse won’t move but can click: The clicking is not affected, but the cursor is not moving. Try fixing the problem with our steps below.
  • The Razer mouse won’t change color: If the colors on the mouse refuse to change, check the dedicated software.
  • Razer mouse won’t connect to Synapse: This is a common problem, but you can try reinstalling the Synapse software.
  • Razer mouse doesn’t respond: The unresponsive mouse problem can be caused by driver or connection problems.
  • The Razer mouse doesn’t work on startup: This issue can be caused by a problematic driver.
  • Razer mouse erratic movement issues: This can happen to any mouse. We have an excellent guide to help you fix erratic movement problems.

How can I fix the Razer mouse if it’s not working?

Before delving into the solutions below, here are some preliminary troubleshooting steps you should try:

  • Clean the mouse, including the sensor
  • Unplug and plug the mouse
  • Try a USB 2.0 port
  • Try the mouse on another PC without Razer Synapse
  • Check for firmware update

1. Reset the surface calibration

  1. Plug the mouse into your USB port and place it on a flat surface.
  2. Press and hold the left-click, right-click, and mouse-wheel buttons for about seven seconds.
    press  razer mouse not working
  3. This should reset the calibration.

Sometimes, If your Razer mouse tracker stops working randomly, it might be because of the calibration. Resetting the calibration to default should fix this convincingly.

2. Update your PC

  1. Press the Windows key + I to open the Settings app and select the Update & Security option.
    update
  2. Click the Check for updates button.
    check for
  3. Now, install the available updates.
  4. Click the View optional updates option and install any one available too.

If your Razer mouse is not working well, it might be because your PC is outdated. You need to install the latest updates, including the optional ones, as they might contain essential driver updates.

3. Reinstall mouse drivers

  1. Press the Windows key + X and select the Device Manager option.
    device manager
  2. Click the arrow next to the Mice and other pointing devices option and right-click each device.
  3. Now, select the Uninstall device option.
    uninstall razer mouse not working
  4. Click the Uninstall button.
    uninstall button
  5. Finally, restart your PC.

Some users have complained that their Razer mouse was not working because of issues with their mouse drivers. This affects the communication between your PC and the mouse.

The quick way around this is to reinstall the mouse drivers.

4. Adjust Power Management Settings for USB Controllers

  1. Press the Windows key + R, type devmgmt.msc, and click OK.
    devmgmt
  2. Click the arrow next to Universal Serial Bus controllers to expand it and double-click each device.
    usb razer mouse not working
  3. Now, click the Power Management tab.
  4. Finally, uncheck the Allow this computer to turn off this device to save power option and click OK.
    allow

Your PC has numerous power management features to help you get optimal performance from your battery. One is the ability to turn off some devices to save power.

If this is feature is enabled, it might why the Razer mouse stopped working and won’t even turn on. Hence, you need to disable this feature for all your USB ports.

5. Turn off Hibernation

  1. Press the Windows key, type power plans, and select the Choose a power plan option.
    choose power plan razer mouse not workingchoose power plan razer mouse not working
  2. Click on the Choose what the power buttons do.
    choose waht
  3. Now, select the Change settings that are currently unavailable option.
    change razer mouse not working
  4. Finally, uncheck the Hibernation box and click Save changes.
    hibernate

Some users have confirmed that turning off Hibernation can fix the Razer mouse if it is not working. This solution is beneficial if the mouse stops working after a cold start.

Those resolutions should fix a Razer mouse that is not working. If you still can’t fix it, you might need to see and technician and probably get a replacement.

If you need a list of the best Razer gaming mice, check our detailed guide for the excellent options you can go for.

Feel free to let us know the solution that helped you fix this issue in the comments below.

Co-op Steam Games: 30 Triple A Titles You Don’t Want to Miss

We discuss the best coop games on Steam steam in the article. But before we do, here is what you must know.

Valve’s Steam is a storefront and digital distribution service for video games. In fact, in 2003, it was released as a separate software client as a means for Valve to give automated game updates. However, it later extended to distribute and market titles from third-party game companies.

The platform comes with a library of games, a repository of your gaming experience, and should be enjoyable to browse.

For example, Steam’s new library makes finding, categorizing, concealing, and highlighting your games simple. Also, drag and drop is a great way to get things done, and it is the easiest way to restructure the library on the go.

You will find about 30000 games in Steam’s library; included in this collection are a lot of co-op games.

Let us introduce you to our favorite co-op games on Steam. These are the games you can play with your friends.

Before diving in, if any of the games in this article do not launch, you can take these steps to fix Steam games that won’t launch on Windows.

What Steam games can I play with my friends in 2022?

➡ Sniper Elite 5 – Best all-round steam co-op game

Sniper Elite 5 is the next installment in the trophy franchise, including tactical third-person action, unrivaled sniping, and an improved kill cam.

You battle across comprehensive maps, with numerous real-world locales recreated in spectacular detail and a new navigation system that interlinks more of the places than ever.

As you embark on extremely competitive 16-player engagements that will put your sharpshooting abilities to the test, you may customize your avatar and loadout while earning medals, XP, and ribbons.

Additionally, if you prefer cooperative gameplay, its Survival mode allows you to fight waves of foes with up to three other participants.

This is one of our top recommendations for anyone looking to try co-op games.

Additional features:

  • Very extensive graphics
  • Abundant levels
  • Realistic graphics

⇒ Get Sniper Elite 5

What are some good 2-player games on Steam?

➡ Portal 2 – Best overall two-player co-op game

This award-winning mix of narrative, unique gameplay, and music that gained the first Portal around 70 industry honors and a huge fan base is carried over into Portal 2.

Portal 2’s single-player mode offers a slew of new puzzle components, a cast of vibrant new characters, and a considerably more significant number of perplexing test chambers.

Test rooms, a distinct campaign with a unique scenario, and two additional player characters are included in the game’s two-player co-op mode.

Players will have to reevaluate all they believed and understood about portals in this game. They must behave together and think alike if they are to succeed.

Additional features:

  • Several portals
  • Original music
  • Competitive challenges

⇒ Get Portal 2


➡ Knights And Bikes – Best animated 2-player co-op game

You’ll take control of Demelza and Nessa as they ride and upgrade their bikes, exploring a historical island with their little pet geese Captain Honkers, searching for adventure and riches.

With an expanding assortment of toilet-plungers, water balloons, frisbees, and a boom-box loud enough to rouse the zombies, they’ll encounter riddles, perils, and the growing powers of an old curse as the game progresses.

These heroines would learn, laugh, and mourn together. Their creativity and camaraderie must be strong enough to preserve the island to be successful.

Additionally, you’ll use your improvised talents to solve puzzles and fight opponents throughout the game. You’ll use welly boots to trample through puddles, water balloons, frisbees, and a loud boom-box sound.

Additional features:

  • Windows and Mac compatibility
  • A treasure assortment
  • Many levels

⇒ Get Knights And Bikes


➡ We Were Here – Best puzzle adventure

Let’s start by mentioning that We Were Here requires both participants to use a functional PC-compatible mic.

You’ll be separated from your buddy within a deserted mansion and trapped in a frigid landscape throughout the game. Finally, you’re down to your last possession: a two-way radio with a recognizable voice at the other end.

This game is a free preview of a coop Steam standalone adventures collection.

Will you be able to find your way out? Can you follow the voice on the walkie-talkie to safety?

Additional features:

  • Intriguing environments
  • Windows compatible
  • Multiple puzzle integration

⇒ Get We Were Here


➡ Hide and Shriek – The best horror game

The setting is Halloween, and magic students at Innsmouth Academy and Little Springs High are ready to carry out an age-old ritual: creeping into school past nightfall, becoming invisible, and frightening the living daylights.

The game is a one-on-one multiplayer game that takes place over 10 minutes.

You must be a naughty rogue and terrify opponents nearly to death while the timer still runs. But, in the end, if there’s no apparent winner, the person with the highest score wins.

Lastly, spooking your adversary, enticing them towards traps, or executing an old ritual may earn you points.

Additional features:

  • Leaderboards
  • Spooky scenes
  • Thirty different spells

⇒ Get Hide and Shriek

What are the best local co-op games on Steam?

➡ Castle Crashers – Best for four people teams

In this newly upgraded edition of The Behemoth’s immensely famous 2D arcade adventure, you will smash, slash, and hack to be victorious. Online or locally, as many as four friends can play. 

In this game, you must save your princess, destroy certain castles, and protect the kingdom.

Castle Crashers also features a new Ultra texture quality and an unlimited framerate option, thanks to its recent Barbarian Makeover Update.

It even includes a new rapidly-paced multiplayer minigame designed specifically for buddies.

Additionally, it features Ultra graphics, a novel alternative texture quality option in the Game Settings menu.

Additional features:

  • Alien Hominid character
  • Arena mode
  • Insane Mode

⇒ Get Castle Crashers


➡ Trine 4: The Nightmare Prince – Best Overall local co-op game

With this game, the Trine series comes back to 2.5D magic.

This best-selling adventure series’ 3 protagonists are back on a mission to find the poor Prince Selius. Pontius the Knight, Zoya the Thief, and Amadeus the Wizard reunite for another exciting adventure through incredible fantasy landscapes brimming with peril.

Prince Selius has incredibly dark dreams throughout the game and owing to his magical abilities, and terrible nightmares may escape into real life and cause mayhem in the world.

Finally, Trine 4 takes the franchise to new heights, offering fans and newcomers the most comprehensive gaming experience.

Additional features:

  • Amazing gameplay
  • Great graphics
  • Nice backing sounds

⇒ Get Trine 4: The Nightmare Prince


➡ Broforce – Best Anti-terrorism 4-player game

When the globe is threatened by evil, the world turns to Broforce, a poorly funded paramilitary group dedicated solely to using extreme force.

You must prepare to run and shoot at countless different people and exterminate the enemy terrorist troops that menace your way of life, and you could do this with three other teammates. 

For liberation’s sake, you’ll unleash various exotic weaponry and set off spectacular cascades of fire, limbs, and napalm.

The game includes a level editor where you may create a bespoke playground of devastation and share it online to become the admiration of other bros.

Additional features:

  • Bro-Op & Deathmatch
  • Explosion Run
  • Destructible terrains

⇒ Get Broforce


➡ Trine 2 – Best fairytale Local Steam game

Trine 2 is a puzzle and action game where you and two other heroes navigate through unknown dangers in beautiful fantasy land.

Join Zoya the Thief, Pontius the Knight, and Amadeus the Wizard on a journey filled with magic, friendship, and betrayal in this game.

The all-new unlocked Dwarven Caverns level and the Goblin Menace expansion campaign are seamlessly integrated into one magnificent narrative in Trine 2. In addition, the Complete Story edition is automatically upgraded for all Goblin Menace owners.

You’ll journey across gorgeous sights and environments throughout the game, including a blazing desert, ice mountains, a castle by the dangerous sea, and even the insides of a giant worm.

Additional features:

  • Superb graphics
  • Hidden collectibles
  • NVIDIA 3D Vision support

⇒ Get Trine 2


➡ Left 4 Dead 2 – Best action horror FPS

This eagerly expected companion to the famous Left 4 Dead, 2008’s number one co-op game, is based on a zombie attack.

From New Orleans to Savannah, this co-op action horror first-person shooter takes you and your pals through the Deep South’s marshes, cities, and cemeteries throughout five massive missions.

You’ll take control of any of four new survivors, each armed with a diverse arsenal of modernized and traditional weapons. 

Aside from firearms, you’ll be able to unleash your rage on the infected persons using various carnage-inducing weapons, like axes, chainsaws, and even the odd frying pan.

Additional features:

  • A new multiplayer mode
  • 20 new weapons
  • AI Director 2.0:

⇒ Get Left 4 Dead 2


➡ LEGO Marvel – Best Marvel-based

An original plot spanning the whole Marvel world is featured in LEGO Marvel.

Players control Captain America, the Hulk, Spider-Man, Iron Man, Wolverine, and a slew of other Marvel heroes as they band together to prevent Loki and a slew of other Marvel adversaries from putting together a mega-weapon capable of ending the planet.

Players will trek around LEGO Manhattan, searching for cosmic bricks while visiting significant Marvel Universe landmarks such as a Hydra outpost, Asteroid M, Stark Tower, and the X-Mansion.

Smash, soar, and swing in this first LEGO videogame featuring above 100 Marvel heroes and Villains.

Additional features:

  • Hulk smashes
  • New and powerful moves
  • Customizable characters

⇒ Get LEGO Marvel


➡ Brawlhalla – Best 2D platform fighting game

In an epic battle of skill and power, history’s best fighters compete to see who is the greatest. These brawls are peppered with lethal weapons and devices. Every gun you acquire alters your playing style.

This free 2D platform combat game for PS4, PS5, PC, Nintendo Switch, Xbox Series X|S, Xbox One, Android, and iOS allows as many as 8 online or local players.

You may play rated matches, casual free-for-alls, or host a private room for friends. Match recording and playback, as well as best-in-class spectating, are available in gameplay. It also includes a large number of maps.

Additional features:

  • Brawl of the week
  • Experimental mode
  • Training Room

⇒ Get Brawlhalla

What are the best free co-op games on Steam?

➡ Counter-Strike: Global Offensive – Best FPS

Counter-Strike: Global Offensive (CSGO) is next on this list. It’s a terrific option if you’re seeking a free shooter game to play among your friends. 

The game was released by Value in 2012, and although Counter-Strike is more than nine years old, it continues to be exciting among players.

You may also install new modifications by downloading recent maps to make them more enjoyable. You may purchase maps through the Steam Workshop and other activities to attempt with your buddies.

While playing, note that Sniper is a powerful weapon in this game, and you can increase kills if you master how to use it. 

Additional features:

  • Steam Achievements
  • Full controller support
  • Multiplayer

⇒ Get Counter-Strike: Global Offensive


➡ Fistful of Frags – Bests Wild West-themed FPS

This is an action-packed, first-person, multiplayer-based, and skill-demanding shooter set in the Wild West.

It offers a one-of-a-kind blend of nonstop action and slow-moving yet devastating weapons.

Years ago, Fistful of Frags (FoF) was conceived as a Wild West-themed Source engine tweak. In this Steam release, it’s been entirely reworked, with a focus on battle mechanics.

It is, of course, free, with no need to register or micro-transactions. So it’s as easy as installing and playing.

However, you may encounter advertisements when you join some third-party servers where the game is hosted. That, however, has nothing to do with the FoF development team.

Additional features:

  • Crossplatform Multiplayer
  • Lan PvP
  • Online PvP

⇒ Get Fistful of Frags


➡ Warframe – Best interplanetary war game with free play

As you build your Warframe and follow the instructions of the enigmatic Lotus, you’ll face off against warring groups throughout a vast interplanetary universe.

In this third-person, exhilarating combat experience, you will discover your ultimate potential across enormous open environments and amass an arsenal of lethal weapons.

To play the game, you’ll need to put on your Warframe, a bio-metal suit with incredible strength. You’ll be able to activate its powers and wield a wide range of destructive weapons from inside, allowing you to crush swarms of foes on sight easily.

When the carnage is done, you earn or quickly unlock over 40 distinct Warframes, each having its abilities, to relive the chaos in any way you wish.

Additional features:

  • Remote play
  • Cross-device compatible
  • Single-player support

⇒ Get Warframe


➡ Escape Room: The sick colleague – Best Free puzzle

Escape Room – The Sick Colleague is another game that is free to play; however, it gives the option of purchasing the supporting DLC. This is a way to help the dev team. 

This game includes a beautiful sticker in the multiplayer lobby and on the main menu, letting everyone know you are a great person (Or maybe not so lovely).

From its main menu, you will equally be able to download the sticker’s high-resolution version in a png file.

This game also falls within the multiplayer puzzle category. So, if you can solve riddles quickly, this is a short game for you that lasts about 1-2 hours.

Additional features:

  • Online Co-op
  • Single-player
  • Leaderboards

⇒ Get Escape Room: The sick colleague


➡ Ring of Elysium – Best nature simulation

A completely new desert map is launched after the release of Europa Island and Mt. Dione, Vera. You must endure the competition and come alive despite the devastating nuclear storm.

This game, which has realistic visuals, a wide range of tactical and traversal skills, and its spectacular helicopter escape, encourages players to participate in an intense royale 60-man battle.

The game’s extremely accurate display of natural disasters will enthrall you, recreating abnormal weather conditions such as cloudy, sunny, heavy rain, foggy, thunderstorms, and so on. 

Additional features:

  • Multiplayer
  • Real-life disaster simulation
  • Stealth Cloak

⇒ Get Ring of Elysium


➡ Maelstrom – The best free fantasy game

Maelstrom is another game that is free to play on the list. This one is for you if you like games set in fantastical realms. The naval fights in Maelstrom are the inspiration for the fun.

Gunpowder Games, Inc. created this game, released in 2019 by Double Jump Publishing. It’s a good one to share, and you and your friends may play the game for free on Steam. 

Finally, note that to play, you’ll need a powerful PC with a quad-core CPU, 8 GB of RAM, and a GTX470.

Additional features:

  • Incredible scenes
  • Online PvP
  • Single-player

⇒ Get Maelstrom

What are the best coop survival games on Steam?

➡ Dying Light: Bad Blood – Best post-apocalyptic co-op game

best coop games steam

Over 16 million gamers across the globe have praised Dying Light: Enhanced Edition, which has received over 50 nominations and awards.

The game contains everything you’ll need to begin your journey in a zombie-infested post-apocalyptic universe.

It adds a new game mode, the buggy (your ride), two packages, and two more confinement zones, bringing the whole gaming experience to a new level.

You can play Dying Light in its final version and various gameplay enhancements. You’ll have to make weapons, hunt for materials, and do whatever you can to stay alive in a zombie-infested metropolis.

Additional features:

  • Multiplayer mode
  • Numerous modes
  • Plenty missions

⇒ Get Dying Light: Bad Blood


➡ 7 Days to Die – Best Zombie survival co-op game

best coop games steam

This Steam game defines the survival category, with unequaled crafting and world-building capabilities, and has sold around 14 million copies.

It offers a unique blend of tower defense, survival horror, first-person shooter, and role-playing games, all set in a harsh post-apocalyptic world that zombies have now overrun.

In this game, crafting, looting, fighting, exploration, mining, and character advancement are all presented in a manner that has elicited an ecstatic reaction from fans all over the globe.

You may scour the globe for the most excellent tools and armor and enhance objects with various modifications.

Finally, the game offers six quality ranges, each with millions of variations.

Additional features:

  • Multiple zombie archetypes
  • Multiple worlds
  • Customizable characters

⇒ Get 7 Days to Die


➡ Tribes of Midgard – Best graphics

best coop games steam

Tribes of Midgard is yet another co-op game that combines survival, action, and Rogue-lite aspects in a new way.

Every night, armies of attackers attempt to ruin the Seed of Yggdrasil, the holy tree you’ve promised to guard, so the players must now defend their hamlet.

Ragnarök of the world’s end will only be averted if you, alongside your tribe, preserve this Seed.

To combat strong opponents, hunt mythological monsters, topple giants, harvest rich resources, and claim treasures, you will explore the untamed wilds of Midgard.

Lastly, the more complex the struggle and the bigger the rewards, the deeper you wander from the settlement.

Additional features:

  • Face colossal game-changers
  • Viking Legend
  • A Bright Norse Realm

⇒ Get Tribes of Midgard


➡ State of Decay 2 – Best open-world survival-fantasy game

best coop games steam

This sequel to the State of Decay is set shortly after the zombie outbreak. Your little group of survivors is trying to reconstruct a sliver of civilization, and it’s on you to decide how they do it.

You choose how to strengthen and improve your base, where and how to establish the community, who to attract to the squad, and when to move on.

In the game, it is also on you to decide which survivors to go on a foraging mission for ammunition and the food needed and who you’ll employ to defend your stronghold from the undead. It is up to you to determine how you will deal with newcomers to your community.

Finally, not that the sandbox experience of every player is different, and the problems you confront differ depending on who joins your team and your choices.

Additional features:

  • State-of-the-art graphics
  • Realistic sound effects
  • Multiplayer mode

⇒ Get State of Decay 2


➡ Icarus – The best apocalypse co-op game

best coop games steam

Icarus was supposed to be the next earth, but terraforming failed, the air became poisonous, and humanity’s aspirations of populating a new planet were dashed.

On Icarus, our biggest blunder, you must survive a hostile alien landscape. You’ll have to create, gather, explore, and hunt through the harsh terrain while looking for your fortune.

Prospectors descend to the planet’s surface for short periods from their orbiting station, where they adjust to coping with the unfamiliar environment, seek rare exotic minerals, and execute faction objectives.

Survivors become seasoned veterans transform and take on more difficult drops using their newfound expertise.

Additional features:

  • Multiple missions
  • Plenty skill levels
  • Wonderful graphics

⇒ Get Icarus


➡ Conan Exiles – Best Graphic survival co-op steam game

best coop games steam

Conan Exiles is an online survival game based on the tales of Conan the Barbarian’s world.

You’ll join a giant, open-world sandbox where you’ll create your house or perhaps a shared metropolis with strangers and friends.

You’ll have to raise your avatar from a peasant to a great warrior, explore loot-filled dungeons, brave frigid weather, and battle to conquer your foes in epic siege conflicts.

It would help if you rapidly learned to live when Conan saves you by cutting you free. Then, surviving might be as simple as avoiding extreme heat and hunting animals for sustenance.

You will travel over a large and continuous universe, from the mountains in the north to the scorching southern desert.

Additional features:

  • Persistent online multiplayer
  • Full single-player
  • Stunning scenes and graphics

⇒ Get Conan Exiles

Are there any co-op RPG games on Steam?

➡ Monster Hunter – Best monster-hunting Steam co-op game

best coop games steam

Hello, and welcome to this new era. Here, you assume the duties of a hunter and fight terrible beasts in a natural, active ecosystem where you may gain an advantage by using the terrain and its different residents.

You can hunt alone or in groups of as many as four, collecting resources from slain adversaries to construct new equipment and even take on larger stronger animals.

Lastly, you’ll be tasked with hunting creatures in various environments. Kill these creatures, and you’ll get resources to make better weapons and ammunition.

Additional features:

  • Monster tracking
  • Extensive weapon collection
  • Specialized tools

⇒ Get Monster Hunter


➡ Borderlands 3 – Most detailed RPG co-op steam game

best coop games steam

This game brings back the original shooter-looter with a slew of new weapons and a brand-new chaos and confusion adventure.

Playing as any of the all-new Vault Hunters, you’ll blast your way through new worlds and adversaries.

Also, you may play alone or with pals to fight mad foes, get plenty of riches, and rescue your homeland from the galaxy’s most deadly cult leaders.

As you go through the game, you may choose from one of four incredible Vault Hunters, each with rich skill trees, playstyles, powers, and customization possibilities.

Every hunter in the game can wreak havoc on their own, but when they work collectively, they are unbeatable.

Lastly, every combat is a chance to gain new gear, thanks to the plethora of weaponry and gadgets available.

Additional features:

  • Wonderful graphics
  • Great game scenes
  • A rich assortment of weapons

⇒ Get Borderlands 3


➡ Warhammer: Vermintide 2 – The most bloody RPG co-op game

best coop games steam

To begin, please be aware that this game includes material unsuitable for every age or watching at work. For example, it provides gore or violence and some general mature material.

That said, the game is a cooperative action game for four players, and it’s based in the universe of Warhammer Fantasy Battles.

Vermintide 2 is the sequel to the highly praised Vermintide, and it’s the newest entry in a series noted for its brutal and deadly first-person combat action.

Five warriors return to face an even bigger enemy than ever in the game, and with your friends, you remain the only thing standing between complete loss and triumph.

Additional features:

  • Multiple war-ravaged lands
  • Five character options
  • Skill progression ladder

⇒ Get Warhammer: Vermintide 2

➡ Grim Dawn – The best apocalyptic fantasy co-op game

best coop games steam

Enter this apocalyptic fantasy where humanity is almost getting extinct. Iron is more valuable than gold in this land, and trust is difficult. 

Complex character growth, unique items, crafting, and missions with decisions and consequences are all included in this ARPG.

Players will make difficult choices that have far-reaching consequences for the rest of the globe. So, depending on your decisions, desperate families, strangers on the road, and even whole communities may live or die.

You’ll gain favor with human groups, allowing you to access new quest lines, merchant discounts, and faction-specific equipment and augments. Some neutral groups may become friends, but assisting one makes another an adversary.

Additional features:

  • 35 quests
  • Several weapon choices
  • Excellent graphics

⇒ Get Grim Dawn


➡ Outriders – Best 3-player co-op game

best coop games steam

Outriders is a cooperative RPG shooter game for 1-3 players, and it is set in a unique, harsh, and desperate sci-fi environment.

You’ll design your Outrider and begin on a trip across the barren earth while humanity dies out on the battlefields of Enoch.

The game offers a grand narrative covering a vast universe. Hence, you’ll leave the shanty towns and slums of the First City behind and travel across mountains, woods, and deserts in search of a mystery signal.

Outriders deliver numerous hours of gaming and are a product of one of the best shooter game developers in the market.

It will quickly become one of your favorites by combining furious gunplay with deadly abilities and an inventory of more twisted weapons and gear sets. 

Additional features:

  • Brutal and bloody combat
  • Single and multi-player support
  • Custom Outrider character

⇒ Get Outriders


➡ Remnant: From the Ashes – Most dynamic RPG co-op game

best coop games steam

An old horror from a different realm has plunged the planet into disarray in the game.

As one of humankind’s last survivors, you must confront swarms of deadly monsters alone or with as many as two additional survivors to rebuild and recover what was lost.

You will explore regularly created worlds that vary every time you play, introducing new quests, maps, monster encounters, and world events.

Lastly, the game’s four distinct worlds are full of horrific inhabitants and surroundings that provide new difficulties with each run.

Added features:

  • Endless realms
  • Online co-op
  • Vast weapon choice

⇒ Get Remnant: From the Ashes

Can Mac and PC devices play Steam games together?

PC and Mac can work for the base games; however, Mac does not run Horizons.

Cross-platform play is possible across many platforms depending on the game. You can play with your mates on PC/Mac (Steam), Xbox platforms, PlayStation, Google Stadia, and the Nintendo Switch.

What Steam games work well on Mac?

Even though the list is considerably more extensive, we’ve picked some of the most appreciated games that allow users to play across platforms. Below, you can have a look at our selection:

There you have it, our extensive list of the best coop games Steam has to offer. While many of these require cooperative play, a few can also be enjoyed in single-player mode.

To get started on the games in this article, you could follow a few easy steps to register and install Steam on your computer.

Lastly, we like to hear from you in the comments, so let us know which of these games is your favorite to play.

Can you install Xbox Game Pass games on a secondary drive?

With the rise in popularity of the Xbox Game Pass and the launch of the Beta version of the Xbox app installer, users have started asking questions regarding the functionality of various games.

One question that seems to be on a lot of users’ minds though is this: Can you install Xbox Game Pass game on a Windows 10 secondary drive?

This question also stems from the fact that several users have already reported encountering issues when trying to install games on drives other than the primary one.

Because all Xbox Game Pass games are technically downloaded from the Microsoft Store, the way they are treated as far as installation and storage location is concerned is pretty much the same as with your typical Store Apps.

This means that while some games can be installed on secondary drives, others can only be installed on your primary drive.

This is mostly because the latter requires more user data and permission rights, which they can only receive by being installed on the primary drive.

It can also be a simple matter of rule definition on behalf of the game’s developer when he made it available on the Microsoft Store.

Whichever the case, if you’re having storage space issues on your primary drive and installing Xbox Game Pass games on a Windows 10 secondary drive is a must, you should consider changing the default install location of all your apps and games.

Steps to install Xbox Game Pass games on a secondary drive

For a step-by-step guide on how to change the default location for future game and app installations, follow the instructions at the end of this guide. After setting up storage, you may also want to manage your subscription. Here’s how to cancel Xbox Game Pass if you no longer need it.

You can also make the most of your subscription by learning how to gift Xbox Game Pass to friends or family.

Following these steps will allow Xbox Game Pass games as well as regular games and apps to be installed on your secondary drive by default.

However, if you encounter a title that can only be installed on a primary drive, at least you will be prompted beforehand, and you can then choose the best course of action.

Alternatively, you can also consider reinstalling the Xbox app installer.

How To Create a Windows 11 Bootable USB on Ubuntu

While Windows 11 came with a lot of new and advanced features, and changes, it was still a tough task to create a Windows 11 bootable USB on Ubuntu Linux.

The NTFS format on Windows lacked quality drivers and hence, could not handle the bigger NTFS files, thus, corrupting the newly created installation media.

It would also need you to split the install.wim file into several different files to create the bootable USB. However, currently, the Linux Kernel 5.15 and the later versions feature the latest NTFS driver and are adept at handling bigger NTFS files, thus, helping users to create a Windows 11 bootable USB on Linux.

This guide will explain the steps in detail on how to create a bootable Windows 11 USB in Linux (Ubuntu).

? Check the requirements

Before creating a Windows 11 bootable USB on Linux, here are a few things to remember:

  • Get a 6 GB+ USB drive
  • A computer or laptop with a processor that is 1 GHz or faster
  • 4GB+ RAM
  • 60GB+ hard disk
  • DirectX 12 or late (graphics) compatible
  • Supports UEFI, and Secure Boot
  • Supports TPM 2.0 or WinPE (in old devices)

How to make Windows 11 bootable on Linux?

1. Download & Create Windows 11 ISO USB

  1. To download the Windows 11 ISO file, visit Microsoft’s official page for software download.
  2. In Linux, it’s recommended to use the direct download links, because the other two options – Windows 11 Installation Assistant and the Create Windows 11 Installation Media are applications, built only to function in Microsoft Windows.
    • Therefore, navigate to the Download Windows 11 Disk Image (ISO) section.
    • From the drop-down, select Windows 11 (multi-edition ISO) and click on Download.
      windows-11-usb-installer-linux/
  3. Next, under the Select the product language field, select the desired language from the drop-down and press Confirm. For example, you can select English (United States), English International, or any other preferred language.Select the desired product language and confirm
  4. It will now display a Windows 11 64-bit Download link that is valid for 24 hours from the time of creation. Click on the link to finish the download and then create the bootable USB installer for Windows 11.Click on Windows 11 64-bit Download link

➡️ Now that you’ve downloaded the W11 ISO, here’s how you can burn it on your USB stick:

    In order to burn the Windows 11 ISO file on your USB driver accordingly, you have our guided steps as an example.

  1. 1. Connect your USB device.

  2. 2. Go to the Windows icon on the taskbar (Start) and search for WoeUSB in the search bar.

  3. 3. As the app opens, select From a disk image (ISO) option and select your ISO image from the drop-down. Now, navigate to the Target device section at the bottom and highlight your USB drive.


    select disk image iso and target device in Woeusb app and install
  4. 4. Press Install to continue. 

  5. 5. Next, search for Disks in the Windows search to open the Disk Utility and unmount the USB device, or it will show an error message.

    windows-11-usb-installer-linux
  6. 6. In the Disks utility, go to the left side of the pane, select the USB device and click on the square symbol. This will unmount the USB device.

  7. 7. Once done, return to the WoeUSB app, click the Refresh button below, and select the USB device.

  8. 8. Press Install again.

  9. 9. It will now start cleaning the USB drive and burning the Windows 11 OS to it.

  10. 10. Once the installation process is over, it will display a success message.

  11. 11. Shut down and boot from the USB device to begin installing the Windows 11 OS.

You can also use GParted to create a bootable USB flash drive to install Windows from Linux. You would first need to install GParted and then follow the process as mentioned in the link.

Those who own a Windows device running on Intel 8th, 9th, 10th, or 11th generation and the RAID SATA Operation, and wish to install Windows 11, would need extra storage controllers. This will help them to identify the storage controller easily and find the NVMe SSD.

For this, download the Intel Rapid Storage Technology Driver from the official website, extract the folder and copy the same to the install partition of the Windows 11 bootable USB on Ubuntu Linux.

2. Use a dedicated app

Download & install WoeUSB in Ubuntu

  1. Go to Start, and type Ubuntu to search for the Ubuntu command-line app.Start - search for Ubuntu - click to open
  2. Run the below command in the Ubuntu app and press Enter: sudo add-apt-repository ppa:tomtomtom/woeusb This will add the PPA.Ubuntu app - execute command - add PPA
  3. Next, type the password, and press the Enter key as asked.Enter Linux password in Ubuntu app
  4. Now, execute the below command to finish installing the WoeUSB tool: sudo apt install woeusb woeusb-frontend-wxgtk Press Y to continue.Ubuntu app - execute command - WoeUSB install
  5. The process takes a while, so wait till the installation is complete.

To create the Windows 11 bootable USB on Ubuntu, the WoeUSB app needs to be
installed.

How to install Windows Subsystem for Linux (WSL) in Windows 11?

The previous Windows version was called the Linux Kernel version. However, in Windows 11, it’s known as WSL or the Windows Subsystem for Linux.

Currently, there are only two WSL versions, WSL 1 (released originally) and WSL 2, the second version that comes built-in with the Linux kernel within a virtual machine.

While it supports all the features of the original version, it also helps optimize the system performance, supports multiple monitors, compatible with call support for the entire system, and also supports all of the Linux GUI-based apps.

However, it has to be installed on your Windows 11 PC. Here’s how to check if the WSL or the Windows Subsystem for Linux is installed on the Windows 11 device. Here’s how:

  1. To open the Run command window, press the Win + R keys together on your keyboard.
  2. In the search bar, write CMD and press the Ctrl + Shift + Enter keys at the same time. This will open the elevated Command Prompt. Type cmd in Run and press Ctrl + Shift + Enter to open Command Prompt (admin)
  3. Now, copy and paste the below command in the Command Prompt (admin) and press Enter:
    wsl –install It will show the message: The requested operation is successful. Changes will not be effective until the system is rebooted.Run command to install WSL
  4. Restart your PC to complete installing the WSL on Windows 11. The process will be completed in the Ubuntu app console.
  5. Create the UNIX username and password as requested.Create user name and password

As the username and password are successfully created, it will show the message: Installation successful. One can now proceed with the below method to check the WSL version installed.

Check the WSL version or Linux Kernel Version

  1. Press the Win + R shortcut keys simultaneously to launch the Run command.
  2. In the Run command search bar, type in CMD and press Ctrl + Shift + Enter. This will open the Command Prompt window with admin rights.Type cmd in Run and press Ctrl + Shift + Enter to open Command Prompt (admin)
  3. As you see the elevated Command Prompt window, run the below command and hit Enter: wsl --list –verbose This will show whether the device has WS 2 or WS 1 installed.
  4. Check the WSL version under the Version column. For WSL 1, it will show 1 and for WSL 2, it will show 2.Run command to check WSL version in cmd

Now that the WSL version is known, the latest Windows Subsystem for Linux is installed, and hence, can proceed to create the Windows 11 bootable USB on Ubuntu Linux.

WoeUSB is a free and open-source Microsoft Windows® USB installation media preparer for GNU+Linux. Go to the PPA repository to download and install the tool, which includes all current Ubuntu releases (Ubuntu 18.04, Ubuntu 20.04, Ubuntu 21.04).

Note icon NOTE
To install the WoeUSB tool, the commands must be run in the Ubuntu command-line app and not in the usual Command Prompt or Terminal. So, make sure it’s installed.
Download Ubuntu from Microsoft Store. 

If Windows 11 is running Ubuntu 18.04 (Linux Mint), run the below command to generate a fresh list of packages: sudo apt update

No doubt, Windows 11 is the most sought-after Windows OS at this moment. Thanks to its splendid features and functionalities, users are keen to install the OS on their computers. However, installing the Windows 11 OS on Linux can be perplexing.

But, if you follow the above methods properly, it should not be a tough task after all. This guide will get you going with your Windows 11 installation on Linux (Ubuntu). So, simply mount the bootable USB on the PC and reboot. This will auto-start the Windows 11 installation process and that’s it!

File Explorer Search not Working: 5 Ways to Enable it

Users have remarked that File Explorer searches might return a No items match your search message even when there certainly are files that match the keywords entered.

Therefore, File Explorer’s search utility can effectively stop working for specific folders or more widely. For example, one user stated on the Microsoft forum:

The search facility in Explorer has stopped working. I can see all files and access them, but when I try to find any of them using the search box it comes up with No items match your search. This facility worked 48 hrs ago, but is no longer!

Why is my search not working in File Explorer?

From what we gather, a few things will trigger this issue among Windows users. Here are the top factors:

Some common problems users have encountered are File Explorer search not working after an update, not working on a network drive, not showing all results, and not finding files.

How can I fix the File Explorer search if it’s not working?

Before going into any of these fixes, we recommend a reboot. This is because a restart can force some difficult processes to end, which may rectify simple computer problems.

Also, you may use a third-party tool in place of File Explorer. If you need to find another efficient file explorer solution, it’s advised to choose from the best file finder software for your PC.

1. Open the Search and Indexing Troubleshooter

  1. Click Settings on the Start menu, and select Update & Security.
  2. Select Troubleshoot, then select Search and Indexing.
    file explorer search not working
  3. Click Run the troubleshooter and go through the troubleshooter’s resolutions.

2. Restart File Explorer

  1. Press Ctrl + Shift + Esc to open the Task Manager.
  2. Under the Processes tab, select  Windows Explorer.
    file explorer search not working
  3. Then press the Restart button.

3. Rebuild the search indexing

  1. Press the Windows key + R keys, type Control Panel, and hit Enter.
  2. Click the downward pointing arrow on the address bar and select All Control Panel Items.
  3. Then click Indexing Options.
  4. Press the Advanced button.
  5. Press the Rebuild button, and click OK to confirm.

4. Turn on Index Properties and File Contents option

  1. Follow steps 1 to 4 of solution 3.
  2. Click on the File Types tab and tick Index Properties and Files Contents.
    file explorer search not working
  3. Click the OK button.

Some users have confirmed they’ve fixed File Explorer searches by selecting the Index Properties and File Contents option.

5. Enable Windows Search Service

  1. Press the Windows key + R keyboard shortcut to open Run, type services.msc in the Open text box, and hit Enter.
  2. Double-click the Windows Search service.
  3. Select the Automatic option on the Startup Type drop-down menu, and click the Start button.
  4. Select the Apply and OK options.

Those resolutions will often fix FileExplorer’s search utility. Remember, however, that users can utilize numerous third-party search tools for Windows as an alternative to File Explorer.

Now that the search feature is working again, why not check our guide to learn how to search special characters in Windows Explorer.

If you have questions or suggestions, don’t hesitate to leave them in the comments below.

Fix: Adobe Acrobat Reader Keeps Crashing & Main Reasons

If you’re using the Moreover, it most cases, it’s not even the app’s fault because usually, system errors are the culprit for pretty much all anomalies encountered.

For instance, Redstone 2 build 14901 causes Adobe Reader crashes big time each and every time you launch it.

So, if your Reader starts acting erratically and even crash intermittently, here are a few useful troubleshooting steps you can try out.

What can I do if Adobe Reader DC crashes in Windows 10?

1. Install or update the Acrobat Reader to the latest version

update acrobat

Launch the software, check for updates, and follow the steps prompted in the Updater screen to install the latest updates.

Make sure you run the official, uncompromised version of the software in order to avoid any compatibility issues.

Adobe Acrobat Reader DC

Prevent frequent crashes or product issues by keeping your PDF reader up to date at all times.
Get it free Visit website

2. Run Repair Acrobat installation

Launch the software, choose Help > Repair Acrobat Installation, and follow the instructions on the screen.

Once the repair process is complete, simply restart your PC and check if the issue is still present.

3. Disable protected view

  1. When Acrobat Reader is open, got to Edit and choose Preferences.
  2. Here, select Security (Enhanced).
  3. Uncheck Enable Protected Mode at startup.

Enabled by default, Protected Mode was introduced in order to mitigate and prevent security vulnerabilities.

Nevertheless, this feature is known not to support all changes across releases and also, for compatibility issues with antivirus software.

4. Use a different Windows user account

Since your system can just as well be responsible for abnormal behavior at the applications level, you might want to try signing out of your Windows account and then signing in with a different one. You can also try to use an Administrator account.

Also, make sure that your system meets the minimum requirements for Adobe Reader to work. You can check this information on Adobe’s official site.

5. Turn off applications running in the background

  1. Type msconfig in the Start menu to open the System Configuration window.
  2. On the default General tab, go to the Selective startup section.
  3. Deselect Load Startup Items (but make sure the Load System Services option is checked).
  4. Switch to the Services Tab, and check to Hide All Microsoft Services.
  5. Click Disable All, press OK, and restart Windows.
  6. Relaunch the Reader and see if the issue still occurs.

When running in parallel with Adobe Reader, some may cause system errors or freezes. Following these steps, you should be able to identify which app is causing trouble.

Afterward, you can enable apps one by one, except for the one that was interfering.

6. Troubleshoot plug-ins conflicts

Remove third-party plug-ins from the Reader plug-ins folder, then relaunch Adobe Reader and see if the issue still occurs.

Run a detect and repair on Adobe Reader with the corrupted Reader plug-ins removed from the Reader folder.

These are some of the solutions you can try out in order to fix freezes, crashes, and other abnormal behavior related to your Reader in build 14901 or any other Windows version.

Have you come across such issues already? Share your experience in the comments section below.