9 Best Intrusion Detection Software [Free & Paid]

Intrusion detection software for Windows checks for changes that are made by all sorts of unwanted programs that could be injected into your system by cyber criminals.

These tools study the data packets, both incoming and outgoing, to check what kind of data transfers are at hand. It will alert you if they find any suspicious activity on the system or in the network.

Intrusion detection software exists as an answer to the increasing frequency of attacks made on systems.

Such tools usually inspect the host configuration for risky settings, password files, and more areas. Then, they detect all kinds of violations that could prove dangerous for the network.

IDS also set in place various ways for the network to record any suspicious activities and potential attack methods and to report them to the admin.

In other words, an IDS is quite similar to the Windows firewall but more than guarding against attacks from outside the network, an IDS is also able to identify suspicious activity from within the network.

Some IDS software is also able to respond to potential intrusion. This is Host Intrusion Prevention System software (HIPS) or just IPS (Intrusion Prevention System).

Generally speaking, Intrusion Detection Software for Windows shows what is happening. The IPS solutions also act upon the known threats.

There are some products which combine these two features, and we’ll present to you the best on the market.

What are the types of IDS?

An intrusion detection system (IDS) is a tool created to test the vulnerability exploits against a target system or computer. There are four main types of intrusion detection systems:

  1. Network intrusion detection system – an independent platform that monitors network traffic, probes hosts, and identifies intruders.
  2. Host-based intrusion detection system – an agent installed directly on the host and filters malicious traffic that goes through allocation logs, system calls, and file system modifications.
  3. Perimeter intrusion detection system – creates “perimeter fences” around main system infrastructures to detect and locate intrusion attempts there.
  4. VM-based intrusion detection system – similar to any of the three above, is deployed remotely via a virtual machine.

Best intrusion detection systems to install on PC

Total AV – Best browsing security and system maintenance
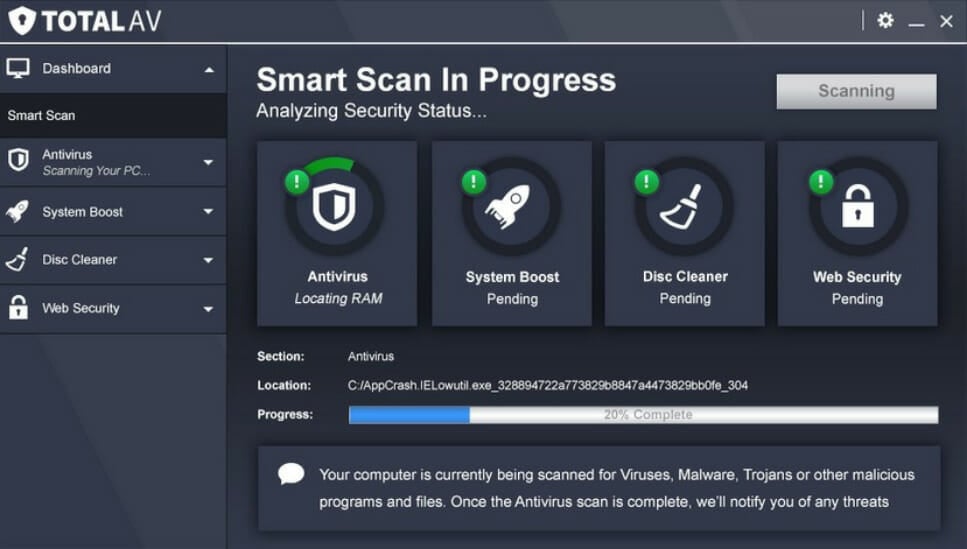
If you want complete antivirus protection, TotalAV is the right choice for you. With features to protect your system from any online or offline threats, it’s one of the few antiviruses that offers you a series of tune-up tools to maintain peak performance.

With TotalAV and WebShield, you are completely protected while browsing. Malicious websites and links are automatically blocked, and downloaded files and executables are verified before you even click on them.

Besides full virus protection, it provides a Total Adblocker to reduce all unwanted pop-ups and notifications and load all pages faster.

Some of TotalAV’s key features include:

  • Data breach monitoring and alerts
  • Blocking of tracking cookies
  • Tune-up tools for system maintenance
  • PUA protection and zero-day cloud scanning

Total AV

A great intrusion detection software that will protect every aspect of your computer.
Check Price Visit Website

ESET HOME Security Essential – Most comprehensive security features
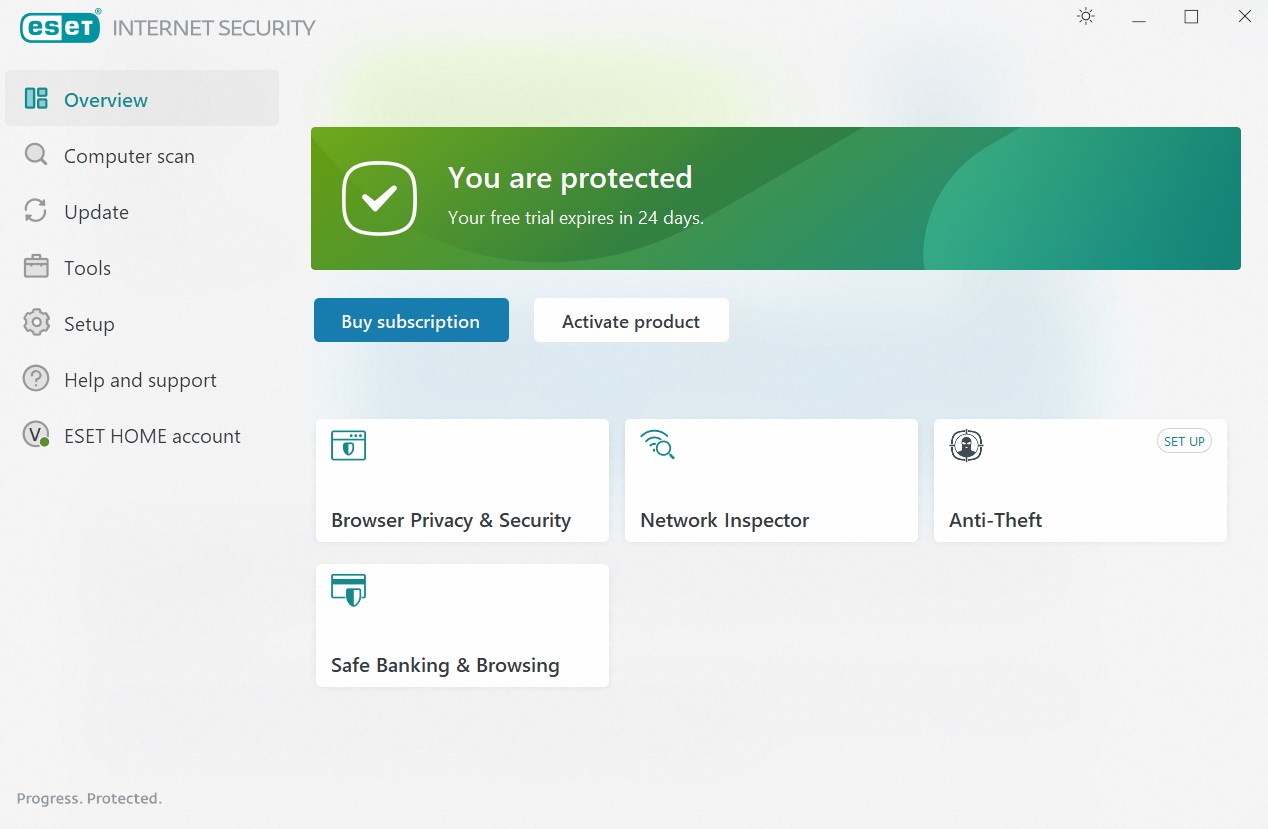
ESET HOME Security Essential will actively protect your PC from any kind of threat. The software will ensure that your sensitive data, banking transactions, passwords, login credentials, and webcam are safe.

ESET uses advanced AI and machine learning to create proactive protection which will stop known malware and emerging ones from entering and infecting your device.

Since it is cross-platform, the antivirus is ready to secure all kinds of devices, such as Android phones, iPhones, Linux and Windows computers, or MACs.

Here is a list of its core features:

  • Privacy protection
  • Anti-theft measurements
  • Lightweight software with minimal power usage
  • Secure active scanning and malware removal

ESET HOME Security Essential

It utilizes advanced AI to scan your computer for harmful software and keep your system safe.
Check Price Visit Website

Bitdefender Internet Security – Most advanced virus protection and prevention
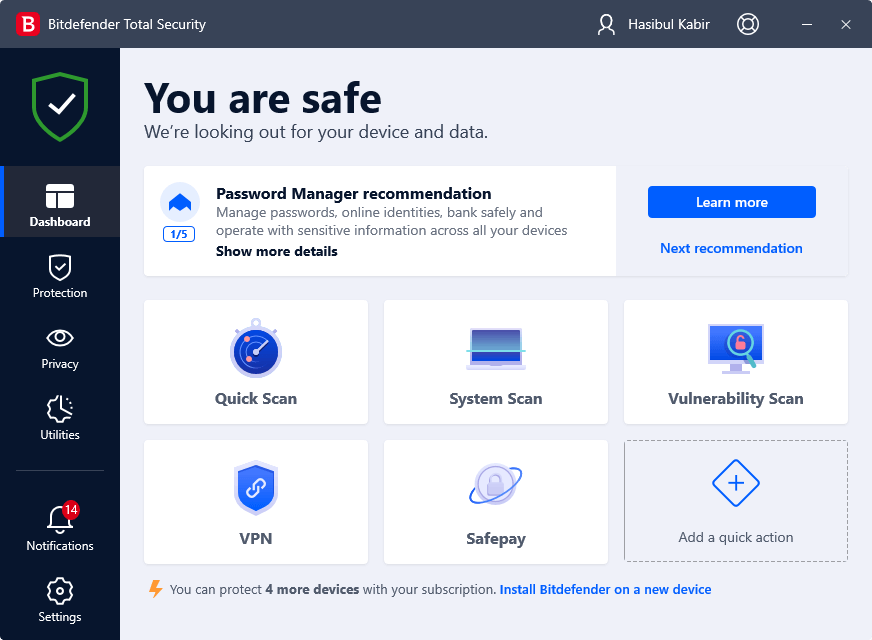
Bitdefender is a self-proclaimed global leader in cyber security, protecting millions of users around the world from online threats.

The software is equipped with multilayered protection to ensure nothing gets past its real-time scanning. In addition, the program is lightweight and doesn’t consume resources from your computer.

Bitdefender Internet Security will perform periodic scans, and it will actively take care of your online data and privacy, prohibiting any intruding software from stealing it.

Let’s have a look at the software’s key features:

  • Multiplatform protection
  • Privacy firewall
  • Parental control is perfect for keeping children safe
  • Multilayered antivirus, malware, ransomware, adware protection

Bitdefender Internet Security

Bitdefender Internet Security is an award-winning antivirus with unbeatable virus protection.
Check price Visit Website

Malwarebytes Endpoint Protection – Best malware protection
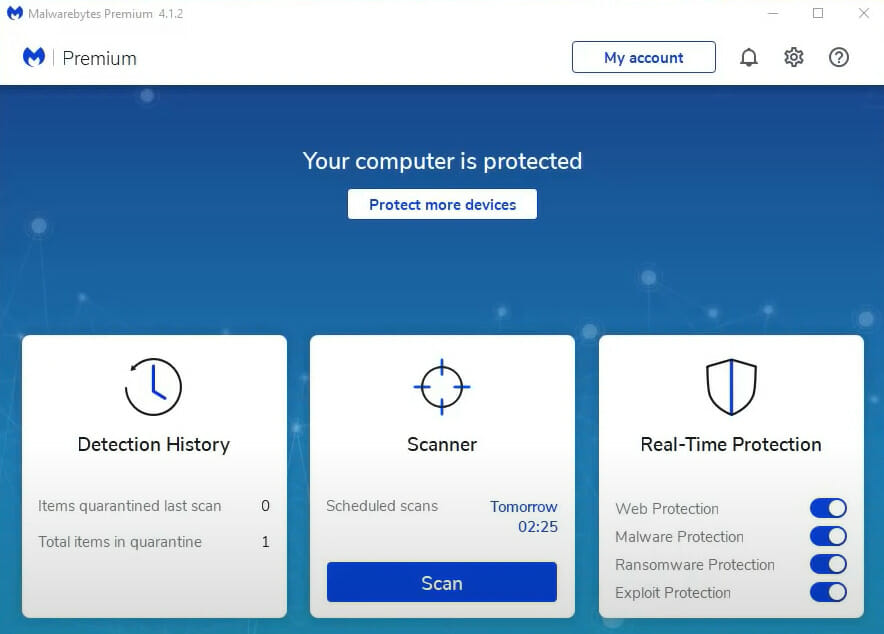
According to Malwarebytes, the industry-leading security software manufacturer, there is no better protection strategy than proactive prevention and we couldn’t agree more.

Malwarebytes Endpoint Protection is an advanced IDS solution for endpoints that uses a layered approach packed with multiple detection techniques to identify and keep malware and other cyber threats away from your systems.

It delivers best-in-class protection against both known and unknown malware, ransomware, and zero-hour threats within one unified solution meant to reduce costs and simplify the deployment process.

Let’s quickly look at its key features:

  • Web protection (against malicious websites and ad networks)
  • Application hardening (reduces vulnerability exploit surface)
  • Application behavior protection (prevents apps’ leveraging and endpoint infection)
  • Mitigation (blocks ransomware and attempts to execute code on the endpoint from any distance)
  • Machine learning-based anomaly detection
  • Pre and post-execution layered detection techniques
  • Centralized cloud-console (for easy cloud-enabled deployment and management)

Malwarebytes Endpoint Protection

The best protection strategy is prevention. Keep your endpoints safe with Malwarebytes!
Check price Visit Website

Avast Free Antivirus– Great basic free protection
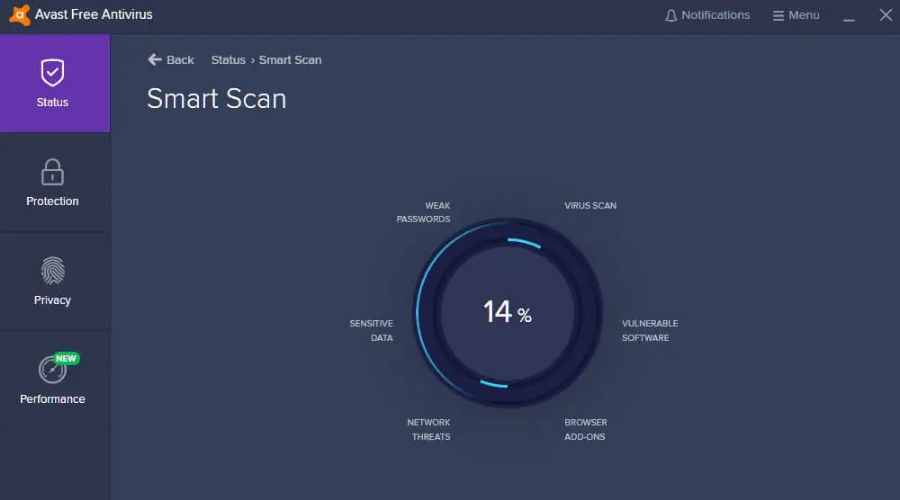
One other great malware detection software is Avast Free Antivirus. The program also uses advanced AI to optimize its scans and find all harmful software and viruses on your PC.

The free version of this program comes with the malware scanner and removal tool which is more than enough for those who want to keep their data secured.

If you choose to upgrade to the premium version, you’ll benefit from these key features:

  • Premium malware scanner and removal
  • PC cleaner and optimizer
  • Customer support and remote control
  • Wi-fi inspector

Avast Free Antivirus

Avast gives you more than any other competitors, providing excellent antivirus protection for free.
Free download Visit Website

Malware Defender – Great for advanced users

This is a free Windows-compatible IPS software that provides network protection for its advanced users.

The software will successfully handle intrusion prevention and also malware detection. It is very well-suited for home use even if its instructional material is a bit too complex for average users.

Acting as a host intrusion prevention system, the tool monitors a single host for any kind of suspicious activity.

Malware Defender was initially a commercial program, but its excellent features changed its ownership a while ago, and then a new version was released that was freeware.

Let’s quickly look at its key features:

  • Default installation into learning mode to reduce the number of initial alerts to a minimum
  • Files, registry, application modules, and network protection
  • Connection Monitor (the perfect companion to Windows native firewall, with more detailed control)

The software is an excellent performer, but its only minus would be the fact that its complexities make it unsuitable for the average user.

On the other hand, all mistakes can be rectified by changing rule permission from the log entries.

Although if you have already denied a vital system function you won’t be able to do much more to get things back the way they were before, so you should pay attention.

⇒ Get Malware Defender

Snort for Windows – Open-source network IDS

Snort for Windows is an open-source network intrusion software that delivers real-time traffic analysis and packet logging on IP networks.

The software is able to perform protocol analysis, and content searching/matching can be used to detect a variety of attacks and probes, such as buffer overflows.

It will also analyze stealth port scans, CGI attacks, SMB probes, OS fingerprinting attempts, and much more.

The program is straightforward to deploy, and it has a vast number of open-source developers. The Snort community supports the software, but it also provides the core rule sets for some commercial IDS/IPS products.

Protect your home network with the firewall devices on this thorough list and never worry about malware again.

Let’s quickly look at its key features:

  • Returns everything that it sees including detailed packet decodes
  • Easy configuration to only present alerts from its set of rules
  • Robust tools for gathering and for analyzing network traffic.
  • Deployment across very large network infrastructures is also possible

Due to its ability to be quickly deployed, its very comprehensive capabilities, and its great open-source community support, Snort is usually everyone’s favorite.

There is also the commercial version which is available as an appliance from Sourcefire, and it’s guided by Snort’s developer as its CEO.

Roesch managed to blend perfectly the best parts of the open-source and the commercial worlds into the Sourcefire offerings.

⇒ Get Snort for Windows

The Bro Network Security Monitor / Zeek – Good framework analysis

The Bro Zeek IDS

This is a powerful network analysis framework that is very different from the typical IDS you may have known until now. Bro’s domain-specific scripting language will enable site-specific monitoring policies.

The program comes packed with analyzers for lots of protocols, and it enables high-level semantic analysis in the application layer. It also keeps a great application-layer state about the network that it monitors.

Let’s quickly look at its key features:

  • No traditional signatures (interfaces with other applications for real-time exchange of information)
  • Comprehensive logs archive
  • Targets especially high-performance networks

If you are looking for the best free and paid Windows 10 FTP clients, check out this awesome list with the best products on the market and decide for yourself.

While the program focuses on network security monitoring, it will also provide users with a comprehensive platform for more general network traffic analysis.

It is well-grounded in more than 15 years of research the software managed to successfully bridge the traditional gap between academics and operations from its very beginning.

The user community of Bro includes some major universities, supercomputing centers, research labs, and also lots of open-science communities.

Note icon NOTE
Update: The Bro has undertaken a rebranding process and it is now known as Zeek.

⇒ Try The Bro Network security monitor

OSSEC Free IDS for Businesses – Good multi-purpose IDS

This is an open-source host-based IDS that performs file integrity checking, log analysis, policy monitoring, rootkit detection, real-time alerting, and active responses and it runs on almost all platforms including Windows.

The software watches it all, and it actively monitors all aspects of the system’s activity. With this program, you will not be in the dark regarding what is happening to your valuable computer assets anymore.

Let’s quickly look at its key features:

  • Real-time analytics and insights into your network security events (via alert logs and email alerts)
  • Full host-based intrusion detection across multiple platforms
  • Fully open-source, and free to use
  • Fully customizable (extensive configuration options, add your very own customized alert rules and writing scripts, modify the source code and  add new capabilities)
  • Detect and alert unauthorized file system modifications and malicious behavior based on entries in the log files

⇒ Get OSSEC Free IDS

Securing your enterprise these days doesn’t have to be a nightmare and a back-breaking ordeal. All the solutions that we mentioned above will provide you with industrial-strength protection against all intrusion attempts.

All these tools combine the most popular open-source security software into one unified solution stack that will be easy enough to install and use. So feel free to pick your favorite one according to your needs.

Ignite 2022 : Improvements and new features coming to Azure

At this year’s Ignite conference Microsoft announced a long list of new features and improvements to a variety of Azure services. As is to be expected there is continued focus around Machine Learning (ML), Artificial Intelligence (AI) and Big Data. Below are some of the new features or improvements you can expect or are already in preview.

Responsible AI dashboard

The Azure Machine Learning Responsible AI dashboard will be generally available soon, allowing customers to easily implement Responsible AI by debugging machine learning models and making informed data-driven decisions. The Responsible AI scorecard includes an on-demand UI for generating PDF scorecards, allowing no-code/low-code customers to create reports for their models.

Cognitive Service for Speech

New functionalities are being added to the speech-to-text and text-to-speech services offered by Azure Cognitive Service for Speech. The way businesses deliver media experiences, accessibility, and customer service will change as a result of these services.

They include the addition of new languages and emotions to Neural Text to Speech in order to expand the capabilities of voice assistants and do other things, as well as synthetic voice training with Custom Neural Voice, which includes multiple tones like happy or sad. They also include Embedded Speech, which enables businesses to use Azure speech services on their devices, customization features like lexicons to increase speech recognition accuracy, and improved audio processing of all Azure pre-built voices.

Form Recognizer capabilities in preview

A pre-built AI model that automatically extracts elements specific to contracts, such as parties and payment terms, as well as enhanced language support to 275 languages globally are among the additional features that Azure Form Recognizer currently offers in preview.

Computer Vision

Image Analysis 4.0 and Spatial Analysis on the Edge are two services that Computer Vision is introducing and are currently in preview. Image Analysis 4.0 is an improved model created to extract a wide range of visual information from photos to enhance client accessibility and digital asset management.
By absorbing live streaming footage from cameras, deriving insights, and producing events that other systems can exploit, Spatial Analysis on the Edge will increase security and safety.

Cosmos DB adding distributed PostgreSQL support

With the addition of distributed PostgreSQL support, Azure Cosmos DB now provides open-source relational data with a quick, adaptable, and scalable service. The new Azure Cosmos DB for PostgreSQL, which is based on the Hyperscale (Citus) engine, delivers everything developers love about PostgreSQL and the potent Citus extension to Microsoft’s quick and scalable database for building cloud-native apps. Now, developers may use the same well-known database service to create apps that use both relational and non-relational (NoSQL) data.

The developer interface for open-source technologies has been enhanced in Azure Cosmos DB.
Now that Azure Cosmos DB for MongoDB supports documents up to 16 MB in size, MongoDB developers can store larger documents. The majority of these modifications are accessible.

For more information on these and other news, check out the official Microsoft Ignite 2022 site.

What are your thoughts on these new features and improvements? How do they compare to offerings from Google or Amazon? Do you think Microsoft is innovating fast enough to catch up and stave off the competition? Let us know in the comments below.

Best OCR Software for Windows 10 to Use in 2026

You may have noticed that paper hasn’t gone away, but digitalization is slowly taking over. This is where Optical Character Recognition (OCR) comes in. It is a program that can convert scanned, printed, or handwritten image files into a machine-readable text format.

Maybe you have a book or receipt that you typed or printed years ago and you want it put in a digital format but you don’t want to retype it. OCR software can be very useful in such a case on Windows 10.

We can also use this wonderful technology to accurately extract text from images, and convert a printed table into an Excel spreadsheet or an old book into a PDF with searchable texts underneath the page images.

In this article, we will introduce you to the best free and paid optical character recognition software on the market.

Rating (1 to 5)Free/PaidMulti-language recognitionDesktop/OnlineSupport 24/7
Soda PDF5PaidYesDesktopYes
Adobe Acrobat DC5Paid (has trial)YesDesktopYes (phone)
Readiris4.5Paid (has trial)YesDesktopNo
ABBYY Fine Reader 144PaidYesDesktopYes (phone)
Microsoft One Note3.5FreeYesDesktopYes
Simple OCR3FreeYesDesktopNo
Free OCR3FreeNoOnlineNo
Boxoft Free OCR3.5FreeNoDesktopNo
Top OCR3PaidNoDesktopNo

What are the best OCR software tools for Windows 10?

Soda PDF – Fully-featured editing tools

Soda PDF offers a wide range of solutions for your office suite, along with a powerful OCR tool to help you digitize your documents.

Converting documents into digital text without re-typing is fairly easy. Simply take pictures of your physical documents using your mobile phone, upload them to Soda PDF, and convert them into an editable PDF within seconds.

Highly flexible, this tool allows you to customize its OCR tool depending on your needs. With both automatic and manual scanning, you are in full control of your text transmission.

Need to scan multiple images or documents at the same time? The OCR batch scanning feature helps you recognize text from multiple images or documents, cutting down on conversion time.

The OCR tool is included in the PRO version of Soda PDF, which offers the best value for all your PDF editing needs.

Soda PDF features a range of other tools that will help you edit PDFs easier and faster:

  • Fully featured editing capabilities
  • Easy PDF creation and conversion
  • File merging and compression
  • Form filling, surveys, and electronic signatures

If you are uncertain if Soda PDF is right for you, a free trial is available that lets you explore all of its features. The flexible pricing system allows you to choose the plan that best suits you.

Soda PDF

Transform any image into text in seconds with Soda PDF!
Check price Visit Website

Adobe Acrobat DC – Great converter

Adobe Acrobat DC is designed for users who want to enjoy the powerful features of optical character recognition software.

The version of Adobe Acrobat DC supports many input files like .doc, .docx, .xls, .xlsx, .ppt, .pptx, .ps, .eps, .prn, etc., so it will be easier for you to extract the desired part from the text to reformat and retype the sequence. 

It is easy and very intuitive to use because it does the work for you by automatically converting the text section from the scanned document into text that can be modified in a PDF.

Moreover, you can archive your document and add restrictions in order to limit the capabilities of editing and copying.

You can add notes, highlights, and other annotations, and reduce the size of your PDF for easier sharing. It also allows you to send documents to others for signing and turn existing forms and scans into fillable PDF forms.

The OCR is automatically applied to your document, so you will be able to edit it by typing the text sequences that you desire.

Take a look at other key features:

  • Fill and sign
  • Reorder and extract PDF pages
  • Protect PDF feature
  • Compare files
  • Split PDFs into multiple files

Adobe Acrobat DC

Extract and convert all your scanned files into editable formats, and archive and password-protect them.
Check price Visit Website

PDFelement – Powerful AI-powered tool

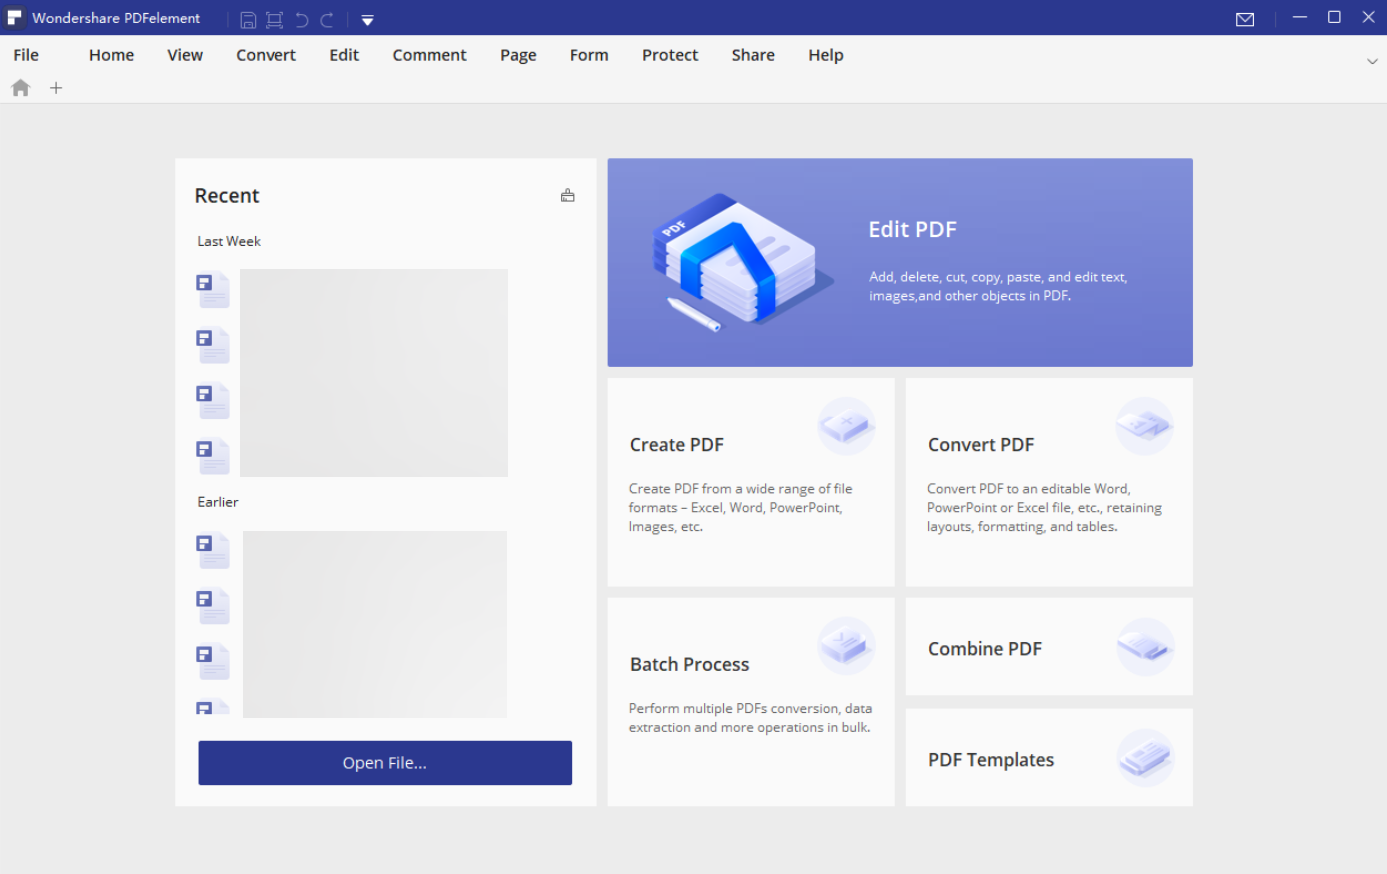
PDFelement from Wondershare is a great AI-powered solution for all you’re needs related to PDF, including OCR recognition and transformation.

This is a powerful tool that will allow many kinds of file manipulation. You can create, organize, and eSign all sorts of documents.

Wondershare’s PDFelement, as mentioned before, comes with AI-powered tools that will allow you to quickly summarize, translate, or rewrite a document.

Speaking of AI, this program will let you customize your AI prompts, creating unlimited possibilities for work and study.

Overall PDFelement is secure and professional software, here are some more of its key features:

  • Intuitive user interface
  • Batch convert multiple files
  • Change sizes, colors, and font styles
  • Create e-signable PDFs
  • OCR PDFs to Word and editable/searchable PDFs in 23 languages
  • Safeguard your PDFs by adding passwords 

PDFelement

This amazing AI-powered tool will take care of all your OCR needs.
Check Price Visit Website

ABBYY FineReader – Advanced correction tools

ABBYY FineReader is the most powerful OCR software on the market and is the best tool for anyone who needs fast and accurate text recognition.

This OCR handles high-volume work perfectly well and comes with advanced correction tools for difficult tasks.

The superb verification tool easily corrects doubtful readings by making a neat comparison between the OCR texts and the original.

ABBYY Finereader does more than you would expect from an OCR. Is it that 500-page old book you want to be converted to a searchable PDF? The application handles it with utmost precision.

ABBYY will extract the most accurate texts from the images found on the web and can convert a scanned document into HTML or into the ePub format used by e-readers.

You can share ideas, collect feedback from others, and get documents approved by marking up, commenting on, and drawing within the document directly in a PDF thanks to its collaboration tools.

With this software, you can apply and verify digital signatures, clean up sensitive information, detach hidden data, and manage access to your PDF files.

ABBYY Finereader also has these key features:

  • Edit and organize PDFs
  • Convert into searchable PDFs
  • Create fillable PDF forms
  • Compare documents in various formats
  • Optimize digitization routines

ABBYY FineReader

Share, convert, and edit your PDFs in no time with software that uses AI-powered OCR technology.
Free Trial Visit Website

Readiris – Rare cloud-saving feature

readiris start window

Readiris is the latest version of this high-performance OCR software. It comes with a new interface, a new recognition engine, and faster document management.

You can easily convert to many different formats, including audio files thanks to its verbal recognition. Readiris supports most file formats and comes with other attractive features that simplify the conversion process.

For instance, images can be sourced from connected devices like scanners and the application also allows you to adjust processing parameters such as DPI adjustments.

Readiris has a rare cloud-saving feature that allows users to save the extracted text to different cloud storage services like Google Drive, OneDrive, Dropbox, and others.

It is perfect for collaboration because it offers a group of tools so you can annotate, comment, and attach hypertext lines on your PDFs.

With Readiris, you are able to sign and protect your PDFs and send them electronically. You can also edit texts embedded in your images because its OCR engine allows you to recover texts in all kinds of files, preserving the original format with flawless accuracy.

Here are some other great features of Readiris:

  • Recognize texts in many languages
  • Integrate verbal recognition
  • Add watermarks
  • Edit character styles
  • Visualize annotations in one view

Readiris

Convert audio formats and create editable files from your scanned documents at an affordable price.
Free Trial Visit Website

Simple OCR – User-friendly interface

SimpleOCR is a handy tool you can use to convert your hard-copy printouts into editable text files.

If you have a lot of handwritten documents and you want to convert them to editable text files, then SimpleOCR would be your best option.

However, handwritten extraction has restrictions and is only offered as 14 days of a free trial. Machine print is free and has no restrictions.

There’s a built-in spellchecker that you can use to check for discrepancies in the converted text. You can also set up the software to read directly from a scanner.

Just like Microsoft OneNote, SimpleOCR does not support tables and columns.

⇒ Get SimpleOCR

FreeOCR – Automatic scan cleanup

FreeOCR uses the Tesseract Engine which was created by HP and is now maintained by Google.

Tesseract is a very powerful engine and is said to be one of the most accurate OCR engines in the world today.

FreeOCR handles PDF formats very well and has support for TWAIN devices such as digital cameras and image scanners.

In addition, it supports almost all known image files and multi-page TIFF files. You can use the software to extract text from pictures and it does that with a high level of accuracy.

And, just like the other OCR software solutions for Windows 10 from this list, Free OCR can’t translate tables and columns.

⇒ Get Free OCR

Boxoft Free OCR – Easy to use

Boxoft Free OCR is another handy tool you can use to extract text from all kinds of images.

This freeware is easy to use and is capable of analyzing multi-column text with a high degree of accuracy.

It supports multiple languages including English, Spanish, Italian, Dutch, German, French, Portuguese, Basque, and many more.

This OCR software allows you to scan your paper documents and converts them into editable texts within a very short time.

While there are concerns that this OCR doesn’t excel in extracting text from handwritten notes, it performs exceptionally well with a printed copy.

⇒ Get Boxoft Free OCR

TopOCR Reader – Multi-format support

TopOCR Reader differs from the typical OCR software in many aspects but performs the job accurately. It works best with digital cameras and scanners.

Its interface is also different as it has two windows – the image (source) window and the text window.

Once the image is sourced from the camera or scanner on the left side, the extracted text appears on the right side where there is the text editor.

The software supports GIF, JPEG, BMP, and TIFF formats. The output can also be converted into multiple formats including PDF, HTML, TXT, and RTF.

The tool also comes with camera filter settings that you can apply to enhance the image.

⇒ Get TopOCR Reader

The market is flooded with OCR software programs that can extract text from images and save you a lot of time you could have spent retyping the document.

How to use OCR software in Windows 10?

Optical Character Recognition (OCR) can be used in all apps targeting Windows 10 because it is a part of the Universal Windows Platform.

OCR is created to help you manage various types of images, from scanned documents to photos, so you can use it to extract text and text layout information from them.

How can I choose which OCR software to download?

This is the main question that you might have before downloading an OCR. We will help you choose by answering more specific questions:

  • Does it support multiple file formats?
  • Does the OCR software have language recognition?
  • Can you use an OCR tool online?
  • Does it recognize the text from image files?

However, good OCR software should do more than extract text from printed documents. It should maintain the layout, text fonts, and text format as the source document.

If you’re working with Kanji you might want to explore the best image-based Kanji translator tools in one of our older guides.

We hope that this article will help you find the best OCR software for Windows 10. Feel free to comment and share.

How to Use Clipchamp to Trim Video, Audio or Images

So you want to become a savvy clip producer, and you chose Clipchamp as your starting ramp? If so, now it’s time to learn how to properly trim your videos in Clipchamp.

How can I trim videos using Clipchamp?

  1. 1. As usual, the first step is to go to the Microsoft Store and download and install the Clipchamp video editor.


  2. 2. Open Clipchamp and press the Create a video button.

    clipchamp create video
  3. 3. Click the plus button to add your video to Clipchamp.

    clipchamp upload video
  4. 4. Press the Add button or drag the clip to the timeline.

    clipchamp add video
  5. 5. Click on the clip to highlight it and position your cursor over the front or back end of the clip.

    clipchamp trim
  6. 6. Press on the trimming icon and drag it depending on how much you want to trim the video.

    clipchamp trim guide
  7. 7. When you are happy with your results, use the Export button to save your final video.

    clipchamp export video
  8. Trimming is one of the most basic actions you can perform in Clipchamp. Yet trimming is extremely important, especially when you want to create certain sequences.

    Follow the steps above and trim your video to your liking using this software.

We’ve recently explored the app’s functionality panels and reviewed how to edit videos using Clipchamp, so you already know the basics.

FAQs

How do I cut out the middle of a video in Clipchamp?

Use the Split tool. Place the playhead at the start and end of the section you want removed, split twice, select the middle part, and delete it.

Can I trim multiple clips at once?

No. You must trim clips individually, but you can split and delete sections across several clips.

Does Clipchamp reduce video quality after trimming?

No. Clipchamp keeps your original quality unless you export at a lower resolution.

Where do I find the trim handles?

Trim handles appear on the left and right edges of a selected clip on the timeline.

That’s pretty much all you need to do if you want to trim clips using Clipchamp on your Windows 11 device, so don’t be discouraged.

After exporting, you may also want to review our guide on how to save a project in Clipchamp to fully understand autosave, export, and backup options. To avoid losing your edits, learn how to save Clipchamp videos directly to your computer with our Clipchamp save to computer guide.

To take your editing further after trimming, see our step-by-step guide on how to speed up video in Clipchamp.

If you also want to split or remove parts of your footage, check out this guide on how to cut video in Clipchamp for simple steps.

This free video editor may yet prove to be your best choice when it comes to fast, simple editing.

⇒ Get Clipchamp

However, there are tons of other video editing software alternatives out there as well, if you feel that Clipchamp just won’t do enough for you.

Did you find this guide to be useful? Let us know in the comments section below.

What is Quota Underflow? Fix this BSOD in 9 Steps

If you have a quota underflow problem in Windows 10 or 11, we have prepared all you need to know to resolve it in this article.

BSOD errors are usually caused by faulty hardware or a software conflict. These errors can be severe and even prevent you from accessing Windows 10.

Fortunately, there are several solutions available that can help you fix this issue. We’ve comprised a list covering all of them, so put your trust in us and read them in detail.

What is Quota Underflow?

Windows 10 and 11 stop code QUOTA_UNDERFLOW is one of the many BSOD errors a user may encounter. It basically arises due to issues with the disk quota and causes the OS to crash.

This could be the case when either the Disk Quota, the File Quota, or both have been misconfigured by the system administrator. This a fairly complex error and requires a proper understanding before you can effectively troubleshoot it.

What causes Quota Underflow error?

The Quota Underflow error is mainly caused by incorrectly configured, outdated, or corrupted drivers. However, it can also be caused by malware, registry issues, and hardware problems.

The blue screen error QUOTA UNDERFLOW frequently occurs following the setup of new devices or software.

It can also happen when software, including games, starts up, shuts down, or when an application is in use. Users have also encountered a quota_underflow blue screen error and a quota_underflow (21) error.

How can I fix the QUOTA UNDERFLOW BSOD error on Windows 11?

1. Use a third-party BSoD fixer

An excellent system file restoration tool with many features will keep your entire system and data in pristine condition and safe.

2. Update your Windows

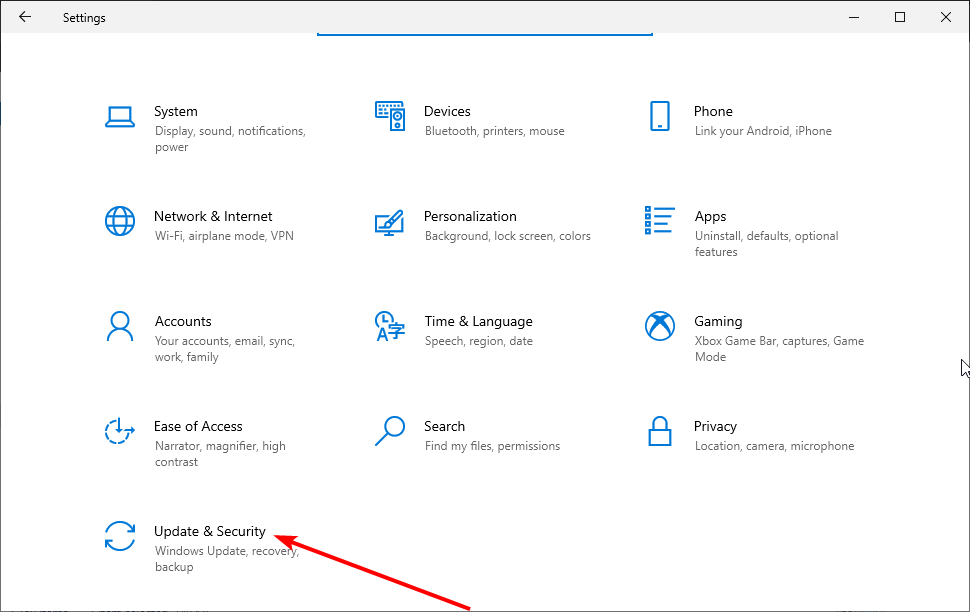
  1. Press Windows + I to launch the Settings.
  2. Navigate to the Update and Security section.
    quota underflow
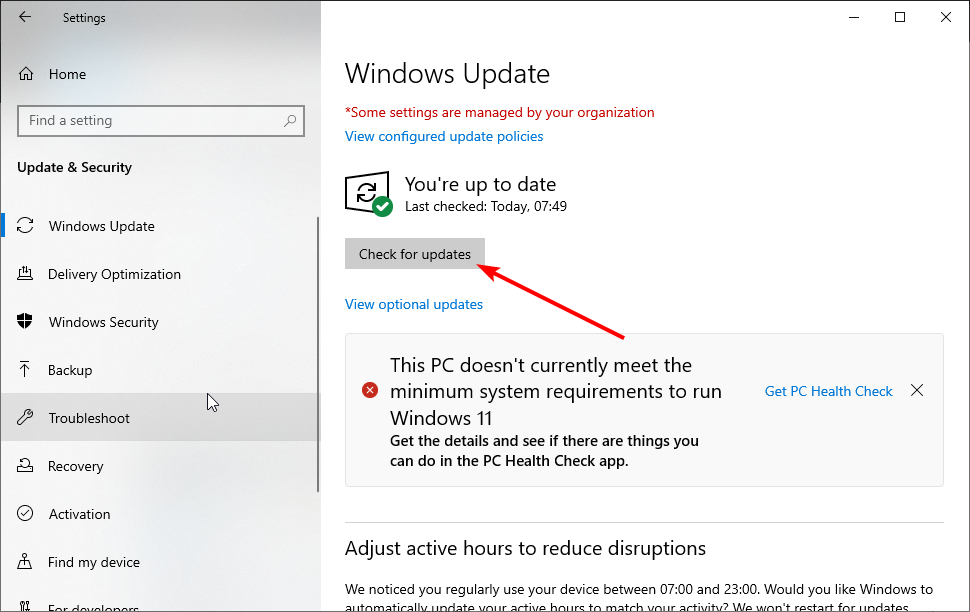
  3. Now click the Check for updates button.

Often these issues are caused by hardware or software incompatibility, and to prevent these issues from appearing, you must update Windows 10 regularly.

Microsoft is constantly fixing hardware and software issues, and to achieve the most stable and error-free Windows 10 experience, you must install updates regularly.

Several users reported that their problem with the QUOTA UNDERFLOW error was resolved after updating Windows 10 to the latest version.

Remember that updating Windows 10 might not fix your problem, but keeping you free from most incompatibility issues is still a good practice.

3. Update your drivers

3.1 Manually updating drivers

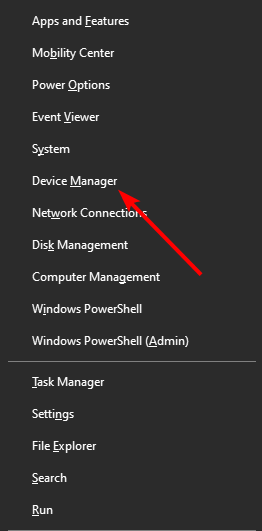
  1. Press Windows Key + X and choose Device Manager.
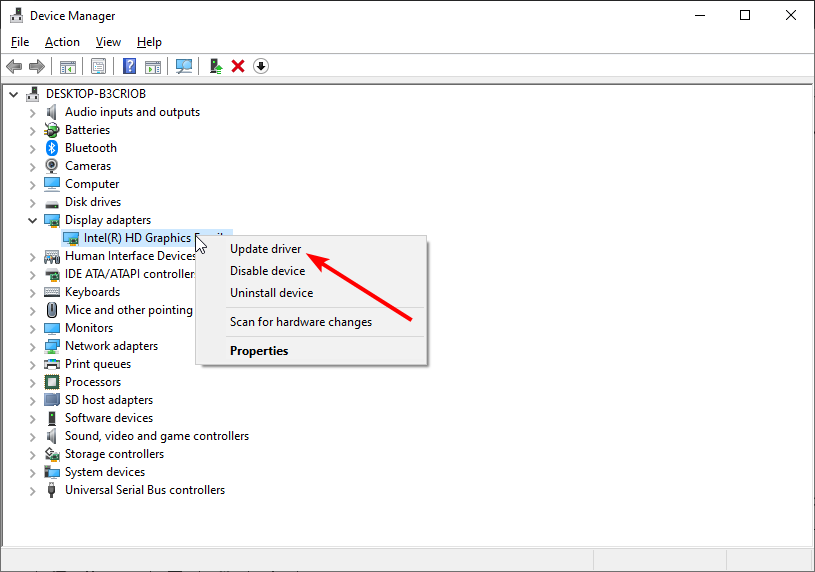
  2. Once Device Manager opens, locate the problematic device, and right-click on it.
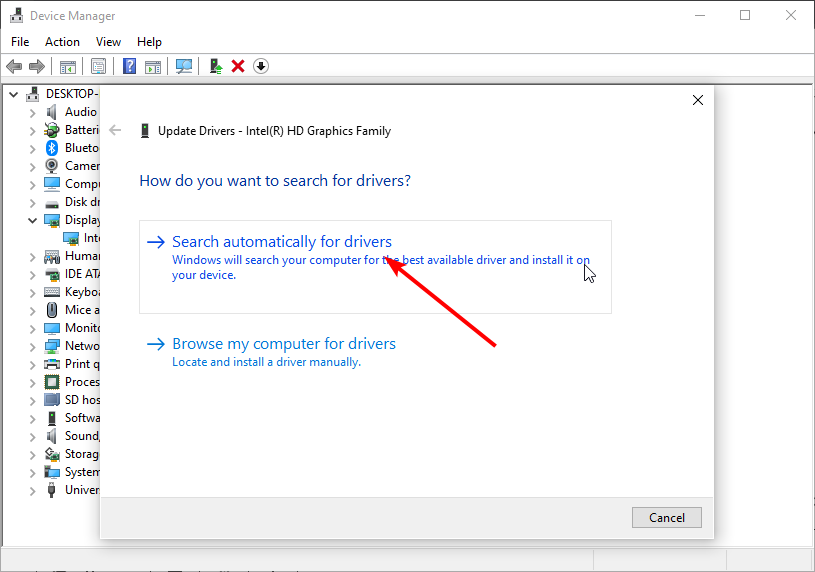
  3. Choose Update Driver Software. You’ll have to repeat this step for several devices until you find the one causing you problems.
    quota underflow

As we already mentioned, the QUOTA UNDERFLOW error can be caused by outdated drivers, and to fix this error; it’s essential to have the latest drivers installed.

You can download all the necessary driver software from your hardware manufacturer or the Device Manager.

3.2 Update the drivers automatically

Searching for drivers on your own can be time-consuming. So, we advise you to use a tool automatically to do this for you.

Using an automatic driver updater will save you from the hassle of manually searching for drivers and keep your system updated with the latest drivers.

A dedicated tool will help you update drivers automatically and prevent PC damage caused by installing the wrong driver versions.

We concluded that the most efficient method of resolving drivers’ issues is using the best driver update software on Windows 10.

4. Run the BSOD troubleshooter

  1. Open the Settings app and go to the Update & Security section.
    quota underflow
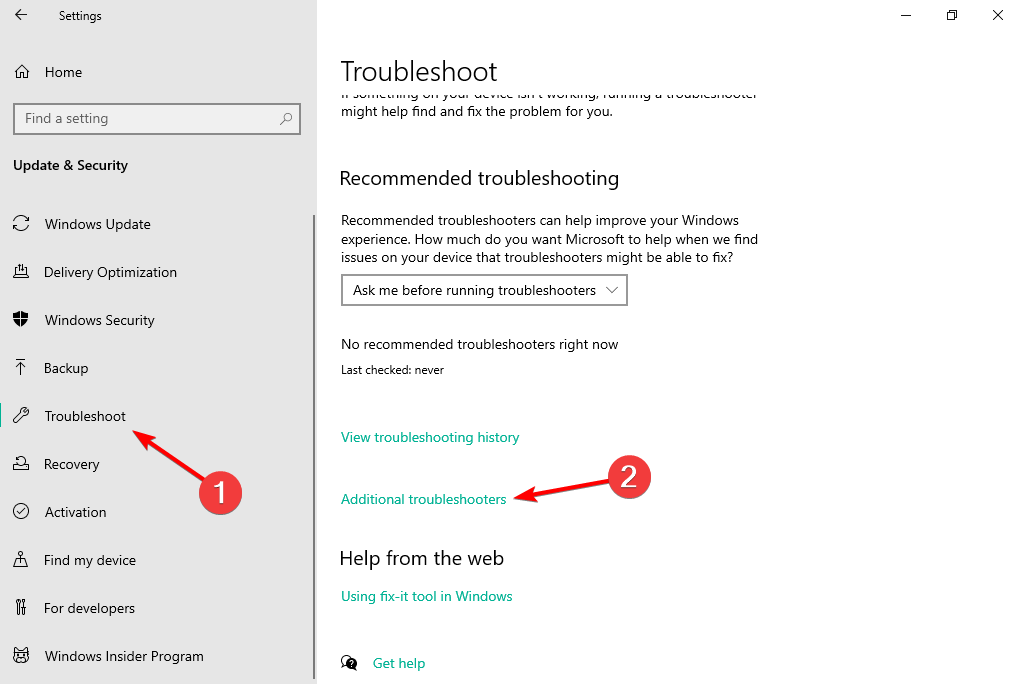
  2. Select Troubleshoot from the menu on the left, select BSOD from the right pane, and click on Run the troubleshooter
    quota underflow
  3. Follow the instructions on the screen to complete the troubleshooting.

The next thing we will try is Windows 10’s troubleshooting tool. This troubleshooter can resolve various system issues, including BSOD problems.

So, it might also be helpful when dealing with the QUOTA UNDERFLOW error. To run Windows 10’s troubleshooter, follow the steps mentioned above.

5. Try the SFC scan

  1. Right-click on the Start menu button and open Command Prompt (Admin).
  2. Enter the following line and press Enter: 
    sfc /scannow
    quota underflow
  3. Please wait until the process is done (it may take a while).
  4. Then, if the solution is found, it will automatically be applied.
  5. Now, close the Command Prompt and restart your computer.

We will try a command-line troubleshooter if the built-in troubleshooter doesn’t get the job done. The SFC scan goes through your system, searching for issues and resolves them on the way.

6. Run the DISM

6.1 The Standard way

  1. Right-click Start and open Command Prompt (Admin).
  2. Paste the following command and press Enter:
    DISM /Online /Cleanup-Image /CheckHealth
  3. Wait until the scan is finished, restart your computer and try updating again.

6.2 With the Windows installation media

  1. Insert your Windows installation media.
  2. Right-click the Start menu and, from the menu, choose the Command Prompt (Admin).
  3. In the command line, type the following commands and press Enter after each:
    • dism /online /cleanup-image /scanhealth
    • DISM /Online /Cleanup-Image /CheckHealth
  4. Now, type the following command and press Enter:
    • DISM /Online /Cleanup-Image /RestoreHealth /source:WIM:X:SourcesInstall.wim:1 /LimitAccess
  5. Make sure to change an X value with the letter of the mounted drive with Windows 10 installation.
  6. After the procedure is finished, restart your computer.

And the third troubleshooting tool we’re going to try is DISM. Deployment Image Servicing and Management (DISM) is a tool that deploys the system image repeatedly.

So, the QUOTA_UNDERFLOW error may be resolved using the standard and the procedure that utilizes the installation media above.

7. Uninstall recently added software or hardware

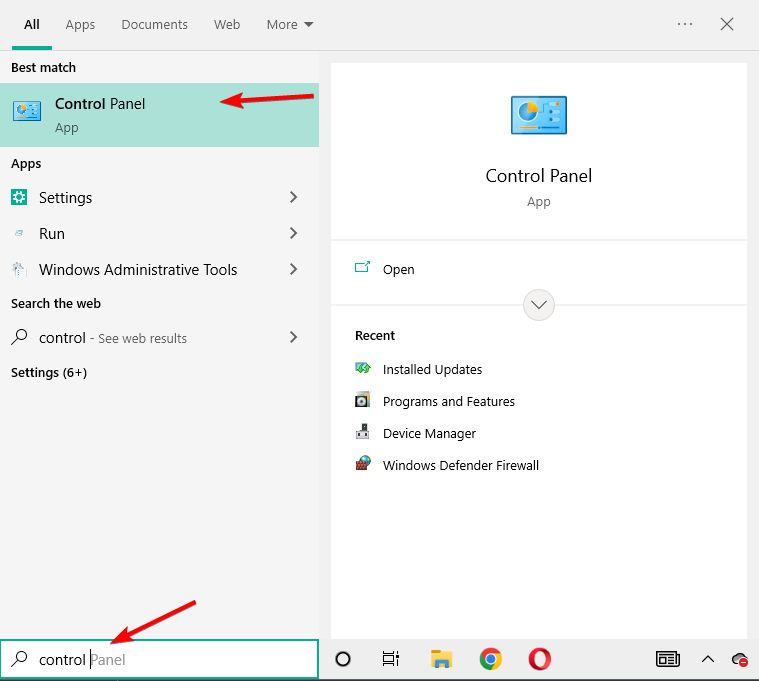
  1. Click the Start menu, type control, and select Uninstall a program option.
  2. Select an app from the list and click the Uninstall button.
    quota underflow
  3. Follow the wizard to complete the uninstallation.

If you installed any software or hardware recently that could cause a QUOTA UNDERFLOW BSoD error, you need to find that respective app and uninstall it.

Sometimes hardware isn’t fully compatible with your PC, which can cause this BSoD error.

If you remember adding any new hardware, such as a new wireless network adapter, hard drive, or graphic card, make sure to remove it and check if your system usually works without it.

Regarding the software, make sure to remove any software that you installed in the last few days.

Some software might not be fully compatible with Windows 10, and this can cause QUOTA_UNDERFLOW BSoD errors to appear.

8. Remove your antivirus software

In some cases, antivirus software can be the leading cause of BSoD errors, and many users reported that removing their currently installed antivirus software fixed the QUOTA_UNDERFLOW error.

When removing your antivirus, remember that certain parts, such as registry keys and files, can remain on your computer, so it’s best to use a proper uninstaller tool.

A dedicated uninstaller is the best and easiest way to uninstall these programs. The software will automatically scan your PC for installed programs, then present them to you in a list.

You can uninstall any software you want with just a few clicks. It is also worth mentioning that this tool can detect software that your default windows uninstaller cannot.

It’s worth mentioning that almost any antivirus software can cause a QUOTA_UNDERFLOW BSoD error to appear.

But most commonly, these problems are caused by McAfee, Avast, AVG, or sometimes Kaspersky.

Even if you don’t use any of the tools above, you should try removing your antivirus software and check if that fixes this issue.

If the problem gets fixed after this, you should immediately switch to another antivirus solution, so we advise you to choose the best antivirus software at the moment.

9. Check your hardware

Users reported that a hardware failure often causes QUOTA_UNDERFLOW BSoD; according to users, after replacing their RAM or SSD, the Blue Screen of Death error was permanently fixed.

It’s worth mentioning that almost any hardware component can cause a BSOD to appear, so you need to perform a thorough investigation to find a faulty part.

There are specific tools, most notably MemTest86+, that you can use to test your RAM, and all that you have to do is to download the tool, install it on a USB flash drive, and boot your PC from that flash drive.

After your computer boots, start MemTest86+ and let it run for several hours. If it reports any errors, your RAM module isn’t working correctly and should be replaced.

How do I fix the Quota Underflow error on Windows 10?

If you have read this far, there is good news for you; you can fix the Quota Underflow error on Windows 10 if you are wondering how to note that the two operating systems are very similar.

This implies that the same triggers in Windows 10 exist in Windows 11. So, the fixes we have discussed still apply.

You should not worry about the interface because, for most parts, they are the same or just marginally different.

QUOTA UNDERFLOW BSOD error can be troublesome, and in most cases, it’s caused by a hardware failure, so you’ll have to locate the faulty hardware and replace it.

Before replacing your hardware, try all the other solutions mentioned in this article.

Windows 11 New Task Manager: How to Get & Enable

Windows 11 comes with a new and improved Task Manager that shows you programs, processes, and services currently running on your computer.

You can easily monitor the performance of your device or close a program that isn’t responding using the Task Manager.

When compared to the old version, the Windows 11 version of the Task Manager does hold some potential to improve the speed of your computer. It now comes with a sidebar menu that includes more options.

The new Task Manager uses WinUI to match the latest Windows 11 design principles. It also comes with dark mode support and a new settings page that allows modifying the update speed of your device.

The new design is far from perfect. However, Microsoft is trying to address UI consistency issues in the operating system, and we can expect more improvements to show up in future builds.

All you need to know about Windows 11’s Task Manager

The Task Manager in Windows 11 is one of the best tools to identify troublesome apps and end their processes.

With the latest version of Windows 11, Microsoft is trying to explore a new and improved Task Manager.

The new version can display the same set of screens, such as Processes, Performance, App History, Startup Apps, Users, Details, and Services.

Nevertheless, there are a few noticeable changes. Below is a list of some new features that come in handy with the new Task Manager.

  • A new sidebar menu that houses options like Processes and Performance
  • Improved tabbed sections with the hero element feature display the computer’s name, model, CPU, GPU, and memory
  • New settings page to modify the Task Managers update Speed and more
  • Command bar on each page to help users access everyday actions
  • A unique feature named Efficiency Mode to limit an app’s CPU usage is also added

What is the shortcut key of Task Manager?

There are two sets of shortcut keys you can press to open the Task Manager directly on your device.

The first set of keys is CTRL + ALT + DEL. This set of keys is mainly used when your device encounters some bugs while performing a specific task and the screen freezes.

This combination allows the user to terminate the hung application and reboot the system if that doesn’t work.

However, you can also use this to access the Task Manager if required. Once you press these keys together, you’ll be redirected to the Security Options, from where you can access the Task Manager.

The second Task Manager shortcut of keys is CTRL + SHIFT + ESC. By pressing these keys altogether, the Task Manager will open directly.

How can I open Task Manager in Windows 11?

Opening the Task Manager in Windows is a very easy task. There are numerous ways to do so on your Windows 11 device.

1. Open Task Manager from Windows 11’s taskbar

  1. 1. Press the Windows + X keyboard shortcut.

  2. 2. The WinX menu will now open, also known as the Power menu.

  3. 3. Locate Task Manager in the list of options.

  4. 4. Click on it.

    open task manager from the taskbar windows 11
  5. 5. Task Manager is now opened on your screen.

  6. One of the easiest ways to get to the Task Manager in Windows 11 is via right-clicking on the taskbar, and then selecting the tool from the WinX menu.

    This is simple and can be done at any time on your PC, regardless of what programs you have opened.

2. Using a Run command

  1. Press the Windows key + R to open the Run dialogue box.
  2. Type taskmgr and hit Enter to open Task Manager.
    Using Run

3. Create a Desktop Shortcut for Task Manager

  1. Right-click on Desktop and select New, then select Shortcut.
    Shortcut icon
  2. It will now ask to enter the file path. Enter the following path as mentioned below:
    C:\Windows\System32\Taskmgr.exe
    task manager windows 11
  3. Now enter the shortcuts name and hit Enter.
  4. You’ve now successfully created a shortcut to open the Task Manager.

4. By running a command in Command Prompt

Click on Start, search for Command Prompt and select Open.
Type taskmgr and hit Enter.
Using cmd
The Task Manager will now open.

5. From the Control Panel

  1. Press the Windows key + R to open the Run console.
  2. Type control and hit Enter.
  3. Once the Control Panel opens, search for the Task Manager in the search bar.
  4. Click on Task Manager under System and the program will open.
    task manager windows 11

6. Using the Settings app

  1. Press the Windows key + I to open the Settings app.
  2. Search for Task Manager in the search bar and hit Enter.
  3. Click on the View system resource usage in the Task Manager option to open Task Manager.
    Using Settings
  4. Task Manager will open.

7. Using Windows Terminal

  1. Click on the Search icon, type terminal, and select Open.
  2. Type taskmgr and hit Enter.
    task manager windows 11
  3. The Task Manager will now open.

8. Using the Start menu

  1. Click on Start and select All Apps.
  2. Scroll down and click on Windows Tools.
    task manager windows 11
  3. Then, click on Task Manager.
    Windows tools task manager

9. Using Windows Powershell

  1. Click the Search icon on your taskbar, type powershell, and select Open.
  2. Type taskmgr and press Enter.
    task manager windows 11
  3. The Task Manager app will now open.

How do I get Task Manager on my Taskbar Windows 11?

If you were wondering how to use Quick Launch in Windows 11, the answer is you can’t.

Unfortunately, Quick Launch is not available in Windows 11 so the closest thing you can get to that function is to add Task Manager.

So, here’s a quick way to add Task Manager on your Taskbar in Windows 11:

  1. Click the Search icon from the taskbar and type task manager.
  2. Then, click on Pin to Start from the results under Task Manager.
    task manager windows 11

How do I open Task Manager in a folder?

You can also open the Task Manager using its executable file called Taskmgr.exe. This exe file is present in the drive where your Windows is installed. Here is how you can open the Task Manager in a folder:

  1. Open This PC from the desktop.
  2. Click on the drive in which your Windows 11 is installed and navigate to the following path:
    C:\Windows\System32
  3. Search for Taskmgr.exe and open it.
    task manager windows 11
  4. Doing so will open the Task Manager in Windows 11.

How do I enable Task Manager permanently?

  1. Download ViveTool from GitHub to enable the new Task Manager.
  2. Double-click on the zip folder and open it with File Explorer.
  3. Extract and install the tool.
  4. Now click the Search icon, type command prompt and select the Run as administrator option.
  5. Type the following command to navigate to the ViveTool folder and hit Enter (replace FOLDER PATH with the actual path of the folder where you installed the app):
    C:\FOLDER\PATH\ViveTool.exe
    task manager windows 11
  6. Type in the following command to enable the new Task Manager on Windows 11 and hit Enter:
    vivetool addconfig 35908098 2
    Enable new task manager
  7. Once done with these steps, restart your device, and the resigned Task Manager experience will be available on your installation of Windows 11.

Why is my Task Manager not showing?

The Task Manager needs to function properly as it monitors how your system’s resources are being utilized.

But recently, many of our readers have complained that Task Manager is not showing or not working in Windows 11.

As Task Manager is an important utility tool, it’s essential to fix it. Below are some troubleshooting methods to help you fix the problem:

1. Run an SFC scan

  1. Click on Start, search for command prompt and select Run as administrator.
  2. Type the following command and hit Enter:
    sfc/scannow
    task manager windows 11
  3. Once the scanning is over, close the Command Prompt window, restart your device, and check if Task Manager opens.

This error can also occur due to the presence of corrupted files on your system. Run an SFC or System File Checker scan to get rid of these corrupted files. Besides that, you can give a try to a specialized tool that will scan your system and fix any errors related to corrupted system files.

2. Run a DISM scan

  1. Click on the Search icon, type command prompt and click on Run as administrator.
  2. Type the following commands one by one and hit Enter after each one:
    DISM /Online /Cleanup-Image /CheckHealth
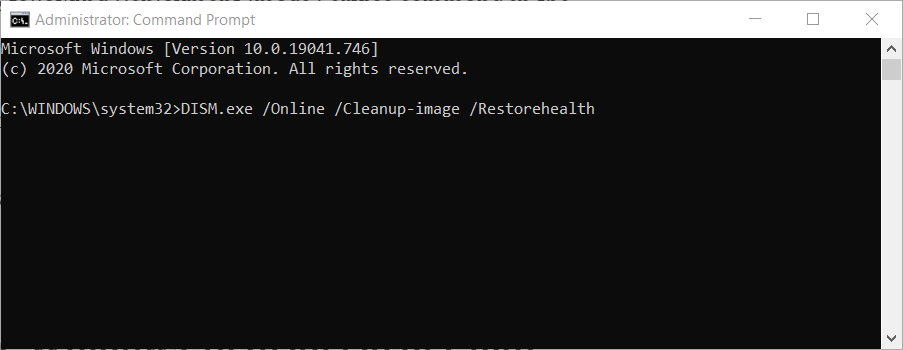
    DISM /Online /Cleanup-Image /RestoreHealth

    CheckHealth-1
  3. Restart your device and check if the Windows Taskbar is now working.

System image corruptions are also known to cause issues like these. Run a DISM Scan to repair any system image corruptions on your device.

3. Disable the third-party antivirus

The third-party antivirus software installed on your device can also cause this issue. Disable any antivirus software installed on your device and check if the Task Manager starts running.

If disabling the antivirus didn’t work, uninstall it temporarily and check for the same.

4. Switch the account using Admin Profile

  1. Press Windows key + R to open the Run dialogue box, type netplwiz and hit Enter.
  2. Choose the profile to modify and click on Properties.
    task manager windows 11
  3. Navigate to the Group Membership tab and select Administrator.
  4. Click on Apply and then on OK to save the changes.
    Group Membership tab

This error can also occur due to a lack of access permissions. To fix this, switch the user account using the admin profile.

Several users complain about corrupt user profiles in Windows 11. Rest assured that our guide shows you what to do in case that happens.

How do I restore Task Manager tasks?

  1. Press Windows key + R to open the Run console window, then type regedit and hit Enter.
  2. Navigate to the following path:
    HKEY_CURRENT_USER\Software\Microsoft\Windows\CurrentVersion\TaskManager
  3. Right-click on the TaskManager key and select Delete to restore the Task Manager tasks.
    Delete Taskmgr from regedit
  4. Once the TaskManager key is deleted, Windows forgets its settings and launches Task Manager with its default settings and tasks.

There isn’t any direct method to reset Task Manager to its default settings. Deleting the TaskManager key in the registry editor will make it run in compact mode.

Does Windows 11 have a dark-mode Task Manager?

Similar to other Microsoft components that are being updated the new Task Manager is getting a new design as well as dark mode support. This redesign was offered to the app with the Insider build 22538.

This new re-designed version of Task Manager follows the same design guidelines as Windows 11 does.

However, the dark Task Manager Windows 11 is still under testing and sometimes can cause the application to crash.

How do I enable dark mode in Windows 11?

  1. Press the Windows key + I to open the Settings app.
  2. Navigate to the Personalization tab and click on Colors.
  3. Beside Choose your mode click on the drop-down menu and select Dark.
    task manager windows 11

Switching to dark mode in Windows 11 brings only cosmetic changes. It won’t affect the performance of your device in any way and could be disabled anytime.

How do I bring up Task Manager in Remote desktop?

While navigating to a Windows device remotely there are a variety of things you can perform including launching the Task Manager. Using the Task Manager is easy on a remote system.

You can open the Task Manager directly by pressing the CTRL + SHIFT + ESC keys on a remote system. Also you can use any of the steps mentioned above to do the same.

What are the most common Task Manager issues?

Despite being the best Windows performance monitoring utility, the Task Manager can still encounter some problems.

Below is a list of some common issues faced by the Task Manager:

  • Task Manager crashing on Windows 11
  • Task Manager disabled on Windows 11
  • Windows 11 Task Manager not working
  • Task Manager missing on Windows 11
  • Windows 11 Task Manager not showing processes
  • Windows 11 Task Manager not showing network usage

If you are also facing any of these issues read our post on how to fix the Task Manager on Windows 11.

What to expect from the redesigned Windows 11 Task Manager?

As we wrote above, the redesigned Windows 11 Task Manager is still in its early stages of development. So it doesn’t contain many modern design changes at the moment.

Many more changes are expected to come as Microsoft is bringing back the Eco mode as Efficiency mode.

However, it will be somehow limited, and users can only apply the Efficiency mode to a single process and not to the entire group.

Well, this was all about Task Manager in Windows 11. We hope the steps mentioned were able to help you.

You might also be interested in our article on how to open Task Manager when it’s disabled by the Administrator.

If you still have any issues or want to make any suggestions, do let us know in the comments below.

Ignite 2022: Updates, new features coming to Microsoft Viva

Microsoft is improving the employee experience platform in its Office 365 for Business offering.  Microsoft Viva allows organization leaders to track the productivity of employees but allows them to interact in a private setting to keep company goals in line with worker goals and satisfaction.  Microsoft is bringing several enhancements to Viva to help enhance relationships inside organizations.

Viva Insights Updates 

Employee feedback is a key aspect of any productive organization.  Meeting effectiveness surveys can now be displayed at the end of meetings with five or more participants.  Meeting organizers with a Viva Insights subscription will be able to see the aggregated results and feedback to promote an effective engagement.  Employers and Employees can also set up a Focus mode experience that allows users to break up projects into short undisturbed bursts followed by a short break.  New Quiet Time settings will also allow admins to silence after-hours notifications and limit the use of apps after hours.

New Viva Learning Experiences 

Learning Paths will allow managers to create a sequenced group of learning materials and make those available to employees as a Learning Path that can be discovered and shared through Viva Learning.  A learning path can be created on any topic. Learning collections will allow employees to organize content from Learning Paths to fit their personalized likes and needs.

The new Viva mobile app features a private homepage with access to required information and pieces of training.  You’ll also be able to see your notifications and complete training exercises on the go.

Viva Engage Storyline is Now Available

Viva Engage provides organizations with a way to create social connections between company leaders and various interests inside the organization.  Anyone inside the company can create feature-rich posts to share with others.  These posts will appear in the Storyline which can be viewed in Viva Engage, Outlook, and the Viva Connections feed inside of Teams.

Stories, which is currently in preview, will allow a more feature-rich experience on the Storyline.  This allows users to share short video clips or photo collections to help enhance relationships among colleagues.

Goals Integrations 

Viva Goals has just launched to help employees and organizations keep their goals aligned.  This helps ensure that people are working on the top priorities that they expect to have the biggest impacts.  It also allows employees to see how their work makes a difference.  New third-party integrations with Microsoft Goals from Slack and Google Sheets are available today, with a Jira integration coming soon.  The Slack integration will allow users to receive notifications, and reminders and conduct OKRs directly from Slack.  The Google Sheets integration will allow users to sync their results inside proper sheet cells.  Microsoft will also be releasing integrations for first-party Microsoft tools and OKR notifications with Azure DevOps, Microsoft Planner, Dynamics 365, and more in the future.


Neat volume trick in Windows 11 22H2 from Jen

It has been a couple of weeks since the Windows 11 2022 update began rolling out, with a ton of features as well as enhancements. While we hit most of these in our previous posts, there’s a nifty and convenient trick that we didn’t get to. It lets users increase and decrease the volume on their devices as noted by Jen Gentleman, Sr Programmer at Microsoft on the Windows Insider team, and has a knack for keyboard shortcuts.

The conventional approach to this is quite tedious and calls for a bit of navigation, this could be done via the Control Panel’s Volume Mixer, the Quick Settings menu, or the Settings app. But now, you can adjust the volume on your Windows 11 device by hovering over the volume icon and scrolling the mouse wheel. Update your device to run on Windows 11 22H2 today to access this and more.

Have you tried out this trick? Share your thoughts with us in the comment section below.

Patch Tuesday October 2022: 85 patches released by Microsoft

It’s almost the end of 2022 and we’ve already reached October, which means the temperatures are slowly but surely starting to drop, so we can get our winter coats out.

Furthermore, it’s the second Tuesday of the month, which means that Windows users are looking towards Microsoft in hopes that some of the flaws they’ve been struggling with will finally get fixed.

We’ve already provided the direct download links for the cumulative updates released today for Windows 7, 8.1, 10, and 11, but now it’s time to talk about Critical Vulnerabilities and Exposures again.

For October, Microsoft released 85 new patches, which is a lot more than some people were expecting in the middle of autumn.

These software updates address CVEs in:

  • Microsoft Windows and Windows Components
  • Azure, Azure Arc, and Azure DevOps
  • Microsoft Edge (Chromium-based)
  • Office and Office Components
  • Visual Studio Code
  • Active Directory Domain Services and Active Directory Certificate Services
  • Nu Get Client
  • Hyper-V
  • Windows Resilient File System (ReFS)

The month of October comes with 85 new security updates

It’s pretty much safe to say that this wasn’t either the busiest or the lightest month for Redmond-based security experts and developers.

You might like to know that, out of the 85 new CVEs released, 15 are rated as Critical, 69 are rated Important, and only one is rated Moderate in severity.

Looking back, we can say that this volume is somewhat in line with what we’ve seen in previous October releases, however, it sets Microsoft on track to exceed its 2021 total.

And, if that were to happen, 2022 would the second busiest year for Microsoft CVEs, so keep that in mind if you want to compare it to other periods.

Know that one of the new CVEs released this month is listed as publicly known and one other is listed as being in the wild at the time of release.

We are going to take a closer look at the patches released in October 2022 and rank them by severity, type, and active exploitation status.

CVETitleSeverityCVSSPublicExploitedType
CVE-2022-41033Windows COM+ Event System Service Elevation of Privilege VulnerabilityImportant7.8NoYesEoP
CVE-2022-41043Microsoft Office Information Disclosure VulnerabilityImportant4YesNoInfo
CVE-2022-37976Active Directory Certificate Services Elevation of Privilege VulnerabilityCritical8.8NoNoEoP
CVE-2022-37968Azure Arc-enabled Kubernetes cluster Connect Elevation of Privilege VulnerabilityCritical10NoNoEoP
CVE-2022-38049Microsoft Office Graphics Remote Code Execution VulnerabilityCritical7.8NoNoRCE
CVE-2022-38048Microsoft Office Remote Code Execution VulnerabilityCritical7.8NoNoRCE
CVE-2022-41038Microsoft SharePoint Server Remote Code Execution VulnerabilityCritical8.8NoNoRCE
CVE-2022-34689Windows CryptoAPI Spoofing VulnerabilityCritical7.5NoNoSpoofing
CVE-2022-41031Microsoft Word Remote Code Execution VulnerabilityCritical7.8NoNoRCE
CVE-2022-37979Windows Hyper-V Elevation of Privilege VulnerabilityCritical7.8NoNoEoP
CVE-2022-30198Windows Point-to-Point Tunneling Protocol Remote Code Execution VulnerabilityCritical8.1NoNoRCE
CVE-2022-24504Windows Point-to-Point Tunneling Protocol Remote Code Execution VulnerabilityCritical8.1NoNoRCE
CVE-2022-33634Windows Point-to-Point Tunneling Protocol Remote Code Execution VulnerabilityCritical8.1NoNoRCE
CVE-2022-22035Windows Point-to-Point Tunneling Protocol Remote Code Execution VulnerabilityCritical8.1NoNoRCE
CVE-2022-38047Windows Point-to-Point Tunneling Protocol Remote Code Execution VulnerabilityCritical8.1NoNoRCE
CVE-2022-38000Windows Point-to-Point Tunneling Protocol Remote Code Execution VulnerabilityCritical8.1NoNoRCE
CVE-2022-41081Windows Point-to-Point Tunneling Protocol Remote Code Execution VulnerabilityCritical8.1NoNoRCE
CVE-2022-38042Active Directory Domain Services Elevation of Privilege VulnerabilityImportant7.1NoNoEoP
CVE-2022-38021Connected User Experiences and Telemetry Elevation of Privilege VulnerabilityImportant7NoNoEoP
CVE-2022-38036Internet Key Exchange (IKE) Protocol Denial of Service VulnerabilityImportant7.5NoNoDoS
CVE-2022-37977Local Security Authority Subsystem Service (LSASS) Denial of Service VulnerabilityImportant6.5NoNoDoS
CVE-2022-37983Microsoft DWM Core Library Elevation of Privilege VulnerabilityImportant7.8NoNoEoP
CVE-2022-38040Microsoft ODBC Driver Remote Code Execution VulnerabilityImportant8.8NoNoRCE
CVE-2022-38001Microsoft Office Spoofing VulnerabilityImportant6.5NoNoSpoofing
CVE-2022-41036Microsoft SharePoint Server Remote Code Execution VulnerabilityImportant8.8NoNoRCE
CVE-2022-41037Microsoft SharePoint Server Remote Code Execution VulnerabilityImportant8.8NoNoRCE
CVE-2022-38053Microsoft SharePoint Server Remote Code Execution VulnerabilityImportant8.8NoNoRCE
CVE-2022-37982Microsoft WDAC OLE DB provider for SQL Server Remote Code Execution VulnerabilityImportant8.8NoNoRCE
CVE-2022-38031Microsoft WDAC OLE DB provider for SQL Server Remote Code Execution VulnerabilityImportant8.8NoNoRCE
CVE-2022-37971Microsoft Windows Defender Elevation of Privilege VulnerabilityImportant7.1NoNoEoP
CVE-2022-41032NuGet Client Elevation of Privilege VulnerabilityImportant7.8NoNoEoP
CVE-2022-38045Server Service Remote Protocol Elevation of Privilege VulnerabilityImportant8.8NoNoEoP
CVE-2022-35829Service Fabric Explorer Spoofing VulnerabilityImportant6.2NoNoSpoofing
CVE-2022-38017StorSimple 8000 Series Elevation of Privilege VulnerabilityImportant6.8NoNoEoP
CVE-2022-41083Visual Studio Code Elevation of Privilege VulnerabilityImportant7.8NoNoEoP
CVE-2022-41042Visual Studio Code Information Disclosure VulnerabilityImportant7.4NoNoInfo
CVE-2022-41034Visual Studio Code Remote Code Execution VulnerabilityImportant7.8NoNoRCE
CVE-2022-38046Web Account Manager Information Disclosure VulnerabilityImportant6.2NoNoInfo
CVE-2022-38050Win32k Elevation of Privilege VulnerabilityImportant7.8NoNoEoP
CVE-2022-37978Windows Active Directory Certificate Services Security Feature BypassImportant7.5NoNoSFB
CVE-2022-38029Windows ALPC Elevation of Privilege VulnerabilityImportant7NoNoEoP
CVE-2022-38044Windows CD-ROM File System Driver Remote Code Execution VulnerabilityImportant7.8NoNoRCE
CVE-2022-37989Windows Client Server Run-time Subsystem (CSRSS) Elevation of Privilege VulnerabilityImportant7.8NoNoEoP
CVE-2022-37987Windows Client Server Run-time Subsystem (CSRSS) Elevation of Privilege VulnerabilityImportant7.8NoNoEoP
CVE-2022-37980Windows DHCP Client Elevation of Privilege VulnerabilityImportant7.8NoNoEoP
CVE-2022-38026Windows DHCP Client Information Disclosure VulnerabilityImportant5.5NoNoInfo
CVE-2022-38025Windows Distributed File System (DFS) Information Disclosure VulnerabilityImportant5.5NoNoInfo
CVE-2022-37970Windows DWM Core Library Elevation of Privilege VulnerabilityImportant7.8NoNoEoP
CVE-2022-37981Windows Event Logging Service Denial of Service VulnerabilityImportant4.3NoNoDoS
CVE-2022-33635Windows GDI+ Remote Code Execution VulnerabilityImportant7.8NoNoRCE
CVE-2022-38051Windows Graphics Component Elevation of Privilege VulnerabilityImportant7.8NoNoEoP
CVE-2022-37997Windows Graphics Component Elevation of Privilege VulnerabilityImportant7.8NoNoEoP
CVE-2022-37985Windows Graphics Component Information Disclosure VulnerabilityImportant5.5NoNoInfo
CVE-2022-37975Windows Group Policy Elevation of Privilege VulnerabilityImportant7.8NoNoEoP
CVE-2022-37999Windows Group Policy Preference Client Elevation of Privilege VulnerabilityImportant7.8NoNoEoP
CVE-2022-37993Windows Group Policy Preference Client Elevation of Privilege VulnerabilityImportant7.8NoNoEoP
CVE-2022-37994Windows Group Policy Preference Client Elevation of Privilege VulnerabilityImportant7.8NoNoEoP
CVE-2022-37995Windows Kernel Elevation of Privilege VulnerabilityImportant7.8NoNoEoP
CVE-2022-37988Windows Kernel Elevation of Privilege VulnerabilityImportant7.8NoNoEoP
CVE-2022-38037Windows Kernel Elevation of Privilege VulnerabilityImportant7.8NoNoEoP
CVE-2022-38038Windows Kernel Elevation of Privilege VulnerabilityImportant7.8NoNoEoP
CVE-2022-37990Windows Kernel Elevation of Privilege VulnerabilityImportant7.8NoNoEoP
CVE-2022-38039Windows Kernel Elevation of Privilege VulnerabilityImportant7.8NoNoEoP
CVE-2022-37991Windows Kernel Elevation of Privilege VulnerabilityImportant7.8NoNoEoP
CVE-2022-38022Windows Kernel Elevation of Privilege VulnerabilityImportant2.5NoNoEoP
CVE-2022-37996Windows Kernel Memory Information Disclosure VulnerabilityImportant5.5NoNoInfo
CVE-2022-38016Windows Local Security Authority (LSA) Elevation of Privilege VulnerabilityImportant8.8NoNoEoP
CVE-2022-37998Windows Local Session Manager (LSM) Denial of Service VulnerabilityImportant7.7NoNoDoS
CVE-2022-37973Windows Local Session Manager (LSM) Denial of Service VulnerabilityImportant7.7NoNoDoS
CVE-2022-37974Windows Mixed Reality Developer Tools Information Disclosure VulnerabilityImportant6.5NoNoInfo
CVE-2022-35770Windows NTLM Spoofing VulnerabilityImportant6.5NoNoSpoofing
CVE-2022-37965Windows Point-to-Point Tunneling Protocol Denial of Service VulnerabilityImportant5.9NoNoDoS
CVE-2022-38032Windows Portable Device Enumerator Service Security Feature Bypass VulnerabilityImportant5.9NoNoSFB
CVE-2022-38028Windows Print Spooler Elevation of Privilege VulnerabilityImportant7.8NoNoEoP
CVE-2022-38003Windows Resilient File System Elevation of PrivilegeImportant7.8NoNoEoP
CVE-2022-38041Windows Secure Channel Denial of Service VulnerabilityImportant7.5NoNoDoS
CVE-2022-38043Windows Security Support Provider Interface Information Disclosure VulnerabilityImportant5.5NoNoInfo
CVE-2022-38033Windows Server Remotely Accessible Registry Keys Information Disclosure VulnerabilityImportant6.5NoNoInfo
CVE-2022-38027Windows Storage Elevation of Privilege VulnerabilityImportant7NoNoEoP
CVE-2022-33645Windows TCP/IP Driver Denial of Service VulnerabilityImportant7.5NoNoDoS
CVE-2022-38030Windows USB Serial Driver Information Disclosure VulnerabilityImportant4.3NoNoInfo
CVE-2022-37986Windows Win32k Elevation of Privilege VulnerabilityImportant7.8NoNoEoP
CVE-2022-37984Windows WLAN Service Elevation of Privilege VulnerabilityImportant7.8NoNoEoP
CVE-2022-38034Windows Workstation Service Elevation of Privilege VulnerabilityImportant4.3NoNoEoP
CVE-2022-41035Microsoft Edge (Chromium-based) Spoofing VulnerabilityModerate8.3NoNoSpoofing
CVE-2022-3304Chromium: CVE-2022-3304 Use after free in CSSHighN/ANoNoRCE
CVE-2022-3307Chromium: CVE-2022-3307 Use after free in MediaHighN/ANoNoRCE
CVE-2022-3370Chromium: CVE-2022-3370 Use after free in Custom ElementsHighN/ANoNoRCE
CVE-2022-3373Chromium: CVE-2022-3373 Out of bounds write in V8HighN/ANoNoRCE
CVE-2022-3308Chromium: CVE-2022-3308 Insufficient policy enforcement in Developer ToolsMediumN/ANoNoSFB
CVE-2022-3310Chromium: CVE-2022-3310 Insufficient policy enforcement in Custom TabsMediumN/ANoNoSFB
CVE-2022-3311Chromium: CVE-2022-3311 Use after free in ImportMediumN/ANoNoRCE
CVE-2022-3313Chromium: CVE-2022-3313 Incorrect security UI in Full ScreenMediumN/ANoNoSFB
CVE-2022-3315Chromium: CVE-2022-3315 Type confusion in BlinkMediumN/ANoNoRCE
CVE-2022-3316Chromium: CVE-2022-3316 Insufficient validation of untrusted input in Safe BrowsingLowN/ANoNoSpoofing
CVE-2022-3317Chromium: CVE-2022-3317 Insufficient validation of untrusted input in IntentsLowN/ANoNoSpoofing

This October 2022 patch release also includes fixes for 11 information disclosure bugs, including one in Office that’s listed as publicly known.

The rest of the info disclosure vulnerabilities only result in leaks consisting of unspecified memory contents, according to experts.

However, the bug in the Web Account Manager could allow an attacker to view unbound refresh tokens issued by one cloud on a different cloud.

Also, the patches for Visual Studio Code and the Mixed Reality Developer Tools fix disclosure bugs that could allow reading from the file system.

That being said, know that the final info disclosure bug fixed this month could allow reading from the HKLM hive of the registry which you normally would not have access to.

Furthermore, eight different DoS vulnerabilities were patched this month, the most interesting being the DoS in TCP/IP, which could be exploited by remote, unauthenticated attackers and does not require user interaction.

This update rollout is rounded out by five spoofing bugs, including the lone Moderate-rated fix, which addresses a spoofing vulnerability in Microsoft Edge (Chromium-based).

Looking forward, the next Patch Tuesday security update rollout will be on the 8th of November, which is a bit sooner than some expected it.

Have you found any other issues after installing this month’s security updates? Share your opinion in the comments section below.

How to Label a Legend in Google Sheets

Sheets is Google’s alternative to Microsoft Excel. The Sheets web app is freely available to all Google account users.

Although it might lack some of Excel’s features, Sheets is still a pretty good alternative.

Like all spreadsheet applications, Sheets enable users to set up charts for data entered. To make Sheets graphs clear, you must add legend labels to them. The legends will show what data the graphs display.

Read on to find out how to add text to a legend in Google Sheets.

How can I label legends in Google Sheets?

1. Add a label legend

  1. First, enter the data for your graph across a column or row in a Google Sheets spreadsheet.
  2. Hold the left mouse button and drag the cursor over the data entered to select it.
  3. Click Insert > Chart to add the graph to the sheet.
  4. Click the Chart type drop-down menu to select one of the pie graph types to add a label legend to.
    Sheets graph without a legend add words legend in google sheets
  5. Click in the Add Label box, and select the cell range that includes your chart data. Then the chart will display the data value labels like the one in the snapshot directly below.
    Add Label box add words legend in google sheets
  6. You can remove the label legend by deselecting the Use column as labels checkbox.

2. Add and edit text in a Google Sheets legend

  1. 1. Double-click a label on the chart that you want to change and go to the Customise tab.

    legend google sheets text options
  2. 2. Navigate to the Legend section.

  3. 3. You can select an alternative font, as well as a different font size for the labels by clicking on the drop-down menu beneath Legend font.

  4. 4. Double-clicking a legend label a second time will open a small text box with which you can change the label’s text.

    change label text box sheets
  5. 5. Click the B and I buttons in the Text style box to apply bold and italic formatting for all the labels.

  6. 6. Press on the Text color box to choose an alternative text color.

  7. You can manually fully edit the text in a Google Sheets legend. Its font size, font type, color and formatting can be easily modified via the built-in Chart editor.


3. Edit the legend labels’ positioning

  1. To change legend positioning, click the Customize tab on the Chart editor’s sidebar.
  2. Click Legend to expand further options.
  3. Then select either Top, Bottom, Left, or Right in the Position drop-down menu to change the legend to one that doesn’t display percentage value labels for pie charts.
    Position drop-down menu add words legend in google sheets
  4. Double-click a specific value within the legend to select it.
  5. Then you can apply specific text formatting to the selected value with the options on the Chart Editor’s sidebar.

So, that’s you can add and edit label legends in Google spreadsheet graphs. The data labels those legends display are essential to charts.

If you found this information useful, or you would like to add some other suggestions to this guide, please feel free to use the comment section found below this article.

Caps Lock Light/Indicator is Not Working: How to Fix it

A few years back, computer companies started experimenting with removing the LED indicator lights from laptops for challenging drive activity and Scroll Lock.

After that, they removed the Num Lock and the Caps Lock indicator lights. Speaking of Caps Lock, many users reported that the Caps Lock light is not working on their Windows 10 PC.

Missing Caps Lock indicator is a minor problem, but some users like to have a visual indicator that shows them whether Caps Lock is activated or not.

In this guide, we will show you how to fix this issue, as we did with the keyboard not working on Windows 10/11 problem.

Why is the Caps Lock light not working?

There are a series of potential causes for the Caps Lock light not working issue. Below are some of the popular variations of the problem and their reasons, as reported by users:

  • Caps Lock indicator on screen: Some users prefer a Caps Lock indicator on their display. This is relatively simple to achieve, and the best way to do it is to use third-party software.
  • Asus Caps Lock light not working on laptop: Sometimes your Caps Lock indicator on the Asus laptop can become missing. To fix this problem, be sure to reinstall the on-screen software that came with your laptop.
  • Caps Lock indicator Windows 10 Lenovo, Dell, HP: This issue can also affect Lenovo, Dell, and HP devices. If you have this problem, be sure to check your keyboard settings and reinstall the keyboard software.
  • Wireless keyboard Caps Lock indicator not working: If the Caps Lock indicator isn’t working on your wireless keyboard, the issue might be your drivers, so be sure to update them.
  • Caps Lock indicator not showing Windows 10: Many users reported that the Caps Lock indicator isn’t showing on Windows 10. This can be caused by a problematic update, so be sure to remove any recent updates.
  • Caps Lock indicator taskbar, tray icon: If you want to have a Caps Lock indicator on your Taskbar or as a tray icon, you’ll have to use a third-party solution to achieve that.
  • Caps Lock indicator not showing on-screen
  • Caps lock light not working Dell,
  • Caps Lock light not working – HP

How do I fix Caps Lock on Windows 11?

1. Change Ease of Access settings

  1. Click the Start button and select the Settings icon.
    settings caps lock light not working
  2. Choose Ease of Access.
    ease of access
  3. Select the Keyboard in the left pane.
    keyboard
  4. Enable Play a sound whenever you press Caps Lock, Num Lock, and Scroll Lock under Use Toggle Keys.
    use toggle key caps lock light not working

Now, each time you activate Caps Lock, Num Lock, and Scroll Lock, your computer will play a notification sound, and it will also play a different one when you turn off these features by pressing the keys again.

2. Enable CAPS lock indicator using TrayStatus

traystatus

TrayStatus is a small application developed by BinaryFortress that places indicator icons directly into the taskbar.

TrayStatus supports icons for Caps Lock, Num Lock, and Scroll Lock but can also display the status of the CTRL, ALT, SHIFT, and WINDOWS keys.

In addition, you can also have an indicator icon for hard drive activity.

The application is very lightweight, taking less than 4 MB of space from your system drive without increasing Windows’ boot time if you enable it to run at startup.

3. Update keyboard driver

  1. Press the Windows key + X and select Device Manager.
    device manager
  2. Double-click the Keyboards option to expand it.
    keyboards
  3. Right-click the driver there and select Update driver.
    update driver
  4. Now, click the Search automatically for drivers option.
    search automatically caps lock light not working
  5. Wait for the Search to complete and install any available update.

If your Caps Lock light is not working on an MSI laptop, it might be down to outdated keyboard drivers. Scanning for updates with the built-in updater should show you the available updates to install.

Alternatively, you can update your drivers with a reliable tool in Outbyte Driver Updater. This tool automatically scans for outdated drivers on schedule and recommends timely updates before they can cause issues.

Also, Outbyte Driver Updater is not just limited to driver updates. It also fixes broken drivers and installs missing ones to ensure your PC runs optimally.

Outbyte Driver Updater

An impressive tool that scans your device drivers and updates them to help you boost your PC performance.
Free Trial Download now

4. Enable Caps Lock light using Keyboard Indicator

Keyboard Indicator is a small application similar to TrayStatus. It was initially developed for Windows XP, Vista, and 7, but it works fine on Windows 8.1 and 10.

Even though I recommend you first try TrayStatus as it officially supports Windows 10, Keyboard Indicator offers many more options.

For example, by default, when you press Caps Lock, Num Lock, or Scroll Lock, you’ll get an icon inside the taskbar that changes status, exactly like TrayStatus does.

However, Keyboard Indicator will also give you a toast notification and will play a notification sound, ensuring you never miss activating one of these functions.

Caps lock indicator not working in Windows 10

Also, Keyboard Indicator offers many customization options, from the font size and color to the position and time duration of the toast animation. It even allows you to customize the text it displays.

The only downside of the Keyboard Indicator is that you can get indicators only for Caps Lock, Num Lock, and Scroll Lock.

If Keyboard Indicator is the application you want to try, you can download it from its official website, found here.

5. Remove the problematic updates

  1. Open the Settings app by pressing the Windows key + I shortcut.
  2. Select the Update & Security option.
    update and security
  3. Now, click on View update history.
    view update history caps lock light not working
  4. Select Uninstall updates. This will open the Control Panel.
    uninstall updates
  5. Now, locate the most recent update and click on it.
  6. Finally, click the Uninstall option at the top and follow the simple onscreen instructions to complete the process.
    uninstall update caps lock light not working

If the Caps Lock indicator isn’t working on your PC, the problem might be a recent update. Windows 10 automatically install updates, and sometimes a specific update can cause this problem to appear.

If this problem started recently, you might be able to fix it simply by removing the latest update. Once you remove the update, check if the problem still appears. If not, it means that the update caused the problem.

We also have to mention that Windows 10 will try to install the same update again, and that will cause the issue to reappear. However, you can prevent that from happening by disabling Windows updates.

6. Check if your keyboard is faulty

Sometimes the missing Caps Lock indicator can signal a faulty keyboard. The best way to check your keyboard is to enter BIOS and see if the LED light is working.

Alternatively, you can connect the keyboard to a different PC and see if the issue is still present.

Even if the Caps Lock indicator isn’t working, the problem is most likely a bad LED, and if your keyboard is working correctly without the Caps Lock indicator, there’s no need to replace the keyboard.

If your keyboard is faulty, maybe a virtual keyboard on the screen that allows you to use the mouse pointer for typing the way you do it with the regular keyboard could be helpful.

⇒ Get Comfort On-Screen Keyboard Pro

7. Turn on Toggle Keys and change accessibility settings

  1. Open the Settings app.
  2. Choose the Ease of Access option.
    ease of access
  3. Click the Keyboard option in the left pane.
    keyboard
  4. Toggle the switch for Use Toggle Keys forward to enable it.
    use toggle key caps lock light not working
  5. Now, choose the Audio option in the left pane.
    audio
  6. Click the dropdown under Show audio alerts visually and select Flash the active window.
    flash active window

If you want a visual indicator that your Caps Lock key is pressed, you might want to turn on Toggle Keys.

This gives you a visual notification whenever the Caps Lock key is pressed. After that, your active window or screen will flash whenever you press Caps Lock.

This effect doesn’t look visually appealing, but at least you’ll receive both audio and visual notifications whenever you press Caps Lock.

8. Reinstall Lenovo On Screen Display

If the Caps Lock light is not working in Windows 10, the problem might be Lenovo On-Screen Display software.

Issues with this software can occur, and to fix the problem, it’s advised to reinstall Lenovo On Screen Display. There are several ways to do it, but the best way is to use uninstaller software in CCleaner.

CCleaner is a unique application that can remove any program from your PC. In addition to removing the application, it will also remove all associated files and registry entries.

This will ensure that the application is completely removed and fix any issues caused by the application.

After you remove Lenovo On Screen Display, reinstall it again and check if the problem is resolved. If you’re using a different laptop brand, check for similar software and reinstall it.

9. Install the latest updates

  1. Press the Windows key + I to open the Settings app.
  2. Select the Update & Security section.
    update and security
  3. Now, click the Check for updates button.
    check for update caps lock light not working
  4. Finally, click the Download and install option.
    download and install

Several users reported that installing the latest updates fixed the problem for them, so you might want to try that.

If you’re having problems with the Caps Lock indicator, the issue might be caused by missing updates. However, you can fix this problem simply by updating Windows to the latest version.

By default, Windows 10 automatically installs the missing updates, but sometimes you might miss an important update due to specific bugs.

How do I fix the Caps Lock light not working on Windows 11?

If the Caps Lock light is not working on Windows 11, it can be because of outdated keyboard drivers. You can effectively fix this by updating your drivers using a dedicated tool.

Another known cause of the issue is a problematic update. Removing this update should fix the problem in this case. You can set the subject using any of the solutions in this guide.

How do you reset Caps Lock?

  1. Open the Settings app and select the Time & Language option.
    time and language
  2. Choose Language in the left pane.
    language caps lock light not working
  3. Select Spelling, typing, & keyboard settings under Related settings.
    spelling
  4. Now, choose Advanced keyboard settings under the Related settings option.
    advanced keyboard
  5. Click Language bar options.
    language bar
  6. Click the Advanced Key Settings tab at the top.
    advanced caps lock light not working
  7. From here, tick the radio button for Press the SHIFT key under the To turn off Caps Lock section.
    press shift
  8. Click the Apply button, followed by OK to save the changes.
    apply
  9. Finally, restart your PC.

You can always turn off the Caps Lock with the Shift key.

Problems with the Caps Lock indicator usually aren’t severe, but if you’re having any issues, feel free to try any of our solutions.

Are you facing other issues like the keyboard typing wrong characters and letters? Then, check our detailed guide to fix it effectively.

Feel free to let us know if you were able to fix the issue using any of our solutions in the comments below.

7 Ways to Fix Your Xbox Game Bar if the Mic is Not Working

The Xbox app for Windows 11 was intended as a cross-platform, all-in-one gaming hub. However, since its ascension, it hasn’t worked all that great for casual gamers and streamers. One of the common problems reported by many is that the mic is not working in the Xbox Game Bar app.

The problem is usually encountered when in an Xbox chat party and has left users in a lurch since there isn’t much information on the web, and the full error message reads: Something went wrong with your microphone. Try changing your party audio settings.

So, we decided to take up the issue, and by the time you are done with this article, things should be up and running if the mic is not working in the Xbox party on your PC.

Why won’t my mic work on Xbox Game Bar?

If the Xbox app voice chat is not working on your PC, it could be the configured permissions to blame. Likely, Xbox can’t access the microphone, and you would have to modify the permissions.

Other than that, a faulty microphone is just as likely to cause the problem. Even connection issues are an underlying cause here. You can verify this by checking if the mic works on other apps.

Also, you may have an incorrect mic chosen in the Xbox Game bar, leading to it not being detected. Besides, outdated microphone drivers or running an older version of the app are just as likely to cause the issue.

What can I do if the mic is not working in Xbox Game Bar?

1. Clear apps cache

  1. Press Windows + I to open Settings and select Apps.apps
  2. Expand the Xbox Game Bar app and then click on Advanced options.advanced options to fix xbox game bar mic not working
  3. Scroll down and click Reset.reset to fix xbox game bar mic not working
  4. Again, click Reset in the confirmation prompt.reset

Let’s start by troubleshooting the app itself. The lackluster nature of the Windows 11 Xbox Game Bar app resembles Windows Live from back in the day. The app has a lot of issues, both performance-wise and design-wise.

Microsoft is seemingly trying to sort things out, but not with significant success to this day. Although most essential features usually work as intended, that’s not always the case.

Every app will eventually pile up the cache, and once that happens, some issues might emerge, including the Xbox Game Bar mic not working in Windows. That’s why the first step we recommend is resetting app services.

2. Check the app’s permissions

  1. Press Windows + I to open the Settings app, and then choose Privacy.privacy
  2. Select Microphone under App permissions from the left.microphone to fix xbox game bar mic not working
  3. Now, make sure the toggle for Xbox Game Bar is enabled.enable toggle to fix xbox game bar mic not working

To use the mic with any app on the Windows 11 platform, you’ll need to permit it. This should be the case by default, but it’s not a rule, even though we’re talking about a preinstalled app.

Once done, check if the Xbox game bar mic is now working. If not, head to the next solution.

3. Check audio input drivers

  1. Press Windows + R to open Run, type devmgmt.msc in the text field, and click OK.devmgmt.msc
  2. Expand the Audio inputs and outputs section.audio inputs and outputs
  3. Right-click on every entry individually and select Uninstall device.uninstall device
  4. Again, click Uninstall in the confirmation prompt.uninstall to fix xbox game bar mic not working
  5. Reboot your PC and make sure the mic is plugged in.
  6. Windows will now automatically install a fresh copy of the driver.

Finally, besides networking, consider reinstalling the audio input driver. Maybe we need to look at the bigger picture, and the driver is subpar, so the audio input device won’t work as intended.

Once you’ve uninstalled the driver, it should be reinstalled on its own after restarting the computer. On the other hand, you can try using a specialized tool to automatically search for the missing driver.

Professional driver updating utilities allow you to scan and update all your drivers in just a few minutes. Plus, they work great as maintenance tools, since they will allow you to set up automatic scans that will notify you if your drivers are going out of date.

⇒ Get Fortect Driver Updater

4. Change the default output format

  1. Right-click on the speaker’s icon in the notification area and select Sounds.sounds
  2. Go to the Recording tab, right-click on your default mic, and select Properties.properties to fix xbox game bar mic not working
  3. Navigate to the Advanced tab and select an option with DVD Quality or Studio Quality from the Default format dropdown menu.change default format
  4. Once done, click OK to save the changes.ok

Many users managed to resolve various mic issues (stutter, delay, or mic not working) by changing the default output format of the recording device. Also, setting the mic you’re using as the default device is essential.

The default format won’t usually work with the mic regarding the Xbox Game Bar app’s performance. Therefore, you must switch from the assigned form (usually CD) to DVD and look for changes.

Some users even switched to Studio quality, and it solved things. So, if the DVD format doesn’t work, try others.

5. Troubleshoot the connection

Another possible reason why one feature fails or underperforms within the Xbox app can be related to network issues. Firstly, you might want to go to the official Xbox Live Status website and check whether any services are down.

Also, the following ports must be open as they are mandatory when using any Xbox Live service:

  • Port 88 (UDP)
  • Port 3074 (UDP and TCP)
  • UDP Port 3544 (UDP)
  • Port 53 (UDP and TCP)
  • Port 80 (TCP)
  • UDP Port 4500 (UDP)
  • Port 500 (UCP)

In addition, restarting your PC and router, for starters, might resolve the temporary connection situation; after you’re sure everything is configured correctly, test your mic within the app and look for improvements.

6. Disable Firewall and antivirus temporarily

Another possible reason the Xbox app can’t access your mic is firewall-imposed limitations. This is hardly the case for the built-in Windows Firewall, but third-party firewalls are known for blocking specific apps from accessing the PC peripherals.

This leads us to believe that disabling them might fix things if the Xbox Game Bar mic is not working.

So, if you’re knowledgeable enough to add an exception to your third-party firewall, do so. On the other hand, temporarily disabling the firewall before using the app should help if you’re not sure how to do it.The Xbox Game Bar push to talk not working issue will be fixed afterward.

7. Install Teredo Adapter

  1. Right-click the Start button in the Taskbar, and then select Device Manager.device manager to fix xbox game bar mic not working
  2. Click on the View menu, and then check the Show hidden devices option.show hidden devices
  3. Expand Network adapters and look for Teredo Tunneling Pseudo-Interface.
  4. If it’s not there, click on the Action menu, and choose Add legacy hardware.add legacy hardware to fix xbox game bar mic not working
  5. Click Next.
  6. Choose the “Install the hardware that I manually select from the list (Advanced)” option and click Next.
  7. Choose Network adapters from the list and click Next again.
  8. Select Microsoft.
  9. Choose Microsoft Teredo Tunneling Adapter from the list and install it.
  10. Restart your PC. The Xbox app voice chat not working on PC issue will be solved.

A lot, and we mean a lot, of Xbox Game Bar app issues trace back to the P2P connection. And in this case, if you are sure that the mic is fully functional, but you still see that the selected microphone could not be found, try with an alternative virtual adapter.

The alternative to a standard configuration is the Teredo Adapter. However, remember that the adapter’s driver installation requires some work.

If the Xbox Game Bar mic is not working in Windows 11, you first should run the Recording Audio troubleshooter. The built-in troubleshooter will automatically identify and fix the problem if Microsoft has already recognized it and a solution is available.

Recording Audio Troubleshooter

Also, make sure the connections are in order. If the mic is not working throughout the system, the links are likely improper, the cables are damaged, or the microphone is faulty.

Besides, you should check the Xbox Game Bar settings and verify that the proper microphone has been selected.

How to use the mic on the Xbox app on a PC?

You can easily open the Xbox Game Bar app and access the microphone settings from the Audio section.

Xbox Game Bar

It allows you to choose the desired microphone and modify the sound level. And through it, you can use the mic on Xbox and reconfigure settings for the desired output.

If you cannot make your mic work in the Xbox app, consider contacting Microsoft support. Unfortunately, it seems that even this, the simplest of features, sometimes doesn’t work.

Also, find out how to optimize the PC for the best gaming performance and enjoy every minute you spend on the Xbox app.

Besides, the solutions listed here would work even if you are getting the Something went wrong with your microphone, Try changing your party audio settings error.

Furthermore, if you have any alternative solutions or questions, feel free to tell us in the comments below.

Fix: Left Mouse Button Drag Not Working on Windows 10

Most of us use the mouse to drag and drop files in Windows rather than copy/paste. This makes things easier and faster, thanks to the little stress and ease of access.

However, some users have reported that their drag-and-drop option doesn’t work when they try to move a specific file or folder.

Thankfully, it is not the most challenging issue to solve, as shown in this guide.

Why is the mouse dragging not working?

The left mouse drag is not working issue has various potential causes. However, one of the essential things you can point to is outdated drivers.

Also, if you have recently installed an application before noticing this issue, the app or software might be causing the problem. So, you might need to remove this app to solve the issue.

What are the other mouse dragging issues that users reported?

There are many problems with your mouse that can occur, and speaking of mouse issues, these are some of the most common problems that users reported:

  • Mouse drag and drop not working Windows 10: This is a relatively common problem that can occur with your mouse. If you’re having this issue, feel free to try any of our solutions.
  • Mouse left click and drag not working properly: This is just a variation of this problem. If you have this issue, be sure to check if your mouse is working properly.
  • Mouse dragging problems Windows 10: Mouse dragging problems are relatively common, and in order to fix this problem, you might want to enable Mouse ClickLock feature.
  • Mouse not dragging properly: Sometimes the dragging function might not work properly on your mouse. This can be a big problem, but you might be able to fix it by cleaning your mouse.
  • Left mouse button won’t drag: Several users reported that left mouse button won’t drag at all. This is an annoying problem, and a faulty mouse most likely causes it.

Now let us discuss some solutions. Note that you may apply them if your touchpad click and drag is not working or your mouse won’t highlight or drag.

What can I do if the left mouse drag doesn’t work?

1. Enable Mouse ClickLock

  1. Press the Windows key + S, type mouse, and select Mouse settings.
    mouse settings left mouse drag not working
  2. Select Additional mouse options.
    additional mouse
  3. Under the Buttons tab, check Turn on ClickLock.
    turn on clicklock
  4. Click the Settings… button in the ClickLock section.
    settings left mouse drag not working
  5. Now, set the time you want your click to be locked.
    set time
  6. When you set everything right, click OK.

You can use a temporary solution until you find the real cause of the left drag problem. And that is ClickLock, a feature that allows you to drag your files just by longer-clicking on them without constantly holding the left mouse button.

Now, you don’t need to hold your mouse button to drag your files, but this would probably be a temporary solution since you get used to having a mouse button. It’s up to you.

2. Update Drivers

  1. Press the Windows key + X and choose Device Manager.
    device manager
  2. Double-click on the Mice and other pointing devices option to expand it.
    mice and left mouse drag not working
  3. Now, right-click on your driver and choose Update driver.
    update driver
  4. Click the Search automatically for drivers option.
    search auto
  5. Wait for the scan to finish and install any available updates.

Windows 10 still has a problem with drivers in general, as some hardware manufacturers didn’t provide the needed software. So, that could be the case with your mouse, mainly if you use a ‘high-end’ device.

So, it won’t hurt to check if your mouse drivers are up to date.

Always keep ahead with updating your outdated drivers for your computer to work properly because they are crucial for some of your system functionalities.

A much easier alternative would be using a third-party driver updater like Outbyte Driver Updater.

This tool oversimplifies the process of updating your drivers, and as a bonus, it also takes care of and fixes the ones that are broken or missing.

The UI is extremely simplistic, the program itself is easy-to-use, and you can even program it to automatically run in the background to find newer drivers as soon as they become available.

Outbyte Driver Updater

Your mouse drivers will no longer be the source of your peripheral problems if you keep them updated with Outbyte Driver Updater.
Free trial Download now

3. Remove any recently installed applications

  1. Press the Windows key + I to open Settings.
  2. Select the Apps option.
    apps left mouse drag not working
  3. Choose the app you want to remove.
  4. Click the Uninstall button and follow the onscreen instructions to complete the process.
    uninstall app

Sometimes third-party applications can cause this problem to appear. If this problem starts appearing recently, remove any applications you’ve installed in the last few days.

According to users, this issue was caused by the Rocketdock application, but the problem was resolved after removing it.

Given the situation, your best bet is to use a dedicated uninstaller software in CCleaner that can remove the program and any remaining residual data that may otherwise be left behind.

CCleaner is an entirely safe utility that can detect residual files and force remove stubborn apps from your PC.

It is easy to use. In just a few clicks, you can select the app you want to remove, and the software removes it and scans your PC for any leftover files related to it.

After successfully removing unwanted apps, check and see if the problem is fixed.

4. Clean your mouse

Maybe the problem isn’t in Windows 10 at all. On the other hand, maybe your mouse is full of dust and needs a good cleaning. Several users reported that they fixed the problem simply by using compressed air to clean the inside of their mouse.

Sometimes, you might have to adjust the little spring in the micro switch.

In addition, you might want to check if your left mouse button is working correctly. Then, simply set the right mouse button as the primary button in the Mouse options.

After that, check if the problem appears using the right mouse button. If the issue doesn’t occur with the right mouse button, the problem is your mouse, so you might have to replace it.

If you’re unsure how to clean your mouse, Search online for the instructions correctly.

5. Perform a Clean boot

  1. Press Windows key + R, type msconfig, and click OK.
    Mouse not dragging properly
  2. Click the Services tab and check Hide all Microsoft services.
  3. Now click the Disable all button.
    Left mouse button won't drag
  4. Navigate to Startup tab and click Open Task Manager.
    Mouse won't drag and drop Windows 10
  5. Right-click on each of apps there and choose Disable.
    Mouse click and drag not working properly
  6. Now, go back to the System Configuration window.
  7. Click on Apply and OK and restart your PC.
    Mouse dragging problems Windows 10

Sometimes left mouse button drag won’t work because of the third-party applications. To fix that, performing a Clean boot is recommended to check if that solves the problem.

Once your PC restarts, check if the problem still appears. If not, it means that one of your startup applications or services was causing the issue.

To find out which application is the cause, you need to enable applications and services individually or in groups. Remember that you need to restart your PC after enabling a group of applications or services.

Once you find the problematic application, you can disable it or uninstall it to fix the problem permanently.

6. Connect your mouse to a different USB port

The problem might be your USB port if you’re using a USB mouse. Several users reported that they fixed the problem simply by connecting their mouse to a different USB port on their PC.

If you have a USB mouse, we advise you to connect it to a USB 2.0 port instead of a USB 3.0.

USB 3.0 offers excellent speed, but your mouse won’t ever need that kind of bandwidth, so we advise you to connect it to USB 2.0 and check if that solves the problem.

It’s worth mentioning that this problem can also occur while using a USB hub.

USB hubs are great since they give extra USB ports for your devices, but sometimes issues can occur with a USB hub and your mouse.

To fix the problem, it’s recommended to disconnect your USB mouse from the hub and connect it directly to your PC.

7. Press the Esc key

Many users reported that they solved left mouse button drag problems simply by pressing the Esc key. This is an unusual solution, but it works according to users.

If your mouse doesn’t drag, press the Esc key, and the problem should be resolved. Several users reported that this solution solved the problem, so try it out.

8. Change Internet options

  1. Press Windows key + S and enter internet options.
  2. Select Internet Options from the menu.
    Mouse not dragging properly
  3. Go to the Programs tab and click the Manage add-ons button.
    Left mouse button won't drag
  4. A new window will now appear. Locate XML 3.0 and disable it. Of course, you can also disable XML 4.0, but it’s not mandatory.

According to users, if you’re unable to highlight text correctly because the left mouse button drag isn’t working, you might be able to fix the problem by changing your Internet options.

This is an unusual solution, but it works according to users.

After making these changes, check if the problem with your mouse is resolved. Several users reported that this solution worked for them, so you might want to try it out.

How can I fix drag & drop not working on Windows 11?

The drag and drop not working issue on Windows 11 is similar to the case reported on Windows 10. The causes are the same, and so are the solutions.

Hence, you can effectively apply the solutions in this guide to fix the issue.

Why does my left click not work sometimes?

If your left click does not work sometimes, it might be down to hardware issues. So, you might need to perform some troubleshooting steps like removing dust and cleaning.

The issue might also be down to outdated drivers. We have shown how to update your drivers in this guide effectively. So be sure to check it out.

The left mouse drag not working issue can be frustrating, as it takes away an essential ease-of-use feature. We hope this article helped you with the left mouse button drag problem.

If you are facing other issues like the mouse keeps clicking on Windows or middle mouse button not working check our detailed guides to fix it effectively.

If you have any comments or questions, write them down below.

Ignite 2022: Mesh avatars come to Teams, Teams Premium introduced, more Teams news

Communication is the cornerstone of any business, it doesn’t matter how big or small.  For businesses that use Microsoft Office 365, Microsoft Teams is the communication tool of choice.  Microsoft is announcing new features available now in Microsoft Teams, and what they are working on in the pipeline for future releases.

Mesh Avatars

Now you don’t always have to turn your camera on during a meeting.  Mesh avatars offer you the ability to choose how you show up in a meeting by designing and choosing a customized avatar.  You can design your avatar by using the Avatars App in the Microsoft Teams App Store.  Users will be able to design up to three avatars using hundreds of customizations ranging from physical attributes to accessories.  

Once your personal avatar is created you can use it in Teams meeting by choosing the option “Effects and Avatars” menu before joining the meeting.  During the meeting, you will be able to use various gestures with your avatar to react to topics.  

Mesh avatars are available in standard Team meetings for private preview customers.  If an organization is interested they can signup for updates on the Teams website if they are not enrolled in the Teams Technical Access Beta Program. 

Teams Premium

The new Microsoft Teams Premium addon will be available in preview starting in December.  Teams Premium will make all meetings more personalized and secure.  Meeting guides will allow you to tailor the path of the meeting to your needs.  Guides can be set up for each meeting by the organization’s I.T. team.  You can also brand each meeting to your specific needs.  

Intelligent recaps, give personalized highlights of every meeting to help you find what matters most to you.  AI-generated tasks are assigned throughout the meeting as well.  Think of it as having a virtual assistant attending your meeting.  Intelligent playback and personalized insights help divide the meetings into chapters making it easier to find what is important to you.  

Teams Premium will also feature live translations of meetings and offer and offer a more secure experience to protect against leaks.  Features such as watermarking and limiting who can record the meeting.  Those with a Microsoft Office 365 E5 subscription will have the most secure options.  Those E5 customers will have access to Microsoft Purview Information Protection to apply protection options.  

Advanced webinars and virtual appointments will enhance the business-to-consumer relationship.  Users will be able to join webinars and appointments through mobile or web browsers as well as the Teams app.  Integration with Microsoft Bookings and the ability to send out SMS message reminders will help keep wait times to a minimum.  

Teams Premium features will begin to roll out in December 2022  as part of the Teams Premium Preview with general availability coming in February of 2023.  AI capabilities and intelligent meetings will begin rollout in the first half of 2023. 

New Chat and Collaboration Features

Staying organized and focused during a busy meeting can be challenging.  Microsoft is introducing new Teams features to make staying engaged easier.  You’ll now be able to send short, rich video clips from desktop or mobile.  The receipt can choose to reply in chat or video of their own.  You can also spice the conversation up with over 800 Teams Emojis.  Suggested replies are also currently available in one on one chats. Teams can suggest a reply based on the context of your conversation.  Suggested replies will be coming to the group chat in October.  

Improvements to Teams Channels

Team channels are getting their design improved for a more modern look and fee. The design will be more intuitive allowing workers to focus more on conversation content.  The compose box will be moved to the top of the page, Pinned posts will make it easier for users to find what’s most important.  Pop-out conversations will also allow users to keep track of a specific conversation while working.  A more streamlined info pane will make it easier to keep users up to speed.  

Branding channels will also be possible.  You’ll be able to customize the channel bar to fit your organization’s brand.  Microsoft will also be adding post types that allow corporations to customize posts, such as announcements or company milestones.  

New App Microsoft Places

Microsoft Places is a brand new app being introduced to optimize places for hybrid work.  The Microsoft Places app can be used the help decision-makers better modify to work environment to accommodate hybrid work.  Microsoft Places will help bridge the gap between remote and in-person work environments.  

Microsoft Places will soon be available in preview and will have such features as a calendar to know when users are working remotely or in the office.  Users wil also be able to use the app to accommodate travel time.  Users will be able to use the app for waypoint finding inside the office and be able to book conference rooms.  Microsoft Places will make it easy for business decision-makers to be able to track facility usage for future planning.

Team Platform For Developers Updates

Updates include a Teams Live Share SDK that allows developers to turn any shared app into a Teams meeting.  Teams Live Share SDK is now in preview and includes the ability for participants to use virtual writing tools to markup meetings.  Teams apps will also be extended to Outlook and Office using the Teams JS 2.0 SDK that was announced at Microsoft Build 2022.  Developers will be able to extend Teams Pages and Message Extensions throughout Office and Outlook. Teams Toolkit is now a part of Visual Studio.  Developers can now use Visual Studio to build collaborative apps to work across Teams, Office, and Outlook.  


Windows 10 & 11 October Patch Tuesday [DOWNLOAD LINKS]

The time has come again for us to open our virtual arms and extend a warm welcome to the latest batch of security updates from Microsoft.

As you are already aware, the 10th round of the monthly Patch Tuesday updates of 2022 has already been documented.

Know that these updates actually bring an entire array of changes for both Windows 10 and Windows 11, regardless of whether it is a newer or an older version.

The October 2022 Patch Tuesday updates are expected to fix some of the issues that were still pending, and in the article below we will be looking to see exactly what we get.

We’ve included detailed changelogs for each cumulative update, and we will also be providing you with direct download links from Microsoft’s Windows Update Catalog, so you know that they are secure.

Just remember that, alternatively, you can always use other methods to get the latest updates, including:

  • The Windows Update menu on your OS
  • The WSUS (Windows Server Update Service)
  • Group Policies set up by your admins if you’re part of a larger network.

Without any further ado, let’s have a closer look at the October 2022 Patch Tuesday updates rollout from Microsoft.

What does the October Patch Tuesday update batch bring?

Windows 11

As most of you know by now, Microsoft released its latest operating system, Windows 11, on the 5th of October, 2021.

Five months after the general rollout, the new OS seems to become increasingly stable and far less buggy than we’ve gotten used to.

You might also like to know that the 22H2 version of Windows 11, the operating system’s first major update, has already been declared feature complete.

It will, most likely, come in the first half of the year, so we might just get it until the summer. Of course, there is a possibility that the Redmond tech giant could postpone to the third, or fourth quarter.

Cumulative update name

KB5018418 

Changes and improvements

  • Addresses security issues for your Windows operating system.   
  • This update contains miscellaneous security improvements to internal OS functionality. No additional issues were documented for this release.

Known issues

  • After installing this update, file copies using Group Policy Preferences might fail or might create empty shortcuts or files using 0 (zero) bytes. Known affected Group Policy Objects are related to files and shortcuts in User Configuration > Preferences > Windows Settings in Group Policy Editor.

[DIRECT DOWNLOAD LINK]

Windows 10 versions 21H2, 21H1, and 20H2

Windows 10 v21H2 is the latest major version of Windows 10, and as such has the most experimental features on it.

Fortunately, most bugs that were first present when it was first made available have been weeded out, and this version of Windows 10 is far more stable.

Cumulative update name

KB5018410 

Changes and improvements

  • This update contains miscellaneous security improvements to internal OS functionality. No additional issues were documented for this release.

Known issues

  • Devices with Windows installations created from custom offline media or custom ISO image might have Microsoft Edge Legacy removed by this update, but not automatically replaced by the new Microsoft Edge. This issue is only encountered when custom offline media or ISO images are created by slipstreaming this update into the image without having first installed the standalone servicing stack update (SSU) released March 29, 2021 or later.
  • After installing this update, file copies using Group Policy Preferences might fail or might create empty shortcuts or files using 0 (zero) bytes. Known affected Group Policy Objects are related to files and shortcuts in User Configuration > Preferences > Windows Settings in Group Policy Editor.

[DIRECT DOWNLOAD LINK]

Windows 10, version 1809

This version of the OS is outdated and will no longer receive any updates from the tech company. Users that are still running this old version on their devices are strongly advised to choose a more recent one to update to.

If you still want to use Windows 10 and are not willing to upgrade to 11, you don’t have to do so right away. After all, Microsoft announced that the support for Windows 10 will go on until 2025.

Cumulative update name

KB5018419 

Improvements and fixes:

  • Addressed an issue that affects a task you schedule to run every two weeks. It runs every week instead. 
  • Addressed an issue that affects scheduled tasks. They might run years in the future if the next occurrence crosses a daylight-saving time change and you set the machine’s time zone to UTC.

Known issues

  • After installing KB5001342 or later, the Cluster Service might fail to start because a Cluster Network Driver is not found.

[DIRECT DOWNLOAD LINK]

Windows 10, version 1607

Windows 10, version 1607 has reached the end of service for all of its available editions. Update to the latest version of Windows 10 in order to keep your system protected.

Cumulative update name

KB5018411 

Improvements and fixes

  • Updated the start date for daylight saving time in Chile. It will start on September 11, 2022 instead of on September 4, 2022.
  • Addressed an issue that affects some virtual machines. They drop User Datagram Protocol (UDP) packets.
  • Introduced a Group Policy that enables and disables Microsoft HTML Application (MSHTA) files.
  • Addressed an issue that affects a primary Active Directory Federation Services (AD FS) node. It might fail to register or update its heartbeat. Because of this, the node is removed from the farm.
  • Addressed an issue that affects robocopy. This issue occurs when you use the backup option (/B) to migrate or synchronize data to Azure Files.
  • Addressed an issue that affects robocopy. This issue occurs when you use the backup option (/B) to address data loss and the source location contains tiered files with Azure File Sync or tiered files with Cloud Files.
  • Addressed an issue that affects a Server Message Block (SMB) multichannel connection. This issue might lead to stop error 13A or C2.

[DIRECT DOWNLOAD LINK]

This is pretty much what we are dealing with in terms of security updates for the month of October, as a part of the Patch Tuesday rollout.

Have you noticed any issues after downloading and installing these security updates for your version of the Windows operating system? Let us know in the comments section below.

The Connection Has Timed Out: How to Fix it on All Browsers

One of the most annoying things when trying to access your favorite website is a connection timed-out error, which can happen on all browsers.

It’s usually not your fault because the server of the site you want to access is probably not available at the moment, so sometimes, all you can do is wait.

But, sometimes, users cause connection timed-out errors by consciously or unconsciously changing Windows settings.

So, follow the instructions from this article to ensure you didn’t cause this error and find out how to solve the problem.

What does it mean when it says the connection has timed out?

When a connection timeout occurs on the client’s end, it often means that the client has lost contact with the server or is unable to connect to it for some other reason, such as a distant firewall blocking traffic or the web server going down.

What can cause a connection timeout?

Most web browsers seem to feature a few-minute timeout or keep-alive setting. This implies that the browser will immediately sever the connection if there is no network activity between it and the server hosting the web page.

Connection timed out can be a problematic error, but users reported the following errors as well:

  • Connection timed out WiFi – This error message can appear on any PC, but according to users, it’s most common while using a WiFi connection.
  • Your connection either timed out or was lost – This is a standard variation of this message, and it appears mostly if your Internet connection is unresponsive.
  • Connection timeout TCP – In some rare cases, this error can be caused by your TCP configuration. To fix this problem, you need to edit your TCP configuration manually.
  • Connection error timed out – This is another variation of this error, and you can fix it simply by using one of the solutions from this article.
  • The connection request timed out – This error message can sometimes appear, and your network configuration usually causes it. To fix it, you’ll need to adjust your network settings.
  • Connection attempt timed out – Sometimes, your connection can get timed out due to network issues. After diagnosing and fixing the issue, the problem should be resolved.
  • Connection server timed out – This problem usually appears if the server doesn’t respond in time, and according to users, the issue is generally caused by a network problem.
  • The connection has been reset, closed by the server – Sometimes, this error can occur simply because your connection was closed by the server. If your configuration isn’t correct, the server might reject your connection.
  • Connection timed out Firefox, Chrome – Users reported this problem on all major browsers – According to them, this issue appears mostly on Firefox and Chrome.

How do I fix the connection has timed out error?

1. Change the default timeout setting

  1. Go to Search, type regedit, and open Registry Editor.
    Connection timed out WiFi regedit
  2. Navigate to the following path: HKEY_CURRENT_USERSoftwareMicrosoftWindowsCurrentVersionInternet SettingsConnection timed out Firefox HKEY_CURRENT_USERSOFTWAREMicrosoftWindowsCurrentVersionInternet Settings
  3. In this subkey, add a DWORD, name it ReceiveTimeout, and set its value to <number of seconds>*100. For example, if you want the timeout duration to be 8 minutes, set the value of the ReceiveTimeout entry to 480000 (<480>*1000).
    Connection either timed out or was lost new dword
  4. Restart the computer.

Browsers usually have a timeout limit for the site’s server to respond, and they automatically show a connection timed-out warning if the server doesn’t respond.

So, if you think your favorite site’s server will respond in, let’s say, 20 minutes, and the timeout limit is set to 10, you’ll get the error.

There’s a way to change the default timeout limit in Windows, and it’s not that complicated. So all you have to do is to perform one Registry fix.

But since sites usually don’t take 20 minutes to load, this probably won’t solve the problem (at least you learned how to change your timeout limit, in case you need it). So, check out some of the following solutions.

2. Adjust LAN Settings

  1. Go to Search, type internet options, and open Internet Options.
    Connection timeout TCP internet options
  2. Go to the Connections tab and then to LAN Settings.
    Connection error timed out connections tab internet options
  3. Uncheck Automatically Detect Settings, and Use Proxy Server for your LAN.
    Connection request timed out local area network settings disable automatically detect settings
  4. Restart your computer.

Try to reaccess your favorite site after changing LAN Settings, and if the error shows again, try the next solution.

3. Edit Windows Hosts File

  1. Go to this location below:
    C:WindowsSystem32driversetc
  2. Find the host file, right-click on it, and open it with Notepad.
    the connection has timed out all browsers
  3. At the very bottom of the file, check if there are any sites listed
  4. If there are any sites listed, delete themConnection attempt timed out edit host files
  5. Save the host file and if you’re having a problem saving it, check out our article about getting permission for folders and files in Windows.

There’s a chance you’ve blocked a specific website in your Host’s file, so logically, you cannot access it now.

4. Renew DNS and IP

  1. Right-click on the Start Menu, and choose Windows Terminal (Admin).
    the connection has timed out all browsers
  2. Add the following commands, and press Enter after entering each one:
    ipconfig /flushdnsConnection server timed out flush dns
  3. Next, input the commands pressing Enter after each successive one
    ipconfig /registerdns ipconfig /release ipconfig /renew
  4. After the process is finished, restart your computer.

DNS cache could also cause a connection timed-out error, so we’ll clear the cache, just in case.

5. Disable problematic extensions

  1. In your browser, click the Menu icon in the top right corner.
  2. Choose More tools > Extensions.
    Connection has been reset extensions chrome
  3. A list of extensions will now appear. Disable all extensions by toggling off the switch below to the extension name.
    the connection has timed out all browsers
  4. After disabling all extensions, restart your browser and check if the problem still appears. If not, you’ll have to enable extensions one by one until you find the one causing this error to occur.

Many users use various extensions, but sometimes your extensions can interfere with your browser and cause Connection timed out a message to appear.

To fix the problem, you need to find and disable the problematic extension.

Users reported that the HTTPS Everywhere extension was the cause of this problem, so if you use it, be sure to disable it and check if that solves the problem.

If you use the problematic extension frequently, update it to the latest version and check if that solves the problem.

6. Reset your browser to default

  1. Launch the browser.
  2. Click on the menu icon and then click the Settings option.
    the connection has timed out all browsers
  3. On the left pane, click Reset and clean up, then click Restore settings to their original defaults on the right.
    the connection has timed out all browsers
  4. Finally, click the Reset Settings button.
    the connection has timed out all browsers

After that, your browser will be reset, and all your cookies, history, and extensions will be removed.

If you’re getting the Connection has timed out message, you might want to try resetting your browser settings to default, and this can be done in all browsers.

Sometimes this issue can appear due to your browser configuration, and to fix this problem, it’s advised to reset your browser to default.

7. Run your browser in Compatibility mode

  1. Locate your browser’s shortcut and right-click it. Choose Properties from the menu.
    Connection request timed out Mozilla properties
  2. When the Properties window opens, navigate to the Compatibility tab, check Run this program in compatibility mode, and select an older version of Windows.
  3. Now click on Apply and OK to save changes.
    Connection attempt timed out run this program in compatibility mode for windows 7

Sometimes you can fix Connection timed out message simply by running your browser in Compatibility mode.

After setting the compatibility mode, the problem should be resolved. However, remember that you might have to experience different settings to find the location that works for you.

You can also use Compatibility mode simply by right-clicking your browser and choosing Troubleshoot compatibility from the menu.

8. Remove Trusteer Rapport

According to users, the Trusteer Rapport application is a common cause for Connection timed-out messages.

This software offers an extra layer of security, but many users reported that it usually interferes with your browser, causing this error to appear.

To fix the issue, users are recommending thoroughly uninstalling Trusteer Rapport. After removing the application, the problem should be resolved entirely.

9. Make sure that you’re using the 64-bit version of your browser

Most PCs today support 64-bit architecture, and to achieve maximum performance, it’s recommended to use 64-bit applications on your PC.

Users reported the Connection timed out message while using a 32-bit version of Chrome on a 64-bit Windows.

We recommend removing your browser and installing the 64-bit version to fix the issue. After doing that, the problem should be resolved entirely.

10. Restart your router

According to users, you might be able to fix the problem simply by restarting your router.

To do that, press the power button on your router to turn it off. Then, you can disconnect all the cables from your router and leave it for a minute.

Now reconnect and press the power button to turn your router on again. After that, wait while your router starts and check if the problem is resolved.

This is a simple solution, and several users reported that it works, so feel free to try it out. However, in some cases, users found that the router was the issue, so you might consider getting a new one.

11. Make sure that your browser is up to date

  1. Open Google Chrome and click on the menu from the top-right side.
    the connection has timed out all browsers
  2. Click the Help option and choose About Google Chrome.
    the connection has timed out all browsers
  3. If your version is not up-to-date, click on the Update button. In our case, it is, hence the missing Update button.
    the connection has timed out all browsers

Sometimes the Connection timed out message can appear if your browser is out of date. This is because outdated software can have compatibility issues and bugs that can cause this and other errors.

To fix the problem, ensure your browser is up to date.

After you update the browser, check if the issue persists. If the problem still appears, you might want to download and install a beta version of your browser.

Several users reported that installing Google Canary fixed the problem, so be sure to try that.

Alternatively, you can try a browser we can’t recommend enough, making all the Chrome-induced aches a thing of the past.

Opera is a great alternative solution that offers smooth browsing and safety online.

⇒ Get Opera

12. Clear your browsing data

  1. Launch the Chrome browser.
  2. Paste the path below into the Address bar and click Enter.
    chrome://settings/clearBrowserData
  3. Ensure all the checkboxes are ticked, then click the Clear data button.
    the connection has timed out all browsers

After clearing your cache, restart your browser and check again. Sometimes, the Connection has timed-out message can appear due to an old cache, and removing the cache may fix it on all browsers.

13. Use Google’s DNS

  1. Press Windows key + R, enter ncpa.cpl, and click OK.
    Connection either timed out or was lost run ncpa.cpl
  2. Network Connections window will now appear. Right-click on your network connection and choose Properties from the menu.
    Connection timeout TCP open Ethernet properties
  3. Select Internet Protocol Version 4 (TPC/IPv4) and click on Properties.
    Connection error timed out select IPv4
  4. When the Properties window opens, select Use the following DNS server addresses. Now enter 8.8.8.8 as the Preferred DNS and 8.8.4.4 as the Alternate DNS server.
  5. Now, click OK to save changes.
    Connection request timed out use google's dns server address

After doing that, check if the error message still appears.

14. Disable IPv6

  1. Follow Steps 1 and 2 from the previous solution.
  2. When the Properties window opens, locate Internet Protocol Version 6 (TCP/IPv6) on the list and uncheck it.
  3. Now, click on OK to save changes.
    Connection attempt timed out disable IPv6
  4. After doing that, restart your PC to apply the changes.

Once your PC restarts, check if the problem still appears. If any new issues appear after disabling IPv6, be sure to enable it back again.

How do I fix the connection has timed out on Windows 11?

Fixing the connection has timed out error on Windows 11 is pretty straightforward. The causes are similar to Windows 10, and the solutions are basically the same.

Hence, go through the list of fixes in this guide and apply them accordingly on Windows 11.

Why am I getting the connection has timed out on all browsers?

If you are getting the connection timed out error on all browsers, it is likely due to problems with the server of the site you are trying to visit.

This is because browsers have a limited time for a website’s server to respond. So if the server does not answer, you will get the connection timed out error.

Also, it might be down to issues with your network. So, you need to make sure it is solid and active.

That’s about it; once again, performing all these solutions doesn’t mean you’ll be able to access the site because it’s often their error.

Note that you will be able to apply these solutions also if the network connection has timed out on AnyDesk, or if you get the error message connection timed out: no further information.

We also have a great guide on The remote device won’t accept the connection error, so don’t miss it.

If you have some questions, reach out in the comments below.

Hypervisor Error on Windows 10: How to Fix the BSOD

Some users have posted on Microsoft’s forum about a Hypervisor_Error BSOD (Blue Screen of Death) issue with a 0x00020001 stop code.

This BSOD error can arise for users utilizing Windows Sandbox or third-party virtual machine applications within Windows 10. For example, in one forum post, a user said:

I’ve seen this Hypervisor_Error BSOD three times in the past two weeks. Each time that it happens, I am running an AVD (Android virtual device); and I am working on a mobile application.

Read this thorough guide to explore the best ways to deal with this annoying issue.

What is Windows hypervisor platform Windows 10?

An extended user-mode API has been added to the Windows Hypervisor Platform, which allows third-party virtualization stacks and applications to create and manage partitions at the hypervisor level.

Moreover, you can configure memory mappings for the partition, and create and control the execution of virtual processors. These capabilities were previously unavailable.

What causes the hypervisor error?

  • Outdated drivers
  • Broken or corrupt system files
  • Outdated operating system
  • Outdated BIOS

How do I fix the Hypervisor error?

1. Update all your system drivers

1.1. Update driver manually

  1. Press the Windows key + X and select Device Manager.
    device manager
  2. Double-click the adapter you want to its drivers to expand it.
  3. Right-click the driver there and select Update driver.
    update hypervisor error
  4. Choose the Search automatically for drivers option.
    search auto
  5. Wait for the search to complete and install the available updates.

It might be because of outdated drivers if you are getting the Hypervisor error while trying to run games like Valorant. In this case, you need to update your graphics drivers and related ones.

2. Run DISM scan

  1. Open Command Prompt as administrator.
  2. Input the following command and press Enter: DISM.exe /Online /Cleanup-image /Restorehealth
    Deployment Image Servicing scan hypervisor error
  3. Wait for the Scan to complete and restart your PC.

Corrupt system files are among the chief causes of the Hypervisor error. You can effectively repair these files using the DISM tool.

3. Fix RAM issues with Windows Memory Diagnostic

  1. Press the Windows + S hotkey for the search utility.
  2. Type memory in the search box and click Windows Memory Diagnostic to open that utility’s window.windows memory
  3. Click the Restart now and check for problems (recommended) option within the Windows Memory Diagnostic utility.
    restart now
  4. After that, your desktop or laptop will restart, and the Windows Memory Diagnostic tool will check for RAM issues.

Sometimes, the Hypervisor error on Dell can be down to issues with your RAM. This can be fixed using the Windows tool. Also, if you are busy with an important task that can’t wait, you can select the second option and restart your PC when you are done.

4. Update Windows 10

  1. Press the Windows key + I to open the Settings app.
  2. Select the Update & Security option.
    update and
  3. Click the Check for updates button.
    check for hypervisor error
  4. Finally, click the Install now button after downloading the available updates.
    install now

If you are getting the Hypervisor error while using the Oracle VM VirtualBox on Windows 10, it might be because your OS is outdated. Updating Windows 10 and restarting your PC should do the trick here.

5. Run a check disk scan

  1. Press the Windows key + S and type cmd.
  2. Select Run as administrator under Command Prompt.
    cmd hypervisor error
  3. Input this chkdsk command and hit Enter: chkdsk C: /f /r /xChkdsk scan hypervisor error

The Hypervisor error can also occur due to bad hard disk sectors. Again, running the CHKDSK command helps to repair these sectors if they can still be saved.

6. Update your BIOS (Basic Input Output System)

BIOS hypervisor error

You’ll need to download the latest BIOS firmware from your motherboard manufacturer’s website to update an outdated BIOS.

There might also be a dedicated software utility available for updating your BIOS. Check out our How to update BIOS article for further details about updating the BIOS.

7. Restore Windows 10 to an earlier date

  1. Press the Windows key + R to open the Run utility.
  2. Type rstrui.exe and press Enter.
    rstrui
  3. Click the Choose a different restore point option and the Next button. 
    choose different hypervisor error
  4. Check the box for Show more restore points checkbox to open the complete list of dates.
    show more
  5. Choose a restore point date that predates the Hypervisor error BSOD issue.
  6. If you’re unsure which one to choose, select the oldest restore point. 
  7. Click Next to continue, and then select the Finish option.
    next

If all the solutions above fail to fix the Hypervisor error, you might need to restore your PC to a later date before the issue.

Note that any software installed after the selected restore point gets deleted. Click the Scan for affected programs button on the System Restore window to see what software a selected restore point removes.

How do I fix the Hypervisor error on Windows 11?

Corrupt system files and bad disk sectors usually cause the Hypervisor error on Windows 11. Also, the issue can be due to some incorrect or conflicting settings on your PC.

To fix it effectively, check our detailed guide on Hypervisor errors on Windows 11.

How do I know if Hypervisor is running?

  1. Press the Windows key + S and type msinfo32.exe.
  2. Select the msinfo32.exe option.
    msinfo hypervisor error
  3. If Hypervisor is running, you will see A hypervisor has been detected. Features required for Hyper-V will not be displayed in the details section.
    running

Those are likely fixes for the Hypervisor error in Windows 10. However, we hope you can fix the issue before exhausting the list.

If you need a list of the best BSoD fixers to repair blue screen errors effortlessly, check our guide for the best options that are currently available.

Feel free to let us know the solution that helped you fix the issue in the comments below.

Meta and Microsoft partner up for new VR experiences

With the release of the Meta Quest Pro VR headset. Microsoft and Meta have taken the opportunity to combine their strengths to bring VR experiences to businesses and consumers.  The Quest Pro is Meta’s first attempt at a high-end virtual reality device.

Microsoft sees the new partnership as an opportunity to bring virtual reality into meetings using Microsoft Teams.  The new collaboration experience will use the Quest and Quest 2 headsets alongside Meta’s avatar system for Teams and support for Meta’s Horizon Workroom.  Microsoft 365 Apps will also be available for Quest Pro and Quest devices allowing users to interact with content from their favorite productivity apps.  Users will also have the ability to stream a Windows Cloud PC with full custom apps and settings.  2D Microsoft apps will be available for the Quest as Progressive Web Apps. (PWA)

Microsoft is also looking to bring Xbox Cloud gaming to the Meta Quest Store allowing users the opportunity to stream hundreds of games to their headsets. Microsoft admits it won’t be a full virtual reality experience but it will allow users to project a large screen for gaming inside the headset.

The Meta Quest Pro will be available on October 25th for $1,499 including the Meta Quest Touch Pro, stylus tips, a partial light blocker, and a charging dock.  You can preorder the Meta Quest Pro now.

Via The Verge
Images via Microsoft

Can’t Access My Files in Windows 10: 7 Easy Fixes

Access Denied error in Windows 10 happens when you try to access or work with files. This can be frustrating, as it can make you lose essential data.

There are different variations of this error with various causes. However, it is not the most issue to fix, requiring some tweaks and alterations in some cases.

If you can’t access your files on Windows 10 and 11 due to various error messages, try the solutions listed in this guide based on what error message you get.

Why can’t I access my documents in Windows 10?

If you can’t access your files, the issue is usually accompanied by an error message. Below are some of the variations of this error and the causes:

  • Access Denied error: This error occurs when you don’t have the necessary permissions to open the file. You can fix this with one of our solutions.
  • You cannot access, change, save or delete files and folders: When a file is currently in use, you might see this error. One quick way to fix this is closing these programs.
  • You cannot open a file or folder after you install a new version of Windows: This is just another variation of the problem that you can fix with our solutions.
  • Folder access Denied Windows 11
  • Can’t open files after Windows 10 update

What do I do if I can’t open files on my computer?

1. Folder ownership changes

  1. Right-click the faulty and click Properties.
    properties cant access my files
  2. Click the Security tab at the top.
    security
  3. Now, click the Advanced button.
    advanced security
  4. From here, click the Change option before Owners.
    change cant access my files
  5. Type the name to give ownership and click Check Names.
    checknames
  6. Now, click the OK button.
  7. If you want this person to be the owner of the files and subfolders in this folder, select the Replace owner on the subcontainers and objects check box.
  8. Finally, click the OK button.
    replace cant access my files

If you upgraded Windows recently from an earlier version, some account information might also have changed, so you may not have ownership of some files or folders.

2. You don’t have the appropriate permissions

  1. Right-click the problematic file or folder and click Properties.
    properties cant access my files
  2. Click the Security tab.
    security
  3. Under Group or user names, tap or click your name to see your permissions.
    read and execute
  4. To open a file, you need to have Read permission.

To change the permissions of a file or folder, follow these steps.

  1. Log on as an administrator.
  2. Right-click the file or folder, and then select Properties.
  3. Click the Security.
    security
  4. Under Group or user names, click your name to see your permissions.
  5. Click the Edit button.
    edit
  6. Tap or click your name, and select the checkboxes for the permissions that you must have.
    grant read access
  7. Click OK.

Permissions determine whether or not you can access or change files and folders. So, for example, if you can’t access your files accompanied by an access denied error message even as an administrator, it might be because you don’t have the read permission for the file.

3. File or folder is encrypted

  1. Right-click the file or folder and click Properties.
    properties cant access my files
  2. Click the General tab.
    general tab cant access my files
  3. Click the Advanced button.
    advanced
  4. Check if the Encrypt contents to secure data check box is selected.
    encrypt
  5. To decrypt the folder, you need to have the certificate used to encrypt it. So, reach out to the person that encrypted it for the certificate or to decrypt it for you.

Encryption protects your files and folders from unauthorized access. If you don’t have the certificate used to encrypt the file or folder, you cannot open it.

4. File or folder may be corrupted

Files can become corrupted for various reasons, but the most common is when you have a file open when your computer crashes or loses power.

Unfortunately, you cannot repair most such files, so you should delete or restore the file from a backup copy.

To run a check on file integrity, we recommend a multi-functional repair tool that fixes most issues on your computer.

5. User profile may be corrupted

  1. Press the Windows key + I to open the Settings app.
  2. Select the Accounts option.
    accounts
  3. Choose Family & other users in the left pane.
    family
  4. Click the Add someone else to this computer option.
    add someone else cant access my files
  5. Now, click I don’t have this person’s sign-in information.
    i dont have
  6. Choose Add a user without a Microsoft account.
    add user
  7. Enter the Username and Password.
    enter username and
  8. Finally, click the Next button and complete the process.

Sometimes Windows may not correctly read your local user profile, which means you may lose access to your files and folders. In this case, you must create a new user profile, so you need a new local user account. This should fix the can’t access folders and files issue.

6. Recover files from Windows.old folder

  1. Open File Explorer and double-click the drive that Windows is installed on (typically, drive C).
  2. Select the Windows.old folder.
    windows old cant access my files
  3. Now, Double click the Users folder.
    users
  4. Double-click your user name.
  5. Open the folders that contain the files that you want to retrieve.
  6. Copy the files you want from each folder and paste them to a folder in the new Windows version, e.g. Windows 10.
  7. Repeat the last two steps for each user account on your computer.

After a recent upgrade, if you don’t reformat your hard disk, you can access old files from the Windows.old folder. To resolve this, you can use the Fix it link from Windows or manually fixes it yourself using the steps above.

7. Manually enable SMBv1

  1. Press the Windows key + I to open the Settings app.
  2. Choose the Apps option.
    apps cant access my files
  3. Select Programs and Features under the Related Settings.
    program and feature
  4. Click Turn Windows features on or off in the left pane of the new window.
    turn windows cant access my files
  5. Now, please scroll down and click the + sign next to SMB 1.0/CIFS File Sharing Support to expand it.
    smb sharing file
  6. Check the box for SMB 1.0/CIFS Server and click OK.
    smb server
  7. Lastly, restart your computer.

SMBv1 is a file-sharing protocol that allows you to access your files from your Windows computer. This will install the files necessary for the file sharing protocol needed for you to access your files.

How do I fix folder access denied on Windows 11?

If you are getting the folder access denied error message on Windows 11, you can fix it by making your account the admin if it is not.

Another fix is to change your permission to be able to read the folder. For detailed steps on these fixes and other potential solutions, check our dedicated article on how to fix the access denied error on Windows 11.

Why can’t I access the Documents and Settings folder?

If you can’t access the Documents and Settings folder, it is most likely that you don’t have the necessary permissions to read the folder.

Also, it might be because you need admin access to read the program. You can check the solutions in the earlier sections of this article to fix the issue.

The can’t access files error message can be time-wasting and frustrating. But it is an issue that is easy to fix, as we have shown in this guide.

If you need a dedicated guide to fix the access denied error message on Windows 10, check this guide for the easy steps.

Were you able to access files after using any of the above solutions? Let us know by leaving a comment in the section below.

8 Easy Ways to Fix Apps Freezing in Windows 10

Windows 10 brought a lot of improvements compared to Windows 8. However, Windows 10 isn’t without its flaws.

According to some users, apps freeze on Windows 10, which can be a big problem.

Especially if you prefer using Universal apps, fortunately for you, a few solutions can help you fix this problem.

Freezing can be annoying on any PC, and many users reported that their apps freeze on Windows 10. Speaking of freezing, users mentioned the following problems:

  • Apps freeze Windows 10 Explorer, Edge – According to users, this problem can appear in both File Explorer and Edge. If you have this problem, be sure to try some of our solutions.
  • App freeze Windows 10 Weather – Several users reported this problem while using the Weather app. To fix the problem, you can try resetting or reinstalling the application.
  • Apps freeze Windows 10 right-click – Sometimes, this problem can appear when you right-click. A corrupted user profile can cause this, but you can create a new user profile and check if that works.
  • Apps freeze Windows 10 on startup – Users reported that this problem could occur right on startup. If that’s the case, the issue is most likely a third-party application; to identify it; you need to perform a Clean boot.
  • Apps freeze Windows 10 Cortana – In some cases, Cortana can cause this problem on your PC. However, you might be able to solve this issue by changing your settings.

Why are my Windows 10 apps not responding?

  • You are running an old version of Windows.
  • Some critical system files are missing or corrupted.
  • There are outdated system drivers.
  • There are some memory-related problems.
  • Your PC is infected with a virus or malware.
  • Corrupt temporary files are causing the problems.

How do I fix apps freezing on Windows 10?

1. Update your Windows

  1. To fix the application freezes when printing in Windows 10 error, open the Settings app.
  2. Go to the Update & security section.
    Apps freeze Windows 10 on startup
  3. In the right pane, click the Check for updates button.
    Apps freeze Windows 10 Cortana

If any updates are available, Windows will install them automatically in the background. Once the updates are installed, check if the problem persists.

2. Switch to a local account temporary

  1. Press Win + I to open Settings.
  2. Select Accounts.
    Apps freeze Windows 10 on startup
  3. Go to Your account and click Sign in with a local account instead.
    Apps freeze Windows 10 Cortana
  4. You will be asked to enter your account password, and after you’ve entered it, you’ll have to set up a username and password for your new local account.
  5. With your local account enabled, go to Other accounts you use and remove your old version if it’s there.
  6. Restart your computer.
  7. Log in to Windows, and head to Settings.
  8. Select Accounts.
  9. Click on Other accounts and check if your old account is there. If it’s there, remove it once again. The all browsers freezing in Windows 10 issue will be fixed.

After that, you can try re-downloading apps and reset the Store:

  1. Go to Store and re-download the apps that were freezing.
  2. If apps aren’t downloading, close the Store, type WSReset.exe in the Start menu, and run it as administrator.
    Apps freeze Windows 10 Explorer
  3. Restart your computer.
  4. Go to Settings.
  5. Click on Accounts, add your Microsoft account and switch to it. The apps freeze on FireStick issue will be solved.

3. Reinstall your printer driver

  1. Right-click on the Start menu icon and choose Device Manager from the results list.
    Apps freeze Windows 10 Explorer
  2. If your printer isn’t connected to your PC, go to View and check Show hidden devices. If the printer is connected, you can skip this step.
    Apps freeze Windows 10 right click
  3. Locate your printer, right-click it and choose Uninstall device from the menu.
    App freeze Windows 10 Weather
  4. Click Uninstall again to confirm.
    Apps freeze Windows 10 right click

Once the driver is removed, restart your PC. Once the PC restarts, your printer driver should be installed automatically.

You can always download the driver manually from the manufacturer’s website if the printer doesn’t install itself automatically.

3.1 Update drivers automatically

Installing the incorrect driver version might result in irreversible harm to your computer. Therefore we recommend using a professional tool, such as a Outbyte Driver Updater, that handles the task for you.

Outbyte Driver Updater is ​​a specialized tool with a regularly updated database of over 18 million driver files. Scan your PC for all outdated drivers and safely update any that are available.

Outbyte Driver Updater

You need to keep your drivers updated at all times, and Outbyte Driver Updater will also make your PC faster!
Free trial Visit Website

4. Run PowerShell command from Command Prompt

  1. Right-click on the Start menu and select Command Prompt (Admin).
    App freeze Windows 10 Weather
  2. Type the below command and press Enter:
    • Get-AppXPackage -AllUsers | Foreach {Add-AppxPackage -DisableDevelopmentMode -Register "$($_.InstallLocation)AppXManifest.xml"} apps freeze wind 10

5. Reset the app to default

  1. Open the Settings app by pressing Win + I.
  2. Navigate to the Apps section.
    Apps freeze Windows 10 Edge
  3. Select the app that is freezing and choose Advanced options.
    App freeze Windows 10 Weather
  4. Now click the Reset button. Finally, click the Reset button once again to confirm.
    Apps freeze Windows 10 right click

After resetting the application to default, start it again and check if the problem still appears. We have to mention that this solution works only for Universal apps, so keep that in mind.

6. Check your antivirus

If apps freeze on your iPad as well as Windows 10 PC, the problem might be your antivirus. Antivirus can interfere with your system and cause this and many other errors.

To fix the problem, check your antivirus settings and ensure that the problematic application is added to the exclusion list.

After doing that, check if the problem persists. You might want to try changing your antivirus configuration if the issue is still present.

If that doesn’t help, you can temporarily disable your antivirus and check if that solves the issue.

As a last resort, you can try uninstalling your antivirus. If uninstalling the antivirus solves the problem, you should consider switching to a different antivirus solution.

Many antivirus tools are optimized not to interfere with Windows. If you’re looking for such an antivirus, we highly suggest using an optimized antivirus for low-end PCs that won’t interfere with your operating system.

7. Perform a Clean boot

  1. Press Win + R to open the Run dialogue.
  2. Type msconfig and click OK.
    App freeze Windows 10 Weather
  3. Go to the Services window and check Hide all Microsoft services. Click on Disable all.
    Apps freeze Windows 10 right click
  4. Go to the Startup tab and click on Open Task Manager.
    Apps freeze Windows 10 on startup
  5. A list of startup applications will appear. Please select the first item on the list, right-click it, and choose Disable from the menu. Repeat this step for all startup applications on the list.
    Apps freeze Windows 10 Cortana
  6. Go to the System Configuration window and click Apply and OK to save changes.
    Apps freeze Windows 10 Edge

Once your PC restarts, check if the problem is resolved. If the issue doesn’t appear anymore, the problem is related to one of the disabled apps or services.

To find the direct cause, you need to enable disabled applications individually or in groups.

Remember that you need to restart your PC every time after enabling a group of applications or services.

Once you find the problematic application, you can keep it disabled, remove it or update it and check if that solves the problem.

8. Uninstall the Nahimic app

Sometimes apps can freeze due to other third-party applications. For example, according to users, the Nahimic app caused other apps to freeze on their PC.

This application is related to the audio driver, and if you want to remove it, you just have to remove the audio driver and allow Windows to install the default driver instead.

Since Windows tends to automatically update your drivers, it might be a good idea to prevent Windows from updating this device. The apps freeze on Samsung Smart TV issue can also be solved this way.

There are several ways to do that, and for more information, we advise you to check our guides on how to prevent Windows from automatically installing drivers and how to prevent Windows Update install.

How do I fix apps freezing on Windows 11?

  • You can reset Microsoft Store using the wsreset command.
  • Update all the applications from the Microsoft Store.
  • Fix corrupt system files using the SFC Scan and DISM commands.
  • Run the Microsoft Store troubleshooter.
  • Perform a clean boot.
  • Use an alternate to the problematic app if the problem still exists.

What causes the PC to freeze randomly?

  • There is some software issue on your PC.
  • Your PC is infected with a virus or malware.
  • You are running an outdated version of Windows.
  • The apps aren’t up to date.
  • There is a third-party app triggering the freezing issue.
  • The graphics driver isn’t up to date.
  • Some important system files are missing or corrupt.
  • There isn’t enough free space in the folder where you have installed Windows OS.

That’s all, I hope at least some of these solutions helped you with the app problem in Windows 10. If you have any questions or comments, just reach for the comment section below.

Apple Music is now available on Xbox consoles

Apple music is now available on Xbox consoles. The new Xbox app launched today (October 12) for both Xbox One and Series X|S, taking its place alongside rival Spotify.

Apple recently announced that the service now has 100 million songs in its catalog, saying that around 20,000 new tracks are added per day. This is in comparison to Spotify’s “over 80 million tracks.”

Apple Music on Xbox will have all the features of its iPhone counterpart, including time-synced lyrics and the ability to search for tracks by lyrics, as well as the option to create personalized playlists. And of course, that curated library of over 100 million songs.

Via theapplepost.com. 

Featured image via digitalmusicnews.com. 

Microsoft announces expanded accessories list with new audio dock, presenter remote and Adaptive Accessories

While not technically branded Surface devices, this is the second year in a row Microsoft has introduced its Microsoft Accessories line alongside its flagship computers.

Last year we got Microsoft wired and Bluetooth headphones and mics, a USB-C powered Teams enabled speaker, and a pretty decent 1080p portable webcam.

Microsoft Adaptive Accessories

In 2022 Microsoft will expand the portfolio of accessories that can accompany its Surface devices to include dedicated Adaptive Accessories such as the Microsoft Adaptive Mouse, Hub, D-Pad button, Joystick, and Buttons and custom 3D printed Pen 2 and Microsoft Business Pen grips designed in partnership with Shapeways.

Attract_0183_RGB Microsoft Modern Accessories

Users can now customize an adaptable Microsoft Adaptive Mouse Tail and Thumb Support that comes in three adjustable components that include the Mouse core, the tail extension and the thumb support. The Adaptive Mouse can be connected wirelessly or through USB-C connection and is designed for ambidextrous use.

Contextual_0172_RGB - Microsoft Modern Accessories

Using the Microsoft Adaptive wireless hub, users can create custom inputs without a keyboard with the ability for the hub to connect to up to three devices that include Adaptive buttons, D-Pads or Joysticks wirelessly or through USB-C. If you happen to already have a custom setup for your accessibility needs, the Adaptive Hub can still connect to your current assistive technologies through five 3.5mm ports as well.

Some of the specifics for use of the new Adaptive Accessories include many of them requiring Windows 10 or 11 for support and USB-C charging, for anyone who finds physical battery replacement more comforting.

The Microsoft Adaptive Hub starts at $59.99 and $39.99 for individual Adaptive Button, Joystick and D-Pad. When it comes to the Mouse Core, customers will have to shell out $44.99 and $14.99 for the trail and thumb support bundles.

Microsoft Audio Dock

Moving onto the Microsoft Audio Dock, the company is now introducing a seemingly larger and more robust audio experience than the one it did with last year’s Teams enabled speaker.

Feature_05_RGB - Microsoft Modern Accessories Speaker

This time around, the Microsoft Audio Dock houses four different ports that include a full HDMI, 2 USB-C and 1 USB-A ports and a power pass-through to help power your connected computer throughout the day for $249.99.

Feature_08_RGB - Microsoft Modern Speaker

Similar to the Microsoft Modern Speaker from last year, this Audio Dock will have a conference focus approach to communications and features that include integrated mute controls with status lights, multi-dimensional sound through OmniSonic speaker placements and a 15-watt woofer paired with 5-watt tweeters, as well as being Microsoft Teams Certified of course.

Feature_07_RGB - Microsoft Modern Speaker

Also, like last year’s more compact Microsoft audio device, there are physical buttons to help quickly access volume controls as well as jump in and out of Teams conference meetings.

Unfortunately, there is no wireless connectivity to the Audio Dock and users will still need to connect through USB-C to their PC, but as a substantially larger, desktop-oriented device, its connectivity options make a bit more sense this year.

Microsoft Presenter+

Microsoft is also putting its own spin on the old school laser pointer with the Microsoft Presenter+.

The four-button thumb controlled tool can help guide co-workers, partners and executives through presentations, slide shows and reports both in-person and online through integrated app controls, programmable buttons and reassuring vibrating feedback to help inform the user when they are on and off mute or raise or lower their hands during meetings.

Contextual_0426_RGB - Microsoft Modern Presnter+

The Microsoft Presenter+ is 93.86 x 29.5 x 9.4 mm (3.7 x 1.16 x .35 in) and weighs 25.6g .90oz with batteries included, it also comes in a single matte black color, makes use of Bluetooth Low Energy 5.1 to help its 6-day battery life projections and comes with its own USB-A powered charging dock for $79.99.

Contextual_0275_RGB - Microsoft Modern Presnter+

When using the Presenter+ in person, the slim and lightweight pointer can reach up to 32 feet/10-meter worth of wireless range and will work with PowerPoint, Prezi and Keynote apps out of the box.

How to Invert Colors on Windows 10 [And Create a Shortcut]

Windows 11 is a great operating system, but some users reported inverted colors on their screens. This is an unusual issue, and in today’s article, we’ll show you how to fix it properly.

This can be a huge problem, mainly because it is not pretty viewing your monitor in colors you are not used to. In addition, it sometimes feels like being forced to a dark mode even though you have not configured such a setting.

There are a few known triggers; we will cover these and give you the best resolutions in this article.

Why is my PC color inverted?

There are a few known reasons for this Windows problem. First, many users have attributed it to outdated or corrupted graphics drivers. In this case, an update or reinstallation is needed.

Additionally, it may be triggered by wrongly configured system settings. You must find what was improperly configured and restore it to its default.

Why do people use invert colors?

People who have particular vision impairments will find that this function is quite helpful. There are certain people who are extremely sensitive to light, for instance, and in most cases, switching the color scheme will have the effect of making the majority of the screen darker.

Additionally, it alters particular hues, which may provide difficulties for individuals who are colorblind.

Inverted colors can be a big problem on your PC, and speaking of display issues and colors, here are some similar problems that users reported:

  • Inverted color scheme Windows 10 – This issue can appear if a high contrast theme is enabled. To fix the problem, check your Ease of Access settings and ensure that high contrast is disabled.
  • Invert colors Windows 10 hotkey, keyboard shortcut – Sometimes, you can fix the problems with inverted colors simply by using a single keyboard shortcut. That shortcut is usually left Alt + left Shift + Print Screen, so feel free to try it.
  • Inverted colors on Dell laptop, HP laptop – This issue can affect laptops as well, and if you encounter this problem, be sure to try some of our solutions.

So, let us now discuss what you can do when Windows 11 colors are messed up.

How do I change my invert colors back to normal?

  1. Reinstall your graphics card drivers
  2. Use the Magnifier tool
  3. Change Ease of Access settings
  4. Disable Visual notifications for sounds feature
  5. Check your graphics card settings
  6. Check your registry
  7. Try running Windows in Safe Mode
  8. Perform a System Restore
  9. Inspect your hardware

1. Reinstall your graphics card drivers

  1. Press Windows Key + X.
  2. Choose Device Manager from the list.
    inverted colors device manager win + x menu
  3. Now you need to find your graphics card driver.
  4. Once you find it, right-click it and choose Uninstall device from the menu.
    device manager uninstall device inverted colors
  5. If it’s available, check the Remove driver software for this device.
  6. Now click on Uninstall to confirm.
    uninstall dialog inverted colors on Windows 10
  7. After you remove the driver, click Scan for hardware changes icon to install the default driver.
    hardware changes icon inverted colors on Windows 10

By doing so, you’ll install the current driver and switch back to the default one.

If removing the driver solves the problem, it’s advised that you update it to the latest version. To do that, visit your graphics card manufacturer’s website and download the latest driver for your model.

If you don’t know how to do that properly, you can always use third-party tools such as updating all your drivers automatically with just a couple of clicks.

Alternatively, you can use third-party software such as Outbyte Driver Updater to remove the driver and all associated files and registry entries.

It’s a portable tool with a very easy-to-use interface. Once the system scan is completed, Outbyte Driver Updater will check your drivers with the ones from its built-in database to fix them.

Outbyte Driver Updater

An automatic solution to keep your PC in check by updating the drivers with the latest version.
Free Trial Download now

2. Use the Magnifier tool

  1. Press Windows Key + Esc key to open the Magnifier tool.
  2. Now press Ctrl + Alt + I, and your invert all the colors on the screen.

If you’re having issues with inverted colors on your PC, it’s possible that the problem was caused by a Magnifier tool.

This built-in tool allows you to zoom certain parts of the screen to see them better.

However, the Magnifier tool can also invert your colors, and the steps above will help you how to reverse the colors using this tool.

3. Change Ease of Access settings

  1. Open the Settings app. You can do that quickly by using Windows Key + I shortcut.
  2. Navigate to the Ease of Access section.
    ease of access settings app inverted colors on Windows 10
  3. From the menu on the left select High contrast.
  4. In the right pane, disable the Turn on high contrast option.
    high contrast inverted colors

If this option is already disabled, you can use Left Alt + Left Shift + Print Screen to turn off high contrast quickly.

Alternatively, you can set the high contrast theme to None and check if that solves the problem.

4. Disable Visual notifications for sounds feature

  1. Press Windows Key + S and enter control panel.
  2. Select Control Panel from the list.
    control panel inverted colors how to fix
  3. Navigate to Ease of Access Center when Control Panel opens.
    ease of access center inverted colors
  4. Select Use text or visual alternatives for sounds from the list.
    disable visual alternatives for sounds inverted colors
  5. Disable Turn on visual notifications for sounds (Sound Sentry), and click Apply and OK to save changes.
    visual alternatives disable inverted colors

After making these changes, your colors shouldn’t be inverted, and the issue will be resolved.

5. Check your graphics card settings

According to users, sometimes inverted colors can appear on your PC due to your graphics card settings.

Almost all graphics cards have software that allows you to configure all sorts of graphics-related settings.

You may have the Stereoscopic 3D feature enabled if your colors are inverted.

To disable it, open Nvidia Control Panel or Catalyst Control Center and look for this feature. Once you find this feature, please disable it.

6. Check your registry

  1. Press Windows Key + R and enter regedit.
  2. Press Enter or click OK.
    run dialog regedit inverted colors on Windows 10
  3. When Registry Editor opens, navigate to the path below.
    Computer\HKEY_CURRENT_USER\Software\Microsoft\ScreenMagnifier
  4. In the right pane, double-click the Invert DWORD to open its properties.
  5. Once the properties window opens, ensure that the Value data is set to 0.
  6. Click OK to save changes.

7. Try running Windows in Safe Mode

  1. Open the Settings app and navigate to the Update & Security section.
  2. Select Recovery from the menu on the left; click the Restart now button.
    restart button inverted colors
  3. Select Troubleshoot.
  4. Click on Advanced options.
  5. Then choose Startup Settings, and click the Restart button.
  6. Finally, select Safe Mode with Networking by pressing the appropriate keyboard key.

Once you start Windows in Safe Mode, check if the problem is still there. If the problem doesn’t appear in Safe Mode, your settings or drivers are causing the issue.

8. Perform a System Restore

  1. Press Windows Key + S and enter system restore.
  2. Now, choose to Create a restore point from the list of results.
    create restore point search results inverted colors on Windows 10
  3. Select the System Restore button.
    system restore button inverted colors on Windows 10
  4. Once the System Restore window opens, click the Next button to proceed.
    system restore start inverted colors on Windows 10
  5. Now check the Show more restore points option if it’s available.
  6. Choose the restore point you want to revert to and click the Next button.
    restore point inverted colors
  7. Finally, follow the instructions on the screen to complete the process.

Once you complete the restoration process, check if the problem is still there.

9. Inspect your hardware

Sometimes inverted colors can appear due to hardware issues. To check if your hardware is the problem, pay close attention if your colors are inverted during the boot sequence or in BIOS.

If this problem appears outside of Windows, it’s almost certain that there’s a problem with your hardware.

To troubleshoot the issue, ensure your cable is tightly connected to your monitor and PC.

Also, you might want to check your monitor and ensure it’s not faulty. Finally, you can connect your PC to your TV or any other display.

If the problem isn’t related to the monitor, your graphics card may be faulty.

Inverted colors are one of the symptoms of a faulty graphics card, so be sure that you check if your graphics card is seated correctly on your PC.

If you have an extra slot, you can try moving it to a different slot on your PC and check if that helps.

How do I fix inverted colors on Windows 11?

Above, we have shown fixes that apply to Windows 11 PCs. However, you must know that Windows 11 and 11 are very similar, and the triggers for this error on Windows 11 apply to the latest OS.

Hence, all the fixes mentioned above are relevant if you encounter a problem with the latest OS. However, you may experience slight UI differences on rare occasions, but you should generally apply the exact solutions.

How do I invert the colors on my computer?

  1. Click the Start menu, search for Turn color filter, and select the top result.
  2. Toggle on Turn color filter, then select the Inverted option.

Inverted colors can cause many problems, but in most cases, this issue is caused by your settings or your drivers.

However, if our solutions didn’t fix your problem, the hardware issue may be causing this problem.

Also, we encourage you to try any solutions that feel most appropriate to your case since we have not written these fixes in any particular order.

Lastly, we are curious about what worked for you; please tell us in the comments section.

Windows Key Not Working on My PC: 8 Easy Ways to Fix It

Windows key has multiple functionalities, and both basic and advanced users use it. It holds many keyboard shortcuts that make tasks easier on PC.

Unfortunately, a few users reported that the key is not working on Windows 10 and 11. This is without disabling the Windows key and with no noticeable fault.

In this guide, we will show you quick ways to fix this problem and get back the dynamism and ease of use offered by the Windows key.

Why won’t my Windows key work on my keyboard?

There are different Windows key-related issues with varying causes, as reported by users. Below are some of the popular ones:

  • Windows key + Tab not working Windows 10: Several users reported that the Windows key + Tab shortcut isn’t working on their PC. This isn’t a big problem, and you can fix it by using one of our solutions.
  • Windows key not working after update: Sometimes, an update can cause the Windows key not working issue. If that’s the case, you must find and remove the problematic update from your PC.
  • Windows key not working Razer Blade: Several users reported this problem while using the Razer Blade keyboard. This problem can appear if you have the Game Mode feature on your keyboard.
  • Windows key + R, windows key + S, windows key + Q not working: Sometimes, various keyboard shortcuts do not work due to issues with the Windows key. This can be a big problem, mainly if you use keyboard shortcuts.
  • Windows key not working in Remote Desktop: Remote desktop is a valuable feature of Windows that allows you to access other computers. Even though this feature is excellent, many users reported that the Windows key isn’t working while using Remote Desktop.
  • Windows key shortcuts not working: Many users reported that all Windows key shortcuts on their PC aren’t working. This can be a big problem, but you should be able to fix it using our solutions.
  • Windows not working: Many users reported that their Windows key is disabled. In most cases, your Windows key will become disabled if you enable Game Mode on your keyboard.
  • Windows key not working after hardware change: Many users reported the issue after adding or removing a piece of hardware to the computer.

Here are some of the devices you can encounter the error with:

  • Windows key not working Asus ROG
  • Windows key not working Alienware
  • Windows key not working on Corsair keyboard
  • Windows key not working HP OMEN

How do I fix my Windows key not working?

1. Use PowerShell

  1. Right-click on the Windows icon and select Windows PowerShell (Admin).
    powershell admin windows key not working
  2. Enter the command below and hit Enter: Get-AppXPackage -AllUsers | Foreach {Add-AppxPackage -DisableDevelopmentMode -Register "$($_.InstallLocation) AppXManifest.xml"}powershell
  3. Wait for the command to finish running.

A few users reported that they fixed the Windows key problem simply by using one PowerShell command.

We have to mention that PowerShell commands can sometimes have unpredictable results on your Windows 10 installation.

Therefore it might be better to create a new System Restore point and use it to restore your Windows 10 if anything goes wrong after using PowerShell.

2. Update your keyboard’s drivers

  1. Right-click on Start and choose Device Manager from the menu.
    device manager
  2. Expand the Keyboards option by clicking the arrow on the left side.
    keyboards
  3. Right-click on your driver and select Update driver.
    update driver
  4. Finish with Search automatically for drivers.
    search windows key not working

According to users, the Windows key might stop working if there is a problem with your drivers, but you should be able to fix it simply by updating your drivers.

Having an assistant whenever this happens saves time and eases the process of installing the right driver, avoiding errors, including backup for your driver files in a database.

In this context, we recommend Outbyte Driver Updater. The scans, reports, and updates are the core of this useful application. Manufacturers’ drivers are different from generic drivers, but it can find and update/fix them if there are any missing drivers or damaged ones.

Outbyte Driver Updater

A safer and faster option for keeping your drivers up-to-date and boosting your PC health.
Free Trial Download now

3. Disable Gaming mode

If you have a gaming keyboard, you probably have support for Gaming mode on your keyboard. Gaming mode is designed to disable specific keys during gameplay sessions that can interfere with your game.

For example, it can happen that you accidentally press the Windows key during a game, and in most cases, that will minimize your game and open the Start Menu.

This can be a problem if you’re playing an online game with your friends, and this is why gaming keyboards have support for Gaming mode.

Many users aren’t aware that their keyboard supports Gaming mode and sometimes turn it on accidentally when cleaning their keyboard.

If the Windows key is not working on your keyboard when playing a game or not, be sure to check if Gaming mode is turned on.

Many keyboards have a Gaming mode switch, so be sure the switch isn’t set to Gaming mode.

This switch is usually located above F2 and F3 buttons and has a joystick image next to it, so be sure to check your keyboard for this switch and use it to turn off Gaming mode.

Some keyboards, such as Apex M800, have a hidden Gaming mode, and to disable it, you need to hold the SteelSeries button and press the Windows key to turn off Gaming mode.

As you can see, different keyboards use different methods to disable Gaming mode, so check your keyboard’s instruction manual to see how to disable Gaming mode properly.

4. Check for the Win Lock button on your keyboard

While some keyboards have a Gaming mode switch, others have a Win Lock button.

The win Lock button is designed to disable the Windows key on your keyboard, so be sure to check if your keyboard has this key available.

According to users, this key should be located next to the right Ctrl button on your keyboard, so be sure to look for it. After you find the Win Lock button, press it, and your Windows key should start working again.

5. Create a new user account

  1. Click the Start button and select Settings.
  2. Choose the Accounts option.
    accounts
  3. Click Family & other users in the left pane.
    family windows key not working
  4. Now, click the Add someone else to this PC button.
    add someone else
  5. Choose I don’t have this person’s sign-in information.
    i dont have
  6. Now select Add a user without a Microsoft account.
    add user
  7. Enter the new user account name and click Next to complete the process.
    next button windows key not working

After creating a new user account, sign out of your account and switch to a new one.

Check if the Windows key works without any problems. If there are no problems with the Windows key on a new account, the software is causing this issue.

Now you need to move your files to a new account and use it as your main account.

6. Revert any changes to Windows services and packages

Windows 10 comes with a DISM tool that lets you create Windows 10 images that allow you to restore Windows 10 to an earlier state quickly.

Many people tend to use these images to reinstall their Windows 10 quickly, but we have to mention that DISM is a powerful tool that allows you to change which components of Windows 10 will be installed.

A few users reported that changing DISM packages caused the problem with the Windows key on their PC, so if you made any changes to DISM packages on your PC, be sure to remove them to fix this problem.

7. Perform an SFC scan

  1. Right-click on Start and select Task Manager.
    task manager
  2. Click the File tab at the top, followed by Run new task.
    run new task
  3. When Create new task window opens, enter cmd and check the box to Create this task with administrative privileges.
    cmd  windows key not working
  4. Now, hit Enter.
  5. Finally, type the command below and press Enter. sfc /scannowsfc scannow
  6. Restart your PC after the scan is completed.

Your Windows 10 installation can sometimes become corrupted, and that can cause certain features of Windows to stop working. If the Windows key is not working on your PC, you might want to perform an SFC scan.

When your PC restarts, check if the problem is resolved. If the issue persists, start Command Prompt again and run the command below: Dism /Online /Cleanup-Image /RestoreHealth

dism

After the process is finished, check if the problem is resolved.

8. Check for malware

  1. Click the Search icon on your taskbar and type virus.
  2. Select the Virus & threat protection option.
    virus windows key not working
  3. Choose Scan options.
    scan options
  4. Finally, click the Scan now button.
    scan now windows key not working

Finally, the Windows key not working or opening Start Menu can be caused by the presence of a virus on your PC. Performing a virus scan should help eliminate the problem and restore normalcy on your PC.

To perform a deeper scan and remove even the most hidden malware, we recommend using trusted antivirus software in ESET NOD32.

ESET NO32 is a top-notch software built with cutting-edge technology to protect your digital life. It detects and eliminates viruses quickly before they can affect your PC.

What’s more, it is not just limited to online protection, as it protects your system from viruses from other devices and apps. This software just about ensures your security at all times.

⇒ Get ESET NOD32

How do I fix the Windows key not working in Windows 11?

  1. Click the Start icon and select Settings.
  2. Choose Accessibility in the left pane.
  3. Now, select Keyboard.
    accessibility keyboard
  4. Now, toggle the switch for Filter Keys backwards to turn it off.
    filter keys windows key not working

The Windows key not working on Windows 11 issue is similar to Windows 10. Hence, you use any solutions in this guide to tackle the problem.

Also, we have a dedicated guide for Windows key not working in Windows 11. So, feel free to check it out.

How do I know if my Windows key is working?

To know if your Windows key is working, it should open the Start Menu by default when you press it. Also, the various shortcuts, like Windows key + S for search and Windows + R for run, should open these functions.

If all these do not work as designed, your Windows key might face some problems.

Windows key has multiple functionalities, and advanced users often use it. If the Windows key isn’t working on Windows 10, check if Gaming mode is turned on.

If Gaming mode isn’t the problem, feel free to try any other solution from this article.

Are you facing other issues like @ key not working or the Backspace key not working? Then check our detailed guides to fix them easily.

Feel free to let us know the solution that helped you solve this issue in the comments below.

5 Ways to Fix Logilda.dll Error/not Found on Windows 10

The logilda.dll error is an error message that can pop up on desktops and laptops with Logitech mice when Windows starts up.

The error message states explicitly: There was a problem starting C:\Windows\System32\LogiLDA.dll. The specified module could not be found.

Some users have stated that the error message started to pop up after upgrading their Windows platforms.

This article will show you the easiest ways to resolve this problem.

What is LogiLDA dll used for?

This is a Windows Dynamic Link Library (DLL) file. It’s a valid process file and a part of the Logitech Download Assistant program. 

You will be able to find it in the following path: 
C:/Windows/System32

In case you didn’t know, the Logilda.dll is intended to check for recent updates to any Logitech drivers for Logitech gear each time Windows boots, and hardware like a keyboard, mouse, video cameras, etc. depend on it.

Why does the logilda.dll not found message appear?

If this dll cannot be found, it may have been improperly installed or may not be present in the application.

In a lot of instances, a recent Windows update could have made the software start looking for this file in the incorrect place.

You may need to download the File again if it’s corrupted, which is another possibility.

Logilda.dll error after Windows Update

  1. Open the Settings app and navigate to the Windows Update section.
  2. Select Update history and click on Uninstall updates.
  3. Finally, locate the update you want to remove and click on Uninstall.

Windows updates are essential and help keep your OS in pristine condition. However, it is not a perfect system so glitches can occur occasionally.

We recommend you use a professional Windows Update repair tool to address these potential issues and enjoy the Windows experience to its full potential.

The logilda.dll error primarily pertains to the Logitech Download Assistant, and these are some potential fixes for it.

How do I fix Windows system32 LogiLDA DLL?

  1. Disable LogiLDA from the Windows Startup with Task Manager
  2. Use a third-party app
  3. Erase the Logitech Download Assistant Key from the Registry
  4. Uninstall the Logitech SetPoint software
  5. Reinstall the Logitech Driver

1. Disable LogiLDA from the Windows Startup with Task Manager

  1. Press the Windows key + R hotkey.
  2. Enter taskmgr in Run’s text box, and press the OK button.
    logilda.dll error
  3. Click the Startup tab on the Task Manager window, select LogiLDA on the list of startup items, and press the Disable button.
  4. Disable other Logitech startup items if there are any. The logilda.dll missing issue will be fixed afterward.

To fix the logilda.dll error, you’ll usually need to at least disable LogiLDA (Logitech Download Assistant) from Windows startup.

2. Use a third-party app

If all kinds of errors plague your system, the cause might be problematic files on your PC which need to be addressed.

Thankfully, you can install a third-party system restoration app that automatically scans your device for corrupted files, data, and malware; then, it will remove or repair them.

3. Erase the Logitech Download Assistant Key from the Registry

3.1 Using the registry

  1. Open Run with the Windows Key + R keyboard shortcut.
  2. Enter regedit in Run’s text box, and press the OK button.
    logilda.dll error
  3. Then enter the following path in the Registry Editor’s path text box and hit Enter:
    Computer\HKEY_LOCAL_MACHINE\SOFTWARE\Microsoft\Windows\CurrentVersion\Run
  4. Right-click the Logitech Download Assistant key and select Delete.

To ensure the Logitech Download Assistant is entirely removed from the Windows startup, erase the Logitech registry key.

Note: changing and deleting files through the Registry Edit is risky and requires some background knowledge, so you must be careful.

Alternatively, you can erase the Logitech Download Assistant registry key with a batch file.

3.2 Using a batch file

  1. Open Notepad.
  2. Copy the batch file below.

    echo Startecho #

    echo ######################## Default dirctory for x86 x64 ########################

    echo #

    echo this command is default system32 directory for x86 OS or x64 OS

    cd %windir% & cd system32

    reg delete "HKCUSoftwareMicrosoftWindowsCurrentVersionRun" /v "Logitech Download Assistant" /f

    reg delete "HKLMSOFTWAREMicrosoftWindowsCurrentVersionRun" /v "Logitech Download Assistant" /f

    echo #

    echo ######################## Change the dirctory for x64 ########################

    echo #

    echo this command is x86 application's registry for x64 OS

    cd %windir% & cd syswow64

    reg delete "HKCUSoftwareMicrosoftWindowsCurrentVersionRun" /v "Logitech Download Assistant" /f

    reg delete "HKLMSOFTWAREMicrosoftWindowsCurrentVersionRun" /v "Logitech Download Assistant" /f

    echo End

  3. Paste that code into Notepad by pressing the Ctrl + V hotkey.

  4. Click File, and select Save as.
  5. Select All Files from the Save as type drop-down menu.
    logilda.dll error
  6. Enter Logitech.bat as the batch file title.
  7. Select to save the batch file to the desktop, and press the Save button.
  8. Then right-click the Logitech.bat File on the desktop and select Run as administrator.

4. Uninstall the Logitech SetPoint software

  1. Enter appwiz.cpl in Run, and click OK.
    logilda.dll error
  2. Enter the keyword Logitech SetPoint in the search box.
  3. Select the listed SetPoint software, and press the Uninstall button.
  4. Press the Yes button to confirm further.
  5. Restart the Windows OS.
  6. Navigate to the SetPoint software website and click on the Download Now button.
  7. Open SetPoint‘s installer to add the software to Windows.

Removing Logitech Download Assistant from Windows startup will usually fix the logilda.dll error.

However, if not, then reinstalling the Logitech SetPoint software with the latest version might also fix the logilda.dll error.

5. Reinstall the Logitech driver

5.1 Using the Device Manager

  1. Enter devmgmt.msc in Run’s text box and hit Enter.
    logilda.dll error
  2. Double-click Mice and other pointing devices to expand the listed devices.
  3. Then right-click the Logitech HID mouse and select Uninstall device.
  4. Windows will then reinstall the default logilda.dll driver for the mouse when you restart your laptop or desktop.

Another alternative resolution for the Logilda.dll error is reinstalling the default Logitech mouse driver.

If your Windows cannot find and download new drivers, you may resolve it in a few clicks.

5.2 Update drivers automatically

If you won’t want to spend a lot of time searching for the appropriate drivers, if you think it is tedious or don’t have the necessary knowledge, know that you can install a third-party driver installer.

Not only will the software help you quickly get the latest compatible version of your drivers, but it will also do it automatically and periodically, so you won’t have to worry about it anymore.

⇒ Get Outbyte Driver Updater

How do I fix the logilda.dll error on Windows 11?

Since Windows 10 and 11 are very similar, you will find that all the solutions we discussed will work on both operating systems.

There are rare occasions where you will have a slightly different UI. But typically, it is the same processes and steps.

Does Logitech need a download assistant?

The Logitech Download Assistant is a decent tool for maintaining the functionality and updates of Logitech products.

You need it if your Logitech products remain fresh and correctly operational. However, while we do not recommend disabling or uninstalling it, you may disable LogiLDA from startup, so your computer startup faster.

Those are a few fixes that will obliterate the logilda.dll error message window and allow you to use your PC the way you need.

Please note that you can keep your system performing correctly by updating your drivers regularly. If you have any more questions, don’t hesitate to leave them in the comments section below.

Error Printing in Windows 10: How to Fix it in 4 Steps

Some users have posted in Microsoft forums about a status reading Error Printing in Windows 11 that they see in the print queue window.

One user stated the following situation:

Whenever I try and print a document, from WordPad, Adobe Reader, Word, whatever, it just appears in the print queue with the status as ‘Error – Printing.’” Users can’t print when the “Error Printing” error arises.

Let’s check some more related issues that our readers reported in connection to this situation and then find out how to fix them as soon as possible. Follow along!

Why does my printer keep saying error printing?

In most cases, the Error Printing notice is brought on by a connection that is too loose or by printer drivers that are too old. There is a possibility that an error code may be shown alongside this dialog box when it displays, but there is also a possibility that there’ll be no such code.

It is conceivable that your Printer Spool service became overwhelmed with corrupt data and shut down, stopped operating normally, or did not start up. Corrupt data in the spool or the printing tray caused this service to cease working.

Where and when can this error occur, and what does it look like?

There are plenty of printer errors that arise daily. However, the following are the most common ones reported by our readers that we will address below:

  • Windows 10 printing network printer error – One clear indicator of this issue is when Windows cannot connect to the printer.
  • Status error printing – It’s possible that there’s something wrong with the printer itself.
  • Printer in error state – If there is already a default printer specified and configured, or if Windows does not wish to create the new printer at all, this error message will appear.
  • Error printing wireless printer – Changing the port settings is the first thing you should try to do if you want to bring your printer out of the error status.
  • Printer error 0x00000709 in Windows 10 – When upgrading to Windows 10 from an earlier version, one of the most significant issues that might develop is the incompatibility of devices.
  • Printer keeps saying error printing – The process of printing is much more involved than you may believe, and it involves a number of different components.
  • Error printing Windows 10 HP/Brother/Canon/Epson – After completing any outstanding obligations, you should restart the printer spool service to get everything back on track.
  • Error printing Windows 10/11/7 – If your printer works well on a different computer, the issue is probably with the USB drivers on the computer you’re using.
  • Printing issues with Windows 10 update – There are instances in which the drivers from older versions are not always compatible with Windows 10.
  • Error printing PDF Windows 10 – It can arise from having the printer’s settings configured incorrectly.
  • Error printing restarting Windows 10 – Launch the Printer Troubleshooter and let it do its thing so you can figure out what went wrong with your printer.

First, you should try resetting the printer. Thus, turn the printer off, then unplug it. Plug the printer back in, and turn it back on.

Resetting the printer is a simple resolution, but it might still not be enough to resolve the issue for some users. If the problem persists, move to the solutions below.

How do I fix printer problems in Windows 11?

1. Update your drivers

Outdated drivers have always caused problems as all software and hardware are optimized for the latest driver versions. Windows rarely updates each driver you have individually, so you may have to fix the problem yourself.

Instead of searching for each driver manually, you can use automated tools for this process. It’s much faster and more secure because it uses its own driver database from which it installs updates. Afterward, the Windows 11 USB printer not detected issue will be fixed.

2. Open the Printer Troubleshooter

  1. To fix 0x00000bc4 printer error in Windows 11, access the Settings app by pressing Windows + I , and then go to the Update & Security section.update-security nmi hardware failure windows 10
  2. Choose Troubleshoot from the menu on the left, followed by Additional troubleshooters on the right panel.troubleshoot-aditional can't remove bluetooth device windows 10
  3. Next, click the Printer troubleshooter and press Run the troubleshooter.
  4. Choose the Printer that needs fixing, and click Next to go through the troubleshooter.Printer troubleshooter error printing message windows 10

3. Clear the Print Spool Folder

  1. Users have also said they’ve fixed the Error Printing issue by clearing the Print Spooler folder. To do so, press the Windows key + R, which opens Run. Then enter services.msc in the open box, and click the OK button.services-ok error printing windows 10
  2. Next, double-click the Print Spooler service to open the Properties window.Print Spooler settings error printing message windows 10
  3. Press the Stop button to turn off the service. Then select the OK button.
  4. Press the Windows + E keyboard shortcut, then input the following location in File Explorer’s address bar, and press the Enter key: %WINDIR%\System32\Spool\Printersspool-printers error printing windows 10
  5. Press the Ctrl + A keyboard shortcut to select all the files within the Printers folder. Then right-click anywhere in the window and select the Delete button.
  6. Open the Services window again, as shown in the first step.
  7. Double-click Print Spooler to open its window, and press the Start button. Select the OK option to close the window and save the changes made. The Windows 11 Printer Offline issue will be fixed.start-ok-printer error printing windows 10

4. Check the Printer’s Port Settings

  1. Press Windows and input control inside the search bar. Select Control Panel from the list.control-panel-serarch-w10 opera not responding
  2. Click Hardware and sound, followed by Devices and Printers.devices-printers error printing windows 10
  3. Right-click the default printer there to select Printer properties.
  4. Then select the Ports tab and check if the port you usually plug the printer into is the one chosen there. If not, deselect the currently selected port and select the port with which the printer is generally connected.
  5. Select the Apply option, and click OK to exit the window.

In Windows 11, if you choose to Search automatically for updated driver software, your computer will check for available updates, then install them. Of course, you will need to reboot your PC afterward.

You can also try to use a professional tool for more efficiency. Outbyte Driver Updater will scan your device for outdated drivers and update them instantly with the most recent version of it.

How do I fix a print queue error?

Having issues with the printer queue in Windows 11 or any other operating system may be pretty frustrating, especially if the printer queue becomes stuck and the papers you have printed in the past continue to print repeatedly.

You may immediately repair the issue by canceling the paper printing using the What’s printing option; however, you should check out our dedicated guide on fixing print queue errors to find more detailed solutions.

We hope the solution in this article has solved this issue, but if your computer is still unable to connect to your printer, we recommend that you have a look at the linked article.

If you have any other suggestions or tricks to fix this issue, do not hesitate to let us know in the comment below.

5 Ways to Fix Black Desktop Background on My Windows PC

Some users have discovered and reported a bug in Windows, not a crucial one, but still very annoying. After performing a specific number of operations, the desktop background keeps going black, and the wallpaper disappears.

This black background issue is annoying, especially for those who have set the desired aesthetic image or customized wallpaper. Also, a user asked, My desktop background is black, and I can’t change it.

Unfortunately, the newer versions of the Windows operating system are full of similar minor but annoying bugs, and Windows users are constantly complaining about them, but they’re right.

Luckily, you can quickly solve the desktop background that keeps going black in Windows 10 problem with just a few clicks, and we are presenting the steps in this article.

Why does my desktop background go black?

Here are a few reasons the desktop background is black in Windows:

  • Improper settings: In some cases, the Show desktop background image setting, when disabled, triggered the issue.
  • Outdated graphics driver: When the graphics driver is outdated, you are likely to face performance-related problems as well as some trivial errors like this.
  • Misconfigured power options: Many who wondered why my background is black how do I change it, were able to fix things by reverting the power options to default settings.

Why does my desktop background keep disappearing on Windows 10?

This can happen if Windows keeps refreshing for some reason, and in most cases, the cause for this is the background processes, so be sure to disable them.

A few users reported that desktop icons are flashing, so disabling them might be a decent workaround you could try.

In some instances, you might even see a flashing black box on Windows 10, and if this happens, it’s always a good idea to disable all startup applications.

How can I fix the black desktop background on Windows 10?

1. Disable Desktop icons

  1. Right-click on the desktop, hover the cursor over View and uncheck the Show desktop icons option.show desktop icon
  2. Again, right-click on the desktop, and select Personalize from the context menu.personalize
  3. If you are using a theme with a single wallpaper, select some themes with multiple wallpapers. For example, Microsoft’s Line and colors theme, and then switch back to the default theme.wallpaper
  4. Finally, you have to re-disable the Show desktop icons option.

Once done, verify if the desktop background turns black when highlighting in Windows 10 anymore. If yes, head to the following method.

2. Update drivers

  1. Type Device Manager in the Search bar and click on the relevant search result.Device manager
  2. Double-click the Display adapters entry to expand and view the devices under it.display adapters
  3. Right-click on the graphics adapter and select Update driver from the context menu.update driver to fix desktop background keeps going black
  4. Select Search automatically for drivers in the new window.search automatically for drivers
  5. Wait for the OS to locate and install the best available driver.

The Device Manager offers a relatively quick way to update the drivers. But it’s often not that effective since only the drivers available on the computer are looked through, while there may be an updated version available on the manufacturer’s website.

Of course, there is a way around this, known as an automatic driver updater. This ensures you have the correct driver patch downloaded and installed without issue.

These tools have great scanning speed, and if you want to save even more time, you can activate the auto-update and get the latest updates without effort.

3. Reconfigure the display settings

  1. Press Windows + I to open the Settings, and click on Ease of Access from the options here.ease of access
  2. Now, locate the Show desktop background image option on the right and make sure the toggle under it is enabled.show background images to fix desktop background keeps going black

Once done, restart the computer, and the problem should be resolved. If not, head to the final solution.

4. Try a different image or method

Often times, the problem may lie with the image itself, which you are trying to set as the desktop background. Try another image and see if that fixes things.

In case the error persists, try a different method altogether. If you are changing the desktop background from the image’s context menu, try doing it via Settings and vice-versa.

5. Disable high contrast settings

  1. Press Windows + I to open the Settings app and select Ease of Access.Ease of access to fix desktop background keeps going black
  2. Now, select High contrast from the tabs on the left, and disable the toggle for Turn on high contrast.Turn on high contrast to fix desktop background keeps going black

If the methods listed previously did not work, disabling the high contrast settings should prevent the desktop background from going black and getting things up and running.

How do I fix the desktop background that keeps going black on Windows 11?

First, update the graphics driver for those who see the desktop background keeps going black in Windows 11.

Also, taking a different route might work if you have been using the same method to change the desktop background. You can do it from the Settings app or manually set any picture as the background.

Besides, switching to the High-Performance power plan did the trick for many, and you may also try that. If nothing seems to work, there’s always the option to perform a System Restore.

How do I restore my desktop color?

It depends on what led to the change in desktop color. Reverting them should do the job if you inadvertently change the display or color settings. Or, if you remember the previous desktop color, you can always reset it.

Also, it could have to do with the configured theme on your PC. Windows offers Dark and Light modes for both apps and the OS itself. Check that as well. As is usually the case, you can always restore the PC to a previous point, or factory reset the Windows.

That’s all there’s to desktop background keeps going black in Windows and other related display issues. Of course, you would have the problem resolved by now, and the system is running like usual.

We often encounter questions like, My desktop background keeps changing to black in Windows 7. Remember, the solutions listed here would work on all recent iterations of Windows.

Also, find out the best wallpaper apps to customize your PC. For those interested, do check some trendy black wallpaper 4k for download.

If you have any other queries or know of a method not listed here, drop a comment below. We would love to hear your comments and suggestions.

Atikmdag.sys: Causes & How to Fix This Blue Screen Error

Windows users reported experiencing atikmdag.sys BSOD (Blue Screen of Death) errors, especially after upgrading from Windows 7 or Windows 8 to Windows 10 OS. This BSOD error prevents Windows PCs from booting normally.

Atikmdag.sys is a .sys file associated with ATI Radeon Family, developed by Advanced Mirco Devices, Inc. (AMD) for Windows OS.

However, we have identified possible reasons for atikmdag.sys BSOD problem includes virus or malware infection, corrupt or old ATI Radeon device drivers.

Other causes include missing or corrupt Windows registry keys, damaged hard disk, recent system changes, or even corrupt HDD.

What causes the atikmdag.sys error?

Here are some of the common reasons behind the atikmdag.sys error in Windows 11:

  • Faulty hardware, usually the RAM
  • Outdated drivers
  • Issues with memory allocation
  • Corrupt system files
  • Malware or virus on the computer

Page Fault in Nonpaged Area error can occur due to hardware failure. This error is present on all versions, and many reported Page Fault in Nonpaged area error in Windows 11. So regardless of the version that you’re using, the solutions are almost the same.

Other files can also cause issues, and many reported error wdf01000.sys on their PC.

Sometimes, the error comes in a few variations, including driver_irql_not_less_or_equal atikmdag.sys. This error happens when the same driver creates or utilizes a wrong memory location while carrying out its task.

How do I fix Atikmdag sys in Windows 11?

1. Use a third-party BSoD fixer

We recommend using a professional tool you can rely on when repairing or replacing damaged files, preventing and fixing BSoD errors, and restoring your PC to its best so it can function at optimum capacity.

2. Run a full system scan

  1. Go to Start, type defender, and click Windows Defender to launch the tool.
  2. In the left-hand pane, select the shield icon.
  3. In the new window, click the Advanced scan option.
  4. Check the full scan option to launch a complete system malware scan.

Viruses and malware are a primal cause of the atikmdag.sys error that results in the blue screen of death on your Windows 10.

Run a full system scan on your PC to remove every possible virus corruption. In addition, there are several third-parties antivirus software around that you may use.

We strongly suggest you check out some of the best antivirus software for your Windows PC and install them on your computer.

Note: If you are done scanning your PC, you should remove all detected viruses; the option may be clean or delete depending on the antivirus you are using.

3. Repair PC Registry

  1. Press the Windows key, type cmd, then select Run as Administrator.
    atikmdag.sys
  2. Now, type the following code, then hit Enter.
    sfc /scannow
    atikmdag.sys
  3. Wait for the scanning process to complete, restart your computer, and all corrupted files will be replaced on reboot.

The simplest way to repair your Windows registry is to use a dedicated tool. Alternatively, you can use Microsoft’s System File Checker to check for system file corruption.

The registry cleanup software has various features to assist you with system-related registries and difficulties.
Registry cleaners may be beneficial to your computer. However, as a precaution, choose the option to create a backup copy before cleaning it. If something goes wrong, you’ll need that backup copy.

The utility software verifies the integrity of all system files and repairs files with problems when possible.

4. Update your Windows OS

  1. Open the Start menu from the Taskbar at the bottom of the screen, then click to open the Settings right above the Power button.
    atikmdag.sys
  2. Click Update & Security.
    atikmdag.sys
  3. Click the Check for updates option.
  4. After the update is complete, restart your Windows PC.

In addition, you can fix atikmdag.sys BSOD error problem by updating your Windows 10 OS to the latest version.

Microsoft constantly releases Windows updates to improve the system’s stability and fix various issues and errors associated with the startup error.

5. Update ATI Radeon drivers

  1. Press the Windows + R key to launch the Run program.
  2. In the Run windows, type the code below and click OK to open the Device Manager:
    devmgmt.msc
  3. Expand the Display adapters category, right-click on the video card, select Update Driver, and follow the prompts to apply the update.
  4. Finally, after the video driver on your PC has been updated, restart your PC.

Obsolete or old ATI Radeon family device drivers could probably be responsible for atikmdag.sys BSOD problem. You can update your PC’s graphics driver by following these steps:

Another way by which you can update the ATI Radeon driver(s) is by visiting the AMD website to download and install the video card driver for your PC’s model.

We recommend updating your drivers automatically using a dedicated driver updater to scan your PC for out-of-date drivers and provide you with a detailed report. This procedure will have your PC running like new in no time.

Outbyte Driver Updater

An automated solution that helps you scan your device drivers and keep them updated constantly.
Free Trial Download now

6. Run CHDSK

  1. Press the Windows key, type cmd, then select Run as Administrator.
    atikmdag.sys
  2. Enter the script below and hit Enter.
    chkdsk C: /f
  3. Enter this second script below and hit Enter.
    chkdsk C: /r
  4. Enter Y if Windows prompts you to schedule the check for the subsequent system restart. Then, restart your computer after that to run the test.

7. Replace RAM/HDD

You can remove your HDD and connect it to another PC to access the files and folders on the PC. This will enable you to back up essential files for security purposes.

If the new PC cannot identify and access the HDD, you need to replace it with a new one. But, if you can access the HDD on the new PC, then you should replace the RAM because it is a faulty component.

You can purchase a new RAM/HDD from your PC manufacturer’s online retailing website, Amazon, or your local computer shop.

However, we highly recommend that you can carry out the replacement by a professional – computer engineer.

Suppose you are unable to solve the atikmdag.sys error that causes BSoD using any of the fixes above (which is quite unlikely), there is a possibility that your system’s RAM/HDD is faulty.

8. Clean install Windows 10 OS

Another way of fixing the error concerning the atikmdag.sys file on Windows 10 is to perform a clean install of Windows OS on your PC.

However, this method will clear all pre-installed apps, files, and folders, but it will solve atikmdag.sys BSOD problem regardless of this.

If you’re experiencing issues on your computer running Windows 10/11, the cause may be various bottlenecks, bloatware, and other programs that slow down your computer’s performance.

How can I fix atikmdag.sys BSOD on Windows 11?

We recommend using the exact solutions we have explored in this article. On both operating systems, this error is triggered by the same things; hence the exact solutions apply.

You should note, however, that there may be rare UI differences, but typically the steps that work on Windows 10 work for Windows 11.

So go ahead and choose any solutions that seem most relevant to you.

Where is Atikmpag sys located?

To find Atikmpag sys, you will navigate to the drivers folder. This can be found in the path below.

C:\Windows\System32\drivers

On Windows 10/8/7/XP, the file’s size is 263,680 bytes.

By following the methods listed above, you should be able to get rid of any atikmdag.sys issues you may have encountered while upgrading your Windows PC.

If you know of any other method that works that we may have missed out on, do not hesitate to leave us a message in the comments section below. We will then take your feedback and update the article accordingly.

We’d like to hear more from you on this matter, so drop us a comment in the dedicated section below.

How to Fix Distorted Audio on Windows 10 [7 ways]

Microsoft is presenting Windows 10 and 11 as exquisite improvements over older Windows iterations. And they truly are upgrades in many areas, but occasionally fall short in fundamentals.

To be precise, many users that upgraded from Windows 7 or 8, reported many sound issues that include sound distortion, static, lackluster quality, and many other problems.

It’s needless to say that those sound problems occurred only in Windows 10 and that, allegedly, everything was performing well on the pre-upgraded system.

Luckily, no matter how complicated the problem is, there’s always a silver lining, you just need a correct approach.

For that purpose, we enlisted a few solutions that should relieve you of the trouble at hand and help you retrieve proper sound in Windows 10. Make sure to check them out below.

Why is my audio distorted?

There are various reasons for distorted audio on Windows 10 and 11. The major cause of the issue is faulty or outdated drivers. This can be fixed by using a dedicated tool to update and install the correct driver.

Also, your PC might be giving off distorted audio because of faulty hardware. Regardless of the cause, we will show you how to fix the issue in this guide.

How can I fix distorted sound on Windows 10?

1. Reinstall drivers

  1. Right-click the Start button and select Device Manager.
    device manager distorted audio
  2. Double-click the Sound, video, and game controllers option to expand it.
    sound video
  3. Right-click on the sound device and select Properties.
    properties device distorted audio
  4. Click the Details tab at the top.
  5. Click the Property dropdown and select Hardware Ids.
    hardware ids
  6. Copy the first value of the driver’s signature, paste it into a browser of your choice and google it.
    first distorted audio
  7. Open the official site and download the corresponding sound driver.
  8. Install it and restart your PC.

In scenarios when you’re 100% positive about hardware functionality, the first thing you should investigate to solve the distorted audio issue is the sound driver.

One of the easiest ways to keep your driver in top shape is to install the original version from the official website. With the steps above, the task has been made easier for you.

2. Update drivers

  1. Right-click Start, and select Device Manager.
    device manager distorted audio
  2. Click the arrow next to Sound, video, and game controllers to expand it.
    sound video
  3. Right-click on your sound driver and choose Update driver.
    update driver distorted audio
  4. Now, click the Search automatically for drivers option.
    search auto distorted audio
  5. Wait for the scan to complete and install the available update.

Outdated drivers cause all sorts of issues, including, but not limited to the distorted audio problem. Whether you are using a Bluetooth speaker or just your normal speaker, you can get Windows 10 random audio stutter once your drivers are not in top shape.

Remember to restart your PC after the driver update.

3. Run Windows Audio Troubleshooter

  1. Press the Windows key + I to open the Settings app.
  2. Choose Update & security.
    update and security
  3. Select Troubleshoot in the left pane.
    troubleshoot distorted audio
  4. Click on Additional troubleshooters.
    additional trouble
  5. Click on the Playing Audio to expand it.
    playing distorted audio
  6. Finally, click on the Run the troubleshooter button and follow the further instructions.
    run troubleshooter

While we’re at it, the specified Audio Troubleshooter can come in handy in fixing the computer audio suddenly distorted issue. too. Drivers can work fine, and the sound output can still present an underwhelming experience with stutters, distortion, or low quality.

The Windows Audio Troubleshooting tool should, at least, give you an insight into the instigators of the problem. In a favourable scenario, it might resolve the issues, too.

4. Inspect hardware

Now, what are the chances that your Windows 10 audio is messed up and distorted because something went wrong with the hardware just after you upgraded your OS? We would say minimal.

But, since Windows troubleshooting is all about the detailed, meticulous approach and step-by-step system of elimination, you’ll need to check out everything. Just in case.

So, make sure that everything is properly connected depending on the type of sound system you run. Basically, double-check speakers and triple-check sound cards.

The best way to do so is to connect your speakers to an alternative device and see for yourself. If the problem is present only on the current device, continue with the additional steps below.

If you need to replace your sound card, check out this list of the best sound cards to use on Windows 10.

5. Disable the exclusive control option

  1. Right-click on the sound icon in the notification area and select Sounds.
    sounds option distorted audio
  2. Click on the Playback tab at the top.
    playback
  3. Right-click on your default Playback device there and select Properties.
    properties sound
  4. Select the Advanced tab.
    advanced
  5. Now, uncheck the box for Allow applications to take exclusive control of this device under the Exclusive mode section.
    allow applications distorted audio
  6. Finally, click the Apply button, followed by OK to save the changes made.
    apply ok distorted audio

Now, let’s move to system-related options that can and will occasionally affect playback and cause issues. If you keep getting distorted audio after applying the fixes above, you should consider disabling the Allow applications to take exclusive control of this device feature.

This enables individual applications (both third-party and system apps) to take control of the device and override default sound settings.

6. Change the Sound format for the default Playback device

  1. Right-click on the sound icon and select the Sound option.
    sounds option distorted audio
  2. Click the Playback tab at the top.
    playback
  3. Right-click on the default Playback device and choose Properties.
    properties sound
  4. Select the Advanced tab.
    advanced
  5. Switch between different formats, click on the Test button.
    test distorted audio
  6. If you manage to find the fitting format that performs without distortion, make sure to save the changes.

Moreover, certain users managed to resolve the distorted audio problem by simply switching to a different sound format within the Playback device settings.

The only problem with this solution is that you’ll need to check multiple formats until you, so to say, hit the right note. Follow the instructions above to change the default sound format on your PC.

7. Reset Windows 10

  1. Press the Windows key + I to open the Settings app.
  2. Select the Update & Security option.
    update and security distorted audio
  3. Select Recovery on the left pane.
    recovery distorted audio
  4. Click on the Get Started button under the Reset this PC section.
    get started
  5. Choose to Keep my files.
    keep my files
  6. After the procedure ends, your sound issues should be long gone.

Finally, if none of the previous steps worked in your favour to solve the distorted audio issue, it’s time to get the big guns into play. Namely, if you upgraded to Windows 10 rather than performing a clean reinstallation – certain problems might occur.

With the Reset this PC option, you’ll avoid performing a clean reinstallation but the system will be renewed, nonetheless. If you’re uncertain how to do it, make sure to follow the instructions above and we should be good to go.

How do I fix distorted audio on Windows 11?

Just like on Windows 10, the distorted audio on Windows 11 issue is majorly down to outdated and faulty drivers. Also, it can be caused by problematic hardware and other glitches on your PC.

Thankfully, we have a dedicated guide on how to fix distorted sound on Windows 11. So, feel free to check it out for stepwise solutions to the problem.

Why is my laptop audio glitching?

If your laptop audio is glitching, the issue might be caused by incorrect sound settings. This issue can also be caused by your hardware like the speaker and its connectivity.

Lastly, another culprit to look at is a problematic driver. You can follow the steps in this guide to fix this issue.

The distorted audio issue can be pretty annoying, especially if you are in the field of recording and editing. But with the solutions in this guide, you should be able to get rid of the problem for good.

Also, if you were wondering how to fix distorted audio file, these solutions should come to your aid.

Do you want to know how to fix Realtek sound issues on Windows 10? Then check our excellent guide to do it effortlessly.

If you have any questions, alternative solutions or suggestions in regard to the sound distortion issue we addressed today, feel free to share them with us in the comments section below.

OpenGL Fix: Not Working on Windows 10 [Easy Steps]

Windows 10 is an excellent operating system, and despite all the major improvements it received, it still comes with some issues and bugs. Several users have reported OpenGL problems that affected the overall gaming experience.

Pretty much any OpenGL error is caused by a lack of optimization of drivers in Windows 10 and Windows 11, the latest iteration from Microsoft. And when you encounter OpenGL problems, several applications and games that depend on it, for instance, Minecraft, stop working.

Some of the OpenGL errors you will come across are as follows:

  • OpenGL error 1282
  • OpenGL error 1280
  • This program requires OpenGL 2.0 or higher

But, fret not! We will walk you through everything there’s to know about the problem and the most effective solutions.

What causes OpenGL errors on Windows 10?

Here are the primary reasons users encounter OpenGL errors in Windows:

  • Incompatible or outdated graphics driver: One of the important aspects of the OS, the graphics driver, should be both compatible and up-to-date, or you will come across several errors. So, update the graphics driver regularly.
  • Corrupt system files: A PC with corrupt system files is bound to throw errors while running applications or performing operations.
  • Problems with the app itself: If the other apps work fine and the problem is limited to one, it could be an improper installation of that particular app or it missing critical files to blame.

How can I fix OpenGL errors on Windows 10?

1. Remove graphics drivers and reinstall the latest version

The first thing that you should consider doing is first to remove and then reinstall the latest version of the graphics driver.

However, do note that it is essential to choose the correct driver versions from the manufacturer’s website. In case you choose and install the wrong ones, this may have a negative impact on the PC and affect its core functioning.

Updating drivers manually may put the computer at risk, so we recommend you download a professional driver updater to do it automatically.

These tools will keep your system away from damage by downloading and installing the appropriate driver versions every time you need to do so.

2. Install the graphics driver in Compatibility mode

  1. After downloading the latest version of the graphics driver, right-click on the setup file, and select Properties.properties to fix opengl problem
  2. Next, navigate to the Compatibility tab.compatibility
  3. Now, check Run this program in compatibility mode for option and then select an older iteration of the OS from the dropdown menu.run this program in compatibility mode to fix opengl problem
  4. Once done, click OK to save the changes and then run the setup file to complete the installation.ok

Once done with the installation, verify if the OpenGL problems are resolved. In case these persist, head to the next solution.

3. Run the SFC scan

  1. Type Command Prompt in the Search bar, and then click on Run as administrator on the right.Command prompt
  2. Click Yes in the UAC prompt.yes
  3. Now, paste the following command and hit Enter to run the SFC scan:sfc /scannowsfc scan to fix opengl problem

If it was corrupt system files behind the error, running an SFC (System File Checker) scan should fix things. Also, if the SFC scan individually couldn’t resolve the OpenGL problems, you may run the DISM tool first and then the SFC scan again.

4. Download OpenGL from the website

  1. Head to the OpenGL website, and choose the download option.download
  2. Now, select your graphics hardware from the options here.graphics card
  3. Locate the relevant driver and download it.
  4. Once done, run the setup and follow the on-screen instructions to install it.

Many users reported that Windows stopped detecting OpenGL on their systems after installing the latest updates, and once they went ahead to install OpenGL 2.0 in Windows 10 from the website, it worked as a solution. So, make sure to try that as well.

5. Adjust your PC for best performance

  1. Type View advanced system settings in the Search bar, and click on the relevant search result.view advanced system settings
  2. Click on the Settings button under Performance.settings
  3. Now, select the Adjust for best performance option, and click OK to save the changes.adjust for best performance to fix opengl problem

If your computer doesn’t direct enough resources to power the game, you may experience OpenGL problems, among other issues. And after making the changes described in the last few solutions, things should be up and running.

How can I fix OpenGL problems on Windows 11?

When you come across OpenGL problems in Windows 11, try the solutions listed in the previous section. If these don’t work, reinstall the game throwing errors with OpenGL because it’s likely an issue with the game itself.

Also, you may disable OpenGL if your graphics card doesn’t support it. Incompatibility is a major reason behind OpenGL problems, and disabling it should fix things in Minecraft and other apps.

Besides, if the problems started recently, you can always perform a system restore. It will revert any changes made to the PC, and your files won’t be affected. Remember to choose a restore point created before you first encountered the problem.

Can you update OpenGL?

Yes, you can update OpenGL, but it cannot be done independently. OpenGL comes bundled with the graphics driver installed on the computer, be it Intel, Nvidia, or others.

And the only way to update OpenGL is to update the graphics driver in Windows. Once you install the latest version of the graphics driver, the latest version of OpenGL will automatically be installed.

That’s all for now! You now know how to fix OpenGL problems in Windows and update it in case of incompatibility or games requiring a newer version.

Also, find out how to optimize your PC for the best gaming performance.

For any suggestions or questions, reach for the comments section below.

Laptop Can’t Connect to iPhone Hotspot: 7 Quick Ways to Fix It

If your Windows laptop refuses to connect to your iPhone’s hotspot—or just hangs on “connecting” forever, you’re not alone. Whether the hotspot isn’t showing up, is grayed out, or just won’t stay connected, the issue usually comes down to a few common Windows or iOS quirks.

In this guide, we’ll walk you through the real fixes that work.

How do I fix a laptop if it can’t connect to an iPhone hotspot?

1. Use a data cable

  1. Drag down from the right top of the iPhone, then long press the network icon.
    laptop can't connect to iphone hotspot
  2. Tap the Cellular Data icon, then press the Personal Hotspot icon.
    laptop can't connect to iphone hotspot
  3. Use a data cord to link your iPhone to your Windows computer.
  4. The Windows computer will connect to your hotspot, and the connection will seem like an Ethernet one.

The connection to the iPhone’s hotspot can be made using this straightforward and dependable approach, but you must use an authentic Apple cable or a certified cable. This method will work like a charm if the iPhone hotspot is not showing up in Windows.

2. Troubleshoot the Wi-Fi hotspot problems

  1. Turn the Personal Hotspot off.
  2. Verify if the Wi-Fi is ON in Settings > Wi-Fi.
  3. Turn the Personal Hotspot back on.

3. Update network drivers

  1. Right-click the Start button and select Device Manager.select device manager
  2. Expand the Network adapters section.network adapter drivers
  3. Look for your Wi-Fi adapter (it might include words like “Wireless,” “AC,” or your laptop brand).
  4. Right-click it and choose Update driver.update network adapter driver
  5. Click Search automatically for drivers.
  6. Windows will search for and install any available updates.
  7. If it says you already have the best driver, move to the next fix—or try a third-party updater.

If you’d rather avoid digging through menus or want automatic scans and repairs, you can use a reliable tool like Fortect Driver Updater to handle everything for you.

4. Change the name of your iPhone

  1. Go to Settings > General > About > Name.
  2. Now click on the X icon to remove your current name.
  3. Enter a new name, and you’re good to go.

Note: A few users reported that removing extra spaces from the hotspot name fixed the problem for them, so be sure to try that as well.

Once you change the hotspot name, your PC can connect to the iPhone Wi-Fi hotspot again.

5. Use the Forget option for the Wi-Fi hotspot

  1. Click the Wi-Fi icon in the bottom right corner.
  2. Now locate your Wi-Fi hotspot, right-click it, and choose to Forget from the menu.
    laptop can't connect to iphone hotspot

Try to connect to it again, and you’ll be asked to enter a password. After doing that, the Wi-Fi network will start working.

Using this option, you will stop your device from connecting automatically to the same hotspot source. This way, your iPhone will forget your PC Wi-Fi address, so you can try and reconnect to the iPhone hotspot.

6. Change the iPhone’s hotspot password

  1. Drag down from the right top of the iPhone, then long press the network icon.
    laptop can't connect to iphone hotspot
  2. Tap the Cellular Data icon, then press the Personal Hotspot icon.
    laptop can't connect to iphone hotspot
  3. Navigate to Settings > Personal Hotspot.
    laptop can't connect to iphone hotspot
  4. Tap on Wi-Fi Password, then edit it.

According to users, if Windows doesn’t connect to the iPhone Wi-Fi hotspot, the issue might be your hotspot’s password. However, you can fix this problem simply by changing your hotspot’s password.

This process should be done fast and without much technical knowledge. So the little thing to do is press the change password button and introduce your old and new password to reset it quickly.

The problem should be resolved, and you’ll be able to connect to the iPhone’s hotspot again.

7. Uninstall the Intel Proset wireless software

  1. Open the Settings app and go to the Apps section.
    Windows 10 iPhone WiFi yellow triangle
  2. Select Intel Proset wireless software from the list and click on Uninstall button.
    Windows 10 iPhone WiFi Unidentified network
  3. Follow the instructions on the screen to remove it.

Once you remove the software, restart your PC.

Note: If you don’t use Intel Proset software, remove your wireless software and check if that helps.

How to connect iPhone Hotspot to a laptop?

  1. Drag down from the right top of the iPhone, then long press the network icon.
    laptop can't connect to iphone hotspot
  2. Tap the Cellular Data icon, then press the Personal Hotspot icon.
    laptop can't connect to iphone hotspot
  3. Click on the network icon on your computer, and click on the forward pointing network arrow.
  4. Choose your hotspot network from the list and click Connect.

Wrapping up

Hotspot issues aren’t limited to iPhones. If your laptop also struggles to connect to an Android hotspot, or you’re using a MacBook with similar connection problems, the fixes might overlap.

You’ll also find helpful steps if you’re facing a mobile hotspot setup error on Windows 10 or if the mobile hotspot isn’t working at all on Windows 11.

Let us know if the steps above have done the trick for you. If not, maybe you can share with us your exact problem, and we’ll try to find a solution together.

Microphone Enhancements Tab is Missing: How to Get It Back

The enhancement tab has been one of the necessary Windows features. In fact, before Windows 10, most of us would use the Enhancement tab to toggle volume and other audio controls. But for many, the microphone enhancement tab is missing in Windows 11 and 10.

If you cannot access the microphone enhancement tab in the microphone properties, fret not; you have come to the right place. On an added note, this issue can also cause your mic to distort, leading to average voice quality. Let’s find out how you can fix things.

Why does my mic not have an enhancement tab?

Here are the reasons you have a missing enhancement tab in Windows:

  • Incompatible or outdated drivers: The most common reason you can’t find the enhancement tab in Windows is incompatible or outdated drivers.
  • Conflicting third-party apps: In some cases, a third-party app on the PC could conflict with the microphone properties or even the OS.
  • A bug in the OS update: If the problem started after updating the OS, it’s likely a bug in the latest version that’s triggering the problem.

How does audio enhancement work in Windows?

The microphone enhancements in Windows 10 made it easy to tweak the audio hardware for the perfect sound, and you can adjust it by enabling specific options.

These features include loudness, room correction, the bass level, and other options that can make your audio stand out.

Where do I find sound enhancements in Windows 10?

  1. Right-click on the Speakers icon at the bottom-right corner and select Sounds.sound
  2. Next, navigate the Recording tab, right-click on the desired microphone, and select Properties.properties
  3. You should now find the Enhancements tab if the microphone supports it.enhancements tab

How can I fix the missing microphone enhancements tab?

1. Reinstall/update the audio drivers

  1. Visit your device manufacturer’s website.
  2. Select your model on the list and go to the Driver section.
  3. Locate the Audio driver on the list and click on Download.

If the Realtek enhancements tab is missing, it could be due to using an outdated driver version. Head to the official website and download the latest version. In case of no enhancements tab in Realtek, this should be your primary approach.

This process can sometimes be complicated, especially if you don’t know where and how to download the necessary drivers. However, you can easily update all your drivers automatically using specialized software.

2. Check your hardware

  1. Press Windows + R to open Run, type control in the text field, and hit Enter.
  2. Now head over to Add a device.
  3. Select your audio device and click Next.
  4. Restart your PC.

It’s also advised to connect your audio device to other ports or PCs and check if it’s working correctly. It’s also possible that your audio card isn’t working properly, so you might have to buy a dedicated sound.

3. Try enabling audio-related services

  1. Open Windows Services by pressing Windows key + R and entering services.msc.
  2. Locate Windows Audio and double-click it.
  3. Set Startup type to Automatic and click on OK to save the changes.

The audio-related services may have been stopped or disabled on your Windows 10, and, as a result, the USB microphone enhancements tab is missing.

4. Change your sound card vendor settings

Every sound card vendor offers its dedicated app. One can try to fix the missing enhancement tab issue using the sound card vendor manager.

Open the app, select the Microphone option, and configure the desired settings. Once done, head back to the Recording Device and see whether the Enhancement tab appears. Also, you can use the app if the microphone level in speaker properties is not showing up.

How to get the enhancement tab on a microphone in Windows 11?

  1. Press Windows + I to open the Settings app.
  2. Go to the Apps section and select Installed apps.
  3. Locate Conexant SmartAudio Audio and click three dots next to it. Now pick Uninstall.
  4. Follow the instructions on the screen to complete the process.

Remember that other audio software can also cause the microphone enhancements tab to go missing, so be sure to remove it from your PC.

Where is the equalizer in Windows 11?

  1. Press Windows + S to open the Search menu, enter Change system sounds in the text field, and click on the relevant search result.change system sounds
  2. Right-click on the desired device and select Properties.properties
  3. Now, head to the Enhancements tab, and you should find Equalizer listed here if the device supports it.enhancements

Once you have found the Equalizer, modify the various options there to get the desired sound.

What audio enhancement features are available in Windows?

Several features are available out of the box in Windows, such as a bass boost that makes lower frequencies easier to hear. On the other hand, headphone virtualization will try to replicate the surround sound on any audio device.

If the volume of certain sounds is too high, loudness equalization should lower it. Lastly, a room calibration feature ensures that your microphone doesn’t pick up the sound from your speakers.

Are there any third-party audio enhancers that I can use?

Almost all audio drivers come with audio settings software that you can use to adjust the sound settings or manually add various effects.

You can always use specialized audio enhancement software if you need additional functionality.

We hope that this guide was helpful to you and that you managed to fix the issue with no enhancements tab available on Windows 10 and 11.

If you’re still having problems, visit our microphone has disappeared from the device list guide for more in-depth solutions.

Did you find a different solution to this problem? If so, let us know in the comments section below.

APC Index Mismatch: Main Causes & How to Fix This BSoD

Shall we discuss the APC Index Mismatch? BSOD errors can be troublesome on Windows 10, and in most cases, these errors are caused by an incompatible driver or faulty hardware.

The apc_index_mismatch error, for instance, will force your PC to restart whenever it appears. 

This can occur on almost any device, with users of Lenovo or Dell laptops reporting it most often, and any Windows version can crash with this stop code.

This error message will sometimes give you the file’s name responsible for this error (ntoskrnl.exe, fltmgr.sys, wdf01000.sys, win32k.sys, vhdmp.sys). And once you know the file name, you need to do a bit of research and find the application or driver that is related to this file.

If the BSOD occurs after installing a specific update, uninstall it. If you have overclocked your hardware, remove overclock settings and check if that solves the issue.

So let’s see how to fix the apc_index_mismatch issues. Note that you might work in Safe Mode if your device doesn’t allow normal booting.

What is an APC Index Mismatch?

When specified circumstances are met, a function that runs outside the main program is called an asynchronous procedure call (APC).

When something goes wrong with your computer, many BSoD errors default to referring toward an APC Index Mismatch, which explains why there are so many possible explanations for this problem.

This APC Index Mismatch error often denotes a discrepancy in the process count that entered and exited an active region where a program is running. As a result, your system crashes with a BSOD.

This is essentially the operating system informing you that it cannot launch applications without running the danger of the computer being harmed.

APC Index Mismatch BSoD errors are frequently brought on by faulty or outdated audio drivers, particularly for Realtek components. However, you can quickly solve it by obtaining and installing your system’s most recent compatible drivers.

This BSOD problem is frequently attributed to the online printer, audio, and graphics card drivers; however, any system driver could be to blame.

What causes APC index mismatch?

There are several potential causes of the APC index mismatch. One of the popular ones is an outdated operating system.

Also, as with some other BSOD issues, this problem can be due to your drivers. Irrespective of the cause, we have a suitable fix in this guide.

How do I fix the apc_index_mismatch Windows 11 blue screen?

  1. Disable Realtek HD Audio Manager from startup
  2. Install the latest updates
  3. Check your drivers
  4. Deploy a BSOD troubleshooter
  5. Uninstall the DisplayLink driver
  6. Change your RAM frequency
  7. Disable Virtualization in BIOS
  8. Check your hardware
  9. Remove interfering software

1. Disable Realtek HD Audio Manager from startup

  1. While your computer boots, restart it. You’ll have to restart it a few times before the Automatic Repair starts.
  2. Windows should automatically start the repair process.
  3. Choose Troubleshoot, then Advanced options.
    apc index mismatch
  4. Go to Startup Settings and click the Restart button.
  5. Once your computer restarts again, you’ll see a list of options—Press F5 or 5 to select Safe Mode with networking.

Once you’ve entered the Safe Mode, you can stop the problematic application from starting by doing the following:

  1. Start Task Manager (press Ctrl + Shift + Esc on your keyboard).
  2. Navigate to the Startup tab.
    apc index mismatch
  3. You’ll see a list of startup apps. For example, if you see Realtek HD Audio Manager on the list, right-click it and choose Disable. If that application isn’t on the list, disable all applications starting with Windows 10.
    Apc_index_mismatch Windows 10 update
  4. Close Task Manager and restart your PC.

Realtek HD Audio Manager can also cause apc_index_mismatch ntoskrnl.exe errors, so it’s one of the first applications you should check.

2. Install the latest updates

  1. Press Windows Key + I to open the Settings app and navigate to the Update and Security section.
    Apc_index_mismatch Windows 7
  2. Now click the Check for updates button.
    Apc_index_mismatch ntoskrnl.exe

Windows will now check for available updates. Updates will be downloaded automatically in the background if any updates are available. Once you download the updates, they will be installed as soon as you restart your PC.

Several users reported that they fixed this problem simply by installing the latest updates, so be sure to try that.

3. Check your drivers

  1. If you cannot access Windows 10, enter Safe Mode.
  2. Start the Device Manager by pressing the Windows Key + X hotkeys, and choose Device Manager from the list.
    Apc_index_mismatch Lenovo
  3. Once the Device Manager starts, locate the newly installed device. (If you see an Unknown Device or any device with a yellow triangle, you’ll need to update its drivers.)
  4. Right-click the device and choose Update driver. In addition, you can also download the latest drivers online.
    Apc index mismatch Realtek

If you wish to keep your Windows 10 PC error-free, we strongly advise that you update all your drivers.

Updating drivers manually can be a long process, but you can use third-party tools to update all your drivers with just a single click.

4. Deploy a BSOD troubleshooter

BSOD errors are particularly unique since there is no definitive reason for them. Still, there’s always the list of usual suspects, such as damaged registries, DLLs, driver issues, and hardware trouble.

The fastest way to deal with them is to use dedicated software that can run through all the variables mentioned above and fix them one by one, thus minimizing the chances of triggering BSOD errors.

5. Uninstall the DisplayLink driver

  1. Open Control Panel and navigate to Programs and Features.
    Apc_index_mismatch blue screen
  2. Locate DisplayLink Core software on the list and click the Uninstall button.
  3. After you’ve uninstalled it, restart your computer.

To altogether remove the DisplayLink driver, you need to download and run DisplayLink Installation Cleaner.

After using this software, the DisplayLink driver should be removed entirely, and the apc_index_mismatcherror should be fixed.

DisplayLink is useful when you have an additional monitor, but unfortunately, there are specific issues with the DisplayLink driver and Windows 10.

6. Change your RAM frequency

This is an advanced solution, and by performing it, you might cause damage to your PC.

Changing the RAM frequency might lead to system instability if not done correctly, so bear in mind that you’re doing this at your own risk.

If your motherboard cannot handle the frequency of your RAM, it’s advised to remove any overclock settings.

Alternatively, you can underclock your RAM to match your motherboard frequency.

7. Disable Virtualization in BIOS

  1. Enter BIOS. (To do that on your PC, you need to press Del or F2 during the boot sequence.)
  2. Once you enter BIOS, you must find and disable the Virtualization feature. (To see how to locate this feature, you might want to check your motherboard manual for detailed instructions.)

After disabling this feature, check if the problem is resolved. You can skip this solution entirely if you don’t have a Virtualization feature in BIOS.

8. Check your hardware

As previously mentioned, BSOD errors can appear due to faulty hardware.

According to a few users, the problem was caused by a faulty touchpad on their laptop, and after replacing the touchpad, the apc_index_mismatch error was resolved.

If your device is still under warranty, you might consider taking it to the official repair shop for a hardware replacement.

9. Remove interfering software

Software such as LogMeIn can cause the error; therefore, we recommend that you update it or remove it from your PC.

In addition to LogMeIn, specific antivirus software, most notably Norton or Avast, can cause this issue.

If you’re using any of these antivirus programs, we urge you to remove them by using a dedicated uninstaller to make sure all related files are deleted.

Also, you might want to consider switching to different antivirus software. Many great antivirus tools offer excellent protection and are fully compatible with Windows 10.

How can I fix APC Index Mismatch on Windows 11?

Windows ‘ latest operating system is very similar to Windows 10. This also implies that the two suffer from similar issues triggered by the same elements.

Because this is the case, we recommend that you use any of the solutions discussed in this guide to correct the error in Windows 11.

They are helpful and accurate since both operating systems share a similar UI. So regardless of the APC Index Mismatch cause, you should be well on your way.

Is the blue screen of death error fixable?

A blue screen of death can be fixed in the domain of personal computers. Even a novice computer technician may resolve these issues and get PCs back to optimal functioning order with the correct software.

If you have followed this guide, you should be able to fix BSOD resulting from the APC Index Mismatch.

Apc_index_mismacth can cause a lot of trouble, but fortunately, this Blue Screen of Death error can be quickly resolved using one solution.

If one of our suggestions worked in your case, please let us know in the comments.

Note: This article has constantly been updated for freshness and accuracy. We have been editing the solutions that might fix the problem with the error’s latest updates.

We hope that you solved your BSOD issue quickly and safely.

Green Line on Laptop Screen: Causes and Fixes

A green line on a laptop screen usually means the display, cable connection, or graphics processing is malfunctioning. It can be caused by faulty hardware, driver problems, or temporary glitches. Below, you’ll find the most common causes and a step-by-step guide to fix it.

Why Is There a Green Line on My Laptop Screen?

The issue typically falls into one of these categories:

  • Hardware problems such as a damaged LCD panel, loose or frayed display cable, or failing GPU.
  • Software or driver issues such as corrupted graphics drivers or wrong display settings.
  • Temporary glitches such as static buildup, wake-from-sleep anomalies, or OS hiccups.

If you are also experiencing vertical red lines on screen, similar causes and fixes will apply.

How to Fix Green Lines on a Laptop Screen

1. Restart Your Laptop

  • Shut down completely and power it back on.
  • If the line disappears temporarily, it might be a minor glitch.

2. Use the Screenshot Test

  • While the green line is visible, take a screenshot (PrtScn).
  • View the image on another device:
    • Line visible in screenshot means it is a software, driver, or GPU problem.
    • Line not visible in screenshot means it is an LCD panel or display cable issue.

3. Update or Reinstall the Graphics Driver

  1. Press Windows + X and select Device Manager.
  2. Expand Display adapters.
  3. Right-click your graphics card and select Update driver then Search automatically.
  4. If it does not help, right-click again, select Uninstall device (check Delete the driver software) and restart.

💡 Alternative: Use a trusted third-party tool like Fortect Driver Updater to automatically detect outdated or corrupted graphics drivers and install the latest version without manual searching. This is especially useful if you have dealt with color distortions such as a red tint screen in Windows 10.

4. Check in BIOS Mode

  • Restart and press F2, F10, or Del to enter BIOS.
  • If you are unsure how, follow this guide on accessing BIOS on Windows PCs.
  • If the green line appears in BIOS it is a hardware problem.
  • If it is gone the cause is likely a driver or OS issue.

5. Connect an External Monitor

  • Use HDMI, DisplayPort, or USB-C.
  • If there is no line on the external screen, the laptop LCD or cable is faulty.
  • If the line appears on both, the GPU or driver is the issue.

6. Adjust Display Settings

  1. Go to Settings → System → Display → Advanced display settings.
  2. Set the refresh rate and resolution to the recommended (native) values.
  3. Apply changes and check if the line disappears.
  4. Incorrect settings can also cause issues like blue tint screens in Windows 10.

7. Install Pending Windows Updates

  • Go to Settings → Windows Update.
  • Install all available updates and restart.

8. Reseat or Replace the Display Cable

  • If you are comfortable opening your laptop, disconnect and reconnect the cable between the motherboard and screen.
  • Replace it if damaged.
  • This often fixes intermittent green lines caused by movement or hinge position.

9. Replace the Laptop Screen

  • If the green line is always in the same spot and survives restarts, updates, and cable reseating, the LCD panel is likely faulty.
  • Replacement screens cost about $50–$150.

10. Repair or Replace the GPU / Motherboard

  • If the green line appears on both the laptop and an external monitor, the graphics chip or motherboard is failing.
  • This repair usually requires a service center.
  • GPU problems can also cause red screens while playing games and other display artifacts.

Quick Diagnostic Flow

  1. Appears in BIOS? → Hardware issue.
  2. Captured in screenshot? → Software, driver, or GPU issue.
  3. External monitor OK? → Laptop screen or cable fault.
  4. Changes with lid angle? → Display cable problem.

Conclusion

A green line across a laptop screen can be as simple as a driver glitch or as serious as a failing display panel. Start with easy software checks, then move to hardware inspection. If it is a cable or panel fault, replacing them is usually cheaper than a full motherboard repair.

Frequently Asked Questions

Why is there a green line on my laptop screen?

It is usually caused by a damaged LCD panel, loose display cable, faulty GPU, or corrupted graphics driver.

Can I fix a green line without replacing parts?

Yes. If it is caused by software, updating or reinstalling the driver or changing display settings may fix it.

Does a green line mean my laptop is dying?

Not necessarily, but if it is a hardware fault, it will not go away without repair or replacement.

8 Ways to Fix White Screen While Gaming on Windows 11

Microsoft’s OS success and prevalence owe much to gamers, as Windows 11 is a prerequisite for most modern games. But, it’s also the prime example of Murphy’s law, with issues like white screen while gaming plaguing the OS.

The problem is peculiar to games and has been encountered several times. However, it’s more prominent while gaming.

So, let’s discover why you come across a white screen while gaming and its solutions.

What is the white screen of death?

The White Screen of Death is exactly what it sounds like a white screen that appears on your screen if there is an issue with your computer system’s hardware or software components.

Unlike a Blue or Black Screen of Death, a White Screen of Death is not often accompanied by an error number or status.

Because of this, it is somewhat more challenging to identify the problem that could be causing it and to put the appropriate problem-solving strategies into action.

Why is my PC showing a white screen?

White Screen of Death is a standard error in Windows and, as the name suggests, causes the OS to crash.

Whenever you encounter a PC white screen crash, it likely points to hardware incompatibility, malfunction, or damage. These hardware issues can also cause your colors to change when gaming, so check the connected devices and the various components for these three aspects.

Also, there’s a chance that the graphics driver is corrupt or outdated, and many managed to eliminate the white screen while gaming by simply updating it.

Besides, missing or corrupt system files and conflicting background applications are just as likely to cause the error. So make sure to check for these as well.

Some of the games and devices you are likely to encounter the error with are listed below:

Let’s now walk you through the solutions to the problem.

How do I fix the white screen on my Windows 11 laptop?

1. Check the hardware

Sadly, when something as critical as this appears, we can’t immediately eliminate hardware as a possible culprit. There are various reasons why something like a white screen can occur.

However, since this is a specific problem during the gaming session, we can confirm that the display or GPU needs an inspection.

So, make sure that your HDMI cable is attached correctly. Secondly, make sure that the graphics card is in place. You can inspect these two by simply connecting your PC to an alternative monitor (especially if the laptop suffers from white screens) and confirming that the problem is or isn’t replicating.

If the error persists, continue the steps below, even on an alternative monitor. If that’s not the case, chances are that your GPU is failing and requires some treatment or replacement.

2. Update graphics drivers

  1. Press Windows + X to open the Power User menu and select Device Manager.Device Manager
  2. Navigate to Display adapters and double-click on it to expand this section.display adapters
  3. Right-click on your graphics adapter and select Update driver.update drivers to fix white screen while gaming
  4. Select Search automatically for drivers here.search automatically for drivers to fix white screen while gaming
  5. Once done, restart the computer for the changes to come into effect.

To be completely frank, drivers are far beyond the most likely reason behind a white screen while gaming. Windows and GPU driver dispute is well-known since most system-induced generic drivers won’t cut it most of the time.

With that said, you’ll need to get the proper drivers. GPU OEMs provide those, should be found on the dedicated support sites, and should help fix things. Also, a specialized driver updating tool will do the trick as well.

3. Disable integrated graphics

The problem might be the liaison between the two cards if you have a dual-GPU configuration. Namely, the integrated graphics card (mostly Intel GPUs) covers most graphics operations in the planned scenario.

On the other hand, the dedicated graphics card (Nvidia or ATI) is there for the heavy-lifting processes, like games or rendering.

Sometimes, they mix up their roles, and issues emerge. This can likely cause the white screen while gaming on AMD to appear. Since we can’t be sure, it’s advised to temporarily disable the integrated onboard graphics adapter and stick with the dedicated GPU.

You can do that in the Nvidia Control Panel/ATI Catalyst Center. Alternatively, you can uninstall its driver and disable the device. However, do that at your own risk, as some alternative issues might emerge.

4. Disable startup apps

  1. Press Ctrl + Shift + Esc to open Task Manager, and then navigate to the Startup tab.startup tab
  2. Select all the apps that read Enabled under the Status column individually, and click on Disable.disable to fix white screen while gaming
  3. After disabling all the apps, restart your PC.

We can’t neglect the impact an erratic background app or process can have on system performance. It’s a far-fetched effort, but you can try and disable all third-party apps from loading at startup and look for improvements.

Even if it doesn’t fix the white screen while gaming, disabling these apps would undoubtedly reduce the boot time for Windows.

5. Make sure the PC isn’t overheating

It fits perfectly in the first solution framework, but we must emphasize this. Overheating can and will eventually inflict damage on your PC. Over an extended period, it can even destroy specific sensitive components.

The common signs of overheating are crashes while gaming since PC games are generally harder on the resources, especially on GPU and display, which might result in a white screen error.

Cleaning dust and debris and replacing the thermal paste should help. Also, don’t shy away from adding extra cooling fans. After you’ve done that and the GPU temperatures are back to normal (around 50-70 degrees Celsius), the GPU white screen should stop.

6. Disable antivirus

Specific third-party antivirus solutions might prove to be more troublesome than expected. Most of them work nicely when the PC is idle, but things change when more intensive processes start running.

For that reason, we suggest disabling antivirus during the gaming sessions. Or, if you are concerned about security, switch to the best antivirus for Windows 10 that does not throw any errors or conflict with other processes.

An alternative is to enable the Game Mode if available. Although, some antivirus solutions, like BitDefender, have specific modes or profiles for gaming. Once you’ve configured them, the likelihood of a white screen while gaming will substantially reduce.

7. Update Windows 11

  1. Press Windows + I to open Settings, and click on Update & Security.update & security
  2. Now, click on Check for updates on the right.check for updates to fix white screen while gaming
  3. If any newer versions of the OS are available, click on Download and install to get them.Download & install to fix white screen while gaming
  4. Once done, restart your PC.

Keeping Windows 10 up to date is of utmost importance. Even though those come automatically, manually checking for updates won’t take too much of your time.

8. Reset Windows 11

Finally, if the issue is persistent, we can only recommend you go to recovery options, and factory reset the Windows 10 PC to factory values.

Of course, you’ll get to keep your files and settings. Otherwise, we won’t suggest it. However, this nifty recovery option lets you reset your PC to default system values in minutes.

The first thing you should do when encountering a white screen while gaming in Windows 11 is to update both the game and the OS. Also, if the error is limited to a particular platform, for instance, a Steam game white screen, edit the Steam app.

In addition to that, update the graphics driver, run the DISM (Deployment Image Servicing and Management) and SFC (System File Checker) scans, and check for overheating.

If you find the CPU temperature higher than usual, find out how to fix overheating issues in Windows 11. A straightforward way to resolve overheating problems would be to manually control the computer fan and set it to run faster.

What causes white screens in Windows 11?

As with Windows 11, the white screen in Windows 11 can be caused by a range of issues, the most common being hardware issues.

Check for the compatibility of the connected devices as well as problems with the RAM. The Windows Memory Diagnostic tool should help with the latter.

Many reported that the problem started after updating Windows, which points to a bug in the new version itself. Reverting to the previous stable version or performing a system restore should do the trick. 

These solutions worked for most users facing a white screen while gaming and should have worked for you. However, if the problem remains unresolved, it’s most certainly a hardware-based issue to blame, and you must get the device physically inspected.

Also, find out how to optimize Windows and get the best gaming experience.

Tell us which fix worked and the game you faced issues with within the comments section below.

Why is my Computer Beeping Randomly? Here’s How to Stop it

When you hear the computer beeping, you know you must pay attention to something. You can usually listen to it when the wrong key or combination of keys is pressed or when an error occurs.

But what about your speakers beeping out of the blue? This is how a user describes the situation:

Alright so just today this issue started. Randomly, while using my computer, I will get a series of beeps from my speakers when I do things like Alt+Tab out of a game, open a File Explorer window, etc. When these beeps happen, my computer slows down for a brief moment.

If you’ve experienced something similar, you’re in the right place. In the following article, we’ll discuss a few ways to bypass this unpleasant situation.

Why does my computer keep beeping randomly Windows 11?

Now, there are different reasons why your speakers are making a continuous beeping sound. Your Windows 11 may keep chiming at random times, but after some research, we have deduced a list of the most common reasons for this issue.

  • There is a hardware problem.
  • Your drivers aren’t up to date.
  • You have kept the microphone on.
  • The sound settings have been mis-tweaked.
  • This could also happen because of loosely fitting power cables.
  • The port is faulty.
  • When the speaker is receiving low voltage.

How do I fix computer speakers’ beeping randomly?

1. Update drivers

  1. Right-click on the Start menu to open the context menu.
    device manager computer speakers beep randomly
  2. Click on Device Manager.
  3. Expand the Video and Game Controllers.
  4. Double-click on each driver to open the Properties Window.
  5. Click on the Driver tab, and then select Update Driver.
    update driver computer speakers beep randomly
  6. Install the drivers on your computer, then be patient for the installation to finish. The beeping sound when scrolling in Windows 10 will disappear.

If this method doesn’t work, you can also try using a third-party tool such as Fortect Driver Updater to update your drivers with just a few clicks automatically.

⇒ Get Fortect Driver Updater

2. Disable your microphone

  1. To fix the Windows 10 random beep, open the Control Panel.
  2. Click on the Hardware and Sound option, then click on Sound.
    sound control panel computer speaker beep randomly
  3. Go to the Recording tab.
  4. Right-click on the Microphone and choose the Disable option.
    disable microphone computer speakers beep randomly

3. Change Sounds settings

  1. Open Control Panel.
  2. In the Hardware and Sounds menu, click on Sound.sound control panel computer speakers beep randomly
  3. Choose the Sound tab.
  4. Scroll through the Program Events box, then click on Default beep.
    sounds default beep computer speakers beep
  5. Select the None option from the drop-down menu.
  6. Click on Apply to save changes and click OK to close the window.
    sounds computer speakers beep randomly
  7. Close the Control Panel.

There you go, three straightforward solutions that should help you if your computer speakers are beeping randomly.

How do I fix random beeping noise on Windows 11?

Here are some quick fixes you can apply to fix the random beeping noise in your Windows 11 PC.

  • Restart your PC.
  • Update the driver software.
  • Install the latest Windows updates.
  • Reconnect peripherals.
  • Turn off the default beep option in Sound settings.

Why is my laptop beeping randomly?

  • There is a signal error.
  • Your speakers are worn out.
  • The speakers are receiving low voltage.
  • Some important files are missing from your PC.
  • The sound driver is not up to date.

See this helpful article as well, in case your keyboard beeps annoyingly whatever you’re trying to type. Feel free to try all our solutions and let us know which solution worked for you.

Remember that you can turn to our Windows 10 Troubleshooting section for any system-related issue. Our Peripherals’ Hub contains useful guides for similar problems to the one described here.