The Cricut machine is great when it comes to bringing your digital designs to life. However, in some instances, you may come across some common problems when dealing with the machine.
Sometimes your PC can’t find the Cricut machine and other times there is a communication error between your PC and the machine. It is a problem that occurs when the connection between your computer and the cutting machine breaks down.
When you encounter this error you will not be able to send any design files from your computer to your Cricut cutting machine or receive any updates from the internet. Before you try anything, ensure that your Cricut machine is plugged into power and turned on.
Why is my Cricut machine not connecting?
If you are experiencing Cricut connection issues, it could be due to a variety of reasons.
Below are some of the reasons:
Loose connection – You may be experiencing the Cricut maker 3 machine communication error because of loosely connected cables. If you are using a cable connection, make sure that the USB cable is securely plugged on both ends.
Outdated firmware – If you’re using a Windows computer, make sure that you have the latest version of Cricut Design Space installed on your computer and that it is fully updated.
Poor internet connection – If your internet connection is not working, then it’s going to be impossible for your Cricut to connect. Make sure that you have internet access on your computer and that it’s not blocked by any firewalls or antivirus software.
Incompatible devices – In other instances, your device may not meet the minimum system requirements. Check on Cricut’s website to ensure your current device is whitelisted before you proceed.
If you have verified that you meet all the requirements, proceed to attempt our troubleshooting solutions.
How do I fix the communication error on Cricut machine?
1. Restart your PC
If you’re having trouble connecting to your Cricut Maker, try restarting your computer. Restarting your PC will clear out any temporary files or programs that are causing the problem.
Your Cricut machine may have trouble connecting to your PC because of open programs but once you restart, the connection will be seamless again and you can go back to cutting magnificent patterns.
Open your browser (in this case Chrome) and tap the three horizontal ellipses on the top right corner.
Select Settings.
Navigate to Privacy and security on the left pane and select Clear browsing data on the right.
Check Browsing history,Cookies and other site data and Cached images and files then hit Clear data.
3. Try a different browser
If you’re having trouble connecting to your Cricut, and you’ve tried everything else on this list, try using a different browser.
We noticed that Opera One is one of the most responsive browsers. It is light when compared to other similar tools and has a very low error rate.
So if you want to connect to the Circuit machine with a different browser, we highly suggest this one. It has a modern interface paired with useful built-ins, like VPN, Ad Blocker, AI and also a modular AI-ready design for the integration of other AI technologies.
Opera One
Avoid Circuit machine problems by using this high-performing and stable browser.
We hope you have been able to resolve the Cricut machine communication error and that you are back to making more excellent designs.
If none of the above solutions work and the machine communication error on your Cricut explore air 2 is still present, you can try unpairing and pairing your Bluetooth device.
Should you face any other issues such as Cricut not cutting properly, we have a dedicated guide on how to solve the problem.
Feel free to let us know of any other Cricut-related issues you have faced in the comments section below.
If you are just getting started or a veteran GitHub user, there’s always plenty for you to learn and explore as it keeps on evolving with time. Previously, users had to rely on secondary platforms such as Learning Lab and explainer videos to stay in touch with what’s new on the platform.
Now there is a new approach to this, where users will get to enhance their GitHub knowledge on GitHub. As such, Learning Lab is also set for deprecation on September 1.
Hence the debut of GitHub Skills, which is backed by GitHub Actions. Essentially, it is in place to help both beginners and pros enhance their Github skillsets. As such, the developing process will now become mor efficient and effective.
GitHub Skills aims to provide users with a smooth, fast, and customizable learning experience which is why it is built with GitHub Actions. The learning experience will feature some popular topics such as Introduction to GitHub and Continuous integration. Furthermore, the user is at liberty to curate their own courses for their projects using the open source course template.
Based on the fact that the learning experience is built on GitHub Actions, the course will be free in public repositories and on self-hosted runners, However, if you are taking the course on a private repository, you will also get it for free. However, it is limited to your account’s monthly free GitHub Actions minutes. Sign up for GitHub Skills to gain access to all these and more.
Most Wi-Fi users often get torn in the debate about the best connection between Wi-Fi mesh vs. Multiple access points.
A stable, fast, and reliable Internet connection is necessary for every home, business, and organization.
With this in mind, planning how to connect your home to a fast and consistent wireless connection is necessary and can also be tricky.
The comparison between Wi-Fi mesh vs multiple access points is confusing, and it takes a simple breakdown to make it easier for you to understand. Some even get it mixed up and ask if mesh Wi-Fi the same as an access point?
This is why it is always hard for most people to choose between the two options. That said, we should understand that both Wi-Fi mesh and multiple access points have pros and cons.
So, we will put the two options side by side and do an extensive comparison to help you choose which one best suits your needs and capabilities.
What are the differences between a Wi-Fi mesh and multiple access points?
What is a Wi-Fi mesh?
The Wi-Fi Mesh is a router system made out of several nodes to provide uninterrupted connections to every part of your home.
Every place in your home enjoys the same consistency and speed in Wi-Fi connectivity, eliminating issues of dead zones.
Mesh technology is great for the kind of services it provides. It uses intelligent technology that dispenses one network to your entire home.
With the help of multiple mesh nodes, you can connect multiple home devices at the same time, and this would not affect the productivity and strength of your bandwidth.
Mesh routers are easy to set up and manage, and with little knowledge of how it works, you can control the network settings, and check the speed.
If you want to buy such a device, check our list including the best mesh routers to enhance coverage on your premises.
What are multiple access points?
An access point is actually another router or extender that creates a WLAN, also known as the wireless local area network.
Using an Ethernet cable, an access point connects to a router, switches, pivots Wi-Fi, and broadcasts a wireless signal to a specified area.
In other words, to enable a Wi-Fi connection in any part of your company or building, you need to install an access point and then run an Ethernet cable to get to the designated area.
An access point is suitable for big offices because it can serve more than 50 devices at a time without affecting the network connection.
Should I buy a Wi-Fi mesh or set up multiple access points?
Wi-Fi Mesh is very productive in its way, and it is easy to set up because you can buy the whole system and install it in one go.
Depending on the need for setting it up, there are some things you should take note of before making your decisions.
Pros
Wi-Fi Mesh is easy to set up and manage
It provides a fast Internet connection
Makes use of nodes to deliver a better coverage
It allows its user to roam freely within the network coverage
Cons
It is quite expensive
Cannot accommodate more than 20 devices at a time
Possibility of a dead point if not properly covered
Building an access point network can be very tricky to set up, especially if the nodes have different standards and you buy them from different manufacturers.
It can accommodate up to 60 devices at a time without any interruptions in the network speed
Wide transmission range
Allows equal signal strength for every device
It's a cheaper solution
Cons
It is difficult and takes time to set up
There may be overlapping channels and networks
If you’re running into trouble when you set up multiple access points, check our article on access point related issues to fix the problems.
Picking one can be confusing, but you should go through this guide carefully to identify the one that best suits your needs.
Anyways, judging by the comparison that has been done in this guide, Multiple access points is a better option, but we shouldn’t dispute the fact that it has shortcomings, especially when you get the access point is temporary full error.
Leave your comments and suggestions below in the comments section. We’d love to hear from you.
Steam is one of the best platforms for gamers, and it’s not just because its library has a huge selection of games.
But with so many options, how do you know which game to play or which will provide the best gaming experience?
It’s an incredibly active community that can help with that. You can use review information to find out which Steam games are popular now.
For example, there are categories like best games on Steam right now. Some of these games have been out for years, and others were just released last week.
But you can notice that there are games that have managed to outrun the most popular ones and acquire the most reviews in a given year.
What are the most popular games on steam right now?
If you’re looking for popular games to play on Steam, these are the ones that have been getting the most attention right now.
Elden Ring is the most reviewed game on Steam in 2022, and it’s easy to see why.
The game has received endless praise from critics for its unique gameplay mechanics, character customization options, and, above all, its graphics and beautiful world design.
Lost Ark is a free-to-play MMORPG that has been a major success. It is the second most reviewed game on Steam in 2022.
This success can be attributed to its highly immersive storyline, beautiful and detailed graphics, and constantly fresh and updated content and features.
With its vast and expansive world to explore, multiple races and factions to choose from, gameplay, and lastly, its graphics, it’s no wonder that this Steam game is an unequivocal hit.
It’s a turn-based type game but it certainly doesn’t feel so static, and it really sets your mind to work when it comes to winning battles.
The Teardown Steam community has a lot of positive things to say about it. It has an extensive campaign mode with over 120 levels and 15 boss fights, plus a multiplayer mode with 1,000+ maps to play on.
If you didn’t play it yet, it’s about crushing, destroying, stealing data, acquiring objects, blowing stuff up, and other fun objectives.
God of War is a narrative-driven action-adventure game. The game has a unique approach to combat and story-telling and stands out from other games in themes or gameplay styles.
It’s been described as being similar to a cinematic experience rather than a traditional video game.
Modern devices allow greater control over device access than ever before, thanks to the app and browser control feature.
It’s not just about switching off your phone or creating complex passwords with patterns and alphanumeric keys. Also, it’s not exclusive to password manager apps.
Now, you can do much more, restricting access to different apps or even your browser. You needn’t worry about nosy snoopers prying sensitive information out of your device.
This feature is important for maintaining the security of your computer. In this article, you’ll learn everything there is to know about it. Read on!
What is app and browser control?
App and browser control is a part of Windows security that provides a list of settings for the Microsoft defender smart screen. It is designed to protect your device from dangerous downloads, sites, apps, and files.
When this feature is set up, users can block obscure apps, dodgy sites, web content, and downloads.
Users can also set up warnings and notifications for such apps, sites, downloads, and the likes. On the flip side, users can also turn off the warnings and block settings.
How do I enable apps and browser control?
Press Windows + S to go to the start menu.
Type windows securityin the search bar and open the app.
From the list of options on the windows security page, select app and browser control.
Click on turn on and allow administrator access.
If you ever wondered how to turn on App and browser control, this is the best way to do it.
What can I do if app and browser control keeps turning off?
Why is App and browser control turned off? There are several reasons for this; it could be a bug or a result of a third-party antivirus.
If it’s been a while since your last Windows update, you might want to consider updating it now to get your systems running smoothly again.
You can even download Windows 11 and install it to fix this problem since App and browser control is available in Windows 11 as well. Once the update has been installed, restart Windows and see if your is everything is working.
In addition, you can uninstall third-party antivirus solutions. Running a third-party antivirus alongside the this feature may disrupt the app’s function and cause it to keep turning off.
If you suspect there’s interference between the two, disabling third-party antivirus is a good step.
So should you keep App and browser control on or off? It depends, if it interferes with your daily activities, then turn it off, but remember to stay vigilant.
By disabling it, you’ll allow all types of applications to run on your PC, and you might end up running some malicious software if you’re not careful.
In some cases, the protection feature may also block trusted applications. You can resolve this by following the steps in our guide on Smart App Control blocking apps.
Thank you for making out time to read this article. Hopefully, you’ve been able to learn a thing or two. We’d be pleased to read your thoughts in the comments section below!
Google Voice scam is a fraudulent activity that occurs when scammers hijack a victim’s phone number to create a Google voice number. Then, they make use of the number for fraudulent activities.
Google voice scam usually happens on Craigslist, Facebook Marketplace, and similar websites. Unfortunately, providing your number on your profile leaves you open to scams such as Google Voice scams.
Scammers can pretend to want to buy from you but need to verify your identity. Meanwhile, their real intention is to impersonate you for their scam projects.
This isn’t the only scam that you can encounter, and we already wrote about the Windows Defender order scam.
How safe is Google Voice?
Speaking of the safety of Google Voice, it is considered secure like other Google services. When you send and receive text messages and attachments on Google Voice, they’re stored securely in Google data centers.
Data is encrypted in transit from a Google Voice client to Google, and when stored at rest.
Google users are especially encouraged to use an authenticator app for their 2FA codes to reduce the chances of someone hijacking their account after a data breach.
There’s one downside to this method since your Google Voice number is tied to your Google account. If hackers manage to compromise your Google account, you’re back to square one because they’ll also have access to your 2FA codes.
What can a hacker do with my Google Voice number?
If you fall for the Google Voice scam, your exposure is very limited. But unfortunately, this does not apply to the people that the hacker contacts next.
Google Voice numbers are routinely used to steal thousands of dollars. They are used for everything from shopping to investment scams.
To avoid being an unwitting accomplice, it’s important to take your phone number back as soon as possible, and in this guide, we’ll show you how to deal with a Google Voice code hack.
A Google verification code is a short (six) numeric code that is sent directly to you, usually via phone or email, to verify your identity.
You might need to enter a verification code if you try to create a new Google account, reset your password, or log into a different computer or device.
It is no different in the case of retrieving your Google Voice number. You should receive a text message saying something like —##### is your Google Voice verification code. Don’t share it with anyone else— you best want to pay attention to the last sentence.
Google Voice Scammers need this six-digit code to take control of your Google Voice number to perpetuate their nefarious acts.
What do I do after Google Voice Scam?
Phone verification scams are pretty easy to fall for if you’ve never heard of them before. However, all you need to avoid the scam is to understand that there is no legitimate reason for anyone to ever ask you for a code.
You can also avoid these scams by keeping your phone number private, but this usually isn’t practical. Legitimate buyers are just as worried about being ripped off as legitimate sellers.
However, if your legitimate buyer is bent on verifying your identity, do anything that does not require you to give off a code, be it a video call, a picture of the product they intend to buy, etc.
The most common way to fall victim to a Google Voice scam is to send your verification code to the other party, so you should never do this.
It is also worth noting that nobody can create a Google Voice account (GVA) with your number if you already have one.
Lastly, don’t forget to report the Google Voice scam to the authorities if you fall victim to it or if anybody asks you for your verification code. You can also try alternative services for more security.
This isn’t the only type of scam going around, and many have fallen victim to FedEx text scams, so be sure to inform yourself and stay vigilant online.
We believe this article is helpful and has provided you with some security. Have you any questions or comments? Please feel free to drop them in the comments section below.
As a user of Microsoft Rewards, you must have run into the annoying error of Microsoft Rewards mobile search not working. This error can quickly become frustrating.
Microsoft Rewards is a free program that rewards users for everything they do every day. When the points that you earn increase, you have the chance to get great rewards.
But the issue of Microsoft Rewards mobile search not working may happen while you are searching on your device, and you see the points are not accumulating as before.
In this article, we will talk about how you can fix this error so that you get to have a seamless experience when you use this app.
How do I use Microsoft Rewards to search mobile?
First, open a browser and go to bing.com.
Now, press Ctrl + Shift + I to open Developer Tools. Once the Developer Tools open, tap the Toggle device toolbarbutton; you can see that it makes the screen smaller because it emulates a mobile phone.
After that, choose your preferred phone. You can then search for everything you want. If you open Microsoft Rewards, you can see your points and searches.
When you open the Microsoft Rewards program, three options display on your screen at the top of the list, including Daily offers, PC searches, and Mobile searches.
If you need to get mobile search results, you need to do it on your computer because there is currently no mobile application for Microsoft Rewards.
How can I fix the Microsoft Rewards mobile search not working issue?
1. Re-login to your account
If you encounter a Microsoft Rewards mobile search not working issue, do not hesitate to log out for a few minutes.
Then, all you have to do is to re-login to your account and check if the problem is solved.
Uninstalling the Bing app and then reinstalling it is another way to alleviate the issue. Sometimes, the problem is with the app itself and not Microsoft Rewards.
It is worth mentioning that the aforementioned solutions can also work for Bing mobile searches not working and Microsoft Rewards PC search not working.
You can also restart your PC or mobile if the workarounds above don’t work for you. Some issues may solve after you restart your device.
If you still encounter this problem, the only way is to contact the Microsoft Rewards Support team and report it.
Before deleting or uninstalling the application, first, redeem your points because you may lose all of your available points. Then, follow the proper instructions to uninstall the app.
How many searches can you do on Microsoft Rewards? There is no limit on how many searches you do on Microsoft Rewards; if you use Bing for mobile searches, you earn one credit for every two searches.
In the comments section below, let us know if you were able to fix the issue.
We’re sure you have a great memory, so you must remember that the Autopatch service was first announced back in April.
Back then, Microsoft said it would be made generally available in July 2022 and committed to providing this for free to customers with a Windows 10 or 11 Enterprise E3 license or greater.
Now, as the latest update from the Redmond-based tech giant, the Windows Autopatch service has reached public preview.
Here’s what you need to know about Windows Autopatch
The Autopatch feature automatically manages the deployment of Windows 10 and Windows 11 quality and feature updates, drivers, firmware, and Microsoft 365 Apps for enterprise updates.
Microsoft says that the launch date for the service is definitely July, so the release of a public preview gives interested users a chance to try it out a few weeks early.
You will surely want to take advantage of such a service, but you should know that there are certain prerequisites for doing so.
Licensing: Windows Autopatch is available at no extra cost to Windows Enterprise E3 and above license holders.
Specifications: Windows Autopatch works with Windows 10 and 11 Enterprise versions and, when we reach general availability, on virtual machines including Windows 365 Cloud PCs.
Hardware requirements: If your corporate-owned devices are running a current. The supported version of Windows 10 or Windows 11, they can be enrolled in Windows Autopatch. Bring-your-own-device (BYOD) scenarios are not currently supported.
Management requirements: Your devices must be managed with either Microsoft Intune or via Configuration Manager co-management.
Identity requirements: User accounts must be managed by Azure Active Directory or Hybrid Azure Active Directory Join.
How do I enroll in the Autopatch program?
https://www.youtube.com/watch?v=gu4bpXYiAd8
Now that you’ve seen what you’re getting, you are surely going to want a piece of the action, so we’re about to show you how you can achieve that.
There are a few steps needed for taking advantage of this great service, so sit back and go through this same process:
Log in to Endpoint Manager as a Global Administrator and find the Windows Autopatch blade under the Tenant Administration menu. If you don’t see ‘Windows Autopatch’ you don’t have the right licenses. See Windows Autopatch prerequisites for more information on prerequisites, including licensing.
Use an InPrivate or Incognito browser window to redeem your public preview code.
Run the readiness assessment, add your admin contact, and add devices.
Path of Exile is a free-to-play online-only game developed by Grinding Gear Games. Many readers reported a slow loading time for Path of Exile.
This could have to do with many reasons, especially if your PC’s performance is not up to the mark. Also, low available RAM is another common issue if the textures are loading slow on Path of Exile. Misconfigured settings are just as likely to affect your gaming experience.
Read the following sections to fix the PoE long loading screen, and other games as well.
How can I fix Path of Exile if it’s loading too slow?
1. Terminate resource-consuming tasks
Press Ctrl + Shift + Esc to launch the Task Manager.
Now, locate the non-critical resource-consuming tasks, right-click on them, and select End task from the context menu.
If it’s the low system resources behind Path of Exile loading slow on your computer, terminating some tasks might help. Make sure to not terminate any of the critical ones, as it could affect the functioning of the system.
Press Windows + S to launch the Search menu, enter Device Manager in the text field, and click on the relevant search result.
Double-click on the Display adapters entry here.
Right-click on the graphics card used by the game, and select Update driver from the context menu.
Next, select Search automatically for drivers from the options that appear.
Windows will now locate the best available driver on the system and install it.
An outdated graphics driver is just as likely to lead to a slow loading screen on Path of Exile, among a bunch of other issues. Therefore, it’s recommended that you always update the graphics driver for the best performance.
If you want more accurate results and automate the task of updating your drivers, use Outbyte Driver Updater. It keeps track of all new driver releases and installs them to your PC without any effort on your part.
3. Use a third-party game booster software
If both the above methods don’t work, you can still use reliable game booster software to reduce the PoE 3.16 loading time. These tools optimize the system’s performance such that the game files are processed quickly, and you notice considerably better performance.
Other than reducing the loading time, it will help bring down ping, eliminate or at least keep the FPS drops in check, amongst other things.
How can I make games load faster on Windows 10/11?
Before you can make the games load faster, it’s imperative to identify what’s causing it. And once you are able to do that, fixing things will be a lot simpler and quicker. For instance, if it’s an overworked CPU, try bringing it to normal levels.
If you are running the game on an HDD, it could be that over time, the files may have spread out, and loading them takes time. Defragmenting the HDD would do the trick here. Also, increasing the virtual memory may help, in case it’s the low RAM causing the games to slow down.
Gaming-oriented PC optimization tools can also help you fix this issue. Game Fire 6 PRO will automatically turn off unnecessary system features and change your settings to ensure maximum performance.
Game Fire
Tweak your settings and improve PC performance to get exceptional speed rates in Path of Exile.
By the time you reach this part, the slow loading error on Path of Exile should be eliminated, and you can play the game, chat with friends, or trade without experiencing any lags.
Viber message not delivered even though your connection is up and running? Here’s how to fix that so your messages will get the green tick in no time.
The this message was not delivered error might signal a problem with the app, your internet connection is down, or you might have the wrong number. Following the steps below will help fix it no matter the cause.
How can I fix Viber when it says that the message isn’t delivered?
1. Check your Internet speed
Launch your preferred browser on your phone.
On the address bar, type and search for Speed test.
Click on the Run Speed Test button to initiate it.
You will then get a detailed account of your internet speed. If your results are not impressive, you can opt to use another Wi-Fi connection or use cellular data.
2. Try a different number
It is also possible that you have been blocked.
You can use someone else’s number to decipher whether the contact you want to reach can receive messages from the other number. In this case, the message will be delivered to them.
If the Viber message is delivered, you have been blocked but if it says not delivered then this means that they might have deactivated their Viber account.
3. Uninstall and reinstall Viber
Navigate to your phone, and locate Viber.
Long press and select Uninstall.
Go to Google Play Store and Install it again.
Why are my Viber messages not delivering?
Sometimes, if the calendar settings are not configured properly, the app will be unable to send out messages at certain times of the day. It might also be because the recipient’s contact information is flawed. This is also, often, the reason behind EE error 0.
At this point, we hope that this guide has helped you resolve the Viber message not being delivered error. Also, remember to refer to our expert guide when Viber fails to launch in Windows 11 or Windows 10.
The Windows 10 Enterprise LTSC (Long Term Servicing Channel) is designed for devices where the key requirement is that functionality and features don’t change over time. These devices include ATMs, point of sale (POS) devices, and other automation and IoT systems.
Things to consider before you install
Wondering how you can get Windows 10 Enterprise LTSC? Before you think about all the benefits a Windows 10 PC without Microsoft bloatware can give you, there are some caveats:
3. The Windows 10 Enterprise LTSC build you install is the build you’re stuck with. You will still get the latest Windows 10 security updates and bug fixes, so security won’t be an issue. Windows 10 LTSC versions released after 2021 only receive 5 years of security update support as opposed to 10 years for other versions.
4. Windows 10 LTSC works fine on an everyday PC as long as you’re okay with not getting the latest features. You can still connect to the internet, install third-party apps, and play PC games, but it may take some extra work to get some apps and games to function properly on your version of Windows.
5. You’ll need to install alternative apps to make up for the lack of Media Player, Microsoft 365, Edge, and others. Windows 10 LTSC also does not include the Microsoft Store app, but this can be downloaded and installed if you want it. You may also need to update your device drivers manually in some cases.
Should I install Windows 10 Enterprise LTSC?
A recent Reddit post details the benefits of Windows 10 Enterprise LTSC, a version of Windows 10 that reportedly comes without any ads, bloatware, or spyware. LTSC stands for “Long Term Servicing Channel” and you may see it elsewhere by its previous name, LTSB, or “Long Term Servicing Branch.” LTSC is a stripped-down version of Windows 10 Enterprise.
Windows 10 Enterprise LTSC 2019
The number of standard Windows consumer features you have or don’t have depends on the version of Windows 10 Enterprise LTSC version you install.
However, the missing Windows features will free up extra hard drive space and PC system resources to help your PC run even more efficiently.
If you do decide you want to throw caution to the wind and install this version of Windows anyways, remember that once you install LTSC, you cannot upgrade to a non-LTSC version.
1. Go to the Microsoft Evaluation Center.
2. Click the 64-bit or 32-bit LTSC version you want to install to start the ISO file download.
3. Once the download is finished, you will need to create a Windows 10 bootable USB drive to install the LTSC ISO on your PC.
Once the 90-day evaluation expires, you will need to reinstall another operating system. At that point, you can either reinstall Windows 10 or 11 or wait out the 90-day evaluation period. After two weeks, your PC will no longer boot into the Windows operating system and you will need to do a clean install of Windows 10.
Make a fully informed choice about LTSC
Before you get too excited, it’s important to point out the downsides to installing this version of Windows on your daily PC. If you have a Windows 11 Pro product key already, congratulations, you can upgrade to Windows 10 Enterprise LTSC. If you have Windows Home, you’ll need to upgrade to a Pro license first, before you can upgrade to Windows 10 LTSC.
LTSC is not available as an individual license and must be purchased for a minimum of 5 or more devices. There’s a really helpful video from 2019 about Windows 10 Enterprise LTSC that estimates the cost of an LTSC license to be approximately $350 (USD) in 2019.
2. LTSC does not keep pace with the releases of new hardware, feature, or security enhancements. LTSC may not support new peripherals either because the driver support models do not change past the LTSC release you deploy. For example, Microsoft’s Office 365 ProPlus is not supported on LTSC.
3. Your favorite applications and Xbox Games may not work or may not support LTSC versions of Windows, so your favorite apps and Xbox games and functionality might not work correctly, if at all. The Windows 10 Enterprise LTSC N version doesn’t include the gaming and media-related features of the more consumer-friendly Windows 10 on the Service Channel.
Conclusion
Some have found success with installing Windows 10 LTSC. Chris Titus Tech has a helpful video detailing Microsoft’s stringent licensing requirements and offers detailed advice on installing Windows 10 Enterprise LTSC 2019 on your PC.
But, if you can’t get the required Microsoft licenses to run LTSC, you will face the same dilemma. At the end of the 90-day evaluation period, your PC will no longer boot, you won’t be able to continue using LTSC, and you’ll have to purchase a new license key to reinstall Windows 10.
If you have any questions or comments about Windows 10 LTSC, let us know in the comments or reach out to me on Twitter!
Pulse Secure is a popular VPN client used by many organizations and individuals. You can download it in different ways and set it up on your Windows PC.
Although it’s a great tool to protect your privacy, you may find that it disconnects from the VPN server at random times.
This can be frustrating if you’re trying to use it for an extended period of time. Fortunately, there are several ways to stop Pulse Secure VPN from disconnecting on Windows 10/11.
If you are using Windows 10 or 11 and noticed that after connecting to the Pulse Secure VPN, it disconnects every few minutes, we have a few workarounds you can try.
Why does my Pulse Secure keep disconnecting?
If you are using Pulse Secure on Windows 10/11 and have found that the connection keeps disconnecting, it could be because of one or more of the following reasons:
Poor Internet connection – When your internet connection is slow or unstable, it may cause the Pulse Secure client to keep disconnecting again and again. You should try changing your Wi-Fi network or upgrading your router as well.
Outdated network drivers – It could be that there is a problem with your network card or its drivers. To check this out, try installing the latest version of drivers from your vendor’s website or update your drivers manually.
Firewall settings – Another reason could be that your antivirus software may have blocked Pulse Secure from connecting to the internet or from accessing some files on its server. Make sure that your antivirus software is up-to-date and scans for viruses. If it still does not work then try disabling your antivirus temporarily and see if that works for you.
Outdated Pulse Secure version – If you are running an older version of Pulse Secure, it may no longer be supported. Check for an updated version on the website and update if necessary.
So, how long does Pulse Secure stay connected? Pulse Secure has a 24-hour timeout in which you are required to reconnect. You can time yourself to finish your work before it elapses to avoid interruptions.
However, if Pulse Secure disconnects every 5 minutes, there may be an underlying problem that needs to be addressed.
?️ Quick Tip! To reduce the risk of being disconnected, use a VPN with a large server base. Private Internet Access has over 35 000 servers across the globe.
It’s secure, with DNS protection and military-grade encryption. Plus, the PIA app has a killswitch feature that will temporarily block traffic data if you disconnect.
Try changing from a wireless connection and use an Ethernet cable when connecting your device with Pulse Secure VPN.
While this may seem like an odd suggestion, it actually works because most wireless connections have issues with latency and connection drops that are caused by interference or distance from the router itself.
Hit the Windows key, search for Windows Security and click Open.
Select Firewall & network protection.
Click on Public network.
Toggle off the Microsoft defender Firewall button.
3. Update network drivers
Press the Windows key, type Device Manager in the search bar and click Open.
Navigate to your network driver, right-click and select Update Driver Software.
Select Search automatically for updated driver software.
Another option is to use a dedicated tool like Outbyte Driver Updater. It can identify outdated drivers on your PC and install the latest versions. If you want, you can automate this task and let it run regular driver updates.
Does Pulse Secure work with Windows 11?
If Pulse Secure keeps disconnecting in Windows 11, you may wonder whether there are any compatibility issues. Well, Pulse Secure works with Windows 11.
Although it is compatible with the OS, there have been a number of reported Pulse Secure Windows 11 issues. Nonetheless, the VPN still works and you can always use Windows 10 if they become too annoying.
We hope one of our recommendations was able to solve your disconnection errors but if not, Pulse Secure is not the only available VPN you can use to secure your privacy. We have an excellent list of reliable VPNs for you Windows 11.
Let us know what method worked out for you in the comment section below.
Roblox fans tend to modify certain game features using Synapse X, but the software sometimes fails to download the UI files as you try to launch/install the Synapse application.
While the error may appear due to various reasons, it is easy to fix, as we will show in the ensuing sections of this guide.
Why has Synapse X failed to download UI files?
Below are some of the causes of the Synapse X failed to download UI files issue:
Antivirus interference: If Synapse X failed to download files or find Roblox, it might be because your antivirus software is blocking the app. The solution to this is to disable your antivirus temporarily and add an exclusion.
Lack of privilege: Sometimes, this issue might occur because you don’t have administrative rights. You need to run the app as an admin to solve the problem.
What can I do if Synapse X has failed to download UI files?
Here’s what to do first:
The Synapse X app may sometimes fail to work due to a problem with the network connectivity. In this case, you can try changing to a different network or use your mobile phone’s internet through the mobile hotspot.
1. Disable the real-time protection and add an exclusion
Click on the Windows Security icon in the system tray.
As the Windows Security app opens, click on Virus & threat protection on the right.
Next, go to Virus & threat protection settings and click on Manage settings.
On the next screen, go to Real-time protection and turn it off.
Now, scroll down, and under Exclusions, click on the Add or remove exclusion link.
On the Exclusions page, click on Add an exclusion and select Folder.
Now, look for Synapse X and select it to add an exclusion for it.
You can try launching Synapse X, and it should be working now.
But, if you are using a third-party security solution, turn it off temporarily or add Synapse X as a trusted item (add to the exclusion list).
2. Open Synapse X with administrator rights
Right-click on the Synapse X shortcut icon
Select Run as administrator.
Now that the Synapse X software has the right to access the protected system resources, the failed to verify UI data Synapse X error should be fixed.
Download the VPN of your choice and install the same.
Now launch the VPN software and connect.
Sometimes, you may encounter the Synapse X download error if your ISP blocks a crucial related file or process. Hence, using a VPN may help you deal with the error.
A practical solution to avoid connection errors with the Synapse X tool is to use a flexible VPN like Private Internet Access.
You have open-source VPN support, thousands of servers in many regions, a no-log policy, or advanced features like the network kill switch.
Private Internet Access
Get the fastest and most secure VPN solution for your device.
Open the xFi advanced security app and click on More.
On the next screen, click on My Services.
Now click on Disable to turn off xFi Advanced Security.
You can now try launching the Synapse X engine, and the xFi Advanced Security by Xfinity will not block access to the Synapse website anymore.
With this, we can conclude this guide on fixing the Synapse X failed to download UI files issue. You only need to follow the instructions in this guide, and things should be back to normal.
If you want to run content like Adobe Flash on your browser, you’ll need NPAPI plugins (chrome://flags/#enable-npapi). These plugins are crucial for displaying interactive elements but are no longer supported in newer versions of Chrome.
However, there are ways to enable NPAPI support, and that’s what we’ll talk about today. For this reason, most versions of Chrome have blocked this plugin.
How do I enable NPAPI in Chrome?
1. Use the Chrome Extension
There are a few different Google Chrome extensions that you can use, but we recommend using either NPAPI Plug-in Support or Enable NPAPI. These extensions will enable NPAPI plugins and allow you to use them in Chrome.
To install either of these extensions, visit the Chrome Web Store and search for NPAPI Plug-in Support or Enable NPAPI. Once you find the extension you want to install, click “Add to Chrome” and follow the instructions.
2. Enable NPAPI from Chrome settings
First, you need to type chrome://flags/#enable-npapi into the address bar.
Next, click on the Enable link under the Enable NPAPI section.
Finally, restart Chrome, and your NPAPI plugin should now be enabled.
Keep in mind that this workaround will only work until Google permanently removes NPAPI support from Chrome, so it’s not a long-term solution.
3. Use a VM (virtual machine)
If Chrome at school or work doesn’t let you use NPAPI plugins, you can use VirtualBox. It creates a secret virtual room in your computer where you can use a different browser that still supports those plugins.
There are a few different virtual machine software programs that you can use, but I recommend using VirtualBox. VirtualBox is a free and open-source virtual machine program.
These are just a few tips on how you can enable or bypass the NPAPI plug-in support in Chrome. If you need to use an NPAPI plugin, your best bet is to use a different browser.
However, if you must use Chrome, you can try one of the solutions listed above. Additionally, you can find other troubleshooting resources on our website to help work around different issues.
At last, Microsoft Word on the web is getting a dark mode
A dark mode has been announced for Microsoft Word on the web, with the aim being to reduce eye strain and help with light sensitivity when working on documents for long hours. Whilst May was listed as the release date for the feature, as that’s been-and-gone, June is looking likely.
Microsoft Entra is Microsoft’s new product family, focused on identity and access capabilities
Entra is Microsoft’s new product family with a focus on identity and access capabilities, and therefore brings together Microsoft Azure Active Directory (Azure AD), Cloud Infrastructure Entitlement Management (CIEM) and decentralized identity.
Microsoft Edge is getting a new cross-platform “Drop” space for note, file storage
Chrome is a veteran browser that has championed many innovations in the industry. In addition, it provided the open platform on which most modern-day browsers, including Kiwi, now operate.
On the other hand, Kiwi Browser is an Android app that has firmly established itself as one of the top Chrome alternatives. Though it shares many things in common with Chrome, they are still distinctively different.
With security now one of the essential features of browsers, it is an excellent parameter to know a browser that suits you well.
Like we did in our Kiwi Browser vs. Opera guide, we will pit the Android browser against the mobile Chrome version in this article. Again, much focus will be on the safety features without neglecting other vital properties.
How to choose the right browser for your needs
There are multiple browsers online that promise to do what you need. But most of them only flatter to deceive.
Hence, it would help to compare factors like the interface, speed, resource usage, privacy, and security to make the right choice.
This Kiwi Browser vs. Chrome guide will consider all these factors to help you make an informed decision.
Kiwi Browser vs. Chrome: Which one should you use?
➡ Design
Kiwi Browser: Customizable interface
Kiwi browser is a Chromium browser like Chrome; hence, their interfaces are similar.
However, unlike Chrome, the Kiwi browser allows you to customize its interface to a certain degree. For example, you can move the Address bar to the bottom of the page.
This makes it easy to browse with one hand. In addition, you can add a hand button, which gives complete control of the navigation, among other customization features.
Chrome: Clean and minimalistic design
It is safe to say Chrome innovated the clean and minimalistic interface found on most modern browsers. Its features a Search bar in the middle of the page.
Just below the search bar is the list of your most visited websites. Then, scrolling down, you will find the Discover section that holds popular news based on your location.
The only letdown is that Chrome does not allow much customization on its mobile version. You can only customize basic things like changing the text scaling and switching to a dark theme.
➡ Performance
Chrome: Speed data saving
Chrome is a fast browser that boasts respectable numbers even on its mobile version. But it comes at a tradeoff of using a lot of system resources.
It is considerably more significant than the Kiwi browser starting from the download file size. However, it has a Data saver feature that is useful if your internet provider does not give unlimited data.
In terms of speed, Kiwi performs far better than Chrome. Its browsing speed is one of the highest for an Android mobile browser.
This is all thanks to its optimized rendering engine and the built-in pop-up and ads blocker that reduce the page loading speed.
➡ Privacy and Security
Kiwi Browser
Kiwi Browser is a safe app that keeps you secure online. It is a browser with a built-in ad blocker that removes even the most stubborn ads and banners.
It also has a popup blocker. This feature selectively blocks all unsafe popups without showing them to you.
Lastly, this browser is credited with innovating the security filter that prevents crypto miners from using your phone’s resources for mining. All these, plus its anti-tracking feature, are why Kiwi Browser is a good option for privacy and security.
Chrome
Chrome does a good job keeping users safe online. While it does not have a built-in ad blocker, it blocks ads below its standard.
Also, it warns you against insecure sites, especially those running HTTP. What’s more, it incorporates the usual anti-malware and anti-phishing features found in most modern browsers.
Despite Kiwi Browser having most Chrome features, the Google app has kept some things. One feature that is unique to Chrome is Syncing.
You can only Sync your browser data across all its platforms on various devices, but never on another browser. Also, the Data saver feature mentioned above is only available on Chrome.
Kiwi Browser
One of the unique features of Kiwi Browser is the ability to use Chrome Web extensions. This might sound surprising, but it is currently the only browser that uses Chrome desktop extensions on mobile.
Another feature that is only available on Kiwi is the ad blocker. This is understandable, as Chrome’s parent company depends mainly on ads for its revenue.
Kiwi Browser sync with Chrome
There is no way to sync Kiwi Browser with Chrome. This is one of the features that the Google-owned app has kept to itself, and understandably so.
The inability to sync browsing data makes Chrome users reconsider switching to Kiwi Browser if they are ever tempted. Hence, you can only sync your Chrome data across different devices on its platform.
Kiwi Browser vs. Chrome: Verdict
Being among the best Chromium-based browsers for Android, the two have more similarities than differences. However, they still have some unique traits that set them apart.
If you are looking for a fast and secure Android browser, the Kiwi Browser is the best fit for you.
However, if you need an all-rounder that offers a syncing option on various devices, Chrome is the best you can get.
Running into FF XIV error 1014 can quickly become so frustrating when you are playing Final Fantasy XIV. However, the good news is that it is easy to fix.
Final Fantasy XIV is an online game developed and published by Square Enix. This popular game became massive so fast. You can also buy this game or start a free trial.
But FF XIV error 1014 sometimes appears, and there is no specific reason for that. It can happen because of different reasons based on where you are in the process.
For example, the MMO’s login, gate, or World servers could be down. This error may appear when you are trying to choose a character or when a sudden in-game crash occurs.
Although these issues are resolved automatically after a short time, the MMO’S server problems stem from congestion or DOS attacks that may prolong this process.
Is FF XIV still good in 2022?
The answer is yes, indeed. One of the best things about this game is the community itself. For instance, new players don’t need to ask questions when trying something new in-game.
The presence of groups helps them learn together, and there are also some players’ mentors who would help the new players to learn how to play the game.
Besides, the new version of this game, Endwalker, has been released recently. There are also holiday events for new players that show up regularly with fun cosmetics and adorable mounts.
As you can see, the number of players has increased over time. You can download this game by heading over to its website; there are some download links for all devices.
How can I fix World Data Could Not Be Obtained error?
1. Check the FF XIV server status
Check the official Final Fantasy XIV server status website to make sure if the server is down or not. The Final Fantasy XIV error 1014 might be triggered by a malfunctioning server maintenance.
If this is the case, your only option is to wait for the server to get back up and running. Please keep in mind that checking the servers first is always recommended before moving on to further options.
2. Power cycle the Wi-Fi router
First, turn it off.
Then unplug the power cable from the router.
Now, wait a few minutes. Then, plug in the cable and turn on the router.
You should run a power cycle on your Wi-Fi router to fix the networking glitch.
Make sure you follow the on-screen directions to finish the Home World transfer process
If you have a character in another world, try it to check if it works correctly or not. The reason this might work is that the excessive number of active players may cause this error.
How can I uninstall and reinstall Final Fantasy XIV?
First, right-click on the Start menu and select Apps and Features.
Then, locate FINAL FANTASY XIV on the list and click on it.
Select Uninstall.
Now reinstall the game.
Make sure that you have already uninstalled the application. Now download your installation file from a trusted source. Then click on it in your web browser’s window to launch the installation.
When the User Account Control window opens, you need to click on Yes to continue the installation process. Now, allow the installation to finish.
If those workarounds don’t work for you, you can restart the game or your system. Rebooting your PC usually results in getting rid of glitches.
Another way is to report the problem to the customer support team of Final Fantasy XIV; they are experts who will help you solve the issue.
Also, keep in mind to check the connectivity status at any time. An unstable network can be the main reason you face FF XIV error 1014.
Let us know if you were able to resolve FF XIV error 1014 in the comments section below.
Since its initial release in October 2018, Synapse X has transformed our understanding of what it means for a platform to be used for execution. However, users have recently reported that Synapse X is not opening after installation.
Today, Synapse is the standard by which the competition is measured. Even after all this time, they have not deviated from the original feature set that was well-received by their communities and that continues to be well-received to this very day.
How do I download Synapse?
Users have been wondering whether Synapse X is free or not. The price of the Synapse X program, which is a private product, ranges between $15 and $20 USD. You may buy a single license that gives you unlimited access by hitting the Purchase button from the center of their home page.
The program may be downloaded by following the link that was supplied to your email address. It is only permitted for you to use Synapse X on a single personal computer that you possess at any given moment.
How do I enable Synapse X?
Following the completion of the software download and extraction process, you will be required to create a new Synapse account within the program by entering the serial key that was sent to you through email.
You will be able to use Synapse X in Roblox once you have completed the registration process. Now let’s see what to do if Synapse X is not opening after installation. Keep on reading!
How to fix Synapse X if it’s not opening after installation?
1. Reinstall the app
Open Settings by holding Windows + I then navigate to Apps followed by Apps and features.
Here, type Synapse X inside the search bar then click on the three-dot menu next to it and select Uninstall.
A faulty installation process might be the cause of the Synapse X not opening after installation error. Thus we recommend that you uninstall the app and then reinstall it on your computer.
To open the Command Prompt interface you need to press Windows and S then type in cmd. Lastly, right-click on the top result and choose Run as administrator.
Now type or copy-paste the following command and let it run: sfc /scannow
Instead of running time-consuming processes, you have the opportunity to deep scan your Windows PC for broken files and errors and resolve them automatically within a few clicks.
3. Temporarily disable your antivirus
Click on the carrot arrow from your Taskbar then right-click on your antivirus icon and choose Disable for 10 minutes.
The steps are similar, no matter what antivirus software you are using and it will fix the Synapse X not working error.
4. Update Windows
Hold Windows and I to open Settings then go to Windows Update.
Here, click on the blue button that will Install or Check for new updates for your operating system. This way, the Synapse X not opening error will be solved.
5. Contact the support team
If none of the above solutions worked for you, we strongly recommend that you contact Synapse X’s support team.
The error might be caused by their servers or download links. If this is the case, you can’t do anything to fix the issue, besides contacting them.
Users have recently reported not having access to the file upload feature on the forms. The option either doesn’t show up at all or it is greyed out and unavailable.
Microsoft Forms is part of Office 365 and allows users to create forms and questionaries. Many organizations and institutions use Microsoft Forms for making surveys, quizzes, polls, and more.
The data collected from the forms can be exported to Microsoft Excel to easily keep track of the collected information. The file upload feature is one of the most useful features for these forms. Keep reading if the file upload option is not visible in Microsft Forms.
How do I enable file upload in Microsoft Forms?
In Microsoft Forms, click the three dots in the top right corner.
Select Settings.
Under Who can fill in the form, change it from Anyone can respond to Only people in my organization can respond.
If your sharing settings are set to share with anyone, then the file option won’t be available. Once the sharing settings are adjusted to sharing with people in your organization, then the file upload option will no longer be greyed out.
How do I fix the file upload option in Microsoft Forms?
1. Adjust sharing preferences
As stated above, make sure you have the file upload feature enabled by adjusting the sharing preferences from Anyone to either Only people in my organization can respond or Specific people in my organization can respond.
Please note that the file upload button will appear greyed out for you, the author, as you are editing the form, but not for the participants.
The file upload feature on Microsoft Forums is only available for internal use, meaning only people within your organization can have access to it.
After adjusting these settings, try logging out and back in if you find that it still isn’t working.
In Microsoft Forms, click on the three dots located at the bottom right corner of the form or quiz.
Select Move to group.
Choose the destination and click Move.
Users have reported that the File upload option doesn’t show up or is grey out when editing the form as a collaborator. Try moving the form to Group Forms to allow other members of the group to edit to solve this problem.
When Microsoft forms don’t have an upload option, though, having backup software on hand can save you a lot of time and effort. If you’re not sure where to start, you may want to get a try to Adobe Acrobat DC , an excellent tool for creating fillable forms, publishing them online, and managing real-time data all in one place.
We hope the above solutions helped solve the file upload option not showing up in Microsoft Forms. For issues on Microsoft Forms not showing all the questions, we offer solutions for that as well.
Be sure to let us know in the comments below which of the above steps worked for you, or if you solved the problem using a solution not listed.
We shall be exploring the issue of no sound in Microsoft Edge.
But first, it’s worth noting that Microsoft Edge has evolved from a list of Microsoft browsers, most notably Internet Explorer 11. For OS like Windows 10 and 11, it is the most compatible, and this has increased its relevance in recent years.
Among its many great features, is its syncing mechanism that makes it possible to work across devices without missing a single thing. Other than this, its UI offers a lot of features that make it endearing. Among these are its collections, vertical tabs, and smart copy.
In spite of its many useful features, just like every modern tech, it is not without its flaws and the occasional need for troubleshooting.
Let us now turn our attention to trouble shooting sound issues in this browser. Remember that you can fix general Microsoft Edge problems on Windows 11 in a few clicks.
How do I find audio settings in Edge?
On your Taskbar, right-click on the volume icon at the bottom right.
From the options, select Open Volume Mixer.
Under the Apps section of your volume mixer settings, you should see settings for Microsoft Edge browser.
You will be able to adjust the volume here, set what devices are used for different sound functions and more.
While these settings give you some flexibility, you will not be able to resolve every Microsoft Edge issue here.
Some common audio issue users have encountered include YouTube audio errors and audio cut out errors.
How can I fix my sound not working in Microsoft Edge?
1. Tab unmuting
Launch Microsoft Edge.
Navigate to YouTube and play a video (Or play a video or audio from any other web service).
Right-click on the tab with the playing video or audio.
Select Unmute tab.
This solution works usually if this audio is caused from a previously muted tab. It is also the most efficient way of switching between tabs and determining which audios you listen to at a particular time. This fix is efficient when there is no sound on YouTube while using Microsoft Edge.
2. Make sure Edge volume is not muted
On your Taskbar, right-click on the volume icon at the bottom right.
From the options, select Open Volume Mixer.
Under the Apps section of your volume mixer settings, you should see settings for Microsoft Edge browser. Here, drag the slider to 100 for maximum volume.
This is a useful way of getting augmented volume if Microsoft Edge sounds low. It is also useful with other devices and will work if you have no sound in Microsoft Edge Xbox one devices.
When the volume is at 0, it means that it is totally muted, and 100 means it is at maximum.
While Microsoft Edge integrates seamlessly with Windows OS, we love to recommend Opera One. This browser is extremely robust and comes with the best customization options.
It is built on Chromium and includes a very extensive range of extensions and plugins. You will be able to add almost any kind of functionality by choosing the right plugins. It also includes an AI and a modular AI-ready design.
Navigate to the site exhibiting this problem, on the left of the address bar, click on the padlock icon and select the option for Permissions for this site.
At the top of the permissions list on the right pane, click the button to Reset permissions.
Check to see if the browser sound issue has now been resolved.
This solution is specially effective when audio problems are specific to some websites. It will resolve no sound problems on Microsoft Teams used in Edge, as well as sound cracking on Microsoft Edge.
We have shared 3 reliable ways of troubleshooting no sound issue on Microsoft Edge. These solutions are in no particular order, and you should use whichever seems more convenient for you.
Finally we like to recommend rebooting your system. Many minor issues on your computer can be solved by a simple computer restart. This process, forces many stubborn processes to close and reset.
As the world’s number one online streaming platform, Youtube boasts millions of hours of enjoyable video content accessible from virtually any location globally. Despite its lofty reputation, it is no stranger to bugs and user experience errors that halt access to the service.
If you’re a regular user of the Chrome browser, then the chances are that you’ve encountered some of these Youtube errors. For example, the infamous Black Screen is so-named for the error display that leaves users unable to use the video playback.
It’s caused by several issues ranging from a simple playback error to geo-blocked content and adblockers and browser plugin interference.
The black screen issue is just one of a handful of Chrome-related Youtube problems, with the equally unpopular Green Screenissue frequently reported by users as far back as Windows 7 and 8.
Luckily, there are several ways to fix the black screen issue. Here are three methods to get rid of it:
Quick Tip:
In case you require to fix this irritating issue on your browser without spending much time, simply switch to a more effective and stable browser.
With Opera One, you can avoid YouTube issues using practical features like a built-in VPN, no ads trackers, integrated messaging apps on your homepage and a native AI.
Input chrome://extensions into the address bar and press Enter.
Navigate to any adblocker extension that you have installed.
Disable it by toggling the icon.
By trying out any of these three solutions, you’re bound to resolve the issue.
However, some users have reported an additional twist to the problem.
Chrome YouTube Black Screen with sound
Many Chrome users have reported experiencing the black screen issue, only this time without sound.
If you’re getting the dreaded black screen error coupled with a lack of sound, then the most likely cause is a poor internet connection.
Also, the solutions highlighted above work fine as troubleshooting techniques.
The primary symptom of this issue is the video’s failure to load. It happens when your internet is slow or there is a YouTube bug. However, the black screen often shows up because of some poor configuration stemming from your device.
Here, it could be browser extension issues or Chrome’s inability to load the content page properly. You can quickly resolve the issue by restarting your device and internet connections and removing ad blockers.
As this issue is not unique to Windows 11, you can check out this article on how to fix it in Windows 10.
Just as well, similar abrupt black screens occur when loading media content on Facebook. Again, the fix is quite identical to its YouTube equivalent, so you should certainly see how it’s done.
We hope this article has been of use to you. So, try out the solution and give us feedback in the comments section below. We’d love to hear from you!
Let’s show you how to add GIF wallpapers on Opera GX. If you’re curious about this browser, you must note that it is the first and most robust browser explicitly made for gamers and gaming.
It is identical to Opera in functionality, even though the design is much more colorful. With integrations for Twitch and Discord, it brings an all-around gaming experience.
However, there is so much more you can do to customize it, and the use of GIFs is just one of the many customization options.
Click on the Settings gear icon at the bottom of the left pane. Alternatively, you can use hotkeys Alt + P.
On the center pane, under the GX menu, click on Use custom wallpaper.
Select a wallpaper from the list displayed.
Optionally, you can click on the option for Get more wallpapers. This takes you to Opera’s repertoire, where you can download different sets of wallpapers.
On the list of Opera wallpapers, click on anyone you are interested in.
Click on the green Add to Opera button. This will download and install your wallpaper on the browser.
Now return to your ready-to-use wallpapers set (Step 4), and select the newly downloaded wallpaper.
You should now use the hotkeys Alt + Home to view your new wallpaper on the Opera GX home screen.
Now we have shown you how to change wallpaper on Opera GX,
How do I set a custom animated background in Opera GX?
Search for the GIF you want to use on Google.
When you find it, download it, change the Save as type to All files, and add .jpg to the file name.
Launch the Opera GX browser.
Click on the Settings gear icon at the bottom of the left pane. Alternatively, you can use hotkeys Alt + P.
On the center pane, under the GX menu, click on Use custom wallpaper.
Click on the Add your wallpaper button.
Navigate to the location where you saved the downloaded GIF and add it.
You should now use the hotkeys Alt + Home to view your new GIFwallpaper on the Opera GX home screen.
And there you have it, you have succeeded in adding a custom GIF as wallpaper on Opera GX.
We have discussed Opera GX wallpapers and custom animated backgrounds. These as well as Opera themes are excellent features because they allow you to change the look and feel of the browser according to your personality.
Several reasons could cause the CefSharp.Browsersubprocess stopped working on your device, and usually that is caused by a bad installation.
Damaged installation will use more resources that in should, causing the application to crash or experience other problems.
Luckily, there are several methods that you can use to fix this problem. This isn’t the only service that users have problems with, and we wrote about how AOL Mail is not syncing with Mail app in a different guide.
Cefsharp.browsersubprocess, what is it?
Cef.Sharp browsersubprocess is a program used to load full-featured, standards-compliant web browsers in .Net or C# applications.
Introduced by Cef.sharp Authors software developers, it allows users to perform various tasks like playing games, sending emails, etc.
The Cef.Sharp process is essential for AOL Desktop Gold devices, especially for speed and efficiency.
What can I do if cefsharp.browsersubprocess stops working?
1. End CefSharp browsersubprocess.exe task
Open the task manager bar by pressing Shift + Ctrl + Esc.
Look for the AOL Desktop Gold icon and click on it.
From the dropdown, right-click on the CefSharp.Browsersubprocess.
Click on End Task.
This is a great method if CefSharp BrowserSubprocess is causing high memory or CPU usage issues.
2. Use an antivirus software
It’s commonly known that an effective antivirus will take care of your PC, and scan the system files for errors and corrupted settings.
To fix these issues, you should use an antivirus tool with a high detection rate and advanced anti-malware instruments.
So is CefSharp BrowserSubprocess a virus? You can determine that with TotalAV due to its high-end file scanning or network inspector capacities.
4. Delete the CefSharp.Browsersubprocess file completely
Open the File Manager and navigate to the following path: C:\Windows\system32
Enter CefSharp.Subprocess.exe into the Explorer and delete all associated files.
Keep in mind that deleting these files might cause issues, so it’s a good idea to have a backup ready.
As you can see, you can easily remove cefsharp.browsersubprocess from your PC, but since it’s located in Windows directory, it’s advised not to.
So, is cefsharp.browsersubprocess safe? Yes, it’s a legitimate process from AOL, but you can encounter issues with it, you can fix them using our solutions.
There are other issues with AOL’s services, and many reported that AOL Mail isn’t displaying images, so you might want to check that issue as well.
We hope that you enjoyed reading this piece and that the information provided proves helpful in helping you detect and fix any issues with your computer caused when the CefSharp.Browsersubprocess is not responsive.
Opera and Chrome are well-known names in the browser industry with a lot of history and innovations. However, while being relatively new, the Brave Browser has made giant strides to close the gap on the big names.
For any browser to gain relevance, it has to thrive in some features. Security is arguably the most important, as it is an area where most have failed and lost authority in the industry.
The Brave Browser, like Opera, is considered one of the most secure browsers with a built-in adblocker. Being the innovator of many modern browser features, Chrome is no pushover in this aspect.
However, the best of them offer you adequate privacy and security without compromising other features.
This Brave Browser vs. Opera and Chrome guide will show how these browsers match up in terms of security and other defining features in a modern browser. In the end, you should be able to decide which is best for you.
How to choose the best browser for you?
With the plethora of browsers available, each with its strong points and downsides, you might need to put one or two at loggerheads to know the one that best suits your needs.
Some of the factors to consider are the interface, ease of use, privacy, security, and performance. While it is hard to find a browser that ticks all of these boxes perfectly, some do an excellent job of being considered an all-rounder.
In this Brave Browser vs. Chrome and Opera, we will consider all of the above features.
Brave Browser vs. Chrome vs. Opera
➡ Design
Brave Browser: Simple, but the interface is a bit blocky
The Brave Browser boasts a customizable, easy-to-use interface. Upon launching the browser, you will be greeted by a list of your favorite websites.
This is accompanied by wallpaper changes every time you launch your browser or open a new tab. Finally, at the top left corner of the homepage is the stats on vital data like saved bandwidth and loading time, blocked ads, etc.
In the right corner is everything cryptocurrency and Brave Rewards. While the placement of these features makes them easily accessible, the result is an overwhelming-looking interface.
Chrome: Easy to use
It is safe to say that Chrome is the father of minimalist browser interfaces. The design is simple, intuitive, and can be easily customized.
The usual Google search bar at the center is on its homepage with a shortcut to your favorite websites just below. The Address bar is located at the top with the bookmark button, menu button, and the extensions button by its side.
The only downside is that, as clean and simple as the interface is, it is not fully customizable.
Opera: Simple and intuitive
Opera boasts one of the most straightforward and intuitive interfaces in modern browsers. In addition, its design is clean with many features without being overwhelming.
At the center of the homepage is a thumbnail of your favorite websites. Right above it is the search bar for quick access to the web.
The main distinguishing factor between Opera’s interface and others is the Sidebar. It contains some of the browser’s built-in features like settings and history.
You can also find some integrated apps like Instagram and Facebook Messenger. This well-placed Sidebar allows the homepage to hold a lot of features without appearing clumsy.
Add the fact that the interface is fully customizable, and it will be hard for Brave Browser and Chrome to match what Opera brings to the table here.
➡ Privacy & security
Brave Browser: A privacy and security juggernaut
This is the selling point of the Brave Browser, and it has certainly lived up to its promise. It has a built-in adblocker that is automatically enabled.
This feature allows you to eliminate ads, banners, trackers, cookies, and scripts and offers fingerprinting protection. The Brave Shields feature also helps you upgrade any website connection to HTTPS for a secure connection.
What’s more, the Brave Browser integrates a software called Tor. This software allows you to surf the web anonymously. The only downside is that it reduces your browsing speed more than the VPN.
But this takes away nothing from Brave’s exceptional security feature.
Chrome: Standard security level
Chrome has no built-in adblocker nor a VPN feature. However, it blocks some ads automatically that are below a particular set of standards.
It also has a Do Not Track feature in its advanced settings that prevent publishers from tracking you. However, this feature is not practical as some publishers can honor it.
Lastly, Chrome offers all the usual security and privacy features, such as incognito browsing and sandboxing that stops a website program from infiltrating your PC.
Opera: A browser with accessible, compelling security features
The VPN feature allows you to surf the web anonymously. It also lets you access location-restricted contents without the risk of being exposed.
The built-in ad blocker does an excellent job blocking ads on any website. In addition, it helps you remove harmful banners and links disguised as ads.
The anti-tracking feature also makes sure your activities cannot be tracked online. Lastly, Opera is excellent in other browser-related security features such as incognito browsing, SSL certificate check, and sandboxing.
➡ Performance
Opera: Fast and lightweight
Opera is one of the best lightweight browsers for Windows, macOS, tablets, and other devices. Compared to Chrome and most other modern browsers, Opera consumes less RAM and CPU.
Based on the Chromium engine as Brave and Chrome, they seem to have comparable speed.
However, Opera has a Turbo feature that allows you to speed up your browsing impressively. Also, with resources-consuming ads blocked, the page loading speed increases exponentially.
Its ad blocker blocks crypto miners from using your system resources for mining. This results in improved loading speed and slick browsing sessions.
Brave Browser: Low resources usage
The Brave Browser is considerably better than Chrome regarding resource usage. Again, the numbers are close vs. Opera, but Brave RAM and CPU usage are slightly less.
But when it comes to startup, Opera consumes notably less memory. Moreover, the Brave Browser ranks well in terms of speed. It is written on its official website that it is three times faster than Chrome.
This is not necessarily true, as the load times differ with pages. However, there is no dispute that it is not as fast as Opera, even if the margins are close in some cases.
Chrome: Customizable resources usage
Chrome is well-known for its speed, even though it’s not as fast as Opera and Brave Browser. The only caveat is that it consumes a lot of system resources.
It makes up for this with its Data saver feature that allows you to minimize your data usage and speed up your browsing. Also, it has a built-in Task manager for each tab that shows the resource consumption.
With this, you can close any website slowing down your browser and PC.
Opera is known for its series of integrations. For example, it boasts integrations of apps like Messenger, Twitter, Facebook, Telegram, and Instagram.
But those are not all the features unique to Opera. Below are some other ones:
Opera Workflow.
Opera Turbo.
Battery Saver.
Snapshot tool.
Music player.
Workspace.
Chrome
There are not too many unique features to Chrome, as most browsers look to emulate most of its properties. However, it still has a few, like creating a reading list.
This allows you to add a bookmarked page to a list that can be read offline. There is a Task manager for websites. With this feature, you can check the resource usage of each website and close the page there.
Brave
The Brave Browser has some unique, innovative features like the Brave Rewards. This feature lets you earn tokens for allowing some safe ads.
Also, there is the cryptocurrency feature for buying crypto right on the homepage. Lastly, you can use the Search Tabs feature to look for open and recent tabs.
Conclusion: Our choice
While these three are regarded as some of the best Chromium-based browsers available, our pick for this guide is the well-rounded Opera browser.
This is because it scores highly in all features considered. Moreover, it is notably better than Brave browser and Chrome in design and interface.
It uses low system resources and offers an excellent browsing speed. Lastly, while the Brave Browser might be safer, Opera is no slouch in the privacy and security section. ⇒ Get Opera
Steam is either one of the most popular gaming platforms in the world or the most popular platform overall. However, you can still encounter errors on it, such as There was a problem adding this product to your Steam account.
Follow along as today we will show you how to fix this Steamerror in 3 simple ways.
How do you fix An error was encountered while processing your request: There was a problem adding this product to your Steam account?
1. Add the base game first
If you are trying to add a DLC to Steam, without having the base game added first, you will receive the There was a problem adding this product to your Steam account error. Thus, head to the game’s page that you want to add and click on the Download button.
Once you click on the Add a game button and add the game, you can further add DLC packages.
Downloadable content is what DLC refers to in the game industry. It extends the functionality of the base game by adding elements that were absent from the original version of the game.
Close your Steam app and head to Task Manager by pressing CTRL + SHIFT + ESC then navigate to the Details page.
Here, look for any Steam processes left and make sure to select End task in order to close it completely.
Afterward, reopen the Steam app and try to add your product.
3. Update Steam
Click on the Steam option from the top bar.
Now select the Check for Steam Client Updates option in order to update it. After this, retry to add your product. The Steam product activation error should be gone.
Download problems can occasionally be caused by servers in a particular region being too sluggish, overloaded, or suffering from a hardware breakdown. But otherwise, the update process should be completed shortly.
What can be purchased on Steam?
Despite the fact that Steam is an online-only business, it nevertheless provides gift cards. And it is better than penning an activation code at the bottom of a standard birthday or Christmas card.
Steam furthermore provides digital gift cards, which means the transaction can take place fully online. The distinction between a physical gift card and a digital one is the dollar amount that is pre-loaded onto it.
The value of a Steam card may be transferred into the recipient’s digital Steam Wallet. Do this by entering the activation code that comes with the card. This code can be found on the back of it.
After that, you’ll be able to utilize the balance in your Wallet to purchase things. If you encounter issues with the payment process, check out our guide on how to fix the Steam Paypal purchase error.
If you’re familiar with the Untitled error in Google Chrome, you know how frustrating it can be.
A corrupt user profile, extensions or plugins, hardware acceleration, cache and cookies, as well as antivirus interference, could all contribute.
The good news is all of these problems are easy to address:
How do I fix the untitled error in Chrome?
1. Add no-sandbox
First, close Google Chrome.
Then, right-click on the Google Chrome icon, and afterward, go to Properties at the bottom of the list.
Inside the shortcut tab, click on the text box in front of Target,and add the following text after the path to the application: --no-sandbox
Click on Apply, and then tap on OK. Now, restart your computer, then launch your Google browser.
2. Clear Chrome cache
First, open Google Chrome.
Then, press Ctrl + Shift + Delete together. Now, the Clearing browser data window opens.
Choose the Advanced section next to the Basic section. Then, change the Time range to All-time at the bottom of the menu. After that, click the Clear data button.
When it’s done, close your web browser and open Google Chrome again.
3. Turn the hardware acceleration off
First, click on the vertical Ellipsis icon at the top of the browser window. Then, click onSettings to open it.
Scroll down and clickon the Advanced tab. Next, go to the System section and turn off the Use hardware acceleration when available toggle switch.
Another way to fix the Chrome untitled error is to disable your browser’s hardware acceleration settings.
4. Disable the extensions
First, you need to open Google Chrome and click on the vertical Ellipsis icon again. Then, select More Toolsnext, and choose Extensions from its submenu.
The extension page displays on your screen; you need to turn off any toggle switches.
Now, close Google Chrome and open it again to make sure the problem is already solved.
5. Edit Chrome shortcut target
To do this, first, close the Google Chrome browser.
Then, right-click on the Google Chrom icon and choose Properties.
Go to the Shortcut tab; in the Target box, add the following text: --disable-GPU
Finally, click OK to save and confirm changes.
Although those previous workarounds even work in Windows 10, this solution would be helpful to resolve the issue in Windows 11, Windows 10, and Windows 7. Disabling the GPU can help solve the issue.
Reddit is a social media platform that allows users to share, vote, and comment on content. It includes a wide range of topics in its communities, which are called subreddits.
You can also track your Reddit feed on Windows which is just one of its many useful features. Whereas it is a great platform, some users don’t find it user-friendly and would rather use a plugin to enhance their experience.
The Reddit Enhancement Suite (RES) is a browser extension for improving the usability of the Reddit website and provides several features such as quick access to many important functions, like voting, commenting, messaging, and saving links.
?️Quick Tip:
The Reddit Enhancement Suite (RES) is accessible in any browser, but you may be surprised how smooth it works in the Opera browser. You may move all of your extensions, bookmarks, passwords, and other stored data from your current browser to Opera and experience a fully optimized add-on.
Since you have a browser that gives you a hard time enjoying RES, you could switch to Opera to take this add-on to the next level of awesomeness.
Reddit Enhancement Suite is a browser extension for Safari, Google Chrome, Mozilla Firefox, and Edge that enhances your Reddit browsing experience.
It is packed with a set of features that will help you get more out of your time on Reddit such as:
A button in your browser’s toolbar that allows you to quickly create new posts, comments, and submissions.
An interface to view all posts from a particular subreddit on one page.
Comes with hover zoom that lets you hover over an image to zoom in on it. You can configure this so it only works on images you want to see in high resolution.
A powerful customizable multireddit feature that lets you create, share and manage multireddits from submenus.
Browse in a reader-friendly format, with or without images, with or without comments.
So, how do you use Reddit Enhancement Suite?
Easy, on your selected browser, search for the tool on the associated store, install the plugin, and start using it right away.
What can I do if the Reddit enhancement suite isn’t working?
1. Reddit enhancement suite not working on Chrome
Navigate to your browser and in a new tab, enter the following address: chrome://extensions/
Locatethe RES extension and click Remove.
Navigate again to the Chrome Web Store, search for RES and click Add to Chrome.
2. Reddit enhancement suite not working on Firefox
Navigate to your browser, hit the three settings icon at the top right corner, and select Add-ons and themes.
Click on the three ellipses next to the Reddit Enhancement Suite and click Remove.
Confirm Remove in the next window that pops up.
Go back to the Firefox Addons, find RES, and click Get to add it again.
3. Reddit enhancement suite not working on Safari
Navigate to your Safari browser, click on Safari, and select Preferences.
Go to the Extensions tab, find RES, and click on Uninstall.
Navigate to your Safari browser, click on Safari, and select Safari Extensions.
Navigate to your browser and click the three horizontal ellipses and select Extensions.
Locate the RES extension and click Remove.
Click on Remove in the next window that pops up.
Go back to the store, find RES, and click the Get button to install it again.
What can I do if the Reddit enhancement suite filter is not working?
When you set up filters in RES, you only want to see certain posts on your homepage to avoid missing any important updates.
Sometimes, the filter option may fail to perform its duties and your feed will be full of all Reddit threads that you don’t want to see. The solution to this problem is simple.
If you are using the redesigned version, you just need to download the old version of RES on old.reddit.com and it should work just fine.
We hope that you have been able to get your RES extension working again and can proceed to enjoy its many features.
Should you encounter any other related issues such as Reddit not working on Chrome but we have covered that in our expert guide.
You may also encounter the unauthorized 401 error but worry not because we have an expert guide to cover the bases.
The video game Diablo Immortal is the latest installment in the Diablo franchise and is available to play for free on mobile devices. However, users have been reporting there is no sound in Diablo Immortal. Keep on reading as we will show you how to fix it.
Between the events of Diablo II and Diablo III is where the story of this massively multiplayer online action role-playing game takes place. It was developed by Blizzard Entertainment and NetEase. And it was stated in late 2018 that Diablo Immortal’s release date will be in late 2022.
On June 2, 2022, it was launched on Android and iOS, and on the same date, a beta version was released for Windows.
It is a game that can only be played online and requires a connection to the Internet. The player’s progress may be linked to their Battlenet account using the game’s cross-save technology. Which enables them to continue playing the game on other devices without losing their previous saves.
Why is there no sound on Diablo Immortal?
If you’ve started up Diablo Immortal but there’s no sound, check to see if you’ve downloaded all of the accessible resources. If you have, then try loading up the game again.
The first download is a substantial amount of data. But after you enter into the game, there is an extra installation that takes over 700 MB.
This supplementary installation contains additional game files, a number of which are required in order to get the most out of your experience with Diablo Immortal.
If this is your first time playing the game, you will be prompted to begin the installation when you do so. It is imperative that you do so, and after you have, the sound should function normally when it is completed.
If it doesn’t work, the problem that causes there to be no sound is probably caused by the settings on your own device.
On iOS devices, in particular, music that is playing in the background of applications like Spotify can occasionally overpower the sound that is being played within the app.
To guarantee that everything runs more smoothly, you should double verify that you are not now using Spotify or any other music applications. And you should also consider closing all other programs that are open in multitasking mode.
How to fix the game audio in Diablo Immortal?
1. Redownload the game on Windows
To fix the Diablo Immortal no sound in Windows issue we recommend that you uninstall the game first. Head to Settings by pressing Windows and I.
Next, head to Apps followed by Apps and features.
Type Diablo Immortal inside the search bar then click on the three-dot menu next to the game and choose Uninstall.
Now go to Diablo’s official website and click on the Play now button in order to redownload the game. Make sure you download all the files that you need.
Blizzard Entertainment Inc. is a video game developer and publisher operating out of Irvine, California, in the United States of America.
Since the late 1990s, Blizzard Entertainment has concentrated nearly entirely on the development of a few games. Such as Warcraft, Diablo, StarCraft, and Overwatch game franchises.
All of Blizzard’s games that have been launched since 2004 are still getting expansions and new content. Notably the massively multiplayer online role-playing game World of Warcraft, which has been around for a very long time.
2. Update your audio drivers
Open Device Manager and expand the Audio inputs and outputs category.
Right-click on your speaker driver.
Select Updatedriver. If you get a prompt asking How do you want to search for drivers? select the automatic option.
If Windows finds any new driver version available, it will automatically install them. Unfortunately, this utility is not always able to detect the latest driver releases. For faster and better results, use Outbyte Driver Updater.
It has access to a huge driver database. It uses it to scan your drivers and replace any outdated or corrupt ones. Outbyte Driver Updater can save you a lot of time. Just enable the auto-update option and never worry about your drivers again.
Right-click on the carrot arrow from your Taskbar. Then check what apps you are running that might be using your audio outputs. Some examples are Spotify or Tidal.
Right-click on the apps and choose the Exit, Quit,or Close option.
There will be no sound in Diablo Immortal on iOS especially if other apps interfere with the game.
Unfortunately, Blizzard has not yet released a patch that specifically addresses the situation. If you’ve tried the three techniques described above but are still unable to hear anything in Diablo Immortal, the issue is probably on their end.
Wait for a patch to be released shortly so that these minor issues, which have surfaced in the days after the debut, may be fixed.
Radmin VPN taking forever to connect or not connecting will prevent you from accessing your remote network and disrupt your workflow. To put an end to that, you have to address configuration and network issues causing the problem.
Here’s how:
How do I fix my Radmin connection?
1. Check your Internet connection
Problems with one’s Internet connection are inevitable for anybody who uses it these days. If a certain website won’t load, you should try using a different website.
In case none of them load effectively, try to change your network connection to another source. If you don’t have any, simply disconnect and reconnect to your current one.
The Radmin VPN stuck on the connecting issue should be gone now.
2. Use Registry Editor
Press Windows and S and type in Registry. Click on the topmost result in order to open Registry Editor.
Paste the following location inside the search bar and press Enter: Computer\HKEY_LOCAL_MACHINE\SOFTWARE\WOW6432Node\Famatech\RadminVPN\1.0(forx64)
Right-click on the IPv4, IPv6 and RID keys and select Delete.
Check the Alias keys and make sure the name corresponds to the name of your device.
Type View PC name in the Windows search bar if you want to check your device name.
3. Allow Radmin through the firewall
Type Firewall, in the Start bar and select Windows Defender Firewall.
Click Allow an app or feature through Windows Defender Firewall on the left.
Click Change settings and then Allow another app…
In the Add an App window, click Browse, navigate to Radmin VPN’s installation directory (e.g., C:\Program Files\Radmin VPN), select rvservice.exe, and click Open, then Add.
Ensure Radmin VPN is listed with both Private and Public checkboxes checked, then click OK.
4. Disable your antivirus and reinstall Radmin
Right-click on your antivirus icon from your Taskbar and choose Disable for 10 minutes.
Next, head to Settings by pressing Windows and I and go to Apps followed by Apps and features.
Type in Radmin, then click on the three-dot menu next to it and choose Uninstall.
Navigate to Radmin VPN’s website and hit the Free download button. The Radmin VPN can’t connect to server error will be resolved now.
5. Try another VPN
Get a reliable VPN with a Remote Networking feature. We recommend NordVPNbecause it offers Meshnet for free.
Install it and log in. For remote connections, you’ll have to install the VPN app on all devices you want to interconnect (up to 60).
Navigate to the Meshnet feature in the sidebar and enable it.
Add the devices you want to connect to your Meshnet.
Test the connection by ensuring you can access each device on your Meshnet network.
If all else fails, consider switching to an alternative to Radmin.
We like NordVPN because it lets you securely connect up to 60 devices across different platforms for file sharing, gaming, and remote access. It’s free, easy to set up, and fast.
Double-click on the executable file that was downloaded on your computer and follow the onscreen steps in order to install the VPN.
Next, click on the Create Network button.
Enter the name and password of the network and hit Create.
Now you can download Radmin VPN on your other devices and then select Join Network.
Enter the network name and password. The network created earlier and its nodes will be shown in the Radmin VPN Main window.
If Radmin VPN is not connecting, first ensure that the computers are connected and verify the connection status. For proper functionality, configure your router to forward connections to port 4899 on the target machine.
Several websites, generally the ones dealing with finances and trading, require you to submit documents to create an account. While uploading these, many came across There was an error processing your document. Try uploading a different document to continue.
When you encounter this, the document upload process won’t go through and whatever task you are up to wouldn’t be completed. The problem is generally pretty simple, and so are the solutions.
So, let’s first head straight to what’s behind the There was an error processing your document. Try uploading a different document to continue problem, and then the fixes for it.
Why is there an error uploading my photo?
Most likely, the photo that you are trying to upload doesn’t meet the requirements set by the platform. Every platform has a bunch of guidelines that the photo/document has to meet. For instance, its size, dimensions, or format.
If the platform has set a limit of 5 MB and you are trying to upload a 7MB photo, it wouldn’t be accepted, let alone approved. Then comes format, check if the platform accepts photos in PNG or JPEG since these are widely accepted. Also, check the dimensions.
In case all these guidelines are met, there could be a problem with the platform’s server. Here, the screen might read something like Verification is currently in progress, please allow 1-2 minutes. Wait for a while for the issue to resolve. If it doesn’t, the browser cache and cookies could be behind things.
Let’s now head to the most effective solutions. But before we do, make sure that your photo/document fulfills the upload criteria and then proceed.
How do I fix the document processing error?
NOTE
The methods listed here are for Google Chrome. In case you are using a different browser, head to the FAQ section of its official website for exact steps.
1. Try a different browser
If you encounter this issue on a regular basis, trying out a browser that’s better for the task is not a bad idea. A good option that is optimized for performance and speed is Opera One.
This browser gives you the possibility to block ads and trackers, which in return will make it faster. If you enable these options you should have no more document processing problems.
It’s one of the lightest browsers you can find and it’s very responsive, with low error rates. You can create your own workspace with custom settings and useful add-ons and protect your privacy with the free VPN.
Press Ctrl + H to launch the browser History, and click on Clear browsing data on the left.
Click on the Time range dropdown menu, and select All time from the list of options.
Next, make sure that the checkboxes for Cookies and other site data and Cached images and files are selected, and then click on Clear data.
Once done, restart the browser for the changes to come into effect, and check if you can now upload the photo/document that threw an error on PayPal or DocuSign earlier.
If There was an error processing your document. Try uploading a different document to continue issue persists, try the next fix.
3. Use incognito mode
Every browser offers the Incognito or Private mode option where the cookies and browsing history are not saved and hence are not trackable.
The Kraken verification team, in response to one of the queries on Reddit, recommended the user to try uploading in incognito/private mode.
Incognito mode in Google Chrome
To access the incognito mode on Google Chrome or private mode on Microsoft Edge, press Ctrl + Shift + N. For Mozilla Firefox, you can use Ctrl + Shift + P.
If the previous two methods didn’t work, you can contact the support team. The easiest way out is to raise a ticket for the problem.
In most cases, the support team would ask you to share the documents over email and will upload these themselves. But, this should always be the last resort.
Why do I see the Kraken invalid image dimensions error?
If the photo that you are trying to upload exceeds the dimensions set by Kraken, you would receive an invalid image dimensions error. Here are the guidelines for uploading an image on Kraken:
Parameter
Supported
Dimensions
350 x 350px to 6144 x 6144px
Size
5 KB to 16 MB
Format
.jpg, .jpeg, .png, .pdf
Follow these and you should face no trouble uploading images to Kraken from now on.
These are all the ways you can fix the There was an error processing your document. Try uploading a different document to continue issue.
Whereas there are a number of reliable VPNs in the market, not many compare to WatchGuard. WatchGuard’s robust security technologies include a firewall, intrusion prevention system (IPS), anti-malware, and more, so you can be confident that your data is safe and secure.
You can check out our comprehensive breakdown of the pros and cons of WatchGuard VPN to see whether it will be a great choice for you.
Like any software, you can expect that some errors are bound to appear once in a while. Some can be easily fixed with a restart but others can interfere with the efficiency of the program.
Some of the most common errors include VPN general processing error ikev2 and error 13804 general processing error.
A lot of users who are facing these errors say that they appeared immediately after they installed a bunch of Windows security patches.
Does WatchGuard use OpenVPN?
WatchGuard uses OpenVPN but only for SSL. OpenVPN is one of the most popular VPN protocols in existence today.
It’s open-source, which means that it can be used by anyone for free or for profit as long as they respect the open source license agreement.
You may be wondering, What type of VPN is WatchGuard? Well, it is a multi-faceted type of VPN that offers various choices for connectivity: Mobile VPN with IKEv2, Mobile VPN with SSL, and IPSec VPN client.
All three choices offer a full suite of advanced features to secure your remote access connections with advanced encryption and authentication properties.
The WatchGuard IPSec VPN Client makes it easy for you to set up and manage secure connections with multiple clients at different locations around the world.
It also provides secure access to your network over the Internet, protecting data as it travels between your network and your remote users.
How do I fix my WatchGuard VPN on Windows 10/11?
Uninstall the latest Windows update
Press the Windows + I keys simultaneously to open Settings.
Navigate to Windows Updates and go to Update history.
Click on Uninstall updates.
Select the most recent update then click Uninstall.
How do I clear WatchGuard SSL VPN cache?
The WatchGuard SSL VPN client caches web pages and other data. This is to ensure that users do not have to wait for it to be downloaded each time they access a site.
It can be very useful if you are accessing public sites such as news sites. However, it can also lead to problems when the cached version of a page is out of date and needs updating.
To clear the cache, follow the steps below:
Hit the Windows + R keys to open the Run command.
Type regedit in the dialog box and click Enter.
Navigate to the following location: KEY_CURRENT_USER\Software\WatchGuard\SSLVPNClient\Settings
Delete the entry.
WatchGuard is an excellent VPN service but it is not the only one. You can check out other VPNs that encrypt and protect your data making sure that you are secured even when working remotely.
We’d love to know what VPN service you are using and your reasons why. Drop us a comment down below to start the conversation.
Etsy not connecting error is one of the most common issues on the platform and it occurs for many different reasons.
You could be trying to log in but because of 2FA, you are either not getting the code or staying on the page for too long.
Etsy being among the top online selling software for businesses, experiencing such errors can lead to massive losses if many users encounter a similar problem at the same time.
In most cases, you can fix this issue by clearing your browser cache or removing the connection between your computer and Etsy’s servers and then re-establishing it. If you are not successful in logging back into Etsy, you can proceed to our advanced troubleshooting methods.
Why can I not connect to Etsy?
If you are having trouble connecting to Etsy, a number of factors can lead to a connection issue, including:
Poor internet connection – Your internet connection may be down if your computer has multiple network connections. Make sure that you connect using an ethernet cable if possible.
Firewall settings – You may have trouble connecting to Etsy if you are using a firewall or antivirus software. The most common reason for this is that the application is blocking the connection.
Technical difficulties – While the site is usually very reliable, it’s possible that you may experience problems connecting due to a server issue or scheduled downtime. You can verify a downtime on downdetector.com by typing Is Etsy not working right now?
Too many login attempts – You’ve entered incorrect login credentials too many times in a row, so you’ve been locked out of your account temporarily as a security precaution for your own protection.
If any of the above causes are the reason for Etsy not working, proceed to troubleshoot using our recommended solutions.
How can I fix the Etsy connection error during authentication?
1. Use backup codes
If you have tested your internet connection and everything is working fine, it’s possible that Etsy is down or experiencing high traffic. This is a common occurrence and usually resolves itself within a few minutes.
You can force your app to bypass the connection error by using backup codes. Etsy provides you with a backup code when there’s a delay in code generation.
Open your browser (in this case Chrome) and tap the three horizontal ellipses on the top right corner.
Select Settings.
Navigate to Privacy and security on the left pane and select Clear browsing data on the right.
Check Cookies and other site data and Cached images and files then hit Clear data.
3. Switch to another browser
Bypassing the Etsy connection error during login, you risk exposing your browser to a potentially dangerous connection. If none of the other solutions work, switching to a different browser to log in can be a lifesaver and the fastest way to get back on Etsy.
The built-in VPN and anti-tracking feature in the Opera browser may be able to secure your location via their servers, allowing you to avoid Etsy’s restricted authentication page.
It defends against cyber attacks, identity theft, and DNS hijacking at the same time. We gladly recommend it because our software experts were able to successfully log in using the Opera browser, which we specifically tested for this problem.
You can also switch from any browser to Opera with a single click after you install without losing any saved data, such as login credentials and bookmarks.
Etsy’s two-factor authentication is an extra layer of protection when logging in or making purchases. It works by sending a code to a device that only you have access to — usually your phone.
You cannot access your account or make a purchase before you pass this step. In this age of advanced cyber crimes, it is important to enable 2FA or multi-factor authentication on any online platform.
Etsy is particularly important since you may enter your credit card details at some point to check out and don’t want unauthorized parties to access your credentials.
Having reached the end of this article, we hope one of our solutions was able to help you bypass the Etsy connection error during authentication.
You can also benefit from our safe password managers list that will ensure your passwords are stored for easy retrieval if you are in the habit of easily forgetting them.
Let us know whether you were able to bypass this error in the comments section below.
Sometimes, people opt-in for the free mode of Avast antivirus, and this can be for different reasons. The two editions of Avast antivirus are free and paid.
Even though they both function just fine, some major differences give the paid edition an edge over the free one.
The primary reason for installing Avast antivirus on your device is for security. It protects your device from external threats.
This is so important because it keeps your devices safe and it prevents malware or internet threats from accessing them. Even though this is a great antivirus, few users reported Avastui.exe application error, but that can be easily fixed.
The decision of whether to keep the free version of Avast or upgrade to the paid version is challenging for many individuals. In this article, we have compared the two versions so that you can decide which one suits your needs best.
Hence, we will examine the features of the two versions before diving into the differences, so join us for a quick Avast Antivirus review.
Avast antivirus Free vs Paid: What are the differences?
Avast Antivirus Free
This version of Avast is comparable to most paid products on the market today. So, is Avast Free really free? The answer is a resounding yes.
It does not charge any fee for its services as it is free. It is effective for detecting and blocking viruses that are already on your device, protecting it from new ones trying to get in.
The free edition comes with features that provide a powerful defense for your device against malware, adware, ransomware, spyware, and any other threatening software on your device.
Avast Antivirus Free features:
It provides a solid shield for your device against malware and viruses.
It has WiFi security that scans your wireless network, detects intruders that are sharing your network, and also blocks future intruders from getting in.
The free version builds a shield that monitors the behavior of the user’s applications and it immediately alerts the user when there is any misbehavior or threat from any application.
Password manager secures all your passwords and protects any security engagements carried out by the user.
It has live ransomware protection which acts as a comprehensive updating mechanism that keeps your software updated.
A virus chest is a feature that traps and quarantines viruses from affecting other components of the device.
It has a Do not disturb mode.
There are some other side features like transparency, user-friendliness, enhanced security, etc. The main distinction between the free and paid versions is the advanced features available in the paid version that are not available in the free version.
Is Avast Antivirus free forever, you may ask? Yes, it’s free forever, so you can use it without any restrictions as long as you want.
Avast antivirus paid version is an extension of the free version, it is embedded with more sophisticated and effective features that provide more security for your devices.
This paid version is of three affordable packages:
Premium security for a single device.
Premium security for multiple devices.
The ultimate package.
Features of Avast Antivirus Paid:
It has a powerful firewall that automatically scans any contact with your connection and blocks suspicious activities.
This paid version has a built-in web browser script. This examines every website you visit and protects you against fraudulent sites. Also, it ensures safety while you are buying online or surfing the web. It protects you from intruders trying to steal information or password from your device.
Avast sandbox protects your device from dangerous apps downloaded from the web even before they are installed.
It offers Email security. It reads the header packet of your mail to detect annoying spam or phishing emails and blocks them.
Avast paid offers File protection for your files when you enable file encryption for it. This stops viruses and other contents that are liable to steal from your device, from accessing your files.
It provides webcam spying security that blocks and notifies you when an external device or app is spying on you through your webcam.
Data shredder destroys any document or folder you have deleted so that no one can access what is originally in them.
Avast Ultimate and Premium share a lot of features, and in fact, the Ultimate version has all the Premium features. However, the Premium version comes bundled with the following applications:
Avast Cleanup: Using this software you can find and remove unnecessary files, and optimize your PC for ultimate performance.
Avast SecureLine VPN: If you want to ensure that your browsing sessions are completely private, even from your ISP, then SecureLine VPN will help you with that. You can also access geo-restricted websites by using this software.
Avast AntiTrack: Protect yourself from websites that track your online activity once and for all with Avast AntiTrack software.
We can not dispute the fact that the premium version is worth being paid for. This is because of the sophisticated features that are made available which are not available for the free version.
Nonetheless, Avast Free is also an excellent tool for active-virus removal and real-time threat analysis. With this, the choice to either upgrade or stick with it depends on the user’s need depending on the extent of security needed.
However, for those who want maximum protection for their devices and family, Avast paid versions are the best.
Also, if you’re having other Avast antivirus issues on your device and you need help, you can check our guide for possible fixes for it.
When you’re editing your videos, you may also consider adding some subtitles to them either. The subtitles will make your videos more personalized or simply better at conveying their meaning.
The market is filled with subtitle tools that are great for helping you add subtitles to your videos and also for editing them afterward.
You will also be able to translate your favorite movies with the help of these programs.
We gathered five of the best subtitle editing software that will be able to help you add and edit subtitles to your favorite videos. Check them out and decide.
What is the best subtitle editing software for Windows 10?
Our top recommendation for adding and editing subtitles in a video is Adobe Premiere Pro. Getting on the first spot in this list is no surprise for us, it is of the best video editing software overall.
Premiere Pro comes with a vast toolset for editing captions and text along with a couple of export and import features.
The import feature allows you to view a caption and edit fonts, colors, and backgrounds in real-time. The supported subtitle formats being .scc, .mcc, .srt, .xml and .stl which are the most widely used.
Adobe Premiere Pro 15.4 includes Speech to Text, an integrated, automated, and quick workflow for adding and modifying captions, native support for Apple M1 devices, and text stylizing and editing capabilities.
Speech to Text, powered by Adobe Sensei, converts transcripts into caption elements on the timeline that follow the pace of your dialog. You can use broadcast captioning settings or build your own if necessary.
With the caption tool, you can edit, create and export files into any format foreign language lines are also easy to implement due to the non-linear video editing format it has.
Premiere Pro also gives you the freedom to create subtitle files from scratch, all you need is the text and practice of syncing the sound with captions.
Adobe Premiere Pro
Create awesome subtitles and captions in any shape or form to suit your needs with Adobe Premiere Pro
Movavi Video Converter is the ultimate tool in terms of video conversion and it’s so easy to use that you don’t even have to bother with formats.
Why? Simple, because the tool also comes with specific conversions for certain devices or social networks.
For instance, you can convert your video directly to fit the iPhone requirements or Facebook or Instagram, so you don’t need to worry about what you need to do in order to get the right resolution or format.
As for subtitles, this app automatically identifies the movie and gets the right subtitle for your language so you won’t even bother with editing it.
Of course, you can still edit its position, the encoding, and the sync timing although you will rarely need to touch those features.
Movavi Video Converter can use the hardware acceleration for NVIDIA NVENC, NVDEC, Intel HD Graphics, and AMD graphics cards and convert your videos with lightning speed.
But that’s only a fraction of what you can use the software for. It comes with easy subtitling tools but also with a pretty advanced video editor.
Yes, not only you can convert it, but you may also crop it, add color filters, normalize audio, and a lot more.
The conversion alone supports over 180 formats which is staggering but you will also notice that you will be able to compress your videos without any quality loss.
Enjoy the free trial version to test all its features or use the online tool for quick conversions on the fly!
Movavi Video Converter
Convert your videos to more than 180 formats and compress your videos without quality loss!
Use WonderShare Uniconverter to edit your videos just the way you like. Make changes to your video entirely with the software’s easy and interactive interface.
In addition, you can also edit and add any subtitles to your videos with ease. The program works perfectly with most video formats, and it allows you to downsize and resample them.
There are two methods to modify your movies with subtitles using WonderShare Uniconverter. Make your own or have them generated for you.
To make a subtitle, go to the Toolbox area and select the Subtitle Editor option, then add the necessary file.
If you want to add subtitles quickly, you may use the Auto-Subtitle Generator function. Its intelligent voice recognition function will convert the audio in the video directly and clearly into words.
After you’ve submitted the subtitle content, you can customize its font, size, color, opacity, position, and make it bold, italics, and underlined.
Some of WonderShare Uniconverter’s key features include:
Being able to convert more than 1000 video and audio formats
Insane conversion speed, up to 30x faster
Being able to convert multiple media files at the same time from different devices
It allows you to extract and insert subtitles
It allows you to compress and burn your videos into DVDs
WonderShare Uniconverter
Wondershare Uniconverter allows you to edit, create, and export subtitles for your awesome videos with ease.
VideoProc Vlogger is a desktop-based video editing program that includes a text editor. To caption the video, just insert the text in the caption/subtitle track.
You may set the time, font, type size, alignment, angle, character space, border, shadow, and other amazing features using the software.
The name implies that it is perfectly suitable for making documentaries for your vlog or long videos and sharing them on YouTube, Vimeo, and other video streaming platforms.
This software also provides more complex options for subtitle editing, which is especially useful if you wish to include burned-in or forced subtitles.
The subtitle stream is burned into the video, so the subtitles become part of the movie and can be watched without the need for subtitle plugins.
As a result, if you want to freely watch videos with subtitles on computers, mobile phones, TVs, and anyplace else while keeping the subtitles correctly and permanently displayed on those devices, this program can assist you.
VideoProc Vlogger
Insert burnt-in subtitles and use special effects to create cinematic films for everyday creativity, special moments, or fun.
VideoPad excels indirect social media uploads due to its user-friendly design and lightweight performance, as well as simple functionalities that allow you to generate a desired short movie.
It is a wonderful option if you are a beginner who wishes to modify your videos but has little experience with video editing. Furthermore, it performs well in terms of adding a professional touch to your movies.
In terms of audio, unfortunately, VideoPad lacks a real-time EQ audio preview.
VideoPad is a well-known video editor that aids in the recording of footage from camcorders (DV camcorder, VHS camcorder, and Webcam).
Many transitions and visual effects have been integrated into the editing program.
You may apply transitions and effects to your video or movie while editing to make it look more professional.
VideoPad Video Editor is an excellent application for coping with video subtitles.
Whether you want to add commentary to your vlog video or generate professional movie subtitles, VideoPad makes it easy. You may also load subtitles from existing files and modify them to exactly match your video.
VideoPad
This tool’s Subtitles function makes it simple to create or edit captions for your video. You may change the position, text size, and color to your preference.
Subtitle Edit is another great easy subtitles synchronizer for Windows 10. It allows you to easily adjust the start line of any subtitle if it’s not synced with the movie.
If you just want to make modifications to the subtitles, this multi-language captions editor is ideal.
Subtitle Edit provides many options for synchronizing subtitles. You can change the timing if you need to show the text earlier or later, and you can sync by matching the start/end scene.
Sync point time codes may be manually inserted, making it simple to use time codes from another subtitle that is already in sync.
You may match one of the initial paragraphs, match one of the end lines, sync, and then all lines should be in sync if you have another subtitle in sync in another language.
Take a look at the best features that come together with this software for editing subtitles:
You will be able to create/adjust/sync and translate subtitle lines
The program comes with a cool audio visualizer control that is able to display waveform and spectrograms
You will be able to visually sync and adjust a subtitle and its start/end position along with speed
The software provides auto-translation via Google translate
Subtitle Edit 3.5.4 can merge and split subtitles
It also comes with a wizard that fixes errors
You will be able to also enjoy spell checking via Open Office dictionaries
The Jubler Subtitle Editor is a handy tool that is able to edit text-based subtitles into videos with an interactive and colorful interface.
It can be used as a tool to convert, correct, transform or refine existing subtitles. You can also use the software as an authoring program for new subtitles.
The minimum requirements to use the software is the latest version of JRE, MPlayer to view the subtitles, and ASpell to spell-check the subtitles.
The software is written in Java 5.0, and this means that it’s multiplatform. You can check out more of its features, and you can also download Jubler Subtitle Editor from its official website.
Take a look at the most impressive features of Jubler Subtitle Editor:
It supports some of the most popular subtitle formats
You will also get to preview in real-time or in design time the subtitles
The program comes with a spell checker, and it also includes a translation mode
Jubler Subtitle Editor comes with various editing styles for your subtitles
POP Subtitle Editor is a really easy-to-use program that allows you to write and add your very own subtitles to any video file.
You can write your texts while previewing the movie and all you have to do after that is to select both start and end times by using the same function key.
It’s important to note that with this software, subtitles will be always justified to the left margin.
This will be more obvious with longer subtitles that will take up at least a line or two. You will be able to center the whole block of text if that is what you want.
You can download the POP Subtitle Editor 1.0 from the official website and start adding and writing subtitles on your videos.
Check out more impressive features that are packed into this software for editing subtitles:
You can customize the font, size, color and also position of your subtitles.
You will be able to generate AVI, MPEG or WMV files with just a single click
Adding subtitles to your videos will turn out to be the most straightforward task even for beginners with this editor
You can easily change and edit the font properties
Aura Video Editor is a full-featured and effortless to use video editor that comes with a built-in subtitle editor for managing your subtitles.
The software is really efficient to edit videos, trim audio and video, and also add watermarks and subtitles as well.
You will be able to preview all your edits in real-time without having to render your entire project first. This is one of the best video editing software out there with an abundance of helpful features regarding subtitles.
You can check out the complete detailed list of its functionalities, and you can download Aura Video Editor from the official website.
Take a look at the most impressive features of this tool below:
This is a professional video editing software that allows you to create your very own videos
Here is the point where our roundup of the five best subtitle editing programs comes to an end. We recommend that you analyze all these tools’ features to decide which software is the best for you.
All five of these programs are compatible with systems running Windows 10. Check them all out and pick your favorite. If you have any other suggestions or questions, drop them in the comments section below.
The cryptocurrency market, although currently down, has seen tremendous growth in recent times. More and more people are excited about this decentralized currency market.
If you are interested in cryptocurrencies, then you would know that there are a whole bunch of different cryptocurrencies, each having traits different from the other.
You will also find a wide variety of crypto wallets available on the internet, that help you to keep your cryptocurrencies, safe and secure. Moreover, you can also use them to trade within the app itself.
MetaMask and other open-source crypto and web-based crypto wallets are examples of such open-source crypto and web-based crypto wallets.
All you need to do is simply install the MetaMask extension on Firefox, Chrome, or other supported browser and create an account. Then you are good to store your cryptocurrency.
However, just like every other app or software, MetaMask also has its own set of issues. One of which is MetaMask not working problem.
Although the term “MetaMask not working” doesn’t specify anything, there are a bunch of solutions that we have compiled in this post that you can apply and possibly fix this problem.
What are the key features of MetaMask crypto wallet?
As already mentioned, there is a good variety of crypto wallets you can choose from and use to store your cryptocurrencies in them.
Talking about the MetaMask crypto wallet, let us take a look at some of the key features of this wallet:
One of the simplest and cleanest UI on a crypto wallet.
Along with cryptocurrencies, you can also store crypto collectibles and NFT arts as well in MetaMask.
You do not need to download software to use MetaMask. It is web-based and is available as an extension for compatible browsers.
It makes use of Swap technology to allow swapping cryptocurrencies.
Transaction fees are decided based on the blockchain network you use.
It is an open-source crypto wallet, which gets frequently updated.
What can I do if MetaMask is not working?
1. Restart your browser
Press the 3-dot menu icon on the browser.
Click on Exit.
Open the browser back again and see if MetaMask is working or not.
2. Use an alternative browser
In order to fix the MetaMask issue on your PC in a practical way, it’s advised to change your browser to a more compatible one.
Changing your browser to Opera One can highly benefit you and grant compatibility with many extensions and apps like MetaMask.
This browsing tool is on the market for 25+ years with constant improvements, offering integration options to run services like messaging apps or a built-in crypto wallet.
Opera One
Use one of the best options to make your browsing experience seamless.
You can also apply the solutions mentioned for the MetaMask not working issue as well to fix the connection problem on the crypto wallet.
While it is important to opt for a safe cryptocurrency wallet, you might also find cryptocurrency price tracker extensions for browsers.
Apart from investing in cryptocurrencies, you can also opt to invest in NFTs (Non-Fungible Tokens). These are available in a variety of shapes and sizes.
If you are interested in the business side of things and want to sell your very own NFT to the market, then you can check out our guide on some of the best software to create NFT art.
Taking things to the next level, you can even play Xbox NFT games at this point. Thanks to the versatility of this medium, you can expect more unique features to arrive in the future.
To answer this, taking a screenshot of an NFT doesn’t allow you to have your crypto wallet attached to purchasing that NFT. Ultimately, this means that you are not the owner of it.
We’d love to know your thoughts on this topic. Let us know in the comments below which solution helped you fix the MetaMask issue.
The power promise of Intel’s 12th Gen Alder Lake processors is finally making its way into Ultrabook’s such as the Dell XPS 13, HP Spectre and Acer Aspire, but Lenovo’s Yoga 9i may be the best showing yet for sleek and powerful.
The Yoga 9i isn’t just a chassis redesign where much of the body is rounded off for a more comfortable fit and finish, but it’s also a showcase for a new third tier 12th Gen Intel offering. In 2022 Intel will power select devices with a new P-series variant of its Alder Lake chips which sits between the high-performance H-Series and low wattage U-Series.
Unfortunately, where Intel got away with super-cooling its H-series variants, OEM’s such as Lenovo aren’t given that much runway in these ultra-thin laptops and as a result performance consistency is sacrificed for designed portability.
2.0-megapixel IR & RGB hybrid, FHD 1080p webcam with privacy shutter, fixed focus
Memory
16GBDual Channel LPDDR5-5200 (soldered)
Dimensions
318 x 230 x 15.25 mm (12.52 x 9.06 x 0.6 inches)
Wireless
IntelWi-Fi® AX211+ Bluetooth 5.2
Battery
75WhLi-Polymer, supports Rapid Charge Boost (2 hrs runtime with 15 min charge)
Color
Oatmeal
Ports/Slots
1x USB 3.2 Gen 2
1x USB-C 3.2 Gen 2 (support data transfer, Power Delivery 3.0 and DisplayPort™ 1.4)
2x Thunderbolt 4 / USB4™ 40Gbps (support data transfer, Power Delivery 3.0 and DisplayPort 1.4)
1x Headphone / microphone combo jack (3.5mm)
What’s in the box
Lenovo Yoga 9i
Charging Cable
Pen
Quick Start Guide
Look and Feel
Key takeaways
New rounded design is among the best designed laptops on the market
Keyboard includes new secondary functions for Power, Audio, Windows theme modes, webcam toggles
Better feel in-hand
OLED display is bright with vivid color profiles
Touchpad is larger
In 2022 Lenovo seemingly adopted an arguably classic design language from 2014, back when Apple leaned heavily on polished rounded accents to accentuate an iPhone that nestled comfortably in the hand with the iPhone 6.
The seventh generation Lenovo Yoga 9i resembles two gold iPhone 6’s stacked on top of one another when closed thanks to the heavily jewelry-inspired aesthetic on display with this ultra-thin portable.
Lenovo claims the new design “improves grip comfort while being used in tablet mode,” and while I only used the laptop in tablet mode on a handful of occasions; handling the device in and out of bags, to and from meetings and generally about, the palms of hand and edges of my fingers contoured around the rounded finishes of the 9i much better than the angular models of old.
Similar to other models and even Microsoft’s flagship Surface brand, Lenovo makes use of reflective aluminum for the subtle Yoga lettering located in the top-left of the lid as well as 1/3-inch Lenovo branding in the opposite corner.
The polished rounded edge is accented by the Oatmeal polish on the speak grill-hinge of the Yoga 9i and helps package the entire device with a premium attention to detail.
The Oatmeal color is more akin to a pale gold and depending on the lighting in an area, can traverse from light grey to hints of copper.
The weight of the laptop feels significantly lighter than other previous Yoga’s despite being only 0.28 oz slimmer than last year’s model.
The next biggest visual upgrade is found in the 14-inch 16:10 display that Lenovo offers in both 4K and 2.8K configurations. For that aspect ratio, users are getting a panel of 3,840 x 2,400 OLED goodness powered by Lenovo’s PURESight calibration technology.
When opting for the 2K version, users will get a 90Hz refresh ration option while the 4K OLED models are stuck at 60Hz, which all of that translates to a more vivid color profile out of the box. Users who need to be more color accurate for work can also make some tweaks with Intel’s display tech downloaded from the Microsoft Store.
The last noteworthy change to the Yoga 9i for 2022 is the keyboard where Lenovo managed to cram an entire row of secondary function keys in alongside the right side of the deck.
Users can quickly initiate Window’s dark mode color profile, toggle between performance and audio profiles and adjust background blur when using the hybrid IR and integrated webcam.
The sacrifice on space is minimal and Lenovo manages to maintain a satisfying key travel with its traditional U-shaped keys on the new deck, all while also raising the length of the palm rest area to incorporate an even larger touchpad.
Perhaps, the biggest quibble with the new 9i design is in the lack of space dedicated to storing the included pen. Unlike other Lenovo laptops, the 9i for 2022 forces users to come up with their own makeshift MacGyver-esque sets to house and store the included pen when not in use.
Performance
Key Takeaways
New Intel 28W 12th Gen Alder Lake P-Series CPU makes another leap in power but is hamstrung by old integrated graphics
Fans run often
Optimum performance requires the charging cable
In consistent performance off charger
The configuration I had was an Intel Core i7-1260P which makes use of 4 performance cores with Hyperthreading support as well as 8 additional efficiency cores. The combination of both 8E and 4P cores means the SoS can deliver 16 threads of simultaneous execution channels to better handle peak workloads.
In real world usage, that meant that editing video in Adobe Premiere, bulk uploads and edits in Photoshop and closing and opening macro-laden Excel docs ran quicker than other comparable laptops using 11th Gen Intel chips.
That is not to say that the Yoga 9i couldn’t be tripped up by overlapping workloads and ram draining tabs in Edge or Chrome, but for the most part the system powered through most processing tasks with little to no effort.
Where the Lenovo gets dinged points is in its per wattage consumption, which is notably high for Intel’s 12th Gen Alder Lake mobile P and U chips so far as well as the fans.
The fans on the Yoga 9i are considerably lower in volume than other Lenovo laptops but they seem to run pretty consistently when in use during my review.
Despite having a larger battery embedded in the Yoga 9i this year, the power-hungry performance of Intel’s 12th gen practically negates the change. Battery life isn’t awful but also is nothing to write home about.
However, when plugged in the Yoga 9i does a relatively good job of outpacing current laptop competition as well as keeping pace with Apple’s M1 architecture.
My day typically starts and ends with Excel docs and depending on the device, this could be a blessing or a curse (in most cases, it’s a curse). On the Yoga 9i working with a piece of software called SuperMetrics was quick and easy, traversing back and forth between data sheets, data Studio and crafting APIs in real time worked second to none.
For my more creative tasks, as I mentioned, the Yoga 9i handled most Adobe software fairly well as well the Affinity catalog of apps. Real time editing with Da Vinci Resolve was a bit of a labor for some reason. Using a set with proxies and rendering 1080p quality level video took just about as long as 11th Gen processor setups.
Moving into the theoretical, I wonder if and when Intel pairs more devices with its new Arc GPUs, will setups like the 9i finally make that per wattage performance leap that many Windows users have been clamoring for.
As I’ve gotten olde, my PC gaming days have been limited, but I tried running older titles such as State of Decay 2 and Far Cry 6 on the 9i to varying degrees of success.
State of Decay 2 played smoothly at minimum settings, while bumping it up slight produced some choppier results. Far Cry set to 1080p resolution was a fun experience and similar to my gameplay on the Xbox but moving to native resolution actually stalled out the game.
Summary
Beyond some power niche power-hungry activities, the 9i is perhaps the best new all-around laptop for 2022. Where Dell opted for a complete makeover of its XPS line up which has proven to be polarizing, Lenovo’s subtle refinements may be easier for both consumer and commercial users to get behind.
The 9i isn’t an inexpensive purchase but will serve most people attempting to do most compute tasks fairly well.
I’d recommend the Yoga 9i 7th Gen to anyone who isn’t reliant on it being a dedicated gaming device or software the specifically utilizes dedicated GPUs, otherwise it’s both power and perhaps the most stylish laptop being offered in 2022.




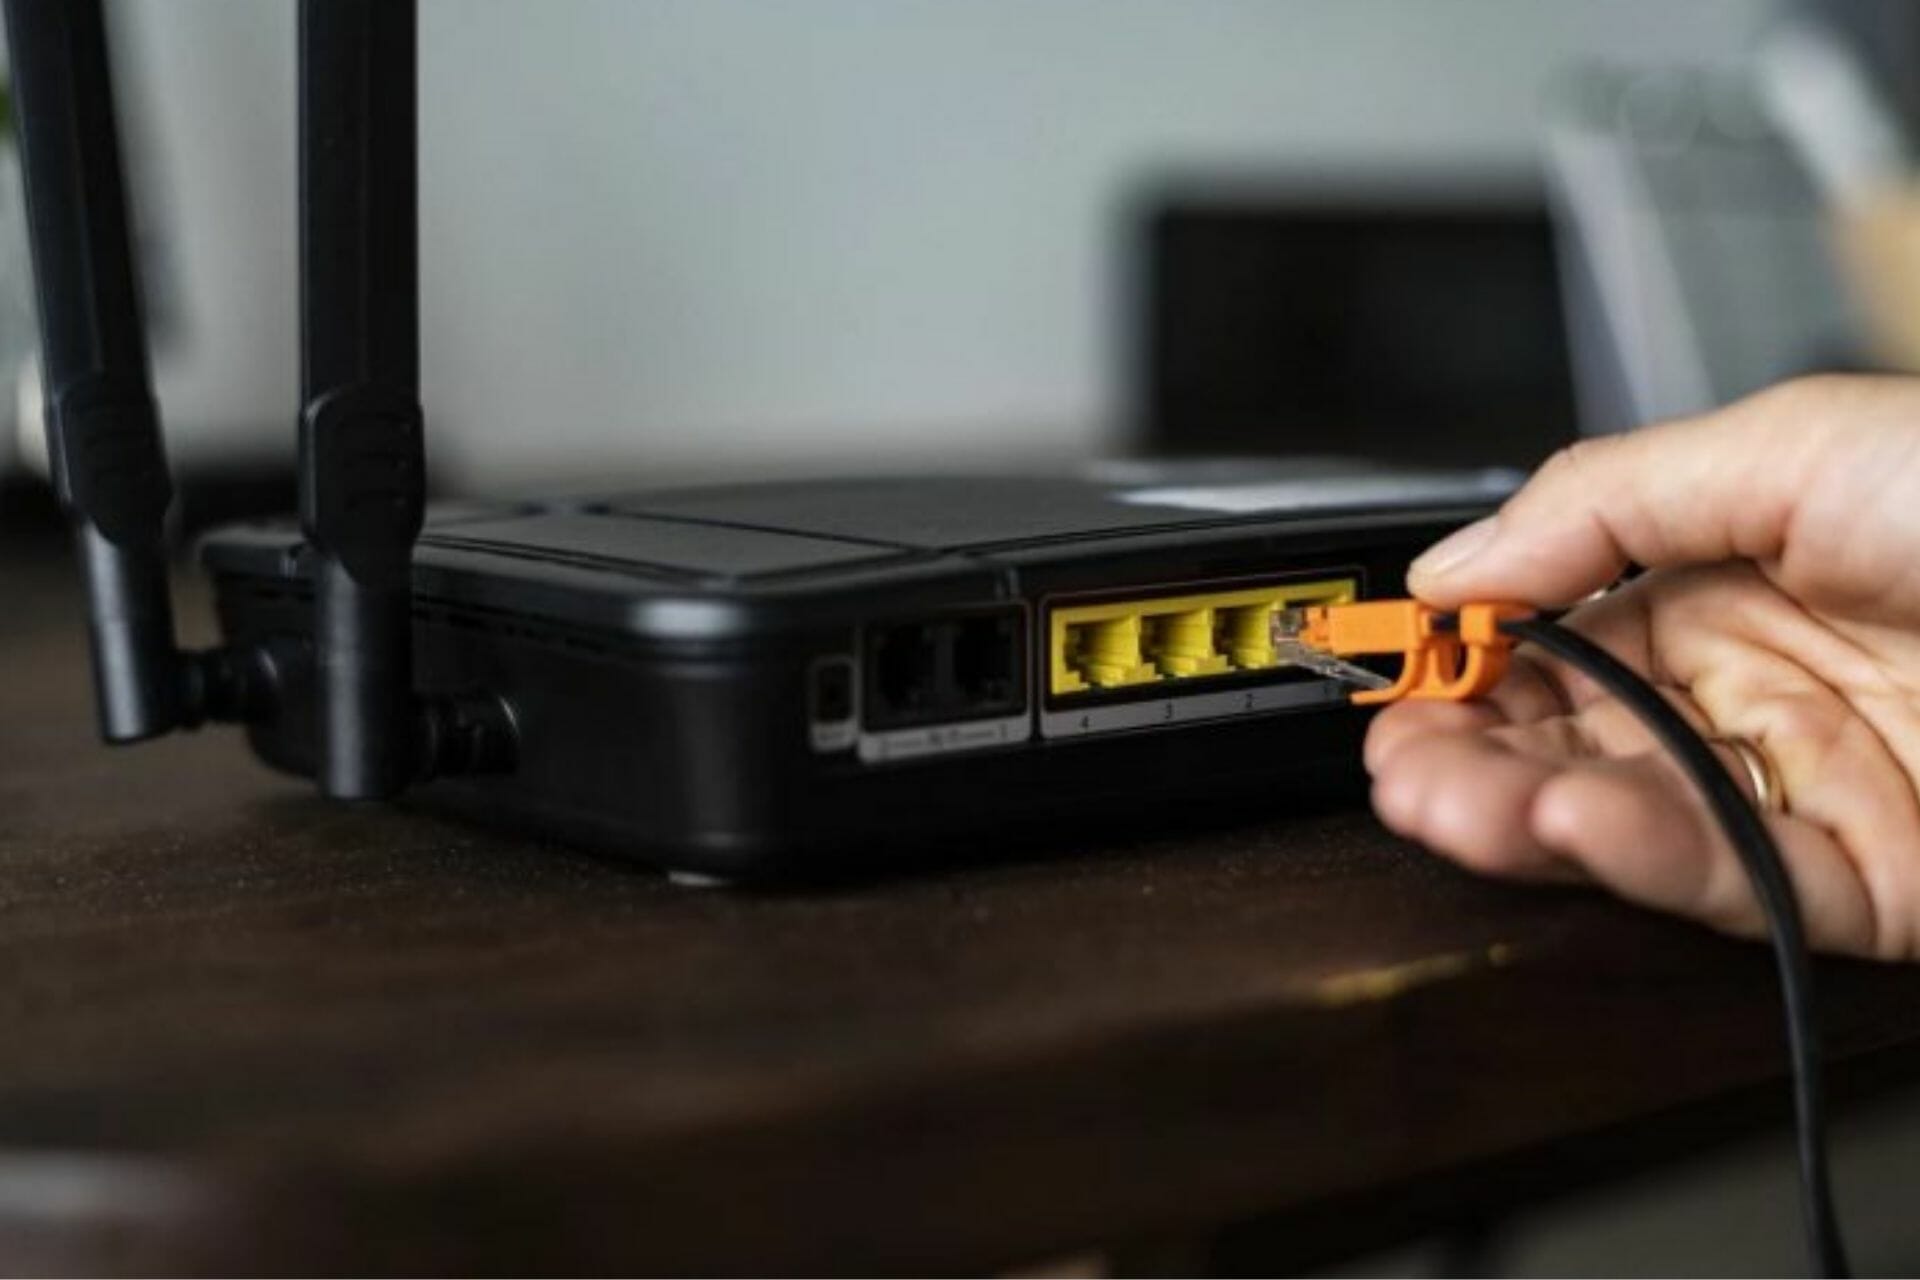


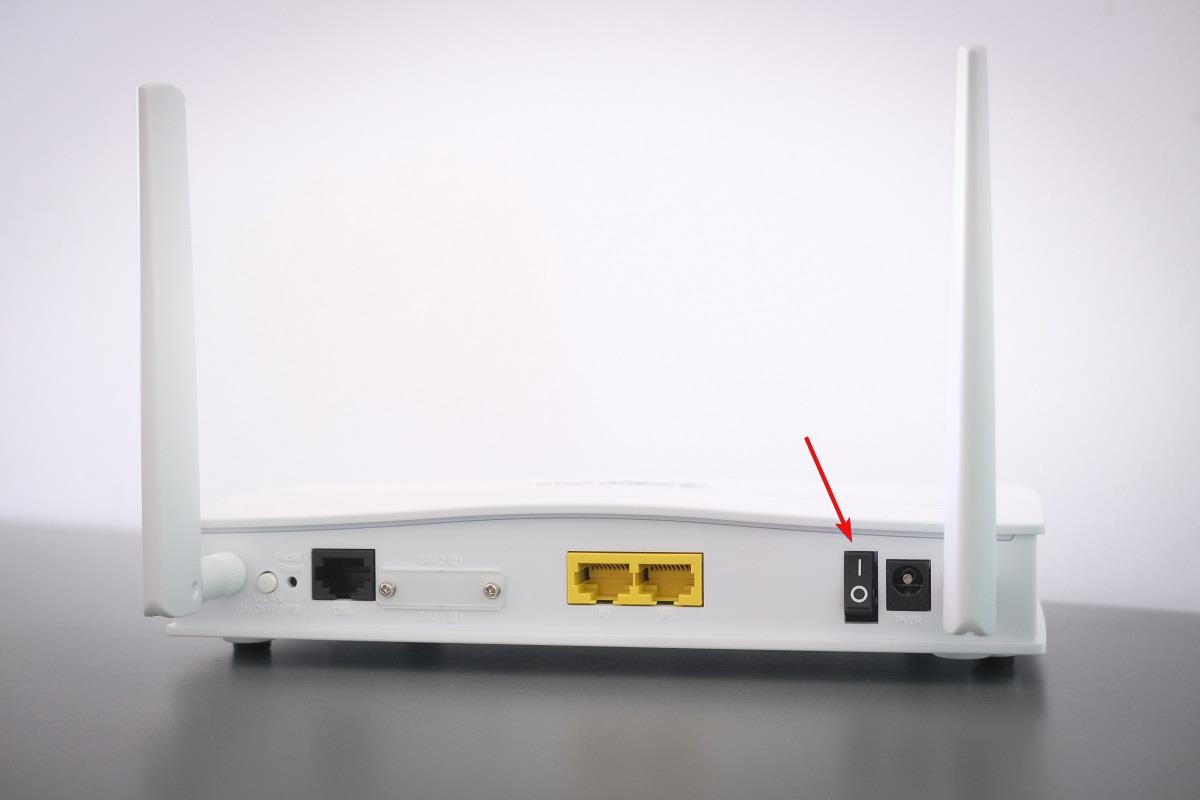
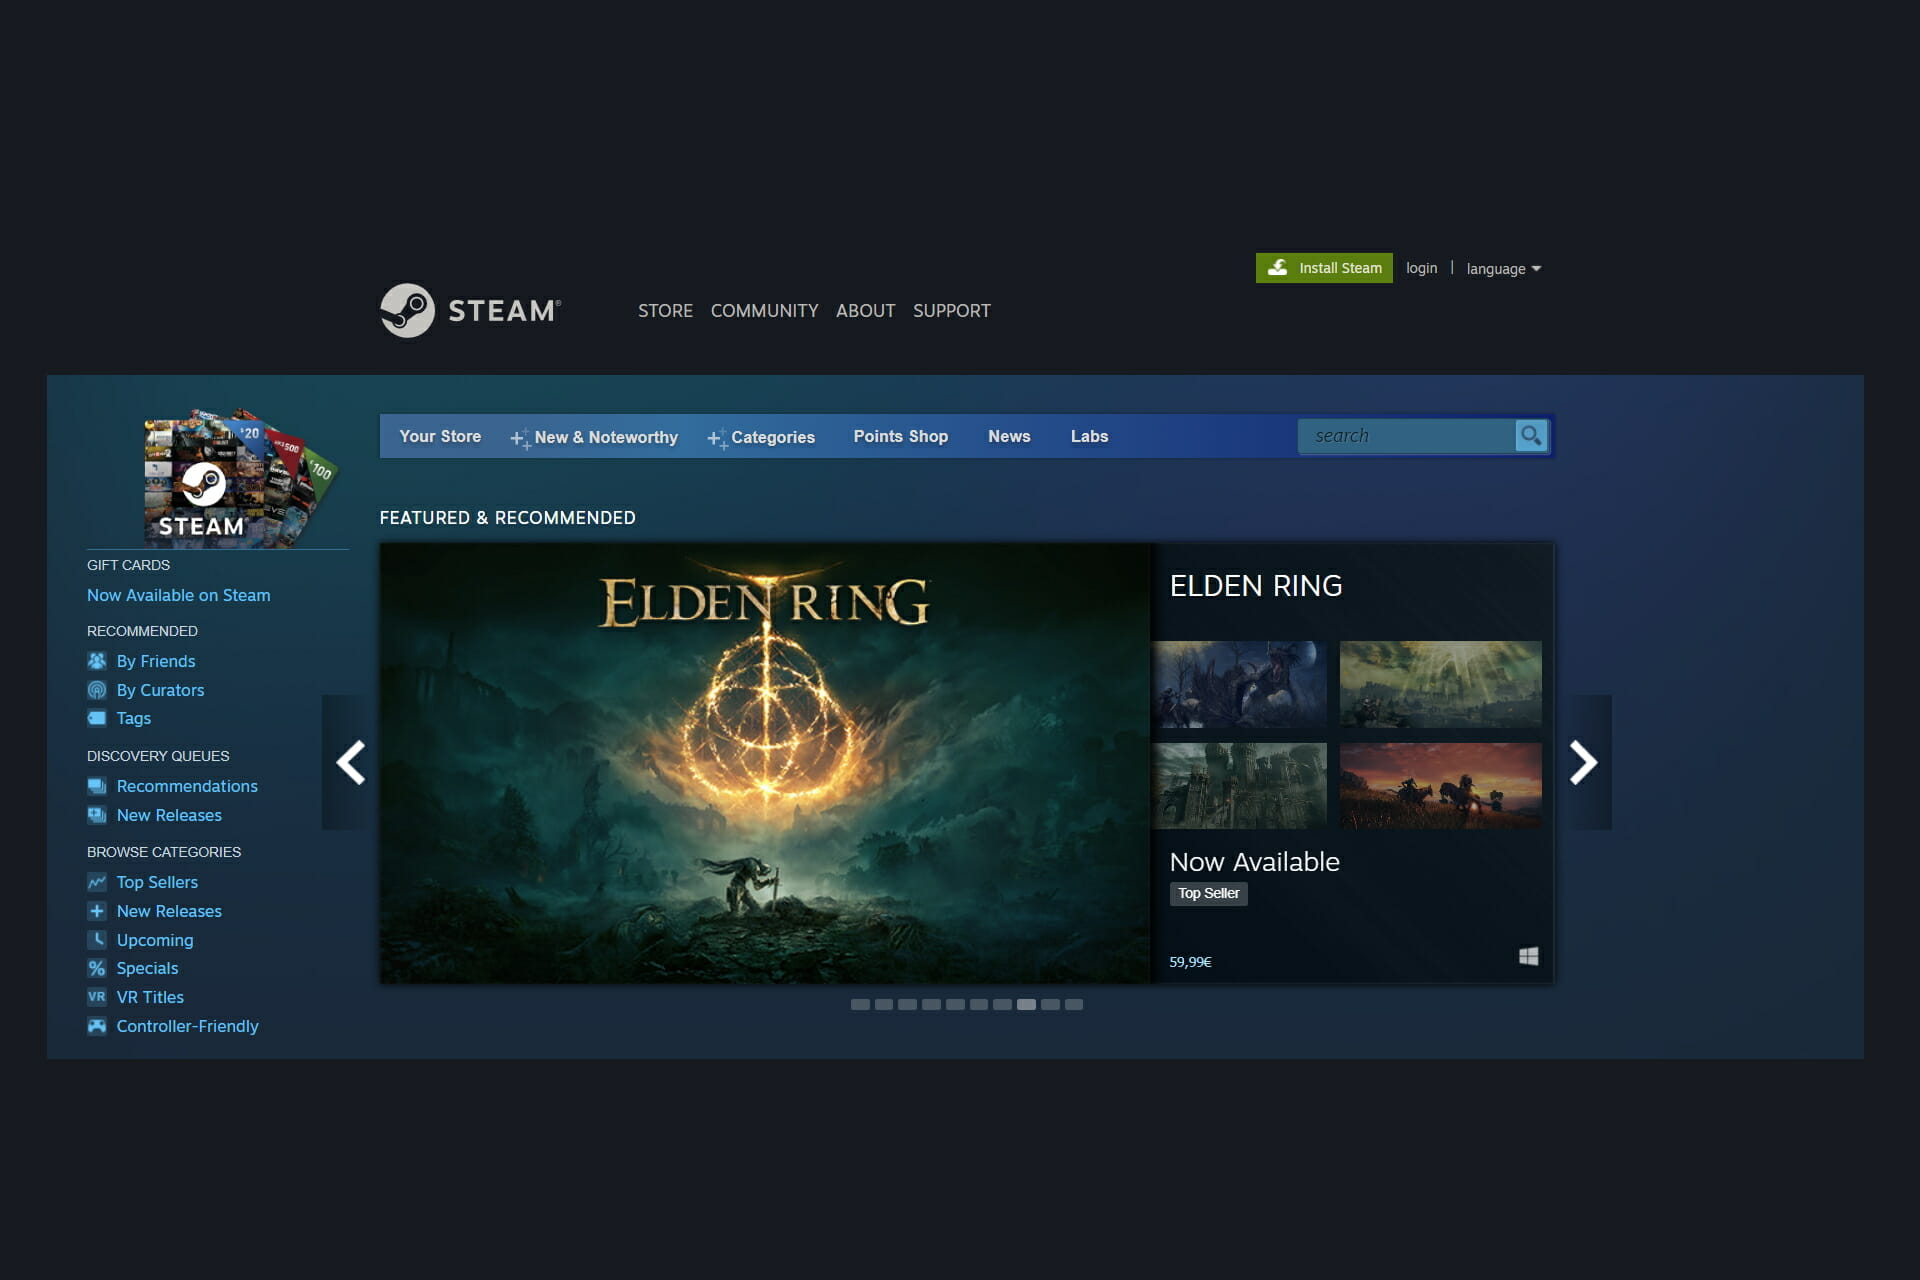

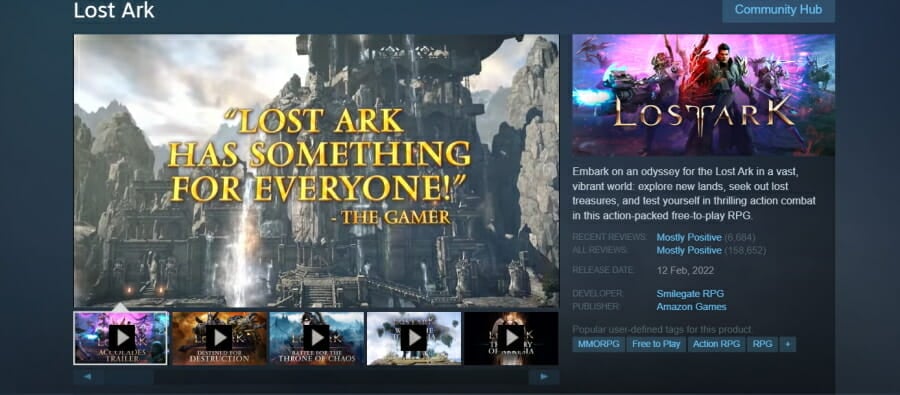

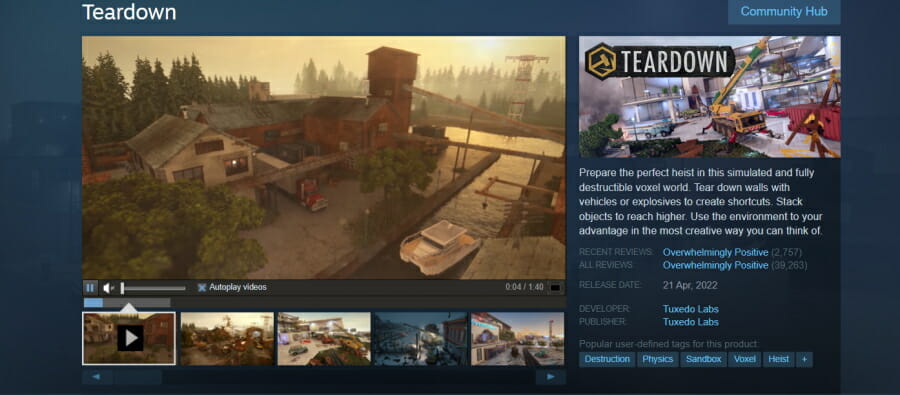
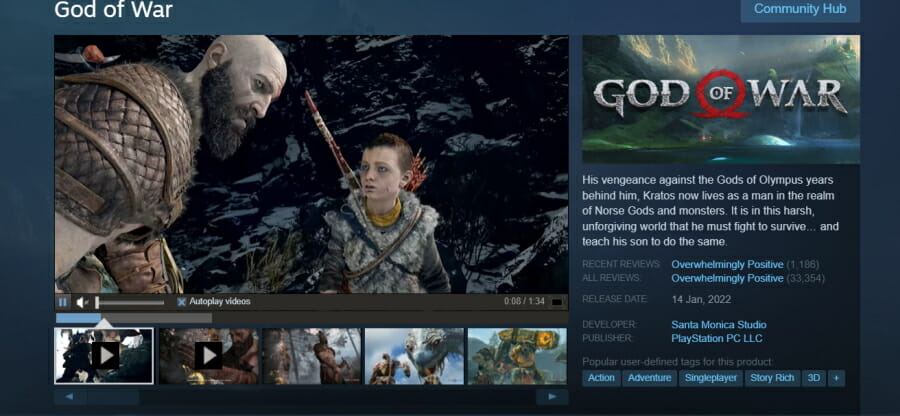


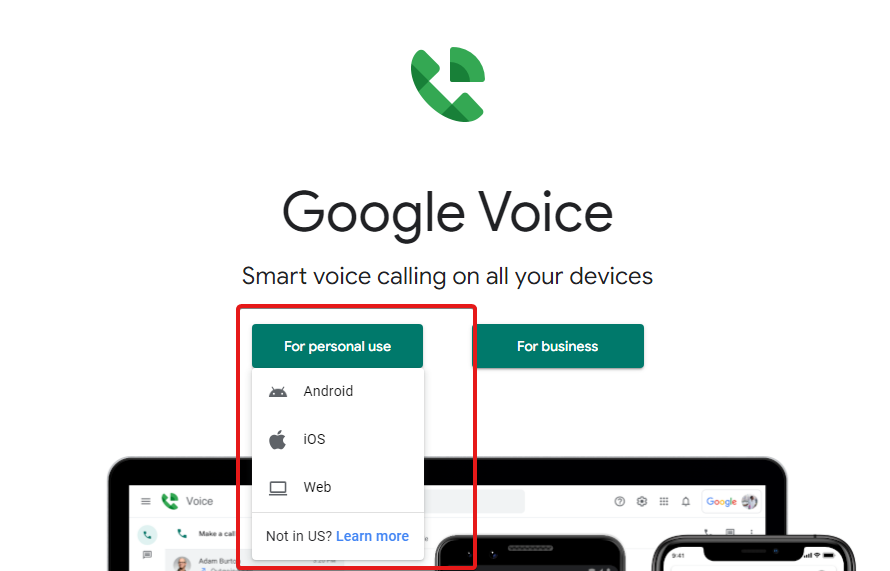
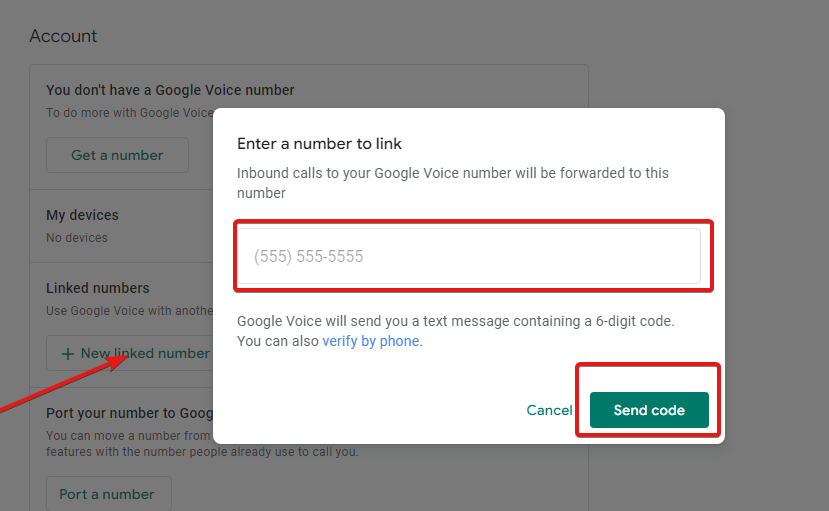
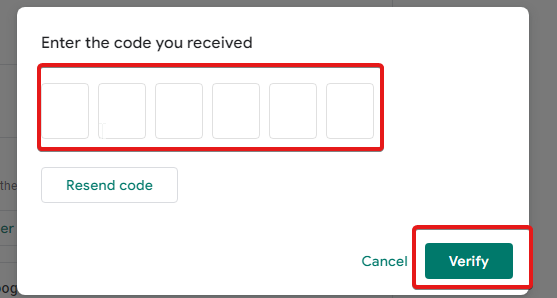
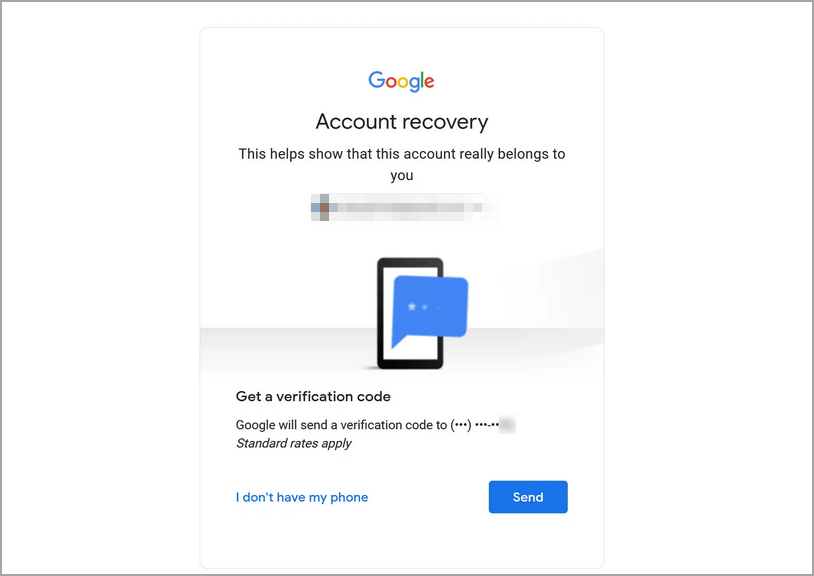
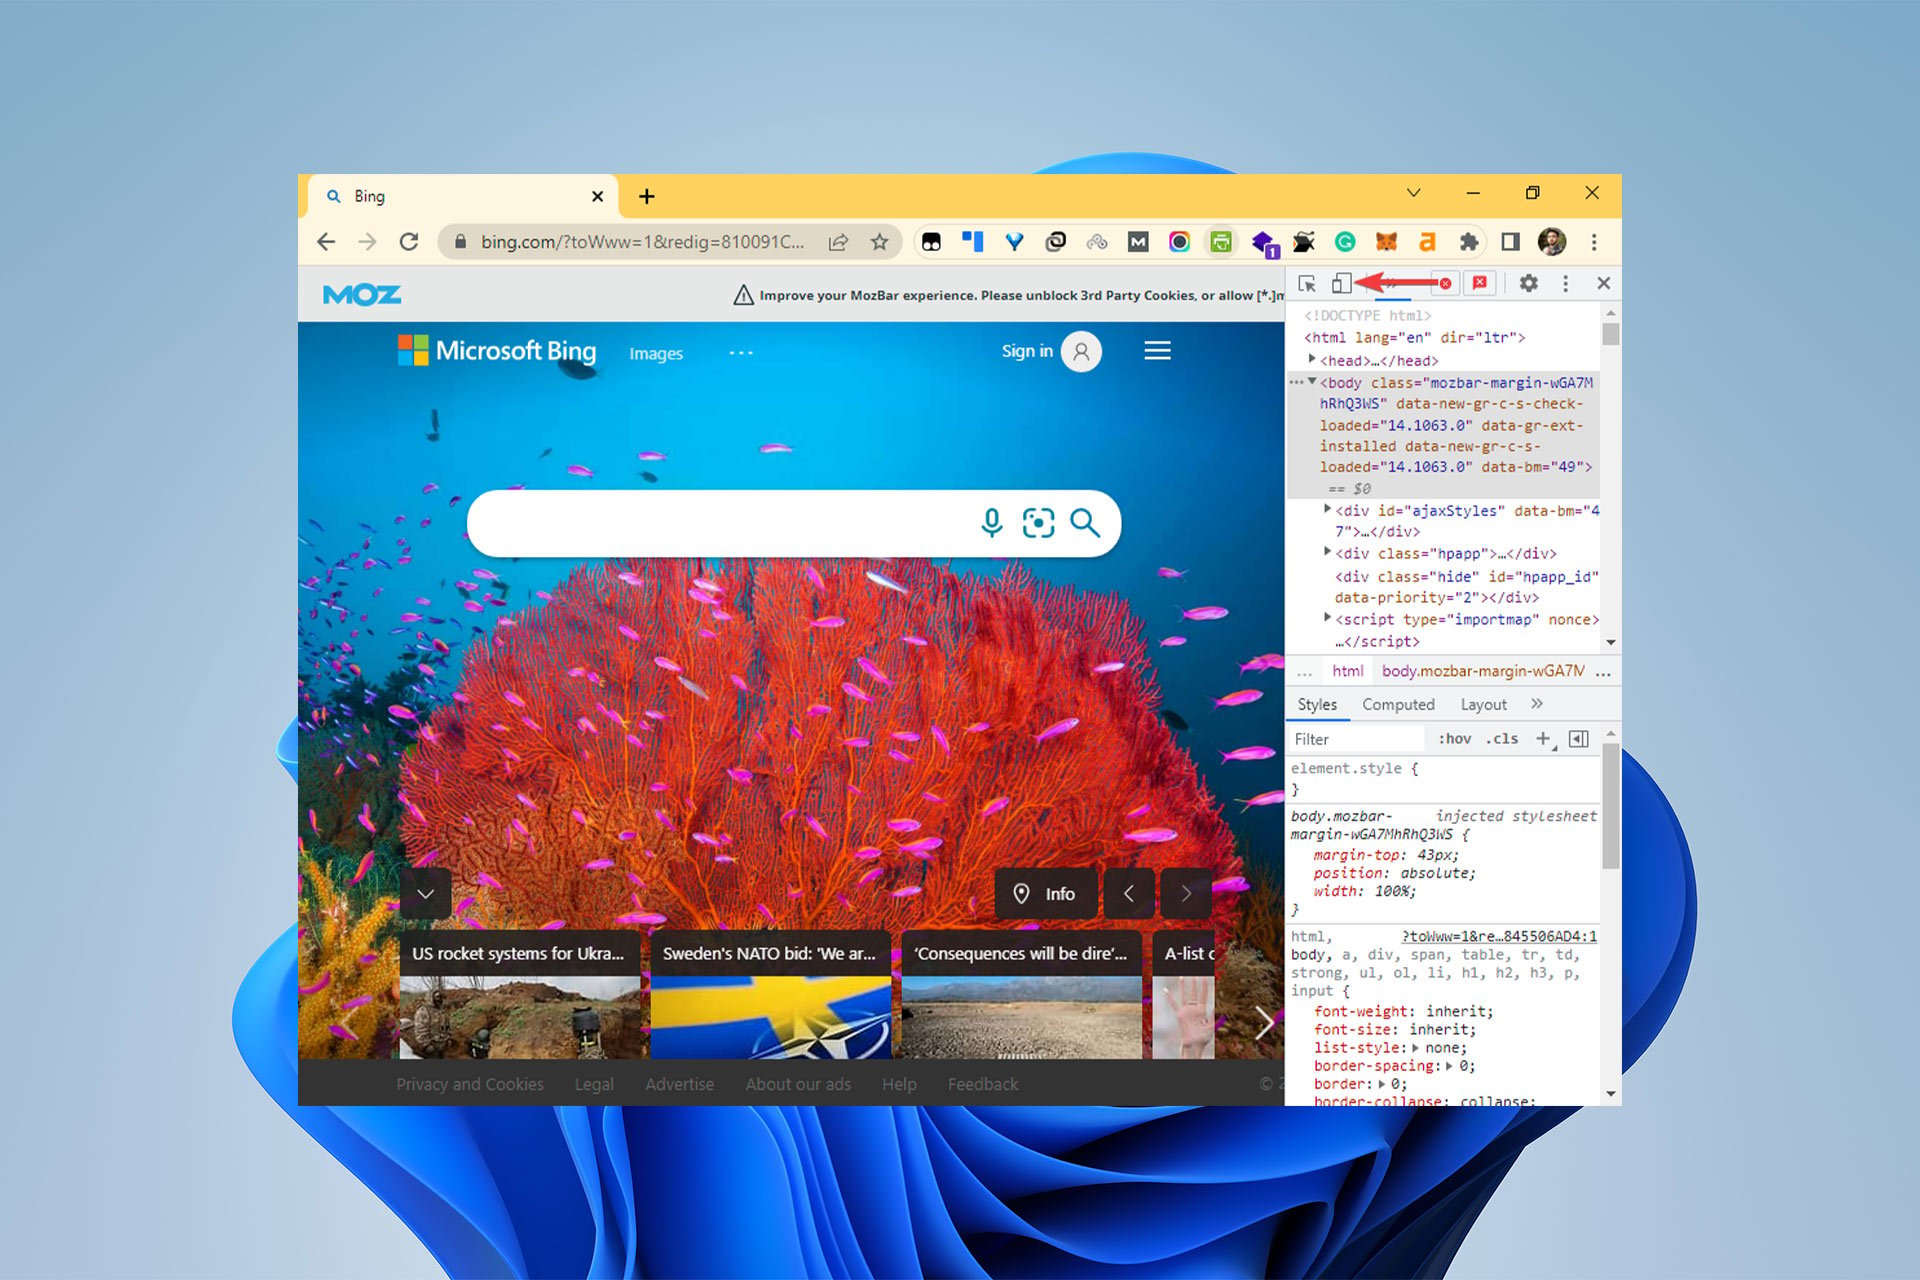







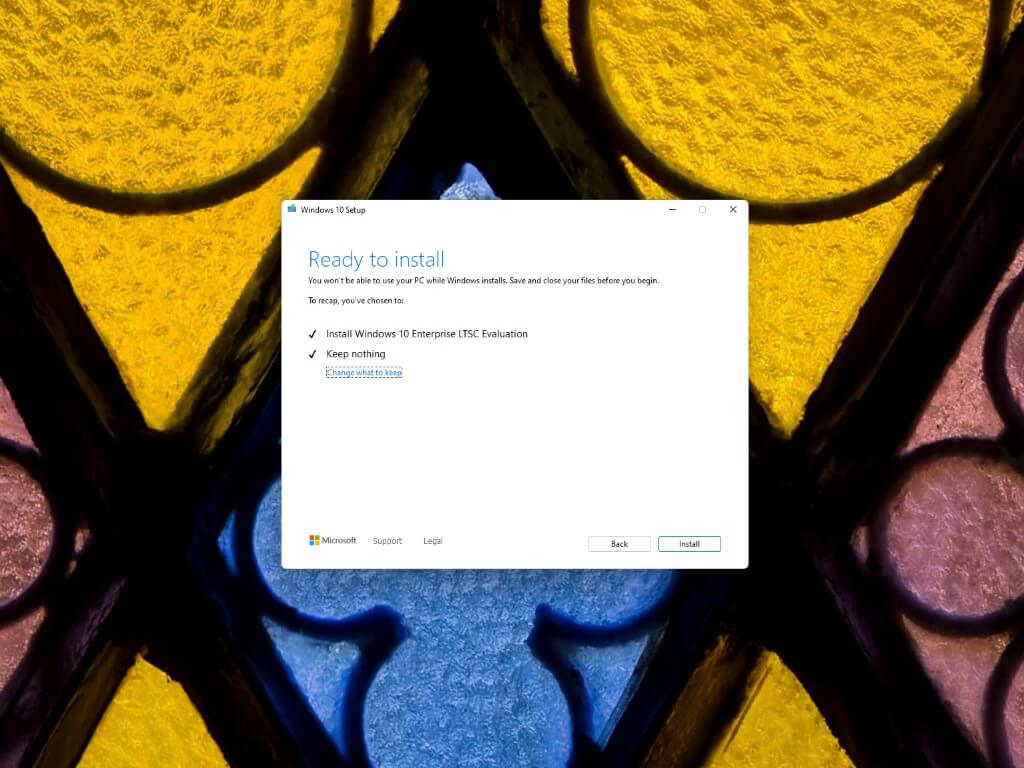
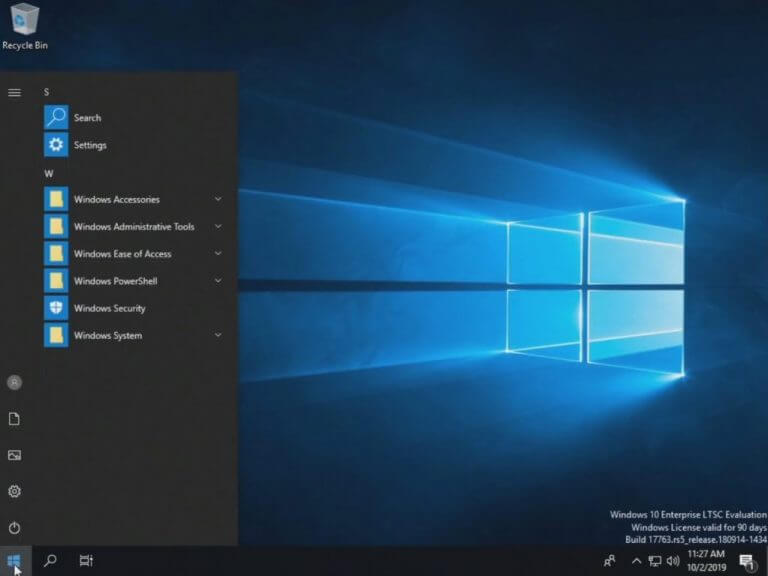
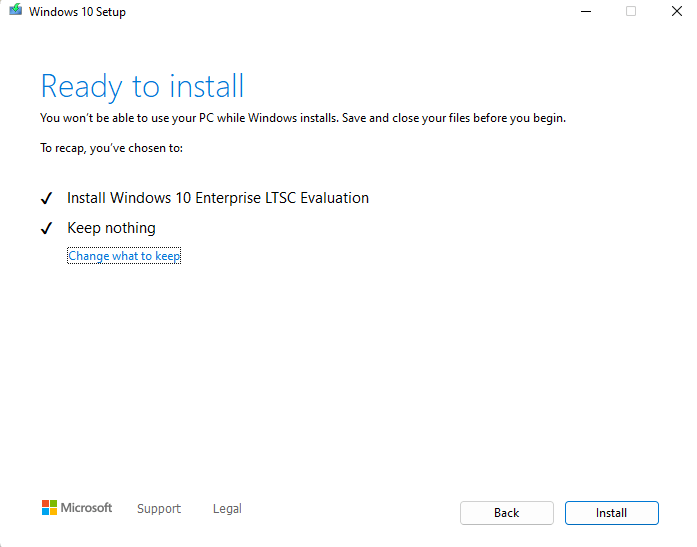
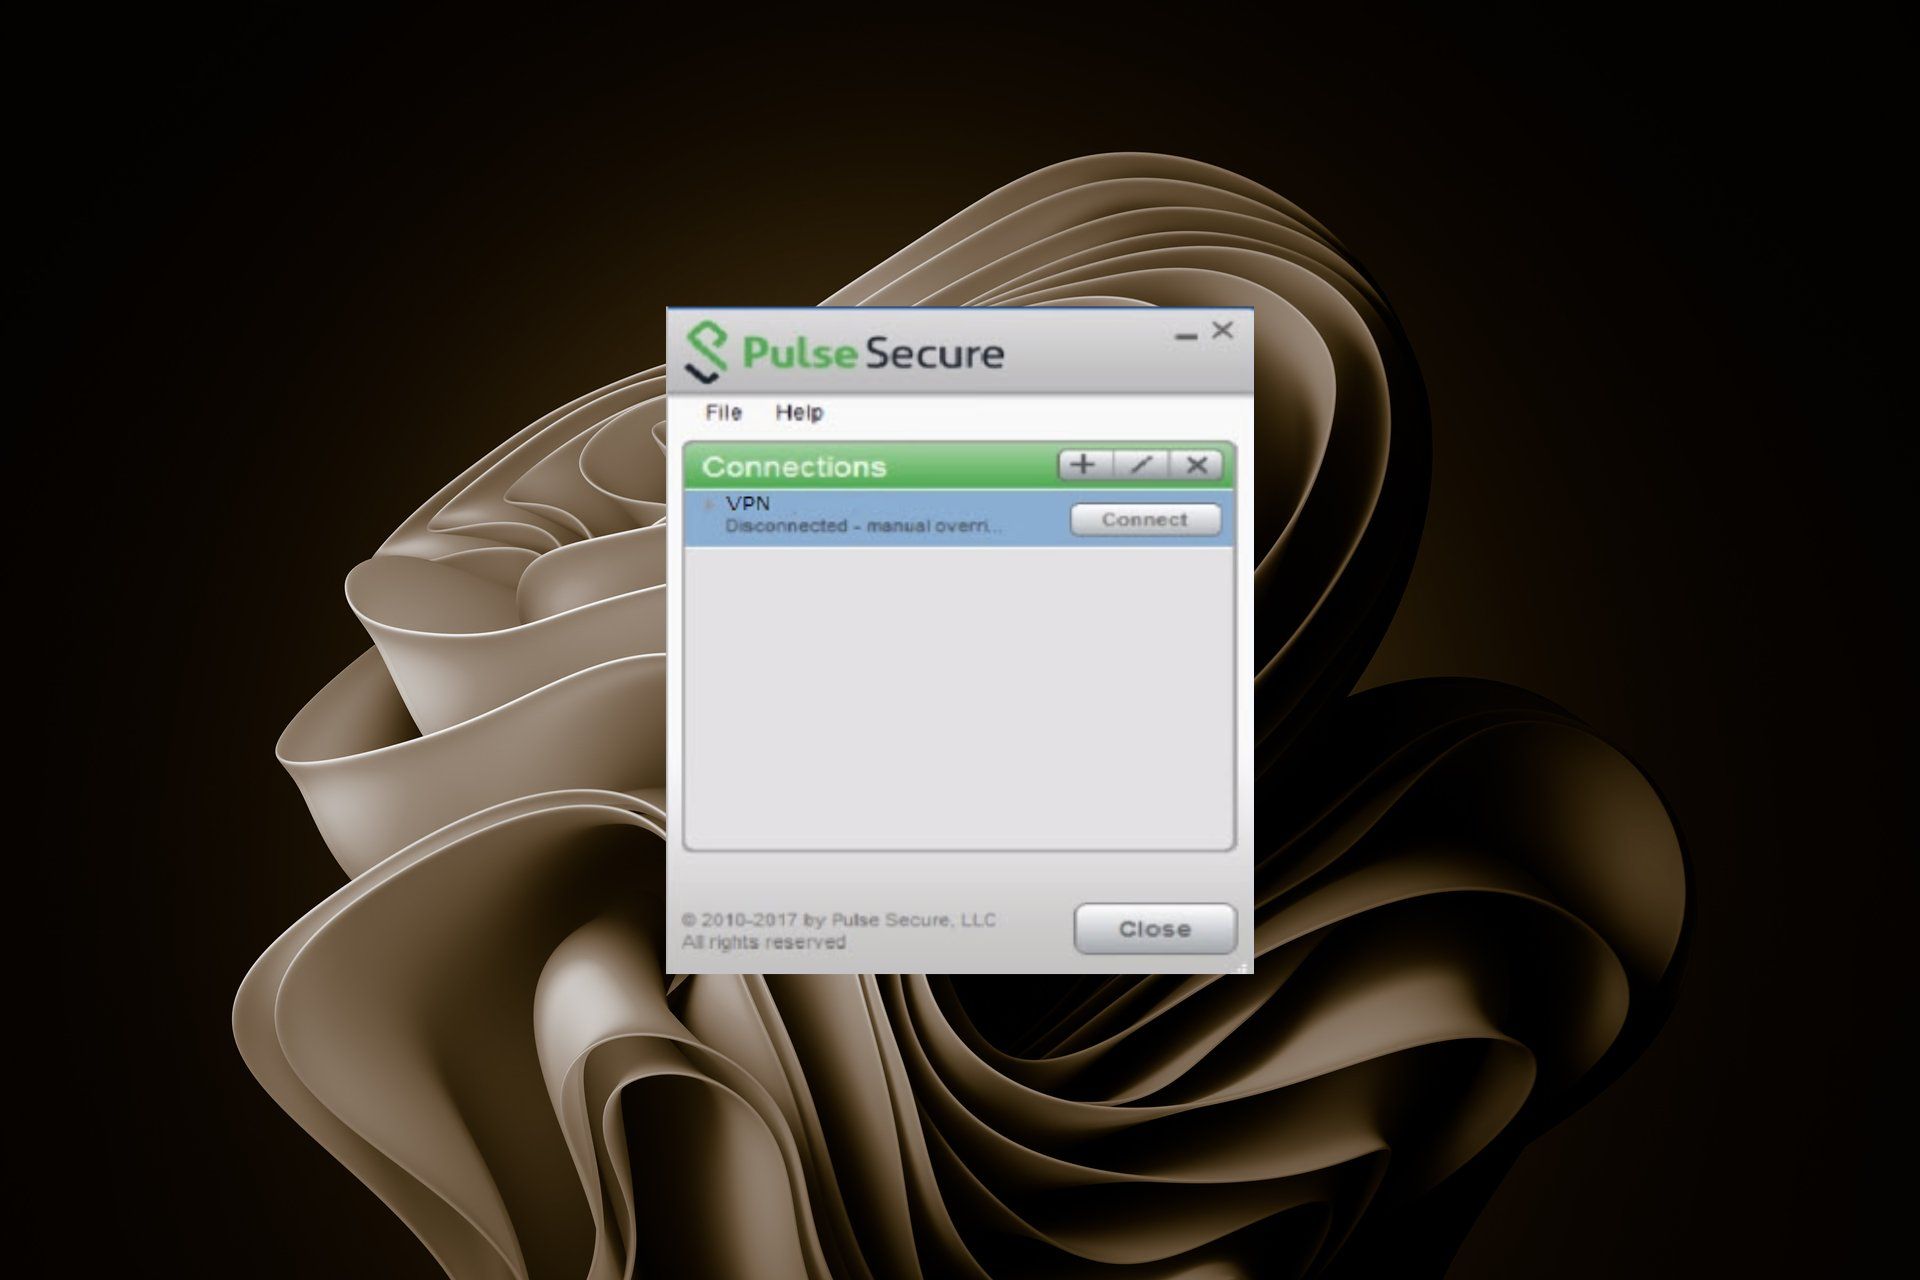


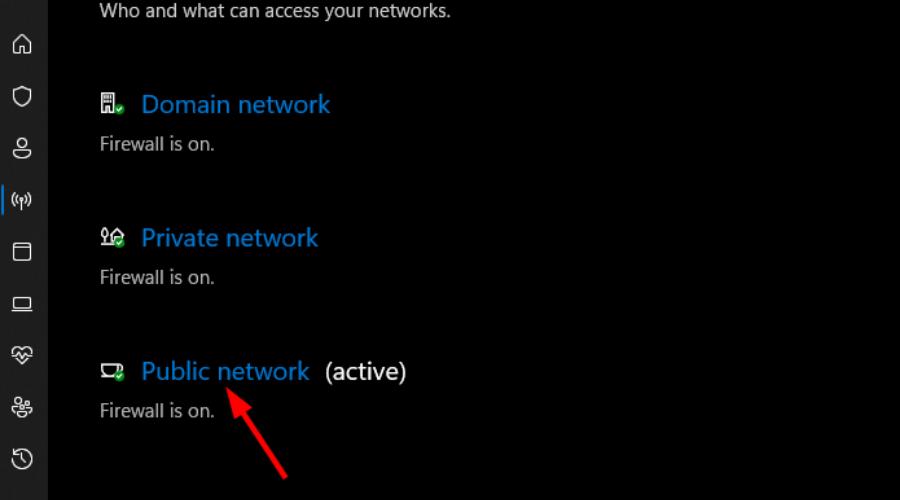

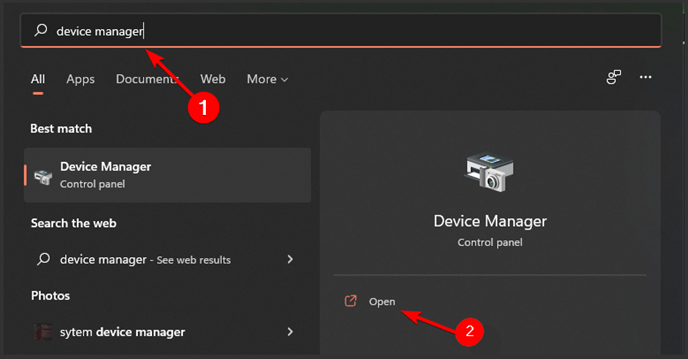


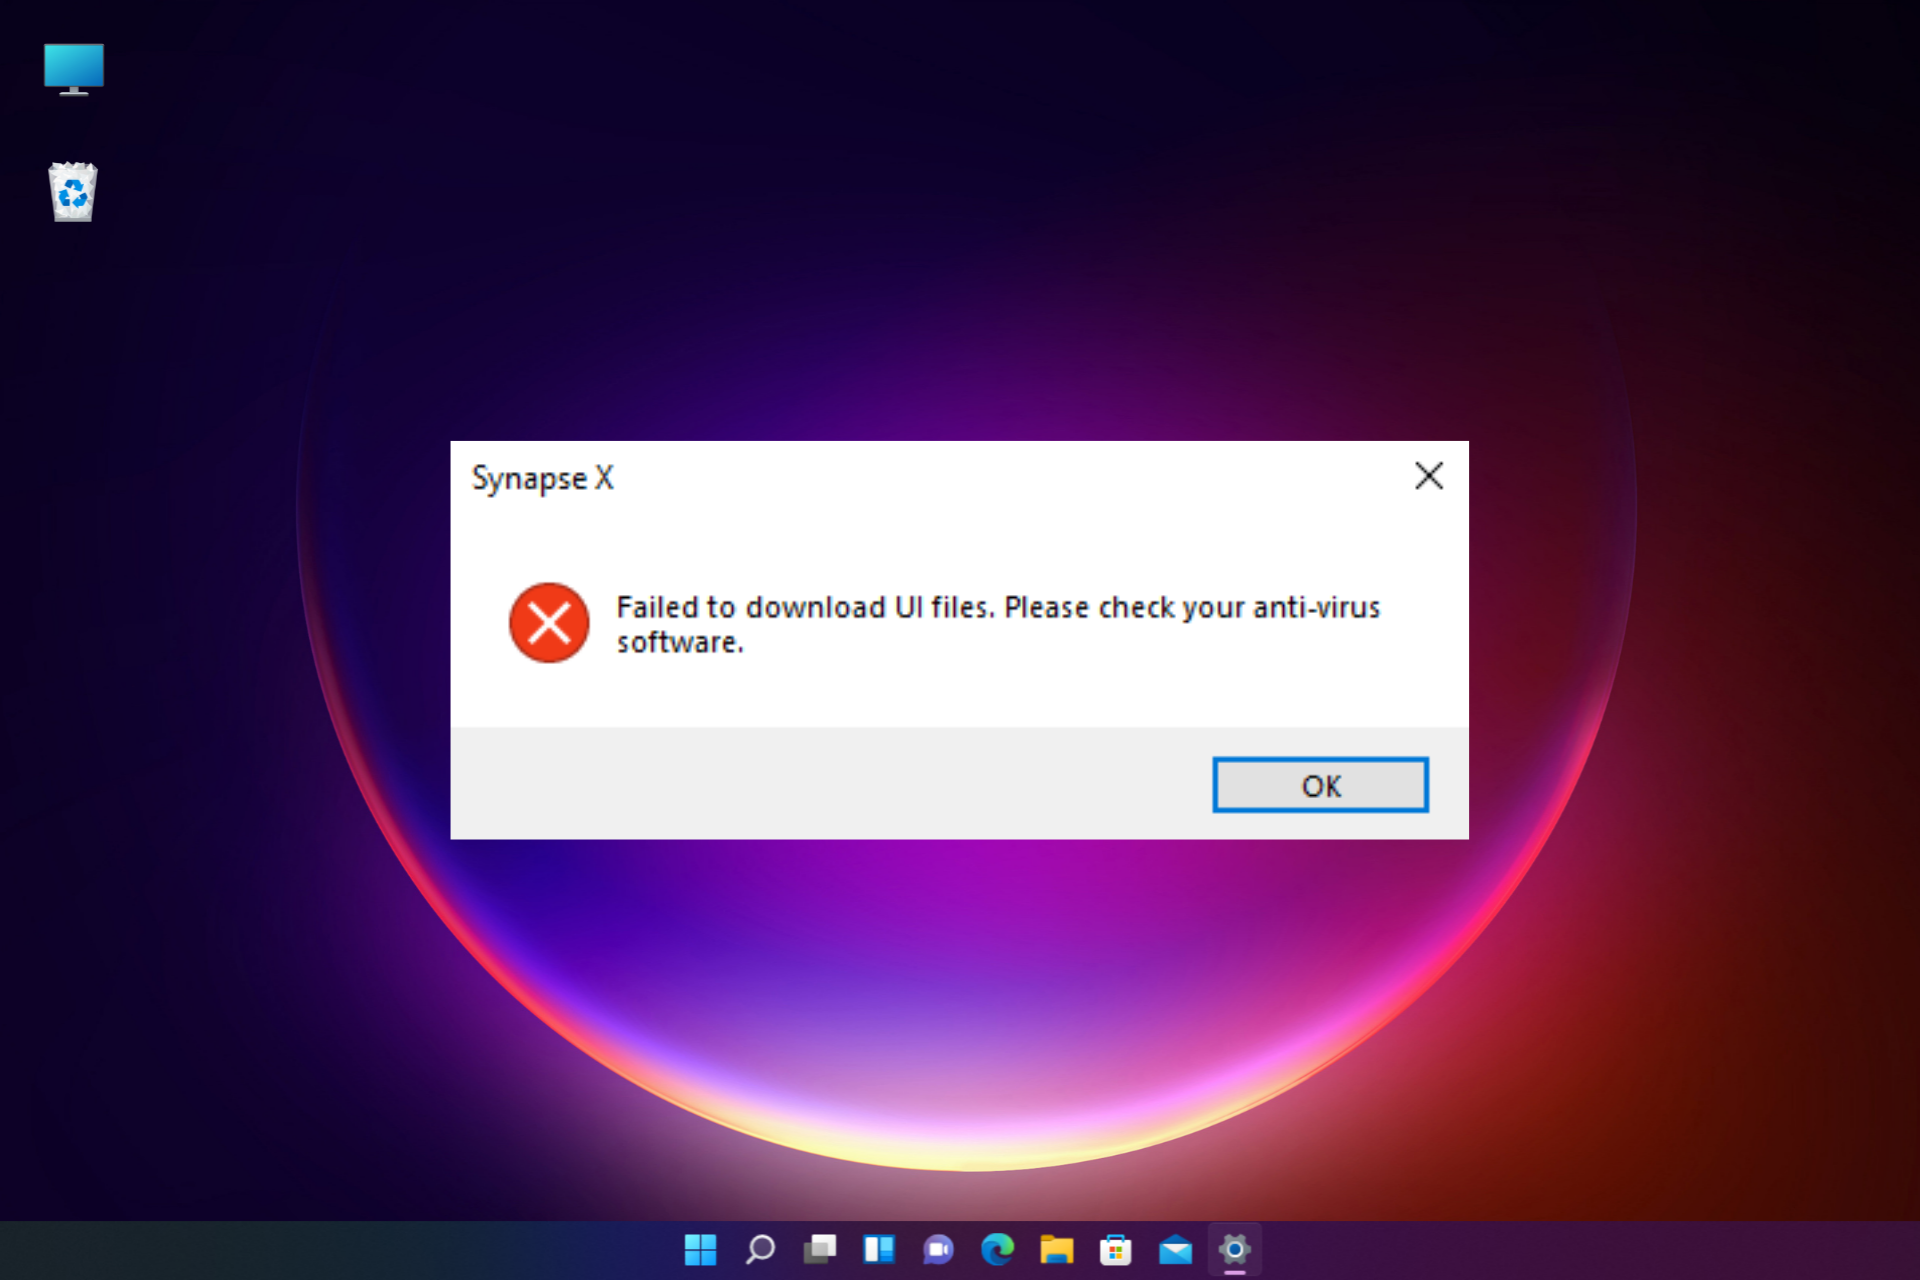





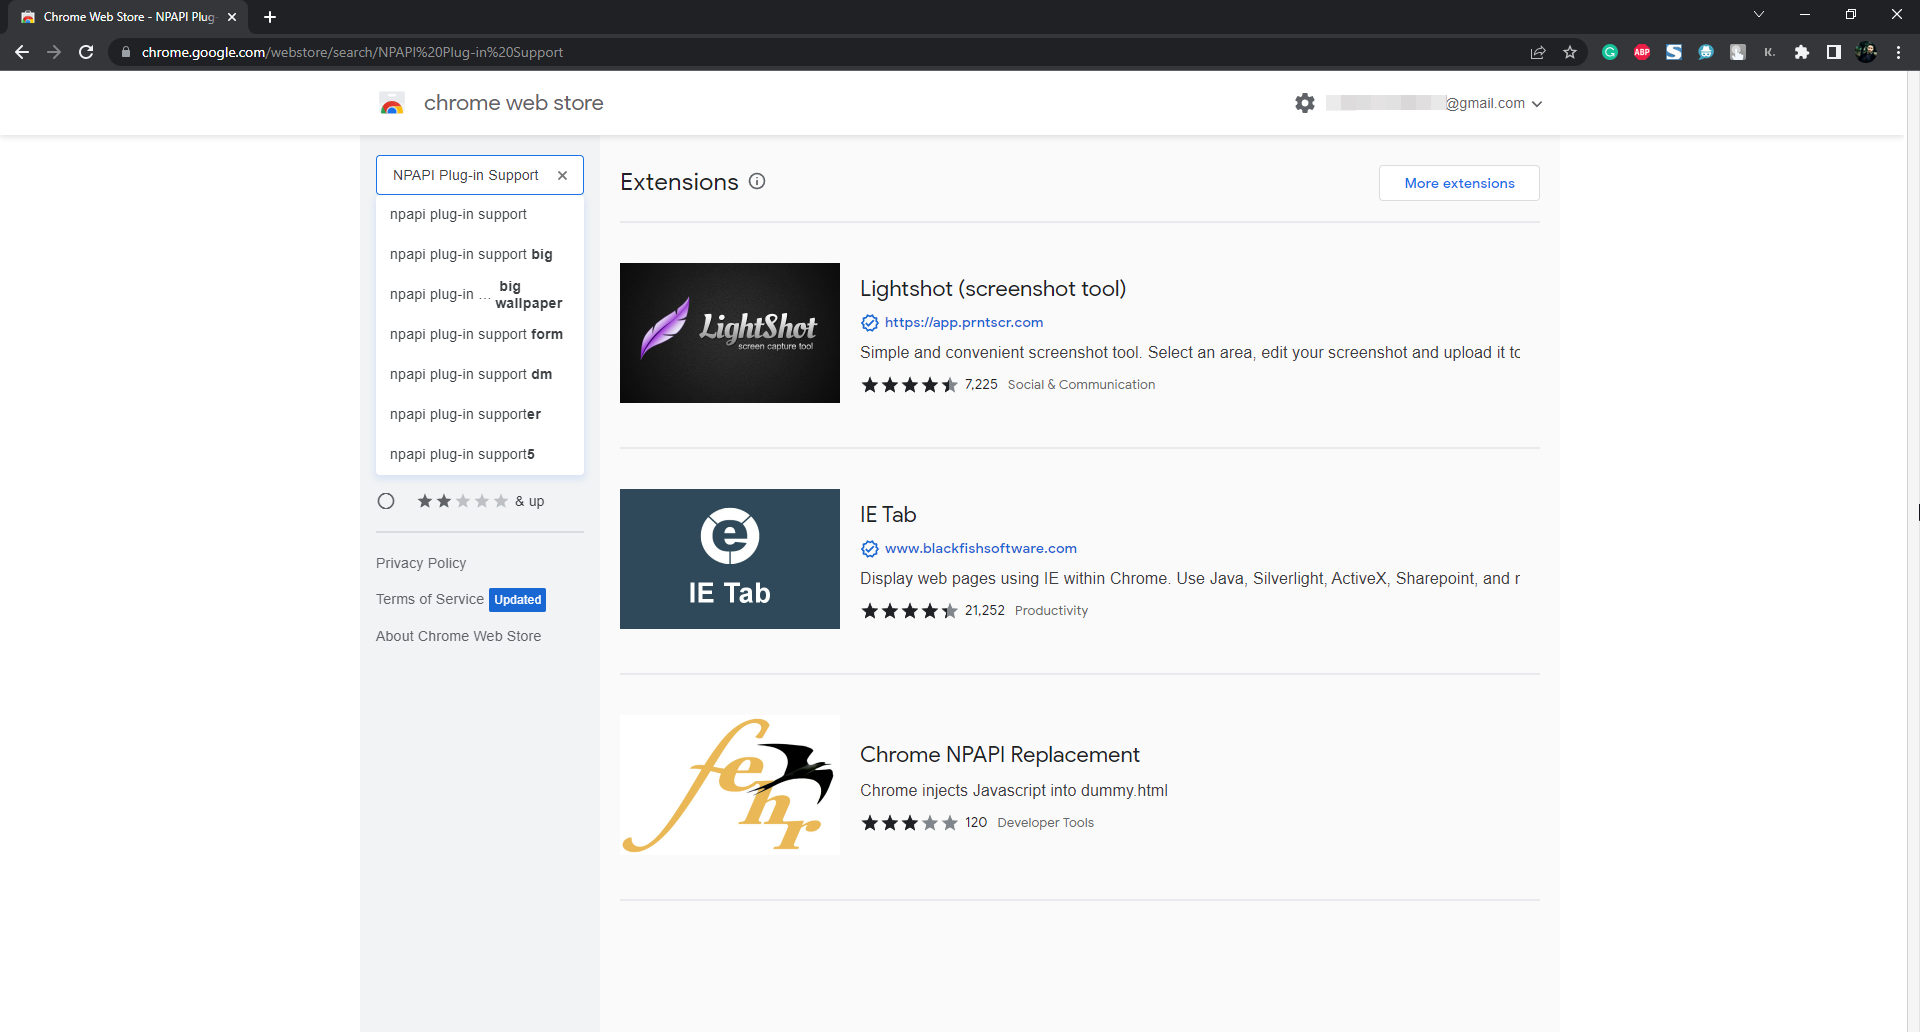



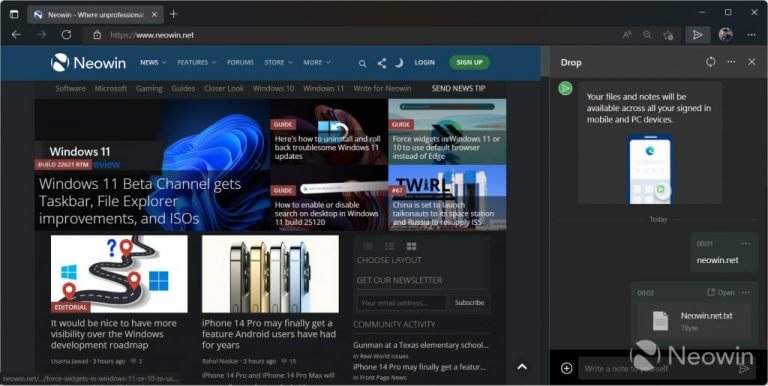




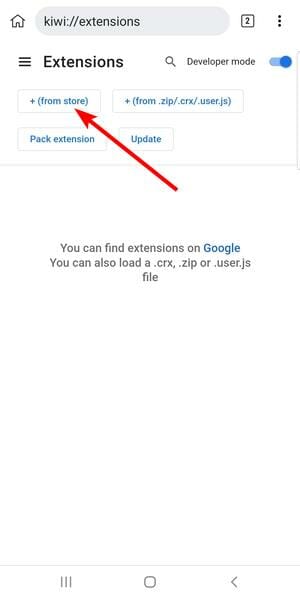
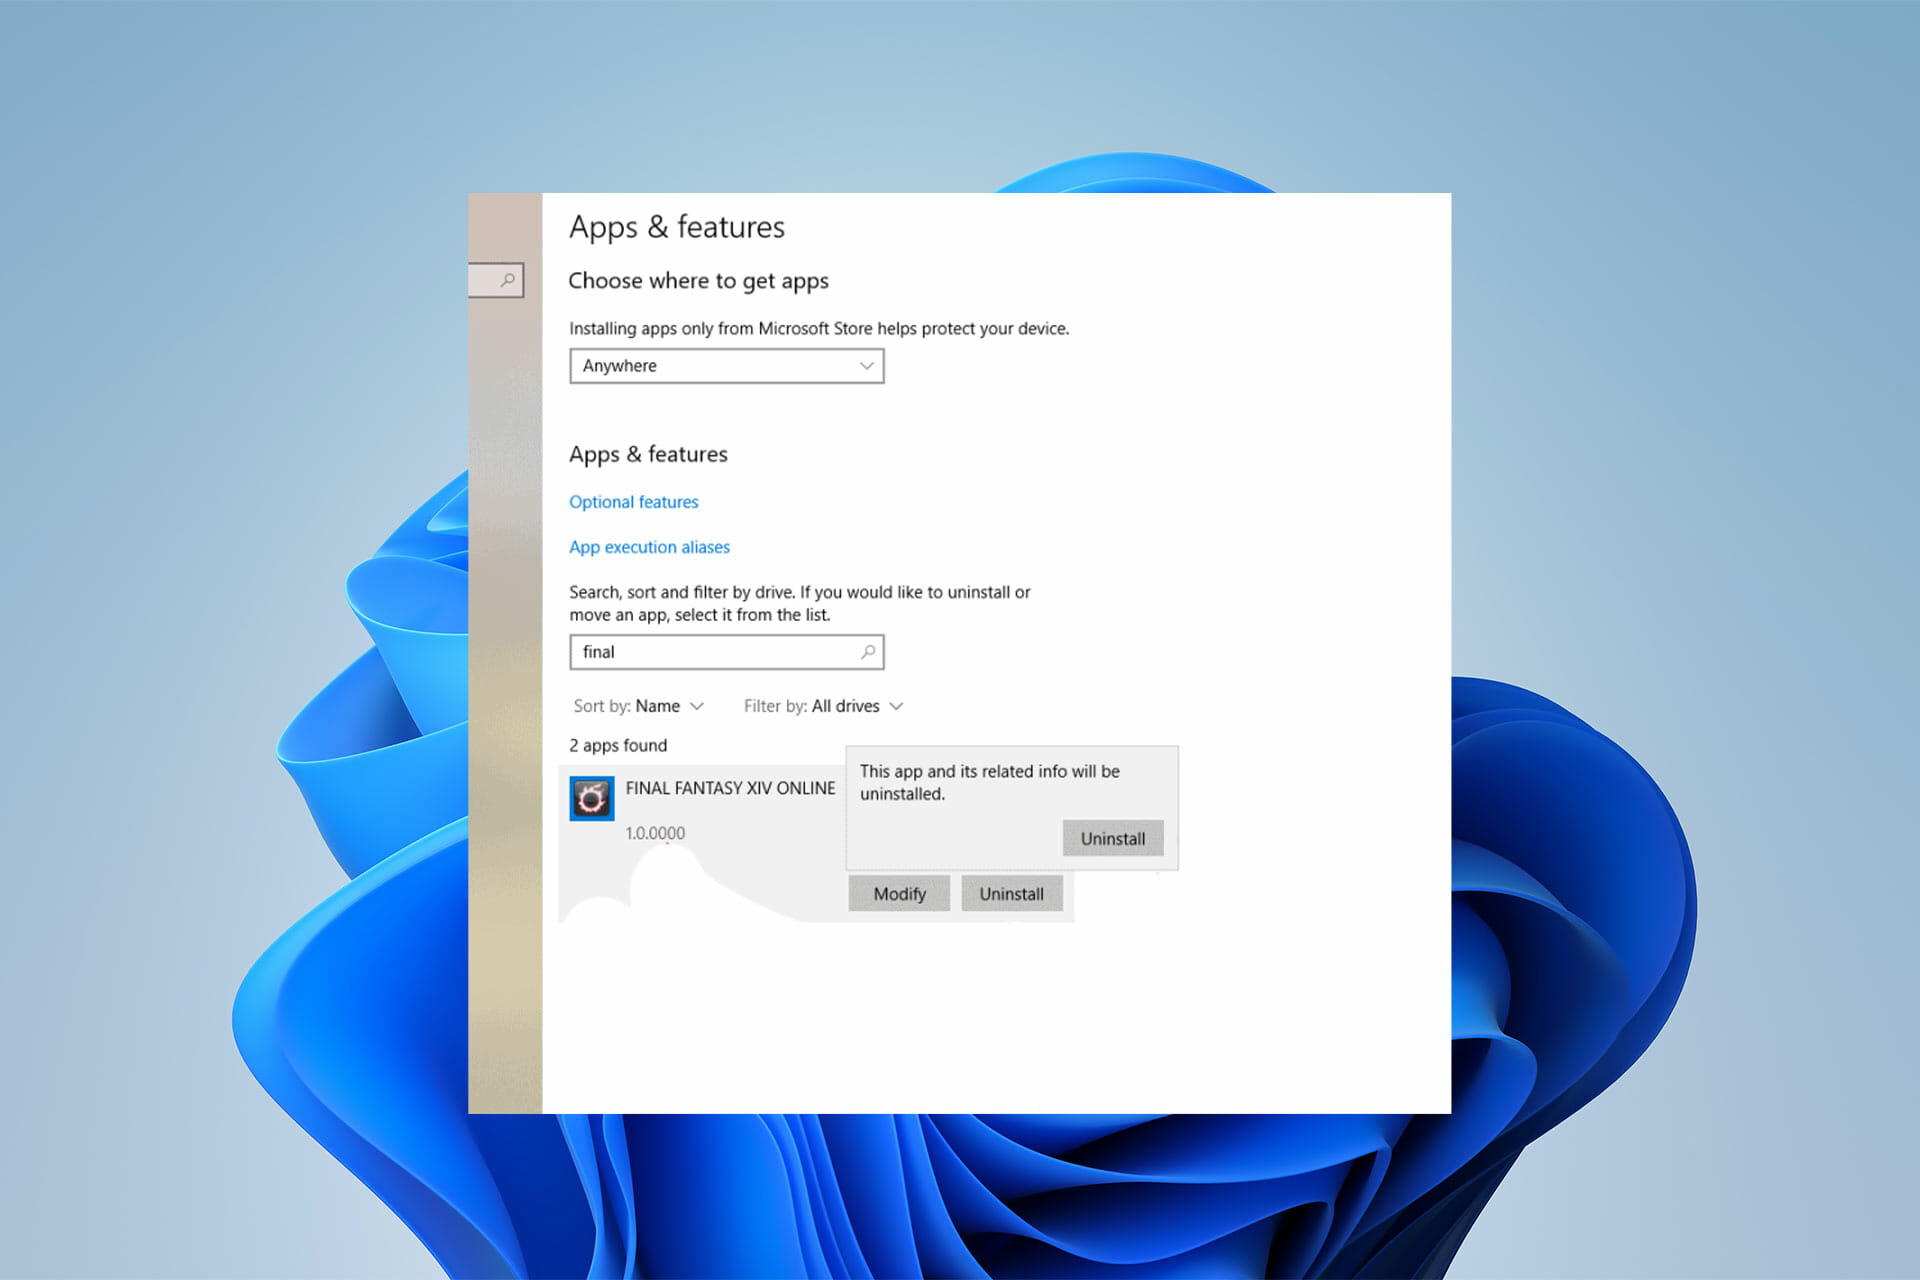


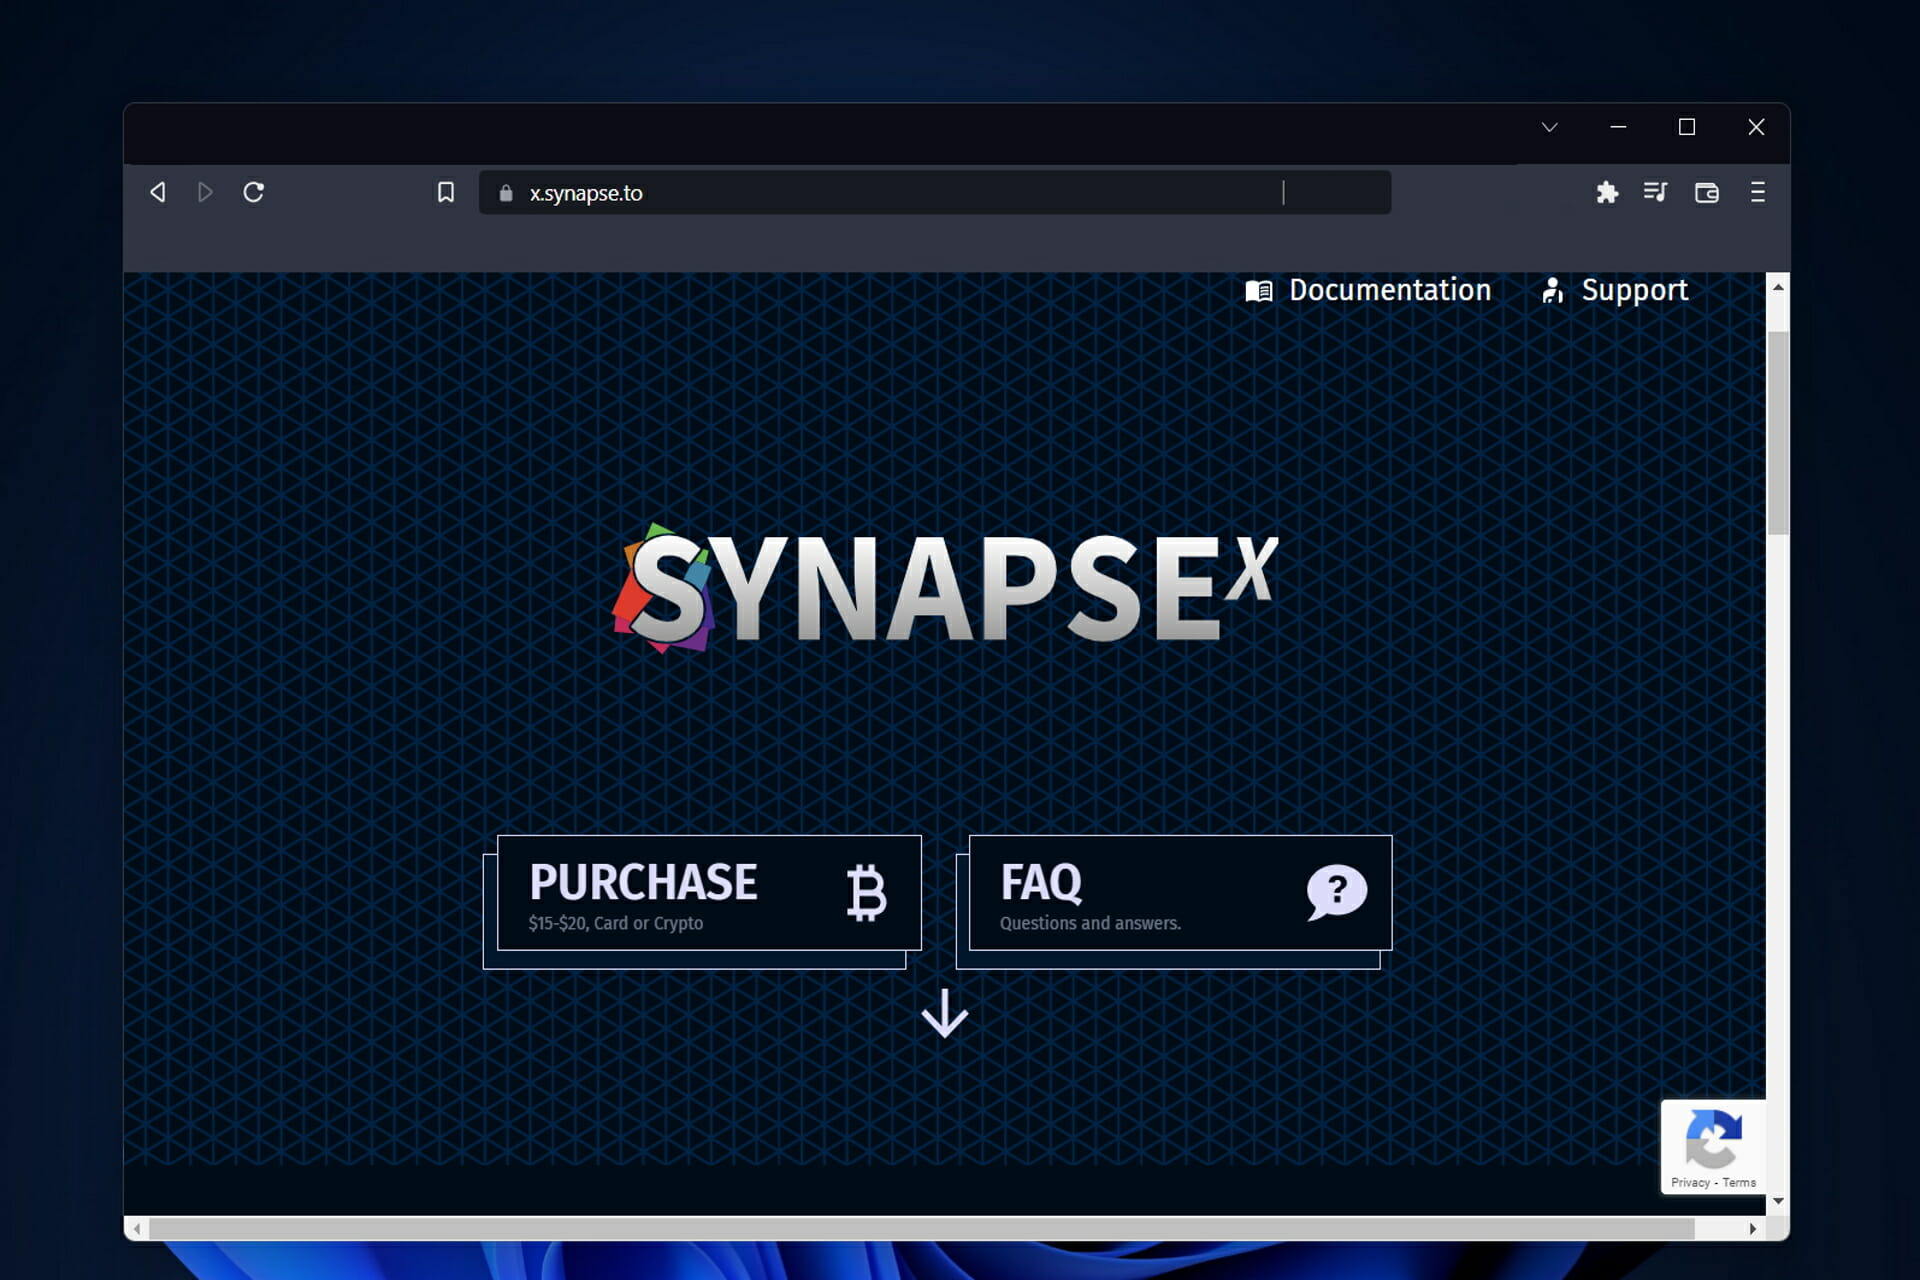
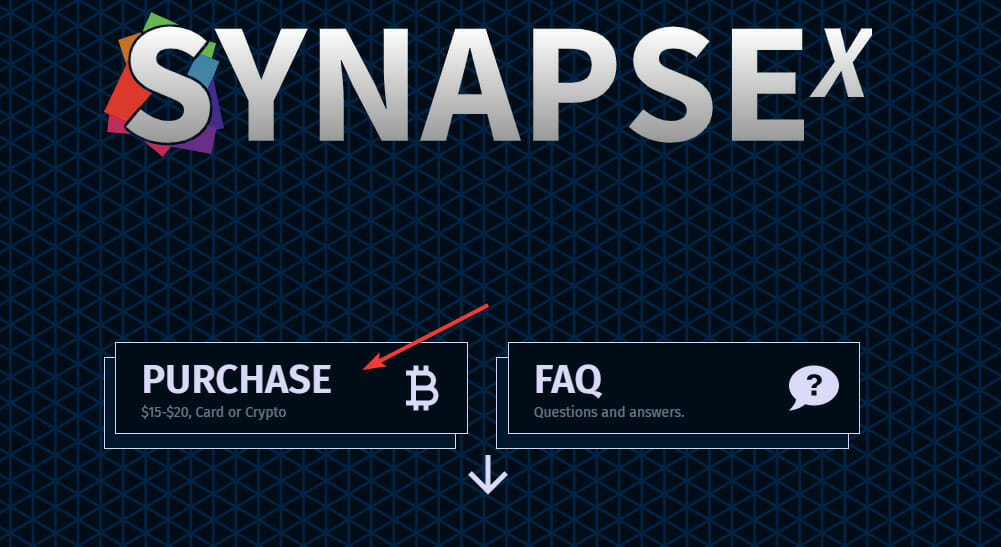

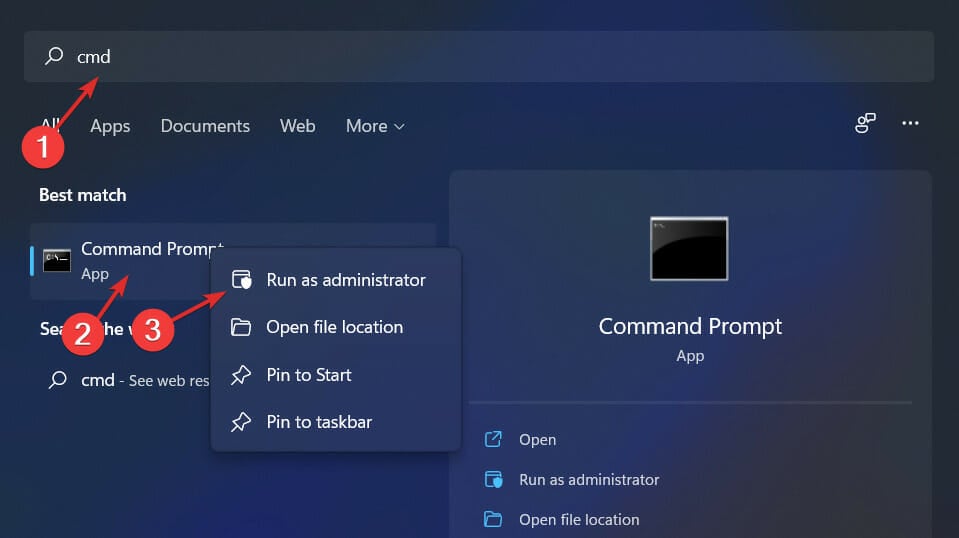
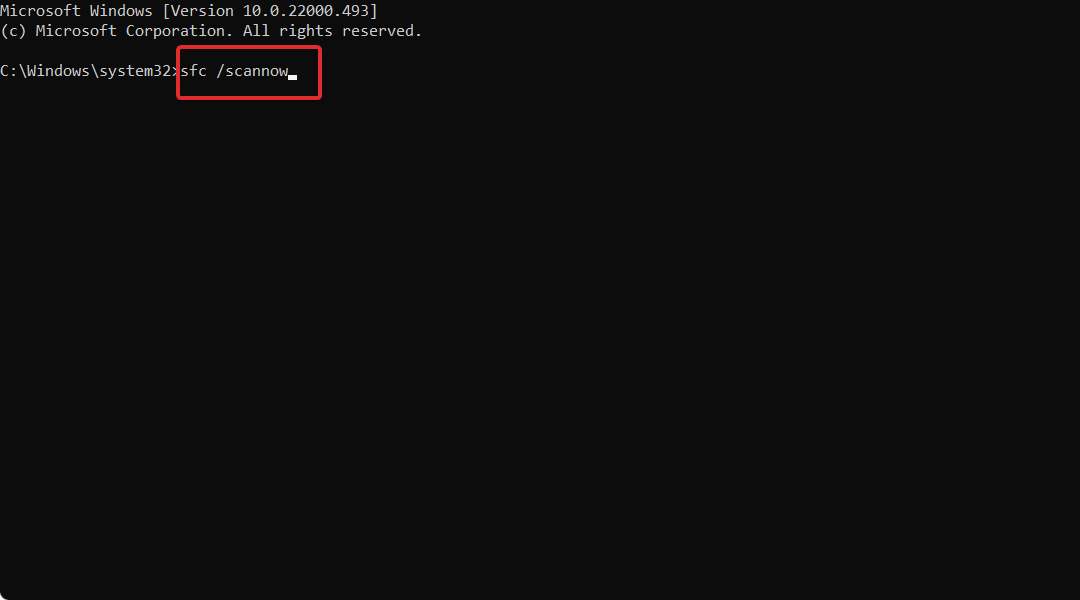
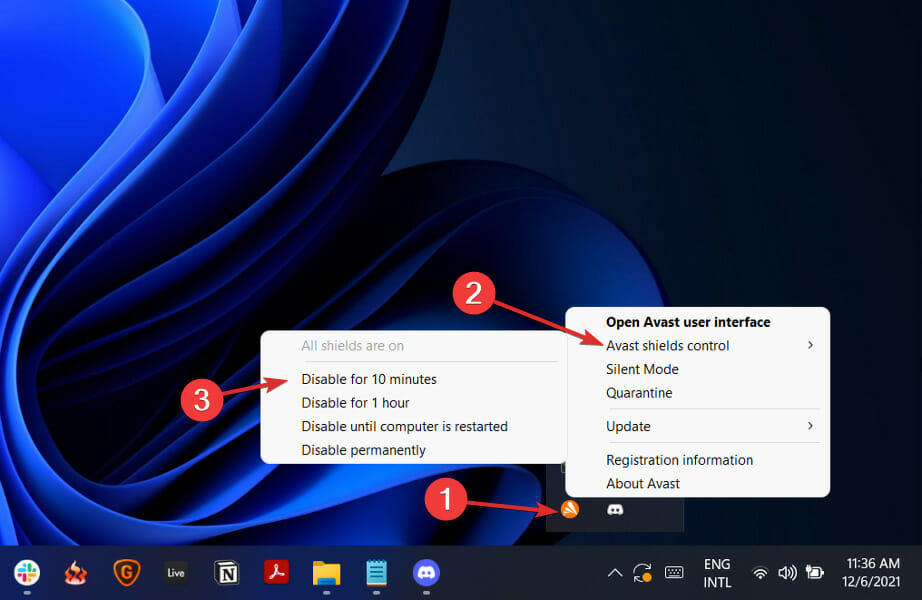
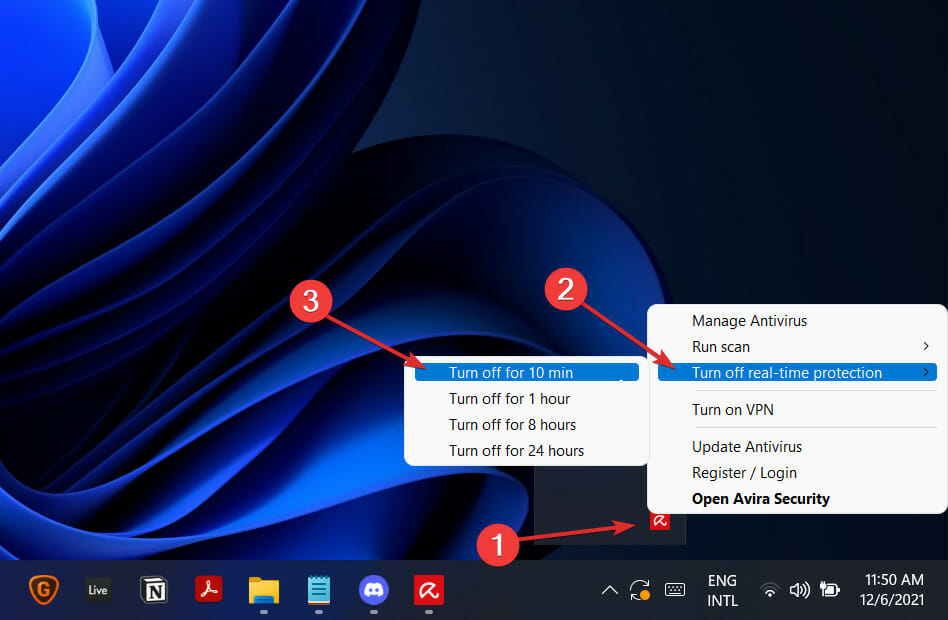


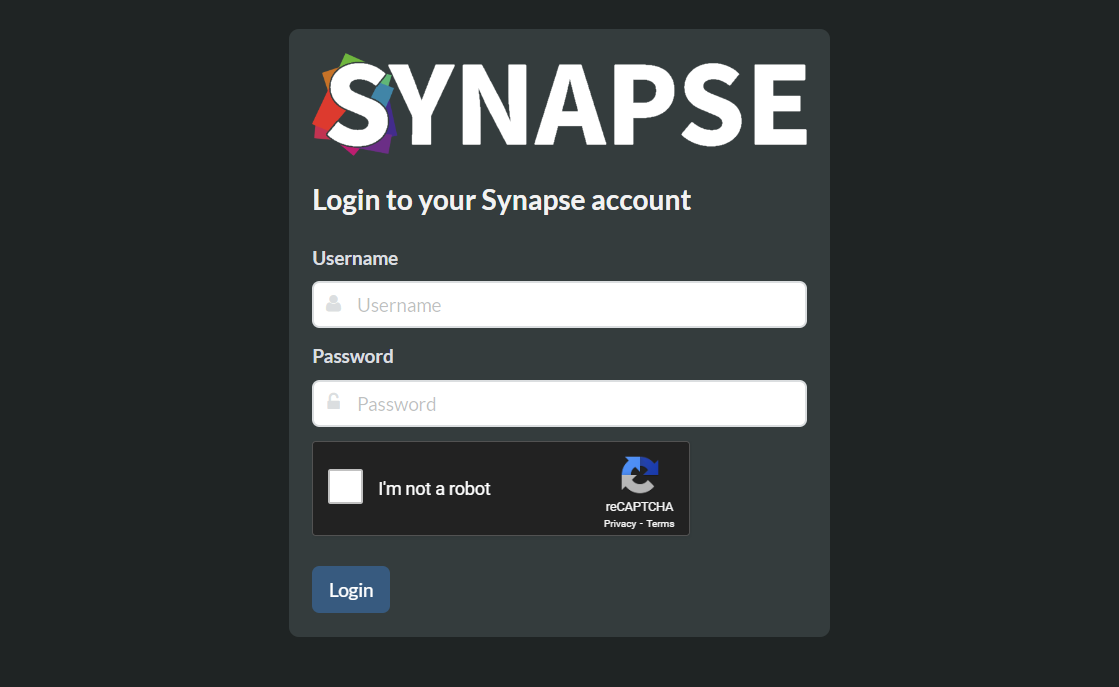





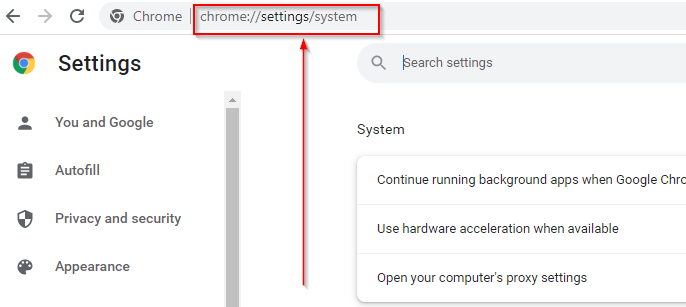
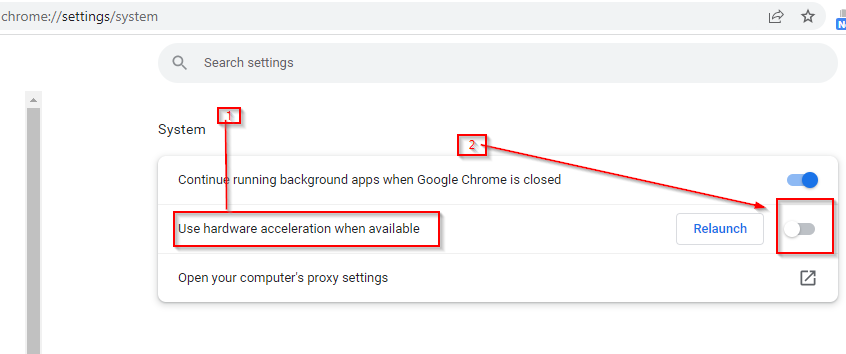
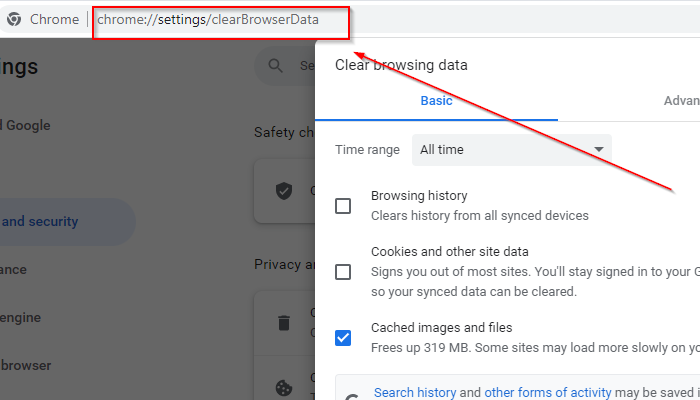
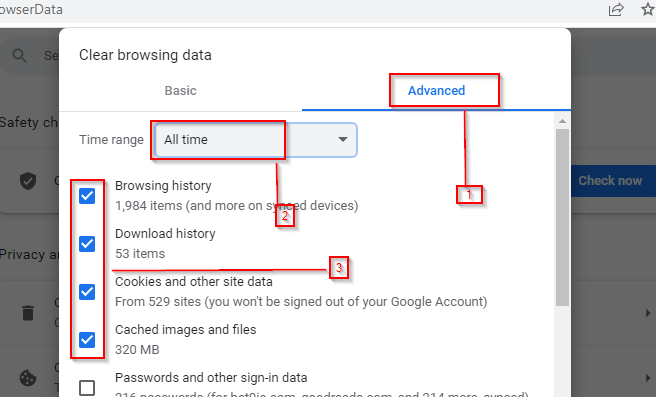
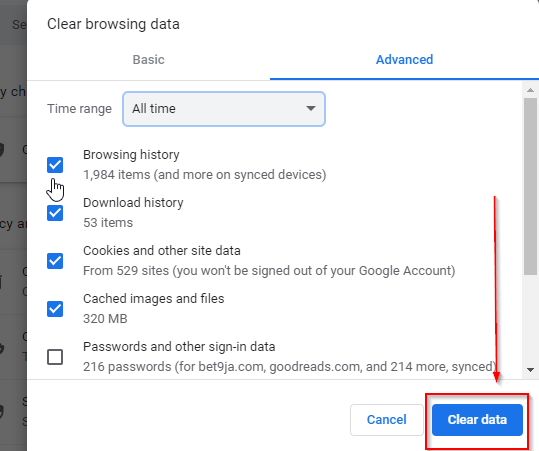
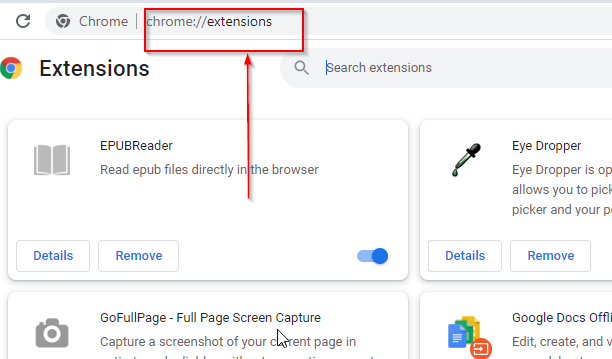
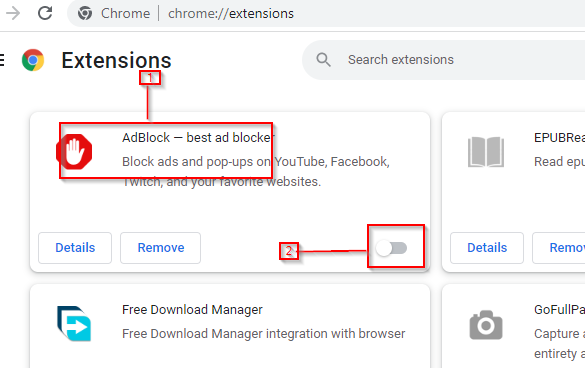

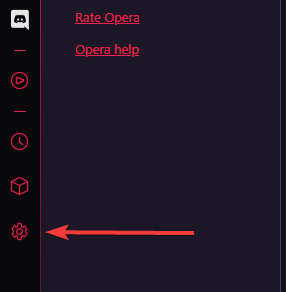
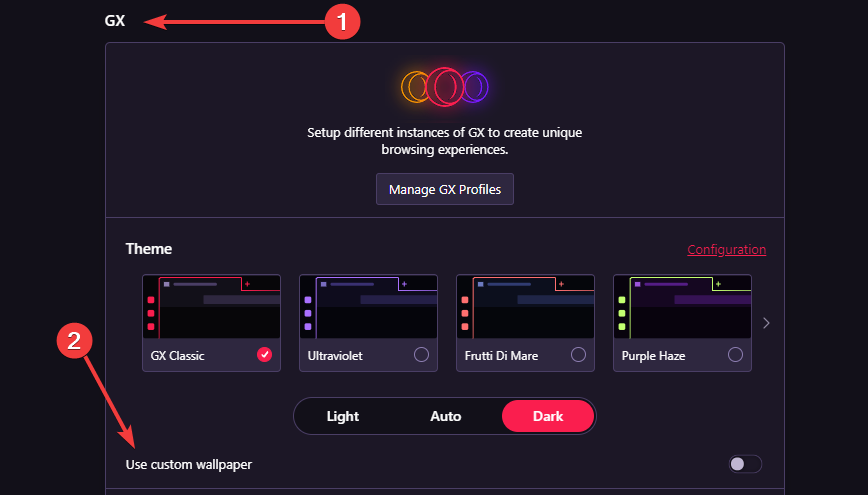
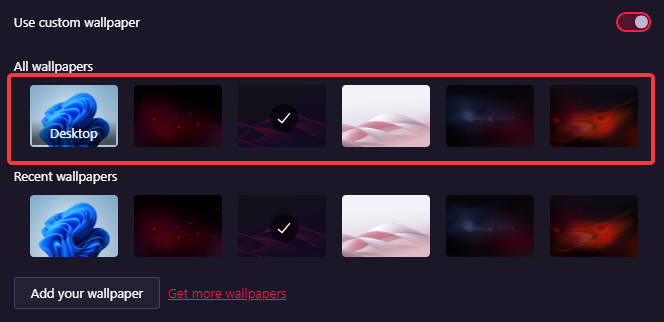
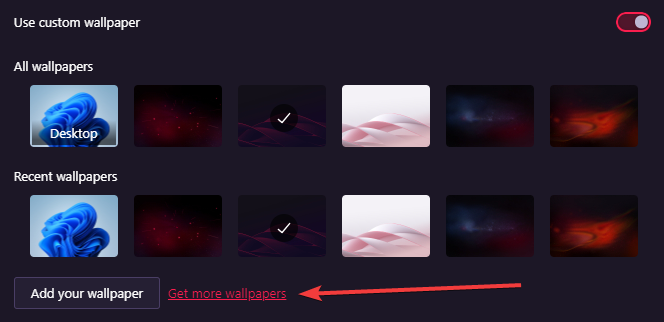
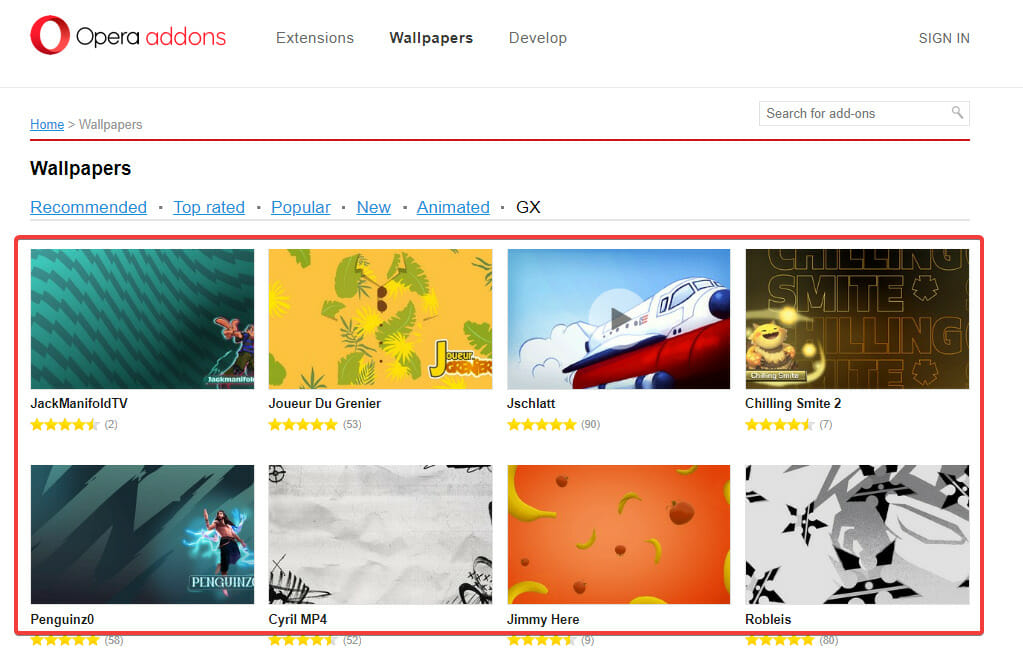
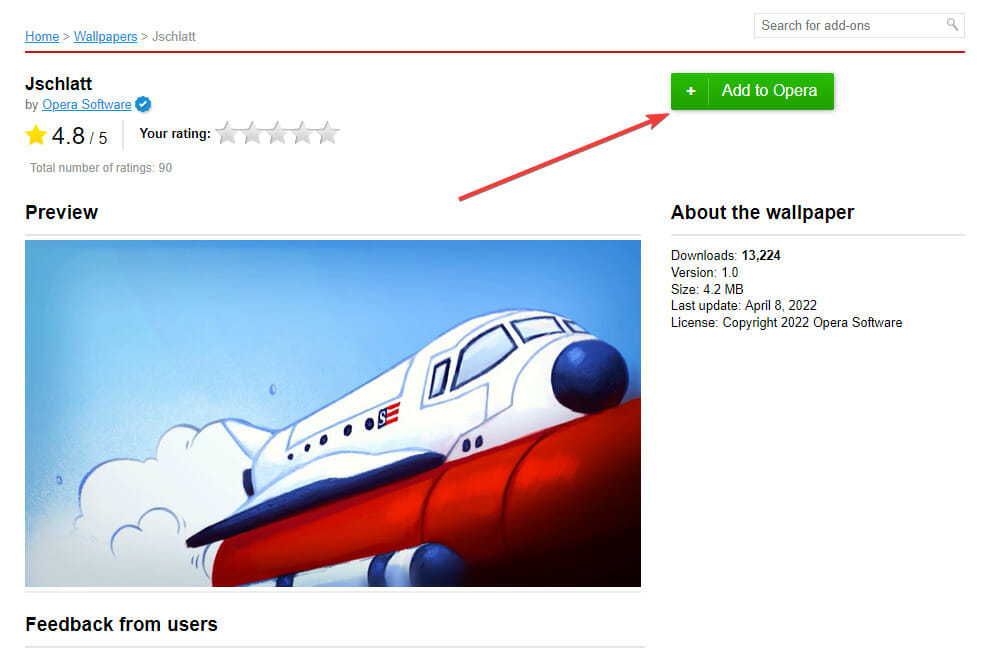
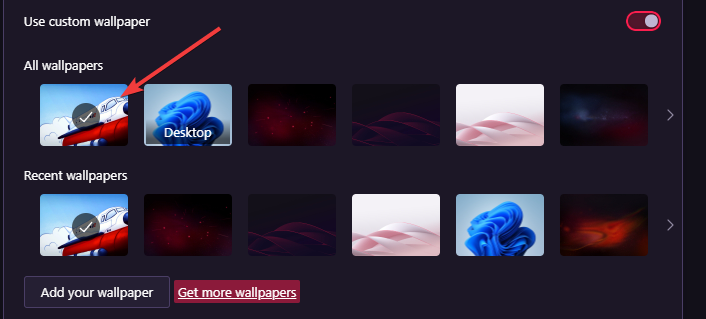
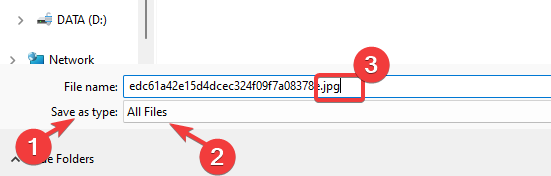
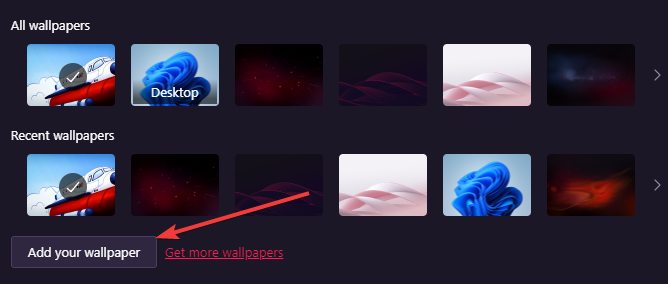
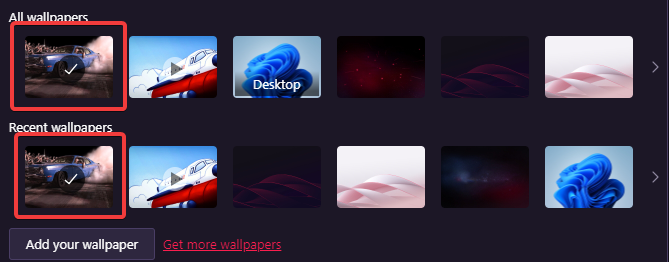
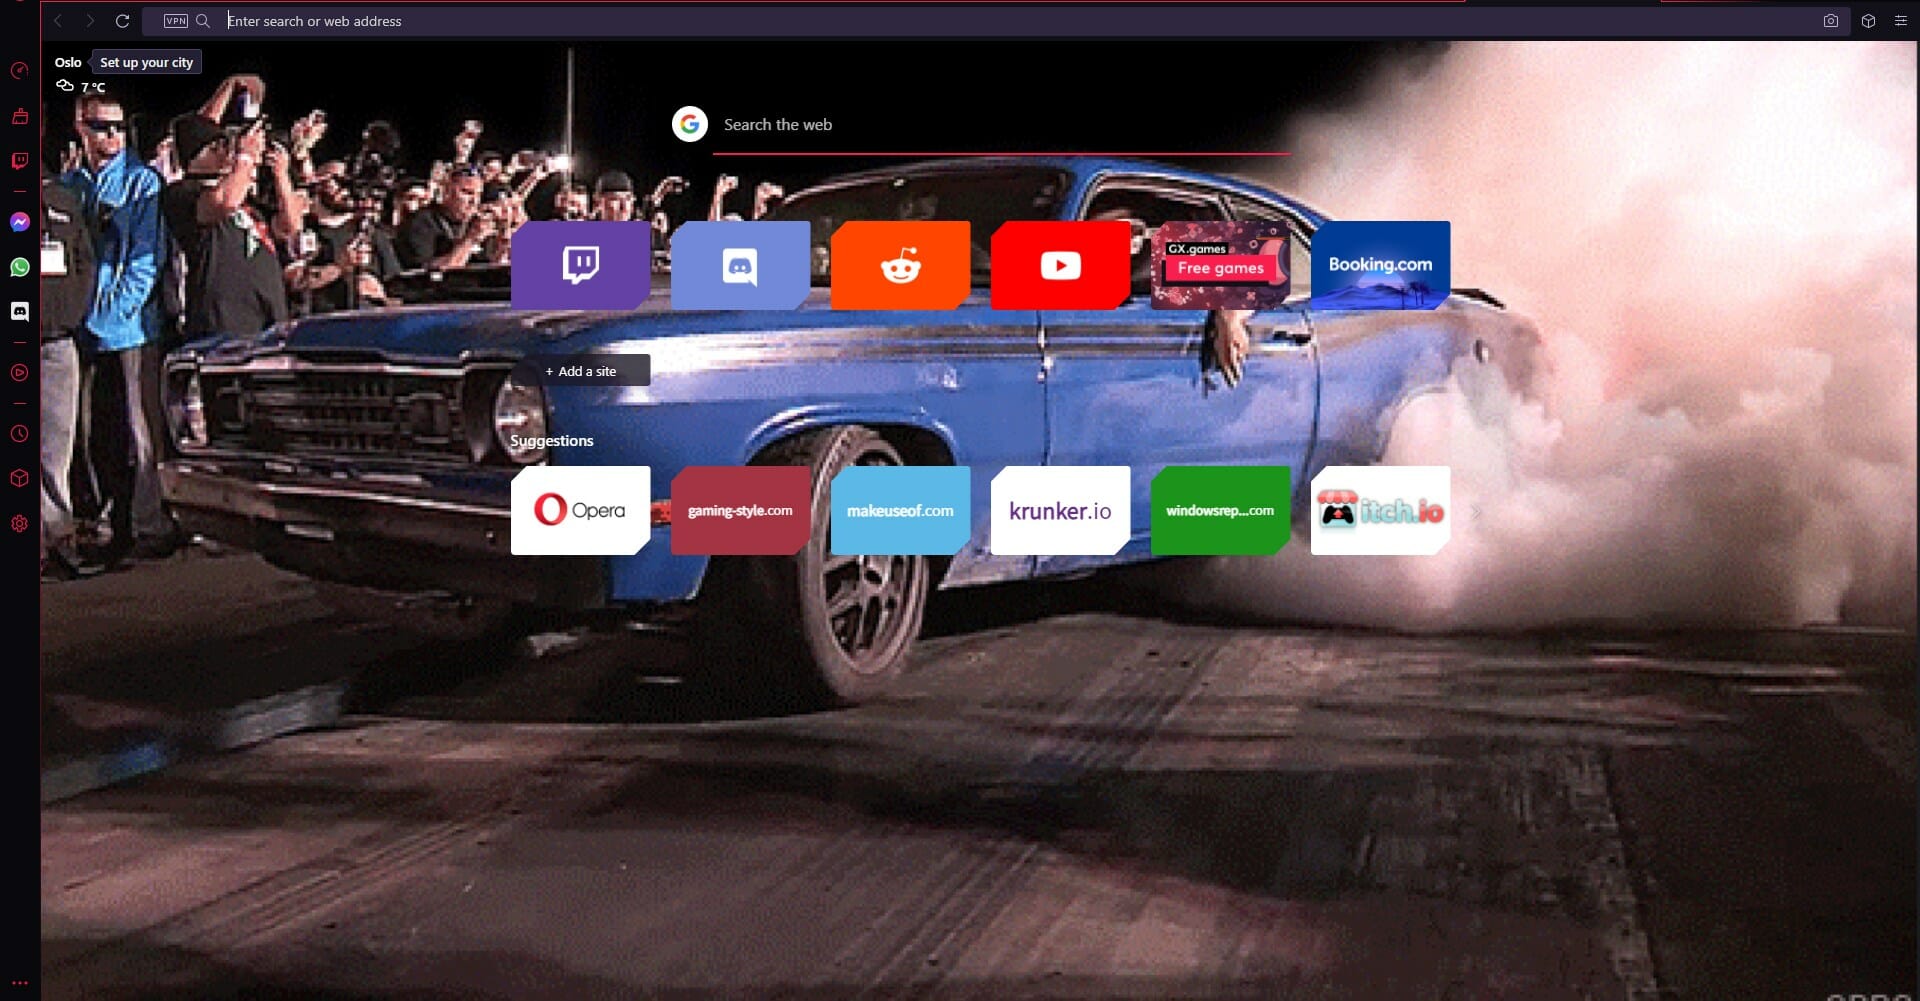


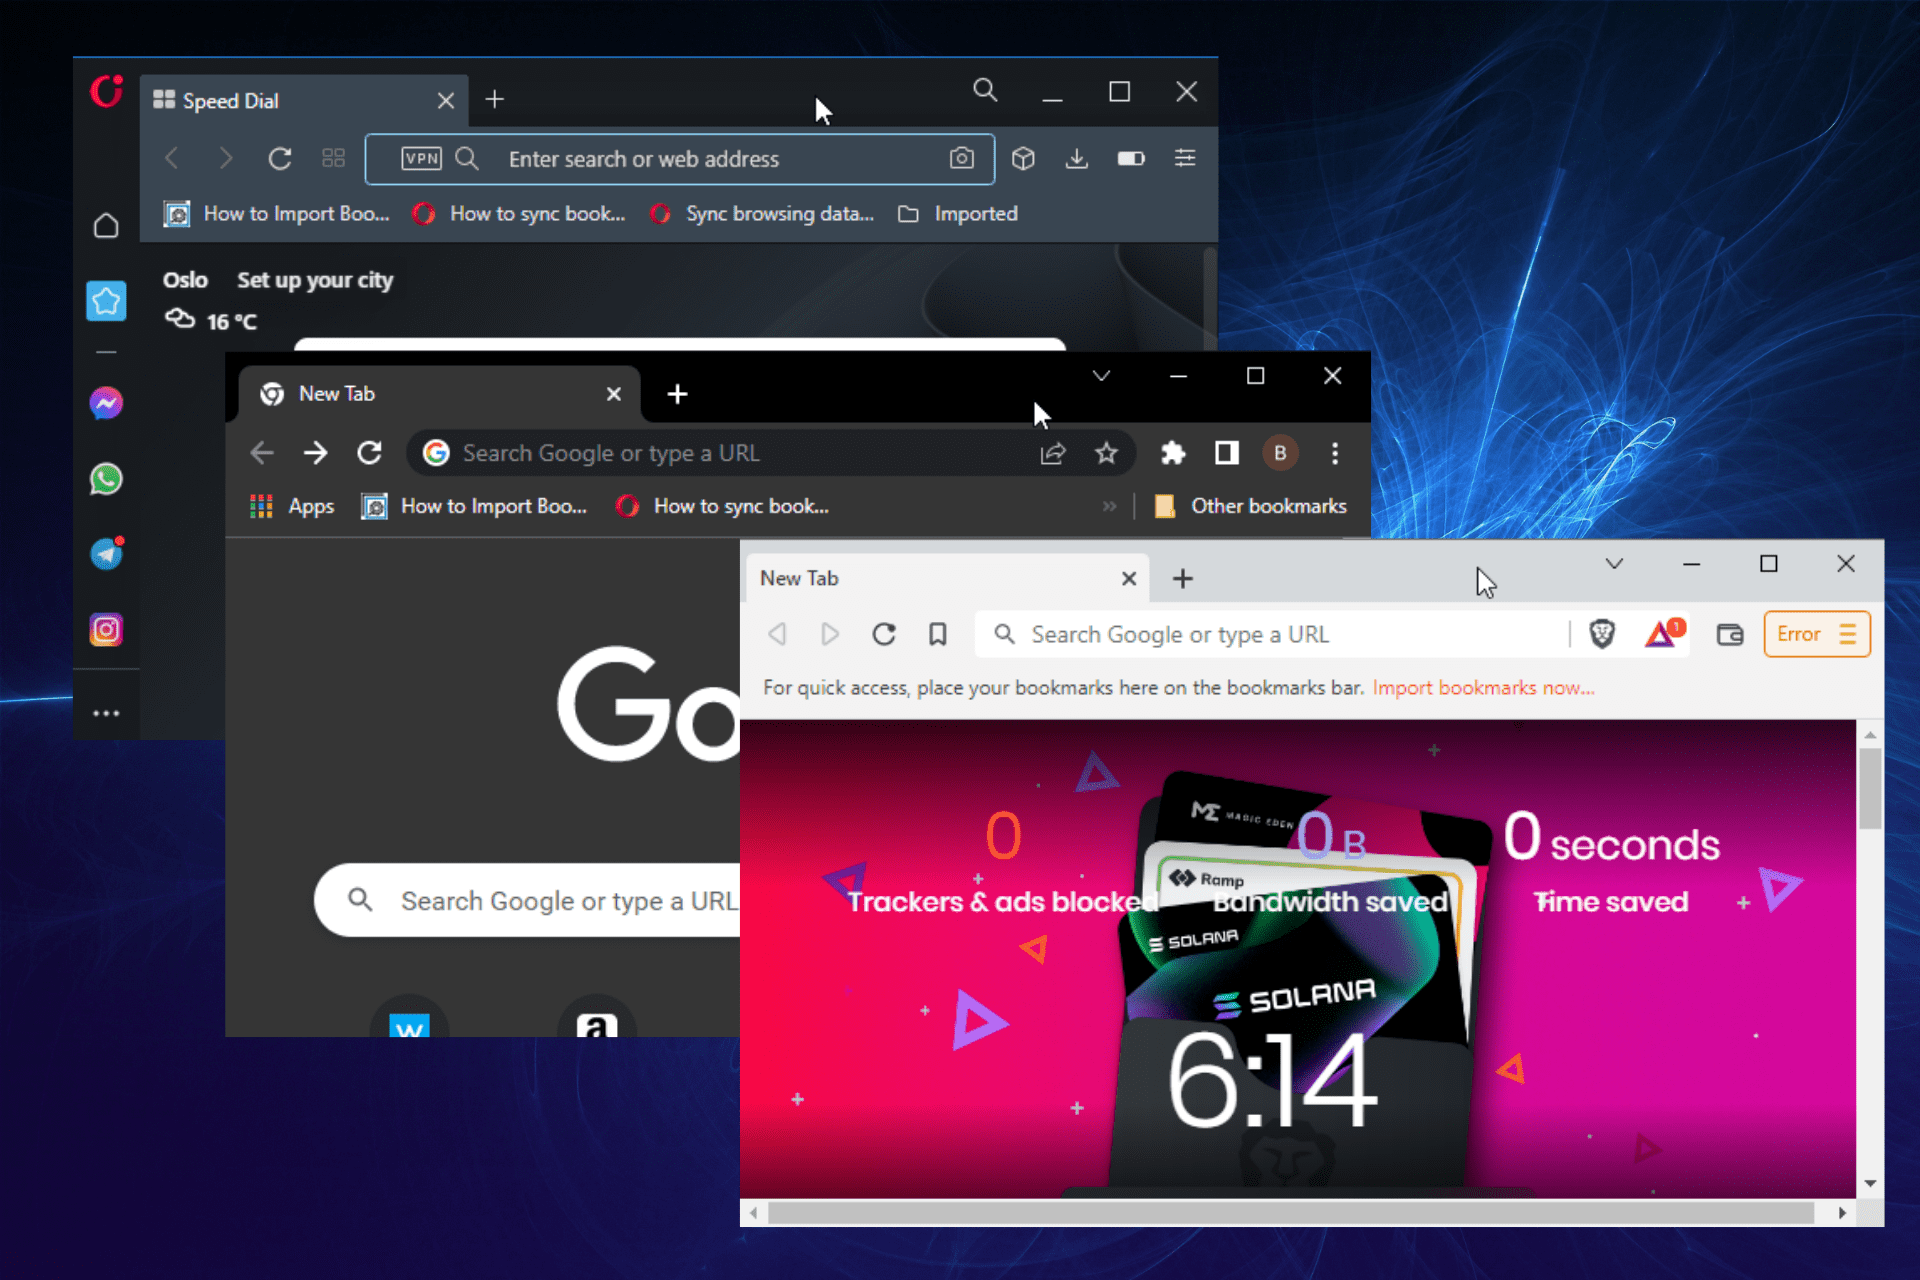




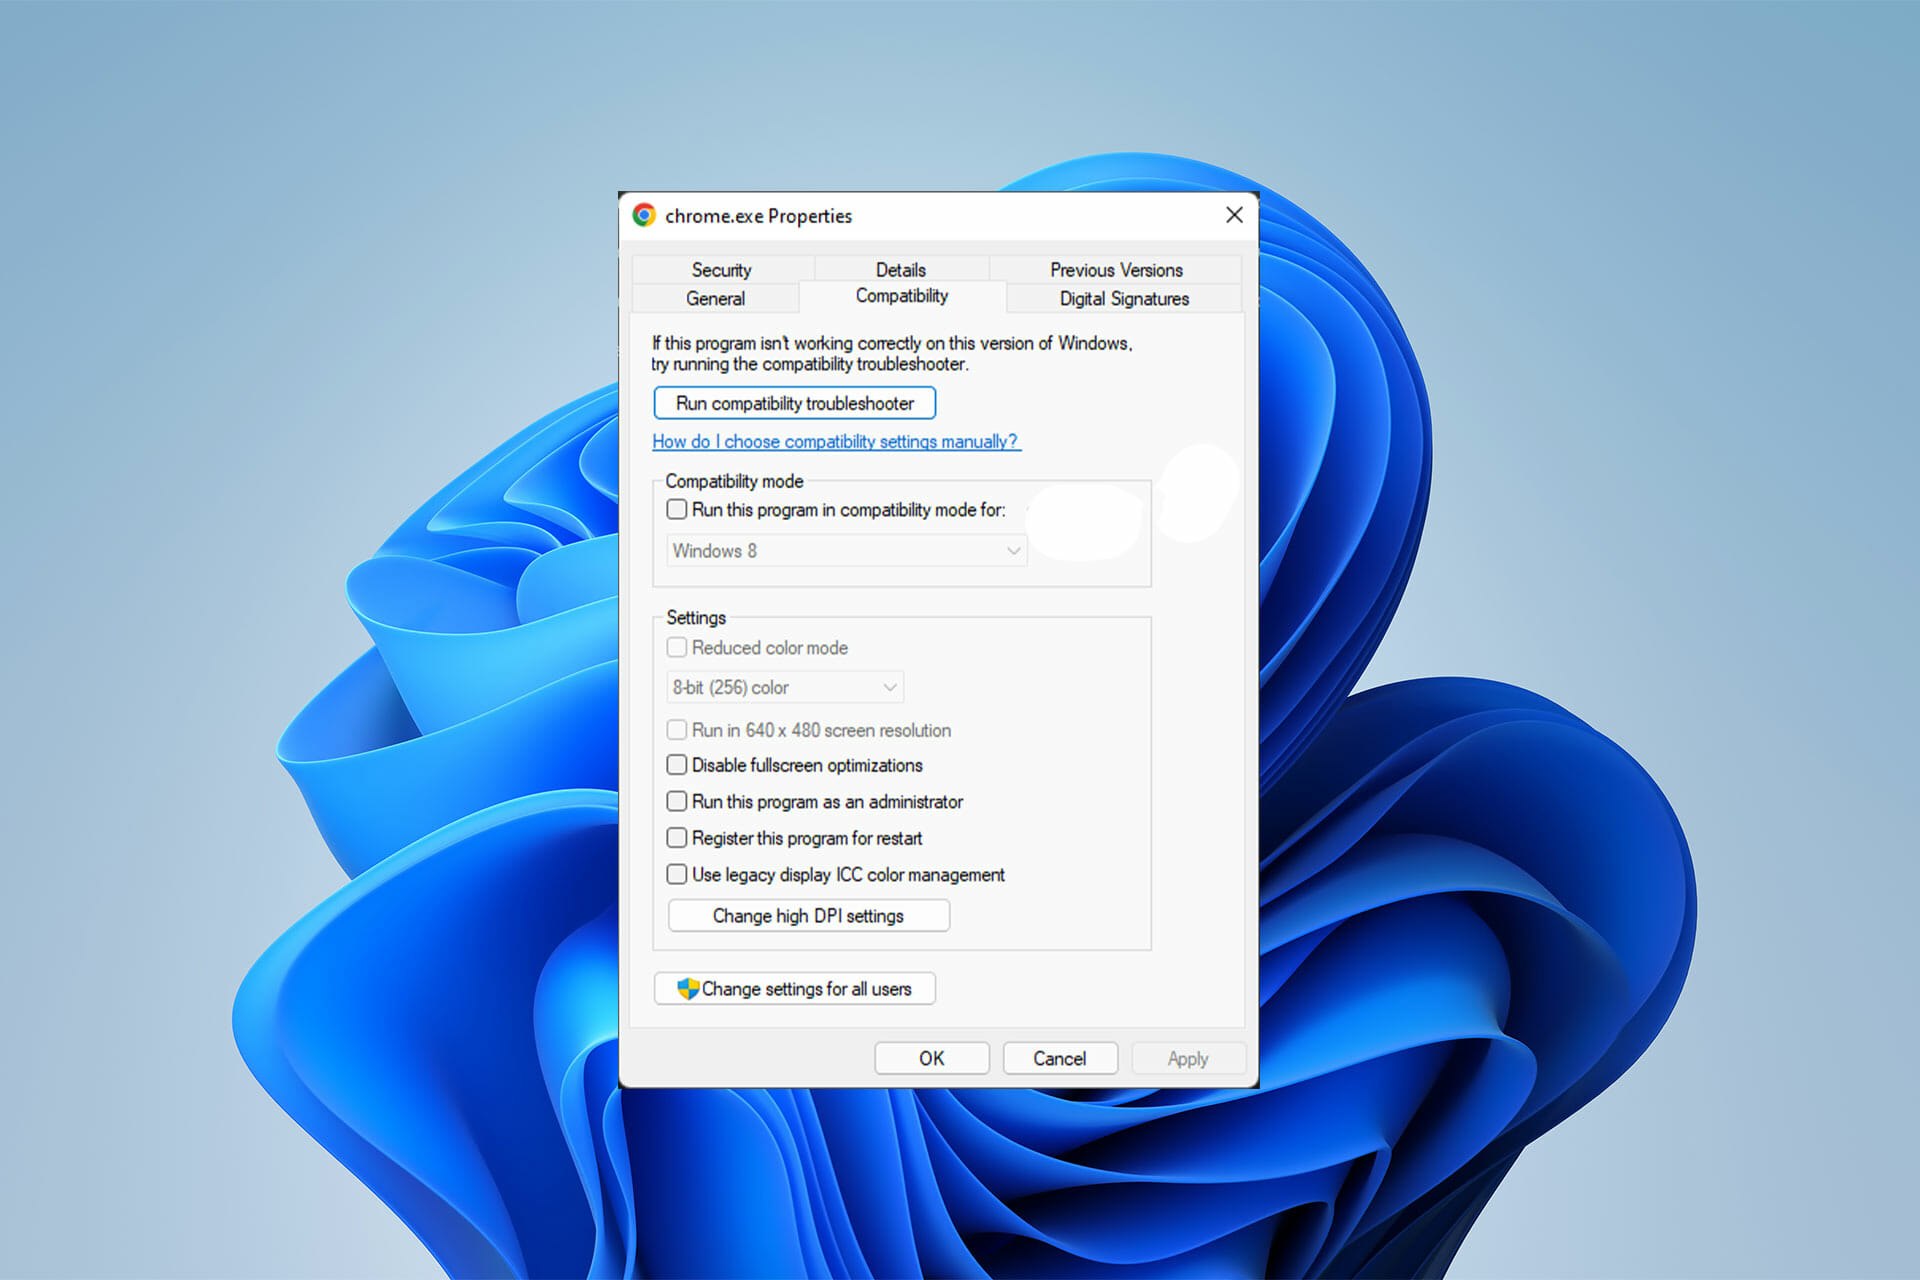


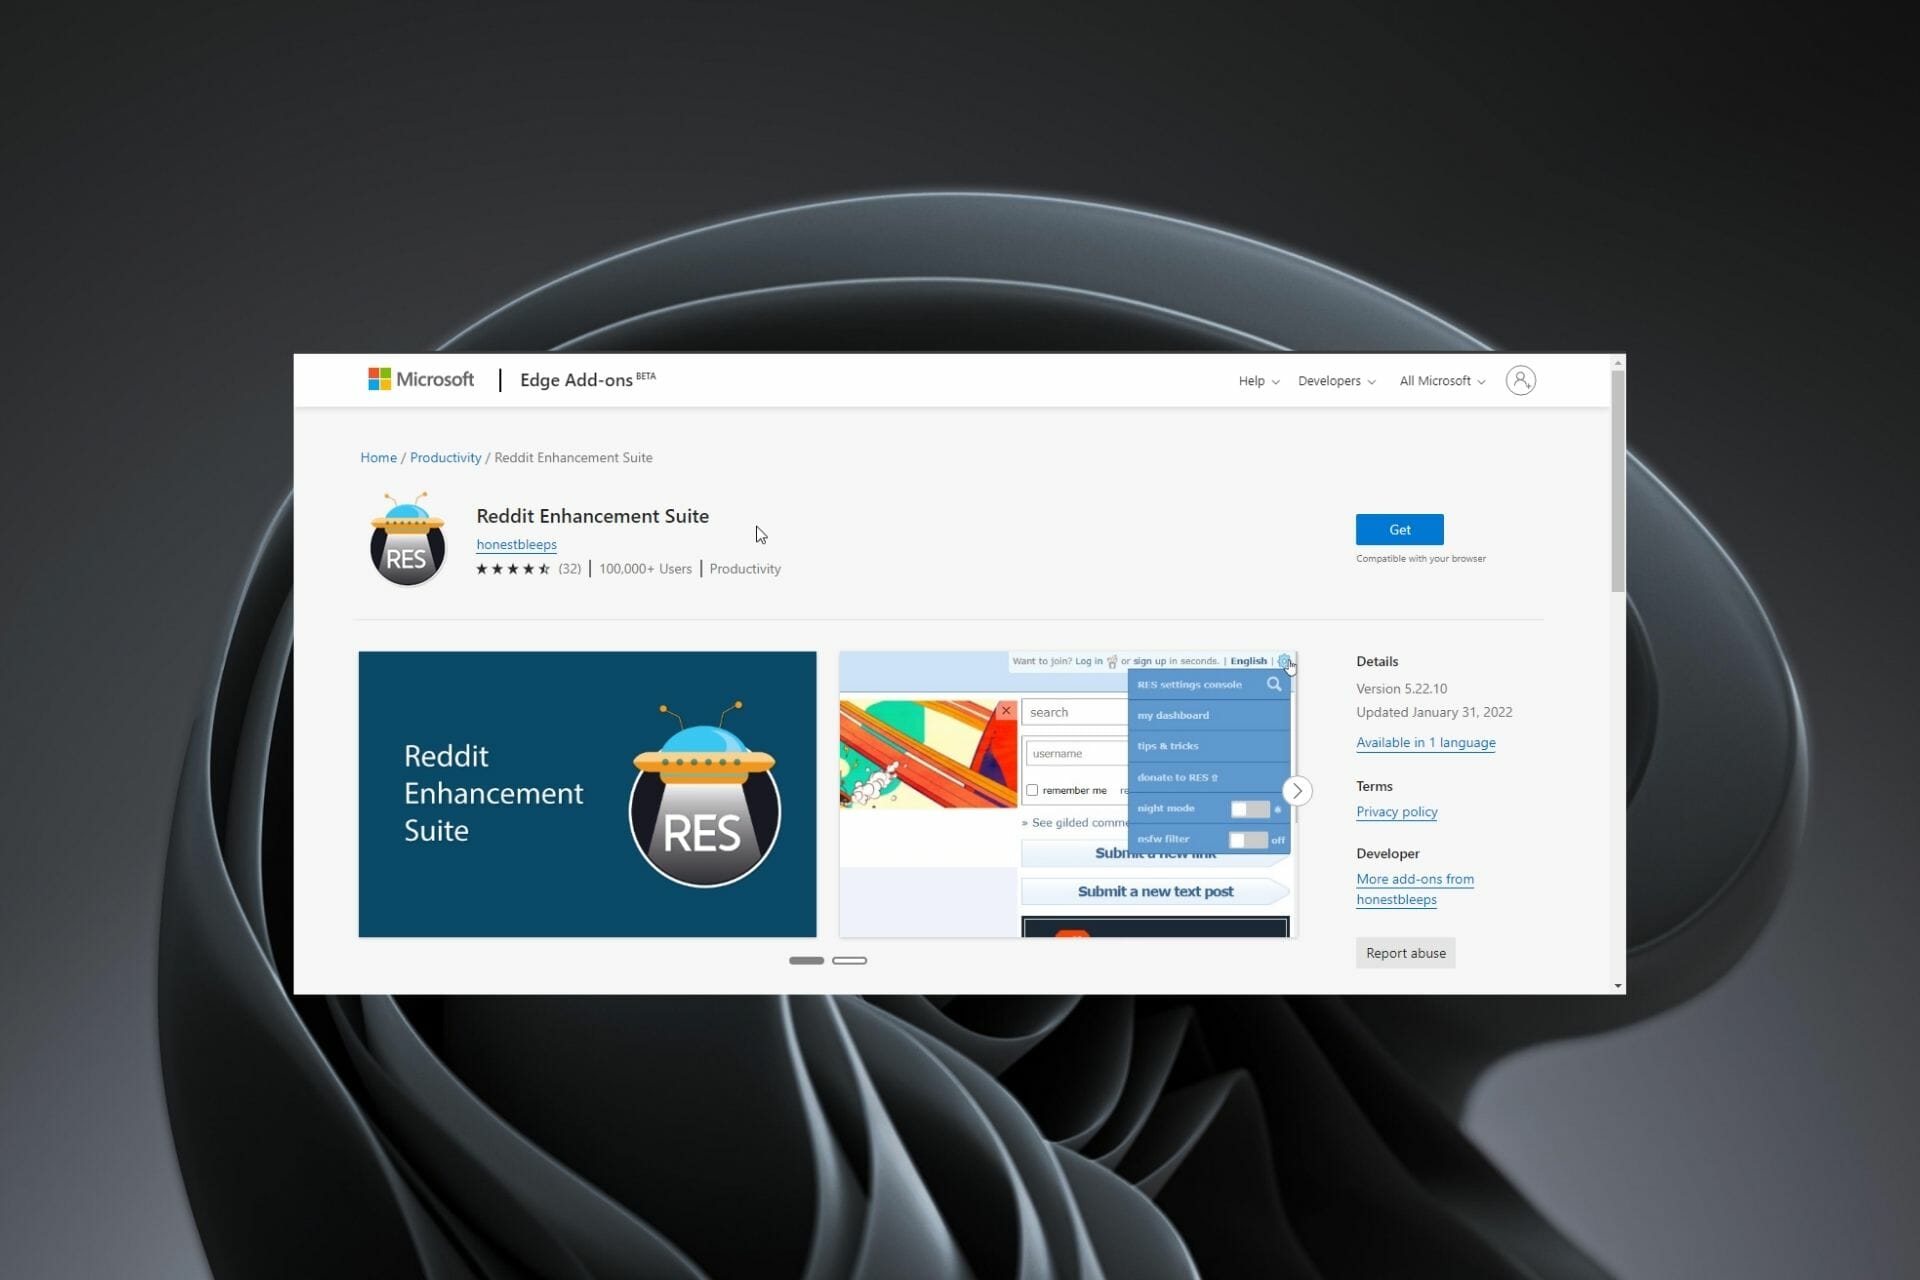


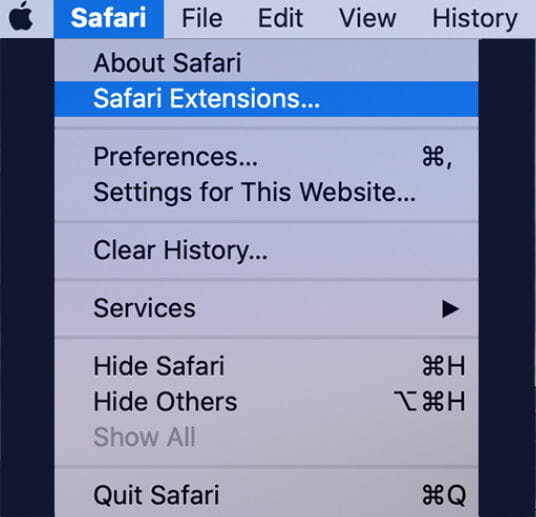


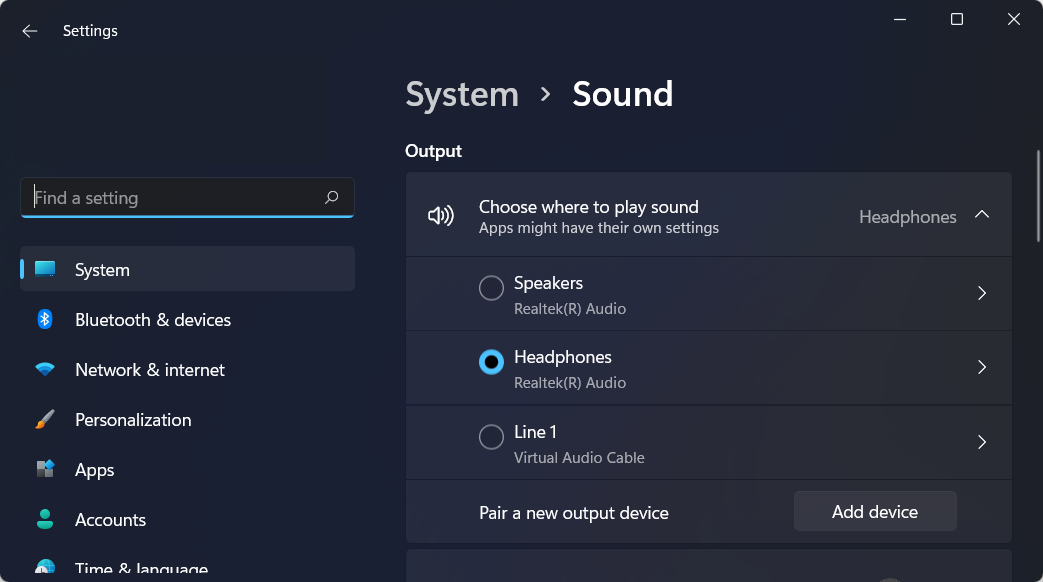
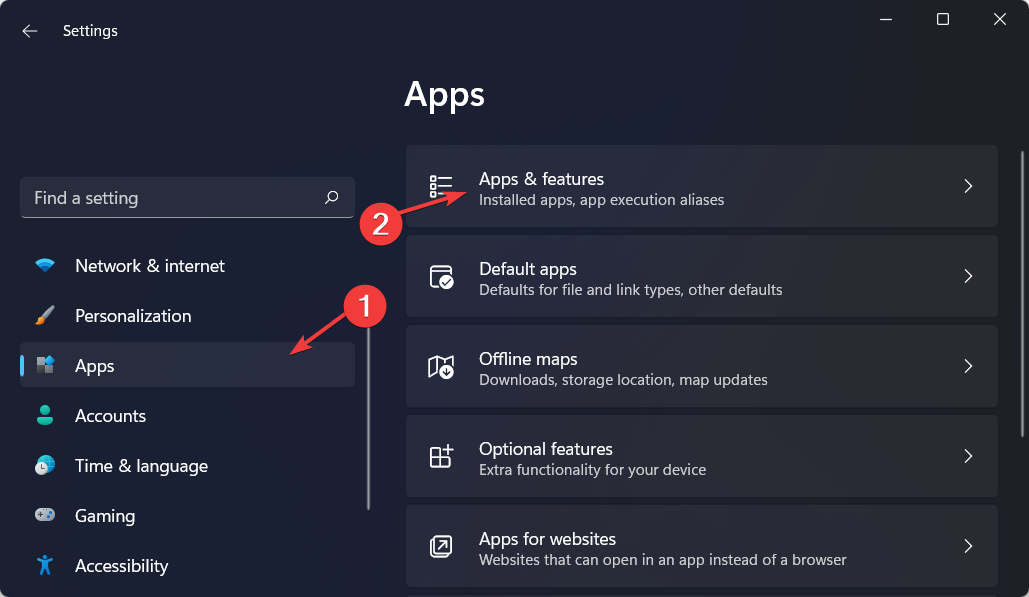

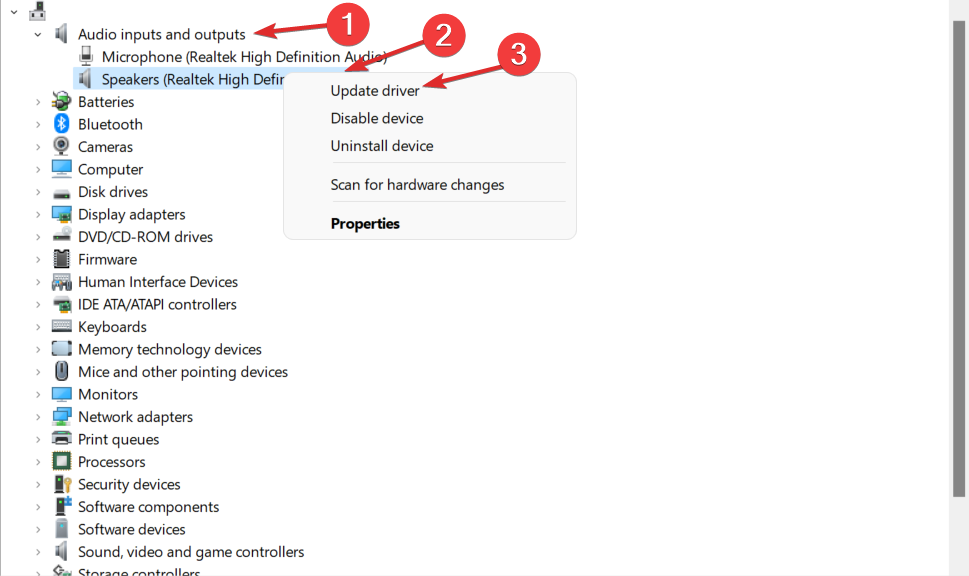
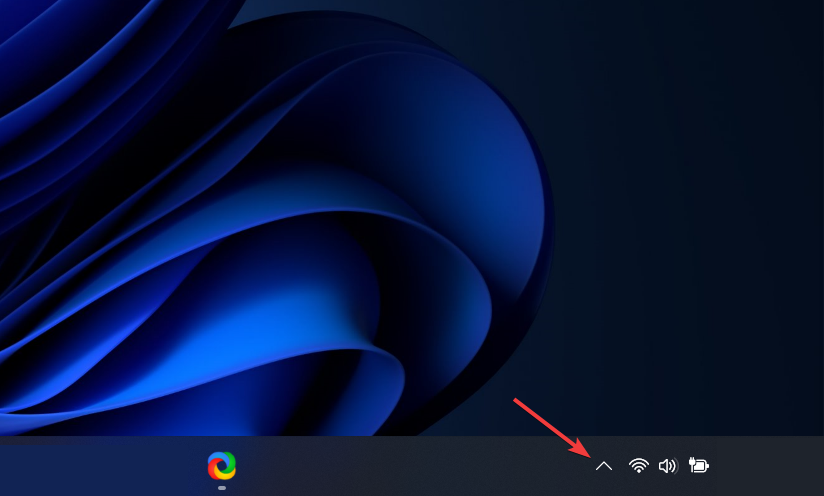
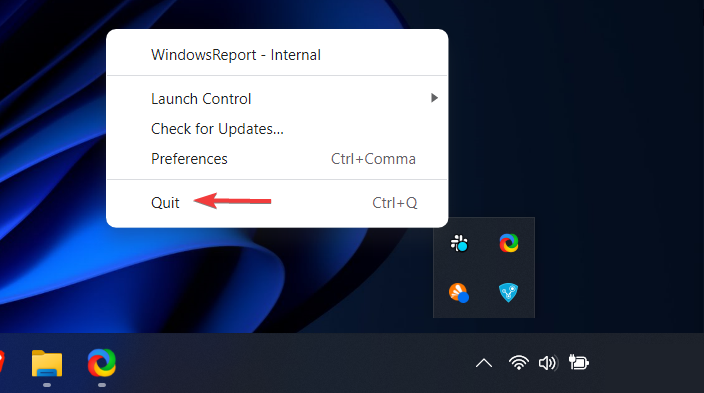


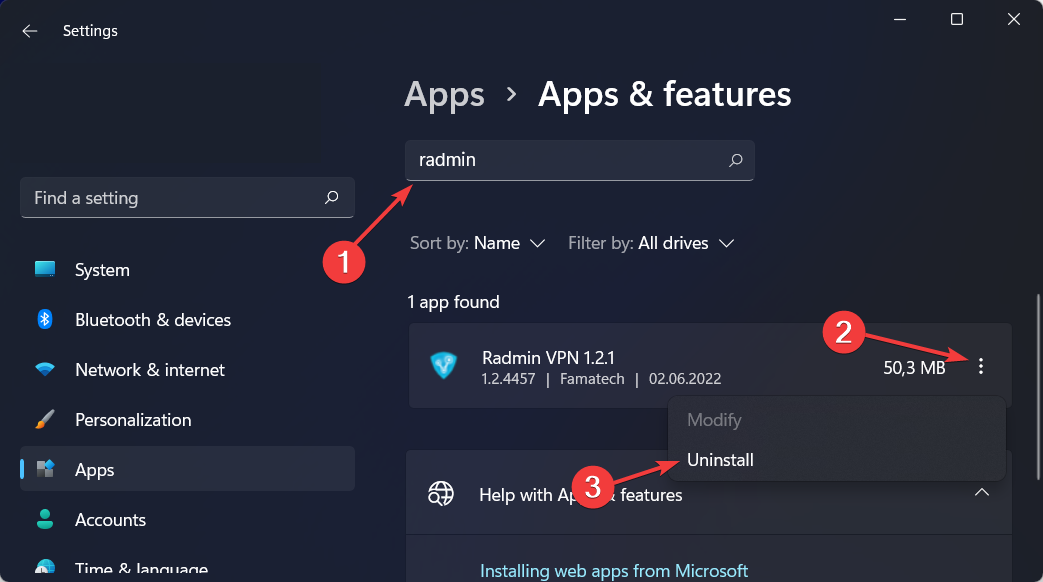
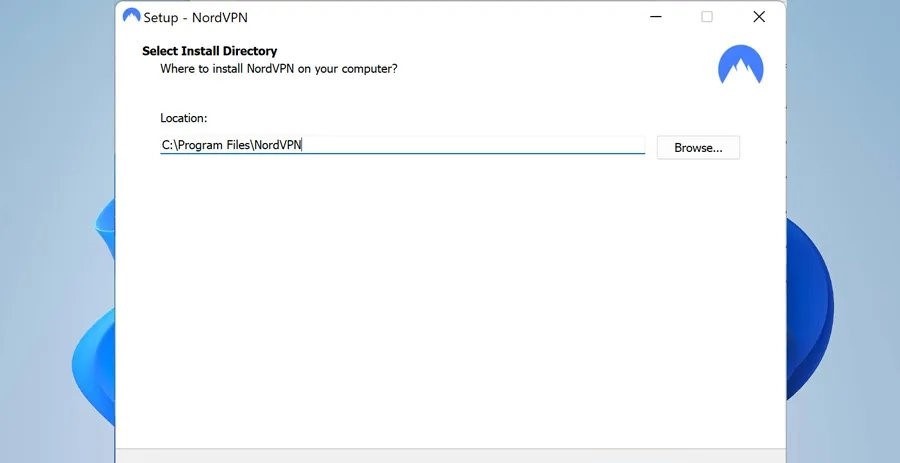

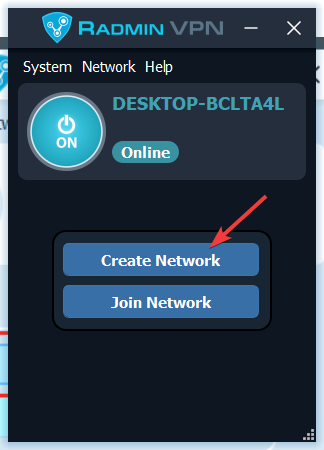
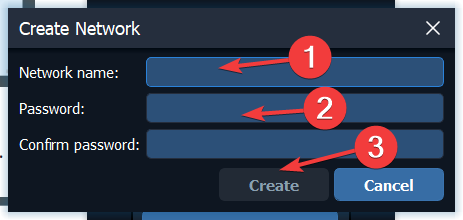
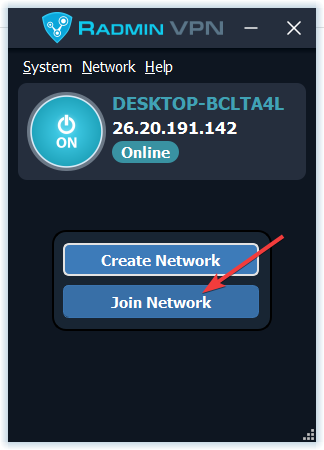




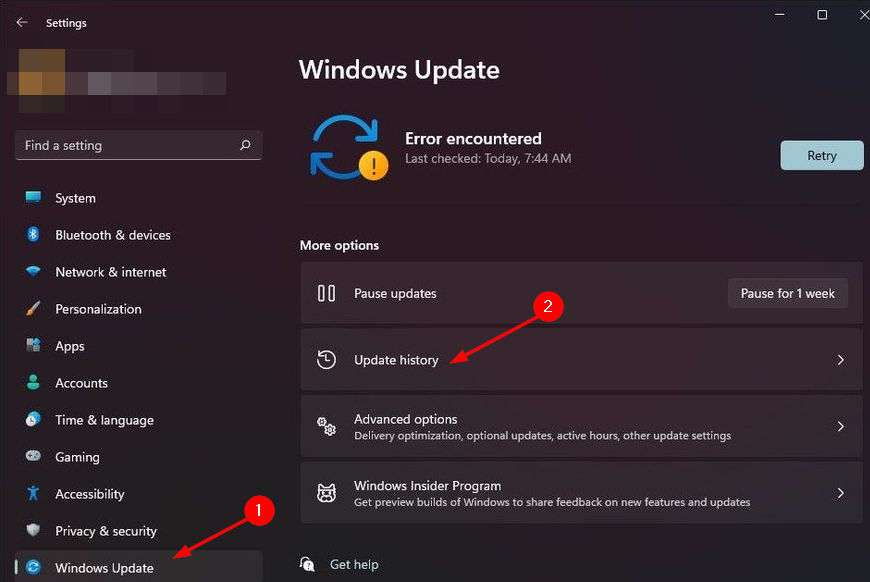




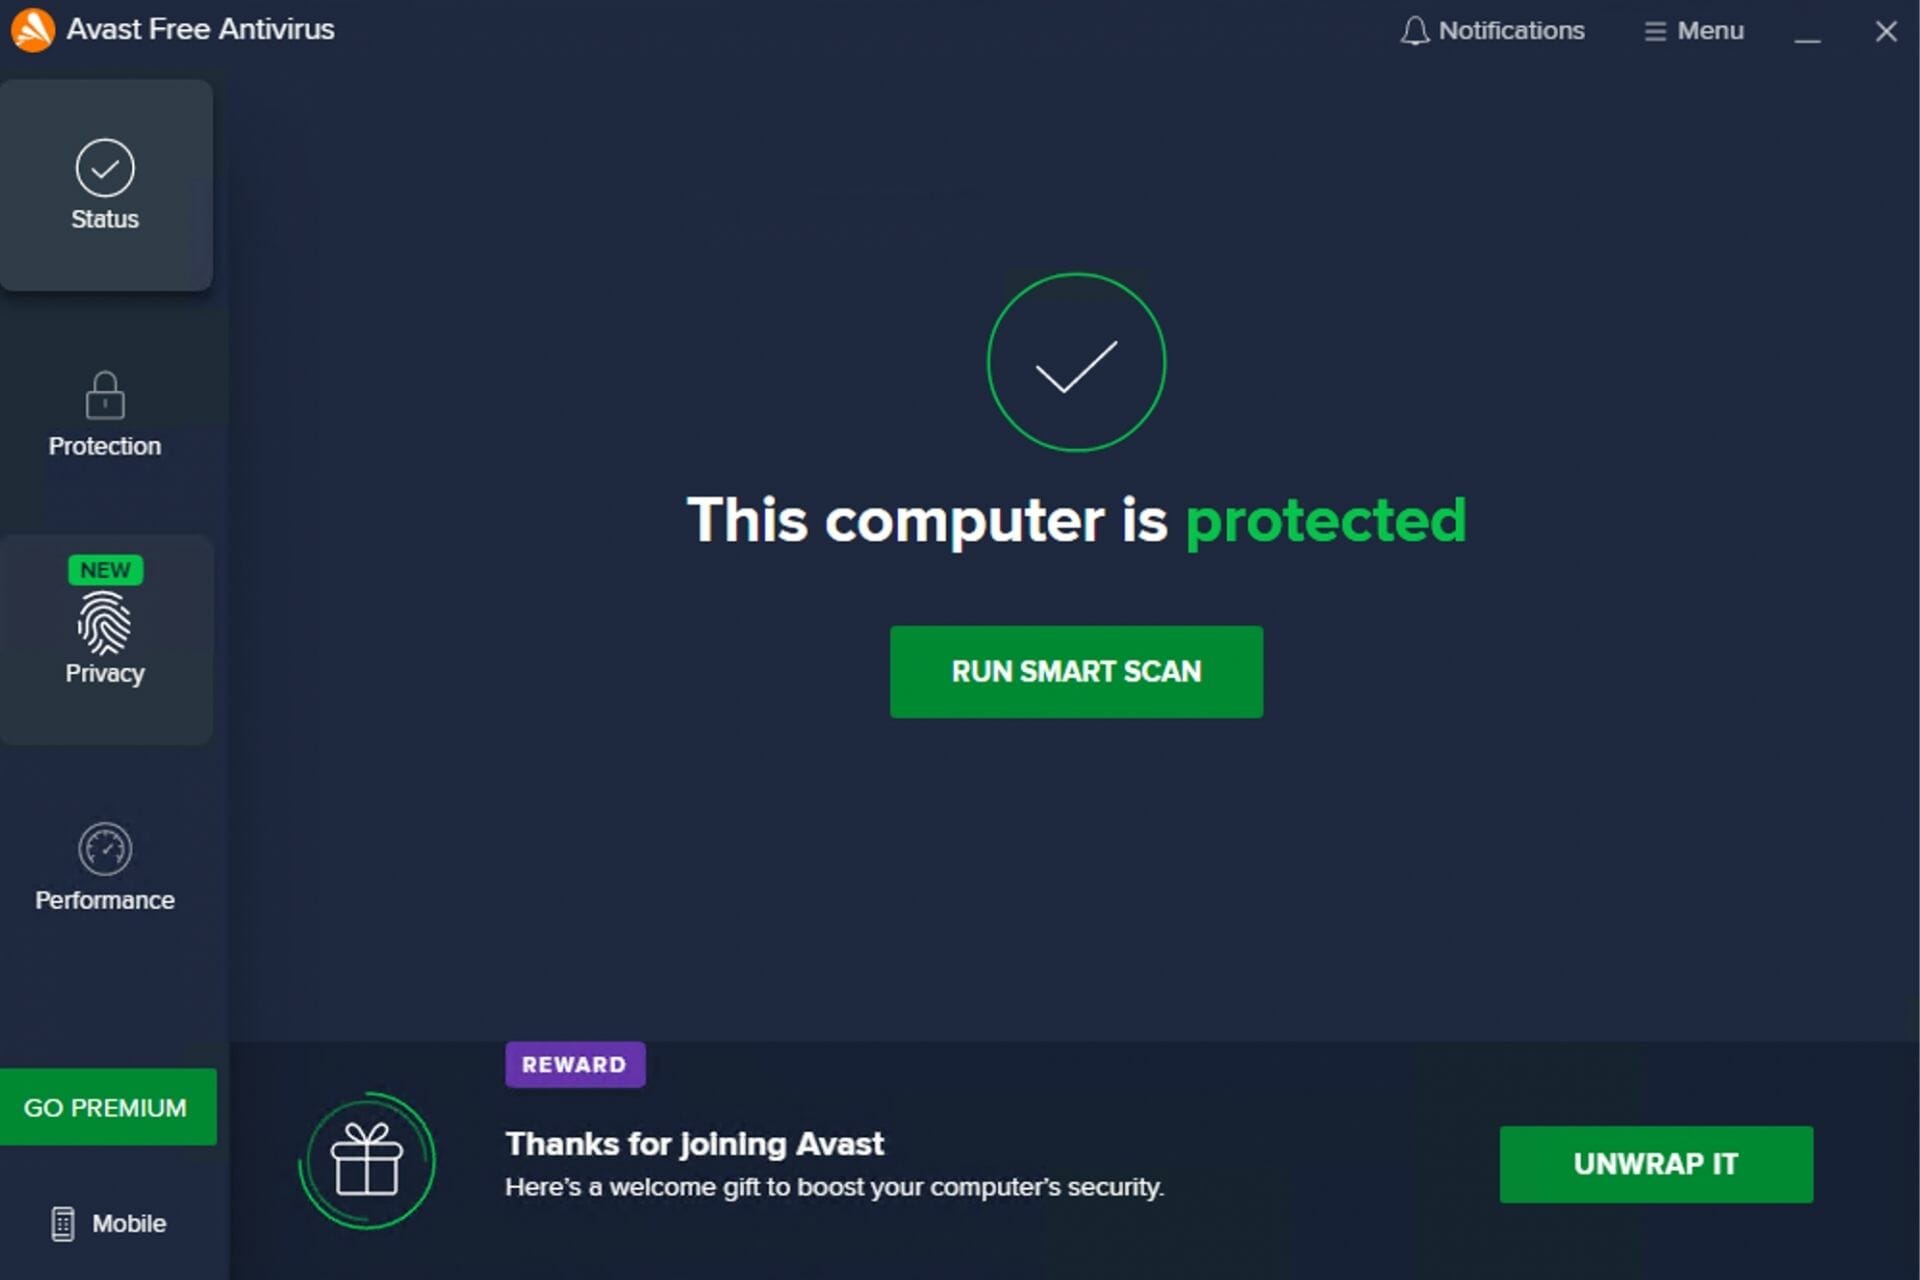


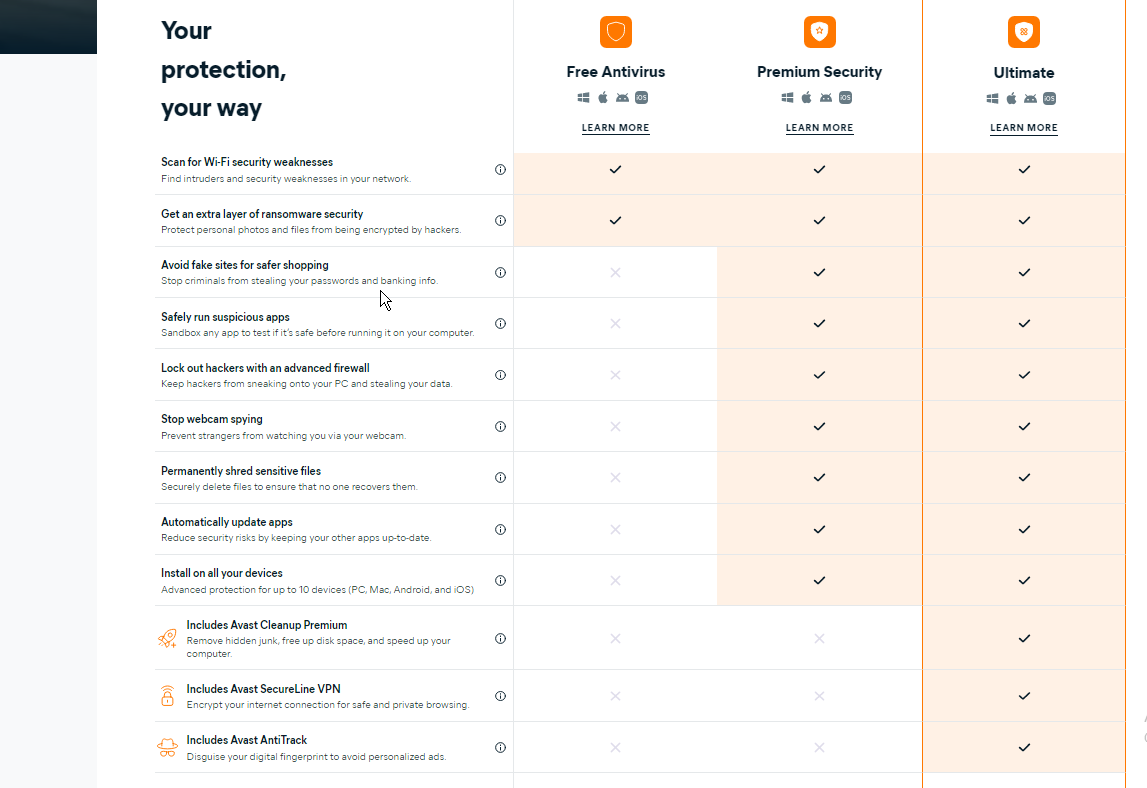
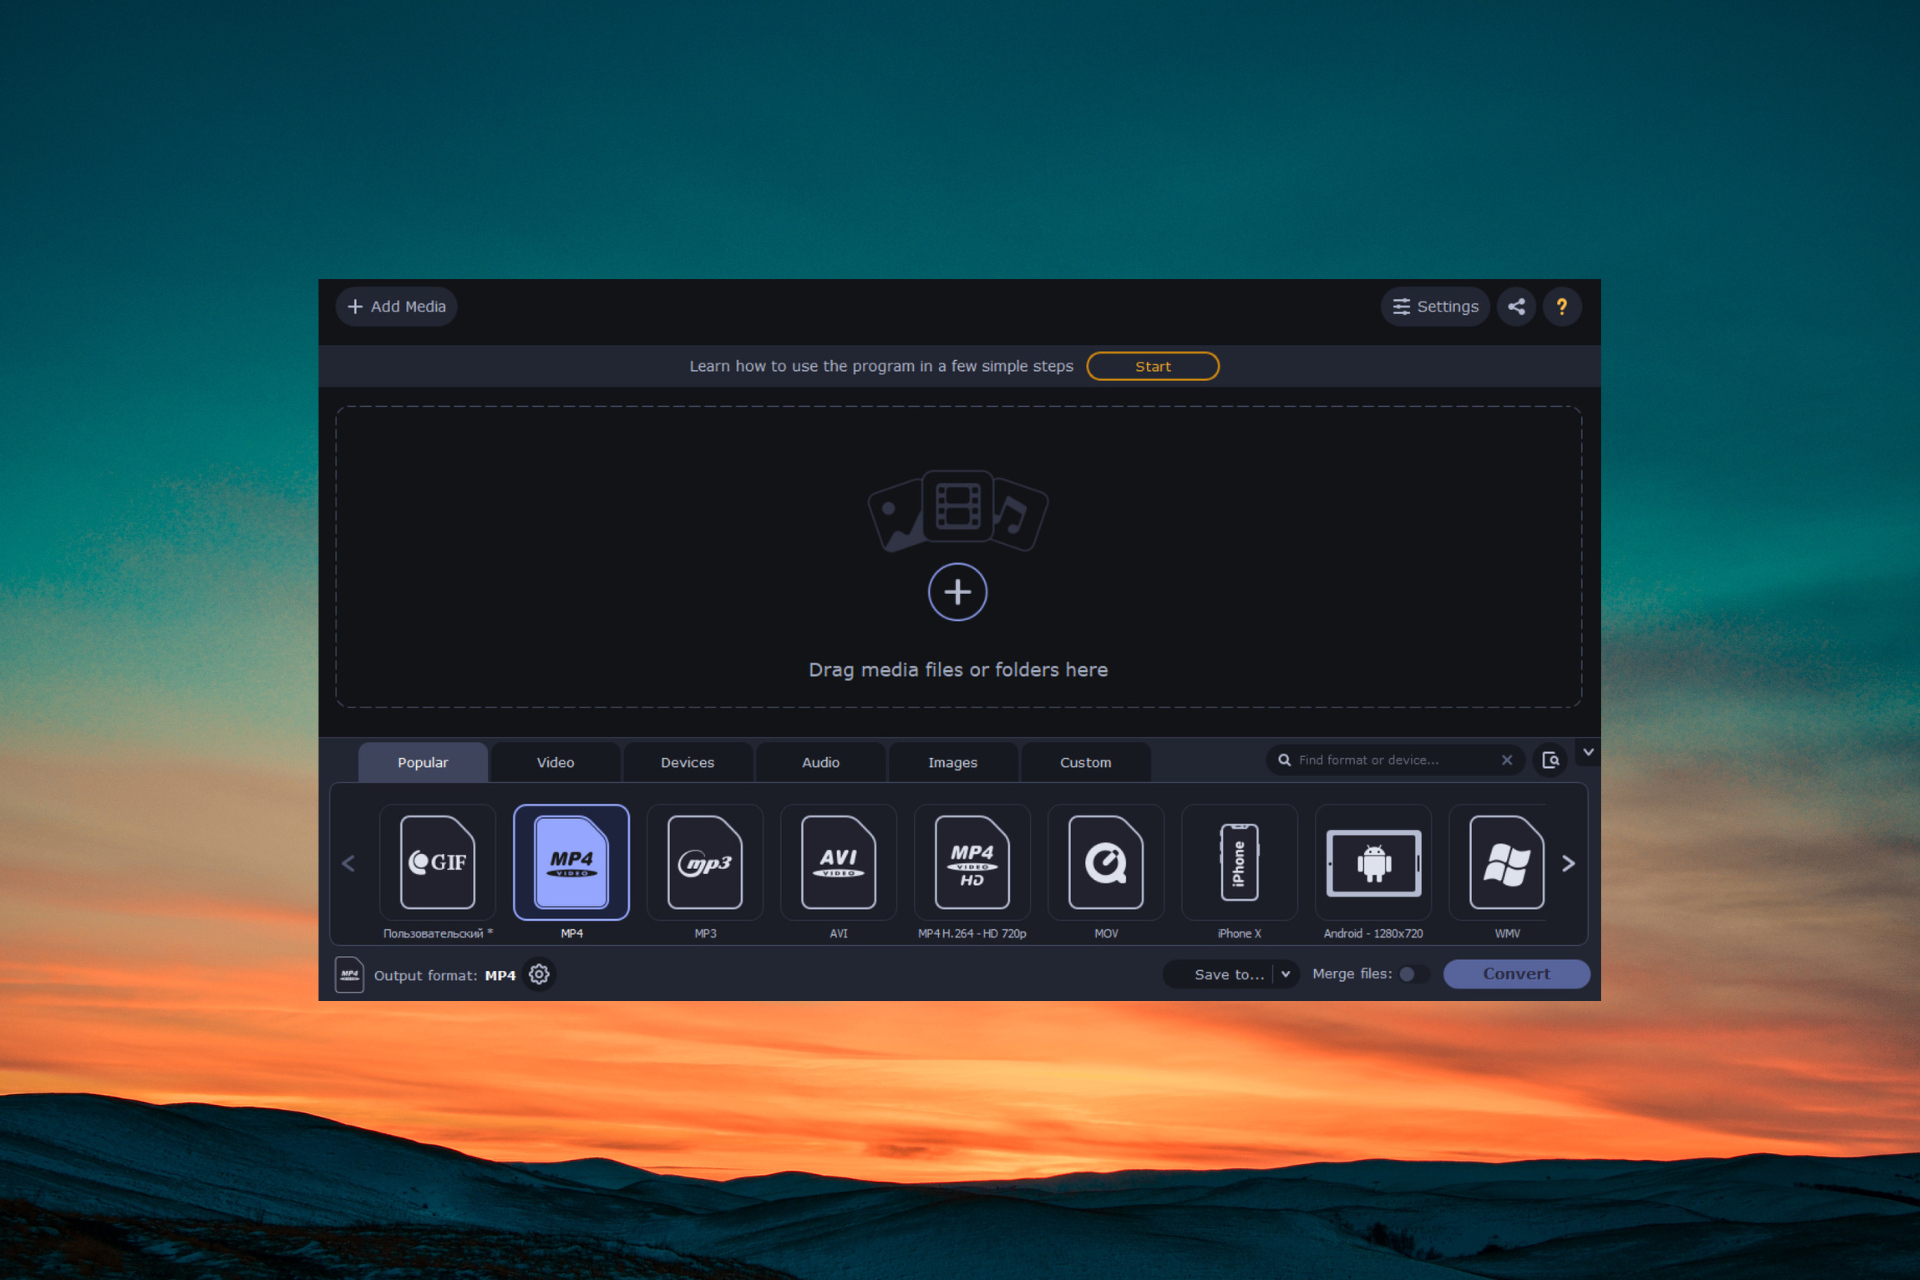
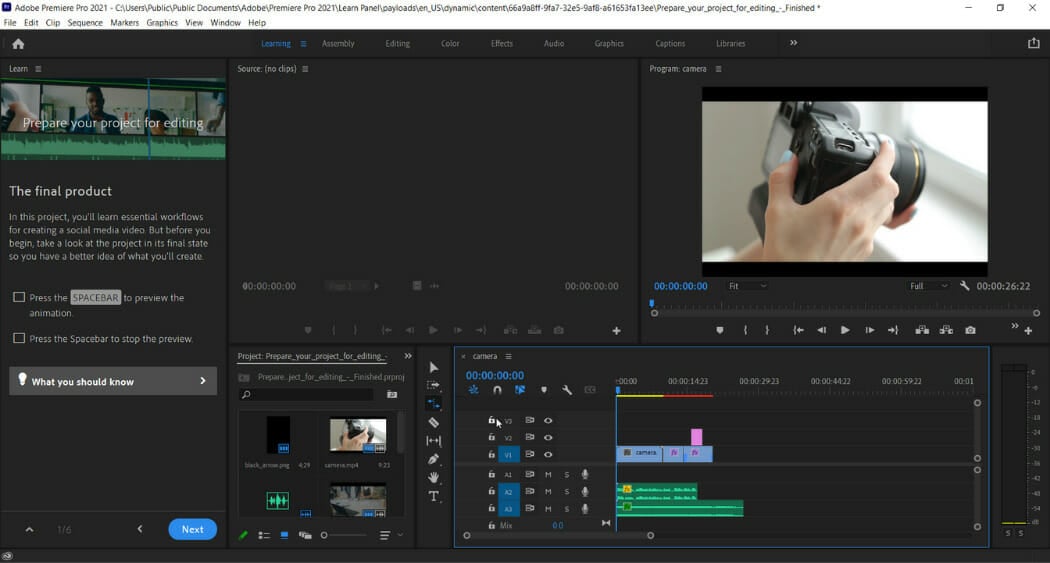







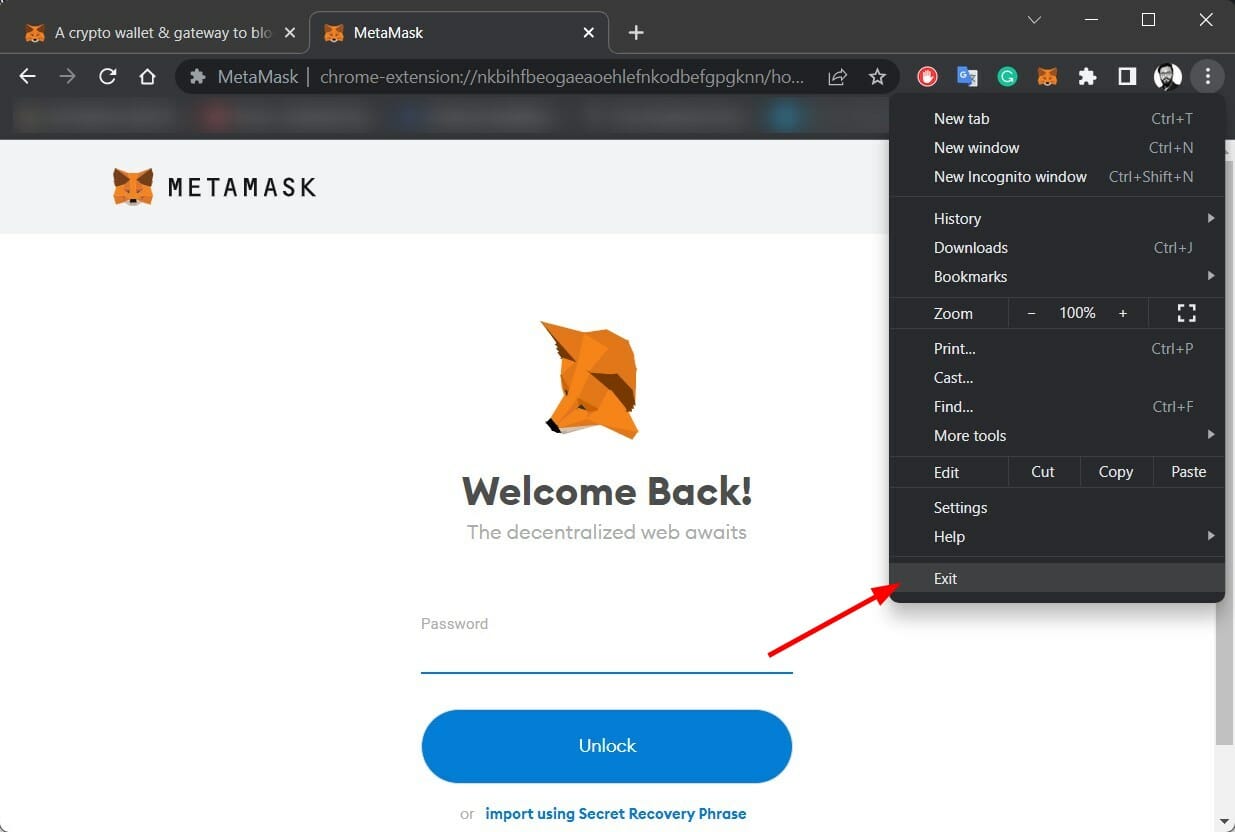

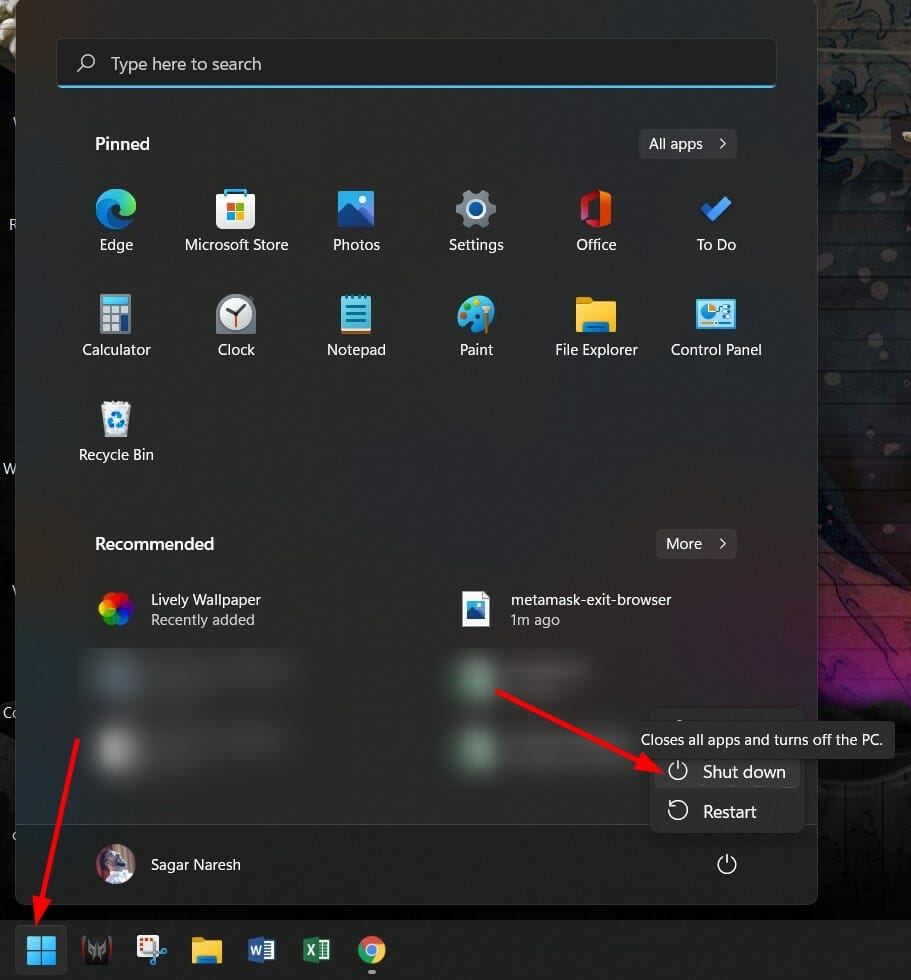
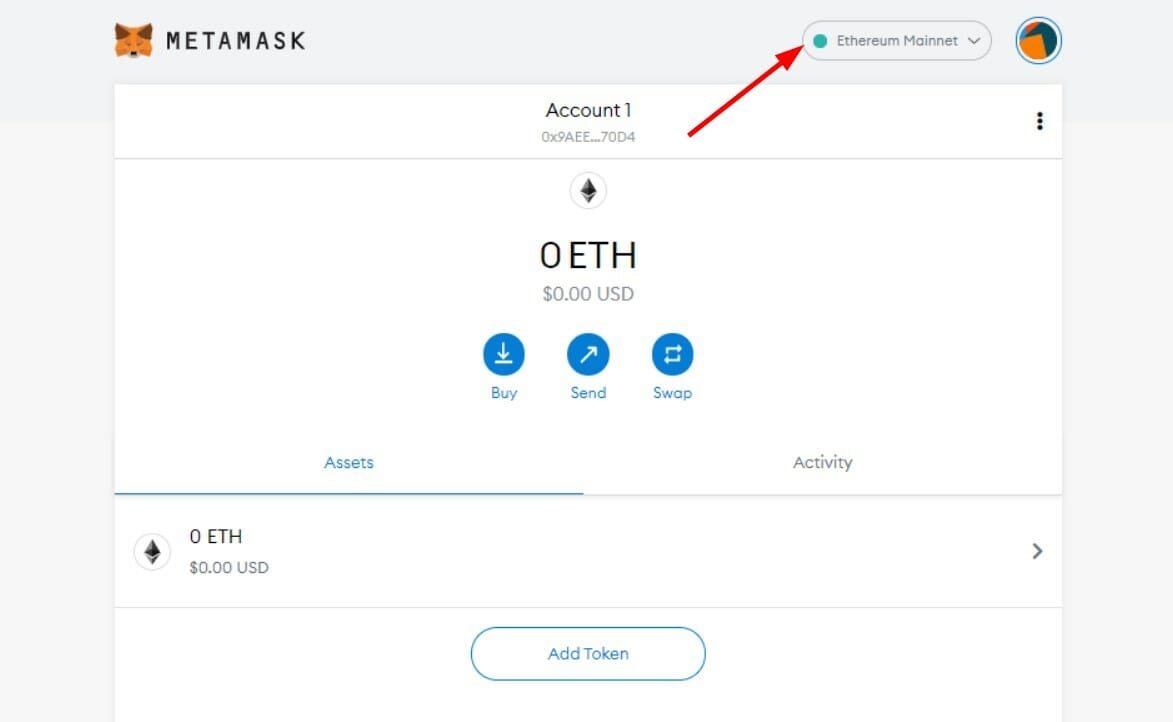
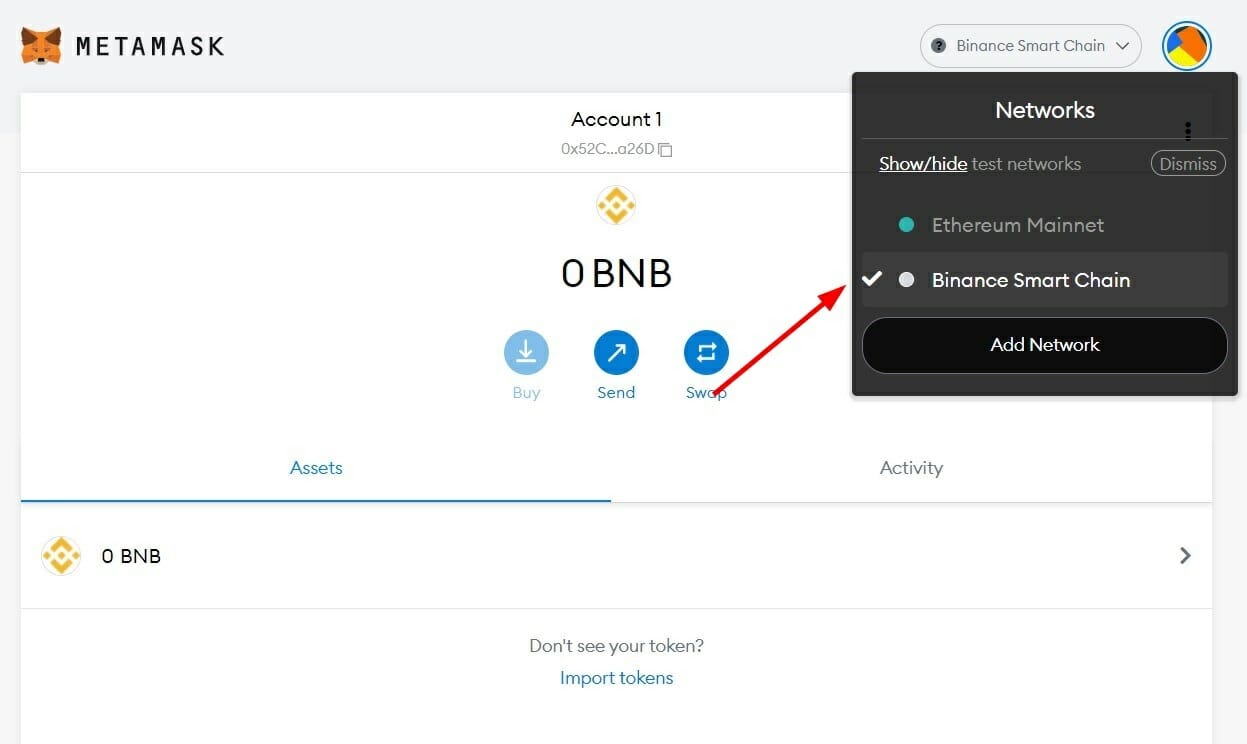
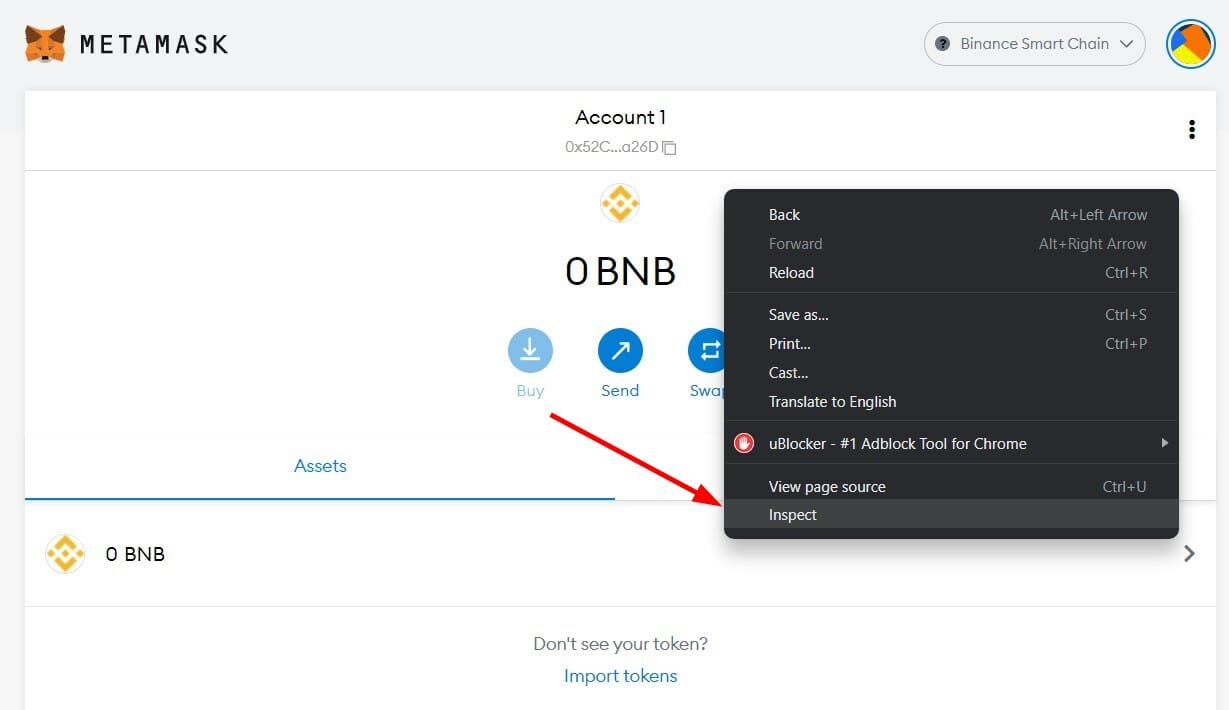
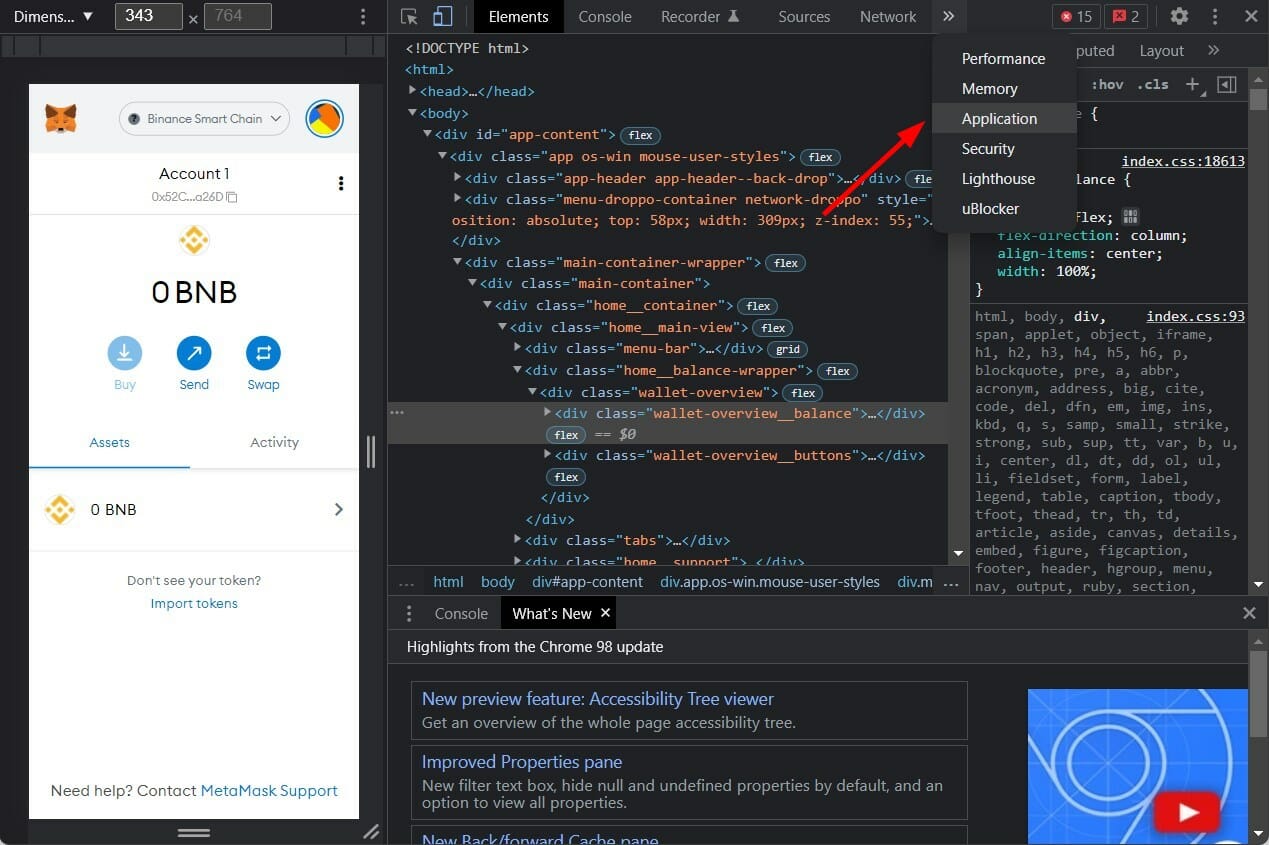
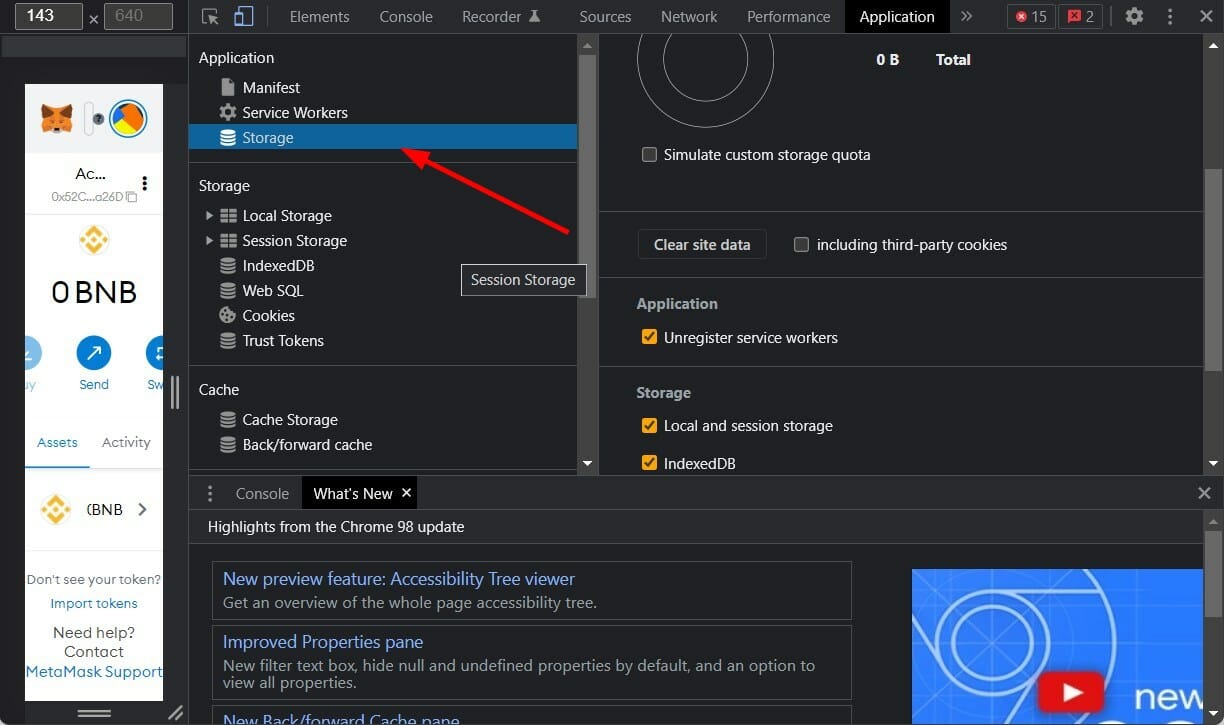
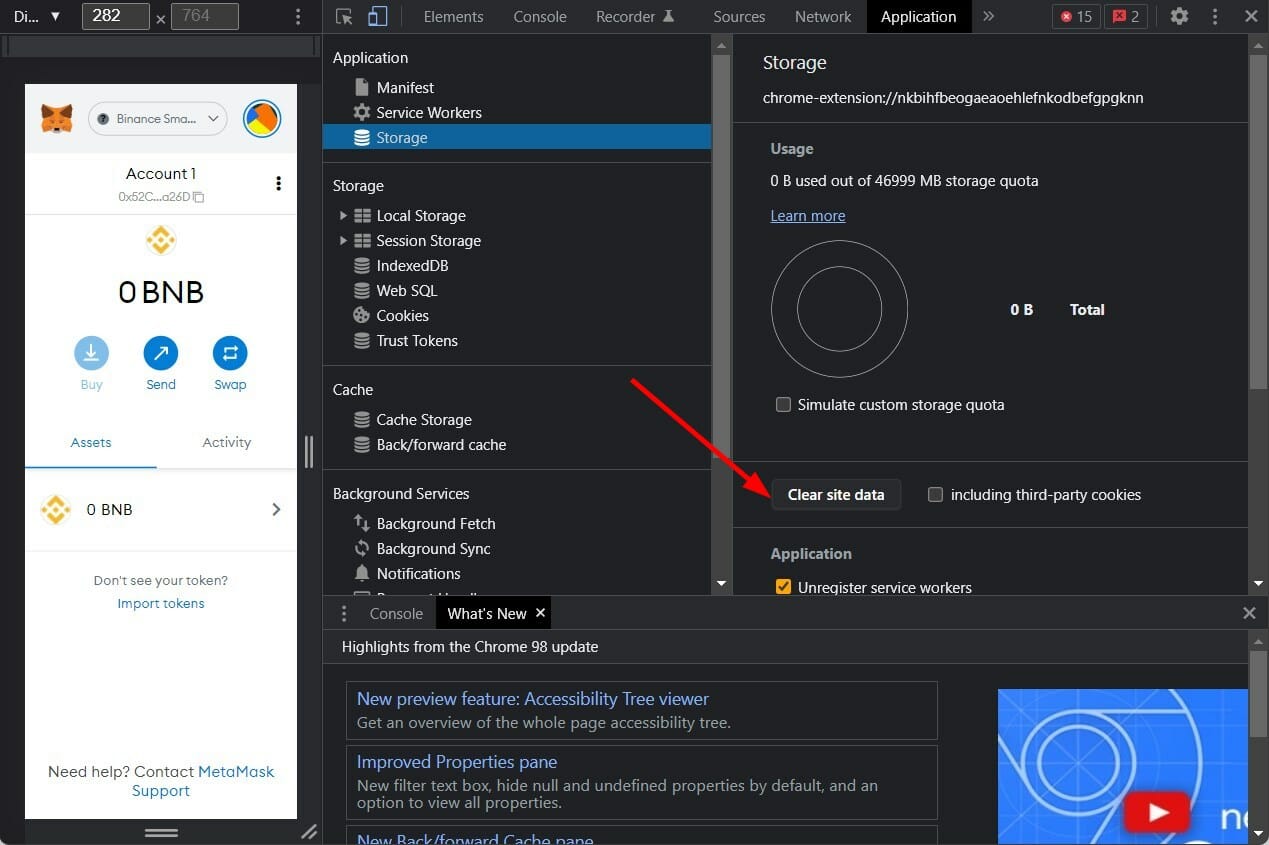
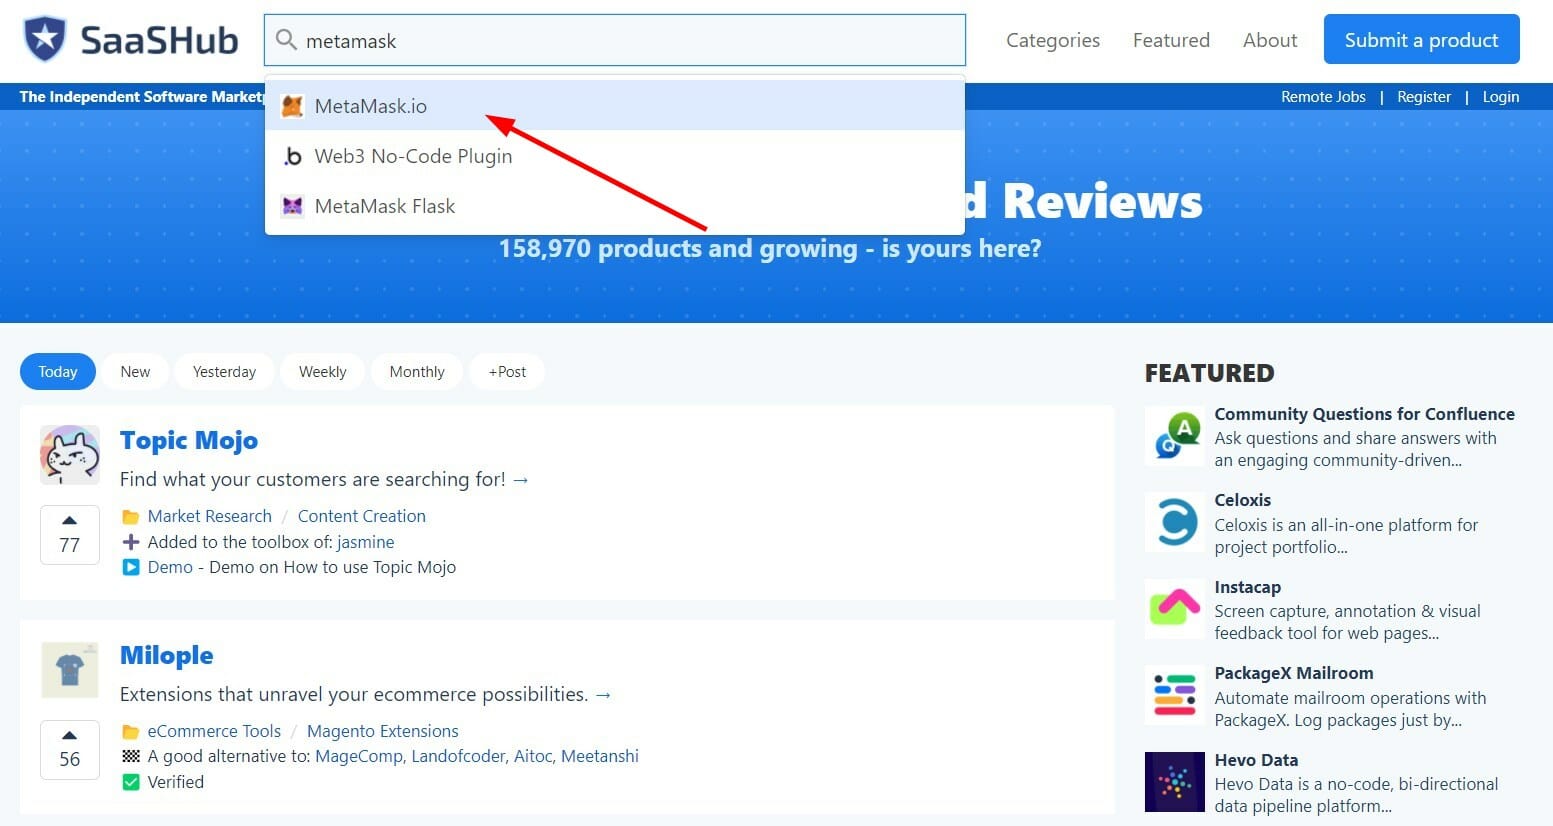
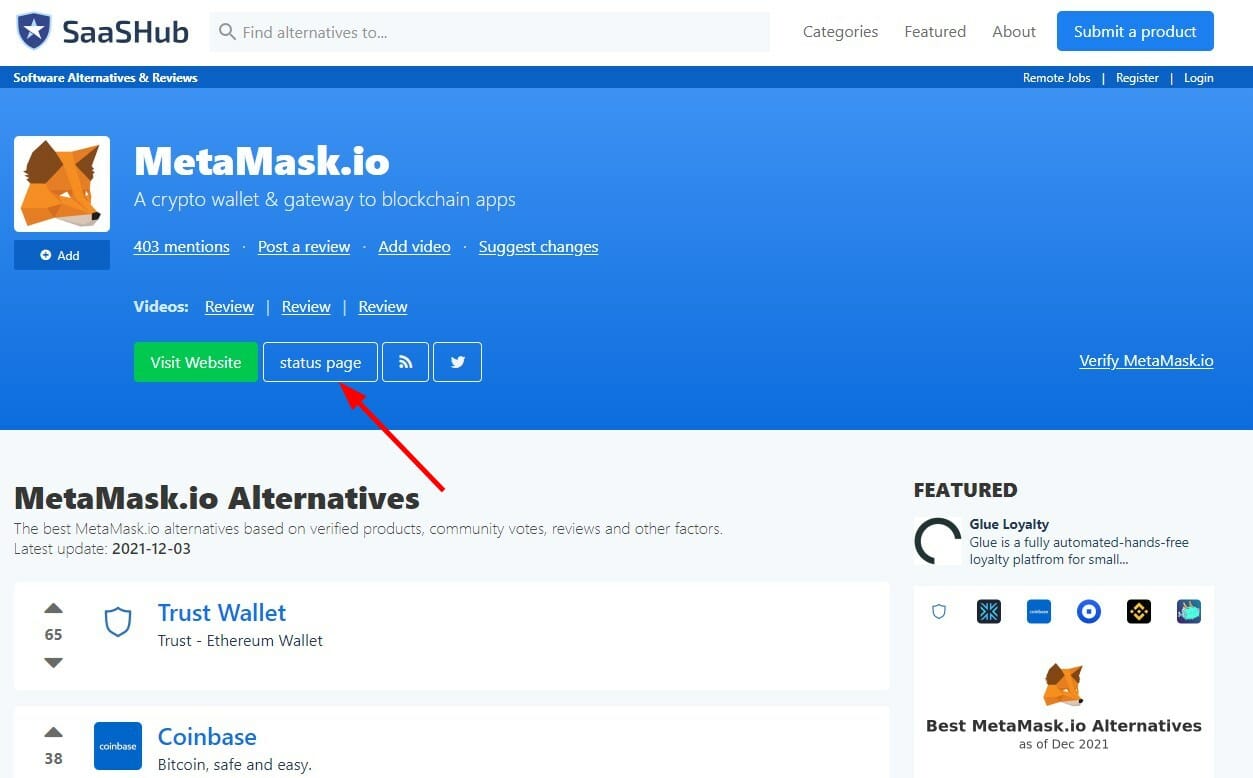
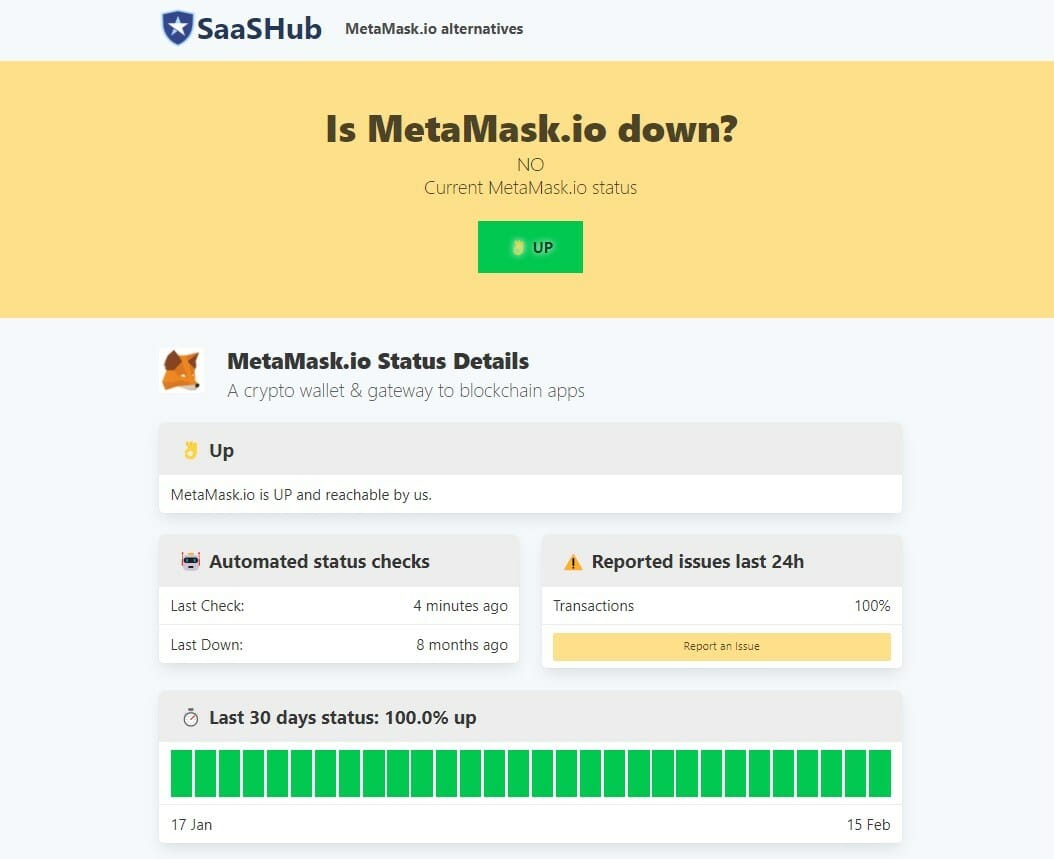
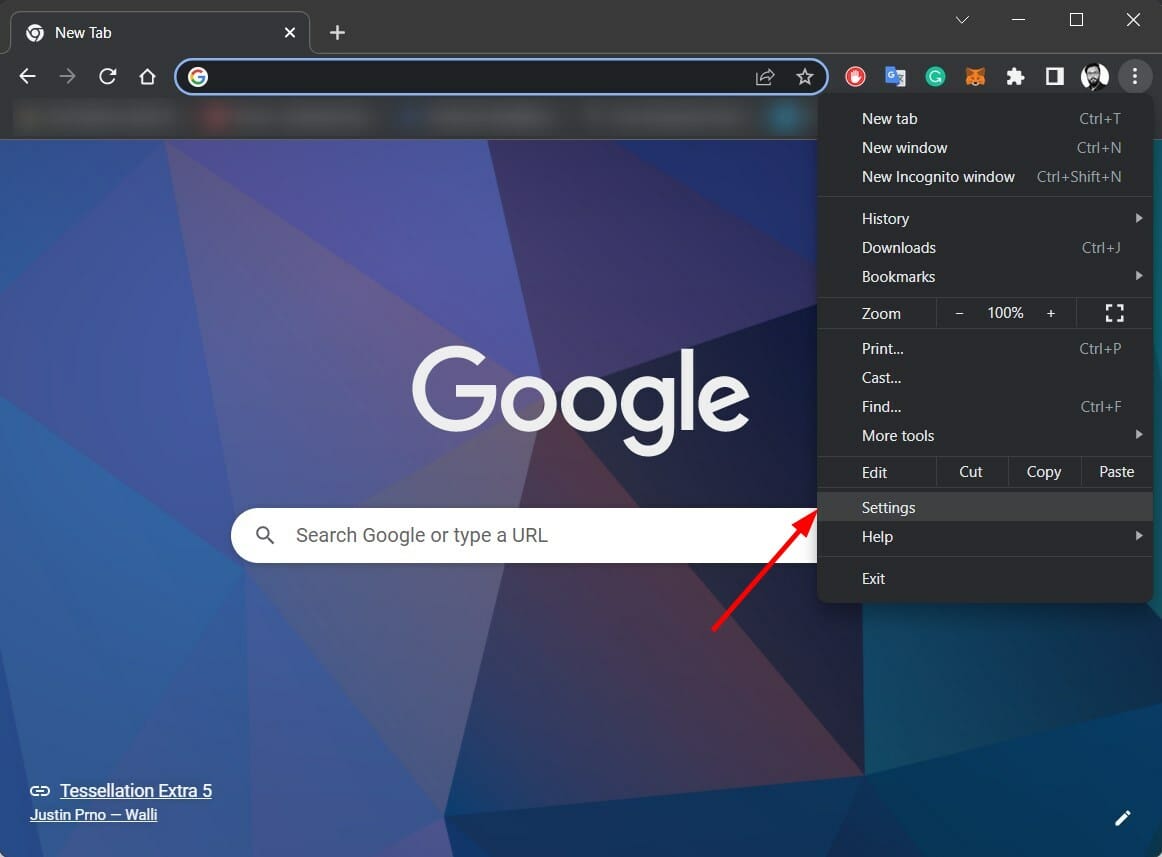
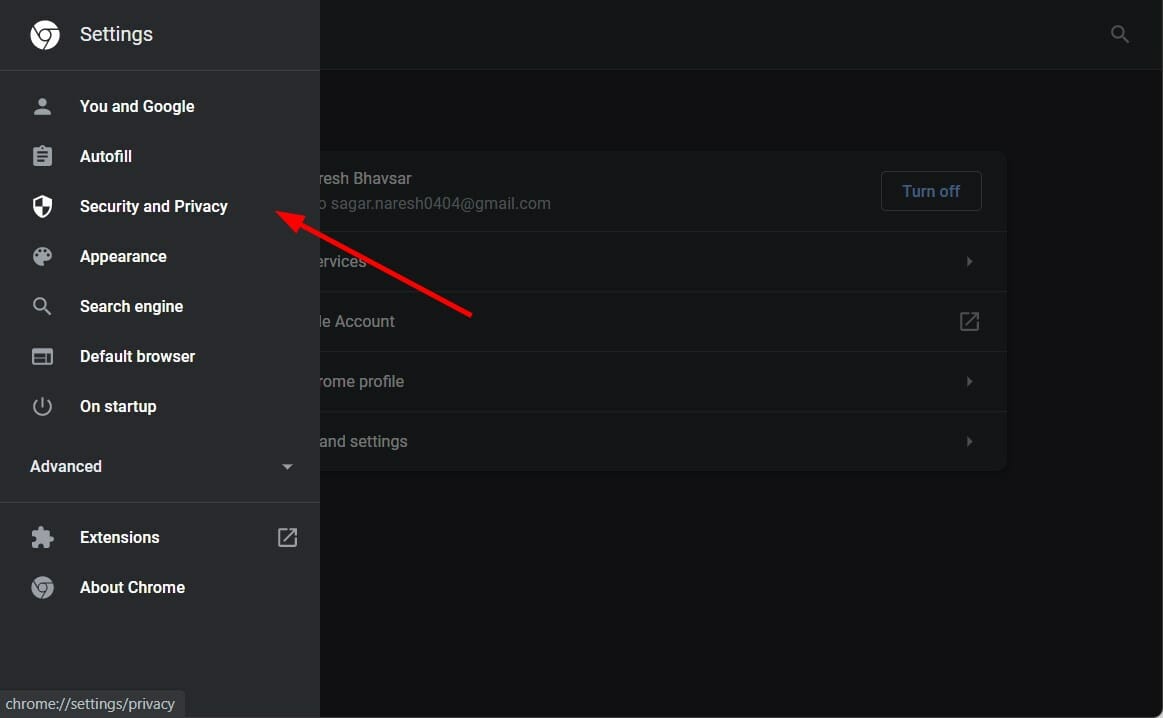
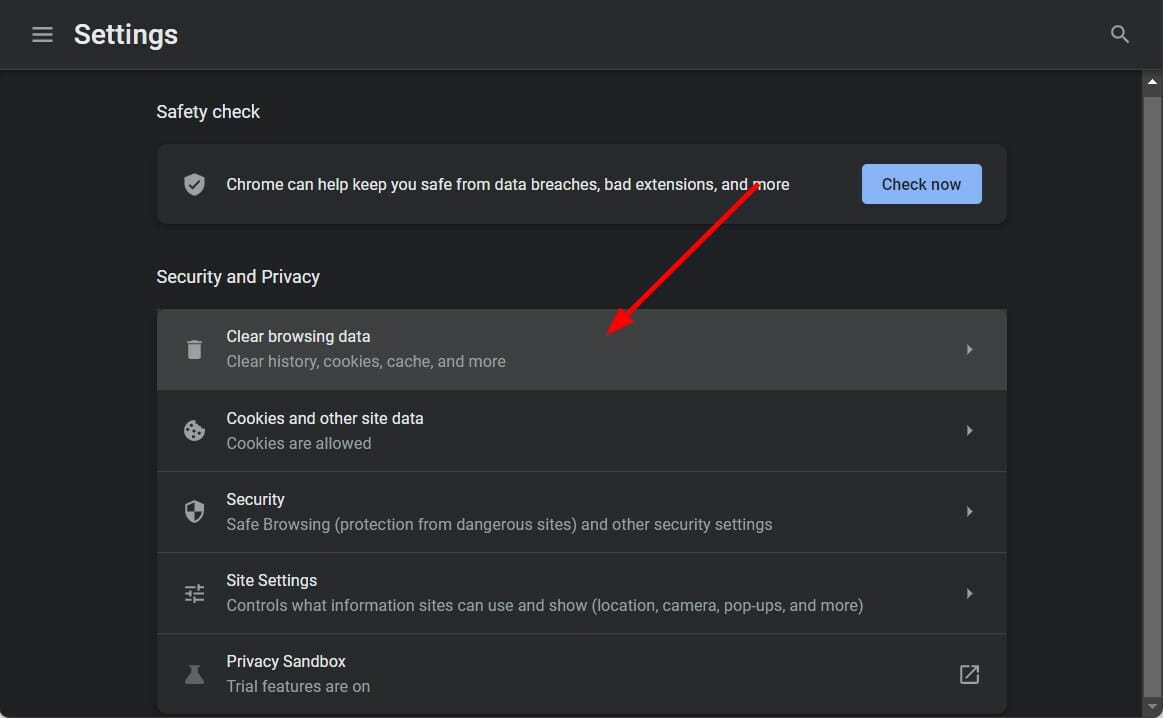
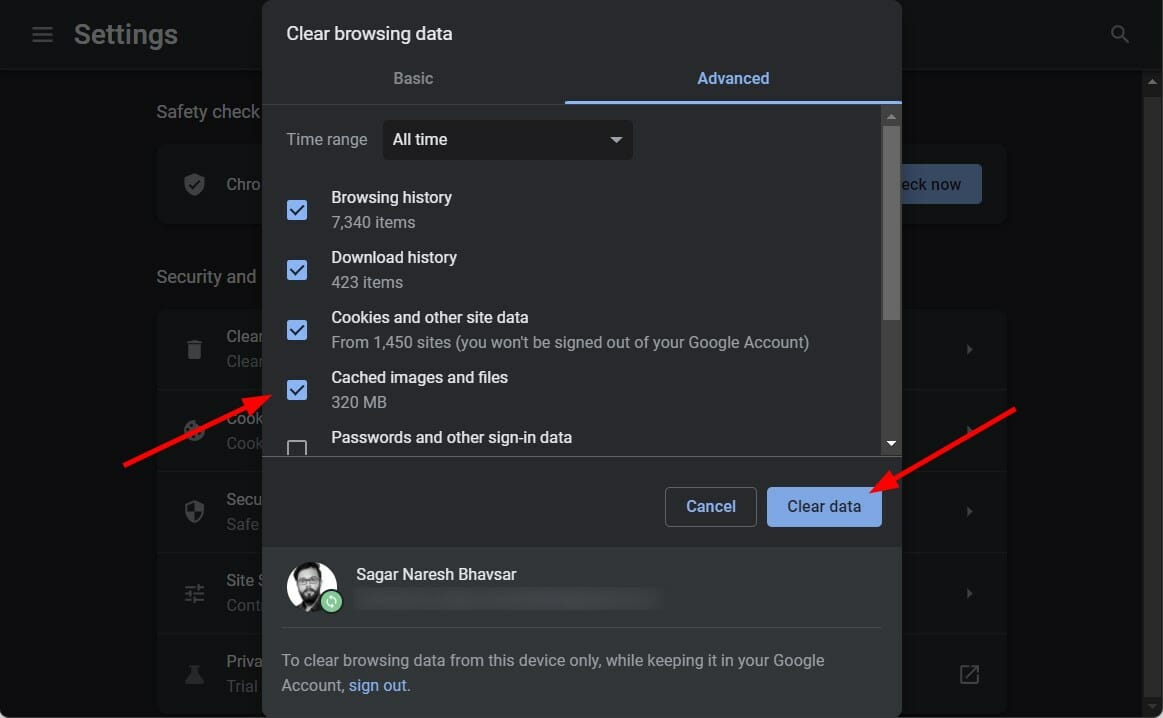
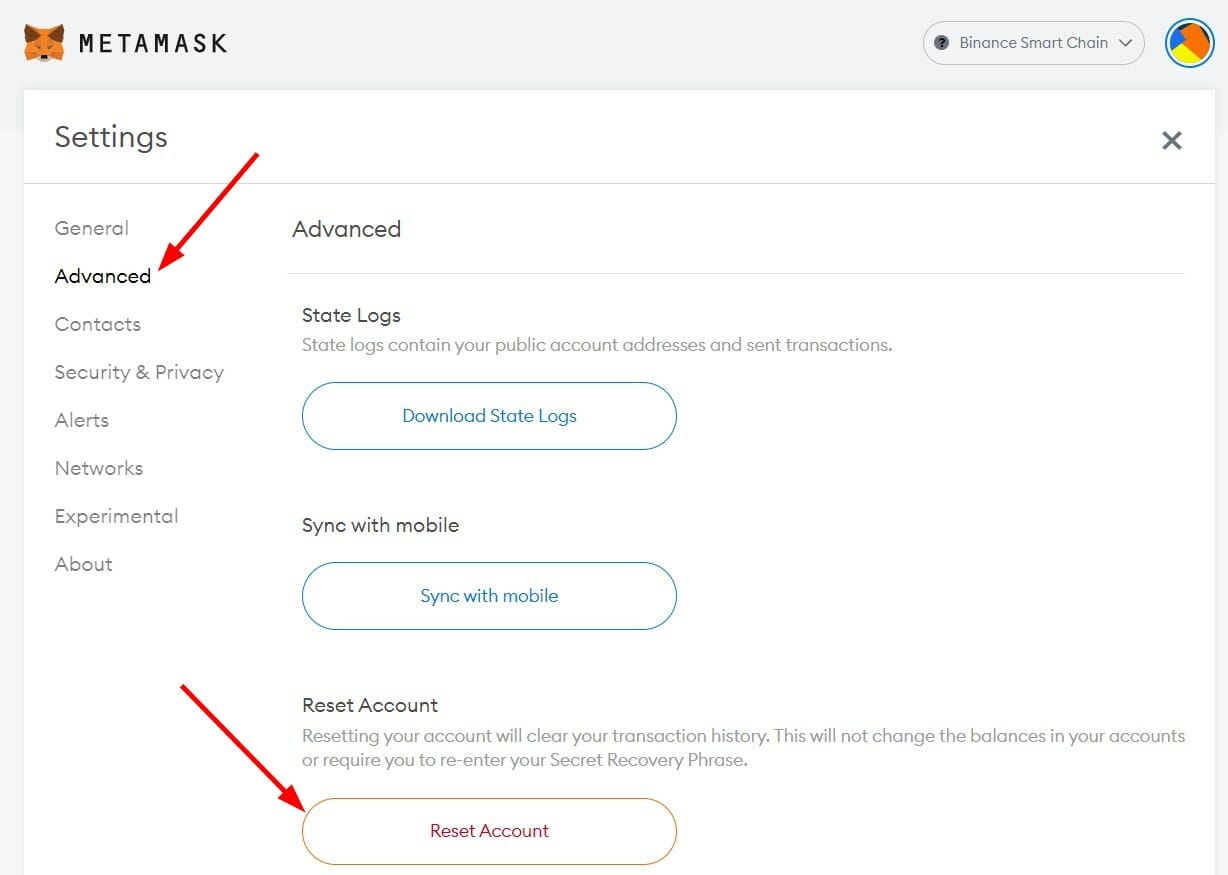
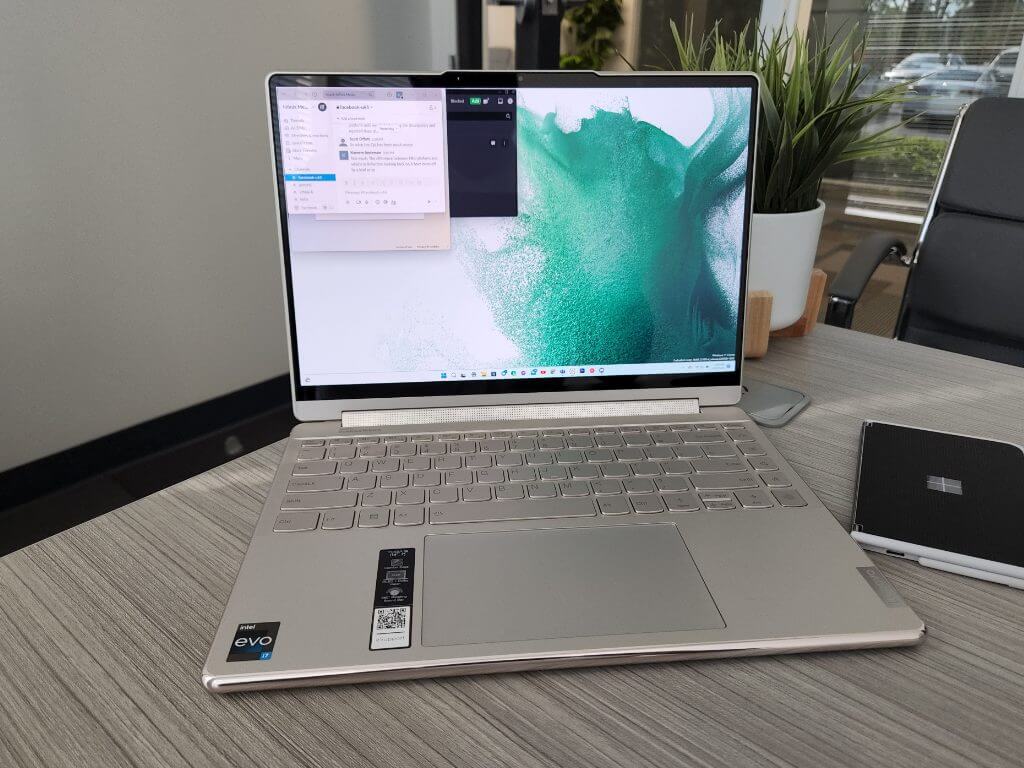

 However, when plugged in the Yoga 9i does a relatively good job of outpacing current laptop competition as well as keeping pace with Apple’s M1 architecture.