How to Set Up a Dev Drive on Windows 11

As a developer, dealing with repositories containing thousands of files and directories can be challenging, especially when it comes to heavy I/O operations like builds. Fortunately, here comes the good news: Microsoft introduced a new storage volume feature set called Dev Drive, specifically designed for developers, offering enhanced performance and security on Windows 11. 

As the Redmond-based tech giant’s blog post noted, your system needs to run on Windows 11 and have sufficient available storage. Dev Drive should also not be used to store developer tools like Visual Studio, MSBuild, .NET SDK, Windows SDK, etc. These tools should be stored on your main C:\ drive.

Nevertheless, Microsoft has announced that this feature will be available in the Preview channel within this week, indicating that it may take some more time before it becomes widely accessible to the general public. We’ll keep you updated as we go. 

And, as spotted by Windows insider @PhantomOfEarth, if you have the For developers setting opted in, you will see all your Dev Drives within the Settings app. 

If you’re still curious how it will work, we’ll walk you through setting up a Dev Drive to supercharge your development workflow.

How to set up a Dev Drive on Windows 11?

1. Click on the Start menu and select the gear icon to open the Windows Settings window.

2. In the Windows Settings window, click on the System category and choose Storage from the left-hand sidebar

3. Click on Advanced Store Settings under the Storage section.

4. Within the Advanced Store Settings, locate and click on the Disks & Volumes option to open the configuration settings for your system’s disks and volumes.

4 In the Disks & Volumes settings, click on the Create dev drive option.

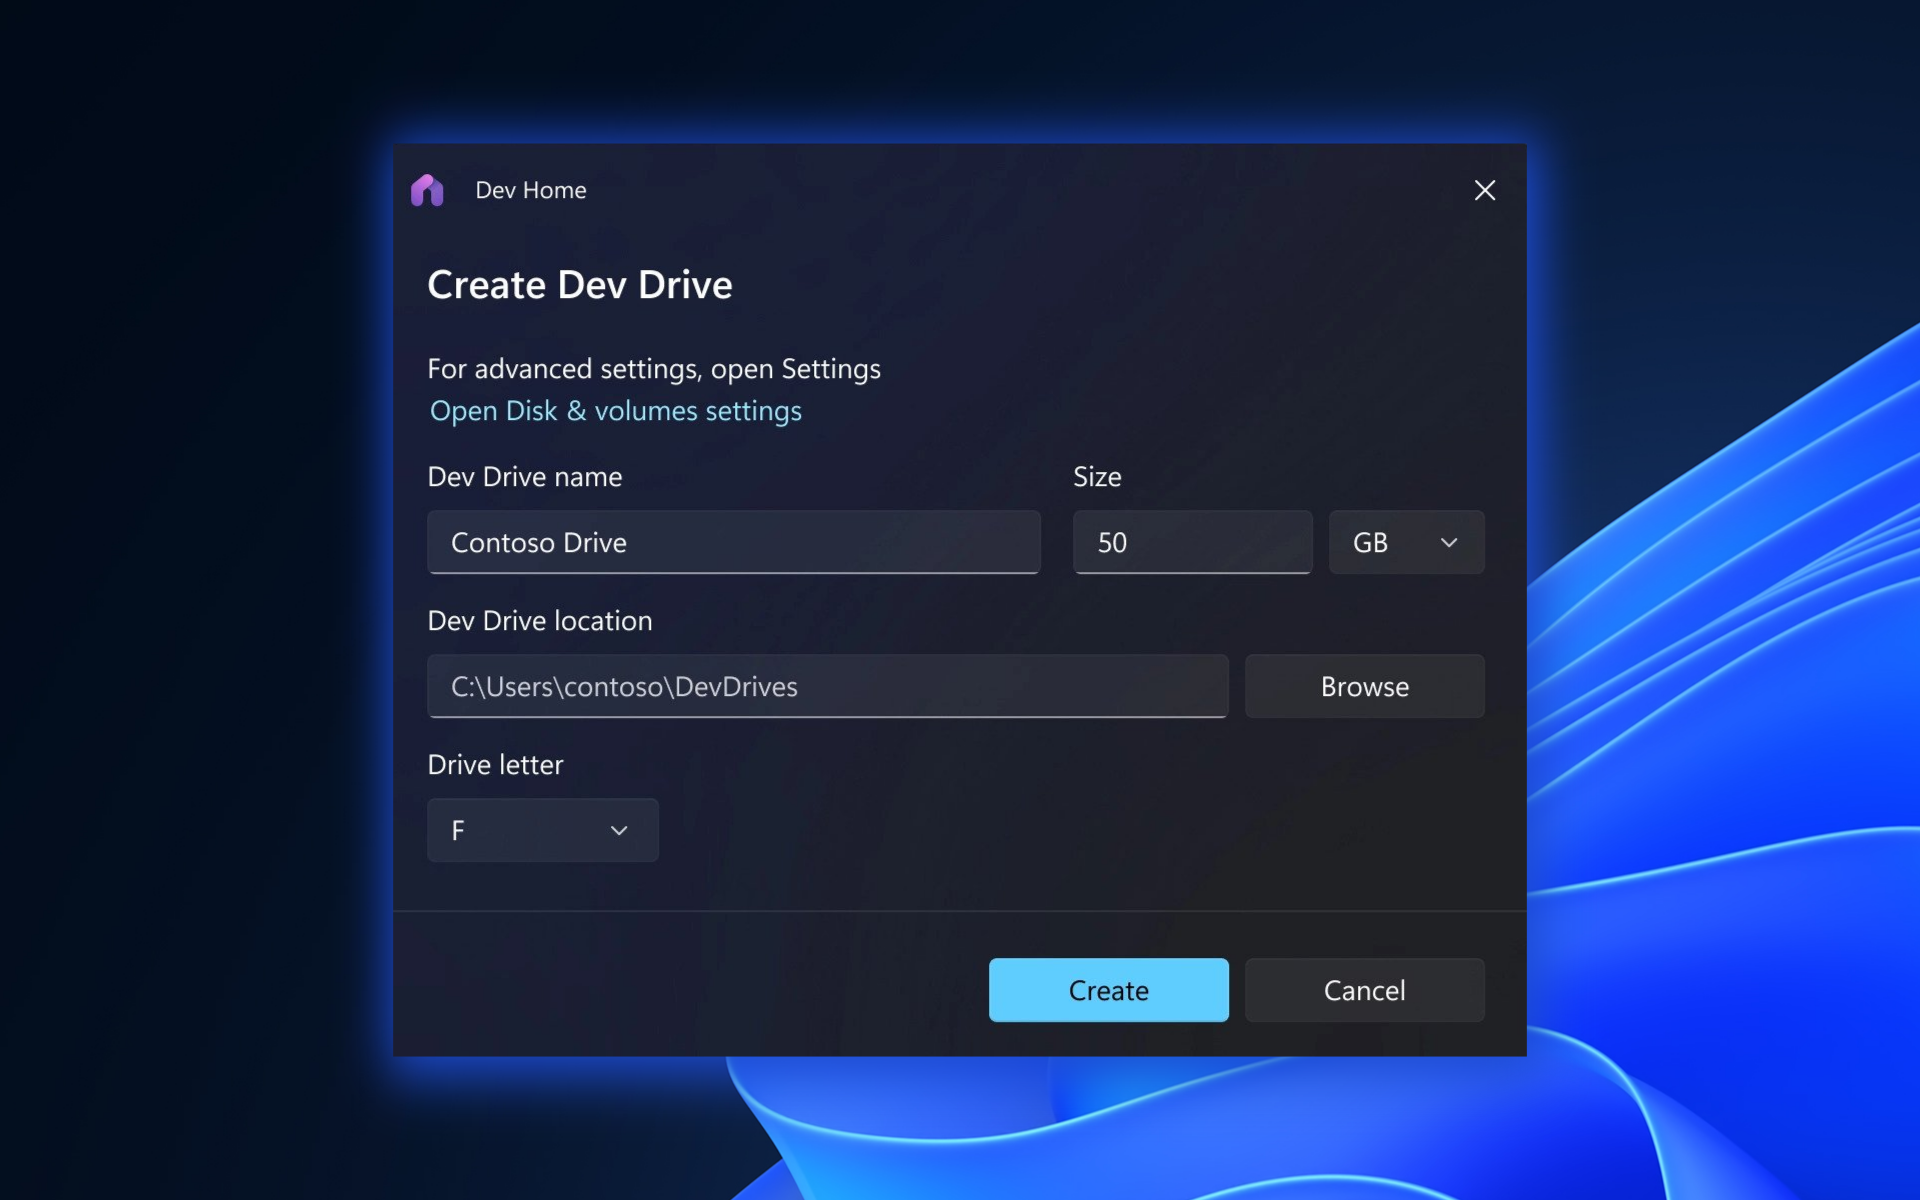
5. A setup wizard will guide you through creating your Dev Drive. Choose the appropriate size and follow the wizard’s instructions.

6. After specifying your Dev Drive’s size, follow the instructions provided by the setup wizard to finalize the creation. 

With the introduction of Dev Drive on Windows 11, developers now have a specialized storage volume to enhance their productivity. And, if you’re a developer on the market for some good browsers, we’ve also got you covered.

Before you leave, find out all about Windows SDK and start developing apps today! In case you want to know how to enable/disable Dev Drive Protection on your computer, we have a detailed guide to help you with that.

What do you think about the introduction of Dev Drive on Windows 11? Let us know in the comments!

Xbox Gamertag Search: How to Find Any Player

If you’ve played games online, you know that your Gamertag is your identity in the game world. It’s how other players see you and how they’ll recognize you.

This guide will walk you through all the steps to find Xbox Live Gamertags on your own and share them with others.

Is there a need to look up Gamertags?

For gamers, this is important because you want to make friends when playing online. Your Gamertag is also the only way to identify players when searching for opponents online. 

Other reasons include:

  • Unable to log in to Xbox – If you’re unable to log into your Xbox account because you have forgotten your email, searching for your Gamertag can help you find the email linked to your account and regain access.
  • Add a friend – If your friend has recently joined Xbox and you want to play with them, finding their Gamertag will allow you to add them as a friend.
  • Find your own profile – Sometimes, your Xbox profile may not show your Xbox Gamertag, so the only way is to find your own profile. This is especially if you want to recommend yourself to another friend and don’t have the correct name.

How do I look up an Xbox Gamertag?

1. Use the official site 

  1. Navigate to your browser and log in to your Xbox account.sign in to Xbox with Microsoft account
  2. Switch to the Friends tab and start searching for their Gamertags.
  3. If it’s available, you’ll see a list of results appear. You can then click on one of these results to view more details about that player, including their real name and location.

It’s important to note that with this method, you cannot partially enter a Gamertag to generate search results. You need to know the entire ID to search.

2. Use a search engine

You can also use a free search engine, Xbox Gamertag, to look up your friends. Provided the user you’re searching for is not private, you can access their Gamerscore, the number of games played, recent game clips, and games history.

This information may look basic, but for gamers, it is a gold mine because, from here, you’re able to evaluate worthy opponents. Their game history also lets you know whether your taste in games is aligned or whether you should keep looking.

Can you check if an Xbox Gamertag is taken?

Yes, you can. The recommended search engine above makes it easy to find any Gamertag. Gamertags are usually unique, so finding more than one person with the same Gamertag is impossible.

Once you have verified it is available and want to use it, you can follow through the Xbox guide on changing your Gamertag. Xbox allows you to change your Gamertag once for free, but it will be charged any other time.

So, if you’ve been wondering why it costs 10 dollars to change a Gamertag, It is because you have exhausted your free chances. However, the actual reason is to tame the number of change requests.

Gamertag changes require server space and result in extra expenses for Xbox. The price is also not fixed, and it may go up the next time you want to change it.

If you have problems changing your Gamertag, check out our article for quick fixes. Also, check out the highest Gamerscore leaderboard to see who you could be potential opponents.

That brings us to the end of how to search for an Xbox Gamertag. If you’d like to know how to find someone on Xbox without a Gamertag, you can go through your suggested friends list.

It may be tedious to go through it, so you should consider the methods recommended above.

Leave any additional thoughts you may have on this topic.

Why has Firefox ended support for Windows 7, 8, and 8.1?

In a recent blog post, Firefox announced that it has ended support for Windows 7, 8, and 8.1. So if you’re still using this browser on these Windows versions, then you might have to update.

Extended support for these Windows versions is still guaranteed until September 2024. So you have a few months before Firefox shuts its doors to the older Windows OSes.

The current version, Firefox 115, is also the last Firefox version for Windows 7, Windows 8, and Windows 8.1. You will be moved to the Firefox Extended Support Release and you will receive security updates until the browser version becomes obsolete.

However, after that date, no more security updates will be provided, and browsing on Firefox can leave you very vulnerable to attacks, viruses, and malware.

So why has Firefox ended support for Windows 7, 8, and 8.1?

It seems that Mozilla is following Microsoft’s roadmap for Windows. Microsoft ended support for Windows 7, 8, and 8.1, so Firefox agrees that it is no longer suitable to provide support for these Windows versions.firefox windows 7 support

Microsoft ended official support for Windows 7, 8 and 8.1 in January of 2023. Unsupported operating systems receive no security updates and have known exploits. With no official support from Microsoft, maintaining Firefox for obsolete operating systems becomes costly for Mozilla and dangerous for users.

Mozilla

As we said earlier, these versions will still get critical security updates that will allow you to safely browse the internet. Still, Mozilla advises you to update your Windows to the latest version, even if you’re still on Windows 7.

What to do then? You can either update to Windows 10, or you can update to Windows 11, and then you will be able to enjoy Firefox’s newest features. You need to know, though, that Windows 10 will officially reach the end of support on October 14, 2025, so Windows 11 seems to be the better idea.

Are you using Firefox on Windows 7 still? What’s your experience with it? Let us know in the comments sections below.

Windows is Scrolling By Itself: 8 Ways to Fix This

Whether browsing the web, working on a document, or simply navigating through your files, the sudden and uncontrollable scrolling can disrupt your workflow and make using your computer challenging.

Fortunately, several methods exist to address the Windows 10 scrolling bug and regain control over your experience.

What causes the Windows scrolling itself issue?

There could be several reasons for this scrolling bug; some of the common ones are mentioned here:

  • Driver or software conflicts – Conflicting or outdated drivers related to input devices such as mice could lead to erratic scrolling behavior. Try updating the driver.
  • Malfunctioning or dirty input devices – Physical issues with the input devices, such as a malfunctioning mouse scroll wheel or a sticky touchpad, can cause unintended scrolling.
  • Background apps – Running applications or processes that consume excessive system resources can lead to lag or delays in input responsiveness.
  • Malware infection – Malicious software or viruses can interfere with system operations, including input devices, resulting in abnormal scrolling behavior. Run a deep scan using an antivirus tool.
  • Accessibility settings – If the accessibility settings in Windows, such as Scroll inactive windows when I hover over them, are enabled, you could face this issue.

How can I fix the Windows scrolling itself issue?

1. Run a hardware troubleshooter

  1. Press Windows + R to open the Run window.Hardware and device troubleshooters windows 10 scrolling bug
  2. Type msdt.exe -id DeviceDiagnostic and click OK to open Hardware and device troubleshooter.
  3. Click Next.Initiate the scan
  4. It will start detecting issues and will list if there will be any. Click Apply this fix.Apply this fix
  5. Follow the onscreen prompts to complete the process

2. Remove the hidden devices

  1. Press Windows +R to open the Run dialog box.Device Manager Run command
  2. Type devmgmt.msc and click OK to open the Device Manager app.
  3. Go to View and click Show hidden devices.Shoe hidden devices Device Manager Run command
  4. Locate and expand Mice and other pointing devices. If too many mouse devices are installed, right-click and select Uninstall device.Uninstall device
  5. Then, plug in the mouse and reboot your computer.

3. Tweak the mouse settings

  1. Press Windows + I to open the Settings app.
  2. Click Devices.Devices windows 10 scrolling bug
  3. Select Mouse from the left pane.
  4. Locate Scroll inactive windows when hovering over them and toggle off the switch next to it.
  5. For the Roll the mouse wheel to scroll option, select the Multiple lines at a time option.Mouse settings scroll window
  6. Click the Additional mouse settings link. Additional settings
  7. Go to Wheel, and make sure Vertical Scrolling and Horizontal Scrolling are set too high. Once done, click Apply, then OK.Vertical and horizontal scrolling

4. Reinstall the mouse driver

  1. Press Windows + R to open the Run dialog box.device manager windows 10 scrolling bug
  2. Type devmgmt.msc and click OK to open the Device Manager app.
  3. Locate, expand Mice and other pointing devices, & right-click Uninstall device.Update device
  4. Now click Action from the top menu and select Scan for hardware devices.Scan for hardware changes
  5. Reboot your computer to save the changes.

5. Uninstall the Windows Updates

  1. Press Windows + I to open the Settings app.
  2. Click Update & security.Update & security windows 10 scrolling bug
  3. Go to Windows Update, and click View update history.View installed updates
  4. Click Uninstall updates.Uninstall updates
  5. Locate the recently installed Windows Update and click Uninstall.Uninstall Windows update
  6. Follow the onscreen instructions to complete the process.

6. Run SFC & DISM scans

  1. Press the Windows key, type cmd, and click Run as administrator.windows 10 scrolling bug Command Prompt Windows Run as Administrator
  2. Copy & paste the following command to repair system files and hit Enter: sfc/scannowScan now Windows 10
  3. Wait for the process to complete, and type the following command to restore the Windows OS image and press Enter: Dism /Online /Cleanup-Image /RestorehealthRestore health
  4. Restart your computer to save the changes.

7. Perform a System Restore

  1. Press the Windows key, type control panel, and click Open.CP windows 10 scrolling bug
  2. Select View by as Large icons and click Recovery.Recovery Windows 10
  3. Click Open System Restore.Open System restore
  4. On the System Restore window, click NextNext Restore point.
  5. Select the restore point and click Next.Restore your computer
  6. Click Finish to initiate the process.Restore

Windows will restart and restore the old version on your computer. If System Restore didn’t successfully complete, we recommend you check out this informative guide for solutions.

8. Change the background settings

  1. Right-click the empty space and click Personalize.Personalize
  2. Click Colors from the left pane.
  3. Remove the checkmark Automatically pick an accent color from my background.Colors

This solution only applies to people with a Slideshow background as it constantly changes; the automatic accent color picks a new color every time. So, due to this, Windows refreshes every time the image changes.

Youcan also:

  • Try restarting your machine and checking if all Windows updates are installed.
  • Examine the mouse wheel to check if there is dust or dirt.
  • Check the mouse cable for damage, and remove & replug it.
  • Use a different USB port to connect the mouse.
  • Disconnect all the external peripherals if not in use.
  • Check if any key is stuck on your keyboard, and gently release it.
  • For the wireless mouse, try changing the batteries.
  • Boot your computer in safe mode and check if the issue persists.
  • Use a different mouse or try a different keyboard.
  • Sign out of your user account and sign in again.

So, these are methods you can use to fix the Windows 10 scrolling bug and take back control over the scrolling behavior of your Windows machine for a more productive computing experience.

If you’ve ever experienced the frustrating issue of Windows Settings endlessly scrolling down, check our guide that addresses this problem.

We also recommend reading our guide on how to stop the autoscrolling on Windows 11 if you have upgraded your OS.

If you have any questions or suggestions, feel free to use the comments section below.

How to add more clocks to Windows 11

There are times when you need to check what time is in other parts of the world, especially if you work with people who live in different countries. Fortunately, Windows 11 has a feature that lets you add more clocks to your desktop.

Whether you’re managing international projects, planning meetings, or simply keeping in touch with friends and family around the world, Windows 11 makes it easier than ever to stay synchronized. Gone are the days of mentally calculating time differences or switching between multiple timekeeping apps. With this feature, Windows 11 offers a streamlined solution to manage time across the globe.

Once toggled, you can see additional clocks being displayed on top of your calendar from the taskbar. You’re also free to customize them however you want – add an Eiffel Tower emoji for France (GMT+2). Or a Japan flag for Tokyo (GMT+9)? It’s your call. 

With this simple guide, you’ll be able to add more clocks to your Windows 11 desktop. 

How to add more clocks to Windows 11

1. Open the Settings app.

2. Go to Time & language ➜ Date & time.

3. Scroll down and click on Additional clocks.

4. Click on the toggle that says Show this clock for it to appear.

5. Select the desired time zone, and you can also rename it with emojis. 

6. Click Apply and OK.

Speaking of which, there’s also a feature that lets you show seconds on your clock, which began rolling out starting from the KB5023780 update back in March 2023. We’ve also reported on other features and fixes that came with the update. It’s worth checking out.

What do you think about the feature to add more clocks to Windows 11? Have you tried it? Let us know in the comments!

Enable File and Folder Compression: What is it & How it Works

Reducing the size of the file or folder gives you some extra space on your PC for other important things. We usually ZIP the file and decompress them when needed.

But Windows OS has a new feature that facilitates enabling file and folder compression. In this guide, we will learn more about this feature and see how it works.

What is Enable File and Folder Compression feature?

Windows OS comes with a feature called Enable File and Folder Compression, that lets you compress the file and folders and use them without decompressing them.

This feature is available within the Disk Management tool. Using the File and Folder Compression feature, a file’s redundant data, text characters in the file, etc. are removed and compressed to save space.

However, do note that since the files are compressed using the Enable File and Folder Compression feature, your PC will take some time to open it since it isn’t practically decompressing it.

The good thing about the Enable File and Folder Compression feature is that it simply allows you to compress the data, you can access everything without losing anything. This is called Lossless Compression.

What is the connection between NTFS and the Enable File and Folder Compression feature?

A lot of our readers have asked the question that what is the relation between NTFS and the Enable File and Folder Compression feature.

They pointed out why the file and folder compression feature isn’t visible for all the drivers or partitions on their PCs.

The answer to this question is that the Windows File Compression technique compresses a drive that is a part of the NTFS file system. Notably, the Enable File and Folder Compression feature uses a built-in compression feature called NTFS compression.

So, you are actually using the NTFS compression feature which drives the data into the control unit and compresses each unit automatically and individually.

What are the ideal cases for enabling file and folder compression?

Not always you would want to use the Enable File and Folder Compression feature. Below are some of the best most apt scenarios where you can opt for this compression feature.

  • You can compress files and folders that aren’t used regularly. Compressing them will let you open them whenever you need them, while the rest of them won’t eat up the space.
  • File compression can come in handy, especially for SSDs that have a limited quota of space available.
  • Files that are required to be shared over the network can be compressed using the compression feature and data can be saved while the transfer process can occur at a good speed.
  • Also, if the processing power of your PC is slow, you can compress the files freeing up more resources for other important tasks.

How to use Enable File and Folder Compression on Windows?

  1. Press the Win key to open the Start menu.
  2. Type Disk Management and open the top result.
  3. Right-click on the already created NTFS partition or the NTFS partition that you have recently created and select Format.
  4. Check the box for Enable file and folder compression. Choosing this option will automatically compress everything within the partition.

The above steps are good if you have a NTFS file system partition as the file and folder compression is available for NTFS only.

In case you have a FAT32 file system, you can first convert them into NTFS and then use the File and Folder Compression feature.

When should I not use the file compression feature?

Here are some kinds of files that you should not compress or think of compressing:

  • Windows system files and folders. Since compressing these files can affect your system performance, in fact, can break your system.
  • Files that are already compressed should not be compressed. This is because you won’t see many improvements and there will be negligible file space saving.
  • We would advise you from using the file and folder compression for game folders as it will make the game lag and you won’t get optimal performance.

That is it from us in this guide. In case you want to compress other file formats, you can check out the list of some of the best file compression tools that you can opt for on your Windows PC.

Feel free to let us know in the comments below if you understood how the file and folder compression feature works and when should you use this feature.

How to Update Your Gigabyte BIOS [3 ways]

Fixing any motherboard-related issues require you to make sure that you are running the latest version of the BIOS. Updating the BIOS of a Gigabyte motherboard can be a complex task and you should follow proper steps to accomplish it.

In this guide, we will share with you all the different ways via which you can easily update Gigabyte BIOS on your PC. Let us check out the methods.

How to check the BIOS version you currently have?

  1. Open the Start menu by pressing the Win key.
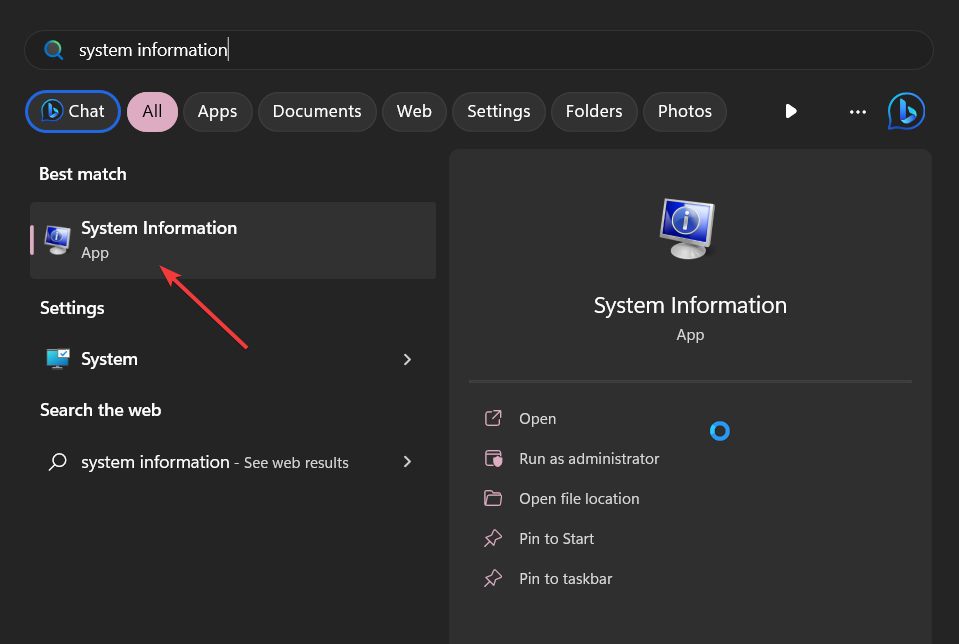
  2. Type System Information and open the top result.
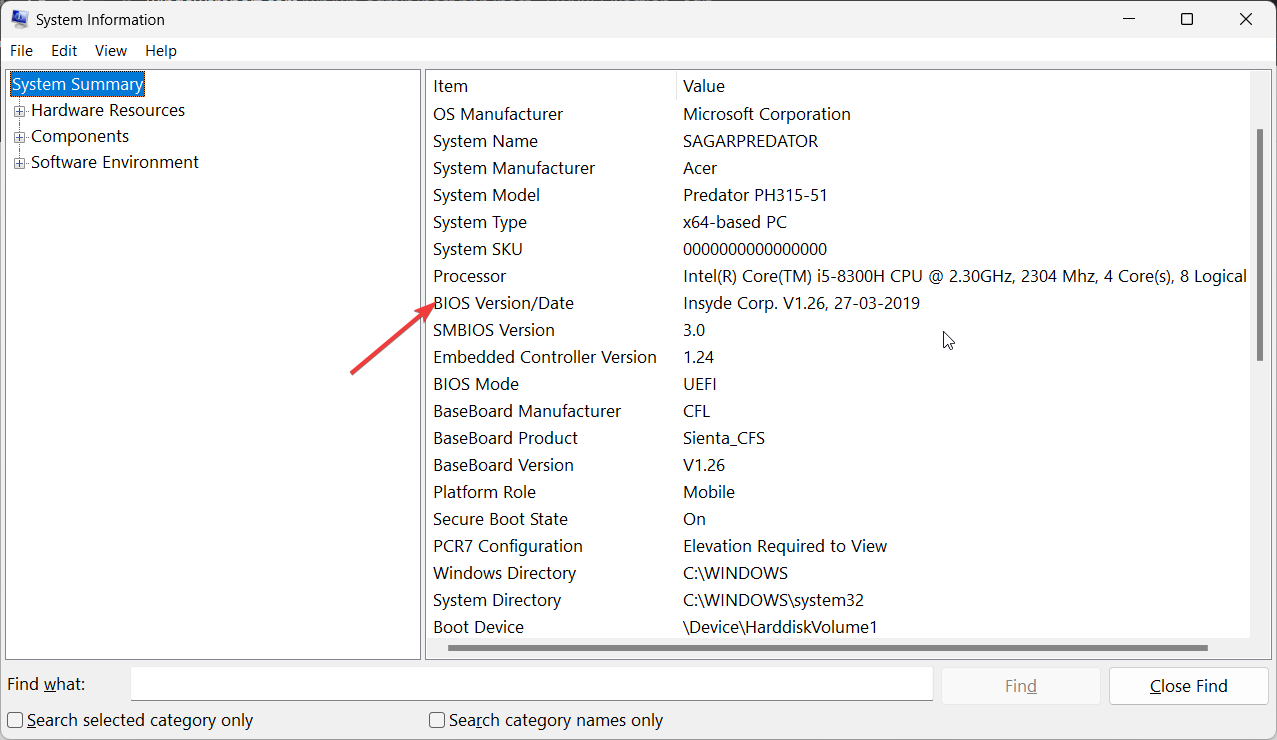
  3. Locate BIOS Version/Date section on the right side.

Note down the version of the BIOS you are running. This will let you decide whether you are running the latest version or not.

How can I update Gigabyte BIOS?

1. Use the Gigabyte App Center

  1. Download the Gigabyte app center.
  2. Install the App Center on your PC and launch the program.
  3. Click on the downward arrow in the top-right corner.
  4. Click on @BIOS.
  5. Switch to the Update from Server tab.
  6. Choose the closest server.
  7. The App Center will automatically detect your motherboard details and provide you with the latest BIOS update.
  8. Click on the file and select Next.
  9. Follow the on-screen prompts and install the BIOS update.

Updating the Gigabyte motherboard BIOS using the App Center is probably the easiest way. It simply needs you to perform some clicks and you are all set.

Apart from updating BIOS, you can also use the Gigabyte App Center to update the drivers as well. You can manually update the BIOS using the App Center as well. For that, you need to download the BIOS update file onto a USB drive and then select it within the App Center.

2. Use Gigabyte Q-Flash

2.1 Format the USB drive to FAT32

  1. Insert the USB flash drive to your PC.
  2. Press Win + E to open the File Explorer.
  3. Right-click on your USB drive and click on Format.
  4. Choose FAT32 from the File system dropdown menu.
  5. Click on the Start button.

2.2 Download the Gigabyte BIOS update

  1. Visit the official Gigabyte motherboard support page.
  2. You can search for the BIOS file based on your processor, chipset, or even your computer’s model name.
  3. Select BIOS for your computer model.
  4. Under the BIOS section, download the latest available update.
  5. Once the download is complete, extract the contents onto your FAT32 formatted USB drive.

2.3 Update the BIOS

  1. Insert the USB drive containing the Gigabyte BIOS update file into any USB port on your PC.
  2. Restart your PC and when it is booting up enter the BIOS menu by pressing the Del key.
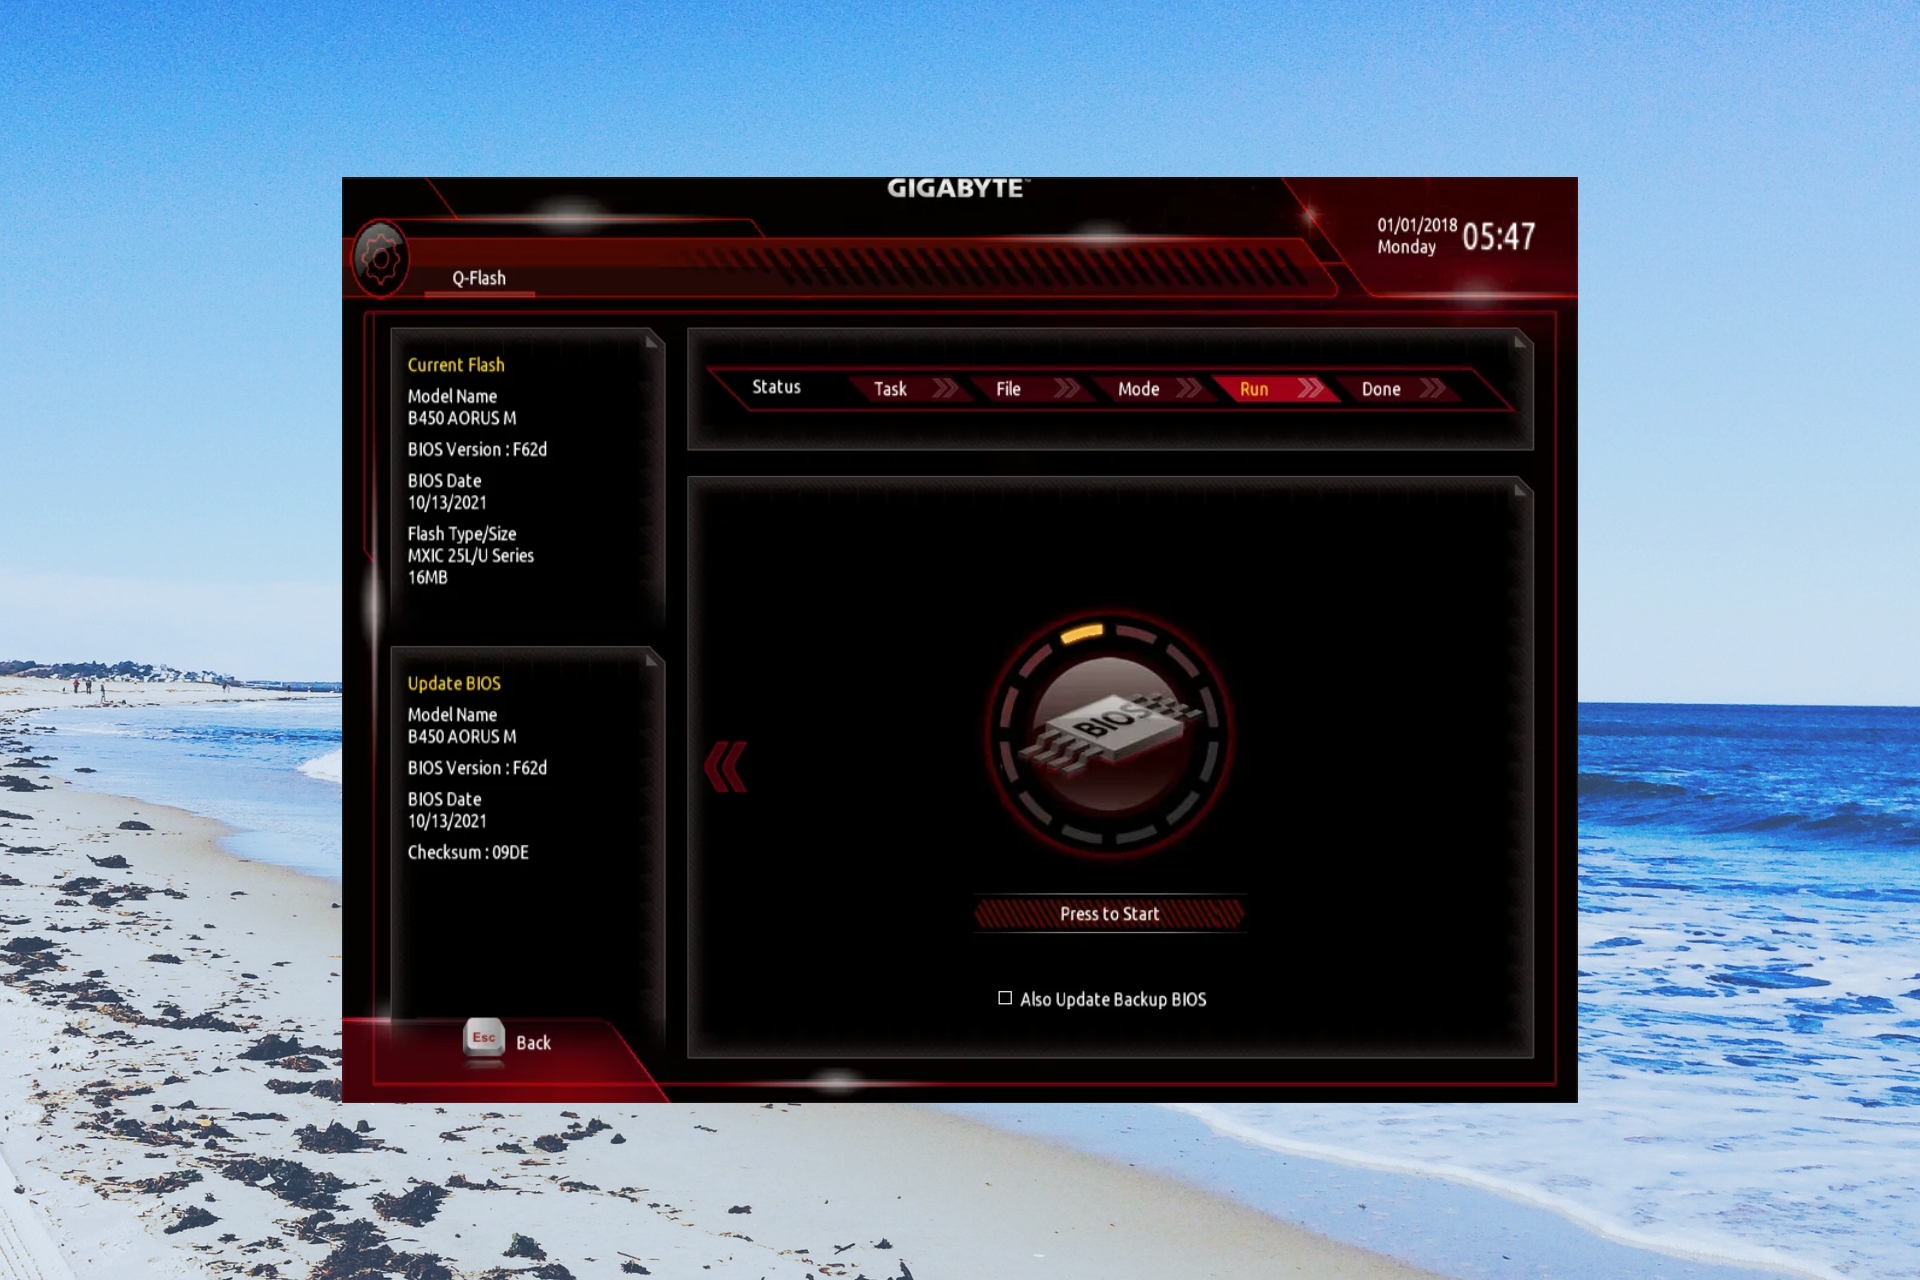
  3. Select Q-Flash menu.
  4. Choose Update BIOS option.
  5. Locate the BIOS update file and select it.
  6. Start the BIOS update process.
  7. Once the BIOS is updated, switch to the Save & Exit tab, and select Load optimized defaults.

This process of the Q-Flash method may look a bit complex, but in reality, it isn’t. All you need to do is follow the steps mentioned above carefully and you will be done with the Gigabyte BIOS update process without any issues.

Make sure that the USB drive onto which you have copied the BIOS update file is in FAT32 format.

3. Use the Q-Flash+ update method

  1. Copy the BIOS update file downloaded from the Gigabyte official website to the FAT32 formatted USB drive.
  2. Insert the USB drive into the white USB port on your motherboard.
  3. Turn on the motherboard.
  4. The LED light next to the USB will flicker indicating the BIOS update is in progress.
  5. Once the update is complete, the LED will stop blinking.
  6. Start your PC and wait for the BIOS update process to complete.

This is another one of the Gigabyte exclusive ways of updating the BIOS. However, there are some other manufacturers that offer the same process of updating the BIOS. You should check with your manufacturer about that.

That is it from us in this guide. You can check out our guide that gives you a proper explanation of what is BIOS and everything that you need to know about BIOS.

We have also listed 3 different ways to access the BIOS menu on your computer that will be beneficial to update the BIOS. In case you come across any issues, you can read our guide to fixing the BIOS corruption issue on a Windows PC.

Feel free to let us know in the comments below, which one of the above methods you used to update the Gigabyte BIOS.

Fix: BEDaisy.sys Blue Screen When Launching Games

Many of our readers have reported that when they launch any game on their PCs, they are treated with the BEDaisy.sys BSoD error. This Blue Screen of Death error crashes their PC and they are unable to play certain games.

In this guide, we will give you a list of solutions that will help you resolve the BEDaisy.sys BSoD error on your PC, after which you will be able to play games without any issues. Let us get right into it.

What is causing the BEDaisy.sys BSoD error?

We did some research and after going through multiple user reports, we have prepared a list of reasons that could trigger the BEDaisy.sys BSoD error when launching games.

  • There is a problem with the game: Chances are some important game files are corrupt or could not load properly because of which you are getting the error.
  • Corrupt system files: System files when corrupt or go missing can cause multiple issues when the programs are installed on the computer.
  • The overclocking tool is causing the problem: The overclocking tool that you are using might be malfunctioning the system resources because of which you are getting the BEDaisy.sys BSoD error.
  • The issue with the network driver: There are chances that this BEDaisy.sys BSoD error is related to the network driver.

Now let us apply the different solutions and try resolving the BEDaisy.sys BSOD error.

How can I resolve the BEDaisy.sys BSoD error?

1. Reinstall the problematic game

  1. Press the Win key to open the Start menu.
  2. Open Control Panel.
  3. Select Programs and Features.
  4. Click on the game and hit the Uninstall button.uninstall program roblox configuring stuck
  5. Follow the on-screen steps to completely remove the game.
  6. Visit the official website of the game and reinstall the game without interruptions.

2. Check the game file integrity

  1. Launch Steam client.
  2. Click on Library at the top.
  3. Right-click on your game from the left pane and select Properties.
  4. Click on LOCAL FILES.
  5. Select Verify the integrity of game files option.
  6. Steam will begin verifying the games files and fix if found any problems.

Chances are the game files are corrupt or have some issues, which can be resolved or at least identified by verifying the integrity of the game files.

3. Run SFC and DISM scans

  1. Press the Win key to open the Start menu.
  2. Type command prompt and run it as an administrator.
  3. Type the below command and press Enter. sfc /scannowFvevol.sys
  4. Wait for the process to finish.
  5. Type the below commands and press Enter after each one. Dism /Online /Cleanup-Image /CheckHealth Dism /Online /Cleanup-Image /ScanHealth Dism /Online /Cleanup-Image /RestoreHealth
  6. Restart your PC.

Fixing corrupt system files can also help resolve the BEDaisy.sys BSoD error as there might be chances that some important system files are unable to load that are required by the game.

In any case, we suggest specialized repair software that runs automatically on your PC and fixes corrupted files that generate screen issues.

4. Reinstall the network drivers

  1. Press the Win key to open the Start menu.
  2. Type Device Manager and open it.
  3. Expand the Network adapters section.
  4. Right-click on your network driver and select Update driver option.
  5. Select Search automatically for drivers option.
  6. Install the latest update and restart your PC.

Failure to communicate with the server can often cause games to crash and throw BSoD errors such as BEDaisy.sys. You can try updating the network driver and check if this resolves the issue or not.

5. Disable the Intel Turbo Boost Technology

  1. Power off your computer.
  2. Press Esc to enter the BIOS menu.
  3. Select BIOS/Platform Configuration (RBSU).
  4. Choose Performance Options.
  5. Change the Intel Turbo Boost Technology option to Disabled.
  6. Save the changes by pressing F10 key and reboot your PC.

Many of our reader reports suggest that disabling the Intel Turbo Boost Technology helped them resolve the BEDaisy.sys error.

This is because turning this feature on utilizes more resources and in turn increases the temperature of the PC causing all sorts of crashes. Simply disable it and check if this fixes the issue or not.

That is it from us in this guide. We have a guide that will help you with a list of the best BSOD fixers that will resolve the issue automatically. And if it’s a BSoD on only one game, we’ve got that covered too.

You can also check out our guide that explains how you can resolve the Wdfilter.sys BSOD error on your Windows PC.

Let us know in the comments below, which one of the above solutions fixed the problem of BEDaisy.sys error.

4 Ways to Quickly Reinstall Your Mouse Driver

There are certain instances when one of the essential input devices of your PC, the mouse, won’t work correctly. In such cases, you might need to reinstall the mouse driver.

In this guide, we will explain to you the different ways you can follow to reinstall the mouse driver on your Windows PC. Let us get right into it.

Why do I need to reinstall the mouse driver?

Reinstalling drivers not only comes in handy when the device is malfunctioning, but it also comes in handy when you have moved to a new PC or cannot update your device’s drivers.

Here are a few reasons why you would need to reinstall the mouse driver.

  • The mouse isn’t functioning properly – The mouse does not act on your inputs and isn’t doing a perfect job.
  • The mouse driver is outdated – Chances are some important files are missing because of this you cannot update the mouse driver.
  • There is a driver conflict – Often third-party apps can interfere with the system drivers and can cause them to misbehave, which is when you would need to reinstall the mouse driver.

Now, let us check out the different ways via which you can easily and quickly reinstall the mouse driver.

How can I reinstall the mouse driver?

1. Reinstall using Device Manager

  1. Press the Win key to open the Start menu.
  2. Type Device Manager and open it.
  3. Expand the Mice and other pointing devices.
  4. Right-click on your mouse and select the Uninstall device option.
  5. Make sure that the box for Delete the Driver Software for This Device is selected.
  6. Restart your computer.
  7. Once your PC restarts, the mouse driver will be automatically installed.

This is one of the most effective ways of reinstalling the mouse driver on your PC. You do not need to install the driver again from the website, the system will do that for you once your PC boots up.

2. Download and install the driver manually

  1. Visit the official website of the mouse manufacturer.
  2. Download the compatible mouse driver for your mouse.
  3. Launch the EXE, it will ask you whether you would like to Repair or Reinstall the driver. Select Reinstall.
  4. Restart your computer.

For your mouse brand, there is a dedicated mouse driver download page that you can visit using any web browser. To install Microsoft mouse and keyboard drivers, you can visit this official driver download center.

3. Using a dedicated tool

In case you have uninstalled the mouse driver on your PC and the driver fails to reinstall, you can always rely on a dedicated driver downloader tool.

A dedicated driver updating tool will help you update all outdated drivers on your PC. Also, it will remind you when you need to update your drivers to avoid any mishaps.

Reinstalling drivers can also help you get the latest update when you install the driver back on your PC.

Hence, you should employ this standalone application to install or update any driver on your PC entirely safely.

Outbyte Driver Updater

Reinstall any type of mouse driver using this rich database driver solution.
Free trial Visit website

4. Use Windows Update

  1. Press the Win + I keys to open the Settings menu.
  2. Click on Windows Update on the left pane.
  3. Select the Check for updates button.
  4. Install all the pending updates.
  5. Click on Advanced options.
  6. Select Optional updates.
  7. Check the boxes for the available updates and press Download & install button.
  8. Restart your PC.

Often mouse drivers arrive as a part of the Windows update, where you can download and install them to reinstall the mouse driver on your PC. Also, do not forget to check the Optional Updates section for the mouse drivers.

Mouse drivers aren’t necessary in case you have a simple mouse with un-customizable buttons. However, if you own a mouse with multiple buttons and RGB lighting then you need to install the mouse drivers to customize them according to your needs.

That is it from us in this guide. We have a guide that explains how you can resolve Event ID 5379 where the mouse disconnects frequently.

For some users, the right-click context menu doesn’t show up. If you are also facing the same issue, then you should apply the solutions in our guide to resolve the problem.

Also, Windows 11 users have complained that the mouse sensitivity on their PCs changes without their input. Such issues can be easily resolved by applying the solutions in our guide.

Let us know in the comments below, which one of the above solutions you used to reinstall mouse driver on your PC.

0x800704f1 Windows Update Error: How to Fix It

Windows updates are important for the effortless running of your PC. However, the update process is not always smooth, as some users complain of a Windows update error 0x800704f1.

Unlike some update errors, this one does not go away with a simple PC restart. Thankfully, it is not the most difficult issue to fix, provided you apply the fixes in this guide.

What is error code 0x800704f1?

The error 0x800704f1 usually occurs when users initiate the update process manually instead of allowing their PCs to perform the task automatically.

Below are some of the causes of this error:

  • Faulty system files: Sometimes, this issue can be due to corrupt or broken system files on your PC. The solution to this is to repair and restore these files and restart your PC.
  • Issues with some system services: System services like the Background Intelligent Transfer Service are important for the Windows update process to work normally. Restarting these services should do the trick here.

How do I fix the Windows update error code 0x800704f1?

1. Reset Windows update components

  1. Press the Windows key, type cmd, and select Run as administrator under Command Prompt.
    cmd admin
  2. Type the commands below and press Enter after each: Net stop bits Net stop wuauserv Net stop appidsvc Net stop cryptsvc Del %ALLUSERSPROFILE%\Microsoft\Network\Downloader\qmgr*.dat /Q Del "%HOMEDRIVE%\Users\All Users\Microsoft\Network\Downloader\qmgr*.dat" /Q Del %WINDIR%\SoftwareDistribution\*.* /s /Q Net start bits Net start wuauserv Net start appidsvc Net start cryptsvc
  3. Finally, wait for the commands to finish running and restart your PC.

Issues with the Windows update components can cause the error 0x800f0841. This problem can be resolved by restarting the required components and renaming the update folders.

This is made easy by running the commands above.

2. Restart some services

  1. Press the Windows key + R, type services.msc, and click the OK button.
    services
  2. Double-click the Background Intelligent Transfer Service to open its properties.
    background
  3. Now, set its Startup type to Automatic and click the Start button.
    automatic 0x800704f1
  4. Next, click the Apply button, followed by OK.
    apply ok
  5. Finally, repeat Steps 2 to 4 for the Windows Update service and restart your PC.

The Windows Update and Background Intelligence Transfer Service are important to the working of the update process. So, if these services are not working properly, it can lead to errors like the 0x800704f1 code.

Restarting the services should help restore normalcy in this case.

3. Repair system files

  1. Press the Windows key, type cmd, and select Run as administrator under Command Prompt.
    cmd admin
  2. Type the command below and hit Enter to run it: DISM /online /cleanup-image /restorehealthdism restore 0x800704f1
  3. Wait for the command to finish running. Now, run the command below: sfc /scannowsfc scan
  4. Finally, wait for the command to finish running and restart your PC.

Corrupt or broken system files can cause many issues, and this is true with the 0x800704f1 error. You can rectify this by running the dedicated commands, as shown above.

Another option is to use a special repair tool to help you restore your system file automatically to perfect condition.

4. Run the Windows Update troubleshooter

  1. Press the Windows key + I and choose Troubleshoot in the right pane.
    troubleshoot
  2. Click the Other troubleshooters option on the next page.
    other troubleshooters 0x800704f1
  3. Finally, click the Run button before the Windows Update option.
    run update

Glitches with the update services and processes can cause the 0x800704f1 error on Windows 10 and 11. The quickest way to fix this is to run the Windows update troubleshooter.

5. Download the update manually

  1. Press the Windows key, type update history, and select View your update history.
    view 0x800704f1
  2. Note the KB number of the update giving the error.
  3. Now, visit the Microsoft Update Catalog and search for the update in Step 2.
    update catalog
  4. Next, choose your specifications and select the Update that matches it.
  5. Finally, run the downloaded file to install it.

If using the Windows updater to update your PC keeps returning the 0x800704f1 error, you can download and install the update manually. This will allow you to bypass the glitches that might be causing the error.

There you have it: tested and proven fixes to eliminate the 0x800704f1 error. You should now be able to fix the issue with these detailed solutions.

If you are dealing with other update errors like 0x800f0841, check our detailed guide to fix them.

Feel free to let us know the solutions that helped you fix this issue in the comments below.

How to Update Your MSI BIOS [3 ways]

BIOS is the motherboard’s OS to handle the basic I/O functions. Your PC must be running the latest version of it on your PC.

In this guide, we will discuss how you can update the MSI BIOS on your Windows PC. Notably, we will show you the different ways to update the MSI BIOS.

How do I check the BIOS version?

  1. Open the Start menu by pressing the Win key.
  2. Type System Information and open the top result.
  3. Look for BIOS Version/Date section on the right side.

Make sure to note down or take a screenshot of the BIOS settings such as default settings, whether it’s for custom overclocking, enabling XMP, or setting RAM timings of your PC. This will come in handy when things go south.

There are three different update methods that we will be discussing in this guide that will help you update the MSI BIOS.

How can I update the MSI BIOS?

1. Update the BIOS using a USB flash drive

1.1 Format the USB drive to FAT32

Note icon NOTE
The action from this solution will erase all data on your USB drive so if you have any important files, back them up first.
  1. Plug in the USB to your PC.
  2. Press Win + E to open the File Explorer.
  3. Right-click on the USB drive and select Format.
  4. Choose FAT32 from the File system dropdown.
  5. Click on the Start button.

1.2 Download the MSI BIOS update file

  1. Find your laptop’s model name, which is usually written on the lower right side of the computer where you rest your palm.
  2. Visit the official MSI website to download the latest BIOS version.
  3. Enter your laptop’s model number in the search field and hit the magnifying glass icon.
  4. Hit the Download button for your laptop’s model.

1.3 Update the MSI BIOS

  1. Paste the downloaded BIOS file to the USB drive that you have formatted to FAT32.
  2. Insert the USB drive on the computer on which you wish to update the MSI BIOS and restart your PC.
  3. When the PC is booting up, hit the Del key to enter the BIOS menu.
  4. Use the Arrow keys to navigate to the Advanced page.
  5. Use the Volume keys to move to the UEFI BIOS Update option and press Enter key.
  6. Again, select the UEFI BIOS Update option and hit Enter key.
  7. Select the location of the BIOS file, which in our case is the USB drive and press Enter.
  8. Select the BIOS update file from the USB drive and press Enter to select it.
  9. Choose Yes if a prompt appears.
  10. Select OK to restart your computer to begin the update process.
  11. After the PC boots up, it will load to the BIOS update page, here you have to select Proceed with flash update option.
  12. Once the update completes press OK when the Flash update completed. Press any key to reset the system prompt appears.

This is the best way to update the MSI BIOS on your PC. Following the steps correctly, you will be able to safely update the MSI BIOS, however, do not skip any step as it could prove to be fatal for your PC.

2. Use BIOS Flashback

  1. Copy the downloaded BIOS update file onto a USB drive.
  2. Insert it inside the BIOS Flashback port. It should be right next to the dedicated button.
  3. Tap and hold the Flashback button of BIOS.
  4. It will take about 15-20 seconds to the BIOS update process. It will be indicated with blinking lights.

An alternative to updating the BIOS via USB drive is to use the Flashback button. This button isn’t found on many motherboards, but MSI has this.

The advantage of this method is that you do not need to enter the BIOS menu manually in order to update the MSI BIOS. However, that may not be the case every time.

3. Update using the Device Manager

  1. Press the Win key to open the Start menu.
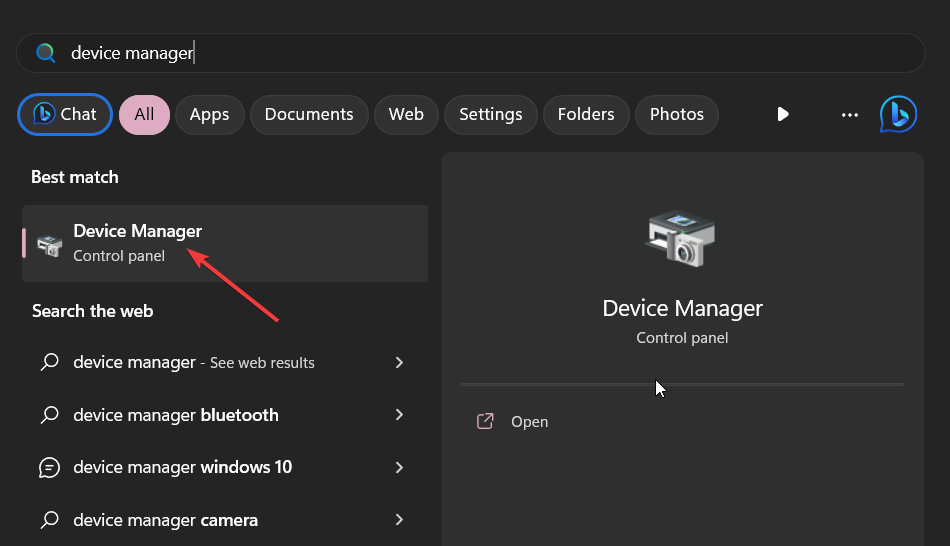
  2. Type Device Manager and open it.Start Device Manager reinstall bluetooth driver windows 10
  3. Expand the Firmware section.
  4. Right-click on your motherboard and select Update driver.
  5. Hit the Search automatically for driver option.
  6. Install the latest MSI BIOS driver is available.

This is another way of updating the motherboard firmware. However, do note that this may not be beneficial for all brand’s PCs.

That is it from us in this guide. We have a guide that properly explains what is BIOS and everything else that you need to know about it.

You can also check out our guide that lists 3 different ways to access the BIOS menu on your computer. Also, read our guide to fix the BIOS corruption issue on a Windows PC.

You can also update drivers using specialized tools from MSI. However, it might be easy to download the MSI Driver Utility Installer application. We also have a guide on how to update BIOS using MSI Dragon Center, and you might want to visit it for more information.

Let us know in the comments below, which one of the above solutions you went ahead with to update the MSI BIOS.

What to Do if You Discover You Are Using an Outdated Browser

What should you do if you discover you are using an outdated browser? You should get it up to date ASAP as it’s a must-have browser security setting. Having clarified that, let’s take a closer look at the how, when, and why.

Most people are simply unaware that browsers need updating. If you are not a heavy Internet user, yours may not have key performance issues. So, it’s not that hard to skip or ignore this aspect entirely.

That’s why some users rarely update them. So, when should you update your browser? Ideally, this operation should be done regularly but let’s be honest here – who needs another task added to their hectic agenda?

The right time to do this is whenever you see an outdated browser message or warning. That’s when you need to intervene and launch the update process.

But what is an outdated browser? What does it mean when it says your browser is out of date? If you are using an outdated browser, it might be slowing down your computer or leaving you vulnerable to hackers. 

By keeping up-to-date with the latest version of your browser, you’ll also be protecting yourself against hackers who might try to use these vulnerabilities against you.

New features can make your life easier by letting you do things faster and more easily. Sometimes new versions come with fixes for security vulnerabilities.

What happens if the browser is not updated?

If you’re wondering what issues can an outdated browser cause, here are a few things to consider:

  • ❌ You’ll miss out on essential security updates. Security holes in your browser can be used by other websites and programs to install malware on your computer (see cases where people are struggling to uninstall the Browser Assistant virus from their PCs).
  • ❌ Updates for browsers are especially important because they can prevent cyber-attacks against your computer. Hackers can take advantage of vulnerabilities in older versions to steal your data.
  • ❌ Your browser can also become slower and less stable as it ages. Without an update, you won’t be able to visit some websites or use certain functions on them.

So, is it safe to use an outdated browser? Absolutely not and you should immediately update to the latest version.

Quick Tip:

Get yourself an efficient browser that gets updated automatically. You can easily import all your saved data in a few clicks.

⇒ Get Opera

What should you do if you discover you are using an outdated browser?

1. Enable automatic updates

Some browsers come with in-built features that enable you to auto-update your browser whenever a new version is available.

This is particularly useful especially if you are too busy and don’t always remember to check for new updates.

If you don’t pay much attention to the version of your browser as long as it is working for you, this feature will come in handy.

2. Manually check for updates

Each browser has a page where you can check for updates. You can visit the official website and see if there is a new release or directly from your browser.

The pages list all versions and indicate which version of the browser is up-to-date and which ones are behind by one or more versions.

This way, you’ll know exactly which version needs updating and how many updates there are available at any given time.

3. Update your browser when available

Some browsers always send users notifications whenever a new update of the browser is available. This way, you don’t have to keep checking for them.

You may be working on your computer and receive a notification to update to the latest versions. In some cases, the updates will tell you when your current version will stop being supported.

4. Uninstall and reinstall the browser 

If you’ve changed your computer recently, it could be that the problem is a software conflict. Uninstalling the old browser and reinstalling it will solve this issue.

Sometimes, your browser won’t update even when you install the new update until you completely remove all the files from your PC.

5. Clear your browsing history and cache

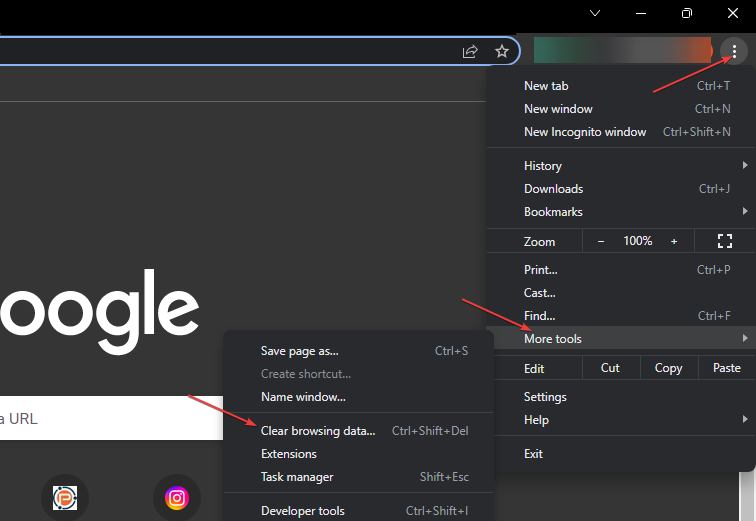
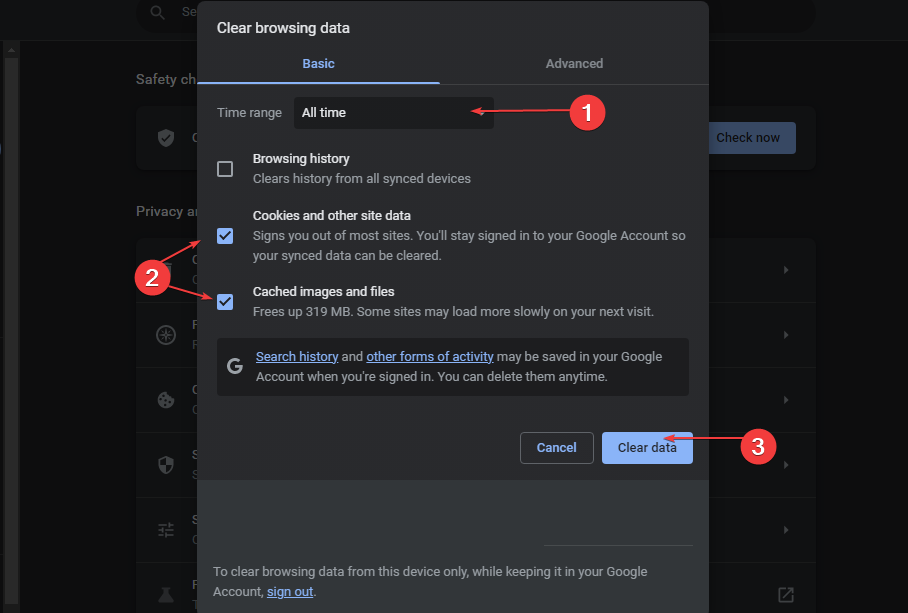
If you keep getting the You are using an outdated browser Chrome message but can’t update, clearing your browsing history might do the trick.

It is a quick and easy way to get rid of some of the things that are slowing down your browser and get rid of files that may be blocking an update for your browser. Once you clear them, try checking for updates again.

At the same time, you can best use CCleaner as a specialized cleaning tool created to help you delete browsing data like cookies or cache with automated tools.

6. Update your operating system

Oftentimes, outdated browsers are also caused by outdated operating systems (OS). Make sure that your OS is updated as well so that it doesn’t clash with your browser’s features or functionality. 

This ensures that your computer has the latest security updates and patches, which reduces the chance of being compromised.

7. Clear storage space

If you’re having trouble updating your browser, it’s possible that your PC doesn’t have enough storage space to install the update. 

So, what should you do if you discover you are using an outdated browser? Try clearing some space on your PC by uninstalling apps or backing up pictures to cloud storage or an external hard drive.

Now, there are lots of reasons for you to update your browser. Some of them include:

  • More secure – Older browsers are more likely to have security holes that allow malicious software to infect your computer or get stuck in endless site connection loops. 
  • Compatibility – Older browsers may not support some of the features of a website such as new forms.
  • Speed – Browsers are constantly changing and improving their features. You may have heard that the latest browser versions are faster than older versions. 

We hope that with these tips, you now know how to update your browser and the importance of keeping up-to-date with the latest versions.

You may also want to check out some of the best-equipped browsers for accessing high-traffic websites, so be sure to scan through our list to find one that meets your needs.

Let us know of any additional thoughts you may have regarding this topic in the comments section below.

What is Dw20.exe & How to Disable It?

If you have encountered the dw20.exe process in the Task Manager and want to know about it, this guide can help!

In this guide, we will explore dw20.exe in more detail, understand its purpose, and discuss the steps you can take to disable Dw20.exe if necessary.

What is dw20.exe?

Dw20.exe is an executable file that runs in the background and is associated with the Windows Error Reporting (WER) feature in Microsoft Windows operating systems.

It is usually located in the following folder: C:\Windows\Microsoft.NET\Framework\v2.0.50727

Whenever an application crashes or experiences an error, it becomes active and collects data about the issue, including information about the software, system configuration, and the error itself. This data is then sent to Microsoft for analysis.

While dw20.exe serves a vital purpose in helping Microsoft address software issues, the file may be an easy target to disguise viruses or malware.

So, if you didn’t install Microsoft Office or some of the software from the suite, you shouldn’t see the dw20 process running on your PC. If you don’t have Office installed, that’s a pretty clear sign that the dw20.exe running is actually a harmful piece of software.

Also, if you find the process somewhere other than the location mentioned above, you can run a deep scan using an antivirus tool to remove it and proceed with the solutions below.

What can I do to disable dw20.exe?

1. Use the Task Manager

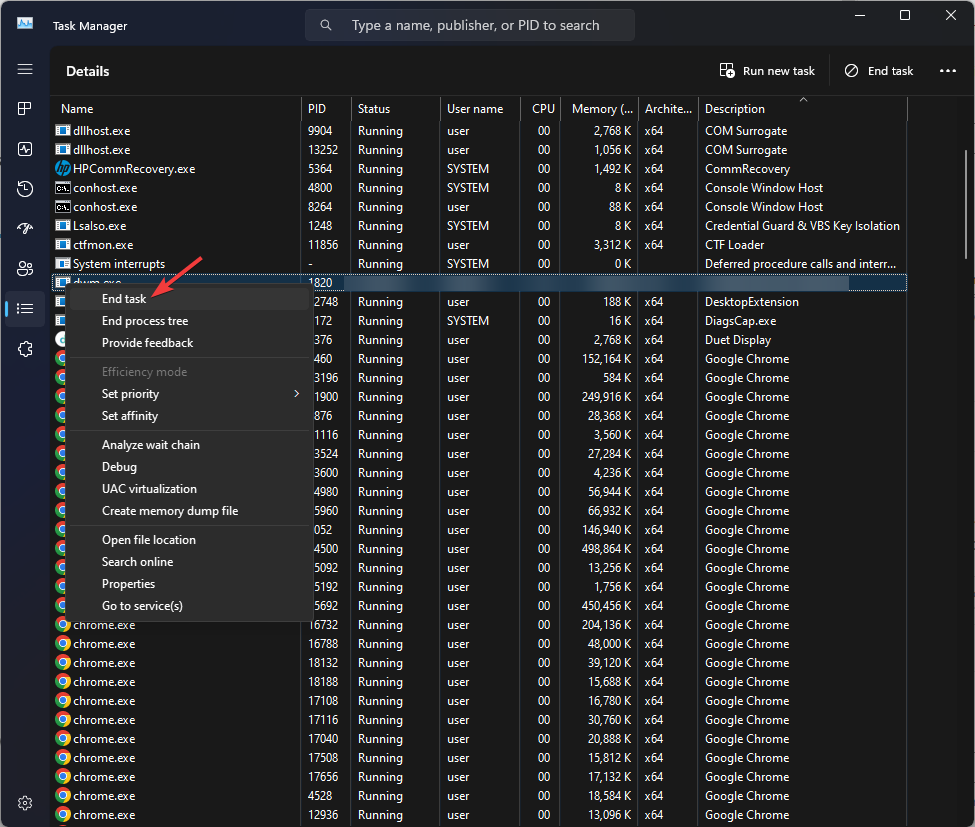
  1. Press Ctrl + Shift + Esc to open the Task Manager.End taskwindows 10 scrolling bug
  2. Go to the Processes or Details tab, locate and right-click dw20.exe and click End task.

2. Use the Services app

  1. Press Windows + R to open the Run dialog box.Services windows 10 scrolling bug
  2. Type services.msc and click OK to open the Services app.
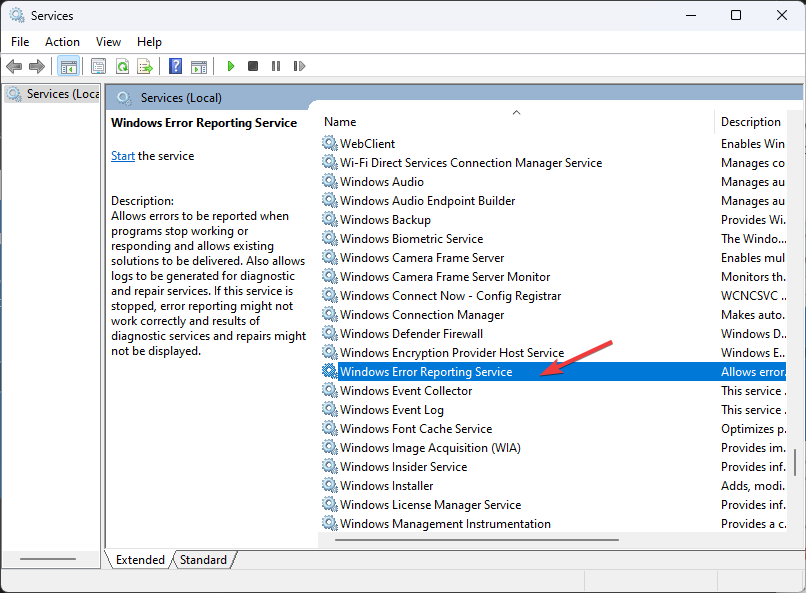
  3. Locate and double-click Windows Error Reporting Service to open Properties.Windows error reporting service
  4. For the Startup type, select Disabled from the dropdown list.Disabled
  5. Click Apply, then OK.

3. Use the Group Policy Editor

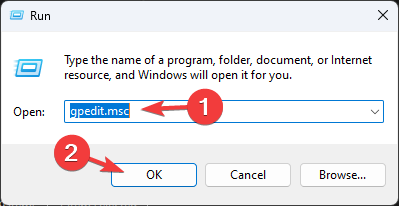
  1. Press Windows + R to open the Run window.GPEDIT MSC RUN GPEDIT MSC RUN
  2. Type gpedit.msc and click OK to open the Group Policy Editor.
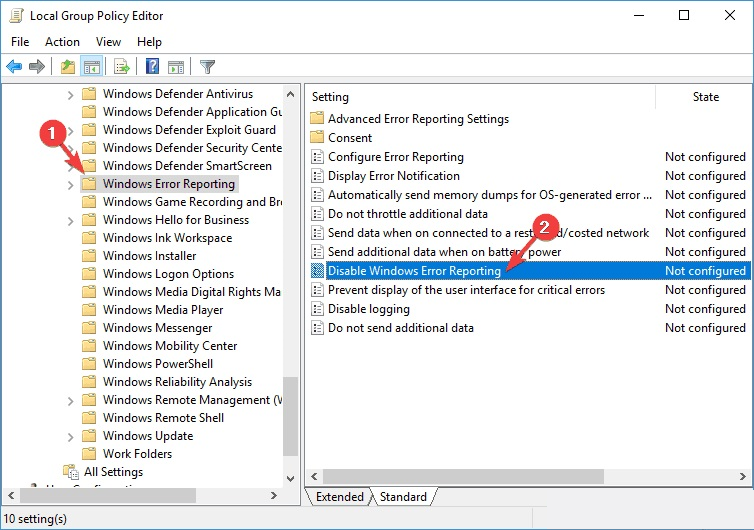
  3. Navigate to this path: Computer Configuration\Administrative Templates\Windows Components\Windows Error ReportingWindows Reporting service
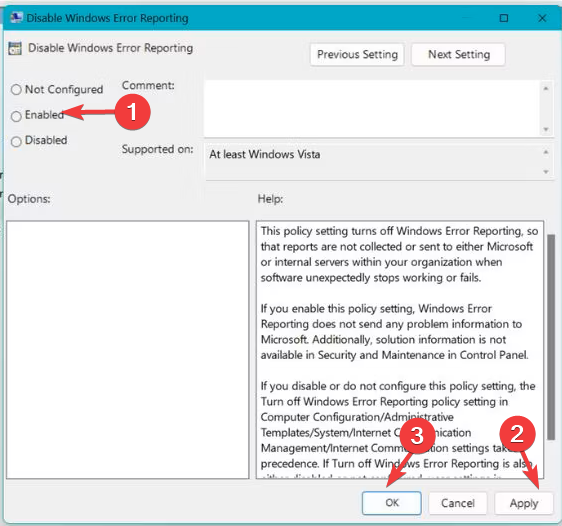
  4. Double-click Windows Error Reporting to open Properties.Enabled Click Apply
  5. Select the Enabled option and click Apply, then OK.

4. Modify the registry entry

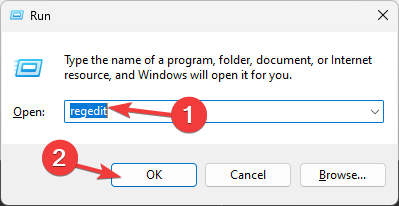
  1. Press Windows + R to open the Run window.Regedit windows 10 scrolling bug
  2. Type regedit and click OK to open the Registry Editor.
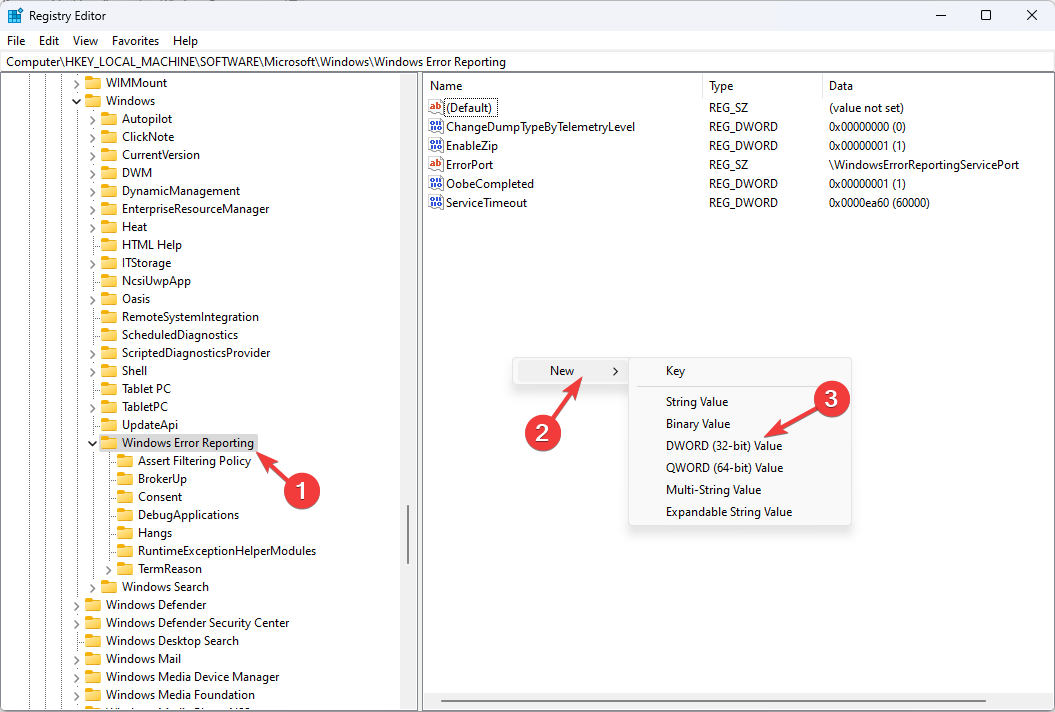
  3. Navigate to this path: Computer\HKEY_LOCAL_MACHINE\SOFTWARE\Microsoft\Windows\Windows Error Reporting
  4. Right-click the right pane, choose New, then select DWORD (32-bit).New Dword
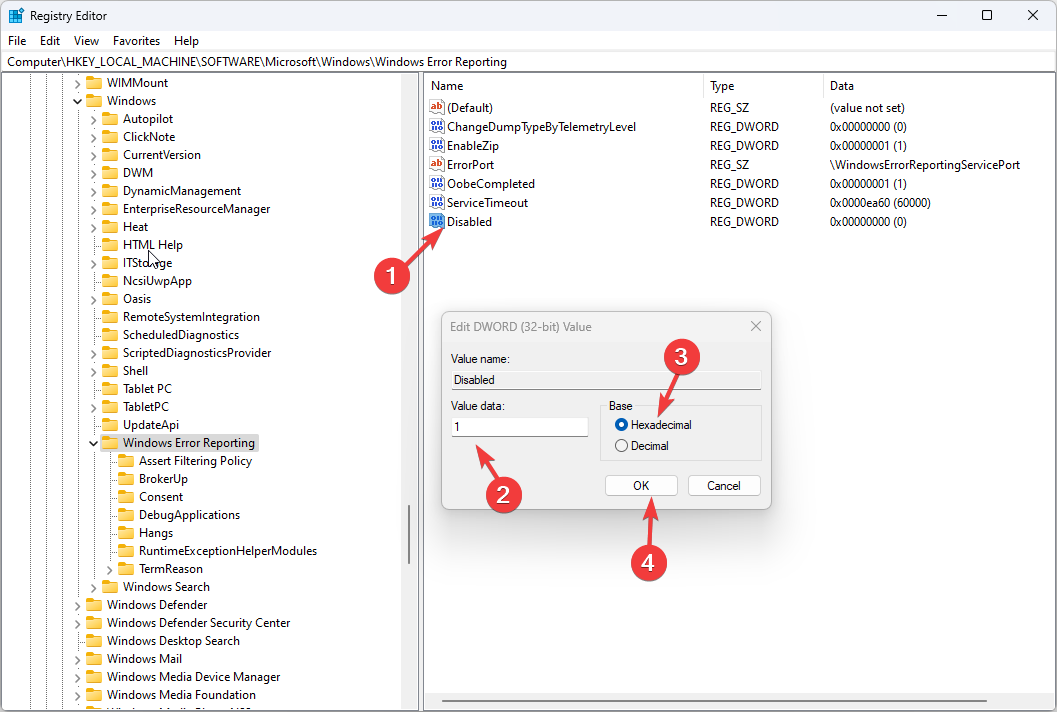
  5. Right-click the new DWORD and click Rename and name it Disabled.
  6. Now double-click the DWORD, set the Value data to 1, and select HexaDecimal, then click OK.Value data 1 Disabled
  7. Close the Registry Editor and reboot your computer to save the changes.

So, these are the methods to disable the dw20.exe if needed. If you have any questions or suggestions, feel free to mention them in the comments section below.

Microsoft goes after CMA, demands quick turnaround of its appeal case

Microsoft has unleashed a fresh round of criticism of the British Competition & Markets Authority (CMA), which last month decided to block the Activision Blizzard deal in the U.K. It delivered a major obstacle to Microsoft’s chances of finalizing the merger in doing so, and Microsoft has already moved to appeal the decision.

Microsoft’s lawyer in the case, Daniel Beard, called the CMA the outlier in its decision. Beard pointed out that with the announcement today that South Korea’s FTC had approved the deal, the merger now has 10 clearances. Beard added that “it (the CMA’s decision) creates the uncertainty that risks delaying the deal.”

South Korea Ftc Custom
South Korea is the latest country to approve Microsoft’s buyout of Activision Blizzard

Activision also had some fresh criticism of the CMA’s conclusion, saying it “ignores the facts, the law, and all commercial reality.”

Microsoft is requesting a quick settlement of the appeal, and has asked the court to set a date for a four-day substantive hearing beginning on July 17. On Beard’s point that the appeal process could deal the acquisition a substantial delay, the CMA responded that a later hearing in September or October would cause “no incremental delay to the transaction.”

Then there is the FTC in the United States, which has filed a lawsuit to block the deal. That case is set to begin in August.

Fix: League of Legends Error Connecting with Maestro

Recently, many players have reported running into an error message indicating a League of Legends error connecting with Maestro. It can occur while playing a game or at some other random time. However, this article will look into how to fix the issue.

Also, you may be interested in our guide on fixing the League of Legends unable to connect to an authentication service error.

What causes the error connecting with Maestro on League of Legends?

Some factors that can cause the There was an error connecting with Maestro. League of Legends will now exit. Please try restarting the client error are:

  • Inability to access specific game files – The first probable reason for this error is the game having a hard time accessing specific game files needed for its operation. It can be due to a lack of administrator permissions, resulting in the failure.
  • Interference from security software – Having numerous antibody software running on your computer can cause issues with League of Legends as they can block the connection between the game and its servers. Also, firewall services can interfere with the game connection to Maestro.
  • Outdated League of Legends game – When the game app is outdated, it can impede its functionality due to the bugs affecting the current version causing issues connecting to the servers.

The factors listed above can vary from each other on different PCs depending on the circumstances. Nevertheless, you can fix the problem by following the steps discussed in the next section.

How can I fix the League of Legends error connecting with Maestro?

  • Restart your PC – Restarting the PC is the quickest way to fix underlying problems affecting its performance, and it refreshes its system to help the game run smoothly.
  • Relaunch the League of Legends game – It will reload the game and re-establish the connection between it and the necessary files on the computer.
  • Temporarily disable security apps – It will prevent the security services running on the computer from intercepting your gaming activities.
  • Repair the game client – Few users reported that repairing the game client helped, so be sure to try that.

1. Run the League of Legends client as an administrator

  1. Find the League of Legends app icon on the desktop, right-click it, and select Properties from the drop-down menu.
  2. Go to the Compatibility tab and check the box for the Run this program as an administrator option.
  3. Now, go to the Compatibility mode tab, check the box for Run this program in compatibility mode, then choose a Windows version from the drop-down.
  4. Click OK to save the changes.

Running the game as an administrator will resolve permission issues preventing it from accessing its files and compatibility issues causing the error.

Also, check our guide for what to do if running as administrator is not working on your PC.

2. Turn off user account control

  1. Left-click the Start button, type Control Panel in the search box, and open it from the search results.
  2. Then, locate the User Accounts option, then click the Change User Account Control Settings button.
  3. On the security slider that appears on the next page, drag the slider Never to Notify, then click OK to save the change.
  4. Restart the PC and try launching the game to see if the error persists.

In addition, we recommend you read through our article about what to do if League of Legends keeps crashing on your PC.

Also, you can check how to fix the League of the Legends unable to log into account issue.

Feel free to leave your suggestions or questions on this guide if you have any. We’d like to hear from you in the comments section.

How to Install & Use the Bionic Reading Firefox Extension

Did you know that there are helpful browser modules that can help every user to read more efficiently online? A great example is the Bionic Reading Firefox extension.

What is Bionic Reading? First off, you should know that bionic reading is a method that makes digital reading easier by bolding a few letters in order to make it more intelligible.

So, you can install this extension on different browsers and improve online reading on almost any website. Don’t worry, you won’t have to deal with failed loading plugin errors or anything like that.

Does Bionic Reading work?

It’s not scientifically proven that such methods are effective for different users, yet it provides an aspect that helps you read the text easily. In short, Bionic Reading will enable you to read more efficiently because it guides your eyes to go through the text with fixation points.

More so, the add-on will help people with dyslexia or ADHD conditions that need special reading conditions. They can also install and utilize Bionic Reading on Firefox mobile browser. So no more wondering what is the Firefox extension for ADHD reading.

➡️Does Bionic Reading help ADHD?

Yes, this method may help people with ADHD read big chunks of text without any issues. Actually, there are studies that demonstrate its efficiency for such individuals with special needs.

Before that, you can use a distraction-free browser like Opera to keep you focused due to its bionic reading mode and built-in ad-blocker.

  Opera

Opera

Navigate through exhausting digital texts using this browser’s bionic reading and improved UI.

Not only that, it’s a great option for reading Manga books no matter of platform in case you need a more streamlined reading.

How do I enable Bionic Reading?

It is fairly simple to find and install the Bionic Reading Firefox addon on any device. Hence, follow the guide below to perform it quickly.

  1. Launch the Firefox browser.
  2. On the Firefox homepage, click on the Puzzle icon to open the add-ons page.
  3. Go to Extensions and search for Bionic Reader in the search box.
  4. Now, select the original reader from the results page.
  5. Click on the Add to Firefox button to install it.
  6. It should install almost instantly, so check in the extensions.
  7. Make sure the Bionic Reader is enabled.
  8. Next, go to any web page to see if the text is changed.
  9. If the letters in the text are bolded, you are now using bionic reading.

Is there a dyslexia-friendly Firefox extension?

Yes, this browser has extensions developed for dyslexic people to help them read easier online. This extension mainly changes the font for any webpage designed for them. Not only that but there are also effective dyslexia software that can be used to help dyslexic readers.

Wondering what is the easiest font for people with dyslexia to read? According to specialists in this area, the best fonts to use are Comic Sans or Arial due to the narrow letters.

While it’s not perfect and can occasionally cause its fair share of havoc such as screen tearing when scrolling, Firefox is an overall useful and intuitive browser, especially when it comes to reading activities.

Now, the issue mentioned here – screen tearing – can just as easily affect other browsers such as Edge, or Chrome. If that’s the case, you can avoid such interferences simply by saving the webpage as a PDF and reading it on your desktop.

All said and done, we encourage you to get this extension and improve the reading experience on Firefox no matter the text or webpage. Everybody can use it for reading faster or more efficiently online.

Fsavailux.exe: What Is It & Should You Remove It

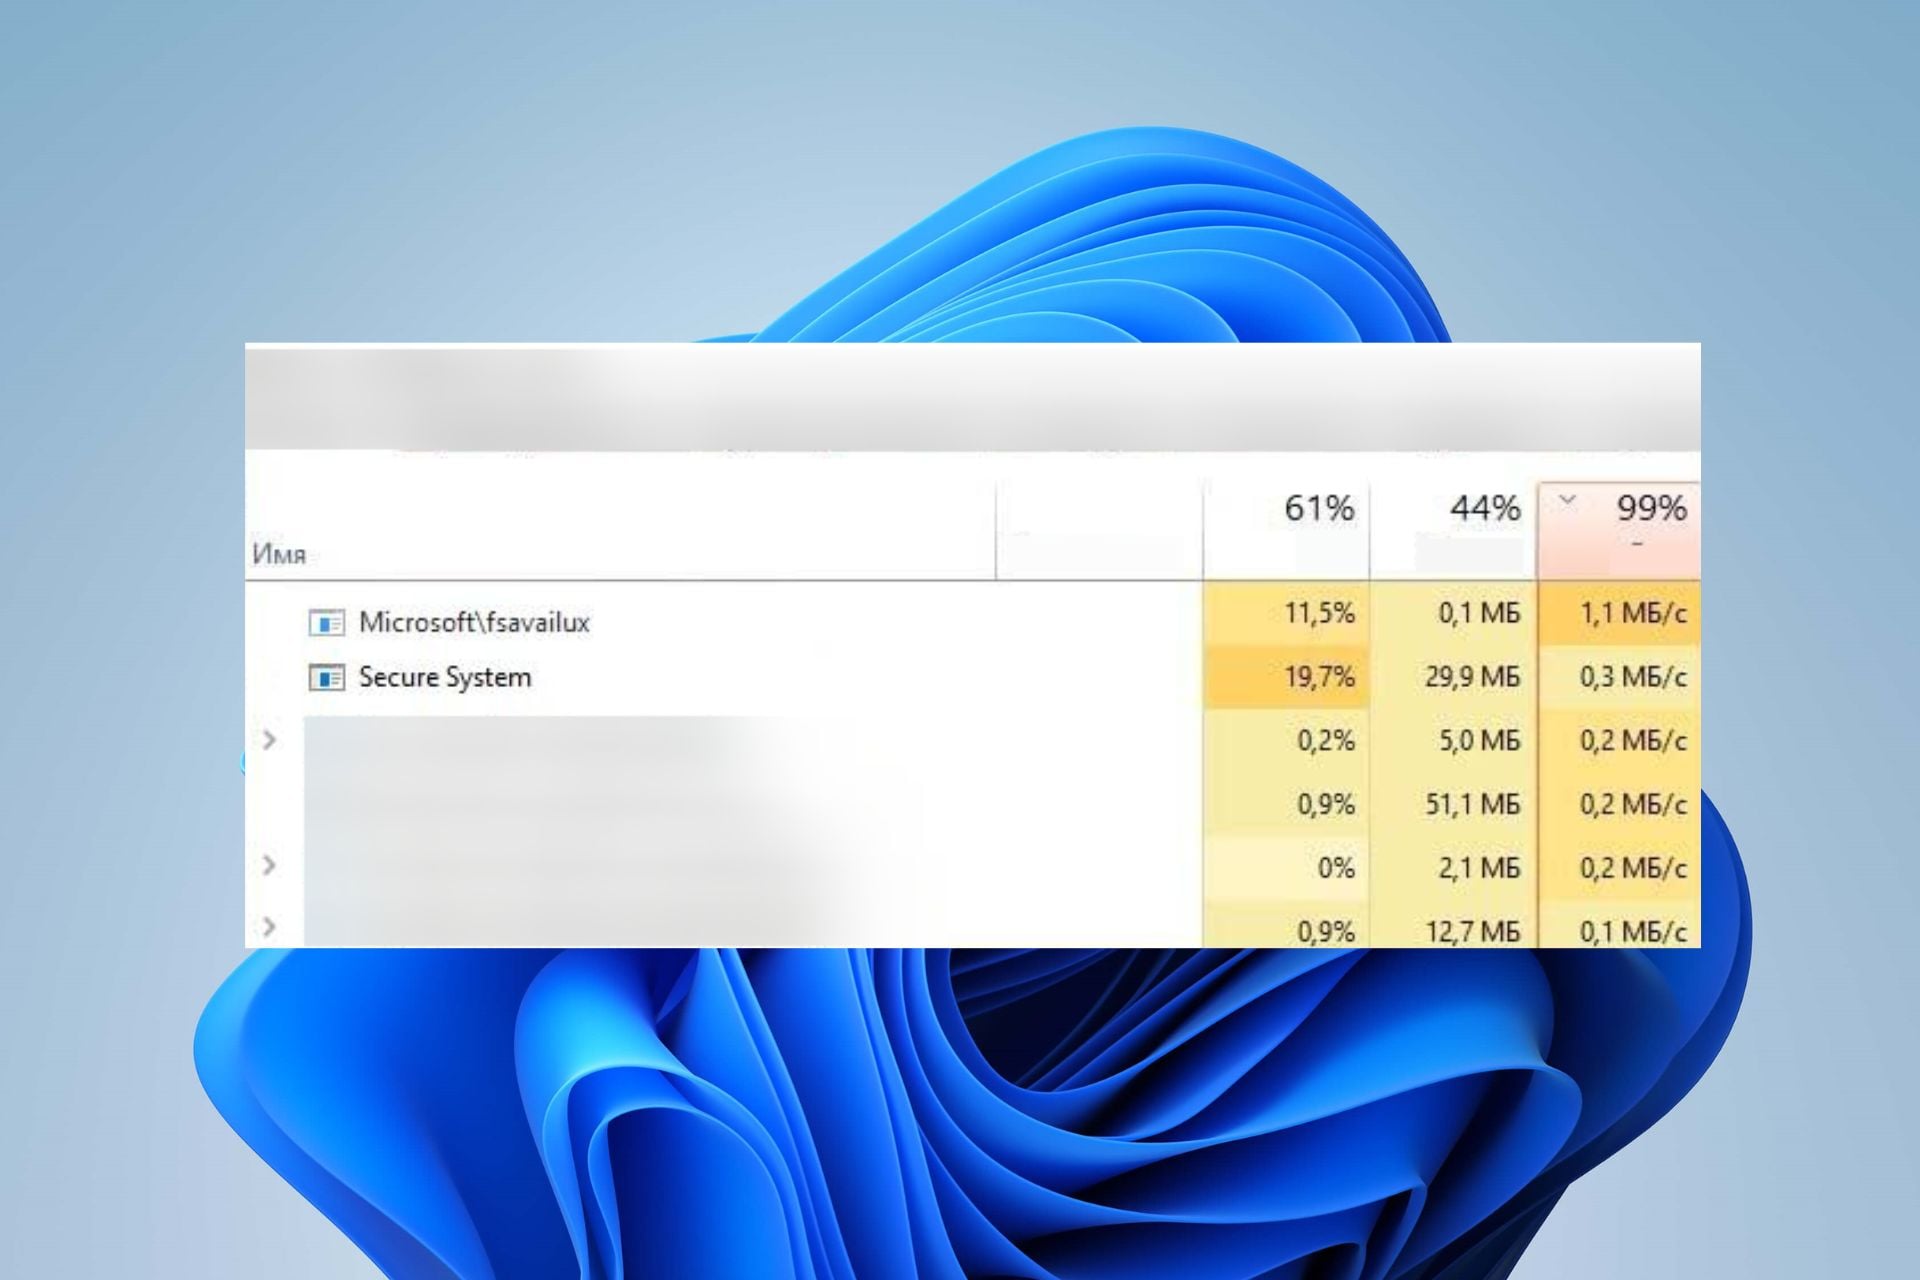
Many Windows users have been curious about the process called fsavailux.exe running on their computers. It is because some notice issues like high CPU usage while others are bothered about it. However, this guide will discuss the file and whether you should remove it.

Also, we have a detailed guide on why exe files are not opening on your PC and some fixes to resolve the problem.

What is fsavailux.exe?

Fsavailux.exe is an executable file that is a component of Microsoft Windows developed by Microsoft Corporation. Its process belongs to the most recent Windows installations. The software process is legitimate and is used by Disk Check Utility, a proprietary Windows tool.

Additionally, fsavailux.exe calls, starts, and manages the Disk Check Utility scans. So, it is an essential part of the system.

Should I remove fsavailux.exe?

Usually, the legitimate fsavailux.exe file is signed by Microsoft and is in no way a threat to the PC. Sadly, malware can disguise itself as system executables and make its way into the system without detection by security scanners. So, there is a possibility that the fsavailux.exe on your PC is unsafe.

However, certain behaviors can point towards the need to remove the executable from your PC. For instance, if the Disk Check utility scan starts running without being triggered by the user or an ongoing system task, it can be malware.

How can I remove fsavailux.exe?

Use Task Manager

Note icon NOTE
In most cases, this file isn’t malicious and shouldn’t be removed.
  1. Right-click the Start button and select Task Manager from the menu.
  2. Go to the Details tab.
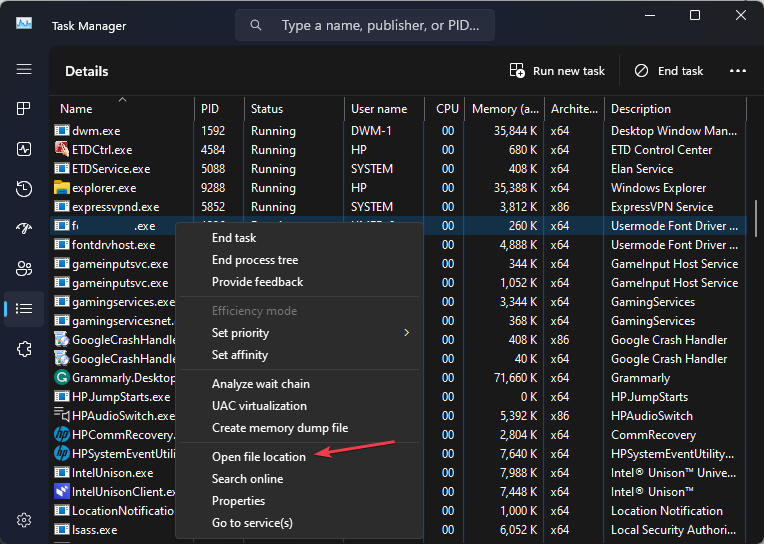
  3. Locate the fsavailux.exe in the Task Manager. Right-click on it and click on Open File Location from the drop-down menu.

The original location of this file is C:\Windows\System

If you manage to find it in any other directory, the file may be malicious. Then, you should remove it before it fully manifests its damage to the system.

Alternatively, you may be interested in how to fix corrupted system files on Windows 11.

If you have further questions or suggestions on this guide, kindly drop them in the comments section.

Epic Games Stuck on Loading Your Order: How to Fix

Many of our readers have reported that the Epic Games launcher gets stuck on loading your order when they try to purchase any game from the Epic Games Store.

In this guide, we have compiled some solutions that have helped several Epic Games users to resolve the issue and successfully purchase games. Let us check out the solutions.

Why is the Epic Games launcher stuck on loading your order?

Before going ahead with the solutions, let us take a look at the most common reasons why the Epic Games launcher gets stuck on loading your order message.

  • Faulty Internet connection: If the internet connection is faulty, then you will have issues with the Epic Games Store.
  • Epic Games server issue: Chances are that the Epic Games servers are faulty or under maintenance because of which you are unable to complete the purchase.
  • Store cache is corrupt: The Epic Games Store cache might be corrupt or there are underlying issues which is why the Epic Games launcher gets stuck on loading your order.
  • The Epic Games launcher is outdated: You might be running an old version of the Epic Games launcher.
  • The game isn’t available in your region: You may be trying to download a game that is not available in your region.

Let us check out the solutions and hopefully resolve our Epic Games launcher stuck on loading your order issue.

How can fix the Epic Games launcher stuck on loading your order issue?

Here are a few things that you should check before applying the advanced solutions.

  • Check the Epic Games server from the official website.
  • Make sure the internet connection that you are using is working perfectly well.
  • Run the Epic Games launcher as an administrator.
  • Use VPN to purchase and download the game. Check out the list of some of the best VPNs.
  • Try purchasing the game on the website.
  • Reinstall the Epic Games launcher as there might be a bug that is causing the issue.

Now let us apply the advanced solutions and fix the Epic Games launcher stuck on loading your order issue.

1. Clear the web store cache

  1. Press the Win + R keys to open the Run dialogue.
  2. Type %localappdata% and press Enter.
  3. Open the Epic Games Launcher folder.
  4. Double-click on the Saved folder to open it.
  5. Delete the webcache folder. You can also delete the webcache_4147 and webcache_4430 folders if found.
  6. Relaunch the Epic Games launcher.

Many of our readers have suggested deleting the Webcache folder helped them resolve the Epic Games launcher stuck on loading your order issue. You should also give this solution a try.

If you are encountering issues like Install Failed Error Code: II-E1003 on Epic Launcher, we recommend you check out this guide for detailed solutions.

2. Update the launcher

  1. Open the Epic Games launcher.
  2. Click on your profile icon at the top-right corner and select Settings.
  3. If you see Restart and Update button click on it to install the pending update.

In case, there is no such button, the Epic Games launcher is already up to date. You should make sure that the Epic Games launcher is updated as the latest version always fixes such petty bugs.

3. Flush DNS cache

  1. Open the Start menu by pressing the Win key.
  2. Type command prompt and run it as an administrator.
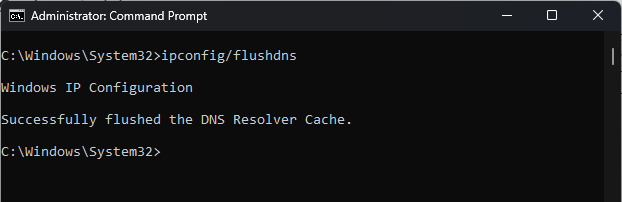
  3. Type the below command and press Enter.ipconfig /flushdns
  4. Wait for some time till the process is complete and reboot your PC.

Flushing the DNS cache has helped several users to resolve the Epic Games launcher stuck on loading your order issue. After flushing the DNS cache reconnect your internet and check if this Store works or not.

4. Change the DNS servers

  1. Launch the Start menu by pressing the Win key.
  2. Open Control Panel.
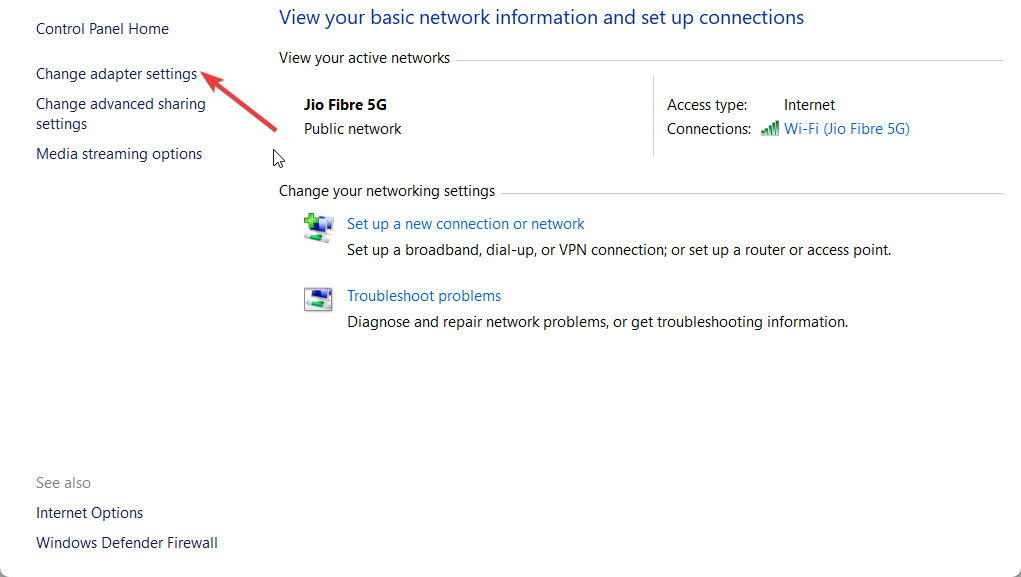
  3. Select Network and Sharing Center.
  4. Click Change Adapter Settings.
  5. Right-click on your connection and select Properties.
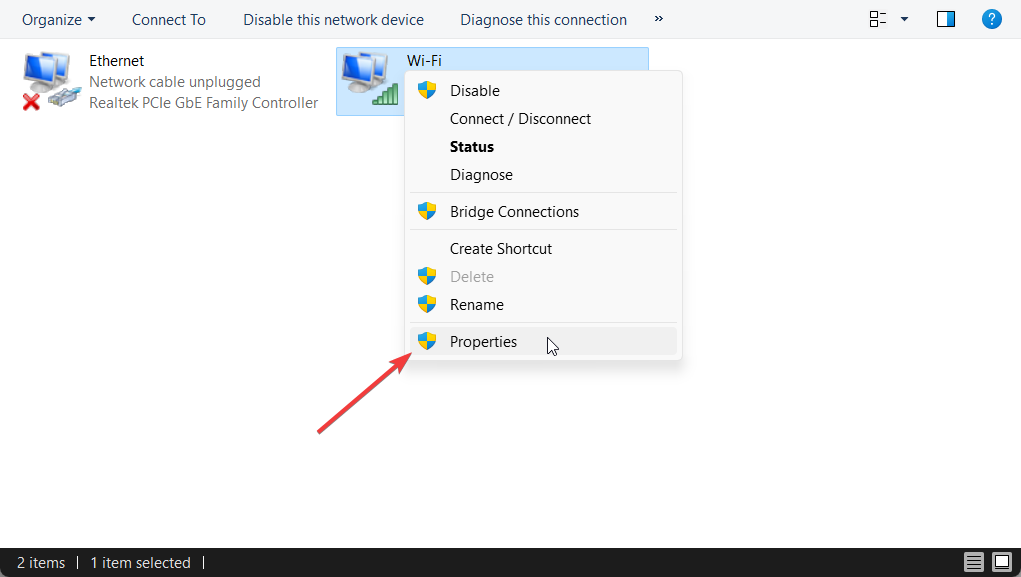
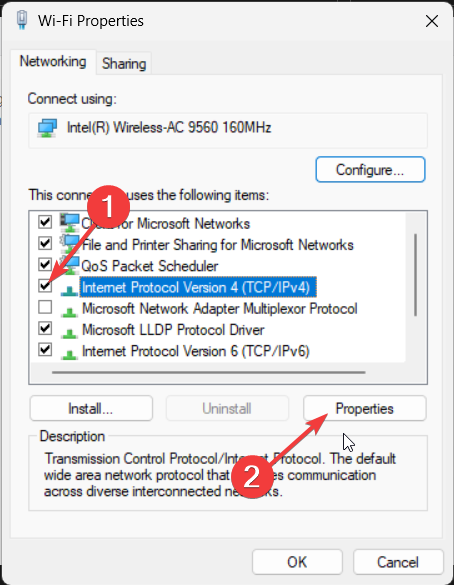
  6. Select Internet Protocol 4 (TCP/IPv4) and click on the Properties button.
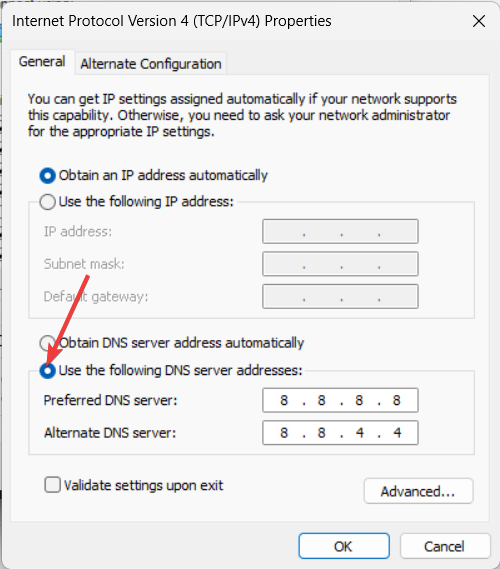
  7. Check the radio button for Use the following DNS server addresses and enter the below details.
    • Preferred DNS server: 8.8.8.8
    • Alternate DNS server: 8.8.4.4
  8. Click OK to apply the changes.

Changing the DNS server has helped several users resolve the Epic Games launcher stuck on loading your order issue.

That is it from us in this guide. If you are getting the Epic Games launcher Unsupported Graphics Card error, then you can apply the solutions mentioned in our guide to resolve the problem.

Users who are unable to uninstall the Epic Games launcher from their PCs, can check out the solutions and resolve the problem without any issues.

Feel free to drop a comment below which one of the above solutions fixed the Epic Games launcher stuck on loading your order issue.

0xc19a0013 Printer Error Code: Best Ways to Fix it

It has been rampant for users to report the 0xc19a0013 printer error code that appears when they attempt to startup or print on their printers. The error indicates an Ink system failure problem and can render the whole device unusable.

Nevertheless, this article will take you through some basic steps for fixing the issue. Alternatively, you can read our detailed post about the printer not working on Windows 11 and ways to fix the problem.

What causes the 0xc19a0013 printer error code?

Some factors that are liable to cause the ink system failure error code OxC19a0013 are:

  • Ink cartridge leakage – When you insert the cartridge, which doesn’t form a good seal, it may allow air to enter and stop it from working properly or cause the cartridge to leak.
  • Low printer ink – You can also encounter errors, including 0xc19a0013, if the ink cartridge is not providing ink well.

Since there are several printer products out there, the causes for the error code 0xc19a0013 may differ. Regardless, we will discuss ways to resolve the error and get your printer working correctly.

How can I fix the 0xc19a0013 printer error code?

Before trying any advanced troubleshooting steps, apply the following preliminary checks:

  • Power cycle the printer – The power cycling printer will refresh its processes, kill background tasks affecting its functionality, and fix other temporary issues causing the error.
  • Change the printer’s ink cartridge – Since the ink cartridge may be responsible for the problem, switching to another one will help mitigate the issue.
  • Uninstall and reinstall the printer drives – It will fix corrupt or outdated printer drivers issues causing the ink system failure error code OxC19a0013. Also, reinstalling the printer driver will help install the latest version. You can read our guide on what to do if you can’t remove the printer in Windows 11.

If you still can’t use your printer after the checks above, proceed with the solutions below:

1. Reset the printer

  1. Turn on the printer and wait until it is completely booted.
  2. Unplug the power cable from the rear end of the printer and then remove it from the power outlet.
  3. Wait for at least 60 seconds.
  4. Plug the power cable back into the power outlet.
  5. Plug the power cable into the rear end of the printer.
  6. The printer will switch on automatically as it wasn’t switched off earlier. If the printer fails to turn on automatically, turn it on by pressing the Power button.
  7. Then, press and hold the Resume/Cancel button for 10-20 seconds till the Attention light turn on.
  8. Wait for the printer to be silent, then check if the error code 0XC19A0013 persists.

The above steps will hard reset the printer device and can fix any issues causing the error.

Note icon NOTE
If you still can’t get your printer to work properly after trying the steps above, there is only one option to consider. The only alternative is replacing the printer with a newer and functional printer.

In addition, you may be interested in our detailed article about printers not recognizing your router and the steps to fix it.

2. Try manual hardware reinstall

Note icon NOTE
This is a very risky process, and it can cause irreversible damage to your Printer if not careful.
  1. Boil 1 inch of water and soak the print head for 5 minutes.
  2. Repeat this step at least three times until no more ink comes from any of the four print orifices.
  3. Reinstall the print head and change all the cartridges.

Some users claimed this step worked smoothly for them, and the printer worked fine afterward. However, as stated earlier, this is a very risky way to fix this error.

Also, we have a comprehensive post about how to fix the printer busy error on your computer.

If you have further questions or suggestions, kindly drop them in the comments section.

Gpscript.exe: What Is It & How to Remove It

It is common for Windows users to notice the gpscript.exe process running on their computers without knowing what it does. Further, some complain about the executable using up system resources and causing issues with its performance.

Hence, this guide will discuss what it means and how to remove it. Likewise, you can check how to show file extensions on Windows 11.

What is gpscript.exe?

Gpscript.exe is an essential executable file for the Microsoft Windows Operating System by Microsoft Corporation. In addition, it was developed for the Group Policy Script Application process on the computer. The Group Policy uses the executable file to execute and process scripts.

However, you can encounter numerous variances of this error due to various factors, including malware and virus attacks and corrupt system files.

Should I remove gpscript.exe?

Additionally, the legitimate gpscript.exe file is commonly in the following directory: C:\Windows\System32\gpscript

If the location differs from the above, there’s a high chance it is malicious. Then, you should remove it before it fully manifests its damage to the system.

How can I fix gpscript.exe?

  • Restart your PC – It is the easiest and fastest way to refresh the system and fix temporary performance issues.
  • Run a virus scan – A virus scan will find the malware and other malicious files or programs liable to cause the error or infect the file on your PC.
  • Perform a system restore – Restoring the system will roll back recent changes and software installations causing the .exe errors on the computer. You check what to do if the Restore Point is not working on your computer.

If the error persists after trying the above preliminary checks, go ahead with the fixes outlined below:

Delete Gpscript.exe from the Task Manager

Note icon NOTE
Deleting this file from the Windows directory can cause issues with your PC. Only delete this file if you’re 100% certain it’s malicious.
  1. Right-click the Start button and select Task Manager from the menu.
  2. Now, go to the Details tab. Locate the gpscript.exe in the Task Manager, right-click on it, and select End task from the drop-down menu.
  3. Right-click on it and click on Open File Location from the drop-down menu.
  4. Then, right-click the file, and click the Delete button.
  5. Restart your PC and check if the file is no longer available.

Further, the above steps will stop the activities of gpscrip.exe in the Task Manager and delete the file from the system.

Check what to do if the Task Manager is slow to open or respond on your computer if you’re having additional problems with Task Manager.

In conclusion, you may be interested in our detailed guide on why exe files are not opening on your PC and some fixes to resolve the problem.

If you have further questions or suggestions about this guide, kindly drop them in the comments section.

How to Fix Windows Update 800B0109 Error in Windows 7 [Solved]

Errors while trying to install Windows updates or when updating a Windows component are quite common. Some of these might prove more challenging than others, as is the case for 800B0109 Error.

Having worked with many computer systems over the years, I have encountered many of the errors Windows operating systems can throw at you, including the 800B0109 Error.

In this article, I will guide you through some quick and easy-to-follow steps to fix this pesky issue so you can just go and enjoy the latest Windows updates.

What causes the 800b0109 Windows update error?

Some notable factors that can cause the Error(s) found: Code 800B0109 Windows Update encountered an unknown error on your PC are:

  • Corrupt system files – You can run into errors due to corrupt system files. They become inaccessible when invoked by the system and can prevent the Windows update process from using them when needed. Hence, the Windows update error 800b0109 will appear.
  • Windows update Temporary Cache folder – Old updates on your PC are stored in the Windows updates installer patch files as update cache files in the Temp cache folder. They can be corrupted when kept for long, interfering with Windows update services.
  • Issues with the signing certificate for the Windows Update – If there’s an issue with the certificate on the update, this may lead to this error.
  • Issues with Windows Update components – Updating Windows requires certain services to run on your computer. If these update services are not running correctly or intact, it can cause issues with the update you’re trying to install.

These factors can vary on different computers depending on the circumstances. Regardless, you can resolve the error by following the troubleshooting steps below.

How can I fix the 800b0109 Windows update error?

1. Run an SFC scan

  1. Left-click the Start button, type Command Prompt, and click the Run as administrator option.
  2. Click Yes on the User Account Control (UAC) prompt.
  3. Type the following and press Enter: sfc /scannow
  4. Restart your PC and check if the update error persists.

Running an SFC scan will find and repair corrupt system files causing the Windows update error. You can check our article on fixing SFC scannow not working on your PC.

In addition, it’s more practical to repair damaged files using dedicated system repair tools. That is because it will fully detect system issues and repair them only by pressing Start Repairing.

2. Reset the timezone and time correctly

  1. Press Windows + I key to open Settings.
  2. Select Time & language and click on Date and time.
  3. Disable Set time zone automatically. Then, select the drop-down beside the Time zone in the new window and click on your correct zone.
  4. Click the Change button beside Set date & time manually.
  5. Choose the correct time and click on Change.

Doubling down and fixing the issues with time zone and time has been claimed to work by some users. Also, do not hesitate to consult this guide if the time keeps changing on your Windows PC.

3. Perform an in-place upgrade

  1. Go to Microsoft’s official website, choose the installed OS edition, and click Download.iso to fix 0x80096010
  2. Select the product language from the dropdown menu, and click Confirm. Now, click on the download button to get the Windows 11 ISO.download ISO to fix 0x80096010
  3. Once downloaded, double-click on the ISO file and click Open in the confirmation prompt.
  4. Now, run the setup.exe file and click on Next to continue.next
  5. Click Accept to agree to Microsoft’s license terms.license terms
  6. Finally, verify that the setup reads Keep personal files and apps. Click on Install to start the in-place update, and wait for the process to complete.in-place upgrade to fix 0x80096010

Performing this in-place upgrade will automatically reset the PC and add new files and updates. However, you are guaranteed the safety of your data since everything is secured.

If you tried all of the above and you still have issues you could also try the following:

  • Restart Windows in Safe Mode – It will start Windows in a basic state, using a limited set of files and drivers, and fix temporary issues impeding its performance.
  • Disable or uninstall antivirus software – It is common for antivirus software to interfere with or block the Windows update process. So, disabling it can resolve the error.
  • Run a system restore – A system restore will backdate the computer to a previous point where it runs without errors. It will reverse system changes interfering with the update process.

Alternatively, you may be interested in our article about how to fix the 0x800f0900 Windows Update error on Windows 11. Also, check our guide about fixing Windows Update Error 0x80242017 on your PC.

If you have further questions or suggestions, kindly drop them in the comments section.

How to send organizational messages in Windows 11

After a very big week for Microsoft, Windows users will be able to send organizational messages in Windows 11 very soon.

The Redmond-based tech giant announced the release of this feature on 31 May and it comes with a lot of updates and improvements.

You will be able to edit and schedule organizational messages on Windows 11. You will also be able to deliver messages in 15 languages and even configure fully customizable URL links.

Just make sure your OS is updated to the latest version, as organizational messages are only supported for devices running Windows 11, version 22H2, and later.

Without further ado, let’s get into it.

Here’s how you can send organizational messages in Windows 11

  1. Go to your Microsoft Intune admin center profile
  2. Once you’re there, head down to the End user experiences panel and select Organizational messageswindows 11 organizational messages
  3. Click on Message, then push the Create button. A Create Message panel will appear to the right.
  4. Here you can start to customize your message according to your needs, as you can see.
  5. You can name your message, put the organization’s logo into it, URLs, etc.
  6. You can schedule your messages in depth.windows 11 organizational messages
  7. In the scope panel, you can assign members from the admin group to see, edit or delete the organizational message.
  8. The assignments panel lets you select the groups you want to send the messages.
  9. And finally, in the Review+create panel, you can review your message before scheduling it.

You’ll need some important files, before creating your messages. For branded messages, you’ll need the following:

  • Three sizes of logos for your organization in PNG format with a transparent background
    • 48 x 48 pixels (for messages in the Notifications area)
    • 64 x 64 pixels (for messages attached to the Taskbar)
    • 50 x 50 pixels or 50 x 100 pixels (for Get Started app messages)
  • If your messages feature links, make sure the URLs use verified Azure AD custom domain names.

What do you think about this feature? Will it be helpful or not? Let us know in the comments section below.

0x8004def7 Error: How to Fix this OneDrive Sign in Issue

The error code 0x8004def7 is a recent error code many users complain about when launching the OneDrive app on their PCs. It appears with an error message Can’t sign into OneDrive. There is a problem with your account, and it occurs for several reasons. Hence, this article will discuss how to fix the issue.

Also, you can check our guide on fixing the OneDrive upload issues you can encounter when uploading files.

What causes error 0x8004def7?

Numerous factors may be responsible for the Error code 0x8004def7 when signing into OneDrive. Listed below are some notable ones:

  • Storage capacity exceeded – Since OneDrive is a cloud-based storage service, it has a storage capacity that determines the amount of data you can store. So, exceeding the space limit can affect the program’s work and cause errors when signing in or launching it.
  • Your account was suspended – Also, when you try to sign in to Microsoft OneDrive with a suspended account, it can be problematic and may be the cause for you receiving the error code 0x8004def7.
  • Network connection issues – Running the OneDrive app with an unstable network connection can cause problems with its connection during sign-in. Network-related issues like network congestion, and outdated router firmware can cause the network connection to be slow.
  • OneDrive sync app configuration issues – OneDrive allows users to sync their data across different devices to aid accessibility. However, you may have difficulty signing in to your account if the OneDrive sync app configuration issues impede the synchronization process.

Even though these factors can vary in different PCs, we’ll take you through basic steps for fixing the error and getting OneDrive to work.

How can I fix error 0x8004def7?

We recommend you perform the following preliminary checks before proceeding with any advanced troubleshooting:

  • Check your OneDrive storage – It will help to determine how much space you’ve used and have left. If you have exceeded or are near the storage limit, delete files or folders in OneDrive to free up space.
  • Check your network connection – You can power cycle your router or modem to refresh its network connection or switch to a more stable network.
  • Restart the OneDrive app – Close and relaunch OneDrive to see if it resolves background tasks affecting its process.
  • Try signing in via the web – If you can still access your account via the OneDrive native app, contact the support line for assistance.
  • Restart your computer – It is the fastest way to fix temporary issues impeding how the system works and interacts with programs.

You can go ahead with the solutions below if you can’t resolve the error:

1. Unlink and relink OneDrive

  1. Click the OneDrive cloud icon in your notification area, and then select the OneDrive Help and Settings icon then Settings from the drop-down.
  2. Navigate to the Account tab, the Add an Account section, and click Unlink this PC.
  3. Click on the Unlink account option to confirm the unlinking process.
  4. Input your OneDrive email and click the sign-in button.
  5. Type in your password and select the sign-in button.
  6. Follow the on-screen instructions till you get to the last setup and select the Open my OneDrive folder option.

Re-linking your account will fix any login credentials or sync configuration issues causing the error and refresh the account setup.

2. Reset the OneDrive app

  1. Press Windows + R key to open the Run dialog box. Type the following and press Enter: %localappdata%\Microsoft\OneDrive\OneDrive.exe /reset
  2. The OneDrive icon will reappear when the process is complete.
  3. If the icon doesn’t reappear, open the Run dialog box, copy and paste the following strings and press Enter: %localappdata%\Microsoft\OneDrive\OneDrive.exe

Resetting the app will reset all OneDrive settings and corrupt cache data that can cause a OneDrive sign-in error. You can read about how to reset an app in Windows 11 if you have issues with the above steps.

Resetting the app will reset all OneDrive settings and corrupt cache data that can cause a OneDrive sign-in error. If the issue persists, you can also check our complete guide on fixing OneDrive stuck on signing in for additional solutions.

Alternatively, you may be interested in our article about OneDrive error code 0x8004def7 and ways to fix it on your PC. Also, we have a comprehensive guide on OneDrive error code 0x8004deef and some fixes for it.

If you have further questions or suggestions, kindly drop them in the comments section.

How to Customize Captions in Teams Meetings

Are you a Microsoft 365 Insider? If so, you’re in for a treat as Microsoft Teams unveils a new feature allowing users to customize Teams meetings’ captions. This update aims to enhance inclusivity and accessibility by providing real-time transcriptions of meeting conversations.

The newly introduced Captions settings pane in Teams empowers users to customize various aspects of captions during meetings. One can now adjust the font color and size, increase the number of displayed lines, and even change the positioning of the captions within the Teams window. 

Users can also scroll through the most recent captions, making it easier to refer back to specific points in the conversation.

Wondering if you can customize captions just yet? Microsoft says that the feature has just arrived in preview, meaning that it’ll take time to arrive in general availability. If you’ve joined the Preview Insiders channel, follow these steps to customize captions in Teams meetings

How to customize captions in Teams meetings?

1. During a Teams meeting, click on More in the meeting controls menu.

2. Select Language and speech from the dropdown menu. Turn on the live captions option.

3. A Caption settings menu will appear at the bottom of the screen.

4. Click on the gear icon (⚙️) in the captions box, then select Caption settings.

5. In the Caption settings pane, you can customize the spoken language, the caption language (available with Teams Premium), colors, height, position, and font size.

6. Click Apply or Save to confirm your settings.

In case you want to add customized stickers to your Teams conversations, read this guide to know the steps.

Speaking of Teams, there’s also a next-gen version of the app coming soon to general availability. Dubbed collectively as Teams 2.0, Microsoft promises that the new app will consume less energy but boot up faster. Exciting, isn’t it?

Have you tried customizing captions in Teams meetings? Let us know in the comments!

Winsock Error 10053: Causes & How to Fix It

Some of our readers have reported the Winsock error 10053 – Software caused connection abort or other similar messages when trying to connect to the SMTP mail or when trying to perform execute a Winsock command.

The error code indicates a locally aborted TCP connection, poor server connection, and a problem with the server. If you looking for effective ways to get around this error, you are at the right place. 

Why do I get the Winsock error 10053?

The Winksock error 10053 can occur due to several reasons, the most common ones being: 

  • The proxy servers and VPNs – A malfunctioning Proxy server or a VPN can utilize all the previous socket queues forcing Windows to throw this error. 
  • Conflicting network configurations – The error can also show up if the dynamic IP assigned by your ISP conflicts with certain SMTP options.
  • Overprotective firewalls and antivirus – Firewalls and antivirus may wrongly consider the email client or (similar software) to be a potential threat and may block the connection. 
  • TCP/IP scenario – If the local system does not get the acknowledgment for the data it sent, the Winksock error is likely to show up, signifying a problematic connection. 

Now that we know what the roots of this problem are, let’s apply the solutions below.

How do I fix the Winsock error 10053 in Windows?

Try the following solutions to fix the error before moving on to the advanced solutions listed later in this guide. 

If these workarounds did not help, try the methods listed below.

1. Reset TCP/IP

  1. Launch the Start menu by pressing the Windows key. Type cmd in the search box and select Run as administrator option to launch a command prompt with elevated permissions. Winsock error 10053
  2. If prompted on the UAC (User Account Control) window, click the Yes button to grant permission. 
  3. In the Command Prompt window, type or paste the following commands in the exact order and hit the Enter key after each of them to successfully reset TCP / IP. 
    • ipconfig /flushdns
      nbtstat -R
      nbtstat -RR
      netsh int reset all
      netsh int ip reset
      netsh winsock reset
  4. After every command is processed successfully, close the elevated Command Prompt window and reboot your PC. 

After your computer restarts successfully, perform the same action as before to see if the Winsock error 10053 is now resolved. 

The 10053 Winsock error may indicate a data transmission timeout or a protocol error if it occurs instantly after the operating system aborts the TCP / IP connection. Resetting the TCP / IP resolve the bug in the network adapter and the bad DNS range which may have induced the error.

2. Disable the proxy server

  1. Launch the Run dialog box using the Windows + R shortcut key. Type the following command in the text box and press the OK button to access the Internet Properties window. inetcpl.cpl Winsock error 10053
  2. Press the Yes button on the User Action Control prompt to grant administrative privileges.
  3. Next, switch to the Connections tab in the Internet Properties box and press the LAN Settings button located under the Local Area Network LAN settings section. 
  4. In the Local Area Network (LAN) settings pop-up, uncheck the box preceding the Use a proxy server for your LAN located under the Proxy server. 
  5. After this, press the OK button to save the changes and restart your Windows PC. 

3. Disable NetBIOS over TCP/IP

  1. Press the Windows key, type Control panel in the search bar, and choose the relevant search result. 
  2. Change View by to Large icons and select Network and Sharing Center. winsock error 10053
  3. Click Change adapter settings located on the left. Winsock error 10053
  4. Right-click the relevant network interface and choose Properties from the context menu. 
  5. Select Internet Protocol Version 4(TCP/IPv4) and press the Properties button. 
  6. Press the Advanced button. 
  7. Switch to the WINS tab in the Advanced TCP/IP Settings window and select the checkbox for Disable NetBIOS over TCP/IP option. 
  8. Finally, press OK to apply the changes. 

NetBIOS over TCP/IP causes several network-related issues and poses security threats so, disabling this feature is a viable option. 

4. Add the client IP to your system 

  1. Restart your server and launch the Internet Service Manager tool.
  2. Right-click the Web Proxy and select Properties from the context menu. 
  3. Select the Local Address Table option. 
  4. Provide the range encompassing the client’s IP address. 
  5. Finally, press the OK button to save the changes. 

As an administrator, adding the IP address of your client receiving the Winsock error 10053 to the LAT table on the Proxy server helps resolve the error for them. 

That’s all in this guide! Hopefully, you were able to resolve the Winsock error 10053 on your Windows PC by performing the solutions listed in this guide.

In case, you encounter the 0x8007003b network error on your Windows PC, this guide offers quick fixes to fix this issue. 

Which of these methods listed in the guide worked for you? Do let us know in the comments below.

0x800f0906 DISM Error: How to Fix it

Many users have reported error code 0x800f0906 when running the DISM command in an elevated Command Prompt. It makes it impossible to use the DISM command-line utility on your computer.

However, this guide will discuss fixing the 0x800f0906 DISM error on Windows PCs. Also, you can check our article for what to do if Command Prompt keeps crashing on Windows 11.

What causes the 0x800f0906 DISM error?

Several factors may be responsible for the DISM error on your computer. Some notable ones are:

  • Windows updates issues – Running an outdated Windows operating system on your computer prevents it from installing patches and builds for fixing bugs liable to cause errors like 0x800f0906.
  • Corrupt system files – When the essential system files are corrupted, it can make the system file responsible for the DISM (Deployment Image Servicing and Management) command-line utility inaccessible.
  • Network-related issues – Because the DISM tool requires a stable network connection to run, it’s important that your connection is stable.

These factors may vary on different devices depending on the circumstances. Regardless, we’ll take you through basic steps for resolving the error and getting DISM to work again.

How can I fix the 0x800f0906 DISM error?

Before trying any advanced troubleshooting steps, observe the following preliminary checks:

  • Restart your computer – Restarting the PC is the quickest way to fix temporary functionality issues and refresh its processes.
  • Perform a clean boot – A clean boot will start your computer with minimal drivers and programs, allowing you to determine if a third-party program is interfering with the Windows installer.
  • Remove recent updates – Uninstalling the recent Windows updates may help troubleshoot the issues causing the error when using the DISM command.
  • Update Windows OS – Updating Windows helps fix the bugs causing issues with the DISM utility tool. Fix Windows not connecting to update service if the error occurs on your PC.

If you still can resolve the problem, proceed with the solutions below:

1. Run the SFC scan

  1. Left-click the Start button, type Command Prompt, and click the Run as administrator option.
  2. Click Yes on the User Account Control (UAC) prompt.
  3. Type the following and press Enter: sfc /scannow
  4. Restart your PC and check if the error persists.

Running an SFC scan will detect and repair corrupt system files causing the errors. You can check our article on fixing SFC scannow not working on your PC.

As an alternative, we encourage anyone who experiences Windows issues to use an all-in-one repair tool for solving all the PC issues in no time.

2. Via the DISM fix commands

  1. Download the Windows Disk Image and create an Installation media.
  2. Press Windows + E keys to open File Explorer.
  3. Click the Downloads folder, locate the downloaded file, right-click on it, and select Mount.
  4. After mounting the ISO, a new drive in This PC section on your File Explorer.
  5. Get the drive name, left-click the Start button, type CMD, and click Run as administrator.
  6. Input the following command and press Enter: DISM /Online /Cleanup-Image /RestoreHealth /source:WIM:X:\Sources\Install.wim:1 /LimitAccess
  7. The name of the file should replace X in the code above.
  8. Close the command prompt and restart your PC to take effect.

Users claim they could solve the error immediately by running the above codes. However, if not, you can also run the following code: DISM /Online /Cleanup-Image /StartComponentCleanup /ResetBase

Alternatively, you may be interested in our comprehensive article about using DISM Commands to repair Windows PCs.

Likewise, we have a detailed overview of the diverse error codes that can accompany the DISM source files could not be found error.

Feel free to leave your suggestions or questions in the comments section.

How to enable/disable Authenticator Lite for Outlook mobile

Microsoft has made it possible for you to enable/disable Microsoft Authenticator Lite for Outlook mobile. The feature was announced a while ago, but now the Redmond-based tech giant released it to the general public.

Microsoft Authenticator Lite is another way for Azure Active Directory users to go through the authentication process. By using push notifications or time-based one-time passcodes on Android or iOS devices, this method comes with added security.

And it seems that it’s needed. According to a study conducted by Microsoft, 71% of authentications made via Microsoft Authenticator are less likely to be compromised compared to those completed via SMS codes.

The Redmond-based tech giant implemented this method before, and recently, Microsoft Authenticator has been updated to feature a number-matching validation. So, it’s safe to say that more security is on the way from Microsoft.

How to enable/disable Authenticator Lite for Outlook mobile

  1. In the Azure portal, go to the Azure Active Directory > Security > Authentication methods > Microsoft Authenticator.
    • For Entra admin center, on the sidebar select Azure Active Directory > Protect & Secure > Authentication methods > Microsoft Authenticator.
  2. In the Microsoft Authenticator tab go to the Enable and Target tab and select Enable.
    • Go to the Include section, click on All users or Select group, depending on your situation, then set the authentication mode to Any or Push.microsoft authenticator lite for outlook mobile
  3. In the Microsoft Authenticator tab go to the Configure tab and select Enabled.
    • Choose who to include/exclude and then click Save.

You should know that this feature is Microsoft managed by default, until June 9th. On this day, the Microsoft managed value of the feature will change from ‘disabled’ to ‘enabled’.

Once you are enabled for the Authentication, you will receive a prompt message to register your account directly from Outlook mobile.

When you’ve registered, you will get push-up notifications every time you sign in.

There are some prerequisites to be able to access this feature:

  • Your organization needs to enable Microsoft Authenticator push notifications for users and groups.
  • If your organization is using Active Directory Federation Services (AD FS) adapter or Network Policy Server (NPS) extensions, they need to be updated to the latest version.
  • Users enabled for shared device mode on Outlook mobile aren’t eligible for Authenticator Lite.
  • You must run a minimum Outlook mobile version.

What do you think about this new feature? Let us know in the comments section below.

The Video Cannot be Played Error Code: 102630 [Fix]

Many users encounter the “This video file cannot be played, error code 102630” message when trying to stream videos in their web browsers. This playback error often appears in Chrome, Firefox, or Brave and is typically caused by unstable internet, broken playlists, or strict browser settings.

In this guide, we’ll walk you through proven fixes, ranging from disabling hardware acceleration to flushing your DNS cache. If you’re also facing other playback issues, check our detailed guide on how to fix the 0xc10100bf: this file isn’t playable error on Windows 11.

Why do I get error code 102630?

Numerous reasons can cause this video file cannot be played (error code 102630). Some notable ones are:

  • Weak or unstable network connections – Most of the time, issues you encounter while browsing the internet on a browser are caused by network issues like network congestion or malfunctioning network devices. So, you can run into the error code 102630 if your network connection isn’t stable.
  • Browser cache and cookies – browser caches and cookies can become corrupt or damaged, causing the browser to malfunction and run into errors when opening online media content.
  • Outdated browser – Running an outdated browser can cause compatibility issues between the requirements for playing the video you’re trying to open. Also, bugs from the outdated browser version can impede its performance.
  • Corrupt video file – If the video file you’re trying to play is corrupted, it can cause the video cannot be played Error Code: 102630 because it’ll be inaccessible and potentially dangerous for the system.
  • Hardware Acceleration – You can also encounter the error if the hardware acceleration feature runs on your browser. It is known to cause issues with video playback and other graphic content.

Regardless of the cause of the error on your computer, we’ll take you through some basic steps to resolve it.

What can I do if I get the error code 102630?

Before trying any advanced steps, observe the following preliminary checks:

  • Power cycle your router – Power cycling the router or modem will refresh its network connections and help it work faster and more stable.
  • Restart your browser – It will stop any background activities preventing it from playing the video and fix temporary issues.
  • Download the K-Lite Codec Pack – A codec compresses or decompresses media files such as songs or videos. It allows media players and other apps using codecs to play and create media files, and enable faster transmission.
  • Switch to another browser – Using another browser to access the video file will help you decide if browser issues are causing the problem. Check our detailed guide about the best browsers to download on your PC.

Proceed with the solutions below if the error persists:

1. Update your browser

  1. Launch the Google Chrome browser on your PC, click three dots to open the Menu, and go to Settings.
  2. Click About Chrome and click on Update Google Chrome. If there’s an update available, it’ll update automatically.
  3. Relaunch the browser and see if you can open the media file.

Updating Google Chrome will fix bugs causing the browser to malfunction and install new features to improve its performance.

Note icon NOTE
The above steps may differ on other browsers. Hence, consult your browser’s customer support for the procedure to update the browser.

2. Turn off hardware acceleration in Chrome

  1. Launch the Google Chrome browser on your PC, click three dots to open the Menu, and go to Settings.
  2. Expand the Advanced tab, then click on System.
  3. Toggle off the Use Hardware Acceleration when available option, then click the Relaunch link to restart the browser.

Disabling the Hardware Acceleration option can fix issues affecting its graphics that can cause the Error Code: 102630. Check our guide on what to do if Chrome is running slow on your computer.

3. Clear your browser’s cache and cookies

  1. Launch the Google Chrome browser on your PC, then click three dots to open the Menu. Go to More Tools and click Clear browsing data.
  2. Select All time to delete everything. Check the boxes for Cookies, other site data, and Cached images and files, then click Clear data.
  3. Restart your browser and check if the error persists.

Clearing your browser caches and cookies will delete the corrupt files impeding its performance.

Alternatively, you can read our article about how to fix the 0xc10100be video playback error on Windows PCs.

Feel free to leave your suggestions or questions if you have any regarding this guide. We’d like to hear from you in the comments section.

How to insert a video in PowerPoint web app

Just like what Microsoft did by introducing the Copilot AI assistant tool for all Office 365 apps, Redmond officials also have something for PowerPoint web app users. Not too long ago, those users have a feature that lets them insert a video into their presentations. 

A part of the Microsoft Office suite, which includes other popular productivity applications like Word, Excel, and Outlook, PowerPoint is widely used in business, education, and various other fields to create visually appealing and interactive slide-based presentations.

While PowerPoint users have been able to insert videos from popular online platforms like YouTube, Vimeo, and Stream, there are times when the perfect video for your presentation is one that you’ve created yourself. Sure, incorporating your videos can add a personal touch and authenticity to your presentations.

In this step-by-step guide, we will walk you through the process of adding your videos to PowerPoint for web presentations. With this feature, you can seamlessly integrate your custom videos into your slides, further enhancing your ability to convey your message and engage your audience.

How to insert videos in PowerPoint web app

1. Open a PowerPoint presentation

2. Click on the Insert tab and select Video followed by Video from device option.

3. In the video menu, locate the Video from device command and click on it.

4. Next, choose the desired video file and click the Open button. This action will insert the selected video onto your slide. Make sure that the video is in the .mp4 video file format and under 256 MB for a better experience. 

5. Once the video is inserted and visible on the slide, you have the flexibility to adjust its position by moving it, resizing it as needed, and even applying shape effects to enhance its visual presentation.

With that being said, however, this feature is only available to all PowerPoint web users. But, don’t fret if you still aren’t able to access this yet. Sometimes, Microsoft rolls out features to a smaller number of insiders before general availability, so, patience is a virtue. 

Before leaving, don’t miss our guide on how to insert an Excel file into PowerPoint as an icon.

Have you tried the feature to insert a video in the PowerPoint web app? Let us know in the comments!

Chrome Reader Mode: How to Enable & Use

Browsers have several features that make surfing the Internet easier, and Reader Mode is one of the lists. Speaking of which, it seems that Chrome got its Reading Mode feature in the latest update.

Also, you can go through our detailed guide on why Google Chrome is not responding and ways to fix it on Windows 11.

To learn more about it, be sure to keep on reading.

What is Chrome Reader Mode?

Reader Mode in Google Chrome is a built-in feature that converts web pages into a more reader-friendly view. It is not enabled by default, so it may not be accessible easily.

Furthermore, it helps declutter web pages and remove distractions to enhance the readability of pages’ important content.

Also, the Reader Mode feature blocks ads so you can focus on the text of the article. It cuts out colors and reduces the page contrast by toning down the white, making it much easier on the eyes.

Reader Mode for Desktop may also alter images or certain formatting on web pages because it is a Chrome flag. It is still an experimental feature and may prompt performance issues when enabled.

Note icon NOTE
Before dabbling into the steps for enabling and using Reader Mode, you must update the browser. It is because the feature may not be supported in older versions.

How can I enable and use Chrome Reader Mode?

1. Enable Reader Mode via flag

  1. Launch your Google Chrome browser.
  2. Type the following into the search bar and press Enter to launch the Chrome flags hidden features menu: chrome://flags/
  3. Scroll down to the Reading Mode flag on the list and select Enable from the drop-down menu on the right pane.
  4. Click the Relaunch button on the bottom-right corner to restart Chrome to apply the change.

The above steps will enable Reader Mode in Chrome.

2. Use Chrome Reader Mode

  1. After Chrome has successfully relaunched itself, open the website you want to access in Reader Mode.
  2. Click the Reader Mode icon beside the search bar.
  3. To change the font, text size, and background color., click the A icon in the top right.

As you can see, enabling Reader Mode is simple and it takes just a couple of minutes.

3. Use a Reader Mode extension

  1. Go to the Chrome web store and search for Reader Mode extensions.
  2. Click any of the options available and select Add to chrome button.
  3. Then, click Add extension button from the pop-up window.
  4. Now, open the website you want to access in Reader Mode and click the Extension Manager icon. Click on the Reader Mode extension to activate it.

You can also add Reader Mode extensions to enjoy the feature on the browser. The extension comes with more features to make browsing easier and more interesting. Visit the Google Chrome web store to download it.

In addition, you may be interested in what to do if Chrome Sync pauses and asks you to sign in on your device.

Likewise, we have a comprehensive article about how to stop websites from opening automatically in Chrome.

Feel free to leave your questions or suggestions in the comments section.

0xa0430721 Error: Unable to Install Chrome or Edge [Fix]

When attempting to install Microsoft Edge or Google Chrome browsers on the PC, users complain about encountering the error 0xa0430721. The error message indicates There was a problem installing, causing the process to fail. Fortunately, this guide will help you resolve the issue.

Also, we have a comprehensive article about how to get rid of the 0x8004070c Chrome installation error on Windows 11.

What causes the 0xa0430721 error code?

Several factors can be responsible for the error when installing Chrome or Edge. Some are:

  • Installing directly from the browser – One of the main culprits that cause the error is the other browser used to download the installation files. They somehow prevent a direct installation if you attempt to open the browser’s installer while using them.
  • Issues with Windows registry – Some configurations in the Windows registry can cause issues with installing Chrome or Edge browser. Also, a corrupt Windows registry can be responsible for the error during installation.
  • Permission issues – You can also encounter the error if the installation file doesn’t have the administrator’s permission to make changes or install new programs on the system.
  • Outdated Windows OS – It is possible for Windows users to run into errors when installing the Google Chrome or Microsoft Edge browsers on their PCs if their operating system is obsolete.

The causes of the Error Code: 0xa0430721 may vary on different computers depending on the circumstances. Nonetheless, we’ll take you through some basic steps to fix the issue and install your browser.

How can I fix the 0xa0430721 error code?

Before proceeding with any advanced troubleshooting steps, try the following:

  • Turn off background apps – Stopping background apps from running might resolve the error by preventing other apps from using the Windows installer.
  • Check your memory capacity – Ensure you have enough memory space to accommodate the browser installation.
  • Install Windows update – Updating Windows will install the build and patches for fixing bugs in the current version and install new features to help the system run properly.

If you can’t resolve the error after trying the preliminary checks, go ahead with the fixes below:

1. Run the setup file as admin (Google Chrome and Microsoft Edge)

  1. Press the Windows + E key to open File Explorer. Navigate to the Downloads folder and find the browser .exe setup file.
  2. Right-click on the ChromeSetup.exe or Edge setup file and select Properties from the drop-down.
  3. Go to the Compatibility tab and check the box for the Run this program as an administrator option, then click OK to save the changes.
  4. Try and see if the browser installer runs without errors.

Running the installer as an administrator will resolve permission issues causing the error. Check what to do if running as administrator is not working on your PC.

2. Check your date and time settings

  1. In the lower-right corner of the desktop, click on the clock, and then click Change date and time settings.
  2. Then, click the Change button beside the set the date and time manually.
  3. Set the time and date to current and click Change to save the changes.
  4. Now, click on Sync now button to integrate the time across the servers and browsers.
  5. Restart your PC and check if the error persists.

Most users confirmed that resetting the time and date on their PC resolved the error 0xa0430721 when installing Edge or Chrome.

3. Change Registry settings (For Microsoft Edge)

  1. Press the Windows + R button to open the Run dialog box, type in regedit, and Enter to open the Registry Editor with admin access.
  2. Click Yes when the User Account Control (UAC) is prompted.
  3. Go to the following location: HKEY_LOCAL_MACHINE\SOFTWARE\WOW6432Node\Microsoft\EdgeUpdate\Clients\{F3C4FE00-EFD5-403B-9569-398A20F1BA4A}
  4. Right-click on {F3C4FE00-EFD5-403B-9569-398A20F1BA4A} on the left pane, then select Delete from the drop-down menu.
  5. Exit Registry Editor and restart your computer, then try running the Edge browser installer.

Making the registry changes above will resolve corrupt registry keys causing the error. Read about how to fix a corrupt registry for more detailed steps.

Alternatively, you can check our article about the Google Chrome 0xc00000a5 error and ways to fix it on your PC or what to do when Edge keeps logging you out of Google.

PDF Printing is Slow? Make it Faster in 5 Steps

The use of the PDF file format for transferring and saving documents is on the rise, thanks to its less susceptibility to data loss. However, things are not always straightforward, as some users complain that PDF is printing slowly.

This can be frustrating, as it wastes a lot of time for a usually fast process. Luckily, there are proven ways to speed up printing on your PC, and we will show them to you in this guide.

Why are PDFs printing slowly?

Various factors can be responsible for slow PDF printing on Windows 10 and 11. Below are some of the potential causes:

  • An outdated or faulty driver: Most times, this issue can be down to problems with your printer driver. The quickest way around this is to reinstall or update the required drivers.
  • Wrong app setting: The most prominent cause of this issue is the wrong settings on Adobe Acrobat. You can address this by making the necessary changes before printing.

How do I make my PDF print faster?

Below are some preliminary steps to apply before making changes to your PC in a bid to fix this issue:

  • Restart your printer and PC.
  • Update Adobe Acrobat.

If you still can’t fix the issue with the steps above, you can now proceed to the detailed solutions below:

1. Let the printer determine the color

  1. Launch Adobe Acrobat and open a PDF file.
  2. Click the File tab at the top.
    file pdf printing slow
  3. Now, choose the Print option.
    print
  4. Next, click the Advanced button.
    advanced
  5. Check the box for Let printer determine colors.
  6. Finally, click the OK button to save the changes and click OK to print your file.

If your PDF is printing slowly due to flattening, it might be because your printer is not in charge of color determination. You need to let your printer determine the color to improve your printing speed.

2. Print as an image

  1. Open a PDF file and choose File > Print.
    print
  2. Click the Advanced button.
    advanced
  3. Now, check the box for Print As Image.
    print as pdf printing slow
  4. Finally, click the OK button to save the changes and proceed to print your files.

Adobe Acrobat has a feature that allows you to print your files as an image. This helps to speed up the printing process considerably and should fix the PDF printing slow on Adobe Reader issue.

3. Update/reinstall printer drivers

  1. Press the Windows key + X and select the Device Manager option.
    device manager
  2. Double-click the Print queues option to expand it and right-click the driver under it.
  3. Now, select the Update driver option.
    update driver pdf printing slow
  4. Choose Search automatically for drivers and install the available updates.
    search auto
  5. If updating the driver does not work, choose the Uninstall device option in Step 3 instead.
    uninstall device
  6. Finally, click the Uninstall button to complete the removal process and restart your PC.
    uninstall button pdf printing slow

An outdated driver is one of the reasons PDF might be printing slowly on printers like HP LaserJet. Updating or reinstalling your drivers should restore normalcy in this case.

If the Windows driver updater cannot find the latest drivers, we recommend using a dedicated tool in Outbyte Driver Updater for the job. This tool will automatically scan and repair/update any faulty printer with little to no effort from you.

⇒ Get Outbyte Driver Updater

4. Clear printing queue

  1. Press the Windows key + R, type services.msc, and click OK.
    services
  2. Right-click the Print Spooler service and select Stop.
    stop pdf printing slow
  3. Now, launch File Explorer and navigate to the path below: C:\Windows\System32\spool\PRINTERSprinters
  4. Delete the content of the PRINTERS folder.
  5. Finally, go back to the System Services window, right-click the Print Spooler service, and select Start.
    start

If the printing queue is corrupt, your PDF files might print slowly. To fix this, you need to clear the printing queue and restart the required services.

5. Disable Postscript Passthrough

  1. Press the Windows key + R, type control, and select the Control Panel option.
    control
  2. Choose the View devices and printers option.
    view devices pdf printing slow
  3. Now, right-click your printer and select Properties.
    properties
  4. Click the Device Settings tab at the top.
  5. Finally, disable the Postscript Passthrough option and click OK.

Another effective solution for the slow PDF printing issue is to disable the Postscript Passthrough feature on your printer. Note that this is not a universal solution and only works for printers that support only UPD PS drivers.

We have reached the end of this guide on how to fix the PDF printing slowly issue. With the information in this guide, you should now be able to fix the issue for good and improve your printing speed.

Similarly, if PDF is not printing correctly on your PC, check our detailed guide to fix it.

Feel free to let us know the solution that helped you fix this issue in the comments below.

NVIDIA’s ACE will revolutionize how you play games on Windows

You might now know it yet, but during yesterday’s keynote address at Computex in Taiwan, NVIDIA’s CEO, Jensen Huang, showed off a new technology for game developers.

And yes, this new tech involves using AI and cloud servers, which has become the company’s big new focus.

Without spoiling anything just yet, just know that this new tech will actually make use of Microsoft’s Chat GPT and Google’s BARD AI software.

NPC interactions will become increasingly real

This new technology is called NVIDIA ACE (Avatar Cloud Engine) for Games. It’s not the shortest of names, as names go, but you can just use the acronym.

In truth, it will allow developers to put in NPCs that can talk to player characters in real-time, but with dialogue that is non-scripted and powered by AI chatbots similar to ChatGPT, Bing Chat, and Bard.

Furthermore, you will also be allowed the NPC facial animations to match the non-scripted dialogue. How’s that for some 2023 tech?

With it, you can bring life to NPCs through NeMo model alignment techniques. First, employ behavior cloning to enable the base language model to perform role-playing tasks according to instructions.

To further align the NPC’s behavior with expectations, in the future, you can apply reinforcement learning from human feedback (RLHF) to receive real-time feedback from designers during the development process.

The company also stated that these AI NPCs are controlled by NeMo Guardrails, which will hopefully keep them from saying weird or even offensive things to gamers.

As you can see above, NVIDIA showed off a brief demo of ACE that was posted on YouTube. It was created in Unreal Engine 5 with ray tracing enabled and MetaHuman tech for NPC character models.

NVIDIA also used technology from a startup company called Convai that’s creating AI characters in games.

Keep in mind that Convai used NVIDIA Riva for speech-to-text and text-to-speech capabilities, NVIDIA NeMo for the LLM that drives the conversation, and Audio2Face for AI-powered facial animation from voice inputs.

The AI NPC shown in the demo is definitely not perfect. His speech pattern seemed very stilted and, dare we say, artificial in nature.

That being said, it’s more than likely that speech patterns will be improved and become more natural in the months and years ahead.

However, NVIDIA did not state when ACE for Games will be available to game developers, so let’s not get too ahead of ourselves.

Audio2Face technology, which matches the facial animation to a game character’s speech, is being used in two upcoming games: the third-person sci-fi game Fort Solis, and the long-awaited post-apocalyptic FPS sequel S.T.A.L.K.E.R. 2: Heart of Chornobyl.

What are your thoughts on this recent news from NVIDIA? Share your opinions with us in the comments section below.

What is Unwise.exe & How to Remove it

Unwise.exe is a Windows Utility that launches once you begin an uninstallation. The process is not intensive and doesn’t use up large system resources, but it can still slow down your PC.

In this article, we’ll briefly discuss the unwise.exe file and its importance and provide the best ways to remove the file from your PC.

What is unwise.exe?

Unwise.exe is an uninstaller that is automatically installed when you add any software to your PC. The file comes with third-party applications, so it is not necessarily considered a Windows Utility, but it is one of the main factors that help in uninstalling the Program if the need arises.

When it is in operation, it scans your PC for any affiliated file, registry item, or folder after an uninstallation; this way, it thoroughly removes every file or process associated with the deleted software.

How can I fix unwise.exe?

There are several views and misconceptions about Unwise.exe; some see it as a Windows Process, while some as malware. However, they’re not wrong; unwise.exe can be a Windows essential process while also being masked as a virus:

1. Disable using Task Manager

  1. Press Ctrl + Alt + Del keys simultaneously to open the Task Manager.
  2. In the Task Manager window, navigate to the Processes tab, and scroll through the list of Processes to locate uniwse.exe.
  3. Click unwise.exe to highlight the process, then click End Task at the top of the window to remove it.
  4. Repeat the steps above until you’ve closed every running instance of unwise.exe

Using the Task Manager is the easiest way to remove and disable unwise.exe from operating in the system background.

If multiple instances of unwise.exe in the Task Manager exist, your PC is likely suffering from malware attacks. In such a case, you’ll need to disable all the instances to stop the app from operating.

2. Uninstall the parent software

  1. Press the Windows key, type Control Panel, and hit Enter.
  2. In the Control Panel window, click Uninstall a Program under the Programs section.
  3. Then, scroll through the list of applications to locate the associated software name, right-click and select Uninstall.
  4. Wait for the software to be removed, close the Control Panel, and restart your PC.

As we’ve pointed out earlier, unwise.exe is a tag-along application that usually appears once third-party software is installed. You’ll have to uninstall the parent application if you’d like to stop the unwise.exe app from operating. 

Unwise.exe is one file that Windows users aren’t entirely sure of its use and security; most still view it as malware.

However, that isn’t always the case. If you’ve recently installed specific programs, unwise.exe is bound to tab along to facilitate the uninstallation process if needed.

Nevertheless, some users have reported that the file is malware masquerading as a Utility tool. If you’d like to remove the file, you can follow the steps listed above.

Apphelpercap.exe: What is it & How to Remove it

The apphelpercap.exe file is a Windows-based file developed by HP. However, the file can be targeted by malware creators who disguise malicious code by renaming it to match a process like apphelpercap.exe. 

If this is the case, you’ll need to remove the file to protect your PC from harm. Luckily, this article briefly discusses the apphelpercap.exe file/process and recommends steps you can apply to remove it.

What is apphelpercap.exe?

apphelpercap.exe is an executable file developed by HP Software Developer. It belongs to the HP App Helper HSA Service Process, which usually accompanies the AppHelperCap software.

The file is legitimate and normally poses no harm to your PC, but it can also be used as a camouflage to sneak malware into your PC. 

How can I remove apphelpercap.exe?

Here are a couple of ways you can remove the apphelpercap.exe file:

1. Run the Software’s Uninstaller Package

  1. Press the Windows key + E to open File Explorer.
  2. In the File Explorer window, navigate to the following path: C:\Windows\System32\DriverStore\FileRepository\hpcustomcapcomp.inf_amd64_3fe14bedeb9ca7a2\x64
  3. Once you’re in the directory, locate AppHelperCap_uninstall.exe, and double-click it to run the uninstaller.
  4. Follow the onscreen instructions to complete the uninstallation and restart your PC.

If you want to uninstall the apphelpercap.exe, the most efficient method is to run the software’s uninstaller package. This package will completely remove all the application data from your PC. 

2. Uninstall the associated software from the Settings

  1. Press the Windows key + I to open the Settings app.
  2. In the Setting app, click Apps and select the Installed apps tab.
  3. In the next window, type AppHelperCap in the search bar on the right pane, or you can enter the developer’s name (HP) in the search bar.
  4. Then, click on the displayed result and click Uninstall Program, and click Uninstall again to complete the uninstallation.
  5. Close the Settings app and Restart your PC.

Using the Settings, you have to identify the app that the system file represents and remove the app altogether.

3. Disable the process from the Task Manager

  1. Left-click the Start menu and click the Task Manager.
  2. In the Task Manager window, navigate to the Processes tab, and locate apphelpercap.exe. Once you’ve located the task, click on it and select End Task.
  3. If there are multiple instances of apphelpercap.exe, repeat the steps until you’ve closed all the running instances.
  4. Close the Task Manager.

If you can’t locate the parent software or the file is unable to delete, you can fix the apphelpercap.exe error by disabling the process from the Task Manager. 

The apphelpercap.exe is a critical Windows component; if you suspect that the file/process is malware or uses too many resources, you can remove or disable the executable from your PC.

This isn’t the only unknown file you can encounter, and we have a fresh guide on ASCService.exe, so don’t miss it.

Should you have further questions or suggestions regarding this guide, kindly drop the in the comments section.

What is Cimfs.sys & How to Remove it?

The cimfs.sys is a legitimate Windows essential component that facilitates important operations in the OS. However, the file is usually targeted by malware creators who disguise malicious code as .sys files.

If you’ve verified the integrity of the file and you still want to remove it, stick around; this article briefly discusses the cimfs.sys file, and provide you with the best ways to remove the file from your PC.

What is cimfs.sys?

The cimfs.sys file is a critical Windows file developed by Microsoft. The file is commonly associated with the Microsoft Windows OS and is typically found in the System32 folder.

Several Windows applications use the file; once an app requires the services of the file, it’s automatically loaded into the memory and run in the background.

Should I remove cimfs.sys?

.Sys files are mostly critical Windows files that facilitate several operations on your PC. There are several variants of .sys files that are responsible for separate tasks.

Removing such files isn’t recommended in most cases, especially if you’re not very tech-savvy; deleting .sys files could be fatal and lead to data loss. 

However, in rare cases, rootkits and malware may appear as a .sys file. In such cases, you’ll have to remove the file from your PC to prevent it from harming your OS.

How can I remove the cimfs.sys?

If you’d like to remove the cimfs.sys file, here are a couple of ways you can achieve it:

1. Delete the File from File Explorer

  1. Press the Windows key + E to open File Explorer.
  2. In the Explorer window, navigate to the following path and locate the cifms.sys file: C:\Windows\System32
  3. Right-click on the file and hit the Delete key on your keyboard.
  4. Close the File Explorer and restart your PC.

If you’d like to remove a file, the first place to go look is the File Explorer; .sys files are usually stored in the System32 folder, simply navigate to the folder and remove the file from your PC.

2. Disable the File from the Task Manager

  1. Right-click on your Start menu and select Task Manager.
  2. In the Task Manager window, navigate to the Details tab. Locate the cimfs.sys task.
  3. If multiple instances of the process are running, one of those processes is likely malware.
  4. Right-click on the cimfs.sys, and select End task.
  5. Repeat the steps until you’ve ended all the cimfs.sys processes and close the Task Manager. 

If you’re unable to remove the file from your PC due to reasons like admin privileges, you can prevent the service from running by killing the task in the Task Manager. This will temporarily prevent the Process from operating. 

Windows essential files are designed to facilitate the daily operations of a PC; if such files are missing, it can lead to fatal errors. However, in some cases, you’ll need to remove the file from your PC.

If you followed our guide completely, remove the cimfs.sys file should be no problem.