Fde.dll Failed to Load: Best Ways to Fix It

DLL files, such as fde.dll are essential if you want to keep your operating system running smoothly. If you have missing DLL files on Windows 10, you will experience various issues.

In case your DLL files are missing, certain features might not work properly, or applications won’t be able to start at all, so it’s paramount that you fix the missing files as soon as possible.

Before we start fixing issues with the missing fde.dll file, let’s first see what it is and what it does on your PC.

What is fde.dll?

Fde.dll is one of many system files available on Windows. It’s associated with the Folder Redirection Snapin Extension process.

As such, it’s a crucial file on your operating system, and if it’s damaged or missing, you may experience various issues.

What can I do if fde.dll failed to load?

1. Use a dedicated DLL fixer

The loss or corruption of DLL files can pose a major problem on your PC, preventing applications and features from working properly.

To fix this issue, it’s advised to download the missing DLL file, but doing so from unverified third-party sources can jeopardize the security of your system.

Instead of doing that, we suggest using DLL repair software. These tools are designed to effortlessly resolve 100% of Windows DLL issues with ease with just a couple of clicks.

2. Repair your system files

Note icon NOTE
The following Group Policy Settings steps are optional and intended only for advanced users.

Adjust Group Policy Settings

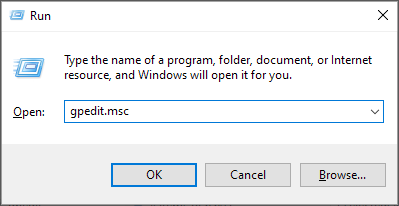
  1. Press Windows key + R and enter gpedit.msc. Click OK.
  2. Once it opens, navigate to the following path: Group Policy\Computer Configuration\Administrative Templates\Windows Components\Windows Update
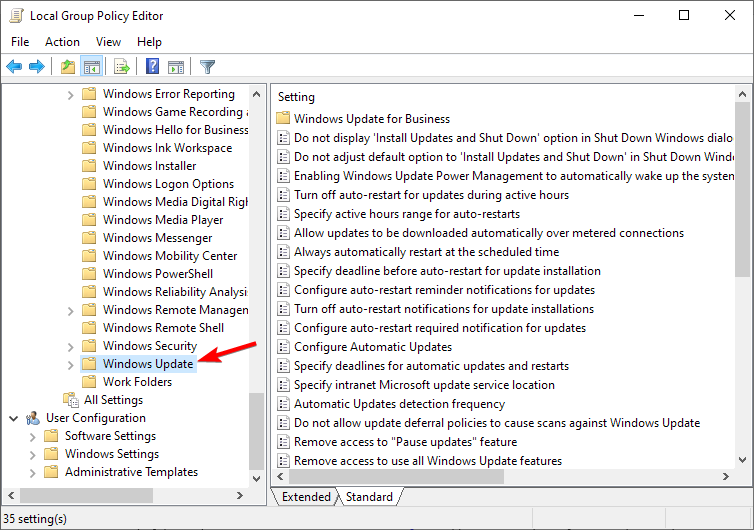
  3. Locate the following settings and enable them:
    • Enable client-side targeting
    • Allow Automatic Updates immediate installation
    • Automatic updates for Windows Update (from WSUS)

Make sure that necessary tasks and services are running

  1. Press Windows key + X and choose Windows PowerShell (Admin).
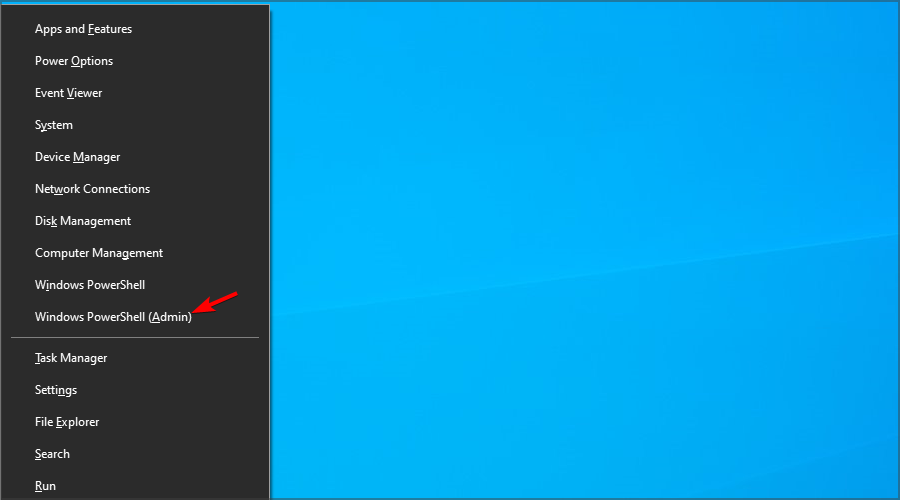
  2. Enter the following commands:
    net start wuauserv
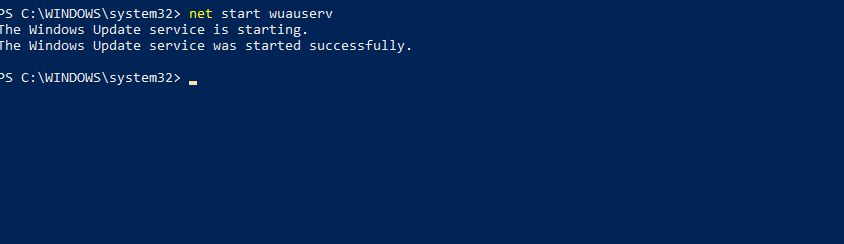
    schtasks.exe /Run /TN "\Microsoft\Windows\Servicing\StartComponentCleanup"

These steps aren’t mandatory if you want to fix the fde.dll file, but they will ensure that the following commands will work.

Run DISM and SFC scans

  1. Open Windows PowerShell or Command Prompt as administrator.
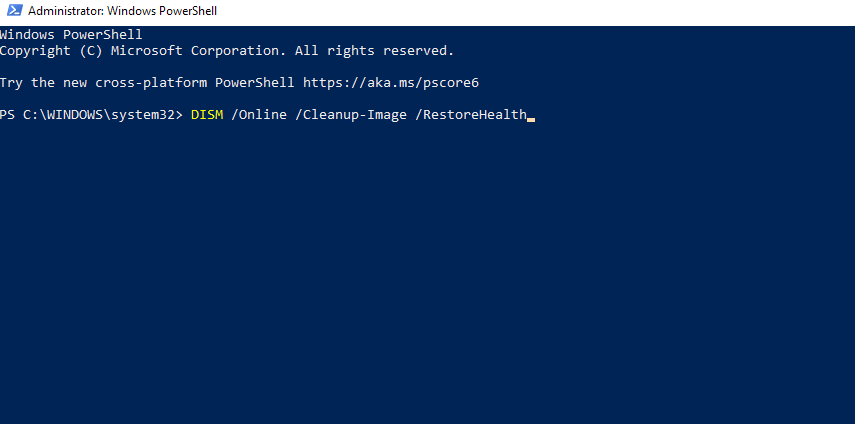
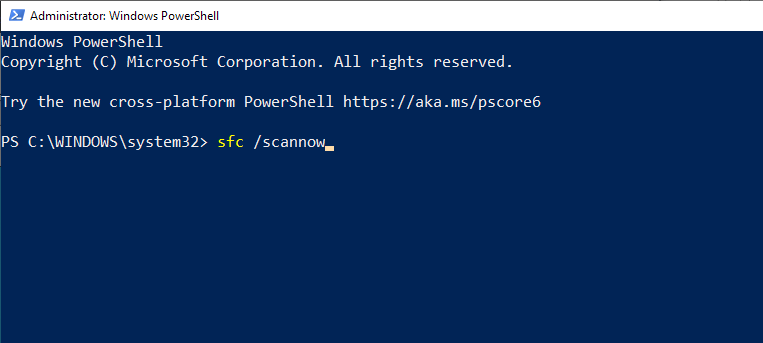
  2. The following commands might take a bit to complete, so don’t interrupt them. Run the following commands one by one:
    Dism /Online /Cleanup-Image /ScanHealth
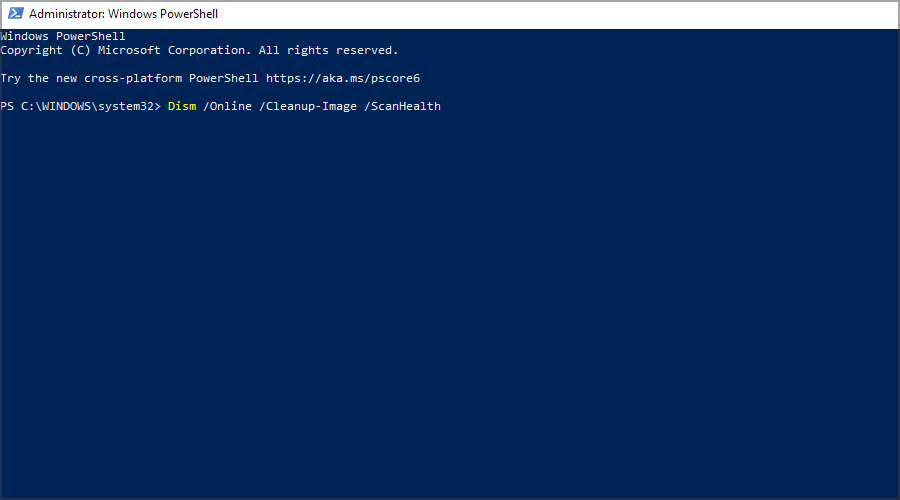
    DISM /Online /Cleanup-Image /RestoreHealth
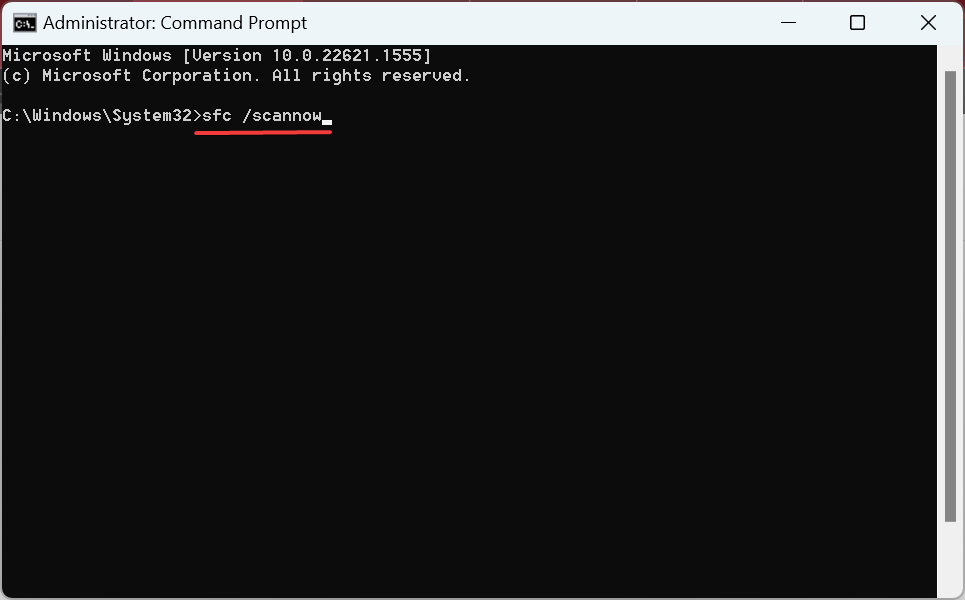
    sfc /scannow
Once the scan is finished, check if the problem is resolved. Keep in mind that not all steps are mandatory, except for the DISM and SFC scan.

As you can see, fixing issues with fde.dll is pretty simple. Although these steps are for Windows 10, you can use them to repair missing DLL files on Windows 11 as well.

In most cases, a system scan will help you restore the necessary files without too much hassle. If you’re looking for a more straightforward solution, there is always specialized software you can use.

Have you ever had issues with fde.dll and how did you fix them? Let us know in the comments section.
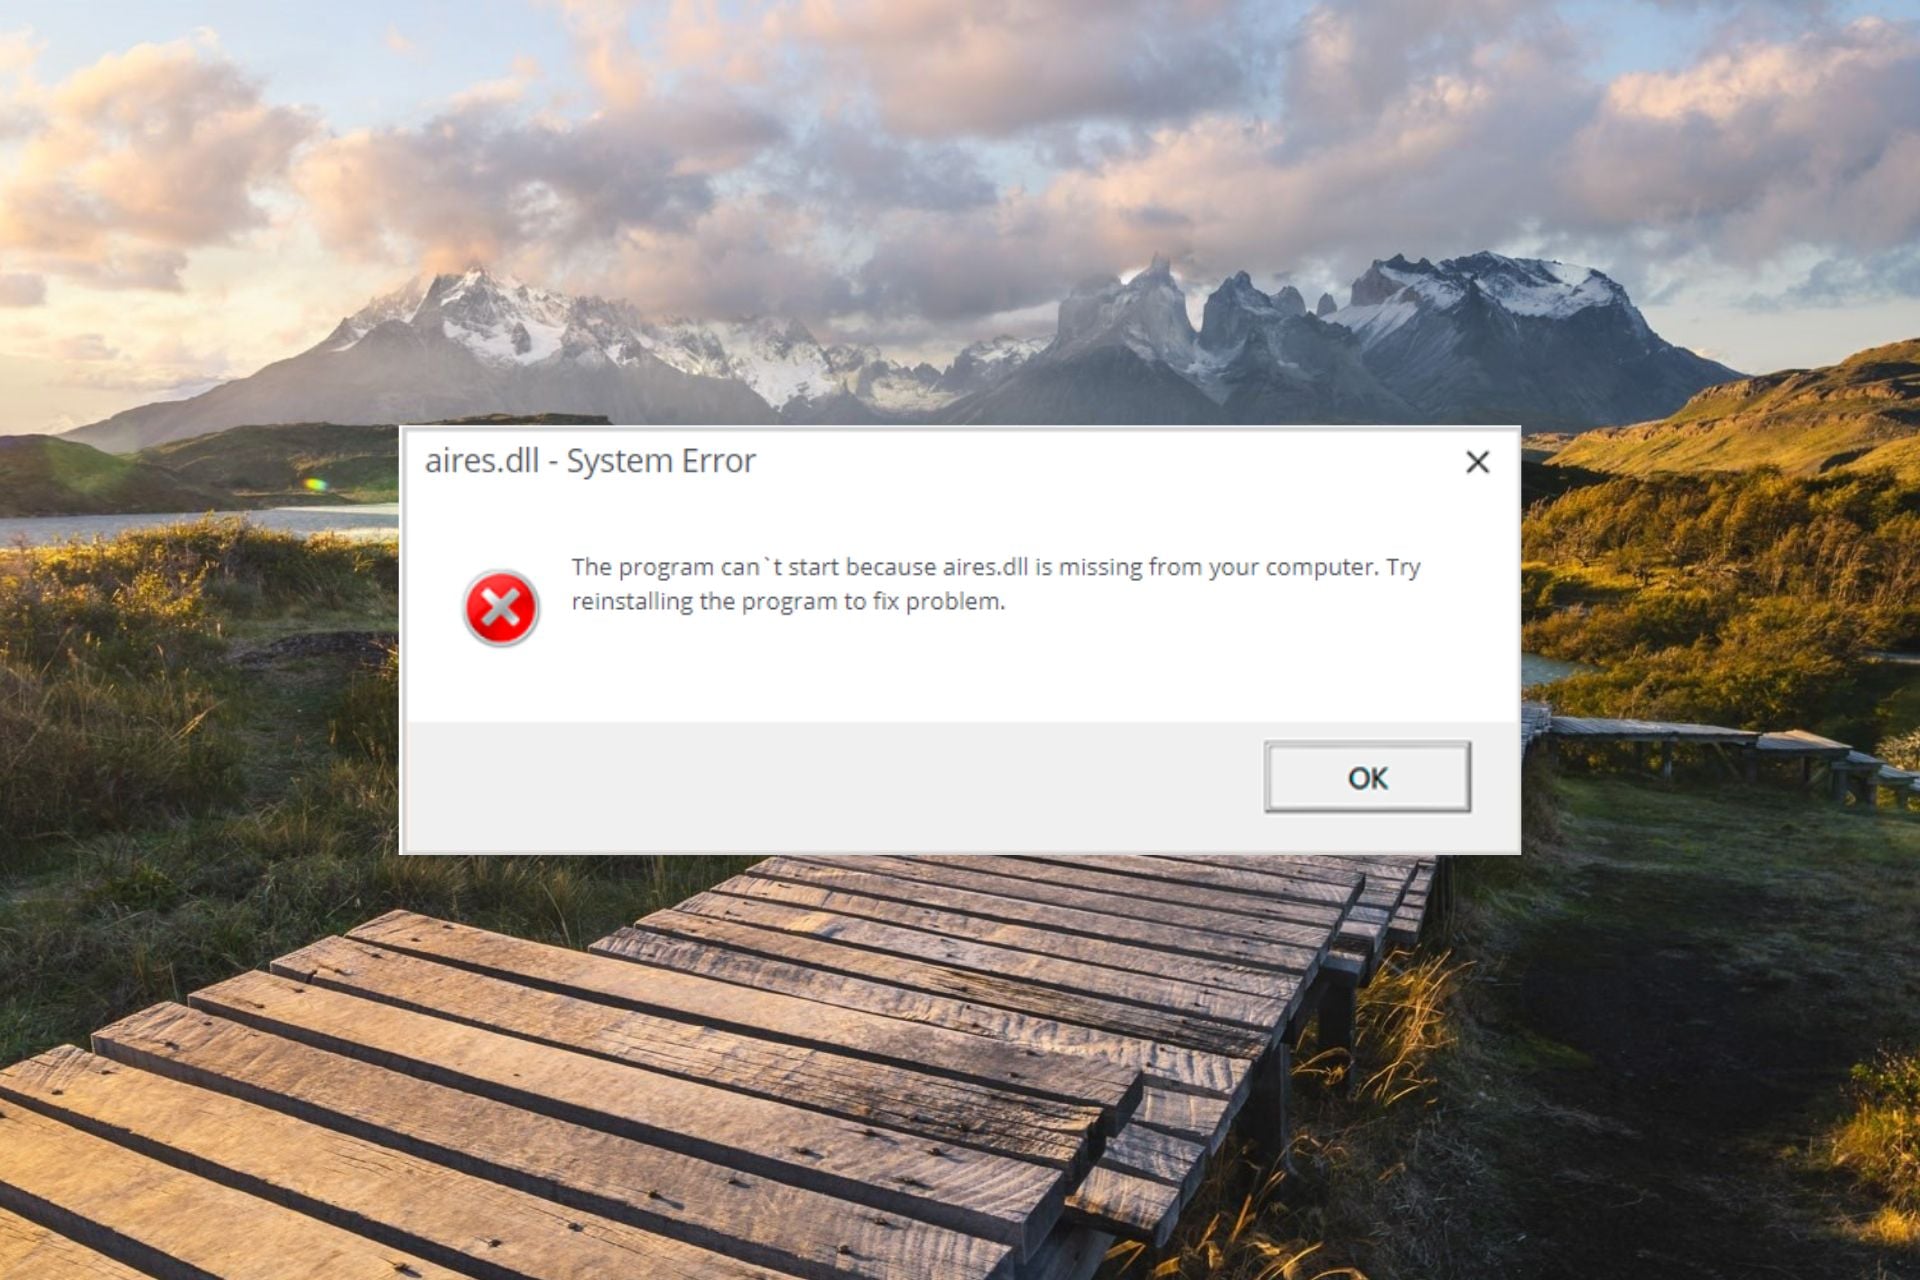
Aires.dll Missing or Not Found: How to Fix This Error

Aires.dll, also called Adobe Illustrator 11.0 Resource is a part of Adobe Illustrator software. If Aires.dll is missing or not found, the Adobe app won’t start because it can’t access its resources. Missing DLL files can be cumbersome, but our solution below will help you fix the problem.

Why is aires.dll missing from my PC?

There are several reasons why the aires.dll file is missing or not found, but we will highlight the most important ones:

  • Malware or virus infection – If you do not have an antivirus installed, a virus can infect the DLL files such that they can no longer be recognized.
  • Incompatible apps – Installing major updates on your PC leaves several Adobe apps, including Illustrator incompatible, and they may essentially require the aires.dll to run on your computer.
  • Modified or accidentally deleted – Windows can no longer find the DLL files because they may have been accidentally deleted when you tried to free up the disk space.
  • Corrupt Windows Registry – Damaged or corrupt Windows registry can create havoc on your system and can be a possible cause of why the aires.dll file can no longer be found.

Fortunately, you can fix the missing aires.dll error by implementing the proven solutions in this guide.

How to fix the aires.dll missing or not found issue?

Before you proceed toward the complex solutions discussed in this guide, make sure to perform the following actions:

1. Use a DLL Fixer

The missing or not found aires.dll error surfaces due to the incompatibility between Adobe Illustrator and the Windows operating system.

Resolving this by yourself may do more harm to your system, especially if you are new to the Windows ecosystem or do not have experience repairing system-level files.

Interestingly, several DLL fixer tools in the market offer to resolve system file-related issues.

2. Repair the System Files

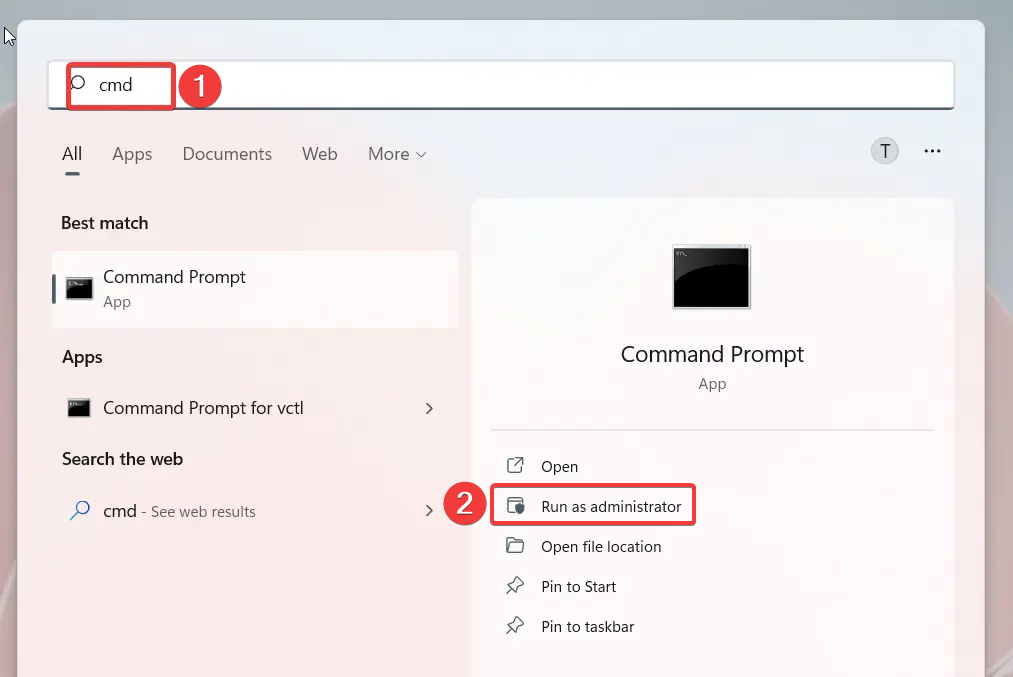
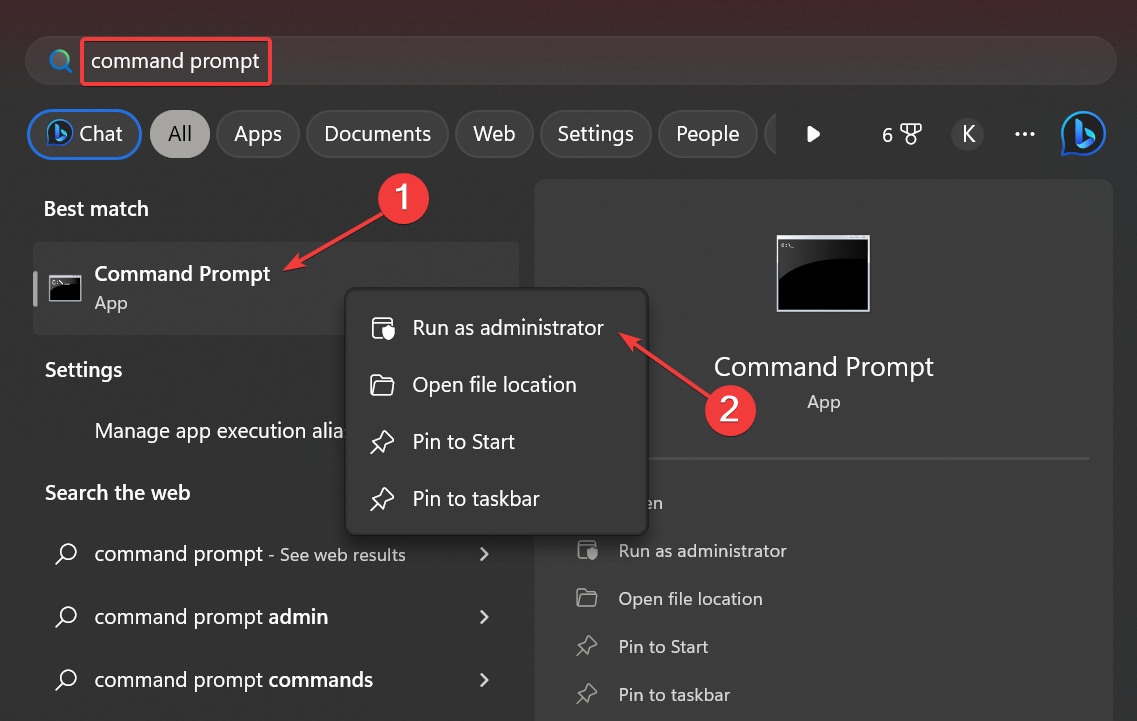
  1. Press the Start icon on the taskbar, type cmd in the search box, and choose Run as Administrator.aires.dll
  2. Choose Yes on the UAC prompt to launch Command Prompt with administrative privileges.
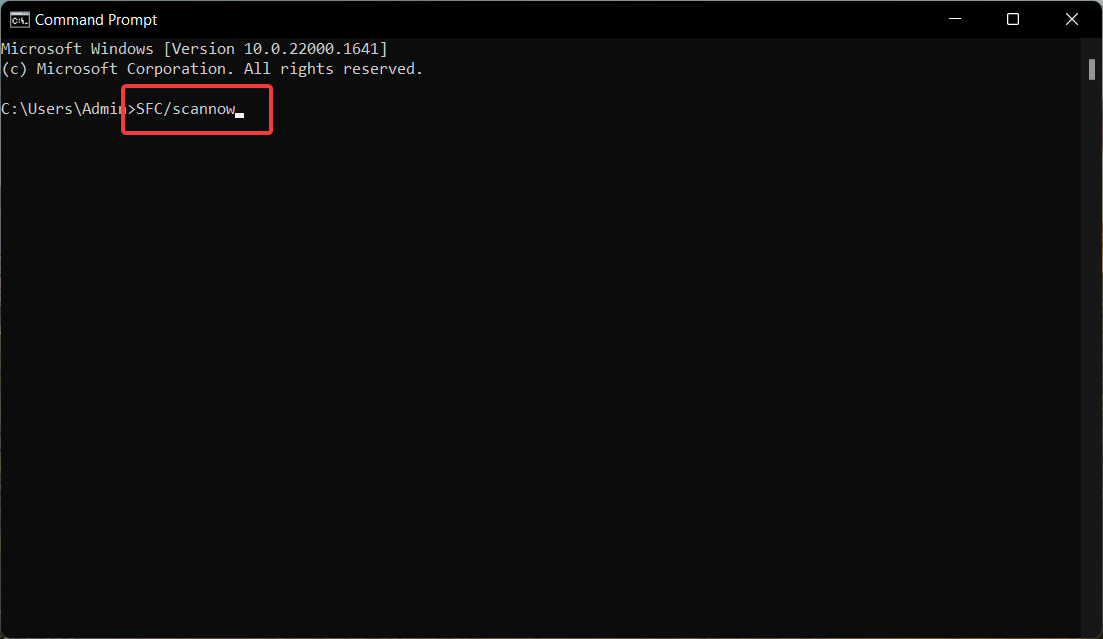
  3. Type or paste the following command and press the Enter key to initiate the SFC scan. sfc/scannowaires.dll
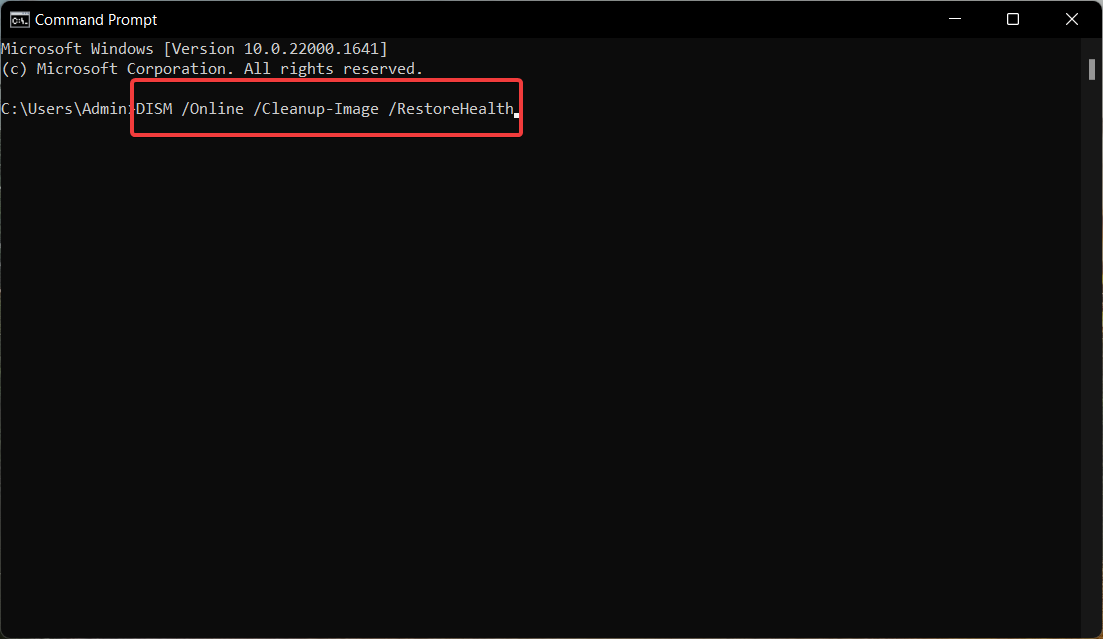
  4. After the SFC scan gets completed, type or paste the following command to scan the PC with the DISM tool DISM.exe /Online /Cleanup-Image /RestorehealthAires.dll
  5. After the DISM scan is complete, restart your computer and see if the missing aires.dll error persists upon launching the Adobe app.

The SFC and DISM tool will scan your PC to diagnose the damaged or corrupt protected system files and images and replaces them with the cached copy stored in the compressed folder, hence fixing the missing DLL file issue.

3. Scan for viruses and malware

  1. Bring up the Settings app using the Windows + I keyboard shortcut.
  2. Choose the Privacy & Security option from the left sidebar and click Windows Security located in the right section.Aires.dll
  3. Choose the Virus & threat protection option listed under Protection areas.
  4. Click the Scan options located on the right of the Windows Security app.
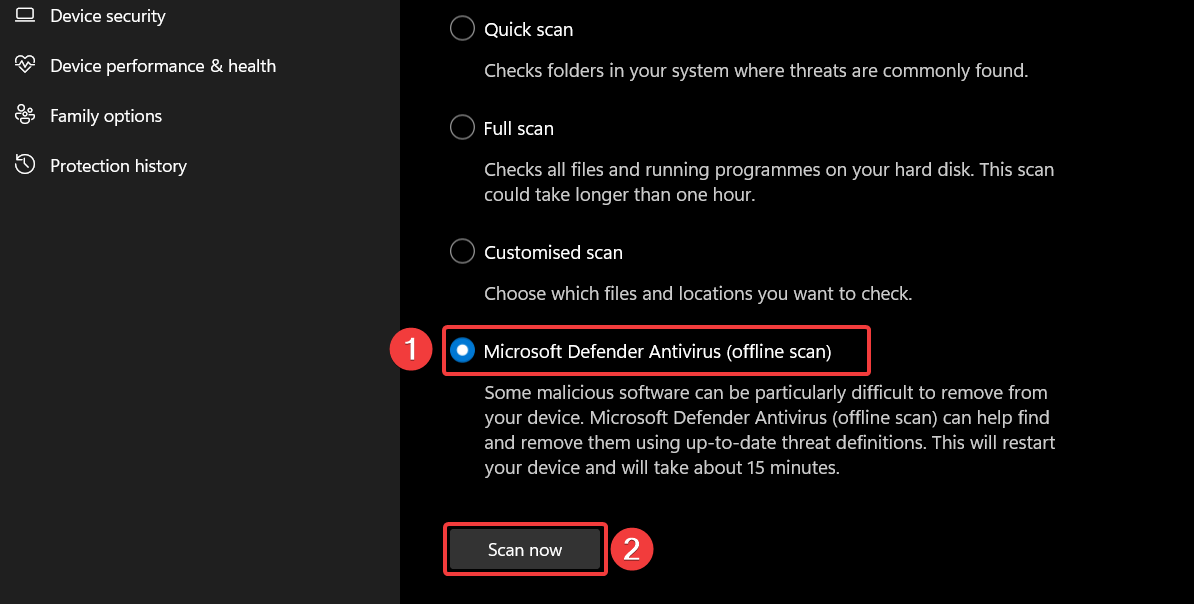
  5. Select the Microsoft Defender Antivirus (offline scan) option and press the Scan now button.Aires.dll

The Windows Defender program will now begin to scan your PC and will remove all the viruses and malware it finds. If you have a thirty-party antivirus installed, you can run a full scan on it to purge viruses or malicious codes.

So it’s more reliable to utilize a multi-layered software that includes malware protection, ransomware, or phishing attacks shield. TotalAV is the solution that will remove any threats in seconds.

4. Manually restore the DLL file

We always discourage downloading apps and files from untrusted websites on the internet to keep your computer protected from online threats that masquerade as the files you looking for.

However, there is no harm in downloading and installing the DLLs from reliable websites such as dll-files.com, which provide different versions of DLL files compatible with your OS and system architecture.

Before initiating the download, you can scan the download link with an online virus scan tool to ensure it is not infected.

After the DLL gets downloaded on your PC, paste it in the following location. C:\Windows\System32

Now, restart your PC to let Windows automatically recognize the restored DLL file.

So that’s pretty much it! We hope you could get around the aires.dll not found error by employing these easy fixes.

In case the Mfc140u.dll is not found on your system, follow this guide to troubleshoot this problem. We also have a new guide on acroiefavclient.dll, so feel free to visit it.

Which of the methods mentioned above worked in your case? Do let us know in the comments section.

Comcat.dll: What Is It & How to Fix It When It’s Missing

Developed by Microsoft Corporation, Comcat.dll is a crucial Component Categories DLL (Dynamic Link Library) that hosts the COM’s Component Categories Manager.

This DLL is required by several Windows services and apps to operate properly, and if the file is not found, an error stating that the app could not be opened will appear.

Why is the comcat.dll missing from my system?

If the comcat.dll file is missing from your system, one or more of the following are the possible reasons:

  • Faulty installation files – If the missing DLL file error occurs during the installation process, it’s probably because the app installation has been restricted.
  • Virus infections – The presence of viruses and malicious software on your computer messes up the system’s performance and damages essential system files, including DLLs.
  • Corrupt or damaged – If the comcat.dll has been damaged, modified, or overwritten during a system update, you will get the missing DLL file error on Windows.
  • Corrupt registry – In some cases, corrupt registry files also prevent the system programs to access the files and folder.

If you are also struggling with the missing comcat.dll file, we will show you effective ways to solve the problem.

What can I do if comcat.dll is missing in Windows?

Before you try the software-related remedies discussed later, make sure you perform the actions mentioned below:

If these prerequisite methods didn’t help you fix the problem, perform the solutions below.

1. Use a dedicated DLL-fixer

Resolving the missing DLL files issues can damage the integrity of your computer, especially if you do not have enough experience to repair corrupt files and execute commands. In such a scenario, authentic DLL fixer software should be preferred.

This authorized solution assists Windows users repair a slew of system-level problems, including missing DLLs, incompatible or virus-infected DLLs, and corrupt system files. The software diagnoses the underlying problems at a button click and automatically tackles them without your intervention.

2. Run SFC and DISM scans

  1. Press the Windows key, type cmd in the search bar, and select the Run as administrator option from the result section.comcat.dll
  2. Now, type or copy-paste the following command and press Enter to initiate the SFC scan. sfc /scannowcomcat.dll
  3. Wait patiently until the SFC scan diagnoses the problem. Then type or paste the following command and press the Enter key to run the DISM scan: DISM.exe /Online /Cleanup-Image /Restorehealthcomcat.dll

When the scanning process is complete, reboot your PC and see if the missing comcat.dll issue persists.

Performing the SFC and DISM scans will repair and replace the protected system files, and as a result, the comcat.dll file should now be available.

3. Manually download the DLL

Downloading DLLs from unreliable internet sources means exposing your computer to various internet threats.

However, you can manually download the comcat.dll from trusted websites such as dll-files.com, having legitimate DLL files.

Before initiating the download, ensure that you have selected the current OS version and system architecture. You can scan the downloaded file with antivirus software to ensure that it is not malicious code masquerading as the DLL file.

Once the DLL file is downloaded, move it to the installation folder of the application that could not be opened because of missing comcat.dll or paste it into the following folder. C:\Windows\System32
After performing the steps, restart your PC as you normally do and see if the missing DLL error is resolved.

4. Perform System Restore

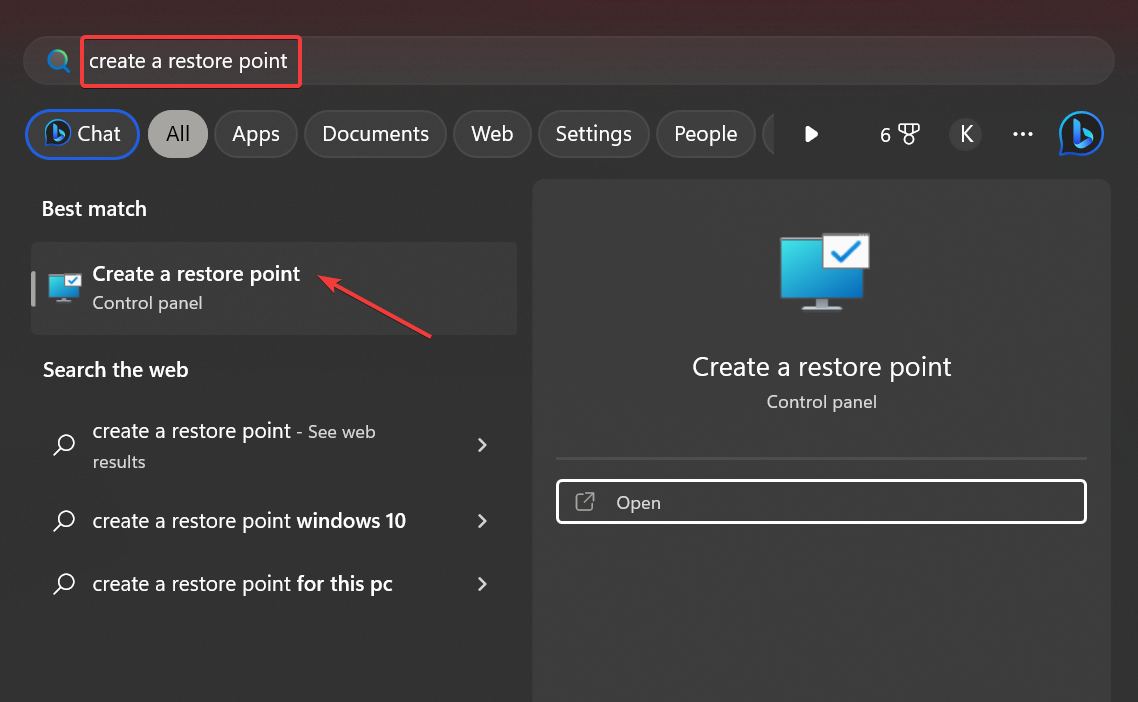
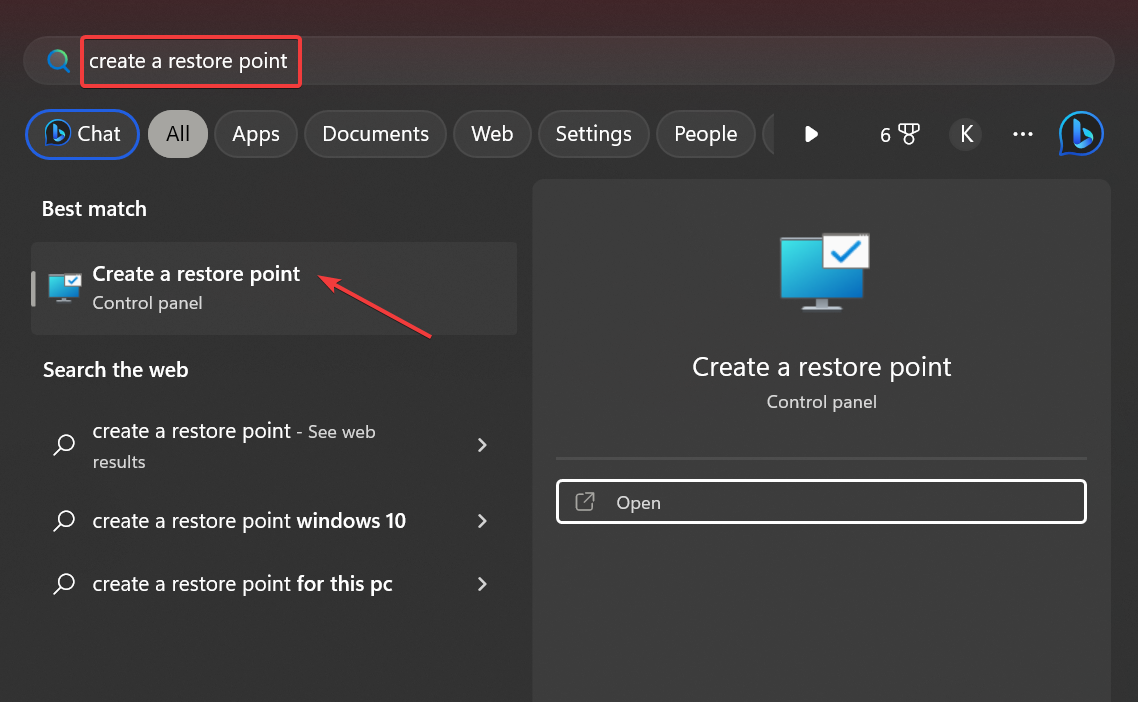
  1. Press the Windows key to launch the Start menu, type create a restore point in the search box, and select the relevant search result.comcat.dll
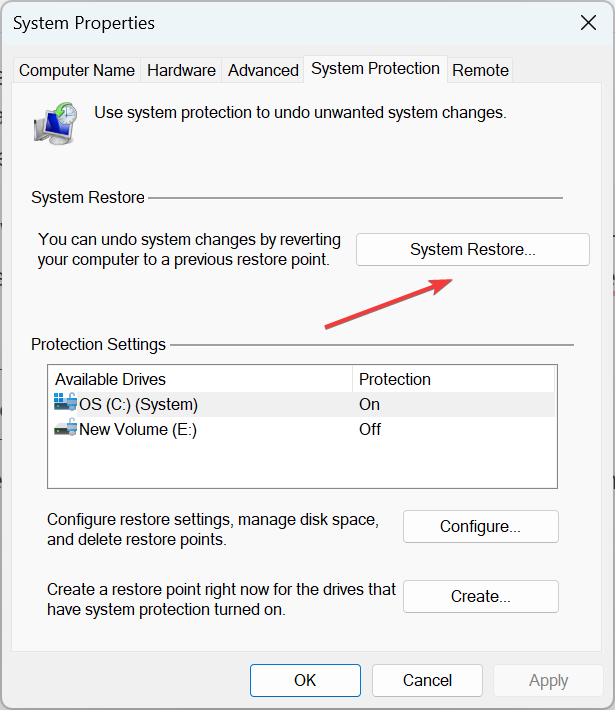
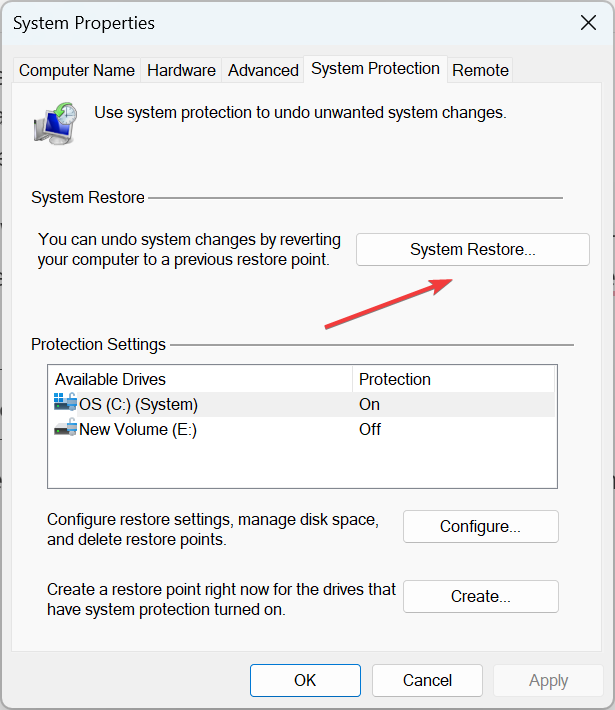
  2. In the System Properties window, click the System Restore button located under the System Protection tab.comcat.dll
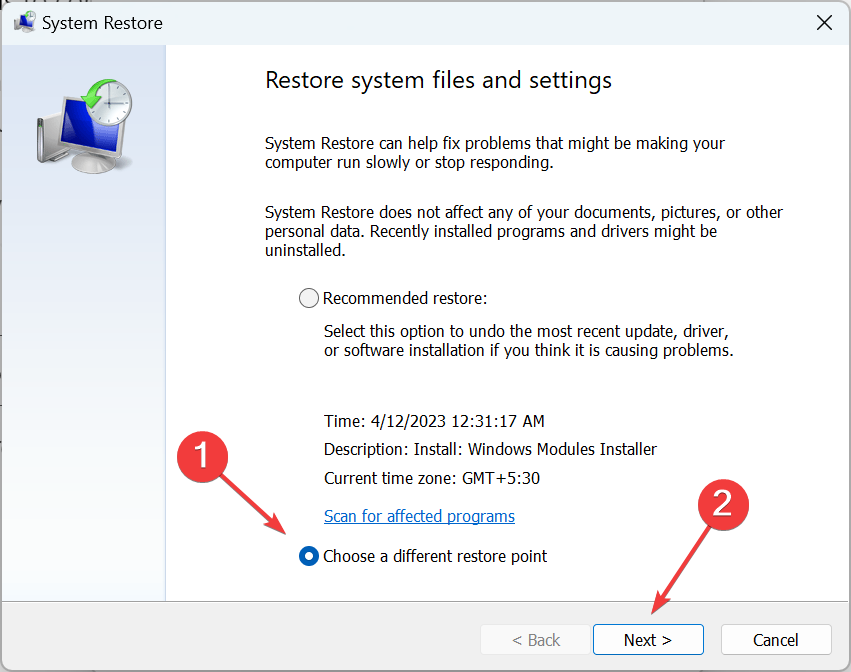
  3. Press the Next button.
  4. Choose the suitable restore point where the programs were functioning properly and press the Next button.
  5. Click Finish on the Confirm your restore point window to initiate the system restoration process.

Restoring your system to an earlier point in time will roll back all the changes made in your computer that may have damaged the comcat.dll file.

That’s it! Implement these workarounds in the same sequence as mentioned to fix the missing comcat.dll file and restore the system performance.

Also, you may want to restore the Emp.dll file on your computer if Windows does not find it.

Which of the methods suggested in this guide worked to fix the missing comcat.dll error? Do let us know in the comments section.

Ck2.dll Missing or Not Found: How to Fix It

Ck2.dll, a DLL (Dynamic Link Library) file developed by Virtools SA, is an essential system-level file that ensures the Windows OS functions properly. This DLL file contains a set of procedures, and driver functions that Windows utilizes to perform the tasks.

If the ck2 msvcp100.dll goes missing or gets corrupt, the programs that require this DLL file won’t function on your computer.

Why is the ck2.dll file missing?

Windows cannot find the DLL files for several reasons; however, the notable ones are as follows:

  • Accidental deletion – The DLL file could get deleted unknowingly if you recently uninstalled program a program or deleted files to free up disk space.
  • Corrupt or damaged – Unreliable third-party software can overwrite the DLL file, which cannot be used by the operating system anymore.
  • Malware attack – The presence of malware or virus leads to a series of problems, and that’s why you should have a third-party antivirus installed on your computer and stay protected.
  • App incompatibility – Installing a major Windows update can make the software incompatible with your PC, and you will get the missing DLL file error.

Regardless of why the ck2.dll file is missing, the solutions in this guide will help restore the DLL so that your system can function flawlessly.

How can I fix the missing ck2.dll error?

Before moving on to the advanced fixes, you should try these steps on your PC:

If you still run into the ck2.dll not found error, perform the following tasks.

1. Use a DLL fixer

Ck2.dll is a system-level DLL file on your computer hence restoring it should be performed with extreme caution. To avoid messing up your system, you can utilize a DLL fixer as a perfect solution for novice users to repair the missing, corrupted, and overwritten DLL files on your computer.

2. Run SFC and DISM scans

  1. Bring up the Start menu by pressing the Windows key, type cmd in the Search bar, and select Run as administrator from the right section of the results.ck2.dll
  2. Press the Yes button on the User Account Control window to grant administrative privileges.
  3. Type or paste the following command and press the Enter key to let SFC scan your PC. SFC/scannowck2.dll
  4. Once the SFC scan is completed, type or copy-paste the following command and press Enter key to execute it. DISM /Online /Cleanup-Image /RestoreHealthck2.dll

The SFC scan analyzes your system to identify damaged or corrupt protected files, and the DISM tool scans and repairs the faulty files of the Windows system image. This will resolve all the system-related issues why the ck2.dll file could not be found.

3. Download the DLL from a reliable source

Downloading and installing the DLL files from the internet is not a good idea as there is always a fear of virus and malware infection. However, you can download the missing DLL file from a trusted website that scans your download to ensure it is safe to download and install on your computer.

You can visit dll-files.com and verify the correct version before initiating the download. After the file is successfully downloaded, you can copy and paste it into the install directory of the application missing the DLL file. Alternatively, you can also paste the file into the following directory on your Windows computer. C:\Windows\System32

Once done, reboot your computer, and the DLL file will be recognized upon startup.

4. Manually update display drivers

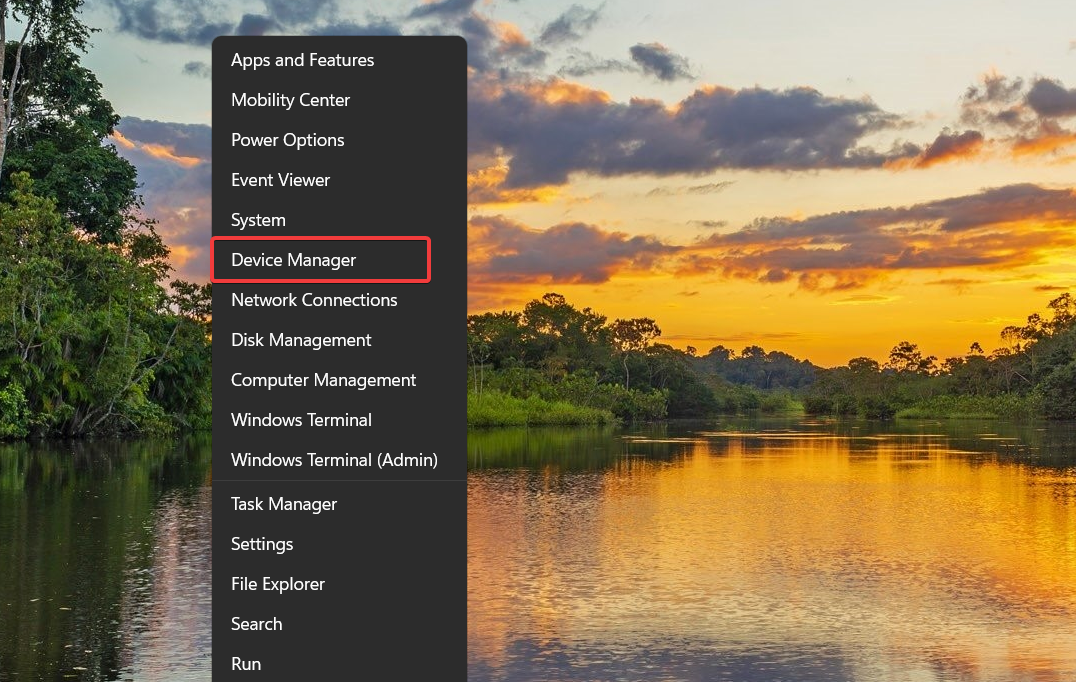
  1. Right-click the Windows icon on the taskbar and choose the Device Manager option from the Quick Links menu.ck2.dll
  2. In the Device Manager window, double-click the Display adapters category to expand the list of devices.
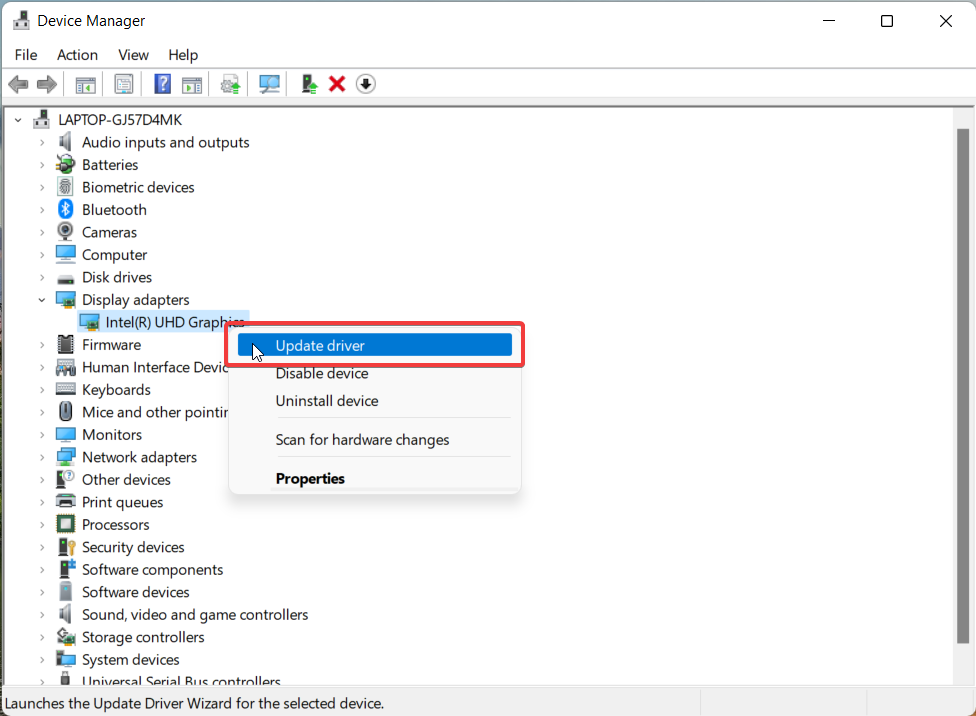
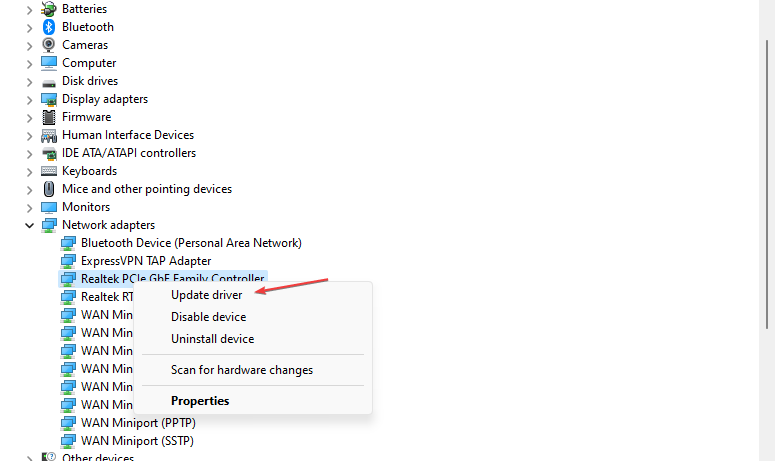
  3. Right-click the graphics card and select the Update driver option from the context menu.ck2.dll
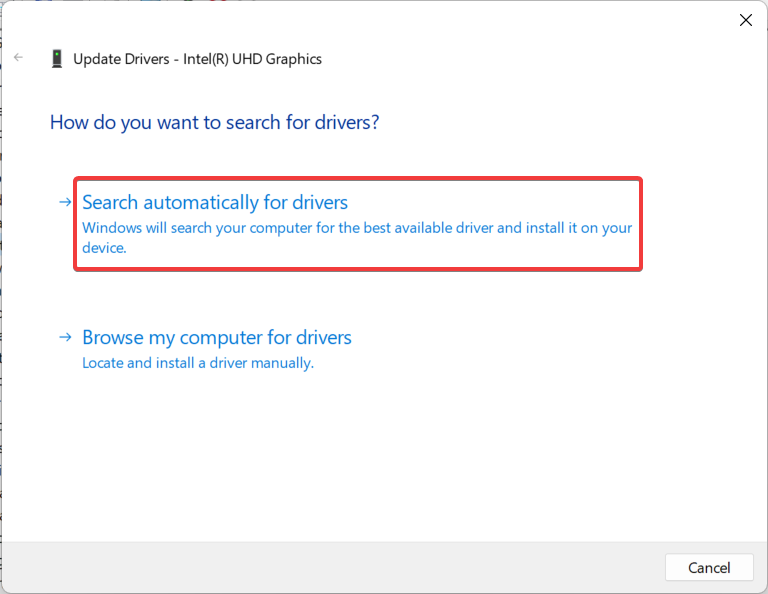
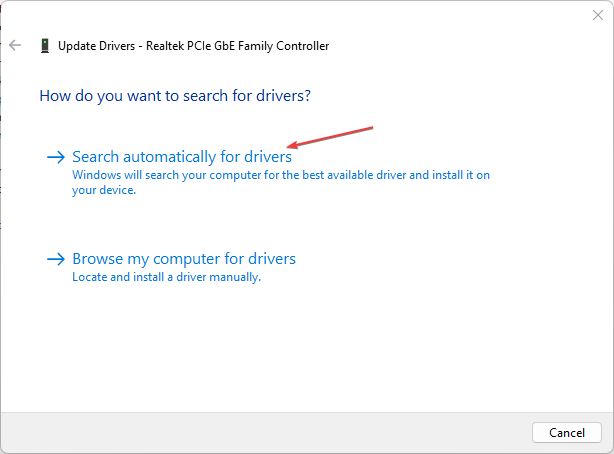
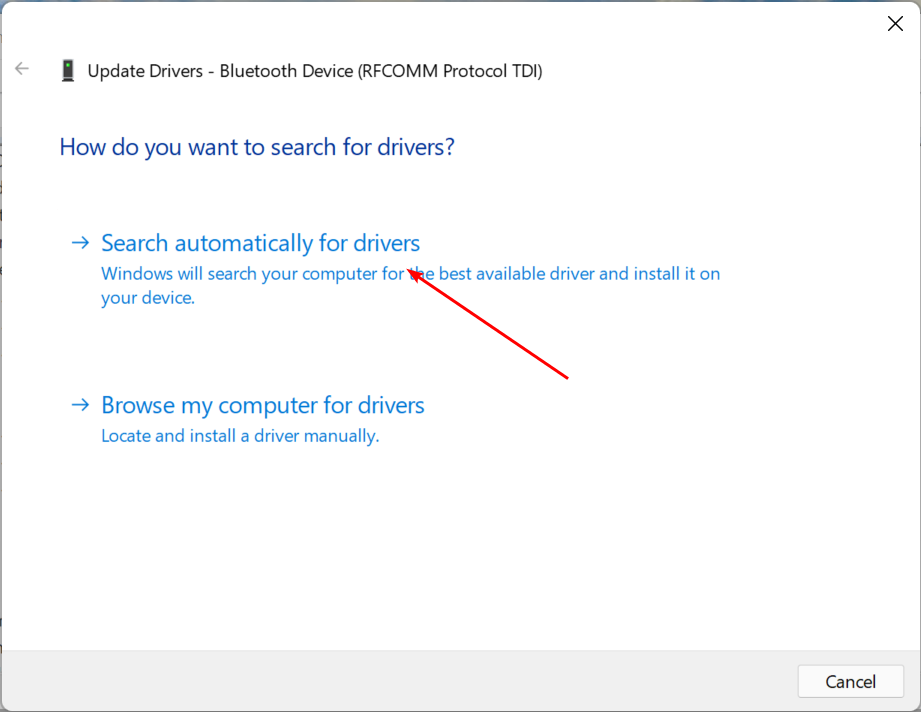
  4. Choose the Search automatically for drivers option on the Update Drivers window that pops up.

Windows will now search for the latest driver update for your graphics card and if available, will automatically download and install them without your intervention.

ck2.dll file contains the essential driver functions and if the driver is obsolete, the DLL will no longer be compatible with the OS.

Anyhow, you could use standalone software that can automatically detect outdated drivers and install the latest version from its manufacturer.

⇒ Get Outbyte Driver Updater

5. Scan the PC using Microsoft Defender

  1. Use the Windows + I shortcut to open the Settings app.
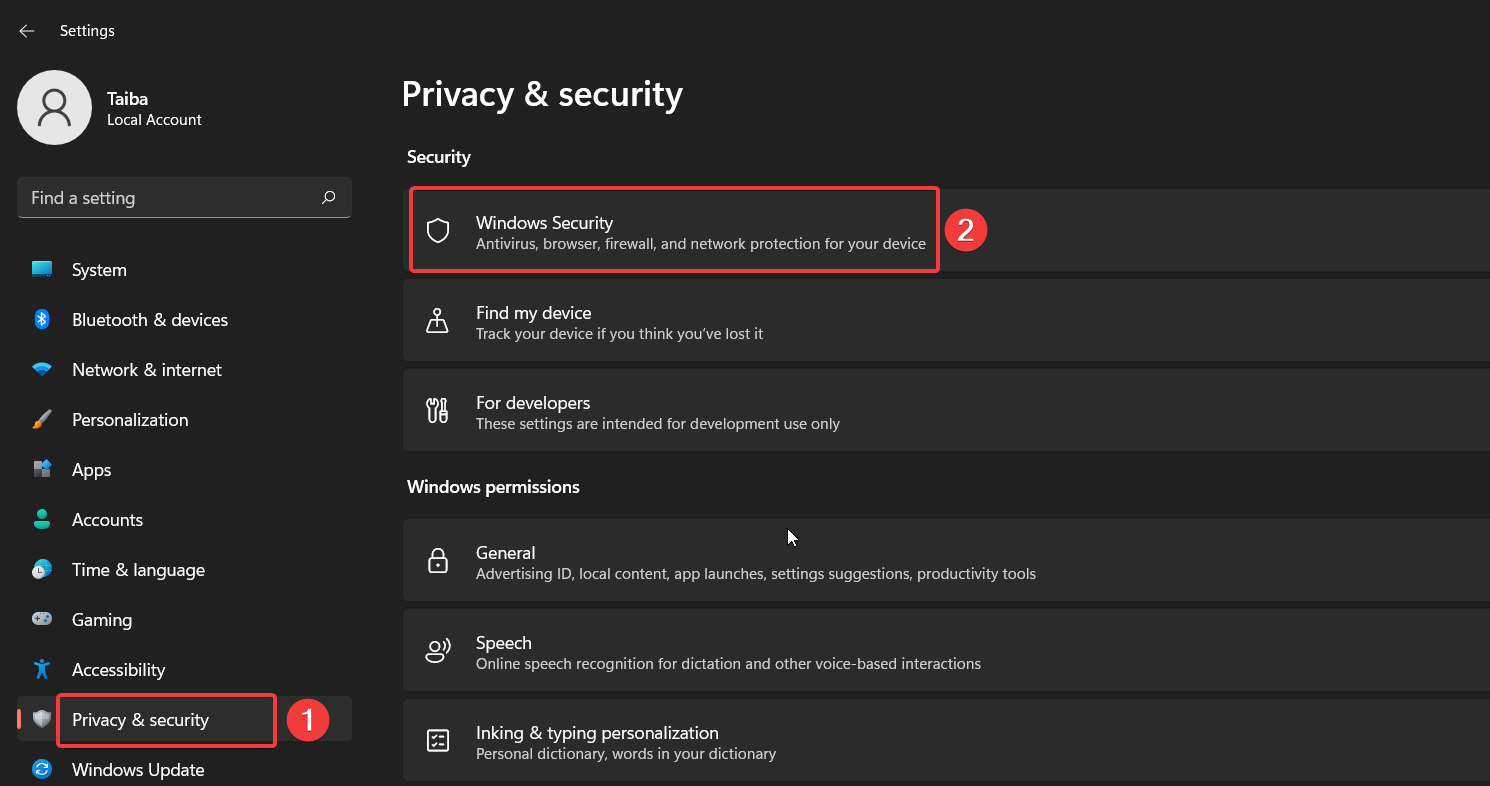
  2. Choose Privacy & Security from the left navigation pane and then Windows Security from the right.ck2.dll
  3. Next, select Virus & threat protection option.
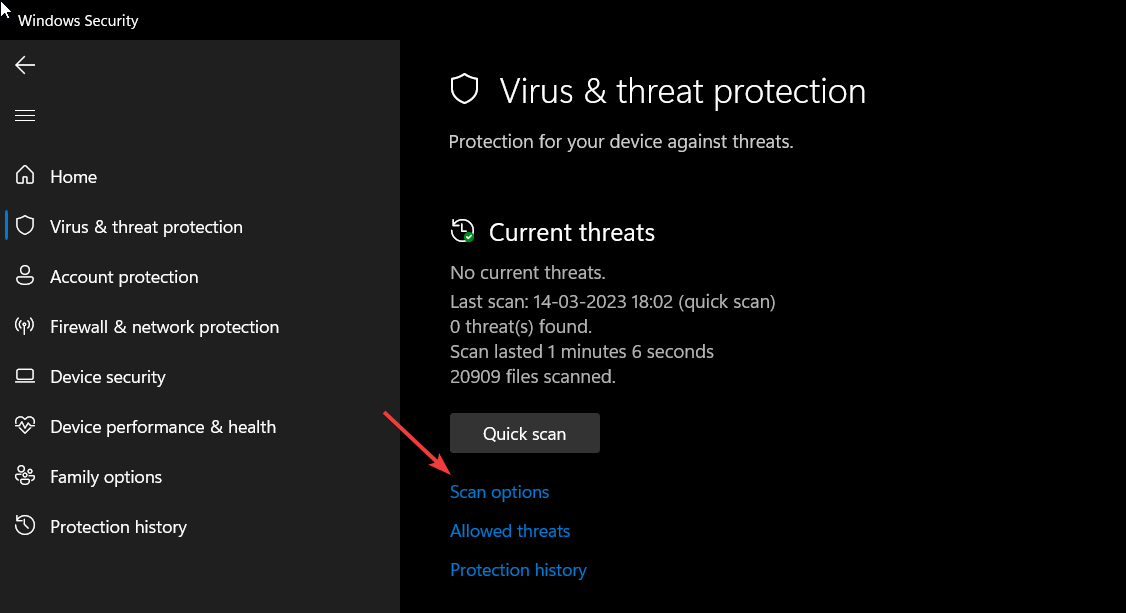
  4. Click the Scan options located on the right.ck2.dll
  5. Select the Microsoft Defender Antivirus (offline scan) option and press the Scan now button at the bottom.ck2.dll

The Windows Defender program will scan your PC to find and remove viruses and malware if it finds any. If you have a thirty-party antivirus, you can run a full scan on your system to eliminate the malware and viruses.

The troubleshooting methods listed here can resolve the missing ck2.dll error in Windows.

If several DLL files are missing on your Windows PC, you can check out our comprehensive guide offering expert guidance to resolve the issue.

Also, if you have more queries or suggestions for us, feel free to drop them down in the comments section below.

What is Error Code 80180002 & How to Fix It

When trying to join a domain such as Azure AD, you must fulfill various requirements before your account can be successfully created. Things don’t seem to be going as planned because users are met with the error 80180002 when doing so.

Further, the error code is accompanied by a message that says The Mobile Device Management (MDM) server failed to authenticate the user. Stay with us as we unpack what this error means and how to resolve it.

What is error code 80180002?

The error code 80180002 is what happens to users who try to create or add a Microsoft work account on their personal PCs. You may be wondering why this is happening, and below are some possible reasons:

  • Insufficient permissions – Your organization manages most work Microsoft 365 accounts. This is usually because of some security settings. So while the account may belong to you, you are somewhat restricted in how you manage it.
  • Wrong configurations – If your device or account does not meet the prerequisites to join Azure AD, your account may be denied access.
  • Network change – If the user’s account is linked with a Microsoft account, it’s possible that the user has changed their network, and you need to link them with the correct Azure AD tenant again.
  • Device not on MDM – MDM is a security policy that determines the devices that can access Azure. If your device is not enrolled in Mobile Device Management (MDM), you might get the error 80180002.

How do I fix error 80180002?

Before any advanced troubleshooting, check the following:

  • Ensure you have administrative privileges.
  • Check your network again and ensure it reflects your location.

1. Add the account to your device

  1. Hit the Windows key and click on Settings.settings windows 11
  2. Click on Accounts on the left pane, then select Access work or school.access workor school option
  3. Locate the account you’re trying to log in using, then disconnect it.
  4. Wait for a few moments, then add the account again.

2. Disable conditional access

  1. Sign in to your Azure account.
  2. Click on the Menu at the top left corner and select Azure Active Directory.
  3. Select Protect & secure on the left pane, then click on Conditional Access.
  4. Under the Access policy option, toggle it off.

Azure AD conditional access allows you to control access to your applications and data based on the location of your users, their identity, and their device. When you disable this option, you allow users to join with any device without restrictions.

3. Remove the account credentials 

  1. Hit the Windows Search icon, type Credential Manager in the search bar, then click Open.
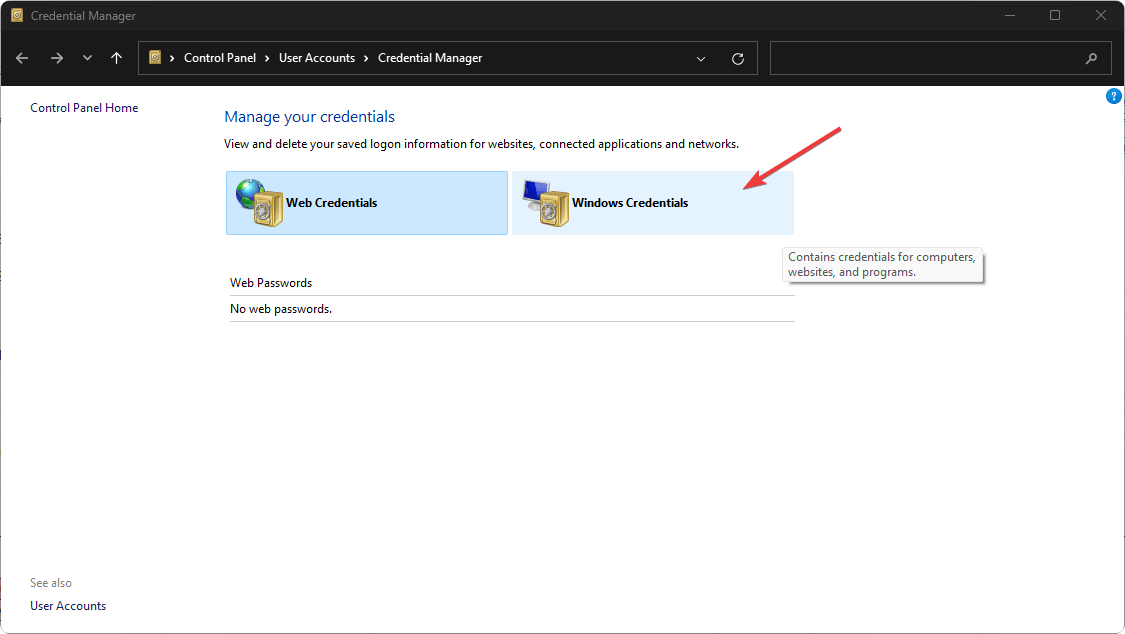
  2. Click on Windows Credentials.going windows credentials windows 11
  3. Select MicrosoftAccount, click on it to expand, then hit Remove.
  4. You’ll get a command prompt asking you to confirm whether you want to remove the credentials, so click Yes.

4. Change MDM and MAM settings

  1. Sign in to your Azure account.
  2. Click on Azure Active Directory under Azure services.
  3. Select Mobility (MDM and MAM) on the left pane.
  4. Click on Microsoft Intune under Mobility (MDM and MAM).
  5. Find MDM user scope and MAM user scope options, set them to None then, click on Save.

MDM stands for mobile device management, and MAM stands for mobile application management. They are two ways to manage your company’s mobile devices. MDM is a more comprehensive solution that allows you to manage all aspects of the device. 

MDM and MAM are two security features that can be used to provide a secure workspace for employees. However, they also have some drawbacks. MDM allows you to control the devices that can connect to your network.

When enabled, they can restrict the devices trying to add user access. Once disabled, you can get rid of the 80180002 error.

Elsewhere, you may get an error where your Microsoft account doesn’t exist, but we have answers on how to fix this issue.

For any additional thoughts don’t his topic, leave a comment down below.

Realtek Semiconductor Corp Extension Install Error [Fix]

For most people, updating Windows is a smooth process. Nobody expects errors, but users are now getting the Realtek semiconductor corp extension install error. From the error, it is already clear that this is related to Realtek drivers.

When you update Windows, your drivers may also get an update so that they are compatible with your OS. You might get such errors if there’s a mismatch in the versions. Now, let’s explore the various reasons why this happens and how to resolve it.

What is Realtek Semiconductor Corp update install error?

Realtek Semiconductor Corp update install error is a common error that usually occurs when trying to install the latest Windows updates.

Some of the triggers for this error include:

  • Outdated OS – Most drivers are created for a specific version of Windows. You may encounter this error if there’s a mismatch between the driver and your Windows version.
  • Driver errors – If you’re experiencing driver issues, it may be because it is incompatible, outdated, or corrupt.
  • Incomplete installation – This error can also occur if the update process was interrupted either by a slow or unstable internet connection.

How do I fix Realtek Semiconductor Corp extension install error?

Before you begin troubleshooting, please perform the following preliminary steps:

If all these things are fine, then it’s time to troubleshoot the Realtek Semiconductor Corp Extension Install error on your own by following these steps.

1. Check for Windows updates 

  1. Hit the Windows key and click on Settings.settings windows 11
  2. Click on Windows Update, then select Check for updates.check-updates-w11 windows 11 blue screen
  3. If available, Download & install.download and install option in the settings

2. Run the Windows update troubleshooter 

  1. Hit the Windows key and click on Settings.settings windows 11
  2. Click on System and select Troubleshoot.Open system troubleshooter
  3. Navigate to Other troubleshooters.other troubleshooters
  4. Click the Run option for the Windows Update troubleshooter.windows-update-run-troubleshooter runtimebroker.exe error

3. Rollback driver version

  1. Hit the Windows key, type Device Manager in the search bar, and click Open.device manager w11
  2. Navigate to your Realtek driver, right-click, and select Properties.properties
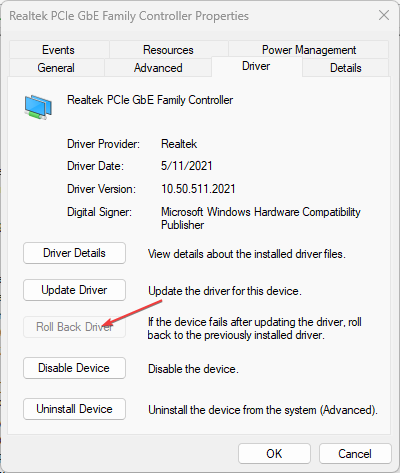
  3. Switch to the Driver tab and select the Roll Back Driver option.
  4. Select a reason for rolling back, then click Yes.
  5. Restart your PC.

4. Download the Realtek drivers from the Manufacturer 

The drivers for your Realtek sound card can be downloaded directly from Realtek’s website. The process of downloading drivers can be a little confusing and time-consuming, but it is necessary if you want to use your computer or any of its components.

The first step in installing a new driver is finding out what version of Windows you are running. Once you know which version of Windows you have installed on your computer, download the drivers from Realtek’s website by selecting your operating system.

5. Hide the updates

  1. If you had already installed the update, you first need to rollback the update before hiding it.
  2. Navigate to your browser and go to the Microsoft Download Center page to download the Show/hide troubleshooter file.
  3. Open the file after it has finished downloading and click on Next.
  4. The wizard will start running to detect any problems.
  5. Now, select the Hide updates option.
  6. A list of updates will appear. Select the one with the Realtek semiconductor corp extension install error and hit the Next button.
  7. Close the wizard and go back to the Windows update page.
  8. You’ll realize that the update has been omitted from the list.

It should be noted that this is only a temporary solution. Microsoft releases regular updates, so they will be automatically installed when the next updates become available. Hopefully, it will have resolved this issue.

Windows update errors are common, so you need a cheat sheet on dealing with them whenever they appear. If they happen often enough, consider installing one of the Windows update repair programs to help you easily sail through such hiccups.

That brings us to the close of this article, but don’t let the conversation end here. We’d love to hear of any additional solutions that may have helped you out of this situation but missing from our list. Share with us in the comment section below.

Dell.SupportAssist.Client.Plugin.IDiags.dll [Download & Fix]

Dell.SupportAssist.Client.Plugin.IDiags.dll is an important component of Dell software that works in sync with the Dell Update app to ensure that the system recovery environment is up to date.

If your computer is unable to find this DLL in the system folder, it will fail to diagnose, fix the system issues and recover your system.

Why is the Dell.SupportAssist.Client.Plugin.IDiags.dll missing?

The DLL file in question might go missing because of one or more reasons discussed below:

  • Incomplete app installation – If the program installation process was interrupted or the app was not installed successfully, the Dell.SupportAssist.Client.Plugin.IDiags.dll file can go missing.
  • Malware infection – A malware and virus infection on your computer creates many weird problems on your system, including the missing DLL files.
  • Compatibility issues – If you installed the latest version of Windows or recently upgraded the app, the old DLL files may not be compatible anymore.
  • Accidental modification or deletion – There are chances that the DLL file accidentally got deleted or gets modified by a third-party app.
  • DLL file is corrupt or damaged – If the DLL file gets broken or corrupt, it will no longer be traceable, hence the Dell.SupportAssist.Client.Plugin.IDiags.dll not found error.

If you are looking for ways to restore the Dell.SupportAssist.Client.Plugin.IDiags.dll file, employ the methods mentioned in this guide.

How can I fix the Dell.SupportAssist.Client.Plugin.IDiags.dll error?

Before proceeding to the complex solutions, we recommend you try these basic workarounds:

  • Restart your computer to resolve the trivial bugs and restore things to normal.
  • Ensure that the latest available Windows updates are installed on your PC.
  • Scan your computer with Windows Defender or any other third-party antivirus to eliminate the malware.
  • Install the pending updates of the malfunctioning app.

If the DLL error still persists, implement the troubleshooting methods mentioned below.

1. Use a dedicated DLL fixer

The Dell.SupportAssist.Client.Plugin.IDiags.dll file can go missing because of the incompatibility between the DLLs of the third-party apps and the operating system. Fortunately, you can use a reliable DLL fixer tool to fix broken or missing file problems on your Dell computer.

These tools come in handy for resolving various issues, such as missing or corrupt system images, corrupt or incompatible damaged DLLs, malware-affected DLL files, and so much more.

2. Repair system files

  1. Press the Windows icon on the taskbar to launch the Start menu, type cmd in the search bar and choose Run as administrator to launch Command Prompt with elevated permissions.
  2. Type or paste the following command and press the Enter key to run the System File Checker scan. sfc /scannowDell.SupportAssist.Client.Plugin.IDiags.dll
  3. After the SFC scan is complete, type or copy-paste the following command and press the Enter key. DISM /Online /Cleanup-Image /RestoreHealthDell.SupportAssist.Client.Plugin.IDiags.dll

The SFC and DISM tools will scan all the protected system files to replace the corrupt or modified system files and images with the cached version. This will ensure that your system can successfully locate the Dell.SupportAssist.Client.Plugin.IDiags.dll file so that the application can work flawlessly.

3. Run the System Maintenance tool

  1. Press the Windows key, type control panel in the search bar, and choose the first search result to launch the Control Panel on your system.Dell.SupportAssist.Client.Plugin.IDiags.dll
  2. Choose Small icons in the View by drop-down and then click Security and Maintenance.Dell.SupportAssist.Client.Plugin.IDiags.dll
  3. Expand the Maintenance section to view the related settings and press the Start Maintenance button located here.Dell.SupportAssist.Client.Plugin.IDiags.dll

System Maintenance is a troubleshooting tool in-built into Windows that optimizes the system performance to ensure there are no underlying issues with your system.

After the maintenance task is complete, you can launch the concerned app again to check whether or not you received the missing DLL error.

4. Manually install the missing DLL

Generally, manually installing the DLL files is discouraged owing to the risks involved on untrusted websites, but you can download and install the missing DLL file from a reliable source available online.

For this, you need to visit this website and press the download button next to the DLL file version compatible with your computer. Extract the DLL file from the ZIP or RAR archive, and then make sure to install it in the following location: C:\Windows\System32

You can also install the DLL file in the same folder that contains the application you are facing issues with. After you download and install the DLL file successfully, attempt to launch the application, and hopefully, the Dell.SupportAssist.Client.Plugin.IDiags.dll not found error will no longer bother you.

Those are the proven fixes that can help restore the missing Dell.SupportAssist.Client.Plugin.IDiags.dll file so that you no longer run into an error when launching different apps on your PC.

Also, if the Obs.dll file is missing from your computer, refer to the exhaustive guide to fix the problem. We also have a new guide on how to uninstall Dell SupportAssist, so feel free to check it out for more information.

Which solutions helped resolve the missing DLL error, let us know in the comments section below.

MSVCP71.dll Not Found: How to Fix This Error

DLL files, be they the ones published by Microsoft or third-party developers, play a vital role in running the apps. And when a DLL is missing, you would encounter critical issues with the programs that use it. One such is the MSVCP71.dll file that often throws the error.

For those trying to figure out what is MSVCP71.dll, it’s a system library file that was extensively used earlier but now finds application in only a few programs that rely on Visual C or C++. When it’s missing, these programs fail to launch. So, let’s find out how you can fix things.

Why is MSVCP71.dll missing in Windows?

Here are a few reasons MSVCP71.dll is not found:

  • Corrupt system files: In most cases, when a DLL file is missing or can’t be located by the app at the time of launch, it’s the corrupt system files to blame.
  • Improper app installation: Since the MSVCP71.dll in Windows 10 is used only by a handful of applications and comes bundled with them, there’s a high chance that the program wasn’t installed properly if the DLL can’t be found.
  • DLL got deleted: There have also been cases where one of the applications using the DLL, or even the end user, deleted the file.

What can I do when MSVCP71.dll is missing?

1. Use a dedicated DLL repair tool

When a third-party DLL can’t be found on the PC, it’s either an inadvertent removal or incompatibility between the OS and the file to blame. And in this case, an effective DLL repair tool can help you.

2. Copy the DLL from another PC

A quick solution that worked for many was to copy the DLL from another PC running the same operating system. The MSVCP71.dll can be found in either of the two paths:C:\Windows\System32 C:\Windows\SysWOW64

Simply head to the folder, locate the DLL, copy it to a USB drive, and then move the file to the computer where it’s missing.

Remember, there’s also a chance the other PC might not have the DLL file you are looking for. In this case, you can try the repair tool recommended earlier or move to the fixes listed next.

3. Run the DISM and SFC scan

  1. Press Windows + S to open Search, type Command Prompt, right-click on the relevant result, and select Run as administrator.command prompt
  2. Click Yes in the UAC prompt.
  3. Paste the following commands individually and hit Enter after each:DISM /Online /Cleanup-Image /CheckHealth DISM /Online /Cleanup-Image /ScanHealth DISM /Online /Cleanup-Image /RestoreHealth
  4. Now, execute this command to run the SFC scan:sfc /scannowsfc scan to fix missing msvcp71.dll
  5. Once done, restart the computer for the changes to come into effect.

4. Reinstall the affected application

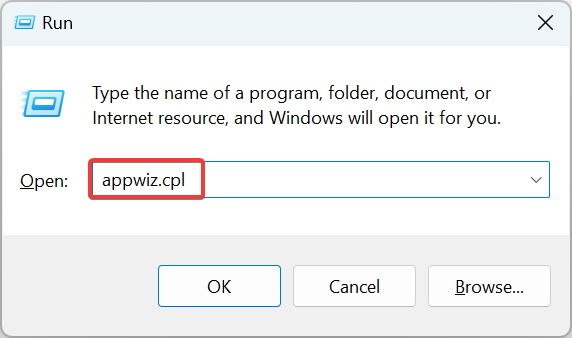
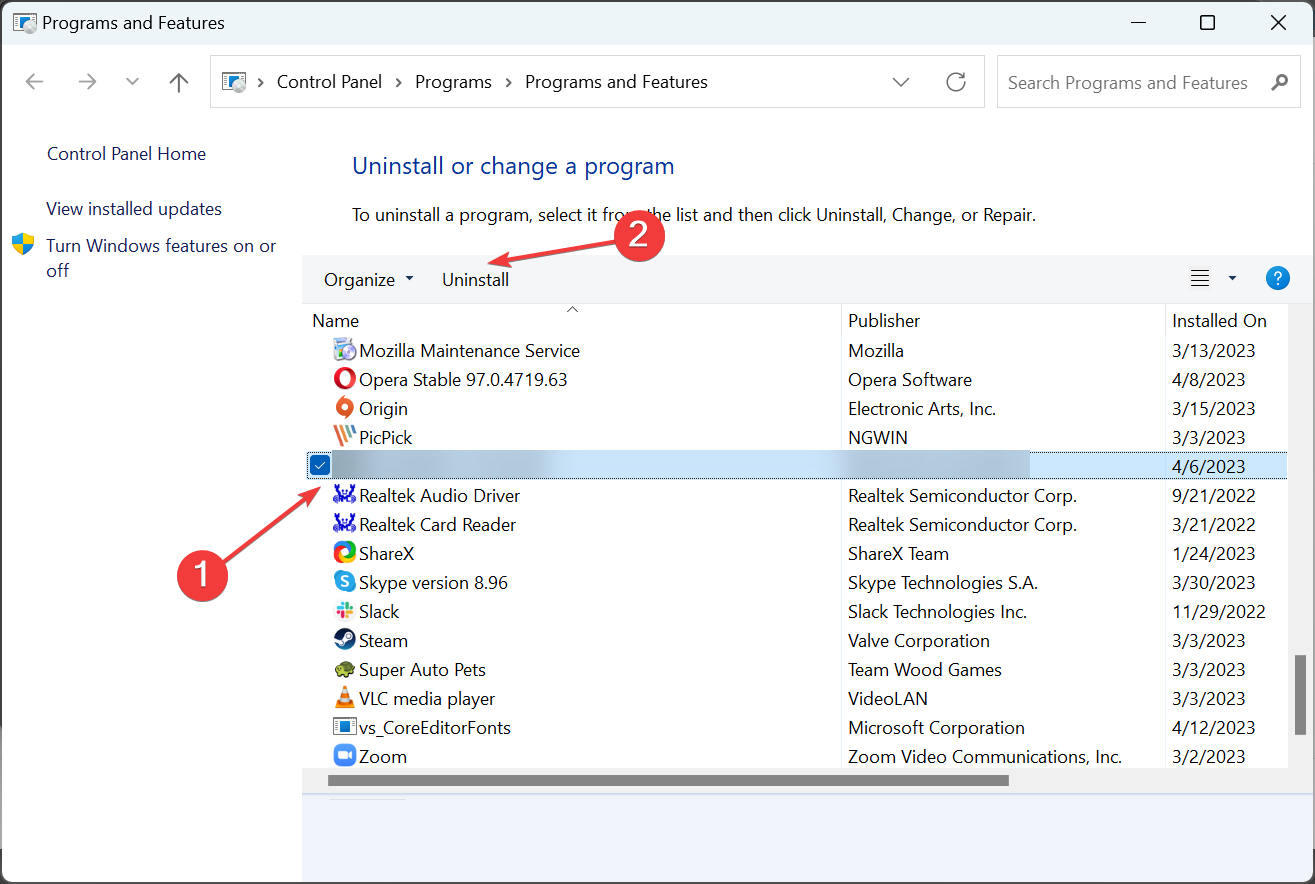
  1. Press Windows + R to open Run, type appwiz.cpl in the text field, and hit Enter.appwiz.cpl
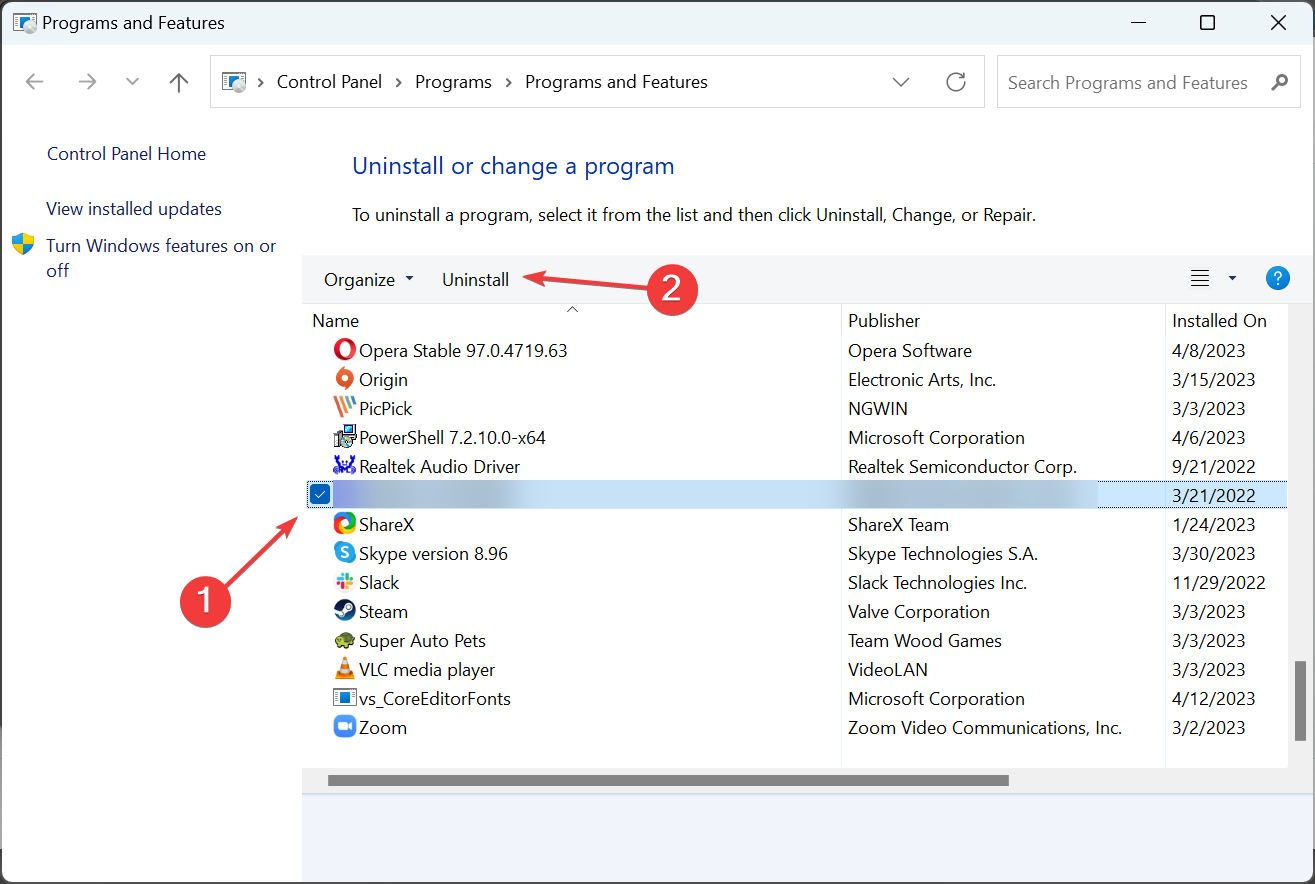
  2. Select the application from the list that’s throwing the DLL not found error, and click Uninstall.uninstall to fix msvcp71.dll
  3. Follow the on-screen instructions to complete the process.

As discussed earlier, programs that require a DLL usually have these bundled as a package and store them on the PC during the initial installation. So, when MSVCP71.dll is missing from your computer, reinstall the affected program, and you will get the file if it wasn’t added the first time around.

Also, you could use a reliable uninstaller software to get rid of any leftover files for a clean reinstall.

5. Repair Visual C++ Redistributables

  1. Press Windows + R, type appwiz.cpl, and click OK.appwiz.cpl
  2. Select a Microsoft Visual C++ Redistributable entry here and click Change.change to fix missing msvcp71.dll
  3. Now, click on Repair.repair to fix msvcp71.dll
  4. Wait for the repair to complete.repair
  5. Similarly, repair the other Visual C++ Redistributables listed here one at a time.

Repairing the redistributable packages can sometimes help get the missing MSVCP71.dll. Also, you could download Microsoft Visual C++ Redistributables from the official website.

Before you leave, check the best DLL repair tools to keep such errors at bay in the future.

For any queries or to share a solution with us, use the comment section below.

d3dx9_30.dll Not Found: How to Fix this Error

DLLs are critical to apps running on the computer, and multiple programs often share these files, making changes to them simultaneously. As a result, you are more likely to encounter problems with them. One such file that has troubled quite a few users is d3dx9_30.dll.

Several users who face the issue need to download d3dx9_30.dll for Resident Evil 4 or PES 13 when the DLL is missing. The process is not always as complex as one would imagine, and you can easily fix the d3dx9_30.dll not found error in Windows. Let’s find out how!

What is the d3dx9_30.dll?

The d3dx9_30.dll file, as is somewhat evident from the name, is linked to Microsoft DirectX, a collection of APIs to handle multimedia, gaming, and other graphic-intensive tasks. And issues with this DLL arise due to running an outdated DirectX, removal of the DLL file, or problems with the application.

The error usually appears when running games. NFS Carbon, League of Legends, and Flatout 2 are the prominent ones that often throw the d3dx9_30.dll is missing error.

How do I fix the d3dx9_30.dll error?

1. Use a dedicated DLL repair tool

Be it the DLLs published by Microsoft or the ones from third-party developers, a dedicated repair tool always works. And in the case of the latter, it’s usually incompatibility with the OS to blame for the problem.

So, we suggest you use one of the best DLL repair tools and a d3dx9_30.dll fixer, to seamlessly download the file and get rid of the error message in no time.

2. Manually move the DLL

Another solution that worked for many was to move the missing DLL file from a healthy computer to the affected one. The d3dx9_30.dll location is:C:\Windows\System32

So, if you were wondering where to put d3dx9_30 dll, head to the System32 folder, and move the DLL you copied from the same folder on the other PC.

3. Update DirectX

  1. Press Windows + I to open Settings, navigate to the Windows Update tab from the left, and click on Check for updates.check for updates
  2. Now, if an update is available for DirectX, wait for it to download & install.
  3. Finally, restart the computer for the changes to come into effect.

While users could manually update DirectX and download d3dx9_30.dll earlier, the newer versions are now released via Windows Update. So, it’s all the more simple to get the latest version.

4. Download the DirectX End-User Runtime Web Installer

  1. Go to Microsoft’s official website, choose English from the Select Language dropdown menu, and click Download.directx to fix d3dx9_30.dll
  2. Once done, run the setup and follow the on-screen instructions to complete the process.setup

Several users managed to fix things when d3dx9_30.dll was missing by downloading the DirectX End-User Runtime Web Installer. Even Microsoft recommends the solution in its official blog on the missing DLL error.

5. Reinstall the application

  1. Press Windows + R to open Run, type appwiz.cpl in the text field, and hit Enter.appwiz.cpl
  2. Locate the application throwing the error, select it, and click on Uninstall.uninstall to fix missing d3dx9_30.dll
  3. Follow the on-screen instructions and choose the appropriate response when prompted to complete the process.

In most cases, simply uninstalling the application throwing the error, and downloading it all over again will help if the DLL file is not found. This especially works when d3dx9_30.dll is missing in Windows 10 and the latest iteration.

Once you have managed to get rid of the problem, choose one from the list of the best DLL repair tools to keep such errors at bay in the future.

For any queries or to share a solution that worked for you, drop a comment below. Also, don’t miss our latest guide that shows you what to do if d3dx9_25.dll is missing.

d3dx11_43.dll Not Found: Fix It in 5 Steps

Most Windows users who don’t understand the intricacies often encounter an error and find themselves in a tricky spot. But most of these are easily fixable, especially when a DLL file is not found. And d3dx11_43.dll is one such file that usually throws an error.

Part of the DirectX library, the DLL is used by particularly graphic-intensive apps, for instance, games. Users generally find d3dx11_43.dll missing on Need for Speed: The Run and GTA 5. Let’s learn about the problem and the solutions that worked for others!

Why is d3dx11_43.dll not found?

Here are a few reasons the DLL file is missing:

  • Improper installation of the program: The most common reason the DLL is not found is when the program that requires it was not installed properly, and the file is not located in its directory.
  • Issues with the graphics driver: Oftentimes, a corrupt or outdated driver is responsible for the error, and a quick reinstall does the trick.
  • DLL files are not readable: In some cases, it is the corrupt state of the file that triggered the d3dx11_43.dll is either not designed to run on Windows or it contains an error message.

What can I do when d3dx11_43.dll is missing?

1. Use a dedicated DLL repair tool

When it comes to missing DLL files, there is no better way to fix things than using a dedicated repair tool. It works seamlessly, even when the DLL files are from third-party apps, and incompatibility is to be blamed for the error.

2. Reinstall the graphics driver

  1. Press Windows + X to open the Power User menu, and choose Device Manager.device manager
  2. Expand the Display adapters entry, right-click on the graphics adapter, and select Uninstall device.uninstall to fix d3dx11_43.dll
  3. Tick the checkbox for Attempt to remove the driver for this device, and then click Uninstall.uninstall
  4. Once done, restart the computer, and Windows will automatically install a fresh copy of the driver.

Some users reported that when d3dx11_43.dll was missing in Windows 10, the issue was linked to the graphics driver, and reinstalling it worked. Also, you could try updating the graphics driver.

In order to update the graphics drivers correctly, without causing system incompatibility, it’s better to use a dedicated driver tool to automatically get the latest version for all drivers.

⇒ Get Outbyte Driver Updater

3. Download DirectX End-User Runtime Web Installer

  1. Press Windows + E to open File Explorer, paste the following path in the address bar, and hit Enter:C:\Windows\System32path
  2. Locate the d3dx11_43.dll file, select it, and hit Delete.delete to fix missing d3dx11_43.dll
  3. Similarly, delete the file from the following path:C:\Windows\SysWOW64
  4. Once done, go to Microsoft’s official website, pick English from the Select Language menu, and click on Download.directx to fix missing d3dx11_43.dll
  5. After you have the setup, run it and follow the on-screen instructions to go through with the installation.setup

Deleting the d3dx11_43.dll file and then running the DirectX End-User Runtime Web Installer helps when the DLL is corrupt and can’t be read by the application. So, while it appears to be there and things seem in order, you still need to replace it to get things running.

4. Reinstall the game

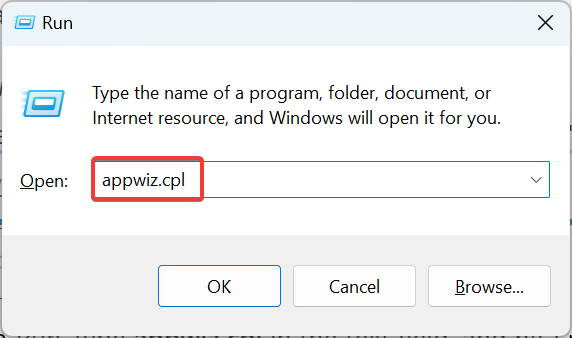
  1. Press Windows + R to open Run, type appwiz.cpl in the text field, and hit Enter.appwiz.cpl
  2. Select the app that’s throwing the missing DLL file error, and click Uninstall.uninstall program to fix d3dx11_43.dll
  3. Follow the instructions and choose the appropriate options to complete the uninstallation process.
  4. Now, head to its official website or a reliable source, and download the program’s setup, to install it all over again.

5. Perform a System Restore

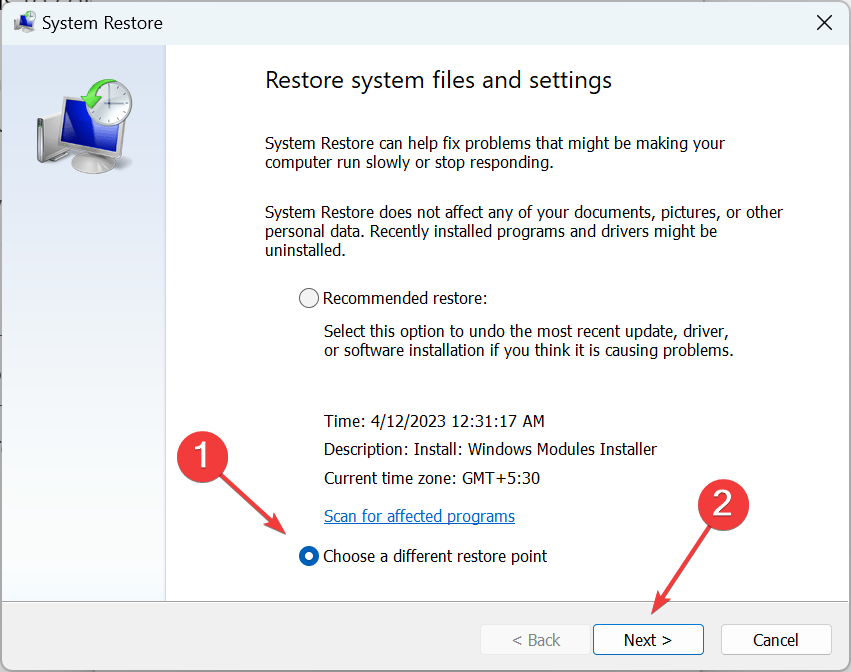
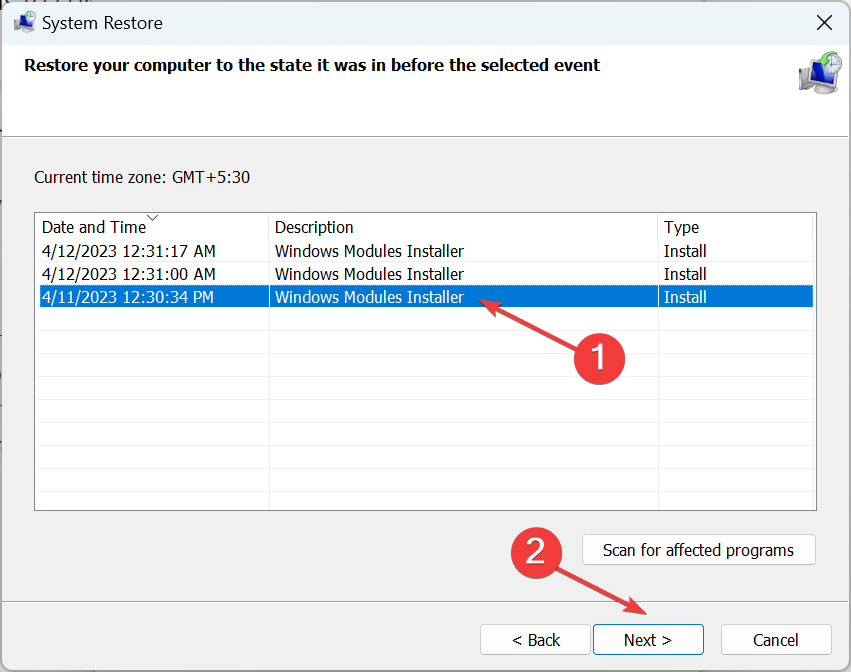
  1. Press Windows + R to open Run, type rstrui.exe, and click OK.system restore to fix d3dx11_43.dll
  2. Select the Choose a different restore point option, if available, and click Next.restore to fix d3dx11_43.dll
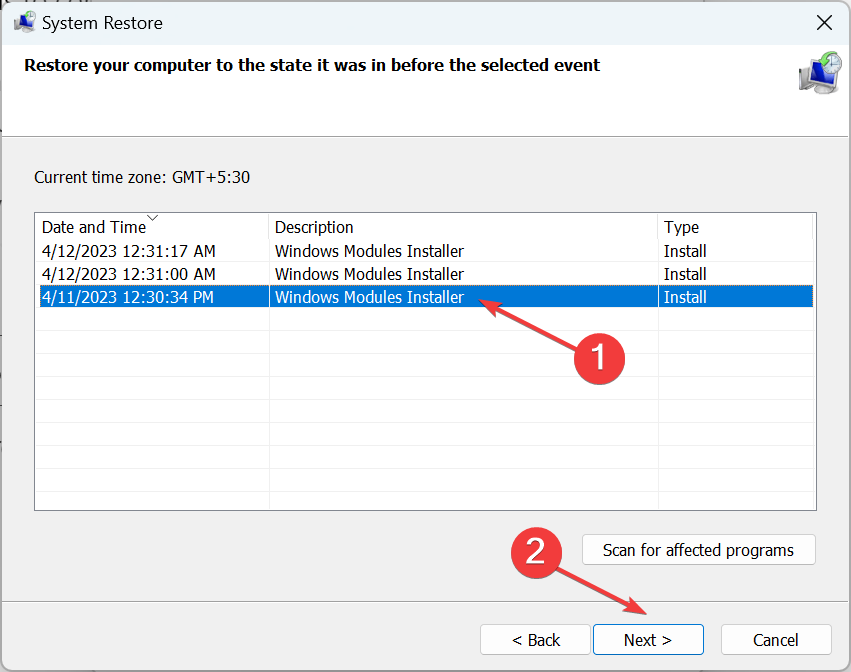
  3. Now, pick another restore point from the list, one created before the error first appeared, and click Next.restore point
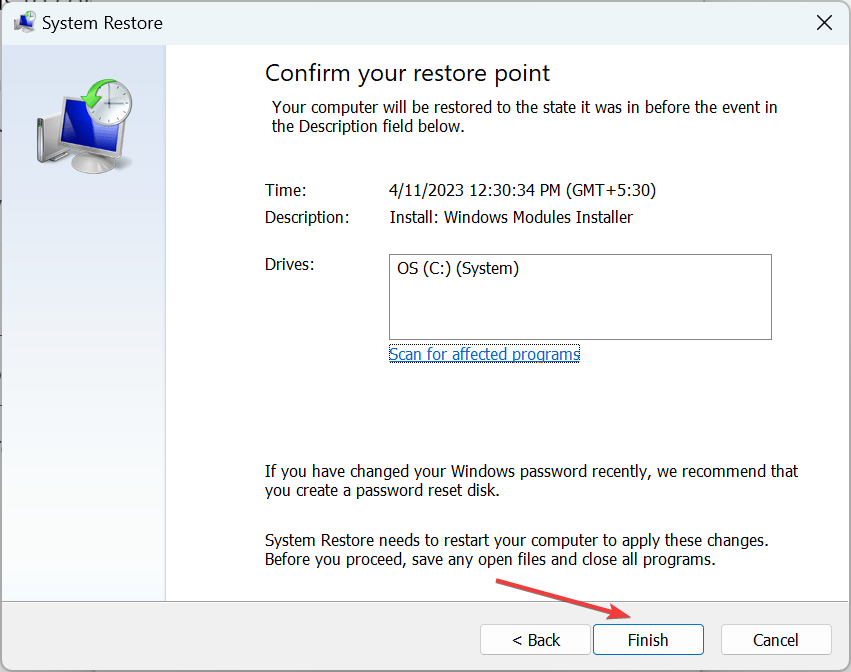
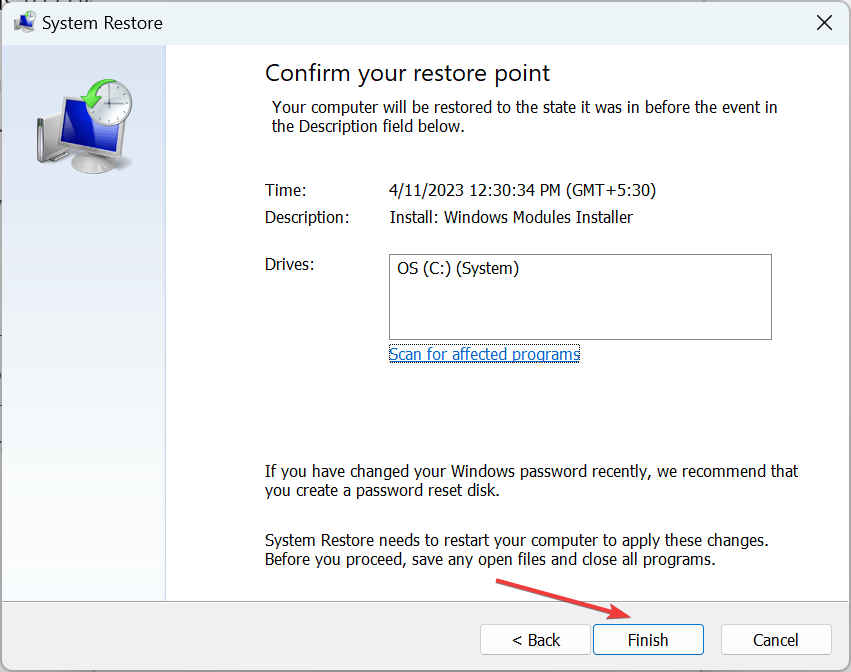
  4. Verify the details, and click Finish to start the restore.system restore to fix d3dx11_43.dll

In case recent system changes are to blame when d3dx11_43.dll is not found in Windows 10, going for a system restore with the correct restore point should help. The process is simple and shouldn’t take much time.

Before you leave, check the best DLL repair tools and get one today to prevent such errors from reappearing!

For any other queries or to share more solutions with us, drop a comment below.

RiotGamesApi.dll Was Not Found: 5 Ways to Fix It

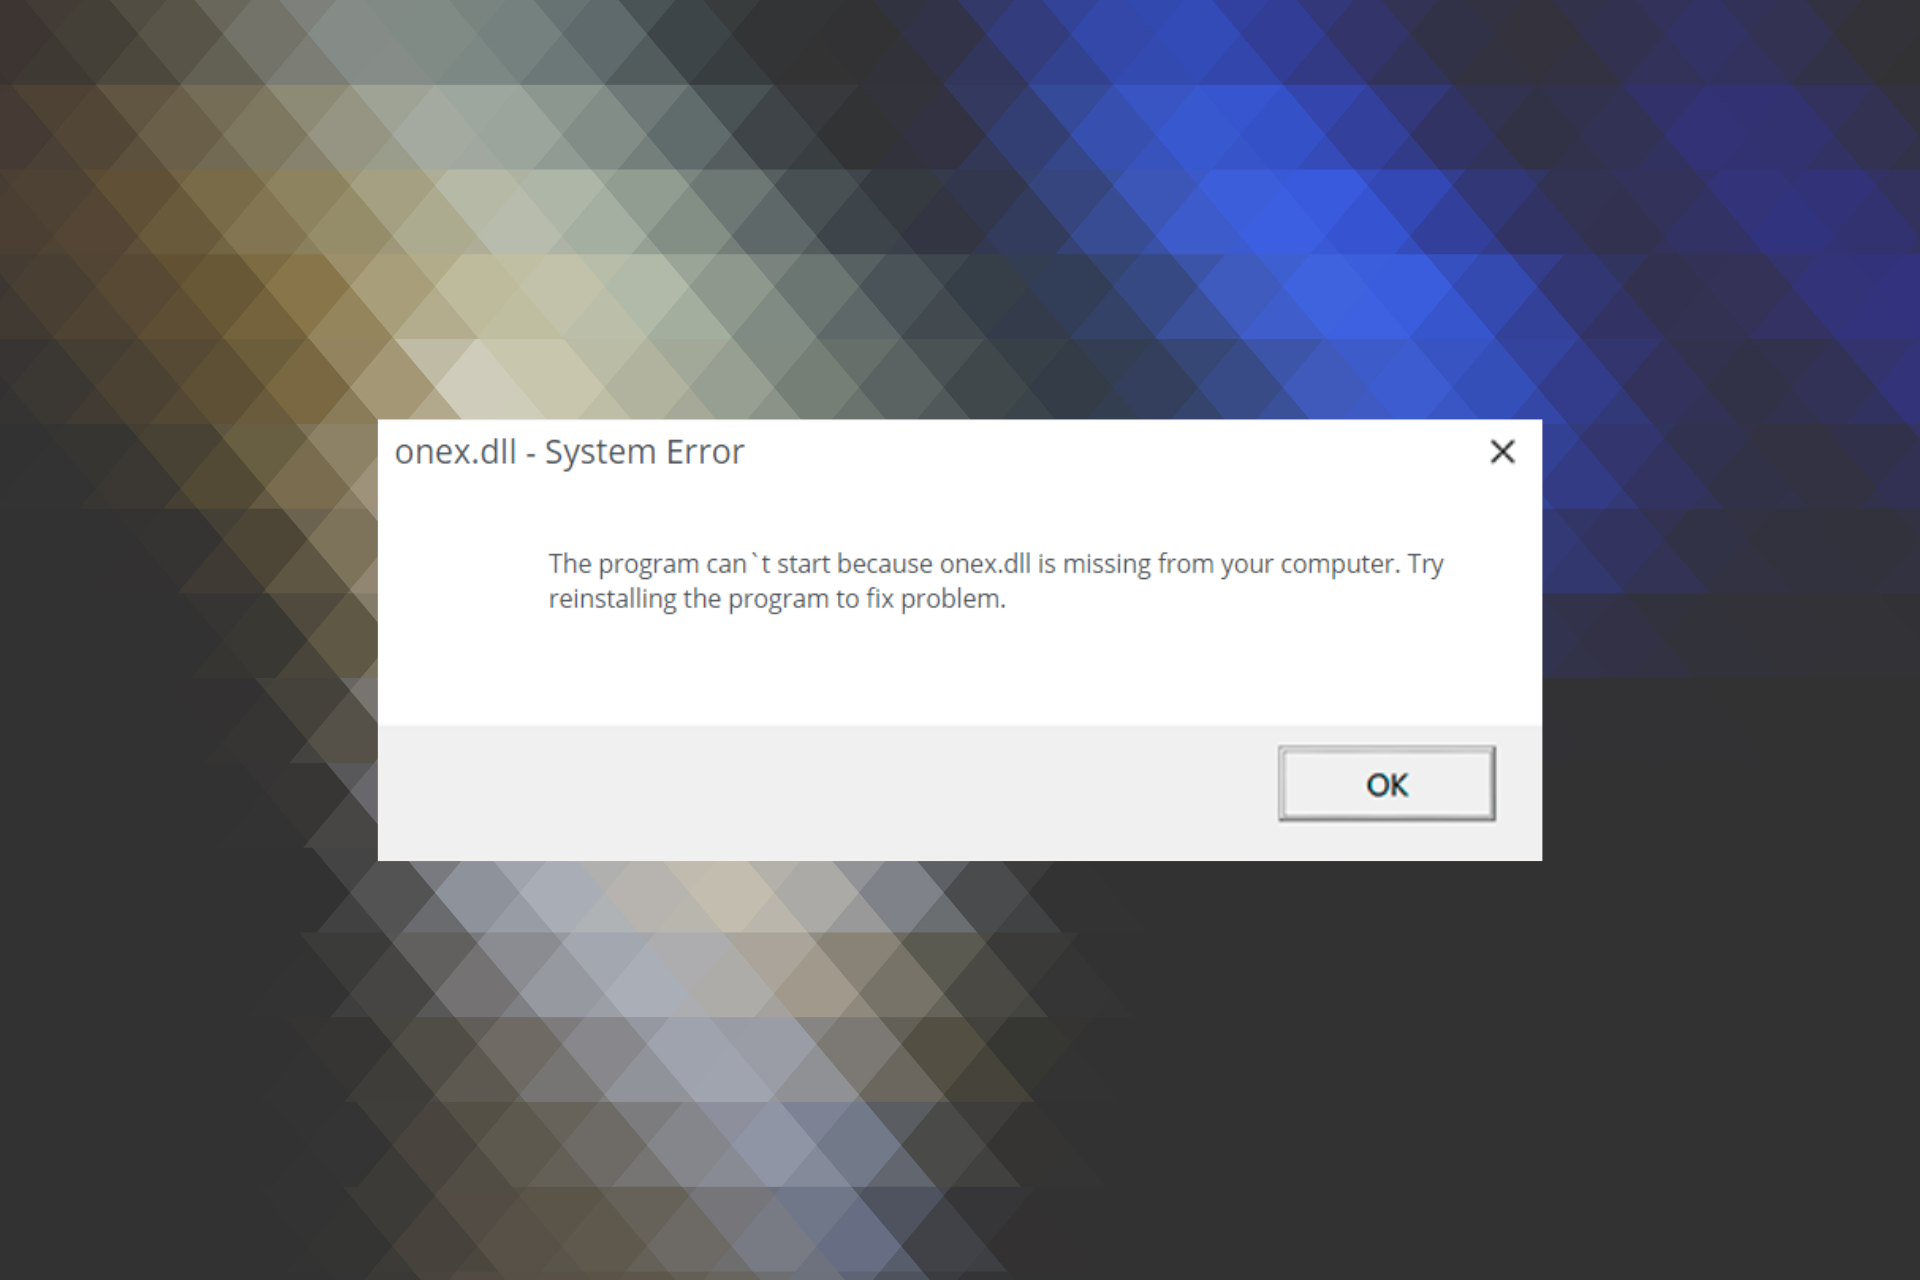
An error reading The program can’t start because RiotGamesApi.dll is missing from your computer. Try reinstalling the game to fix this problem stops Windows users from launching the Riot gaming client.

As a result, you won’t be able to launch League of Legends as well as other titles belonging to this client. In today’s guide, we’ll explain how to fix this in just a few simple steps.

What can I do if RiotGamesApi.dll is missing?

Before making any drastic changes, try restarting your PC and relaunch Riot, and install any pending game or client updates.

1. Use a dedicated DLL repair tool

When faced with the problem, your primary approach should be to use an effective DLL repair tool. Problems with DLL files linked to third-party apps arise due to incompatibility and are often complex in nature. So, dedicated software will help get things running in no time.

2. Repair the corrupt system files

  1. Press Windows + S to open Search, type Command Prompt, right-click on the relevant result, and then select Run as administrator.cmd
  2. Click Yes in the UAC prompt.
  3. Paste the following commands individually and hit Enter after each to run DISM:DISM /Online /Cleanup-Image /CheckHealth DISM /Online /Cleanup-Image /ScanHealth DISM /Online /Cleanup-Image /RestoreHealth
  4. Next, run the following command for the SFC scan:sfc /scannowsfc scan to fix riotgamesapi.dll
  5. Once done, restart the computer for the changes to come into effect and relaunch the game that earlier threw the error.

3. Reinstall the game

  1. Press Windows + R to open Run, type appwiz.cpl, and click OK.appwiz.cpl
  2. Select the affected game, and click on Uninstall.uninstall to fix riotgamesapi.dll
  3. Follow the on-screen instructions to complete the process.
  4. Once done, download the game from the official website or the client, and the error won’t appear anymore.

A quick fix when RiotGamesApi.dll is missing in Windows is reinstalling the game. If that doesn’t work, you can completely uninstall the Riot Games client and then download it again. Just make sure to use the default installation settings this time around.

4. Perform a system restore

  1. Press Windows + S to open Search, type Create a restore point, and click on the relevant result.system restore
  2. Click the System Restore button.system restore
  3. Select Choose a different restore point and click Next.restore point to fix riotgamesapi.dll
  4. Pick a restore point created before the error first appeared, and click Next.restore point
  5. Finally, verify the details, and click on Finish to start the process.restore to fix riotgamesapi.dll

Once the restore is complete, you might notice minor changes to the system, but the Riot client and the installed games should work fine without throwing an error about the missing RiotGamesApi.dll file.

5. Update graphics card drivers

  1. Open Device Manager.
  2. Locate the Display adapters section and click on the downward arrow to expand it.
  3. Right-click on your graphics card and select Update driver.choose update driver for NVIDIA graphics card device manager
  4. Pick Search automatically for drivers and wait for the process to complete. automatic driver search

Why is RiotGamesApi.dll missing?

Here are a few reasons you can’t launch LoL due to a missing RiotGamesApi.dll file:

  • Improper game or client installation: critical DLL file is missing due to an improper installation.
  • Recent changes made to the PC: changes like installing a game optimization software or manually changing the file path
  • The DLL file is corrupt: The DLL file might be corrupt and, as a result, is not readable anymore.

For those wondering is DLL files legit, the answer is yes. These are critical files, sometimes offered by Microsoft and on other occasions by third-party developers, for their programs to run effectively. So, you must replace a missing DLL file ASAP. And you could always use a reliable DLL repair tool.

For a better experience, check some quick tips to boost gaming performance.

Tell us which fix worked in the comments section below.

rbxfpsunlocker.dll: What Is It & How to Download It

Each program or even an add-on carries several DLL files to run effectively, and when a DLL file is missing, the app does not launch. In the case of Roblox FPS Unblocker, it’s usually the rbxfpsunlocker.dll file to blame.

The program is specifically designed for Roblox after several players got banned for using an FPS booster. But when Roblox FPS Unlocker is not working due to a missing rbxfpsunlocker.dll file, things are easy to troubleshoot. Here’s everything you need to know about it.

Why is the rbxfpsunlocker.dll file missing?

Here are a few reasons rbxfpsunlocker.dll is not working or cannot be found:

  • Improper app installation: One of the primary reasons Roblox FPS launcher can’t locate the DLL file is issues with the installation itself, and these are evident right away in one form or the other.
  • Major changes post-installation: When you launch a program, it looks for the DLL file in the directory or the System32 folder, and sometimes, the file can’t be found. This happens when files are moved post-installation, either by a user or a third-party program.
  • Inadvertent deletion of DLL: In rare cases, the file can be deleted by the app or even the end user, and, as a result, you come across the rbxfpsunlocker.dll DLL not found error.

What can I do if rbxfpsunlocker.dll is missing?

Tip icon Tip
When the concerned DLL file is not found, your primary approach should be to move it to the affected device from another computer running the program and the same OS. Also, we recommend you check with the Roblox support team whether the software and the DLL go against their policies.

1. Use a dedicated DLL repair tool

When it comes to DLL files linked with third-party apps, the problem usually arises due to incompatibility, and the built-in Windows methods don’t work. This is where a dedicated DLL repair tool comes into the picture and gets the missing rbxfpsunlocker.dll file in no time.

2. Reinstall the program linked to the DLL

  1. Press Windows + R to open Run, type appwiz.cpl in the text field, and hit Enter.appwiz.cpl
  2. Locate Roblox FPS Unlocker, select the program, and click Uninstall.uninstall program to fix rbxfpsunlocker.dll
  3. Select the appropriate response and follow the on-screen instructions to complete the process.
  4. Once done, you can head to the official website from where you downloaded the software earlier, and proceed with the installation. Also, make sure to go with the default installation settings to avoid encountering similar issues later.

Another simple, though not that quick, fix is reinstalling the program the DLL file comes bundled with. And this is generally the solution recommended by Windows in the error box. So, try it for the missing rbxfpsunlocker.dll file.

Besides, if things don’t work out, you could employ a reliable uninstaller software to remove all traces of the program before reinstalling it.

3. Perform a system restore

  1. Press Windows + R to open Run, type rstrui.exe, and click OK.rstrui.exe
  2. Select the Choose a different restore point option and click Next.restore point to fix rbxfpsunlocker.dll
  3. Pick a restore point from the list created before the error first appeared, and click Next.restore point
  4. Verify the restore details, and click Finish.restore to fix rbxfpsunlocker.dll
  5. Wait for the process to complete and verify whether the missing rbxfpsunlocker.dll now appears.

Sometimes, due to recent changes to the PC, a DLL could go missing, or the program relying on it can’t find the file. In such cases, it’s best that you perform a system restore to get rid of the error.

After you download the missing rbxfpsunlocker.dll and have the program running fine, check some quick tips to optimize Windows for gaming. Besides, discover the best DLL repair tools, get one, and never worry about such errors.

For any queries or to share a solution that worked for you, use the comments section below.

qqmail.dll is Missing? How to Fix or Download It Again

QQmail, developed by Tencent, a company based in China, is an excellent free email service and works the same way as other popular ones, like Gmail or Yahoo. QQmail also contains a qqmail.dll file which is required for the basic functioning of the program.

As with others, when the DLL file is missing, users report issues opening the related program. So, if you are, too, getting errors due to a missing qqmail.dll file, here’s all you need to know!

Why is the qqmail.dll missing?

Here are a few reasons the file is missing:

  • Improper installation of QQmail: The most common reason you face issues with the DLL files linked to third-party apps is improper installation. You may also find Npqqmailwebkit.dll missing in some cases, and the solutions below work.
  • The DLL file was deleted: More often than not, the DLL file is deleted by QQmail itself or the user, and thus an error appears each time the program is launched.
  • Antivirus is blocking access to the DLL: Though rare, Tencent’s programs are often classified as adware or malware by several third-party antiviruses, and that’s why the file is not accessible, and you may have a missing DLL file.

What can I do if qqmail.dll is missing?

Before we proceed to the complex ones, try these quick solutions first:

  • Disable any third-party antivirus installed on the PC and check whether you get rid of the error message. If this works, we recommend you switch to a Windows and app-friendly antivirus.
  • In case there’s another computer with the program installed, check its directory, copy the DLL file to a USB drive, and move it to the PC where the file is missing. This a better solution than downloading qqmail.dll.

If these don’t work, move to the fixes listed next.

1. Use a dedicated DLL repair tool

When you face issues with a DLL file linked to a third-party program, it’s generally due to incompatibility. And on such occasions, you have dedicated software to take care of it.

2. Reinstall the program

  1. Press Windows + R to open Run, type appwiz.cpl in the text field, and hit Enter.appwiz.cpl
  2. Select QQmail from the list of programs, and click Uninstall.uninstall to fix missing qqmail.dll
  3. Follow the on-screen instructions to complete the process.
  4. Once done, restart the computer for the changes to come into effect.
  5. Now, download QQmail from the official source, like you did earlier.
  6. Finally, you should be able to launch the program without it throwing any errors.

When you come across missing DLLs, Windows recommends reinstalling the program itself to quickly resolve the problem, as it’s considered a sure-shot fix. And this works just as well in the case of qqmail.dll.

3. Perform a system restore

  1. Press Windows + S to open Search, type Create a restore point in the text field, and click on the relevant search result.create a restore point
  2. Click on the System Restore button.system restore to fix qqmail.dll
  3. Select the Choose a different restore point option and click Next.choose a different restore point
  4. Now, select a restore point from the list that was created before the DLL error first appeared, and then click Next.restore to fix missing qqmail.dll
  5. Verify the restore details and click Finish.finish
  6. Wait for the restore process to complete. It will take some time, depending on the changes to be made.

When other solutions fail to work, and you still can’t get the missing qqmail.dll file, a quick solution would be to perform a system restore. That’s why it’s recommended that you regularly create restore points or configure things such that these are created automatically.

Before you leave, take a quick look at the best DLL repair tools and download one to prevent such errors from reappearing.

Tell us which fix worked for you in the comments section below.

pholder.dll: What Is It & How to Download if It’s Missing

Every DLL (Dynamic-link library) file in Windows is critical and is shared by several applications simultaneously. The same is the case for pholder.dll, a DLL file linked to Microsoft Visual Studio.

Developed by Microsoft, this DLL is not a critical Windows file and usually involves third-party programs. If you are running any that rely on it, and the DLL file is missing, the application won’t launch. Let’s find out more about the program.

Why is pholder.dll missing?

Here are a few reasons the DLL is missing in Windows 10 and other iterations:

  • Improper app installation: A common reason for the problem is when the app isn’t installed properly. Maybe the setup crashed, or security software blocked the installation of certain components.
  • The DLL file got deleted: On some occasions, the DLL file might get deleted by the program using it or due to an inadvertent error on the user’s part.
  • Malware or virus infection: A malware or virus is known to make changes to the PC, delete files and even download more harmful ones. This might also affect the pholder.dll file in Windows.

What can I do if pholder.dll is missing?

Tip icon Tip
When it comes to DLL files, you can always replace them with a copy stored on another PC running the same operating system. It’s quick and completely safe. Also, we don’t recommend downloading DLL files from untrusted sources, especially websites that don’t appear reliable.

1. Use a dedicated DLL repair tool

When it comes to using programs, especially the ones that will download files to the computer, you must choose only the best one. And for DLL files, there’s nothing better than an expert-recommended repair tool that is effective at quickly identifying and replacing the missing program-linked DLL because the problem often arises due to incompatibility between the app and the OS.

These will fix things in no time and require minimum intervention from the user’s end. Hence, you will get rid of all DLL-related errors for good.

2. Scan for malware

  1. Press Windows + S to open Search, type Windows Security in the text field, and click on the relevant result.windows security
  2. Click on Virus & threat protection.virus & threat protection
  3. Click Scan options.scan options
  4. Now, select Full scan and click the Scan now button.full scan to fix pholder.dll
  5. Wait for the full system scan to complete.

A full scan using the built-in Windows Security does a deep check of all the files stored on the PC and successfully identifies the malware most of the time. On the occasions when it doesn’t, you can rely on some of the best antiviruses for Windows.

3. Reinstall Visual Studio

  1. Press Windows + R to open Run, type appwiz.cpl in the text field, and hit Enter.appwiz.cpl
  2. Locate and select Visual Studio, and then click the Uninstall button at the top.uninstall to fix pholder.dll
  3. Click OK in the confirmation prompt to proceed.confirm to fix pholder.dll
  4. Now, wait for the uninstall process to complete, and then restart the computer for the changes to come into effect.
  5. Finally, head to Visual Studio’s official website, download the setup, and then run it to reinstall the program.

That’s it! When the DLL file linked to a program is missing, experts recommend reinstalling the program. And this also works in the case of missing pholder.dll. If things don’t work out on the first attempt, you can always use an effective uninstaller software to get rid of any leftover files.

Besides, before you leave, check the best DLL repair tools and download one today to keep such errors at bay.

For any queries or to share a solution that we might have missed, drop a comment below.

Social Club Error Code 1002: How to Quickly Fix It

If you’re a gamer, you must be aware of the Social Club gaming platform that guarantees you an unmatched experience when playing your favorite games. This fun may, however, be short-lived as you may run into an error saying the social club failed to load due to an incomplete installation.

While this is not an unusual experience, it doesn’t make it any less frustrating. You can expect such issues with most gaming platforms, as sometimes Steam fails to launch games too. If you’re in a similar fix, you’ll find this article extremely helpful in navigating the error code 1002.

What does error code 1002 mean?

The Social Club error code 1002 often occurs when trying to launch the game. Instead of the game opening, you’ll get a message directing you to exit the game and reinstall the Social Club app. Below are some possible reasons why this happens:

  • Antivirus software – Antivirus software could be blocking the Social Club launcher from running.
  • Proxy server – Your computer may be using a proxy server to connect to the internet instead of directly connecting with an IP address. This can cause proxy errors and limit access to certain websites.
  • Incorrect installation – It is possible that you don’t have the correct version of the game installed.
  • Conflicting app – Another app may be preventing you from launching your games.
  • Outdated game – If your game is not compatible with the latest version of Social Club, then Social Club will not allow you to launch your game.
  • You’re using a VPN – A VPN is used to encrypt your internet traffic and hide your IP address from prying eyes. However, with this added layer of security, some games will block users who use these services. 
  • Incorrect folder location – If you launched the game from another location other than its original folder, you may come across the Social Club error code 1002.
  • Missing files – When you launch a game, it has to access the game files to open. If some files are missing from the folder, the game won’t open.

How do I fix error 1002 on Social Club?

A few workarounds that may help eliminate the Social Club error code 1002 include:

1. Restore the default Documents folder 

  1. Hit the Windows + E keys to open File Explorer.
  2. Locate the Documents folder, right-click on it, and select Properties.
  3. Navigate to the Location tab and click on Restore Default.
  4. Next, click on Apply and OK to save the changes.

2. Remove the VPN 

  1. Press the Windows key and select Settings.settings windows 11
  2. Next, select Network & internet and click on VPN in the right-side menu.
  3. Select the VPN connection you want to disable, click on the drop-down, and select Remove.

3. Disable the proxy server

  1. Press the Start Menu icon and select Settings.settings windows 11
  2. Click on Network & internet on the left pane, then scroll down and click Proxy on the right pane.Network proxy settings
  3. Select Edit next to Use a proxy server option in the Manual proxy setup section.
  4. Next, toggle off Use a proxy server and click on Save.Disable proxy server

4. Allow the app through firewall

  1. Hit the Start menu icon, type Windows Security in the search bar, and click Open.
  2. Click on Firewall & network protection.
  3. Select Allow an app through firewall.allow an app through firewall
  4. In the drop-down menu, check Rockstar Games Social Club and Rockstar Games Launcher, then click OK to save changes.

5. Reinstall the Rockstar Games Launcher 

  1. Hit the Windows key, type Control Panel in the search bar, and click Open.control-panel-search fallout new vegas runtime error
  2. Select Uninstall a program under Programs.going uninstall program control panel
  3. Locate the Rockstar Games Launcher and Rockstar Games Social Club, then click Uninstall for each.
  4. Hit the Windows + E keys to open File Explorer.
  5. Locate the following folder locations and delete them. Alternatively, you can also remove software leftovers using special software: C\Users\[USERNAME]\Documents\Rockstar Games\Social Club C:\Users\[USERNAME]\Documents\Rockstar Games\Launcher C:\Program Files\Rockstar Games\Launcher C:\Program Files\Rockstar Games\Social Club C:\Program Files (x86)\Rockstar Games\Social Club
  6. Launch your preferred browser and download the Rockstar Games Launcher.
  7. Follow the on-screen instructions to install, then try launching your games again and see if the issue persists.

Aside from errors, we also share tips on getting the most out of your games. For instance, we have a list of the best graphic settings to help you avoid choppy games. You may also be interested in how to boost your FPS and take your gaming to the next level.

Should you have any thoughts on this issue, feel free to leave us a comment below.

onex.dll Missing: How to Fix or Download It Again

The DLL files are an integral part of Windows and help both the built-in and third-party applications run on the PC. When a DLL file is missing, the apps relying on it fail to launch. The situation becomes all the more intricate when onex.dll is missing.

A large number of DLLs come preinstalled in Windows, while there are a few that are bundled with applications and are stored in the relevant directory at the time of installation. Let’s find out which category onex.dll falls under and the solutions to try when it’s missing.

What is OneX DLL?

The onex.dll file is a Windows system file developed by Microsoft and is sometimes referred to as IEEE 802.1X Supplicant Library. The file is stored in the System32 folder along with the other DLLs.

Here are a few reasons onex.dll is missing in Windows:

  • Presence of malware: One of the common reasons a DLL file is not found on the PC is due to malware or virus infection. Running an antivirus scan usually works in this case.
  • Corrupt system files: Since DLLs are a part of it, corrupt system files also have an effect here, but the problem is easily resolved with a few quick scans.
  • The DLL file got deleted: Because multiple programs access and make changes to the DLL file, there’s a good chance that one might delete it or change the storage location. In some cases, even a user might inadvertently delete the DLL file.

What can I do if onex.dll is missing?

Tip icon Tip
For users with another PC running the same OS, head to the System32 folder on the other device, copy the DLL to a USB drive, and move it to the same path on the computer where the DLL is missing.

1. Use a dedicated DLL repair tool

While most perceive DLL issues as trivial and download the missing DLL from the web, this poses a major risk, and there is a high possibility of your system being infected with malware. That’s where a dedicated DLL repair tool comes into the picture.

2. Repair corrupt system files

  1. Press Windows + S to open the Search menu, type Command Prompt, and click on Run as administrator.command prompt
  2. Now, click Yes in the UAC prompt.
  3. Paste the following commands one at a time, and hit Enter after each for the DISM tool:DISM /Online /Cleanup-Image /CheckHealth DISM /Online /Cleanup-Image /ScanHealth DISM /Online /Cleanup-Image /RestoreHealth
  4. Now, run the SFC scan using the following command:sfc /scannowsfc scan to fix onex.dll missing

3. Scan for malware

  1. Press Windows + S to open Search, type Windows Security in the text field, and click on the relevant search result.windows security
  2. Click on Virus & threat protection.virus & threat protection to fix onex.dll missing
  3. Click Scan options to view the available types of scans.scan options
  4. Now, choose Full scan and click on Scan now.full scan to fix onex.dll missing
  5. Wait for the scan to complete. The scan’s progress will be displayed here.

In case it’s malware or virus that led to a missing onex.dll file in Windows 11, the best option is to perform a full scan using the built-in Windows Security. In case it’s unable to locate the malware, try an effective third-party antivirus to run a deeper scan for enhanced protection.

4. Perform an in-place upgrade

  1. Head to Microsoft’s official website, select the currently installed edition of Windows 11, and then click Download.download to fix onex.dll missing
  2. Choose the preferred product language from the dropdown menu, and click Confirm.language
  3. Click on the displayed link to start the download.download
  4. Once downloaded, double-click on the ISO and click Open in the confirmation prompt.open
  5. Now, run the setup.exe file.setup.exe to fix onex.dll missing
  6. Click Yes in the UAC prompt that appears.
  7. Click on Next to proceed.next
  8. Now, click Accept to agree to the license terms.accept
  9. Finally, verify the upgrade details, make sure the setup reads, Keep personal files and apps, and then click Install.in-place upgrade to fix onex.dll missing
  10. Wait for the process to complete. Remember, it will take a few hours.

When all else fails to replace the missing onex.dll, an in-place upgrade appears to be the most viable solution in case of software-related problems. We recommend you use reliable DLL repair tools as a last resort because, with these tools, there’s no DLL error you can’t fix.

Tell us which fix worked for you in the comments section below.

Wdfilter.sys Blue Screen Error: How to Fix it

Many reported wdfilter.sys blue screen error on their PC, and in today’s guide we’re going to show you a few methods that can fix it, so let’s get started.

How do I fix wdfilter.sys blue screen error?

1. Update the Windows Defender definitions and Windows

  1. Press the Windows button to open Windows Search, type Windows Defender, and select the Windows Security or Windows Defender app from the result.Open Windows Security
  2. In the Windows Defender app, navigate to the Virus & threat protection tab, and select the Protection updates option.Protection updates
  3. On the following screen, click the Check for updates button to update the virus definition. Check for update
  4. Windows Defender will download and install any available security definitions.
  5. Now, press Windows + I to open Windows Settings.
  6. In the Windows Settings, go to the Windows Update tab and click on Check for Updates.Update Windows
  7. After the updates are installed, restart your PC, and scan your computer for malware with the Windows Defender.

2. Run SFC and DISM scans

  1. Press Windows + R to open the Run command box, type cmd, hold the Ctrl + Shift key, and click OK to run Command Prompt as Administrator.
  2. Click Yes on the User Account Control (UAC) prompt window.
  3. Type the following command and press Enter: sfc /scannow
  4. After the SFC scan is complete, type the following commands and press Enter after each: DISM /Online /Cleanup-Image /ScanHealth DISM /Online /Cleanup-Image /RestoreHealth DISM scan
  5. After the scanning process finishes, restart your computer and verify whether the WdFilter.sys BSoD error has been resolved.

3. Update or reinstall the graphics card drivers

  1. Click the Start menu button, type device manager, and click on the Device Manager control panel from the search result.Device Manager open
  2. Click on the Display adapters to expand it and then right-click on the video card driver and select Update driver.Update driver
  3. On the following screen, select Search automatically for drivers.Automatic Update
  4. If there is an updated driver available, follow the on-screen instructions to install it
  5. Then, restart your computer.

If the Device Manager fails to update the driver, completely uninstall the driver (Choose Uninstall device option in Step 2). Then manually download the latest driver from the manufacturer’s website. Install the downloaded driver and reboot the computer.

4. Run Driver Verifier

  1. Press Windows + R to open the Run command box, type verifier, and click OK or press Enter to launch the Driver Verifier Manager. open Verifier
  2. On the Driver Verifier Manager window, select the Create standard settings radio button and click Next.Create Standard Settings
  3. Now, select Automatically select all drivers installed on this computer and click Finish.select all drivers
  4. Restart your computer and use your computer as you normally would.
  5. Wait for your computer to crash, or if there were specific actions that caused the blue screen before, you could try repeating them to trigger the error again.
  6. When the system crashes, you will be presented with the buggy driver’s name and the error code. You can use it to fix the issue.

To stop the Driver Verifier app, follow the steps above, but choose the Delete existing settings option in step 2.

5. Boot into Safe Mode with Networking or low-resolution video mode

  1. Click the Power button on the login screen and then, press and hold the Shift key while clicking on the Restart option.Shift+Restart
  2. In the Windows Recovery Environment, select the Troubleshoot option to continue. Troubleshoot
  3. Next, select Advanced options.Advanced options
  4. On the following screen, choose Startup Settings.select startup settings
  5. Click the Restart button to reboot your computer and open the start-up-up settings.restart
  6. Windows will reboot into Startup Settings with multiple numbered options. Press number 3 on your keyboard for low-resolution mode or press 5 for Safe Mode with Networking.
  7. Windows will finally boot into Safe Mode or low-resolution mode, depending upon your selection.

The Safe Mode loads only the essential drivers and services needed for the system to run. Once you are in Safe Mode, you can try various troubleshooting steps such as removing recently installed programs, updating drivers, performing system scans for malware, or others.

6. Disable Real-time protection

  1. Click the Show Hidden Icons button on the taskbar to view hidden icons, and click on the Windows Security icon.open from taskbar
  2. Navigate to Virus & threat protection on the left-side pane and click Manage settings underneath Virus & threat protection settings on the right pane.Virus & threat protection
  3. Then, turn off the toggle under Real-time protection.Real time protection Off

7. Restore the Default Startup Configuration for Windows Defender Antivirus Mini-Filter driver

  1. Press Windows + R to open the Run dialog, type cmd, hold the Ctrl + Shift key, and click OK to run Command Prompt as Administrator.
  2. Click Yes on the User Account Control (UAC) prompt window.
  3. Type the following commands one after the other and press Enter after each one: sc config WdFilter start= boot
    sc start WdFilter reset Win Defender
  4. After that, close the Command Prompt and reboot your computer.

If the above methods were not effective in fixing the WdFilter.sys BSoD error on your computer, you could try resetting your PC or take a closer look at our guide on cldft.sys BSOD.

There are many files that can cause these types of errors, and we wrote a guide on how to fix hidparse.sys BSOD, so don’t miss it.

Feel free to use the comments section below if you have any additional questions or suggestions.

Evr.dll is Missing? How to Fix or Download It Again

Every operating system needs DLL files, such as evr.dll, to run properly, and if your DLL files are damaged or missing, you might get an error message.

This can be a problem and cause certain features to stop working on your PC. Therefore, it’s important to fix missing DLL files on Windows 10 as soon as possible.

In today’s guide, we will focus on evr.dll, explain to you what it does, and how to get it back if it’s missing on your PC.

What is the EVR DLL file?

Evr.dll is a Windows DLL file used alongside the Enhanced Video Renderer feature. In case you’re unfamiliar, this feature is used to display a video on desktop applications.

There are two versions of EVR:

  • EVR media sink – For Media Foundation applications
  • EVR filter – For DirectShow applications

As you can see, this is a system DLL file, and issues with it will affect your operating system and data rendering, so it’s important to fix it.

What can I do if evr.dll is missing?

Before we start fixing this issue, there’s a quick workaround that might help you:

  • Install an older version of the software – This error can appear when installing certain software. You can avoid the issue by trying to install the older version instead.

1. Use a dedicated DLL fixer

Missing DLL files can be a big issue, and manually downloading DLL files, especially from third-party sources, is a major security risk.

Alternatively, you should use specialized DLL repair software. These apps are simple to use, and they can fix 100% of the issues that you have with Windows DLL files.

2. Install the Media Feature Pack

  1. Press Windows key + S and type optional. Select Add an optional feature.
     
  2. Once a new window opens, click the Add a feature button.
  3. Search for Media Feature Pack. Once you find it, select it and click the Install button.
  4. Wait for the installation to complete. Restart your PC if asked.

3. Download a Windows 8 version of Viber

Note icon NOTE
This issue only applies if you’re using Viber on a PC. If you’re not using it, skip this solution.
  1. Visit the Viber download page.
  2. Select Download Viber for Windows 8 and lower.
  3. Wait for the file to download and then run the setup file.

How can I perform evr.dll download?

Since this is a system file, we recommend against downloading it manually from third-party sources. While many websites offer you to download this file, the file may have been tampered with.

This can result in stability issues, and in the worst-case scenario, a malware infection. Therefore, we strongly suggest that you download this file using the solutions outlined in this article.

As you can see, fixing this issue is pretty simple, and in most cases, you can fix it by installing the latest Windows components.

If you’re having this problem on a new version of Windows, we suggest reading our missing DLL files Windows 11 guide for more solutions.

What solution did you use to fix this problem? Share it with us in the comments section below.

Msvcp140.dll Is Missing? How to Fix the Error

You must have gotten an error message notifying you that msvcp140.dll is missing. Let us guide you through the process of correcting this error.

Dynamic Link Libraries, or DLLs, are important files containing data and essential resources that several programs may use concurrently. They help connected applications or processes work better and more efficiently. Hence the missing DLL presents a real challenge.

What does msvcp140 DLL mean?

Msvcp140.dll is a native Microsoft file. It is a part of the Visual C++ Redistributable package. All programs that have C++ code are required to interact with this DLL file to run successfully on any Windows operating system.

It contains vital functions supporting operations like input and output, string, and memory management. If this file is missing on your OS, it could be because of any of the following reasons:

  • Corrupted applications – If you install any app with corrupt files or if it is incompatible with your OS, it may trigger the missing DLL error.
  • Driver issues – Corrupt or outdated drivers also are an element that may trigger this issue.
  • Problems with MS Visual C++ Redistributable package – These errors may be due to a missing package or corruption of the redistributable.
  • Malware infection – Malware is a massive trigger of computing problems, and it can corrupt vital files, which may trigger this error.

Regardless of what triggers the missing DLL problem, the solutions we recommend below should help resolve it.

How do I fix the missing msvcp140 DLL?

1. Use a dedicated DLL fixing tool

Missing DLL issues are common, but luckily, a few tools are often effective in fixing the problem. This option is preferred since downloading a DLL from random sites may introduce malware to your computer.

However, for files like the msvcp140.dll native to Microsoft, the best recommendation will be to use the system repair tool. You will get an effective resolution of the missing file with a single click.

2. Install Microsoft Visual C++ 2015 Redistributable Update 3

  1. Visit the official Microsoft Visual C++ 2015 Redistributable download page.
  2. Click on the Download button.
    msvcp140.dll
  3. Tick vc_redist.x64.exe or vc_redist.x86.exe, depending on your system architecture, and click the Next button.
    msvcp140.dll
  4. Click on the downloaded file and follow the wizard to complete the installation.
    msvcp140.dll
  5. Once the installation is complete, restart the computer and verify that the missing msvcp140.dll issues is resolved.

Since this DLL is part of the Microsoft Visual C++ 2015 Redistributable, you probably have it on your computer. So, the problem is that it may be corrupted, and reinstallation of this redistributable would be an easy fix.

3. Redownload msvcp140.dll

  1. Navigate to dll-files.com.
  2. To topmost entries are the most updated versions. Click the Download link for one matching your system architecture.
  3. Right-click on the downloaded ZIP file and select Extract All.
  4. Copy the extracted msvcp140.dll file and add it to the program’s installation folder that triggered the error.
  5. Reinstall the program.

4. Reinstall the problematic program

  1. Press Windows + R, type appwiz.cpl, and hit Enter.
    msvcp140.dll
  2. From the list of programs, click on the problematic one and select the Uninstall button.
  3. Follow the prompts from the wizard to complete the uninstallation.
  4. Download a fresh copy of the uninstalled program, and reinstall it.

A reinstallation is often effective if the original install file is corrupt. So you must perform the installation using a freshly downloaded copy.

The solutions we have explored should suffice to fix your msvcp140.dll problems; however, if they do not work, as a last option, you may contact Microsoft Support. They may be able to troubleshoot the problem, and in rare situations, you may need to reinstall the OS.

We also covered what to do if Msvcp120d.dll is missing, so don’t hesitate to check it out for more information.

But that is as far as we go in this guide. We are optimistic you have fixed the error and are curious about what worked for you. Please reach out to us using the comments below.

ncsi.dll: What Is It & How to Fix It When It’s Missing

DLL (Dynamic-link library) files are critical ones shared by multiple apps (both built-in and third-party) on the computer. But users often reported that certain DLL files are missing, and ncsi.dll, too, featured in the list.

Problems with DLL files are easy to fix since these can simply be replaced with a copy of the file, either from the web or another computer running the same OS. So, let’s find out about it!

What is NCSI DLL?

NCSI stands for Network Connectivity Status Indicator and is a Windows DLL file published by Microsoft, pertaining to network-related tasks. The ncsi.dll file is stored in:C:\Windows\System32

ncsi.dll file in the System32 folder

The file is used by multiple programs, including a few games, and if the DLL file is missing or corrupt, you will encounter an error when launching the app that relies on it.

How do I fix a missing ncsi.dll file?

Tip icon Tip
If you have another PC running the same version and architecture of the OS, locate and copy the DLL file to the affected computer. This is, by far, the easiest solution. Besides, avoid downloading DLL files from unreliable sources on the web since these could be malware or virus disguised as legitimate files.

1. Use a dedicated DLL repair tool

When it comes to missing Windows DLL files, you can always use a reliable DLL repair tool to get things up and running. These identify and replace the missing DLL with a fresh copy within seconds.

2. Run the DISM and SFC scan

  1. Press Windows + R to open Run, type cmd, and hit Ctrl + Shift + Enter.cmd
  2. Click Yes in the UAC prompt.
  3. Paste the following commands individually and hit Enter after each to run DISM:DISM /Online /Cleanup-Image /CheckHealth DISM /Online /Cleanup-Image /ScanHealth DISM /Online /Cleanup-Image /RestoreHealth
  4. Once done, execute the following command to run the SFC scan:sfc /scannowsfc scan to fix missing ncsi.dll
  5. After running the scans, check whether the corrupt/missing DLL file is available.

Running the DISM tool and SFC (System File Checker) scan are two easy ways to fix corrupt system files on Windows and get back the missing DLLs, including the ncsi.dll file.

3. Perform an in-place upgrade

  1. Go to Microsoft’s official website, select your edition of Windows 11 from the dropdown menu, and click Download.download
  2. Choose the preferred language and click Confirm.language
  3. Click on the provided link to start the download.64-bit
  4. Once done, double-click the ISO file, and click Open in the confirmation prompt.open to fix missing ncsi.dll
  5. Launch the setup.exe file.setup.exe to fix ncsi.dll
  6. Now, click on Next in the Windows 11 Setup to proceed.next
  7. Click Accept to agree to Microsoft’s license terms.agree
  8. Finally, verify that the setup reads Keep personal files and apps, and click Install to start the in-place upgrade.install to fix ncsi.dll

When it comes to troubleshooting issues with Windows, an in-place upgrade helps eliminate all kinds of software-related problems. Though the process may take a few hours, you won’t lose any apps or personal files. Besides, generally, the PC performs faster after an in-place upgrade.

These are all the ways you can get the missing ncsi.dll file in Windows, be it any iteration. Also, to troubleshoot things seamlessly, check our curated list of the best DLL repair tools.

Before you leave, we have a similar guide that explains what is NcsiUwpApp, so don’t miss it.

For any queries or to share the solution that worked for you, use the comments section below.

Xbox Error E102: Main Causes & How to Fix

Multiple Xbox users have reported the Xbox error E102. They are getting an error message that reads System Error: E102. This Xbox error E102 pops up mainly when you are trying to start up the console or installing an update.

Thankfully in this guide, we have a bunch of solutions that will help you resolve the error and enjoy playing games on your Xbox console. It is a pretty serious issue. However, you will be able to fix it easily with our solutions. Let us get right into it.

What is causing the Xbox error E102?

After going through several forums, we have deduced a list of the most common reasons that could trigger the Xbox error E102 on your console.

  • Bad network connection: If your Internet connection is unstable or jumpy, then you will come across multiple issues, including the Xbox error E102.
  • Corrupt data: Some users have also reported getting this error because of some underlying corrupt Xbox system data.
  • The update is faulty: Chances are that the update that you are trying to install on your Xbox is at fault itself.
  • Previous files interference: Files of the previous version of the update might be conflicting with the latest update on your Xbox console.

Let us now take a look at the solutions that will help you resolve the Xbox error E102.

How can I fix the Xbox error E102?

Before you go ahead with the advanced solutions, you should first try the below-mentioned solutions:

  • Check your Internet connection and make sure that it is working properly.
  • Try restarting your modem and see if that helps.
  • You can also try to restart your Xbox console, as it might be a temporary glitch.

1. Run the Xbox startup troubleshooter

  1. Turn off your Xbox console.
  2. Unplug the main cable from the socket.
  3. Plug the cable back in after 30 seconds.
  4. Power on your console.
  5. Press the Xbox and Pair buttons on your console.
  6. You will hear two power-up tones, after which you can release the buttons.
  7. The console will boot and take you to the Xbox startup troubleshooter.
  8. Choose Reset this Xbox option.
  9. Select the Remove everything option.
  10. Your console will restart and reset.

When you restart your Xbox console, you are resetting all the system files that might be causing the Xbox error E102 in the first place.

Resetting replaces all the corrupt or missing system files with new ones that will work without any issues and possibly resolve the problem as well.

2. Re-sign with your Xbox account

  1. Press the Xbox button on your controller.
  2. Select Profile & system.
  3. Select Sign out.sign out account xbox
  4. Press the Xbox button again on your controller.
  5. Head to Profile & system.
  6. Click on Add or Switch.Profile & System
  7. Select your account.
  8. Sign in with it.

Often corrupt profile can cause several issues and prevent you from installing the latest updates. In such a case, we would suggest you sign out of your account, then resign back in and check if this fixes the Xbox error E102 or not.

3. Perform an offline update

  1. Insert the USB drive with at least 7GB size on your PC.
  2. Perform a quick format to NTFS.
  3. Download the Offline System Update File (OSUF).
  4. Extract the content of the OSUF file.
  5. Copy the $SystemUpdate file into the flash drive.
  6. Power off your console.
  7. Unplug the mains for 30 seconds and replug it back again.
  8. Press the Pair and the Xbox button on the console together for 10-15 seconds.
  9. You will hear two power-up tones.
  10. Release the buttons when you hear the tones.
  11. It will take you to the Xbox Start-up Troubleshooter.
  12. Insert the USB drive on your Xbox console.
  13. Select the Offline system update option.
  14. Wait until the process is complete.

The above process will help you perform an offline update. You can use this because you are getting the Xbox error E102 when performing the online update.

4. Use the Device Service and Repair option

  1. Open the Microsoft account sign-in page for Device service and repair.
  2. Sign in with your credentials.
  3. Select your device to repair.
  4. Follow the on-screen process.
  5. Submit your request.

That is it from us in this guide. We hope that the above solutions helped you resolve the Xbox error E102 on your console.

If you are getting an Xbox error code 0x800701c4, then you can check out the solutions in our guide to resolve the problem at your end.

For users coming across the Temporary network problem error code 0x80832003 on their Xbox console, they can refer to our guide for a quick resolution.

Several users have reported coming across the Xbox error code 0x87e107df. You can easily fix it by applying the solutions from our guide.

If you are coming across the Xbox error code 0x80073cfc, you can resolve it quickly by following the solutions from our guide.

Feel free to let us know in the comments below which one of the above solutions resolved the Xbox error code E102 for you.

How to Download and Install the ASIO Driver on Your Windows PC

In this article, you’ll learn how to quickly download and install the ASIO driver on Windows 10. Having the right ASIO driver is key for smooth, low-latency audio performance and avoiding errors like asio.sys issues.

Let’s get started.

How can I install the ASIO driver on Windows 10?

1. Download ASIO4All driver

  1. Visit the ASIO4All page.
  2. Locate the version that you want to use and click to download it.
     
  3. Run the setup file.
  4. When the setup file opens, click on Next.
  5. Accept the terms of service and click Next.
  6. Select the install location and click Install.
  7. Wait for the process to finish.

2. Use FlexASIO

  1. Visit the FlexASIO GitHub page.
  2. Now select AlexASIO-1.9.exe to download it.
     
  3. Once the file is downloaded, run it.
  4. Choose the installation location and click Next.
  5. Check if the installation path is correct and click on Install.
  6. Follow the instructions on the screen.

3. Use ASIO2WASAPI

Note icon NOTE
Keep in mind that this project hasn’t been updated in several years, so it might have certain compatibility issues.
  1. Visit the ASIO2WASAPI GitHub page.
  2. Next, go to Code and choose Download ZIP.
     
  3. Once the ZIP file is downloaded, open it and run the Install file.
  4. You’ll get a message saying that the driver was installed successfully.

As you can see, downloading and installing ASIO drivers is pretty simple, and you can install them just like any other application.

If you found this guide useful, we also have a special guide on how to download and install the ASIO driver on Windows 11, so be sure to check it out.

And if you run into any issues, you might want to read our troubleshooting tips for ASIO.sys errors and how to fix asio3.sys problems.

Have you ever used an ASIO driver before? Let us know in the comments below.

How to Disable Bing Chatbot in Skype [Quickest Ways]

The use of artificial intelligence (AI) chatbots is on the rise, and many businesses are increasingly adopting them as a way to interact with customers. While a significant number of users marvel at all that AI assistants have to offer, not everyone is a fan.

A section of users still prefers the old-fashioned way of using the internet. However, developers seem to be integrating these chatbots into every app. Skype is one of them, and in this article, we show you how to delete/disable the Bing chatbot on Skype.

What is Bing in Skype? 

The Bing chatbot is an intelligent agent that can help you get answers to questions. It is a search engine from Microsoft designed to help you find what you’re looking for through various search tools and services. 

Although AI has just started gaining traction, Microsoft doesn’t seem to be putting the brakes up anytime soon, as it has already expanded the AI experience to mobile apps.

Bing is integrated into many Microsoft products, such as Windows 11, Skype, and the Edge browser. 

You can learn more about how to use Bing on Skype in our comprehensive article. Now onto the topic at hand today. You might be wondering why anyone in their right mind would want to disable Bing chat.

From the ability to search images on the Bing AI chatbot to its availability on the Windows 11 taskbar, the benefits are immense. We have an in-depth Bing AI review, so be sure to soak in all its benefits.

Still, some users feel that it is somewhat intrusive and coerced. The problem seems to be that it won’t go away. Even after deleting it, it reappears the next time you log in.

How do I get rid of the Bing chatbox on Skype?

1. Block Bing 

Once you log in to Skype and the Bing chat pops up, long-press on the chat, then select Delete. This will only be a temporary solution to disable the Bing chatbot because if you log out and log in back again, you’ll have to delete the chat again.

You can also pull up the Bing profile and click on Block. The only issue is that it is not a permanent solution.

2. Report as spam 

Although not recommended, some users have confessed that reporting the chatbot as spam fixed the issue. Once you log in to your Skype app and receive the Bing chat messages, report them as spam.

This will prevent further communication, and you will no longer receive such messages. It could, however, present problems in the future if you ever want to use the feature again.

3. Use an older version of Skype

The other alternative is to get rid of Bing chat by using an older version of Skype that is yet to receive the Bing chat update. You won’t find an older version from the Microsoft Store or the Skype website.

To find one, you’ll need to go to third-party sites and download an older version. You must, however, exercise caution, as unofficial sites may package software with malware. Ensure you have a reliable antivirus for any eventualities.

While this may work, you may experience some performance and stability issues with the application since it may no longer be optimized to run with the current version of your OS.

4. Contact Microsoft

If none of these methods work, we suggest you leave some feedback for Microsoft. The feature is still improving, and user feedback is important when the next roll of updates is released.

If you’re still figuring out your way with the AI chatbots, we have an interesting head-to-head comparison of Bing vs Bard. These are two of the biggest tech giants, so you may want to have a look.

If you’re a fan of Bing chat and have no issues with the numerous integrations, you may be interested in fixing other issues, such as audio hiccups with the Bing translator.

Should you have any other tricks on how to delete or disable the Bing Chatbot in Skype, share them with us in the comment section.

Windows LAPS isn’t compatible with legacy policies, says Microsoft

If you’ve installed April’s Patch Tuesday update, there’s a likelihood that you’ve encountered an interoperability issue between the new Windows Local Administrator Password Solution (LAPS) and legacy LAPS policies. The update featured a new integration between Windows LAPS on Windows 10, Windows 11, and Windows Server 2019 or newer releases.

For those not familiar, Windows LAPS is a tool designed to help IT admins manage and back up passwords for local administrator accounts on Azure Active Directory-joined or Windows Server Active Directory-joined devices. It can also be used to manage and back up the Directory Services Restore Mode (DSRM) account password on the Windows Server Active Directory domain controllers.

According to Microsoft:

There is a legacy LAPS interop bug in the above April 11, 2023 update. If you install the legacy LAPS GPO CSE on a machine patched with the April 11, 2023 security update and an applied legacy LAPS policy, both Windows LAPS and legacy LAPS will break.

Microsoft has indicated that some of the main tale-tell signs include Windows LAPS event log IDs 10031 and 10032, and legacy LAPS event ID 6. The company has indicated that it’s currently working on a fix to patch this issue.

However, till the fix is available, Microsoft has provided a workaround for the issue. If you’ve encountered this issue and would like to get rid of it, you’ll need to uninstall legacy LAPS under the HKLM\Software\Microsoft\Windows\CurrentVersion\LAPS\State registry key. Alternatively, you can delete all registry values.

Have you encountered this issue? Let us know in the comments.

via: BleepingComputer

How to fix the 0xC0EA000A Windows Activation Error

The 0xC0EA000A Windows activation error appears when you don’t have a legitimate copy of the OS. The full message reads It looks like the hardware on this device has changed.

That means you probably have an OEM Windows license but you’ve changed the hardware configuration and the OS detects it as a different PC.

So, before anything else, make sure that you have a valid product key and you have a legitimate copy of Windows. Sometimes Windows may fail to validate your product key.

Let’s see how you can fix it.

How do I fix the 0xC0EA000A Windows activation error?

1. Restart the Windows Time service

  1. Hit the Windows + R keys to open the Run command.
  2. Type services.msc in the dialog box, then hit Enter.run services.msc command
  3. Find the Windows Time service, right-click on it, and select Properties.
  4. Under the Startup type, click on the drop-down menu, select the Automatic option, and hit Start.
  5. Click Apply and OK to save changes.

Your PC’s clock and that of the Microsoft servers must be in sync for the activation to be successful.

2. Use the Activation troubleshooter

  1. First, you must link your digital license to your Microsoft account. The Microsoft account linked should also be an administrator account.
  2. Hit the Windows key and select Settings.settings windows 11
  3. Click on System and scroll down to Activation.
  4. Select Troubleshoot, and you should see the following message: Windows can’t be activated on your device.
  5. Click on I changed hardware on this device recently, then select Next.
  6. Type and enter the credentials associated with your Microsoft account.
  7. Mark the This is the device I’m using right now checkbox and click Activate. 

This step is for users who have recently made hardware changes to their devices. If not, skip this step and proceed to the next one.

If you get to step 7 and don’t have an activation key, you can fix the 0xC0EA000A by purchasing one on the Microsoft Store. In the event that the activation troubleshooter is not working, check out our article on how to fix it.

3. Remove devices from your Microsoft account

  1. Open your web browser, navigate to Microsoft Account web, and sign into your account.
  2. Click on the Devices tab in the top right corner.
  3. Find the device you want to remove from the list and select the Remove device option.
  4. From the pop-up warning page, check the I’m ready to remove this device box and click on Remove.
  5. A new confirmation page will show details about the device you remove, then click Back to Device.

4. Reset the license files

  1. Hit the Windows key, type Powershell in the search bar, and click Run as administrator.
  2. Type and Enter the following command: slmgr -ipk <Your product key here>
  3. Next, type the following command, then hit Enter. Don’t worry if nothing happens immediately, as it can take a bit of time: slmgr -ato

5. Sync time and date

  1. Go to Settings.
  2. Select Time & Language > Date & Time.time and language
  3. Turn on Set time automatically and click Sync now under Additional settings.set time automatically
  4. Try activating Windows again.

6. Reactivate Windows

  1. Press Windows + R, type cmd, and press Enter.run command prompt command
  2. Run the following command: slmgr.vbs /rearm
  3. Restart your PC and attempt activation again.

7. Run a SFC scan

  1. Press Windows + R, type cmd, and press Enter.run command prompt command
  2. Type sfc/scannow and press Enter.SFCSCANNOW CMD
  3. Wait for the process to complete and try reactivating your OS again.

What is error code 0xC0EA000A?

If you need more information about the error 0xC0EA000A when trying to activate Windows, it may be because of one or more of the following reasons:

  • Pirated version – The most common reason people can’t activate Windows is that they don’t have a genuine copy of the operating system.
  • Incorrect product key – If your product key is not working, you may have entered it incorrectly, or it’s the wrong one.
  • Hardware changes – If you have recently changed critical parts on your PC, such as the motherboard, your PC may not match the unique ID stored on Microsoft servers.
  • The product key has already been used – Windows licenses are usually tied to a specific hardware configuration and cannot be transferred to another computer if already used.
  • Different Windows editions – It’s possible that the edition of Windows running doesn’t match the edition of Windows used to activate the current edition.

At times, your copy of Windows may become non-genuine for any reason. As such, it may be possible for you to reset your license. When resetting your license key, ensure you’re the owner of a legitimate copy of the Microsoft Windows operating system.

Another approach would be to transfer the Windows license to another device. However, this is only relatively easy for digital licenses. If you have a PC with an OEM license, transferring it can be extremely difficult and not without risks.

And that’s how to resolve the activation error 0xC0EA000A. For any additional thoughts on this topic, feel free to comment below.

Here are 7 of the most popular Power Automate prebuilt templates to try out

Power Automate is one of the most popular business process automation tools available. This cloud-based platform enables users to automate repetitive tasks across a range of different applications and services with little to no coding experience. The Microsoft’s Power Automate website offers a massive selection of popular Power Automate prebuilt templates to choose from, making it simple to find the best option for your business operations.

7 Popular Power Automate prebuilt templates

Here are seven of the highest-ranking Power Automate prebuilt templates and their benefits for businesses:

  1. Save Outlook email attachments to a SharePoint library and receive a notification: This template allows you to filter email attachments by sender, type, or subject and save them directly to SharePoint. This feature enhances effective document management and organization. Don’t worry, there’s even a template if you want to save attachments to OneDrive too.

    power automate prebuilt templates
    Find similar Power Automate prebuilt templates via search.
  2. Get notifications for new Microsoft Forms survey responses: If you frequently use Microsoft Forms to conduct surveys, this flow will come in handy. You can get notified instantly whenever someone submits a response, allowing you to stay up to date with all feedback shared by your users.
  3. Get daily weather forecasts in your email: This template sends you email notifications with the daily weather forecast for your chosen location. It’s perfect for those who need to stay updated on weather conditions, especially if your work is affected by weather changes.

    power automate prebuilt templates
    More specific weather options are available.
  4. Save specific tweets to a SharePoint list and get a notification: This Power Automate prebuilt template is particularly useful for businesses that are monitoring social media platforms, like Twitter. The flow saves tweets to a SharePoint list and can be used to collate social media content and analyze user feedback for marketing purposes. You’ll get a push notification when the flow is successfully run.
  5. Extract contact details from an email and send to Outlook: This template sets up an integration allowing you to organize and sort incoming emails and attachments and automatically save the extracted information as new contacts in Outlook.
  6. Analyze email sentiment with AI Builder and send results to Teams: When you get a new email in Office 365 Outlook, you will get a message in Microsoft Teams that contains the email details and analysis, so you don’t need to bother even reading emails anymore.

    power automate prebuilt templates
    Rely on the AI Builder to extract other data, not just contact information.
  7. Get a push notification when you receive an email from your boss: This flow is useful for users who receive emails from their boss frequently. It sends a push notification to your mobile device when you receive an email from your boss, allowing you to stay responsive and efficient.

Power Automate prebuilt templates provide a wide range of options for automating business processes. The seven most popular Power Automate prebuilt templates covered in this guide are just the tip of the iceberg and are just a few examples of the innovative automation benefits businesses can expect to leverage. By automating your repetitive, mundane, and time-consuming tasks, you can save time, minimize errors and improve your organizational efficiency. Power Automate prebuilt templates reduce the need to code while still enabling your organization to create efficient and effective processes that drive productivity, quality, and value. Overall, by utilizing these flows, you can streamline many business processes, enhance communications & efficiency while carving out invaluable time to focus on more important tasks.

How to View Blurred Images on Websites: 4 Ways

It can be quite frustrating when images are blurred on a certain page, and in this guide, we’re going to show you how to unblur an image on a website, so let’s get started.

Some websites are blurred because they want to restrict their content to only registered or paying users. Others want to interact with the website before revealing the whole content.

How do I remove the blur from a website?

1. Use the Reader mode

  1. Open the page with blurred content.
  2. Next, activate the Reader mode. It’s usually located in the address bar.
    reading mode icon in the address bar
  3. Your page with images should now be unblurred.

2. Use the Google Translate tool

  1. Open the website and copy the URL of the page.website address in the address bar
  2. Then, go to Google Translate and paste the URL into the text box on the left.
  3. Click on the URL that appears on the right.google translate pasted link
  4. After completing the steps above, a new tab with an unblurred version of the page will open.

3. Use the Internet Archive tool

  1. Copy the URL of the page with the blurred content you want to view.
  2. Then, go to Internet Archive and paste the URL into the WayBack Machine search bar to check if the page was archived.waybakc machine paste website
  3. Now, select the page version you want to view by picking the latest archived version based on date and time.select version wayback machine
  4. This should direct you to the archived version you selected, where you can see the blurred content.

4. Use the Inspect Element tool

  1. Right-click anywhere on the page you want to unblur and select Inspect or Inspect Element.inspect element browser menu
  2. Once the Inspect section pops out on your browser window, look for the line starting with aside class=”Paywall”. edit code inspect window in browser
  3. Next, right-click on the line and select Delete element from the context menu. Doing this will remove the page’s blocker element.
  4. Now, change the next line of code which starts with <body… In that line, you’ll find the style=”overflow: hidden;” code.
  5. Finally, right-click on this section and select Edit attribute. Change the attribute value from hidden to visible and press the Enter key.

The Inspect tool is one of the most common methods to reveal blurred content on a website. It can also be used to check your website’s source code, HTML, and other aspects.

That’s it on how to unblur texts and images on a website. You can work your way through any of the techniques provided in this article to know which suits your need.

If you’re using Chrome, we have a great guide on how to fix Chrome if it’s blurry, so don’t miss it. For more advanced users, you can try to unblur images in Adobe Photoshop.

Let us know if you have any questions in the comment section below.

How to adjust active hours on Xbox

It’s that time of the month for Xbox users, as Microsoft rolled out its monthly patch for security and improvement on Xbox’s consoles. This time in the April 2023 update, Redmond officials rolled out adjustable active hours power settings.

With the Xbox April Update, if you have the Sleep power option selected on your Xbox, you can configure your console active hours, which default to “always active” unless you change them. During your selected active hours your Xbox will boot quickly and be available for activities like Remote Play and mobile game installs.

To sum it up, this feature allows the console to automatically shuts down instead of sleep when you turn it off outside those active hours. You can adjust them manually or let the system pick them for you automatically, depending on your playing patterns. 

So, how to adjust active hours on Xbox, you may ask? If you relate to this question, here’s how you can do just that. 

How to adjust your active hours on Xbox

1. Press the Xbox button on your controller

2. Go to Profile & system ➜ Settings ➜ System ➜ Updates.

3. Once updated, restart your console and press the Xbox button again. 

4. Go back to Settings ➜ General ➜ Power options.

5. If you select the Sleep power option, you can now adjust active hours. From the Adjust active hours drop-down, select Manually if you want to do it manually or the other option if you want to let the system do it for you

6. Select the start and the end of your active hours. 

In the meantime, Microsoft has also made its commitment to green gaming loud and clear by launching a carbon-aware downloading mechanism back in February 2023. In short, when the console is on and connected to the internet, the system will schedule updates for apps and games at specific times during the nightly maintenance window.

What do you think about this active hours adjustment feature on Xbox? Let us know in the comments.

3 Easiest Ways to Change File Type on Windows 11

The operating system can identify and open any file using the file extension of the respective item. But, the file may sometimes not open if the format is incorrect.

So, you need to change the file type to make Windows open it with the appropriate app. In this article, we will provide you with all you need to know about how to change file types in Windows 11.

Why do I need to change file types on Windows 11?

You may need to change your file format type on a Windows 11 PC for several reasons. We have discussed some of those reasons, as seen below:

  • Compatibility – Some applications or devices may require specific file types to function properly, and converting your files to these formats can help ensure seamless integration.
  • Accessibility – Another possible reason for changing file types is that it improves accessibility for individuals with disabilities.
  • File Size – Different file types have varying sizes, and you may need to change the file type to reduce the file size. Changing the file type can be helpful when sending large files over the internet or storing them on a device with limited storage capacity.
  • Security purposes – Changing file types may also enhance security. For example, you may want to convert a file to a password-protected ZIP file to prevent unauthorized access or to encrypt a file to protect sensitive data.
  • Editing – Some file types may not be editable in their original format. Hence, you may need to convert it to a format compatible with your preferred image editing software.
  • Compression – In some cases, changing the file type can help compress the file without losing quality.

Now that you know some of the potential reasons why you may need help with changing your file format, let us proceed to how you can change the file types.

How can I change the file types on Windows 11?

1. Rename the file in File Explorer

  1. Press the Windows + E to open File Explorer.
  2. Click on the View tab in the top menu area. Then select Show, and click on File name extensions to check the box next to it.
  3. Now, right-click on the file and click Rename icon to change the file type.
  4. Next, change the file extension (everything after the last period) to the file type character that you want. Press Enter to save the changes.

Although this is a viable technique to change a file type, you can’t change a .doc file to a .wav file.

You can only change the file type by renaming the file if the two file types are associated or similar enough for the file to still open after renaming.

2. Use online converting tools

Note icon NOTE
This process has been tested and proven to be safe by our expert.
  1. Go to an online converter website, such as Zamzar and click Choose files.
  2. Select the file that you want to convert and click Open.
  3. Choose the file type.
  4. Then, click on Convert Now.
  5. Once the file is converted, download it.

You can also check convertio.co, Ilovepdf.com, etc. All you need to do while on those sites is simply upload the file, select the new file type, and convert.

3. Using the Save As feature

  1. Open the Word file and click on the File menu on the ribbon.
  2. Then, select the Save As option from the left pane.
  3. Next, choose a location for the file to be saved.
  4. In the Save As window, you’ll see the box to change the file name and the Save As Type or Format option.
  5. Click on the drop-down button to view the available formats and select PDF (or anyone you prefer).
  6. Finally, click on Save.

This will immediately change the file format to your selected file type. You can also add tags to the file to differentiate it from the original one when searching for it.

And that’s it on how to change a file type on Windows 11. In case you have come across the PA file extension and want to know how to open it, read this guide.
If you have any questions or suggestions, please use the comments section below.

Wdiwifi.sys BSoD Error: How to Fix It in 3 Steps

Several complaints have been received this past few weeks regarding the blue screen issues and recently, some of our readers reported the wdiwifi.sys blue screen of death error message.

Have you encountered this error message while using your PC, but you don’t seem to know what it means or how to get past the issue? Worry less, this article will provide you with all you need to know.

What is wdiwifi.sys?

Wdiwifi.sys is a system file that is part of the Microsoft Windows operating system. It is primarily associated with Wi-Fi connectivity and is responsible for managing wireless network connections.

The file is a driver that allows Windows to communicate and connect with wireless network adapters and provides essential functionality for wireless networking.

The wdiwifi.sys file is typically located in the Windows\System32\drivers directory and is loaded into the system’s memory when the computer starts up. This makes wdiwifi.sys a critical system file.

What causes the wdiwifi.sys?

The wdiwifi.sys message does not come up unless there’s an error. Below are some of the potential reasons behind the wdiwifi.sys BSOD error message;

  • Outdated or corrupted driver – If the Wi-Fi driver for your hard drive is outdated or corrupted, it can cause the wdiwifi.sys BSOD error message to appear. Updating the driver to the latest version may resolve the problem.
  • Malware infection – Malware can infect your system files, including the wdiwifi.sys driver, and cause it to malfunction. Running a thorough malware scan may help identify and remove any infections.
  • Hardware issues – A faulty hard drive or other hardware components may also cause the wdiwifi.sys BSOD error message to appear. Running hardware diagnostics or seeking assistance from a professional may help identify and resolve any hardware issues.
  • Conflicting third-party programs – Certain software, such as antivirus programs, firewalls, or system utilities, may conflict with the wdiwifi.sys driver and cause the error message to appear. Temporarily disabling or uninstalling conflicting apps may resolve the issue.
  • System configuration changes – Changes to your system configuration, such as installing new hardware or software, may also cause the wdiwifi.sys BSOD error message to appear. Reversing any recent changes or performing a system restore to a previous point in time may help resolve the issue.

Now that you know some of the possible causes of the wdiwifi.sys BSOD error message, let’s proceed to how you can fix this problem.

How can I fix the wdiwifi.sys BSoD error?

Before engaging in any advanced troubleshooting or settings tweaks, you should consider performing the following preliminary checks;

  • Restart your PC.
  • Update your outdated drivers.
  • Perform a system restore –  You can try performing a system restore to a previous point in time before your computer encountered the problem
  • Try to inspect changes to your hardware for possible issues, especially your RAM.

Having confirmed the above checks if the problem persists, you can explore the advanced solutions provided below to know what works for you.

1. Update the Wi-Fi driver

  1. Left-click the Starts menu to open the Power User menu. Then, select Device Manager.
  2. Find and expand the Network adapters category. Right-click on your Wi-Fi adapter and select Update driver.
  3. Now, choose the option to search automatically for updated driver software and wait for the update process to complete.
  4. Then, restart your computer.

The first step of fixing the wdiwifi.sys BSoD error is to update the Wi-Fi driver on your computer.

In any case, you can perform this without any effort and automatically update all drivers with an expert driver tool.

After installation, the software will start with a full system scan to detect outdated drivers and then fix them right away.

Outbyte Driver Updater

Take care of your PC health and update network drivers with this top-class software.
Free trial Visit website

2. Roll back your Wi-Fi driver

  1. Left-click the Starts menu to open the Power User menu. Then, select Device Manager.
  2. Find and expand the Network adapters category. Right-click on your Wi-Fi adapter and select Properties.
  3. Navigate to the Driver tab. Select Roll Back Driver and follow the prompts to complete the process.
  4. Restart your PC.

If updating the Wi-Fi driver does not fix the wdiwifi.sys BSoD error, you can try rolling back the driver to an earlier version.

3. Run the Windows Memory Diagnostic Tool

  1. Press the Windows + R keys to open the Run dialog box. Type mdsched.exe in the dialog box and press Enter.
  2. Choose the option to restart now and check for problems.
  3. Wait for the tool to finish checking your memory. Check the results and make any necessary repairs.
  4. Restart your computer.

Sometimes the wdiwifi.sys BSoD error may be triggered due to a problem with your computer’s memory. Hence the need to run the Windows Memory Diagnostic tool.

And that’s it on how to fix the wdiwifi.sys BSoD error. If you have any questions or suggestions, do not hesitate to use the comments section below.

AMD Driver Error 182: How to Fix in 5 Steps

AMD is one of the most popular GPUs available today. However, users have reported several technical issues with certain products, one of which includes driver error 182.

This error is triggered during an update and prevents them from updating the driver. In this article, we’ll provide the five best ways to resolve AMD driver error 182.

What causes AMD Driver Error 182?

Here are some of the most common causes of AMD driver error 182:

  • Unsupported Product – AMD software is the primary resource for AMD auto updates. Some versions of AMD drivers require users to update using the web app. If you attempt to update such drivers using the software, you can run into error 182. 
  • Corrupt GPU Drivers – In some cases, error 182 can be triggered due to corrupt AMD driver files. When this happens, you’ll need to perform a clean install of the drivers to rid your PC of the error.
  • Corrupt System Files – System files can get corrupted due to viruses, forced system shutdowns, failed software installations, etc.
  • Conflict Between Integrated GPU and AMD GPU – If you’re working with an older version of an integrated graphics card, e.g. an ATI Radeon GPU, you’ll likely trigger the error 182 because the AMD software is attempting to update the integrated GPU rather than the dedicated GPU. 

In such cases, you’ll have to uninstall the integrated graphics card to allow the dedicated GPU to be updated.

How can I fix the AMD Driver Error 182?

Apply the following preliminary checks before anything:

  • Ensure your Graphics Card is Properly Connected.
  • Update your Windows Operating System.
  • Reset Windows.

Then try the following steps if the error persists.

1. Update the driver

  1. Press the Windows key + I to open the Settings app.
  2. In the Settings app, click Windows Update tab and click on Check for Updates on the right pane to see if there are any available updates.
  3. If Windows discovers any update after the search, it’ll be installed automatically.

A computer that runs outdated software is likely to experience bugs and errors. Keeping your PC updated helps keep your PC error-free. 

If you run into the Windows Update not working error, do well to read our guide on how to resolve it. 

As opposed to the steps above, you can actually update all your PC drivers safely with a tailored driver solution.

Outbyte Driver Updater

Escape any AMD driver problems by using this proficient driver solution to update it fast.
Free trial Download now

2. Disable Integrated Graphics card

  1. Press the Windows key, type in Device Manager, and hit Enter.
  2. Then, expand Display Adapter, right-click on your Integrated GPU, and click Disable Device.
  3. Close the Device Manager, and restart your PC.

3. Run SFC/DISM scans

  1. Press the Windows key, type in CMD, right-click on the displayed result, and select Run as Administrator.
  2. Click Yes to grant the app administrative access in the User Account Control window.
  3. Then, input the following command and press Enter: sfc /scannow
  4. After entering the command, type the following and hit Enter: DISM.exe /Online /Cleanup-Image / Restorehealth
  5. Wait for the scan to be completed, and reboot your PC.

DISM scans are used to resolve errors triggered by corrupt system files. Running the scan can help resolve the AMD Driver error 182. 

4. Perform a Clean boot

  1. Press the Windows key + R, type in msconfig and hit Enter to open the System Configuration window.
  2. Navigate to the Services tab. Check the box next to the Hide all Microsoft services box, then click on Disable all.
  3. Navigate to the Startup tab, and click on Open Task Manager.
  4. In the Task Manager window, right-click on every available entry, and select Disable.
  5. Close the Task Manager window.
  6. While in the System Configuration window, navigate to the Boot tab, and check the box next to Safe Boot. Click Apply and click OK.
  7. Restart your PC and check if the error is resolved.

If the error disappears after the Clean Boot, you can begin enabling each of the Services simultaneously until you discover the problematic software. Once it’s found, you’ll need to disable it permanently.

After performing a clean boot, you’ll need to restart your PC. However, some users have reported that the computer won’t restart. 

5. Update drivers using the AMD driver Selector

  1. Press the Windows key, type in the name of your preferred browser, and hit Enter.
  2. In your web browser, navigate to the official AMD driver download page.
  3. On the AMD page, scroll down to the section below the Download section, and type in the name of your Graphics card or manually select your GPU from the menu below. Then, click Submit.
  4. Click the Drivers tab at the top of the window, then expand the drop-down menu associated with your operating system.
  5. Click the Download button and wait for the file to be completely downloaded.
  6. Once the download is complete, double-click on the .exe file, and follow the onscreen instructions to complete the installation.
  7. Restart your PC and check if the error is resolved.

The AMD software comprises a series of generic drivers that supports a range of graphic products. However, there are certain AMD products that are not supported by the AMD software.

If your graphics card falls into any of those categories, the AMD software will most likely be unable to update your graphics card. In such a case, your only option is to update your graphics card using the AMD Driver Selector.

If you don’t mind the data loss, you can go for a clean Windows install. However, if you wish to keep your personal files, you should perform a Windows repair install.

Office Insider program: How to join & why should you

Microsoft always continues to innovate with its software, especially the 365 productivity apps like Word, Excel, PowerPoint, Outlook, and more. To do so, Redmond officials usually roll out updates and experiments with new features on users that join its Office Insider program.

Long story short, this is similar to Microsoft’s Windows Insider program, but exclusively for office apps on Windows, Mac, iOS, and Android. The channel was announced first in 2015 as the Office Insider program but later rebranded as Microsoft 365 Insider in 2023 as a part of its transition from Office to Microsoft 365. 

“Our goals are to help you learn about all of the upcoming Microsoft 365 features, apps and services, and to deliver content that you are interested in, no matter which preview program or update channel the updates are released through.”

With that said, however, not everyone can join the Insider program. If you have your 365 license from school or work, you’d need to contact your administrator to move you to the program. Only those with a 365 Family or Personal subscription can install the builds.

So, how do I get in and what are the perks, you may ask? If you relate to these questions, then this article is for you. Here’s how to join Microsoft Office 365 Insider program and why should you.

How to join Microsoft Office 365 Insider program

1. Open any 365 program. Word, Excel, or PowerPoint would do.

2. On the upper left of your screen, click Account ➜ Product Information.

3. If you’re eligible, you should see the Office Insider button that you can click below Office Updates.

4. Click Join Microsoft 365 Insider.

5. In the Join Microsoft 365 Insider dialog box, tick the box next to the Sign me up for early access to new releases of Microsoft 365 check box.

6. Select the Insider channel you want, which we will explain in a bit. 

7. Click the box to agree to the terms and conditions.

8. Click OK.

What are the perks of joining the Insider program?

No matter how few those updates are, Microsoft always tests them on Insiders’ devices on the Office Insider before rolling them out for general users. 

Now, as Redmond officials are working closely for a better, newer generation of Microsoft Teams or the GPT4-powered Copilot for example, only Insiders will get the first access to those features before anyone else. 

Moreover, there are two Insider levels available called Beta and Current Channel (Preview). The difference between them is that Beta is dedicated to those who want to identify issues and provide feedback on features that are still far from primetime while Preview is most likely for first-time adopters — less frequent, more stable updates.

As you may also have guessed, you’ll also be more likely to encounter a few hiccups and bugs here and there while accessing builds from Beta, so it’s up to you to decide. 

Do you want to join the Office 365 Insider program? Let us know in the comments!

Dynamiclink.dll: What Is It & How to Fix It if It’s Missing

DLL files are essential for Windows and other applications to work properly. One of these DLLs is dynamiclink.dll.

However, many users don’t know what this DLL file is, and others reported that it’s completely missing from their PC. Speaking of which, we already wrote about missing DLL files in Windows 10 in a separate guide, so be sure to check it out.

If you’re having issues with this file, you’re in luck because today we’re going to explain how this file works and how to restore it if it’s missing.

What is dynamiclink.dll?

Dynamiclink.dll is a part of the DynamicLink Media Server feature in Adobe software. This feature is designed to prevent users from rendering by offering an alternative.

Using it you can share files between the two Adobe apps, by linking them together. By doing so, if you make a change in a single Adobe app, the changes will be applied to the file linked dynamically with other apps.

It’s an incredibly useful feature that allows you to edit files and collaborate better with others.

What can I do if dynamiclink.dll is missing?

1. Use a dedicated DLL fixer

Fixing DLL manually can be a tedious task and somewhat dangerous, especially if you download your files from third-party sources. So why not use specialized DLL repair software?

Many problems can occur because of compatibility issues with third-party DLLs and your operating system, but luckily, this software can help you.

2. Reinstall Adobe software

  1. Press Windows key + X and choose Apps and Features from the menu.
  2. Locate the Adobe product that you want to reinstall.
  3. Select it and click on Uninstall.
  4. Follow the steps on the screen to remove it.
  5. Once the software is removed, install it again and check if that solves the issue.

Many users reported issues with dynamiclink.dll in Photoshop CS6, but other Adobe software can also experience these problems.

We hope this guide has helped you understand better what a dynamiclink.dll file is and how it works. Missing DLL files can cause problems on any version of Windows, and to learn more, be sure to read our guide on missing DLL files on Windows 11.

Did you ever had issues with this file, and how did you fix them? Let us know in the comments section below.

What is Bthmodem.sys & How to Fix Its BSoD Crashes

The bthmodem.sys blue screen error occurs when the bthmodem.sys driver file on your PC is missing or corrupt. This file is an extension of the Bluetooth Modem Device driver and is used to connect your computer to a Bluetooth device.

If this file becomes corrupt, it will cause Windows to crash and display the infamous BSoD error message. It may be accompanied by a code that identifies the problem driver causing the crash or not. Regardless of the situation, there are various ways to fix it.

What is the bthmodem.sys file?

The Bluetooth Modem Communications driver is also known as the bthmodem.sys file. It is a driver that allows your computer to communicate with your Bluetooth device.

When you connect a new device to your computer, Windows automatically installs the needed drivers. This can sometimes cause problems if you encounter driver errors, especially if those drivers aren’t up to date or incompatible with the hardware you’re trying to use.

That’s where the bthmodem.sys BSoD error might occur. The bthmodem.sys BSoD error can be caused by a faulty driver, which can be a hardware or software-related issue. This BSoD is usually caused by improper installation of the device driver or an outdated version of it. 

Other causes include:

  • Hardware/software change – A recent hardware or software change might have installed a file that is causing conflicts with the bthmodem driver.
  • Virus – If you don’t have a comprehensive antivirus solution, malware infection can impact your system’s performance and cause the BSoD error to appear.
  • PC hardware failure – If your PC hardware malfunctions, it may cause this Blue Screen of Death error message to appear on your computer screen.

How do I fix the bthmodem.sys BSoD error?

If you are experiencing this issue, then we recommend that you follow these steps:

1. Update your Bluetooth drivers

  1. Enter into Safe Mode, click on the Start Menu icon, type Device Manager in the search bar, and click Open.device manager w11
  2. Find your Bluetooth device, right-click and select Update driver.bluetooth-driver-update windows 11 bluetooth driver download
  3. Select Search automatically for drivers.
  4. Restart your PC and try reconnecting.

Consequently, you can use a driver updater utility, as Windows can sometimes match you with the wrong drivers. Outbyte Driver Updater will scan your system and automatically identify all outdated drivers. 

The tool has a built-in database containing over 5000 drivers for different devices. If you don’t know what driver is missing or broken, you can use this program to scan all the installed devices on your PC and let it find out which one needs an update.

Outbyte Driver Updater

Install or update the Bluetooth driver in minutes and fix the unpleasant BSoD errors.
Free trial Visit website

2. Run the DISM and SFC scans

  1. Hit the Windows key, type cmd in the search bar, and click Run as administrator.cmd-run-admin-w11 unexpected kernel mode trap windows 11
  2. Type the following commands and press Enter after each one: DISM.exe /Online /Cleanup-Image /Restorehealth sfc /scannow
  3. Restart your PC.

A lot of users reported that the DISM scan was clean, but the SFC scan found errors, so be sure to run both. Consequently, you can opt for an intelligent automatic tool to do the repairs. A system repair software can scan and repair corrupted files and will find any issues that may be causing problems with your PC’s performance or stability.

3. Run a virus scan

  1. Press the Windows key, search Windows Security, and click Open.settings windows 11
  2. Select Virus & threat protection.
  3. Next, press Quick scan under Current threats.
  4. If you don’t find any threats, proceed to perform a full scan by clicking on Scan options just below Quick scan.Scan options
  5. Click on Full scan, then Scan now to perform a deep scan of your PC.Full Scan Scan Now
  6. Wait for the process to finish and restart your system.

With the built-in Windows Security feature, it may not always catch wind of all viruses and malware. You’ll need a comprehensive suite of security software.

TotalAV provides the best protection for your PC against all types of malware, including viruses, spyware, and other malicious programs. The program includes real-time scanning and proactive protection against new threats.

4. Restore the default configuration of the driver

  1. Press the Start Menu icon, type cmd in the search bar, and click Run as administrator.cmd-run-admin-w11 unexpected kernel mode trap windows 11
  2. Type the following command and hit Enter: sc config BTHMODEM start= demand
  3. Restart the PC.

The restore default configuration of the driver option restores the default settings for all of the parameters used by the driver. This option is an alternative for rolling back previous driver versions, but the option is unavailable in Device Manager.

5. Perform a System Restore

  1. Press the Windows + R keys, type rstui, and hit Enter.
  2. The System Restore window will open. Click on Next.
  3. Select the restore point you wish to revert to and click on Next.
  4. Now click on Finish.

Remember that a System Restore only works if you had created a restore point prior. 

That brings us to a close on the bthmodem.sys BSoD error. Hopefully, one of the solutions above has helped resolve this issue.

You may also encounter another BSoD-related error dubbed the bthad2p.sys error, so don’t hesitate to check out our expert article on how to fix it. Our latest guide covers BC_Bthmini_Verifier_Fault, so you might want to check it out for more information.

Leave a comment below, letting us know which method worked for you.

0x80020010 Windows Update Error: 4 Ways to Fix It

Some of our readers have reported running into the error 0x80020010 during a Windows Update process. The error occurs when Windows Servers are restarted out of schedule despite the Group Policy specification. However, this guide will discuss basic fixes for the error.

Also, we have a comprehensive guide about the Windows Update error 0xc1900401 and ways to resolve it on Windows 11.

What causes Windows Update error 0x80020010?

The 0x80020010 Windows Update error can occur for reasons such as:

  • Issues with Window update components – Numerous components are responsible for the update process. If they are not intact or they are inaccessible, it can cause errors. You can repair the Windows Update components by following the steps in this guide.
  • System files are corrupt – When you have corrupt system files necessary for the update, they may impede the process and result in an update error.
  • Issues with an Internet connection – You can also encounter the Windows Update continuously failing if you don’t have a stable Internet connection or there’s network congestion.
  • Virus and Malware – Viruses and malware infection on the computer can cause it to malfunction and be inaccessible. However, it can restart Windows Servers despite the Group Policy specifying Download and Notify to Install.

The factors listed above are liable to vary in different PCs. Regardless, we’ll take you through effective fixes to resolve the error.

How can I fix Windows Update error 0x80020010?

Before attempting any advanced troubleshooting steps, go through the following:

  • Perform an antivirus scan to remove malware from your device.
  • Power cycle your router and reconnect your network.
  • Restart Windows in Safe Mode and check if the error 0x80020010 persists.

If you can’t resolve the error, go ahead with the solutions below:

1. Run Windows Update troubleshooter

  1. Press Windows + I key to open the Settings app.
  2. Click on Update & Security.
  3. Select Troubleshoot, then click on the Additional troubleshooters button.
  4. Go to Windows Update, and click on Run the troubleshooter.
  5. Wait for the Windows Update troubleshooter process to complete and restart your PC.

The troubleshooter will resolve issues affecting the Windows Updates installed. Do not hesitate to check for ways to run the Windows Update troubleshooter on Windows 11 for more detailed steps.

However, you can also dedicated repair tools to troubleshoot your OS and detect the current issues that determine this update error on your device.

2. Reset the Windows Update components

  1. Left-click the Start button, type cmd and right-click Command Prompt. Select the Run as administrator option.
  2. Click Yes on the User Account Control prompt.
  3. Copy and paste the following commands and press Enter after each one: net stop wuauserv net stop cryptSvc net stop bits net stop msiserver
  4. Then, input the following and press Enter after each command: ren C:\Windows\SoftwareDistribution SoftwareDistribution.old ren C:\Windows\System32\catroot2 Catroot2.old
  5. Finally, type the following and press Enter: net start wuauserv net start cryptSvc net start bits net start msiserver
  6. Exit the Command Prompt and restart your PC to see if error 0x80020010 persists.

The above steps will fix the malfunctioning update component causing the 0x80020010 update error.

Read our article if you encounter issues running the Command Prompt as an administrator on Windows 11.

3. Configured the Schedule Time via the Registry Editor

  1. Press the Windows + R button to open the Run dialog box, type in regedit, and press Enter to open the Registry Editor.

  2. Copy the following path and paste it into the Registry Editor’s address bar and press Enter: HKEY_LOCAL_MACHINE\Software\Policies\Microsoft\Windows\WindowsUpdate\AU
  3. Set AuOptions to 4, then set the install time with ScheduledInstallTime.
  4. Enable AlwaysAutoRebootAtScheduledTime and specify the delay in minutes through AlwaysAutoRebootAtScheduledTimeMinute.
  5. Close the Registry Editor and check if the error persists.

Tweaking the above registry keys will set a timer to warn a signed-in user that a restart is going to occur. Also, it will give the update enough time to install.

If you have any issues regarding the registry keys, check how to fix a corrupt registry on Windows 11.

4. Perform an SFC scan

  1. Left-click the Start button, type Command Prompt and click on Run as administrator.
    command prompt run as admin
  2. Click Yes on the User Account Control prompt.
  3. Type the following and press Enter: sfc /scannow
  4. Restart your PC and check if the error persists.

Performing an SFC scan will repair corrupted system files affecting the Schedule Update installation process. You can read about how to fix SFC scannow not working on your Windows device.

In addition, we recommend you read about what to do if Windows Update is slow on PCs. Also, do not hesitate to check how to fix Windows Update error 0x8007045b on Windows 11.

For more questions or suggestions on this guide, kindly drop them in the comments section.

How to Use Gemoo Recorder to Create Meaningful Content

Video content is the most powerful and effective way to communicate ideas while engaging with audiences. Whether you are a marketer, content producer, or educator, you need a good screen recording tool to create an impact.

One such screen recorder tool is Gemoo Recorder, which can help you easily create high-quality videos. This guide will discuss how to use this recording tool to create impactful videos that resonate with your viewers.

How can Gemoo Recorder help you create engaging content?

Gemoo Recorder is an intuitive recording tool that helps you create meaningful content by allowing you to focus on your messages and engage your viewers. You can either download the desktop application or log in to the web version and start recording.

Gemoo Recorder web app

You can record a video, upload them, or embed a video from YouTube to get started. The tool is available for both Windows and Mac. This screen recording tool allows you to focus on what’s important by enabling you to show the capture area. You can add annotations, animated GIFs, and highlight text to make the content more interactive.

Once you are done recording the video, it gets uploaded to the cloud. You can share it using the Share button to share it with your audience or teammates. You can also limit the activities on video by managing the rights and setting a password before sharing the video.

Sharing options

The feature that makes Gemoo Recorder differ from other screen recording tools is that it has a web platform that allows users to organize the recordings in view of Mind Map, Slide, or Calendar. You can also share them using a single link or embed them on your web page.

Sorting options Gemoo Recorder

Here are some ways in which this video recorder can help you:

  • Record several screens simultaneously – It is a versatile tool that gives you options to record your screen, webcam, or both at the same time. So, you can create product demos, tutorials, explainer videos, etc.
  • Has an inbuilt editor – You can refine your videos by adding text, images, animations, annotations, and more. You can also trim, cut or merge your recording using the tool.
  • Allows customization – It will enable you to set the video’s resolution, frame rate, and audio quality. You can also choose various filters, virtual backgrounds, and more.
  • Makes sharing videos easy – All the videos are stored on the cloud, and you can share them with your teammates or students using a link. You can also manage the sharing access with ease.

Now that you know how Gemoo Recorder can help you, let’s see how it works!

How do I use Gemoo Recorder to record videos?

1. Download the tool and configure recording settings

  1. Go to the Gemoo Recorder website. Click on Record Now to download the tool.Download now Gemoo Recorder
  2. Once downloaded, double-click on the installer file to run the setup file. On the Setup wizard, click Install.Install Gemoo Recorder
  3. Once installed, it will ask you to sign up. Edit Post “How to Use Gemoo Recorder to Create Meaningful Content” ‹ Windows Report - Error-free Tech Life — WordPress
  4. Now it will present you with options; Screen + Camera, Camera only, Screen only, and Audio only.GemooRecorder_iscreen 1
  5. Click More Settings, and select the camera, microphone, screen area, and resolution before initiating the recording.More settings Gemoo
  6. Locate and click three dots from the top right corner and click Preferences. You will get four options:Preferences1
    • Automatically Disappearing – Enable/disable annotations to disappear after the retention period function
    • Retention Period – Choose the reserved display time of the annotations
    • Recording Countdown – Turn on/off the recording countdown when you begin to record.
    • Auto-Hide Toolbar – Enable/disable the auto-hide toolbar.

2. Record a video

  1. Once you have customized the settings, select the screen and click Start Recording.Start recording Gemoo Recorder
  2. If you have selected the Camera to record, you will get a circle in which you can see yourself. Also, you would get some options, including Small camera, Default camera, Full screen, Camera avatar, Hidden camera, and Cam Effects (Virtual Background, Portrait Filters, Avatar Frame).Screen camera
  3. You get the Stop, Pause, Restart, or Delete options with the sidebar present. Options
  4. You also click the Add Annotation button to get options Brush, Text, Shape, Numbers, Stylus, and Stickers.Annotation Gemoo =Recorder
  5. Once the recording is complete, click the red Stop button or click Finish Recording.Finish camera
  6. It will then be uploaded; a page will open in your browser.Video ujploaded Gemoo Recorder

3. Edit & Share the video

  1. Once the video is uploaded, hover over it to get options to edit it. The available options are:Video edit options
    • Trim allows you to trim the video length by dragging handles
    • Description option enables you to add text related to the video
    • Thumbnail option allows you to add a thumbnail to your video for better presentation.
    • Text option lets you add text throughout the video
    • Call-to-action gives you the option to add a call-to-action button and link
  2. Once done, click Save Changes.

  3. Click the Share button to share the video with anyone you like by link or entering the receiver’s email address. save changes
  4. You can also download the video to keep it locally on your device. To do so, you need to play the content and click the downward arrow located at the bottom right corner.
Download the video

This is how you can create, upload, download, and share your video content using Gemoo Recorder.

Gemoo Recorder

Record on-screen activities, your face, and your voice simultaneously to create engaging videos.
Free trial Visit Website

What are the best features of Gemoo Recorder?

This intuitive tool can help you record, edit and customize your videos per your needs. Here are some of the critical features of this recording tool:

  • Audio Recording – Gemoo Recorder allows you to capture audio from your microphone or system audio to add voiceovers or music to your videos.
  • Customizable recording settings – You can customize recording settings, including frame rate, audio quality, and recording area.
  • Multiple output formats – It saves recordings in several formats, including MP4, AVI, and more.
  • Cloud storage – The software comes with a cloud platform, making it easy to save, organize, download, and share your recordings to get feedback on the recorded videos.
  • Built-in editor – A built-in editor enables you to refine your recordings, add annotations, and trim your videos.

Gemoo Recorder is a versatile and robust recording tool that can help you create informative content. Gemoo Screen Recorder can help you elevate your content quality and make it more meaningful to your audience.

While using the Gemoo Recorder tool, we found it responsive, easy to use, and customizable. The complete process was seamless; we were able to record a video without issues.

We hope the information provided helped you record crisp and high-quality videos.

Have you tried Gemoo Recorder yet? If so, tell us all about your experience in the comments section below.