Need to connect a projector to your Windows 10 PC? We’ll show you how to do it step by step. Just make sure your ports match (HDMI, VGA, or DisplayPort), or use an adapter.
Most projectors work plug-and-play, but you can install drivers if needed. For older models, check the manufacturer’s site. And if you’re shopping for one, see our picks for 360-degree projectors.
Let’s get to the good part.
How do I connect my Windows laptop to a projector?
1. How to connect your projector to a Windows 10 computer
Make sure that the projector is powered On and connect the video cable to the PC in the appropriate port.
Press the Windows key + P and choose one of the following options:
Duplicate These Displays – This option shows the exact same image on your regular monitor and on the projected screen
Extend These Displays – This option stretches Windows to fit across both screens
Show only on 1 – Choose this before you’re ready to show off your presentation. Then switch to Duplicate These Displays
Show Only on 2 – Choose this to show only the second display, which is useful when hooking up a tablet to a TV for watching movies in a dark room
Click Apply to save your settings.
2. How to connect a laptop to a projector using HDMI to VGA cable
What if the technical configuration available forces you to connect your computer to a projector using an HDMI to VGA cable? How do you connect a laptop that has no VGA port to a projector?
If one of your devices has an HDMI port, while the other sports only a VGA port, then you’ll need an HDMI to VGA converter to connect your laptop to your projector.
Connect the converter to your laptop, and then connect the projector to the converter and you’re done.
That’s it, you now know how to connect and adjust your projector and Windows 10 computer, and you can get ready for the presentation. If you have any comments or suggestions, reach for the comments section, below.
3. How to connect a projector via wireless display
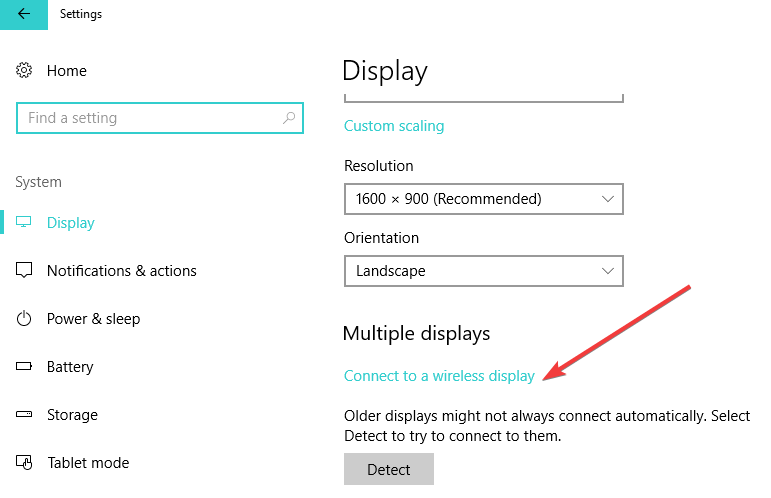
Click the Start button and go to Settings.
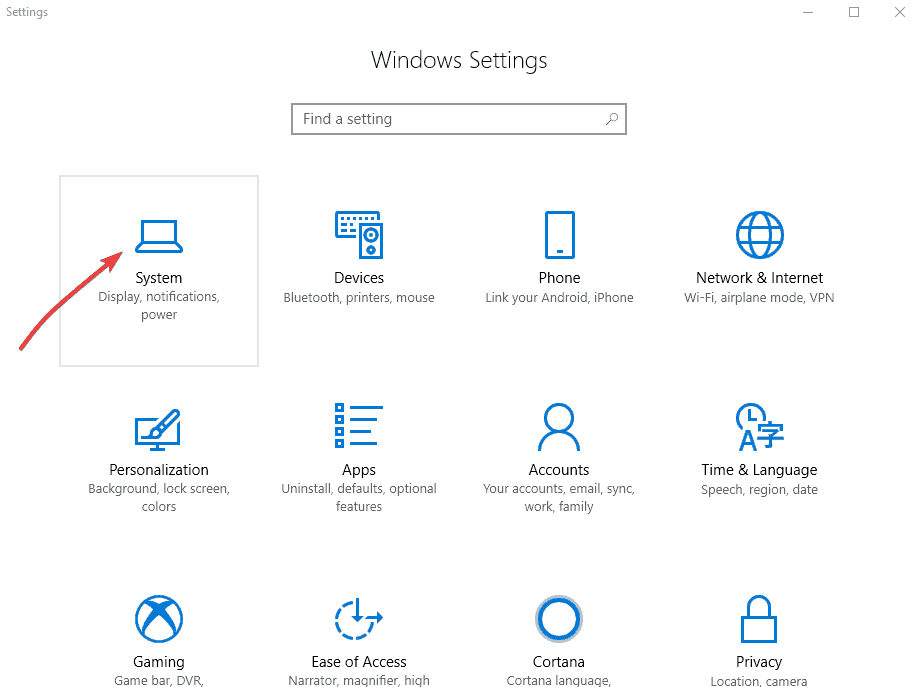
Choose System, and then select Display.
Click on Connect to a wireless display.
A new window will appear on the right side of the screen displaying all wireless devices found.
Select the projector that you want to connect to, and you’re done.
It is worth mentioning that you don’t need a cable to connect your Windows 10 computer to a projector. If both devices support Miracast, you can simply select the option ‘Connect to a wireless display’ choose a projector and then the projector will mirror your computer’s screen.
Speaking of Miracast, we have dedicated a series of articles to this tool. Check them out to better understand what Miracast is, how to use it and how to fix various issues that may occur during usage:
4. Connect your computer to a projector on Bluetooth
Click the Start button and choose Settings.
Choose Devices and click on Add Bluetooth or other device. Also, ensure that Bluetooth connectivity is turned on for both devices.
Select your projector and follow the on-screen instructions to link the two.
Of course, if both your computer and projector support Bluetooth technology, you can also use this method to connect the two.
What do I do if Windows 10 doesn’t recognize my projector?
If Windows 10 doesn’t recognize or detect your projector, there is probably a problem with the connection itself or the drivers.
Make sure that you connected the projector to the correct port in the PC or laptop and if you’re using a converter, test it to see if it works with another video device such as an external monitor.
If the connection is not the problem, check if you have the correct drivers installed for the projector.
Alright, so this is how you can get your computer to display on a projector and also fix potential issues along the way. Here’s how you can connect a projector to Windows 11.
If you have any more suggestions or questions, don’t hesitate to leave them in the comments section below.
Kindle Paperwhite is a popular E-reader device that comes with WiFi and, in instances, cellular connectivity features. However, at times the device may fail to connect to WiFi.
Several users have reported saying their Kindle Paperwhite won’t connect to WiFi.
If you are experiencing similar issues, this could be due to network issues, software glitches, or even hardware faults.
In this article, we have listed a couple of troubleshooting steps to help you resolve the Kindle Paperwhite that won’t connect to the Wi-Fi problem in five easy steps.
How can I fix the Kindle Paperwhite WiFi error?
1. Perform a power cycle
Press and hold the power button until either a power dialogue box appears or the screen goes blank.
Continue holding the power button for another 40 seconds and then release it.
Leave the device idle for a few minutes.
Press and hold the power button once again to power the device.
Try connecting to the WiFi network to see if the problem is resolved.
Restarting your Kindle device at times can fix intermittent issues such as slow devices or poor connectivity.
2. Check your home network for issues
Try connecting your smartphone or device to the WiFi network.
If other devices in your home can access the network, skip to other steps.
If the connectivity issue occurs on other devices as well, restart your home network.
Restart your home network
Power off your modem and WiFi router.
Disconnect the power cable from the wall outlet.
Leave the device idle for a few minutes.
Reconnect the power cord and turn it on.
Wait till all the LED indicators on the router stop blinking.
Try connecting your Kindle Paperwhite to see if the error is resolved.
If the issue persists, check if the Airplane mode is turned on. Your device disables all the connectivity options when Airplane mode is on. Try disabling the Airplane mode and check again.
3. Connect to a 2.4 GHz band
Open your router admin dashboard.
Disable the 5GHz channel.
Reboot the router.
Connect your Kindle to the 2.4GHz network.
Once connected, enable the 5GHz band again but do not reboot the router this time.
If this works, your Kindle is facing issues connecting to a 5GHz band.
Change the Authentication Type on your router.
Open your Router admin dashboard.
Refer to the owner’s manual to find the Authentication Type setting.
Change the Authentication Type from WPA2-PSK to WPA-PSK/WPA2-PSK.
Save the changes and exit the dashboard.
Try connecting your Kindle device again to see if the issue is resolved.
Check if your device is blocked
Routers allow users to block devices from their WiFi gateway.
Check if you have accidentally blocked your Kindle device.
Unblock the device to connect to the WiFi again.
4. Manually update Kindle Paperwhite software
Note: Follow these steps if your Kindle Paperwhite is not downloading the latest updates automatically.
Download the latest version for Kindle Paperwhite. Make sure you are downloading a newer version than the one already installed on your device. If not, skip this step.
Update Kindle Paperwhite manually
Connect your Kindle device to the computer.
Move the downloaded file to the Kindle drive.
Once the file is transferred, eject the device and disconnect the charging cable.
On your Kindle device, tap on Menu.
Open Settings.
Tap on Menu and select Update Your Kindle.
Tap OK to perform the updates.
Kindle will show Your Kindle is Updating message.
The update may take a few minutes to install. However, don’t try to boot or use the device until the update is successful. At times, it may take more time than usual.
5. Reset to factory default
Note: Resetting your device will delete all the data stored in the device. Create a backup before proceeding with the steps below.
Tap on Settings from the home screen.
Tap the Menu
Select Reset Device.
Tap Yes when the warning message appears to confirm the action.
Your Kindle Paperwhite will reset in a few minutes. Once done, you may have to re-register the device with Amazon and download your Kindle e-books and other content from the Cloud using your Amazon account.
6. Forget the WiFi network on Kindle Paperwhite.
From the home screen, tap on Menu.
Open Settings.
Tap on WiFi Networks.
Locate and tap on the network that has a checkmark on it.
Tap on Forget.
Search for the network again and select the network from the list.
The Kindle Paperwhite won’t connect to the WiFi problem can occur due to many reasons. Begin with performing a power cycle, change Authentication Type and band speed on the router, and as a last restore reset the device.
If your Windows 10 computer goes to sleep too fast, it could be happening for several reasons, among them the lockout feature that ensures your computer is locked or sleeps when unattended, or your screensaver settings, and other issues like outdated drivers.
Your computer goes into sleep mode based on the power management, which caters both for your security and saving power, but sometimes sleep mode also causes issues as you work.
This post will guide you through a series of solutions and troubleshooting fixes that will help you when Windows 10 goes to sleep too fast.
Click Power and select Next to run the troubleshooter
Follow on-screen instructions to complete the process, then restart your computer
2. Create your own custom power plans
Click Start and select Control Panel
Click Hardware and Sound
Click Power options
Click Create a power plan
Go to Plan Name and give a name to your custom power plan then click Next to configure the time settings.
3. Update your graphics card drivers
Driver updates for Windows 10 are automatically downloaded and installed through Windows Update. To do this:
Right click Start and select Device Manager
Expand Display adapters category
Right-click and select Update Driver
Select Search automatically for updated driver software. If Windows doesn’t find a new driver, you can try looking for one on the device manufacturer’s website and follow their instructions.
NOTE
You can also try reinstalling the driver by right-clicking Start> Device Manager> right-click graphics card>select Uninstall. Restart your computer and Windows will attempt to reinstall the driver.
In addition, it exists another method to update your graphic drivers more efficiently, and namely using dedicated software like Outbyte Driver Updater.
With this third-party solution, you can update the right drivers automatically without harming your system even more.
4. Control sleep/lockout mode
Click Start and select Settings
Click System
Click Power & Sleep
Configure the time out for your screen as well as sleep timing. Usually, the default is set to 10 minutes for screen timeout and 30 minutes for sleep mode.
5. Use the power button to go to instant sleep
If you don’t want your computer to go to sleep on its own but want to do it manually, you can change the settings to ensure the power button is used for sleep mode. To do this:
Click Start and select Settings
Click System
Select Power and Sleep
Click Related Settings
Click Additional Power Settings
Click Choose What the Power button does
Select Sleep instead of Shutdown
This helps you save more power otherwise your computer waits for 10 minutes to turn off the screen, and another 30 minutes to go to sleep. Sleep mode uses very little power, and your computer will start up faster, so you can instantly resume your work from you left off. If you have a low battery, Windows will save all your work, and turn off the machine.
6. Check Screensaver Settings
Click Start and select Settings
Search for Screensaver
Find the search result that reads: Turn screen saver on or off
NOTE
Whether or not you use a screensaver, the time value locks the screen, so you can set it to None and ensure the checkbox is unselected such that it won’t need a password.
7. Change System unattended sleep timeout
If the screensaver settings solution doesn’t work when Windows 10 goes to sleep too fast, check the System’s unattended sleep timeout settings. To do this:
Ensure you have admin permissions for this as you’ll also be editing registry settings
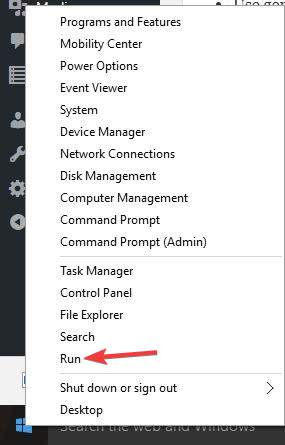
Right click Start and select Run
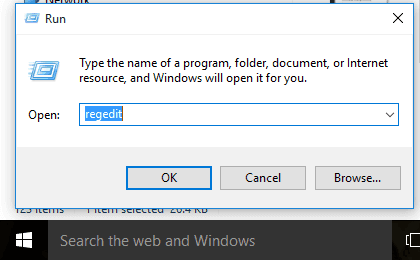
Type regedit and press Enter
Go to this registry key: HKEY_LOCAL_MACHINE\SYSTEM\CurrentControlSet\Control\Power\PowerSettings\238C9FA8-0AAD-41ED-83F4-97BE242C8F20\7bc4a2f9-d8fc-4469-b07b-33eb785aaca0
Double click Attributes
Enter the value as 2
Exit the Registry Editor
Click Start and select Settings
Search for Power Plan
Select Edit Power plan from the search results
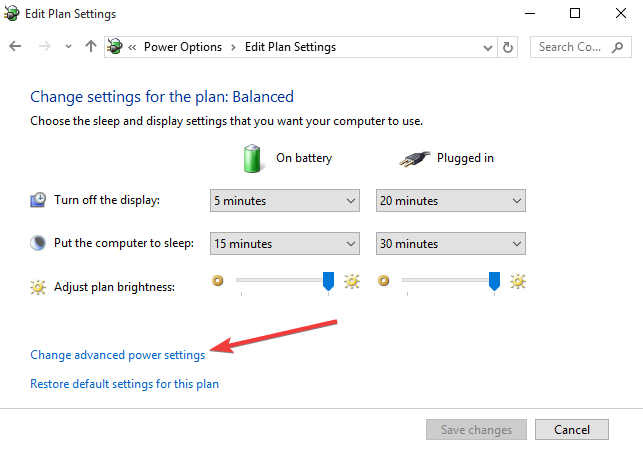
Open the Change advanced power settings link
Go to Sleep
Select System Unattended sleep timeout and change to 10 minutes
If Windows 10 goes to sleep too fast even after trying the above solutions, perform a clean boot to eliminate software conflicts that happen when you install a program or update or run a program in Windows. To do this:
Click start and type msconfig then select System Configuration from the search results.
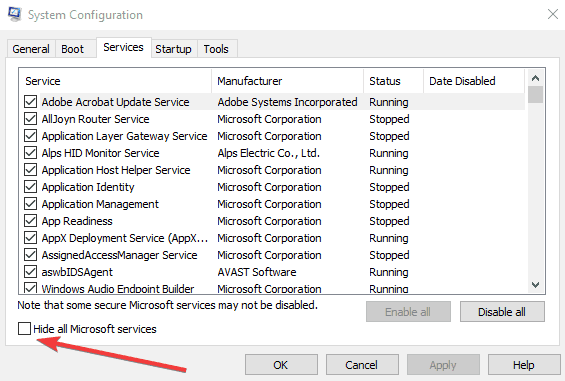
On the Services tab of the System Configuration dialog box, tap or click to select the Hide all Microsoft services check box and click Disable all.
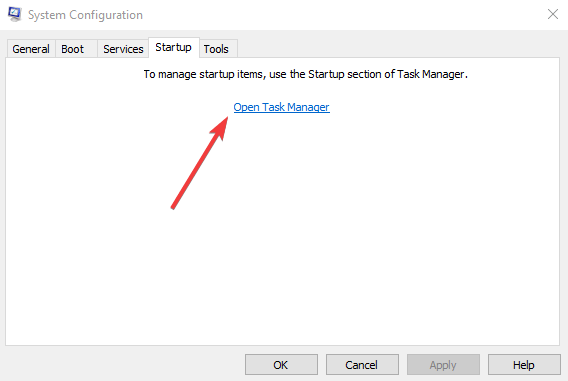
On the Startup tab of the System Configuration dialog box, tap or click Open Task Manager
On the Startup tab in Task Manager, for each startup item, select the item and then click Disable.
Close Task Manager.
On the Startup tab of the System Configuration dialog box, click OK, and then restart the computer.
9. Change Power options settings
Click Start and select control panel
Click Hardware and sound
Select Power options
Go to Screen and Sleep section
Click Never for When plugged in, turn off after (instead of a fixed time)
In the battery power section under Screen and Sleep, 5 to 10 minutes is ideal for most people
10. Change the time when the display turns off when your PC is locked
Right click Start and select Run
Type regedit and press enter
Go to this path: HKEY_LOCAL_MACHINE\SYSTEM\CurrentControlSet\Control\Power\PowerSettings\7516b95f-f776-4464-8c53-06167f40cc99\8EC4B3A5-6868-48c2-BE75-4F3044BE88A7
On the right side, double-click the Attributes DWORD.
Change the value from 1 to 2.
Click OK.
Note: These steps enable the Console lock display off timeout. To customize this option at any time, do this:
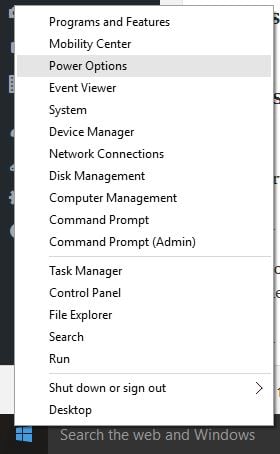
Right click Start and select Power Options.
Click the Change plan settings link for the selected plan.
Click the Change advanced power settings link.
On Advanced settings, scroll down and expand the Display settings.
You should now see the Console lock display off timeout option, double-click to expand.
Change the default time of 1 minute to the time you want, in minutes.
Click Apply.
Click OK to complete the task.
11. Change the Lock screen timeout using Command Prompt
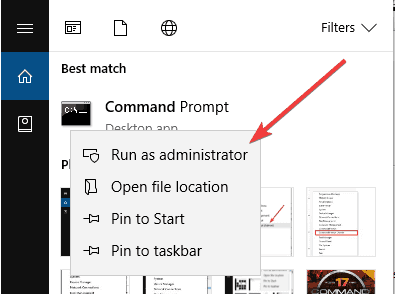
Type CMD in the search box, then right click Command Prompt and select Run as administrator
Type the following command and press enter: powercfg.exe /SETACVALUEINDEX SCHEME_CURRENT SUB_VIDEO VIDEOCONLOCK 60
Note: You must change “60” in the command line with the timeout time you want to use, in seconds. For example, if you want the screen to turn on for 5 minutes, use 300 at the end of the command.
Type the following command and press enter: powercfg.exe /SETACTIVE SCHEME_CURRENT
Use the Windows key + L keyboard shortcut to lock your PC and see if the new settings work.
The command in the second step will work when your computer is using AC power. Replace /SETACVALUEINDEX for /SETDCVALUEINDEX if you want to change the timeout setting on your laptop or tablet running on battery.
Let us know if any of these solutions worked by leaving a comment in the section below.
The audio jack is the connector point between the audio devices and the PC. While it’s definitely important, users reported laptop headphone jack not working issues on numerous occasions.
When that happens, connected headphones and speakers will have no sound. So if it suddenly stopped working, you’ll obviously want to know how to fix the headphone jack on your laptop.
In order to do just that, let’s see why this happens in the first place.
Why isn’t my headphone jack working on my laptop?
From deprecated audio drivers to improper sound configuration or hardware glitches, there can be many culprits responsible for the laptop headphone jack not working.
Is the headphone jack repairable in a laptop? It can be with a few troubleshooting tips.
While we’re at it, let’s see what you can be up against. Don’t worry though, these simple, yet highly effective fixes should do the trick in all these situations, as follows:
Laptop earphone jack not working
Laptop 3.5 mm jack not working
Headphone socket not working on laptop
Laptop speakers and headphone jack not working
Laptop headphone jack not working Windows 10, 11, 7, 8, 8.1
HP, Dell, Asus laptop headphone jack not working Windows 10
Laptop headphone jack not working one side
Laptop headphone jack not working properly
How do I get my headphone jack to work on my laptop?
If the sound suddenly goes off with speakers or headphones connected, first reinsert the audio device in the audio jack.
Unplug the device, clean the plug, and restart Windows.
Reinsert the headphones or speakers into the desktop’s or laptop’s audio jack after the restart.
1. Update the sound card driver
Press the Win key + X hotkey to open the Win + X menu. You can select to open Device Manager from there.
First, select Sound, video, and game controllers in Device Manager.
Then you can right-click your sound card and select Update Driver Software.
Select Search automatically for updated driver software to scan for driver updates. If Windows finds any updates, it will automatically download them.
Even if Windows doesn’t find any driver updates, it might still be worth checking for sound card driver updates on the device manufacturer’s website.
If you can’t update the driver, reinstall it instead to kick-start it. You can do that by right-clicking the sound card in Device Manager and selecting Uninstall.
Now when you restart your desktop or laptop, Windows will automatically reinstall the sound driver.
The second method, which happens to be our method of choice as well, consists of using a specialized third-party tool for the job. It’s simpler, more efficient, and hassle-free.
2. Run the sound troubleshooter
Right-click the speaker icon on your system tray to open the context menu. There you can select Troubleshoot sound problems to open the troubleshooter in the snapshot below.
If you can’t find that option on the speaker context menu, click the Cortana button on the taskbar and enter sound troubleshooter. Then select to open Find and fix audio playback.
Click Advanced and select Apply repairs automatically.
Press the Next button to run the sound troubleshooter.
Keep in mind that Windows has numerous troubleshooters that can fix software or hardware issues.
3. Enable audio for the line-in connection
Click the Cortana button on the taskbar, and then enter audio devices in the search box.
Select Manage audio devices to open the window below.
Click the Playback tab, select Speakers (or another external audio device), and press the Properties button.
Next, select the Levels tab, and then you can press Mute under Line in to enable line-in connection sound.
Enter audio devices in the Cortana search box. Select Manage audio devices to open the window below.
Now you can right-click the headphones or speakers plugged into the audio jack and select Properties.
Select the Enhancements tab shown in the snapshot below.
Deselect the Disable all sound effects option there. Alternatively, you can manually deselect the selected sound enhancement checkboxes.
Press the Apply > OK buttons on the window.
Windows 10 has sound enhancements that supposedly enhance the audio effects. However, they can also be an audio hindrance. So it might be worth trying this solution.
5. Check the default playback device
Open the Sound window by entering ‘audio devices’ in the Cortana search box. Click Manage audio devices to open further options.
Now click the Playback tab to open a list of connected audio devices. Select the device plugged into the audio jack, and click the Set default button.
Press the Apply > OK buttons to confirm the new default setting.
This step is useful if the headphones or speakers plugged into the audio jack have not automatically been set as the default device.
Those are a few ways you can fix an audio jack that stops working. If none of the above suggestions fix it, then your audio device’s jack might require repairs or replacement.
If the speakers or headphones are still within warranty, return them to the manufacturer for repairs. Let us know how did the troubleshooting work for you by reaching for the comments section below.
Airplane mode not showing up or is greyed out (so unusable) in Windows 11? We’ll show you how to fix it. Follow the steps below and you’ll be able to use it within minutes.
How do I fix Airplane Mode Greyed Out in Windows 10?
1. Try using keyboard shortcuts to disable Airplane mode
Press Fn + key with radio tower (for some users it’s PrtScr key, it might be a different key on your computer).
You might have to hold those keys for a few seconds.
If this shortcut works you should see Airplane mode turned off message on your screen.
2. Change network adapter properties
Press Windows Key + X and choose Device Manager from the list of options.
When Device Manager opens go to the Network Adapter section and expand it.
Find your wireless adapter, right-click and choose Properties.
When Properties window shows up to go to the Power Management tab and uncheck Allow the computer to turn off this device to save power.
Then click OK to save changes.
If the above-mentioned solutions weren’t helpful, you can try changing your network adapter settings.
3. Update your network adapter drivers
Open Device Manager and go to the Networkadapters section.
Expand it and find your network adapter.
Right-click and choose Update Driver Software.
Choose Search automatically for updated driver software option.
Wait for the process to complete.
If updating drivers via Device Manager fails, try using a specialized tool like Fortect Driver Updater. This app scans your PC, identifies outdated drivers, and updates them automatically.
You can also enable automatic updates whenever new hardware is installed.
When Settings app opens go to Network & Internet category.
On the left pane choose Wi-Fi.
Now on the right pane look for Change adapter options. Click it.
This will open a new window.
Locate your wireless connection, right-click it and choose Disable.
Now right click your wireless connection again, and this time choose Enable.
The next thing we’re going to try is disabling the network connection and enabling it again. If changing the network adapter settings and disabling the network connection didn’t work, try our next solution.
5. Uninstall the wireless adapter
Open Device Manager and find your wireless adapter.
Right-click it and choose Uninstall device.
When the confirmation dialog shows click Uninstall.
After the uninstallation process is complete Windows 10 will install its default wireless driver.
Now you just need to restart your computer in order for changes to take effect.
Another thing you can try to solve the problem with Airplane mode in Windows 10 is to uninstall the wireless adapter driver.
6. Perform a clean boot
Press Windows Key + R and enter msconfig.
Now click OK or press Enter.
System Configuration window will now open.
Go to the Services tab and check Hide all Microsoft services.
Now click Disable all button.
Go to Startup tab and click Open Task Manager.
When Task Manager opens, you’ll see a list of startup applications.
Select the first item on the list, right-click it and choose Disable from the menu.
Repeat this step for all startup applications on the list.
Go back to System Configuration window and click Apply and OK to save changes.
Restart your PC.
According to users, sometimes a third-party application can cause this problem to occur. To fix the issue, it’s advised to disable all startup applications and services.
Once your PC restarts, check if the problem is still there. If not, you can enable applications and services one by one until you find the application that is causing the problem.
Keep in mind that you’ll need to restart your PC every time after enabling an application in order to apply changes. Once you find the problematic application, it’s advised to remove it.
There are several ways to do that, but if you want to completely remove the application, including all of its files and registry entries, we suggest that you use uninstaller software
7. Disable radio switch device
Open Device Manager.
Expand HID Interface Device section and right-click Radio Switch Device.
Choose Disable device from the menu.
When the confirmation menu appears, click Yes.
According to users, Airplane mode errors can occur due to certain devices, such as the Radio Switch Device. To temporarily fix the issue, it’s advised to find and disable those devices.
8. Change your adapter settings
Open Device Manager and locate your wireless adapter.
Double-click it to open its properties.
When Properties window opens, go to Advanced tab.
Select 802.11n Channel Width for band 2.4 from the list and set its value to 20MHz Only.
Now click Apply and OK to save changes.
According to users, you might be able to fix Airplane Mode being greyed out on Windows 10 by changing a couple of network adapter settings. After making these changes, check if the Airplane mode errors are resolved.
9. Check your BIOS
While your system boots press F2 or Del to enter BIOS.
If you don’t know which key to use to enter BIOS, check your motherboard manual.
Now go to Onboard Device Configuration and enable Onboard WLAN/WiMax feature.
If you want to know more about the BIOS update, we advise you to check our useful article dedicated to flashing BIOS on your PC.
That’s it, after performing some of these solutions, your Airplane Mode shouldn’t be greyed out anymore. If you have any comments, questions, or suggestions, just write them down in the comments, below.
A TIF file or TIFF file extension is short for Tagged Image Format, which stores high-quality graphics, and supports lossless compression.
The easiest way to open a TIFF is to drag and drop it to the Photos app in Windows or, if its the default image viewer, just double click the TIFF file.
How do I open .tif files without compromising on quality?
1. Opening .tif files to view
There are various apps that can be used to open .tif files in Windows 10, but if you just want to view it, you can opt for a photo viewer such as the default, built-in Windows Photo viewer or the Photos app.
2. Use a file or image converter
Adobe Acrobat DC
You might encounter difficulties while opening .tif files in the built-in Windows Photo Viewer or Windows Photos App.
If you want to avoid any headaches and open your .tif files with a simple double-click, Adobe Acrobat DC is the right tool for you.
Not only that, but you can also use it to convert .tif files to a different format or PDFs to .tif files. All you need to do is hit the Save As button and select the format you want to use.
Another great software to open .tif files that you can use is:
File Viewer Plus (suggested)
We highly recommend downloading File Viewer Plus. It is an extremely powerful tool that opens more than 300 file types and also lets you edit them directly in its interface.
You will easily open, edit, and convert to other formats of your .tif files without any problems.
Irfanview is one of the most popularly used and best photo viewer software you can get. It is small, super-fast, and compact, plus if you’re a beginner, it is so simple to use.
Professionals can also take advantage of this powerful tool, which, unlike other photo viewers, is built to create new, unique, and interesting features for your graphics.
It is actually the first photo viewer globally that delivers multipage TIF support. Plus it comes completely free of charge if not used for commercial purposes.
This is also one of the best Windows photo viewer software used in the world that can also convert images as it supports over 500 image formats. You can also edit images and export over 70 image formats.
It has unrivaled compatibility in terms of format support, which includes animated still formats.
If you’re looking to edit the .tif file, whether it is in a different format, you can convert it without having to install a photo editing program for the TIF format.
This is a free photo editing software with sophisticated editing tools to create stunning and visually appealing photos in your library though it requires some extra skills to use.
You can also use Adobe Photoshop, though it isn’t free. For GeoTIFF files, you can open them with GDAL, Geosoft Oasis Montaj, MathWorks’ MATLAB, and ESRI ArcGIS desktop software.
4. How to open .tif files in Windows 10?
With an image viewer or photo editor that supports .tif files, you can simply open the file in the program itself, and then save the .tif file in a different image format.
This is done by clicking File and selecting Save As. You can also use file converters that convert one image file format to another like .tif files.
If you cannot use an image or graphic file because the format is not supported, try a file converter software for images.
Do you use .tif files? Share with us how you open them by leaving a comment in the section below.
Adobe Premiere Pro has become an industry standard when it comes to video editing, but many users reported that Adobe Premiere does not export video.
This can be a big problem, and that’s why we have found the best solutions for you to solve this problem easily, so keep reading.
What can I do if Premiere Pro is not exporting any video?
1. Install the latest Premiere Pro updates
Before proceeding with any troubleshooting steps, ensure the root of the problem isn’t just you having an outdated version of Adobe Premiere Pro.
Remember that Adobe constantly updates its software, meaning your current version is most likely dated by now.
That being said, make sure you have the latest version installed, only go for the troubleshooting steps afterward.
Additionally, you should install the newest software updates and get brand-new features of Adobe Premiere Pro.
2. Restart your PC
You would be surprised to know how often the errors can be solved with a simple computer restart.
Restarting your computer is always the first thing you should do after encountering an error and before applying any other fixes.
3. Ensure that you have enough storage space
If Adobe Premiere does not export video, it’s possible that you don’t have enough storage space. To fix this issue, try freeing up some space and try again.
The error may also occur if you are using an external hard drive as a storage device for exported videos. Try to export the videos to the internal hard drive and see if it is resolved.
This is particularly helpful if you get Disk Full, I/O Error, or Invalid output drive errors.
4. Close the other programs
If you are getting Unable to save file. Destination file is in use by Premiere, or destination file is in use by Adobe Media Encoder error, then look for any other application that might be using the destination file.
If you have other programs using the same file or trying to access the location, close the program and relaunch Adobe Premiere Pro.
5. Change the rendering optimization preferences
Launch Premiere Pro.
Go to Edit, and select Preferences.
Click Optimize rendering for, and select Memory.
Click OK to save the changes.
Close Premiere Pro and reopen the project for changes to take effect.
If Adobe Premiere does not export video, the issue might be related to virtual memory. You can fix this by changing the rendering optimization preference from Performance to Memory.
6. Check for Folder permission
Go to the folder location where the exports are saved.
Right-click on the Folder, and select Properties.
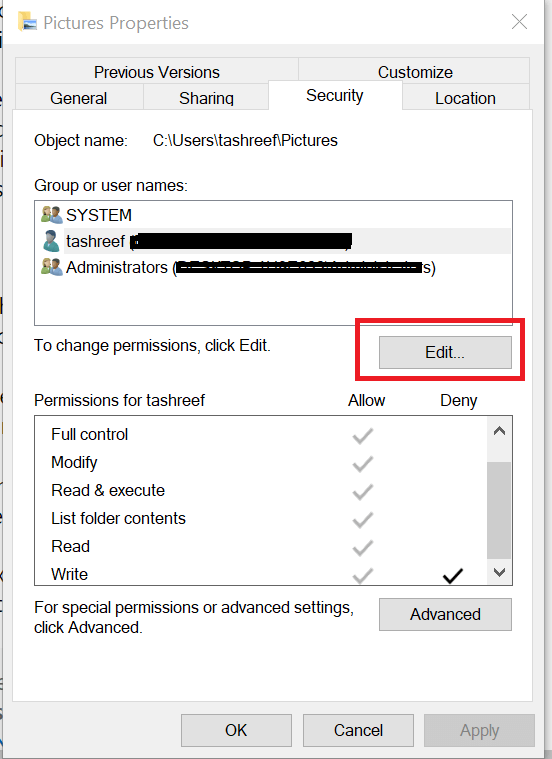
Open the Security tab, and click on Edit.
Under Group or user names, look for your username. If not found click on Add.
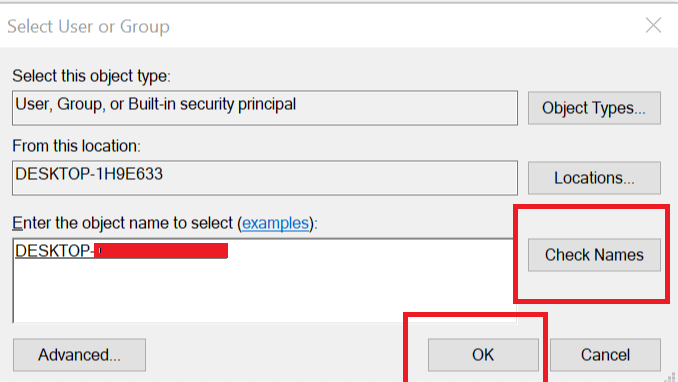
Enter your username, and click Check Names.
Click OK to add the user.
Under the Permissions for username check the Full Control option.
Click on Apply, and press OK to save changes.
If you are writing into a folder without appropriate permission, you may encounter Unable to create or open output file error. To fix this, you must take full control of the said folder.
Adobe Premiere Pro does not require Full Control on any location but only permission for reading and writing. However, providing Full Control permission can resolve permission-related errors.
7. Change the codec format
Open Export Settings.
For Format: click on Drop-down menu, and select QuickTime or None.
For Video Codec select Photo – JPEG from the drop-down menu.
After that, try to export the video.
By default, Premiere Pro uses h.264 or MPEG codec format for rendering videos. However, due to compression issues, you may get the following message error:
Codec compression error. This codec may be unable to support the requested frame size, or there may be a hardware or memory problem error.
To fix this, try to change the codec format as explained above.
8. Check Media for file corruption
If Adobe Premiere does not export video, some project frames may be corrupt.
One way to fix this is to disable all tracks but one and export the video. Do this for all the tracks until you can recreate the exporting error.
If found, save the project with a different name and export the project by removing the problematic frame or track.
After that, please create a new project, open the problematic track or frame, and save it with a new name. Open the exported video import the newly saved corrupt frame and insert it into the completed project.
Export the video, and you should be able to render it without any error.
Our guide on how to fix the Adobe Media Encoder not installed error may provide further solutions so check it out.
These are some solutions you can try if Adobe Premiere does not export video. Be sure to try them, and let us know which fix worked for you in the comments.
The PC must support TPM 2.0 is one of the most common errors users encounter when trying to update or upgrade to Windows 11. This can be frustrating, as some users feel their PCs meet the requirement but still get the error.
If you are getting this error, we will show you the best ways to fix it and make the upgrade in this guide.
What is TPM 2.0?
TPM 2.0 is a core part of your PC located on your motherboard. This small chip provides security features at the hardware level.
It generates the cryptographic keys used in the authentication of your PC. The TPM 2.0 works in a way that makes it difficult for malicious people to attack your PC.
This chip communicates with the security features when you turn on your PC. It then generates an unchangeable cryptographic key, which will be checked. If the authentication is successful, your PC boot up, and if it fails, it won’t startup.
How do I fix the TPM 2.0 error in Windows 11?
1. Check if the PC has TPM 2.0
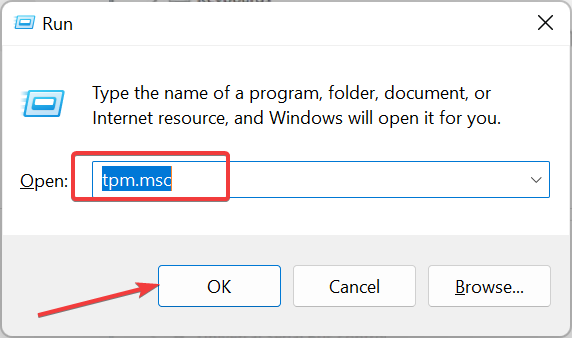
Press the Windows key + R, type tpm.msc, and click OK.
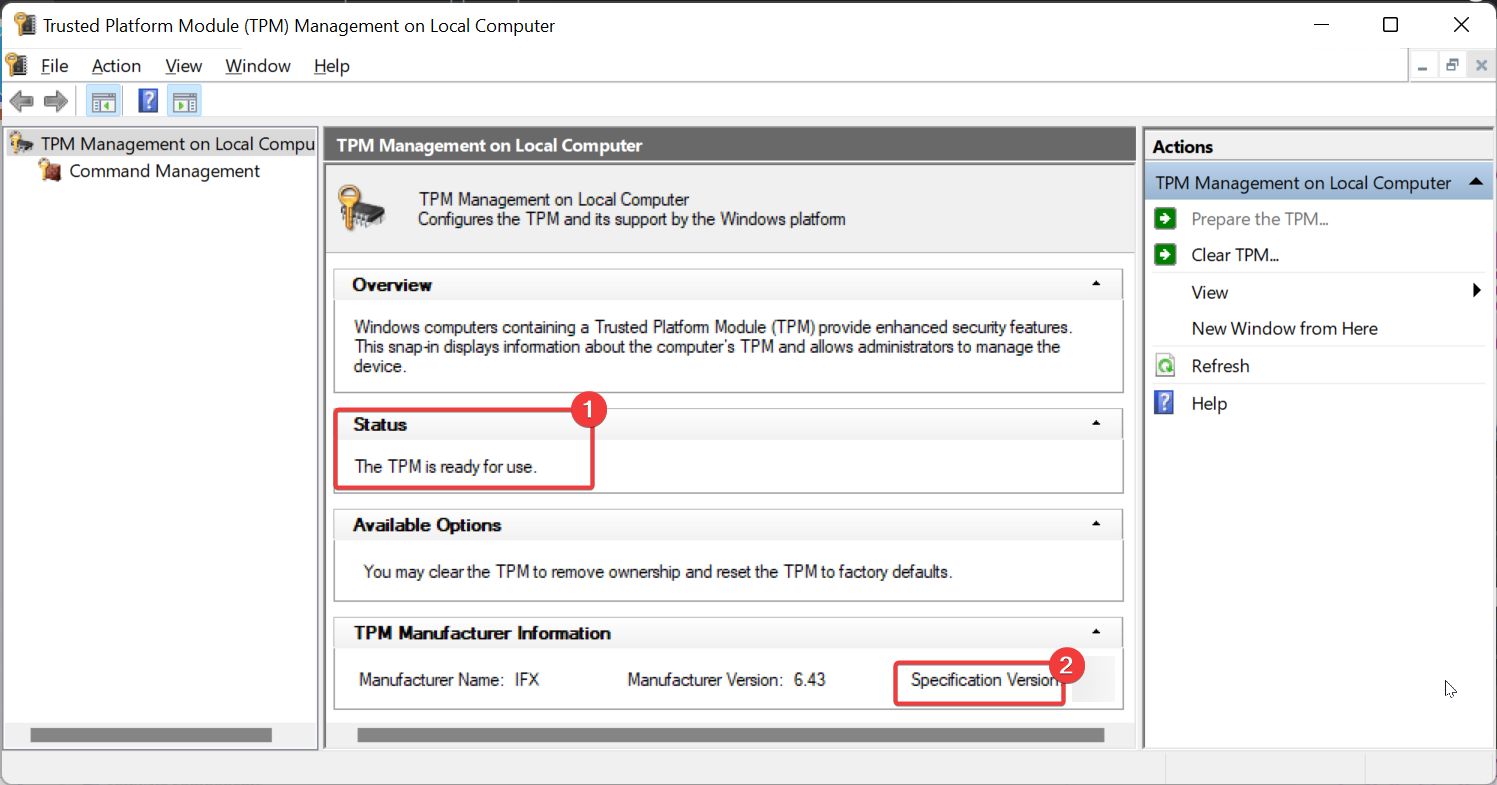
Check under the Status section to see if your TPM is ready to use.
Also, check the Specification Version under TPM Manufacturer Information for your TPM type.
The first thing you need to do is to check if your PC supports TPM 2.0 to update to Windows 11. If the specification version is below 2.0, your PC does not meet the requirement to install Windows 11.
However, you can proceed to the ensuing solutions to still install the OS. Also, if Status states that a compatible TPM cannot be found, you need to enable it in the BIOS.
2. Reinstall TPM drivers
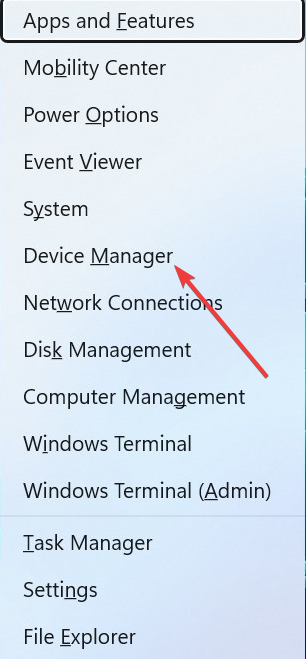
Press the Windows key + X and select the Device Manager option.
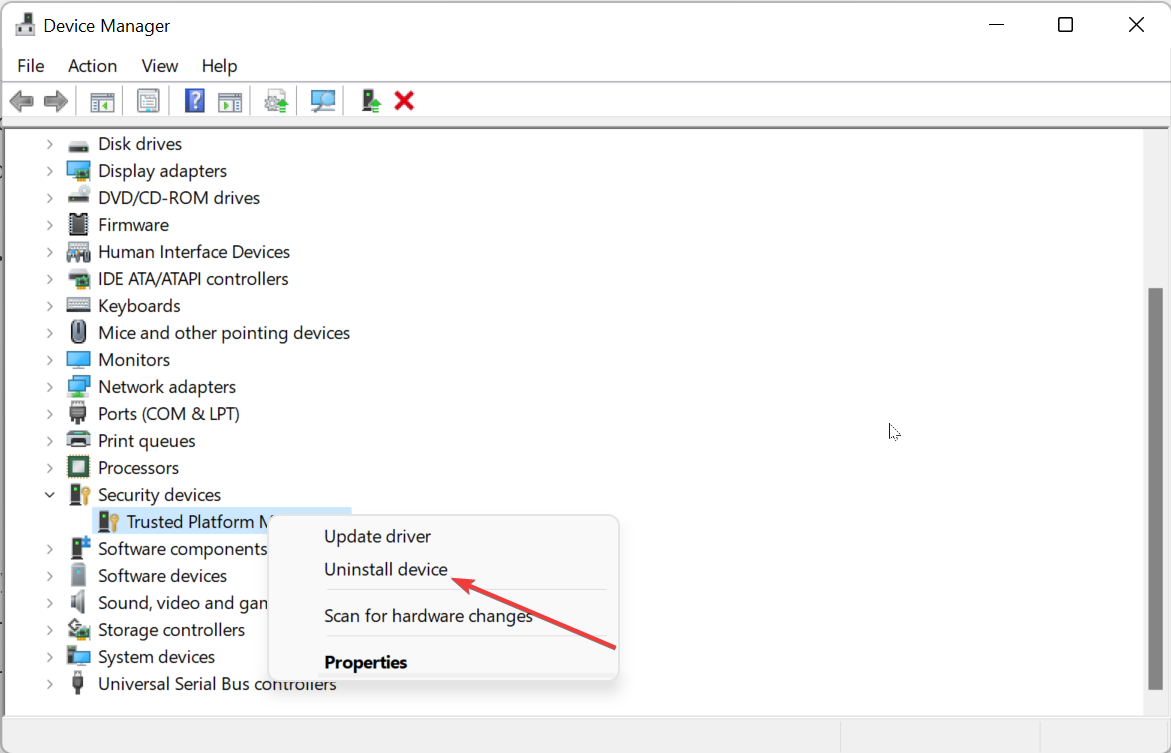
Double-click the Security devices option and right-click your TPM device.
Now, click the Uninstall device option.
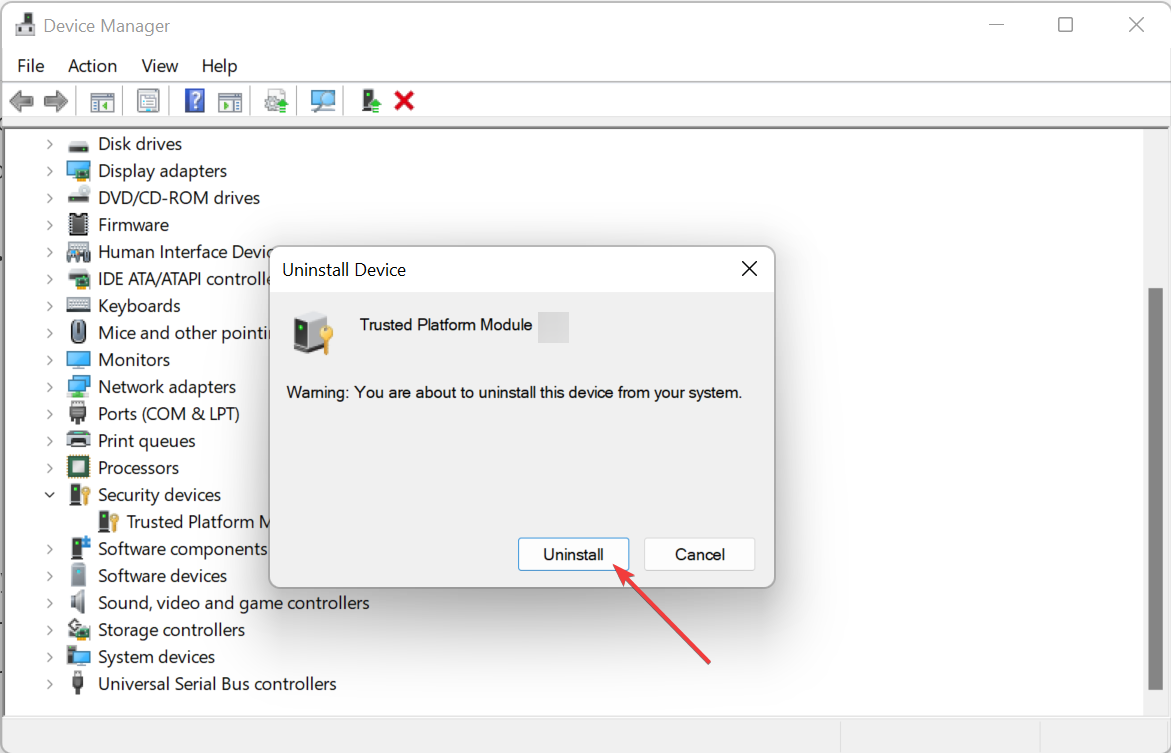
Finally, click the Uninstall button to confirm the action and restart your PC.
If you are sure your PC meets the requirements and you are getting the PC must support TPM 2.0 prompt, it might be due to issues with the TPM drivers. The solution here is to uninstall and reinstall the drivers.
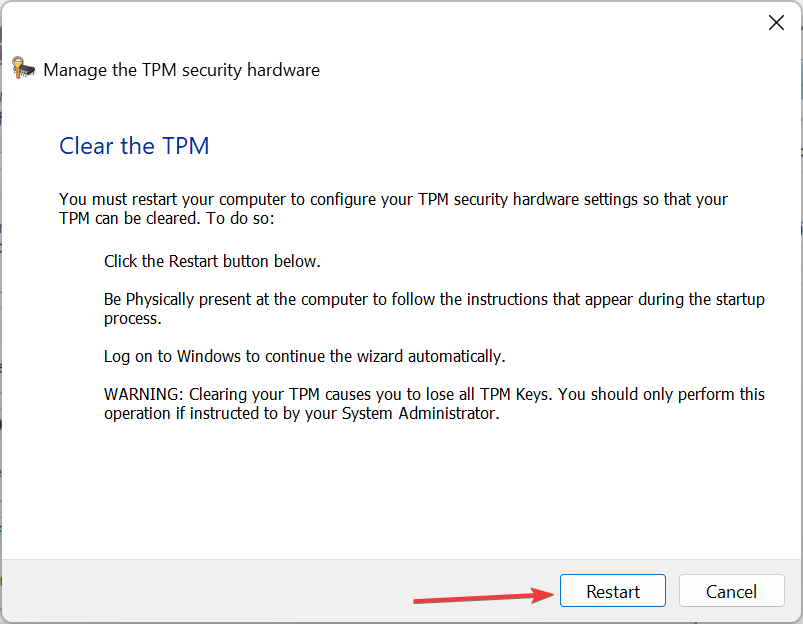
3. Clear the TPM keys
Press the Windows key + R, type tpm.msc, and click OK.
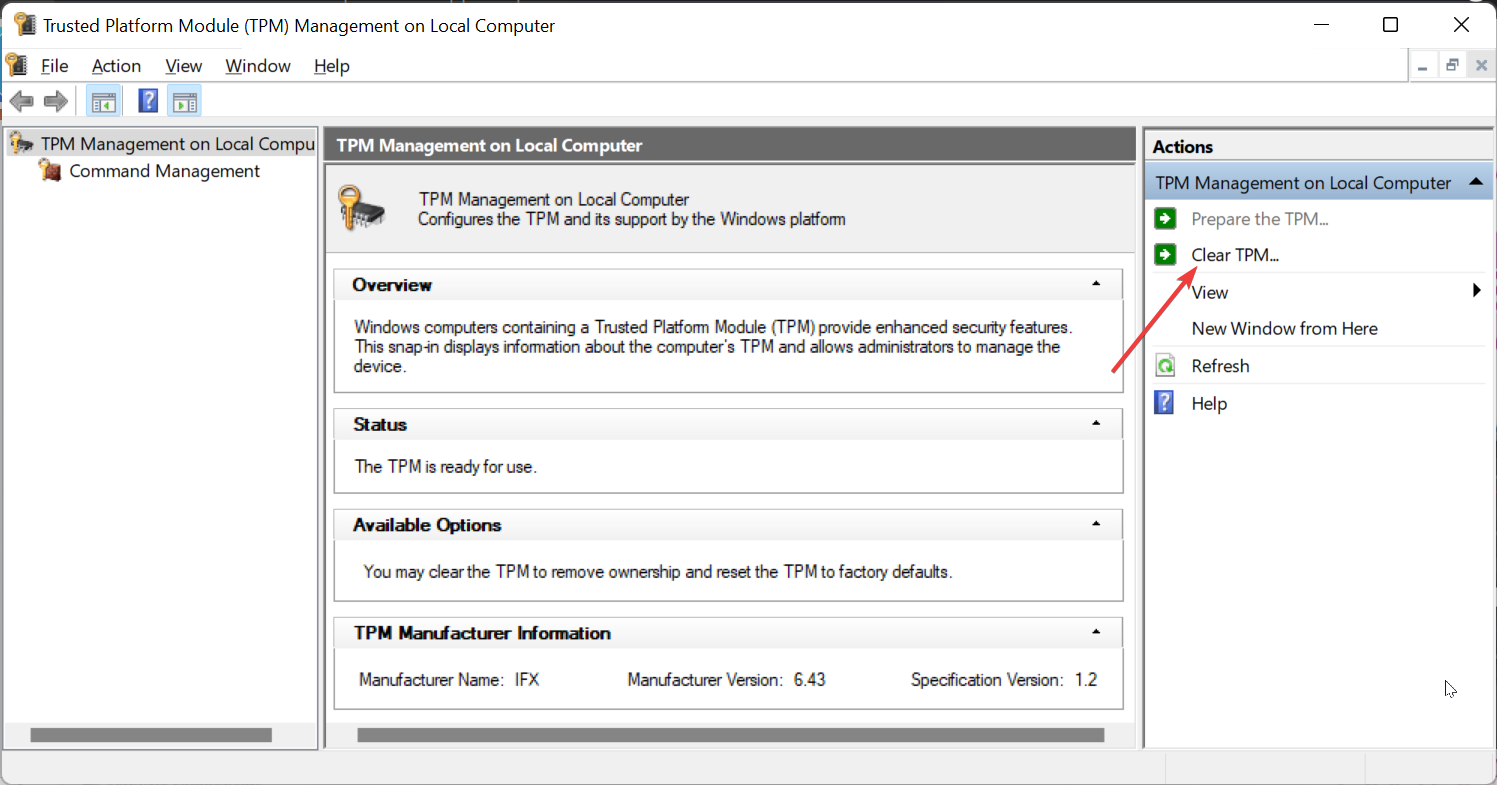
Click the Clear TPM option in the right pane.
Finally, click the Restart button to confirm the action and follow the onscreen prompts after your PC restarts.
If you are getting the Valorant needs TPM 2.0 error on Windows 11 or you can’t update your PC, it might be because of faulty keys. Clearing the keys and allowing your PC to generate new ones should restore normalcy here.
4. Bypass TPM requirements
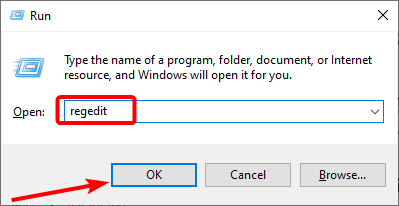
Press the Windows key + R, type regedit and click OK.
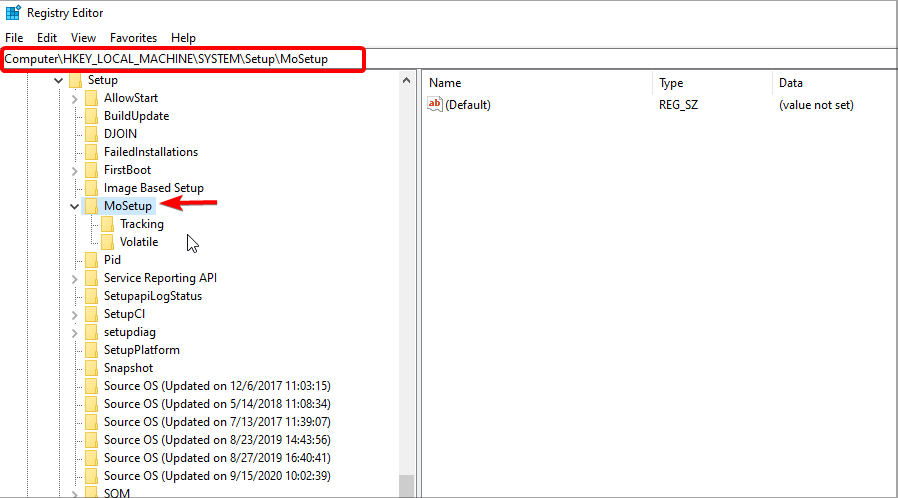
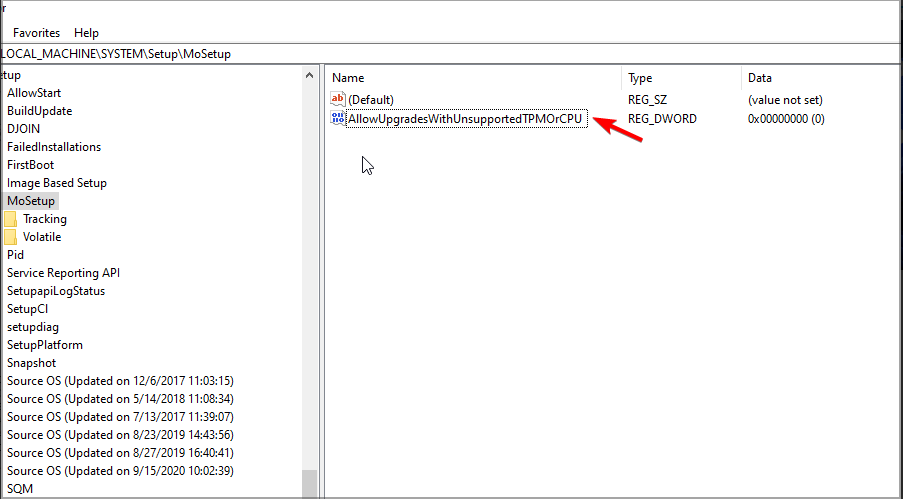
2. Navigate to the following path in the left pane:Computer\HKEY_LOCAL_MACHINE\SYSTEM\Setup\MoSetup
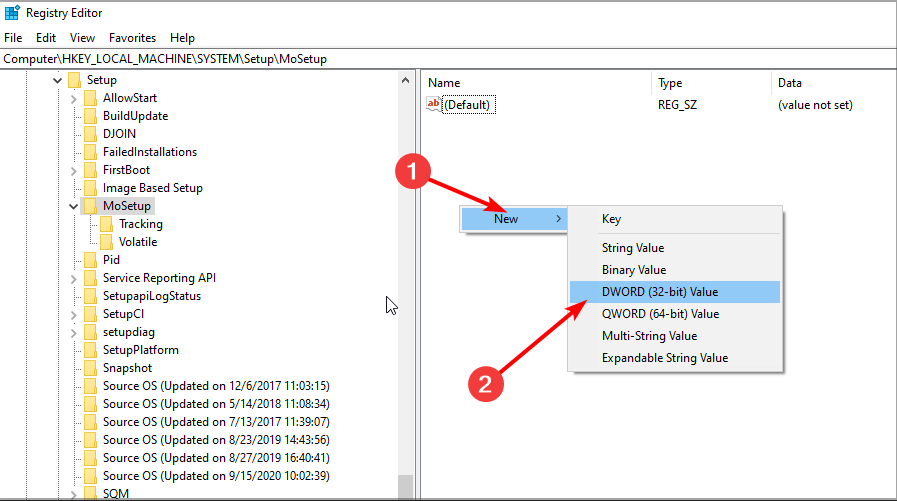
3. Right-click the space in the right pane and choose New > DWORD (32-bit) Value.
4. Type AllowUpgradesWithUnsupportedTPMOrCPU as the name of the new value and hit Enter.
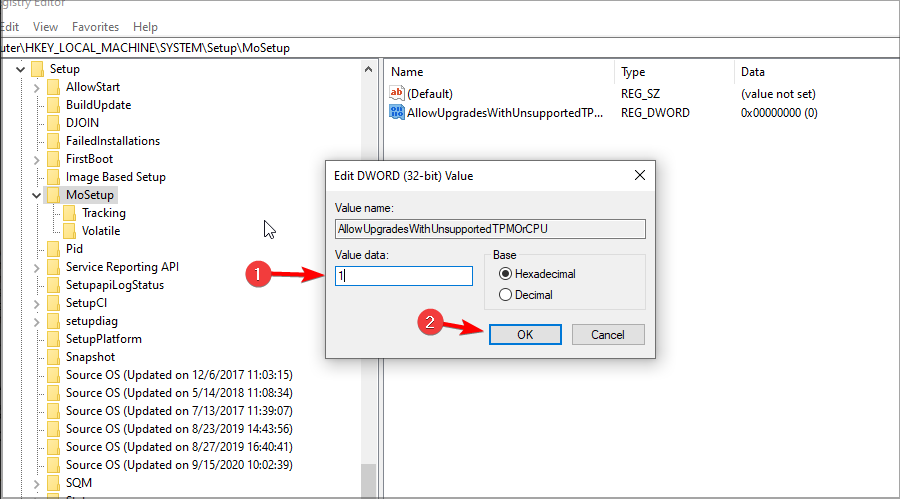
5. Double-click the value that you just created.
6. Set its Value data to 1 and click OK to save the changes.
If you are dealing with the PC must support 2.0 or Safe boot to upgrade to Windows 11, and your PC does not meet the requirement, this method will allow you to bypass the TPM check. This is the recommended method by Microsoft, so you should feel safe using it.
If you still can’t install Windows 11 because your PC does not support TPM 2.0, you need to go for broke and get a motherboard that supports the feature.
This will get rid of the problem altogether. Check our detailed guide for a list of the best TPM 2.0 motherboards.
How do I get TPM 2.0 in BIOS?
While your system boots, keep pressing the Del key.
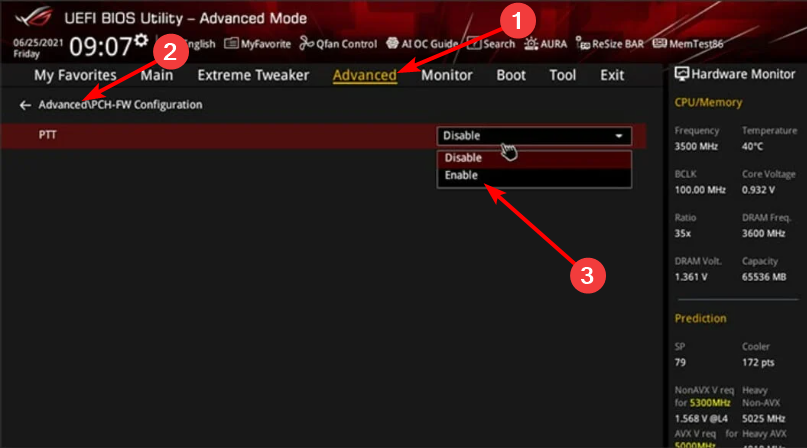
Click the Advanced tab at the top.
Now, choose PCH-FW Configuration.
Click the dropdown before PTT and set it to Enable.
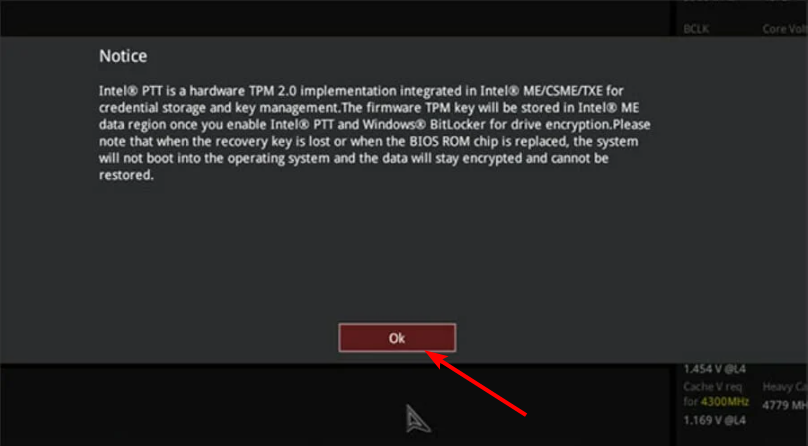
Next, click the OK button to confirm the action.
Finally, press F10 to save the changes and restart your PC.
Enabling TPM 2.0 in BIOS depends on your motherboard and your PC model. The method above ASUS PCs using the Inter motherboard.
With this, we can conclude this article on the PC must support the TPM 2.0 prompt. We believe you now have everything to tackle this issue and update or upgrade your PC to Windows 11 effortlessly.
Are you looking to download and install the Realtek Bluetooth 5.0 driver on your Windows 10, Windows 11, and Windows 7 PC, but could not find a straightforward guide? Look no further.
Because in this guide will give you a complete guide that will help you download and install the Realtek Bluetooth 5.0 drivers on your Windows PC. Installing and downloading a Realtek driver is the same as installing any other program. Let us get right into it.
Click the Software button next to the Realtek Bluetooth 5.0 driver.
Click the Download button.
Install the EXE file.
Restart the PC to apply the changes.
You can download the latest version of the Realtek Bluetooth driver from the official website. Alternatively, we have a guide for using a third-party source.
The tool will automatically scan for missing or outdated software.
Select all the drivers that you wish to download or upgrade, which in our case is the Realtek Bluetooth 5.0 driver.
Hit the Update button at the top.
Wait for the program to download and upgrade all the drivers.
Restart your PC for the changes to take effect.
Fortect Driver Updater is our recommended tool to upgrade or download missing drivers on your PC. It is an efficient tool that will help you to get everything done with just a few clicks.
Apart from updating drivers, you can use Fortect Driver Updater to schedule automatic scans, create software backups, and much more.
Click the Software button next to the Realtek Bluetooth 5.0 driver.
Hit the Download button.
Install the EXE file.
Restart your PC.
You can download the latest version of the Realtek Bluetooth 5.0 driver from the official website by following the above steps on your Windows 10 PC or you can also use the Driverpack website, as described above.
The tool will automatically scan for missing or outdated software.
Select all the drivers that you wish to download or upgrade, which in our case is the Realtek Bluetooth 5.0 driver.
Hit the Update button at the top.
Wait for the program to download and upgrade all the drivers.
Restart your PC.
3.3 Use Device Manager
Open the Start menu.
Open Device Manager.
Expand Network adapters.
Find the Realtek Bluetooth 5.0 adapter.
Right-click on it and select the Update driver software option.
Follow the on-screen prompts and download the file.
That is it from us in this guide. Updating drivers is also pretty easy, and you can make use of any of the listed driver updaters in our guide of the 10 best driver updaters that will facilitate the updating process.
For Realtek audio driver issue, you can check out our guide that mentions some solutions to fix Realtek audio driver missing problems.
Let us know in the comments below, which one of the above solutions you followed to download the Realtek Bluetooth 5.0 driver on your Windows 11, 10, or Windows 7 PC.
Some users got the error code 0xc004f074 when trying to activate Windows after upgrading. If you’re currently dealing with this problem, we’ll help you sort it out.
So, without further delay, here are the steps to eliminate the error 0xc004f074 and activate your product.
How can I fix error 0xc004f074 in Windows 10?
1. Use the slmgr.vbs command
Press the Windows key + S, type cmd, and select Run as administrator under Command Prompt.
2. Type the command (Replace the Y letters in the code with your 25-number product key number) below and hit Enter: slmgr.vbs –ipk YYYYY- YYYYY - YYYYY - YYYYY - YYYYY
3. Now, type the command below and hit Enter: slmgr.vbs –ato
4. Finally, reboot the computer and see if your device gives you the same error.
If you are getting we can’t activate Windows 10 on this device with error code 0xc004f074 on your PC, the slmgr.vbr command should help you fix it.
2. Use the Slui 3 command
Press the Windows key + R, type slui 3, and click OK.
Write your product key in the window that appears.
Now, click the Next button.
Finally, restart your PC and check if the issue persists.
If you are getting the error code 0xc00f074 on office 2014, 2016 or while trying to activate your PC, you should try using the above command.
3. Run an SFC scan
Open the Command Prompt with administrative rights.
Type the command below and hit Enter: sfc /scannow
Wait for the command to finish running and restart your PC.
That is how to replace and fix the system files that might cause the can’t activate Windows 10 error code 0xc004f074 without a product key but with a digital license.
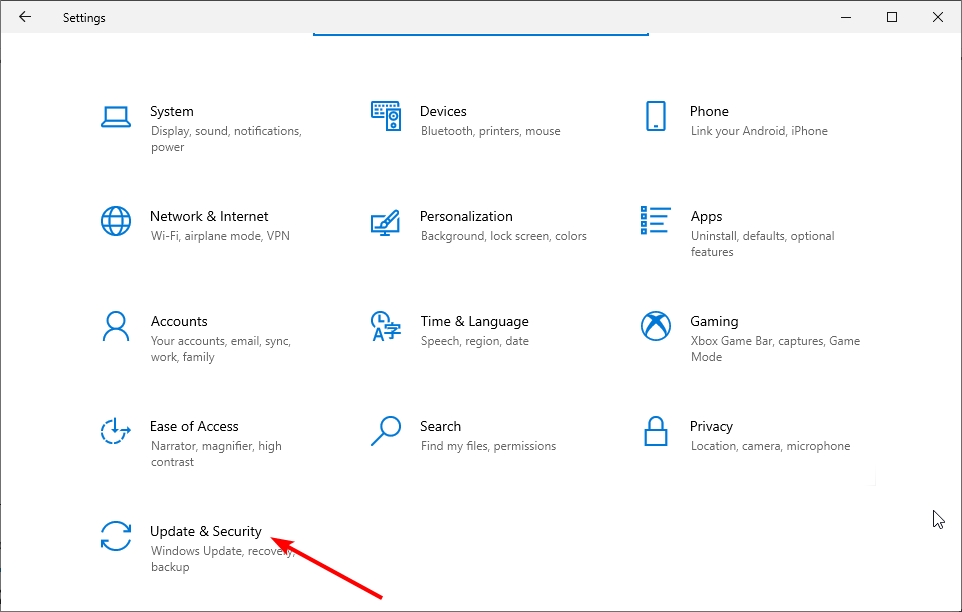
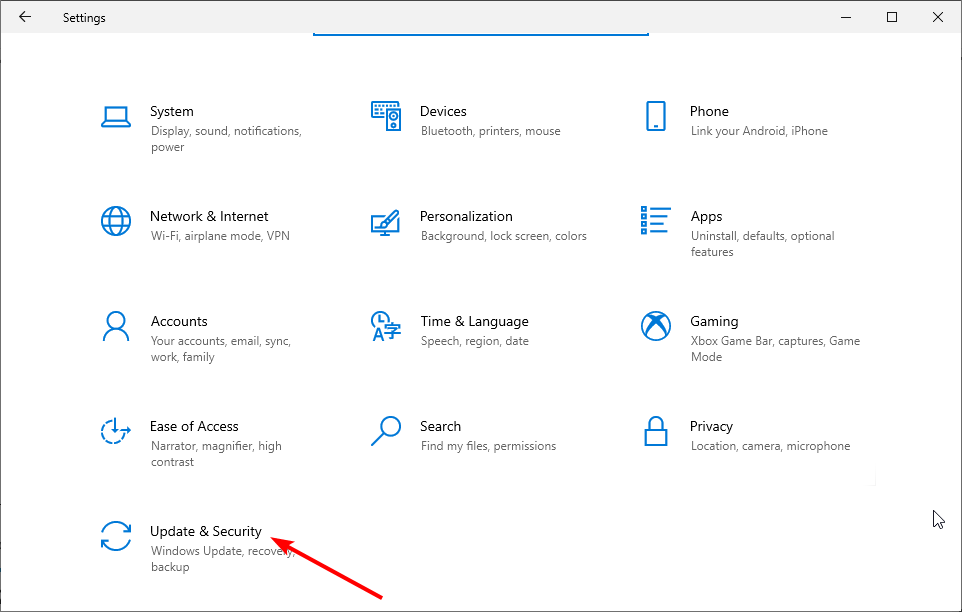
Press the Windows keys + I to open the Settings app and select Update & Security.
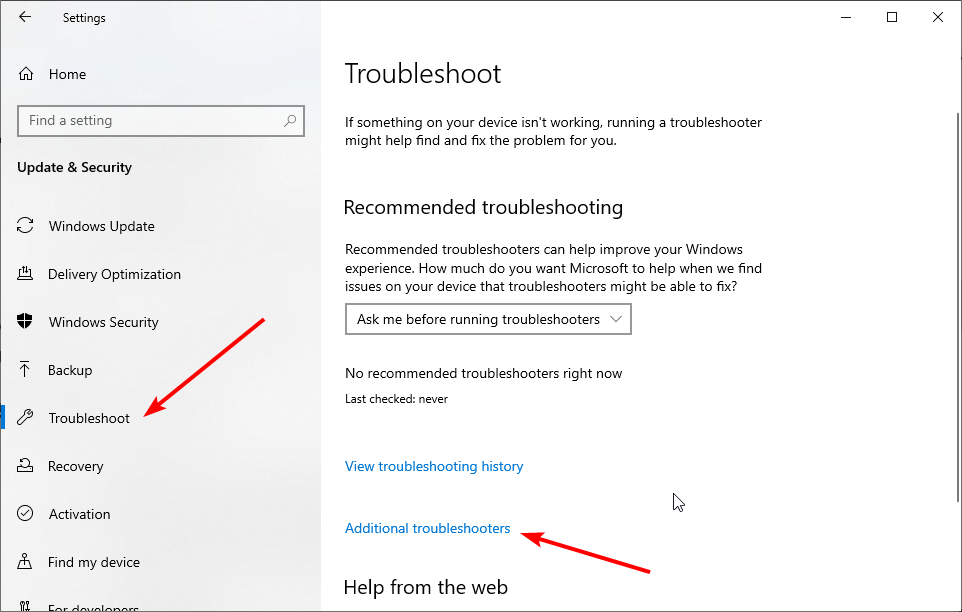
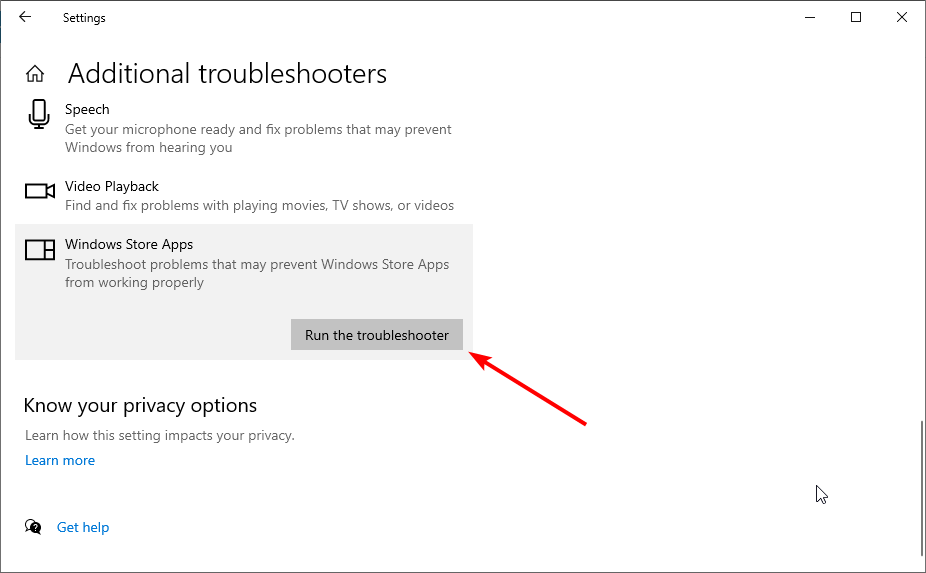
Click Troubleshoot in the left pane and select Additional troubleshooters.
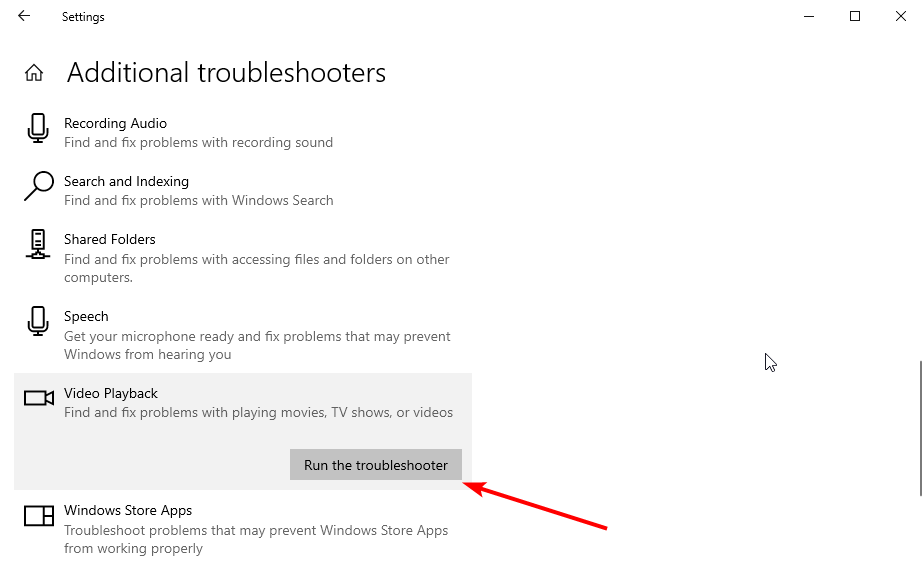
Now, select Windows Update and click the Run the troubleshooter button.
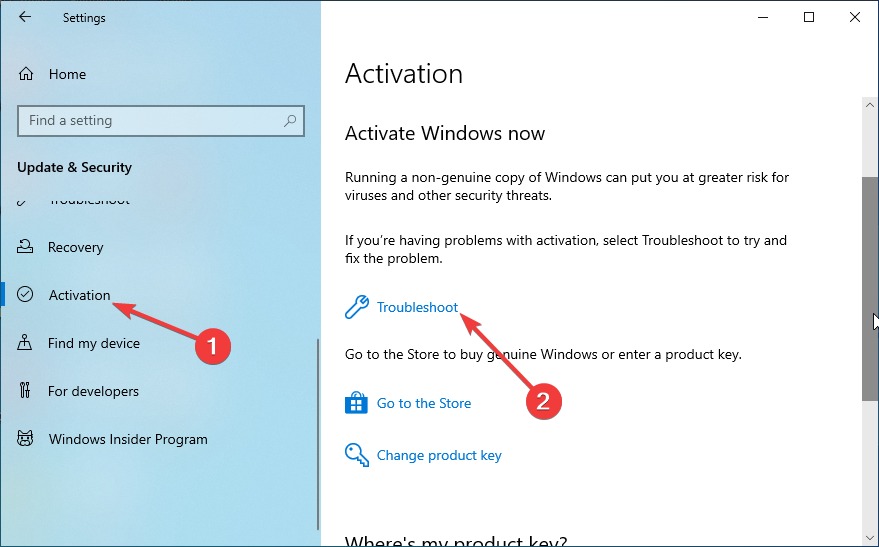
If this does not fix the issue, go back to the Update & Security window and select Activation in the left pane.
Finally, click the Troubleshoot option and apply any recommendation by the tool.
If you are facing the error code 0xc004f074 on Windows 7, 8, and server 2019 after installing an update, running the Windows update troubleshooter might help you.
On the other hand, the Windows Activation troubleshooter is your best bet for most activation issues.
5. Contact Microsoft Support
Try calling the Microsoft support team and tell them what the error you are getting and ask them to change your product key is. In some cases, when you try to use the product key too many times, it will get blocked by the server.
In this case, you need to reset the product key with the help of Microsoft’s support team.
So, the methods above should help you solve your issue with the error code 0xc004f074 to activate your Windows 8 or Windows 10 operating system.
In this article, we will explore the best Bass booster for PC and other platforms that allow you to tweak the sound features. With a special focus on boosting bass sound software solutions.
Audio boosters in general are a great way of increasing your system’s audio capabilities without the need to invest large sums of money into sophisticated audio peripherals.
Due to technology, we can even create virtual surround audio, which will make it seem there are more speakers around you than there actually are.
Whether you listen to music, play games or create content these software solutions will only boost your capabilities and your listening experience.
These tools should help you manipulate and tweak the bass to your taste. If you have a genuine interest in making the best of your playback devices and getting the most vibrant bass output, check the solutions below.
What are the best bass boosting tools for Windows 10?
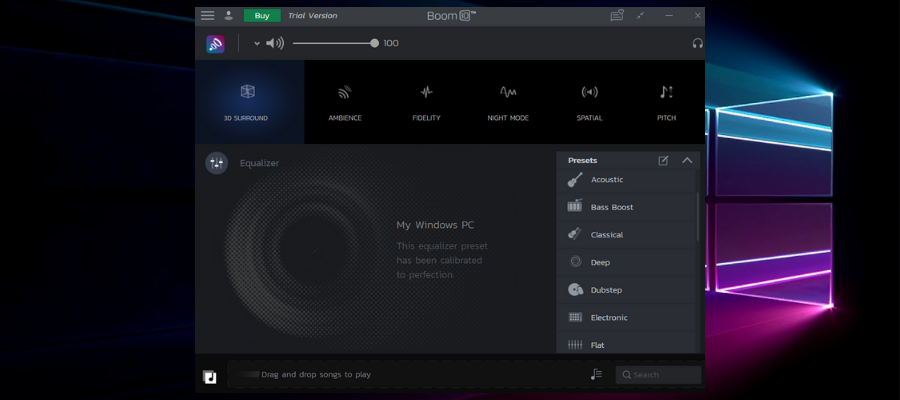
Boom 3D is, for all intents and purposes, probably the tool that brings the best bang for the buck, as it is pretty cheap to cover two major OS platforms.
It’s an amazing, feature-rich software solution for all of you that want an immersive sound experience on Windows 10 with bass-boosting capabilities. It’s not only a great tool for music playback, but Boom 3D is also great for gaming and home theater setups.
With its specific approach to realistic surround sound and 31 equalizer presets, along with audio fidelity, this tool will make the media intake a completely enhanced experience.
Whether you work in a music studio or you just enjoy listening to good quality music casually, this software should not be missing from your PC. The surround-sound system, paired with good speaker placement or headphones will result in an immersive and realistic experience.
But that’s not the only good feature you’ll find. There are more, and all of them serve the purpose of entertaining you, the customer, with the best and highest quality sound on the market.
The most distinctive features of Boom 3D are:
3D Surround
Vivid and Vibrant audio reproduction
31 Band Equalizer Presets
Ambient and Spatial sound enhancements
The feature-rich audio player that’s available on Windows, macOS, Android, and iOS.
This is an amazing package and we suggest giving it a try as there’s a 30-day trial period. After that, you can purchase it for quite a low price.
Boom 3D
Listen to the best audio quality, enhance your music with cool equalizers with Boom 3D
Equalizer APO is one of the best equalizers for tweaking your audio experience to the smallest details. It is a very reliable tool and you can use it in conjunction with Room EQ Wizard.
This allows you to easily read its filter text file format. This tool also has a very useful UI add-on called Peace GUI.
Equalizer APO can significantly enhance and improve the quality of your sound. Once it’s installed, it can be configured by accessing its configuration TXT file found in the installation folder on your Windows 10 PC.
Here are the key features of Equalizer APO:
Virtually unlimited number of filters
Incredible bass-boost capabilities
Works on any number of channels
Very low latency, which makes it suited for interactive applications
Equalizer APO also offers you the possibility to transform its look by installing Peace GUI, which makes it even easier to use and adds audio mixing tools to your PC.
Using Peace GUI with Equalizer APO offers you other very important options:
Effects panel – balance, cross-feeding, delay
Graph window
You can save configurations and activate them by a simple click/hotkey or desktop shortcut
Up to 31 gain dB Equalizer sliders per channel/speaker
9 speakers support (all, stereo, 5.1 and 7.1)
Filter frequencies, dB gains, filter qualities can all be changed per slider
Filters: peak, low/high pass and shelf, bend, notch, and all pass
Pre amplifying dB values for volume control (per channel/speaker)
Graph of your filters (transfer function) per speaker
To get everything set up, you want to first install Equalizer APO and then install Peace GUI. Your antivirus may detect a virus in the PeaceSetup file. You don’t have to worry because this is only a false positive.
You can check out the step-by-step guide for install instructions and configuration here.
FX Sound, formerly known as DFX Audio Enhancer, is one of the world’s most popular PC multimedia software accessory.
This tool enhances the sound of most online music and video content – Youtube, Pandora, Spotify – and also runs real-time audio enhancement on a variety of players including iTunes, Windows Media Player, and Winamp.
FX Sound has a completely overhauled user interface compared to DFX allowing you to have a highly intuitive and aesthetically pleasing experience while using it.
If you own an average quality set of PC speakers – that has stopped you from experiencing your music fully – and you don’t want to spend a lot of money on a quality audio system, then FX Sound is a cheaper alternative.
It transforms the way you listen to songs into a top-of-the-range listening experience. This software is very simple and easy to use, it runs in the background and it has a huge impact on your music.
Here are the key features of FX Sound key:
7.1 Surround Sound
High definition music optimization without playback delay
Optimization for low quality tracks even – YouTube, Spotify, and Pandora
You can erase audio compression – MP3s are heavily compressed to reduce file size but this also affects sound quality
Deep Bass and Upper Bass Adjustment
Lower-midrange adjustments
Fidelity and ambiance adjustments
Dynamic Range
You can easily create and save your own presets.
Previous users of DFX can upgrade to Fx Sound Premium with a discount. You can try FX Sound as a 7 free day trial. You can also buy FX Sound Premium and enjoy extra options and settings.
Bass Treble Booster is a shareware (free to try) licensed program that has a very easy to understand interface. You can easily adjust the sounds coming out of your Windows 10 PC to any frequency you desire.
It is not as powerful as FX Sound when it comes to the range of frequencies it can operate changes on but it makes a viable option for users that need a simpler alternative.
It has the ability to losslessly increase the volume of your music, apply different settings to the bass, and treble using its custom presets, and convert audio files to your desired file type.
The Bass Treble Booster key features include:
You can change low, medium and high frequencies (ranges from 30 to 19Khz)
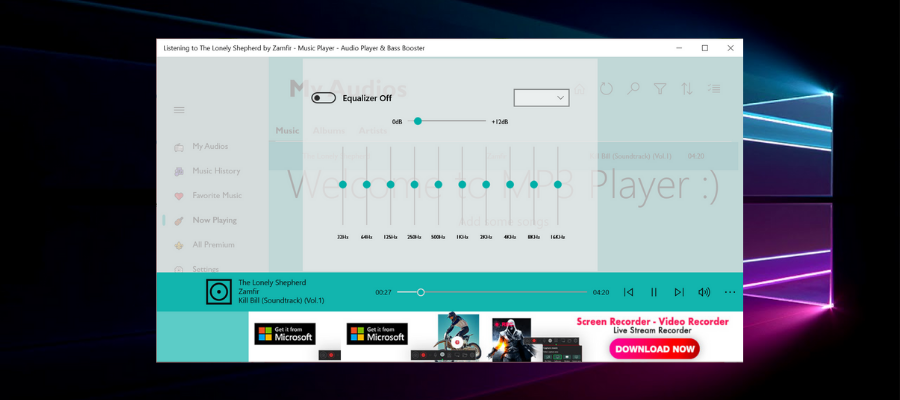
The Music Player from Sandpiper Studio has a modern, minimalistic UI where it encompasses multiple music file management features, along with a song equalizer and bass booster.
You can add multiple types of audio files to the Music Player Library. It is compatible with WAV, AIFF, MIDI, AAC, MP3, OTA, MP2, S3M, MOD, MTM, UMX, MP1, XM, MO3, and M4A files.
The song library is simple and well organized. It has a search bar where you can type details about a song (e.g. song name, album name), and the results will be displayed in a list. You can also browse by using albums, artists, playlists, and also folder-specific filters.
Other key features of Music Player include:
Color theme change
Custom tone music style
Manually adjustable equalizer
Genre specific presets
Play Stats in the Music History Tab regarding Most Recent Plays, Recently Added Songs, and Most Played Songs
Shuffle/Repeat/No Repeat Controls
Allows you to set favorite tracks, and then easily find them in the Favorites Tab
Music Player has a free and a premium version. You can get the premium version as a one-time purchase, or get a subscription plan.
Bongiovi DPS was created in a place called Motown, where Tony Bongiovi began his legendary career working with renown artists.
Digital Power Station (DPS) is a professional patented algorithm with 120 calibration points that is able to optimize any audio signal in real-time, adding depth, clarity, definition and incredible stereo field imaging.
Bongiovi DPS changes the way you listen to sound and allows you to get a personalized experience no matter if you use it for music, movies, streaming audio, internet communication, or games.
Bongiovi DPS with its Digital Power Station technology is one of the best software solutions that scans the audio signal of your device in reading time using its custom profiles to optimize as well as possible.
Bongiovi DPS key features:
Virtual Subwoofer Technology
Support for internet communications software – Google Voice, Skype, Face-time
120 calibration points
Adjustable spatial enhancements
Real-time adjustments without loss of quality (lossless)
This information presented in this article allows you to choose the best software options to boost your Windows 10 PC bass sound. We listed a wide array of bass boosting tools both at a professional and beginner level.
If you believe we missed some essential software, let us know in the comment section below.
The best video codec packs for Windows 10 can help users effectively resolve unsupported video-playing file format issues. The Windows 10 Media Player supports a wide variety of multimedia file formats including MP3, MP4, WMV, AVI, etc.
However, there is a wide array of audio and video file formats in the market currently. Therefore, all file formats might not work effectively with all media players for Windows 10.
To resolve these issues, users definitely require the best video codec pack for compression, be it for Android, After Effect, QuickTime, or Plex.
Others include Windows 10 video codec pack for PowerPoint, Adobe Premiere, Facebook, YouTube, Instagram, MP4, editing, streaming, HEVC (H.265) encoding, etc.
Does Windows 10 need video codecs?
A codec makes it possible to process audio-visual signals through encoding and decoding digital data streams. Consequently, Windows 10 definitely required a codec pack for the job.
It could either be an application or a device pack that helps interpret different media file formats.
Here’s a quick preview of our top choices to download the best codec pack:
1️⃣ WinX HD Video Converter Deluxe
The most versatile media player codec pack
CyberLink PowerDVD
Download video codecs for Windows 10 64-bit & 32-bit
? GOM Player
Top-notch MP4 codecs for Windows 10 & more
VLC Media Player
The ultimate open-source player to stream codec packs
? K-Lite Video Codec Packs for Windows 10
Best codec pack with regular updates
? Media Player Video Codec Packs for Windows 10
4K audio and video streaming
Now, Windows 10 does not include the latest video codec packs by default and you’ll need to download and install them yourself in order to render all kinds of videos, fix file format issues and overall improve your user experience,
Due to the large volume of codec packs available out there, just settling for any video codec could result in malware, adware, and other harmful virus or infectious files.
This article, therefore, presents users with the top 6 media codec players to download the latest video codecs and codec packs for Windows 10, both 32 and 64-bit systems.
What are the best video codec packs for Windows 10?
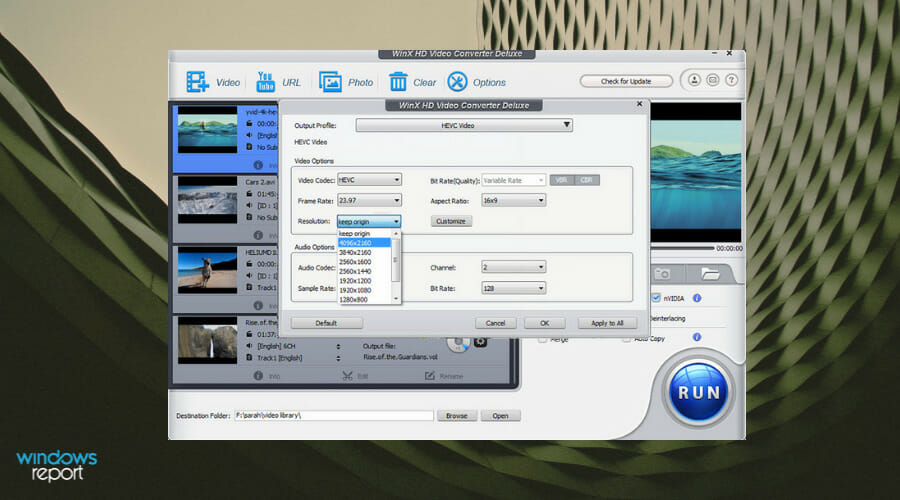
Although not a code pack, but rather an extremely versatile media player, WinX HD Video Converter is the king on our list.
With over 90 million users in the past 10 years, we can easily understand how this software has gained popularity.
The tool converts and processes media in any possible format, including hevc, h.264, mp4, mkv, avi, wmv, m2ts, avchd, and in whatever resolution or codec.
Besides, you can import, edit, store, share, or just play your media from a multitude of devices including action cams, drones, surveillance cams, or camcorders.
Thanks to the impressive Level-3 hardware acceleration technology, video transcoding speed spikes considerably without compromising the image quality.
The same technology is used to reduce any file size by up to 90%, with no impact on the video quality, only to make your media sharable.
WinX HD Video Converter
The most powerful video converter to edit any 4k media file and play it in Windows 10.
Coming second on our list is not a codec pack per se, but rather a video player that can pretty much support all user-grade video formats.
Given that you would only need a codec pack because you have a video that you cannot run, having a video player that can run anything is simply the better option.
Of course, Cyberlink Power DVD isn’t just your typical DVD or Blu-Ray player, it is an entire multimedia suite, allowing you to manage your entire collection of videos, music, and photos all from within one single menu.
More so, you can sync your content, allowing you to enjoy and share movies, TV shows, and photos anywhere, on any device.
Here are some of the perks of using CyberLink Power DVD:
Allows you to enjoy multimedia content on any device
Incredible audio and video quality enhancements
Full control over your videos, music, and photos
Gain access to the CyberLink cloud
Easy multimedia file sharing
CyberLink Power DVD
This singular program is an entire multimedia suite that will boost entertainment.
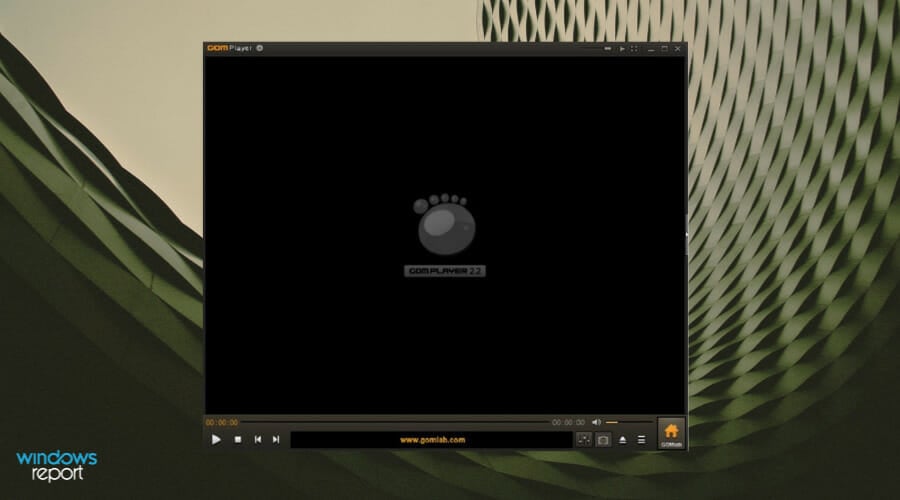
GOM Player – Top-notch MP4 codecs for Windows 10 & more
The next entry on our list follows the same trend, with GOM Player being a very reliable video player that can support pretty much all standard user-grade video formats.
However, even if it does manage to run into a file that it cannot open, it will immediately scan it and download the appropriate codecs anyway, as a form of self-improvement.
As for the video-playing part, GOM Player is incredibly lightweight and fast, and you won’t feel any strain on your PC, even when running high-definition formats such as Blu-ray or 4K content.
More so, it too features plenty of video-enhancement tools, the ability to switch audio, subs, and more.
Here are some of the perks of usingGOM Player:
Support for different formats like AVI, MP4, MKV, FLV, WMV, or MOV
Offers automatic subtitles from classic to newly released movies
Access to 360° VR experiences
Build-in codecs included
No ad playback on the Pro version
Priority for technical support
GOM Player
Use this self-updating video player to watch any video you want without worrying about missing codecs.
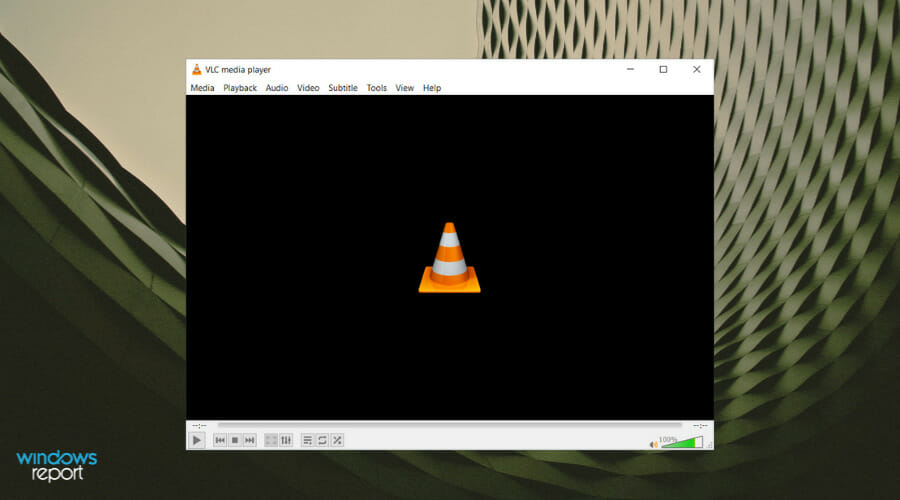
VLC Media Player – The ultimate open-source player to stream codec packs
VLC Media player is developed by Video LAN. The Media player is an excellent application that’s best suitable for viewing videos working with different file formats.
Users enjoy a free but open-source software multimedia player and framework playing audio, video CD, and DVD files across different streaming protocols.
VLC works perfectly with a wide variety of codecs even without the need for codec packs. Such formats include DivX, WebM, MP3, H.264, MKV, MPEG-2, etc. Some other great reason to give VLC Media Player a shot is that it comes entirely free to download.
As of September 2018, VLC Media Player has been downloaded 8.2 million times to show its popularity. The regular updating of VLC has helped to take care of issues with bugs and crashes.
As a universal media player, it’s possible to have VLC as the only media player on the user system. Though, programmers could develop other add-ons and extensions for attachment on VLC. These and more make VLC Media Player one of the best video codec packs for Windows 10.
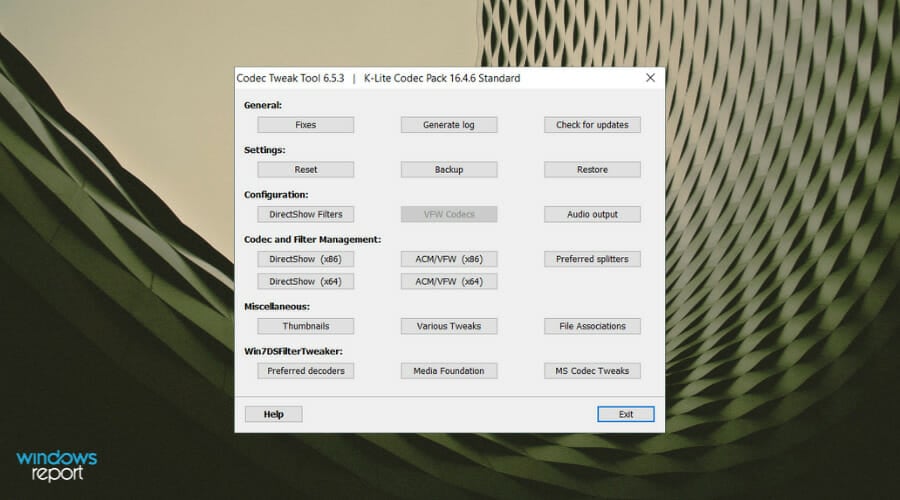
When searching for the best video codec pack for Windows 10 available in the market today K-Lite does offer the most popular and exceptional pack.
It is a virus-free application that plays almost any file format using a direct show filter.
The K-Lite codec pack developers regularly update the application to give users the best experience. It comes easily to install with an interesting graphic user interface and with over 1 million downloads.
K-Lite comes in four different packages:
Basic pack: It contains the essential tools for playing video codec files.
Standard pack: K-Lite standard pack offers the best pick for a regular user. It, however, has additional features for playing video formats not found in the basic pack.
Full pack: The full pack is richer with bigger and better features for users such as filters and other tools.
Mega Pack: K-Lite is the must-have package for heavy users seeking to have all available options. It allows one to encode video and audio files.
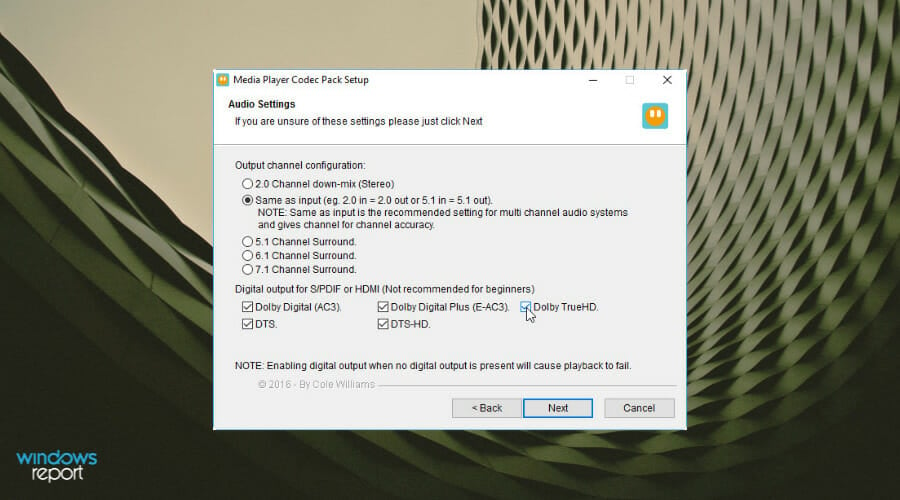
The Media Player video codec pack is also another very helpful video codec pack for intermediate/ average and heavy users. If you want to get the Windows 10 codec pack from Microsoft itself, here’s your best shot: get the latest Windows Media Player codecs for Windows 10.
The Media player codec supports any file type or compression for audio and video files. It can support up to 4K audio and video streaming.
Media Player codec comes in two packages: easy installation and expert installation. The easy installation gives users the basic package while expert installation contains advanced features for heavy users.
Media Player codec pack offers the best video format and size for Real, VLC, DVDs, MP4, Xvid, etc. That again makes it an option for the best video codec packs for Windows 10.
Press the Alt + H shortcut to open the Help menu and select About Windows Media Player.
Now click on Technical Support Information.
Scroll down to find all the audio and video codecs installed on your system.
If you have other players than the WMP, you can, of course, follow the instructions – and they shouldn’t be much different – to identify your codecs.
You may need to inspect the K-Lite codec pack or the VLC codec pack if you’re running any of these options.
Now, a list of the best video codec packs for Windows 10 cannot be exhausted in a single article.
Nevertheless, one thing remains critical when trying to pick the best free video codec pack. Namely, the user needs to consider what they expect from such software.
Even so, the above-listed video codec packs arguably make the top of the ranks and are suitable for a wide variety of file formats. Enjoy a pleasant streaming, music, or video-playing experience!
Press the Windows key, type cmd, and select Run as administrator under Command Prompt.
Type the command below and hit Enter: sfc /scannow
Wait for the command to finish running.
The first thing you need to do if Windows 10 deactivated itself is to search for faulty system files. Running the SFC scan should fix or replace any file causing problems.
2. Validate your product ID via Command Prompt
Press the Windows key + I and select the System option.
Click About in the left pane and note your Product ID.
Now, launch the Command Prompt as admin, type the command (replace product ID with the value in step 2) below, and hit Enter: slmgr/ipk Product ID
You should now have a window in front of you displaying an activation prompt.
Now, type the command below and hit Enter: slui
Finally, check if the product key displayed is the same as in Step 2 and restart your PC.
3. Reset your PC
Press the Windows key + I and select Update & Security.
Click the Recovery option in the left pane.
Now, click the Get Started button under Reset this PC.
Choose the Keep my files option and click Next.
Finally, follow the onscreen instructions to complete the process.
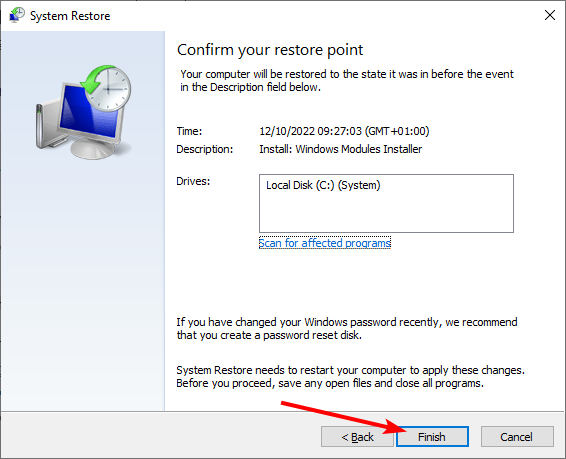
4. Use System Restore
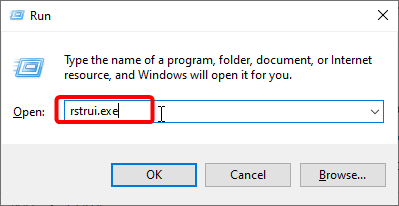
Press the Windows key + R, type rstrui.exe, and click OK.
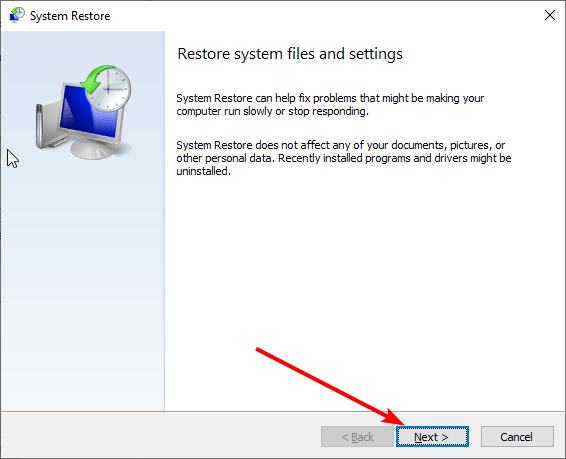
Click the Next button in the window that pops up.
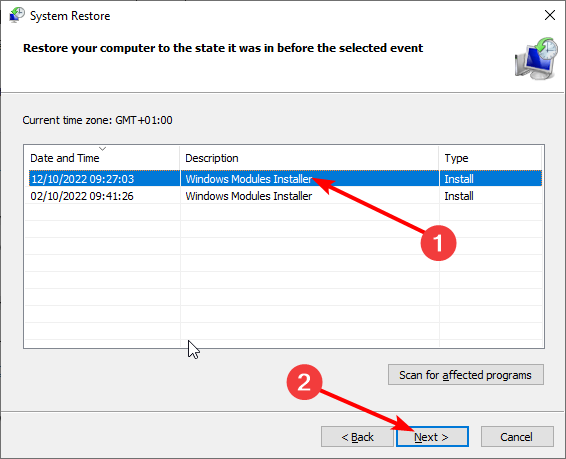
Now, choose your preferred restore point and click the Next button.
Finally, click the Finish button to confirm the action and follow the onscreen instructions to complete the process.
With this, your system should return to a time when it was working well.
5. Clean install Windows 10
If you still cannot fix the Windows 10 deactivated itself issue after applying the fixes above, you might need to perform a clean install of the OS.
While this process can be time-wasting, it will help reactivate your PC, as you will need to enter the activation key during the installation. For everything, you need to make it successful, check our guide on how to clean install Windows 10.
However, if you don’t want to resort to complex and irreversible solutions, such as clean installing Windows 10, follow the steps below.
Indeed, a few users confirmed that these methods worked for them, but the fact is that some of these solutions may help you activate the OS. You’ve got nothing to lose if you try them out.
6.1. Launch the Activation Troubleshooter
Press the Windows key + I and select Update & Security.
Click on Activation in the left pane.
Now, click on Troubleshoot.
You could run the Activation Troubleshooter if the digital license activation failed after Windows 10 deactivated itself. This tool will check for activation conflicts and hopefully resolve them.
6.2. Run a full system scan
Press the Windows key, type virus, and select Virus & threat protection.
Select Scan options.
Now, select the Full Scan option and click the Scan now button.
Malware may cause various issues on your computer, including activation errors. If malicious codes were already on your PC before you hit the upgrade button, they might be blocking the Windows 10 activation process.
Perform a full system scan to detect any malware running on your computer. You can use Windows’ built-in antivirus, Windows Defender, or third-party antivirus solutions.
6.3. Update your OS
Press the Windows key + I and select Update & Security.
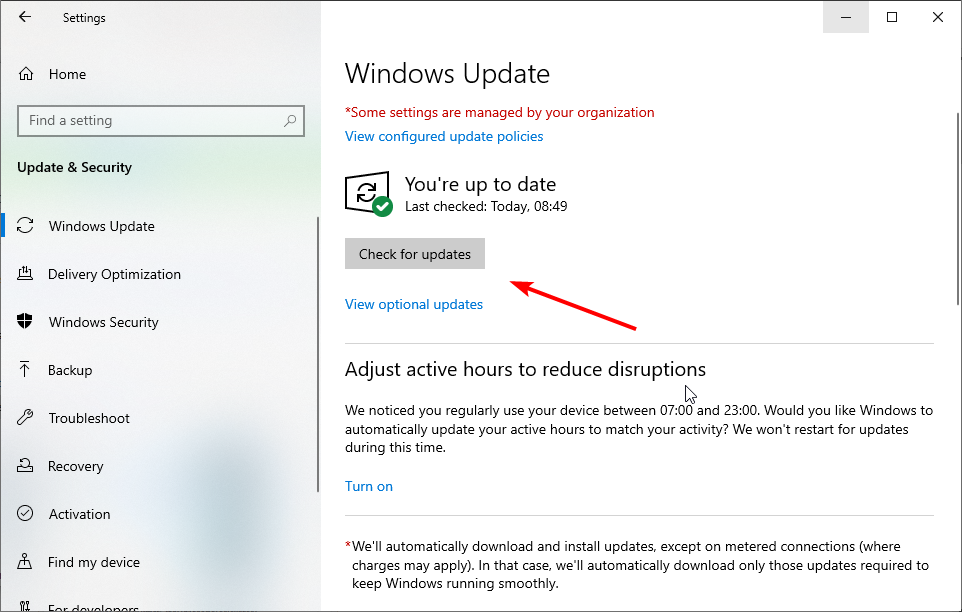
Click the Check for updates button.
Finally, install all available updates, including the optional ones.
6.4. Check your disk for errors
Launch Command Prompt as admin.
Copy and paste the command below and hit Enter: chkdsk c: /r
If you get any prompt, press the Y key and wait for the command to finish running.
Some users reported they could activate Windows 10 after checking their disk for errors. Of course, perform this check on the disk where you installed the OS.
6.5. Clean your temporary files and folders
Press the Windows key, type disk, and select Disk Cleanup.
Check the boxes for the options you want to clean.
Now, click the Clean up system files option and wait for the process to finish.
The simplest and quickest manner to delete your temporary files and folders is to use Disk Cleanup. Using your computer or browsing the Internet, your PC accumulates various unnecessary files.
These so-called junk files may affect your computer’s processing speed, causing apps to respond slowly and triggering various error codes. In rare cases, they can even push Windows 10 to deactivate itself.
6.6. Contact Microsoft Support
If all the above methods fail to address this problem and you can’t use your key to activate the OS, try contacting Microsoft Support. You can chat online with a Microsoft Support Engineer or call Support directly.
With this, we can conclude this guide on how to fix the Windows 10 deactivated itself issue. All that is left for you to do is follow the instructions carefully, and you should regain your activation status.
Looking for a third-party password manager for Opera? You’re in the right place.
Even though the browser has a built-in password manager, it doesn’t offer all the bells and whistles as others. If you feel you need more features, check out the options below.
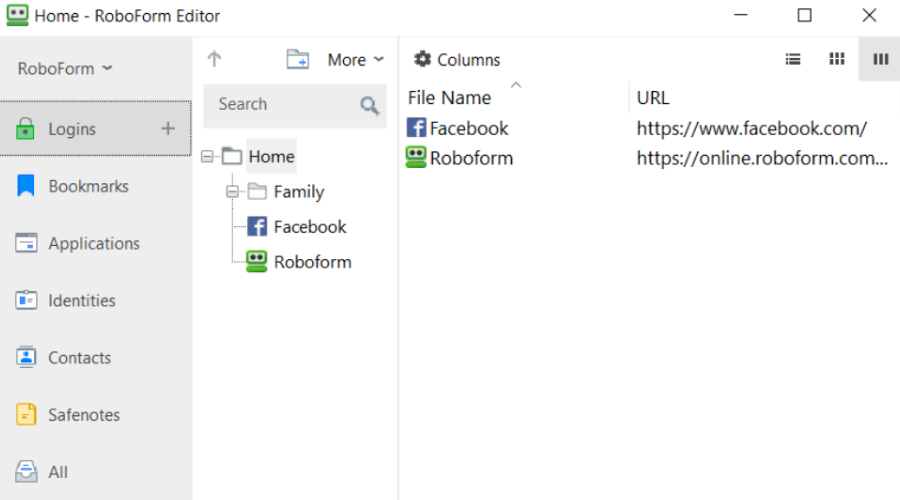
RoboForm is an excellent password manager compatible with Opera. It’s simple to install, with a Help center for guidance.
The free version offers unlimited logins, form fills, password audits, and generators, while paid plans offer advanced features. It uses AES-256-bit encryption for robust digital privacy.
Key features of RoboForm:
One-click logins
Multi-factor authentication
Security center
Offline access
RoboForm
Try the RoboForm Opera extension and avoid losing control of your passwords.
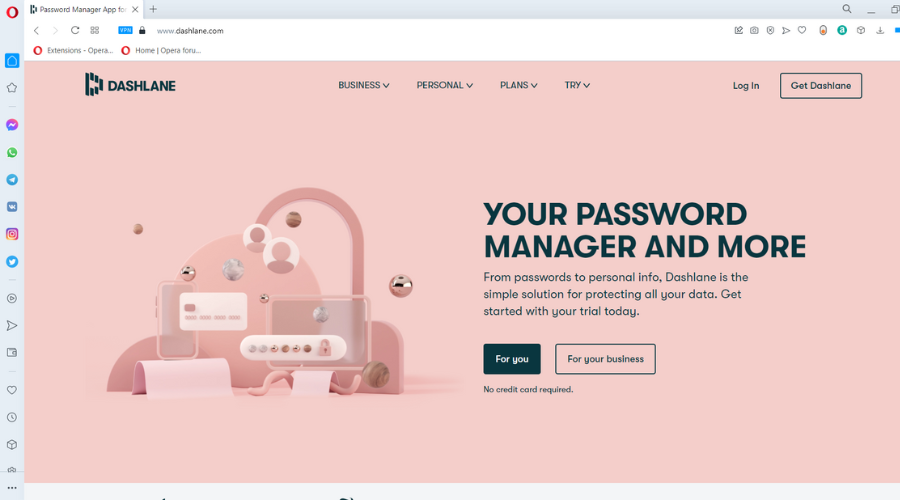
Dashlane offers a secure web app accessible as a lightweight browser extension for most browsers, enabling easy login and form autofill.
It’s popular in small businesses and software industries, offering free, family, and premium plans. While it’s not available in the Opera add-on store, you can download it from the Chrome Web Store.
Key features of Dashlane:
Great for beginners
Password monitoring
High level of encryption
Sync for all devices and browsers
Dashlane
Easy setup, cross-platform and encrypted security for a safe online environment.
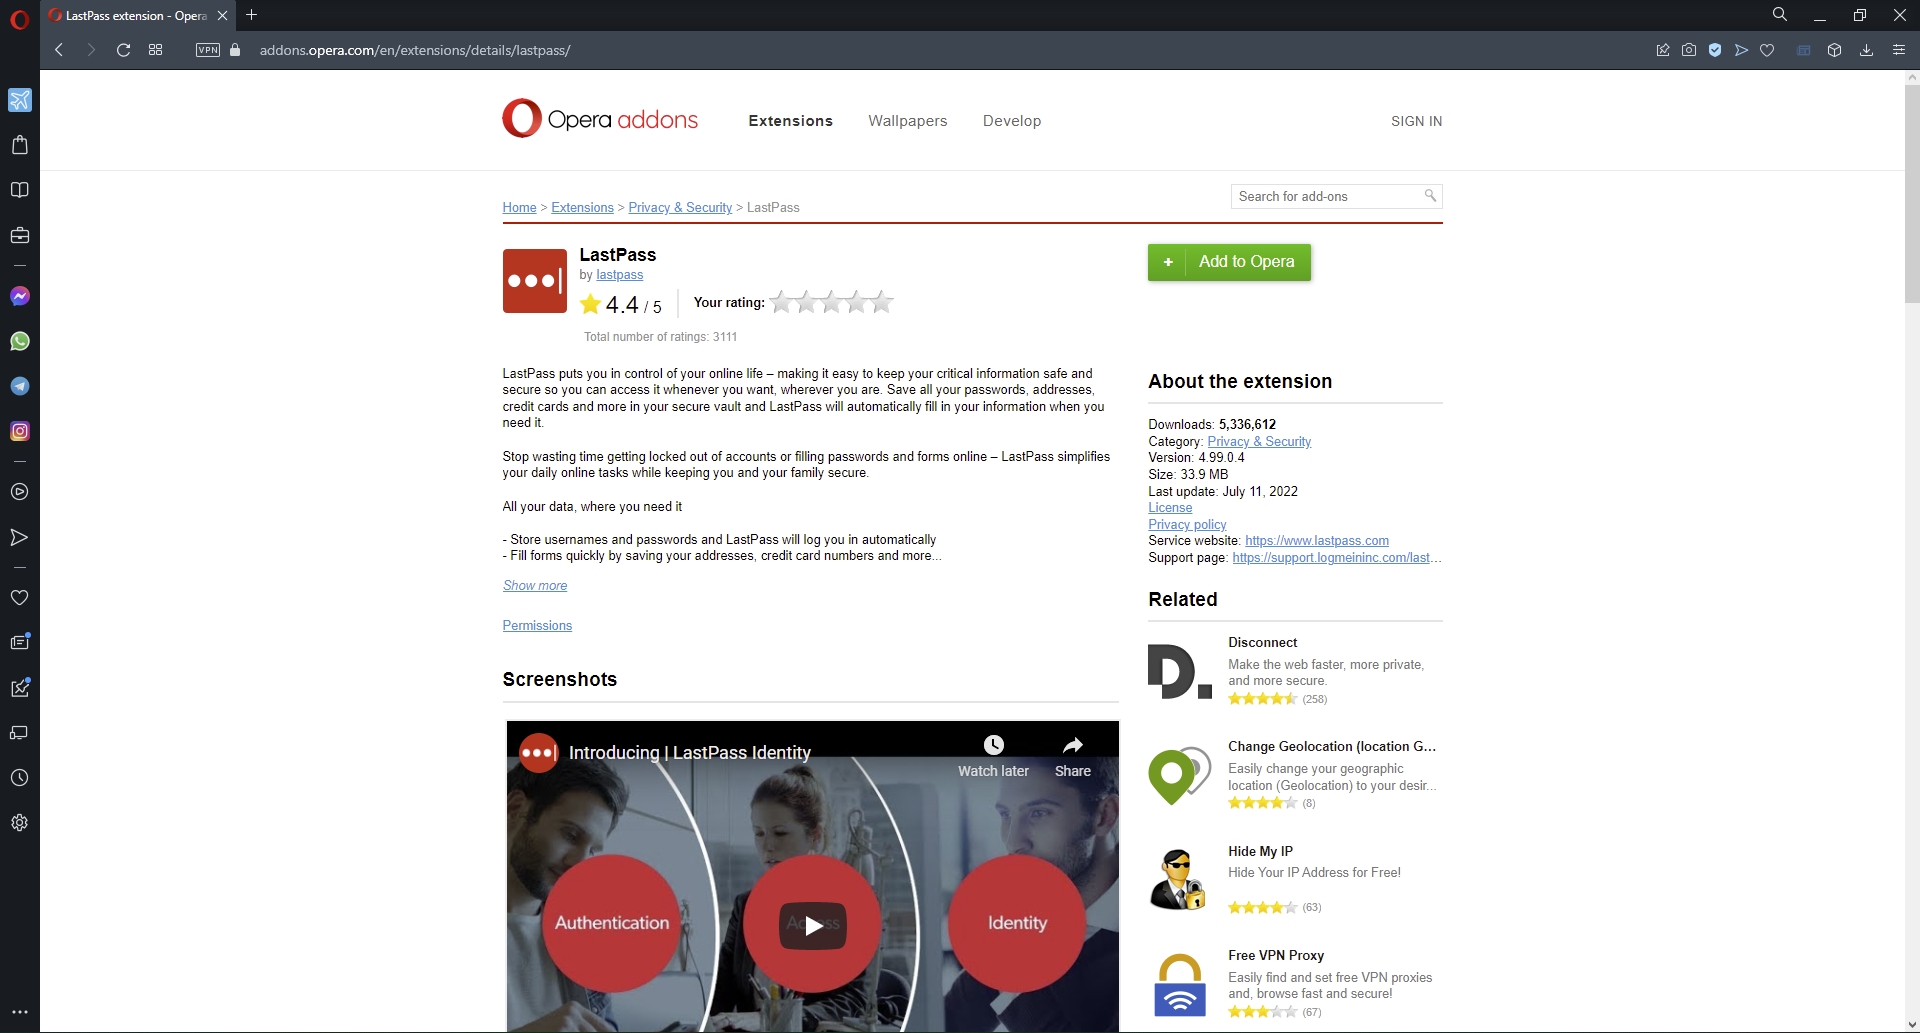
LastPass is a versatile Opera password manager with free and paid versions. It syncs login info across mobile and desktop platforms.
Moreover, it saves and autofills passwords, addresses, and credit card details, and features a Security Dashboard to strengthen weak passwords and monitor for suspicious activity on the dark web.
Key features of LastPass:
Cross-platform compatibility
Provides Security Dashboard
Password generator
LastPass
One secured vault for multiple devices with sync on all platforms.
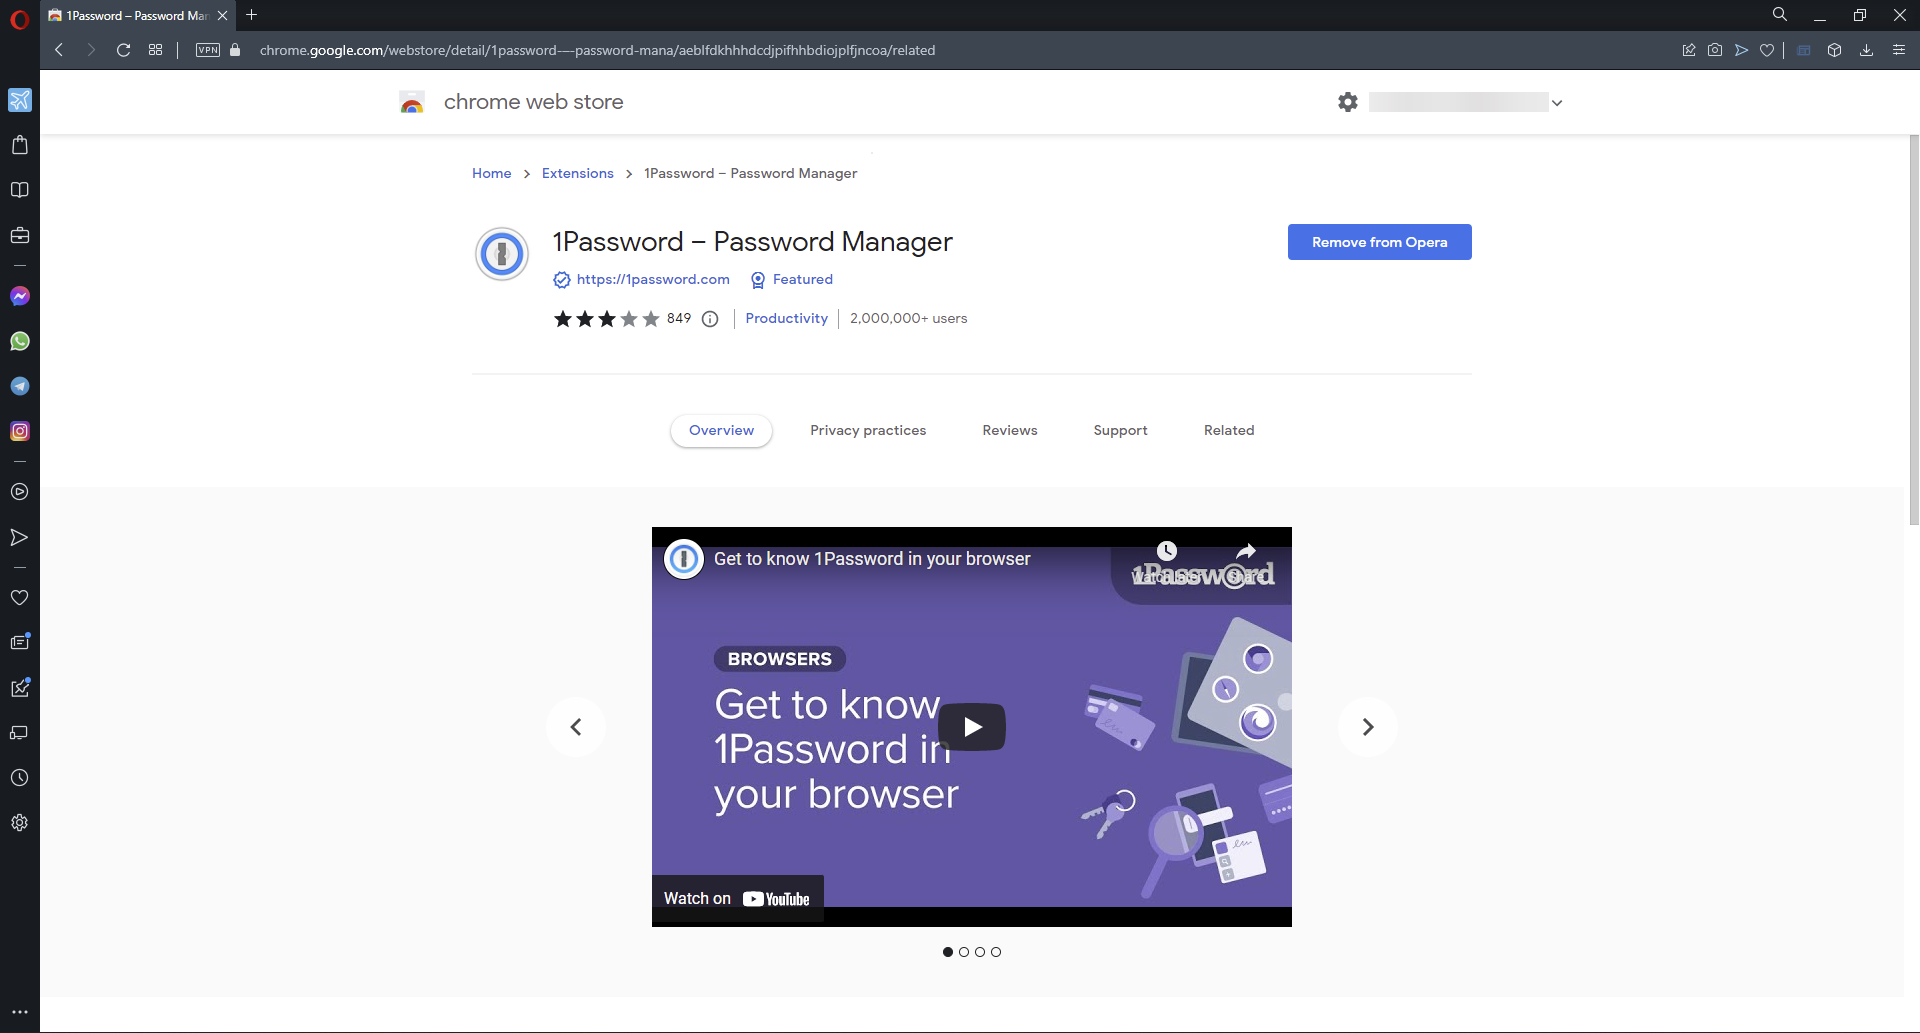
1Password provides secure access to login information via a master password, offering convenience with robust security.
It’s a paid service with a 14-day free trial for new users. The Travel Mode feature hides sensitive data during travel and restores it easily.
Watchtower alerts users to weak or compromised passwords and offers customization options like fingerprint verification and master password settings for enhanced security.
Key features of 1Password:
Uses master password
Travel mode
Watchtower feature
1Password
Easily manage and change the compromised passwords to stay safe everywhere.
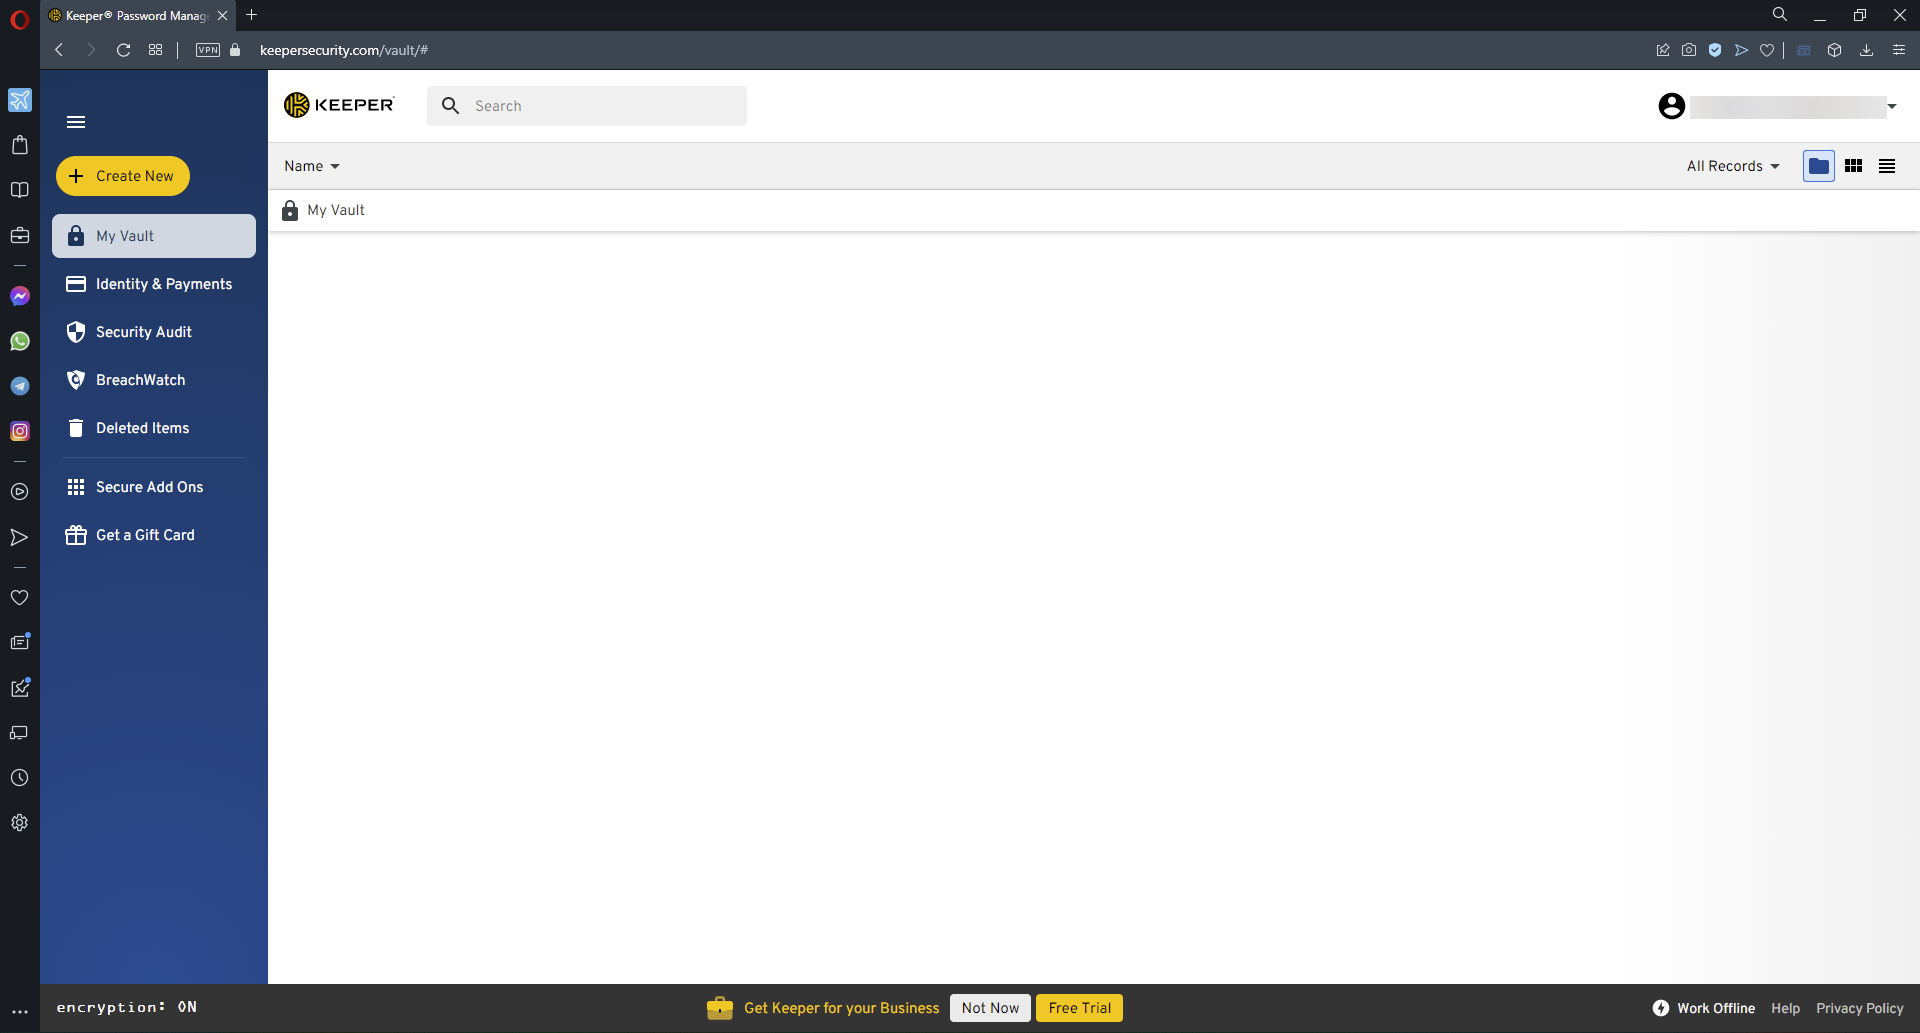
Keeper offers both free and paid versions for password management. It’s available as a PC or mobile app with a browser extension for Opera from the Chrome Web Store.
Keeper suggests strong passwords, auto-fills logins, and handles two-factor authentication. The vault also stores sensitive files, photos, and more, organized neatly with folders.
Key features of Keeper:
Offers app and extension
Allows users to store files, photos, and more
Multiple accounts
Keeper
Advanced protection for your online identity for personal and business use.
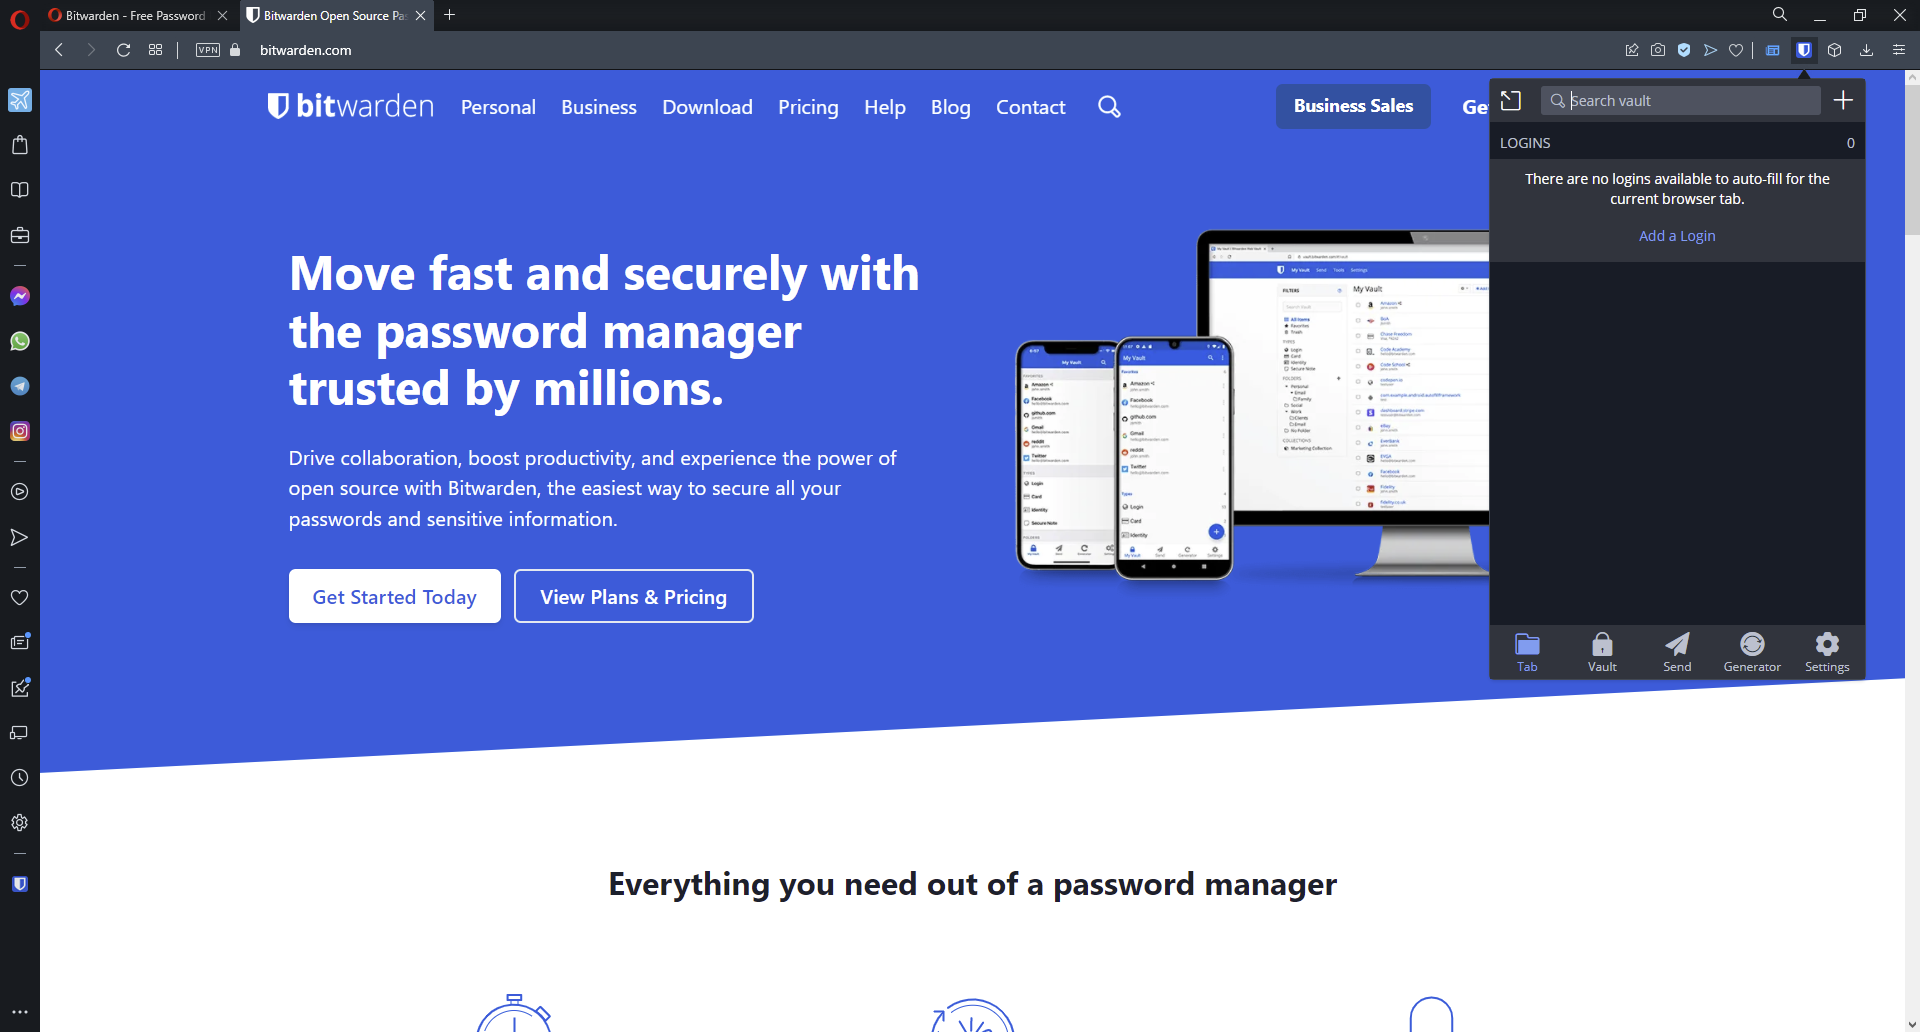
Bitwarden offers unlimited free option and premium features available via subscription.
It securely stores logins with AES-256 bit encryption, salted hashing, and PBKDF2 SHA-256, ensuring data remains private. It’s very easy to use and syncs across all devices.
Yes, the Opera password manager is safe. Your saved passwords are protected by your OS login and you need to type in your password before you can use them. To make things better, you cannot use the password on other devices or even on a different user account on the same PC.
How do I see saved passwords in Opera?
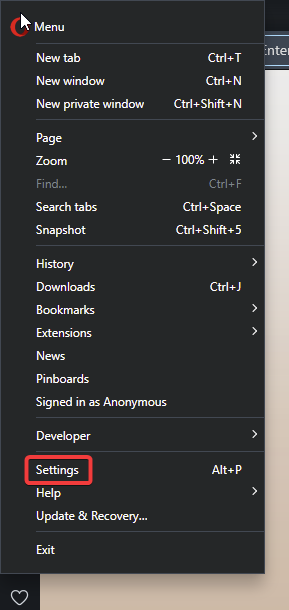
In Opera, click on the menu in the top left corner and select Settings.
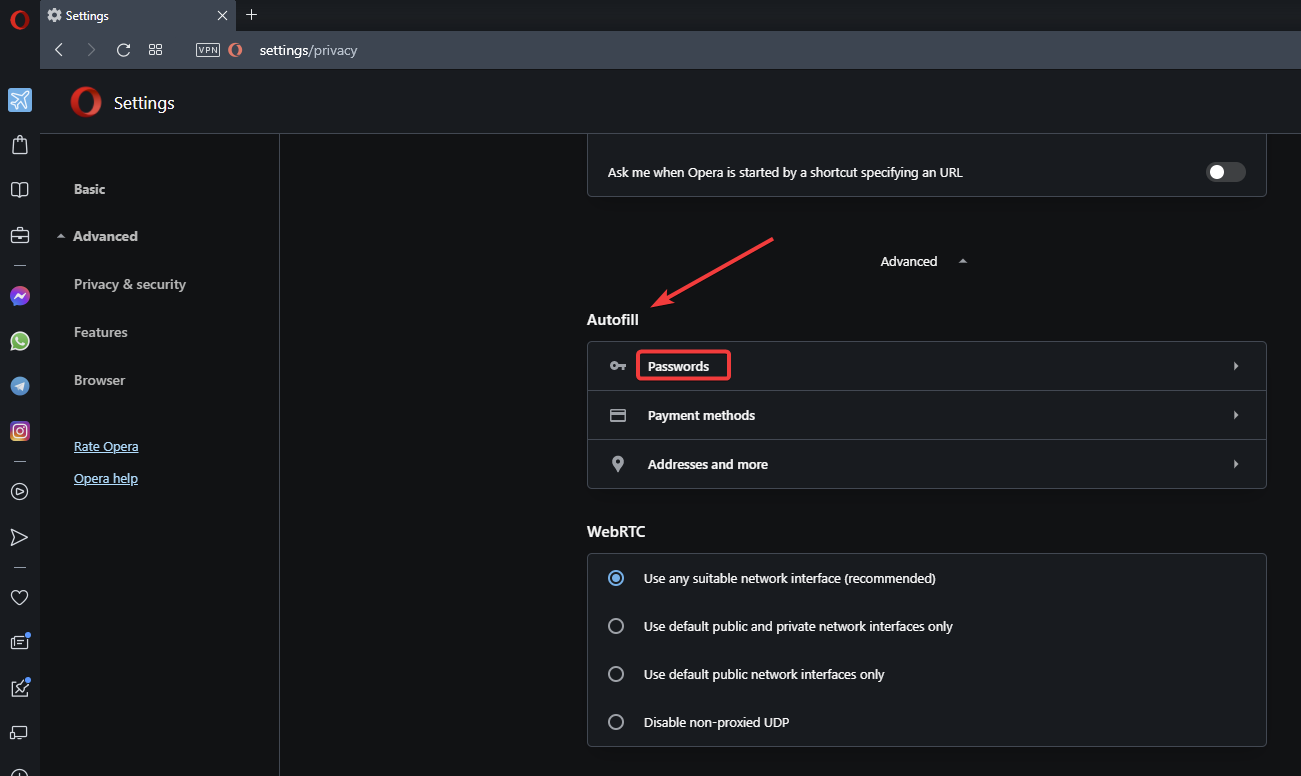
Click on Advanced to reveal the dropdown menu, then click Privacy & security.
Scroll down to Autofill and select Passwords.
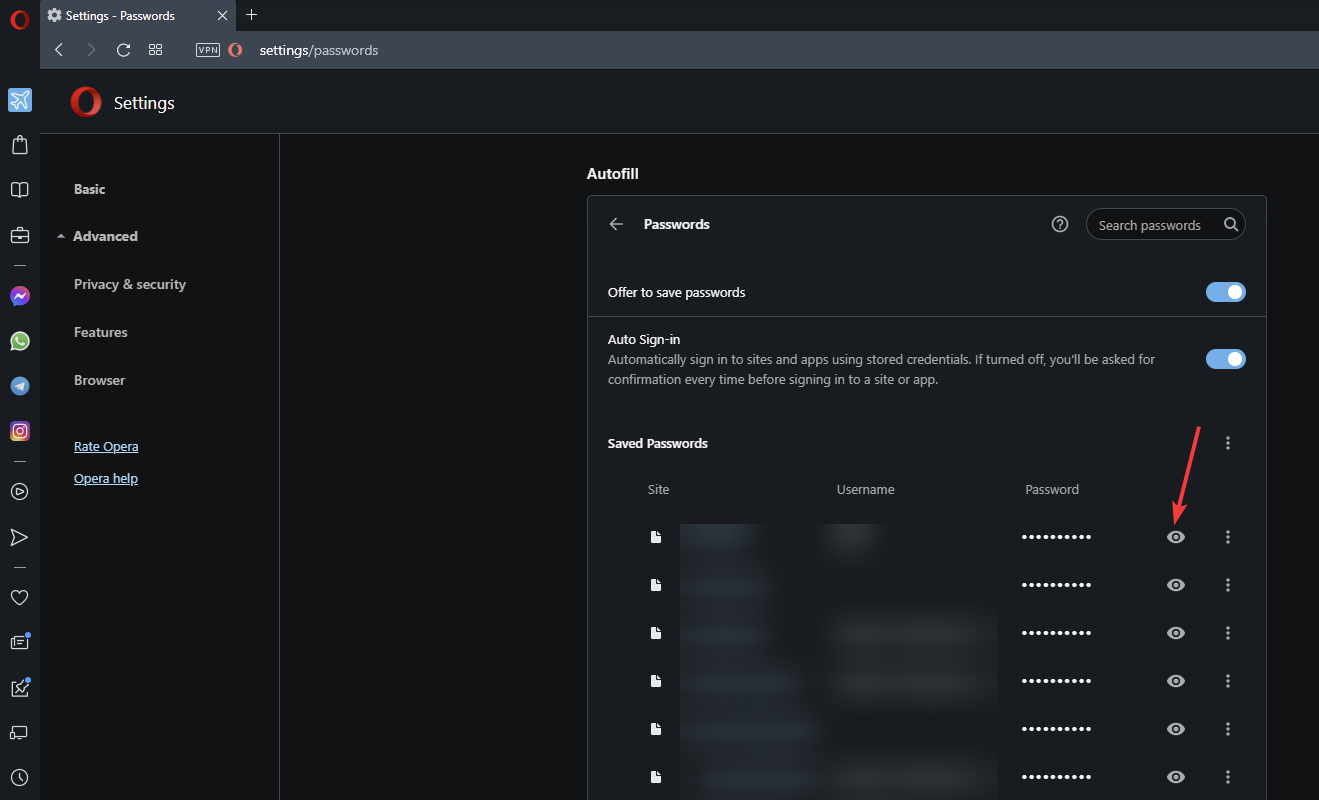
Here you have access to all of your saved login credentials. Click on the eye icon next to the password to view a password.
Enter your computer password to view.
Here, users can see any saved passwords and login data. Users can edit, copy, and remove individual passwords or export all stored passwords to their devices for safekeeping.
Why isn’t Opera saving my passwords?
The major reason Opera might not save your password is the issues with your OS. Many users have reported this issue, which can sometimes be traced to another app or a faulty user account.
We hope you enjoyed our list of the top password managers for Opera Browser.
Let us know in the comments which one you prefer to use.
VHS tapes are now obsolete. So if you have few recorded VHS tapes gathering dust in a cupboard, you’ll need to convert them to a digital format for PC playback.
VHS to PC converters are packages that usually include a video capture adapter card device and software to convert the VHS to a digital format with ease.
The video capture adapter card connects a VCR player with the PC, and then you can further edit videos and add them to a digital versatile disc with the VHS to DVD converter software.
When selecting a VHS to PC converter, you’ve got to go for one with wide device compatibility. The best VHS converters will enable you to convert the video to various output formats.
Furthermore, they’ll also include editing software that you can further refine the digital videos with.
You can even utilize some VHS converters to optimize videos for mobile and tablet playback. These are a few of the best VHS to PC converter packages for Windows 10.
What is the best VHS to PC converter software for Windows 10?
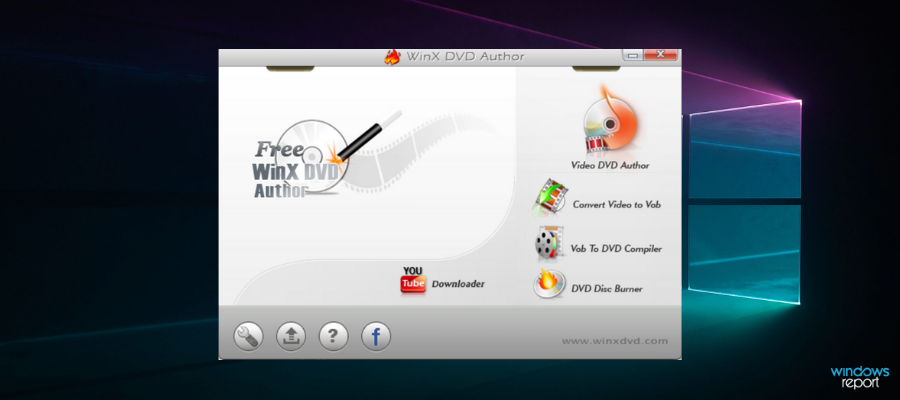
If you are looking for one of the best VHS to PC converters, you need to take a closer look at WinX DVD Author. This application empowers you to make personalized DVDs with ease.
Let us tell you from the start that it supports almost any video format and even if you’re in a hurry, speed is guaranteed.
Besides the conversion, you can also edit your videos. You can get professional DVD results. The software allows you to organize the footage by providing different layouts for chapter menus and DVD title menus.
An additional feature is that you can add subtitles to your video material. This can be of use in case your video has harder-to-understand audio, or if you want to translate the content into a different language.
Key features that WinX DVD Author brings to the table:
Dolby Digital AC-3 audio support
High-quality engine
Built-in YouTube downloader
Straightforward interface
The software is compatible with Windows 10 OS and lower. It is completely free and fairly easy to use.
WinX DVD Author
WinX DVD comes with a built-in powerful video encoder and can help you convert VHS to DVD with ease!
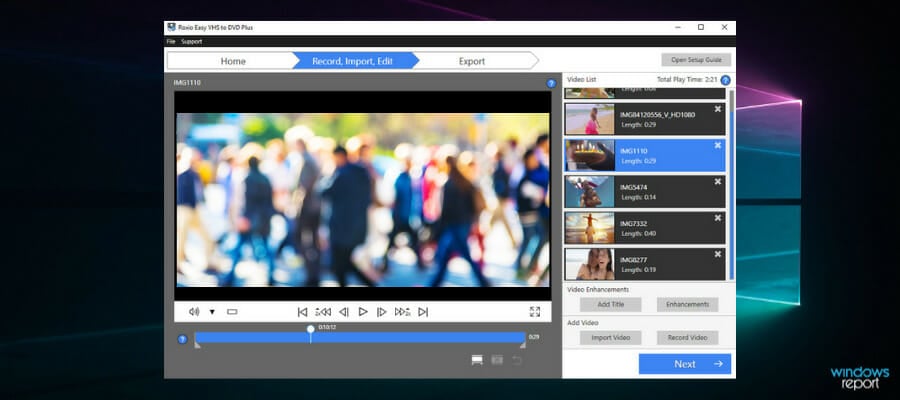
Roxio Easy VHD to DVD 3 Plus is a versatile and intuitive VHS converter with which you can convert both VHS tapes and vinyl records to digital formats.
The package includes a Roxio Video Capture USB, as well as an RCA cable. These help you connect most devices with composite outputs to your PC and then convert and edit them.
This VHS converter comes with its own exclusive software for transferring VHS videos directly to PC or burning them to digital versatile disc.
The conversion process is easy and fast. The software guides you through the necessary steps and once the process is done, you can start editing. The editor is intuitive and straightforward as well.
Roxio Easy VHS to DVD 3 Plus enables its users to trim videos, stabilize footage, add transition effects and titles, enhance clips’ color balance and lighting and stabilize footage.
Besides video materials, you can also convert audio formats from LPs and tape cassettes to digital audio formats.
Other key features of Roxio Easy VHS to DVD include:
Can add tittles and rolling credits
Color enhanching editing features
Disc burning assistance
Split movies across multiple discs
Convert videos for Android and iOS devices
The software is compatible with PCs running a Windows XP OS or higher.
Roxio Easy VHS to DVD
Connect and transform your VHS tapes into digital video formats, with easy-to-use editing software.
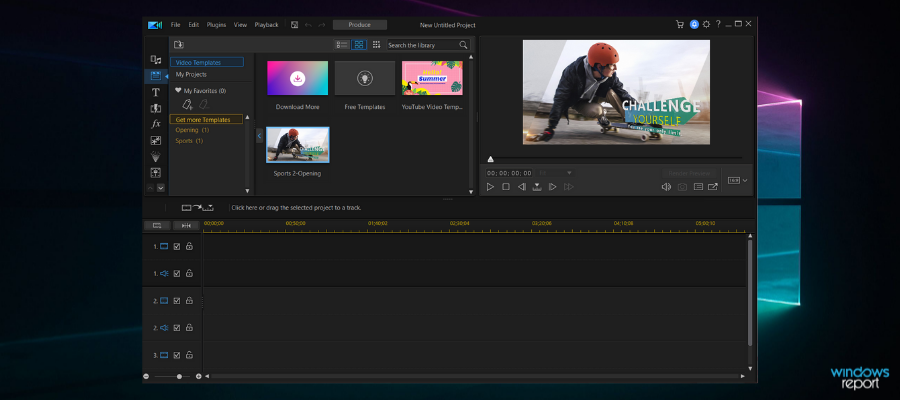
The CyberLink Director Suite is a very comprehensive package that offers software solutions for all types of analog to digital conversions. It comes with video editors, photo editors, video templates, audio editing software and more.
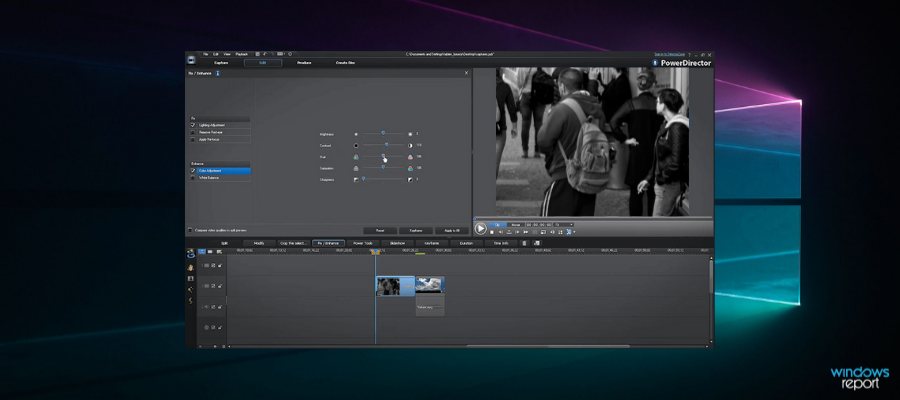
You already have an overview of the powerful capture features provided by the CyberLink PowerDirector software. It can help improve the quality of the video you’re starting with, so you can give your VHS tapes a new life.
The bundle also comes with photo editing software, the PhotoDirector 9. It is an easy-to-use software that comes with 360 photo editing features, group shot assistance, multi-exposure merging, and more. You can also use it to create motion stills, by inserting a few seconds of video footage into your image.
Another great tool that comes in this package is the Audio Director 8 that can enhance the quality of your audio files. You can use it along with the video editing software, or on its own, for audio files.
Other key features of the CyberLink Director Suite include:
Third party premium plug-ins and templates included
Pro level color grading
Fast exporting rendering engine
The CyberLink Director Suite is compatible with Windows operating PCs, starting with Windows 7.
CyberLink Director Suite
Fully edit media files to deliver professional-level end results.
Diamond Video Capture VC500 is a highly rated VHS converter package that includes the CyberLink PowerDirector video-editing software and the Showbiz DVD burning software. It is a video capture adapter card that connects PCs with different VHS players or camcorders.
The best thing about Diamond Video Capture VC500 is probably the software that comes with it. CyberLink PowerDirector is one of the best video-editing applications for Windows, and with that, you can apply a wide range of transitions and effects to videos.
You can also use the CyberLink PowerDirector editing software to cut scenes out from videos and add text and audio to the footage. This can help you create professional-looking final products.
Another useful feature of the CyberLink Power Director is that you can organize all your videos within the software’s UI. You can create your own video library and make your video materials easy to access, edit and play, all in one place.
Showbiz is the other software bundled with VC500, so feel free to use it in order to burn videos to DVDs with menus and chapters included. The package provides all the necessary software features to convert, edit, and store video materials, so you don’t have to get additional tools.
Other key features of Diamond Video Capture include:
Compatible with most video sources
Supports video capture, you just have to connect a camera
Diamond VC500 is a one-time purchase, with an unlimited license for the software included. It is compatible with Windows OS from XP up.
AverMedia DVD EZMaker 7 is a VHS converter that does much more than burn VHS videos to DVD.
That’s largely thanks to the great media suite that comes with it. EZMaker 7 comes with the usual video capture card adapter that you can connect with VCR, cassette, and vinyl record players.
This VHS converter is compatible with Windows platforms from XP up and Mac OS X 10.8 or above.
That isn’t the most recent PowerDirector version, but you can still add more than 500 effects, titles, and audio to videos with that software.
PowerDirector also enables you to stabilize and trim footage. In addition, you can export clips to six alternative file formats and optimize footage for iOS, Android, and Blackberry devices with the video editor.
PowerProducer 5.5 is the other Cyberlink software bundled with EZMaker 7.
That’s DVD authoring software with which you can quickly add your videos to Blu-ray Disc and DVD. That software also includes a range of customizable menu templates for discs.
PowerProducer also enables its users to cut out ads from recorded videos, which is handy. So, with both PowerProducer and PowerDirector bundled with it, EZMaker 7 includes one of the best VHS converter media suites.
Vidbox is one of the most straightforward VHS to PC converters. This package includes a video conversion box, which isn’t entirely the same as a video capture adapter card.
Vidbox users can capture videos from VCR, camcorders, DVD players, and even game consoles. The Vidbox software is a wizard that takes you through all the required steps to convert VHS tapes to digital formats.
As such, converting cassettes with Vidbox is a breeze. Vidbox users can convert their videos to MPEG1, MPEG2, WMV, MP4, and MOV or select to burn them to digital versatile disc.
You can also utilize Vidbox for converting audio to digital formats, which is another bonus. Although Vidbox lacks editing options for videos, it’s still a straightforward package for converting videos.
Other key features of the Vidbox package include:
USB video capture device
USB cable
RCA AV Cable
Interface available in English, French, Spanish and Portuguese
The software can be used on Windows PC running with the Windows 8 OS or higher.
Those are six of the best VHS to digital converters that you can use to revitalize your VHS videos. They’ll convert videos into a digital format for playback on DVD, Blu-ray Disc, PC media players, and other devices.
Do note that the list even includes some free VHS to DVD software tools for Windows 10. If you have any other suggestions or questions, feel free to reach in the comments section below.
The Java error code 1618 is a common error that you will come across when trying to install Java on your Windows PC. This issue has been reported by multiple users, and it could pop up because of another instance of Java running on your PC.
What causes Java error code 1618?
After some research, we have found out a few of the most common reasons why you will get the Java error code 1618:
Java installation: In case you have Java installed on your PC, then you will get this error.
Antivirus is blocking Java: Aggressive antivirus settings can often lead to it blocking the Java installation.
The installation file is corrupt: Corrupt installation or program-related files can also trigger this problem, so don’t hesitate to refer to our below solutions.
Windows installer service is not running: A third-party program might have turned off the Windows Installer service. Here’s what to do if the Windows Installer service can’t be accessed.
Corrupt registry keys: If some important registry entries are missing or corrupt then they can cause multiple issues.
How can I fix the Java error code 1618?
Here are some quick fixes that you can apply before applying the advanced troubleshooting methods:
Restart your PC as it will load all the system-related files from scratch.
Close any other instance of the Java setup running on your PC.
Well, that’s about it. Let us check out the advanced solutions and possibly fix this problem.
1. Restart Windows Installer Service
Press the Win + I buttons to open the Run dialogue.
Type services.msc and press Enter.
Locate Windows Installer service.
Double-click to open it.
Under Service status, select Start.
You should make sure that the Windows Installer service is running to run the Java installation. Follow the above steps and start the service in case it is stopped.
Right-click on the downloaded EXE file and select Run as administrator.
Install the program.
Restart your PC and check if this fixes the error or not.
Chances are the Java installer is unable to fetch the installation files required to complete the installation. In this case, we would suggest you download the Java offline installer.
The benefit of using an offline installer is that it will download the entire package, i.e., the installation files and other important program-related files required for a successful installation. Once you have downloaded the offline installer, you can install the program without the internet.
Click on Turn Windows Defender Firewall on or off.
Select Turn off Windows Defender Firewall options for both Private and Public network settings.
Your Defender Firewall might be blocking Java installation because of aggressive settings, which is why you are getting the Java error code 1618.
All you need to do is disable the Windows Defender Firewall by following the above steps. We would suggest you turn Firewall back on when the issue has been resolved.
4. Install the latest Windows update
Press the Win + I buttons to open Settings.
Select Update & Security.
Click on Windows Update on the left pane.
Click the Check for updates button.
Windows will look for a new update and prompt you to install it if it detects a new one.
Several users have reported that updating their PC with the latest available update resolved the problem. Moreover, this issue was also associated with a specific version of the Windows 10 update.
Reportedly, the Windows 10 update version KB2918614 broke the Windows Installer and hence caused multiple issues including the Java error code 1618.
5. Clean boot your PC
Press Win + R to launch the Run dialogue.
Type msconfig and press Enter.
Click on the Services tab.
Check the box for Hide all Microsoft services option.
Click Disable all.
Click Apply.
Switch to the Startup tab.
Select Open Task Manager.
In the Startup tab, select each service and hit the Disable button.
Restart your PC and see if this resolves the problem or not.
When you perform a clean boot, your PC boots up with minimal drivers and programs that are the only essential ones required for the PC to function.
This also prevents the situation where a third-party program might be conflicting with the Java installation and trigger the Java error code 1618.
6. Install Java in a new folder
Launch the Java installer file.
Click on Next.
Click Change.
Choose a location, most probably C Drive.
Click OK.
Install Java and check if this resolves the issue or not.
Often Java can throw errors if the location isn’t apt for its installation. In such a case, we would suggest you install Java in a new folder and see if this resolves the Java error code 1618.
We have a dedicated guide that lists down all the steps that you need to download the latest version of Java, both 32-bit and 64-bit on your Windows PC.
Apart from Java error code 1618, you will also come across Java error 1603. To fix it, we have a guide that will help you. You can also check out our list of the best browsers that support Java and how you can enable it.
Let us know in the comments below, which one of the above solutions helped you resolve the Java error code 1618.
Microsoft has changed how the system activates with Windows 10, and due to different activation methods, some users are getting the 0x803F7001 error, so let’s see how to fix this error.
Previous versions of Windows could be activated simply by entering the product key, but Windows 10 brought us digital entitlement that doesn’t require you to enter the product key.
Using the digital entitlement method, your Windows 10 gets activated when you upgrade from genuine Windows 7 or 8.1. However, it has been reported that this activation method has flaws, with users keep reporting various activation errors on Windows PCs.
Here are some more examples of this problem:
0x803f7001 after hardware upgrade – This problem usually appears after you replace a piece of your computer’s hardware.
Windows 10 activation failed because this device doesn’t have a valid digital entitlement
slui 4 not working Windows 10– slui 4 is one of the most common methods of activating Windows, but if it doesn’t work, the 0x803F7001 error will appear.
How do I fix error 0x803F7001 on Windows?
1. Change the product key
Press the Windows key + I to open the Settings app and select Update and Security.
Next, click the Activation option in the left pane and click the Change product key.
If you get User Account Control prompt just click Yes.
Find the version of Windows 10 that you’re using and enter the product key from the list below:
Windows 10 Home: YTMG3-N6DKC-DKB77-7M9GH-8HVX7
Windows 10 Pro: VK7JG-NPHTM-C97JM-9MPGT-3V66T
Windows 10 Home N: 4CPRK-NM3K3-X6XXQ-RXX86-WXCHW
Windows 10 Home Single Language: BT79Q-G7N6G-PGBYW-4YWX6-6F4BT
Windows 10 Home Country Specific: 7B6NC-V3438-TRQG7-8TCCX-H6DDY
Windows 10 Professional N: 2B87N-8KFHP-DKV6R-Y2C8J-PKCKT
After entering the product key, click Next.
You will get a message saying We couldn’t activate Windows.
Repeat the entire process from Step 1, but this time enter your serial number for your copy of Windows 7 or Windows 8.1.
If the process is successful, you should get a message saying you’re running a genuine Windows 10.
Users report getting the message saying, Activation failed because this device doesn’t have a valid digital entitlement or product key. Error code: 0x803F7001” when they navigate to the Activation section in the Settings app.
To fix this, you need to change the product key by following the instructions above.
2. Use Command Prompt
Press the Windows key + S, type cmd, and select Run as administrator under Command Prompt.
Type the command below and hit Enter: wmic path softwarelicensingservice get OA3xOriginalProductKey
Now, copy the code given and use it to activate your PC.
3. Run the Activation troubleshooter
Press the Windows key +I and select the Update & Security option.
2. Click Activation in the left pane.
3. Now, select Troubleshoot.
4. If the troubleshooter detects a digital license linked to your PC, it will help you activate it automatically.
Running the troubleshooter offers so many ways to fix the 0x803f7001 issue. If you have just changed your hardware, it will show that it can’t activate your PC with an option to activate it after changing hardware.
Press Windows Key + R and enter Slui 4. Press Enter or click OK to run it.
Now, select your country or region from the list.
You should see a toll free number. You need to call it and enter your installation ID.
After you’ve made the call, you should get a confirmation ID.
Click Enter confirmation ID and type the confirmation ID that you were given.
Click Activate, and that’s it.
If you’re getting error 0x803F7001 while activating Windows 10, you might want to try activating it over a phone. If Slui.exe still shows error 0x2a 0x803F7001, proceed to the last fix below.
5. Upgrade to Windows 10 again
You should try this solution if the license activation (slui.exe) failed with the following error hr=0x803F7001. You’ll need to install a genuine version of Windows 7 or 8.1 and activate it. After you’ve activated Windows 7 or 8.1, you’ll have to upgrade to Windows 10 and try activating Windows 10 again.
As we said, this is the last solution, and only do it if there’s no other way to fix error 0x803F7001.
Insider Gaming has reported that CEO of Sony Interactive Entertainment Jim Ryan recently dismissed Xbox Game Pass as a threat to Sony’s position in gaming. The remarks were apparently made at an employee Q&A session earlier in December according to the anonymous source.
As the report claims, Jim Ryan told employees:
When we consider Game Pass, it seems to be getting lower [Game Pass numbers]. When we consider Game Pass, we’ve sold more PS5’s in two years than they have gathered subscribers and they’ve been doing that for 6-7 years…We’re just shy of 50 million subscribers and they are in the low 20s, but there’s more work to do to grow that number.
If the report is valid, these statements are in pretty stark contrast to those made by Ryan publicly to regulators. And they might also lend credence to Microsoft’s claims that Sony is trying to mislead regulators over the scope of the merger’s (between Microsoft and Activision Blizzard) impact should the deal conclude.
Windows user interface has changed through the years, but Minimize, Maximize and Close buttons are present in every version of Windows.
They’re one of the most important aspects of the user interface of any Windows. But what if these buttons disappear?
Windows interface is simple to use, but sometimes certain issues can appear. Speaking of interface issues, users reported the following problems:
Close, Minimize, Maximize buttons missing Firefox, Chrome, Excel, Internet Explorer – Sometimes this problem can appear in various applications such as Firefox, Chrome, and many others. To fix it, open the affected application and restore its settings to default.
Minimize and Close buttons gone – Several users reported that Minimize and Close buttons are gone from their PC. To fix this problem, be sure to try some of our solutions.
Close, Minimize, Maximize buttons not working – In some cases, Close, Minimize, and Maximize buttons won’t work at all. This is most likely caused by a corrupted user profile, so you might have to create a new user profile.
One case or another, don’t worry, there’s a way to make these icons visible again.
What can I do if Minimize/Maximize/Close buttons are missing?
1. Restart Desktop Window Manager
Press Ctrl + Shift + Esc to start Task Manager.
When Task Manager opens, locate Desktop Windows Manager, right-click it, and choose End Task.
The process will now restart and the buttons should appear again.
The reason why Minimize, Maximize and Close buttons disappeared is probably because of some kind of error with dwm.exe (Desktop Window Manager), and resetting this process should solve the problem.
But before we give you precise details about the solution, let’s talk a little about Desktop Window Manager itself.
Windows’ Desktop Window Manager is a built-in file in your system which manages the visual effects in Windows operating systems.
For example, this process allows your Start Menu to be transparent, and it was also managing the Aero environment in previous Windows versions.
It also manages other User Interface elements, such as our missing buttons.
So an error in the running of this process could cause various visual issues, and disappearance of Minimize, Maximize and Close buttons is just one of them.
Now that you know which service causes the problem, and all you need to do is to restart it, and Minimize, Maximize and Close buttons should show up as normal.
To get comfortable with window controls and learn how to minimize and maximize windows properly, see our full guide on how to minimize and maximize windows in Windows.
Press Windows Key + X to open Win + X menu and choose Device Manager from the list.
Locate your display adapter in Device Manager and double click it to open its properties.
Go to the Driver tab and click the Roll Back Driver button.
According to users, sometimes a problematic graphics card driver can cause this problem to appear. If that’s the case, we advise you to roll back to the older version of your graphics card driver.
Keep in mind that the Roll Back Driver option might not be always available. If this option isn’t available, you might want to try removing your driver and using the default driver instead.
If the default drivers don’t work, you can also try updating your graphics card driver and check if that helps.
We wrote a quick guide on how to update your graphics card driver, so be sure to check it out.
3. Make sure that you’re using a standard Windows theme
Right-click your desktop and choose Personalize.
Settings app should now appear. Navigate to Themes section in the left pane. In the right pane, select one of the default themes such as Windows or Windows 10.
Many users like to customize their Windows with custom themes, but some themes might not be fully compatible with Windows 10.
As a result, Minimize, Maximize and Close buttons can disappear from Windows.
This can be an annoying problem that can interfere with your work, but in order to fix it, it’s recommended to switch back to a standard Windows 10 theme.
After doing that, Windows 10 will switch back to the default theme and the problem should be resolved.
4. Remove problematic third-party applications
There are many great third-party applications that can customize the look of Windows 10. Using these apps you can add various features and enhance the look of Windows 10.
However, some third-party applications can cause certain problems to appear. If Minimize, Maximize and Close buttons are missing, the problem might be a third-party application.
To fix the issue, be sure to remove any application that allows you to change the look and functionality of your user interface.
To ensure that the problematic application is completely removed, we advise you to use uninstaller software.
These types of applications are great since they will remove the desired application as well as all files and registry entries associated with it.
If you’re looking for a good uninstaller application, be sure you try out a professional uninstaller program that helps you clean all unwanted residual files after the uninstallation process.
5. Make sure that you’re not using the Tablet Mode
Open the Action Center by clicking its icon in the Taskbar. Alternatively, you can open it quickly by pressing Windows Key + A shortcut.
Now look for Tablet Mode option, and click it to disable it. If Tablet Mode isn’t available, first click on Expand to reveal the Tablet Mode option.
Windows 10 is optimized for touchscreen devices, so it comes with a special Tablet Mode that mimics the look of a tablet interface.
In Tablet Mode there are no Minimize, Maximize, and close buttons available for Universal apps.
If these buttons are missing, you need to turn off the Tablet Mode. After that, the issue should be resolved and the buttons should appear again.
Many users reported that Minimize, Maximize, and Close buttons are missing from certain applications. This is usually caused by the application settings.
Many applications allow you to customize their user interface, and sometimes you can hide the title bar or these buttons by accident.
If this problem appears only in specific applications, be sure to open the affected application and change its user interface settings to default. After doing that, the problem should be completely resolved.
7. Change your graphics card configuration
Your graphics card comes with its own configuration software that allows you to change various features.
According to users, this problem usually appears with AMD graphics cards and it’s related to Catalyst Control Center.
According to users, their graphics card was configured to work in High-Performance mode in Catalyst Control Center which caused this error to appear.
To fix the issue, you need to change your mode from High Performance to Standard performance in Catalyst Control Center. After doing that, the issue should be completely resolved.
Another problem can also be the Dual Graphics option. This option will force your PC to use both dedicated and integrated graphics at the same time.
As a result, certain issues, such as missing buttons, can appear.
What to do if Catalyst Control Center is not working? Here are the best solutions.
8. Change your Project mode to Extended
Press Windows Key + P to open the Project panel.
A list of projects will appear. Select Extend from the list, and the issue should be resolved.
If you’re using a dual monitor setup, you might be able to switch between several different Project modes.
If the usual buttons are missing, you might be able to fix that simply by switching to the Extended Project mode.
Several users reported that this solution worked for them, so you might want to try it out.
9. Make sure that Windows is up to date
Open the Settings app. You can do that quickly by using Windows Key + I shortcut.
When the Settings app opens, navigate to the Update & Security section.
In the right pane, click on Check for updates button.
According to users, if Minimize, Maximize, and Close buttons are missing, the problem might be related to a Windows 10 glitch. To fix the issue, it’s advised to check for updates and keep your PC updated.
By default, Windows 10 will automatically download the missing updates, but sometimes you might miss an important update.
However, you can always check for updates manually as described above. Windows will now check for available updates.
If any updates are available, they will be downloaded automatically in the background.
Evernote is a powerful note-taking and task-management application. It is available to install on Windows PCs and supports cross-platform operation. However, there are multiple users reports that they are coming across Evernote can’t connect to server error.
This Evernote error appears on the login page, and as soon as the user enters the credentials and hits the Sign in button, the error message pops up.
What am I getting Evernote can’t connect to server error?
After some research, we have found out a few of the common reasons you will face Evernote can’t connect to server error while signing in:
Server error: There could be a legit server error because of which the Evernote app is showing you the error message.
Evernote isn’t updated: Chances are that the Evernote app that you are using is not updated to the latest version, which is causing the server issue.
Problem with the app file: If any Evernote-related file is missing or corrupted then it could result in multiple issues.
Antivirus is blocking Evernote: Often antivirus software can block an app from accessing the internet and cause server error.
What should I do if Evernote can’t connect to server?
Here are a few things that you can try before trying the advanced troubleshooting methods:
Check the Evernote server status by heading to status.evernote.com. This will ensure that there isn’t a server-side problem triggering the Evernote can’t connect to server error while signing in.
Restart your PC and check if this resolves the problem as it will load all the program files from scratch.
Close the program, then relaunch the app and sign back in to see if this fixes the issue or not.
Let us check out the advanced troubleshooting methods and solve the problem.
1. Clear browser cache
Open Google Chrome.
Click on the 3-dot menu icon.
Select Settings.
Click on Privacy and security.
Select Clear browsing data.
Check the boxes for Cookies and other site data and Cached images and files.
Hit the Clear data button.
A corrupt or outdated browser cache can also cause issues with certain sites. You try clearing the browser cache to resolve the Evernote can’t connect to server error if you are facing the issue on a web browser.
If this doesn’t resolve the problem, we suggest you try a different web browser. We have a guide that lists some of the best web browsers that you can try on your PC.
2. Update Evernote
Open the Microsoft Store.
Click on Library.
Click on the Update all button. If Evernote update is pending, then hitting Update all will update the app.
Updating the app makes sure that you are not only able to use the latest features available for the app, but also fixes the bugs that might be present in the previous version.
Select Evernote and hit the Uninstall button at the top.
Restart your PC.
Visit the Microsoft Store.
Search for Evernote and download the app.
After the installation is complete, launch the app and sign in.
A dedicated uninstaller can also help you get rid of all residual files of already uninstalled programs, enabling a clean reinstallation. Often when you perform a simple uninstall, some files related to the program still remains, and you will face the error again, even if you reinstall it.
In such a case, we would suggest you use a specialized tool like CCleaner. This tool will scan your PC for unwanted apps and software and uninstalls them. This works for apps that are built-in. So, using CCleaner to uninstall Evernote allows for a clean reinstallation with no leftover files.
Other benefits of using CCleaner uninstaller software it that you can uninstall multiple apps at a time, create backups, and more.
Click on Turn Windows Defender Firewall on or off.
Select Turn off Windows Defender Firewall options for both Private and Public network settings.
Chances are your Defender Firewall is blocking Evernote from accessing your internet, and thereby you are getting the Evernote can’t connect to server error.
Simply disable the Windows Defender Firewall by following the above steps and check if this fixes the issue. However, make sure that you turn Firewall back on when not using Evernote as it protects your PC from unwanted viruses.
That is it from us in this guide. Let us know in the comments below, which one of the above solutions resolves the problem for you, and also share any other methods if they worked for you.
So maybe CDs and DVDs won’t be a regular part of our daily lives in the future if advancements in the digital world are anything to go by.
In this case, you might want to archive your favorite audio collection stored in CDs. The best tool for the job isn’t File Explorer or your computer’s built-in media player.
Especially if you have an extensive collection, you will need CD ripper software for Windows 10 & 11.
How can CD ripper software help me?
Unlike ripping the audio with File Explorer or media players, CD ripper software sort of sieves out the errors when reading the data.
Thus, you get to enjoy the finest quality audio as they were on your original CDs.
If you want to preserve your audio tracks for a long time, away from the scratches and skipping that come with CDs, try any of our top picks for the best CD ripper software for Windows 10 & 11.
What is the best CD ripper software for Windows 10 & 11?
Express Rip is one of the easiest CD ripper software for Windows 10 you can use. Simply go to the options menu on the toolbar, modify the format for the ripping output, and then extract your digital audio from the CDs.
A good thing about this tool is it automatically detects the audio file, so if it’s a song, it will detect both the song and the artist’s information and then tag it appropriately.
With this tool, you get your digital audio files in perfect CD quality, ripped in the fastest time possible, and in major formats such as MP3 and WAV.
It applies the direct digital extraction technology which helps preserve the quality of your audio the same way they were on the CDs without the slightest of errors or differences.
Let’s quickly look at its key features:
Back up your CDs to digital formats
Extract other formats such as WMA, AAC, AIFF, and others
Save track information/tags to MP3 files
You can also link an online database with the tracks and album name information
Available for free (non-commercial purposes only)
Express Rip
The easiest CD ripper software that you can ever use is up for grabs. Digitize your CD collection effortlessly and enjoy it forever and ever!
Recovering all the music and audio files from your CDs can be tedious. With a tool like Xilisoft CD Ripper, you can restore old files from your CDs in just a few minutes effortlessly.
As a result of this software, you can convert all soundtracks from CDs to any format from a multitude of different audio formats. More exactly, you will be able to play your favorite files on Windows and Apple devices.
The tool includes various options through which you can improve the audio quality of the files from your CDs.
Supported audio formats are MP3, WMA, WAV, AAC, FLAC, OGG, and APE, with all playable within different music players.
Also, through Xilisoft CD Ripper you can separate tracks, or set audio effects such as fade-in/fade-out, normalize, or bandpass.
Next, you have a shortlist with its main features:
Convert multiple CD tracks to audio formats at once
Batch CD converting and transferring to IPad or iPhone
Add effects to audio tracks and customize it
Convert files in the background for saving CPU resources
Xilisoft CD Ripper
Convert all your audio files with Xilisoft CD Ripper and play the best tracks on your PC.
As the name suggests, DVDFab Blu-ray Ripper is a great option for ripping files from your Blu-ray discs. With this software, you can copy everything you need from Blu-ray discs, at a high quality, and at a suitable speed.
Compared to other solutions from the list, this tool offers the service of copying files stored on Blu-ray DVDs directly on your device. In other words, it can remove any type of protection from newly purchased Blu-ray DVDs such as CSS, APS, or DC.
Regardless of the format, you need to convert the files to, DVDFab Blu-ray Ripper can play it seamlessly on multiple devices, like mobile, PC, and even home theaters.
Moreover, you can compress video size but preserve quality for mobile devices, like smartphones or tablets. You can get this handy software for free on Windows 10, 8, or 7.
Here are the main features of this tool:
Built-in video editor
GPU acceleration technology for faster results
Multi-task mode for ripping files altogether
AI enhancement for videos, 1080 to 4K
DVDFab Blu-ray Ripper
If you need plain and efficient software for DVDs ripping, try this one to get the best video or audio quality.
WinX DVD Ripper Platinum is taunted as the only DVD ripper accelerated by Intel CPU, Nvidia GPU, AMD, Multi-core CPU, and Hyper-Threading.
That is why the developers say that you will be able to pip a full DVD to MP4 (H.264) in only five minutes at the speed of 300fps to 500fps.
Also, this app is one of the most versatile on the market, with support for more than 350 formats out there, covering a huge variety of devices, including consoles and mobiles.
The tool can also rip videos of up to 4K at 60fps and that means it’s futureproofed in that department.
And if you get playback errors, there’s a big chance that WinX DVD Ripper Platinum will fix that too after conversion.
It can deal with encrypted DVDs, regional DVDs, unplayable DVDs, and a lot more. And if you’re prepping a home DVD with your footage, you’ve got an editor that will help you create a masterpiece.
Let’s see some of its best features:
Super-fast ripping
CPU and GPU acceleration with Intel, Nvidia, and AMD support
Supports 350+ media formats
4K @60fps support
Modern, easy-to-use interface
WinX DVD Ripper Platinum
Rip all your DVD in record time with this versatile tool that supports level 3 acceleration.
As its name clearly suggests, Roxio Easy CD & DVD Burning 2 is a burning software but it also has advanced ripping features as well.
It easily converts your CDs and DVDs videos to MPEG2, WMV, WMV HD, AVC (H.264), and AVCHD formats.
The tool can also do a great job on your music media, transforming them into MP3, WAV, WMA, Ogg Vorbis, FLAC, MPEG-1/2, M4a, M4b AAC, and even Playlists (M3U, PLS, XSPF, WPL).
And if you’re looking to create a bootable media, the Roxio software reads ISO, C2D, BIN/CUE, and GI images and writes ISO.
This app is great also for authoring the footage shot at your family events and helps you create a memorable DVD for your folks to enjoy.
Take a look at some of its key features:
Extensive burning and ripping features
Comprehensive menus and options
Rips your audio CDs in various popular formats, including the creation of playlists
MPEG2, WMV, WMV HD, AVC (H.264), and AVCHD video formats supported
Authoring and backup options
Roxio Easy CD & DVD Burning 2
Rip or burn CDs and DVDs with this friendly tool that comes with all popular format possibilities.
dBpoweramp CD Ripper is not as complex as the other tools featured above but if you’re only looking for simple software to rip your CDs, it will do the job nicely.
Being specialized in audio ripping, this app connects to GD3, Discogs, SonataDB, Musicbrainz, and freedb, to grab the correct titles and album names and also high-resolution album artwork.
And it offers interesting DSP effects like processing the audio with Volume Normalize or HDCD decoding to 24 bit which is handy for any audio buff.
The ripping and encoding processes use all CPU cores at once for increased speed and if you use the Multi-Encoder feature, you will be able to encode to more formats simultaneously.
There’s a free trial version that you can test will full features for 21 days but after that, you will need to make a purchase.
Take a glance at its key features below:
Full range of audio encoders including MP3, M4A, WMA, Ogg Vorbis, FLAC, ALAC, and more
Encode to multiple different formats at the same time
This software is a freeware solution for converting audio files and CD ripping. It can convert a lot of formats and encoders easily like MP3, M4A/AAC, FLAC, WMA, Opus.
Let’s get on point and see why this tool is worth it. Well, using the features of this software you have assured any media content from CDs to other modern portable media.
Thus, it can convert entire music libraries while keeping the filename structure which is extremely convenient.
On the other hand, you can do CD ripping effectively with an online CD database plus automatically query information and write it to ID3v2 or other ID tags.
Moreover, you can benefit from multi-core upgraded encoders that help to increase the conversion speed on modern computers.
Among all these useful features you should acknowledge the power and utility of this software for media consumption nowadays.
You can no longer rely on your CDs so you need to convert all the precious memories to more advanced devices.
With that being said, it’s no need to emphasize the importance of such tools because it’s already known. Hence check it out and rip your content now.
Let’s review its main features below:
MP3, M4A/AAC, FLAC, WMA, and Opus support
Convert entire music libraries while keeping the filename structure
Exact Audio Copy is a free so-called audio grabber that can rip any audio from CDs or DVDs on your PC in no time.
The central difference between this tool and other sound ripping programs is the technology used to read audio CDs faultlessly, or the fact that it costs nothing.
So, stop worrying about scratched discs or wrecked sound by choosing this capable software that will bring any of your valuable audio tracks back to life.
Other important features of this software include support for any CD or DVD drives, hidden sector synchronization, fast and secure extraction, detection of reading errors, automatic speed reduction on read errors, etc.
Moreover, the technology used by this program is quite impressive due to its nearly perfect CDs read process, also helping with errors that can’t be detected in the first place.
All in all, with such practical software it’s almost impossible to not get attached and manage all your valuable recordings from old discs.
This is an advanced CD to MP3 converter but is a very easy-to-use CD ripper software for Windows 10.
With this tool, you can read audio files from your CDs and then save them to your PC or device in most major digital formats such as MP3, WMA, WAV, OGG, or even FLAC.
Simply insert your CD into your PC’s CD drive, run the FreeRIP converter, then click the Rip button and it does everything else.
Once ripped, you can then load your favorite audio to other devices or audio media players such as your smartphone, tablet, or any other device.
What makes this CD ripper software fantastic is that unlike ripping your audio using Windows Explorer or a media player, this tool supports high-quality yet lossless compression that the latter two do not prevent.
Other features include an advanced tag editor, track search shortcuts, and easy cataloging of your audio collections, and it supports Windows XP/Vista/7/8 versions as well (in case you’ve not yet upgraded to Windows 10.
FreeRIP comes in two versions: Basic (free), and Pro, which has more features and options but comes at a cost.
You also get to load or save album artwork for your audio files but only as BMP, JPG, and PNG, plus burn audio CDs for free and get CD information such as track titles and artist info.
You will benefit from the following best features:
Support for various formats including MP3, WMA, WAV, OGG, or FLAC
Advanced audio conversion features
High-quality, lossless compression
Advanced MP3 tag editor (supporting ID3 v1 and v2)
In order to get this free CD ripper software for Windows 10, you need a full-duplex sound card, Windows 10 or 11 OS, and a CD/DVD driver, plus some 3.25 MB of space to house it on your computer.
It is lightweight but very powerful with amazing features such as normalization or automatic volume adjustment, ID3 tag support, and audio file format support for MP3, WMA, OGG, WAV, and others.
It also has a built-in media player so you can preview your audio before ripping it from the CDs.
Plus, with this software, you can convert any media file like SmartMedia (RM, RA, RAM, RMJ, RMVB) or file formats such as MP3, AAC, and M4A.
If you as well need a fast-converting service without temporary files this is a good fit. Or if you need to convert a batch of audio files at the same time, it is useful to know that it’s covered by the tool.
Other great features include benefits like drag and drop actions, automated ID3 savings while converting, high converting speed, and the economy of hard disk resources.
Take into consideration some of its best features:
Very small footprint on your system
Convert any media file like SmartMedia (RM, RA, RAM, RMJ, RMVB) or file formats such as MP3, AAC, M4A
As a long-time user of Windows systems, I’ve come to learn that Microsoft frequently releases updates to fix bugs, introduce new features, and improve system stability.
Staying up to date with these updates is crucial for keeping your system secure against malware attacks.
However, things don’t always go smoothly when updating your operating system. Recently I’ve come across the 0x80244022 error code while trying to apply certain update patches on my Windows 10 device.
I can relate to the frustration this issue can cause, so I created this short list of tips and tricks, from my own experience, that you can use to solve this issue.
Windows update error 0x80244022: Why does it occur?
The 0x80244022 error code is associated with a dedicated software update issue and is displayed when a connection problem occurs in the middle of the update operation.
If you receive this error you shouldn’t panic – there is nothing wrong with your Windows 10 system, and usually, the problem can be fixed easily.
Note: the error code does not describe a system problem but an interrupted connection between your device and Microsoft’s servers.
The behavior for this system bug is the following one: you decide to check for updates and you run the Windows 10 Update feature.
Somewhere the process gets interrupted and you get this message: ‘There were some problems installing updates, but we’ll try again later. If you keep seeing this and want to search the web or contact support for information, this may help: (0x80244022)’.
If you are currently trying to find the perfect fix for this malfunction, you should also try the troubleshooting solutions listed below.
How do I fix the Windows update error 0x80244022?
1. Use Windows Update Troubleshooter
As usual, Microsoft is trying to offer the right software in order to guide you through different troubleshooting methods.
Well, in this case, we should discuss the Windows Update Troubleshooter which is a tool that once initiated will scan your computer for certain errors.
If any problems are found, then this official troubleshooter will address all the malfunctions automatically. You can run the Windows Update Troubleshooter from the Settings page.
Go to Settings > Update > select Troubleshoot
Go to ‘Get up and running’ > select Windows Update.
In most situations, the Windows update error code 0x80244022 signals an overloaded service.
Shortly, if you try to apply various update files at once, or if the server is busy, you can experience this update issue.
So, among the first solutions to apply, you should also include a restart. In this way, you can initiate a clean scan operation, which might even work this time.
3. Verify the date and the time
This is another fix that might not be considered by most of us – its simplicity might be the reason why.
However, if the Date and Time aren’t set correctly, the updates cannot be installed on your computer (this is a default security measure on Windows 10).
The bottom line is that you should adjust these system settings before reapplying the update sequence.
4. Install the updates manually
This is quite a complicated operation – not because it’s complex or anything but because it’s time-consuming.
Anyway, if you have enough time to spend on trying to get past the Windows update error code 0x80244022 malfunction, try to install the update packages manually.
You first need to note down the version number for each update file – access Update History and locate the latest Windows 10 KBs; then write down the KB numbers.
Finally, access the official Microsoft Update Catalog and search the KB codes noted down earlier. Download each update package and install it manually on your Windows 10 device.
The guidelines from above should clarify why the Windows update error 0x80244022 occurs. Also, the solutions listed in this tutorial should fix this error, so hopefully you can now update your Windows 10 device.
A keyboard driver error can make your keyboard inoperable, which leaves you having to struggle using mouse-only operations.
Windows 10, however, offers a few quick solutions you can use through the Device Manager, but you need to verify a few things first about your keyboard.
To resolve the keyboard driver errors in Windows 10, below are a few preliminary checks and quick fixes, as well as solutions that you can use going forward.
How can I fix a keyboard driver error in Windows 10?
1. Reinstall the keyboard drivers
If your keyboard isn’t working we suggest you reinstall your keyboard driver manually from Device Manager. To reinstall a certain driver you just need to follow these steps:
Right-click the Start button and choose Device Manager from Control Panel.
Go to the Keyboards section and expand it.
3. Locate your keyboard, right click it and choose Uninstall from the menu.
4. An window confirmation will appear and you just have to click OK.
After the keyboard driver is removed you need to restart your computer. After your PC restarts the default keyboard driver will be installed and your keyboard should start working.
Automatically update keyboard drivers using third-party application
If you want to keep your PC and all its components safe and working flawlessly, you need to use third-party programs to update your keyboard drivers.
Needless to say, downloading and installing the wrong system drivers will cause permanent damage to your system, so we suggest you try a third-party tool.
Instead of trying the workarounds, a professional driver updater will reinstall your keyboard driver or, even better, all your corrupted drivers. They all deserve this special treatment since no driver problem can remain unnoticed for too long.
2. Examine your keyboard to ensure it isn’t damaged physically
Keyboard drivers (and other drivers generally) can cause issues, and sometimes the simplest of things can cause such malfunctions.
If for example, liquid spilled into the keyboard, you may have to replace it altogether. Another thing to examine is the cord of your keyboard to ensure no wires have been exposed.
If yours is a wireless keyboard, change the batteries to see if the corrupted keyboard driver issue disappears.
3. Check the keyboard connection
Before you resolve to find solutions for the corrupted keyboard driver, check that your keyboard is connected properly. If not, the driver probably didn’t load.
Follow the keyboard cable and ensure it is connected to the correct port.
USB keyboards have to be connected to USB ports on your PC, while the round PS/2 port keyboard should be connected to their corresponding port labeled with a keyboard icon or picture.
For wireless keyboards, check manufacturer instructions on how to connect them.
4. Check installation of Windows driver
There is a standard Windows keyboard driver that comes packaged with Windows operating system, so there’s no need for installation CDs or more downloads.
For the best driver installation for your keyboard, uninstall the previous or original driver and let Windows reinstall it once you restart your computer.
You can do this through Device Manager using mouse-only navigation.
5. Use proprietary software
There are keyboards that require proprietary drivers that are Windows-based so as to access any advanced keyboard features like hotkeys and media controls.
These drivers come with the CD that accompanied your keyboard, but you can also get them from the brand manufacturer’s official website.
Once the driver installation program is in place, run the program based on the given instructions from the manufacturer’s website.
Select Update driver software and follow the prompts.
A new window will appear asking How do you want to search for driver software?
Select Search automatically for updated driver software – Windows will search online for an update to your keyboard. If one is available it will apply the update to your keyboard.
Reboot to complete the change.
Oftentimes, the keyboard driver, if incorrect or outdated, can be corrupted. You can update it to the next version and see if it resolves the issue.
7. Use a Command Prompt
Open the on-screen keyboard so as to type some commands below.
Click Start.
Using the on-screen keyboard, type This PC and wait for it to appear on the list.
Right-click This PC.
Select Properties.
In the System window, click the Device Manager link.
Find Keyboards and click to expand the list.
Find Standard PS/2 keyboard – it may have an exclamation point next to it which indicates an error.
Double left-click Standard PS/2 keyboard.
A window with the title Standard PS/2 keyboard properties will display.
Under General tab, it will show There’s a problem with the keyboard. Normal functioning shows The device is working properly.
Delete the keyboard device.
Re-detect it in the Device Manager.
Click the Keyboards category to expand the list.
Left-click Standard PS/2 Keyboard to highlight it.
Press DEL on your keyboard to delete it. Windows will warn you that You are about to remove the device from the system.
Click OK. If it asks whether you want to remove the driver, click Yes.
Go to the Device Manager window, at the top.
Click Action.
Select Scan for hardware changes.
Your keyboard will re-detect itself. Try and update it using Device Manager.
Right-click Start.
Select Device Manager.
Expand the Keyboards category.
Right-click the keyboard you want to repair.
Select Update driver software and follow the prompts
A new window will appear asking How do you want to search for driver software?
Select Search automatically for updated driver software – Windows will search online for an update to your keyboard. If one is available it will apply the update to your keyboard.
Reboot to complete the change.
If Windows reports that The best driver software for your device is already installed, go to the next step.
Open an administrative command prompt by typing CMD in the search bar.
Right-click Command Prompt and select Run as Administrator.
Use your mouse to highlight this text: reg add HKEY_LOCAL_MACHINESYSTEMCurrentControlSetServicesi8042prt" /v Start /t REG_DWORD /d 1 /f
Right-click over top of the above-highlighted text.
Select Copy from the dialogue menu.
Right-click in the middle of the command prompt window.
Select Paste.
The text you copied should output to the command line.
Restart your computer to force the keyboard to detect itself again.
Check if the keyboard now works.
If you’re having trouble accessing Command Prompt as an admin, then you better take a closer look at this handy guide.
If the keyboard isn’t working, a simple registry edit can resolve the issue. To do this:
Right-click Start.
Select Run.
Type regedit and press Enter.
Click Edit.
Click Find.
Type kbdclass and press Enter.
Find any key that has the name UpperFilters and Data of.
If you find the key, double click on it.
Edit the text to include only kbdclass and press OK.
Continue searching until you find and edit all UpperFilters keys. All of these should have a data file that includes only kbdclass
Close Registry Editor.
Right-click Start.
Select Device Manager.
Click Keyboards to expand the list.
Find your keyboard and uninstall it.
Restart your computer and see if after this your keyboard works.
If none of these solutions work, your keyboard is probably damaged so you can replace it.
8. Hardware and devices troubleshooter
Open Control Panel.
Click Troubleshooting.
Select View all.
Click Hardware and devices troubleshooter and follow the prompts.
This is a built-in tool to detect and fix the most incorrect settings and errors that cause issues with hardware. To do this, complete the above procedure.
9. Install keyboard drivers in compatibility mode
Right-click on the setup file of the driver.
Select the Compatibility Tab.
Check the box next to Run this program in Compatibility mode.
Select the operating system accordingly from the drop-down list.
Let the driver install and check the functionality.
Were any of these solutions helpful? They are useful when you intend to update the HID keyboard device driver, uninstall the keyboard driver, or solve pretty much any keyboard driver error.
Let us know in the comments section below which tip worked for you.
Apparently this tidbit had gone unnoticed until recently pointed out in a Twitter post by Xbox News for Koreans. As you can see in that post below, the list of titles under such exclusion agreements is pretty impressive…not to mention disappointing for Xbox gamers, particularly fans of the Final Fantasy roleplaying franchise.
MS has already told CMA that Final Fantasy VII Remake cannot be released on Xbox. This is because Sony has signed a "Xbox exclusion" agreement with some third-party publishers for several games including FF VII Remake.https://t.co/g5URqGI2HAhttps://t.co/jbk6hXoQejpic.twitter.com/caChLDNkrH
— Xbox News for Koreans ???????? – 네이버 Xbox 정보 카페 (@KoreaXboxnews) December 22, 2022
Among the games for which Sony has procured console exclusivity: Final Fantasy XVI, Final fantasy VII Remake (all three installments), and the Silent Hill 2 remake. The Xbox exclusion stipulation doesn’t seem to apply to PC gaming, so we may at least eventually see PC versions of these games as has already been the case with Final Fantasy VII Remake.
Do you need to transfer images, videos, music, or other files from your desktop or laptop to an iPhone? If so, there are various software you can utilize for PC to iPhone file transfer. Many utilize iTunes for file transfer to and from Apple mobiles and tablets.
However, don’t overlook the numerous third-party software designed for iPhone file transfer. These are some of the best third-party programs for Windows that you can transfer files to and from Apple mobiles with.
Transfer files from PC to iPhone with these programs
One of the best transfer tools on the market right now is IOTransfer 4. It works perfectly on Windows OS and allows you to get rid of iTunes and transfer files directly between your iOS device and your PC.
Besides the transfer process, it also lets you clean your phone or tablet in order to free some space. This is an important feature because can help you manage better the files you transfer in real-time.
Before transferring your files, you can also make a backup for situations when something goes not as planned (a wrong click or the light goes off). After that, you can transfer easily all that you want. All iTunes limitations are not applicable to IOTransfer 4. You also can delete files in just a few clicks if you don’t have enough space.
Besides data transfer, this tool also allows you to create backups for your contacts, messages, and all other sorts of important data. More so, you will be able to transfer files easily using the wireless transfer option and get your favorite photos, music, videos, etc.
So you should give IOTransfer a try by downloading the trial version and benefit from practical and new features instantly.
Therefore this software delivers high-grade help for Apple users and helps to manipulate files thus getting any media you would need from the PC.
IOTransfer
Transfer any files you need using this proficient iOS file managing software to always be synchronized.
Syncios iPhone Transfer is a highly rated iPhone file transfer software that you can transfer files from PC to iOS and Android tablets and mobiles with.
The software is compatible with Windows platforms from Vista to 10, Mac OS X (10.9 and above), and Android 3.0-8.0.
However, you can still transfer files from PC to iPhone with the freeware Syncios iPhone, which you can add to Windows by clicking the following link.
Syncios iPhone Transfer is one of the best iPhone file transfer software because you can transfer many alternative file categories with it. Syncios users can transfer images, music, videos, ebooks, audiobooks, contact lists, apps, and more besides.
The software includes handy bonus tools within its toolkit, such as video and audio file converters and a media file library manager. In addition, you can also utilize the software to download videos from YouTube, Vimeo, Dailymotion, and other websites.
Hence Syncios iPhone Transfer can come in handy even if you don’t need to transfer files. Regardless of device, you can manage files cross-platform from Android to iOS or in reverse.
Syncios iPhone Transfer
Consider this software and go beyond only iPhone transfer, managing files from a multitude of devices.
You can transfer files from PC to all the iPhones, iPads, and iPods with Xilisoft iPhone Transfer, which is compatible with Windows platforms from XP up. The software has a freeware version with batch processing restricted to 10 files.
Update: Due to some company changes, Xilisoft iPhone Transfer can be found under the name Xilisoft iPhone to PC Copy. Both software has the same features and performs in the same way.
Xilisoft iPhone Transfer has an intuitive UI design with all the various iPhone file categories organized along with its left window. You can utilize the software to transfer podcasts, music, ebooks, audiobooks, images, videos, and apps to and from Apple mobiles and Windows PCs. The software also enables you to sync your mobile with iTunes.
The great thing about this software is that it’s also a file manager with which you can organize and edit playlists and photo albums. Xilisoft iPhone Transfer users can even turn their mobiles into portable hard disks and browse their files with File Explorer.
It doesn’t have quite as many bonus tools as Syncios iPhone Transfer, but the software’s file management options are second to none.
Thereby using this tool means you can practically use your iPhone as a portable hard disk, transfer and synchronize any files you need on the go.
With full support for iOS 14 or iTunes 12, this tool can guarantee cutting-edge services anytime and provide 100% secure file transfers
Xilisoft iPhone Transfer
Consider this software and go beyond only iPhone transfer, managing files from a multitude of devices.
The iMyFone Tunesmate software is a straightforward app for quickly transferring files to or from iPhones. This software also enables you to transfer files directly from iPhone to iTunes, or the other way around.
At the moment this flexible iOS transfer tool is compatible with all iPhone models running from iOS 7 and later versions. Also, the trial version restricts you to five music file transfers and five sessions for video transfers.
You can add the software to Windows 10/8/7 by clicking the Try it Free button on this webpage.
Tunesmate users can transfer music, videos, photos, ringtones, podcasts, audiobooks, and playlists from their desktops or laptops to iOS devices by dragging and dropping them. The good thing about this software is that transferring files between devices is very quick and straightforward, and it avoids many of iTunes’ file transfer restrictions.
You can also utilize the software to merge iTunes libraries together and uninstall apps. Although it lacks a few of the tools included in some of the alternative iPhone file transfer software, this is still a decent package to bypass iTunes with.
iMyFone Tunesmate
Choose confidently this program to just drag and drop your files and transfer instantly.
WinX MediaTrans has an export function that lets you transfer files between your iPhone/iPad and the computer in no time. When you lack space for the next iOS upgradeor new 4K videos, don’t hesitate to keep your iPhone clean by transferring any photos, movies, music, or purchases from the iTunes Store into the PC.
This data transfer software also has an intuitive playlist feature which is ideal to create, modify, and delete playlists. Adding and managing songs is as easy as dragging and dropping them. Moreover, it is quick to transfer a large number of 4K or 1080p HD videos and films between your computer and the iDevice you use, in batch.
WinX MediaTrans is more than just an efficient iPhone transfer app. It also allows you to manage ringtone and voice easily, reduce big video files to optimal size, automatically convert any video formats to iPhone/iPad, or music to AAC or MP3. Backup and sync media content between iPhone/iPad works without iTunes.
Other valuable features offered by this tool like two-way music transfer that allows transferring music between iOS and Windows without the risks of leaking.
Thus such superior software is a great option to manage your iPhone files without any storage or iTunes limitations. You are equipped to transfer your files between your PC and mobile without losing any significant data.
You can download a free trial or buy it at an affordable price if you’re already sure this is the perfect tool for you.
WinX MediaTrans
Check out this powerful software designed for data transferring between your iPhone and computer.
Dr.Fone is a comprehensive iPhone management solution that can transfer files between your iPhone and PC without relying on iTunes. It supports common data types such as photos, videos, music, contacts, messages, and other files, making it useful both for regular transfers and for keeping your device content organized.
The software lets you import and export files between iOS devices and computers, while its built-in management tools give you more control over the content stored on your iPhone. For example, you can organize photos and music, manage documents and other files, and export messages when needed.
Dr.Fone also supports wireless file transfers between an iPhone and Windows PC when both devices are connected to the same Wi-Fi network. This provides an alternative to connecting the phone with a cable every time you need to move files.
Beyond file management, Dr.Fone includes additional tools for tasks such as phone-to-phone transfers, backups, data recovery, and iOS system repair. This makes it a broader device management suite rather than a tool designed exclusively for transferring files.
Overall, Dr.Fone is a convenient option if you want to transfer and manage iPhone files from a Windows PC while having access to additional device management features in the same application.
Dr. Fone
Manage all your iPhone files with this proficient data backup solution.
The iMazing iOS device manager has had some rave reviews and boasts a user base eclipsing 10 million. It enables you to connect iPhones with desktops and laptops via USB or wirelessly so that you can utilize the mobiles as external storage.
The software is compatible with Windows 7/8/10 and Mac OS X platforms. You can add an unregistered version to Windows by pressing the Download for PC button on this page. However, the freeware iMazing restricts the number of files you can transfer from PC to iPhone.
When you’ve connected an iPhone to a PC with iMazing, the software displays the content of your iPhone. Then you can drag and drop your video, music, contacts, and other files onto the iMazing window to transfer files from Windows to iPhone.
The great thing about the software is that it displays iPhone files exactly as they appear on the device. You can also utilize the software to directly copy content between iPhones and iPads. Overall, iMazing is a more flexible alternative to iTunes and iCloud for backing up and transferring files.
Therefore using the capabilities of this tool can impact your file management by offering easy audio transfers, photos access, smart data backups, and so on.
iMazing
Benefit from a trusted software with powerful services that support any file managing requests.
So who needs iTunes? Instead, you can transfer all kinds of media files and contact lists from PC to iPhone and vice versa with iMazing, Tunesmate, Dr.Fone, Xilisoft iPhone Transfer and Xilisoft iPhone Transfer. They are full Apple device management suites for Windows.
Twitter is one of the most popular social networks, but many users reported that Twitter DMs are not loading at all. Unfortunately, Twitter is suffering from other issues as well, and we already wrote about Twitter Nothing to see here error.
This can be a problem and prevent you from communicating with your followers, but there are a couple of solutions that can help you solve this issue.
How to fix the Direct Messages if they are not loading on Twitter?
1. Reinstall the app
Open Settings, and navigate to Apps & notifications.
Select Twitter from the list.
Now tap on Uninstall.
Wait for the process to finish then download the app again from the Play Store.
This is a quick and easy solution, and many reported that it worked for them, so be sure to try it.
Besides the abundance of the new features,Windows 10also has some distinctive problems that were rarely seen in the previous system editions.
One of those troubling segments is the update errors that are sometimes hard to cope with.
To make things even harder, there’s no way to ignore updates, like that, was the case in some other Windows versions.
At least, not without some effort. Don’t get us wrong, it’s advised to install updates, but what if some annoying error prevents you from doing so?
Just like the error we’ll try and address today. This error goes by the code 0x80070652, and if you’ve encountered it, you should definitely check the workarounds we have provided below.
How can I fix the error code 0x80070652in Windows 10?
1. Restart the PC and run Windows Troubleshoot tool
Press the Windows key + I to open the Settings app.
Open Update & security.
Under the left pane, click Troubleshoot.
Click on the Windows Update and run the troubleshooter.
The first obvious step is the PC reboot. On more than one occasion, troubled users resolved update issues by a simple restart.
Restart can clear the infliction brought by some of the system’s features, like third-party programs or update services.
Another thing you should do as soon as possible is hidden under the refurbished Troubleshoot menu that came with the Creators update.
We now have the troubleshooting tools that cover most of the system errors in one spot. You can utilize the Windows Update troubleshooter by following the above steps.
2. Uninstall the latest updates and try again
Open the Settings app, and go to theUpdate & security section.
Click Windows Update in the left pane, and select theAdvanced Options.
Choose View your update history.
Click Uninstall updates.
Choose the latest update that probably caused the issue, and uninstall it.
Check for updates again, and watch out for any interference that may corrupt the update during the process.
With Windows 10, we got ourselves a bunch of mandatory updates installed on (almost) a daily basis. And it’squite hard to prevent them from appearing, almost impossible.
But, you can at least uninstall them if something goes wrong and check for updates again.If your problem goes deeper than this, you’ll probably want to check the remaining solutions.
3. Use third-party tool for Windows issues
Clutter in your system and damaged registry files can sometimes lead to errors like 0x80070652. Restoring the registry settings to their default values and performing an in-depth cleanup might prevent these issues.
Right-click on the file, and run it as an administrator.
After the process is finished, restart your PC and check for updates once more.
It not uncommon for the Windows update services to get unresponsive. But, luckily, there’s a way to reset them.
Now, you can do that manually by resetting certain update services or use the pre-created batch script that can do that for you. You can use the batch file in a few simple steps.
If you want to create the script on your own, the complete instructions can be found in our comprehensive guide.
After the installation is finished, restart your PC.
If you have a problem with a major patch (build) you may need torestore your system in order to start from scratch. Follow the above instructions to reinstall the update file manually.
Luckily, that’s not the case with the small security patches or cumulative updates. You can download those from Microsoft’s official site and manually install them.
In the end, if all of these steps weren’t enough to overcome the error, you can use the final step to force the updates.
Start the desktop client, and click Upgrade this PC now.
The tool should obtain and install the available updates.
After that, restart your PC, and you’re good to go.
Media Creation Tool was introduced with Windows 10 to vastly improve the digital delivery of the system.
And it’s more than a welcomed tool for the multitude of upgrade/installation procedures.
Additionally, you can use it to force the updates and surpass the issues brought by the standard over-the-air update system.
That should wrap it up. These methods can be used for a large variety of update issues, but we advise you to check our site for detailed explanations and workarounds for a multitude of distinctive errors.
In addition, make sure to share your experiences and suggestions in the comments section below.
Windows 10‘s infamous update issues are something many users have to deal with at least once. I know I have encountered it many times and so have many of my acquaintances.
Even though most of them are easy to work around and pretty intuitive to fix, some can be a real nuisance and can easily block the update process.
Error code 0x80072ee7 is one of those particular issues that seems to appear from time to time and its cause seems to vary from one user to another.
Since I have dealt with this issue on some occasions in the past, I will try to provide the most effective ways to deal with it in this article.
What causes the 0x80072ee7 Windows Update error?
This problem can appear in various situations, but most frequently when you’re trying to install a new major update for Windows 10 (Anniversary Update, Creators Update, etc.).
Error code 0x80072ee7 can cause many problems on your PC, and speaking of this error, these are some common issues that users reported:
Code 0x80072ee7 Windows 10 Store – According to users, this error can appear while trying to run Windows Store. If you encounter this issue, be sure to repair corrupted files and check if that works.
0x80072ee7 Windows Update – This issue can appear while trying to run Windows Update. If that’s the case, make sure that the necessary services are enabled and running properly. Alternatively, you can run Windows Update reset script to reset these services.
Windows 10 upgrade error 0x80072ee7 – This error can appear while trying to upgrade to the latest version of Windows. This can be due to your antivirus, so be sure to disable it. In the worst-case scenario, you might even have to uninstall your antivirus.
Windows 10 Media Creation Tool error 0x80072ee7 – According to users, this error can appear even while using Media Creation Tool. To fix that, try editing hosts file and check if that helps.
So, if you’ve recently encountered these problems, they need to be addressed as soon as possible, because installing major updates for Windows 10 is highly advisable.
How can I fix the error code 0x80072ee7 on Windows 10?
1. Change the DNS server address
According to Microsoft’s community forums, changing the DNS server address is the solution that proved to be helpful for the majority of users.
So, that’s the workaround we’re going to try first. Here’s what you need to do:
Go to Windows Search, type control panel, and open Control Panel.
Go to Network and Sharing Center, and click on Change adapter settings from the left pane.
Choose the network you’re currently using, right-click it, and choose Properties.
Scroll down to Internet protocol version 4 (TCP/IPv4), and choose Properties.
Now, choose to Use the following DNS Server addresses
Enter the following values: DNS Server – 8.8.8.8 and Alternate DNS Server – 8.8.4.4
Save changes, and restart your computer
Now, try to update Windows 10 again, if the problem still persists, try some of the solutions listed below.
Windows 10 (and any previously-released version of Windows, as well) has a built-in error-checking tool, called SFC scan. This tool deeply scans your computer for possible problems, in order to resolve them.
This tool can also be helpful when resolving Windows Update issues.
Here’s what you need to do to perform the SFC scan in Windows 10:
Press Windows Key + X to open Win + X menu. Now Choose Command Prompt (Admin) from the menu. You can also use Powershell (Admin) as an alternative.
In the command line type sfc/scannow.
The process should last a few minutes.
After it’s done, close the Command Prompt
If the SFC scan doesn’t work, or if you can’t run an SFC scan at all, you might want to try using a DISM scan instead. To do that, simply start Command Prompt as administrator and run DISM /Online /Cleanup-Image /RestoreHealth command.
Once the DISM scan is finished, check if the problem is resolved. If the issue is still there, or if you couldn’t run SFC scan before, be sure to repeat the SFC scan and check if that helps.
Learn more about the System File Checker by reading this guide.
Alternatively, you can use third-party repair software to do this task for you. These powerful dedicated system repair tools will allow you to fix any broken system files in just a few minutes after a short scan of your computer
3. Run the WUReset script
The WUReset script is a custom-made script specifically designed for resolving update problems in Windows 10.
This script does some of the most common workarounds for Windows Update issues, like resetting the Windows Update process, deleting the SoftwareDistribution folder, etc.
Therefore, it saves you time and effort, as you don’t have to perform these actions by yourself.
To find out more about the WURest script, and download it, check out this article.
4. Edit the hosts file
According to users, sometimes error code 0x80072ee7 can appear if your host’s file is altered. Several users reported 0.0.0.0 IP addresses in their host’s file, and according to them, these addresses caused the problem.
To fix the issue, simply remove or comment out those addresses by adding the # symbol at the beginning that line. Modifying the host’s file can be tricky, so some caution is advised.
In addition, many users reported Access denied message when editing hosts file. This is not a big problem, and it can be easily resolved. Once you fix your host’s file, check if the problem is still there.
5. Check your antivirus software
In some cases, error code 0x80072ee7 can appear if there’s an issue with your antivirus software. Sometimes your antivirus software can interfere with your system and cause this error to appear.
To fix the problem, it’s advised to disable certain antivirus features and check if that helps. If that doesn’t help, you might want to try disabling your antivirus completely.
Even if you disable your antivirus, Windows 10 comes with Windows Defender that acts as a default antivirus, so there’s no need to worry about your safety.
If removing the antivirus software solves the issue, you might want to consider switching to a different antivirus solution.
6. Make sure that Windows Update and DNS Client services are running
Sometimes error code 0x80072ee7 can appear if Windows Update service isn’t running. Many features rely on this service, and if the service is disabled, you might encounter errors such as this one.
However, you can fix the issue simply by following these steps:
Press Windows Key + R and enter services.msc. Press Enter or click OK.
When the Services window opens, locate Windows Update and double-click it to open its properties.
If the Startup type is set to Disabled, be sure to change it to Manual or any other value. Now click Apply and OK to save changes.
After doing that, check if the problem is resolved. Keep in mind that you might have to restart your PC to apply changes.
Many users reported that DNS Client service can cause this problem as well. Simply follow the instructions above and enable DNS Client service.
Once you do that, the issue should be permanently resolved.
7. Remove problematic applications
Sometimes third-party applications can interfere with your system and cause this issue to appear. In fact, several users reported that certain registry cleaner software caused this issue.
To fix the problem, you need to find the problematic application and remove it manually. There are several ways to remove an application, but the best one is to use uninstaller software.
In case you’re not familiar, uninstaller software is a special application that can remove any program, along with its files and registry entries, from your PC.
If you want to completely remove a certain application from your PC, uninstaller software might be the best choice for you.
There are many great uninstaller applications, but one of the best is IOBit Uninstaller, so we strongly recommend to try it out. Once you find and remove the problematic application, check if the problem is resolved.
Searching for the best uninstalling tool? Look no further! Check our fresh list!
8. Change registry permissions
According to users, sometimes your registry might not be properly configured, and that can cause this issue to appear. To fix the problem, you need to change certain permissions by following these steps:
Press Windows Key + R and enter regedit. Press Enter or click OK.
In the left pane navigate to HKEY_LOCAL_MACHINESYSTEMCurrentControlSetServicesTcpip. Right-click Tcpip and choose Permissions from the menu.
Click Advanced.
Check Replace all child object permission entries option and click Apply and OK to save changes.
After doing that, check if the problem is resolved.
That’s about it, we hope at least one of these solutions helped you to resolve the error code 0x80072ee7 in Windows 10. If you have any questions or suggestions, feel free to let us know in the comments below.
Hard as it is to believe, 2022 is about to come to a close. As we get ready to ring in a new year it’s good to take a look back at the year in Xbox games for 2022. While it wasn’t the greatest year for first-party releases from Xbox Game Studios (and that’s putting it kindly) there were still plenty of exciting third-party releases.
Below is a rundown of some of the biggest Xbox games in 2022, in so specific order. Bear in mind that this Xbox 2022 wrap up is in no way meant to be an all-inclusive list of the best Xbox games in 2022; instead, think of it as a highlight reel. We’ve included Xbox Store links for your convenience.
The world is a vast, beautiful, and dangerous place – especially when you have been shrunken to the size of an ant. Explore, build, and survive together in this cooperative survival-adventure. Can you thrive alongside the hordes of giant insects, fighting to survive the perils of the backyard?
Uncover the mysteries while playing through the story!
How did you wind up so small? Who did this to you? How do you go home? These are all answers you will uncover as you play through the story.
Solo or with friends – anytime!
You can face the backyard alone or together, online, with up to three friends. Not only that, but with the Shared Worlds feature, you can continue to play in your shared world even if the original host is not on, with all your progression saving!
Overwatch 2 is an always-on and ever-evolving free-to-play, team-based action game set in an optimistic future, where every match is the ultimate 5v5 battlefield brawl. Team up with friends and dive into the reimagined PvP experience as a time-jumping freedom fighter, a beat-dropping battlefield DJ, or one of over 30 other unique heroes as you battle it out around the globe.
Explore a land filled with lost legends, ancient powers, and ferocious monsters in TUNIC, an isometric action game about a small fox on a big adventure. Stranded in a ruined land, and armed with only your own curiosity, you will confront colossal beasts, collect strange and powerful items, and unravel long-lost secrets.
From the Co-Creator of Rick & Morty and Solar Opposites, comes High On Life.
Fresh out of high school with no job and no ambition, you’ve really got nothing going for you until an alien cartel that wants to get high off humanity invades Earth. Now, you and a team of charismatic talking guns must answer the hero’s call and become the deadliest intergalactic bounty hunter the cosmos has ever seen.
Travel to a variety of biomes and locations across the cosmos, go up against the nefarious Garmantuous and his gang of goons, collect loot, meet unique characters, and more, in the latest comedy adventure from Justin Roiland!
DEATHLOOP is a next-gen first person shooter from Arkane Lyon, the award-winning studio behind Dishonored. In DEATHLOOP, two rival assassins are trapped in a mysterious timeloop on the island of Blackreef, doomed to repeat the same day for eternity. As Colt, the only chance for escape is to end the cycle by assassinating eight key targets before the day resets. Learn from each cycle – try new paths, gather intel, and find new weapons and abilities. Do whatever it takes to break the loop.
Welcome to the new era of Call of Duty®.
Call of Duty®: Modern Warfare® II drops players into an unprecedented global conflict that features the return of the iconic Operators of Task Force 141.
Infinity Ward brings fans state-of-the-art gameplay, with all-new gun handling, advanced AI system, a new Gunsmith and a suite of other gameplay and graphical innovations that elevate the franchise to new heights.
Modern Warfare® II launches with a globe-trotting single-player campaign, immersive Multiplayer combat and an evolved Special Ops game mode featuring tactical co-op gameplay.
You also get access to Call of Duty®: Warzone™ 2.0, the all-new Battle Royale experience.
Stay frosty in the Wonderlands this holiday season with ice-cold guns, spells, and gear! Embark on an epic adventure full of whimsy, wonder, and high-powered weaponry! Bullets, magic, and broadswords collide across this chaotic fantasy world brought to life by the unpredictable Tiny Tina.
Roll your own multiclass hero and loot, shoot, slash, and cast your way through outlandish monsters and loot-filled dungeons on a quest to stop the tyrannical Dragon Lord. Everyone’s welcome, so join the party, throw on your adventuring boots, and be Chaotic Great!
Embark on a heartrending journey into a brutal, breathtaking world twisted by supernatural forces.
After escaping their devastated homeland, Amicia and Hugo travel far south, to new regions and vibrant cities. There, they attempt to start a new life and control Hugo’s curse.
But, when Hugo’s powers reawaken, death and destruction return in a flood of devouring rats. Forced to flee once more, the siblings place their hopes in a prophesized island that may hold the key to saving Hugo.
Discover the cost of saving those you love in a desperate struggle for survival. Strike from the shadows or unleash hell, overcoming foes and challenges with a variety of weapons, tools and unearthly powers.
Prepare for the award-winning RPG experience in this definitive edition of Persona 5 Royal, featuring a treasure trove of downloadable content included!
Forced to transfer to a high school in Tokyo, the protagonist has a strange dream. “You truly are a prisoner of fate. In the near future, ruin awaits you.” With the goal of “rehabilitation” looming overhead, he must save others from distorted desires by donning the mask of a Phantom Thief.
Honorable mentions
The following are a few bonus games from 2022 that were too good to go unmentioned in our Xbox 2022 wrap up.
So there you have it—our Xbox 2022 wrap up. All in all Xbox had a pretty strong 2022 despite a dearth of AAA first-party releases. This is largely thanks to Game Pass, which continues to strengthen its position as the best gaming service out there. And 2023 is shaping up to be the best year yet for the next gen Series X|S console, with several AAA releases on the slate from Xbox Game Studios and others including Forza Motorsport, Redfall, Wo Long: Fallen Dynasty, Atomic Heart, Minecraft Legends, Dead Island 2, Diablo IV, Street Fighter 6, Dead Space Remake, and of course Starfield.
One of the most strange errors users of Microsoft Windows receive is the 0xc004f200 Windows, not a genuine error.
I say strange because it pops up even when using a valid Windows activation key. It is more interesting that Windows could have been showing it’s activated all along and working seamlessly, only to claim it lacks a genuine activation abruptly.
What follows are ongoing issues, including the operating system disabling some features. And again, the xc004f200 complications are not limited to Windows and will sometimes surface when transferring Microsoft Office to new PCs.
But before we discuss them, let’s see what triggers the 0xC004F200 (not genuine) warning.
What causes error 0xc004f200?
Most users have been encountering this issue after an update. For others, it’s when installing Office software on new PCs or after a hardware upgrade.
Now, the issue is not due to a software misconfiguration, but rather because of the nature of Microsoft’s licensing arrangements.
For instance, your MSDN key or TechNet Product Keys may become blocked if used in other machines since they are meant to be used by a single person.
But you may be able lucky and manage to use it for a while before the system senses. Your luck runs out with a system change, for example, after reinstalling Windows.
Again, despite users being aware of the strict Microsoft licensing terms, some users still give away product keys illegally or resell them on auction sites. Microsoft usually detects once such a key has been installed in a second machine and blacklists it, preventing further use.
So in short, the error emanates from Microsoft thinking that your software is pirated and happens to even users who have installed genuine programs.
How do I fix error code 0xc004f200?
Here are our recommended ways to get rid of this challenge.
You may get this fault if you reinstalled Windows using other media but the valid Recovery disks for your machine.
In such a case, you need to change the Product Key and install the one printed on your COA (certificate of authenticity) sticker.
Steps:
Locate the COA sticker the on your computer case.
Press the Windowskey + R.
On the Search box, type SLUI.EXE 3
Enter the License Key from the sticker when requested then follow the subsequent instructions.
The following Windows will appear at the end confirming that your Windows has now been activated.
2. Uninstall latest Updates/Roll back changes
Uninstalling the Windows Update which brought about the error also solves the problem in some cases. This is the update you lastly did prior to receiving a 0xC004F200 warning for the first time.
Steps:
Windows 7/Vista
Click Start then select Control panel.
Choose System and Security.
Under Windows Update, select View Installed Updates.
Look for the relevant update then right-click it and choose Uninstall. This will remove the trouble-causing update.
Restart your computer in normal mode.
Windows 8/8.1
While in the Starting screen, swipe up or click on the down arrow icon (facing downwards). This brings up the Apps screen.
Scroll inside the Apps section until you access the Windows System area. You will notice the Control Panel below there. Click it.
(For 8.1 just click the Start button then type “Control Panel” in the search box to perform a quick search )
Go to Programs and look for Programs and Features.
Click on the View Installed Updates.
Select the update you need to uninstall and Right-Click on it. Choose Uninstall.
Confirm that you wish to proceed with the uninstallation by Click on Yes when asked by the UAC (User Account Control).
Click on Uninstall when UAC asks you to save /close the opened application.
Reboot your computer as soon as it completes the Uninstallation. The error will hopefully go.
Windows 10
Click Start then tap on Settings.
Click on the Update & security tab.
Again click on the Windows Update option.
Now tap on the Update history tab.
Now you click on Uninstall Updates.
From the list of Windows 10 updates, choose the unwanted update and tap on Uninstall.
3. Try the Activation Troubleshooter
Press the Windows key + I and selectUpdate & Security.
2. Select Activation in the left pane and click Troubleshoot just below the Activate Windows Now section (Note that the Troubleshoot option is only available in inactivated Windows).
3. Click Yes when asked by the UAC.
4. The troubleshooter will show that Windows can’t activate this device.
5. Now, click I changed hardware on this device recently.
6. Next, sign in with the Microsoft account linked with your digital license.
7. Select your device from the list of devices and click this is the device I’m using right now.
8. Finally, click Activate.
That’s all. Your error should now be gone.
Users running version 1607 of Windows 10 or later can get help from the Activation troubleshooter mostly if the 0xC004F200 related issues arise after a major hardware change (like upgrading RAM) or reinstalling Windows.
4. Do A Complete Reinstall
If everything else fails, you try to reformat and reinstall your edition of Windows. You can use the manufacturer’s Recovery media -if available for that PC as well as a download of a Retail ISO/disk. You will then need to activate Windows using a legal license as described below.
Maybe your computer lost its activation settings so try to undertake a fresh Windows activation.
Windows 7
Click the Start
Right-click on Computer and select
Now click Activate Windows now.
If online, select onActivate Windows online now. Confirm your choice and enter an admin password if asked.
Type your product key when requested and select
Follow the remaining instructions.
You can also activate the Windows 7 copy by phone:
Steps:
Repeat step 1-3.
Select “Show me other ways to activate”.
Type your product key and click Next.
Choose “Use the automated phone system”. Type an admin password or confirm your choice if prompted.
Select your precise location (or the nearest location) from the provided drop-down list. Click Next.
Call any of the available listed phone numbers and follow the guidelines as given by the automated system to complete the activation process.
Windows 8.1
Click on the Startbutton then type PC settings.
On the listed results, choose PC settings.
Now selectActivate Windows.
Type your Windows 8.1 activation key on the provided window.
Now click Next and follow the remaining instructions.
To activate Windows 8.1 by phone:
Repeat steps 1-3 above.
Click Contact customer support(for help). Enter your administrator password/confirm this choice- if prompted.
Again pick your exact location (or the nearest location) from the drop-down list then click Next
Call any of the indicated phone numbers and follow the automated instructions.
Windows 8
Press the Windows + Rkeys on the keyboard to open the run command.
Type cmd to access the command prompt.
Type vbs -ipk xxxxx-xxxxx-(the25 digit Windows 8 product key)in the command Window then press Enter.
In the next line down there, type vbs -atoand again press Enter.
That should be it.
However, if the error persists in Windows 8, you can execute these remedial steps to see if you might finally make progress:
Repeat steps 1-2 to reopen the command prompt.
Type Slui 3 and press enter (on the command prompt).
A new Window pops up. Type your 25-digit product key in this Window then Click Activate.
This may successfully remove the error.
Windows 10
You can reactivate your Windows 10 by entering your 23-digit product key or a digital license.
Click the Start button and select Settings.
Go to Update & Security.
Select Activation.
Select Change product key.
Click yes to let the App. make the required changes.
Now re-enter the product Key and follow the instructions.
6. Contact Support
Microsoft support is very helpful when faced with a plethora of technical issues so you can chat with them for assistance.
You can contact them here to find the exact status of your Windows Key.
Error 0xc004f200 When Installing Office On Windows
Some users meet his problem when trying to install Microsoft Office. If you are in a similar scenario, you can still get your way out using the following fixes:
1. Use Microsoft’s Genuine Advantage Diagnostic Tool
Launch the diagnostics process by clicking the tool from the taskbar as shown, then choosing run.
You can also right-click and select run as administrator from the Downloads folder.
Choose continue then follow the instructions to execute a full diagnosis.
2. Re-install Office
Reinstalling the software may also be a solution regardless of your Office version.
Steps:
Restart the PC in Clean Boot mode. For starters, the “clean boot” usually starts Windows with minimal drivers and startup programs.
This helps you determine whether it’s a background process that’s interfering with the office and triggering problems.
Here is how to enter a clean boot:
Click Start then type msconfig in the search Window (For Windows 8 you swipe into the home screen (from the right edge) the start typing msconfig).
Select System Configuration or msconfig.exe from the results (depending on your Windows).
Go to the Services option in the System Configuration window and select the checkbox “Hide all Microsoft services”.
Now click Disable all.
Head over to the Startup tab on the same System Configuration window then click on Open Task Manager.
On the Startup option under Task Manager, select each item and then choose Disable for every startup item.
Close the Task Manager.
You are now taken back to the Startup tab in the System Configuration Click OK and restart the PC.
Now the computer will restart and run in clean boot.
Manually uninstall the Office program and re-install it again. The issue may disappear, allowing your Office to activate seamlessly.
How to Reset the PC To A Normal Boot
Remember to return your PC to starting normally after you’re done troubleshooting in clean boot.
Steps:
Windows 8, Windows 8.1, and Windows 10
Search for msconfig as I had described earlier.
From the results, choose msconfig/System Configuration.
On the General option, click on Normal Startup.
Tap on the Services tab and clear the check box next to Hide Microsoft services.
Now click Enable all.
Next, click the Startup tab then tap Open Task Manager. Here you will enable all the startup programs and click OK.
The computer will prompt you to restart it. Accept the reboot request.
Windows 7
Repeat steps 1 and 2.
Proceed to the General tab and select the Normal Startup option. You should then Click OK and Restart when requested.
That’s all for this method and this guide. If you are facing a similar issue in Windows activation error 0x80041023, check our detailed guide to fix it quickly.
Feel free to let us know the solution that helped you fix this issue in the comments below.
Did you have any hardware issues recently? For example, if your hard drive crashed for any kind of reasons you will install the Windows 10 operating system again on a new hard drive you buy.
Unfortunately, after you are asked to enter your product key during the installation in the Windows 10 system you might end up with the Activation Error Code 0xC004C008.
The error code usually appears when you install the Windows product a specific number of times. The Windows 10 license can only be installed on a single device.
So, if your device crashes and you buy a new one or just change a hardware component, you might need a new product activation code.
Press and hold the button Windows and the button R to open the Run window. Note: Another way to open the run Windows is from within the start menu of theWindows 10 system.
Write in the Run window the following command: SLUI 4.
Press the Enter button on the keyboard.
You will now have a Phone Activation window in front of you.
In the window, you will need to choose the country from which you registered.
Call the activation number after you chose the country.
After you dialed you should be asked to write your Installation ID. Note: type the installation ID in your phone.
After you typed the installation ID it will ask you how many copies of Windows have been installed with this license and you should choose 1. If you choose any other option it will not work. Note: The option 1 you chose means that you only used it once.
After you did the steps above you should get a confirmation ID and then you are set to go with a workable product key.
2. Use Windows Activation Troubleshooter
Press Windows Key + I to open Windows Settings.
Scroll down, find the Update&Security tab , and open it.
Open Activation tab.
Click the Troubleshoot feature and wait until it finishes.
See if the problem still persists.
Some users reported that they fixed this issue by using the troubleshoot option from the Activation options window. While this is not the fix for every user, this is a simple manipulation that you can try and which may fox your problem.
Before trying out this solution, sign in as Administrator. After you have signed in as an Administrator, here’s what you have to do.
If the options posted above made no difference you can always call directly Microsoft office by dialing the number 18009365700 and explain what error message you get in your Windows 10 operating system.
They will most likely resolve it over the phone, and you can go on with your installation of Windows 10.
Please write us below with any other thoughts on the Activation Error Code 0xC004C008, and we will help you further in the quest of installing Windows 10 into your device.
After purchasing your Windows 10 license, you need to validate your product key to register your OS. The validation process goes through the Activation Server of Microsoft. If Windows 10 has trouble connecting to the server, activation will fail and show the error code: 0x87e10bc6.
The full error message reads “Something prevented us from communicating with our activation servers. Wait a few minutes and then try again. Error code: 0x87e10bc6”.
If you are facing difficulty activating Windows 10 license, we have prepared the fixes to apply just like we did with the Activation Error 0xc0020036.
At times, the Windows server 2019 or 2022 error code 0x87e10bc6 on Windows 10 may not be the issue with your system but on Microsoft’s end. If the activation servers are down for maintenance, the process may fail.
First, restart your PC and try to activate the license. If it does not work, wait a few minutes and try again.
2. Update Windows 10
Press the Windows key + I to open the Settings app and select Update and Security.
Click the Check for update button.
Finally, install any available updates and restart your PC.
Users have reported that installing pending updates for the Windows OS has fixed the issue and allowed for successful activation. Check for any pending updates for Windows and install it.
3. Run the Activation troubleshooter
Press the Windows key + I and select Update & Security.
Click Activation in the left pane.
Now, select Troubleshoot and follow the on-screen instructions.
If you are facing the Windows 10 activation error 0x87e10bc6 on Microsoft Store or even the server 2019, something prevented us prompt, the Activation troubleshooter is the best-placed tool to help you fix them.
When the tool completes its diagnosis, make sure you apply the recommended fixes. Note that you must sign in as the administrator to use the Activation troubleshooter.
4. Disable your firewall temporarily
1. Press the Windows key, type Windows Security, and select Firewall and Network protection under Protection areas.
2. Select your Active Network (Private or Public).
3. Turn off Windows Defender Firewall using the toggle switch.
4. Also, make sure under Incoming Connection, the Blocks all incoming connections, including those in the list of allowed apps box is unchecked.
5. Finally, close the Setting window and try the activation process again.
If you have a third-party Firewall installed, the Firewall may be blocking the connection to the server. You can try disabling the Firewall temporarily just get past the error 0x87e10bc6 to activate Windows 10.
After this, try to validate the license key again and check for any improvements.
Press the Windows key + I and select Update & Security.
Click the Troubleshoot option in the left pane and select Additional troubleshooters.
Now, choose the Video Playback option and click Run the troubleshooter.
Apply any recommended fix and check if the error persists.
If a Windows Store app is causing the error, click on the Windows Store App option and select Run the troubleshooter.
The 0x87e10bc6 error on Windows 10 can also affect your system hardware, like the DVD driver. If you are facing issues with your DVD player, try to run the Hardware and device Troubleshooter to fix it.
6. Perform a system restore
Press the Windows key + R, type rstrui.exe, and click OK.
Click the Next button in the window that pops up.
Now, select a restore point and click the Next button.
Finally, click the Finish button to confirm the action and follow the onscreen prompt.
If the 0x87e10bc6 error on Windows 10 is caused after you received a Windows update, you can try to roll back the update using the System Restore Point for the time being. After Microsoft releases a fix for this error, you can install the latest update.
With that said, we can conclude it. We believe you now have everything you need to fix the Windows Activation error 0x87e10bc6 on Windows 10.
In the same vein, if you are troubled by the activation error 0xc004f211, check our detailed guide to fix it for good.
Feel free to let us know the solution that helped you fix this issue in the comments below.
An HDMI to VGA adapter is helpful as it allows you to connect devices with different types of display that otherwise would not work together.
In this article, we will show you how to download the VGA adapter drivers easily, so keep reading.
What is an HDMI to VGA adapter, and how does it help?
An HDMI-to-VGA adapter is an external device that converts the current HDMI output into a VGA output.
Usually, these adapters are portable, and you can easily carry them with you if you need to connect your device to a projector or any other type of display that uses a VGA connection.
Since the VGA makes a bridge between the device and the operating system is quite crucial that they work correctly.
You also need to know that you will lose the sound channels that HDMI may carry by converting the output from HDMI to VGA.
How can I download HDMI to VGA adapter driver?
1. Install the driver manually
Right-click the Start button and select Device Manager.
Make sure that your HDMI to VGA adapter is connected to your device.
Look for your device (Usually, you would find it under the Monitors or Display adapters sections).
Right-click on the adapter and select Update driver.
Next, click on Search automatically for drivers.
If the system finds any compatible driver, it will install it.
Another way is to visit the device manufacturer’s website and download the driver directly. You will usually find it in the Support section of the website.
Depending on the driver, you may either double-click it to install or perform the solution above and at step 5, select Browse my computer for drivers. Then, indicate the location where you saved the file on your computer.
Most of the time, manually downloading and installing the drivers can be a tedious and time-consuming process, especially if you lack technical skills.
You should consider using a dedicated third-party tool that will take care of the entire process automatically. Not only will you not have to spend time trying to figure out which driver to download and what steps to take next, but you will also have the drivers updated at all times with this tool.
These are the most efficient ways of downloading the HDMI to VGA adapter driver, and we hope that the solutions presented in this article have helped you.
You may have noticed that after using an HDMI cable you started to experience all kinds of issues with your Dell laptop. It is important to download and install the correct HDMI driver for it and all the associated apps to work properly.
Is there a Dell Update application?
Dell offers a dedicated tool called Dell SupportAssist that scans your PC configuration and helps you get the latest driver updates.
Moreover, it diagnoses any problems with your system and tunes it up to an optimal configuration. Of course, the tool only works on Dell and Alienware PCs.
How do I get Dell SupportAssist?
If you own a Dell or Alienware laptop, you probably have the SupportAssist tool preinstalled. But if you don’t or uninstalled it by mistake, you can get it back quickly.
Just go to the dedicated Dell webpage and hit the download and install button to get the app, just as it’s shown in the screenshot below.
Thereafter, install the app and run it. On the first launch, it will scan your hardware configuration and drivers and offer updates if there are any available.
As you will discover, the app has many other uses. It can clean your drives of unnecessary files, tune up the PC performance, optimize the network and even remove viruses and malware.
The app gets regular driver updates for your PC, and it doesn’t occupy too much space on your drive.
If for some reason, you don’t want to use Dell’s dedicated update app, the solutions below will help you get the latest HDMI driver for your machine.
How can I download the HDMI driver for a Dell laptop?
Type in the model in the Search area and hit the blue button.
Wait for the results to show up, then download and install the driver.
2. Use Device Manager
Press Windows + R together to open the Run console, type in devmgmt.msc, and hitEnter.
Locate and expand the Monitors dialog, then right-click on your Dell monitor to choose Update driver.
Click Search automatically for updated driver software. In case you already downloaded a driver, select the second option, Browse my computer for drivers and indicate its path to install it.
Follow the on-screen instructions to complete the process.
Repeat the solution to update the Display adapters as well.
The PC’s temperature is a critical aspect that cannot be ignored owing to its direct implications on the computer’s health. But, even many who took good care reported that the graphics card was overheating and shutting down the computer.
The temperature at which the PC shutdown is different for every manufacturer, but it’s usually in the 90-105°C range for GPU. So, if you are facing shutdown issues due to overheating, the temperature has reached that range. Though, it can easily be fixed.
Why do graphics cards overheat?
Some of the most likely causes for graphics cards overheating are:
High graphical settings: You might be playing games with graphics settings that are too high for a more limited GPU to handle.
Broken GPU fan: The fan on your graphics card might be broken or not running at the designed speed.
Dust buildup: Dust buildup in the fan, case, or even inside the CPU can lead to overheating.
Degraded thermal paste: Another common reason behind high graphics card temperature is a bad thermal paste. Over time, the paste can dry up and will not effectively aid air release.
How can I check my GPU’s temperature?
The easiest way to check the GPU temperature is through the Performance tab in the Task Manager. Simply press Ctrl + Shift + Esc to open the Task Manager.
GPU temperature in Task Manager
Some gaming PCs also come with pre-installed temperature monitoring apps users can check GPU temperatures with. Besides, you could use an effective third-party tool to monitor the CPU and GPU temperature.
What can I do if the graphics card is overheating and shutting down the PC?
Before trying the slightly complex solutions, here are a few quick tricks that might help:
Open up the case and use a can of compressed air to clear any dust buildup. An effective way to identify whether dust buildup (in the GPU case) triggers the issue is to run the PC without the case. If the temperature now drops, you know the culprit.
In a humid climate, the dust accumulation may turn solid, and, in this case, you will have to use a sharp object to remove it.
Make sure the graphics card is properly connected. An issue with the connection can also cause overheating in the graphics card and, subsequently, the PC shutting down.
Disconnect the power supply and press and hold the power button for 30 seconds to drain off any charge in the capacitors. Now, turn on the computer, and the problem should be resolved.
If you have overclocked the PC without putting in much consideration, it’s time you revert the changes.
If you’re having a problem while playing resource-intensive games, try reducing the FPS (Frames per Second).
Also, you could lower the resolution and make other changes that decrease the load on the GPU.
If these didn’t work, the ones listed next probably would.
1. Update your GPU’s driver
Press Windows + R to open Run, type devmgmt.msc in the text field, and hit Enter.
Expand Display adapters, right-click on the graphics card, and select Update driver.
Now, select Search automatically for drivers and wait for the best one to install.
Your graphics card’s driver will have a direct impact on the GPU’s temperature. If Windows is unable to find a better version, you can always update the drivers manually though it’ll be a tricky and time-taking process.
This is where an effective tool comes into the picture. A driver updater utility scan will tell you if your GPU’s driver is old or faulty. Then you can install a new GPU driver with the driver updater software.
2. Disable Cortana
Press Windows + I to open Settings, choose Apps from the navigation pane, and click on Installed apps.
Click on the ellipsis next to Cortana, and select Advanced options.
Now, disable the toggle under Runs at log-in.
Once done, restart the computer for the changes to come into effect and verify whether the graphics card is still overheating and shutting down. If that is the case, head to the next solution.
3. Change the thermal paste
The thermal paste is a critical part of the GPU and helps keep the temperature under check by aiding heat transfer. Check if it’s dried up. Though the thermal paste usually works fine for about 5 years, there are times when it goes bad sooner.
You can purchase a thermal paste off the web or get one from a nearby store. These are readily available. Once you have it, replace the one on your PC, and the graphics card will no longer be overheating and shutting down.
4. Get the hardware inspected
If nothing else works, the last option is to get the hardware inspected by an expert. However, before you do that, try running MemTest86+, an open-source tool that looks for issues with the RAM and fixes them. It most likely won’t yield results but is worth a shot.
The hardware specialist will be able to identify what’s causing the overheating, whether it’s the connection, malfunctioning components, or the GPU, and provide you with a solution.
Remember that playing GPU-intensive games can also cause overheating. This, in turn, can lead to a BSoD on that particular game.
With these solutions, you can easily fix things when the graphics card overheats and shuts down. While you are here, also find out how to make Windows run faster without modifying the hardware.
Tell us which fix worked for you in the comments section below.
Running the Ctrl–Alt–Del key combination when connected to a Remote Desktop will execute the command on the local computer. So, it is essential to know how to send the Ctrl–Alt–Del command to the Remote Desktop and use its functions on the Remote Desktop.
The Ctrl–Alt–Delete keyboard shortcut brings up the Task Manager page in Windows 95 and others after it. Additionally, it opens a menu where you can see the status of all running processes and terminate any of them.
Furthermore, the keyboard combination allows users to stop processes for frozen programs and end tasks for system components. Users can restart or shut down the computer in some cases.
Likewise, you can check the resource usage on your system and select the applications to run on startup.
In short, concurrently, pressing the Ctrl-Alt-Del key combination offers more functions than bringing up the Task Manager. However, some settings and functions may differ depending on your version of Windows.
How can I send and use the Ctrl-Alt-Del command on a Remote Desktop?
1. Tweak the Remote Desktop software
Press Windows + R keys to open the Run window, type mstsc, and click OK to launch the Remote Desktop software.
Type the IP address or name of the remote computer in the Remote Desktop box and press Enter.
Type your username and password into the appropriate fields, then press Enter to connect to the Remote computer.
While on the Remote Desktop window, simultaneously press the Ctrl + Alt + Endkeys on your keyboard.
Running the Ctrl + Alt + Endcommand will execute the traditional Ctrl + Alt + Del command on the Remote Desktop instead of on the local computer.
Press Windows + R keys to open the Run dialog box, type mstsc, then click OK to open the Remote Desktop connection.
Click on the Show Options button, then select the Local Resources tab.
Go to the Keyboard windows and select the On the remote computer option to work on any screen size.
Connect to the other computer and press the Ctrl + Alt + End combination instead of the normal Ctrl + Alt + Del key combination.
It allows you to control and work on the Remote Desktop on any screen size.
Using the Ctrl + Alt + Del command during a Remote Desktop connection will cause the command to be executed locally on your computer. Hence, you need to slightly modify the combination to execute it on the Remote Desktop.