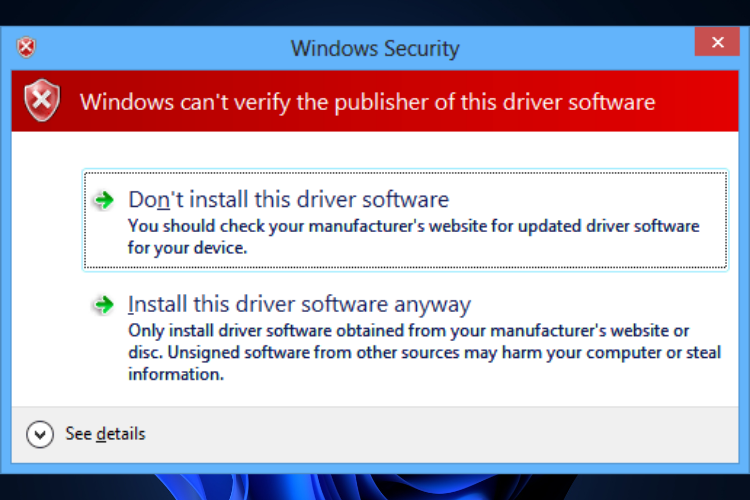
Error Code 52 is considered to be a Device Manager issue because it’s caused by one’s device drivers and it can occur on any OS version, from Windows 7 to the newest Windows 11.
Our readers already know some of the best features in Windows 11 to upgrade for and they made the big step in this direction. However, some of them have asked us what they should do when they encounter the Windows cannot verify digital signature – Code 52 message in Device Manager or DXDiag. The full error is the following one:
Windows cannot verify the digital signature for the drivers required for this device. a recent hardware or software change might have installed a file that is signed incorrectly or damaged, or that might be malicious software from an unknown source. (code 52)
That being said, having a better understanding of why this error appears and how to better take care of your device and prevent this issue from happening in the future has become a necessity.
Is the digital signature mandatory?
According to Microsoft, the digital signature’s main purpose is to actively protect your system from threats and infections by making sure that the signer is trusted and that the files were not altered in any way after they were published.
Therefore, every single driver and program must be digitally signed before you install and run it on your device. But this isn’t always the case, as not all publishers and vendors are verified and neither are their products.
It is simply impossible for Microsoft to check all the drivers or programs that are published daily and have them digitally signed for your device’s safety.
That is why you can come across driver errors since the OS won’t allow an unsigned legitimate software or driver to work or load as it should.
Error Code 52 main causes
You are about to discover how to troubleshoot this issue, but first, understand that the most common cause is related to incorrectly signed driver files installed on your PC and it mostly occurs after updating or upgrading Windows.
Things are no different for those who discovered that their PC is eligible for a free upgrade after using WhyNotWin11. They’ve learned to download Windows 11 and it seems that this error is part of the package too.
Corruption in the Windows Registry from a recent software change can also lead to this issue, as well as problematic filters for USB or incompatible drivers installed in the system.
Some other reasons include damaged hardware, improper installation, or uninstallation of a program, and virus or malware infection that has corrupted Windows system files.
That’s why we strongly recommend using one of the best antivirus options for Windows 11 by taking into consideration elements such as scanning capabilities, ransomware protection, malware/virus removal, or resource consumption.
Even if it’s not a situation you want to be in, rest assured that we have the solution to this error. Some step-by-step guides are waiting for you below, so check them out.
How to fix the digital signature – Code 52 error on Windows 11?
1. Uninstall the driver manually
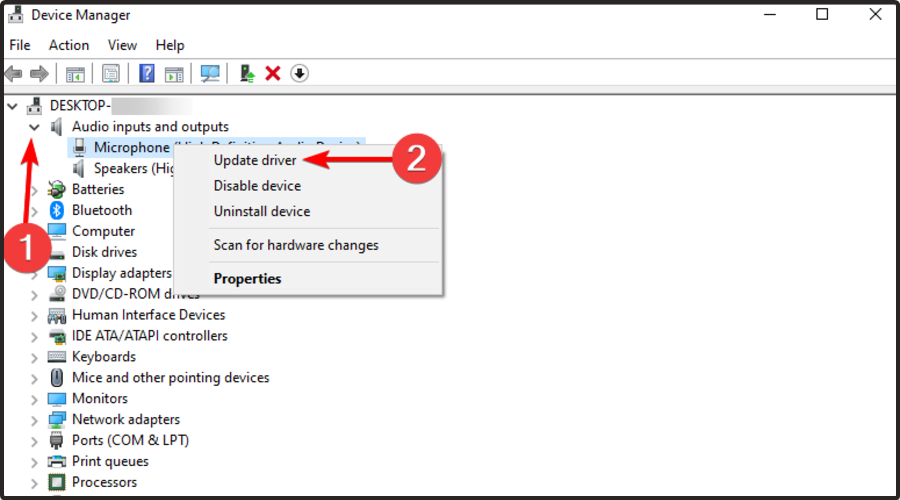
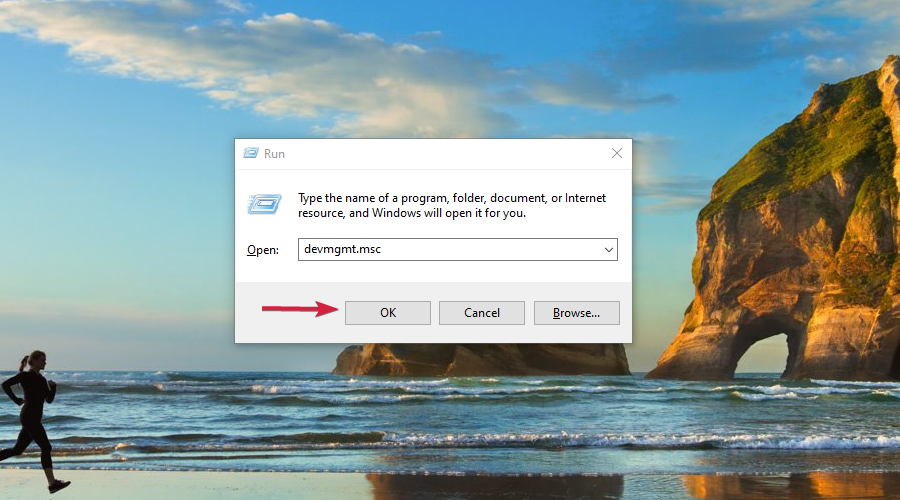
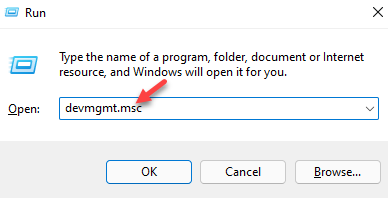
Right-click on Start and select Device Manager.
Go to the Universal Serial Bus controllers section and expand the menu.
Right-click on your faulty driver, the one with the yellow exclamation mark next to it.
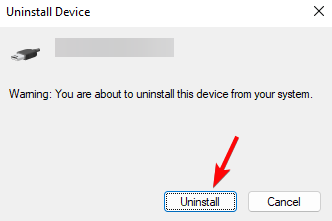
Choose Uninstallfrom the menu.
Click Yes to continue with the uninstallation.
If you have more than one faulty driver, you should repeat the steps for each one.
Reboot your PC to save the changes.
2. Download and install the driver
Once again, open the Device Manager as in the previous solution.
Right-click on your faulty driver but this time, click ok Update driver.
Select the first option Search automatically for updated driver software.
Windows will now try tofind and installthe latest driver for your PC.
Follow theon-screen instructionsto finish the installation process.
After the update is complete,reboot your device.
You can also try Outbyte Driver Updater, a driver updater tool that will automatically perform the procedure if you do not want to go through the above steps to update your faulty drivers.
Even more, by choosing this software, you won’t put your computer at any risk by installing the wrong drivers and having to deal with errors all over again.
3. Run SFC scannow to fix the corrupt system files
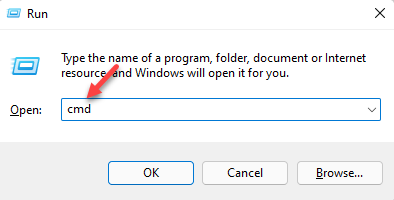
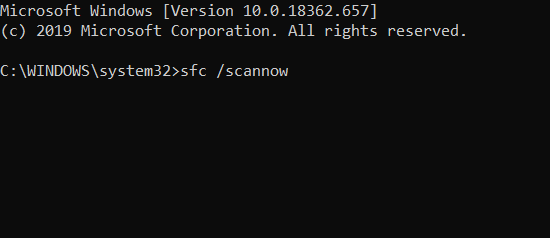
In the Search box, type command prompt and click on Run as administrator.
After Command Prompt starts, enter the following:sfc/scannow
Press the Enter button and the System File Checker process will now start.
Because the repair process can take a while, wait patiently while it completes and don’t close the window.
Once the scanning gets completed, restart your computer and check whether the error Code 52 is still appearing.
If the scannow command has stopped before the process finished, there’s no reason to worry about. As always, we’ve got an easy fix for you.
4. Remove USB Upper Filter and Lower Filter entries
Open the registry by pressing the Windows + R keys and typing regedit in the run box.
Hit Enter and navigate to: HKEY_LOCAL_MACHINESYSTEMCurrentControlSetControlClass{36FC9E60-C465-11CF-8056-444553540000}
On the right pane, locate and right-click on the UpperFilters and select Delete option.
Repeat the process for the LowerFilters as well, if you have the option.
Restart your computer to save changes.
5. Perform a System Restore
Press Windows + R on your keyboard to open the Run box.
Type sysdm.cpl in the search box and click OK.
Go to the System Protection tab.
Click on the System Restore option.
Click on Next and choose the desired System Restore point and follow the on-screen instructions to complete the system restore.
Check if the error still persists.
System Restore is a recovery feature in the Windows operating system that allows you to restore your PC to an earlier state.
You can do a restore point manually, but you should know that your PC will usually create them on its own when installing new software, driver, or if you update your system.
6. Disable driver signature enforcement
In the Search box, type command prompt and click on Run as administrator.
When Command Prompt starts, enter the following lines:
Note that it is required tou00a0suspend oru00a0turn off BitLockeru00a0for the OS drive and to disableu00a0Secure Boot before disabling the driver signature enforcement.
7. Disable Automatic Hardware drivers update
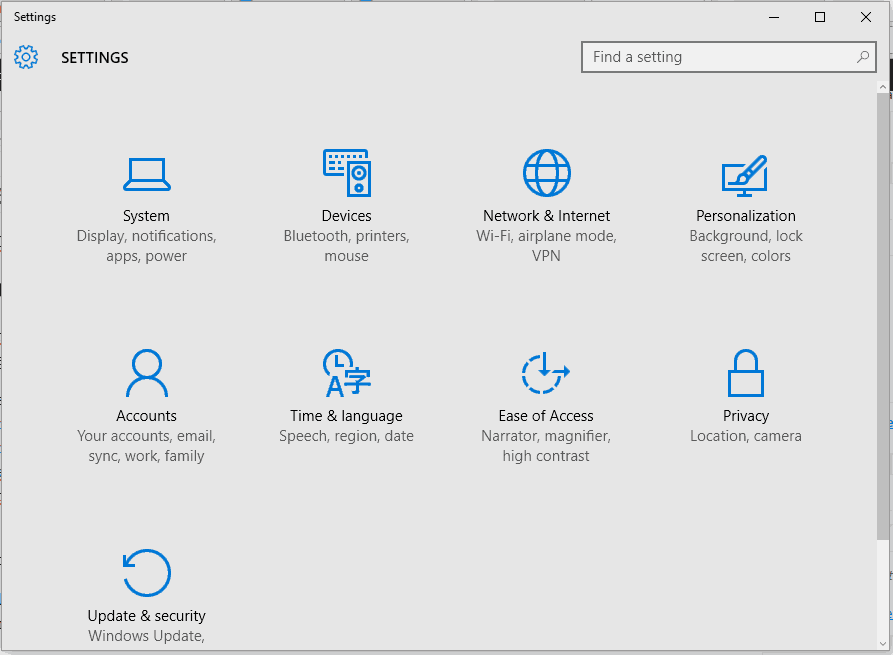
Go to Start and click on Settings.
Under the System option, scroll down until you find About and click on it.
Next to Related links, select the Advanced System Settings option.
In the new windows, go to the Hardware tab.
Click on Device Installation Settings, select No, then Apply changes.
This will prevent Windows from interfering with your hardware drivers in future updates, while keeping important security updates.
8. Boot your PC and disable driver signing enforcement
Press the Start button and open Settings.
Under the System option, scroll down until you find Recovery and click on it.
Press on Restart now next to the Advanced startup.
A pop-up will appear where you’ll need to click on Restart Now again.
In theChoose an optionscreen, select theTroubleshootoption.
Now click on Advanced options.
SelectStartup Settings.
Press on the Restart button.
Your PC will restart and show you different boot options. Press the 7 or F7 key to Disable driver signature enforcement.
The computer will now automatically restart with the driver signature enforcement disabled.
The default boot location is none other than your hard drive where the operation system is installed. However, if the above method isn’t for you, have a look at our guide and discover how simple it is to boot from USB too.
9. Reset your BIOS
Follow the above steps until you reach to the blue screen with Advanced options, or step 7. Now, select UEFI Firmware Settings.
Click Restart to continue.
Your computer should shut off and then load a setup menu. Look for the Reset the system button.
Because the interface may vary, pay attention to phrases such as Load Setup Defaults or Load Default Options. Selecting one of these options will open a dialog box. Select Yes and your default settings should be restored.
Now simply exit and startup your PC as usual.
If you are having trouble resetting your BIOS, you should definitely check out this article and find out how to easily update your BIOS. This brings you access to new features and increased stability.
What happens if I disable driver signature enforcement?
As previously said, this Windows feature pretty much guarantees you that your drivers are authentic and unbroken by malicious apps.
A digital signature is an integral part of any operating system, meant to protect your system and prevent you from installing unverified drivers.
When it comes to Windows, the OS actually requires that a driver belongs to a verified developer and that the driver understands that it simply cannot be fraudulent.
If you disable signature enforcement, there will be nothing to prevent you from installing broken, poorly-written, or malicious drivers, which can easily crash your system.
You can also temporarily shut it down, as the ongoing lack of verification can lead to negative computer performance.
So if you don’t wish to disable driver signing permanently, or want to know how to enable it back on, you should check out our full comprehensive guide on driver signature verification.
We hope that this guide has successfully helped you in resolving the issue and your PC is now error-free. Even more, learn all about the latest Windows 11 preview build 22000.65 and be on the lookout for its bugs but also its newest features.
Use the comments section below and tell us which method has helped you fix the problem. If you have any suggestions or know of another solution, then feel free to share them with us as well.
Windows 11 is the latest OS offering from Microsoft, and it has undoubtedly drawn a lot of users. But how does it compare to other user-friendly operating systems? Many wanted us to do a Windows 11 vs. Linux comparison, and here we are with it.
The market share for Windows 11 has been on a steady rise over the last few months, with many upgrading the OS. But the latest iteration is yet to match the success achieved by its predecessors. That’s a discussion for another day. For now, let’s focus on Windows 11 vs. Linux.
Windows 11 vs Linux
1. User interface
Windows 11 brings a fresh user interface with a centralized Taskbar, while the Linux user interface can significantly vary based on the distribution and the desktop environment you’re using.
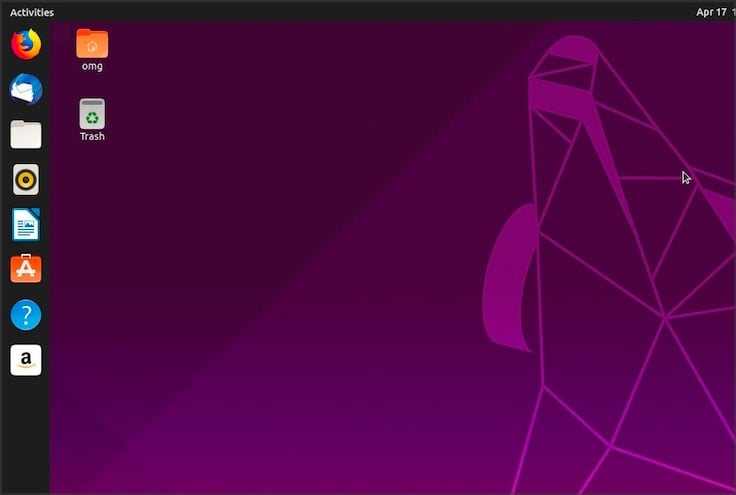
Most Linux distributions have rounded corners, so they look a bit like Windows 11, but they usually have the menu in the bottom left corner of the screen.
Speaking of Start Menu, the Windows 11 Start Menu was streamlined and did not come only with the pinned applications and recently used apps and files.
On the other hand, the Linux menu can be a bit cluttered since you can access most applications from the menu. While this is useful, it might feel just a bit overwhelming to some users.
Some distributions have the dock on the left side of the screen, and some allow you to center your dock at the bottom, like the Windows 11 Taskbar.
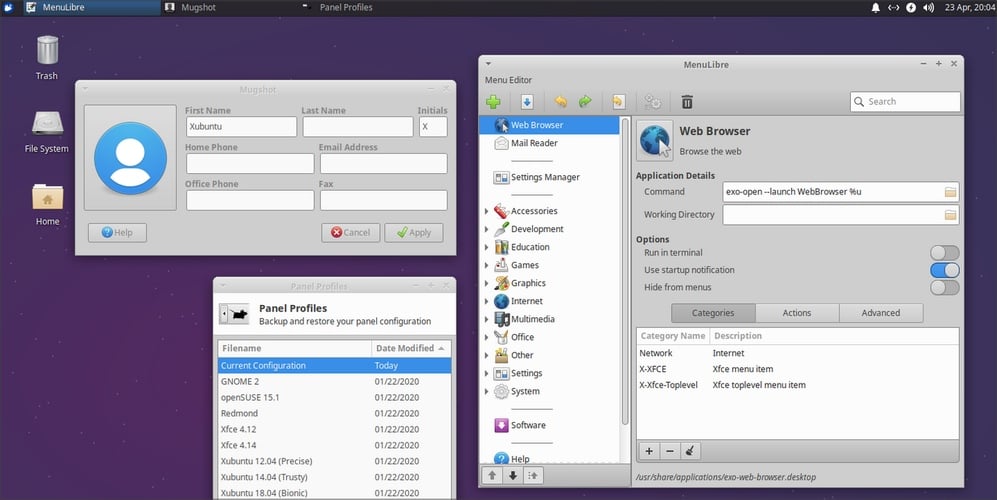
As for the general look, it all comes down to personal preference, but some lightweight distributions, such as Xubuntu, might not look as visually appealing as other distributions.
This is why it’s hard to compare the visual interface between Windows 11 and Linux distributions since distributions are so different.
Regardless of the distribution you’re using, the interface on Linux is consistent and minimalistic. Certain distributions might even look better than Windows, but that all comes down to personal preference.
It’s worth mentioning that Windows 11 is customizable, and there are many great Windows 11 themes that you can download for free.
If you’re interested more in the technical differences, don’t hesitate to discover what sets apart Windows kernels from Linux kernels from our dedicated guide. The Linux code is known to be better for development, it has a monolithic architecture. and might surprise you when it comes to its multi-user support capabilities.
2. Architecture
The Windows Architecture has two unique layers, i.e., User mode and Kernel mode.
While the User mode has integral subsystems for fixed system support processes, service processes, the security subsystem, user applications, and environment subsystems, the Kernel Mode consists of Executive, microkernel, kernel-mode drivers, and the hardware abstraction layer.
Windows Architecture main components
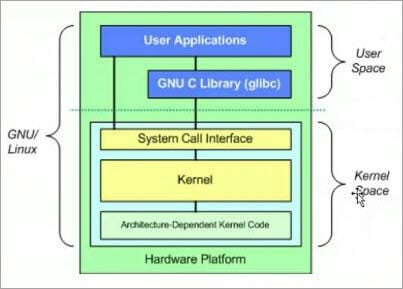
At the same time, Linux Architecture is comprised of User space and Kernel space, these layers include the following main components: Hardware, kernel, System call interface, as well as User applications or utilities.
Linux Architecture main components
3. System requirements
When we compare the system requirements for Linux and Windows 11, the former is the clear winner due to its ability to run on a wide range of PCs, even those with relatively basic configurations.
The Windows 11 OS has long been criticized for its fairly high system requirements, which made many users ineligible for the upgrade. We have drawn a comparison of Windows 11 vs. Linux regarding system requirements to help you get a clear picture.
Tip
These are the minimum requirements for both operating systems, not the recommended ones. For the best performance, we recommend going with better configurations.
While the hardware requirements aren’t that high, the biggest change is the requirement for a TPM 2.0 chip, and many early adopters encountered a TPM 2.0 error while trying to install Windows 11.
Linux has no such requirements, and certain Linux distributions are optimized for low-end PCs, so the hardware requirements will vary depending on the distribution that you’re using.
Windows 11 also dropped support for 32-bit systems, so if you’re on an older 32-bit system, Linux is your way to go.
When comparing Windows 11 vs Linux in terms of hardware requirements, Linux comes with more variety, and it offers better support for older computers.
5. Security
When it comes to Windows 11 vs. Linux security, Linux is the champion for several reasons. First off, almost 73% of users are on Windows, and that’s a massive number of users that hackers can exploit.
On the other hand, the Linux user base is much smaller, with about 2.6% of the market share, and the number of hackers and potential victims is much smaller.
Global market share held by Linux, from June 2016 to June 2021 (Statista)
Since Windows is the dominant platform, it’s no wonder that most malware is created specifically for Windows. It’s worth noting that there are a couple of viruses on Linux, but you won’t need to use antivirus software like in Windows.
Lastly, most malware is in .exe format, and you’ll infect your PC when you run the malicious .exe file. Linux can’t work with .exe files and can’t run them, so if you ever download a malicious Windows file, it won’t run on Linux.
In terms of numbers, about 74.8 million different threats are available for Windows, while that number is a lot less on Linux.
Number of threats available for Windows during the past 7 years (AV Test)
As you can see, the main advantage of Linux lies in its smaller userbase, but despite that, Linux limits access to the root or administrator account, so even if you get hacked, without the administrative credentials the hacker won’t be able to do much.
In terms of user privacy, Windows might collect some of your data for analysis unless you turn that off manually.
We wrote about Windows 10 privacy issues in the past, and we’re doubtful that Windows 11 will address these privacy concerns.
On the other hand, Linux won’t ever collect your data or send it for analysis without your knowledge and consent, so you can rest assured that your privacy is protected when using Linux.
When comparing Windows 11 vs. Linux regarding security and privacy, Linux is the clear winner. However, Windows 11 is also a safe choice to consider using, as long as you choose reliable Windows 11 antivirus software.
6. Gaming
When it comes to Linux vs. Windows 11 gaming, Windows 11 is the clear winner, especially with the addition of the Xbox Game Pass for Windows 11.
This isn’t the only new feature, and Windows 11 plans to improve game performance and shorten loading times with the DirectStorage feature’s introduction.
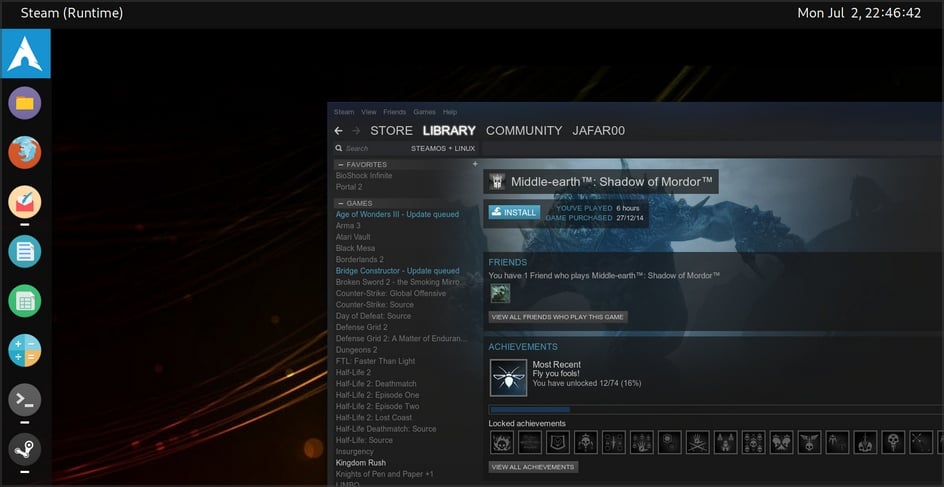
Although Steam works with Linux, not all titles are available, and some might not be as optimized for Linux as their Windows counterparts.
You can circumvent this by using a compatibility layer called Wine, but it took time to configure games for Linux, if it at all could be achieved. But Steam recently released Proton, a preconfigured forked version of Wine, to seamlessly download and play your favorite Windows games on Linux.
Lastly, Linux doesn’t support DirectX API, which causes compatibility issues with most games. Although Linux is capable of gaming, the results vary, which makes Windows 11 a go-to choice for many when it comes to gaming.
We will have to wait and see how other platforms work out the intricacies, but until some major transformations are brought in, Linux is no match for the Windows ecosystem.
7. Application compatibility
With this one, just like with gaming, Windows 11 is a clear winner. Being the dominating operating system on the market, most developers are optimizing their software for Windows exclusively.
Linux doesn’t work with .exe files, meaning that you can’t even run Windows applications on Linux without Wine or a virtual machine.
This means that, technically, Windows applications can work, especially if you’re using Wine, but the results can greatly vary depending on the application that you’re trying to run.
Linux has alternatives for most regular Windows applications, and while those applications get the job done, they lack the familiarity and ease of use that Windows applications have.
On the other hand, Microsoft has plans to bring Linux GUI app support to Windows, so we expect to see Linux apps running on Windows 11 without issues.
Moreover, WSL2 enables Linux GUI applications (X11 and Wayland) to feel natural when used on Windows. Those using Microsoft’s Windows Subsystem for Linux (WSL) are entitled to expect a fully integrated desktop experience.
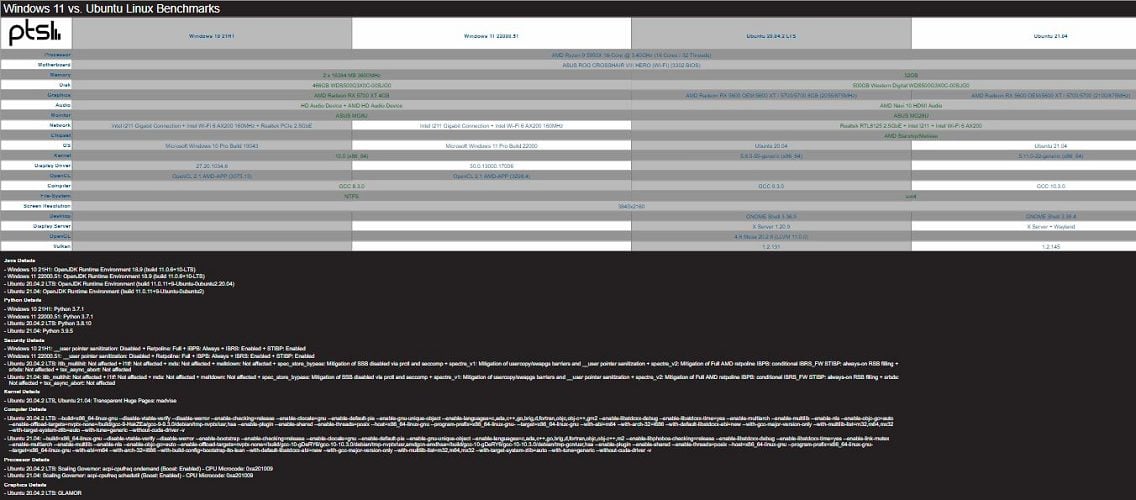
The confirmation comes from a few early benchmarks of the Windows 11 22000.51 build against Windows 10 and Ubuntu 20.04.2 LTS/Ubuntu 21.04 on the same hardware.
All versions of Windows are closed-source applications, meaning that the source code is available only to Microsoft, and only Microsoft can modify how Windows works.
Windows 11, just like all other versions before it, is proprietary software, so to use it on a single PC, you’ll need to purchase a license.
However, Windows 10 users should be able to download Windows 11 as a free upgrade, but the pricing is still unknown for new users.
On the other hand, Linux is completely open-source, and the software is maintained by a community of developers, which means that anyone with enough skill can customize Linux according to its needs.
Being open-source software, Linux is completely free, and you can install it on as many computers as you want for both personal and business uses without any restrictions.
As for applications, there are many free and open-source applications for Windows, but many require a license to use them. On the other hand, most Linux applications are entirely free and can be used without restrictions.
9. Ease of use
Windows 11 is just like its predecessors: straightforward to use, and to do so, you don’t have to know how to work with the command line.
All settings are accessible from the graphical interface, allowing you to change any setting easily. If you’re an advanced user, you can also use Windows PowerShell to modify settings with the command line.
Installing applications is pretty simple you have to download the setup file, double-click it and follow the instructions on the screen.
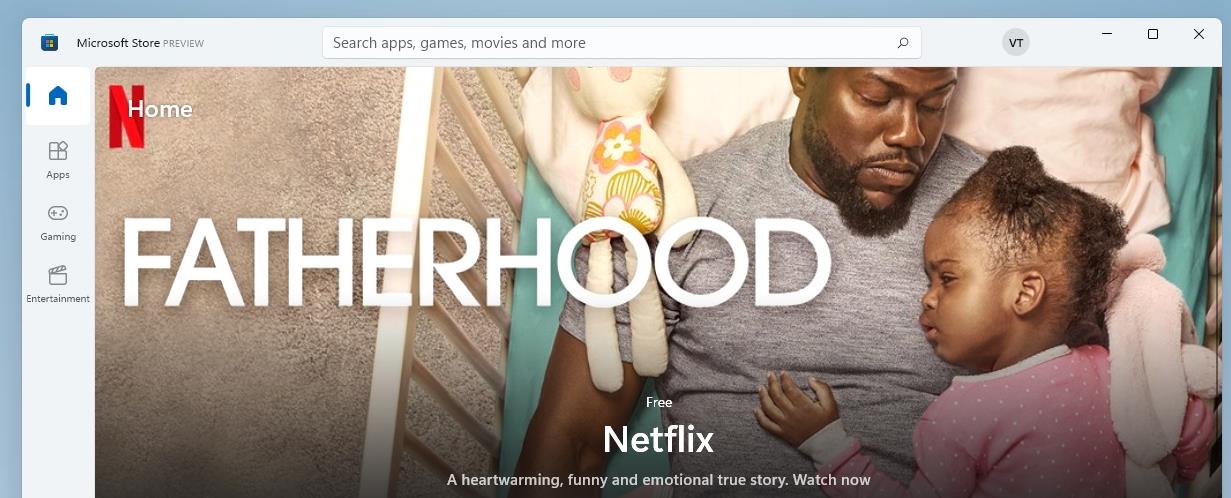
With the recent changes to the Microsoft Store, you should be able to install Win32 applications directly from it, so you won’t even have to use the browser to download setup files.
Linux, on the other hand, does require a bit of technical knowledge. While the operating system has a store that you can use to download apps, some apps are only available for download through the Terminal.
Installing apps is simple as long as you know the download location of the app that you want to install, and it’s faster than downloading the installation file manually and running it.
As for configuration, you might have to change certain settings in Linux through the Terminal. This can be a bit daunting to first-time users, and it does have a learning curve to it.
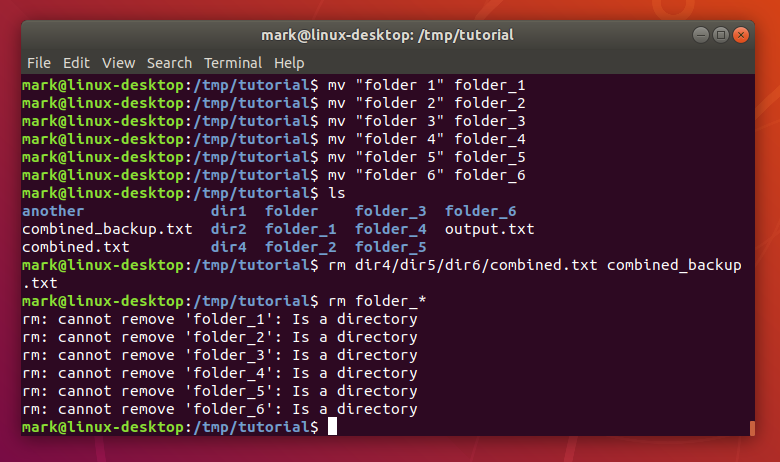
Deleting/removing files and folders through the Terminal (Ubuntu)
If you’re not familiar with the Terminal, Windows has its own Windows Terminal that works similarly to the Linux Bash, so you might want to give it a try and see how it works.
As for the Windows 11 vs Linux ease of use debate, Windows is a more user-friendly solution than Linux, allowing you to easily change settings and install apps without ever having to open the command line.
If you want to try Linux on your Windows PC, you can do so easily with Linux emulator software and see which operating system is easier to use.
10. Support for Android apps
Linux doesn’t have support for Android apps natively, and the only way to run them is to use a compatibility layer such as Anbox. This isn’t a perfect solution, but it should work on any PC with enough power to run it.
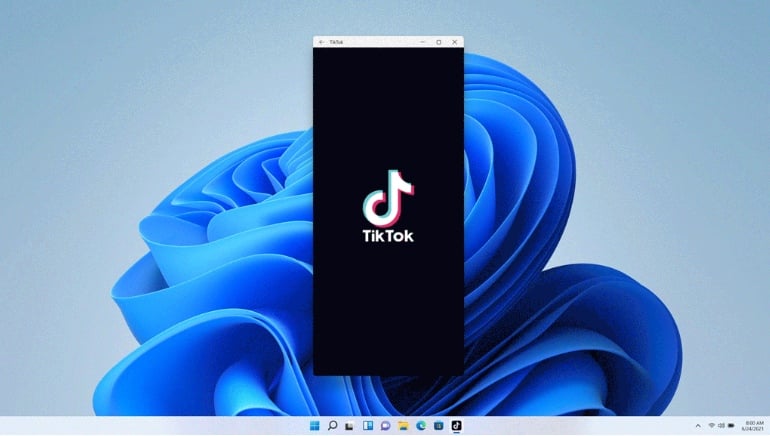
On the other hand, Windows 11 will natively support Android apps, so you won’t have to use third-party applications or emulators to run it.
TikTok app running directly on Windows 11 (Microsoft)
Android apps will utilize Intel Ivy Bridge technology, but you should be able to run Android apps even if you’re using AMD CPU.
Windows 11 vs. KDE
KDE is a popular desktop environment for Linux, and many users are wondering how Windows 11 is compared to KDE.
All that we said about Linux in the previous section also applies here to KDE. However, there is one similarity between KDE and Windows 11: the user interface.
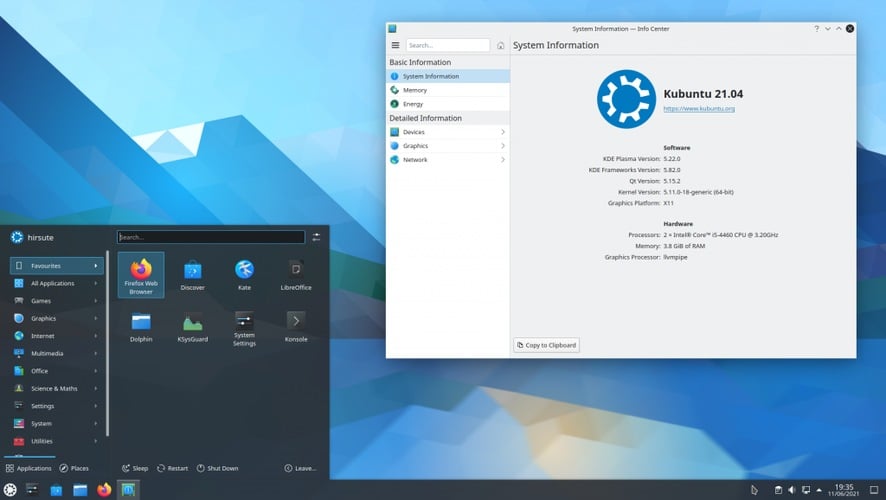
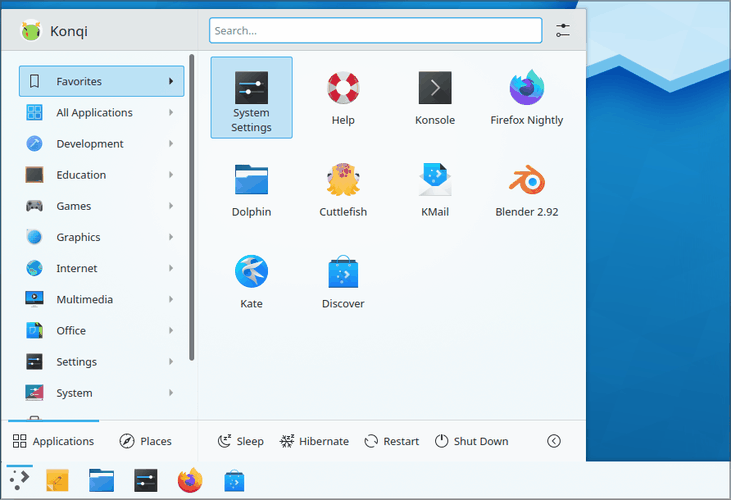
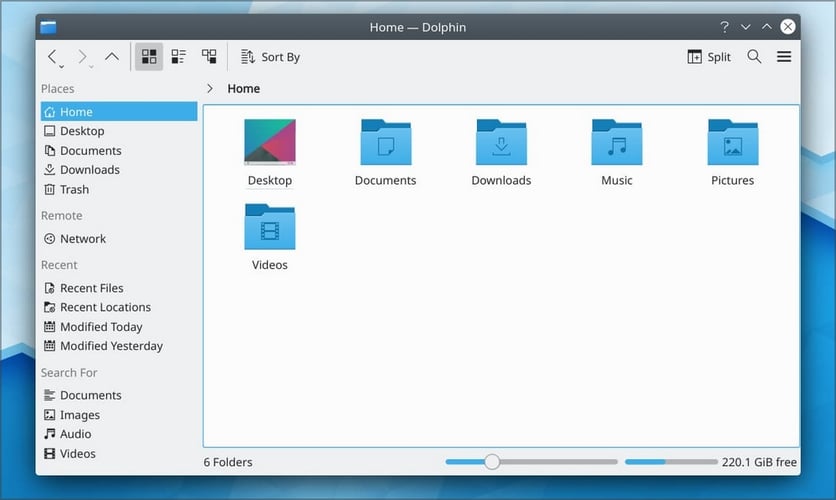
The menu is slightly similar to the new Start Menu from Windows 11 with its big icons, but unlike the new Start Menu, the menu in KDE has a sidebar that you can use to access applications and settings.
The interface is highly customizable, and you can even set the dock to be in the center like on Windows 11 or macOS.Widgets are also available in KDE; you can add various widgets from the widgets panel to your desktop.
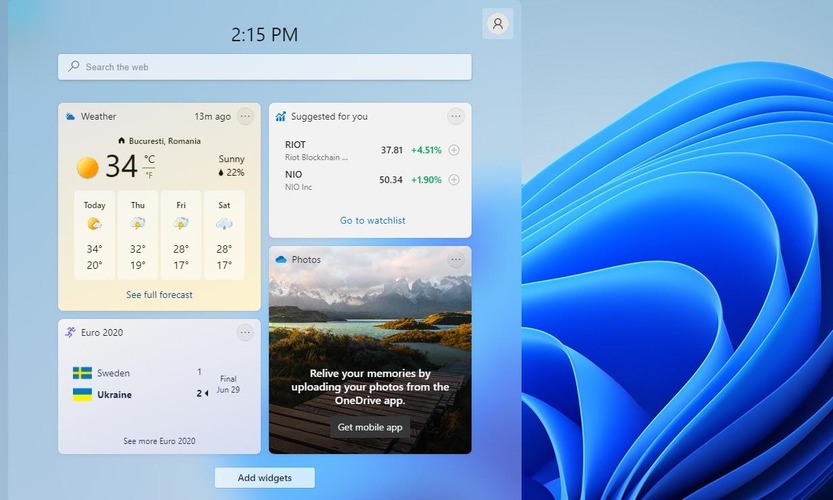
Unlike in Windows 11, KDE widgets don’t have a separate panel, so they are always on your desktop, like in the older versions of Windows.
It seems that Windows 11 widgets are designed to show you information from other online services, while in KDE, the widgets are used to show you mostly system information or act as shortcuts.
As for Windows, KDE seems to have slightly rounded top corners while keeping the bottom corners sharp.
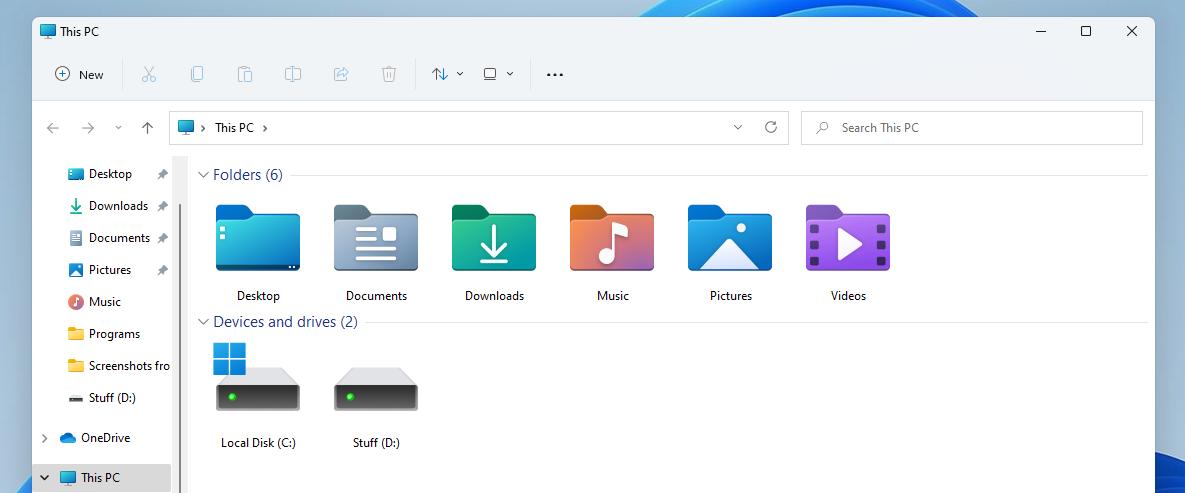
Microsoft has revamped File Explorer and removed all Ribbon menus, and instead of them, File Explorer now has a set of most used functions in the icon toolbar.
This is somewhat similar to what KDE and other Linux distributions are doing, and with a fresh set of icons and a more streamlined File Explorer, Windows 11 might look just a bit like KDE.
While the two systems might have some visual similarities, picking the better one depends on your needs, and the pros and cons are the same as with the Windows vs Linux debate.
In terms of visual interface, KDE might look a bit more minimalistic and streamlined, and some users might prefer that.
Other than that, it comes down to if you’re Windows or a Linux user and what you expect to get from an operating system.
Windows 11 vs GNOME
GNOME or GNU Network Object Model Environment is a great open-source Linux desktop environment with a unique and minimalistic design. And if you’re looking for a new Linux distribution to try, the new version of GNOME might be just what you need.
This version, called GNOME 40, was released recently, and it has a lot of visual similarities with Windows 11.
The interface has a minimalistic design and rounded corners, so it resembles Windows 11, but that’s not the only similarity.
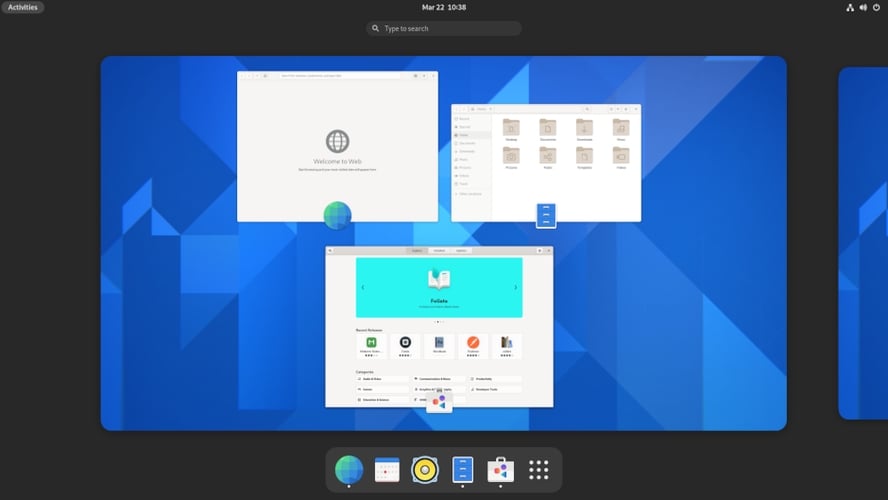
GNOME has a dock on the center bottom of your screen, and you can use it to access your apps quickly.
Source: GNOME
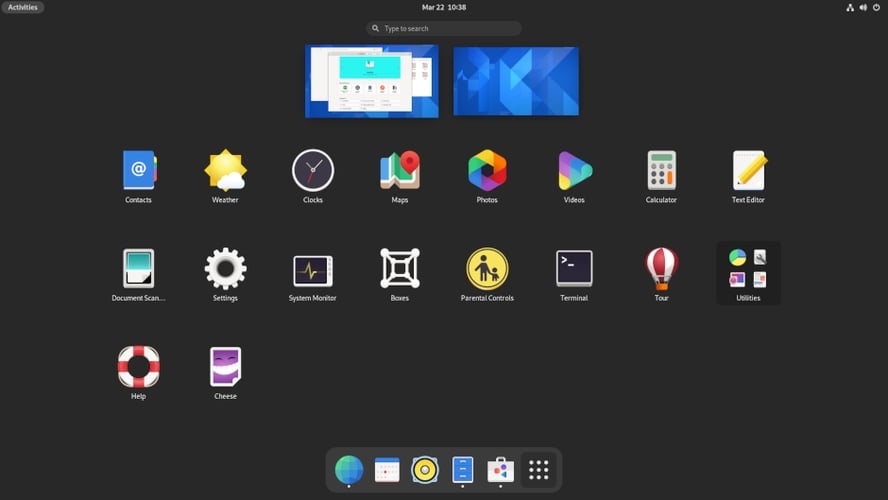
With the App grid button, you can easily find any installed application, and you can rearrange apps for quick and easy access.
Source: GNOME
Workspaces have improved in this version, and they are now arranged horizontally, which seems more intuitive. This version also has a new three-finger gesture support that allows you to switch between workspaces easily.
This is similar to the virtual desktop feature and the new gestures we got on Windows 11. However, on Windows 11, you can switch to a different virtual desktop from the Taskbar, which isn’t available in GNOME.
GNOME and Windows 11 have certain similarities, mostly in terms of visual appearance, but this is where the similarities end.
Windows 11 vs Kali Linux
Comparing Windows 11 and Kali Linux isn’t fair since Kali Linux is designed for pen-testing, and it comes with a wide array of tools to check the system for security vulnerabilities.
Some of these tools include Nmap, Wireshark, Responder, Hydra, and many others. With these tools preinstalled, you don’t have to configure anything. Start Kali Linux, and you can get to work.
Xfce desktop environment in Kali Linux (Source: Kali)
Kali Linux can also be run on Windows using a Windows Subsystem for Linux, so you can use Kali tools seamlessly with other Windows applications.
Kali also comes with several desktop environments, and you can choose between Xfce, GNOME, and KDE, depending on your preference.
Ubuntu, a great choice for beginners
In our opinion, Ubuntu or any other distribution based on Ubuntu is an ideal choice for beginners. We find it so user-friendly, thanks to its easy installation and intuitive desktop, while the LTS releases are supported with security updates for no less than five years from the initial date.
Moreover, we see it as the first turn-to choice for those who also like the idea of not exploring on their own when others are eager to step in whenever you need to get things on the right track.
If you happen to experience certain issues, rest assured that all you need to do is to be active on forums on search the web, and you’ll find someone else who’s been in your shoes. There’s genuinely a Ubuntu community out there, just waiting for you.
If you have used both, we would love to hear your take on Ubuntu vs. Windows 11 performance.
Can I use Linux and Windows on the same PC?
Using Linux and Windows on one PC is incredibly simple; to do that, you just need to dual boot Windows with another OS. By doing so, you’ll create a special partition with Linux on it and boot from it when needed.
We have to mention that with this method, there isn’t a quick way to switch between systems, so if you want to switch back to Windows from Linux, you need to restart your PC and boot again.
You can also use virtual machine software and run Linux in a virtual environment inside Windows. However, this method can put an extra load on your hardware because you’ll be running two operating systems simultaneously.
If you need to multitask and switch between Linux and Windows quickly, virtual machine software is a better option than dual booting.
Can I run Windows files on Linux?
Many file extensions are universal, and they will work on both Linux and Windows platforms. This includes images, videos, music, text, or document files.
As long as you have the software that can open a specific file type, you can open that file on both Windows and Linux.
EXE and MSI files won’t work on Linux out of the box, but you might be able o run them if you install Wine software. Once you install Wine, you can run the aforementioned file types by using these commands in the Terminal:
wine /path/to/windows_sofware.exe
wine msiexec /i /path/to/windows_installer.msi
Closing thoughts on Windows 11 and Linux
Now that we’ve compared Windows 11 vs. Linux, the question remains: is it better to use Windows or Linux? And the answer depends solely on your needs.
Are you using Windows software exclusively, and do you like this operating system? If so, Windows 11 is the way to go.
If you’re comfortable with using alternative applications, or you’re tech-savvy, and want a secure, private, and completely free operating system, maybe you should try Linux.
The Windows 11 final version will be officially released soon, but many early adopters are testing the Windows Insider version, and we recently performed an in-depth review of Windows 11 build 22000.71.
Windows always had a rivalry with Linux, and we already compared Windows 11 vs Linux in one of our previous guides.
In today’s article, we’re going to compare Windows 11 with Ubuntu and see which is a better and more secure operating system.
Windows 11 vs Ubuntu, what are the main differences?
User interface
Windows 11 comes with a fresh look that adds rounded corners to all user interface elements. Ubuntu does have some similarities with Windows 11 since both have rounded corners for the user interface elements.
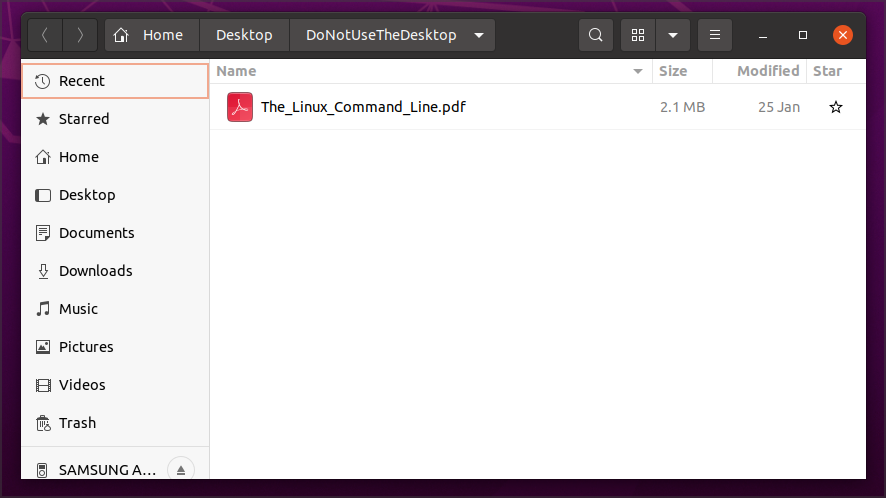
The new OS from Windows made some changes to the File Explorer so it looks more streamlined without any unnecessary clutter, so it’s somewhat similar to the file manager on Ubuntu in terms of appearance.
The dock on Ubuntu is located on the left side by default, but you can customize its position with ease, and you can even make it centered like on Windows 11.
Sadly, Windows 11 doesn’t offer much customization in this regard, since the Taskbar is locked in the bottom position, so you can’t move it like in previous versions of Windows.
Start Menu has been revamped, it’s more streamlined and it shows only pinned apps and recently used files and apps. Of course, you can reveal all apps if you want to.
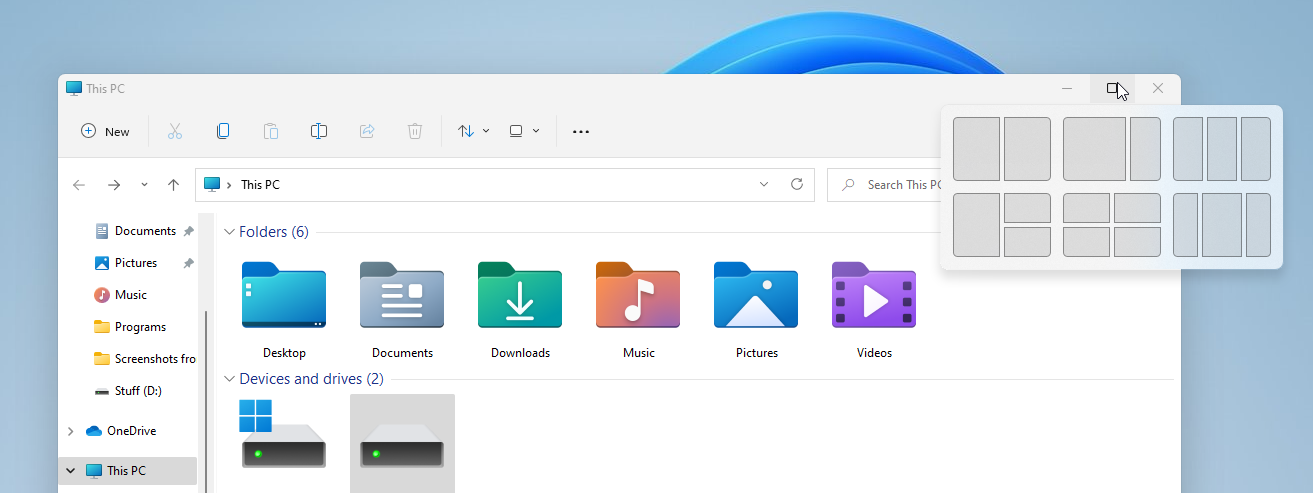
Snap groups are also present, allowing you to easily return to the previously used snap layout. Unfortunately, Ubuntu doesn’t support window snapping without third-party extensions.
As for the interface, although Ubuntu is more streamlined and minimalistic, some might find its interface dull, but that’s all up to your personal preference.
In terms of multitasking, we feel that Windows 11 is a better option since it supports window snapping out of the box.
TPM is a requirement for Windows 11, and if Microsoft fixes this workaround, you’ll have to buy a TPM chip or invest in a TPM motherboard to be able to install the new OS from Microsoft.
The other hardware requirements include what we could expect from a new OS, but keep in mind that certain older CPUs won’t work with Windows 11, so be sure to check if your CPU is on the list of supported devices.
It’s also worth mentioning that Windows 11 will drop support for the 32-bit processors, so the only way to use it is with a compatible 64-bit CPU.
As for Ubuntu requirements, they aren’t as demanding, and the latest version of this OS should run without any problems on any dual-core PC that has a dedicated graphics card with at least 256MB memory.
This varies drastically depending on the desktop environment that you’re using, and certain distributions such as Xubuntu or Lubuntu will work on PCs that are even 10 years old.
Ubuntu doesn’t require a TPM chip and it will work with most processors, so you won’t have to worry about compatibility issues since Ubuntu distributions should work on any 32-bit or 64-bit PC.
When comparing Windows 11 vs Ubuntu in terms of hardware requirements, Ubuntu is much more accessible. Speaking of requirements, here’s a quick rundown of both Windows 11 and Ubuntu 21.04 requirements:
Security
Windows 10 was a pretty secure operating system since it came with a built-in antivirus software called Windows Defender, and we expect the same from Windows 11.
On the other hand, Ubuntu doesn’t require antivirus software since Linux has a considerably smaller userbase, so there’s not much malware developed specifically for Linux.
Currently, Windows holds almost 73% of the desktop market share, while Linux holds about 2.6%. This means that the Windows userbase is a lot larger with more potential victims.
Global market share held by operating systems for desktop PCs – Source: Statista
It’s also worth noting that Ubuntu can’t run .exe files, so even if you download a virus that is hidden in the .exe file, you can’t run it on Linux.
Lastly, all programs on Linux are run with normal user privileges, so even if your PC is infected, the application won’t have administrative or root access, so it can’t make any major changes to your PC.
Lastly, Ubuntu is open-source and privacy-oriented, so you can rest assured that it isn’t collecting your data. On the other hand, Windows 10 has privacy issues, and we’re looking to see how will Windows 11 address that.
When comparing Windows 11 vs Ubuntu in terms of security, Ubuntu is a better choice since it’s more secure by the design, it has less malware, and it’s open-source, with a strong focus on user privacy.
Application support
Application support is the biggest difference when comparing Windows 11 to Ubuntu. Windows 11 supports Win32 apps, and since Windows is dominating the market share, most applications are made specifically for Windows.
Windows 11 is also bringing better app support and now it will be able to run Win32, .NET, UWP, Xamarin, Electron, React Native, Java, and Progressive Web Apps with ease.
To top it off, Windows 11 will bring native support for Android apps, so you should be able to run them without using Android emulators.
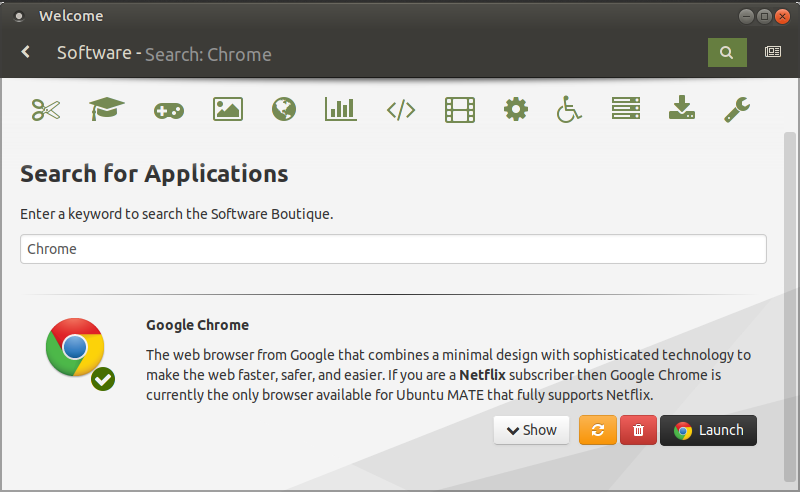
This is a great move, that will allow the Microsoft Store to act as a download hub for all types of apps, similar to the Software Center that Ubuntu and other distributions have.
Ubuntu and other Linux distributions can’t handle Win32 apps, and the only way to run them on Ubuntu is to use a compatibility layer called Wine.
While Wine works with Windows apps, it’s not the most reliable solution. The same goes for gaming, and while Ubuntu can run certain games, don’t expect all games to run smoothly like on Windows 11.
Ubuntu does have alternative versions for all major Windows apps, but those alternatives might not be always as good as their Windows counterparts.
On the other hand, Windows has a Windows Subsystem for Linux, and Windows 10 can run Windows GUI apps, so expect that to be the case with Windows 11 as well.
If we compare Windows 11 vs Ubuntu and the app support, it’s clear that Windows 11 is the winner since it supports Win32 apps as well as Android apps.
However, if you prefer free and open-source software, Ubuntu might be a better choice, but keep in mind that you might have to say goodbye to some of your favorite Windows software.
Ease of use
Windows 11 is incredibly simple to use, and if you used Windows 10 or any other version, you won’t feel any different when using Windows 11.
The new interface is streamlined, the Start Menu is decluttered, and Live Tiles are replaced with widgets, and since they have their separate panel, they won’t take any space in your Start Menu.
The good news about this feature is that you can easily disable any widgets, and thus customize your experience even more than changing the wallpaper and sound scheme.
Ubuntu is a bit more complex, and it does have a learning curve. The operating system does require a basic knowledge of the Terminal, so be sure that you know at least the basic commands.
The Terminal is used for installing apps and dependencies, and sometimes you need to use the Terminal to change certain settings.
Example of how the Ubuntu terminal looks – Source: Ubuntu
This might sound daunting at first, and it’s not as hard as it sounds, but it does require getting used to it. On the other hand, Windows 11 doesn’t rely on the command line at all, and you can change most settings from the GUI.
Of course, advanced users can use the command line to change settings on Windows 11, but most average users won’t ever have to open the command line, which isn’t the case with Ubuntu.
If we compare Windows 11 vs Ubuntu in terms of ease of use, we would have to say that Windows is much simpler to use, since it doesn’t require you to use the command line.
On the other hand, if you’re an advanced user and you’re no stranger to the command line, perhaps Ubuntu would be perfect for you.
Pricing
Windows 11 is proprietary software which means that you need to purchase a license to install it on a single PC. If you have multiple PCs in your home, this means that you need to purchase multiple licenses.
However, Windows 10 users should be able to download Windows 11 as a free upgrade, while the new users will have to purchase the license. So far, no information is available about pricing, but hopefully, Microsoft will disclose that soon.
The same goes for software on the Windows platform, and while there are many open-source and freeware applications, the majority of apps require a license if you want to use them.
On the other hand, Ubuntu is completely free, and you don’t have to purchase any license to use it, plus you can install it on as many computers as you want, both for personal and commercial use.
Most applications on the Linux platform are also open-source and free which means that no license is required, so you can use them almost without any restrictions.
If your main concern is the price, Ubuntu is a better choice since it’s completely free, and it can be installed on multiple PCs without any restrictions.
However, if you already have a Windows 10 license, you should be able to upgrade to Windows 11 for free.
Can you run Ubuntu on Windows?
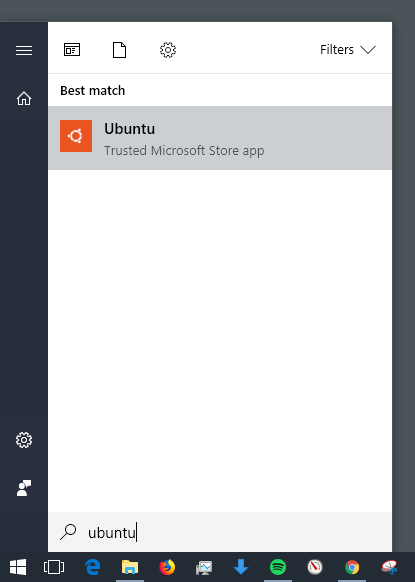
Yes, you can run Ubuntu on Windows by using virtual machine software. Do keep in mind that this method might be demanding on your hardware because you’ll be running Ubuntu inside Windows.
Ubuntu doesn’t have native support for Android apps like Windows 11. However, it can still run Android apps by using specialized software such as Anbox.
It is safe to say that if you’re planning on using both Android apps and the native system applications, it would be recommended that you try Windows 11, which offers native support for Android.
This is entirely up to the user’s preference, and all versions of Ubuntu are more or less the same, with the only difference being the desktop environment.
The original Ubuntu and Kubuntu are the best-looking Ubuntu distributions, but our personal favorite is Lubuntu due to its modest hardware requirements.
Making a decision about which Ubuntu to choose will be entirely defined by your needs, but no matter what option you choose, it will probably not disappoint you.
Conclusion
Ubuntu and Windows 11 have their share of similarities, most notably in the user interface with its minimalistic design and rounded corners.
Another similarity is the dedicated app store that you can use to discover and download software.
Other than that, the two operating systems are completely different in terms of app support, security, and privacy.
Ubuntu offers better compatibility with older PCs, it’s more secure, but it can’t run Windows apps without jumping through hoops, and it’s can’t handle gaming as efficiently as Windows.
Ubuntu comes with a learning curve, so if you’re not a fan of the command line, maybe Ubuntu isn’t for you.
There’s no clear winner in Windows 11 vs Ubuntu comparison, and it all falls to your needs and personal preferences.
If we would need to make a clear choice, we’d have to go with Windows 11 since it’s easier to use, plus, the better application support suits our needs better.
What is your operating system of choice? Let us know in the comments below.
If you are stuck with We can’t sign you in right now. Try again later (0xbba) while signing in on the Xbox app, then you are not alone. It is a quite common error and can be easily fixed.
In this guide, we will walk through the solutions to resolve this sign-in error right after discussing the potential reasons for the same.
What causes the Xbox app 0xbba error?
There might be various reasons for the issue to occur. Some of the popular ones are listed here:
Third-party antivirus – Sometimes, a third-party security app installed on your computer can prevent the Xbox app from connecting to the server, hence the error. Try uninstalling the software.
Proxy setting enabled – If you are using a proxy server to filter your network connection, it can cause an issue. Disable it to see if it helps.
Xbox app files are infected – If, somehow, Xbox app system files are corrupted or broken due to third-party app conflicts, it could prevent you from signing in.
Data & time are not correct – The Xbox app, while connecting to the server, checks whether the time and date of your computer match the region from where you connecting. If there is a discrepancy, it shows you this error.
Permissions denied – If your Xbox app doesn’t have the necessary permissions, it could cause an issue. In this case, changing registry permissions can help.
Network set to Public – If your HomeGroup network is set to Public, it can also be the reason for the issue. Try changing it to private to get rid of the error.
What can I do to fix the Xbox app 0xbba error?
Before jumping to the troubleshooting methods, let us try to resolve this issue using these quick fixes:
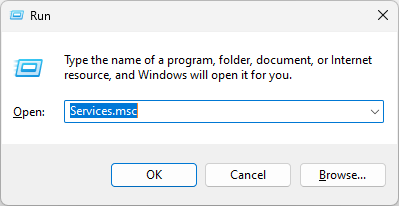
Type services.msc and press Enter to open Services.
On the Services window, locate and double-click Windows Update service.
On the next page, select the Startup type as Automatic, and under Services status, click on Start button.
Click Apply and OK.
Now repeat steps 3 to 5 for Xbox Live Auth Manager, Xbox Accessory Management Service, Xbox Live Game Save, and Xbox Live Networking Service.
5. Make changes to the Registry Editor and reset the IP
Press Windows + R to open the Run window.
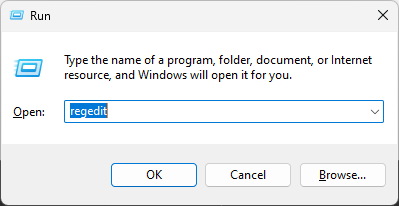
Type regedit and press Enter to open Registry Editor.
Follow this path: HKEY_LOCAL_MACHINE \ SYSTEM \ CurrentControlSet \ Control \ Nsi \ {eb004a01-9b1a-11d4-9123-0050047759bc} \ 26
Right-click on 26 and select Permissions from the context menu.
On the Permissions for 26 window, select Everyone from Group or user names, and under Permissions, place a checkmark next to Allow for Full Control option.
Click Apply and OK.
Restart your PC.
So, these are methods that you can use to fix the 0xbba error on the Xbox app. If nothing has worked for you so far, try uninstalling and reinstalling the Xbox app.
If you are facing difficulties in following any of the methods, feel free to let us know in the comments section below.
If a user account is locked out, event ID 4740 is added to domain controllers, and event ID 4625 appears on client computers. It is generated when an account is locked due to too many failed attempts.
The event has all the information about the user account that was locked out, the time of the lockout, and the source of the failed login attempts (caller computer name).
In this guide, we will discuss all the reasons for the event ID 4740 and how to find the source of account lockouts.
Tip
The event ID for an account lockout event may vary depending on the version of Windows and the security product used.
What causes Event ID 4740, a user account might be locked out?
There are various reasons for the event to be generated. Some of the popular ones are mentioned here:
Too many failed login attempts – If a user inputs an incorrect password several times, their account may be locked out to stop further attempts.
Password expiration – The account may be locked out if a user’s password has expired until they reset their password.
Group Policy settings – Your organization may have set Group Policy settings that lock out the user accounts after a specific number of failed login attempts or after a particular time.
What can I do to determine the source of the Event ID 4740 account lockout?
1. Enable Auditing for event 4740
Click on the Search icon, type Group Policy Management, and click Open.
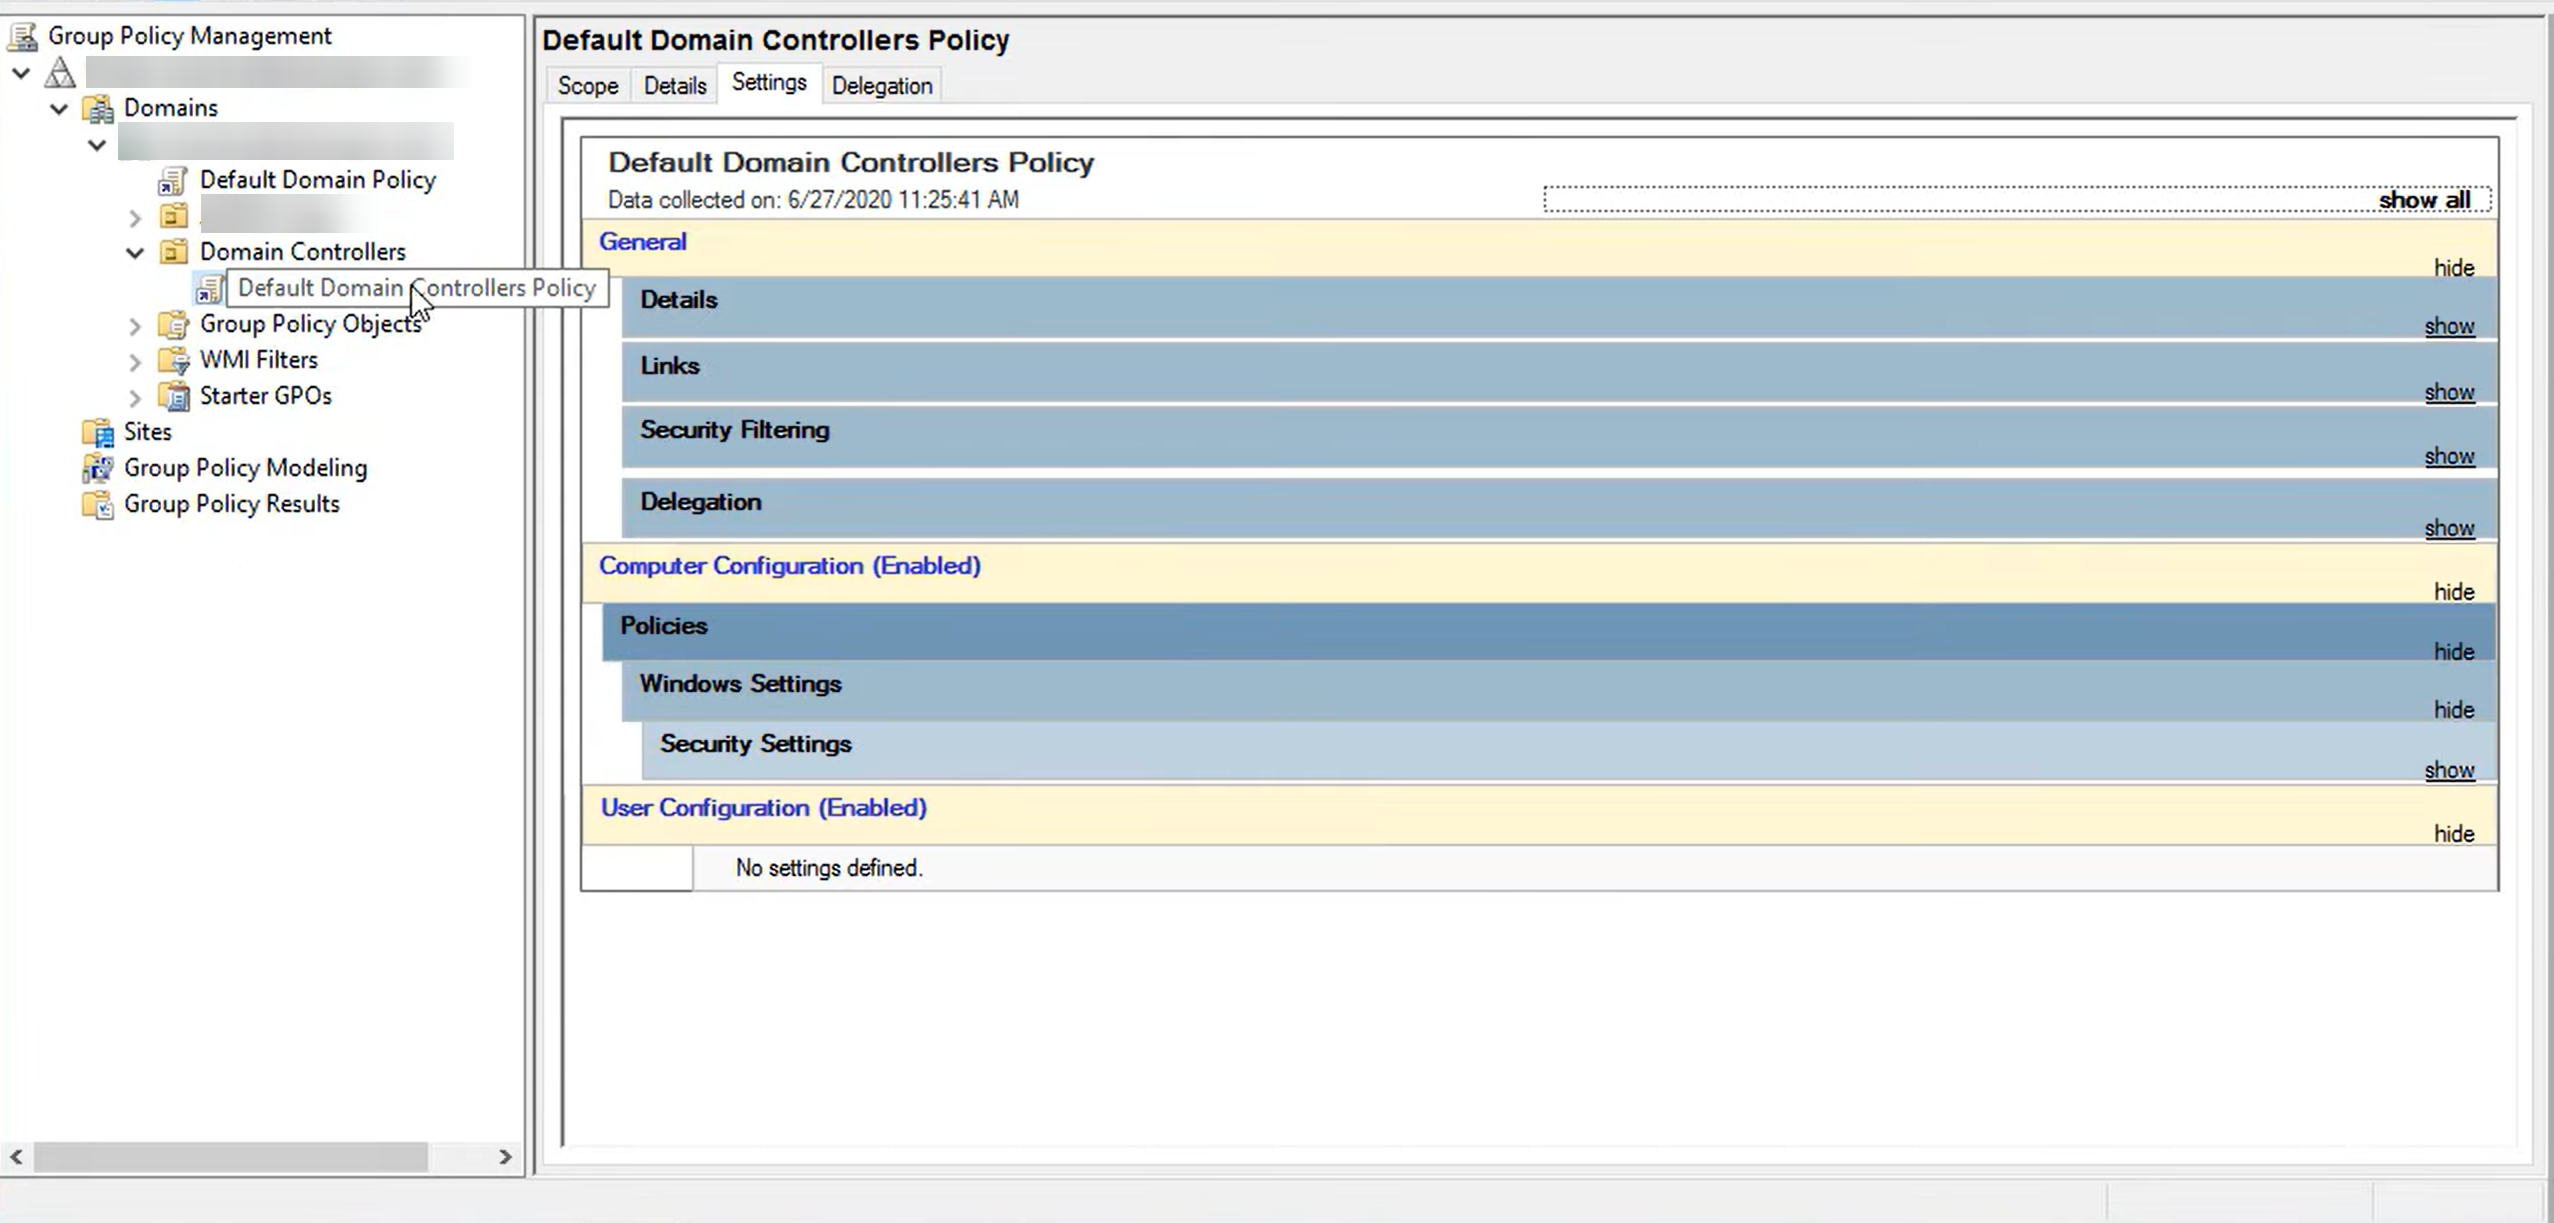
Under Domain, right-click on Default Domain Controllers Policy and select Edit.
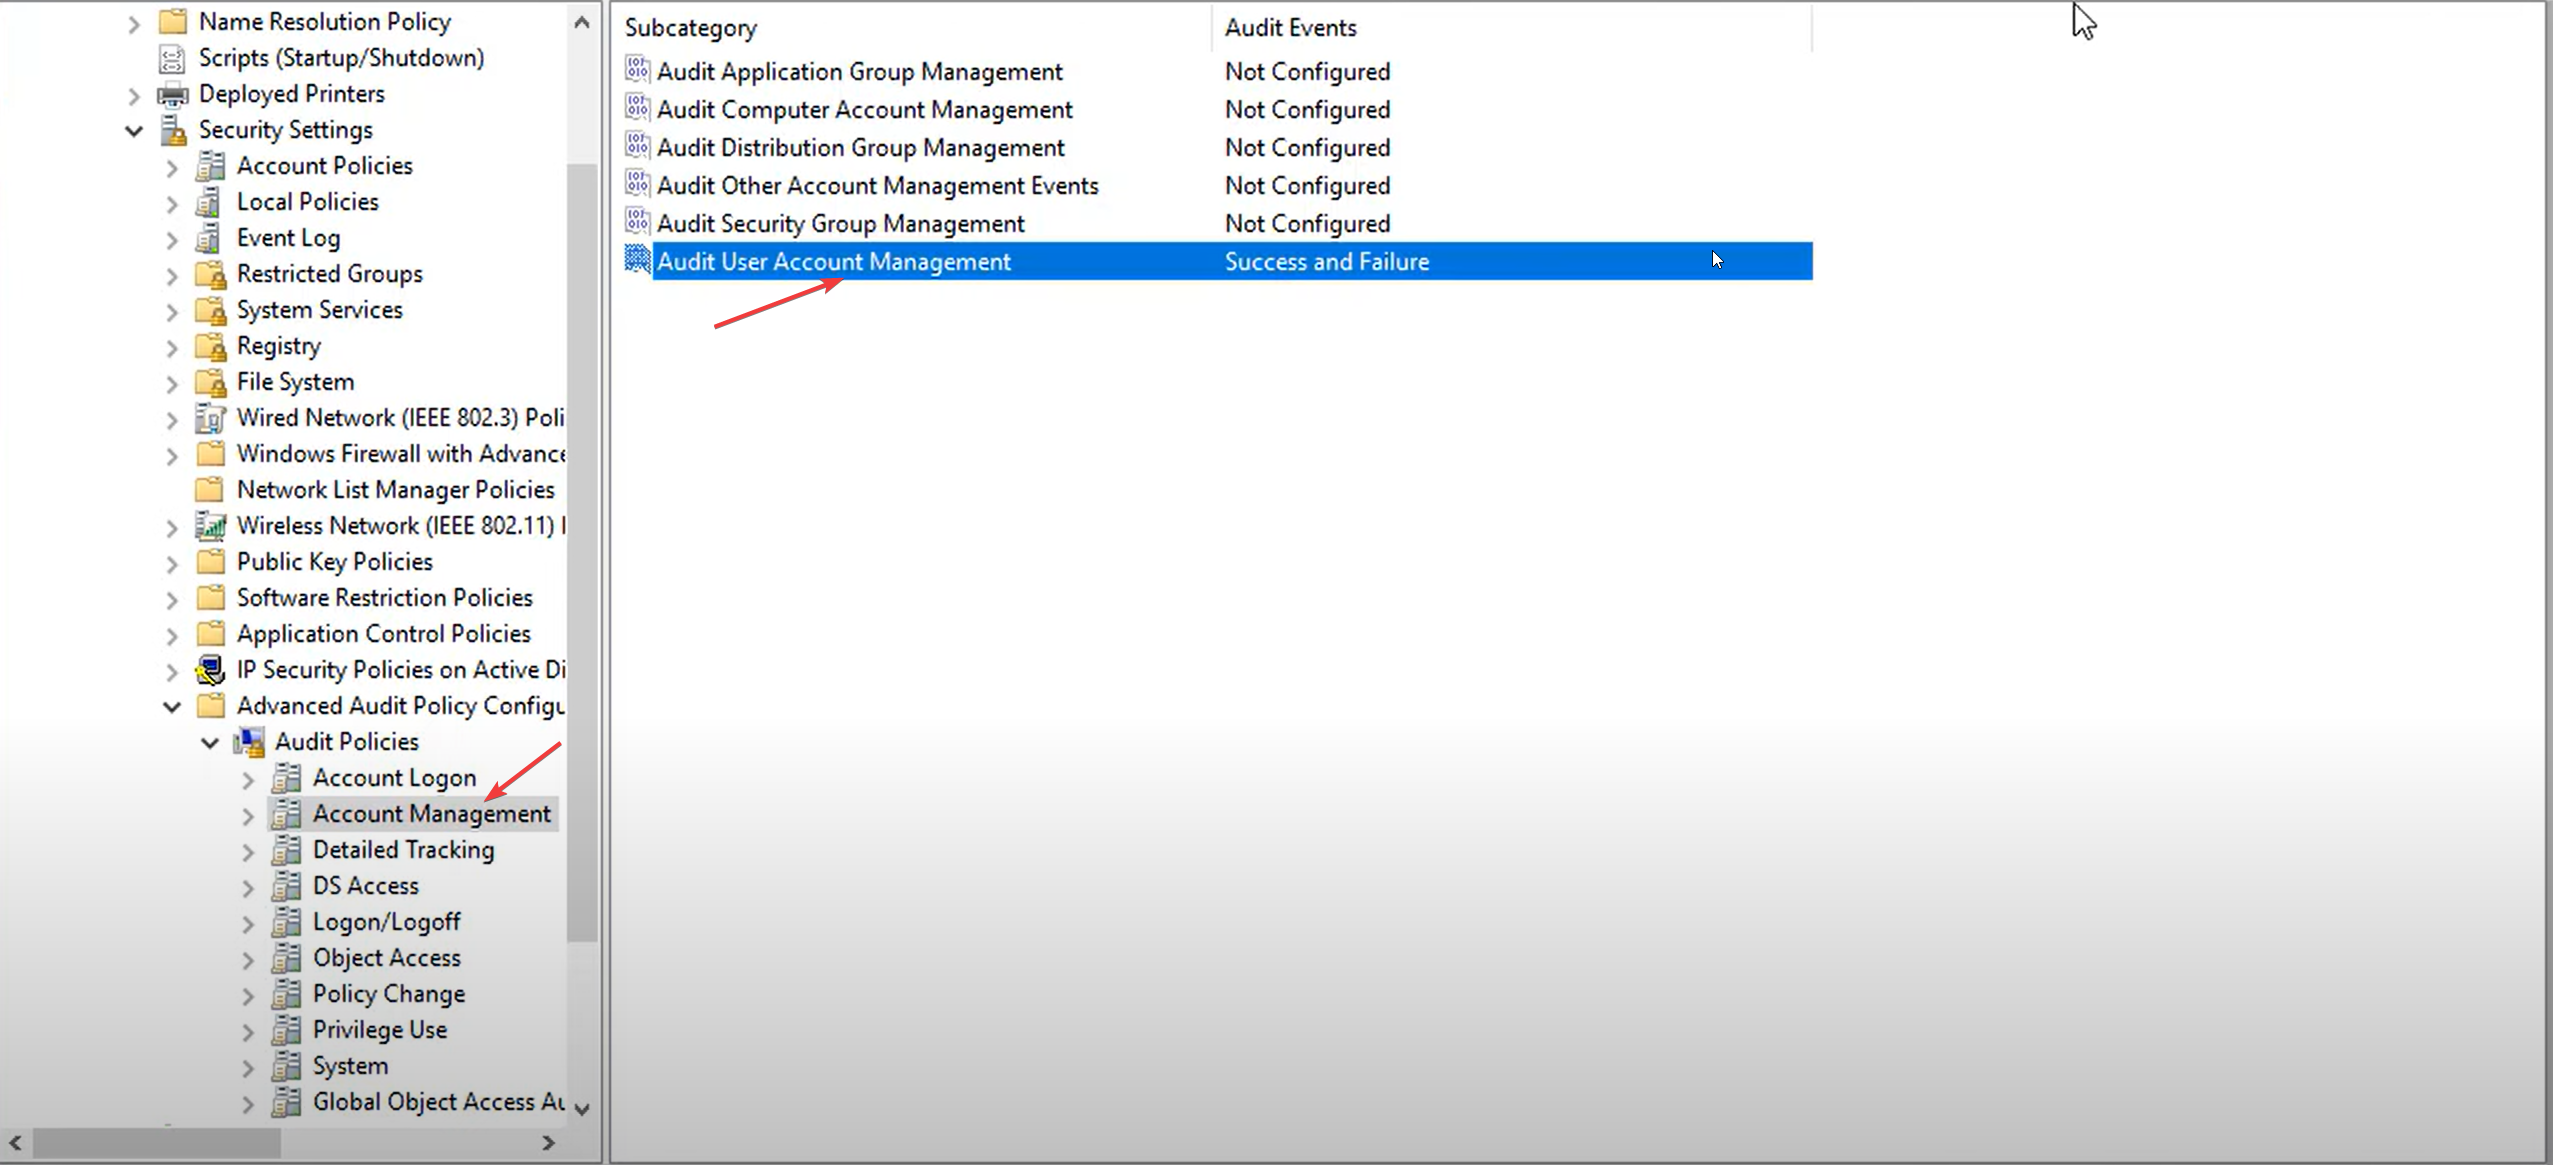
Now on the next window, follow this path: Computer Configuration\Policies\Windows Settings\Security Settings\Advanced Audit Policy Configuration\Audit Policies\Account Management
On the right pane, double-click on Audit User Account Management.
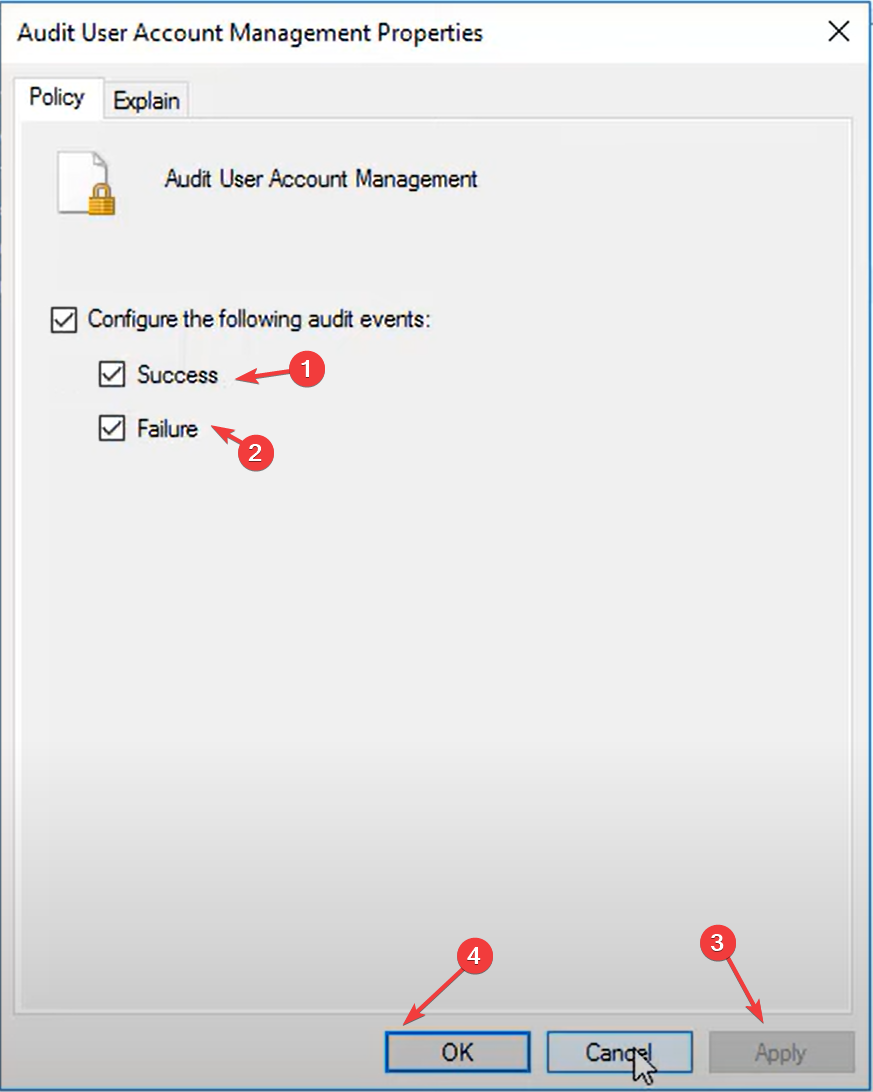
Put a checkmark on Success and Failure on the Audit user account management properties window.
Click Apply and OK.
2. Use PowerShell to find the PDC emulator role
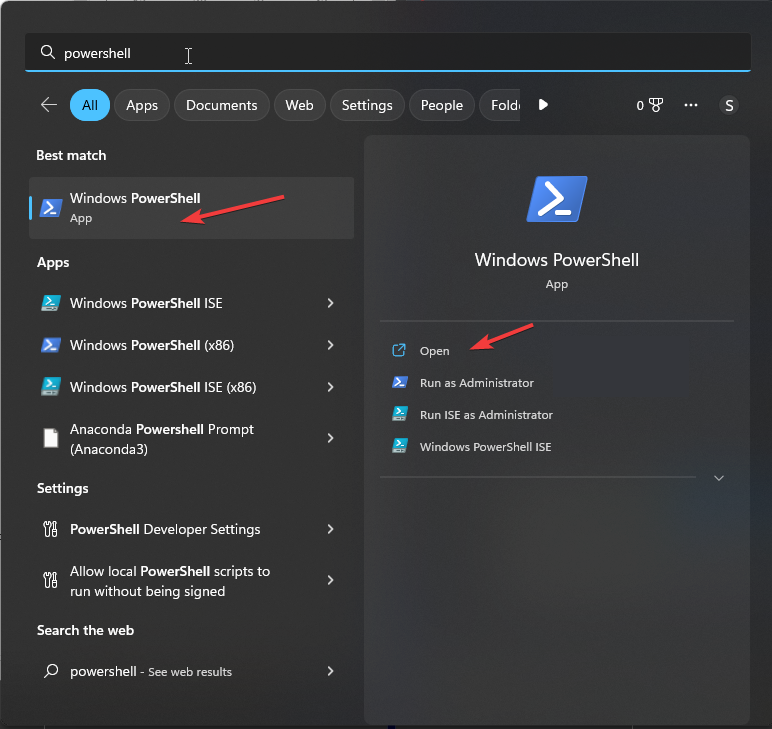
Click on the Search icon, type PowerShell, and click Open.
Type the following command to know the domain controller that holds the PDC role and press Enter: get-addomain | select PDCEmulator
To search the lockout events, copy and paste the following command and press Enter: Get-WinEvent -FilterHashtable @{logname=’security’; id=4740}
To display event details, copy and paste the following command and press Enter: Get-WinEvent -FilterHashtable @{logname=’security’; id=4740} | fl
You will get the list of logon events.
3. Use Event Viewer
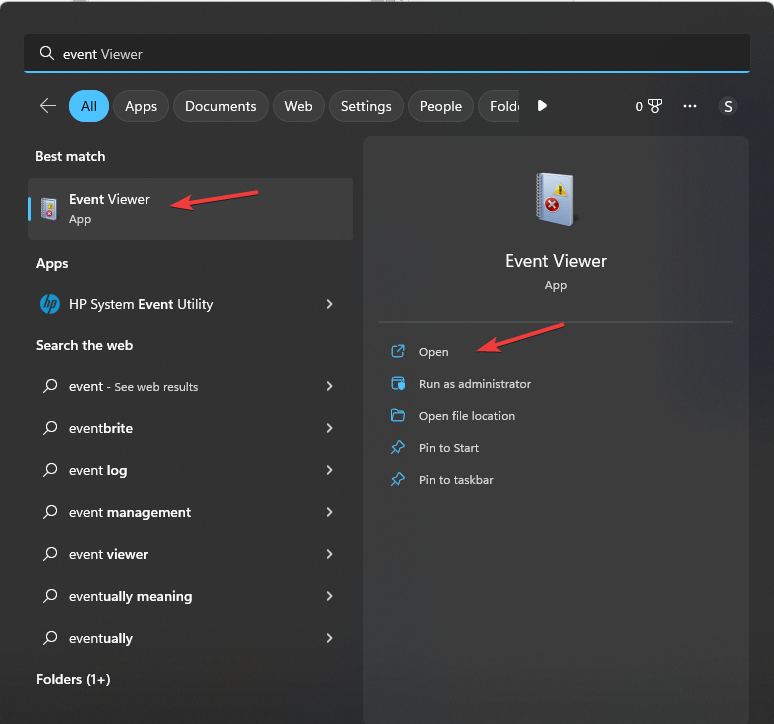
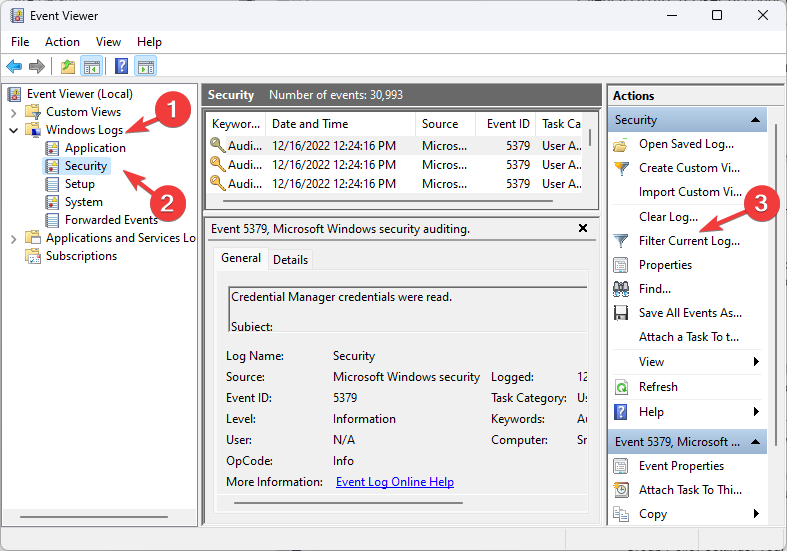
Click on the Search icon, type Event Viewer, and click Open.
On the left pane, go to Windows Logs, then click Security.
From the right pane, select Filter Current Log.
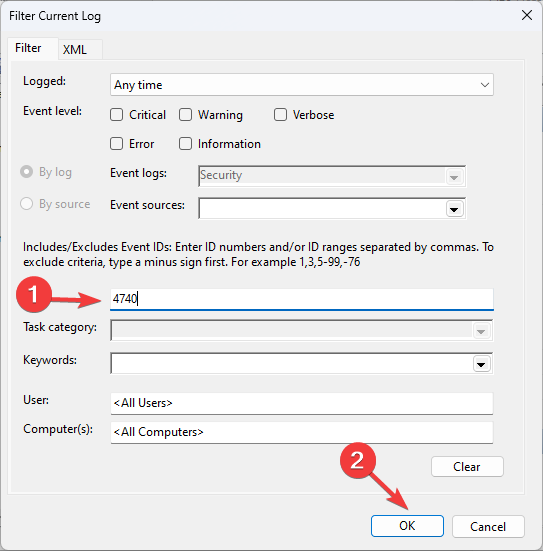
Search 4740 and click OK.
You will get a list of events Click on the event and check out the details of the source.
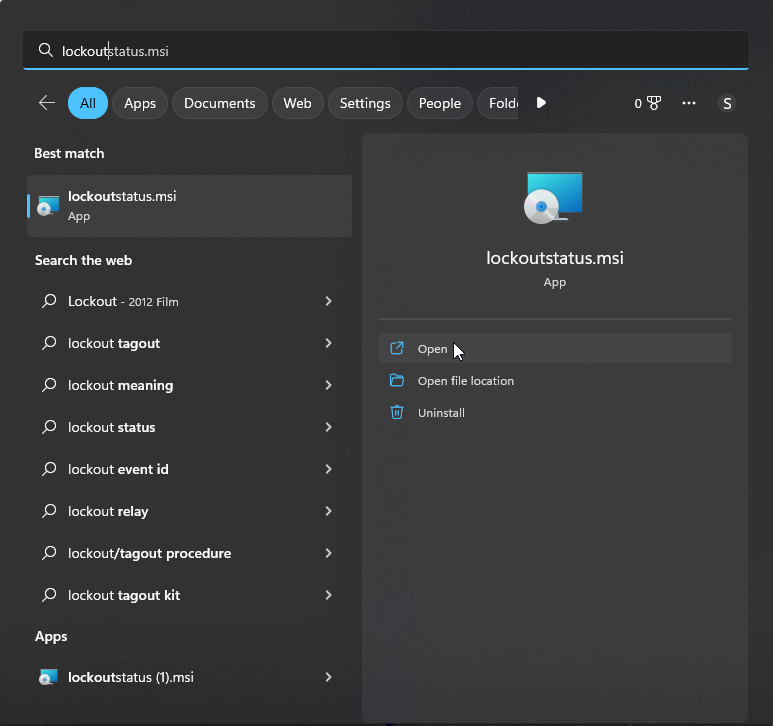
Click the Search icon, type lockoutstatus, and click Open.
The app will check all the lockout events with all the instances, sources, and additional details.
5. Use a third-party tool
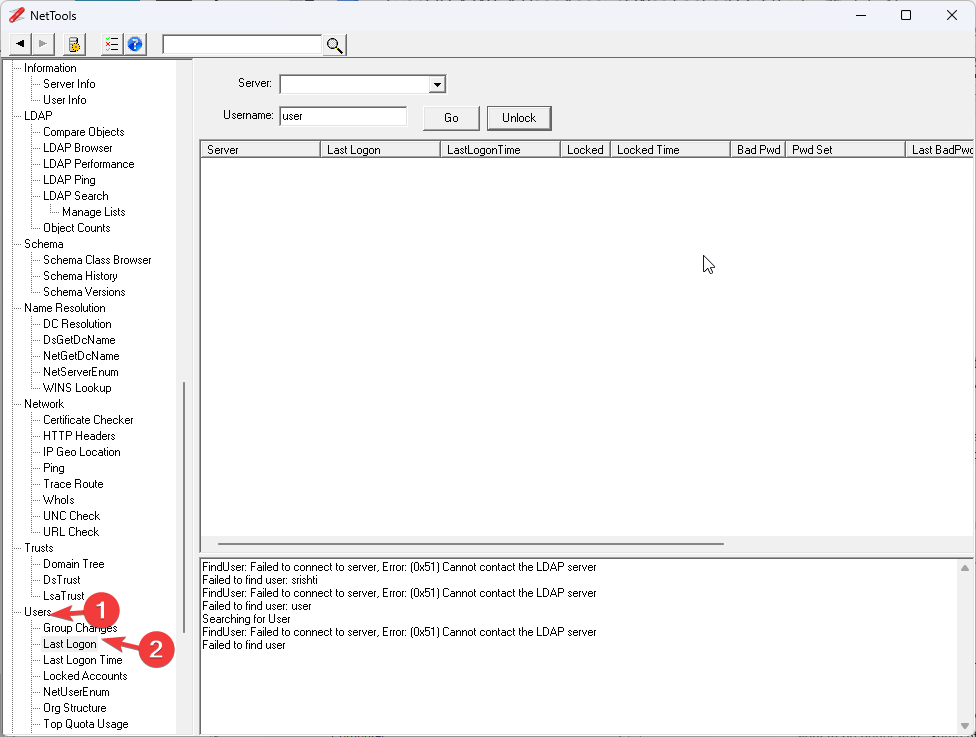
Using a free Active Directory troubleshooting tool like NetTools helps to troubleshoot, update queries, and report Active Directory and other Lightweight Directory Access Protocol directories. It is a portable executable file that allows you to view and troubleshoot Active Directory permissions.
NetTools searches the event logs to locate events relevant to the account on the selected domain controller. Also, it can find the event logs of any member servers in the authentication chain and can display the information related to the reason for the lockout. To know the source, follow these steps:
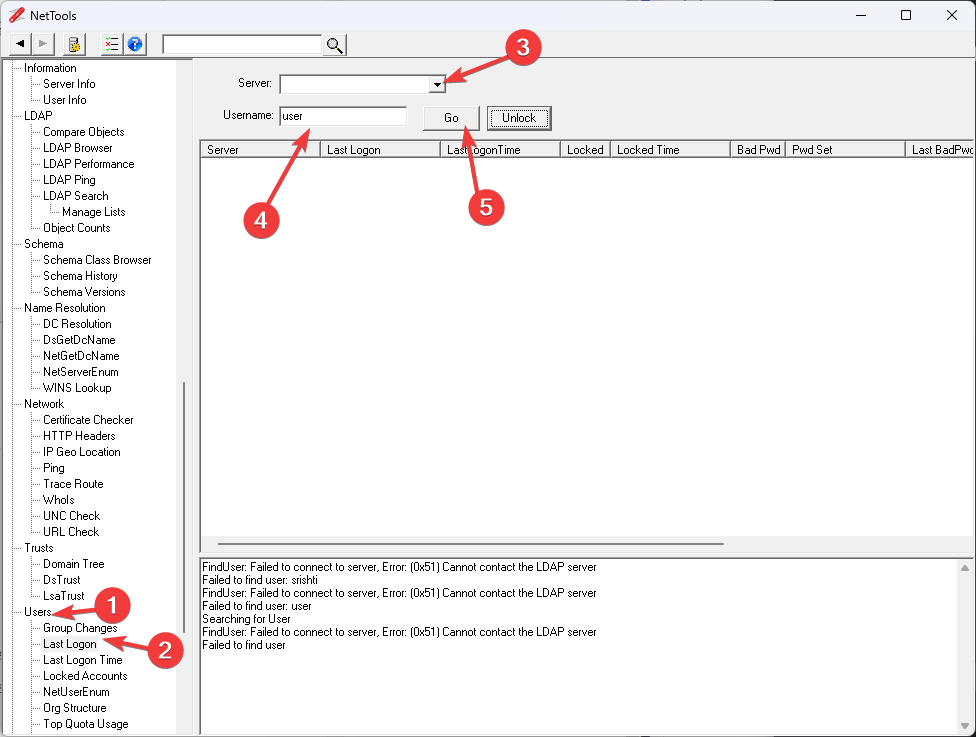
The tool will launch on the left pane; under Users, select Last Logon.
Enter the Username and Server, and click Go.
NetTools will show you all the login details.
Sort the results using the BadPwd column. The first entry on the list will be when the account was last locked.
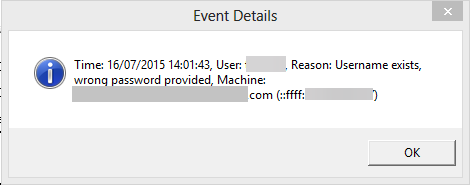
To get details, right-click the domain controller with the previous lockout time and choose Display Event Details.
So, these are the easiest ways to find out the source of account lockout event ID 4740. Once you get the source, you can easily take steps to prevent it from happening.
Have you already tried some of these solutions? Or maybe you know of other methods to solve this Windows event ID? Feel free to share your expertise with us via the comments section below.
Event ID 4776: the computer attempted to validate the credentials for an account gives you essential information which helps you identify the sources of the login attempts.
Here we will discuss what Event ID 4776 means and how to fix error code 0xc0000064. Let’s get started!
What does the Event ID 4776 computer attempted to validate credentials mean?
Event ID 4776 is a security-related event. It is generated every time a computer tries to validate credentials using NTLM authentication. It occurs only on the computer with authority for the provided credentials.
The event contains detailed information about the user account used for authentication, the destination and the source of the authentication request, along with the status of the attempt.
If Windows Event ID 4776 is successful, there is no need to worry. However, seeing multiple failed instances might indicate the relay, cracking attacks, and reverse brute force attacks. Therefore keeping an eye on this event ID is important.
What causes Event ID 4776 error code 0xc0000064?
A few reasons for the error to occur are mentioned below:
Third-party programs cache – If any third-party programs cache the user’s wrong password, this error code may come up.
Incorrect status by Net Logon service – When the Netlogon.dll manages the returned status incorrectly, the issue occurs.
Kerberos fails while authenticating RDP – If you connect to the network using a Remote desk protocol, it uses Kerberos to authenticate. But, if it fails, then it has to use NTLM. Hence the error
What can I do to fix Event ID 4776 error code 0xc0000064?
1. Identifying the Logon account and the source workstation when blank or unknown
1.1 Enable Netlogon to find the source
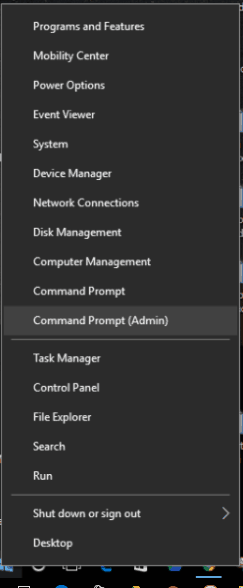
Press the Windows key, type CMD and click Run as administrator.
Type the following command and press Enter: nltest /dbflag:0x2080ffff
Close the CMD window.
To access your Netlogon files, press Windows + R to open the Run window.
Type the following command and press Enter: %SYSTEMROOT%\debug\netlogon.log
Now check the username and other details to identify the login attempt.
1.2 Use a Packet Analyzer
Tools like Wireshark can be used to keep an eye on your network on a microscopic level. It can capture the traffic simultaneously when someone tries to log in and helps you find the source. The tool can identify IP addresses so that you can easily locate the logons.
2. Identifying the Logon account and the source workstation if there is a remote client
2.1 Use firewall
You can use your firewall to protect your server or computer from unknown login attempts. Follow the whitelists approach (block all, allow some) instead of denylists (allow all, block some). This will ensure that only authorized attempts are initiated outside the network.
2.2 Use VPN
Using a reliable VPN can also help you safe-keep your network. It will let remote users connect to the local server and then authenticate normally.
A great VPN option that we recommend is Private Internet Access (PIA) because it is fast and highly customizable and has unbreakable security thanks to its numerous privacy features that will keep your activity always safe.
Private Internet Access
Keep your data protected and secure all the time with the most privacy-focused VPN service.
Yarn is a package manager for Javascript that aids in automating, installing, updating, and managing libraries and utilities. You can download it using various methods.
Here, we will discuss the different methods to download Yarn on Windows and some frequently asked questions related to Yarn. Let’s start!
How can I install Yarn on Windows?
Before proceeding with any steps for installing Yarn, go through the following preliminary checks:
Click on the Next button on the installation wizard.
On the next window, accept the license agreement and then click Next.
Choose the installation location if you want, or keep it default as shown and click Next.
Click Install and then wait for it to complete.
Now, click Finish to close the window.
To verify Yarn installation, press Windows + X and select Terminal (Admin).
Copy and paste the following command: yarn --version
2. Use NPM
Tip
Before proceeding with this method, ensure you have the latest version of Node.js installed.
Press the Windows key, type CMD and click Run as administrator.
Type the following command and press Enter: npm install -g yarn
To verify Yarn was correctly installed and check the version, copy and paste this command yarn --version
3. Use Chocolatey
Press the Windows key, type CMD and click Run as administrator.
Copy and paste the following command and press Enter: @"%SystemRoot%\System32\WindowsPowerShell\v1.0\powershell.exe" -NoProfile -InputFormat None -ExecutionPolicy Bypass -Command "iex ((New-Object System.Net.WebClient).DownloadString('https://chocolatey.org/install.ps1'))" && SET "PATH=%PATH%;%ALLUSERSPROFILE%\chocolatey\bin"
Once Chocolatey is installed, type the following command and press Enter: choco install yarn
Now on the command prompt window, you will be asked, Do you want to run this script? Type Y and press Enter. Yarn will be installed on your computer.
Close the command prompt window.
How do I install Yarn in VS Code on Windows?
You can use method 2 to install Yarn in Virtual Studio Code on Windows. To use Yarn with Visual Studio Code, follow these steps:
Once installed, press Ctrl + Shift + P and type Yarn. You will get a list of commands you can use on VS Code.
Where is the Yarn install directory on Windows 10?
The default address of the Yarn install directory is C:\Program Files (x86)\Yarn However, if you have chosen a different install location at the time of installation, then open Command Prompt and type the following command, and press Enter: where yarn
Can I install Yarn without NPM?
Yes, you can install Yarn without NPM. Yarn is a separate package manager developed by Facebook and is not tied to NPM. Therefore, you can follow the first method to install Yarn without NPM.
So, these are the different methods you can use to install Yarn on your Windows. Follow any one of them, install Yarn, and start quickly managing, installing, and updating packages.
If you have any queries or suggestions regarding this guide, then feel free to mention them in the comments below.
Many users have complained that whenever they try to crop a picture to use it for a Profile pic on Discord, it shows unable to open file: bad activity result code 96, for request code: 800. And the same error comes up when cropping the server logo as well. Well, this can be annoying, but don’t worry, it can be fixed.
Here, we will walk you through steps to get rid of this error message on Discord right after discussing the reasons behind the issue.
What causes bad activity result error code 96?
There can be various reasons for the issue to occur. However, some of the most popular reasons for the issue are listed here:
Multiple instances of changing profile picture – If you have tried changing your profile picture more than twice within a few minutes, you might see the error. Wait for 5-10 minutes to upload a new photo.
Slow internet connection – There might be a possibility that the process is not getting completed because your device can’t reach the server due to a flaky internet connection.
What can I do to fix bad activity result error code 96?
Before engaging in advanced troubleshooting steps, you should consider performing the following checks:
Update the Discord app and check for updates on your device
Use a different device to upload a photo
Restart your device and your router. This also helps against Discord Error 1105.
Turn on and off Airplane mode to reset the internet connection
Use an ethernet connection if you are using Discord on a computer
1. Delete the Discord photos folder (Android)
Tip
The file manager on Android can be denoted by My Files, File Manager, or Files on different Android devices.
Open the list of apps, locate and click My Files (File Manager).
Locate the Photos folder, go to the Discord folder and delete it.
Open the Discord app and try to change your profile picture now.
2. Upload profile picture from Google Photos(Android)
Go to Discord and try to change your picture.
When you get options to upload an image, select Google Photos.
Select an image from Google Photos, crop it, and upload it.
From the list of programs, select Discord, and click Uninstall.
Follow the on-screen instructions to complete.
4. Contact the Support team
If nothing worked for you, contact the Discord support team. Explain to them everything you have done to resolve the problem; this will help them assist you better.
So, these are the workarounds you can do to fix bad activity result code 96 until Discord developers find a solution to the problem. Try them, and let us know what worked for you.
Outdated graphics or USB driver – The Oculus link might not work correctly if your computer has outdated drivers. Therefore it is advised to update your PC drivers.
Misconfigured resolution settings – The issue might occur if the resolution settings set are high. Try lowering the resolution.
Game overlay – Game overlay can also cause this issue; disable the in-game overlay on the graphics card app and try again.
Corrupted system files – If your computer files are corrupt, you might face issues. Use a repair tool to fix it.
What can I do to fix Oculus Link is not working?
Perform the following preparatory checks to ensure that the issue is not a result of fundamental problems which may require only subtle tweaks:
Now right-click on the graphics driver and select Update driver.
On the next screen, choose Search automatically for drivers.
Follow the on-screen instructions to install.
Repeat the same for USB drivers as well.
1.2 Use a third-party tool
Updating drivers manually can be time-consuming and not always fruitful. Therefore, it is suggested to use a driver updater tool like Outbyte Driver Updater. This driver updater can download and install all the outdated drivers in a few clicks. Here are steps to use it:
2. Repair Oculus client
Press Windows + E to open File Explorer.
Follow this path: C:\Program Files\Oculus\OculusSetup.exe
Right-click on the setup file and click Run as administrator.
Now choose the Repair option and follow the on-screen prompts to complete.
3. Modify visual settings
3.1 Reset graphics preferences
Launch the PC app.
Locate Devices, then click Meta Quest and Touch.
Under Advanced, click Graphics Preferences.
Click Reset to Default.
Click OK. To apply the changes, the headset and app will restart.
3.2 Reduce resolution
Unplug Quest 2 from your PC.
Press Windows + E to open File Explorer.
Follow this path: C:\Program Files\Oculus\Support\oculus-diagnostics
Double-click on OculusDebugTool.exe.
On the Oculus Debug tool, change the Encode Resolution Width setting to a recommended value by Oculus, i.e., between 2000-3000, depending on your graphics card.
4. Disable the in-game overlay
Launch the GeForce Experience app.
Click Settings, then go to General.
Toggle off the switch for IN-GAME OVERLAY.
5. Use the dedicated graphics card
Right-click on a space on the desktop.
Select NVIDIA Control Panel.
From the left pane, click 3D Settings to expand.
Click Manage 3D settings.
Head to Program Settings, and choose the Oculus app from the drop-down.
From the Global Settings tab, select High-performance NVIDIA processor.
So, these are things you can try to fix the Oculus link not working issue. If nothing works for you, then it is suggested to contact Oculus support. Explain the situation and solutions you have tried so far for better assistance.
If you have any questions or suggestions about the guide, feel free to let us know in the comments section below.
Nevertheless, many durable VPNs are compatible with laptops (Windows and others) and mobile devices (iPhone, iPad, and Android).
This article reviews eight of the best VPNs for laptops and iPhone devices. Many of you might wonder: Can I have the same VPN on my Windows laptop and iPhone? The answer is yes; using multiple devices with a single VPN connection is possible, including a desktop PC or laptop and mobile devices like iPhone or Android.
Many privacy tools allow users to utilize multiple devices simultaneously and thus secure the entire home with one VPN subscription.
That said, many of the following VPNs for PCs are also effective as VPNs for iPhones. If your VPN is not working on your iPhone, this is a normal issue that also happens on a PC, so don’t worry; there is always a solution.
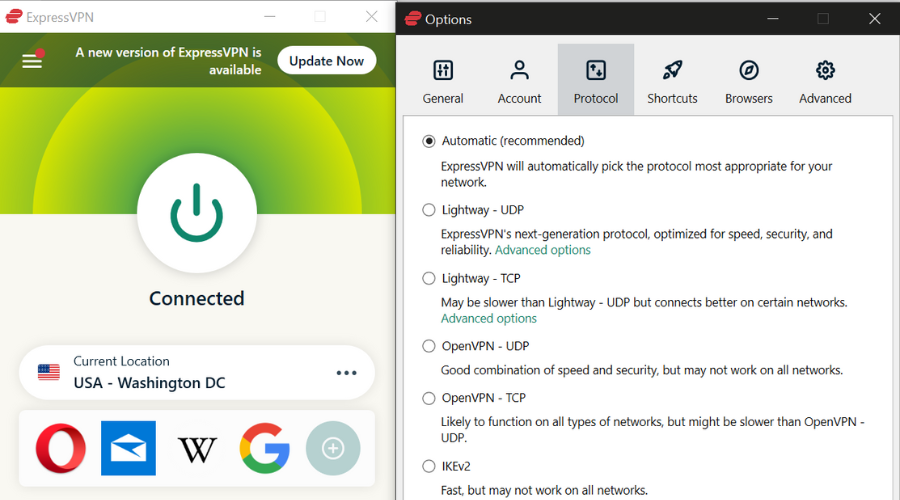
ExpressVPN is widely regarded as the fastest and broadest VPN network in the industry. It has over 3000+ optimized servers in 160 cities (94 countries) worldwide.
When it comes to ease of use and system compatibility, ExpressVPN is, no doubt, one of the best VPNs available.
It is compatible with laptops and smartphones, routers, browser extensions (Chrome, Safari, and Firefox), and home gadgets like Smart TV, Apple TV, etc.
Also, this Express VPN International Ltd. VPN solution gives you the advantage of multiple simultaneous connections.
As such, whether you are running the VPN on your Windows 10 (laptop) or iPhone, you can easily connect both devices and enjoy an optimized browsing experience.
Other features of ExpressVPN include IPv6 leak protection, IP checker, split tunneling, internet kill switch, round-the-clock customer support, AES protocol, unlimited data, zero activity logging, and unrestrained server switching.
Lastly, ExpressVPN offers a 30-day refund policy on all subscriptions. The most popular (cheapest) monthly subscription plan is available at $8.32.
ExpressVPN
ExpressVPN has top-notch privacy protection, regardless of the device you use it on.
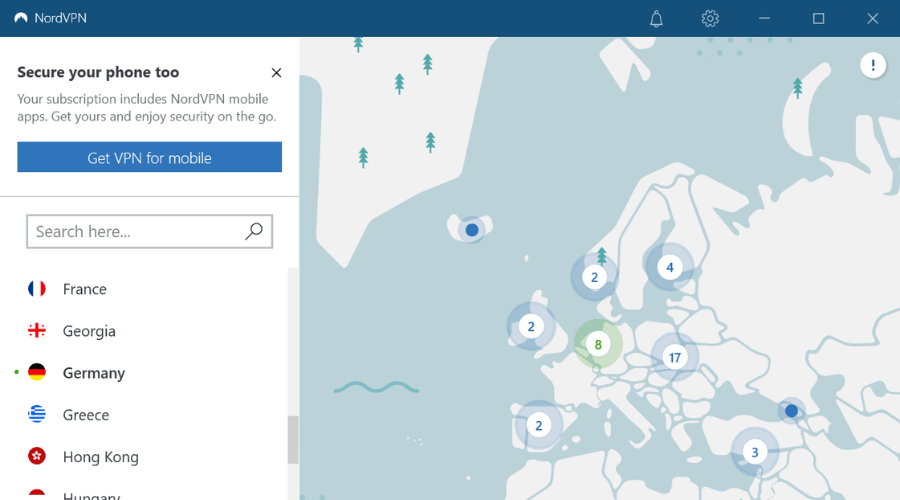
NordVPN is one of the industry’s most prominent Virtual Private Networks, compatible with Windows laptops and iPhones.
This VPN developed by Tefincom & Co., S.A. is especially known for its double encryption setup.
NordVPN hosts the 2048-bit SSL and the 256-bit AES encryption systems, which provide formidable security to connected PCs and/or smartphones.
Regarding the server network, NordVPN is arguably the best, with over 5400 servers in 59 countries worldwide.
Also, features like L2TP/IPsec security protocols, a kill switch, P2P traffic, dedicated IP addresses, and unlimited server switches constitute the other key features of NordVPN.
In addition, its flexibly designed, powerful set of features works perfectly on multiple OS platforms, namely Windows, iOS, and Android.
Also, it can support up to six connections at a time. So you can easily encrypt your mobile and desktop Internet connections, effectively masking your identity.
Not only that, NordVPN offers a 30-day refund policy, which enables users to cancel their subscriptions (within one month) and reclaim their money.
NordVPN
Getting enhanced privacy has never been easier! Get the best deal right away!
Private Internet Access is best known for its relative ease of use, as it offers several easy-to-install apps for laptops (Windows, Mac, Linux) and mobile devices (iPhone, iPad, and Android).
This Kape Technologies VPN solution has no less than 35000 servers in 80+ countries across the globe.
You only need basic digital proficiency to download, install, and run the program on your system effectively.
Moreover, it allows you to connect unlimited devices with one subscription. So it will efficiently cover all your needs.
Private Internet Access, as the name implies, is primarily aimed at encrypting the Internet data of its users.
As such, it houses the standard AES encryption protocol (256-bit), which conveniently encrypts users’ Internet traffic. Even more, you have encrypted WiFi for improved security in public networks.
You also have advanced features that increase online privacy due to server switching, split tunneling tools, and P2P traffic.
There is also an Ad blocker utility that can block tracking scripts from your browser and eliminate unwanted ads.
Plus, you have multiple security protocols like L2TP and OpenVPN, no traffic logging, and unrestrained bandwidth.
You must also note that Private Internet Access offers a reasonably affordable price. Plus, it provides a 30-day money-back guarantee on all subscriptions, just in case you change your mind.
Private Internet Access
PIA is your top VPN choice for both iPhones and laptops.
Surfshark – Price convenient VPN for unlimited devices
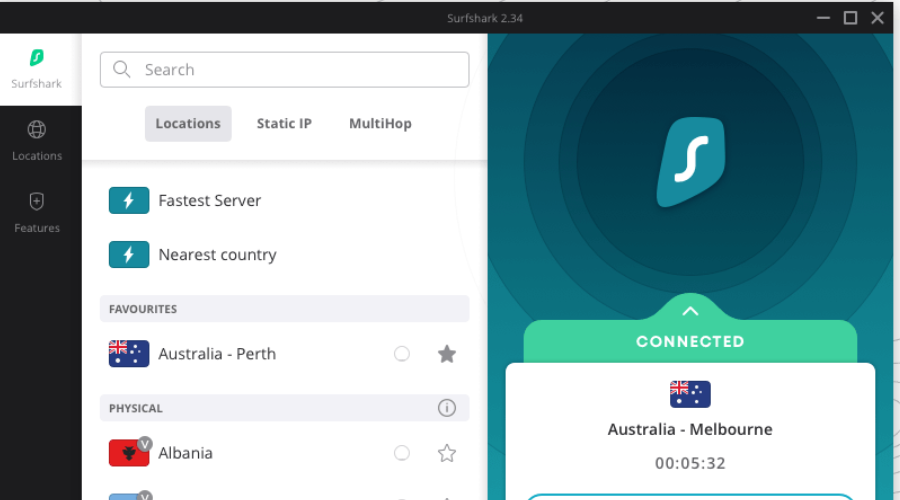
This Surfshark LTD VPN is compatible with iPhones and can be used to secure the connection established from your laptop.
Surfshark is a strong believer in keeping your data private. It uses military-grade AES 256-bit encryption and two of the best protocols, IKEv2 and OpenVPN.
While it is relatively new to space, many servers are available (1700+) in 63 countries.
It’s also optimized for speed, allowing you to enjoy your favorite streaming services.
Moreover, it is compatible with multiple platforms, and it offers connectivity with an unlimited number of devices.
Additionally, its strict no-logs policy ensures that your data stays private. There’s also a kill switch feature, which immediately shuts down your connection if the VPN service stops working.
If you need support, it’s available 24/7. Even more, with their money-back guarantee, you have 30 days to try the service for free.
Lastly, Surfshark has three pricing options with one of the lowest rates right now if you choose their 2-year plan.
Surfshark
Surfshark can protect your privacy regardless of the device you install it on. Check it out right now!
CyberGhost is a popular VPN service provider headquartered in Romania. This VPN hosts some of the industry’s most advanced encryption and internet security tools.
CyberGhost has dedicated apps on Windows laptops, iOS smartphones (iPhone and iPad), and Android devices.
On top of that, CyberGhost offers its users a broad server network. It adds up to 9000+ servers in over 90 countries. In addition, there are about 3000 IP addresses on the VPN network.
Basic encryption features of CyberGhost include AES 256-bit encryption protocol, MD5 HMAC authentication, kill switch, DNS leak cover, unlimited bandwidth, and more.
These features ensure your privacy is adequately secure. CyberGhost can support up to seven connections at a time.
This means you can easily protect your laptop, iPhone (or Android), and up to seven other devices on a single CyberGhost account.
Lastly, regarding affordability, CyberGhost stands out as one of the cheapest VPN providers, with a 30-day money-back guarantee on every subscription.
CyberGhost VPN
Let this amazing VPN protect your iPhone and laptop. Don’t hesitate to claim the best deal!
IPVanish is one of the most suitable VPNs for laptops, iPhones (and other iOS). In fact, its free trial is available only to iPhone and iPad users.
IPVanish has been a Ziff Davis business since April 2019, after previously being developed by StackPath, LLC, which ceased operations in 2024. This VPN is built with a blend of speed and enhanced geo-encryption features.
IPVanish hosts over 2,400 servers in locations all over the world. This is aptly augmented by over 40,000 IPs (dedicated and shared) globally.
The VPN offers unlimited connections on a single network and hosts a set of powerful security/encryption and speed-enhancing features.
Some of these include a no-log policy, unrestricted P2P sharing, IPsec/OpenVPN security protocols, top-class customer support, and more. IPVanish also uses WireGuard, which is the latest high-speed protocol.
Additionally, IPVanish offers a 30-day money-back guarantee to all subscribers and is available at a convenient price.
IPVanish
Need state-of-the-art privacy protection on all your devices? IPVanish could take care of that.
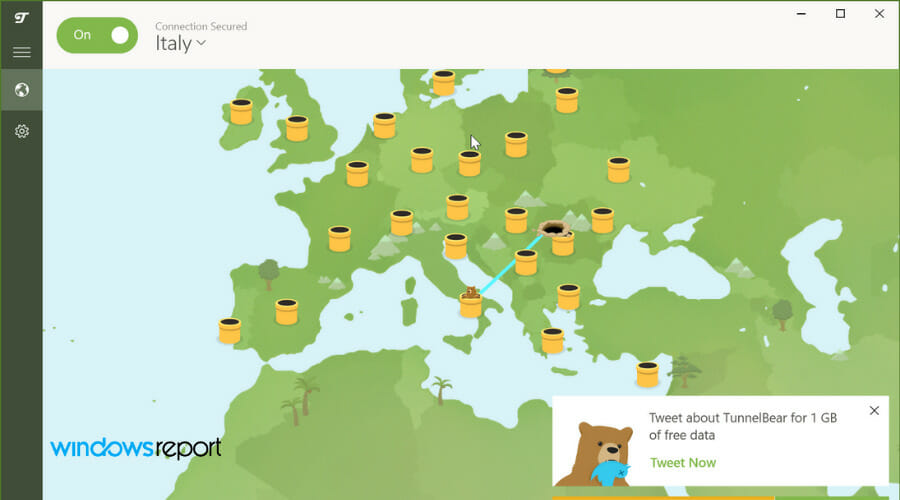
TunnelBear is one of the few VPN providers that offer free services to its users, albeit with limited functionality.
This McAfee, LLC VPN protects users’ privacy while improving their Internet experience with optimized connectivity.
TunnelBear is a user-friendly platform with multiple compatibilities across desktop/laptop (Windows & Mac OS) and mobile platforms (iOS and Android).
Also, it allows multiple simultaneous connections (up to five), on a single TunnelBear account.
Additionally, this VPN houses four sets of features – Privacy, Encryption, Performance, and Worldwide.
Overall, TunnelBear’s features include zero log policy, GhostBear, AES 256-bit encryption, 23 server locations, dedicated support, Vigilant Mode, optimized Internet speed, and more.
These features enable you to bypass any geo-restriction on censored websites easily. Also, the VPN is optimized for speed to enhance your Internet connectivity further.
Regarding pricing, you should note that TunnelBear offers a free version with limited features (e.g., limited bandwidth).
However, you must subscribe to a paid plan to improve performance and unlock the advanced features.
Available subscription plans include Unlimited and Teams, with various privacy benefits and responsive customer support.
TunnelBear
Are you looking for privacy protection on all your devices? Try TunnelBear.
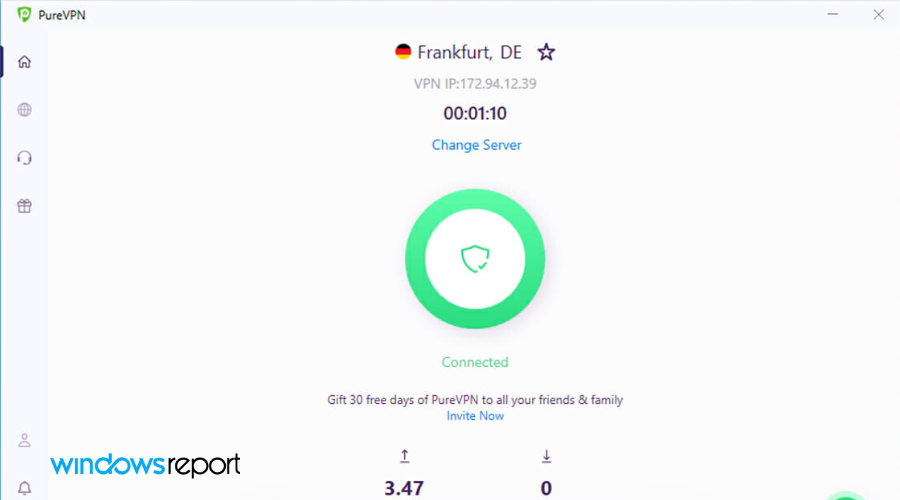
PureVPN is a leading VPN provider offering powerful features to bypass geo-blocked websites and censored content.
GZ Systems Limited owns this VPN with 2000+ servers in about 140 locations worldwide. This means that PureVPN has at least one server in every two countries.
Moreover, PureVPN, like other top VPN providers, has dedicated apps for laptops or desktops (Windows 10 and below) and smartphones (iPhone, iPad, and Android).
It is also equipped with some of the best obtainable security/privacy features in the VPN industry.
Some of these features include an inbuilt ad-blocker, AES 256-bit encryption, NAT Firewall, Onion over VPN, web (and app) filter, unlimited server switching, IPsec/L2TP support, and more.
PureVPN has a 7-day trial available. There is also a 31-day refund policy, which allows users to cancel their subscriptions and reclaim their money.
PureVPN
Do you need a VPN to protect your privacy on all your devices? Try PureVPN.
This list was compiled and ranked based on system compatibility (with Windows 10 and iPhone), server network/coverage, VPN speed, encryption protocols, affordability, and more.
Low Level Fatal Error occurs in many games, including Atomic Heart, Jedi Survivor, Dark and Darker, Mechwarrior 5, Borderlands 3, and many Unreal Engine titles.
In most cases, this issue is caused by corrupted or missing game files or problems with your graphics card driver. Game optimization software can also cause this issue.
Here’s how to fix it:
What can I do to fix LowLevelFatalError?
Before we try to fix this issue, try restarting your PC and reinstalling Visual C++ Redistributables. Also, disable any overlays or always keep your game up to date.
1. Verify the integrity of game files
Launch the Steam app.
On your Steam launcher, click Library.
Go to the game, right-click on it and select Properties.
Locate and click Local Files from the left pane.
Now click Verify integrity of game files.
2. Disable game optimization
Click on Search and type GeForce experience.
Click on the Gear icon.
From the left pane, select Games.
Remove the checkmark beside Automatically optimize newly added games.
3. Update the graphics driver
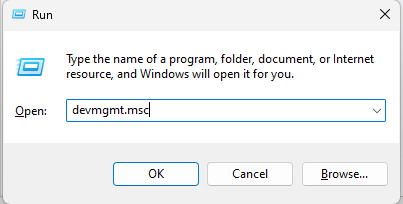
Press Windows + R to open the Run window.
Type devmgmt.msc and press Enter to open Device Manager.
Go to Display adapters and expand it.
Right-click on the NVIDIA GeForce and select Update driver.
On the next page, select Search automatically for drivers.
Follow the on-screen instructions to complete the process.
Suppose you don’t like performing this process manually. In that case, you can opt for a professional driver updating tool that can help you update your drivers automatically by scanning your PC for outdated drivers and locating the latest updates.
4. Run the game in Compatibility mode
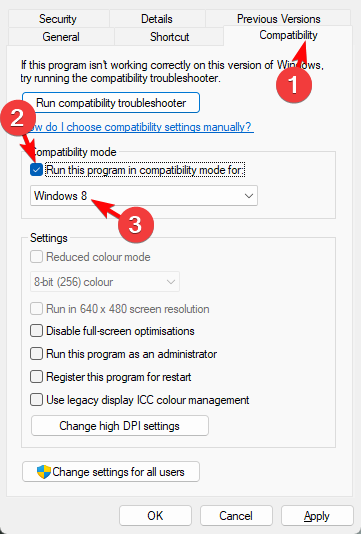
Right-click the game exe file and select Properties.
Click the Compatibility tab.
Under Compatibility mode, place a checkmark beside Run this program in compatibility mode for.
Click Library, go to the game, right-click on it and click Properties.
Go to General, click Set Launch options, and type -force -dx11
Click OK to save the changes.
Click Close to close the Properties window.
6. Disable full screen optimization
Right-click the game’s executable file.
Select Properties from the dropdown menu.
Go to the Compatibility tab.
Check the box that says Disable Fullscreen Optimizations.
Click Apply.
Click OK.
7. Disable background apps
Press Ctrl + Shift + Esc to open Task Manager.
Go to the Processes tab.
Look for any apps using high CPU, memory, or disk.
Right-click the unwanted app or process.
Select End Task.
So, these are some of the fixes you can use to fix LowLevelFatalError on line 684, 197, 198, 671, or 4075 when launching a game. If nothing has worked for you, try reinstalling the game.
Steam trading cards are virtual card that only exists on your Steam profile. You cannot use it outside this gaming platform or turn it into any physical card.
These virtual cards can be earned by buying and playing games on Steam. While many of them are easy to earn, some are expensive and can be a reward for fantastic gameplay.
This guide will show you the most expensive Steam cards that you can look to earn or sell.
What is the most expensive trading card on Steam?
Ami (Foil Trading Card) has the highest pricing tag in the community market, making it the most expensive Steam trading card.
There are even more cards with similar pricing tags. If you wish to buy one or are just curious about the top list for this year, go through the next part of this article.
Top 20 most expensive Steam cards in 2022
Tip
Note: The prices of these trading cards vary with time and can drop or go higher depending on several factors. The costs for each item in this guide are the exact values at the time of writing. Hence, don’t be surprised if you notice any remarkable price drop or surge.
Though you will not find many 1-bit-styled games today, the Skeleton, a rare Steam trading card related to Death Crown, has been one of the most expensive in 2022.
This is a real-time strategy game where you will play as the Death itself and punish humanity.
The Ami (Foil Trading Card) is the most expensive Steam trading card at this time of writing. This trading card is gotten from A Wild Catgirl Appears!
It involves Ami, who was picked up as a loner. She likes to draw but does not like meeting people. Hence, you have many challenging tasks to complete in the game.
The Li Chengsong card is related to the game Chaos Galaxy. It’s a pixel art Galaxy total war game. You can select from 61 heroes and hundreds of warships and run the operation on a specific map.
How you will do in the game depends on your strategy. There are many complex tasks to complete to earn cards and rewards.
If you are a False Front game fan, you may want to own this rare Steam trading card. The game is free to play right now though there is a premium version.
But, its rare Bulldozer foil trading card has been one of the most expensive cards on the community market in 2022.
This cartoonish looked first-person shooter game has a lot of fun. While playing, you will get many rewards like the one listed in this article.
This expensive Steam trading card, USA! USA! has the tagline Make USA better. But, the name of the game behind this item is Jump to Die!!, where you will run your own company that helps people to commit suicide.
However, things are hard to accomplish here as zombies are on every corner. As a result, this trading card has been listed in the community market with a very high price tag though the actual worth is less than a dollar.
The Fast destroyer is an expensive Steam trading card related to the game Infinite Tanks. This game features modern combat vehicles, especially Tanks.
There are huge environments with realistic views that are very attractive. Moreover, you can play and complete single-player missions and enjoy the multiplayer mode.
The Uranium mine is another exciting Steam trading card with a very high price tag. This item is related to Thousands of Years Later, an action game.
Here, you can make various weapons, gears, vehicles, and other things to protect your construction and survive. While playing, you can get some nifty badges and cards.
The Crystal Caverns is one of the most expensive Steam trading cards in 2022. This foil trading card is related to an arcade game called Will of the Gods.
Here, players play as Gods, guide the followers, and punish the others who do not obey the other Gods.
The virtual reality game Pierhead Arcade 2 is an indie game where you can find many different arcade games. While playing, you can find many rewards, including trading cards.
However, the Sumo Bot is the most expensive in the community market. Therefore, you can spend a hefty price to get this Steam trading card.
The game behind this expensive Steam trading card, Faceless, is Warside. Even though the game is not available on the Steam store right now, the items related to it are available in the marketplace.
This trading card is infrequent and may not be worth the price the seller is asking for, but it is one of the fantastic items you can get from the community market.
The Score Bonus Steam trading card is one of the most expensive on the community market. Matris is the game behind this item which is an excellent puzzle game.
You can face various logic puzzles here and earn rewards by completing them smoothly, including cards.
El Condor Pasa is one of the most expensive Steam trading cards available. However, even though it is not worth the seller’s price, it is still a very demanding and exciting item available on the marketplace.
Winning Post 8 2017 is the game related to this trading cart, a horse racing simulation game. You can play this game, explore the racing experience and earn cards.
The game Fat Chicken is behind this cool trading card, Fat Pig. You must fatten up farm animals for slaughter in this reverse tower defense game.
There are many exciting things to do in this game. But, one seller has featured the trading card we are talking about with far more than the price it may be worth. That sounds not so exciting.
The Cloud Hound is one of the most exciting items available in 2022. A puzzle adventure platformer game, So Many of Me, is related to this item.
This item was sold at an excellent price in the past. But, the current pricing is far from that, making it one of the most expensive Steam trading cards in 2022.
GIGN Riot Guard is one of the exciting trading cards with a very high price tag. Though the actual worth may be around a dollar, the seller is still hoping for luck.
S.K.I.L.L. – SpS.K.I.L.L.e 2 game is no longer available as it was closed in 2019. However, its trading card is still available on the marketplace.
The Rogue is another expensive Steam trading card from the game Reigning Cats. It is also a tower defense game with many challenges to test your love for cats.
This trading card had several sales in the past, which is far less than the current price.
There are many other expensive cards you can find on the community market. However, we have featured only the ones with at least a certain number of buy requests. It must be mentioned again that the pricing mentioned with each card may vary from time to time.
While still on the topic of cards and rewards, if you are looking to Refund a gift on Steam, check our guide for the detailed steps to follow.
If you have opinions about the costly cards, you can share them in the comment box.
Any gamer knows all too well the inconvenience and frustration that comes with a game crash. Users have reported that their Microsoft Store games keep crashing on their PCs.
For some of them, the Microsoft Store games are crashing on startup, whereas for others, they crash during game time.
To resolve the game crash problem, check first whether you can play any other games saved on your computer, then use these 14 solutions to troubleshoot.
We strongly recommend updating drivers automatically and safely with a full-dedicated tool that will help you to avoid permanent damage to your PC by downloading and installing the wrong driver versions.
3. Register the Windows Store App again
Follow the instructions below to re-register:
Click Start
Go to the search field box
Type cmd
Right click on Command Prompt
Write this command on the command prompt window: powershell -ExecutionPolicy Unrestricted Add-AppxPackage -DisableDevelopmentMode -Register $Env:SystemRootWinStoreAppxManifest.xml
Press Enter
Check the displayed result
If it processed successfully, type Exit
Press Enter
4. Use the App Troubleshooter
Right click Start
Select Control Panel
Go to the top right corner and change View by option to Large icons
Click Troubleshooting
Click on View all option on the left panel
Select Windows store Apps
Follow the instructions to run the app troubleshooter
5. Check for the latest game update
Go to the respective website for the particular game that crashed and download the latest updates for it.
6. Perform a clean startup and configure startup options
Performing a clean boot for your computer reduces conflicts related to software that can bring up the root causes of the PC reset bluescreen error issue. These conflicts can be caused by applications and services that start up and run in the background whenever you start Windows normally.
In order to successfully perform a clean boot on Windows 10, you have to be logged on as the administrator, then follow these steps:
Go to the search box
Type msconfig
Select System Configuration
Find Services tab
Select Hide all Microsoft services box
Click Disable all
Go to Startup tab
Click Open Task Manager
Close Task manager then click Ok
Reboot your computer
Once your computer restarts, configure Selective Startup options using these steps:
Go to System Configuration Utility dialog box
Go to General tab and choose Selective Startup
Uncheck the Load Startup items box
Click Services tab
Select Hide All Microsoft Services box
Click Disable all
Click Ok
Restart if prompted to
After restart is complete, try to start the same game that crashed so as to check whether the game crash issue was resolved.
If the problem goes away after a restart, then the cause is a background program or service.
If the problem returns after the clean startup and configuration, the interference is a different issue altogether.
To determine what is causing the game crash problem, use these two steps:
Start System Configuration Utility
Enable half of the services items
How to start System Configuration Utility
Click Start
Go to the search field box
Type msconfig
Press Enter
If prompted for an admin password, type it in. Otherwise click Continue to confirm
How to enable half of the services items
Type msconfig
Select System Configuration
Find Services tab
Select Hide all Microsoft services box
Click to select half of the checkboxes under Services list
Click Ok
Restart your computer
If the game crash problem recurs after restarting, repeat step 1 and 2, but clear half of the check boxes in the Services list you had selected previously. If it still recurs after the second restart, click to clear half of the remaining check boxes under Services list.
If the game crash issue goes away after restarting, reverse the selected check boxes and repeat this until you identify the service that runs when the game crash occurs.
If the game crash doesn’t occur after restarting, repeat step 1 and 2 but select half of the cleared check boxes. If it still doesn’t occur, click to select half of the cleared boxes.
Repeat until you identify the service that runs when the game crash occurs.
If you find the service that causes the game crash, it is the problem item. In this case, contact the manufacturer of the specific program to determine if it can be resolved, or run System Configuration Utility then click to uncheck the box of the problem-causing service item.
If not, then the issue is with startup. In this case, enable half of the startup items as explained above, then click to clear the Hide All Microsoft Services box. Finally, repeat the steps above to clear check boxes for Startup list (not Service list).
How to return to normal startup mode
Click Start
Type msconfig in the search field box
Press Enter
Provide admin permissions or password
Under General tab, click Normal Startup – load all device drivers and services
Click Ok
Restart if prompted to
7. Create a new user account
Here’s how to create a new user profile:
Click Start
Select Settings
Select Accounts
Click Add someone else to this PC
Fill in the form with the user name and password. Your new user account will be created.
Restart your computer
Login to the new account you just created
Try launching the game using the new account.
Note: some games require accounts with administrator privileges to run. In this case do the following to grant admin rights/privileges:
Here’s how to create a new user profile and give administrator privileges:
Click on Change account type
Click the drop down arrow and choose Administrator to set the account to administrator level
Restart your computer
Login to the new account you just created
Try launching the game using the new account.
If this fixes the problem, sign out of the new account and sign back in to your usual user account and check if the game crash problem is still there.
If it is, then the problem is your usual user account. Use the Fix It button to restore default security settings for the account, then check if it resolves the problem.
Otherwise, move your data from the problematic user account to the newly created user account in order to access it.
8. Change Compatibility settings
Right click the game’s icon
Click Properties
Click Compatibility tab
Select Run this program in compatibility mode for box
Select the Windows version
Click Ok
Note: this method may not work for newer games that need advanced features.
9. Temporarily disable sound card
Right click Start
Select Device Manager
Right click the driver
Click Disable
Click Yes, then click Ok
Restart and test the game
10. Update the sound driver
Get in touch with the manufacturer of the sound card so as to find out how to get the latest version of the sound driver for your sound card.
How to determine your sound card’s name and manufacturer
Click Start
Type dxdiag in the search field
Press Enter
Click Sound tab
Under Device, locate the Name
Under Drivers, locate Provider
Click Exit
11. Remove and reinstall the game
Sometimes a game crash leads you to do the inevitable: removal of the entire game and all its components, then reinstalling it.
Here’s how to do it:
Perform a clean boot using the steps below:
Go to the search box
Type msconfig
Select System Configuration
Find Services tab
Select Hide all Microsoft services box
Click Disable all
Go to Startup tab
Click Open Task Manager
Close Task manager then click Ok
Reboot your computer
Remove and reinstall the game using the steps for your version of Windows, by reinserting the game’s CD then following the instructions to complete installation.
If setup doesn’t start automatically, do the following:
Click Start
In the search box, type drive:setup.exe (drive is the letter of the CD/DVD drive)
Press Enter
Follow the on-screen instructions to complete installation.
12. Check Solution Center
Go to the Games for Windows Solution Center to find solutions that let you check product issues, error messages and troubleshooting tips. You can also find product help from discussion forums or a support professional, or technical product information such as contacts to reach support.
13. Scan your computer for viruses
If the game closes, generates an error or you experience a game crash when you start/launch, or while playing, your computer is infected by a virus.
If you already have an antivirus software, update it by installing the most recent signature files before performing a scan. Such signature files are released each month. Once you get it, scan your computer.
After the full scan is complete, repeat solution 11 to remove and reinstall the game.
14. Remove spyware and any other unwanted software programs
Follow these steps to run a scan for spyware and other unwanted software:
Click Start
Go to search field and type Windows Defender
Select Windows Defender app from the search results
Select Full Scan on the right hand side
Once cleaned up, follow Solution 11 to remove and reinstall the game.
What happens when my Microsoft Store games crash?
In order to understand how to resolve a game crash, you need to figure out where it stems from. Here are some symptoms of a game crash:
Even though it’s still trailing behind the competition, the Microsoft Store has more than a few nice exclusives. Purchasing games or applications closely resembles other similar services and everything is done in a matter of seconds.
However, some users willing to spend some bucks on a game or two had issues with finalizing the purchase.
Namely, they were met with theWe’re having trouble processing your payment and we’d like to get it sorted out. Get more info. error message. A variation of it is We ran into a problem completing this purchase.
This error message has been reported by both PC and Xbox users, as seen on forums. Let’s find out how to fix it together.
How can I fix the Microsoft trouble processing payment issue?
1. Reset the Store’s cache
Let’s start with the simplest solution which usually works. Of course, if you’re certain that everything is properly configured and the error is completely uncalled for. Microsoft Store is far from flawless, and its plagued by a whole plethora of issues. However, the temporary stall might be the cause for the in-store purchasing error, as it’s the case for so many problems.
Microsoft Store is a native Windows 10 app and works in the background all the time. This leads to pilling up data which, consequently, might follow with an error. Because of that, we suggest resetting Microsoft Store’s cache.
If you’re not sure how to do it, follow the steps we provided below:
Press Windows key + S to open Windows Search.
WSReset.exe and press Enter.
Try purchasing the Store content again.
2. Log out and log in again
The second step is as obvious as they come. Nonetheless, an inexperienced user might panic and forget about it. Namely, if the system has issues with your active account, you might resolve this little stall by simply logging off and logging in again. Some users even advised logging with an alternative account and then going back to the original one.
Either way, this seemingly helped for the similar problem on Xbox Live. Since Microsoft Store is the same for all Microsoft devices, we can expect it to be a success on a Windows 10 PC as well.
3. Check your funds and re-establish a paying method
More times than not, the “We’re having trouble processing your purchase” error is a temporary occurrence. However, if the same message pop-ups every time you try purchasing something from the Store, there might be something else at hand. Firstly, we suggest checking your funds.
In addition, consider deleting you paying method (debit/credit card, PayPal, etc.) and establishing it again. This might take some time, but the paying method might get locked down due to a service error. You can do all of that, here.
4. Make sure region/time settings and pay account are properly set
As we go deeper into the possible causes list, it’s important that you come from a region which allows purchases. The rules for this vary, so there are some games or apps you’ll be able to obtain regardless of your geo-location. On the other hand, lot’s of games are not available globally, so make sure you’re able to get the game in the first place.
Also, you can change your region and time to match the account settings and payment options. Namely, your account credentials need to be set to the same location and ZIP code number as your debit/credit card. For example, you won’t be able to pay for a game with the foreign card.
Finally, if none of the aforementioned solutions helped you address the “We’re having trouble processing your purchase” error, we suggest sending the ticket to Microsoft.
The support should be able to check what’s exactly causing the problem. You might need to send a few screenshots, but the whole effort won’t take you more than 15 minutes.
You can report your issues and send inquiries, here.
With that said, we can conclude this article on the the Microsoft we’re having trouble processing your payment issue. Hopefully, you’ve found it informative. In addition, make sure to share your thoughts and additional solutions in the comments section below.
You can test if the issue is fixed by checking your Microsoft Store order history, and we have a guide that will show you how to do that.
Some of our readers reported that the Task Host window is preventing a shutdown along with a Shut down anyway option. While clicking on it helped some, others again got the error on their subsequent attempts at performing a shutdown.
The Task Host window is not a virus, as often understood by many. This error is usually caused by a stuck OS update, or when a program is installing in the background. Certain running services and corrupt system files may also preventing a shut down.
Before we go to the slightly complex solutions, click the Shut down anyway button on the error prompt and check whether it appears again. For some, it was a one-off thing.
1. Run the Windows Update troubleshooter
Press Windows + I to open Settings, and then choose Troubleshoot from the right in the System tab.
Click on Other troubleshooters.
Now, click on Run next to the Windows Update entry to launch the troubleshooter.
Follow the on-screen instructions to identify and eliminate the problem.
In most cases, it was an issue with Windows Update that led to the Task Host window preventing shutdown. And the built-in troubleshooter did wonders by fixing things in no time.
2. Restart the Microsoft Store Install Service
Press Windows + R to open Run, type services.msc in the text field, and hit Enter.
Locate the Microsoft Store Install Service, right-click on it, and then choose Restart.
Wait for the service to restart.
The Task Host window preventing shutdown mistaken for a virus can also be due to issues with the Microsoft Store Install Service, and restarting it should get things up and running.
3. Disable startup apps and non-critical services
Press Windows + R to open Run, type msconfig, and click OK.
Head to the Services tab, tick the checkbox for Hide all Microsoft services, and then click on Disable all button.
Now, press Ctrl + Shift + Esc to open the Task Manager and go to the Startup apps tab.
Select the apps that read Enabled under the Status column individually, and click on Disable at the top. Do it for all such apps.
Once done, restart the computer, and verify whether the Task Host window is still preventing shutdown. In case it is, head to the next solution.
Press Windows + R to open Run, type cmd, and hit Ctrl + Shift + Enter.
Click Yes in the UAC prompt.
Paste the following three commands one at a time, and hit Enter after each:DISM /Online /Cleanup-Image /CheckHealthDISM /Online /Cleanup-Image /ScanHealthDISM /Online /Cleanup-Image /RestoreHealth
Once done, execute the following command to run the SFC scan:sfc /scannow
In a few cases, users got the Task Host window preventing shutdown due to corrupt system files, and running the DISM tool and the SFC scan got things working. These two shouldn’t take more than half an hour to run under ideal conditions.
Another option for easily erasing corrupt files would be a dedicated repair tool. They have massive databases with healthy system files with which they can replace all malfunctioning files found on your PC.
5. Uninstall Windows updates
Press Windows + I to open Settings, go to Windows Update from the navigation pane, and click on Update history.
Scroll down to the bottom and click on Uninstall updates.
Now, click on Uninstall next to the update that was installed right before the error first appeared.
Again, click Uninstall in the confirmation prompt.
If the error persists, uninstall another recent update, and check again.
Many users who reported that the Task Host window is preventing shutdown fixed things by uninstalling a few problematic updates. For most, it was the last two, but it might be different for others.
6. Turn off Fast Startup
Press Windows + S to open the Search menu, type Control Panel, and then click on the relevant search result.
Click on System and Security here.
Now, choose Change what the power buttons do under Power Options.
Click on Change settings that are currently unavailable.
Now, uncheck the box for Turn on fast startup (recommended) and click on Save changes.
Once done, restart the computer, and the error shouldn’t appear again.
7. Install the optional updates
Press Windows + I to open the Settings app, navigate to Windows Update, and click on Advanced options.
Now, click on Optional updates.
Tick the checkboxes for all the available updates here, and click on Download & install.
That’s it! If nothing has worked so far, installing the optional updates should fix things in case the Task Host window is preventing shutdown.
We also have a new guide on Error Fail Shutdown, so don’t miss it for more information.
For any queries or to share a solution that’s not listed here, drop a comment below.
HoloTour lets you explore the beauty and history of old Rome or uncover the hidden secrets of Machu Picchu.
Thanks to its unique combination of 360-degree video, spatial sound, and holographic scenery, you’ll believe that you’re really there. You can visit the world’s biggest cities with HoloTour.
Melissa, your personal tour guide, provides a fresh perspective on your surroundings, as well as interesting information.
She’ll help you learn interesting facts and uncover rich historical insights. You can use your gaze, gesture, and voice to naturally interact with the world around you.
HoloTour
Now is the perfect time for a virtual tour around the world’s most famous places, from the comfort of your home.
If you’re fascinated by the human body, we recommend that you try out INSIGHT HEART.
This is the first app from a planned series for the medical education of the future.
As its name suggests, this app guides you through the functions of the heart. You can actively engage in the learning process and control the heart by gesture or voice control. You can zoom, rotate and scale a high-resolution heart hologram.
INSIGHT HEART also shows impressive visual effects of myocardial infarction, arterial hypertension and atrial fibrillation.
All these highly detailed visual elements offer a better learning experience.
INSIGHT HEART
A must-have app for medical students and established professionals alike, that can change the future of medical education.
Sci-Fi is more real than ever thanks to HoloBeam Tech. Valorem, the company behind this impressive app, has managed to create an innovative telepresence technology that will definitely amaze you.
This holographic streaming technology captures the likeness of a person using a stereoscopic camera as 3D point cloud data.
The point cloud data is then streamed across the Internet. Microsoft HoloLens decodes and renders the holographic stream, providing a good representation of the sender’s likeness.
Although this demo may seem a bit rough for some users, we’re sure that Valorem will improve HoloBeam Tech’s image quality in the future.
HoloBeam Tech
Communicate in real-time with holographic representations of your piers via this revolutionary collaboration app.
HoloLens will definitely be one of the most popular learning supports in the future. This device has a huge educational potential and we’re sure more companies will exploit it in the future.
HoloStudy Demo offers is a series of geology, physics, chemistry, and biology lessons. You can set off on an incredible journey with virtual professors, to better understand the complexity of science.
Although this is only the demo version of the app, the information quality and the presentation manner will make you fall in love with this app.
HoloStudy Demo
Learn geology, physics, chemistry or biology with the help of virtual reality and see science from a completely different perspective.
Jurassic Park fans will definitely love this HoloLens app. Land of Dinosaurs is actually a portal that allows users to enter a time warp to 65 million years ago when dinosaurs ruled the earth.
You’ll meet the fierce Titanosaurus, the largest dinosaur that ever lived, as well as other impressive creatures.
The Land of Dinosaurs app is perfect for museums, schools or other educational institutions, or regular dinosaur fans. For more information, check out the video below:
Land of Dinosaurs
A highly entertaining app that takes you beyond the fictional Jurassic Park experience, deep into the realm of long-gone creatures.
HoloFlight is another interesting HoloLens app from Valorem. It allows users to visualize real flight data in 3D as holograms.
You can walk around and explore various parts of the visualized flight space, and zoom in to see specific details, including the control tower’s point of view.
The app also offers an introductory tutorial when launched for the first time. You can open the tutorial at any time by saying Show Tutorial.
This holographic game proves that HoloLens is also a powerful gaming tool. You’ll play the role of a detective gifted with the unique ability to investigate crimes based on memories.
You’ll examine holographic crime scenes and gather clues blended into your reality.
Use your wits and sense of observation to solve the crimes and make the perpetrators pay for their deeds.
As its name suggests, this is a cross-platform app that you can use to watch TV. Yes, you read that right.
You can now watch TV using your HoloLens headset. This was not even possible when Microsoft first launched the device.
Moreover, TV Online Univ is compatible with your Window 8.1 and Windows 10 computer, Windows phone, and Xbox One console. It supports Continuum as well.
The app also features a Live Tile that provides you with more information on the number of channels and upcoming events.
There is also a program guide that you can use to make sure you won’t miss your favorite TV shoes.
Other interesting features include:
Picture in Picture support — this means that you can view two channels simultaneously
DLNA/Miracast Send support
Full Cortana and OneDrive support
You can also record live content to watch later if you don’t have enough time.
Does Space Invaders ring any bell for you? If it does, then you’ll be more than happy to learn that there’s a modern VR version of this game — well, sort of.
It’s called Robo Raid. There are no space chickens involved in this game, but the principle remains the same.
As a player, you need to shoot and destroy waves of robots that are constantly attacking you with laser beams.
We’re sure that this mixed reality first-person shooter will impress you. Vicious robot invaders will break through your walls trying to shoot you.
Don’t sit still, otherwise, you’ll die. You’ll need to move constantly in order to avoid enemy fire.
You can use your gaze, gesture, and voice to attack and destroy the robots.
My Notes is now available on the HoloLens. This is perhaps the best note-taking app for the HoloLens.
It supports a series of useful features that help you to stay organized.
You can use it to create task lists, shopping lists, write down event details, and more. The best part is that you can then sync your note to OneDrive.
So, if you wrote down an important reminder using your HoloLens device, you can then access and edit it from your computer.
There are hundreds of HoloLens 1 and HoloLens 2 apps available in the Microsoft Store presently. Of course, we can’t cover all of them in this guide.
There are many more interesting apps worth your attention. Apart from the apps listed above, here’s what may also interest you:
Aircraft Explorer: Explore seven of the most common commercial aircraft.
HoloAnatomy: A tour of the Case Western Reserve University and Cleveland Clinic HoloAnatomy course.
3dDraw for HoloLens: Draw with your hand in 3D and then walk around in what you have created. Speaking of 3D drawing, there’s another similar app that you can try. It’s called HoloBrush.
The Red Pill: This allows you to see the code behind the “real” world.
Holo Real Estate: This app allows you to view a property without being there. Basically, the app gives you a virtual tour of the house/ office that you’re interested in renting or buying. You can even perform an actual Life-Size Walk-Through the Home using a tag-a-long menu and voice commands.
Sort my stuff! With the help of this app, you can quickly create inventories of all the stuff you own. You can name the respective items, place them into a specific category, add a price tag and even a photo of it. You can also add a short description and then export the list to social media or other apps.
HoloBlocks is another fun app to try. You can build intricate structures using HoloLens blocks and then knock them down just for fun.
As you can see, the HoloLens app universe is pretty spectacular although the HoloLens is a relatively new device.
Taken into account its impressive capabilities, we’re sure that more and more developers will turn their attention to HoloLens in the near future.
If you’ve come across other interesting HoloLens apps, feel free to use the comment section below to tell us more about your experience.
Starting with Windows 8 we can use the Windows Store to download and install various apps, tools and programs on our devices. This feature works even better on the latest Windows 10 versions.
However, some problems might cause malfunctions within the Windows Store and you may end up facing problems when trying to download, update or install software from the Store.
And the most common error that’s reported by Windows 10 users is related to the ‘This product needs to be installed on your internal hard drive’ message. Shortly, at some point, Windows Store stops working correctly.
So, if you are reading these lines, then you most likely noticed this problem. Anyway, don’t panic as we are going to fix this issue right away.
How to fix the This product needs to be installed on a system drive error?
1. Repair the Windows 10 system
You can repair your system, without losing your data, by using an ISO file, with USB installation media, or by using the Media Creation Tool. Once you have the Windows 10 system files you need to run the Windows 10 Setup executable file. Make sure that when asked by the installation wizard you choose both Install Windows 10 and Keep personal files and apps.
From that point that follow on-screen prompts in order to complete the flashing process. When done, your Windows 10 system should run without any problems meaning that now Windows Store can be accessed without experiencing the ‘This product needs to be installed on your internal hard drive’ error message.
Should the Media Creation Tool fail to work, check out this article to troubleshoot the problems.
Alternatively, we recommend using third-party repair software that aims to fix Windows files that keep your PC from functioning properly.
These tools come with comprehensive databases of Windows system files and are able to detect whether you have faulty ones and quickly replace them.
On top of that, the software can fix your registry, DLL files, detect hardware problems, and tweak your system settings in order to minimize or remove them.
2. Check the default App location
The first thing to check is the location where Windows Store is installed. By default it should be on C drive – the ‘This product needs to be installed on your internal hard drive’ error message might refer exactly to this aspect; so:
Press Win+I keyboard hotkeys in order to access System Settings.
From the main panel click on System – Display, notifications, apps, power.
From the System window click on Storage (it’s located on the left sidebar).
Under Save locations every entry should point to C drive.
Change these values if you get something different.
Save your changes and try to use Windows Store again.
3. Uninstall the latest Windows 10 updates
A new update might cause this Windows Store malfunction. So, you can try to uninstall the latest update and check if the problem was related to this software. Here is how you can complete this troubleshooting solution:
Right click on the Windows Start icon or press the Win+X hotkeys.
From the list that’s displayed click on Programs & Features.
Then, select View installed updates.
Select the latest updates and choose Uninstall.
If the Windows Store app is working properly make sure you block the update that was causing the issues, at least for a while (until Microsoft comes with a fix).
4. Clear Store cache
A certain app (default or third party) might be the cause why you get the ‘This product needs to be installed on your internal hard drive’ error when you access Windows Store. So, it’s time to clear cache for these apps:
For clearing default apps store cache
Press Win+R keyboard keys and launch the Run box.
There type WSReset.exe and click OK.
The Windows Store and a cmd window will be displayed; Store cache will be automatically erased.
For clearing third party store cache
Open a command prompt window – right click on the Windows Start icon and select ‘Command Prompt (Admin)’.
In the cmd window type wmic useraccount get name,sid and press Enter.
The command will return the SID for the user account that apps are not working.
Now, press Win+R hotkeys and in the Run box enter regedit and click OK.
From Registry Editor navigate towards HKEY_LOCAL_MACHINE -> SOFTWARE-> Microsoft-> Windows-> CurrentVersion-> Appx-> AppxAllUserStore
From the left panel expand AppxAllUserStore and remove the SID entries that were displayed as not working before.
Close everything and restart your computer.
5. Reinstall Windows apps
Run an elevated cmd window on your device – right-click on the Windows Start icon and choose ‘Command Prompt (Admin).
In the cmd window enter: Get-AppXPackage -AllUsers | Foreach {Add-AppxPackage -DisableDevelopmentMode -Register “$($_.InstallLocation)AppXManifest.xml”}.
Execute this command and restart your Windows 10 device.
If you want to reinstall just a certain App, you will need to find its appxmanifest.xml file path. To do so:
Open PowerShell as an administrator
Enter this code: Get-AppxPackage -allusers | Select Name, PackageFullName
Select the App you want to reinstall and double-click onits PackageFullName
Copy/paste the string to your clipboard
Go back to PowerShell
Enter this code Add-AppxPackage -register “C:\Program Files\WindowsApps\PackageCodeName\appxmanifest.xml” -DisableDevelopmentMode
Replace PackageCodeName with the string you copied
Of course, you can also include a system scan for checking if there are processes that aren’t running properly. This system scan can be done within an elevated command prompt by running the sfc /scannow command.
We hope that you now have a fully functional Windows Store platform. So, go ahead and download, update and install your favorite Windows 10 tools.
Windows 8 store not working? This can be an issue, especially if you tend to use the Universal apps a lot, but there’s more than one way to fix this problem.
Don’t worry too much though. With the simple tricks below you’ll be able to fix it:
What can I do if the Windows 8 Store is not working?
1. Create a new user account
Open the Settings app.
Navigate to Accounts section.
Select Family & other people from the menu on the left. In the right pane click on Add someone else to this PC.
Click on I don’t have this person’s sign in information.
Choose Add a user without a Microsoft account.
Enter the desired user name and click on Next.
Note: After creating a new user account check if the issue appears on the new account. If not, you might have to move your personal files to the new account and use it as your default account.
2. Check your antivirus
Sometimes antivirus apps can lead to this error, particularly McAfee and Avast. To figure out if that’s the problem, disable your antivirus temporarily and try opening the Windows 8 Store again.
If it now works, we recommend uninstalling it an replacing it with an antivirus with low CPU usage because these are generally less prone to cause errors.
3. Switch to a local account
Open the Settings app and go to the Accounts section.
Click on Sign in with a local account instead.
Enter your account password and click on Next.
Enter the desired username and click on Next.
4. Delete the LocalCache directory
Navigate to the following directory: C:Usersuser_nameAppDataLocalPackagesMicrosoft.WindowsStore_8wekyb3d8bbweLocalCache
You can do that by simply by pressing Windows Key + R and entering %appdata%.
Select all files in the Local Cache directory and delete them.
5. Use PowerShell
Search for powershell right-click it and choose Run as administrator.
Enter the following command: PowerShell -ExecutionPolicy Unrestricted -Command "& {$manifest = (Get-AppxPackage Microsoft.WindowsStore).InstallLocation + 'AppxManifest.xml' ; Add-AppxPackage -DisableDevelopmentMode -Register $manifest}"
Note: If the previous command doesn’t work, you can try this command instead: Get-AppXPackage -AllUsers -Name Microsoft.WindowsStore | Foreach {Add-AppxPackage -DisableDevelopmentMode -Register "$($_.InstallLocation)AppXManifest.xml" -Verbose}
If you’re still using Windows 8, you might want to try running the following command: powershell -ExecutionPolicy Unrestricted Add-AppxPackage -DisableDevelopmentMode -Register $Env:SystemRootWinStoreAppxManifest.xml
6. Enable UAC
Search for user and select Change User Account Control settings from the menu.
Move the slider to the default position and click on OK to save changes.
Note: According to users, problems with Microsoft Store might be related to UAC. User Account Control is a security feature that prevents certain actions that require administrative privileges. Perhaps your Windows 8 Store is not working because of it.
This feature generates many security notifications, and this is the main reason why users tend to disable it.
7. Run the Microsoft Store Apps troubleshooter
Open the Settings app and select the Update & security section.
In the left pane, select Troubleshoot. From the right pane select Microsoft Store Apps and click on Run the troubleshooter button.
Wait for the troubleshooter to finish.
8. Reset the Microsoft Store
Go to Settings and click on Apps, then on Apps & Features.
Locate the Microsoft Store app in the list and select it.
Click on Advanced options as shown in the screenshot below.
Click on the Reset option and restart your computer.
Our last solution for the Windows Store not working on Windows 8 problem involves resetting the Store altogether. This should make it functional again.
Once you apply the steps above your Windows Store problem should be gone. Leave us your thoughts in the comments section below regarding the Windows 8 Store not working topic.
Steam is one of the most popular clients, with thousands of exciting games. Some of these are free, while others require purchase, both prior and in-game. But several users reported that Steam crashes when uninstalling a game.
The issue is not new and has been present for quite a few years now. For some, it got fixed automatically, but many continue to report it even today. So, let’s find out how you can fix the problem.
Why does Steam crash when uninstalling a game?
Here are some of the reasons Steam crashes when removing a game:
Another game is updating the background – In some cases, users realized that a game was updated in the background while they were uninstalling another, which triggered the crash.
Bug in the current version – Since many reported that the issue was fixed after installing Steam updates, it could be that there was a bug in the program that led to the error.
What can I do if Steam crashes when uninstalling a game?
Before we head to the slightly complex solutions, here are a few quick ones you can try:
Restart the computer and check if Steam still crashes when uninstalling a game.
Terminate all other programs on the computer while uninstalling the game since these might be conflicting with the process.
If these two don’t work, the solutions listed next surely will.
1. Launch Steam in offline mode
Open Steam, click on the Steam menu near the top-left corner, and select Go Offline from the menu.
Now, click on Enter Offline Mode in the confirmation prompt.
Next, navigate to the Library.
Right-click on the game that you were trying to remove earlier, hover the cursor over Manage, and choose Uninstall.
The game should now uninstall successfully.
Once done, again click on the Steam menu, and this time, choose Go Online.
This solution works on all Steam versions and allows users to uninstall games effectively. If Steam still crashes while uninstalling a game, head to the next solution.
2. Update the Steam Client Software
Open the game client, click on the Steam menu, and select Check for Steam Client Updates.
Now, wait while Steam checks for updates and installs any available ones.
Once done, restart the computer for the changes to come into effect.
Though the game client automatically looks for updates by default at launch, there’s no harm in checking manually when Steam crashes while uninstalling a game.
3. Uninstall the game via Programs and Features
Press Windows + R to open Run, type appwiz.cpl in the text field, and then hit Enter.
Locate the game that couldn’t be uninstalled via Steam, select it, and click Uninstall.
Now, follow the on-screen instructions to complete the uninstall process.
This one is more of a workaround than a solution but is often highly effective at bypassing the problem if Steam crashes when uninstalling a game.
You can also uninstall Steam games with third-party uninstaller software. The best third-party uninstaller utilities will erase leftover files from uninstalled software the default Windows uninstaller might leave behind. Some third-party software removal tools include useful force uninstaller features.
The Microsoft Store can’t update for some, and that problem is usually caused by app corruption or incorrect region settings. Here’s how to fix it quickly.
What can I do if the Microsoft Store won’t update?
1. Change The Region Settings
Go to Start Menu and click on Control Panel
In Control Panel, go to Region, and change your region under Formats drop-down menu
Reboot your MicrosoftStore and try to update it again
Maybe the Microsoft Store is not updating apps because you’re in the unsupported region or your region somehow changed from your actual one.
To solve the problem all you need to do is to change your Region Format in the Control Panel and your MicrosoftStore app should be able to update again.
2. Repair the Microsoft Store app
If changing the region didn’t help, you can try with repairing your Store app in the Command Prompt. To do that, follow these steps:
In the Search box, type cmd
Right click on Command Prompt and choose Run as administrator
In the command prompt, enter the following command:
The next thing we’re going to try is running the built-in Store troubleshooter to make Microsoft Store update.
Go to Settings.
Navigate to Updates & Security > Troubleshoot.
Click Windows Store Apps and choose Run the troubleshooter.
Wait for the troubleshooter to finish the process.
Restart your PC.
4. Reset the Store
Go to Search and type wsreset.
Click WSReset.exe
Wait for the process to finish and restart your computer.
Another widely used troubleshooting tool that’s tightly connected to the Windows Store is the WSReset command. You can use this command to reset the Store, and bring to its previous state, back when it had no issues updating.
Some users reported that you can’t install Windows Store updates or any other updates if your date and time are wrong. So, make sure to get your time and date settings right before trying to update the Windows Store.
6. Reinstall a problematic app
If you have a problem with a certain app, it may block the entire Store and cause it to not update. So, go through all the apps installed on your computer, find and uninstall the troublesome one.
You can find the list of all the installed apps in Settings > Apps > Apps & features.
Go to Search, type cmd, right-click Command Prompt, and go to Run as Administrator.
Enter the following command, and press Enter on your keyboard: sfc/scannow
Wait for the process to finish.
Restart your computer.
Another troubleshooting tool designed for dealing with various system errros within Windows, including the Windows Store, is the SFC scan. So, you can try and run this feature to resolve the problem with updating the Microsoft Store.
8. Update Windows / Delete updates
Press Windows key + I to open the Settings app.
Select Update & security.
Click on View installed update history.
Choose to Uninstall updates.
Uninstall all recent updates and restart your PC.
Windows updates are crucial for the system’s functioning. So crucial that some updates even determin whether your system will work better, or become broken. Because of that, it takes installing just one Windows update to solve your problem. And that’s what we’re going to do now.
To check for new updates, simply go to Settings > Updates & Security, and check for updates. If a new update is available, the app will install it automatically.
But as I said, a broken update can also cause a handful of issues. So, if installing a new update didn’t sovle the problem, try with uninstalling the most recent update. Maybe you’ll get more lucky.
After you finish trying out all of these solutions, try to see if you can update the Store.
So, here are the solutions for Microsoft Store updating problems. After performing these solutions your MicrosoftStore should be able to receive new updates on a regular basis.
If you have any other questions, suggestions, or these workarounds somehow didn’t work for you and Microsoft Store still won’t update, please tell us in the comments section below.
Missing updates can be a problem, and one update that many reported missing is KB2999226. Sometimes Windows Update isn’t showing, and we already wrote about this issue in one of our previous guides.
In today’s guide we’re going to show you how to properly download this update on your PC, so let’s get started.
What is KB2999226?
This is an update intended for older operating systems that brings the following improvements:
Windows 10 Universal CRT – This update is intended for users that use game programming software and other development tools. With this update, older operating systems will be able to utilize Windows 10 Universal CRT functionality.
How do I download and install KB2999226 on Windows 10/7?
1. Use Windows Update
Windows 10
Press the Windows key + I to open the Settings app. Next, go to Update & Security.
If the update isn’t showing, click on Check for Updates.
In case the update is still not listed, click on View optional updates and download it from there.
Look for the update and select it to download it.
Windows 7
Open Control Panel.
Go to the System and Security section and then select Windows Update.
A manual download for Windows 10 isn’t possible since the update isn’t available in this form for Windows 10.
We hope that you found this guide helpful and that you manage to install the update. For more information, be sure to read our guide on how to update Windows 10 offline.
Comment down and let us know how easy it was to install the KB2999226 following our guide.
If you’re troubled by this error message: Sorry this profile can’t connect to Xbox Live on this console, we have a few solutions that can help you to resolve this.
Sometimes the issue appears due to your Gamertag. Moreover, like a computer, your Xbox contains a cache system that stores items such as gamer pictures, game updates, or system update installation packages. This could also cause hitches in your console’s performance sooner or later.
One way or another, it’s time to take action. Follow the steps given below to fix the problem in no time.
How to fix Sorry this profile can’t connect to Xbox Live on this console?
1. Delete your Gamertag and download your profile
To begin, launch a Backward Compatible title on your console.
Press the View and Menu buttons simultaneously for a few seconds.
Then, select Manage Storage.
You will get a warning that you are leaving the game, so confirm your intention.
Select Profiles.
Look for your Gamertag next and delete it.
Press B to back out of the screen and then press the same View and Menu buttons again to bring up the menu.
You may see an option there to download the profile. Click on that and it will ask for your email and password.
If you can’t find this option, select Sign In or press X on the controller.
Finally, don’t forget to select Download Profile to download it once again to the console.
Sorry, this profile can’t connect to Xbox Live on this console is a message often related to your Gamertag in backward compatible games. The procedure above described shows you how to delete your Gamertag and redownload your profile.
Apply it as a first-line solution as this should resolve any issues you have with the profile connecting to Xbox Live.
2. Clear the cache of your console
Firstly, hold down the Power button on the front right corner of your console until it turns off completely.
Then, unplug the power brick from the back of the console.
Press and hold the Power button on the Xbox several times to expel any remaining power and clear the cache.
You may plug the power cable back in.
Look at the power brick and wait for the AC adapter light to change from white to orange. When this happens, you may turn the Xbox back on.
To confirm the cache clear was successful, load a game at your choice. The console should display that it is Syncing, which means it is synchronizing with your saved data from the onboard storage.
Note: This process works on all console versions, including the Xbox One original, Xbox One S, and Xbox One X.
Some users that were also struggling to resolve this problem have confirmed that they managed to fix it by clearing the cache. You can actually solve a lot of common problems with your Xbox by simply removing temporary files and data stored in the system cache during normal use.
This procedure is both fast and easy, and comes with only one small downside – it removes previously downloaded game updates, so you need to download them again the next time you play the game. That’s why it’s a good idea to apply the above steps before attempting a full factory reset.
Then, access the Settings menu by pressing the gear-shaped icon.
Choose System from the left panel.
Select the Console info & updates section.
Select Reset console.
On the Reset your console? screen, you’ll see a few options to choose from. If you want to leave game and app data in place, then highlight Reset and keep my games & apps.
To reset the system to factory defaults, highlight Reset and remove everything (recommended in this case).
If the previous procedures haven’t resolved the problem, your final move should be performing a factory reset. This procedure will successfully replace any corrupted data that might be responsible for the error message you’re seeing.
Resetting your console to factory settings isn’t difficult, but it’s a procedure that can’t be undone. That’s why we’re recommending to sign in and connect to Xbox Live if you want your data synced up.
If you have any other questions or suggestions for solving this Xbox Live connection problem, don’t hesitate to leave them in the comments section below.
Many users have been complaining about the sound issues in Dell XPS 15 speakers. For most, the Dell XPS 15 speakers are simply not working.
While the PC is rated highly, this flaw can be annoying because of the important role of sound in your computer use.
The problem might stem from multiple causes, and Realtek speakers are known to encounter sound problems, especially with audio drivers.
So to fix this issue, this article will be covering various solutions that can be used to troubleshoot Dell XPS 15 audio not working on Windows devices.
What can I do to fix Dell XPS 15 speakers not working?
1. Update audio drivers
PressWindows Key + Xand selectDevice Managerfrom the options listed.
Find your audio drivers on the list, right-click it and choose Update drivers from the menu.
Select Search automatically for updated driver software to scan for driver updates. If Windows finds any updates, it will automatically download them.
Then Restart the PC to take effect.
Alternatively, it is advisable to install the latest drivers by downloading directly from Dell’s official site, we recommend usingOutbyte Driver Updater for your driver update.
Right-click the Volume icon in your Taskbar and click on sounds.
Click on the Playback, and right-click on your speaker device. Then check Show Disabled Devices and Show Disconnected Devices.
Right-click on your speaker and select Enable.
. Proceed to click on Set Default to set the device as the default audio device. Then click OK.
4. Enable Automatic Windows Audio Service
Press Windows key +R and input services.msc. Click on OK or press enter key.
Choose Windows Audio and double-click on it.
On the General tab, change the Startup type to Automatic, and click on Start.
Click on Apply, then OK to save.
If the Windows service is not enabled, it could cause sound issues.
5. Check mute speakers
Right-click the Volume icon in the Taskbar and select Open Volume Mixer.
Turn up the Speakers and System Sound.
Often overlooked but the issue of no sound on your Dell XPS 15 might be because of the volume control.
Issues related to sound and speakers are rampant among Dell XPS 15 users. If you want additional information on how to fix laptop speakers not working, check out our best fixes.
Is your Dell XPS 15 speakers not working issue gone by now? Is sound working properly, finally?
We’d like to hear from you in the comment section on your experience using the solutions above. So, leave your questions and suggestions below.
A clean install Windows 11 download is your best bet when things get sluggish, buggy, or bloated. It wipes the slate clean and puts a fresh, stable version of Windows back in place, without leftover junk or broken settings slowing you down.
Whether you’re upgrading, troubleshooting, or just want to start from scratch, a clean install can fix way more than a typical reset.
And if your current PC doesn’t meet Microsoft’s strict requirements, don’t worry. You can still install Windows 11 24H2 on unsupported PCs using a few smart workarounds.
This method will move your files to a Windows.old directory, and your files won’t be deleted. If you want to remove everything, use the Format option before completing Step 11.
As you can see, performing a Windows 11 reinstall is pretty simple, and you can even do it without losing your files. For less experienced users, we suggest a Windows 11 factory reset since the process is simplified and will give you the same results.
We use Wi-Fi networks on a daily basis, and to create a Wi-Fi network, you need to use a wireless router. There are different types of routers, but some users prefer a router with an internal antenna.
If you’re one of those users, you’re in luck because today, we’re going to show you the best router with an internal antenna that you can buy.
If you’re looking for a router with an internal antenna, then Linksys E5600 might be the perfect choice for you. This model has a range of up to 1,000 square feet and can support more than ten devices.
The device uses Wi-Fi 5 standard, and it can provide you with a 1.2Gbps transfer speed. Dual-band support is there, but there are also features like Parental Controls and Guest Access.
As for the available ports, there is a single WAN port and four LAN ports available. Regarding the antennas, the device has four internal antennas.
Linksys E5600 is a great router, and if you’re looking for a model with internal antennas, then this might be the right choice for you.
WAVLINK AC3200 is a dual-band router, and it provides you with speeds up to 1,000Mbps on a 2.4GHz network and up to 2,167Mbps on a 5GHz network.
The device has a single Gigabit WAN port and three Gigabit LAN ports. Regarding the antennas, there are 8x5dBi Omni-directional internal antennas available.
As for additional features, there’s MU-MIMO technology support, parental control, and an LCD so you can see the status of your network.
WAVLINK AC3200 offers some great features, and it’s a perfect choice for a router in your home or office.
This is a dual-band router, and it supports speeds up to 300Mbps on 2.4GHz and up to 1200Mbs on 5GHz networks. The device also supports OFDMA and MU-MIMO for better connectivity.
The device has 4 Gigabit Ethernet ports and an automatic WAN detection, so it’s easy to set up. Speaking of setup, you can do that easily with AZORES mobile app.
As for the supported standards, the device supports Wi-Fi 6 (802.11ax) as well as IPv6. It’s also worth mentioning that the device supports Easy Mesh technology.
AZORES AX1500 is a solid router, and if you’re looking for a router with an internal antenna, this might be the right choice for you.
TP-Link TL-WR902AC is a lightweight and compact router, so it’s perfect for traveling or a device that won’t take too much space.
The router supports 5GHz and 2.4GHz networks, and it can deliver transfer speeds up to 433Mbps and 300Mbps, respectively. As for the antennas, the device comes with two fixed internal antennas.
The device has a single WAN/LAN and USB 2.0 ports. As for working modes, there is a standard router mode, access point mode, client mode, and hotspot mode.
Overall, TP-Link TL-WR902AC is a simple and compact router, and if you need the most basic router with an internal antenna, then this model is what you are looking for.
We want to show you another great router with an internal antenna: D-Link DIR-850L. The router comes with six internal antennas, and it supports both 2.4GHz and 5GHz bands.
Regarding the speed, you can achieve up to 300Mbps on 2.4GHz and up to 867Mbps on the 5GHz band. As for wired connectivity, there’s one Gigabit Ethernet WAN port and four Gigabit LAN ports.
For file sharing, there’s a USB 2.0 port, DLNA support, and you can also monitor your home network using the dedicated mydlink app.
D-Link DIR-850L offers great features, so if you need a router with an internal antenna, be sure to consider this model.
Yes, there are also routers with external antennas. Only non-wireless routers don’t have antennas because they don’t send Wi-Fi to other devices. Basically, a Wi-Fi router requires an antenna by default.
If you prefer using a router with an internal antenna, be sure to consider any model from our guide.
Open the Guide and select Sign in, then Switch profile.
Now log out of your profile.
Press the Xbox button again and choose Sign in.
Select your account again and log in.
5. Set the console as the home console
Make sure you’re signed in to the account that has the gaming license for the game you’re trying to run.
Press the Xbox button to open the Guide and choose System.
Navigate to Settings.
Go to Personalization, then choose My Home Xbox.
Now select Make this my home Xbox.
Sign in with the account that’s giving you this error and check if the issue is still there.
There you go, a few quick and easy solutions that might help you with The person who bought this needs to sign in and Sign in with the account that purchased the game errors on your Xbox One.
Some worldwide users claimed that Xbox One can’t accept game invites, and if it’s happening to be in the same boat, make sure you follow some specialized steps to fix this kind of problem.
Connecting a mouse to your computer allows you to extend the range and reachability of your PC or computer screen. Moreover, the users’ prominent issue is the Bluetooth mouse that keeps disconnecting in Windows 11.
Using external devices with your computer allows you to make the best of it. Hardware like mouse and keyboard gives you more features to use on your computer. However, users may encounter issues while using this hardware with the computer.
Furthermore, the Bluetooth mouse keeps losing connection on Windows 10/11 error may occur due to hardware issues, outdated driver issues, boot errors, and lots more.
However, the causes may differ in different mouse products like Logitech, Apple, or Dell Bluetooth mice.
Nonetheless, this article will discuss the causes and some fixes for the ‘Logitech/Dell/Apple Bluetooth mouse keeps disconnecting’ issue.
Why does my Bluetooth mouse keep disconnecting in Windows 11?
Computer boot error: Many things can go wrong while booting. Hence, it can make the computer act up and not function properly, resulting in the Windows 11 Bluetooth mouse keeps disconnecting issue. Furthermore, the computer can go through a faulty shutdown which may affect you whenever it comes up again. So, how you shut down and start your computer can affect its Bluetooth connection with the mouse.
Connection error between the mouse and the computer: When the mouse is not correctly connected to the computer, it can make the Bluetooth mouse keep disconnecting and reconnecting. Likewise, a wireless mouse can encounter some issues if it is connected to another device without being adequately disconnected from your computer,
Windows Power Management interference: Latest Windows computers come with an inbuilt Power management system that helps it disconnect or end tasks for programs that consume more power. However, the power management system can disconnect the mouse from your computer because it uses a noticeable amount of power.
Mouse driver issues: Mouse drivers may become corrupt or faulty. Hence, it can make the Bluetooth mouse keep losing connection to Windows 10/11.
Many other things may be responsible for the Windows 11 Bluetooth mouse’s keeps disconnecting issue. However, we recommend that users read through ways to fix Bluetooth mouse lag in Windows 11.
How do I stop my Bluetooth mouse from disconnecting in Windows 11?
1. Restart your computer
Click Start on your screen.
Select Power.
Click on Restart and OK.
Restarting your computer will help fix any boot error that causes the Bluetooth mouse keeps disconnecting and reconnecting issues.
2. Update the mouse driver
First, you need to press Windows + R at the same time to open the Run command windows.
Now, in the Run command window, type devmgmt.msc and press OK.
In this window, search for Mice and other pointing devices, click to expand it, find the mouse’s driver, right-click on it and select Update driver.
Lastly, select on Search automatically for updated driver software.
If this updating drivers manually seems to take too much time, you can always use an automated tool that scans your PC for outdated drivers and keeps them all up-to-date instantly.
3. Uninstall the mouse in the Device Manager
Press Windows + R on your keyboard to open the Run command.
Type in devmgmt. msc and press Enter to prompt the Device Manager.
Select the Bluetooth mouse device and right-click on it.
Click on Uninstall device and OK.
Uninstalling the Bluetooth mouse driver from your computer flushed the faulty files on it. However, restart your computer and try to connect the mouse. The computer will install the missing driver automatically.
4. Disable Windows Power Management
Press Windows + R on your keyboard to open the Run command.
Type in devmgmt.msc and press Enter to prompt the Device Manager.
Select the Bluetooth mouse and double-click on it.
Go to the Power Management tab and uncheck the Allow the computer to turn off this device to save power option.
Click OK to save the changes.
We recommend that you restart your computer and see if the issue persists.
Conclusively, there are lots of Bluetooth mouse products in the market that users can buy. However, users can read our guide on the best Bluetooth mice.
You can leave your suggestions and feedback in the comments section. We’d love to know if the article has helped you.
If you’re having difficulty installing Windows 11 from a USB, it can be incredibly frustrating. Not many people know their way around computers, so this can be a daunting task. Unfortunately, this is a common problem that many users are trying to solve.
When installing Windows 11, it is important to be aware of the various risks and problems. For example, USB installation can be susceptible to errors and hardware malfunctions. Make sure you use an official Windows ISO file when installing from a USB stick.
Some possible reasons for a failed Windows OS installation using a USB stick include incompatible hardware, insufficient disk space, or a malfunctioning USB port. If none of those issues apply to you, the best solution is to use a different installation method.
The process can be overwhelming and frustrating, especially if you don’t know the necessary tricks. But don’t worry, this article will help with that. Read on to know more about the fixes.
Why can’t I install Windows 11 from USB?
There are several reasons why your Windows installation may have failed. The following are some of the most common ones:
One possible reason you can’t install Windows 11 from the USB stick is that your USB stick itself doesn’t work. Another possibility is that the USB may be corrupted or not formatted correctly.
If the UEFI settings are configured incorrectly, they can interfere with the installation. So, it’s wise to make sure that the settings are configured correctly before starting the installation process.
The Windows 11 installation on your PC requires quite a lot of space (at least 64 GB). If it doesn’t have enough free space, you can’t complete the procedure.
Here are a few possible fixes that might help you get rid of this issue.
How to install Windows 11 on USB drive if it’s not working?
✅ Pre-checks:
✔️ Check for compatibility
Before installing Windows 11, please refer to the PC Health Check app to confirm that your device meets the minimum system requirement.
That being said, if you are on a laptop or desktop with good specs, chances are that you will enjoy the new release. The Windows release information status for known issues is also available for your reference.
✔️ Try a different USB port
Before proceeding, it is important to make sure the USB port you’re using is not broken. To ensure this, switch to a different USB port and try installing Windows 11 from the USB drive again to see if the issue resolves.
1. Check if your PC is configured to install Windows 11 from a USB
One of the best preparatory steps before installing Windows 11 is to plug in a USB and configure your computer to boot from it. This setting isn’t enabled by default, and you’ll need to manually set it up.
1️⃣ Firstly, reboot your computer. When the manufacturer’s logo appears, there are often some keys or a key combination that you can use. This will depend on the make and model of the PC. Refer to your PC manufacturer’s website for the same.
When pressing a special key, you’ll most likely see another prompt appear. It will show which key to press. For example, some common keys are F8 and F12. The options might differ based on the computer setup.
You’ll most likely see a menu that has options for different boot-up types. On the top-right corner, you’ll see an option that indicates which key is likely to trigger what. Therefore, pay close attention to the screen.
Upon pressing the key, find the option to access CD-ROM or DVD-ROM and make sure it’s enabled.
2. Free up space to install Windows 11
Press Windows + X key and locate File Explorer.
Navigate to My PC and verify the disk with the Windows label has at least 20 GB of free space.
If not, it’s time to delete some files to free up space for Windows 11.
Go to the Windows Search bar and type Device Manager. Hit Enter.
In the Device Manager, locate the USB in question.
Right-click the USB and select Update device.
At times, an outdated driver can prevent you from installing Windows 11 using a USB. Therefore, it is advisable to keep your drivers up to date to avoid any unpleasant experiences.
Searching for drivers on the web is time-consuming and frustrating. Outbyte Driver Updater is a great way to keep your computer up to date without spending hours researching the right drivers.
It works by scanning your computer and finding any outdated drivers; it then searches the web for updated drivers and installs them on your computer.
Outbyte Driver Updater
To fix USB installation issues with Windows 11, update the USB drivers automatically with this tool.
2. Navigate to Create Windows 11 Installation Media and click on Download now.
3. Accept applicable notices and license terms.
4. Plugin your USB drive.
5. Open the downloaded Windows 11 Media Creation Tool, follow the on-screen instructions to create a Windows 11 installation USB drive.
6. Having done this, restart your computer and navigate to the BIOS. And then set the USB media as the boot drive.
7. When you see the installation interface, click Next to proceed.
In the next window, you can reinstall/install Windows 11 by clicking the Install now button and following the on-screen instructions.
Most probably, this should fix the problem and you should be able to install Windows 11 on your PC. If it doesn’t, move on to the next resolution.
5. Try a different USB drive
If your USB drive is too old, it may not be compatible with your computer. You should, therefore,consider replacing it with a more up-to-date model. USB 1.0 or USB 2.0 drives, for example, are not suitable for being used as bootable USB drives these days.
6. Run Windows Troubleshooter
Go to the Windows Search bar and type Troubleshoot settings. Hit Enter.
Select the option, Other troubleshooters.
Navigate to Windows Update and click on Run.
One of the most effective ways to determine what’s causing your problem is to run the Windows 11 troubleshooter. It can detect and try to fix some of the most common problems with the OS.
Press Windows + X key simultaneously and choose File Explorer from the menu that appears.
Next, locate My PC and expand it.
Right-click the USB in question and select Properties.
Navigate to the General tab and check whether the USB is formatted as FAT32 or not. As you can see in the screenshot below, the USB is formatted as NTFS.
You can change the format to FAT32 by right-clicking the USB driver again. This time select the option Format.
On the new window that pops up, select FAT32 format, and click Ok to proceed.
If you are going to reformat the USB stick, it’s a good idea to make a copy of the files you want to store on the USB. Once you’ve done that, reformatting the USB is pretty straightforward.
8. Enter the BIOS Configuration
In the Windows Search bar, type Change advance startup options and hit Enter.
Next, select restart now.
Windows will now reboot your computer.
Once your computer reboots, click on troubleshooting.
Select Advanced options.
Click on UEFI Firmware Settings.
Then, click on the restart option to enter the BIOS configuration.
BIOS (stands for Basic Input Output System) is a type of firmware for computers. The principal job of a computer’s BIOS is to control the early stages of the startup process, such as ensuring that the Windows 11 operating system is successfully loaded into memory.
How can I create a Virtual machine (.ISO file) to install Windows 11?
You can create a Virtual machine (.ISO file) by visiting the Microsoft Website. Find the option Download Windows 11 Disk Image (ISO). Next, click on download and then follow the on-screen instructions.
Do you encounter an error that says Local area connection doesn’t have a valid IP configuration even if you have a stable internet connection?
You may often come across this error message when trying to run the troubleshooter through Windows. Besides, the error may also show up when you try to connect to ethernet or Wi-Fi.
What causes the local area connection doesn’t have a valid IP configuration?
The error means that the IP (Internet Protocol) address provided to the network adapter is wrong or invalid.
Some networking apps can alter the adapter’s default parameters, such as web browsers and VPN clients.
However, we can easily fix these changes by setting the values ourselves or performing a network reset.
Why does my LAN not have a valid IP?
There are a few other reasons that may be causing this issue, which we have listed below.
Incorrect Winsock catalogs
Network services have not started.
Overheated routers
Outdated/corrupted network drivers
However, the local area connection doesn’t have a valid IP configuration error is not a great concern and can be fixed even with limited technical knowledge.
But before you proceed, make sure that you restart your system because many users report that this method has helped them fix the issue.
How do I fix the local area connection doesn’t have a valid IP configuration?
1. Change your network adapter settings
Press the Win + R keys simultaneously to launch the Run console.
Type ncpa.cpl in the search box and hit Enter.
In the Network Connections window, right-click on your internet adapter and select Properties.
Next, under the Networking tab, select Internet Protocol Version 4 (TCP/IPv4) and click on Properties below.
Now, in the Properties dialog, under the General tab, select Use the following DNS server addresses.
Here, add the below addresses in the respective fields: Preferred DNS: 1.1.1.1; Alternate DNS: 1.0.0.1. Press OK.
Now try connecting your WiFi or Ethernet and check if the issue still persists.
2. Reset network and flush DNS
Press the Win + R hotkey to open the Run console.
Type cmd in the search bar and press the Ctrl + Shift + Enter keys together to open the elevated Command Prompt.
In the Command Prompt (Admin) window, run the below commands one after another and hit Enter after each one:
To open the Run console, press the Win + R keys together.
Type in ncpa.cpl and hit Enter to open the Network Connections window.
Now, right-click on the internet adapter and select Status.
In the next dialog, click on Disable.
Now, wait some time, right-click on the internet adapter again and click on Enable.
This should help you fix the Local area connection doesn’t have a valid IP configuration error.
4. Reset network
Press the Win + I keys together to launch the Windows Settings app.
Next, click on Network & internet on the left.
Now, navigate to the right, scroll down and click on Advanced network settings.
On the right, go to More settings and click on Network reset.
Now, on the next screen, go to Network reset, and click on Reset now.
Click on Yes to confirm and proceed.
Once the process is over, your PC will reboot automatically. You can then check if your ethernet or Wi-Fi is working properly.
5. Update/reinstall network adapter
Editor’s tip
You can try a more efficient solution, such as Outbyte Driver Updaterto ensure that your updated driver is compatible with your operating system. This tool can update not only your network adapter driver but all the outdated drivers as well.
5.1 Install your drivers in compatibility mode
Visit the manufacturer’s website for the network adapter, download the driver, and save the installer on the desktop.
Right-click on the installer and select Properties.
In the Compatibility tab, go to Compatibility mode, select Run this program in compatibility mode for, and select Windows 8. Press Apply and OK.
Now, run the installer and finish installing the network adapter drivers and this should help you fix the issue.
5.2 Reinstall the network adapter
Press the Win + R keys together on your keyboard and the Run console opens.
In the search bar, type devmgmt.msc and hit Enter.
Next, expand the Network adapters section, right-click on the device, and select Uninstall.
Click on Uninstall again in the prompt to confirm.
Now, click on the Action tab at the top, and select Scan for hardware changes.
Now, restart your PC and check if the LAN issue is resolved and you can access the Internet.
How do I assign an IP address to a local area connection?
Follow the below steps to assign a valid IP address to a local area connection network:
Open the Run console by pressing the Win + R shortcut keys.
In the search bar, type ncpa.cpl and hit Enter.
As the Network Connections window opens, right-click on your network adapter and click on Properties.
On the next screen, under Networking, highlight Internet Protocol Version 4 (TCP/IPv4) and press the Properties button below.
Next, in the Properties window, under General, select the radio button next to Use the following DNS IP address.
Now, enter the below addresses in the respective fields: IP address: 192.168.1.50; Subnet mask: 255.255.0.0; Default gateway: 192.168.0.0
Press OK to save changes.
Once done, check if the Local area connection doesn’t have a valid IP configuration issue is resolved.
Alternatively, you can update your BIOS to make sure that the built-in network adapter becomes fully compatible with your router or network hardware.
You can also visit the manufacturer’s website for your router to download & install the latest firmware and fix the local area connection doesn’t have a valid IP configuration issue.
We hope you managed to fix the Local area connection doesn’t have a valid IP configuration Windows 10 issue. If you have any other queries related to network adapter issues, you can let us know in the comments section below.
Everything is better when done with your friends, and video games are no exception. While there are many online multiplayer games available for all the platforms, finding a decent collection of LAN party games is not an easy task.
Especially when your friends are not the biggest fan of the platform that you use.
Irrespective of whether your group uses Linux, Windows or MacOS systems, you should be able to host LAN parties with these cross-platform LAN games.
In this article, we take a look at the best cross-platform LAN games that you can play on your Windows, macOS, and Linux systems and relieve the moment of LAN parties before it becomes history.
Which are the best cross platform LAN games?
Xonotic
Price – Free
Supported Platform – Windows, macOS, and Linux
Xonotic is a free and fast arena shooter game which is addictive and the best game to start your new LAN party. It is completely free to download and play.
Xonotic offers an addictive first-person shooter style gameplay with a wide array of weapons to choose from combined with flexible game mechanics.
Your arsenal has over 9 core and 16 full weapons each with a primary and UT-like secondary firepower including Blaster, Shotgun, Machinegun, Mortar and more.
You can play the game in multiple modes including a normal game mode that offers similar arena shooter experience like other popular games like Deathmatch and Capture the Flag. Then there is a Nebal and Freeze Tag mode with multi-player race support.
Out of the box, Xonotic offers 25 official maps but you can get more community made maps with a single click, or you can create your own if you prefer using the map editor.
Other features in the game include integrated player statistics, customizable heads-up display to include all the information you need, and full customization option to use the game in a competitive environment with anti-cheat system and customizable servers.
Xonotic is an excellent first-person shooter game that is free to use and supports three major platforms.
If fantasy themes and strategy games are your things, Warcraft III is one of the most popular games from Blizzard that is available for only two platforms, Windows and Mac. Warcraft offers both single player and a multiplayer pack that can be played over LAN.
The single player campaign story allows you to play as four mighty races. You can play as Night Elves, Orcs, Undead and Humans.
You can lead the forces into the battle and learn to cast spells, carry special items while advancing in the level. Players are given new quests (objectives) regularly to keep them on their toes.
Being a strategy-based game, Warcraft offers a map covered with black fog, which starts to clear as you advance in the game. The players can begin with building settlement and establish troops to protect it from the enemy attacks.
What’s more? You can expand your map with Warcraft Word Editor to design custom 3D Maps and creation mission with scripts for the unit, spells, etc.
XCOM 2, the successor to the original XCOM is a popular cross-platform game that is available on Windows, Mac, and Linux systems through Steam.
You play the role of a resistant fighter using guerilla combat tactics to fight the new breed of enemy. Each mission of the game offers new and unique challenges to take on with your friends and other online players.
In the single-player campaign mode, the players issue the command from the base to research and develop new weapons to fight the non-human enemies.
One of the highlights of XCOM 2 is its new random maps that take you on a new mission around the world from wildlands to the heart of alien-controlled cities.
Thanks to the open-ended gameplay mode that allows you to decide your target and counter enemy operations. You can also recruit fighters from five soldier classes, each with its own skill sets to create your strike force.
XCOM 2 is an excellent strategy game with some rave reviews and multi-player support. If you have played XCOM, there is no reason to miss XCOM 2.
The latest iteration of Warhammer 40K comes with new story modes that show the planet under siege by the armies of Ork. This war game is a brutal battle between three warring factions.
Warhammer is a critically acclaimed game with an average score of 8/10 from the reviewers. You play as the main lead Gabriel Angelos, the commander of the Blood Raven with a big hammer.
Dawn of War 3 is a strategy-based war game that offers a better story than its predecessor. The full campaign is 17 missions long, and you can play all the three fractions (Space marines, Orks and Eldar) to complete the game.
You can play the game on LAN or join the army online to forge new alliances. Warhammer III offers all that you need from a war game including epic actions, elite collection squads, super destructive abilities, and a fully customizable army.
While the concept of LAN parties may not be as an intriguing as it was a decade ago (thanks to the online gaming community) it can still be a fun experience as you get to face your friends face to face and challenge them.
LAN parties are a fading trend, but the online gaming communities cannot beat the excitement and competitiveness offered by the traditional and evergreen LAN parties.
All the games listed in this article allow you to host your own LAN game party without having to worry about the system compatibility.
So, what cross platform LAN games are you playing today? Let us know your favorite game in the comments below.
Since its launch in 2001, the Xbox brand has seen continuous success and shows no sign of slowing down. It’s unique because it is the only American console in a world dominated by Sony and Nintendo.
Many American companies tried their luck in the video game industry, only for all of them to bite the dust and fade into obscurity. Finally, however, Microsoft hit the ground running as it had one of the best possible games.
The very first Xbox console had Halo: Combat Evolved as one of its first games, and it was, without a doubt, the star of the show. It was a revolutionary game whose effects are still felt to this day.
Halo was a massive success and has gone off to lead all of the Xbox consoles that came after as the main star, which the brand is most known for. And from we got exclusives like the Gears of War franchise and Forza.
And then we saw the release of the beloved Xbox 360 and the start of games like the Mass Effect series, Grand Theft Auto 5, the first iterations of the modern Call of Duty games, and so on.
We even saw Microsoft experiment with its consoles, such as the Kinect peripheral, during the time of the Xbox 360. After that, the brand expanded to PC with Xbox Game Pass.
The Xbox Game Pass is a gaming subscription service that provides a rotating catalog of games from various publishers and services. All you have to pay is a monthly subscription, and you get many games at your disposal.
According to Microsoft, the most popular game on the Xbox Series X is Fortnite. This isn’t all that surprising if you think about it. Fortnite has enjoyed consistent success ever since it came out in 2017.
The gameplay is fast and engaging, the graphics colorful and inviting, and tons of pop culture characters. For example, what other game has Darth Vader shot Spider-man, who is also shooting a guy in a fish mask?
No other game that is so jammed-packed with fantastic characters and gameplay modes that hold a massive amount of character comes to mind. And the best part is it’s free.
You don’t have to pay a single dollar to enjoy the game, but if you do, you’ll be able to enjoy it even more.
Next up on the list is Call of Duty: Modern Warfare, although it would probably be more accurate to call it Call of Duty: Warzone. Modern Warfare is part of a more extensive game package that includes two other games.
Even though there are multiple games, Modern Warfare is the most popular; the question is why? The multiplayer in this game is more organized than in the other entries. Cold War is much more fast-paced, and Warzone is a battle royale.
Modern Warfare is more systematic. The game is slower-paced because it focuses more on tactical gameplay than running and shooting. Players often camp while laying traps or hiding behind doors.
Gunfights are rare and much more impactful. The other games have you absorb bullets like a sponge. As a result, modern Warfare is more nerve-wracking than the others, which has translated to addictive gameplay.
Third place is Apex Legends, yet another free-to-play shooter like Fortnite. And just like the number one spot, it has similar fast-paced gameplay and bright, colorful graphics. So what’s the difference?
The gameplay in Apex Legends is more technical and has a higher skill ceiling. Fortnite is a casual game; anybody can pick it up, and it is pretty easy to master. It doesn’t have a high-skill ceiling.
Think of Apex Legends as a cross between Fortnite and Call of Duty. It’s a first-person shooter with various weapons, from pistols to sniper rifles and even a bow and arrow.
You can attach unique weapon mods that change the accuracy, ammo capacity, and power of a gun. Weapon skills also matter heavily; they can turn the tide in your favor.
Plus, Apex Legends has a set cast of heroes that you can choose from, who all have unique abilities to give the game its flavor.
ROBLOX – Extremely large open-world adventure game
The first non-shooter on this list is ROBLOX. Well, to be more accurate, it’s the first entry not to have FPS gameplay as its primary focus. Instead, ROBLOX is like Minecraft because it’s an enormous open-world game with many different modes.
You can race cars, break out of jail in a massive cops and robbers mode, create a theme park, adopt a pet, or hang out with friends. There are also shooting modes like a zombie apocalypse or battle royale modes. What sells ROBLOX is the amount of creativity it allows.
The modes don’t come from the developers themselves but rather from the fans. Players can take the time to create these modes and then upload them to ROBLOX.
The developers have some instructions that fans can follow if they want to try and make FPS modes for the game. ROBLOX is genuinely the ultimate sandbox game.
Grand Theft Auto V is the juggernaut that doesn’t go away. It first came out on the Xbox 360, and people still play it. But, unfortunately, it’s gotten to the point gamers joke around and say that the developer Rockstar can’t count to six.
People also make fun of the number of platforms the title is on. However, the game has been out for almost a decade and still sees a consistent player base. It’s gotten to the point where it’s one of the most successful entertainment products of all time.
GTA 5 has made more money internationally than some movie franchises and TV shows. The funny thing is that the main story is often ignored, which is a shame because it’s excellent.
The main draw is multiplayer, centered around being a criminal and pulling off massive heists. You can buy fast cars, own huge houses, and do whatever you want.
Now we have the first of two sci-fi shooters, Destiny 2. Like many entries on this list, it’s a free-to-play game developed by the old Halo developer, Bungie.
It’s a bit strange game because it takes so many different elements from various games. First and foremost, it’s an MMORPG, meaning you can play with many other people with a set goal.
People come together to face off against raid bosses for valuable loots and weapons or fight each other in a player versus player mode. In addition, exploration was expanded upon in Destiny 2 compared to the first game.
The first game was pretty restrictive in what players could do. However, new content is consistently being rolled out that continues the story and adds more weapons.
Critics love it, players love it and show no signs of slowing down.
We’ve finally reached a game that has nothing to do with shooting gameplay. As you can tell, FPS games are top-rated on the Xbox Series X/S and Game Pass.
NBA 2K22 is the premier basketball game from 2K Games. You can play out your fantasy NBA career with the MyCareer mode and rise through the ranks of the NBA. If you’d rather be a manager, you can play MyGM or My League to be an executive.
The game claims it has the most competitive and immersive version of basketball in a 2K game. You can add skills that improve your dribbling, shooting, dunking, and blocking.
Later this year, a probable 2K23 will come out as this is a yearly franchise. Few changes happen between titles other than an up-to-date roster for the NBA.
Going back to the FPS game, we have Rainbow Six: Siege. This title takes what Modern Warfare does and takes it even further. It’s a tactical shooter, so it has an emphasis on strategy.
This isn’t a game where you go into a room with guns blazing. Instead, it heavily emphasizes cooperation between team members; you can only win if you work together.
Different modes in the game may have you try to defuse a bomb, rescue a hostage, or take control of an objective point. One team will be the attacker, and the other will be the defender.
Another big emphasis in the game is environmental destruction. You can shoot through walls or blast through them. Developers encourage players to blow up walls to get to their objectives.
It offers a new gameplay mechanic open to creativity.
Elden Ring – Amazing open-world game with great quests
Elden Ring was a highly anticipated game that managed to deliver on the hype. But, unfortunately, that isn’t some most games can boast. The majority of developers make a lot of promises that they can’t keep and end up disappointing the players.
BANDAI NAMCO hit it out of the park with this one. So Elden Ring is an open-world RPG similar to the Dark Souls series. It’s a challenging game where a nameless knight goes out to harness the power of the Elden Ring.
Players must fight monsters, explore dungeons, and jump over considerable chasms in their quest. In addition, there are tons of different classes that you can build with unique gameplay mechanics.
The story is even written by George R.R. Martin, the same author behind the Game of Thrones series.
Now we have the family-friendly Minecraft. Microsoft bought the game some years back for an absurd amount of money and has seen continuous success.
It’s a bit like ROBLOX in that it’s an open-world game that theoretically allows you to do whatever you want. Minecraft does this, but it’s much more focused on its gameplay.
The game’s main objective is to explore a vast world, build anything that comes to mind, and compete with other players on multiplayer servers. No unique shooting modes or race tracks exist, but you can create a castle.
Plus, it has cross-play support, so you can play with friends on a PC while playing on the Xbox Series X. Finally, it has an extensive modding community that further enhances the game.
Halo Infinite – Powerful multiplayer and singleplayer shooter
Now we have the premiere Xbox title and are the only one on this list that’s exclusive to the brand: Halo Infinite. But, of course, the Halo series is synonymous with the Xbox brand, so much so that it would have been strange not to include the game here.
The sixth mainline entry continues the story of the Reclaimer Saga Master Chief facing off against an alien threat known as the Banished on the ringworld called Zeta Halo.
What’s unique about Halo Infinite is that it’s the first entry to have its multiplayer mode separate from the main game, and have it be free-to-play. Unfortunately, the multiplayer came out before the main story annoyed some people.
They would’ve liked the complete package from the get-go, but still, players enjoyed the multiplayer. In addition, people praised the title’s gameplay, soundtrack, and graphics.
It has fallen off recently, but that’s probably low developer support. They’re probably cooking up something in the back.
Hades is the only indie game on this list and is highly beloved on Metacritic. It’s a rogue-like game, meaning you explore a procedurally generated dungeon.
Procedurally generated means that the game randomizes its rooms. The story has you trying to escape the realm of Hades, and it takes you multiple times to escape the underworld.
And every single time you escape, the rooms and enemies you encounter are different. In addition, the power-ups that drop change every single playthrough, so you never know what you’ll get.
One run, you may have thunder and fire, and then in the next, you have thunder and water. It’s a great way to keep the game fresh yet familiar.
Now we have the only racing game on this list with Forza Horizon 5. In the Halo series, Forza has been on Xbox consoles since the original console. There are two mainline titles: the Motorsport line and the Horizon line.
Forza Motorsport is a traditional racing game, while Horizon is an open-world title. The game takes place in Mexico and has stunning visuals that account for the country’s unique landscape.
It brings in new modes such as Events Lab, which lets players create customized races with unique rules and objectives. And there’s also Forza Link, a little AI assistant that tracks your progress and helps you find players.
Rocket League is the final game on the most popular titles for the Xbox Series X/S and Game Pass. Don’t let the cars fool you, thinking this is a racing game. It’s quite the opposite.
Rocket League is a weird form of arcade-style soccer where you crash into a giant soccer ball and try to score into a vast net. But as you can see, you see turbo-boosted cars instead of players.
It’s a silly game with bright colors everywhere and an excellent cartoon style. You can boost jump into the soccer ball or other players to stop them from getting a goal.
Like some of the older games on this list, it has enjoyed continuous success. It’s going through season six, bringing in new items and arenas.
What were the most played games on other Xbox consoles?
According to sales figures, this section will break down the most played games on other Xbox consoles. Because, at this point, that’s all that’s available.
But because this guide has already talked about that game, it will be skipped here. So instead, the second and third places will be the focus.
1. PUBG: Battlegrounds – Battle your online friends with hundreds of weapons
Starting off the list the best-selling Xbox One game is PUBG: Battlegrounds. Short for PlayerUnknown’s Battlegrounds, PUBG was a battle royale game before the genre got popular.
One person initially created it, Brendan “PlayerUnknown” Greene, based on previous that he had created. A group of 100 players got thrown onto an island where people had to look for weapons to kill others to survive.
From that description, this was the inspiration for Fortnite. It even had a shrinking map size that forced players together. The game is still widely played worldwide and has a pretty big community in Asia.
This has led to PUBG hosting pretty random collaborations with various anime franchises. It’s weird, but it works.
The other best-selling Xbox One game is (unsurprisingly) Call of Duty: Black Ops III. It’s a lot like any additional Call of Duty game. It’s an action-packed FPS shooter where you go around killing other players.
What was unique about this particular title was how silly it was. It took itself seriously on the surface, but if you look deep down, Black Ops III had some goofy modes.
For starters, the multiplayer had players equip cybernetic enhancement that allowed them to jump off the walls and fly briefly through the air on a jetpack.
And there’s the infamous Zombies mode where you had to fight off a horde of the undead in a suit. Of course, all of that still exists in modern entries, but Black Ops III took it to another level.
You have to wonder how many people reading this guide remember the Kinect on the Xbox 360. But, to give a brief history lesson, it was a massive success when the Nintendo Wii was launched.
From that, Sony and Microsoft tried to incorporate their version of motion control games on the PS3 and 360. However, However, However, However, However, However, However, However, However, However, However, However, Mircosoft was arguably more successful with its Kinect.
The Kinect was packaged in many Xbox 360 consoles, leading to its main game, Kinect Adventures, being incredibly successful. According to Microsoft, the Kinect sold 24 million copies.
The game itself has players surf through rapids, play a weird version of handball, and fly through space. Unfortunately, despite high sales, the Kinect died off quickly.
This is the final Call of Duty entry on this list, and we’re ending it with Modern Warfare 3. It’s been repeated repeatedly, but it cannot be ignored; just influential Call of Duty was when it got a facelift.
It was no longer a slow-paced World War II shooter but now an action-packed game where many people could jump and shoot each other. Modern Warfare3 didn’t change much from the previous installment but it improved things.
The Special Ops mode from 2 made a comeback with new features. It brought in Survival mode, where two players are thrown into an arena and must survive multiple waves of enemies.
It also brought back Zombie mode, a big hit in the previous game. Also, returning from Modern Warfare 2 were Team Defender and private matches. But, again, this game didn’t reinvent the wall; it just made it better.
5. Halo 2 – Immerse yourself in a virtual world like no other
Halo 2 was an enormous success for the original Xbox and was a console seller. You just had to buy an Xbox to get your hands on this game. People regard it as one of the best games of all time.
It was the most popular game on Xbox Live for a while and sold over 8 million copies in its lifetime. Halo 2 took what the original did and improved upon it significantly.
The story was grander; certain weapons could be dual-wielded, melee attacks were made more powerful, and you could steal vehicles. But, of course, these simple changes were mid-blowing back in those days.
The Covenant weapons got more of an identity as being able to pierce shields but tended to overheat. The multiplayer used matchmaking, which allowed you to choose the map and game type you like.
Then it searches out other players who want the same thing. What a fantastic g
The duo of Grand Theft Auto III and its prequel Grand Theft Auto: Vice City is closing out this list. They were packaged on the Xbox at the Rockstar Games DoublePack, which combined the two titles.
According to VGChartz, the double pack had a total of 2.49 million sales throughout its lifetime. These were massively popular video games for their time. GTA 3, in particular, revolutionized open-world games and brought the industry into a new era.
No longer were video games seen as a child’s plaything. Now games were telling more mature stories and showing violence on screen. This caused much controversy for the games but served as great marketing.
Word of mouth spread the infamy of these games and saw the start of popularity that continues today. Good luck with finding the old versions, however. Rockstar seems to prefer gamers to play the terrible remakes.
And good luck with finding a copy of the double pack. Unfortunately, it’s been out of print for a long time.
Getting exact numbers on the most played Xbox Series X games is challenging. Developers and publishers are very tight-lipped about these sales numbers or how many people actively play.
They often mesh numbers from different platforms into one. The closest thing found was a Statista post on the most popular games on the Xbox Series X/S in the US as of November 2020.
These numbers are based on how many players had these games installed on their consoles. Also important to note is that these numbers have been rounded off.
Although sales numbers for the Xbox Series X/S in other regions are unknown, what is known are the other consoles. The website VGChartz has been gracious enough to keep detailed information about popular games.
➡ Xbox One
The most popular Xbox One game by total shipping numbers is Halo 5, with five million units shipped. These are the following entries for their respective region.
➡ Xbox 360
The most popular games in terms of total shipped are Kinect Adventures and Halo 3. Apart from those two, these are the five runner-ups.
➡ Original Xbox
Going by total units shipped, the most popular games on the original Xbox were Halo 2 (eight million), Project Gotham Racing (six million), and Halo: Combat Evolved (five million). These are the runners-up.
How can I view my most played games on Game Pass?
Sign in to your Xbox account on your PC.
Click on your profile picture on the next page and select Xbox Profile.
Under your profile, select Achievement and then choose a game.
Now, click on Achievements again and see how long you’ve played the game; therefore, you can find out which is your most played game.
We all love playing our favorite games, but things become much more interesting when we do it with our friends or family.
Normally, the only way to achieve a connection with one or more PCs would be to do it over a cabled LAN network.
With the latest advancements in computer tech, we can use specialized LAN emulators that allow you to create virtual LAN networks, that give your friends the power to connect to your PC through the internet.
Here are the top 5 best LAN simulator software that will make playing games with your friends easy.
LogMeIn Hamachi is one of the most popular software options on the market that allow you to play your favorite games with your friends by creating a virtual LAN connection.
This LAN emulator is very easy to set up and manage, and it gives you the power to create and manage all aspects of your virtual LAN network. The virtual networks created in this software are secured and can be managed from anywhere in the world.
By using this app you can create a private virtual network, allow access for your friends, and easily play multiplayer games without the need to be connected to the internet.
Here are some of the best features of LogMeIn Hamachi:
Manage and restore networks from anywhere on the planet
Centralized deployment of software – transfer virtual network client to new computers easily
Can be ran in the background to allows access even if the host is not online
Allows secure access to your network by using the LogMeIn Hamachi gateway
Can allows access of remote users with specific computers
Mesh networking
AES 256-bit encryption
Hamachi can be used free for 5 computers, the Standard edition allows 6-32 computers per network, the Premium edition allows 33-256 computers per network, and the Multi-Network allows unlimited numbers of users.
Even though Hamachi has great features included, some of the downsides of using this app is the limit of the free version to 5 clients per network (including host), and the fact that users have reported having lag issues.
ZeroTier is one of the best Hamachi alternatives that allows you to create your own virtual LAN network and play LAN games online with your friends.
This software is open source and also contains free Android and iOS apps. ZeroTier is actually a combination between a VPN (virtual private network), SDN (software-defined networking), and SD-WAN, under one single friendly looking user interface. It is a great choice for a LAN simulator.
Because of it’s easy to set up process, ZeroTier is one of the simplest but most advanced softare that can create virtual LAN networks easily, offers great speeds, and works very well both for gaming and other VLAN features.
ZeroTier was released in 4 different versions, each with it’s own capabilities.
ZeroTier Free: Community support, GPL license, support for up to 100 devices.
ZeroTier Basic contains all features of the Free version and adds ticketed support and an unlimited number of devices supported.
ZeroTier Professional contains all the features found in the previous versions and adds support with higher priority than the Basic version
ZeroTier Enterprise offers the highest level of priority support, non-GPL product embedding license, and Live priority chat with their support team.
GameRanger is another great software option that allows you to play more than 700 games and demos with your friends and other online opponents.
This software has a great set of features like instant messaging, player profiles, can create lists of friends, ranking features, and also allows you to communicate with your game buddies through voice while playing.
Even though the number of features found in GameRanger is not as vast as the other software options we presented in this article, this app offers the best security level and stability on the market.
It is worth noting that software options like Hamachi allow you to play any LAN games, while GameRanger only allows you to play the supported games. You can find a full list of supported games here.
How to install GameRanger on your Windows 10 PC:
Download the .exe file and navigate on your computer to the download location
Right-click on GameRanger.exe , and choose ‘Troubleshoot Compatibility’ and wait for the service to finish processing
Click on ‘Try Recommended Settings’ – in my case the recommended compatibility mode was Windows Vista (SP2)
Click on ‘Test the program’, and that will run the installer like you normally would
DynVPN is another great software option that allows you to easily create and manage your own virtual private network. This software has a great network virtualization platform called NetVirt.
After you’ve logged into the DynVPN dashboard, you can see an overview of your entire network and can manage access by using the peer-to-peer encrypted channels.
This software is fully encrypted with AES256-SHA, and for even more security, all the private networks you created have a unique CA (certificate authority).
You can use this software to allow employees access to the resources of your company, can secure embedded devices, allows you to set up a networking security camera, and gives you the power to play games over LAN or Internet while also offering virtual business networking solutions.
If you want to know how to get started using this software, you can find a good range of step-by-step guidance following the link below.
Radmin VPN is another great software option for creating virtual private networks on which you can play an unlimited number of games.
Because of the speed at which this software operates, it feels like you are playing games on your local LAN network.
This software can reach speeds of up to 100Mbps and also offers a great secure VPN tunnel. This feature encrypts your network and maintains the security of all network nodes.
Here are some of the most notable features of Radmin VPN:
Easy to set up and manage for users with all proficiency levels
Can play network games over Internet-Play at the same speeds as a LAN game would reach
Can create and network teams distributed across the globe (can connect to remote PCs hidden behind firewalls)
Because of the big popularity of games that support local multiplayer, using virtual LAN software gives you many other benefits, like advanced IP protection, the ability to share files, video streaming, and much more.
The LAN emulator options we presented in this article will surely cover all your virtual-LAN gaming experience needs, and they also offer useful additional features.
We would love to find out if you have any other LAN simulator suggestions for playing games on virtual LAN. Feel free to let us know what your experience was like and what your favorite software option is.
Is Saint Row 4 crashing/freezing during gameplay mode? Saint Row 4 is an astounding adventure game, and it’s in high demand. But despite this popularity, many gamers have been found reporting Saints Row IV crashing/freezing experience.
This article will lay down methods and steps to improve gaming experience and prevent future crashes and freezing experience.
How to fix Saints Row 4 crashing and freezing on PC?
1. Check system specs
There is a recommended specification-grade your computer should have for you to get the best experience while playing. If your computer does not meet the required specification you will always get Saints Row 4 crashing/freezing.
Hard Disk: 70GB and above
Version: Windows 7 (64-bit)
Graphics Card: AMD Radeon 5850 or GTX 260 (GeForce)
RAM: 4GB and above.
CPU: Intel Core (2 Quad Q9300) or AMD Phenom 9850
Saints Row 4 can work on systems with lower specifications. However, for you to enjoy the best experience, you need to meet the above specs, to prevent crashes.
2. Switch Threaded Optimization off to stop Saints Row 4 crashing/freezing
Right-click on your desktop to display the menu.
Click the NVIDIA Control Panel.
Select the Manage 3D Settings link on the left-hand pane.
Next, select the Program Settings tab.
Click the Add button.
Choose browse and add the folder in the following path.C:Program Files (x86)SteamsteamappscommonSaints Row IV
Continue by disabling the Threaded Optimization feature.
Finally, click Apply, save the new settings , and exit.
3. Verify the Integrity of Game Cache
Click the Steam icon on your Desktop to open it.
Sign in with details you used for Steam account registration.
Right-click on the Saints Row icon, and select properties option when the Game Library displays.
Select the Local Files tab.
Select Verify integrity of game cache to complete the process.
In some cases, it might take a while to complete the verification process, you have to be patient.
4. Update Drivers
You will experience freezes like this whenever your graphic drivers are not updated.
To run an update, simply go to your graphics card manufacturer site (AMD/ATI or GeForce), and install the current driver version.
These solutions will fix Saints Row IV crashing/freezing. However, if you still experience Saints Row 4 crashing/freezing, you can also try reinstalling the game itself if none of the methods above work.
5. Verify Conflicts with Windows Security Features
Press the Windows Key simultaneously with R key to open the Run dialogue box.
Input sysdm.cpl in the textbox displayed.
Proceed by pressing OK.
Click the Advanced tab when System Properties dialogue opens.
Under the Performance options tab select settings options.
Continue by clicking the Data Execution Prevention tab.
Click Turn on DEP for all programsand services.
Select the Add button. Include the launcher file located here:
6. Reinstall Microsoft DirectX to resolve Saints Row 4 crashing/freezing
For this method, we will be using the Command prompt to reinstall DirectX in order to avoid Saints Row 4 crashing/freezing.
Close all open programs on your desktop.
Press the Windows button on your computer, and type cmd in the search bar.
Right-click on the returned search result, and choose Run as administrator.
Type in these commands below in the given order, and Press ENTER after typing each command. cd C:Program Files (x86)SteamsteamappscommonSaints RowIV_CommonRedistDirectXJun2010DXSETUP.EXE
After code input, Reinstall The DirectX after setup program for Microsoft DirectX initiates.
Finally, restart your computer to complete the process.
7. Review the Registry Privileges
Press Windows Key + R to open the Run dialogue box.
Next, type regedit inside the input box.
Click OK to launch the Registry Editor.
Locate the subkey, when the Registry Editor opens:
HKEY_CURRENT_USERSOFTWAREVALVE
Next, Right-click on VALVE subkey, and select Permissions in the context menu.
Check the Allow box for the options below.
Special permissions
Read
Full Control
Click Apply and select OK. Close the Registry Editor.
Error 0x8007043c arises for some users when they try to install Windows updates. In one Microsoft forum post, a user said:
In trying to install the Windows 10 update, it takes forever; and then at the 99% level, I get a failed message with Error Code 0x8007043c.
There aren’t that many confirmed fixes for issues like This service cannot be started in safe mode 0x8007043c, Failed to connect to server error 0x8007043c, or other latest Windows 10 update issues. However, these are some of the potential fixes for error 0x8007043c that are worth a shot.
How do I fix the Windows update error 0x8007043c?
1. Open the Windows Update troubleshooter
The Windows Update troubleshooter could resolve the issue if the OS is trying to install an update that isn’t compatible with the platform version.
To launch that troubleshooter, open Windows 10’s search box by clicking Type here to search.
Input troubleshoot in the Type here to search box.
Click Troubleshoot settings to open Settings as in the image directly below.
Select Windows Update there, and click the Run the troubleshooter option for it.
Click Apply this Fix if the troubleshooter provides a resolution.
2.Run an antivirus scan
An antivirus scan might help fix error 0x8007043c for some users. To initiate an antivirus scan, click the Settings button on the Start menu.
Select Update & Security, and then click Windows Security on the left of Settings.
Press the Open Windows Security button.
Select Virus and threat protection on the left of the window.
Press the Quick scan button.
Alternatively, click Scan options and the Full scan option.
Users with third-party antivirus software will need to initiate scans with those utilities.
Corrupted system files can be another factor behind error 0x8007043c, which the System File Checker can repair.
To initiate an SFC scan, enter the keyword cmd in Windows 10’s search utility.
Right-click Command Prompt in the search utility and select Run as administrator.
Before initiating the SFC scan, enter DISM /Online /Cleanup-Image /RestoreHealth in the Command Prompt.
Then press the Enter keyboard key.
Next, input sfc /scannow in the Command Prompt’s window.
Press Return to initiate the scan.
Please wait for the SFC scan to weave its magic. Restart Windows when it’s done.
4. Turn off third-party antivirus utilities
Third-party antivirus software might be blocking your Windows updates. To remedy that, right-click an antivirus icon in your system tray to open its context menu.
Then you can usually select some kind of disable option to turn off the antivirus utility with. If the antivirus utility happens to have a firewall component, like the one shown directly below, disable that as well.
Try updating Windows with the antivirus utility disabled. Some users might need to completely uninstall their antivirus software to stop them from blocking Windows updates.
The resolutions above are among the most likely fixes for Windows Update error x8007043c. However, they might not fix the issue for all users. Some users might need to refresh Windows with a repair install or the Reset this PC utility to fix error x8007043c.
If you know of any other method to fix this issue that we may have missed out on, let us know by leaving us a message in the comments section below.
The default location is on the system partition, which is lower in size. That’s the proper reason to re-assign the location for games downloaded via Microsoft Store.
So in this article, we’ll explain where does Microsoft store install games and how to change the location.
How can I find my Windows 10 games?
All games are, by default, stored in C:Program FilesWindows Apps. But, the thing is, this folder is both hidden and it requires strict administrative permission in order to access it.
That’s why we’ll explain how to change ownership of the given folder and how to move the game installations to an alternative HDD partition.
Quick tip
The majority of players acquire their games from different sources. But since cross-platform gaming is a thing now and there are some Microsoft exclusives, many games turn to this source.
If you don’t know where your downloaded Microsoft games go, you can use Copernic Desktop Search. It will find your files for you in the myriad of entries stored on your hard drive.
Copernic is an award-winning search tool for PC, that scans the system for specified files. It is compatible with 119 file types, text included. Autocad of Photoshop files can also be searched using this program.
Copernic Desktop Search
Finding your files and documents is super easy with this precise, award-winning tool.
How to access the Windows Apps folder in Windows 10
Navigate to C:Program Files.
2. Select View in the Menu and check the Hidden items box.
3. Right-click on the Windows Apps folder and open Properties.
4. Choose Security and then click on Advanced.
5. Under the Owner, click Change.
6. Enter the registered email related to your Microsoft account you use to sign in to Windows 10.
7. Check the Replace owner on subcontainers and objects box and apply changes.
8. Now, click on your account in the list and select Edit.
9. Check the Full Control box and there you have it.
We won’t recommend changing anything within the given folder, but you can, at least, delete the associated files when the app or game is uninstalled.
This can come in handy if you need to clear some space. Also, once you move the installation to an alternate partition, you don’t want any leftover files from the previous installation.
How to change the default location for future game and app installations
Press Windows key + I to open Settings.
Open Apps.
Select the game you want to move and click Move.
Furthermore, what you can do is change the default location for the new games and apps you install in the future. This way, you’ll reduce the storage consumption on the system drive.
Also, and maybe of even greater importance, if your system goes awry, you’ll get to keep the games instead of them evaporating after the clean system reinstall.
Follow these instructions to do it:
Press Windows key + I to open Settings.
Choose System.
Select Storage.
Click on the Change where new content is saved.
Under apps, select an alternate partition.
If you’re looking to change the default location for other files on Windows 10 or older, see this comprehensive guide.
Hopefully, you found where microsoft store install games in this article. Don’t forget to post your questions or suggestions on this topic in the comments section below.
The frame rate for games is essential, as it can make or mar users’ gaming experience. However, some users report that they get a low FPS on games after powering their PC until they restart it.
While this issue might not be the frame rate problem, it can still be frustrating. This guide will show you the easy steps to fix the problem and restore normalcy to your system.
Why is my FPS dropping so low all of a sudden?
Various factors can be causing the low FPS issue on your PC until you restart it. Below are some of the prevalent causes:
Outdated or faulty driver: If your computer lags until you restart it, it might be because of an outdated or faulty graphics driver. You need to reinstall or update the driver to fix this for good.
Wrong power setting: Sometimes, the fast startup feature can cause your games to run slowly until you restart your PC. Disabling this feature has solved this problem for many users and should do the trick for you.
How can I fix low FPS issues?
1. Update your graphics card driver
Press the Windows key + X and select Device Manager.
Double-click Display adapters to expand it and right-click your graphics card.
Now, select the Update driver option.
Finally, choose Search automatically for drivers.
Your graphics card drivers are essential for the smooth running of your games. If you are experiencing a low FPS until your restart your PC, it might be because your drivers are outdated.
If you cannot update the driver from the Device Manager, you can go to the graphics card manufacturer’s website to download the latest version of the driver.
Alternatively, you might consider updating your drivers automatically using a dedicated program in Outbyte Driver Updater.
It automatically identifies each device on your computer and matches it with the latest driver versions from an extensive online database.
Outbyte Driver Updater
Use this great app to find the correct and newest updates for all your drivers.
Press the Windows key + X and select the Device Manager option.
Expand the Display adapters option and right-click the device there.
Now, select the Uninstall device option.
Finally, check the box for Delete the driver software for this device, click the Uninstall button, and restart your PC.
Another effective fix for the low FPS until the restart issue is to reinstall your graphics card drivers. You can use DDU to uninstall the driver to make sure you effectively remove the driver.
Finally, if this does not work, you can enable Safe Mode and repeat the process.
3. Disable Fast Startup
Press the Windows key, type power plan, and select Choose a power plan.
Select Choose what the power buttons do in the left pane.
Now, click the Change settings that are currently unavailable option.
Finally, uncheck the box for Turn on Fast Startup and click the Save changes button.
The Fast Startup feature helps to increase your startup time by ensuring that your PC does not shut down completely. This helps retain some of the information on your RAM and other components.
However, it can be why you have a low FPS on your games until you restart your PC, as reported by some users. So, you need to disable the feature to get past the problem.
Now, right-click the superfluous background processes under the Processes tab and click End task.
Click the Startup tab at the top and right-click each process there.
Finally, select the Disable option and check if you still get the low FPS.
Because of the startup processes and apps, you might sometimes get a low FPS on your games until you restart your PC. The quickest way around this is to disable these processes.
You can also maximize system resources with game booster software. For a better gaming experience, we recommend you use a professional game optimizer program.
It will focus your computer resources and processes on the game without overclocking your hardware. It includes optimization features and various tools for defragging your game folders.
Those are a few remedies that might ensure your desktop’s or laptop’s FPS always remains at a standard frame rate.
Also, you can check out our article on how to boost your FPS to get a peak gaming experience.
Feel free to let us know if you have any suggestions or questions in the comments below.



 NOTE