Outlook Disconnects When Connected to VPN [8 Tested Fixes]

Microsoft Outlook is one of the most popular email clients worldwide.

Some of its users also turn to VPN services to secure their connections, bypass government censorship, and access blocked websites.

Unfortunately, many Outlook users have server connection issues right after establishing the VPN connection.

As a result, it’s impossible to use Microsoft’s email client to check the inbox, compose new messages, forward emails – anything that requires an Internet connection.

We’re showing you exactly what to do if Outlook won’t connect over a VPN.

Check out our step-by-step guide below to troubleshoot this problem, whether you have PC experience or not.

Does Outlook work with a VPN?

Yes, it’s possible to configure Outlook email to connect with a VPN on your device. What you need to know is that Outlook has an option for this.

In the email account, you have the option that allows you to connect to your VPN, and that is the Exchange server connection.

To have a better knowledge about this issue, these are the potential errors you can run into:

  • Outlook disconnects when connected to Cisco VPN,
  • Cisco Anyconnect Outlook disconnected
  • NordVPN Outlook issues
  • Outlook 365 not working over VPN
  • Outlook and teams not working over VPN
  • Outlook freezes on VPN
  • My Outlook account keep disconnecting
  • Why does my VPN block my Email

So, the final takeaway is that you should be able to use Outlook even connected to another IP address on a VPN.

Why does my Outlook disconnect when I connect to VPN?

This Outlook problem may have multiple factors for not connecting to the Internet when the VPN is on. It can be due to your connection or other causes like the ones presented here:

? The Microsoft Outlook is not updated to the latest version

? The wireless network adapter blocks Outlook connection with a VPN

? Your DNS address is not suited for the VPN connection

? The antivirus or firewall can block Outlook connection

How can I make Outlook connect over VPN?

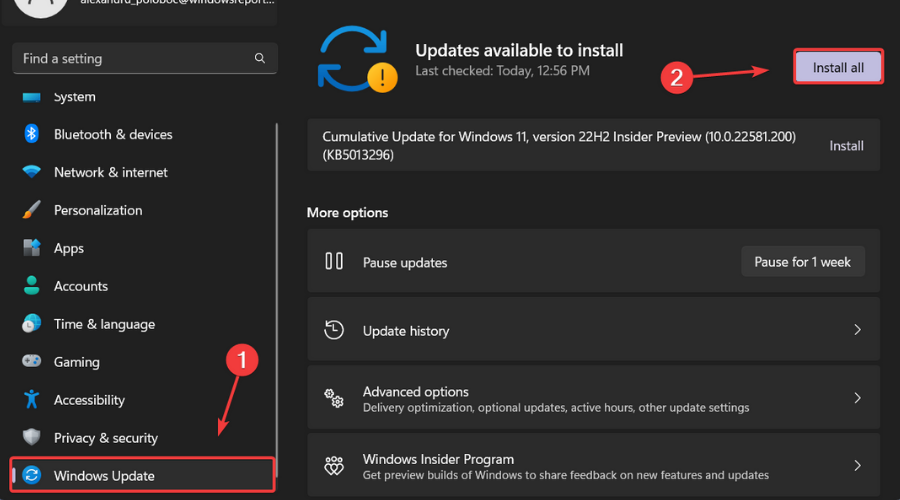
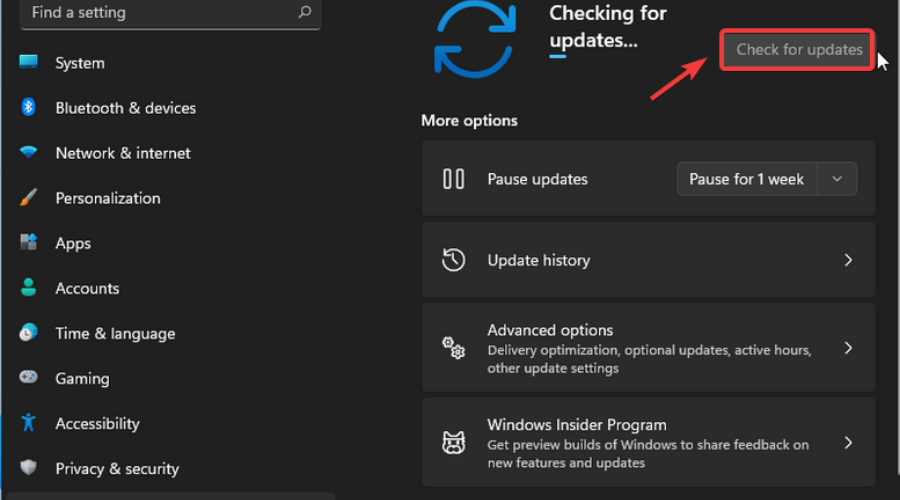
1. Update and restart Microsoft Outlook

enable Microsoft Outlook update
  1. Disable the VPN connection.
  2. Update Outlook to the latest version.
  3. Exit Outlook.
  4. Connect to a VPN server.
  5. Launch Outlook.

Make sure you’re running the latest version of Microsoft Outlook. It could help resolve various compatibility issues with the software, including VPNs.

You should be able to enable updates from your Office account after opening the main menu in Microsoft Outlook.

2. Check your Internet connection
Netflix has encountered an error

If your Internet connection isn’t stable enough, it could be the reason why Outlook won’t connect over a VPN.

Perhaps there’s a problem with your router or your laptop’s Wi-Fi is too slow. To quickly test this, you can restart your router or switch to wired mode.

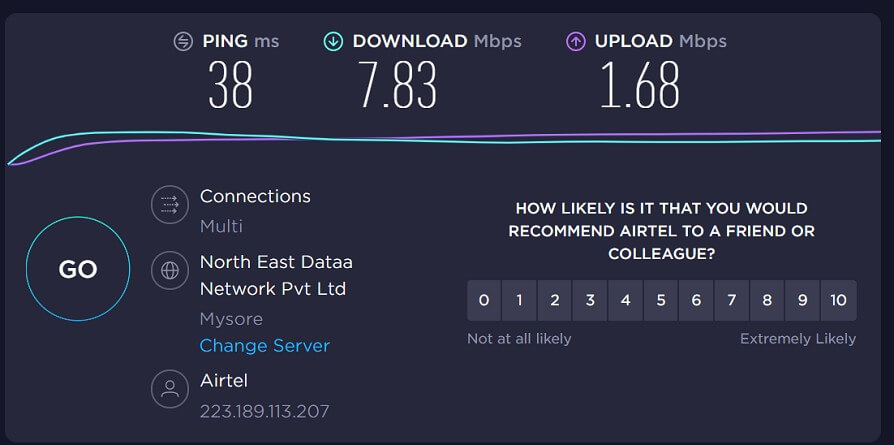
It’s also a good idea to run an Internet speed test in two parts: while staying connected to the VPN and without an active VPN connection.

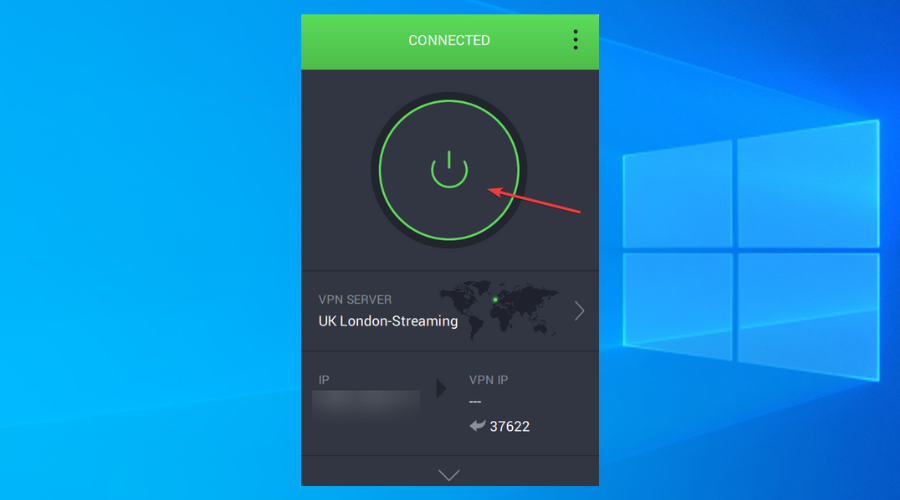
3. Use a reliable VPN

One of the greatest options you can count on is ExpressVPN. It is a VPN service that helps you secure your internet connection and private data, in this context, on Outlook email.

It can support multiple protocols that create secure tunnels without affecting your connection speed, DNS protection for each server, or streaming optimized servers for unrestricted web content.

Here’s how you can get ExpressVPN:

  1. Download and install ExpressVPN from their official website.
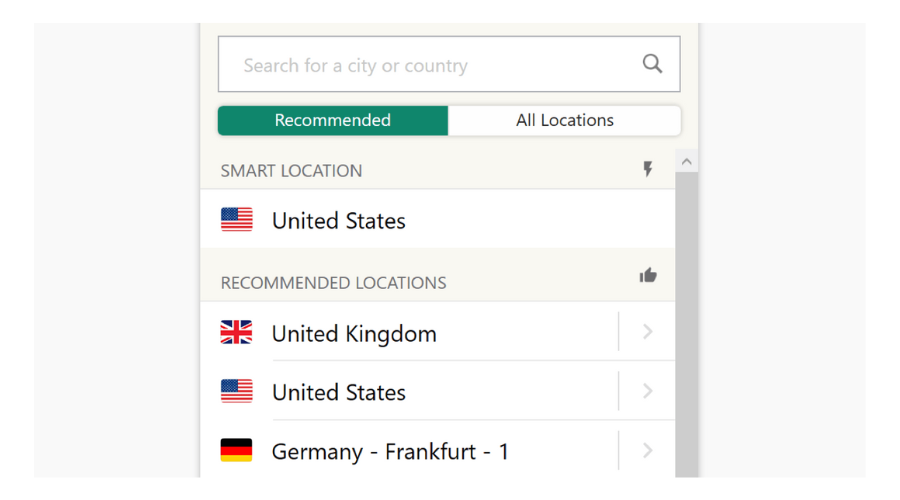
  1. Open ExpressVPN and click on Choose location to see all the available IP locations.
  2. Select your region from the Recommended button.
  1. Enjoy using ExpressVPN.

When you’re browsing the internet, ExpressVPN protects your data so you can’t be tracked you are entirely anonymous.

ExpressVPN

Protect your data and browse the internet more safely with high-speed connectivity as well.
Check Price Visit Website

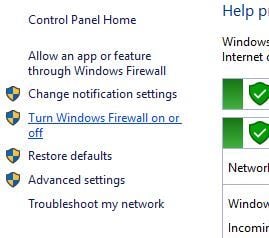
4. Add an exception to the Windows Firewall

  1. Press the Start button, type firewall, and select Firewall & network protection.
  2. Click Allow an app through the firewall.
  3. Click Change settings (you need admin rights).
  4. Find your VPN service on this list.
  5. Enable the Private and Public options for its entry.
  6. If your VPN isn’t here, click Allow another app to locate it.
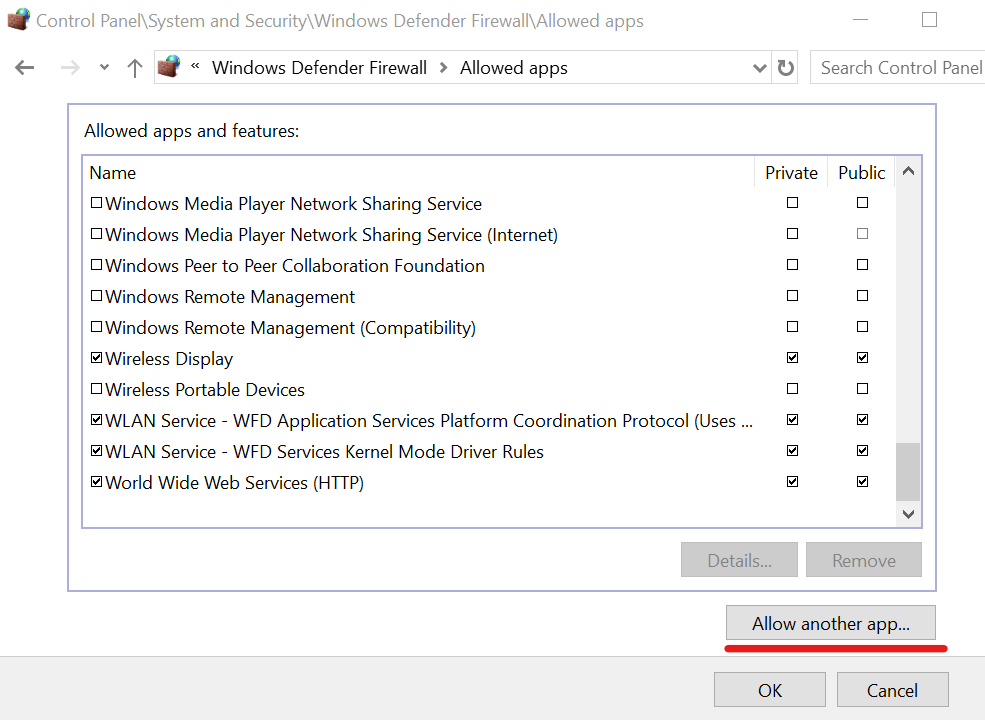
If you follow these steps, you will fix firewall issues with VPN traffic. If Outlook connects over your VPN now, it means there was never a problem on the email client’s side, but with your firewall.

And, if you’re using a third-party firewall, make sure to adapt the instructions we provided for Windows Defender above.

A premium VPN service like ExpressVPN shouldn’t get blocked by your firewall because it automatically creates an exception for itself when you install it.

5. Disable the wireless network adapter

  1. Go to Control Panel.
  2. Select Network and Internet.
  3. Go to Network and Sharing Center.
  4. Click Change adapter settings.
  5. Right-click your Wi-Fi connection and Disable.
    disable Wi-Fi in Windows
  6. Connect to the Internet in Ethernet mode.

If you’re connected to the Internet in both Wi-Fi and Ethernet mode, it could result in a conflict that causes the VPN connection error on Microsoft Outlook.

To easily fix this problem, simply deactivate your Wi-Fi connection and stick to wired mode.

It also indicates that you have Wi-Fi connectivity issues, which you should troubleshoot as soon as possible to continue using wireless mode.

6. Change your DNS settings

  1. Go to Network Connections > Change adapter options.
  2. Right-click your Internet connection and select Properties.
  3. Double-click Internet Protocol Version 6 (TCP/IPv6).
  4. Select Use the following DNS server addresses.
  5. Set Preferred DNS server to 8.8.8.8
  6. Set Alternate DNS server to 8.8.4.4
  7. Click OK.

If your default DNS servers take too long to load pages, this could also cause VPN connection issues over Microsoft Outlook.

But you can solve this problem by changing the DNS servers. The servers we listed above are free, public, and belong to Google Public DNS. You can also try Cloudflare or OpenDNS.

However, if you have a reliable VPN service like ExpressVPN installed, you don’t have to worry about this issue.

7. Reset the network settings
flush DNS servers in Windows 10
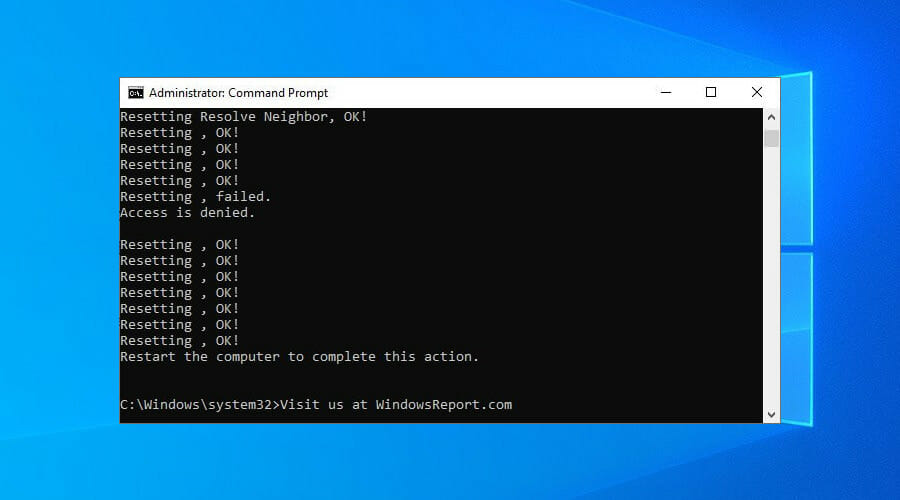
  1. Run Command Prompt with elevated rights: press Ctrl + R, type cmd, hold Ctrl + Shift, and press Enter
  2. Copy and paste the next lines (press Enter between each line)
ipconfig /flushdns

ipconfig /registerdns

ipconfig /release

ipconfig /renew

NETSH winsock reset catalog

NETSH int ipv4 reset reset.log

NETSH int ipv6 reset reset.log

exit

Restart your computer to finish the modifications.

You can easily reset network connectivity settings on your Windows computer by flushing DNS servers and resetting Winsock.

A lot of VPN connection problems can be fixed this way.

8. Allow VPN traffic on your router

If your router doesn’t allow VPN traffic, you wouldn’t be able to connect to a remote VPN server or accept VPN connections. It doesn’t matter if you’re trying to use Microsoft Outlook or any other tool.

In this case, you must access your router’s admin panel, look for a NAT Passthrough option, and enable it for your VPN protocol. Out-of-the-box router firmware typically supports PPTP and L2TP.

If you intend to use a VPN protocol that’s not supported by your router’s firmware (like OpenVPN), here’s what you can do:

➡️ Set up port forwarding at the router level* (not safe). But it only works with VPN server mode.

➡️ Check if your router allows you to install third-party firmware. If so, you can set up DD-WRT, Tomato, or OpenWRT (requires advanced skills). They support VPN client mode.

➡️ If your router doesn’t support third-party firmware, you can purchase a router with VPN client capability and then set up bridge mode to avoid Double NAT.

➡️ Instead of configuring router settings and risk messing up its functionality, you can just Express software to switch your protocol for OpenVPN or other within a few clicks.

How does a VPN affect email?

Actually, a VPN can make an important difference while using email like Outlook or other providers. That means you have online identity safety and security for personal data sent on emails.

However, if your VPN interferes with mail connection and blocks it, you should try our solutions presented above.

To conclude, you can fix VPN connectivity issues with Office by updating and restarting MS Outlook, checking your Internet connection, and adding an exception to the Windows Firewall.

You can also disable the Wi-Fi network adapter, change your DNS servers, reset network settings, and allow VPN traffic on your router or set up port forwarding.

But one of the best ways to stay secure while using Microsoft Outlook is by turning to a reliable VPN service like ExpressVPN.

Thus, you can join our Outlook Troubleshooting Hub for more similar quick-fix guides. Visit our VPN section to learn everything about VPN services.

Frequently Asked Questions

 How do I fix Outlook connectivity problems? To fix Outlook connection errors, you can disable the AppData directory redirection, create a new Outlook profile, repair Office programs, and try other possible solutions.

How do I fix error 0x8004011d in Outlook? To repair Outlook error 0x8004011d, flush your DNS servers, verify add-in issues, repair the Outlook installation package, and so on.

What is the most anonymous email? ProtonMail is one of the best anonymous email clients.
Fix: Can’t Remove Xbox Wireless Controller Device

Playing your favorite game on your PC doesn’t necessarily have to be done using a mouse and keyboard. In fact, many games are easier and a lot more fun to play with a controller.

And, if you are using a Windows PC, for optimal compatibility, you are most likely using an Xbox controller. The software for these devices can sometimes bug.

If you have a wireless Xbox controller, you will also want to know what to do when it is recognized but not working in games.

Knowing how to set up your Xbox wireless adapter will also make your life easier when trying to connect your controller.

Windows 10, as well as Windows 11 users, have complained about not being able to remove the Xbox controller from their PC. Today, we are going to show you how.

Why can’t I remove my Xbox wireless controller device?

This mostly happens when there is an error with the current driver for the gaming device. Files associated with the controller might have become corrupted, again, triggering this error.

However, before updating the driver for the controller, you will need to remove it somehow. If you are unable to remove the Xbox wireless controller from your Windows 10/11 PC, stick around.

That being said, before we start, make sure you restart your PC. Many users claim that this was enough for the process to run as intended.

Do I need third-party software to remove the Xbox wireless controller?

No, you don’t need to go that far. We will show you exactly what you need to do in order to get this done without downloading and installing anything.

Only resort to third-party apps for the job when you’ve wasted all available paths to do it in-house, or so to speak.

How do I remove my Xbox wireless controller device?

1. Uninstall the Xbox wireless controller from Device Manager

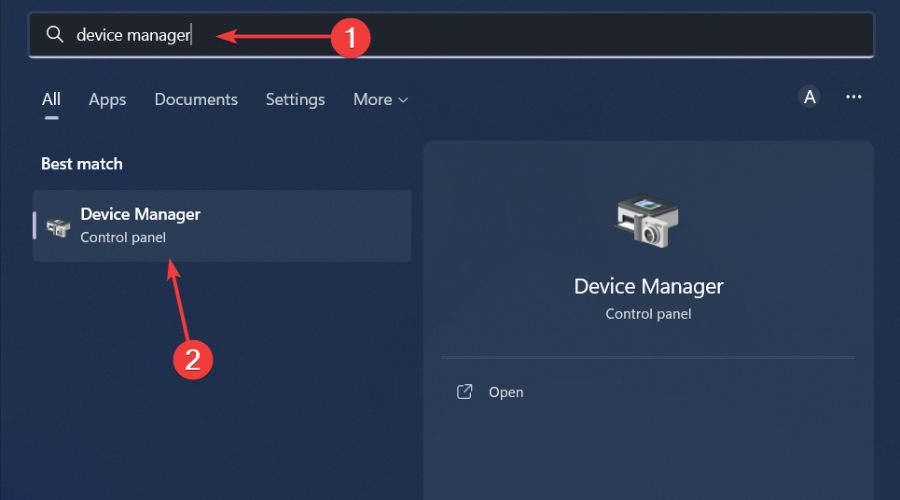
  1. Search for Device Manager and open the app.device manager windonws 11
  2. Expand Sound, video and game controllers, right-click the Xbox controller, then select Uninstall device.uninstall controller

2. Remove the Xbox wireless controller from Devices and Printers

  1. Press Win + R to bring out the Run box, then type Control Panel and press OK.control panel run
  2. Click on View devices and printers.view devices and printers
  3. Click on Devices.windows 11 devices
  4. Click on the three dots next to the Xbox wireless controller, then select Remove device.remove device

Before we proceed with the last step, we recommend you create a system restore point and backup your Registry, just to be safe.

If you want to make sure that this procedure will be done safely, then you might try using third-party software. A system repair tool simplifies the process of protecting your PC from malware and optimizing it to perform flawlessly at all times.

3. Delete the registry key from Windows Registry

  1. Press Win + R to bring out the Run box, then type regedit and press OK.regedit
  2. Type in the following path, then press the Enter key: Computer\HKEY_LOCAL_MACHINE\SYSTEM\CurrentControlSet\Services\BTHPORT\Parameters\Devices
  3. Expand the Devices folder.devices registry
  4. Delete the folder belonging to the Xbox wireless controller.

Each of the folders you find under Devices represents a different Bluetooth device currently connected to your system.

You have to delete the folder for the Xbox wireless controller, and to find it you have to select the first folder and look for the Value Name on the right side.

After you found it, double-click on it, and a window will open containing its Binary Value. You will see then be able to see your device’s name in the Value Data box.

After locating the Xbox wireless controller folder, right-click it and click delete it. Once you deleted the folder, close the Registry Editor and restart your PC.

You have now completely removed the Xbox Wireless Controller from your PC. You can reconnect it later if that is what you want.

How do I update the Xbox wireless controller’s driver?

  1. Search for Device Manager and open the app.windows 11 device manager search
  2. Expand Sound, video and game controllers, right-click the Xbox controller, then select Update driver.update controller driver
  3. Select Search automatically for drivers.search automatically for frivers

That is pretty much all there is to be said on the matter and we hope this guide has helped you overcome this software issue.

Leave a comment in the dedicated section below if you know of any other methods to remedy this problem.

Waze Audio not Working? Try these 4 Simple Solutions

Waze is a popular direction and traffic map app that saves time by showing real-time traffic and alerting users about potential traffic jams.

Sometimes, the voice direction feature may not work resulting in Waze audio not working issues.

Many users have reported similar issues with their iOS and Android devices. Apparently, the voice narration is not working even though the Sound settings are on.

Why is there no sound on my Waze?

There are plenty of reasons why the sound or the voice narration is not working on Waze but let’s go through some of the most important:

  • Incorrect audio settings
  • The Waze app is not updated
  • Your device is connected to a Bluetooth device that is not working
  • The smartphone was set on a Mute/Do not disturb profile

If you are also troubled by this issue, here are a couple of troubleshooting tips to fix the Waze audio not working glitch.

How do I fix Waze audio not working issues?

1. Make sure that the sound is On

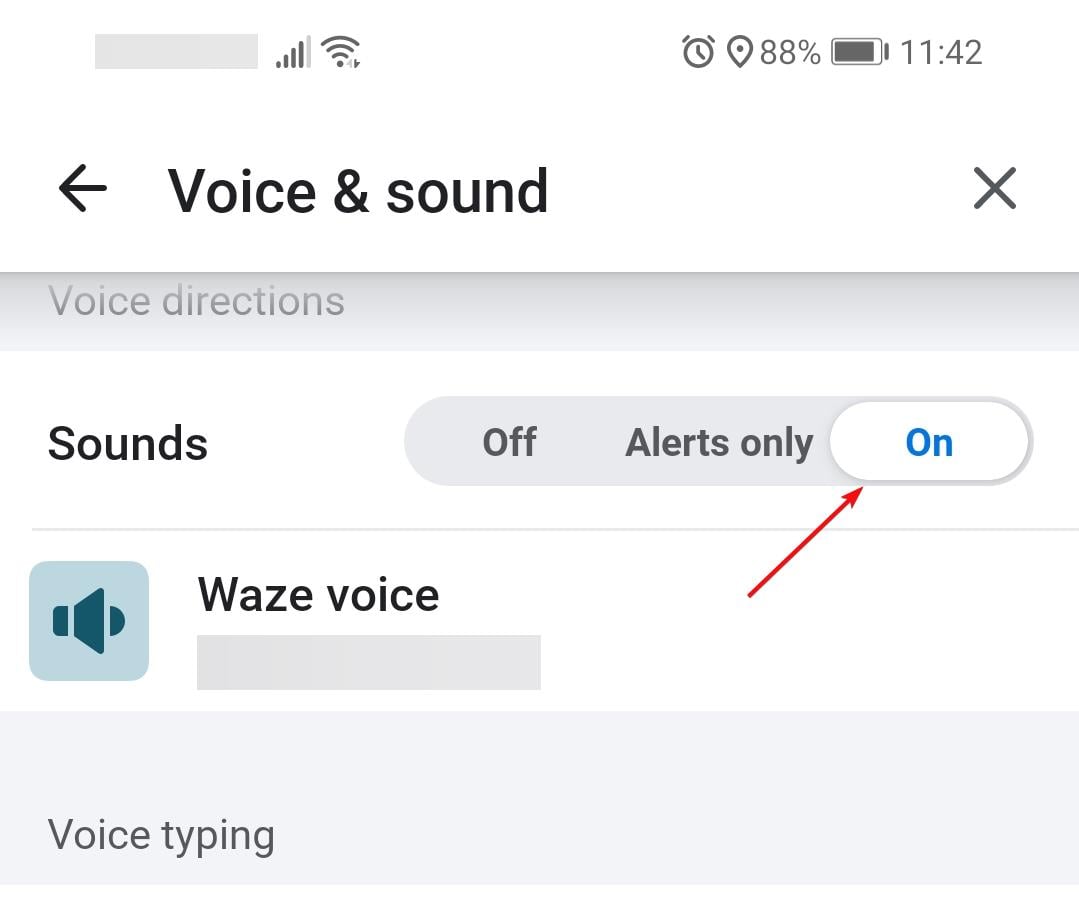
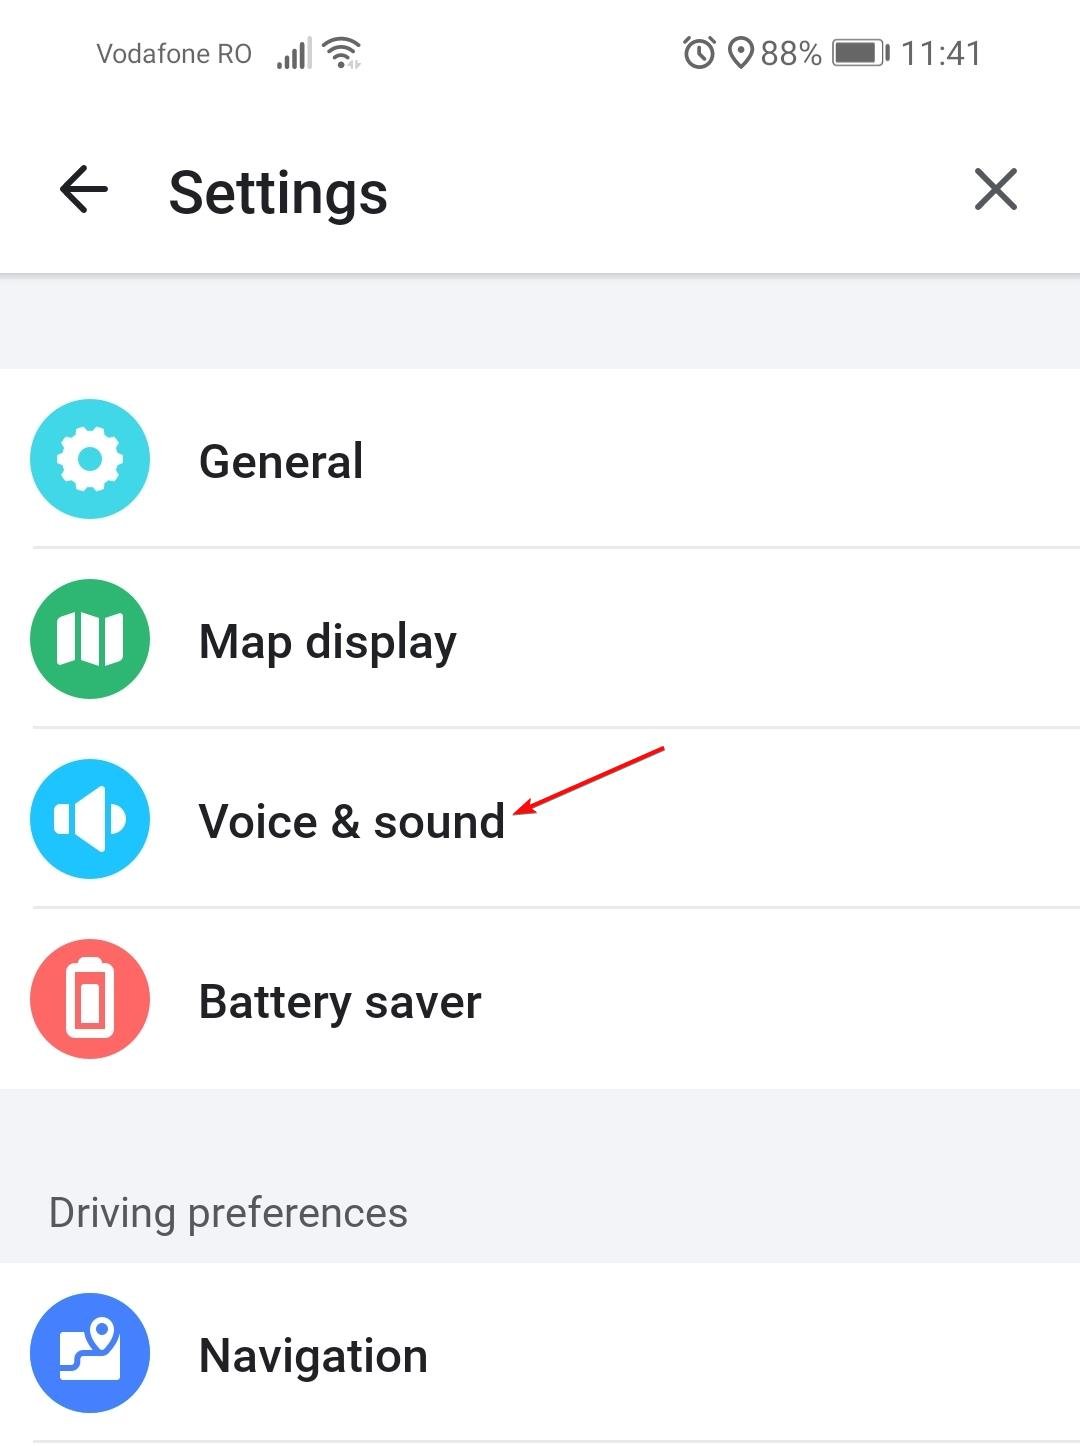
  1. Open the Waze app, tap on Settings, then access the Voice & sound menu.
  2. Now, make sure that the Sounds are set to On.

Some of our readers also said that they managed to fix the problem just by turning the sound Off and then On again after a few seconds.

2. Unmute Waze during calls

  1. Open the Waze app on your phone.
  2. Tap on Setting and select Sound and Voice.
  3. Make sure the option Mute Waze during calls option is turned off.
  4. Also, turn the Guidance volume from the Sound menu to the maximum level.
  5. Relaunch the Waze app and check for audio improvements.

If you have disabled sound and voice during voice calls, it can create issues with the Waze audio. Try to enable the option and check for any improvements.

Should the issue persist, make sure the volume is at maximum on your phone. Now open a video player and play any video from the gallery. Adjust the volume again and check for any improvements.

Also, make sure that your smartphone is not in a Mute or Do not disturb mode because that will also affect Waze.

3. Try the older version of Waze

  1. If the issue started to occur after updating Waze to the newer version, try an older version of the app.
  2. Doing so, you can resolve the issue temporarily until the bug is fixed in the new app.
  3. Android users can download the older version of the app apk from third-party sites like apkpure.
  4. Make sure you have enabled Install from unknown sources option in the Developer Options before installing the app using apk.

4. Upgrade or reinstall Waze

  1. If the issue persists, try to uninstall the Waze app. Reinstalling the app will fix any file corruption that is creating issues with the app.
  2. From the home screen, tap and hold on to the Waze app icon.
  3. Choose Uninstall or Delete from the option and then tap on Yes to confirm the action.
  4. Restart the phone after you have uninstalled the app.
  5. Open the App Store or Play Store and install the latest version of Waze.
  6. Log in and check if the Waze audio not working issue is resolved.

Where are the voice navigation settings on iPhone?

  1. Open Waze on your iPhone.
  2. Navigate to Settings.
  3. Now, select Maps and tap on Navigation & Guidance.

The Waze sound issues usually occur due to incorrect configuration or software glitches. Follow the steps in this article one by one to fix the issue on your device.

Some of our readers also fixed the sound problem on Waze by turning off the Bluetooth connectivity and turning it back on so it’s worth a try.

If you have connectivity issues, read our guide including 5 ways to fix the Waze not working error.

Do let us know which method helped you resolve the issue in the comments.

Easy Tips to Get Your Canon Printer to Be Encrypted

Several Canon printer users have registered queries regarding specific errors they come across, such as the Canon printer not being encrypted while making efforts to secure printed information.

Printers are mostly neglected and even overlooked when it comes to security awareness. For the few that note this, Encrypted printing is a significant measure to take note of.

However, what to do when the printer no longer accepts encrypted jobs? Or what to do when encrypted credentials have expired?

This can be a problem and prevent you from printing, but in this article, we’ll discuss how to fix it.

What is encrypted secure print?

An encrypted secure print is a term used for printing tasks, usually those that meet a standard for privacy to prevent the unauthorized use of printed information.

With a secured print, print information is protected until it is released by a user who has access through password or card authentication.

A secure print is kept encrypted during transmission and storage.

How do I get the Canon printer encrypted?

1. Enable secure printing

  1. 1. Click on your PC’s Start button.

  2. 2. Search for Devices and Printers.

    devices and printers
  3. 3. Open the printer folder.

  4. 4. Right-click your printer icon and select printer properties or Properties from the dialogue box.

  5. 5. Click the Device Settings tab and tick to mark the Allow Use of Secured Print check box.

    printer properties set
  6. 6. Then, click OK.

  7. If you want to ensure your Canon printer is encrypted, you must first enable the secure printing option. This can be easily done via Printer properties within a few clicks.

2. Send secured documents from the computer to the printer

  1. Open a document and display the Print dialogue box.
  2. Select your printer, and click on Preferences.
  3. Next, click on Secured Print, then select Yes in the information Pop-up box screen. (This will enable you to create a username and pin for the secured document)
  4. You can use the Basic Settings, Page Setup, Finishing, Paper Source, or Quality tabs to specify the print settings on each page.
  5. Click OK when you are done with the print settings.
  6. Next, click Print or OK.
  7. Insert the document name, user name, and PIN.
  8. Then, click OK.

What does an encrypted job mean on a printer?

Encrypted job is used to mean all print jobs which are readily encrypted but are stored on the disk of the print provider as they await printing.

Is encryption key the same as the password?

An encryption key is not the same as a password. The significant difference between the two is that passwords are humanly created, read, and remembered by a user.

At the same time, a key, on the other hand, is used by the software that implements the algorithm, meaning that it doesn’t have to be readable by a human.

Hopefully, the tips provided in this article will be helpful for you. You can also read through our detailed guide on fixing your printer encryption credentials whenever they expire.

Windows 10/11 users can fix their printer if it fails to respond by following our troubleshooting instructions.

Do not hesitate to use the comments section below for further questions or comments.

Can’t Print From Chrome? 5 Ways to Enable This Feature

Google Chrome is one of the best browsers for all devices, thanks to its excellent performance, speed, and availability of third-party extensions. But some users reported that they can’t print from Chrome making things a tad difficult.

This is a common problem; many users have shared instances when they can’t print from Chrome in Windows 10 or 11.

Before we tackle this issue, we advise you to read our guide on how to enable system print dialog in Chrome. Given the frequent encounters, we decided to list the solutions for users who can’t print from Chrome.

Why is my printer not printing from Chrome?

You might have asked yourself, why can’t I print from Chrome? The reason could have to do with corrupt browsing data, misconfigured settings, or conflicting applications and processes.

Also, for several users, the problem lay with the printer itself. So check if the printing issue is limited to Chrome or is present on other apps. In case it is, installing the printer driver should do the trick.

How do I enable print on Google Chrome?

  1. Launch Chrome and open the file you want to print.
  2. Press the Ctrl key + P to print.
  3. Choose your preferred printing destination and other settings.
    pages cant print from chrome
  4. Finally, click the Print button.

What can I do if I can’t print from Chrome anymore?

1. Switch to a more reliable browser

If you notice that printing from the browser occurs only too frequently in Chrome, perhaps it’s time you tried an alternative browser.

At this stage, we recommend using Opera One, to which you can add a Print add-on for ease of use.

It has many features that allow navigation between various tabs, workspaces, and built-in social media chat apps.

The Print Opera One add-on is a lightweight tool that adds a specific button to your browser, so you can easily print a page with one click. opera print add on

Furthermore, this add-on can be installed on all systems (PC, Mac, Linux, Chromebooks) and is compatible with all other popular browsers, Chrome or Mozilla.

If you choose to print directly from the Opera One browser with the shortcut, you can do that with Ctrl+Shift+P. opera browser printing

For some other actions, though, add-ons are necessary, and you have many of them in the browser’s library.

For what is worth, the download option in Opera One is automatic, so you need to click on what you want without the hassle of also saving the file, program, or app. In addition, it scans those downloads very quickly because it’s a security-oriented browser.

Opera One

Try it and get the Print add-on to have your documents ready for print at any time.

2. Use the keyboard shortcut

Chrome offers a dedicated keyboard shortcut to print the web pages you are viewing at that very moment. Press Ctrl + Shift + P, make the necessary selections, and you should be good to go.

This is only a quick workaround, but if you want to solve the problem for good, you’ll have to eliminate the issues that caused the error by executing the other methods here.

If you can’t print in color from Chrome, be sure to try this quick solution.

3. Clear the browsing data

  1. Open Google Chrome, and press Ctrl + Shift + Del to open the Clear browsing data window.
  2. Select All time from the Time range dropdown menu.All time to fix can't print from chrome
  3. Tick the checkboxes for Browsing History, Cookies and other site data, and Cached images and files.
  4. Finally, click on Clear data.
    Clear data to fix can't print from chrome
  5. Wait for the process to complete.

Often, the corrupt data causes issues, and users can’t print PDFs from Chrome even with the built-in viewer. Clearing the browsing data and starting fresh has helped many users solve the problem.

Additionally, many reported that the print popup is not working in Chrome which too should start working after you execute this method.

4. Delete the printers you don’t use

  1. Press Windows + I to launch Settings, and select Bluetooth & devices from the tabs on the left.Bluetooth & devices to fix can't print from chrome
  2. Now, click on Printers & scanners on the right.Printers and scanners to fix can't print from chrome
  3. Click on the printer you don’t use anymore from the list.Printer
  4. Next, click Remove.Remove to fix can't print from chrome
  5. Click Yes in the confirmation prompt.
    Yes

With many of these added, your HP printer might not print from Google Chrome. It could just as well be the case with other manufacturers. So it’s best to remove the ones not used anymore and check if you can print from Chrome.

5. Reset the Chrome settings

  1. Launch Chrome, paste the following path in the address bar, and hit Enter:chrome://settings/reset
  2. Next, click on Restore settings to their original defaults.Restore settings to their original defaults to fix can't print from chrome
  3. Finally, click on Reset settings and wait for the process to complete.Reset settings

If none of the methods listed earlier have worked, this one would; if you can’t print on Chrome with the preview not loading, Chrome is printing blank pages, or it doesn’t recognize the printer.

Why can’t I print anything?

You can look at many things if you can’t print anything from your web browser or other apps. But, of course, it could be due to basic printer issues, like paper jams and low ink toner.

Also, it can be caused by issues with your browser or the app you are trying to print from. So, be sure to troubleshoot both the hardware and software components involved.

Printing failed. Please check your printer and try again in Chrome

This issue is primarily limited to Microsoft Edge, and a patch was released in Edge version 95. However, the problem continues to show up now and then.

The good part is that the problem has been acknowledged, and another patch to eliminate it should be released soon. Also, updating the browser or trying the methods here should do the trick if you encounter it in Chrome.

These are all the ways to quickly fix the problem and get things up and running in no time. If you can’t print from Chrome on Mac, the concept remains the same, and these fixes would help.

Also, find out what to do if Google Chrome is not working.

If any of these solutions were helpful, contact us using the comments sections and tell us more.

8 Best Email Client for Windows 10 [2026 Updated List]

Emails are a huge part of our work-life. They have transformed communication into something instant and replaced the letters of olden times when people had to wait weeks if not months to get a reply to their messages.

But in this modern age, the information itself can get overwhelming. There is too much data to handle, and you need tools that make you better at doing your job.

Different Email clients always strive to be better than their competition. This make them bring innovative ideas to present you with all this information in a simple manner that you can easily go through at a glance.

Of course, when there are so many of them, it gets a bit hard to figure out which one to go for, and the same goes for apps.

Thus, we made this list here to help you sort out the top email clients and apps for Windows 10. If you’re using the latest OS by Microsoft, you might find it useful to have access to some great Windows 11 email clients.
Does Windows 10 have an email client?

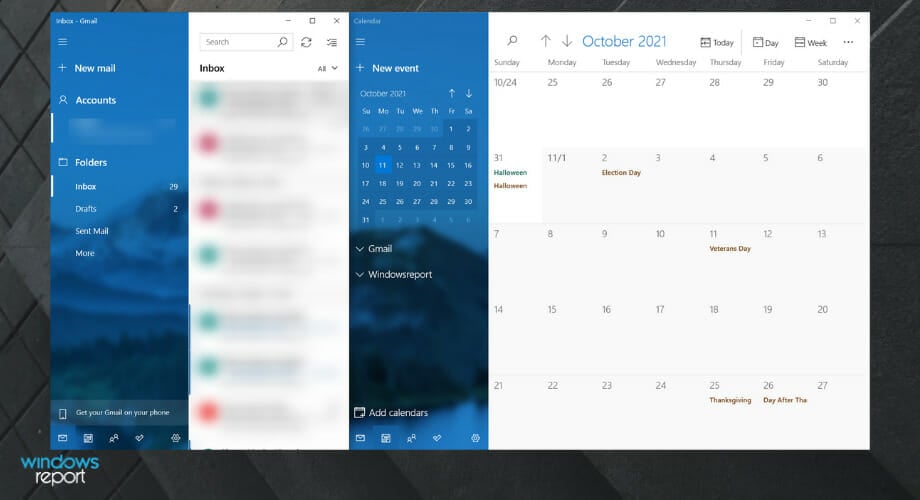
Windows 10, like other recent releases from Microsoft, has a built-in email app. This app called Mail is preinstalled on your PC with Calendar and other important features.

This email app allows you to connect all your email accounts on one platform. With this, you can improve your productivity, thanks to the ease of use.

What are the best Windows 10 desktop email clients?

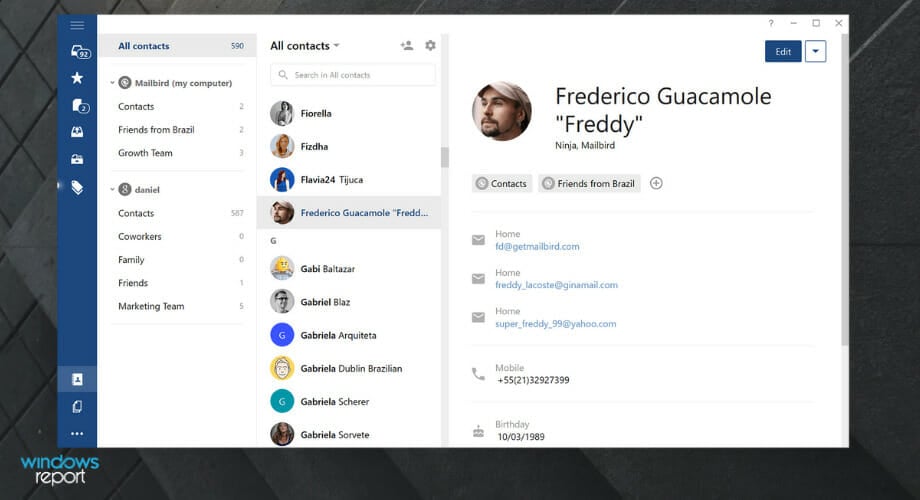
Mailbird – Overall best email client for Windows 10

mailbird

Mailbird attempts to bring the intuitiveness of Sparrow to Windows. Sparrow was a Mac-only email client that was bought by Google before it was shut down and its development was abandoned.

Mailbird is quite possibly the simplest email client to use for Windows while supporting multiple email accounts. It is no wonder it is widely regarded as the best email client for Windows 10.

It also supports simple keyboard shortcuts, has an extensive label and folder search feature, and supports HTML emails.

Some of the special features that put Mailbird at the top of the list are:

  • Free visual customizing (choose from tons of free themes)
  • App integration: connect your LinkedIn, Facebook, Twitter, WhatsApp and Google Calendar to Mailbird
  • Speed reader for quicker mail reading
  • Attachment search feature
  • Multi-language support
  • Snooze less important emails for later

These are only a few of the multiple useful features that Mailbird has.

Mailbird

Feature-rich Mailbird will make your workload easier and faster in no time – give it a try!

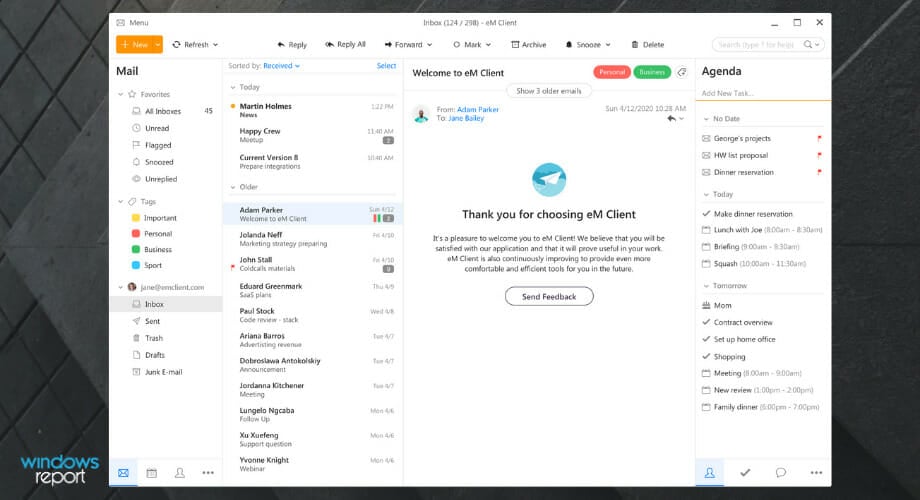
eM Client – Secure email client

em best Windows 10 email client

eM Client has a basic interface that prioritizes usability above providing a plethora of functions. You may add numerous email accounts, but the free version is limited to only two.

What distinguishes this is the Skype connection, which allows you to utilize the same email interface.

Keeping up with the most recent security information and ensuring that new threats are adequately protected, eM Client provides a great email service.

It supports almost all email technologies (POP3, SMTP, IMAP, Exchange, Office365) and has a very well-organized UI. This is why eM Client is one of the best email providers on the market for Windows 10.

Here are the key features of eM Client:

  • Message encryption and digital signatures for a secured content guarantee
  • Instant translation
  • Snooze incoming messages for a better workflow efficiency
  • Keep track of replies so you won’t miss flagged information
  • Cloud storage support

In addition to these characteristics, eM has a calendar, tasks, sync contacts from other devices, organizers, templates, and much more.

eM Client

Boost productivity, manage emails, take notes, and chat. One email client that is simple and enjoyable to use.

Thunderbird – Extendable email client for Windows 10

thunderbird best Windows 10 email client

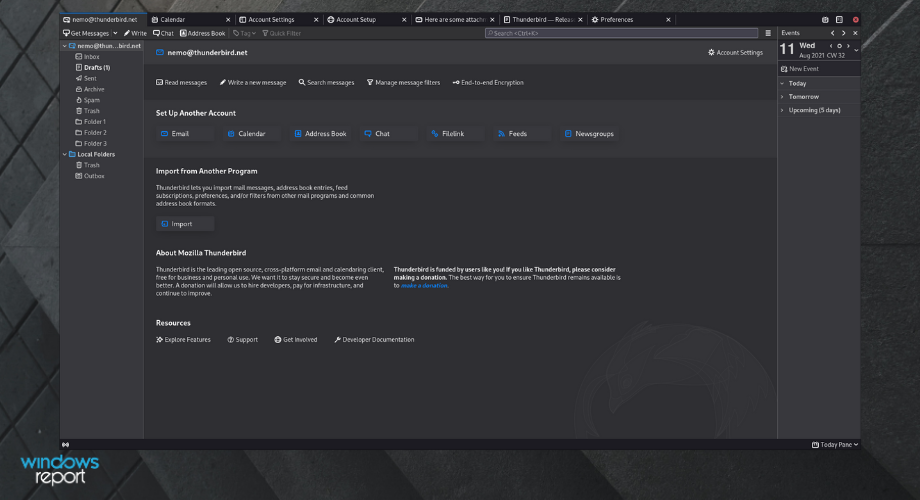
Thunderbird email client is one of the freeware clients that you can extend like a web browser on Windows 10. If there is a feature that you really need, somebody has probably made an extension to add it to Thunderbird.

The new multi-process Thunderbird makes greater use of your computer’s processor. It does this by dividing the program into several smaller processes rather than operating as a single large one.

Thunderbird includes a PDF viewer, allowing you to read and even edit PDFs emailed to you as attachments. You can accomplish all of this without ever leaving Thunderbird, allowing you to quickly return to your email.

Depending on how you use Thunderbird, whether you’re using it on a huge desktop display or a tiny laptop touchscreen, you may adapt the interface’s icons and text to be larger, more spread out, or extremely compact.

The calendar sidebar enhancements in this edition make it easier to manage numerous calendars. Also, there is a fast enable button for calendars. There is also the show/hide icon for rapidly changing calendars are shown.

Lastly, Thunderbird should work flawlessly for you. But if you face any kind of problems, we have the perfect solutions for any problems reported with Thunderbird on Windows 10 in this article.

⇒ Get Mozilla Thunderbird

Inky – Excellent interface

inky best email client windows 10

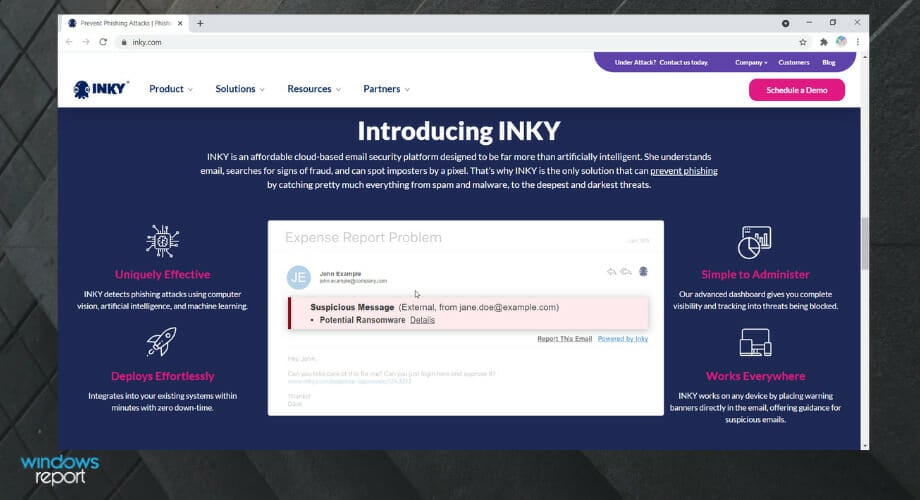
Inky stands out because of its well-polished UX – basically, it looks good. It also has mobile clients, and it can sync all your settings between them over the cloud.

INKY is a low-cost cloud-based email security technology that is considerably more than just artificial intelligence. It interprets emails, looks for indicators of fraud, and can detect imposters with a single pixel. It is also a lightweight email client you can always use on Windows 10.

That is why INKY is the only solution that can prevent phishing by capturing everything from spam and malware to the most insidious and dangerous threats.

INKY is the best investment you can make to defend your organization against zero-day phishing attacks. INKY’s artificial intelligence detects anything from spam and viruses to the most insidious phishing scams. It’s determined, inquisitive, and mobile, and it’s getting smarter by the topic line.

You can determine which threats are delivered to your users’ inboxes and know how to avoid them. You can automatically detect phishing and harmful email and route them to quarantine. This enables you to prevent known threats from reaching your end-to-end customers.

Setting up your different email accounts is simple as well as you don’t have to tinker around with settings.

⇒ Get Inky

Outlook – All-in-one email client

outlook

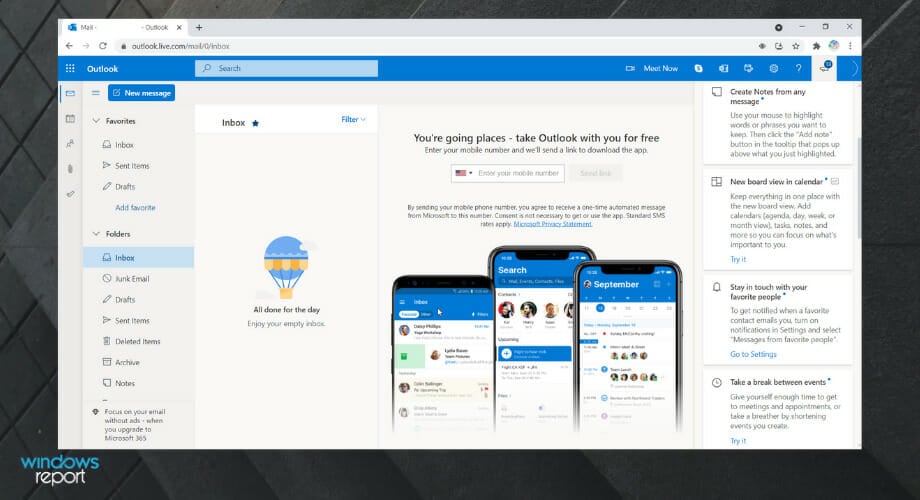
Outlook is more of an all-in-one solution and comes as a part of Microsoft Office. You can also access it through a browser for free. This tool packs the most featured email client, a calendar, and the ability to store contacts, and even make notes.

Outlook makes it simple to engage with Word, PowerPoint, and Excel. You may use Skype to communicate in real-time straight from your Outlook account.

It works as everyone’s most accessible inbox, with simple, voice-controlled navigation, compatibility for numerous assistive devices, and inbox protection and data encryption after mail delivery.

The UX is as friendly as it can get for a client with these many features, but it might be a bit overwhelming to users who are not used to such a density of data and the number of options and settings.

Premium Outlook features like an ad-free interface, custom domains, better security, the complete desktop version of Office applications, and 1 TB of cloud storage are included with a Microsoft 365 subscription.

Outlook is a tool that is not easy to master, but it can be very powerful.

⇒ Get Outlook

Mail for Windows 10 – Built-in email app

mail for windows 10

Windows 10 comes with its own email client made by Microsoft – not outlook, but a simpler one.

Obviously, it’s not as feature-packed as Outlook, but it features a UX that is easy to understand, and setting it up can’t get any easier. But it is probably the best email application for Windows 10.

With the familiar and extensive capabilities of Microsoft Word integrated into the writing experience, creating emails has never been easier or more powerful. Simply insert tables, images, and bullets to create lists.

Keep up with your inbox with new touch gestures that assist you in reading, sorting, and archiving your mail. The navigation bar provides a quick and simple toggle, enabling you to navigate freely between your email and your calendar to get things done.

The calendar is Exchange-optimized, with comprehensive support for scheduling meetings and managing a busy calendar, and it gives useful, powerful views of your schedule, such as day, week, and month.

The email client supports the rich notifications featured in Windows 10 that lets you reply to an email just from its notification.

⇒ Get Mail for Windows 10

TouchMail – High organization

touch mail

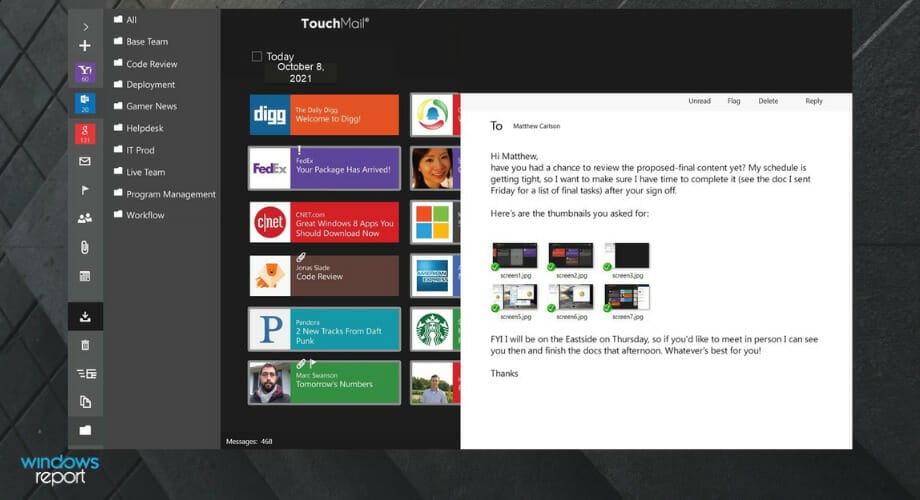
TouchMail presents your emails in a unique yet simple fashion. You have your emails split by contacts and each email is highlighted as its own tile.

TouchMail is the quickest and simplest method to locate and tidy up what matters most in Gmail, Outlook.com, Yahoo Mail, iCloud, AOL, Office 365, and most IMAP email accounts.

Transform your email into a beautiful and colorful inbox that you can explore as you choose – using touch, mouse and keyboard, or pen – with rich visuals, resizable message tiles, and familiar interactions.

In only a few clicks, you’ll be clutter-free! Delete a message with a single tap or hundreds of messages at once. And, with just a few clicks, you can archive, flag, or transfer messages to manage your inbox, as well as quickly identify essential emails with unique color coding.

You can also preview the content of your messages without having to open them, you can easily zoom out to obtain a bird-eye perspective of where your messages are coming from.

TouchMail also supports multiple accounts and has full support for all the filters you could think of. It is primarily made for Windows 10 tablets, so the UI is designed for touch instead of mouse and keyboard, but you can always install those for your tablet.

⇒ Get TouchMail

Flow Mail – High integration

flow mail

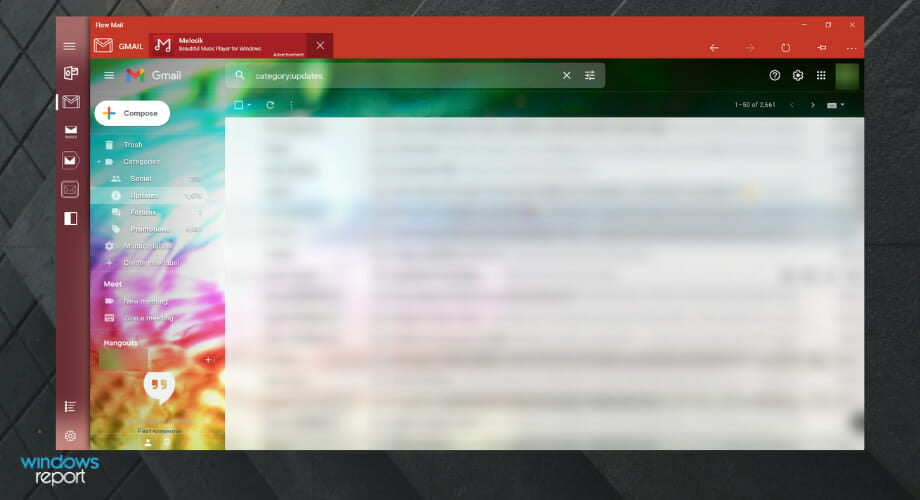
Another great email app that you should try out is Flow Mail. The application has a beautiful design and is also quite fast. You can quickly check all your emails and take advantage of the integration offers with most email browser services like Gmail.

Regarding the features, here are some notable ones that Flow Mail offers:

  • Sleek user interface with Fluent Design
  • Support for Split View
  • Support all major webmail providers such as Outlook, Gmail, Yahoo, and more. Flow Mail operates in a sandboxed (secure) environment, far more secure than accessing the web. In addition, it does not collect or retain personal information such as logins or email addresses.
  • Advanced privacy protection with support for custom passwords and Windows Hello
  • Sandbox environment that won’t collect any personal information
  • Frequent updates
  • Jumplists
  • Native downloading support
  • Ability to quickly upload or download files

Flow Mail operates in a sandboxed (secure) environment, far more secure than accessing the web. In addition, it does not collect or retain personal information such as logins or email addresses.

⇒ Get Flow Mail

Is Windows 10 email client any good?

While not as feature-rich as Outlook, the Windows 10 email client is still an excellent tool. It boasts an easy-to-use interface, as well as other superb features.

This is why it is a fitting mention on this list of the best email client and apps for Windows 10.

And these were some of the best Windows 10 desktop and apps email clients you could ask for. Each with its unique features and experiences.

While some borrow from others and refine the innovations, others think of something completely absurd and make it work with their experience in UX design and programming.

How an email client presents all the condensed information makes or breaks it – and it also depends on the user’s perspective. So do tell us what you think about these clients.

5 Ways to Fix FPS Drops, Lag & Stuttering in Black Ops 3

Playing games like Black Ops 3 on your computer requires enough resources and a stable system to run smoothly. It is a first-person shooter game and one of the Call of Duty series entries.

The most common issue players encounter on their computers when playing the game is FPS drops in Black Ops 3. It indicates that, for some reason, some actions on the game affect the FPS rate and prompt issues like the Black Ops 3 menu lag on PC, Black Ops 3 stuttering, and Black Ops 3 FPS cap.

However, Black Ops 3 PC frame rate issues can occur for several reasons that may vary on many computers.

The common causes are outdated drivers issue, system issues, or issues with the system DVR. Fortunately, fixing the FPS drop in Black Ops 3 is not difficult, and you can solve the problems by following the simple steps in this article.

Users may be interested in the methods for fixing GPU memory complete issues if they encounter the message on their computers.

Why is FPS dropping suddenly on Black Ops 3?

  • Outdated Operating System: The computer may conflict with your game if the operating system is outdated. So, not keeping your operating system up to date may affect the Black Ops 3 PC performance.
  • Outdated graphics driver: An outdated graphics driver poses more threats than an outdated OS. Running an outdated graphics driver on your computer can affect the graphics performance of your games and cause the FPS to drop drastically.
  • Issues with the Game DVR: Users complain that whenever the Game DVR feature is on, they experience a drop in the FPS on their computer. So, the feature may be responsible for the problem you’re experiencing.

We recommend you check our article about driver updates software for Windows to keep your drivers updated.

How do I fix FPS drop or lag when playing Black Ops 3?

1. Reboot your PC

  1. Click Start on your computer.
  2. Select the Power option.
  3. Click on Restart.

Restarting the PC is the simple fix for startup errors that may cause FPS to drop in Black Ops 3.

2. Update graphics drivers

  1. Press Windows + R keys to prompt the Run window.
  2. Type devmgmt.msc into the search space and click OK.
  3. In the search results, click on Display adapters, then select the driver from the drop-down menu.
  4. Click the Update driver software option, and select Search automatically for drivers.search automatically for drivers.

We recommend you restart your computer after the updating process is complete.

Alternatively, if this seems tedious, you should use a third-party tool to update all your driver automatically.

3. Disable Game DVR

  1. Press Windows + R keys to prompt the Run window.
  2. Type Regedit in the search space.
  3. Double-click Game DVR on the AppCaptureEnabled option, then select the Modify option.
  4. In the Edit DWORD (32-bit) Value tab, change the Value data to 0, then Click OK.

Check if Black Ops 3 FPS drop issue is eliminated on your PC.

4. Set High Performance in Power Options

  1. Click on the Start Menu, type Control Panel and click on it from the search result.
  2. Now, go to Hardware and Sound and select Power Options.
  3. Click on High Performance to select it.
  4. Make sure to close the window and fully shut down your computer.

Restart your computer. Check if the FPS drop issue in Black Ops persists.

5. Close unimportant programs

  1. Click on the Taskbar and select Task manager.
  2. Select the CPU and Memory usage in the Task Manager tab.
  3. Click on the applications consuming lots of CPU and memory space on your PC.
  4. Click on the End task from the drop-down that pops up.

Restart your computer after making the changes for them to take effect. It’ll create more resources for Black Ops on your PC.

Read about how to fix Team Fortress 2 packet loss if you encounter any on your computer.

Is Black Ops 3 capped at 60 FPS?

Black Ops 3 is capped because VSync defaults in the game settings. Hence, the game’s multiplayer is limited to 60 FPS by default due to VSync.

However, a reliable way of uncapping Black Ops 3 is by disabling VSync. It increases the FPS cap to 240 FPS max rate in Multiplayer using the in-game menu.

You may find it beneficial to learn how to fix the GPU if it is at 0% usage in your games. Likewise, we have a list of the methods for eliminating FPS drop and stuttering issues on Team Fortress 2 in Windows.

How to Install the USB Audio Device Driver for Windows 11 [Step-by-Step]

If you want to enable USB audio on Windows 11, whether for external speakers, headphones, or microphones, you need the right drivers installed.

This guide will show you how to download and install USB audio drivers, including how to reinstall the Realtek audio driver on Windows 11 if you run into issues.

We’ll also cover how to find the correct USB audio OEM device download so your system recognizes your hardware properly and plays sound without problems.

How do I download and install USB audio drivers for Windows?

Option 1: Download from the manufacturer’s website

  1. Locate the manufacturer’s site to find the appropriate drivers for your computer.
  2. Download the driver manually from the Downloads menu.
  3. Launch the USB audio driver installer and follow the onscreen prompts to complete the installation.
  4. Connect your USB audio device via the USB port.
  5. Play your audio to check if it’s working.

For example, if you are using an audio interface like the Scarlett Solo, you can follow this Focusrite Scarlett Solo driver download guide to get the correct package and ensure smooth installation on Windows.

Option 2: Use Windows Updates

  1. Connect your audio device to your PC.
  2. Go to Settings.
  3. Pick Windows Update from the left pane.windows update settings
  4. Select Advanced Options.advanced options windows update
  5. Select Optional Updates.optional updates
  6. Locate the name of your USB audio device, tick the box next to it, and start downloading.

Option 3: Use a driver updater software

Alternatively, you can opt for a specialized program to update the drivers to precisely what your device needs. It can also help fix corrupt drivers on your PC.

It is a much safer process because this way you will know that your device drivers are updated with the latest version. Plus, you can automate the process so your USB audio device driver is not only installed, but also update whenever a new version is released.

⇒ Get Fortect Driver Updater

What is a USB audio driver?

They are drivers that provide support for audio devices that comply with the Universal Serial Bus. The driver helps the computer to accept the device, communicate with it, and control it.

The USB audio driver performs the role of a translator and enables the audio device and the OS to function coherently.

Is Realtek audio driver compatible with Windows 11?

Yes, Windows 11 supports Realtek audio drivers. The latest Realtek driver was released for Windows 11 on January 11, 2022. Hence, it works fine on Windows.

However, there are some occasions where the Realtek drivers may not work due to audio driver issues; you can check out our guide to fix that.

Although there are relatively complex issues with Windows 11, most are being rectified with driver updates. Hence, getting the correct audio drivers will make using USB audio devices easier.

Further, you can check out our guide on downloading any audio driver on Windows 11. Also, if you mistakenly remove the driver, you can reinstall the audio driver using our article.

If you encounter issues, our guides on the best audio driver for Windows 10, how to fix generic audio driver problems, and solutions for the Realtek HD Audio Manager missing can help you troubleshoot and get your sound working smoothly.

Please leave feedback or a question in the comments section if this guide has been helpful. We’d love to hear from you.

How to Access & Use The Event Viewer in Windows 10

If you’re running Windows 10 and run into issues, the Event Viewer can help you understand what’s going wrong. Many avoid it, thinking it’s only for tech experts, but it’s actually easy to access and use.

The Event Viewer logs everything that happens on your system, especially errors and warnings. For instance, if your network suddenly fails, it creates a log with an event ID and severity level.

Find below all you need to know to use it like a pro.

How do I open Event Manager in Windows 10?

1. Use the Search button

  1. Click on the search icon in the lower-left corner of your task manager. 
  2. Type Viewer or Event Viewer. Use search box to open Event Viewer
  3. Click on the application.

2. Use the Control Panel 

  1. Click on the search icon in the lower-left corner of your task manager. 
  2. Type control panel and select the control panel app. Search for control panel
  3. Once opened, click on System and Security. Select system and security
  4. At the bottom, click on View event logs. Click on View event logs

3. Use a keyboard shortcut

  1. Click the Windows + X keys on your keyboard.
  2. Click on the Event Viewer option provided. Winx menu for Event Viewer

4. Use the Run dialogue

  1. Press the Windows + R to open the Run box on your keyboard. 
  2. Type eventvwr in the Run box and hit Enter. Run box for Event viewer

5. Use CMD prompt or Windows PowerShell 

➡ CMD prompt 

  1. Click on the search icon in the lower-left corner of your task manager.
  2. Type cmd or command and open the app. CMD for Evener Viewer
  3. On your cmd, type eventvwr. CMD eventvwr

➡ Windows PowerShell

  1. Click the Windows + X keys on your keyboard to open the Winx menu. Windows Viewer powerShell
  2. Select the PowerShell option on the menu and type eventvwr.

6. Use Computer Management 

  1. Click on the search icon in the lower-left corner of your task manager.
  2. Type computer management and open the resulting app. Computer management for Event Viewer
  3. You’ll see the Event Viewer link on the left side of the screen. Select Event Viewer from computer management
  4. Click to access it.

7. Use the Task manager 

  1. Press your keyboard’s Ctrl + Shift + Esc keys to open the task manager. Open Task Manager
  2. Click File and select Run new task. Run new task
  3. Type eventvwr in the field provided and select OK. Task Window

8. Use the File explorer 

  1. Select the file explorer icon on your Taskbar. Select File Explorer
  2. If you don’t have this icon, click on your keyboard’s Windows + E keys. 
  3. Go to your local disk (C:). Local Disk (C:)
  4. Then select Windows. Local Disk (C:)/Windows/
  5. Once opened, look for your System32 folder and open it. Windows/System32
  6. Please scroll down to your eventvwr.exe file and open it. eventvwr.exe file

9. Use the Smart menu

  1. Click on the Windows button on your keyboard. 
  2. You can also select the Windows icon on the bottom left side of your screen. Select Windows button
  3. Scroll down to the Windows Administrative Tools section and click to open. Windows Administrative Tools
  4. Select the Event Viewer app from the list. WAT Event Viewer

What is the Event Viewer logs location?

By default, Event Viewer log files use the .evt extension and are located in the following folder: %SystemRoot%\System32\winevt\Logs

To access the folder, you may press the Windows + R keyboard shortcut to open the Run console, paste the path above, and press Enter. A File Manager window will open straight on the location of the logs.

What are some common Event Viewer Windows 10 errors?

As is the case in other circumstances, the Even Viewer app on Windows 10 has some commonly encountered issues affecting users over time.

Here are some of the most frequent errors:

  • Event ID 1000 error – Most commonly caused by some corrupt WRP system files, this error can be resolved by checking for software conflicts and updating drivers
  • Event ID 1001 error – Caused most often by various issues, including but not limited to high system resource usage and system file corruption.
  • Event ID 6008 error – Can be caused by a variety of reasons, including missing driver updates
  • Event ID 455 Esent error – Usually appears because of missing directories which are required by Windows 10 to create log files

Making sure to follow the guides presented above with attention will ensure that no other issues will be pestering your system, so make sure to go through the solutions one by one.

Did any of our methods help you find the Windows Event log location? 

If you would like to tinker with a more advanced tool than the standard one provided by your OS, consider going through these event log viewers. And if Event Viewer is not working in Windows 10 and 11, our detailed guide will help you.

If you upgraded your OS, the Event Viewer still works the same way, here’s how to check error logs in Windows 11.

With this tool, you can see which events occur on your PC, many users reported an event ID 7034, but we have a guide that addresses it.

Finally, let us know in the comment section if you know any other way to access the Event Viewer on Windows 10.

5 Quick Ways to Fix Outlook Couldn’t Set up Your Account

Windows users reported experiencing a frustrating issue with Outlook recently. When trying to connect their email to the app, the error message Something went wrong and Outlook couldn’t set up your account showed up.

The error can be encountered after making specific changes to Outlook or out of the blue, and users usually have no clue about solving it.

If you came across the Something went wrong and Outlook couldn’t set up account error on Office 365, here’s all you need to know and the solutions that would get things up and running.

Why does the Outlook couldn’t set up account message appear?

The issue usually arises when Autodiscover, a process employed by Outlook, receives an unexpected result. Also, your firewall or third-party antivirus may conflict with Outlook’s connection attempt, thus leading to the error.

Besides, as discussed earlier, making changes to the account can cause an error to appear. For instance, many saw the Something went wrong and Outlook couldn’t set up your account message after enabling MFA (Multi-Factor Authentication).

How can I fix the Something went wrong and Outlook couldn’t set up account error?

1. Create a profile through the Control Panel

  1. Press Windows + S to open the Search menu, enter Control Panel in the text field, and then click on the relevant search result.control panel
  2. Click on the View by dropdown menu, and then select Large icons.large icons
  3. Now, click on Mail (Microsoft Outlook) here.Mail to fix something went wrong and outlook couldn't set up account
  4. Click the Add button.add
  5. Enter a profile name and then click OK.always use this profile to fix something went wrong and outlook couldn't set up account
  6. Now, select the Always use this profile option and click OK.enable auto option

The first thing that you should do is add a mail profile to the system. This will make the system recognize it as an administrator and help you log into Outlook.

Once done, verify if you still see the Something went wrong and Outlook couldn’t set up your account message when trying with an Exchange account.

2. Tweak your Registry

  1. Press Windows + R to open Run, type regedit, and click OK to access the Registry Editor.regedit
  2. Click Yes in the UAC prompt that appears.
  3. Now, paste the following path in the address bar and hit Enter:HKEY_CURRENT_USER\Software\Microsoft\Exchangenavigate path
  4. Next, Right-click anywhere on the blank portion, hover the cursor over New, select DWORD (32-bit) Value, and name it as MapiHttpDisabled.DWORD to fix MapiHttpDisabled
  5. Double-click on the DWORD, set 1 as the Value data, and click OK to save the changes.ok
  6. Now, navigate to the following address:Computer\HKEY_CURRENT_USER\SOFTWARE\
    Microsoft\Office16.0\Outlook\AutoDiscover
  7. Create a new DWORD (32-bit) Value here, and name it as ExcludeScpLookup.
  8. Also, set its Value data to 1 and save the changes.edit to fix something went wrong and outlook couldn't set up account
  9. Similarly, create two more DWORD (32-bit) Value in the AutoDiscover folder, and name them ExcludeHttpsRootDomain and ExcludeHttpRedirect. Make sure to set 1 as both their Value data.
  10. Close the Registry Editor and reboot your PC for the changes to come into effect.

Sometimes, your DNS might be broken, causing the Something went wrong and Outlook couldn’t set up your account error.

Fixing this issue requires you to make a few registry changes. Be careful when making these, as incorrect settings could cause severe system damage. Follow the steps here as it is to be on the safe side.

3. Disable Windows Firewall

  1. Press Windows + R to open the Run command, enter Control Panel in the text field, and click OK.control panel
  2. Click on System and Security.system and security
  3. Next, click on Windows Defender Firewall here.Windows Defender Firewall to fix something went wrong and outlook couldn't set up account
  4. Next, select Turn Windows Defender Firewall on or off in the left pane.turn off
  5. Select Turn off Windows Defender Firewall (not recommended) for both Private network settings and Public network settings, and then click OK to save the changes.disable firewall to fix something went wrong and outlook couldn't set up account

Sometimes, Windows Defender Firewall blocks certain apps from accessing the Internet. In which case, you can disable it and verify if the Outlook 2016 Office 365 Something went wrong and Outlook couldn’t set up your account error is fixed.

4. Turn off your antivirus

Just like in the case of the Windows Defender Firewall, your third-party antivirus software could restrict certain apps from accessing the Internet. Open the antivirus, find the option to disable it, and check to see if this fixed the issue.

If it doesn’t work, turn the antivirus back on to avoid potential malware attacks. But, in case it did, the problem lies with the antivirus itself. Here, we recommend first uninstalling the program, you can easily use CCleaner to clean up, and then choosing an effective and reliable antivirus for your PC.

5. Run the troubleshooter

  1. Press Windows + R, type control in the text field, and click OK.control panel
  2. Choose Large icons from the View by dropdown menu.large icons
  3. Click on Troubleshooting.troubleshooting to fix something went wrong and outlook couldn't set up account
  4. Click on Programs.programs
  5. Next, click on the Program Compatibility Troubleshooter.Program compatibility troubleshooter to fix something went wrong and outlook couldn't set up account
  6. Follow the on-screen instructions and choose the appropriate response when prompted to complete the process.run

That’s it! If the previous methods didn’t work, running the troubleshooter would fix the Something went wrong, check your account info, try again, or contact your IT admin.

How can I fix the Something went wrong and Outlook couldn’t set up account on Windows 11?

If you are encountering the error in Windows 11, we would first recommend trying the solutions listed in the previous section since these are the same for both iterations of the OS.

Now, first things first! Most users reported the Something went wrong and Outlook couldn’t set up your account error after enabling 2FA. And the best solution is to disable it for the time being while you set up the account, and after it’s done, re-enable the feature.

Also, check for DNS entries you are unaware of; if any are found, remove them. Besides, if nothing else work, try disabling IPv6.

How do I add email accounts to Outlook?

Adding an email account to Outlook in Windows 11 is pretty simple the first time. Then, on launching the app, you would be asked to provide the login credentials and complete the authentication if required, and things should be up and running.

Things aren’t difficult here for those who already have it set up and want to add multiple accounts to Outlook. Head to the File menu, click Add account, and follow the on-screen instructions to complete the process.

By the time you reach this part of the guide, the Something went wrong and Outlook couldn’t set up your account error should be gone for good.

Also, find out how to check rules in Outlook. If the problem persists, you might have to uninstall and download Outlook for Windows 11 again.

If you find any other working solutions, please share them in the comment section below.

Posted in Fix

How to Change the Primary Monitor in Windows 10

A two-monitor setup certainly enhances the display and allows better productivity. Sometimes, you may need to change the primary and secondary monitors to get the desired results.

This is rather simple, and you can do it in a matter of moments. The best part, there is more than one way to do that, thus giving the option to choose whichever suits you the best.

If you don’t know how to change your primary and secondary monitor, this article will be perfect for you.

How do I change which monitor is primary in Windows 10?

1. Via Display Settings

  1. 1. Right-click on an empty space on the Desktop and choose the Display settings option from the menu.

    display settings desktop
  2. 2. Scroll down to Multiple displays. Your monitors should be displayed here.

  3. 3. If your secondary monitor is not visible here, click on Detect.

    detect to change primary monitor in Windows 10
  4. 4. Select the monitor you want to be your primary one, scroll down and click on Make this my main display.

  5. 5. After doing that, the selected monitor will become the primary monitor.

  6. If you own multiple monitors and want to change which one is the primary one and which one is the secondary one, you can do this through the Display Settings menu.

    This is a fast and easy method which allows you to change the primary monitor in just a few clicks.

2. Set the main display in NVIDIA Control Panel

  1. Open the NVIDIA Control Panel.
  2. Under the Display option in the left pane, select Set up multiple displays.
    set up multiple displays How to change primary and secondary monitor
  3. Now, right-click on the display you want to use as primary and choose to Make primary. Note: the display number you can see with an asterisk (*) is the current monitor.make primary on how to change the primary monitor
  4. Then, click on Apply to save the changes.apply
  5. Finally, confirm by clicking Yes.

If you can’t open Nvidia Control Panel, fix that first, and you can then find out how to change the primary monitor in Windows.

3. Use the Command Prompt

Note icon NOTE
This is a slightly intricate method and would require you to use hit-and-trial while identifying the monitor to be set as primary. It’s because the tool (we will be downloading) doesn’t follow the same display configuration set by the OS.
  1. Go to Nirsoft’s official website, scroll down to the bottom of the page, and click the download button, depending on your version of the OS.download
  2. Press Windows + E to open the File Explorer, head to the folder where the downloaded file is stored, right-click on it, and select Extract all.extract all
  3. Choose the location for the extracted files, and click on Extract.extract
  4. Now, select the extracted folder, and click on Copy path in the Home menu.copy path
  5. Press Windows + R to open the Run command, type cmd in the text field, and then press Ctrl + Shift + Enter to open Command Prompt with administrative privileges.cmd to how to change primary monitor
  6. Click Yes in the UAC prompt.
  7. Now, paste the following command while replacing Path with the one you copied earlier, and hit Enter:cd /d Pathcommand to how to change primary monitor
  8. Next, paste the following command and hit Enter:nircmd.exe setprimarydisplay 1change monitor

The last command is the tricky part because the number 1 wouldn’t work for most of you. As stated earlier, the monitors are not identified the same in the Command Prompt as they were in the Nvidia Control Panel or Display settings.

So, you would have to follow a hit-and-trial approach. Start with 1 and then keep increasing until you identify the correct value to set the desired monitor as primary. And once you hit the bull’s eye, things will be much more seamless in the future.

Also, while you are at it, make sure to identify the values for all connected displays in case you want to change again in the coming days or revert to the previous configuration.

Changing primary and secondary monitor is quite simple to do on Windows 10. The fastest option is to do it from Display Settings, but you can also use the Nvidia Control Panel. However, using the Command Prompt method is a little too intricate for normal users.

If the game is opening on the wrong monitor, you need to edit the display settings; read this guide to know more.

You can also use similar steps to fix your app if it is opening on the wrong monitor in Windows 11.

You should know that these solutions also work for multiple display setups, not only two. Find out how to configure a three-monitor setup in Windows 10.

Be sure to try all of our solutions, and let us know in the comments section which solution worked for you.

How to Run Windows XP Virtual Machine in Windows 10

A lot of people still use Windows XP, although it’s almost sixteen years old. On the other hand, a lot of people are using Windows 10.

There are also millions of computer users who rely on the stable versions of Windows 10 worldwide.

So, if you need to run a copy of Windows XP, you can try to run it within Windows 10 with a little program called VirtualBox.

Many of you would say that a virtual machine is the only right choice for running one Windows operating system within another.

And you’re probably right, but installing your second system on the virtual machine means installing a fresh, clean copy of Windows and installing all third-party programs afterward.

What do I need to do before I can set up a Windows XP virtual machine?

Prior to starting to set up your Windows XP VM using our guide, you need to take care of a few things. First of all, you need to ensure you’re using Windows 10 on the PC where you want to add Windows XP. The guide was written for Windows 10 and therefore might not work for other OSs.

Moreover, installing a VM requires that you have virtualization enabled on your PC. This can be done via BIOS or UEFI settings.

If you only want to run Windows XP games on Windows 10, we have a dedicated article that you can read.


How do I run Windows XP on Windows 10?

    If you’re looking to set up a Windows XP Virtual Machine, we recommend VirtualBox,  an Oracle tool. With VirtualBox you can keep all the programs you installed on your old XP and transfer them to the newer version of Windows.

    VirtualBox simply converts your current Windows XP system and all programs installed on it to the Microsoft virtual image.

    Once the conversion is finished, you can open it in Windows 10 and access your XP system, files and programs just like you do with the virtual machine.

    Do keep in mind that the tool hasn’t been updated in 2 years, and should be used with carefulness at all times.

  1. 1. Download VirtualBox from the official website.

    download virtualbox tool
  2. 2. Install the tool on your PC.

  3. 3. Launch VirtualBox and click on the New button, then name your VM.

  4. 4. Now you need to choose an installation location for the VM, as well as the Windows XP version you want. After you make your selection, click on Next.

  5. 5. Select the amount of allocated memory you want to have for your Windows XP virtual machine, and then click on Next.

  6. 6. Choose Select a virtual hard disk now.

  7. 7. Click on Dynamically allocated and then select Next.

  8. 8. Choose the desired size for your virtual hard drive.

  9. 9. Go to the top menu and click on Start.

  10. 10. Insert your Windows XP startup disk.

  11. 11. Now you need to finish installing Windows XP by following the setup wizard.

  12. 12. After the installation finishes, you can use Windows XP on your Windows 10 device whenever you want.

    virtual box windows xp
  13. 13. For further configuration, navigate to the Windows XP tab and go to Settings.

One of the main reasons people choose not to install Windows 10 Technical Preview on their computers is program compatibility issues.

A lot of older programs can’t even be installed on Windows 10, and people who use them simply choose to stick with their current operating system.

With VirtualBox you’ll be able to try all exciting features of Windows 10 and run all the programs you used in Windows XP at the same time.

We hope that Microsoft will fix the compatibility issues with older programs in the future, but until that happens (if it ever happens), you can use VirtualBox as an alternative solution for running programs compatible with Windows XP in Windows 10.


2. Use Virtualization software

vmware logo


The easiest and most flexible way is to find a Windows XP emulator for Windows 10. Our recommendation comes from VMware.

With over 12 years of experience running virtual machine emulations, VMWare is one of the heavy hitters in the industry, offering a plethora of options.

Today we will concentrate on their Personal Desktop category. Here we will find the tools we need to get the job done.

The scenario is as follows: you have your Windows 10 device up and running. You install VMware Workstation. You load your Windows XP physical disc or a disk image of it.

You create a new virtual machine in the Workstation. There, you install and load Windows XP.

Fire up the new virtual machine and you are done. Windows XP is running alongside Windows 10.

From there you can:

  • easily transfer files from the guest to the host and vice-versa
  • install VMware Tools in Windows XP
  • perform any actions safely since the machine is completely isolated from Windows 10

VMware Workstation provides DirectX and OpenGL support. This means that even Windows XP will be able to benefit from your graphics card. Also important is that VMware supports USB3.0

Please note that only VMware Workstation Player version 15 or up is compatible with the latest version of Windows 10.

VMware Workstation Player

VMware Workstation Player

Create a Windows XP virtual machine that runs simultaneously with your Windows 10, sharing the resources.

Can I use Windows XP mode on Windows 10?

In the past, you used to be able to download and install the Windows XP Mode directly from Microsoft’s official website. With the help of this tool, you could run Windows XP-specific programs on your Windows 10 computer. Of course, this tool is not the same as VirtualXP.

More specifically, with the Windows XP Mode, you still needed to install Windows XP on your machine. However, Farstone’s VirtualXP tool allowed you to simply migrate your Windows XP OS and apps to your virtual disk. It too became obsolete in the meantime.

VirtualBox though is still up and running and can be safely used on your PC. Don’t forget to install reliable and compatible software such as XP browsers and security software.

We hope you found this article helpful and managed to set up a Windows XP virtual machine on your Windows 10 device. Let us know in the comments section below whether you have any questions.

13 Best Invoice Software for Windows 10 in 2026

Running a business encompasses many financial functions, and invoicing tops the list.

You will require a reliable way to handle all the transactions, keep track of customers, professionally manage the invoices, and make payments on time.

Instead of outsourcing or hiring a professional accountant, you can manage these functions with reliable invoice software.

How can invoice software help your business?

Keeping track of your finances is very important as finances determine the future of your business.

Producing professional and timely invoices for your clients not only upholds professionalism but also impacts a positive impression.

The best invoice software provides a single platform in which you can create and send invoices, track payments, and manage customer accounts.

They offer advanced invoicing features such as payment processing, batch processing, and customer portals. In this article, we will discuss the best billing software for Windows 10.

What are the best billing and invoice apps for Windows 10 & 11?

FreshBooks – Great for invoicing

FreshBooks is not only the best finance and accounting software but also offers the best billing and invoicing features.

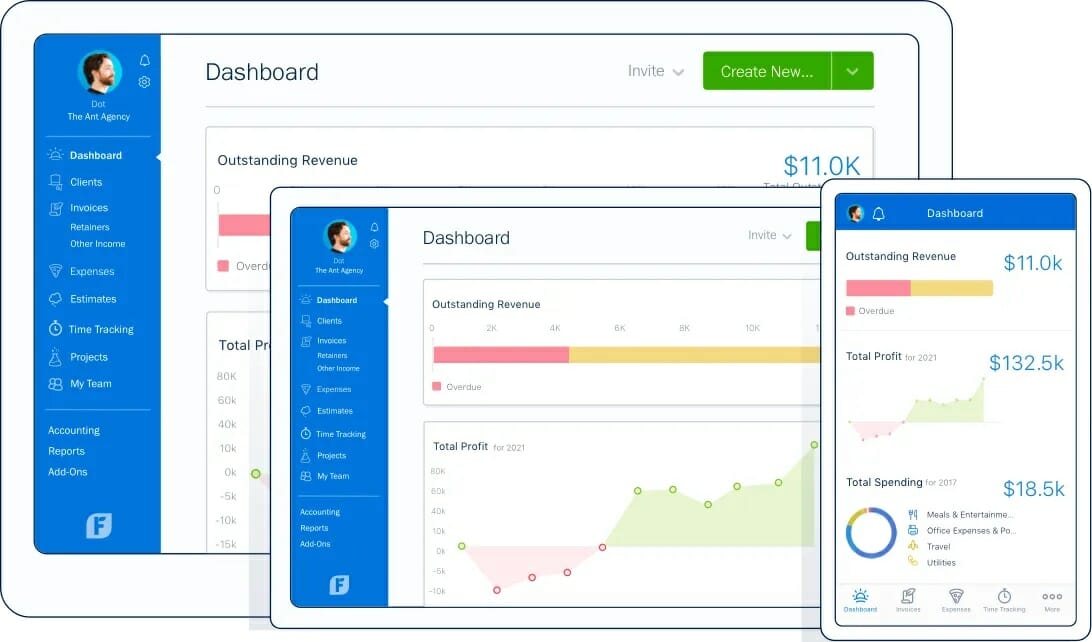
Its mobile app has a clean blue and white interface with a convenient tap to access all the invoicing and time-tracking features.

The Freshbooks system constantly monitors the status of your invoices once you send them. It notifies you when the client receives and views the invoice.

It also comes with a customer portal that allows your clients to review their accounts and pay bills.

Let’s quickly look at its key features:

  • On the dashboard, you will find all the invoice reports such as paid and unpaid for a certain period of time
  • View the invoices reports that show the amount that has not been paid for 30, 60, 90 days, or more
  • Highly customizable invoices allow you to add tasks, rates, items, and time including the cost per item or service
  • Professional invoice templates available with space to add your own logo
FreshBooks

FreshBooks

Running a business is easy thanks to this excellent all-in-one bookkeeping and invoicing tool.
Free trial Visit Website

QuickBooks – Best for accounting

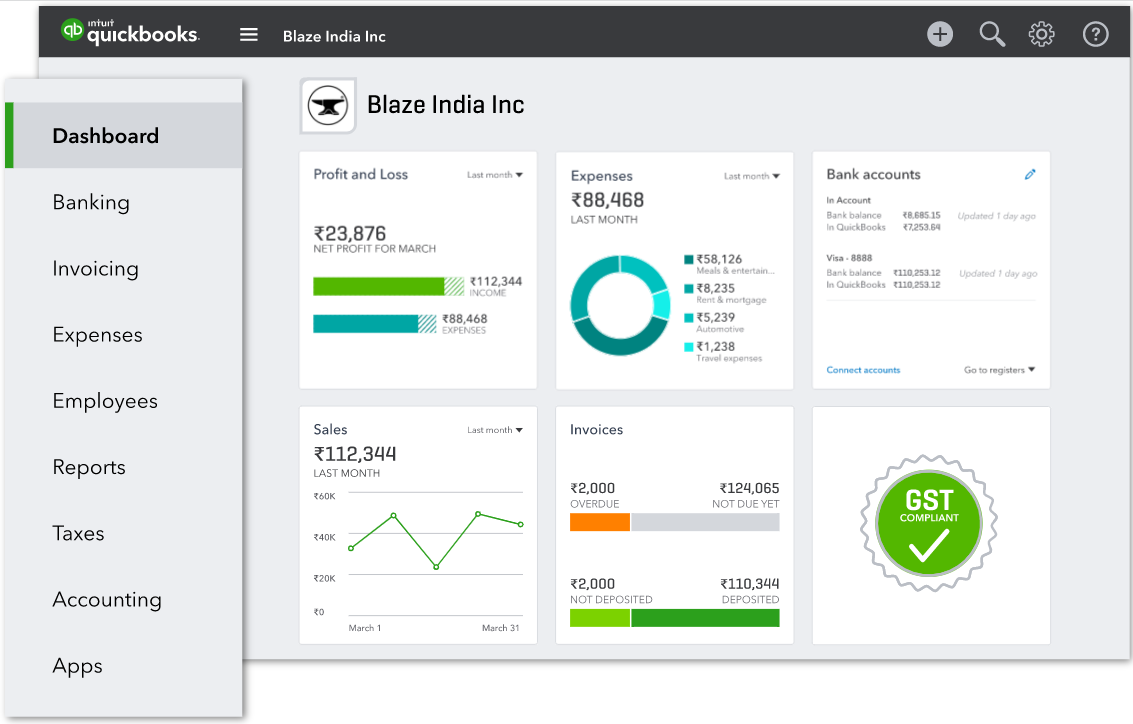
QuickBooks is great for all types of small businesses, online activities, and entrepreneurs. It offers you an intuitive and easy-to-use navigation system that will help you perform the needed tasks.

This software works on Windows, Android, MAC, and iOS so you can operate from all your devices effortlessly.

Invoicing with QuickBooks is easy, with lots of customizable options. You can create and send PDF invoices even from your mobile, not only your PC.

You can also enable online payments, thus getting paid faster after sending an invoice.

Let’s quickly look at its key features:

  • Manage payments, invoicing, and card processing from one centralized location
  • Send invoices from any device and schedule recurring billing
  • Customize paying button directly in the invoice
  • Set reminders and receive notifications when invoices are viewed or paid
  • Reconciliation tools to automatically match payments to invoices

IRISmart Invoice – Personalized invoicing

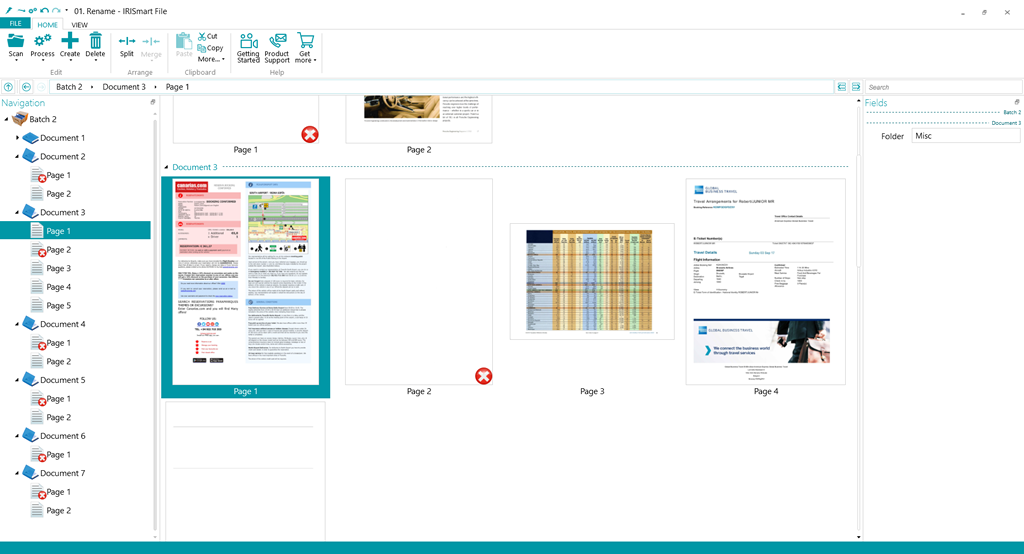
IRISmart Invoice is one of those types of software that can be considered very well-rounded, in the sense that it caters to both professionals and amateurs alike.

Creating invoices has never been simpler, as the provided form templates look extremely professional, greatly simplifying the creative process for freelancers.

As for managers and those that receive the invoices, IRISmart Invoice comes with some special tools as well.

For example, the program gives them a direct, summary view into all of their incoming invoices, which are then classified, commented on, categorized, and even pre-posted

All in all, it streamlines both the creation and receiving and processes of invoices, making it a valuable tool when time and efficiency are two very important resources.

Let’s quickly look at its key features:

  • Invoice classification and encoding
  • Expense management and account charting
  • Cloud support
  • Fast and easy-to-use
  • Creates indexed and compressed PDFs

Sage Intacct – Automated Cloud Invoicing

Sage Intacct is a powerful cloud-based financial management software that suits perfectly either a startup or an established public company.

This software gives you real-time visibility of your business due to its comprehensive dashboard and detailed reporting systems.

Sage Intacct makes everything simpler, with dedicated features for things like invoices, accounts payable, accounts receivable, and AI-boosted integrations.

With technology like Intelligent GL, you can scan thousands of transactions within minutes and then audit the numbers and plan accordingly all within Sage Intacct.

Invoicing can be streamlined via the cloud automation software, reducing the risk of manual error and the time needed to manually admin that task.

Here are some more features of Sage Intacct:

  • Collaborate in real-time across the entire organization
  • Spreadsheet-like formulas
  • Easily combine payroll, people, and accounting data
  • Multi-entity and global consolidations
  • Sales and use tax
  • Salesforce advanced integration
  • Time and expense management

Tridens Technology – Best financial tool

Tridens Technology -best billing and invoice apps

Tridens Monetization is an all-in-one cloud billing software solution designed to provide the diverse needs of numerous industries, such as Software & SaaS, Telecommunications, Energy & Utility, Media & Entertainment, and more.

This state-of-the-art software is ideally suited to handle complex pricing structures and billing requirements for hybrid business models and traditional subscription-based or consumption-based billing models.

Tridens Monetization offers the flexibility to seamlessly process payments through pre-integrated solutions and stay on top of financial statuses with real-time analytics.

The software is developed on reliable and secure Amazon Web Services (AWS) and offers robust integration capabilities for payments, taxation, customer relations, and more.

With Tridens Monetization, your business can streamline billing operations and enhance your revenue to the next level.

Let’s quickly look at its key features:

  • Accommodate different industry and partner-enabled business models, allowing adaptation of billing processes to specific requirements
  • Configurable offer design for tailored pricing plans and promotions
  • Flexible billing cycle management, dynamic schedules, and template-based invoicing
  • Real-time advanced analytics and notifications for financial insights and customer behavior
  • Effortless self-service functionalities through web and mobile apps for your customers

⇒ Get Tridens Technology

ZoHo Books – Good app implementation

Zoho Books offers one of the best billing and invoicing systems that is clean and easy to use.

The dashboard displays graphical reports that show unpaid and overdue invoices, sales and expenses, and other billing information.

This online system allows you to manage your customers and invoices in an easy-to-use platform that is accessible from your PC as well as on mobile devices.

And it’s possible to link customers’ accounts to payment methods of their choice including PayPal, Stripe, Authorize.Net among others.

Let’s quickly look at its key features:

  • Select a customer from the contact list or add a new one to create an invoice
  • You can adjust the descriptions and prices without affecting the originally saved information
  • Private customer portal where your customers can view their transactions and invoices as well as update their account information
  • Send up to 3 reminders at set dates either before or after the due date
  • Generate reports about payments, taxes, timesheets, etc.

⇒ Get Zohobooks

Nutcache – Perfect for billing

Nutcache is one of the most promising billing and invoicing software that is easy to learn and fun to use.

Launched in January 2013, Nutcache has slowly become one of the most reliable invoicing and time tracking applications on the market.

The tool allows you to create an unlimited number of invoices, estimates, clients, and taxes all in your own branding.

It then gives you the option to convert an estimate into an invoice and send the invoice in many formats such as Microsoft Word, PowerPoint, PDF, RTF, and CSV.

Nutcache offers a 30-days free trial allowing you plenty of time to test its features before closing the deal.

Take a look at some of its most important features:

  • Create an unlimited number of invoices, estimates, clients, and taxes
  • Send invoices in Word, PowerPoint, PDF, RTF, and CSV
  • Use the Gantt chart to plan, track and organize visually your tasks
  • Set up different alerts and get notified when potential cost overruns occur
  • All-in-one project management software

⇒ Get Nutcache

Momenteo – Great cloud-based tool

If you are a freelancer and accounting isn’t really your strong suit, Momenteo is the user-friendly solution meant for you.

Simply keep track of your work done, expenses, and travels in our beautiful calendar and let our free software generate your accounting.

With a little discipline and a few minutes every month, you’ll never have to stress with accounting again, as Momenteo is cloud-based, automated, and your data is stored in the safest way possible.

Easily manage your clients, invoices, and expenses while having a clear portrait of your freelance business, for free.

You’ll be able to focus on developing your craft with the peace of mind that your finances are straight.

Send your quotes and invoices, personalize them, track them with just a few clicks and receive your payments.

Add your cash inflow and cash outflow to our calendar to do your bookkeeping. Then, at the end of the month, do your bank reconciliation in no time.

Take a look at Momenteo’s best features:

  • Send your invoices in any form you want: paper, e-mail, or PDF
  • Cloud-based app, accessible from almost any device anywhere
  • Convenient cash inflow and outflow for quick bookkeeping
  • Easily manage your clients, invoices, and expenses
  • Advanced automation features

⇒ Get Momenteo

Invoicely – Great invoice filtering

Just as the name suggests, Invoicely aims at producing professionally designed invoices with the best set of options such as currency, taxes, invoice notes, discounts, shipping, and more.

This tool takes a new approach to online invoicing. It allows you to create new invoices in a snap, see which invoices have been sent, paid, and due, as well as filter your invoices by status, client, or period.

The app has a unique billing timer that ticks in the background while you continue with your work.

Invoicely is ideal for freelancers and businesses who want a simple and clear-cut means for creating and managing invoices.

For small businesses, the service is free and offers up to 3 invoices per month. Medium and large-sized businesses have to pay a fee.

Consider some of its best features below:

  • Track hourly billed tasks, expenses & trips
  • Unlimited mobile invoicing
  • Recurring invoices, and automatic payment
  • Fully customize statements, logos, icons, control panel pages, and log-in screens
  • Add taxes, discounts and shipping to single line items

⇒ Get Invoicely

SliQ Invoicing – Includes professional invoice templates

SliQ Invoicing is an intuitive billing and invoicing software that offers you full control over the customization of your invoices.

The software is feature-rich and gives you full control over the management of your bills, invoices, customers, products, and services.

For products and services, the software allows you to set up stock controls, manage orders, and keep track of prices.

You can also specify payment terms, see the payment history, and manage customer profiles.

You can choose from the 11 invoice templates provided, and all can be customized to reflect your company’s ascetic.

Reporting is excellent, you can choose from over 20 reports, and all give you the option to specify the reporting period. Reports include sales reports, payment reports, product reports, and others.

Here are a few of its best features:

  • Manage your bills, invoices, customers, products, and services
  • 11 invoice templates available for customization
  • Over 20 report templates to use
  • See the payment history, and manage customer profiles
  • Bulk emailing feature

⇒ Get SliQ Invoicing

Invoice2go – Quick and easy usage

Invoice2go is a feature-rich yet efficient invoice software that is highly customizable and easy to use. Its magic is seen when it comes to editing and personalizing invoices.

You can edit every line of the invoice, upload a logo, enter company information, adjust the placement of every element, and chose from over 50 background images, 20 colors, and over 40 fonts.

You can also add up to three payment options to the invoice. Various reports can be generated, including customer-aging reports that show when the customers are overdue, payment reports, sales reports, and P & L reports.

However, the system does not automatically send email notifications to notify customers when payments are due.

Get a glimpse of Invoice2go’s best features:

  • Fully customizable invoices
  • Add up to three payment options to the invoice
  • Generate various reports, including customer-aging reports
  • Automated overdue invoice reminders, and invoice status tracking
  • Accept payments via bank transfer, credit card, debit card, or PayPal

⇒ Get Invoice2go

Tipalti – Good ERP integration

Tipalti provides one of the world’s most reliable billing and invoicing solutions automating the entire supplier payments operations.

What makes this app unique is that it comprehensively covers all the phases of the payouts processes—from funds disbursements to payments and control.

Tipalti covers every facet of the payment cycle including electronic invoice collection, currency selection, global supplier remittance, tax remittances, payment reconciliations, payee payment status communication, and also integrates with ERP.

The tool also comes with Cloud Optical Character Recognition (OCR) to its invoice processing module, a process that slashed the invoice processing time by 80% by delivering touchless invoice automation.

Check out Tipalti’s key features:

  • ERP integration
  • Invoice processing with OCR function
  • Automated supplier payments operations
  • Electronic invoice collection, global supplier remittance, tax remittances, payment reconciliations, and payee payment status communication

⇒ Get Tipalti

Billdu – Best for small businesses

If you have a small business, Billdu is definitely going to make your life or your accountant a lot easier.

The app has a built-in invoice generator that you will be able to use in creating appealing professional invoices, estimates, and purchase orders in just a few seconds.

With Billdu also comes with a PDF receipt maker and a bill payment organizer, but it’s so easy to use that you won’t even need to hire a dedicated accountant.

The software has multiple payment options, including card payments, so your clients will be able to pay immediately.

You will know about your available budget at all times because as you upload your expenses, you will be able to track every cent.

But the best of all, Billdu is a cloud-based app and it also has mobile apps for Android and iOS devices.

That means that all your data is stored safely and securely and you may access it wherever you are on pretty much any device.

Let’s see some of Billdu’s best features:

  • Dedicated invoice maker with customizable templates
  • Built-in PDF receipt maker
  • Very easy to use even for non-professionals
  • Advanced communication features
  • Online booking and online store

⇒ Get Builldu

The software discussed above all offers standardized invoicing, so no matter which one you choose, you will get stellar services.

Using any of these products will save you time, let you get paid faster, and add a professional touch to your business.

You will also be able to focus entirely on business knowing that you have reliable invoice software and all you’ll need to do is check from time to time to see how much money you have paid and expensed.

While we are on this subject, you might be interested in our list including the best free cloud-based tax software for small businesses.

What will you go for? Share your impressions via the comments section below.

7 Ways to Fix FPS Drops, Lag & Stuttering After Nvidia Update

The Nvidia update helps keep your PC up-to-date with the latest Nvidia drivers. It notifies you when a new driver is available and directs you to the download page for the driver.

However, running Nvidia on your PC may be challenging due to some issues you are likely to encounter with it. Many users complain about FPS drops after the Nvidia update. It indicates that the update affects the computer, causing its FPS to drop, lag or stutter.

However, various factors may cause the FPS to drop after the Nvidia driver updates your computer.

Hence, we’ll discuss how to fix FPS drops, lag, and stuttering that you may encounter after updating Nvidia drivers on your computer.

You may also encounter FPS drop and stuttering problems with your game on your PC. Here are some: Team Fortress 2 FPS drops and stuttering, Low FPS in Sea of Thieves on PC, and FPS drop in Lost Ark on a high-end PC.

However, you can click the links above for solutions to your games’ FPS drop, lag, or stuttering issues.

Why did my FPS drop after the update?

  • Outdated graphics drivers: When you have outdated graphics drivers on your computer, it reduces the performance and strength of your drivers. It indicates that your computer lacks the necessary updates and patches that help fix bugs on your computer and improve performance. Hence, it is possible to be the cause of the FPS drop after the Nvidia driver update in 2021.
  • Too many programs/apps running concurrently: The Nvidia update may not be responsible for the FPs drop. Having many apps open on your PC may be the cause. It consumes your computer’s resources, hence leaving it with low RAM.
  • Outdated Windows: Users may encounter FPS drop after driver update if the operating system on their PC is outdated. Outdated Windows can make the computer perform poorly.

However, there are many other factors that may contribute to the FPs drop after the Nvidia driver update on your PC. The above list of causes is the common one.

How do I fix FPS drop in games after the Nvidia update?

1. Update the graphics driver

  1. Press Windows + R key to prompt the Run window.
  2. Type the following into the search space: devmgmt.msc, and click OK.
  3. Click on Display adapters from the search results, select the driver from the drop-down, and then right-click.
  4. Click the Update driver Software option, then select Search automatically for drivers.

Restart your computer after the updating process is complete.

You can also use a specialized program if you don’t want to follow the manual steps from above. The third-party solution can scan your device for old drivers and find them instantly an updated version.

2. Update Windows

  1. Click the Start button.
  2. Select Setting and click on Windows update.
  3. On the Windows update page, select Check for updates. If there are any updates available, Windows will automatically search and install them.

3. End task for programs

  1. Click on the Start button, search Task manager, and launch it.
  2. Select the CPU and Memory usage in the Task Manager.
  3. Click on the applications consuming lots of CPU and memory space on your PC.
  4. Click on the End Task from the drop-down that pops up.
  5. Restart your computer.

We recommend you check the best Task Manager software for Windows 10 for better performance.

4. Scan for viruses

  1. Press Start and search for Windows Security.
  2. Open the Windows Security option and select Virus & threat protection.
  3. Click on Quick scan below the Current threats tab.

Restart your PC after the process finishes and check if the FPS drop or lag persists.

5. Reboot your PC

  1. Click Start on your computer.
  2. Select the Power option.
  3. Click on Restart.

Restarting the PC will help fix any startup error causing FPS to drop after the Nvidia update.

6. Disable Intel’s overclocking technology

  1. Click on Start and select the Control Panel.
  2. Select Hardware and Sound and click on Power Options.
  3. Click on Change plan settings.
  4. Click on Change advanced power settings to prompt the Power Options tab, then expand the Processor power management option.
  5. Expand the Maximum processor state and set the On battery and Plugged values as 99%.
  6. Click on Apply, then OK.

7. Check for corrupt files on the PC

  1. Press Windows + R to open the Run window.
  2. Type cmd in the text space and press Ctrl + Shift + Enter to open Command Prompt as administrator.
  3. Type sfc /scannow in the search space and press Enter.

Wait until the scanning process is complete, then restart your computer.

Why is my FPS high but choppy?

Various factors may cause your performance to be choppy or unsmooth, regardless of having a high FPS. However, low computer RAM and Outdated graphics drivers can cause the issue.

Nonetheless, we have an extensive guide on the methods to fix full GPU memory problems on your PC.

Let us know which solution worked for you in the comments area below.

How to Turn Off Automatic Updates on Windows 10 Step by Step

Turning off automatic updates in Windows 10 can save you from unexpected restarts and slowdowns when you’re in the middle of something important. Automatic updates often kick in at the worst times, and if you want to take control and stop Windows 10 from updating itself without your say-so, this guide will show you how to disable those updates for good.

How Do I Permanently Disable Windows Update in Windows 10

1. Disable Windows Update via Services

This is one of the most reliable methods.

  • Press Windows + R, type services.msc, and hit Enter
  • Scroll down and double-click Windows Update
  • In the new window, set Startup type to Disabled
  • Click Stop, then Apply → OK

This will make Windows stop auto updates completely until you manually re-enable the service.


2. Use Group Policy Editor (Windows 10 Pro)

If you’re using Windows 10 Pro or Enterprise, follow these steps:

  • Press Windows + R, type gpedit.msc, and hit Enter
  • Go to: Computer Configuration > Administrative Templates > Windows Components > Windows Update > Manage updates
  • Double-click Configure Automatic Updates
  • Select Disabled or choose Notify for download and auto install
  • Apply and OK

This gives you more control over when and how updates are applied.


3. Set a Metered Connection

Perfect for Home edition users:

  • Go to Settings > Network & Internet > Wi-Fi
  • Click your connected network and toggle Set as metered connection ON

Windows treats metered connections with limited data usage, so it won’t auto-download updates.

For more control, you can also schedule update downloads in Windows 10 instead of disabling them outright.


4. Pause Updates Temporarily

If you only need a break from updates:

  • Go to Settings > Update & Security > Windows Update
  • Click Pause updates for 7 days
  • For more time, click Advanced options and choose a date

This doesn’t disable Windows Update permanently but gives temporary relief.

5. Use a dedicated Windows 10 update disabler tool

You can install Windows 10 Update Disabler and block the automatic installation of updates. This tool runs in the background and doesn’t affect your system’s performance.

The software evaluates the status of Windows Update using an undocumented system to prevent Windows from overwriting it before it disables updates. The tool also terminates all scheduled Windows Update tasks.

FAQs

How do I stop automatic updates in Windows 10 Home?

Use the metered connection method or pause updates via Settings. These are the most effective on Home editions.

Can I re-enable Windows Update after disabling it?

Yes. Just go back to services.msc, set Windows Update to Manual or Automatic, then click Start.

How do I update from CMD?

Open Command Prompt as Admin and type:
wuauclt.exe /updatenow
or
USOClient StartScan
This forces Windows to check for updates.

How do I know which version of Windows I have?

Press Windows + R, type winver, and hit Enter.
Or go to Settings > System > About.

Is there a way to only block cumulative updates?

Not directly, but you can use tools like wushowhide.diagcab to selectively hide certain updates. For details, see this guide on how to manage Windows 10 cumulative update installation.

Will this affect Microsoft Edge updates?

No, Edge updates are handled separately. You can follow this tutorial on upgrading to the latest version of Microsoft Edge on Windows 10.

Can I stop updates on Windows 11 the same way?

Windows 11 has different controls. Check out this walkthrough on how to disable automatic updates in Windows 11.

Wrap up

That’s all there’s on how to disable automatic updates in Windows 10. And by now, you would have it turned off. Though, we recommend manually installing the update every once in a while to get the latest security patches.

Also, find out how to improve the performance of your Windows 10 PC.

If you’ve used other workarounds to disable automatic Windows updates, list the steps to follow in the comments section below.

How to Fix Forza Horizon 5 Stuttering on a Windows PC

Forza Horizon 5 is an enthralling racing game at the best of times. Yet, nothing spoils Horizon 5’s gameplay more than excessive stuttering. One player’s Reddit post said this about Horizon 5 stuttering:

I bought Forza Horizon 5 Premium Edition a few days ago. I have noticed some kind of stuttering in the game, especially when I drive fast. I don’t know if it is a coincidence, but I noticed it especially when I drove fast.

When excessive stuttering occurs in Horizon 5, its gameplay becomes very jerky and unresponsive. Momentary and regular delays to player actions caused by stutter can significantly impact gameplay.

Besides, excessive stuttering in Forza Horizon 5 can ruin the game for some players. You can fix, or at least reduce, stuttering in Forza Horizon with the potential Windows 11/10 remedies below.

What causes Forza Horizon 5 stuttering on PC?

The causes of Forza Horizon 5 stuttering can be varied. However, overly extended system resources can often cause stuttering. Games don’t run so smoothly when PC resources are stretched.

Windows also has a few built-in features that can cause more stuttering in games. Disabling those features can help to reduce stuttering.

Graphics card drivers are important to optimal gaming performance. If your PC has an outdated or even corrupted GPU driver, updating it could be a solution for Horizon 5 stuttering.

What are Forza Horizon 5’s system requirements?

Bear in mind that gaming performance is primarily determined by PC hardware. So, it might also be worth checking how your PC matches up with Horizon 5’s system requirements shown directly below.

Horzon 5's system requirements forza horizon 5 stuttering pc

If your PC hardly matches those minimal requirements, you can’t expect optimal Horizon 5 gaming performance. Upgrading your PC’s GPU or RAM might then be the best way you can reduce stuttering.

However, upgrading hardware does come at a cost. So, you might as well first try applying some of the potential resolutions below for reducing Horizon 5 stuttering to see if they make any difference.

How can I fix Forza Horizon 5 stuttering on my Windows PC?

1. Free up system resources for Forza Horizon 5

  1. Press the Windows + X hotkey to select Task Manager on the Power User menu.
    Task Manager option forza horizon 5 stuttering pc
  2. Click Startup at the top of Task Manager.
    Startup tab
  3. Select unneeded startup items, and click the Disable option for them.
    Disable option forza horizon 5 stuttering pc
  4. Press Windows + R to open the Run command, type msconfig in the text field, and then hit Enter.
  5. Then select Services along the top of the System Configuration window.
  6. Deselect superfluous third-party services listed on that tab. You can select Hide all Microsoft services to filter out more essential ones, and then click on Disable all.disable all
  7. Select Apply to save your newly selected MSConfig options, and then click the OK option.
  8. Click Restart on the dialog box to reboot your PC.

2. Update your PC’s graphics card driver

2.1 Find your PC’s graphics card model details

  1. Press Windows + S to open the Search menu, enter System Information in the text field, and then click on the relevant search result.system information
  2. Double-click Components in System Information to expand it.
    Components category forza horizon 5 stuttering pc
  3. Select Display to view graphical details.
    Graphics card model name forza horizon 5 stuttering pc
  4. Note down the name of your PC’s graphics card listed there.

2.2 Download and install the latest graphics driver

  1. Open either the AMD or NVIDIA website, depending on your graphics card model.
  2. Then select your PC’s graphics card model on the NVIDIA or AMD driver download pages. You’ll also need to select your Windows 11/10 platform from there.
  3. Click Search or Submit on NVIDIA/AMD driver download page.
    Search button forza horizon 5 stuttering pc
  4. Select the Download option for the latest, platform-compatible graphics driver available for your PC’s GPU.
    Download button forza horizon 5 stuttering pc
  5. Press Windows + E to open File Explorer, navigate to the folder where the setup was downloaded, and then launch it.
  6. Then, follow the on-screen instructions to complete the installation process.
  7. Select Power and then Restart from the Start menu after installing the latest driver.
    Restart option

3. Run Forza Horizon 5 with a higher priority

  1. Start the Forza Horizon 5 game.
  2. Press the Windows key to return to the desktop with the game running.
  3. Press Ctrl + Shift + Esc to open the Task Manager and head to the Details tab.
    Details tab forza horizon 5 stuttering pc
  4. Right-click the ForzaHorizon5.exe, and then select Set priority.
    Set priority option forza horizon 5 stuttering pc
  5. Select the Above normal or High options.
    High option forza horizon 5 stuttering pc
  6. Then return to Horizon 5 to play the game.

4. Disable player designs

  1. Start the Forza Horizon 5 game, and click its Options button.
  2. Select the Hud and Gameplay menu option.
    Hud and Gameplay option forza horizon 5 stuttering pc
  3. Set the Player Designs option to Off.
    Player Designs forza horizon 5 stuttering pc
  4. Click the Save option.

5. Disable sound enhancements

  1. Right-click the speaker icon in the system tray, and then select Sound.sounds
  2. Then right-click any sound devices on the Playback tab you don’t use to select Disable. Repeat that step for the Recording tab.
    The Disable option forza horizon 5 stuttering pc
  3. Right-click on the active sound device and then select Properties.
  4. Navigate to the Enhancements tab.
  5. Click the Disable all enhancements checkbox.
    Disable all enhancements checkbox forza horizon 5 stuttering pc
  6. Select the Advanced tab.
  7. Then select the 24-bit 48000hz option on the Default Format drop-down menu.
    Default format forza horizon 5 stuttering pc
  8. Click Apply, and then choose OK.

6. Disable GameDVR (background recording)

  1. Press the Game Bar’s Windows + G hotkey.
  2. Click the Settings button on the Game Bar.
    Settings button forza horizon 5 stuttering pc
  3. Select the Capturing tab, and deselect the Record in the background while I’m playing a game option.
    Record in the background option forza horizon 5 stuttering pc
Note icon NOTE
In Windows 10, you can disable GameDVR by selecting Gaming > Captures in Settings. Uncheck the Record in the background while I’m playing the game option there. Also, deselect the Enable Xbox Game option on the Xbox Game Bar tab.

7. Lower in-game graphical settings

  1. Launch Forza Horizon 5.
  2. Select Options to view the Settings menu.
    Options button forza horizon 5 stuttering pc
  3. Select Graphics, and then lower the graphical Preset setting by at least one level.
    Environment Texture Quality options forza horizon 5 stuttering pc
  4. Save the new settings.
  5. It’s recommended that players also lower Horizon 5’s Environment Texture Quality option and disable the game’s Ray Tracing.

8. Play Forza Horizon with your PC’s best graphics card

  1. Type Graphics Settings in the Search bar, and then click on the relevant search result.
  2. If the game isn’t listed there, click the Browse button, select Forza Horizon 5, and then click the Add option.
    Graphics options forza horizon 5 stuttering pc
  3. Press the Options button for Forza Horizon 5.
    Options button forza horizon 5 stuttering pc
  4. Click the High-performance radio button, and then click on Save.
    High performance option forza horizon 5 stuttering pc
Note icon NOTE
This resolution is only applicable for PCs that have dual graphics cards. You can also change the selected graphics card for games via the NVIDIA Control Panel.

9. Select a high-performance power plan

  1. Press Windows + R to open Run, type powercfg.cpl in the text field, and click OK.The Run accessory forza horizon 5 stuttering pc
  2. Then click Hide additional plans to expand it.
  3. Select the High-performance radio button from there.
    High performance option forza horizon 5 stuttering pc

Those are just some of the best ways you can reduce Forza Horizon 5 stuttering for the smoothest of gameplay. With stuttering fixed, you’ll be able to enjoy Horizon 5 at its exhilarating best.

Your PC’s hardware is most important to Horizon 5 gaming performance. If you’re still experiencing considerable stuttering in Horizon 5 after applying those fixes, you might need to improve your gaming rig.

But, before you do, find out the best settings to optimize your PC for gaming, and see if that boosts the game’s performance.

You’re always welcome to discuss this article’s topic within the comments section below. Have you found any other good ways to fix stuttering in Forza Horizon 5? If so, let us know about them below.

Posted in PC

How to Reinstall Microsoft Edge Browser in Windows 10

Microsoft Edge debuted alongside the release of Windows 10. It is the default web browser that has taken the place of Internet Explorer. We are here to help you reinstall the Microsoft Edge browser on your Windows PC.

Microsoft Edge is a clean and lightweight web browser with features such as Cortana integration, a reading mode, and so on.

Many users are experiencing problems while using Microsoft Edge. Users have reported that Edge does not start at all, crashes a lot, works slowly, and sometimes crashes right away.

Although these issues appear minor, they can be enraging if you use Microsoft Edge as your primary web browser.

All of these problems are easily resolved by simply reinstalling the browser. The process of reinstalling Microsoft Edge is a little tricky and must be done with care.

However, you have the possibility to switch your browser to benefit from smoother navigation and fast search results.

Quick Tip:

If you don’t plan on going through the reinstall process again any time soon, we recommend trying Opera One, a browser that has the same features as Edge but also comes with some bonus features.

The Opera One browser comes with a Modular AI-Ready Design ready to use with it’s build in Aria Browser AI which is free and Up-to-Date. The browser also features messaging, social media buttons, a build in VPN and Add-block.

Opera One

Improve your browsing experience with features that make web browsing smarter and safer.
Free Download Visit website

Note: During the reinstallation process, there is a chance that you will lose all of your favorites as well as your browsing history, so we recommend that you export favorites to another browser to keep them safe and secure.

Here’s a quick guide on how to reinstall Microsoft Edge in Windows 10.

How do I reinstall the Microsoft Edge browser in Windows?

1. Close Edge

If you currently using Microsoft Edge or it is already opened, close it so we can start the troubleshooting process. If you try to reinstall it while it’s open, it’s not going to work.

2. Open File Explorer

  1. Press Windows + S to open the Search menu, type File Explorer, and click on the relevant search result.
  2. Click on the View menu at the top left of the screen and check the Hidden items box.

3. Search for Edge in File Explorer

  1. In the address bar of File Explorer, paste the following path and hit Enter while replacing UserName with the one in your case: C:\Users\UserName\AppData\Local\Packages

To find your username, navigate to C: Users, which will display all current user names. The username, in our case, is admin. You can get here by pasting this command into the Run Command box.

4. Delete the location folder

  1. Look for the folder with the name Microsoft.MicrosoftEdge_8wekyb3d8bbwe and delete it.
  2. Click on Yes to confirm the deletion.
  3. Close everything and restart your PC.

It may take up to 10-15 minutes to delete the file. Just click on Yes to all the prompts during the deletion.

5. Start PowerShell

  1. Type PowerShell in the Search menu, and then click on Run as administrator. run powershell as administrator
  2. Paste the following command and hit Enter while replacing UserName with the current one on your PC: cd C:\users\UserNamePowerShell User Profile Nabvigate
  3. Type the following and then press Enter: Get-AppXPackage -AllUsers -Name Microsoft.MicrosoftEdge | Foreach {Add-AppxPackage -DisableDevelopmentMode -Register “$($_.InstallLocation)\AppXManifest.xml” -Verbose}
  4. You will see the Operation Completed for message when the command is fully executed.

All you have to do now is restart your computer, and you will find that Microsoft Edge is working perfectly fine. With the help of this guide, we hope you were able to reinstall the Microsoft Edge browser in Windows 10.

If you are having trouble with Microsoft Edge, check the best lightweight browsers for Windows 10.

If these methods didn’t work for you, perhaps steps from our guide on how to use Edge offline installer will help.

Share your review of Microsoft Edge in the comments section below.

Here is how you can enter for a chance to win this custom Deathloop Xbox Series X console

It looks like Microsoft is once again up to its custom Xbox console shenanigans, this time with a custom Deathloop-themed Xbox Series X. You won’t be able to buy this in stores, but you can enter for a chance to win this awesome Xbox by following the instructions in the tweet below.

As you can see, the Series X and matching controller feature artwork inspired by Bethesda’s time-looping first-person shooter. Previously a PlayStation exclusive, the highly-acclaimed (the game has won Game of the Year accolades from publications such as EDGE and Gamespot) Deathloop released on Xbox—and Xbox Game Pass—on September 20 to the delight of Xbox fans everywhere.

According to the game’s official description,

In DEATHLOOP, two rival assassins are trapped in a mysterious timeloop on the island of Blackreef, doomed to repeat the same day for eternity. As Colt, the only chance for escape is to end the cycle by assassinating eight key targets before the day resets. Do whatever it takes to break the timeloop.”

Just follow the official Xbox Twitter account and retweet the post with the appropriate hashtag and you will be entered for a chance to win the Deathloop custom Series X. You can check out the rules here.

Featured image via purexbox.com. 

5 Ways to Fix FPS Drops, Lag & Stuttering Because of Your HDD

FPS drops, lag and stuttering are some of the most common problems that PC gamers face. These issues can occur due to the slow speed of the hard disk, low memory or outdated graphic drivers. 

If you are experiencing any of these problems in your games, it is possible that this could be because of your HDD. The truth is that most computers don’t have enough processing power to run modern games at their highest settings. 

Even if your computer has the right specs and enough RAM, there’s still a chance that your games will run poorly because of other factors.

HDDs are great to store data or just have extra storage space. However, when it comes to gaming, HDDs can cause issues as they can’t keep up with the fast pace of games. This means that your PC will struggle to run games at their maximum potential.

Does a HDD affect gaming performance?

A hard disk drive can slow down your gaming performance in some games and make no difference in others. It all depends on the type of game as well as your hard drive.

It’s a common belief that using an HDD instead of an SSD will slow down your gaming performance. If it’s an old mechanical HDD, your hard drive can be a bottleneck in your PC’s performance.

SSDs are much more reliable than HDDs, especially when it comes to data loss and corruption. They are also fast and don’t suffer from seek times or latency issues like hard disk drives (HDDs) do.

The only downside is that SSDs are relatively expensive compared to HDDs. Luckily, there are excellent choices of external hard drives for gamers in the market that can elevate your gaming performance

Can a bad HDD cause stuttering in games?

A bad hard drive can cause many problems, including slow performance and corrupted files. When you are playing a game, it requires access to the disk drive frequently, especially if you have a large game.

If your disk is not fast enough, the game may stutter or stop completely and FPS drops to 0. Also, if your disk is getting full, you may experience stuttering. This can happen for a variety of reasons, including downloading too many games and installing frequent large updates.

To ensure your HDD is in perfect condition, it is recommended that you install health check software as hard drives have a limited life span.

Hard Disk Sentinel

Can hard drive speed affect FPS?

FPS is a common way to measure how smoothly a game runs. If your FPS is low, your game may stutter or freeze up entirely. A faster hard drive will allow you to load your games quickly and reduce the time between frames.

Latency has an impact on frame rate in video games because when your computer needs data from the disk, it has to wait for it to be read from the disk before acting on it. Also if you notice that your FPS drops over time, it may be time to upgrade to a faster hard drive.

How can I solve low FPS, lag and stuttering caused by my HDD?

1. Optimize Your RAM

RAM is an important part of every computer because it stores all the data and programs that are being used by the user and makes them readily available when needed. High-quality RAM will improve your overall performance and make your system run smoother than ever before.

If you have low-quality or old RAM installed on your device, then it might be causing some problems such as FPS drops, lag and stuttering while playing games or using other applications on your PC. 

You can simply optimize your RAM by upgrading it with a new one or removing any unwanted applications from running in the background while playing games.

2. Update your drivers

Don’t forget that drivers play an important role when it comes to gaming performance as well. Outdated and corrupted drivers can cause all sorts of problems ranging from reduced FPS to crashing during gameplay.

Some may even prevent specific games from launching properly at all. As a rule of thumb, you need to update your drivers whenever a new update is available.

3. Lower resolution and graphics settings

If you’re playing at high resolutions and with high graphical settings, it can put a lot of strain on your system. Lowering these settings will make the game run smoother without reducing the quality too much.

If your system can’t handle the game at 1080p resolution or higher settings, try dropping it down to 720p or lower. The difference in quality will be noticeable, but it may fix some of your performance issues.  Alternatively, if your FPS drops in fullscreen, you can exit the fullscreen mode for smooth gameplay.

4. Clear up some space on your HDD

If you have a lot of games installed on your PC and there isn’t enough space on your HDD for them all to load at once, this can cause lag and stuttering while playing games that require multiple files to be read simultaneously.

Consider uninstalling games you have installed but don’t play often enough if there’s no room left on your drive.

5. Defragment your Hard Drive

If your computer has been running for a while without doing any maintenance or defragmentation, then it might be time for an overhaul. You can use defrag tools to remove HDD clutter for a hassle-free process.

By defragmenting your hard drive, you are increasing the speed of your computer by optimizing its performance. This means that all the files on your hard drive can be accessed easily without any lag or delay. 

Can low storage cause FPS drops?

It’s important to know how much space each game will take up on your hard drive before buying it. The most common way in which low storage causes FPS drops is when the game’s files are fragmented. 

When this happens, your computer has to read through multiple locations on your hard drive to find a particular file or piece of information. This takes time, and if it’s happening frequently enough, it can cause your computer to lag.

Another cause for FPS drops is too many programs running in the background while you’re playing a game. For instance, if you have an antivirus program running in the background, it can slow down your computer and cause FPS to drop.

If FPS keeps dropping, you can opt for FPS booster software to avoid frequent interruptions that kill the fun while playing your favourite games. 

With Windows 11 you can optimize settings to enhance your gaming performance so that you don’t have to experience lag and stuttering.

And that’s how you can fix issues with FPS drops, lag and stuttering because of your HDD.

Let us know of any other issues you may be experiencing with your HDD when gaming in the comment section below.

5 Ways to Stop Your Windows 11 Webcam from Flickering

People have been using webcams for as long as we can remember, but the market witnessed a huge growth after the COVID-19 pandemic kicked in and triggered hybrid work solutions.

Now, in order to attend work-related situations, webcams are pretty much mandatory for users, which is why addressing webcam problems is even more important than it was.

That being said, if your webcam is not working with a USB extension cable, we will gladly help you solve this annoying issue.

Also, if you are looking for a reliable USB cable to use with your webcam, check our dedicated list and make the best choice.

However, if you are experiencing screen flickering when using your webcam on Windows 11, follow the guide below.

Why does my webcam keep flickering?

We’re glad you asked because this is really a topic we can get into and see why something that seems so banal can cause so much trouble.

Actually, webcam flickering is caused by an interaction between lights and the shutter speed of the webcam.

Know that the electricity supply used to power lights uses AC power, which rapidly oscillates the current being used.

Thus, this oscillation is perfectly normal and is used around the world, the exact frequency varies between countries but is always either 50Hz or 60Hz.

To be a bit more direct, the annoying behavior known as webcam flickering has something to do with the artificial lighting that you are using.

Keep in mind that, if you are using a different refresh rate for the artificial lighting, the camera will be recording at a different rate, causing the video image from the external webcam or built-in camera to flicker.

So, whether your webcam is flickering in OBS, or your laptop webcam won’t stop flickering, the solutions below are for you.

How do you stop camera flickering in Windows 11?

1. Update Windows to the latest version

  1. Press Win + I to access Settings.
  2. Select Windows Update from the navigation pane, and click on Check for updates on the right.check for updates
  3. If an update is listed after the scan, download it and then restart the computer.

2. Update webcam drivers

  1. Search for Device Manager and open the app.device manager
  2. Expand the Imaging devices section, right-click on your device and choose Update driver.update driver

Although sometimes Windows doesn’t find the drivers by itself, you can use third-party software that does that for you. Make this process faster and safer than manually searching for drivers with a tool we use, Outbyte Driver Updater.

Outbyte Driver Updater will do a quick scan and show you all outdated drivers on your PC. Since it’s faster and automated, rest assured the installation process will be smooth and errorless. Also, it might even increase your PC performance because everything is now optimized.

Outbyte Driver Updater

Optimize your system by updating all your drivers, webcam drivers included.
Free Trial Download Now

3. Connect the webcam to a different USB port

It could be that the USB port to which you connected your webcam to has broken and is now defective and unable to properly do its job.

If the flickering sops once you have switched USB ports, please stop using the defective one immediately and think about changing it.

You should know that this solution, as simple and basic as it is, it has actually helped many users fix their problems.

Thus, if your device has a USB 3.0 port and you have connected your webcam to a USB 2.0 port, disconnect it from there and connect it to the USB 3.0 port.

Why? Well, it’s because the USB 3.0 ports have a faster data transfer rate as compared to the USB 2.0 ports.

4. Disable Low Light Compensation for the webcam

As you probably already know, the Low Light Compensation feature of a webcam brightens your shot automatically, which is helpful if you are recording in a dark room.

That being said, if your webcam supports this feature, you can turn it off in the Camera Control options in your webcam’s Properties.

After disabling the Low Light Compensation feature of your webcam, check if your webcam still keeps flickering while you use it.

5. Disable Power Saving/Battery Saver

  1. Press Win + I to access Settings.
  2. Select the System tab and click on Power & battery.power and bettery
  3. Select Battery saver and set it to Never.battery saver

How do I change my webcam settings?

  1. Press Win + I to access Settings.
  2. Select the Bluetooth & Devices tab and click on Cameras.camera

From this section, you can manage all settings for your camera. So just keep this in mind next time you need to surf these settings.

If your webcam keeps flickering in Zoom, or the webcam is flickering while in Teams, consider deleting the cache for these apps before using the camera again.

In case nothing works, it could be a hardware fault or manufacturing defect. The best option here would be to buy a new, more reliable, and high-quality webcam.

Also, find out what to do if your webcam isn’t listed in the Device Manager.

It’s never a good sign when your webcam starts flickering green. So, we hope this article helped you solve this annoying problem. Let us know if it did in the comments section below.

LinkedIn Polls – ask your business connections how they really feel

As LinkedIn positions itself firmly as a networking tool for businesses, it has adopted many of the features offered by its competitors. An addition to the platform is LinkedIn Polls, first introduced onto the business networking platform during the lockdown in 2020.

The ubiquity of social media in our lives has resulted in a significant reduction in active online engagement. It is far simpler to click like or use a similar emoji than waste time typing into the comment box talking about how you feel.

You can use Polls across the platform, asking for opinions from your personal profile, business page or group. The Poll feature is intended to help LinkedIn members engage with other members and connections by asking them to chose an option from a topic presented to them.

As this is a business networking platform, LinkedIn expects you to post about relevant topics. You are not permitted to create a poll asking for political opinions, health status, or other sensitive data.

How to create a LinkedIn Poll

You construct a poll in a very similar way to Poll creation on Twitter. From the main home page on LinkedIn, click ‘start a post’, then select the graph icon to start a Poll.

LinkedIn Polls - ask your business connections how they really feel eileen brown onmsft

A pop-up window will appear where you can type your questions and fill in the poll options for the vote. You can create a simple Poll with two options, or click the add option link to add another option to the Poll up to the maximum of four options.

You also have the chance to modify the time that the poll is displayed. Although the default is for one week, you could choose to display the poll for one or three days, or one or two weeks.

Once you have clicked the ‘done’ icon, you can see the poll in preview and you have the option to add your comments to the poll to put it in context. You also have the opportunity to choose the visibility for the poll and there are quite a few options to choose from.

LinkedIn Polls - ask your business connections how they really feel eileen brown onmsft

Hashtags are a key feature across the platform and can be used to extend the reach of a poll. Anyone searching for a specific hashtag can discover your poll and respond to it. Using regularly searched-for terms in a hashtag can be picked up by the software algorithm and show your poll to a new audience.

LinkedIn Polls - ask your business connections how they really feel eileen brown onmsft

You can share the poll with anyone on or off LinkedIn, or to LinkedIn and Twitter, your connections, or show the poll to a group of members. The default option is set to anyone on or off LinkedIn.

LinkedIn Polls - ask your business connections how they really feel eileen brown onmsft

Once the poll has been published, the poll creator can see who voted and how each person voted. You can also view aggregate results and the number of votes submitted for each option.

Creating Polls from LinkedIn Pages or Groups

If you are creating a poll on behalf of a business page, or group you manage, you can create a poll directly from the home page in the Group or Page.

Other admins of the page will be able to see who voted and how each person voted. This enables the Page’s sales team to be able to get in touch with the Poll respondent and follow up on a potential sales lead.

Advantages of using Linkedin Polls

Spotting trends and market sentiment will bring you an advantage if you are trying to compete for business. Knowing what your customers want will help you to deliver the right product for your business, or add features that will benefit your customers. Informative, engaging, fun, or baffling questions will keep your audience intrigued enough to want to connect with you.

If your polls are wacky enough or cover topical news, you might gain new followers who just want to see what your next poll of the day is going to be.

Check out these LinkedIn posts, too:

6 reasons why LinkedIn is important for your business

Make your LinkedIn profile more dynamic with a cover story video

On LinkedIn – our series on getting more out of LinkedIn

Image via alphastockimages.com

Slim Rancher 2 and more added to Xbox Game Pass today

Three new video games launched today on Xbox consoles and Windows PC. All three are also now available to play for free via Xbox Game Pass on each platform for those with an active subscription. Each title also has support for Xbox Cloud Play.

Slime Rancher 2 launches today on Windows PC and Microsoft’s Xbox Series X family of consoles in Game Preview. Game Preview is essentially an open beta testing version of the game that’s playable though not as complete as most would like.

Slime Rancher 2 is a sequel to the award-winning, smash-hit original that has been enjoyed by over 10 million fans worldwide. Continue the adventures of Beatrix LeBeau as she journeys to Rainbow Island, a mysterious land brimming with ancient technology, unknown natural resources, and an avalanche of wiggling, jiggling, new slimes to discover. As Beatrix attempts to unravel the island’s secrets and uncover its true purpose, she’ll build, ranch, and farm within a beautiful conservatory, whose sparkling glass walls give her full view of the prismatic paradise she now calls home.

Beacon Pines is now live on Windows PC and both Xbox One and Xbox Series X console families. It’s an action adventure title targeted at kids and families.

Beacon Pines is a cute and creepy adventure set within a mysterious book. You play as both the reader of the book and its main character, Luka.

  • UNCOVER THE TRUTH: Something strange is happening at the old warehouse, and Luka and his friends seem to be the only ones taking notice. Sneak out late, make new friends, uncover hidden truths, and collect words that will change the course of fate!
  • REWRITE PAST EVENTS WITH CHARMS: While helping Luka investigate the strange goings-on in Beacon Pines, you’ll collect special golden charms, each with a word engraved on it. These charms can be used at certain turning points in the story to fill in a blank word and drastically change everything that follows.
  • DISCOVER NEW STORY PATHS: As the book’s reader, you’ll navigate the story’s turning points using The Chronicle: an interactive story tree that branches and grows along with your choices. Exploring one set of events can unlock new charms to use on another branch, leading you to jump back and forth between entirely different versions of the story in order to unravel the mysteries at the heart of Beacon Pines.

SpiderHeck also launched on Windows PC and both current and last gen Xbox consoles today. SpiderHeck is a platform brawler with support for up to four players.

Spiders With Laser Swords! SpiderHeck is a fast-paced couch co-op brawler where spiders dance to the death in the grip of chaotic battles using laser swords, grenades and even rocket launchers to defeat their foes.

Challenge yourself by fighting wave after wave of vicious enemies in endless hours of single-player fun, or let the mayhem begin in a dazzling fight against your friends taking on the enemies in PvE; stab, sling, and scramble your way to victory in this silly spider showdown.

In other Xbox Game Pass news, yesterday say the announcement of the Logitech G CLOUD, a handheld device for playing video games purely via the cloud with support for Xbox Cloud Gaming.

Slime Rancher 2
Slime Rancher 2
Developer:
Monomi Park
Price:
Free


Beacon Pines
Beacon Pines
Developer:
Fellow Traveller
Price:
$19.99


SpiderHeck
SpiderHeck
Developer:
tinyBuild
Price:
Free

3 Quick Ways to Fix Microsoft Bingo Server Connection Error

If you’re a fan of Bingo and have been playing on your Windows computer, you might’ve received a Server Connection Error at some point. In fact, you might even be experiencing this issue as we talk.

If that’s the case, you’ll probably feel less alone to find out that there are many other players getting the error.

Although it doesn’t help your case much, at least you can rest assured knowing that it’s not you, it’s them. And by them we mean Microsoft.

That is most of the time the root of the problem, but it can also be caused by your Internet connection, in which case you can try to improve it.

A quick and easy method to fix network problems and increase speed is to use a suitable VPN (Virtual Private Network). It will connect you to a virtual server that can be faster than your ISP’s servers.

What is Microsoft Bingo?

Microsoft Bingo is exactly what it sounds like. Much like other games in the Microsoft games suite, it’s a playable title that can help you waste a few good hours and have fun while at it.

Long story short, it’s a Bingo game developed and published by Microsoft. You watch numbers (balls) get announced, mark them off your Bingo cards, and win some virtual prizes.

You win points called Luggage, which you can redeem for rewards later on. Microsoft Bingo also has special power-ups to help you enhance your game, which makes it even more appealing.

Last, but not least, you can either play as a guest or log in to your Xbox account to unlock extra features.

How to fix Microsoft Bingo Server Connection Error?

1. Wait it out

Given the current global pandemic situation, a lot of people are more or less stuck at home. Therefore, it’s not ridiculous to assume that many of these home users are just discovering the wonders of spending hours in front of your PC.

As a result, many services may be crippled by the sudden increase of requests. No, Microsoft Bingo doesn’t make an exception.

Just like video streaming platforms, games had an incredibly hard time keeping up with the unusual increase in their player count.

So, if you’re feeling like filling some virtual Bingo cards and get that error we’ve talked about, maybe just wait it out.

If the game server is overcrowded, there’s absolutely nothing you can do about it except contact customer support.

However, chances are somebody already complained before you, so things might not get fixed until they do. Patience is key in this case.

2. Use a VPN

  1. Purchase a premium VPN subscription (we recommend ExpressVPN).
  2. Download the VPN installer.
  3. Deploy the VPN on your computer and launch it.
  4. Connect to your VPN account using your credentials.
  5. Choose a fast server (nearby servers are usually faster).
  6. Launch Microsoft Bingo.
  7. Check if you still receive the Server Connection Error.

Note that a VPN will work if the connectivity issue is triggered by your ISP. Your Internet provider could be throttling your connection, which can definitely affect your connectivity and render you unable to use certain services.

Furthermore, using a VPN can also have a positive effect if you’re experiencing network congestion.

A lot of users on your network combined with improper traffic management (also your ISP’s fault) may trigger server connectivity issues.

Yes, you may even get the dreaded Server Connection Error in Microsoft Bingo because of network congestion.

ExpressVPN

Fix connection fluctuations and get better speed to get back on Microsoft Bingo as soon as possible!
Free trial Visit website

3. Keep trying

Usually, this error spawns for players who are yet to log into the game. It’s less likely to get the Server Connection Error in Microsoft Bingo if you’re already in the game.

Just keep trying to connect, and if you’re lucky enough to snatch an open slot on the Microsoft Bingo server, you’re probably there to stay.

However, you might want to try another game instead of potentially wasting precious minutes of your time trying to log in.

After all, games are supposed to be fun and not a source of frustration. Especially free games such as Microsoft Bingo.

Final thoughts on fixing Microsoft Bingo Server Connection Error

To wrap it up, if you’re experiencing the Server Connection Error while trying to log into Microsoft Bingo, a wise thing to do would be to wait it out. It’s highly likely that game server congestion caused the issue.

If that’s the case, there’s little you can do about it other than create a thread on Microsoft’s Community website, which we guarantee somebody else already did.

You could try using a VPN, but you should keep in mind that this fix will only work if your network is the one suffering from congestion.

It could also work if your ISP triggers the server connection error by throttling your bandwidth.

Last, but not least, don’t give up. Even if Microsoft Bingo didn’t work for you today, tomorrow the problem might get fixed.

Keep it positive and don’t turn a trivial issue such as a game error into something bigger than it is.

FIX: ESET Blocked VPN on Windows Computers [10 Easy Methods]

ESET is very strong security software, in fact, one of the best for Windows 10, with its comprehensive protection for your everyday home or business online activities.

Among its advantages and benefits include multi-layered security against any online or offline threats, privacy protection, safer connection and browsing, password management, data, and folder encryption, all backed by three decades of innovation built and run by security enthusiasts.

With such strong security, you can imagine what would happen when you try using your VPN with ESET and it gets blocked.

However, this doesn’t mean that it cannot be fixed. There are solutions to resolve the blockage and get back to enjoying the VPN services as soon as possible. Check out some of the fixes listed below.

Why is ESET blocking my VPN?

ESET antivirus blocks suspicious activity and connections. It can sometimes block certain DNS requests and connections, which can happen to be your VPN’s.

Another possible issue is that you mistakenly blocked the connection. When you access a new network, ESET asks you if you trust it, and if you picked No (by mistake) for your VPN, it will not let you connect.

This can be easily fixed by using a trusted VPN service. Additionally, you can remove all custom rules and manually add trusted addresses to ESET’s firewall.

How can I fix VPN blocked by ESET?

1. Allow VPN access

  1. Remove all custom rules
  2. Ensure all the subnets 192.168.1.0/24 and 10.1.1.0/24 are marked as Home or Office networks in the known networks setup

If this doesn’t help, run the Firewall troubleshooting wizard which shows a list of recently blocked communications and lets you create the appropriate allow rule with a few clicks.

2. Pause the ESET firewall

  1. Launch ESET to open the main program window
  2. Click Setup
  3. Select Network protection
  4. Click the slider bar next to Firewall
  5. Select Pause until reboot and click Apply. This will pause the ESET firewall till you restart your computer

VPN blocked by ESET can be resolved by pausing the ESET firewall until a system restart is performed. With the firewall paused, you can try to reconnect the VPN that is blocked.

While the ESET firewall is paused, the protection status will turn RED to indicate that the maximum protection isn’t ensured, and your PC is now vulnerable to threats.

If you are diagnosing potential firewall problems, connect the VPN that is blocked. If successful, then the problem is related to the firewall. Re-enable the firewall and complete the steps below to resolve connection issues. To do this:

  1. Launch ESET to open the main program window
  2. Click Setup and select Network protection
  3. Click the slider bar next to Firewall to enable the firewall status
  4. Try connecting your VPN again.

3. Use another VPN

If your current VPN client is being blocked by ESET, then the easiest solution is to switch to a different provider.

Private Internet Access is a reliable and ESET-compatible VPN service that works in conjunction with antivirus software to give you the maximum level of protection.

Whilst ESET will safeguard your PC from being infected with malware, PIA will create a secure tunnel between your machine and the target server.

This way, you reduce the likelihood of your PC being infected and you have the added benefit of having all your data encrypted and safe.

Signing up for PIA takes only a few minutes: just register an account, download the client, and select a server to connect to.

Moreover, once you start using Private Internet Access, you will benefit from all the other features offered:

  • Protection for up to 10 devices simultaneously
  • Blocks ads, trackers and malware
  • Unlimited bandwidth for streaming content from all over the world
  • Over 3300 servers in more than 45 countries
  • Cross-platform support (Windows, Linux, macOS, Android, iOS)
  • Support for Wireguard, PPTP, OpenVPN and L2TP/IPSec protocols
  • P2P support
  • Out-of-the-box compatibility with other software, including ESET

Private Internet Access

Private Internet Access will work alongside any software, including ESET and other antivirus solutions.
Check price Visit website

4. Stop the ESET firewall from interrupting web browsing

  1. Launch ESET to open the main program window
  2. Press F5 to access Advanced setup
  3. Click Firewall and expand Advanced
  4. In the Filtering mode drop-down menu, select Interactive mode
  5. Next to Rules, click Edit
  6. Click Add
  7. In the Name field, type a name for your rule.
  8. In the Direction drop-down menu, select Both
  9. In the Action drop-down menu, select Allow and click OK
  10. Select the checkbox next to Show built-in (predefined) rules and select the rule you created in the Name field
  11. Click the UP arrow to move your rule to the top and ensure it is enforced
  12. Click OK to save changes

You can do this without exposing your system to security risks. If an intrusion is detected, the system will still be protected using this method. You can create a rule to permanently allow all network traffic.

5. Disable the firewall until re-enabled by you

  1. Launch ESET to open the main program window
  2. Click Setup
  3. Select Network protection
  4. Click the slider bar next to Firewall
  5. Select Disable permanently and click Apply.

This can potentially expose your system to an attack and isn’t recommended unless advised by ESET’s technical support to entirely disable the firewall. To disable HTTP, POP3 and IMAP scanning, follow the steps above.

Once you’re done, re-enable the firewall. The protection status won’t change to RED, though your PC will be at risk when the firewall is disabled.

6. Add a firewall exception

  1. Launch ESET to open the main program window
  2. Click Setup
  3. Select Network protection
  4. Click Troubleshooting wizard
  5. Locate your VPN in the list and click Unblock. If it isn’t in the list, check the temporary IP address blacklist. You may see other blocked communications unrelated to your problem, which is normal, and not related to your system security
  6. Click Done. Alternatively, click Unblock another and repeat these steps to unblock another communication.

The troubleshooting wizard helps resolve home network connectivity issues caused by ESET firewall with a VPN blocked by ESET. This fix will allow your VPN to work on your home network.

Check if the VPN can connect after doing the above.

7. Check temporary IP address blacklist and allow communication directly

  1. Launch ESET to open the main program window
  2. Click Setup
  3. Select Network protection
  4. Click Temporary IP address blacklist
  5. Select the blocked IP address you want to allow and click Add exception
  6. The IP address is removed from the Temporary IP address blacklist and is now on the IDS exceptions list. The IP address you allowed can now connect to your home network

The IP address of your VPN may have been added to the temporary IP address blacklist, and if it has, allow the communication directly from the list.

8. Use Firewall interactive mode

This mode helps you create personalized firewall rules to ensure your devices can connect to your home network. Network communication is handled based on predefined rules.

If there are no pre-existing rules applying to a detected communication, you will be prompted to allow or deny the connection. You can make this decision by saving it as a new rule for the firewall.

When the new rule is created, all future connections of this type will be allowed or blocked based on the rule.

Interactive mode will let you create a customized group of rules. This mode, however, isn’t intended for prolonged use. Disable it once you establish a set of rules for use in your environment.

Use it with caution especially in a corporate environment because inattentive users can create rules accidentally that may expose them to risks or hinder their ability to communicate over the network.

To create a firewall exclusion in Interactive mode, here’s what to do:

  1. Launch ESET to open the main program window
  2. Press F5 to access Advanced setup
  3. Click Firewall and expand Advanced
  4. In Filtering mode drop-down menu, select Interactive mode and click OK
  5. Run the VPN that was blocked. You will be prompted to allow or deny each connection that isn’t affected by an existing rule. To create the rules you need to unblock your VPN or device, select Create rule and remember permanently and then click Allow
  6. Press F5 on your keyboard to access Advanced setup
  7. Click Firewall, expand Advanced
  8. Click IDS and advanced options
  9. Expand Allowed Services and ensure the slider bars are all enabled. Don’t change settings in the Intrusion Detection or Packet Inspection sections. Click OK when you’re done.
  10. Once you finish creating rules, reset the filtering mode to automatic. Click Firewall, expand Advanced and select Automatic mode (from filtering mode drop-down menu)
  11. Click OK

9. Create a Firewall rule to permit specific connections

  1. Launch ESET to open the main program window
  2. Press F5 to access Advanced setup
  3. Click Firewall and expand Advanced
  4. Click Edit (next to Rules)
  5. Click Add
  6. Type a name for the rule in the Name field and select your desired options from the Direction and Action drop-down menus
  7. Click the Local tab and select Browse (…)
  8. Go to your VPN and click Open
  9. Click OK>OK>OK to save changes

10. Create a rule to allow/deny a connection from a remote IP address

  1. Launch ESET to open the main program window
  2. Press F5 to access Advanced setup
  3. Click Personal Firewall and expand Advanced
  4. Click Edit (next to Rules)
  5. Click Add
  6. Type a name for the rule in the Name field and select Both from the Direction and then select Allow or Deny from the Action drop-down menus depending on if you want to block or allow the specific IP address, or not
  7. Click Remote tab and type the IP address, range or subnet you want to allow/deny in the IP field and click OK
  8. Select the checkbox next to Show built-in (predefined) rules
  9. Scroll down and select the new rule you added and click the Top icon to move the rule up to the top
  10. Click OK twice to save changes and exit

These solutions should help you secure your traffic with the VPN whilst using ESET to protect against malware.

For those of you wondering wether ESET has a built-in VPN solution, they don’t, but it works great alongside most third-party VPNs if you configure it correctly.

Did any of these solutions help? Let us know in the comments section below.

Fortnite Upload Packet Loss: How to Get Rid of it?

Fortnite upload packet loss can cause issues and negatively impact your online experience, so it’s important to fix it, and this guide will show you how to do it.

What causes packet loss Fortnite?

Issues with your network connection or ISP can cause this problem. Sometimes server problems can lead to this as well.

How to fix upload packet loss in Fortnite?

1. Use a VPN

  1. Download Private Internet Access.
  2. Install PIA on your PC.
  3. Launch it and log into it.
  4. Connect to your favorite server.
  5. Launch Fortnite and see if the packet loss issue persists.

Private Internet Access is a Kape Technologies owned VPN service that passed our tests with flying colors, being able to get rid of packet loss in Fortnite.

It’s a well-balanced, feature-rich VPN that can help you get rid of several issues.

For instance, you can use it to secure your connection, keep your traffic data private, and even unblock geo-restricted content.

It’s worth mentioning that if the packet loss issue is server-side or occurs on your home network, using a VPN won’t work. The packets must leak on your ISP’s side for VPNs such as PIA to be of any help.

Private Internet Access

Having trouble with packet loss in Fortnite? Team up with PIA VPN to bypass any obstacle!
Check price Visit website

2. Manually troubleshoot the connection

  1. Use our guide to help you run a packet loss test.Packet loss analysis Windows with tracert and pathping
  2. Identify and isolate the troublesome hop on your connection.
  3. Take the necessary measures to fix packet loss as explained below.
  • Check/repair/update/upgrade/replace components in your home network (PC, router, cables)
  • Ask your ISP to contact the network distribution company
  • Contact Fortnite’s support team if the problem’s on their side
  • Check Fortnite ping to ensure that the problem is gone.

How to fix packet loss for Fortnite on PS4?

PS4 packet loss spikes in Fortnite are no different from PC packet loss, both being most likely caused by your ISP.

You can set up a VPN connection directly through your router and connect your PS4 to this network.

Another option is to disconnect any device that’s using up the network unnecessarily (like an idle mobile phone, for example).

If you’re having packet loss issues in Fortnite, don’t fret. It usually passes by itself without your assistance. However, if you notice a pattern in these leaks’ occurrence, you might want to step in.

With a VPN you’ll be able to fix Fortnite server packet loss and get better and more stable gaming sessions in return.

Note that this method’s efficiency depends on the location of the leak inside your connection.

However, it’s good having a VPN on your PC, as it can keep a lot of things at bay, such as prying eyes, or even hackers.

Minecraft Packet Loss: What is It & How to Fix It? [Tested]

Minecraft is an awesome building/survival game that’s taken the world by storm 9 years ago. Yeah, that’s right, Minecraft was released in 2011, and it still doesn’t cease to amaze us.

It’s heavily based on procedural generation to create the environment around you automatically, as you advance. You get to gather materials, and craft tools and build intricate shelters for when the night comes.

If you’re not familiar with Minecraft, nightfall brings along various mobs that are out to get you. They’ll bite you, scratch you, and even fire arrows at you or explode nearby. The hissers are the most annoying ones, by the way.

Aside from damaging your characters really well, they also ruin your constructions and the terrain. Awful.

But let’s get back to our sheep. Although you can play Minecraft in single-player, many players prefer teaming up with their friends. It’s only fair considering that mobs never end spawning each night.

Here’s where things get hairy: playing Minecraft in multiplayer might make you face some technical challenges that simply aren’t there in the single-player version. Some of them include high latency, jitter, and even packet loss.

What is packet loss in Minecraft?

As with any online game or service, packet loss in Minecraft happens whenever packets you send or are sent to you never reach their destination.

If you are unable to send a packet to the server while not in-game, just logged in to the main menu, then the issue is most likely caused by ISP throttling.

As a result, you might experience some more visible issues such as rubberbanding, sluggish movement, desyncs, or disconnections.

However, with Minecraft, things are a bit different. For starters, most of the servers are player-hosted. So losing packets might take some team effort to fix if the other party (client, host) is up for the task.

Nevertheless, if you choose to play on Minecraft Realms, the servers are hosted by Mojang. So everything you previously knew about packet loss still applies.

How to fix Minecraft packet loss?

1. Use a VPN

  1. Get a fast and reliable VPN like ExpressVPN to get the best Internet speed and fix packet loss.
  2. Download and install the dedicated ExpressVPN app on your PC.
  3. Log into your account using your ExpressVPn credentials or activation code.
  4. Connect to a server of your choice.
  5. Launch Minecraft.
  6. Try joining the server where you experience packet loss.
  7. Check if the problem still persists.

ExpressVPNi s a great all-around VPN that’s brought to you by Kape Technologies.

It can help you tackle all sorts of challenges, ranging from packet loss to high ping, and even privacy concerns, connection security, and geoblocking.

It’s worth mentioning that using a VPN won’t work every time, except if your ISP is the one throttling your bandwidth and causing packet loss.

The VPN is capable to fix packet loss in many instances, especially when your ISP is the one throttling your bandwidth and causing packet loss.

It can also offer more network stability and speed which also helps a lot with packet loss.

However, it’s still wise to invest in a trustworthy VPN for security/privacy concerns.

If you want to keep your privacy safe and secure your connection while playing the game, ExpressVPN is one of the best VPNs for Minecraft.

ExpressVPN

Are you leaking packets in Minecraft? Use ExpressVPN to fix it!
Free trial Visit website

2. Troubleshoot your connection

  1. Launch CMD
  2. Run a packet loss test using pathping x.x.x.x (x.x.x.x = IP address of the Minecraft server)CMD pathping
  3. Depending on your findings, take any of the following actions:
  • Check/repair/upgrade/update any faulty component on your network
  • Ask the host to perform a packet loss test and see where the leak is
  • Use wired connections instead of wireless (WiFi leaks packets more often)
  • Contact your ISP and ask them to look into the matter
  • Ask your ISP to contact the network company and inform them of any potential leaks

You can fix Minecraft packet loss

To wrap it up, even if you’re leaking packets in Minecraft, it’s not such a big deal. More often than not, it’s caused by network congestion and passes without your assistance.

However, sometimes the leak follows a pattern or keeps recurring, in which case stepping in can be a great idea.

You can even use a VPN for Minecraft, but note that sometimes you might not be able to log into Minecraft with a VPN.

Even if VPNs don’t seem to patch things up, investing in one isn’t such a bad idea.

For starters, it can greatly improve privacy, offer your connection a much-needed security boost, and even get you around geo-restrictions.

3 Quick Ways to Fix Outlook if Verification is Not Working

Using Microsoft’s Outlook has become second nature for some of us and it is beyond annoying when the platform malfunctions and won’t work.

So is the case of users that can’t log into the service because of the Outlook verify process not working. There have been a lot of reports, actually.

We are about to tackle this issue today and show you how to resolve it within a few minutes. Also, if you can’t delete a folder in Outlook, we got you covered with that as well.

Or, maybe your Outlook folders have disappeared. Either way, you will find all the fixes you might need right here.

Why is my outlook verification not working?

Well, even though it doesn’t happen often, Microsoft might experience some trouble on their end, resulting in some server issues. You can check that on the Service Health page.

The more plausible explanation is that your cache and cookies, as well as outdated software, might get in the way of your verification.

However, there’s no need to worry, as we are about to solve the Outlook verify account not working problem right now.

How do I fix Outlook when verification is not working?

1. Try a different PC

As a first troubleshooting step, we recommend trying to log in and verify your account using a different PC than the one initially used.

If the Outlook verification code is not working, or Outlook keeps asking to verify your account, the problem is not local and you will have to contact customer support.

That being said, if you can verify your account on the other PC, it means that problem is on your end and we will fix it in the next steps.

2. Delete browser cache & cookies

  1. Click on the Customize and control Google Chrome button. customize and control google chrome
  2. Select History, then click on History again.history chrome
  3. Click on the Clear browsing data button.clear browsing data chrome
  4. Select Cookies and other site data and Cached images and files, then select All time and click on Clear data.clear cookies and cache chrome

3. Update Windows

  1. Press Windows + I to access Settings.
  2. Select the Windows updates tab and click Install all.install-Windows-updates-1
  3. If no updates are queued for installation, press the Check for updates button.check-for-updates-1

We hope this guide has proven useful for your Outlook problem. Be sure to leave a comment below with your thoughts and opinions.

How to Download and Install Dolby Atmos on a Windows 11 PC

Want immersive surround sound on your PC? This step-by-step guide shows you how to download and install Dolby Atmos on Windows 11, so you can upgrade your audio experience with 3D spatial sound.

How can I install the Dolby Atmos app on Windows 11?

1. Download Dolby Atmos from the Microsoft Store

  1. Press Windows + S to launch the Search menu. Enter Microsoft Store in the text field at the top, and click on the relevant search result.Launch Microsoft Store to install dolby atmos windows 11
  2. Next, enter Dolby Access in the search box at the top, and click on the relevant search result.Dolby Access app
  3. Click on the Get button to download the app.Get to install dolby atmos windows 11
  4. Once the app is downloaded and installed, click on Open to launch it. Alternatively, you can launch it from the Search menu.Open app
  5. Click on Next.Next to install dolby atmos windows 11
  6. Click on Get started.Get Started to install dolby atmos windows 11
  7. Now, choose whether you want to make a purchase or take the 7-day free trial.Choose subcription
  8. Complete the authentication process and click on Get.Authenticate to completely install dolby atmos windows 11
  9. The default device will be listed here. Click on Continue to proceed with it, or select Audio devices to choose another.Verify selection
  10. Click on Experience now.Experience surround sound after you install dolby atmos windows 11

2. Activate Dolby Atmos from Sound Settings

  1. Press Windows + S to open the Search menu, enter Change system sounds, and click on the relevant search result.change system sounds
  2. Go to the Playback tab, right-click on the default device, and select Properties.properties
  3. Now, head to the Spatial Sounds tab, select Dolby Atmos for Headphones from the dropdown menu and click OK to save the changes.activate dolby atmos

3. Set up Dolby Atmos for home theater in Windows 11?

  1. After you have set up the app, select the Dolby Atmos for home theater option in the Products tab and click on Setup.Set up Dolby Atmos for Home Theater
  2. Connect a compatible audio device and follow the on-screen instructions to complete the setup.Complete setup to install dolby atmos windows 11

The Dolby Atmos for home theater will help you connect the system and enjoy surround sound on your Windows 11 PC.

For a deeper walkthrough on turning the feature on, read this guide on how to enable Dolby Atmos on Windows 11.

4. Download Dolby Atmos drivers for your device

You can find the drivers for Dolby Atmos in the following locations:

After downloading the Dolby Atmos driver in Windows 11, double-click on the file to launch the setup and follow the on-screen instructions to complete the installation process.

Alternatively, you can try using dedicated driver updating software to scan your PC and replace any missing or outdated drivers. This can help prevent errors like unable to start the Dolby Audio driver.

Downloading and installing Dolby Atmos on Windows 11 is an easy process. You should have no Dolby Atmos errors in Windows 11 or Windows 10 if you follow the steps above.

Tell us your experience with Dolby Atmos in the comments section below.

3 Ways to Fix the BEX64 Error on Windows 10/11

The BEX64 error is related to an app crash. According to some users, the error occurs randomly, while others encounter it after they perform a demanding activity.

This is often the result of a conflict between two processes. For example, users reported applications such as Teamviewer, MacType, or Razer Synapse that caused interference and launched BEX64.

Regarding Windows, you should know that the Data Execution Prevention (DEP) will sometimes block the application that crashes. This may as well trigger the error and crash named BEX64.

Here’s what one concerned user claims on Microsoft’s forum:

While playing Call of Duty: Black OPS 4, the game stopped working, and I received the Problem Event Name BEX64. I have tried so many solutions to get this to work (clean boot, startups disabled, dep off – which doesn’t work for a 64bit application, turned WIndows Firewall exceptions to all for bo4, nVIDIA control panel add program).

How can this problem be solved?

Assuming that’s your question, take your time to read through this article and learn about three efficient solutions that will help you solve the BEX64 error for good.


What is BEX64?

BEX 64 is an error usually appears when File Explorer, a third-party app, or a game has crashed. This can be caused by conflicting processes or a problematic app on your PC.

Also, it can be due to activating some wrong settings on your PC. No matter the cause, we have a detailed solution to help you fix it in this guide.

How can I fix the BEX64 error?

1. Disable the amBX service

  1. Press Windows key + R, type services.msc in the run box, and hit Enter.
    services.msc bex64
  2. Navigate through the list and Right-click on amBX
  3. Choose Properties from the new menu.
    properties
  4. Click the dropdown before Startup type and select Disabled.
  5. Finally, click Apply to save the changes.
    disabled

After you have passed through each of these steps, restart your computer. Launch the game, causing the BEX64 error after the startup is complete.

Some games, such as GTA V, will have issues with the amBX service. So, disabling the amBX feature should prevent the error.


2. Eliminate third-party interfering apps

2.1. Perform a clean boot

  1. Press Windows + R, type msconfig, and click the OK button.
    msconfig bex64
  2. Click the Services tab at the top.
    services
  3. Check the box for Hide all Microsoft devices
  4. Now, click the Disable All button.
    hide all
  5. Click the Startup tab at the top and select Open Task Manager.
    open task bex64
  6. Right-click each of the processes in the Startup tab and select Disable.
    disable bex64
  7. Now, go back to the Services tab and click the Apply button, followed by OK.
    apply and ok

The clean boot will start up the system using only the Windows services loaded and the default programs necessary to function.

Using clean boot will also free up computer memory from your system and stop any process that can cause the BEX64 error.


2.2. Uninstall faulty programs

  1. Press the Windows key + I to open Settings.
  2. Select the Apps option.
    apps
  3. Select the problematic app and click the Uninstall button.
    uninstall button
  4. Finally, follow the onscreen instruction to complete the process.

If the BEX64 error stopped after the clean boot, you could enable the disabled programs again. However, it would help if you also restarted your PC several times to identify the problematic program.

This second phase of our solution allows you to eliminate that program.


3. Disable the Data Execution Prevention (DEP)

  1. Press Windows key + S and type cmd in the search box.
  2. Click the Run as administrator option under Command Prompt.
    cmd
  3. Press Yes to grant admin access to User Account Control (UAC).
  4. Type the following command, and press Enter: bcdedit.exe /set {current} nx AlwaysOffbcedit
  5. Restart the computer and wait until Windows has loaded.

After following these steps, you can relaunch the app causing this BEX64 error and see if it is still there.

This solution is essential because Data Execution Prevention ensures no malicious codes run in your operating system by performing additional checks on the computer memory.

Unfortunately, certain games will interact with the DEP environment because of how they were built. As a consequence, this will launch the BEX64 error on your computer. 


How do I fix the BEX64 error on Windows 11?

The BEX64 error is a general issue on all Windows systems with similar causes. If you are getting the error on Windows 11, it can be down to faulty apps or conflicting programs.

You can effectively fix the issue using the solutions provided in this guide.

If you have encountered the BEX64 error in Windows 10, you should know how frustrating it is. But with the fixes in this guide, it should now be history.

If you are facing other issues like your device ran into a problem and needs to restart, check our detailed guide on how to fix it quickly.

Test out our recommended solutions and leave a message to tell us if they have proven helpful to you.

5 Ways to Fix Your Canon Printer if It’s Not Printing Black

Canon is beyond a doubt one of the most popular brands when it comes to printers, and there are literally millions of people that use them.

But, even though they are efficient and do a great job, they can sometimes malfunction and refuse to work properly, just like any other machine.

Luckily, you have us to show you exactly what actions you can take to try and remedy the issue because buying a new printer every now and then just won’t cut it.

Speaking of Canon printers issues, we prepared a guide for you in case your Canon printer won’t scan on Windows 10 or Windows 11.

Also, if you are looking for some quality cables for your printer, we compiled a list of products that we recommend.

However, if your Canon g3010 printer is not printing black, or any other model as a matter of fact, here’s what you can do about it.

Why is my Canon printer not printing black?

There are multiple reasons for it. For example, if you are not using your printer daily, then your printer might dry out.

Sometimes, if there is a problem with the ink cartridge, you can face the same problem, so it’s not just the printer’s fault.

Obsolete drivers can also contribute, but as you are about to see, we have solutions for every possible scenario, so don’t worry about anything.

Let’s look into why your Canon printer is not printing black properly, on models like G3000, or any other from the Canon family.

Why is my printer not printing even with new ink?

Putting new ink in your printer won’t always solve the problem, as it might not even be cartridge related, to begin with.

It could be the drivers, it could be the software, or other causes, but rest assured that if your Canon IP7250 is not printing black, we’ll take care of it.

In fact, here are the models that users are facing these problems on:

  • Canon G3010
  • Canon G3000
  • Canon G2010
  • Canon IP7250
  • Canon Pixma MX700
  • Canon MX922

How do I fix my printer not printing black ink?

1. Perform a deep cleaning

  1. Power on your Canon printer.
  2. Put 5 or more A4 size papers in the printer’s tray.
  3. Open the paper output tray and the output tray extension.
  4. On the printer’s panel, select setup, then press the tools/wrench icon.
  5. Use the arrow keys to select the Maintenance menu, then press OK.canon deep clean
  6. Select Deep Cleaning and press the OK button.

2. Only use genuine ink cartridges

This is a fact that a lot of printer users will advise you to do if you want years of stress-free, problems-free printing.

You might not know, but if you are not using a genuine cartridge then you can pretty much face this problem in your printer.

You should only use genuine ink or toner supplies because Canon does not guarantee the quality of duplicate cartridges.

3. Update the printer driver

  1. Search for Device Manager and open the app.device manager
  2. Expand Print queues, select your Canon printer, right-click it, and select Update driver.update printer driver
  3. Choose Search automatically for drivers.drivers

If you want a simpler and more reliable option to check for your drivers and update them, you can always employ the help of specialized tools.

4. Replace the faulty cartridge

Sometimes, cartridges can become faulty and no longer do their job. So, if your Canon printer refuses to print black, this is something you should definitely check.

More so, if the printer prints every other color except black, then something must be wrong with the cartridge itself.

Many users facing this problem have explained that it all went back to normal after replacing the black ink cartridge with a new one.

5. Update Windows

  1. Press Windows + I to access Settings.
  2. Select the Windows updates tab and click Install all.install Windows updates
  3. If no updates are queued for installation, press the Check for updates button.check for updates

How can you tell if a printhead is clogged?

Excellent question. If your PC or the printer’s LCD screen is telling you that your ink cartridges are full but no ink is passing through to the paper, it’s most likely due to a clogged printhead.

Also, blurry documents and images that appear faded are also signs that it’s time to remove the excess ink, so keep that in mind.

How do you unclog a Canon ink cartridge?

After removing the cartridge, moisten a soft, lint-free cloth with water and wipe the print head area gently, a couple of times.

That being said, if you have hard water or are concerned about mineral deposits from your tap water, better use distilled water.

Also, if your cartridge has a gold, silver, or copper nozzle plate, try not to get it wet. Use a wet cotton swab to only clean the print head. Now put the cartridge back and try again.

We hope this guide has helped you fix the problem. Be sure to leave a comment below regarding your experience.

5 Ways to Fix FPS Drops, Lag & Stuttering in Minecraft

There are thousands of games users can play on their PCs. Every game has requirements that help determine the systems that can work with them efficiently.

However, many things may go wrong when playing games like Minecraft on your computer. Users report FPS drops in Minecraft, resulting in lag or stuttering on the PC.

The FPS drop issue on the computer affects its performance and t the programs running on it. Numerous factors may cause the Minecraft FPS drops, even on a good PC.

fminHowever, low computer RAM, outdated drivers, Windows issues, and others can cause the FPS drop issue when playing Minecraft on your computer.

Furthermore, the FPS drop issue in Minecraft can occur in several ways. Some users complain that the Minecraft FPS drops when moving, some complain that modded Minecraft FPS drops, and Minecraft FPS drops when loading chunks.

Nonetheless, you can fix any FPS drop problem in Minecraft with the solutions we’ll discuss as we go further in the article.

You may be interested in the methods to fix FPS drop issues in Rocket League on your PC.

Why does my FPS drop in Minecraft?

  • Outdated graphics driver: If you have obsolete graphics drivers on your computer, they can affect the graphics settings and performance, decreasing FPS. Likewise, it impedes how the game interacts with your graphics drivers to perform smoothly. Also, it can cause difficulties when you perform special effects on your game.
  • Many applications running on your computer: Many applications running on your PC simultaneously can consume most of your computer’s resources and cause game issues.
  • Outdated Windows: Outdated Windows can cause many problems with your gaming experience. It makes the computer malfunction because it cannot update patches for fixing bugs. Also, not updating your operating system leaves your computer with no improvements.
  • Requirements issues: Minecraft has some minimum PC requirements for you to enjoy your game on it. However, you may encounter problems with your game if your computer doesn’t have the required features. Likewise, not updating your apps and drivers can make it not fit for the current game version.

How do I fix Minecraft if FPS drops or lags?

1. Reboot your PC

  1. Click Start on your computer.
  2. Select the Power option.
  3. Click on Restart.

Restarting the PC is the simple fix for boot errors that may cause FPS to drop in the game.

2. Update graphics drivers

  1. Press Windows + R keys to prompt the Run window.
  2. Type devmgmt.msc into the search space and click OK.
  3. In the search results, click on Display adapters, then select the driver from the drop-down menu.
  4. Click the Update driver software option, and select Search automatically for drivers.

Restart your computer after the updating process is complete.

Alternatively, you can use third-party software to automatically update your GPU driver and all other outdated drivers to their latest versions.

3. Disable Game DVR

  1. Press Windows + R keys to prompt the Run window.
  2. Type Regedit in the search space.
  3. Alternatively, press the Ctrl + Shift + Enter keys to prompt the Registry Editor.
  4. Double-click Game DVR on the AppCaptureEnabled option, then select the Modify option.
  5. In the Edit DWORD (32-bit) Value tab, change the Value data to 0, then Click OK.

4. Update Windows

  1. Click the Start button.
  2. Select Setting and click on Windows update.
  3. On the Windows update page, select Check for updates. If there’s an update available, Windows will automatically search for it and install it.

Restart your computer. Check if the FPS drop issue persists.

5. End tasks for unimportant programs

  1. Click the Start button, input Task Manager, and launch it.
  2. Select the CPU and Memory usage in the Task Manager tab.
  3. Click on the applications consuming lots of CPU and memory space on your PC.
  4. Choose the End Task from the drop-down that pops up.

Restart your computer after making the changes for them to take effect. It’ll create more resources for the game on your PC. Hence, it will fix the FPS drops or lags in Minecraft.

What are the minimum PC requirements to run Minecraft smoothly?

The minimum PC requirements to run Minecraft are:

  • 2 GB RAM space on your PC
  • A DX 11.0 GPU (Intel HD Graphics 4000, GeForce 400 series card, or Radeon HD 7000)
  • Core i3-3210 / A8-7600

These are the best options for fixing Minecraft’s FPS drops or stuttering issues. Ensure to follow the steps strictly for optimal results.

Nonetheless, we recommend you read another article about FPS drop issues in games, like how to fix FPS drop and stuttering issues in Team Fortress and ways to improve FPS issues in PUBG.

For mod users, remember to keep them at a minimum to avoid loading issues while playing Minecraft.

Leave your comments and suggestions in the section below. We’d like to hear from you.

5 Ways to Fix FPS Drops, Lag & Stuttering in Overwatch

Overwatch is a team-based multiplayer shooter game that allows users to play in teams of six against each other. It is one of the best first-person shooter games on the market.

However, many users complain about encountering some issues with the game on their PC. FPS drops in Overwatch issues are dominant. They make the game stutter and lag when playing it.

Furthermore, you may encounter FPS drops in Overwatch for many reasons and may occur in various situations.

Some instances are Overwatch frame drops after an update, Overwatch low FPS in high-end pc, and Overwatch low FPS in the menu.

However, the factors causing the FPS drop issue in Overwatch may differ on various computers. Hence, we’ll guide you through some solutions that can generally fix FPS issues.

Check our comprehensive guide on how to download and play Steam games on your PC at the same time.

Why is my FPS dropping in Overwatch?

  • Outdated graphics driver: The first on the list is outdated graphics drivers. It is the most common factor responsible for the Overwatch FPS drop. An outdated graphics driver indicates that your device lacks the updates and patches required for fixing bugs and errors in your version. Hence, the FPS rate may drop in Overwatch if you don’t keep the graphics driver up to date.
  • Many applications running on your computer: Games like Overwatch require enough system resources to function. Hence, having many apps running simultaneously on your PC can affect the performance of your game. Likewise, it limits the RAM available on your computer and can prompt FPS to drop in Overwatch.
  • Outdated Windows: Outdated Windows is a common cause of the problems you encounter on your computer. It prevents your PC from improving its performance and impedes its ability to self-fix bugs. So, it can make Overwatch drop to 30 FPS.

How do I fix Overwatch if FPS drops or lags?

1. End tasks for unnecessary applications

  1. Click the Start button, input Task Manager, and launch it.
  2. Select the CPU and Memory usage in the Task Manager tab.
  3. Click on the applications consuming lots of CPU and memory space on your PC.
  4. Choose the End Task from the drop-down that pops up.

Restart your computer to implement the changes properly. Closing unused applications create more resources for Overwatch on your PC.

2. Update graphics drivers

  1. Press Windows + R keys to prompt the Run window.
  2. Type devmgmt.msc into the search space and click OK.
  3. In the search results, click on Display adapters, then select the driver from the drop-down menu.
  4. Click the Update driver software option, and select Search automatically for drivers.

Restart your computer after the updating process is complete. Fixing your graphics driver is a good fix for Overwatch having a low FPS high-end PC.

Alternatively, you can automatically update your graphics drivers alongside all other outdated or corrupt files on your PC using third-party software.

3. Disable Game DVR

  1. Press Windows + R keys to prompt the Run window.
  2. Type Regedit in the search space.
  3. Alternatively, press the Ctrl + Shift + Enter keys to prompt the Registry Editor.
  4. Double-click Game DVR on the AppCaptureEnabled option, then select the Modify option.
  5. In the Edit DWORD (32-bit) Value tab, change the Value data to 0, then Click OK.

4. Update your operating system

  1. Click the Start button.
  2. Select Setting and click on Windows update.
  3. On the Windows update page, select Check for updates. If there’s an update available, Windows will automatically search for it and install it.

Restart your computer and check if the FPS drop issue in Overwatch persists.

5. Disable Intel’s overclocking Technology

  1. Click on Start and select the Control Panel.
  2. Select the Hardware and Sound option and click on Power Options.
  3. Click on Change plan settings.
  4. Choose Change advanced power settings to prompt the Power Options window, then expand the Processor power management option.
  5. Click on Maximum processor state and set the values of both On battery and Plugged in as 99%.
  6. Click on Apply, then OK.

If you encounter any, you may be interested in knowing how to fix FPS drop and stuttering issues in Rocket League.

What are the minimum PC requirements to run Overwatch smoothly?

The minimum requirements for the PCs that are not high-end PCs are:

  • Operating systems: Windows 7/8/10 64-bit
  • Processor: Intel Core i3 or equivalent
  • Memory: minimum of 4GB RAM
  • Hard Drive: minimum of 5GB space on a 7,200 RPM drive
  • Graphics: GeForce GTX 460

Ensure that your computer fulfills the system specifications. It’ll help you enjoy a conducive and smooth gaming experience.

Recommended articles users should read through for solutions to FPS issues on other games include the one on how to fix low FPS in Red Dead Redemption 2. Also, it would be best to read about the methods for solving FPS issues and boosting frames in RuneScape.

Alternatively, you can check the methods to fix your GPU memory if it is full to create enough system resources for apps and games.

Kindly leave a message in the comments section if this guide has been helpful to you. We’d like to hear a response from you.

Airpods Keep Disconnecting from Windows 10: 6 Easy Fixes

Apple AirPods are Bluetooth earbuds users can pair with Windows 10. However, on Microsoft’s support forum, some users said that their AirPods keep disconnecting in Windows 10. One user stated:

I’m using my computer, and it (an AirPod) randomly disconnects and reconnects. It’s very annoying. I’ve tried updating drivers, and forgetting the AirPods and repairing, but no avail.

Let’s dive deeper into this subject and discuss the intricacies of this circumstance.

Why do AirPods keep disconnecting from Windows 10?

AirPod Bluetooth connections with Windows 10 aren’t always entirely stable for some users. One of the most common causes is Windows 10’s power management settings that turn off AirPod devices. In addition, Windows 10 can disconnect seemingly unused AirPods when song playback is paused.

Another potential cause lies in certain Bluetooth services required by AirPods. When those services aren’t correctly configured, AirPods disconnect from Windows 10. The required services need to be configured to automatic startup type.

The good news is that there are a few confirmed resolutions for fixing AirPods that frequently disconnect from Windows 10. Try applying these potential resolutions if you need to fix an AirPod that keeps disconnecting from your PC.

How can I fix an AirPod that frequently disconnects and reconnects?

1. Run the Bluetooth troubleshooter

  1. Press Windows + I to open Settings, and click on Update & Security.update & security
  2. Select Troubleshoot from the navigation pane, and click on Additional troubleshooters on the right.troubleshoot
  3. Select the Bluetooth entry, and click on Run the troubleshooter button under it.
  4. After that, the troubleshooter will open, identify the issues, and automatically apply fixes if possible.

2. Update the Bluetooth driver for your AirPods device

  1. Type Device Manager in the Search bar, and the click on the relevant search result.device manager
  2. Next, expand the Bluetooth category.
  3. Right-click the AirPods device the issue arises for and then select Update driver.
    Search automatically for drivers option airpods keep disconnecting from windows 10
  4. Select the Search automatically for drivers option in the Update Drivers window.

Alternatively, you can update device drivers for AirPods with third-party driver updater software that will do this automatically.

3. Adjust power management settings for AirPods

  1. First, right-click the Start button to select the Device Manager option.device manager
  2. Click the View menu, and then select Devices by type.
  3. Double-click the Human Interface Devices category.Device Manager window airpods keep disconnecting from windows 10
  4. Right-click the AirPods Audio/Video Remote Control HID device and select Properties.
  5. Select the Power Management tab in the screenshot directly below.
    Power Management tab airpods keep disconnecting from windows 10
  6. Deselect the selected Allow this computer to turn off this device to save power checkbox, and click the OK button to save the changes.
  7. Next, right-click AirPods Hands-Free Call Control HID in Device Manager and select the Properties option.
  8. After that, repeat steps six to eight to deselect the Allow this computer to turn off this device to save power setting for the AirPods Hands-Free Call Control HID device.

4. Adjust settings for required Bluetooth services

  1. Press Windows + R to open Run, type services.msc in the text field, and click OK.services.msc
  2. Double-click Bluetooth Support Service to open the window directly below.
    Bluetooth Support Service airpods keep disconnecting from windows 10
  3. Click Automatic on the Startup type drop-down menu.
  4. Select the Apply option, and click OK to exit.
  5. Next, double-click the Bluetooth Audio Gateway Service to bring up its properties window.
    Bluetooth Audio Gateway Service airpods keep disconnecting from windows 10
  6. Select the Automatic startup option.
  7. Press the Apply button to save the new service settings.
  8. Click OK to close the properties window.

5. Edit the registry

  1. Press Windows + R to open the Run command, enter regedit, and then click OK.services.msc
  2. Click Yes in UAC prompt.
  3. Now open the following key in the Registry Editor: HKEY_LOCAL_MACHINE\SYSTEM\ControlSet001\Control\Class\{e0cbf06c-cd8b-4647-bb8a-263b43f0f974}\0000
    Registry Editor airpods keep disconnecting from windows 10
  4. Right-click the 0000 key, hover the cursor over New, and then select String Value.
  5. Input PnPCapabilities as the new string value’s name.
  6. Double-click PnPCapabilities to open an Edit String window.
    Edit String window airpods keep disconnecting from windows 10
  7. Enter 24 within the Value data field, and then click OK to save the changes.

6. Uninstall all Bluetooth devices

  1. Press Windows + R to open Run, enter devmgmt.msc in the text field, and then click OK.devmgmt.msc
  2. Next, double-click the Bluetooth category.
    Bluetooth category airpods keep disconnecting from windows 10
  3. Right-click all the Bluetooth devices listed there and then select the Uninstall device options for them.
  4. Then, click the Uninstall option to confirm.
  5. Once you have uninstalled all the Bluetooth devices, restart the computer.

What can I do if I need more potential fixes?

Microsoft’s support service is probably the best for fixing Windows 10 Bluetooth issues. You can chat with a support agent by clicking Contact us on the Microsoft Support page.

Then enter a description for the problem, select an appropriate product and category, and click the Confirm button.

But most of you wouldn’t need to consult the Microsoft support team since the solutions listed here will fix things if AirPods keep disconnecting in Windows 10 and 11.

Also, find out what to do if the AirPods volume is low.

If you have any other queries, please drop a comment below, and we will get back to you.

Fix: No Internet, There Is Something Wrong With Proxy Server

Applying Murphy’s Law to all kinds of technology and computing is easy. For example, Internet connection failures are common in the web browser. And the No Internet, There is something wrong with the proxy error that has troubled users for quite a while.

By default, you’re prompted with a message that informs you about issues caused by the proxy server. So even though you’re not using one, you’re stuck watching your screen showing your favorite content just a second ago.

The complete error message reads, No Internet, There is something wrong with the proxy server, or the address is incorrect. Luckily, there’s a way to address this issue, and we prepared some probable solutions. Check the list below if you have problems with the web browser and a ghost proxy server.

Why can’t I connect to the proxy server?

The primary reason behind the error is an unstable Internet connection. If that’s the case with you, try solving issues causing the interruption, and things should be fine.

Misconfigured network settings have often been found to be an underlying cause. Besides, the problem may be limited to a particular browser. To verify this, check if the other browsers work fine. If they do, we have also listed a solution for that.

How do I fix No Internet, there is something wrong with the proxy server?

1. Check your internet connection or proxy settings

  1. Click on the Start menu, type Internet Options, and then open it from the search results.
    no internet there is something wrong with the proxy server
  2. Select the Connections tab, and click LAN settings.
    no internet there is something wrong with the proxy server
  3. Uncheck Use a proxy server for your LAN box, and check the Automatically detect settings option.
    no internet there is something wrong with the proxy server
  4. Click OK to save the changes.

If There is something wrong with the proxy server error in Opera One or another browser keeps arising every now and then, the above solution should help.

2. Check if the connection is stable

Firstly, a stable connection via LAN should be used instead of wireless. Even if it isn’t the underlying cause, switching to a stable connection will ease further troubleshooting steps. Moreover, you can check alternative browsers for the same issue.

Remember that Firefox may work fine since it can override Proxy settings. However, since that’s not the case for Chrome and others, you’ll need to turn to a manual approach and tweak settings yourself.

3. Check your antivirus or firewall

  1. Click on the Start menu, type Windows security, and then click on the relevant search result.
    no internet there is something wrong with the proxy server
  2. Click on Virus & threat protection here.virus & threat protection
  3. Now, click on Manage settings.manage settings to fix no internet there is something wrong with the proxy
  4. Turn off the toggle for Real-time protection.real-time protection

Having an excellent third-party antivirus is essential for protecting your PC from online threats. However, this error is often triggered by users of third-party antivirus software.

Your antivirus can sometimes interfere with your browser, triggering the error message – There is no internet connection; there is something wrong with the proxy server.

To fix this problem, try disabling certain features of your antivirus. In the worst-case scenario, you might even have to temporarily uninstall it.

If removing the antivirus fixes your issue, you might want to switch to a different antivirus solution and check if that solves the problem.

The market is full of good antivirus options that are reported to protect users’ devices well without impacting their functionality.

Look for tools with an extensive threat database because these are the antivirus software with the highest detection rate. Updating your threat database in real-time is key in creating shields and blocking intruders.

4. Tweak the Registry

  1. Press Windows + R to open the Run command, type regedit, and hit Enter or click the OK button.
    Err_proxy_connection_failed Windows 10
  2. Back up the Registry by clicking Export under the File menu.
  3. Once done, navigate to this path or paste it into the address bar and hit Enter:ComputerHKEY_CURRENT_USERSoftwareMicrosoftWindowsCurrentVersionInternet Settings
  4. Delete these three DWORD on the right:
    • ProxyOverride
    • MigrateProxy
    • ProxyEnable
  5. Restart your PC and look for changes within a browser.

Deleting the proxy server registry key can also help you fix the err_proxy_connection_failed Windows error; read this guide to learn more.

There are multiple ways to disable Windows features. The most used one is through the system’s interface.

However, the Registry should be the next logical solution if something can’t be resolved with the simple box unchecking procedure.

The same goes for ghost proxy, which will continue blocking your connection and, thus, cause errors within the browser. Consider acting cautiously with the Registry because mistakes can be costly.

5. Reset Google Chrome

  1. Click the Menu icon in the top-right corner and choose Settings from the menu.
  2. Select Reset and clean up from the left, and then click on Restore settings to their original defaults.
  3. Click the Reset settings button to confirm.reset settings

According to users, one cause for the No Internet, There is something wrong with the proxy server message might be your Chrome settings.

If you have this problem, reset Google Chrome to default. Remember that this process will remove your cache and extensions, so you might want to back up important data.

The issue should be resolved after resetting Chrome to the default, and everything will start working again.

6. Remove any problematic or suspicious applications

Sometimes third-party applications can interfere with your system and cause the No Internet, There is something wrong with the proxy server error. To fix it, finding and uninstalling any applications that be creating conflicts in Windows is advised.

Any application that changes your Internet settings can cause this issue. Many users reported that the Browser Security application caused this issue on their PC, so if you have this or any other similar application installed, be sure to remove it.

The best way to remove an application is to use uninstaller software.

One optimal software to completely uninstall any unwanted app with all its files and leftovers is IOBit Uninstaller. It’s easy to use, and the guide from the software will assist you in doing it correctly.

⇒ Get IOBit Uninstaller

7. Reinstall Chrome

  1. Click on the Start menu, type Control Panel, and click on the relevant search result.
    no internet there is something wrong with the proxy server
  2. Select Uninstall a program.
  3. Click on your browser and select Uninstall, then follow the wizard to complete the uninstallation.
  4. Navigate to Chrome’s official website and click the Download Chrome button if you use the browser. For other browsers, head to their official website to download the installer.
    no internet there is something wrong with the proxy server
  5. Double-click on the downloaded file and follow the wizard to complete the installation.

If the No Internet, There is no internet connection, there is something wrong with the proxy server message keeps appearing; the issue might be related to the browser’s installation.

To fix the problem, you need to reinstall the browser. The steps above are easy, but if you want to obliterate the browser, we advise you to use an uninstaller software mentioned in a few solutions earlier.

If Chrome is your primary browser, other versions are available, and using one might help eliminate the error.

The Beta version usually brings new fixes, and if you think a Chrome bug is causing the problem, feel free to try the Beta version.

On the other hand, the Canary version offers the latest fixes, but these fixes might not be thoroughly tested, so you might encounter different issues.

There is something wrong with the proxy server message in Chrome can cause several issues and here are some similar problems reported by users:

  • There is something wrong with the proxy server, or the address is incorrect (Windows 10 and 11) – Your proxy settings can sometimes cause this issue, and to fix it, you need to disable them in Windows.
  • Can’t connect to proxy server (Windows 10 and 11) – This is a variation of this error, and if you encounter it, perhaps you should try using a VPN instead of a proxy.
  • Err_proxy_connection_failed (Windows 10) – Sometimes, you might get this error message in your browser. If that happens, reset the browser to the default or try switching to a different browser.
  • There is no internet connection Opera One, Kaspersky, Chrome, VPN – Your antivirus can cause this issue, affecting any browser. To fix this problem, disable or uninstall the antivirus, and the case should be resolved.

How do I find my proxy address?

  1. Press Windows + S to open the Search menu, enter Internet Options in the text field, and click on the relevant search result.internet options
  2. Navigate to the Connections tab and click on the LAN settings button.lan settings
  3. You will find the proxy address and other information listed under the Proxy server.proxy address

You can also find your proxy settings and tweak them for enhanced performance.

How do I check my proxy settings?

We have covered this in our first solution. It is independent of your browser and should be carried out on the Internet options application of your Windows OS.

Once you have wrongly configured your proxy settings, you can expect a host of connectivity issues while using any browser on your computer. In this case, browser changes will not be sufficient to fix the error.

How do I reset my Internet proxy settings?

  1. Press Windows + S to open the Search menu, enter Command Prompt in the text field, and click on Run as administrator.command prompt
  2. Click Yes in the UAC prompt.
  3. Now, paste the following command and hit Enter to reset the proxy settings:netsh winhttp reset proxyreset proxy

The proxy settings will now be reset, and if any issues arise, those shall be eliminated.

With these eight solutions, you should have successfully resolved the proxy server error message. However, remember that the issue may not be from your PC often, and you will have to wait for server admins to address it.

Also, if you come across Please check your Internet connection, Most likely you use a proxy server error, the solutions here should help resolve that as well.

Besides, find out how to fix slow Internet speed in Windows.

If you have questions or suggestions, let us know in the comments.

5 Ways to Fix Your Chromebook if It’s Not Recognizing Headphones

Not everyone is comfortable with using Windows as their main operating system, so choices such as Linux or Chrome OS will always be appealing to some people.

However, just like Windows, other operating systems come with their own set of problems, so don’t be quick to judge Microsoft’s creation.

No software is perfect, and we are still going to get the occasional glitches and unknown errors, so we just need to focus on how to remedy these problems.

By the way, we can show you how to download and install Chrome Enterprise, among others, if that is what you need.

Also, downloading and installing Chrome OS Flex on Windows 10 or Windows 11 is totally possible and we can show you that as well.

And, speaking of unexpected errors, we also have a guide for when you get An unexpected error during Chromebook Recovery.

Circling back, if you are trying to use your headphones on your Chromebook but can’t, we will show you what you need to do.

Why won’t my Chromebook recognize my headphones?

It could be because you haven’t inserted your headphones properly into the Chromebook, or maybe the headphones or the laptop’s jack are defective.

Or maybe you are using a wireless headset and you simply haven’t paired it properly. Another reason might be the headphones aren’t selected as the main output source.

Whichever reason it is, we will show you how to overcome this problem and listen to your favorite tunes or podcasts in your headphones.

How do I fix my Chromebook not recognizing my headphones?

1. Restart your Chromebook

Even though many might see this as a complex problem, we are going to kick off this troubleshooting guide with one of the simplest solutions.

More than often, users have found themselves in this situation and claim that a simple system restart has fixed the problem for them.

So, if you too are affected by the above-mentioned issue, perform a quick restart and check if you can now use your headphones on your Chromebook.

2. Make sure the headphones are plugged all the way in

An apparent simple, yet easily overlooked reason, why your headphones aren’t being recognized by your Chrome OS, is because they aren’t properly plugged in.

When inserting the headphone jack into your laptop, be sure to push it all the way in until you hear the click, and not just partially.

Not inserting the jack properly will not trigger your Chromebook to recognize a new device, as the sensor hasn’t been activated.

3. Perform jiggle test

You might find this silly, but a simple way to find out if its even worth going through the last troubleshooting steps is doing the so-called jiggle test.

How? Push your headphone connector into the jack slot and give it a slight jiggle, but be very careful as this is sensitive hardware.

When doing this, the jack should remain stable without any jiggling. However, if it jiggles, you may have a defective Chromebook and you should contact customer support of your manufacturer, or get a refund from wherever you bought it from.

It should go without saying that you also need to inspect the headphone cable for damage. If you find any, replace the headphones.

Also, try using a different headset and see if that works. If it does, you will, again, need to purchase a new pair and replace them.

4. Select the correct sound output

  1. Click on Quick Settings located in the bottom right corner.chromebook system tray
  2. Click on the little arrow next to the Audio control.chromebook audio
  3. Select Headphones as the output method.headphones chrome os

5. Enable Bluetooth and sync headphones

This step is only for users that are trying to connect their wireless headphones to their Chromebook and failing.

Firstly, you have to make sure that the Bluetooth feature is turned on. After doing so, follow the same steps as in the previous solution.

Select the headphones as the main output source and you should be able to use them without any type of problems.

How do I enable Bluetooth on my Chromebook?

  1. Click on the Quick Settings button.
  2. Press the Bluetooth button.chrome OS bluetooth

No seriously, it is that easy to activate the Bluetooth feature on your Chromebook. And, now that you know, you will be better prepared for the future.

Has this guide helped you remedy the headphone situation? Share your experience with us in the comments section below.