The Chrome always on top feature allows you to pin or station Chrome or Chrome tabs at the top of Windows. You can prioritize browser tabs depending on how important they are and how quickly you want to reach them.
Today we’ll show you all you need to know about how to enable and disable this feature in a few different ways.
How to make Chrome tabs always on top
1. Use the integrated Picture in Picture option to keep a video tab always on top
Launch the Google Chrome browser on your computer.
Go to a streaming website like YouTube and play a video.
Right-click the video to prompt Chrome’s options menu and click the Picture in Picture option. It will play the video on the always-on-top window.
PIP allows users to watch videos in Chrome and set it over other tabs. Also, you can move the tab around.
2. Download the Picture-in-Picture Chrome Extension
Go to the always on top tab in the Chrome browser.
Press the x button in the top-right corner of the tab or press the Back to tab button displayed at the center of the floating tab.
Doing this will help you disable the always-on-top tab in Chrome and return it to other Chrome tabs.
2. Use shortcut keys
Use the Ctrl + Alt + Esckeys to stop the always-on-top tab in Chrome. Likewise, users can press the Ctrl + space keys to disable Chrome always on the top tab.
Chrome gives you multiple options for tab management that you can set up and personalize based on your needs and workflow.
These are the most effective solutions to enable and disable the Chrome tab always on top feature.
We hope the steps above were helpful. Let us know in the comments below if you need any more help.
Creating a screenshot on your PC is relatively simple, but what if you want to share that screenshot with others?
To do so you need to save it on your PC and then upload it manually to an image-sharing website or send it to someone directly.
This can be a tedious process, especially if you send screenshots frequently. Fortunately for you, there are many great tools for Windows 10 that will allow you to create and upload screenshots online.
What are the best tools to create and upload screenshots online?
Apowersoft Screen Capture Pro offers a wide range of features and it allows you to create screenshots with ease.
The tool allows you to create screenshots of the full screen, particular region, or a window. In addition, you can also create screenshots of scrolling windows. It’s worth mentioning that this tool allows you to create scheduled screenshots.
You can customize the settings and select a region, program, or window that you want to screenshot at selected intervals.
This tool comes with a solid image editor that works like Paint, so you can make changes to your screenshot. Using this tool you can add text, rectangles, and other objects to your screenshots. You can even blur or highlight certain parts of your screenshot.
After you finish editing your screenshot, you can upload it directly to the cloud or you can share it on social networks. Of course, you can also save it locally on your PC. In addition to creating screenshots, this tool also supports video recording,
Apowersoft Screen Capture Pro supports a wide range of features, so it will be perfect for basic and advanced users alike.
Unfortunately, the tool isn’t free, but you can download and use the trial version for three days.
Apowersoft ScreenCapture Pro
Take this complete screenshot software with cutting-edge editing tools and a user-friendly platform.
If you want a simple tool to upload screenshots online, we recommend that you try out Lightshot. This tool uses the same shortcuts as Windows, so you can easily create screenshots simply by pressing the PrintScreen button.
The application has a minimalistic user interface, and you can easily create your screenshots. Simply select the area that you want to capture and you can instantly upload your screenshot to Lightshot servers and share it with others.
In addition, you can also share the screenshot on social networks or search for similar images on Google. The tool also allows you to print directly from it or copy a screenshot to your clipboard. Of course, you can also save the screenshot locally if you want.
It’s worth mentioning that Lightshot supports some basic image editing and you can draw lines, arrows, rectangles, or add text to your screenshots.
After you create your screenshot, you’ll see a link to it so you can easily share it with others. This is a simple tool, and it will allow you to share screenshots online with ease. If you’re looking for a basic screenshot tool with a simple interface, we strongly recommend that you try Lightshot.
Regarding the flaws, one flaw might be the lack of ability to take a screenshot of the currently active window, but if you don’t mind this small limitation we strongly recommend that you try this tool.
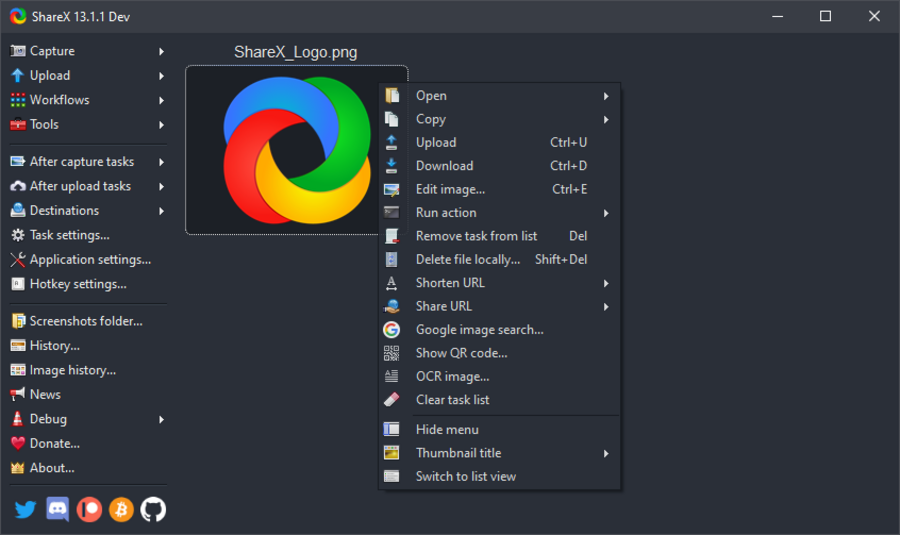
ShareX is a free and open-source application for taking and sharing screenshots online. The tool supports several screen capture methods such as full screen, window, monitor, region, scrolling, and freehand.
ShareX offers a wide range of actions after taking a screenshot, and you open the screenshot in your image editor, upload it online, open its destination folder, and much more.
We have to mention that this tool allows you to upload screenshots automatically once you take them, but you can also upload any file from your PC.
Regarding file sharing, this tool is compatible with 80 different online services including Imgur, Dropbox, and Pastebin. If you don’t want to use any of these services, you can also use FTP connection to upload files and screenshots directly to your FTP server.
ShareX also comes with tools such as a color picker and image editor, so you can easily edit your screenshots. Additional tools include a ruler, DNS changer, QR code generator, etc. We also have to mention that this tool supports screen recording, which can be extremely useful.
ShareX is undoubtedly one of the most powerful screenshot tools that allow you to upload screenshots online.
The tool has a wide array of features so it’s perfect for advanced users. This is a great tool, and since it’s completely free we highly recommend that you try it.
Another simple tool for uploading screenshots online is Gyazo. The tool supports both screenshots and animated GIFs.
As for screenshot sharing, you just need to run Gyazo or press the keyboard shortcut to capture a screenshot. This application is completely automatized, and as soon as you create the screenshot, it will be uploaded online. After the upload, you can easily share the link and your screenshot with others.
It’s worth mentioning that your screenshots are automatically organized online by the app name, date, or web address, so you can easily find them. The free version of Gyazo offers decent features, but there’s also a Pro version available.
The Pro version offers unlimited image history and storage, as well as the ability to recognize text from your screenshots. Additional features of the Pro version include the ability to add notes, arrows, and drawings to your screenshots.
The Pro version also allows you to create GIF animations that last 60 seconds. It’s worth mentioning that Pro version also has an Ivy Search feature that lets you search through your image history more easily.
Gyazo is a solid screenshot tool, but if you want to access certain features, you’ll need to pay a monthly fee.
We also have to mention that the tool doesn’t allow you to create a screenshot of a currently active window, which can be a minor flaw for some users.
If you want to quickly and easily upload your screenshots online, you might want to consider ScreenCloud tool. The tool allows you to take a screenshot of an entire screen, specific region or an active window.
Each of these actions can be triggered by using a specific keyboard shortcut thus making the process fast and simple.
After you create a screenshot, you can upload it to ScreenCloud servers or you can use third-party services such as Dropbox or Imgur. You can also upload the screenshot to your own server using the FTP connection. In addition to uploading your screenshot, you can also edit it by adding shapes and text to it.
Regarding compatibility, this tool is available for Windows, Mac, and Linux operating systems.
ScreenCloud is simple and free to use, but we have to mention that there’s a premium model available. The Premium model allows you to create uncompressed screenshots and image albums.
In addition, the Premium version offers unlimited storage time, but you’ll need to pay a monthly fee if you want to use premium features.
Sharing your screenshots online is quite simple if you have an appropriate tool. Monosnap tool allows you to capture a full screen, part of a screen, or a selected window. The tool has a built-in magnifier so you can create pixel-perfect screenshots with ease.
After you create a screenshot, you can easily edit it thanks to the built-in editor. You can add text and different shapes to your image, or you can crop and resize it.
The tool also allows you to blur out specific sections which can be rather useful if you want to protect your personal information.
Regarding the upload, the tool supports the Monosnap service that requires a free account in order to work. You can also use WebDAV, Amazon S3, FTP or SFTP.
Monosnap is a great tool with a simple user interface, and its biggest flaw is the lack of support for third-party image hosting websites. If you don’t mind this limitation, you can download and use this software for free.
Another simple tool that can upload screenshots online is PostImage. This is a free and simple tool, and it comes with a minimalistic user interface that allows you to easily take screenshots.
The tool allows you to take the full screen, window, or region screenshots, which should be enough for most users.
PostImage also allows you to upload images from your PC online with a single click of a button. Simply select the image you want to upload, right-click it and choose the desired option.
This feature is quite useful if you need to upload multiple images online. PostImage allows you to quickly share your screenshot on social networks such as Facebook, Twitter or Reddit, but you can also share screenshots via email.
The tool also allows you to print or save your screenshot locally. Of course, you can save image to the clipboard and paste it later to any other tool.
This application also supports basic editing so you can add shadows or outlines to your screenshots. If you want, you can also add a watermark to your screenshot in order to protect it.
Another feature that can be useful is the ability to blur certain parts of the image thus protecting sensitive information.
Of course, you can add shapes such as rectangles and arrows to your screenshots, and you can even add text and highlight certain elements.
The tool is free to use, and with its simple interface it will be perfect for any user that wants to share screenshots online. It’s worth mentioning that a portable version of this application is available, so you can use PostImage without installing it on your PC.
If you’re looking for a simple tool to upload screenshots online, you might want to check out Screenpic. This tool allows you to easily upload your screenshots online, and according to the developer, it takes less than 5 seconds to do so.
As soon as your screenshot is uploaded, its link will be copied to your clipboard automatically so you can easily share it with others.
Another great feature of this application is the upload history. By using this feature you can see all your uploaded screenshots, thus making it easier for you to share older screenshots again.
Screenpic has a built-in editor so you can easily add shapes such as arrows to your screenshots. You can also highlight certain elements, add text or blur sensitive information.
The tool also allows you to crop your screenshots thus leaving only important information available. Regarding the supported image hosting servers, this tool works with Imgur and Geekpic.
Screenpic is a simple tool, but it offers some useful features such as upload history. If you want to quickly share your screenshots with others, this tool might be perfect for you.
The application supports hotkeys and the entire upload process can be automated thus making screenshot sharing more streamlined and natural.
Regarding the flaws, the only flaw of Screenpic might be the limited support for image sharing websites and the lack of FTP options. Despite these minor flaws, this is still a great application for basic users, so be sure to try it.
Another tool that can quickly upload your screenshots online is Grabilla. We have to mention that this tool uses Grabilla cloud storage, so you’ll need to register a free account before you can use it.
Regarding the tool, it allows you to take full screen, window, or rectangle screenshots. In addition to screenshots, this tool supports animated gifs, scroll capture, and video recording.
The tool offers the basic image editing options so you can add shapes, arrows, and text to your screenshots. The application has a humble user interface, and it’s simple to use, so basic users won’t have any problems with it.
Grabilla is a decent tool for uploading screenshots online, and its main flaw is the inability to use third-party image hosting services.
In order to share screenshots online with this tool you’ll have to register a Grabilla account. Another minor flaw might be the application’s humble user interface.
Although user interface is simple, sometimes it can be a bit unresponsive and it looks a bit outdated by today’s standards. Despite these minor flaws, this is still a decent and free application, so you might want to try it.
This screen capture tool will allow you to create full-screen screenshots as well as screenshots of active windows or scrolling windows.
In addition, the tool also allows you to create a screenshot of a specific region on your screen. The tool also has a built-in image editor so you can add arrows, text and different shapes to your screenshots. Of course, the image editor also supports various effects such as shadows, frames, watermarks, blur, etc.
PicPick supports advanced sharing and you can upload the screenshot to your FTP server or you can use cloud storage services such as Box, Dropbox, Google Drive, or SkyDrive.
You can also share screenshots on social networks. In addition, you can upload your screenshots directly to Imgur.
As for additional features, this tool comes with a color picker, color palette, and pixel ruler feature that will be useful to designers.
There’s also a magnifier, crosshair, protractor and whiteboard. These features aren’t related to screenshots, but they can be quite useful to designers.
PicPick is a great tool, and it offers a wide range of features, so it will be perfect for basic users and designers.
This application is free for personal use, but if you want to use it commercially you need to purchase a license. We also have to mention that this tool is available as a portable application, so there’s no need to install it.
If you want to quickly create screenshots and share them online, you might want to consider MyImgur application. This application supports Imgur, and it won’t work with other image hosts or cloud services.
The application allows you to create a screenshot of an active window or of a certain region. After doing that, your screenshot will be uploaded to Imgur automatically. In addition to screenshots, you can also upload any other image from your PC to Imgur.
Once the upload is completed, you can get the share link and share the screenshot with your friends. We have to mention that this application doesn’t support any kind of editing, so you can’t add shapes or text to your screenshots.
It’s worth mentioning that this application is available in a portable version, so you can run it on any PC without installation.
MyImgur is a simple application, and it’s perfect if you want to share your screenshots online on Imgur. If you’re looking for an application that supports screenshot editing and other image hosting sites, we suggest that you skip MyImgur.
War Thunder is an MMO game focused on military combat, which you can play in single- or multi-player mode. You can control aircraft, warships, and ground vehicles from many regions, including the USA, USSR, Germany, and Japan.
War Thunder has Arcade, Realistic, and Simulator game modes, which you can play in Aviation, Ground, and Fleet. It’s rather engaging, and most users prefer multiplayer mode. You can play it on PC, PS4, Mac, Linux, and Xbox.
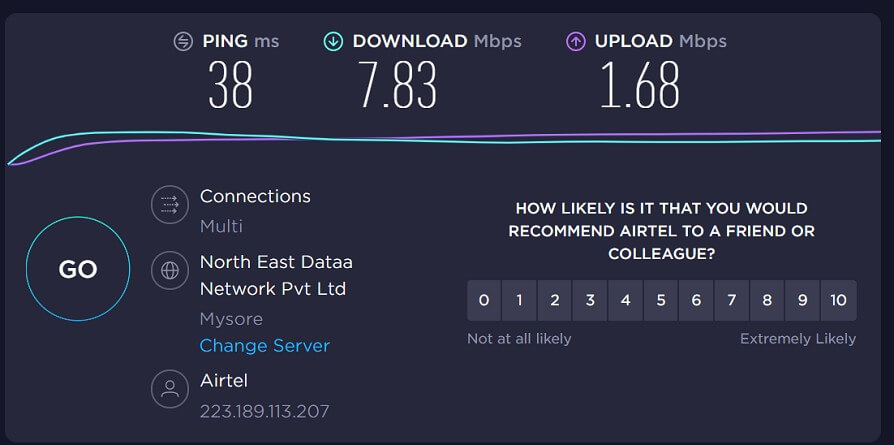
Unfortunately, War Thunder lag spikes might prevent you from enjoying the game, which is common among players. Use a fast VPN service if you’re wondering how to reduce high ping in War Thunder.
It’s well-known that you can improve your ping with a VPN by connecting to the right server. But that’s not all it takes. To get started, you must get hold of a reliable VPN service that provides you with fast network connections and DDoS protection.
Why do I have 999 ping in War Thunder?
According to users, this can result from invalid IP configuration settings, bandwidth throttling, game server issues, etc. War Thunder usually freezes or crashes when you have such high ping rates.
Make sure to check your Wi-Fi or Ethernet connection before retrying to connect.
Others hint that you may be connected to a gaming server that is too far away from your actual location.
Why is my War Thunder so laggy?
Several things cause War Thunder lag spikes, most notably:
Bad internet connection
Outdated network drivers
Old/damaged hardware
Does high ping cause packet loss?
War Thunder high ping can cause packet loss. The easiest way to reduce ping in War Thunder is by using a VPN connection. Also, it’s important to check your network and ensure your drivers and OS are current.
Which are the best VPNs to fix War Thunder ping spikes?
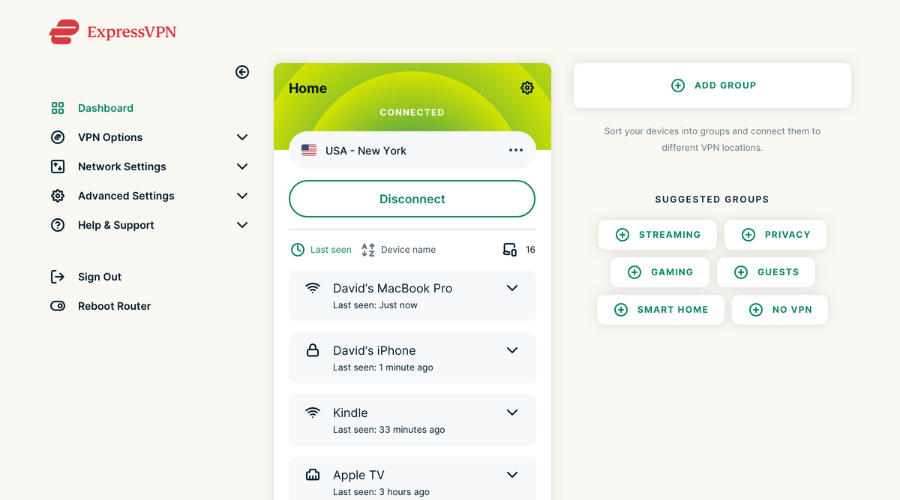
Gaming can be an art if you invest your passion in it, but it can also be a nuisance without proper software. You can forget about War Thunder’s high ping with ExpressVPN.
Using powerful software like this can increase your chances to enjoy your game, by getting a low ping and strong internet connection. Luckily, if you use this solution, you can choose from many strong servers that can boost your connection.
What’s more, playing entertaining games like War Thunder using VPN support is much safer if you think about downloads or updates.
How can ExpressVPN fix War Thunder lag spikes:
Network lock to prevent data loss
3000 servers from 94 countries
Supports multi-devices or OS
Gives you a loud VPN speed
Split tunneling feature
ExpressVPN
Get rid of high ping whenever you need it with this VPN and play uninterrupted game sessions.
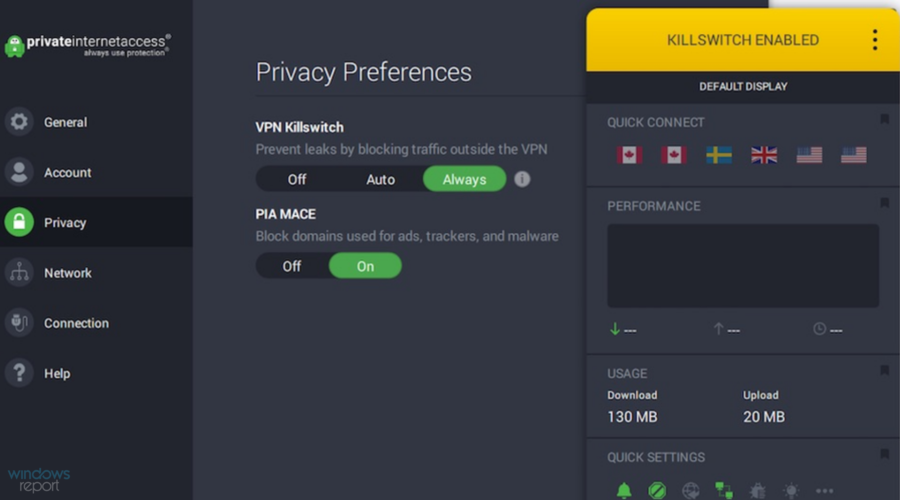
Private Internet Access (PIA) offers an easy solution for reducing War Thunder’s high ping. You can use it to fix packet loss, improve your Internet connection speed, and eliminate latency-related issues during gameplay.
Kape Technologies creates PIA and supports multiple platforms, including PC, PS4, Mac, Linux, and Xbox. Furthermore, it’s one of the few VPN services with 24/7 live chat support.
CyberGhost VPN is another solid choice to deal with high ping in War Thunder. You can use it to minimize jitter while you’re playing on PC or console, regardless of your preferred game mode.
A product of Kape Technologies, CyberGhost VPN can be installed on a wide range of platforms to fix network congestion, including PC, Mac, Linux, PS4, and Xbox.
It has an extensive network of servers worldwide, which are optimized for gaming, streaming, and torrenting.
How can CyberGhost VPN handle War Thunder lag spike issues:
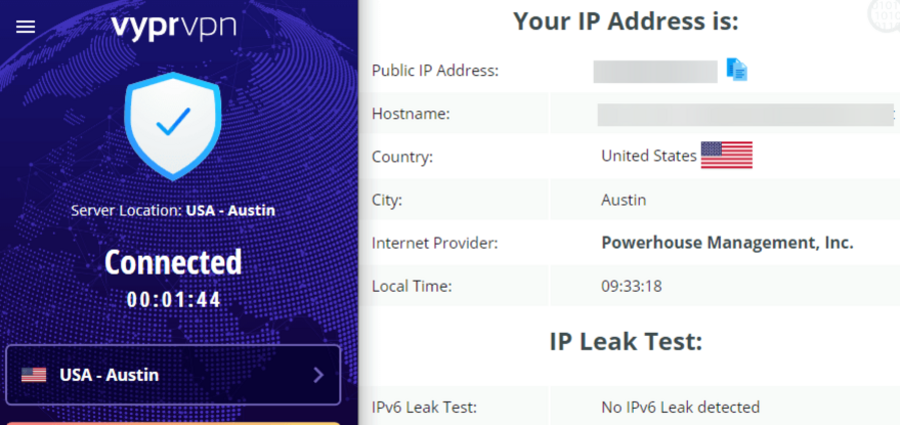
VyprVPN is a great choice when it comes to gaming or streaming. by switching your IP address, your War Thunder packet loss should be resolved.
Get access to over connections anywhere in the world and escape the internet restrictions issued by either the government, work, or other organizations.
Use VyprVPN to stream and have access to geo-restricted in-game content or even events that are happening. Do all this while all your privacy and data are secured.
This is how VyprVPN takes care of War Thunder high ping:
Doesn’t use third-party companies
95+ server locations all over the world
Audited no-log VPN
Up to 10 active connections
DNS leak protection
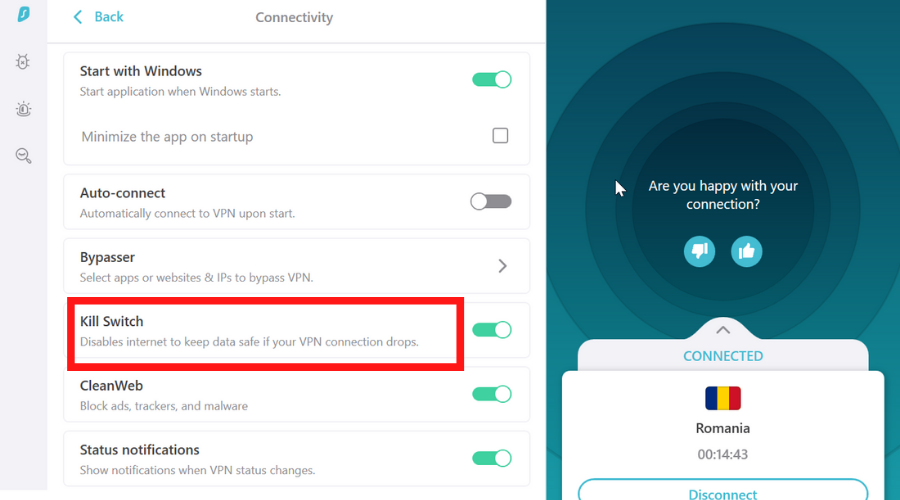
Kill switch
VyprVPN
Safely use a VPN for enjoying your favorite games with VyprVPN.
Some users report having packet loss problems even if their ping rates are low. Even though the two problems are linked, packet loss doesn’t necessarily mean you have a high ping.
So if you wonder if you can have low ping and packet loss in War Thunder, unfortunately, the answer is yes. The good news is that in this case the issue is most likely related to hardware or outdated drivers.
So you know where to start with your troubleshooting process.
It can become frustrating to try and play War Thunder on your PC or console when your performance is hampered by sudden ping, especially when you’re right in the middle of battle.
However, if you download and install one of the fast VPN services above and connect to a VPN server that’s optimized for War Thunder, the odds will be in your favor.
Even if you decide to set up the OpenVPN manual configuration mode on your router to share VPN access with all household devices, you can easily turn off your VPN and return to the public Internet.
Windows Defender is Microsoft’s default and a solid line of defense when it comes to a consumer’s cyber-protection.
This is done thanks to the security intelligence definitions which it constantly updates. And the software does a good job too.
However, those of you running Windows 10 on older PCs may notice that Windows Defender 100% CPU usage for scans can be quite high at times.
If that is the case, then knowing how to reduce max CPU usage may help you in the long run and save you a lot of headaches in the process.
How do I change Windows Defender’s full scan 100% CPU usage?
1. Use PowerShell
Right-click the Start button and select PowerShell (Admin) from the list.
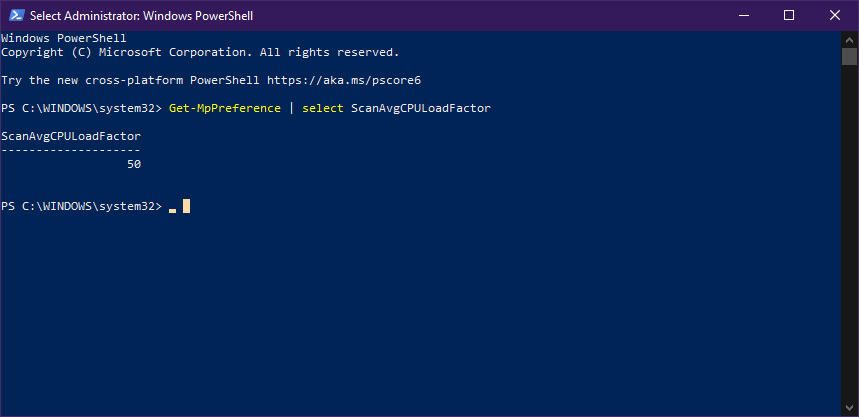
Type in or copy-paste the following command: Get-MpPreference | select ScanAvgCPULoadFactor
By doing this, you will display the current CPU usage percentage limit for Windows Defender.
To change the value, type in or copy-paste the following command: Set-MpPreference -ScanAvgCPULoadFactor <percentage>
Keep note that the value of <percentage> needs to be between 5 and 100. If you set the percentage value to 0, it will remove the CPU limit and allow Windows Defender to use up even 100% of it.
This is not recommended as it can lead to unresponsive apps, freezing, and even overheating so proceed with extreme caution.
2. Modify the Registry
1. Press Win + R.
2. Type in regedit and press Enter (This will open the Registry Editor).
3. Go to the following Registry key: HKEY_LOCAL_MACHINE/SOFTWARE/Policies/Microsoft/Windows Defender/Scan
4. Edit or make a new 32-bit DWORD value called AvgCPULoadFactor.
5. Switch the value data editor to Decimal.
6. Set the value data between 5 to 100.
If you are having trouble with Windows Defender’s 100% CPU usage, you can tweak your Registry to fix it.
You can set a percentage of CPU usage that you want Windows Defender Antivirus not to exceed with the help of a custom DWORD. You can add any value and limit CPU usage to it.
If you want to undo the change, simply delete the DWORD you created and everything will go back to the previous settings.
If you can’t access the Registry, don’t worry because you can fix this issue right away by following the instructions in our step-by-step guide.
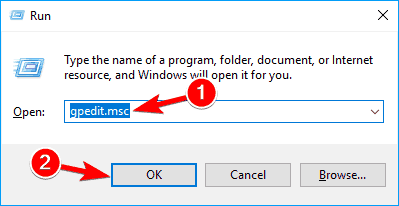
Type in gpedit.msc and pressEnter to start the Group Policy Editor.
Navigate to Computer Configuration.
Go to the following path: Administrative Templates/Windows Components/Microsoft Defender Antivirus/Scan
Double-click on the Specify the maximum percentage of CPU utilization during a scan policy.
Enable it.
Enter the desired CPU limit under Specify the maximum percentage of CPU utilization during a scan.
Select Apply.
Click OK.
By following these steps, you can manage the average CPU usage that your Windows Defender uses up during scans.
Changing the value has both pros and cons. While higher values mean the scans will perform better, you won’t be able to make use of the PC until it is complete.
On the flip side, lower values mean your scans will take a long time, but you will at least be able to use your PC undisturbed.
4. Try a better antivirus
Unfortunately, many users complained that Windows Defender consumes a lot of the CPU resources when it’s performing a scan.
We have just shown you how to change that but if you find it too complicated, there’s always the option to switch to a third-party antivirus that will not create that problem.
In fact, the tool recommended below has a dedicated low-power mode that will stop all resource-hungry processes to conserve energy.
That is also perfect if you’re running it on a laptop and you want to stay online as much as possible to finish your tasks.
So, that’s it! We hope that our methods helped you change the Windows Defender max CPU usage during scans.
But if you don’t get to fix the things to your liking, consider getting a third-party antivirus from our list containing the best antiviruses with unlimited license that will also help you save some money.
Do you think changing Windows Defender‘s CPU usage is useful? Let us know in the comments section below.
A lot of users are complaining about receiving error messages saying that HDMI is not compatible with the signal, which is what prompted this article.
That being said, if you are having this problem, relax, sit back, and take a few minutes to learn how to deal with it properly.
Keep in mind that the HDMI not compatible with this signal is not only an error for PC users, and you can also experience it on your Smart TV.
What does it mean when HDMI is not compatible with this signal?
In a nutshell, the TV may not support the same higher resolutions that your computer monitor might, but they’ll almost certainly support resolutions that are much more acceptable.
So, we recommend verifying that the source device has power and is turned on before you go ahead and try anything else.
If the source device is connected with an HDMI cable, make sure the TV and source device are both turned on, then disconnect the HDMI cable from one of the devices and then connect it again.
What can I do if HDMI is not compatible with the signal?
1. Manually switch the Input source
It should go without saying, but sometimes the solutions to what seem the most complicated problems are actually simpler than you might have imagined initially.
Whether we are talking about your monitor or your TV, make sure to press the Input or Source button and switch the input source to the HDMI port.
One more thing to keep in mind is the fact that, if you have more than one HDMI port, be sure to select the right one.
2. Unplug/replug the HDMI cable
As we said, the simplest solutions can sometimes prove to be the most effective ones, so before we go further with the troubleshooting, please also consider this.
Again, whether we’re talking about a TV or a PC monitor, simply unplug the HDMI cable from the back, leave it out for a couple of minutes, then plug it back in.
Many users have actually mentioned that the problem disappeared once they unplugged and then replugged the HDMI cable.
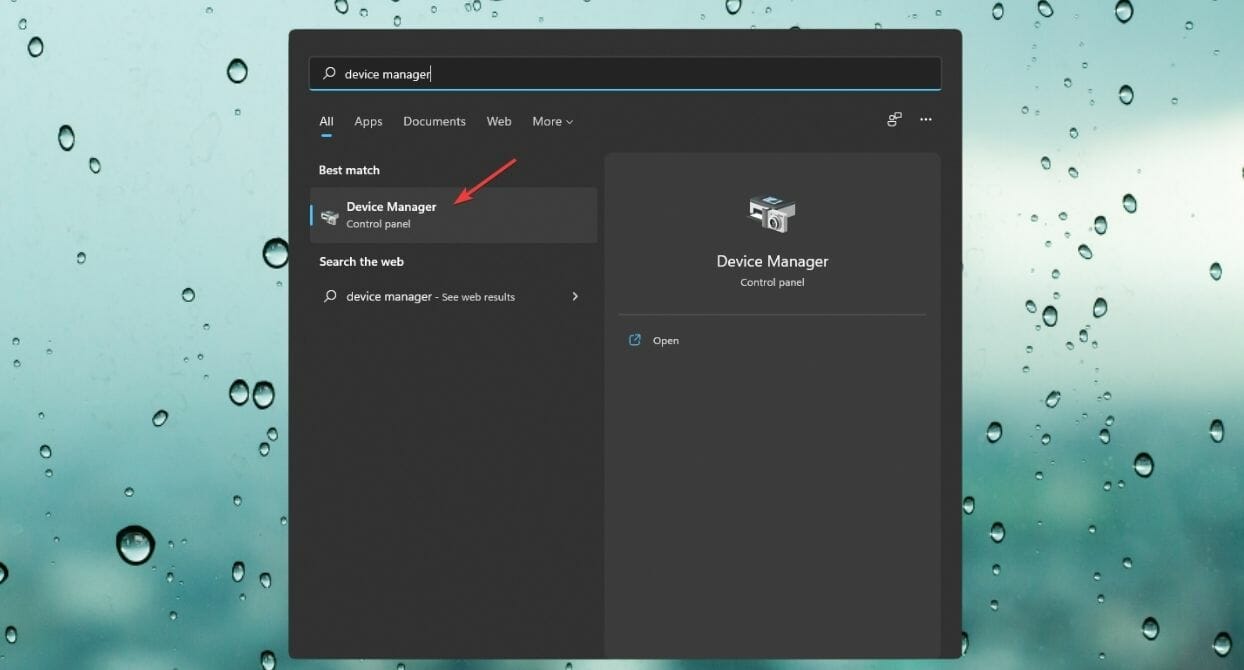
Expand Display adapters, right-click the one you are using and select Update driver.
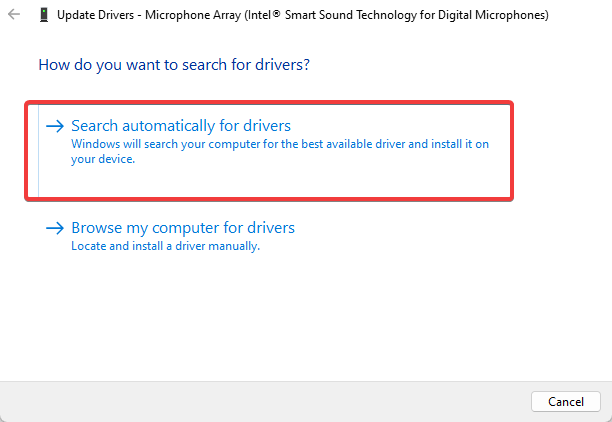
Select Search automatically for drivers.
Since Windows doesn’t always find a solution for you, the best way to solve the HDMI issue is to use a tool to search for the Display adapter driver.
4. Perform a factory reset on PC monitor/TV
We’re hoping it won’t come to this, but if all else fails, this is what you must do in order to fix this extremely annoying problem.
Only use this as a last resort and keep in mind that whatever settings or apps you had on your monitor, or TV, will be gone as a result.
5. Switch HDMI cables
Sometimes cables can get damaged and won’t be able to do the job they were made for, so here’s another factor to take into consideration.
Simply perform a simple visual inspection and make sure the cable doesn’t have any frays or cuts that could prevent it from working properly.
If by chance you find any damage, simply buy another cable and try again. You might find it hard to believe, but some users actually reported that this worked for them after replacing faulty cables.
How do I reset my HDMI?
If you were expecting some intricate, complicated answer here, you are in luck. In fact, to reset an HDMI connection, you only need 1 minute.
Turn off both devices that are connected via HDMI, then go ahead and carefully unplug the cable ends from both of them.
Now, plug the cable back into the devices, this time using the opposite ends of the HDMI cable. Turn your devices back on and, voila!
Many users reported their Sharp TV’ss HDMI not being compatible with this signal, so just refer to the solutions above if you have this problem.
You can also be in a situation where Roku might not be compatible with this signal, which is when you can also use the guide above.
That being said, if you or one of your friends or loved ones experience the HDMI not compatible with this signal on Windows 10/11, know that they came to the right place to get it fixed.
To learn more about HDMI, we have a great article on how to convert a monitor to a TV so don’t miss it.
Has this guide helped you fix this annoying issue? Share your experience with us in the comments section below.
But how do we switch between these Insider channels? This article contains a full guide on how to perform this action.
Should I switch the Dev channel to Beta?
The advantage of switching to the Beta channel is that you will receive a much smoother experience, and it’s not only for highly technical users, such as the Dev preview.
Our suggestion is to switch as soon as you can if you really want to do so, before the time window runs out.
How do I change from the Dev channel to the Beta channel?
1. Press the Start button on your taskbar to open the Start menu.
2. Access Settings from the menu.
3. Select the Windows Update tab and then click on the Windows Insider Program button.
4. Click on Choose your Insider settings.
5. Select the Beta channel from the list.
6. Restart your device.
Usually, switching from the Dev channel to Beta required a complete operating system re-install. However, according to the Redmond-based tech company, it is possible to switch without reinstalling for a short period of time.
Switching to the Beta channel only requires a quick reboot, after selecting it from the Settings menu. That’s all there is to it. It’s a pretty simple process that will only take up one minute of your time.
What can I do if I can’t change to the Beta channel?
Have you tried switching to the Beta channel but couldn’t? Rest assured that there is no error involved. The main reason for this is the fact that your hardware isn’t compatible.
And you are also not alone. Many Windows 11 Insiders found themselves in a similar situation when trying to change their channels to Beta.
Many are stating that their devices fulfill the necessary criteria for the new OS to function properly but are unable to move from the Dev channel to Beta.
Your best option is to look into upgrading your setup, so that it supports any future versions of Windows 11, and also wait for further updates from Microsoft.
Can I roll back to Windows 10 from Windows 11 Beta?
The answer is yes, you can go back to Windows 10, but only under one circumstance. Rolling back is only possible within the first 10 days after installing a Windows 11 build on your device.
After these 10 initial days, which can be considered a trial, you will not be able to roll back anymore. When entering the Settings menu to go back to Windows 10, you will no longer be able to select this option.
If you decided to try out the Beta version but it wasn’t to your liking, all you have to do in order to go back is:
Open the Settings menu.
Select the System tab and then click on the Recovery button.
Click on the Go back button.
If you are still within your rights to switch back to the previous version of the OS you were running before installing the Beta channel, the button should be accessible to you.
With all this information in hand, feel free to test the Beta version for Windows 11 and enjoy all its new features. Also, remember to leave feedback for all problems you encounter, to help Microsoft improve the experience.
Have you already switched to the Windows 11 Beta channel? Let us know how it went in the comments section below.
It goes without saying that, nowadays, most monitors, TVs, and graphics cards feature at least an HDMI 1.4 port which is enough for 144Hz at 1080p, 75Hz at 1440p, and 30Hz at 4K.
Keep in mind that some monitors have limited bandwidth over HDMI 1.4 making it max out at 120Hz or even at 60Hz in some cases, which are mostly G-SYNC and older monitors.
Furthermore, most 144Hz monitors are limited to 120Hz over HDMI 1.4. Still, some monitor manufacturers use custom timing parameters and pixel rates to use the full potential of the HDMI 1.4 bandwidth, thus getting 144Hz at 1080p.
That being said, we are now going to show you what to do when your 144Hz monitor is only showing 120Hz or less.
Users that have experienced this problem can understand the frustration that comes with a monitor that isn’t displaying correctly.
It all comes down to pairing compatible cables with compatible monitors, so keep this in mind just to avoid nasty surprises.
Just make sure the exact monitor you’re looking at supports 144Hz or at least 120Hz over its HDMI 1.4 port, or just look for a 144Hz display with HDMI 2.0.
Remember that HDMI 2.0 is also fairly standard and can be used for 240Hz at 1080p, 144Hz at 1440p, and 60Hz at 4K.
What can I do if my HDMI doesn’t allow 144Hz?
1. Check the monitor’s specifications
As we said above, it all starts with choosing the right monitor and the right cables for the job, so we are going to start here.
In fact, most 144Hz monitors will connect at that specification on Windows computers by default, so remember that in the future.
Thus, if your monitor is not working correctly, check to make sure you have a 144Hz-capable display and have it plugged into the display or DVI-D port.
It is also important for you to keep in mind that other display connections will not render at 144Hz. So, before we get further into the troubleshooting process, make sure this is checked.
2. Inspect the cable for any damage
We know that this should go without saying but we can sometimes overlook the simplest details and go through a lot of work.
All you need to do is a simple visual inspection and make sure the cable doesn’t have any frays or cuts that could prevent it from working properly.
If by chance you find any damage, simply buy another cable and try again. You might find it hard to believe, but some users actually reported that this worked for them after replacing faulty cables.
Under Choose a refresh rate, choose the desired rate (144Hz).
4. Update monitor drivers
Search for Device Manager and open the app.
Expand Monitors, right-click the one you are using and select Update driver.
Select Search automatically for drivers.
5. Update Windows
Press Win + I to access Settings.
Select the Windows update tab.
Click on Check for updates, and then Restart now.
Do I need a special HDMI cable for 144Hz?
Yes, as we mentioned at the beginning of the article, not all cables will suit your needs so make sure you buy the correct one.
For 144Hz at 1440p, you will need at least HDMI 2.0 or DisplayPort 1.2 while for 4K 144Hz you are going to need HDMI 2.1 or alternatively, DisplayPort 1.4 with DSC 1.2.
That is all you need to know about the matter, so you can think twice before getting an HDMI 1.4 cable for a 144Hz refresh rate.
We recommend HDMI 2.1 for 144Hz, so don’t even waste your time with anything else. Thus, if your monitor is 144Hz but only has a 60Hz refresh rate, remember what we told you.
Skype is one of the most popular apps used for online communication with millions of users worldwide. Skype requires a Microsoft account so as to be able to use its instant messenger-Skype.
However, Skype users are faced embattled with an error while attempting to log in to Skype. Sometimes, users may see only a white screen while others get the Skype error Javascript required to sign in.
Do you get the Skype error Javascript required to sign in while attempting to login into Skype? Windows Report will show you how to fix this issue.
What causes the Skype Javascript error?
The full error states: Microsoft account requires JavaScript to sign in. This web browser either does not support JavaScript, or scripts are being blocked. To find out whether your browser supports JavaScript, or allows scripts, see the browser’s online help.
This Javascript error is caused by several issues such as erroneous Skype installation, outdated web browser, and outdated/corrupt system components e.g. .Net framework.
Therefore, we’ve come up with working solutions to fix the Skype error Javascript required to sign in problem in no particular order.
Firstly, you need to test for JavaScript on your Internet Explorer (IE) web browser. Skype utilizes the IE engine for its web interface; therefore, you need to test for JavaScript on IE as a preliminary check.
Sometimes, after testing for JavaScript, you may find out that JavaScript is disabled on your IE browser. So, you have to enable JS, and then launch Skype application afterward to see if this solution worked.
1. Go to Start > Internet Explorer.
2. Click on the gear icon to open the Tools menu.
3. Now, open the Security tab.
4. Click on Reset all zones to default level, and select Apply.
5. In the same tab, click Other.
6. Locate Scripting and make sure that it is set to Enabled for the Active scripting option (if not, put the check mark).
7. Now, click on OK to close Security Settings.
8. Click OK again to close Internet Options.
9. Close Internet Explorer.
10. Afterward, launch the Skype application.
It is widely reported that enabling JavaScript on IE fixed the Skype error JavaScript required to sign in. However, if you are still experiencing this issue, then you may have to proceed to the next solution.
Microsoft .NET framework is also an essential component to make Skype work. Some Windows users reported being able to fix the Skype error JavaScript required to sign in problem by installing the latest .NET framework on their PC.
However, at times the latest .NET framework version might not solve this problem, therefore, you may have to try out several .NET framework versions.
Another way of solving the Skype error JavaScript required to sign in problem is by reinstalling Skype. Therefore, you need to uninstall Skype, and then install Skype afresh from its official website.
Note: After uninstalling Skype, ensure you install Skype from its executable files, and then sign in afterward. This should definitely fix the Skype error JavaScript required to sign in prompt.
5. Disable VPN
Some Skype-incompatible VPNs may prevent you from using the Skype application resulting in the Skype error.
The best workaround in such cases is to temporarily disable your active VPN before your Skype session. This solution is very simple; just disable or turn off your VPN, and then launch Skype application.
Meanwhile, consider using CyberGhost VPN, NordVPN, or check out our list of the best VPN for Skype PC which would give you no issue while signing in on the Skype Desktop application.
6. Run Windows Update
Finally, updating your Windows OS can fix the Skype error JavaScript required to sign in. Here’s how to update your Windows OS:
Go to Start>type update in the search box and then click on Windows Update to proceed.
In the Windows Update window, check for updates and install the available updates.
After the update process is complete, restart your Windows PC.
7. Disable two-step verification
Some users also suggested that disabling two-step verification could fix this problem. So, if you enabled this option, turn it off and check if the issue persists.
Conclusively, any of the solutions we listed above can fix Skype error JavaScript required to sign in.
If you have any comments on any of the steps or success using another method not listed above please leave a comment below.
IPTV presents some great TV shows that include sports, entertainment, etc. This is based on the Internet Protocol networks.
These days, many IPTV users have reported that they are facing issues while streaming their favorite shows, especially sports.
When users try to access any TV show, it simply denies them access and blocks IPTV.
Does Optus use PPPoE?
Yes. Optus telecommunication service uses PPPoE authentication. You can enable it by logging in to your router and checking out your manual guide.
Then, go to Internet Access on the homepage, select the PPPoE option, and then click Enable for your profile. Then, enter all the necessary details, like setting up the username and password Optus gave.
Once done, you are connected to the internet in a few minutes.
The five best possible ways to stop Optus from blocking IPTV are explained below.
How do I stop Optus from blocking IPTV?
1. Check if you are subscribed to IPTV
IPTV services have premium content that needs to be subscribed to watch without a break. However, when this subscription expires or lapses, it might cause problems like the one mentioned above.
So, please go to your IPTV account and check if the subscription is still valid. Otherwise, renew it to continue watching the TV shows.
2. Try installing the MyIPTV Player app
Open the Microsoft Store app on the system by pressing the Windows key and typing Microsoft store.
Click the Microsoft Store app from the results page.
After the Microsoft Store app opens, type myiptv in the search bar on the top.
Select the MyIPTV Player app from the suggested apps on the search results page.
Click Get under the MyIPTV Player page.
This starts downloading and then installing the application.
After installation is done, open the MyIPTV Player app.
Click Settings on the top menu and select Add new playlist and EPG source under the Manage playlist and EPG section.
Enter the IPTV channel name in the Remote channel list Name textbox.
Then provide the IPTV subscription link in the Remote channel list URL textbox.
Finally, click Add remote list and start watching IPTV channels.
3. Use a VPN
IPTV services restrict some countries because they are country-specific in displaying the content. For example, some TV shows can be watched only in the US; if a US resident moves to another country, he cannot watch it due to this problem.
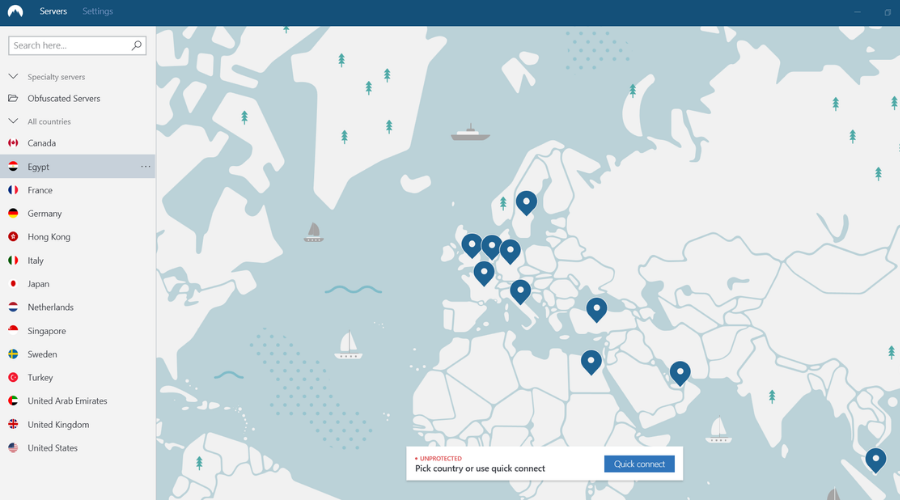
Therefore, using the best VPN might help in resolving this issue. The perfect VPN provider for this issue is ExpressVPN. It’s one of the most trusted VPSs on the market and it provides great threat protection.
Here are some simple steps on how to use ExpressVPN:
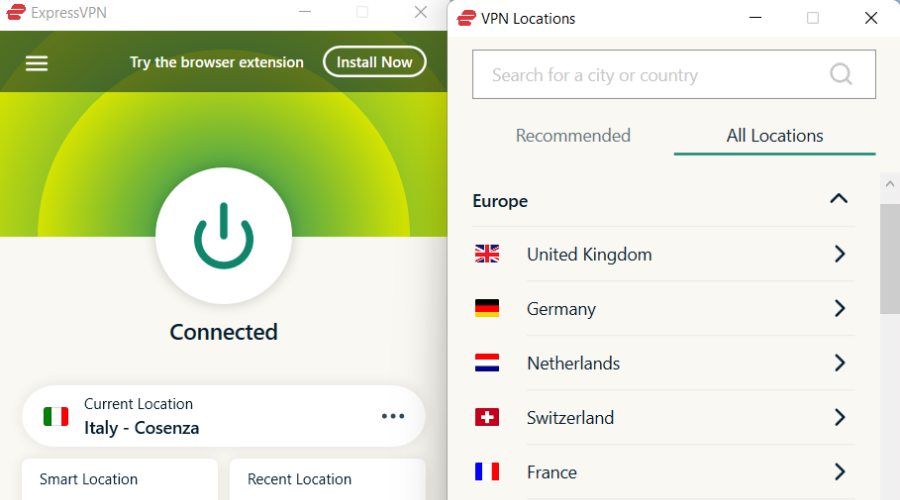
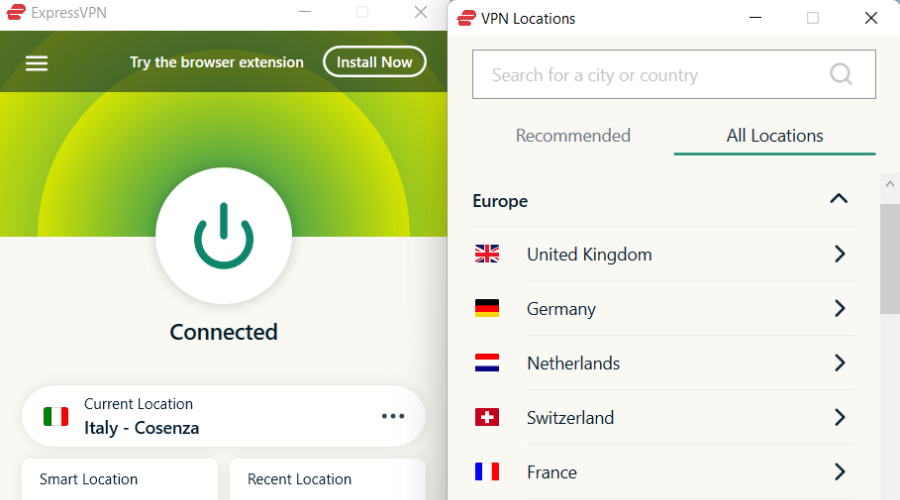
Now, select Choose Location to open the VPN Locations
Search for the location you want or just select one from the Recommended tab and you are ready to go.
Watch IPTV from any device with ExpressVPN, one of the most trusted VPN providers on the market. Not only does it focus on your security and privacy, but it also keeps you hidden while using this VPN.
ExpressVPN
Enjoy IPTV and other streaming platforms without worrying about restricted content.
If you are consistently getting blocked by the Optus service, you can always try using the Opera browser on the system. This browser has a built-in VPN which is free of cost.
You must ensure the VPN settings are turned on in the Opera web browser. To do so, you need to click the toggle button of Enable VPN option on the Settings page of Opera.
Without this, it will be unable to stop any ISP from blocking the websites or IPTV.
5. Use a VPN router
When the IPTV device is connected to a standard router that does not have VPN software, it tends to create problems like blocking some websites or TV services like IPTV.
Therefore, we suggest taking a VPN router and then connecting it to the IPTV device to start watching the TV shows without restrictions. You can also try installing the best available VPNs that could resolve this problem where IPTV gets blocked.
How do I check if my ISP is blocking streaming?
The easiest way to check if your ISP is blocking streaming is by using the hide.me or whoever.net proxy server address and accessing the website or streaming service. If you can access it without issues, your ISP is blocking streaming.
Another way to check is by connecting your mobile network carrier to the system and trying to access the website. Here are some best TV recording software available for your Windows system. These can be helpful at times.
Did you find this article informative? Please let us know about it in the comments section below.
Dell is one of the biggest tech giants in the PC industry, and it constantly rolls out new products, both hardware, and software.
That being said, Dell introduced another neat tool called Dell Migrate, and it aims to help Dell users migrate their data from an old Dell PC to a new one in the most efficient way imaginable.
They also have a proprietary set of services called Dell SupportAssist that acts as a platform filled with tools that can allow users to better handle their Dell PCs.
The guide below will be showing you exactly what you need to do in order to use Dell Migrate efficiently.
What should I know before I migrate my data?
Before proceeding, make sure that these conditions are met first:
The OS installed on the source PC needs to be Windows 8 or higher
The OS installed on the Dell target PC needs to be Windows 10 or higher
You need to be logged into the source PC as an Administrator
Both source and target Dell Pc are connected to the same LAN
No applications are running on either source or target PC when you start the migration
How do I use Dell Migrate to transfer data to a new computer?
As long as you meet the criteria for migrating your data, you can begin doing so. It is now easier than ever to move important files and settings from your old PC to your new Dell PC with the Dell Data Assistant assistant.
Dell Migrate allows you to work on your new PC without interruption while the migration is in progress. Moreover, you don’t have to restart your computer when the migration is complete, you can already access the files you just moved.
1. Turn on your source PC.
2. Open a browser and go to the Dell official website.
3. Scroll through the page until you see the Dell Data Assistant tool or search for it in the search box.
4. Download the executable file to your source PC, and then run it.
5. On your Dell target PC, press Start.
6. Search for Support Assist and then launch it. You need to have Dell SupportAssist installed in order for this to work.
7. Go to the SupportAssist Home menu.
8. At the bottom of the menu, click on Go now. Alternatively, you can go to Troubleshooting > Copy my files and settings from another PC > Go now.
9. Select Get Started.
10. Click Connect on the next page.
11. You will be asked for a verification code.
12. Input the one from your source PC. It is a 6-digit code.
13. Dell Migrate will scan the source PC for any data that it can migrate.
14. As far as data transfer goes, you will need to choose one of the following options:
Move everything for me.
This will move all files and settings detected on the old PC.
Let me choose what to move.
This lets you see what was discovered, and then you can choose what to transfer or not.
15. Click Migrate now.
16. Your data should now migrate, and you can view a brief summary of how the operation went, and if everything is OK.
If you are using Microsoft’s upcoming operating system on a laptop or tablet, you will surely want to know how to check the battery status and find out at what level are the apps or processes you are running draining your battery.
Luckily, the revamped battery information section in your Settings menu will display a detailed graph along with the information on battery consumption by apps and programs installed on your device.
Moreover, you can also perform a battery report or energy report via Command Prompt if you are looking to find out even more about it.
In this article, we’re going to show exactly how to do all of this, step by step.
How do I check the battery usage by apps on Windows 11?
A fairly simple process that will offer you detailed information on specific software energy consumption, that can be done with just a few clicks.
We recommend that you check this information, especially if you are on the go and rely on your device’s battery to finish your tasks.
Certain apps will take a higher energy tool than others and you might want to close them before your device’s battery is drained.
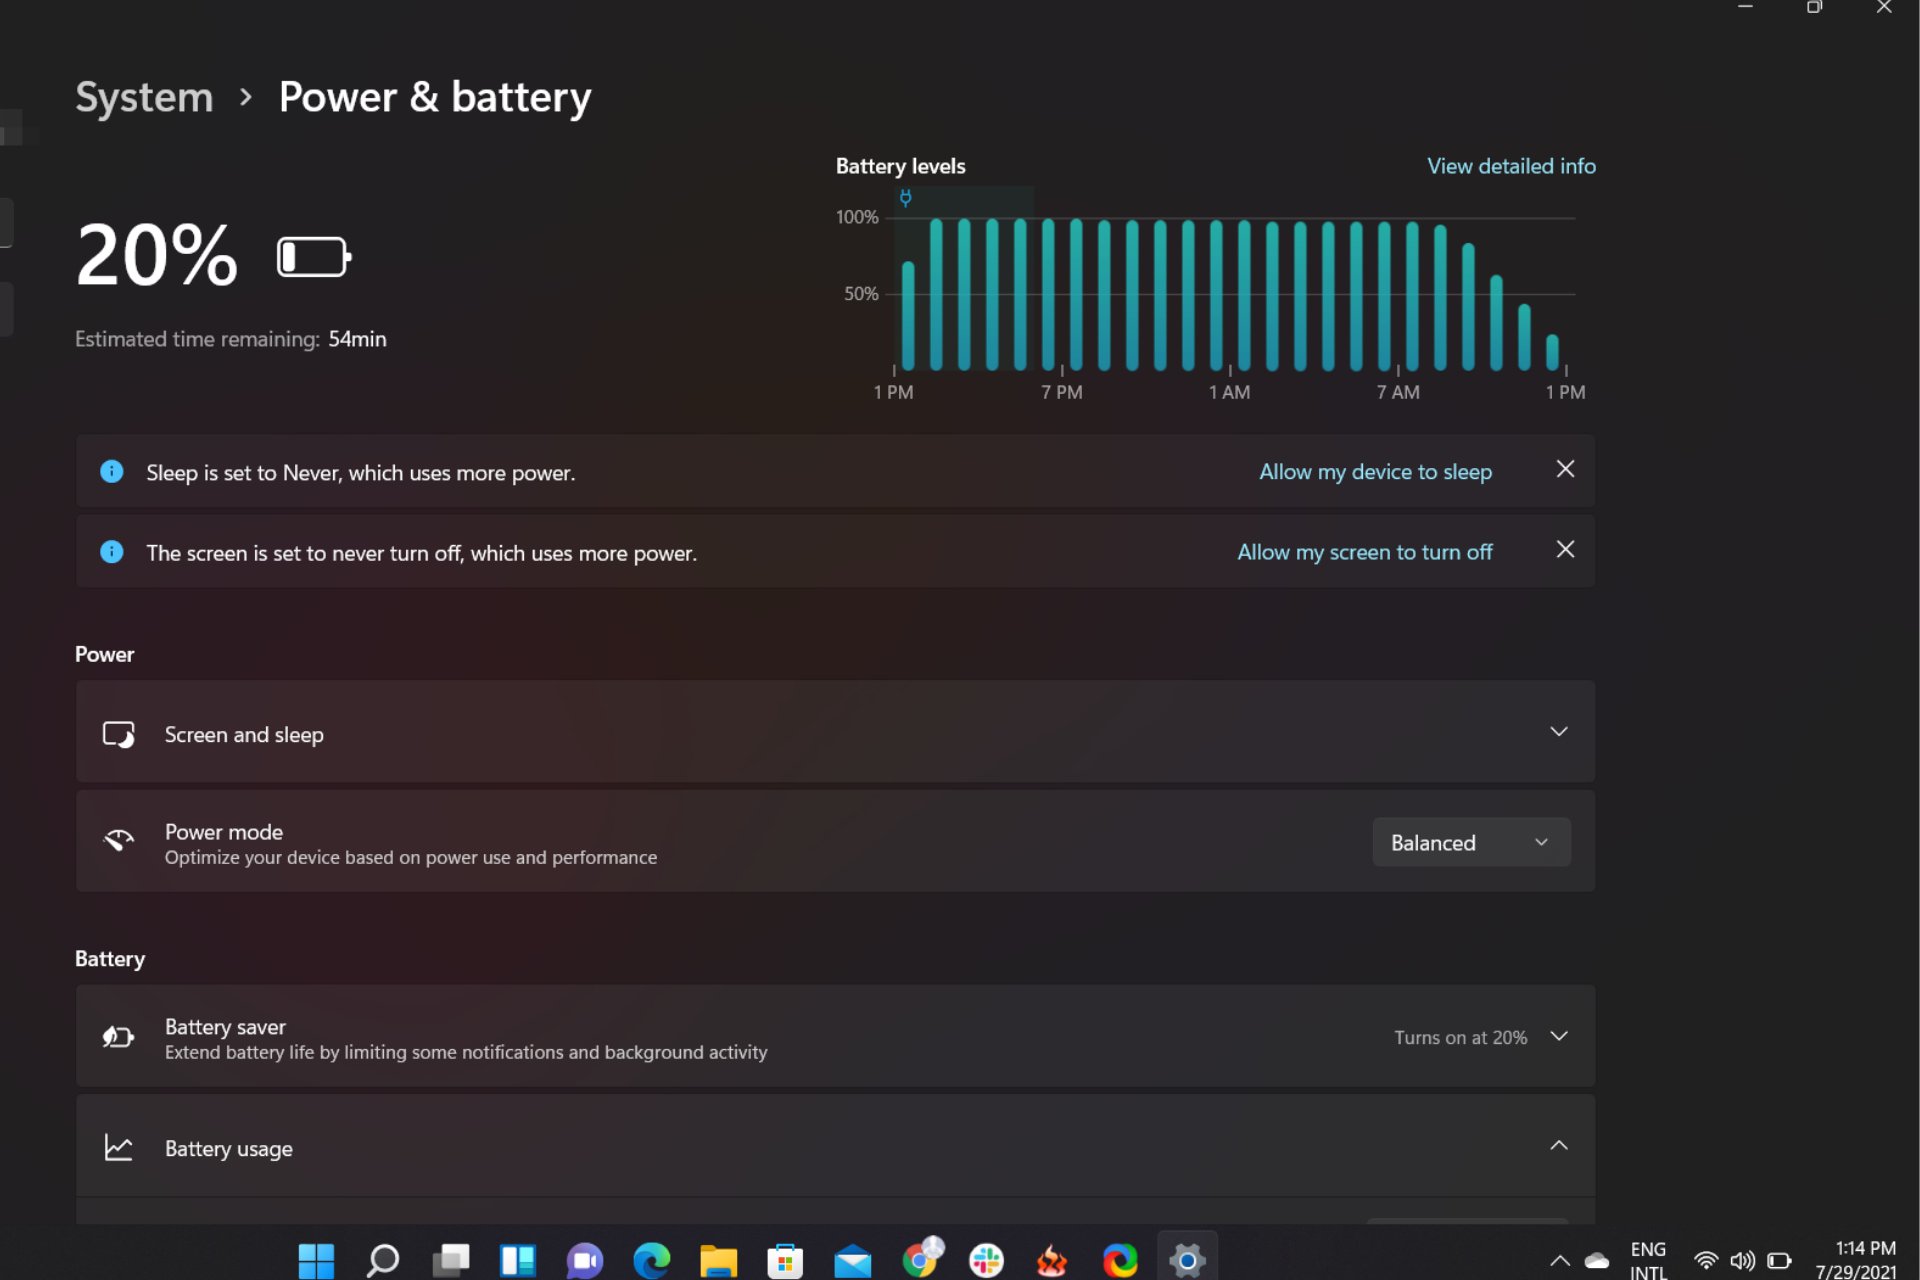
Open Settings, either from the Start menu or by pressing Windows key + I.
Select the System category and then click on Power & Battery.
Click on Battery usage to expand it.
In this window, you will have the necessary usage information, based on which you can choose to close some of the apps that prove to be consuming more than others.
1. Press the Windows key on your keyboard or click on the Start button on the taskbar to open the Search menu.
2. Type command prompt or cmd in the search box and right-click on the result, then select Run as Administrator.
3. Input the following command and press Enter : powercfg /batteryreport
4. You will receive a message stating that a report file for your battery life has been saved to a specific file path.
5. Navigate to the file path from the message and click on the battery-report html file.
6. Select in which browser you want to open the file from the list, then click on OK.
7. Read the file and navigate to the desired section to find out what you want to know about your battery’s health.
For more detailed information regarding your Windows 11 laptop’s battery’s capacity, usage, life estimates and more, you can generate a battery report. This can be done via Command Prompt through a simple command.
Command Prompt will generate a html file that can be opened on your browser, which contains all the necessary info regarding your battery: installed batteries, recent usage, battery usage, usage history, battery capacity history, and battery life estimates.
Many users confuse a battery report with an energy report. They are both commands that scan your Laptop’s battery, but they fulfill different purposes.
A battery report checks your battery health, whereas an energy report generates information about what drains a lot of battery on your device and prevent it from running properly.
How can I perform an energy report on Windows 11?
Open the Windows Search box and type cmd in it, then select Run as Administrator.
Type the following command in cmd’s box, and then press Enter to run the command: powercfg /energy
The tool will perform a 60 seconds scan on your Windows 11 device. This is the default duration for a scan.
If you want the process to last for more than 60 seconds, you can do this by specifying the duration in the command. For example, you can write powercfg /energy /duration 120 if you want it to run for two minutes. A more detailed scan will give more in-depth information about your battery life.
When the scan is complete, Command Prompt will tell you whether and how many energy efficiency problems were found. Moreover, an HTML file will be generated to a specific file path.
Navigate to that file path and open the energy report file on the browser of your choice.
Read the report. It can be very detailed. You just need to navigate to the desired section to read what you want, or you can read all of it.
Why is it important to know how much certain apps drain my battery?
As we mentioned above, working while on the move, on a portable device such as a tablet, a laptop, or even a phone, depends on the autonomy of the device in question.
Conserving battery life can prove to be crucial in finishing your appointed tasks, more so if you don’t have an available socket in which to plug said device.
Therefore, knowing exactly what apps take a higher toll on your remaining battery is an important factor that you should definitely consider while traveling.
And now that everyone is familiar with the fact that Windows 11 runs great on mobile phones, as well as on a number of foldable devices and Microsoft’s own Surface models, more people are going to install it on such gadgets.
Be sure that you keep track of every important detail, in order to avoid unpleasant surprises.
What portable devices are you currently running Windows 11 on? Let us know in the comments section below.
The Modern Setup Host is an important Windows 10 update component, but some users are complaining that it stopped working on their PCs for some reason. Unfortunately, this error usually happens when upgrading to Windows 10 or updating the OS.
Consequently, users are unable to perform the upgrade. If you are also dealing with this issue, the solutions in this guide should help you restore normalcy and push the upgrade through.
What does Modern Setup Host has stopped working mean?
Modern Setup has stopped working, meaning a program might interfere with your Windows 10 update. Below are some of the causes of the issue:
Corrupt system files: Sometimes, faulty or broken system files can cause the Modern Setup Host has stopped working during a Windows 10 update. You can fix this by restoring these files.
Interference from third-party apps: Sometimes, a third-party app or process running a counter-program can lead to this issue. Performing a clean boot and probably uninstalling the app should fix this.
Issues with Windows update components: Another potential cause of this problem is the glitches with some update components. The solution to this is to restart these components.
How can I fix the Modern Setup Host error on Windows 10?
1. Free up some hard drive storage space
First, ensure there’s enough hard drive system partition space to upgrade to Windows 10. Users will need at least 15 GB of free HDD storage to upgrade to Windows 10 with the Media Creation Toolkit.
The best way to free up storage space is to uninstall superfluous software. Check out our guide on how to free up hard drive storage.
2. Clean Boot Windows
Press the Windows key + R, type msconfig, and click OK.
Select Services, check the Hide all Microsoft services box, and click the Disable all button.
Now, click the Startup tab and select Open Task Manager.
Right-click each of the apps there and select Disable.
Next, go back to the System Configuration window and click Apply, followed by OK.
Finally, restart your PC and try installing the update.
Clean Boot eliminates software conflicts that may sometimes occur when ins
Clean-booting Windows will ensure that third-party software doesn’t conflict with the upgrade process.
3. Run Deployment Image and System File Scans
Press the Windows key, type cmd, and select Run as administrator under Command Prompt.
Type the command below and hit Enter to run it:DISM.exe /Online /Cleanup-image /Restorehealth
Now, wait for the command to finish running.
Next, type the command below and press Enter:sfc /scannow
Finally, wait for the command to finish running and restart your PC.
In some cases, faulty system files can cause the Modern Setup Host has stopped working issue. Thankfully, Windows has a couple of tools to repair these files.
Alternatively, you can use a dedicated tool to repair and restore your registry and to replace any broken file with the original
4. Check if the Default Language is configured to U.S. English
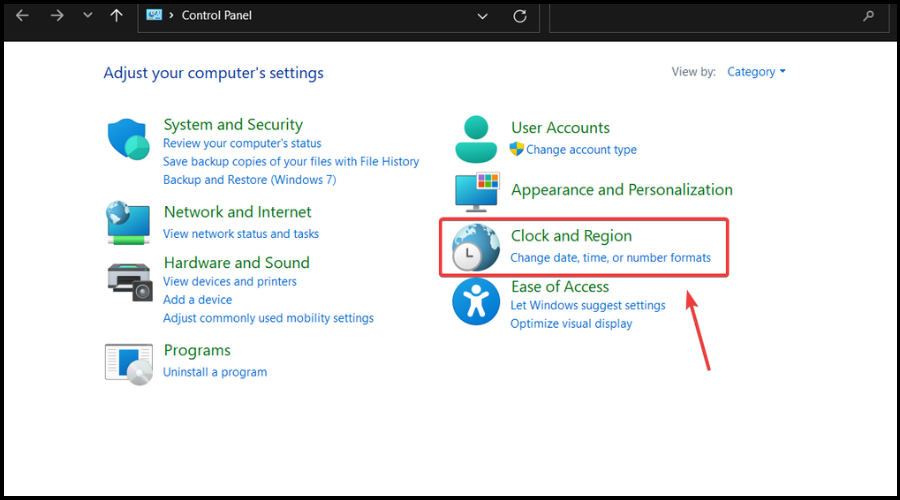
Press the Windows key + R, type control, and click OK.
Click the View by drop-down menu to select Category.
Now, click Clock and Region to open the applet.
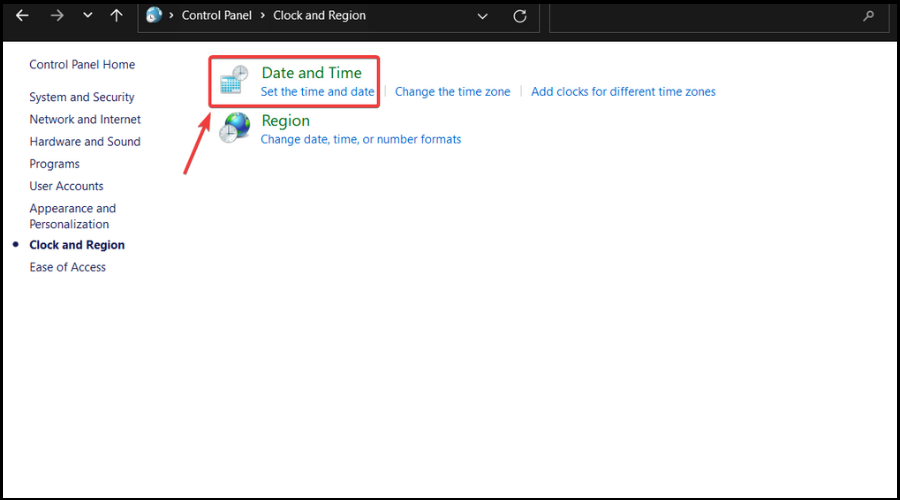
Then, click Region.
Select English (United States) on the Format drop-down menu.
Select the Apply option and press the OK button to exit the window.
After that, restart the desktop or laptop.
Some users have said that adjusting the Windows language settings to U.S. English can fix the MSH error.
5. Run setupprep.exe to resume the system upgrade
Open Run with the Windows key + R keyboard shortcut.
Then enter the following command in Run and press the OK button: C:\$Windows.~WS\Sources\Windows\sources\setupprep.exe
Finally, restart the upgrade process.
If you are dealing with Modern Setup Host that has stopped working during a Windows 10 upgrade, the command above should help you restart the process.
6. Run the Windows Update troubleshooter
Press the Windows key + I to open the Settings app, and select Update & Security.
Choose Troubleshoot in the left pane and click Additional troubleshooters.
Now, select Windows Update and click Run the troubleshooter.
All Windows versions feature a dedicated Windows Update Troubleshooter that can detect and fix update errors. So if you are dealing with the Modern Setup Host has stopped working issue, try running this tool.
Press the Windows key + S, type cmd, and select Run as administrator under Command Prompt.
Now, type the following commands and press Enter after each: net stop wuauservnet stop cryptSvcnet stop bitsnet stop msiserverren C:\Windows\SoftwareDistribution SoftwareDistribution.oldren C:\Windows\System32\catroot2 Catroot2.oldnet start wuauservnet start cryptSvcnet start bitsnet start msiserver
Finally, close Command Prompt and restart your PC.
Another potential solution to this issue is to restart the Windows update components. This should clear up the glitches that might be stopping your updates.
Those are some potential resolutions that might fix the error when installing Windows 10 Modern Setup Host has stopped working for some users.
They can also upgrade to Windows 10 with a bootable USB drive that includes a Windows image.
Are you looking for the Epson ES-400 drivers for Windows 11? If yes, you are in the right place.
All-in-one printers have become very popular nowadays. However, the scan quality doesn’t always look so good. So, dedicated scanner devices like Epson WorkForce ES-400 have been very popular.
Unfortunately, many PC users have been unable to use it after upgrading to Windows 11. The issue was created by driver incompatibility.
You must install the latest driver to get it to work in the newest OS. This article will show you how to do it.
Before knowing about the steps to get the latest ES-400 drivers, let’s know some helpful information.
Are Epson printers compatible with Windows 11?
Yes. Modern Epson printers should not have any problem working on Windows 11. However, like the ES-400 scanner, some printer models may not work correctly on this OS.
If the software support circle ends for specific printer models, you may not get any compatible driver for Windows 11. In that case, you will need to purchase a new printer or rely on unofficial third-party drivers.
But, if any updated driver version is available, you can get it to eliminate incompatibility issues.
How do I download & install Epson ES-400 drivers on Windows 11?
Open the installer file and install it on your computer.
Restart your PC.
2. Get the latest driver automatically [Recommended]
The most recommended way to get the Epson ES-400 driver for Windows 11 is using a third-party tool that can automatically download and update the compatible drivers. There are plenty of options.
We suggest you use a tested and trustworthy driver updating software. These tools can automatically scan for missing or outdated drivers on your PC and install/update them automatically or with just a single click.
How do I update Epson drivers in Windows 11?
1. Use Device Manager
Open the Start Menu, type Device Manager, and hit Enter.
Find the Epson device you want to update.
Right-click on the device and choose Update driver.
After finishing the scan process, click on Update & Apply Selected.
In some cases, you may restart your computer to finish the process.
What can I do if Epson ES-400 is not connecting to computer?
If the ES-400 scanner doesn’t connect to your computer, it means there is something wrong with the connection, or there is a software-related problem.
So, check if the scanner has appropriately connected to the USB port. If necessary, try a different port. Also, make sure you have the latest version of the drivers.
For the best experience, you should install Document Capture Pro on Windows or Mac.
If you still face the Epson scanner ES-400 not connecting to the computer or not working issue, you can consider contacting the support team.
This article has featured how you can download Epson ES-400 drivers on Windows 11 and some other helpful information. If you have an opinion, feel free to write it down in the comments box.
We all know that every virtual machine needs a Network Adapter for connectivity. However, there are many situations when you may need to change the network adapter type of a Virtual Machine.
VMware offers several types of virtual network adapters that can be added to your virtual machines. Relying on the OS version you install it will select a default adapter when you create a Virtual Machine.
Should I change my VM network adapter type?
For Windows, the default adapter is the Intel E1000. However, there is an adapter that will provide you with a better performance, which is the VMware VMXNET3 adapter.
It looks like some users often experience some problems while allocating a new network adapter type. One of the users described the issue on VMware forums:
When I create a new network card, or modify the existing card via the api the Adapter Type is set to E1000. How do I change the adapter type to VMXNET 3?
In this guide, we will explore how you can change the network adapter type by following some easy steps.
How can I change the network adapter type for VMWare?
You can configure the power-on connection setting, the MAC address, and the network connection of the virtual network adapter type at your virtual machine via Settings.
1. Navigate to the inventory and right-click on your virtual machine and press on Edit Settings.
2. Go to the Virtual Hardware tab, and click Network adapter to expand it. Use the drop-down menu to choose the specific port group that you want to connect.
You will see a list of distributed and standard port groups that you can use to establish a connection.
3. Choose a network resource pool port group if you are interested in providing network adapter bandwidth from a reserved quota with the help of vSphere Network I/O Control version 3.
4. You can also change the Status settings to Connected or Connect at power on.
5. Now use the Adapter Type drop-down menu to choose the desired network adapter type.
6. Use the drop-down menu to assign the MAC address to either Automatic or Manual.
7. Allocate the bandwidth to the network adapter if it is connected to a distributed port group of a vSphere Network I/O Control version 3 enabled distributed switch.
8. It should be noted that allocating bandwidth to SR-IOV passthrough network adapters is prohibited.
9. Set the relative priority of the traffic from the virtual machine by using the Shares drop-down menu.
10. You need to set a minimum bandwidth for the VM network adapter when the VM is turned on. Use the Reservation text box to set the limit.
11. Finally, set a bandwidth limit for the Virtual Machine network adapter with the help of the Limit text box.
12. Click the OK button to save the new settings.
Once the new settings are saved successfully, you should now be able to see the new network adapter type.
There you go, a quick and easy guide on how to change the network adapter type of VMWare. If you found this solution helpful, let us know in the comments section below.
If you encounter any network adapter issues in VMWare you can check our article to solve the common issues that other users experienced.
We hope that you found our article helpful. Let us know if you encountered any difficulties in the comments section below.
Kindle is free software that allows users to download and read digital books from Amazon. It is a cross-platform software available across operating systems like Windows, macOS, and Android.
However, it’s interesting to be able to rest your fingers while you use the Kindle app on your PC is interesting. What makes it possible is the Kindle PC app text-to-speech feature.
Furthermore, many users don’t know how to use text-to-speech on the Kindle app on their computers. This article will guide you through how to enable and use it.
Does the Kindle app offer text-to-speech?
The Kindle app offers a text-to-speech feature that allows users to interact with the app without having to press their computer. However, the text-to-speech feature is not available on every version of the app.
1. Enable the Narrator on your PC to use text-to-speech on the Kindle app
Click Start on your screen, select Settings from the drop-down, or press the Windows + Ikeys.
Go to Ease of access and select Narrator.
Toggle on the switch for Turn On Narrator.
However, you can use the text-to-speech on Kindle by pressing Windows + Ctrl + N keys to prompt Narrator settings, then enable the Use Narrator switch. The narrator will then read what’s on the screen.
This solution is the best for the Kindle app with no text-to-speech problems.
To explore more reading options, see this complete tutorial on how to read Kindle on PC easily.
2. Use Text-to-speech from Tools
Click on the book you want to read in the Kindle app.
Go to Tools at the top of the screen.
Click on Start Text-to-Speech.
These steps are applicable for Windows and macOS versions of the Kindle app.
Users may encounter the text-to-speech greyed-out issue if the publisher doesn’t allow it for the book. However, not all books on Kindle are text-to-speech enabled. So, the problem may occur if the book selected falls in the category of books that the publishers don’t have TTS enabled.
Nonetheless, an easy way to confirm is by trying the TTS feature on another book to see if it works.
6. Right-click the video and choose Save Video As.
7. Optional: Click on Convert to GIF and then right-click the GIF and choose Save Image As.
You can easily save your favorite GIFs from Twitter to your PC via third-party apps, such as Ezgif. It is free to use and does not need to be downloaded, which makes it very convenient to use.
When downloading a GIF image using a third-party app, it will be downloaded to your computer as an MP4 file. You would then need to convert it back to a proper GIF image.
When you create a Google Account, you receive a Gmail address that is created for that account. However, many reported that they can’t sign into Gmail.
This can be a problem, but luckily, a couple of solutions can help you if you can’t sign into your Google Account.
Why can’t I log into my Gmail account?
There are multiple reasons for this issue. First, it’s possible that your password isn’t correct or your account is hacked, so be sure to reset your account password.
Issues with the browser can cause login problems as well. Try clearing your cache or resetting your browser. Alternatively, you can switch to a more reliable web browser.
How do I force a Gmail account to sign in?
There is no way to force a Gmail account to sign in without the correct password. This is all to protect you from hackers and data theft.
Can’t sign into Gmail forgot the password
If you forgot your password, you’d need to recover your email. We explained in detail how to do that in Solution 3, so check it out for in-depth instructions.
The process is simple; you just need to enter your recovery email or phone, and you’ll get instructions on how to create a new password for your Gmail account.
Some users reported that Gmail is not receiving emails, and we covered that in detail in a separate guide, so you should check it out.
Why is my email not accepting my password?
This answer might be a bit frustrating, but your email not accepting your password is the most apparent reason you are entering the wrong one.
It can be because you are not typing it correctly or using the wrong letter case. Another cause might be that you are using a saved password on your browser after recently changing the password.
How do I fix the Google Account sign-in problem?
1. Try an alternative browser
If you keep having this issue, try opening Gmail in a different browser. We strongly suggest Opera One, which is safer and less prone to possible errors.
This is an overall better browser, and it comes with tracking protection. In addition, there’s a built-in ad blocker that clears any distractions out of the way.
The essential advantage over many other browsers is the built-in free VPN for extra security and privacy.
For those unaware, a virtual private network reroutes all your Internet traffic through other safe servers worldwide, concealing your identity on the web and even from your ISP.
Try Opera One and its modular design interface, AI prompts for refined web navigation, and fluid animation buttons.
Opera One
Avoid any possible errors by switching your browser with this fast, AI-ready, and highly secure tool.
What should I do if Google won’t let me sign in? The Gmail service might be down when users can’t log in to Google’s webmail. To check, open the G Suite Status Dashboard page shown in the snapshot below.
That page will highlight if there’s a service outage for Gmail. If the Gmail service is down, wait for Google to fix it.
Enter the Gmail email address for the account that doesn’t sign in.
Alternatively, users can click on Forgot email if they can’t remember that.
Users can enter a phone number associated with the email address or another email address (with alternative webmail) provided upon establishing the Gmail account.
Fill out the name details.
Click Send to receive a verification code at the alternative email address.
Open the email sent that includes the verification code.
Enter the verification code received, and click the Next button.
Users can reset their Google Account passwords by clicking on the Forgot password.
For a clear step by step walkthrough of the sign in process, read our full guide on how to login to Gmail.
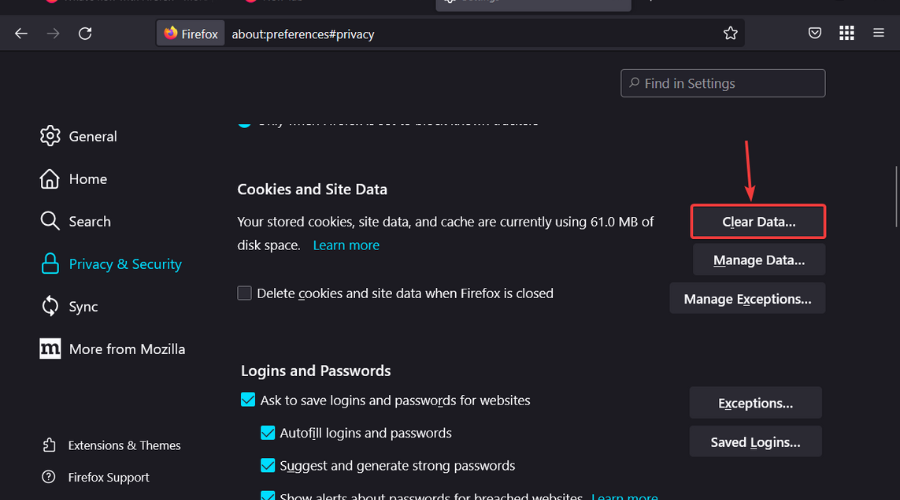
4. Clear the browser data
The next instructions will help you clear the browsing data like cookies and cache on your browser, with the purpose of fixing can’t sign into Gmail issue.
1. Clear the browser data in Chrome by pressing that browser’s Ctrl + Shift + Del hotkey.
2. Click the Advanced tab on the Clear browsing data window.
3. Select the All time option on the Time range drop-down menu.
4. Select theBrowser history,Cached images and files,Cookies and other site data,Passwords, and other sign-in datacheckboxes.
5. Click the Clear data button.
Remember to restart your browser after clearing the data to sync the changes.
Many options on the market are similar to Gmail. You won’t have to change your email address, as these tools are for opening and managing your emails.
Dedicated email clients usually allow you to log in to multiple email addresses and access all your messages from one UI.
Good email clients integrate great search tools that help you find any lost email by typing a few keywords. On top of that, many of them include OCR, which also allows you to search for images.
If you decide to change your email client, pay attention to the security and privacy of the service. Keeping your data private is one of the essential things a good email client should have in place.
The resolutions above will usually fix Gmail login issues. However, some of those fixes might also be handy for users who can’t log in to other Google services.
Whenever you share a PC with someone else, and you are not the administrator, there are many drawbacks.
The first thing that comes to mind is that a lot of programs can be set up to only run while having administrator rights. This means that if you are logged in using a sub-account, you are pretty much limited in what you can do.
For example, a security program or program that manages Windows features that triggers a UAC prompt may not launch at all if you deny it.
How can I run an exe file without admin rights?
There is a free dedicated tool called RunWithRestrictedRights that you can use to run apps without admin rights.
RunWithRestrictedRights is essentially a command-line utility tool that uses the Windows Integrity Mechanism to restrict permissions for other applications. This makes it so that they don’t harm your computer.
The tool is a lightweight program that comes in a portable form and can run on Windows XP, but it can also be used on Windows Server 2003 and above.
What you need to do is download RunWithRestrictedRights, which takes very little disk space, and then use it via Command Prompt to launch whatever app you want to.
By following the below-mentioned steps, the application should open with limited rights and more importantly, without any UAC pop-ups.
1. Download RunWithRestrictedRights from the official website to your PC. Be mindful of the location you choose, because you will need to know it when we get to a later step in the process.
2. Press the Windows key or click on the Start button to open the search box.
3. Type command prompt in it and right-click on the first result, then choose Run as Administrator.
4. Type in the following command line: C:RunWithRestrictedRights.exe "application"
The command itself is made out of two parts: the location of the tool’s exe file and the name of the application you want to run without admin rights.
For the first part, you will need to specify the exact location whereRunWithRestrictedRights.exeis located. Moreover, you need to enter the full location of the app under quotations, as shown above.
5. Press Enter to run the command and thus launch the app.
What to do if this method did not work?
In case these steps alone did not do the trick, it means the tool needs more permissions from you in order to do its job. Basically, in order to use RunWithRestrictedRights, you need two things:
Adjust memory quotas for a process
Replace a process level token
You can manually allow these permissions yourself by following these steps:
Navigate to Control Panel > Administrative Tools > Local Security Policy > User Rights Assignment.
Here, you need to check whether the Groups box is checked and if not, manually do it yourself.
Add the Administrators group to policies.
Restart your PC to apply the changes and see if the tool works properly now.
BSOD errors were very unpleasant in Windows 10, and most certainly, they are no different in Windows 11 because they seem to appear out of nowhere and are usually pretty serious. One of these is the Memory Management blue screen in Windows 11.
The Memory Management blue screen error signals a problem with your RAM but can also have other roots, as you soon discover.
As obvious as it may sound, Memory Management is the function that handles your system memory, and it’s crucial for the proper functioning of your system.
Its role is to track the memory location and manage the transfer of memory and processes between your RAM and physical memory when running a program.
It decides how much memory you have and what amount to allocate to each program or process, and when you close that process, it signals the free memory or gives it to another.
Now let’s see what can cause a Memory Management blue screen error on Windows 11:
➡ Failing or improperly connected RAM module
The Memory Management error is directly associated with RAM, so the leading cause for this blue screen is a faulty or improperly connected RAM module.
Therefore, you will have to replace that module in the worst-case scenario. Then, you will see how to check if you have such a hardware problem.
Check if the plastic knob is inside the module
➡ Hardware problem or incompatibility
Many have reported stop code Memory Management after RAM upgrade, but any other hardware compatibility problem can trigger this blue screen.
More precisely, the other possible component responsible for this error is the graphics card and its drivers.
➡ Software issues and corrupt system files
In a more optimistic scenario, the Memory Management stop code can be caused by some corrupt files on your system.
We’re not saying that it’s a good thing, but file corruption problems can be fixed easier with a bit of time and effort, and that’s certainly better than buying new RAM.
Now that we know precisely what this error causes, we can start troubleshooting the Memory Management error in Windows 11.
How do I fix Memory Management error on Windows 11?
1. Run the Memory Diagnostic tool
Click the Search icon on your Taskbar, type memory diagnostic, and select the Windows Memory Diagnostic app from the results.
Select the first option, Restart now and check for problems.
After the restart, the Memory Diagnostic tool will start checking your RAM for problems; if it finds any, you will receive details about them. If not, the system will begin booting normally.
If the tool detects a problem, it is usually about one or more faulty RAM modules. If you recently replaced them, recheck their compatibility and see if they are correctly inserted in their sockets.
Once done, verify if the Memory Management error in Windows 11 is fixed.
2. Check for Windows updates
Click the Start button, then choose Settings.
Select Windows Update from the left menu and click the Check for updates button from the right pane.
If there are any updates, the system will download and install them. Restart the PC after it finishes the process.
Sometimes, a simple system update can fix everything, and you’ll never know what the issue was all about in the first place. For example, installing the latest version of the OS would also work if you encountered the Memory Management BSOD after a Windows update.
3. Check for driver issues
Click the Search icon on your Taskbar, type device manager, and click on the app from the results.
Check the list and look for any driver marked with an exclamation mark.
If you find one, right-click on it and select Update driver.
Select the first option, Search automatically for drivers.
If the system finds a new driver, it will install it, and you will be prompted for a restart. If not, you can click on Search for updated drivers on Windows Update.
Select Advanced options.
Look under the Optional updates section. If there are any such updates related to drivers, install them, then restart your PC.
Another way to fix multiple drivers is to use dedicated driver updating software to scan your PC for missing or outdated drivers and prompt you to update them.
4. Run an SFC scan
Select the Search icon on the Taskbar, type cmd, and select Run as administrator to start Command Prompt with full privileges.
Type or paste the following command and press Enter to run it: sfc /scannow
The System File Checker will look for any corrupted system files and attempt to repair them. Wait until the process is finished and restart the system afterward.
If you want a complete in-depth integrity check on every system file on your computer, specialized software is what you need. These tools will help you scan for and replace any broken system files in just a few minutes.
5. Run a CHKDSK scan
Click the Search option from the Taskbar, type cmd, and select Run as administrator to start Command Prompt with administrative privileges.
Type or paste the following command and press Enter to run it: chkdsk /r
The CHKDSK tool will start detecting any problems with your drive and try to fix them. Wait for the procedure to end, then restart your PC.
As strange as it may sound, the root of the problem may be one or more bad sectors on your hard drive, which may produce file corruption and more.
Once done, check if the SSD Memory Management error in Windows 11 is fixed. In case you still encounter it, head to the last method.
6. Reset your PC
NOTE
Please back up your important data before performing this step, as it may cause data loss.
Click the Windows button and select Settings.
Choose System from the left pane, then scroll down on the right pane and click on Recovery.
Now select the button to the right from the Reset this PC option.
You can choose whether you want to keep your files or erase them, and we would advise you to go for the first choice.
Now you can opt for a Cloud download or a local source for the Windows 11 kit. Again, we recommend the first option, although it would require 4 GB of free space on your drive.
Review the data and click Next.
The PC will restart, and the Windows 11 installation process will start. Follow the instruction on the screen to complete the procedure.
Resetting your computer is the last resort for the Memory Management Windows 11 blue screen error, but it’s worth thinking about if nothing else works.
The BIOS is the only thing you can access when dealing with several significant errors in Windows, and it does offer a couple of troubleshooting options.
In case of a Memory Management error, you can run the Memory Test and Disk Check from the BIOS if any of the two is the culprit. The BIOS also offers a few other tools that might be useful in this case.
Besides, updating the BIOS, too, might work as an effective fix for the Memory Management error in Windows 11.
How to free up memory in Windows 11?
Of course, the Memory Management error is critical, but in the meantime, if your system has become very slow, the reason might also be a crowded startup list.
In other words, there might be a lot of apps running on startup and in the background, and they all can use your precious resources. So here’s how you can clear that issue:
Click on the Search icon, type task manager, and open the app from the results.
In the Task Manager, go to Startup.
Right-click on an app and select Disable.
This is a simple method of memory management that you can perform very quickly; after that, the apps you disable won’t run when the system starts.
Disabling all unnecessary startup programs will keep your PC running optimally. However, be careful not to disable any critical processes.
Outlook’s shared mail folders are cached by default for users who utilize the email software with its Cached Exchange mode. That has been the default configuration for Outlook’s Cached Exchange mode since MS Office 2010.
Thus, shared folders are downloaded automatically. However, Outlook users can disable shared folder caching and we will show you how to do it.
How can I disable Outlook’s download shared folder caching?
1. Turn off Outlook’s shared folder caching with Group Policy Editor
Extract either the admintemplates_32bit.exe or admintemplates_64bit.exe file to one of your folders.
Next, copy either the Outlk16.admx (for Office 2019, ‘16, and 365) or Outlk15.admx (for Office 2013) file to this folder path: C:WindowsPolicyDefinitions.
Then copy the Outlk16.adml (for Office 2019, ‘16, or 365) or Outlk15.adml (for Office 2013) file to: C:WindowsPolicyDefinitionsxx-xx. The xx-xx at the end of the path is the Language Culture Name for that folder, which would be en-us for most users in North America.
Thereafter, you should be able to select a Disable shared mail caching setting in Group Policy Editor. Press the Windows key + R keyboard shortcut to open the Run accessory shown directly below.
Input gpedit.msc in Run, and click the OK button.
Double-click User Configuration on the left of the Group Policy Editor window.
Click Administrative Templates > Microsoft Outlook > Outlook Options > Delegates to open the Group Policy Object settings in the shot directly below.
Double-click the Disable shared mail foldercaching setting.
Select the Enabled option, and click the OK button.
2. Use the Registry Editor to turn off sharing of cached folders in Outlook
1. Back up your Registry to ensure safety in case anything goes wrong while modifying it. This is not a mandatory step, but it is recommended.
2. Press the Windows + R keys at the same time on your keyboard to open the Run dialog.
3. Input regedit in Run’s text box and click OK to launch the Registry Editor.
4. Open this registry path: HKEY_CURRENT_USERSoftwareMicrosoftOfficexx.0OutlookCached Mode.
The xx.0 placeholder represents different versions of Office, which would be 16.0 for Office 2019 & ‘16, 15.0 for Office 2013, and 10.0 for Office 2010.
5. If you can’t find a Cached Mode key, right-click the Outlook key and selectEdit.
6. SelectNew>Keyon the menu.
7. Enter Cached Mode as the key title, and then press the Return keyboard key.
8. Then select the Cached Mode key.
9. Right-click an empty space on the right of the Registry Editor to select New > DWORD Value.
10. Enter CachedOthersMail as the DWORD’s title, and press the Return key.
11. Double-click on CachedOthersMail to open the window shown directly below.
12. Adjust its value to 0, and click theOKbutton.
13. Exit the Registry Editor window.
If you don’t have a Group Policy Editor, you can still turn off the default shared folder caching in Outlook by editing the Registry. This is also a good method for advanced users who are familiar with modifying their Registry.
However, as always, it is recommended to be careful while making any changes to the Registry Editor, because it comes with a risk. As long as you follow our guide thoroughly, and also create a back up prior to making any modifications, you will be safe.
That’s how Outlook users can disable the download shared folder setting from Microsoft Exchange. Thereafter, shared mail folders will not download to the local cache.
If you have any other questions or suggestions, don’t hesitate to leave them in the comments section below.
You should definitely know the fact that Microsoft has just published a message for users running client and server versions of Windows 7-11.
Based on what the tech company had to say, users could experience issues and bugs in various parts of the operating systems due to the upcoming Daylight Saving Time (DST) time zone change.
Microsoft also clarified the fact that this is no Y2K bug, so Windows users from Chile, because that is where this problem is affecting people, should not expect anything extraordinary.
Microsoft acknowledges Daylight Savings time bug
Even though this problem was spotted in one country, security experts are wondering if this could actually spread to other places as well.
Users reported that time had advanced 60 minutes on September 10 instead of September 4. As a result, devices running the operating system could run into the following problems:
Time shown in Windows and apps will not be correct.
Apps and cloud services which use date and time for integral functions, such as Microsoft Teams and Microsoft Outlook, notifications and scheduling of meetings might be 60 minutes off.
Automation using date and time, such as Scheduled tasks, might not run at the expected time.
Timestamp on transactions, files, and logs will be 60 minutes off.
Operations that rely on time-dependent protocols such as Kerberos might cause authentication failures when attempting to logon or access resources.
Windows devices and apps outside of Chile might also be affected if they are connecting to servers or devices in Chile or if they are scheduling or attending meetings taking place in Chile from another location or time zone. Windows devices outside of Chile should not use the workaround, as it would change their local time on the device.
However, as unpleasant as that might seem, the Redmond-based tech giant also provided a workaround for this issue, while it works on a more permanent solution.
How can I fix the Daylight Savings Time issue?
According to Microsoft experts, you can mitigate this issue by doing either of the following on September 4, 2022, and undoing on September 11, 2022:
1. Turn of the auto Dayilight Savings setting
Search for Date and Time and open the app.
Toggle the Adjust for daylight saving time automatically to Off.
2. Turn of the auto Daylight Savings setting in the Control Panel
Search for Control Panel and open the app.
Click on Clock and Region.
Select Date and Time.
Press the Change time zone button.
Unselect the Automatically adjust clock for Daylight Saving Time option.
That being said, follow the steps above in case you notice anything strange, in order to ensure accurate time switching with future DST transitions.
This is the workaround mentioned in the official documentation that Microsoft recently posted, and it applies to currently being affected in Chile.
Even though Microsoft said that users from other countries should not change their Daylight Saving Time settings for the time being, keep these solutions in mind just in case.
Microsoft plans to release an update to support the new DST settings as soon as possible, but it needs more time to build, test, and ship such updates.
Furthermore, the tech giant will not make it before the change goes into effect, so users need to tweak their systems manually this year.
As far as affected platforms, we are looking at:
Client: Windows 11, version 21H2; Windows 10, version 21H2; Windows 10, version 21H1; Windows 10, version 20H2; Windows 10 Enterprise LTSC 2019; Windows 10 Enterprise LTSC 2016; Windows 10 Enterprise 2015 LTSB; Windows 8.1; Windows 7 SP1
Server: Windows Server 2022; Windows Server 2019; Windows Server 2016; Windows Server 2012 R2; Windows Server 2012; Windows Server 2008 R2 SP1; Windows Server 2008 SP2
Have you also noticed any time savings related issues on your device? Share your experience with us in the comments section below.
With Omegle, you can meet new people from all over the world and chat with them in real-time using your webcam, microphone, and keyboard. The best part is that there are no signup requirements at all and you don’t have to download any application.
Most people prefer to use Omegle on their browsers but sometimes even browsers fail. You may find that Omegle is not working on Chrome hence the need to download the app.
Windows 11 allows users to install Android apps through the Windows Subsystem for Android. After you have installed the app, you can now open APK files on your OS.
Can you download Omegle on PC?
Yes, you can download Omegle on a PC. You just need to know how to do it. Unfortunately, there’s no official way to download it on your computer. The app is not available on Google Play Store or the Apple App Store.
However, there is a workaround you can use to get the app running without having to go through the usual channels. You can simply download the APK file and then install it on your computer using an android emulator.
Alternatively, you can sideload the app but you have to be extremely careful. Most apps from unofficial sites have not passed through the rigorous security checks as those on the Microsoft Store. They can come bundled up with malicious malware that could put your system at risk.
As such, you will need a reliable antivirus that can detect any malicious files before installation and secure your system.
Editor’s tip
Thus, using an antivirus can offer you more safety and security for your PC. An excellent choice would be ESET HOME Security Essential because of its features that protect all your devices from online threats such as malware, ransomware, phishing scams, and others. On top of that, it has a unique feature that helps you recuperate your device in case it gets lost or even stolen.
How do I open Omegle on PC?
1. Use an emulator
Download or launch your favorite emulator (in this case Bluestacks).
Click on Select an APK and choose Omegle from your storage location.
Hit Install.
Now open the app.
Does Omegle work on Windows 11?
Omegle works on all major operating systems, but you need to make sure that you are using the latest version of your OS. It also works on Windows 11. The safest way to use Omegle on Windows 11 is to visit their website using your browser.
You can access Omegle using your web browser or download an APK file app for Windows, Mac, or Linux computers.
Hopefully, you have been able to download and install the Omegle app on your PC and can continue enjoying chatting and meeting new people.
In case you find that you are blocked from accessing Omegle or the app is a bit slow, we recommend using a VPN that will mask your identity.
If the VPN fails to work with Omegle, we also have a detailed guide on how you can bypass the issue so you can quickly get back to the popular chat site.
Let us know of any issues you may encounter during installation in the comments section below.
Omegle is an extremely popular chat app and has millions of users from all over the world. One requirement is that the site requires you to have a working microphone on your computer to use it.
If you don’t have one or your microphone isn’t working, it can take away from the fun of meeting new people. When you’re on Omegle holding a video chat, your microphone needs to be in tip-top shape and if it isn’t working, things can get very frustrating.
You want to be able to talk to people around the world and show off your personality, but if you can’t hear yourself talking, then how are they supposed to?
Aside from your microphone not working, you may also experience an error where Omegle is not connecting to the server but we have adequately covered fixes to circumvent this issue.
Why won’t my mic work on Omegle?
If you’re trying to enter a conversation on Omegle, but your microphone won’t work, here are some possible reasons:
Your microphone is muted – Some keys on your keyboard can mute your mic if you press them accidentally. Check if your microphone is muted and unmute it.
Outdated drivers – Check for updates for the audio driver of your computer. If an update is available, download and install it.
You have not enabled access – Most sites require you to authorize permissions before using your microphone. You can enable microphone access from Windows settings or on the select site/app.
The microphone isn’t plugged in – The most common reason why your microphone won’t work on Omegle is that it isn’t plugged in. If you’re using a desktop PC or laptop, check that your headphones or headset are plugged into the right jack and plugged correctly.
Damaged microphone – If you have a damaged microphone, it will not work on Omegle. You can use a microphone tester to verify whether it is working. If you cannot hear anything at all, then your computer might not have a working speaker.
If any of the above is the reason you can’t use your mic on Omegle, we have various ways you can troubleshoot the issue and get your microphone working again.
How do I fix my microphone if it’s not working on Omegle?
1. Check your microphone settings
Check that you haven’t accidentally muted your speakers or turned the volume too low. To do this, check the volume button at the bottom right corner of your screen and make sure that the volume is turned up all the way.
If you’re using headphones or earbuds with an integrated microphone, make sure they are plugged in properly and that there isn’t any debris blocking them from making contact with your computer’s audio jack.
Hit the Windows + I keys simultaneously to open Settings.
Type Device Manager in the search area and click Open.
Locate Audio inputs and output options and expand.
Right-click on your microphone and select Update driver.
Select Search automatically for drivers.
Another option would be updating your drivers automatically with a specialized tool. It helps you ease this process and assure you detailed reports of your drivers and keep them updated at all times.
3. Run the audio troubleshooter
Press the Windows + I keys simultaneously to open Settings.
SelectSystem on the left pane and hit Troubleshoot on the right pane.
Click on Other troubleshooters.
Scroll down to the Recording Audio section, then click on the Run button.
And that’s how to get your microphone working on Omegle again. Should you encounter any other related errors such as camera not working on Omegle, refer to our expert article for quick fixes.
If your mic still is not working on Omegle after these fixes, consider switching platforms. See our guide to Ome TV alternatives for safe video chat options.
Let us know whether you have been able to solve this issue in the comments section below.
Welcome to Xbox Classics Revisited. In this new series we aim to take a look back at the previous three generations—the original Xbox, the Xbox 360, and the Xbox One—of Xbox games. These mini-retrospectives serve as a tribute to some of the best gaming that Xbox has given us over the last 20+ years.
For those who were lucky enough to have been there for all of it, read on and savor the nostalgia. For those Xbox fans too young to remember Maude Flanders or Pepsi Twist: get ready to meet your Xbox gaming backlog.
Sudeki (Xbox)
July 2004 (Microsoft Game Studios)
Sudeki could be called the only real JRPG on the original Xbox. It breaks the genre mold somewhat however, in that the combat employs a real time battle system in which the player has the ability to slow time to a crawl as they handle party commands. This was quite a novelty for a JRPG back then and was only possible thanks to the Xbox’s hard drive, as were the game’s graphics—Sudeki was quite the looker in its time.
Sudeki was decidedly more influenced by JRPGs like the Star Ocean and Mana franchises than by genre juggernaut Final Fantasy. Unfortunately the game did not enjoy great sales numbers (and thus never got a sequel) although it is remembered today an Xbox classic.
Lost Odyssey (Xbox 360)
February 2008 (Microsoft Game Studios)
From legendary Final Fantasy creator Hironobu Sakaguchi came this, one of the most unexpected roleplaying classics to hit the Xbox 360. It was one of the first games from Sakaguchi’s Mistwalker Studios, and featured veteran Final Fantasy composer Nobuo Uematsu handling the soundtrack. The story of Lost Odyssey was co-written by Sakaguchi and popular Japanese author Kiyoshi Shigematsu.
While the gameplay of Lost Odyssey relies on traditional JRPG mechanics—random, turn-based battle encounters, an intricate leveling/ability system, over-the-top magic spells, and a mind-bending fantasy narrative that is utterly epic in scope—it has earned praise for how well it executes all the aspects. It is considered one of the best JRPGs of this era of gaming.
Nier: Automata (Xbox One)
March 2017 (Square Enix)
This action RPG is the sequel to the original Nier released in 2010. Set in the year 11945, in a post-apocalyptic world ravaged by a proxy war pitting alien machinery against manmade androids, Nier Atuomata carries on the dark atmosphere of its predecessor. Both games are spiritual successors to the Drakenguard series of roleplaying games.
The game combines hack and slash combat with nonlinear exploration. Nier Automata has received accolades for its story, soundtrack and design. As with all the games featured here, this modern classic carries on the rich storytelling tradition of the JRPG genre, and proves that the genre is anything but dead.
Wrap up
We hope you’ve enjoyed these mini-retrospectives. What are some of your favorite classic Xbox, Xbox 360 and Xbox One games? Are any of them on this list? Let us know about your favorite Xbox gaming experiences in the comments below. And thanks for reading.
Omegle is a great way to meet new people from around the world. But the site can be frustrating when it randomly decides to show you a grey loading screen instead of connecting you with your conversation partner.
The grey loading screen on Omegle appears when you are connecting to another user through the site. This can take anywhere from five seconds to a minute, depending on your internet connection speed and how busy the website is at that time of day.
Sometimes the grey screen disappears and other times it might be an error connecting to the server. You can decide to wait it out or attempt one of our recommended solutions.
Why is my Omegle screen grey?
There are a few reasons why your screen might go grey when using Omegle:
Intermittent connection – If you have a poor Wi-Fi or Internet connection, Omegle cannot stay connected for long enough to show you a good view of yourself and whoever else is watching. You can use a speed tester and check whether your internet connection is fast enough.
Outdated browser – If you have an old version of a browser installed on your computer, it might not work properly with Omegle’s website. This can cause problems like a grey screen or other glitches.
Omegle is down – Each site at some point may face downtime. When it does, you’ll see nothing but a dark grey screen.
Can’t establish a connection to your camera/microphone – Ensure that you have granted permissions for both your camera and microphone. Also, ensure that they’re both working properly by trying another program that uses them such as Skype.
After establishing the root cause of why you are getting a gray screen on Omegle, below are some troubleshooting options.
Quick tip:
Switching your browser in this context could be very helpful. Opera One Browser is a great option because it offers you a faster and distraction-free browsing experience thanks to its various features.
Its free VPN, Ad blocker, and Tracker blocker make your browsing faster, safer, and more secure. It also allows you to set custom shortcuts for almost any browser action to enhance both speed and efficiency.
Opera One
Customize your browser and enjoy a much faster and safer online experience.
How do I fix my Omegle loading screen if it’s grey?
1. Close and reopen your browser
If you’re experiencing this issue, it’s likely due to your browser being slow or buggy. The first thing you should try is closing all tabs in your browser and then opening them again after a few minutes.
This will refresh the connection with the server and clear any temporary glitches that may be causing the problem.
2. Check your internet connection
When trying to fix a grey loading screen on Omegle, you need to check your internet connection. If there’s no signal or your connection is weak, then it won’t matter how many times you try to connect — it will still take forever for everything to load properly.
You should try to reset your router or modem and see if this helps. If the problem persists after the reboot, then we suggest that you contact your ISP and report it as an issue with their service.
Sometimes, your browser cache (or history), can cause issues with websites loading correctly. Clearing them will reset your browser’s settings to their default state, deleting any temporary files or data from memory that might have been causing an issue with the site.
If this still does not work, then there may be a problem with the website itself and it could be down for maintenance.
What browsers work with Omegle?
Omegle is a browser-based chat service that works in all major browsers. We have recommended a list of browsers that you can use with Omegle without any problems.
If none of these methods work, Omegle servers could also be down so you can contact Omegle support and enquire or report the issue.
You can also try out alternative sites to Omegle if you want to experience a new site with similar features.
Let us know what solution worked for you in the comments section below.
Last month, the Microsoft PowerToys app on Windows got a new feature, PowerOCR, which lets the user copy text from any image. And now, through an update, the app has three more new features; a screen ruler, a quick accent tool, and a text extractor.
With the screen ruler, users will now be able to easily measure pixels on the screen. With Quick Accent, users now have an easier way to write letters with accents, just by holding down the letter you want accented and pressing (for example) the space key. And finally, Text Extractor, which is quite similar to Windows’ Snipping Tool, although on top of this, users will also be able to copy text out of the selected region using OCR and put it on the clipboard courtesy of Joe Finney, (former OnMSFT.com – known back then as WinBeta.org – writer, way to go Joe!).
However, this update does come with a couple of known issues, for instance, the text extractor feature may fail to recognize text in some cases on ARM64 devices running Windows 10. In some cases, after making the update, context menu entries for PowerRename and Image Resizer for Windows 11 may not appear unless you perform a system restart. And finally, some users have raised concerns and indicated that they are unable to launch the Settings window, which might be caused by the incompatibility with some applications like RTSS RivaTuner Statistics Server and MSI AfterBurner.
If you already have PowerToys running on your device, it should automatically notify you of this update. Alternatively, you can get this update today by launching your app, then clicking on General followed by the Check for Updates, and then the Install Now button. This version of the app is also available on GitHub as well as the Microsoft Store if you do not have it already.
The mouse is one of the essential parts of the computer because it controls and navigates it. One of its features is to allow the device to wake the computer from sleep. Nonetheless, the Windows 11 mouse not working after sleep is an issue some users complain about.
Furthermore, being able to wake your computer without having to press your keyboard is the work of the mouse. In Windows computers, users can activate sleep mode.
However, it doesn’t mean the computer is entirely inaccessible. So, using the mouse while the computer is in sleep mode allows you to wake it without pressing keys.
Nevertheless, this article will discuss why the mouse is not responding after sleep mode and how to fix the Windows 11 touchpad not working after sleep.
Why does my mouse stop working after sleep mode?
The Allow Mouse to Wake the Computer option is disabled: Windows allows you to toggle settings depending on what you want. Suppose the mouse is not allowed to interact with your computer while in sleep mode; it won’t work while the computer is not active. Furthermore, not allowing the feature can also prompt the mouse freezes after sleep Windows 10/11 issue. Hence, without being permitted, the mouse will stop working immediately after the computer goes to sleep.
Interference with Windows Power management: Users can set the computer to disconnect or stop tasks that consume power. However, it is possible with the help of an inbuilt Power management system. Furthermore, the power management system can end functions for the wireless mouse immediately after the computer sleeps. It is shared with wireless mice.
Outdated or corrupt mouse drivers: Outdated mouse drivers can cause many issues with mouse activities across the computer. It impedes its functionality, preventing it from performing tasks efficiently. Hence, the outdated or corrupt mouse driver can result in the Windows 11 mouse not working after sleep.
USB Selective Suspend: Users may notice that the Bluetooth mouse doesn’t work after sleep. However, it can be due to the active operations of USB selective suspend on your computer. The USB Selective Suspend is a power-saving option that stops inactive devices from running under USB accessories.
Outdated Windows: Outdated Windows is a common culprit for Windows issues. It is because the computer is obsolete and doesn’t have the necessary patches and updates to help it run better. So, it can cause the ‘Windows 11 mouse not to work after sleep.
How do I fix my Windows 11 mouse if it’s not working after sleep?
1. Allow the Mouse to Wake the Computer
Click on Start on the screen.
Select the Device Manager and double-click on Mice and other pointing devices.
Right-click on the mouse and select Properties.
Go to the Power Management tab.
Uncheck the Allow the computer to turn off this device to save power option.
Check the box for Allow this device to wake the computer, then OK.
It gives the mouse permission to wake the computer from sleep.
2. Disable Windows Power Management
Press Windows + R to open the Run command.
Type in devmgmt. msc and press Enter to prompt the Device Manager.
Select the Bluetooth mouse and double-click on it.
Go to Power Management and uncheck the Allow the computer to turn off this device to save power option.
Click OK to save the changes.
We recommend that you restart your computer and see if the issue persists.
3. Update device’s drivers
Firstly, search for Device Manager and open the application.
Then, from the hardware list in Device Manager, check for Mice and other pointing devices.
Click the right button and select Update driver.
This process can also be done automatically using a pro tool. It simplifies the steps for you and makes sure that all drivers are scanned and up to date.
4. Update Windows
Click on Start.
Select Settings from the options.
Click on Windows Update, then select Check for updates.
Windows will automatically search and download updates if there are any available.
5. Disable USB Selective Suspend
Press Windows + Skeys to prompt the Search menu.
Type in Edit power plan and click Enter.
Click on Edit power plan from the result and select Change advanced power settings.
Double-click on USB settings.
Select the USB selective suspend setting menu and click on the drop-down menu.
Click on Disabled, then Apply.
Click on OK to save the modifications.
It will prevent the computer from suspending the mouse.
6. Uninstall the mouse in the Device Manager
Press Windows + R keys to prompt the Run command.
Type in devmgmt.msc and press Enter to open the Device Manager.
Select the Bluetooth mouse device and right-click on it.
Click on Uninstall device and OK.
Restart your computer and connect the mouse. The computer will install the missing driver automatically. It can help fix the mouse not responding after sleep mode.
BitTorrent is a peer-to-peer (P2P) file-sharing protocol through which popular files can be shared easily among many users. If you’re looking for a reliable BitTorrent privacy tool, you’ve come to the right place.
Downloading a file using this protocol means you are sharing it with every other person that is downloading the same file.
Still, you only download it once you have every piece needed to put the full file together.
Once this happens, it is considered good to seed so that others can also get to 100 percent completion.
The BitTorrent protocol is effective and efficient for sharing and downloading content, which is why BitTorrent is still popular despite being traditional.
Also, its popularity comes despite the presence of online streaming services or websites. Torrenting is technically legal unless you don’t have the content owners’ permission.
So if you don’t, you’re better off not torrenting as your IP address can be discovered after which they can notify your ISP or pursue legal action against you.
What you need to check for when choosing the best BitTorrent privacy software is whether it supports torrenting, has fast download speeds, has a clear privacy policy, and has a zero-log guarantee.
Check also for strong encryption, no DNS leaks, and kill switch.
How do I use BitTorrent without being tracked?
Firstly, you can use a VPN when downloading from torrent websites because torrent sites are much safer.
It hides your real IP while encrypting traffic such that your internet service provider can’t see your activity.
VPNs also have a kill switch to protect you in case of the VPN disconnects while you’re downloading content.
We advise that you use a VPN with BitTorrent for the purpose of providing online security and privacy.
➡️ Does BitTorrent hide your IP?
No, this torrenting software can’t hide your IP address by itself. It needs VPN support in order to hide your Internet traffic.
➡️ Can BitTorrent be tracked?
Yes, it is possible that BitTorrent is tracked by your Internet provider. In case your ISP tries to detect torrent usage, they can certainly do it.
➡️ Can I use VPN for BitTorrent ?
It is safe to use BitTorrent with VPN software and torrent files securely without risking your personal data while accessing torrents.
You should also check that your network has a trusted P2P connection in order to download files getting malware or suspicious files.
This is one of the leading VPN software for security and privacy and is the best BitTorrent privacy software.
Developed by Express VPN International Ltd., it features include a server network of over 1500 servers in 148 server locations, and support for up to three devices.
ExpressVPN also gives you a variety of IP addresses which number about 30,000. In terms of performance, this VPN delivers excellent speeds which is great for torrenting and downloading files.
For security, ExpressVPN has strong encryption, and a privacy policy that provides for zero-logging on activity, plus its split tunneling feature lets users choose to protect only BitTorrent, not all other activities they’re doing online.
An important component of ExpressVPN is the offshore jurisdiction in the BVI that helps protect your anonymity.
However, it is pricier than other VPNs, but it is great for the best torrenting experience.
ExpressVPN
Keep your browsing habits private with this amazing VPN, now at a discounted price for a limited time only
Torrenting is probably the main reason why users may ever want to get VPNs. With such great risk that torrenting poses, getting the best VPN available that your budget can afford is a must.
Thankfully enough, VPN services like Private Internet Access are available on the market, and it guarantees privacy and security.
Developed by Kape Technologies, this service has over 3300 servers in 46 countries, allowing you a whole world of fake locations to choose from.
More so, your connection will also become encrypted, and not even your ISP will know what you are doing.
Of course, one cannot torrent if their bandwidth becomes limited, but that isn’t the case with PIA, since a subscription gives you unlimited bandwidth, allowing you to download at almost full speed.
Here are some of the perks of using Private Internet Access:
You are provided with a secure VPN account, even from your ISP
It uses PPTP, OpenVPN, and L2TP/IPSec technology
You gain multiple VPN gateways
3300 servers in 46 countries
SOCKS5 Proxy Included
Encrypted connection
P2P support
Private Internet Access
Keep your browsing habits private with this amazing VPN that has P2P tools and the highest speed.
This VPN scores highly when it comes to security and speeds, so it’s a great VPN for torrenting.
Owned by Tefincom & Co., S.A., its features include double data protection, over 4500 servers in its network in 62 server locations, plus support for up to six devices.
Its performance is good, but even better is its Double VPN feature that passes your data through two separate servers for added security.
Additionally, it has kill switch, steady download speeds, a zero log policy, and is reasonably priced. Besides being good for torrenting, it also works with streaming services like Netflix, Hulu, Amazon, and Player.
NordVPN
Try NordVPN if you want peace of mind while using BitTorrent on your PC.
Like the other VPNs mentioned in this guide, CyberGhost also includes a P2P download profile making it easy to set up.
Its features include more than 3000 servers, server locations in over 60 countries, fast speeds, up to 7 simultaneous connections, and no bandwidth limits.
CyberGhost also offers security features such as strong encryption, and a tight logging policy, all at an affordable price.
It has efficient Wi-Fi Protection capable of hiding your entire browsing activity. Also, all your data, including personal information such as passwords, is protected from hackers.
The 256-bit encryption technology secures you online and protects your privacy, even if your device is connected to the internet via a public Wi-Fi.
CyberGhost
Afraid your VPN might leak data while using BitTorrent? Why not try this VPN instead?
This VPN offers excellent download speeds, a no-logs policy, and a server network of over 1000 servers in more than 60 locations.
Owned by StackPath, LLC, it also provides more than 40,000 IP addresses you can use while torrenting to hide your real one and supports up to 5 devices.
IPVanish VPN offers unlimited P2P traffic and its client works well across different platforms, though for Windows, it may have network issues.
For security, IPVanish VPN offers strong encryption through its protocols, and kill switch for a truly private and secure experience.
IPVanish
Is BitTorrent not working with your current VPN? Try this practical choice.
This VPN offers P2P sharing so it allows torrenting and at an affordable price, with server locations in 60 countries, but a low number of servers at 100 in its entire network.
It provides for simultaneous connections on up to 6 devices and supports all major platforms.
Features include a no-logging policy, firewall-based system kill switch, application-level kill switch so you can leave torrents downloading over time, DNS leak protection, and helpful customer service to back it up.
The downside is it doesn’t provide stealth technology for torrenting outside China.
PrivateVPN
Check out Private VPN if you want unmatched privacy protection while using BitTorrent
This VPN has servers in more than 40 locations across the world and supports up to 5 devices simultaneously on a single connection.
Owned by eVenture Ltd., it boasts of being the world’s fastest VPN, as it has impressive download speeds and performance levels, besides being well designed and easy to use.
Features include impressive download speeds, a strict no-logging policy, VPN protocols, and a 2GB per month free plan so you can test run it before committing to the payment plans offered.
Hide.me VPN
Looking for a sturdy VPN that works great with BitTorrent? Check out Hide.me
If you want to move your GOG games from the current location to another hard drive, you just found the perfect guide.
This situation usually occurs when you have installed your beloved GOG games to a hard drive on your PC, and you’re either running out of space, or you want to perform a complete migration of the games to another hard drive for safe-keeping.
Please read on to find out what are the best steps to take depending on your specific situation.
How can I move a GOG game to another drive?
The exact steps required in order for you to be able to perform this task will vary depending on the mode in which you installed your GOG games.
The difference in these situations will be caused by the exact way in which you installed the games. You could have chosen to install the games by running the installer files normally, or by using a GOG installer like Galaxy.
In this guide we will discuss all the possible options, and what you can do about them.
1. If you installed the game via GOG Galaxy
1. Locate the desktop shortcut of the game you want to transfer, right-click on the game and choose Properties from the list of options, then select Open File Location.
2. Right-click the folder that contains your games and selectCopy.
3. Navigate to the location of your other hard drive and right-click on any empty space, then select New > Folder.
4. Right-click an empty space inside the newly created folder and selectPaste.
5. OpenGalaxy on your PC.
6. Locate the game in the library, click on it and select Manage installation > Uninstall.
7. Click theGOG COM logofound at the top left of your screen, then press on Settings.
8. Select the Scan folders for GOG Gamesoption.
9. Click on Select Folder and browse your PC for the folder you previously created.
10. Once this process is completed,Galaxywill also repair the game. If the repair process doesn’t start automatically, you can start it yourself by clicking on More -> Manage Installation -> verify/repair.
11. Launch the game and enjoy it from your new hard drive location.
Gamers who utilized the GOG Galaxy installer for their games can use it to move their games from one drive to another via the Import feature.
If you’re using Galaxy, the save game file is usually backed up in the cloud storage. Nonetheless, it is recommended that you back them up before trying out this method.
2. If you installed your games with the site installer
In the case that you don’t use a GOG game installer, there are two possible options:
you have the game installers downloaded already
you don’t have the game installers downloaded (you will need to re-download them)
If you find yourself in the first situation mentioned above, then you can simply follow steps 1 to 4 from the first method.
Note: It is worth mentioning that some errors may occur by performing the move in this style, as the Scan and Import option will not be available in order to repair registry entries, etc.
If this method doesn’t make your game runs properly, then you will have to uninstall, and then re-install them to the desired location.
In today’s how-to guide we talked about the best solutions to apply in the situation that you want to move your GOG-installed games to a new hard drive.
Please feel free to let us know if this guide has proven useful to you. You can do so by using the comment section found in this article.
Whether you’re a gamer or need to save content for later use, clipping software is a necessity. Clipping software makes it easy to preserve memorable content to be shared on social media platforms or for personal use. Here are our picks for the 10 best PC clipping software for your videos.
Clipping software is probably the most popular among the gaming and streaming community, but it is also widely used in eLearning platforms and for business purposes.
Some clipping software can be heavy on computer resources, especially if used to record gaming. For recommendations on the best game recording software for low-end PCs, we have a guide for that.
What is clipping software?
Clipping software allows users to clip and save content easily for social media posts or videos. These platforms provide a central area for users to save content they want to use later all in one place.
Users can clip images, text, articles, videos, and more to use for sharing on social media. It makes editing significantly easier because users don’t need to go through hours of footage for a specific moment.
Adobe’s Captivate is an interactive video creator that allows users to record their screens to be used for eLearning, business, or gaming purposes. Captivate is fully compatible with Adobe Creative Cloud. This software is great for teachers to create engaging videos by adding buttons to their videos.
Captivate is also great for professional use with high-definition screencast for presentations or product demos. Users can also easily publish to YouTube without needing to convert or re-size content.
Key features of Captivate:
Adobe Creative Cloud integration
Create interactive videos
Easy upload to YouTube
Adobe Captivate
Record presentations, gaming moments or everything you want from your screen.
Bandicam is one of the most popular high-resolution game recording software. The software is able to capture high-definition clips without affecting performance because it uses hardware acceleration. Bandicam is capable of 4K UHD, and 480 FPS recordings without taking up a ton of storage space.
Users can upload footage directly to YouTube without needing further encoding. Bandicam also supports various audio devices simultaneously and users can save them as separate WAV files.
Key features of Bandicam:
Uses hardware acceleration
Can support 4K UHD, 480 FPS recordings
Upload directly to YouTube
Bandicam
Capture everything from your gaming session with the best gaming recording software.
This clipping software duals as a screen recorder and video editor. Wondershare DemoCreator supports screen, audio, and webcam recording and has tools that allow users to annotate content. The video editing features include a green screen, transitions, and a library of video effects.
DemoCreator is extremely versatile and perfect not just for gamers, but also educators, freelancers, and more. The platform offers cloud backup and the ability to work and collaborate with others. However, DemoCreator operates on a paid subscription basis but does offer a free trial period.
Key features of DemoCreator:
Screen recorder and video editor
Supports screen, audio, and webcam recording
Cloud backup
WonderShare DemoCreator
Edit with ease all the moments with amazing effects and features.
Icecream Screen Recorder is a free and simple clipping software that allows users to record games, tutorials, webinars, live streams, video calls, and more. Users can record their entire screen or a select area and users can add annotations.
Users can also add their own logo as a watermark and easily share content to YouTube, Dropbox, Google Drive, and more. Icecream is free and easy to use, making it perfect for experts and beginners.
Key features of Icecream:
Free and easy to use
Annotation capabilities
Watermark support
Icecream Screen Recorder
Simple to use and intuitive interface for easy screen recording on demand.
EaseUS RecExperts is another versatile clipping software that is designed for gamers, teachers, businesses, and more. This clipping software offers hardware acceleration, so it doesn’t hinder gaming performance and is great for low-end PCs.
The simple-to-use interface allows users to get the hang of things quickly and set hotkeys to make screen clipping fast and easy. Users can also preview and edit footage using EaseUS RecExperts.
Key features of EaseUS:
Hardware acceleration
Easy-to-use interface
Built-in editor
EaseUS RecExperts
Professional clipping of all your screen recordings with a few clicks.
Action! is one of the best clipping software for gaming because of its high-performing FPS without high consumption of computer resources. This recorder offers some of the smoothest recording of up to 120 FPS with audio and webcam support.
Users can record their screen and have it directly converted to mp4 for easy uploading to YouTube and Facebook. However, Action! is a paid service that offers a 30-day free trial.
Medal is another great option for gamers and has a simple, user-friendly interface. The desktop application offers a hub for users to keep all of their clips and recordings in one place. There is also an app for iOS and Android so users can capture epic game moments on their mobile devices.
Medal also offers a unique AI feature that will automatically track and record key moments while gaming so users aren’t distracted from the gameplay, making it one of the best clipping software.
NVIDIA’s ShadowPlay allows users to clip video in 4K at 60 FPS. Users can set a hotkey to quickly save the last 30 seconds of gameplay to share on YouTube or Facebook.
ShadowPlay is hardware accelerated, meaning it does not have a major impact on gaming performance while running. The software also has the ability to broadcast gaming easily to Twitch, YouTube Live, and more.
This clipping software is popular amongst gamers because of its versatility. OBS offers a lot of options and has little impact on PC performance making it perfect for gamers and streamers.
With OBS users can screen record their content and even add watermarks to the footage. This software offers tons of features and functions for users to play around with including an intuitive audio mixer. Users can also utilize native plugins to take editing and screen recording to the next level.
However, because OBS Studio offers so many features, it may take some time for new users to get the hang of it, so there is a learning curve to consider.
Xbox Game Bar is an app that comes preinstalled on most devices that Windows 10 and later. This app allows users to easily clip games for sharing. Users can capture clips for up to two hours. Xbox Game Bar is free and easy to use and provides in-app chatting with Xbox users while gaming.
However, because it is an extremely simple clipping software, it lacks all the bells and whistles of other platforms. But for those that are only looking for something simple, quick, and easy, then this app is a perfect choice.
Users can use the built-in Xbox Game Bar if using a Windows 10 or newer or use one of the clipping software mentioned above. For more recommendations on the best screen recorder software for Windows 10 and 11, we have suggestions for that as well.
Why does FPS drop while recording?
Some clipping software uses more CPU than others and can thus lead to FPS drop when recording games that are heavy on PC resources. Most screen recording software allows users to adjust the amount of CPU consumed for smoother framerates.
We hope you enjoyed our picks for the best clipping software for PC. Let us know in the comments which clipping software you prefer to use.
A lot of new devices, including Sony Smart TVs, come with the Netflix application pre-installed. This makes the process of setting up and using the Netflix app a lot easier, but there are still some steps that you have to follow.
If you want to start watching your favorite TV shows and movies as soon as possible on your Sony Smart TV, follow the simple steps below.
Can I get Netflix on my Sony Smart TV?
The first thing that you should know is that some Sony Smart TVs are not compatible with Netflix. On compatible devices, usually, there will be a certification process.
This means that you’ll have to officially register your Sony Smart TV and your Netflix account.
How can I register my Sony Smart TV?
Make sure that your TV is connected to the Internet and has the latest firmware update installed.
Press the Home button on your remote control.
Now go to Network and look for the Activate Enhanced Features option. Select it to get your registration code.
Write down the registration code as you will need it later.
Open an Internet browser and go to Sony Entertainment Network (former Sony My Essentials).
If you already have an account, log in. If you don’t, create a new one.
Follow the on-screen steps to register, select your Sony Smart TV, and then enter the registration code to link it to your account.
After registering your TV, you’ll have three options to connect your TV to Netflix, as you will see from the guides below.
How do I connect my Sony Smart TV to Netflix?
Depending on your model number, there are different ways to set up and connect your Sony Smart TV with Netflix.
1. Use the Netflix button on your remote control
1. Press theNetflix button on your TV remote.
2. If you’re already a member of Netflix, selectSign In. If you’re not, set up a membership on Netflix’s official website and then try to access it on your TV.
3. Now enter your Netflixemail addressandpassword.
4. After that, select Sign In or Continue.
5. Your Sony Smart TV is now connected to your Netflix account and you can watch your favorite shows.
If you are using a newer Sony Smart TV model, chances are that it has Netflix pre-installed on it. Moreover, the remote you received while buying the TV has a Netflix button, that works as a shortcut for the app.
Using this Netflix button, you can easily access the Netflix application and connect to your account with your username and password.
Press left or right on your remote control until you find the Video option and select it.
Now find Netflix and select it.
If you see a message that tells you to register your device with Sony, follow the steps from the registration solution above.
If you’re already a member of Netflix, select Sign In. If you’re not, set up a membership on Netflix’s official website and then try to access it on your TV.
Use the code that appears on Netflix’s activation page (Netflix.com/activate).
Now the Sony Smart TV is connected to your Netflix account and you can start using it.
3. Use the wireless keyboard remote
If your TV has a wireless keyboard remote, press the Home button.
Now choose All Apps.
Find the Netflix app and press OK.
If you’re already a member of Netflix, select Sign In. If you’re not, set up a membership on Netflix’s official website and then try to access it on your TV.
Enter your credentials and then select Continue.
Now your device will connect to the Netflix account.
After you register your Smart TV with Sony and connect it with your Netflix account, you should be able to start using the app and watch your favorite movies without any issues.
Keep in mind that you’ll need a fast Internet connection to stream videos on your TV, so we recommend to connect your TV directly to the Internet via an Ethernet cable.
This way you can avoid any possible interferences and slow speeds from the wireless connection.
If you have any other questions, feel free to leave them in the comments section below.
On the older versions of Windows, ejecting the USB drive from the Safely Remove Hardware shortcut was usually easy to find.
Well, since Microsoft introduced us to Windows 10, 8, and Windows 8.1 operating systems, a lot of people seem to be having problems finding this icon and using it properly.
We will show you exactly how to properly eject the USB drive in a few short steps using the guide below.
Before you eject USB drives from your PC
Making sure your folders with music, films, and other kinds of data are saved properly on your storage device (USB) is really an important thing to do before removing the USB
So, if you are trying to properly remove the USB hardware on Windows 10, and you have trouble doing so, you will see exactly how to access this feature by reading the short tutorial below.
How can I eject USB from Windows 10?
1. Create a Safely Remove Hardware shortcut
1. Right click on a free space on the desktop and select New from the tab that appears.
2. Now we need to select the Shortcut option by left clicking on it.
3. Set the location of the shortcut to be the following: RunDll32.exe shell32.dll,Control_RunDLL hotplug.dll
4. Click Next.
5. Name the shortcut to Remove Hardware or any other name you find more appropriate, so that you can easily recognize it.
6. Click the Finish button on the lower side of the window.
7. Now that you have the shortcut on the desktop, before you unplug the USB, you need to double click the Remove Hardware icon and select the USB you want to remove by left clicking on it.
8. Select Stop on the lower side of the Safely Remove hardware window you opened. Wait a little bit.
9. Windows will notify you with a message when it will be safe to remove the USB hardware from your computer.
In order to use a shortcut to safely eject hardware on your Windows 10, you must first create it. You can easily do so directly from your PC’s desktop.
You can manually configure the shortcut’s location and name, so that it performs the desired action: ejecting USBs.
First, make sure that your USBhardware is not running any operation (copying or syncing) and then enable the Safely Remove Hardware icon from Taskbar settings:
To enable the Safely Remove Hardware icon > right-click on the taskbar > select Taskbar settings
Scroll down to Notification Area > Select which icons appear on the taskbar
Go to Windows Explorer: Safely Remove Hardware and Eject Media > turn it on.
Of course, if the Safely Remote Hardware icon is already available on your taskbar, you can quickly eject your USBhardware by selecting the icon, then select the hardware you want to remove and confirm your choice.
That is all, this is how you can safely remove your USBstorage device on Windows 10. If you have any other thoughts don t hesitate to write below.
ISP (Internet Service Provider) is a company that gives people, and companies access to the internet and other associated services.
IPTV (Internet Protocol television) is a service that offers television programming and other visual material using the Transmission Control Protocol/Internet Protocol (TCP/IP) suite instead of cable TV, broadcast TV, or satellite signals.
Generally, ISP blocking IPTV is a common occurrence, but there are ways to stop it from happening.
Why has my IPTV stopped working?
One of the reasons is installation and updating issues. Some IPTV software tools are illegitimate and may cause problems with your device during installation. Furthermore, updates are required if you have the proper IPTV. Your app probably won’t launch if you don’t update it.
Crashing issues can also make IPTV stop working. Crashing may be caused by excessive traffic and viewing IPTV for an excessive amount of time.
Not forgetting, internet provider blocking IPTV is a reason your IPTV is not working. Internet providers have the authority to stop some services or terminate your account if you violate their terms of service, which may forbid using IPTV.
How can I tell if my ISP is blocking IPTV?
For many, ISP blocking IPTV is a problem that is not easily noticed. To tell if ISP is blocking IPTV, follow the listed steps.
Click the Windows Start button and then select Settings.
Select Network & Internet from the Settings menu.
Click on VPN on the left-hand side menu and add a VPN connection.
navigate to the website using its IP address rather than its URL. You should be able to unblock the site if your ISP just restricted the URL or used DNS filtering, in which case you will be aware that your ISP is restricting your access to the site.
Use the ping command (“ping [site name]”) in the Command Prompt to determine a website’s IP address.
If the page loads after entering the website’s address into your browser, your ISP is limiting access to the site for you.
If the page won’t load, the problem lies with the website rather than your IP address.
How do I stop ISP from blocking IPTV?
1. Use a VPN
A great choice in this context is ExpressVPN. It lets you watch IPTV in a secure and private way, which means your internet provider cannot block services or lower your connection speeds based on content.
Moreover, all your internet traffic, including your IPTV streams, proceeds through an encrypted VPN tunnel, and not a single source can see into that tunnel. Thus, no one can see which websites you are browsing or which services you are using.
➡️ Here is a short guide you can follow:
Go to ExpressVPNwebsite and click on the Download button.
Then, double-click and install ExpressVPN on your PC.
After you run the application, click on Choose location.
In Recommended tab, select a country that allows IPTV.
Enjoy IPTV without any blocking.
ExpressVPN is a much easier, safer, and faster option for this process, but if you prefer to do this manually, you can always choose and use the manual alternative as well.
ExpressVPN
A VPN with high speed that is ultra-secure and easy to use thanks to its various features.
Click the Windows Start icon and then select Settings.
Select Network & Internet on the Settings menu.
On the left-hand side, select VPN.
Click Add a VPN connection and then provide the correct login details.
Click Save to add the VPN connection.
Connect by choosing the connection from the VPN Settings screen.
By using a VPN service, you can browse the internet more safely. It allows you to stay anonymous, which means you can avoid possible threats from getting your data and communications by providing a fake IP location.
2. Use an intelligent DNS
Log into your router Admin Panel. You can find this information in the manual for your modem or router.
Enter the admin username and password for your router.
Locate the DNS settings and modify them to use the Smart DNS proxy DNS IPs.
Click on the Windows Start icon and type Comand Prompt.
Select Command Prompt and launch it.
Type ping, followed by a space, your website’s address (including the “www.” component), and then add with a space -t. For example, ping www.mywebsite.com -t.
4. Use a free proxy
Press the Windows + I key combination to launch Windows Settings.
Select Network & Internet on the Settings menu.
On the left-hand side menu, click on Proxy.
Ensure that the toggle for Automatically detect settings is enabled.
Turn on the Use a Proxy Server toggle under the Manual Setup section. Windows will check to see if your network already has an automated proxy server established and ready to go. It will identify it for you and urge you to follow its recommendations if it does.
Assuming Windows discovers a PAC file, turn on the Use Setup Script switch under the Automatic Proxy Setup.
Click Save after entering the script’s address.
5. Use Tor
Obtain a VPN and install Tor by downloading it from Tor’s official download site. You might choose to join right away or configure it beforehand.
Before you launch Tor, connect to your VPN to provide the best level of internet security.
How do I use VPN with IPTV?
You’ll be prepared to go if you follow these simple instructions.
Sign up with a reputable VPN; you can choose one of the best Windows 10 VPNs.
Download and install the VPN app on your device – we are using Proton VPN.
Open the program, then establish a connection to a new server.
Open your preferred IPTV and then start watching anything you want.
Most ISPs are notorious for blocking IPTV, which affects many users. Fortunately, you can solve this problem using one of the abovementioned solutions.
If you encounter any issues, feel free to share them in the comment section below. In addition, let us know about any other solutions that are not shared in this article.
Usually, people use VPNs to give their online privacy a much-needed boost. Maybe even secure their default Internet connection against snooping individuals who might be eager to access some data they’re not supposed to.
There are several scenarios when personal information leaks out of your devices on a daily basis. Even liking your best friend’s photo on social networks might help build your online profile.
And each opportunity has someone (or something) ready to grab it.
Nowadays, numerous websites use tracking methods to collect apparently anonymous data on you for various purposes.
As it’s been proved several times so far, some of the collected information is sold to various third parties with an agenda.
Other times, user-collected data is simply used for targeted ads. And we know how annoying that can be.
For instance, chatting with your friends about some piece of furniture, only to discover ads on your frequently-visited websites urging you to buy that specific item. And it only takes moments for the ads to find you.
Is a VPN the same as an adblocker?
No, it is not. Using a VPN implies other processes compared with ad-blockers, meaning that it hides your IP address from online parties.
The ad-blocker on the other hand can protect you from online ads and tracking scripts from your accessed websites.
By default, VPN software can’t block digital ads like an adblocker because it doesn’t serve the same purpose. However, many VPNs have ad-blocker features included.
How can I block advertisements?
You can turn to ad blockers, of course. These tools detect ad servers and prevent them from displaying content on your device, whether on a website you visit or within an app you’re using.
The only downside is that many creators design their websites around ad panels. Or modify their designs so that ad panels are seamlessly (or so they think) integrated within the pages.
Using an ad blocker will either hide these panels altogether, which could make the website’s layout look awful, or simply blank their content.
In the latter scenario, you’ll see large chunks of blankness on websites or within apps.
The great news is that you won’t see as many ads. The even greater news is that you won’t risk accessing some malware-ridden websites by accidentally clicking ads.
You know exactly the type. You scroll down on a click-bait article, hoping to find what you’re looking for, when out of the blue a wild ad slides or pops under your cursor or finger.
And then the inevitable happens, you click it, and all hell breaks loose. You can’t go back to the original article, as more and more redirects unfold right before your eyes. Ad blockers can make sure that this is just a bad dream.
? Will ads ever go away?
It is stated that traditional paid-placement marketing it’s already in the past. Even though you will still see ads online, this strategy is not that efficient anymore.
? Are ad blockers illegal?
No, they aren’t. You can stop unpleasant ads using ad-blocker without any legal issues. It’s possible to install them as extensions and use them accordingly.
? Does a VPN block ads?
We’ve praised VPNs as these perfect privacy-protection machines, but can they block ads?
Unfortunately, it’s not one of their standard features, so chances are you won’t find ad-blocking capabilities on just about any VPN.
The good news is that most, if not all VPNs have tracker-removal abilities. So even if your VPN lacks an ad-blocker, chances are you won’t be targeted by those spooky ads that seem to know everything about you.
The even better news is that some VPNs have built-in ad-removal capabilities.
? Does a VPN block Twitch ads?
Affirmative, you can stop different ad types on Twitch using a VPN with ad-blocking functionality. It’s possible to even block pre-roll or mid-roll ads from Twitch.
? Does a VPN stop targeted ads?
Yes, it does. It’s possible to block targeted ads from tracking websites using technology that acts like a proxy and hides the Internet traffic from your ISP.
? Does VPN block Youtube ads?
In theory, no. Your VPN can’t block YouTube ads by itself in case it doesn’t have a specific feature. There are premium tools that can block them from any website.
Which VPN blocks ads?
We’ve compiled a list of the best VPNs that can easily remove ads. Note that these VPNs may be different in terms of price, features, number of servers, speed, security, and logging.
However, they all do an excellent job of preventing ads from spawning on your screen.
So you can pick the best VPN with AdBlock and use it to navigate freely without seeing aggressive ads everywhere.
If you need a good-for-everything service, we recommend ExpressVPN. It passed all of our tests with flying colors, whether it was speed or security we have tested.
ExpressVPN
If you’re looking for a VPN that can block ad trackers, this VPN covers your needs.
There are a few options to stop YouTube ads using security methods that help you navigate clean:
A VPN with AdBlock
VPN Browser extensions
Browsers that have ad-blocker integrations
Ad-blocker installed as extensions.
Generally, these are the main solutions you can utilize to stop ads on YouTube and enjoy content without interruptions.
Can VPN remove ads? Some can, some can’t
To wrap it up nicely, it’s possible to find VPN services that can also block ads. You have the living proof just a few rows above.
There are several VPNs that, aside from their privacy protection and connection security features also offer ad-blocking capabilities.
However, While most of them have embedded the ad-blocker within the main service, some of them make use of proprietary browser extensions to let you remove ads from your online environment.
If you’re having Borderlands 3 lag in multiplayer mode, use a VPN to quickly fix this issue and improve your gaming experience.
Borderlands 3 (BL3) is a first-person shooter that you can play on Steam, Stadia, Windows, Mac, PlayStation 4, and Xbox One. Although it has a single-player edition, BL3 shines in the multiplayer version, where you can team up with 3 other players in co-op mode.
Unfortunately, many users can’t fully enjoy the game with their peers due to Borderlands 3 lag. If you’re one of them, just use a VPN to reduce your ping.
It’s your best chance to eliminate BL3 lag spikes and high ping issues. Besides, you can also fix packet loss with a VPN.
Why is my Borderlands 3 laggy?
Borderlands can be laggy and could be caused by a network or frame rate (FPS) issue. If you experience Borderlands 3 stuttering and lag in both online and offline modes, the frame rate issue is most likely to blame, and you should take steps to perform a low FPS PC fix to get back on track.
If you only encounter the problem when playing the game online, your network should be to blame. In this case, you may encounter the issues listed below, which we resolved with the VPNs on this list.
Borderlands 3 lag when playing with friends
Borderlands 3 co op lag
Borderlands 3 lag multiplayer PC, PS4, Xbox one
Borderlands 3 high ping, rubberbanding
Borderlands 3 server lag
Borderlands 3 internet lag
Borderlands 3 network lag
Borderlands 3 lan lag
Borderlands 3 crossplay lag
Borderlands the pre-sequel multiplayer lag
Borderlands 3 suddenly lagging
The easiest way to stop Borderlands 3 from lagging is by using a VPN to reduce your ping. The following list presents the best VPNs from the industry that are known for fixing lang and ping.
Private Internet Access (PIA) is the best Borderlands 3 VPN for reducing lag and high ping. It comes equipped with numerous VPN servers and can help you host game servers, thanks to the fact that it has support for native port forwarding.
This VPN solution is operated by Kape Technologies. You can choose between static and dynamic IP addresses, use exclusive DNS servers to boost your Internet connection speed, as well as easily fix network congestion.
You should also know PIA is among the few VPNs that offer 24/7 live chat support. This way, you can ask for technical assistance whenever you have trouble attempting to redirect your network traffic through VPN and fix Borderlands 3 co-op lag.
More about PIA:
+3,300 VPN servers in 49 countries
Compatible with Windows, Mac, PS4, Xbox One
No-logging policy
Easily handles Borderlands 3 multiplayer lag
30-day money-back guarantee (no free trial)
Private Internet Access
Whenever Borderlands 3 starts to lag on your PC, PS4, or Xbox One, turn to PIA for help.
An alternative way to fix Borderlands 3 lag on Steam, PS4, Xbox One, and PC is by turning to NordVPN. Operated by Tefincom & Co.
This is a superior VPN solution that improves your Internet connection speed during gameplay. It can also fix Wi-Fi packet loss.
What makes NordVPN a special Borderlands 3 VPN app is that it can hide the fact that you’re using a VPN. This way, you can get around any VPN blocks on your computer or console. And you can easily turn off the VPN reuse your normal Internet connection.
NordVPN supports custom DNS servers and an integrated kill switch. It secures your browsing sessions using CyberSec, an exclusive malware blocker. As far as encryption is concerned, it uses the OpenVPN protocol.
More about NordVPN:
+5,100 VPN servers in 59 countries
Set it up on Windows, Mac, PS4, Xbox One
Strict no-logging policy
Effortlessly fixes Borderlands 3 multiplayer lag
30-day money-back guarantee (no free trial)
NordVPN
Reduce BL3 lag and high ping by connecting to the high-speed servers of this powerful VPN tool.
ExpressVPN is one of the world’s largest VPN services, so we will explain how well that is on the cards for Borderlands 3. When you connect to ExpressVPN, you get unlimited bandwidth at high speeds.
With 160 locations in 94 countries to choose from. Avoid DDoS attacks by hiding your IP address, and benefit from the split-tunneling feature if you disable a VPN or do other things.
ExpressVPN makes it simple to stop ATT throttling and ensure that you have the most bandwidth available. In Borderlands, you can use ExpressVPN to access pre-ordered games a few hours earlier in some cases, while doing so may result in censorship if not available in your region.
More about ExpressVPN:
Speeds ideal for gaming and streaming
Servers in over 94 countries
Compatible with consoles and routers
Excellent customer service
30-day money-back guarantee
Packets with high-level encryption
There are no bandwidth or data limits to worry about, and ExpressVPN can even bypass ISP throttling, which could otherwise interfere with your gameplay in Borderlands 3.
ExpressVPN
If you want the best Borderlands 3 performance, then just use the UDP Lightway protocol.
Surfshark premium subscription is not a ten-for-one-penny deal. Despite the plethora of features available, their price offering remains the cheapest in the VPN market.
To begin, Surfshark’s extensive server coverage is unmatched. The population of Surfshark VPN servers cannot be compared to NordVPN’s army of 5,500+ servers.
Surfshark’s content, on the other hand, remains global and extensive, with 1,700 servers in over 60 countries.
CleanWeb, a Surfshark feature that protects subscribers from phishing and malware attacks, is another exciting feature.
Furthermore, the Whitelist feature works similarly to split tunneling, except that it only allows pre-selected apps and websites to bypass the VPN.
More about Surfshark VPN:
No footprints
Allows torrenting
256-bit AES encryption
Full DDoS protection and prevention
Surfshark’s unlimited simultaneous connections are one of its main selling points! This means there is no limit to the number of people or devices that can connect to the service, and you won’t have to log in and out every time you switch devices.
Surfshark
Play Borderlands 3 gameplay with your buddies without having any lag with this VPN fast connection.
Another way to deal with BL3 multiplayer lag is by using CyberGhost VPN. Also a product of Kape Technologies, this VPN tool is one of the fastest on this list. It’s also the only one here that you can test for free (no credit card required). Plus, it can evade geoblocks.
CyberGhost VPN has a huge network of servers to help you fix BL3 online lag. You can use it to minimize jitter, set up split tunneling, activate an emergency kill switch, switch to private DNS servers, and enable DNS leak protection.
What makes CyberGhost VPN an ideal Borderlands 3 VPN are its high-speed VPN servers and premium security features that keep you safe from DDoS attacks. Also, you can easily fix Xbox packet loss.
More about CyberGhost VPN:
+6,500 VPN servers in 89 countries
Works with Windows, Mac, PS4, Xbox One
No data logs
Quickly fixes Borderlands 3 laggy co-op issues
Up to 45-day money-back guarantee (1-day free trial)
Cyberghost VPN
If Borderlands 3 lags after an update, turn to this reliable VPN to solve this matter in a few steps.
The Xbox One and PlayStation 4 versions are still not optimized, and Borderlands 3 keep freezing. Increasing the settings from medium to high yields diminishing returns.
For most mainstream cards, medium settings at 1080p are ideal; additionally, the game prefers more cores and threads, preferably a quad-core. It doesn’t run well, but the frame losses aren’t worth the higher settings.
To stop frame drops in Borderlands 3, adjust your graphics settings, update your drivers, and try running the game through a VPN to reduce network congestion and game server overload.
The first thing to know is that Borderlands 3 relies far more on GPU power than CPU power, especially at higher settings and resolutions. The second important aspect is that if you only need 60 frames per second, almost any recent CPU should suffice.
Whenever you have Borderlands 3 lag issues that prevent you from enjoying the game with your friends, just use one of the three BL3 VPN tools we described above to solve your problems fast and easily.
In a nutshell, a VPN may help you resolve your lag problem in some cases. So, which VPN should you probably go with? Nevertheless don’t use a free VPN service.
As the saying goes, If you don’t pay for it, you become the product, using free VPNs can have unintended consequences, such as information leakage.
Join our Borderlands 3 Troubleshooting section to fix other issues related to this game. If you typically lag or lose network packets in games, visit our Gaming VPN Hub.
A VPN is the ideal choice, especially since you can use it to not only fix lag but also packet loss. And, if you can’t decide which VPN is the best for gaming, we suggest going with ExpressVPN.
Brawlhalla is a fighting game that you can play online for free. It’s available on Windows PC, OS X, PlayStation 4, Xbox One, and Nintendo Switch.
There are multiple game modes in Brawlhalla, but the most popular one is to fight other players until they’re knocked off the stage.
The game runs servers in several regions, including the United States, Europe, Southeast Asia, Australia, and Brazil. Unfortunately, a lot of users have high ping when playing Brawlhalla, which prevents them from fully taking advantage of the game.
In this case, you can use a VPN to improve ping, reduce lag and delay, and ultimately enhance your gaming experience. Even the team behind Brawlhalla recommends using a VPN to overcome connection speed problems.
Why is Brawlhalla so laggy?
Aside from obvious Brawlhalla connection issues with the game, the problem could also be caused by an unstable or slow Internet connection, thus resulting in Brawlhalla servers lagging.
That is why it is critical that we invested enough time in researching potential solutions to fix these. This way, we learned what caused Brawlhalla lag ps4, and Brawlhalla lag switch to occur.
That’s why we are here, to show you the test results when using a VPN to fix Brawhalla ping, lag, and connection issues.
What is a good ping for Brawlhalla?
Pings of less than 100ms are ideal for online games such as Brawhalla. Pings greater than 150ms, on the other hand, will cause lag.
Those are the links for every region to test your Brawhalla high ping issue:
Perform a 100-ping test to that address and log the results (replace <server address> with the address you determined in the above section).
Go to Start Menu.
Type in cmd.
Press Enter.
Type: ping -n 100 <server address>
When finished, right-click on the window title bar.
Choose Edit and Select All
Press Enter to copy it.
Right-click in your email and choose Paste to paste it into your email.
How do I fix lag on Brawlhalla mobile?
Brawlhalla mobile lag can be avoided if you switch your phone settings to Performance Mode, or install a VPN on your phone that will employ the kill switch mode in order to redirect more traffic to the game.
Why do I have 3 bars in Brawlhalla?
Three bars (yellow) indicate an input delay of between 4 and 7 frames. Your latency is detected by those bars. You may experience input delay if some bars drop.
Even when you play the game and still get Brawlhalla lag with 4 bars, the problem may be when using a controller instead of a mouse or keyboard. If you want to use a controller when playing on PS4 or Xbox, we recommend using a wired controller instead of a wireless one.
We end our rundown with a VPN loved by many due to its exceptional speed rates and great privacy features.
NordVPN is a great candidate because it has over 5 000 worldwide servers and imposes no restriction on traffic. You can browse anonymously and use up as much bandwidth as you need.
Not only that, but this service combines multiple advanced privacy features including private DNS on every server, virtual IP address, and obfuscated servers.
With all these powerful features your identity and browsing data will stay completely anonymous and not even your ISP will be able to detect your activity.
This means that the risk of getting any restrictions on your traffic is extremely low. Your ISP won’t detect your traffic data, so it won’t be able to know how much bandwidth you actually use.
What else you should know about NordVPN:
Strict no logs policy
Anti-malware protection
Can be used on up to 6 devices
Split tunneling
DoubleVPN
NordVPN is available under several subscription plans, with the 2-year plan offering the best deal when it comes to monthly charges.
NordVPN
Enjoy exceptional speed rates and complete anonymity with this advanced VPN service.
ExpressVPN is fast, with over 3,000 servers in 94 countries. Data and bandwidth are both unlimited. ExpressVPN is easily undetected, allowing you to bypass ISP throttling, and it even works in countries with strict censorship, such as China.
This VPN prioritizes security. With 256-bit encryption, perfect forward secrecy, a kill switch in the desktop apps, and DNS, WebRTC, and IPv6 leak protection, you can rest assured that your data is safe.
ExpressVPN keeps very few metadata logs and no data that can be used to identify you. Desktop clients for Windows, macOS, and Linux are available, as are mobile apps for iOS and Android.
What else you should know about ExpressVPN:
Kill switch and split tunneling
Powerful 256-AES encrypted connections
Native obfuscation servers
Bypasses ISP throttling without notice
Available on all devices
30-day money-back guarantee
If you want to protect every internet-connected device in your home, including those that don’t have native apps, you can configure the VPN with specific routers. ExpressvPN supports up to five concurrent connections.
ExpressVPN is a fantastic way to have a truly global gaming experience. ExpressVPN is the ideal way to increase your gaming time, whether you want to legally access more content online or simply reduce lag and bandwidth restrictions.
ExpressVPN
Decrease lag spikes and use split tunneling to allocate more bandwidth for Brawhalla.
If you’re interested in the fastest VPN app to help you reduce Brawlhalla ping, look no further than Private Internet Access (PIA).
Created by Kape Technologies, PIA has stable and speedy VPN server connections. And, if you need more speed, you can disable encryption.
PIA has thousands of servers in over 80 countries, including the regions supported by Brawlhalla game servers. You can use private DNS servers and encrypt your traffic with OpenVPN or WireGuard.
PIA can offer you a seamless online experience with the help of its built-in adblocker as well as its anti-tracking features.
The VPN is very easy to set up and includes plenty of customization options.
Private Internet Access lets you connect to up to 10 devices, including your router. You can find dedicated apps and guides on how to install and use the VPN on the device of your choice.
What else you should know about PIA:
Supports Windows PC, OS X, PlayStation 4, Xbox One, Nintendo Switch
Allows 10 simultaneous connections
No identifying logs
30-day money-back guarantee (no free trial)
Private Internet Access is a subscription-based VPN with multiple plans available. If you are not sure about its capabilities, you can try it out and, if not satisfied, you will get a refund in the first 30 days of your subscription.
Private Internet Access
Get Brawlhalla optimal ping with the help of this incredibly fast VPN solution.
Surfshar VPN for Brawhalla is the best gaming VPN for the money value. Surfshark, a provider known for its clean, modern apps and ability to circumvent blocks, provides a strong VPN and does not impose connection limits.
Surfshark’s security features are constantly being expanded. In addition to 256-bit encryption and perfect forward secrecy, all platforms include a kill switch, protection against DNS, IPv6, and WebRTC leaks, split tunneling, and automatic wifi protection. Your data is never logged by this provider.
What else you should know about Surfshark:
Internet kill switch
Whitelisting for apps
Ad-blocker
Geolocation spoofing for Android phones
256-bit AES Encryption
Unlimited simultaneous connections
Surfshark is much better suited if you want to stream Brawhalla rather than reduce lags and pings, thanks to its fast server connections.
Surfshark
Connect to blazing speeds servers and avoid DDoS attacks with this robust VPN provider.
CyberGhost VPN has an impressive network of servers that you can explore when trying to reduce Brawlhalla ping: more than 6,200 servers in 89 countries, which also include the game server areas. It’s a VPN solution developed by Kape Technologies.
CyberGhost VPN helps improve your gameplay by routing your DNS requests through proprietary DNS servers. It supports the OpenVPN protocol and also includes an ad and malware blocker.
Cyberghost has a strict no-logs policy. They do not keep any information regarding your browsing history, session duration, bandwidth usage, or IP address.
The service is built to provide high-speed rates and offers unlimited bandwidth. Not only will you be able to enjoy seamless Brawlhalla sessions, but you will be able to do it for as much time as you like.
The service uses 256-bit AES encryption along with secure protocols to ensure your data stays private. It also includes a secure killswitch that blocks all traffic in case the connection drops.
What else you should know about CyberGhost VPN:
Works with Windows PC, OS X, PlayStation 4, Xbox One, Nintendo Switch
Connect up to 7 devices at once
Zero traffic logs
45-day money-back guarantee (1-day free trial)
Cyberghost VPN is a subscription-based service, with a 3-year plan offering the best value. All plans include a 45-day money-back guarantee.
Cyberghost VPN
Eliminate all your Brawlhalla ping issues with the aid of this VPN app.
Brawlhalla is a colorful, fun, and action-packed game that you can play for free. However, it can be really annoying to keep losing fights because of high ping.
Using a VPN solution like the one we described above should fix this problem, though. If you can’t decide which one is better, we recommend going with NordVPN.