Sometimes, when creating tutorials, capturing gameplay footage, or making a presentation, you must record multiple screens on your Windows 11 computer.
This isn’t too hard to achieve, but it requires a bit of initial setup, and in today’s guide, we will show you how to do that.
Does Windows have a built-in screen recorder?
Windows has a Game Bar feature that works as a screen recorder. While this feature is useful, it offers limited functionality and can only record one screen at a time.
Launch the software, and click the + button from the Sources box to add a new source. Then, select Display Capture from the context menu.
On the next screen, name the source and click OK.
From the Display menu, choose the display you want to record. Click OK.
Repeat 3-4 steps to add additional display sources to add screens you want to record.
Locate the Settings button from the bottom right corner.
Choose the Output tab and select the preferred Recording Quality, Recording Format, Encoder, and more.
Calculate the total width of your monitors; now go to the Video tab, click the Base (Canvas) Resolution dropdown, and select the full width that you calculated with the height of the tallest display. Next, click Apply, then OK.
Click the Start Recording button to initiate the recording.
Click the Stop Recording button to stop the recording when you are done with it.
Can OBS record two screens at once?
As you can see from our previous steps, OBS can record multiple screens simultaneously. For this to work, you must set up multiple display capture sources.
You need proper software to record multiple screens on Windows 11 since the built-in solutions don’t have the necessary features. If you’re not a fan of OBS, you can use one of these screen recorders for Windows 11 instead.
It’s that time of the month: Microsoft launched Windows 11 Insider Build 25309, featuring a plethora of new features you do not want to miss, live on the Dev Channel for several select users.
However, as noted by Windows enthusiast @PhantomOnEarth, it seems like Microsoft is experimenting by hiding the Add device button from Bluetooth settings if the device doesn’t support Bluetooth connection. The antidote feature itself is living inside the build and is not activated by default without a few registry tweaks via ViVeTool.
Interesting change is being tested out in 25309: hiding the Add device button in Settings > Bluetooth & devices > Devices if Bluetooth is unsupported.
It’s not clear what Microsoft is trying to achieve by experimenting with this, but it’s a nice feature nonetheless. With this, you can easily know if your device supports the Bluetooth connection or not.
What should I do if I can’t add Bluetooth device on Windows 11?
As Insider-only features, it makes sense if you’ll be encountering problems while accessing this build. Make sure to report any other issues you might come across, in order for Microsoft to address and improve the overall OS experience for us all.
What are your thoughts about this experiment? Let us know in the comments!
Windows Defender is Windows’ primary security tool, and while it has a graphical interface, you can also perform a CMD (Command Prompt) virus scan by using the methods from this guide.
How can I run a virus scan from CMD?
Use the MpCmdRun.exe -Scan command
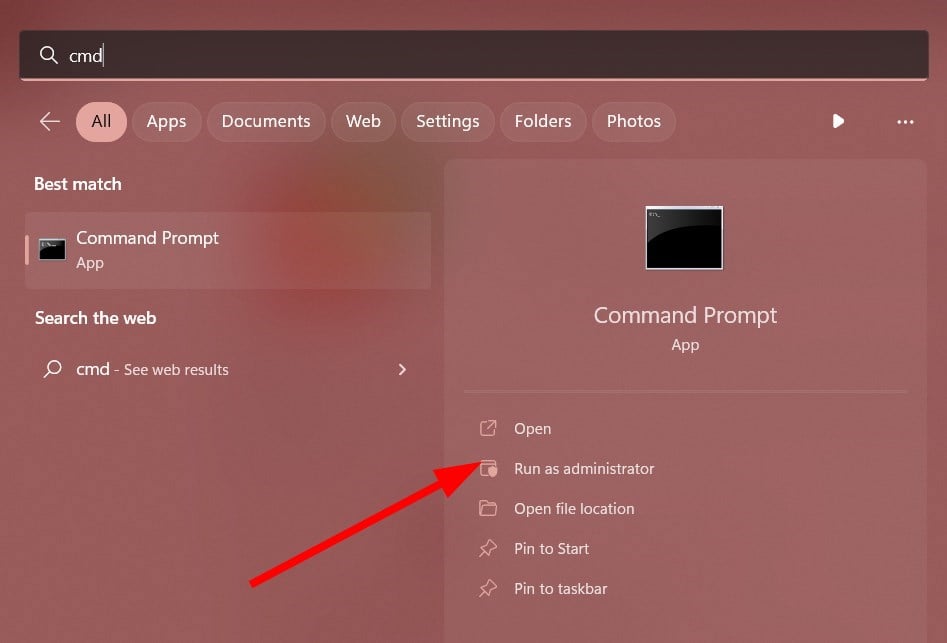
Press the Windows key + S, type in command prompt, right-click on the displayed result, and select Run as Administrator.
In the User Account Control window, select Yes.
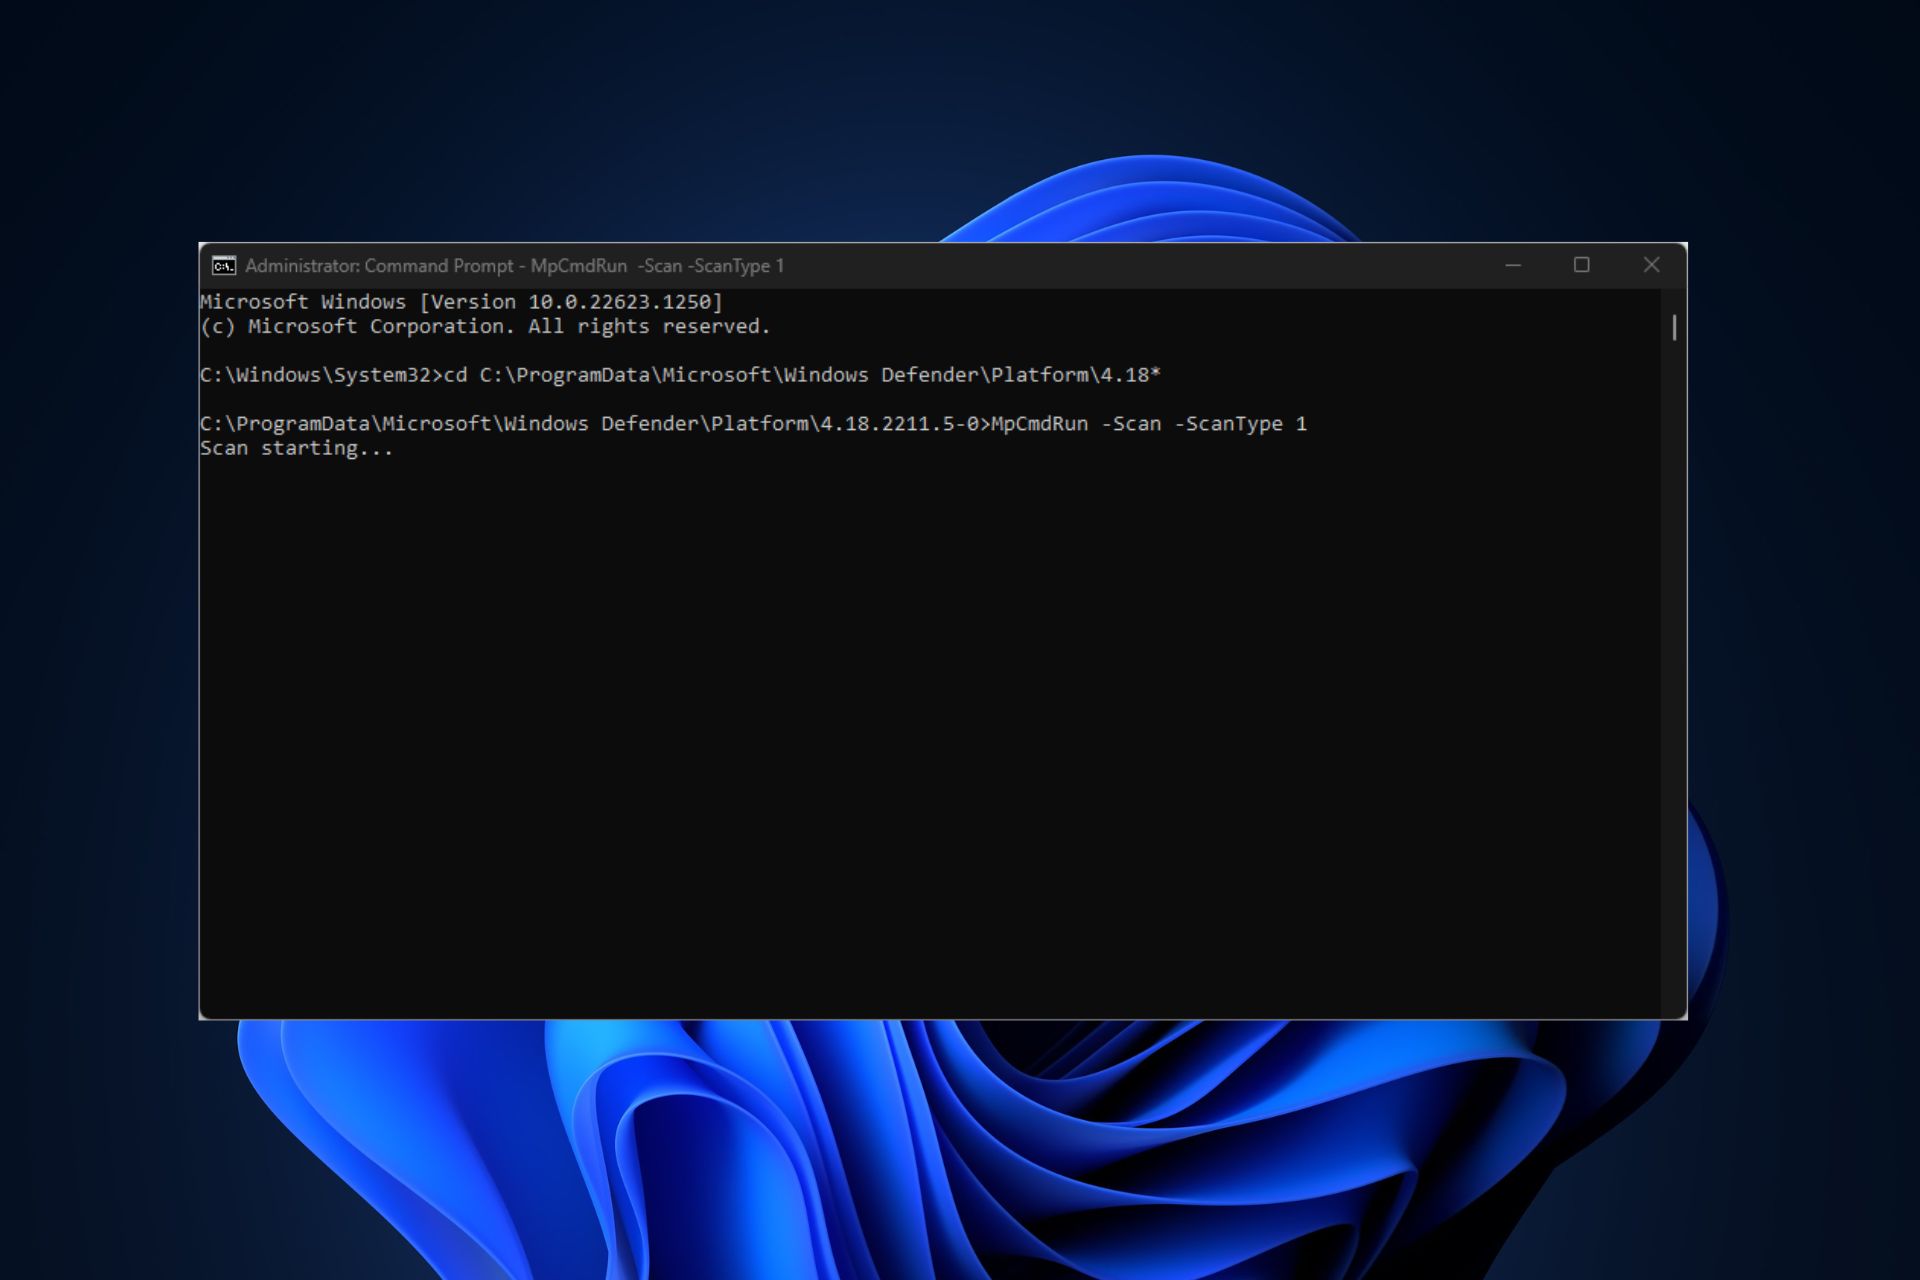
In the CMD window, type in the following command to navigate to the Microsoft Antivirus Directory: cd C:\ProgramData\Microsoft\Windows Defender\Platform\4.18*
After navigating to the Windows Defender directory, type in the following to run a quick scan: MpCmdRun.exe -Scan -ScanType 1
If you want to run a full scan, type the following command and press Enter: MpCmdRun.exe -Scan -ScanType 2
If you need to stop the scan mid-way, press Ctrl + C to quit the scan.
You can also perform a scan of a custom path with the following command:
Windows key + S, type in command prompt, right-click on the displayed result, and select Run as Administrator.
Type in the following command and press Enter: MpCmdRun.exe -Scan -ScanType -BootSectorScan
Running this command from the command prompt will scan your PC’s boot sector and remove any suspicious files found in the system. Here is a detailed guide on how to fix a corrupt boot sector.
How do I restore quarantined files using Command Prompt?
While in the command prompt, type in the following to view the list of quarantined files: MpCmdRun.exe -Restore -ListAll
Then type the following command: MyApp.exe along with the name of the file you want to restore, and press Enter.
Can CMD remove a virus?
CMD can help you remove viruses. By using the command MpCmdRun.exe -Scan -ScanType 2, Microsoft Defender will perform a full scan of your system, quarantining any detected threats.
You can also delete them manually:
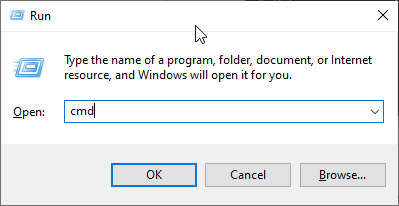
Press Win + R, type cmd, and press Enter to open Command Prompt.
Go to the Folder. You’ll have to enter the following command and the folder’s path. For this example, we’ll use the Downloads folder. cd C:\Users\YourUsername\Downloads.
To see all files, including hidden ones, type dir /a.
Once the file is visible, delete it by typing del filename.ext. Replace filename.ext with the actual file name. This command deletes the file from the folder.
How do I scan my PC for malware with Windows Security?
Press Windows key + S, type windows security and click on Open.
Select Virus & threat protection.
Now choose Quick scan.
Alternatively, you can use the command line to start the scan more quickly.
With the steps outlined above, you can run any virus scan directly from CMD. If you like the effectiveness of this tool, you may also want to check out our uide on copying Windows 11 files using Command Prompt.
For any other questions or potential solutions, let us know in the comments section below.
Good news for Xbox users. Microsoft just rolled out Xbox Insider Build 2303.230227-2217 for the Omega ring, bringing a plethora of new features, fixes, and improvements to life.
One of them is the audio stuttering bug where users experience out-of-sync and cease playback audio. Being released for the Omega ring means that the feature is close to the general availability release.
The bug can be annoying and choppy, especially for those games that require high mobility, or those online plays that require you to listen to the conversation in real time.
While there are plenty of reasons that cause this bug, some users of high-resolution triple-A games with an over-the-top graphic requirement like Red Dead Redemption 2, Cyberpunk 2077, and the Horizon franchise are prone to this issue.
So, are there any workarounds you can try to fix this, and what other features are coming within this update? Read along to find out.
How to fix audio stuttering on Xbox
1. Restarting the game
1. Press the Xbox button on your controller to trigger the side menu.
2. Select the game that you’re running
3. Close the game & restart it
2. Restarting the console
1. Press the Xbox button
2. Click Restart console -> Restart
3. Clear the game’s cache
1. Press the Xbox button
2. Select My games & apps, then choose the game that you want and select the menu button on your controller
3. Select Manage game and add-ons -> Saved data
4. Select Delete all to delete the cache, then restart the game.
What other features are coming within this update?
[Fixes Implemented]
Thanks to the hard work of Xbox engineers, we are happy to announce the following fixes have been implemented for this build:
Audio
Fixed an issue where some audio could begin to stutter and become out of sync.
Fixed an issue where some audio could cease playback unless the Guide was open.
Games
Additional fixes to address issues where steering wheel force feedback could be unresponsive or stop responding.
System
Various updates to properly reflect local languages across the console.
Note: Users participating in Preview may see “odd” text across the console, for more information go here.
Known Issues
We understand some issues have been listed in previous Xbox Insider Release Notes. These items aren’t being ignored, but it will take Xbox engineers more time to find a solution.
Audio
We have received reports of users experiencing intermittent issues with audio across the dashboard, games, and apps.
Note: If you experience issues with audio, please submit feedback via Report a Problem immediately with the “Reproduce with advanced diagnostics” option.
Select the category “Console experiences” then “Console Audio Output Issues” and include the following information:
When did the issue start? After a console update, reboot, resume, etc.
Did you lose audio just in the game/app or system audio as well?
Does changing the audio format resolve the issue? If yes, what was the format before and after?
Does rebooting resolve the issue?
What does your setup look like? Equipment, layout, etc.
And any additional information you can provide to reproduce the problem.
Controllers
We’ve received some reports that users’ controllers are randomly losing sync or disconnecting from the console. If you encounter this behavior, please be sure to report this issue after reconnecting.
Games
We have received reports that some users are experiencing an error which cannot be dismissed, requesting they clear some space when attempting to update a title when the storage device is full. We are investigating.
Workaround: If possible, disconnect your console from the Internet, then clear some space before reconnecting and attempting to update the title again.
HDMI-CEC
We’ve received some reports that HDMI-CEC is not working correctly.
Note: Ensure that your TV supports HDMI-CEC and is also enabled before filing feedback.
My Games & Apps
Titles in collection may incorrectly appear with a “trial” tag.
TV/Display
Some users have reported that the console is displaying at the incorrect resolution on boot. We are aware and investigating.
Note: If you encounter this behavior, please ensure that you submit feedback via Report a Problem immediately. Please include the make/model of you TV/Display in the description.
Workaround: Restarting the console via the Power menu (Holding down the Xbox button displays the power menu) should resolve the behavior. If not, ensure you are looking at the troubleshooting here, specifically the section about ensuring your TV firmware is up to date.
As Insider-only features, it makes sense if you’ll be encountering problems while accessing this build. Make sure to report any other issues you might come across, in order for Microsoft to address and improve the overall gaming experience for us all.
This is everything you can expect if you are an Xbox user. Leave a comment below if you found any issues since installing this build.
VRChat is a free-to-play virtual reality social platform. You can play, chat, or just hang out as a fully-customizable avatar.
Unfortunately, the game may stop working if you turn your VPN on. Players have complained about “Access Denied” errors.
But, don’t let this ruin your fun.
In this guide, we’ll get into the reasons behind this problem and help you fix VRChat VPN not working. Ready?
Why is your VPN not working with VRChat?
VRChat may block VPNs because they allow banned users to bypass restrictions.
Since VPNs let you temporarily acquire a different IP address, players could use them to avoid IP bans. Additionally, VRChat has blocked many common VPN ranges due to excessive botting.
Basically, it checks all incoming requests and their associated IP addresses and then matches these IPs to those that are known to belong to VPNs.
It can use special IP databases likeIPQualityScore and IP2Location which monitor which IP addresses are used by VPNs or proxies.
Furthermore, it may detect an unusual amount of connections coming from the same IP address. If it’s more than ten devices, VRChat will count that as suspicious activity.
In both cases, VRChat will block you from connecting while on a VPN. You’ll get an “Access Denied” Error 1005 with the message:
The owner of this website (vrchat.com) has banned the autonomous system number (ASN) your IP address is in (*****) from accessing this website.
This message is not to be confused with another common error: Cannot Connect to VRChat (Make sure your device has a working internet connection and restart VRChat).
It indicates general connection issues and isn’t related to your VPN.
How to fix it?
If you keep getting Error 1005 screens, it’s time to take matters into your own hands. Here’s how to fix VRChat VPN not working:
1. Switch to another VPN server
Your first step should be to change your VPN server.
As mentioned earlier, VRChat is blocking IP addresses associated with VPNs. Premium VPNs are quick to react and keep creating new IPs to evade their notice.
Additionally, you might be sharing a server with too many users at once.
In any case, you should visit your VPN’s server location list and pick a different one. After that, reload the game.
2. Try a different VPN protocol
Many users reported problems with Lightway and other proprietary protocols. Switching to OpenVPN and WireGuard seemed to resolve the issue.
Fortunately, both are excellent.
Here’s a quick overview.
OpenVPN is an open-source protocol that’s supported by almost every VPN provider. It’s been around for over two decades, so it’s been thoroughly tested.
It’s also compatible with most encryption ciphers, including AES-256. Overall, it’s one of the most secure protocols with decent speeds.
Its only downside is that it consumes more bandwidth than other protocols.
On the other hand, WireGuard is one of the newest protocols, but it’s very promising.
It’s also open-source, but not as widely available as OpenVPN. It has a surprisingly light code base and is highly secure.
On top of that, it’s significantly faster than OpenVPN and consumes much less bandwidth. Still, you might prefer a more experienced and tested protocol.
Either way, you can surely find at least one of these options in your VPN’s connection settings.
3. Change your VPN provider
If all else fails, you can always try a different VPN service. We recommend NordVPN for VRChat.
It’s speedy, reliable, and even has a few options that will let you bypass the trickiest VPN detection systems.
Many users experience problems with their computer’s audio or network connection and suspect a problem with the hardware components of their system.
Realtek Semiconductor Corp is a leading manufacturer of computer hardware components and understanding their roles and functions can help users determine if this is the cause of their problem.
This article explains what Realtek Semiconductor Corp is and how to remove its drivers if necessary.
What is Realtek Semiconductor Corp?
Realtek Semiconductor Corp is a Taiwanese company that manufactures computer hardware components. The company is popularly known for its network interface controllers, audio codecs, and card reader controllers.
Realtek Semiconductor Corp has been in the industry for over 30 years and has consistently maintained a strong market presence. The company’s products are used in a wide variety of devices, from desktop computers to laptops to some smartphones.
Therefore, understanding the role of his Realtek components in your system is very important when troubleshooting and optimizing your device’s performance.
If you are experiencing issues due to Realtek’s hardware components, such as issues with network connection or audio output, then removing the drivers related to Realtek may resolve the problem.
How can I delete Realtek semiconductor corp?
Before proceeding to remove Realtek-related drivers, it is imperative to confirm that they are the cause of the issue you are experiencing.
You may also consider updating your driver, checking for Windows updates, or rolling back to a previous version before completely removing the driver.
1. Use the Control Panel
Press Windows + R to open the Run dialog box.
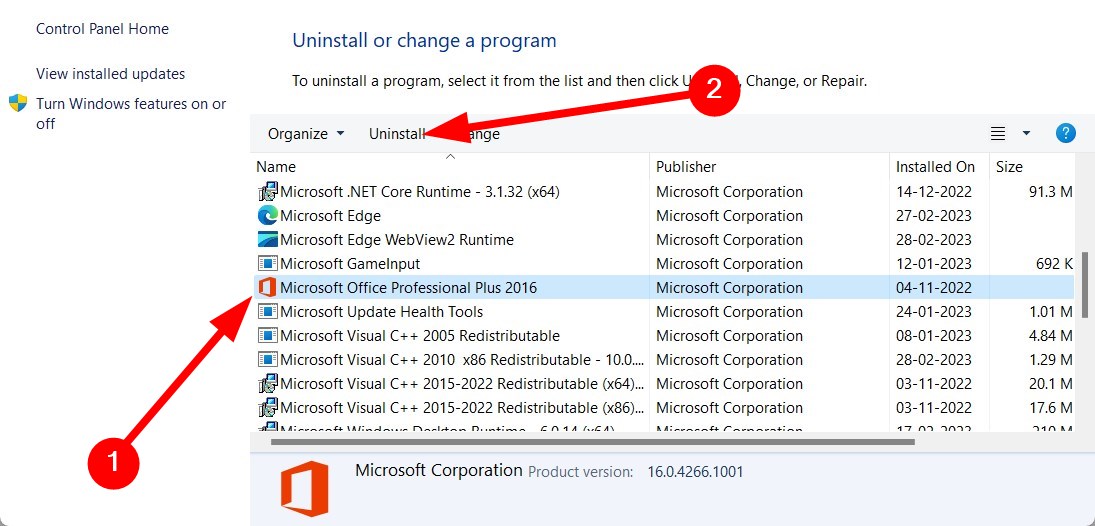
Type appwiz.cpl and click OK to open the Program and Features window.
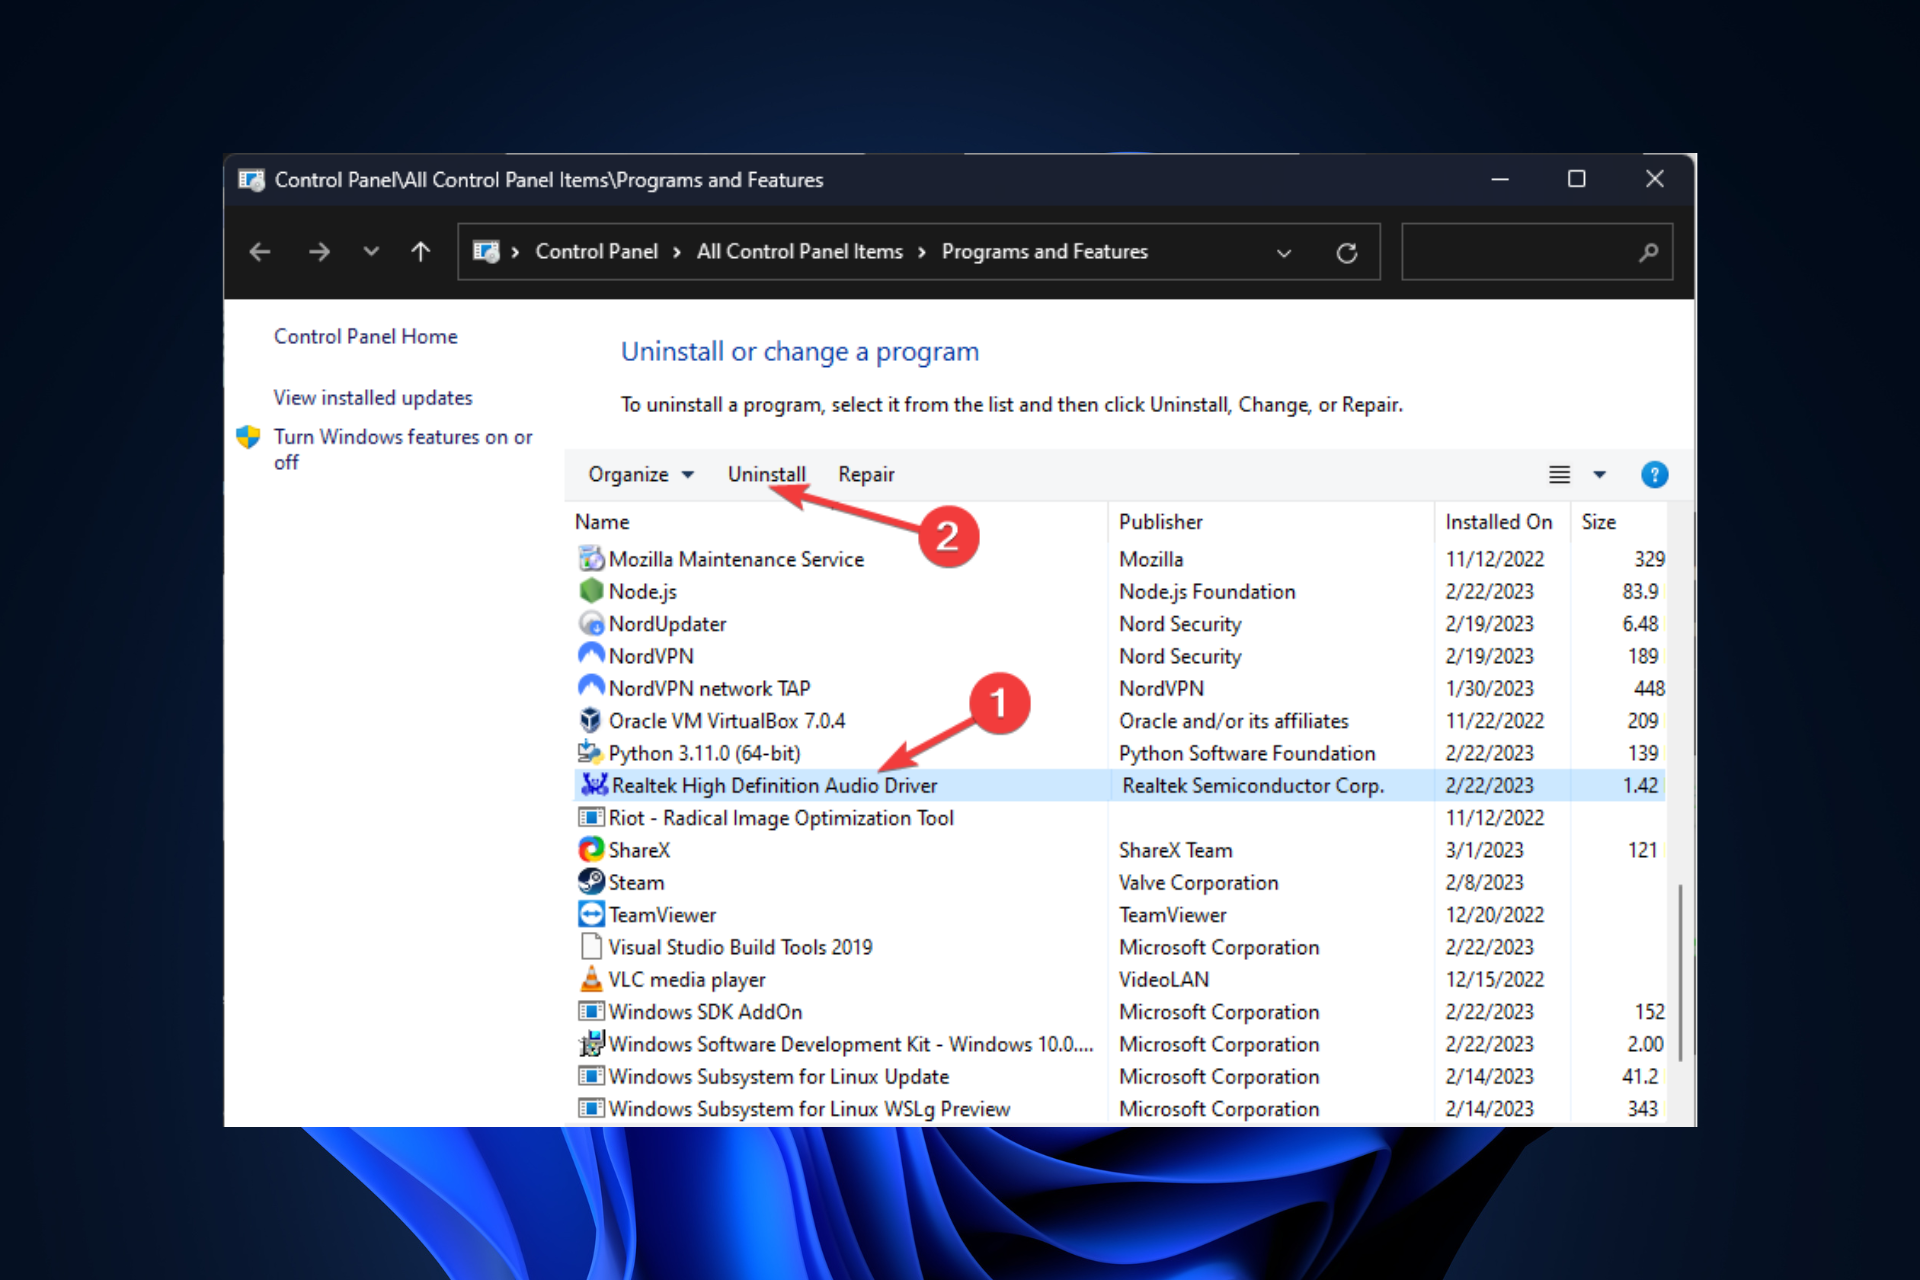
Look for Realtek components with which you are facing issues and click Uninstall.
2. Use the Registry Editor
Press Windows + R to open the Run console.
Type regedit and click OK to open the Registry Editor.
Navigate to this path: Computer\ HKEY_LOCAL_MACHINE\SOFTWARE\Microsoft\Windows\CurrentVersion\Uninstall
Locate the Realtek component from the left pane, double-click UninstallString, and copy the Value data.
Now press Windows + R to open the Run window.
Paste the Value data in the window and click OK.
Follow the onscreen instructions to complete the uninstallation process.
Navigate to this path: C:\Windows\Program Filesx86\Realtek
Locate unins000.exe or uninstall.exe and double-click on it.
Follow the onscreen instructions to complete the process.
4. Use the System Restore
Press the Windows key, type Control Panel, and click Open.
Select Large icons as View by and click Recovery.
Click the Open System Restore option.
Now click Choose a different restore point and click Next.
Choose the restore point created on the date before you installed the app and click Next.
Click Finish to start the process.
Now click OK. Once the process is started, it can’t be reverted, so wait till it’s completed. Now your computer will be in the state it was before installing the Realtek Semiconductor Corp app.
So, these are the methods to remove Realtek Semiconductor Corp if there is a problem with the drivers or the components. Try them and let us know what worked in the comments section below.
Dxgmms1.sys is a Microsoft DirectX Graphics MMS system driver file, but sometimes, this harmless file can trigger a BSoD error. In this article, we will explain its functions and provide the necessary steps to help you disable or fix it.
What is dxgmms1.sys, and why does it cause BSoD?
As we’ve mentioned above, dxgmms1.sys is a DirectX-related file that Windows deploy to manage the graphics of your PC. The file is completely safe and isn’t a threat to your computer.
However, apparently out of the blue, the system crashes into a BSoD pointing directly at dxmms1.sys. Here are some potential reasons:
Outdated or corrupted graphics driver – BSoDs and this particular dxgmms1.sys file crashes are mostly due to graphics driver problems. Updating the graphics driver will fix the problem.
Graphics card conflict – If you have a discrete graphics card, it may conflict with the existing Intel integrated GPU and crash the system. Disabling the integrated GPU will solve the issue.
System file corruption – System file corruption is one of the other possible reasons, and some dedicated scans might fix the problem quickly.
Now that we know what causes the problems with dxgmms1.sys, let’s try to fix o disable it.
How can I fix dxgmms1.sys?
Before we proceed with more advanced solutions, here are some quick fixes you can try:
If none of these preliminary steps helped you, the solutions below will.
1. Update the graphics driver
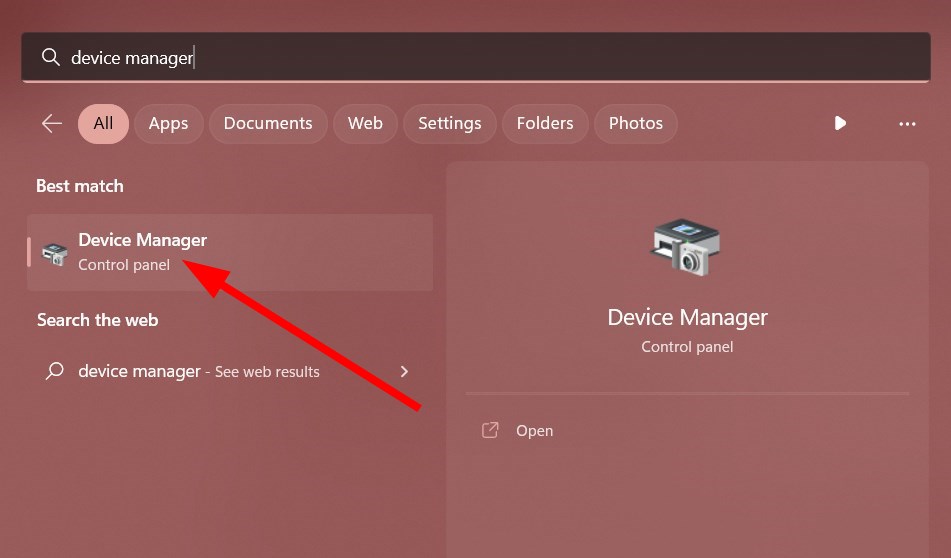
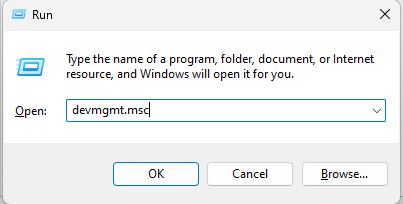
Right-click the Start button and select Device Manager.
Expand the Display adapters selection, right-click on your driver, and select Update driver.
Select the option of Search automatically for drivers.
Wait for Windows to locate and install available updates and restart your PC.
The dxgmms1.sys error is graphics related; an outdated graphics processing card could be the reason behind the error. Updating the card ensures that the error is fixed.
To ensure you have the newest driver, visit the graphics card manufacturer’s website and download the driver manually.
Another possibility for updating your graphics processing unit is using a specialized app like Outbyte Driver Updater that can help you get the best updates automatically from its database after its thorough scanning process.
This is a delicate procedure. Installing the wrong BIOS software may damage your PC, so if you’re not too confident about your actions, leave it to a specialized technician.
Visit the motherboard manufacturer’s website, download the latest BIOS software for your device, and copy it onto a USB flash drive.
Open the Start menu and click the Power button.
Hold the Shift key and choose the Restart option.
After rebooting, choose Troubleshoot.
Now select Advanced options and select UEFI Firmware Settings.
After you select the Restart button, your PC should boot to BIOS.
Now, look for the option to update your BIOS and select it.
You will be pointed to select the BIOS update file, so select it from the USB flash drive and proceed with the update.
Right-click the Windows icon and select Device Manager.
Locate the Display adapters selection, right-click on the integrated GPU, select Disable device, and click Yes.
Restart your PC after disabling the device.
4. Perform SFC and DISM scans
Click the Search button, type cmd, and select Run as administrator from the results.
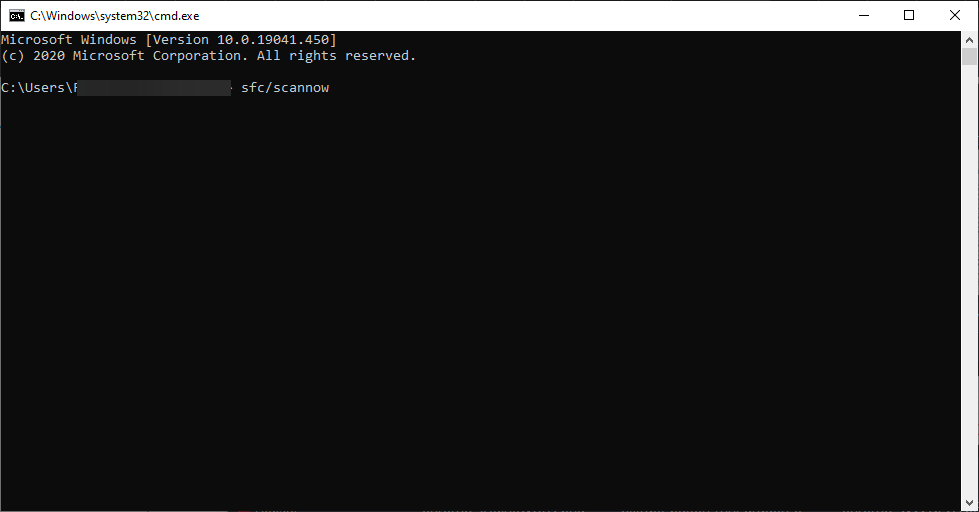
Type the following command and press Enter to run it: sfc /scannow
After the scanning is complete, type the following command and press Enter: DISM /Online /Cleanup-Image /RestoreHealth
Wait until the process is complete and restart your computer to see if the problem persists.
In case the error is produced by system file corruption, the SFC and DISM scans will repair any such problems on your PC.
5. Perform a Clean Installation of Windows
Launch your preferred browser, visit the Windows Installation Mediasection, and click the Download Tool Now button.
Once the file is completely downloaded, double-click on the setup file.
In the UAC window, click on Yes, and click Accept in the next window.
Select the option of Upgrade this PC now, and click on Next.
Select the option of Keep my files and hit the Next button.
Click on Install, and follow the installation instructions to complete the Windows Upgrade.
Restart Windows.
Performing a clean installation of Windows automatically resolves most of the errors currently plaguing your PC. However, ensure your files are backed up before reinstalling Windows to ensure you don’t lose any important files.
The dxgmms1.sys stop code is a rare error after a system crash or overload. Resolving the error is quite challenging but entirely possible. With the steps outlined in this article, you should be able to rid your system of the dxgmms1 BSoD error.
If you’ve got any alternative solutions to resolve this error, you can let us know in the comments below.
Spotify is the industry leader in music streaming, however, many users encountered the Something went wrong error.
Unlike Spotify error code 18, this occurs when the user tries to play a playlist, search for an artist, etc., thus making the software completely useless.
Many users are affected by this, and it’s a major problem, especially if you’re paying for a service that you now can’t use.
If you are facing a similar error, here are a couple of solutions to fix this Spotify error on Windows computers but not before understanding why the issue shows up in the first place.
Why does the Something went wrong Spotify error occur?
Billing information – Sometimes your billing information isn’t correct, which can cause this issue to appear. Making sure that your information is correct usually fixes the problem.
Web cache – If you’re using the web version, your browser cache can be the issue, so be sure to clear it to fix this problem.
How can I fix the Something went wrong Spotify error?
1. Choose a compatible browser
Spotify Something went wrong, try reloading the page error can appear if there’s an issue with the client app. However, you can circumvent that with a specialized browser.
The Player in the Opera One browser sidebar allows you to instantly connect to Spotify from the browser’s sidebar, allowing full control without interruptions.
When you start streaming a movie or an audio file in a tab, the Player in Opera One pauses and instantly restarts music playback, thus easily manageable.
When something goes wrong with the web version of Spotify, this sidebar integration is your savior.
Furthermore, the proxy VPN allows you to change your IP whenever there are connectivity issues with your internet or the servers.
Opera One
The Player sidebar integration allows full control over Spotify.
If you’re getting Spotify login Something went wrong error, the problem is likely related to your VPN, so you might want to try disabling it.
Many VPN services can cause this issue with Spotify, and if you want to avoid it, we suggest using a reliable service such as Private Internet Access.
5. Check the Family accounts billing address
In Spotify, click your profile and select Account from the menu.
Navigate to Premium Family in the left pane.
Check your address.
Make sure that every member of the Family plan has the same address added.
Something went wrong error with Spotify premium can occur due to your billing information, so be sure to double-check it.
NOTE
Members of the Family plan will have to check their address by going to the Account section on their Spotify account.
6. Clear browser cache
Chrome
Click the Menu icon and select Settings.
From the left pane, select Privacy and security. Now click on Clear browsing data.
Select a Time Range to All time and click the Clear data button.
Now try to log in to your Spotify account, and you should be able to log in and perform a search without any errors.
Edge
Click the menu button in the top right corner. Next, choose Settings from the menu.
Select Privacy, search and services from the left pane. In the right pane, click on Choose what to clear button.
Now set Time range to All time and click on Clear now.
Firefox
NOTE
This solution only works if you’re using the web version of Spotify.
In the top right corner click the Menu button and choose Settings.
Select Privacy & Security from the menu on the left. On the right pane, click Clear data button in the Cookies and Site Data section.
Check the data that you want to clear and click on Clear data.
7. Update or reinstall Spotify
Make sure that Spotify is up to date.
If updating the app doesn’t fix the problem, press the Windows key + I to open the Settings app.
Go to the Apps section.
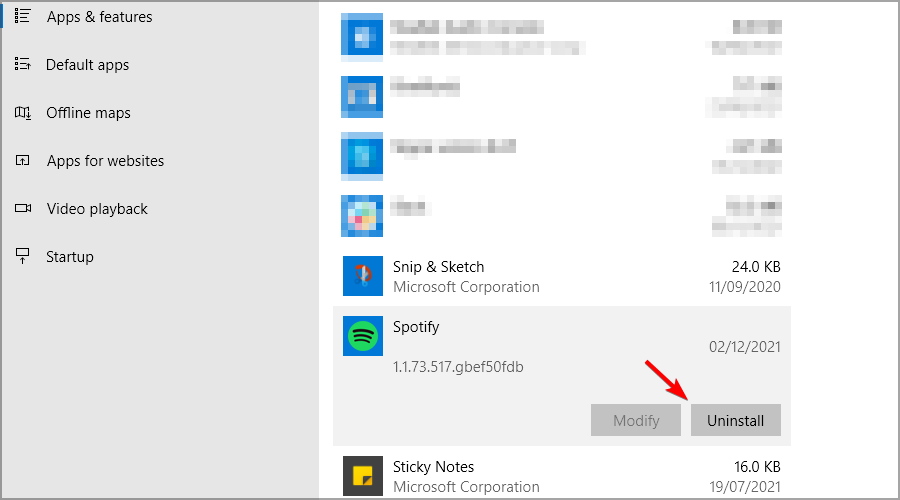
Select Spotify from the list and click on Uninstall.
After the application is removed, install it again and check if the issue is still there.
If you keep getting Something went wrong please try again in Spotify, it’s possible that your installation is corrupted. Reinstalling the software might help.
How do I delete the Spotify cache?
Exit Spotify completely.
Press Windows key + R and enter %appdata%. Press Enter.
Navigate to the Spotify directory, and then go to Users.
You should see a directory that has your username in it. Delete it.
Does this Spotify Something went wrong error appear on other platforms?
This error message can appear on almost any platform, and Windows isn’t an exception. Many users encountered the Something went wrong error on both PC and iPhone/Android devices.
Even if the issue appears on your phone, for example, it doesn’t have to mean that the cause is the same, thus making it harder to fix.
Something went wrong error can cause a lot of problems, and you won’t be able to play your favorite songs, similar to Spotify error code 4.
This can be an issue, especially if you use it as your default web media player, but we hope that you managed to solve that and get rid of the Something went wrong Spotify message with our solutions.
Did we miss a certain tip? Do not hesitate to let us know in the comments section below.
External hard drives have become an essential part of our lives as we have exponentially increased the usage of documents, pictures, videos, and whatnot.
Our PCs come with limited storage; to expand it, we use a hard drive. But are you getting a clicking sound from your external hard drive?
If yes, then you aren’t alone. Several users are looking for a fix for the external hard drive clicking issue. There are several reasons your external hard drive makes clicking noises, which we will discuss in this guide.
Why is my external hard drive making clicking noises?
If you hear some weird noise coming from your external hard drive, it could create some curiosity and fear in the minds of the user. Here are some of the most common reasons your external hard drive makes clicking noises.
Physical damage: Mis-handling or improper storage of the external hard drive can cause physical damage, thus causing weird noises. It can also happen because of prolonged usage.
Electrical problems: Chances are the internal circuit board of the external hard drive is at fault and causing the clicking noise.
Now enough power input: Many external hard drives require external power input for them to work. The hard drive can make weird noises if there isn’t sufficient power input.
Manufacturer defect: If you recently purchased the hard drive and got the noises, it could be a manufacturer defect.
Misaligneddisk head: You will hear clicking noises if the read/write disk head is damaged.
High temperature: Continuous usage of the external hard drive can increase the temperature, thus causing the thermals to malfunction.
How can I resolve the clicking noise from my external hard drive?
1. Check the hard drive connection
Make sure that the connection between the external hard drive and your PC is proper. You should check the cable connecting the two devices and the connection heads and clean them if needed.
If that doesn’t help, you can try changing the connection cable and check if this works and if the clicking noises stop from your external hard drive.
2. Turn the hard disk upside down
You can put the hard disk upside down. This will prevent the magnetic head from touching the disk platter, which could be why you are hearing the clicking sounds.
Moreover, there will not be any damage if you use your hard drive upside down. So, give this method a try and check if this fixes the issue or not.
If the external hard drive that you own requires a power supply connection for it to work, then ensure that you provide sufficient power input.
You can try changing the power supply source to see if this resolves the clicking noises from your external hard drive. Also, you should ensure that there aren’t any voltage fluctuations, as this could damage the internals of the hard drive.
4. Wait for the hard drive to cool down
Prolonged usage of the hard drive can increase the internal temperature as the hard drive performs the tasks continuously.
You should disconnect your hard drive, turn it off, and wait for some time before using it again. This will help cool the internal components of the hard drive and will also silence the clicking noises.
5. Get it replaced or repaired
If none of the above solutions helped and your external hard drive is breathing its last, you should get it repaired or replaced.
Before replacing the hard drive, getting it checked by a professional could save you some bucks, as there could be minor damage that might be causing the clicking noises from the inside of the external hard drive.
That is it from us in this guide. Unfortunately, there isn’t much you can do from the software end to fix the clicking noises from your external hard drive apart from applying the fixes mentioned above.
Feel free to let us know in the comments below, which one of the above solutions helped you fix the clicking noises coming from your external hard drive.
It’s that time of the month: Microsoft launched Windows 11 Insider Build 25309, featuring a plethora of new features you do not want to miss, live on the Dev Channel for several select users.
As noted from Microsoft’s blog post, three main touch-ups are included in this update. After a few months of sitting in hidden, the Volume Mixer feature is finally official on this build. Now, you can easily tweak volumes for each opened program through your taskbar without opening the Settings app or customizing it per-app basis. You can also hit the shortcut Win + Ctrl + V to bring you faster to the mixer.
Moreover, the touch keyboard setting that was previously disabled in Build 25217 is back with a few fixes. The Auto Color Management (ACM) also gets a nice expansion where now all Insiders can turn it on for their SDR displays with all colors available, and so does the in-app command help page in voice access.
Redesigned in-app command help page: We have completely renovated the in-app command help page in voice access to make it simpler to use and comprehend. The search bar allows users to quickly find commands and the different categories provide further guidance. Every command now has a description and examples of its variations, making it easier to understand and use.
So what other features are coming within this build? Read along to find out.
What other features are coming within Windows 11 Insider Build 25309?
1. Changes and Improvements
[General]
Starting with Build 25290, we started a new exploration of badging on the Start menu with two new treatments that some Insiders in the Dev Channel will see. Starting today, we’re trying out different text variants within these treatments. If you see one of these treatments, give us feedback on what you think. As a reminder, it is normal for us to try out different concepts in the Dev Channel to get feedback.
Different treatments of badging on the Start menu with different text variants.
We’re trying out a more personalized second-chance out of box experience (SCOOBE) with a small subset of Windows Insiders in the Dev Channel.
Example treatment of a personalized second-chance out of box experience (SCOOBE) screen.
[Search on the Taskbar]
The search box on taskbar will be lighter when Windows is set to a custom color mode. Specifically, when the Windows 11 mode is set to dark, and the app mode is set to light under Settings > Personalization > Colors you will see a lighter search box on taskbar.
The search box on taskbar will be lighter when Windows is set to a custom color mode.
[File Explorer]
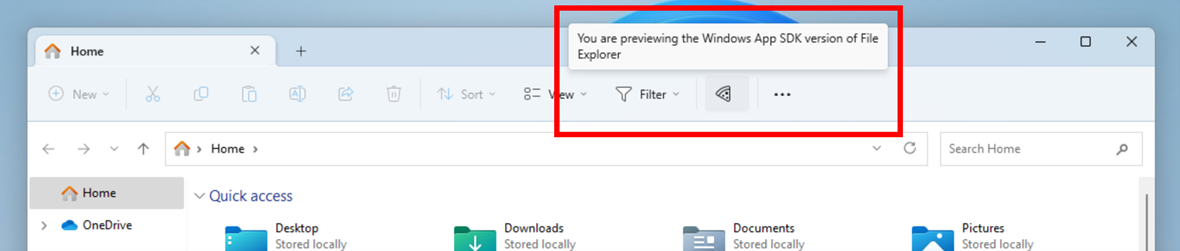
Windows Insiders will begin noticing a “pizza” icon on the command bar in File Explorer. This icon denotes that an Insider is previewing the Windows App SDK version of File Explorer. Functionality in File Explorer remains unchanged, it just switches from using WinUI 2 to using WinUI 3.
Pizza icon in File Explorer’s command bar to denote previewing the Windows App SDK version of File Explorer.
[Snap layouts]
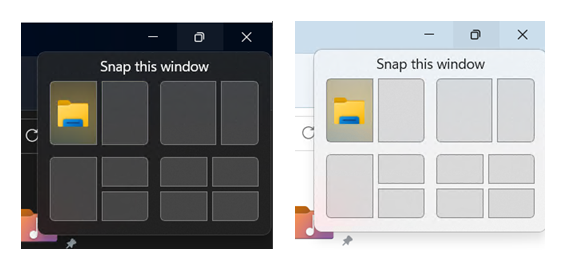
After pausing this with Build 25300, we are un-pausing this with this build – we are trying out different treatments for snap layouts with Windows Insiders in the Dev Channel. We are investigating ways to improve the discoverability and usage of the snap layouts such as decreasing the hover time required to invoke the flyout when you mouse over the maximum/restore button in an app’s title bar. In addition to a few other tweaks, you’ll notice some treatments will also pull in the icon of the app window you are working in and adding a descriptive title. If you see one of these treatments, give us feedback on what you think. As a reminder, it is normal for us to try out different concepts in the Dev Channel to get feedback.
Example of a snap layout treatment we’re trying with Windows Insiders in the Dev Channel.
[Windows Spotlight]
Starting today, we are disabling the different treatments we’ve been trying out for Windows Spotlight that began with Build 25281 due to an issue impacting the experience Insiders will have on these treatments. We plan to re-introduce an updated Windows Spotlight experience for Insiders in a future flight based on the feedback from Insiders from using these different treatments. As part of disabling these treatments, Insiders may need to go to Settings > Personalization and re-enable Windows Spotlight.
[Input]
We have updated the Simplified Chinese handwriting recognition engine to be faster and more accurate as well as supported characters defined in GB18030-2022. Currently you can write characters in GB18030-2022 Level 2 and some of characters in GB18030-2022 Level 1 in the handwriting panel or directly into the text field when it’s supported. Please try it and let us know what you think.
The Simplified Chinese handwriting recognition engine is faster and more accurate and now supports characters defined in GB18030-202.
[Widgets]
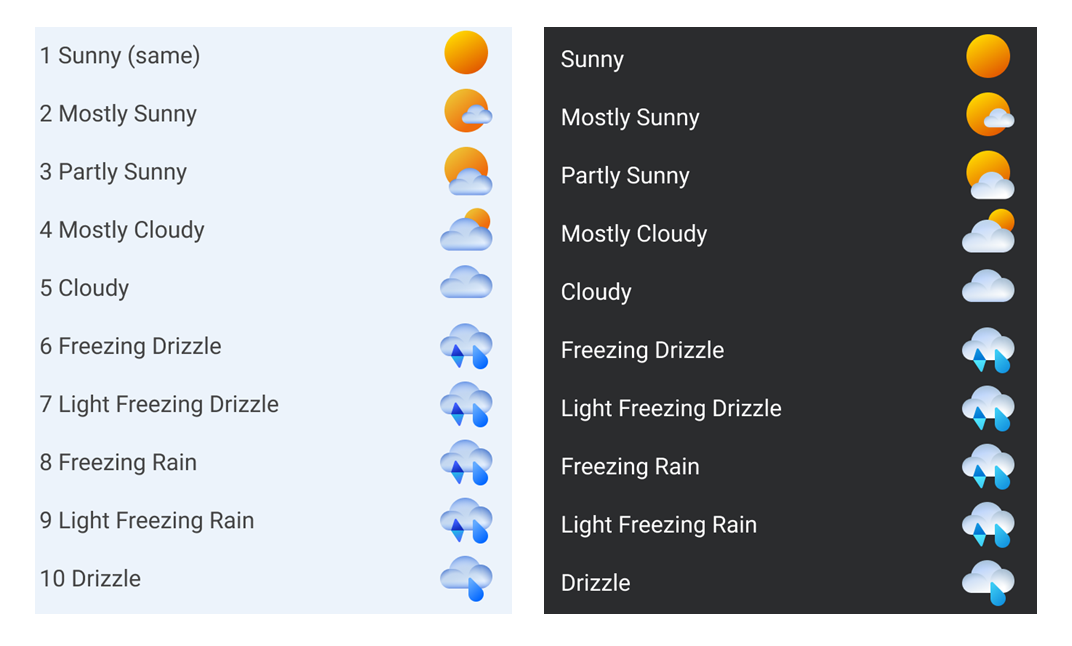
We are beginning to roll out theme-aware icons for Widgets on the taskbar so that based on the user’s Windows theme (dark or light), the Widgets icons will display a theme-aware icon that will have a higher contrast ratio which will make information on the taskbar clearer for users, particularly for those with low-sight.
Examples of updated theme-aware icons for Widgets on the taskbar with a higher contrast ratio.
[Settings]
Settings > Power & Battery has been updated to include settings for choosing what happens when interacting with your PC’s physical power controls.
2. Fixes
[General]
Fixed an issue causing USB devices (including keyboard and mouse) to not work for some Insiders after upgrading to Build 25295+.
Fixed an issue for some Insiders where if you’d uninstalled the previous flight, it would cause your Start menu and taskbar to cyclically crash.
Fixed an issue where when using Windows Hello to sign in with facial recognition, it may not have worked on Arm64 PCs.
Fixed an issue with the Windows Insider Program settings page showing a newer build was available in Windows Update even though you were on the latest available build in the Dev Channel.
[Taskbar & System Tray]
Fixed multiple Explorer.exe crashes impacting taskbar and system tray.
Fixed a display issue that could result in the taskbar appearing duplicated when making resolution changes.
Fixed an issue which was causing app icons on the taskbar to appear on the wrong monitor for some Insiders with multiple monitors.
[Widgets]
We fixed an issue where under certain circumstances third-party widgets were not loading as expected.
[Search on the Taskbar]
Fixed rendering issues when using the touch keyboard with the search box on taskbar.
Fixed an issue when double clicking the search highlight glyph in the search box makes it disappear.
Fixed an issue where the search box would randomly disappear.
Fixed an issue where the search icon flips incorrectly for right-to-left (RTL) languages.
Fixed on issue where you might have seen some text flicker in the search box when you click into it.
Fixed an issue where the search box might disappear on one monitor if you are using multiple monitors.
Made some accessibility fixes to the settings for search under Settings > Personalization > Taskbar.
[File Explorer]
Fixed an issue which caused Insiders with custom desktop icon arrangements / sizes to get set back to default in the previous build.
Fixed an underlying issue believed to be the cause of File Explorer unexpectedly jumping into the foreground sometimes.
The “Open in new tab” context menu option and middle clicking folders will now open the tab in the background rather than switching focus.
Fixed an issue where the close button could get stuck in a highlighted state when you moved your mouse across it.
[Input]
Fix an issue where when using the French-Canadian layout for the touch keyboard, the letters output when typing didn’t always match what was displayed on the keys.
When using the Korean IME, CTRL + F10 should no longer open the IME context menu.
[Settings]
Fixed an underlying issue believed to be the root cause of why some Insiders saw their startup app settings get reset with the previous build.
Going to Privacy & Security > Phone Calls should no longer crash Settings.
[Windowing]
Fixed a high hitting DWM.exe crash in the last couple flights.
[Other]
Fixed multiple issues that were preventing some of the new live captions language models from downloading correctly.
Fixed an underlying issue causing Insiders on Arm64 PCs to not be able to activate M365, with it citing a network issue.
Fixed a search indexer crash.
Fixed an underlying issue that could cause UWP apps to appear in English after upgrading although that wasn’t your display language.
Fixed an issue which was causing .appinstaller packages to fail to install with an error message that says “The parameter is incorrect” (even though it wasn’t).
Fixed an underlying issue causing certain cameras to not work in apps with the last flight.
Fixed an underlying issue which was leading to Microsoft Edge crashes for some Insiders in the last few flights.
NOTE: Some fixes noted here in Insider Preview builds from the Dev Channel may make their way into the servicing updates for the released version of Windows 11.
3. Known issues
[General]
We are investigating an issue where some users are experiencing longer than expected update times installing recent builds. If you experienced this issue, please submit a new feedback item with logs in Feedback Hub.
Some AAD (Azure Active Directory joined users are now seeing “Getting ready for you” screens when signing into Windows after updating the latest builds. We are investigating the issue.
Launching Group Policy Editor may show an error about a displayName attribute not being found.
[Snipping Tool]
We’re working on the fix for an issue causing the New button in Snipping Tool to not work for some Insiders after upgrading to Build 25295. If you are impacted by this, going to Settings > Apps > Default apps, and setting screen snipping as the default for ms-screenclip, it should resolve the issue.
[Live captions]
On ARM64 devices, enhanced speech recognition support installed through the Language & Region settings page will require restarting live captions if you switch languages in the live captions Caption language menu.
Certain languages shown on the Language & Region settings page will indicate speech recognition support (e.g., Korean) but don’t yet have support for live captions.
When adding a language through the Language & Region settings page, language feature installation progress may become hidden, and you may not see install completion of “Enhanced speech recognition” (required by Live Captions). (You can use the language’s “Language options” to monitor progress.) If this happens, there may be an unexpected delay before the live caption setup experience detects this and lets you continue.
The Language & Region settings page may not offer the necessary speech recognition language support for live captions for up to an hour after first login.
Captioning performance may be degraded in non-English languages and missing out-of-language filtering in non-English (United States) languages which means that incorrect captions will be shown for speech not in the caption language.
[Voice access]
[NEW] Please note that the redesigned in-app help page in voice access may not include all commands and the supplementary information may be inaccurate. We plan to update this in future builds. If you want an exhaustive list of Voice Access commands and extra information about them, we recommend you refer Use voice access to control your PC & author text with your voice – Microsoft Support.
C++ packages for Win32 headers and libs per architecture
BuildTools package when you just need tools like MakeAppx.exe, MakePri.exe, and SignTool.exe
These NuGet packages provide more granular access to the SDK and better integration in CI/CD pipelines.
As Insider-only features, it makes sense if you’ll be encountering problems while accessing this build. Make sure to report any other issues you might come across, in order for Microsoft to address and improve the overall OS experience for us all.
This is everything you can expect if you are a Windows 11 user. Leave a comment below if you found any issues since installing this build.
Is your printer’s ink cartridge full but not printing? If so, you are not alone, as several other users have crossed paths with this problem.
Well, the only job of a printer is to print, and if that doesn’t happen, it could be frustrating. And this isn’t the only problem you will encounter with a printer.
Do not worry. In this guide, we have listed some solutions and methods that can help you resolve the ink cartridge full but not printing problem. Our solutions vary from basic to advanced troubleshooting methods. So, sit back, and let us look at the solutions.
Why is my printer not printing even though the ink cartridge is full?
We have compiled a list of reasons which is the reason why your printer isn’t printing even after the ink cartridge is full.
Clogged printheads: If you recently refilled or changed the cartridges, the printheads will be sealed with tape to avoid color flow when handling. This can result in incorrect color in the final print copy.
Drive issues: If some driver files are outdated or there is faulty driver installation, you will encounter multiple issues.
There is a long print queue: Chances are that there are already a bunch of prints in the queue, because of which the printer is throwing the error.
The ink levels arelow: Ensure that the ink levels aren’t low.
What can I do to get prints from my printer?
1. Update the printer driver
Open the Start menu by pressing the Win key.
Open Device Manager.
Expand Printers.
Right-click on your printer and select Update driver.
Select Search automatically for drivers.
Let the system install the latest driver.
This is the usual way of updating the driver on your Windows PC. However, to fasten the process, you can take the help of a dedicated tool called Outbyte Driver Updater.
With Outbyte Driver Updater, you can update all of the drivers in one go. It also helps you perform scheduled scans, create a driver backup, act as an efficient download manager, and more.
2. Check if the printhead is clogged
As mentioned, when you have refilled your cartridge or purchased a new one, the printhead of it will be clogged. The printhead is the place from where the ink flows and colors your print.
You should remove the cartridge and check the printhead; if you see a seal or tape, remove it. Also, you can take one step further and rub the printhead with a cloth to ensure the color flows without issues.
The automatic deep clean option comes with many of the printer software. The above steps are shown for Canon printers. You can also check if your printer brand provides this option or not.
4. Clear the print queue
4.1. Use Command Prompt
Open the Start menu by pressing the Win key.
Open Command Prompt as an admin.
Type the below command and press Enter. net stop spooler
Execute the below command. del %systemroot%\System32\spool\printers* /Q
Type the below command and press Enter. net start spooler
Restart your PC and check if this fixes the ink cartridge issue full but the printer not printing issue or not.
4.2. Use the Run dialogue
Press the Win + R keys to open the Run dialogue.
Type services.msc and press OK.
Locate Print Spooler from the list.
Select Stop.
Open the Run dialogue again.
Type %systemroot%\System32\spool\printers\ and press Enter.
Select all files and delete all files.
Go back to the Services window, and start the Print Spooler service.
That is it from us in this guide. If nothing works, it is better to take your printer to a service center and check if it is a hardware issue.
Nikon is a popular camera brand with an extensive lineup of some of the best products available. It has a dedicated app, SnapBridge, to connect to its devices. You may often find that the Nikon camera is not connecting to Bluetooth.
When SnapBridge is not connecting to the camera or the setting is greyed out and reads, This option is not available, it’s generally a trivial issue to blame, one that can be fixed easily. So, let’s find out why Nikon SnapBridge is not connecting to iPhone or Android and the solutions.
Why won’t my Nikon camera connect to my phone?
Here are a few reasons you are facing the issue:
Issues with SnapBridge: Often, the problem lies with the app or the smart device it’s installed on. For instance, compatibility issues, location not enabled, and a few conflicting features.
Misconfigured settings: If the camera or phone settings are misconfigured, you will find Nikon D5600 Bluetooth This option is not available error.
You should now be able to enable the Bluetooth functionality.
What can I do if the Nikon camera is not connecting to Bluetooth?
Before we head to the slightly complex methods, here are a few quick ones you can try:
Ensure Bluetooth is enabled both on the camera and the phone (also discoverable for the smart device).
Restart the Nikon camera and the phone, and verify whether the Nikon P1000 Bluetooth is still not working.
Do make sure you tap OK on the camera when the 6-digit code appears. If you don’t, there might be issues with the connection.
Turn off the camera, pull out the batteries, plug them back in, and verify whether the Nikon camera is now connecting to Bluetooth after turning it on.
If nothing appears on the Select an Accessory list in the SmartBridge app, make sure to wait for a while. It may take up to 1-2 minutes for the camera to appear.
If you have Bluetooth greyed out on the Nikon camera, use the Connect to smart device option to link the camera to the phone, follow the on-screen instructions, and once done, Bluetooth won’t be greyed out anymore.
Reconnect the two devices. For that, Forget the Nikon camera from the phone’s Bluetooth settings and re-establish a connection using the SmartBridge app.
Make sure GPS/location services are enabled on the phone and that SmartBridge can access it. You are usually asked to grant permissions when setting up the first time.
When Nikon D3500 Bluetooth is not working, forget the camera from any smartphone it was previously connected to.
Disable any installed VPN on the phone. A user reported that Norton VPN was responsible when the Nikon camera was not connecting to Bluetooth.
Register your camera with the Nikon Image Space app since this has helped many get things running. The app is available for both iOS (Apple) and Android devices.
If these don’t work, move to the fixes listed next.
1. Clear the app data
Open the phone Settings, and go to Apps.
Select SmartBridge from the list.
Tap on Storage.
Now, individually tap on Clear data and Clear cache and confirm the change to delete both.
Once done, relaunch SmartBridge and check whether you can connect to the camera. If the Nikon camera is still not connecting to Bluetooth, head to the next method.
2. Reset the camera settings
Go to the Setup Menu, move to the wrench icon from the left, scroll down, and select Reset all settings.
Choose Reset.
Choose Yes to confirm and wait for the reset to complete.
A reset of the camera settings usually helps when the Nikon camera is not connecting to Bluetooth, and get’s things up and running in no time.
Also, there’s a simpler way to reset the Nikon camera settings. Locate the two buttons with green dots near them on the Nikon camera, hold them for a few seconds, and wait for the display to blink. This should complete the reset.
3. Reinstall the SmartBridge app
NOTE
This method highlights the process of reinstalling SmartBridge on iOS devices. Though if you are on an Android phone, the process remains similar and shouldn’t take much effort.
Tap on hold the SmartBridge app, and select Remove App.
Tap Delete App.
Now, tap Delete to confirm.
Once removed, open the App Store, search for SmartBridge, and download the app again.
If Nikon SnapBridge is not connecting in iOS 16, and, as a result, you can’t transfer photos between the Nikon camera and iPhone, reinstalling the app might do the trick.
4. Reinstall the camera firmware
Connect a memory card to the camera and then format it.
Now, use a memory card reader to connect it to the computer or use the dedicated cable to directly plug in the camera itself.
Head to the Nikon Support website and choose your camera here.
In the Firmware tab, click on the View download page option next to the firmware version.
Tick the checkbox for Accept to agree to the license terms, and then click Download.
Run the setup to extract the firmware.
Now, open the newly created folder.
Move the .bin file to the memory card you formatted and connected to the PC earlier.
Next, put the memory card in the camera, or disconnect the camera from the computer, as the case may be.
Open the Setup Menu, select the wrench icon, and choose Firmware version.
Choose Update and then follow the on-screen instructions to complete the process.
That’s it! After the firmware update, you shouldn’t face the Nikon camera not connecting to Bluetooth issues anymore. Also, if you are already on the latest firmware version, reinstalling it also works and has helped quite a few users.
Running into the CAA70007 error in Microsoft Teams? It usually pops up when you’re trying to sign in, and something’s gone sideways. This often happens on work laptops or machines set up through Autopilot. In this guide, we’ll show you what causes it and how to fix it fast, so you can get back to work without the headache.
The CAA70007 error usually means there’s a device authentication problem. Teams can’t verify who you are or whether your device is allowed to access Microsoft 365 services. It’s often tied to:
Corrupted Teams app data
Devices set up using Autopilot
Hybrid Azure AD join setups
Conflicts in cached credentials
How can I fix the error code Caa70007?
1. Clear Teams cache
Open the Run dialog by pressing the Win + R keys.
Type %appdata%\Microsoft\teams and press Enter.
Delete all files from the folders Cache, tmp, and GPUCache.
Restart your computer.
Launch Microsoft Teams and check if this fixes the issue or not.
Such petty issues are often caused by corrupt cache files associated with the program. You can quickly clear the cache files for Microsoft Teams and check whether this fixes the Caa70007 error message.
2. Set the correct date and time
Press the Win + I keys to open the Settings menu.
Select Time & language from the left pane.
Click Date and Time on the right.
Toggle on the Set time automatically option.
Hit the Sync now button as well.
You will encounter the Caa70007 error with Microsoft Teams when the time and date on your PC are incorrect. Several users have recommended checking the time and date settings to resolve the issue.
Under the Security section, uncheck the Check for Server Certification revocation.
Click Apply and OK.
Restart your PC.
Launch the Teams app after the PC boots up and check whether this fixes the issue.
4. Enable all TLS Internet Options
Open the Start menu by pressing the Win key.
Open Control Panel.
Click on Internet Options.
Click on the Advanced tab.
Under the Security section, check the boxes for Use TLS 1.0, Use TLS 1.1, Use TLS 1.2, and Use TLS 1.3.
Click Apply and OK.
Restart your PC.
5. Use the Compatibility Troubleshooter
Right-click on the Microsoft Teams icon.
Select Properties.
Switch to the Compatibility tab.
Click on the Run compatibility troubleshooter button.
Select the Try recommended settings option.
Restart your PC.
Launch Microsoft Teams and check if this fixes the issue or not.
Compatibility troubleshooter will help you run the Caa70007 error message as well.
6. Renew IP address
Open the Start menu by pressing the Win key.
Open Command Prompt as an admin.
Type the below command to release the current IP address of your network and press Enter. ipconfig /release
Execute the below command to renew the IP address. ipconfig /renew
Restart your PC.
As the Caa70007 error is also associated with the network issue, you can try running the above commands to release and renew the IP.
7. Clear the browser cache
Launch your web browser.
Click on the 3-dot menu icon.
Click on Settings.
Select Privacy and Security.
Click on Clear browsing data.
Check the boxes for Browsing history, Cookies and other site data, and Cached images and files.
Hit the Clear data button.
Restart the browser and check if this resolves the issue or not.
You can try clearing the browser cache if you are accessing Microsoft Teams via a web browser. However, the browser cache can often cause multiple issues if corrupt.
Also, if that doesn’t help, you can check out our guide that lists some of the best browsers you can use on your Windows 11 PC.
8. Reset Microsoft Teams
Press the Win + I keys to open Windows Settings.
Click on Apps on the left pane.
Select Installed apps.
Locate Microsoft Teams and click on the 3-dot icon next to it.
Select Advanced options.
Scroll down, and under Reset, click on the Reset button.
9. Check Azure AD Device Registration
Run this command in an admin PowerShell window:
dsregcmd /status
Look for AzureAdJoined : YES.
If it’s NO, your device isn’t properly registered, which causes this error.
Device registration issues are often the root cause of sign-in failures like CAA70007.
10. Reconnect Your Work or School Account
If your device is registered but still errors out, try this:
Open Settings → Accounts → Access work or school
Remove your work/school account
Restart your PC
Add the account back
This resolves conflicts that cause errors like CAA70007 and other similar sign-in problems caused by account synchronization issues or corrupted local authentication data.
11. Turn Off VPN or Proxy Temporarily
VPNs and proxies can block or interfere with the connection Teams uses to authenticate. Disable them temporarily, sign in again, and if successful, configure your VPN to allow Teams traffic or set up split tunneling.
12. Use Teams Web App as a Quick Workaround
When all else fails, log in through the Teams web client at teams.microsoft.com. The browser version bypasses some device authentication checks that trip up the desktop app.
Other CAA Errors? Here’s What They Mean
CAA70007 isn’t the only Teams error tied to identity and device trust. These are related and often show up under similar conditions:
CAA50021: Often caused by expired tokens or account conflicts. Removing and re-adding your work account usually resolves it.
CAA30194: Points to issues with corrupted local files or tokens. This one often requires deeper cleanup or profile repair.
CAA50024: Usually happens when Teams can’t validate user credentials. Updating Teams or Office and removing conflicting accounts helps.
Knowing the difference between these codes helps you pinpoint the real issue faster.
Struggling to access your PSN account? If you can’t sign into PlayStation Network, it’s likely due to server issues, incorrect login info, or network problems. This guide breaks down all possible causes and fixes, whether you’re on PS4 or PS5.
What do I do if I can’t log into PlayStation Network?
Then, click on thetrouble signing in option and select Reset password.
When prompted, provide the email address used to create your PSN account.
Check your email for instructions on how to reset your password.
Once done, return to your console and try signing into your account.
If you recently changed your account’s password or forgot it, changing it again would be helpful.
2. Restart your PlayStation
1. Press and hold thePS buttonfor approximately 10 seconds until you see the Quick Menu.
2. Next, go to thePower tab.
3. Select the Restart option.
4. Confirm your action.
5. Wait a few seconds while your console reboots and try signing into your account again.
Restarting your PlayStation is generally the first step to try if you encounter minor bugs and glitches. This easy fix can help you sign in to PlayStation Network without any problems.
3. Check for any pending updates
Enter PS4 Settings using your controller.
Next, go to System Software Update.
Select Update Now and wait while your console checks for available updates.
If an update is available, click Accept and follow the on-screen prompts to install it.
If you have a PS5, here’s what to do:
On your PlayStation 5, go to the Settings and access the System tab.
Navigate to System Software and select System Software Update and Settings.
Click on Update System Software and choose Update Using Internet.
One of the things to check when you’re having problems logging in is if there are any recent pending updates to your console. Updating it can sometimes help solve the problem. This also helps when faced with The page cannot be displayed. (80710a06) PS3 error.
When creating an account with PlayStation Network, you agree to obey the Terms of Service. If you breach these terms, they may suspend your console from accessing the PlayStation Network, and, as a result, you can’t sign into it.
The suspension could either be permanent or temporary. However, in the case of permanent suspension, you can appeal PSN for removing the ban.
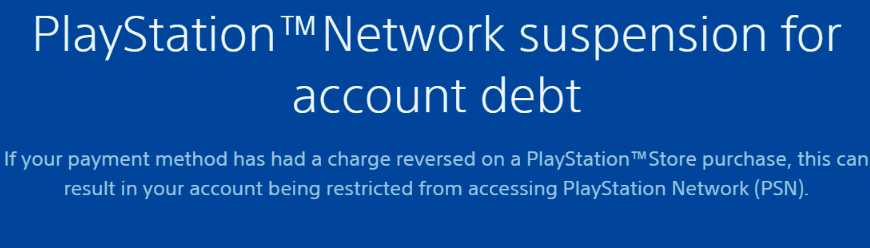
5. Pay off the debt
With so many payment methods, shopping on the PlayStation Store has never been easier. But with great choice comes great responsibility. If your payment method has had a charge reversed, you might find yourself locked out of PSN.
In the event of a chargeback, PSN can react swiftly to protect your account from fraudulent activity. If a chargeback occurs without cause, you will retain access to your account only once the debt has been repaid.
6. Disable 2-step verification
If you have Google TV or Media Go, you will receive a wrong password message the first time you sign in to these devices with your 2SV code.
This is only temporary and can be easily resolved. Just disable 2SV when signing in, then enable it again after you finish.
7. Contact PlayStation Support
Suppose you cannot provide the verification information for your account or cannot access the email with a link to reset your password. In that case, we recommend contacting PSN support for further assistance.
What are some of the most commonly reported issues on the PlayStation Network? We’ve outlined some of the most common PSN issues below:
PlayStation Network sign-in failed: If you face a PSN sign-in error, you need to check whether your online ID or password is incorrect or the PSN servers are down. In such cases, an error code ce-33729-4 may appear.
PlayStation 4 error NW-31473-8: It is an extremely annoying problem that can happen to anyone who uses the console. However, we have a quick guide to walk you through solving it for good.
Content cannot be selected at this time (PS4 error): If you are getting the Content cannot be selected at this time error on your PS4, it can be frustrating. While there is no official fix for this issue, there are some troubleshooting methods detailed in our guide that you should try.
If services are undergoing maintenance, wait until Sony resolves it.
9. Manually Set DNS Settings
Go to Settings > Network > Set Up Internet Connection
Choose Custom, then select:
IP: Automatic
DHCP Host Name: Do Not Specify
DNS: Manual
Primary: 8.8.8.8
Secondary: 8.8.4.4 (Google DNS)
MTU: Automatic
Proxy Server: Do Not Use This helps resolve DNS-related login issues.
10. Enable UPnP or Port Forwarding on Your Router
Log in to your router settings.
Enable UPnP if available, or manually forward these ports:
TCP: 80, 443, 3478, 3479
UDP: 3478, 3479, 49152–65535 This improves NAT type and connectivity with PSN.
11. Sign In Using Another Device
Try logging in to your account on a browser or the PlayStation App.
If you can log in there, the issue may be with the console or its connection, not your credentials.
12. Rebuild Database in Safe Mode
Turn off your PS console completely.
Hold the power button until you hear the second beep (about 7 seconds).
Connect your controller with a USB cable and select Rebuild Database. This can resolve corrupted system files that prevent login.
If the problem is still there, we have a great guide on how to fix An error has occurred on PS4 message, so don’t miss it.
Though the Xbox One often overshadows the PS4, many reasons exist to choose Sony’s console. Thus, you may want to check our guide on the best PS4 emulators for PC to enjoy your favorite games.
If there is anything we missed, please leave a comment below. We will surely try to address the issue.
It seems that This content cannot be selected at this time error on PS4 in FFXV, Assassin’s Creed, Modern Warfare & DiRT Rally had a higher rate of occurrence than with other games. Nevertheless, it continues to affect other PS4 users now and then.
This usually happens due to misconfigured region settings, parental control settings or an outdated PS4 firmware. If the PS4 firmware is outdated, check for updates and install them right away. You might encounter a System Software Update Error, but it’s easy to fix.
How can I fix the This content cannot be selected at this time error on PS4?
1. Restore Licenses
Open PS4 Settings, and go to Account Management.
If the PS4 is not yet set as the primary device, select Activate as Your Primary PS4.
Choose Activate and wait for the process to complete.
Once done, select Restore Licenses in the Account Management settings.
Select Restore.
After the restore is complete, you shouldn’t get the error message.
If you recently purchased some content from the PS Store and arere facing the dreaded This content cannot be selected at this time error, restoring licenses.
2. Access the PS Store from the PS4 dashboard
Many users receive this error when trying to access or purchase PS Store content in-game. For instance, if you’ve purchased (or want to purchase) DLCs for some of your games, you may try to access them from within the game.
If you’re encountering the abovementioned error, try long-pressing the PS button and accessing the PS Store from the PlayStation dashboard. If that doesn’t work, try closing the game, then go to the dashboard Store app again.
This is quite an extreme measure, as it involves creating a new PSN account. And we all know that switching accounts are not a great measure, especially if you invested a lot of time in your account.
However, if you have a VPN and want to see if the This content cannot be selected at this time error is purely regional, this is a good way to check.
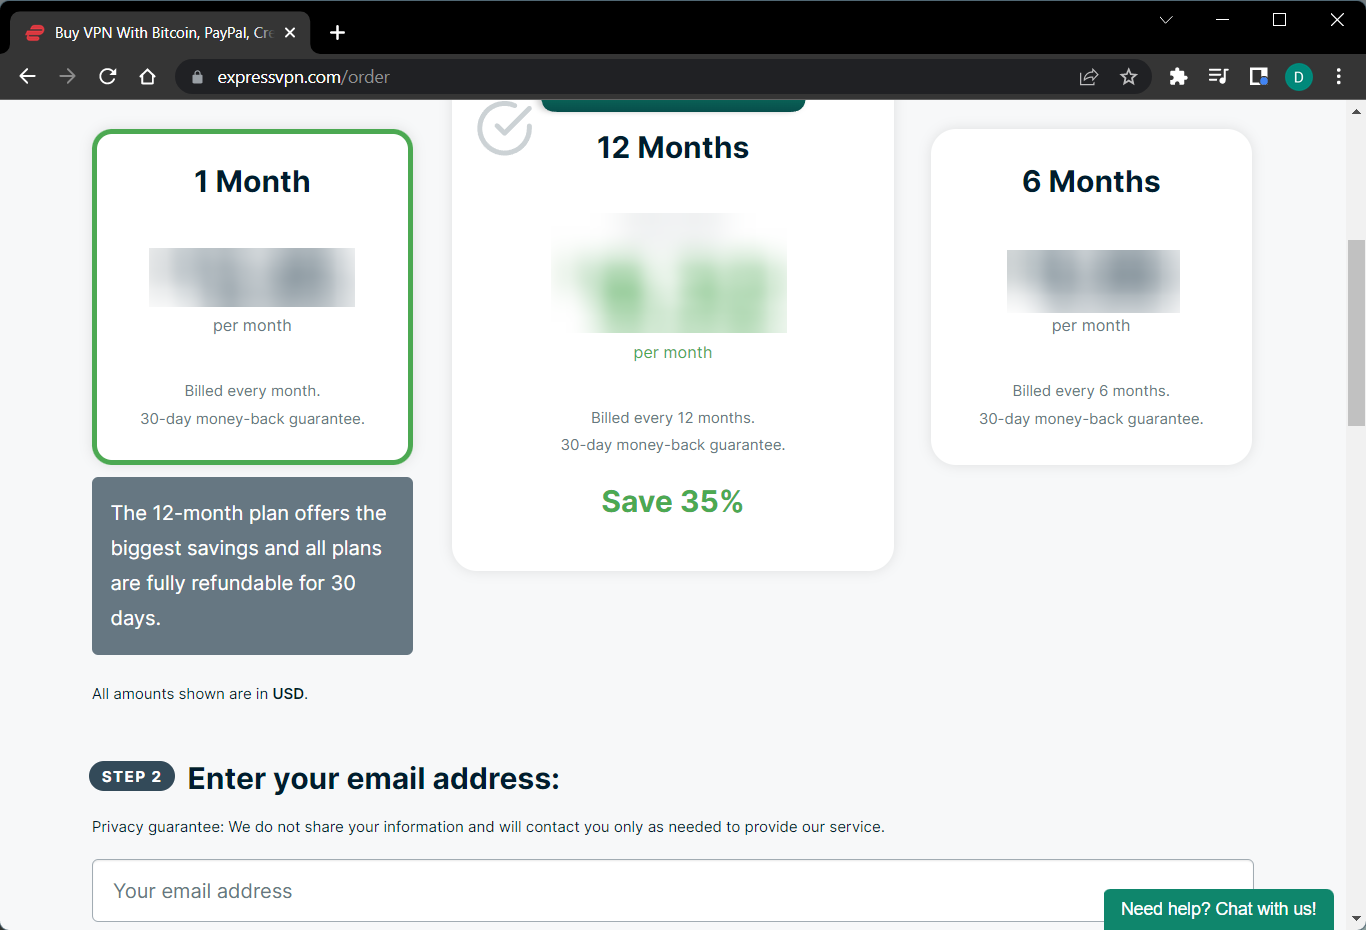
The most reliable VPN software that works on PlayStation 4 consoles and offers plenty of servers in 94 countries is ExpressVPN.
So if you can confirm that the error is indeed related to your region, go back to step 4 and repeat it as necessary.
Other solutions you can try
Restart the PS4. While doing so, make sure to unplug it from the power source, then reconnect it, and press the power button to turn on the PS4. Make sure you don’t choose the Rest mode.
In case it’s a server outage or a lot of users are trying to access the same title, the PS4 may throw this message. So, you should wait for a while, probably an hour or so, until the servers resume normal operation.
Make sure you have selected the correct region in the PS4 settings. If there’s an issue here, try changing the region.
Disable Parental Controls on PS4.
Final thoughts on fixing the This content cannot be selected at this time error
All things considered, if you encounter the This content cannot be selected at this time error, don’t fret. More often than not, the error is purely regional, meaning you’ll need to wait for it to pass.
Other times, merely powering off your PS4 and switching it back on can save you from a lot of headaches.
Last but not least, if you’re determined to find out what’s wrong, you could use a VPN and create an account using a different region. It won’t fix your issue if you care about your old account, but it will provide some useful insight.
Also, if you are wondering, users can now play PS4 games on a PC. So, you should try that.
If you have any other queries or know of a solution that we missed, drop a comment below.
The error has occurred PS4 sign-in message shows up when you sign in to your PSN account and it will prevent you from making online purchases and more.
Fixing this issue is pretty simple, and today we’re going to show you the best ways to do that, so let’s get started.
Why does An error has occurred on sign in on PS4 appear?
This issue appears if your account isn’t verified or if your account information isn’t up to date.
What can I do when the PS4 says an error has occurred?
Users who got the an error has occurred PS4 sign in error have fixed it by simply logging in to their account on a different PS4 console.
6. Change the Privacy Settings to No One
Turn on your PS4 console.
On the Home menu, go to Settings.
Navigate to PlayStation Network.
Click on Account Management and select Privacy Settings.
On the Privacy Settings page, modify every setting to No One.
First, click on Gaming | Media.
Click on Edit next to the item and change the dropdown menu option to No One.
At this point, you have to repeat the steps on all the options under Friends | Connections and Personal Info | Messaging.
Note: You can also access the Privacy settings from the website via this link.
What do you do when your PS4 keeps logging out?
You should stay logged on to your console. However, if you’re getting logged out of PS4 because an error has occurred, follow the next steps to resolve it.
Sign out the account with the issue from the PS4 system.
Turn off your PS4 console.
Visit the PlayStation website on your internet browser.
For desktop: Sign out and sign back in, if you are already logged in. Then, sign out again.
For smartphones:
iOS: Tap and hold the refresh button and select Request Desktop Site.
Android: Tap the three dots in the upper right-hand corner and tap on Desktop Site.
Sign in to your PlayStation account.
Sign out of the account.
Power on your PlayStation console.
Can’t connect to PlayStation Network?
Even if you are positive that your Internet connection is up and you entered the correct password, you may still have difficulty with your network.
Here are some of the most common error messages that indicate an underlying issue with your network setup:
Sign in to PlayStation network error has occurred, error code NW-102311-8
Sign in to PlayStation network error np, error code 31730-4
When registering your PS4 account, if you are under 18 years old, it’s not a good idea to increase your age because you won’t be able to add billing information. Get an adult to help you out.
With these methods, you will easily remove the PlayStation network sign-in failed error and sign in to your account. The solutions on this page will also fix the problem of PS4 logging you out.
Let us know if this guide helped you solve the problem. If you have your solutions and suggestions, please let us know in the comments below. Might be useful for somebody else in the community.
DLL or Dynamic Link Library files are necessary for your PC to work without issues. However, if an important DLL file such as Mfc71u.dll is missing or becomes corrupted, then it could cause your PC to malfunction.
People have been reportingMfc71u.dll Not Found or Missing error messages for quite some time now.
If you also face the Mfc71u.dll Not Found or Missing error message, you have landed at the right place. In this guide, we will help you with several methods to download the Mfc71u.dll file in case it goes missing.
What are the different types of Mfc71u.dll errors?
Well, Mfc71u.dll not found or missing error message isn’t the only form of the error message that could pop up.
Here is a list of similar common error messages that you will see.
Mfc71u.dll Not Found
This application failed to start because mfc71u.dll was not found. Reinstalling the application may fix this problem.
Cannot find [location]\mfc71u.dll
The file mfc71u.dll is missing.
Cannot start [program]. A required component is missing: mfc71u.dll. Please install [program] again.
As you can see, this error has quite a variety, depending on the exact circumstances in which it appears, but they all signal the missing DLL file.
How can I download and fix Mfc71u.dll error?
1. Use a dedicated tool
When handling system files you should always exercise the utmost care. If you are not entirely sure on what needs to be done you can always rely on specialized repair tools.
This kind of software will scan your system, identify the issue, and try to fix it. If that doesn’t work they will download a fresh new file instead of the broken one.
2. Run SFC Scan and DISM commands
Open the Start menu by pressing the Win key.
Open Command Prompt as an admin.
Type the below command and press Enter. sfc /scannow
Wait for the process to complete.
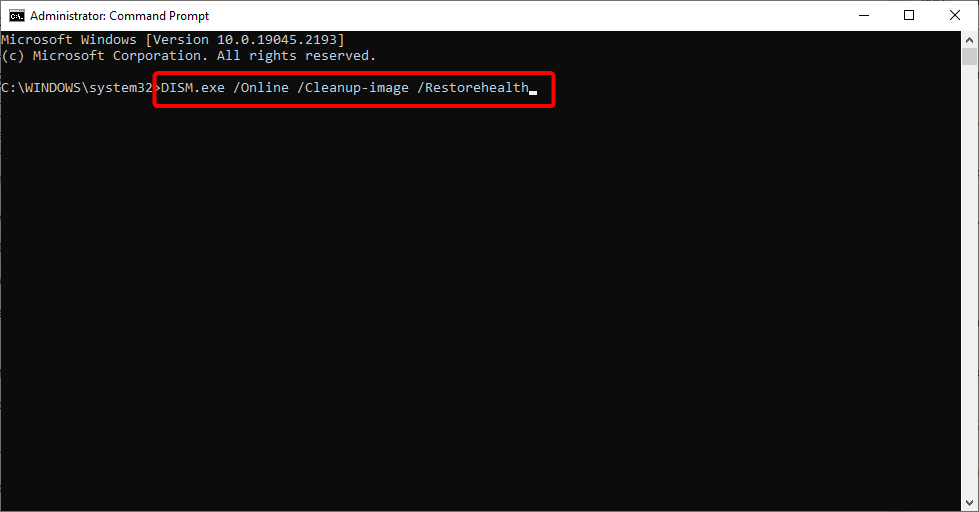
Execute the below command. DISM.exe /Online /Cleanup-image /Restorehealth
Restart your PC after the process completes.
You can also use the Windows in-built SFC Scan, and DISM commands to fix the missing or corrupt system files. For example, this could also replace the missing Mfc71u.dll file.
Expand any section, to begin with—for example, the Display adapter.
Double-click on your GPU to open it.
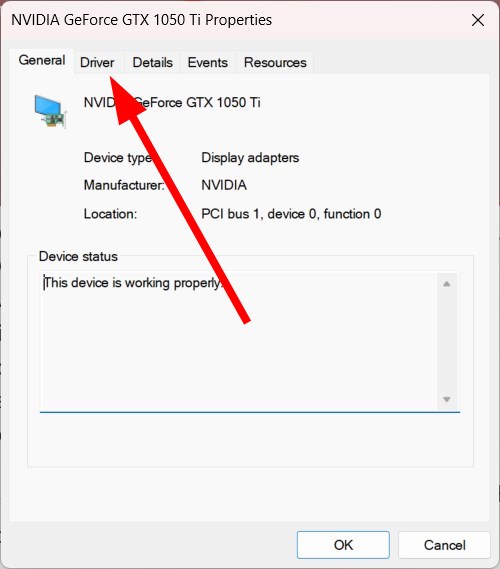
Switch to the Driver tab.
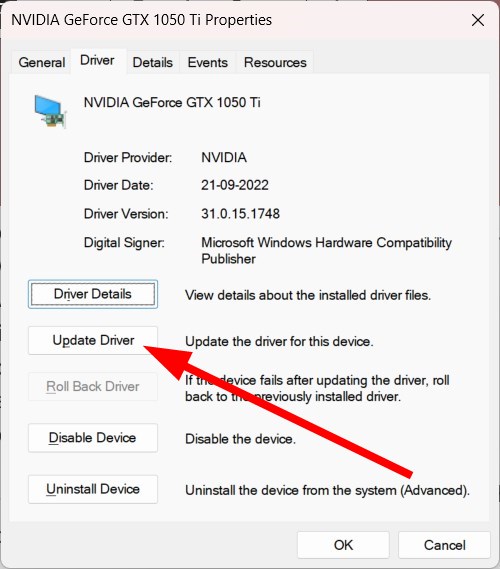
Select Update driver.
Choose Search for drivers automatically.
Let the system install the latest drivers for your GPU.
Perform the same steps for other drivers.
The Mfc71u.dll error is often associated with a program, for example, with a game you are playing. In such a case, the main driver component for a game to run smoothly is the display adapter.
So, you can troubleshoot the issue by updating the driver. However, this error could also be related to audio and other drivers. In such a case, the above steps will take more time. To avoid this issue, you can opt for a dedicated tool called Outbyte Driver Updater.
With Outbyte Driver Updater, you can update all drivers with just a few clicks. You can also perform schedule scans, create driver backups, and more.
4. Perform System Restore
Press the Win key to open the Start menu.
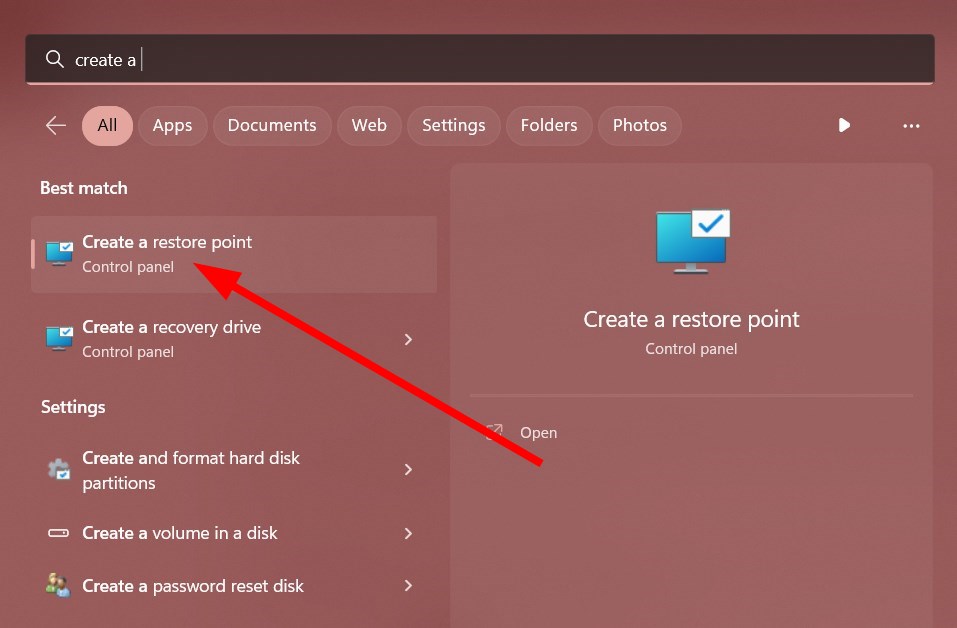
Type create a restore point and open the appropriate program.
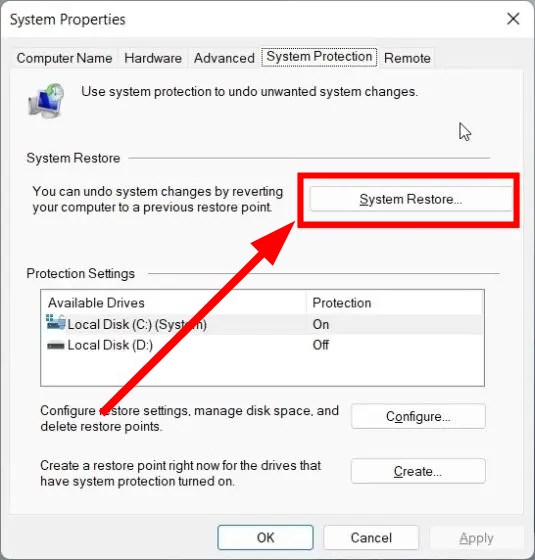
Click on System Restore.
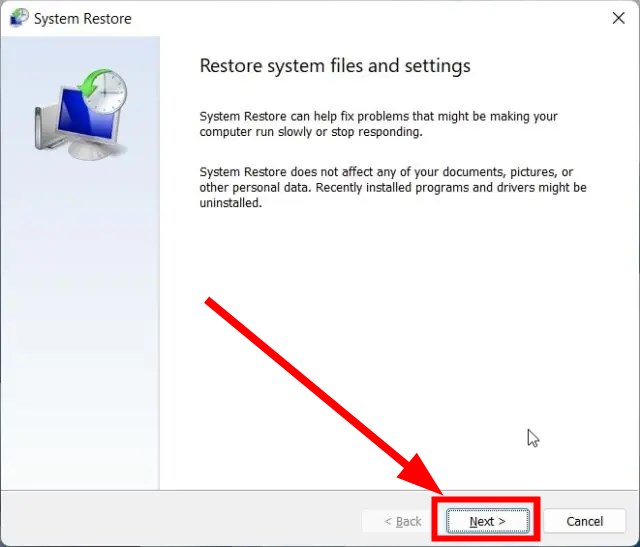
Click on Next.
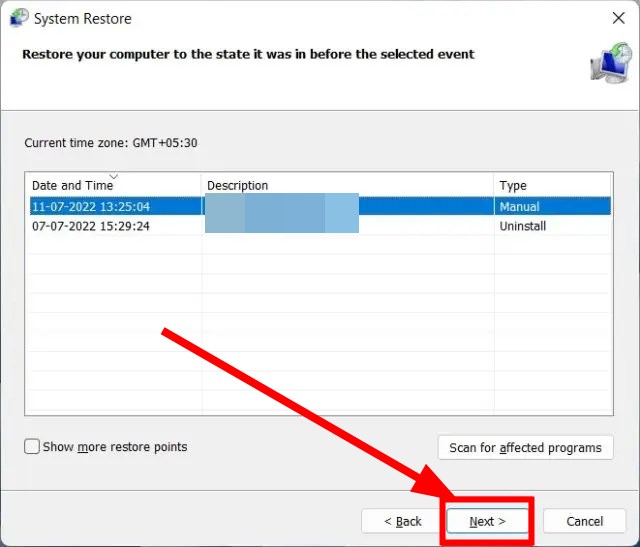
Choose the restore point and hit the Next button.
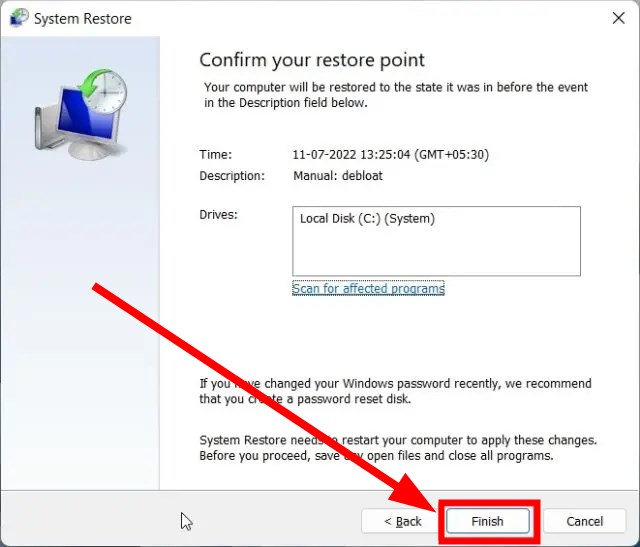
Select the Finish button.
The system will begin restoring your PC to a state where everything is normal.
You can also perform a system restore to return to the state when your PC was working, and the Mfc71u.dll error message wasn’t popping up.
Note that the system restore will only work if you have created a system restore point. If you do not know how to do that, check out the guide to understand how to make a restore point on your Windows 11 PC.
5. Reset your PC
Press the Win + I key to open the WindowsSettings menu.
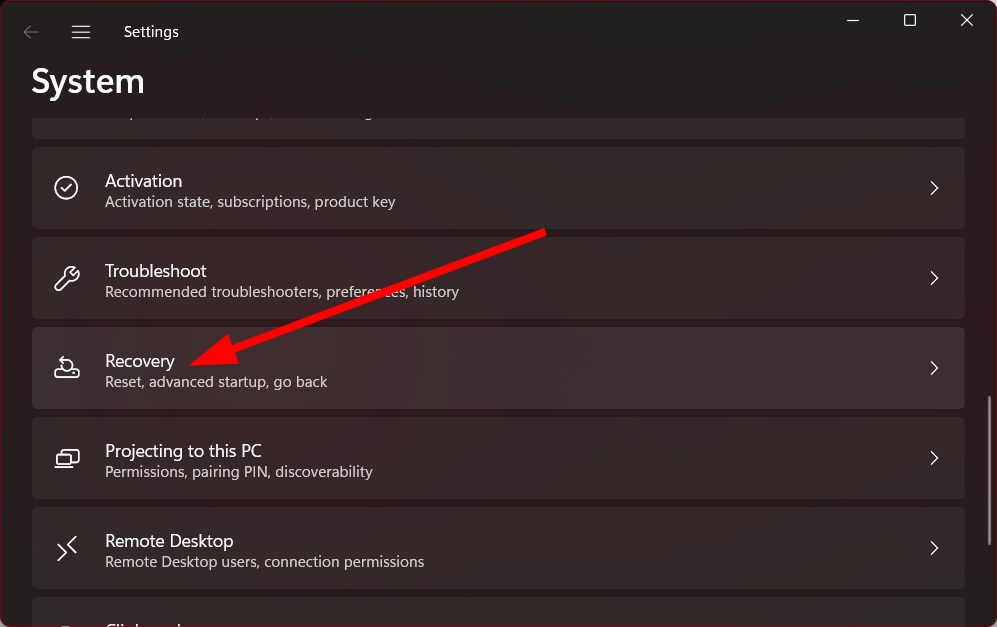
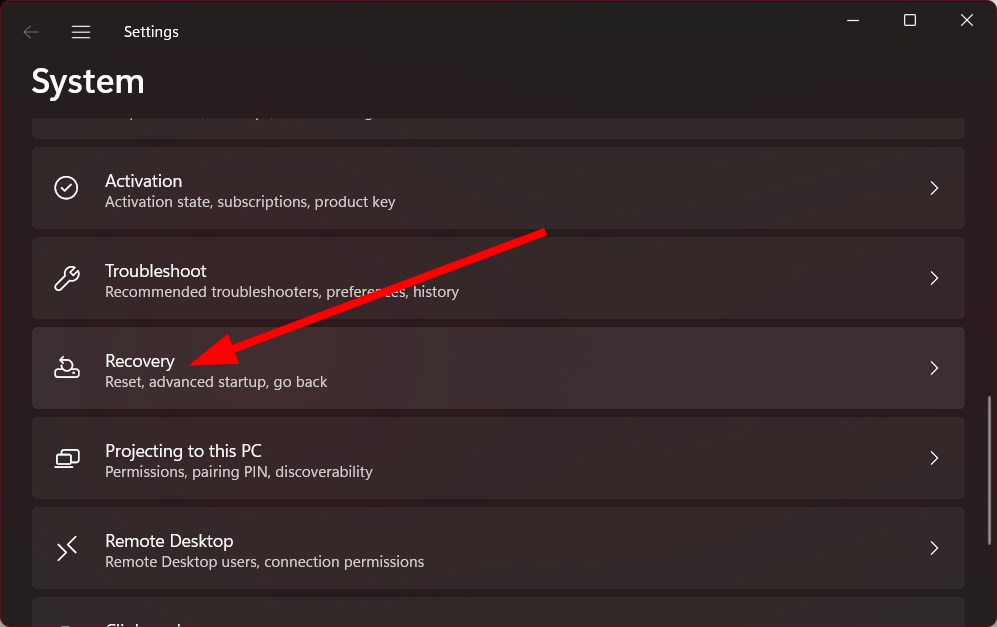
Select Recovery from the right pane.
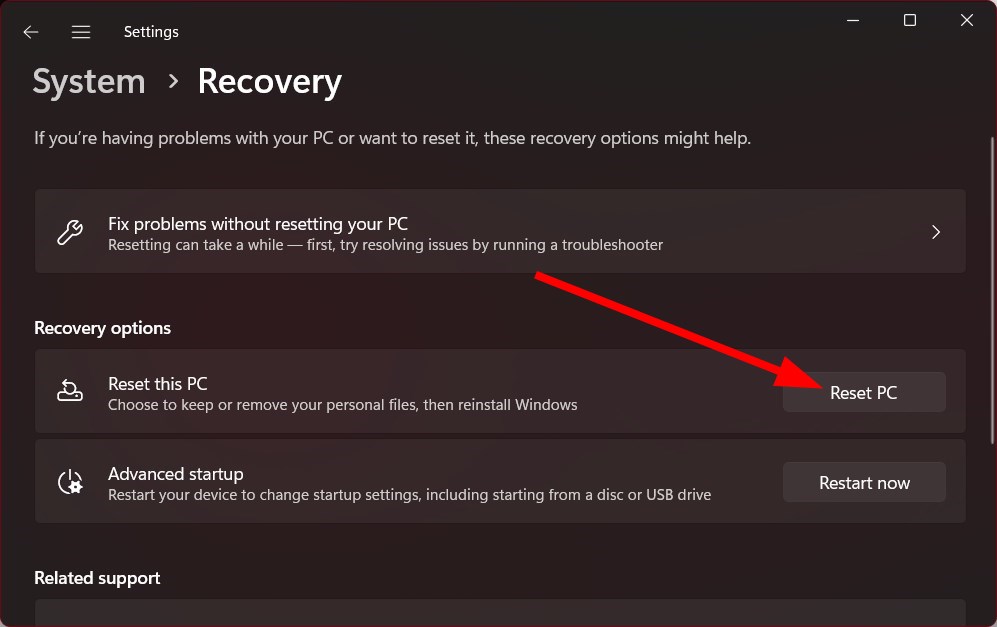
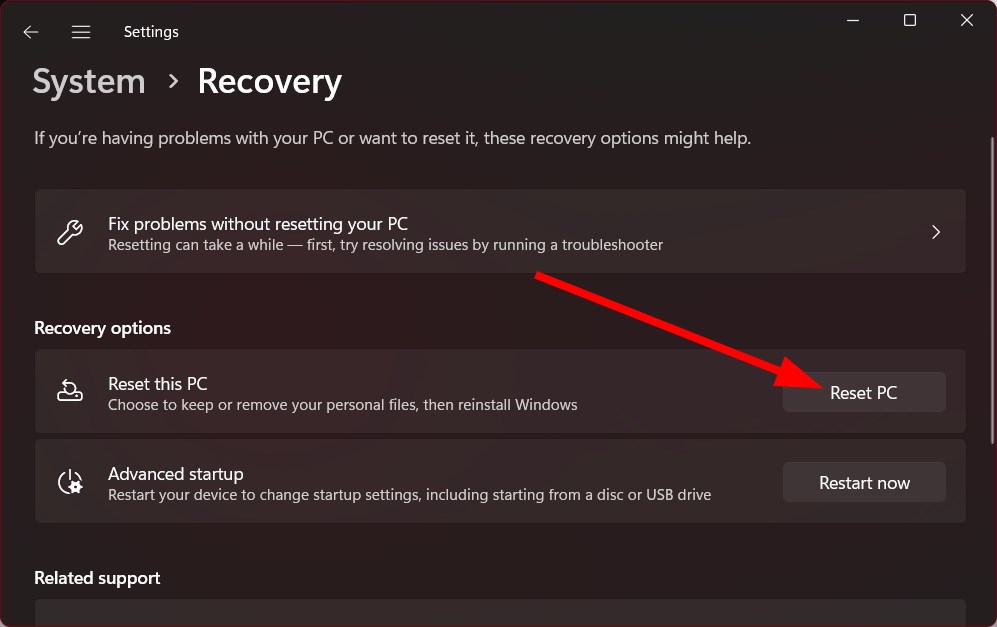
Click on the Reset PC option.
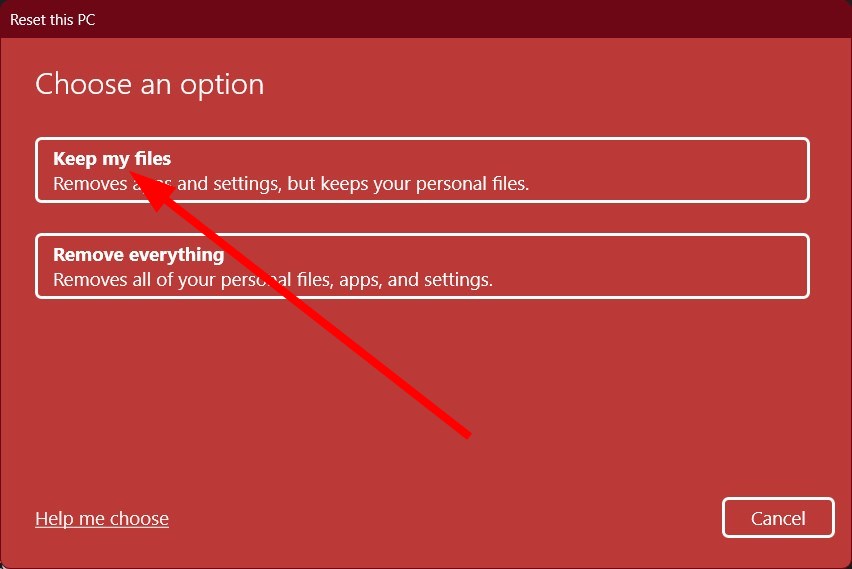
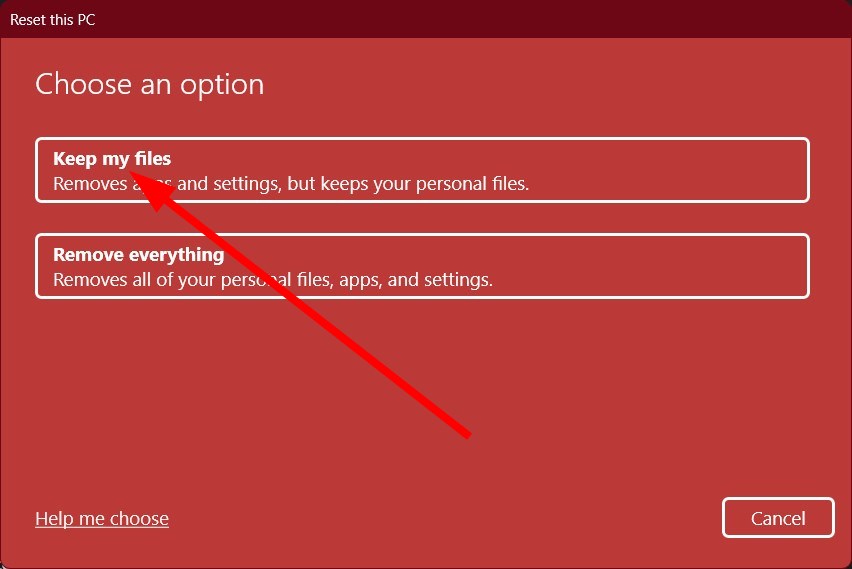
Choose the Keep my files option to reset your PC without deleting your personal files.
After the reset process completes, restart your PC.
You should reset your PC only if none of the above solutions worked for you in resolving error messages associated with Mfc71u.dll.
That is it from us in this guide. You might wonder why we haven’t suggested you download the Mfc71u.dll from a website and fix the problem.
First of all, there isn’t any trusted website that we could recommend you to download the file from, and secondly, chances are the DLL file that you download could be malware or ransomware that could cause severe issues to your data.
What we can suggest is to reinstall the application that is mentioned in the error message. Also, you can try updating your Windows PC.
Notepad is a built-in Windows text editor app that can be used to view, create, and edit text files at any time, similar to note-taking apps. But some of our readers have recently reported that they encounter Notepad not opening on Windows 11 error, and this is becoming frustrating.
If you have been experiencing similar issues on your Windows 11 PC, do not worry, as we have gathered some potential fixes on how to enable your Notepad application.
Why is Notepad not opening on Windows 11?
Several things will likely trigger the Notepad Not Opening on Windows 11 error. Below are some of the major reasons reported by some users:
Corrupt or missing files – If a crucial system file connected to Notepad is damaged or missing, the application may not function as expected.
Using an outdated version of Notepad – Another possible reason for this error is if the Notepad app is outdated. This means the version of the app is not compatible with Windows 11.
Interference with third-party programs – Notepad and another program may have a software clash, which may cause the app to malfunction due to some programs interfering with it.
Sudden system shutdown – Some users also claim they experience this error when the system’s power supply is interrupted suddenly while Notepad is opening.
Above are some potential reasons for the Notepad not opening on Windows 11 error, as reported by some users. Not to worry, below are some proven fixes for the error.
How can I fix Notepad if it’s not opening in Windows 11?
Before trying any of the advanced solutions provided for this error, you should perform the following checks, as any of them may fix the issue:
Try to restart your PC, as this has fixed several computer problems.
Make sure you are running the latest version of Notepad.
Having confirmed the above checks, and you still require further assistance on how to fix Notepad if it’s not opening in Windows 11, you can work your way through any of the steps provided in the next section.
1. Set Notepad as the default text editor app
Press the Windows key + I to open the Settings app.
Navigate to the Apps and select Default apps from the right pane.
Now, scroll down to click on Notepad in the list of applications.
Scroll down and select the .txt entry.
In the pop-up window, choose Notepad and click OK to save the settings.
Once you have set Notepad as the default text editor, you can open any text file with Notepad. If you still have issues with Notepad not opening, move to the next solution.
2. Reset Notepad to default settings
Press the Windows key + R to open Run window, type regedit in the text field and press Enter to open Registry Editor.
Go to the following registry key: HKEY_CURRENT_USER\Software\Microsoft\Notepad
Select the registry key and click the Delete button.
Confirm the deletion if prompted.
Now, close the registry editor and restart your computer.
Another effective way to reset Notepad to its default settings is via the Installed apps in Settings. However, make sure you have backed up your registry if you choose to use the registry editor.
Press the Windows key, type command prompt, and click on Run as administrator.
Next, type the following and press Enter: sfc /scannow
Wait for the scan to complete, then type the following command, and press Enter: DISM /Online /Cleanup-Image /RestoreHealth
Once completed, restart your PC and check if the error is fixed.
The System File Checker (SFC) and Deployment Image Servicing and Management (DISM) scans are both Windows utilities that can help to detect or repair corrupted system files and other issues.
In addition, you can automate the above SFC and DISM procedures by simply using dedicated applications.
4. Open Notepad using its .exe file
Press the Windows key + E to open File Explorer.
Click on the address bar, type the following in the address box and press Enter: C:\Windows\System32\notepad.exe
Notepad should open now.
Opening Notepad from its executable file is another easy means to get notepad running again. However, if File Explorer won’t open, you can explore this guide to fix it.
5. Repair and reset the app
Click the Start button and select Settings.
Choose Apps from the left pane, then click on Installed apps from the right.
Look for Notepad in the list of apps, click on the three dots from its right, and select Advanced options.
Now, scroll down and click on the Repair button.
After the repair process, check if Notepad is opening. If not, repeat the solution and choose the Reset button instead.
6. Reinstall Notepad
Press the Windows key + I to launch the Settings app.
Navigate to Apps on the left pane and click on Installed apps.
Scroll down and select Notepad to expand it and click the Uninstall button.
Check for the official Notepad app and click on Get to install it.
Uninstalling and reinstalling Notepad is one of the most effective ways to get Notepad running again in Windows 11.
And that’s how to fix your Notepad if it’s not opening in Windows 11. You don’t have to use all the fixes provided in this article. Work your way through any of them to know which works best for you.
While using Microsoft Teams, users often delete messages. Usually, if these messages are important, you’d have to find a way to recover the message. If you’re looking for a way to recover deleted chats, this article will provide you with the best methods to recover deleted messages in Microsoft Teams.
Is it possible to recover deleted chats in Teams?
The short answer is yes; restoring deleted chats in Teams is entirely possible. However, what makes it a challenge is the complexities that come with it.
Recovering deleted chats in Teams requires you to utilize a tool called eDiscovery. Traditionally, Microsoft Teams isn’t built to recover deleted chats, unlike other applications.
However, with this tool, you should be able to search for deleted messages and restore them to your PC.
How can I recover deleted chats in Teams?
Recovering deleted chats in Teams cannot be done directly. To perform this task, you’d need to have a compliance retention policy or a legal hold in place for Teams messages.
With this in place, you can follow the steps below to help you recover deleted chats in Microsoft Teams.
1. Create an eDiscovery Manager
Launch your preferred browser and navigate to the Compliance Portal.
While in your compliance portal, click on eDiscovery on the left pane, and select Permissions.
Navigate to Microsoft Purview solutions on the Permissions page and click Roles.
Scroll down and check the eDiscovery Manager box. A mini-window named eDiscovery Manager will appear on the right pane.
Click on the Edit Role group option.
Navigate to the Choose eDiscovery Manager option on the left pane and click Choose eDiscovery Manager.
Click the Add button, select your name from the list of users, and click the Add button.
Scroll down to the bottom of the window and click Done.
Click the Savebutton to save your changes.
You need to be an eDiscovery manager to be able to view the results of the eDiscovery search. If you already have access to eDiscovery, move on to the next step.
2. Create a case for recovering deleted messages
Navigate to your Compliance Portal.
Click on eDiscovery on the left pane and select User datasearch from the drop-down menu.
Click the Create a case button, and name your case. Preferably, you can name it Deleted Teams Messages.
You can choose to write a description and click the Next button to proceed.
In the User who filed the request box, click on the box, and select your name from the drop-down list.
Click the Next button and click Save to save your changes.
After successfully creating your case, click the Finish or Show me search results buttons.
After creating a message to delete, you’ll need to create a case before running an eDiscovery search.
In the eDiscovery manager, click on the Open Case button. A new browser tab called Microsoft Purview will open.
In the new tab, click Searches on the Menu bar.
Click the Guided Search button to open the search query.
In the next popup window, click the Cancel button in the top-right corner.
Click Yes when the prompt Cancel this wizard displays.
Click the Add Conditions button toedit the search query.
Check the following boxes: Date, Sender/Author,and Type, and click the Add button at the bottom.
To search for messages between two dates, you’ll set a Before and After.
Use Between and set the exact date in each box to search for a specific day,
To search for messages sent by a specific person, type their name in the Sender/Author box.
After selecting the search query, check the box next to Instant Messages, and make sure all other options are deselected.
In the Specific Locations tab, click Modify.
Click the toggle button next to Teams messages and click the Save button.
Click the Save and Run button to conclude your changes.
You’ll have to create a name for the search before it runs. Type your preferred name into the Name box and click Save.
After the search is completed, click on the results to view the message.
Deleted messages will appear as duplicate messages.
Before running an eDiscovery search, you’ll need to open your case.
4. Export the search results
In the Results page, click More, and then select Export result.
Scroll down and click the Export button.
Navigate to the Exports tab at the top of the menu bar and select your Export.
Click on the option Download Results at the top of the next window.
Click Yes when you receive the prompt Open this file?
Once the download is completed, click on the link next to Export Location.
The newly created data will be stored in a CSV file named Results.
You must read the file with Microsoft Excel or a similar application.
Recovering deleted messages in Microsoft Teams is a very hectic procedure that requires following many carefully laid out techniques, but this is how to see deleted messages in Teams. Similarly, you can also recover deleted Skype messages.
However, with the steps above, you should be able to recover deleted messages in Teams. If you have any questions or suggestions, kindly drop them in the comments section.
It can be frustrating if your laptop suddenly turns on and off repeatedly. There could be various reasons behind it, including overheating, damaged hardware, or malware infection.
In this guide, we will discuss the step-by-step instructions to fix the issue right after talking about the reasons for the problem.
What causes the laptop to turn on and off repeatedly?
There could be various reasons for the laptop to behave in such a manner; some of the common ones are:
Hardware issues – Check for faulty RAM, hard drive, or other hardware components, as any of these could cause your laptop to turn on and off by itself.
Power issues – A faulty battery, charger, or power supply outlet could cause your laptop to turn on or off immediately.
Overheating – Check your laptop for overheating, as high temperatures could cause various problems, including this error.
Software interference – If there is an incompatible or damaged app, it could cause the laptop to malfunction, hence the issue.
Virus infection – If your computer is infected with a virus or malware, it could cause your laptop to turn on and off. You need to run a deep scan using security software to remove malware.
BIOS or firmware issue – Check the BIOS or firmware settings to ensure all the settings are correct. If not, reset the settings to default to fix the problem.
What can I do if the laptop turns on and off repeatedly?
Before engaging in advanced troubleshooting steps, you should consider performing the following checks:
Turn off your laptop completely and shut down the flap.
Go to your laptop’s back panel and slide the latch to the unlock position.
Remove the battery from the laptop.
Connect the charger to the power outlet and laptop to check for an issue. If the computer works fine, then you need to change the battery to fix the problem once and for all.
2. Check for overheating
If your laptop is overheating, it could be due to clogged air vents, which prevent proper ventilation. To clean the air vents, follow the steps:
First, turn off your laptop and unplug the charger.
Now turn your laptop over and locate the air vents.
Next, use a soft brush to remove the dust or debris that could clog the air vents.
3. Check the RAM and hard drive
Turn off your laptop and unscrew the laptop’s back cover.
Locate the RAM module and remove it by releasing the tabs.
Clean the slot and reinsert the RAM module into place.
Next, locate the hard drive, remove it, and clean the slot.
Reinsert the hard drive and make sure it fits into the slot.
Now put the back cover and screws back in, then restart your computer.
4. Check the power supply outlet and charger
Remove the charger from your laptop and power source.
Inspect the power cable for any visible damage or cuts.
If the charger is damaged or faulty, replace it with a new one.
Unplug the charger from the laptop and power source.
Remove the battery and hold down the power button for 15-20 seconds.
Reinsert the battery and plug in the charger.
Now turn on your laptop and check if the issue is fixed.
6. Run a malware scan
Press the Windows key, type Windows Security, and click Open.
Go to Virus & threat protection and click Scan options.
Select Full scan and click Scan now.
Follow the onscreen prompts to remove detected viruses.
You can as well consider using proficient antivirus software that comes with new virus detection algorithms and secures your PC from complex malware. TotalAV is a no-brainer option to protect and fix such laptop issues caused by viruses.
7. Update the drivers
Press Windows + R to open the Run window.
Type devmgmt.msc and press Enter to open Device Manager.
Look at all the drivers’ lists; if there is a yellow triangle on the icon, right-click it and select the Update driver.
Next, click Search automatically for drivers.
Follow the onscreen instructions to complete the process.
8. Reset the BIOS settings
Shut down your computer completely. Then, press the Power button to restart the device.
Now press F2, F10, or the designated key to enter BIOS as per your device’s manufacturer.
Locate Reset to default or Load Defaults option.
Follow the onscreen prompts to complete the process.
Click Apply Changes or Save and Exit, and press Enter to restart Windows normally.
So, these are the steps you must follow to fix the laptop turning on or off repeatedly. If the issue persists, it is recommended to seek professional help.
Please let us know in the comments section below if you have questions or concerns about the issue.
The use of Artificial intelligence has progressed and has made its way into photo editing. An AI photo editor uses machine learning algorithms to enhance and transform images, giving stunning results with minimal work.
There are various AI photo editors with unique features available in the market. In this guide, we will discuss some of the best AI photo editors available to make it easy for you to choose one as per your needs. Let’s start!
One of the most popular photo editing tools, Adobe Photoshop, has integrated AI-powered features into its Creative Cloud suite to help users retouch and style photos in a new way. Some of the useful tools are Sky Replacement, Content-Aware Fill, Auto Tone and Color, and Object Selection.
With the Neural Filters option, you can bring your old photos back, transfer colors, change facial expressions, poses, and more with a few clicks. The Colorize filter can automatically color black-and-white photos with precision.
With layers and masks, Photoshop can edit individual elements in an image without affecting other elements. The Adobe Sensei feature can automatically tag & organize images and recognize text & objects.
More about Adobe Photoshop
Automatically select specific objects in an image, making it easy to edit and remove.
Identifies the main subject of the image, which helps add effects with ease.
Removes unwanted objects or fills in gaps in an image.
Adjusts brightness, color, and contrast to provide a balanced and natural-looking photo.
Adobe Photoshop
Go for this industry-standard photo editor and bring your AI photos to life.
Luminar Neo – Best photo editing tool for beginners
Luminar NEO is an easy-to-use photo editor that comes with innovative AI-driven tools to enhance and beautify a photograph.
With fast image processing, it allows you to apply multiple edits use different tools on a photo, and save the changes with ease without any performance loss.
It comes with a set of AI-driven tools, including Magic Light, Supersharp AI, Focus Stacking, Upscale, Background Removal, Noiseless, and HDR Merge, to add more exposure to your images and make them flawless.
With Relight AI feature, Luminar Neo can create a depth map of a photo, which can be used to distribute light throughout the 2D image, providing a more spatially accurate representation of the photo. The software preserves the original image, and changes made can be reversed or adjusted anytime.
More about Luminar Neo
Supports a wide range of file formats, including RAW files.
Provides support for masks and layers, making selective adjustments easy.
You can add text & graphic overlays and adjust the position, size, & opacity.
Has a range of filters and presets to use and also allows you to create custom presets.
Luminar Neo
Bring the future of photo editing with this top-notch AI photo editor today.
With a set of comprehensive tools, Corel PaintShop Pro is one of the best AI-powered photo editors, which can help you enhance your images swiftly. It has a range of AI-driven features, including Upsampling, AI Denoise, AI Artifact Removal, AI Style Transfer, and more.
This software uses AI algorithms to fill gaps and produce high-quality enlarged images without comprising image quality or resolution.
With AI Portrait feature automatically can smooth skin, remove blemishes, and brighten eyes to enhance your portraits naturally.
The tool analyzes the image and removes the artifacts while preserving important details in an image using the Artifact Removal module.
More about Corel PaintShop Pro
Supports RAW image formats from a range of cameras, which allows you to work on high-quality images.
Allows you to apply the same changes to multiple images at once, saving you time.
Enables you to apply different styles to your photos to create unique effects.
Can automatically separate the background from the subject precisely to let you focus on what’s important.
Corel PaintShop Pro
Benefit from this professional AI photo editor and transform your images into art.
Topaz Photo AI is an exceptional photo editing tool that can help you improve image quality, giving the best possible results. You can remove noise, sharpen the image, and increase the resolution of the image with a few clicks.
This software can distinguish between noise and image detail and can accurately separate noise from your image, giving you a clearer photo. The Color correction module can help you bring the real colors of your pictures back.
With one-click presets it is easy even for a novice to use the tool and get better output. When upscaling a low-quality image, it remembers minute details from several similar images and fills in missing pixels based on that understanding, thus giving you a sharp and clear photograph.
More about Topaz Photo AI
Supports RAW image processing, allowing you to work with an uncompressed and high-quality image.
Can apply creative effects, including artistic filters and stylized looks, in a single click.
Allows you to use preset and can process images in batches.
Can also be used as a plugin for photo editing software such as Adobe Photoshop.
If maintaining consistency is what you look for in your photo edits, then Imagen-AI is for you. It asks you to upload your previously edited pictures to analyze your style and generate your unique profile or choose pre-built Talent AI profiles.
This AI-powered batch photo editor allows you to enhance your photos in a few seconds. To do that, it analyzes each photo you want to edit in real time and adjusts the parameters based on your selected editing style to give you the best results.
This powerful tool can automatically remove the background from the image so that you can focus on the subject. With Image enhancement, you can enhance the image quality and appearance by adjusting the brightness, contrast, sharpness, and other parameters.
More about Imagen-AI
Can transfer style from one image to another seamlessly, saving you time.
Allows you to compress images without compromising the image quality.
Can help you create vibrant and realistic-looking color images from archival photos.
Restore old or damaged photos by repairing scratches, stains, and other imperfections.
What are the advantages of using AI photo editors?
Although the built-in Photos app in Windows 11 has the Generative Erase feature, using artificial intelligence photo editor software has several benefits: some of which are:
Speedy – These photo editors can examine the image and make edits swiftly; therefore can be used to remove unwanted objects from photos.
Accessible – These tools make editing images easy, even for people with little or no knowledge and experience in using photo editing software.
Consistent – If you want to edit several images the same way, an AI photo editor can do that perfectly.
Can automate tasks – These tools can be used to automate repetitive tasks such as cropping and resizing images, thus saving time.
Accurate – The software can identify and correct image imperfections, including red-eye and blemishes, with greater accuracy and make changes to enhance the image.
So, these are some of the best AI photo editors available for you to choose from. Try them and let us know your favorite in the comments section below. Moreover, if you need a good free AI image generator, we can help you out!
A lot of organizations are now dependent on online communication platforms like Microsoft Teams or Skype, especially after the COVID-19 pandemic hit and forced them to take up hybrid work. It’s no secret that Microsoft has been busy at work pushing updates as well as new features to Teams with the aim of enhancing its user experience.
As it happens, Microsoft has shipped a new capability to general availability to further enhance the user’s productivity. The Schedule send suggestions feature is in place to especially help users that work asynchronously across different time zones communicate effectively and efficiently.
The feature, powered by Viva Insights helps “suggests times to send chats that might otherwise arrive after hours”. This way users are able to establish “healthy collaboration habits”.
What’s more, work-related matters are strictly restricted to working hours, thus reducing instances where you get notifications from work when you’re not on the clock.
It is worth noting that, this capability won’t be available when you’re sending a message to yourself, when you’re sending a message marked as important or urgent, or when composing a new message 30 minutes before the start of the recipient’s official working hours.
Microsoft shared with OnMSFT that:
Microsoft research suggests that the 9-to-5 workday is fading and found that Teams chats outside the typical workday increased by 42% in the beginning of the pandemic. While the rise of flexible work has made it easier to balance work and life, an increase in after-hours messages has led to a feeling of being always-on, so it is important to use tools like schedule send to model healthy collaboration habits and minimize work-related notifications during personal time.
The feature is expected to start rolling out to Microsoft Teams users on Windows, Mac, or the web with a Viva Insights subscription this week. This is one of the many features in Teams that you can leverage to enhance productivity.
Steam is one of the most popular cloud-gaming libraries out there and offers users a plethora of titles to choose from. But, the Steam compatibility mode error has been driving users crazy.
This error is generally encountered when you have compatibility mode turned on in the launcher properties. And honestly, it’s quite simple to fix the error and shouldn’t take more than a few minutes.
But before we walk through the fixes for the Steam compatibility mode error, it’s imperative that you understand how the compatibility mode works.
How does the compatibility mode work?
Compatibility mode is a feature that allows you to run applications that were built for a previous version of Windows. This helps users if they encounter an error saying that the installed version of the OS can’t run that particular app.
So, if you see that a particular program is not running on the current version, simply switching to compatibility mode and choosing an earlier version that supports the program should work.
But, making the switch often leads to issues, as is the case here with the Steam compatibility mode error. Also, the Steam support recommends against running their program in Windows compatibility mode.
Now that you have a basic understanding of how compatibility mode works, let’s see how can eliminate the error.
How can I fix the Steam compatibility mode error?
1. Disable compatibility mode for Steam
Press Windows + E to launch the File Explorer, paste the following path in the address bar at the top, and hit Enter to navigate to it.C:\Program Files (x86)\Steam
Locate and right-click on the steam.exe file, and select Properties from the context menu. Alternatively, you can select the file, and hit Alt + Enter.
Navigate to the Compatibility tab.
Now, untick the checkbox for Run this program in compatibility mode for and click on OK at the bottom to save the changes. Also, make sure that all the other checkboxes here are disabled.
This is the simplest and most direct fix since the error here is with running Steam in compatibility mode, and disabling it should most likely eliminate the issue.
2. Update Windows
Press Windows + I to launch the Settings app, and select Windows Update from the list of tabs in the navigation pane on the left.
Next, click on Check for updates on the right to scan for a newer version of the OS.
If any updates are listed after after the scan, click on Download & install.
Running an outdated version of Windows is just as likely to cause the Steam compatibility mode error. So, it’s recommended that you always keep up-to-date with the latest version.
Also, with each update certain new features, performance enhancements, and patches for previously known bugs are introduced, which are bound to make your system do a lot better.
3. Modify the registry
Press Windows + R to launch the Run command, enter regedit in the text field, and either click on OK or hit Enter to launch the Registry Editor.
Click Yes on the UAC (User Account Control) prompt that pops up.
Now, paste the following path in the address bar and hit Enter.HKEY_CURRENT_USER\Software\Microsoft\Windows NT\CurrentVersion\AppCompatFlags\Layers
Look through the various items in the navigation pane on the left, until you locate an entry with the path to the Steam launcher (steam.exe), and then right-click on it and select Delete.
Now, click Yes in the confirmation prompt that pops up.
Restart the computer for the changes to come into effect.
Since the method requires making changes to the Registry, we recommend you be extra careful here, since a minor lapse could damage the OS. Also, in case things go wrong, you can fix broken registry items by using specialized repair software.
After making the changes, check if the Steam compatibility mode error is fixed. In case it persists, head to the last method.
4. Reinstall Steam
Press Windows + I to launch Settings, and select Apps from the tabs listed in the navigation pane on the left.
Click on Apps & features on the right.
Now, locate the Steam app, click on the ellipsis next to it, and select Uninstall from the flyout menu.
Again, click Uninstall in the prompt that pops up.
If there’s a problem with Steam itself, you have no option but to reinstall it, since you are unable to launch the app. And after you have reinstalled it, the Steam compatibility mode error should be fixed.
What do I do if Steam games are not launching?
Most users are not likely to face any issue launching games on Steam, but if that happens, the issue is easily fixable.
You can try reinstalling the game that’s not launching, updating the Steam app and the OS, running the app as administrator, or updating DirectX on your computer.
We have a dedicated guide to fix it when Steam games are not launching, so do check it. Though it’s for Windows 10, the methods listed there should work just as well on the latest iteration as well.
That’s it! By the time you reach this part of the article, the Steam compatibility mode error should be long gone, and you can start playing your favorite games on the platform.
Are you getting the Word found unreadable content error message? If yes, then you aren’t alone. Several users are looking for solutions to resolve the Word found illegible content error message. Users have even said no option fixes the issue.
Fortunately, this guide has a bunch of solutions that will help you resolve the error. Moreover, we will also explain why you come across the Word found unreadable content error message in the first place. So let us get right into it.
Why do I get the Word found unreadable content error message?
After our careful research, we did some digging and found out the most common reasons why you will come across the Word found unreadable content error message.
The file is corrupt or damaged: If the file you are trying to open in MS Word is corrupt or damaged, you will encounter this error.
The document wasn’t closed properly: Unexpectedly shutting down the PC or closing the document leads the document to get saved without proper formatting.
Your PC is infected with Virus: Virus or malware can corrupt not only all your files but also corrupt the system files and make them unreadable.
The document did not convert properly: If you tried to convert the document into another format, you will receive this error message.
How can I fix Word found unreadable content error message?
1. Repair the Word file
Launch Microsoft Word.
Open a new Word file.
Click on File.
Select Open.
Click the Browse button and select the problematic Word file.
From the Tools drop-down menu, select the Open and Repair option.
The problematic Word file will be repaired, and you can open it.
The Open and Repair option, as shown below, has helped several users fix the Word found unreadable content error. This fixes any issues with the document.
Click the Browse button and select the problematic Word file.
Expand the All Word Documents drop-down and select the Recover Text from the Any File option.
Click on Open.
The damaged file will take some time to open.
3. Unblock the document
Open File Explorer by pressing the Win + E keys.
Locate the Word file.
Right-click on the Word file.
Select Properties.
Uncheck the Read-only box.
Click Apply and OK.
Open the Word file and check if this fixes the issue or not.
4. Reinstall Microsoft Office
Open the Start menu by pressing the Win key.
Open Control Panel.
Click on Programs and Features.
Select Microsoft Office and click the Uninstall button at the top.
Follow the on-screen steps to uninstall MS Office from your PC.
Restart your PC.
Run the MS Office EXE and install the application.
Open the Word document and check if this resolves the issue or not.
Chances are that some of the critical MS Office files are missing, because of which you are getting the Word found unreadable content error message.
In such a case, the best bet is to reinstall the entire package and ensure you do not interrupt the installation process after reinstalling. Then, you can open the problematic Word file and check if this fixes the issue.
5. Scan PC for virus
Open the Start menu by pressing the Win key.
Open Windows Security.
Click on Virus & threat protection.
Click on Quick Scan.
Wait for the process to complete and apply the prompted solution to remove the virus from your PC.
Click Scan options and select Full Scan for a deeper PC scan.
You can use the built-in Windows Security tool to scan your PC for viruses quickly. However, often this isn’t as effective as a dedicated third-party antivirus tool.
If you need more support, we advise you to confidently pick TotalAV to gain the most effective data and file security from the market.
That is it from us in this guide. However, if you are having issues running MS Office on your PC or any of the office products, you should check out our guide, which lists some practical solutions to resolve the problem.
Several users have reported coming across Microsoft Office error code 30204-44. However, you can quickly fix the issue by checking out our guide, which mentions some solutions that help users fix the problem.
If you use Microsoft Office 365 and want to know how to remove the Recommended Documents list from showing on the home screen, you can check out our guide.
Feel free to let us know in the comments below which one of the above solutions helped you fix the Word found unreadable content error message.
The best Windows 11 optional features allow you to take full advantage of your PC’s enormous potential. You get to activate productivity features and get more functionality.
Hence, seeing these settings blank suddenly when you need them can be annoying. Some of the features become blank, from wrong system settings to missing and corrupt files.
Irrespective of the cause, we have gathered seven simple yet effective fixes to help you get the Windows 11 optional features back.
Why is the Windows feature box empty?
The reasons the Windows 11 optional features box is empty are numerous. Below are some of the popular ones:
Wrong settings.
Corruption of the component store containing information about Windows features.
Corrupt system file.
How do I enable optional features in Windows 11?
Press the Windows+ Ikeys to open Settings.
Select the Apps option.
Choose Optional features.
Click the View features button in front of Add an optional feature.
Select any optional feature to install and click the Next button.
Finally, click the Install button to complete the process.
How do I fix Turn Windows features on or off blank?
1. Set Windows Module Installer as automatic
Press the Windows+ Rkeys to open the Run utility.
Type services.msc in the search box and press the Enterkey.
Scroll down in the Services windows and select Windows Modules Installer.
Click the dropdown before Startup type and select Automatic.
Now, click the OK button to save the changes.
The Windows 11 optional features blank can be caused by manually setting the Windows Module Installer. This is because this feature is in charge of installing windows updates and other features.
To explore all available Windows 11 optional features and learn how to manage them, visit Windows Optional Features for detailed guidance.
2. Disable Hide Windows Features
Launch the Run utility, type gpedit.msc in the Run box, and press Enter.
Select User configuration on the left pane, followed by Administrative Template.
Choose the Control Panel option.
Now, select Programs.
Double-click on the Hide “Windows Features” option.
Tick the radio button for Disabled.
Finally, click Apply followed by OK.
If the Windows 11 optional features are empty on a user account and present on another, this fix will help set the local group policy to make it available on all of them.
3. Perform SFC scan
Start the Run utility.
Type cmd and press Enter.
Copy the code below in the Command Prompt window and hit Enter. sfc/scannow
The Windows optional features might not be loaded due to corrupt or missing files. The System File Checker (SFC) should help scan and restore the files.
4. Perform DISM scan
Press the Windows+ Rsimultaneously to open the Run utility.
Type cmd in the run box and hit the Enterkey.
Copy the code below into the Command prompt window and press Enter. DISM/Online/Cleanup-image/Restorehealth
The DISM scan helps scan and repair corrupt files that could cause Windows 11 optional features not to load. Wait for the scan and the repair to complete and restart your PC to effect the changes.
Type the command below and press the Enterkey. reg delete HKLM\COMPONENTS /v StoreDirty
7. Restore system
Launch the Run utility, type rstrui.exe, and hit Enter.
Click the Next button.
Now, select a restore point from the options shown.
Check if the details are correct and click Finish.
This is the last resort if every other fixes fail. The system restores you to return your system to a time when the Windows 11 optional features last worked.
What are Windows 10 features missing from Windows 11?
A series of features were present on Windows 10 but are now missing on Windows 11. Below are some of the notable ones:
Ability to move the Taskbar.
File dragging and dropping to open in an app on Taskbar.
Quick status on Lockscreen.
Desktop wallpaper roaming when signed in with a Microsoft account.
The Windows 11 optional features empty issue can be pretty annoying, as it stops you from accessing high-level features like Hyper-V. So we have provided seven effective fixes to help you get them back.
Check this guide on the best new features on Windows 11 to enable today to maximize its strengths and increase its functionality.
Feel free to let us know the fixes that helped you solve the issue in the comments below.
If there’s a public enemy number-one for Windows 11 users since October 2022, that would have been BlackLotus. At that time, the UEFI bootkit malware was rumored to be the only thing that could pass any defense in the cyber landscape.
For just $5,000, hackers on black forums could have an access to this tool and bypass Secure Boot on Windows devices.
Now, it seems like what has been feared for months is true, at least according to ESET’s recent study done by analyst Martin Smolár.
The number of UEFI vulnerabilities discovered in recent years and the failures in patching them or revoking vulnerable binaries within a reasonable time window hasn’t gone unnoticed by threat actors. As a result, the first publicly known UEFI bootkit bypassing the essential platform security feature – UEFI Secure Boot – is now a reality.
When you boot up your devices, the system and its security load first before anything else to disarm any malicious attempt at accessing the laptop. BlackLotus, however, targets UEFI so that it loads before anything else.
Matter of fact, it’s able to run on the latest Windows 11 system with the Secure Boot feature enabled.
BlackLotus exposes Windows 11 through its CVE-2022-21894 vulnerability. While it was patched in Microsoft’s January 2022 update, the malware takes advantage of this by signing binaries that have not been added to the UEFI revocation list.
Once installed, the bootkit’s main goal is to deploy a kernel driver (which, among other things, protects the bootkit from removal), and an HTTP downloader responsible for communication with the C&C and capable of loading additional user-mode or kernel-mode payloads.
Smolár also writes that some of the installers do not proceed if the host uses locales from Romanian/Russian (Moldova), Russia, Ukraine, Belarus, Armenia, and Kazakhstan.
Details of this first emerged when Kaspersky’s Sergey Lozhkin saw it being sold on black markets with the aforementioned price tag.
What do you think about this latest development? Let us know in the comments!
Much has been said about VPNs. But have you heard of VPN routers? To achieve increased online privacy, they’re just what the doctor ordered.
Keep reading to discover what VPN routers are all about, how they work, and what their different types and benefits are.
We’ll also show you how to choose the right VPN router for your needs, and how to set it up.
Let’s dive in!
What is a VPN router?
In essence, it’s a WiFi routerthat has the firmware needed to set up a VPN.
Conversely, a regular router doesn’t have the built-in software necessary to support VPN connections. But, you may be able to convert one into a VPN router by flashing it. More on this later.
VPN routers and router VPNs aren’t the same, although some incorrectly use them interchangeably.
Router VPNs are VPN apps you could install on routers. Oftentimes, they’re compatible with a wide variety of router firmware and can mesh with dedicated router apps.
How does a VPN router work?
To understand how VPN routers work, here’s a primer on VPN technology:
A VPN is a tool that reroutes your device’s traffic through an encrypted tunnel to a third-party server, allowing you to interact with the web indirectly.
As a result, you use the VPN server’s IP to spoof your location and hide your activity and DNS queries from snoopers.
Moreover, a VPN app on a device strongly encrypts outgoing traffic and decrypts incoming one. So, whoever tries to monitor or intercept your data in transit would remain clueless about what you’re doing.
Usually, VPN services have server networks that span dozens of jurisdictions across the world. Some providers might use virtual server locations, but they take this route to obtain IPs registered in places that are prone to cyberattacks or not friendly to VPNs.
Leading services offer extraordinary capabilities such as obfuscationand split tunneling, which is for using your VPN selectively.
A VPN router follows the same basic principle, except that it secures all devices on the network using a single VPN connection. So, it encrypts all data leaving it and decrypts the one coming in. However, the traffic between your router and devices is unencrypted.
In terms of setup, you can configure VPN routers in different ways, ranging from simple to complex. Your configuration options would depend on your router model, your VPN, and your technical know-how.
Types of VPN routers
VPN routers do work after the same principle, but they come in different forms. As follows are the most common ones on the market:
Pre-configured VPN routers
These routers are ready to go. You can buy an off-the-shelf model or one that you can tailor to your favorite service.
Now, pre-configured VPN models don’t come cheap. But, they make setup and configuration changes painless.
Pre-flashed VPN routers
These routers are VPN-enabled. This means they have the firmware needed to install a specific VPN but are yet to be pre-configured to a particular server. You can set one up using a VPN router app or manually.
Manually flashed VPN routers
These routers are compatible with VPN firmware. However, they don’t have it pre-installed. If you have one of these, you’ll have to flash it so that it can run a VPN.
Retrofitting VPN functionality to your WiFi router can be taxing, especially if you’re not technically proficient.
However, keep in mind that not every VPN-compatible regular router supports any VPN firmware. Installing something incompatible could mess up the hardware beyond repair.
So, do your homework beforehand.
Dedicated VPN routers
A dedicated VPN router could refer to a secondary routerwith VPN software installed on it and connected to a primary router with no VPN capabilities or to an enterprise-grade VPN setup.
In your home, you could configure a dedicated VPN router to create a new WiFi network with VPN protection while keeping your original network as usual.
In the office, a dedicated VPN router housed in the HQ can create secure connections at the hardware level site-wide while eliminating the need to install a client VPN on individual devices. As a result, the entire remote office can enjoy continuous access to the network.
Setting up a dedicated VPN router at home may intimidate not-so-tech-savvy users.
In business settings, pulling off a proper VPN router setup is a Herculean task for tech greenhorns. So, that’s why you should probably leave this job to IT experts.
Pre-configured
Pre-flashed
Manually flashed
Dedicated (home)
Dedicated (office)
VPN compatibility
Limited
Limited
Wide
Depends on router model
Limited
Setup difficulty
Easy
Moderate
Hard
Moderate or hard
Hard
Setup time
Fast
Moderate
Moderate or lengthy
Moderate or lengthy
Lengthy
Router upgrade cost
High
High
None
High or none
Depends on enterprise-grade VPN router vendor’s pricing
Benefits of using a VPN router
Installing your VPN on a router instead of directly on your device can be a massive inconvenience. So, why bother?
Well, using a VPN router can be advantageous for many reasons.
Let’s discuss the most important ones:
Increased privacy at the network level
Normally, only the devices that individually connect to the VPN can stay protected. The rest expose you geographically and broadcast your activity to your ISP.
A VPN router changes everything. It can keep the IP and DNS data of all devices on its network a secret. That’s why it’s such a useful tool if you’re privacy-minded.
Automatic encryption
If you use a VPN router, you’ll only need to log in once and enjoy the merits of data encryption around the clock.
Its set-and-forget nature can not only make it incredibly convenient to obscure your traffic. But also enhance your network security to the point where you may no longer need additional firewall protection.
Protect devices that don’t natively support VPNs
Generally, VPN apps are designed for Windows, macOS, iOS, and Android. Only some vendors have developed dedicated clients for Linux, ChromeOS, and FireOS.
Say you have a gaming console like PlayStation or an Apple Watch. Or you’re using a streaming media player like Chromecast or Roku. Such devices aren’t usually enabled to route data to a VPN.
So, if you want to hide your online activity on all your electronics, having a VPN router is your best bet.
Unblock geo-restricted content on all devices
Spoofing your location with a VPN is one of the most effective ways to beat regional lockouts, which limit the kind of content you can enjoy on the internet.
But, if you have a VPN router, you can successfully pretend you’re located in another area or country as long as you’re using a device that’s connected to your WiFi network.
Get around simultaneous VPN connection restrictions
And, if you reach the limit, you’ll have to remove a device, buy another subscription, or purchase extra slots (if possible) to make room for more.
Using a VPN router is a neat workaround. No matter how many devices you connect to your home network, your service provider would count it as just one.
So, when you’re outside and want to use your mobile data, you can still secure your traffic with your VPN at no extra cost.
Easily create a double VPN connection
Using another VPN service when connected to a VPN router can take your online privacy to another level.
This setup can mask your IP and encrypt your data twice, creating a second line of defense in case your VPN router becomes leaky.
More importantly, it can secure the traffic between your devices and your WiFi router.
Now, keep in mind that this configuration will noticeably slow down your internet connection. However, this may be a trade-off you’d be willing to accept if, for example, you live in a country with heavy internet usage restrictions.
VPN routers are easier to set up than ever
There’s no denying that setting up a VPN router seems more complicated than downloading a native VPN app for your system.
That said, VPN router apps are now available to simplify the configuration process. At the moment, ExpressVPNand VyprVPN are the only ones that offer them. But, it could inspire or pressure others to follow suit.
How to choose the right VPN router
VPN routers come in many shapes and forms. So, to select the one that suits your needs, you should take note of the following factors:
VPN preference
Obviously, not all VPNs are router VPNs. And not all router VPNs are installable on any router model. So, if you want to subscribe to a particular service, you’ll be limiting the number of products you can use.
However, leading VPN providers usually have lists of supported routers on their websites to make things easier.
VPN compatibility
Installing an incompatible VPN on your router is futile. So, it’s important to determine whether your preferred model can actually function with the particular VPN service you’re eyeing.
Setup difficulty
Again, setup methods come in varying degrees of difficulty. If you’re not technically proficient to handle the complex process of flashing your hardware and configuring your VPN, you may want to take the easiest route to installation and get a pre-configured router.
Cost
The more convenient a VPN router is to set up, themore expensive it usually is. So, if you want to spend as little as possible, you should explore the manually-flashed option.
How to set up a VPN router
To get an idea of the whole setup process, here’s a walkthrough of ExpressVPN’s installation guide forNetgear Nighthawk R6700, one of the best VPN routers you can buy:
If you already own a supported router, choose Install on the router I’ve been using.
Select the model and download its firmware.
Click Continue.
Follow the on-screen instructions.
Click continue.
Follow the final set of instructions to complete the setup.
If you encounter connection failure or IP and DNS data leakage on all devices, restarting your WiFi router may fix what’s wrong. But, if the issue is isolated, restarting the problematic device should do the trick.
If the above troubleshooting steps don’t work, contact your VPN service provider’shelp desk. Its customer support reps can diagnose the problem better and offer the most effective solution.
Summary
Now you know the answer to the question: How does a VPN router work? However, that’s just the tip of the iceberg.
The real keys to determining the right model for you are understanding the differences between its many types and realizing the most important factors when comparing products.
Hopefully, you found this explainer helpful. If you think we missed something, share your thoughts in the comments!
Screenshots are necessary as it helps to save information without needing to note it down. You can always open the screenshot and refer to it for information. Windows offers the ability to take screenshots inbuilt. However, that is restricted to screenshots for the active window or a selected area.
It cannot take scrolling screenshots. This guide will give you multiple ways to take scrolling screenshots on your Windows 10 PC. This would also involve using several third-party apps to accomplish the task. Let us get right into it.
How to take scrolling screenshots in Windows 10?
1. Capture a scrolling screenshot in the browser
1.1. Microsoft Edge
Launch the Microsoft Edge browser.
Click on the 3-dot menu icon.
Click on Web Capture.
Select Capture full page.
This will capture the scrolling screenshot on Microsoft Edge’s active tab. Do note that you can later edit this screenshot and annotate it.
Click on the webpage or Windows app of which you wish to take a scrolling screenshot.
Click on Start scrolling capture.
ShareX is an excellent piece of software that lets you take different screenshots, such as scrolling screenshots. It also is a great video recording tool.
Using ShareX, you can take scrolling screenshots of a webpage or a browser and any Windows app, for that matter.
Among all the toolbar options, click on the fourth icon to take a scrolling screenshot.
Select the page or window you wish to take a scrolling screenshot.
The app will automatically take the scrolling screenshot.
Once the screenshot has been captured, you can easily edit the photo in the screenshot editor. It will open right after the screenshot has been taken.
Apart from scrolling screenshots, you can take Tweakshot to take regular and full-screen screenshots, capture windows, use the image editor, video record, screen color picker, and more.
Select the Scrolling Window option from the list that appears in the menu.
Left-click on the area in which you wish to take a scrolling screenshot.
PicPick will automatically start taking the scrolling screenshot.
To stop the scrolling screenshot, simply right or left-click on the screen.
The screenshot will immediately appear in the editor, where you can do all sorts of things to the image.
So, to take scrolling screenshots on your Windows PC, you have to rely on third-party tools, as mentioned above, if you want to take screenshots of a Windows app or games specifically.
Otherwise, popular browsers such as Firefox and Opera can take scrolling screenshots. You can use an extension on Google Chrome to take scrolling screenshots on Windows 10.
We have a dedicated guide that lists some of the best screenshot-taking tools you can opt for on your Windows 10 PC.
You can also refer to our guide that explains how you can disable the PrintScr button on your keyboard, which is usually meant to capture screenshots on a Windows PC.
We also have a guide that explains the different methods that will help you to add text in the Snipping Tool. For those who don’t know, Snipping Tool is Microsoft’s default screenshot tool on Windows OS.
Feel free to let us know in the comments below which methods you used to take scrolling screenshots on Windows 10.
Microsoft always gives the latest update for the sake of features and security, especially for a next-gen console like Xbox Series X&S.
However, several users have reported that they’ve been stuck in updating Microsoft Store on their Xbox consoles. The problem varies, but the main takeaway is the Store always tells them to update. Then, once they did, it would tell them to do another update.
For users that have been stuck in this endless cycle of nonsense, it can get quite irritating. As a matter of fact, this particular problem has been around since Xbox One was a hot console in the market, and the size of these updates isn’t small either (over 100 MB).
Some have even reported the issue to Microsoft through the Feedback hub, but the problem still seems to persist to them.
So, how do we fix it? Or, is there any possible workaround we can try?
What can I do if my Microsoft Store on Xbox keeps updating?
Microsoft hasn’t officially announced anything that may cause this bug, but it seems like the problem arrives at the most random time to the most random user.
However, here are some of the workarounds you can try.
1. Restarting the console
1. Press and hold the Xbox button in the center of your Xbox controller to open the Power Center.
2. Select Restart console.
3. Select Restart.
2. Performing hard reset
1. Hold the power button for 10 seconds until it’s off.
2. Wait for another 30 seconds
3. Press the Xbox button to switch it on again
3. Nudging
1. With the update prompt on, press Start, then Pause it.
2. Press and hold the Xbox button in the center of your Xbox controller to open the Power Center.
3. Select Restart console ➜ Restart.
4. Resume the update to nudge it into fully updating.
4. Continue without updating
1. With the update prompt on, press Cancel.
2. It takes you to the store without the update, although there’s a chance that the annoying pop-up may come back.
There are many other errors that plague Xbox consoles, including the unavoidable black screen for some Xbox One users. Make sure to follow our Xbox-dedicated page to find the easiest & clearest fixes of any Xbox problem.
Has this annoying bug affected you? Let us know in the comments!
If you have accidentally disabled all services in MSCONFIG, many users on Microsoft’s forums have experienced the same issue. This can prevent you from logging into your PC and may even cause BSoDs or system crashes.
These services are essential for keeping Windows stable and functional. In this guide, we’ll explain how to re-enable all MSCONFIG services and get your system working normally again.
What can I do if I accidentally disabled all services MSCONFIG?
2. Enable MSCONFIG services using a different account
Sign in to your other account that doesn’t require any password.
Press Win + R keys to open the Run dialogue.
Type msconfig and press Enter.
Switch to the Services tab.
Click on Enable all.
Click Apply and OK.
This would work for users who have created one extra account on their PCs. You should ensure that at least one account doesn’t require password access, as this could help if you have disabled all services in the MSCONFIG situation.
3. Replace the on-screen keyboard with CMD
Turn off your PC.
Turn on your PC and press the F10 key when the first screen appears. The key could be different for different brands of PCs.
Select Troubleshoot.
Choose Advanced Options.
Select Command Prompt.
Run the below command to know the partition letter where you have installed Windows OS. BCDEDIT
Execute the below commands to change the directory. C:/cd Windowscd System32
Replace the on-screen keyboard app by running the below command. ren osk.exe osk.exe.bak
Copy the command prompt to osk.exe by running the below command. copy cmd.exe osk.exe
Restart your PC.
In the Windows login screen, click on the on-screen keyboard icon.
Why it works: Repairs corrupted or altered service configurations so Windows can boot normally.
9. Revert MSCONFIG Changes via Command Prompt
Boot from installation media.
Open Command Prompt.
Type bcdedit /deletevalue {current} safeboot.
Then run msconfig and re-enable services.
10. Reset your PC
Turn off your PC.
Turn on your PC and press the F10 key when the first screen appears.
Choose Troubleshoot.
Select the Reset this PC option.
Choose Keep my files.
Follow the on-screen prompts to complete the reset process.
Wait for the process to complete.
As a last resort, if nothing works, you should opt to reset your PC. You can follow the above process and safely reset your PC and get back your PC in normal working condition.
That is it from us in this guide. You can check out our guide that lists different ways to access MSCONFIG on your PC.
We have also correctly explained how to use the System Configuration tool on Windows 10. Feel free to let us know in the comments below which one of the above solutions resolved your problem.
MSinfo32.exe is a system information utility that is used to diagnose system problems or optimize system performance as well as troubleshoot system issues or generate reports.
Unfortunately, several of our readers claim this tool isn’t working on their PC due to the Msinfo32.exe not working error that they encounter. We will provide step-by-step instructions on how to fix this error.
Why is Msinfo32.exe not working?
An additional message comes with the error: Cannot access the Windows Management Instrumentation software. Windows Management files may be moved or missing.
There are several potential causes of the Msinfo32.exe not working problem. The following are some of the main causes, as reported by some users:
Outdated drivers – If you haven’t updated Windows in a while, there might be issues.
Critical services are not running – Msinfo32.exe can’t collect information if the Windows Management Instrumentation (WMI) service has been disabled.
Corrupt system files – If the System files are corrupt, it can prevent the MSinfo32 app from working properly and affect the core functioning of the Operating System.
Incompatibility issues – Only Windows 7 and 10 are compatible with the MSinfo32 app. The tool won’t function if you’re running an older version of Windows.
Conflicting updates – At times, the MSinfo32 app may malfunction as a result of some Windows update files interfering with it.
The potential causes of the system information not showing in Windows, as reported by certain users, are listed above. Not to worry, some of the error’s tested fixes are listed below.
What can I do if Msinfo32.exe is not working?
Before engaging in the lengthy troubleshooting or settings tweaks for this error, below are some quick steps:
Check if there are any available updates for Windows and install them.
Restart the computer and check if it resolves the problem.
Uninstall the latest Windows update.
If, after doing the aforementioned checks, you still need help fixing Msinfo32.exe not working error, you can follow any of the instructions suggested in the following section.
1. Run SFC & DISM scans
Left-click the Start button, type command prompt in the Windows Search bar, and click on Run as administrator.
Next, type the following and press Enter: sfc /scannow
After the scan is complete, type the following command and press Enter: DISM /Online /Cleanup-Image /RestoreHealth
Hold on till the verification reaches 100%. Once completed, restart your PC and check if the error is fixed.
The SFC and DISM scans can detect, repair and replace corrupted system files that might prevent MSinfo32 from running properly.
2. Reset the Windows Management Instrumentation service
Left-click the Start menu, type command prompt, and click on Run as administrator.
Type the following command in the text field and press Enter after each:
net stop  winmgmt
winmgmt /resetrepository
net start   winmgmt
Now, close the Command Prompt window and check if the Msinfo32.
If the Windows Management Instrumentation service is not working properly, resetting the service would help restore it to default, hereby fixing the Msinfo32.exe not working issue.
Click the Start button, type command prompt and select Run as administrator from the results.
Type or paste the following commands one by one and press Enter after each:
cd /d %windir%\system32\wbem
for %i in (*.dll) do regsvr32 -s %i
for %i in (*.exe) do %i /regserver
4. Temporarily disable your security software
Press the Windows key and type control panel in the Windows Search bar and launch it.
Next, click on System and Security. Then, click on Windows Defender Firewall.
Click on Turn Windows Defender Firewall on or off on the left pane.
Check all the boxes with the Turn off Windows Defender Firewall (not recommended) options under all menus.
Then, restart your PC.
Another effective way to fix this MSinfo32 problem is by disabling security software such as an anti-virus or firewall program.
5. Perform a System Restore
Press the Windows key and type restore in the Windows Search bar, and select Create a restore point.
Now, select System Protection and click on the System Restore button.
Next, from the list, select a restore point and click Next.
Follow the prompts to complete the system restore process.
Restart your PC.
If all other steps fail to fix the Msinfo32.exe not working problem, restoring your system to the earlier point should do the trick.
Hence, you can apply this process with the steps above but also perform it automatically with a dedicated PC repair tool capable of detecting corrupted system files and replacing them with functional ones.
And that’s it on what to do if Msinfo32.exe is not working on Windows. Your system information tool is very important as it provides you with many details about your computer.
So, using the methods provided in this article should help you to get it working again. Also, while fixing things, find out a few quick tweaks to improve Windows’ performance. Discover a few quick adjustments to enhance Windows’ performance while you are fixing things as well.
In conclusion, you can leave your questions and suggestions in the comments section if you have any.
You can back up the files on a drive using the built-in Windows backup tool. However, the File History service is often known to throw up errors. One of the most common errors is the File History no usable drives found.
In this guide, we will give you a bunch of solutions to resolve the File history no usable drives found error. Along with the solutions, we will also give you some reasons that could cause this error to trigger in the first place. So let us get right into it.
Why am I getting the File history no usable drives found error?
After digging the internet, we have discovered some of the most common reasons you are facing this error.
File History has some bugs: Just like every Windows feature, you will encounter this File History error because of bugs.
File History is disabled: Chances are some third-party or even first-party app has disabled the File History service on your PC, which is why you are getting the error.
Storage drive has some issues: Due to corruption in the File History backup drive, you will come across this File History no usable drives found error.
Corrupt system files: The presence of corrupt system files can also trigger multiple system problems.
Select the drive where you have created File History backup and hit Configure.
Choose Disable system protection.
Click Apply to make the changes.
Select Turn on system protection.
Click Apply.
Some users have reported that adjusting the System Protection settings, or in simple terms, re-enabling the feature, helped them resolve the File History no usable drives found error.
Enabling them listed the usable drive on the list, and the error message didn’t reappear.
3. Select another drive
Press the Win key to open the Start menu.
Open Control Panel.
Select File History.
From the left pane, click on Select drive.
Under the Select a File History drive section, select your original File History backup drive or a new one.
Click Next.
You can try to select a new drive or the original File History drive and fix this issue. This has reportedly helped several users resolve the problem.
4. Fix corrupt system files
Open the Start menu by pressing the Win key.
Run Command Prompt as an admin.
Type the below command and press Enter. sfc /scannnow
Run the below command and press Enter. dism /online /cleanup-image /restorehealth
Restart your PC.
If the system files are missing or corrupt, then this can cause multiple issues on your PC and ultimately lead to system crashes.
The SFC Scan and DISM commands can help fix the corrupt system files. However, often these commands aren’t as effective as using a dedicated third-party tool.
5. Cloud reset Windows
Open the Settings menu by pressing the Win + I keys.
Select Recovery.
Click on Reset PC.
Select the Keep my files option.
Choose the Cloud download option.
Let the process begin and wait for it to complete.
One wrong move can delete all files from your PC. To avoid it, we would advise you to back up your files. For that, we have a guide that lists some of the best backup tools you can have on your Windows 11 PC.
That is it from us in this guide. Unfortunately, you cannot rely on File History to save your backup. We suggest you check out our guide, which lists some of the best backup tools for your Windows 11 PC.
In the comments below, let us know which one of the above solutions fixed the File History element not found error.
Does VPN affect your email or block SMTP on your Windows PC? Are you having issues sending or receiving emails in your custom webmail while on VPN?
Even though it might seem like a complicated problem, a few methods are worth trying, as some users have confirmed them.
SMTP (Send Mail Transfer Protocol) is used for outgoing mail from a PC. This protocol is generally used during Mail exchange.
SMTP is provided by the ISP and has a particular address through which these mail exchanges are sent, such as TCP 25, used by many older email client programs.
How does a VPN affect email?
SMTP can be blocked for different reasons apart from your VPN. This problem can be especially felt when traveling outside your ISP coverage area.
You may have difficulties sending emails from email clients such as Microsoft Outlook, Mozilla Thunderbird, and others email clients.
This is usually caused due to differences between the information your ISP has and your device.
For instance, some hotels have checks that search if your ISP is from that region; however, your SMTP may be blocked if it’s not.
Another reason SMTP is blocked while you are on VPN is spam. Many reputable VPN providers do not keep logs, so they must also block spam messages. One way they reduce spam messages is by blocking SMTP traffic.
Most VPNs block outgoing SMTP on port 25 (because this port is unsecured). However, MS Outlook and several email client programs use this port as the major port for SMTP mails.
You should know the most frequent scenarios that imply this email issue. These are the following:
Cannot send an email when connected to VPN
NordVPN email not working – NordVPN blocking email
Yahoo is not working with VPN
Outlook not working on VPN – Outlook is not receiving emails on VPN
Apple mail is not working with VPN
Gmail VPN problem
Meanwhile, the WindowsReport team has developed practical solutions to help you work around the VPN SMTP blocked problem.
What can I do if my VPN service blocks SMTP?
1. Use a webmail provider
Most complaints about VPN SMTP blocked issues emanated from custom webmail users. An example of a custom webmail is [email protected].
However, standard webmail is an excellent solution since most webmail provides an SMTP server on an SSL port TCP 465. Moreover, many VPNs do not block this port because it is secure.
This is because several VPN service providers do not block these webmail providers. They also have a vast user base and provide excellent anti-spamming and security features.
Also, they are free to use and easy to access, unlike email clients.
In addition, many webmail providers provide anti-spamming features for users, reducing the number of spam messages entering your inbox. You can pick from many available webmail clients online.
However, we recommend using Gmail, or Yahoo Mail, as these have become some of the most well-rounded and known email providers.
2. Change your VPN
Even though plenty of competent options are on the market regarding VPN software, some stand out from the crowd, especially when dealing with SMTP issues.
One such VPN software that will never stop you from accessing your email due to SMTP issues is the well-rounded and easy-to-use ExpressVPN.
This VPN app not only ensures a smooth browsing experience no matter what tasks you’re focusing on online but also allows you to efficiently transform your IP to almost any country by using many servers across the globe.
The easy-to-use interface ensures you won’t waste time configuring the VPN. You can also access geo-restricted content worldwide while protecting your IP from any third parties collecting online data.
As mentioned, many other viable VPN apps exist, even though we highly recommend this one. It is a VPN that does not affect your email.
ExpressVPN
Forget all STMP email problems by using this powerful and versatile VPN today!
3. Contact your VPN provider and add the email server to the whitelist
Even though you might have another VPN service installed, you can always try contacting them and asking about adding the email server you’re using to the whitelist.
This is a standard procedure used for the security and privacy of their subscribers, and it is merely another sign that the service is very secure.
Like many other VPN providers with no-log policies, ExpressVPN must block outgoing SMTP traffic due to the spam associated with using VPN services. Still, they are highly responsive when it comes to specific requests.
Fortunately, they can be contacted so your specific email server can be whitelisted.
All you need to do is submit screenshots showing all of the following settings that you currently have entered to use in your email program:
The email addresses being blocked
The SMTP/outgoing email server name for the above address
For example smtp.mail.com, mail.example.net, etc.
The Port number used to connect to the mail server
Your SSL setting
Whether it is enabled or disabled
It may appear as TLS or SSL
Alternatively, you can bypass these blocks by simply changing the SMTP server settings on your email client to the TCP port.
4. Switch to a newer email client
Many new email clients do not use TCP port 25 for their SMTP services. Upgrade to a more recent version if your VPN still blocks your SMTP.
This incredible tool has a free version and includes multiple email accounts. It also allows you to classify and organize your emails, thus making your email work easier.
Meanwhile, some VPN providers don’t block SMTP mails on TCP 25. So if you use your email client regularly, switching your VPN service to SMTP-friendly VPN may be beneficial. We’ll list these VPN services below.
The exact process to disable your VPN service will vary depending on the application you use for this task. However, we will cover the same steps to disable the ExpressVPN software.
A quick fix that bypasses the SMTP blocked on the VPN issue is to disable your VPN temporarily, send the email to your email client, and enable your VPN afterward.
This would effectively work; however, many dangers are involved, as you could be exposed to hacks and attacks from trackers.
Does a VPN affect your email? A VPN is perfect for stopping cyber threats like spam emails or phishing attacks that may reach your email inbox.
Using VPN protection can shield your email data with encryption operations and mask your traffic to hide your location or sensitive information on email.
That being said, which of these methods worked for you? Feel free to share your thoughts and experience using the comment section below this guide.
While using ChatGPT, if the system detects suspicious behavior, you can trigger the error We’ve detected suspicious behavior.
If ChatGPT is showing the error, we’ve detected suspicious behavior, this article will provide you with the fixes to resolve the error.
Why do I get we’ve detected suspicious behavior in ChatGPT?
The full message reads: We’ve detected suspicious behavior from phone numbers similar to yours. Please try again later or contact us through our help center at help.openai.com.
The error is basically linked to a security issue; here are some of the common reasons why you’re getting the error:
Unauthorized login attempts – ChatGPT, like most websites with login pages, will restrict access to their service if a user makes multiple failed login attempts. If you’ve tried logging into ChatGPT with the wrong credentials, it might trigger we’ve detected suspicious behavior error.
Spamming – Oftentimes, spammers create multiple accounts on free services using countless phone numbers in an attempt to mess with the website. Webmasters usually put web blocks in place to prevent such spamming attempts; it might be the reason for the ChatGPT error.
Change in Usage Pattern – A sudden change in your usual usage pattern of Open AI’s service might trigger we’ve detected suspicious activity. The website will see the spike in pattern as suspicious behavior and will move to thwart any further actions.
Now that we know what this is all about, let’s see if we have any solutions or workarounds to this issue.
What can I do when I get We’ve detected suspicious behavior error in ChatGPT?
If you’re getting the We’ve detected suspicious behavior error in ChatGPT, here are some quick fixes you can apply:
If those quick fixes couldn’t resolve the error, here are some advanced troubleshooting steps you can attempt.
1. Use another phone number to verify your ChatGPT account
Launch your preferred browser, and visit the Open AI phone number verification tab.
Now, provide another phone number. It can be your secondary number or one you can access to confirm the SMS code.
Alternatively, you may use a temporary phone number. Several services can provide a phone number and a verification code just for this purpose.
There are several services which you can obtain a free temporary phone number from. For example, anonymsms.com gives out limitless free numbers that you can use to verify your ChatGPT account.
On the bottom right corner, click on the little chat bubble.
Click on Messages and select Send us a Message.
In the Login or Sign Up issues tab, select No.
Enter your email address, and type your message.
Contacting the support team of most websites usually takes a few days to get a response. However, using the live chat feature ensures prompt and immediate response.
These are some of the best ways to help resolve we’ve detected suspicious behavior in ChatGPT. Usually, changing your phone number is all that’s required.
If you’ve got other solutions that helped resolved this error, do let us know in the comments below.
While using your PC, you must back up your files to ensure that your files remain secured during fatal windows errors. However, you can run into errors like the 0x8078002a while backing up your PC.
If you’re currently experiencing this error, this article will provide you with the necessary steps to help resolve the 0x8078002a Windows backup error code.
What causes the Windows backup error 0x8078002a?
The full error message reads: One of the backup files could not be created. Details: The request could not be performed because of an I/O device error.
Here are some of the common reasons why you’re experiencing the Windows backup error code 0x8078002a:
Backing up external files using 4K logic disk sector – If you’re attempting to back up your PC files to an external drive using a 4K logical disk sector size drive, you can trigger the 0x8078002a backup error code.
Improper system shutdown – When performing a system shutdown, you must follow the proper procedure. A forced system shutdown due to a system crash can trigger the 0x8078002a.
Corrupt system files – Occasionally, Windows system files can get corrupted by viruses or malware. A PC housing a host of corrupt system files will likely experience errors like the 0x8078002a.
The reasons may seem complicated, but as you will see, the solutions are pretty simple.
How can I fix the Windows backup error 0x8078002a?
Before we proceed with advanced troubleshooting techniques, here are a couple of quick fixes you can attempt:
Restart your PC.
Power cycle your PC.
Disconnect and reconnect the external HDD, if present.
If those quick fixes couldn’t resolve the 0x8078002a backup error code, the following solutions will help you.
1. Check Volume Shadow Copy and Windows Backup
Press the Windows key + R, type in services.msc, and hit Enter to open Services.
Locate the Volume Shadow Copy service, right-click it, and click Start.
Then, right-click and select Properties. Change the Startup type from Manual to Automatic.
Click Apply and OK to save the settings and close the window.
Now, scroll down and locate the Windows Backup service, right-click on it, and select Properties.
In the popup window, make sure the service under the Service status is running.
If the service is not automatically running, click Start under the Service Status tab, and click OK.
Due to advancements in the data storage industry, the format of physical hard drives has moved from 512-byte sectors to 4096.
Windows doesn’t support 4K sectors, and this leads to incompatibility issues with existing software. Checking the Volume Shadow Copy and Windows Backup services can help resolve the error.
This method will wipe out any data on the drive, so make sure you back up any valuable data before this procedure.
Plug in your external drive and press the Windows key + E to open File Explorer.
Locate the drive, right-click on it, and select Format from the drop-down menu.
Select the type of file system you want, and give your drive a name under the Volume Label tab.
Ensure the Quick Format selection box is checked.
Click Start and wait for your computer to format the external hard drive completely.
Formatting the external media is the last resort and is usually one of the quickest ways to resolve the 0x8078002a backup error code. You can format the drive a couple of times repeatedly to ensure you get rid of everything on the drive.
There aren’t a lot of fixes to help resolve the 0x8078002a backup error code. However, if you’re battling the error, you can follow any of the above fixes to help you resolve the error.
A lot of users have suggested several fixes that helped them resolve this error. If you’ve got other solutions that helped you bypass this error, you can let us know in the comments below.