3. Change the WiFi band from Automatic to 5 Gigahertz
Go to Settings.
Select Network.
Wait for the initial scan to complete, and click the Options button from the Controller to get the Advanced menu.
Under Wi-Fi frequency bands, choose 5GHz.
Your PSN will scan for Wi-Fi networks again on the 5GHz band; once you see the network listed, select it, enter the credentials, and follow the on-screen instructions to complete the steps.
4. Upload the Save files to Cloud manually
Locate the game’s files that you suspect might be causing PS4 Error NP-31805-7.
Go to the Options button on the controller, from Advanced options, choose the Upload/Download option, and get the saved file list.
Choose every file from the recently saved list and transfer or copy them manually to the Cloud.
Remember that you might be unable to upload your data and get this error if you have a slow internet connection or the PSN server is down.
So, the best way to fix it is using the wired connection, resetting the network, or ensuring the PlayStation server is up and running.
Did we miss a step that helped you fix the PlayStation error NP-31805-7? Don’t hesitate to mention it in the comments section below. We will happily add it to the list.
Microsoft made some important announcements at the Microsoft Ignite conference, in Seattle. With a heavy focus on AI, the Redmond-based tech giant announced Microsoft Copilot Studio, which will allow users to create, publish, and similarly monetize their Copilots to OpenAI’s GPTs.
The event also unveiled Microsoft’s first chips, the Microsoft Azure Maia AI Accelerator, and the Microsoft Azure Cobalt CPU, both coming in 2024, and the Azure text-to-speech avatars, which are very useful tools to have, except for the fact that they’re still uncanny.
However, as all the bets are placed on AI, Microsoft also announced the release of the Windows AI Studio, a brand new platform that will allow developers, or any other Windows user, to build their own AI models locally, on a Windows-running device.
Today we are excited to announce Windows AI Studio, a new AI experience to help enterprises and developers jumpstart local AI development and deployment on Windows.
Microsoft
The Windows AI Studio will provide a list of state-of-the-art (SOTA) models including Llama 2-7B, Mistral-7B, Falcon-7B, and Stable Diffusion XL, that will be added to the platform in future updates, so it’s safe to say users will have all they need to build their own AI on a local Windows machine.
How can users build AI models with Windows AI Studio?
Microsoft hasn’t revealed too much just yet, and the Redmond-based tech giant said that the users will get a glimpse of the studio in the following weeks, as a VS Code extension, but the company promises that we’ll be able to build generative AI models ourselves.
Windows AI Studio simplifies generative AI app development by bringing together cutting-edge AI development tools and models from Azure AI Studio and other catalogs like Hugging Face, enabling developers to fine-tune, customize and deploy state-of-the-art small language models, or SLMs, for local use in their Windows apps.
Microsoft
The company also presented a roadmap for developing AI models on Windows AI Studio:
Windows AI Studio: AI Studio will be extended to Windows through VS Code
Model Selection: Curated list of models coming from HuggingFace and Azure
Fine-tuning: Utilize QLoRA through Olive to generate a quantized model with low-rank adapters.
Model evaluation: Model-validation for the fine-tune task.
Model optimization: Onyx conversion and post-finetune optimization through Olive.
Model integration: Deploy into application for inference through ORT.
Here’s how the Windows AI Studio looks as a VS extension:
It’s worth mentioning that Windows AI Studio might not be a friendly platform, as this new experience is aimed at IT developers who are passionate about AI.
So, if you’re not into software development, you should try the new Microsoft Copilot Studio instead, which lets you build personalized Copilots using natural language.
If you are stuck with the Formula parse error while working on a workbook in Google Sheets, this guide can help!
We will explore the meaning of this error and offer different ways to avoid or fix this generic error message in no time.
What does the Formula parse error mean?
The Formula parse error occurs when Google Sheets cannot fulfill the formula request, returning an error message. It could happen due to:
Typos or mathematical mistakes.
Incorrect or incomplete syntax or unexpected value type
How can I fix the common Formula parse error in Google Sheets?
1. #ERROR! – The entry doesn’t make sense
The #ERROR! message means Google Sheets can’t interpret the formula as it doesn’t make sense; check the red triangle in the right-hand corner of the cell to get more information.
To fix it, check these things:
Check the cell that contains your formula for important operators between cell references, parameters, or values, like commas or quotation marks.
Ensure the number of opening brackets matches the closing brackets numbers.
Remove the currency sign from the formula.
Also, when you start typing the formula, Google Sheets suggests the correct one, and you get to see the variable you need and how the formula will work, so use it instead of typing.
2. #REF! error – The reference doesn’t exist
Google Sheets throws you the #REF! error when a reference doesn’t exist or a sheet that contains it is deleted.
First, check the formula for all the references to ensure you have selected the correct ones. If not, replace all the invalid ones.
However, if a reference is missing from the sheet, you can review the previous versions of a file in Google Sheets for reference; you can launch the older version to check if removing the reference was the last action you performed.
If that’s the case, you can press Ctrl + Z to reverse the action. Alternatively, you can replace the previous iterations of the file with the current one.
3. #N/A error – The item was not found
If a formula doesn’t find what it looks for, Google Sheets throws you a #N/A error. For example, if you are using the VLOOKUP/HLOOKUP function to search for a value in the table, and it doesn’t exist in the table, you will get the error.
To fix it, check these things:
Check the red triangle in the cell, indicating the error, to understand the cause of the error.
Once you have determined the issue, whether it is the wrong spelling or missing value, make the changes until you get rid of the problem.
Google Sheets displays this error if you have used an incorrect spelling or invalid name in a formula. For example, if you have a category with the name Due Dates but used Due Date in the formula, you will get the error.
To fix it, follow these steps:
Click the red triangle on the cell that displays the error to get additional information.
In case there is a word misspelled, correct the spelling. However, if that’s not the case, go to the formula’s section with the word.
Add or remove quotes around the word and check if the issue persists.
In case you are facing issues with #NAME! error on Microsoft Excel, there could be many things to check; read this guide to learn about it!
5. #DIV/0! error – You are trying to divide by zero
#DIV/0! error appears when you try to divide a value by zero. If you have done it mistakenly, you can remove the zero from the denominator.
However, if a formula applied to the sheet is the culprit, use the IF operator to tell the operation to perform division only if the number is larger than 0.
You can also get this error while using the Average formula, so to fix it, check the range selected and make the changes accordingly.
6. #NUM! error – The number is too large to display
If you enter invalid numeric values in a formula or have a result that has a value that is beyond the capability of Google Sheets to calculate or display, you see #NUM! error.
To fix it, double-check the calculations to ensure you have not included negative integers or invalid values in the formula.
7. #VALUE! error – The invalid item type
Google Sheets throws you the #VALUE error if the formula gets the wrong data type as an input or you have spaces in empty cells.
To fix it, follow these steps:
Click the red triangle on the cell that displays the error to get additional info.
Once you have figured it out, go to the cell with the formula, check which parameter is causing the issue, and change the data type to the relevant one.
Tips to avoid the Formula parse error in Google Sheets
Review your formulas for typos and missing commas, brackets, or misspelled words or functions.
Function in Google Sheets are case-sensitive, so use them as they are.
Make sure you have opened and closed all the parenthesis or brackets in the formula.
Check the number and order of arguments for every function you use, as each function has a specific requirement for the number & type of arguments.
If you are working with text or strings, they should also be enclosed within the quotation marks.
Use the IFError function to deal with potential issues in the formula, or use the function wizard to get help on building formulas as you go.
Ensure you put in the correct data type, as some formulas take numerical value, while others take data string or text value to work.
Keep these little tips in mind and keep the wrong syntax and cell references to disrupt your entire sheet on Google Sheets.
If you often work with graphs and want the objective representation of your data to observe any differences in measurements, you must add error bars to the sheet; read this guide to know how!
Did our post help you fix the problem? Feel free to mention your experience, or you can ask questions or leave your suggestions in the comments section below.
Any app can suffer from system glitches, but when it’s a communication app widely used like Viber, and you get a system temporary failure, you’ll need to address it immediately.
As always, WindowsReport experts were able to get to the root of the problem and present you our findings below.
How do I fix the Viber error system temporary failure?
Kickstart your troubleshooting with these preliminary steps:
Check the Viber server status for any downtime or maintenance schedules.
Close down all background programs and processes, update the Viber app and your OS then relaunch it.
Try accessing Viber on web and see if the issue persists.
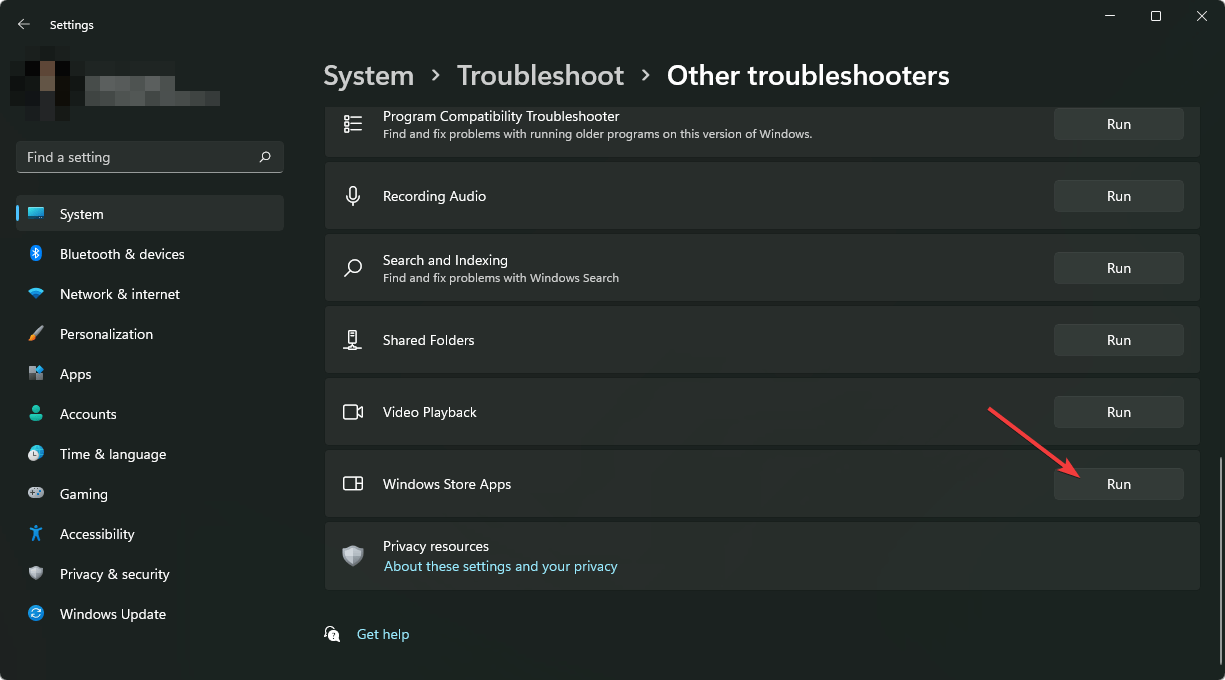
1. Run the Windows Store Apps troubleshooter
Hit the Windows key and click on Settings.
Click on System and select Troubleshoot.
Navigate to Other troubleshooters.
Click the Run option for the Windows Store Apps troubleshooter.
2. Delete app cache
2.1 Windows app
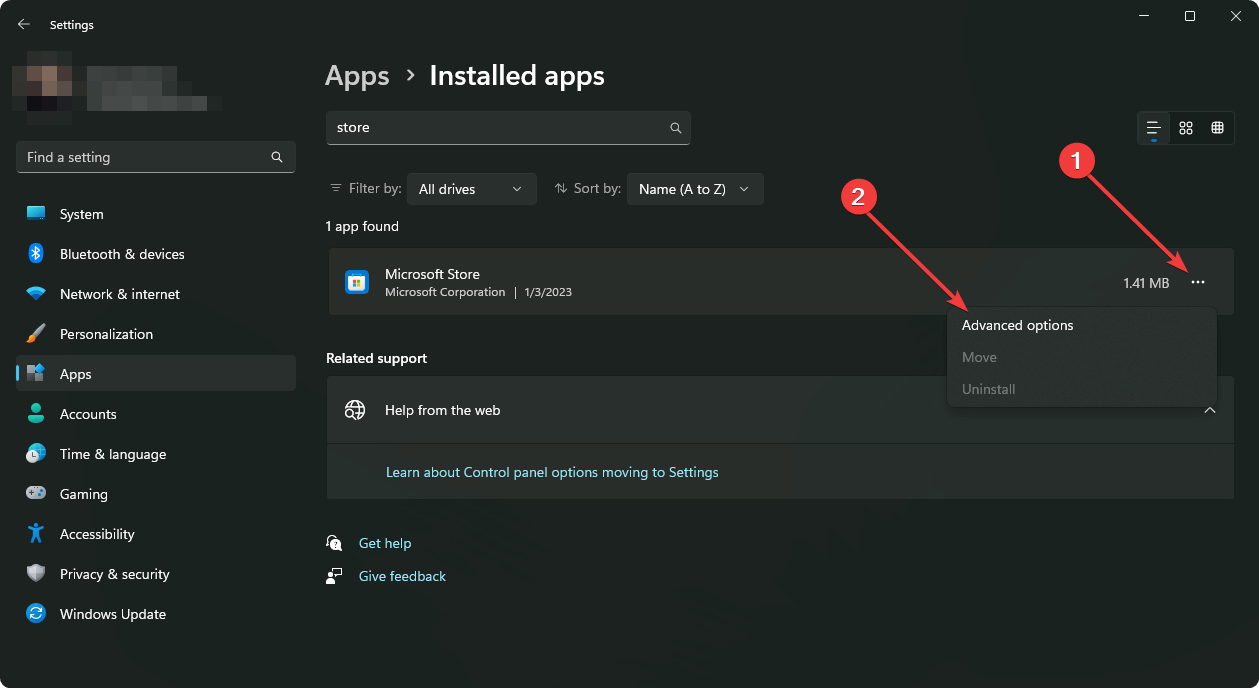
Hit the Windows key and click on Settings.
Click on Apps on the left pane then Apps & features on the right pane.
Locate the Viber app, click on the three vertical ellipses, and select Advanced options.
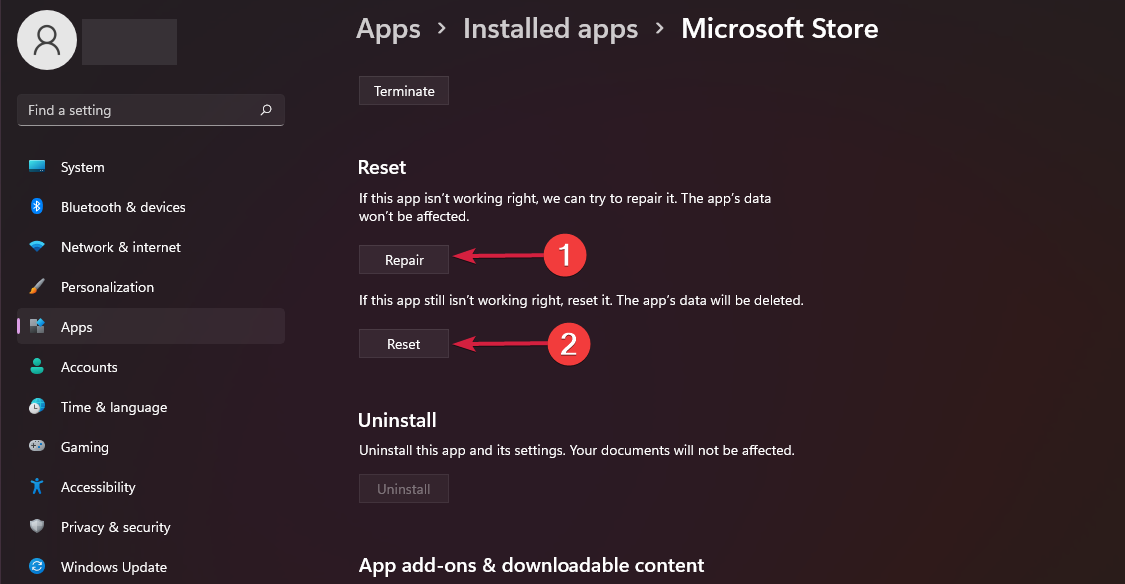
Click on Repair.
Go back and click on Reset if the repair option failed.
2.2 Android app
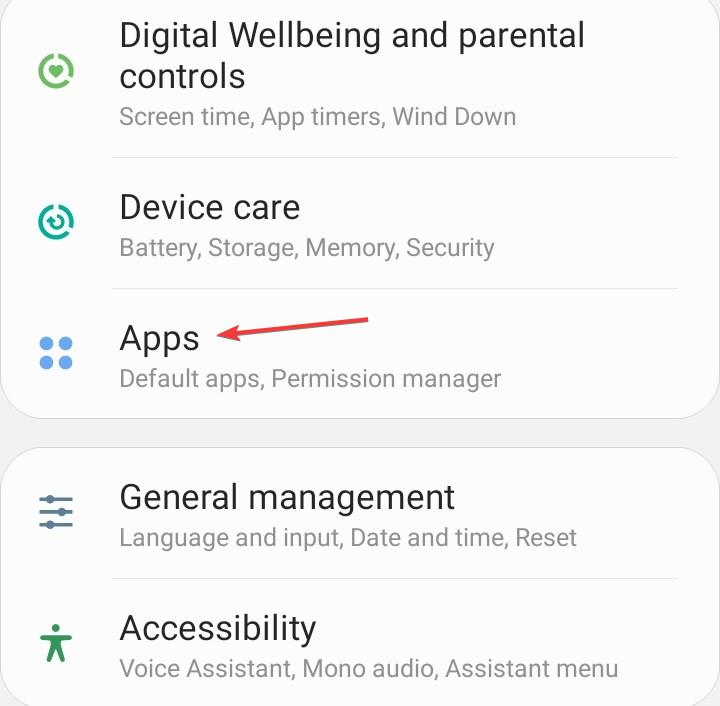
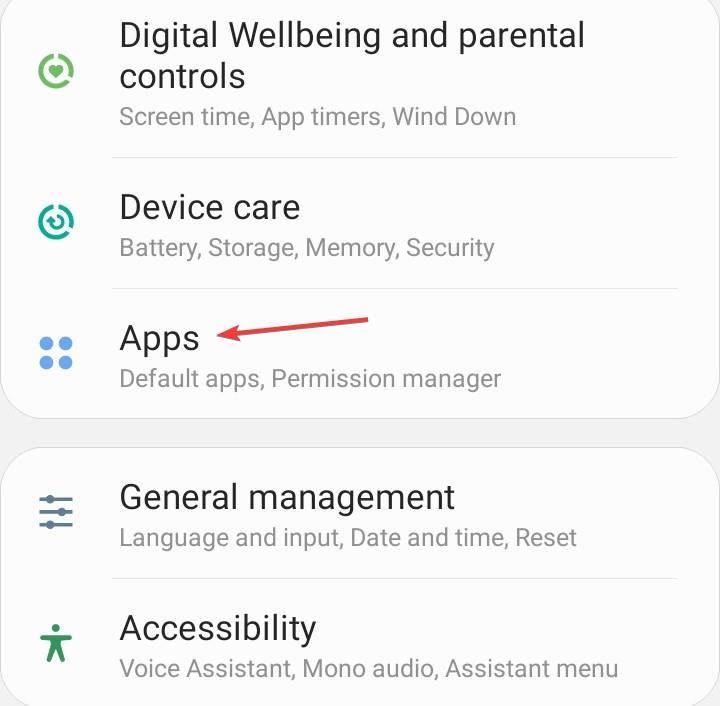
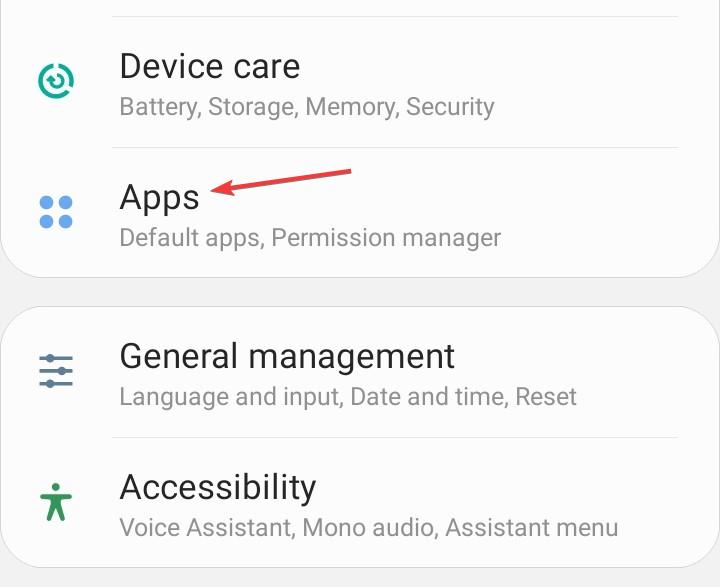
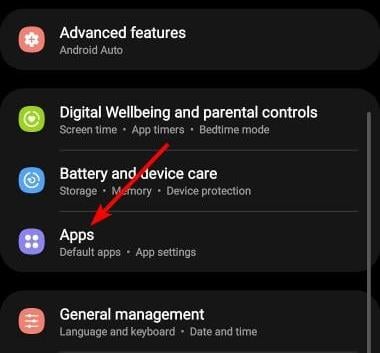
Open the Settings app on your Android device, and select Apps.
Choose Viber from the list of applications.
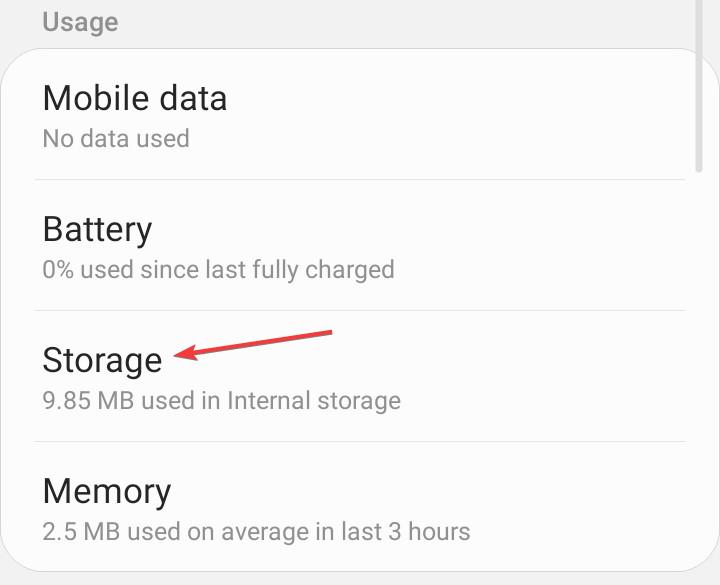
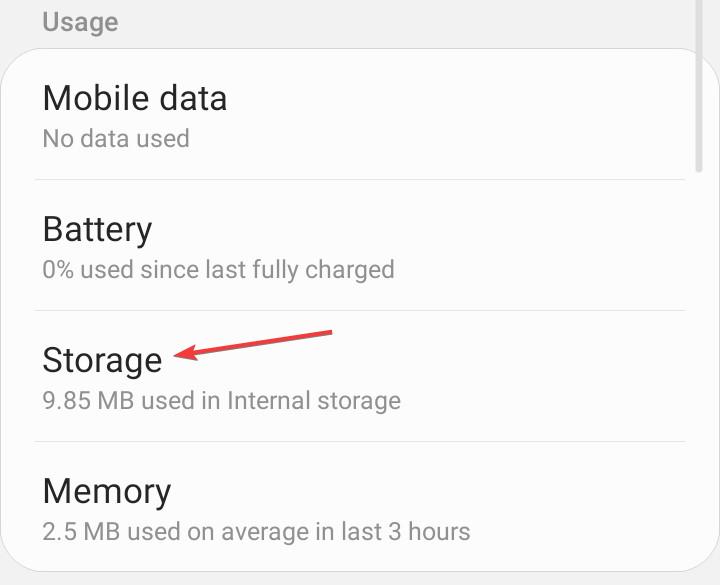
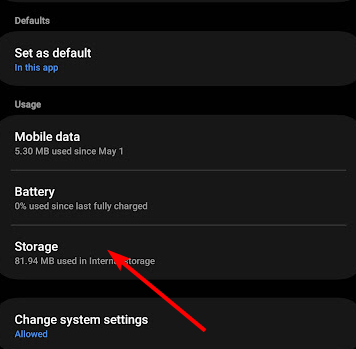
Tap on Storage.
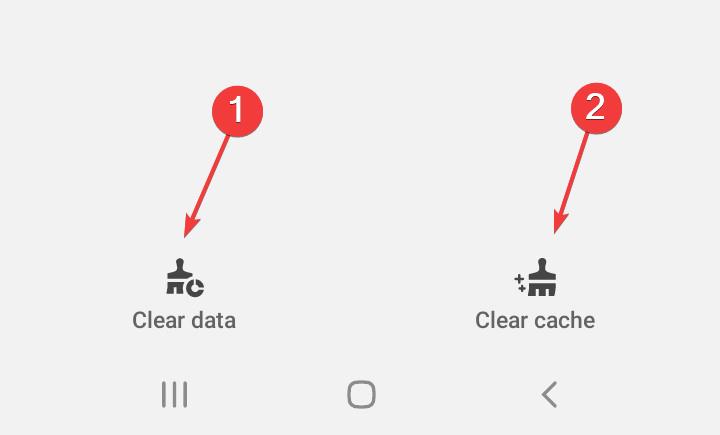
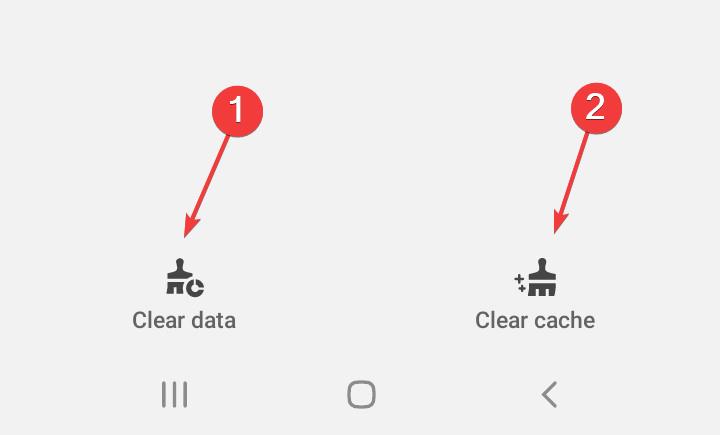
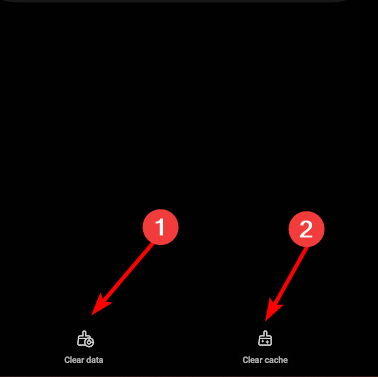
Tap on Clear data and then on Clear cache.
Open the Viber app again and check for improvements.
While built-up cache can be helpful in maintaining a database, over time, it can get corrupted. This in turn can lead to Viber not sending messages.
3. Reinstall Viber
3.1 Android app
Navigate to your phone, and locate Viber.
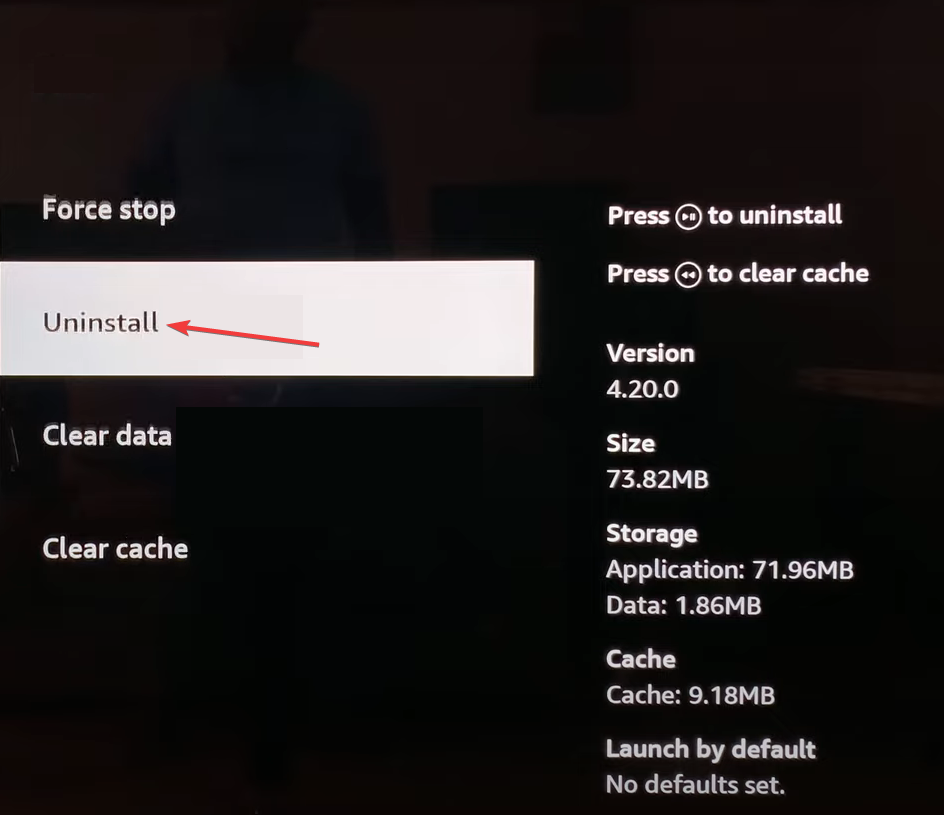
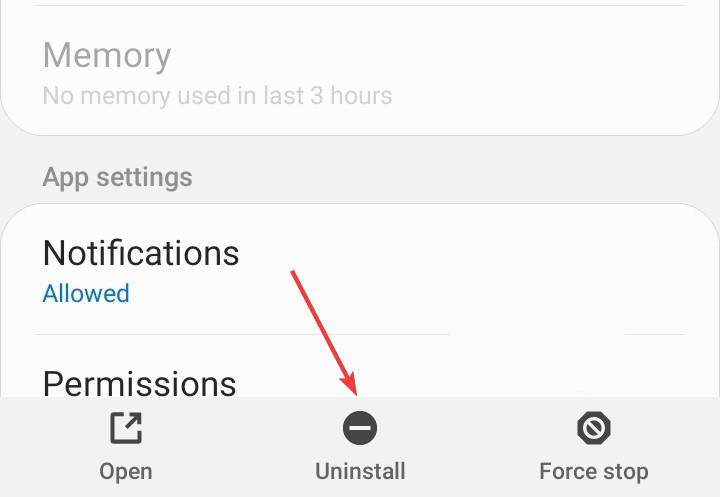
Long press and select Uninstall.
Go to Google Play Store and Install it again.
3.2 Windows app
Hit the Windows key, type Control Panel in the search bar, and click Open.
Navigate to Uninstall a program under Programs.
Locate Viber, click Uninstall at the top of the menu, and then press OK.
Restart your computer, then go to the Viber download page to install the latest version available for your computer.
Sometimes, app updates can cause problems. If you’ve reinstalled the app but the system temporary failure message is persistent, you can download a previous version that worked well.
You may not find the older version on the official Viber site so you’ll have to rely on third-party sites. If you choose to go with this route, ensure you have a comprehensive antivirus solution as you can’t be 100% sure the app is malware-free.
If you are getting the Viber error system temporary failure message and you have already tried to restart your device, then there is nothing else you can do except to wait for the issue to be resolved by the app developers.
Google introduces a new mode called “Probabilistic Memory Saver Mode” to improve Chrome’s Memory Saver feature. This mode makes intelligent decisions on which tabs to discard and which to keep, thereby reducing the time it takes to reload discarded tabs.
Memory Saver is a feature in Chrome that optimizes memory usage by freeing up memory from background tabs and allocating it to active tabs. Google’s data indicates that users revisit Memory Saver tabs within 24 hours about 60% of the time. Google aims to improve this statistic by making better decisions on which tabs to discard with the Probabilistic mode.
Chrome’s new Probabilistic Memory Saver Mode
The Probabilistic mode uses probability distributions to estimate the likelihood of a tab being revisited based on observations about the tab’s state. It discards tabs that are less likely to be revisited and retains those that are more likely to be revisited.
Google is testing this new feature in Chrome 121. Users can enable the feature from the chrome://flags page. The feature flag has three states:
Enabled: The feature is enabled and works normally. Enabled Simulative: The feature is enabled but does not discard any tabs. It only simulates the discarding process and logs the results. Enabled Active: The feature is enabled and discards tabs aggressively. It only keeps the most likely tabs to be revisited.
Development of new components: For Probabilistic mode, there are several other ongoing development efforts to improve Chrome’s Memory Saver feature. These include the development of new components such as TabPageDecorator, TabRevisitTracker, and ProbabilisticMemorySaverPolicy. These components indicate a focus on smarter tab management, especially in terms of deciding which tabs to discard and when.
Enahnced tracking and estimation: There’s also an enhanced tracking and estimation system in place, with the implementation of components like TabRevisitTracker and ProactiveDiscardEvaluator. These components suggest an approach to more accurately track user tab usage patterns and predict tab revisits.
Testing and refinement: Various commits indicate ongoing testing and refinement, such as adjustments to the time histograms and additions like TabConnectednessDecorator. The introduction of flag indicates progress towards user-end testing and potential future integration into mainstream Chrome versions.
In summary, Chrome is focusing on using probability-based methods to manage tabs, which is a complex but effective way to optimize memory. The updates show major progress in how Chrome can save memory by smartly deciding which tabs to discard, based on user habits and probability calculations.
Do you use the Memory Saver?Have you found it useful? Let us know your thoughts in the comments below.
The Error 503 Maximum threads for service reached message is encountered by the end-user or client while accessing a website. In the past, we have reports of Reddit, Fastly, and a few other websites throwing the error message.
In most cases, it turned out to be a problem at the server’s end. But there were instances where some minor reconfiguration at the user’s end got things up and running!
What is Error 503 Maximum threads for service reached?
It is an HTTP error, part of the 5xx status codes, highlighting a server-side issue. The problem arises when the servers are under maintenance or facing downtime due to a sudden surge in traffic, often a result of the DDoS attack. On the user’s side, it’s usually the network settings or DNS to blame.
How do I fix Error 503 Maximum threads for service reached?
Before we start with the slightly complex solutions, try these quick ones:
Check the website’s server status on the dedicated page, if there’s one, or use a third-party service like Downdetector.
Reload the webpage or try accessing it on another device.
Reboot the device router or connect to another network. Also, if you are on a wireless connection, switch to a wired one or use the mobile hotspot.
1. Clear the DNS cache
1.1 On the PC
Press Windows + S to open Search, type Command Prompt in the text field, right-click on the relevant result, and select Run as administrator.
Click Yes in the UAC prompt.
Paste the following commands individually and hit Enter after each: ipconfig /release ipconfig /flushdns ipconfig /renew netsh int ip reset netsh winsock reset
1.2 On the browser
NOTE
The steps listed here are for Google Chrome. In case you are using another browser, check its official website for the process.
Open Google Chrome, paste the following path in the address bar, and hit Enter: chrome://net-internals/#dns
Click the Clear host cache button.
Once done, reboot the device and access the affected website again.
If the Error 503 Maximum threads for service reached issue appears due to a corrupt DNS cache, you will have to completely flush and reset DNS on the device. It also helps with HTTP error 431.
2. Switch to another DNS server address
Press Windows + R to open Run, type ncpa.cpl in the text field, and hit Enter.
Right-click on the active network adapter, whether Ethernet or Wi-Fi, and select Properties.
Choose Internet Protocol Version 4 (TCP/IPv4), and click the Properties button.
Now, select Use the following DNS server addresses and enter the following information in the fields underneath:
Preferred DNS server: 8.8.8.8
Alternate DNS server: 8.8.4.4
Finally, click OK to save the changes and check for improvements.
We used Google’s public DNS server, but there’s always the option to set the fastest DNS server near you, as long as it serves the purpose.
3. Reset the network settings
Press Windows + I to open Settings, go to Network & Internet from the navigation pane, and click on Advanced network settings.
Click on Network reset.
Click the Reset now button.
Finally, click Yes in the confirmation prompt that appears and check whether the website is accessible.
If none of the network-related reconfigurations work, you should contact the website’s administrator or support team through the official channel. Make sure to include a screenshot of the error message, as it contains crucial details.
Besides, you may check the official forums to verify whether it’s a site-wide issue faced by users worldwide or in your region.
5. Access the cache copy
Search for the webpage or website you are trying to access on Google.
Click on the ellipsis next to the search result.
Expand the options and select Cached.
You will now see a cached copy of the page.
Viewing a cached copy of the webpage is a quick workaround when faced with Error 503 maximum threads for service reached or other HTTP errors. Remember, Google’s cache shows an older version of the webpage, and some information might be different from its present form.
How can I fix Error 503 Maximum threads for service reached as the administrator?
Here are a few things an administrator could do:
Check the error logs, identify the underlying cause, and eliminate it.
Remove any recent plugins and themes or switch to the default one.
Verify whether there’s over-utilization of resources.
Revert to the previous stable version if the error appeared after an update.
Check for spikes in traffic and allocate the resources accordingly.
These are all the ways you can fix Error 503 Maximum threads for service reached as both the end user and the website administrator. Remember, it mostly has to do with the servers, and that’s where you should start.
Besides, some of the solutions for HTTP error 404 might work in this case. So, do give them a look!
For any queries or to share what worked for you, drop a comment below.
Users have been encountering errors now and then while playing Diablo 4 since its launch. One such error is the Data Retrieval error, which usually occurs on Windows PCs, but the consoles are also not spared from it.
In this guide, we will cover the expert-recommended solutions with step-by-step instructions to get rid of the problem.
What causes the Data Retrieval error?
Unstable or weak internet connection.
Corrupted game files.
How can I fix the Diablo 4 Data Retrieval error on Steam?
Before proceeding with any steps to fix the Diablo 4 Data Retrieval error, go through the following preliminary checks:
Ensure you have a stable internet connection or switch to an ethernet cable, and prevent other error codes like 395002.
Make sure your Windows PC and Steam software are up to date, and you are logged in using the admin rights.
1. Set the game to run always as the administrator
From the start menu or desktop, locate the game, right-click, and select Properties.
On the Properties window, select the Compatibility tab.
Select Run this program in compatibility mode for & choose Windows 7 from the drop-down list.
Under Settings, place a checkmark next to Run this program as an administrator.
Press the Windows key, type control panel in the search box, and click Open.
Select Category for View by and click System and Security.
Under Windows Defender Firewall, click Allow an app through Windows Firewall.
On the Allowed apps screen, look for Diablo 4; if not found, click Change settings, then click Allow another app.
Click Browse, look for the game executable file in the system drive, select it, and click Open.
Now click Add.
Once added to the Allowed apps page, place a checkmark next to Private and Public for the app and click OK to finish.
4. Reinstall the game
Press Windows + I to open the Settings app.
Go to Apps, then click Installed apps.
Search for Diablo 4, and click the three dots icon, then select Uninstall.
Click Uninstall again to confirm the action.
Press the Windows key, type steam in the search box, and click Open.
Go to Library, right-click Diablo 4 from the list, and click Install.
Once installed, check if the issue persists.
If you are facing the same issue on Battle.net, you can follow the same steps to add the game to the firewall or reinstall the game to remove this error.
For other common issues related to Diablo 4 on Battlenet, like Diablo 4 Error Code 700004; read this guide to learn solutions.
Did we miss a step that helped you fix the Diablo 4 Data Retrieval error on Steam? Don’t hesitate to mention it in the comments section below. We will happily add it to the list.
Many users have complained about encountering Discord’s Fatal Javascript error when trying to start the app. In this guide, we will discuss the common causes and offer the WR experts-tested methods to fix the issue quickly.
What causes the Discord Fatal Javascript error?
Corrupted Discord app or antivirus interference.
The problem with the configurations, which means the data packets cannot synchronize with the cloud service.
Quality Windows Audio Video Experience service not working as expected.
How can I fix the Discord Fatal Javascript error?
Before proceeding with any steps to fix the Discord Fatal Javascript error, go through the following preliminary checks:
Restart your computer and ensure you have signed in using the user account with admin privileges.
Disable third-party antivirus temporarily and turn off the VPN if connected.
1. Delete the app cache
Press Windows + R to open the Run window.
Type %appdata% and click OK to open the Roaming folder in the AppData directory.
Locate Discord, select it, and click the Delete icon from the top menu.
Next, go out of the Roaming folder and click the Local folder to open it.
Find and select the Discord folder, and click the Delete icon from the top menu to remove it.
Launch the game, sign in using your credentials, and check if the issue persists.
Press Ctrl + Shift + Esc to open the Task Manager.
Go to the Processes tab, right-click Discord, and click End task.
Press the Windows key, type cmd in the search bar, and click Run as administrator.
Type the following command to update the policy update on Windows, and hit Enter: gpupdate /force
Once executed, close the Command Prompt window, then restart your computer.
5. Disable Hardware Acceleration
Press the Windows key, type discord in the search bar, and click Open.
Click the User Settings icon from the Profile image.
Go to App Settings from the left pane, and click Advanced.
Toggle off the switch next to Hardware Acceleration.
Restart Discord to check if the issue persists.
It is recommended to keep this feature on for better performance; however, if your system configuration doesn’t support it, you might face issues like these.
6. Modify the Update file
Press Ctrl + Shift + Esc to open the Task Manager.
Go to the Processes tab, right-click Discord, and click End task.
Press Windows + E to open the File Explorer window.
Navigate to this path after replacing <username> with your user account name: C:\Users\<username>\AppData\Local\Discord
Locate the Update.exe file, select it, click the Rename icon, then change the name to Update1.exe.
Restart your computer to let the changes take effect.
7. Reinstall the app
Press Windows + I to open the Settings app.
Go to Apps, then click Installed apps.
Search for Discord, click the three dots icon, then select Uninstall.
Press the Windows key, type control panel in the search box, and click Open.
Select Category for View by and click System and Security.
Under Windows Defender Firewall, click Allow an app through Windows Firewall.
On the Allowed apps screen, look for Roblox; if not found, click Change settings, then Allow another app.
Click Browse, look for the app executable file in the system drive, select it, and click Open.
Now click Add.
Once added to the Allowed apps page, place a checkmark next to Private and Public for the app and click OK to finish.
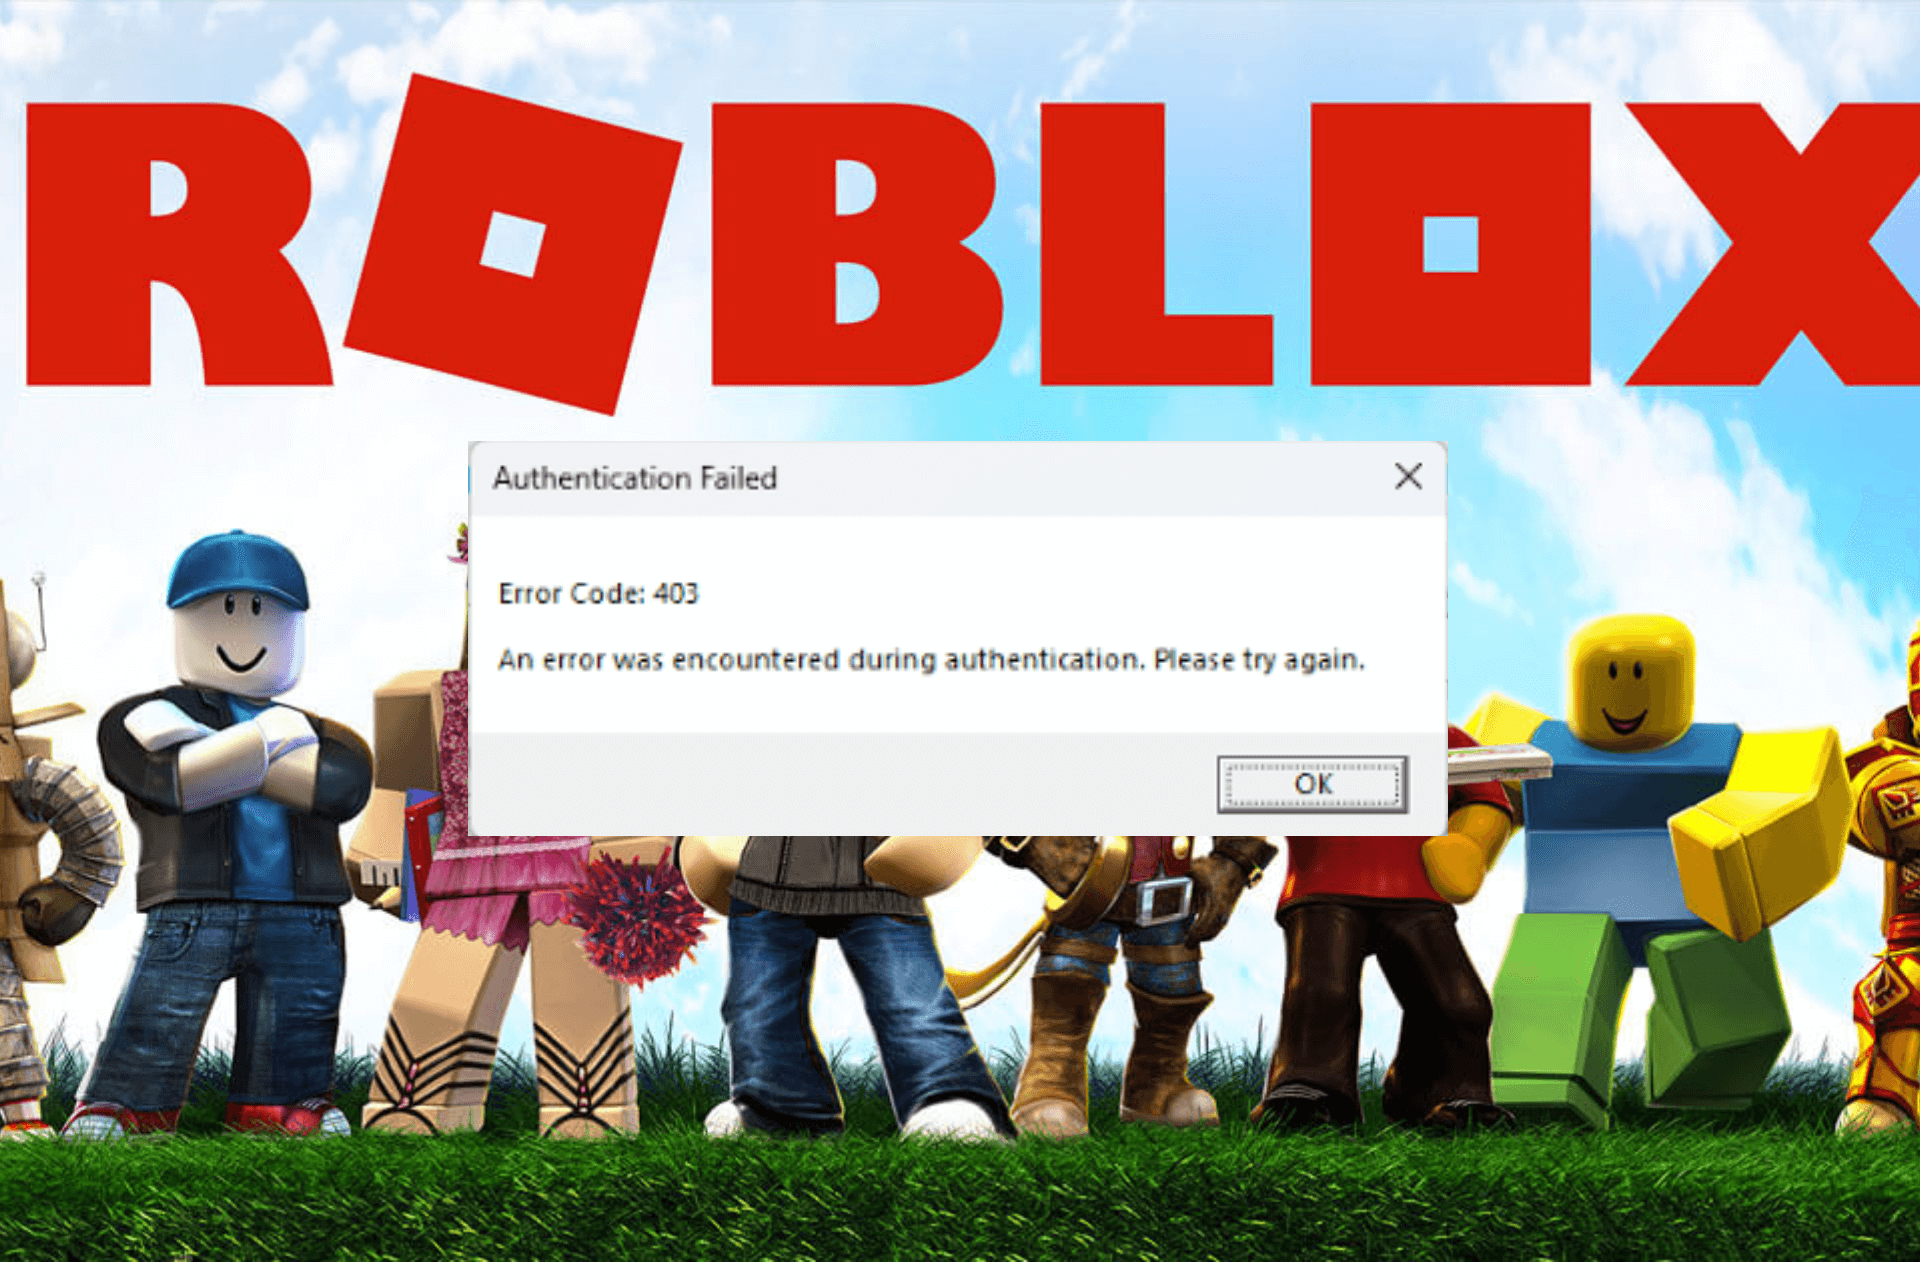
It is essential to allow Roblox through the Firewall on Windows, as it solves other problems that could arise due to firewall interference, such as error code 279.
Press the Windows key, type cmd in the search bar, and click Run as administrator.
Type the following command to repair the corrupted files on Windows, and hit Enter: sfc / scannow
Wait for the process to complete, then copy & paste the following command and press Enter: Dism /Online /Cleanup-Image /RestoreHealth
Restart your computer to let the changes take effect.
Running these scans can fix the corrupted system files and clear out the general issues on your PC, including Roblox not opening on Windows; read this guide to learn more.
This can be much faster and simpler by using dedicated repair software. These tools will scan your computer, and with just a few clicks, you can automatically fix any broken or corrupted system files.
5. Change the DNS server address to Google DNS
Press Windows + R to open the Run window.
Type ncpa.cpl and click OK to open the Network Connections.
Right-click the network connection and select Properties.
From the Properties window, select Internet Protocol Version 4 (TCP/IP) and click Properties.
Select the radio button next to Use the DNS server addresses.
Now, for the Preferred DNS server, type 8.8.8.8, and for the Alternate DNS server, type 8.8.4.4.
Click OK, then OK to save the changes.
6. Reinstall the app
Press Windows + I to open the Settings app.
Go to Apps, then click Installed apps.
Search for Roblox, click the three dots icon, then select Uninstall.
Click Uninstall again to confirm.
Now, we will remove all the app data and reinstall the app. Follow these steps:
Go to Settings app again. Next, click System, then select Storage.
Click Temporary files.
Select the range of files to delete and click Remove files.
Press the Windows key, type store in the search box, and click Open.
Go to the search bar, and type Roblox.
Click Install to get it on your computer in no time.
Remember that to avoid any issues while using Roblox, you should have a stable internet connection and an updated version of the app, and make sure it is added to the Allowed apps list of your Firewall.
Did we miss a step that helped you? Don’t hesitate to mention the steps in the comments section below. We will happily add it to the list.
After YouTube debuted AI features to the platform that will help with summarization and video content, while also providing insight with a conversational AI, the company is debuting a new AI tool called Dream Track.
According to their latest blog post, Dream Track is a tool that will let virtually anyone generate personalized soundtracks for Shorts using real stars’ voices.
Several celebrities lend their voices, including starts and singers such as Alec Benjamin, Charlie Puth, Charli XCX, Demi Lovato, John Legend, Papoose, Sia, T-Pain, and Troye Sivan, in a fashion similar to Meta’s AIs, announced in September, which also uses celebrities’s likeness to create AI avatars.
With our experimental feature called Dream Track, we’re testing a new way for musical artists and fans to connect through Shorts. Even though Dream Track is in its very early days, we’re excited about the potential that this experiment (and AI in general) offers.
YouTube
How does Dream Track work?
For now, YouTube has given a small group of select US creators the chance to create Dream Track-rendered soundtracks of up to 30 seconds for their Shorts videos.
To create a personalized soundtrack for a Shorts video with Dream Track, users will need to type an idea into the creation panel. That will offer a list of participating artists, mentioned above, that users can choose from.
Dream Track will then render the soundtrack for the Shorts video using an AI-generated voice of that artist. It will take seconds, and many artists who have signed up for this experiment, think that the tool is a game changer.
However, there are some points to be taken into consideration:
Shorts using Dream Track soundtracks will follow the same monetization policies as Shorts with music.
Shorts with Dream Track-generated soundtracks can’t be downloaded.
Remember when we told you that Copilot is not available in the European region, more specifically the European Economic Area? Well, that might change soon, as Microsoft is taking all the necessary steps to comply with the EEA policies, by announcing a string of changes to Windows PCs.
Windows 10, and Windows 11 PCs will suffer (or benefit from) some substantial changes that might culminate with other tools, such as the popular Copilot, finally being available in the EEA countries (basically, almost all of Europe).
The changes must be done by March 6, 2024, and the Redmond-based tech giant has already started implementing some of them. Until the date is due, though, they will be released gradually through non-security preview updates, as Microsoft says.
Coming soon, we will be releasing the November 2023 non-security preview update for Windows 11, version 23H2 to the Release Preview Channel that will preview many of the changes we’ve made to Windows 11 to meet these obligations. These changes will gradually be rolling out to devices in Release Preview over the next couple weeks.
Microsoft
What changes are coming to Windows to make it EEA-compliant?
In a blog post, Microsoft details several changes coming to Windows 10, and Windows 11 to make EEA-compliant.
The first of these changes has to do with a clear differentiation between Windows operating system functionalities and Windows apps in places such as Settings, Start, and Search.
Settings > System > System Components will show notable operating system components.
Start menu’s All Apps list has been renamed to All and operating system components are labeled with “system”.
Under Search, search results will show operating system components labeled with “system”.
We all know by now that several Windows apps can be uninstalled, but the EEA Windows users will be able to uninstall several more such as:
Web Search from Microsoft Bing, in the EEA
Microsoft Edge, in the EEA
The second of these changes has to do with interoperability. Windows features will be interoperable in the EEA region, meaning users will be able to customize apps to suit different EEA-compliant policies, such as the way they search the internet. Plus, the region will get two new interoperability points:
The third change, as we previously reported, Windows will ask users if they consent to sync their Microsoft account with Windows, to get a better experience with the operating system.
The fourth change, and probably the best of them, will see Windows respecting users’ choices of the default apps, instead of telling them to change the default apps to Windows native apps.
In the EEA, Windows will always use customers’ configured app default settings for link and file types, including industry standard browser link types (http, https). Apps choose how to open content on Windows, and some Microsoft apps will choose to open web content in Microsoft Edge.
Microsoft
The final change regards Windows PCs located in the EEA: some functionalities are only available in this region. EEA-designated Windows PCs are labeled as such when the user chooses a country from EEA.
Regarding Copilot, the AI tool is not coming to the EEA anytime soon, however, Microsoft plans to release it in the region one day. So hope is not lost.
The initial markets for the Copilot in Windows (in preview) include North America, United Kingdom and parts of Asia and South America. It is our intention to add additional markets over time including the EEA.
Microsoft’s End of Life support for Windows 10 is still scheduled for October 14, 2025, but the eight-year-old operating system will still receive the company’s new flagship artificially intelligent platform, Copilot.
As a matter of formality, Windows 10 Pro Edition devices that happen to be on 22H2 and serve as testing devices for some organizations will not be on Microsoft’s initial rollout plans for Copilot. Unfortunately, the same release omission goes for Windows 10 Enterprise and Education editions on the same channel.
However, for those on the right channel with an eligible device, the same Copilot experience available to Windows 11 users will now be backported to Windows 10 that includes the new UI design of an additional icon in the taskbar, a left-aligned information and chat pane when engaged and the same accessible content powered by mostly from Bing Chat.
Globally Compliant
With the new Windows 10 preview version of Copilot being made available in select global regions, Microsoft is also updating system components to comply further with the Digital Markets Act European markets.
According to Microsoft,
Today, with the November 2023 non-security preview update for Windows 11, version 23H2 (Build 22631.xxxx) in the Release Preview Channel, we are previewing many of the changes we’ve made to Windows 11 to meet these obligations. These changes will gradually be rolling out to devices in Release Preview over the next couple of weeks. We will be previewing changes for Windows 10 in Release Preview later. We’ll be updating Windows 10, version 22H2 and Windows 11, version 23H2 PCs in the EEA to be compliant by March 6, 2024
Windows Insider Blog
As for the specifics, Windows use in EU markets will now clearly identify operating system functionality in places such as the Settings, Start and Search menus.
Settings > System > System Components will show notable operating system components.
Start menu’s All Apps list has been renamed to All and operating system components are labeled with “system”.
Under Search, search results will show operating system components are labeled with “system”
Preview Updates and Improvements
Copilot and regulatory disclaimers aren’t the only things coming with the latest Release Preview build for Windows as the Windows team also planted some non-security preview updates and improvements that include,
New! If you use Home or Pro consumer devices or non-managed business devices, you can get some of the newest experiences as soon as they are ready. To do so, go to Settings > Update & Security > Windows Update. Set the Get the latest updates as soon as they are available toggle to on. Note that this toggle is not turned on for devices that your IT department manages unless IT configures a new policy.
New! This update adds new functionality that affects app defaults. To learn more, see A principled approach to app pinning and app defaults in Windows.
New! The news & interests feature on your device is now larger! This will help you use the feature more effectively and show the content you care about most on a larger scale.
New! This update adds Windows Update opt-in notifications to the screen when you sign in.
This update affects the Netherlands time zone. It adds the recent man-made landmass outside of Rotterdam to the shape files.
This update addresses an issue that affects the Trusted Sites Zone logon policy. You cannot manage it using mobile device management (MDM).
This update addresses an issue that causes IE mode to stop responding. This occurs if you press the left arrow key when an empty text box has the focus and caret (cursor) browsing is on.
This update addresses an issue that affects IE mode. A webpage stops working as expected when there is an open modal dialog.
This update addresses app cursor issues. These issues occur when apps use the WebView2Standalone XAML control.
This update addresses an issue that causes IE mode to stop responding. This occurs when you have multiple IE mode tabs open.
This update addresses an issue that affects fontdrvhost.exe. It stops responding when you use Compact Font Format version 2 (CFF2) fonts.
This update addresses an issue that affects non-admin processes. Game performance goes down, and the video stutters.• This update addresses an issue that affects protected content. It stops cross-process windows from being created. Because of this update, you can keep using out-of-process hosting for things like WebView2 under protected, top-level windows.
This update addresses an issue that affects the cursor. Its movement lags in some screen capture scenarios.
This update addresses an issue that affects the touch keyboard. It might not appear during the out-of-box experience (OOBE).
This update affects Microsoft Defender for Endpoint (MDE). It enables Conditional Access (CA) scenarios.
This update addresses a localization issue for Great Britain English (EN-GB) locales. The error message for invalid characters in a new Windows Hello PIN is wrong.
This update addresses a leak in volatile notifications. This might stop you from signing in to your machine.
This update addresses an issue that affects Windows LAPS. Its PasswordExpirationProtectionEnabled policy fails to turn on the setting.
Copilot Gamble
Microsoft has staked a lot on the claim of its AI led Copilot platform being the future company in accordance with its expanding cloud services empire and bringing it to Windows 10 is yet another sign of the company doubling down on that bet.
When we asked about how backporting a signature feature of Windows 11 to Windows 10 would incentivize older OS users to move to newer versions, Microsoft executives relayed the notion that the company is reimaging the way its services and features affect its users.
Perhaps the days of arbitrary cut offs and marketing lock-ins per operating system versions will make way for more transfixed and hyper focused use case determined primarily by the users, thanks in large part to cloud-based software and AI.
HTTP status codes like error 302 are the most popularly used way to send a response back to the end user. They are used to define the type of error or success that has occurred when requesting a resource from a web server.
While they may not be errors per se, they have a direct effect on your site, so we figured out quick ways to get rid of it.
What does HTTP response code 302 mean?
HTTP response code 302 is used in cases where a web page has been temporarily moved to a new URL. The response code tells the browser to redirect the request to the new location.
This is a great way to ensure clients visiting your site have somewhere to go as you continue with any maintenance on the site. It rarely happens on the user side, but it’s not impossible.
NOTE
The steps listed here are for both server-side and client-side.
How can I fix HTTP error code 302?
Start off with the following preliminary steps:
Make sure you are connected to the Internet and that there is no problem with your network. If the problem persists, contact your Internet Service Provider (ISP) for further assistance.
If you’re using an unstable Wi-Fi connection, try connecting to another network or power cycle your router.
Check your server configuration for any inconsistencies that may cause a bounce back or any other unexpected results.
1. Clear browser cache and cookies
For this step, we shall be using the Chrome browser.
Launch your Chrome browser and click the three vertical ellipses in the top right corner.
Select Settings.
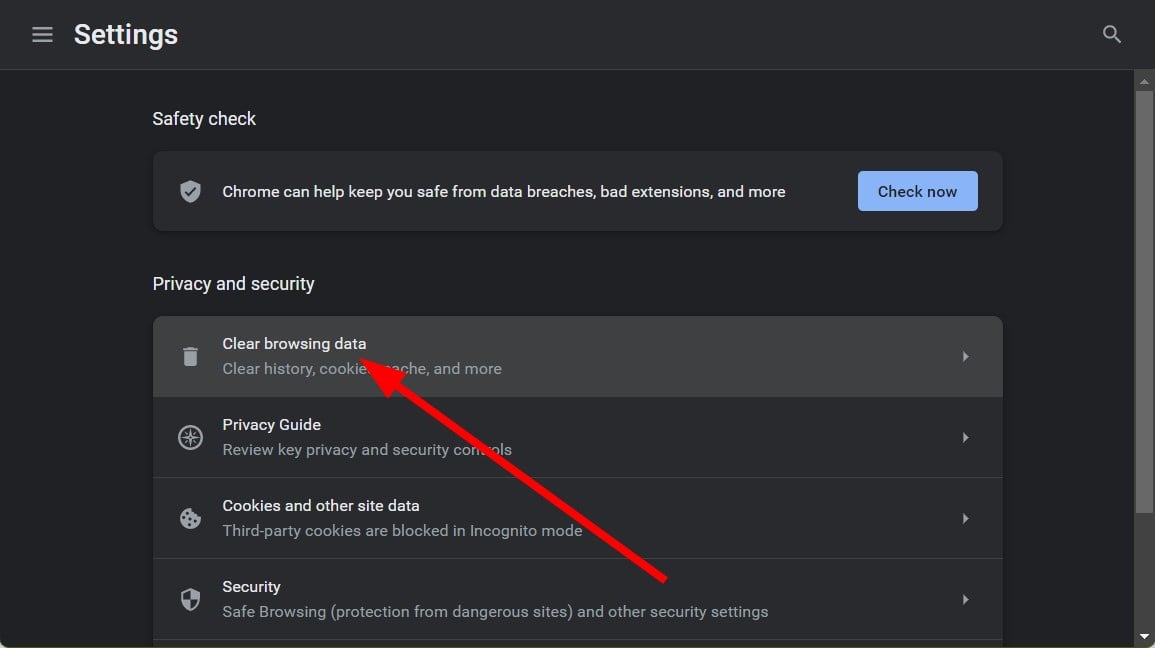
Click on Privacy and security, then select Clear browsing data.
Check Cookies and other site data and Cached images and files, then hit Clear data.
If the HTTP error 302 was caused by a broken or missing link, you may also encounter another HTTP error 404. Clearing your browser’s cache and cookies can help recreate a new database void of corruption, but if that doesn’t work, you can also try with another browser.
The problem might be related to the type of browser you are using or its compatibility with the site you are trying to reach.
2. Flush the DNS cache
Press Windows + R to open Run, type cmd, and hit Ctrl + Shift + Enter.
Click Yes in the UAC prompt.
Now, paste the following command and hit Enter:ipconfig /flushdns
Once done, restart the computer for the changes to come into effect.
If you moved your website to a new domain name without changing your DNS settings, the HTTP error 302 may appear. When you change web hosts, you need to update your DNS records so that they point to the right IP address.
3. Remove third-party extensions
Launch the browser, paste the following in the address bar, and hit Enter:chrome://extensions/
Turn off the toggle under an extension to disable it and verify whether the error disappears. Do it for all the installed extensions.
Once the problem is fixed, click on Remove under the extension removed last.
Again, click on Remove in the confirmation prompt.
On the server side, we recommend removing any third-party plugins you may have recently enabled. If you cannot remove them, deactivate them before accessing your site.
You can contact the website’s admin or host and let them know that you’re seeing a 302 response code. They may be able to fix it for you or at least provide some insight into what’s going on.
So, if you’ve been struggling with HTTP error code 302, whether as a user or website owner, there is no need to panic. Our fixes are sufficient to get you through this issue.
In the future, as a site owner, you need to pay closer attention to your site configuration lest you run into other errors like HTTP 413. Such mistakes can put undue pressure on your server and cause your website to crash.
If you’ve run into this error before, we’d love to hear from you. Were you a site owner or user? Was there a unique solution you applied that fixed the issue? Share with us in the comment section below.
You are in the middle of a match, and the most awkward mw3 error code 14515 pops up. This is just a normal situation, right? Wrong! We have got you covered with many fixes to resolve this issue.
What is error code 14515 on Modern Warfare?
The error code 14515 is a problem with the game’s network subsystem. This means that you are unable to connect to the server, or there is a problem with your connection speed. You cannot play since the game cannot connect to online servers due to overloading or maintenance, you cannot play.
How can I fix MW3 error code 14515?
A few basic workarounds to perform before the slightly complex solutions include:
Check for connection issues like slow speeds or the Internet randomly disconnecting, then switch to an Ethernet cable and restart your router or modem.
Restart your computer and Xbox, then relaunch the game.
1. Update your Xbox console
Press the Xbox button on your console and click on your account icon to open Settings.
Click on Devices and connections.
Select Accessories.
Click on your Xbox controller and select Update now and restart once it is finished.
2. Clear system cache
Press the Guide button on your controller.
Navigate to Settings and select System Settings.
Click on Storage.
Highlight a storage device then press the Y button on your controller to open Device Options.
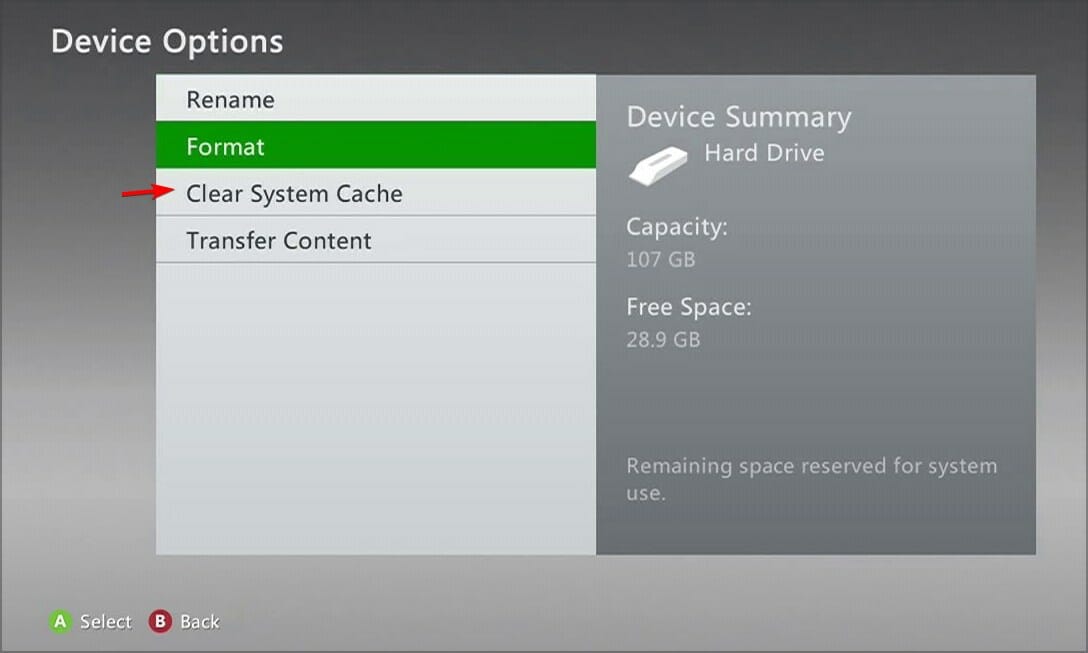
Click on Clear System Cache under Device Options screen.
Click Yes when the confirm storage device maintenance prompt pops up.
If you have been playing Modern Warfare for a while, the game may have cached some old files that no longer work with the current version hence throwing the mw3 error code 14515.
The mw3 error code 14515 is still a relatively new error, so the Call of Duty team might still be working on other solid fixes.
The best you can do is wait since it appears to be more of a server-related error, but ensure you keep an eye out on community forums where other players are constantly sharing new insights. We’ll update this article as soon as we get any new information, so bookmark this guide and check later.
In the meantime, you can explore other first-person shooter games that guarantee you the same or even better experience than Modern Warfare 3.
With such new errors, we like to keep it interactive, so share with us in the comment section below what you’ve tried so far and what worked for you.
Quite a few users who set a lock screen background in Windows 11 found that it reverts to a blue screen with white wavy lines, the default selection. The same happens in the previous iterations of the OS as well.
The problem appears whether you use Windows Spotlight, select a picture, or go with the slide show. The changes don’t reflect after a reboot. And in most cases, it turned out to be an issue at the user’s end.
Why does my lock screen wallpaper keep changing in Windows 11?
Windows Spotlight not registered properly (if using the feature)
Corrupt system files
Critical apps and components not running in the background
The user doesn’t have access to the required folders/files
A third-party application is triggering conflicts
What can I do when the lock screen background reverts to blue screen in Windows 11?
Before we start with the slightly complex changes, try these quick ones first:
Check for any pending Windows updates and install them.
Re-enable Windows Spotlight, or if you have configured a picture or slide show, re-set it.
Press Windows + R to open Run, type cmd, and hit Ctrl + Shift + Enter.
Click Yes in the UAC prompt.
Now, paste the following two commands and hit Enter after each: DEL /F /S /Q /A "%USERPROFILE%/AppData\Local\Packages\Microsoft.Windows.ContentDeliveryManager_cw5n1h2txyewy\LocalState\Assets"DEL /F /S /Q /A "%USERPROFILE%/AppData\Local\Packages\Microsoft.Windows.ContentDeliveryManager_cw5n1h2txyewy\Settings"
Press Windows + S to open Search, type Windows Powershell, right-click on the relevant result, and select Run as administrator.
Click Yes in the UAC prompt.
Execute the following command: Get-AppXPackage -AllUsers |Where-Object {$_.InstallLocation -like "SystemApps"} | Foreach {Add-AppxPackage -DisableDevelopmentMode -Register "$($_.InstallLocation)\AppXManifest.xml"}
Once done, reboot the PC and check for improvements.
When Windows Spotlight is not working, and the lock screen wallpaper reverts to a blue wavy picture, your primary approach should be to re-register Windows Spotlight.
2. Modify the permissions
2.1 Accessing the SystemData folder
Press Windows + E to open File Explorer, click the View menu, select Show, and choose Hidden items if it’s presently unchecked.
Navigate the following path or paste it in the address bar and hit Enter: C:\ProgramData\Microsoft\Windows
2.2 Taking full control of the folder
Right-click on the SystemData folder and select Properties.
Go to the Security tab, and click the Advanced button.
Click on Change.
Type your current profile name in the text field, click on Check Names, and then OK.
Tick the checkbox for Replace owner on subcontainers and objects, and click Apply.
Click Yes in the confirmation prompt.
Again, go to the Security tab in the Properties window of the SystemData folder, and click Advanced.
This time, tick the checkbox for Replace all child object permission entries with inheritable permission entries from this object and click OK.
Confirm the change.
2.3 Finding the SID
Press Windows + R to open Run, type cmd in the text field, and hit Enter.
Paste the following command and hit Enter: wmic useraccount get name,SID
Identify the SID for the affected user account.
2.4 Moving the files
Go back to File Explorer, and double-click the SystemData folder to view its contents.
Now, double-click the folder with the same SID as the affected user profile.
Open the ReadOnly folder.
Now, open the LockScreen folder. There might be several here with different letters. Choose one which stores the wallpaper you see on the lock screen.
Now, move the image you want to set as the lock screen wallpaper here and remove the default blue one.
3. Allow Microsoft Edge and Store to run in the background
3.1 Microsoft Edge
Launch Microsoft Edge, click the ellipsis near the top right, and select Settings from the flyout menu.
Go to the System and performance tab, and enable the toggle for Continue running background extensions and apps when Microsoft Edge is closed.
3.2 Microsoft Store
Press Windows + I to open Settings, and click on System Components on the right in the System tab.
Click on the ellipsis next to Microsoft Store, and select Advanced options.
Now, select Always under the dropdown menu for Let this component run in background.
4. Repair the corrupt system files
Press Windows + R to open Run, type cmd, hold Ctrl + Shift and click OK.
Click Yes in the UAC prompt.
Paste the following DISM commands individually and hit Enter after each: DISM /Online /Cleanup-Image /CheckHealthDISM /Online /Cleanup-Image /ScanHealthDISM /Online /Cleanup-Image /RestoreHealth
Execute the following command for the SFC scan: sfc /scannow
If it’s the corrupt system files to blame for the Windows 11 lock screen wallpaper automatically changing, running the DISM tool and SFC scan should get things running. Alternatively, you can use dedicated repair software to automatically replace corrupt system files with healthy versions from an extensive database.
5. Uninstall conflicting applications
Press Windows + R to open Run, type appwiz.cpl in the text field, and hit Enter.
Select any antivirus or similar security software from the list that might prevent access to the network, and click Uninstall.
Follow the on-screen instructions to complete the process.
Reboot the device and check for improvements.
We saw a few users fix things when the lock screen background reverts to a blue screen in Windows 11 by removing BitDefender, AVG Internet Security, and Total AV or uninstalling apps in the same category.
if that doesn’t work right away, consider using an effective software uninstaller tool to remove any leftover files and Registry entries, and clear any changes made by the app.
Once downloaded, double-click the ISO file and click Open in the prompt.
Run the setup.exe file.
Click Yes in the UAC prompt.
Click Next to proceed.
Check the license terms and click Accept.
Verify that the Windows 11 setup reads, Keep personal files and apps, and click Install.
Wait for the in-place upgrade to complete. It may take a few hours.
A repair upgrade is an effective solution when the problem lies with the OS or the system files. It’s equivalent to reinstalling Windows, but you don’t lose the installed apps or stored files.
7. Create a new user account
Press Windows + R to open Run, type netplwiz in the text field, and click OK.
Click the Add button.
Click on Sign in without a Microsoft account (not recommended).
Now, click on Local Account.
Enter the user name and password (not mandatory) for the new profile, and click Next.
Once done, select the new user account, and click on Properties.
Go to the Group Membership tab, select Administrator, and click OK to save the changes.
Finally, sign in with the new user profile, customize the lock screen, and verify whether the changes reflect after subsequent reboots.
If nothing else works, the last option is to create a local account when the lock screen background wallpaper reverts to a blue screen in Windows 11. To transfer data between the two accounts, use an external USB drive. Besides, you can always make apps available to all users.
Remember, the problem is fixable, though it might take some time, depending on the underlying cause. As a last resort, you can reinstall Windows 11, but it shouldn’t come down to that for most!
And if it’s specifically the lock screen slideshow not working, you will have to check indexing and modify the local group policies.
For any queries or to share which fix worked for you, drop a comment below.
Streaming apps like BBC iPlayer may fail to load content and throw error code 02050 on your screen.
It could be a temporary issue that resolves itself, but if not, keep reading to discover what our WindowsReport experts were able to come up with to address this issue.
How do I fix BBC iPlayer error code 02050?
Before we start, verify that your streaming device has been registered with BBC iPlayer. You can also register it again. Check your Internet speed and restart your router.
1. Update your device’s firmware
1.1 TV firmware
For this solution, we shall be using the TCL model.
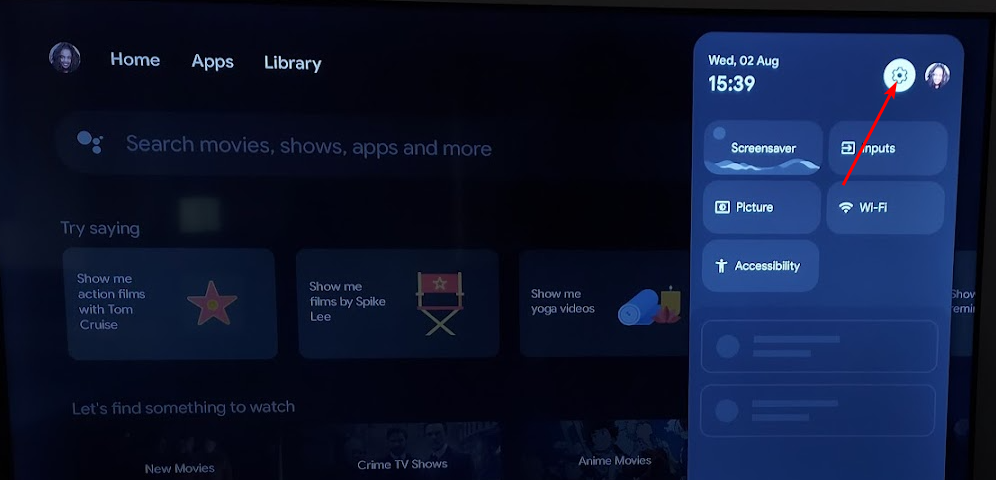
On your TV, find your Settings.
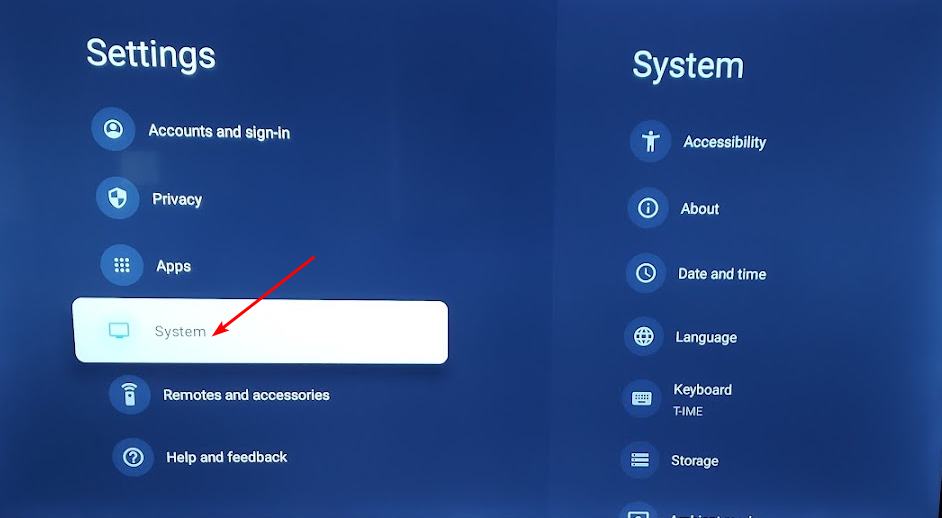
Go to System.
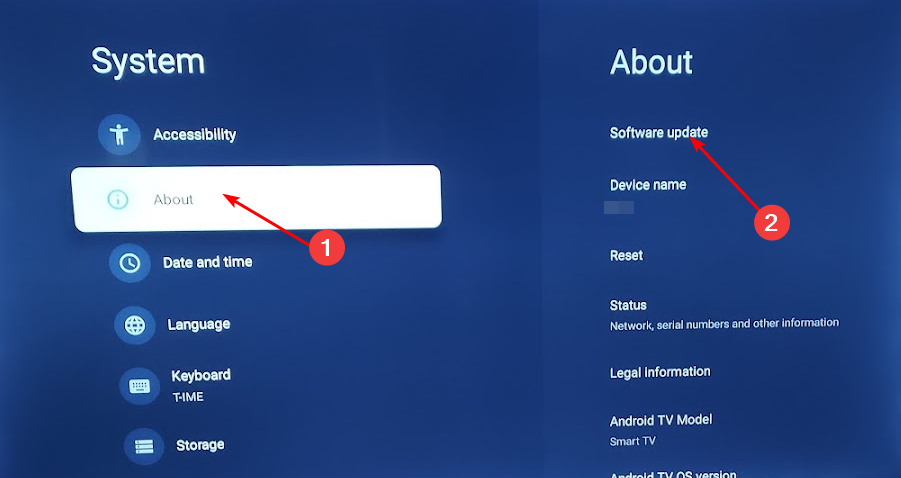
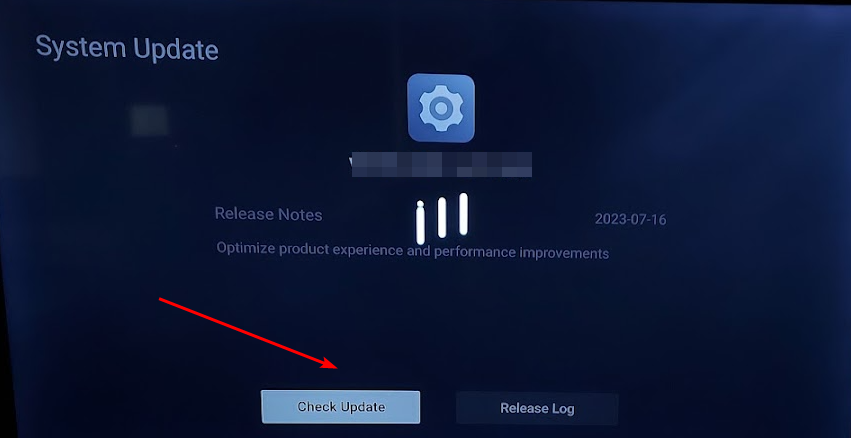
Click on About then select Software update.
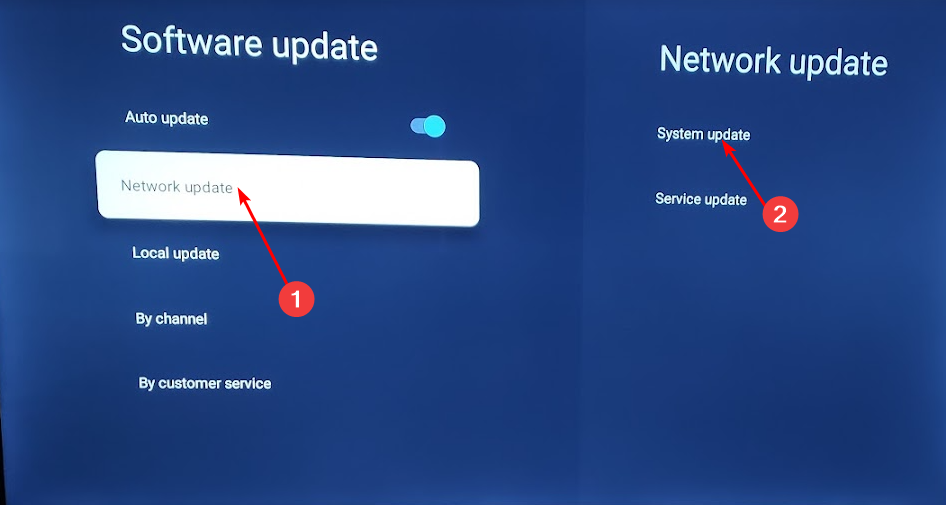
Select Network update and click on System update.
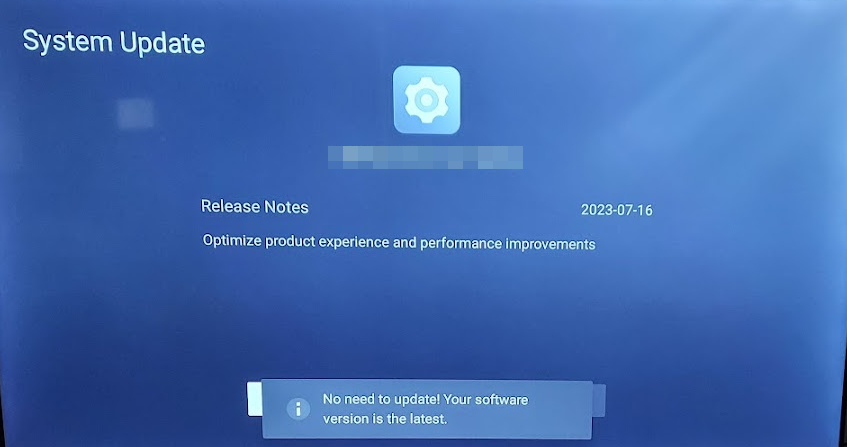
Now click on Check Update. Your system will scan for any available updates.
You’ll either start downloading updates or get a message that your TV is already up to date.
1.2 Phone OS
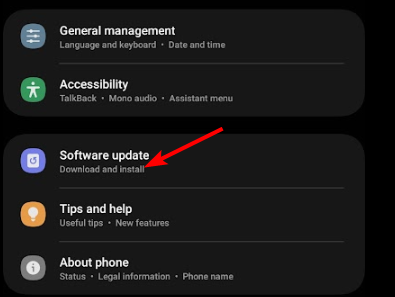
Locate Settings on your device. (We’ll be using the Samsung model for this step).
Go to Software update.
Tap on Download and install.
Wait for the update to finish installing if available, and retry your transaction.
Updating your device’s software can also help with other loading issues on BBC iPlayer like error code 02062.
2. Clear cache
2.1 On your TV
On your TV, find your Settings.
Go to Apps.
Find BBC iPlayer and click on it.
Scroll down and select Clear data and Clear cache.
2.2 Android app
Open the Settings app on your Android device, and select Apps.
Choose BBC iPlayer from the list of applications.
Tap on Storage.
Tap on Clear data and then on Clear cache.
Open the BBC iPlayer app again and check for improvements.
2.3 Browser cache
For this step, we shall be using the Chrome browser.
Launch your Chrome browser and click the three vertical ellipses in the top right corner.
Select Settings.
Click on Privacy and security, then select Clear browsing data.
Check Cookies and other site data and Cached images and files, then hit Clear data.
3. Enable/disable VPN
Press the Windows key and select Settings.
Next, select Network & internet and click on VPN in the right-side menu.
Select the VPN connection you want to disable, click on the drop-down and select Remove.
By following the advice above, you may be able to resolve the problem you’re experiencing with BBC iPlayer not loading content error 02050. It’s worth noting that these instructions will work on any device that allows you to stream BBC iPlayer content.
There may still be other ways to fix this issue that are beyond the scope of this article. As such, we’d like to welcome any additional or even unorthodox solutions that may have helped you bypass this issue. Drop us a line in the comment section below.
Arena of Valor is a popular MOBA (Multiplayer Online Battle Arena) mobile game available for Android and iOS, but recently, users on both received Error 201 when launching the game’s app.
Troubleshooting it is a tad bit difficult, given the lack of information on the web. But, in most cases, things are fixed automatically within a few hours.
What is error code 201 in Arena of Valor?
The error code highlights an issue with the Arena of Valor servers, which usually happens when an update is being deployed. Ideally, the developers should apprise users of the update beforehand, but that has not been the case with Arena of Valor. Also, issues with the game files and network can trigger the error.
How do I fix Arena of Valor Error 201?
Before we start with the slightly complex solutions, try these quick ones:
Check for any pending game updates and install them. Also, switch to another network. If you are using Wi-Fi, connect to mobile data and vice-versa.
Force close Arena of Valor, then launch the game and check for improvements. Alternately, reboot the device.
Tip
Before you start manually troubleshooting things, we recommend waiting a few hours in case the issue is server-related. If that doesn’t work or you have been facing the error for some time, start with the solutions listed below.
1. Clear the game cache
1.1 Android
Open the phone Settings, and go to Apps.
Select Arena of Valor from the list.
Tap on Storage.
Now, tap on Clear data and Clear cache to delete the corrupt files.
Once done, relaunch Arena of Valor and check whether it now runs fine.
1.2 iOS
iOS devices don’t offer an option to clear just the app cache, and you will have to uninstall the application altogether. But don’t do it just yet! Try the next solution and then proceed with the uninstall.
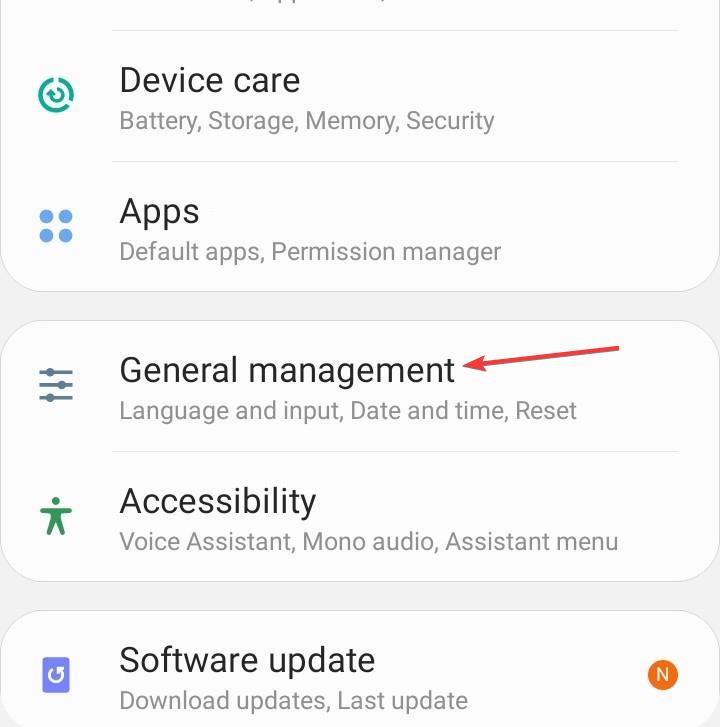
Open the phone Settings, and go to General management.
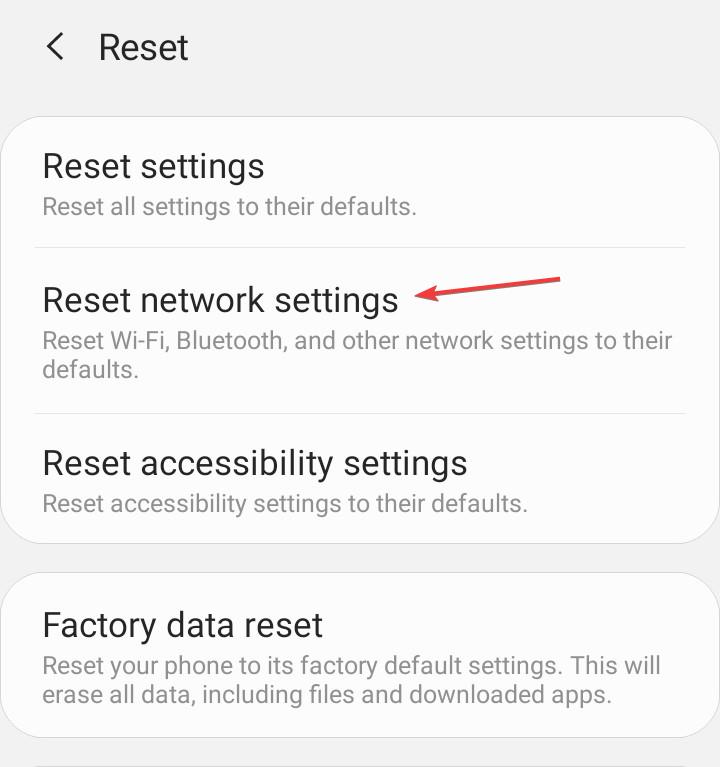
Tap on Reset.
Now, select Reset network settings from the list of options.
Tap on Reset settings to confirm.
2.2 iOS
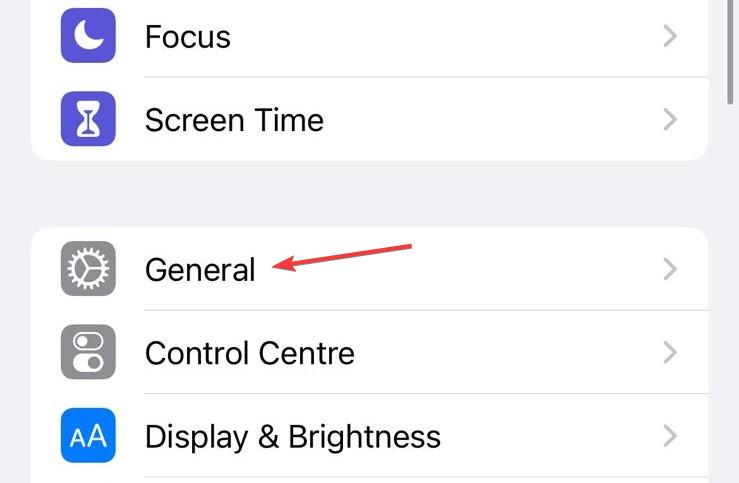
Open the iPhone Settings, and go to General.
Tap on Transfer or Reset iPhone.
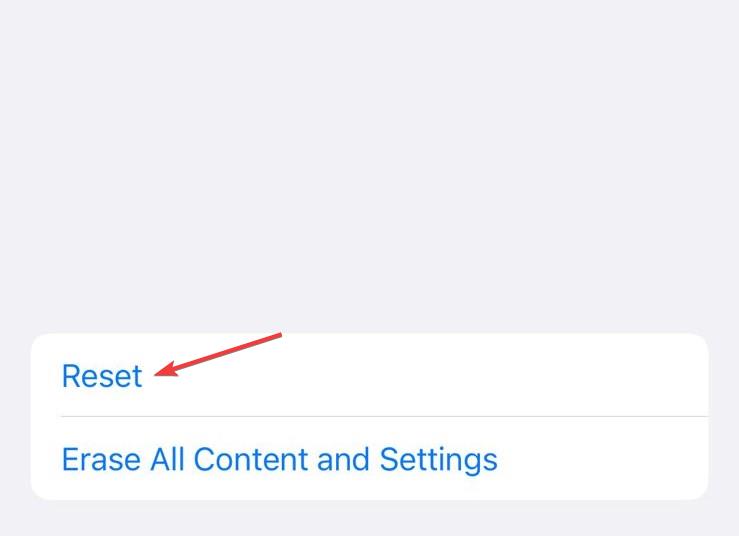
Tap Reset at the bottom.
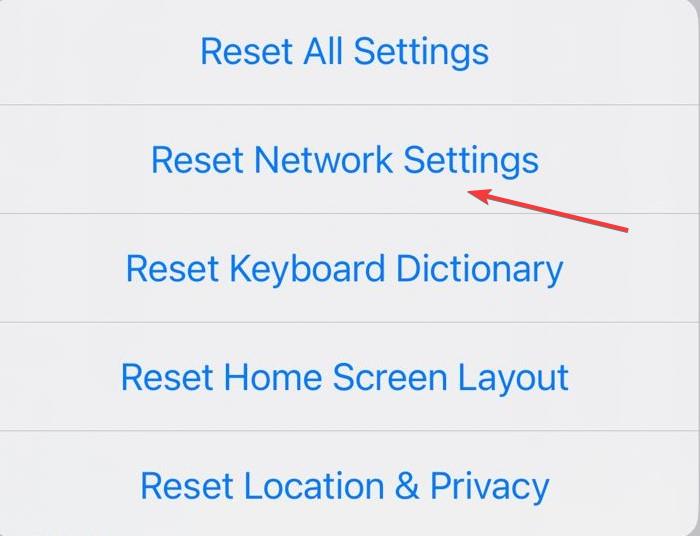
Select Reset Network Settings from the list of options.
Enter the device’s passcode to confirm the reset.
A reset is effective against the Arena of Valor Error 201, when the problem lies at your end, especially with the network configuration. It also helps with SMS issues like the Vodafone error 69.
3. Reinstall Arena of Valor
3.1 Android
Open the device Settings, and go to Apps.
Choose Arena of Valor from the list.
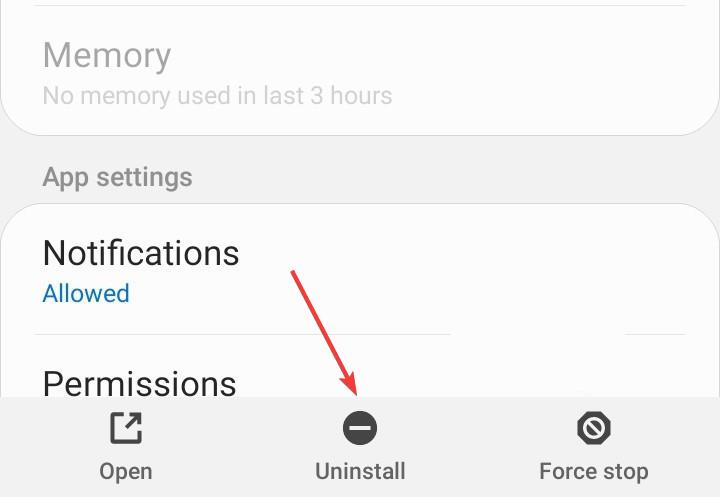
Tap on Uninstall at the bottom and confirm the change.
Now, reboot the Android device, and then reinstall Arena of Valor from the Google Play Store.
3.2 iOS
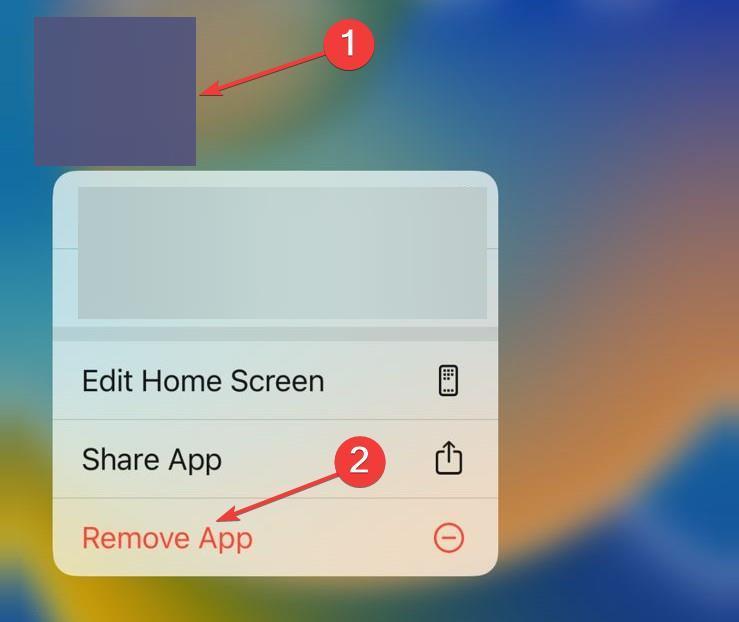
Tap and hold Arena of Valor on the iPhone’s home screen, and select Remove app.
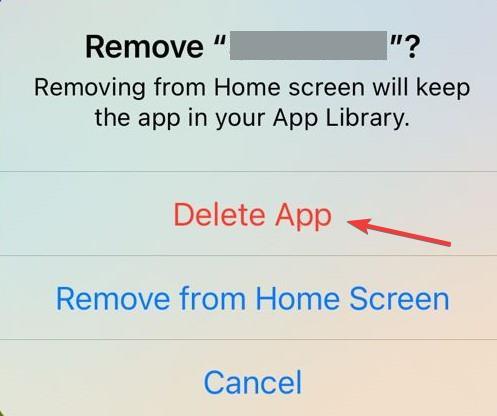
Choose Delete app in the prompt that appears.
Tap Delete to confirm the uninstall.
Now, reboot the device and download Arena of Valor from the Apple App Store.
When nothing else works, contact the Arena of Valor support through the official website. Just click the Support option at the top, select the appropriate problem, and look for a solution or try connecting to a support agent.
The Arena of Valor support interface is not that good or user-friendly, but in most cases, things shouldn’t come down to that!
These are all the ways you can fix the Arena of Valor Error 201 in no time! Remember, for server or network-related issues with most mobile games or even apps in general, you will have to follow a similar approach.
If you have encountered the Paramount Plus error code 3205 while trying to watch a series, channel, or sometimes multiple shows on your Android TV, phone, or browser, this guide can help!
We will explore the probable causes along with the recommended fixes by WR experts to get the app working in no time.
Why does the error code 3205 occur on Paramount Plus?
The Paramount app is corrupted or outdated.
TV firmware is not updated, or you have an unstable internet connection.
Incompatible browser, adblocker, or device you are using.
How can I fix the Paramount Plus error code 3205?
Before proceeding with any advanced steps, restart your computer or TV and ensure your app is compatible, or try using a different device; verify if you have a stable internet connection and an updated browser version, and try using a different browser.
1. Force close the app (on Android device)
Tap on the Settings icon from the home screen.
Select Apps from the list of options.
Tap on App Management.
Now scroll to find Paramount Plus, then tap on it.
Under the app name, locate and click Force stop.
Forcing the app to close can help you clear out other issues like Paramount Plus fatal error; read this guide to learn the other detailed steps.
2. Delete the browser cache
Launch your preferred browser. Here, we are demonstrating the steps using Google Chrome.
Click the three dots icon, then click Settings from the drop-down.
Select the Privacy & security option from the left pane, and click Clear browsing data from the right.
For Time range, select All time from drop-down list, and place a checkmark next to Cookies and other site data, & Cached images and files.
Click Clear data.
If you cannot access the Paramount Plus on the browser, it could be due to corrupted or outdated cached data stored; these steps could help you delete it, resolving the problem.
Now tap on Clear cache to clear the app cache, and check if the issue reappears.
If it does, repeat the steps and choose Clear data this time.
Tap on Delete to confirm.
Steps to clearing the app data can vary from device to device; however, you can look for similar options to perform on other devices; for example, on iOS, you need to look for the Offload App option. Also, once the data is cleared, you must sign in to your Paramount Plus account the next time you launch the app.
4. Disable the ad blocker
Launch your preferred browser. Here, we are demonstrating the steps using Google Chrome.
Click the three dots icon, then click Settings from the drop-down.
Select the Privacy & security option from the left pane, and click Site Settings.
Click the downward arrow next to Additional content settings to expand it, and choose Intrusive ads from the list.
Under the default behavior, place the checkmark next to Any site you visit can show any ad to you, to remove it from the Ads are blocked on sites known to show intrusive or misleading ads option.
If you use an extension to remove ads, click Extensions instead of Settings and toggle off the switch next to the add-on to disable it.
First, open the Paramount app, then log out of it.
Launch Google Play Store from the home screen, search for Paramount Plus, and click Update if available.
On your device’s home screen, locate Paramount Plus, then tap & hold to get options.
Select Uninstall to delete the app.
Go to the Play Store again, search Paramount Plus, and tap Install to get the app on your device.
If you are using it on your Android TV or iOS device, try updating or reinstalling the app and check if it fixes the issue.
Remember that this issue usually occurs if your app is outdated or corrupted or you try to run the site using an incompatible browser, so for the browser version to work seamlessly, make sure you check your internet connection, clear browser cookies, and verify your browser is compatible & updated with the latest version.
Also, if using it on a TV or phone, check the app for updates, switch to the Wi-Fi connection, force stop the app, update or reinstall it to fix the problem.
Speaking of connectivity, a slow internet connection could also lead to other issues on the app, including Paramount Plus keeps buffering; read this guide to learn more.
You may have trouble installing Zoom, which will throw error code 3000. It is a very common issue with the users of this software, and it can be fixed easily by following some simple steps.
What is Zoom error 3000?
This installation error may appear when you try to upgrade your Zoom client. It can happen because of an incorrect version of the software installed on your system, leading to connection errors.
The installer will fail to complete the setup process because an existing file cannot be overwritten, probably because it is corrupt.
How can I fix Zoom error 3000?
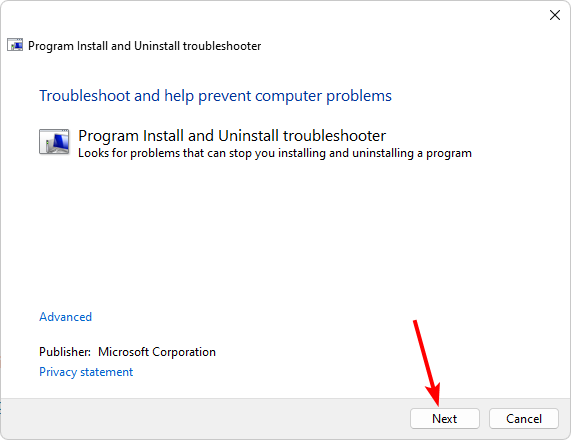
Kickstart the troubleshooting process with these preliminary steps:
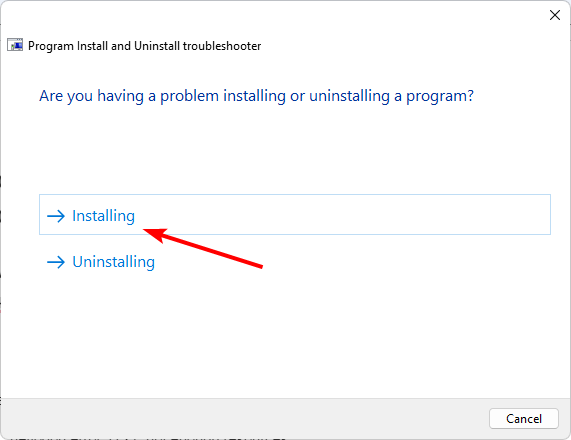
You’ll be asked whether you have a problem installing or uninstalling a program. Select one option.
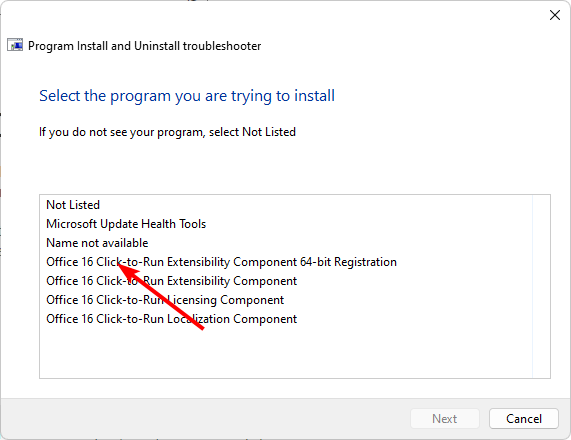
Next, you’ll be asked to select the program that is not installing. Pick the problematic program from the list.
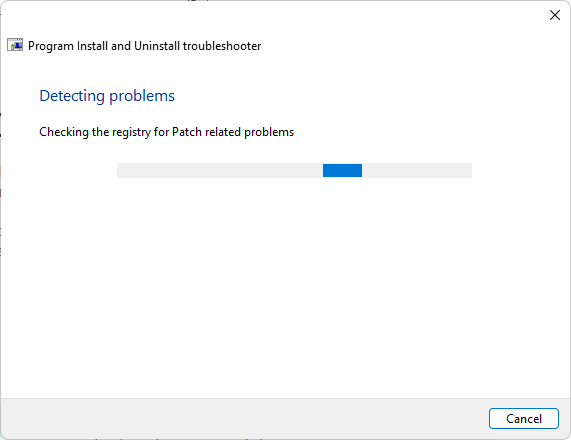
The troubleshooter will start scanning for problems.
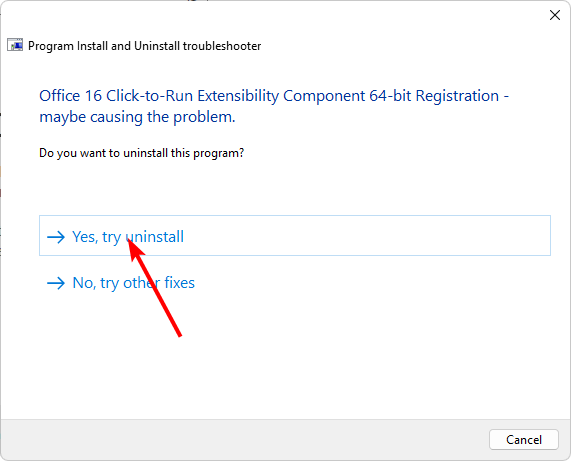
Once it completes, you’ll be presented with two options. Pick either and wait for the troubleshooter to recommend fixes.
3. Disable the Windows Firewall temporarily
Press the Windows key, type control panel, and click Open.
Select Category as View by and click System and Security.
Click Windows Defender Firewall.
Select Turn Windows Defender Firewall on or off.
Click the radio button next to Turn off Windows Defender Firewall for both Private & Public network settings.
Click OK.
Antiviruses and firewalls have the tendency to block certain programs from being installed if they flag them off as potential risks. Disabling them momentarily can help you address installation errors, but don’t forget to enable them to keep your system secure.
Once the executable file is downloaded, double-click it to install the app.
It’s important to start by uninstalling the old version of the app and removing any remnant files that may interfere with the new installation.
Corrupt files that lead to an incomplete installation can present problems like Zoom not launching.
Next, you will need to download the new version from the official website for your platform. If you’re on Windows, you’ll need to run the installer with administrative privileges.
While the process outlined above may seem like a tedious one, it’s nonetheless a relatively simple way of fixing the Zoom error 3000. Once you’ve gone through this step-by-step guide and rebooted your computer so that the change takes effect, your problem should be solved.
Several users recently received the Reddit user agent error wherein they were informed that their account was blocked.
The message read, Whoa there, pardner! Reddit’s awesome and all, but you may have a bit of a problem. Make sure your User-Agent is not empty, is something unique and descriptive and try again. If you’re supplying an alternate User-Agent string, try changing back to default as that can sometimes result in a block.
But that’s not the case. It turned out to be a temporary glitch due to a bad code change, which got fixed automatically within a few hours. Before starting anything else, check the official Reddit service status or Downdetector and access Reddit on another browser or on the mobile app. Also, try using old.reddit.com or new.reddit.com to access Reddit.
How do I fix the Reddit user agent error?
1. Clear the browser cache and cookies
Launch the browser, and press Ctrl + Shift + Delete to open the Clear browsing data box.
Select All time from the Time range dropdown menu, tick the checkboxes for Cookies and other site data and Cached images and files, and then click on Clear data.
Relaunch Reddit and check for improvements.
If the Reddit user agent error in Chrome is intermittent and keeps reappearing after a while, clearing the browsing data will do the trick! Besides, it also helps when Reddit is not loading in Chrome.
If the issue still looks like a wider platform block or you continue to see error messages after changing the User Agent, check this detailed Reddit server error troubleshooting guide for additional solutions.
4. Contact Reddit support
When nothing else works, it is best that you contact Reddit support. But don’t do it via the email address link provided in the error message. Instead, go with the official support channel, i.e., the dedicated website.
And Reddit should inform you of any localized issues at your end or whether the outage is still affecting devices. Though as per user reports, the problem seems to have been fixed completely.
These are all the ways you can fix the Reddit user agent error. Remember, in most cases, it shouldn’t come down to that and the Whoa there, pardner! Reddit error message should disappear automatically.
If your Pokemon Masters is not opening and you see the An error occurred 10104 pop-up, then this guide can help! We will discuss the probable causes and WR expert-tested solutions to fix the issue and play your favorite game.
What causes the An Error Occurred 10104 issue?
The app cache is corrupted.
The Pokemon Masters server is down.
Outdated game.
How can I fix the An Error Occurred 10104 on Pokemon Masters?
Before proceeding with any steps for fixing the error code 10104, go through the following preliminary checks:
Switch the Wi-Fi connection to mobile data or vice versa, and make sure your phone has sufficient storage space.
Restart your device and relaunch the game.
Ensure your Android or iOS operating system is up to date and check the game’s server status.
1. Switch to a mobile connection
Scroll downwards on your phone to get options, and tap the Wi-Fi option to turn it off.
Next, enable Mobile data.
Tap on the app to relaunch it.
2. Force close the app
Android
Tap on the Settings icon from the home screen.
Select Apps from the list of options.
Tap on App Management.
Now scroll to find Pokemon Masters, then tap on it.
Under the app name, locate and click Force stop.
iPhone
On your phone’s home screen or while in the app, swipe up from the bottom.
Wait for a while until you see the App Switcher. Next, swipe left and right to navigate through the open apps.
Once you see Pokemon Masters, swipe up to close the app.
3. Clear the app cache
Android
Tap on the Settings icon from the home screen.
Select Apps from the list of options.
Tap on App Management.
Locate Pokemon Masters, then tap on it.
Next, click Storage usage.
Now tap on Clear cache to clear the app cache, and check if the issue reappears.
If it does, repeat the steps and choose Clear data this time.
Tap on Delete to confirm.
Clearing the app data can help you fix other Pokemon game issues on Android, like Pokemon Home error code 400; read this guide to learn more.
Offloading unused apps can recover space on your phone while backing up important data in case you want to use the app again.
4. Reinstall the app
Android
On your device’s home screen, locate Pokemon Masters, then tap & hold to get options.
Select Uninstall to delete the app.
Go to the Play Store, search Pokemon Masters, and tap Install to get the app on your device.
iPhone
Tap the Settings icon from the home screen.
Next, locate and tap General.
Tap iPhone Storage.
Scroll and locate Pokemon Masters, then tap it.
Tap the Delete app option.
Click Delete App.
Go to the App Store and tap Get to install the app again.
Deleting the app removes all the data from your phone and ensures you can reinstall the app as a new one.
In case you want to play Pokemon games on Windows, try this guide to learn how to install Pokemon Go on your computer.
If nothing worked for you, you need to contact Pokemon Masters customer support and explain to them the issue & fixes you tried for further assistance.
If you like to play Pokemon games on your browser on PC, learn how to play the best Pokemon games online on your browser; check our guide for the steps to do it easily.
Did we miss a step that helped you? Don’t hesitate to mention it in the comments section below; We will happily add it to the list.
Error 1067: The process terminated unexpectedly is a system error affecting several Windows services, including Bluetooth Support Service and Windows Audio, and third-party services, namely MySQL and Autodesk Desktop Licensing Service, on the local computer.
The problem was reported on all iterations of the OS, including Windows 7, Windows 10, and Windows 11. And based on our findings, it was generally an issue or misconfiguration at the user’s end.
What is Error 1067: The process service terminated unexpectedly?
This is usually an OS-related error arising from corrupt system files or missing permissions. For services related to hardware functionality, it could be the outdated drivers to blame. Besides, if it’s a third-party service, an incorrect software installation might trigger the error.
How do I fix Error 1067: The process terminated unexpectedly?
Before we start with the slightly complex changes, try these quick ones:
Check for low storage space on the drive where the application/service is installed. If that’s the case, run Disk Cleanup.
In case the RAM usage is high, terminate a few resource-intensive programs.
For Error 1067: The process terminated unexpectedly with third-party services, disable the antivirus or whitelist the related app in the firewall. Also, if it has a License Manager, reinstall it.
Tip
Based on our research, checking the error logs helps identify what’s triggering Error 1067 and effectively eliminating the issue. So, we recommend you do that first and directly head to the relevant fix. Otherwise, try them all in the listed sequence.
1. Repair the corrupt system files
Press Windows + S to open Search, type Command Prompt in the text field, right-click on the relevant result, and select Run as administrator.
Click Yes in the UAC prompt.
Paste the following DISM commands individually and hit Enter after each: DISM /Online /Cleanup-Image /CheckHealthDISM /Online /Cleanup-Image /ScanHealthDISM /Online /Cleanup-Image /RestoreHealth
Now, execute this command to run the SFC scan: sfc /scannow
Finally, restart the computer and check for improvements.
Press Windows + R to open Run, type services.msc in the text field, and hit Enter.
Locate the affected service, right-click on it, and select Properties.
Now, select Automatic from the Startup type dropdown menu.
Go to the Log On tab, choose Local System account, and then tick the checkbox for Allow service to interact with desktop.
Finally, click on Apply and OK to save the changes, then reboot the PC and check for improvements.
Changing the Log On type helps when you get Error 1067: The process terminated unexpectedly with the Autodesk Desktop Licensing Service, MySQL, and Windows services.
If this doesn’t work or the Local System account is already selected, choose This account instead, enter the password for it, and confirm the change.
3. Update the related drivers
Press Windows + X to open the Power User menu, and select Device Manager from the list of options.
Locate the device related to the affected service, right-click on it, and select Update driver.
Choose Search automatically for drivers and let Windows install the best locally available version.
Once done, restart the computer.
Often, outdated drivers can trigger Error 1067: The process terminated unexpectedly, especially with the Bluetooth Support Service or the Windows Audio service. So, update the drivers for the relevant device.
Press Windows + R to open Run, type regedit in the text field, and click OK.
Click Yes in the prompt that appears.
Navigate the following path or paste it in the address bar and hit Enter: Computer\HKEY_LOCAL_MACHINE\SYSTEM\CurrentControlSet\Services
Right-click on the affected service’s key, and select Export (saving a backup to be on the safer side).
Head to the desktop (our choice) or another preferred storage path, enter a file name and click Save.
Now, right-click on the service’s key, and select Delete.
Click Yes in the confirmation prompt.
Finally, restart the computer and check for improvements.
In case the OS or the software doesn’t automatically add the service to the Registry after reboot, export it on another working PC, move it to the affected computer, and then import the key under the Services.
To do that, select the Services key > click the File menu > choose Import > select the required .reg file > click Open > confirm the change.
Besides, if you can’t delete the key, take full control and then proceed. The process is similar to taking ownership of files and folders.
6. Reinstall the related application
Press Windows + R to open Run, type appwiz.cpl, and hit Enter.
Select the application related to the service (if it’s a third-party program), and click Uninstall.
Follow the on-screen instructions to complete the process.
Now, restart the PC and then download the program from an official source.
7. Perform an in-place upgrade
NOTE
The steps listed here are for Windows 11. In case you are running the previous iteration, learn how to perform an in-place upgrade on Windows 10.
Go to Microsoft’s official website, choose the OS edition and product language, and then download the Windows 11 ISO.
Double-click the ISO file and select Open in the prompt.
Run the setup.exe file.
Click Yes in the UAC prompt.
Click Next to proceed.
Check the license terms, and click Accept.
Finally, verify that the setup reads Keep personal files and apps, click Install, and wait for the process to complete.
When nothing else works against Error 1067: The process terminated unexpectedly with Windows services, an in-place upgrade will get things running. Besides, you won’t lose any files or apps during the process, as opposed to reinstalling Windows 11.
Remember, for third-party services like Jenkins, Apache Tomcat Webserver, or MongoDB, always check the folder permissions and take access, free up disk space, or reinstall the program.
Whether you want to break free of geographical restrictions or browsing limitations, choosing the right extension is the key to liberating your online experience.
In this comprehensive guide, we will talk about the best extensions to unblock websites and help you browse seamlessly.
What should you consider while choosing an extension to unblock websites?
Ensure the extension is compatible with the browser you are using.
Robust security features to guarantee a protected browsing experience.
Should be able to unblock a wide range of websites.
Check the impact of the extension on your browsing speed.
Nord VPN is one of the popular extensions that can be used to unblock websites and browse anonymously, and it comes with 5000+ servers in over 57 countries.
With next-gen encryption, NordVPN comes with advanced security at a faster speed and hides your IP and location, providing complete privacy.
The Threat Protection Lite Feature blocks intrusive ads and websites that might contain malware, and it also protects your online payments, preventing malicious websites from stealing your data.
Another fantastic feature is Stop WebRTC leaks, which protects your IP address from getting exposed through WebRTC protocol.
You can download the VPN app, add an extension to your browser, sign in using the credentials, select a server & click Quick Connect to get started.
ExpressVPN – Connects to the most secure HTTPS versions of websites
Express VPN extension is available in multiple languages and has WebRTC blocking features, ensuring the websites you visit can’t access your location and IP address.
Break the region-based restrictions and access websites across borders with a different IP address while keeping your privacy intact.
The extension for ExpressVPN is optimized for speed, so you can stream and browse online seamlessly.
The VPN never logs IP addresses, traffic destinations, browsing history, DNS queries, or metadata, thereby keeping your sensitive information private.
With the Network Lock kill switch, you can block your internet traffic the minute your VPN loses connection, ensuring you are always safe.
Additional features of this extension are:
Available for Google Chrome, Firefox, Brave and Vivaldi
VPN servers are located in over 105 countries, including Canada, the UK, the USA, and Australia
Comes with advanced AES 256-bit encryption
Lets you bypass ISP throttling, which helps you eliminate buffering
CyberGhost VPN is a browser extension that allows you to access websites without geo-restrictions and without slowing down your network connection’s speed.
With the free extension, you don’t need to sign up; you can install the extension and choose from eight available servers in the United States, Romania, Germany, or the Netherlands to connect & browse anonymously.
With the app’s premium version, you can access servers in 125 cities, 100 countries, and 20 dedicated IP locations.
With a single click, you can change your IP address to one in a different country, rerouting your data via encrypted servers and letting you access streaming services and websites worldwide.
CyberGhost VPN has a no-logs policy, which means it never tracks, stores, or sells whatever you do on the servers.
Additional features of this extension are:
Available as an extension on Chrome and Firefox
Comes with a free trial and a 45-day money-back guarantee
The data standards are equal for both the extension and the app
Secures your identity with military-grade AES-256 encryption and VPN protocols
With the global server network, Private Internet Access VPN lets you access content on the Internet without any limitations.
This extension can cut out ads, disable trackers, and block WebRTC detection to secure your online presence.
One of the amazing features of the extension is Webcam Blocking, which prevents unauthorized microphone and webcam access to ensure personal privacy.
The anti-tracking tools of the extension block tracking scripts, cookies, and URLs to ensure your browsing habits are private.
It can convert supported websites from insecure connections to HTTPS encryption, fortifying the security and privacy of user data in online interactions.
Some other features of this extension are:
Available as an extension on Chrome, Opera and Firefox
Stops websites to access and share your location data
With 3200 VPN servers in over 80 countries, the HotSpot Shield VPN extension for Chrome can help you access content worldwide without any restrictions.
You can stay anonymous and have the best browsing experience while hiding your IP address and location on public Wi-Fi.
The Hotspot Shield has built-in malware and phishing protection, preventing malicious apps and suspicious websites from compromising the user’s device and personal information.
The app’s premium version includes unlimited streaming, 115 virtual locations, and the Hydra VPN protocol to ensure fast VPN speeds with stable and secure internet proxy connections.
With military-grade encryption and unlimited bandwidth, the Express VPN extension ensures top-notch security and seamless connectivity in the online realm.
Some other features of this extension are:
Available as an extension on Chrome and Firefox
Doesn’t keep track of any connection logs or IP addresses
The Cookie pop-up blocker feature lets you access your favorite websites without having to select consent requests.
With 3200+ servers, 100 countries, and 6 continents, Surfshark VPN extension is one of the safest ways to preserve internet speed while keeping your security intact.
Ensure you turn on website safety warnings to get detailed pop-up notifications about breaches of the pages you surf.
With the Surfshark extension, accessing geo-blocked websites by connecting via the right servers and unblocking the internet is easier than ever.
It also keeps personal information safe even when you connect to the internet using a public network, and the CleanWeb feature prevents annoying ads from spoiling your browsing experience.
Additional features of this extension are:
Available as an extension on Chrome, Edge and Firefox
TunnelBear extension for Chrome, Firefox, and Edge helps keep your data and location hidden from ISPs, hackers, and malicious websites.
You can choose a country server & access websites, and browse content blocked at your real location.
This browser extension keeps your browsing activities private even when using the internet via public Wi-Fi.
Get unlimited data on the TunnelBear extension with monthly or yearly subscriptions for the VPN for a seamless browsing experience.
With 5000+ secure VPN servers in more than 47 countries across the world, the VPN comes with a range of VPN protocols, including OpenVPN, WireGuard, and more.
Some other features of this extension are:
Available as an extension for Chrome, Edge, and Firefox
With AdGuard VPN enabled on your browser, you can access content on various popular streaming services without interruption.
You can use the Exclusions feature to choose which websites you want to access using the VPN or select the sites to know your real identity.
The AdGuard VPN extension, when teamed up with AdGuard Ad Blocker, ensures you surf the internet anonymously and is free from ads.
It also lets you change the default DNS server according to your preferences to boost your DNS privacy with options to avoid ads & trackers and even filter adult content.
The private proxy hides your location, IP address, and the websites you visit from everyone, including ISPs, to ensure your browsing activities stay anonymous.
Additional features of this extension are:
Available as an extension for Chrome, Edge, Opera and Firefox
Do not collect or share any of your online activity data
Over 65+ locations to choose from
Securely encrypts your traffic, which makes it inaccessible to third-party observers
Make your browsing experience better with Windscribe, as it eliminates ads and prevents you from accessing malware domains & social networks, keeping you secure.
With servers in more than 112 cities in 69 countries, Windscribe gives you the freedom to surf the internet without geo-restrictions.
With the WebRTC Slayer feature, the extension blocks WebRTC from leaking your sensitive information outside the tunnel.
Another great feature is Double Hop, which proxies your connection via any two servers on the Winscribe network.
Using it is very simple; all you need to do is download the extension, add it to the compatible browser, sign in or sign up, click the On button, choose a server location, or let the extension choose it for you, and voila, you are a ghost!
Some other features of this extension are:
Available as an extension for Chrome, Edge, and Firefox
Delete the cookies once you close the tab
Keeps an eye out for trackers that follow you across the web
With 531 VPN servers across 52 countries, the 1ClickVPN extension lets you connect to the nearest server or the server of your choice to enable you to visit geo-location-restricted sites.
It makes your browsing history totally undetectable with zero IP or DNS leaks, keeping your browsing activities safe.
Keeping your identity hidden even from internet service providers to avoid the speed throttle, enabling you to stream your content seamlessly.
You can use this free VPN without sign-ups or long-term commitments; all you need to do is install the extension, click Quick Connect, select the server, and browse anonymously.
Private browsing and unlimited sessions ensure you browse the web safely while keeping your data fully anonymous.
Additional features of this extension are:
Available as an extension for Chrome, Edge, and Firefox
Supports 256-bit encryption for complete protection
With advanced encryption, a user-friendly interface, and a 2500 worldwide network of VPN servers in 89 countries, VeePN ensures you can browse the internet limitlessly.
It stops search engines, website owners, and markets from following you and collecting your sensitive information.
With VeePN connected, you no longer have to think about geo-restrictions and access websites blocked by your ISP without any issues.
It protects your data and hides your identity while shopping online, even when you are connected using public Wi-Fi.
VeePN lets you browse freely with 100% protection of your data and no speed limit to stop you from streaming your favorite shows.
Some other features of this extension are:
Available as an extension for Chrome, Edge, and Firefox
Now that you know a few extensions to browse anonymously, however, if you want to prevent other PC users from accessing your browsing history, go for private browsing instead.
To conclude, the VPN extensions to unblock websites listed can help you with secure encrypted connections to advanced protection against malware and phishing threats, providing you with accessibility and a secure browsing experience.
If you want complete freedom and total anonymity on your device while surfing the internet, you should opt for a VPN app; check out the list of best VPN apps available.
Which one is your favorite and why? Don’t hesitate to mention the one you like the most in the comments section below.
Samsung’s Galaxy Book laptops are well known for their mobility and flexibility characteristics, carrying out enough power to work or to do a bit of gaming on the road. The lineup is seen as a soft of rival to the Microsoft Surface laptops, or even Apple’s MacBooks.
The new lineup, Galaxy Book 4, is set to debut in 2024, and thanks to our trusty source, we have exclusive insights on it. There are 5 new devices: Galaxy Book 4, Galaxy Book 4 360, Galaxy Book 4 360 Pro, Galaxy Book 4 Pro, and finally, Galaxy Book 4 Ultra.
At first glance, they’re similar in specifications to the Galaxy Book 3 lineup. All of the new devices sport Intel processors, continuing the current lineup’s usage of Intel CPUs (why wouldn’t Samsung try AMD processors, though?).
This lineup also comes as a surprise regarding processors, because we were all kind of expecting Samsung to eventually integrate the new Qualcomm Oryon processors, announced last year, into the Galaxy Book laptops. However, these laptops are Intel-based, so it might be a while until Oryon is released (we speculate a 2024 Q2-Q3 release).
But without further ado, let’s get into details about the new Galaxy Book 4 devices.
Galaxy Book 4 lineup: Full specifications
As we mentioned earlier, there are 5 new devices in this lineup. Each of them is different and suited for different situations, but as far as we can tell from the specifications, all of them are meant for mobility.
Galaxy Book 4
The lightest of them all, the Galaxy Book 4 is the entry device in this lineup. Based on the main specifications, as you can see below, this laptop is meant for office work.
We don’t have a price for it, but if we are to compare it to Galaxy Book 3’s $999 price, this device should be around it, more or less.
Galaxy Book 4 360
Book 4 360’s heavier specs could make it a suitable choice for those who want to work, and do a bit of light content editing/gaming on the side as well, as you can see in the specs below.
This one should cost around $999 as well, as the current Galaxy Book 3 360 is priced around this sum.
Galaxy Book 4 Pro
This device is a better version of the Galaxy Book 4, focused on ultra mobility and a stronger set of specifications, as you can see below. It’s meant for the same goals, office work + editing on-the-go.
16” WQXGA AMOLED 2880 x 1800 Touch Screen Anti-Reflective Digitizer
Storage
1 TB NVMe SSD Slots: 1
Connectivity
Bluetooth v5.3 Wi-Fi 6E 802.11 ax 2×2
The price for it might be around $1899 if we compare it to the current Galaxy Book 3 Pro 360.
Galaxy Book 4 Ultra
The high-end laptop of this lineup, Book 4 Ultra sports some incredible specifications, as you can see below. It comes with a Core 9 Processor, GeForce RTX 4070, and 32 GB of RAM. Basically, you can use it for high-end gaming, high-end professional editing, content production, and so on.
16” WQXGA AMOLED 2880 x 1800 Touch Screen Anti-Reflective
Storage
1 TB NVMe SSD Slots: 2
Connectivity
Bluetooth v5.3 Wi-Fi 6E 802.11 ax 2×2
However, you should know that this device could end up being quite expensive. If we compare it to the current Galaxy Book 3 Ultra, which costs around $2.399, this device should have a similar or even higher price.
Below, you can find a list of the complete specifications of all the Galaxy Book 4 devices:
Galaxy Book4
Galaxy Book4 360
Galaxy Book4 360 Pro
Galaxy Book4 Pro
Galaxy Book4 Ultra
Processor
Intel® Core™ 5 Processor 120U (1.4 GHz up to 5.0 GHz 12 MB Smart Cache)
Intel® Core™ 5 Processor 120U (1.4 GHz up to 5.0 GHz 12 MB Smart Cache)
16” WQXGA AMOLED 2880 x 1800 Touch Screen Anti-Reflective Digitizer
14” WQXGA AMOLED 2880 x 1800 Touch Screen Anti-Reflective
16” WQXGA AMOLED 2880 x 1800 Touch Screen Anti-Reflective
Storage
512 GB NVMe SSD SSD Slots: 2
265 GB NVMe SSD SSD Slots: 2
1 TB NVMe SSD SSD Slots: 1
512 GB NVMe SSD SSD Slots: 2
1 TB NVMe SSD SSD Slots: 2
OS
Windows 11
Windows 11
Windows 11
Windows 11
Windows 11
Weight
1,57 kg (3.46 lbs)
1,46 kg (3.22 lbs)
1,66 kg (3.66 lbs)
1,26 kg (2.78 lbs)
1,86 kg (4.10 lbs)
Audio/Video
720p HD Camera Stereo Speakers Dolby Atmos® Internal Dual Ray Digital Mic
1080p FHD Camera Stereo Speakers Dolby Atmos® Internal Dual Ray Digital Mic
2M Camera AKG Quad Speakers Smart Amp Dolby Atmos® Internal Dual Ray Digital Mic
2M Camera AKG Quad Speakers Smart Amp Dolby Atmos® Internal Dual Ray Digital Mic
2M Camera AKG Quad Speakers Smart Amp Dolby Atmos® Internal Dual Ray Digital Mic
Memory
8 GB LPDDR4x
8 GB LPDDR5
16 GB LPDDR5X
16 GB LPDDR5X
32 GB LPDDR5X
Adapter
54 Wh 45 W USB Type-C Adapter
68 Wh 65 W USB Type-C Adapter
76 Wh 65 W USB Type-C Adapter
68 Wh 65 W USB Type-C Adapter
76 Wh 140 W USB Type-C Adapter
Width Depth Height
365 x 229 x 15.4 mm (14.04″ x 9.02″ x 0.61″)
355 x 228 x 13.7 mm (14″ x 9.9″ x 0.5″)
355 x 252 x 12.8 mm (14.04″ x 9.02″ x 0.61″)
312.4 x 223 x 11.6 mm (12.30″ x 8.8″ x 0.46″)
355 x 250 x 16.5 mm (13.99″ x 9.86″ x 0.65″)
Network
Bluetooth v5.1 Wi-Fi 6 802.11 ax 2×2
Bluetooth v5.3 Wi-Fi 6E 802.11 ax 2×2
Bluetooth v5.3 Wi-Fi 6E 802.11 ax 2×2
Bluetooth v5.3 Wi-Fi 6E 802.11 ax 2×2
Bluetooth v5.3 Wi-Fi 6E 802.11 ax 2×2
Color
Moonstone Gray
Moonstone Gray
Moonstone Gray
Moonstone Gray
Moonstone Gray
Peripherals
1 USB 3.2 2 Thunderbolt™ 4 1 HDMI MicroSD Card Reader Headphone/Mic jack
1 USB 3.2 2 Thunderbolt™ 4 1 HDMI MicroSD Card Reader Headphone/Mic jack
1 USB 3.2 2 Thunderbolt™ 4 1 HDMI MicroSD Card Reader Headphone/Mic jack
1 USB 3.2 2 Thunderbolt™ 4 1 HDMI MicroSD Card Reader Headphone/Mic jack
1 USB 3.2 2 Thunderbolt™ 4 1 HDMI MicroSD Card Reader HeadPhone/Mic jack
Video card
Intel® Graphics
Intel® Graphics
Intel® Arc Graphics
Intel® Arc Graphics
NVIDIA® GeForce® RTX 4070 Laptop GPU 8GB GDDR6
Security
TPM
TPM Fingerprint Reader
TPM Fingerprint Reader
TPM Fingerprint Reader
TPM Fingerprint Reader
Keyboard
Numeric Key Clickpad
Numeric Key Backlit Touchscreen Clickpad
Numeric Key Backlit Touchscreen Clickpad
Backlit Touchscreen Clickpad
Numeric Key Backlit Touchscreen Clickpad
If Galaxy Book 4 is priced around the current Book 3 devices, these new laptops can become a real competitor to Microsoft Surface laptops, or Apple’s MacBooks, as we mentioned earlier. Samsung has the potential to be a strong competitor in this market, as well.
What do you think? Are you excited about the Galaxy Book 4 lineup?
Most streaming services like Disney Plus have dedicated standalone apps to prevent compatibility issues like error code 83. However, even apps are not immune to such errors, but our WindowsReport experts were able to get down to the root cause of this issue and came up with the following fixes.
Causes of error code 83 on Disney Plus:
Using emulators, unofficial or modded versions instead of the official Disney Plus app.
Streaming using unsupported devices.
Poor and unstable internet connections.
How do I fix error code 83 on Disney Plus?
Before we begin with the slightly complex solutions, try these quick ones first:
Check your Internet speeds and boost them if necessary, then relaunch the app.
Double-check that your device is among the Disney Plus supported devices and verify that the server status is up and running.
Confirm that all cables are securely connected, and restart your device.
1. Update your device’s firmware
1.1 TV firmware
For this solution, we shall be using the TCL model.
On your TV, find your Settings.
Go to System.
Click on About then select Software update.
Select Network update and click on System update.
Now click on Check Update. Your system will scan for any available updates.
You’ll either start downloading updates or get a message that your TV is already up to date.
1.2 Phone OS
Locate Settings on your device. (We’ll be using the Samsung model for this step).
Go to Software update.
Tap on Download and install.
Wait for the update to finish installing if available, and retry your transaction.
2. Clear cache
2.1 On your TV
On your TV, find your Settings.
Go to Apps.
Find Disney and click on it.
Scroll down and select Clear cache.
2.2 Android app
Open the Settings app on your Android device, and select Apps.
Choose Disney + from the list of applications.
Tap on Storage.
Tap on Clear data and then on Clear cache.
Open the Disney + app again and check for improvements.
From the list of apps, click on Disney+, and then press Force Stop.
Next, press OK to confirm the action.
Now, go back to the app menu, click on Clear Cache, and press OK again to confirm the action.
Again, in the menu, click on Clear Data, and click on OK to confirm.
Return to the app menu, and click on Uninstall.
Press OK to confirm the uninstallation of the app.
3.3 On a mobile phone
Open the phone Settings, and go to Apps.
Select Disney + from the list.
Tap on Uninstall at the bottom.
Choose OK in the confirmation prompt.
Finally, reinstall Disney + from the app store.
4. Reset your Network
Hit the Windows key and click on Settings.
Navigate to Network & internet.
Select Advanced network settings.
Click on Network reset.
Next, hit the Reset now button.
If you previously had an issue with your ISP and there was an outage for a moment, resetting the network may help fix this error along with buffering issues on Disney Plus. When you do, ensure you re-login to your Disney Plus account.
Finally, contact Disney support if none of the above steps worked. Sometimes, it’s an internal issue, and you’ll just have to wait until it’s fixed. You can also visit Disney Plus’s FAQ section and try other recommended fixes.
They may not resolve the error code 83, but they can help with other Disney Plus errors. We also have our own dedicated section for such issues as the error code 1026, so don’t hesitate to visit our expert article for quick solutions.
For any additional thoughts or comments on this article, get in touch with us in the comment section below.
When purchasing tickets, you may encounter the Ticketmaster error 504, and your seats may be lost. However, this is no cause for alarm, as this can happen to anyone. Luckily, the workaround is pretty easy to execute.
Why am I getting the Ticketmaster error 504?
When purchasing tickets on Ticketmaster, your internet connection may drop, or the server may become temporarily unavailable. This can prevent you from completing your purchase, but make sure you check your email and account for any payment notifications before re-purchasing.
How do I get rid of Ticketmaster error code 504?
Perform the following preliminary checks before any advanced troubleshooting: verify the status of the Ticketmaster website for downtimes and ensure your Internet speeds are fast enough, check for an app update, try another connection, and restart your browser/device.
If your internet connection is having issues, you may be unable to confirm your purchase because Ticketmaster cannot send a confirmation code. A reset will refresh the connection and hopefully clear any connection problems.
5. Reinstall the Ticketmaster app
On your phone, locate the Ticketmaster app, tap and hold, then select Uninstall. Go to your app store and download it then try purchasing the tickets again and see if the error persists.
The This page has been blocked by Opera error stops you from accessing websites. You also get an error code, ERR_BLOCKED_BY_CLIENT that signals the same problem.
Based on our research, the cause is almost always on the user’s end. The website itself is rarely the culprit. No matter the case, we’ll show you how to fix it in no time.
How do I unblock blocked sites on Opera?
First things first: turn off your VPN, switch to Private Mode (Ctrl+Shift+N), and restart Opera. If you’re still having trouble, it’s time to dive into some more advanced troubleshooting.
1. Disable the conflicting extension extensions
Launch the Opera browser, click the Extensions icon near the top-right, and select Manage extensions.
Now, click the Disable button under all the extensions here and check for improvements.
If the problem is fixed, click the Enable button to re-enable the extensions one at a time and wait for the error message to appear.
As soon as it does, the extension enabled last is the culprit. Click the Remove button to delete it.
Again, click Remove in the confirmation prompt.
Often, the This page has been blocked by Opera error appears due to an extension, especially an adblocker or VPN. So, disable or remove all such extensions. This also helps when Opera keeps opening new tabs.
2. Whitelist the website in the built-in ad blocker
Open the website that throws the error in Opera.
Now, click the Privacy Protection icon in the toolbar, and click the Turn off for this site button for ads.
Check if the problem is gone.
3. Disable the ad blocker and allow trackers
Launch the browser, and click the Settings icon in the left pane.
Now, turn off the toggle for Block ads and surf the web up to three times faster and Block trackers under Privacy Protection.
Open Opera, paste the following path in the address bar and hit Enter: opera://settings/system
Enable the toggle for Use DNS-over-HTTPS instead of the system’s DNS settings, and try the different options listed here. If it’s already enabled, turn off the toggle.
Now, go to the Cookies’ settings using the following path:opera://settings/cookies
Click the Add button next to Sites that can always use cookies.
Paste the affected website’s address in the text field, tick the checkbox for Including third-party cookies on this site, and click Add.
5. Whitelist Opera in Windows Firewall
Press Windows + S to open Search, type Allow an app through Windows Firewall in the text field, and click the relevant result.
Click the Change settings button.
Make sure both opera.exe and opera_autoupdate.exe have the Private and Public checkboxes ticked.
If opera_autoupdate.exe doesn’t appear here, click the Allow another app button.
Click on Browse.
Now, head down the following path, where Username is your current profile’s name, and open the latest version’s folder: C:\Users\Username\AppData\Local\Programs\Opera
Select the opera_autoupdate.exe file, and click Open.
Click on Add.
Tick the checkboxes for Private and Public next to opera_autoupdate.exe, and click OK to save the changes.
Finally, reboot the device and relaunch the website.
Open the Opera Settings, scroll down to the bottom, and click on Reset settings to their original defaults.
Again, click Reset in the confirmation prompt.
Once done, check for improvements.
7. Reinstall Opera
Press Windows + R to open Run, type appwiz.cpl in the text field, and hit Enter.
Select Opera from the list, and click on Uninstall.
Follow the on-screen instructions to complete the uninstall process.
Once done, reboot the device and then reinstall Opera from the official website.
Conclusion
One of these methods should have worked against the This page has been blocked by Opera error. Remember, you might also encounter the same This page has been blocked error on Brave, and following a similar approach helps!
This isn’t the only error you can encounter, and many reported various privacy errors in Opera GX, but we have a special guide dedicated to it.
For any queries or to share more solutions with us, drop a comment below.
The concept of administrator and elevated privileges on a computer can be a little confusing for someone who is not very tech-savvy. Which one should they choose? Which one would be best?
Let’s look closely at the advantages of each to help you make an informed decision.
What are elevated privileges?
An elevated privilege is a temporary status that gives you access to more powerful system settings than what a standard user has access to. They can be granted by the operating system itself, or they can be requested by an application using specific programming techniques.
What is the difference between administrator and elevated privileges?
1. Administrator account
Overview
An administrator account is a special user account with more abilities than normal users. It is the account that you set up when you first install Windows and has complete control over your computer. Administrative privileges are the highest level of access that can be granted to a user.
With these permissions, you can install new programs and remove existing ones. You can also change permissions and restrict access on your computer, add new users and delete existing ones, manage network settings, and much more.
A user with administrative privileges can access any folder or file on a computer.
You can create new users and delete existing ones.
Allows you to make changes directly on the system, such as changing settings or installing device drivers.
You can change the look and feel of your desktop.
You can use a centralized account to perform tasks that need to be performed across multiple computers. For example, if you want to change the passwords for every user account in a domain, you don’t have to make individual changes on each computer.
Disadvantages of administrator privileges
Administrative privileges can make it easier for viruses and other malicious programs to get into your computer.
You could accidentally delete important system files or modify settings that affect other users or programs running on your computer.
Administrative passwords are not encrypted by default hence anyone who knows the password can easily access your computer and make changes to it.
You have to be logged in. Otherwise, you won’t be able to run some applications that require explicit administrative privileges if you’re using a standard account.
Elevated privileges, are special permissions granted to a user account. When enabled, you have the authority to make changes to the operating system or other programs. As a users with elevated privileges, you have access to parts of Windows that regular users do not.
The most fundamental reason for using elevated privileges is to increase the scope of your application. The main security model of Windows is that a user can only do what he or she is authorized to do. You cannot perform administrative tasks when you log on to Windows as a regular user.
By using an elevated privilege token, your application can perform these tasks on behalf of the administrator. Another reason is to avoid the need for multiple users with administrative rights on the computer.
Advantages of elevated privileges
Allows you to view system information that is otherwise inaccessible to standard users.
You can install and uninstall applications that require administrator access.
Provides unrestricted access to certain areas of the Registry normally blocked from non-administrators.
Disadvantages of elevated privileges
There’s a lack of accountability with elevated privileges if an error occurs. This is because it is difficult to determine who was responsible for the error if more than one user has elevated privileges.
Programs that run with elevated privileges can potentially gain access to sensitive information on your computer.
You may accidentally delete or modify the wrong files and cause a system crash.
You can use an elevated or administrator account to run Windows programs, but you won’t be able to do everything in these accounts. You’ll need to log out and log back in using an administrator account if you want to make critical changes to your computer’s registry or disable the UAC.
In summary, the notable differences between administrator and elevated privileges are as tabulated below:
Administrator privileges
Elevated privileges
Used for normal use or for administrative purposes
Can only be used for administrative purposes
Cannot be disabled by any user except other administrators
Can be disabled by an administrator
Are permanent
Only limited when performing certain tasks
Unrestricted access to all features
Has limited access to features
Full control over other users’ computers
Has limited control over other users’ computers
Built into Windows
A feature of UAC
How do I check if I have elevated privileges?
Hit the Windows key, type Task Manager in the search bar, and click Open.
Navigate to the Details tab, right-click on any of the headers, and click on Select columns.
Scroll down the list, and check both the Elevated and UAC virtualization options.
Now, scroll to the end to view the newly added columns. You’ll see whether a process is running on an elevated command if it is marked by Yes or No.
Elevated privileges are a double-edged sword. The good news is that you can perform tasks more quickly and efficiently than before instead of going around creating extra administrator accounts. The bad news is that you have access to more sensitive data than before.
While there is often a lot of confusion surrounding these two separate sets of permissions, knowing the difference between them is key for understanding how to effectively use your Windows-based computer.
Ultimately, it’s not really a battle of which one is better but how much control you need to perform a certain task. As such, if you need a lot of control over your organization’s network resources, it may be necessary to create an Administrator account.
However, in most cases, using an elevated privileges account will be sufficient to accomplish the day-to-day tasks required by an average user.
Now that you’ve learned the differences between these two permissions, you should be able to tell whether a process is running with elevated privileges or not.
We hope that, above all else, this article has helped you better understand the differences between these privileged roles. Do let us know the different scenarios you use either of these permissions in the comment section below.
This page has been blocked by Brave message can appear when visiting any website, which will ultimately prevent you from accessing it.
Not being able to access certain websites can be a significant issue, especially if use them for school or business projects, so today we’ll show you how to fix this problem.
Why am I being blocked from a website?
Third-party extensions can prevent Brave from accessing specific pages.
VPN or antivirus software on your PC can sometimes block certain websites.
Corrupted browser installation or cache issues can also cause this problem.
How do I fix This page has been blocked by Brave?
1. Disable extensions
Click the Menu button in the top right corner and choose Extensions.
Next, click the switch next to all extensions.
Restart the browser and check if the problem is still there with all extensions disabled.
If the problem is resolved, enable extensions one by one until you manage to find the extension that is causing the problem.
2. Change Avast VPN settings
Open Avast VPN and in the top right corner click on Menu. After that, select Settings.
Next, select VPN Protocols in the left pane. In the right pane, select Mimic.
Save changes.
Keep in mind that other VPN software might be causing issues, however, most users reported issues with Avast VPN.
3. Reinstall Brave
Press the Windows key + I to open the Settings app.
Go to Apps and select Installed apps.
Next, locate Brave on the list, click the dots next to it, and choose Uninstall.
Once the browser is removed, install it again and check if that solves the issue.
How do I unblock a website blocked by the administrator?
If a page is blocked by the administrator, you need to adjust your security settings, such as webpage filtering in your antivirus. We tackled this issue in depth in our This page has been blocked by your administrator guide, so don’t miss it.
As you can see, it’s simple to fix This page has been blocked by Brave err_blocked_by_client error, and in most cases, all you have to do is disable a problematic extension or adjust your VPN settings.
It’s worth mentioning that Chrome and Brave share many similarities, and if you need more solutions, perhaps our blocked by client error in Chrome guide can help you.
Sometimes, you need to exclude one or more users from MFA in Azure because, for some reason, they can’t use multi-factor authentication.
Our WR software experts have tested a few methods to exclude users from the conditional access policies and outlined them below.
How do I disable MFA for a specific user in Azure?
1. Disable MFA from Azure Active Directory
Open the Azure portal and log in with administrative credentials.
Select Azure Active Directory from main menu.
From the new menu, select Users.
Choose the user you need to exclude from MFA by looking or searching in the list of users, then click Authentication Method from the left pane.
Now, slide the Multi-Factor Authentication box to Off and confirm the decision.
To confirm that you removed the multi-factor authentication for that user, try to log into Azure with the user credentials and check if there is any request for an MFA login.
Select New group and select Security in the Group type list, then specify a name and description.
Leave or set the Membership type to Assigned, then select the owner of the group and the users that should be part of this exclusion group. Finally, select Create.
2.2 Create an MFA exclusion policy for the group
Browse to Protection and select Conditional Access.
Select Create new policy and fill in the name and description of the policy.
Select Users and groups under Assignments
On the Include tab, select All Users.
Go to Exclude, select Users and groups, and choose the exclusion group you created in solution 2.1 above.
Continue the process to set up the conditional access policy.
Now, the users from the group you have selected should have been excluded from multi-factor authentication when logging in.
Log into Azure with administrative rights, click on Security, and select Conditional access.
Next, click on What if.
Now, click on User from the left pane, look for the user you want to check, and hit the Select button from the bottom right.
Now, you will be able to see to what policies the user is subjected to.
The What If tool allows you to check what policies are applied to each user to see if there are any problems or conflicts. This will help you see if the multi-factor policy or other security policies are enforced.
4. Disable Per User MFA in PowerShell
Connect to Azure AD (Entra) PowerShell by running the following commands:
Import-Module MSOnline
Connect-MsolService
Sign into your Azure AD administrative account (now called Entra).
Type or paste the following command and replace UPN with the user’s principal name: Set-MsolUser -UserPrincipalName "UPN" -StrongAuthenticationRequirements @()
How do I know if a user is registered for MFA?
You can check the Azure MFA policy in the Security menu, but using the What If tool from Solution 3 above is a lot easier.
Note that in order to have access to users and the security defaults, you will need an administrative account.
So, now you know how to exclude a user from Azure Multi-Factor Authentication (MFA) and restore the user access to the classic username and password method.
The second annual Microsoft Technical Takeoff for Windows + Intune will take place at the end of this month, roughly 2 weeks after Microsoft Ignite, which happens later this week.
The event is aimed at organizations and IT professionals who want to find out about the latest updates for everything Microsoft related: Microsoft Entra, Microsoft 365, and Intune, to Windows and Azure Visual Desktop, and beyond.
We’re excited to present the second annual Microsoft Technical Takeoff for Windows + Intune! This virtual technical skilling event takes you deep inside the latest features, capabilities, and scenarios for commercial organizations and the IT professionals that support them.
Microsoft
The main thing that you should know about Microsoft Technical Takeoff is that all of its events are live, and they will have live Q&A. If you, by any chance, can’t attend some of the sessions, they will be recorded and available on demand.
Microsoft Technical Takeoff 2023: Where to watch & What to expect?
Where to watch/How to attend?
The event will take place from Nov 27 2023 07:00 AM to Nov 30 2023 11:30 AM (PST); Microsoft has prepared a list of the sessions taking place, and all you have to do is to go through that list, select the sessions you want to attend, and click on RSPV to save a spot.
You can find the list here. Plus, by selecting RSVP, you will automatically add the event to your calendar, and Microsoft will send you reminders about them, so you won’t be able to miss it.
What to expect?
According to the list of sessions, AI will take the forefront of this Technical Takeoff edition, while cloud solutions will also be discussed, along with many new capabilities for Microsoft Intune, Windows 365, and Azure Virtual Desktop.
However, below is the complete list of everything waiting for you at the end of this month.
If you have ever thought you needed more protection or privacy when opening up a WhatsApp chat, then we have good news for you. According to the WhatsApp-based site, WaBetaInfo, the communication app will receive a feature that will allow users to type in a secret code to hide/unhide locked chats.
Most recently, it was also revealed that WhatsApp for Windows will get an update that lets users start chats with unknown numbers. However, the feature we’re covering in this article will only be available for Android devices, according to WaBetaInfo.
The feature is currently rolling out to WhatsApp users on the Beta channel, with a release scheduled most probably at the end of this month.
How to enable a secret code for a lock chat on WhatsApp?
In the list of your locked chats on WhatsApp, a new settings page will appear, called Chat lock settings. Here, you’ll have the option to enable setting up a secret code that you can use to unlock hidden chats, as you see in the image below.
Configuring a secret code will make all your locked chats disappear and unable to be accessed. This way, if your phone ends up in the wrong hands, people won’t be able to see that you have a list of locked chats.
After you set up your secret code, typing it into the Search bar within the Chats tab will automatically unhide the list of locked chats for the session.
As WaBetaInfo reported, this feature is quite useful, especially in situations where information would be compromised, such as someone else having access to your phone, and such.
The feature is only available on Android for now, with a general release scheduled to take place in the following weeks. However, WhatsApp will most likely release the feature on other platforms, as well.
While Thrustmaster products work fine most of the time, you often need to reconfigure the settings in the Control Panel, and if it’s not working, the gaming experience stands affected.
For some models, you simply need to plug them in and configure the settings in-game. But for a few, especially on PCs, it’s critical to have the components set right, or else the Thrustmaster Control Panel won’t show up.
Why isn’t my Thrustmaster working?
It’s usually due to missing or outdated drivers or when you are running an older version of the firmware. Besides, when the wheel is connected to a USB 3.0 port, it won’t be detected, and subsequently, you will find the Thrustmaster Control Panel not showing.
Incompatibility, misconfigured settings, and a bug in the OS are other common reasons to blame.
What can I do when the Thrustmaster Control Panel is not working?
Before we start with the slightly complex solutions, perform these few quick checks:
Restart the computer. Also, if you are connected to a USB 3.0 port, switch to USB 2.0, and make sure not to use a USB hub or any additional power cord.
In case you are using the T300 RS racing wheel base and connected to a PC, set the USB sliding switch to PC-PS3.
1. Terminate all Thrustmaster process and relaunch
Press Ctrl + Shift + Esc to launch the Task Manager.
Right-click on any Thrustmaster process listed here, and select End task from the context menu.
After terminating all, relaunch the Thrustmaster Control Panel and verify whether it’s working.
2. Make sure all the critical services are running
Press Windows + R to open Run, type services.msc in the text field, and hit Enter.
Scroll down, locate the Thrustmaster services, right-click on one, and select Properties.
Select Automatic from the Startup type dropdown menu, and click the Start button.
Once the service is running, click Apply and then OK to save the changes.
Make similar changes to all other Thrustmaster services, and check for improvements.
3. Repair the current Thrustmaster installation
Double-click the driver setup (.exe file) you downloaded earlier.
Click Yes in the UAC prompt.
Now, choose Repair and click Next to perform a repair operation on the driver.
Finally, restart the PC and check for improvements.
If you don’t have the installer setup anymore, download the file from the manufacturer’s official website, the same way you did the last time. A quick repair does help when the Thrustmaster Control Panel is not working.
4. Update the Thrustmaster firmware
Press Windows + R to open Run, type joy.cpl in the text field, and click OK.
Select the Thrustmaster device from the list, and click Properties.
Click on Check for Updates, and if any new firmware versions are available, install them.
5. Disable EHCI hand-off and Intel xHCI Mode in BIOS
Turn off the PC, then press the Power button to turn it on, and as soon as the display lights up, hit the F1, F2, F10, F12, or the Del key, depending on the system manufacturer, to access the BIOS.
Go to the Advanced tab, and select USB Configuration.
Now, set EHCI Hand-off to Disabled. To do that, select the option and choose Disabled.
Similarly, disable the xHCI Hand-off mode.
The xHCI Hand-off mode handles USB 3.0 ports, while EHCI Hand-off manages USB 2.0 ports. Disabling both did the trick when the Thrustmaster Control Panel was not responding or working.
Click the Download icon next to the compatible driver. Do verify that the driver is compatible with the installed iteration of Windows.
Run the installer setup.
Follow the on-screen instructions, and when prompted, re-connect the controller to the PC via a USB 2.0 port.
Complete the installation and then restart the PC.
Often, when the Thrustmaster Control Panel is not working, reinstalling the drivers gets things up and running. Just make sure not to have the product connected all throughout and only plug it in when prompted. Also, reboot the PC for the changes to come into effect.
Besides, you may consider using a reliable driver uninstaller tool to effectively remove the previous installation before re-downloading it.
7. Uninstall recent Windows updates
Press Windows + I to open Settings, go to Windows Update from the navigation pane, and click on Update history.
Scroll down to the bottom and click on Uninstall updates.
Click the Uninstall button next to the recently installed update.
Again, click Uninstall in the confirmation prompt.
With a few new OS versions, changes are introduced that may lead to the Thrustmaster Control Panel not working. So, you will have to uninstall Windows updates to get things running, sometimes even a few.
These fixes will work, no matter the underlying cause. Based on our research, 9 out of 10 times, reinstalling the driver while following the instructions provided in the Thrustmaster manual helped. So, do it as the manual says!
If the Logitech keyboard is not lighting up, you’re in the right place. We figured out why this happens and we’ll show you how to fix it. Notably, issues with selected lightning profiles can lead to this. Outdated firmware or faulty settings can also play a role.
Let’s see what you can do to fix it.
What can I do if the Logitech keyboard is not lighting up?
First, try the following:
Use 4-5 colors and try different profiles; avoid single-color options.
Disconnect the keyboard, try a new USB port, and press the Power button a few times.
Update the Logi app.
Check that the backlight is on.
If you did and the keyboard still won’t light up, keep reading:
1. Use the keyboard shortcut
Press the Light key + 1 to turn on the lighting
Next, press the Light key + 0 to select the preferred color.
Start the software and follow the instructions on the screen.
Once the process is finished, you’ll have the latest firmware installed.
3. Check the software settings
Open the Logitech keyboard software.
Click on Keyboard and then on More.
Make sure that Disable backlighting isn’t checked.
How do I reset my Logitech keyboard?
This varies on the model, but many wireless models can be reset by pressing the following keyboard keys in a sequence: Esc, O, Esc, O, Esc, B.
Keep in mind that this works only for some models, mostly MX and K series. The reset can sometimes help if the Logitech wireless keyboard not lighting up, so don’t hesitate to try it.
Do keep in mind that certain models require you to use the dedicated software, so be sure to check your keyboard manual.
If the Logitech Pro keyboard not lighting up the issue is most likely related to your settings or outdated software or firmware. If that’s the case, be sure to download Logitech G Hub or Logitech Unifying software and keep it up to date.
2024 will bring more than a new Windows client (AI-based Windows 12, everyone): Microosft will be releasing a new Office client, Microsoft Office LTSC Professional Plus 2024, according to new leaked images, provided by Windows enthusiast, @techosarusrex.
The images are seemingly confirmed by Microsoft, as the official Windows Insider Program X (formerly known as Twitter) profile commented on the leaked images.
The future is bright indeed.
Windows Insider Program
The date of the release is yet to be announced, but Office 2024 will be out in Q3 or Q4, next year. It will include 7 apps of the Microsoft Suite package, including Word, Office, and PowerPoint.
New Office 2024 client: How does it compare to Microsoft 365?
A new Office 2024 client means that it could get into conflict with the existing Microsoft 365 Suite. The difference between them, however, should be enough to end this conflict, as Office products can be purchased on a standalone version, rather than going for a monthly subscription, as is the case with Microsoft 365.
Another difference would be the lack of certain features: for example, Microsoft 365 is getting Copilot this month, and Office 2024 might not get it, but we’ll have to wait for the official announcement from Microsoft, on this.
However, the release of a new Office client should be good news for those users who want to own a license rather than pay a subscription, and it’s something that people have been requested for already.
Microsoft Teams has introduced App Ratings and Reviews in the platform, allowing users to rate apps and leave reviews for those that made an impact on their daily activity in Teams. According to the announcement, this new option will allow users to get feedback and interact with others on apps they want to install or have installed already.
If you ask us, Microsoft should have implemented this option sooner, but it’s never too late: this new feature is part of what Microsoft promised for Teams, last month. In October, the Redmond-based tech giant debuted a new default client for Teams, dubbed the new Teams, or Teams 2.0.
Microsoft says this new version is faster and optimized for modern applications. The company also said that Teams will get more new features, and here we are.
The new App Ratings and Reviews should be available to everyone using Microsoft Teams. Just make sure your Teams is updated to the latest version.
How to leave a review on Microsoft Teams apps
Users won’t have to do anything to enable the new App Ratings and Reviews, as the option will be automatically added when updating Teams to the latest version.
Once you open Teams, going to the App section will automatically enable the new layout for App Ratings and Reviews, as you can see in the image below.
You’ll easily be able to rate an app and leave a review for it, by clicking on the said app and assigning a rating.
Once you’ve done that, all you have to do is click Submit and that’s it. As you can see, you can rate an app from 1 star to 5 stars, and once you’ve submitted your review, other users can choose to vote as helpful or not.
Plus, Microsoft Teams will encourage you to rate any app that you’ve installed and review them. Of course, this is not mandatory and you can opt out of it if you like.