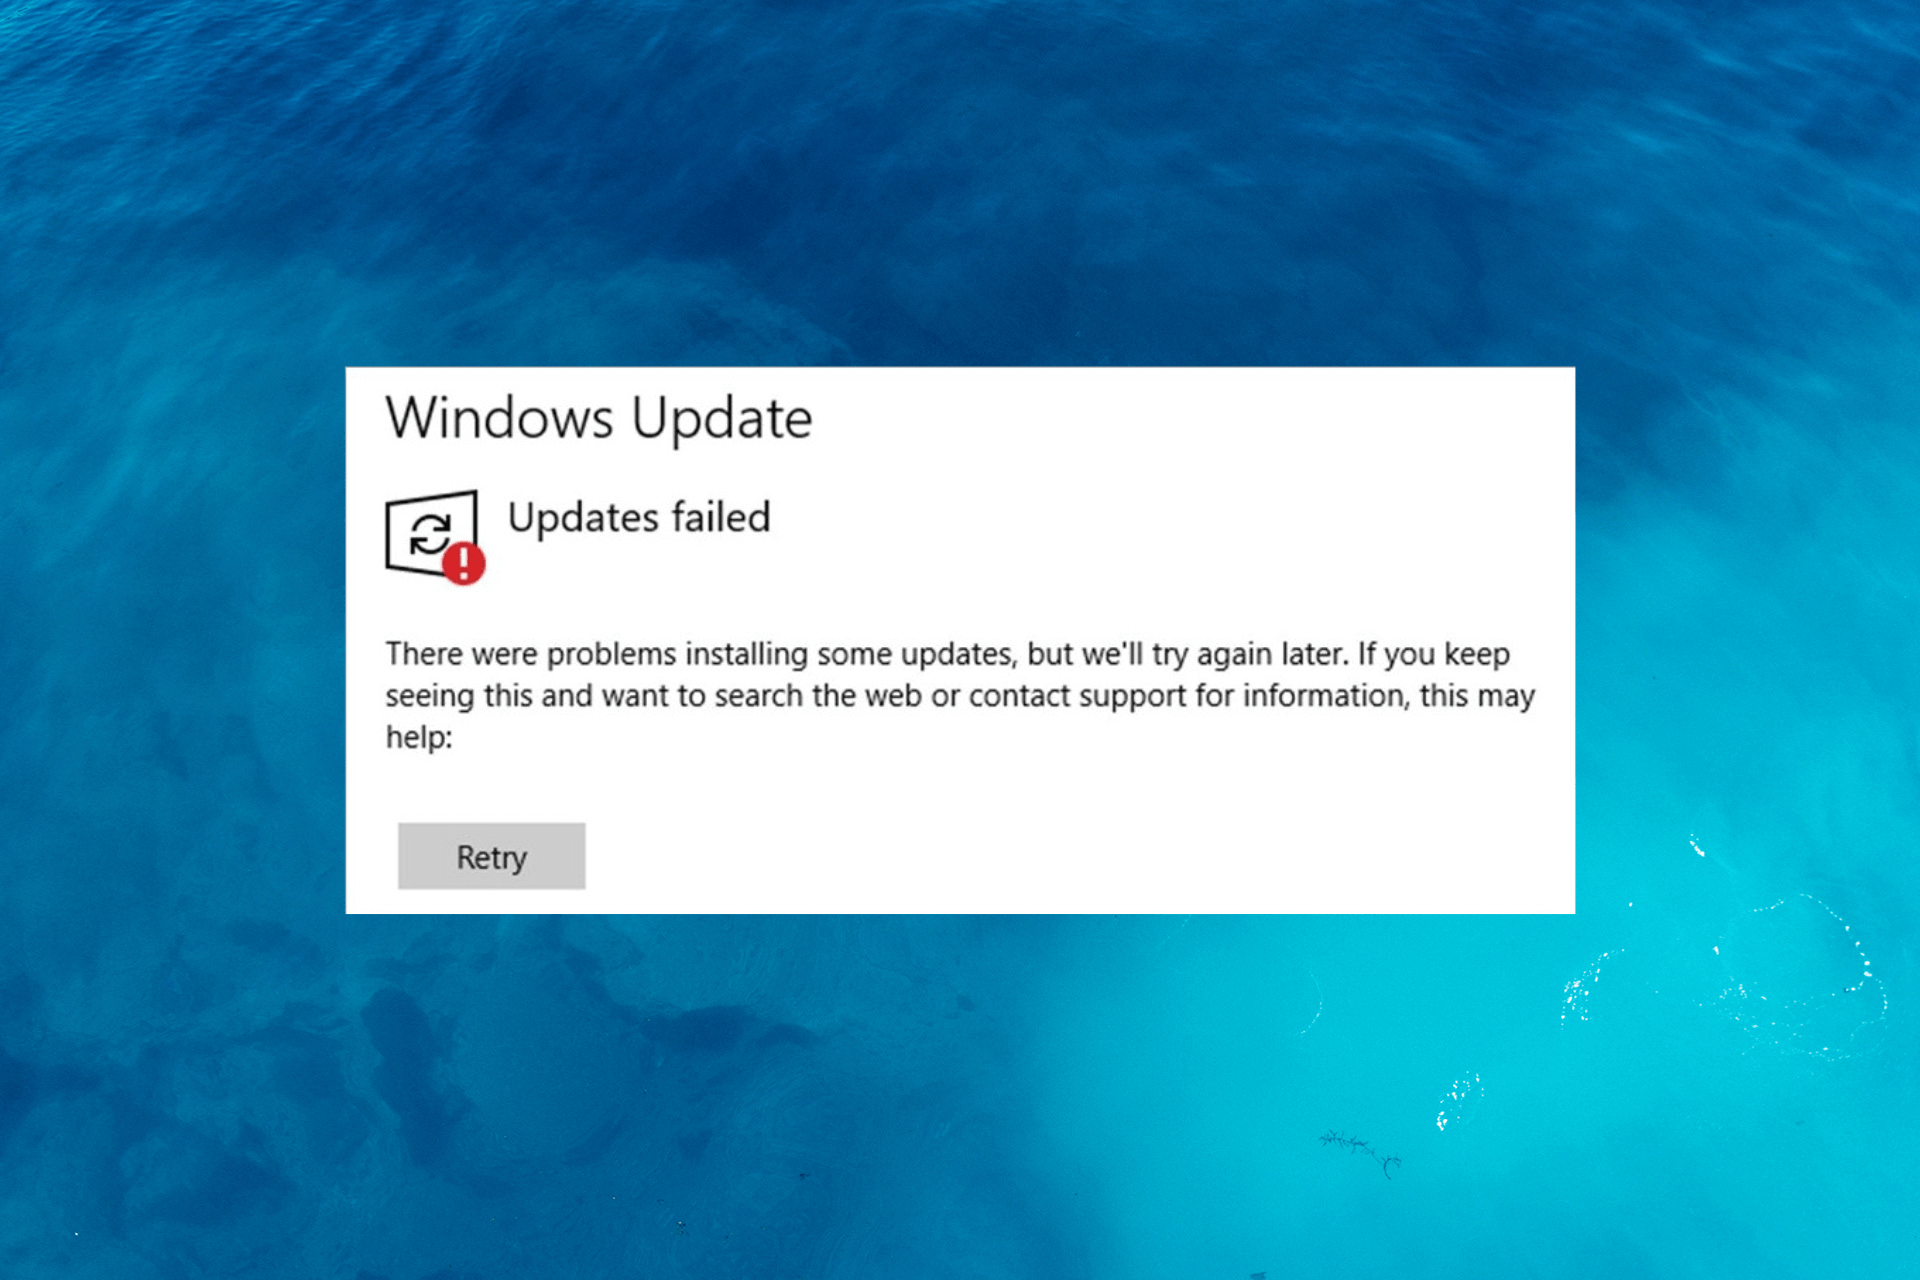
Error code 0x8004def4 in OneDrive hinders the functionality of the cloud storage app.
Some of the most common reasons why this error is occurring include network connectivity issues, cache corruption, third-party software interference, and outdated versions of the OneDrive app.
Let’s check out how you can fix all of these.
What can I do to fix the 0x8004def4 OneDrive error?
First, make sure you’ve logged in with an administrator account. You must also have a stable internet connection and make sure your Windows is up to date and has enough space.
1. Restart OneDrive
Right-click the OneDrive icon in the system tray and select Exit or Quit OneDrive.
Press Ctrl + Shift + Esc to open the Task Manager.
Go to the Processes or Details tab, locate OneDrive or any process related to it, and right-click it to select End task.
Restart your computer. Once your computer is rebooted, OneDrive will start automatically; sign in using the Microsoft Account.
2. Reset the app
Press Windows + R to open the Run window.
Type the following command and click OK: %localappdata%\Microsoft\OneDrive\onedrive.exe /reset
Now OneDrive will reset and reconfigure itself.
Once done, sign in with your Microsoft account when prompted and check if the error persists.
3. Reinstall the app
Press the Windows key, type control panel, and click Open.
Select Category as View as and click Uninstall a program.
On the Programs and Features window, select OneDrive, and click Uninstall.
Follow the onscreen instructions to complete the process.
Double-click the file to install the app, then sign in with your Microsoft account and check if the issue persists.
4. Check the proxy settings
Press Windows + R to open the Run console.
Type inetcpl.cpl and click OK to open the Internet Properties window.
In the Internet Properties window, go to the Connections tab.
Click LAN settings.
Place a checkmark next to the Automatically detect settings option.
If you are using a proxy server, ensure that the right proxy settings are configured. Click OK to confirm the changes and reboot your PC.
5. Clear cache
Locate the OneDrive icon from the system tray, right-click, and select Settings.
In the Microsoft OneDrive settings window, go to the Accounts tab.
Click Unlink this PC to temporarily disable OneDrive on your computer.
Press Windows + R to open the Run console.
Type in the following command and press Enter:%localappdata%\Microsoft\OneDrive\
You will be in the OneDrive folder, press Ctrl + A to select all files and click the Delete button. This will clear the cache on your PC but will not delete the files stored on the cloud.
Go to OneDrive settings again, click Accounts, then select Add an account.
Sign in using your Microsoft account credentials.
Select the folders you want to sync, and OneDrive will start working.
6. Sync System time and date
Press Windows + I to open Settings.
Go to Time & Language > Date & Time.
Toggle on Set time automatically and Set time zone automatically if they’re not already enabled.
Restart your computer and check if OneDrive is working.
If nothing worked for you so far, you must contact OneDrive support to mitigate the error. Tell them the issue and all the troubleshooting issues so that they can help you with advanced troubleshooting methods.
If you have other sync issues with OneDrive, we advise you to read this guide to find suitable solutions.
So, these are methods you can follow to fix the 0x8004def4 OneDrive error. If you have questions or suggestions, feel free to mention them in the comments section below.
The error code 0xcaa80000 in Microsoft Teams has been a major annoyance for many users who want to join a call or access their accounts. It usually reads We can’t connect you 0xcaa80000.
You might get it when certain security protocols aren’t enabled on your PC or you run an outdated MS Teams app. Regardless of the cause, the tricks below should help you fix it:
How can I fix 0xcaa80000 Microsoft Teams error
1. Update Microsoft Teams
Launch Microsoft Teams.
Click the 3 horizontal dots beside your profile.
Next, choose Check for updates.
If there is an available update, it will be automatically downloaded and installed without any action required on your part.
2. Omit the Microsoft Teams data
Close Microsoft Teams and make sure it’s not running in the background.
Right-click on the Windows icon and choose Run.
Type the following command and press Enter: %appdata%/Microsoft/Teams
Open the following folders and delete the files inside each of them: blob_storage Cache databases GPUcache IndexedDB Local Storage tmp
Lastly, try deleting the token binding key in the following directory: C:\Users\BobSled\AppData\Local\Packages\Microsoft.AAD.BrokerPlugin_cw5n1h2txyewy\AC\Microsoft\Crypto\TokenBindingKeys\Keys fb47a8d42be514593f982d4b0d7edd08_90cb05ef-cd90-4066-aafe-3397eb8039a5_4068bc0f75fd0f09b9c2c7507f15f982
Search for internet options and run it and select Internet Options.
Navigate to the Advanced tab.
Check Use TLS 1.1 and Use TLS 1.2.
Apply the changed settings.
We hope that this guide has successfully resolved your issue. If you encounter any further impediments, we recommend referring to a similar Microsoft Teams error code CAA20002.
It would be immensely helpful if you could leave a comment below and let us know which solution worked best for you.
Task Scheduler is an incredibly useful tool, especially for advanced users that want to automate tasks. However, many reported The operator or administrator has refused the request error message while using it.
In case you’re not familiar with this tool, we have a great guide on Task Scheduler tips that you should check out to learn more.
To properly tackle this issue, first, we need to find the right cause.
What causes The operator or administrator has refused the request error?
There are few reasons for this issue, but the most common ones are the following:
Task settings – The task might not be configured properly and that can lead to this problem.
BIOS settings – In some instances, your PC won’t wake up and complete tasks unless it’s properly configured in BIOS.
How can I fix The operator or administrator has refused the request error?
Before start fixing this issue, a few quick solutions might work:
Adjust to the affected task – Sometimes making a small change to your task can fix the problem.
Use the path to the script as an argument – If you have issues with PowerShell scripts, start PowerShell via task and use the path to the script as an argument.
1. Change task settings
Enter task scheduler in Search and select Task Scheduler from the list of results.
Locate the task that is giving you trouble and double-click it.
Navigate to the Settings tab. Make sure to check the Run task as soon as possible after a scheduled start is missed and If the task fails, restart every.
Make sure that If the task is already running, then the following rule applies is not set to Do not start a new instance. Some users suggest setting it to Stop the existing instance instead.
Go to the Conditions tab and turn off Start the task only if the computer is on AC power.
Go to the General tab and check Run with highest privileges. Click on Change User or Group button.
Type Administrators. Next, click on Check names and if everything is in order click on OK.
Save changes.
NOTE
Not all steps are necessary, and you might need to apply only a few to fix the problem on your PC.
2. Enable HPET in BIOS
Restart your PC and keep pressing F2 or Del to access BIOS.
Once you enter it, navigate to Advanced and select PCH Configuration.
Locate the High Precision Timer and set it to Enabled.
Save changes.
NOTE
The location of this feature might be different on your version of BIOS.
The operator or administrator has refused the request can cause problems, but in most cases, the issue is caused by task configuration, and it can be easily fixed.
High resource consumption affects the PC’s performance, which generally happens when many background processes are running. When users look up the Task Manager to identify the underlying cause, it’s often the usocoreworker.exe process to blame.
The process is a vital part of Windows and was recently introduced. As a result, many antiviruses initially mistook it for a threat, but that’s not the case. USO Core Worker is a legit Windows process. Keep reading to find out all about it!
What is the USO Core Worker?
As per Microsoft, the process, USO (Update Session Orchestrator) Core Worker, manages Windows updates. It prioritizes the updates to be installed first and identifies the ones to be downloaded later. Besides, it also helps troubleshoot issues with the update process.
The usocoreworker.exe location is:C:\WINDOWS\System32
For many users, usocoreworker.exe caused high RAM usage, sometimes as much as 3.5 GB for extended periods, which caused other applications to crash. No matter the case, you should never delete the executable file since it’s a core Windows process.
Here are a few reasons you are facing issues with usocoreworker.exe:
Outdated Windows: Oftentimes, an outdated OS triggers the error due to a bug in the installed version or simply performance-related problems.
Corrupt system files: For many users, it was the corrupt system files that led to the problem, and repairing them with the DISM tool and SFC scan fixed things.
Issues with Windows Updates: Since it is linked to Windows Update, problems with the related components can also cause issues with usocoreworker.exe.
Third-party apps triggering conflicts: Many users reported that their third-party antivirus or firewall blocked the process. This mostly happened in the initial days.
How do I disable USO Core Worker?
1. Terminate the process from Task Manager
Press Ctrl + Shift + Esc to open the Task Manager.
Locate the USO Core Worker entry under Windows processes, right-click on it, and select End task.
The easiest way to terminate the process and fix the usocoreworker.exe memory leak is to terminate it via the Task Manager. Once terminated, it would free up significant resources and make the PC run faster.
2. Disable the Update Orchestrator Service
Press Windows + R to open Run, type services.msc in the text field, and hit Enter.
Now, locate the Update Orchestrator Service, right-click on it, and select Properties.
Select Disabled from the Startup type dropdown menu, and click on Stop to terminate the service.
Once done, click on Apply and then OK to save the changes.
Since usocoreworker.exe is triggered by the Update Orchestrator Service, a new way to manage updates, disabling the service will ensure that the process does not initiate automatically.
Press Windows + S to open Search, type Registry Editor in the text field, and click on the relevant search result.
Click Yes in the UAC prompt.
Paste the following path in the address bar and hit Enter:Computer\HKEY_LOCAL_MACHINE\SOFTWARE\Policies\Microsoft\Windows\WindowsUpdate\AU
Right-click on the empty portion, hover the cursor over New, then select DWORD (32-bit) Value, and name it NoAutoRebootWithLoggedOnUsers.
Double-click on the newly created DWORD.
Enter 1 under the Value data text field, and click OK to save the changes.
A more concrete way to disable usocoreworker.exe is through the Registry (regedit). But be mindful while making changes to the Registry because even a minor lapse can wreak havoc and render the computer unusable.
That’s how you can disable USO Core Worker easily in Windows and provide your PC with the much-needed boost.
Some of our readers have reported coming across the Windows can’t stop your Generic volume device because a program is still using it error when ejecting an external hard drive or USB flash drive.
In this guide, we will give you a bunch of solutions that will help you resolve the error and safely eject the external hard drive. Let us get right into it.
Why can’t Windows stop your Generic volume device?
After researching the issue, we have deduced a list of reasons why you will get the Windows can’t stop your generic volume device error:
Your PC is still using the drive – Chances are your USB drive or external hard drive is being used by one program on your PC.
There is an ongoing file transfer process – You might have started a file transfer process that is running in the background.
Windows might be indexing the contents of the USB – Windows indexes the content of the drive that is connected to save the metadata.
The drive is not configured for quick removal – You might have not turned on the quick remove feature for your USB drive so the system can’t eject it.
Let us check out the solutions that will help you fix the problem.
How do I do if Windows can’t stop your Generic volume?
1. End the Explorer.exe process
Right-click on the Taskbar and select Task Manager.
Under the Processes tab locate explorer.exe process.
Right-click on explorer.exe and hit the End task button at the top.
You can also kill the process that might be using the USB drive.
Eject your external hard drive or USB and check whether this resolves the issue.
Some of our readers have suggested that ending any Explorer.exe process on their system has helped eliminate the Windows can’t stop your generic volume device because a program is still using it error.
2. Configure your USB for quick removal
Press the Win + E keys to open the File Explorer.
Right-click on the USB drive and select Properties.
Click on the Hardware tab.
Choose the USB Drive under the All disk drives section.
Click the Properties button.
Click on Change settings.
Switch to the Policies tab.
Select Quick removal (default) under the Removal policy section.
Click OK to apply changes.
One of our readers suggested enabling the Quick Removal settings for the USB drive or the external hard drive to fix the Windows can’t stop your generic volume device because a program is still using it error.
Run the below commands to force your USB to be in offline mode and press Enter. list diskselect disk*offline disk (The * sign should be replaced with the drive letter)
Restart your PC.
You can remove the USB Drive and check if this fixes Windows can’t stop your generic volume device because a program is still using it error.
4. Assign a new drive letter to your USB drive
Press the Win key to open the Start menu.
Type disk management and open the top result.
Right-click on your USB drive and choose Change Drive Letter and Paths option.
Click on Change.
Select Assign the following drive letter and click OK.
Hit the Yes button in the prompt that appears.
Another trick suggested by one of our readers was to change the drive letter of the USB Drive or the problematic external hard disk with which you are getting the error.
5. Change the file format to FAT32
NOTE
Formatting your drive will erase all data on it so try to back up all the important data before proceeding with this solution.
Open File Explorer by pressing the Win + E keys.
Right-click on your USB drive and select Format.
Select FAT32 under the File System drop-down.
Hit the Start button.
Another way to resolve the Windows can’t stop your generic volume device because a program is still using it error is to format the USB drive or the external hard drive to FAT32 format.
Make sure that you have copied and created a backup of all the data stored on your USB Drive safely before formatting it. We have a guide that explains what you can do to format a USB drive if you aren’t able to do so.
That is it from us in this guide. We have a guide that explains how you can easily merge multiple USB partitions in 3 ways.
Feel free to let us know in the comments below, how you can easily resolve the Windows can’t stop your Generic volume device because a program is still using it error.
Sound issues in Windows are common, be it a distortion of some kind or unclear audio. And users have been able to fix distorted audio with ease. But things appear complicated when there are no playback devices in Windows 10.
What would you do when playback devices are not showing? Probably reconnect them, but it generally doesn’t work that easily. So, let’s find out how you can fix things when it reads No audio device is installed on Windows 10.
Why can’t I see playback devices?
First, let’s understand the meaning of playback devices. These are the ones used to output audio or play sounds. Common examples include headphones and speakers.
Here are the primary reasons why you can’t find playback devices in Windows 10:
Incompatible or outdated drivers: Users running incompatible or outdated drivers for the playback device are likely to encounter the error.
Issues with the audio service: The audio service is largely responsible for ensuring effective playback, and any issues with it can trigger the error.
Problems with the hardware: When the playback devices don’t show up, it could be the hardware to blame for the problem. And in this case, our recommendation would be to visit a repair shop.
How do I get playback devices on Windows 10?
Before we proceed to the slightly complex ones, here are a few quick fixes to try:
Restart the computer since this often does the trick.
Ensure the playback devices are plugged in properly if you can’t find them in Windows 10. Try connecting it to another USB port in case a specific playback device is not showing up.
Check for any pending Windows updates and install them.
If none work, move to the solutions listed next.
1. Update the audio drivers
1.1 Via Device Manager
Press Windows + X to open the Power User menu, and select Device Manager from the list.
Expand the Sound, video and game controllers entry, right-click on the affected audio device, and select Update driver.
Choose Browse my computer for computers.
Select Let me pick from a list of available drivers on my computer to proceed.
Untick the checkbox for Show compatible hardware, select Microsoft from the pane on the left, then choose High Definition Audio Device.
Once done, click on Next and follow the on-screen instructions to install the driver.
Often the quickest way to fix things is to update the audio drivers. But in case there’s a bug in the installed version, going with a generic driver does the trick, as reported by many users. Besides, if there are still no playback devices in Windows 10, it’s time to manually install the drivers.
1.2 From the manufacturer’s website
Go to the manufacturer’s official website, locate the audio drivers for Windows 10, and click on Download.
Now, run the setup package to install the driver.
Once done, restart the computer.
When Windows can’t find an updated version, it’s recommended that you locate the most recent driver version on the manufacturer’s website and download them. But since the process is somewhat complicated, it’s best that regular users go with an effective driver updater tool.
A more effective way to update all drivers on your PC is to employ dedicated support.
More exactly, you could use highly performant tool that can scan and find outdated drivers instantly, updating them with their official manufacturer version.
Press Windows + S to open Search, type Device Manager in the text field, and click on the relevant search result.
Locate the device not appearing in the playback section, right-click on it, and select Properties.
Go to the Drivers tab, and click on Roll Back Driver.
Choose a reason for rolling back the drivers, and click on Yes.
Finally, restart the computer for the changes to apply.
Often, when you see no playback devices in Windows 10, it could be that the devices had a recent buggy driver update. And there’s no better solution to it than rolling back the driver. Also, you can disable driver updates for a while to prevent the problematic one from installing again.
3. Restart the audio service
Press Windows + R to open Run, type services.msc in the text field, and hit Enter.
Locate the Windows Audio service, right-click on it, and select Properties.
Select Disabled from the Startup type dropdown, click on Stop, and then on OK to save the changes.
Now, restart the computer, again head to the Windows Audio service’s properties, select Automatic from menu, click on Start, and finally on OK.
If you have no sound devices found in Windows 10 or there’s no audio altogether, it could be the relevant service to blame. So, restart the Windows Audio service, and it should get things up and running.
4. Modify the Registry
Tip
You will need a healthy Windows 10 PC for this solution. So make sure to get one ready before you proceed.
Press Windows + R to open Run, type regedit in the text field, and click OK.
Paste the following path in the address bar and hit Enter:Computer\HKEY_LOCAL_MACHINE\SYSTEM\CurrentControlSet\Control\Terminal Server\WinStations
Double-click on the ConsoleSecurity DWORD towards the right.
Ensure the entries on the affected device match that on a healthy PC. Make any changes if required, and click on OK to save the changes.
Many users reported that when there were no playback devices on Windows 10, it was generally due to misconfigured Registry settings. This happened after users installed an OS update, which automatically made the changes.
5. Uninstall recent Windows updates
Press Windows + I to open Settings, and click on Update & Security.
Click on View update history in the Windows Update tab.
Now, click on Uninstall updates.
Select the update installed recently, after which the error first appeared, and click Uninstall.
Click Yes in the confirmation prompt.
Once done, restart the computer for the changes to apply.
That’s it! If you can’t find another PC or couldn’t figure out the changes to be made to the Registry, uninstalling the Windows update that led to the No audio devices are installed error in Windows 10 should do the trick.
And before you leave, check the best Windows repair tools to get rid of such errors automatically and in no time.
For any queries or to share what worked for you, drop a comment below.
If you are here, sadly it means your HP OfficeJet or Photosmart printer is out of order because of the error code 0xc19a0003. Luckily, it also comes with the message The printhead appears to be missing, not detected, or incorrectly installed and can be easily resolved by effective troubleshooting methods.
Why do I get the 0xc19a0003 HP printer error code?
The HP printer error code 0xc19a0003 is primarily triggered due to the following reasons:
No proper ink supply – If the ink cartridge is unable to supply ink or is not detectable by the printer, this error code will pop up.
Printhead failure –The error code 0xc19a0003 can also occur if the printhead is missing, not detected, or not installed correctly.
Remove the ink cartridges when it slides to the central position.
Take a clean paper or a microfiber cloth and place the cartridges on it.
Thoroughly clean the seats of the cartridges and install them in the correct position.
After you are sure that the cartridges are placed in the correct position, close the front lid of the printer.
Now perform the print test by printing the configuration page to ensure that everything is working smoothly.
3. Clean the printhead
Launch the HP OfficeJet Toolbox on your computer.
Access Toolbox settings for cleaning the toolbox’s printhead.
Next, select the Printer Services option.
Choose the option Clean Printheads.
Follow the step-by-step process on the wizard.
Next, launch the HP Inkjet Utility again and choose the Clean option.
Follow the on-screen instructions to complete the process of cleaning the HP OfficeJet printer.
After the printhead is cleaned completely, the error code 0xc19a0003 will no longer bother you.
4. Restore your printer to factory settings
Launch the HP printer software on your computer.
Access the Setup option on your screen.
Select the Tools option under the Setup settings.
Choose the Restore Factory Defaults option.
A confirmation pop-up to reset your printer to factory default will open. Select Yes to proceed.
After the printer drivers are up-to-date, the 0xc19a0003 error code should subside.
That’s all about it! Hopefully, you were able to bypass the error code 0xc19a0003 on the HP printer by implementing the solutions listed in this guide.
There has been a growing number of reports from Windows users experiencing difficulties executing the Get-Appxpackage commands within the PowerShell application. Instead, they are confronted with an error Get-Appxpackage Access is Denied.
To truly address the issue at hand, we must delve into the root cause.
What is the Get-Appxpackage access is denied error?
The Get-Appxpackage access is denied error is a common issue that a variety of factors can cause:
Admin privileges – If the PowerShell software is not granted administrator authority, it might prompt this specific error.
Restriction to the destination folder – A lack of permissions for a specific folder can cause this message to appear.
How can I fix the Get-Appxpackage access is denied error?
Run PowerShell as administrator – Running Powershell as an admin can be quite effective in operating your command to tackle this error.
1. Make sure the AppX Deployment Service is running
Open Search and search for powershell. Select Run as administrator.
Once the PowerShell app window opens, type the following and press Enter: Get-Service “AppXSvc”
If the status says Running, the Appx Deployment Service is running faultlessly.
If the service is not running, open the Command Prompt by pressing the Windows key + R simultaneously and typing cmd in it.
Then press Ctrl + Shift + Enter keys concurrently and click Yes on the UAC prompt to proceed.
Type the following and press Enter to run it: net start AppXSvc
This command gets executed, and it starts the Appx Deployment Service on your system.
2. Allow permissions to the location folder
Locate the folder on your PC where you want to install the app.
Right-click on this folder and choose Properties from the context menu.
Immediately the Properties window pops up, click the Security tab and look for your username in the Group or user names section.
After selecting your user profile, check if all the permissions are allowed or not in the section just below that.
If there are some permissions not allowed, then click the Edit button to change the permissions.
In the Permissions window, choose your user profile again in the Group or user names section.
Then, make sure all the checkboxes are selected under Permissions for your User profile at the bottom. Note: If you cannot find your user profile, you can click Add button and follow the instructions on the popup window to search for your profile and add it.
Next, click OK.
Now you can close all the windows that were opened by clicking OK on all of them.
Lastly, try and see if the commands are executed without any errors.
Keep in mind that you shouldn’t change permissions for any system folders.
On your home screen click Start and select Settings.
Now choose Accounts, Under Family & other users, choose the account owner name (you should see Local account below the name), then select a Change account type.
Under Account type, select Administrator, and then choose OK.
Sign in with the new administrator account.
Now, Launch Powershell and check if the error is gone.
We hope that this manual has successfully addressed your concern. If you face any further hindrances, we recommend exploring PowerShell Export-CSV access to the path is denied for comparable remedies.
We would greatly appreciate your feedback on the most effective solution you have found. Kindly leave a comment below to let us know your thoughts.
Stereo Mix on your PC lets you record the sound coming out from your computer’s speakers. Many of our readers have complained that the Stereo Mix is missing on their Windows 10 PC.
In this guide, we have listed some solutions that will help you get back the Stereo Mix on your Windows 10 PC. Let us check out the solutions.
Why is Stereo Mix missing on my Windows 10 PC?
Here are some common reasons why Stereo Mix is missing on your Windows 10 PC:
There is an underlying issue – Chances are that the problem is within the Stereo Mix application that is not allowing you to record the audio.
Audio driver is outdated – There might be a problem with your audio driver or the version you are running might be outdated. Updating the audio driver will help you.
Stereo Mix is disabled – There is a good chance that the feature itself is disabled on your PC. So, no point in tweaking other settings.
Let us now go through the solutions that will help you resolve the Stereo Mix is missing on Windows 10 problem.
How can I resolve Stereo Mix is missing on Windows 10 problem?
1. Check disabled devices
Right-click on the Volume icon on the taskbar and select the Sounds option.
Switch to the Recording tab.
Right-click on the blank area and select Show Disabled Devices and Show Disconnected Devices options.
If Stereo Mix appears, then choose Enable.
Chances are by accident or while using another audio device, you have disabled or disconnected the Stereo Mix on your PC. You can simply enable them by following the above steps.
Download the appropriate Realtek audio driver on your Windows 10 PC.
Double-click on the EXE file.
Follow the on-screen steps to install Realtek drivers and restart your PC.
Right-click on the Volume icon on your taskbar and select Sound.
You will see Stereo Mix. If not then right-click on the blank space and click on Show Disabled Devices and enable Stereo Mix.
Select Stereo Mix as the default input device.
3. Enable the microphone
Press the Win + I keys to open the Settings menu.
Click on Privacy.
Click on Microphone from the left pane.
Click on Change and set the slider to On.
Toggle On the slider below Allow apps to access your microphone.
Reboot your PC.
If the microphone on your PC isn’t accessible, then you will face multiple issues including the Stereo Mix missing on your Windows 10 PC. We have a guide that explains some other ways to turn on the mic on your Windows 10 PC.
4. Update the audio driver
Press the Win key to open the Start menu.
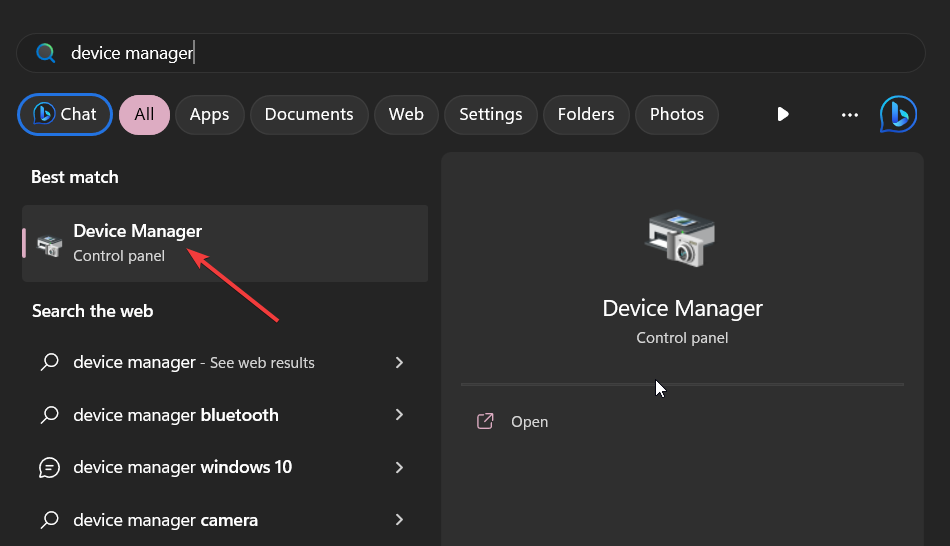
Type Device Manager and open the top result.
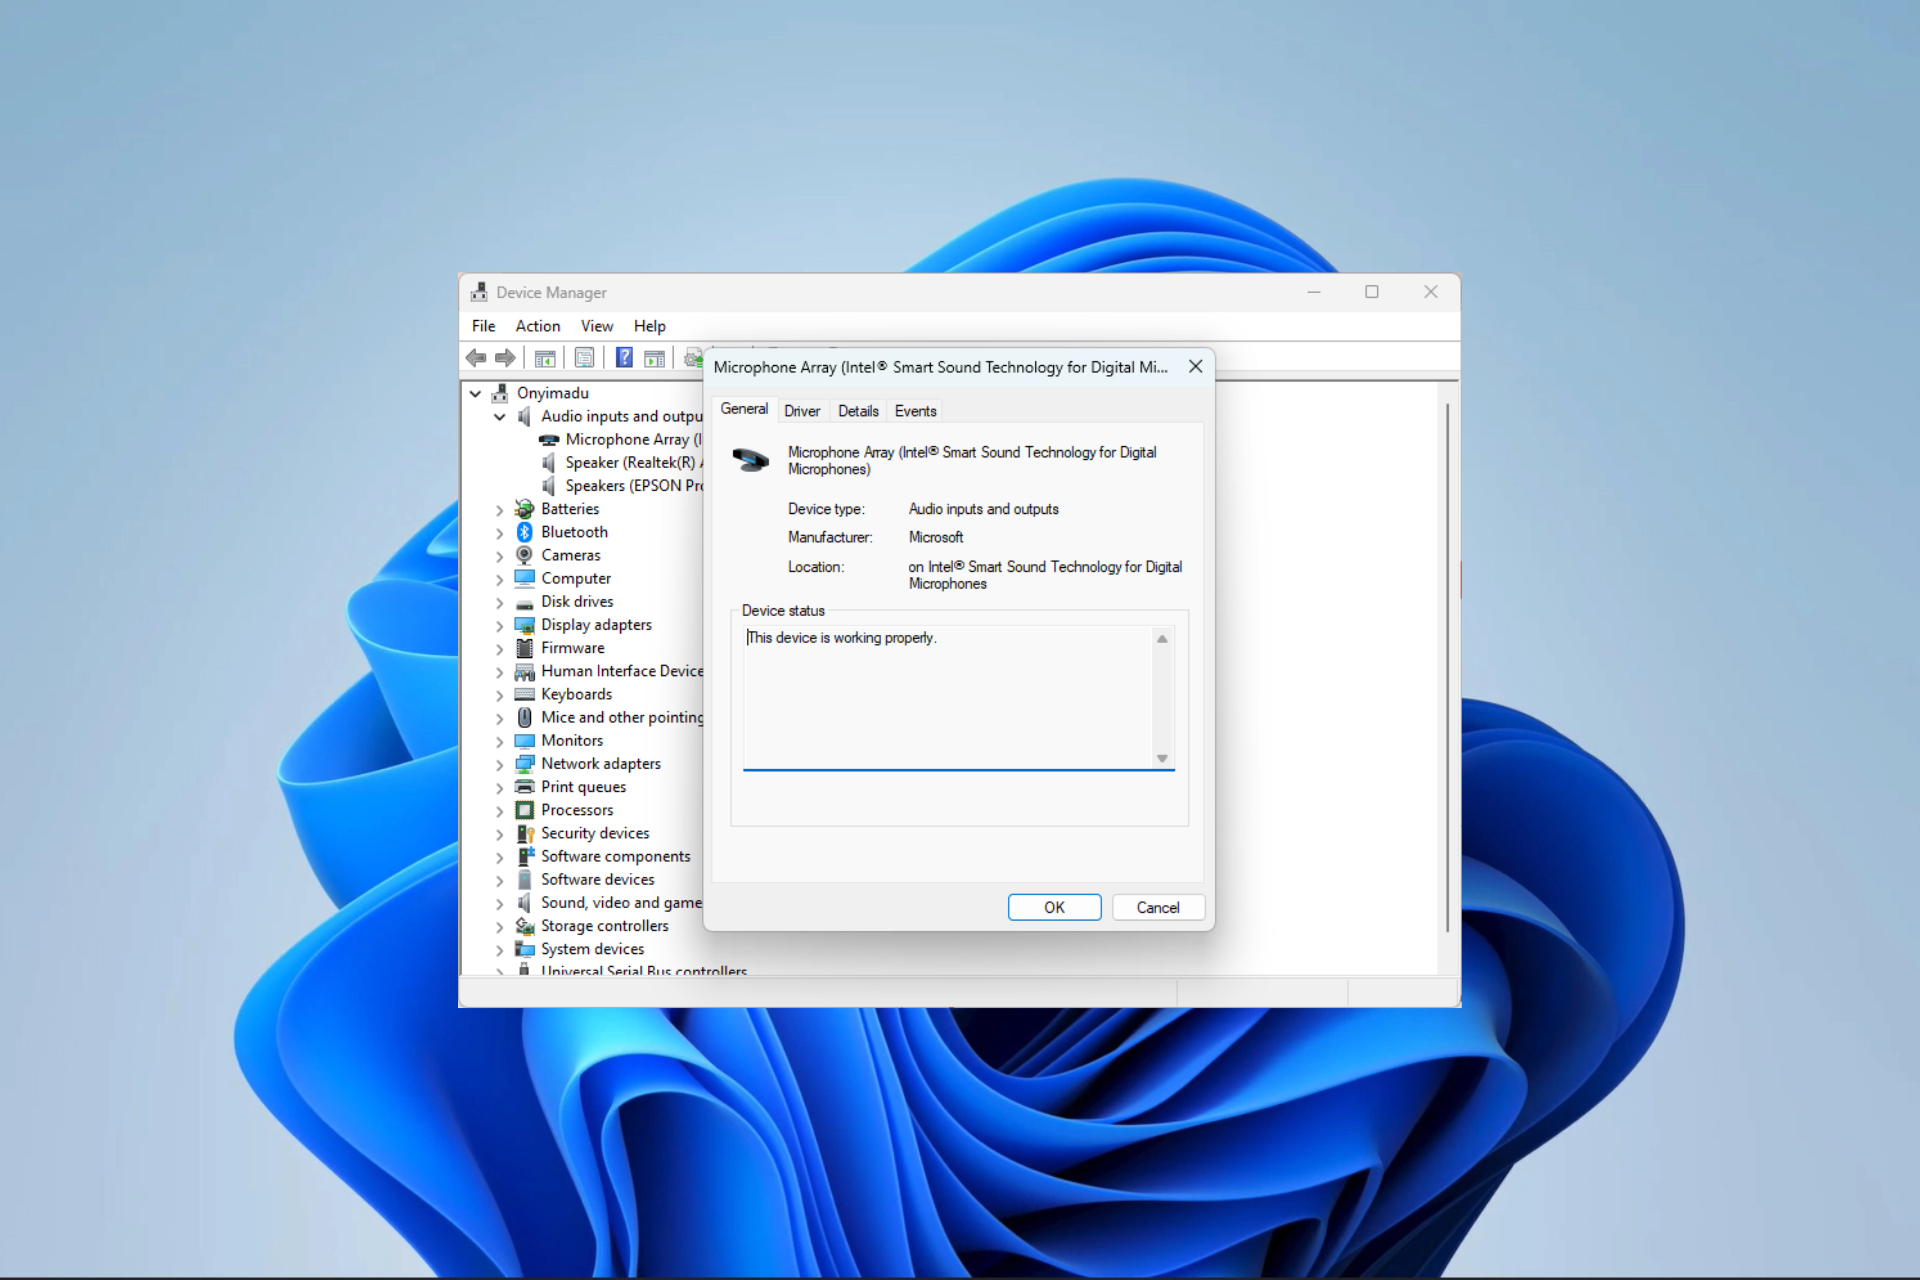
Expand the Audio inputs and outputs section.
Double-click on your audio device.
Click on the Driver tab.
Hit the Update driver button.
Select Search automatically for drivers option and reboot your PC.
Whenever you come across any audio issue on your PC, then you should check if the audio driver installer on your PC is the latest version or not.
If not then, follow the above steps and update the driver and check if this resolves the Stereo Mix missing on Windows 10 problem or not.
Right-click on the Volume icon on the taskbar and select Sound.
In the Playback tab, right-click on your playback device and select Properties.
Switch to the Levels tab.
Unmute the sound and microphone.
Click Apply and OK to apply the changes.
If your speaker is muted, then the Stereo Mix will not work. Check if the sound levels are muted and unmute them and check if this resolves the Stereo Mix is missing on Windows 10 problem.
That is it from us in this guide. For users who are looking to fix the audio latency issue on their Windows 10 or 11 PCs, they can check out our guide to resolve the problem.
If you are getting crackling audio on your PC, then you should apply the fixes mentioned n our guide to resolving the problem.
Let us know in the comments below, which one of the above solutions fixed the problem of Stereo Mix is missing on Windows 10.
Nessusd.exe is a legit process associated with Tenable Nessus, a popular vulnerability scanning tool used to identify security weaknesses in computer systems and networks.
In this guide, we will discuss what Nessusd.exe is and how to terminate its process if it’s using too many resources.
What is nessusd.exe?
Nessusd.exe is an essential component of the Tenable Nessus software suite and acts as the core engine responsible for managing scanning tasks, collecting vulnerability data, & generating comprehensive reports.
It runs in the background while continuously monitoring the target systems and networks for potential vulnerabilities.
It is located at C:\Program Files\Tenable\Nessus\; however, if it is found in another location, you can run a malware scan using an antivirus tool to remove it.
How can I disable Nessusd.exe?
Before engaging in advanced troubleshooting steps, you should consider performing the following checks:
Verify you have logged in with an account with administrator permissions.
Once you are done, move to the methods mentioned below.
1. Stop the process & uninstall the app
Press Ctrl + Shift + Esc to open the Task Manager.
Go to the Details tab and locate the Nessusd.exe process.
Right-click on it and select Open file location.
Once it takes you to the location, return to Task Manager, select the process, and click End task.
Press Windows + I to open Settings.
Go to Apps, then click Installed apps.
Locate Tenable Nessus and click Uninstall.
Follow the onscreen prompts to complete the process. If you can still see the files in the Program Files folder, locate & select the file, then click the Delete button to remove it.
This will remove Nessusd.exe from your computer for good. For removing apps with their associated files from your computer, you can check out our list of best uninstallers on Windows.
If you have ever installed a program and realized you didn’t need it or the app installation failed, you might be aware of the Windows Installer Cleanup utility.
This tool was available in earlier versions of Windows, but we show you how you can still download it in newer versions.
What does Windows Installer Cleanup Utility do?
Windows Installer Cleanup Utility is a tool that helps you to remove invalid registry entries and other system garbage. Such files can cause your PC to run extremely slow and other performance issues.
By using this utility, you can scan your computer for known issues and repair them. The utility also provides a way to uninstall programs that were installed on your computer by using Windows Installer technology.
How can I download the Windows Installer Cleanup utility?
Before you download the Windows Installer Cleanup utility, there are a few things to note:
Microsoft has shelved the tool and stopped offering it for download.
The tool is free to download, and you can still use the utility, but Microsoft will no longer update it.
The utility was built for earlier versions of Windows, so if you’re downloading it for newer versions, such as Windows 10 and 11, it may be incompatible or have some glitches.
For newer Windows users, such as Windows 10 and 11, Microsoft replaced the Windows Installer Cleanup utility with the Microsoft Fixit tool but later discontinued it.
Since the tool was discontinued, it is no longer available on the official Microsoft site, so you’ll have to download it from third-party sites.
Because a lot of these sites are untrustworthy, ensure your system is backed up by a reliable antivirus before downloading it.
Is it safe to delete the Windows Installer folder?
The Windows Installer folder is a hidden folder that contains all the Windows Installer data for your system. It can get pretty large if you have a lot of programs installed on your computer because it includes files and registry keys.
If you delete this folder, you’ll lose access to many applications. Instead of deleting the entire folder, we recommend performing a Disk Cleanup or finding other ways to free up space on your hard drive.
The good news is that other options are still available if you want to clean up your PC. Windows 11 has many built-in repair tools at your disposal. The program install and uninstall troubleshooter for Windows 11, for instance, is a replica of the Windows Installer Cleanup utility.
However, you may feel these tools are insufficient, so we recommend you reach out for uninstaller software. These tools will allow you to delete unnecessary files from your computer without worrying about causing future problems with your PC.
Let us know whether you still use the Windows Installer Cleanup utility and your experience thus far, especially in newer Windows versions.
Even more, a staggering 60% of Microsoft 365 tenants suffered at least one successful account takeover incident in 2022.
Researchers at Proofpoint analyzed over 450 million malware attacks, over the second half of 2022, specifically targeting Microsoft 365 tenants.
They found out that Microsoft Teams is one of the ten most targeted sign-in applications, and almost 40% of targeted companies had at least one unauthorized login attempt to gain access to the company’s data.
You can see the top 10 most targeted apps in the second half of 2022, according to Proofpoint, below.
40% of Microsoft Teams accounts had at least one hacking attempt in 2022
Researchers at Proofpoint emulated all kinds of hacking scenarios that took advantage of Teams’ security gaps. They managed to target Teams with additional tabs for files, which allowed them to break through.
They could also easily place malicious URLs in chats, taking advantage of the fact that Teams doesn’t provide a visible URL bar.
Even more, researchers created a malicious website tab that pointed to a file. Teams then automatically downloaded the file to the user’s device, easily compromising an organization’s data and network.
Further, they also created malicious Microsoft Teams meetings, with corrupted links that would enforce a download of malware software.
Needless to say, Microsoft Teams can be easily weaponized against your company. It’s no wonder hackers target it specifically.
So what can you do to make sure your account, or organization, doesn’t get compromised? Proofpoint has a list of recommended actions that you should take to protect yourself from hackers and malware.
Be aware: educate yourself and your organization to be aware of the risks when using Microsoft Teams.
Secure your cloud: Identify the ones trying to hack your cloud environment. The sooner, the better, and the least unfortunate outcome.
Secure your web environment: isolate potentially malicious links in Teams chats.
Know when to limit access: especially when you’re the target, consider limiting its usage.
Restrict the access of Teams to your team only: make sure your Teams services are internal only.
Microsoft is assuring users that Microsoft 365 has the best possible protection.
Regarding the findings made by Proofpoint, the Redmond tech giant has emphasized its Zero Trust Security program is more than capable of handling every hacking attack.
Have you ever experienced a hacking attack? Do you use Microsoft Teams? Let us know your experience with it in the comments section below.
This year has brought us notable advances in AI. There’s no surprise that finding the best AI search engine is a hot topic for almost anyone now.
Since ChatGPT started to change the way we search online, other big actors joined the scene with intelligent products designed to help users to find answers to their questions much faster. It started with web3-ready search engines and keeps on going.
There is a lot of talk regarding AI and its impact on results pages. However, it’s clear that you can take advantage of this new method to browse more efficiently.
Are there any AI search engines?
In addition, there are already browsers that deliver AI-oriented tools such as Opera One from Opera. According to Opera’s last year financial stats, the browser is ranking higher in the market and is also coming with an enhanced search engine that integrates multiple AI prompts.
Actually, there are plenty of AI search engines that already bring incredible technologies:
Microsoft Bing – Suitable for complex topics
Google Bard – Great for research
Neeva AI – Cross-platform & clutter-free
You.com – Alternative AI search engine for developers
Komo AI – Best free AI search engine
For instance, you have Microsoft Bing’s AI chat, the Bard assistant from Google, or others like the You.com engine. Now, let’s find out more about their useful functionalities.
This new Bing engine can help you navigate any topics you’re interested in. For instance, you can get detailed responses about hard topics or plan your next vacation with this assistant.
?️ Key feature: Inspiration answers to help you decide about real-life incidents and image creation AI
2. Google Bard – Great AI search engine for research
Does Google Search have AI? You wanted to know, we’re here to answer. And the answer is definitely yes. It’s called Bard. You can simply use this AI language chat for multiple queries.
To access it, all you have to do is sign in with your Gmail account and start asking your curiosities. The AI search engine project from Google deserves its place in the list because it comes with enhanced AI language technology.
You can go for this AI hub to search for any complex topics and get a comprehensive summary explained for a 10-year-old.
At the same time, this tool is helpful for productivity improvement. You can ask for planning advice and tools that can enhance your daily goals.
?️ Key feature: Coding experimental responses that help the user to understand complex topics on short notice.
Last but not least, this integrative AI search engine is a free solution that offers exploration tools without any ads.
Firstly, you can use Komo for three main purposes: Search mode, Explore, or Ask, each one with its specific model.
With the search mode, you have resourceful AI solutions while the Explore and Ask mode can deliver community links and insights from social spaces.
?️ Key feature: Specifically tailored answers for different needs and users.
That’s it for today. All having been said, we hope that our AI search engine picks meet your browsing needs. For other tips or questions, talk with us in the comment section below.
You can explore more evolving search technologies with this detailed meta search engine list that highlights tools built for broader and more efficient browsing.
Visiting a site on your browser could return the request header or cookie too large error message. You already know that cookies are small bits of data that your browser stores locally.
They’re used for authentication and tracking purposes, but if they exceed a certain limit, they can make accessing a website impossible. Here’s how to resolve this issue.
What does 400 request header or cookie too large mean?
A request header or cookie too large error appears when you attempt to open a given website, but instead of bringing up the expected content, it brings up this error.
This indicates that the server is refusing to fulfill your request because the request header size has exceeded the capacity limits of either the server or the software that runs it.
The exact size of the limit depends on the server’s configuration and operating system.
There are several reasons why this can happen:
Corrupt cookies – Unfortunately, cookies can sometimes cause problems in browsers. They may become corrupted if your browser crashes or gets infected with malware.
Cookie size is too large – If you’re receiving the request header or cookie too large error, it means that the cookies set by the site you’re trying to visit have gotten too large.
Website limitations – Some websites have a limit to how much data they can accept in one request. This is often due to security concerns and/or limitations on their network infrastructure.
Outdated/corrupt add-ons – Extensions can sometimes cause problems when connecting to websites.
Server issues – Sometimes, it’s an issue with a particular server and the websites linked to it. You may get a 400 request header or cookie too large nginx error because it may be overloaded with traffic and cannot handle all requests simultaneously.
How do I fix 400 Bad Request request header or cookie too large?
Perform the following basic checks before moving on to the slightly advanced solutions:
Make sure your browser and OS are up-to-date by installing any available updates.
Close out any unnecessary browser tabs or windows on your computer and retry the site.
Verify the URL of the site you’re trying to visit and ensure it’s correct.
Open your Chrome browser and click on the three vertical ellipses at the top right corner.
Select Settings.
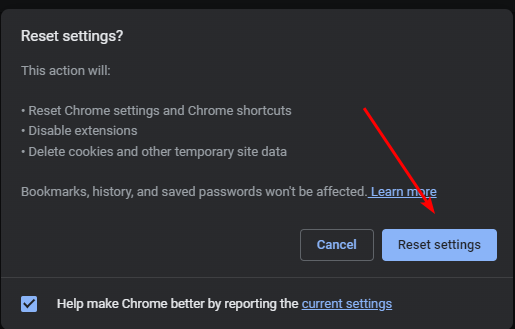
Next, click on Reset and cleanup, then select Restore settings to their original defaults.
Confirm Reset settings in the next dialog box.
If none of these methods fix the request header or cookie too large error, the problem is with the server. You can communicate with the owner of the site or give it some time and see if it fixes itself.
Caktus is a ChatGPT alternative, so you can expect it to offer similar features. While it is a very useful app that can make your life easier, sometimes it may not work properly, and you will face certain issues while using it.
If this happens, you must fix it as soon as possible. In this article, we will tell you about the most common Caktus AI not working problems and their solutions so that you can use it without any hassle.
How does Caktus AI work?
Caktus AI is a student-centered writing assistant that mainly focuses on delivering academic content by writing essays.
While it is considered just another of the many AI software that seem to be popping up every other day, this one has piqued the interest of many students, given how it delivers its content.
It generates content according to the chosen writing style and cites published sources from its large database.
A unique quality found in Caktus AI is that it can easily adapt to your writing style and apply it to all papers. You can do this by uploading a sample paper you have written before, and the AI will personalize your style for future papers.
Does Caktus AI work?
Having a number of praises, one would actually wonder whether it is a reliable assistant. Well, like any other AI assistant, it does work well and encounters the usual hiccups from time to time. So what causes it not to work during these times? Below are some possible causes:
Poor connection – To connect to any website on the Internet, you’ll need a stable connection. If your connection keeps dropping, your Caktus AI cannot perform as expected.
Outdated browser – If you’re using an outdated browser, it may not be up to par with the Caktus AI website causing compatibility issues.
Overloaded server – Sometimes, too many users are trying to generate content simultaneously, so it becomes overwhelming for Caktus AI.
Expired subscription – You may ask whether Caktus AI is no longer free. There was a free subscription, but now, you have to select a plan to use it. If you were on the free plan, perhaps that’s why it is not working.
Corrupt cache/cookies – Browsers accumulate a lot of cached files and cookies, and over time, they become corrupt. This can affect your access to certain websites, including Caktus AI.
Browser addons/plugins – At times, you may have installed browser extensions or plugins that interfere with how a certain website works.
What can I do if Caktus AI is not working?
Before jumping to any permanent solutions, try the following:
Open your Chrome browser and click on the three vertical ellipses at the top right corner.
Select Settings.
Next, click on Reset and cleanup, then select Restore settings to their original defaults.
Confirm Reset settings in the next dialog box.
Sometimes, your browser settings may have been tampered with, and resetting will undo any changes preventing certain websites like Caktus AI from working.
4. Contact Caktus AI support
Finally, if none of the above recommendations seem to be working, it might be a problem with Caktus AI.
In such cases, you need to report the issue via their contacts, such as Twitter account, detailing when you noticed the anomaly, how long it has been going on, and any other relevant information to get a faster response.
Are you longing for the ability to have the ChatGPT app on your mobile device? Well, we have some fantastic news to share with you.
OpenAI is thrilled to announce the launch of the ChatGPT app for iOS. This free app allows you to access ChatGPT’s capabilities conveniently, with the added benefit of syncing your conversation history across multiple devices.
Shortly after its launch, the ChatGPT mobile app skyrocketed to the top position among productivity apps, making it an absolute must-have.
Additionally, the app integrates Whisper, OpenAI’s open-source speech-recognition system, enabling voice input for seamless interactions. ChatGPT Plus subscribers on iOS also gain exclusive access to the advanced features of GPT-4, faster response times, and early access to upcoming enhancements.
Unfortunately, at present, the ChatGPT mobile app is exclusively accessible to iOS users. Android users, on the other hand, may have to exercise a bit of patience as they await the arrival of the app on their devices.
In this guide, we will walk you through the process of getting started with the ChatGPT iOS app, so you can unleash the versatility of AI conversations right at your fingertips.
3. Tap the Get button to initiate the installation.
4. Wait for the app to download and install on your device.
With that being said, however, the mobile app is only available to US users on iOS, as things stand, but we will keep you updated as OpenAI expands the availability of the app to more countries.
And, while the dedicated ChatGPT app may not be available for Android at this time, Android users can still engage with the impressive AI-powered conversations via Bing AI chat mode.
Have you downloaded the ChatGPT app on mobile? Let us know in the comments.
Encountering the 0xC00D36FA error code along with the error message We can’t find an audio playback device can be frustrating when trying to play audio or video files. It is a common issue that many Windows users face when using Windows Media Player.
However, there are a few possible solutions to address the 0xC00d36FA error in Windows, and we will explore them here.
What is the 0xC00D36FA error?
When you encounter the error code 0xC00D36FA while playing videos or audio files, you won’t be able to hear any sound, and there may be an issue with the audio device or driver.
Here are some common causes for the error code 0xC00D36FA:
Third-party interference: Certain applications or plugins installed on your computer might modify audio settings or conflict with Windows Media Player, causing the error to occur.
Audio device or driver issues: Outdated or incompatible audio drivers, misconfigured settings, or faulty hardware can trigger the 0xC00D36FA error when playing audio.
Malware or security software: Security software or malware on your system can interfere with the audio playback, resulting in the error code.
How do I fix error code 0xC00D36FA?
Before attempting the complex solutions below, try these:
Check your audio device: Ensure you have properly plugged your headphones or speakers into your computer and check if the cables are not damaged.
Restart your computer: In most cases, a simple restart will resolve the issue.
Use a different player: Try using different media players to open the file and check if the problem is with the program.
Disconnect audio devices: Disconnect all external sound devices, such as headphones or speakers, to ensure that the sound device is not malfunctioning.
1. Enable the audio device
NOTE
Ensure that your audio devices have not been accidentally disabled or uninstalled.
Press the Windows key, type device manager, and select Device Manager.
Expand the Sound, video, and game controllers category and check if any device is disabled.
Then, right-click on the disabled device and select Enable device.
You should be able to play your audio file now without any errors.
2. Run the Audio troubleshooter
Press Windows + I to open Windows Settings, go to System, and select Troubleshoot.
Under Troubleshoot options, select Other troubleshooters.
Then, click the Run button next to Audio.
Follow the on-screen instructions to troubleshoot the audio or sound problems in Windows.
The troubleshooter will perform diagnostics on your PC to identify the issue you are experiencing. It will also carry out both automated and manual steps to resolve the problem.
3. Restart Audio Services
Press Windows + R, type services.msc in the dialog box, then press Enter.
Find the Windows Audio service from the list, right-click on it, and select Properties.
Then, click Stop.
If you see a prompt to stop other services, click Yes.
Make sure the Startup type is set to Automatic and click Apply.
Click Start and then OK to restart the service.
After that, right-click on the Windows Audio Endpoint Builder and select Properties.
Click Stop and then set the Startup type to Automatic.
Then, click Apply and then select Start to restart the service.
Finally, close the Services console, restart your computer, and check to see if the 0xC00D36FA error is fixed.
Open the Start menu, type device manager, and select Device Manager.
From the list of drivers, expand the Sound, video and game controllers, right-click the audio device, and select Update driver.
In the Update Drivers window, select Browse my computer for drivers.
Next, click Let me pick from a list of available drivers on my computer. You can also click Browse to choose the driver you downloaded from the manufacturer’s website.
Select the correct driver from a list of compatible drivers and click Next.
Once the driver is installed, click Close.
Then, click Yes on the prompt to restart your computer.
5. Perform a system restore
Press the Windows key, type restore,and click Create a restore point.
In the System Properties window and click the System Restore button.
Select the Choose a different restore point option, and click Next.
Then, select the restore point, and click Next.
Then, click Finish.
If the 0xC00D36FA error remains unresolved after attempting the previous steps, you may need to consider resetting the Windows.
If you have more questions or suggestions, leave them in the comments section below.
As is the case with any operating system, Windows comprises a wide array of background processes, tasks, and services. While programs call some of these, others are native to the Windows ecosystem. One such is the nslookup.exe process.
The nslookup.exe often results in high CPU usage, and that’s when most users realize its existence. Many wonders if it’s a virus and their PC has been compromised, along with many other queries. And we are here to answer it all! Keep reading to find out.
What is the nslookup process?
The nslookup.exe process relates to a critical built-in command-line tool, nslookup, which is used to query the DNS (Domain Name Server) and other similar network-related tasks. The host file can be found in:C:\Windows\System32
Most of us have never seen the process or been interrupted by it, given its functioning in the background, and that, too, rather discreetly. So, you shouldn’t remove it or try to modify the process.
Though when nslookup.exe keeps popping up, it doesn’t just affect the experience but also leads to high resource consumption, which will ultimately crash the PC if not rectified right away.
How do I get rid of nslookup?
Before we head to the slightly complex solutions, here are a few quick ones to try:
Restart the computer, which will close any instances of the process.
Install the latest version of Windows to get rid of any bugs.
In case your PC is part of a domain, check with the host whether they are running the nslookup.exe command.
If none work, move to the fixes listed next.
1. Disable startup apps
Press Ctrl + Shift + Esc to open the Task Manager, and navigate to the Startup apps tab.
Now, select any processes that list Enabled under Status, and click Disable near the top right.
When faced with multiple instances of nslookup.exe in Task Manager, your primary approach should be to check for apps that trigger it and disable them from running automatically at boot.
2. Repair corrupt system files
Press Windows + R to open Run, type cmd, and hit Ctrl + Shift + Enter.
Click Yes in the UAC prompt.
Now, paste the following commands one at a time, and hit Enter after each to run DISM:DISM /Online /Cleanup-Image /CheckHealthDISM /Online /Cleanup-Image /ScanHealthDISM /Online /Cleanup-Image /RestoreHealth
Once done, use this command to run the SFC scan: sfc /scannow
Finally, restart the computer for the changes to come into effect.
If this Windows command is overly complicated, we suggest a system repair solution that simply works to repair corrupted system files on your Windows OS.
3. Scan for malware
Press Windows + S to open Search, type Windows Security in the text field, and click on the relevant search result.
Click on Virus & threat protection.
Now, click on Scan options.
Select Full scan and then click on Scan now.
Wait for the scan to complete.
While nslookup.exe is not a virus, it could be triggered by malware that has infected the PC. And in this case, running a malware scan will help. Besides the built-in Windows Security, you can use an effective antivirus solution for a deeper scan.
Press Windows + R to open Run, type appwiz.cpl in the text field, and hit Enter.
Select any suspicious programs from the list, especially those installed around the time the error first appeared, and click Uninstall.
Follow the on-screen instructions to complete the process.
If the problem remains unresolved, similarly remove other apps from the PC.
A suspicious program might often call the nslookup.exe utility, and you will have to identify and uninstall the app. Remember, any credible program uninstalled in the process can always be downloaded later.
All that’s left is to change the boot order, load the Windows setup, and install the OS. It will result in data loss, so we recommend transferring the critical files to external storage beforehand.
And once you have fixed the nslookup.exe errors, learn some quick tips and tricks to run Windows faster than ever.
For any queries or to share more solutions with us, drop a comment below.
And we got even more good news. Teams is getting another couple of updates over the course of this month and the next.
According to Sara Fennah, a Microsoft 365 Consultant, group policy assignment support to additional policy types is coming to the Microsoft Teams admin center.
This means that admins will be able to create new groups or use existing ones to assign custom policies for various policy types in Teams admin center.
How to manage the Teams group policy assignment
The first thing you need to know is that these updates are coming at separate times.
The first update will be available for the Caller ID policy, Dial plans and Teams update policy. It will be out by mid-late May for all Microsoft Teams commercial licenses.
The second update will be available for the rest of the policies. It will be out by early June for all Microsoft Teams commercial licenses.
The group policy assignment feature lets you assign custom policies to groups that were created in the Microsoft 365 Admin center. The Teams admin center supports Microsoft 365 groups, distribution lists, mail-enabled security groups, and security groups for groups policy assignment.
Microsoft
You can use the group policy assignment feature for the following policy types in the Microsoft Teams admin center:
Call hold policy
Customization policy
Emergency calling policy
Emergency call routing policy
Enhanced encryption policy
Mobility policy
Meeting template policy
Template policy
Voicemail policy
Voice routing policy
Voice applications policy
Also, it’s good to know that the maximum number of groups per policy will also be lifted, and it will no longer be capped at 64.
However, you also have to keep in mind that you won’t be able to use the group policy assignment in the core policies: meeting policies, calling policies, and messaging policies.
With that being said, your organization will be now able to have different custom policies for various policy types in Teams groups.
What are your thoughts on these updates? Let us know in the comments section below.
A typical Windows PC consists of hundreds of background processes and tasks that kick in automatically when a particular action is to be performed. The SetupPlatform.exe, too, falls in the same category.
It has been a cause of concern for many, throwing system errors from time to time. But things are not as complex as they appear, and SetupPlatform.exe errors are easy to fix. Let’s find out all the about the process and the solutions that worked for others!
What is SetupPlatform.exe?
The executable file is a part of the Microsoft library and is digitally signed. The SetupPlatform.exe process kicks in during the Out-of-Box-Experience in Windows or during an update or upgrade process. The file location is:C:\WINDOWS\System32\oobe\SetupPlatform
SetupPlatform.exe
If we were to look into the file properties, SetupPlatform.exe has a size of 265 KB. Also, remember that it’s not malware and is completely safe as per scans run using the best antiviruses for Windows.
Do I need SetupPlatform.exe?
While you don’t need the file at all times, we recommend against deleting SetupPlatform.exe for a simple reason, this might trigger more errors. Or, for that matter, you shouldn’t delete any files bundled with the Windows installation by default.
And the process being critical during the upgrade process, it becomes all the more important to leave the file as it is.
How do I fix SetupPlatform.exe errors?
Before we start with the slightly tricky solutions, here are a few quick ones to try:
Restart the computer and try the operation that earlier threw the error.
Make sure the file is stored in the correct location. If you can’t find it, manually replacing the file might do the trick.
If none work, head to the fixes listed next.
1. Repair the corrupt system files
Press Windows + S to open Search, type Command Prompt in the text field, and click on Run as administrator.
Click Yes in the UAC prompt.
Paste the following commands individually and hit Enter after each for the DISM tool:DISM /Online /Cleanup-Image /CheckHealthDISM /Online /Cleanup-Image /ScanHealthDISM /Online /Cleanup-Image /RestoreHealth
Once done, execute this command for the SFC scan:sfc /scannow
Finally, restart the computer for the changes to come into effect.
Since SetupPlatform.exe is a part of Windows by default, corrupt system files can often trigger issues with it. And a quick fix to eliminate problems arising out of it is to run the DISM tool and the SFC scan, which will replace any corrupt files with their cached copy stored on the PC.
As an automated process for the above solution, you can go for a dedicated tool to ensure an in-depth repair of your Windows system.
2. Uninstall any third-party antivirus
Press Windows + R to open Run, type appwiz.cpl in the text field, and hit Enter.
Now, select any third-party antivirus from the list of installed programs, and click Uninstall.
Follow the on-screen instructions to complete the process.
If you have a third-party antivirus or security software on the PC, it could conflict with the functioning of the OS and trigger SetupPlatform.exe issues. In most cases, uninstalling the program does the trick. Besides, if you still prefer using a third-party solution, check the best antivirus for Windows.
The steps here are for an in-place upgrade on Windows 11. In case you are running Windows 10, download the Media Creation Tool, run the setup, and then perform a repair upgrade.
After downloading, open the ISO file and run setup.exe.
Click Yes in the prompt.
Click Next in the setup window to proceed.
Now, click on Accept to agree to Microsoft’s license terms.
Verify that the setup reads, Keep personal files and apps, and click on Install.
Another sure-shot solution to fixing SetupPlatform.exe errors in Windows 11 is to perform an in-place upgrade. The process doesn’t affect the stored files or apps and takes a few hours to complete. If this too fails, create a bootable drive and reinstall Windows from scratch.
It goes without saying that there isn’t a soul today that hasn’t heard about the now-defunct Internet Explorer browser.
On that note, back in August 2020, Microsoft started dropping Internet Explorer 11 (IE11) from its web-based services to set the ball rolling for the end of IE11.
The tech giant followed it up last year in March by issuing a reminder about it and providing a detailed timeline about the end of support for Edge’s IE mode.
However, what we’re about to tell you about the obsolete browser will surely bring a smile to your face, especially if you were an IE user before.
Here’s what changed in the Internet Explorer 11 policy
Back in February, Internet Explorer was permanently disabled via an Edge update on Windows 10, although components of IE are most certainly still inside Edge.
That being said, in the meantime, the company published a Group Policy configuration guidance article that detailed how organizations can better control the timing of the removal of IE11 user interface (UI) and other visual elements.
Microsoft also explained how these Windows elements would be disabled via Windows Update. But wait, there’s actually more.
Redmond officials announced a big change in these plans. Now, before you jump to any conclusions, here’s what the company has envisioned.
The IE11 desktop app retirement FAQ article has been updated to add that Windows Update will no longer remove the IE11 visual references, UI, and similar elements, and it will be up to the IT and system administrators of organizations to deal with.
You also need to know that, additionally, Internet Explorer11 will still be accessible to Edge in case of exceptional scenarios.
Thus, based on customer feedback, Internet Explorer 11 (IE11) visual references, such as the IE11 icons on the Start Menu and taskbar, will no longer be removed by Windows update as previously communicated.
Now, organizations will continue to maintain control over determining the timing to remove IE11 visual references from their devices, if they have not already done so, by using the Disable IE policy.
Changes will be made over the next coming months to redirect a small subset of exceptional scenarios where IE11 is still accessible to Edge.
It goes without saying that this ensures users access a supported and more secure Microsoft browser, in case you were wondering.
Share your opinions, thoughts, and ideas with us in the designated comments section located right below.
Windows 11 users may experience a Device Manager error with the notification Windows cannot determine the settings for this device code 34.
This error typically indicates a problem with a device driver or hardware settings in Windows. So in this guide, we introduce some practical fixes and probable causes of the error.
Why am I getting the notification Windows cannot determine the settings for this device code 34?
Any of the following is a probable cause for the error on your devices:
Incompatible or outdated device driver – It’s possible that the hardware’s device driver isn’t compatible with your version of Windows or needs to be updated.
Corrupted device driver – Your device driver files may be corrupted, which could be causing Windows to have trouble determining the device’s proper settings.
Invalid hardware configuration – There may be an issue with the hardware configuration, such as conflicting resources or incorrect settings in the device’s firmware or BIOS.
How do I fix Windows cannot determine the settings for this device code 34?
We recommend the following workarounds before exploring more detailed solutions.
Uninstall conflicting apps – You may want to uninstall apps most recently installed on your device, as they may be causes conflicts.
Unplug peripherals – You should unplug all peripherals apart from the ones you need now. Alternatively, unplug them all and replug them.
Restart the computer – A few minor bugs may be fixed after a reboot since it will force problematic programs to shut down.
However, if the above does not work, you must try the more elaborate solutions we explore below.
1. Reinstall the device driver
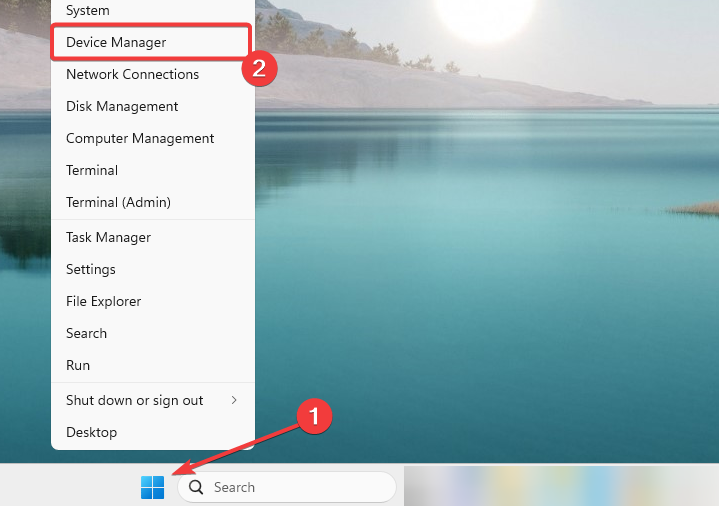
Right-click on the Start menu and select Device Manager.
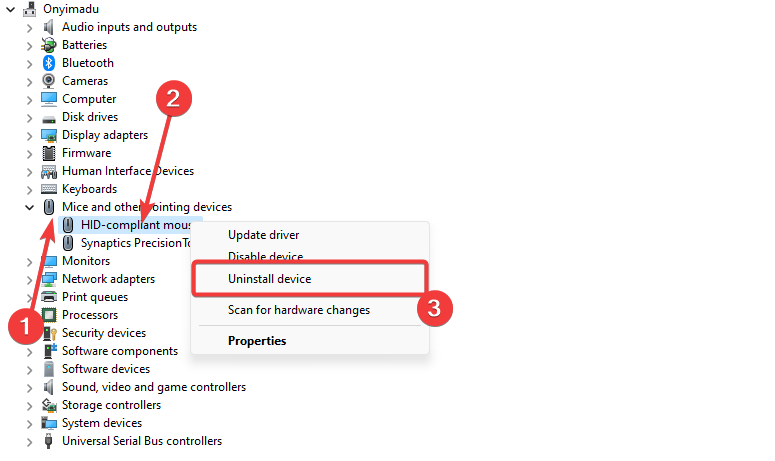
Expand the category related to the device that triggers the issue, right-click on the driver, and select Uninstall device.
Confirm your choice.
Restart your computer, and when it comes on, relaunch the Device Manager.
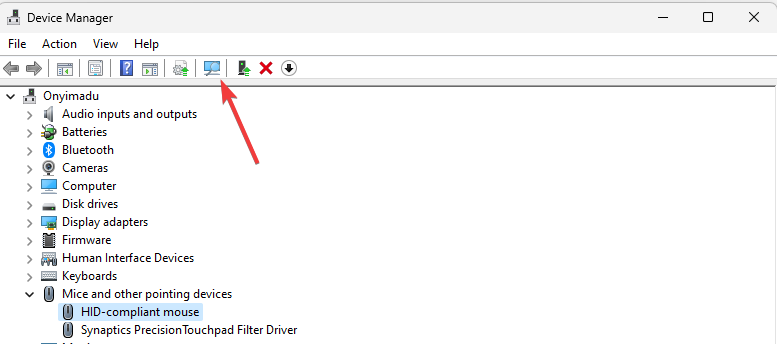
Click on the Scan for hardware changes icon.
Verify it fixes the Windows cannot determine the settings for this device code 34 issue.
2. Update the driver
Right-click on the Start menu and select Device Manager.
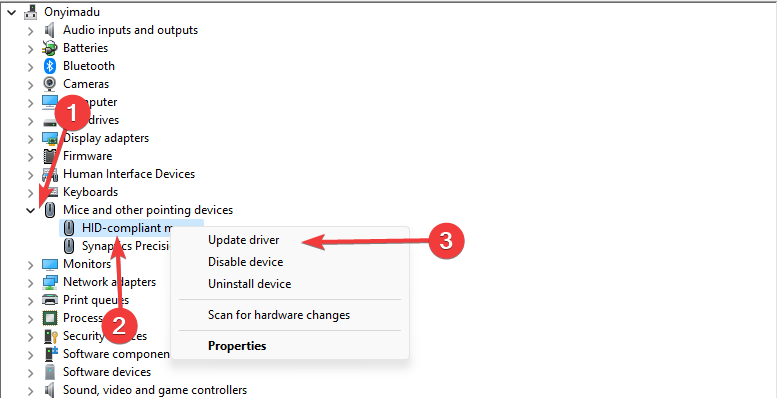
Expand the category related to the device that triggers the issue, right-click on the driver, and select Update driver.
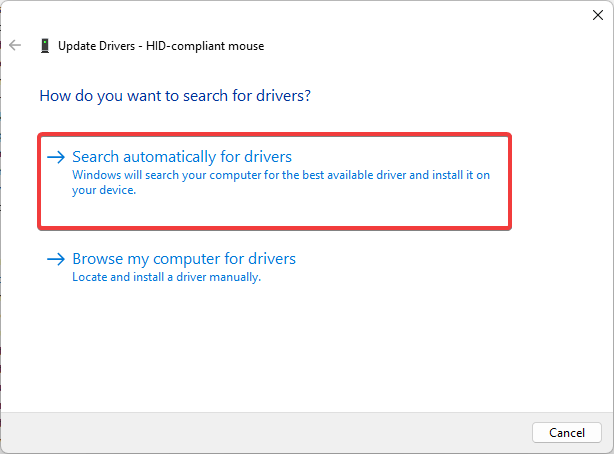
Select Search automatically for updates.
Install any updates, restart the computer, and verify it fixes Windows cannot determine the settings for this device code 34.
If this process seems too complex and time-consuming for you, the alternative method will definitely help you fix the issue.
More exactly, you have automated support to update old drivers on your PC or find missing ones from a database with millions of files.
Outbyte Driver Updater
Resolve any error codes on your Windows device with this mighty software.
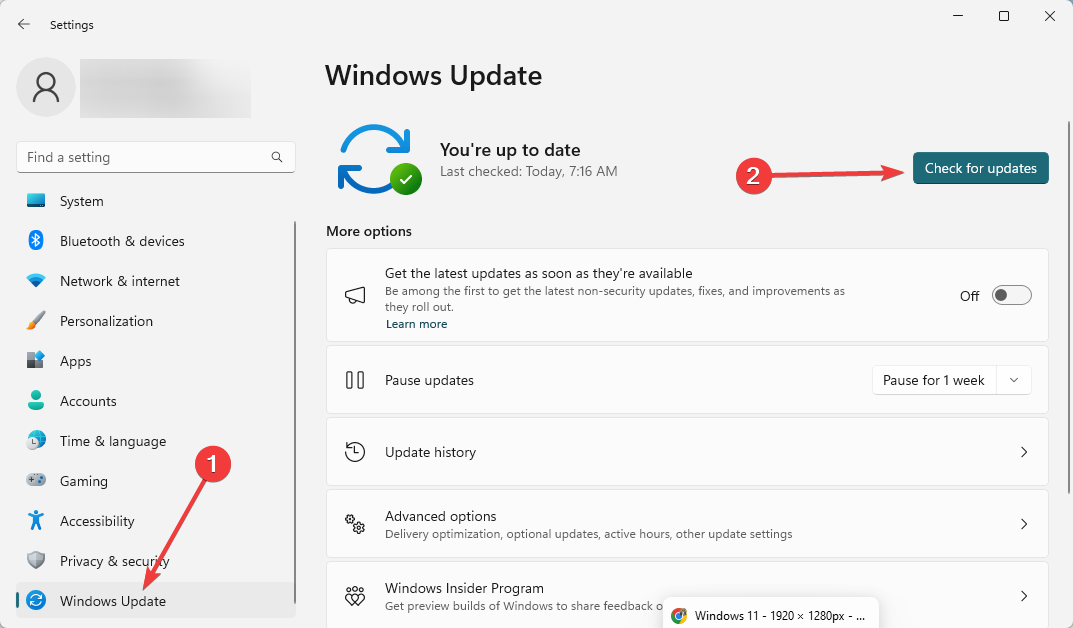
On the right pane, select Windows update, then on the left, click the Check for updates button.
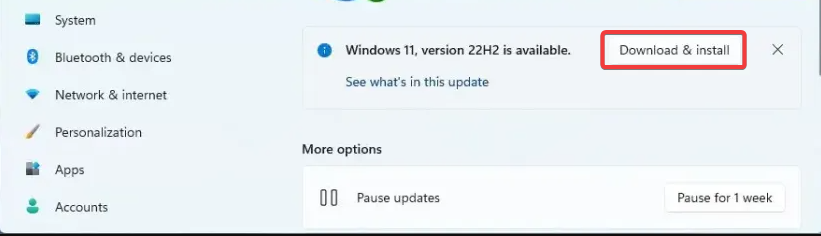
Click the Download & Install button and finally restart your computer if prompted.
A few readers have reported that they have had to fix the problem with a System Restore in rare situations. You may try this as a last resort, but note that this process may delete your most recently added apps and files.
Microsoft is updating many of the default applications found in Windows 11, and Calculator and Clock have already been improved with new looks and features.
While these apps are useful, they aren’t the ones that are used too often, therefore many users might not even notice the improvements.
However, we work frequently with all types of images, and this is why Microsoft decided to improve its default photo viewer software.
And, as noted from May 2023 update, the tech giant has just rolled out dozens of new improvements here and there.
In short, there are 25 original music soundtracks, complete with transitions and animations to choose from while making a slideshow on the Photos app. Redmond officials also re-introduced the timeline scrollbar to group photos by year and month, and you’ll also be able to remove unwanted objects in your photo with the Spot Fix feature.
And, in a recent entry on the Feedback hub, Microsoft has also included support for WebP image format. Now rolling out for insiders in the Dev and Canary channels, users are required to install the WebP Image Extensions from the Microsoft Store for seamless integration.
To get these new features and fixes, update your Photos app to version number 2023.11050.2013.0 or higher. As always, we look forward to hearing your thoughts, so please send in your feedback.
The new Photos app in Windows 11 brings several enhancements, and in today’s guide, we’re going to take a closer look at it, and see what’s new.
How does the Photos app work?
This application was first introduced in Windows 8, and it became the default photo viewing software in the future versions of the operating system.
This Photos app works as an image viewer, but it also allows you to organize them, or perform basic edits quickly. However, for better results, we recommend using specialized photo editing software.
You can open most formats with it, and with its simplicity and ease of use, it’s a perfect software for home users.
Is Photos app better than other image viewers?
The main advantage of this software is that it comes with Windows for free. When it comes to features, the app is intuitive and it does its job well, so it’s perfect for less demanding users.
If you’re a photographer or an advanced user that is working with hundreds of images, there might be better alternatives that you can use.
For more information, we suggesting reading our best photo viewers guide to find the software for your needs.
What’s new about the Photos app in Windows 11?
Visual changes
The first thing you’ll notice when you start the Photos app is its design. The application now has rounded corners, so it fits better into the whole Windows 11 interface.
In addition, Mica material is used for the background, and with improved fonts, you’ll be able to easily find any feature or see the image information.
Improved photo viewing
The biggest change is that photos fill the window completely, unlike in the previous versions that had a bit of space between the image and the edges.
Another improvement is the filmstrip that appears when you click the preview. With this feature, you can jump to any image in your collection with ease.
In the past, you were forced to use the navigation arrows, but that’s not the case anymore. Now you can select multiple pictures if you want, and view them separately, which is a welcome addition.
With the new design, you won’t see the edit menu until you click the image, thus allowing you to focus more on the photo viewing instead of having editing options at your fingertips.
Most of the options are now grouped in the See more menu, so they won’t clutter the viewing space. It’s worth mentioning you can open the photo you’re viewing in one of many third-party photo editors right from this menu.
How can I get the new Photos app?
The new version is slowly rolling out, and it should be available to you shortly. If you’re impatient, you can always check for updates manually by doing the following:
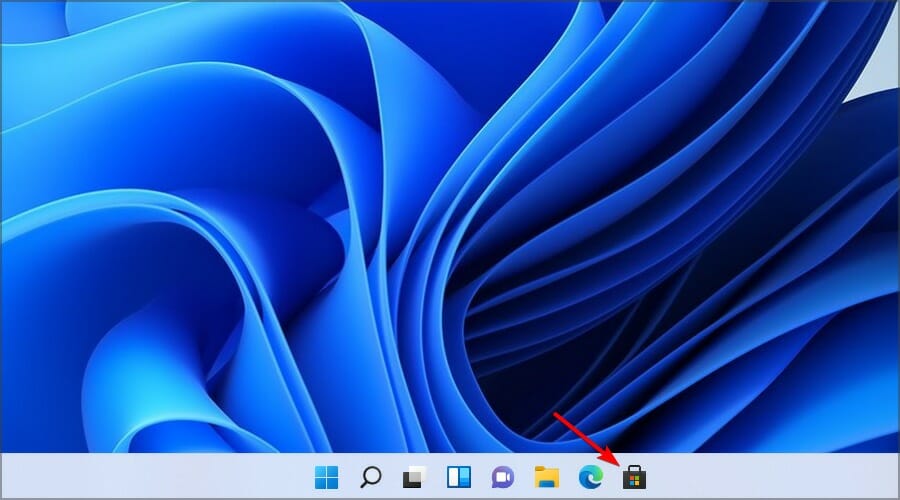
Click the Microsoft Store icon in the Taskbar.
Select the Library in the left pane.
Now click the Get updates button.
Wait for the download to finish.
Does the Photos app support editing?
Just like the previous version, the application fully supports editing, allowing you to crop, resize, or annotate your photos.
In addition, you can add text, or various filters to your images in a matter of seconds right from the app. Video editor is also there, but it offers the most basic features.
The new Photos app brings many welcome changes, the design looks sleek, and features such as filmstrip make viewing more intuitive than before.
While the application can organize images, this option still feels somewhat basic, and advanced users might prefer using specialized photo management software instead.
Have you tried the new Photos app as well? Share your thoughts with us in the comments section below.
Are you experiencing the error message Windows cannot load the device driver for this hardware code 38 when you try to connect an external drive, such as a memory card, USB stick, external hard drive, or SD card, to your computer?
A few of our readers have experienced this, so our guide will explain why you may encounter the error, as well as give you some practical fixes.
Why am I seeing Windows cannot load the device driver for this hardware code 38?
There are a few causes for this error, including the following:
Driver corruption – If you are running on an outdated or corrupt driver, you will likely encounter the error.
Missing drivers – Sometimes, the error is triggered because your computer does not have the driver needed to run a specific hardware unit.
Hard disk unresponsiveness – Users will get the error if their hard disk has been turned off, which accounts for many instances of the problem.
Hardware errors – There could be a problem with the connected hardware unit, which may need to be repaired or replaced.
How do I fix Windows cannot load the device driver for this hardware code 38?
You may start with these workarounds before exploring further fixes.
Check for hardware failure – You may connect the external device to a different computer to ascertain it is not faulty.
Restart the computer – Press Shift while turning off the computer to ensure on the next restart, it comes from a total shutdown.
If the problem remains after the above, you should proceed to the solutions below.
1. Run the Hardware Troubleshooter
Press Windows + R to open the Run dialog.
Type cmd and hit Ctrl + Shift + Enter.
Type in the script below and hit Enter. msdt.exe /id DeviceDiagnostic
Click on Advanced.
Select Apply repairs automatically and hit Next.
Click on the Apply this fix option.
Verify the solution fixes Windows cannot load the device driver for this hardware code 38.
2. Ensure the hard disk is on
Press Windows + R to open the Run dialog.
Type control and hit Enter.
Select Large icons on the View by option, then click on Power Options.
Click Change plan settings.
Select Change advanced power settings.
Type never in the On battery (minutes) text field.
Click Apply and OK to save the changes, then verify it fixes Windows cannot load the device driver for this hardware code 38.
Right-click on the Start menu and select Device Manager.
Expand the category relating to the device that triggered the error. In most cases, this is Sound, video and game controllers. Right-click on your driver and click Update driver.
Select Search automatically for driver.
After the update, verify it fixes Windows cannot load the device driver for this hardware code 38.
4. Perform a clean boot
Press Windows + R to open the Run dialog.
Type msconfig and hit Enter.
Under the General tab, click Selective startup and uncheck Load startup items.
Click the Services tab, tick Hide all Microsoft services, then click the Disable all button.
Click the Startup tab and select Open Task Manager.
Finally, click on each startup app and select Disable.
Now you will have to enable this startup item while restarting the computer one by one to verify which one triggers Windows cannot load the device driver for this hardware code 38.
Once discovered, you may uninstall the app or repair it if possible.
These fixes should suffice to fix code 38. Remember that we recommend starting from the initial pre-solutions as they may save you time and effort of further troubleshooting.
After the workarounds, you may start with any other solution that seems most applicable to your case.
Please reach out to us in the comments section below, and tell us what worked.
Ping is a unit of measure showing how fast a device can communicate with an online server. So, the ping rate shows the time it takes for data to travel from a device to a server and back.
The higher the ping, the slower the communication with an online server.
As you can imagine, high ping hinders many online activities, such as streaming and online gaming, which require rapid interactions with the game environment and other players.
Fortunately, there are ways to improve your connection, and one of them is to use a wired connection (Ethernet).
Unlike a wireless network, Ethernet ensures a steady connection between your PC and modem or router which results in mitigating a bad ping.
To find out how to lower ping with Ethernet in detail, keep reading.
What is Ethernet?
Ethernet is the technology of setting up a local or wide area network using a physical cable (the Ethernet cable).
Devices connected to wired networks can communicate with each other via specific protocols defined by Ethernet technology.
Contrary to wireless network protocols, such as WiFi, that communicate via transmitting wireless signals, Ethernet protocols rely on physical, wired connections for transferring data.
Connecting your device to the internet using an Ethernet cable has several benefits over WiFi connections:
Great transfer quality
Faster speed
More stable connection
Increased security
Less noise
Lower ping
Such benefits have made Ethernet more favorable for online gamers and streamers who require faster, more reliable connections with lower latencies.
How to set up Ethernet for lower Ping
Connecting to the internet via an Ethernet cable means the data can be transmitted from your device to the server and back to your device directly without encryption and noise.
This allows for a lower ping and a more stable connection.
Find the yellow Ethernet port on your router or modem and connect one end of the cable to it.
Connect the other end of your Ethernet cable to your device via a LAN port. Most LAN ports feature a light. If your laptop’s port has an Ethernet light, make sure it is on.
Your device will automatically detect and connect to the Ethernet connection. After that, you can test your connection by opening web pages.
Sometimes, however, this process doesn’t happen successfully, and you must set up your Ethernet manually.
If that’s the case, follow these steps:
Setup Ethernet manually
Right-click on the Start menu and open Settings.
Click on Network and Internet on the left menu, then select the Dial-up option.
Select Setup a New Connection.
Choose Connect to Internet option and click Next.
Click on Broadband (PPPoE).
Enter the username and password your ISP has given you and click on Connect.
If the connection is successful, you can see it listed under Network in Network and Sharing Center.
Your network icon on the taskbar will also indicate a wired connection.
If not and you still have issues with your Ethernet not connecting, thus not lowering ping, you probably have to configure your Ethernet IP address manually.
Here’s how:
Configure Ethernet IP address
Here is how:
Click on the Start menu, type Control Panel, and press Enter.
Go to Network and Internet, and click on Network and Sharing Center.
After that, select Change Adaptor Settings from the left menu.
Right-click on your network connection and select Properties.
In the Networking tab, select Internet Protocol Version 4 (TCP/IPv4) and click on Properties.
In the General tab, enable the Use the Following IP Address option. Enter your IP address and subnet mask (provided by your ISP) and click OK.
Then, click OK in the Properties section.
If you still have trouble setting up your Ethernet and lowering your ping, you can try specific network commands to reset the TCP/IP stack, refresh the IP address, and reset the DNS cache.
Just follow these steps:
Type CMD in the Start menu and open Command Prompt as Administrator by clicking on Run as Administrator.
Type the following commands one by one and press Enter after each:
netsh winsock reset
netsh int ip reset
ipconfig /release
ipconfig /renew
ipconfig /flushdns
Other ways of improving Ping
Sometimes, even an Ethernet connection can’t provide you with your desired latency.
You can say so by the lags that are turning your online gaming experience into a frustrating nightmare.
In that case, we have several tips for you that can improve your connection quality and lower your ping.
1. Check your Ethernet cable
If you’d like to lower your ping with Ethernet, please make sure you use an intact cable.
A physically damaged cable can reduce your connection quality and, therefore, increase your latency.
Also, the shorter the cable, the faster the data can travel between your router or modem and your device.
In a small space such as a single room, the differences the cable length makes in connection quality are negligible.
However, in larger spaces, when very long cables are needed, you might experience a higher ping.
2. Restart your router or modem
Restarting your modem or router means disconnecting it from its power source until all of its electricity is drained.
This process allows your router or modem to refresh its connection with your ISP and fix various issues, such as slow connection.
To restart your device, simply unplug it and wait for at least 15 seconds. Now, plug your device back in and turn it on.
If your device uses batteries, don’t forget to take them out when power cycling.
4. Update your router or modem
Updating your modem or router’s system software can make it function more efficiently and give you lowered ping on your Ethernet connection.
To update your router or modem, follow these steps:
Open your browser on a device connected to the modem and type your modem’s IP in the search bar. It’s usually 192.168.1.1.
Sign in to your modem. Your default username and password is admin.
Search for the Update section. Different routers and modems have different UIs, but you’ll be able to find the Update section with a little bit of search. In our Huawei modem, it’s under the Advanced tab.
Select search for an update. Your device will search online for the latest system software update. You can install the update afterward.
Note: Your modem or router will not be available during the update.
3. Disconnect unnecessary devices
It’s better to keep the bandwidth all to yourself when playing online games. Disconnect your cell phone and any other devices from the internet.
4. Close background apps
You might not notice it, but many background apps usually run simultaneously on your device.
Not only they lower loading speed but also feed on your internet connection, resulting in an increased ping. Closing all these apps will in turn lower the ping rates.
Also, if you have any downloads pending in the background, pause them temporarily.
5. Optimize your game’s frame rate
Although higher frame rates make your gaming experience smoother, a lower frame rate occupies less bandwidth and gives you a better ping.
Head to the in-game settings and adjust the graphics options until you obtain the desired frame rate.
6. Connect to a suitable server
Some online games give you the option to choose the server you want to connect to.
Select the server closest to where you live. A shorter physical distance between your location and the game servers results in better ping.
7. Use a high-speed VPN
Contrary to conventional belief, using a VPN can improve ping. Even though the connection isn’t as direct, you may end up connecting to a better server than what your ISP provides.
Moreover, it gives you the possibility to manually pick servers located closer to your game’s servers.
With this in mind, here’s how to use one to lower ping:
Now check your ping. As you can see, we got much lower rates after connecting to VPN.
If you have selected the closest location, but the quality of the internet isn’t good, try another server.
Additionally, ExpressVPN is available on all platforms and operating systems, from Windows and macOS to Android and iOS.
It’s a fast and secure VPN featuring a variety of high-speed servers across 94 countries.
So you can easily find and connect to servers closest to your location (connecting to servers far away from your location can negatively affect your connection quality).
You can try ExpressVPN for 30 days and get a full refund afterward in case you are not satisfied.
ExpressVPN
Get this VPN service to improve your ping and enjoy a seamless gaming or streaming experience.
If you are using a high-speed VPN and still having connection issues, don’t forget to check out our practical tips on how to fix high ping with VPN.
Bottom line
As you know, high ping is a blight on online gaming and streaming. Such activities require low latency and a stable connection.
In order to fix it you can set up an Ethernet connection.
In most cases, just connecting to the internet with an Ethernet cable will lower ping, but there are also other tricks and tweaks to optimize the connection.
For instance, disconnecting unnecessary devices, connecting to more suitable servers, and restarting your modem are among other ways of lowering latency.
Using a high-speed VPN like ExpressVPN is also a reliable way to fix high ping.
Many have encountered Windows failed to install the following update with error 0x80240009, and this issue can leave your system vulnerable and out of date, so it’s important to fix it. Keep on reading to learn how to do that.
What is error 0x80240009?
The error appears if there’s an issue with the update cache, file system corruption, or issues with your antivirus.
How can I fix the Windows update error 0x80240009?
1. Clear Windows update cache
Press the Windows key + R, type cmd, and select Run as administrator under Command Prompt.
Now, type the following commands and press Enter after each: Net stop bitsNet stop wuauservNet stop appidsvcNet stop cryptsvcDel %ALLUSERSPROFILE%\Microsoft\Network\Downloader\qmgr*.dat /QDel "%HOMEDRIVE%\Users\All Users\Microsoft\Network\Downloader\qmgr*.dat" /QDel %WINDIR%\SoftwareDistribution\*.* /s /QNet start bitsNet start wuauservNet start appidsvcNet start cryptsvc
Finally, wait for the command to finish running and try the update again.
Oftentimes, the update error 0x80240009 is caused by a corrupt update cache. You can fix this by clearing the faulty files and allowing your PC to build another.
2. Repair system files
Press the Windows key, type cmd, and select Run as administrator under Command Prompt.
Type the command below and hit Enter: sfc /scannow
Finally, wait for the command to finish running and restart your PC.
This issue might sometimes be due to problems with your system files. Restoring these files should do the trick in this case.
To make things easier and faster, we recommend using a dedicated repair tool. This practical software will restore any broken, missing, or faulty system files with just a few clicks of the mouse.
3. Disable antivirus
Press the Windows key + S, type virus, and click Virus & threat protection.
Click the Manage settings link.
Finally, toggle the switch for Real-time protection backward to disable it.
You can get the installer encountered an error 0x80240009 due to third-party antivirus software, such as McAfee, so be sure to remove McAfee from your Windows 11 PC completely. For best results, use the McAfee Removal Tool.
Press the Windows key + I and select Troubleshoot in the right pane.
Click Other troubleshooters on the next page.
Finally, click the Run button before the Windows Update option.
Sometimes, you can get the 0x80240009 error message because of minor glitches with the update process. The solution is to run the Windows Update troubleshooter, which will help you restart the needed processes.
5. Delete the update download path
Press the Windows key + R, type regedit, and click OK.
Now, navigate to the path below in the left pane: HKEY_LOCAL_MACHINE\SOFTWARE\Policies\Microsoft\Windows\WindowsUpdate
Next, locate the WUServer and WIStatusServer options in the right pane. If these two options are unavailable, this solution won’t work for you.
Finally, right-click each of them and select the Delete option.
At times, you might be able to get rid of the Windows failed to install the following update with error 0x80240009 message by clearing the update download path. This should clear up any potential glitch that can cause the issue.
We have reached the end of this detailed guide on fixing the Windows update error 0x80240009. With the information in this article, you should now be able to solve the problem for good.
The location of Office applications like Outlook.exe is generally the same for all computers. But if you’re having trouble locating it, just check out our quick tips below.
Where is Outlook.exe stored on Windows 10?
1. Check via File Explorer
Press the Windows key + E to open File Explorer.
Follow the path below to get to your Microsoft Office folder: C:\Program Files\Microsoft Office\root\Office16
Note that the Office16 in the path above will vary depending on your Microsoft Office version.
Finally, scroll down to locate the Outlook option.
The first method to reach the Outlook.exe file location is to use File Explorer. While this method might seem lengthy, it is easy to follow.
Note that in the final location, you might find just Outlook. It is the same as that is the executable application. Also, you can find other Microsoft Office executable files in this location.
Now, click Open this file location in the right pane.
This should open a File Explorer window showing the Outlook executable file.
Another method to get to the Outlook.exe file location on Windows 10 is to search for it on the Start Menu. This method is quick and eliminates the need to follow multiple paths.
3. Using Command Prompt
Press the Windows key + S, type cmd, and click Run as administrator under Command Prompt.
Type the following commands and hit Enter after each: cd /dir OUTLOOK.EXE /s /p
Finally, wait for the command to finish running, and you will be shown the path of the Outlook.exe file.
If you are unsure of the path you installed Microsoft Office on your PC, you can find the Outlook.exe file location using Command Prompt. This will show you the path, and you can navigate to it on File Explorer.
Where can I find Outlook.exe on Windows 11?
Press the Windows key + E and follow the path below: C:\Program Files (x86)\Microsoft Office\root\Office16
Note that Office16 in the path above is your Microsoft Office version.
Finally, scroll down to locate Outlook on the list of options.
The methods of getting to Outlookk.exe on Windows 10 and 11 are the same. One major difference is in the path above, which is pretty different from the path for Windows 10.
Solutions 2 and 3 in the Windows 10 section can be easily applied to Windows 11 as they are.
With this, we can conclude this detailed guide on reaching the Outlook.exe location. We have shown different methods to achieve this task, and you can trust every one of them to work effectively.
GarageBand is a macOS exclusive and it’s not available on Windows, but that doesn’t mean that you can’t run GarageBand on Windows, with a bit of tinkering.
Select VMware Virtual SATA Hard Drive Media and choose Erase.
Set a new name for your drive, Format to APFS, and Scheme to GUID Partition Map. Click on Erase again.
Exit Disk Utility and select Install macOS Monterey.
Select the desired drive and click on Continue.
Follow the instructions on the screen to complete the setup.
Once the macOS is installed, you’ll be able to access GarageBand from the virtual machine.
Is GarageBand for PC safe?
Garage Band app for Windows doesn’t exist, so downloading it from third-party websites isn’t safe since they are fake and potentially malware-infested.
What is PC equivalent of GarageBand?
If you need a GarageBand alternative for Windows you can use one of many available music production software. For users who prefer a native Windows setup without using a virtual machine, exploring a GarageBand alternative for PC is a safer and faster way to start producing music directly on your computer.
In today’s highly competitive job market, having a strong online presence is crucial for professionals looking to make their mark. LinkedIn, the world’s largest professional networking platform, has emerged as a powerhouse for connecting job seekers with potential employers. However, merely having a LinkedIn profile is not enough; it’s essential to optimize it strategically to catch the attention of recruiters and stand out from the crowd. Now, when recruiters are only looking for the best fit for their organization, it’s important to optimize and grow your LinkedIn profile so that employers and recruiters can find you.
In this guide, we will explore the art of optimizing your LinkedIn profile and growing it to maximize its potential and increase your chances of getting noticed by recruiters. We’ll dive into the key elements that can make or break your profile’s effectiveness and provide you with practical tips and techniques to enhance your professional brand.
How to Optimize Your LinkedIn Profile
Optimizing your profile is important for ensuring that you are discovered by potential employers on LinkedIn. You don’t want to be overlooked because of a weak profile.
Here are some tips to optimize your LinkedIn profile.
1. Add Skills and Endorsements
Just entering the basic details isn’t enough to make your profile stand out. You should also add a list of skills and get endorsements from others for those skills as well.
To add/edit Skills on LinkedIn, here are the steps to follow:
Under your profile page, click the Add profile section.
Select the Add skills option.
List all relevant professional skills you have. Also, select in which organization you put that skill to use.
2. Write an Engaging Summary
Your summary is where you can really add some personality and create excitement about your profile. Write a few sentences summarizing your experiences, skills, and goals.
Follow these steps to write the Summary:
Under your profile page, click the Add profile section.
Select Add about from the menu that appears.
Now write a few sentences summarizing your experiences, skills, and goals.
Include one or two keywords related to your industry so employers can easily find you in searches.
Click Save at the bottom right.
3. Add a Custom URL
Finally, add a custom URL to your profile. This will make it easier for employers to search and find your profile when you apply for jobs.
Follow these steps to add/edit a Custom URL:
Under your profile page, click the Edit public profile & URL option on the top right.
Now, click the Edit icon next to your public profile URL.
Then enter a unique URL that includes either your first and last name or some combination of those two.
Lastly, click Save at the bottom right.
4. Showcase Projects, Publications, and Other Achievements
If you have any projects, publications, or any other achievements that demonstrate your talents, showcase them on LinkedIn. This can include anything from writing samples to case studies and more. It’s a great way to let employers know what you are capable of doing.
To add/edit Projects and Publications, follow these steps:
Under your profile page, click the Add profile section.
Expand the Additional section.
Select the Projects or Publications option from the menu that appears.
Now, list all of your relevant projects and publications.
How to Grow Your LinkedIn Profile
Once you have created a compelling profile and optimized it, it’s now time to start growing your presence on LinkedIn. Here are the things you need to do.
1. Connect With Colleagues, Peers, and Industry Professionals
One of the fundamental steps to grow your LinkedIn profile is to connect with colleagues, peers, and industry professionals. Building a robust network of connections opens doors to new opportunities, expands your professional reach, and increases your visibility within your industry.
When sending connection requests, take the time to personalize them by mentioning how you know the person or why you would like to connect. This personalized approach demonstrates genuine interest and can significantly increase the chances of your request being accepted.
2. Engage With LinkedIn Groups and Communities
LinkedIn groups and communities provide a valuable platform to engage with like-minded professionals and establish yourself as a thought leader in your industry. Join relevant groups that align with your interests, expertise, or career goals.
Actively participate in group discussions by sharing your insights, perspectives, and experiences. By contributing valuable content, asking thoughtful questions, and providing meaningful input, you can build relationships with other professionals and gain visibility among your target audience.
3. Follow Groups of Your Interests
In addition to actively participating in LinkedIn groups, it’s beneficial to follow groups aligned with your interests. Following groups allows you to stay updated on the latest trends, news, and developments in your industry.
By regularly consuming industry-specific content shared within these groups, you can enhance your knowledge and stay informed about the topics that matter to you. This knowledge can be leveraged to contribute to discussions, share valuable insights, and position yourself as a knowledgeable professional within your network.
4. Requesting Recommendations From Former Colleagues or Clients
One of the most effective ways to enhance your LinkedIn profile is by requesting recommendations from former colleagues or clients. Recommendations serve as testimonials to your skills, expertise, and work ethic, providing potential employers or clients with valuable insights into your professional abilities.
When reaching out to request recommendations, be specific about the aspects of your work, you would like them to highlight. This helps ensure that the recommendations align with your goals and provide a well-rounded perspective of your capabilities.
5. Provide Genuine Endorsements to Others in Your Network
Endorsing others in your network is an excellent way to build relationships, establish goodwill, and showcase your appreciation for their skills and expertise. When endorsing someone, make sure it is genuine and based on your personal experience or knowledge of their work.
Be specific about the skills you are endorsing and provide meaningful feedback to highlight their strengths. By providing genuine endorsements, you not only contribute to the professional growth of others but also enhance your own reputation as a supportive and engaged member of the LinkedIn community.
6. Share Relevant Content
Sharing relevant content on LinkedIn is a powerful strategy to demonstrate your industry knowledge, establish yourself as a thought leader, and engage your network. Consider sharing articles, blog posts, industry news, or thought-provoking insights that align with your expertise or interests.
Adding your unique perspective or initiating discussions around the content you share can help spark meaningful conversations and attract engagement from your connections. By consistently sharing valuable and relevant content, you position yourself as a valuable resource within your network and enhance your professional visibility on the platform.
Keep Your Linkedin Profile Updated
When Optimizing your LinkedIn profile, don’t forget to keep it updated with any relevant career changes or achievements. As your professional journey evolves, make sure to update your profile accordingly. Highlighting awards and recognitions, projects you’ve worked on, or new certifications can help demonstrate the progress you have made over time and impress potential employers or clients.
Here are some tips to keep your profile updated on LinkedIn.
1. Regularly Update Your Profile With New Experiences and Achievements
One of the most important aspects of keeping your LinkedIn profile up to date is regularly updating it with new experiences and achievements. As you progress in your career, make sure to add any new job positions, promotions, or significant projects you have undertaken. Include details about your responsibilities, accomplishments, and the skills you developed or utilized in each role.
Additionally, if you have obtained new certifications, completed relevant courses, or attended professional development programs, be sure to showcase them on your profile. By consistently updating your profile with recent experiences and achievements, you present an accurate and comprehensive snapshot of your professional journey.
2. Regularly Engage With Your Connections
LinkedIn is a powerful networking platform, and it’s important to engage regularly with your connections. This involves actively participating in discussions, reacting to and commenting on their posts, and congratulating them on their professional milestones.
Engaging with your connections not only strengthens your existing relationships but also helps you expand your network by connecting with their connections. By staying active and showing genuine interest in the activities and achievements of your connections, you foster a sense of community and establish yourself as a reliable and supportive professional within your network.
3. Stay Active by Writing Posts and Articles
Another effective way to keep your LinkedIn profile updated and engage with your network is by regularly sharing your insights, expertise, and experiences through posts and articles. Writing thoughtful and relevant content allows you to showcase your industry knowledge and thought leadership. Share industry trends, best practices, or tips that can benefit your connections.
Additionally, if you have recently accomplished something noteworthy or have a unique perspective on a relevant topic, consider writing an article to share your expertise. By consistently sharing valuable content, you demonstrate your commitment to staying informed and contribute to meaningful discussions within your professional community.
Wrapping Up
By following the above-mentioned tips, you can ensure that your LinkedIn profile is up to date and that you are making the most of this powerful platform. A well-maintained and engaging profile will help you attract the attention of recruiters, showcase your professional journey, and expand your network. Leverage the power of LinkedIn to stay connected with industry professionals and opportunities that can advance your career.
FAQs
What does an optimized LinkedIn profile look like?
An optimized LinkedIn profile includes a professional photo, a detailed description of your work experience, strong keywords to make it easier for recruiters to find you, and regular content updates.
How often should I update my LinkedIn profile?
It is recommended that you update your LinkedIn profile whenever there are changes in your professional life. This could be anything from a new job role to certifications or new skills.
What are the benefits of updating my LinkedIn profile?
Updating your LinkedIn profile regularly keeps it accurate and helps you stay connected with industry professionals and potential opportunities. It also gives recruiters a better understanding of your career progression and allows you to showcase your knowledge, skills, and experience.
Jp2launcher.exe is a legit & safe executable file related to Java Web Start, a technology developed by Sun Microsystems. In this guide, we will explore its use and functionalities.
What is jp2launcher.exe?
Jp2launcher.exe is the launcher for Java Web Start, which handles the deployment & execution of Java applications and facilitates downloading & caching application resources.
It also manages the automatic updates of Java applications, ensuring that you have the latest version of the apps available.
The file is usually stored in either of these paths on your computer, depending on your operating system: C:\Program Files\Java\jre-1.8\binC:\Program Files (x86)\Java\jre-1.8\bin\
If it is found anywhere else than these paths, run a deep scan using an antivirus tool to remove the file.
What can I use jp2launcher.exe for?
1. Running Java applications
This file allows you to run Java-based applications directly from the internet without complex installation procedures. It acts as a bridge between the web server and the application, which makes it easy to execute.
2. Running RIAs
It lets you execute rich internet applications (RIAs), the interactive web apps that provide a desktop-like experience with advanced features and functionalities.
For example: If you visit a website that offers a data visualization tool powered by Java and click on the Launch button, then jp2launcher.exe is invoked. It enables the seamless execution of the data visualization app on your machine.
3. Handles automatic updates
This .exe file checks for updates periodically to ensure you have the latest version of your app. This is helpful as it applies bug fixes and security patches and introduces new features without manual intervention.
4. Cache and offline access
Jp2launcher.exe caches the necessary resources of Java Web Start applications on your machine. It allows you to access and run the applications even when offline or with limited internet connectivity.
It provides a secure environment for running Java Web Start apps and enforces various security measures to protect your device from threats and malicious code.
6. Launches web-based games
When you come across an online game that requires Java to run, clicking on the game’s link may trigger jp2launcher.exe to launch it, allowing you to play it within your browser.
7. Access financial applications
It enables you to access financial apps securely, providing functionalities, including fund transfers, stock trading or balance checking.
8. Educational resources
It allows you to access interactive lessons, quizzes, or other educational material provided by educational institutions or online learning platforms.
So, jp2launcher.exe is crucial in providing a seamless and secure environment for running Java applications across different platforms. If you have questions or suggestions, feel free to mention them in the comments section below.
Xbox has emerged as a popular gaming platform and is the first choice of many. It offers a wide array of games, along with a built-in Xbox Chat. But for many users, the Xbox chat is not working, or they receive the error code 0x87DD0013 while launching a game.
The problem affects almost all consoles as well as the Xbox Windows app. While Microsoft has a dedicated page for the error, it doesn’t list many solutions, which makes troubleshooting a tad more complicated. So, let’s find out all about it!
What is error code 0x87DD0013 on Xbox?
The 0x87DD0013 error is linked to network issues and affects both the in-game Xbox chat and triggers issues while joining a game. It highlights the inability to reach Xbox servers.
Here are a few reasons users get the error:
Misconfigured network settings: When you get such an error, it’s generally the network settings to blame, and this should be the primary aspect you check for. Check if Xbox can’t connect to the Internet.
Another app blocking access: For some users, a third-party antivirus, security software, or network configuration tool triggered the error.
Issues with the Xbox server: In a few instances, the error could also be traced back to issues with the server, especially during downtime.
The account is banned: Many also found that the 0x87DD0013 Xbox chat error appeared after they were banned for violation or were reported by another user.
How do I fix error 0x87DD0013?
Before we move to the slightly complex solutions, here are a few quick ones:
Restart the console or the PC. For the former, hold the Xbox button on the controller for 10 seconds until the console turns off. Then unplug the cable, wait for a while, reconnect it, and power on the Xbox.
Restart the router. Make sure to remove the power cable as well for 30 seconds while it’s turned off.
Check the Xbox status page to verify whether there’s a downtime, or you could use a service like Downdetector for real-time data.
Now, check for any Active suspensions or look up the Enforcement history to identify one.
When Xbox penalizes users for behavior that violates the laid-out guidelines, it’s part of the enforcement history. In such cases, you can’t open Xbox games or use the chat feature, and the 0x87DD0013 error appears instead.
2. Uninstall conflicting apps
Press Windows + R to open Run, type appwiz.cpl in the text field, and hit Enter.
Now, select any security software or antivirus installed on the PC, and click Uninstall.
Follow the on-screen instructions to complete the process.
Restart the computer and check if you can now access Xbox chat.
In many cases, it was an antivirus that triggered the 0x87DD0013 Xbox chat error. For one user, switching from ESET HOME Security Essential to Avast did the trick. Besides, you may disable the antivirus first to verify if it is indeed triggering the error.
3. Change the DNS server
Press Windows + R to open Run, type ncpa.cpl, and click OK.
Right-click on the active network adapter, and choose Properties.
Select Internet Protocol Version 4 (TCP/IPv4), and click on Properties.
Choose Use the following DNS server addresses, enter this in the provided fields, and click OK:
Preferred DNS server: 8.8.8.8
Alternate DNS server: 8.8.4.4
Once done, restart the computer.
If it’s a network issue that’s triggering 0x87DD0013 in Windows, sometimes, changing the DNS server to a public one does the trick. In this case, we used Google’s DNS server, but you can try other options as well.
Press Windows + I to open Settings, go to Apps from the navigation pane, and click on Installed apps.
Locate the Xbox app, click on the ellipsis next to it, and select Advanced options.
Click on Repair.
Check whether the error is fixed.
If not, click on Reset in the app settings.
Again, click on Reset to confirm.
If nothing else fixed the 0x87DD0013 Xbox error, resetting the app would do the trick. Once done, sign in to Xbox again, and you should be able to join chats and games seamlessly.
As earlier reported, Microsoft’s annual partner event, Inspire 2023 is set to take place on July 18-19, 2023. And as we edge closer to these dates, the company has announced that registration for the event is now open.
You can head over to the Microsoft Inspire 2023 website to register, and just like last year, the event will be held virtually thus opening it up to partners across the world.
According to the company:
The event represents how Microsoft continues to invest in partner capabilities and growth through an evolved partner program, bringing them along in the transformation journey with innovation, new programs, pricing, products, incentives and a commerce experiences that builds success.
You can also expect to here from a lot of speakers during Microsoft Inspire 2023 including “Microsoft CEO Satya Nadella, Judson Althoff, Nick Parker and Nicole Dezen; together with success partner stories and the opportunity to celebrate 2023 Partner of the Year Awards winners.”
In related news, Microsoft’s Build 2023 developer conference will kick off next week and run through May 23-24 in Seattle. While there’s little to go about what will be discussed during this event, the company is likely to touch on its efforts pertaining to generative AI, much like the recently released Work Trend Index report.
If you have been using Outlook for a long time, you may have already encountered this error. Error 0x80040600 happens when you can’t receive emails in your Outlook mail. Additionally, accessing any other folders also becomes impossible.
If you have this issue, don’t worry; we have a solution for this error. In this article, we will tell you how to fix this Outlook error so that you can use your email account without any further problems.
Why is Outlook not updating error 0x80040600?
This error code belongs to the family of Outlook errors, meaning it is not specific to any particular version. The Outlook error 0x80040600 occurs when you try to access your email account through the application.
You can send emails, but you cannot receive any; even after refreshing, no new messages will be displayed. This implies that there is a problem with the Exchange server that your Outlook client is trying to connect to.
However, that is not the only reason, and below are some possible causes of why this happens:
Poor internet connection – If your internet connection has gone down temporarily or permanently, Outlook will not be able to connect to the server and, therefore, won’t receive any new messages until it’s back up and running again.
Corrupt PST file– PST is a database file used by Microsoft Outlook to store emails, contacts, and other important information. It is easy to get corrupted by viruses or even incorrect configurations.
PST file is up to capacity – If you have a large amount of data in the PST file, Outlook will not be able to open it unless you resize it.
The server is down – If the email server is down, none of its users will be able to send or receive emails until it comes back online.
Virus infection – Operating a system without a good antivirus can lead to problems as these viruses alter settings that change how things work on your PC.
How to resolve 0x80040600?
The following solutions have worked for most users to fix the error 0x80040600, but before you try them, ensure you check off these basic prerequisites:
Navigate to the following path depending on where your Outlook files are located: C:\Program Files\Microsoft Office\Office14C:\Program Files\Microsoft Office(x86)\Office14
Double-click on the SCANPST key to launch the SCANPST.EXE utility.
On the Microsoft Outlook Inbox Repair utility page, click Browse, and choose the PST file.
Click Start to scan the file for errors; if there are errors, click Repairand wait for the Repair to complete.
While the free Outlook PST repair tool from Microsoft works well, sometimes it may not yield expected results or just not responding.
That’s why you need help from a third-party tool such as Stellar Repair for Outlook. It has advanced features that makes it the best choice for repairing corrupted or damaged PST files.
Hit the Windows key, type Control Panel in the search bar, and click Open.
Type Mail in the search bar and click to open.
Next, click on Show Profiles under Profiles in the Mail setup window that pops up.
A list of Outlook profiles registered on your PC will appear. Find the one that was shaving problems, click on it, then select Remove.
A confirmation dialog box will appear, so click Yes to confirm.
Restart your PC, configure your email, and try again.
Aside from errors, another cool thing you can do with the email client is make Outlook pop out replies for you. This makes messaging so much easier and faster.
Let us know which solution helped you fix this issue or any other we may have missed.
If you encountered the 0x80090017 Windows Update error while updating Windows, this guide could help! We will cover all the methods to get rid of this error right after discussing the causes.
What causes the 0x80090017 Windows Update error?
There could be various reasons for this update error; some of the common ones are mentioned here:
Corrupted Cryptographic service provider – If the Cryptographic Service Provider on your PC becomes corrupted or damaged, it can lead to this update issue.
Third-Party Software Interference – Some third-party security software may conflict with cryptographic operations performed during Windows Updates, leading to the problem.
Outdated cryptographic algorithms – When the cryptographic algorithms used by the Cryptographic Service Provider are obsolete or incompatible with Windows, you may see the error.
Misconfigured group policies – Group Policy settings, if misconfigured or altered incorrectly, can impact the Cryptographic Service Provider functionality, leading to these problems.
So, these are the causes for the error; let us check out the solutions for the problem.
How can I fix the 0x80090017 Windows Update error?
Before engaging in advanced troubleshooting steps, you should consider performing the following checks:
Check your internet connection or talk to your ISP.
Restart your computer & router.
Try disabling the third-party antivirus tool temporarily.
If these minor fixes didn’t work for you, move to the methods mentioned below.
1. Run the Windows Update troubleshooter
Press Windows + I to open the Settings app.
Go to System, then select Troubleshoot.
Click Other troubleshooters.
Locate Windows Update and click Run.
Follow the onscreen instructions if prompted.
2. Restart the Windows Update Service
Press Windows + R to open the Run dialog box.
Type services.msc and click OK to open the Services app.
Locate and right-click Windows Update service and click Stop.
Now wait for it to stop; once done, right-click it again and select Start.
Let the service start, then close the Services app.
If you are not able to update Windows via the Settings app, then we advise you to read this guide to update Windows 10 offline.
3. Reset the Windows Update components
Press the Windows key, type cmd and click Run as administrator.
Copy & paste the following commands to stop Windows Update, BITS & Cryptographic services, one by one and hit Enter after every command:
net stop bits
net stop wuauserv
net stop appidsvc
net stop cryptsvc
To delete the qmgr*.dat files, type the following command and press Enter:Del "%ALLUSERSPROFILE%\Application Data\Microsoft\Network\Downloader\qmgr*.dat"
Copy & paste the following commands one by one to clear the Windows Update cache to allow Windows to re-download the updates, and hit Enter after every command:
To reset the BITS and Windows Update service to the default security descriptor, type the following commands one by one and press Enter after every command:
Copy & paste the following command and hit Enter:cd /d %windir%\system32
To re-register the BITS files & the Windows Update-related DLL files, type the following commands one after the other and press Enter after every command:
Press Windows key, type control panel and click Open.
Select Large icons for View by and click Recovery.
Click Open System Restore.
On the System Restore window, select Choose a different restore point and click Next.
Select the restore point and click Next.
Click Finish to complete the process.
Now Windows will restart and restore the machine to the selected version. If the System Restore is not working for you, then we suggest you check our informative guide on it to know the solutions.
So these are the solutions that you can use to fix the 0x80090017 Windows Update error. If you have questions or suggestions, feel free to mention them in the comments section below.
Microsoft Search is building a name for itself already. The tool allows you to find relevant information about people, resources, and data across your working organization.
In a recent post, Microsoft announced the Semantic Index for Copilot, and it seems Microsoft Search will also benefit from it. What does that mean?
It means every time you use the tool to find something, the results that you find will be far more personalized and relevant to you.
The good news is that you can use it from anywhere. The tool is native to Microsoft 365. Virtually, you can search for information in Microsoft Teams, or Outlook. You can even use it in Bing or other desktop and phone browsers.
How to find relevant information with Copilot and Microsoft Search
First of all, it is a tool that you can use a lot of platforms and it will remember the searches you’ve made.
Go to Microsoft Bing for Business and search for something within your working organization
Open up your Edge and type the exact word
You can now see Microsoft Search’s personal recommendations
You can also use search suing the Search tab in your Start menu.
Click on the Start button
Go to the Search task bar and type in what you’re looking for
Microsoft Search will then show you the results from your working organization as well
As you can see, it is looking at your search choices and then comes back to you with personalized results.
But that’s not all.
For example, if you have any questions that you want to ask, especially in your organization, you can just type in your questions and the tool will show you all the relevant answers.
Microsoft Search also allows you to find all the available resources of your company. As you can see below, it will show you files, sites, images, videos and so on.
It also gives you a search experience based on your work and your activity. For example, when you search for a co-worker info, it will get you all the details about your co-worker, including messages.
Microsoft is using Copilot on this tool, to specifically emulate and give personalized and humanized answers. You type in exact words, and Copilot will take those words and use them to give you complex results.
With that being said, Microsoft is taking it to the next level, and all these technologies are very exciting, especially when talking about the working organizations.
What do you think about Microsoft Search? Will you use this tool? Let us know in the comments section below.
If you encountered the error has occurred, not all of the updates were successfully uninstalled while trying to uninstall Windows updates, then this guide can help.
This guide will cover some expert-recommended methods to fix it right after discussing the causes.
Why didn’t the system uninstall all the updates?
There could be various reasons for this error; some of the common ones are mentioned here:
Insufficient permissions – If the user account you use to uninstall an update doesn’t have admin privileges, you may face this issue. Try logging in from an administrator user account.
Software or process interference – Some software or process may conflict with the uninstallation process, causing the termination of it. Remove unwanted apps & processes and try again.
System instability – If the system experiences unexpected errors during the uninstallation process, it can lead to incomplete removal of the updates. Check for disk errors and run memory tests.
Corrupted update files – This uninstallation process may not be successful and come up with this error message if the update files are incomplete or corrupted.
Now that you know the causes, let us jump into the solutions to resolve the problem.
How do I uninstall an update that won’t uninstall?
Before engaging in advanced troubleshooting steps, you should consider performing the following checks:
Restart your computer.
Make sure you have logged in using an administrator account.
Try deleting unwanted apps and ending unnecessary processes.
If these minor tweaks didn’t work for you, check out the solutions mentioned below.
1. Use Command Prompt
Press the Windows key, type cmd, and Run as administrator.
Type the following command to find the update you want to uninstall and press Enter: wmic qfe list brief /format:table
A list of updates available for uninstallation will be listed, copy and paste the following command after replacing NUMBER with update number and hit Enter: WUSA /UNINSTALL /KB:NUMBER
Click Yes when prompted, then restart your computer to complete the task.
2. Use the DISM tool
Press the Windows key, type cmd and Run as administrator.
Type the following command and press Enter: dism /online /get-packages | clip
You can see the output of the command copied into a clipboard. Open a Notepad and paste it.
Now locate the update you want to delete, and copy its package identity.
Copy and paste the following command after replacing PACKAGE_ID with the package identity you copied and hit Enter: dism /Online /Remove-Package /PackageName:PACKAGE_ID
Once done, exit the command prompt and reboot your PC to confirm the changes. Now run Windows updates.
Additionally, if you want to execute an in-depth process of your system and repair all the stability issues, including the current error, you can try a specialized repair program.
3. Edit the Registry & uninstall the update
3.1 Modify the RPCAuthnLevelPrivacyEnabled Value
Press Windows + R to open the Run console.
Type regedit and click OK to open the Registry Editor.
Navigate to this path: Computer\HKEY_LOCAL_MACHINE\System\CurrentControlSet\Control\Print
Right-click Print, select New, then DWORD (32-bit) Value.
Now right-click the DWORD and select Rename and name it RPCAuthnLevelPrivacyEnabled.
Double-click this DWORD, and set the Value data to 0.