Most streaming services, like HBO, where you can sign up for an account, provide a password reset feature because customers occasionally forget their passwords.
But what if you chose this method and ran into the HBO Max not getting password reset email problem?
Several factors, including insufficient email storage, website server problems, or false spam detection, may be to blame.
Let’s continue reading the article to learn all the fixes to this issue so you can reset your password and resume watching movies.
How long does it take to receive a password reset email?
A password reset email can take up to 15 minutes to arrive. Therefore, there’s no need to rush or repeatedly select the forgot password option.
However, if, after about 15 minutes, you still haven’t received the email, there might be a problem with your email account or the HBO website.
What can I do if I’m not getting a reset password email?
1. Check the spam folder
On your computer, sign in to your Gmail account.
Scroll down on the left sidebar, which shows all the folders, including your inbox.
To access the spam folder, select More and scroll down.
Then. click the Spam folder (indicated with an exclamation icon).
Check this section for any emails from HBO.
Your spam filter prevents irrelevant emails like junk mail and phishing scams from entering your inbox.
Password reset emails can occasionally be blocked by the algorithm distinguishing between spam and valuable emails.
Enter HBO, review the results, and click on the relevant link.
Check if there are any server connectivity or service outages.
Make sure the streaming service you’re trying to access is reachable. The availability of streaming services like HBO Max may occasionally be interrupted.
Google will show all emails with attachments larger than 10MB.
Select the Emails you don’t need and tap the delete option.
To clear space in your account, go to Bin or Trash and tap the empty Bin (Trash) now button.
Go to the Spam folder now by using the left navigation bar.
After that, click the button Delete all spam messages now.
Your email storage may be full if you are the type of person who receives tens of thousands of emails per day.
You won’t receive emails if your email storage is full unless you make some room. Batch-deleting pretty much everything in your inbox is the quickest and easiest approach to free up space in Gmail.
4. Change your account
If you have other active accounts, try using those, or if you don’t have any active plans on the account you forgot your password for, register a new account on the service.
However, if the account has an active plan, use the alternate approaches mentioned above and below to reclaim your account.
5. Contact the HBO customer support
The last step would be to contact HBO customer service if none of the suggestions worked for you. Send an email to mailto:[email protected] to get in touch with their customer service.
They’ll hopefully walk you through the process of changing your password so you can get back into your account.
What happens if I cancel my HBO subscription?
You might wish to cancel your membership since you can’t access your account, but you can’t do it from within the app because, then again, you can’t access your account.
Therefore, contacting support and requesting them to handle it for you would be your best course of action.
Until you cancel it, your HBO Max subscription will renew. You can’t ignore it because it will automatically charge your monthly or yearly subscription even if you can’t access your account.
Other workarounds exist, like using a browser to access the login page rather than an application or switching devices, although these have rarely been seen to work.
Users who have previously encountered the same problem have verified the effectiveness of the abovementioned methods.
You shouldn’t require professional assistance to carry out the procedures because these solutions are simple to understand and put into practice.
In the comments section below, let us know if you were able to fix HBO Max not getting a reset password email issue.
Rocket League is a vehicular adrenaline-pumping video game that was created and published by Psyonix.
In-game, there are unlimited ways you can customize your car and loads of events available to keep you busy.
Rocket League is available on many platforms including Windows, macOS, Linux, PlayStation, Nintendo Switch, and Xbox one. It has a single-player and multiplayer mode.
The problem begins when there is a Rocket League lag spike that causes the game to respond slower. The issue is most likely caused by a poor connection, and we show you below how to fix it.
What causes lag spikes in Rocket League?
➡️ Internet connection: When your ISP has throttled your network connection or you are in an area with poor reception, you may experience latency and high ping during gaming.
➡️ An outdated version of Rocket League can also cause your game to lag terribly. Operating systems are also not left out.
Always be on the lookout for updates of both the game and your OS so you can enjoy playing Rocket League.
✅ Preliminary checks
Make sure your Internet connection is up. If you can connect, check your speed rates. Use an online tool like Speedtest by Ookla.
For gaming, the minimum speed requirement is at least 3Mbps download speed and 1 download speed, but ideally, the rates should be above 10 Mbps.
If your rates are lower, you can try to reboot your router and reconnect, and contact your ISP if the problem persists.
How do you fix Rocket League lag spikes?
1. End tasks to free up bandwidth
On the Start menu search for Windows Security and click to open.
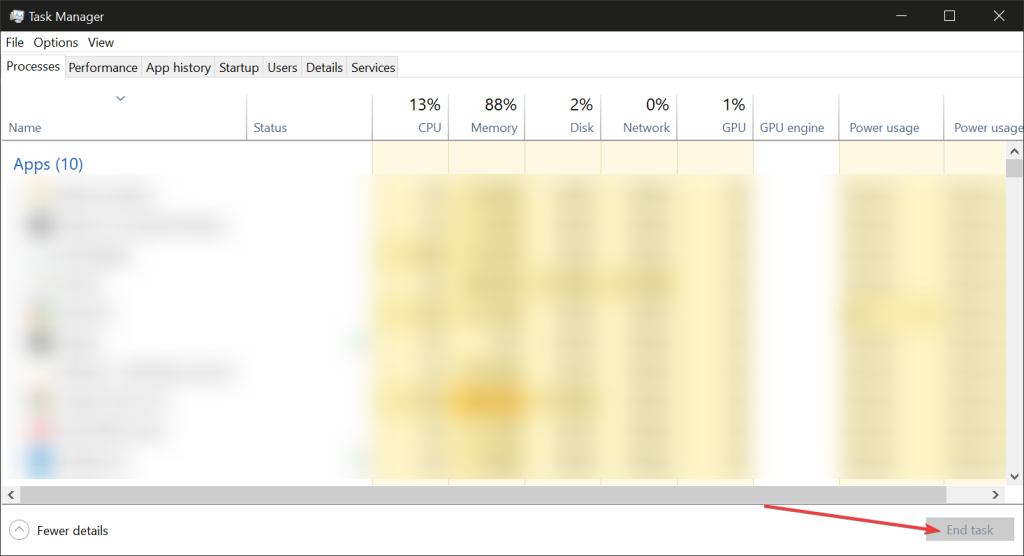
Go to the Task Manager.
On the Task Manager, click on the Applications tab.
Check the box beside all the applications you want to close then click End task.
Now open the Processes tab. Click on all the programs you want to end. Then click End process.
Note: Do not close System or EXPLORER EXE. or other vital processes/ apps. Just those that run in the background without being necessary.
2. Update Rocket League/download the latest version
It is easy to update Rocket League on your console because whenever there is a new version, an update prompt appears on your console asking you to initiate the update.
To update Rocket League on your PC:
Log in to your Steam account.
Find Rocket League in your Library.
If there is any available update, you will see a message that says Please install the most recent Rocket League update.
Click on the message to start updating the game.
When you are done, restart your device.
If you do not want to update the game, you may as well download a new version. Remember to uninstall the old version first.
3. Use a VPN for gaming
A VPN is a powerful tool for gamers because you can achieve a swift and stable network connection when you use it when gaming. One of the best VPNs for Rocket League is ExpressVPN, thanks to its fast servers.
Follow the installation wizard to install the VPN on your device.
Log in with your activation code.
Turn on the VPN and connect to any server close to you.
Launch Rocket League and play.
It’s best to connect to a server close to you because the data is able to travel a lot faster and minimize the risk of having any late.
Apart from giving you optimum network performance, a VPN protects you from DDoS attacks that are common in the gaming space and can also help with packet loss in Rocket League.
It also encrypts your IP address so that your ISP cannot monitor you. This way you are safe from your ISP interfering with your game by throttling your bandwidth.
ExpressVPN
Connect to ExpressVPN to fix lag spikes and high ping in Rocket League and play without restrictions!
Your Firewall may interfere with Rocket League if you have not permitted the game on the Firewall settings thereby causing the game to lag.
To get your game through your Firewall (if you are using Windows),
On the Start menu, search for Windows Security.
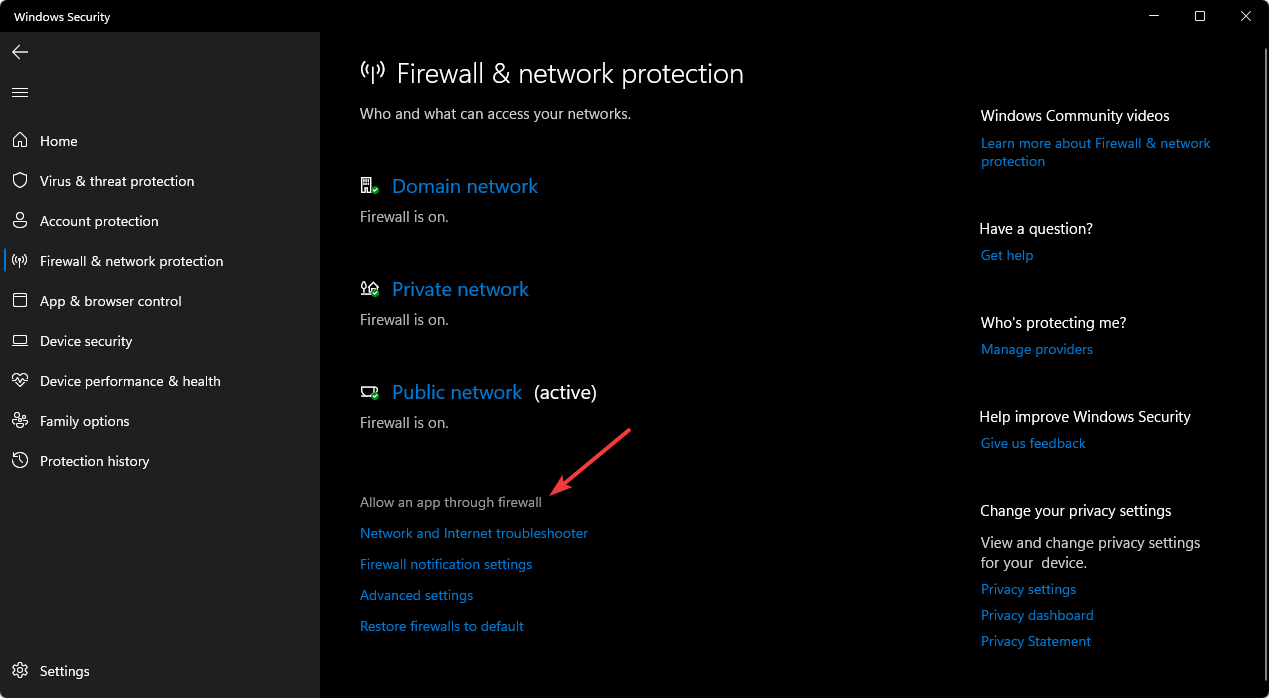
Go to Firewall and network protection.
Select Allow an app through the firewall.
Click on the Change settings button.
Check the box beside Rocket League to allow it through either a public or private network.
Click Ok.
If you don’t find Rocket League on the list, Click on Allow another app button to locate it.
How can I troubleshoot my connection in Windows?
Type Settings in the Start menu and click on it to open.
Go to Network & Internet.
Click on Network troubleshooter to run the troubleshooting.
If the troubleshooter detects the underlying issue, follow the instructions on the screen to fix it.
The built-in troubleshooter is often able to detect underlying problems with your connection that lead to Rocket League lag spikes and high ping.
What are the device specifications for Rocket League?
Another important thing to pay attention to if you have problems in this game is the system requirements for the game.
If your PC doesn’t have all resources necessary, you will most likely experience lag and other issues with Rocket League.
Rocket League recommended specifications:
OS: Windows 7 (64 bit) or Newer (64 bit) Windows OS
Processor: 3.0+ GHz Quad-Core
Memory: 8GB RAM
Graphics: NVIDIA GeForce GTX 1060, AMD Radeon RX 470, or a better version.
DirectX: Version 11
Storage: 20 GB available space.
Every demanding online game plays faster when launched on the appropriate device.
Rocket League lag spikes but the ping is fine
When trying to troubleshoot latency and wondering why is Rocket League so laggy all of a sudden, you probably checked your ping rates.
These two are oftentimes linked together, but you can have lag problems without high ping. Packet loss can also lead to latency issues.
Also, if the game is delayed and moving slowly (low FPS), the reason isn’t necessarily related to network problems such as lag and high ping.
Your graphics card may not be able to support Rocket League graphics at maximum quality, which is why they are a bit delayed. You can fix that by tweaking your graphics settings a little bit.
Lag spikes affect even professional gamers and we are certain you know that it is a mood killer. It doesn’t have to happen again.
A good fix is all you need to boost your game speed on Rocket League and make it through your opponent without hitches in your way.
We hope these solutions helped you get back in the game and enjoy it to its full potential. Let us know which of our recommendations you ended up using.
Windows is a fantastic operating system, but it still carries the same flaws and problems that users have often complained about in the past, with some important improvements when it comes to Windows 11.
This OS, no matter the exact version, can become quite bloated if you don’t take good care of it – and this can cause serious performance issues, while also occupying the hard drive of your device with clutter.
Even though things have improved since Windows 7, even the latest releases of the OS have some clutter here and there, even though the OS is considerably more optimized for performance.
Usually, the best solution to this is to format Windows and reinstall it, but there are things you can try before doing that, as formatting your hard drive takes a long time, and the moving of data is quite cumbersome for most users.
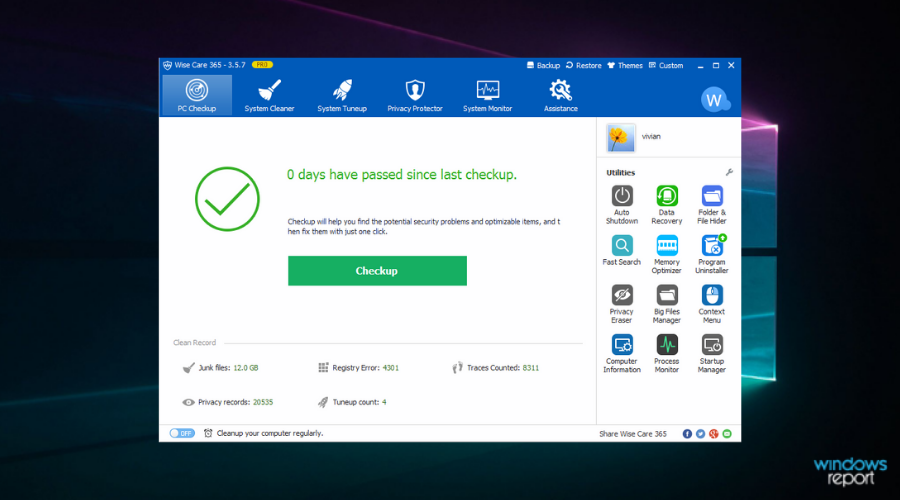
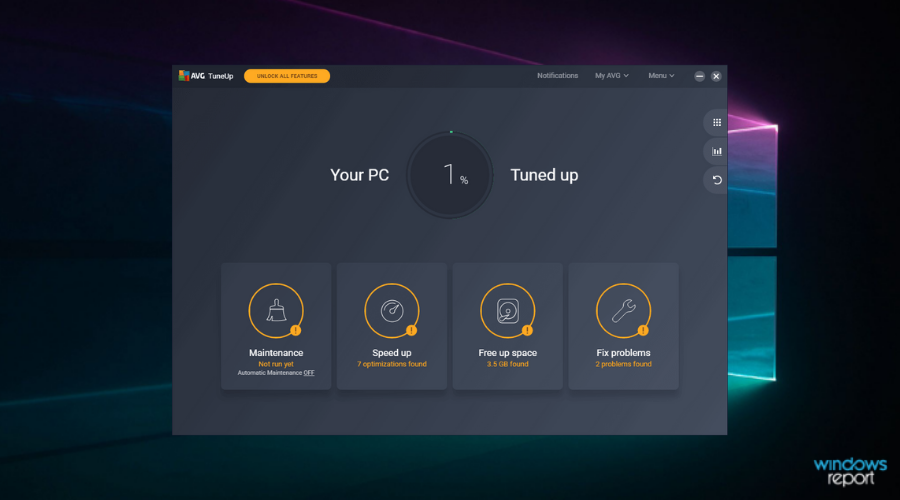
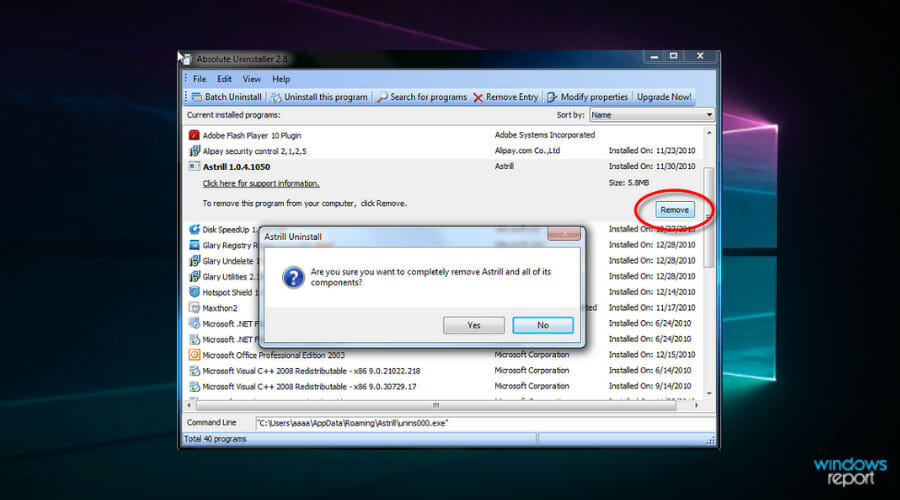
Optimizing your PC’s performance can be done with specialized software that allows you not only to remove and replace any files with issues but also to refresh any registry files that have been left behind from previous installations of software.
This type of software is called a PC optimizer, tune-up utility, or PC optimization software, but they all do the same thing, which is making your PC run better.
Does Windows 10 have an optimizer?
A PC optimizer is a software with a good-looking and encompassing user interface that allows you to streamline the process of tweaking your PC and making it run smoother and better.
The market is saturated with a wide range of PC optimizer software, in all shapes and sizes, and with a variety of features.
As we all know, not all software is created the same, and this type of software is no different, with some having a plethora of useful features, while others have a more limited number. Beyond this, the overall efficiency of software will vary considerably, in strict relationship with the cost of the app.
No matter if you’re interested specifically in a Windows 10 optimizer for gaming or simple day-to-day usage, the list provided in this guide will cover your needs.
Tune-up utility/ PC optimizer pricing
Even though prices on the market fluctuate considerably, and offers are updated by the owners constantly, the pricing of a good PC optimizer tool will be starting around 20$ and depending on the version of the software, can also reach 45$.
There is of course a large spectrum range in the prices, both between the software options themselves and also because of the variety of licenses for each of them.
It is worth knowing that while the software options with free trials could be useful, their capabilities are restricted, while in the case of free software, the level of optimization might not be up to par with your PC’s needs.
How we choose the best PC optimization software
Our team of testers, with a combined experience of more than 15 years of testing software, hardware, and other devices, spend a large amount of their time first identifying the best options for the respective category.
Once that element is clarified, they install, set up, and utilize the software in a variety of conditions. These conditions imply different operating systems, computer setups, system update levels, and even older PCs with low overall capabilities.
This type of test ensures that our review of the respective software or hardware is always complete, and offers readers a set of very useful information, no matter what setup they have.
How do I completely optimize Windows 10?
There are a number of things you may try to completely optimize your Windows 10 devices. A few include:
Upgrade to an SSD
Add RAM
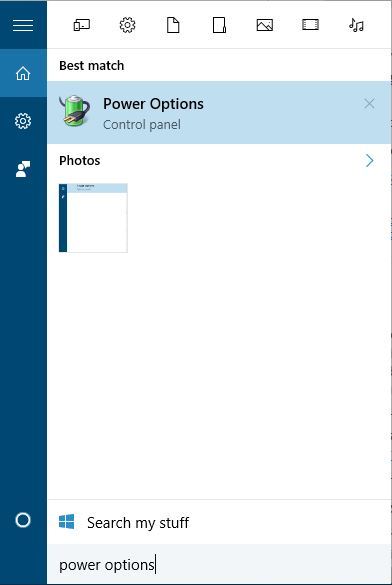
Adjust your power profile
Disable your startup programs
Update your drivers and applications
Restart the computer
Scan the device for viruses
This list is not exhaustive but consists of some of the best ways to get the best out of your Windows 10 devices. Downloading and using a Windows optimizer is a straightforward way to automate this process.
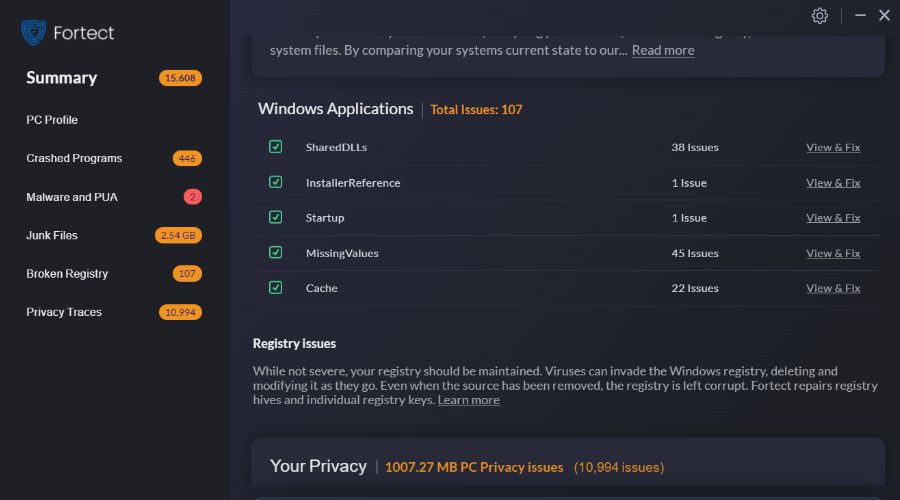
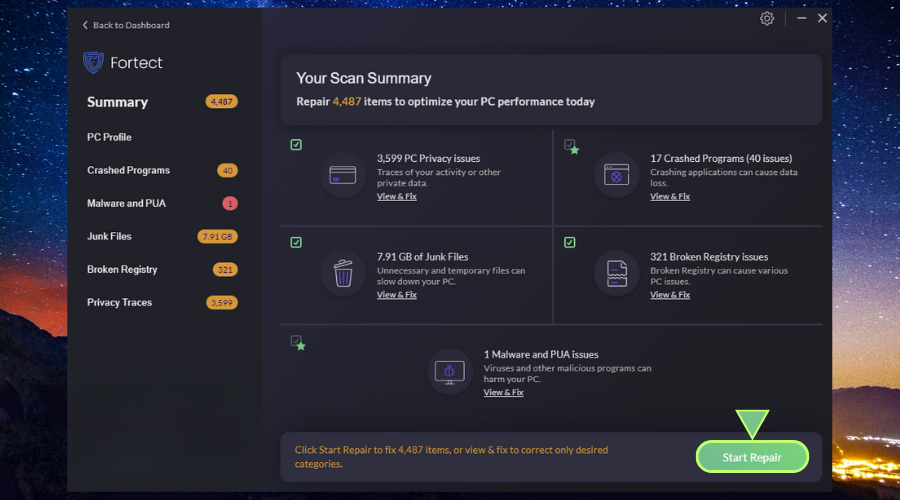
Fortect is a great optimization tool that can easily help you resolve multiple PC errors that can affect its health gradually.
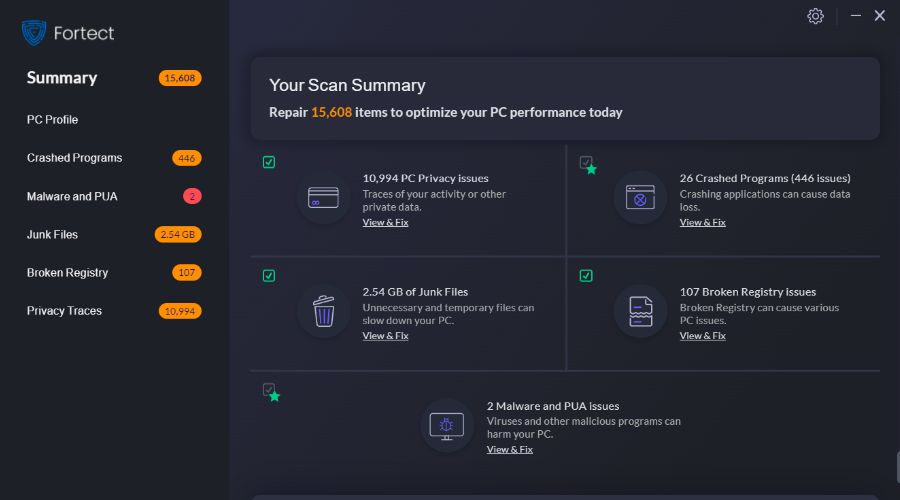
The first thing you should do is let Fortect run a detailed scan of your computer’s system, a process that will take up to five minutes, to detect what causes your errors.
Because it has advanced OS technology, this software will compare your faulty system to a system that is in great shape and will eliminate any deficiency that occurred.
Furthermore, it helps you speed up your computer’s performance by fixing all of the corrupted or missing files from your operating system, including DLLs and registry keys.
Another best feature that Fortec includes is the ability to also detect faulty or incompatible hardware during its scan, so you can replace it on time to prevent the blue screen of death error.
You can also pick to clean up your folders, disk, and hard drive by obliterating any junk files and build-up files, leading to more free space and visibly improving your PC condition.
Fortect
Choose to use Fortect to undeniably increase your device performance by getting rid of system errors.
Fortect PC Cleaner is a powerful computer maintenance tool designed to fix and improve the performance of your Windows 10 system. This software stands out for its user-friendly interface and powerful features that ensure your PC runs smoothly.
This software goes beyond basic optimization by offering a deep registry cleaner that can identify and repair invalid entries, fragmented files, and broken links within your system’s registry.
In addition to registry cleaning, Fortect PC Cleaner provides a powerful junk file remover. This tool scans your system for temporary files, old backups, and other unnecessary data that clutters your hard drive.
This tool also features advanced privacy tools designed to protect your sensitive information. The privacy cleaner removes traces of your online activities, such as browsing history, cookies, and saved passwords, safeguarding your personal data from prying eyes.
Fortect Driver Updater
Boost your computer’s speed and security with this powerful tool.
Shields your system from a wide variety of malicious agents
Cons
Limited cleaning and boosting customization
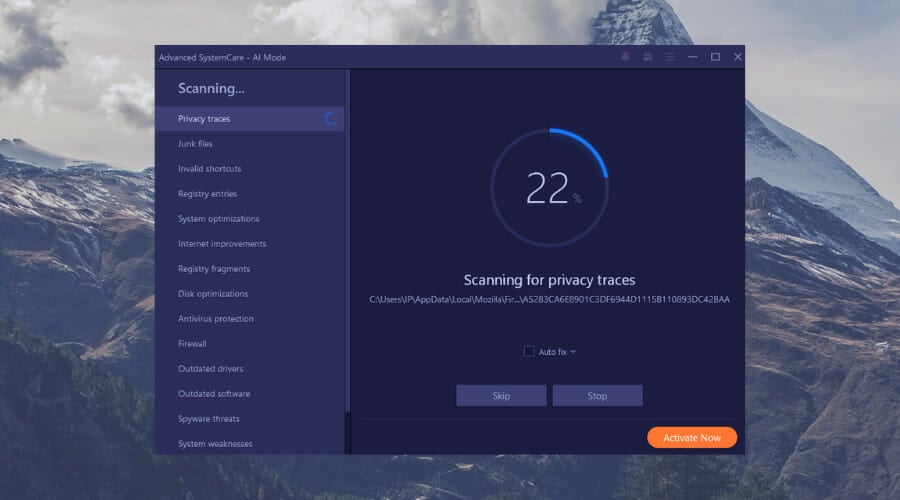
IOBit’s Advanced SystemCare Pro is unique in that: it is portable – you don’t need to install it, and it works like a swiss army knife.
It packs over 20 tools – things such as a disk cleaner, a registry cleaner, and a privacy sweeper, it can even defrag your disks and help you uninstall any software on your PC.
Overall it is the kind of software that will let you do things that its competitors might not.
The interface is another strength of it – you can easily browse through its functions and use the features inside without any problem.
Advanced SystemCare Pro
Clean up junk files and privacy traces to enhance your PC performance by up to 200%.
Creates backups of your registries and DLLs before fixing them
An unlimited number of licenses
Many PC performance boosting tools
Cons
Some features require a payed plan
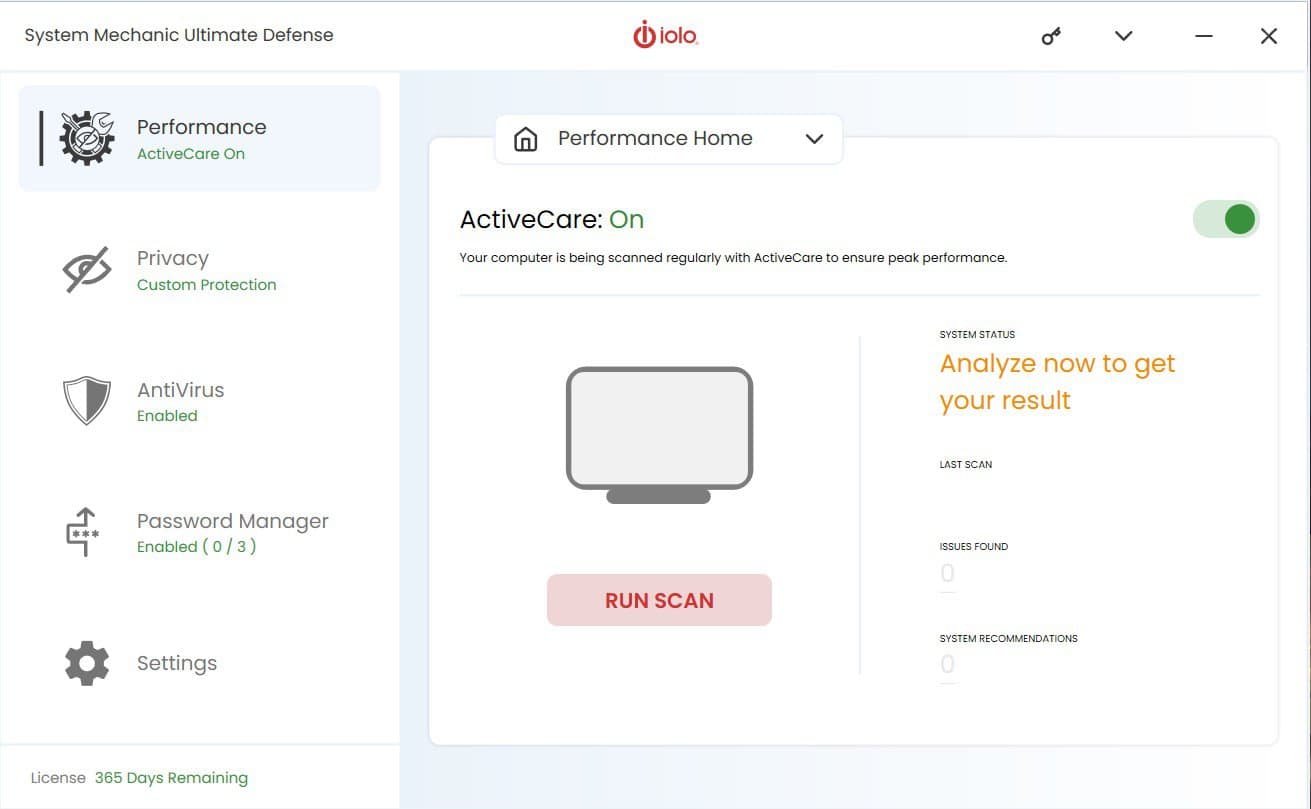
Iolo System Mechanic Ultimate Defense tries to be as user-friendly as possible. It includes various features that others like it don’t.
It comes with a privacy tool that will help you change certain privacy-related settings in Windows 10, and it explains all the problems you have with your PC in easy to understand language.
It also includes a NetBooster tool that might help you increase your internet speed.
Iolo System Mechanic Ultimate Defense
Give your PC a much-needed speed boost with the help of this great optimization tool!
Repair and cleanup: free disk space, cleans your registry
System tools: repair system files, restore the registry
Optimization: memory and startup optimizer, disk defragmentation, disk management
Backup and restore
Cons
Automatic maintenance feature is available only to paying customers
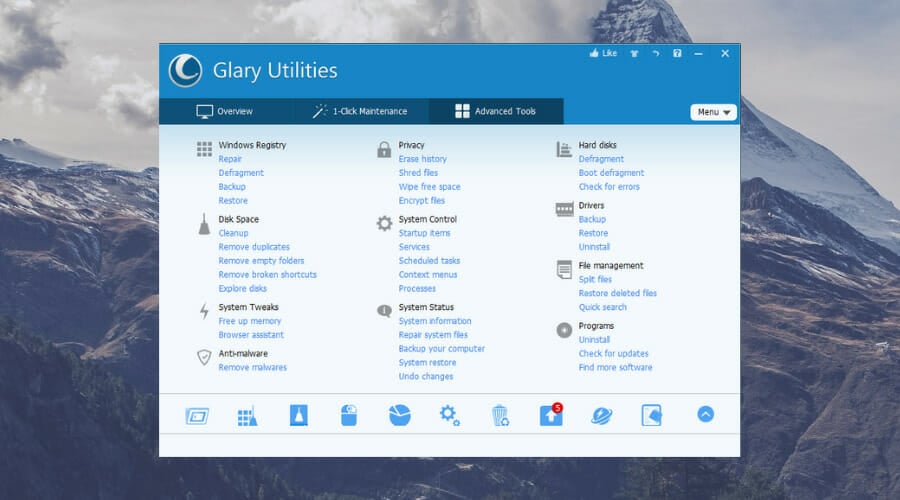
Glary Utilities Pro is another great choice. Not only it is good and does not require many PC resources to run, but it is also ultra-safe and won’t interfere with your antivirus or firewall.
These features are great and are sure that you will find much more PC optimizing options to enjoy. This tool is available for free on the official website.
Glary Utilities Pro
Speed up your computer in no time with this all-in-one ultra-safe PC care service.
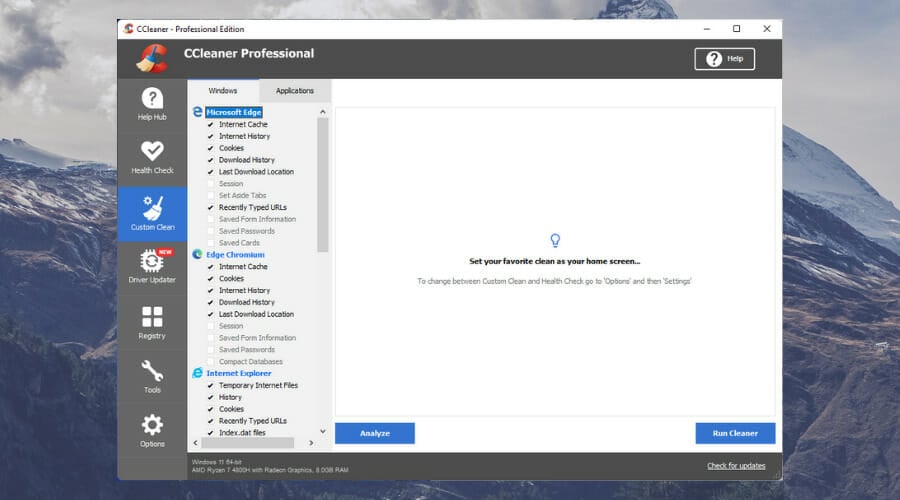
CCleaner from Piriform is one of the best PC optimizers that can provide almost all the tools you need to successfully make your PC run better than before, clean registries, remove cookies and caches from browsers, and even uninstall software.
The most impactful of these features is the Registry cleaner tool, which analyzes your PC and identifies any missing or corrupted files of this type. As soon as the process is completed, you get the choice of removing the registry files which don’t work.
Another great advantage of using CCleaner often is the fact that it will automatically scan your system for any cookies and caches, for each of the browsers, and will allow you to easily remove them by clicking one button, instead of spending time doing so for each software separately.
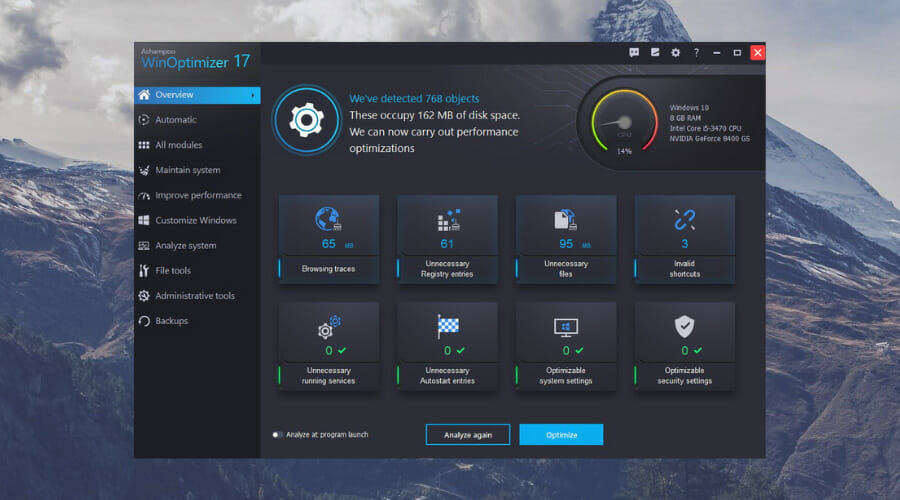
Ashampoo WinOptimizeris one of the most expensive software on this list.
This tool offers features such as file encryption, a complete backup of your hard disks, and the ability to run benchmarks on your system.
There is a 40-day free trial to check it out and see if it is what you want, but it offers every feature that its competition offers and gives more on top of it.
If you want feature-rich software worth its price, this is the one.
Razer Cortex is specifically designed to optimize gaming PCs and ensure that your overall gaming experience is not bothered by any other pop-up or notification.
This free PC optimizer stops any processes that are not useful for your gaming experience and defragments your system to get the most out of your system’s setup.
Even though you shouldn’t expect amazing improvements after using it, in some cases, users have had a great experience achieving acceptable FPS levels for games that were not running before using this optimizer.
How do you find out what is slowing down my PC?
One of the best freeways to find out the source of a problem is to make changes to your PC sequentially.
This means installing new software, adding new hardware, and more, since you can then tell which new addition to your system is causing the performance lag.
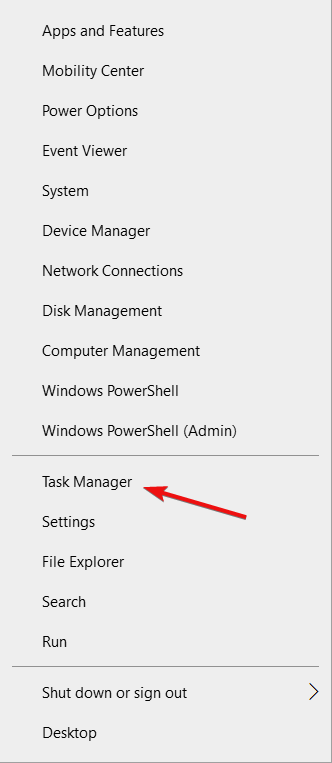
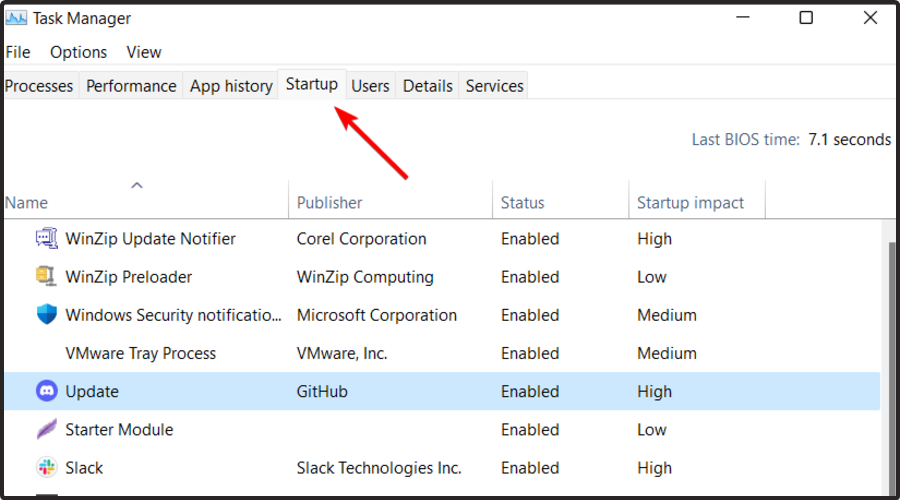
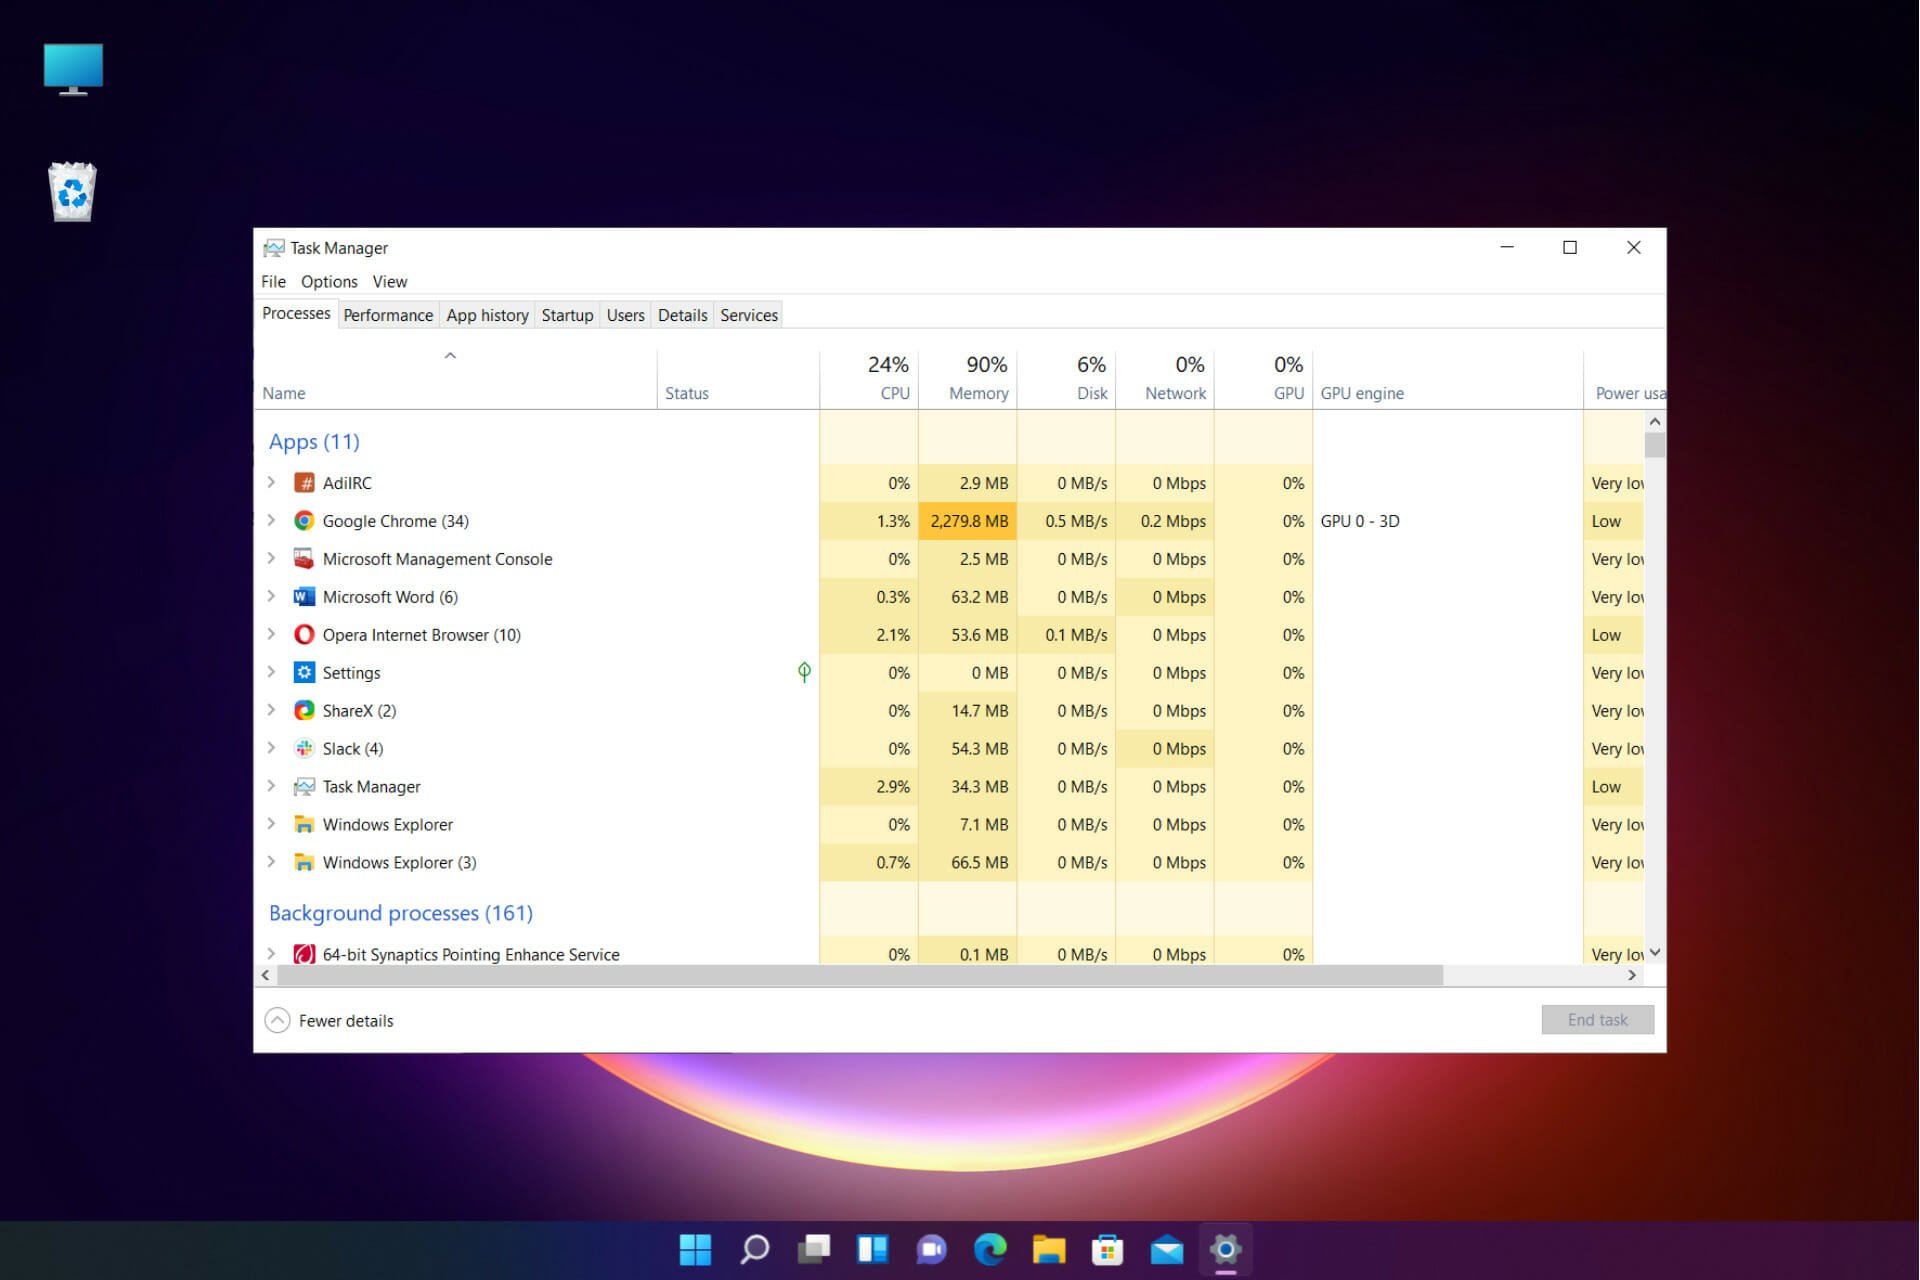
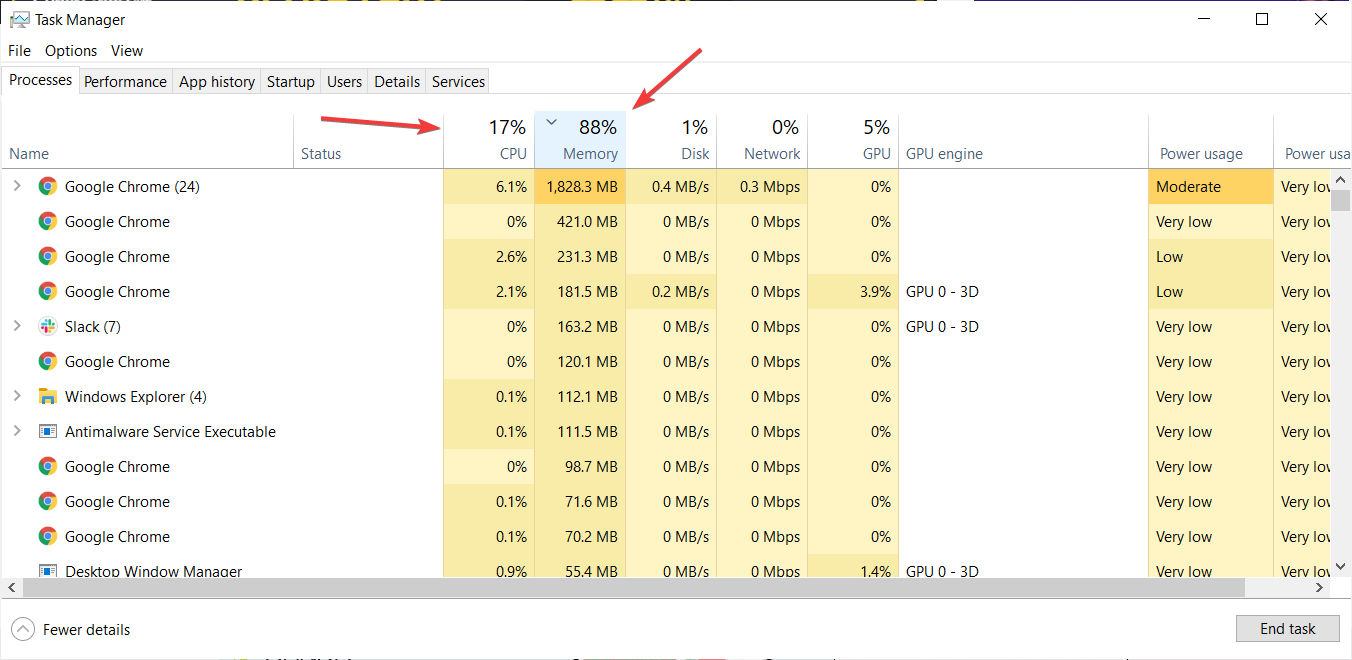
Another way of finding out what is slowing down your PC is to look into the Task Manager and see what is using up most of your RAM, CPU and how many items you have configured for automatic startup.
Additionally, ensure that your PC’s registries and DLLs are running accordingly. If you notice these are the problem, then a good registry cleaner will do you good.
How do I speed up my Windows 10 computer?
As mentioned above, a complete system reset is always a surefire solution to fixing a slow PC, although it is also the method with the most drawbacks.
That is when a solid and reliable Windows 10 optimization tool can come in handy, as it will clean, repair, and boost your PC’s performance in no time, among other features.
An optimizing software tool will delete the unused keys from your registry and other temporary files that are slowing down your computer.
It will also make sure specific settings don’t conflict with each other. Unfortunately, choosing a reliable optimizer software can be tricky since there are so many of them, and you need to pick one that will fix your computer rather than make it worse.
This list will go through some of these options to help you pick the one that might work for you.
These are some of the best PC optimizers available on the market. But, of course, you need to pick the one that works best for you.
Moreover, it’salways advised to make backupsbefore running such a tool – which is a feature most of them offer. So what’s your favorite weapon of choice?
There you go! Now you have everything you need to choose the right system optimization software for Windows 10.
If you are looking for a free PC optimizer, choose one from our list and make the most of its perks.
All the best Windows optimizer software choices are here, so have a look, decide what you need, and get your Windows 10 optimizer for free.
And, to get rid of all the files you don’t need, which might also slow down your machine, make sure you use a free PC cleaner for your Windows 10 rig.
Feel free to share your thoughts by reaching out in the comments below.
To access the internet, your DNS has to work without any problems. Unfortunately, users reported various DNS issues on Windows 10 that prevent them from accessing the internet.
There’s a long list of the most well-known DNS issues, especially the DNS server not responding error, which plagues Windows 10 users as well, and we will list efficient fixes below.
Why is my computer having DNS issues?
A problem from your end usually causes DNS issues on your computer. This can be in the form of wrong configuration, network issues, and other problems.
Below are some of the well-known problems that could lead to DNS issues:
Being an integral part of your connection, a router can cause DNS issues. When your router is wrongly configured, it might lead to the DNS not working on Windows 10.
Also, if the router is faulty, it can cause DNS errors on your PC.
How do I fix DNS server on Windows 10?
1. Use Command Prompt
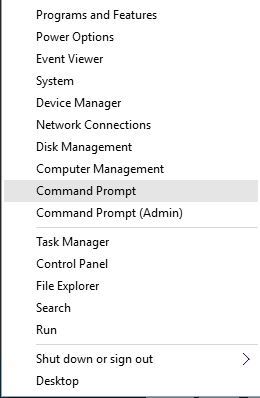
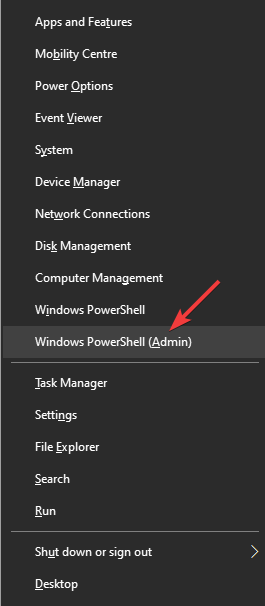
Press the Windows key + X to open the Power User Menu.
Select Command Prompt (Admin) from the menu.
When Command Prompt opens, enter the following lines and press Enter after each: ipconfig /flushdns ipconfig /registerdns ipconfig /release ipconfig /renew NETSH winsock reset catalog NETSH int ipv4 reset reset.log NETSH int ipv6 reset reset.log Exit
After you close the Command Prompt, check if the issue is resolved. According to users, you can fix DNS issues, like the error you experience after Windows 10 update, by flushing the DNS and resetting some settings.
2. Turn off the peer-to-peer download for Windows updates
Press the Windows key + I to open the Settings app.
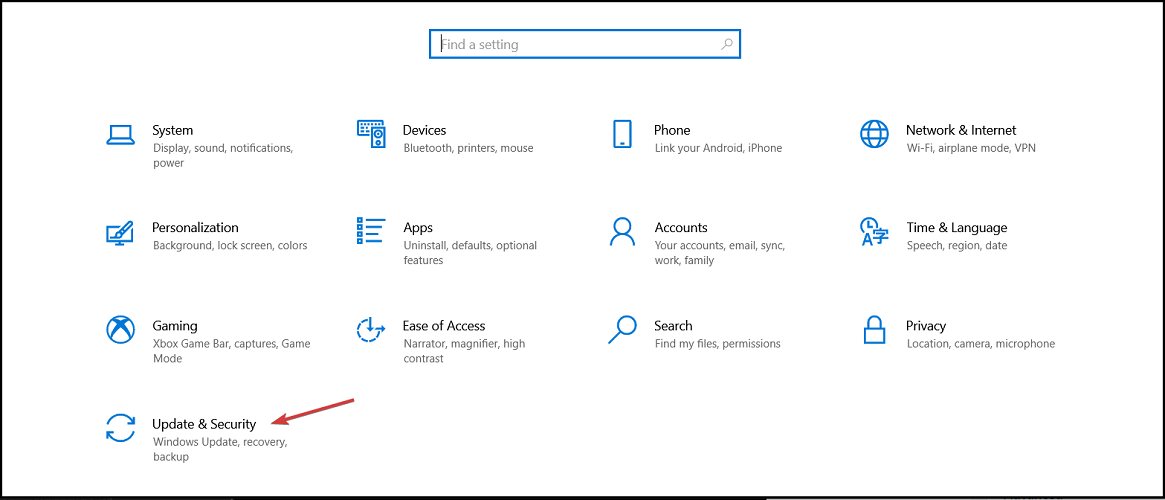
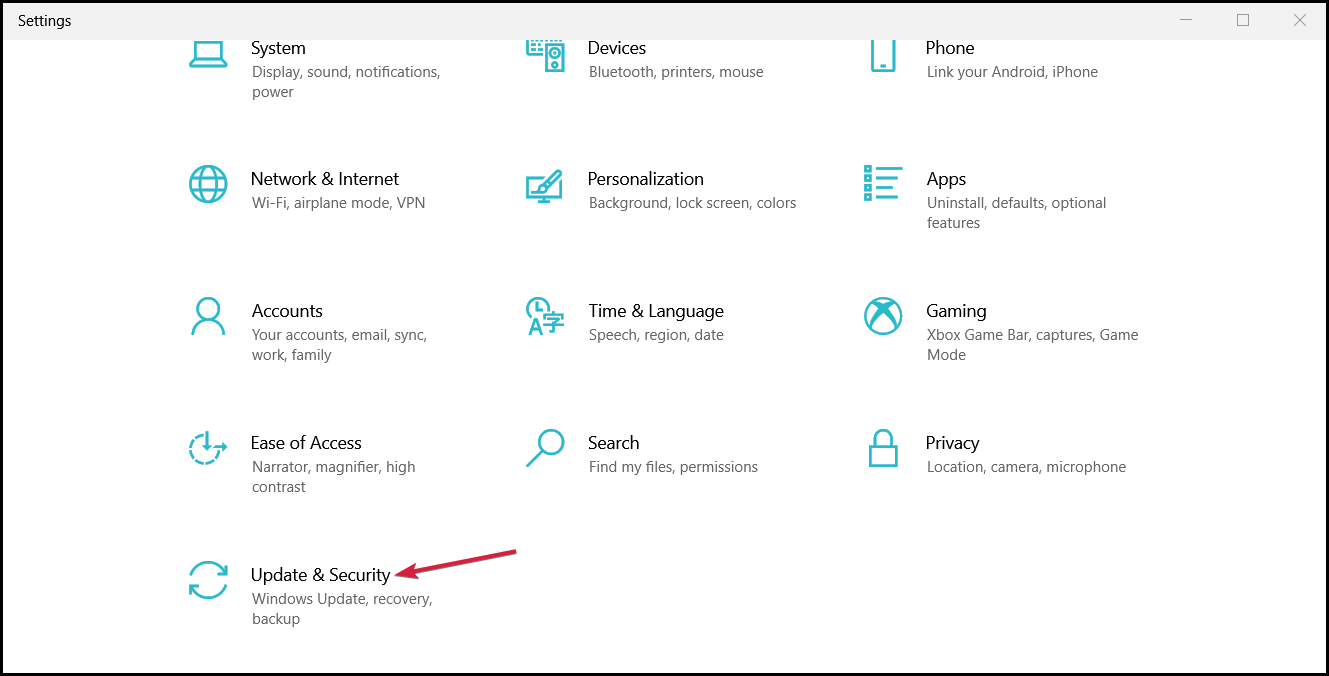
Select the Update & Security option.
Click Advanced options.
Now, click the Delivery Optimization option.
Toggle the switch for Allow downloads from other PCs.
Finally, select PCs on my local network.
Sometimes Windows updates can cause issues with DNS. One potential solution that users found is to disable peer-to-peer download for Windows updates.
3. Reinstall your network adapter drivers
3.1. Update driver manually
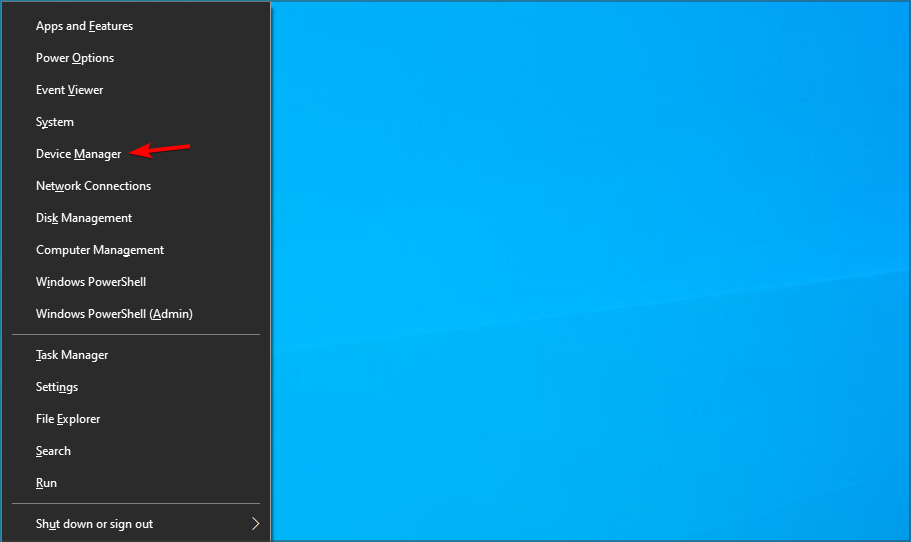
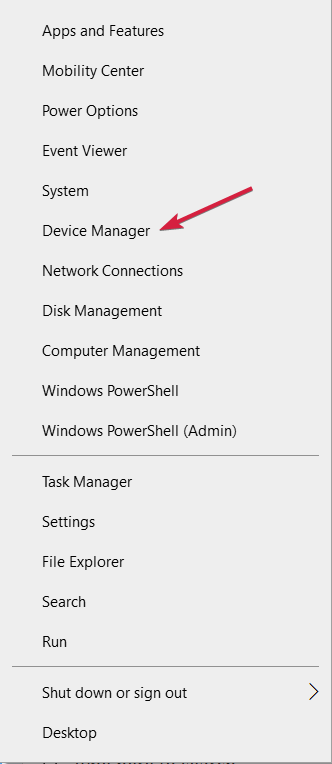
Press Windows key + X and select Device Manager from the results list.
Double-click on the Network adapters option to expand it.
Right-click on the drivers there and select Uninstall device.
After you uninstall it, click the Scan for hardware changes button.
Locate your network adapter once again, right-click it and choose Update driver.
Choose the option to Search automatically for drivers.
Wait for Windows 10 to download and install the necessary software on your device.
Some users claim you can fix this issue by removing and reinstalling your network adapter driver.
3.2. Update drivers automatically
Updating your drivers using the Device Manager is not the best way to find the latest network drivers. Therefore, we strongly suggest installing a third-party driver installer.
You won’t need to search for drivers manually anymore. Dedicated driver updater software such as Outbyte Driver Updater will help you do it automatically by performing periodic scans and making sure everything is up-to-date.
Outbyte Driver Updater is meant to be as lightweight as possible, and the only components you actually download and install on your PC are the driver scanner and downloader.
Outbyte Driver Updater
Use this performant tool to keep all your drivers up to date.
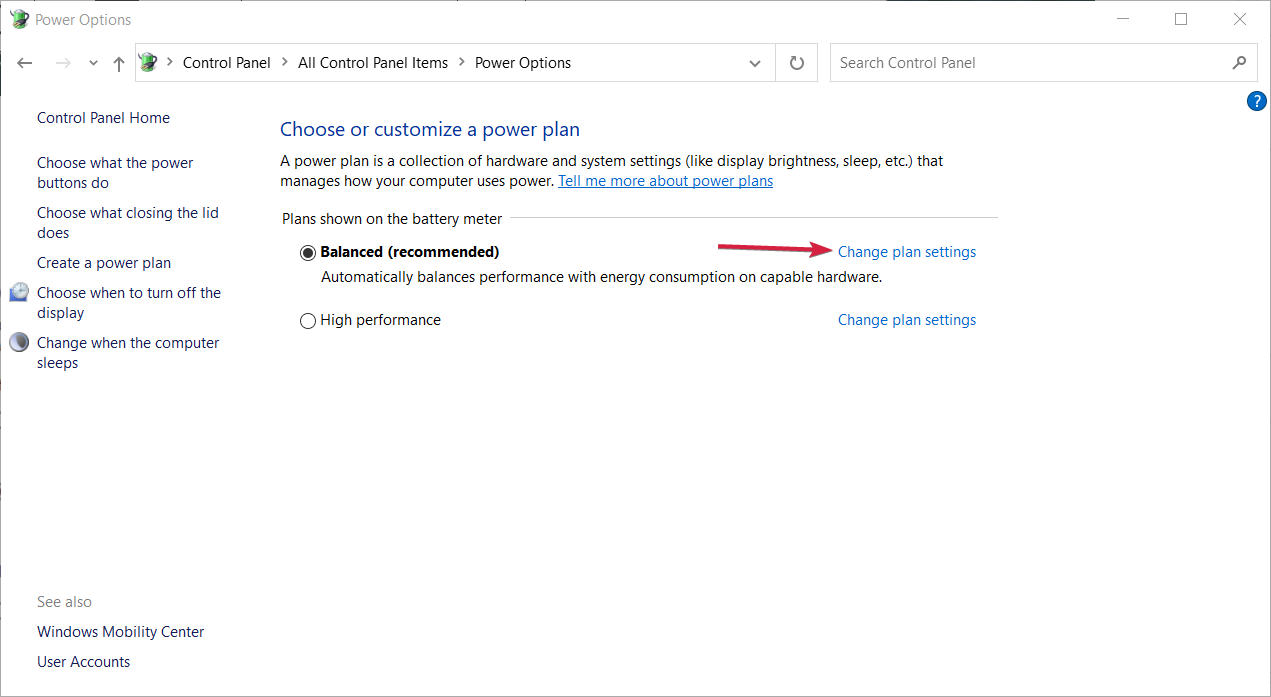
Locate your current power plan and click Change plan settings.
Now click on Change advanced power settings.
Locate Wireless Adapter settings and set them to Maximum Performance.
Click Apply and OK to save changes.
You can fix this problem by changing the power settings of your wireless network adapter.
5. Make sure that Microsoft LLDP Protocol Driver is enabled
Press Windows key + R and type control to open Control Panel.
Select Network and Internet.
Choose the Network and Sharing Center option.
Click on your active internet connection.
Now, click on the Properties button.
Check if the Microsoft LLDP Protocol Driver checkbox is marked.
Finally, click the OK button to save the changes.
If the DNS server is not responding with ethernet or WiFion Windows 10, we suggest you check if the Microsoft LLDP Protocol Driver is enabled for your connection.
6. Perform Clean boot to fix DNS issues on Windows 10
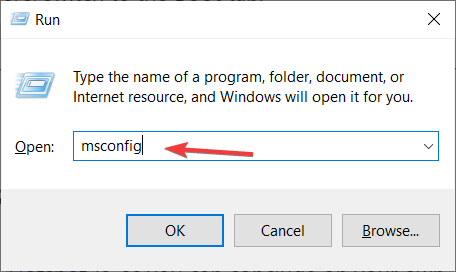
Press Windows key + R to open the Run utility.
Type msconfig in the run box and click the OK button.
Click the Services tab at the top.
Check Hide all Microsoft services and click Disable all button.
Click Apply and OK to save changes.
Restart your PC.
Now you can repeat the same steps and enable services one by one until you find the problematic one.
According to them, some third-party service was interfering with DNS, and the issue was resolved after finding and disabling the problematic service.
7. Change the configuration of the wireless router
Users reported that Windows 10 has some issues with certain wireless frequencies and standards.
To fix this issue, you need to change your wireless router settings.
It seems that Windows 10 has problems with 2.4GHz networks. Therefore if your wireless adapter supports 5GHz frequency, make sure you use it.
If your adapter doesn’t work with a 5GHz frequency, use the 2.4GHz Legacy option instead. For more details on how to change these settings, be sure to check your wireless router manual.
8. Use Google’s public DNS server
Open the Control Panel and select Network andInternet.
Click Network and Sharing Center.
Select your active network.
Click on the Properties button.
Now, click Internet Protocol Version 4 (TCP/IPv4), followed by the Properties button.
Tick the radio button for Use the following DNS server addresses.
Set the Preferred DNS server to 8.8.8.8.
Now, set the Alternate DNS server to 8.8.4.4.
Finally, click the OK button.
Your ISP’s DNS server might have some issues, so you might want to use Google’s public DNS instead. To do that, follow these steps.
Alternatively, some users suggest using 208.67.222.222 as the Preferred DNS server and 208.67.222.220 as the Alternate DNS server.
NOTE
CloudFlare has recently launched a free DNS server, and you can read all about it in our article about using DNS server 1.1.1.
9. Change the MAC address of your network adapter
Start Command Prompt as administrator.
Type ipconfig /all and press Enter.
Locate the Physical Address and copy the value.
Now, press the Windows key + R to open the Run utility.
Type ncpa.cpl and click the OK button.
Right-click on your active network and select Properties.
Click the Configure button.
Go to the Advanced tab and select Network Address.
Check the Value option and enter the MAC address that you got in Step 3. Note that you don’t need to add the dashes.
Click the OK button when you are done.
Restart your PC after applying this fix and check if the DNS issue is resolved.
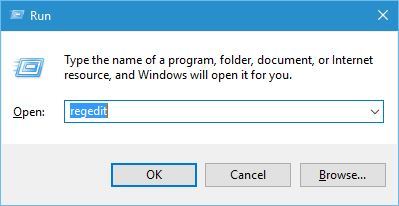
Launch the Run utility and type regedit in the run box.
Press the Enter key to start Registry Editor.
In the left pane, navigate to: ComputerHKEY_LOCAL_MACHINE
Then go to: SYSTEMCurrentControlSetServices
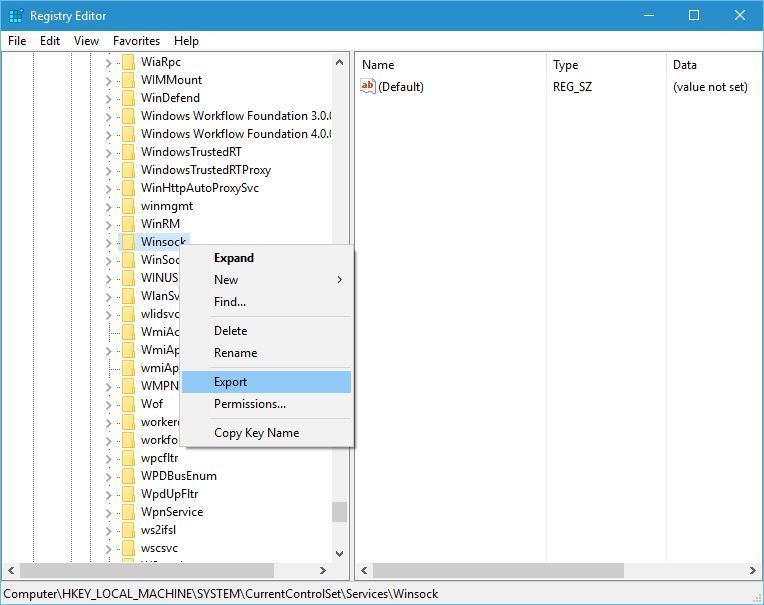
Locate Winsock and Winsock2 keys.
Right-click each key and choose Export.
Save them as winsock and winsock2.
After you’ve exported both Winsock and Winsock2 keys, you need to delete them.
Right-click each key and choose Delete from the menu.
Restart your PC.
Once your computer restarts, start Registry Editor once again.
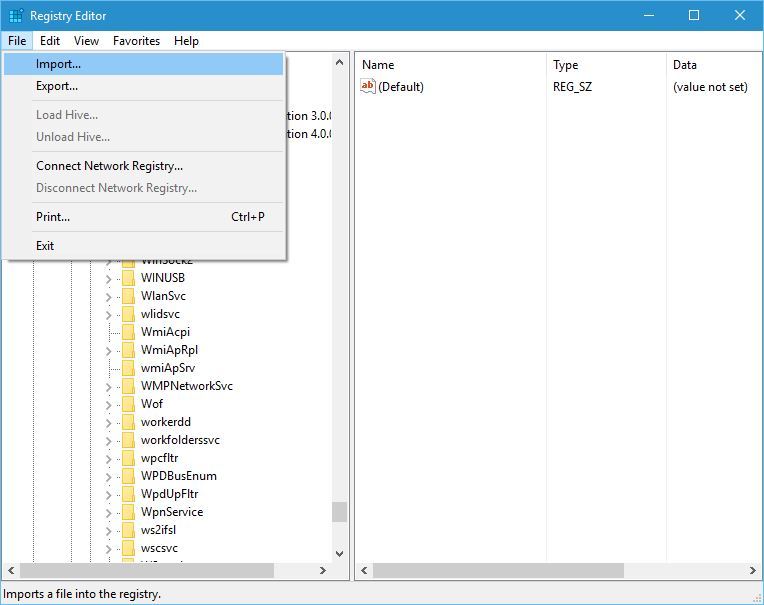
Go to File > Import.
Select winsock and click Open.
After importing the winsock file, import winsock2 as well.
Restart your PC once again and check if the problem is resolved.
If your DNS is not responding, you can try removing the Winsock keys from the registry.
Is it OK to clear the DNS cache?
It is a good practice to clear your DNS cache often. This is important for privacy and security purposes.
The DNS cache works like a virtual address book that contains information about your websites. Clearing the info often is a good way to keep it away from hackers and bad actors online.
DNS issues on Windows 10/11 can be frustrating, as they can stop you from accessing the internet. But with the right information we provided in this guide, you should be able to get past it easily.
One thing that Windows users fear the most is the infamous BSOD also known as Blue Screen of Death.
It seems that some of them are getting the Unexpected Store Exception Windows 10 error, and today we’re going to help you fix this problem.
What causes the Unexpected Store Exception error?
There are multiple causes for this on Windows 10 and 11, but we’re going to list the most common ones:
Software – This is most likely related to your antivirus or drivers, so be sure that third-party software is fully compatible with your OS. Also, always keep drivers up to date.
Missing Windows updates – This issue was reported on various PCs, and updating your system will ensure that there are no compatibility issues
Hardware – This usually comes down to your SSD or hard drive and its configuration in BIOS, so be sure that everything is properly configured
This can be quite unpleasant, and speaking of which, users reported the following issues as well:
Unexpected Store Exception Dell, Asus, HP, Toshiba, Lenovo – This error is relatively common, and many Dell, Asus, HP, and Lenovo users reported it on their devices.
Unexpected Store Exception SSD, hard drive – In most cases, this error is related to your SSD or hard drive. If you’re experiencing it, be sure to check if your storage device is working properly.
Unexpected Store Exception while gaming – This error can also appear while gaming. Once it appears, your PC will restart so you’ll have to start your game all over again.
Blue screen Unexpected Store Exception – In most cases, this comes with a Blue screen followed by a restart. The cause is usually your hardware or a faulty driver.
Unexpected Store Exception No bootable device – Sometimes this can come with a No bootable device message. If that happens, be sure to check your hard drive for problems.
Unexpected Store Exception critical process died – This is another variation of this issue, but you should be able to fix it with one of our solutions.
Why does the Unexpected Store Exception error occur?
There are several reasons for this error, but the common ones are incompatible software or drivers, so you’re advised to find and remove them.
This issue can occur if there’s a problem with your storage device, so you’ll have to inspect it and replace it if it’s faulty.
BSOD errors usually appear when you encounter a fatal system error. This happens when your system reaches a critical condition and crashes since it can no longer function properly.
When a critical problem occurs, the error will appear on your screen with the necessary information. Your only course of action is to wait for the system to restart automatically or do it manually.
How to fix the Unexpected_Store_Exception error on Windows 10?
1. Use specialized software
This kind of tool can be used for various computer issues, including BSoD errors. Instead of troubleshooting manually the problem, you can always rely on professional software to solve this for you.
2. Update your OS
Press Windows key + I to open the Settings app.
Head over to Update & Security section.
Check if any updates are available and download them.
3. Reinstall your antivirus software
NOTE
It has been confirmed that McAfee and Avira antivirus tools are causing this issue, so be sure to remove or update them.
Press Windows key + I. This will open the Settings app.
Go to the Apps section.
Select your antivirus on the list and click on Uninstall.
After removing your antivirus check if the problem is resolved. To avoid issues such as these in the future, always use reliable antivirus software for Windows.
Turn off your PC and disconnect it from the power source.
Locate your SSD or hard drive and disconnect it.
Now connect it again and check if the problem is gone.
If the issue persists, try connecting the drive to a different SATA port or using a different cable.
Try if the drive works on a different computer.
These are just some of the tips that worked for users. In case your drive is the problem, you’ll need to replace it, so be sure to check our list of best 1TB and 2TB SSDs to buy.
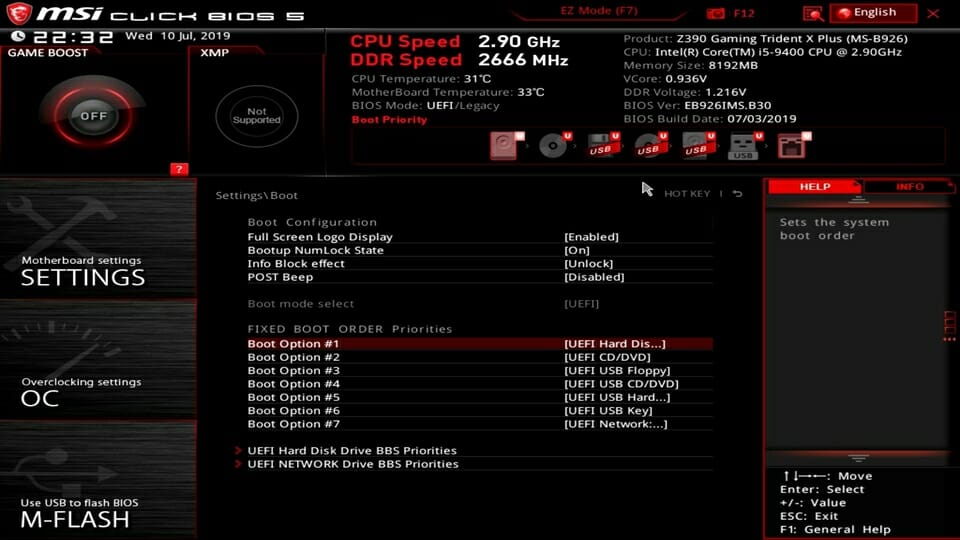
5. Check your BIOS configuration
Restart your PC.
Keep pressing F2 or Del while your PC boots to access BIOS.
Locate the SATA mode section and set it to RAID or AHCI.
Set your hard drive or SSD as the first boot device.
NOTE
Since every BIOS is different, we strongly advise you to check your motherboard manual for detailed instructions on how to locate these settings.
6. Disable Fast Startup and Sleep features
Press Windows key + S and type power plan. Select Choose a power plan
Go to Choose what the power buttons do.
Click on Change settings that are currently unavailable.
Uncheck Turn on fast startup (recommended) and click on Save changes.
To disable the Sleepfeature, fromPower Options locate your current power plan. Click on Change plan settings.
Set Put the computer to sleep to Never and click on Save changes.
Optional: Click on Change advanced power settings.
Expand the Sleep section and set all options to Never.
Press Windows key + X to open the menu. Select Device Manager from the list.
When Device Manager opens, locate the problematic driver, right-click it, and choose Uninstall device from the menu.
A confirmation dialog will now appear. Click on Uninstall to remove the driver.
Click on Scan for hardware changes icon or restart your PC and Windows will install the default driver.
Dell laptop owners found out that Realtek USB 2.0 Card Reader was causing the Unexpected Store Exception problem to appear, but almost any device can lead to this issue.
Open the Settings app. You can do that quickly by using Windows key + I shortcut.
Now navigate to Update & security section.
Now go to Backup section in the left pane and turn off Automatically back up my files option. If this option isn’t available, it means that File History isn’t running on your PC.
10. Use the High-Performance power plan
Press Windows key + S or click the Search field.
Type power plan. Select Choose a power plan.
When the Power Options window opens, select High performance.
11. Upgrade/downgrade BIOS
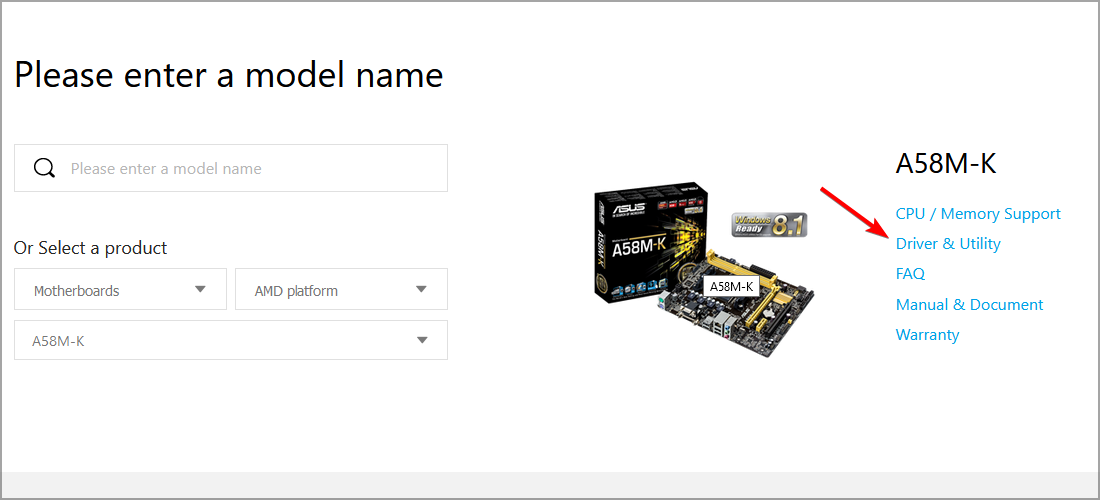
Visit your motherboard’s manufactuer website.
Locate your model on the list.
Go to the Drivers & Utility section.
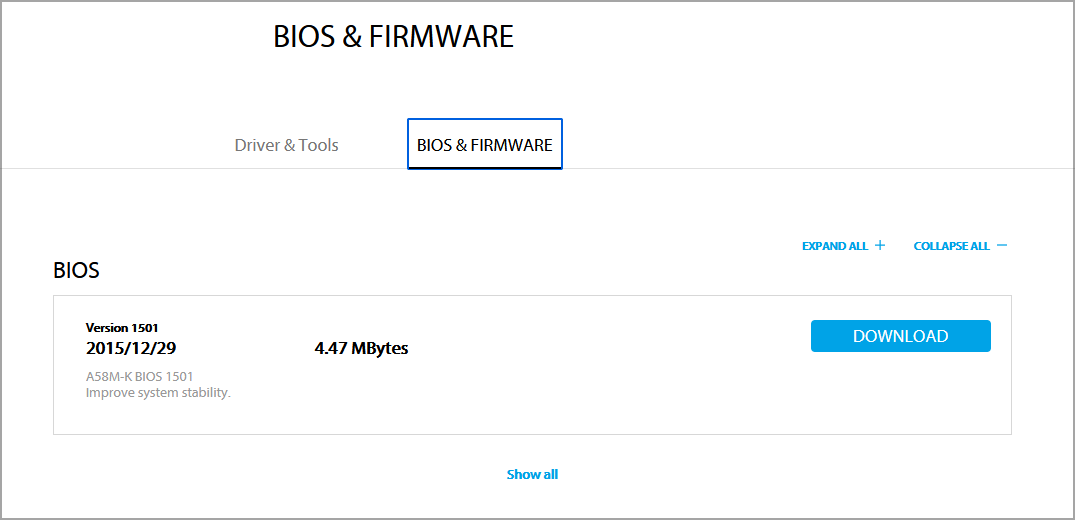
Locate the latest version of BIOS and download it.
Once the files are downloaded, move them to a flash drive.
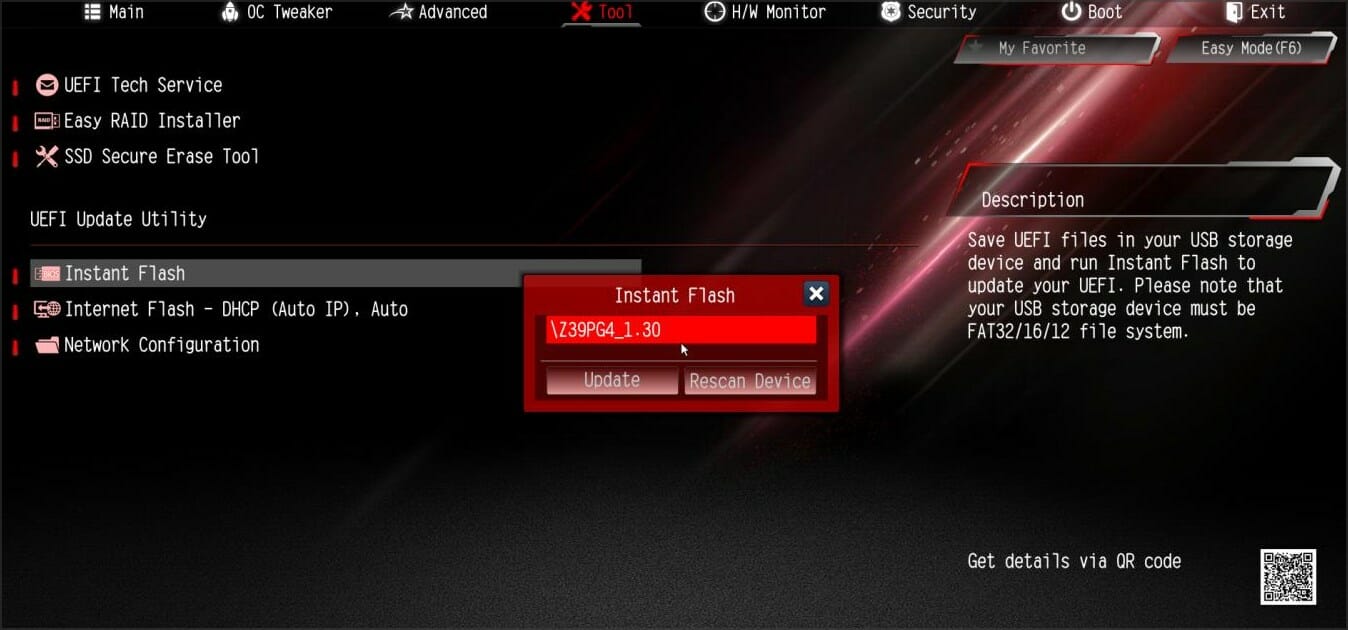
Restart your PC and keep pressing F2 or Del to access BIOS.
Now look for the option to update it and select the firmware from your flash drive.
Wait for the process to finish.
For more information, we suggest visiting our guide on how to flash BIOS.
NOTE
Few users claim that this issue started appearing after a BIOS upgrade. In some rare cases, you might be able to fix this problem simply by downgrading BIOS to the older version.
What causes a blue screen on Windows 10?
The blue screen error has a standard message explaining what happened. But it also contains the stop code that you could use to research the issue.
In addition, there’s a QR code and link to the website that you can visit for more information. Lastly, there might also be the name of the file that caused the crash.
Are Blue Screen of Death errors serious?
Yes, Blue Screen of Death errors can be serious. First off, they will force your PC to restart, so you’ll lose any unsaved work.
These types of issues will make your system unstable, and finding the cause of the problem can be harder than it seems.
Lastly, these errors can occur if your hardware is failing, so you’ll have to find the faulty component and replace it, which isn’t always simple or cheap.
And, since we’re talking about these errors, we’re about to show you the variations that you could come across, in which case, please refer to this guide.
BSOD unexpected store exception
Unexpected_store_exception Blue Screen
Unexpected store exception windows 10 on HP
Bluescreen unexpected store exception
Stop code unexpected store exception
Windows unexpected store exception
Unexpected_store_exception on Windows 10
Unexpected store exception on SSD
Does resetting the PC fix the blue screen?
The blue screen issue is usually down to hardware issues and requires you to fix the cause of the problem. Resetting your PC can sometimes help to circumvent it and fix minor issues.
However, it can not be relied on as a surefire fix.
If you have any comments or suggestions regarding our article on fixing the Unexpected Store Exception error in Windows 10, please write them down in the comments section below.
Surely everyone has either played or at least heard of the Need for Speed gaming franchise, especially since cars are such a big part of our lives and culture.
And, if you’ve already bested tall the challenges in Need for Speed Heat, which was the last title in the series, you are guaranteed ready for the next one.
However, you might not be ready for the major changes EA envisioned for the next NFS game. Wait, you haven’t heard? Need for Speed Unbound has already been announced.
Besides brand new adventures and characters to fall in love with, EA has also completely changed the visual style of the game, and we are about to take a closer look at it.
Before we begin, know that if you are going to play this upcoming title on Windows 11, we have some tips to improve your gaming experience.
Need For Speed Unbound comes with a different art style
Just in case you didn’t know, Criterion Games is back in the driving seat of Need for Speed development (pun intended), following its Hot Pursuit and Most Wanted entries back in the day.
The company unveiled its upcoming project, which is called Need for Speed Unbound, and represents the next installment of EA’s arcade racing franchise that’s hitting PC and current-gen platforms later this year.
This time around, as seen in the footage above, the gaming studio is going for a new graphics style when compared to other Need for Speed entries.
Actually, Criterion says it is delivering the most realistic-looking cars in Need for Speed history with an added street art-inspired flair.
You are surely wondering about the new story’s location, so get ready to burn some serious rubber on the streets of Lakeshore City.
The game’s plot surrounds a priceless car that was stolen from a family auto shop, starring artist ASAP Rocky, who is also involved in the storyline, while also being featured in the original soundtrack.
What you should also know is that Criterion is promising a huge variety of car customization options that will now include Driving Effects alongside cosmetic items for the player character from popular fashion labels.
If you get bored with the single-player campaign, Unbound will also ship with free roam and competitive street racing for those looking for multiplayer action.
Release date-wise, Need for Speed Unbound is scheduled to come out on December 2 on PC (EA app, Steam, Epic Games Store), Xbox Series X|S, and PlayStation 5 with pre-orders available now for $69.99.
It goes without saying, but EA Play Pro members on PC will be able to dive into the game on day one for no extra cost as well.
What cars are we driving in Need For Speed Unbound?
Since EA and Criterion are looking to make this the best Need For Speed game yet, you can imagine that we are getting a pretty generous number of cars.
We are getting a number of 143 driveable cars, so diversity isn’t really a problem. All we have to do is complete the necessary challenges and unlock them.
We are going to present the full list right here, so you don’t have to go scouring the internet to find it. Here are the vehicles we can customize and drive in Need For Speed Unbound:
Acura NSX 2017
Acura RSX-S 2004
Alfa Romeo Giulia Quadrifoglio 2016
Aston Martin DB5 1964
Aston Martin DB11 Volante 2018
Aston Martin DB11 2017
Aston Martin Vulcan 2016
BMW M3 2006
BMW M3 Evolution II 1988
BMW X6 M 2016
BMW M3 2010
BMW M5 2018
BMW Z4 M40i 2019
BMW M4 Coupe 2018
BMW M2 Competition 2019
BMW M1 1981
BMW i8 Coupe 2018
BMW M4 GTS 2016
BMW M3 Convertible 2010
BMW M4 Convertible 2017
BMW i8 Roadster 2018
Bugatti Chiron Sport 2017
Buick Grand National GNX 1987
Chevrolet Corvette Stingray 2020
Chevrolet Corvette Stingray Convertible 2020
Chevrolet C10 Stepside Pickup 1965
Chevrolet Corvette Grand Sport 2017
Chevrolet Camaro Z28 2014
Chevrolet Corvette Z06 2013
Chevrolet Camaro SS 1967
Chevrolet Bel Air 1955
Chevrolet Corvette ZR1 2019
Chevrolet Colorado ZR2 2017
Dodge Challenger SRT8 2014
Dodge Charger R/T 1969
Dodge Charger SRT Hellcat 2019
Ferrari LaFerrari 2016
Ferrari Testarossa Coupé 1984
Ferrari 488 GTB 2016
Ferrari F40 1988
Ferrari 458 Italia 2009
Ferrari 488 Pista 2019
Ferrari FXX-K Evo 2018
Ferrari 458 Spider 2011
Ford F-150 Raptor 2017
Ford Mustang GT 2015
Ford GT 2017
Ford Mustang BOSS 302 1969
Ford Mustang 1965
Ford Mustang Foxbody 1990
Ford Crown Victoria 2008
Ford Focus RS 2016
Ford Mustang GT Convertible 2019
Honda Civic Type-R 2000
Honda Civic Type-R 2015
Honda NSX Type-R 1992
Honda S2000 Ultimate Edition 2009
Infiniti Q60S 2017
Jaguar F-Type R Coupe 2016
Jaguar F-Type R Convertible 2019
Koenigsegg Regera 2016
Lamborghini Countach LPI 800-4 2021
Lamborghini Huracán LP580-2 2018
Lamborghini Aventador S 2018
Lamborghini Countach 25th Anniversary 1989
Lamborghini Murciélago SV 2010
Lamborghini Urus 2018
Lamborghini Huracán Performante 2018
Lamborghini Aventador SVJ Coupe 2019
Lamborghini Diablo SV 1995
Lamborghini Huracán LP580-2 Spyder 2018
Lamborghini Aventador S Roadster 2018
Lamborghini Aventador SVJ Roadster 2019
Lamborghini Aventador LP750-4 SV Roadster 2018
Lamborghini Huracán Performante Spyder 2018
Land Rover Range Rover Sport SVR 2015
Land Rover Defender 110 Double Cab Pickup 2015
Lotus Exige S 2006
Lotus Emira 2021
Mazda RX-7 Spirit R 2002
Mazda MX5 1996
Mazda RX-8 Spirit R (R3) 2011
Mazda MX5 2015
McLaren P1 2014
McLaren F1 1993
McLaren 570S 2015
McLaren 570S Spider 2018
McLaren 600LT 2018
McLaren P1 GTR 2015
Mercedes-Benz 190E 2.5-16 1988
Mercedes-AMG C 63 Coupe 2018
Mercedes-AMG G 63 2017
Mercedes-AMG GT S 2019
Mercedes-AMG A 45 2016
Mercedes-AMG GT R 2017
Mercedes-AMG GT S Roadster 2019
Mercedes-AMG C 63 Cabriolet 2018
Mercedes-AMG GT Black Series 2021
Mercury Cougar 1967
MINI John Cooper Works Countryman 2017
Mitsubishi Lancer Evolution IX 2007
Mitsubishi Lancer Evolution X 2008
Mitsubishi Eclipse GSX 1999
NISSAN GT-R Premium 2017
NISSAN Skyline GT-R V·Spec 1999
NISSAN 370Z Heritage Edition 2019
NISSAN Silvia K’s 1998
NISSAN Z Prototype 2022
NISSAN Silvia Spec-R Aero 2002
NISSAN Skyline GT-R V·Spec 1993
NISSAN 350Z 2008
NISSAN Skyline 2000 GT-R 1971
NISSAN Fairlady 240ZG 1971
NISSAN 180SX Type X 1996
NISSAN 370Z Nismo 2015
NISSAN GT-R Nismo 2017
Pagani Huayra BC 2017
Plymouth Cuda 1970
Polestar Polestar 1 2020
Pontiac Firebird 1977
Porsche 911 GT3 RS 2019
Porsche 911 Carrera RSR 2.8 1973
Porsche 918 Spyder 2015
Porsche 718 Cayman GTS 2018
Porsche 911 Carrera S 1997
Porsche 911 GT2 RS 2018
Porsche Panamera Turbo 2017
Porsche 911 Turbo S Exclusive Series 2018
Porsche Boxster 718 Spyder 2020
Porsche 911 Carrera GTS 2018
Porsche 911 Turbo S Cabriolet Exclusive 2018
Porsche 911 Targa 4 GTS 2018
Porsche 911 Carrera GTS Convertible 2018
Porsche Cayman GT4 2015
SRT Viper GTS 2014
SUBARU Impreza WRX STI 2006
SUBARU BRZ Premium 2014
SUBARU Impreza WRX STI 2010
Volkswagen Beetle 1963
Volkswagen Golf GTI 1976
Volkswagen Golf GTI Clubsport 2016
Volvo 242DL 1975
Volvo Amazon P130 1970
Out of all the cars we have at our disposal in Need for Speed unbound, which one is your absolute favorite? Share your thoughts with us in the comments section below.
We’ll explain all you have to do if you cannot initialize the disk when trying to use an external drive.
There are many reasons why this could happen, including bad sectors causing read/write problems, incorrect hardware usage, mechanical failure, cable problems, as well as virus infections.
No matter the exact reason, the guidelines below will help you fix it.
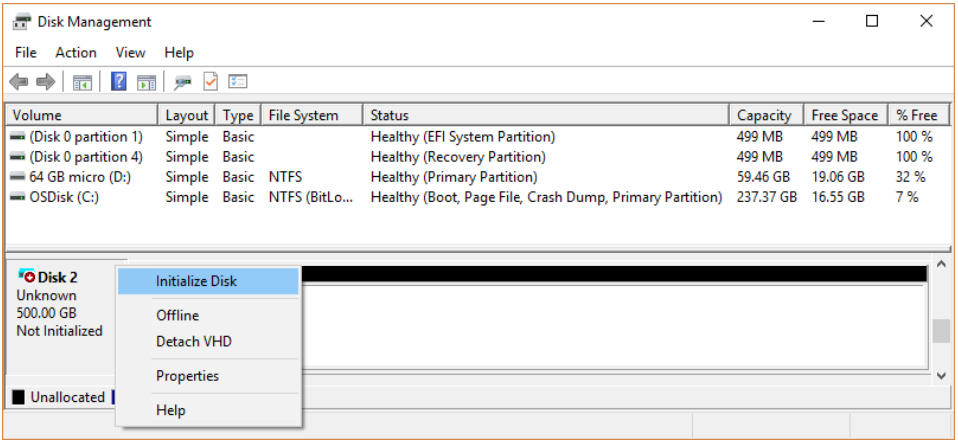
In the bottom left, click on the uninitialized disk and choose Initialize Disk from the contextual menu.
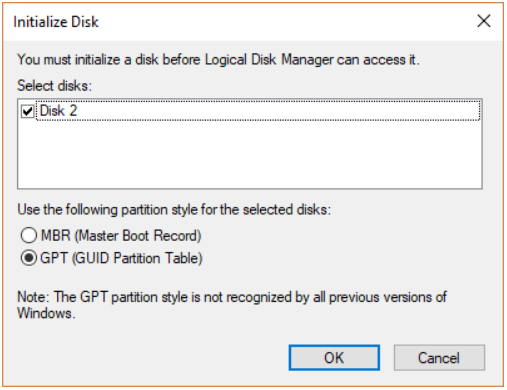
Choose the partition style, GPT or MBR. This will wipe everything from the disk storage.
Click Ok and try accessing the drive.
Of course, before doing this, try some of the free or paid recovery software to get your data out of it. You can try one of these programs to do so but have in mind that you’ll hardly manage to get the 100% of the data.
Before you decide which partition style to choose, you should first know what is the volume of your hard disk. If it is smaller than 2TB, you might as well initialize it to MBR, as MBR disk supports at most 2TB per partition.
That being said, if it proves to be bigger than 2TB, you must initialize to GPT to ensure all of the disk space is usable, but you can’t always do it.
For that to happen, you must also ensure your motherboard with UEFI and your operating system support GPT.
Furthermore, Microsoft officially declared that Windows 11 system only supports UEFI if you use the Check for update feature to upgrade to Windows 11 from Windows 10, users will have to choose a GPT disk for the Win 11 upgrade.
How do I initialize a hard drive without losing data?
For you to successfully do this you must use some specialized hard drive recovery software that can not only perform common deleted file recovery, formatted data recovery, and RAW drive recovery but also recover data from inaccessible disks, like in this case.
If you’re still unable to initialize the disk, consider replacing it. The most likely reason for this is the hardware malfunction and it’s hard to fix it.
This is all you need to know in case you want to check the initialized disk without losing data, or if you can’t access it due to the disk being unknown, not initialized, or unallocated.
For any other questions or suggestions, we invite you to use our comments section below and tell us all about them.
FAQs
Why does Windows say “Cannot initialize disk – incorrect function”?
This typically means there’s a communication error between Windows and the drive. It could be due to bad cables, corrupted MBR/GPT, or incorrect drivers.
Can I fix a disk that is not initialized without losing data?
Yes, if the issue is related to the partition table or drive signature, you can often fix it using PowerShell or recovery software without formatting.
What if my external hard drive is not initialized?
Try different ports, power supplies (if needed), and check if it appears in Disk Management or Device Manager. You may need to run DiskPart or use data recovery tools.
Is formatting necessary to initialize a disk?
Not always. Initializing creates a partition style (MBR/GPT), but formatting wipes data. Use partition recovery tools first if you want to avoid data loss.
You are probably wondering what memory cleaner options to try, here is all you should know.
When you buy a new computer, it comes loaded with stuff that you don’t need that can take up memory and make it slower, and this isn’t how a brand-new machine should ordinarily behave.
Everybody wants a PC that delivers fast startup and runs operations at peak capacity, regardless of the brand or price of the machine.
However, you cannot escape the slow computer issue because it will happen over time or even soon as you upload your files from a hard drive or other storage devices.
What is the best way to clear memory?
You can either choose to do it manually, by closing background processes, or you can use one of the best-specialized memory cleaners:
Fortect – Universal repair tool
Fortect PC Cleaner – Boost memory and app performance
IObit Advanced System Care – Excellent speed-up feature
Ashampoo WinOptimizer – Powerful one-click PC optimizer
System Mechanic Ultimate Defense – Great for bloatware removal
Advanced System Optimizer – Secure deletion and optimization
CCleaner – Great for add and driver update
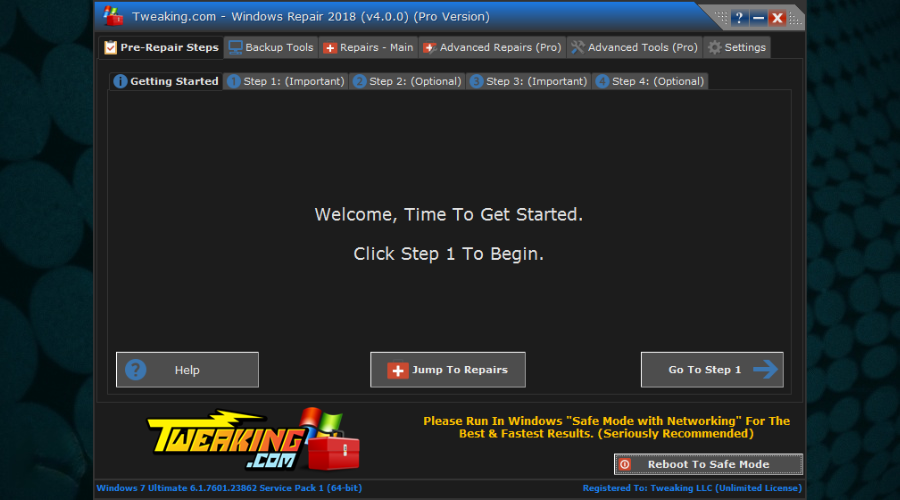
TweakingWindows Repair – Lightweight option
What is a memory cleaner?
Memory cleaners are apps that check your computer and fix the troublesome spots by defragmenting your hard drive, repairing the registry, and freeing up memory by getting rid of unnecessary and duplicate items on your computer – but some go the extra mile.
Cached RAM (also known as SRAM) is closely linked to your CPU and stores data frequently executed by it. The purpose is to provide accelerated and smooth access to commonly used programs by memory caching the recurrent instructions.
Fortect is a universal tool to fix almost any type of Windows-related issue and malware threat.
The tool is capable of removing faulty files, deleting duplicate content, repairing or recovering initial registry settings, fixing DLL files, and much more.
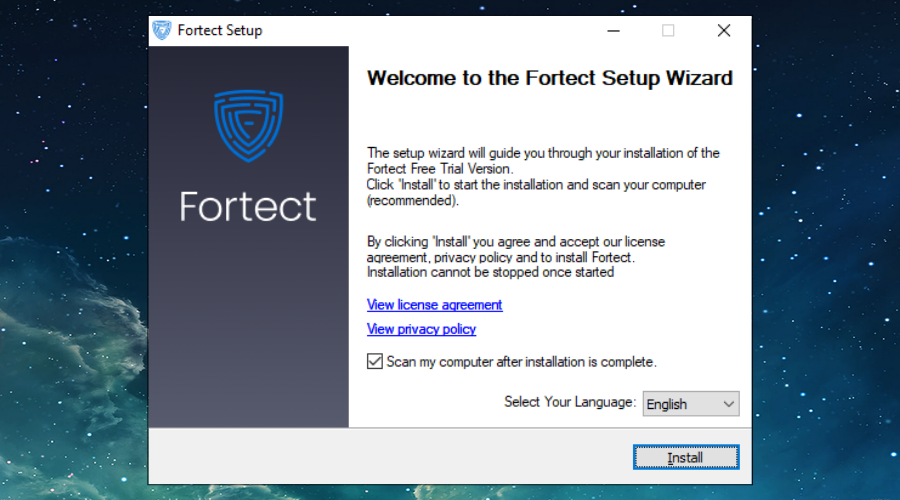
It is one the easiest-to-use PC repair tools we have tested so far; all you need to do is install the program, run the initial scan, and let Fortect do its job.
It is one of the most effective tools to recover your Windows system, which is possible because of the massive database of official Windows registry files Fortect gets.
One handy feature is real-time monitoring which spots issues and solves them on the go.
Fortect is one of the best investments you can make to repair safely and restore your Windows OS or boost your PC performance by cleaning up the memory.
You should try it out if you want an excellent memory cleaner for Windows 10 and 11.
PC Cleaner is a comprehensive all-system optimization tool from Fortect. This software can clean your computer memory and optimize apps for more efficient memory consumption.
This program is very easy to use and comes with intuitive sections. The memory cleaning tool can be found under optimization.
You can set up the software to automatically boost the memory used or you can manually select different settings for specific apps.
On top of that PC Cleaner also offers a boost feature which will increase the overall performance of your computer memory.
This software is a complete optimization program and the memory booster is just one of the many features available.
Other notable features:
Registry Cleaner
Windows Security
Uninstall software
Remove residual files
Fortect PC Cleaner
Clean and optimize memory usage with this powerful software.
Buying a new computer is usually one of the solutions users think of when they’ve tried to deal with a slow computer and nothing works. But, thankfully, there are more robust solutions that can save you money, such as investing in a memory cleaner like IObit.
This app performs system repairs on your computer, cleans up your registry deeper than you can imagine, adds real-time optimization, and is affordable if you consider the premium performance it delivers.
The IObit Advanced SystemCare comes in the Free, Pro, and Ultimate types.
IObit Advanced SystemCare Free features include essential protection, backup and restore, system optimization, and privacy protection, and its Speed Up feature removes junk files while defragmenting the registry.
IObit Advanced SystemCare Pro is packed with extra features such as malware protection and real-time system optimization in addition to the free version.
The Ultimate Advanced SystemCare, on the other hand, includes security tools that protect your system from emerging malware and other threats.
This is a fantastic memory cleaner for Windows 10, but it is limited to three computers, which may be challenging when multiple computers exist. Otherwise, it installs pretty fast and doesn’t take forever to download.
You’ll get a more responsive and snappier computer due to the improvement IObit Advanced SystemCare brings to your PC’s performance.
Important features:
One-click to update
Large software database
Secure & Fast to download
IObit Advanced System Care
A Cleaner PC memory means faster response times and better potential for work and play. Get IObit Advanced System Care today!
If you want a faster and more stable computer system, then Ashampoo WinOptimizer is an excellent choice as it frees up your system from junk data, plus has powerful modules that help you fix errors and boost your PC’s performance.
This memory cleaner for Windows 10 and 11 features a one-click optimizer that declutters hard drives. It also repairs corrupt shortcuts and deletes unwanted cookies or browsing history.
It also manages unnecessary services and autostarts entries to declutter your CPU and memory for other processes to run.
Through its defragmentation tool and ability to permanently erase files, your computer gets a full maintenance and optimization package all in one tool.
However, you just get three licenses which can be very limiting where there are multiple computers unless you get the Family Extension plan.
Also included with the Ashampoo memory cleaner is a backup manager and task scheduler, but it doesn’t have a desktop widget like Iolo’s, which lets you scan through the system’s information at a glance.
You have to open the whole app to check the status of your computer’s health.
Important features:
Window scaling and docking
Convenient cookie manager
Clean cleaner UI
Ashampoo WinOptimizer
Your PC’s speed is limited by how you take care of it. Make it run fast again by using Ashampoo Winoptimizer!
This memory cleaner for Windows 10 is compatible with Windows versions from XP and later. It is also relatively priced, but unlike other IObit, this one lets you install it on multiple computers regardless of the number, though not for commercial use.
One tool you can run to refresh your computer and free up memory is a Repair Now button that displays when a problem is detected. Once you click on it, the fixing tool required for the specific problem is launched.
Another tool is CRUDD (Commonly Redundant or Unnecessary Decelerators and Destabilizers). This removes unnecessary files that jam your computer and eliminate any extra programs that are installed together with programs you add to your computer.
Other tools include LiveBoost to boost your CPU and RAM, plus ActiveCare, which performs analysis and repair on your system. You can also get an anti-malware tool if you upgrade to the Iolo System Mechanic Pro.
You also get PowerSense which adjusts power settings and processor modes on your computer automatically, and PC Accelerator, which aligns program files on the hard drive.
It also features AcceleWrite, which organizes how data is written on your storage drives, IntelliStatus, which shows information about your RAM and hard drive, and Stability Guard, which stops system threats.
A unique feature is the Privacy Shield suite, a privacy tool for Windows 10 that keeps your data safe from involuntary collection and sharing.
With this tool, you can disable services on Windows 10 that share your WiFi and collect your browsing habits and other details in a few mouse clicks.
Iolo System Mechanic boosts your computer’s speed, removes bloatware, repairs problems, declutters, and protects your privacy and security, leaving your computer feeling new.
Phoenix 360 is a comprehensive package comprising 7 software products, including Iolo System Mechanic.
Important features:
Clutter cleaner
Privacy and security protection
System repairs
Automated PC care
System Mechanic Ultimate Defense
Clean your PC’s memory today and make it run as if it were brand-new with Iolo System Mechanic.
Advanced System Optimizer from Systweak is a multi-functional system performance and optimization software for Windows operating systems. This PC optimizer’s modules allow you to boost your PC’s speed, improve its security, change and optimize its settings, and customize and personalize your displays.
It is activated by a single mouse click. Furthermore, Advanced System Optimizer’s Registry Cleaner improves system stability by removing incorrect Registry entries, while Registry Optimizer defragments the Windows registry, allowing the system to perform more smoothly.
To clean and optimize your hard drives, the application offers more powerful tools such as System Cleaner, Disk Optimizer, Disk Tools, and Disk Explorer.
When you finish running any program on your system, the Memory Optimizer ensures that memory is correctly allocated. There is even a Game Optimizer, which provides a unique environment in which games may run efficiently.
Secure Remove is a function that allows you to delete files and folders safely and permanently. It really implements a mechanism developed by the United States Department of Defense. Secure Delete deletes any private or sensitive information permanently, and no program can restore any files or folders erased with Secure Delete.
There are certain drawbacks to the software, such as the lack of a progress meter and the invasive reboot request for your PC. To minimize conflicts or unexpected PC reboots, we recommend using each feature independently. This way, you may utilize it without the risk of crashes or freezing.
Advanced System Optimizer
Robust RAM cleaner, defragmenter, and secure file deletion and disk optimization.
With CCleaner software, cleaning your PC is like riding a bike. You can free up your memory simply by erasing unwanted or secret files.
As time goes by, you can experience some issues regarding your computer performance. And that is because your disk space becomes busier; thus, the system can be affected by broken files or settings.
Therefore, the functionalities of CCleaner can instantly resolve such problems by quickly scanning your system. It takes a few clicks to check the registry and clean unnecessary files afterward.
If you want your computer to be faster and eliminate old files that slow down your performance, you can get this software to clean up the clutter. You only have to press a few buttons and control your computer resources.
Plus, the software promises features that can improve your digital experience by cleaning junk files, running health checks, automatically cleaning history, real-time virus monitoring, and so on.
You can also take advantage of the free version of CCleaner and enjoy the above benefits. Also, consider the pro version if your PC is getting slower and it’s time for a change.
Important features:
Updates apps for security issues
Cleans memory all the way
Safeguards against junk files
Erase browser history when you close
Protects online identity
Improves computer speed
CCleaner
If you start thinking about alternatives for your slow computer, act smart and try out CCleaner to resolve fast.
Even though Tweaking Windows Repair might seem to be outdated software at first glance, rest assured that it uses the latest advancements in computer analytics and problem-solving.
An old-school look allows it to focus all its power and delivery with just a few clicks of the mouse. This look also means that it consumes fewer resources than other software options.
This software can fix BSoD issues, resolve corrupt or missing DLL files, resolve problems with Windows Update, and maintain your system’s stability.
The program is available in both a free and a Pro version. However, the Pro version is what you truly need if you are interested in deep-cleaning your PC’s system.
Important features:
Streamlined, updated interface
Missing packages registry cleanup
Windows Services Tool
Tweaking Windows Repair
Never worry about your system’s cleaning by installing and using this powerful software today.
Yes, memory cleaner programs can be effective, and we will show you the best available options.
However, it would help if you had in mind that you may introduce malware into your computer by using certain dubious cleaner freeware. So, it would help if you were mindful only to try highly recommended ones.
Let us take you through our top recommendations, many of which are also excellent memory cleaner options for gaming.
Do phone app cleaners actually work?
They do, indeed. Finding phone cleaning applications that genuinely deliver on their claims is the problem.
A poor cleanup program only wastes storage space at best. At worst, it may corrupt you with adware or malware. However, not all mobile cleaning applications are pointless.
These tools mentioned are some of the best PC memory cleaner options and are also great memory cleaner options for Mac.
Ready to free up some space on your computer? Let us know which memory cleaner for Windows 10 and 11 you can’t wait to use by leaving a comment in the section below.
If you’re using an AMD graphics card you might face some problems after installing Windows 10/11.
Some users report that when they try to install their AMD drivers, the installation couldn’t be finished because of an error involving a detection driver.
Fortunately, the solution for this problem is very simple and it works not just on Windows 10/11, but also on older versions.
Why is my AMD driver not working?
More specifically, the problem appears if you’re connected to the Internet when installing Windows 10 because the setup wizard automatically installs Microsoft AMD drivers.
After the detection phase, your screen might turn black and you’ll be forced to restart your computer, or you’ll simply get a Detection Driver error. Below are some of the variations of the issue:
AMD driver install black screen
AMD driver install stuck
AMD driver install factory reset
AMD driver install error 1603, 192, 182
How do I fix my AMD driver if it’s not installing?
1. Uninstall your current driver
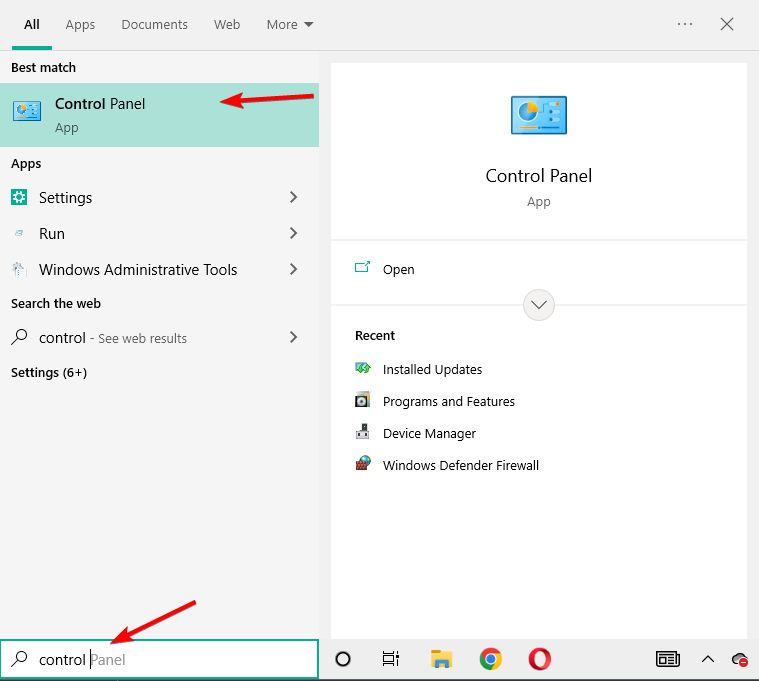
To fix the AMD driver not installed error, press Windows then type control and select Control Panel.
Click on Programs followed by Programs And Features.
Select AMD Catalyst Install Manager then click Change.
When prompted by the AMD Catalyst Install Manager– InstallShield Wizard, select Express Uninstall ALL ATI Software.
Click, OK to allow the tool to remove all AMD drivers and application components.
Click, Yes when prompted to restart the system and complete the uninstall process.
When the utility finishes uninstalling all the AMD drivers, your screen should look as if it had a standard VGA driver installed.
Then restart the AMD Catalyst setup and you should be able to install your AMD Catalyst drivers normally.
If you don’t have to worry about residual data and files, then we suggest you try a high-quality driver uninstaller. A professional tool will quickly scan your system for all installed drivers and it will let you select one or more drivers at once for removal.
2. Download the new driver with a third-party application
If you do not have the necessary computer skills to update/fix the drivers manually, we strongly suggest doing it automatically with a professional tool.
One of the biggest benefits of updating drivers automatically is that you can use it to update any driver on your computer.
The AMD chipset driver installation failed issue will be soon fixed once you fix your computer drivers with the help of a professional driver updater such as Fortect Driver Updater.
This is the old-fashioned and probably the most used method of installing and updating drivers on Windows. Once you’re done, the AMD drivers not installing error will be solved.
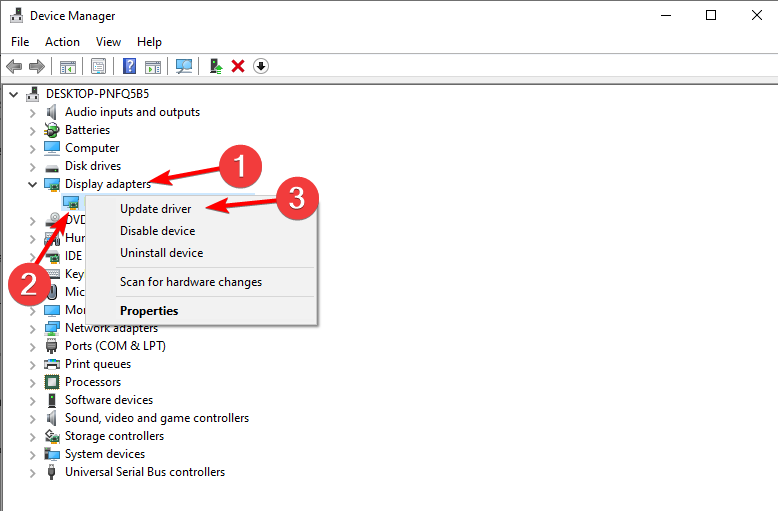
1. Right-click the Start icon then select Device Manager.
2. Expand the Display adapters folder, right-click your AMD graphics card, and select Update driver.
3. Follow further on-screen instructions then restart your computer.
6. Turn off your Firewall and antivirus
Press Windows + S, type Firewall, and select Windows Defender Firewall from the list of results.
When Windows Defender Firewall starts, click on Turn Windows Defender Firewall on or off.
Select Turn off Windows Defender Firewall (not recommended) for both private and public network settings.
Click OK to save changes.
If you’re unable to install or update your drivers using any method mentioned above, try to disable your antivirus and Windows Firewall, only temporarily.
Antivirus programs are known for not getting along with Windows updates. And driver updates may not do any better, as well. To disable them, right-click on the antivirus icon from your Taskbar and choose Disable for 10 minutes.
Alternatively, you can uninstall it together and opt for better antivirus software that won’t interfere with necessary processes.
7. Try installing drivers in Compatibility mode
Locate the driver setup file, right-click it, and choose Properties from the menu.
Head over to the Compatibility tab and check Run this program in compatibility mode for option. Choose Windows 8 or higher and click OK to save changes.
How do I fix my AMD driver problem in Windows 11?
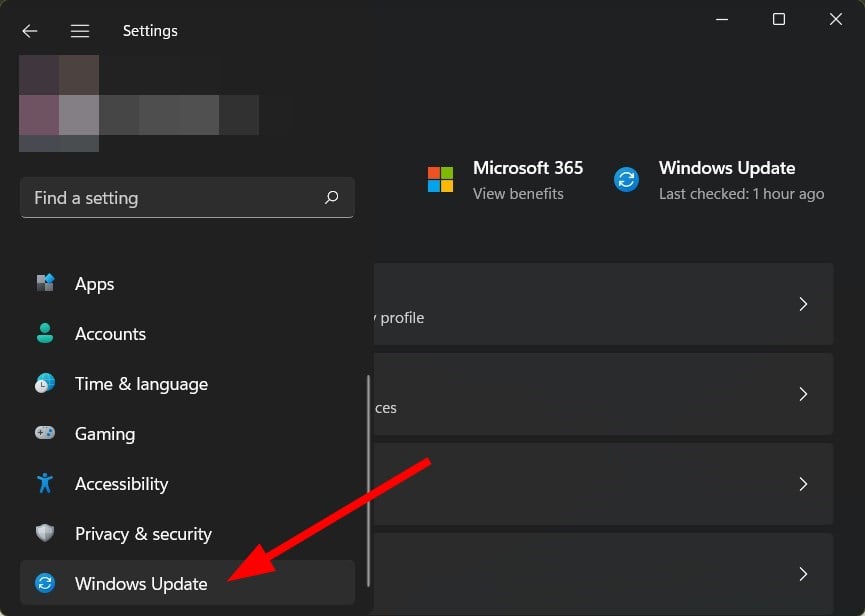
Press Windows + I then go to Windows Update.
Here, click the Update or Restart now button in order to bring your OS up to date.
Even in Windows 11, you can apply the above methods, moreover, making sure the OS is up-to-date is adamant in solving the AMD driver not installing situation.
How do you know if AMD driver is installed?
Users are able to alter the visual quality as well as the amount of detail in games with the AMD Radeon Settings. But, this is not the only usage of the app. Instead, you can check all your installed drivers as well as new updates that you need to download.
Because increased visual quality can have an effect on performance, obtaining the best possible gaming experience demands striking a balance between performance and visual quality. And updating your drivers is important in attaining that balance.
That’s about it. We certainly hope at least one of these solutions helped you resolve the problem with the AMD drivers.
If you have any comments, questions, or suggestions on this topic, just let us know in the comments down below.
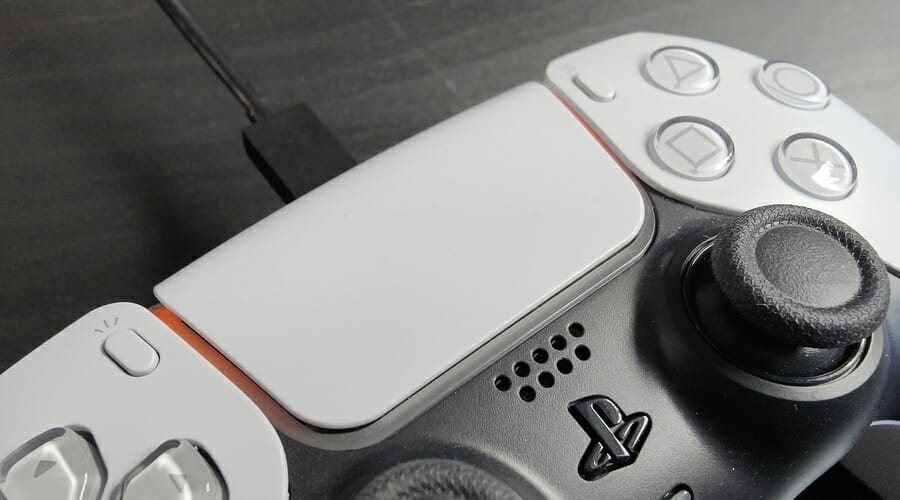
Sony made the wireless controller on its latest console, PlayStation 5, even better than the last-gen PS4. However, like everything wireless, the PS5 controllers are battery-operated and require charging.
Unfortunately, there is no way to know the charge level on the controller without going into the menu.
It is essential to keep your controller charged enough so that it doesn’t go off during gameplay.
Can you overcharge a PS5 controller?
As with most electronics in this day and age, surge protection is used when it comes to charging the battery too much.
This applies in the case of the PS5 controller as well, and it uses a special chip that automatically stops any more electricity from passing through whenever the controller is fully charged.
You can leave your controller plugged in even overnight, without worrying about any sort of damage occurring.
Here’s how to check the PS5 controller battery level on your console with a step-by-step guide, so that you can charge it on time.
How can I check the PS5 controller battery percentage?
1. Show the battery level on a PS5 console
1. Open your PS5 console.
2. Press the PS5button on your controller to bring up the menu.
3. Next, when the quick menu pops up, locate the Accessories icon in the bottom left corner of your screen.
4. Highlight and select the Accessoriesoption.
5. It will show the PS5 controller battery level. The battery level will be displayed in bars.
You can check your PS5’s controller battery percentage directly from it, without using third-party apps. All you need to do is navigate to the Accessories section, where you will find the battery level displayed under the form of bars.
Unfortunately, it still doesn’t show the percentage of battery available, but only bars. However, assessing the battery level through the bars is easy.
If you have one bar left, it means you have about two more hours of playtime. You can multiply the number of bars available to get a rough estimate of the playtime available on your PS5 controller.
That said, the playtime for your controller can vary depending on your controller settings. If you have enabled all the cool features such as adaptive triggers and others enabled, the playtime will dramatically reduce.
2. Check the PS5 battery level on PC
Another method to find out how much battery you have left on your PS5 controller is to use your PC. This is a better method for those who want to know the percentage of battery left. Thus, you can more accurately find out how much is left and how soon you need to charge your controller.
PS5 DualSense controllers are compatible with a dedicated Windows app called DS4 Windows, which allows you to perform the battery check.
That being said, this is what you need to do to show your PS5 DualSense controller’s battery on PC:
How long does it take to charge the PS5 controller?
Fortunately, the PS5 controller charges pretty quickly. You can charge the controller fully in about 3 hours. This is slower than your PS4 controller, but it also lasts longer.
The PS5 controller battery lasts for about 15 hours, compared to the 6 hours average on the PS4 controller.
You can also use the controller when charging. While it does not affect the controller performance, the charging time increases when it is in use.
It’s important to mention that your console has different status indicators in the form of colors, and we explained them in detail in our PS5 blinking orange guide.
So, that’s a quick article on how to check the PS5 controller battery level. Make sure to allow your new controller to charge fully to maximize its lifespan. Have anything to add? Let us know in the comments below.
Hybrid workforce professionals now have another thin and light laptop choice. Acer brings the Acer Swift Edge, a 16-inch thin and light-running AMD Ryzen PRO 6000 series, and AMD Ryzen 6000 processors. Each processer brings up to eight cores based on the Zen 3+ 6nm architecture. AMD PRO brings along security and management features to give IT administrators the options they need to ensure long-term reliability alongside data security.
Alongside the AMD Pro processor stands the Microsoft Pluton security processor. The Pluton hardens Windows 11 PCs with additional protection for sensitive data such as passwords and encryption keys. To further enhance security the Acer Swift Edge features biometric authentication and a Nobel Wedge lock.
The package is wrapped up with a 4K OLED display that supports 100 percent of the DCI-P3 color gamut. The screen features an impressive 500 nits of brightness, not only making your work content brighter but allowing you to work outdoors and enjoy high-quality images and video during downtime. The VESA DisplayHDR True Black 500 and TÜV Rheinland Eyesafe display certifications help reduce eyestrain making longer workdays more comfortable.
For those who want to get the most out of their Windows 11 machine in terms of gaming, there are a few options you can try to configure your PC for optimized gaming performance. Specifically, there are a couple security features that can be turned off to boost performance.
These are Memory Integrity and Virtual Machine Platform (VMP).
Memory Integrity “helps prevent attackers from injecting their own malicious code and helps ensure that all drivers loaded onto the OS are signed and trustworthy.” While VMP “provides core virtual machine services for Windows.” These security features are typically enabled by default in Windows 11. However, the OS allows for user choice when it comes to these features. By turning off Memory Integrity and VMP, users can prioritize gaming performance. Here’s how.
Turn off Memory Integrity
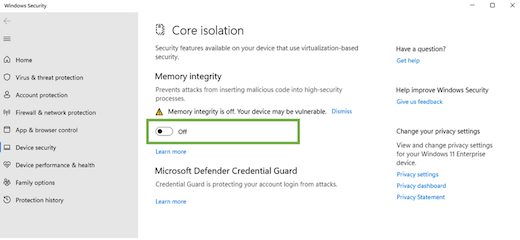
Enter Start key (or Windows key). Enter ‘Core Isolation’ in the taskbar. Select Core Isolation from the results list. This opens The Windows security app.
On the Core Isolation page, toggle off Memory Integrity. Restart your device if needed.
Turn off VMP
Press Start key. In the search box Enter ‘Windows features.’ Select Turn Windows features on or off in the results list.
This opens the Windows features window. Find Virtual Machine Platform. Unselect to turn it off.
Select OK. Restart your device if needed.
You should now be able to see a noticeable improvement in gaming performance. You can always turn these security features back on if you choose through the same methods. And if you’re playing browser games, we have the best browsers for gaming for an enhanced experience.
In this guide, we will walk you through how to download and install Visual Studio 2022 Preview on Windows 11 on Arm64 devices, like the Surface Pro X or the Lenovo ThinkPad x13s.
Arm64 development and workload support
Visual Studio 2022 17.3 preview 2 has the following workloads enabled for developers:
Desktop development with C++ (for MSBuild-based projects).
.NET desktop development (WinForms, WPF) using both .NET Framework, and modern .NET.
NET and Web development.
These workloads will be generally available by the end of 2022 and Microsoft needs developer feedback to enable more tools and experiences. Check the Visual Studio 2022 Roadmap for more information.
Visual Studio versions before 17.3 Preview 2 can run on ARM-powered via x86 emulation, but some other features are not supported. It is not recommended that you run older versions of Visual Studio on devices that use ARM-based processors.
Install Visual Studio 2022 Preview
Here are the prerequisites for downloading and installing Visual Studio 2022 Preview on Arm64 devices.
An Arm64 device with Windows 11.
Uninstall any previous versions of Visual Studio 2022 from your device.
Once you have met these requirements, you can continue to download and install Visual Studio 2022 17.3 preview 2. There is a single installer for both x64 and Arm64 Visual Studio. Once downloaded, double click the installer and it will detect your system architecture, download the appropriate Visual Studio version, and install it to your Arm64 device.
For managed developers
.NET 6 has native Arm64 support already, and this release expands its native Arm64 support to include .NET Framework 4.8.1 runtime and SDK support for building managed desktop applications (Windows Forms and WPF) using both .NET 6+ and .NET Framework 4.8.1.
Making your extension Arm64-compatible is relatively easy if you are familiar with Visual Studio 2022. Leslie Richardson, Program Manager for Visual Studio Extensibility,provides a quick and helpful guide.
If you are just getting started developing Arm64 apps or are thinking about it, keep in mind, most of the C++ libraries you already use natively support Arm64. Vcpkg already runs natively on Arm64 and while some dependent third-party tools will run emulated, you will still be able to build and use 600+ C++ libraries natively in your Arm64 build environment.
The Waypoint update is a big milestone for the game. It brings literally hundreds of improvements to the game, and a whole host of new features, some of them detailed below.
Relaxed mode: a more approachable sandbox-focused mode for players new to the game.
Survival and Challenge: veterans will find plenty of challenge in this mode.
Custom play style: this allows players to tweak gameplay elements to create a tailor-made experience.
Saves: game saving is now easier and more frequent, allowing players to jump in and out of their game more readily.
Cross Game Mode Play: matchmaking has been changed so players can see and play with players in other game modes.
Information portal: for players who’ve been away for a while, this will provide them with a useful recap of where they were in the game.
Streamlining: 20 major updates and hundreds of patch notes have been streamlined.
Inventories and increased level cap: inventories have been overhauled, increasing the level cap for ships, weapons, freighters, and suits.
The Waypoint update is free of additional charge. No Man’s Sky is available on Xbox Game Pass. If you haven’t delved into the near-infinite vastness of No Man’s Sky, there has never been a better time to get started.
Something happened to the @windowsinsider Twitter account, the official account of the Windows Insider team, yesterday. For a while it was up, but unable to load any tweets, and now the account “doesn’t exist.”
Windows Insider lead Amanda Langowski posted yesterday that the team was “investigating an issue” with the account
Hey Folks – We are investigating an issue with our @windowsinsider account. Will update once it's restored. In the meantime, feel free to reach out to me or the team if you any questions regarding the recent flight. Thanks
… but that was over 12 hours ago, and the account is completely gone now.
Hopefully Microsoft and Twitter will be able to get the issue resolved, until then, you can follow Amanda Langowski for questions regarding the Windows Insider program, and of course you can follow us at @OnMSFT for all the latest Windows Insider, Xbox, and Microsoft news and information.
Good luck to the Windows Insider team, hope you get this resolved soon!
We have all encountered an error on Windows 11, and speaking of errors, it seems that some users are having the Explorer.exe class not registered issue.
As far as we know, this error can affect almost any software, and users have reported that Google Chrome isn’t working on Windows 11 due to this one either. We will further see what other programs and software also get affected by this issue.
But fear not as you have come to the right place! Below, we have prepared a list of solutions for you to try in order to fix the problem right after we see what the Explorer.exe class not registered message means. Follow along!
What does class not registered mean?
One of your most asked questions is what the above error message means, thus we will explore it in the following section because we want you to be informed at all times.
According to the error message, the occurrence of this issue indicates that the system files associated with explorer.exe have become corrupted or have gone missing. In order to fully comprehend this mistake, we must first understand the operation and significance of the DLL files within Windows.
The Dynamic-link Library (DLL) files, also known as shared libraries, are essential for the proper operation of all Windows programs.
These files are extremely advantageous to users since they may run on less memory and have the capability of completing their function without having to be loaded in their whole at the same time.
The class not registered error is not specific just to Windows 11 alone. It appears on different operating systems as well. For example, Windows 10’s class not registered issue is exactly the same one and occurs because of similar reasons.
Another variation that causes trouble to our users is class not registered on Windows 7. Even though we haven’t heard much about it lately, we still take it into account and wish to help you get over any bumps along the way.
This can cause various problems on your PC, and speaking of that, many clients reported the following ones as well:
Class not registered msstdfmt.dll – Your DLL files can sometimes cause this issue, so be sure to remove the application associated with that DLL file and check if that solves the problem
Runtimebroker.exe class not registered– Inside Task Manager, scroll down to find the exe program, right-click on it and select End task from the drop-down menu
Explorer.exe class not registered after update – The occurrence of an error can be caused by a variety of factors, such as corrupted files or a failing hard disk
Class not registered looking for object with CLSID – The Class ID, often known as the CLSID, is a serial number that serves as a unique identifier for any program component running on a Windows computer
Explorer.exe class not registered black screen – There are many programs that can show class not registered error and that can throw the PC into a BSoD
On top of this, the error doesn’t occur on just one brand of computer, but it appears on multiple laptop/PC brands such as:
Lenovo class not registered – The class not registered error may occur when your Windows is not updated; restart your PC and do a Windows Update
Acer class not registered – Acer users have also encountered the class not registered error on their PC’s randomly
Class not registered HP – According to HP clients, the error message appears when they try to open a .JPG file
Class not registered Huawei – Fortunately, we have prepared a list of solutions that are also applicable to Huawei laptops/computers
When you launch an application, the explorer.exe file attempts to load the program by accessing the DLL documents. You will obtain an error message stating class not registered if the DLL files associated with that application have been uninstalled or have not been updated to their most recent version.
The reason for this problem is that the shared DLL file becomes unregistered from time to time due to various causes. As a result, Windows is unable to associate the file with the program that the user wishes to start.
Another cause of the issue could be antivirus software that a user has installed on his or her computer. When the antivirus software is contaminated, it deletes some antivirus files as well as the system files it was destroying. As a result, the Explorer.exe class is not registered message appears.
The error is a straightforward one that may be resolved in a short period of time by simply following the below instructions. It is critical to first identify the root cause of the error before attempting to resolve the problem at hand.
How do I fix a class not registered error?
1. Disable iCloud
1.1 End the iCloud process
Press Ctrl + Shift + Esc to start Task Manager.
When Task Manager opens, find iCloud.
Right-click on it and choose End Task.
1.2 Disable the iCloud startup
Open Task Manager and navigate to the Startup tab.
If Internet Explorer keeps crashing while giving you the class not registered error, you might need to open the Command Prompt and manage DLL files as shown in the example below.
1. Open Command Prompt as administrator. To do that, type cmd in Windows search and select Run as administratorfrom the list of options.
2. When Command Prompt opens, paste the following code and press Enter to run it: regsvr32 ExplorerFrame.dll
3. Press the Enter key and wait for the file registration to be completed.
3. Check your hard drive
In some rare cases, a class not registered error can be caused by a faulty hard drive, so make sure that your hard drive is working properly. Few users have reported that replacing their hard drives has fixed this issue. Take a look at our post on new hard drive not showing up in Windows 10/11.
That’s why we recommend you use a high-quality hard drive, like the Seagate BarraCuda 2 TB, which provides 2000 GB of space along with a read speed of 220 Megabytes per second.
This is a 3.5 inch SATA 6Gb/s HDD that also comes with a 7200 RPM that ensures that your PC will run smoothly each time and a 256MB Cache of 3.5-Inch.
Press the Windows key + R, type the following command, then press Enter or click on OK to run it: dcomcnfg
When the Component Services window opens, expand the folder with the same name, then click on Computers. Finally, go toMy Computer and double-click on DCOM Config.
You should get a few warning messages. If that happens, just click Yes. Now close the window and restart your computer. After doing that, this error message should stop appearing.
Most users have stated that modifying certain settings from the Component Services menu has solved the problem for them.
5. Use a different local account
Go to the Settings app. You can open it quickly by using Windows key + I shortcut.
After the window opens, navigate to theAccounts section. Then click Family & other people from the menu on the right.
Select Add account next to Add other user from the right side.
Now enter your Microsoft account email and click Next.
If there’s no other way to fix the class not registered error on your Windows 11 PC, you might want to create a new Microsoft account, so just take a look at the next solution.
Open the Settings menu as we have shown above in previous solutions, then click on the Accounts option.Then click on the Sign in with a local account instead option. In our case, we have the Microsoft account option but don’t mind it.
Next, you’ll be asked to enter your password. After doing that, you’ll have to enter the username and password for your local account as well.
We have to mention that this solution might not work unless you choose to sign in with a local account instead. To switch to the local account, follow the steps above.
7. Use a great browser
When it comes to an issue like the class not registered error on your browser, a great idea would be for you to switch to a better one.
We recommend an established browser that comes with a built-in VPN, such as Opera One, which means that your online experience is safe from cyber threats.
In addition, you have some really fun extensions like the incorporated Messenger app. You also get built-in VPN, Ad Blocker and even an AI.
Opera One
A lightweight browser with unique features that create an amazing browsing experience.
Press the Windows key + S and type control panel. Click on the top match from the list of results in order to open it.
The Control Panel window will now appear. Next, select Programs followed by Default Programs from the list.
After the Default Programs window opens, select the Set your default programs option.
Input Edge in the search bar then select the Microsoft Edge result.
Click Set default.
You can do the same to select any other browser except for the one you were using at that moment since it didn’t work that well.
9. Check if Internet Explorer ETW Collector Service is running
Press the Windows key + R to open the Run dialog. Now enter services.mscand click OK.
From the list of services spot the Internet Explorer ETW Collector Service option, right-click on it and choose Start.
Next, you need to open Task Manager and navigate to the Detailstab.
Find explorer.exe and right-click on it. Choose End Task from the drop-down menu in order to stop the process from running.
Now click on File from the top-left side, then click Run new task.
The Create new task window will appear. Next, type in explorer and click OK.
The class not registered error often affects Internet Explorer so if you’re having this specific problem with your browsers, try the instructions above.
After you complete this procedure, Explorer will start again, and everything should be working accordingly.
This solution is addressed only for the users who still use Internet Explorer. This browser will become obsolete on June 15th 2022 so make sure you switch to Microsoft Edge or another, more recent browser.
10. Change the default image viewer to Microsoft Photos
Find any picture on your computer and right-click on it then choose Open with and click on Choose another app.
Next, select Microsoft Photos from the list. If you want to only use this program from now on, make sure that you select Always use this app to open .jpg files. Now click OK to save changes.
If you don’t want to add any changes to your registry, you can simply download any free image viewing software, install it on your computer and repeat all steps starting from Step 2.
As we already mentioned, the class not registered error can appear when you try to view .jpg files, and if this happens, you might want to set your default image viewer to Microsoft Photos.
Open the Settings app by pressing on Windows + I, then go to Apps and select Default apps.
Scroll down until you see the Reset all default apps section and click on the Reset button.
According to users, a class not registered error appears when they try to open a .jpg file on their computer, and this problem can be fixed by resetting default apps. To do that, follow the instructions above.
Press the Windows + S key to open the Search function. Type cmd in the box then right-click on the top result and choose Run as administrator.
Now type or copy-paste in the following command and press Enter in order to start the process: sfc /scannow
Reboot your computer after you’ve finished waiting for the process to complete(which could take some time) before continuing.
The class not registered error details are usually found in the interruption message, which may include characters such as file explorer class not registered or other characters indicating a malfunctioning or unresponsive process, among other things.
It simply means that your Windows 11 is unable to link to a file that you are attempting to access with the software you are attempting to launch.
Which games and browsers are affected by the class not registered error?
It may come off as a surprise when you hear that the same class not registered error occurs also in games, and in popular ones such as:
Minecraft class not registered – Minecraft gamers have sadly reported that they get the error when they try to open the game on their computers
Forza Horizon 4 class not registered – Like their brothers, FH4 players have been impeded from playing the game due to class issues
Explorer.exe class not registered Valorant – The Valorant game is another example that experiences DLL file problems before starting, resulting in a black screen
On top of this, browsers are no exception from this. Multiple web browsers such as those listed below will experience at some point the class not registered error:
Microsoft Edge class not registered – Users reported that Microsoft Edge meets the same error when they open it and have issues with the DLL files
Explorer.exe class not registered Opera – Opera is another app that experiences today’s error, according to its clients
Explorer.exe class not registered Opera GX – The Gaming browser which includes unique features like CPU, RAM, and Network limiters also fails to function due to the class not registered error
Lastly, the error at hand is portrayed on other programs, tools, and services outside Microsoft or Windows such as the following examples:
Spotify class not registered – This error may occur when you try to open the Spotify app on your computer
Explorer.exe class not registered Netflix – Users reported that they get this error when they open up the Netflix app on their computer, both in Windows 10 and 11
Explorer.exe class not registered Bluetooth – If you turn off Bluetooth, wait a few seconds, then turn it back on; remove the Bluetooth device, then add it again
EOleSysError class not registered – The class not registered error is a COM issue; COM libraries are not linked statically, they are loaded dynamically in this case
iTunes class not registered – Apple products are no exception to this; iTunes is one of their products that experiences the same issue
Class not registered ZkTeco – The ZKTeco company focuses on biometrics of fingerprint, face recognition, finger vein and iris recognition, however they also can face the class not registered error
Class not registered PDF – In several cases, users reported this error while trying to open PDF files; this can be an issue, but you should be able to fix it using one of our solution
Windows components are no exception to this. Microsoft products neither. The following are some of the errors our users reported getting:
OneNote class not registered – This error occurs when you try to open the OneNote program on your computer and the DLL files are in the way
Class not registered error when opening pictures, videos – Another message similar to this one or even this one can appear while trying to open pictures or videos
MS-available networks class not registered – Your nearby available networks will stop working due to the issue at hand, and an additional troubleshoot may be necessary
Xbox app class not registered – The Xbox app is another victim of the infamous class not registered error, and the cause seems to be similar to the other cases
Skype class not registered – Uninstalling and reinstalling the app won’t work in this situation
Explorer.exe class not registered when using mailsoftware – Whether you are using the Gmail app or other mail software, the error can occur due to DLL file errors
EndNote 20 class not registered – The Microsoft EndNote 20 feature can be impeded by the class not registered error, to which you will have to respond with the solutions below
Class not registered Windows 10 when opening Photos – This error can appear on any version of Windows, and many users reported it while trying to run Photos app
Sticky Notes class not registered – The SFC scan will particularly work best for this case, alternatively signing with a local account will suffice
VBA class not registered – The Visual Basic for Applications program is an implementation of Microsoft’s event-driven programming language Visual Basic 6
Unable to initialize Adobe plugins class not registered – Adobe and Microsoft’s partnership has proven to be one of the most helpful conjoining for the user end-point
Class not registered Visual Studio – Microsoft Visual Studio is an integrated development environment from Microsoft that can be rendered useless due to the class not registered error
Calculator class not registered – The Calculator feature might give up on us when we need it most due to DLL file errors. To fix it, an SFC scan must definitely be performed
Class not registered Access – Microsoft Access is a database management system from Microsoft that combines the relational Access Database Engine; fixing the error is adamant before you lose any data
Office 365 class not registered – We all use the Office 365 package on a daily, if not, hourly basis; losing access to it is one headache that we don’t want to meet often
Class not registered Outlook – Outlook.com is a personal information manager web app; fear not as your information will not be lost or exposed when the class not registered error occurs
Snipping tool class not registered – Window’s Snipping tool ca be rendered futile due to the explorer.exe error that we have covered today
Taskbar class not registered – Task Manager along with the Windows Taskbar can stop working because of the class not registered error
Windows 10 Start Menu not working explorer.exe class not registered – When this happens, you will have to rely more on your keyboard combinations to open the necessary programs
Settings class not registered – The Windows component named Settings may fail to open or function properly due to various reasons
Windows Terminal class not registered – Windows Terminal generally can be opened if you right-click on the Start icon, but in this case it stops to do so
What happens if I end explorer exe?
It has been discovered that terminating explorer.exe would not only close any open File Explorer windows, but it will also render the Start menu, Taskbar, and System Tray useless.
This is because explorer.exe is responsible for maintaining open File Explorer windows. However, restarting Explorer may in fact be of assistance in some circumstances.
The Explorer.exe class not registered error can cause all sorts of problems on your computer, but we hope that our solutions have fixed this issue for you.
Just finished recording your album and considering designing your own cover? Check out these top album cover-maker tools.
Whether you prefer collage, bold graphics, vector-based art, detailed typography, or dramatic effects, these tools offer diverse styles to bring your album cover vision to life.
Adobe Express offers an extensive range of themes and graphics, making it perfect for creating diverse album cover styles.
Its integration with other Adobe products allows you to design covers that range from sleek, modern aesthetics to bold, graphic-centric layouts.
For example, you can create minimalist designs akin to the covers of indie rock albums or vibrant, eye-catching graphics similar to those seen in electronic music.
The software’s customization options ensure your cover aligns with your musical style and brand.
Take a look at its best features:
Integration with other Adobe products
Extensive library of ready-made graphical elements
Simple and intuitive interface
Easy sharing
Great library of themes and templates
Adobe Express
Create stunning album covers to compliment your musical skills and share your artwork instantly!
CorelDraw is great if you’re big on creativity and is the go-to tool to materialize every single one of your creative projects, including album covers.
It offers a powerful suite of features for advanced album cover design, ideal for creating striking vector-based art and detailed typography.
Also, it supports professional vector illustrations similar to those used in high-end album designs across genres like jazz and classical.
Let’s quickly look at its key features:
Professional vector illustration and photo editing
Layout, font management, and typography tools
Seamless integration across devices and platforms
you need to create and complete important design projects, from virtually any device
AI-powered imagery with bitmap-to-vector trace results
Noise reduction capacities for fine-tuning, photo repair, and restoration
Countless effects, masks, lenses, patterns, gradients, mesh fills, and more
Color Replace, Color generator, and transparency tools for non-destructive editing
CorelDRAW
CorelDRAW is a professional tool for image editing, which makes it a perfect choice for creating album covers.
Skylum Luminar 4 is renowned for its advanced image editing capabilities, making it perfect for creating visually impactful album covers.
Its AI-powered tools and professional-grade effects enable you to design covers with unique enhancements and striking visual elements.
Similar to high-profile covers with dramatic skies or vibrant color treatments, Luminar 4 allows you to apply creative filters and effects that make your album stand out and leave a lasting impression.
Let’s see a few of its key features below:
Ai-powered image-enhancing tools
One-click sky replacement
Professional-grade image effects and filters
Works on any platform and most devices
Simple and intuitive menus
Luminar
Luminar is a simple but powerful photo editor, so it’s perfect for both professionals and beginners alike.
VistaCreate – Rich collection of album cover templates
VistaCreate excels in providing a vast array of album cover templates, which are perfect for creating professional and engaging designs.
With over 650 templates, you can easily craft covers that range from classic, photo-based designs to modern, illustrative styles.
Whether you want a retro look reminiscent of vintage vinyl covers or a contemporary design similar to today’s pop albums, VistaCreate’s drag-and-drop functionality and rich library of assets make it straightforward to achieve your desired look.
Let’s review some of its best features:
Over 650 album cover templates
Cloud-based web app available on any platform
Easy, drag-and-drop functionality
Social media templates for all the major platforms
Ideal for marketing, advertising, and website content
VistaCreate
Make your album cover in minutes by using a huge collection of templates and editing tools.
Canva is a versatile tool for quick and effective album cover design, ideal for those needing a straightforward solution.
It offers an array of pre-made templates and design elements, making it easy to create covers with styles ranging from sleek, modern aesthetics to vibrant, artistic designs.
Canva’s extensive library of photos and fonts enables you to achieve a wide variety of looks, whether you’re aiming for a clean, minimalist cover or a bold, colorful design.
Let’s review a few of its most important features:
Cloud-based, available on any platform
Lots of pre-made templates to choose from
Great library of free graphical elements and fonts
Simple, drag-and-drop functionality
Built-in editor with all the tools necessary
Canva
Combine various graphical elements to create unique album art designs!
There are now various reliable cover art software, which can easily be employed to create album covers within minutes, thereby saving you valuable time and money.
Google Docs cover pages that make your documents look professional and beautiful. You need to create one, especially if you plan on distributing the document.
Google provides two ways of creating cover pages – you can build it from scratch or simply modify a pre-built template.
Most browsers work well with Google Docs, but some work better than others. For creating cover pages, you want to use the best browsers for Google Docs.
Launch the browser and follow the steps below.
How can I make cover pages in Google Docs?
1. Create a title page on Google Docs from scratch
2. Choose the Blank document with a Google-colored plus sign.
3. Click on the Filemenu and select Page setup from the dropdown menu.
4. Lower the margins, select your preferred page options, and hit OK.
5. Click on theInsertmenu and selectTable.
6. Choose the number of rows and columns.
7. Click on the lower line of the table and drag it to the bottom of the page.
8. To add an image, go to the Insertmenu and choose Image.
9. Add and customize the text to the page using the Drawing Tool.
10. When you’re done, click on File > Download.
You can create a beautiful cover page in Google Docs all by yourself, from scratch. When doing so, you can fully customize it: edit the page layout, add borders, text and images, as well as format the text.
The result can be saved in the file type you want, and you can use the title page straightaway after completing it. You can also use it as a template for making another cover page in the future.
Go to Google Docs and click on the Template gallery.
Select a suitable template.
Modify the template.
Save the Google Docs cover page.
Google Docs has a bunch of default title page templates that you can use on your projects. You can either use one of them in your project or choose one and edit it to your liking.
2.2 Edit the saved Google Docs title page template
To change the dummy image, right-click on it and select Replace image.
Change an image‘s color by clicking on Image options.
To modify dummy texts, click on it, and enter your text.
Add a header or numbering from the Insert tab. Click on Header & page number.
Making Google Docs cover pages is quite straightforward. You now know the two ways to create these cover pages.
Templates make it easy to make a cover page in Google Docs. You can play around with the options and make your own Google Docs cover page template until you get it right. Don’t worry, deleting a page in Google Docs is easy.
However, if these methods are tough, and you want more ready-made options, you can make use of another tool such as Canva.
We hope you managed to make a cover page on Google Docs using our guide. If you need further guidance, do let us know in the comments below.
Microsoft Windows is one of the most popular operating systems in the world. One of the reasons for its popularity is that it comes with automatic driver updates, which help users to get rid of old drivers and install new ones.
It also alerts you when important security patches are available. However, some users may not want to allow the Windows Update to automatically install the driver updates on their computers as it can sometimes cause them trouble.
The main reason is that a lot of users are operating old PCs or don’t have enough bandwidth to accommodate automatic updates. You can easily update your Windows 11 drivers manually or disable them to prevent such issues.
Can Windows 11 update drivers automatically?
Yes, Windows can update drivers automatically. If you have an old computer, it’s possible that you won’t have the latest driver for your hardware and Windows will prompt you to install them.
As you might already know, your computer’s hardware and software components are controlled by drivers. Driver updates are important for more than just security reasons.
Newer drivers often include bug fixes, performance enhancements, and security improvements that weren’t present in older versions of the driver.
When you connect a new device to your computer, Windows will automatically search for the best-matching driver from its own database or from Windows Update. If it finds a match, it will install the driver and you’ll be able to use the device right away.
While automatic driver updates are a great thing, they can also cause problems. Most of the time, the built-in Windows drivers work just fine. But problems can occur when Windows gets an outdated or incorrect driver from the manufacturer’s website.
If a driver isn’t installed correctly, it could cause issues such as frequent errors and crashes or even damage to your hardware. In such cases, it is important to disable automatic updates.
How do I keep all my drivers up to date?
Driver updates are critical to keeping your PC running at its best. Other reasons include:
Better performance – Updated drivers can improve your computer’s performance by reducing system crashes and other errors, as well as fixing issues with power management.
Security – Newer drivers usually include security patches that help protect against malware attacks.
Better compatibility – Newer drivers are often designed to be more compatible with the latest hardware and software.
Fewer issues – When you use up-to-date drivers, you’re less likely to experience computer problems such as screen flickering or system crashes.
It can be hard to keep track of which driver updates you’ve installed, let alone newer versions that are available. Windows Update does a good job but you have to manually check and select the updates you wish to install.
This is where an automatic tool comes in. Outbyte Driver Updater is designed for users who have little or no experience in updating drivers but want to keep their computers running smoothly at all times.
This product is also ideal for those who would rather not spend hours trying to find the right driver on their own. Outbyte Driver Updater will scan your system for all missing, corrupt, and outdated drivers and automatically download the correct version of this driver from the Internet.
Outbyte Driver Updater
Save time and keep all drivers updated with this intuitive tool.
How do I disable automatic driver updates in Windows 11?
1. Use the Settings app
1. Hit the Windows key and select Settings.
2. Select System on the left pane then click on About on the right pane.
3. Click on Advanced system settings under Device specifications.
4. In the System Properties window that opens, navigate to the Hardware tab and click on Device Installation Settings.
5. Click on No to disable automatic driver updates and then hit Save changes.
If you want to re-enable them, simply go back to this window and click on Yes.
If you’re looking to disable automatic driver updates on your Windows 11 PC, the easiest way to do so is via Settings. In just 5 steps, you can say goodbye to these updates.
Whenever you change your mind, you can easily re-enable driver updates from the same menu where you disabled them from.
2. Use Control Panel
Hit the Windows key, type in Control Panel in the search bar and click Open.
Type Change device installation settings in the search bar and click to open.
Click Yesto enable and No to disable.
3. Use Registry Editor
Hit the Windows key, type in Registry Editor in the search bar and click Open.
Navigate to the following path: HKEY_LOCAL_MACHINE\SOFTWARE\Microsoft\Windows\CurrentVersion\DriverSearching
Double-click on SearchOrderConfig to edit the DWORD value.
Type in 1 in the Value data field to enable and 0 to disable.
4. Use Group Policy Editor
Hit the Windows + R keys simultaneously to open the Run window.
Type gpedit.msc, and press Enter to open Group Policy Editor.
Navigate to the following location: Computer Configuration/Administrative Templates/Windows Components/Windows Update/Manage Updates offered from Windows Update
Double-click on Do not include drivers with Windows Updates.
Select Enabled then press Apply and OK to effect the changes.
To disable, follow steps 1 to 4 then click on the Disabled option.
Battlefield 4 is one of the online games that is played by millions of gamers and having lost connection to session problems on PC is one of the reasons that most gamers gave up the game completely.
However, you do not need to abandon the game if you come across any issues. Instead, it would be best if you strived to know what’s wrong with the game and what you can do to fix it.
Why am I experiencing a lost connection to session problem on my PC?
? Internet connection problems – when your internet connection is slow, it is common to not be able to connect to gaming servers, or even have high ping or packet loss. Don’t hesitate to take a closer look at our simple guide dedicated to troubleshooting Battlefield 1 server connection problems as the tips here detailed are similar for Battlefield 4 users too.
? Battlefield banned your IP – if you broke the Terms of Use of the game, it’s possible they banned your IP; you can regain access if you change it using a VPN.
?Security apps are blocking the game – possibly your firewall or antivirus is blocking access to the game.
We found several methods that can help you access the game and get rid of this problem for good.
How do I fix the Battlefield 4 lost connection to the server error?
You might lose connectivity to the Battlefield 4 server for various reasons, ranging from problems with the player’s network to an out-of-date driver:
Check the following solutions and see which one matches best your particular needs.
1. Change your DNS
Another element that could have played a role in the development of the issue you are currently facing is inconsistency with the DNS server you are using.
Go to settings.
Select Network and Internet and go to Change Adapter Options.
Right-click on your Internet Connection and click Properties.
From the list, select Internet Protocol v4 and select Properties.
Pick Use the following DNS address option and enter your new DNS.
Therefore, if you want to get rid of the problem, you should think about switching to a DNS server that is more reliable, like Google DNS.
2. Use a reliable VPN for gaming
If you use a virtual private network (VPN), your connection will run faster, and you will be able to prevent your internet service provider from throttling your data because they will not have access to it.
Decide on a good VPN for Battlefield 4. ExpressVPN is an excellent choice, with thousands of fast servers optimized for gaming.
Download the VPN to your device and install it.
Launch the VPN and click on the power button to connect to a server.
Open Battlefield 4 and check if the issue is fixed.
ExpressVPN will keep you protected against other gamers or anyone who wants to spy on your data, and the overall quality of your games will significantly increase, making it a top VPN for Battlefield 4.
The VPN can also help you bypass geo-restrictions and enjoy privileges not usually available to users in your location.
If your virtual private network (VPN) connection drops for a moment, several VPNs, including NordVPN, provide an additional layer of safety for your data.
ExpressVPN
Use ExpressVPN to improve your connection and get unrestricted access to Battlefield 4!
If you cannot connect to the game server, you should try closing all the background apps and even web pages on your system that you are not using.
You might not even be aware that certain apps, such as antivirus, are on because sometimes you set them to run automatically.
Check everything and ensure all unessential apps are closed, as this might also be taking part of your system space.
4. Update your network adapter driver
Launch Device Manager.
Find your Network Adapter section. Expand it and select the network you are currently using.
Click update driver and let Windows automatically install any new available versions.
You can also update your drivers manually, by visiting the website of the manufacturer. However, make sure you install the correct versions, otherwise, you may end up with more errors.
If you want to keep track of your drivers all the time and remove the need to periodically check them, you can use Outbyte Driver Updater. It’s a lightweight automated tool that installs new versions as soon as they are released.
5. Adjust your setup
➡️ Use a wired connection
Using a wired connection can also help improve your speed and get rid of connectivity problems. So instead of connecting via your router, use an Ethernet cable instead.
Wired connections are
➡️ Move your router
You can try to move closer or move your router closer to your device so the range will be short, as we all know that the further away we are from the router, the slower the connection will get.
Put it out in the open with the antenna (if there is one) pointed in the direction of your device and see if you get a stronger signal from it.
Being unable to connect to the game server is one of the issues that most gamers face while playing Battlefield 4.
However, if you read this article, I have no doubt you will have a greater understanding of the issue.
The most common issue is a bad Internet connection which you can improve if you change DNS or use a VPN. The VPN can also help with other problems like lag or packet loss.
It is vital, however, to keep in mind that these are not the only possible explanations for why a gamer might be unable to log in and you may need to contact the game’s support system if things do not function as you would like.
Windows 11 lets you run Android apps natively using the Windows Subsystem for Android (WSA). If your favorite app is not in the Amazon Appstore, you can sideload it with an APK file. This guide shows how to enable WSA and install Android apps, plus alternatives, benefits, and risks.
Shift + right-click inside that folder and select Open PowerShell window here.
5. Download the APK File
Get the APK from a trusted source and save it in an easy location, for example C:\adb\apps. If you are not sure how to handle APK packages on a PC, see this quick primer on how to open APK files on Windows 11.
6. Connect ADB to WSA
adb connect <WSA-IP-address>
Example:
adb connect 127.0.0.1:58526
7. Install the APK
adb install appname.apk
Replace appname.apk with the actual file name.
8. Launch the App
Open Start and search for your newly installed app. It runs like any other Windows program.
Tip: If you want to avoid the command line, try WSA PacMan, a graphical APK installer that uses ADB behind the scenes.
Other Ways to Sideload Android Apps
1. Use LDPlayer Emulator
If your PC does not support WSA, consider LDPlayer, a lightweight Android emulator for Windows. It supports direct APK sideloading, macro automation, and performs well with both apps and games. For a broader perspective on the category and where LDPlayer fits, see our roundup of the best Android emulators for Windows 11.
To sideload with LDPlayer:
Download LDPlayer from its official site and install it.
Start the emulator session.
Drag and drop the APK into the emulator or use the Install APK button.
LDPlayer
Grab LDPlayer and bring your favorite Android games and apps to Windows in seconds.
Install desktop-oriented Android builds such as PrimeOS or Bliss OS alongside Windows to run Android natively. This suits users who want better performance without virtualization.
3. Run Android in a Virtual Machine
Create a VM with VirtualBox or VMware and install Android-x86 from an ISO. This keeps Android isolated and lets you take snapshots, though graphics acceleration may be limited.
4. Cloud-Based Android Access
Stream Android from the cloud with services like Now.gg or Genymotion Cloud. This reduces local resource use but requires stable internet.
5. Phone Link or Scrcpy
Run your phone’s apps on the desktop by mirroring. Use the built-in Phone Link app or the open-source Scrcpy tool for wired or wireless control.
Benefits of Sideloading Android Apps
Access more apps by installing titles not available in the Amazon Appstore or Microsoft Store.
Improved gaming experience with emulator features like keyboard mapping and higher FPS.
Developer flexibility for testing across different Android versions and form factors.
Convenience by keeping phone and desktop workflows in one place.
Cost savings since you do not need extra Android hardware.
Risks of Sideloading
Security risk if APKs come from unverified sources that may include malware.
Performance overhead since WSA and emulators consume CPU, GPU, and RAM.
Compatibility limits because some apps block or restrict non-phone environments.
Privacy concerns with closed-source tools and some cloud solutions.
System stability issues when dual-booting or misconfiguring VMs.
Policy or licensing conflicts if an app forbids sideloading or geo-bypass.
Final Thoughts
Learning how to sideload Android apps on Windows 11 unlocks a larger app library on your desktop. Whether you use WSA with ADB, a simple GUI like WSA PacMan, or LDPlayer, always source APKs from trusted places and keep your system secure.
It’s time to discuss one of the new features that Microsoft brings to the table with its latest operating system. This one is dedicated to users who use laptops for their everyday needs.
So, for the first time, Microsoft is introducing a new Dynamic Refresh Rate feature designed to save laptop battery life and boost refresh rates when needed.
From what we’ve seen and heard so far, it seems that the Redmon-based tech company is trying to send us performance-wise to the future with Windows 11.
What is Dynamic Refresh Rate on Windows 11?
Firstly, if you want to know the actual Dynamic Refresh Rate and Variable Refresh Rate meaning, you should know that Dynamic Refresh Rate differs from the Variable Refresh Rate, which has been a part of Windows 10 for quite a while, a feature that focuses on gaming to prevent screen-tearing.
Some new generation laptops are now equipped with 120Hz displays, making the OS much smoother while scrolling, enhancing animations, and eating up a lot of power.
Know that the Dynamic refresh rate feature can now be found in Windows Insider builds on the Dev channel, available for all supported devices, as Microsoft’s Ana Martha explains.
As the name suggests, DRR lets your device set the refresh rate dynamically. This means that Windows 11 will seamlessly switch between a lower refresh rate and a higher refresh rate based on what you’re doing on your PC. This helps to balance performance and power consumption. For example, with a Dynamic (60 Hz or 120 Hz) mode, your display will refresh at 60 Hz for everyday productivity tasks, such as email, writing a document, and so forth to conserve battery life. It will then seamlessly switch to 120 Hz for tasks such as inking and scrolling, to provide a smoother and more responsive experience.
What you should also keep in mind is the fact that all your existing games will continue to run and perform like they always have because DRR does not apply to games.
What Microsoft promises to deliver via this new and interesting feature is:
Smoother inking: Microsoft Office, Microsoft Edge, Microsoft Whiteboard, Microsoft Photos, Snip & Sketch, Drawboard PDF, Microsoft Sticky Notes, Adobe Acrobat, Adobe Illustrator, Microsoft To-Do, Inkodo
Smoother scrolling: Microsoft Office
How do I use Dynamic Refresh Rate?
First and most importantly, you’ll need a laptop that supports DRR and 120Hz or above refresh rates.
Also, note that this feature will make tasks such as writing emails or documents run at 60Hz, at this point, DRR will kick in and boost the screen to 120Hz for inking and scrolling.
Another factor worth considering is that Apps will need to support DRR, and during the Windows 11 preview, DRR is limited to just Office as far as the scrolling boost goes.
Apps such as Office, Microsoft Edge, Microsoft Whiteboard, Microsoft Photos, Snip & Sketch, Drawboard PDF, Microsoft Sticky Notes, Adobe Acrobat, Adobe Illustrator, Microsoft To-Do, and Inkodo will all support DRR for inking as well.
Make sure your display drivers support DRR
As DRR is still a relatively fresh implementation, the first step would be to check if your graphic driver supports Windows Display Model 3.0. To do that, we need to access the DirectX Diagnostic Tool.
Make sure that your graphic drivers are up to date and then follow the steps below:
Press the Windows key+ R to open the Run dialog box.
Enter dxdiag and click ok.
Select your active display in the top ribbon.
Under the Drivers section, check the Driver model.
If it’s under WDDM 3.0, then your display does not support DRR yet.
Windows has not yet released new driver versions for all displays. We recommend you keep track of your drivers and check the WDDM version in the future.
If you run a compatible driver, we can move on and enable Dynamic Refresh Rate on your Windows 11 PC.
Users of Windows 11 can easily enable and disable dynamic refresh rates from the Settings panel or from Intel’s Graphics Command Center.
How to enable Dynamic Refresh Rate in Windows 11?
1. Enable DRR from Windows Settings
1. Press the Windows key and write settings in the search box, then press Enter to open the app.
2. Go to System.
3. Select Display from the list.
4. Scroll to theAdvanced display settingscategory.
5. Select the display device you want to set up.
6. Now scroll down to Choose a refresh rate. You can choose whichever refresh rate you want, according to your monitor’s capabilities.
In order to get a dynamic refresh rate on your Windows 11 PC, all you need to do is navigate to Settings and choose another refresh rate from there.
Do keep in mind that the maximum refresh rate you can choose depends on your monitor’s specs. If your monitor can support an 144hz refresh rate, then you can choose whichever refresh rate you want from 60hz, 75hz, 120hz or 144hz.
If you want to disable DRR, follow the same process but select a static refresh rate, such as 60 Hz.
Type Intel Graphics Command in the taskbar and open the panel.
Select the System submenu.
Select the Power tab.
Enable the Dynamic Refresh Rate Switching option.
Select a preferred refresh rate. You can play around with this option until you are satisfied with the result.
To disable DRR, just toggle the button from On to Off.
All in all, this seems like a pretty solid and much-needed feature, which will likely make a lot of Windows users happy. Refresh rate features have their issues, and they can make your monitor stuck at 60Hz on Windows 11, so keep that in mind.
Everything that can improve performance for the hardware needed to run this demanding software is a welcome upgrade.
What is your opinion on this new feature that Microsoft is introducing with Windows 11? Let us know in the comments section below.
Just recently, judges in Belgium ruled that Facebook broke privacy laws by deploying cookies and social plug-ins, among other technologies to track Internet users’ activity across the web.
This was a huge blow for Facebook as it uses such personal data collected from users to sell targeted advertising. However, the social media giant couldn’t clarify clearly how user digital activity is used.
For this, Facebook faces fines of up to $124 million, with a daily fine rate if it doesn’t comply with the court’s ruling to stop tracking the web browsing habits of Belgians, in addition to destroying any data they obtained illegally.
This just shows how much you continue to be tracked online, whether you want to accept it or not, and whether it’s by Facebook or even Google or your favorite website.
Most, if not all, websites serve up ads tailored to your browsing behavior.
The proverbial adage that says you can run but can’t hide, may not hold water as such because, on the internet, you can actually run and hide from online tracking.
And here are three quick and easy things you can do now to protect yourself.
DuckDuckGo vs VPN
It might be easy to confuse them since they are both tools that protect your anonymity and privacy. However, they are not the same. DuckDuckGo is a search engine.
It’s a website that can be accessed with any device that is connected to the Internet and has a web browser. On the other hand, a VPN is used to protect your very connection to the Internet.
The device connects to a VPN server through a tunnel, and that VPN server then connects to the Internet. While connected to a VPN, you can, and should, use DuckDuckGo to perform your web searches online.
Does DuckDuckGo really not track you?
DuckDuckGo employs a set of measures in order to ensure they have the ability to monetize and maintain operations and, at the same time, not have and store any personal data from you.
They don’t store any cookies and you can use them without them, there are no user accounts to be created and have data associated with that, and the affiliate programs they are registered in are the only ones that can be used completely anonymously.
For more details, we recommend their Privacy Policy page.
Does DuckDuckGo use a proxy?
Yes, you’re able to use proxy servers with the DuckDuckGo browser to get encrypted data while you navigate.
Unfortunately, using proxies can slow down your internet speed when it routes the traffic to different addresses.
Hence, according to different reviews, it is not beneficial to use this browser proxy if you want speedy navigation.
How to protect your privacy while online
1. Use a high-privacy VPN
This tool is powered by one of the best privacy protection companies in the US and is meant for use whenever you have a privacy concern.
A tool like ExpressVPN provides a short and effortless method to access websites without being tracked, by typing in your preferred website and the proxy works its magic.
If you seek 100 percent anonymity for your daily online activities, like surfing or unblocking streaming websites like Netflix, Hulu, Amazon Prime, or BBC iPlayer, or torrenting privately, go for this software.
In addition, using a VPN is more efficient than a proxy because it came with fast server locations spread across the globe. Plus, you get full encryption and private data on the web.
You can use as well private DNS for every server you connect to and browse on DuckDuck or other browsers with improved speed and privacy.
ExpressVPN
Surf your websites privately without any trackers and completely hide your online traces with this VPN.
Privacy mode or Incognito mode, as we know it, is a privacy tool found in some web browsers that disables your browsing history and the web cache, allowing you to browse without local data being stored for retrieval later.
It also disables data storage in cookies and flash cookies, but the protection is only on the local device as it is still possible to identify frequently visited sites by associating IP addresses at the webserver.
If you are using Chrome for example, which has an Incognito Mode, you can also install some privacy extensions.
While this may be a quick way to protect yourself, the next two are even stronger.
3. Use DuckDuckGo
This is a search engine that doesn’t track you the way Google and others do. It is built to protect you from online tracking because you deserve privacy.
Companies make money off your private information without your consent online, so you need to protect your identity and data from such.
DuckDuckGo lets you take back your privacy with a simple app and browser extension to stop online tracking so you can surf and browse with peace of mind.
Search privately, without being tracked, and get privacy tips while you’re at it. This tool has set a new standard of trust online.
You need not buy or install anything, your searches are protected, and search leakage is stopped so that sites you visit won’t know what you searched for, plus your IP address won’t be sent to the search engine or browser’s user agent.
It also has an encrypted version that preserves your privacy, and a password-protected cloud saves setting so you can create search policies, and sync them across your devices.
Does DuckDuckGo hide your IP from websites?
No, you can’t really mask your IP address with this browser. The browsing tool is known for complete privacy on websites without tracking.
That means you can navigate without sharing personal data with other parties, but your IP and therefore location can be seen.
Is DuckDuckGo safe?
It’s clear that using this browser is safer to some extent. Meaning that when you’re searching on DuckDuckGo, you can’t be tracked by any website or web service you visit.
In other words, you’re protected against browsing leaks and tracking cookies used by every platform.
There are indeed privacy flaws when it comes to more complex entities like cyber threats or location tracks.
So, you’ve found your answer. DuckDuckGo is not a VPN, but it doesn’t track you as Google does. However, if you want to stay protected online, you should use a VPN.
To learn more about DuckDuckGo, we have a special guide on DuckDuckGo vs Brave browser, so don’t miss it fore more information.
If you have any thoughts on this, leave us a note in the comments section below.
While interest in cryptocurrencies and their value continue to soar, governments have raised concerns about over-regulation, which may hinder the otherwise open trading of the currency worldwide.
A VPN lets computers connect through a remote server via tunnels that encrypt data from both ends, thus information transmitted is protected from monitoring by third parties.
Where countries are banning cryptocurrency trading, to some extent, geo-blocking is used to enforce GeoIP bans that restrict content from such regions based on the IP addresses of the same users.
VPNs can bypass such GeoIP bans using IP addresses from regions that aren’t blocked. What you need to look for in the best cryptocurrency VPN is a watertight approach to security, good performance levels and speeds, and a variety of user-friendly native apps.
Developed by Express VPN International Ltd., this all-around cryptocurrency VPN has a wide server selection of over 1500 servers in 148 locations and a variety of 30,000 IP addresses to use on up to 3 devices simultaneously.
Among its advantages are its speedy performance and great user experience. You can run a speed test to determine the fastest server available, so you don’t have to keep checking for one randomly.
ExpressVPN also has an excellent user interface and 24/7 tech support via messaging-based chat, which is useful when you need VPN assistance.
Other important cryptocurrency features include the kill switch, peer-to-peer sharing, AES-256-bit encryption, and a zero-knowledge DNS solution. You can also choose the protocol you want to use.
However, it doesn’t have a free plan or trial, but you can buy it via cryptocurrency, though it is a bit pricey.
ExpressVPN
Tired of worrying about your privacy while trading cryptocurrency? ExpressVPN can help you with that.
Touted as the most secure VPN, NordVPN has very strong security with a kill switch, and a huge server network of over 3200 servers in 60 locations, plus support for up to 6 devices at the same time.
Developed by Tefincom & Co., S.A., it has one of the largest networks based on servers and locations, plus great speeds and performance.
However, security is the most important quality to find in a VPN besides these two, which is why NordVPN has 256-bit encryption inclusive of other standard security protocols.
The unique feature of this cryptocurrency VPN is the double VPN technology, which is like using two VPNs, as it routes your connection via two separate servers and Onion over VPN among other protocols.
You can use the free trial to give it a go, and, you can pay for it via Bitcoin.
NordVPN
Check this out if you want comprehensive privacy while trading cryptocurrency online.
Private Internet Access is a VPN service developed by Kape Technologies. It is an affordable VPN with a simple user interface, so it’s great for beginners. However, if you’re using the app, you only pick specific countries, not servers, which can be pretty limiting.
It’s actually a more basic VPN compared to its counterparts, but it makes for a solid choice if you’re looking for a less pricey VPN.
Features include a kill switch, peer-to-peer sharing, AES-256 bit encryption, a server network of over 3300 servers in over 46 countries, and multiple platform support, including Windows.
Trading crypto has never been easier since you can now also do it over the phone.
This is thanks to the fact that PIA is also available for mobile, both Android and iOS, and because one subscription gives you support for 10 devices simultaneously.
Here are some of the perks of using Private Internet Access for crypto trading:
10 devices can use the service simultaneously
3300 servers in 46 countries to choose from
SOCKS5 proxy included
Easy to use and set up
Unlimited bandwidth
Instant activation
P2P support
Private Internet Access
Looking for a VPN fit for cryptocurrency trading? PIA should be ideal for this.
CyberGhost is not just a reliable VPN, it’s also pretty fast in terms of performance with above-average speeds, a huge server network of over 1200 servers in more than 50 locations, plus it supports a maximum of 5 devices simultaneously.
This VPN comes with 256-bit encryption with protocols such as OpenVPN and an automatic kill switch. Other features include zero-logging, an ad-blocker, antimalware, and also a tool that blocks online tracking.
CyberGhost VPN
If you’re worried about your privacy while trading cryptocurrency, you should try CyberGhost VPN.
Surfshark is a practical VPN to connect to for securing crypto tasks whether for protection or hiding your sensitive monetary data.
It’s one of the few VPNs with an unlimited number of devices with one subscription, so you can manage crypto wallets from any device out there.
More than this, it offers a great number of 3,200 servers located in 65 countries. Plus, it has private DNS on each of its servers.
Surfshark also comes with a built-in malware domain and ad blocker called CleanWeb. Plus, it supports OpenVPN and WireGuard protocols.
It’s worth knowing that you have an open Internet feature that gives you unrestricted content wherever you live and stops tracking from crypto websites instantly.
Surfshark
Manage any of your cryptocurrencies securely with this double-protection VPN software.
Yes, a VPN is essential for protecting your funds and transactional data stored on trading websites.
With a VPN, there’s more extensive protection, plus users can evade most obstacles in accessing these cryptocurrencies across the globe.
Similarly, users can hide their IP addresses because every VPN provides different IP addresses from the user’s actual ones, making it hard for anyone to get personal data that can be linked to blockchain records.
It can secure your crypto assets recorded on your trading platforms with split tunneling or extra private protocols.
It also provides a higher level of security, which is further strengthened by using a different digital wallet for payments.
Encrypting wallets makes it harder to access your transactions and keep payment addresses private.
Is using a VPN to trade crypto illegal?
It’s legal to use a VPN to purchase crypto on different websites. No law forbids VPN usage for buying or selling crypto so you can perform it without trouble.
We suggested here some of the best VPNs for cryptocurrency, and in this regard, you can test any software and see your financial privacy for yourself.
You can also discover the best VPN for crypto exchange in case you need increased anonymity when trading your crypto assets.
Even if the value of many crypto coins plummeted in recent months, this does not mean you should let your guard down. There are still many hackers out there trying to steal your coins.
A reliable VPN tool can help you protect your hard-earned crypto coins, offering you peace of mind.
So, even if you stopped mining, as long as you still have some coins stored on your computer, it is worth installing a good VPN solution – just in case.
Having your BitTorrent getting stuck while connecting to peers is a major challenge that users face when downloading torrents with a client.
When you get this error message you can’t initialize the download of torrents and obtain your transferring files.
You may encounter this common issue while using BitTorrent due to specific reasons. One of the most probable factors is your network connection.
More so, this connectivity problem happens if your antivirus or firewall service blocks the sharing program.
It is possible to fix such issues on BitTorrent with the proper tools and a little technical support that we offer in this practical article.
Why does BitTorrent stuck at connecting to peers?
The most common reason why BitTorrent gets stuck at connecting to peers is that your internet connection speed is either too slow or unstable.
So, checking your Internet connection would be the first step to do. If your Internet speed is okay, it could be caused by any of the following factors:
Dead torrents.
Antivirus software or Firewall is blocking the service.
Using a VPN service that is not compatible.
Scroll down to find out how to resolve this pesky issue once and for all.
How do I fix BitTorrent getting stuck while connecting to peers?
1. Connect through a VPN
Some VPN networks block connections to/from BitTorrent connections specifically.
In order to be certain that the VPN you try to use for fixing this issue allows BitTorrent downloads, the VPN we recommend is ExpressVPN because it has the highest and most stable speed.
This software was developed by Kape Technologies and ensures that you will never experience any blockages or any sort of issue while using file-sharing tools like BitTorrent.
You can get 3,000 VPN servers across a number of 94 countries, ensuring that your online anonymity is protected at all times.
All this is possible with this worthwhile VPN while also optimizing the connection speeds to such an extent that you’ll not feel like you’re using VPN software at all.
Here are some of the most notable features of ExpressVPN:
Incredibly fast connection speed.
VPN Test speed
Latest data encryption tools
Intuitive UI experience with an instant connection
To add to the mixture, Express allows you to connect 5 different devices at the same time and offers full compatibility with Android, iOS, Mac, Windows, and smart TVs or routers.
ExpressVPN
Go for a smooth connection with BitTorrent and stay fully protected online with this fast VPN.
Take note of the download folder and other important settings.
Stop BitTorrent.
Open File Explorer and navigate to the following directory: C:\Documents and Settings\[YourUserAccountName\Application Data\Bittorrent or C:\Users\[YourUserAccountName]\Application Data\Bittorrent
Find and delete the following files:
settings.dat
settings.dat.old
Restart BitTorrent.
Modify your settings as needed.
Reload your torrent list.
These are the solutions that work when BitTorrent is stuck at connecting to peers. In the unlikely situation where you try these and they all don’t solve the problem; you can consider using a different BitTorrent client.
This also helps you fix the issue because if your downloads still get stuck at connecting to peers, you can be sure that the problem is from the torrents.
Moreover, in case you have a concern where BitTorrent connecting to peers but not downloading, you should also check the solutions from above that involve the Internet connection or your torrents.
To access similar in-depth and easy-to-follow guides, visit our extensive How-To Hub.
To find more useful information about this topic, don’t hesitate to explore our BitTorrent webpage.
All being said here, we encourage you to give your opinion on this subject and share your experience with our solutions in the comments section.
What can I do if Settings is not opening on Windows
1. Install the necessary updates
You can install Windows updates using our practical example in order to fix settings errors on Windows 10 in a short time.
1. Start Control Panel
To do that, press Windows Key + S and enter Control Panel. Select Control Panel from the list of results.
2. Type Windows Updates
In the search box in the top right corner enter Windows Updates. Click on View Installed updates after the search has finished.
3. Install the updates
Check for and install the update KB3036140 if it is not already installed.
4. Reboot your PC
After you successfully updated to KB3036140 you will need to reboot the Windows 10 once more.
5. Check the Update Settings
Now check to see if you’re Updates and Settings feature are working for you.
This solution will allow you to prevent the error of Windows update settings not opening. Following these steps will install all updates necessary for your operating system.
2. Create a new user
Open Control Panel like we showed you in the previous solution.
Select User Accounts from the list.
Left-click or tap on the option that says Manage another account.
Now left click or tap on the Add new User in PC settings.
After you created a new user account reboot your Windows 10 Technical Preview system once more.
Log in with the new user account you created and check to see if you still have the same issue.
You can also create a new user account by using Command Prompt. To do that, you need to do the following:
Press Windows Key + X to open Win + X menu and choose Command Prompt (Admin) from the list of results. If Command Prompt isn’t available, you can choose PowerShell (Admin) instead.
When Command Prompt starts, enter net user NewUser password1 /add.
Now enter net localgroup administrators NewUser /add.
After doing that, switch to NewUser account and use password1 to access the new account.
Once you log in to the new account, you need to install the missing updates. To do that, you need to do the following:
Press Windows Key + I to open the Settings app.
When Settings app opens, select Update & security.
Now click on Check for updates button.
Windows will download and install the missing updates. After installing the updates, you can switch back to your main account and everything should start working again.
You can also create a new account by doing the following:
Press Windows Key + R and enter lusrmgr.msc. Press Enter or click OK.
Select Users from the left pane, and right click the empty space in the right pane. Choose New user from the menu.
Enter the desired user name and uncheck User must change password at new login. Now click on Create button.
After creating a new user account, switch to it and check if the problem is resolved. If the issue is resolved, you need to move your personal files to the new account and use it as your main one.
Left click or tap on the Download Now button situated in the upper side of the page accessed above.
Follow the instructions on the screen to finish the downloading process and installation process.
Run a scan and let the application fix any potential threats to your system.
Reboot your Windows 10 after the process has finished.
Check again to see if your updates and settings features are working.
There were a few situations in which users reported to solve the Windows update settings not opening issues with Microsoft software. In this regard, we recommend you install and run Microsoft Safety Scanner.
Follow the simple steps described above and your computer will be able to update its operating system.
4. Run the SFC scan
Press Windows Key + X and choose Command Prompt (Admin) from the menu.
When Command Prompt opens, enter sfc /scannow and press Enter to run it.
SFC scan will now start. Keep in mind that this process can take 10 minutes or more, so don’t interrupt it.
After the scan is finished, check if the problem is resolved. If the problem still persists, or if you can’t run an SFC scan at all, you might want to try using a DISM scan instead.
To do that, start Command Prompt and enter the following command: DISM /Online /Cleanup-Image /RestoreHealth
Open the Start Menu, click the Power icon, press and hold the Shift key and choose Restart from the menu.
You’ll be presented with three options. Choose Troubleshoot > Reset this PC > Remove everything.
You might be asked to insert Windows 10 installation media to proceed, so be sure to have it ready.
Select your version of Windows and choose Only the drive where Windows is installed > Just remove my files.
Now click the Reset button to start.
Follow the instructions on the screen to complete the reset process.
After the reset is done, you’ll have to move your files from the backup and install your applications again. Keep in mind that this is a drastic solution, and you should use it only if other solutions don’t work.
There it is guys, a few simple methods on how to fix the Updates and Settings options you have in Windows 10 in only ten minutes of your time.
Also if you found any other way or if you need further assistance don’t hesitate to write us in the comments section of the page situated a few lines below and we will help you as soon as possible.
MAC address is a crucial component of every network device, and in some cases, you might want to change your MAC address.
This is a relatively simple procedure, and today we will show you how to change your MAC address on Windows 10 by using a MAC address changer.
MAC address is a unique identifier that allows your network device, such as an Ethernet or wireless card to connect to other networks.
Every network device comes with a Media Access Control, or MAC for short, address that allows that device to be identified on a network.
Just like IP address, MAC address is crucial when transferring data from one computer to another because each data packet comes with a header that contains MAC address of the destination PC.
Unlike IP address assigned to your PC by your ISP or network administrator, MAC address is assigned by the manufacturer of your network device.
How can I find out my Windows 10’s Mac Address using cmd?
To change your MAC address, first, you need to know how to locate it.
Unlike your IP address, your MAC address isn’t displayed in the network information window, but it’s still easy to find by following these steps:
Press Windows key + X and select Command Prompt from the menu.
Once Command Prompt opens, enter getmac /v /fo list and press Enter to run it.
A list of all network adapters should appear. Locate your network adapter and check the Physical Address value in order to see the adapter’s MAC address. As you can see, MAC address is represented by a hexadecimal value and it consists of 6 pairs of characters.
Now, that you know how to locate and check your MAC address, let’s see how to change it. Changing your MAC address doesn’t require any third-party software, but you can use it if you prefer.
Before we show you how to change your MAC address, bear in mind that changing your MAC address might cause issues with your current network.
In a worst-case scenario, your network device might not be able to be recognized by the network.
1. Via Device Manager
1. Press the Windows key + X and select Device Manager from the list.
2. Once Device Manager opens, locate your network adapter, right-click it and choose Properties.
3. When theProperties windowopens, navigate to theAdvanced taband selectNetwork Addressfrom the list.
4. Select the Valueoption and enter any 12-character hexadecimal value.
5. ClickOKto save the changes.
The best and easiest way to change your Mac address in Windows 10 is via Device Manager, a built-in tool on your device.
As you can see, changing your MAC address is rather simple, but keep in mind that your actual physical MAC address remains the same. In case anything goes wrong you can simply revert to it by following the aforementioned steps.
Just select Not Present in Step 4, and you’ll easily revert back to your default MAC address.
Once you’ve downloaded and installed this tool, run it.
When Technitium MAC Address Changer starts, you should see the list of all network adapters available.
Select the network adapter you want to change, and in the Change MAC address section enter a new MAC address. Remember to use a hexadecimal value. If you wish to make this step faster, you can just click Random MAC Address button that will generate a random MAC address for you.
Click Change Now! button and your MAC address should be changed.
Optional: If you wish to restore your default MAC address just click the Restore Original button.
This tool works similarly to the previous one, but it comes as an evaluation copy, so it lacks certain features, such as the ability to change MAC address of multiple adapters.
Another MAC address changer tool we have to mention is NoVirus Thanks MAC Address Changer. This is an entirely free and simple tool that allows you to change your MAC address easily.
To do that, you must start the application, select your network adapter, and click the Change MAC button.
After that, you can manually or randomly enter your new MAC address. Of course, there’s also an option to restore your MAC address. You can explore more useful options by checking our detailed roundup of the best MAC address changer tools.
In addition to Device Manager and third-party tools, you can change your MAC address using the Registry Editor. Bear in mind to change your registry carefully to avoid causing any potential problems.
To change the MAC address of your network adapter using Registry Editor, do the following:
Open Command Prompt. You can open Command Prompt by pressing Windows key + X and choosing Command Prompt from the menu.
When Command Prompt opens, type net config rdr and press Enter.
Locate Workstation active on and write down the number between the curly brackets. You’ll need that number for future steps, so write it down or don’t close Command Prompt. In our example, that number is 0297EE55-1B73-4C00-BE24-1D40B59C00C3, but it will be different on your PC.
Press Windows key + R and enter regedit. Press OK or Enter to start Registry Editor.
When Registry Editor open, navigate to the following key in the right pane:
HKEY_LOCAL_MACHINE/SYSTEM/Current/Control/SetControl/Class/{4D36E972-E325-11CE-BFC1-08002BE10318} While searching for this key you’ll see several similar keys, so pay extra attention and select the correct one.
You should see several folders with names such as 0000, 0001, etc. Each of these folders represents one network adapter on your PC. You’ll need to navigate through each of them in order to find your network adapter. To find your network adapter check the NetCfgInstanceId value to see if it matches the value that you got in Step 3. In our example it was FA33397D-9379-4682-92C8-C77533236D28, therefore folder 0001 matches our network adapter.
Right click the folder that represents your adapter, in our case it was 0001 but it can be a different folder on your PC, and choose New > String Value. Enter NetworkAddress as the name and double click NetworkAddress to open its properties.
In Value Data enter your desired MAC address. Remember, it has to be hexadecimal 12-character value.
Click OK to save changes.
Restart your computer or your network adapter to apply changes.
We have to mention that when changing your MAC address sometimes you have to use 2,6,A or E as the second character. For example: A6CE91…, 3ECCF1…,E2AA95…, etc.
This applies to all 3 solutions. By not following this rule, some adapters might not work properly if you change their MAC address, so keep that in mind.
Changing your MAC address on Windows 10 PC is relatively easy, and it can be even easier if you use any third-party MAC address changer tool that can assign a random hardware address to your network adapter.
If you have any more questions, feel free to leave them in the comments section below.
Fortect repairs and optimizes your system by targeting corrupted or missing files like DLLs and registry keys.
It’s straightforward: scan your PC, view a detailed report, and fix the issues automatically. Fortect even tackles blue screens and malfunctioning hardware.
Personally, we find its diagnostic process simple yet powerful for stabilizing performance.
Key features of Fortect:
Detect failing or incompatible hardware
Included driver updater
Improves security settings
Repairs DLL and registry
Fixes Windows update issues
Fortect
Fix, update, and repair drivers and system files quickly using Fortect!
Iolo System Mechanic allows you to easily block and turn off any unwanted programs, wipe logs, clean out unwanted data clogging up your RAM, and even help delete your internet cache and history.
Is there a reliable free RAM optimizer for Windows 10
The straightforward answer is yes! There are reliable free RAM optimizers for Windows 10. However, you may get the best complete solutions as paid-for software.
In most cases, they come with either trial periods before payment or free and limited versions. But among the tools discussed in this article, you will have a broad spectrum to pick from that suits this bill.
Some free options are RAM optimizer Windows 10 portable solutions, and others are RAM Booster Windows 10 solutions.
However, your computer sometimes needs a RAM optimizer tool to help it run better.
The applications mentioned above are not necessarily listed in order from top to worst. Rather, each of these programs offers different advantages and disadvantages so that you will have a wider variety to choose from.
Let us know your choice in the comments area below.
League of Legends crashing on the loading screen is one of the most annoying things that can hit right when you’re ready to dive into a match. It might freeze before champion select loads, crash as soon as the loading bar shows up, or get stuck mid-update.
That usually means something’s off: corrupted files, outdated drivers, or the Riot client glitching out. If the game won’t even launch or freezes before it gets going, don’t waste time reinstalling just yet. There are a few quicker fixes worth trying first.
How can I fix League of Legends crashing on loading screen?
2. Click on the settings icon in the top right-hand corner.
3. Select Full Repair and wait for the process to complete (The repair process can take up to 30 minutes, so be patient).
4. To make sure that changes apply after the repair, restart your PC.
5. Login again into the League of Legends client to make sure everything works as intended.
2. Update graphics card drivers
Open Device Manager.
Locate the Display Adapter section and click on the downward arrow to expand it.
Right-click on it and click Update driver.
Select Search automatically for drivers and confirm.
Keeping drivers updated helps with performance issues, FPS problems, and ensures the game can start up with no issues. If you want to automate the process, we recommend using a third party app:
Among the best driver updaters is the one made by Fortect. It’s lightweight, easy to use, and can update your graphics card driver whenever a new version arrives.
As always, if you’ve come across other solutions to fix League of Legends crashing, feel free to list the troubleshooting steps in the comment section below.
If your PC has been acting up lately with slow performance, random crashes, or strange error messages, it could be due to corrupted or missing system files.
These problems are more common than you’d think, and thankfully, Windows 10 offers several built-in tools to help you fix them.
In this guide, we’ll walk you through how to fix corrupted system files on Windows 10 using proven methods like the System File Checker (SFC) and DISM utilities.
How do I repair corrupted system files on Windows 10?
1. Use the SFC tool
1.1 Run System File Checker
1. Press the Windows key to open the Windows Search box.
2. Type cmd in the search box and click on Run as Administrator to open an elevated Command Prompt window.
3. Input the following command: sfc /scannow
4. Press Enter to run the command. The repair process will begin.
5. Don’t close Command Prompt or interrupt the repair process. It can take a while, so wait patiently while it completes.
If you want to repair corrupted files on your Windows 10 device, you need to perform an SFC (System File Checker) scan. It can be done easily with a command-line tool such as Command Prompt.
When you run the SFC scan, it will identify the problems and repair missing or corrupted system files in Windows 10. Also, it can easily take care of issues when the C drive is corrupted in Windows 10.
After the repair process is finished, if your system files are not corrupted, you’ll see the message Windows Resource Protection did not find any integrity violations.
However, the System File Checker tool can’t always fix corrupted files, so keep that in mind.
1.2 Check the SFC log
Enter cmd in the Windows Search Bar and click on Run as administrator to open Command Prompt with full rights.
Enter the following command and press Enter (By doing this, you’ll create a sfclogs.txt file on your Desktop): findstr /c:"[SR]" %windir%\logs\cbs\cbs.log >sfcdetails.txt
Open the sfcdetails.txt and check the results of SFC scan.
Keep in mind that this log file contains only information related to the SFC scan that is performed in Windows. Using the two methods listed above, you can easily do a CMD scan and repair.
2. Use the DISM tool
Press the Windows key + X and click on Windows PowerShell (Admin) or Command Prompt (Admin) to open the app with administrative privileges.
Type/paste the following command and press Enter: DISM /Online /Cleanup-Image /RestoreHealth
The repair process can take 10 minutes or more, so be patient and don’t interrupt it.
After DISM tool repairs your files, restart your PC.
DISM stands for Deployment Image Servicing & Management, and it’s used to fix any corruption problems that can prevent the SFC tool from running optimally. Also, this tool will help if the Windows 11 installation file is corrupted.
You can also use a dedicated tool for corrupted system files. Fortect is a comprehensive Windows repair tool that will scan for and replace missing system files while repairing other errors.
The tool has a patented technology that replace your current system files with fresh versions from its repository. It’s like installing a fresh new Windows on your pc. Here is how to use it:
3. Once finished, click on Start Repair, and it will replace missing system files automatically from its up-to-date repository of clean Windows components.
3. Run a SFC scan from Safe Mode
Press the Windows key to launch the Start menu, click on the Power button, and while holding the Shift key, select Restart.
You’ll see three options available. Select Troubleshoot.
Select Advanced options.
Next, click Startup Settings.
Click the Restart button.
When your PC restarts, you’ll see a list of options. Select any version of Safe Mode by pressing the appropriate key.
When Safe Mode starts, repeat the steps from Solution 1 to perform an SFC scan.
Sometimes, an SFC scan can’t repair your files by running Windows normally, but if that happens, you can try running the SFC tool in Safe Mode.
Safe Mode is a special mode that uses only default drivers and applications and by using it, you’ll eliminate any possible interference from third-party apps.
Press the Power button to turn on the system, and as soon as the Windows logo appears, hold it to turn off the computer.
Repeat the same process thrice, and on the fourth attempt, Windows will automatically perform a Startup repair.
Once the process is complete, click on Advanced options.
When the list of options appears, select Troubleshoot.
Choose Advanced options and select Command Prompt.
When your PC restarts, you might be asked to enter your username and password, so be sure to do that.
Find the letter of your Windows 10 drive. To do that, enter the following command and press Enter: wmic logicaldisk get deviceid, volumename, description
Pay attention to Volume Name. In most cases Windows Volume Name will be assigned to the letter D. This is perfectly normal if you start Command Prompt before starting Windows, so no need to worry about it.
Also check System Reserved drive. In most cases, it should be C.
Enter the following command and press Enter (Be sure to use the letters that you got from the previous steps): sfc /scannow /offbootdir=C:\ /offwindir=D:\Windows
Wait while your system files are scanned.
After the scan is completed, close Command Prompt and start Windows 10 normally.
Sometimes, you need to scan and repair protected system files, but you can’t do that by running Windows 10 normally.
To scan protected system files, you’ll have to run an SFC scan before Windows 10 starts, as shown above in this solution.
5. Use the System Restore feature
Press Windows Key + S, type create a restore point, and select the option from the results.
Click on the System Restore button.
You will be recommended the latest restore point, but you can click on Choose a different restore point and hit the Next button to select a previously created one.
Select the desired restore point and click Next.
Follow the instructions on the screen to perform the restoration.
After completing the process, system files should be restored to the previous healthy version.
System Restore is a useful feature that will restore your system to an earlier state. If you cannot fix corrupted files, you might want to consider performing System Restore.
If all these steps seem a bit too complicated for you, you could also use an automated Windows 10 repair tool in order to perform the same actions without any worries.
6. Replace the files manually
Press the Windows key + X combination and select Windows PowerShell (Admin) or Command Prompt (Admin),depending on your system’s settings.
Paste or type the following command and press Enter: takeown /f C:\corrupted-file-location-and-file-name
Remember to replace corrupted-file-location-and-file-name with the actual location of the corrupted file. You need to include both the file name and extension and not just the location of the directory (By running the takeown command you’ll have ownership over the corrupted file).
Include the following command to gain full administrator privileges over the file and press Enter: icacls C:\corrupted-file-location-and-file-name /Grant Administrators:F
Once again, replace the corrupted-file-location-and-file-name with the actual location of the file.
Now you need to replace the problematic file with the healthy file that you copied from a different PC.
Paste the following command and press Enter: copy C:\location-of-healthy-file C:\corrupted-file-location-and-file-name
Enter Yes if you’re asked whether you want to overwrite the file.
Repeat these steps for all corrupted files.
After all corrupted files are replaced, run the following command to verify if the problem with corrupted files is fixed: SFC /verifyonly
NOTE
This is one of the more advanced solutions, so be sure to follow it exactly. We also advise you to be extra cautious while performing the steps, as getting them wrong could cause system instability.
First, you need to open your SFC log and check which corrupted files can’t be repaired. We already explained how to view the SFC log file in Solution 1, so be sure to check it out for instructions.
After you find the corrupted file, you need to transfer a healthy version of that file from another PC to your PC. Keep in mind that both PCs have to use the same version of Windows 10.
7. Reset a corrupted Windows 10
Press the Windows key to open the Start Menu.
Then, click the Power button, press and hold the Shift key, and select the Restart option.
Choose Troubleshoot and select Reset this PC.
You have two options available:
Keep my files will reinstall Windows 10, but it will keep your personal files and settings.
Remove everything will remove both personal files and settings (Keep in mind that third-party applications and downloaded files will be removed by performing the reset).
If asked whether you want to clean the drive, choose the Just remove my files option.
Choose your username and enter its password (If you’re asked to insert Windows 10 installation media, be sure to do so).
Select your version of Windows and click the Reset button to start.
Follow the instructions on the screen to complete the process.
If everything else fails, you might have to reset your Windows 10. This process will remove your installed apps and files, so be sure to back up important files.
You might need a Windows 10 installation media to perform this process, so be sure to create one using a bootable USB flash drive. Once done, you can repair Windows 10 system files from USB.
If the reset process didn’t fix the problem, repeat it, but choose the second option, Remove everything. Then select theOnly the drive where Windows is installedoption and finally select the Just remove my files option.
After going through all these methods, you know how to get rid of corrupted files in Windows 10. Also, you are now aware of how to recover corrupted files in Windows 10.
There is also great third-party software that can help you repair easily the majority of Windows 10/11 problems you may encounter, check out this guide and learn more.
Besides, many of you might wonder how to fix corrupted files in Windows 7. And you will undoubtedly be pleased with the answer. The methods listed above will work as effectively and fix corrupted files in this OS as well.
How to fix corrupted files in Windows 11 using Startup Repair?
Press Windows + I to launch the Settings app, and click on Recovery on the right in the System tab.
Click on the Restart now button next to Advanced startup.
Once your computer enter the Windows RE (Recovery Environment), click on Troubleshoot.
Next, click on Advanced options.
Now, select Startup repair from the options listed here.
Select your user account.
Enter the password for your user account, if you have set one, and click on Continue to start the Startup Repair.
The Startup Repair tool helps repair issues preventing OS from booting effectively. This is most likely due to corrupt system files in Windows 11 or the complete absence of specific critical system files.
It will automatically scan for corrupt files, and either replace or remove them, thus eliminating the problem. The tool may sometimes take a while to run, but it’s recommended that you let the process complete and not terminate it mid-way.
Also, remember that the method listed above is in addition to the previous section’s methods. You can also try those to get rid of corrupt files in Windows 11.
For those of you trying to learn how to fix corrupted files on Mac, the process may be different, but the idea is pretty much the same.
What causes corrupt system files in Windows 10?
A system file plays a vital role in the operating system, and when it gets damaged and cannot complete its function, it may be called corrupt.
All the programs can end up having corrupted files, but when these files are part of the operating system, things can get slightly more complicated. Some of the common causes include:
There are a lot of other possible reasons for which your Windows files or system files can become corrupted, but here are some of those:
Viruses and malware – Viruses and malware sometimes cause system files to be corrupted. This occurrence is not very common as the primary goal of a virus or malware is to gather essential data, so crashing your system would not meet its end goal. But, if you spot a .djvu file extension, it is most likely a virus, so learn all the ways to remove it and secure your system. To keep yourself away from all the trouble, also check our curated list of the best antiviruses.
Power outages – These can happen randomly and without any telltale sign, and they can cause many problems with your hard disk. If the part of the storage containing your system installation is affected, the files that allow your OS to run normally may corrupt. Do not hesitate to check the best UPS to keep your system up and running even in case of a power failure.
System crashes – System crashes may occur because of hardware or software problems, and in turn, they may produce the corruption of system files. Check this guide to find out how to eliminate issues causing the system to crash in Windows 11.
Update errors – Update errors are common and often create problems with the system files and BSOD errors, which can lead to system file corruption. Check the linked guides for the best solutions to the following Windows Update error codes:
Hardware problems – When the hard drive starts having problems reading and writing data, bad sectors and corrupt files can occur. Find out the best tools for hardware diagnostics in Windows.
Apart from the above reasons, various corrupted file generator tools could have been used. If that’s the case, head to that very tool or website for the solution.
How to find corrupted files in Windows 10?
The process is not tricky but requires you to be attentive to minute details. If it’s the corrupt system files in Windows 10 or 11, you will notice performance-related issues or may be unable to use certain features.
In the worst case, the OS won’t boot at all, which can be fixed by running the DISM tool, SFC scan, or the Startup Repair tool from the Recovery Environment, as discussed in the previous sections.
In the case of corrupted files on SSD, you might not be able to access these, or they may crash soon after launch. The same is the case for an SD card, so if you have been wondering how to fix corrupted files on an SD card, just try the methods listed earlier, or use a dedicated third-party tool.
Many users believe in the idea of a corrupted file virus since they are unable to use these files. But that’s not the case, and you should never delete them. Instead, go with the troubleshooting to repair these.
Until now, we have discussed a particular segment or location of the corrupted files, but specific formats may also corrupt.
How to fix corrupted game files on Windows 10 PCs?
In the case of corrupt game files, that particular game will crash frequently or fail to run altogether. Several platforms, such as Steam and Xbox, have a built-in feature to replace or repair corrupted game files.
Also, the Repair and Reset feature built-in with Windows allows users to fix corrupted game file issues in Windows quickly. The option can be found in the Apps settings. But remember that you will not find the option for all apps installed on the computer.
So, if you made any changes or were trying to get a cheat code to work, it might corrupt game files and call for repair in Windows 10. Apart from that, downloading applications from unreliable sources is also known to cause file issues.
Be it the League of Legends corrupted files, Valorant corrupted files, Minecraft corrupted files, Forza Horizon 5 corrupted files, GT5 corrupted files, Civ 5 corrupted files, or any other game for that matter, you could easily go ahead with the corrupted files replacements using the dedicated platform.
How can I prevent file system corruption?
We’ve already explained why this problem occurs and how to fix it, but it can happen again if you’re not careful.
Of course, not all the issues can be avoided but we can supply a couple of tips that will help with corrupted files prevention in Windows.
➡ Protect your PC with an antivirus
Viruses and malware are some of the leading causes of system corruption, so it’s reasonable to start thinking about protecting your PC with an antivirus.
Windows Defender, the built-in antivirus, can do a great job. Still, if you like to live more dangerously and visit untrusted websites, you can also pick one of the best antiviruses for Windows 11 from our list to make things safer.
We are using the powerful ESET HOME Security Premium to protect our PCs, which offers great scanning options.
The possibility to pause its protection for a specified amount of time is extremely useful, and the fact that it contains a Gaming mode ensures that you won’t be bothered while gaming.
➡ Maintain your hard-drive
HDDs are more vulnerable than SSDs regarding physical damage and their resilience over time.
After a while, an HDD can develop bad sectors simply from normal usage and if you add power surges, power outages, or drops, you can get serious problems.
You can prevent power-related issues by getting an uninterruptable power supply, a device that acts as a buffer between your PC and the outlet and mitigates any such issues.
Also, you can also maintain your hard drive in good condition by defragmenting it and checking for errors by using the system tools.
But, do remember to never defragment an SSD since it has no real benefit and can actually harm the health of the drive and reduce its life.
Here is how you can easily perform defragmentation of your HDD in Windows 10:
Click on the Search button on your taskbar, and type defrag.
Select Defragment and Optimize Drives.
Choose the drive you want to optimize and click the Optimize button to initiate the process.
As soon as the process is finished, you will see that the Current status section has changed.
➡ Other useful tips
Shut down and restart your computer correctly by using the standard methods and not the physical power button
Always ensure that you meet the requirements when updating your system and installing software
Remove external drives safely; use the option from the system tray or from File Explorer, don’t just remove the drive from the port
Avoid interrupting any system process when you are performing a SFC, DISM, CHKDSK or any other system scan
Don’t delete any system files without knowing exactly what you’re doing
Also, you may come across ads claiming to excel at Windows 10 online repair, but it’s recommended that you first check the source and verify that they are not malware or viruses disguised as repair tools.
We hope our guide helped you repair corrupted files in Windows 10 and that your PC is in perfect working order.
Fixing corrupted system files is sometimes tricky, and if you can’t repair the files with the SFC tool, you’ll need to use the DISM tool instead. Using them can help you fix other file system errors like 2147163890; read this guide to learn more about it.
If issues persist, you’ll have to reset your PC or perform a clean install, but all these methods will help fix corrupted files free of cost.
You should also try a third-party tool. We’ve got an excellent list, including the best repair tools that will fix corrupted files in Windows 10. For Windows 11 users, here’s a separate guide on fixing corrupted system files.
If you have any other suggestions or questions, you can write them in the comment section below.
Too many background processes slowing your PC down? You’re not alone. A bunch of system monitors and startup apps launch the second Windows boots, and most of them just sit there eating up memory.
In this guide, we’ll show you how to cut the clutter, shut down what you don’t need, and free up system resources for the stuff you actually use.
1. Clean up the Windows Startup
Press the Windows key + X and select Task Manager to open the Processes tab.
Select the Start-up tab.
Select any system tray program and press the Disable button to remove it from the Windows Startup.
You can always open any applications that you need during your usage of Windows, and, if you change your mind, you can always add and remove startup apps to Windows 10 at will.
2. Terminate background processes using Task Manager
Start Task Manager by pressing the Windows key + X combination and selecting it from the list.
Inside the Processes tab, select the one you want closed, and click on the End task button from the bottom right.
Note the RAM and CPU percentage figures that highlight the system resource usage for the processes. Stop the third-party software processes that waste the most resources.
However, stick to terminating third-party background services only. Do not tamper with Windows processes that are essential to the OS.
3. Remove third-party software services from the Windows Startup
3.1 Remove the services individually
Right-click the taskbar, and select Task Manager.
Open the Processes tab.
Expand a service you need to disable by clicking the drop-down arrow.
Right-click the service and select Open Services.
Double-click the service you need to disable on the Services window to open its properties window.
Select Disabled from the Startup type drop-down menu.
Select the Apply option and click OK to close the window.
Many of the third-party software services listed under background services might be a part of the Windows startup.
As such, the End task button will only temporarily stop those services until you restart Windows.
To completely turn them off, simply follow the steps described in the first solution of this guide.
3.2 Remove the non-system services in bulk
Press the Windows key + R hotkey to start the Run app.
Enter msconfig in and click OK or press Enter.
Select the Services tab.
Click the Hide all Microsoft services check box.
Press the Disableall button, then click the Apply and OK buttons.
Press the Restart button on the dialog box that opens.
Click the Selective startup option, and then deselect theLoad startup items check box.
Now you can either toggle off the Let apps run in the background option from the top or you can toggle off the individual apps below.
These apps don’t consume a significant amount of resources and that’s why we left them at the bottom, but they still are background processes that you can disable.
5. Turn off system monitors
Task Manager also lists third-party system monitors as background processes. Some third-party utilities include system monitors that check system resources and hard disk usage.
Even though system monitors start during the Windows startup, you can’t always disable them with Task Manager.
Thus, the only way to ensure that some system monitors don’t start with Windows is to configure the options for them included within their utility software.
So, if you see a system monitor listed in Task Manager’s background processes, search for an option in the software’s settings that will disable it.
➡ It’s recommended not totouch the Windows processes
We recommend not to mess around with the Windows processes unless you know exactly what you’re doing because terminating them can cause system instability.
However, it is important to understand how can you differentiate between a Windows process and an ordinary process.
Follow these simple steps to check the type of process:
Right-click on the taskbar and choose Task Manager.
Click the View button and choose the Group by type option.
Now the tasks listed in the Task Manager will be separated by their type in drop-down lists.
You will be able to find the Windows processes section at the end of the list, so make sure not to modify the state of any tasks from that part.
➡ Which processes consume more resources?
After you open Task Manager, you can sort the processes in the descending order of their memory or CPU usage just by clicking on the corresponding column on top.
Moreover, as you can see in the screenshot above, usage is color-coded and you can tell that the process on top is consuming a lot of memory. If you’re having troubles with Service Host: SysMain specifically, we’ve got you covered.
How to prevent getting too many processes in the long run?
➡ Don’t open too many programs
Even if you’re not using a program this instant, that doesn’t mean that they are not running. Maybe you opened a program 10 minutes ago with several windows and then forgot about it.
Try to see a list of programs you are running right now by pressing the Alt + Tab combination. You can use it not only to switch between them but also to identify them quickly and close them. If they are too many, consider closing all app windows at once.
➡ Don’t allow programs to run in the background
After you run and then close a program, at its first use, the software will ask you if you allow it to run in the background.
To modify these settings, simply follow these steps:
Press Win Key + Xand choose Settings.
Choose Privacy.
Scroll down in the left side list and click on Background apps.
Activate the Let apps run in the background toggle.
Choose which of the apps on your PC will be allowed to do so.
Both the general option and the activation for all specific applications can be easily changed again at any time by following the same steps and toggling off the options.
➡ Uninstall unwanted programs
Try to clean your system of unwanted programs from time to time. That will get rid of their background processes too, but most of all, it will lighten up your system.
Simply follow these steps to achieve this:
Press Win Key + S, and type Remove.
Choose the Add or remove programs entry.
Select the app you want to uninstall, and choose Uninstall.
So, you can fix an excess of background processes primarily by removing third-party programs and their services from the Windows startup with the Task Manager and System Configuration utilities.
That will free up more system resources for desktop software on your taskbar and speed up Windows. If you want to take the customization to the next level, you can also find out how to improve system performance in Windows 10.
Microsoft seems to have a cozy yet bullish relationship in the Industrial Metaverse. Microsoft Executive VP and Chief Commercial Officer Judson Althoff told investors last month that three brand categories have emerged in the Metaverse; consumer, commercial, and industrial. The metaverse is still young but is showing promise in allowing businesses to better engage and become more productive with clients. Althoff is known for using ioT technologies instead of prototyping products to help reduce energy and waste.
While these were all things businesses should be pursuing, one thing Althoff seemed to leave out, according to Bob Evans at Acceleration Economy, is how businesses can better connect with their customers and deliver a more refined product. What’s the value of sustainability with less energy consumption and product waste if consumers aren’t impressed with the product or service being delivered? Althoff could have been more persuasive with his argument if he addressed “the ability for businesses to deliver to their customers better and more finely tuned products, services, and experiences,” said Evans.
“To simplify, I look at it in kind of three buckets: there’s the consumer metaverse, and there’ll be a monetization thing there in the consumer metaverse.
“There’s the commercial metaverse, where people will have more engaging and experiential collaboration in the metaverse. And I do think that there’s an opportunity there to bring people from around the world with different perspectives to collaborate.
“But where I actually have the most amount of passion is in this thing I call the industrial metaverse, and we have real tangible outcomes for driving with customers today. And so think of it as combining sets of technologies and IoT capabilities where you come in and create a sensor fabric for any industrial process, any manufacturing environment, any supply chain or logistics scenario.”
While being industrially efficient does carry a level of importance, interlacing that with great experiences with products and services for consumers is also important. Evans says “I’m all for being as efficient as possible with energy usage, and with reducing waste wherever and whenever possible. But those highly desirable outcomes need to be fused with great experiences for customers, and great products and services and outcomes for customers.” He’s looking for a bit more “dazzle” from Althoff. Do you agree?
Xbox Free Play Days is back for another weekend of free-to-play Xbox games from Thursday, October 6 through Sunday, October 9. This weekend’s lineup is a doozy, with the highlight for many being a certain high-profile online action-roleplaying game set in a post-apocalyptic Appalachia. However there are two other worthy titles available this weekend that should not be overlooked. Let’s have a look at the Xbox Free Play Days lineup for this weekend.
Bethesda Game Studios, the award-winning creators of Skyrim and Fallout 4, welcome you to Fallout 76. Twenty-five years after the bombs fell, you and your fellow Vault Dwellers—chosen from the nation’s best and brightest – emerge into post-nuclear America on Reclamation Day, 2102.
Experience the beauty and detail of mowing the Great British countryside in Lawn Mowing Simulator, the only simulator that allows you to ride an authentic and expansive roster of real-world licensed lawn mowers from prestigious manufacturers; Toro, SCAG and STIGA as you manage your mowing business.
Outcast – Second Contact is the complete remake of the cult title Outcast, the first 3D open-world game in video game history and pioneer in the modern action-adventure genre.
These games are free to install and play during the Xbox Free Play Days event. They are also available to purchase at impressive discounts throughout the duration of the Free Play Days event. Note that Xbox Free Play Days is a perk available only for subscribers of Xbox Live Gold and Xbox Game Pass Ultimate. You can learn more about the program over on the Xbox Free Play Days FAQ page.
The Downloads directory stores files that you download with browsers. However, an unresponsive Downloads folder can take ages to open. Some users have stated that they can’t open Downloads at all.
When that folder is not responding, File Explorer might then stop working and that can be extremely frustrating because you won’t be able to access your files.
What to do if I can’t open the Downloads folder?
This issue can appear on all operating systems, and even Windows 11 users reported that the Download folder not responding.
If you have two Download folders on Windows, it’s possible that you’re lacking certain privileges thus being unable to access this folder.
One way to fix this is to change the download location on your PC, redownload the file, and check if the problem is gone.
In case the problem is still there, you can always try using the solutions mentioned in this guide.
Why is the Downloads folder not responding?
The main problem with the Downloads problem can be the fact that it accumulated too much content and it’s hard for the system to process it.
So, if File Explorer is working fine and only the Downloads folder is opening slowly or being unresponsive, take the time and delete the bigger files there when it does open.
You can also use specialized repair tools to perform a full integrity scan of your system files. This kind of softwarescans your computer, finds corrupted or corrupted files, and restores them.
2. Use the Windows Store Apps troubleshooter
Click the Start button and select Settings.
Choose Update & Security.
Select Troubleshoot from the left, then click on Additional troubleshooters from the right pane.
Scroll down until you find Windows Store Apps, click on it to expand, then hit the Run the troubleshooter button.
Go on with the troubleshooter to fix File Explorer and the Downloads folder.
The Downloads folder problem is directly connected to File Explorer so running the Windows Store Apps troubleshooter may fix the app and indirectly the aforementioned folder.
3. Optimize the Downloads folder for General items
Press the Windows key + E to open File Explorer.
Right-click your Downloads directory and select Properties.
Select the Customize tab and select General items from the drop-down menu.
Then click the Also applythis template to all subfolders checkbox, select the Apply option, and click OK to close the window.
An unresponsive Downloads folder is often due to Automatic Folder Type Discovery that automatically optimizes directories for specific file types.
Folder Discovery is great for the Videos, Pictures, and Music folders that include one very specific file type. However, it doesn’t work so well for the Downloads directory that includes more variable files.
Thus, Folder Discovery can be more of a bug that considerably slows down the Downloads folder’s load time. File Explorer doesn’t include an option to switch off Folder Discovery.
Thus, optimizing Downloads for general items just like in our solution above might fix that folder.
4. Select the Always show icons option
Press the Windows key + E to start File Explorer.
You can configure Explorer to show icons only by clicking its File tab and selecting Change folder and search options.
Click the View tab and select the Always show icons, never thumbnails option.
Press the Apply button and then click OK to close the window.
After completing these steps, the download folder not responding Windows 10 issue should be solved.
5. Disable Automatic Folder Type Discovery
5.1 Disable Automatic Folder Type Discovery using the Registry Editor
Press the Windows key + R to start a Run window, type regedit and hit Enter or click OK.
Navigate to the following Registry key: HKEY_CURRENT_USER\SOFTWARE\Classes\Local Settings\Software\Microsoft\Windows\Shell
Now, delete the subkeys Bags and BagsMRU subkeys under Shell.
Next, right-click on Shell and select New, then Key to recreate the Bags subkey.
Right click the newly created Bags and select New and Key to create a new AllFolders subkey.
And under AllFolders, create a new key and name it Shell.
If you’ve followed the steps correctly, you should have the follolwing path: HKEY_CURRENT_USER\SOFTWARE\Classes\Local Settings\Software\Microsoft\Windows\Shell\Bags\AllFolders\Shell
Right click on the right pane, select New and String Value and name it FolderType.
Double click FolderType and set its value to NotSpecified, then click OK.
Lastly, restart your PC for the changes to take effect and see if the Downloads folder is working now.
This solution is a bit complicated for inexperienced users and it may require your full attention as a wrong approach to modifying the Registry may lead to some serious issues. But it should fix the download folder not responding windows 10 issue.
However, below you will also find a solution that uses a dedicated tool that will do this same job a lot easier so read on.
Press the Windows key + E to start File Explorer, open WinAero’s ZIP file, click theExtract allbutton, and choose a path other than Downloads to extract it to.
Open the software’s installer from the extracted folder to install Winaero, then, after the installation, start the tool.
Click File Explorer on the left of the window to expand further options.
Select Automatic Folder Type Discovery on the left of the window, and then click the Disable automatic folder type discovery checkbox.
As mentioned, you can’t turn off Automatic Folder Type Discovery with a File Explorer option. However, the Winaero Tweaker customization software does include a Disable automatic folder type discovery setting.
Thus, you can select that option to ensure Folder Discovery no longer slows down the Downloads directory. Add this should fix the download folder not responding Windows 10 issue.
How can I fix the Downloads folder in Windows 10?
It’s no surprise that the Downloads folder can get unresponsive in Windows 11 and that’s because the new OS inherited a lot of Windows 10’s issues.
Apart from a lot of design modifications and new features, Windows 11 is not so different from its older counterpart.
However, returning to the problem at hand, all the solutions we provided above to fix the Downloads folder in Windows 10 will work perfectly fine on the new OS.
The only differences are in the design of the Windows 10 but as you can see in the screenshot above, the Downloads folder and the options list are the same.
Some of those resolutions will fix an unresponsive Downloads folder so that it opens and loads more quickly and we hope that the problem was resolved.
If you have any other suggestions or ideas on the download folder not responding Windows 10 issue, don’t hesitate to write us all about them in the comments section below.
TechCrunch has reported that Microsoft has been in talks with Zupee to possibly lead a funding round of over $100 million. This with the aim to help the Indian cloud services company to expand to overseas markets.
To be clear, no agreement has been reached as of yet, and there is a very good possibility it will not come fruition at all. Neither party has made any public comments concerning the potential partnership.
Zupee is a startup based in New Delhi. It is a cloud-based, play-to-earn casual gaming platform with over 70 million downloads and a valuation of $600 million. The platform features casual board games such as ludo, carrom, snakes and ladders, etc. If the deal should go through, it could mean the integration of Microsoft’s Azure cloud service with Zupee.
Tired of uninstalling programs only to find junk files still hanging around? Windows’ default tool leaves remnants that clutter your PC, slow performance, and waste space.
Third-party uninstallers fix that, removing software completely and cleaning up the leftovers. We’ve tested the best tools – let’s check them out.
Third-party uninstaller benefits & comparison:
Product
Runs on
Key features
Our Rating
Price
IObit Uninstaller
Win11-Win10- Win8- Win7- Vista- XP
– Web browsers analysis, – Monitor new programs installations, – Forced uninstall
The interface is simple, and it can also force uninstall stubborn apps. After using it, we noticed an improvement in system performance due to the removal of clutter.
If you want a reliable, feature-packed tool, this one’s hard to beat.
Pros:
Deep scanning for leftovers
Force uninstall option
Simple, clean interface
Regular updates
Cons:
Some features locked behind Pro version
May not catch every hidden file
IObit Uninstaller Pro
Safely uninstall even the most stubborn of programs and keep your PC clutter-free at all times!
Revo Uninstaller stands out with its advanced features. It offers multiple uninstall modes, like Quick Uninstall and Forced Uninstall, that can remove even the most stubborn software remnants.
It’s effective at cleaning up junk files and leftover registry entries.
If you want more control and a few extra tools like a browser cleaner, Revo has you covered.
Pros:
Multi-mode uninstall
Removes stubborn program leftovers
Browser and autorun manager
Portable version available
Cons:
Paid features can be expensive
Interface feels cluttered at times
Revo Uninstaller Pro
Uninstall any software completely and make sure no traces of it are left behind using Revo Uninstaller.
Ashampoo Uninstaller brings power user features to the table with advanced uninstall options, including silent uninstalls.
It also offers tools for managing startup programs and optimizing your system’s performance. While we appreciate the many features, it’s a bit overwhelming for casual users.
If you want a full suite for software management and PC optimization, Ashampoo is an excellent choice.
Pros:
Advanced features for optimization
Silent uninstalls
Great for managing startup programs
Cons:
Doesn’t support batch uninstall
Complex interface
Ashampoo Uninstaller
Fully optimize and protect your PC with Ashampoo Uninstaller, rubbing out all undesired programs.
Wise Care 365 Pro isn’t just an uninstaller, it’s a full PC maintenance suite.
Along with uninstalling programs, it optimizes your PC, cleans junk files, and fixes registry issues. We love how it speeds up system performance and makes it easier to manage the startup process.
If you want more than just uninstallation, this tool is perfect for comprehensive system care.
Pros:
All-in-one maintenance tool
Speeds up PC performance
Simple to use
Cons:
Not focused purely on uninstallation
Some features require manual tweaking
Wise Care 365 Pro
Try this useful software for a complete cleaning and safeguarding experience of your computer!
Absolute Uninstaller specializes in thorough and secure uninstallation. It removes programs and their remnants with precision and offers detailed reports on any leftover files.
We appreciate its focus on security, ensuring that no traces are left behind.
If you’re looking for a straightforward and secure uninstaller, Absolute is a reliable choice.
Pros:
Thorough removal of remnants
Secure and safe uninstallation
Detailed uninstall reports
Cons:
Interface could be more modern
Lacks additional system optimization features
Absolute Uninstaller
If you need a straightforward uninstaller tool that performs its job, confidently choose Absolute!
To conclude, all the best uninstaller software for Windows 10 presented above will do a fantastic job of removing unwanted software from your computer, but each one of them also packs some pretty cool extras.
Check them all out and stick with your favorite. For more suggestions, please access the comments section below.