The .tag file type is fairly obscure. You won’t run into it much unless you’re a programmer or web design enthusiast.
However, if you are not, you may find yourself concerned that these files are part of an elaborate viral infection if they’re on your PC.
The following guide should help you dissolve those worries. You will learn what files with the .tag extension do and how to open them.
What are .tag files?
It’s interesting just how many use cases there are for TAG files. For instance, in web design and development, TAG files are used to build custom tags. They are usually written as mini JSPs (JavaServer Pages).
TAG files typically have one function. Once a programmer defines them, a plethora of JSPs, programs, and/or web pages can use and re-use them.
WordSmith Tools, a software suite used for word analysis in texts and applications, uses TAG files to extend and add custom functionality. Some programs use them for simple metadata.
If you’re unfamiliar with what metadata is, it’s essentially more descriptive information about data or a file.
Other programming tools that create and utilize .tag files include DataFlex and COREX. Both of these are visual object-oriented programming tools for developing multiplatform software applications. These tools for data mapping purposes use TAG files.
How do I open a .tag file?
1. Using HTML CoffeeCup HTML Editor
Download and install CoffeeCup HTML Editor. You don’t have to run CoffeeCup HTML Editor after the setup is complete.
CoffeeCup HTML Editor will assign itself as the default program to run any web-design-related files (that don’t already have default programs to run them). All you have to do is open Windows File Explorer, navigate to where the .tag file is, and double-click on it.
After double-clicking the file, CoffeeCup HTML Editor will open it in a new tab where you can read through it and even edit it.
The best way to open and edit files with the .tag file extension is through the use of a code editor or IDE (Integrated Development Environment) such as CoffeeCup HTML Editor.
CoffeeCupHTML Editor is a development environment for the creation of advanced websites and webpages. It’s particularly useful for opening complex TAG files.
2. Once Notepad is open, click on File, and then on Open.
3. Make sure you select ‘All Files (.)’ from the file-type dropdown box (not ‘Text Document’).
4. Navigate to the .tag file on your directory and then open it.
5. Once it’s opened with Notepad, you can read through it (if you understand JSP) and even make changes to it.
If the .tag file in question is small and not worth opening with a dedicated third-party app such as CoffeeCup HTML editor, then another solution is to use Windows Notepad.
Notepad is a built-in tool available for free on your device, which is perfectly safe to use. It can help you open all kinds of file formats, so that you can not only view them, but also edit them.
As you can see, TAG files are flexible. Although they are primarily used for encapsulation and the recording of metadata, the average user is unlikely to encounter them.
If you do find them on your system, remember, that you have nothing to worry about. As for other unknown files, we also have a guide on AADL3inscription2024.dz, so you might want to visit it.
For any other questions or suggestions, don’t hesitate to reach for the comments section below.
And, if you are into gaming, read the available information on how to turn on Auto HDR on your Windows 11 device.
That being said, let’s focus on the error described in the title and walk you through the necessary steps for fixing the problem.
Why does GeForce keep saying an unknown error has occurred?
Rest assured you won’t have to buy a new PC, only follow a short troubleshooting process that will only take a few minutes.
One of the reasons why we get this error is the internet connection, which is too weak or not working at all, will prevent you from installing the GeForce update.
Your current drivers becoming corrupted or your antivirus software can also stand in the way of a successful installation.
Now that we know what causes An unknown error has occurred on GeForce now, we can properly fix the issue quickly.
How do I fix An unknown error has occurred on Nvidia GeForce?
Expand Display Adapters, right-click on the one you are using and select Update driver.
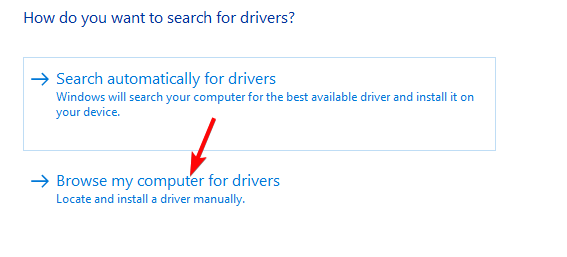
Select Browse for my computer for drivers.
Click on the Browse button, select the driver, then click on Next and follow the instructions.
If this sounds like a hassle, a simple and quick solution is to use a dedicated tool that automatically scans your PC for outdated drivers and updates them.
2. Close all running apps and programs
Search for Task Manager and open the app.
Locat other running processes, select them individually, and press the End Task button.
Right-click the file you downloaded, then select Run as administrator.
4. Disable your antivirus software
You might not think so at first, but the antivirus software you are using can actually prevent Nvidia GeForce Experience from installing drivers or updates.
Now that you know this, all you need to do is to actually turn off the antivirus service until Nvidia finishes downloading and installing the new software.
Just to be safe, you can also add the Nvidia GeForce Experience app as a Firewall exception. We’ll show you how to do that as well.
How do I allow Nvidia GeForce Experience through the Firewall?
Press Windows + S to open the Search menu, enter Allow an app through Windows Firewall, and click on the relevant search result.
Click on the Change settings button.
Next, click on Allow another app.
Now, click on Browse.
Locate the launcher (.exe file) for GeForce Experience, select it, and then click on Open.
Click on Add.
Make sure you have both Private, and Public checkboxes ticked for the game, and then click on OK to save the changes.
5. Uninstall/reinstall GeForce Experience
Press Win + I to access Settings.
Select the Apps tab, then click on Installed apps.
Locate Nvidia GeForce Experience, click on the dots next to it and select Uninstall.
These are the solutions we recommend for the scenario where you are trying to install a GeForce update or driver and the installation fails with the An unknown error has occurred message.
Share with us in the dedicated comments section located below if this guide has helped you fix this annoying GeForce issue.
Notepad++ is one of the best text editors for Windows that’s packed with handy options, which users worldwide very much like.
One of the best is the handy Word wrap option that adds line wraps to documents. That’s an important option as it wraps lines so that they fit within the Notepad++ window.
How can I wrap lines in Notepad ++?
1. Enable text wrapping in Notepad ++
Launch Notepad ++.
Click the View button from the menu at the top of the window.
Choose the Word Wrap option from the dropdown menu.
Clicking the Word Wrap option once will either turn off or turn on the feature, depending on the original state of this setting.
2. Wrap text in Notepad ++
1. Launch Notepad ++.
2. Click on File > Open, then select a text document to open from your PC.
3. To add a line wrap, click theViewmenu.
4. Select the Word wrap option on the menu. Thereafter, all the lines will be wrapped so they fit within the window.
5. Alternatively, you can click theWord wrapbutton on Notepad++’s toolbar to add line wrap to a text document.
After you enable text wrapping in Notepad ++, you can begin using the feature to your liking. All you need to do is open the file you want to edit text in and apply the wrapping feature to it.
3. Give Word wrap a hotkey in Notepad++
You can assign a hotkey to the Word wrap option by recording a macro for it. To do that, click the Start Recording button shown directly below.
Then click the View menu to select Word wrap.
Click the Stop Recording button.
Click the Macro menu.
Select the Save Current Recorded Macro option.
Enter a title for the macro in the text box.
Select the Ctrl and Shift checkboxes. Then choose an additional keyboard key for the hotkey.
Press the OK button.
Then you can press your Ctrl + Shift hotkey to add line wrap to a document.
You can also wrap lines after a specified number of characters or symbols. To do that, click the Search menu, and choose Find, and click the Replace tab.
Enter (.{10}) in the Find what box. The 10 value specifies a maximum line length of 10 characters for lines, which you can adjust.
Next, input $1rn in the Replace with a text box.
Select the Regular expression radio button.
Click the Replace All button. Then your lines will wrap to a maximum 10 (or whatever value you entered) character length.
5. Get the file to wrap the line at 70+ characters
Make sure to back up your file before attempting this method.
Note the number that represents the length you want your text to wrap to (70+ in this case).
Copy the number to your clipboard.
Select the piece of text you want to wrap.
In the top menu, click on TextFX, and choose the TextFX Edit option.
Choose the option ReWrap Text to your desired 70+width.
So, adding line wrap is straightforward in Notepad++. With Word wrap selected, you won’t need to scroll across text documents anymore as all their lines will fit neatly within the Notepad++ window.
Let us know what you think about our article in the comments section below.
How do I recover the deleted media from my Sony camera?
1. Use Command Prompt
1. Connect the Sony camera to your PC with the USB cable provided with the camera.
2. Windows will detect it and assign a new drive letter to it.
3. Press the Windows key + F to open File Explorer and look to find out what is the drive letter.
4. Click the Start button, type cmd, and select Run as administrator from the results.
5. Type or paste the following command and replace g with the actual drive letter of your camera: chkdsk g:/r
6. CHKDSK will attempt to recover any files you have on your camera.
A handy method to try to recover deleted photos or videos from your Sony Camera is using the chkdsk command in Command Prompt. The tool will attempt to restore the files to your PC.
However, you should know that the tool will not be successful all the time.
Look for the photos you deleted from your Sony camera.
There’s a chance that if your camera has backup options and you’ve connected with your Google account, the photos and videos are backed up on Google Photos.
You can do the same for your Xperia smartphone by opening the Google Photos app on your device.
3. Recover deleted photos/videos using iMyFone D-Back
Visit the D-Back website and click on the Free Download button to get the app.
After the download is finished, double-click the file and select Install.
The software will install shortly and when it’s over, click on Start Now to launch the app.
Now, connect your Sony camera or SD card, USB drive and select the drive from the menu.
iMyFone D-Back will perform a quick scan of your drive first, then switch to a deep scan. The process will take a couple of seconds to a couple of minutes, depending on the drive size.
After the scanning is finished, you need to select the category of files from the left pane, then select all the files or individual ones by checking their boxes.
After you have selected all the files you want to recover, just hit the Recover button from the bottom-right corner of the window.
As you could probably notice, you can recover any files with iMyFone D-Back, not only photos and videos.
Actually, it supports more than 1000 file types, including Office documents, archives, and a lot more.
Also, it can recover files from any drive, including external media like the memory of a camera, an SD card, a USB flash drive, or external SSDs or HDDs.
iMyFone D-Back has an app dedicated to Android devices that you will find on the Google Play Store, download, and use even easier than on your desktop.
So, if you have a Sony Xperia or other Android device, there’s also the possibility of recovering your files quickly.
How do I get iMyFone D-Back?
As you’ve seen, there is a free version that you can use. However, you should know that this version only allows the recovery of up to 100 MB of files.
If you want to recover more files, you will have to purchase a license. But you’re in luck because if you apply the coupon code 90register you will benefit from a 10% discount right now!
The Tumblr dashboard lets you keep up with the blogs you follow and get all their updates in one place.
In a bid to improve your feed, Tumblr’s Best Stuff First feature determines the best content and pushes them to the top of your feed.
Although this is a useful feature, many users consider the Best Stuff First feature to be a miss. That’s mainly because the algorithm determines the best stuff by their note counts.
How can I turn off Best Stuff First on Tumblr?
1. Launch the Tumblr app on your smartphone.
2. Tap on the Account icon.
3. Select the blog for which you want to turn off the feature for.
4. Go to Settings by tapping the gear icon at the top right corner of the screen.
5. Select General settings.
6. Tap Dashboard preferences.
7. Toggle off the Best stuff first switch.
8. You can also turn off Stuff in your Orbit recommendations from this screen.
If you don’t find the Best Stuff First feature useful, feel free to turn it off. You can do this from your smartphone by navigating to Settings.
Best Stuff First gets turned off only on the specific device. So, if you use Tumblr from different devices, you must deactivate Best Stuff First on each of these phones.
Do keep in mind that you can only disable Tumblr’s Best Stuff First feature on Android and iOS devices. There’s no option to disable it from the desktop version.
The screenshots in this guide are from the Tumblr app for Android. The options and layouts are a little different on the iPhone versions, but the steps are the same on both.
We hope this guide has proven useful in your situation. To share your experience with us, feel free to use the comment section found below this guide.
If you are looking for a VPN without email registration, we are here to discuss this misconception of this situation.
One of the most popular ones is Betternet and we shall focus on this type of VPN as well as compare how Betternet holds up to some of the best VPN services on the market, ExpressVPN, PIA, and CyberGhost.
Your identity is not stored in logs, and your email address is only used to validate their marketing purposes in order to improve your experience, once you decide to sign up for the free trial.,
Even though there are no VPNs that do not require you to use your email to register, you will find the best VPNs with no-logs policies in this guide, and signing up for them may require a code sent to your email. However, this is the majority of your data that is tracked or stored in the VPN provider’s database.
Can you use a VPN without an account registration?
Email registration vs No-logs Policies and Anonymity
Most of the completely free VPNs come with ads and potentially unwanted apps that can be installed on your PC without your knowledge if you don’t research thoroughly about them.
There are legitimate reasons to use a VPN with email registration, and if the VPN provider does not keep logs, it doesn’t matter what email or payment method you use. Your information is not visible to anyone public, only to VPN vendors that are using the information to process the payments.
As you can see, even Betternet will require an email for registration when you sign up for the free trial. This does not imply that your information is sold or used against your will and knowledge. This means solely to mark you as a buyer and to offer the features you want extra from the VPN service.
With a proper VPN service, you can remain anonymous, hide your location, and change your IP address. If you do not want any third parties looking into your private life, then a VPN service is ideal for you.
Another advantage of using a VPN is that you can use it to easily access all the functions of streaming services such as YouTube and Netflix. In other words, if you are a Netflix user, then you can access content available for Netflix users in other countries.
Even for casual users, surfing the internet without anti-malware can compromise the security of your computer and private information. Check out this list of the best browsing security solutions that you can use on your computer.
On the other hand, if you are looking for highly functional, secure, no-logs VPN providers, then we suggest you check out ExpressVPN, PIA, and CyberGhost.
A no-logs or zero-logs VPN service does not store information about your online activities or connections.
This means that it will not save any information about your online activities, such as your personal information, payment information, or search history. As a result, you can remain completely anonymous.
What are the best VPNs that don’t keep logs?
ExpressVPN – best VPN for streaming & gaming with ultra-fast servers
ExpressVPN has over 80 servers in the United States alone and can easily bypass geo-restrictions to unblock almost any website or streaming service in the country, including Netflix, Hulu, HBO, and Amazon Prime.
On the surface, both ExpressVPN and Betternet appear to have elegant and slick native Windows clients. Further investigation reveals that, even for its paid service, Betternet lacks several features such as a kill switch, DNS and IPv6 protection, the ability to change protocols, and stealth technology.
ExpressVPN has a feature-rich Windows app with a kill switch, as well as a large server network with Smart Location to choose the fastest server.
Moreover, it has the ability to change protocols, DNS and IPv6 leak protection, and split tunneling to filter which apps should use your VPN connection.
While neither ExpressVPN nor Betternet provide a kill switch in their iOS apps, ExpressVPN is more elegant, user-friendly, and customizable.
ExpressVPN for iOS offers a much larger selection of ultra-fast servers, as well as enhanced security and a verified no-logging policy.
Let’s quickly look at its key features:
Split tunneling
Network lock kill switch
AES-256 encryption
MediaStreamer for VPN non-compatible device
Private DNS
Lightway protocol
Threat manager
If you want the best VPN for streaming, get ExpressVPN. It is extremely fast and unblocks all streaming platforms. To summarize, if you value your privacy and want the best VPN experience, choose ExpressVPN over Betternet.
ExpressVPN
Boasts unrivaled connection speeds, circumvents any geoblocks, and has solid online security and privacy.
PIA – known for the impressive worldwide network of servers
While Betternet allows you to browse the web privately, PIA (Private Internet Access) builds multiple layers of privacy around you and acts as an impenetrable shield against malware, prying eyes, ads, your ISP, and pretty much any kind of threat you can think of, regardless of its nature.
Enjoy the free internet with unmatched perks ranging from military-grade encryption for your data, secure VPN tunnels for routing your traffic, an impressive worldwide network of servers to choose from, lightning-fast speeds, and supreme privacy.
Once activated, the IP cloaking option will anonymize your browsing, plus your online activity will never risk falling in the wrong hands simply because there are no records stored. At all.
Its best-in-class security and privacy-oriented features do not come free of charge, but it is as cheap a solution as you could ever get when searching for a premium VPN.
It’s safe to safe that Kape Technologies owned PIA is budget-friendly offering enormous discounts for top VPN services, plus you get to test all these features completely free of risk thanks to its generous 30-day money-back guarantee.
Let’s quickly look at itskey features:
Private IP address allocation for anonymous browsing
Protection against your ISP and more with a strict no-logs policy
Liberate streaming, bypass censorship, and unblock geo-restricted websites and content
Highest download speeds and unlimited bandwidth without any buffering or slow loading times (ideal for streaming, gaming, and P2P torrenting)
Access to servers from all over the world (3292 + servers in 46 locations)
Secure Protection on Public Wi-Fi and military-grade encryption for your traffic data
Block ads, trackers, and malware
Secure VPN Protocols and tunneling technology
Protects up to 10 devices simultaneously with just 1 subscription
Close to free, but packed with high-grade functionalities, you would not want to miss this VPN.
Private Internet Access
No email, no worries – just supreme privacy with PIA!
CyberGhost – a VPN with no logs, that keeps you completely anonymous
Both VPN providers offer unlimited bandwidth and numerous server locations. But that is pretty much as far as the resemblance goes.
With 15 years of expertise, Cyberghost offers 6479 servers that are renowned for being extremely fast, secure, and reliable. In fact, CyberGhost utilizes a 256 AES bit encryption for its premium network.
Moreover, with just 1 subscription plan you get to protect as many as 7 different devices at the same time, which is a great facility.
Their concern for your privacy goes beyond encryption, they also adhere to a strict no-logs policy that will keep your online activity and traffic data tracking-free, plus you get to enjoy complete anonymity while browsing the web.
In addition, CyberGhost hides your IP address and guarantees supreme confidentiality and protection even when connecting through a public Wi-fi network.
Let’s quickly look at its key features:
Automatic Kill Switch and DNS and IP Leak Protection
Highest possible speed and unlimited bandwidth
Access to over 6479 servers worldwide
Strict No Logs Policy
256-bit AES Encryption
Secure VPN protocols (OpenVPN, L2TP-IPsec, and PPTP)
Simultaneous connections on up to 7 devices
Compatible with all major OS
Whopping 45-day money-back guarantee
So in short, CyberGhost would be a far better option over Betternet as their services are far more flexible, secure, and fast.
Cyberghost VPN
Cyberghost-powered total privacy with no hassle, no logs, completely anonymous.
Windscribe is one of the most trusted no-logs-free VPNs that is safe to use. It uses the same level of encryption as a good VPN provider, so you don’t have to worry about it.
This no-logs-free VPN encrypts your online traffic with military-grade encryption. It uses a 256-bit figure, SHA512 verification, and a 4096-piece RSA key to scramble all of your web data so that no one can catch and understand it.
It also makes use of advanced security features, for example, Forward Secrecy, which generates new and unique encryption keys for your online traffic.
Windscribe is safe and secure to use in terms of security; however, considering the fact that it comes free, we suggest a more trusted VPN service, such as ExpressVPN.
Is there a completely free VPN?
Free VPN services are generally not recommended if you are using social media, streaming services, or accessing confidential banking information because the majority of free VPN providers are not genuine or trusted.
According to our VPN advocates, free standalone VPNs that are not under a bigger vendor umbrella may jeopardize your privacy and security, selling out your information to third parties for marketing purposes.
A free VPN incurs costs for network connections and infrastructure. Advertisements, selling collected information, and more, are not doing this in their free time, everything has its purpose to make something out of it.
If they are not making much money but have a large number of customers. You can expect them to cut costs by limiting your usage in some way, and they will cut costs by using less expensive data protection. Does this imply that free VPNs provide inferior service? Most likely they do.
Does this imply that you will receive better service from a paid vendor? No, not always. The less expensive paid VPN alternative may still be reducing costs and selling valuable data where possible.
Explore more VPN Solutions that can cover every single one of your privacy needs. Don’t forget to check out our Security Hub as well.
While Betternet is a free service, it only offers basic features, that will not be satisfactory for long-term use. A more well-rounded tool like ExpressVPN, PIA, or CyberGhost will, however, fully satisfy your privacy needs.
There has been a lot of talk regarding the first major update for the Windows 11 operating system, and today we’re going to elaborate even more on the subject.
For starters, back in May, when version 22H2 was declared RTM, which means ready for release to manufacturing, everyone thought it was going to get released then.
Now, however, rumors claim that Microsoft is actually getting ready to release Windows 11 22H2 as soon as September 20, 2022.
That being said, users have started receiving updates under the moniker Windows 2022, which triggered them to believe this is actually Windows 11 22H2.
Is Windows 11 2022 actually Windows 11 22H2?
Of course, we do not have an official word from the tech giant yet, but everyone is reasonably confident with what the company plans to ship to its customers.
Users now spotted what everyone thinks seems to be the first mention of the marketing name Microsoft could use for this upcoming OS release.
You’re now running the Windows 11 2022 Update! Read on to discover new features and set things up just how you like.
This could be entirely possible since we are getting closer and closer to the rumored release date, which means the information is not as farfetched as some might think.
Microsoft clearly stated that it plans to service Windows 11 with one feature update per year, so its actually quite reasonable to assume that this release would be called the 2022 Update.
As you might remember, in the past we had monikers such as Creators Update, as well as other puzzling Windows 10 update aliases.
Even though many claim to have already solved the mystery that is Windows 11 and already know what to expect, Microsoft will surely surprise them as well.
Now, however, tidbits of upcoming Insider builds connected to the Moment update may have begun surfacing as Build 22940 has been spotted in a PowerShell issue opened back in July.
According to Windows 11 Insiders, who also happens to be a pretty famous Windows leaker, the Build 229xx range belongs to the 2nd Moment update.
Nice to see a mention of 229xx builds! These are dedicated to development of the 2nd update/"Moment" for Windows 11 v22H2. First comes v22H2 GA, then Moment 1 in October, and Moment 2 sometime next year. Every Moment brings a few new features, e.g. Tabs in File Explorer in M1. https://t.co/SBPOXRb5sT
The 1st moment update also has its own set of Insider builds under the range 228xx, and the updates are apparently getting back-ported to the recent Windows 11 Beta channel builds that have been happening under 22622.
No, it looks like Windows 11, version 22H2 has apparently already begun shipping inside new laptops, just in case you were looking for a new device that supports the latest OS.
Users that have recently bought new laptops were pleasantly surprised to notice a new boot animation when they powered up the devices.
I was not sure if this was actually shipping or not, but I just received a Dell laptop that has Windows 11 22H2, build 22621.521. I thought something was different as it had the new circle animation on boot.
Some of the early reports, backed up by some compelling evidence, had pointed to a September 20th general availability (GA) of the next feature update.
Everybody also believed that build 22621.382 was meant to be packaged as the above-mentioned GA release, but it was apparently false.
Keep in mind that Windows 11 build 22621.521 appears to be a cumulative update under KB5017321 that Microsoft released a couple of days ago in Release Preview alongside the Patch Tuesday updates.
Dism.exe error 1392 is usually displayed whenever a file or directory is corrupted and unreadable.
The location specified in the error message states that some temporary files are corrupt. Since the files are only temporary, you could delete the mentioned file in the error message and check if the issue persists.
The error is caused by missing system files or broken corrupted data, which should be fixed as soon as possible. Taking action should prevent further hardware and app damage, as this can lead to system crashes, data loss, or hardware failure in most cases.
Error 1392 manifests in issues like warning messages, slow or lagging PC performance, system freeze, program lock-up, startup or shutting down problems, and errors in installing apps or other programs and updates.
If you tried to delete the temporary file and nothing happened, try the other solutions in this guide.
What is error 1392?
The DISM error 1392 is usually displayed when a file or directory is corrupt. Also, this issue can be down to unreadable bad sectors on your hard drive.
Below are some of the causes of the DISM error 1392:
Corrupt system files
Antivirus interference
Presence of malware
Bad sectors on the hard disk
How can I fix the Dism.exe error 1392?
1. Perform an SFC scan
Press the Windows button and type cmd.
Click the Run as administrator option under Command Prompt.
Type the command below and hit Enter: sfc/scannow
Whenever you find the Dism error 1392, most likely there are corrupted files, and a system file checker scan will help you replace the incorrect versions with the genuine, correct Microsoft versions.
Restart your computer and check if the Dism error 1392 goes away after completing the above procedure.
2. Run Check disk to check and fix disk errors
Right-click on the Start icon and select Command Prompt (Admin).
Copy and paste the command below, and press Enter to run it. chkdsk /f h:
Note that you need to replace the letter h in the command above with the letter of the drive with the dism.exe error 1392 problem.
After the command, Check Disk will analyze the disk and return a status message regarding any problems it encounters. One of the ways Check Disk locates errors is by comparing the volume bitmap with the disk sectors assigned to files in the file system.
Check Disk can’t repair corrupted data within files that appear structurally intact. Unless you specify further options, Check Disk won’t fix problems, which is why you should use the format of the command above.
When you use this command, Check Disk analyzes the disk and then repairs any errors it finds if it is not in use.
path/filename specifies files to check for fragmentation (FAT16 and FAT32 only)
/F fixes errors on the disk
/V displays the full path and name of every file on the disk (FAT16 and FAT32); displays cleanup messages if any (NTFS)
/R locates bad sectors and recovers readable information (implies /F)
/X forces the volume to dismount first if necessary (implies /F)
/I perform a minimum check of index entries (NTFS only)
/C skips checking of cycles within the folder structure (NTFS only)
/L:size sets the log file size (NTFS only)
/B re-evaluates bad clusters on the volume (NTFS only; implies /R)
3. Scan your computer for malware
Press the Windows key and type virus.
Select the Virus & threat protection option.
Choose Scan options.
Select your preferred scan option and click the Scan now button.
The Dism error 1392 could be related to a malware infection on your computer system. This can damage, corrupt, or even delete Runtime error-related files.
You should choose either the Windows Defender Offline scan or the Full scan option for a deep scan.
Alternatively, you can use one of the best dedicated antivirus software to do a fast scan and detect any malware or virus that can pose a threat and create this issue.
4. Temporarily disable the antivirus program
Press the Windows key and type virus.
Select the Virus & threat protection option.
Click the Manage settings option.
Now, toggle off the switch for Real-time protection backward to disable it.
Click the Yes button when prompted to complete the process.
Antivirus software can help protect your computer against viruses and other security threats. In most cases, you shouldn’t disable it.
When you have to temporarily disable it to see whether it causes the Dism error 1392 or not, do note that your computer is open to attacks all this time.
You can find plenty of non-intrusive alternatives, not to mention the anti-threat and ransomware protection that always keeps you away from system performance and security issues.
5. Perform a system restore
Press the Windows key + S and type restore point.
Click Create a restore point in the list of search results.
Enter your administrator account password or grant permissions if prompted to.
In the System Properties dialog box, click System Restore.
Click Next.
Now, click a restore point created before you experienced the problem.
Finally, click the Next button, followed by Finish.
To go back to a restore point, do the following:
Press the Windows key and type control.
Select Control Panel.
Type recovery in the control panel search box.
Select Recovery.
Click Open System Restore.
Click Next.
Choose the restore point related to the problematic program/app, driver, or update.
Click Next, followed by Finish.
If the Dism error 1392 persists after a clean install, your runtime errors are not software but hardware related. So, replace the hardware that is causing dism.exe error 1392.
As you use your computer, over time, junk files accumulate and if not cleaned out, they may cause your computer to slow down or lag.
This may also bring up the Dism error 1392 due to file conflicts, or an overloaded hard drive. To clean these files, it is advised you use a top cleaner in CCleaner.
This tool removes all junk and unwanted files that can be dragging down your PC. Also, it can be used to uninstall all unwanted apps and their associated files.
CCleaner might just be the only tool needed to keep your PC running optimally.
CCleaner
The best way to clean up your PC and make it smoother.
Press the Windowskey + I to open the Settings app.
Select the Update & Security option.
Click the Check for update button.
Outdated PC can lead to the operating system error 1392, the file or directory is corrupted and unreadable encountered error message. The only fix, in this case, is to update your system to the latest version.
8. Reset PC
Press the Windows key + I to open Settings.
Click the Update & Security option.
Choose Recovery in the left pane.
Click the Get started button under the Reset this PC section.
Choose the Keep my files option and follow the onscreen instruction to complete the process.
If you face the unrecognized win32 error code: 1392 on your PC, you might need to reset your PC if the previous solutions could not solve it. This solution will not delete your valuable files. So you have nothing to lose.
Should I run DISM or SFC scan first?
DISM and SFC are repair tools used to fix issues on your PC. However, the SFC scan comes first and is used to detect and fix corrupt system files.
But if this fails, you can run the DISM scan to fix more complicated issues, including problems with SFC.
The Dism error 1392 can be annoying. Fortunately, it is not the most difficult to fix, as shown in this guide.
Do you want to know how to fix the DISM failed on Windows 10/11 issue? Then, check our guide to do it effortlessly.
Feel free to let us know in the comments below which of these solutions worked in your case.
Windows 10 is the most popular and the latest OS you can install from Microsoft. Upon installation, it allows you to bring some personal customizations and take advantage of a variety of features.
One such feature is the keyboard language. You can add multiple languages so you don’t have to change the keyboard itself whenever you want to type in a language like Japanese.
Can I use the Japanese keyboard on my PC?
Because the Japanese language uses different characters than English, Windows also integrates a feature called Japanese IME.
This is typing software that is already built into your system. You can type Japanese words in Hiragana, Katakana, and Kanji using an English keyboard.
There are basically two methods to type the characters, Romaji Input, and Kana Input. Currently, for the Japanese people, Romaji Input is the preferred method.
The Romanji input is a Romanized version of Japanese, literally meaning the Roman character that the other languages have. The other is via keyboard keys corresponding to the Japanese Kana.
In this article, we will guide you on how to easily add the Japanese language pack and start using it as soon as possible.
How do I use the Japanese keyboard on Windows 10?
1. Add the Japanese keyboard on Windows 10
1. Click on the Start icon and select Settings.
2. Go toTime & Language.
3. From the left menu, choose Language.
4. Under Preferred Languages, click onAdd a language.
5. Type Japanese in the search bar and once it is found, select it and click on the Next button.
6. Select the optional features you want then click Install.
7. Windows willdownload and install the language pack and the keyboard layout.
8. After installing, you will see it on the Language Bar Icon on the taskbar. From here, you can choose to use the Japanese keyboard.
9. To change the keyboard layout, click on the A icon that appeared.
10. The icon will change to Hiragana あ character.
11. Now you can type in Japanese with your keyboard.
In order to use the Japanese keyboard on your device, you must first add it manually via Time & Language settings.
After you confirm your selection for Japanese in the Add a language section, you can choose whether you want to add optional features as well, such as handwriting and TTS.
2. Manually enable the Japanese keyboard
In order to switch to Japanese, you have to see the language icon on the right side of your taskbar, as described in the method above.
However, if you don’t have it, follow the steps below to activate it.
Go to the Start icon and select Settings.
Click on Personalization.
From the left menu, choose Taskbar.
Scroll down to Notification Area and select Turn system icons on or off.
Locate the Input Indicator option and turn it ON.
Now you should see it in the right corner of your taskbar.
From the small A icon, you can switch to different IME options. By default, it will be selected as half-width alphanumeric.
With a right-click on the A icon, you can choose the keyboard mode you want, Hiragana or Katakana.
To use Kanji, instead of pressing Enter after writing the word, you need to hit the space key.
A list will pop up and you can use the arrow keys and space bar to go through the available options.
Now you are all set and can practice Japanese typing without needing a special keyboard.
Let us know whether you found our article useful and learned everything you wanted to know about adding and using the Japanese keyboard on your device.
If you’re learning Japanese, you might be interested in the Rikaikun Firefox extension that will help you read Japanese online.
All Intel-powered computers have an integrated graphics processor to perform basic graphic tasks.
However, while installing a newer version of the Intel Graphics driver, you may encounter This computer does not meet the minimum requirements for installing the software error.
This error can occur for multiple reasons, including motherboard disabling the integrated graphics chipset, incompatible driver or the OS, lack of integrated Intel Graphics, etc.
Now that Windows 11 is out, many out there are testing the new PC Health Check app to see whether they can make the jump to the latest OS as well.
What does this computer does not meet the minimum requirements message mean?
This computer does not meet the minimum requirements for installing the software error message shows up when most users try to install graphics drivers.
It occurs due to incompatible drivers and outdated operating systems. Also, the error can be down to a disabled graphics chipset. Irrespective of the cause, we have prepared a suitable fix for you in this guide.
Can I run a game if my PC doesn’t meet the minimum requirements?
It is possible to run a game from below the minimum needs at roughly 20-30 frames per second, arguably playable.
Occasionally, the game would refuse to allow you to play it and display a notice stating that your computer does not meet the minimum requirements for playing this game. However, you may be able to get away with running it at low enough settings on occasion.
Usually, when the lowest resolution and the lowest settings are used, your machine can only run the game at its lowest settings and resolution while maintaining an average frame rate of 30 frames per second.
You will be able to participate in the game, but the quality of the experience will be significantly reduced, making you want to uninstall it immediately.
If you are also troubled by this issue, here are a couple of troubleshooting tips to help you resolve it in no time.
How do I fix the PC doesn’t meet the requirements error?
These complete solutions scan your PC for any missing, broken, or outdated drivers and then download and install them.
2. Check for Windows updates
Click the Start icon and select Settings.
Select the Updates & Security option.
Now, click on the Check for updates button.
Go through the available updates and click the Install now button to install them.
Once all the available updates are installed, check if the OS or computer doesn’t meet the minimum requirements for this installer error code 21 message occurs again. If the issue persists, try other fixes below.
3. Update graphic card from Device Manager
Press the Windows key + R to open Run.
Type devmgmt.msc, and click OK.
Double-click on the Display adapters option to expand it.
Right-click on Intel HD Graphics and select Update driver.
Click on the Search automatically for drivers option.
Windows will look for a newer version of the driver and install it.
If you are getting a system or graphics device does not meet the applications minimum specifications, it might be down to outdated drivers. Updating it manually will help you search for a suitable driver to install.
Go to your driver manufacturer’s website to download the latest version.
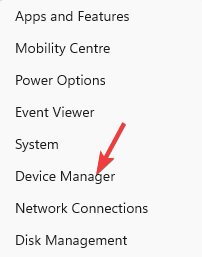
Press the Windows key + X and select Device Manager.
Expand the Display adapters option.
Right-click on your driver and select Update driver.
Choose Browse my computer for drivers.
Now, select the Let me pick from a list of available drivers on my computer option.
From here, click the Have Disk… button and navigate to the folder where the driver you downloaded is saved.
Now, navigate to the Graphics directory and choose the .inf file.
If there is no Graphics directory, just select the .inf file and click Open.
Now, click the Next button.
Finally, click the Yes button when prompted and wait for the driver to be installed.
What happens when a device doesn’t meet the minimum requirements specified by a manufacturer
Manufacturers set minimum requirements for a reason. If your computer does not meet the minimum requirements for installing software or application, the program you are trying to install will not run.
However, if your computer meets the minimum requirements but not the suggested specifications, the program will install but will be slow. Also, it can sometimes encounter problems.
How do I fix this computer does not meet the minimum requirements on Windows 11?
The cause of this error on Windows 11 is the same as on Windows 10. You can effectively fix the problem by updating your graphics driver with a dedicated tool.
Also, you can update your PC to the latest version. Lastly, you can handle this issue effectively with any of the solutions in this guide.
This computer does not meet the minimum requirements for installing the software error occurs if the Intel Graphics processor installed on your system is not compatible with the driver package you are trying to install.
By following the steps in this article, you can install the Intel Graphics processor’s correct version and eliminate the error.
However, your laptop might be outdated or broken if you can’t solve the issue with any of the above solutions.
In this case, you can think about buying a new one. Here you can find a list of the best laptops for any budget, so check it out and find the proper one for your needs.
We hope our solutions helped you fix the PC that doesn’t meet the requirements error. For more suggestions or other questions, please access the comments section below.
You’re preparing for a meeting, you got your notes and everything you need when you realize your webcam doesn’t work as it should.
This is usually caused by a broken driver that either needs to be downloaded and installed from scratch or just updated. Things are no different for Logitech webcam C270 drivers.
Keep reading and discover two simple methods to download and update the necessary driver on your Windows 10 PC.
How to download and install the Logitech webcam C270 driver?
2. Type Logitech webcam C270 in the search bar and press Enter.
3. Scroll down to the Support section and click onView all downloads.
4. A new page will open, and from there you’ll be able to download the necessary driver.
5. Download the driver setup file andlaunchit.
6. Follow the on-screen instructions to complete the driver installation.
7. After the installation is complete, rebootyour computer.
The first recommended method to install Logitech C270 drivers for Windows 10 devices is from the manufacturer’s website, which is Logitech’s official website.
The driver available there is safe to use and up to date, so that you don’t need to update your C270 webcam further after you install it.
2. Update your C270 webcam driver using Device Manager
Right-click on Start and select Device Manager.
Go to Cameras and expand the menu.
Locate your Logitech C270 webcam, right-click on it, and select Update driver.
On the next screen, choose Search automatically for updated driver software.
Follow the on-screen instructions to finish.
After the update is complete, rebootyour Windows 10 device.
3. Use a third-party app to automatically update the driver
A far better solution to update your driver is using dedicated software, that way you’ll be keeping your PC safe from any serious malfunctions caused by installing the wrong ones.
This software does it all for you, so if any driver is found broken, the app will compare it to its built-in database and update it accordingly.
In addition, you can resolve any aspect regarding driver performance and have full support for optimizing driver devices at maximum capacity.
There you have it, a fully, functional Logitech webcam with the latest C270 driver installed on your Windows 10 computer, just in time for work.
Isn’t the webcam working properly? In this case, take a look at our guide on how to fix webcam connection issues, and don’t let them interrupt your workflow.
Have any suggestions or just want to say a quick thank you? Feel free to use the comments section below.
Programs like Outlook require enough resources to run smoothly on your computer. Hence, your system can encounter issues like Outlook not having enough system resources whenever the resources are insufficient.
The RAM on your PC shares memory between the programs you run on your computer. However, some programs require more resources (RAM) to run them, while some don’t demand much. Users may run into issues with some programs if the available resources on their computer are not enough to run them.
Furthermore, Outlook is a web software by Microsoft for managing personal information such as webmail, contacts, calendar entries, and lots more. Outlook needs enough resources to perform these tasks smoothly.
However, the lack of enough system resources may cause problems such as Outlook import – there are not enough system resources available for this operation.
Nevertheless, there are some ways to fix Outlook not having enough memory or system resources, which we’ll discuss in this article.
What does Out of memory or system resources mean in Outlook?
Out of memory or system resources: this is an error message users may encounter when using Outlook. This error message indicates insufficient memory or system resources for Outlook to perform tasks on your PC.
Likewise, it can mean your device doesn’t have enough free RAM disk space. However, users may encounter this error message on Outlook for several other reasons.
Furthermore, some common causes of the Out of memory or system resources error message are:
Having many PST files opened on Outlook: Many issues may occur with the PST files oversizing or becoming corrupt. The files may also become damaged due to malware infection or system problems. Hence, they may cause issues with the activities of Outlook on your computer.
Many programs run on the PC: When you have many programs running on your computer can consume most of the system’s resources. Hence, it may cause the Outlook program not to have enough resources for its tasks.
Outdated system OS and Outlook: Users may encounter problems with programs if the system OS is outdated. Likewise, outdated Outlook software can prevent it from functioning correctly.
Quick Tip:
A simple alternative to this issue is switching to a new mailing app. Our recommendation is Mailbird since it comes with some great features.
Mailbird helps you manage your emails and contacts in one unified inbox. It also has a highly customizable layout that integrates with many apps such as Facebook, Twitter, WhatsApp, and Google Calendar.
Mailbird
A great mailbox with amazing customization features and app integrations.
On the Windows update page, select Check for updates. (If there’s an update available, Windows will automatically search for it and install it)
3. Update Outlook on your PC
Launch Outlook on your computer and navigate to File.
Click on the Office Account.
Select the Update Options and click on the Enable Updates option or Update Now.
Restart your PC after the update. Once this is done, the Outlook not enough system resources issue should be resolved since the app will be better optimized.
4. Reduce memory cache size for each PST file using the Registry
Press Windows + Rkeys to prompt the Run dialog box.
Type Regedit in the search box and press Enter to open the Registry Editor window.
Navigate using this path: HKEY_CURRENT_USER> Software> Microsoft> Office> XX.X> Outlook> PST
Then right-click on the blank area, select New, then click on DWORD (32-Bit).
Input UseLegacyCacheSize as the Value name and change the value to 1.
Save the changes and exit the Registry Editor.
Restart your computer for changes to sync. Since there is a shortage in the available resources for the app to function well, removing unnecessary cache will help beat down the space consumed. Hence, Outlook not having enough system resources should cease to exist.
5. Remove additional profile or PST files
Launch Outlook and go to Files.
Click on Info and select Account Settings.
ChooseData Files and select the profilesor associated PST files you don’t need.
If you own any product developed by Adobe, such as Adobe Photoshop, then you know that all of their products are membership-based. You pay a subscription and they provide you with the product, constant updates, and the newest versions when one is available.
However, these memberships differ in terms of functionality. For example, you can have a membership only for Adobe Illustrator, or you can have a membership for the entire Creative Cloud.
One thing many people don’t know about is that you can upgrade your membership from a single app to a complete Creative Cloud membership.
This means you don’t need to first unsubscribe and then make a new membership. Read on to find out more.
How can I upgrade to a complete Creative Cloud membership?
1. Sign in to your Adobe account on Adobe.com.
2. Select Manage plan or View plan for the membership plan you want to change.
3. Under Plan & payment, click Change plan.
4. Choosethe desired plan you want.
5. Manage your storage and billing frequency.
6. Click Select.
7. Review Terms and conditions.
8. ClickConfirm.
You can upgrade a single-app Creative Cloud membership to complete Creative Cloud membership from the My Account section on the Adobe website.
What happens when you change your membership plan?
When you make these changes, the existing plan is canceled and you get a refund for it. Keep note that the refund is based on the date when you canceled the old plan.
The new plan will go into effect immediately, and you will be charged for it. Now that you’ve made the change, your monthly billing date changes to the date when you change the plan.
Reversing the action and going back to a single app membership can be done by following the exact same steps, so canceling the full Creative Cloud membership is extremely easy.
We hope you managed to upgrade your Creative Cloud membership following our guide. If there are any other Adobe-related questions that you want us to answer, please do not hesitate to let us know in the comments section below.
One of the most often used yet critical peripherals is the microphone, with which many users have faced issues. Messages including the HP Envy x360 microphone are not working one has been reported by them, and we will address it in today’s article.
It might be the internal microphone or an external one that you’ve connected. Whichever is the case, resolving issues that prevent the microphone from working is simple.
Microphone troubles are the most aggravating since they are frequently merged with hardware issues, which are sometimes begun by a loose connection.
Follow along as we have put together a list of methods in which you can fix the HP Envy microphone not working error.
What can I do if the HP Envy x360 microphone is not working?
1. Unplug and replug the peripheral
If your microphone isn’t working, check to see that it is properly attached to your computer. If the connection is a little sloppy, it may look to be properly plugged in, but it may just not function.
Ensure that the connection is secure by pulling out the cable; whether it is a USB microphone or just a regular audio jack, and plugging it back in.
Also, be certain that it is connected to the correct audio jack on your computer. Look for a jack that says microphone or at the very least audio in. The color of audio output jacks is typically green, but the color of microphone input jacks is typically pink.
Mute switches may be available on some microphones. On the wires of some PC audio headsets, for example, we’ve noticed mute controls for the microphone. If the microphone has a mute switch that is turned on, it will not function.
2. Update the driver
2.1 Manually update the driver
First of all, right-click the Start icon then tap Device Manager to open it.
Now expand the Audio inputs and outputs section and right-click the Microphone option in order to choose Update driver.
Select Search automatically for updated driver software and then wait for Windows to search for and install the appropriate update.
Allow the processes to complete before restarting your computer to ensure that the changes are applied correctly. Afterward, the HP Envy microphone not working error will be solved.
We strongly advise you to use a dedicated driver update program, to forego manually updating your drivers and save yourself some time.
2.2 Use an automated tool
An automated tool provides a safe way to keep all your drivers up to date. Outbyte Driver Updater is a special tool that automatically scans your computer and tells you which drivers are outdated.
Following through, it will update all of them if possible. Outbyte Driver Updater uses a database of over 18 million driver files that is updated daily.
Outbyte Driver Updater
The best tool when it comes to driver updates and repairs.
Navigate to AMD’s support page and download AMD Auto-Detect and Install Radeon™ Graphics Drivers for Windows®. This, of course, if you are using an AMD chip, otherwise skip to the third step below.
After you have installed the above software, run it and follow the on-screen steps; in order to allow it to reinstall your Graphics drivers.
If you don’t use an AMD chip, access Device Manager as we have shown in the second solution of this article; then expand the Audio inputs and outputs section and right-click the Microphone option in order to choose Uninstall device.
Reboot your computer in order to reinstall the driver automatically.
How do I test the microphone on my HP Envy laptop?
Press Windows + I then go to Sound from the right panel.
Here, scroll down and click on your Microphone under Input.
Click Start Test then talk into your microphone and click Stop Test to see the results.
For more information and potential solutions, check out our article on the Microphone not plugged in error and learn how to fix it and avoid it in the future.
Outlook is undoubtedly one of the most preferred mailboxes but it does come with a few nuances of its own. The one we are going to cover in this segment is the Storage Issues.
Most of us are not aware that Outlook or, as a matter of fact, any other mailbox service stores temporary files in a folder of your PC.
Why should I delete Outlook’s temporary files?
It’s quite likely that the size of these temporary files will balloon and not only cause performance issues, but also increase the risk of data thefts.
The temporary files include the attachments you view without downloading and the actual attachments that have been opened.
Needless to say, the temporary folder contains sensitive data.
Another side effect is that users will no more be able to open the new Outlookemail attachments as the system is already bloated with previous temporary files.
Ironically sometimes even PC cleaners fail to delete the temporary Outlook files. So the next time you run out of storage space does make it a point to clean the Outlook temporary files.
Let’s check out some of the best methods to clear Outlook temp files and let’s start with the easiest of them all.
How can I clear Outlook temp files?
1. Delete Outlook temporary files via Registry Editor
1. Press the Windows + R keys on your keyboard to open the Run dialog.
2. Type regedit in the dialog box and press Enter to run it and open the Registry Editor app.
3. Navigate to Security > OutlookSecureTempFolder.
4. Right-click on OutlookSecureTempFolder and select Modify from the options.
5. In the Edit String window, you need to copy the path to your clipboard.
6. Now press the Windows + E keys to open File Explorer.
7. Paste the previously copied path onto File Explorer’s search bar press Enter.
8. Once inside the Outlook temp files folder, you can directly delete the temp files.
Thankfully, one can directly delete the temp files from the Outlook folders, but the issue here is that the temp folder location is stored in registry keys.
We have listed the Outlook version along with the name of the key. Just head over to the registry and find the location of the temp files:
Outlook 2003-HKEY_CURRENT_USER\Software\Microsoft\Office\11.0\Outlook\Security
Outlook 2007-HKEY_CURRENT_USER\Software\Microsoft\Office\12.0\Outlook\Security
Outlook 2010-HKEY_CURRENT_USER\Software\Microsoft\Office\14.0\Outlook\Security
Outlook 2013-HKEY_CURRENT_USER\Software\Microsoft\Office\15.0\Outlook\Security
Outlook 2016-HKEY_CURRENT_USER\Software\Microsoft\Office16.0\Outlook\Security
2. Use Outlook Temp Cleaner for Windows
The one thing I really appreciate about the Windows Ecosystem is the availability of tools, every error has a tool to patch it.
Outlook Temp Cleaner is something that is best for those of us who don’t want to struggle a lot trying to locate the Secured Outlook Temporary files.
This is a free utility and pretty simple to use as well on Windows 10, and it will safely clear your Outlook’s temp files.
Download the Outlook Temp Cleaner file and run it. The tool automatically locates the temporary files and cleans up the SecureTempFolder.
It can also be used by admins with corporate login and logoff scripts without the need for any end-user interaction.
Outlook Tem Cleaner also displays the current size of the temp files that are stored in the folder and offers one button to delete all the temporary files.
One can also use the Empty Folder option to schedule the temp file cleaning process. That being said, the program needs Microsoft’s .Net Framework for functioning.
A professional optimization tool is able to quickly scan your computer and identify any files that may cause it to underperform.
These tools come equipped with modern and safe-to-use technology, not allowing any files that might be necessary for your computer to run. In this case, you can safely instruct the chosen software to only remove the temporary files from Outlook.
It’s also worth mentioning that OutlookTools is yet another free cool program that not only lets you delete the temp files in an instant but will also give you other powerful features.
We can name an Outlook startup switch, Tweaks to New Mail alert notification, and also an option to unblock the attachments altogether.
In case you notice a large number of temporary files, you can always disable Outlook logging to save space.
Did you manage to safely clear temporary files within Outlook on your Windows 10 device? If you encountered any other issues, please let us know in the comment below.
Keyboard problems are unfortunately more common than we would like, and the Lenovo IdeaPad 320 keyboard not working is just one such example.
The IdeaPad notebooks were introduced in January 2008, and the design signaled a shift from the business-oriented ThinkPad laptops. The Lenovo IdeaPad 320 series is a line of home and business laptops powered by Intel Core CPUs.
Why is my Lenovo laptop keyboard not typing?
After interacting with a few users who have encountered this problem, we can attribute it to any of the following factors:
Physical damage – The laptop may have been dropped, or the keyboard has taken some form of impact; hence it is damaged and will no longer work.
Connection issues – Some connections may be out or not seated properly or attached correctly.
Driver issues – Drivers link hardware with software, so if the keyboard driver is not up to date, it could be a source of the problem.
Wrong settings – Sometimes, you could have activated a setting that affects the keyboard’s usability.
Outdated OS – The keyboard and many other computer components can start to malfunction if the OS is outdated.
Regardless of the trigger, just like other keyboard issues, you should have some success using the solutions recommended below.
How can I fix Lenovo IdeaPad 320 keyboard if it’s not working?
1. Check for Windows updates
Click the Start icon, then select the pinned Settings icon.
Go to Windows Update and click the Check for new updates button. After installing the necessary updates, the Lenovo IdeaPad keyboard not working issue will be solved.
Updating hardware and peripherals ensures you get the best performance, the most up-to-date features, and better security. We recommend using Windows Update and Lenovo System Update to keep the system and hardware up to date.
2. Install the latest drivers
2.1 Manually update drivers
Right-click the Start icon and select Device Manager.
Expand the Keyboards section, right-click on the keyboard, and select Update Driver.
Select Search automatically for updated driver software and wait for the process to finish.
Alternatively, you may go to the Lenovo official website and download the most recent manufacturer drivers.
On the manufacturer’s website, you will find the proper driver for Lenovo IdeaPad 320 laptop and all steps you need to follow to download and install the missing drivers manually.
2.2 Update drivers automatically
If you don’t have the time, patience, or computer skills to update the driver manually, Outbyte Driver Updater can do it. Outbyte Driver Updater will detect your system and locate the appropriate drivers for it.
You don’t have to know what operating system your computer is running, you don’t have to risk downloading and installing the wrong driver, and you don’t have to worry about making mistakes when installing the driver.
Outbyte Driver Updater allows you to update outdated drivers in only a few clicks. The automated solution is the most efficient method of updating drivers.
Not only that, but the program also allows you to schedule scans to keep all of your drivers up to date.
Outbyte Driver Updater
Easily resolve any issues with the Lenovo IdeaPad 320 keyboard by updating the drivers automatically with this powerful software.
As there are limited numbers of USB ports, getting a separate mouse and keyboard will take up space for you.
Hopefully, the solutions provided above will assist you in resolving the Lenovo keyboard not working issue. This isn’t the only issue you can encounter, and many reported that Lenovo laptop won’t turn on but the power light is on.
Lastly, if you have any queries, please leave them in the comments section. We’d like to hear your thoughts and suggestions.
OST is not an Outlook data file is an error that users complain about using the Outlook app, and it may occur for several reasons. However, this article will discuss the cause of the error and how you can fix it.
Microsoft Outlook is one of the best tools for managing personal information such as webmail, contacts, calendar entries, and lots more.
It has many features that make it better than other software in the market. One of the advantages of using Outlook is that users can work on it when offline.
Though you need an internet connection to connect with Outlook servers, users can work offline and sync it later whenever there is an internet connection.
Furthermore, using Outlook without a network connection enables the Offline mode. It works with an OST file (Offline Storage Table), an Offline Outlook data file used to store your activities while disconnected from the servers.
Hence, the copy saved on the OST file is synchronized with Outlook when there is an internet connection.
Is Outlook OST a data file?
Outlook OST is an Offline Outlook Data File that allows you to store all the work you have done while offline. It contains a synchronized copy of mailbox information on a local computer.
So, without the Outlook OST data file, users won’t be able to synchronize the offline Outlook data.
Can we convert OST to PST?
Users can convert OST files to PST files. However, it may be for reasons such as exporting or accessing the OST file on another computer or exporting it for someone else to use.
Select the default profile and click on Properties.
Click on Exchange Account and tap on Change.
Then, enable the Use Cached Exchange Mode option.
Navigate to More settings, select Offline folder file settings and disable the offline use option.
Then, click Yes.
Go to Cached Exchange Mode settings, enable Use Cached Exchange Mode and click OK.
Click Next and the Finish option.
It will help fix the Outlook data file.ost cannot be opened error.
2. Delete the OST file
Open the Control Panel and click on Mail.
Click on Show Profiles in the Mail Setup.
Select the default profile and click on properties.
Select Email Accounts, go to the Data Files tab, and click on Open File Location.
Right-click on the OST file in the source directory and select Delete.
After the process is complete, launch Outlook. It’ll automatically recreate the OST. It is the best fix for fixing the error message: The set of folders cannot be opened – the file is not an Outlook data file.
3. Use an OST Converter Application
Download the OST Converter, then launch the software on your PC.
Navigate to the OST file from the PC.
Click on Mail to preview the Data on the OST file.
At the top of the screen, click on Export to convert the OST file data.
Select PST and click on Export.
Exporting the OST file to PST allows the user to import the PST file into the Outlook application.
Restarting the PC will fix startup issues affecting the file.
5. Update Outlook on your PC
Launch Outlook on your computer and navigate to the file.
Click on the Office Account.
Select the Update Options and click on the Enable Updates option or Update Now.
Restart your PC.
What is the difference between .PST and .OST in Outlook?
Outlook PST Files can store local copies of your email data. Also, users can export and import tasks, messages, contact, etc., to any PC.
However, Outlook OST files allow you to store work done in offline mode and can only be synchronized individually using Outlook servers. Likewise, exporting is not possible unless converted to PST.
Even the best computers sometimes run into problems. A stuttering or lagging mouse is the most common of these. And, the worst is when the mouse lag is on a 4K monitor.
Here, you spend dearly on the best 4K monitor, though end up not getting the desired result. The problem may affect both gaming and normal use. However, what most users don’t realize is that the underlying cause is easily fixable.
Go through the following sections to find out what’s causing the mouse lag on a 4K monitor, and the best ways to fix them.
Why is my mouse lagging on a 4K monitor?
There could be various issues behind the mouse lag on a 4K monitor but remember, it’s unlikely that any of these have to do with the monitor, though you can’t negate the chances of it altogether.
The most common reason behind the lag is an underperforming PC. In this case, though it may appear to you that the mouse is lagging, it’s actually the poor system performance to be blamed.
Other than that, running an outdated driver is another underlying cause of the problem. Besides, if the mouse settings have not been configured properly, you may face issues with it.
Now that you have a basic understanding of the issues causing mouse lag on a 4K monitor, let’s walk you through the most effective fixes for it.
How can I fix the mouse log on a 4K monitor?
1. Boost the computer’s performance
When it comes to the computer, there are several methods that could help you boost its performance, both temporarily and in the long run. If you face mouse lag on an external monitor not too frequently, it could be a background process that leads to the problem.
Check if there’s a Windows Update in progress, or another application or process consuming a lot of resources. If yes, terminate it in the Task Manager and check if the problem is solved.
Task Manager
Also, if the RAM is heavily loaded and there isn’t much space left on it, you are bound to face mouse issues on a 4K monitor. To combat this, use an effective RAM cleaner tool.
Press Windows + S to launch the Search menu, enter Device Manager in the text field at the top, and click on the relevant search result.
Next, double-click on the Mice and other pointing devices entry.
Right-click on the malfunctioning mouse, and select Update driver from the context menu.
Select Search automatically for drivers from the two options in the Update Drivers window.
Now, wait for the system to search for the best available driver and install it.
It is necessary to regularly update the drivers for the device to function effectively. This is all the more important for the critical ones, such as the Graphics driver, and those for the regularly used peripheral devices.
Additionally, if you still need a more efficient and automated method to update your mouse driver or any other drivers, you have dedicated driver updater software.
Outbyte Driver Updater
Simply let the software update all your outdated drivers and optimize your PC.
Press Windows + I to launch the Settings app, and select Bluetooth & devices tab from the navigation pane on the left.
Click on Mouse on the right.
Select Additional mouse settings from the options here.
Navigate to the Pointer Options tab from the top.
Next, adjust the slider under Select a pointer speed until you get the desired results.
Once done, click on OK at the bottom to save the changes.
If the pointer speed has been set too low, it would appear as if the mouse is lagging on a 4K monitor. In this case, adjusting the pointer speed should help do the trick.
Sometimes, the Asus router may be difficult to connect when plugged in because of some settings fault or the other. One cannot set up a router without going to the configuration or set up page of the router.
Therefore if you cannot go into the configuration or set up page of the Asus router, you cannot set it up. Difficulties that are encountered in logging in to the Asus router alter the flow of work, entertainment, and general life.
Your VPN may also get blocked by your router, or it may be that you bought a router from a friend or from somebody else and they didn’t give you the credentials to access the configuration page, so it is impossible to log in.
Asus router lights meaning
Power light– the power light is the light that turns green to indicate when your router is switched on. it blinks when you are restarting your router, and also blinks 5 times per second when using the WPS. If the power light of your router does not come on, then check the ethernet cable or the power cable
Ethernet light– the ethernet light is the light that turns green on the router, when connecting the PC to the ethernet port.
Internet light– the Internet light turns green when there is a stable Wi-Fi connection. This light blinks when transmitting or receiving data from the router to the PC.
Wi-Fi light– A Wi-Fi light error occurs when there is an Internet issue. The Wi-Fi light turns green when the router is performing optimally. The light blinks when there is a change in bandwidth frequency.
Common connection problems you should know about
You may not be able to access your router configuration settings because of the following reasons:
Your web browser has set up a proxy server.
Your Asus router is not connecting to the Internet.
The router is not in the default setting.
You have forgotten the router IP address.
The WAN connection of your router is not connected correctly.
Your router is not set to obtain IP automatically.
Your Asus router is not connecting to WAN.
If all this is the case, there are ways that you can access the configuration page of your Asus router without a login.
Why is my Asus router not connecting to the Internet?
1. Reset your router
Find the reset button of your router.
Hold the reset button for 11-15 seconds, until the led lights start to flash.
Do not worry if the other led lights do not come on. The router is restarting.
Once the led lights come on, the reset is complete.
2. Re-configure your router settings
Find the IP address of your router. To do this, check behind the router, and you will find the IP address written there.
Press the Windows key and enter cmd. Click the top result.
Type in the following command and press Enter: ipconfig/all
Find the default gateway in the option as the menu opens.
Open your preferred browser and type the IP address into your browser.
A request will be sent and a server-processed response will be received. This will help to grant you access to the configuration panel of the Asus router.
Press and hold the WPS button and turn the router on.
When you see the power light on, keep holding the WPS button.
As the power led light starts flashing, release the WPS button.
The router will automatically reboot when the power light stops flashing.
If after the hard factory reset, you have issues connecting, use the ethernet cable and connect to your PC or laptop so that you are sure that your router is the only router you are accessing.
Can my Asus router block VPNs?
Your Asus router can recognize your IP address and then block your VPN. there are certain protocols that your VPN operates with and your router can block these protocols. some of these protocols are:
PPTP
SSTP
Open VPN
There are ways to work around this interference and solutions that you can walk through to get this fixed. Organizations need VPNs to help with network synergy and mergers, and a block can be frustrating.
If after the hard factory reset, you have issues connecting, use the ethernet cable and connect to your PC or laptop so that you are sure that your router is the only router you are accessing.
How do I get my printer to connect to my router?
Plug the printer into the router’s USB port.
Open a web browser then type in the IP address of your router.
Enter the router ID and password, which is mostly by default admin.
Click the USB application.
Select Network printer server. Then click download.
Search in the download items on your PC and set up the server by following the on-screen steps.
Wireless connections in organizations whether large or small are best with a router. Oftentimes, these connections are set up together with a modem. Modems are limited, but together with a router, give a better wireless connection and accessibility.
Routers enable a local area network connection and allow for more connection of devices. Our guides will enable you to find solutions to any other challenge that you encounter in the use of your router so that you can enjoy wireless connections, whenever you need to.
Don’t hesitate to leave a comment in the section below and tell us which solutions worked best for you. Thanks for reading!
Are you suddenly unable to edit a Word document? This common issue affects many users, especially after updates or when working with downloaded files. If you’ve been wondering why am I not able to edit a Word document or how to make a Word document editable, the guide below outlines straightforward solutions to help restore full editing access.
Right-click on the document and select Properties.
Click Unblock.
2. Enable editing
Open your document and go to the File Tab.
Select Info.
Select Protect document.
Select Enable Editing.
Enabling editing will also allow you to update all fields when you make changes to different sections.
3. Assign permissions/Remove protection
Opening a document with Editing Restrictions from earlier Word versions may prevent editing, even with password permissions.
From Word 2003 onwards, you can assign read-only permissions to specific parts of a document. In earlier versions, such files open in ‘protected’ status, allowing comments but not edits.
To remove these protections, follow these steps:
For Word 2013, 2010
Click File.
Choose Options.
Click Trust Center on the left pane.
Click on Trust Center Settings.
On the left pane, click Protected View.
Uncheck all three boxes under Protected View.
Click OK.
For Word 2007
Click Review.
Click Protect Document.
Under Protect group, click Restrict Formatting and Editing.
Open it and check if you can edit the Word document now.
Word Online doesn’t have all the features of Microsoft Office’s completely installed program. But this is a quick solution if you can’t edit in the offline tool.
5. Use Undo
If you notice that your text is highlighted or frozen, this happens when the text is converted to a field. You can Undo or press the Ctrl + Z in this case simultaneously.
Check the Undo arrow at the top menu to see whether you had previously inserted a field. If this is the case, then Undo will resolve the issue. Otherwise, unlink the field using Ctrl + Shift + F9.
6. Check if another user has the document open
Sometimes, the document you are trying to edit has been locked for editing by another user.
This happens whenever someone owns the file, or you try to use a document on a shared network, and another user has it opened.
If this is the case for you, note that these steps may vary based on your version of Microsoft Windows:
Save all the work you have open.
Quit all programs.
Press Ctrl + Alt + Del to open Windows Security.
Click Task Manager.
Select Processes.
Click Winword.exe, then End Process.
Click Yes under the Task Manager Warning box.
If a message prompt comes up that the program is not responding, click End now, then continue with the following steps:
Go to File.
Click Exit Task Manager.
Start Windows Explorer and go to the folder with the Word document you wanted to edit.
Delete the file owner (a .doc file that looks like this: ~$cument.doc that is found in the same folder as the document you want to edit).
Open Word and click No if asked to load changes made to the template.
Open your Word document.
7. Use an alternative to Microsoft Word
Microsoft Office alternatives usually come in a similar form: a suite with multiple tools to create documents, presentations, and spreadsheets.
WPS Office, a completely free solution, is a great alternative to MS Office that supports all its file formats. WPS has a PDF toolkit where you can read, edit, and even convert PDFs to other file formats, all for free.
You can easily edit and create documents with tools like Writer, Spreadsheets, and Presentation. All these tools are necessary to get the job done quickly.
WPS Office
An all-in-one office suite alternative for inconvenient times.
If your Microsoft 365 subscription or Office license has expired or isn’t properly activated, editing may be disabled. To check:
Open Word
Go to the File tab → Account
Look under Product Information and confirm it’s activated If not, sign in with your Microsoft account or activate your license to restore functionality.
9. Save the Document Locally
Files opened directly from your email, browser, or Teams often open in Protected View or as temporary files. To fix it:
Click File → Save As and save the file to your desktop or Documents folder.
Close the file and reopen it from the new location. This allows Word to open it in full-edit mode.
10. Convert Template or Legacy File Formats
Files with extensions like .dot, .dotx, or .doc may restrict editing. To resolve:
Open the file
Select File → Save As
Choose Word Document (*.docx) from the format dropdown This creates a standard editable copy.
Why can’t I edit my Word document?
Here are some of the most common reasons why you can’t edit your Word document:
You are using the trial version of Microsoft Office, and the license has expired.
The Word document is open in read-only mode.
The author of the Word document has restricted editing of the document.
Protected View mode might be enabled.
More than one user might have opened the same document on a shared network.
Why is my Word document locked?
Here are a few reasons why your Word document is locked:
The file is shared and two users simultaneously are editing it.
Another instance of the Office app with the same file runs in the background.
The file has been might be marked as Final and can no longer be updated.
Lenovo has been expanding the number of product lines that come with AMD processors and this year’s ThinkBook 13s Gen 4 has been added to the list.
The addition of an AMD configuration option is immediately felt when considering battery life on the latest generation of the ThinkBook 13s, and Lenovo has gone back to the drawing board by actually adding ports to this version of the laptop over its predecessors.
Specs
Lenovo ThinkBook 13s Gen 4
Processor
AMD Ryzen™ 5 6600U Processor (2.90 GHz, up to 4.50 GHz Max Boost, 6 Cores, 12 Threads, 16 MB Cache)
AMD Ryzen™ 7 6800U Processor (2.70 GHz, up to 4.70 GHz Max Boost, 8 Cores, 16 Threads, 16 MB Cache)
Operating System
Windows 11 Home
Windows 11 Pro – Lenovo recommends Windows 11 Pro for business
Windows 10 Pro 64 preinstalled through downgrade rights in Windows 11 Pro 6
Display
13.3″ WUXGA 2k (1920 x 1200) IPS, with Dolby Vision™, anti-glare, 300 nits, TÜV low blue-light (software controlled)
12.47″ x 8.67″ x 0.68″(361.51mm x 249.65mm x 19.20mm)1.9kg / 4.19lbs
Audio
Dolby Audio™ certification
2 x 2 Harman Kardon® speakers
2 x noise-cancelling digital microphones
Weight
Starting at 1.23kg / 2.71lbs
Color
Arctic Grey, dual tone, anodized aluminum cover
Ports/Slots
USB-C 4.0 (Power in)
USB-C 3.2 Gen 2
USB-A 3.2 Gen 1 (Always on)
HDMI 2.0
Headphone / mic combo
Battery
Up to 10.9 hours* 56Whr (MM18)
Supports Rapid Charge
What’s in the box
ThinkBook 13s (13″ AMD)
65W adapter (supports Rapid Charge)
Internal battery
Quick Start Guide
Look and Feel
While brandishing the name ThinkBook, the ThinkBook 13s is really more like a Yoga-style laptop. The two-tone grey aluminum design replaces the traditional matte black chassis of more traditional ThinkBook aesthetic, the dual button trackpad present on most ThinkBook’s is replaced with a single glass trackpad with uniformed lines around the edges, and the historic red trackpad nub is removed entirely.
In addition to the more consumer-like differences with the ThinkPad 13s comes with a new 16:10 aspect ratio on a 13.3-inch panel that supports up to WQXGA resolution (2560 x 1600), covers 100% of the sRGB color gamut at 300 nits of brightness on a matte display.
The relatively portable ThinkBook 13s does retain the legendary port selection of the ThinkBook line with one side supporting USB Type-A, and headphone jack, while the other has a full HDMI port and two-Thunderbolt 4 Type-C slots.
This year, the ThinkBook 13s updated its webcam technology but not really the sensors, which results in a slightly clearer image that leans in to some over processing, but the attempt can be appreciated by some.
The keyboard on the ThinkBook 13s is very much identical to other ThinkBook laptops and provides a familiar typing experience that I find is only surpassed by the keyboard on a Surface device.
The keys get fairly bright in low-light situations which enable anyone to continue to be productive in situations where they probably shouldn’t be.
Lenovo has begun baking a programmable button selection into its keyboards and the ThinkBook 13s offers just that along with the other functions and media keys.
Last up is the bottom firing speakers that sound like your average laptop speakers. While I don’t personally like bottom facing speakers, I believe the reality is that most people at work, aren’t blaring music for 8 hours straight and its relatively niche issues for those of us who use headphones or Bluetooth earbuds.
Performance
If you can snag an AMD version of the ThinkBook 13s you’ll be pleasantly surprised by the battery life of the device, but it comes with a bit of throttled performance.
While the ThinkBook 13s runs a bit cooler and quieter than its Intel counterpart which comes with a Core i5 P-Series that’s recording poorer battery life in test, an issue customers may have is the short-peak period the AMD processor puts out, when on battery.
What this means is that in real world usage is that, on battery, the ThinkPad did show some noticeable lag when exporting PowerPoint files to video, documents to PDFs, or sorting data in Excel.
Often when dealing with Excel documents with macros in Lenovo’s default Best Efficiency Mode, the system would come to a grinding halt. I’m not sure what was going on but the experience was reproducible more often than not.
Shifting out of that mode to Best Performance helped mitigate the issue, but it would still occur in rarer instances.
Another area where either Lenovo or AMD is cradling its processor effects performance is in the GPU experience. The GPU in the ThinkBook 13s is pretty powerful and shows glimmers of high framerates in certain games, but due to the throttling and low power of the CPU, there are more times when playing games such as Cyberpunk 2077 result 8FPS slow level framerates.
However, there are a host of other games that are playable at decent resolutions that include WoW, Rocket League, Sims 6, Forza, Minecraft, Roblox, The Witcher, Skyrim, and Dota among others.
Understandably, the ThinkBook 13s is designed as an affordable SMB device, but even if the customer isn’t gaming, those GPU stutters are present in 3rd party applications that deal with heavy graphical experiences such as AutoCad, video and graphics editing.
Lastly, the performance also appears to be hampered by the bloatware that nibbles at memory resources while shrinking storage capacity for no discernible benefit.
While I find the Lenovo Vantage app a relatively centralized place to go to manage the system for people who don’t know how to navigate Windows, its existence is redundant and the power modes it offers tend to nerf its own hardware more often than Microsoft’s recommended options.
With a wipe and clean installation of Windows, the ThinkBook 13s gained 13-25% more efficiency in both single and multi-threaded benchmark tests than it did with all of the extra bloatware draining resources.
Summary
It feels pretty clear cut that anyone who prefers battery life over consistent performance would be well suited with the AMD powered version of the ThinkBook 13s. That is not to say the performance on the 13s is poor, it’s just a bit more erratic than the Intel P-Series counterpart.
However, with both the Intel and AMD models of the ThinkBook 13s sitting on a desk, customers would be hard pressed to really notice a difference other than the price, which is also a consideration.
At $851.80, and several discounts throughout the year, the ThinkBook 13s is a no brainer upgrade for anyone looking to venture beyond the typical ThinkBook aesthetic or a years old laptop.
The last consideration for customers regarding the ThinkBook 13s is finding a model that actually has an AMD chip in it. As I am writing this review, AMD options are out at Lenovo.com, Best Buy and NewEgg, that may change in the coming weeks.
Long gone are the days when you would have to be physically present to access a computer. What might have seemed like science fiction in the old days is a reality for the average Windows user now.
Through remote access, you can access your Windows remotely from far-off places with ease. Here, we’ll lay down the different ways you can do that. So let’s get started.
How to access your Windows PC remotely on Mac
To access any computer remotely—whether through Windows, Mac, or Linux—you have to rely on a process called Remote Access. It’s a fairly straightforward method by which you can access any computer or network through a network connection.
To access your Windows computer from your Mac, you’ll have to use remote access software; it’s a special program that lets you access your PC remotely. And in 2022, there are a host of options available to do that. We’ll discuss the two handiest ones: Microsoft Remote Desktop and Team Viewer.
1. Microsoft Remote Desktop
A handy option for remote access is the Microsoft Remote Desktop. It’s the official, free remote transfer and access app from Microsoft that lets you connect to a remote PC without any hassles.
To get started with the Remote Desktop transfer, you’ll first have to first install the app on both of your systems. On your Mac, head to the Mac store and grab the official Remote Desktop app from there.
Similarly, on your Windows computer, head to the App Store and download the app.
Launch the app on both the computers. Then, head to your Mac, launch the app and click on Add PC.
In Add PC window, you’ll have to enter the IP address of your Windows computer. You can easily find out your Windows IP address from the Command prompt. Just head to the Start menu search bar, type in ‘cmd,’ and select the best match. In the command prompt, type in ‘ipconfig’, and hit Enter. Look for IPv4—it will have your IP address.
Now enter this IP address in the PC name column. Moreover, if you like, you can give an apt name to your PC in the Friendly name section. Finally, click on Save.
Now, right-click on the icon of your newly saved connection from the Remote Desktop app on your Mac. The connection will start initiating a new connection and you will be able to access your Windows in no time.
However, if you can’t then you might first have to enable the Remote Desktop setting on Windows manually. Here’s how:
Hit the Windows key + I to open the Windows settings.
Head to System > Remote Desktop and toggle the switch for Remote Desktop.
Note that the Remote Desktop feature is only available for Pro and Enterprise editions of Windows. So if you’re running the Home edition of Windows, the Remote Desktop app from Microsoft won’t work for you. If that’s the case, then the second method below is what you’re looking for.
2. Team Viewer
TeamViewer is propriety remote access software first released in 2005. It’s your one-stop solution to access computers and networks remotely through other computers or laptops.
A lot of new additions have been made to the software since it was first released in 2005. For instance, you can not only see the remote screen from the endpoint but also share and receive different files from both computers.
To set up remote access on your PC through the TeamViewer app, first head to the official website of TeamViewer and download the app from there. Do this for both your Mac and Windows.
Now launch the app on both of your systems. On your Mac, in the Control Remote Computer section, enter the ID of your Windows computer in the section of the partner ID of your PC, and click on Connect.
As soon as you do this, the app will then start connecting and authenticating a new connection.
A new dialog box will pop open, asking for the password on your Windows PC. Enter the password and click on Log on.
That’s it, your Mac will get access to the Windows PC instantly. This is what it will look like:
Anything that you do through this remote window—deleting the files, opening a browser, and so on—will take place in real time on your Windows PC.
To close the session, simply click on the Close[X] icon in the bottom right corner of your TeamViewer app.
Using the Windows PC through your Mac
There are a host of reasons you might want to access the Windows PC through your Mac. Whether you have to troubleshoot the home PC from your office, or you simply want to collaborate with your colleagues, accessing your PC remotely through different operating systems like Mac is a real choice for almost all Windows users now, thanks to handy remote access apps out there. Team Viewer and Microsoft Remote Desktop are some of the best ones out there, but they aren’t the only ones for sure.
If remote accessing is a long-term setup for you, then make sure you only choose from the best ones out there.
Researchers at JavaScript security company otto-js, while testing script behaviors detection, noticed something unusual: enhanced spellcheckers, like the Enhanced Spellchecker in Google’s Chrome (off by default, needs to be turned on), or Microsoft’s Editor (an Edge plugin, needs to be installed), send potentially personal identifiable information (PII) to servers at Google and Microsoft, respectively.
What’s more, if users take advantage of the “Show Password” option, then passwords themselves can be transmitted, as well.
The info, potentially anything entered in form fields while these enhanced spell checkers are on, is only sent temporarily to Google, the company said:
“The text typed by the user may be sensitive personal information and Google does not attach it to any user identity and only processes it on the server temporarily. To further ensure user privacy, we will be working to exclude passwords proactively from spell check.”
In addition, turning on Enhanced Spell Checker in Chrome states that “(t)ext that you type in the browser is sent to Google.”
Both Microsoft and Google use company servers to perform the enhanced spellchecks, but in doing so may be opening up attack vectors that users may not be aware of.
If the Java Runtime Environment not found message appears, you won’t be able to run Java applets on your PC at all. It usually occurs if the Java Runtime Environment isn’t installed properly or if the system can’t find it.
Here’s how to fix it:
How do I fix the Java Runtime Environment not found error?
Choose if you need a 32bit or a 64bit architecture of JRE based on your PC specifications.
Click on the Agree and download button to start the actual download.
2. Install Java Runtime Environment (JRE)
Right-click on the downloaded JRE setup file.
Select Run as administrator and accept the installation prompt.
Click on the Install button to complete the installation.
You will receive a message that the installation was successful. Next, click on close to complete the installation and close the window.
3. Copy Java installation from another PC
On a PC that has Java installation, go to one of the following directories: C:\Program Files (x86)\ C:\Program Files\
Locate the Java folder, right-click it, and select Copy.
On your PC, go to Program Files (x86) or the Program Files directory. Make sure that the destination directory matches the directory that you use to copy Java from.
Right-click and choose Paste.
While this method works, it requires you to have another PC with Java running in order to copy files from it.
Press the Windows key + X and choose Windows PowerShell (Admin).
To find out the JRE version, run java -version
If you want to know the version of JDK, run javac -version
Java Runtime Environment location
Follow the steps from the previous section to view Java settings.
In the Path field you’ll find the installation directory.
Click X to close the window.
How to enable Java Runtime Environment
Press the Windows key + S and enter Java. Select Configure Java.
Navigate to the Java tab and click on View.
Make sure Java is enabled by clicking the Enabled checkbox and then OK.
That is it. You should now have the latest version of Java Runtime Environment on your PC and no longer receive the error message.
This isn’t the only issue you can encounter and we already wrote about outdated Java message as well as Java not recognized error in our previous guides.
If you’re having issues with Java files, don’t hesitate to check our guide on how to run JAR files on Windows.
Please write us in a comment below if these solutions helped you or if we should include any other suggestions in our article.
When working on big PowerPoint presentations, there may come a time when you are suddenly faced with a file save error. The full name of the error is the following: an error occurred while Powerpoint was saving the file.
This PowerPoint error while saving the file can be rather frustrating, so try following these steps that may help your solve this common issue.
Why is my PowerPoint file not saving?
Delete the diagrams and graphics on any slides that do not copy-paste well, then attempt to save the file and see what happens.
Check to see if there is another faulty slide that is preventing the save function from working properly. It’s not unusual for certain kinds of diagrams or graphics to give rise to this issue.
To accomplish this, go to the File tab from the menu and then select the Save option. To save your file, you can alternatively choose to just hit Ctrl + S.
But, if none of these methods works, keep on reading as we have put together a comprehensive guide on how to fix the PowerPoint saving file error!
How do you fix an error occurred while PowerPoint was saving the file?
1. Save the file as a new PowerPoint presentation
A quick workaround for the Powerpoint can’t save file error is to save the file as a new PPT presentation. This is a clever way of saving your presentation if something goes wrong. After saving it under a new name, your presentation should work fine.
1. Press the Windows Start button.
2. Type in PowerPointand click on the result to open the app.
3. Select View from the top menu.
4. Click on Slide Sorter.
5. Now, open the faulty old PPT file in a new window and select Slide Sorter on it as well.
6. Click on Editand then chooseSelect All.
7. Go back to Editand click onCopy this time.
8. Return to the new PowerPointwindow.
9. Click on Edit, and selectPaste.
10. Save the PowerPoint document under a different name.
2. Repair PowerPoint
Type control panel in the Windows search tab and click to open the Control Panel app from the results.
Go to Uninstall a program under Programs.
Here, click the Microsoft Office app and select Change.
You will have the option to do a quick repair which we advise that you do. Follow the on-screen steps and you are done. The PowerPoint saving PDF file error will be fixed.
3. Remove ActiveMovie control
From PowerPoint’s menu select Developer followed by Visual Basic.
If you can’t see the Developer tab, click File followed by Options.
Select Customize Ribbon then select Developer under the Main tab and click OK.
Select UserForm under the second icon from the toolbar.
Go to the File menu and select Remove UserForm, and then choose No.
Go back to the Filemenu. Select Close and Return to Microsoft PowerPoint. The PowerPoint not saving video files error will be solved.
More so, the errors may be the result of faulty registries caused by an old PowerPoint install, so a quick repair or a fresh install may also be a valid solution.
4. Perform a fresh new install of PowerPoint
Remove your old Microsoft Office completely by pressing Windows + I then going to Apps followed by Apps and features.
Select Install Now to save the installation file on your PC.
Double-click on the downloaded file and follow the on-screen instructions of the setup wizard. The PowerPoint save file not responding issue will be gone afterward.
If the reinstall didn’t solve this issue either, this might be caused by file corruption. To repair broken files we use Stellar PowerPoint Repair Tool, a tool specialized in repairing PowerPoint files.
When important data or hours of work are at stake, don’t take any risks and perform raw recovery of severely corrupted PPT/PPTX/PPTM files using Stellar.
5. Use an alternative platform for presentations
If you’re someone who often finds themselves presenting in front of a large audience, you’ll know that the most embarrassing thing that can happen is your presentation not working because it didn’t save correctly.
This is a common nuisance, which is why you need an alternative for creating presentations that can be accessed across a multitude of platforms and work from any Internet-enabled device.
Adobe Creative Cloud Express is just such an application. This web-based creation tool is perfect for creating professional-looking presentations, posters, flyers, Facebook and Instagram posts, and banner art.
Adobe Creative Cloud Express features high-quality pictures and graphics, and thousands of easy-to-use templates, and it helps you create multiple types of media from one platform.
This great solution also comes with cross-platform support, including mobile and instant access to your creations from everywhere in the world so you should definitely give it a try.
Adobe Creative Cloud Express
This Adobe app is the ideal tool to save your day and create spectacular presentations for any audience.
To access the PowerPoint presentation again, click the button that says Edit Anyway that is located next to the banner message that is displayed in yellow.
The yellow bar and the lettering that said Read-Only should be removed from where they are now shown following the presentation’s title. Your PowerPoint presentation may now be edited.
We hope that our solutions helped you fix the An error occurred while PowerPoint was saving the file error and you saved your presentation quickly. If you have any other suggestions on how to deal with this error, leave us a comment below.
Updating Windows 8.1 is a pretty straightforward process, but as with many other processes, this one does come with its share of errors.
Some of the most common error codes that indicate Windows 8.1 update is not working properly are the following: 0x0xc1900223223, 0x80240034, 0x8007000E, 0x80242006, 0x80244018, 0x80D02002, 0x80246017, 0x80240438, 0x80070070, 0x8007000D, 0x80246008, 0x80096004, 0x80070020.
One of the most common reasons why this error code appears and Windows is not updating is related to not having enough free space available.
We will explore in this article how you can quickly fix the Windows 8.1 update if it’s not working, so keep on reading.
Why are Windows 8.1 updates not downloading?
Here are some of the most common reasons that would trigger Windows 8.1 updates not downloading errors.
Some important Windows Update files are missing or corrupted.
There is not enough free disk space available.
Some non-Microsoft apps are interfering with the Windows Update process.
The Firewall is blocking the update.
The Windows Update tool itself is experiencing some issues.
There is a virus or malware on your PC.
How do I fix the Windows 8.1 update if it’s not working?
1. Rename the software distribution backup folders
Open the Start menu, and type cmd.
Right-click on the Command Prompt and choose Run as Administrator.
Next, type in the following commands and press Enter: net stop cryptsvc net stop bits net stop wuauserv ren %systemroot%softwaredistribution softwaredistribution.bak ren %systemroot%system32catroot2 catroot2.bak net start cryptsvc net start bits net start wuauserv
Close cmd and reboot your device.
Check for Windows Updates again and see if it works now.
This is one way to fix Windows 8.1 update if it’s not working. Alternatively, you can also use the Windows Update reset script to achieve the same results faster.
2. Download the most recent package updates
Press Windows + R, type Control panel, and click OK.
Go to Windows Update and select Change Settings.
Modify the Update settings to Never and choose OK.
Once installed on your device, return to the Change Settings option on Windows Update.
Select updates to Automatic.
Click OK and restart your device.
This simple solution might help if Windows 8.1 update is not working, so be sure to try it.
3. Fix Windows file corruption
In the Start menu, type in cmd.
Right-click on the Command Prompt and choose Run as Administrator.
Type in the following commands and press Enter: DISM.exe /Online /Cleanup-image /Restorehealth
After the DISM scan is finished, run the following command: sfc /scannow
Next, close the command prompt and rerun the Windows Update.
If Windows 8.1 update is not working, your file may be corrupted. However, you should be able to fix them with DISM and SFC scans.
Alternatively, you can use a third-party PC repair utility. It will complete a full PC scan, detect any system, stability, or memory issues you may have, and help you remove them in just a few clicks.
4. Ensure you have enough space
Open File Explorer and go to This PC.
In the Devices and drivers section check the remaining storage space on your drivers.
A 32-bit OS device needs at least 16 GB of free space, or 20 GB for a 64-bit OS, to perform the update correctly. Therefore, making sure you have enough space on your device is mandatory.
You can free up space on your device by deleting unnecessary files and folders and even deleting apps you are no longer using.
Using a dedicated optimization tool is the easiest and most reliable way of freeing some space on your device, ensuring that you will not delete by mistake any critical files.
Can I upgrade my Windows 8.1 to Windows 10 for free?
Download the Windows 10 installation media creation tool.
Launch the program on your PC.
Accept the agreement.
Choose Upgrade this PC now.
Hit the Next button.
Follow the on-screen instructions.
Hit the Install button.
Do note that the free Windows 10 upgrade offer ended way back for the Windows 8 OS. However, you can still use the Windows 8 product key to activate the Windows 10 copy, the option which might end soon as well.
With this last suggestion, we will conclude our article. We hope one of the solutions presented in this article will help you successfully solve the Windows 8.1 update not working problem.
Please let us know in the comments section below if you have additional recommendations or suggestions.
Some users have complained that they encounter the AMD GPU tuning not working issue. Most claim that the issue reflects by displaying errors like AMD tuning not showing and Radeon software overclock not saving.
Adjusting or tuning the GPU settings on your computer is something you can do diversely by using GPU tuning software or tweaking your computer’s settings.
Also, there are technologies like the AMD (Advanced Micro Devices) GPU tuning software that allow you to tweak your GPU performance.
Further, the AMD Radeon GPU performance tuning system allows users to overclock or under-volt their GPU (Graphics Processing Unit).
It helps users analyze game performance on their computers in real-time and suggests ways to improve the gaming experience by tweaking various available in-game graphics settings.
However, users may run into many problems when using the software. A common one is the AMD GPU tuning not working.
Furthermore, numerous factors may be responsible for the AMD Radeon software not working correctly. Some are AMD driver issues and outdated system OS. Hence, this article will discuss how to fix the AMD GPU tuning issues in a few steps.
Why is my AMD GPU tuning not working?
Outdated system OS: When the operating system on your computer is outdated, it affects several parts of the computer. Operating systems like Windows are keen on improving their OS. Hence, users are to install them for better performance. However, not updating your OS can make your PC incompatible with the latest AMD drivers.
Outdated AMD driver: The User may run into many issues if the AMD driver on the PC is outdated. It can result in Radeon software overclock not saving and many other problems. Likewise, it can make the driver version not compatible with the latest version of your OS.
Improper configuration: The AMD Radeon GPU tuning software on your PC may encounter issues if the configuration settings are not correctly set. It may affect how the driver works.
How do I fix my AMD GPU tuning if it’s not working?
1. Update Windows
Click the Start button.
Select Setting and click on Windows update.
On the Windows Update page, select Check for updates. (If there’s an update available, Windows will automatically search for it and install it)
Restart your PC and check if the AMD tuning is not showing anymore.
2. Update graphics drivers
Press the Windows + Rkeys together to prompt the Run window.
Type devmgmt.msc into the search space and click OK.
In the search results, click on Display adapters, then select the driver from the drop-down menu.
Click the Update driver option, then select Search automatically for drivers.
This kind of tool will save you time and effort from manually downloading and updating the drivers.
By doing so, this program will ensure you a much safer process and increase your PC’s working condition so you can get the most out of the gaming experience.
3. Update the AMD driver
Right-click on the desktop, then select AMD Radeon Settings.
In the bottom-left corner of the screen, click on Updates.
Select Check for Updates.
If an AMD updated driver is available, download and install the update.
Restart your PC and check if the AMD tuning not working issue is solved.
To use Hulu, you must be logged into Xbox Live. However, you do not need an Xbox Live Gold subscription to watch Hulu on your device. Xbox Live account is at the silver level and is free while Xbox Live Gold is paid.
Hulu is one of the best and most popular subscription apps in the world today. It would be frustrating if you were not able to enjoy its services especially when you had an upcoming show that you wanted to watch.
Before you go, you might want to check Hulu error code P-DEV320 since it’s pretty common on Xbox.
Fortunately, as you can see above, you can easily fix the problem with the Hulu app not working on your Xbox. Please leave a comment below with your questions and concerns, and we will do our best to assist you. In addition, let us know about any other solutions that might not be discussed in this article.
NBA 2K is one of the most popular video games in the world, but even the best games have their glitches. One such glitch that has been plaguing NBA 2K players for months now is error code 4b538e50.
What is this enigmatic code, and how can you fix it? Here, we’ll explain everything you need to know about error code 4b538e50 and how to solve it.
What does error code 4b538e50 mean on 2K22 & 2K23?
There is a problem with our connection to our online services – thiserror occurs when playing online. There may be several reasons that should be considered and expected, which are,
Not enough space on your disk
The version of your game is not updated
Your firewall might be blocking it
Now, as you know the reasons behind this error, there are some methods by which you can try and fix it.
How do I fix error code 4b538e50?
1. Free up your disk space
Click on the Start button and then click on Settings.
Select the System tab and click on Storage.
Click on Temporary files.
Check all checkboxes and click on Remove files.
Now your disk has enough space to install new features update. Now, your game will not show the error code 4b538e50.
2. Update your game to the latest version
Open the game and click on FEATURES.
After some time, the UPDATE REQUIRED message shows up.
Once the update message pops up, you can go to the main menu, and the game starts updating automatically.
After some time, when the game update will be completed, you will be in a lobby in no time.
Once the game is updated, you will no longer see the code 4b538e50 on your Windows 10/11 PC.
3. Turn off your firewall
Click on the Search icon, type windows defender, and then select Windows Defender Firewall.
Click on Turn Windows Defender Firewall on or off.
Then, click on both options of Turn Off Windows Defender Firewall(not recommended).
Click OK, and you are done.
Now, you will no longer see error code 4b538e50 and start playing the game.
We hope this guide was helpful and you were able to fix the error code 4b538e50 on NBA 2K22 & 2K23. You might also be interested in our list of the best VPNs to fix any lag problems in NBA 2K.
If you have any other questions, feel free to ask in the comment section below and we will get back to you as soon as possible.
Microsoft news recap is a weekly feature highlighting the top Microsoft news stories of the past week. Sit back, grab some coffee, and enjoy the read!
Xbox head Phil Spencer responds to latest Activision deal criticism
Sony has claimed that even if Call of Duty remained on PlayStation following the acquisition of Activision Blizzard, it would still stifle competition as the title would be on Xbox Game Pass, giving players the choice of playing CoD on with a Game Pass subscription or paying $70 per game to play on PlayStation. In response, Xbox’s Phil Spencer said:
When I look at something like Game Pass specifically, I think it’s the output of competition in our market.
Competition is about driving competitors to innovate, driving competitors to do new things like cloud, like subscriptions, like building new intellectual property. And everything we’ve been focused on is how do we compete effectively, how do we deliver more value to our customers.
A brand-new service that brings the power of the Microsoft Cloud to wherever you need it most.
Announcing the General Availability of Azure Orbital Ground Station
Since the launch of Azure Space in October 2020, we have talked about Azure Orbital Ground Station. Today, alongside our partner network, including KSAT, we are making this service available to all satellite operators, such as Pixxel, Muon Space, and Loft Orbital.
Advancing the digital transformation of satellite communication networks
The first demonstration of a fully virtualized iDirect modem.
Together with SES we are announcing a new joint satellite communications virtualization program.
Discord Voice now available to everyone on Xbox Consoles
All players across Xbox Series X|S and Xbox One consoles can now take part in group channels or voice calls with the addition of Discord Voice.
Microsoft Cloud could reach $100 Billion annual revenues this year
Many users encountered The VGA card is not supported by the UEFI driver and if that happens, you might encounter issues with your graphics card. Luckily, this can be fixed and this guide will show you how to do it.
Why does UEFI mode BIOS not support a VGA card?
This happens if the card is compatible with UEFI. Outdated BIOS or shader cache can also cause this problem.
What can I do if the VGA card is not supported by UEFI driver?
Before trying other solutions, disconnect Oculus Rift from your PC since sometimes it can be interpreted as the primary monitor.
1. Enable CSM
Enter BIOS. You can do that by restarting your PC and pressing Del or F2 during the boot.
Navigate to Boot or Boot options.
Look for the Compatibility Support Module or Legacy Boot and enable it.
Save changes and restart.
Some users recommended removing the GPU, installing it again and then enabling CSM in BIOS if the VGA card does not supporting UEFI.
2. Clear the GPU cache
Open the Nvidia Control Panel and go to Manage 3D settings.
Locate Shader Cache Size and set it to Disabled.
Press Windows key + R and type %localappdata%/Nvidia/GLCache
Delete all files from it.
Next, press Windows key + R again and type %appdata%/LocalLow/NVIDIA/PerDriverVersion/DXCache
Delete all files from this folder.
Optional: Run Disk Cleanup, choose the option to delete system files and select DirectX Shader Cache.
Lastly, enable Shader Cache in Nvidia Control Panel.
3. Update BIOS
Make sure you know the exact model of your motherboard.
Visit the motherboard manufacturer and download the latest BIOS version for that model.
Next, follow the instructions from the website on how to install BIOS.
Keep in mind that this process can differ depending on motherboard brand and model, but if ASUS UEFI is giving you VGA not supported message, you need to update ASUS BIOS, and we have a guide to help you with that.
It’s safe to say that pretty much all of us heard at least once about Naraka: Bladepoint since this title first came out.
We’re talking about a battle royale game that includes 60 players in a match and offers players a wide range of weapons and characters with powerful abilities.
And, since we are talking about aging, allow us to lend a helping hand and show you the best mouse settings for improved gaming on Windows 11
Circling back to the topic at hand, just like any other PC game, Naraka Bladepoint users are also reporting getting stuck on the loading screen when they try to run the title.
Today, however, we’re going to look at some fixes for scenarios when Naraka Bladepoint keeps freezing, so you can go back to gaming ASAP.
Why do I keep getting stuck on loading screen in Naraka Bladepoint?
This can happen for multiple reasons. For example, your gaming rig might not be at all compatible with the game, thus it freezes all the time.
You might not have enough RAM memory to run Naraka Bladepoint, or your GPU might not be updated to the latest version.
Even Windows not being updated can cause similar scenarios, so make sure you keep that in mind the next time you run into this issue.
Furthermore, a weak internet connection can cause problems such as Naraka Bladepoint failing to connect to the server. We’re going to take a look at all this right now.
How do I fix Naraka Bladepoint if it gets stuck on loading screen?
1. Check system requirements
It should go without saying, but you should really do this for every game out there that you’ve decided to buy, download, and install.
There’s no point in spending money on a title your PC isn’t strong enough to run. Of course, you can decide to upgrade your rig, but until then, make sure you look at the requirements.
Even though you can play Naraka Bladepoint on Windows 7 as well, developers recommend at least Windows 10 64-bit.
Let’s have a closer look at the game’s requirements and you can decide for yourself if you can run it properly or not.
2. Verify game files integrity
Open Steam.
Right-click Naraka Bladepoint and select Properties.
Select the Local Files tab and click on the Verify integrity of game files.
3. Disable Xbox Game Bar
Press Win + I to access Settings.
Select the Gaming tab, then click on Xbox Game Bar.
Disable the Xbox Game Bar overlay.
4. Update Naraka Bladepoint
Open Steam.
Right-click Naraka Bladepoint and select Properties.
Select the Updates tab and activate one of the two Auto-update options.
5. Update your GPU
Search for Device Manager and open the app.
Expand Display adapters, right-click the one you are using, and select Update driver.
Select Search automatically for drivers.
Windows might not find the latest drivers issued by the GPU manufacturers, so we recommend a specialized driver updating tool that scans for all outdated drivers and updates them to their latest versions.
How can I increase my FPS in Naraka Bladepoint?
Well, as with all PC games, better FPS means that you might need to reach into your pocket and buy some upgrades for your rig.
We say that because, in order to get more FPS, you will need more virtual memory (RAM), a better graphics card, and a solid CPU.
That being said, if you are happy with your current setup, just turn off some of the visual options you don’t really care about, and select Super Performance from Settings.
Closing all of the background processes on the PC and disabling the Discord or other overlays can also be of great help in the race to gain more FPS.
The lack of some of the above-mentioned tweaks can lead to Naraka getting stuck on the 24 Entertainment logo when you run it.
Naraka Bladepoint can get stuck on loading screen non your Xbox console as well, so this is not just a PC problem for the title.
Has this guide been helpful to you? Be sure to let us know in the dedicated comments section located below.
If a Chrome tab is unresponsive and you are unable to close it, it could be due to:
An infinite loop created in JavaScript while coding
A bug preventing the tab/s to close
The tab has crashed
Insufficient memory due to multiple open tabs
Pending Chrome updates
The good news is, that we have a few ways that can help you fix the Google Chrome tab not closing issue.
Quick tip:
A great alternative to solve this situation is switching to a new browser. Opera One is a safer and faster browser that offers amazing features. It has a built-in Ad Blocker that detects and blocks intrusive ads when you enter a webpage.
It also has a free VPN built into the browser that doesn’t collect any information or log your activity. This browser also features a built-in AI and a modular AI-ready design.
Opera One
Outstanding features to improve your browsing experience and get the most out of it.
You can now check if the tabs are working fine and you can close all tabs normally.
How do you force close an unresponsive tab in Chrome?
If you encounter a Chrome tab that simply won’t close, no matter what you do, you can force close it. This can be easily done via Task Manager, in a few clicks.
1. Launch Google Chrome on your device.
2. Click on the three dots on the upper right side of the browser.
3. Press on More tools and then select Task manager.
4. UnderTask, look for the tab, and select it.
5. Now, press End process towards the bottom right.
6. You have now successfully closed the tab and the unresponsive tab issue is resolved.
If you are still facing the same issue where the Chrome tab is not closing, you can check for any latest updates for the browser.
As you proceed to check for updates, Chrome will automatically look for the latest version and install the update automatically.
At the same time, make sure you disable or remove any Chrome extension that may be causing the tab to be unresponsive.
Many PC users are looking for fresh new software. And the software industry is one of the few in which lots of things come for free, so we might as well make the most of freeware.
There are some terrific freeware packages for almost every software category. These are the best freeware programs you can run on Windows 10 and 11 and other platforms.
Just a note of caution: while there is genuine excitement about getting valuable products for free, there is the danger of picking up malware along the way, so we recommend you use good antivirus software while exploring free stuff on the internet.
What is the difference between freeware and free apps?
Although the terms appear to be very similar, there is a fine distinction between freeware and free apps, and we need to clear that up.
Free apps are software you can download and fully use with all the included features without any payment commitment.
Usually, these apps display ads inside the program or invite you to donate to support further development.
Freeware software tools are usually free versions of the full software that provide primary or limited features.
We would also need to mention the third type, the free trial apps that offer a free preview or the software with all the features available but only for a while.
Is freeware free software?
Just like we have mentioned above, they may not be free software, but they are the free versions of software that you may initially have to pay for.
That said, here’s our compilation of the best Windows 10 and 11 freeware apps for your PC.
Fortect is not only a great repair tool but a significant system optimizer as well that has a multitude of advanced features.
It helps you run an assiduous scan of your computer, which takes a maximum of five minutes, to find out its condition and the broken parts that may slow down its performance.
This software has a complex OS repair technology that shows you a comparison between your system and a healthy system to determine the deficiencies and further correct them effortlessly.
It can repair or replace all the damaged or missing OS files, including DLLs and Registry Keys, and upgrade your operating system to an optimal state.
You can use Fortect for a cleanup procedure too as it will remove junk files from your folder, disk, and hard drive, which can instantly boost your computer’s health.
Take a look at Fortect’s key features:
Detects and removes files affected by viruses
OS rehabilitation
Exhaustive scan
Optimize Windows Registry
Fortect
Restorate your operating system in no time and watch how your PC’s performance is remarkably increased.
Bitdefender is a renowned antivirus utility for Windows. It has a full suite of scanning and detection tools for killing off malware and other viruses.
The publisher has already released the latest version, so now might be a good time to add this utility to Windows 10.
For a full-featured version of Bitdefender antivirus, we suggest you choose one of the paid options, which comes with good tech support.
Bitdefender includes antiphishing, USB auto-scans, email, and ransomware protection tools.
It includes a handy gamer mode that temporarily suspends scans and notifications to free up system resources for the game. The tool also scans for outdated software and helps you update antiquated programs.
Here are the top features of this tool:
Minimal resource utilization
Award-winning detection technology
Ransomware and phishing protection
Dedicated Game Mode system optimization
Multi-layered scanning and detection
Bitdefender Free Edition
A cyber-security solution meant to defend systems and devices from all forms of malware, spyware, Trojans, and viral assaults.
If you want to save space on your PC or group or compress files you’re planning to send; we recommend using good file archiver software.
Windows has its file archiver built into File Explorer, and while this archiver is good for the most basic tasks, it doesn’t have many features that WinZip has.
This awesome tool supports all popular compression formats, and the list includes RAR, ZIP, CAB, LHA, LZH, TAR, GZip, ISO, BZIP2, VHD, VMDK, IMG, and 7-Zip formats.
As for the speed, WinZip offers a faster compression speed than its competitors.
The application can recognize the type of files you’re compressing and offer you the best compression method based on the files you’re working with.
A handy feature is its ability to split archives, so you can easily send your archive in pieces. For example, this is incredibly useful if you have a file size limit for your email attachments.
Another great feature that separates WinZip from other file archivers is the ability to encrypt your files using 256-bit encryption. As a result, you can safely archive your files and ensure that only the people with the correct password can access them.
Overall, WinZip offers many great features; it supports a wide range of formats and offers great compression, as well as file encryption.
Here are the top features of this tool:
Support for popular compression formats
Simple and efficient UI
Smart compression
Ability to split archives
256-bit encryption
WinZip
WinZip is the best file archiver and has excellent cloud storage integration.
Diving into the gaming experience, on the top of our list is the Android emulator LD Player, which isn’t just a freeware that runs apps but also a breaking barrier between PC and mobile games, with a neat interface.
Using few resources for lightspeed performance, the emulator is compatible with minimum requirements of 2GB RAM and hard disk space of 36GB, efficiently operating games like PUBG or Clash of Clans.
LD Player is the newest mirroring software on the market, which allows you to use custom control with a mouse and keyboard for your favorite Android games.
It also allows you to execute scripts that manage the game automatically and power up your gameplay with high FPS/graphics.
Here are the top features of this tool:
Emulates large Android games on Windows
Multitasking operating controls
Fast and powerful
Support from developers
Can play all the latest games
LD Player
This software is a tailor-made solution for any gamer who needs to emulate games from Android on PC.
Speccy is another Piriform program that is bundled with CCleaner Plus. This is one of the most detailed system info utilities that provide details you might not find listed on the Windows System Information app.
It is a fairly essential freeware package for anybody planning on upgrading hardware, and you can add it to Windows from the CCleaner website.
Speccy provides one of the most comprehensive system overviews. The software gives you detailed reporting for RAM, CPU, OS, motherboard, graphics card, storage, drives, audio, and more.
Usually, these kinds of apps are cryptic and designed for specialists, but with this tool, anyone can access and comprehend the PC specifications.
Here are the top features of this tool:
System detail export
Detailed reporting for all PC components
See real-time temperatures of components
Friendly user interface
Light on your system
Speccy
Learn about your PC’s specs with this friendly and rich tool for Windows.
MailBird is email client software compatible with Windows platforms from XP to 10 and 11. This intuitive and straightforward email application is easy to set up and configure accounts with.
The freeware version is restricted to three email accounts but boasts a decent feature set.
MailBird is email software with which you can open Yahoo, Gmail, Hotmail, iCloud, and Outlook.com emails.
The client has a unified inbox so that you may easily open emails from multiple accounts in one place.
The software has many email formatting options, including customizable themes and layouts for the inbox.
Here are the top features of this tool:
Integrated Google Calendar, Dropbox
Unified inbox for multiple accounts
Great Windows integration
Modern and easy-to-use UI
MailBird
Manage all of your emails and contacts from various accounts in one consolidated Inbox.
World of Tanks isn’t a new Windows game, but this is still one of the best MMO (Massively Multiplayer Online) blasters.
When the game was at its peak, it set a world record for the number of players online on a single MOG server. So, if you haven’t already played World of Tanks, you’ve got to check it out.
This freeware tank game runs on Windows platforms from XP to 10 and 11, and you can get its installer for free.
Anybody remotely interested in mobile warfare will love World of Tanks. The game pits heavyweight tanks from World War One to the early Cold War era in one-on-one or team battles.
The title has six game modes: random, tank-company, historical, stronghold, and team battles.
However, perhaps the best thing about the game is its tech tree and the amount of tank customization it provides for players.
Players start with essential tanks and can build them into formidable, armored monsters.
Customizing the tanks is essential to victory in the multiplayer battles, and building them up is half the fun in World of Tanks.
Here are the top features of this tool:
Incredible selection of armored vehicles
Windows 11 compatible
Customizable weaponry
Multiplayer
World of Tanks
Play alone or in teams, compete for dominance and climb the leaderboard, or form your clan and rule the world.
Icecream Password Manager is a freeware password manager that has been getting rave reviews. This is ideal software with which to save website login details.
You may add Password Manager to Windows platforms from XP to 10 and 11 for free by clicking on the link below.
Password Manager users can save website login details, credit card, and bank account details with the software, which has its master password.
However, this software is a little more than a password manager as it comes with a form filler with which you may fill out repetitious website forms.
You can also save notes, attach files, and set up automatic backups with Password Manager. In addition, the software has Chrome and Firefox extensions that you should feel free to save website passwords.
Here are the top features of this tool:
Fully Windows 10 and 11 compatible
Chrome and Firefox dedicated extensions
Form filer for repetitious website forms
Excellent security protection
Automatic backups setup
Icecream Password Manager
With the aid of plugins for Chrome and Firefox, you can generate passwords, keep secure notes, and automatically fill out web forms.
Advanced SystemCare is system optimization software to give your Windows laptop or desktop an excellent clean. This is five IObit utility applications wrapped into one single package.
There is a notable difference between Advanced SystemCare’s Free and Pro versions, but the freeware package still offers excellent value.
The software incorporates IObit’s Uninstaller, Driver Booster, malware, and hard disk defrag software.
You can also scan for empty folders, completely erase documents, remove startup programs, and fix invalid shortcuts with the software.
However, the best thing about Advanced SystemCare is its all-in-one Clean & Optimize scan that will delete junk files, clean the registry, and optimize the Windows startup.
It also fixes shortcuts in one sweep, which isn’t something you get in CCleaner or many other software tools.
Here are the top features of this tool:
Complex and complete PC cleaning and optimizing solution
Built-in uninstaller, Driver Booster, malware, and hard disk defragmenting software.
Start-up programs removal
Invalid shortcuts fixing
fast Registry cleaner tool
Advanced System Care
All-in-one PC optimizer that cleans trash files, scans for privacy traces and speeds up starting.
Office suites are among the essential software. There are numerous freeware office suites, and WPS Office Free is one worth noting.
WPS Office includes a word processor, spreadsheet, and presentation application.
This office suite has premium and professional versions, including extra split and merge options for PDFs. In addition, you can add WPS Office Free to Windows platforms from XP to 10 and even 11.
For more features, you may consider the paid version. It’s not so expensive, but it’ll be worth every penny.
WPS Office Free has an intuitive tabbed UI similar to the MS Office UI design. However, unlike LibreOffice, the software opens multiple documents in separate tabs instead of multiple windows.
The WPS word processor is more like desktop-publishing software, as you can drag and drop paragraphs to alternative page positions.
Here are the top features of this tool:
Built-in PDF conversion tool
1 GB of cloud storage included
Over 100,000 templates
Sharing documents using links
Modern look, tabbed UI
WPS Office Free
Get free customizable Word templates, spreadsheet reports, and presentation slides.
E-books are no longer limited to just e-book readers and tablets. You can embrace e-books with the Icecream Ebook Reader software for Windows, which supports various e-book formats.
The software has a pro version with more extensive options, but the freeware version is still a nifty bit of kit that you may download for free.
Ebook Reader supports all the primary e-book formats, such as MOBI, EPUB, CBR, PDF, and FB2. In addition, the software enables you to both import and export e-books to other devices.
Users can set up bookmarks, customize fonts and themes and add notes for certain sections of e-books. Translate is another of Ebook Reader’s handy options with which you can translate selected passages if required.
Here are the top features of this tool:
Wide variety of e-book formats
Importing and exporting across devices
Built-in translation tool
Simple and modern design
Customizing fonts and setting-up bookmarks
Icecream Ebook Reader
Manage your digital e-book library in FB2, EPUB, PDF, and MOBI formats, translate, export, and annotate.
CCleaner is among the most highly rated system maintenance software for Windows that Piriform boasts, and it has more than two billion downloads.
Although the CCleaner freeware version might lack features such as scheduled cleaning, and a software and driver updater, it still packs plenty of handy system optimization options.
If you want to try these features, you can do that with the Pro version, which is available for a free trial. However, a registry cleaner is one thing Windows lacks, and CCleaner fills that void with its flexible registry utility.
The registry cleaner enables users to customize scans by selecting various registry categories and can fix numerous software issues.
Here are the top features of this tool:
PC optimizer
Startup manager
Duplicate file finder
Browser plug-in manager
Disk analyzer
CCleaner
Optimize your system performance with this award-winning software for a healthier PC.
Yes, freeware may have adware, key loggers, spyware, trojans, back doors, bots, and trojans. You should thus be careful.
However, we have shared only the ones we know are safe. But, like we earlier said, you should use a good antivirus always on your computer to guarantee your privacy and security.
However, it is wrong to say they all contain malware; you must get suitable freeware from the right sources.
Those are just a few of the best freeware programs you can add to Windows 10 and 11.
We tried to cover all the possible needs for PC usage, including productivity, security, and even gaming, that will improve your experience.
Even though some of them might lack a few options and features in their proprietary versions, they still offer terrific value.
Also, all the apps above are Windows 11 compatible, so if you switch to the new OS, you can enjoy them seamlessly.
Have you tried any of the products, or do you have better ideas? Please leave us a line in the comments section with your thoughts about our list.
Users of Windows are once again being distracted by the infamously annoying global.iris service in Windows 11.
The process that appears in the Task Manager, even if the service itself often doesn’t impact the system, can be highly bothersome. The worst thing is that you can’t discover or turn it off from the services menu.
What even does this service do? Do you have to disable it, or can it run safely in the background? Let’s find out.
What is the global IRIS service?
Users are looking for information on the service on well-known platforms like Reddit since there is a shortage of information about it.
All that is currently known about global.iris is that it is a component of Windows Spotlight and is in charge of the Bing wallpaper of the day, lock screen recommendations, and other things.
Should I disable global.iris service in Windows 11?
Unfortunately, even if you wanted to, you couldn’t disable this service from within Windows.
The best option right now is to download a third-party service disabler that will let you get rid of this pointless service, according to Reddit users who have addressed this issue.
But when it comes to third-party software, there is always a chance for infections and illegal access to system files. We should also mention that Services often don’t consume enough resources to impact system performance significantly.
You can download a third-party service disabler to remove the global.iris service if you have a computer issue you are certain is caused by this service.
You are better off letting the service function in the background if it is not creating any big issues.
What services can I disable on Windows 11?
Here is a list of Windows 11 services to disable without the operating system performance taking a hit.
While this isn’t one of Microsoft’s official services, it behaves like any other service because it won’t damage your computer or violate privacy settings.
This service only cares about wallpapers; it has no access to personal data or Windows files.
Opposing a far greater threat than allowing the service to function in the background of your operating system is trying to download a program to stop it.
Many readers encounter an issue with the webcam settings which keep resetting and reverting to the default settings, each time they restart their PC.
So, every time they try to use the camera, they need to set it up manually using the webcam Properties window, for example, if you are using OBS Studio.
While uninstalling and reinstalling the external webcam may help fix the issue sometimes, in most cases it does not.
Many readers complain that their camera settings change to the default settings every time you reboot your PC.
Some webcam models are designed to work with their own drivers and hence, using a 3rd party webcam with a standard UVC driver may lead to a glitch.
So, if your webcam settings keep resetting every time you reboot your PC, here we have some workarounds for you.
How do I change my webcam settings permanently?
1. Update drivers to generic drivers
Right-click on Start and select Device Manager.
Expand Cameras, right-click on Integrated Webcam and select Update driver.
Next, click on Browse my computer for drivers.
Click on Let me pick from a list of available drivers on my computer.
On the next page, select USB Video and click on Next to finish installing the driver.
Once done, exit Device Manager, restart your PC, and now check if the webcam settings still keep resetting.
In case you want a faster and safer option, you can always opt for a software that will perform these steps automatically. Outbyte Driver Updater scans your device drivers and immediately updates them with the latest version.
Outbyte Driver Updater
A dedicated program that improves your PC performance by keeping your drivers updated.
Now, wait for the software to complete installation.
Next, connect your Logitech camera to the G HUB and go to the Webcam settings on the left.
Here, you can add a new camera mode, and configure other camera settings.
This will help you to save your settings and will override your system’s default software for your web camera. So, when you restart your PC, the webcam settings won’t keep resetting.
3. Save the webcam settings
1. Create the cam_sett.cfg file
If you are facing a webcam issue with OBS, open the app, and double-click on your camera to open its Properties.
Next, click on Configure Video, then modify the settings as per your requirement.
Now, download the WebCameraConfig.exe, and save this in a location like Documents/Downloads.
Once done, press the Win + R keys simultaneously to launch the Run console.
In the search field, type cmd and press the Ctrl + Shift + Enter keys together to open the elevated Command Prompt window.
Now, in the Command Prompt, type the below path (You can replace the location Documents with where you saved it): C:\Users\%UserProfile%\Documents
Next, run the below command: WebCameraConfig.exe --savedev
A file named cam_sett.cfg will now be created next to WebCameraConfig.exe.
You can now configure the OBS webcam settings to test the output.
2. Create a .bat file and make it automated
Open Notepad, and type the details in the same format as shown in the image below.
Make sure to replace the highlighted parts with your username and location.
Also, add your OBS path, based on where the app is saved on your PC, in the below format: C:\Program Files\obs-studio\bin\64bit
Now, save the file with .bat as the file extension. For example, Webcam settings.bat.
Once done, double-click on this .bat file and it should automatically change the webcam settings and launch OBS.
The next time you boot your PC and run OBS, you can simply run the script instead. This will open the OBS, with the saved webcam settings and won’t reset again.
4. Lock the webcam settings
If you are using OBS, launch the app and go to Source.
Here, double-click on the webcam to open its Properties.
Make changes to the settings as per your requirement.
Now, return to the main page, and next to the webcam, click on the Lock icon.
Once you have locked the webcam settings, it should not keep testing back to the default settings on the next restart.
5. Reset webcam settings
Press the Win + I keys together to launch Windows Settings.
Next, click on Bluetooth& devices on the left.
Now, on the right, scroll down and click on Cameras.
Again, on the right, under the Connected cameras section, click on the webcam.
On the next screen, go to Reset default camera settings and click on Reset settings.
Once the Camera is reset, restart your PC and check if the webcam settings have changed again or are still the same.
Additionally, make sure that your webcams are plugged straight into the PC USB port, and not into the USB hubs as this may limit the bandwidth available.
You can also configure the settings in something like Logitech Capture and start this before you stream to reload the settings to fix the issue.
For more doubts and queries on the webcam settings, you can leave a message in the comments box below.



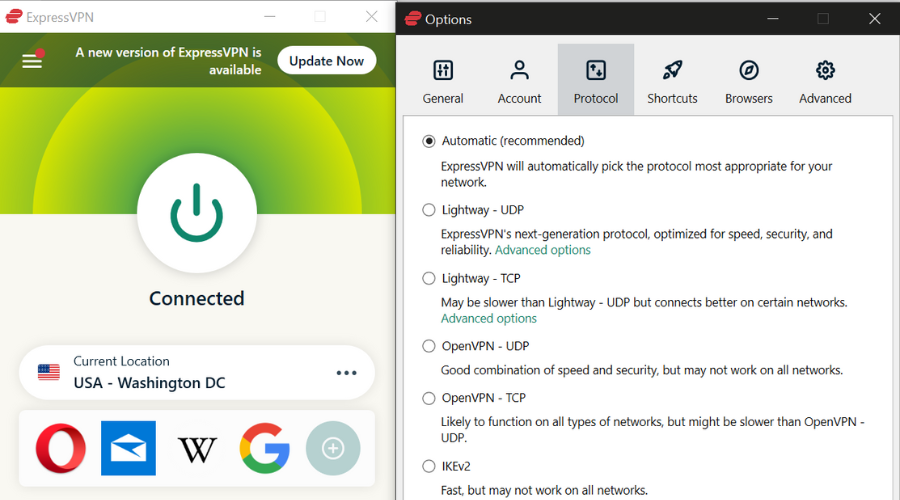



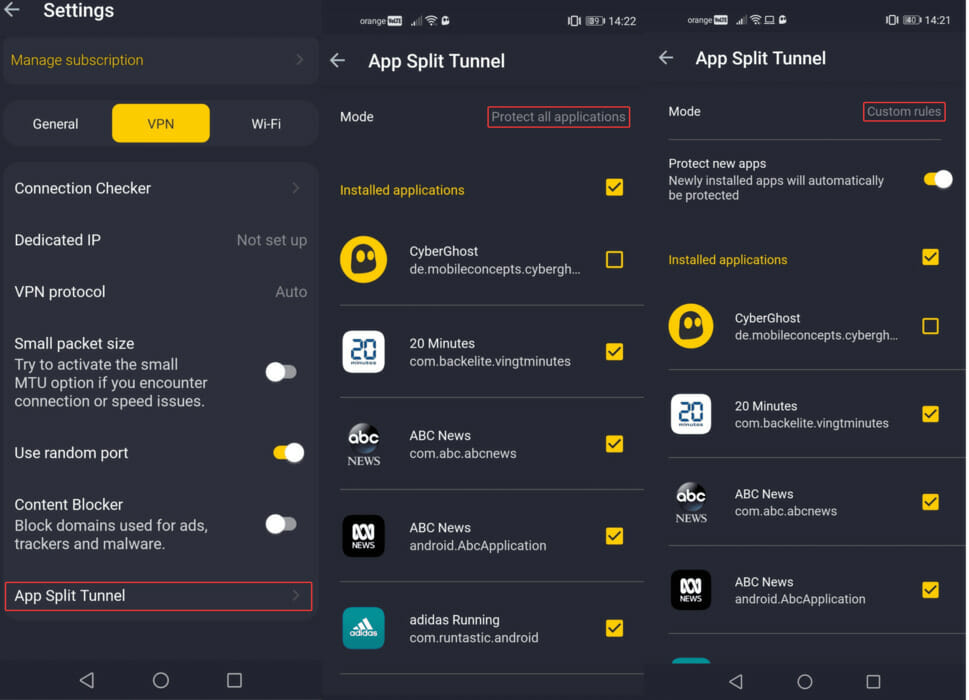

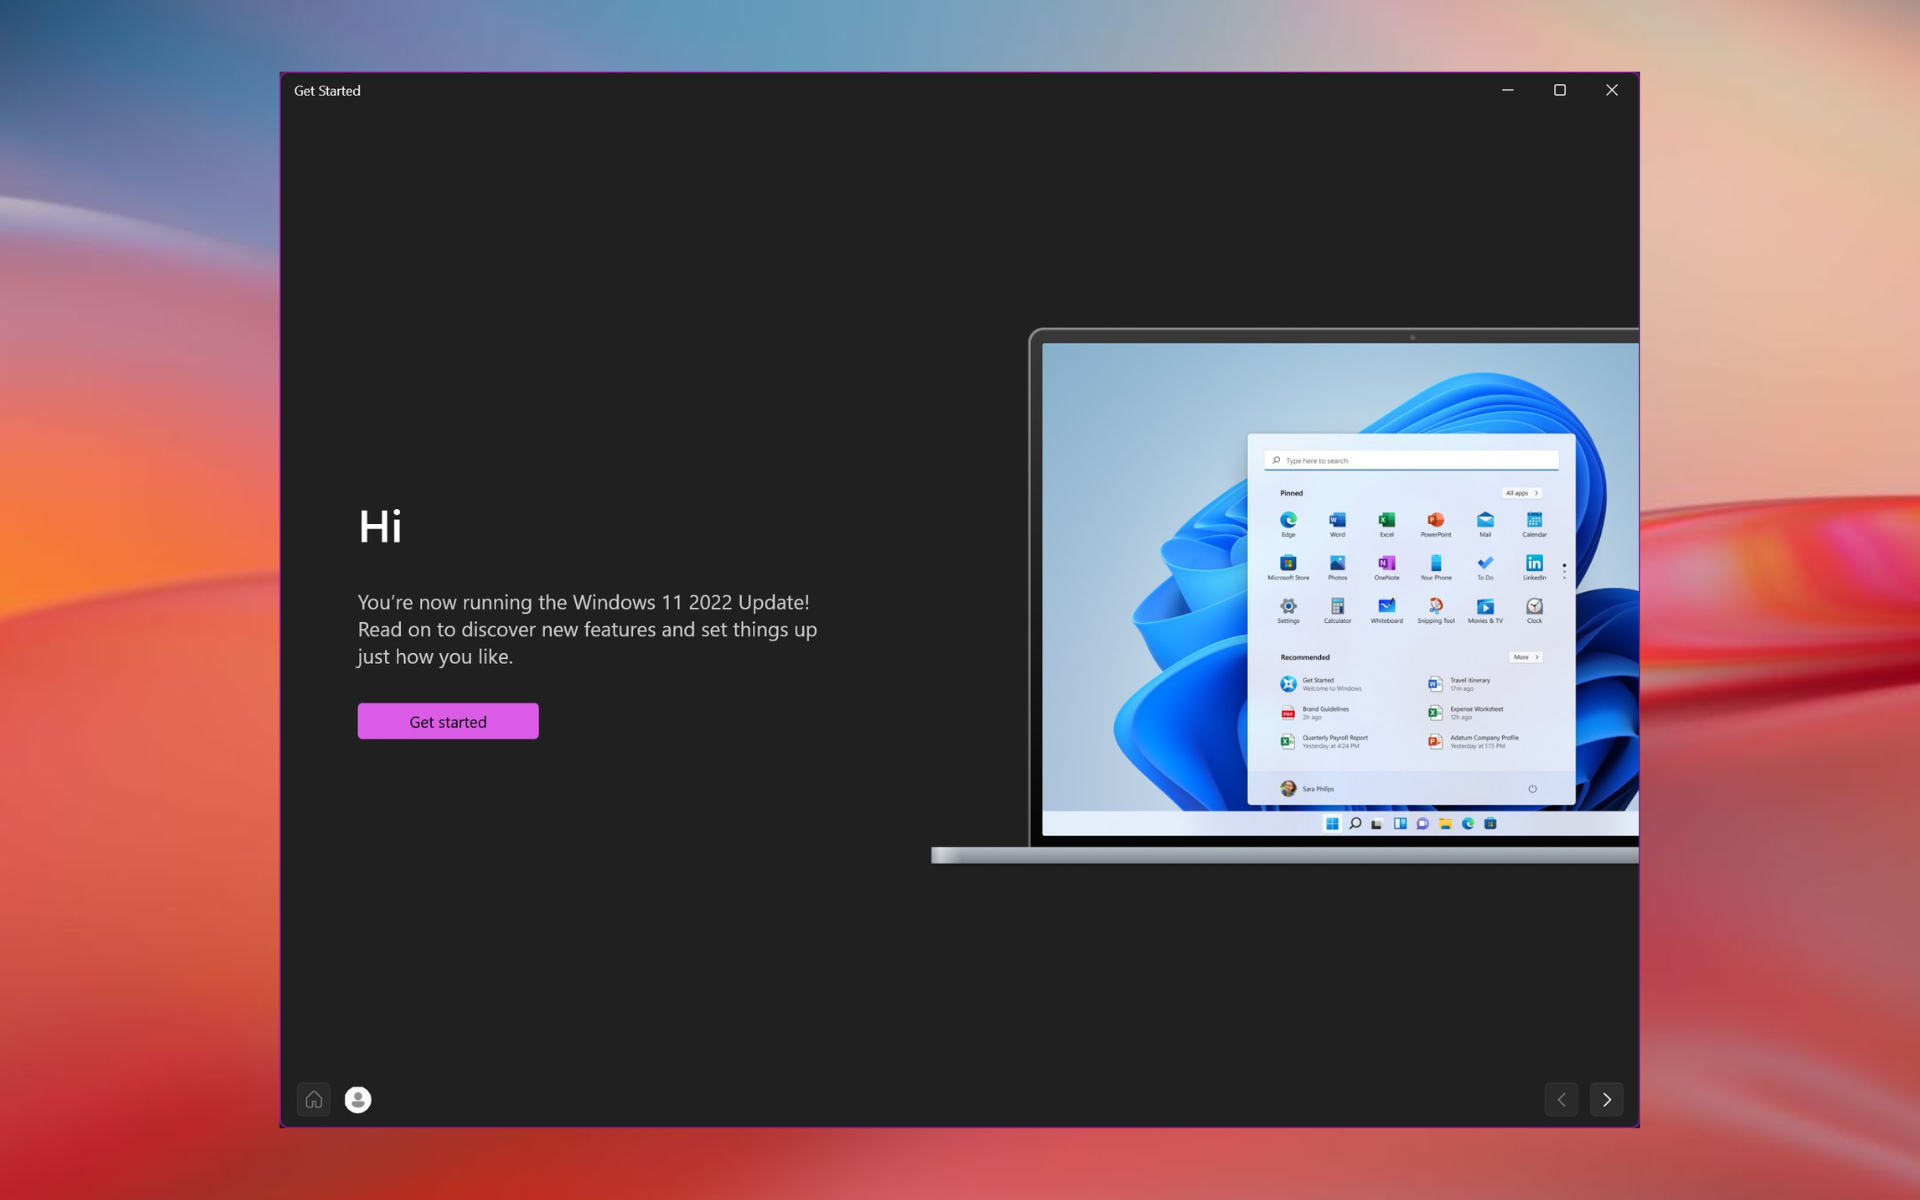





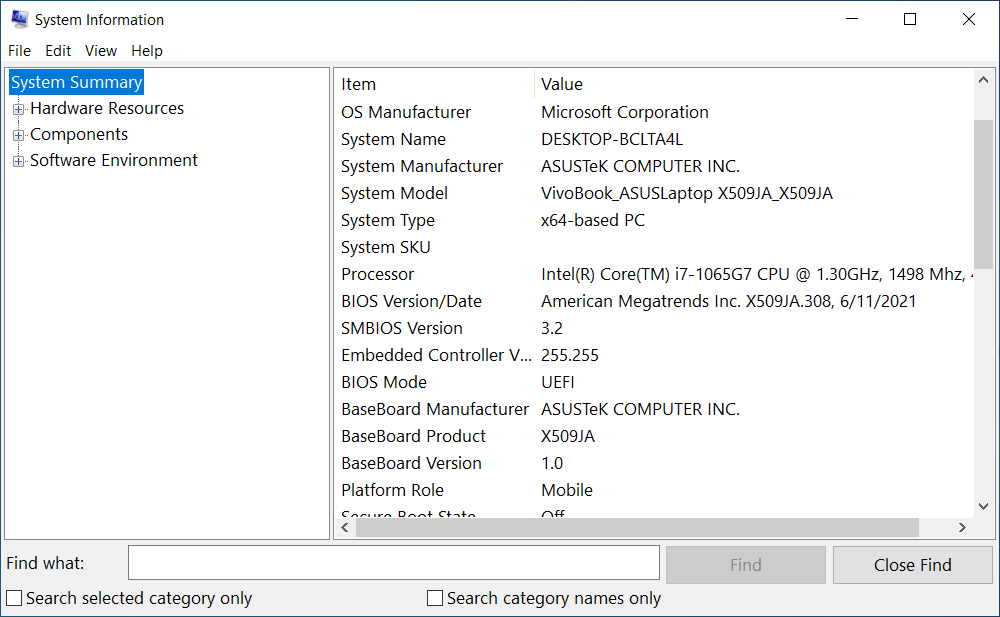








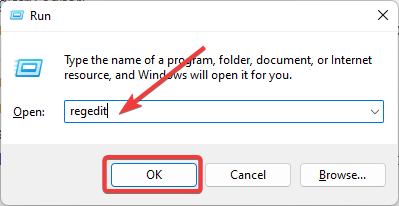


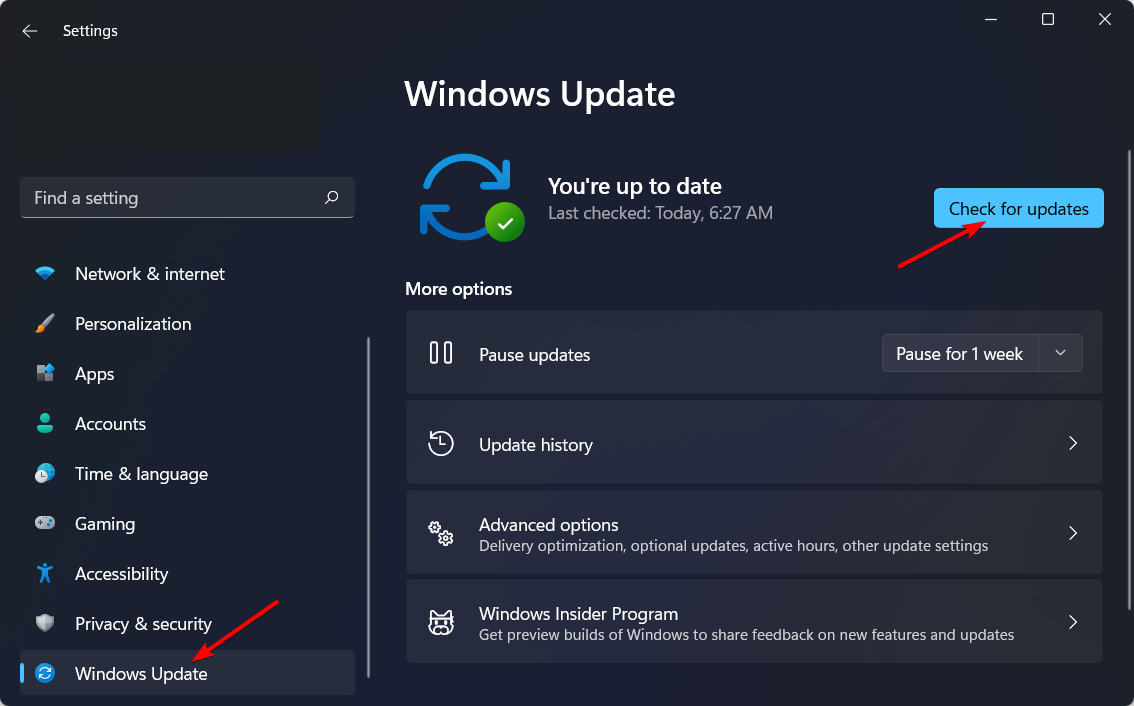


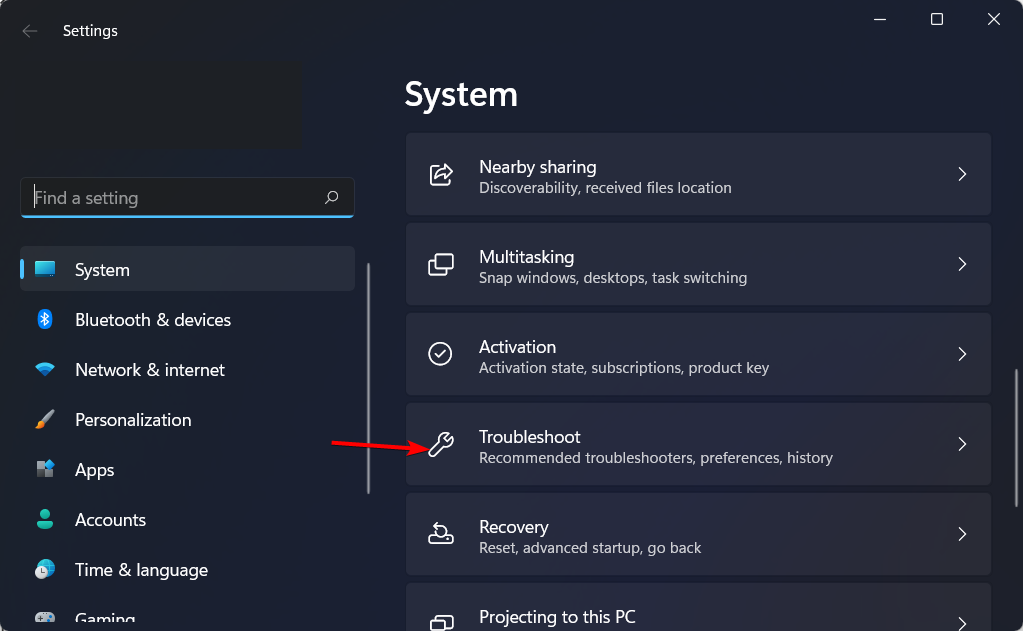


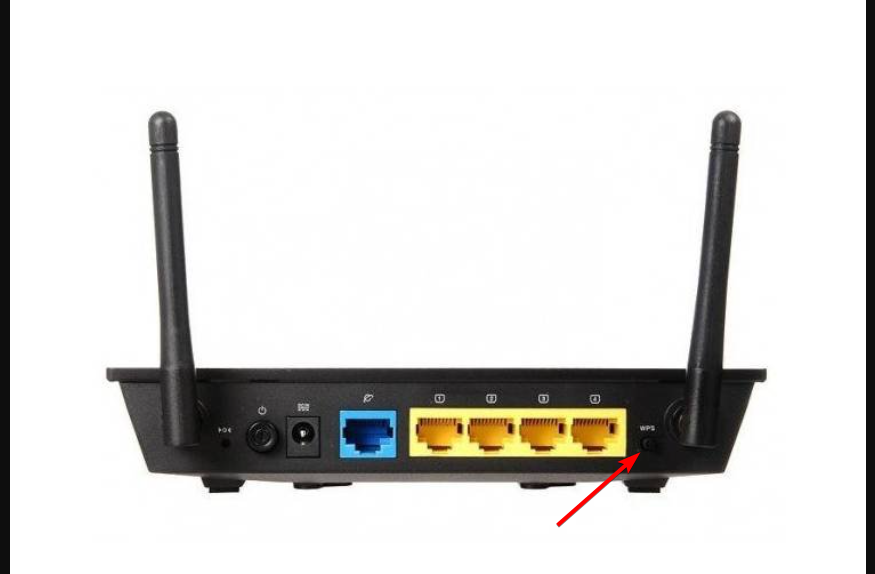


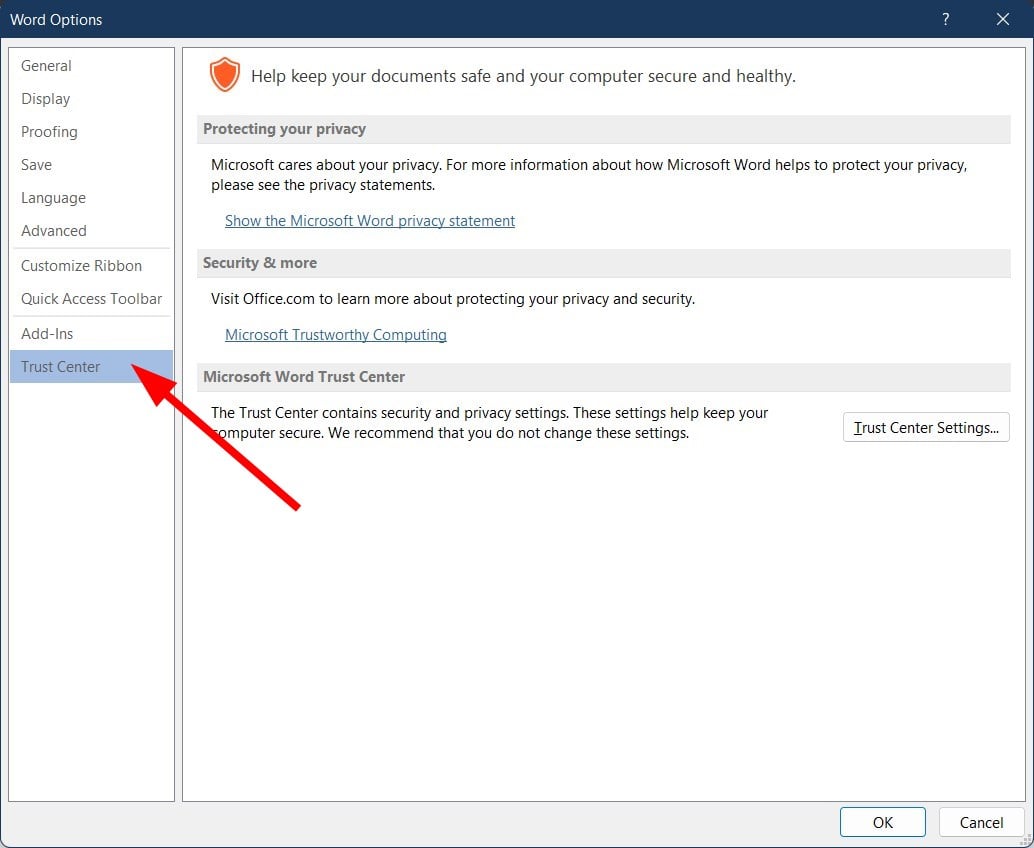








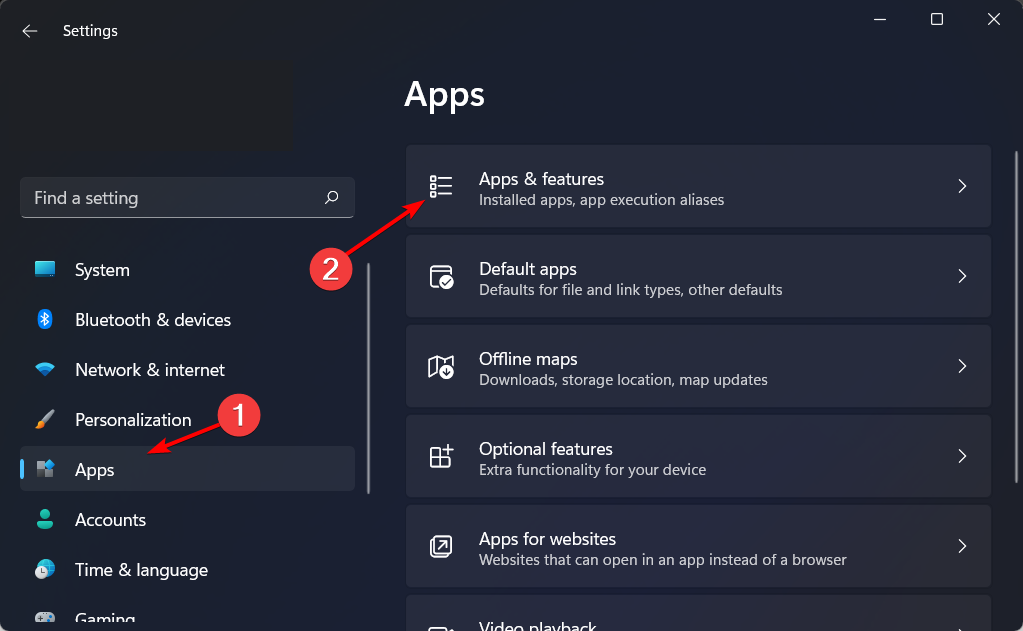




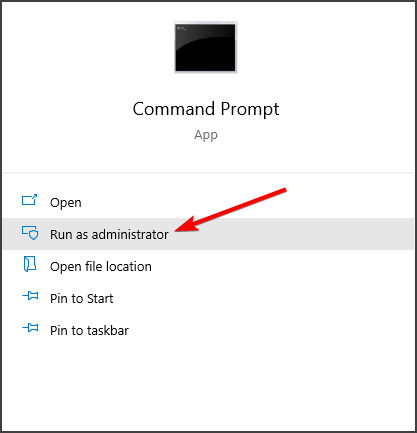
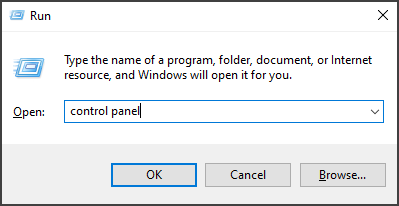

 DISM.exe /Online /Cleanup-image /Restorehealth
 sfc /scannow