Does ExpressVPN Work in China? Tested Tips You Must Know

ExpressVPN is one of the most popular services on the market, and for good reason. It offers its customers unmatched security features, a huge network of servers, and a convenient zero-logging policy.

You can even use it if you’re aiming to bypass Netflix’s geo-restrictions. ExpressVPN is one of the few VPNs that still allow you to enjoy Netflix US and UK from anywhere in the world.

Long story short, ExpressVPN is a service you can trust. Even at crucial moments during official investigations, authorities were unable to find any relevant data on ExpressVPN servers.

However, censorship can take all the fun out of services such as ExpressVPN. Take China, for instance, which has one of the most repressive Internet rules.

Not only it forbids its citizens to use VPNs, but reportedly also sanctions them if found guilty.

Can VPN be used in China?

Yes, you can still use a VPN in China. There’s a popular misconception nowadays that you can’t use a VPN while in China. Wrong. You can use a VPN, only it has to be a government-approved one.

For this reason, access to the official websites of popular VPNs like ExpressVPN or NordVPN is not permitted in China.

Using a Government-approved VPN means that your data will not be 100% private and encrypted, because these do actually keep user activity logs, that’s why they’re approved.

Since China is against any form of criticism against its government or leading parties, you could expect nothing short of being monitored through government-approved VPNs.

The Great Firewall of China

Like we said just a while back, China is not very keen on Internet freedom. As a result, a lot of publications get censored and citizens are only allowed access to certain materials online.

This affects both publishers and those who merely want to view publications online.

On top of that, the Chinese government also enforced strict individual monitoring. Thus, without the proper tools, authorities or ISPs could easily snoop on your online whereabouts.

And without an issue, too, since they have the legal frame to do so.

Thus, it makes sense why certain, non-government-approved VPNs, which are virtual rockstars when it comes to securing your online privacy, were banned.

Citizens can no longer rely on these services to cloak their online activity or bypass censorship.

Fortunately, services such as ExpressVPN still do a pretty good job when it comes to establishing secure tunnels from deep within China to the rest of the world.

And the best part is that it wasn’t compromised by government-imposed backdoors.

Does ExpressVPN still work in China in 2022?

Even though it was banned a few years back, ExpressVPN still continues to work on Chinese territory.

However, there’s a downside to this situation. Since the service is banned, you can’t sign up for it while in China.

Or access the service’s website altogether, for that matter.

However, there are a few workarounds if you want to use ExpressVPN (one of the most trustworthy VPNs) from China.

1. Sign up for ExpressVPN outside of China (if possible)

  1. Get an ExpressVPN subscription plan
  2. Download and install the VPN on your devices
  3. Launch them and log into your account
  4. Enjoy unlimited Internet browsing in China!

This is the most inconvenient way to get ExpressVPN in China if you’re currently living there. You know, since it implies you have to leave the country and all that.

ExpressVPN

Looking for a VPN that still works in China? ExpressVPN can help.
Check price Visit website

However, if you’re about to make a trip to China and want some Internet freedom, you could sign up for ExpressVPN just before you leave.

Just make sure you take all the steps above before you leave. Otherwise, you might be unable to sign up for the service and access it without limitation.

2. Use mirror sites to sign up for ExpressVPN

There are some mirror websites online that you can use to access and sign up for ExpressVPN, even if you’re already in China.

The downside is that the Chinese authorities are quick about blocking them, so you have to identify them in a timely fashion.

For obvious reasons, we can’t share them with you here, since it could be a matter of time before they’ll be taken down. However, we’re positively sure you can find a few such links if you look carefully enough.

3. Use Tor to access the ExpressVPN onion sites

Tor has been around for a while and is still used to access onion services from your PC. The good news is that ExpressVPN has launched an onion website a while back, which you can access with Tor.

The downside is that GFW (the Great Firewall of China) actively blocks Tor, so you might not be able to perform this task too easily.

Thus, you might need to find Tor mirror websites to download the service and anonymize your connection.

How to use ExpressVPN safely while in China

1. Enable automatic VPN protection

By default, ExpressVPN will launch upon system startup. However, it won’t enable VPN protection by default.

ExpressVPN's startup options step 1

Thus, it’s quite important that you get to enable it, so that every time you boot your PC, your connection will be secure and your privacy will remain, well, private.

You can find the automatic protection in the Preferences/Options menu, under the General section.

Just toggle the Launch ExpressVPN on startup and Connect to the last used location options and you should be fine.

2. Activate the ExpressVPN kill switch

In the same section we’ve discussed in step 1, make sure to enable the kill switch feature (also known as Network Lock).
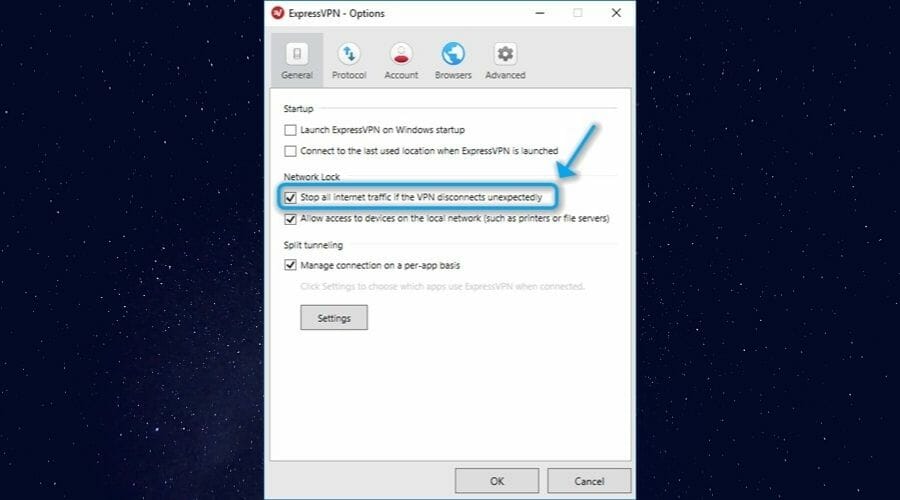
Enabling ExpressVPN's kill switch

This awesome option will ensure that even if your VPN connection drops, your real location, IP address, and other sensitive data won’t leak.

What a kill switch does is detect whether or not the VPN connection is active. If it is, the Internet works as it should. If the VPN connection is lost, the kill switch blocks access to your default, insecure connection.

3. Enable IPv6 and DNS leak prevention

While you’re in the Options window, navigate to the Advanced tab. Once you’re there, make sure to toggle the IPv6 address detection prevention.

ExpressVPN IPv6 and DNS leak prevention

This will make sure that your ISP (or another third party) won’t be able to pinpoint you using leaked IPv6 info.

More so, you can also prevent DNS leaks by making the service use ExpressVPN DNS servers exclusively. Thus, your ISP won’t be able to detect you due to unfortunate DNS leaks while using the service.

How do I download ExpressVPN on my iPhone in China?

As mentioned, the ExpressVPN official website is blocked in China and the mobile app is of course not available in the Appstore there.

For that reason, we recommend using a mobile proxy and then browsing for the ExpressVPN app.

The ExpressVPN team also recommends changing your Appstore location.

  1. Open the Settings app.
  2. Tap on your name.
  3. Select iTunes & App Store.
  4. Tap Apple ID and select Country/region.
  5. Tap Change Country or Region.
  6. Select a different country from the list.

Pick a location where ExpressVPN is not restricted, such as the United States. Now open the AppStore and type ExpressVPN in the search bar. You should be able to download it without much hassle at this point.

There are mirror websites with download links for the iOS app too, but you have to make sure that they are trustworthy.

Other VPNs that work in China

  • Private Internet Access – huge server network and military-grade encryption
  • CyberGhost – easy to use and capable to bypass Chinese restrictions
  • NordVPN – thousands of servers and untraceable connections thanks to obfuscation
  • Surfshark – multi-hop feature to hide your data completely and stay anonymous online
  • VyprVPN – Powerful and fast VPN with Chameleon protocol included (recommended for China)

ExpressVPN still works in China, but you should be careful

To wrap it up nicely, ExpressVPN still works excellently in China.

However, if you really want to use it, you might need to perform a whole batch of operations, since the Chinese government still makes huge efforts to block this service on its territory.

Even if you managed to sign up, purchase a subscription, and install ExpressVPN on your device, the battle is far from over.

So make sure you take all the necessary precautions as we’ve detailed above to make sure you keep the detection rate at a minimum.

You just connect to an appropriate server (matching the country of the restricted service) and you’re all set.

How to Install Games from GOG

If you’ve tried to install GOG games but didn’t manage to, in this article we will offer you a complete guide about how to do it.

Playing some of the GOG (Good Old Games) can take you back to your childhood. As in the case of the games that were produced 10-15 years ago, the times were a lot simpler.

The stories presented in the games and the association of those stories with times long gone can offer you a beautiful experience even in the era of VR headsets and high-definition real-life graphics.

For these reasons, in today’s guide, we will explore the step-by-step guide about how to install GOG games and travel back in time while playing them.


How can I install games from GOG on my PC?

1. Get the GOG Galaxy application and log in

Gog website screenshot - How to install games with GOG Galaxy

In order to get started on this journey, you will first need to download the latest version of GOG Galaxy to your hard drive and install it.

Follow these steps to do it:

  1. Download the latest GOG Galaxy installer.
  2. Run the installer package and follow the on-screen instructions to complete the setup.
  3. Open the GOG Galaxy app and log into your GOG.com account.

2. Download GOG games

GOG website - How to install games with Gog Galaxy
  1. Visit the Games Library and search for the game you want.
  2. Click on the respective game and click the Buy button to get a licensed copy.
  3. After this process is completed, you will be able to click the Download button to start downloading. (the files will download in the default download location of your browser software)
  4. You will get 3 files inside the download package – and .exe file, and two .bin files.
  5. In order to start the installation process -> double-click the .exe file and follow the on-screen instructions.

3. Install GOG games using GOG Galaxy Launcher

  1. 1. Open your GOG Galaxy Launcher.

  2. 2. Log into your GOG account with your credentials.

  3. 3. Select the Owned Games tab and search for the game you want to install.

    install gog games on Windows 10
  4. 4. Click on Install and wait for the installation process to complete.

  5. 5. You can now play the GOG game on your device.

  6. Installing GOG games on your PC is very easy and all you need to have is the GOG Galaxy Launcher installed. You can use it to download your favorite games and then install them by pressing a simple button.

If GOG games won’t launch after installing them, check out our dedicated article to find out how to fix the problem.


This guide covered all the required steps needed in order to install GOG games by using the GOG Galaxy app.

If you found this guide helpful please feel free to let us know. You can reach us by simply leaving a comment inside the designated section found under this article.

7 Best Antivirus for Windows Server 2019 [Free Picks Included]

Windows Server is one of the most used server operating systems, and in order to keep it secure, you need to have a reliable antivirus for Windows Server 2019.

Windows Server is based on Windows 10, and as such, it’s already pretty secure, but to enhance your security, it’s always a good practice to specialize in antivirus.

All models on our list are compatible with Windows Server 2019 as well as with older versions of Windows Server, so let’s find the best antivirus software for your needs.

Does Windows Server need antivirus?

The response to this issue can vary according to your needs and resources. If you need additional security to protect business databases, antivirus software will increase your digital security.

You should know that Windows Server 2019 can offer enhanced security compared to its prior versions.

It’s considered to be the most secure Microsoft OS to that date, and you have improved Windows Defender technologies against online threats.

However, you can better protect your data and online privacy using an antivirus tool that detects new emerging malware or cyberattacks.

What is the best antivirus for Windows Server 2019?

Some of the best antiviruses for Windows Server 2019 include Eset, Norton, and Avast, but there are other options you can consider. Here are a few of them:

Now let’s take an in-depth look at each of them.

ESET PROTECT Advanced – Most advanced security features

The first entry on our list is ESET PROTECT Advanced and this antivirus supports all versions of Windows Server, starting from the 2008 version to the 2019 version.

If you’re looking for the best antivirus software for Windows XP or newer, ESET can also be a great choice for older operating systems.

The software comes with a cloud-based console allowing you to manage detected threats, users, and alerts remotely. It’s worth mentioning that this antivirus has multilayer protection that will keep all your desktop and mobile devices safe, regardless of their platform.

ESET PROTECT Advanced also offers a cloud sandbox feature, so it will analyze suspicious samples in an isolated cloud environment. For data security, there’s a disk encryption feature that will securely encrypt all your files.

ESET PROTECT Advanced

If you’re looking for the best antivirus protection for Windows Server 2019, be sure to try ESET PROTECT Advanced.
Free trial Visit Website

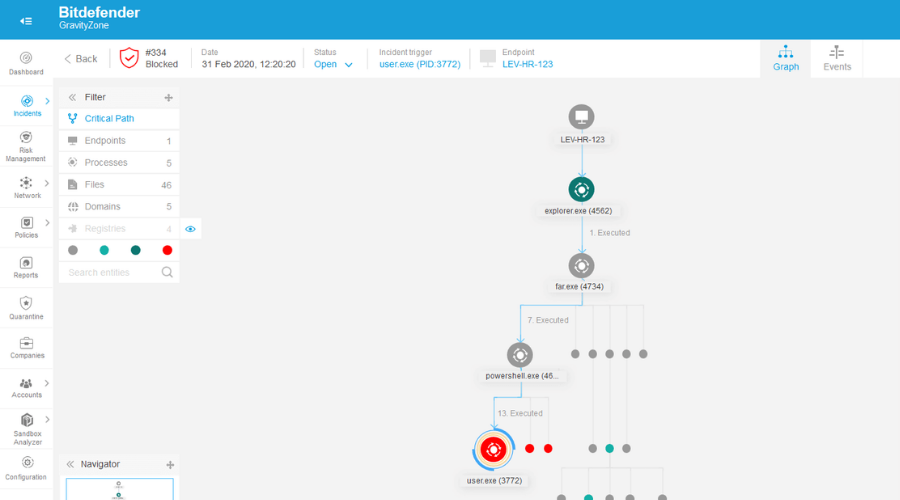
Bitdefender GravityZone Business Security – Best antivirus for businesses

If you’re looking for antivirus software for Windows Server 2019, then Bitdefender GravityZone Business Security might be just what you need.

Just like other applications on this list, Bitdefender for Windows Server 2019 allows you to monitor your workstations and servers from a single console.

The software is designed to detect all sorts of network vulnerabilities, thus stopping all types of malware.

Bitdefender GravityZone Business Security also provides layered security to all your endpoints, and with machine learning, memory protection, and constant monitoring, you can rest assured that your network is completely safe from malware.

Bitdefender GravityZone Business Security

This next-gen antivirus offers the best protection against all threats on Windows Server 2019.
Free trial Visit website

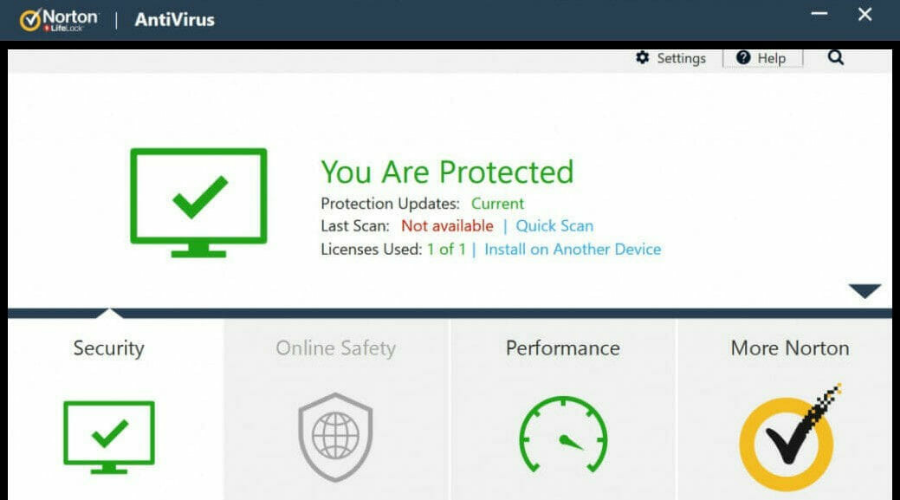
Norton Antivirus Plus – Best online protection

Next on our list is another renowned antivirus software that’s been offering top-level security tools for a long time.

Norton Antivirus Plus is a great antivirus for Windows Server 2019 as it combines multiple security features to make sure your data is secure.

It has a powerful threat database with all known spyware, viruses, malware, and ransomware that may impose an attack on your system.

It automatically blocks any suspicious activity before it gets the chance to infect your server.

It offers real-time protection against online threats and also implements a powerful cloud backup option.

This can be a great addition for Windows Server users. The antivirus will securely store your data and recover it in case anything happens.

Norton for Windows Server 2019 also provides a secure password manager that you can use to store both account credentials as well as other sensitive information.

Norton Antivirus Plus

Prevent attackers from accessing your Windows Server with reliable multi-layered protection and secure cloud backups.
Check price Visit Website

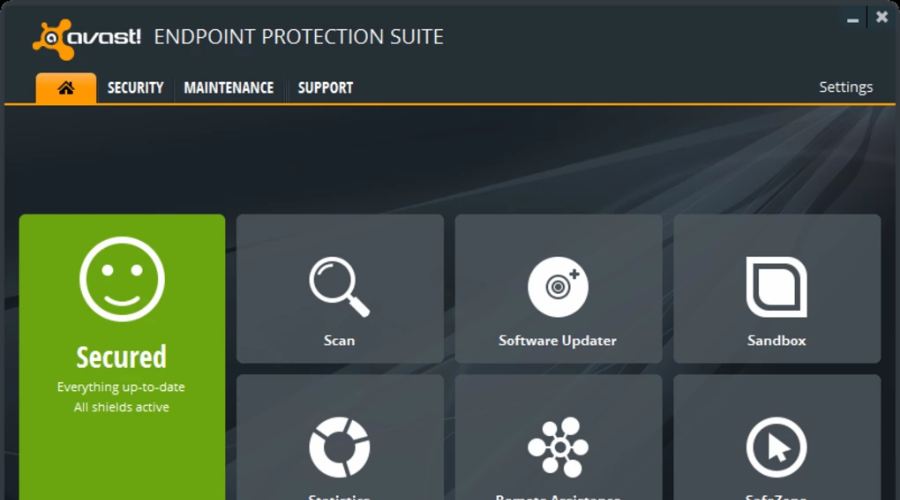
Avast Business Antivirus Pro – Best AI to prevent online threats

Avast Business Antivirus Pro uses artificial intelligence and behavior analysis to detect all sorts of threats. The software also has cloud analysis that will scan files for any unknown threats.

The software is easy to set up, and once you install it, it will inspect all uploads and downloads for any suspicious activity. Thanks to the next-gen endpoint protection all your devices can be managed remotely from a central point.

Avast Business Antivirus Pro offers great features, and it’s compatible with all versions of Windows Server, starting from Windows Server 2008 R2.

Avast Business Antivirus Pro

Avast Business Antivirus Pro offers simple to use and reliable protection for all versions of Windows Server.
Free trial Visit website

VIPRE Endpoint Security Server – Most advanced ransomware protection

Vipre update screen

VIPRE Endpoint Security Server is another great antivirus for Windows Server 2019, but it also supports older versions of Windows Server. The application offers great protection against both zero-day exploits and ransomware.

The software is easy to configure, and you can install it and configure it and a matter of minutes. Of course, the remote management feature is available allowing you to easily manage all devices on your network.

The software also has advanced ransomware protection as well as real-time behavior monitoring with artificial intelligence for maximum security.

VIPRE Endpoint Security Server

For professional Windows Server 2019 protection, be sure to use VIPRE Endpoint Security Server software.
Free trial Visit website

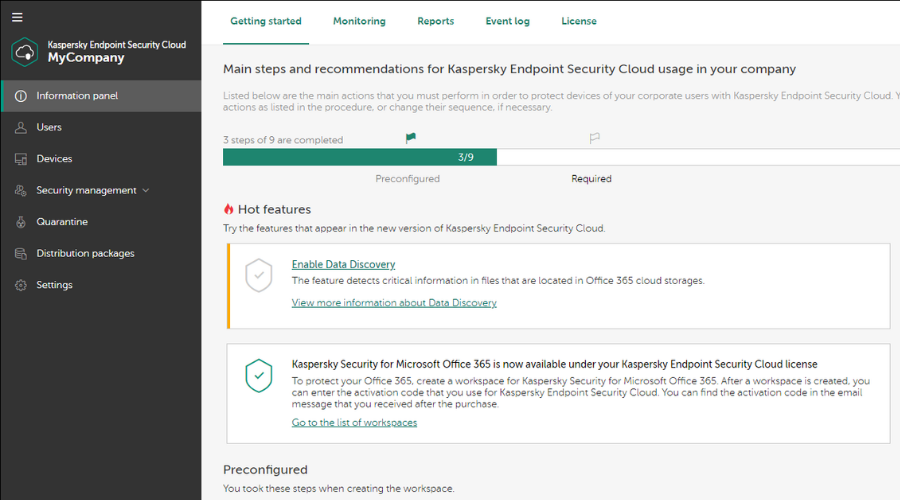
Kaspersky Endpoint Security – Great overall server protection

best antivirus software for small business

If you need a reliable antivirus for Windows Server 2019, then you should consider using Kaspersky Endpoint Security for Windows.

The software uses multi-layer protection that will keep your entire network completely safe.

Thanks to the Exploit Prevention feature, the software will monitor all vulnerable applications and protect them against zero-day threats. The software can also intercept your HTTPS traffic and block malicious websites.

Using real-time behavior analysis, the Kaspersky for Windows Server 2019 can detect any suspicious activity on your server and automatically block the malware from running.

Kaspersky Endpoint Security

Obtain this highly secured Windows server protection for any device from your network.
Check price Visit website

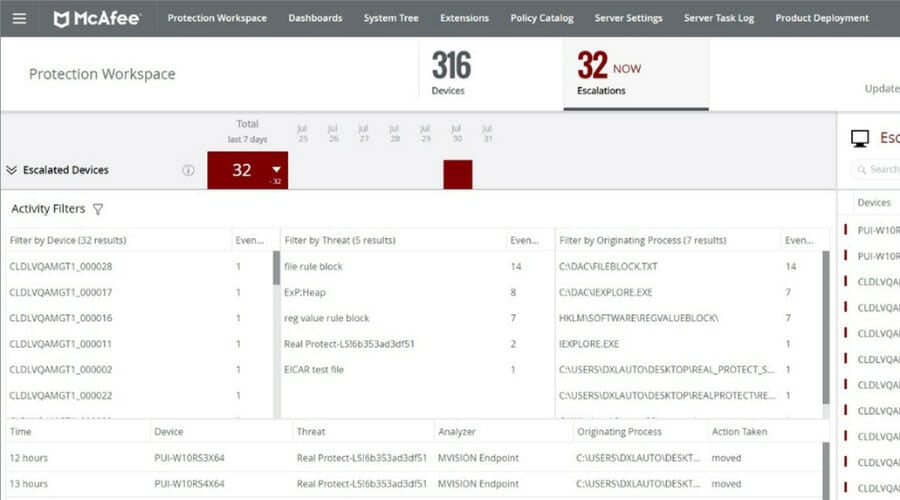
McAfee Endpoint Security – Great database for detecting threats

McAfee is another well-known cybersecurity software company that provides effective and up-to-date protection against today’s threats.

Not only does it use a comprehensive database to detect threats, but it also implements powerful machine learning capable of detecting very new, not previously known threats.

This antivirus is suitable for organizations, providing central management options that give you information about each device’s security status.

The tool also incorporates powerful anti-phishing filters and lets you create digital vaults where you can safely store your data in case anything is to happen to it.

The scanner and real-time threat detector are configured to minimize response rates and take action right away when a threat emerges.

Machine learning detection uses proactive investigation guides to adjust to the threat at hand and figure out the most efficient way to block it.

McAfee

Stay away from advanced cyber threats with this complex Windows Server reliable defense.
Check price Visit website

Is a free antivirus enough for Windows Server?

There are some reliable cybersecurity tools that offer support for Windows Server, the most notable of which is the built-in Windows Defender Antivirus which is truly free, with a strong firewall and multi-device protection.

Cybersecurity experts do however advise you to use it along with a third-party antivirus that offers more features and has a higher detection rate.

In this regard, there are some antiviruses that do claim to offer Windows Server Protection, but the free versions are somewhat limited and still expose you to some risks.

It is important to take into consideration how you use your Windows Server and at what risks you get exposed, but it is generally recommended to get a premium antivirus for maximum protection.

The good news is that the most reliable antiviruses for Windows Server 2019 do include free trials and money-back guarantees so you don’t have to invest right away.

Conclusion

Windows Server offers great features, and if you’re using it, we suggest that you consider getting one of these antivirus applications.

Choosing any of the presented antivirus tools can enhance your server security and protect the valuable data of your own business.

Hence, you can guard all your devices and protect sensitive information from dangerous cyberattacks using high virus detection antivirus software.

What is your antivirus of choice? Let us know in the comments below.

3 Ways To Fix Error Code 111 On Paramount Plus

A return code or error code in computer programming is a numeric or alphanumeric code used to identify the type of a problem and its cause. Systems may decide to provide their user(s) with error codes.

An illustration of how a well-known operating system notifies the user of error codes is the Blue Screen of Death.

Owned by Paramount Global, Paramount+ is an American paid-on-demand video service. Paramount Plus is accessible on a variety of platforms, including the web, Android, iOS, Apple TV, Google TV, Fire TV, and even gaming consoles like the Xbox and PlayStation, much like any other streaming service. 

This is the perfect spot for you if you frequently use Paramount Plus but have encountered problems that have interfered with your ability to stream, such as Paramount Plus error code 111. Continue reading to learn how to resolve that specific error code.

What does error code 111 mean on Paramount Plus?

Error code 111 on Paramount Plus simply indicates that your device is unable to load the content. You may encounter this error for various reasons. The first reason is that the device on which you are using Paramount plus may have shut down as a result of a power outage or power failure. 

Another cause is that some corrupt cache and data may have accumulated in Paramount Plus. The last cause is that there is a problem with your internet connection. You need not worry when you see error code 111 since you can solve the issue without any problems. 

How do I fix Paramount Plus error code 111?

1. Clear cache

On a computer:

  1. Launch Chrome and click the three menu buttons at the top right.
  2. Click More tools and then Clear browsing data.More tools settings - paramount plus error code 111  
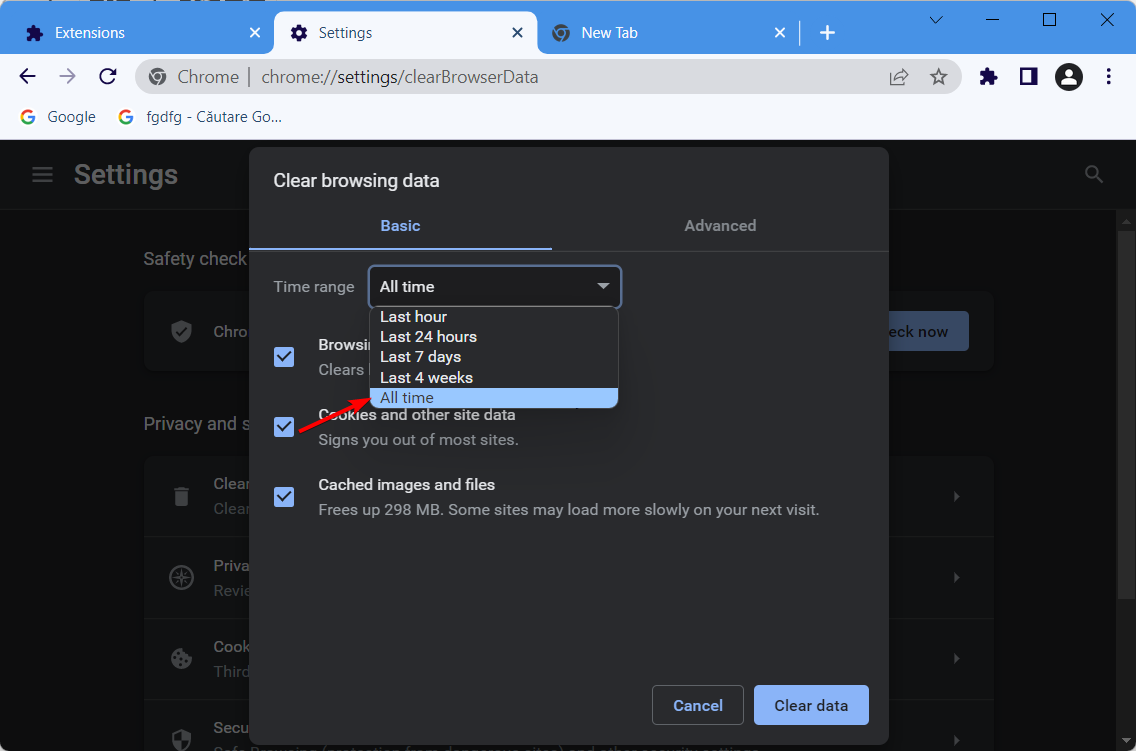
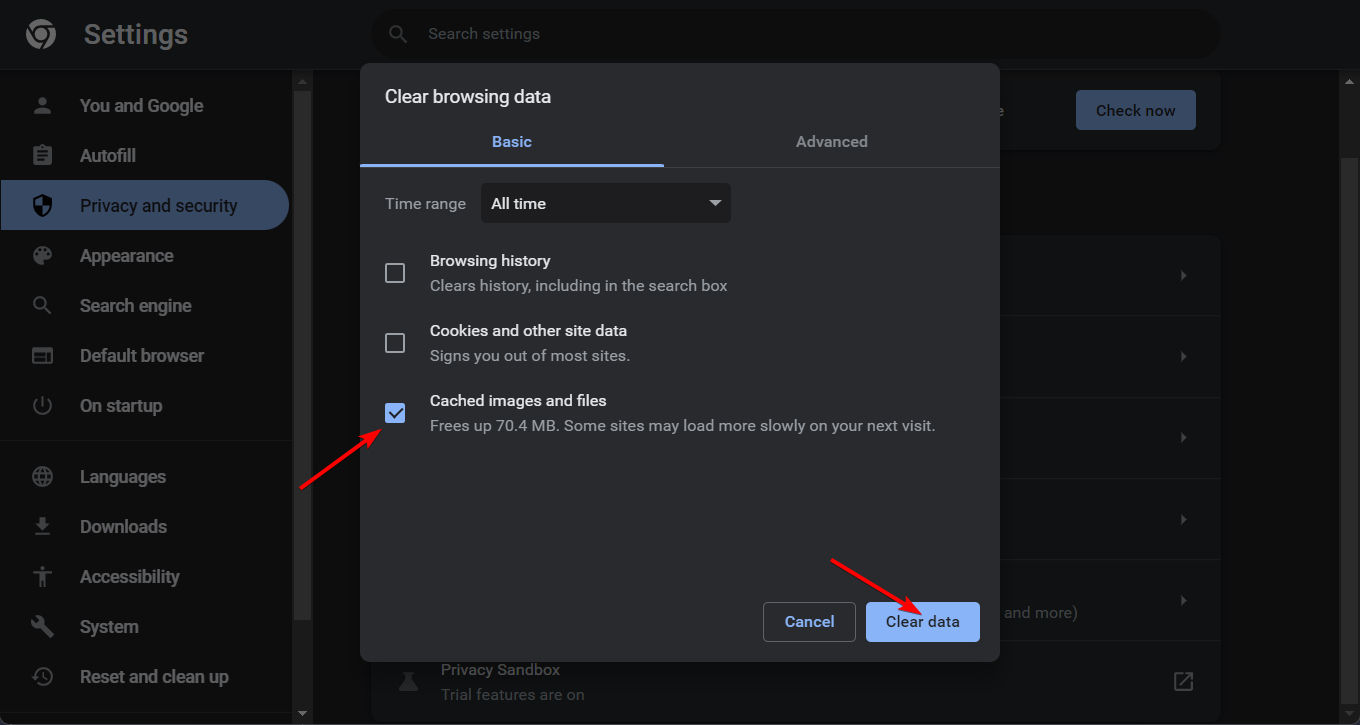
  3. On the Time range drop-down, select All time.
  4. Ensure that the Cookies and other site data and Cached images and files checkboxes are selected.
  5. Click on the Clear Data button.Clear browsing data

On a phone:

  1. Launch Chrome and then tap on the three menu buttons at the top right.menu button - paramount plus error code 111
  2. Tap on History and then Clear browsing data. Clear browsing data phone
  3. In the Time range dropdown, select the All time option.
  4. Next, select Cookies and site data, followed by Cached images and files. 
  5. Tap on Clear data at the bottom.Clear data - paramount plus error code 111

2. Disable Adblocker

On a computer:

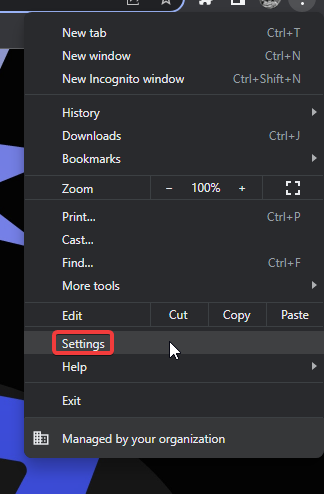
  1. Launch Chrome, click the three menu buttons at the top right, and then select Settings.Menu and settings
  2. Select Privacy and security on the left-hand side menu.Privacy and security
  3. Click on Site settings.Site settings - paramount plus error code 111
  4. Scroll down and select Additional Content Settings.
  5. Select Ads.Additional settings and Ads
  6. Set the preference to All sites that can show any ads to you.All sites can show ads - paramount plus error code 111

On a phone;

  1. Launch Chrome, click the three menu buttons at the top right, and then go to Settings.Settings
  2. Scroll down to Advanced and select the Site settings option.Advanced Settings - paramount plus error code 111
  3. Select Ads and then tap to allow ads.Enable Ads
  4. Reload the page.

3. Restart your device

  1. Completely turn off the device by pressing and holding the Power button. 
  2. If your device is powered by a cable, unplug the cable from the device for at least one minute after you’ve turned it off.Disconnect - paramount plus error code 111
  3. Reconnect the power cable and power on the device.Connect

What other streaming services can I use apart from Paramount Plus?

Paramount Plus is one of the most popular and well-known video streaming services in the world, though it is not the only one. There are numerous Paramount Plus alternatives available that will keep you entertained day and night on your smartphone, tablet, or smart TV. 

Many of these alternatives are less expensive, and some are even free to use, albeit with advertisements. The other alternatives are Netflix, Amazon Prime Video, Hulu, Shudder, Discovery Plus, HBO Max, Britbox, Crackle, YouTube, Apple TV Plus, Disney Plus, Acorn TV, Pluto TV, Britbox, and Peacock.

We hope you found our guide on how to fix the Paramount Plus error code 111 useful. If you have any additional suggestions, please share them with the other readers in the comments section!

If you have any questions about the guide, please contact us; we’d be happy to help!

KB5017380 for Windows 10 is now live on the Release Preview Channel

The most important updates for the Windows 10 operating system, all versions included, have been released via this month’s Patch Tuesday event.

Even Windows 7 and Windows 8.1 received important patches in September so that Microsoft can make sure that even outdated versions of the OS are still secure.

Windows 10 Insiders that are on the Release Preview Channel have received another cumulative update today, and we are going to see what it’s all about.

Windows 10 Build 19044.2075 is full of fixes

The Redmond-based tech giant has released a brand new Windows 10 build to all Insiders on the Release Preview Channel, in the form of Build 19044.2075, also known as KB5017380.

With this cumulative update, users gain the ability to view News and interests on the taskbar in any orientation.

Also, Transport Layer Security (TLS) 1.0 and 1.1 is now off by default in all apps and browsers by Microsoft, plus there is a huge number of fixes.

Furthermore, Microsoft added a functionality that lets you use Azure Active Directory (AD) authentication to sign in to Windows using Remote Desktop.

Using this, you can use Windows Hello or security devices, such as Fast Identity Online 2.0 (FIDO2) keys, for remote sign-in.

Now, as we mentioned, there is a long list of fixes that have been applied to this version of the operating system, containing various problems.

  • Fixed an issue that requires you to reinstall an app if the Microsoft Store has not signed that app. This issue occurs after you upgrade to Windows 10 or a newer OS.
  • Fixed an issue that prevents MSIX updates from installing from the same URL.
  • Fixed an issue that stops codecs from being updated from the Microsoft Store.
  • Fixed an issue that affects cached credentials for security keys and Fast Identity Online 2.0 (FIDO2) authentications. On hybrid domain-joined devices, the system removes these cached credentials.
  • Fixed an issue that affects a network’s static IP. The issue causes the configuration of the static IP to be inconsistent. Because of this, NetworkAdapterConfiguration() fails sporadically.
  • Fixed an issue that affects rendering in Desktop Window Manager (DWM). This issue might cause your device to stop responding in a virtual machine setting when you use certain video graphics drivers.
  • Fixed a rare stop error that happens after you change the display mode and more than one display is in use.
  • Fixed an issue that affects graphics drivers that use d3d9on12.dll.
  • Fixed an issue that forces the IE mode tabs in a session to reload.
  • Fixed an issue that affects URLs generated by JavaScript: URLs. These URLs do not work as expected when you add them to the Favorites menu in IE mode.
  • Fixed an issue that affects window.open in IE mode.
  • Fixed an issue that successfully opens a browser window in IE mode to display a PDF file. Later, browsing to another IE mode site within the same window fails.
  • Introduced a Group Policy that enables and disables Microsoft HTML Application (MSHTA) files.
  • Fixed an issue that affects the Microsoft Japanese input method editor (IME). Text reconversion fails when you use some third-party virtual desktops.
  • Fixed an issue that affects the App-V client service. The service leaks memory when you delete App-V registry nodes.
  • Fixed an issue that might change the default printer if the printer is a network printer.
  • Fixed an issue that affects the ProjectionManager.StartProjectingAsync API. This issue stops some locales from connecting to Miracast Sinks.
  • Fixed an issue that affects Group Policy Objects. Because of this, the system might stop working.
  • Fixed an issue that affects Windows Defender Application Control (WDAC) path rules. This issue stops .msi and PowerShell scripts from running.
  • Fixed an issue that might bypass MSHTML and ActiveX rules for WDAC.
  • Fixed an issue that causes WDAC to log 3091 and 3092 events in audit mode.
  • Fixed an issue that affects Windows Defender Application Control (WDAC). It stops WDAC from logging .NET Dynamic Code trust verification failures.
  • Fixed an issue that affects WDAC policies. If you enable SecureLaunch on a device, WDAC policies will not apply to that device.
  • Fixed an issue that occurs when a WDAC policy fails to load. The system logs that failure as an error, but the system should log the failure as a warning.
  • Fixed an issue that affects non-Windows devices. It stops these devices from authenticating. This issue occurs when they connect to a Windows-based remote desktop and use a smart card to authenticate.
  • Fixed an issue that occasionally causes explorer.exe to stop working when explorer.exe opens.
  • Fixed an issue that affects the Microsoft Japanese IME when it is active and the IME mode is on. When you use the numeric keypad to insert a dash (-) character, the IME inserts the wrong one.
  • Fixed an issue that affects the rendering of the search box. It does not render properly if you sign in using Table mode.
  • Fixed an issue that affects the FindNextFileNameW() function. It might leak memory.
  • Fixed an issue that affects robocopy. Robocopy fails to set a file to the right modified time when using the /IS option.
  • Fixed an issue that affects cldflt.sys. A stop error occurs when it is used with Microsoft OneDrive.
  • Fixed an issue that affects the LanmanWorkstation service. It leaks memory when you mount a network drive. 40366335 Risk Pending
  • Fixed an issue that affects Roaming User Profiles. After you sign in or sign out, some of your settings are not restored.
  • Fixed a known issue that affects XML Paper Specification (XPS) viewers. This might stop you from opening XPS files in some non-English languages. These include some Japanese and Chinese character encodings. This issue affects XPS and Open XPS (OXPS) files.
  • Fixed a known issue that affects daylight saving time in Chile. This issue might affect the time and dates used for meetings, apps, tasks, services, transactions, and more.

This is pretty much what is going on in terms of changes made to the Windows 10 OS for Insiders on the Release Preview Channel.

As you know, pretty soon, all of these tweaks will reach the Stable version of Windows 10 and all our worries will be gone.

Have you spotted any other irregularities after installing KB5017380 on your device? Share your experience with us in the comments section below.

5 Ways To Fix Fps Drops On Microsoft Flight Simulator

Many users complain about several issues while playing the Microsoft Flight Simulator. A common complaint most users battle is the FPS drops in Microsoft Flight Simulator, which affects the gaming experience.

It causes lag and stuttering in the game. We all know how annoying it can be to experience concerns like this.

However, the Microsoft Flight Simulator is a game that features amateur flight simulator programs for Microsoft Windows and some specific operating systems.

The simulator is accessible on most computers, but it has some requirements that help it function smoothly and better.

Nonetheless, players still encounter low FPS in Microsoft Flight Simulator, which can make the game tiring and frustrating.

Especially for Xbox Series X users, they claim the light Simulator stuttering often causes the game to crash altogether.

However, users ask how to get better FPS in Microsoft Flight Simulator and permanently fix the low FPS issue. Fortunately, there are some fixes users can try to solve the problem.

What causes stuttering in MSFS?

  • Outdated graphics drivers: Using outdated graphics drivers on your computer can cause issues with games like the Microsoft Flight Simulator. It affects how the graphics drivers work because they are old and may be corrupt. Also, an outdated graphics driver impedes the computer’s performance. It lacks the necessary updates to fix graphics driver bugs because it doesn’t have the essential updates to help it fix graphics driver bugs on the computer.
  • Poor Internet connection: Since the Microsoft Flight Simulator is an online game, it requires a stable and fast internet connection to run smoothly. However, poor internet connection can cause stuttering and freeze in the game.
  • Running many apps in the background: The computer may become low on resources if many programs run simultaneously. The Microsoft Flight Simulator needs system resources like space to run its heavy graphics display.
  • Requirements clash on the computer: Microsoft Flight Simulator is a game with specified PC requirements. It can cause difficulties for the game to run if the computer does not meet these requirements. Readers may be interested in exploring the best Microsoft Flight Simulator offers.

How do I fix FPS drops in Microsoft Flight Simulator?

1. Reboot your PC

  1. Click Start on your computer.
  2. Select the Power option.
  3. Click on Restart.

Restarting the PC will help fix boot errors causing FPS to drop in the game. It is a good fix for MSFS FPS drop-in mid-flight issues.

2. Update graphics drivers

  1. Press the Windows + R keys simultaneously to prompt the Run window.
  2. Type devmgmt.msc into the search space and click OK.
  3. In the search results, click on Display adapters, then select the driver from the drop-down menu.
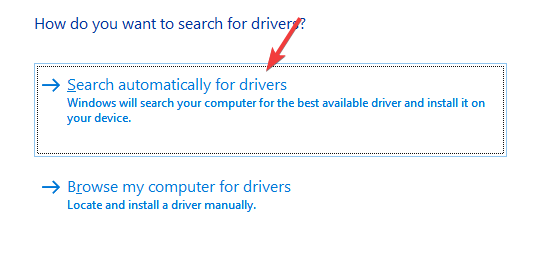
  4. Click the Update driver Software option, then select Search automatically for drivers.

Restart your computer after the updating process is complete. Also, we recommend you try out a tool that can help update not just this driver but all the outdated or corrupt drivers on your computer.

A specialized software can save your time and efforts by automatically downloading all the latest drivers for your device rather than manually downloading one at a time.

3. Update Windows

  1. Click the Start button.
  2. Select Setting and click on Windows update.
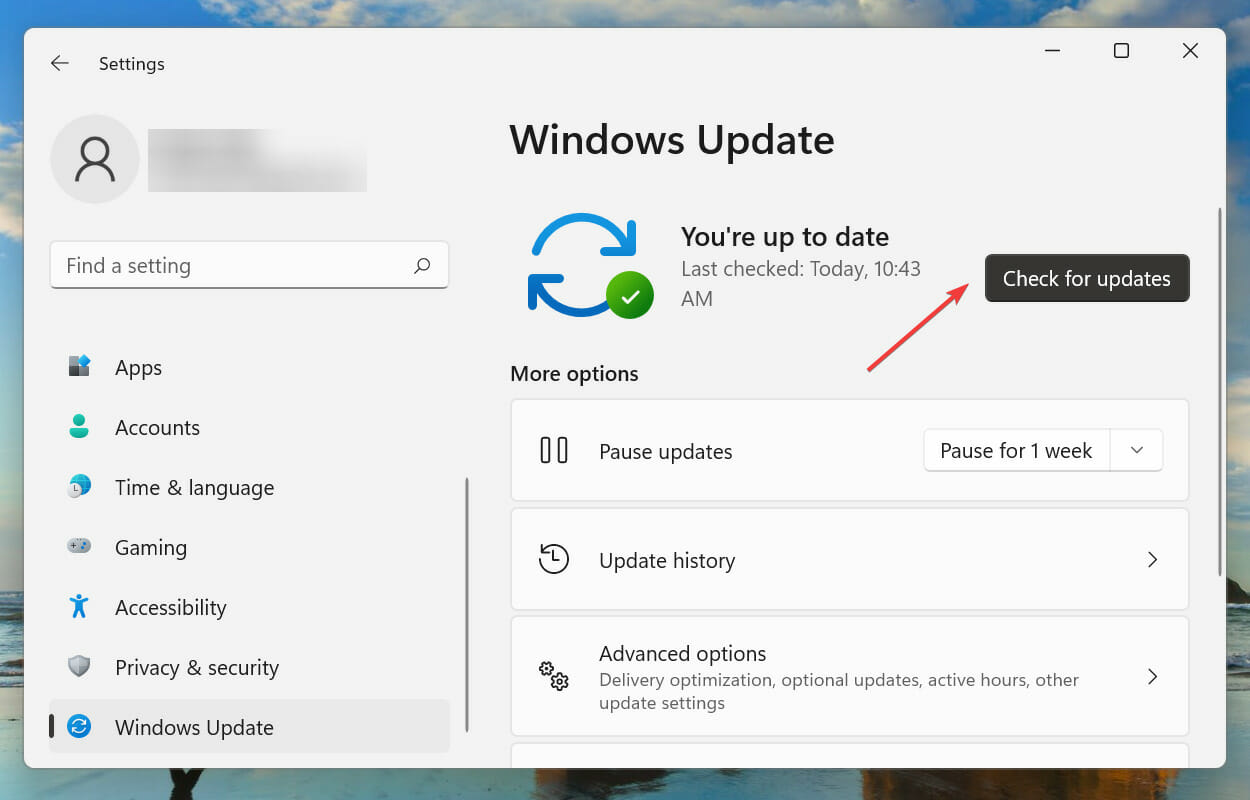
  3. On the Windows update page, select Check for updates. (If there’s an update available, Windows will automatically search for it and install it)

Restart your computer. Check if the MSFS FPS drops after a long flight issue persists.

4. Disable Game DVR

  1. Press Windows + R keys to prompt the Run window.
  2. Type Regedit in the search space.
  3. Alternatively, press the Ctrl + Shift + Enter keys to prompt the Registry Editor.
  4. Click on Game DVR, double-click on the AppCaptureEnabled option, and select Modify.
  5. In the Edit DWORD (32-bit) Value tab, change the Value data to 0, then Click OK.

It will disable the DVR on Windows. Hence, restart your computer and check if the issue persists.

5. Turn Game Mode On

  1. Press Windows + I keys to open Settings.
  2. Select Gaming on the left pane of the screen.
  3. Turn On Game Mode.

It helps your computer to optimize the resources used in the game and aids MSFS FPS boost.

How do I run Microsoft Flight Simulator smoothly?

Make sure the game is updated to enjoy new updates and patches. Adding new features and fixing bugs is possible as part of the updates to the game.

Also, ensure you have a stable internet connection for better performance. If the network is shaky or unstable, FPS will likely drop on Microsoft Flight Simulator.

However, we have a similar comprehensive guide on how to fix FPS drops and stuttering in Team Fortress 2 in just a few steps. Likewise, you can read about how to fix FPS drops and stuttering in PUBG.

If this guide has been helpful to you, leave your comments and suggestions below. We’d like to hear feedback from you.

Windows 11 System Image: 2 Quick Ways to Create One

When using Windows 11 or any operating system, you should regularly create a backup to prevent data loss and restore your system in case significant problems appear.

System images are recommended to back up your files since they create a complete backup of your drive. If you experience any issues, such as a system failure, you can fix them by restoring your system.

Creating a system image disk in Windows 11 hasn’t changed much, and it’s similar to the Windows 10 system image backup creation process.

Nevertheless, this guide will detail and show you how to easily create a system image on your Windows 11 PC.

Why do I need a system image in Windows 11?

A system image is a backup file of your system drive that can restore your operating system in case of a failure.

You can also use a system image to quickly move your operating system to a new hard drive without any file loss.

The size of the system image varies depending on multiple factors, including the size of your partition, the number of partitions you’re backing up, and the compression rate.

Usually, it is equal to the size of your system partition, but some of you might choose to back up the entire hard drive so that the size can vary drastically.

Before creating a system image, ensure you have enough space on your destination drive to store the system image.

What is a Windows image backup?

To put it simply, an image of the entire content of every partition on a computer’s C: or primary disk constitutes an image backup. It is a replica of the disk and includes the things that are stored on it and the operating system, settings, data files, and everything.

Does Windows 11 need backup?

Yes, it does. Every OS needs a backup because there is a chance that you may lose some important data. Hence, the new OS is not an exception.

How can I create a Windows 11 system image backup?

1. Use Control Panel

  1. Click the magnifying glass to start the Search function, then type control panel and select the app from the results list.windows control panel
  2. Now click on Backup and restore.windows backup and restore section
  3. In Backup and Restore, click on Create a system image in the left pane.
    create a system image windows 11
  4. Now select the backup location and click on Next. If you don’t have another drive installed, you will need an external media connected like a USB stick or drive.
    system image location windows 11
  5. A list of drives that you can back up will appear. Uncheck the drives you don’t want to back up and click Next to proceed.
  6. First, ensure that the backup media can handle the backup size, then click on Start backup to initiate the backup process. start backup windows 11
  7. This might take a while, so be patient.windows 11 backup process
  8. Once the process is done, click on Close.
  9. Optional: Click Yes to create a system repair disk in case you don’t have Windows 11 bootable media or if you can’t access advanced boot settings. To complete this process, you’ll need an empty flash drive.

You can also start Control Panel by pressing the Windows + R combination and typing control panel. Then hit Enter or click OK to start the app.

2. Use Settings

  1. 1. Open the Start Menu and click on Settings.

    settings start menu
  2. 2. Navigate to System and then scroll down to the Recovery section.

    recovery settings windows 11
  3. 3. In the Advanced startup section, click on Restart now.

    recovery options windows 11
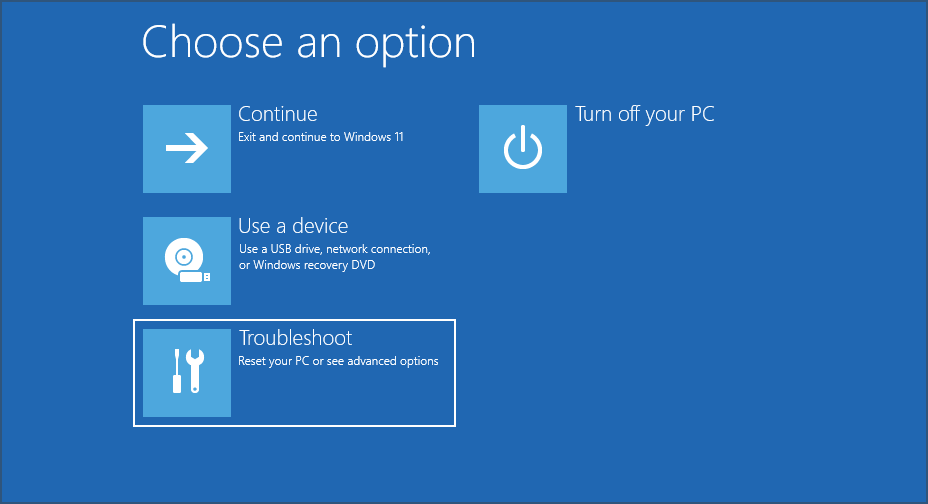
  4. 4. When the PC restarts, select Troubleshoot.

    Troubleshoot to fix device manager power management tab missing
  5. 5. Now select Advanced options.

    advanced options troubleshoot menu w11
  6. 6. Click on See more recovery options.

    see more recovery options troubleshoot windows 11
  7. 7. Select System image recovery.

    system image recovery windows 11
  8. 8. Now choose your system image and click on Next.

    selection windows 11 system image backup
  9. 9. Follow the instructions on the screen to complete the process.

  10. Users can also create a system image backup for their Windows 11 devices via Settings. The OS has a built-in Recovery tool which allows you to both make a new system image and recover the OS using a previously created system image.

Both methods will open the same window, and you can use the more convenient one. However, remember that the latter approach is available only on older builds.

Once you open Backup and Restore, you can create Windows 11 system image backup by doing as described below.

Although this process is simple, you may prefer using specialized software such as Acronis Cyber Protect Home Office because it offers better features and more configuration options.

Is it better to use third-party solutions to create system images?

Even if the Backup and Restore feature in Windows 11 is completely free, it’s only suitable for basic tasks, and if you’re an advanced user, you might find some crucial features missing.

Most cloning applications offer a basic version of their software that you can enjoy free of charge for personal use with some minor restrictions.

Specialized software allows you to create several different system images, including both incremental and differential, while Windows Backup and Restore can only create full system images.

With these tools, you can also run your system image on a virtual machine and quickly gain access to your files on another PC.

Therefore, we recommend specialized cloning software for advanced users for disk images and file backups.

What is the difference between System Restore and system image backup?

System Restore is a feature that allows you to restore your system in case any software problem occurs.

For example, if issues start appearing after installing specific software or driver, you can use it to restore your system to the previous state before installing the software.

Remember that it doesn’t affect your files, so if you accidentally delete important files, you can’t restore them with System Restore. Moreover, note that Windows creates a system restore points automatically.

system restore settings

On the other hand, a system image creates a full copy of your system partition, including all applications, settings, and files.

You can use a system image to repair software issues, but system image files aren’t created as often as System Restore points, and they are used to fix more severe problems that System Restore can’t.

Unlike System Restore, the system image will restore all deleted files since creating the system image.

Remember that it will restore your system drive precisely when you created the system image. This means any files created on the system drive after the system image are removed.

A system image can also be moved to another system, and in case your hard drive is damaged, you can transfer all your files and operating system to a new hard drive and continue where you left off.

How can I restore my PC with a system image?

  1. Open the Start Menu and select Settings.
    windows 11 settings
  2. Navigate to the System and select Recovery.
    windows recovery center
  3. In the Advanced startup, click on Restart now.
    windows advanced startup press restart
  4. When the PC restarts, select Troubleshoot.
    Windows 11 system image backup
  5. Now select Advanced options.
  6. Click on See more recovery options.
    windows 11 see more recovery options
  7. Select System image recovery.
  8. Now choose your system image and click on Next.
    select system image backup windows 11
  9. Follow the instructions on the screen to complete the process.

Creating a Windows 11 system image backup is simple and can be done efficiently with the Backup and Restore application.

It’s a great idea to create backups based on the sensitivity of the information; you can even make more of the same and store them on different media and places.

Any backup on your system or an external device can eventually fail, and you will return to square one.

More than that, a copy of your system image is like an instance in time that you can return to if a significant problem arises on your PC.

Are you using system images, and what’s your favorite method to create system images? Let us know in the comments below.

3 Easy Ways to Fix Error Code 224003 on Safari and Chrome

While watching videos in your web browser, you might sometimes encounter Error code 224003. Unfortunately, when this error appears, you won’t be able to play the desired video at all.

It can be problematic, especially if it appears on most video websites, so in today’s guide, we’ll show you how to fix This video file cannot be played (error code: 224003) error for good.

How can I fix the playback error code 224003?

1. Disable all extensions

1.1 For Chrome

  1. Click the Menu icon, go to More tools, and select Extensions.chrome-extensions=button salesforce not loading in chrome
  2. Now disable all available extensions by clicking the switch icon next to them.
    extension disable error code 224003
  3. If the issue is gone, try enabling extensions one by one until you find the cause of the problem.

1.2. For Safari

  1. 1. Launch the Safari browser on your device.

  2. 2. Open the Safari menu.

  3. 3. Select Preferences from the list of options.

  4. 4. Now navigate to the Extensions section.

  5. 5. Uncheck the checkbox next to all extensions.

    disable safari extensions
  6. 6. If the problem is gone, try enabling the extensions one by one to find the cause of the problem.

  7. Add-ons and extensions are known to cause issues on browsers. Therefore, you might be able to fix error code 224003 by removing them.

This is a simple solution, and it should help you fix error code 224003 in both Chrome and Safari with ease.

Quick Tip:

Switching to a different browser is a simple fix to get rid of this error code. We recommend Opera One as we haven’t had any issues with it.

Opera One is a Chromium-based browser with built-in features ranging from built-in VPN, Ad Blocker and AI, to features like social media and messaging apps buttons right in the sidebar of the browser so you’re never out of touch.

Opera One

An amazing browser with great features to smoothen out your browsing and social media experience.
Free Download Visit website

2. Disable hardware acceleration in Chrome

  1. Click on the Menu icon in the top right corner and choose Settings.chrome-settings images not loading in chrome
  2. Select System from the left menu and make sure the Use hardware acceleration when available option is disabled.sysmte-hardware error-code-224003

Disabling hardware acceleration works only in Chrome, but it won’t help you fix Error code 22400 3 in Safari, considering the same browser doesn’t allow you to change this setting.

3. Clear the cache

3.1 Chrome

  1. Access the Clear browsing data menu with the following shortcut: Shift + Ctrl + Delete. Select All time as the time range.all-time-chrome images not loading in chrome
  2. Select Cached images and files and click Clear data. The 224003 error will be fixed.clear-data-chrome error-code-224003

3.2 For Safari:

  1. Open the Safari menu and choose Preferences.preferences error-code-224003
  2. Navigate to the Privacy tab and click on Remove All Website Data button.privacy-safari error-code-224003
  3. Click on the Remove Now button to confirm.

After clearing the cache, check if error 224003 is resolved.

Error code 224003 can be problematic and prevent you from watching online videos, but we hope our solutions helped you fix this problem for good.

KB5017383: A closer look at this Windows 11 update

Yesterday, we took a closer look at Windows 11 Build 25201, which just got released to the Windows Insider Dev Channel.

A day before that, Microsoft released the monthly Patch Tuesday batch of updates for several versions of the operating system.

Today, we’re going to break down KB5017383 and see what other tweaks the Redmond developers managed to pull off.

What’s new with Build 22000.1041?

Microsoft has released yet another brand new build for all the Windows 11 Insiders on the Release Preview Channel.

Build 22000.1041, or KB5017383 brings several bug fixes as well as some new features like WebAuthn redirection and dynamic Widgets.

With WebAuthn redirection, you can authenticate in apps and on websites without a password when you use Remote Desktop.

After this is done, you can go ahead and use Windows Hello or security devices, such as Fast Identity Online 2.0 (FIDO2) keys.

Once you installed KB5017383, when you open the Widgets board, a banner appears at the top of the board and provides more information about what triggered the notification badge.

The rest of the changelog is talking about all the issues Microsoft managed to fix through this cumulative update, and there are quite a few.

  • Fixed an issue that requires you to reinstall an app if the Microsoft Store has not signed that app. This issue occurs after you upgrade to a newer OS.
  • Fixed an issue that stops codecs from being updated from the Microsoft Store.
  • Fixed a race condition in framework autorepair registration. This issue occurs because a registration key is missing.
  • Fixed an issue that affects the Network Policy Server Management (NPSM) service. This issue causes major delays when you sign out.
  • Fixed an issue that affects the Windows Search service. Indexing progress is slow when you use the service.
  • Fixed an issue that affects cached credentials for security keys and FIDO2 authentications. On hybrid domain-joined devices, the system removes these cached credentials.
  • Fixed an issue that affects a network’s static IP. The issue causes the configuration of the static IP to be inconsistent. Because of this, NetworkAdapterConfiguration() fails sporadically.
  • Fixed a rare stop error that happens after you change the display mode and more than one display is in use.
  • Fixed an issue that affects rendering in Desktop Window Manager (DWM). This issue might cause your device to stop responding in a virtual machine setting when you use certain video graphics drivers.
  • Fixed an issue that affects graphics drivers that use d3d9on12.dll.
  • Fixed an issue that affects URLs generated by JavaScript: URLs. These URLs do not work as expected when you add them to the Favorites menu in IE mode.
  • Fixed an issue that forces the IE mode tabs in a session to reload.
  • Fixed an issue that successfully opens a browser window in IE mode to display a PDF file. Later, browsing to another IE mode site within the same window fails.
  • Fixed an issue that affects window.open in IE mode.
  • We introduced a Group Policy that enables and disables Microsoft HTML Application (MSHTA) files.
  • Fixed an issue that affects the Microsoft Japanese input method editor (IME). Text reconversion fails when you use some third-party virtual desktops.
  • Fixed an issue that occurs when the input queue overflows. This might cause an application to stop responding.
  • Fixed an issue that might cause a black screen to appear on your display. This might occur when you use a pen to turn on high dynamic range (HDR).
  • Fixed an issue that affects the App-V client service. The service leaks memory when you delete App-V registry nodes.
  • Fixed an issue that might change the default printer if the printer is a network printer.
  • Fixed an issue that affects WDAC policies. If you enable SecureLaunch on a device, WDAC policies will not apply to that device.
  • Fixed an issue that affects Windows Defender Application Control (WDAC) path rules. This issue stops .msi and PowerShell scripts from running.
  • Fixed an issue that might bypass MSHTML and ActiveX rules for WDAC.
  • Fixed an issue that causes WDAC to log 3091 and 3092 events in audit mode.
  • fixed an issue that affects Windows Defender Application Control (WDAC). It stops WDAC from logging .NET Dynamic Code trust verification failures.
  • Fixed an issue that occurs when a WDAC policy fails to load. The system logs that failure as an error, but the system should log the failure as a warning.
  • Fixed an issue that affects Code Integrity logging. It logs issues as errors instead of warnings. Because of this, automatic repair is triggered.
  • Fixed an issue that affects the touch keyboard. The touch keyboard immediately closes when you tap to switch apps.
  • Fixed an issue that causes LogonUI.exe to stop working. Because of this, you cannot dismiss the lock screen to view the credentials screen.
  • Fixed an issue that affects the FindNextFileNameW() It might leak memory.
  • Fixed an issue that affects robocopy. Robocopy fails to set a file to the right modified time when using the /IS
  • Fixed an issue that affects cldflt.sys. A stop error occurs when it is used with Microsoft OneDrive.
  • Fixed an issue that affects the LanmanWorkstation service. When you mount a network drive, the service leaks memory.
  • Fixed an issue that affects the Get-SmbServerNetworkInterface It only retrieves a subset of the available network interfaces.
  • Fixed an issue that affects the Get-SmbServerConfiguration It only allows you to run it if you are an administrator.
  • Fixed an issue that affects Roaming User Profiles. After you sign in or sign out, some of your settings are not restored.
  • Fixed a known issue that affects XML Paper Specification (XPS) viewers. This might stop you from opening XPS files in some non-English languages. These include some Japanese and Chinese character encodings. This issue affects XPS and Open XPS (OXPS) files.
  • Fixed a known issue that affects daylight saving time in Chile. This issue might affect the time and dates used for meetings, apps, tasks, services, transactions, and more.

What can I do if KB5017383 fails to install?

  1. Press Win+ I to access Settings.Select the System category and click on Troubleshoot.w11 troubleshootPress the Other troubleshooters button.other troubleshooters windows 11Press the Run button next to Windows Update.windows update troubleshooter

Be sure to report any other issues you might come across, in order for Microsoft to address and improve the overall OS experience for us all.

This isn’t the only important update, and in one of our previous guides we wrote about understanding the significance of KB5034121 in motivating Windows 11 users to update.

Even more, here you can find standalone links to download the KB5034123 updates and all about the three known issues in the package.

MSFS High CPU Usage: 5 Tips to Reduce it

Microsoft Flight Simulator is a game with high performance and graphics. Hence, it may require more resources from the computer than other applications. However, users may face difficulties with the game if it consumes too many resources on the computer.

It can result in the Microsoft Flight Simulator’s high CPU usage problem, making the game sluggish and frustrating. It affects the capability of your apps to run smoothly and can sometimes cause the app and the computer to crash.

Furthermore, Microsoft Flight Simulator 2020 CPU usage can occur due to several factors, including many apps running in the background, malware infection, and many more.

Hence, this article will discuss the best fixes for MSFS CPU 100% consumption and help you get MSFS lower CPU usage.

Is MSFS CPU or GPU heavy?

Microsoft Flight Simulator is high on GPU and consumes a lot of CPU. It means the game uses lots of resources because of its buggy requirements.

The MFFS is mostly heavy on GPU. Also, its requirement specifies that your PC should have a solid GPU to run the game.

However, the game may rely on the CPU when there is a disparity or inadequate Graphics card. Hence, causes the high CPU usage on Microsoft Flight Simulator.

You may be interested in reading about how to make Windows 11 faster for a better gaming experience.

Quick Tip:

High CPU usage can be caused by outdated drivers that are not optimized for this game. A great tool to keep all your drivers up to date is Fortect Driver Updater.

Fortect Driver Updater is ​​a dedicated software that finds all outdated drivers and updates them with the latest versions from the manufacturer, keeping key components such as GPUs and CPUs at optimum levels.

Fortect Driver Updater

Keep your system running at peak performance by having all your drivers updated.
Free Trial Visit Website

How do I reduce CPU usage in Microsoft Flight Simulator?

1. End high-consuming apps on Task Manager

  1. Click on the Taskbar at the bottom of the screen and select Task Manager.
  2. Select the CPU and Memory usage in the Task Manager.
  3. Click on the applications consuming lots of CPU and memory space on your PC.
  4. Click on the End task from the drop-down that pops up.
  5. Restart your computer.

Users can read about the best Task Manager software for Windows 10 that can be used to monitor better and improve computer performance.

2. Disable background apps

  1. Click Start in the bottom left corner of the screen and select Settings, or press the Windows + I keys.
  2. Select Apps from the left pane.
  3. Click on Apps & features and click the three dots option in front of the apps you don’t need.
  4. Select Advanced options, then tap the drop-down button for Background app permissions.
  5. Click on Never and repeat the same process for all apps you want to disable.

We recommend you check our article about the best resource monitor software for Windows 10/11 to improve your PC’s performance.

3. Scan your system for malware and adware

  1. Click on Start from the taskbar.
  2. Type Windows Security in the search space and press Enter.
  3. Select Windows Security from the search results and choose the Virus & threat protection option.
  4. Click on Scan options and tick the Full scan option.
  5. Click Scan now and wait for the process to complete.

It will scan for malware that may cause high CPU usage by Microsoft Flight Simulator. Once this is discovered, it becomes easier to target and remove it from the computer.

4. Update the computer’s policy to speed up the CPU

  1. Press Ctrl + Shift + P keys to open the Windows Terminal (Admin).
  2. Type the following command: gpupdate
  3. Press Enter and wait for the process to complete.
  4. Type the following in the PS C:\Users space and press Enter to close the window: Exit

Doing this will speed up the CPU performance on your PC and thereby reduce the rate of bottlenecking with the GPU.

5. Update Windows

  1. Click on Start.
  2. Select Setting and click on Windows update.
  3. On the Windows update page, select Check for updates. (If there’s an update available, Windows will automatically search for it and install it)
  4. Restart your computer.

Check and see if the MSFS high CPU usage issues persist.

How do I make Microsoft Flight Simulator 2020 run better?

Turn Game Mode On

  1. Press Windows + I simultaneously to prompt Settings.
  2. Select Gaming on the left pane of the screen.
  3. Turn On Game Mode.

It helps your computer to optimize the resources used in games. The Game Mode makes gaming the top priority for your PC. 

It directs most of the computer’s resources to ensure better game performance. Hence, this should prevent the Microsoft Flight Simulator from causing high CPU usage.

Conclusively, we recommend you read through our comprehensive guide about the methods to fix high CPU usage on Windows 11.

If this guide has been helpful to you, kindly leave your comments below. We’d like to hear feedback from you.

How to Permanently Hide Taskbar in Windows 11 [2 Ways]

As expected, Microsoft has made a number of changes to Windows 11. One of them is incorporating an interesting macOS-style Dock in the UI that brings all the apps along with the Start Menu to the center of the screen.

If you prefer to have a clean window while running an app in full-screen, you have to use the taskbar’s auto-hide option on your PC.

How can I hide the taskbar in Windows 11?

1. Enable the Automatically hide that taskbar option

    You can easily hide your taskbar by configuring settings on your device. All you need to do is navigate to Taskbar settings and manually turn the auto-hide feature on.

  1. 1. Firstly, right-click on an empty space on your Taskbar, then select Taskbar Settings from the pop-up.

    how to hide taskbar windows 11 settings
  2. 2. Scroll down until you find the Taskbar behaviors section.

    taskbar behaviors windows 11
  3. 3. Click on Taskbar behaviors to open a drop-down menu.

  4. 4. You will see an option named Automatically hide the taskbar.

    how to hide taskbar windows 11 automatically
  5. 5. Check the box next to it.

  6. 6. The Taskbar is now automatically hidden on your device.

If you have already tried this method and auto hide Taskbar is still not working, it can be a temporary issue.

Just turning the feature off and then on again has helped many users, so don’t hesitate to apply this trick as well.

Note icon NOTE
If you change your mind, simply uncheck the box beside the Automatically hide the taskbar option under Taskbar behavior.

2. Hide taskbar icons from Notification Area

  1. Press Windows + R to open the Run dialog box. Now, copy and paste the following command in the given search box and press Enter or click OK:
    Shell:::{05d7b0f4-2121-4eff-bf6b-ed3f69b894d9}shell-ok windows-11-hide-taskbar
  2. As the Notification Area Icons window opens, uncheck the box beside the option Always show all icons and notifications on the taskbar, then click OK.

You can manually select which icons and notifications should appear on the taskbar from the same Notification Area Icons window itself.

  1. Click the drop-down alongside the Show icon and notification option beside each app.drop-down windows-11-hide-taskbar
  2. Then, select the option Hide icon and notifications to hide icons and notifications of the particular app.hide-icon windows-11-hide-taskbar

If you are looking for further OS personalization, we recommend that you use one of the best apps for customizing your Windows 11 PC.

Why isn’t my taskbar auto-hiding?

Many Windows 11 users have been complaining about the taskbar auto-hiding feature not working on their system. Well, the auto hide Taskbar feature doesn’t come enabled by default.

If you haven’t turned it on yet since your last OS update, it simply won’t work. Apart from that, the preview builds of this operating system came with a few bugs causing such temporary problems when the feature is already enabled.

In that case, you can’t do anything but wait for Microsoft to release the next update.

However, if you’re using the latest version of Windows 11 OS, do not hesitate to turn on the auto-hide feature by following the below-mentioned process.

For more tips on customizing your taskbar, check out our guide on how to set up two rows on the Windows 11 taskbar for a better workflow.

Can I permanently hide the taskbar?

Microsoft does not allow you to hide the taskbar on any Windows OS permanently and Windows 11 is no exception.

However, you can make the Windows 11 taskbar less visible on your system by turning it transparent. Not only that, but it is also possible to show or remove the Notification area icons on the taskbar.

Microsoft always values user experience and takes measurable actions as per user feedback. The recent cumulative updates already allow you to shift the start menu to the left as it was in other Windows versions.

Even so, you still have to pin the taskbar mandatorily at the bottom of your screen. Hopefully, the generic taskbar issues will not be there as we get a stable version of Windows 11.

FAQ

Can I hide the taskbar in tablet mode?

Yes, in tablet mode, the taskbar automatically hides when not in use. You can enable this by going to Taskbar settings and adjusting tablet settings.

Can I hide the taskbar on multiple monitors?

Yes. In Taskbar settings, scroll to Multiple displays and disable Show my taskbar on all displays to hide it on secondary monitors.

Why won’t my taskbar auto-hide?

This usually happens when background apps trigger notifications. Dismiss all notifications or restart Windows Explorer from Task Manager.

How do I hide the taskbar temporarily while gaming or watching videos?

Press F11 for full-screen mode or enable auto-hide in taskbar settings for an uninterrupted viewing or gaming experience.

Can you auto-hide Windows 11 taskbar now? Tell us in the comment section below.

Xbox classics revisited vol.5: classic action-roleplaying

Welcome to Xbox Classics Revisited. In this new series we aim to take a look back at the previous three generations—the original Xbox, the Xbox 360, and the Xbox One—of Xbox games. These mini-retrospectives serve as a tribute to some of the best gaming that Xbox has given us over the last 20+ years.

For those who were lucky enough to have been there for all of it, read on and savor the nostalgia. For those Xbox fans too young to remember Maude Flanders or Pepsi Twist: get ready to meet your Xbox gaming backlog.

Star Wars: Knights of the Old Republic (Xbox)

July, 2003 (LucasArts)

This roleplaying classic took the gaming world by storm with its storytelling and novel light/dark alignment mechanic. This feature allowed for more player freedom in shaping their part in the story, and lent them more ownership of whichever ending they received.

Knights of the Old Republic swept the lion’s share of Game of the Year awards the year it released, including those from IGN, PC Gamer, Official Xbox Magazine, and G4. It stands as one of the greatest RPGs of its era, not to mention one of the greatest games on the original Xbox and one of the best Star Wars games ever.

A forthcoming remake of Knights of the Old Republic was announced in September 2021.

The Elder Scrolls IV: Oblivion (Xbox 360)

March, 2006 (Bethesda Softworks/2K Games)

The fourth installment of The Elder Scrolls was a surefire hit when it was unleashed on the gaming public in 2006. Building upon the massively open-world greatness of its predecessor, Morrowind, Oblivion delivered everything gamers were hoping for with deep character development, almost boundless, open-ended questing, and (mostly) high-end production values for the time. For instance, the game’s voice acting was delivered by the like of Sir Patrick Stewart, Lynda Carter, Terence Stamp, and Sean Bean. Simply put, composer Jeremy Soul’s musical score for Oblivion is the stuff of legend.

Oblivion has been called an “unforgettable masterpiece,” and while it may be dated by today’s standards, you owe it to yourself to give it a chance if you missed it.

The Witcher 3: Wild Hunt (Xbox One)

May, 2015 (CD Prokekt)

Starring one of the baddest video game (and fantasy book series) protagonists out there in Geralt of Rivia, The Witcher 3: Wild Hunt is another fine example of an open world action-RPG that manages to also implement a compelling story. The game has garnered widespread critical acclaim and won many accolades since its 2015 release. One prominent publication even named it as the top game of its generation. It is also one of the best-selling games ever, with over 40 million copies shipped. With all that said, it is safe to say Wild Hunt is a modern classic in pretty much any estimation.

Like the other Witcher games, Wild Hunt is based on a fantasized iteration of Slovakian mythology, from the mind of Polish author Andrzej Sapkowski. However, the game is not directly based on the books and Sapkowski’s involvement was minimal. Being a more open-ended game, the game’s ending(s) are determined by the choices the player makes throughout the course of the narrative.

Wrap up

We hope you’ve enjoyed these mini-retrospectives. What are some of your favorite classic Xbox, Xbox 360 and Xbox One games? Are any of them on this list? Let us know about your favorite Xbox gaming experiences in the comments below. And thanks for reading.

Featured image via gamesradar.com. 

What to play on Game Pass: action-heavy games

Don’t know what to play on Game Pass? With literally hundreds of games available on the service across just about every genre imaginable, it can be quite a task just figuring out where to start. Lucky for you, we’ve got you covered with these Game Pass recommendations for those with a figurative axe to grind. The following are some of best action-oriented games on Xbox Game Pass right now. So hone those weapons and get ready to release some pent-up aggression—these beat ‘em ups, brawlers and hack-and-slash titles will keep you entertained for weeks to come.

Dante’s Inferno

Based on the immensely influential classic poem, Dante’s Inferno takes you on an epic quest of vengeance and redemption through the Nine Circles of Hell. 

Watch the trailer


For honor: Marching Fire Edition 

Includes the For Honor® base game, plus Marching Fire™ Expansion. Enter the chaos of war and choose your faction: Knight, Viking, Samurai, or Wu Lin Warrior. 

Watch the trailer


Midnight Fight Express

A former member of the criminal underworld is lured back into “the life” by a mysterious drone claiming they have until sunrise to prevent a citywide criminal takeover together. 

Watch the trailer


Naraka: Bladepoint

NARAKA: BLADEPOINT is an up to 60-player mythical action combat experience inspired by the legends of the Far East.

Watch the trailer


Ninja Gaiden Master Collection

3 high speed ninja action titles are now available in one package! Ninja Gaiden Sigma, Ninja Gaiden Sigma 2, and Ninja Gaiden Sigma 3: Razor’s Edge. 

Watch the trailer


Also check out on Game Pass:

  • Ninja Gaiden Sigma
  • Ninja Gaiden Sigma 2
  • Ninja Gaiden Sigma 3: Razor’s Edge

Ryse: Son of Rome Legendary Edition

Amidst the chaos of the late Roman Empire, become soldier Marius Titus and embark on a perilous campaign to avenge the death of your family and defend the honor of Rome. 

Watch the trailer


Trek to Yomi

As a vow to his dying Master, the young swordsman Hiroki is sworn to protect his town and the people he loves against all threats. 

Watch the trailer


The Yakuza Remastered Collection

Celebrate Kazuma Kiryu’s saga with the beautifully remastered Yakuza 3, 4, and 5. Complete The Dragon of Dojima’s journey. 

Watch the trailer


Also check out on Game Pass:

  • Yakuza 3 rm 
  • Yakuza 4 rm 
  • Yakuza 5 rm  
  • Yakuza 6 rm 
  • Yakuza 0 
  • Yakuza: like a dragon 
  • Yakuza kiwami 
  • Yakuza kiwami 2 

Wrap up

What are your thoughts on our list? Are there any of your personal favorites on here? Let us know about it in the comments. If you don’t already have a Game Pass subscription, you can sign up here. Learn more over on the Xbox Game Pass FAQ page. And don’t forget to check out our other “What to play on Game Pass” posts for other Game Pass recommendations.

Featured image via eurogamer.net. 

5 Ways to Fix Hulu When It’s Not Accepting Your Payment

Hulu is a subscription-based streaming service that offers live and on-demand TV and movies. Also, Hulu has several subscription plans and prices that users can choose from to enjoy the streaming service whenever they want.

However, users complain about Hulu not accepting payment whenever they want to subscribe or make updates to their subscriptions.

Furthermore, there are many difficulties users can encounter while making payments on Hulu. Some problems are being unable to type in card details, errors after submitting payment information, and no option to update the payment method.

However, many factors can be responsible for your difficulty with Hulu not accepting payment. It can be an issue with your card, browser issues, or Hulu servers issues.

Fortunately, the problem is not grievous and can easily be fixed by following the guidelines in this article.

Readers may be interested in how to fix common Hulu connection errors in a short time.

Why does Hulu not accept my card?

  • Your card is not a US-issued card: Hulu’s payment policy requires that users pay with a credit or debit card issued by a financial institution to a bank based in the US. So, your card might not be accepted because it doesn’t comply with the payment policy about cards on Hulu.
  • Your card is government-issued: Users are not allowed to pay on Hulu through government-issued cards. It doesn’t comply with payment options stipulated in Hulu’s payment policy.
  • Invalid card detail: Users may run into problems with their payment if the card details they input on Hulu doesn’t match the one on their cards. Invalid security code can cause issues because it doesn’t tally with the security code on the card. Also, inputting an invalid expiry date can cause issues. Hence, Hulu won’t be able to process your payment.

Quick Tip:

This issue may be due to incompatible browser settings. A fast and easy solution is to switch to another browser, so our best recommendation Opera.

Opera saves all your card details for later payments and makes sure that they are safely stored. On top, it has a free built-in VPN, an ad blocker and tracked blocker to maintain the best level of security.

Opera

No more ads, annoying pop-ups and notifications when browsing with Opera.
Try it now Download

How do I fix my Hulu payment?

1. Use an acceptable credit or debit card

Hulu requires and accepts only credit or debit cards issued in the US. So, it is advisable to pay with a card that complies with this requirement to avoid difficulties with payment.

Cards like American Express, Visa, Mastercard, and Discover are accepted for payment. Also, users should note that cards for payment must have at least a $1 balance.

It is required to allow Hulu to process a temporary authorization hold to confirm your payment information.

2. Switch to another mode of payment

Users can switch to other modes of payment as digital payments and gift cards. Hulu accepts PayPal as a payment option.

Likewise, users can purchase Hulu gift cards at select retail outlets.

If you’ve switched payment methods but Hulu still declines your card or PayPal, see this guide on My Family Cinema not accepting payment for additional troubleshooting steps that apply to many streaming services.

3. Clear Browser Cache and Cookies

  1. Launch the Chrome browser and click More.
  2. Select More Tools and Clear browsing data.
  3. Select the Advanced option.
  4. Choose the time range you want to clear and check the boxes for Cookies and other site data and Cached images and files.
  5. Click Clear data.

Exit the browser and relaunch it when the process is complete.

4. Use another browser

Users may encounter payment issues on Hulu due to browser issues. Hence, recommend you switch to another browser to check if the payment issue persists.

We recommend you check our article for the best browsers for flawless Hulu Live TV streaming to enjoy the best viewing experience.

5. Contact Hulu support

If you are still unable to fix your Hulu payment issues after trying the above fixes, contact Hulu support for help.

However, users can log in to their accounts to use the Hulu update payment option if they want to change payment information.

Also, users can change the billing due date by requesting for Hulu payment extension.

How do I manually pay Hulu?

  1. Launch your browser and log in to your Hulu account.
  2. Navigate to the Payment method and click on Update payment.
  3. Add a preferred payment method and select Save Changes.

What happens if I don’t pay Hulu on time?

Hulu’s late payment can lead to your subscription being placed on hold. It blocks your access to the paid benefits.

In conclusion, you can read through our articles on how to fix some issues you may encounter on Hulu. Some are how to fix buffering, freezing, and crashing issues on Hulu and how to fix Hulu error code 2 (975) in a few steps.

If this article has been helpful to you, please leave your suggestions and questions in the comments section. We’d like to hear from you.

How to Install & Use Two Microsoft Teams in Windows 11

Installing an app twice on Windows can be challenging if you don’t know the right way to go about it. However, some software won’t allow it based on their build. Other apps won’t even install once on your PC.

Users can run two versions of apps like Microsoft Teams simultaneously on a computer without difficulties. Hence, we’ll discuss how users can go around Windows 11 two Teams apps downloading and installing.

Keep in mind that downloading a second Teams app on a computer can only work if you download the school or work version of Microsoft Teams. Nonetheless, some users still complain about not being able to install and run two Microsoft Teams on startup.

How do I install multiple Teams on Windows 11?

Download Microsoft Teams for Work or School

  1. Launch a browser on your computer. Then go to the Microsoft Teams download website and select Download for desktop.desktop windows-11-2-teams-apps
  2. Go to Teams For Work or School and click on the Download Teams button on the page.
  3. After the file download is complete, double-click on the .exe file and follow the prompts to install the Microsoft Teams app (for school or work).
  4. Fill in your credentials to the new account and sign in.credentials-teams windows-11-2-teams-apps

The difference between this version and the preinstalled version is that one is for a personal account and the other for work or school accounts. Likewise, users can’t access two Teams’ accounts simultaneously.

Nonetheless, users can have two Microsoft Teams apps in the startup. Hence, you can use your account on the preinstalled Teams and your school/work account on the downloaded Teams app.

Can you have 2 Teams apps?

Having two Microsoft Teams apps on your computer is possible without having issues running them. Sometimes, you need a different Teams version for specific functions so you can check the version history and rollback an update.

Moreover, the Microsoft Teams app for Windows 11 is preinstalled, through which users can access their accounts. So, you need to download another version: Microsoft Teams for Work or School.

However, the productivity and responsiveness of this process may differ in older versions of Windows compared to Windows 10/11. It is because Microsoft Teams comes preinstalled on Windows 11.

For those who are focused on efficiency and productivity, we recommend that you take a look at our post on the 6 best Windows 11 apps to boost performance.

Does Microsoft Teams work with Windows 11?

Microsoft Teams is most responsive on Windows 11 because it is the default app that Microsoft promotes for communication on Windows 11. Hence, it works with Windows 11.

Wondering how to set default apps on your PC? Your search ends here; check out our article linked in order to find out.

Furthermore, users can download and install another Microsoft Teams app on Windows 11 besides the default app. This allows them to use Microsoft Teams with an account other than their main account.

Can I log into 2 Teams accounts at the same time?

Microsoft Teams doesn’t support users login into two Teams accounts concurrently. Hence, using the multi-account sign-in can’t work on the Microsoft Teams app.

Fortunately, there is a way around accessing two Teams’ accounts simultaneously. Users can do this using the Microsoft Teams web app on their browsers. This way, users can log into one account on their browsers and also be able to access the other account on the native app.

We recommend that users check our article on what to do if Microsoft Teams stops working in Chrome and get it working again.

Also, some users complain about other issues they encounter with the Microsoft Teams app on their computers. One of these issues is Microsoft Teams not downloading files. Hence, users can read through our article on ways to fix Microsoft Teams if it’s not downloading files.

In conclusion, users who are just trying out Microsoft Team can check out our guide on creating and managing a team. And don’t leave aside the fact that you can take advantage of Microsoft Teams Together Mode, which is currently available to premium members and subscribers.

We hope that you managed to install Teams without too many issues. Be sure to update Microsoft Teams and keep it up to date to avoid issues and get access to the latest features.

Kindly leave your suggestions and feedback below in the comments section. We’d like to hear from you.

Fix Error 0xc00007b: Application Was Unable to Start Correctly

You must have just gotten the Windows 11 error 0xc00007b – the application was unable to start correctly. We will be helping you resolve it in this article.

Many errors that were a part of the earlier iterations have made their way to Windows 11. One such is the 0xc00007b error in Windows 11, which is encountered when you try to launch an application.

And honestly, the accompanying error message doesn’t offer much on the underlying cause or the course of action for effective troubleshooting.

Therefore, we decided to dedicate this article to list the most effective fixes for this particular error, help you eliminate it, and use your favorite applications without any issues.

What causes error 0xc00007b on Windows 11?

It may be hard to pinpoint the exact cause, but here are a few common triggers:

  • An outdated OS – Generally, you can expect more system errors when your OS is not up to date.
  • Privilege levels – Some apps can only be run by an admin, so if you are not an admin, they will naturally not launch.
  • Corrupted app data – If this is the case, your only solution will be to uninstall and reinstall a clean copy of the app.

A few related errors are Witcher 3 0xc00007b and origin 0xc00007b on Windows 11, but the exact solutions should work regardless of the application.

While the above is not an exhaustive list, it is an excellent place to start. So let’s now show you some of the best solutions.

How do I fix error code 0xc000007b in Windows 11?

1. Restart the computer

  1. Navigate to the desktop, press Alt + F4 to launch the Shut Down Windows box and select Restart from the dropdown menu.
    the application was unable to start correctly 0xc00007b windows 11
  2. Now, click OK to restart the computer.
    the application was unable to start correctly 0xc00007b windows 11

Most errors in Windows 11, including 0xc00007b, can be fixed by a simple restart if there’s a trivial issue behind it. When you restart the computer, the OS is rebooted, and any problems are automatically removed.

2. Update Windows 11

  1. Press Windows + I to launch the Settings app, and select Windows Update from the tabs listed in the navigation pane on the left.Windows Update to fix 0xc00007b error windows 11
  2. Now, click on the Check for updates button on the right.Check for updates
  3. If any available updates are listed after the scan, click on Download & install to get them on your computer.Download & install

If on Windows 11 you got error code 0xc00007b – the application was unable to start correctly, updating the OS will come in handy.

3. Use a dedicated third-party tool

Rather than following a manual approach to eliminate the 0xc00007b error in Windows 11, you can use reliable third-party repair tools.

These tools are able to scan your system, identify the broken or missing file, and quickly replace it with a fresh one.

4. Launch application with administrative privilege

  1. Navigate to the folder where the problematic application’s launcher (.exe) is stored, right-click on it, and select Properties from the context menu.Propertie
  2. Now, navigate to the Compatibility tab from the top.
  3. Select the checkbox for Run this program as an administrator and click on OK.Run this program as an administrator to fix 0xc00007b error windows 11

If on Windows 11 you got error code 0xc00007b – the application was unable to start correctly, launching it with administrative privileges will come in handy.

5. Install .Net Framework

  1. Press Windows + R to launch the Run command, enter optionalfeatures in the text field, and hit Enter.
    the application was unable to start correctly 0xc00007b windows 11
  2. Now, tick the checkbox for .NET Framework 3.5 and click on OK at the bottom to enable the feature..NET Framework 3.5 to fix 0xc00007b error windows 11
  3. Wait for Windows to install the necessary files, and once done, verify the state of the error.
    the application was unable to start correctly 0xc00007b windows 11

6. Reinstall Microsoft C++ Redistributables

  1. Press Windows + R to launch the Run menu.
  2. Enter appwiz.cpl in the text field, and then hit Enter or click OK.
  3. Now, locate the Microsoft C++ Redistributable entry, select it, and click Uninstall.Uninstall Microsoft C++ Redistributables to fix 0xc00007b error windows 11
  4. Click Yes in the confirmation prompt that pops up.
    the application was unable to start correctly 0xc00007b windows 11
  5. Next, click Yes in the UAC (User Account Control) prompt that appears.
    the application was unable to start correctly 0xc00007b windows 11
  6. Similarly, uninstall the other Microsoft C++ Redistributable entries here.
  7. Once done, go to the official Microsoft website and download all the Microsoft C++ Redistributables you uninstalled earlier.Download Microsoft C++ Redistributables
  8. After downloading these, double-click on the file to launch the installer and follow the on-screen instructions to complete the installation process.Install to fix 0xc00007b error windows 11

The C++ Redistributable installs the critical files required by applications to function, and if these are outdated or corrupt, you are likely to encounter a 0xc00007b error in Windows 11.

7. Reinstall the problematic app(s)

  1. Press Windows + I to launch Settings, and select the Apps tab from the navigation pane on the left.Apps tab
  2. Click on Apps & features on the right.Apps & features to fix 0xc00007b error windows 11
  3. Locate the problematic app, click on the ellipsis next to it, and select Uninstall from the menu.
    the application was unable to start correctly 0xc00007b windows 11
  4. Again, click Uninstall in the confirmation prompt.
    Launch application with administrative privilege
  5. Restart the computer, and then reinstall the app as you did before.

If nothing else works, the problem likely lies with the program itself, and the best solution here is to uninstall the app and reinstall it.

But, make sure that you go with this method as a last resort since users have recorded a lot of success without having to uninstall apps.

How do you fix application errors?

For many application errors, these solutions mentioned will still come in handy. But, as a tip, start by restarting the device; it is an easy way to eliminate minor problems.

You may also try any of the following:

  • Update the OS
  • Reinstall a clean copy of the app
  • Reinstall essential packages in Windows like Microsoft C++ Redistributables

While these are general fixes, in most situations, they will work.

That’s it! If you encountered the error 0xc00007b – the application was unable to start correctly on Windows 11, you should now have successfully resolved it.

Also, find out what to do if the applications won’t open in Windows 11. This error can be caused due to several reasons, and troubleshooting it is a tad more complex, so you will have to follow a systematic approach.

This isn’t the only application error, and we wrote about The application was unable to start correctly 0xc00005 error in one of our previous guides.

Please tell us which fix worked for you in the comments section below.

3 Quick Ways to Fix Error Code 4200 on Paramount Plus

Relaxing after a hard day’s work is of the upmost importance, and many choose to just lay back and binge their favorite show on either Netflix, HBO Max, or Paramount Plus.

If you are not already using Paramount Plus, you can find out how to get the app for free, so you can start choosing your favorite shows.

However, if your Paramount Plus app fails to connect and it shows you error code 4200, something clearly needs to be done.

And, lucky for you, you came to the right place to get this ridiculous issue fixed and continue the latest movies and series.

What is error code 4200 Paramount Plus?

Since this service has been released, some users have complained about buffering issues while streaming movies on the platform.

We’re going to go on a limb and say that, if you are reading this, you’re most likely having similar issues with Paramount Plus.

Various playback issues have been reported, including buffering, not loading, showing errors, or seeing a blank screen, and a lot of users are looking for solutions.

Remember to also always check your internet connection, as this too can be a factor for many error codes found in this app.

So, without any further ado, it’s time for some good old-fashioned Paramount Plus troubleshooting. This will only take a couple of minutes, by the way.

Quick Tip

You may also take into consideration switching to a new browser. Opera One is a much faster and safer browser because of its great features. It has a free built-in VPN that secures your Internet traffic and doesn’t log any of your activity.

It also has an Ad blocker feature that improves your browsing speeds by blocking and detecting intrusive ads when you open a new tab.

Opera One

Enjoy a faster browsing experience with Opera’s trustworthy features.

How do I fix Paramount Plus error code 4200?

1. Relog into your Paramount Plus account

  1. Click on the profile button in the top right corner.paramount plus profile
  2. Click on Sign out.sign out
  3. Press the Sign in with Paramount+ button.login paramount plus

2. Update your browser

  1. Click on the Customize and Control Google Chrome button.chrome menu
  2. Click on Help, then About Google Chrome.about google chrome
  3. The browser will automatically update to the latest version.update google chrome

3. Clear Cache and Cookies

  1. Click on the Customize and Control Google Chrome button.chrome menu
  2. Click on History, then select History again.paramount
  3. Click on Clear browsing data.clear browsing data
  4. Select Cached images and files, Cookies and other site data, then select All time, then press the Clear data button.clear data

This is pretty much what you are looking at in terms of troubleshooting your Paramount Plus if it keeps saying error 4200.

And, in the future, if you are experiencing any trouble with Paramount Plus error codes, be sure to stop by for the solutions.

Has this guide been helpful to you? Share your opinions with us in the comments section below.

5 Ways to Fix Invoke this Utility Running in Elevated Mode

The You have to invoke this utility running in elevated mode and ensure the disk is unlocked error message is not new to experienced Windows users who regularly use the Command Prompt.

This is how one user on the Microsoft Answers forum described the problem:

I have received this message:

“Access denied as you do not have sufficient privileges or the disk may be locked by another process You have to invoke this utility running in elevated mode and make sure the disk is unlocked”. How can I resolve this problem. Thank you

If you’ve encountered (or you’re encountering) this error and are in the dark about how to fix it, this post will show you practical solutions.

What does You have to invoke this utility running in elevated mode and make sure the disk is unlocked mean?

The functionality of the Command Prompt changes significantly depending on whether it is run typically or with administrator privileges; thus, specific commands won’t be able to run with regular user privileges.

It explains why you need to launch the CMD program in elevated mode, which translates to having administrator capabilities on the system. The error message can also appear as You do not have sufficient privileges to run system configuration.

As you can see, a clear solution is to run Command Prompt as an administrator so that you can gain the privileges needed.

This is because doing so would mean that a guest user on your computer would be able to make significant changes to your computer, which is not recommended.

How do I fix the You have to invoke this utility running in elevated mode error?

1. Run Command Prompt as an administrator

  1. Press Windows, enter cmd, and select the Run as administrator option under the result on the right side.cmd-run-admin 0x80070002 windows update
  2. After that, try running the desired commands and check if the problem still appears.

2. Repair your PC’s registry

  1. Shut down your computer and boot into Safe Mode. Even though the guide linked is for Windows 11, the steps are similar in Windows 10.
  2. Once your PC has booted, press the Windows key, then enter cmd and open the Command Prompt result as an administrator by selecting this option under the result on the right side.cmd-run-admin 0x80070002 windows update
  3. Next, enter the following command and press Enter: sfc /scannow scannow 0x80070002 windows update
  4. Wait for the scanning process to complete, and then restart your computer. All corrupted files will be replaced on reboot. The You have to invoke this utility running in elevated mode and make sure the disk is unlocked error will be solved.

3. Run the CHKDSK command

  1. Press the Windows keyboard button, enter cmd and choose the Run as administrator option from the right panel.cmd-run-admin 0x80070002 windows update
  2. When Command Prompt opens, enter the Command below, but replace the X with your drive (it’s usually C), then hit the Enter key: chkdsk /f X:chkdsk-f-x you have to invoke this utility running in elevated mode and make sure the disk is unlocked
  3. Follow the prompts and then restart your computer.

4. Take ownership of the drive partition

Tip icon Editor’s tip
This solution can cause problems if you take ownership of the system drive, so be extra cautious while performing these steps.
  1. Press Windows + E to open File Explorer, then go to This Pc.this-pc turn off indexing windows 10
  2. Next, right-click the target drive partition and select Properties.c-prop turn off indexing windows 10
  3. Go to the Security tab, then click Advanced.security-advanced you have to invoke this utility running in elevated mode and make sure the disk is unlocked
  4. Click the Change link beside the Owner label.change-link you have to invoke this utility running in elevated mode and make sure the disk is unlocked
  5. Type your user account under the Enter the object name to select pane, then click OK.enter-ok you have to invoke this utility running in elevated mode and make sure the disk is unlocked
  6. Go back to the Security tab. Click the Edit button. Select your user, set the permissions to Full control, then click OK to apply the changes made.user-full-ok you have to invoke this utility running in elevated mode and make sure the disk is unlocked

5. Change the current user to an administrator account

  1. Press Windows + I, then go to Accounts.accounts settings app User profile won't load
  2. Go to Family and other users. Then, select the account owner name, and click Change account type.
  3. Under Account type, select Administrator and click OK.
    account type administrator You have to invoke this utility running in elevated mode and make sure the disk is unlocked
  4. Afterward, sign in with the new administrator account.

How do I fix CHKDSK Access Denied?

To fix access denied issues, you will need to execute Command Prompt as an administrator, just as we did previously. To do this, stick to our instructions, which are laid out above and are pretty easy to understand.

Check out our guide on what to do if you can’t run Command Prompt as admin, so you can also fix this issue.

Alternatively, we have prepared an article on how to fix Access denied in Windows 10/11 that you can visit for more potential solutions.

We hope you resolved the You have to invoke this utility running in elevated mode and make sure the disk is unlocked error message. If so, you can share your experience with us by commenting below.

4 Ways to Fix the WOF Driver Encountered a Corruption

The error The WOF driver encountered a corruption in the compressed file’s Resource Table occurs when the user tries to run the DISM (Deployment Image Servicing and Management) to fix system issues. 

However, due to corrupted system drivers or Windows 10 system files, the tool may fail to repair the system resulting in this error message.

Fortunately, you can fix this error by following a few troubleshooting steps. First, follow the steps in the article below to resolve DISM error 4448 the WOF driver encountered corruption on your Windows 10 PC.

What is a WOF driver?

WOF driver stands for Windows Overlay Filter driver. This is a critical system file located in the directory that contains regular physical files and overlays of virtual files.

It is essential for the smooth functioning of the Windows operating system. The WOF driver boots up by the operating system Boot Loader, and if it fails to start, its failure is recorded in the Event Log.

How do I fix the WOF driver encountered a corruption error?

1. Run Windows Update troubleshooter 

  1. Press Windows + I to open Settings.
  2. Click on Update & Security.
  3. Open the Troubleshoot tab from the left pane and select Additional troubleshooters.
  4. Scroll down and click on Windows Update.
  5. Click the Run the Troubleshooter button. 
  6. The troubleshooter will scan the system for system issues preventing Windows update installation.
  7. Follow on-screen instructions and apply any recommended fixes and restart your computer.

After the troubleshooter is finished, check if the DISM error 4448, the WOF driver encountered a corruption message is still there.

2. Perform an in-place Windows 10 upgrade 

  1. Download the Media Creation Tool.
    WOF driver encountered a corruption
  2. Run the tool to get Windows 10 setup screen. Then, click Accept to agree to the terms.
  3. Click Upgrade this PC now and click Next.
  4. Media Creation Tool will download the latest version of Windows 10 available. Once downloaded, click Next.
  5. Follow-on screen instructions to complete the in-place upgrade process. 

An in-place upgrade is an alternative to clean installing Windows without deleting your files or removing the applications. 

However, if the In-Place upgrade via Media Creation Tool fails, try to use Microsoft Update Assistant to install the latest updates for your PC.

3. Run Microsoft Update Assistant 

  1. Go to Microsoft Download center for Windows 10 update assistant.
  2. Click the Update Now button to download the update assistant for the latest Windows 10 version available.
  3. Run the Windows10Upgrade9252.exe tool. Click Yes when prompted by UAC.
  4. Click the Update Now button in the Update to the latest version of the Windows 10 screen.
  5. The tool will perform a system check to identify system compatibility. Click Next.
  6. Windows will start downloading the update installation file. Make sure to disable the metered connection to download the update.

Once the update is ready to install, follow the on-screen instructions. Your PC will restart to install the updates. After the restart, check if the WOF driver encountered a corruption in the compressed file’s Resource Table error is resolved.

Once installed, run the System File Checker tool and DISM to see if the error is resolved. Here’s how to do it.

Run System File Checker tool

  1. Open the Command Prompt as Administrator. 
  2. In the Command Prompt window, type the following and hit Enter:

    sfc /scannow
  3. The system File Check tool will scan your system for corrupt or missing system files and apply any fixes as required. Wait for the tool to complete and show a 100% completed message.

Run DISM Cleanup-image tool

  1. Open Command Prompt as administrator.
  2. In the Command Prompt, enter the following command and hit Enter: DISM /Online /Cleanup-image /RestoreHealth
  3. Wait for the tool to complete the scan and apply any fixes if required. Once the process is complete, reboot the computer and check for any improvements.

If this seems complicated you can use automated repair software to do those checkups for you. These tools will check the integrity of your system files and repair any corruption. They also detect registry errors and missing DLL files and restore them in the correct format.

4. Check for HDD failure 

  1. Open File Explorer and click on This PC.
  2. Right-click on your HDD and choose Properties.
  3. Open the Tool tab in the Properties window. Then, click the Check button under Error checking.
  4. Click Scan drive. Windows will scan the driver and show any issues if found.

If a fresh install fails to resolve the WOF driver’s corruption in the compressed file’s Resource Table error in Windows 10, check your HDD for hardware failure.

Bad disk sectors or mechanical driver failure may fail to boot your system normally. Use Windows’s built-in error checking option to check your hard disk for errors.

The DISM error 4448 the WOF driver encountered a corruption triggered due to a corrupted system file and can be fixed with an in-place system upgrade. Additionally, check for hard disk issues that may prevent your PC from booting successfully.

What is error 4448?

The error 4448 will show you an error message The WOF driver encountered a corruption in the compressed file’s Resource Table.

This error usually occurs when the Windows Update services aren’t running correctly. To fix this problem, you can follow the solutions below.

  1. Reset your Windows 10 PC instead of a fresh installation.
  2. Run the Windows Update troubleshooter.
  3. Use SFC Scan or DISM tool.
  4. Install a fresh copy of the operating system.

Let us know in the comments below which one of the above solutions helped you resolve the WOF driver encountered a corruption error.

Oculus Quest 2 vs Lenovo Explorer: Which One To Buy?

Virtual reality has exploded in popularity in the past few years. We’re finally at a point where the technology is good enough to make some awe-inspiring stuff.

We have games that genuinely make you feel like you’re in the game. For example, the VR version of Resident Evil 7 is so good at simulating what it would be like to be hunted down by zombies and monsters. It’s terrifying.

The fantastic VR games out there wouldn’t be possible without some impressive hardware. As a result, many companies are launching their virtual reality headsets so they can hop on the hype train before it leaves the station.

You have the likes of Valve Corporation with their Index device and Sony with the PlayStation VR2. In addition, apple is throwing its hat into the ring as the company develops its own VR headset.

But two of the best VR headsets on the market today are the Oculus Quest from Meta and Lenovo Explorer. It’s a shame that hardly anyone talks about the latter because it is a great device.

It’s arguably one of the best examples of a Windows Mixed Reality headset. Windows Mixed Reality is Microsoft’s take on augmented reality for those who don’t know. Instead of taking you into a virtual world, it enhances real life with virtual displays floating around you.

But of course, the Explorer headset does the typical virtual reality worlds people expect from these types of devices. That said, we’re getting ahead of ourselves. So let’s dial back and see what computer hardware is needed.

Does Oculus Quest 2 require a good computer?

No, you do not need a good computer to run the Oculus Quest 2 or 1. You don’t need a computer at all. The Quest 2 headset has its user interface, which you can use to access a game library.

However, it would be best if you used a smartphone to set up an Oculus Quest 2 or Oculus Quest 1. But once you connect the headset, you no longer need to use a phone. It’wonderful.

  • 1832×1920 per-eye resolution with 120 Hz
  • Standalone VR with its own specs
  • Hand and partial finger tracking
  • Integrated stereo speakers
  • Nobody tracking
  • Battery lasts up to 3 hours with 2.5 hours of charge time

As for the Lenovo Explorer, a common question is whether it is worth purchasing. The answer to that question depends on what you’re looking for in a virtual reality headset.

That said, it’s still a suitable device well worth purchasing. Many people have applauded its display resolution, multi-device interaction, and comfortable design. Hopefully, after you read the following two sections, you’ll be able to answer that question yourself.

  • 1440×1440 per-eye resolution with 90Hz
  • Works on SteamVR or Windows Mixed Reality
  • Weights less than the Oculus Quest 2
  • Must be connected to a PC
  • Discontinued

What are the differences between Oculus Quest 2 and Lenovo Explorer?

There are a lot of differences between the two, but let’s start with Windows Mixed Reality because this is the leading platform for the Lenovo Explorer.

Windows Mixed Reality combines a virtual reality world with augmented reality aspects. It works because the device scans the environment and incorporates everything it scans into a virtual world.

Say you’re playing in your bedroom. The Explorer will show you a digital world analogous to the room that you’re in. It’s a melding between the two, and it’s pretty interesting.

The Quest 2 headset doesn’t do any of this. It’s a purely virtual reality experience. You play in a digital world that is already pre-made. So the question is, which one is better? Honestly, neither far exceeds the other, but you can say the Quest 2 is a little better.

The problem is that the Explorer headset doesn’t have anything unique with Windows Mixed RealiAs a result, it. It feels like a neat trick, whereas Quest 2 focuses its processing power on creating fun and interactable worlds.

Also, the Explorer requires a PC to be used. Therefore, you must launch the Windows Mixed Reality app on your PC whenever you want to play on Explorer.

The Quest 2 headset doesn’t do this. Once you’ve set up the device with your phone, you can play games on the headset without launching anything. This is a much better and more efficient way to do things. Pick up the Quest 2, turn it on, put it on your head, and you’re done.

When it comes to games, the two are very similar. Both support SteamVR, so any games from that platform compatible with virtual reality are playable again. Again, however, Meta’s device comes out on top.

Quest 2 also has a library of exclusive titles not seen anywhere else. You have RockBand VR to live out your rockstar fantasy, Vader Immortal, where you journey with Darth Vader through the fiery planet Mustafar and the fantastic shooter Chronos.

Hardware and features

Regarding the hardware side of things, the Quest 2 has the Explorer beat there too. There are a lot of differences between the two, but we’ll focus on the more essential parts.

Like the display resolution. The Quest 2 displays resolutions of 1832×1920 pixels per eye at a 120 Hz refresh rate. The Explorer maxes out at 2880×1440 resolution per eye at a 90 Hz refresh rate.

This means that while animations on the Explorer headset might not be as soon as the Quest 2, they look better graphically.

When it comes to audio, the Quest 2 headset has more options. You can connect a pair of headphones to the device via a 3.5mm audio jack or listen from the integrated speakers. Unfortunately, the Lenovo Explorer only has the headphone jack.

A pair of headphones is a better hearing experience than speakers, but it’s nice to have the option. Going down the list of features, the Quest 2 headset supports Wi-Fi streaming to a virtual desktop via a Wi-Fi 6 connection.

You can connect it to other devices via Bluetooth 5.0. The Quest 2 had 6 GB of RAM and a storage capacity of 128 GB, with a 256 GB option available. The Lenovo Explorer has none of this.

Since the Explorer headset has to be connected to a computer first to play games, it has no storage space. So all the games are on the computer. It can connect to a display via HDMI, but that’s it for connectivity.

The Lenovo Explorer is lighter than the Quest 2 headset. The former is 399 grams (less than a pound), while the latter is 503 grams (about 1.1 pounds). This helps with long-term play as your neck will feel as strained.

Which VR headset is the most powerful?

Unfortunately, we can’t answer this question because there’s no information about what kind of chipset is on the Lenovo Explorer. Looking through Lenovo’s product page, retailers, and online reviews, we couldn’t find a single instance of the processor on Explorer.

It has one because it’s a virtual reality device, but that information is not publicly shared. It could be Windows Mixed Reality, but that’s not a processor or graphics card. That’s just the platform.

For the Quest 2 headset, we know that it’s the Qualcomm Snapdragon XR2 chipset. This hardware allows for high-quality resolution on the headset and provides the high refresh rates mentioned earlier.

And thanks to the Qualcomm FastConnect 6800 subsystem on the chipset, Wi-Fi download and upload speeds are pretty fast on the Quest 2, although some have experienced a significant slowdown in the past.

But ultimately, until people get the specs, we don’t know which is faster.

Our conclusion

Get the Quest 2 headset. It’s much better. The only consistent metric to compare the performance between the two headsets is the platform: Windows Mixed Reality vs. Oculus Home.

Windows Mixed Reality is a neat concept, but I don’t think Microsoft has developed it enough to harness its full potential. It can be something extraordinary, but it doesn’t that the tech giant has any interest in developing it further.

Microsoft seems more interested in the HoloLens than anything else. The Quest 2 is a solid machine and well deserving of its popularity among virtual reality fans. It’s been consistently meeting player expectations, and because of that, users eagerly await what Meta has in store.

Meta has been working on its virtual reality, a follow-up to Quest 2. Unfortunately, it doesn’t have a name yet other than its codename of Project Cambria. The company has been working on it since October 2021. We’re eagerly awaiting its launch.

Also, good luck with buying the Lenovo Explorer. According to the official product page, the headset has been discontinued. So you can’t even buy it from Lenovo anymore. Instead, you might have to buy it second-hand from someone else.

The Quest 2 headset will run you $399 for the 128GB model and $479 for the 256GB model on Amazon.

Feel free to comment below if you have any questions regarding the above processes. Also, do not hesitate to comment about guides you’d like to see or information about any other app on whichever platform.

Posted in VR

Oculus Quest Not Loading Anything: How to Get it Working

You can go through this article to fix the Oculus Quest without loading anything error. You will find the most effective solutions along with helpful information.

The Meta’s Oculus Quest has gained popularity due to its smooth performance, availability, and affordability. But, it also may bring a nightmare to your VR experience when facing critical problems.

We already have featured solutions for some errors, including VR videos not working, YouTube VR not working, Oculus Quest charging problem, etc. But, this article is about a new type of error.

Sometimes, you may notice that Oculus Quest cannot load anything at all literally. You can keep trying repeatedly, but it won’t respond and only show you a message like the following:

Unable to load. Please try again later.

Sometimes, you will not get any messages even after the Oculus Quest is not loading games, stores, profiles, or anything. But, there is hope. You can fix this problem by following some easy methods.

Why is my Oculus not loading any games?

It’s very tough to give you a precise answer why Oculus is not loading any games. But, after doing some research, we have found some possible reasons. These are:

  • A software bug, either with the game or the Oculus system firmware
  • Memory issues
  • Too much temporary data or corrupted cache
  • Outdated version of software or app
  • The improper connection between PC and Oculus Quest (For PC contents only).
  • PC has some issues.

If you can overcome these reasons, you will be able to solve any not loading issues on Oculus Quest. For details, see the next section of this post.

How do I fix the Oculus Quest not loading?

1. Restart Oculus Quest

oculus-quest-power-options-restart-power-off

In most cases, a simple restart can save your day and fix Oculus Quest not loading problem. However, this problem can appear due to temporarily cached dates or memory issues.

So, when you restart the VR headset, it clears everything. Hence, you can play games or load apps again.

2. Re-Install the problematic apps or games

2.1 Uninstall app or game

  1. Go to Quick Settings.going quick settings oq
  2. Go to Settings.going settings oq
  3. Next, go to Storage.going storage on oq settings
  4. Click on the Uninstall/Delete button to remove the problematic app or game from Oculus Quest.uninstalling youtube vr oq
  5. Click on Uninstall.uninstalling app oq

2.2 Install the app/game again

  1. Open the Store.going store oq
  2. Find and install the app.YouTube VR app

Re-install every apps and game you cannot load. However, If Oculus Quest 2 Store is not loading on your device, you can skip this method and try other ones.

3. Update the software

  1. Open Oculus Quest Settings, as shown before.
  2. Go to Software Update.going software update oq
  3. Install any available update.
  4. Restart the device if necessary.

Some users have reported that they have been encountering Oculus Quest not loading problems after installing an update. This method applies to them too. Maybe this was a known bug that has been fixed with another update.

4. Connect appropriately with the PC

This method is for you if you are trying to load games from your PC and cannot do it on Oculus Quest. First, make sure you have connected your VR headset to your PC using a quality cable. Cheap cable with low bandwidth often can give you an unresponsive experience.

Your PC must have the recommended system requirements for resource-hungry content, especially GPU power. Otherwise, nothing will help to fix Oculus Quest not loading issue.

If necessary, learn how to fix Oculus not working on Windows 11.

5. Factory reset

  1. Switch off your Oculus device.
  2. Press the Power + Volume- buttons until you see the boot menu.OQ buttons
  3. Select Factory Reset from there.
    boot device oculus factory reset

After the factory reset, the problem should go away. However, if it still shows the same error, you should try to connect your device to a different WiFi network. Alternatively, you can also use a VPN, like Private Internet Access, to access your preferred network.

Some users also have found changing their Oculus account helpful. Unfortunately, changing accounts is only possible after resetting the device.

Also, check in the down detector if the Oculus service is down or not. If you find that it is down, then you can eliminate the Oculus Quest 2 not loading issue when the service is back.

Why is my Oculus saying Unable to load Please try again later?

The reasons mentioned earlier are also applicable to this problem. In addition, if your device is connected to a problematic WiFi network, that can be another reason.

Else, if Facebook’s Oculus service is down for some reason, it also can be an indirect reason.

Whatever causes this problem, the steps mentioned above will always work.

This article has featured the most effective methods to solve Oculus Quest without loading error. If you know of other better ways, feel free to let us know in the comment box.

How to Setup Auto Reply Mail Flow Rule in Office 365

Are you trying to set up mail flow rules for external email messages in Office 365? They work in a similar way to the Inbox rules that are currently available in Outlook.

You can use these mail flow rules to look for specific conditions on messages that pass through your organization. However, the main difference is that mail flow rules take action on messages while they’re still in transit, and never after a message is delivered to the mailbox.

Overall, the flexibility to implement many types of messaging policies is too good to refuse. All messages that flow through your organization could be evaluated against the enabled mail flow rules in your organization.

So, keep on reading the below steps and learn how to master them.

How can I set up mail flow rules in Office 365?

    Mail flow rules can be easily set up via the Exchange Admin Center. From there, you can create a new rule to your liking by giving it a name and configuring its conditions and actions.

  1. 1. Navigate to Exchange Admin Center and sign-in using your credentials.

    sign in to exchange admin center
  2. 2. Go to Mail flow > Rules.

  3. 3. Now, click on Create a new rule… .

  4. 4. You now have multiple options:

    • Click the Add + icon and select a template in order to create a rule from a template.
    • To copy a rule, select it. Then, select the Copy icon.
    • To create a new rule from scratch, click the Add + icon. Next, select Create a new rule.
  5. 5. In the New rule dialog box, give a name to the rule.

  6. 6. Then, select the conditions and actions for this rule:

    • In Apply this rule if…, choose a condition from the list of available conditions.
    • In Do the following…, select the action you want the rule to take on messages matching the criteria from the list of available actions.
    • Under Audit this rule with severity level, also select a severity level for the rule.
    • Set the mode for the rule: Enforce, Test with Policy Tips, or Test without Policy Tips.
  7. 7. Click More options in the bottom left corner if you want to add more conditions or actions, or if you want to specify exceptions.

    more options setup mail flow rule office 365
  8. 8. Finally, click Save and you’re done.

Note: It can take up to 30 minutes and more for the new rule to be applied to email.

To make sure that you have successfully created a new mail flow rule, run the following command on Exchange Online PowerShell: Get-TransportRule “Mark messages from the Internet to Sales DG”.

With that said, here’s how you set up mail flow rules for external email messages in Office 365. If you still need our help, contact us anytime by using the comments area below.

Meta Quest 2 VR Videos Not Working: 5 Ways to Fix It

If VR videos are not working on your Oculus Quest device, don’t worry. This article has the solutions to get rid of this problem.

How do I fix my oculus quest if it’s not playing any VR videos?

1. Restart the Oculus Quest headset

The restart is the first thing to fix VR videos not working on Oculus Quest. If your device is having a problem playing 360 or VR videos for fundamentalbasic internal reasons, a simple restart can fix this.

However, if the problem is something else, follow the other methods.

2. Re-install the app

2.1 Uninstall the problematic app

  1. Go to Quick Settings, as shown in the screenshot.going quick settings oq
  2. Navigate to Settings.going settings oq
  3. Go to Storage.going storage on oq settings
  4. Next, click on the Uninstall icon to remove or delete the app from Oculus Quest.uninstalling youtube vr oq
  5. Click on Uninstall in the prompt window.uninstalling app oq

2.2 Install again

  1. Go to the Store.going store oq
  2. Find and install the app.YouTube VR app

This method is applicable if you face Oculus Quest VR video playback issues on any video player or streaming app like YouTube VR. But, if it is on browsers or you face the playback problem everywhere, follow the next ones.

3. Change tracking frequency

  1. Go to Oculus Quest settings like before.
  2. Go to System.
  3. Navigate to Headset tracking.going headset tracking settings oq
  4. Change tracking frequency to something other than the default one.changing tracking frequency oculus quest

Now, check if it has fixed the VR video playback issues or not. Sometimes, VR videos may play as a flat one due to tracking problems. For this type of situation, this method is ideal.

4. Update Quest

  1. Go to Oculus Quest Settings, as shown before.
  2. Navigate to Software Update.going software update oq
  3. Install any available update and restart if necessary.

5. Factory reset

  1. Power off your Oculus device.
  2. Press and hold the Power Button + Volume- Button together until you see the boot menu.
  3. Select Factory Reset from there.
    boot device oculus factory reset

After factory reset, you should no longer encounter VR videos not working issues on Oculus Quest. However, if you still get the error, that is another frustrating experience.

Some users have reported that they have been facing this issue after updating an app or browser, or system software. In this case, you can try an alternative software and app for a similar experience.

If you are unable to play VR videos on the Oculus browser, you can try on an alternative one.

In another article, we have shown how you can fix YouTube VR not working on Oculus Quest. Unfortunately, this device’s VR video playback issues are similar to that.

The good thing is that you can solve this issue if you take the proper steps. Here, this article has featured the methods to solve it. But, before that, let’s get some additional information.

If interested, you can also learn how to fix the Oculus Quest 2 charging problem.

Else, other browsers also work well on this platform. You can learn about the best Oculus browser alternatives if you want.

In this article, you have learned how to fix Oculus Quest’s problem: VR videos are not working. If you have a better suggestion, let us know using the comment box.

How to Update Drivers with IObit Driver Booster

You might encounter a lot of issues caused by outdated drivers in Windows 10. A solution to find them and update them is IObit Driver Booster.

Driver Booster has been updated to take full support of Windows 10, so now you can safely use it to find outdated drivers.

Developed by IObit, Driver Booster brings compatibility with the Windows 10 operating system, along with some other new features.

Detect old drivers with a simple click, and update all of them at once just as easily thanks to this awesome program. Compared with other driver updaters, IObit Driver Booster will also improve your PC’s performance.

Use Drive Booster to detect and update Windows drivers for even more hardware components., since it included more hardware in its driver list.

The late version also brings enhanced driver downloading and updating speed. Here are some other improvements released by IObit:

  • Driver backup and shut down & restart options
  • Fixes for bugs found in older releases
  • WHQL test identification process for all supported drivers
  • The user feedback function has been improved

How can I download Driver Booster?

If you’re looking for driver updater software, then Driver Booster is one of the best applications for this task, since it’s incredibly simple to use.

It’s worth mentioning that the application can be used to remove driver software, so if you’re having issues with drivers, this software can easily remove them.

As for the download, the software is available from the official website and there are two versions available. To find out more, be sure to keep on reading.

What is IObit Driver Booster?

IObit Driver Booster is software that will scan your computer’s hardware and its drivers for the newest versions available.

The software will take into account system compatibility, and its driver list is constantly updated with the latest products from manufacturers as soon as they are released

IObit is intuitive, easy to download, install, and use. You have the option to go into more complex details if you want, or you can just use the straightforward interface.

As stated before, a driver updater will make sure there are no issues related to compatibility emerge, and your device performs as it should.

IObit Driver Booster comes in 2 versions. One that’s completely free and does some basic things, and the feature-rich pro version.

IObit Driver Booster Free has the following features:

  • Automatically identifies outdated drivers
  • Downloads and updates outdated drivers with one click

IObit Driver Booster Pro has even more options:

  • Automatically identifies outdated drivers
  • Download and update outdated drivers with one click
  • Supports more hardware devices
  • Has priority to update outdated drivers
  • Driver backup for a safe restore
  • Driver download and update up to 300% faster
  • Hardware optimization
  • Automatic updates
  • Free technical support

Here’s a comparison with the Pro version of Driver Booster, in case you might need any of these options.

As you can see, the free version will identify and update old drivers, but that’s about it. If you’re only looking for that, we recommend using the free version.

The Pro version, however, supports more hardware devices and backups your data in case of emergency. You will also be able to download the drivers at a faster rate.

Additionally, the pro version will update your drivers automatically, optimize your device and provide free 24/7 technical support on demand.

How can I update my drivers using Driver Booster?

    The latest version of IObit Driver Booster will protect your PC from hardware failures, and conflicts, and solves system crash problems caused by outdated driver problems.

    After you finish installing the tool, you can straightaway start updating all your Windows 10 drivers in a few clicks.

  1. 1. Download and install IObit Driver Booster.

  2. 2. Open the tool.

  3. 3. In the main menu of the program, press Scan.

    iobit driver booster press scan
  4. 4. Wait for the software to finish scanning.

  5. 5. After it has finished, it will show all available driver updates.

  6. 6. Press Update Now, or select Update on the driver you wish to update.

    update drivers with iobit driver booster
  7. 7. All that’s left to do is to wait for your device to finish the process.

One thing that you need to be careful about, and which IObit was kind enough to point out, is that the free Driver Booster program is supported by advertising, so you will see ads with offers and sales here and there.

This means it may offer to install third-party programs such as a toolbar or even change your default search engine.

So, be careful when installing. Other than that, the free version of Driver Booster will do wonders for your Windows Operating System.

Keep your Windows 10 clean and optimized. Here’s a great list of the best disk space analyzers for you to check out and choose according to your needs.

We hope this article gave you a better idea of what Driver Booster is and how it works. Feel free to give us feedback regarding the subject in the comment section below.

How to Pin Settings to the Start Menu in Windows 10

As we go on with the latest updates of Windows 10, we keep on finding interesting new features. In this post, we’re going to talk about one of them, which is the option to add your favorite Settings to the Start menu.

So if you want to find out how you can pin certain Settings pages located in the Settings application to the Start menu of Windows 10, follow this tutorial and the steps listed below.

Apart from pining Settings to the Start menu, in this tutorial, you will also find out how to unpin the selected Settings options.

How can I pin Settings to the Start menu in Windows 10?

1. Use the Pin to Start menu

  1. 1. Left-click or tap on the Start button on the taskbar.

  2. 2. From the Start menu, click on the Settings feature situated on the upper left side.

    pin settings to start menu windows 10
  3. 3. Now you should have the Settings window in front of you.

  4. 4. Click the setting you wish to pin to the Start Menu of Windows 10.

  5. 5. Now in the upper side of the Settings window, next to the search dialog box, you will have a Pin icon.

  6. 6. Just left-click or tap on the Pin icon and the setting you selected will be pinned to the Start menu.

  7. 7. You can perform the same steps for all the settings you wish to pin to the Start menu of Windows 10.

    pin to start windows 10
  8. The latest Windows 10 OS versions also allow you to pin your favorite Settings page to the Start menu by simply right-clicking in the respective Settings page.

    Once you’ve done that, a quick Pin to Start menu will appear that lets you set the respective Settings page to the Start menu.

After you pin a certain setting to the Start menu you will also notice that the Pin icon will change, thus notifying you that the setting is already pinned.

2. Create a desktop shortcut

If you want to quickly access certain Settings pages, you can also create a Settings shortcut on the desktop as an alternative to pinning Settings to the Start menu.

All you need to do is right-click on your desktop, select New, then Shortcut. A new window will pop up allowing you to select the page that you want to add to the shortcut.

create settings page shortcut windows 10

Here is the list of the main Settings commands in Windows 10:

Settings app pageCommand
Account infoms-settings:privacy-accountinfo
Airplane modems-settings:network-airplanemode
Backgroundsms-settings:personalization-background
Battery Saverms-settings:batterysaver
Battery Saver Settingsms-settings:batterysaver-settings
Battery usems-settings:batterysaver-usagedetails
Bluetoothms-settings:bluetooth
Calendarms-settings:privacy-calendar
Camerams-settings:privacy-webcam
Cellularms-settings:network-cellular
Closed Captioningms-settings:easeofaccess-closedcaptioning
Colorsms-settings:colors
Colorsms-settings:personalization-colors
Connected devicesms-settings:connecteddevices
Contactsms-settings:privacy-contacts
Data Usagems-settings:datausage
Date and Timems-settings:dateandtime
Dial-upms-settings:network-dialup
DirectAccessms-settings:network-directaccess
Displayms-settings:display
Displayms-settings:screenrotation
Ethernetms-settings:network-ethernet
Family & other usersms-settings:otherusers
Feedbackms-settings:privacy-feedback
For developersms-settings:developers
High Contrastms-settings:easeofaccess-highcontrast
Keyboardms-settings:easeofaccess-keyboard
Locationms-settings:privacy-location
Lockscreenms-settings:lockscreen
Magnifierms-settings:easeofaccess-magnifier
Manage Wi-Fi Settingsms-settings:network-wifisettings
Messagingms-settings:privacy-messaging
Microphonems-settings:privacy-microphone
Mobile hotspotms-settings:network-mobilehotspot
Motionms-settings:privacy-motion
Mousems-settings:easeofaccess-mouse
Mouse & touchpadms-settings:mousetouchpad
Narratorms-settings:easeofaccess-narrator
Notifications & actionsms-settings:notifications
Offline mapsms-settings:maps
Optional featuresms-settings:optionalfeatures
Other Devicesms-settings:privacy-customdevices
Other Options (Ease of Access)ms-settings:easeofaccess-otheroptions
Personalizationms-settings:personalization
Power & sleepms-settings:powersleep
Privacyms-settings:privacy
Proximityms-settings:proximity
Proxyms-settings:network-proxy
Radiosms-settings:privacy-radios
Region & languagems-settings:regionlanguage
Sign-in optionsms-settings:signinoptions
Speechms-settings:speech
Speech, inking, & typingms-settings:privacy-speechtyping
Startms-settings:personalization-start
Storage Sensems-settings:storagesense
Tablet modems-settings://tabletmode/
Themesms-settings:themes
Typingms-settings:typing
VPNms-settings:network-vpn
Wi-Fims-settings:network-wifi
Windows Updatems-settings:windowsupdate
Work accessms-settings:workplace

How can I unpin the Settings from the Start menu?

  1. Open the Start menu.
  2. Find the Setting you wish to unpin from the list.
  3. Right-click or hold tap on that setting.
  4. From the menu that appears left click or tap on the Unpin from Start feature.
    Note: Another quick way to unpin a setting is by going again to the Settings window as you did before, clicking on the setting you wish to unpin, and left-clicking or tapping on the icon presented next to the search dialog box.

Finally, you are all done, you now know exactly how to pin your Modern settings situated in the Settings app to the Start menu of your Windows 10.

If you have any questions regarding these steps, feel free to reach for the comments section below.

Mouse Driver for Windows 11: Download, Install & Update

Today we’ll explain everything you need to know about downloading, installing and updating your mouse drivers in Windows 11.

While PCs typically recognize mouses and install drivers automatically, it may not always go that way. If that’s the case, you’ll have to manually setup your drrvers, or your mouse will not work.

If that’s the situation you’re in, just follow the steps below.

How do I download & install mouse drivers in Windows 11?

1. From the manufacturer’s website

  1. Visit your mouse manufacturer’s driver download page.
  2. Choose your Mouse model.
  3. Select Windows 11 from the Operating System list.
  4. Now, download the mouse driver.downloading razer viper mouse driver
  5. Open the installer file and install it on your computer.
  6. Restart your PC.

Here, we have shown the steps for Razer mouse devices. However, these steps are similar for every other brand. If you want to install Microsoft mouse and keyboard drivers, you can visit this official driver download center.

2. Using Device Manager

  1. Open the Start Menu, type Device Manager, and hit Enter.opening device manager windows 11
  2. Now, find the mouse device with a yellow exclamation mark.
  3. Right-click on it and choose Update driver.
  4. Follow the on-screen steps.

3. Use a driver updater

If you want to get your mouse driver quickly on Windows 11, there is no better alternative than using third-party tools.

4. Windows Update

  1. Press Win + I to open Settings.
  2. Go to Windows Update and click on Check for the update.check for updates windows 11 settings
  3. Click on Download/Install if there are any updates available.clicking install Windows Update

Some drivers may be missing initially after installing Windows 11. But, with the Windows update, Microsoft will install all the missing mouse drivers except the unsupported ones.

How can I update my mouse driver?

1. Use Device Manager

  1. Open Device Manager like before.
  2. Find the mouse device you want to update.
  3. Right-click on the device and choose Update driver.updating mouse driver windows device manager
  4. Click on Search automatically for drivers.
  5. Go ahead and finish the update process.

2. Use a tool like Fortect Driver Updater

  1. Open the driver updater like Fortect Driver Updater.
  2. Click on Scan.
  3. Next, click on Update Drivers.
  4. Restart your computer if it is necessary to finish the process.

To update the mouse driver on Windows 11 and 10, you can try both methods. But, the second one is more convenient.

You should always keep your drivers up to date. It is because outdated drivers can cause a lot of problems on Windows, including the blue screen of death.

How do I reinstall my mouse driver in Windows 11?

1. Uninstall the driver

  1. Open the Device Manager like before.
  2. Find the mouse device, right-click on it and choose Uninstall device.uninstalling mouse driver device manager
  3. Check Attempt to remove the driver for this device and click on Uninstall.

Make sure you have a tracking pad or alternative supported mouse device. It is because if the mouse driver you have uninstalled is the only mouse you have and you don’t have another alternative input device, it will be a problem.

You may not be able to control your OS conveniently with a keyboard only. Windows 11 has built-in mouse drivers. If it works for your device, there will be no issue.

2. Uninstall any mouse software

  1. Press Win + I to open Windows 11 Settings.
  2. Go to Apps and click on Apps & features.going apps & features Microsoft windows 11
  3. Look for the mouse software.
  4. Click on three vertical dots next to it and choose Uninstall.uninstalling mouse software windows 11 settings
  5. Follow any on-screen steps to finish the process.
  6. Please do it for any other mouse-related software or driver.

3. Install the driver again

  1. Open the Device Manager like before.
  2. Click on the Scan for hardware changes button as shown in the screenshot.clicking scan for hardware changes device manager

Now, you should be able to find the missing device and install it.

Alternatively, you can manually download the driver or use an automated software, as shown above.

How do I find my mouse driver in Windows 11?

To find a mouse driver on Windows 11, you should visit the mouse manufacturer’s website and look for any compatible drivers.

Alternatively, from Windows Device Manager, it is also possible to search for such drivers. However, it may fail in many cases.

Overall, the best option is to rely on any decent third-party tool that can find any drivers automatically without any problem.

Summary

This article has explained the ways to update Windows 11 mouse driver. If you have any opinions or concerns, feel free to write them down in the comments box.

Updating drivers can help if your mouse is stuck in corner, so don’t hesitate to try it.

How to Sync OneDrive to External Hard Drive

We are now in an age where storing things on your hard drive is no longer feasible. Cloud storage services are becoming better, faster, cheaper, and more secure, and more and more people are rushing toward them.

However, when you run out of cloud storage, you need a backup option. Read on to discover how to sync your OneDrive to an external HDD.

Can I back up OneDrive data to an external drive?

Many people have been wondering whether or not you can back up your OneDrive with an external hard drive to free up space.

The short answer would be yes, and this step-by-step guide will show just how you can do this.

How can I sync my OneDrive to my external hard drive?

    You can sync OneDrive with an external HDD very easily via the app’s built-in settings. As long as the hard drive is connected to your PC or laptop, OneDrive will treat it as if it is just a regular part of your local storage.

  1. 1. Right-click the OneDrive icon in the System Tray.

    sync one drive to external hard drive
  2. 2. Press on Settings.

    go on settings to sync onedrive to external hard drive
  3. 3. Select Account.

  4. 4. Choose Unlink this PC.

    unlink this account onedrive settings
  5. 5. Navigate to your original OneDrive sync folder. You can select the entire external hard drive for OneDrive to sync, just as long as your OneDrive subscription can handle all the necessary storage space.

  6. 6. Cut and paste the folder to your external hard drive.

  7. 7. Go back to the OneDrive set-up window.

  8. 8. Sign in with your account.

  9. 9. Select Change location to set your sync folder to be your external hard drive.

    change location on onedrive

By following these steps, OneDrive should now be able to sync with that folder from within your external hard drive.

Syncing goes as with any other folder, although you should disable OneDrive when you first disconnect the external hard drive. This is because OneDrive will treat the missing files and folders as deleted, which may result in error messages.

What does OneDrive do?

One of the most extensive cloud storage services is Microsoft’s OneDrive, which is highly safe and reliable.

Microsoft’s cloud storage service is a massive convenience not only because it maintains your files synced across devices and backed up onto the internet but also because there’s so much more about OneDrive.

Nevertheless, depending on how much you store in it, your OneDrive folder could take up a lot of space. Of course, not everyone is such a big fan of cloud storage and still relies on the good old external hard drive as the go-to backup software.

In case you want to keep the files on cloud, you can copy files from the OneDrive account to another, read this guide to learn how.

Did you find this article helpful? Let us know what you think in the comments section below.

How to Import Old Emails into Gmail on Windows 10

Gmail is one of the most popular webmail services, and if you use any of Google’s services, you probably have a Gmail account.

One problem when creating a new email account can be your old messages. If you have important emails that you want to keep, today we will show you how to import old emails into Gmail on Windows 10.

Quick Tip:

If importing your emails from one client to another is your priority, you might as well go for Mailbird since that is its specialty.

Besides being fast, modern, and reliable, Mailbird’s main selling point is its ability to automatically import the entire contents of an email account, allowing you to have them all under one UI.

Mailbird

Mailbird

If you need to import your Gmail emails into an email client, might as well do it using the based, namely Mailbird.
Free trial Visit website

How can I import old mail to Gmail?

1. Use the Import mail and contacts feature

    Gmail comes with a built-in option that allows you to import old emails from different email providers. It is called the Import mail and contacts feature and can be accessed via Gmail’s settings.

    By using this feature, old emails from your old account will be forwarded to your new Gmail account automatically.

  1. 1. Open Gmail and log in to your new account.

  2. 2. Click the Gear icon in the top right corner and choose Settings.

    settings gmail
  3. 3. Go to the Accounts and Import tab.

  4. 4. Click on the Import mail and contacts link.

    import mail and contacts to gmail
  5. 5. Now sign in to your old email account by following the instructions on the screen.

    sign in to another account gmail
  6. 6. If you did everything properly, you’ll see the Start import option as soon as you log in. Click on it to start the process.

Keep in mind that you should inform all your contacts that you won’t be using the old email address anymore.


2. Import old emails and forward all new ones to your Gmail account

  1. Open your old Gmail account.
  2. Click the Gear icon and choose Settings.
  3. Navigate to Forwarding and POP/IMAP tab.
  4. In the POP Download section select Enable POP for all mail.
  5. Set When messages are accessed with POP to keep Gmail’s copy in the inbox.
    import-old-mail-into-gmail-import-1
  6. Click Save Changes.

If you create a new Gmail account and you want to receive email messages that are sent to your old email account, you need to change a few settings.

This method works for both Gmail and third-party email accounts, but keep in mind that some email providers might not support this feature.

2.1. How to configure a Gmail account?

After changing these settings on your old account, you need to configure your new Gmail account. To do that, follow these steps:

  1. Log in to your new Gmail account.
  2. Click the Gear icon in the top right corner and choose Settings from the menu.
  3. In the Check mail from other accounts section click on Add a mail account you own.
  4. Enter the address of the old Gmail account and click Next.
  5. Optional: If you use Gmail with your work or school account you might have to change POP Server to mail.domain.com and select Port 110.
  6. Optional: You have several options available that you can use.
  7. The first option is to Leave a copy of the retrieved message on the server.
    • You can keep this option unchecked because your other account controls this setting.
    • The next option is Always use a secure connection (SSL) when retrieving email.
    • This option will encrypt your connection thus making your email messages safe from malicious users.
    • Label incoming messages feature is designed to help you distinguish messages received on your old account.
    • Lastly, Archive incoming messages option will move all email messages received on your old account to the archive.
    • By enabling this option you won’t see any emails from your old account in your Inbox, so we recommend turning this feature off.
      import-old-mail-into-gmail-import-2
  8. After you’re done, click Add Account button and your old account should be now connected with your new account.
  9. After adding your old account, you’ll get a message asking whether you want to use your old email address or the new one to respond to emails from your old account.

As we already mentioned, this feature also works with third-party email providers, but you need to enable POP on your old email account to use it. After that, try to add your old email account using the above steps.

If you cannot add it, you might want to contact your old email provider and ask them if POP is supported on your account.

2.2. Can I stop receiving emails from my old account?

You can stop receiving new emails from your old account by changing a few settings. To do that, follow these steps:

  1. Open your new Gmail account.
  2. Click the Gear icon in the top right corner and choose Settings.
  3. Navigate to the Accounts and Imports tab.
  4. In the Check mail from other accounts section, locate your old email account and click Delete next to it.

Remember that deleting your old email account will only prevent new emails from being forwarded to your new account. Any old emails that you receive will remain on your account.

As you can see, this method is a bit complicated, but it allows you to use your old email account alongside your new Gmail account without any problems.

This is extremely useful if you want to keep using your old email account or if you didn’t notify all your contacts about the change of your email address.

2.3. How to import contacts from an old email account?

One flaw of this method is that it doesn’t allow you to import contacts from your old email account, but you can easily transfer contacts manually to Gmail. If you want to import contacts from another account, you need to do the following:

  1. Open Google Contacts.
  2. In the menu on the left click More and choose Import.
    import-old-mail-into-gmail-import-contact-1
  3. Select the desired method.
    import-old-mail-into-gmail-import-contact-2
  4. Log in to your old email and click Agree.
  5. After the contacts are imported, click OK.

To import contacts from another Gmail account, you need to first export your contacts as a CSV file. To do that, follow these steps:

  1. Make sure that you’re signed in to your old Gmail account.
  2. Open old Google Contacts and choose More > Export.
    import-old-mail-into-gmail-export-1
  3. Select All contacts and choose Google CSV format.
    import-old-mail-into-gmail-export-2
  4. Select the save location for the .csv file and save it on your PC.
  5. Log out of your old Gmail account.

Now you need to import those contacts to your new Gmail account. To do that follow these steps:

  1. Log in to your new Gmail account and open old Google Contacts.
  2. Choose More > Import.
    import-old-mail-into-gmail-more-import-1
  3. Now click on Choose File button and locate the .csv file that you created.
    import-old-mail-into-gmail-more-import-2
  4. Select the file and click the Import button.

2.4. Import old emails from the desktop client

If you use a desktop email client, such as Thunderbird, for your emails, you should know that all your emails are saved locally on your PC. If your email provider doesn’t offer webmail service, you can still import old emails from your desktop client.

You need to enable IMAP for your Gmail account and add Gmail to your email client. After doing that, simply select the emails that you want in your old email account and drag them to Gmail’s Inbox folder in your email client.

Remember that this process can take a while, depending on the number of email messages, so you must be patient. Be sure to unarchive emails, especially if you’re looking for old messages.

Elsewhere, if you use both Outlook and Gmail, you’ll find the GWSMO tool helpful in integrating both platforms.

We hope you found this guide helpful, but if you’re using AOL, there are simpler ways to use AOL Mail forwarding, and we have a guide dedicated to it, so don’t miss it.

One of the biggest problems when switching to a new email account is your emails, but as you can see, you can easily import old messages into Gmail by using any of our solutions.

How to Connect to Virtual Desktop

Azure Virtual Desktop (formerly known as Windows Virtual Desktop or WVD) is a new virtual desktop infrastructure service from Microsoft.

WVD lets organizations access Windows 7 or Windows 10 desktops hosted on remote servers, namely via Microsoft’s Azure servers.

While Microsoft already has a similar service, known as the Remote Desktop Services (RDS) virtual desktop, Azure Virtual Desktop is better.

Some of you may already have access to the WVD, and given its extreme usefulness, knowing how to set it up and connect to it is a must-know.

What do I need before I can set up Windows Virtual Desktop?

  • An Azure subscription
  • Download and install the Windows Virtual Desktop cmdlets for Windows PowerShell on a device.
  • Configure your virtual network in Azure in such a way that new VMs have your Domain Controller or Azure AD Domain Services (Azure AD DS) set as the DNS
  • Ensure that all Azure resources are in the same region
  • If you require seamless Single Sign-On,  you will need AD FS or users will have to authenticate when gaining access to the Virtual Machine

Once all prerequisites have been met, you may begin setting up the Windows Virtual Desktop.

How can I set up a Virtual Desktop?

1. Allow WVD to access Azure AD

Allow WVD to access Azure AD
  1. Navigate to the Windows Virtual Desktop Consent Page.
  2. Add your Azure AD tenant ID, also referred to as the Directory ID, and hit Submit.
  3. You can find your Azure AD ID by visiting the Microsoft Azure Portal.
  4. Change Consent Option to Client App and enter the same Azure AD tenant ID to the field for AAD Tenant GUID or Name.
  5. Click Submit.

2. Assign the TenantCreator role to a user account

  1. Log in to the Microsoft Azure Portal.
  2. Go to Azure Active Directory from the left menu.
  3. Click on Enterprise applications.
  4. Search and select Windows Virtual Desktop.
  5. Select Users and groups.
  6. Select Add user, select Users and groups.
  7. Choose the user you want to turn into a WVD tenant and hit Select, followed by Assign.

3. Create a WVD tenant

You will require two IDs:

  • Your Azure AD tenant ID.
  • Your Azure subscription ID.

You will then need to create a PowerShell script where you will need these two IDs.

4. Activate your first Virtual Desktop host pool

  • Configure basic settings
  • Configure the virtual machines
    • This includes specifying whether they are personal or pooled
  • Configure VM settings
  • Enter authentication details
  • Create the host pool

After the configurations are made, you will have your first WVD environment.

How do I connect to Virtual Desktop?

Once you are done creating your Windows Virtual Desktop host pool, you can download the client for Windows, or use the HTML5 client.

    1. Connect to Virtual Desktop using the client

    The first method of connecting to the Azure Virtual Desktop implies using the client for Windows. What you need to do is download the Windows Remote Desktop client and subscribe to the feed.

  1. 1. Download the latest Windows Remote Desktop client.

  2. 2. Open the Windows Desktop client.

  3. 3. Select Subscribe on the main page.

    Connect to the Windows Virtual Desktop downloadable Client
  4. 4. Sign in with your user account when prompted.

  5. 5. Once you’ve subscribed, you will find the virtualized apps and desktops in the Start menu.

2. Connect to the Windows Virtual Desktop with the HTML5 client

  1. Launch any browser that supports HTML5.
    • This works in both normal and incognito modes.
  2. Visit the WVD Web App.
  3. Log in using the information to which you assigned a full desktop session.

If you are successful in connecting to a Virtual Desktop using either the desktop or the HTML5 client, you should be able to see something similar to this:

Connect to the Windows Virtual Desktop example

If you have any other questions regarding how to use the Windows Virtual Desktop, let us know in the comments section below.

7 Best Lifetime Antivirus to Protect Your Laptop in 2026

Tired of subscription fees for antivirus software? Lifetime license antivirus tools offer a one-and-done solution to keep your PC secure.

With solid protection against malware and no recurring costs, they’re a smart pick for hassle-free security. Let’s check out the top options below.

What is the best antivirus software with unlimited validity?

TotalAV – Strong scanning features

TotalAV offers one of the most feature-rich lifetime antivirus solutions. It provides extensive malware detection and tools like a VPN, disk cleaner, and browser protection.

The lifetime license gives you access to TotalAV’s Total Security package, which includes additional security features for a more comprehensive defense.

Other astonishing features you can benefit from:

  • Protection against Adware
  • Anti-Ransomware
  • Free up system space with Disk Cleaner
  • Web Shield extension
  • Eliminates viruses, trojans, and malware
TotalAV

TotalAV

Keep your PC safe with TotalAV’s powerful scanning features and lifetime license.
Check price Visit website

Panda Antivirus – Solid detection ratio

Panda Antivirus offers solid protection with a 100% detection ratio, so your PC should remain protected from all threats.

It offers Wi-Fi protection, parental control, identity protection, ransomware protection, file encryption, and password management, built-in VPN.

Some of the key features of this solution:

  • Completely free
  • 100% virus detection ratio
  • Antivirus and firewall
  • Free VPN
Panda Antivirus

Panda Antivirus

Protect your PC with Panda’s 100% virus detection ratio and lifetime free access.
Check price Visit website

Bitdefender Antivirus – Best proved malware defense

Bitdefender Antivirus Free is one of the best free antivirus solutions currently on the market, giving you an antivirus lifetime license.

It also gives you complete activity reports about blocked or fraudulent phishing attempts on your PC. That said, this is the most popular lifetime antivirus software out there.

Let’s see what a few of its key features are:

  • Good antivirus protection
  • Excellent anti-phishing features
  • Easy to install and use
  • Provides timelines of recent activities
Logo Bitdefender Antivirus Free Edition

Bitdefender Free

Protect your PC for life with Bitdefender’s award-winning malware detection.
Free trial Visit website

Avira Antivirus Free – Good browser protection

The Avira Free edition has great features with its on-demand scan and real-time protection. Avira Free user interface offers easy access to information and features.

It offers excellent browser protection, blocking phishing sites and dangerous downloads. The antivirus also includes system scanning for vulnerabilities and missing security patches.

Let’s go through some of its most important features:

  • Excellent in detection and elimination of malware
  • Good anti-phishing and web browser protection features
  • Blocks downloads from suspicious websites
  • Prevents exploit attacks by monitoring software security patches
Avira Antivirus Free

Avira Antivirus Free

Stay safe with Avira’s robust malware defense and enjoy lifetime free protection.
Free Trial Visit Website

Kaspersky Security Cloud – Powerful protecting features

Kaspersky Security Cloud free edition gives the premium power of the antivirus minus a few bonus features available in the paid version.

While the paid version unlocks additional features, the free version is more than enough for personal use, giving you comprehensive defense for life without the need for a subscription.
Key Features:

Let’s see some of its best characteristics:

  • Excellent detecting features
  • Takes only a few minutes to scan
  • Excellent anti-phishing feature
  • Toolbars available for Firefox, Chrome, and Internet Explorer
Kaspersky Standard

Kaspersky

Protect your PC with Kaspersky’s powerful malware detection and lifetime access.
Check price Visit website

AVG AntiVirus Free – Full protection for private data

AVG blocks malicious software and threats from infecting your PC and deletes malware downloads before it is complete.

Upon installing the free antivirus, it opens into the main window with two panels. The Basic protection panel includes icons for web, email protection, and computer protection which are enabled.

Some of the best features of AVG Antivirus Free:

  • Good malware and virus detection
  • Good web browser protection feature
  • Full protection panel for private data and hacker attacks protection
  • E-mail protection included
AVG

AVG

Shield your PC using AVG’s anti malware blocker!
Check price Visit website

Avast Free Antivirus – Free for a lifetime

If you are looking for a free antivirus that offers basic protection and gives many premium products, then Avast Free Antivirus is for you.

It provides solid malware and phishing protection, all without the need for a subscription. The lifetime free version of Avast is a great option for those who want reliable protection with extra features.

Let’s see some of its key features:

  • Excellent detection of malware and viruses
  • Good anti-phishing and Web browser protection features
  • Extra features like Wi-Fi Inspector and password management
  • Premium tools included the network security scanner, the password manager, and a secure browser
Avast

Avast

Unlock advanced protection for your PC with Avast’s lifetime-free antivirus.
Check price Visit website

Did you choose one of the antiviruses above? Do you know any other options? Feel free to comment below.

How to Make a Discord Bot Without Coding

Discord is more than a conventional VOIP chat application, it allows users to group topics into communities and channels, offering an easier way to keep the information straight. 

Initially built for gamers, it has become a generally used platform for any category of users and communities alike.

What are Discord bots?

An important feature that makes the application great, is its bots. Bots are used to automatize some tasks on your Discord server like welcoming new users or adding different types of content.

Bots are a type of computer program, therefore, to create them from the base you would need some coding skills.

But because Discord is such a popular application, free tools were developed to help you add or make a bot without or with minimal coding knowledge.

Bots can help you do everything from automating ordinary tasks to start playing music across your server. In this article, we’ll present the steps for Bots On Discord.

How can I make my own Discord bot without coding?

1. Use a bot that is already created

1. Navigate to the following website: Bots On Discord.

2. Click on the Login button from the upper right side and use your discord account.

press login button on bots on discord

3. Press on the Authorize button.

authorize bots on discord to access discord account

4. Now, once you’re on the profile page, click on Bots on Discord to navigate to the main window.

click bots on discord to navigate to the main window

5. Search for the bot you need in the search bar right below the welcome message.

search for bots in search bar

6. For example, type music, then click on Search.

type music and click search

7. Scroll down, then find the one you need.

8. Once you observe it, click on Add to server.

click add to server on the bot you want

9. Select the server where you wanna add the bot and hit Continue.

select server and click continue

10. Click the Authorize button.

11. Here you have your bot ready to work.

The next thing you need to do is learn the commands and figure out how to customize your bot. You can do this by reading the FAQ links provided in the initial message.

Adding bots from different platforms should work almost the same as here with a few differences. 

2. Use BotGhost

2.1 Make a Discord bot using BotGhost

    BotGhost makes the creation of a brand new Discord bot as easy as it can be. There is no coding knowledge required, all the settings are visual commands and on the go configuration. The app offers both the option to create and add an existing Discord bot.

    In order to program a Discord bot without coding using BotGhost, you have to download the app, create your perfect bot, and then you can add it to your preferred server.

  1. 1. Go to the BotGhost official website.

  2. 2. In the top-right corner of the window, click on Sign up and link your Discord account.

    sign up and link your discord account
  3. 3. Click on the Authorize button.

    click authorize button
  4. 4. Paste your token and hit Submit.

  5. 5. Configure your bot by adding available modules from your dashboard.

    For example, let’s say you want to have it write a welcome message to your new users. To do that, you need to click on the Announcements module, hit the enable button, and configure it.

  6. 6. To add the newly created Discord bot to your server, click on the Invite link you see on the left side panel.

  7. 7. Select the server where you want to add the bot to, click on Authorize and that’s all. The bot will be available to use on the specific server.

2.2 Add an existing bot from Bot Ghost

  1. Click on Bots from the upper menu.
  2. Search for a specific name, use tags, or just scroll the list to find one.
  3. Click on the Invite to Server button, select the server, click Authorize, and there you have a new bot.

It has never been easier for Discord admins to customize servers by using bots, even without any coding skills.

This will add value to channels and communities, and users will also have a great experience.

Don’t hesitate to add awesome features for your users by adding as many Discord bots as you need. Use this guide to do it simply, without having to learn any programming language.

To quickly enhance your Discord server with leveling and automation, check out this guide on adding Arcane Bot to Discord and start improving your community experience in minutes.

5 Quick Ways to Bypass Error 503 First Byte Timeout

There are many variations of the dreaded error 503 that can appear while accessing websites. Users report receiving error 503 first byte timeout when using Fastly websites. Keep reading for 5 quick and easy ways to fix this issue.

Fastly is a content delivery network (CDN) service that provides edge computing services, security, cloud storage, and more for big-name companies. The service is designed to make viewing popular websites and businesses online run seamlessly and quickly.

Read on to find out how to solve error 503 first byte timeout. If you’re receiving HTTP Error 503: service is unavailable, we offer solutions for that as well.

What is error 503 first byte timeout?

Error 503 first a byte timeout error when a server or origin does not respond in time for the first-byte timeout. The first-byte timeout is set to 15 seconds by default, so if the server does not send a response in that time, then the error will occur.

Users mostly encounter this error on websites powered by Fastly, a cloud service platform for many eCommerce sites and companies. Some of these websites include Ticketmaster, PayPal, Github, and more.

How do I fix error 503 first byte timeout?

1. Use a different browser

Not every browser may be compatible with a Fastly site and as a result, may cause the error 503 first byte timeout. Fastly recommends using the latest versions of Google Chrome, Mozilla Firefox, and Apple Safari.

We suggest using Opera One Browser, which also operates with Fastly. Opera One can cache large files for more demanding downloads and optimized speed and performance. The browser also has a built-in VPN, ad-blocker, and AI for top-notch security while browsing.

Opera One

Try using Opera One Browser for a fast and secure browsing experience.

2. Update your browser

  1. Open your browser and access the menu in the top right or left corner then select Settings. Open browser settings.
  2. Click on About.
  3. Select Check for updates if your browser does not automatically check. update your browser to fix error 503 first byte timeout.
  4. Update browser if available.

An outdated browser can lead to a number of issues and errors with any site, including error 503. Ensure that you’re using the latest version of your default browser by checking for any updates.

3. Clear browser data

  1. Open your browser and access the menu in the top right or left corner then select Settings.
  2. Select Privacy & security. go to privacy and security to clear browser data.
  3. Click Clear browsing data.
  4. Ensure all data elements are checked then select Clear data. Clear data to fix error 503 first byte timeout.

If you haven’t cleared your browser data like its cache or history in a while then it may lead to issues. Clear the cache to get rid of any corrupted files and fix error 503 first byte timeout.

This could also fix similar issues like the 503 Backend Fetch Failed Varnish cache server; read this guide to learn the solutions.

4. Extend the first byte timeout

  1. Login to Fastly and go to the Home page. Login Fastly.
  2. Search for your service using ID, name, or configuration then click Edit configuration.
  3. On the Domains page, click on the Origins link.
  4. Locate the host then select Advanced options. click advanced options to change first byte timeout.
  5. Change the value next to First byte timeout in milliseconds then click Update. change first byte timeout to fix error 503.

Changing the first-byte timeout to a longer value will allow the origin or server more time for a response and thus fix error 503 first-byte timeout. If using a shield configuration, then the first-byte timeout should be set to at least 60 seconds.

5. Restart your network

If error 503 persists after trying all of the above solutions, the problem may lie in your network connection. Try switching off all of your network devices and equipment and wait a few minutes, then turn it back on.

Restart network to fix error 503 first byte timeout.

Doing this will help reconfigure the network and will communicate with your devices properly. If you’re having issues with your Windows 10 or 11 being unable to find a network, we offer a guide for that as well.

Hopefully, one of the above solutions helped you fix error 503 first byte timeout. Let us know in the comments which solution worked for you or if you have a suggestion for a different fix.

3 Quick Ways to Free up Space for Windows Updates

A certain amount of free storage space is required for Windows 10’s cumulative patch or feature updates. If there is not enough space, a window will pop up when users check for updates reading Windows needs more space to update.

The message window allows users to update Windows with an external storage flash drive. However, free C: drive space might still be required to update Windows, even with external flash storage.

An error like this, which prevents you from updating the OS, is a significant challenge, considering that you would be losing out on critical security patches in addition to regular feature updates.

So, let’s find out all about the Windows needs more to update error and the solutions to get rid of it.

What does the Windows needs more space to update error mean?

Microsoft recommends users have at least 64 GB of free storage to install Windows 11 and be able to download updates released in the future. There are similar storage recommendations for Windows 10 as well.

Microsoft releases regular updates to introduce features, security patches, and bug fixes. And all these will occupy some space on the computer.

So, if your laptop doesn’t have enough space to update, these can’t be installed, which is what the error indicates. The solution to it is straightforward, free up storage space on the computer!

Let’s find out how you can do that.

How do I fix the Windows needs more space to update error?

1. Check the Cleanup recommendations

  1. Press Windows + I to open the Settings app, and select Storage on the right in the System tab.Storage
  2. Now, click on Cleanup recommendations under Storage management.cleanup recommendations to fix windows needs more space to update
  3. You will now find several categories of files listed here. Choose any one.category
  4. Select the files you want to delete and click the Clean up button.clean up to fix windows needs more space to update

You can similarly clear more storage space on the computer by removing other files recommended by the OS and removing the Windows that need more space to update error.

2. Uninstall software

  1. Press Windows + R to open Run, enter appwiz.cpl in the text field, and click OK to open Program and Features.appwiz.cpl
  2. Choose the program that you want to remove and click on Uninstall.uninstall to fix windows needs more space to update
  3. Follow the on-screen instructions and choose the appropriate response to complete the process if prompted.

Uninstalling extra software that’s seldom utilized is perhaps the best way to free up HDD space for Windows updates, as programs and apps usually hog the most storage.

To free up valuable storage on your PC, the most reliable method is installing uninstall software that removes the programs and associated registry entries.

These efficient tools will offer automated support for uninstalling multiple programs at once after scanning your PC to find unused apps and other residual files that take storage.

Hence, you can save significant storage using automated help from the best uninstaller software available on the market.

Since you have to make sure that no roots remain when uninstalling a program, the best software we use is CCleaner. It was created to remove all junk and associated files to an app so your PC remains fast and lightweight.

CCleaner

There will be no leftovers or junk files left after uninstalling with this amazing tool.
Free Trial Visit Website

3. Reduce disk space storage for System Restore

  1. Press Windows + S to open the Search menu, create a restore point in the text field, and click on the relevant search result.create a restore point
  2. Now, choose the drive for which Protection is turned on, and click on the Configure button.configure
  3. Now, drag the Max Usage slider to the extreme left, and click OK to save the changes.Lower max usage to fix windows needs more space to update

Restore points take up considerable space on the drive, and if you are running out of it, the best option is to reconfigure the System Restore settings, and set it to consume lesser space.

When you are done with these three solutions, check for Windows Updates, and you will now be able to install the latest version.

How do I free up internal storage?

There are various ways to free up storage space in Windows 10 and 11. Most users run the Disk Cleanup tool; remember, it’s very effective at the job. Disk Cleanup should help you clear a few GBs of storage space when running after a long time.

But, there’s another more straightforward option, Storage Sense, to automatically free up space. Storage Sense is a built-in feature in Windows accessible through Settings that helps users configure the cleanup frequency and choose the files to be cleared.

With Storage Sense set up, you don’t need to delete non-critical files to free up storage space manually. Instead, it’s all automatic.

There you go! These solutions should help you remove the insufficient space to update errors in Windows 10 and 11. If there is still not enough space on Windows, you will need an additional external drive to install the updates.

Also, find out how to delete temporary files in Windows 11.

Do you know of any other workarounds? Feel free to share your expertise with us via the comments section below.

MTG Arena Error Updating Data: 4 Ways to Force Update it

MTG Arena is a free-to-play digital collectible card game on the Windows platform. However, several users have reported an updating data error when trying to launch the game.

The full error reads:

Error updating data: check your connection and try again and usually occurs due to a wrong proxy configuration, restrictions by your ISP, or issues with the game servers.

Such a connection issue is pretty standard for this online game, so the message from above can appear when you start the game or add user data to log in.

The game is stuck on startup for many users and keeps getting the same connection issue. Different workarounds might resolve this persistent problem.

For some players, the issue isn’t necessarily related to their network connection, and they also suggest specific bugs might cause the problem.

If you are also troubled by this error, here are a couple of troubleshooting tips to help you resolve the MTG Arena error updating data in your Windows computer.

Why am I getting an MTG Arena error updating data?

After some research, we have deduced a list of possible reasons for triggering the MTG Arena error updating data problem.

  • There is something wrong with your proxy configuration.
  • The game server is experiencing some issues.
  • There is a problem with your internet connection.
  • You are using a VPN.
  • Your ISP applies restrictions.

Now that you know the most common reasons that could trigger this problem let us look at the solutions to fix MTG Arena error updating data.

How do I fix the MTG Arena error updating data?

1. Turn off the Windows proxy settings

  1. Make sure MTG Arena is fully closed.
  2. Press Windows + I to open Settings.
  3. Open Network & Internet.
  4. From the left pane, click on Proxy.
  5. Toggle the switch under Automatically detect settings to disable the option.
  6. Turn on the Use Setup Script option.
  7. Scroll down to the Manual proxy setup section.
  8. Disable Use a proxy server option and set it to Off.
  9. Close Windows Settings.

Launch MTG Arena and check if the app can check for updates without any errors. Then, wait for the updates to download and install. Once installed, relaunch the app and check if the error is resolved.

2. Disable firewall and antivirus

  1. Press Windows + I to open Settings.
  2. Click on Network & Internet.
  3. Open Windows Security.
  4. Click on Firewall & network protection.
  5. Click on your currently active network.
  6. Toggle the switch to turn off Windows Defender Firewall.

Once disabled, launch MTG Arena and check if the error is resolved. If the issue persists, disable your antivirus temporarily.

If you installed a third-party antivirus, open its menu and look for the option to disable the protection for a few minutes or hours.

3. Use a VPN

  1. Launch your VPN client.
  2. Connect to a different region’s server.
  3. Launch MGT Arena and try to update the game.

If MTG Arena updates without any error, it is possible that the error occurs due to the restrictions placed by your ISP or the game server failing to establish a connection.

A VPN client usually helps you to bypass ISP and region-based restrictions on games and other content online.

At the same time, it’s highly recommended to consider other efficient VPN software for gamers to improve ping and avoid connectivity problems.

We reviewed the best VPNs for gaming that allow bypassing restrictions and our recommendation is ExpressVPN for having the fastest speeds.

ExpressVPN

Enjoy the best VPN Service while keeping your data private and safe.
Check Price Visit Website

4. Use Epic Games launcher

3.1 Uninstall MTG Arena

  1. Exit MTG Arena if it’s running.
  2. Press the Windows + R key combination to open Run.
  3. Type appwiz.cpl and click OK to open Control Panel.
  4. Right-click MTG Arena (Magic the Gathering Online) from the list of installed apps and select Uninstall.
  5. Click Yes to confirm the action.

Once uninstalled, reinstall MTG Arena using the Epic Games launcher.

3.2 Reinstall MTG Arena

  1. Download the Epic Games installer.
  2. Once downloaded, run the installer. Wait till the launcher is installed.
  3. Launch Epic Games launcher, and search for MTG Arena.
  4. Download and install MTG Arena.
  5. Launch the game and check if the error is resolved.

If disabling the Windows proxy and enabling the VPN client didn’t work, install the Epic Games launcher, as MTG Arena is also available on the Epic Games store.

The MTG Arena error updating data can occur due to several reasons. To troubleshoot the error, try disabling the proxy settings and stop using a VPN client.

How do I force update MTG Arena?

  1. Open the default installation location on your PC for MTG Arena.
  2. Launch the MTGALauncher.
  3. If there is a new update available, it will start downloading.
  4. Once complete, continue playing as your would.

This is the finish line, so we kindly recommend you follow the instructions from above to get through this MTG Arena gameplay trouble.

The provided solutions are verified and tested by different players with connection issues with the game, which has proved helpful. We also have a new guide on MTG Arena network error that you shouldn’t miss.

If you’re a fan of this genre, you might also be interested in our list, including the best Windows collectible card games.

We hope this article solves your problem. Feel free to write us and give any other feedback regarding the subject in the comment section below.

VGA Monitor is Not Working on Docking Station: 5 Ways to Fix It

The Docking Station is a device that is used to connect the systems like laptops and desktops to other peripherals such as external monitors, keyboards, mice, etc.

When our readers attempted to connect their system to an external VGA display through the docking station, it was not working.

So they unplugged all of the wires from the system and docking station and attempted to rejoin them, but the problem persisted.

Some of our readers also found issues with their second monitor which was not getting detected on their Windows 11 system.

Why is the VGA monitor not working on docking station?

The factors that might be responsible for causing the problem discussed above in this article are listed below.

  • Outdated graphics driver – These types of problems occur when the graphics driver is out of date
  • Loosely connected wires – When the cable wires connecting the system to the docking station are not attached properly, a situation like this occurs
  • An out-of-date Windows system – When the Windows system is not updated for a long time, this might also lead to such issues
  • System requirements – There are some system requirements criteria that need to be met for the devices to work properly
  • Device faults – When there are any internal or external issues, the VGA monitor may not work correctly on the docking station

This article will provide you with the five best possible methods for resolving this issue.

How to fix the VGA monitor if it is not working on docking station?

1. Update the graphics driver

  1. Right-click on the Start button and select Device Manager from the context menu.
  2. In the Device Manager window, expand the Display adapters option from the list.
  3. Next, right-click on the graphics card and choose Update driver from the context menu.
  4. In the Update window, select the Search automatically for drivers option.
    search for graphics drivers
  5. This will start looking for the latest driver updates available online and if any are found, it will update it.
  6. After the graphics driver is updated, restart the system.

2. Reconnect the wires

When a system or other peripherals such as a mouse or keyboard fail to function, it may indicate that the cable used to link them to the system is either damaged or weakly attached.

As a result, we request our users to inspect the cables for damage and reconnect them after unplugging them from the system.

If any of the wires are broken or damaged, unfortunately, you will need to replace them before trying again.

3. Update the Windows system

  1. Press the Windows and R keys together.
  2. Type ms-settings:windowsupdate in the Run box and press the Enter key.
    Run Windows Update
  3. This opens the Windows Update page.
  4. Click Check for updates button at the top right corner of the page.
    unexpected store exception windows 11
  5. This starts checking for any Windows updates available online.
  6. If there are any, download and install them.
  7. After that, restart the system.

4. Rollback a problematic update

  1. Press the Windows key and type view your update history.
  2. Then select the View your Update history system settings from the results page.
  3. This opens the Update history page.
  4. Scroll down to the Related settings section and click Uninstall updates.
  5. If there are recent updates that were installed, they will be displayed here.
  6. Click Uninstall on the updates that you want to uninstall from the system.
  7. This will start uninstalling the updates from the system.

We usually recommend our readers to keep their systems updated at all times, but sometimes, a new patch can do more harm than good.

In this case, if the monitors stopped working on the docking station after a system update, it’s better to uninstall that update as shown in te solution above.

5. Physical damages

If there are any internal faults in the device or peripherals such as the keyboard, mouse, or monitors, this might be the reason why you are facing such issues with the system and device.

We recommend connecting the VGA monitor to another system via the docking station and seeing if this works.

If it still does not function when connected to another system, it is time to replace or repair the VGA monitor and try again.

Is VGA better than HDMI?

HDMI is always a better choice when compared to VGA because VGA still uses the older standard that carries only the video signal and not audio.

The HDMI cables offer better performance and are not prone to the interference of other unwanted signals.

HDMI is preferred by most gamers for a better experience and performance while playing heavy games.

Also, here is the guide to fixing any docking station issues on your Windows system.

Hope you found this article informative. Please let us know in the comments section below!

Windows SSH Permission Denied: 5 Ways to Fix it

SSH, or Secure Socket Shell, is an encrypted protocol that enables secure access to any remote device or server over an unsecured network.

When some of our readers tried to authenticate using these keys, they received an SSH permission denied message on their Windows 11 PC.

The users can unaware of the causes of this type of error message on the system. This is impacting the productivity of their work.

Some users also faced the SSH exchange identification error on the system but the link will bring you to a helpful guide to fix it.

Why do I get SSH permission denied message in Windows 11?

There could be a number of factors responsible for this error message, which are listed below:

  • Incorrect server – If you are trying to connect to some wrong server with its IP address, you might receive an access denied message on your system
  • Wrong password – Some users try to access the server using the wrong credentials
  • Too many SSH keys – When there are a large number of SSH keys present in the system, so the system may select the wrong one from among those accessible
  • SSH key permissions are too open – If the SSH key’s permissions are wide open and accessible to the majority of users in the system, the security purpose of employing the key may be jeopardized

If you are encountering this problem on your Windows 11 PC, this article will walk you through the five best solutions available, which are detailed below.

How do I bypass the SSH permission denied in Windows 11?

1. Check if you are connecting to the right server

This might sound silly, but many users tend to make this mistake and wonder why they are facing such an error message on their system.

When you are trying to connect to a server using the SSH key and the server address, you need to recheck the server address two to three times before trying to access it.

There might be a possibility of missing a few numbers or misplacing the numbers in the server address. So always confirm the server address before continuing.

2. Try to log in with a password

You can always try logging in to the server using the password method. But for this to work, you need to enable the Password Authentication feature.

If it is already enabled, then you can access the server using the following command line:

ssh -o PreferredAuthentications=password -o PubkeyAuthentication=no [email protected]

In the above command, you have to replace [email protected] with the actual server address and password with the real password.

If the PasswordAuthentication is disabled, first you need to enable it and then generate a new ssh key using the following command: ssh-keygen -R server.IP.address

You have to replace the server.IP.address with the real IP address of the server.

3. Add your SSH key to the VPS server

In this method, you are trying to add the SSH key created on the system to the VPS server. This can be done by first generating a new SSH key on the system using the following command: ssh-keygen -t rsa

Now you might have to add this SSH key to the server by following this command: ssh-copy-id [email protected]

Here, you have to change the server.ip.address to the actual server address value and execute the command.

Also, disable the Password authentication feature and edit the ssh_config file for changing the sole authentication method to SSH keys.

4. Manually select the key to use

When there are too many SSH keys available in the system, it can choose any random SSH key and create such issues.

So, you can execute the following command for making it choose the SSH key provided by you in the command: ssh -i /users/user_name/.shh/id_rsa [email protected]

Before executing the command, you have to replace /users/user_name/.shh/id_rsa with the path of the SSH key you want to add and [email protected] with the actual values.

5. Change the permissions of your SSH key

  1. Press the Windows key + F to launch File Explorer and open the folder where the SSH key is present.
  2. Right-click on the SSH key and click Properties from the context menu.
  3. Go to the Security tab and click Advanced at the bottom.
  4. Now click Disable inheritance at the bottom and make sure Owner is your username only.
  5. If the owner is somebody else, click Change and select your username.
  6. After this, choose any other users from the Permission entries section and click Remove.
  7. When done, click Apply and OK.
  8. This will change the permissions to the SSH key.

Where are SSH keys stored in Windows?

All the SSH keys are stored on the system drive in the following folder (replace username with the actual name): C:\Users\username\.ssh

Of course, if your system drive has another letter, you should replace the letter in the path above with your own.

Hope this article was worth reading and was able to resolve the SSH Permission denied issue.

You should also consult our guide on how to fix bad owner or permissions on SSH config because it might offer some additional information.

Our readers also complained that they encountered the Unable to establish host authenticity error. If you’re among them, read the highlighted guide for instructions to fix it.

You can read a clear explanation of modern SSH tools in this helpful guide on what OpenSSH is and how it improves secure remote access on Windows.

If you know any other possible solutions for this problem or would like to ask something about this problem, use the comments section below.