Windows 11 Network Profile Type Missing? Fix it in 5 Steps

Windows allows you to set different network profile types for your connection to the BSS (Basic Server Set). Generally, network profiles entail XML data fragments. However, users can encounter issues like missing profiles while changing the network profile type, particularly on Windows 11.

Hence, we’ll discuss the missing Windows 11 network profile type and the causes of this issue. Likewise, we’ll take you through how to fix Windows 10/11, which can’t change network to private or public, and other network profile type issues.

Why is my network profile type missing in Windows 11?

  • Outdated device drivers: Running outdated drivers on your computer can result in several difficulties, like missing the Windows 11 network profile type. It impedes the smooth performance of your computer. However, the system lacks the essential updates to help it run smoothly. Likewise, the Windows 11 network profile type missing issue indicates that some updates should be installed but are not available. Hence, the unavailability of these device drivers can lead to some computer components, like the network misbehaving.
  • Outdated Windows: Most users ignore the difficulties that outdated Windows can cause. Outdated Windows can result in the Windows cannot find the local profile issue. However, the computer lacks the necessary updates to run its components and fix bugs. So, it prompts errors like this.
  • Issues with the Network Adapter: Users may run into problems with the network connection on their PC if there are issues with the network adapter. The network adapter controls how your computer’s network connections are established and how they perform. Hence, the can’t see network profile on Windows 10/11 issue may occur if the network adapter isn’t functioning properly.

How do I change my network type to private in Windows 11?

Change the network type to private for Ethernet

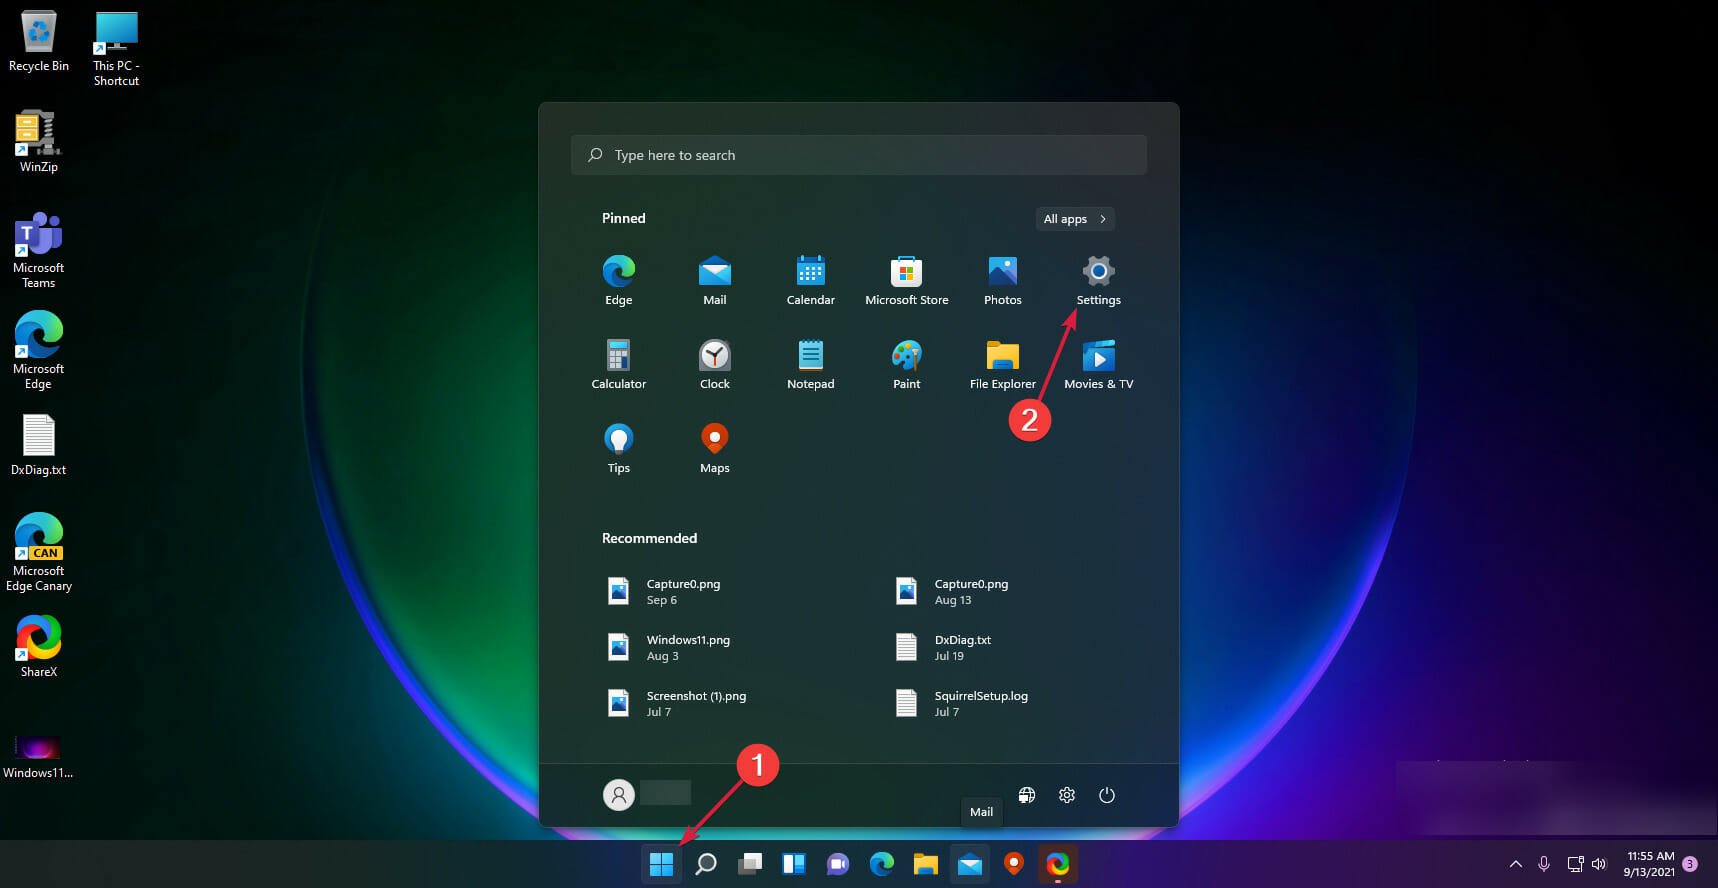
  1. Click on Start on your screen and select Settings from the drop-down.
  2. Select Network and Internet.
  3. Click on Ethernet and go to the Network profile type tab.
  4. Click on the box for Private.

Change the network type to private for Wi-Fi

  1. Click on Start on your screen and select Settings.
  2. Select Network and Internet.
  3. Click on Wi-Fi, then Manage known networks.
  4. Choose the wireless connection and go to Network profile type.
  5. Click on the box for private.

You can change your network type from private to public or vice versa, depending on the environment setting for security purposes.

How do I fix the network profile type missing in Windows 11?

1. Restart your computer

  1. Click on Start.
  2. Select Power and click on Restart.
  3. Click OK.

Restarting your computer will help it fix boot errors that may prompt the issues.

2. Update device drivers

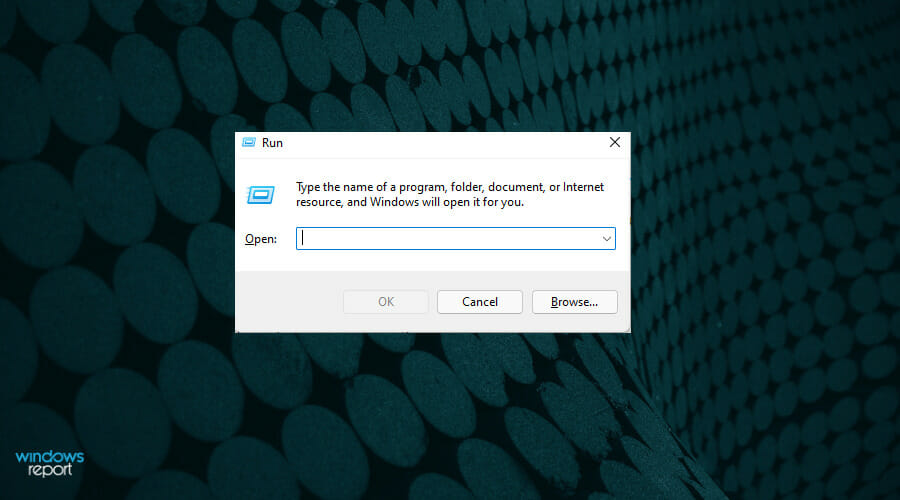
  1. Press Windows + R keys simultaneously to prompt Run.
  2. Type in devmgmt.msc and click Enter to prompt the Device Manager.
  3. Please select a device to update and right-click on it.
  4. Click on Update device and choose Search automatically for drivers.

Restart your device to sync the update correctly.

If you want to create a detailed report of all your current and obsolete devices, you can easily achieve this using Outbyte Driver Updater. We recommend this software because it will scan your PC for missing and out-of-date device drivers.

Outbyte Driver Updater

Use this efficient and friendly tool specially designed to keep your PC in pristine condition.

3. Update Windows

  1. Click on Start.
  2. Select Settings from the options.
  3. Click on Windows Update, then select Check for updates.

Windows will automatically search and download updates if there are any available.

4. Troubleshoot Network Adapter

  1. Press the Windows key, type in Troubleshoot settings, and launch it.
  2. Click on Additional troubleshooters and select the Network Adapter.
  3. Click on Run the troubleshooter.
  4. Select a network from the Select the network adapter to diagnose tab, then Next.
  5. Wait while it runs. Check the diagnosis and see if it identifies the problem.

However, the diagnosis will point you to where the issue comes from: peradventure, the Network adapter is faulty.

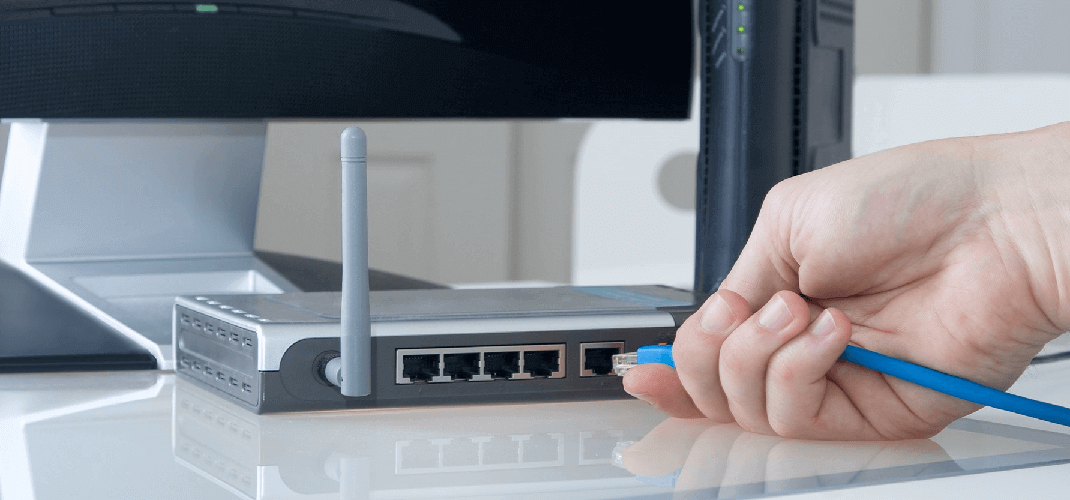
5. Restart the router/network

Re-establishing the network connection can help fix the missing Windows 11 network profile type. Hence, perform a power cycle on your router to help it achieve better.

How do I change network 2 to network 1 in Windows 11?

  1. Press the Windows + X keys to prompt the Quick Link menu.
  2. Select Network Connections from the menu.
  3. Press ALT on your keyboard and click Advanced.
  4. Select Advanced settings.
  5. Select the network connection you want to give priority to, then click the arrows to move it up.
  6. Click OK to save the changes.

However, your computer will follow the order when connecting to available networks.

Nonetheless, users can read our article about the technical fixes for Windows that doesn’t have a network profile for this device issue. Likewise, you can check for more information about how to change Windows 10 network settings to private.

Kindly leave your suggestions and questions below if this guide has been helpful to you. We’d like to hear feedback from you.


5 Most Common Cox Error Codes & How to Quickly Fix Them

Cox cable offers one of the most seamless services these days. However, one of the inevitable things with it is encountering the Cox error codes. It is all a matter of when and not if.

Often, the error codes appear at the worst possible times. Hence, most users are left frustrated when their favorite moments are cut short due to Cox cable problems.

Although, most of the errors can be fixed with minor tweaks to your Cox Contour DVR, Mini box, or the internet.

Also, the most recurring issues are usually related to internet outages, phone issues, and Wi-Fi issues.

Hence, this guide will identify the prominent Cox error codes, discuss them, and provide possible solutions to fix them.

Why am I getting an error on Cox?

  • Cable connection issues: This is one of the most prominent causes of the Cox error codes. Sometimes, it is inevitable to tamper with the connection settings of the cable. Maybe the cord is loose or removed accidentally, which will affect the performance of Cox. Hence, it could prompt an error code.
  • Wireless Router issues: Cox offers wireless unit routers to boost the performance of their gadgets. An issue with the router’s settings could distort the connection with other units. Since the network is essential for Cox to function, this will undoubtedly prompt error codes when you attempt to use Cox services.
  • Server issues: Sometimes, the cause of the error codes may then be due to a down server. Although this is quite rare, you cannot discard its possibility. Users must understand when a server issue affects all users by checking dedicated channels or with Support.
  • Mini box problems: This is a prominent cause of issues amongst Cox users. The problem here is often down to his configuration and connection of the cables. Once there’s an issue with that, the Cox Mini box will constantly prompt error codes.

Quick tip:

In this situation, a VPN software can be beneficial. Private Internet Access (PIA) has a Digital Privacy feature that can help you with unrestricted access to worldwide servers.

It lets you access a fuller, unconstrained internet to get content from anywhere in the world, free from censorship or geographic limitations. It also has a strict no-logs policy and a ton of customizable privacy features to protect all of your data.

Private Internet Access

Outstanding software that lets you access geo-locked content with a blazing-fast speed.
Check price Visit website

How do I fix the most common Cox errors?

1. Cox error code 107

The error code 107 means your account does not meet the minimum eligibility requirements to connect to the server. It also comes up when something on your account isn’t suitable for the TV. Also, it could be that your device is jailbroken.

To fix this, you need to call customer service and require help to bypass the jailbreak detection that causes the error code.

2. Cox error code 012

This error happens when there’s an issue with the Ethernet cable connection between the router and TV. Often, you will see a black, tiled, fuzzy, or blue screen.

Rebooting the cable box or tightening the cable connection will quickly fix this problem.

3. Cox error aaa-200

  1. Log in to your Cox account.
  2. Select My Profile and locate User accounts.
  3. Choose Manage Users.
  4. Select Secondary User and click Add User.
  5. Generate User ID & Password and fill in other credentials.
  6. Click Add Secondary User.

This Cox error code means there is a Panoramic Wi-Fi problem. The aaa-200 unexpected error usually occurs due to a breach per user account’s device limit.

The hotspot is limited to three devices per user. Hence, you need to add more users to the account to fix it.

4. Cox error app 1a09

Perform a long power cycle

  1. Power off the router and disconnect the cords.
  2. Unplug the modem and router from the power source for up to five minutes.
  3. Plug them back and restart.
  4. If there’s a reset button, press it before restarting your devices.

Contact Support

It is advisable to call in or reach out to the Support service for Cox to know if there are coverage problems. If that’s the case, your network issue is general. If there’s a temporary outage, they will give you a duration to fix it.

The error app 1a09 is one of the most popular errors on Cox. It pops up when there’s no network connection at all. It can also manifest itself as a Cox cable box error code on boot.

5. Cox error 15

Set the correct time and date

  1. Press the Windows+ R keys, input timedate.cpl, and click OK.
  2. Select the Internet Time tab and choose Change settings.
  3. Check the Synchronize with an internet time server, and change the server to time.windows.com.
  4. Select the Date and Time tab, and click Change time zone to ensure it is correct.

Contact Support to pre-authorize the device

If accessing Cox from blocked geolocation, this error might come up. Hence, you need permission before traveling so they will not bar your access.

Cox error 15 pops up when your request to the cox server is blocked. Often, this occurs when trying to access it from blocklisted geolocation. Also, if the request is considered malicious, access can be stopped.

How do I troubleshoot Cox cable?

  1. Power off the cable box and unplug it from the wall outlet.
  2. Leave it for 30 seconds to a minute.
  3. Plug them back and restart.

Is there a reset button on the Cox cable box?

No, you can only use the reset button on the Panoramic modem. The main Cox cable box does not have a reset button.

These are the most common error codes and their fixes on Cox cables. Always contact Support if there’s an issue, especially if the fix has failed.

For further reading on Cox, check out our article on the two quick methods to stop Cox browser alerts. Also, we have a guide for gamers to select the best cable modem for gaming to buy in 2022.

In conclusion, our guide to solving broken or not properly plugged-in network cables might also come in handy.

Leave your suggestions and feedback in the comments below. We’d love to hear from you.

Microsoft news recap: Xbox Game Pass Family & Friends launches in 2 countries, Adoption Score launched for Microsoft 365, and more

Microsoft news recap is a weekly feature highlighting the top Microsoft news stories of the past week. Sit back, grab some coffee, and enjoy the read!

Microsoft likely bringing Overwatch, Diablo, and Call of Duty to Game Pass

In a statement responding to a UK regulator’s plan to look at Microsoft’s Activision Blizzard acquisition more closely, Phil Spencer noted that titles such as Overwatch, Diablo, and Call of Duty, would come to Xbox Game Pass, as it’s Microsoft’s intention to do so.

Xbox Game Pass

Xbox Game Pass Friends & Family launches in 2 countries

The Friends & Family Xbox Game Pass plan has launched in 2 countries this week. Available in Ireland and Columbia, it allows 5 individual people access to the subscription, representing good value when compared to the cost of 5 separate subscriptions.

Xbox Game Pass Friends & Family

Xbox’s Phil Spencer releases statement addressing UK regulator’s Activision Blizzard acquisition concerns

As noted earlier, Phil Spencer released a statement in response to the UK’s competition regulator, the CMA, saying it may look at the Activision Blizzard acquisition more closely after raising concerns. Spencer said:

We are expanding choice in two ways: through the creation of Game Pass, which gives players a subscription option; and by bringing more games to mobile platforms.

Bringing more games to mobile platforms, however, requires new capabilities. The expertise that the teams at Activision Blizzard bring in developing games for mobile platforms will help us understand how to create games that engage players around the world.

Microsoft launches Adoption Score to help customers optimize Microsoft 365 subscriptions

To help IT admins understand adoption of their Microsoft 365 subscriptions across their organisation, Adoption Score has been launched, designed to help highlight anonymised metrics showing usage patterns, to provide data to encourage organisations to make use of their subscriptions to the full extent possible.

Microsoft launches Adoption Score to help customers optimize Microsoft 365 subscriptions - OnMSFT.com - August 30, 2022

That’s it for this week. We will be back next week with more Microsoft news.

5 Ways to Fix Epson Event Manager When It’s Not Working

While the Epson Event Manager is an essential utility for your scanner/printer, you may sometimes experience a situation when it’s not working.

It’s a common error that could occur with the Epson printer or scanner and the Event Manager stops working completely.

This is when you may often come across different errors, for eg, Epson Event Manager cannot find the scanner driver, Cannot connect to a scanner check the scanner connection, etc.

However, if you are experiencing Epson scanner problems in Windows 10/11, then you can refer to our detailed post for quick solutions.

Why isn’t Epson’s Event Manager working?

There could be quite a few reasons behind why your Epson Event Manager has stopped working:

  • The Event Manager is blocked by a Firewall
  • It’s not properly installed or not ready to scan
  • The network scanning settings are not set correctly
  • Corrupted system files
  • Outdated scanner drivers

It could also be possible that the Epson Event Manager is not working due to a network communication error, or if there’s a problem with the Epson scanner itself.

Do I need Epson Event Manager on my computer?

The Epson Event Manager is a crucial application that’s often required for essential activities by the scanner.

It’s known to support different Epson scanners and facilitate functions like Scan to Email, Scan as PDF, Scan to PC, etc.

How do I fix the Epson Event Manager if it’s not working?

1. Add Epson Event Manager to exclusions

  1. Expand the system tray on the taskbar and click on the Windows Security icon. windows security icon
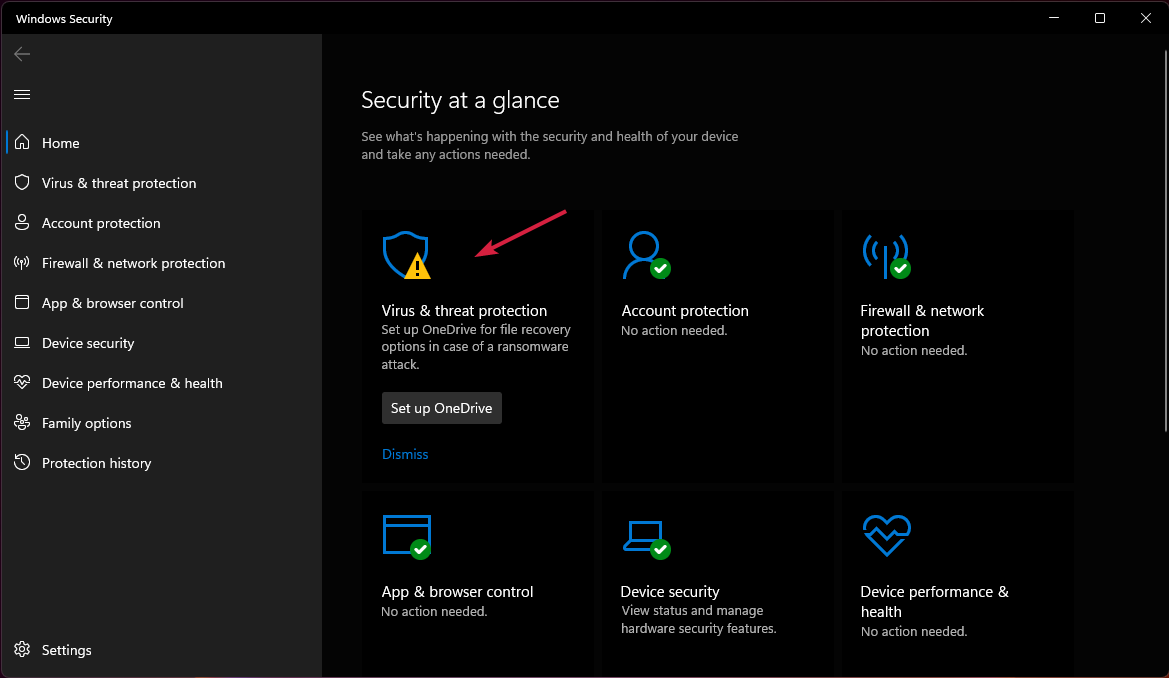
  2. On the Windows Security page, click on Virus & threat protection. Virus & threat protection
  3. Next, go to Virus & threat protection settings and click on Manage settings. manage Virus & threat protection settings
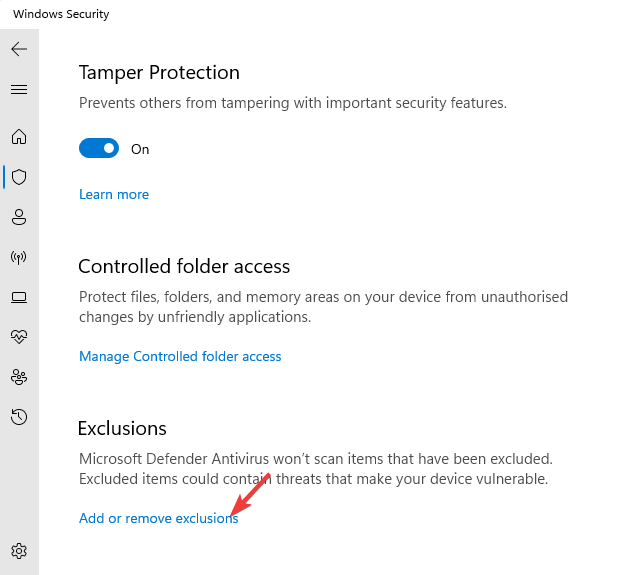
  4. On the next window, scroll down, and under Exclusions, click on Add or remove exclusions. Add or remove exclusions
  5. Under Exclusions, click on Add an exclusion and then select Folder. Add an exclusion
  6. Now, select the EventManager Application folder to add to the exclusion list.

You have now successfully added the utility to the exclusions list and the problem should be resolved now.

2. Update the scanner driver

  1. Visit the official Epson support page, enter the product name and click on Search.
  2. Select your scanner model from the list. search epson product name
  3. Next, click on the blue Download button. click to download
  4. Now, follow the on-screen instructions to finish installing the driver.

You can also follow our detailed guide on how to install the Epson scanner driver for more solutions.

Once done, the Epson Event Manager cannot communicate with the scanner issue should be fixed.

If you are looking for a quicker and safer solution to update your scanner driver, you can fully rely on Outbyte Driver Updater an automated tool which will check, find and replace any available driver on your device.

3. Perform a clean install for the scanner

  1. Press the Win + I keys simultaneously to open Windows Settings.
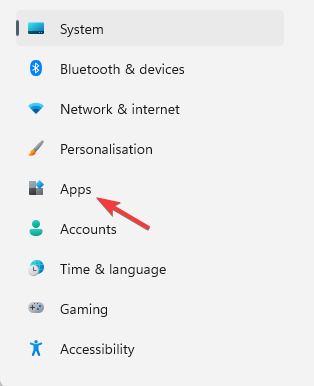
  2. On the Settings screen, click on Apps on the left. click on Apps in settings
  3. Now, go to the right and select Apps & features. Click on Apps & features in the Settings app
  4. Next, go to the App list, look for the Epson scanner, click on the three dots next to it and select Uninstall. uninstall epson scanner
  5. Once the uninstallation is complete, press the Win + R shortcut keys to open the Run console.
  6. Type control printers in the search bar to open the Drivers and Printers window. control printers command
  7. Here, select the scanner and hit Delete.
  8. Once the scanner is completely deleted from the system, restart your PC and visit Epson’s official support page. search epson product name
  9. Here, look for the product name and download and install the complete software package for the scanner model. download epson event manager

You can now open the Epson Event Manager and it should be working now.

4. Run the system file checker

  1. Open the Run console by pressing the Win + R keys together.
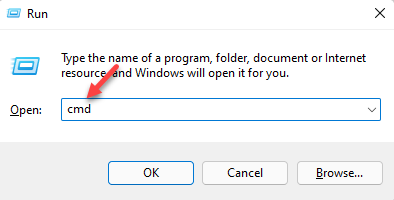
  2. In the search box, type cmd and press the Ctrl + Shift + Enter keys simultaneously to open the elevated Command Prompt. open elevated command prompt by pressing Ctrl + Shift + Enter together
  3. Run the below command in the Command Prompt (Admin) window and hit Enter: sfc /scannowrun command sfc /scannow
  4. This process takes a while, so wait patiently till it’s over and you see the success message.

Once done, restart your PC and now check if you see an error like Epson Event Manager cannot find scanner driver.

A good alternative is a system repair and malware removal tool for Windows devices.

They promise fast and detailed system analysis. As a result, users can expect robust system optimization, no more spyware viruses, and a tidy device.

5. Allow scanning via a network

  1. Click on Start and type Epson in the Windows search bar. search for epson
  2. Open the Epson folder and select Epson Scan Settings.
  3. Next, select your scanner from the Select Scanner list.
  4. Now, click on the Network setting and click Add. select scanner, network, add
  5. It will now start scanning for an IP address.IP address search

This method is applicable if the Epson scanner is not working and causing an issue with the Event Manager.

How do I connect my Epson printer to the Event Manager?

Before you proceed to download and install the utility, and connect it to the printer, make sure you disable any firewall/antivirus to avoid communication block between the printer and your PC.

Now proceed to install and connect the Event Manager with the Epson printer:

  1. Visit the official download page for the Epson Event Manager and download the utility for Windows/Mac. download epson event manager
  2. Click Next on the Epson Event Manager setup wizard and follow the on-screen instructions to finish the installation. event manager installation
  3. Make sure to check the box next to Allow communication through Windows Firewall in the end.
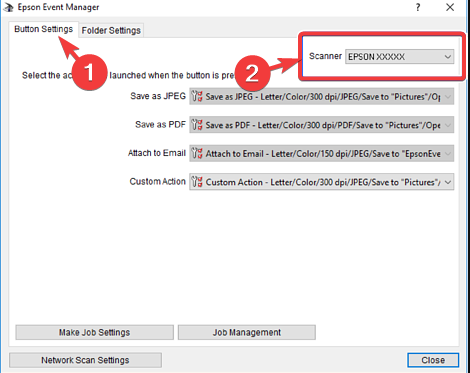
  4. Open the Event Manager and under the Button Settings tab, select your Epson product from the drop-down next to Scanner. select scanner in epson event manager
  5. Next, press the Win + R keys simultaneously to open the Run console.
  6. In the search bar, type control printers and hit Enter. run control printers command
  7. On the Devices and Printers window, right-click on your Epson printer/scanner and click on Printer Properties. select printer properties
  8. Next, in the Properties dialog, click on the Events tab, and Select an event from the drop-down next to it.
  9. Under Actions, select Epson Event Manager to Start this program.select epson events manager to start the program
  10. Click Apply and OK.

However, if your Event Manager is still not working on Windows 10/11, refer to the user manual that came with the printer and contact Epson tech support if the device is still under warranty.

But if your Epson scan is not working on Windows 11, then you can read our troubleshooting guide for more information.

For any other queries related to the Epson printer or scanner, you can let us know in the comments box below.

5 Ways To Fix Lost Ark’S Low FPS On A High-End PC

If you’re playing a game on a high-end PC, you expect a smooth, responsive experience. But if your FPS is low or just plain poor in Lost Ark, it can ruin the entire experience. And with higher-end systems costing more than ever before, low FPS isn’t something anyone wants to have to live with.

FPS measures the speed of your computer’s graphics card. FPS counter software can also help you keep track of the strain in your game. The higher the FPS, the smoother your game will look and feel.

High-end PCs are designed to run games smoothly. The problem is that if you have a high-end PC, but you’re not getting the performance you thought you would, there may be some settings you can change to improve things.

But what causes low FPS in the first place? There are many factors that determine how well your system can run a game and most of them are completely out of your control. However, there are ways for you to improve your frame rate and make sure that it stays at an acceptable level.

Why is my FPS so low on a high-end PC?

So, you’ve got the best graphics card money can buy, a top-end processor, and a high-end monitor. But for some reason, you’re still getting low frame rates in your favorite games. Here is why:

  • System requirements – The first thing to check is the minimum and recommended system requirements for the game. These can be found on the game’s Steam page or in its store listing. If your PC isn’t meeting these requirements, it’s not going to run well even if it is a high-end PC.
  • Outdated OS – Using an outdated operating system can cause decreased performance because there are fewer resources available and the OS is not optimized for your hardware.
  • Hardware failure – One of the biggest reasons for low FPS is hardware failure. If your graphics card or CPU has been overheated for too long, it’s possible that they’re damaged beyond repair and need replacing as soon as possible.
  • Outdated drivers – Your drivers might be outdated or corrupted in some way; this could cause problems with your hardware not working properly or not being able to work with certain programs/games properly. 

Sometimes, Lost Ark just can’t connect to the server so you can decide to wait it out or attempt to resolve the issue.

How do I fix low FPS in Lost Ark?

1. Verify game files

  1. Launch Steam on your PC.
  2. Click Library in Steam.
  3. Right-click on Lost Ark, then select Properties.
  4. Select the Local files tab then hit Verify integrity of game files.
  5. Restart Steam.

2. Update your graphic drivers 

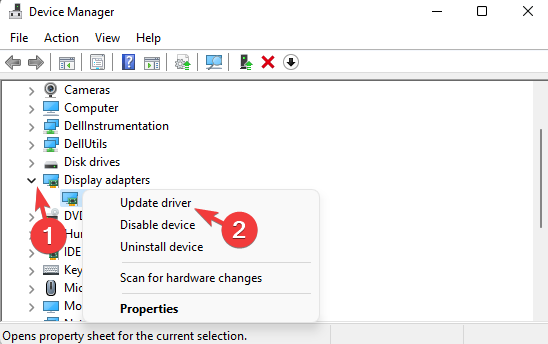
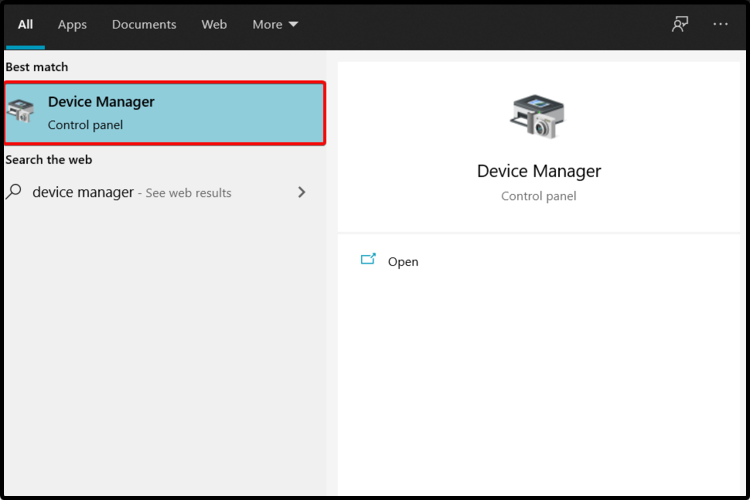
  1. Press the Windows key, type Device Manager in the search box, and click Open.device manager
  2. Navigate to Display adapters and find your graphics card.
  3. Right-click on your graphics card and select Update driver.update graphics driver
  4. Select Search automatically for drivers.

Although you can follow the manually steps mentioned above, a safer process would be using Outbyte Driver Updater because it is an adequate driver tool that will easily monitor your device drivers.

Therefore, it can be a great choice in this situation thanks to its automatic scans and updates. This is an excellent option for finding the most appropriate updates for all of the drivers on your PC. No matter what type of hardware that you use or the brands that your prefer, Outbyte will find the right drivers for all of them.

3. Disable the firewall temporarily 

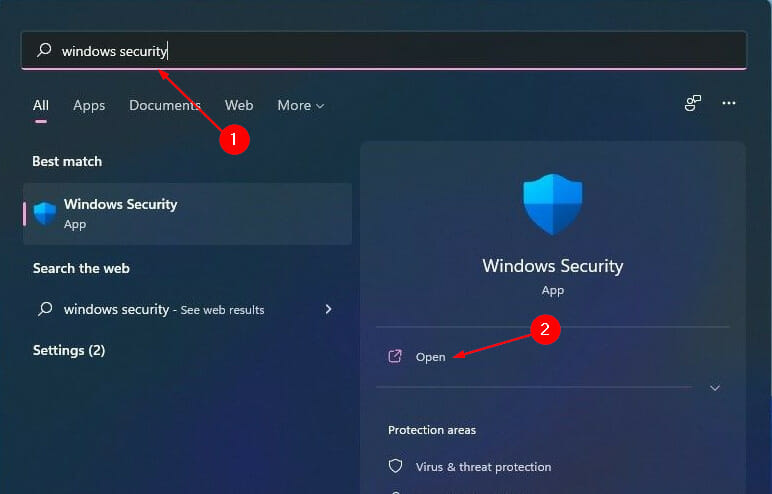
  1. Hit the Windows button, type Windows Security in the search bar, and click Open.
  2. Click on Firewall & network protection then select Public network.league of legends black screen after champion select
  3. Locate Microsoft Defender Firewall and toggle the off button.league of legends black screen after champion select

4. Check for Windows updates 

  1. Hit the Windows keys, type Check for updates on the search bar, and click Open.
  2. Click on Check for updates and install if there are any updates.

5. Play with admin rights

  1. Press Windows + E keys simultaneously to open File Explorer.
  2. Navigate to the following location Program Files/ Steam/Steamapps/common/Lost Ark/Binaries/Win64
  3. Locate the LOSTARK.exe file, right-click on it and select Properties.
  4. Click on the Compatibility tab then select Run this program as an administrator.

How do I maximize my FPS in Lost Ark? 

Lag and frame drops are caused by two things: CPU usage and GPU usage. If either one of these things goes over 90%, then you will start to experience a lag in your game or even worse, complete freezes while playing.

Nevertheless, you can still get the most out of your game with a few tricks. Here are some:

  • Make sure your PC has enough RAM installed.
  • Set your graphics settings to the lowest possible.
  • Make sure you have the latest graphics card drivers installed.

What can I do if Lost Ark FPS capped?

Lost Ark caps its FPS at 60, which is pretty standard for most games these days. That said, if you have a powerful PC with a high refresh rate monitor, you may want to get rid of this cap so that you can enjoy the game at its true frame rate.

To remove the FPS cap in Lost Ark and allow your PC to operate at its full potential, follow the steps below:

  1. Launch the game and go to Settings.
  2. Navigate to Video, set the Screen to Full Screen, and press OK.

If you decide to uninstall and reinstall the game but have problems installing Lost Ark again, refer to our comprehensive guide for a quick fix. You can also fix the Lost Ark insufficient disk space issue by checking out our detailed guide.

Let us know of any other workarounds not mentioned here that may have worked for you in the comment section below.

Fix: Epson Event Manager The Selected Device is Read Only

Epson Event Manager is a software released by the Seiko Epson Corporation. This software needs to be installed on the Windows system in order to manage all the scanning tasks performed by the Epson scanners.

The Epson scanners need to be connected to the Windows system for getting detected by the Epson Event Manager software. After this gets detected, users can scan as many documents using this software.

It also allows users to scan multiple pages into a single PDF file for better convenience.

These days many users who scan originals using the Epson scanner have noticed an unusual error while trying to connect to the selected device on the Epson Event Manager app.

The error says The Selected device is read-only and does not proceed from there.

Why am I getting the selected device is read only in Epson Event Manager?

When users try to connect to the scanner device using the Epson Event Manager app, it throws an error message we discussed above in this article.

Here are the reasons for this error message to occur on any Windows system while using the Epson scanner:

  • Write permission security – The main reason is the disabled write permission security of the user profile on the Window system; try giving the write permissions to the user profile.
  • Outdated scanner device’s driver – When the scanner device’s driver is not updated regularly, it throws errors like mentioned above; so, update the scanner device’s driver on the system.
  • Event Manager app compatibility mode – If the Epson Event Manager app is not compatible with the Windows version and runs as an administrator, it might cause such problems.
  • Windows Image Acquisition Service – When the Windows Image Acquisition service is stopped, this also might create issues like The selected device is read only.

Don’t worry if you are facing this kind of issue. This article guides you on how to resolve the error and continue scanning the documents without any problems.

How do I fix Epson Event Manager the selected device is read only error?

1. Check the Windows Image Acquisition service

  1. Press the Windows and R keys together to open the Run box.
  2. Type services.msc in the textbox of Run and press the Enter key.
  3. This opens the Services app window on the system.
  4. Locate the service called Windows Image Acquisition by scrolling down the list of services to the bottom.
  5. Right-click on the Windows Image Acquisition service and click Properties from the menu.
  6. Once the Properties window appears, ensure you are on the General tab.
  7. Select Automatic from the Startup type dropdown and, if the service has stopped, click Start.
  8. This will start the Windows Image Acquisition service on the system.
  9. Once done, click Apply and OK on the Properties window.
  10. Restart the system and check if this resolves the issue.

2. Update the scanner device’s driver

  1. Press the Windows and X keys together and then press the M key on the keyboard to open the Device Manager app on the system.
  2. Once the Device Manager window opens, locate the Print queues from the list of device categories.
  3. Double-click on the Print queues option to expand it.
  4. Then right-click on the Epson scanner device from the list and select Update driver.
  5. Click the Search automatically for drivers option to start updating the device’s driver.
  6. Follow the onscreen instructions and, once done updating, close the device manager app.

If the manual update didn’t work out, you can use a software that automatically finds updated drivers and update them. We recommend Outbyte Driver Updater for this.

Outbyte Driver Updater is a tool that scans your system and updates any out-of-date driver. It’s faster because it updates all of them simultaneously and it’s a lot safer because it uses its own database for driver files.

Outbyte Driver Updater

Update all your drivers automatically faster and safer with this amazing tool.
Free Trial Download

3. Run the Epson Event Manager app as an administrator

  1. Press the Windows key and type event manager.
  2. Then right-click on the Event Manager app from the search results and select Open file location from the context menu.
  3. This opens the Event Manager app folder on the system.
  4. Right-click on the Event Manager shortcut icon in the folder and select Properties.
  5. In the Properties window, go to the Compatibility tab.
  6. Under the Compatibility tab, check the Run this program in compatibility mode for under the Compatible mode section.
  7. Then select Windows 8 from the dropdown list.
  8. Under the Settings section at the bottom, check the Run this program as an administrator option by clicking on it.
  9. At last, click Apply and OK.
  10. Restart the system and see if this worked.

4. Give the write permissions to the user profile

  1. Press the Windows and R keys together and type C:\users in the run box that appears on the screen and then press the Enter key.
  2. Locate your user profile folder, right-click on it, then click Properties from the context menu.
  3. In the Properties window, click the Security tab and then click Advanced at the bottom.
  4. This opens the Advanced Security Settings window.
  5. Click the Permissions tab, and under this tab, click Continue.
  6. At the bottom, check the Replace all child object permission entries with inheritable permission entries from this object checkbox by clicking on it.
  7. After that, click Apply and OK.
  8. Now you can close the Properties window of the user profile folder also.

Why won’t my Epson printer scan to my computer wirelessly?

Many Windows users have reported that they were unable to scan any documents wirelessly. There may be many factors responsible for this issue.

One of the reasons could be that the computer system itself is rejecting the network channel which receives the instruction from the scanner.

Another reason is that the scanner device is not able to communicate with the system’s network interface when there are many other wireless network interfaces present.

Some users also had issues where the scanner was not being detected on their Windows 11 system.

Hope you managed to resolve the issue using the fixes explained in this article. Please let us know in the comments section below!

How to Turn on Your Wi-Fi when The Function Key is Not Working

It can be very annoying to encounter the laptop’s Wi-Fi Function key not working issue, especially if the mouse is not working. In laptops, the function keys are available to make a few changes to the PC.

These keys can either mute or unmute, increase or decrease the laptop volume, increase or decrease the display brightness, or toggle on and off the wireless connection.

Users have reported that there are times when some of these keys do not work well as expected. Amongst these queries is that using the Function key to turn on Wi-Fi in Windows 10/11 has not been productive

We have hence provided fixes to Wi-Fi button not working on your laptop. You can work down the solutions to know which applies best to you.

Why is my Wi-Fi Fn key not working?

The reason some people face the issue of their Wi-Fi function key not working can be diverse. The following are some of the reasons for the laptop wifi Fn key not working:

  • The keys are locked: One of the reasons the Fn keys stopped working is that someone accidentally pressed the Fn lock key. The Fn lock key does not work for the Wi-Fi toggle key alone; it impacts other toggle keys such as Caps Lock or Num Lock, thereby making it easy to find out if the Fn keys are locked. If this is the case, you need to toggle on your Fn lock key to enable Wi-Fi access. This detailed guide can check how to locate your Function lock key.
  • Check your Keyboard for Dirt and Grime: The reason your Wi-Fi Fn key is not working may not be far-fetched. It could be because you have not cleaned your Keyboard for a long time, thereby allowing dust to accumulate in the key space. You can check our guide on how to clean your Keyboard carefully.
  • Outdated keyboard drivers: If the Fn key stopped working due to an outdated, damaged, or corrupted driver, in this case, updating your keyboard driver should be a positive fix for your Wi-Fi Fn key.
  • Damaged key mechanisms: If you press your Wi-Fi Fn key, but it is not responding, it could mean the keys are damaged. We advise that you seek professional assistance to fix and replace your keyboard panel.

How do I turn on Wi-Fi if the Fn key is not working?

1. Locate and unlock your Fn keys

  1. Look for an Fn, F lock, or a keypad icon key to identify yours.
  2. Hold the Shift key and press the Function key at the same time.

This should unlock your Wi-Fi Fn key and fix the laptop’s Wi-Fi function key not working problem. If this does not work, check out the next fix.

2. Use your On-screen Keyboard

  1. Click the Start button and select Settings.
  2. Select the Ease of Access option.
  3. Locate and click on Keyboard, then toggle the switch to enable the On-Screen Keyboard.
  4. The On-screen Keyboard will appear on your screen, and then you can size and position it where it suits you on the screen.
  5. You can then locate the Fn key on the On-screen Keyboard and use it to access your Wi-Fi.

3. Use the Taskbar Wi-Fi settings

  1. Click on the Wi-Fi icon on the bottom right corner of the Taskbar menu.
  2. Select the Wi-Fi option and wait a few seconds to turn blue.

This should immediately power your Wi-Fi and provide the various options to connect to.

If none of the solutions above worked for you, we recommend you use a USB or a Bluetooth keyboard. This would be your alternative until you can contact the repair shop to diagnose and fix the problem with your laptop for you.

You can check our article on selecting the best Windows keyboard to provide an efficient temporary solution.

We hope the solutions provided have helped you fix the issue with your laptop’s Function key not turning on Wi-Fi in Windows 10/11. You can also check our detailed guide on how to fix your laptop keyboard if it’s not working on Windows 10.

Do not hesitate to use the comments below for further suggestions or questions.

5 Quick Ways to Fix The Internal Server Error 500 on Twitch

Internal server errors are always annoying because they can be tricky to tackle as an internet user. Users may encounter internal server errors while accessing a webpage on their browsers.

However, the Twitch 500 internal server error is one of the most frustrating issues you can encounter while using the Twitch web app.

Fortunately, there are ways to fix this error without much effort or time. Likewise, we’ll discuss why you may encounter an internal server error.

Some notable causes of the Twitch 500 internal server error are server issues, network issues, old or corrupt cookies and caches, and others.

However, the error is not delicate and can easily be fixed by tweaking some things in your browser.

What do 500 internal errors on Twitch mean?

The Twitch 500 internal server error indicates that there is temporarily an issue with the website’s Server. However, it means that the Server encountered difficulty connecting to the Server, preventing it from fulfilling the request.

It can also prompt the streaming server not to respond to errors in other streaming web apps like OBS and Discord.

Furthermore, the 500 internal error on Twitch shows that your web server is having trouble accomplishing your requests.

However, the error message won’t indicate the cause of the error. So, we recommend you go through this article’s end to know the reasons and how to fix them in detail.

Why do I get an internal server error?

  • Network connection issues: Users can encounter an internal server error if the internet connection is unstable and slow. Furthermore, connecting to the web servers like Twitch requires a fast and stable internet connection. So, if you have a poor network connection, it can prompt errors like the failed to fetch settings from Twitch. Likewise, a cable network connection to Windows 10 can impede the connection between the browser and web page servers.
  • The client’s Server is down: Another reason you may encounter an internal server error is if there’s an issue with the client’s Server. It can prompt the 500 internal error on Twitch. Furthermore, some users don’t usually consider server issues as the probable cause of internal server errors. Hence, we advise that you see it as one.
  • Old/corrupt caches and cookies: Browsers collect browsing data and store them in caches and cookies to help you load websites faster and smoothly. However, they can become old or corrupt and affect your browsing activities.

How do I fix a 500 internal server error on Twitch?

1. Reload the Twitch page

On the Twitch error message tab, go to the top of the screen and click the reload button (a circular button). Refreshing the page can fix the internal server 500 error on Twitch.

2. Check your network connection

Web apps like Twitch require a stable and fast internet connection. So, performing a power cycle on your router can help you fix any network issues.

Likewise, we recommend you switch to a wireless network if connected through a LAN network. Cable networks can be slow and unstable.

3. Clear browser cache and cookies

  1. Launch the Chrome browser, then click the Menu button.
  2. Select More tools and click on Clear browsing data.
  3. Select the Advanced option.
  4. Choose the time range you want to clear.
  5. Check the boxes for Cookies and other site data and Cached images and files.
  6. Then click Clear data.

Relaunch your browser and check if the error persists.

4. Check if there’s a server breakdown

Users should check for any information about maintenance or server issues on social media platforms like Twitch’s Twitter page. However, the solution to server issues is to wait while they resolve them.

5. Login with another account

Sometimes, it could be that the error is tied to only your account. Hence, try to use other accounts if you have one or use your friends’ accounts to be sure. If it works, reach out to their support team for clarification on the cause of the error on your account.

Internal server error 500 variations

There are other platforms with the internal server error 500. Platforms like YouTube and Discord also experience the error.

Likewise, Streamcord’s internal server error is also a server error that plagues the Streamcord streaming platform. Also, the failure to connect to server error in OBS is a variation of the internal server error 500.

Nonetheless, following the fixes above can help fix the internal server error 500 error in the platforms mentioned above.

However, users can read through our guide on how to fix the Internal server error 500 on YouTube.

Conclusively, users can alternatively switch to another browser. Hence, you can check through our list of the ten fastest and safest browsers for Windows 11.

If this guide has been helpful, kindly leave your suggestions and feedback in the comments below.

Windows 11 Themes Not Syncing? How to Get it to Work

Syncing your Windows 11 settings and preferences is a good way to have all the same settings across your Windows devices.

However, users have reported having issues with their Windows 11 theme not syncing across their devices.

Why is my Windows 11 theme not syncing?

There are a number of reasons why your Windows 11 theme is not syncing. One of which could be that the administrator of your PC has disabled syncing settings. Your Microsoft account may not be verified, or some account information is incorrect.

Windows 11 theme not syncing.

Corrupted system files may also cause this error to happen. Try the solutions below to quickly solve this issue.

How do I get my Windows 11 theme to sync?

1. Verify your account

This may seem like an obvious solution, but double-check that your Microsoft account is verified. You can do this by logging into your Microsoft account on any browser. If there is a link asking you to verify your account, proceed to do so.

Verify Microsoft account to fix Windows 11 theme not syncing.

If your Microsoft account is not verified, then syncing preferences like themes across devices won’t work properly. After verifying your account, restart your device and enable syncing in settings.

2. Turn sync off then back on

  1. Click on Start and open Settings (or press Windows + I).
  2. Go to Accounts then Windows backup. Accounts open Windows backup.
  3. Toggle Remember my preferences to Off and restart your PC. Turn Remember my preferences off and restart to fix windows 11 theme not syncing.
  4. Return to Windows backup and turn Remember my preferences to On. Turn remember my preferences back on.

Sometimes a good reset of syncing settings does the trick. You may need to give some time between turning sync back on for it to work properly.

3. SFC Scan

  1. Click on Start and search Command Prompt.
  2. Right-click on Command Prompt and select Run as administrator. Run command prompt as admin.
  3. Type in the following command and hit enter: sfc /scannow
  4. Wait for the scan to complete then restart your PC. SFC scan if windows 11 theme not syncing.

The System File Checker (SFC) scans your PC for any corrupted systems files which could be the reason your Windows 11 theme is not syncing.

4. Disconnect then re-connect account

  1. Click on Start and open Settings (or press Windows + I).
  2. Click on Accounts then select Email & accounts. Open email and accounts.
  3. Locate the Work or school account and select Manage. Manage windows 11 account.
  4. In your account overview, click Sign out everywhere. Sign out to fix windows 11 theme not syncing.
  5. Click OK then restart your PC.
  6. Re-enable your Sync settings and re-connect the Work or school account.

Please note that it may take an hour or so for your Work or school account to disconnect from all of your devices. Once it’s fully disconnected, go ahead and re-connect it and enable syncing.

5. Via Registry Editor

  1. Right-click on Start and select Run (or press Windows + R).
  2. Type regedit and click OK. Type regedit then ok.
  3. Open the HKEY_LOCAL_MACHINE folder then open the SOFTWARE folder. open software under local machine.
  4. Locate the Microsoft folder and open it, then open Windows.
  5. Navigate to CurrentVersion and open it and scroll to the Policies folder and open System. Find the policies folder under currentversion.
  6. Make a backup of the System folder by selecting it then click on File and Export. Save the file as System-backup.
  7. With System selected, right-click near it and click on New, then DWORD(32-bit) Value. create new DWORD 32bit value.
  8. Name the new value NoConnectedUser then double-click it.
  9. Ensure that the value data is set to 0 and click OK. Set value to 0 to fix windows 11 theme not syncing.
  10. Restart your device.

This should enable sync from the Registry Editor. Because it’s crucial not to make any mistakes when making changes in Registry Editor, always make a backup of the folder you’re altering.

How do I sync my Windows background?

  1. Click on Start and open Settings (or press Windows + I).
  2. Select Accounts, then Windows backup. Accounts open Windows backup.
  3. Open the dropdown menu next to Remember my preferences and check all of the preferences, then ensure Remember my preferences is toggled to On. Enable syncing preferences.

Your passwords, themes, language preferences, and more should now be synced across your devices logged into your Microsoft account.

We hope one of the above solutions helped you fix the issue of the Windows 11 theme not syncing. If you are having issues with OneDrive not syncing in Windows 11, we have a guide for that as well. Let us know in the comments which solution worked for you.

7 Ways to Fix CS GO if Your FPS Drops When Shooting

CS: GO is a fast-paced first-person shooter game in which you compete with other players online. It’s one of the most popular multiplayer games around and has been played by millions of people worldwide since it was launched.

The game is known for being very demanding on your graphics card, so if you have low FPS (frames per second) or find that your CS: GO FPS drops when shooting, then you need to make sure that your computer is up to the task. 

If you’ve ever noticed that your game looks choppy or slow, it’s probably because your FPS is lower than it should be. A drop in FPS can be a serious problem. It can cause lag. 

The most common form of lag occurs when your computer cannot process all of the information it receives from the server in time.

First, you need to check whether your computer’s hardware meets the minimum requirements for the game. If it doesn’t, then the game will run poorly.

Why is my FPS dropping in CS: GO? 

If you’re experiencing a sudden drop in FPS in CS: GO, then this could be due to several reasons:

  • You have an old processor – If you have an old GPU and play on high settings, then it’s possible that your computer just doesn’t have enough power to run the game smoothly. CS: GO FPS also tends to drop on high-end PCs. You might have hit the CPU and GPU limits of your system. 
  • Too many applications open at once – Some programs use more resources than others. You’ll find that CS: GO FPS drop every few seconds. In such a case, disable any non-essential programs that are not being used for gaming purposes.
  • Insufficient memory – It’s important to remember that CS: GO is a very intensive game that requires a lot of resources from your computer to run smoothly. Low RAM can cause lag and slow down your overall performance. This can cause stuttering and a general lack of smoothness when playing games. 
  • Outdated graphics drivers – Drivers often cause performance issues if they are not compatible with your operating system. Ensure they’re up-to-date before playing games that require high framerates.
  • Graphics settings – If you’re playing on low-end hardware or an older OS, try tweaking some settings such as lowering your resolution. The higher the resolution of your display, the more work your computer has to do to render it.
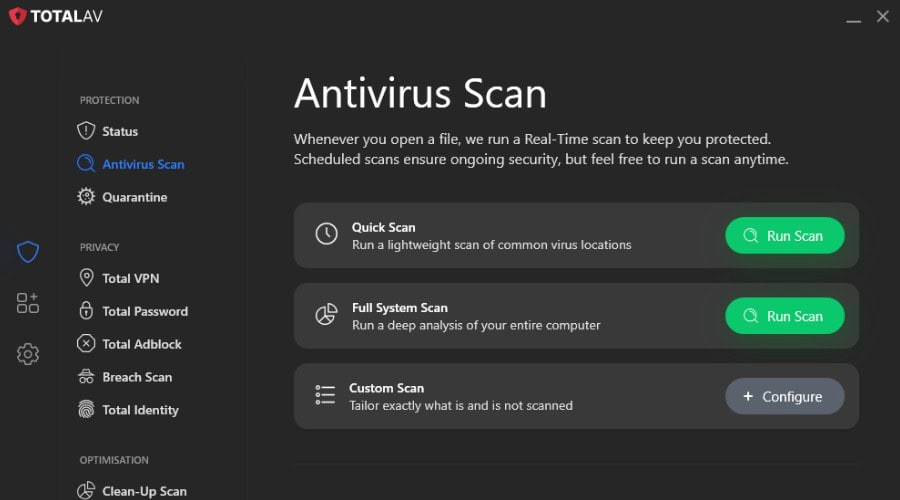
  • Virus/malware infection – Malware can slow down your PC or even cause crashes – so if you suspect that there might be some malware on your system, run a virus scan or install an antivirus program if you don’t already have one.

There are also many other factors that can affect your FPS in CS: GO, such as internet connection speed or whether you’re running background applications while playing.

How do I fix FPS drops when shooting in CS GO? 

1. Close unnecessary programs 

One way that games like CS: GO can slow down is by having too many other programs open while playing. Closing such programs will ensure that your computer isn’t being bogged down by other programs that are running in the background. 

Having multiple programs open at once uses up processing power, which means your computer has less processing power left over for the game itself — which leads to lower FPS rates and lagging issues.

2. Lower your graphics settings

  1. Launch Steam and open Settings in CS: GO.
  2. Click on Options then select Video Settings.
  3. Navigate to the Advanced Video section and, set the following settings to Low: Global Shadow Quality, Model / Texture Detail, Effect Detail, Shader Detail.

3. Update your drivers

  1. Press the Windows key, type Device Manager in the search box, and click Open.device manager
  2. Navigate to Display adapters and find your graphics card.
  3. Right-click on your graphics card and select Update driver.update graphics driver
  4. Select Search automatically for drivers.

In this case, a faster and safer option is using Outbyte Driver Updater. This software offers great features such as automatic scans and updates for all of your drivers.

Although it provides a free version, if you want to unlock all the smart features including the one-click update feature, then we recommend upgrading to its premium version.

4. Clean up disk space

If your PC is running low on hard drive space, it will be forced to use virtual memory (your RAM) instead of real memory (your hard drive). This causes significant performance degradation, which can make even simple actions like opening a menu feel laggy and unresponsive.

To fix this issue, you’ll want to clean up the files that are taking up a lot of space on your computer by clearing out your trash, deleting old documents and photos, and defragmenting your hard drive. 

5. Verify integrity of game files

  1. Launch Steam on your PC.
  2. Click Library in Steam.
  3. Right-click on CS: GO, then select Properties.
  4. Select the Local files tab then hit Verify integrity of game files.
  5. Restart Steam.

6. Uninstall recent programs

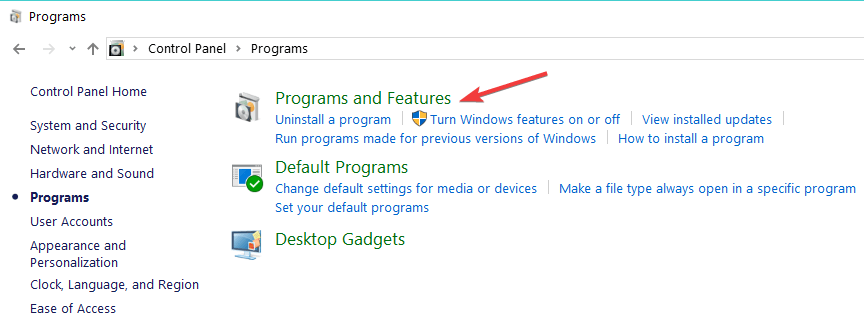
  1. Hit the Windows key, search Control Panel and click Open.
  2. Under Programs and Features, select Uninstall a program.
  3. Navigate to the latest installed program/app, right-click and select Uninstall.

7. Scan for viruses

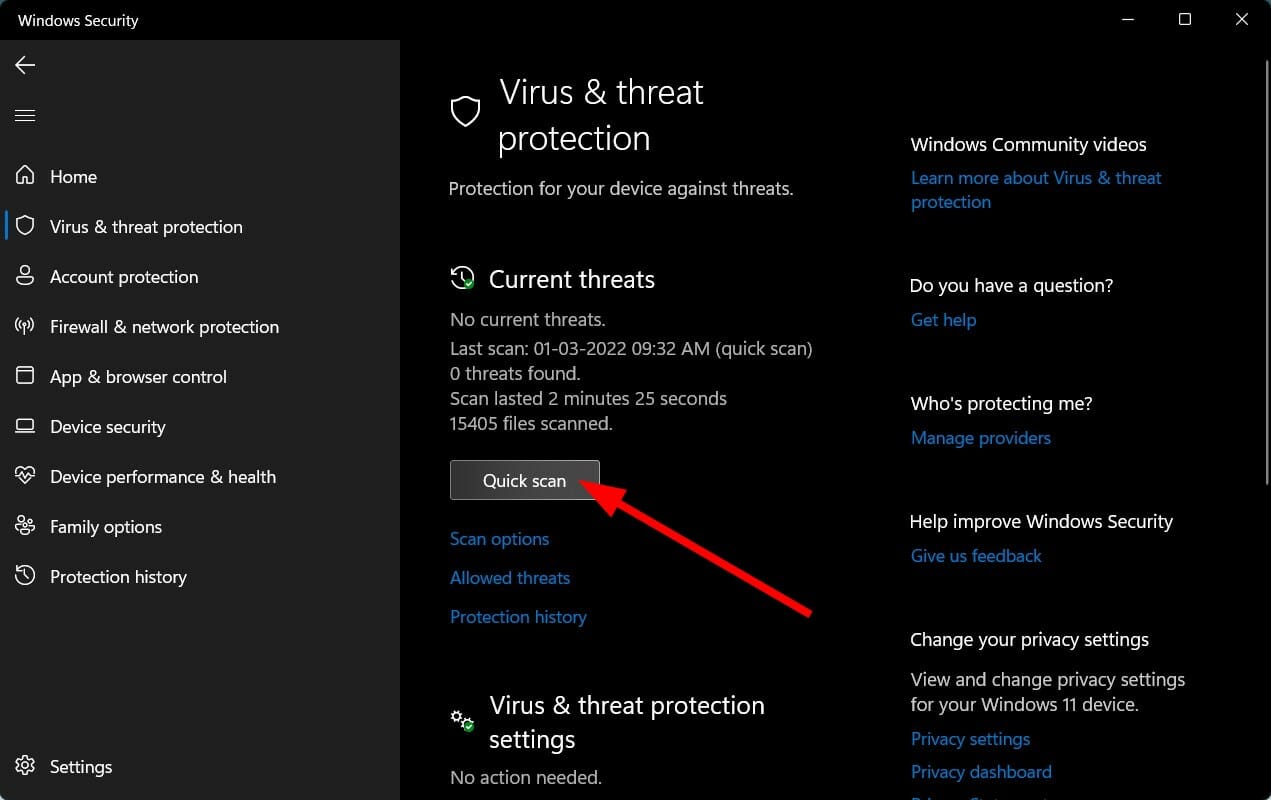
  1. Press the Windows key, search Windows Security and click Open.
  2. Select Virus & threat protection.
  3. Next, press Quick scan under Current threats.
  4. Wait for the process to finish and restart your system.

How can I improve my FPS in CS GO? 

CS: GO is a very demanding game, and if you don’t have a good computer it can be hard to maintain a decent frame rate.

Many people who play CS: GO have the same problem. They want to enjoy playing their favorite game, but the FPS is too low for them. A few tweaks here and there could help with the overall performance such as:

  • Look for PC requirements – Make sure your computer meets the minimum requirements for CS: GO.
  • Have enough RAM -Ensure you have at least 2GB of RAM free on your system drive. This will ensure that Windows does not swap out memory pages during gameplay which leads to significant performance degradation.
  • Adjust your graphics settings – If your PC is already struggling with the current settings, then it’s better not to turn on any additional features or effects.
  • Update your drivers regularly – These updates often include bug fixes and optimizations which will help with overall performance.
  • Avoid mods – Mods can be very useful for tweaking your CS: GO experience, but they come with a cost. They can cause errors or bugs that may reduce your FPS.

If none of these solutions work and you are still experiencing FPS drops, it may be time to upgrade to a laptop or PC for CS: GO. 

By upgrading the RAM on your computer or purchasing a new graphics card and installing it into your computer, you could significantly improve your gaming experience in CS: GO and other games as well.

You can also check out our recommended VPN options for CS: GO if you experience packet loss or extreme lagging.

If you’re experiencing FPS drops in other games or scenarios on Windows 10, you might want to check out these solutions to fix high FPS drops on Windows 10.

We’d love to hear about your experience and how your FPS is performing in CS: GO in the comment section below.

5 Ways to Fix The Files Download Error on Genshin Impact

Genshin Impact is a beautiful video game based on animation, and this is a role-playing action game.

Genshin Impact is free to play, but gamers must pay for additional in-game items such as new, better weapons or characters.

Many gamers have been having difficulties downloading the Genshin Impact game on the Windows system.

When they try downloading the game, it throws a Genshin game files download error: Check your network settings and stop the downloading process.

They cannot download and install this game on the system, which disappointed them. Some gamers also have issues like lag while playing the game.

Why does Genshin keep failing to download?

When gamers tried downloading or updating the game files, they got a file download error on their system. Here are some of the potential causes for this error:

  • Network settings – A downloading error usually occurs when the network settings get corrupted; therefore, resetting the network settings might help.
  • Antivirus software – As an extra layer of security, some antivirus software or the in-built antivirus tool on the Windows system prevents downloading the game files and hence the error
  • Corrupt game files – This kind of issue arises mainly because of corrupt game files, so reinstalling the game might solve it.
  • Change in DNS settings – If the DNS settings are changed unknowingly, this might be responsible for this game file download error, so try using Google DNS to fix this error.
  • Internet connection – The fluctuating Internet connection on the system can cause various problems, including the one mentioned above.

In the article below, you will find five quick solutions for resolving this error and enjoying the game.

Quick tip:

Switching to a new browser can be a great step in this process. Opera GX is a special version of Opera Browser specifically created for gamers. This browser includes distinctive features such as CPU, RAM, and Network limiters to help you get the best gaming and browsing experience.

Opera GX prioritize privacy, therefore it comes with a built-in VPN that safeguards your online privacy and limit what websites can access. In addition, you can also block trackers and ads and customize your privacy and security settings to have more control over your browsing data.

Opera GX

A special version that brings speed, customization, and privacy to desktop and mobile browsers.

How do I fix the file download error on Genshin?

1. Reset the network settings

  1. Open the Settings app on the system by pressing the Windows and I keys together.
  2. Select the Network & Internet option on the left menu and click Advanced network settings.
  3. Scroll down the page and click the Network reset option.
  4. Then, click Reset now.
  5. Finally, click Yes in the small pop-up window to confirm the network settings reset.
  6. After the network settings are reset, close all the windows, and you might be required to sign in to all the necessary networks, like VPN clients or other virtual switches.

This also helps with Genshin Impact’s Error Code 4201.

2. Turn Off Virus & threat protection settings

  1. Press the Windows key and type windows security.
  2. Select the Windows Security app from the search results.
  3. Select the Virus & threat protection option on the left-hand side menu, then click Manage settings.
  4. Please turn off the Real-time protection by clicking the toggle button to disable it.
  5. Once it is disabled, close the Windows Security app and restart it.

This solution will also help you clear the Genshin game files verification error on Steam, so try it out.

3. Reinstall the Genshin Impact

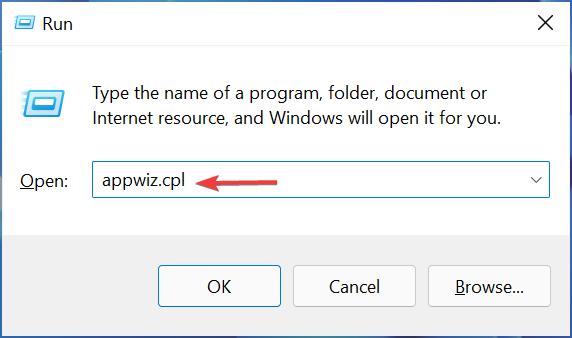
  1. Press the Windows and R keys together to open Run, then type appwiz.cpl and press Enter to open the Programs and Features wizard.
    Type appwiz.cpl in Run dialog box
  2. Now locate the Genshin Impact game from the list of programs and select it by clicking on it once.
  3. Then click Uninstall/Change button on the top for uninstalling the game.
  4. Once the game installs, close the Programs and Features wizard.
  5. Visit the Genshin Impact game website’s download page and click on Windows to download the game installer file for your Windows system.
  6. Go to the Downloads folder on your system and double-click on the GenshinImpact_installer.exe file.
  7. This opens the launcher window and starts downloading the game.
  8. Follow all the onscreen instructions from here onwards to finish installing the game.

4. Change DNS to Google DNS

  1. Open the Run box by pressing the Windows and R keys together.
  2. Type ncpa.cpl and press the Enter key.
    Type command ncpa.cpl in Run and press Enter
  3. This opens the Network Connections page on the system.
  4. Right-click on your connection and click Properties from the context menu.

  5. Select the Internet Protocol Version 4 (TCP/IPv4) option and click Properties just below it.
  6. Now select the Use the following DNS server addresses radio button.
  7. Enter the Preferred DNS server as 8 8 8 8 and the Alternate DNS server as 8 8 4 4, respectively.
  8. Finally, click OK to close the window.
  9. Restart the system and check if the problem still occurs.

5. Perform Disk Cleanup

  1. Press the Windows key and type disk cleanup.
  2. Select the Disk Cleanup app from the search results.
  3. Select the drive where the Genshin Impact game files are present and click OK.
  4. Click all the checkboxes under the Files section to delete and click OK.
  5. In the small pop-up window, click Delete files to clean the disk by deleting all the selected files.
  6. Once done, you can try downloading the game without any issues.

Why is my Genshin stuck on downloading resources?

When the Genshin Impact downloads get stuck, this could be because the Genshin Impact game server is down for routine maintenance or due to request overload.

There is also a possibility of the Internet connection on the system getting unstable. So, contacting your service provider for a stable internet connection might fix this problem.

Also, some users managed to resolve the failure to check for updates error on the Genshin Impact game.

Did you manage to resolve the Genshin Impact launcher game files download error? Do not hesitate to let us know about it in the comments below.

Windows 11 Terminal Themes: Download & Install

Windows 11 brought lots of advanced features to the computer system. One of these features is the Windows Terminal. However, this article will discuss downloading and installing Windows 11 Terminal themes.

Windows Terminal is an emulator built by Microsoft for Windows 10. However, it is a multi-tabbed terminal emulator that now serves as a replacement for Windows Console.

So, Windows 11 has a built-in command-line tool dubbed Windows Terminal. Furthermore, the Windows Terminal allows you to run any command-line app in a separate tab. Likewise, it has been designed to run PowerShell, Command Prompt, WSL, SSH, and Azure Cloud Shell Connector.

However, users can change the appearance of the Windows 11 Terminal to suit their taste. Hence, it is essential to get themes that can fill the space and change the Windows 11 Terminal color scheme.

The Windows Terminal makes use of the default theme, and it makes the appearance less intriguing. Likewise, customizing your terminal appearance allows you to set different visual themes for each shell.

Moreover, utilizing the Windows 11 Terminal color scheme allows you to customize your color scheme and define the appearance of the terminal.

However, you can do this using the built-in preset schemes or download new terminal themes.

Does Windows 11 Terminal have themes?

Windows 11 Terminal comes with a preset color scheme that allows users to change the display’s appearance. However, the Windows11 Terminal has a couple of built-in themes that users can switch between to achieve their visual goals.

Some built-in themes in the Windows 11 Terminal are Campbell, Campbell PowerShell, Vintage, One-Half Dark, and others.

However, users can change from one appearance to another by simply making amendments to the settings.json file. We’ll discuss it more as we go further into the article.

How do I change the terminal theme in Windows 11?

  1. Launch a browser on your computer and go to any Windows Terminal themes repository like github.com.
  2. Scroll through the repository and click on the terminal theme you want to download.
  3. Go to the theme display sample and click on the three dots in the right-hand corner.
  4. Click on Download. (Downloading the theme gives you access to the theme configuration and allows you to download other resources like background images for the theme.)
  5. Click Start on your screen.
  6. Select terminal from the drop-down.
  7. Select Settings from the options to prompt the settings.json file or press the Ctrl + to access Settings directly.
  8. In the settings.json file, select Profiles and go to the colorScheme bracket “[]” under the list.
  9. Edit the colorScheme property and input the theme name you just added to your file.
  10. Save settings and refresh your terminal.

How do I change the color of my theme in the terminal?

  1. Click Start on your screen.
  2. Select Windows Terminal from the drop-down.
  3. Click the Menu button and select Settings from the drop-down options.
  4. Click on Color Scheme, then tap on the Add new button.
  5. Select the Rename option, input a name for the scheme, and click the Accept rename button.
  6. Go to Terminal Colors and select the colors you want for the System Colors panel on the right side of the screen.
  7. Click on Save to implement the changes you sent.

To explore more about Windows Terminal features, including customization options and advanced tools, check out our detailed guide on Windows Terminal Features.

In addition, for users who own Windows XP, it may be helpful to know how to download and install HyperTerminal for Windows 10 & 11.

What can I do if Windows Terminal theme is not changing?

There can be various reasons why the theme of the Windows Terminal is not changing. However, restarting your PC is the easiest way to fix the problems. Also, downloading and installing another theme to test if there’s a problem with the theme in question can help.

Nonetheless, there are many Windows 11 Terminal emulators you can install in 2022. They allow you to communicate with various systems and servers remotely.

Let us know you choice in the comments area below.

Fix: Laptop Wi-Fi Only Works When Close to The Router

It can be very annoying if your laptop Wi-Fi only works close to the router, especially if your other devices connect without issues.

The essence of Wi-Fi is to enable access to the internet comfortably without having to be physically connected to the router.

It becomes even easier to surf the internet wirelessly when connected using a laptop as you do not have to worry about mobility.

Despite this, more than a few users have reported that the laptop Wi-Fi only works near router windows 10/11. Some others claim it is frustrating when only my laptop can’t connect to wifi.

Considering the discomfort Wi-Fi with a short range can cause, we have prepared how to fix wifi, not in range problem. Make sure to check below the fixes to eliminate your connection problems.

Why won’t my laptop connect to Wi-Fi unless it’s close to the router?

There are several reasons why your laptop won’t connect to Wi-Fi, ranging from the fact that you may have some wireless adapter issues. It could mean that your Wi-Fi is not working correctly on the laptop.

It could also be that you use some appliances and hardware that are not related to your computer, yet they can disrupt the Wi-Fi signal. For instance, it is a known fact that microwave weakens the signal.

So, keep away any such appliance that can disrupt the signal near your router.

What can I do if my laptop’s Wi-Fi only works when it’s close to the router?

1. Run Network Adaptor Troubleshooter

  1. Press the Start button, input the Control Panel, and launch it.
  2. Click on Troubleshooting.
  3. Select View All.
  4. Click Network Adaptor, and the instructions that follow are easy to understand.

The Windows troubleshooting process often lets you identify the causes of the laptop Wi-Fi working only when close to the router. Therefore, do not resist the urge to run a network adaptor troubleshooter.

2. Reset your router

  1. Locate the Reset button at the back of the router.
  2. Press and hold the button for about 10 seconds till the SYS led starts flashing rapidly, then release the button.

Resetting your router should enable you to customize it to cover a larger wide space. If this does not work, you can check our guide on fixing the Windows can’t find Wi-Fi problem.

3. Uninstall and reinstall the network driver

  1. Right-click on the Start button
  2. Open Device Manager and navigate to Network adapters.
  3. Right-click on the Wi-Fi device and click the Uninstall device option.
  4. Restart your PC.

4. Update the network driver

  1. Right-click on the Start button and open Device Manager.
  2. Locate and expand Network Adapters.
  3. Right-click on Network adapters and click Update driver software.
  4. Select Search automatically for drivers.
  5. At the end of the process, restart your PC and try connecting, this time from a distance.

After the re-installation, the system should restore the missing network adapter automatically. Hence, this should fix your laptop Wi-Fi only works when close to the router issue.

Alternatively, you can download all the updates for your device rather than downloading them individually using a Outbyte Driver Updater.

Outbyte Driver Updater

A one-step solution to fix all your driver problems thanks to its automatic scans and updates smart feature.
Free Trial Download now

Why is my computer not connecting to Wi-Fi but my phone is?

Your wifi will connect automatically to your phone as soon as you toggle on your mobile phone’s Wi-Fi. This is precisely what you need to ensure for your laptop.

If the wireless button on your laptop is not toggled on, you won’t be able to connect to Wi-Fi. To locate your wireless switch, it may sometimes be a Function (Fn) key; for some other laptops, it may be an actual dedicated switch on the side.

The fixes we have provided above are viable for your connection issues. If you try all the above solutions and it does not fix your laptop’s Wi-Fi issues, you can check our article on Internet connection problems in Windows 10/11.

If you have any questions or comments, kindly drop them in the comments below.

5 Ways to Fix On Demand Error Data Unavailable on Fios

You may often come across the data unavailable error on FIOS On Demand, preventing you to watch your favorite shows.

FIOS On Demand by Verizon is a service that allows you to stream a wide range of videos on multiple devices, including TV, PC, laptop, and mobile phones.

However, this popular ON Demand service is prone to issues like data unavailable errors, channels not showing up, service not working, and more.

You can also refer to our detailed guide to know more about the most common FIOS error codes & how to quickly fix them.

Why is On Demand not working on Fios?

Due to traffic on the On Demand platform, these services may be unavailable for short periods of time.

You may try accessing the service again in a few minutes, but if it’s still not working, it may be due to:

  • Connectivity issues
  • Damaged/Loose cables
  • Network outage/congestion
  • Configuration/technical issues on Verizon’s end
  • Bugs in the TV/Set Top Box/router
  • Scheduled maintenance of FIOS

While rebooting the receiver may sometimes help fix the data unavailable error on Fios On Demand, if that does not help, you may try the below solutions.

How do I fix On-Demand error data unavailable on Fios?

1. General troubleshooting for FIOS on demand

  1. Remove the router plug for 30 seconds, plug it back into your router, and check if the On Demand programs are playing now.
  2. Make sure that the coaxial cable at the back of the set-top box is attached properly, and that there are no loose connections.
  3. If your location has a Network Interface Module (NIM), check if it’s plugged in and if all the connections to it are properly attached.
  4. Check your router to ensure that all cables are correctly and properly connected. 
  5. Make sure that you have access to the FIOS On Demand channels that you want to view, because some channels may need a premium subscription.
  6. Make sure that the router provided to you by Verizon is connected first and then to the VoIP router (if you have one).

2. Power cycle the router and the STB

  1. Detach the router and the STB plug from the power outlet.
  2. Now, wait a minimum of 15 seconds.
  3. Connect the STB plug back to the power outlet first, wait for about 2 minutes, and then connect the router plug to power it on.
  4. Next, wait to see all panel lights on your STB turn green.

You must power cycle (as above) both the router and the STB and not just reboot, and this should help you fix the data unavailable error on FIOS ON Demand.

3. Reset the router

  1. Reset the ONT box first and then wait till all the lights become green except the LAN, TV, and POTS lights. ONT box verizon
  2. To ensure that it worked, check if there’s a dial tone on your phone.  At the same time, the POTS light should turn on. POTS light on
  3. Next, unplug the router from the power outlet, wait for 10 secs, and plug it back in.  
  4. Once all the router lights are on, disconnect your set-top box from the power outlet, wait for 10 secs, and plug it back in.reset the router

This should help you fix the FIOS On Demand issues and it should be working now.

4. Factory reset the setup box

  1. Cover the IR sender on the front end of the remote, press the Play/Pause, and the zero button on your remote till the light starts blinking blue. press pause/play button on FIOS remote
  2. Once it stops blinking blue and turns red, your remote will be unpaired from the set-top box.
  3. Next, disconnect the STB from the power outlet, connect it back, and continue pressing the Menu button on the remote.keep pressing the menu button
  4. After some time, you will notice that just one of the lights on the STB turns green.
  5. Now press the zero button on the remote, press the OK button, and after a couple of seconds, the box will reboot.press the OK button

5. Software update for the media client box

  1. After the factory reset, start the device and switch on the router back as the primary router connects directly to the ONT. switch on the router
  2. The media client will now detect the router and download the latest firmware.
  3. Now, set everything back as it was and now your FIOS On Demand works again.

How do you reset Verizon On Demand?

Resetting your router should be the first troubleshooting method you must try and it usually solves a lot of errors.

However, to avoid problems with your Fios TV service, make sure your router is plugged in and turned on at all times, even if you are not currently using the Internet.

Manually reset your router:

  1. Unplug the router’s power cable and wait for 15 seconds. unplug FIOS router
  2. Then plug it back into the power outlet.  
  3. Now, wait for 30 seconds and then check to see if this resolves the issue.

If the FIOS On Demand is still not working or the channels are not available, you can proceed to reset your Set-Top Box.

Manually reset your Set-Top Box:

  1. Remove your Set-Top Box power cord from the power outlet, wait for 15 seconds and then plug it back in. 
  2. Power on the STB as you see the time appear on its front. time shows on FIOS STB
  3. Now, wait for a while as the Interactive Media Guide updates. 
  4. This should fix the issue and the On Demand autoplay should be working now.

Once done, FIOS ON DEmand should be working now and you should not see the data unavailable error anymore.

Note icon NOTE
Don’t mistake your Set-Top Box power cord with the coaxial cable that is connected at the back of your Set-Top Box.

Check if On Demand autoplay is enabled

If your FIOS On Demand autoplay feature is not working, you can follow the below instructions to fix the issue:

  1. Open FIOS ON Demand, click on the Menu, and select Settings.
  2. You can then click on Notifications. navigate to FIOS notifications settings
  3. Next, select PopUp Alerts. select pop up alerts
  4. Now, disable the feature that you don’t want. You can also disable Recommendations and Promotions in the menu. disable FIOS notification features

Additionally, you must also check if the router’s software is up-to-date and if all the router cords are connected properly.

At the same time, network outages can be the primary reason why your FIOS On Demand service shows the data unavailable error.

Also make sure if there are any equipment outages, or if FIOS is under scheduled maintenance. If nothing works, you can contact Verizon customer support for further assistance.

If you have any other queries related to FIOS on demand, you can let us know in the comments box below.

5 Most Common Cox Email Account Errors & How to Fix Them

Cox Communications is one of the largest broadband companies in the United States of America. It provides automation, home security, telephone, Internet, email, and digital video services using its IP network.

Users of the email service have faced Cox email account errors before, with some of the most common ones being Cox email error failed to load messages, Cox email SSL error, Cox SMTP error, Cox email internal server error, and Cox not receiving email error, among others.

That notwithstanding, you do not have to forgo or worry about your Coz emails when faced with any of these errors.

This is because you can quickly fix them following the guidelines shared in this article. Furthermore, you will not need to contact customer support since you can handle them independently.

Why can’t I log into my Cox email?

Sometimes, logging into your Cox email account might fail. This can be frustrating, especially when you want to send or respond to an urgent email.

Some of the most common reasons for this might include a locked account due to many verification attempts, failure to receive your one-time passcode message, or one-time passcode not matching Cox’s records in two-step verification, among others.

You can fix these issues on your own without any problems. However, if you cannot, you can always contact Cox customer support to help you.

But before then, ensure you use the correct credentials when logging in to your account.

How do I fix email account errors on Cox?

1. Cox email error failed to load messages

  1. Navigate to Cox mail settings and then Preferences.
  2. On the right-hand side, click on the account whose messages are not loading.
  3. Click on the Minus (-) sign on the bottom left corner of the screen.
  4. Re-enter your account details on the screen that appears and click Continue.
  5. Fill in the required details on Account Information, Mailbox Behaviors, and Advanced. Then, follow the on-screen instructions to complete the process.

You will need to re-enter all the account information to solve this error. To do that, apply the above steps.

2. Cox email SSL error

  1. Navigate to Cox mail settings and then Preferences.
  2. On the screen that appears, select Accounts at the top left corner of the menu to see your mail account details.
  3. Select the Advanced tab just above the mail account details.
  4. Delete Port 995 and uncheck the SSL checkbox. Then, replace Port 995 with Port 110 and check the SSL checkbox.
  5. Close the window and save the new settings.

3. Cox SMTP error

  1. Navigate to Mail and then Account.
  2. Set the correct incoming mail server in the format pop.xxxx.cox.net and SMTP settings in the format smtp.xxxx.cox.net. Here are common Cox server names and their settings:
Cox Server NamesSettings
imap.cox.netIncoming IMAP Port: 993 with SSL enabled and check the authentication box
Outgoing SMTP Port587 with TLS enabled
smtp.cox.net465 with SSL enabled and check the authentication box
pop.cox.netIncoming POP Port: 995

Sometimes, you can encounter a Coz SMTP error that prevents the server from sending emails. You can fix this error by setting the correct SMTP settings.

4. Cox email internal server error

1. Clear your local DNS cache

  1. On a Windows machine, press the Start button type cmd, and select Run as administrator from the results.
  2. Type or paste the following command and press Enter: ipconfig /flushdns

2. Clear your browser’s cache – Google Chrome example

  1. Click the three menu buttons on the top right corner of Google Chrome and select Settings.
  2. Select Privacy and Security on the left-hand-side menu and click on Clear browsing data.
  3. Ensure that Cookies and other site data and Cached images and files are selected.
  4. Click on the Clear data button at the bottom.

5. Cox not receiving email

If you are not receiving emails on Cox, the first thing to check is your Internet connection. Always make sure that you have a stable connection.

Another solution to this problem is to refresh the login page and log in again simply.

How do I reset my Cox email?

You can reset your Cox email easily if you have forgotten your login details, such as your Cox password.

The first step is clicking the Forgot password link on the sign-in page. After that, enter your user ID, and follow the instructions to reset your Cox account.

Just like other mail providers, you might face challenges when using Cox. However, as you can see above, you can easily fix the common Cox email account errors without external support.

There are cases where the service doesn’t work, so here’s what to do if Cox is not working.

If you know of other errors and solutions not discussed here, kindly let us know in the comments section below.

Interactive Training Software: 7 Best to Use in 2026

Your business or foundation surely has information to share, and the best way that you can do this is via interactive training modules.

There are lots of free and paid interactive tools out there that you can use to create training modules and build an engaging educational experience for your audience/clients.

Interactivity engages people with your message and mission, and on the other hand, educational content helps to fulfill that mission.

What should you look for in a training module software?

There are plenty of solutions out there that help you create eLearning and training modules but it’s very important to pick the one that will suit your needs and help you achieve your goals.

However, there are certain aspects that will fit all the requirements for this type of field and we will outline the most important here.

➡ Level of engagement

Interactivity is probably the most important learning tool that you can devise to keep the students engaged and interested in your course.

That is why you should analyze and opt for a solution that can integrate games, quizzes, and other such modules that look fresh and interesting.

➡ Course creation tools

The whole point of the training module software is to make it easier for you to create and put together creative content.

For instance, one of the solutions from our selection comes with a complex tool that allows recording and editing your training videos quickly.

All programs mentioned below offer the opportunity to test the tools so you can find out which of them caters to your level of skill and knowledge to achieve your goals.

Test them carefully, assess the opportunities they provide, and find the one that suits you best.

➡ Content resources

It’s hard to start building from scratch. That’s why it’s important to find the software that offers the highest level of integration with other content creation tools.

Some of the products below come with extensive assets libraries and drafts that provide a helpful starting point for your courses and eLearning modules.

So here are the best tools for creating training modules.

What are the best tools to create interactive training modules?

Adobe Captivate – Fully-responsive eLearning content

Adobe Captive is one of the premier solutions for creating captivating and detailed eLearning. It is one of the most versatile tools out there.

However, it does take some time to learn the ins and outs of it so that you get to benefit from everything it has to offer.

The integration with Adobe Suite means that users of similar software will feel right at home with the interface, layer-based interface, and the overall way of using the software.

It comes with a lot of presets and built-in animations and characters. One standout feature is the ability to create truly responsive content.

Note that it lets you adjust, add, or remove elements based on the screen size to make your content perfectly easy to be consumed according to the device used.

The key features of Adobe Captivate are:

  • Easily create mobile-friendly courses
  • Experiential learning like virtual tours, talking-head screencasts, and VR experiences
  • Create multiple modules of one course and impose restrictions via quizzes
  • Importing PowerPoint presentations
  • Free trial version to experiment with everything it has to offer

Adobe Captivate

Impress your audience with highly interactive and richly featured courses that you can create in minutes with Captivate’s out-of-the-box tools.
Free trial Visit website

Teachable – Monetize your knowledge

Teachable is a web-based tool with versatile features designed to help you reach your goals with minimal effort.

Start by creating a domain, or by connecting the one you have to Teachable. After you’re all set, access the Pages section through your dashboard on the submenu and build high-converting landing pages using multiple content options, including text, images, videos, forms, buttons, and more.

The power editor function enables you to create impressive and engaging multimedia lectures or coaching sessions.

Once you sign in, there is even a comprehensive course on how to use it. You don’t need to know any HTML or code, but learning the basics will definitely make things easier.

Alternatively, you can always save time by opting for one of their professional templates and adding your personal touch with visual drag-and-drop page builder instruments.

The platform has various pricing options and a 14-day free trial for the Pro plan.

Other key features of Teachable include:

  • Unlimited Hosting
  • Sales or student insights tracking via the dashboard
  • Third-party integrations, including Circle so, Mailchimp, and Zapier
  • Automatic enrollments for students
  • Basic quizzes and lecture comments
  • Customizable levels of permission and roles
  • Call hosting and task features
  • Various pricing options, such as one-time payments, subscriptions, memberships, and more
  • 2048-bit SSL certificate
  • Instant payouts with Teachable Payments

Teachable

Create engaging and interactive multimedia content with Teachable’s flexible and easy-to-use tools!
Free trial Visit website

Podia – All-in-one platform

Podia is an all-in-one digital platform that allows you to create and sell online courses and enables digital downloads for different types of products.

This platform helps you build a beautiful membership site without the need for any coding skills. It supports a wide range of file uploads (video, MP3, text, PSD, PDF).

It gives you multiple ways to promote your product and engage with your audience: emails, built-in analytics, affiliate programs, coupons and discounts, and integrations with external tools like Convert Kit and Mailchimp.

Podia software is both powerful and flexible when it comes to building digital products. You can easily create an unlimited number of online courses, subscriptions, landing pages, eBooks, PDFs, and audio files.

Check out the best features and functionalities that are included in Podia:

  • Range of customization options
  • Well-designed user interface
  • Free trial available
  • Competitive pricing options
  • Flexible for selling webinars and courses

Podia

The easiest way to sell online courses, memberships, and downloads, no technical skills are required.
Free trial Visit website

eXeLearning.net – Develop accessible contents

ExeLearning is a freeware under GPL-2 that you can use to create educational interactive web content. It is an open-source editor which is easy to customize at will.

The software is packed with awesome features, it is easy to use, and was an interactive interface. It is also cross-platform, so you don’t have to worry about compatibility with your OS.

Its user interface is not so visually appealing but it’s pretty straightforward to add text, images, videos, interactive activities, and more.

And after you’re gone creating your course, it’s possible to generate web pages, ePub, or SCORM compatible with different devices.

For a free tool, it’s amazing that it has access to a pretty large database of Open Education Resources where you will find plenty of useful content.

Check out the best features that are included in this tool:

  • The software can generate interactive contents in XHTML or HTML5 format
  • Create easily navigable web pages including images, text, multimedia clips, interactive activities, and more
  • All the educational materials generated by this tool can be exported in different digital formats
  • Generate complete websites
  • Classify or catalog educational contents according to various metadata models

⇒ Get eXeLearning.net

Raptivity – A bare-bones eLearning authoring tool

Raptvity provides rapid course creation by offering users various templates that can be easily modified by course authors.

Make your online classrooms stand out and be captivating with Raptivity’s awesome customization and interactive software. Interact with your students easily and teach the way you want.

Unlike most authoring tools that offer basic templates, this solution has sophisticated and visually engaging interactions.

And it’s not limited to eLearning courses, but you are able to produce simple games and quizzes that will surely keep the users engaged.

Raptivity comes with a 14-day free trial. Head over to its official website to check out more details on this great tool.

Check out the most exciting features that come packed in this program:

  • Supports output formats such as HTML5 and Flash, and it allows the course to be published on desktops and mobiles supporting the Flash plug-in
  • Includes a media toolbox that offers content creators the opportunity to add their own videos, images, buttons, and text into their course interaction models
  • Powerful and simple program for creating training modules
  • More than 190 customizable interactions
  • Use this tool as a standalone or to augment your existing authoring tools

⇒ Get Raptivity

SmartBuilder – World-leading glass software 

Fast Builder is faster than other similar tools, and it will help you provide experiences that your learners will just love.

It is a free drag-and-drop course creating solution that also allows you to work on your favorite platform without virtual machines.

There will be content management and course creation collaboration tools that support enhanced productivity.

After all the elements are in place, the customization is managed through the object-based inter-communication functionality.

A strong asset of this solution is that being cloud-based, it will look the same on any platform and system you will use it on.

Check out the best features and functionalities that are included in SmartBuilder:

  • Responsive output
  • Install on Mac or PC
  • Supports various content output options
  • Combine multiple triggers, responses, and conditions
  • Create unique content to match any branding

⇒ Get SmartBuilder

Lectora – Award-winning authoring tool

Lectora is one of the premium desktop software options for developing web-based training tools, having everything you need to start teaching your online classes.

Quickly add multimedia content like videos (.mp4, .mov), audio (.mp3), documents, quizzes, and interactive modules, which will captivate the users.

And the learning platform is fully compatible with SCORM and xAPI authoring tools that enable you to insert advanced interactions in your courses.

If you’re offering services for multiple clients, it’s easy to personalize their experience with their own home page branding, banner, URL, email address, and user admin.

Its flexibility also expands on how the content is displayed on all platforms. It automatically adapts to the viewing device, but you can make adjustments along the way.

It comes with a free 30-day trial and the pricing for this software is found on the official website. Head over there and check out your options.

Check out the best features that are included in this software below:

  • The program supports rapid content creation and deployment across more platforms
  • Allows course authors to create the course once and made device-specific customizations
  • One of the most complete desktop authoring solutions that you will find available
  • Is able to provide a comprehensive solution to any video-based or scenario-based and responsive learning needs

⇒ Get Lectora

These are some of the best tools for creating interactive learning modules that are currently found online.

Check out their sets of features before making any decisions because it’s important to know what every tool has to offer for your needs and skills.

And while we’re on this subject, you might be interested in our best authoring software list to get inspired for your next project.

We hope that you have found a suitable tool to create amazing eLearning content and we’re waiting for your impressions in the comments section below.

Laptop Security: 11 Best Software to Secure Your Portable PC

It is vital for your laptop to have the latest security software installed and updated. This guarantees year-round security.

If you do not have any security software installed on your laptop or Windows PC, it will be vulnerable to malware, viruses, and ransomware.

Any laptop security software installed on your system can monitor suspicious activity, and then prevent potentially damaging actions to occur, such as changing registry entries or installation of a browser add-in.

In this post, we have compiled only the very best laptop security software based on their system impact, malware protection, ease of use, and extra features.

Due to cyberattacks becoming fiercer, an antivirus program can no longer make up for laptop security alone. You need to utilize VPN software as well as malware security tools.

This will prevent malware attacks and also safeguard your personal information and online identity.

What is security in laptops?

Good laptop security should combine various types of shields to protect your device against online threats. Today’s digital world is filled with malware, ransomware, and phishing attempts, just to name a few.

That’s why having a good security system is ideal. Most of us have tons of private and important information on our laptops, so we need to make sure it’s not leaked or compromised.

Most laptops have basic security features already built-in, but if you use the Internet on a regular basis, they may not be enough.

Do I need to buy security for my laptop?

Laptops that run Windows come with the built-in Windows Defender, which is a pretty good antivirus utility.

But if you want best-in-class detection and prevention, you should add third-party tools to your arsenal. Using a professional security tool is the recommended way to go.

However, remember that the tools we recommend below offer free trials or money-back guarantees, in case you’re not ready to commit financially.

What is the best security software for Windows 10?

You may know that in today’s world malware and digital threats are more and more advanced, and every PC user should act responsibly. 

In order to do so, you certainly need a helping hand from specialized tools such as antivirus software that is capable to enhance protection for laptops.

?️ Best antivirus software for laptops

TotalAV – Protection built for a laptop on the move

TotalAV antivirus scan

A laptop that connects to hotel, airport and cafe Wi-Fi needs more than a scanner, and TotalAV covers that. Real-time protection stops malware and spyware as they arrive, WebShield blocks phishing and malicious sites, and downloads are scanned before they open.

The higher plans add a Safe Browsing VPN for public networks and a password vault, and the tune-up tools keep the laptop lean. One subscription also protects your phone.

  • Real-time protection against malware and spyware
  • WebShield blocks phishing and malicious sites
  • Safe Browsing VPN in the higher plans
  • Junk cleaner and startup manager
  • Covers your phone under the same subscription
TotalAV

TotalAV

Use this highly secured antivirus on your laptop or other devices for all-around system protection.

Avira – Lightweight and easy to use

Avira Antivirus platform

Avira is one of the best free antivirus software that delivers real-time security against ransomware or malware threats. 

Using this popular antivirus trusted by 100 million users you have complete cyber security support to keep your laptop at its best performance and virus-free. 

More exactly, the software includes protection against malicious websites, spyware threats, or network tracking blockers to be always safe online. 

Additionally, you have valuable features such as anti-scam technology, a speed booster to enhance system performance, or software updates to stay on loop with up-to-date apps or drivers. 

This being said, you should confidently consider this antivirus for a clean PC without digital traces and maximizing privacy. 

Avira

Keep yourself secured with this best-in-class antivirus for reliable support against digital dangers. 
Check price Visit website

Bitdefender Total Security – Advanced file protection

BitDefender is a complete security solution for your laptop that goes beyond basic cybersecurity tools.

Rated as one of the top antivirus programs in the world, this software offers solid security for your device and guarantees to protect you against viruses, malware, and spyware.

One interesting feature about Bitdefender is that it is very easy to use due to its minimal design GUI that seamlessly blends in on any platform and OS.

In addition, you should consider this antivirus tool as a lightweight service in order to consume minimal resources for complex security from new and serious malware.

Let’s quickly look at its key features:

  • Unbeatable threat detection
  • Multi-layer ransomware protection
  • Secure VPN for total online privacy
  • Anti-phishing, anti-fraud, antispam protection
  • Integrated firewall and network protection
  • File encryption and file shredder
  • Password manager and vulnerability assessment

In addition, you can also top these features with one more powerful tool to complete your security suite, the Bitdefender VPN.

Bitdefender

Assure your computer security on every digital activity with this most efficient detection rate antivirus.
Check price Visit website

Norton Antivirus – Best for secure payments

Norton Antivirus offers protection against common online threats including ransomware, viruses, and spyware. The app also has banking and online shopping protection so you can perform transactions online without fear of data theft.

It’s worth mentioning that Norton Antivirus comes in several versions, and the features previously described are a part of the Basic security version.

The Standard version has the same features, but it also has a smart firewall so you can easily control which applications can access the Internet.

The Deluxe version has the same features as the previous version, but it allows you to use a single license on multiple PCs, Macs, and smartphones. There’s also a web portal available so you can easily manage the protection for all your devices.

The Premium version offers family safety features, so you can easily restrict content that your kids view online. This version also offers automatic backup and 25GB of secure cloud storage, so you can easily back up and protect your important files.

Overall, Norton Antivirus offers solid security features, so if you’re looking for a new antivirus, you might want to consider it.

Let’s quickly look at its key features:

  • Protection against standard online threats
  • Online shopping protection
  • Smart firewall
  • Cross-platform availability
  • Parental control and auto-backup
  • 25GB of secure cloud storage

Norton

Acquire real-time malware protection with this authorized antivirus solution.
Check price Visit website

? Best VPN software for laptops

It is highly recommended to employ the best security system for laptops and therefore be relaxed regarding data being lost or stolen.

Hence, thanks to trustworthy security tools on the market, you will provide unbreakable safety against phishing attempts and data leaks.

VPNs encrypt your traffic so none of your activity is visible. They help you stay anonymous online and protect important data such as your identity, bank information, and address.

NordVPN – Great double VPN feature

NordVPN provides the fastest service to protect the user’s privacy for different online activities. With this industry-leading software, you will secure your digital traces efficiently on your laptop.

Firstly, with such a performant VPN, you benefit from dedicated support for hiding sensitive data online and protecting valuable personal information stored online.

This is an easy-to-use platform so you can simply choose from thousands of servers and connect to different locations to bypass location restrictions seamlessly.

By choosing NordVPN you can forget about geo-blocking rules and access secure content on the entire web without being interrupted by local restrictions.

Consequently, you don’t have to worry about bandwidth limits no matter of location and peacefully enjoy your favorite streaming content.

Let’s quickly look at its key features:

  • CyberSec technology
  • An automatic kill switch
  • AES 256-bit encryption
  • Extremely 5300+ fast servers
  • Quick Connect option
  • Fast and secure P2P file sharing
  • Strict no-logs policy
  • Protection for 6 devices with 1 subscription

NordVPN

Protect your privacy online effectively using this VPN’s fast servers on your laptop now.
Check price Visit website

ExpressVPN – Fastest servers

With 3 000+ servers in 94 different countries, ExpressVPN is capable to encrypt your traffic regardless of where you are located.

It’s one of the best-rated VPNs for good reason. The client has a strict zero logs policy, meaning they don’t keep any user data information.

Moreover, they use encapsulation, which basically means that each data packet you send when connected to ExpressVPN is placed inside a secondary data pack.

Consequently, your connection gets an extra layer of protection and security.

The VPN offers access to several VPN security protocols, including OpenVPN and Lightway, which are both very fast and secure.

We must also mention that your data is protected by ExpressVPN even in case you disconnect from the VPN, thanks to the emergency killswitch.

Other key features of ExpressVPN include:

  • Split tunneling
  • Auto-connect feature
  • Built-in VPN speed test
  • 24/7 support
  • Compatible with all major operating systems
  • Allows up to 5 simultaneous connections
  • Improves latency in games
  • Unlocks geo-restricted or censored content

ExpressVPN

Encrypt your traffic with this foolproof and fast VPN!
Free trial Visit website

Private Internet Access – Best US coverage

Compatible with all popular desktop and mobile platforms, PIA is your trusted partner in fighting online censorship, cyber threats, and privacy leaks and it seamlessly matched your laptop’s structure.

When it comes to security features, PIA VPN is your best bet offering secure and reliable connections for your entire network and for up to 10 devices at the same time.

Privacy-oriented PIA provides an IP cloaking function that allows you to hide your IP and replace it with one from its impressive networks of 3292 + servers strategically placed in 46 countries worldwide.

To guarantee you ultimate confidentiality, this world-class VPN service provider adheres to a strict no-logs policy and facilitates anonymous browsing.

Encryption-wise, the tool is unmatched and you will be able to enjoy secure VPN tunnels through which your traffic will be routed while being shielded against any curious eyes.

Let’s quickly look at its key features:

  • Compatible with all gadgets and platforms (mobile, PC, laptops running Windows, MacOS, Linux, Android or iPhone/Ipad)
  • Private IP address to browse anonymously
  • Strong encryption for your data even on public Wi-Fi networks
  • Total privacy and unmatched confidentiality with zero logs
  • Lightning-fast speeds, unlimited bandwidth (ideal for streaming, gaming, and P2P torrenting with no buffering or slow loading times)
  • Access to 3292 + servers in 46 countries from all over the world
  • Bypass censorship and unblock geo-restricted content and websites
  • Block ads, trackers, and malware
  • Secure VPN Protocols (Wireguard, PPTP, OpenVPN, and L2TP/IPSec)

Private Internet Access

Total online privacy and unbeatable protection? It is now possible with PIA!
Check price Visit website

Surfshark – Mpst budget-friendly

Choosing Surfshark as your VPN is a long-lasting decision that will positively impact your online privacy and security.

This VPN solution provides helpful support to encrypt your network connection and disguise internet activities for preventing curious eyes to track you.

You can always stay protected while browsing online and hide your IP address with many services from various locations, keeping your searches private.

Moreover, if you’re concerned about restrictive internet based on your location, don’t worry. This VPN provider offers uncensored content while you travel or for regions where it’s actually forbidden.

This way, you will efficiently protect your online identity and relish the most captivating content out there, on popular streaming platforms or online TV programs.

Let’s quickly look at its key features:

  • Private DNS & leak protection
  • A kill switch option
  • AES-256-GCM encryption
  • Strict no-logs policy
  • CleanWeb option to block trackers or malware
  • Camouflage Mode
  • A bypasser for allowed websites
  • IKEv2/IPsec secure protocols

Surfshark

Benefit from complex security for your digital activity using this award-winning VPN tool.
Check price Visit website

CyberGhost VPN – Great international coverage

CyberGhost is a top-rated VPN service provider with millions of users worldwide. If you’re looking to gain a security advantage on your laptop in addition to an antivirus, CyberGhost will give you the perfect edge.

The software allows you to hide your IP address, which will be replaced with an IP address from its vast network of 6400+ servers strategically located in 90+ countries worldwide.

Enhanced confidentiality is further guaranteed by a strict no-logs policy and your data will benefit from the strongest level of encryption available on the market.

Between an automatic Kill Switch and DNS and IP Leak protection, you are bound to secure your connection, your privacy, and your data in an unpenetrable way.

Let’s quickly look at its key features:

  • Ultra-fast speed, unlimited bandwidth, and traffic
  • Access to over 6479 servers worldwide
  • DNS and IP Leak Protection
  • 256-bit AES Encryption
  • OpenVPN, L2TP-IPsec and PPTP protocols
  • Simultaneous connections on up to 7 devices
  • Compatible with all major platforms and operating systems
  • 45-day money back guarantee

CyberGhost

Want unmatched privacy and connection security? CyberGhost VPN is here to help you.
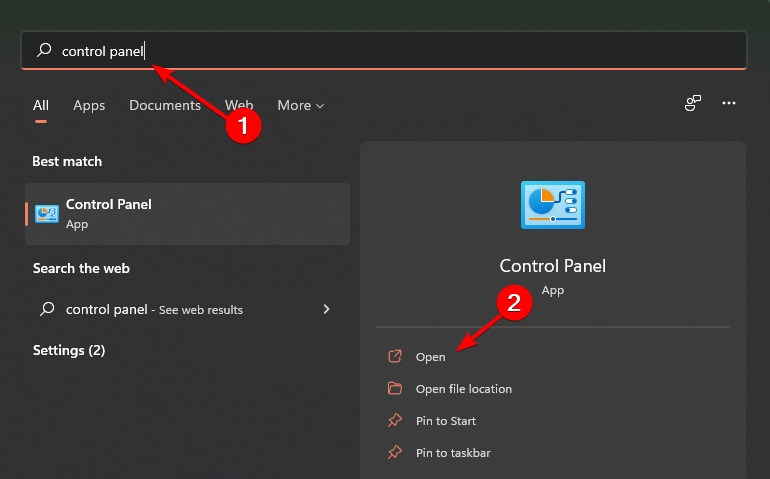
Check price Visit website

Avira Phantom – Advanced anti-tracking

Avira Phantom VPN keeps your devices protected against several network threats. This software anonymizes your Internet connection and prevents you from being tracked online.

With this solution, you can encrypt all your sensitive information and access restricted content from various websites without being blocked.

It can as well provide valuable services to prevent hacking attacks from stealing sensitive data from your system. Plus, you can stop advertisers or trackers to record any of your digital information

In addition, you can run Avira Phantom VPN on all your devices, most especially your laptop.

Let’s quickly look at its key features:

  • Kill Switch with DNS protection
  • Easy to use subscription service
  • Netflix compatible (among other streaming services)
  • Unique data logging policy
  • Complete web anonymity and absolute privacy
  • Secure encryption for your data traffic

Avira Phantom

Have a try with this extremely secure VPN tool for increased privacy anywhere online.
Check price Visit website

Do laptops come with built-in security?

Some laptops have built-in security, but that is generally meant to protect them on a very basic level,, until you’re able to set them up and integrate security software.

➡️ Is Microsoft Defender enough?

As mentioned, Windows comes with its own antivirus, Windows Defender, which has a pretty good detection rate, but it’s not as good as third-party software.

➡️ Is it worth paying for antivirus?

In most cases, yes. Given that most laptops are used for online activity, a good, paid antivirus is the recommended way to go for most users.

If you use your laptop to work, communicate, shop, or even just for gaming, an antivirus will ensure your data stays private an, important files are not being corrupted and your device operates well.

These are the best laptop security software that offers you ultimate protection against gazillions of cyber threats. Most of them are quite easy to use due to their understandable graphical user interface (GUI).

Select any of the tools we mentioned above and utilize them on your laptop for guaranteed security.

Change Default Browser on Windows 11 like this in 2026

While Microsoft Edge has improved significantly, many users still prefer alternatives like Google Chrome or Firefox. If you want to change the default browser on Windows 11, you might notice it’s not as straightforward as it used to be.

Whether you’re setting Chrome as your default browser or trying to avoid Edge altogether, just follow the exact steps below – they work on all versions of Windows 11.

How do I change my default browser on Windows 11?

  1. 1. Press Windows Key+ I.

  2. 2. Click the Apps option from the left side menu.

    settings app windows 11
  3. 3. Select the Default apps tab, from the right side of the screen.

    default apps windows 11
  4. 4. In the search box, type the name of the browser you would like to set as your default, for example, Chrome. After that, click on the Chrome button.

    search for browser w11
  5. 5. You will get a list of categories and for each one, you can select the default browser.

  6. 6. Click on each and select Chrome as the default browser.

    windows 11 set default browser chrome
  7. 7. After completing all these steps, you can simply exit the settings menu and try out your new favorite browser.

Our WR software specialists tested this method, so they know that this action does not disable the other installed browsers, it just makes the one you selected the default one on the system.

Can I turn off Microsoft Edge in Windows 11?

The short answer is yes. You need to navigate to the C:\Windows\SystemApps, and look for the Microsoft.MicrosoftEdge_8wekyb3d8bbwe folder, then rename it. You may also disable its process from Task Manager.

Need the Windows 10 steps instead? See our guide to set the default browser in Windows 10.

How to Fix Network Congestion: Test, Causes & Solutions

Technology advancements have made it possible for more and more people to benefit from an Internet connection daily. However, without proper management, this could lead to various inconveniences.

Imagine networks as cities and Internet-connected devices as citizen-owned cars. Much like cities, if networks aren’t correctly managed, upgraded, and even expanded if necessary, they will be heavily congested.

Network congestion isn’t a simple matter. It’s one of the most complex challenges a network administrator could face. Mainly because there’s no magic fix for it other than competent management skills.

Much more so if you’re on one of the receiving ends or one of the causes of said congestion.

If you’re experiencing network congestion and are not in any way in charge of managing the network, there’s nothing you can do aside from contacting the network administrator.

What is network congestion?

Network congestion is a phenomenon that appears due to a series of factors. Mainly, it is caused by too many devices on a network that isn’t designed to carry that big of a load.

The bottom line is that improper network management could lead to these clogs. Once some of the devices log off or stop exerting the load on the network, the situation should automatically alleviate for everyone, one bit at a time.

Network congestion is also a lead cause of the following underlying issues:

  • High latency (delay) – on a congested network, the time a packet needs to reach its destination might increase by a large deal
  • Connection timeouts – many services will timeout instead of waiting for the arrival of packets
  • Packet loss – if the network is congested, many packets might not be able to reach their destination and will get dropped

The good news is that network congestion isn’t a permanent issue, or at least it shouldn’t be.

Much like rush hour, it occurs every time several connected devices are using network resources at the same time.

? What does it mean when the network is congested?

A congested network means there are not too many devices on the network, but some of them put an excessive load on the network or perform actions that use a lot of bandwidth, such as torrenting.

In a nutshell, this network issue can be seen as a flawed transfer between your devices in the network.

? What does a heavily congested network mean?

If this process affects your network because of an excessive number of devices connected simultaneously, you’ll have a heavily congested network.

That means your bandwidth is drained, and your network, with its routing devices (routers, switches, cables), will lead to network congestion.

What causes network congestion?

Although you probably painted quite a clear picture in your mind already, several key factors play a role in network congestion. The city traffic analogy is quite appropriate.

With that in mind, let’s take a look at the most common causes of network congestion:

  • Too many devices on the network – congestion will most likely occur if the network can’t handle numerous devices (imagine a narrow street overflowing with cars).
  • Excessive bandwidth consumption – sometimes, certain users or devices can consume more bandwidth than the average user/device on the network.
  • Old, obsolete, outdated hardware – not all of them at once, of course. However, paying for a gigabit plan, and having a network adapter that can handle connections up to 100 MBs can lead to bottlenecks. These, in turn, can affect all the network participants. The same goes for old routers or poor-quality connection cables.
  • Poor subnet management – if you have a large network, you will need to divide it into subnets, for better resource management. However, if the subnets are not sized according to usage trends and resource needs, network congestion might become a problem.
  • Over-subscription – a measure that’s usually adopted for cutting costs, but can lead to the network being forced to handle way more traffic than it’s supposed to (at the same time)
  • DDoS attacks and other types of cyber threats – sometimes, malevolent agents (ahem, hackers) might seize your network and use it to host various content on it, hogging the bandwidth and congesting the network. Other times, DDoS attacks might have a similar impact on your network.
  • Unfit Internet subscription – cheap Internet subscriptions are usually throttled or don’t offer you enough wiggle room. For instance, you might have a router/PC combo that can handle gigabit connections without a glitch, but your subscription is capped at 50 MBps.

So, these defined causes of network congestion should make you more prepared for network problems from your own Internet provider.

What are the signs of congestion in a network?

In order to recognize and ultimately get through congested network issues, you must know the signs of network congestion:

✅ Connection high latency and slow navigation

✅ Broadcast storms – broadcast storms can lead to network congestion

✅ Devices with constantly high CPU loads

✅ Hacking attacks or unusual network behaviors

✅ ISP throttling

How do I know if my network is congested?

As we have seen, there are more than just a few causes for network congestion. Therefore, you probably understand better now why there’s no magic fix for this issue.

More often than not, you can solve this problem easily by managing the network properly.

How to test for network congestion?

  1. Press the Win key on your keyboard
  2. Type CMD, right-click the Command Prompt and select Run as administrator
  3. In the CMD window type tracert google.comNetwork congestion test tracert
  4. Notice the number of hops it takes to reach the final server
  5. Take a look at the ping for each hop

In this case, when the final server is relatively far away, you might encounter issues on your side or the receiving end. If the problem’s with you, you might want to try the fixes below.

Waiting could be the most effective approach if congestion occurs on the other end.

How to fix network congestion?

In this section, we’ll describe different ways to handle congestion in the network and offer you some practical advices:

1️⃣ Monitor the traffic on your network and check for any bottlenecks or heavy usage patterns

2️⃣ Segment your network into multiple subnets that you can resize according to usage

3️⃣ Optimize the TCP/IP settings to balance the packet send/request speed

4️⃣ Use a CDN (Content Delivery Network) that will optimize resources by placing more requests on edge servers

5️⃣ Prioritize traffic on your network (for instance, VoIP services is always high-priority)

6️⃣ Use choke packets to reduce the output of sender devices, thus preventing network congestion

7️⃣ Opt for multi-hop routing, so that traffic can be routed over a different path whenever the default route starts queueing

8️⃣ Upgrade your Internet subscription to accommodate more devices and a larger bandwidth

9️⃣ Make sure your devices are up-to-date and not obsolete (even the cables)

? Check for any attack attempts in your connection logs

In addition, you can use a VPN to bypass congestion (if the issue is on your ISP’s side)

The best VPN software for Windows 10 includes advanced security options and has a large number of servers across the globe.

Their main purpose is to provide more secure and private browsing. Your identity and browsing data will be completely private if you use a VPN. This means that your ISP won’t be able to place any restrictions on your traffic use.

If you ran the test as described above and noticed abnormal traffic in the intermediary hops (those belonging to your ISP), you can try using a VPN to fix the situation.

How can network congestion be avoided?

Even though network congestion can be a nuisance, it’s not the end of the world. You should take care of your network connection regularly by troubleshooting or prioritizing your connection in cases where you have more than one available network.

On the other hand, using VPN protection improves connectivity and network connection, so you should go for a fully encrypted tool like ExpressVPN.

Check out our guide to learn more about packet loss and how to fix it. Visit our Network & Internet Hub to learn more about proper network management.

If you know for a fact that your network quality is poor, you can try tweaking it (if you’re a network administrator). Alternatively, contact the network manager and bring the tweaks above into discussion.

Opera VPN for Netflix: Does it Work? How To Watch Netflix US

Opera is a unique web browser that comes bundled with many fantastic and practical features, such as seamless integration with WhatsApp, Instagram, and Facebook Messenger. But it also has a built-in VPN that many users have tried with Netflix.

If you’re one of those who wondered if Opera VPN works with Netflix, we’re here to help.

Since we’ve already done that, you don’t have to download and set up the web browser to see if you can use it to unblock a different Netflix catalog.

In general, you should use the best VPNs for streaming services to unblock restrictions from any of your favorite streaming platforms.

Does Opera VPN really work with Netflix?

netflix best quality browser opera

Yes, it does. It’s possible to stream blocked content libraries from Netflix using Opera integrated VPN.

We managed to unblock Netflix US from Europe with the assistance of the Opera VPN.

To our surprise, the streaming service didn’t detect and block VPN traffic, which makes Opera VPN one of the best free VPNs for Netflix.

How to watch Netflix US with Opera VPN

  1. Visit the Opera official website to download the browser.
  2. Click on the Download Opera button.
    opera vpn netflix
  3. Select a storage location and click on the Save button.
    Opera VPN Netflix
  4. Click on the downloaded file to start the installation and follow the installation wizard.
  5. Once the installation is completed, click on the Opera icon to launch the browser.
  6. Click on the Opera icon at the top left corner of the browser and select the Settings option.
    Opera VPN Netflix
  7. Search for VPN in the Settings search field at the top, then toggle the switch to activate the Enable VPN feature.how to enable VPN in Opera
  8. Click the VPN label in the address bar.
  9. Set your Virtual location to Americas.set the Opera VPN to Americas
  10. Navigate to Netflix on your address bar.
  11. Start watching Netflix US.watch Netflix US with Opera VPN

NOTE: These instructions are available for Opera version 69, so they might vary on your device if you have a different edition.

As you can see, it’s straightforward to use the Opera browser to access Netflix, so we encourage you to try it out.

If you’re interested in a premium VPN that you can use to bypass the Netflix VPN error and watch Netflix US, UK, Canada, Australia, and others, there’s a better alternative.

Opera

Use Opera VPN for free to hide your IP, encrypt your traffic, and unblock Netflix US on your device.

What’s the best VPN for Netflix?

If you’re looking for another way to access Netflix on your device, then VPN would be the best choice. There are many great options, but the most suited for streaming is ExpressVPN.

You will be able to access any geo-restricted content with ease. Regarding the number of servers, there are thousands of IP addresses spread across 94 regions worldwide.

This VPN is straightforward to use and set up, and since it doesn’t collect any traffic logs, your browsing activity will remain completely secure.

Overall, you have the latest encryption to ensure fully private navigation and streaming-optimized servers to access Netflix from anywhere you are.

Other great features:

  • TrustedServer technology
  • Stream capabilities for Netflix geo-restrictions
  • No traffic logs
  • Unblock any restricted websites
  • Fast server locations in 94 countries

Use this streaming VPN with unlimited bandwidth to watch or binge Netflix content today!

⇒  Get ExpressVPN

Opera VPN Netflix not working

1. Restart the VPN

Simply canceling the login attempt, restarting your browser, and reconnecting the VPN are the fastest and most straightforward solutions to many VPN issues. By selecting the VPN option in the browser’s address bar and twice selecting the toggle switch at the top, you will restart the VPN.

2. Clear cookies and cache

  1. Launch the browser.
  2. In the address menu, input the link below and hit Enter.
    opera://settings/privacy
    opera vpn netflix
  3. Under the Privacy and security menu, click on Clear browsing data.
    Opera VPN Netflix
  4. Select a Time range, tick the checkboxes for Browsing history, Cookies and other site data, and Cached images and files, then click on the Clear data button.
  5. Now relaunch the browser and retry the VPN.

3. Disable Apps & browser control

  1. Click on the Start menu, type security, and click on the Windows Security app.
    Opera VPN Netflix
  2. Turn off the option for Apps & browser control.
  3. Relaunch the browser and try the VPN again.

Any of the above-mentioned options should be effective enough to get your Opera VPN working once more. If Opera GX VPN is not working for Netflix, you may try the same fixes.

How do I change my Netflix region on Opera VPN?

  1. Launch your browser.
  2. Click on the VPN setting of the Address bar.
  3. Under the Virtual location menu, select any of the three regions or leave it as Optimal location.

In conclusion, Opera VPN is an incredible VPN tool that works with Netflix. You can use it to unblock Netflix US for free, and there are no monthly caps for the VPN bandwidth.

However, Opera VPN is not the most robust VPN in the business.

Speaking of streaming services, have you heard about Loomi by Opera? We have a whole guide dedicated to it, so you might want to check it out.

If you’re interested in not only accessing all Netflix catalogs but also taking advantage of premium security features, go with our recommended VPN for streaming.

You Require Rermission from TrustedInstaller [Delete/Change]

TrustedInstaller is a legit Windows component and belongs to Windows Modules Installer. And users generally find out about it when seeing the You require permission from TrustedInstaller to make changes to this folder error.

TrustedInstaller is one of the core components of Windows Resource Protection, included in every iteration of Windows since Vista.

Although you are signed into the system with an Administrator account, when trying to access, rename, or delete certain files, you might stumble upon a message that reads, You require permission from TrustedInstaller to delete this file, or even regarding other changes.

If you are confident about your action and realize that it wouldn’t adversely affect the system, there’s a tweak you can apply to move forward.

What is TrustedInstaller permission?

TrustedInstaller permissions are basically the ones that you require when accessing, renaming, or deleting certain critical files on the computer. This includes system files and Windows.old folder (contains files for the previous iteration after you upgrade the OS), amongst others.

TrustedInstaller is a built-in user account with permissions to access to these files, and until you have them, you can’t make any changes to the files.

Consider it an additional security measure enforced by Windows to prevent users from making drastic changes on the computer that may affect the proper functioning of the OS.

Where can I find TrustedInstaller?

  1. Press Windows + E to launch File Explorer, paste the following path in the address bar, and hit Enter:C:\Windows\servicingnavigate to fix you require permission from trustedinstaller
  2. You will now find the TrustedInstaller file located here.TrustedInstaller

TrustedInstaller has a process located within the system drive and can be easily located. We strongly advise against making any changes to it.

Also, if you are interested, find out all about TrustedInstaller, and how to fix issues with it.

Now, that you have a basic understanding of TrustedInstaller, let’s find out how you can fix the You require permission from TrustedInstaller error.

How do I get permission for TrustedInstaller?

1. From the file/folder properties

  1. Right-click on the file or the folder you want to change or delete, and select Properties.Properties to fix you require permission from trustedinstaller 
  2. Now, head to the Security tab and then click on Advanced.advanced
  3. You will see that the owner of the file is TrustedInstaller. So click on Change. (For older Windows versions, there’s a separate tab for Owners).change to fix you require permission from trustedinstaller
  4. In the window that pops up, type the user name you are using on the computerand, click the Check Names button. Windows will automatically check and complete the full object name. Then click on OK.check names
  5. Also check the box before Replace owner on sub containers and objects), then click OK.tick checkbox
  6. In the Properties, again click on Advanced.advanced
  7. Now, click on the Change permissions button under the Permissions tab.change permission to fix you require permission from trustedinstaller
  8. Next, click on Add.add
  9. Click on Select a principal.select a principal to fix you require permission from trustedinstaller
  10. Again, enter your user account here, click on Check Names, and once it’s identified and listed, click OK.check names
  11. Tick the checkbox for Full Control under Basic permissions, and click OK.full control
  12. Once again, click OK to apply the changes.Ok
  13. Finally, click Yes in the confirmation prompt that pops up.yes

This will change ownership, and you should not see the You require permission from TrustedInstaller to make changes to this file message for that particular file.

2. Using Command Prompt

Note icon NOTE
Before executing the steps listed here, make sure you are logged in with an Administrator account. In case you are using a Standard account, switch to an Administrator account and then proceed.
  1. Right-click on the file that you want to take ownership of, and select Copy as path.copy as path
  2. Now, press Windows + S, type Terminal in the text field, right-click on the relevant search result, and select Run as administrator.run as administrator
  3. Click Yes in the UAC prompt.yes
  4. Press Ctrl + Shift + 2 to open Command Prompt.
  5. Now, paste the following command, followed by the file path (without brackets) that you copied earlier, and hit Enter:TAKEOWN /F (file path)command
  6. Once done, you would receive Success: The file (or folder): “file path” now owned by user “your username”.success

That’s it! The Command Prompt method is relatively simpler and quicker. With the detailed step-by-step process listed here, anyone can fix the You require permission from TrustedInstaller error in Windows.

How can I fix You require permission from TrustedInstaller on Windows 11?

There are two ways for it, either to head to Advanced Security Settings and then take over the access of the required file or run a simple command in the Command Prompt.

Both methods have been listed in the previous section, and you should be able to fix the error using any one of them in no time.

How do I fix I need permission to perform this action?

A fairly common error, it arises when you try to access files owned by an administrator on the computer. In this case, switching to an administrator account should do the trick.

If that doesn’t work, convert all the other account types to Standard, log in with the only Administrator account, and try performing the action.

In some cases, the error message will specify who to take the permission from, be it another user account or TrustedInstaller. For the former, you can ask them to provide the required permission, and if it’s the latter, the steps listed in the earlier sections should help.

Besides, check for malware, disable third-party antivirus or other security software, and if nothing else works, boot Window in Safe Mode and then perform the action.

That’s all there’s to the TrustedInstaller error in Windows 10 and 11. Also, the methods listed here would work when getting the You require permission from TrustedInstaller error in Windows Server 2016.

Besides, find out what to do in case of the You need administrator permission to delete this folder error.

If you have any other queries or want us to cover a specific topic, drop a comment below.

How to Disable Animations on Windows 10

Microsoft has introduced among many other features the window animation that you only get with the new Windows 10.

Although this animation only shows when you open a new window or you close a previous one some Windows 10 users are getting pretty annoyed by it.

How can I turn off animations on my Windows 10 device?

how to disable animations in Windows 10 visual options

For those of you who installed Windows 10 technical preview on your devices, you might be wondering how you can completely disable the animations feature you have.

You will see that it is not that big of a deal to learn how to disable the animations in Windows 10 and it will only take you a couple of minutes if you follow step by step the tutorials below.

1. Via System Properties

  1. Press and hold the Windows button and the R button in order to bring up the Run window.
  2. In the Run box write the following: Sysdm.cpl.
  3. Press the Enter button on the keyboard.
  4. You should now have in front of you the System properties window.
  5. In the System Properties window, you will need to left-click or tap on the Advanced tab situated on the upper side of the window.
  6. You will have there a Performance topic where you will need to left-click or tap on the Settings button.
  7. You should now have in front of you the Performance Options window.
  8. Left-click or tap on the Visual effects tab situated on the upper side of this window.
  9. Left-click on the Custom option you have in this window.
  10. You will have there a list of animations that can appear in your Windows 10 system. From the list, if you would like to disable one or more of them you will only need to left-click in the box on the left of the animations name in order to uncheck it.
  11. Next, you will need to left-click or tap on the Apply button you have on the lower right side of this window in order to save the changes you made to the animations feature.
  12. Left-click on the OK button as well in order to close this window.
  13. Go and check if you still have the animations present after you disabled this feature in your Windows 10 operating system.

2. Use the Ease of Access Center

  1. 1. Press the Windows key on your keyboard to open the Search menu.

  2. 2. Type settings in the search box.

  3. 3. Click on the result to open the Settings menu.

  4. 4. Situated on the left side in the menu, you will have the Ease of access option. Click on it.

    ease of access windows 10 settings
  5. 5. Now that you are in the Ease of Access window, you need to navigate to the Display section.

    turn off animations windows 10 display
  6. 6. Scroll down to the Simplify and personalize Windows tab.

  7. 7. Place the switch to the Off state under the Show animations in Windows feature.

    disable animations windows 10 simplify features
  8. If you want to turn off animations on your device, you can do this through the built-in Ease of Access Center. It allows you to toggle animations on and off in just a click.

3. From Control Panel

  1. On your Windows 10 search Bar tap Control Panel, select and open itdisable windows 10 animations control panel
  2. Click on System and Security.
  3. Click on System.
  4. Select Advanced System Settings.disable windows 10 animations system settings
  5. Click on Settings under the Properties tab.disable windows 10 animations advanced properties
  6. Uncheck the animations options you want to be disabled and click Apply.disable windows 10 animations custom animation selection

Here you go! Now you will have your computer running faster.

We also have an article on how to disable animations on Windows 11 that you can check out.

Following either one of the methods above will disable your animations in Windows 10 and now you also know from where you can turn them on again if you ever wish to.

Please write to us below for any other questions related to this article and we will help you as soon as possible.

How to Disable Animations in Windows 11 [3 Different Ways]

There are several new features and functionalities included in Microsoft Windows 11. The user interface has been updated, and some new effects have been introduced by the company.

By default, animation effects are applied to controls and other objects.

Should I disable these animations?

Even though Windows 11 has animation and fading effects that are visually appealing, they can cause your computer to feel sluggish for some users since they add a little delay to some tasks.

It’s simple to switch off animations for a more responsive user experience. We’ll walk you through the methods by which you can turn on or off animation effects in Windows 11 right after we see what other changes have been made to the OS.

We also have an article on how to disable animations on Windows 10 that you can check out.

What’s new in Windows 11?

The most significant change in Windows 11 is the increased stringency of its hardware requirements. If your computer is relatively new, say, within the last five years, you should be fine, but older systems may be trapped with Windows 10 for the foreseeable future, according to Microsoft.

With Windows 11, you no longer have to deal with the clumsy tiling system that was present in the previous version of the famous taskbar.

windows 11 taskbar settings

Instead, you can get to the point quickly and easily. You get a recent files list (both locally and in the cloud) as well as a tray of pinned apps for quick access, as well as a universal search bar at the top for quick online (or on-device) searching.

Cleaning up the lines and making use of widgets to display information such as weather and news is a nice difference from the crowded screen that is present on the previous version of the OS, Windows 10.

In addition, the enhanced Snap Layout and Snap Group capabilities make it easier to manage and resize windows on your display, while also keeping programs that you need to utilize at the same time organized in groups.

You can still grab windows and drag them to the edge of your screen to perform some basic window management, but if you’re working from home or using more than one monitor, simple window organizing can help keep your desktop uncluttered.

If you’re interested in finding out more on this topic, feel free to explore the Windows 11 best features and a full comparison between it and Windows 10.

How can I disable animations in Windows 11?

1. Via Accessibility

  1. Press the Windows key + I to open the Settings app, and navigate to Accessibility in the left panel followed by Visual effects from the right side.accessibility-animations disable animations windows 11
  2. Now turn off the toggle next to Animation effects. The change will apply automatically. If you wish to switch the animations back on, simply turn the same toggle on.animation-effects-off  disable animations windows 11

2. Use Control Panel

  1. 1. Press the Windows + S key to open the Search bar, then type Control panel and click on the most relevant result.

    control panel search for app
  2. 2. Now click on Ease of Access.

    ease-of-access disable animations windows 11
  3. 3. Next, navigate to Ease of Access Centre.

    ease-of-access-center disable animations windows 11
  4. 4. Scroll down until you meet the Use the computer without a display option and click on it.

    computer-without-display disable animations windows 11
  5. 5. Check the box next to Turn off all unnecessary animations (when possible).

  6. 6. Click Apply and OK.

  7. Animations can also be disabled from the Control Panel. All you need to do is navigate to the Ease of Control Centre and adjust the settings for animations.

3. Tweak Performance Options

  1. Press the Windows key + R to open up a Run dialog box. Next, type or paste SystemPropertiesPerformance.exe inside the text box and press Enter to open up the Performance Options menu.systemperformance disable animations windows 11
  2. Once the window is opened, uncheck the Animate controls and elements inside windows, Animate windows when minimizing and maximizing, and Animations in the taskbar then click Apply and OK. That’s it!disable-animation disable animations windows 11

If you decide to get the animations back on, simply follow the above steps then check the boxes next to the animations options, and click Apply and OK.

Disabling the animations will improve your operating system’s performance and speed. You can also disable other features to optimize your user experience as we mentioned below.

What services can I safely disable on Windows 11?

Several services are off-limits, and you should avoid them at all costs. These are required for the operation of basic functions, the provision of security features, and the smooth operation of the Windows operating system.

The only ones that you should be on the lookout for are the ones that you nor Windows never need or use. However, even among the items listed below, there are a few that may be necessary under special circumstances.

windows 11 services
  • Fax – Faxing is a service that, as its name implies, is only required if you wish to send and receive faxes. If you’re not going to utilize it, which is likely to be the case for the majority of people, turn it off.
  • Remote Registry – This service provides access to and modification of the Windows registry for any user. It is highly recommended that you disable this service for the sake of your own personal security. The ability to change the registry locally will not be impacted in any way.
  • Touch Keyboard and Handwriting Panel Service – As the name implies, this service makes it easier to input data using a touch keyboard or by handwriting on touch-enabled devices. So, unless you have one of those, go ahead and turn it off now.
  • Windows Connect Now – Laptops and desktops that need to connect to wireless networks and devices are the primary target audience for this service. However, if you have a desktop setup that does not include a wireless card, you will not require this service and can safely turn it off.
  • Retail Demo Service – Finally, this service is only intended for manufacturers and retailers who need to demonstrate to customers the capabilities of their PCs and Windows operating systems. Because the average user would never require such a service, it can be disabled.

To find out how to disable non-essential services in Windows 11, take a look at the article linked, and don’t forget to check if Windows needs or doesn’t need the feature before modifying it.

Furthermore, you might want to know how to disable telemetry in Windows 11 if you find that you don’t need it either.

And lastly, users have benefited from reading our guide on how to disable Windows 11’s Fast Startup. Make sure not to miss it!

Don’t hesitate to let us know in the comments section below which solution worked best for you. Thanks for reading!

Fix Service Control Manager Errors Event ID 7000 [Updated 2026]

Event ID 7000 errors Service Control Manager errors disrupt essential services from starting, affecting daily tasks like gaming or professional work.

They usually look like this:

Screenshot from Microsoft Answers

Annoying, but you can fix them. And we’ll show you how.

Find below step-by-step instructions for fixing it. And if you need more help, we also have a video explaining it further. You can find it down below.

How do I fix the Service Control Manager error 7000?

1. Check the Event Viewer Log

  1. Press the Start button and enter the keyword Event Viewer in the search box.
  2. Select Event Viewer to open its window directly below.
  3. Click Windows Logs to expand a list of log categories.
  4. Select the System log to open a list of logs.
  5. Click the Event ID column header to organize the events numerically.
  6. Then click one of the event ID 7000 errors to open further details for it, as in the snapshot directly below.

The event ID 7000 log might state: The ServiceName service failed to start due to the following error: The service did not start due to a logon failure.

Note that the exact log details can vary slightly. Nevertheless, they will tell you that a specified service did not start. So, note down the specified service.

If you are looking for the best Windows 10 event log viewers, take a closer look at our top picks, and find the right one for your needs.

2. Restart the service

  1. Enter Services in Cortana’s search box.
  2. Select to open the Services window shown directly below.
  3. Scroll to the service that didn’t start. Right-click the software service and select Properties from its context menu to open the window below.
  4. First, click the Startup type drop-down menu, and select Automatic from there if the service is currently disabled.
  5. Press the Start button to restart the service.
  6. Press the Apply and OK buttons.

It might the case that the application service is not running. Thus, the service is switched off. You can restart a service by following the above steps.

3. Restore your system to its previous state

  1. Type Create a restore point in the taskbar and select it.
  2. In the System Properties window, click System Restore.
  3. Click Next to see available restore points.
  4. Select a restore point and click Next.System restore Show more restore points
  5. Click Finish to restore your system.

We suggest you use powerful registry cleaning software and a complete system repair solution. These tools will allow you to scan and replace any broken files with fresh genuine ones from their databases.

4. Adjust the service Log On settings

  1. Right-click the service included in the event ID 7000 log.
  2. Select Properties to open the service properties window.
  3. Next, select the Log On tab in the shot directly below.
  4. Select the This account radio button option.
  5. Input your credentials, then press the Apply and OK buttons.
  6. Now restart your desktop or laptop.
  7. If the service is already configured with the This account setting selected, select the Local System account option on the Log On tab instead.
  8. Then click OK, right-click the service, and select Restart.

You might need to configure the service’s login so that it matches your user account. You can do that by opening the Services window again.

5. Use the Group Policy Editor

  1. 1. First, log in to an administrator account.

  2. 2. Press the Start button, type gpedit.msc in the search box, and select to open the Group Policy Editor.

    gpedit run
  3. 3. Then you’ll need to expand these categories on the Group Policy Editor window: Computer Configuration\Windows Settings\Security Settings\Local Policies\User Rights Assignment

    click on user rights assignment
  4. 4. Next, right-click Log on as service on the right of the Group Policy Editor window and select Properties on the context menu.

    go to logon properties
  5. 5. Then you can click Add User to add a new user to the policy.

  6. 6. Click OK a couple of times to close the GPE.

  7. Adjusting the service logon user rights with Group Policy Editor is another potential fix for the event ID 7000 logon issue. Just follow the above steps to reconfigure the user rights with Group Policy Editor.

Note icon NOTE
By default, you can only open the GPE in the Windows 10 Professional and Enterprise editions. However, there are ways to install the Group Policy Editor on Windows Home PCs in case you need it.

Event ID 7000 is a Service Control Manager error that occurs when a service can’t start due to incorrect credentials. Similar errors include Service Control Manager codes 7023, 7009, and 7011.

The fix usually involves adjusting credentials or service configurations. If you’re also facing Event ID 1000 issues, check out this guide on Event ID 1000 application errors.

Have you tried these solutions or found others that worked for you? Let us know in the comments below.

How To Import Bookmarks from Firefox to Chrome

Browsers constantly evolve and receive updates, and you reach a point when you may have to choose another default one for the sake of efficiency.

The problem is that when you use a browser for too long, all your personal settings remain there. This means that when you migrate to a new browser, you need to start setting it up from scratch.

Such would be the case when you decide to switch from Mozilla Firefox to Google Chrome. While both Internet browsers are some of the best, you may prefer Google Chrome for one reason or another.

Quick Tip:

Are you going to perform all the steps from the guide below to import your bookmarks or are you going to install a browser that can do that in less than 10 seconds?

We’re talking about Opera, a browser that imports your bookmarks during the installation process. You just need to select the old browser from a list and click on the Import button.

Opera

Switching to Opera is not going to remove any saved bookmarks or passwords.

Can I sync Firefox with Chrome?

Yes, and quite easily, as switching from Chrome to Firefox is simple and totally free of any of the risks you might have read about on the Internet.

The Firefox browser can automatically import bookmarks, passwords, and history from Chrome without deleting them or interfering in any way.

Find out how to import Chrome bookmarks to Firefox as well by reading our dedicated article.

How do I import Firefox bookmarks to Chrome?

    Normally when you install either of the two browsers, you are automatically prompted to import your data from any other detected browsers.

    If you skip this step, you will then need to import them manually, and you can do that from within Chrome’s Settings.

    The Chrome browser allows you to easily import bookmarks from Mozilla Firefox. Its Bookmarks settings provide you with the option to import bookmarks, settings, browsing history and search engines from other browsers.

  1. 1. Open Google Chrome.

  2. 2. Select the 3 dots in the top-right corner of the UI.

    how to import firefox bookmarks to chrome settings
  3. 3. Go to Bookmarks.

    how to import firefox bookmarks to chrome step 2
  4. 4. Click on Import Bookmarks and Settings.

    import bookmarks to chrome from firefox settings
  5. 5. Select Mozilla Firefox from the drop-down list.

    how to import firefox bookmarks to chrome settings
  6. 6. Check the Favorites/Bookmarks box.

  7. 7. Select Import. This will close any instances of Firefox if you had it opened.

  8. 8. When you see a message confirming that the import was a success, click Done.

What can I do if I can’t import Firefox bookmarks directly into Chrome?

1. Export Firefox bookmarks as HTML files

  1. Select the Library icon.
  2. Scroll down the list and select Show All Bookmarks.
  3. Select Import and Backup from the toolbar.
  4. Click Export Bookmarks to HTML… .Export Firefox bookmarks as HTML
  5. Choose a location where to save your bookmark.
  6. Click Save.
  7. Exit the Library window.

2. Import the bookmark HTML files into Google ChromeImport HTML bookmarks to Chrome

  1. Open Google Chrome.
  2. Select the 3 dots in the top-right corner of the UI.
  3. Go to Bookmarks.
  4. Choose Import Bookmarks and Settings… .
  5. Select Bookmarks HTML File from the drop-down list.
  6. Click Import.
  7. When you see a message confirming that the import was a success, click Done.

By following these steps, you will be able to successfully export your bookmarks from Firefox to Chrome without any issues.

Can I sync bookmarks across different browsers?

Usually, you don’t even have to do much, as you will be prompted to import all your stuff to a newly installed browser.

That being said, if you accidentally close the prompt, or didn’t get one in the first place, you can use the browser’s settings to accomplish this goal.

All the browsers that can sync and import from each other, such as Opera, Chrome, Firefox, Edge, and others, have an Import bookmarks and settings option that is pretty easy to locate.

You will find this option in the bookmark-related section of the specific browser’s settings menu.

sync bookmarks across browsers

That’s all you need to know if you are planning to export Firefox bookmarks to Chrome. Know that moving bookmarks from Firefox to Chrome is easy and only takes a few minutes.

Are you interested in knowing how to import bookmarks into other browsers as well? Let us know in the comments section below.

How to Add and Edit Text to a Paint 3D Project

If you ever found yourself asking the question: How can I add text to my image inside Paint 3D?, you will get the answer by reading this guide.

No matter if you’re trying to create a postcard for grandma or you’re working on an art project that requires you to add text to your Paint 3D app, it is essential to know how to.

Adding text to your images is not the only step, as you will also need to know how to edit the added text.

In this article, we will discuss how to add text to Paint 3D and also how you can edit it so it fits the required style, font, size, etc. Read on to find out more.

How can I add text in Paint 3D?

  1. 1. Press the Windows key to open the Start Menu and type Paint 3D in the search box. Alternatively, you can open the search box by pressing the Start button on your taskbar.

  2. 2. Click on the result to open the Paint 3D app.

  3. 3. Press the New icon to create a new blank canvas.

    Paint3D start screen add text
  4. 4. Select the Text icon found in the top menu of your screen. This will open the Text menu, which you will be able to observe on the right side of your screen.

    Text icon paint 3d with options menu
  5. 5. From this menu, you’ll be able to change from 2D text to 3D text, font style, size, formatting, and the color of your text.

  6. 6. To start adding text to your canvas, click and drag a box on the canvas space.

    add a text box to paint 3d
  7. 7. After creating the text box, you can simply start typing the required text by using your keyboard.

    added text inside Paint 3D
  8. It is very easy to insert text in Paint 3D, as you will see from the guide below. The text can be customized to your preference. You can tweak the font style, text size, formatting, and color.

    If you want to add 3D text, you can follow the same steps as above, but choose the 3D text icon from the right-side menu.

How can I edit the text in Paint 3D?

  1. Double-click the text box created earlier to select it.
  2. If you want to delete the text, you can simply use the Backspace key on your keyboard to delete the written text -> then click on an empty space on the canvas to close the text box.
  3. If you want to add another text, follow the steps found in method one.
  4. In the case that you are satisfied with the text you wrote -> select the text you want to modify -> use the options from the right side menu to change the details you want – font, format, color, 2D or 3D, etc.edited text - how to add text paint 3d; how to edit text paint 3d

In this How-to guide, we explored the easiest way to add text to your Paint 3D project and also how to edit it to fit your design needs.

Following these steps will surely allow you to create and modify your text in any way you desire.

Paint 3D can be also used to crop an image quickly on Windows 10 if you need that particular feature. Now that you know how to add text, don’t miss our guide on how to curve text in Paint 3D for more information.

Please feel free to let us know if this guide made things clear for you by using the comment section below.

3 Easy Ways to Screenshot on Lenovo IdeaPad

The ability to capture exactly what you’re looking at on your screen, whether it’s essential documents, amusing images, computer settings, or an achievement in a video game, is provided by the screenshot feature. Thus, we will show you today how to screenshot on Lenovo IdeaPad.

If you’re working on a Windows 11 PC, there are a variety of options for capturing a screenshot of the screen. No matter if you want to take a full-screen grab or a portion of the screengrab, the process is straightforward.

Follow along as we will show you how to screenshot on Lenovo IdeaPad without the PrintScreen button, right after we see what the Xbox Game Bar is all about. Keep up with us!

What does the Xbox Game Bar do?

Xbox Game Bar in Windows 11 & 10 is unquestionably the best thing that Microsoft could have done to improve the gaming experience. It makes it simple to access and control a wide range of important items while playing, such as sound controls, performance data, and framerate.

xbox game bar How to screenshot on lenovo ideapad


In addition to recording all of your gameplay and taking screenshots, it also allows you to listen to your favorite music on Spotify without having to leave the game!

It basically is a gaming overlay that is included in Windows 11 & 10 that allows us to use a variety of widgets while playing games on our PCs.

When you first activate it, the Xbox Game Bar immediately displays all of the audio channels that are currently active on your Windows device.

The Performance widget provides you with an indication of how well your computer performs when you are playing games on the computer. If you enable this widget, the Xbox Game Bar will gather and display the amount of time you have spent playing.

How to screenshot on a Lenovo laptop without the PrintScreen button?

1. Use the Snipping Tool

  1. 1. Press the keys Windows + SHIFT + S simultaneously. This will open the Snipping Tool on your PC. The default screenshot mode is set to Rectangle.

    RECTANGLE How to screenshot on hp envy x360
  2. 2. Click on Rectangle mode in order to display a drop down menu with four different modes you can choose from: Rectangle mode, Window mode, Full-screen mode and Free-form mode.

    RECTANGLE-MODE How to screenshot on hp envy x360
  3. 3. Select your desired snipping mode from the list.

  4. 4. Choose the window you want to capture.

  5. 5. Edit the file or simply save it after you are done screenshotting.

  6. The Windows 11 built in feature named Snipping tool which allows you to screenshot on Lenovo laptop without having to use the PrintScreen key.

    You can easily customize the snipping area with just a few clicks, then you will be able to take your desired screenshots however you like.

If you use the Rectangle mode, it will capture a rectangular piece of your screen and save it as a screenshot. Freeform Snip is a screenshotting tool that allows you to choose any shape you want for your screenshots.

A screenshot of an open browser or program window on your computer can be captured using Windows Snip, and a screenshot of everything visible on the screen of your HP Envy can be captured using Fullscreen Snip.

2. Use the Xbox Game Bar

  1. Press Windows + S and type in Xbox Game Bar then click on the top result in order to open the app.xbox-game-bar-open How to screenshot on hp envy x360
  2. Now click on the Capture icon, followed by the Photo one to take a screenshot. Note that you can also screen record in this app. It should be noted that this program has the capability of recording your screen.capture How to screenshot on hp envy x360

However, if your laptop version comes with a PrintScreen button that is not working in Windows 10/11, don’t miss out on our link anchored in order to fix it.

Alternatively, check out five+ best screen recorder software for Windows 11 and start making videos that you can share with the world.

And lastly, users benefited from reading our post on how to go full screen in Windows 11 as they couldn’t find the right buttons. Take a look at it as well if it resonates with you!

3. Use a third-party screenshot software

If other solutions didn’t work out for you, a practical method would be to use software that can capture and record your screen.

Snagit is a reliable screen capture tool that offers effective support to record your screen or webcam, plus take screenshots with one click.

You can use this software on your Lenovo IdeaPad device and add contextual elements on your screen captures in order to create step-by-step guides or trim recorded videos.

In addition, there is a sharing option that allows you to share images or videos directly on the most used PC apps or platforms.

⇒ Get Snagit

Was this guide helpful for you? Let us know in the comments section below. Thanks for reading!

4 Quick Methods to Install MSI Motherboard Drivers

Although MSI offers its own set of drivers is not uncommon that during installation or even after, you encounter issues that are related to a faulty or missing driver.

Most of the time problems related to drivers not working properly trigger other issues with the associated software which is why solving it becomes a priority.

We will explore in this article some of the best ways to install MSI motherboard drivers, so make sure to keep on reading.

How can I install MSI motherboard drivers?

1. Install drivers from the MSI official website

  1. 1. Go to the MSI official website.

  2. 2. In the Find your product section, enter the required details about your motherboard.

  3. 3. Next, click on the driver tab and then select your operating system.

    msi driver install website
  4. 4. Choose the Motherboard drivers you want to install and click on download.

    how to install msi drivers selection
  5. 5. Run the installation files and follow the on-screen directions.

  6. 6. The driver for your MSI motherboard is now installed.

  7. The recommended and fastest method to install MSI motherboard drivers is to download them directly from the MSI official website. In this way, you can ensure that you are always up to date with the newest updates and that your driver download is safe and secure.

2. Use Device Manager

  1. Press the Windows + R shortcut to open Run.
  2. Enter the devmgmt.msc command and press OK.open run dialog
  3. Next, click on the category of drivers that you need to download, install, and update. 
  4. Right-click on the peripheral and choose Update driver from the popup menu.
  5. Next, select Search automatically for updated driver software.search for updated driver software
  6. Windows will now download and install the drivers needed for the MSI motherboard. install msi motherboard setup
  7. Once the process is complete, restart your device.

3. Update Windows 10

  1. Press the Windows+I shortcut to activate Settings.
  2. Click on the Update & Security option from the displayed options. go to settings
  3. From the left select Windows Update and click on Check for updates.check for updates windows
  4. Click on the Install now button to download and install the found update. install button
  5. Wait for the process to complete, and restart your device. 

4. Use a dedicated third-party tool

Installing the MSI drivers manually can be a sensitive task, especially if you are not experienced with tech things and there is a chance that things can go wrong.

This is why using a dedicated third-party tool, that will automatically install and repair any faulty or missing drivers is the most reliable and efficient method.

Installing the MSI motherboard drivers does not have to be a complicated task and we hope that the information presented in this article has been of use to you.

Moreover, do keep in mind that you can easily install MSI motherboard drivers without a CD. Just apply the spets detailed in our guide in that regard.

Which of the present solutions worked best for you and helped you install the MSI motherboard drivers? As always, don’t hesitate to drop us a comment, we would love to know.

How to Install the LG Monitor Driver in Windows 10

Device drivers represent the backbone of each component of the computer. In order to properly use the device, the first step you must follow is installing the drivers you need.

There are a few ways you should try as alternatives to install the LG monitor drivers on Windows 10 operating system.

You don’t have to worry about not being able to do it, because each method is quite simple. So, getting the right drivers is easy.

This article will make sure you have access to the best ways you can easily install your LG monitor driver with. Thus, read it completely and save much more of your precious time!

How can I easily install LG monitor drivers on Windows 10?

1. Install drivers from the LG website

  1. 1. Go to the official website of LG Software and Driver products.

  2. 2. Search for the exact version of your LG monitor driver.

    search for lg monitor driver on website
  3. 3. After your LG monitor driver is found, download the zip file.

  4. 4. Unzip the file, and run the downloaded .exe file.  

  5. 5. Simply follow the on-screen prompts, and install the monitor driver.

  6. 6. Restart your computer to complete the installation.

  7. The best and safest method to install a driver for your LG monitor is to manually install it from the manufacturer’s website. The drivers are always up to date on the website and perfectly safe to download and install.

You should know that this method can take you more time to complete than the other available methods.

Restarting your computer should be a simple task. However, if any errors occur, take a look at this guide dedicated to Windows 10 PC stuck on restart issues.

2. Access Device Manager

  1. Open Device Manager.open device manager on pc
  2. Expand Monitors, right-click on the Generic PnP Monitor, and select Properties.select properties
  3. Select the Driver tab, then click on Update Driver.update driver button
  4. Click on Browse my computer for drivers.browse computer for drivers button
  5. Select Let my pick from a list of available drivers on my computer.select from computer
  6. Click on Have Disk, browse it, and select OK.

3. Use third-party software

To ensure an efficient and risk-free process, using a third-party software tool that is specialized in this field can help you tremendously.

Unlike the previous one, this method allows you to perform the installation automatically, saving much more of your time and providing long-term support.

You can locate your LG monitor driver and let the software automatically install the latest driver version available.

You also have the option to update drivers in bulk. Just let Outbyte Driver Updater scan your whole system and update or repair any problematic driver.

Outbyte Driver Updater

Manage any PC drivers using this automated software and install LG monitor drivers right now.
Get it now Download

In case you were wondering how to install your LG monitor driver, we hope you found our above procedures extremely useful.

Also, if you’re interested to get some extra information about our recommended driver updater, feel free to find out how to update and fix your drivers like an expert.

Moreover, don’t hesitate to comment in the section below, and let us know which of the suggested alternatives worked best for you.

How to Install or Remove the BCM20702A0 Driver in Windows 7

Drivers are important parts of a PC. They serve as the link between the hardware and software components and ensure things run smoothly. 

The BCM20702A0 is an essential Bluetooth driver that ensures components work well. Unfortunately, some users can’t find this driver on their PCs. Also, there has been no luck finding the driver with the Device Manager.

Thankfully, just like you can install drivers manually on Windows 11, it is possible to do it on Windows 7. And we will show how in this guide.

What is the BCM20702A0 driver? 

BCM20702A0 is a Broadcom driver that ensures Bluetooth components communicate well with your Windows operating system. Hardware components need drivers to work effectively.

The BCM20702A0 driver is currently available for Windows 11, 10, 8, and 7. However, you might need to download and install it manually to use it.

What are some errors that might occur related to it?

  • BCM20702A0 driver Windows 7 Hp: Hp has stopped using the BCM20702A0 and has stopped supporting it. You will need to download it from a third-party website.
  • BCM20702A0 driver Windows 7 Lenovo: You can download the 32 and 64-bit versions of the driver on the Lenovo website.
  • BCM20702A0 driver Windows 7 Dell: It can only be downloaded on third-party sites.
  • BCM20702A0 driver Windows 7 Acer: Driver is not available on official sources.

How can I install the BCM20702A0 driver in Windows 7?

  1. 1. Download the BCM20702A0 driver from the manufacturer’s website.

    bcm20702a0 driver windows 7 download from website
  2. 2. Double-click on the downloaded file and click the Continue button to grant it permission.

  3. 3. Press the Next button when prompted with the welcome info.

  4. 4. Tick the radio for I accept the agreement and click Next.

  5. 5. Select a location to save the driver and click Next.

  6. 6. Click the Finish button when the installation is complete.

  7. 7. Press the Windows + R keys on your keyboard to launch the Run utility.

    open run
  8. 8. Type the location you saved the driver, e.g., C:\Tools\Drivers\Bluetooth\BCM20702A0\Setup.exe, and then press Enter.

  9. 9. Wait for the driver setup program to run and follow the simple on-screen instructions to complete the process.

  10. The safest and easiest way to install the bcm20702a0 driver is from the manufacturer’s website, which is the Lenovo official website. On it, you can find all the drivers you need for your Lenovo products, and download their latest version.

    Do keep in mind that Windows 7 has reached its End of Support. There haven’t been any recent updates to any of its drivers.

If you’re big on saving time, speed up the process using Outbyte Driver Updater. It’s an automated driver updater that detects what type of drivers your hardware needs and downloads and installs the latest version.

Outbyte Driver Updater

Keep your drivers updated at all times with this light and secure utility that requires minimal user input!
Free trial Download

How can I uninstall the BCM20702A0 driver from my PC?

  1. Press the Windows + X keys and select Device Manager.
  2. Click on the Bluetooth Adapter.
  3. Right-click on the BCM20702A0 driver.
  4. Select the Uninstall option.
  5. Click the Ok button to confirm the action.

With this, the driver and its other components will be removed from your PC. 

There you have it: a complete guide on how to install and uninstall the BCM20702A0 driver on Windows 7. It is now up to you to ensure you have the latest version of the driver on your PC 

Are you looking for how to update your drivers on Windows 10 instead? Then give a guide a quick read to see how it is done with ease.

Feel free to let us know if you faced any problems while installing the driver in the comments below.

Windows 11 Safe Mode From Bios: How to Start it in 8 Steps

If you encounter errors within your operating system and need to start Windows 11 in Safe Mode, we got you covered. There are multiple proven methods that will help you start up your PC and fix any errors.

Windows is one of the most popular operating systems on the market and has been around for some time now.

Why should I boot in Safe Mode on Windows 11?

While Microsoft has been diligent and tried to optimize and improve the experience with every new version (and you already know that there are some great features in Windows 11 to upgrade to), there are still a lot of issues that come up in this OS.

For example, there are times when the Windows 11 Start menu is not working. Users also complain about repeated Microsoft Edge problems. But whenever this happens, a solution is just around the corner.

And that’s one of the reasons why Safe Mode is the go-to option when it comes to diagnosing and solving bugs and errors.

This completely isolated environment offers you the option to better identify the apps, programs, or processes that affect your full-on OS.

How does Safe Mode work?

Before anything else, you should know that it starts your operating system in a basic state, using a limited set of files and drivers.

Thus, your device will work with minimal functionality, starting only the mandatory services, and avoiding third-party start-up programs.

Getting your OS in Safe Mode allows you to check the source of a problem and also supports you in troubleshooting issues on your PC.

If you’re having problems with malicious files or processes that use a lot of RAM without a good reason, Safe Mode can definitely help you solve them or pinpoint their source.

In addition, you should know that this also applies to performance issues or bugs related to the interface.

safe mode example desktop

When should I boot in Start Mode?

Here is a list of situations when you should start Windows 11 in Safe Mode:

  • When you’re not able to start your operating system
  • If your PC is infected with malware
  • Safe Mode can also help you when your computer has unstable hardware drivers that can lead to critical errors like BSoD (blue screen of death or black screen of death)

In today’s guide, you’ll find some great options that will help you start Windows 11 in Safe Mode. These are extremely simple, so don’t worry about consuming time performing them.

How can I boot Windows 11 in Safe Mode?

1. Via Startup

  1. 1. Click on the Start menu on your taskbar, then select the Power icon.

    start menu click
  2. 2. Press and hold the Shift key on your keyboard, then click on Restart.

  3. 3. Once you’re redirected to the options screen, select Troubleshoot.

    start menu troubleshoot options
  4. 4. Click on Advanced options.

    advanced options troubleshoot menu
  5. 5. Select Startup Settings.

    troubleshoot startup settings
  6. 6. Click on the Restart button.

    troubleshoot restart pc
  7. 7. After your PC restarts, on the next screen, choose the appropriate option by pressing the number 4 on your keyboard. Up next, the computer will enter the Safe Mode environment via BIOS.

  8. If you need to start Windows 11 in Safe Mode, the first way of doing this is through the Start-up Menu. It allows you to restart your PC and then enter Safe Mode via BIOS.

You can also install the latest Windows 11 updates in Safe mode. It’s a lot better to do that when no other apps are interfering.

2. Through Windows Recovery

  1. Click the Windows button and open Settings.
  2. Click on System, then select Recovery.
  3. Look at the Advanced startup option, then click on the Restart now button.
  4. You computer will reboot, then show the Advanced options screen, and select Troubleshoot.
  5. Click on Advanced options.
  6. Select Startup Settings.
  7. Click on the Restart button.
  8. Press the F4 key to get into Safe Mode.

Another similar solution to enter Safe Mode is through Windows Recovery. The steps are very similar to those above, but with a few key adjustments, just in case you have problems with the power options or your keyboard.

And if you have issues after the system restarts, check our guide on what to do if there’s no login screen in Windows 11.

3. Via System Configuration

  1. Press the Windows key + R to start Run, type msconfig, and press Enter or click OK.
  2. Select the Boot tab, then take a look at the Boot options.
  3. Checkmark the Safe boot, then checkmark the Minimal option.
  4. Click on Apply, then select OK.
  5. In the pop-up window, click on Restart.
  6. Wait a few seconds, then you’ll be taken into Safe Mode.

4. Use the Automatic Repair

  1. When your computer is off, power it on, and turn it off as soon as the Windows logo appears. Repeat this three times, then you’ll be redirected to the Automatic Repair screen.
  2. There, you have to click on the Advanced options.
  3. Choose Troubleshoot.
  4. Select Advanced options.
  5. Click on Startup Settings.
  6. Click on the Restart button.
  7. Press the F4 key to get into the Safe Mode.

5. Boot Windows 11 in Safe Mode from Power Off

  1. Hold the power button for 10 seconds to turn off your PC.
  2. Press the power button again to turn on your PC.
  3. When it is restarting hold the power button for 10 seconds again.
  4. Once your PC is off, press the power button again to turn it on.
  5. When it starts, press the power button again for 10 seconds to turn it off.
  6. Now press the power button to turn on your PC.
  7. Let it restart completely. It should open the Automatic Repair panel.restart windows safe mode
  8. Select Advanced Options.
  9. Choose the Troubleshoot option and you will get the same Safe Mode options as presented in the previous solution.start windows 11 in safe mode

This method is useful in case your operating system has serious problems and you cannot start it up as normal or access Safe Mode.

It is the reason why you will have to turn your PC on and off first and get the Windows Recovery Environment panel.

6. From BIOS

  1. Turn off your computer.
  2. Press the power button to turn it back on.
  3. Start pressing F8 continuously until you get the Boot Options Menu.
Note icon NOTE
Some computer manufacturers require you to press F8 + Shift, others F2. If yours has this Boot option, the corresponding key should appear at the bottom of your screen when you start up your PC.

This is an older method to Enter Safe mode and is not applicable for all Windows computers, especially newer ones. 

It is definitely worth trying as it is harmless even if your PC does not support it. Worst case scenario, nothing will happen and you will need to try a different method from this list.

7. With Networking

  1. Open the Settings panel from Start.
  2. Select System, then Recovery.
  3. From the Recovery options, go to Advanced Startup and select Restart now.
  4. Your PC will restart and show the Startup settings menu. Select Troubleshoot.start windows 11 in safe mode
  5. Click on Advanced Options.start windows 11 in safe mode
  6. Select Startup Settings.
  7. Click on Restart and wait for your PC to reboot.
  8. You will get a panel with multiple options. Press F5 to Enable Safe Mode with Networking.

8. From Command Prompt

  1. Press the Win key + R to open the Run Command window.
  2. Type cmd and press enter to open Command Prompt.start windows 11 in safe mode
  3. Type bcedit / set {current} safeboot minimal in the Command Prompt and press enter.start windows 11 in safe mode
  4. Wait for your PC to restart and show the Safe Mode menu.
Note icon NOTE
As an alternative to the previous solution, if you want to Open Safe Mode with Networking from Command Prompt, you can replace the command with this one: bcedit / set {current} safeboot network

As you can see, some of the steps required to open Safe Mode in Windows 11 are the same for multiple solutions. Thus, as we mentioned before, if you need to use Safe Mode, there are no major differences between the options.

What to do if I can’t boot Windows 11 in Safe Mode?

Some of our readers received a strange Exception Processing Message 0xc0000005 – Unexpected parameters error right after booting into Safe Mode.

cannot boot in safe mode error
Explorer error 0xc0000005 in Windows 11 Safe Mode

At the moment, there are no fixes for this bug other than to return to normal booting but if you update your Windows 11 to the 22000.65 or later build, this problem should disappear.

As this error is connected to system corruption, you can also check our article on how to fix Critical Process Died BSoD on Windows 11 which might help you deal with that.

Can I disable the Windows 11 Safe Mode?

If you’re wondering whether or not you can exit Safe Mode in Windows 11, then the answer is definitely yes, and it will take you only a few seconds.

When it comes to the first two solutions, after you restart your PC, you should exit Safe Mode and start Windows normally.

For the third solution, you’ll have to backtrack the steps and change back the settings in System Configuration or Command Prompt.

The process of entering and exiting Safe Mode is pretty straightforward and is almost identical for Windows 10 and 11.

However, if you’re curious about other major differences between these two operating systems, you can check our in-depth Windows 10 and Windows 11 comparison and find out all the info you need.

Safe Mode will look and feel almost identical to Windows 10’s, so you won’t have to worry about messing things up if you’ve already seen it or used it before.

We hope that this guide helps you enable W11 Safe Mode. If one of the methods above did not work, you should certainly try a different one.

Your system may have some internal errors that won’t start the Safe Mode using some options, like the Command Prompt, but you may be able to open it from BIOS, for example.

Don’t forget to use the comments section below if you have any other questions and we’ll be glad to continue the talk there.

How to Fix: Reboot and Select Proper Boot Device

Reboot and select proper boot device message can be quite problematic since it will prevent you from starting Windows.

It occurs when you try to start your PC and prevents you from successfully booting. Receiving this error message means that your PC cannot boot using the hard drive it is meant to boot from and is asking you to select another device.


What causes the reboot and select proper boot device error?

There are numerous causes for this issue, but the most likely ones are BIOS settings or hardware failures. Here are some possible culprits:

  • Choosing the wrong hard drive to boot from
  • The boot order is wrong
  • There is a hard drive failure
  • The Legacy Boot option is enabled or disabled
  • The hard drive that Windows is set to boot from is not detected

If you encounter the error message on your PC, don’t be alarmed. In this guide, we have a couple of solutions that will surely help you fix this issue and get your Windows 10 or Windows 11 PC to boot again properly.

How can I fix the reboot and select proper boot device error?

1. Enable or disable Legacy Boot (only UEFI computers)

legacy boot reboot and select proper boot device
  1. Restart the computer and enter UEFI settings. 
  2. Search the Legacy Boot option.
  3. Enable or disable Legacy Boot.
  4. Save changes.
  5. Restart computer.
  6. Verify if the problem disappeared.

The Reboot and select proper boot device message can appear on a new PC, and if that happens, be sure to check the UEFI settings before trying out other solutions.


2. Change the boot order in BIOS

  1. 1. Restart the computer and enter BIOS. To do this, you need to press the BIOS shortcut key for your specific device. It could be: F2, F10, F12, Delete, Esc, etc.

  2. 2. Choose the Boot section.

  3. 3. Verify the order of boot devices.

  4. 4. Set Hard Disk Drive (HDD) as the primary boot source.

    Fix error reboot and select proper boot device in bios
  5. 5. Press F10 to Save and Exit.

  6. 6. Click Yes to confirm changes.

  7. If you ever encounter Reboot and select proper boot device or insert boot media in selected boot device and press a key, usually the problem is your boot order. You can easily change the boot order in the BIOS Setup Program.


3. Use Startup Repair and diskpart

startup repair reboot and select proper boot device
  1. Insert a Windows installation disk or USB.
  2. Launch BIOS and navigate to the Boot section.
  3. Select CD-ROM Drive as the primary boot source.
  4. Press F10 to Save and Exit.
  5. Select your preferences for language, time zone, and keyboard layout.
  6. Click on Next and then Install Now.
  7. Select Repair your computer and enter Startup Options.
  8. Click on Troubleshoot and then choose Automatic Repair.
  9. Choose your Operating System and select the Administrator account.
  10. Type in your account password and click on Continue.

This is the first part of the solution called Startup Repair, and at the end, you must restart the computer if you are prompted to.

Once the process has finished, you will be notified if problems were detected and if Startup Repair has fixed them. The second part of this solution involves activating diskpart.

  1. Go to Command Prompt.
  2. Type in diskpart
  3. In diskpart type in select disk 0
  4. Select disk A for the section containing your Windows.
  5. Type in list partition
  6. Type in select partition 1
  7. Type in active

After setting your partition to active, the Reboot and select proper boot device message with your SSD should be gone.

Note: You might have to select a different partition depending on the number of disks and partitions that you have on your PC.


4. Replace the CMOS battery

reset bios password cmos battery
  1. Open your computer case.
  2. Locate the CMOS battery on the motherboard.
  3. Remove the CMOS battery.
  4. Press and hold the Power button for 10 seconds.
  5. Insert the CMOS battery again. Alternatively, you can replace your battery with a new one.

Your computer’s motherboard contains a small circular cell that is the CMOS battery. By removing the battery, you’ll reset your settings to the default and hopefully fix the Reboot and select the proper boot device error.


5. Reinstall Windows

This is the ultimate solution available for you if the reboot and select proper boot device error will not disappear after trying the previous ones.

We have an in-depth guide on how to reinstall Windows 10, so be sure to check it out.


In most cases Reboot and select proper boot device message appears due to your BIOS settings, but hopefully, you managed to fix this issue using our solutions.

Did you find a solution for this issue on your own? Share it with us in the comments section below!

Browsers That Still Support Java & How to Enable It

Progress requires sacrifices and it often makes collateral damages. With that in mind, know that Flash is not the only victim of HTML5. Java is quick to climb the scaffold, particularly Java Applets.

Top technology bundles and Java applets were once key for interactive web content. As browsers improved, these widgets declined.

But if you don’t want to give up on legacy core apps, know you don’t have to. Today, we’ll walk you through the best browsers that support Java.

Do any browsers still support Java and how to enable it?

Opera One – Enhanced modular design

opera one

Opera One is one great browser to have around, but the big question is this: Does it support Java?

Well, newer versions of Opera One use an already embedded version of Java. In order to make sure you will be able to run or access Java-based content, all you need to do is open Opera One’s settings and go to Security and Privacy.

Next, perform a quick search using the Java keyword and make sure the option Sites can use Javascript (under Default behavior) is on, as shown in the print screen above.

For older versions, here’s what you need to do:

  1. Activate the Enable JavaScript option under the Content section.
  2. Next, head over to the Plugins section.
  3. Toggle the Java (TM) Platform module to Always enable.
  4. Close Opera One and reopen it.

Opera One

Enjoy interactive content fluidly and forget about Java issues thanks to this new-age browser.

Firefox – Complete cookies shield

Like many others, Firefox no longer provides Java support for its current versions. In fact, the latest version to include this service is version 51. But that does not mean you won’t be able to run Java content in your Firefox browser.

You can install a 32-bit version of Firefox and manually add the Java plugin, as follows:

Open Firefox and click the upper left-hand corner menu.

  1. From the Tools menu, click on Plugins/Add-ons. Alternatively, you can open a new Firefox tab and type in the address bar: about:addons
  2. Locate the Java (TM) Platform SE 6 U23 plugin in the list and click or Enable/Ask to activate/Always activate, according to your Firefox version.
  3. If it’s the JavaScript item you’re interested in, instead of the above mention, simply type about:config
  4. Accept the warning message if you’re prompted to and enter javascript.enabled.
  5. Right-click on the entry found and toggle it to Enabled.
  6. Restart Firefox and you’re all set!

⇒ Get Firefox

Google Chrome – Greatest speed and extensions

As you’ve probably heard by now, all Chromium-based browsers ditched NPAPI and Chrome makes no exception. In this context, it’s only fair to ask: does Chrome use Java?

Starting with version 42, Chrome no longer supports the Java plugin. The change did not target Java applets in particular, but rather a global overhaul of the plugin architecture required to cope with modern technologies.

This moment opened Pandora’s box for errors stating that plug-in is not supported in Google Chrome, in connection to Flash as well as other technologies.

Still, not all is lost. Don’t worry, we get that some things are worth holding on to and we’re here to help.

How do I enable Java in Chrome in 2023?

You can either use the IE Tab Chrome extension or run a specialized applet viewer such as the CheerpJ. We will focus on the first one for now.

  1. Open the Chrome Web Store and go to Extensions.
  2. Search and install the IE Tab extension.
  3. Next, restart your Chrome browser and open the test page from Java to verify your current version.
  4. Make sure you upgrade to the latest one if it’s not already the case and that should do it.
  5. Finally, to enable the JavaScript feature in Chrome, go to Security and Privacy.
  6. Under the Content section, toggle the switch next to Sites can use Javascript to On.

⇒ Get Google Chrome

Internet Explorer – Ideal for Java support

Obviously, Internet Explorer is the go-to browser that still supports Java applets natively. But beware, IE itself is an endangered species and it’s only a matter of time before it will be exterminated.

For instance, Microsoft’s freshest OS, Windows 11 has turned its back on Internet Explorer for good.

But, if you have not jumped the Win 11 boat yet, you’re in luck. Here’s how to enable Java in Windows 10 with IE:

  1. Open the Internet Explorer browser and click on Tools, then Internet Options.
  2. Go to the Security tab, and press Custom Level.
  3. Locate the following item in the list: Scripting of Java applets
  4. Once you found it, set its button to Enable and save the changes (as shown in the screen shot above).
Tip icon Editor’s tip
Even though IE still supports Java, you might still encounter issues with applets not loading properly. If that’s the case, here are some preliminary steps you can try:

➡ Restart the browser (close all its windows and reopen it to do so)
➡ Reinstall Java altogether
➡ Make sure Java content is enabled in the Java Control Panel (From your PC’s Control panel, go to the search option and type in Java. Then, click the Java icon to launch the Java Control Panel and head to the Security tab. Finally, check the box corresponding to the option Enable Java content in the browser.)

If your browser still displays an error stating that Java is not supported, we prepare a comprehensive troubleshooting guide, so feel free to take a closer look.

⇒ Get Internet Explorer

Microsoft Edge – Modern UI

Does Edge have Java built-in? Microsoft’s browser also dropped support for Java plugins, thus applets are not easily accessible.

However, you can use Edge as a launching platform for Internet Explorer. To do so, simply open its settings and search for Internet Explorer.

Next, you can toggle the following options to Allow:

  • Internet Explorer mode button
  • Allow sites to be reloaded in the Internet Explorer mode
  • Let Internet Explorer open sites in Microsoft Edge (as shown in the above print screen)

Don’t forget to check if Java is enabled in Internet Explorer (as shown in the previous solution).

Finally, to enable JavaScript in Edge, you will have to use the Group Policy editor.

  1. From there, go to User Configuration -> Administrative Templates-> Windows Components.
  2. Expand the Microsoft Edge folder and click twice on Allow to run scripts (JavaScript).
  3. Enable this option, then save the changes and exit the editor.

⇒ Get Microsoft Edge

Are Java applets still used in 2024?

Nowadays, most modern browsers discontinued NPAPI support. Thus, you can easily stumble across error messages such as Your browser is not set up to run Java Applets.

As a quick reminder, Java plugins depend on the Netscape Plugin Application Programming Interface to run.

At first, having a local Java installation on each client machine and an IE (or even an IE mode in Edge) instance seems like the only way left to use the apps.

But the good old Internet Explorer is now officially retired so where does that leave Java applets? Is Java really dead? Certainly not.

Why do browsers no longer support Java?

Many of you wonder – and we dare say it’s a fully legitimate question – what made browsers ditch Java in the first place if it’s so great? Well, they did not.

Java is still an immensely popular web technology. However, the plugins are an entirely different story. Most modern browsers revamped their plugin architecture completely due to security concerns.

In fact, Java plugins are prone to viruses and hackers often take advantage of them to inject malicious code that can slip by your system’s sentinels undetected.

But that does not mean that all Java plugins or Java-based content are disasters waiting to happen. Sometimes, you may need to enable this feature in your browser for better site performance.

We have listed the best browsers that support Java and how you can enable it through their settings. The only thing is, you may have to download an older version of these browsers that is compatible with Java applets.

And since running outdated software is not really advisable, we recommend you install this older version on a virtual machine to avoid exposing your main system to unnecessary risks.

How to Free up Disk Space on Windows 10/11 PCs

 A little extra storage space is always useful, but we often struggle to keep it on the optimal level, because it somehow always gets full.

In this article, we’ll show you a few tips on how to save and free up some disk space on your Windows 10 computer.

How do I free up disk space on the PC?

1. Perform a Disk Cleanup

  1. 1. Press the Windows Key and type this pc in the search box, then click on the result.

  2. 2. Right-click on the drive you want to cleanup and select Properties from the list of available options.

  3. 3. Click on Disk Cleanup under the Properties window.

  4. 4. Wait for it to calculate how much space you’ll be able to free.

    disk cleanup calculate space
  5. 5. Select the types of files you want to delete and click OK (you can delete temporary files, log files, files in your recycle bin, etc.).

  6. 6. Click on Clean Up System Files and wait until the cleaner calculates everything. It will give you even more free space by cleaning some unnecessary system files.

    disk cleanup delete files
  7. 7. Press on OK after you made your selection to confirm the deletion.

  8. 8. Go to More Options and delete system restore data under System Restore, Shadow Copies (This command deletes all previous system restore points, except the most recent one).

  9. The first thing you should do when you want to free up disk space on your PC is to perform a Disk Cleanup. It will help you not only make more space, but also remove any old and unnecessary files from your computer.

    Please note that this inbuilt utility may not always completely delete all temporary files from third-party apps such as web browsers.

2. Uninstall unnecessary apps

We probably have some programs on our computers that we’re not using. These programs could take up a severe amount of disk space, and uninstalling them will definitely provide you with an extra storage expense.

To get rid of unused programs, go to Programs and Features in Control Panel and see what programs or apps you don’t use often, or at all. Uninstall unnecessary software and check your free space again.

access programs and features in control panel

There’s a column in Programs and Features that shows you how much space each program is using, so you can easily calculate how much space you’ll get once you uninstall these programs.

If you don’t see this column, click the options button in the top right corner and select Details view.

3. Run disk analysis and defragment

To figure out what exactly is using space on your hard drive, you can analyze your hard disk with some of the hard disk analysis programs.

Hard disk analyzers scan your hard drive and display all information about it, among other things, what is using space of your hard disk.

After you scan your system with a disk analyzer, it will show you exactly which folders or files are using the most space. Delete unnecessary files or folders and your free disk space will increase (but be careful, don’t delete any important system or personal files).

After performing this task, it is recommended to defragment your hard drive, and you can check our list of best defrag tools for Windows, in case you didn’t choose defragmenting software yet.

You can also learn how to use WizTree to analyze disk space in detail by following our step by step guide on using WizTree for Windows.

4. Find duplicate files

Deleting duplicate files can also free up some space on your hard disk. Luckily, a few programs can find and delete all the duplicate files, and free up some storage space for you.

You can use Easy Duplicate Finder to scan your hard drive for duplicate files and photos and delete them.

5. Disable hibernation and System Restore

These tricks will definitely free up some disk space on your Windows PC, but they will disable some important Windows features. So we don’t recommend performing these operations.

You should use it only if you desperately need more space, but use it on your own because it might be risky:

  • Disable Hibernation – When your computer enters hibernation, it saves the content of RAM memory on your hard drive. This allows your computer to save system state without any usage of power, so it could bring you right where you left off when you boot your computer next time. Windows saves the content of RAM memory in C:hiberfil.sys file, and when you completely disable hibernation, this file will be deleted.
  • Disable System Restore –You can also completely disable System Restore in order to save more disk space. But it will delete all restore points and your backup data, and if something goes wrong with your computer you won’t be able to use System Restore to bring it back to normal.

6. Use Storage Sense

  1. Open Start, and go to Settings > System > Storage.
  2. Turn on Storage Sense.storage sense windows 10
  3. Click on Change how we free up space automatically option.
  4. Select or deselect the checkboxes for options under Temporary Files, Locally available cloud content, and Free up space now.

To learn how this feature works, check our guide on how to use Storage Sense on Windows 10.

Storage Sense automatically deletes temporary files. It monitors your old and unused files and removes them regularly. For example, it’ll delete files in the Recycle Bin for more than 30 days.

That’s particularly all you need to know about saving and freeing up your hard disk space on Windows PCs, but if you have some other tips on how to increase the hard disk space, please share them with us in the comments.

Internet Explorer Cannot Display the Webpage: 7 Ways to Fix It

After 25+ years of helping people use and experience the web, Internet Explorer (IE) was officially retired on June 15, 2022.

Even though most people are migrating to Windows 11 and 10, some still prefer Windows 7. In both cases, a portion of users have chosen their old friend, Internet Explorer, as the main browser.

One of the most common errors this group could get is that Internet Explorer cannot display the webpage when trying to visit a website. The following 6 methods can help them get rid of this error

Why would Internet Explorer display the message Cannot display the webpage?

The reason behind this error mostly doesn’t come from the website, but it is from a software issue isolated to the Internet Explorer or a connectivity issue that affects your whole system.

So before you go ahead with the solutions below, check your Internet connection, restart the Modem/Router, and ensure that there are no VPNs running on your system until the issue is fixed.

How do I fix Internet Explorer Cannot display the webpage?

1. Switch to a different browser

Although Internet Explorer is still a classic, and it’s still usable, it has lost support for some time, so no more updates or hotfixes. There are plenty of browsers out there that might be worth discovering and taking a look.

One important reason to have a modern browser is that it comes with plenty of features already integrated. Since we are talking about built-in features, we recommend Opera One for its wide variety of features.

Opera One is a Chromium-based browser that comes with an ad-blocker as well as a tracker blocker preinstalled, a free VPN that allows you to hide and change your IP address while online, and much more.

Nonetheless, it will also keep you connected with social media through Twitter, WhatsApp, and Messenger right in the sidebar.

Opera One

Smoothen out the browsing experience and enjoy some of the most useful features it comes with.

2. Clear cache and cookies in Internet Explorer

  1. Run Internet Explorer.
  2. Press Ctrl + Shift + Del keys on your keyboard simultaneously.
  3. Select all the checkboxes, and then click Clear now.Clear cache and cookies in Internet Explorer
  4. Tap Exit, and then restart Internet Explorer.

Although the above shortcuts will get you there as soon as possible, you can reach the history setting by the Internet Options window.

3. Check Proxy and DNS settings

  1. Press the Windows key on your keyboard
  2. Click on the Start menu, type Internet Options, and then click on it. finding Internet options
  3. Go to the Connections tab, and then tap the LAN settings.Internet options
  4. Select Automatically detect settings and then click OK.Automatically detect settings in internet options
  5. Restart Internet Explorer to see if the issue is resolved.

As invalid proxy settings can cause Internet Explorer to deviate from the right path, this method will assure you everything is OK because, by default, Internet Explorer automatically detects proxy settings.

However, if this setting has been changed, you may experience connection issues.

4. Check IP address settings

  1. Hold Windows + R keys to open the Run search box.
  2. Type ncpa.cpl and then press Enter.finding Network Connections
  3. In the new pop-up window, right-click on Wireless Network Connection if you are using Wi-Fi or Local Network Connection if you are using cable Internet, then tap Properties at the bottom.choosing type of Network Connection
  4. Double-click on Internet Protocol Version 4 (TCP/IPv4). Internet Protocol Version 4 in network connections
  5. In the new window, check if both Obtain DNS server address automatically and Obtain an IP address automatically are selected. If not, make sure they are. After that, click OK.Obtaining DNS server and IP address automatically

5. Reset Windows Socket with cmd

  1. Run Command Prompt by typing cmd in the Start Menu search box. Right-click on the first result and choose Open as Administrator.Running CMD as administrator
  2. Type the following commands in the CMD window. Press Enter every time you finish each line and type the next command in a fresh line.
    ipconfig /flushdns
    nbtstat -R
    nbtstat -RR
    netsh int reset all
    netsh int ip reset
    netsh winsock resetipconfig and flushdns in cmd
  3. Finally restart your computer.

6. Kill unnecessary programs

  1. Type config in the Start Menu search box and then click System Configuration. finding System Configuration
  2. Tap the Services tab, select the Hide all Microsoft services check box, then click Disable all. Finally, click OK. Disabaling services in system configuration
  3. On your keyboard, hold the Ctrl + Shift + Esc keys simultaneously to open Task Manager.
  4. Right-click each program you want to close and then select End task and check if you’re the issue has been resolved. End task in task manager

7. Disable Internet Explorer add-ons

  1. Run Internet Explorer.
  2. Navigate to the Tools button, and then select Manage add-ons.Manage add-ons
  3. Find the box on the bottom left corner, open it and then select All add-ons.
  4. Right-click the add-ons you want to disable, and then click Disable.Desiabling All add-ons in internet explorer
  5. Click Close.

Some add-ons may be necessary for Internet Explorer to run correctly. So, don’t remove any add-ons that you’re not familiar with. Also, disabling add-ons helps with the ssvagent.exe pop-ups on Internet Explorer.

How do you reset Internet Explorer?

Resetting Internet Explorer is one of the ways that can fix most issues with this browser.

To do so, open the Internet options window by clicking the Tools button in Internet Explorer. You can find the Reset button at the bottom of the Advanced Tab.

After that, click the Reset Button in the pop-up window, wait for the green ticks to appear, and click Close.

Using faster and more secure browsers such as Google Chrome, Mozilla Firefox, and Microsoft Edge is highly recommended instead of Internet Explorer.

However, if you want to continue using this retired browser, you can still access it with Internet Explorer mode in Microsoft Edge.

Keep in mind if none of the methods have resolved the issue for you, you can benefit from Restore Repair Tool, which can scan the repositories to restore your computer to an earlier point in time.

Let us know if you were able to fix the Internet Explorer cannot display the webpage issue in the comment section below.

How to Enable Remote Desktop in Windows 10 [Quick Guide]

Sometimes in order to fix a certain computer problem, you need to access the problematic PC remotely.

Accessing a computer remotely isn’t that hard, and today we’re going to show you how to do it using the Remote Desktop Connection on Windows 10.

What is Remote Desktop Connection?

Remote Desktop Connection is a useful Windows feature that allows you to access a different PC on your network, or on the Internet, from your own PC.

This feature requires that both computers are powered on and connected to the Internet, and if those conditions are met you can use your PC to fix problems on any other PC remotely.

By using this feature you’ll get full access to all files that are stored on that PC, and you’ll even get the live desktop, so you can see the changes in real-time.

Before we start explaining how Remote Desktop Connection works, let’s get familiar with certain terminology.

A computer that is used to access a remote computer is usually called a client, and the remote computer is called the host.

If you want to use this feature, both the client and host operating systems have to support it natively.

Bear in mind that Home editions of Windows don’t support this feature natively, therefore you might have to use a third-party application in this case.

As we already mentioned, you can use Remote Desktop Connection with computers that are on the same network.

But you can also connect to the remote host as long as the host computer has a public IP address.

How can I enable remote access on my Windows 10 PC?

  1. 1. The first step is to press the Windows and the S keys at the same time on your keyboard and then type allow remote in the search box that opens.

  2. 2. You will see a list of results. From them, select Allow remote access to your computer.

    allow remote access to computer windows 10
  3. 3. System Properties window will now open. In the Remote tab make sure that Allow Remote Assistance connections to this computer is enabled.

    If you wish, you can change the Advanced options and set how long can the invitation for Remote Assistance last.

  4. 4. Moreover, you need to select Allow remote connections to this computer. If you want extra security, be sure to check Allow connections only from computers running Remote Desktop with Network Level Authentication (recommended).

    allow remote system properties
  5. 5. You can also set which users can have access to your computer. To do that click the Select Users button.

  6. 6. If you wish to add users which do not currently have access to your computer, you can do that by clicking the Add button.

    add remote desktop users
  7. 7. Now enter the user name in the Enter the object names to select and click Check names. If that user is on your network you might need to enter its computer name as well.

    Alternatively, you can click the Advanced button and search for the user by yourself. If the user has a Microsoft account, you can use his email address instead.

    advanced add users windows 10
  8. 8. After you’re done, click OK. That user should now be added to the Remote Desktop Users list.

    Click OK again to close the box.

  9. Before you can use Remote Desktop Connection, you need to make sure that the host computer has Remote Desktop Connection enabled.

    You can easily do this via Remote Desktop Connection Settings. From there, you can toggle the feature on and off, as well as select which users have access to the PC.

After the host computer has Remote Desktop Connection enabled, you can access it from a client PC by following the below steps.

How can I use Remote Desktop Connection?

  1. Press Windows Key + S and enter remote.
  2. Choose Remote Desktop Connection from the menu.
    remote-desktop-connection-menu
  3. Click the Show Options button to see advanced settings.
    remote desktop show advanced settings
  4. In the General tab, you’ll be able to enter the name or the IP address of the computer you wish to connect to. In addition, you can also set the name of the user account that you wish to access.
    general tab windows 10
  5. Using the Display section you can change the size of the remote desktop window as well as color depth.
    display tab windows 10
  6. In the Local Resources section, you can change how remote audio playback and recording will work. You can also change when and how will keyboard shortcuts work on the host computer. Lastly, you can set which devices you want to use from your client computer.
    remote desktop connection select devices
  7. The experience section allows you to choose between several networking profiles in order to get the best performance, but you can also customize which visual aspects you want to use during the remote session.
    navigate to the experience tab
  8. Lastly, there’s an Advanced section. Here you can change how your computer will react if the server authentication fails.
  9. After you configure everything you can click the Connect button. 

Bear in mind that it’s not mandatory to change any of these options, but if you are an advanced user you might want to fine-tune these settings in order to achieve maximum results.

We have to mention that Remote Desktop Connection isn’t only limited to the Windows platform, and you can connect to a Windows host by using Linux or Mac OS.

If this feature seems a bit daunting to you, or if your host or client PC doesn’t support it, you can use third-party solutions to remotely connect to another computer. You can even Chrome Remote Desktop which is browser-based.

We recommend using a reliable tool, Mikogo, that comes with enhanced security features to ensure your device is accessed only by authorized users, and many other great features.

However, if you’d like to find more options to pick from, just take a closer look at our dedicated list including the best remote control software.

We hope that our guide helped you enable and use the Remote Desktop Connections feature. Let us know in the comments section whether you encountered any difficulties.

Remote Desktop Connection is a useful tool for system administrators that need to fix problems remotely, but this feature can also be used by less experienced users.

Feel free to tell us if you have managed to connect remotely using this tool in the comments sections below.