Certain software might have issues with Windows 11, and this is why many users are wondering how to download and install ActivClient on Windows 11 properly.
The process is rather straightforward and in today’s guide we’re going to show you how to do it properly, so let’s get started.
What is ActivClient software?
ActivClient is authentication software that provides strong authentication by using smart cards or USB keys. The software also supports digital signatures and encryption thus protecting all data that is being transferred.
How do I download and install ActivClient on Windows 11?
Use the setup file
Download ActivClient from a credible source such as your official military branch’s website.
Once the file is downloaded, start the installation.
Accept the terms of use and click on Next.
Select Custom and click on Next.
Click on US Department of Defense configuration and set it to This feature will be installed on a local hard drive. Click Next and follow the instructions on the screen.
Optional: If you’re on non DoD computer, click on Digital Certificate Services and expand it. Locate Microsoft Outlook Usability Enhancements and set it to X. After that, click Next.
Follow the instructions to complete the setup.
Once done, restart your PC.
Is ActivClient compatible with Windows 11?
ActivClient is compatible with Microsoft Windows 8.1 and all newer versions. Keep in mind that it’s only compatible with 64-bit systems.
This can be done by using the auto-update option in the ActivClient software. Alternatively, you can just download the latest version, run the setup file and it will update the software.
In case software was installed using Active Directory Push or with Microsoft SCCM, you need to use the same methods to update it.
As you can see, it’s pretty simple to download ActivClient on Windows 11, just be sure that you’re using a credible source and that you have a compatible smart card reader.
Google finally released Gemini AI to the world, officially joining OpenAI, Amazon, Meta, and Microsoft in the race for AI development, and competing for a place in people’s hearts and minds, pun intended.
The tech giant has been teasing Gemini for a while, and it was reportedly expected to be released by the end of 2023. Now, that it has been released, Google claims Gemini is better than GPT-4 on all tests, and outperforms human experts on MMLU (Massive Multitask Language Understanding), one of the most rigorous tests to understand the AI’s capacities and capabilities.
Gemini is built from the ground up for multimodality — reasoning seamlessly across text, images, video, audio, and code. Gemini is the first model to outperform human experts on MMLU (Massive Multitask Language Understanding), one of the most popular methods to test the knowledge and problem solving abilities of AI models.
Google
Similarly to the other AI models currently on the market, such as ChatGPT, Claude II, or Copilot (formerly known as Bing Chat), Gemini is proficient at rendering text, images, video content, audio files, and code. Plus, Google says its AI model comes in no less than 3 versions, Gemini Ultra, Gemini Pro, and Gemini Nano, and each one is suited for a different situation, of course.
Google’s Gemini AI: Which version should you choose?
Well, Google defines each Gemini version through its suitability. For example, Google says Gemini Ultra is their most capable and largest model for highly complex tasks. On the other hand, Gemini Pro is the best model for scaling across a wide range of tasks, and finally, Gemini Nano is the most efficient model for on-device tasks.
Based on this, we can underline the following situations:
Gemini Ultra would be suitable for highly complex tasks such as server maintenance and management, demanding research work that requires processing a great deal of information, as well, as devising complex strategies for cybersecurities. So this model would be best placed in:
Research laboratories of all kinds
Cloud server farms
Tech security companies
Gemini Pro would be suitable for organization-wide situations. Think about Copilot for Microsoft 365, or Copilot for Azure. In these cases, Gemini Pro could be a great tool for a company to have, and it could be employed to complete a wide range of tasks, from finding specific data and compiling it to offering support for software developers. This model would be best placed it:
Companies of all kinds (gaming industries, software development industries, etc.)
Healthcare and administration (from hospitals to government institutions)
Schools and academic settings
Gemini Nano would be best suitable for a personal AI model, so it would be very similar to Bing Chat, the Meta AI bots, or even the recent GPTs. They would be integrated into mobile devices (which they already have been, in Google’s Pixel), such as phones, tablets, and laptops.
These three versions of the Gemini AI are tailored enough to provide answers and solutions to each one of these situations, and if you don’t know which one to choose, then you should be asking yourself what you need it for.
If you’re an entrepreneur, you can for the Ultra or Pro versions, depending on the scale of your company, and business.
If you have a personal business, such as content creation, freelance software development, or similar professions, the Nano version should be enough for you.
The Event ID 1000 application error is included in the Event Viewer log when applications crash.
Thus, you can’t launch the required program when the error occurs, or the software might unexpectedly close. As one would expect, numerous culprits can be behind this anomaly, and many programs can fall victim to it.
From games to collaboration apps and even random processes, nothing is untouchable for the application error 1000.
Let’s take a closer look and see exactly what to expect.
What causes the application error?
Malware – The presence of malware or a virus on your machine may also have caused this Event ID. A thorough antivirus software scan usually fixes the issue.
Older Windows – Having an older version of Windows installed on your PC could also cause your problem. Installing the most recent one immediately resolves the problem.
Crashing of a particular application – If you encounter the error message, it could also be because of a specific application crashing on your PC. You can determine it by performing a clean boot or looking at the file path in the event.
Corrupt system files – The most common reason why you encounter the Event ID 1000 is corrupt system files. Some Windows components may crash and cause problems with the system if you have damaged system files or missing modules.
.NET Framework improperly installed – Windows and many other apps use.NET framework to function. The Event ID 1000 will appear in the event logs if the framework is wrongly installed or contains faulty files.
Where can the event ID 1000 error be found, and what does it look like?
Servers: Event ID 1000 application error Windows Server 2019/Windows Server 2012 R2/Windows Server 2016
Application error Event ID 1000 Task Category 100 (also hound under this form: Event ID 1000 Task Category: (100)
Other: Netge-1000 error, Event ID 1000 NET Runtime, Ereignis ID 1000, Halo Infinite Event ID 1000)
Across all Microsoft-owned OS versions: Event ID 1000 on Windows 7, 10, and even 11
If the Event ID 1000 error is a frequently occurring one on your Windows desktop or laptop, these are a few resolutions that might fix it.
How can I fix Event 1000 application errors for good?
1. Run a System File Checker scan
Press the Window key + X, and click Command Prompt (Admin).
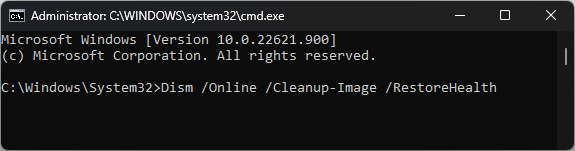
First, input the following line, and press Enter: DISM.exe /Online /Cleanup-image /Restorehealth
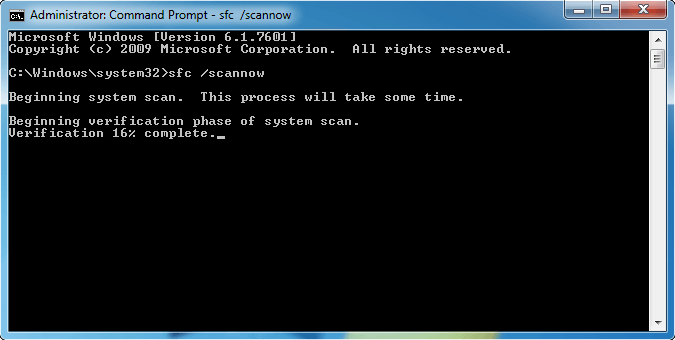
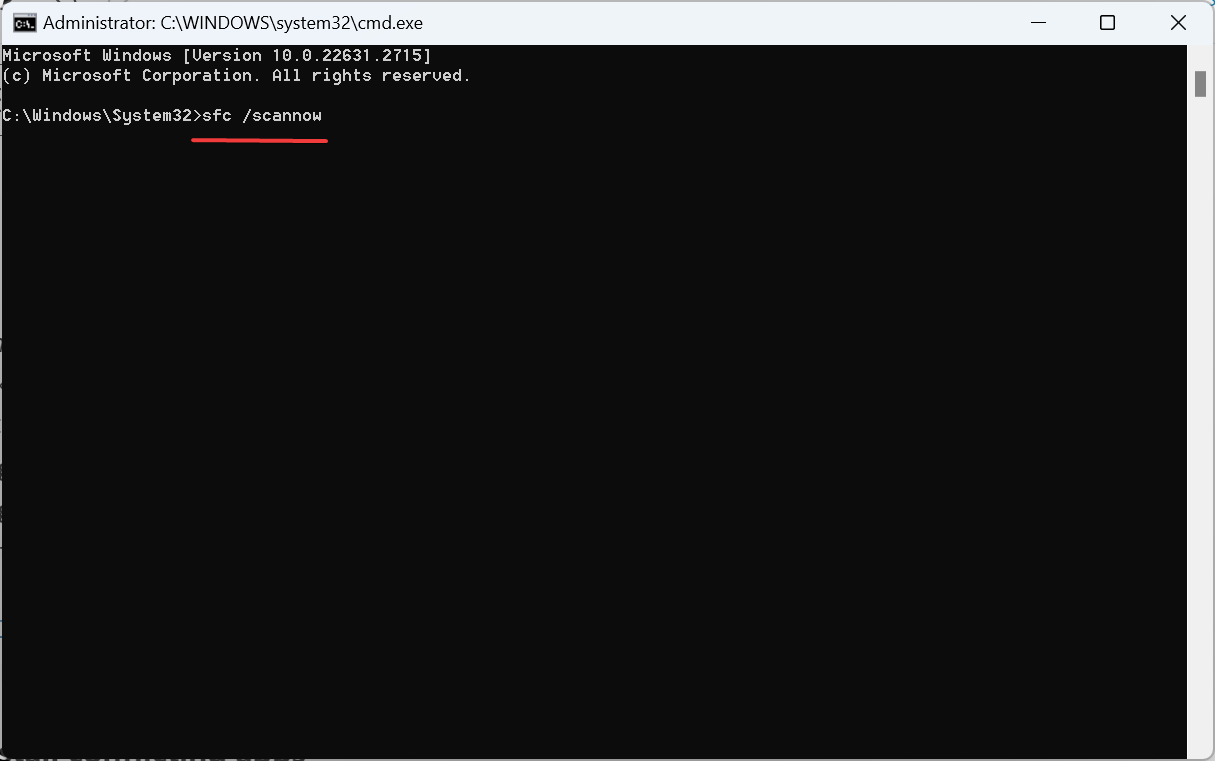
Then you can enter the script below in the Command Prompt and press the Enter key. sfc /scannow
Expect the scan to take about half an hour.
Restart Windows if the scan repairs system files.
Corrupt system files are a probable source for the Event ID 1000 application error. As such, the System File Checker could feasibly resolve the issue.
System File Checker is a Windows utility that scans for corrupted WRP system files and repairs them. Restoring the corrupted files of your Windows 10/11 computer can help you fix other issues like Event ID 5858; to learn more, read this guide.
Outdated drivers can be another factor behind Event ID 1000 errors, so updating and fixing them is your go-to solution.
We recommend you use a reliable third-party tool to handle outdated, broken, or missing drivers, and it won’t take up your system’s resources.
3. Clean boot Windows
Press the Windows Key + R to open the Run accessory.
Then you can input msconfig in the Run dialog.
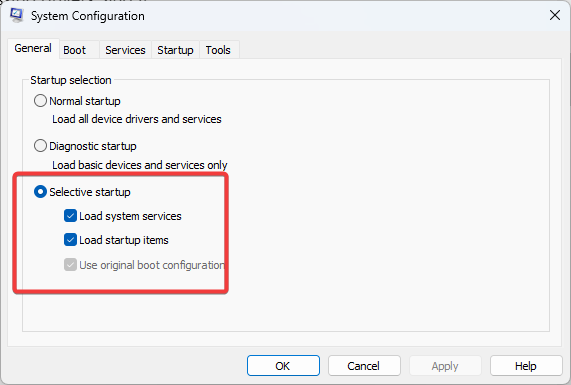
Select the Selective startup option on the General tab, select both the Load system services and Use original boot configuration options, and deselect the Load startup items check box.
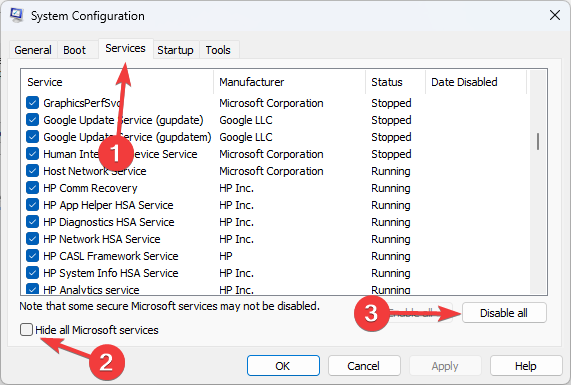
Then select the Services tab, click the Hide all Microsoft services option, and press the Disable all button.
Then press the Apply and OK buttons.
Press the Restart button to reboot Windows.
Software conflicts can often crash programs. So, a clean boot might help fix Windows’s Event ID 1000 error. That boots Windows with minimal startup software and drivers.
4. Scan the Registry
To add the freeware program to Windows, click the Download Now button.
Then open the software’s setup wizard to install the tool.
Open the app, click Registry on the software’s window, select all the registry check boxes, and press the Scan for Issues button.
Next, select the Fix selected Issues option.
You can also select Yes to back up the registry beforehand, but you probably won’t need the backup.
Then click Fix All Selected Issues to fix the registry.
The Event ID 1000 error might also be due to corrupt registry entries. So a registry scan with reputable registry cleaner software might also fix the issue.
Open the NET Framework Cleanup Tool ZIP in File Explorer, and press the Extract all button to extract it.
Open the NET Framework Cleanup Tool’s window, and press the Cleanup Now button.
Then restart the PC.
NET Framework is a development framework that is essential for some software. So the Event ID 1000 error can be due to a NET Framework version that needs fixing.
Thus, reinstalling NET Framework is another resolution for the Event ID 1000 error.
Before reinstalling NET Framework 4.7, check out the Microsoft NET Framework Repair Tool. That’s a utility that fixes NET Framework issues, so it might also resolve Event ID 1000 errors.
6. Reinstall the software
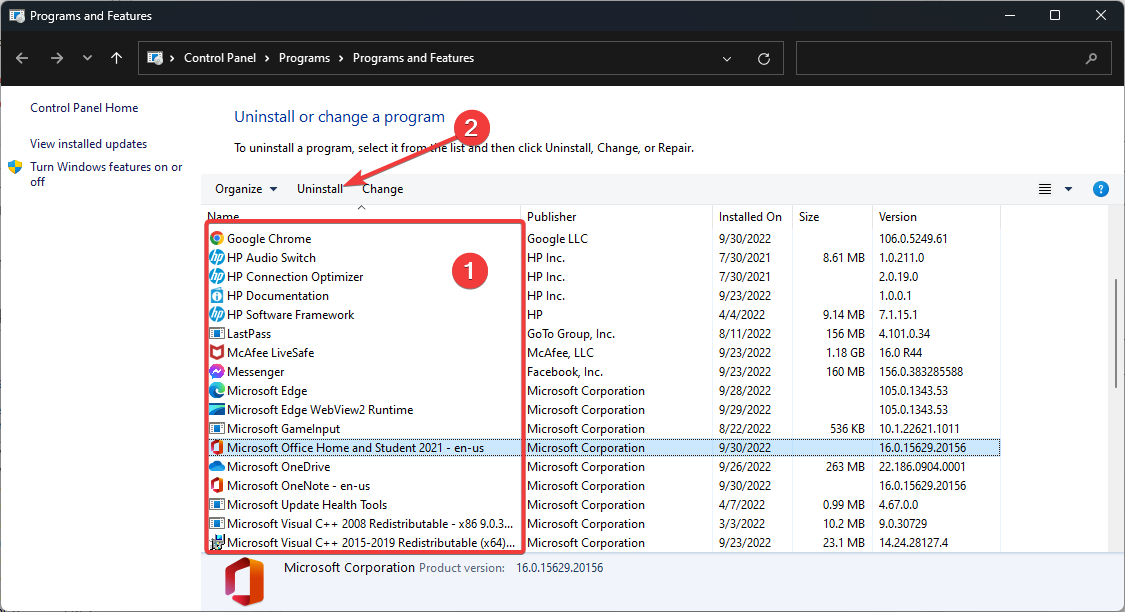
Run with the Windows+ R hotkey, then input appwiz.cpl in Run, and press the OK button.
Then select the program that is crashing, and press the Uninstall button.
Restart Windows before reinstalling the program.
Reinstall the latest version of the software.
How do I fix the Event 1000 application error in Windows 11?
While this is a problem common in Windows 10, users of the new Microsoft OS have also experienced the same issues.
The good news is that if you have followed our guide, you can also solve the Event 1000 application error issues in Windows 11.
This is because OSs are very similar, and except for minor UI differences, the recommended fixes should work on Windows 11.
Those resolutions might fix the event 1000 application error within various Windows platforms.
Users have experienced different variations to this error message, including event ID 1000 kernelbase.dll, event ID 1000 and 1001, event ID 1000 0xc0000005, Task Category: (100), explorer.exe, and excel.
Regardless of the variation, the solutions recommended should be helpful. We also have a great guide on the DistributedCOM Event ID 10016 message, so don’t miss it.
If you have any other suggestions or questions, don’t hesitate to leave them in the comments section below, and we’ll be sure to take a look.
With the festive season around the corner, printing addresses on envelopes will pick up pace. But many, when doing so via Microsoft Word, reported mail merge envelopes are not printing.
For some, it was not printing the delivery or return address, a few found the orientation incorrect, while others claimed that the printer wasn’t printing anything at all, even though it took in the envelope.
Why is my envelope not printing in Word?
A known bug in Microsoft Office conflicted with the mail merge feature for envelopes, but a patch for it was released in the later versions. Besides, misconfigured settings, an incompatible or outdated driver, or issues with the Office installation can trigger the problem.
What can I do if mail merge envelopes are not printing in Microsoft Word?
Before we start with the slightly complex solutions, try these quick ones:
Restart the device and printer and try printing again.
Make sure you are putting the envelope in the correct tray and with the correct orientation. Some printers have a dedicated envelope tray.
1. Update Microsoft Office
Launch Word, and click on the File menu near the top-left corner.
Click on More and select Account from the flyout menu.
Click the Update Options button and select Update Now.
If a newer version is installed, reboot the device, then relaunch Microsoft Word and check for improvements.
In an update released around March 31, 2022, Microsoft fixed issues that led to Word mail merge envelopes not printing. This was targeted at users who had a blank page printed after the envelope, even though it wasn’t a part of the draft.
Press Windows + X to open the Power User menu, and select Device Manager from the list of options.
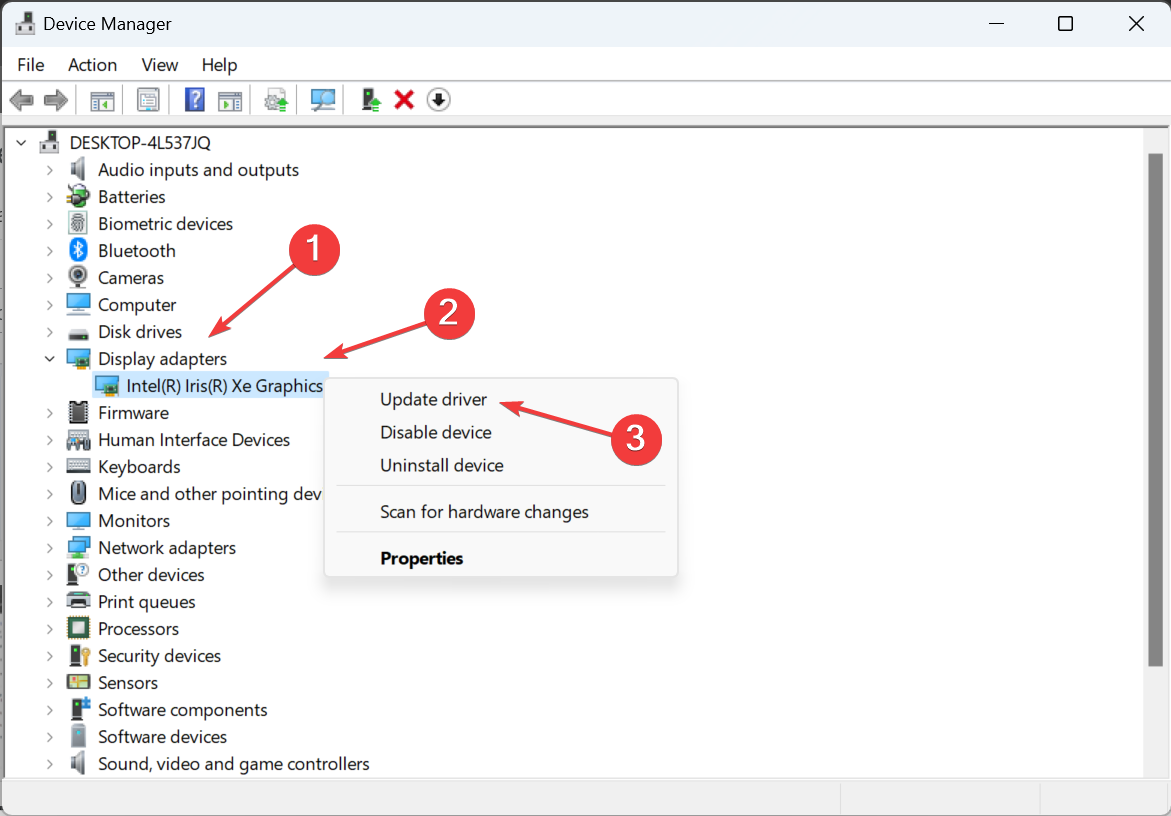
Expand the Printers entry, right-click on the printing device you are using, and select Update driver.
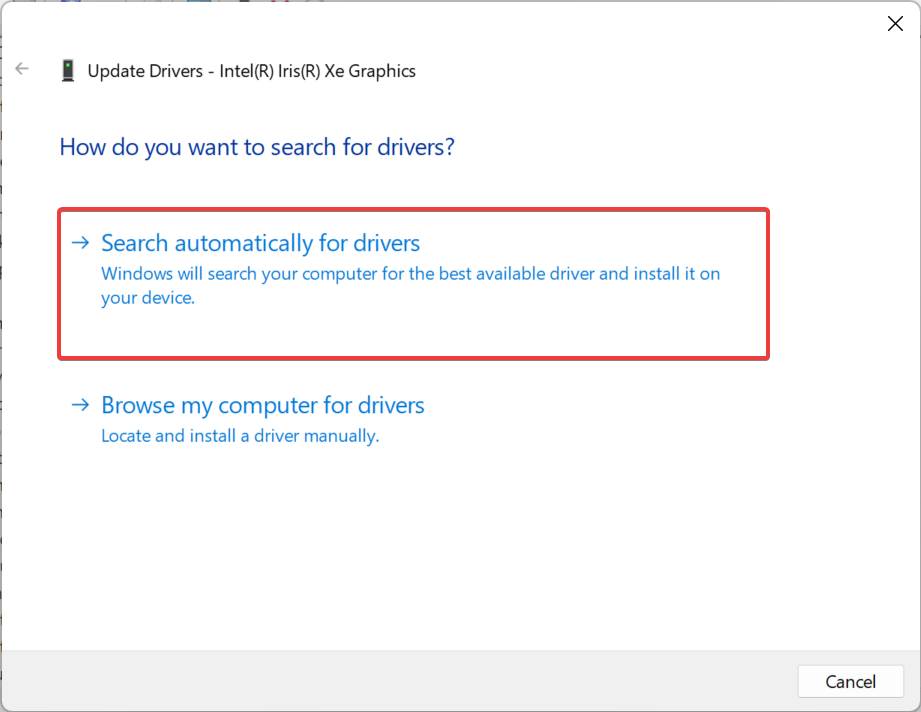
Select Search automatically for drivers and let Windows locate and install the best locally available driver.
If a newer version is installed, restart the computer.
Often, the installed driver can cause issues with how Word communicates with the printer, and it will subsequently lead to Microsoft Word envelope printing problems. So, update the printer driver.
Select a default envelope size provided by Word instead. To do that, head to the Mailings tab > click on Start Mail Merge > choose Envelopes > select an option from the Envelope Size dropdown menu > click OK.
Check the printer settings and disable printing of blank pages.
Change the font for the address, whichever of the two is affected.
In the Printing Options tab of Envelope Options, tick the checkbox for Clockwise rotation, and save the changes.
4. Reset the printing options
Launch Microsoft Word, go to the Mailings tab, click on Start Mail Merge and select Envelopes from the menu.
Head to the Printing Options option and click the Reset button to revert to the earlier stable settings.
Now, check whether Word mail merge envelopes are printing.
Press Windows + R to open Run, type appwiz.cpl in the text field, and click OK.
Select Microsoft 365 from the list of apps, and click on Change.
Click Yes in the UAC prompt.
Choose Quick Repair and click the Repair button.
If that doesn’t work, select Online Repair the next time and click on Repair.
Again, click Repair in the confirmation prompt.
If the previous solutions didn’t work, the last option is to repair Microsoft Office, which, as reported by users, will fix things when Word mail merge envelopes are not printing.
Remember, the problem is usually caused by a misconfiguration at the user’s end and rarely has to do with the Office installation. So, look through the settings and check driver compatibility first.
If you’re looking for free Christmas party invitation templates for Microsoft Word, this might be the right choice for you. It comes with beautiful holiday typography that helps the important information stand out.
There are three variations to choose from, and each comes with different colors, elements, and designs. As for designs, they look both cartoonish and adorable, which makes them perfect for this season.
We enjoyed all three variations, and you can customize them as you wish, so if you’re planning a party, be sure to give this Word template a try.
This is an Excel holiday template that will help you organize your budget for this shopping season. It comes with a simple but clean design that allows you to see your total budget, money spent, and the remaining budget.
The template has a breakdown on the left, so you can see the status of each gift. You can even filter this information by gift category, purchase status, wrapped status, or the name of the person the gift is for.
Overall, this is a great template if you’re planning to do some Christmas shopping and track your budget while doing so.
This presentation comes with 5 slides, and each of them has different graphics and purpose. The first slide can be used as an invitation card or a welcome card.
The other two slides can work as stickers or other decorations. There are also table cards available that you can customize any way you want. You can also find printable flags that you can hang on walls or anywhere else.
All these designs come with adorable Christmas motives, and they will be a perfect choice if you need a free Christmas PowerPoint template.
This Word template comes with six different labels, and each label is available in three different colors. In this pack, you can find various Christmas motives and they are fully customizable so you can change the name, address, or anything else.
Address labels are in a standard size, and you’ll get thirty labels per page, so you’ll have more than enough for all your presents.
If you want to make your presents special with some personal customization or if you want to send them to your loved ones, this free Christmas template for Word is a must-have.
If you’re planning to do Christmas shopping, then this Excel template will surely come in handy. It allows you to allocate your spending budget, and keep track of spent and remaining money.
You can add recipients to the list, and allocate a certain percent of the budget to each person and that will be automatically converted to USD, so you can see exactly how much you’re planning to spend.
Of course, you can set the number of planned gifts, and there’s even a second sheet that lets you track each gift, its cost, purchase, and wrap status.
Overall, it’s a useful template, so you might want to give it a try.
Keep it concise and ensure there are no spelling errors.
Does PowerPoint have holiday templates?
Yes, you can get a holiday template in PowerPoint right from the app. You can get Christmas templates, but other holidays have their templates too, so you’ll be able to find the right one for you.
These are some of the best Microsoft Office Christmas templates that you can get for this season. If you want to spread the Christmas spirit around the office, why not try these great Microsoft Teams Christmas quizzes?
On the Office365 Artwork webpage, you will find no less than 50 high-rez free Christmas backgrounds for Microsoft Teams.
All you need to do is right-click the images and save them on your hard drive. Then, you may freely add them on Teams just as they are, without any additional formatting.
With stars, snow, mistletoe, winter landscapes, and more, you will definitely find one or more to like.
If you’re looking for awesome winter landscapes or other festive layouts, the Crayon selection of 28 images can hit the spot.
The images are grouped on different themes, such as Winter Outdoors, Cozy Living Rooms, Plants and Animals, and more, so you will find the right one for you quickly.
There’s also a downside: All the images come with the Crayon watermark in the bottom left corner.
Another good resource for Teams Christmas backgrounds is the Teams Background website.
You will find a selection of 38 high-resolution images that you can set as backgrounds for your meetings on Teams.
However, all the images are in webp format, so you need to convert them before including them in Teams. Luckily, you can use our guide on how to open and convert webp images.
The bash has another collection of Christmas backgrounds for Zoom, but they are 1920×1080 pixels resolution. That means they are perfect for Microsoft Teams as well.
There are 85 festive high-rez images ready with a download link, and you will find some funny Teams backgrounds among them, like the one we chose above.
All the images are free to download, but they have The Bash watermark on the bottom-right corner. It’s pretty small and discreet, so you shouldn’t mind it.
If you’re looking for some funny Christmas Teams backgrounds, Popsugar has a selection of 20 high-resolution images with download links from free sources.
Whether there are cute animals or Santas with goofy faces, you will definitely find something nice for your Teams background.
They were meant to be used as Zoom backgrounds, but they have the exact resolution to fit on Microsoft Teams, and they are all free, so help yourself!
How do you create a Teams Christmas background using AI?
Nowadays, you can generate your images using a lot of AI bots such as ChatGPT, Bing AI Image Creator, and a slew of other similar tools.
In our text-to-image example, we asked ChatGPT 4 to generate a Christmas Teams background with 1920×1080 pixels resolution, and you can see the result above for the first try.
You can be more specific with your request to include or exclude elements in the image to make it more or less realistic. Basically, the sky is the limit when it comes to image creation.
How do I change my Teams background to a Christmas theme?
Open Teams and log into your account.
Click on the camera icon and select Start meeting.
After you turn on the camera, click on Background filters.
Now, you can select from the available backgrounds or click on Add new.
Locate the image on your hard drive; after you select it, the background changes immediately.
You should know that you need a 1920×1080 pixels image (16:9 aspect ratio) for the desktop app in the JPEG, BMP, PNG, and JPG formats.
For more customization options like blur, filters, and non seasonal images, check out our full guide to Microsoft Teams background effects and learn how to tweak every meeting backdrop.
Does Microsoft Teams have holiday backgrounds?
Yes, Microsoft Teams has holiday backgrounds, but they are not readily loaded into the app. You have to go to the dedicated Microsoft webpage and download them from the page for free.
You will find a selection with 52 free holiday backgrounds, but if you want our opinion, they are not too Christmasy.
If we review the Teams Christmas backgrounds selection in our article, you should be able to find 267 free holiday images to download and bring a smile or joy to your meeting partners.
Of course, you can find even more free image sources like Pinterest, Freepic, Alamy, Canva, and more.
FAQs
How do I add Christmas backgrounds in Microsoft Teams?
Open Teams, start or join a meeting, click the three dots, choose Effects and avatars or Apply background effects, select Add new, then upload your Christmas image and click Apply.
What size should Microsoft Teams Christmas backgrounds be?
For best results, use images with a 16:9 aspect ratio, such as 1920 x 1080 pixels. This helps avoid stretching or cropping when Teams applies the virtual background.
Can I use custom Christmas backgrounds on the free version of Teams?
Yes. Custom backgrounds are available in both free and paid versions of Microsoft Teams, as long as your app is updated and your device meets the minimum hardware requirements.
Why is my Christmas background not showing correctly in Teams?
This can happen due to low lighting, outdated Teams version, or insufficient device resources. Try improving room lighting, updating Teams, restarting the app, or turning off other video effects before reapplying the background.
If you’re looking to entertain your colleagues, friends, or family, here’s a guide on creating Christmas quizzes on Teams and many festive questions to include.
If you’re a Windows 10 user, you may have received a system maintenance notification pop-up on your screen after 15 days of continuous use. This notification asks you to reboot your computer to ensure your system’s stability and proper functioning. But why is this necessary, and what happens if you don’t reboot your system?
How long can you leave your PC running without turning it off? You need to reboot your system at least after Windows updates. If not, you may get a system maintenance notification to do that.
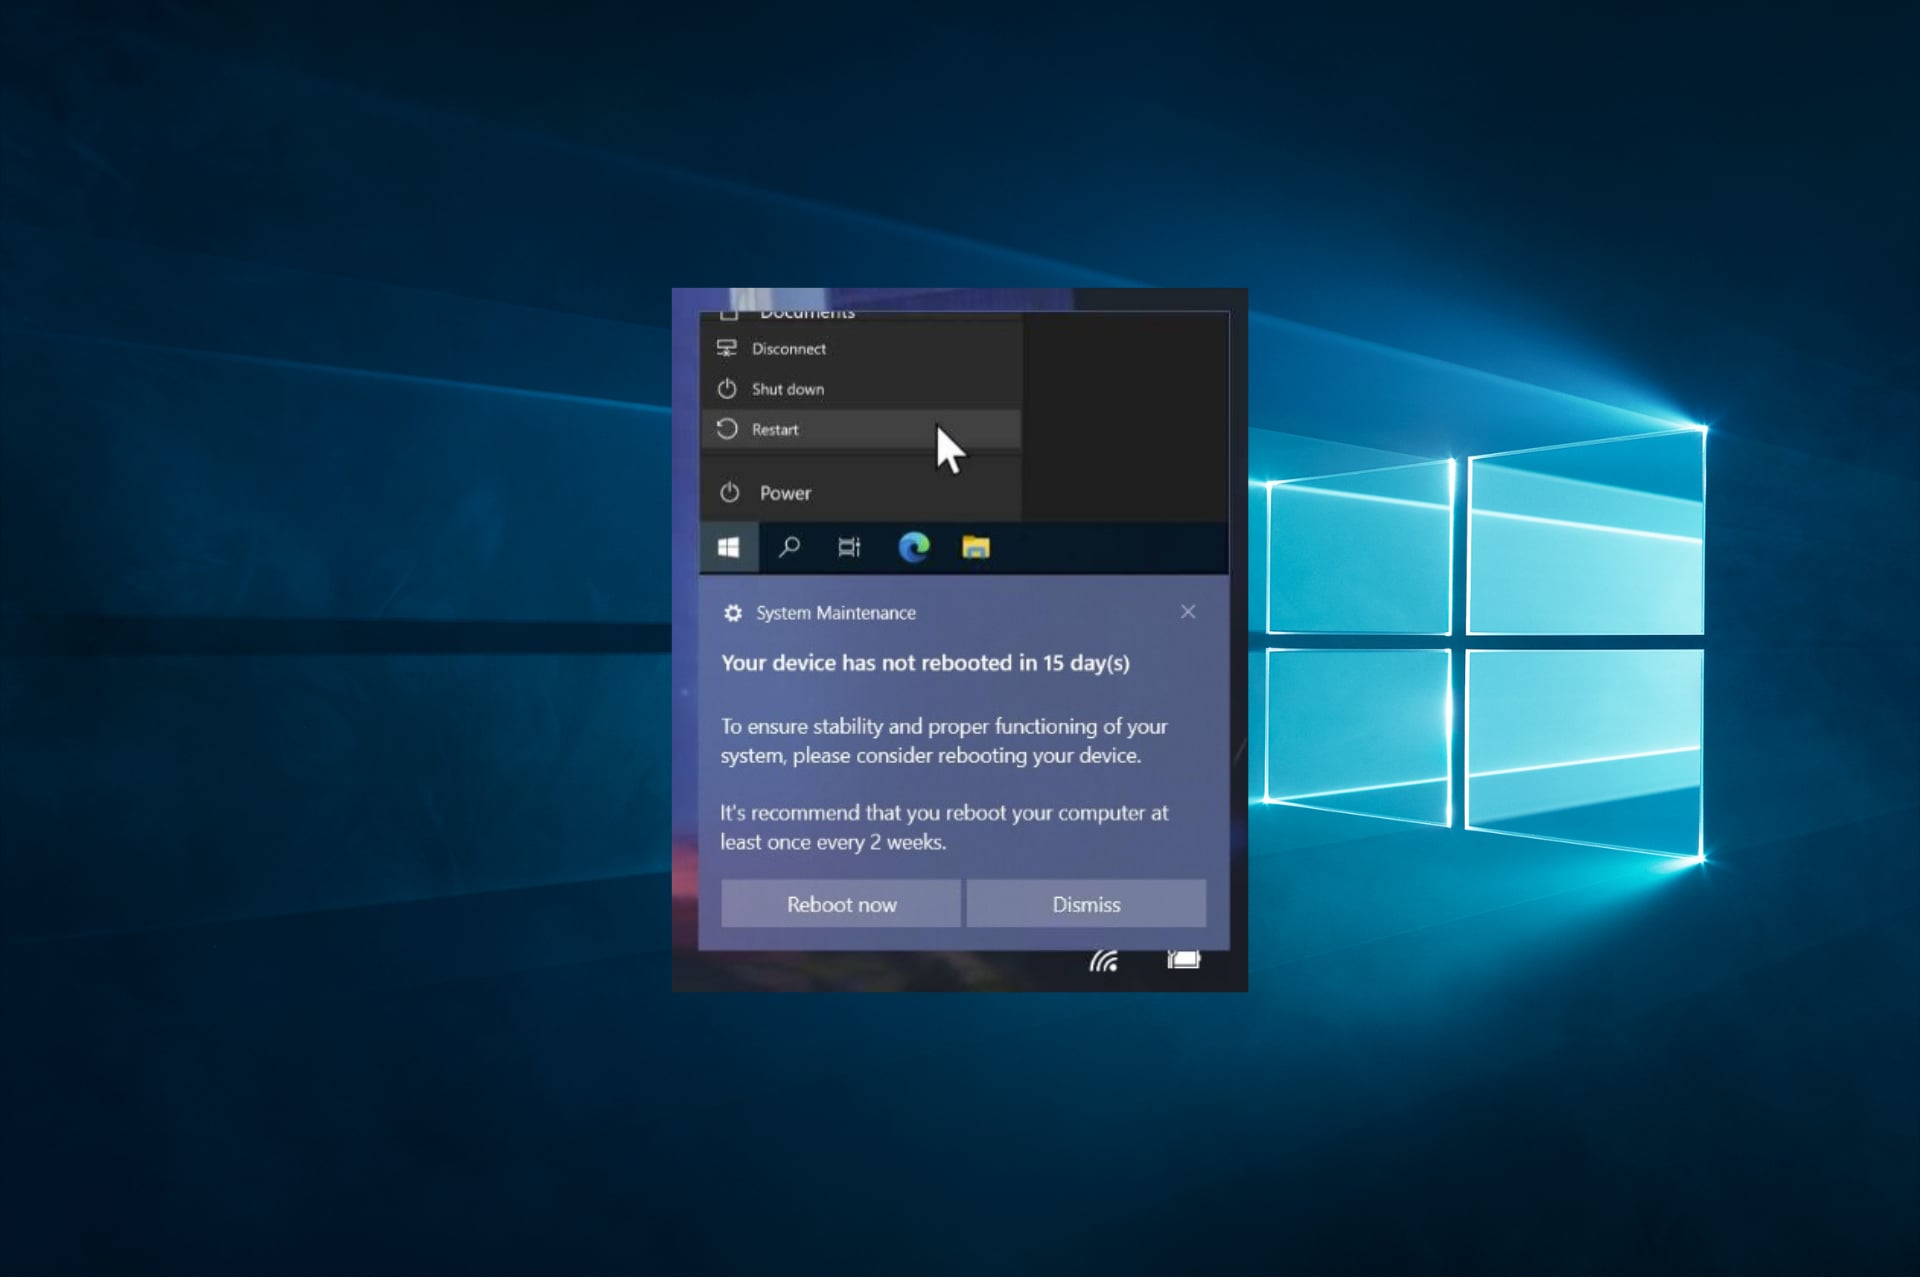
Windows 10 Your device has not rebooted in x days notification
Here is what the notification says:
Your device has not rebooted in 15 day(s). To ensure stability and proper functioning of your system, please consider rebooting your device. It’s recommend that you reboot your computer at least once every 2 weeks.
You can then reboot the system or dismiss the notification.
Firstly, rebooting your system is important to ensure it functions properly. Over time, the system’s performance may decrease due to accumulating temporary files, memory leaks, and other issues.
Rebooting the system clears out these files and frees up memory, which can help improve performance. Additionally, if you don’t reboot your system, it may not receive important security updates and patches. This can leave your system vulnerable to malware and other security threats.
Some applications may not function properly if the system runs for an extended time. This may also cause instability and crashes. Rebooting the system can help resolve these issues.
It’s worth noting that rebooting your Windows 10 computer at least once every two weeks is important to ensure it’s functioning properly and prevent security vulnerabilities, and application or system crashes.
How many days have you left your Windows 10 computer running constantly? Let us know your thoughts in the comments below.
GB WhatsApp is a popular third-party client (mod) offering a wide range of features in addition to the ones present on WhatsApp by default. But in the last couple of days, several users have reported getting the An unexpected error occurred message when launching GB WhatsApp.
For some, the error screen remained visible as long as the app was running, while GB WhatsApp crashed instantly for others.
Why is GB WhatsApp not working?
The problem is usually linked to a bug in the installed version of the app, be it v17.36, v17.40, or GB WhatsApp v17.57, the latest one. Other than that, corrupt app files or missing components can also trigger the unexpected error.
How do I fix the Unexpected Error Occurred issue in GB WhatsApp?
Before we start with the slightly complex solutions, try these quick ones:
Restart the mobile phone.
Make sure you are connected to the Internet. Switch between mobile data and Wi-Fi, if available.
1. Clear GBWhatsApp cache
Tap on hold the GBWhatsApp icon on the screen, and then select App info from the flyout menu.
Now, tap the Clear data and Clear cache options individually.
Tap OK or Yes in the confirmation prompt, if one appears.
Once all the non-critical app files are deleted, relaunch GBWhatsApp and then check for improvements.
On the official GBWhatsApp website, click the Direct Download button under the latest available version.
After the file is downloaded, run it, and then tap Install in the confirmation prompt.
If you get a Harmful app blocked warning, go to Google PlayStore > tap on your profile icon near the top right > select Play Protect > tap the gear (settings) icon > disable the toggle for Scan apps with Play Protect.
Once done, run the downloaded setup again, and then wait for GBWhatsApp to update.
Finally, proceed with setting up GbWhatsApp, and it should run fine without throwing the An unexpected error occurred warning.
If you have the downloaded files for GBWhatsApp v17.55, install it directly from the setup. Or you could find them on the web or Telegram. Make sure to download the setup from a reliable and secure source.
And if that doesn’t work, first install v17.52 and then update to v17.55 from within the app.
Is there any problem in using GB WhatsApp?
GB WhatsApp is not a secure app, given that it doesn’t support end-to-end encryption, rendering your chat and messages exposed. Also, it’s not recommended that you download apps from sources other than the official Google Play Store since these pose security risks.
As per reports published by credible organizations, GBWhatsApp has been found to infect mobiles with malware and run malicious codes. Here, you stand the risk of losing valuable data to hackers. So, if you have GBWhatsApp, uninstall it right away and perform a full factory reset.
These are all the ways you can fix the GB WhatsApp’s An unexpected error occurred message and run the app. But our recommendation is to use the official WhatsApp instant messaging service and not go with mods.
Microsoft just added Windows Speech Recognition to the list of deprecation features for the Windows client, according to the latest entry in the official blog post.
According to the Redmond-based tech giant, Windows Speech Recognition is no longer developed, and it will be replaced by the newer Voice Access feature, in the following weeks or months.
Voice Access is available for Windows 11, version 22H2 and later, but the feature is not yet present on older Windows versions, such as Windows 10, which still uses Speech Recognition. It’s not clear either if Microsoft intends to add the Voice Access feature in Windows 10.
Windows speech recognition is deprecated and is no longer being developed. This feature is being replaced with voice access. Voice access is available for Windows 11, version 22H2, or later devices.
Microsoft
Voice Access will replace Windows Speech Recognition
As we mentioned earlier, Voice Access is a new feature added in Windows 11, and it is quite useful, as it can be used in different situations when navigating Windows 11.
For example, earlier this year, Microsoft revealed that Windows 11 users will be able to sign in to their Windows 11 devices using the Voice Access feature, effectively allowing the feature to be used in Windows Lock Screen.
This is one of the best ways for those unable to use the keyboard or any other ways to sign in to Windows, as the feature will provide them with efficient ways to hide sensitive signing-in information, such as labeling the keyboard with numbers, and the login password.
According to the entry in the official blog post, deprecation for the Windows Speech Recognition feature could start as soon as this month, however, for now, there isn’t any more information regarding it.
We’ll update this article as soon as we find out more about it.
What do you think about this? Is it wise for Microsoft to deprecate this feature or not? Let us know in the comments section below.
Microsoft released Outlook Lite, a stripped, far less-consuming version of its Outlook mobile app, a year ago, in 2022, and the Redmond-based tech giant announced that it has reached 5 million users globally.
A year ago, we launched Outlook Lite with a simple hope: to help people with lightweight phones get the best out of their day with easier email and calendar access. Today, we’re moved by how many of you have joined us on this journey. It’s been only a year, and we’re celebrating the milestone of 5 million downloads that have brought the benefits of Outlook Lite to users across the globe.
Microsoft
Outlook has been getting some exciting features, lately, including AI capabilities, such as Copilot. The AI tool will help users train their tone and style, while also composing emails. The best news is that Copilot is coming to both the new Outlook and the classic Outlook, as well.
Copilot is also available on Outlook Mobile, so that’s a good reason to have Outlook on your mobile phone. However, the app can be demanding for a lot of phones out there, and for this reason, there is Outlook Lite.
Why should you use Outlook Lite?
If you do want to have access to your emails on the go, but don’t want anything else on the side, aside from reading, composing, and replying to emails, then Outlook Lite might be a good choice.
Sure, it doesn’t have Copilot (yet), but it gets the job done, and it won’t eat up your phone’s resources. Here are three reasons why you should try it.
It’s small and fast
Outlook Lite offers the core services of the Outlook app: accessing, reading, composing, and replying to emails, all doing so in a version that is only 5 MB and runs fast on Android devices with just 1 GB of RAM.
Plus, you’ll have access to all your contacts, and you won’t have to worry about space, as it runs on very little resources.
It has a low battery usage and it can connect to all networks
Outlook Lite uses less battery, thus saving up energy. The app is also perfectly capable of working on 2G and 3G networks, letting you access your emails even in places where the connection is not that good.
It supports multiple accounts
Just as the regular Outlook for Android, Outlook Lite supports multiple accounts, including:
Outlook.com
Hotmail
Live
MSN
Microsoft 365
Microsoft Exchange Online
If you want to try it on your Android device, head over to Google Play and download it from there. Be sure to let us know your experience with it.
If you often find yourselves grappling with frozen screens and slowdowns when your laptop is plugged in, this guide can help!
In this guide, we will delve into common causes behind the laptop lagging when charging issue and offer you WR expert-recommended solutions to fix it in no time.
Why does my laptop lag on charging?
Misconfigured power settings or processor throttling.
Resource hogging background processes or malware infection.
Graphics settings set to save power or outdated drivers.
How can I fix the laptop lagging when charging issue?
Before proceeding with any steps to fix the lagging issue, go through the following preliminary checks:
Check your power adapter & laptop hardware to ensure it is not faulty, and check if the charger provides sufficient power flow.
Run a deep scan using a reliable antimalware tool.
Ensure there is no electrical interference or grounding issue when you plug in your laptop to power outlet.
1. Close unwanted background processes
Press Ctrl + Alt + Esc to open Task Manager.
Go to the Processes tab, right-click all the unnecessary processes or apps one by one, and select End task from the context menu.
2. Edit the power settings
Press Windows + I to open the Settings app.
Go to the System, then select Power & battery.
Locate Power mode, and select Best performance from the drop-down list.
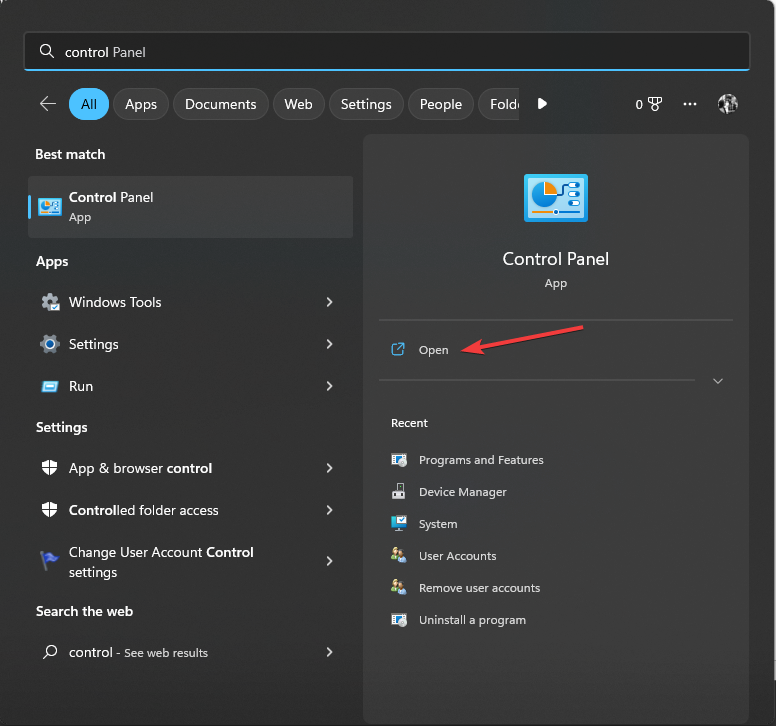
Press the Windows key, type control panel on the search box, and click Open.
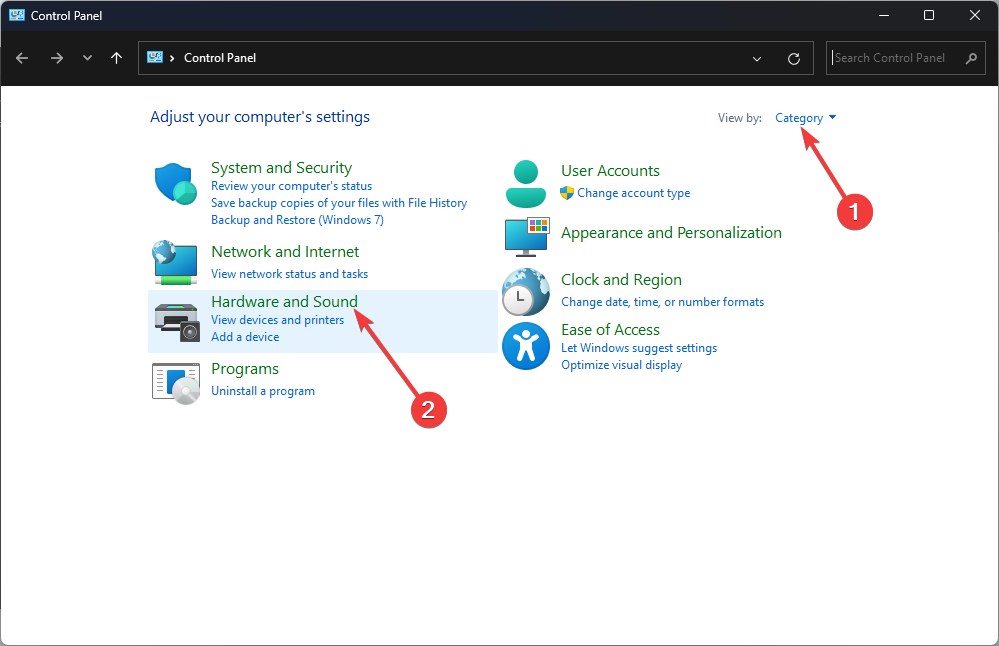
Choose Category for View by, and select Hardware and Sound.
Click Power Options.
Under the Selected Plan option, choose Balance instead of High Performance.
Press the Windows key, type control panel on the search box, and click Open.
Choose Category for View by, and select Hardware and Sound.
Click Power Options.
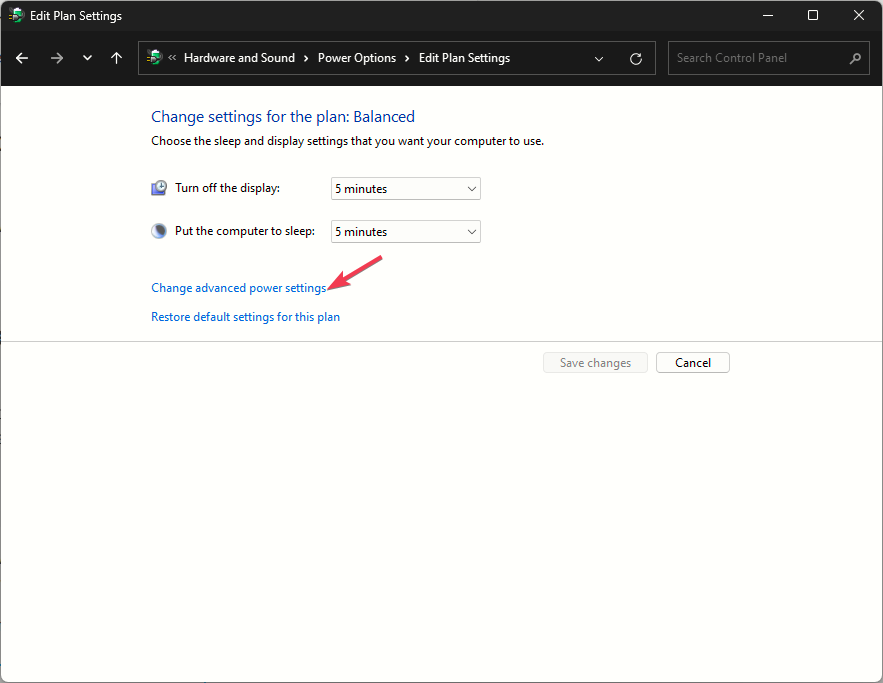
Now, click the Change plan settings option.
Select Change advanced power settings.
On the Power Options window, click the Plus icon next to Processor power management.
Click the Plus button next to Maximum processor state, and change the percentage next to Plugged into 95% or lower.
Click Apply, then OK to save the changes.
5. Reset the BIOS settings
Press the Windows + I to open the Settings app.
Go to System, then select Recovery.
Under the Recovery options section, look for Advanced Startup, and click the Restart Now button.
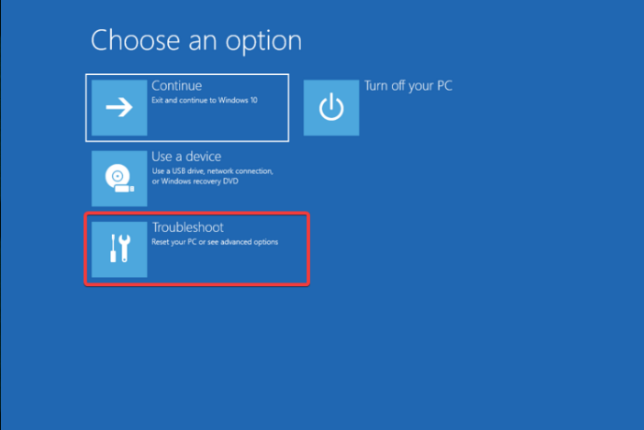
On the Choose an option screen, select Troubleshoot.
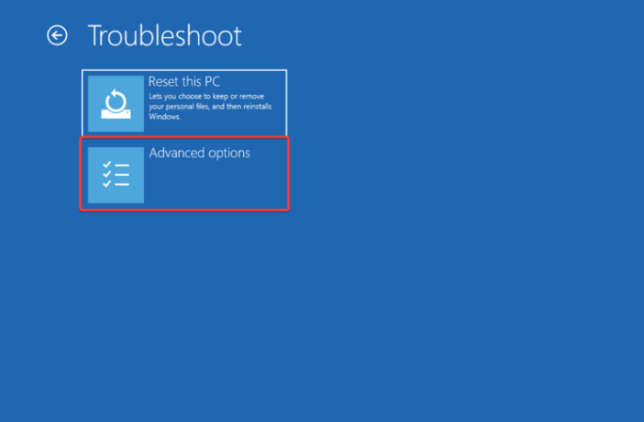
Choose Advanced options on the Troubleshoot page.
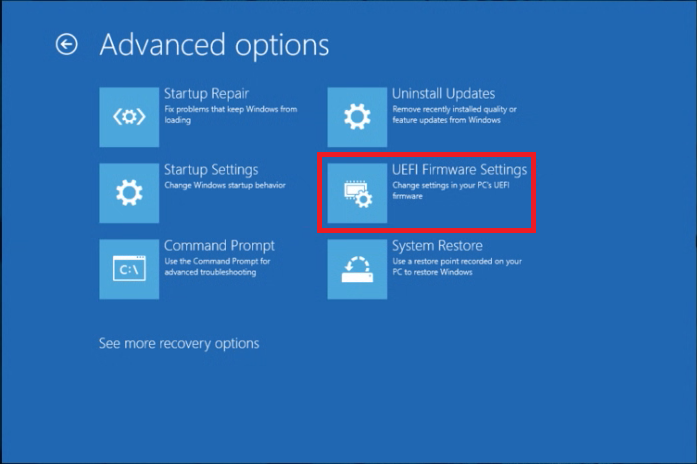
From the Advanced options screen, select UEFI Firmware Settings.
Click Restart.
Now, in the BIOS menu, go to File, then select Apply Defaults, then choose Exit.
The BIOS settings vary for each computer, depending upon the system manufacturer. Therefore, it is essential to locate similar options in the BIOS to reset it to default settings.
To conclude, to fix the laptop lagging when charging issue, you need to check your laptop for overheating and if you have a dedicated graphics card, check its control panel and optimize the settings for better performance.
Remember that your power adapter should be in working condition, and the power outlet should be able to provide the right flow.
If nothing has worked for you so far, you must try to reset your computer to fix all the inconsistencies once and for all.
Did we miss a step that helped you? Don’t hesitate to mention it in the comments section below. We will happily add it to the list.
You may have wondered between Time.windows.com vs Time.nist.gov, which option is best to use for your computer and devices. Since there is more than one option available, the answer depends on what you are using the time for and what type of device you are using it on.
Let’s look at these two popular options for setting your computer’s clock and which one you should consider.
How reliable is time windows.com?
Time.windows.com is the time standard used by Windows and other Microsoft products. It uses the Network Time Protocol (NTP) to synchronize the system time on computers running the Windows operating system. This being an authoritative time source makes it reliable.
What is the most accurate Internet time?
The most accurate internet time is provided by NIST atomic clocks. Atomic clocks use oscillations in cesium atoms to keep time. The frequency of these oscillations can be measured with great accuracy, and thus a time and date can be established with great precision.
Since we all use different devices, you may have noticed that one of them may be behind or ahead by a few seconds. The clocks on your computer or smartphone depend on the accuracy of the time server you’re using.
The server’s clock is in turn dependent on its location, and whether it uses atomic clocks. Therefore, if your device is using the NIST servers, you are reading the most accurate time.
In a lot of cases, especially with high accuracy time synchronization, there will only be a second difference between the Windows Time server and NIST servers.
What are NIST time servers?
NIST stands for National Institute of Standards and Technology, which is a government agency under the Department of Commerce. This agency sets the standards for all sorts of things including how our GPS systems work.
The NIST time server is often used as a reference for other time sources. This includes computers and email programs that require accurate time stamps on messages.
This is because they’re very stable and accurate. They’re designed to synchronize with each other so that they’re all displaying simultaneously.
Are there benefits of maintaining time accuracy?
Avoid security loopholes – If your servers read an incorrect time, it could lead to problems with encryption certificates. This can lead to data being sent over an insecure connection.
Ensures apps work together seamlessly – Applications that require synchronized access to shared data and resources may stop working properly or even cause data corruption problems.
It reduces network traffic – Accurate time synchronization reduces the amount of network traffic on your network since it doesn’t have to send requests often to check if its internal clock is out of sync.
Troubleshoot problems faster – Accurate time stamps on your log events will help you troubleshoot issues much faster. You can easily filter out events based on timestamps and run diagnostic queries.
Time accuracy also plays an important role in ensuring that all systems work properly. When time is not accurate, it can lead to problems with computer networks, affect productivity, and more.
Quality of your time source – The time on your computer is derived from an atomic clock or other time standard that is kept accurate with the use of satellites and radio signals.
Frequency of synchronization – If you’re using a desktop PC, this may happen automatically but in some cases, it might not happen at all unless you configure Windows to do so manually.
Quality of the hardware – Computers with higher-quality components tend to have more accurate clocks. Any slight changes in a PC’s hardware over time may also affect its accuracy and your computer clock may fall behind.
Network latency – The amount of time it takes for a packet to go from one computer to another determines how accurate your system clock will be. Distance, poor or overloaded connections, and network interference all play a role.
When it comes to selecting between time.windows.com and time.nist.gov, your activities should determine which one to go for. Although they all have a high level of accuracy, the NIST server would be the better option if you need very precise time down to a millisecond.
What is the difference between time.windows.com and time.nist.gov?
time.windows.com
time.nist.gov
Protocol
Uses the NTP protocol to get its time
Uses a GPS satellite receiver and atomic clocks
Ownership
Owned by Microsoft
NIST is a government organization
Accuracy
High
Very high
How do I sync Windows time with NIST?
Press Windows + R to open Run, type control in the text field, and click OK.
Click on Clock and Region.
Now, click on Date and Time.
Navigate to the Internet Time tab, and click on Change settings.
Choose the time.nist.gov server from the dropdown menu, click on Update now, and then on OK.
Again, click OK in the Date and Time box.
Now, check if you can synchronize time without any trouble.
Windows has a built-in time service that syncs with the NIST servers. This allows your computer to keep its clock accurate, automatically adjusting for time zone changes and daylight savings time. Unfortunately, time synchronization with time.windows.com may fail at times.
In such situations, being able to change to another server like NIST will come in handy. This will ensure your PC’s clock is set correctly. It will also save you the trouble of having to manually update it every now and then.
As you can see, both time.windows.com and time.nist.gov are run by reputable organizations, and both are used for the very same thing. If you’re looking for time services beyond what’s offered by your operating system, either site should suffice.
The important thing to take away from this article is that you should always use an official resource. Ultimately, it boils down to a matter of preference, and what option you’re more comfortable with.
As part of a long and drawn-out regulatory battle between Microsoft, Activision Blizzard and the Competition Markets Authority (CMA) in the UK, Call of Duty gamers in the region will now be greeted with a new license and services agreement.
New Activision Software and License Agreement
Xbox Wire editor-in-chief Joe Skrebels addressed the upcoming pop up for EEA gamers with an explanation and details on the new Software License and Service Agreement users will now need to opt-in for.
We met this commitment in October, and are now reflecting these changes in four live service games that have an in-game software licensing agreement. While many of you may have already been streaming Activision Blizzard titles, beginning today, the next time you boot up Call of Duty®: Modern Warfare® II, Call of Duty: Modern Warfare III, Call of Duty: Warzone™, and Crash Team Rumble™ you will be asked to accept an updated Software License and Service Agreement.
As of October 13, Microsoft is offering a free Streaming Provider License under the following terms:
“Microsoft licenses its rights under a non-exclusive, non-transferable, non-sublicensable license to Eligible Streaming Services to stream Eligible Games for the sole benefit of Consumers in accordance with the Consumer License, as defined in and pursuant to the Commitments entered into by Microsoft and made legally binding by the European Commission in its decision under Article 8(2) of Regulation (EC) 139/2004 in case M. 10646 -Microsoft/Activision Blizzard.”
Microsoft
The long and short of the new pop up that will appear before Call of Duty®: Modern Warfare® II, Call of Duty: Modern Warfare III, Call of Duty: Warzone™, and Crash Team Rumble™ on players next boot up, is legal affirmation that Microsoft is honoring the CMA’s licensing wishes.
To get its Activision Blizzard deal over the finish line, Microsoft conceded to a licensing deal that would offer a free license to EEA gamers to stream those titles through any cloud game streaming service that supports the games listed above.
The broader view of Microsoft’s licensing deal was expanded to include Ubisoft as a third-party arbiter of the Call of Duty license which it will hold for the next 15 years while allowing other new or existing cloud streaming game platforms same-day access to any games Activision may eventually place on Xbox’s cloud streaming service.
The Xbox team assures gamers in the EEA that the new pop up is a one-time occurrence to facilitate the agreed upon terms between Microsoft and the CMA regarding the recently approved $68.2 billion acquisition of the US-based publisher.
For more details on the pop or general knowledge of Microsoft’s new commitments to EEA gamers visit the following links here and here.
For those unfamiliar with PowerToys, it’s “a set of utilities for power users to tune and streamline their Windows experience for greater productivity.” PowerToys boasts several useful features that allow power users to get the most out of Windows. Fancy Zones, for example, allows users to create custom windows layouts that afford more options than simply snapping windows to halves or quadrants.
Other PowerToys features include mouse and keyboard utilities, which also saw improvements with this newest update with a modernized UI for Keyboard Manager. Additionally, “Keyboard Manager can now remap keys and shortcuts to send sequences of unicode text.”
Similarly, PowerToys Run, Quick Accent and Text Extractor tools also have modernized UIs.
If you are having technical issues or want to reset your PS5 console, you need to start your PlayStation 5 in safe mode. In this guide, we will discuss safe mode, its usage, and steps to start your Playstation in safe mode.
What does Safe Mode do?
The Safe mode on PlayStation 5 provides you access to the system’s most basic functions for troubleshooting. You can
Set the resolutions of the console if you are having display issues.
Update system software via a USB.
Reset the console settings to default values with or without deleting the data.
Scan the drive and create a new database of the content on your system, thereby improving the performance.
How do I start my PS5 in safe mode?
Press & hold the Power button for three seconds to turn off the console. You will see the power indicator blink for a few moments before it completely turns off.
Next, press and hold the Power button again until you hear the second beep. Once you hear two consecutive beeps, release the button.
Connect the controller to the console via a USB cable, then press the PS button on the controller to initiate the safe mode.
Once you are in it, you will get these options:
Restart PS5 – Takes you out of Safe mode and restarts the console normally.
Change Video Output – Has two options: Change Resolution or Change HDCP Mode to help you with blank screen issues.
Repair Console Storage – Helps you fix issues like PS doesn’t start up properly or to deal with storage issues.
Clear Cache and Rebuild Database – To fix the performance or system feature issues, you can clear the system software cache or choose Rebuild Database to scan the drive and create a new database.
Restore Default Settings – Reset your console to default factory settings but will not delete games, apps, screenshots, video clips, and more from your console storage.
Update System Software – Update the PSN system software via USB drive or direct download.
Reset PS5 – Restores PS5 to default state and deletes all the data from console storage.
Reset PS5 (Reinstall System Software) – Removes PS5 system software and deletes all user data.
To close the Safe mode, you can either use the Restart PS5 option from the menu or press & hold the console’s Power button until it turns off.
Updating the system software of the PSN console can help you fix other issues like Something Went Wrong error; read this guide to learn more.
If you are not able to start your PS5 in safe mode using the steps mentioned above, turn the console off, then turn it back on. Also, check the cables connected to the console, then reconnect them just to be sure.
This is how you can put PlayStation 5 on safe mode and resolve issues related to data and display issues on PS5.
Also, remember that choosing some options in Safe mode could result in data loss, so make sure you back up your data to Cloud storage or a USB drive.
2024 could be a huge year for Microsoft, as the Redmond-based tech giant is planning to release some of its most important and breakthrough products and services yet. According to Zac Bowden of Windows Central, Microsoft might release Windows AI, code-named Hudson Valley, next year.
The Windows AI Hudson Valley platform will reportedly be based on another Windows client, code-named Germanium, released before the AI-based operating system.
We’ve known for some time that Microsoft is planning on adding more AI features to Windows, and we’ve even covered a story where we speculated that Windows 12, the purposely next iteration of Windows, will somehow come alive thanks to AI capabilities, to offer a far more personalized experience to users.
The speculation back then was based on Microsoft gathering a team of AI experts, including engineers and researchers, to build an AI capability ready to ‘delight the customers’. We think this is about Windows 12 (which is reportedly being released in June 2024), and if we take a look at what Zac Bowden from Windows Central reported, then Microsoft will indeed provide a highly personalized experience with the next version of Windows.
Windows AI: What’s the timeline for the release and what to expect?
According to Bowden, the Hudson Valley Windows AI version will be ready for manufacturing (RTM) by April 2024, however, the update will finalized in August, and it will be released in September or October 2024.
So we have:
Hudson Valley Windows AI
Roadmap
RTM
April 2024
Finalized
August 2024
Released
September/October 2024
The update will bring various AI capabilities, such as an advanced Copilot, and Bowden describes his sources told him these capabilities will be groundbreaking.
What to expect, though?
A history/timeline for Windows apps, which users can access through Copilot, using specific criteria, and natural language, something Microsoft has already been playing it for OneDrive.
An advanced search engine within Windows, that will also use natural language. If you don’t remember something by specific data, you can just use natural language and the OS will find it for you that way.
A feature called Super Resolution reportedly uses NPU hardware to automatically scale the quality of video content and video games.
A Live Caption feature, that will effectively translate media content (video and audio) in real time.
AI Wallpapers. Windows AI will reportedly be able to create interactive wallpapers that will engage with your mouse, cursor, or controllers. Whatever this means, we will have to wait and see, though.
Huge improvements to battery life on devices running Windows AI. Bowden says they will be able to extend battery life by up to 50% on certain hardware.
Windows AI will also add a Creator startup area that contains all the Microsoft 365 apps and products ready to be open at any moment.
It’s important to mention that Windows AI does not mean Windows 12. It can be the next iteration of Windows 11 or just a Windows frame to use as a foundation for the next Windows versions. Let’s not forget Windows 10 is still the most popular around, with over 1 billion users still on it. Microsoft just announced that Windows 10 EOS will be extended but users will have to pay a subscription to enjoy it.
Encryption is a powerful tool, but it can be confusing and frustrating to set up when you get errors like a problem is preventing this folder from being encrypted.
If you’ve tried to encrypt a folder and had no luck, here are some things to try.
Why am I unable to encrypt a folder?
This can happen if you try to encrypt a folder that’s already encrypted, a corrupt folder, or you do not have a compatible version of BitLocker Drive Encryption. If your account does not have sufficient permissions, you’ll also have issues with encryption.
Other reasons could be that the folder contains files from other accounts on your PC or an antivirus program or software firewall blocking the encryption process.
How can I fix a folder that cannot be encrypted?
You may be able to fix a problem is preventing this folder from being encrypted issue by following these preliminary fixes:
Try encrypting another folder on the same drive to establish whether it’s a case of corruption.
Rename the folder with no spaces or special characters and try encryption again or copy the files into a new folder and retry.
1. Unlock the drive
1.1 Unlock the drive with BitLocker
Hit the Windows + E keys to open File Explorer.
Right-click on the locked drive (c:) and select Unlock Drive.
A pop-up window will appear. Enter the password used to lock the drive and click on Unlock.
1.2 Remove password protection
Right-click on the problematic folder, and select Properties from the drop-down menu.
A window will open. Here, click on Advanced.
Untick the box next to Encrypt contents to secure data and then click OK.
After you click on Apply, a pop-up will open asking you if you want to back up your file. Make your selection and the pop-up will close.
Now restart your PC and try encrypting the folder.
2. Take ownership of the folder
To begin, start File Explorer using the Windows + E keyboard shortcut, navigate to the desired file or folder location and right-click on that file/folder to select Properties.
Navigate to the Security tab, and then click on the Advanced button, which is located at the bottom of the screen.
Then click on the Change button next to Owner, which will take you to a new window.
Administrator should be entered in the Enter the object names to select form, and then the Check Names button should be clicked. Click OK to proceed. After that, you should observe the Owner property being changed from the initial name to your administrative account.
Now, select the Replace owner on sub containers and objects option, which can be found directly below the Owner column, by checking the box.
Finally, to save the changes, click Apply then OK on the toolbar. Windows will now start the process of transferring ownership to the new owner. Once you have completed the process, you will receive a notification, to close it, use the OK button.
Most problems that prevent you from encrypting a folder are because you don’t have permission to open the file. When you take ownership of a folder, you’re becoming the owner with permissions that allow you to make changes.
Hit the Windows key, type Control Panel in the search bar, and click Open.
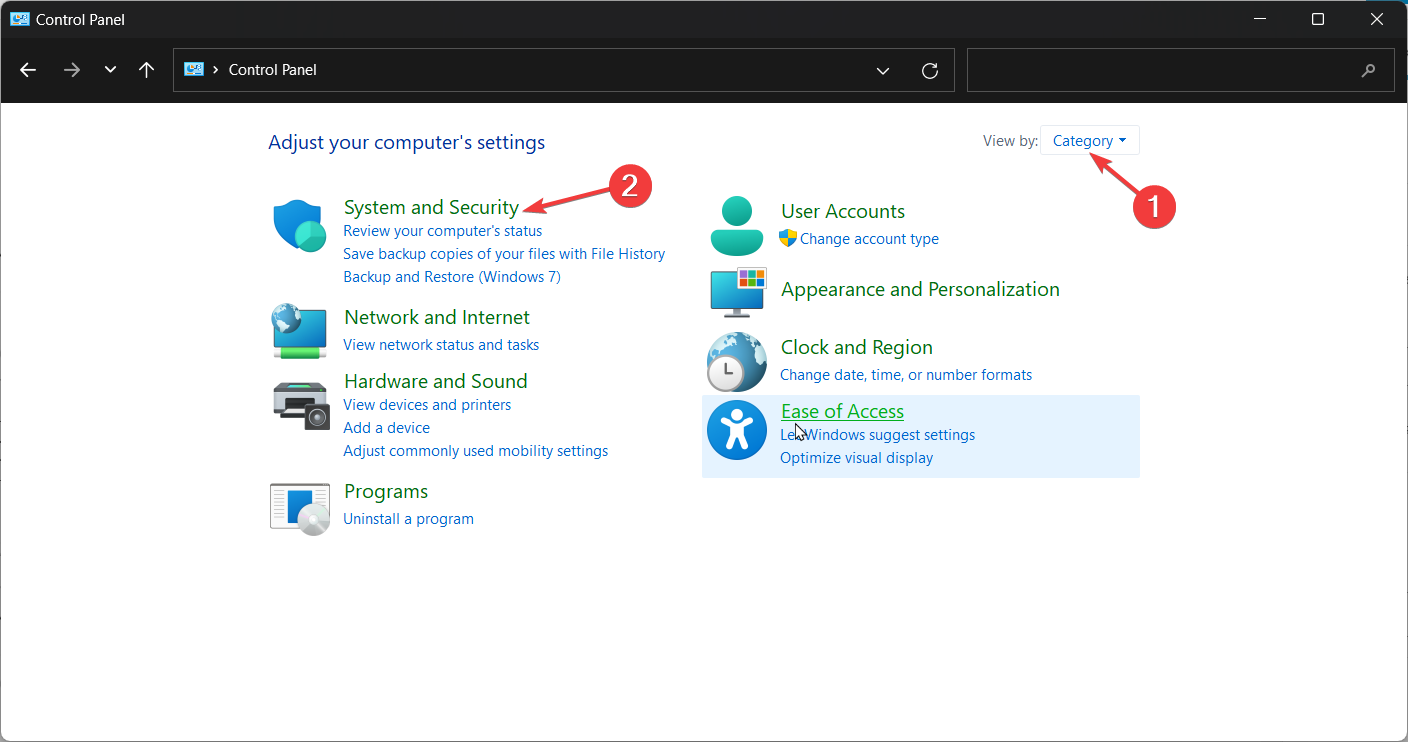
Navigate to System and Security.
Click on BitLocker Drive Encryption.
Locate the drive you want BitLocker Drive Encryption turned off, then select, Turn Off BitLocker.
This can take several minutes depending on the size of the drive. Finally, you’ll receive a message to decrypt the drive. Click on Decrypt to continue.
Once the process is done, you will have removed the BitLocker password and can proceed to encrypt the drive.
You need to be careful when you disable BitLocker because there are instances where BitLocker cannot be enabled when you want to encrypt your files.
Although the cause of a problem is preventing this folder from being encrypted error may vary, most of them are related to the permission settings of the encrypted folder or an invalid encryption key that is used by your system.
However, if these solutions don’t work, you can try your luck with encryption software and see if this resolves the issue. Just keep in mind that a folder that had problems with encryption could also develop issues with decryption.
We hope you’ll find the ultimate solution to your encrypted folder problems, but if you have more solutions, we want to hear about them. Just leave a helpful comment below.
Lenovo is one of the biggest (and oldest) PC manufacturers, with multiple lineups ranging from budget devices to premium laptops and tablets. The Yoga family falls into the premium category, being a consumer-oriented lineup with a slick design and innovative features.
While currently there are only laptops and tablets under the Yoga branding, according to our trusted source, the company is adding a brand new member to the family, the Lenovo Yoga True Wireless Stereo Earbuds (that’s a mouthful). In other words, Lenovo is expanding Yoga beyond a simple lineup into a true (but small, for now) ecosystem, following the likes of Apple, Google, or Samsung.
The Yoga TWS Earbuds enter a pretty crowded and competitive space, but if you already own a Lenovo laptop, you’ll love some of the ecosystem features the company promises.
Yoga TWS Earbuds: How conferencing should sound like
Let’s get one thing out of the way: the Yoga TWS Earbuds aren’t for hardcore fitness enthusiasts or hiking aficionados; they’re more aimed at those who are looking for a seamless conferencing experience or a good integration between multiple sources and the earbuds themselves.
The design aligns with the industry, resembling Apple’s AirPods Pro and other similarly shaped earbuds, with a long stem and silicone earplugs. While the actual body of the buds is matte, the stems have a glossy exterior side, most likely for better control of touch inputs. The case is also matte (goodbye fingerprints!) and has rounded edges, featuring a single pairing button on the left side, an LED indicator on the front, and a USB C port for charging.
But the real star of the show here is the software! And that’s because the Yoga TWS Earbuds have some interesting interactions with other Yoga devices. One is open to connect; again, similar to AirPods, the Yoga buds are ready to connect to your Yoga laptop just by opening the case near your laptop. So, there is no complicated pairing process as long as you connect them to a Yoga device.
Once connected, you can answer Teams calls with a single touch. Pairing the buds with multiple devices allows you to switch between them seamlessly through touch interactions, making the Yoga TWS Earbuds perfect for those using a laptop and a tablet for their work. Both single connection and multipoint connection are available as options.
Another neat trick is Voice ID, a software feature that combines voice recognition from the PC with the one from the earbuds to enhance and articulate your voice in calls and meetings. That’s possible thanks to the 3 included mics on each earbud plus the Active Noise Cancelling (ANC). Both voice and audio quality are covered, the buds also being Dolby Atmos certified.
Lenovo Yoga True Wireless Stereo Earbuds specs
Finally, regarding usability, the Yoga TWS earbuds promise 6.5 hours of battery life with ANC off and 33 hours with the charging case, with only 1 hour to fully charge them. Check out the table below for full specifications:
Lenovo Yoga TWS Earbuds
Specifications
Driver
12.2 mm
Freaquency range
20-20000 Hz
Active Noise Cancelling
Yes
Microphones
6 (3 on each earbud)
Earbuds battery
40 mAh; 1 hour for a full charge
Case battery
500 mAh; 1.5 hours for a full charge
Touch/press inputs
Answer/Reject/Hold/Switch the Call Play/Pause/Forward/Backward for Media ANC/Talk-through/ANC Off
Earbuds weight
6 g each
Earbuds + case weight
47.3 g
The Yoga True Wireless Stereo Earbuds will be officially unveiled at CES 2024, with no confirmed launch date. While there isn’t any price mention yet, we expect them to fall in the same bracket as the already established competitors.
While using the Windows Copilot, many reported getting the Sorry, I can’t access your webpage at the moment. Try again in sometime message. Before that, Copilot read, Searching your active Microsoft Edge tab.
There haven’t been many instances of the error, but issues with Microsoft Copilot are certainly troubling users. So, let’s get straight to it!
Why am I getting Sorry I can’t access your webpage at the moment try again in sometime message?
If Copilot is not working, it could be that you are using a local account or are based in a region where the feature has not been released yet.
Besides, using a VPN, corrupt browsing data, or misconfigured network settings can all trigger the problem.
How do I fix Sorry, I can’t access your webpage at the moment, try again in sometime error?
Before we start with the slightly complex solutions:
Also, install the latest Windows updates and try connecting to a mobile hotspot. If you have a PDF open in Edge, remove any modifications and reload the file.
1. Change the Windows Copilot settings
Launch Windows Copilot, click on the ellipsis near the top right, and select Settings.
Disable the toggle for Share Microsoft Edge content with Bing Chat.
Re-open Copilot and check for improvements.
2. Clear the browser’s cache and cookies
Launch Microsoft Edge, and press Ctrl + Shift + Delete.
Now, select All time from the Time range dropdown menu, tick the checkboxes for Cookies and other site data and Cached images and files, then click the Clear now button.
Once done, reboot the device, launch Windows Copilot, and check whether it’s able to respond.
Press Windows + I to open Settings, go to Apps from the navigation pane, and click on Default apps on the right.
Select Microsoft Edge from the list of applications.
Now, click the Set default button to make Microsoft Edge your default browser.
Finally, restart the PC, launch Windows Copilot and then check for improvements.
When you are seeing the Sorry, I can’t access your webpage at the moment. Try again in sometime Copilot error, change the default browser and use Microsoft Edge for all relevant file associations.
4. Reset the network settings
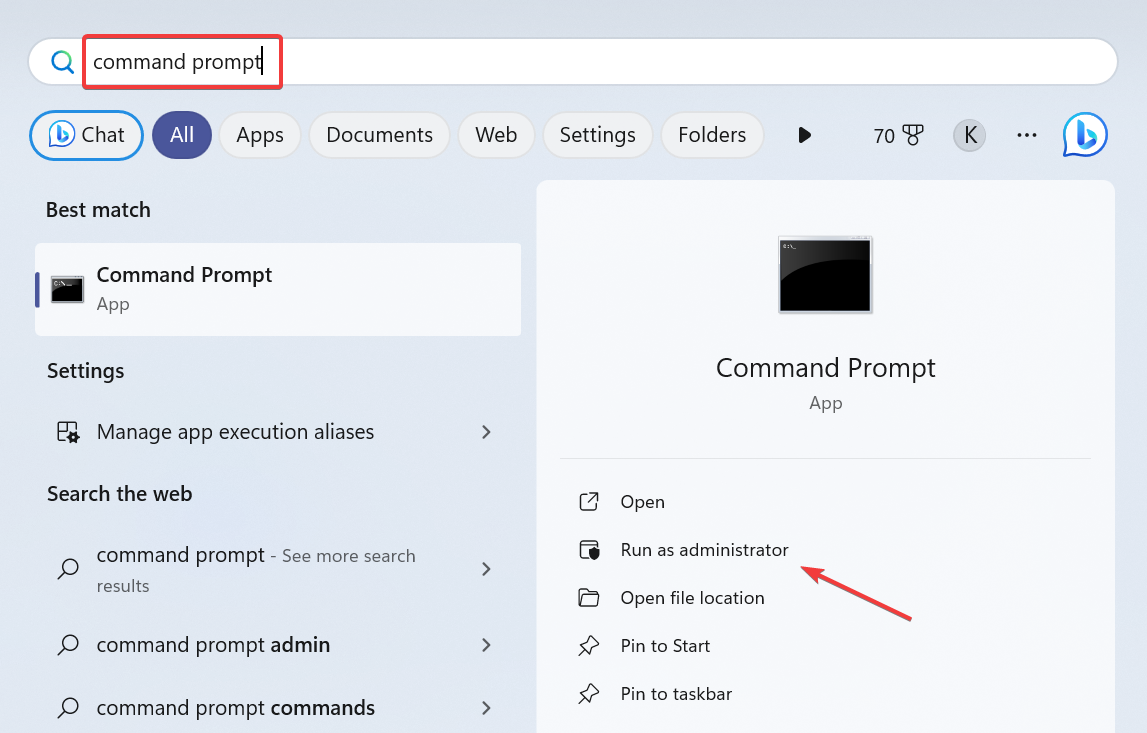
Press Windows + S to open Search, type Command Prompt in the text field, and click on Run as administrator.
Click Yes in the UAC prompt.
Paste the following commands individually and hit Enter after each: ipconfig /renew ipconfig /flushdns ipconfig /registerdns netsh int ip reset netsh winsock reset netsh winhttp reset proxy
Once done, reboot the PC and check for improvements.
5. Repair the Edge browser
Press Windows + R to open Run, type appwiz.cpl in the text field, and hit Enter.
Select Microsoft Edge from the list of apps, and click on Change.
Click Yes in the UAC prompt.
Now, click the Repair button and wait for the setup to reinstall Microsoft Edge.
6. Perform an in-place upgrade
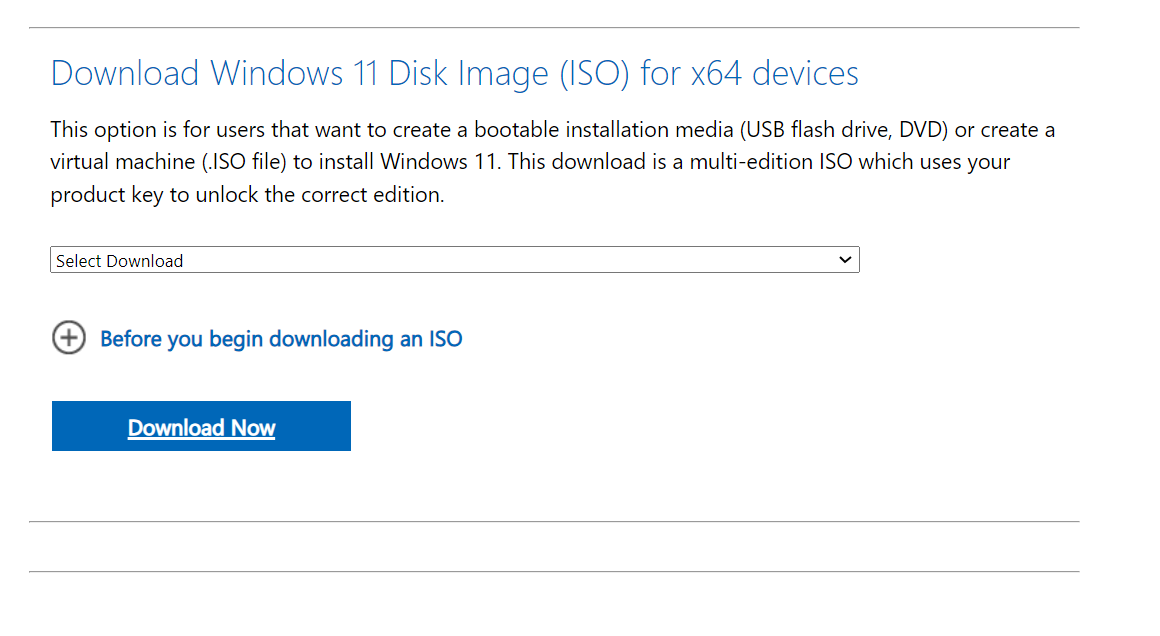
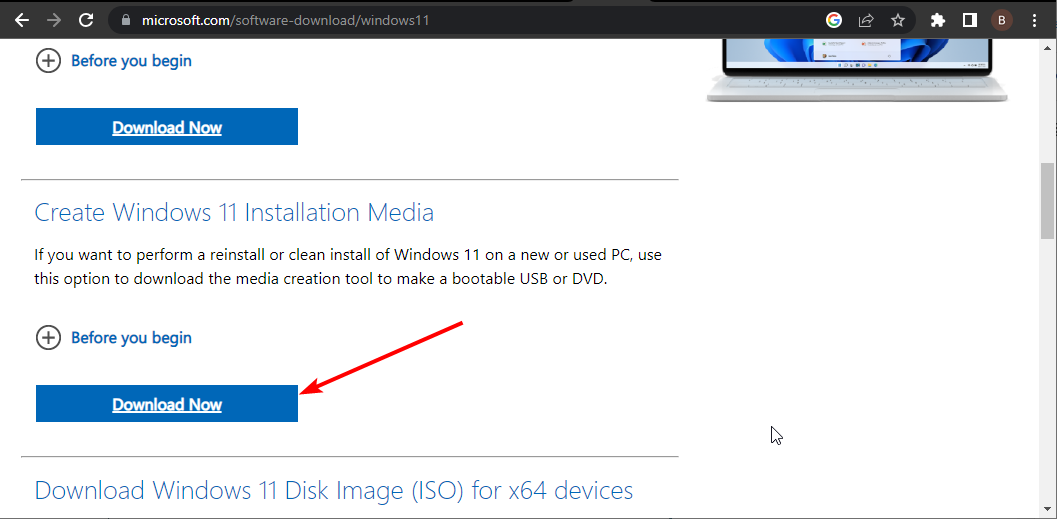
Go to Microsoft’s official website, select the preferred edition and product language, then download the Windows 11 ISO.
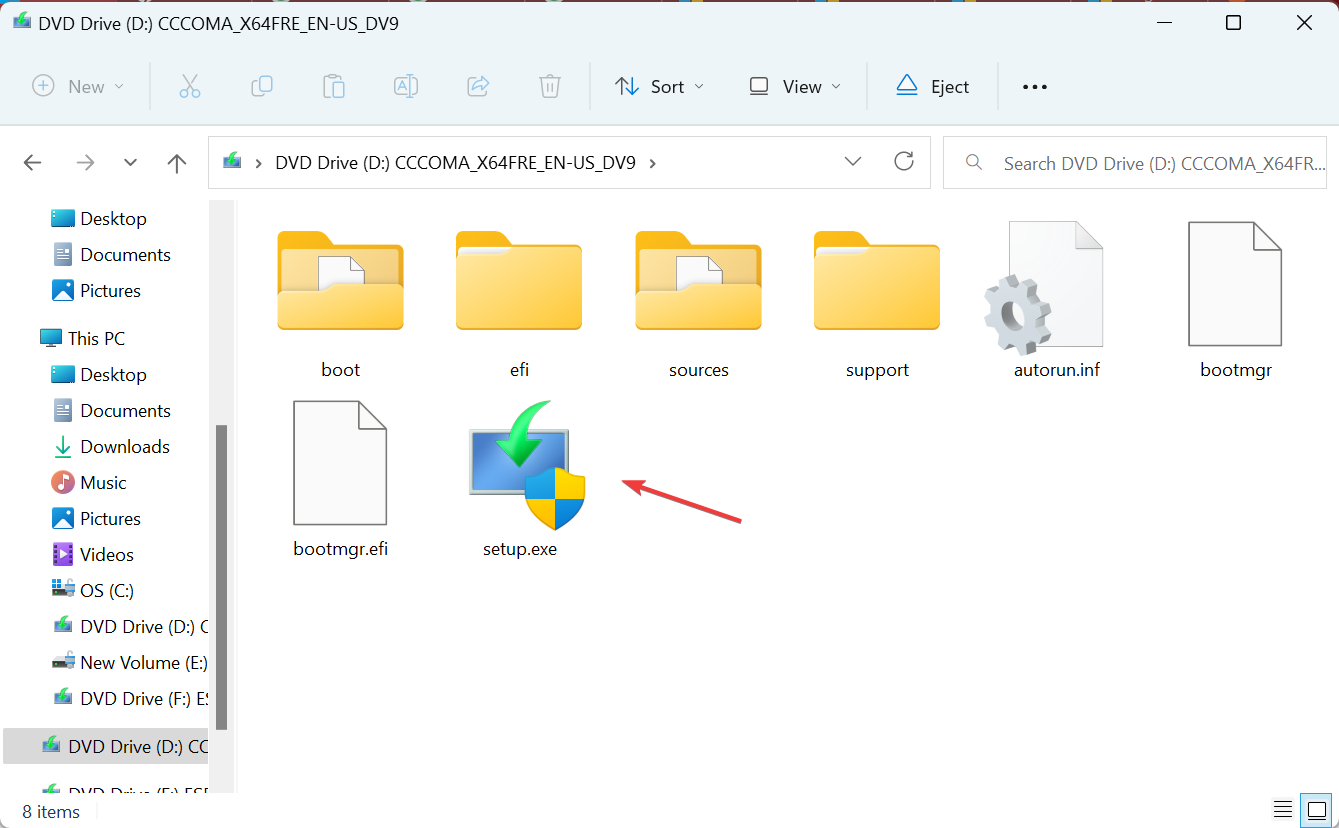
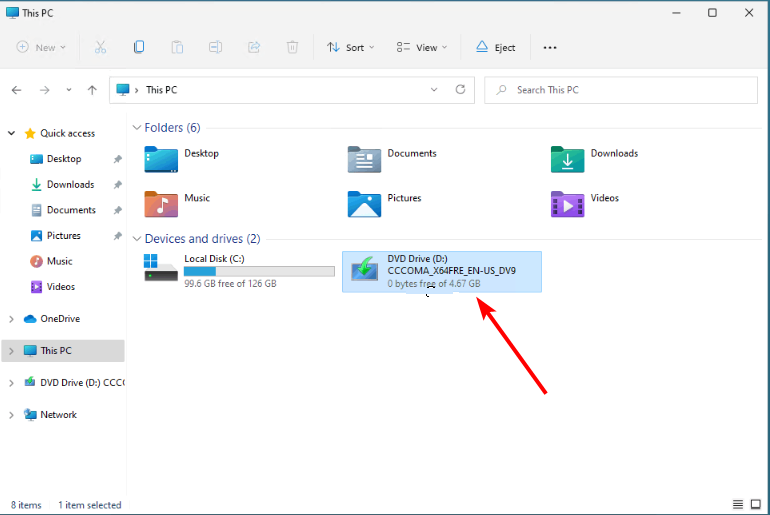
Double-click the ISO file, and then select Open in the confirmation box.
Run the setup.exe file.
Click Yes in the UAC prompt.
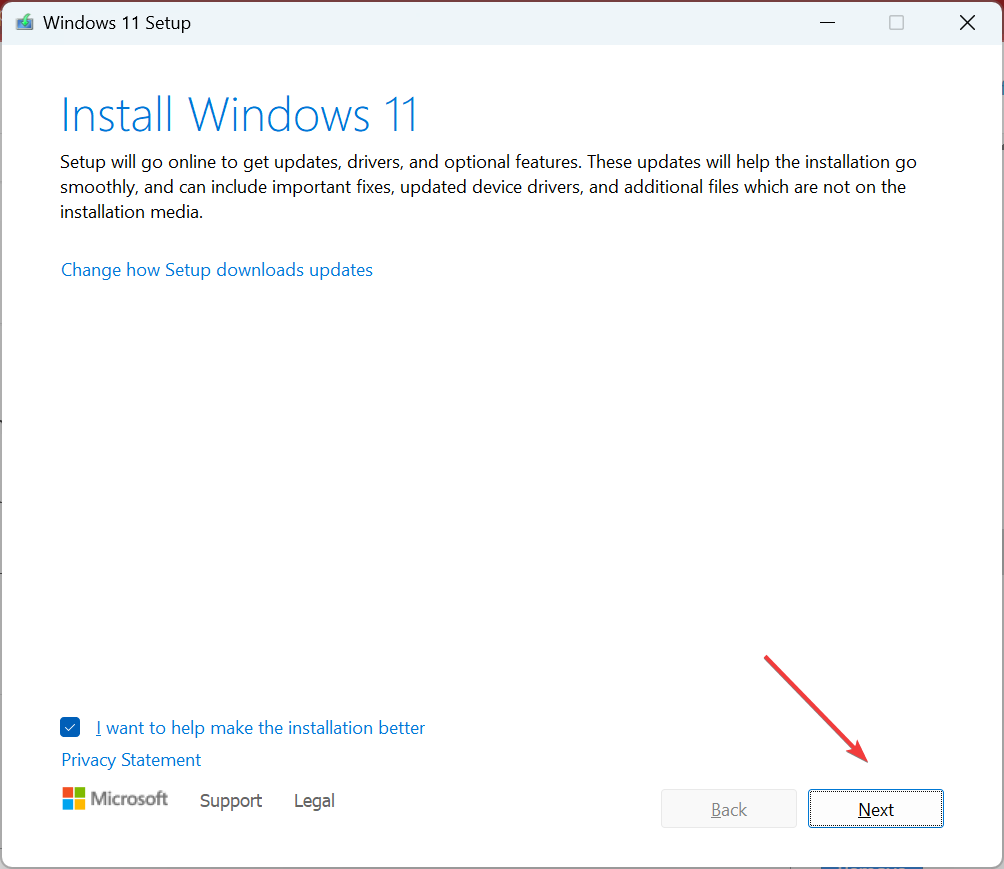
Click Next in the Windows 11 Setup to proceed.
Review Microsoft‘s license terms and click Accept.
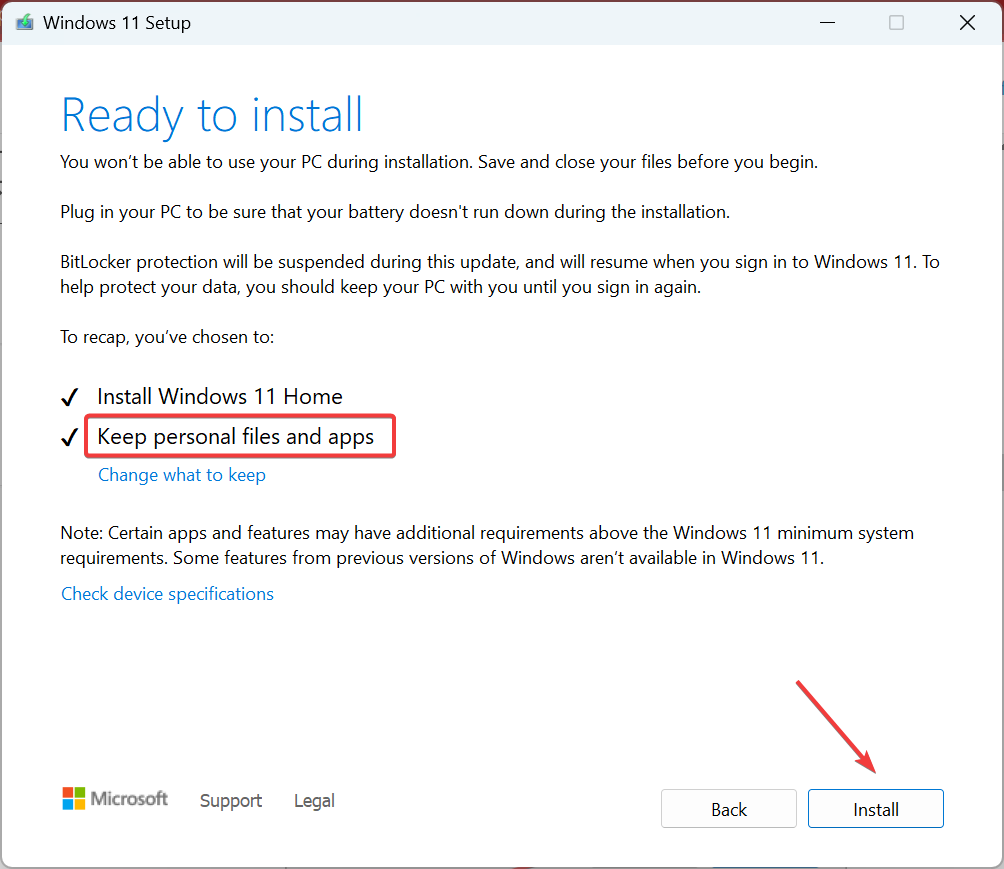
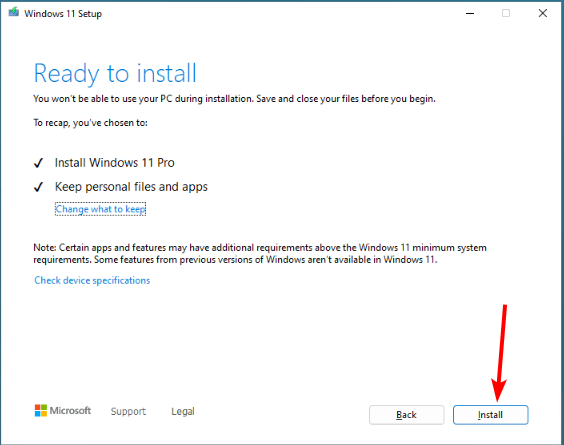
Finally, make sure the setup reads, Keep personal files and apps, then click on Install, and wait for the process to complete. It will take a few hours.
For Windows-related issues that don’t go away, as might be the case with the Sorry, I can’t access your webpage at the moment. Try again in sometime Microsoft Copilot error, an in-place upgrade will help. It’s the same as reinstalling Windows, except you won’t lose the stored files and installed apps.
If you don’t find this feature useful, there’s the option to remove Windows Copilot. In case you can’t access this feature at all, we also have a guide that shows you what to do if Copilot is not available, so don’t miss it.
And don’t forget to check recommendations for the best AI websites.
For any queries or to share which fix worked for you, drop a comment below.
Fatal JavaScript invalid size error 169220804 affects web app developers, and in most cases, only the developers will encounter this issue.
This can be a serious problem and it will affect the performance of your app and cause it to crash, so it’s important to address it, and this guide will help you do that.
What causes Fatal JavaScript invalid size error 169220804?
Issues with your code such as indefinite loops are the most common cause for this problem.
Certain modules can cause issues unless they are in devDependencies.
Problems with node_modules or the Node version can lead to this error.
How can I fix the fatal JavaScript invalid size error 169220804?
Before we start:
We advise you to check your loops. It’s rather likely that your code has issues and that loops are running indefinitely thus causing this error. If you’re using NextJS, you can try deleting the .next folder.
Run the following command, but be sure to use the version from step 1: nvm install 10.24.0
Once installed, switch to that Node version with the following command: nvm use 10.24.0
After doing that, check if the problem is resolved.
What is the fatal JavaScript error?
Fatal JavaScript errors can prevent the code from working properly and they can even stop it altogether. They are usually caused by the following:
Syntax errors
Reference errors
Type errors
Unhandled promise rejections
The fatal JavaScript invalid size error 169220804 is usually caused by an error in your code, and it can be easily fixed. However, this isn’t the only problem and many reported that Javascript error occurred in the main process.
Often, you will get a black screen after changing the refresh rate, both with integrated displays on laptops and external monitors. The problem is independent of the OS and usually arises due to issues with the graphics driver or the monitor’s functionalities.
In a few cases, changing the refresh rate also leads to flickering or a small visible strip/line at the top of the display.
Does refresh rate affect display?
The higher the refresh rate, the smoother the display, which results in better app performance and gameplay. That’s the general rule. But if you set a refresh rate that is not supported by the monitor, it will black out or have horizontal lines appear across the display.
What can I do if I get a black screen after changing the refresh rate?
Before we start with the slightly complex solutions, try these quick ones:
Use another monitor to lower the refresh rate and make sure the monitor supports the refresh rate you are trying to set.
If using HDMI, switch to DisplayPort and vice-versa, depending on the connection supported by the monitor at the configured refresh rate.
1. Enable low-resolution video (640×480) and lower the refresh rate
1.1 Enable low-resolution video
Shut down the computer, then turn it on, and as soon as the Windows logo appears, hold the Power button to turn it off again.
Repeat this thrice, and on the fourth attempt, Windows will start Preparing Automatic Repair, sensing that there is a problem with the OS. Let it run.
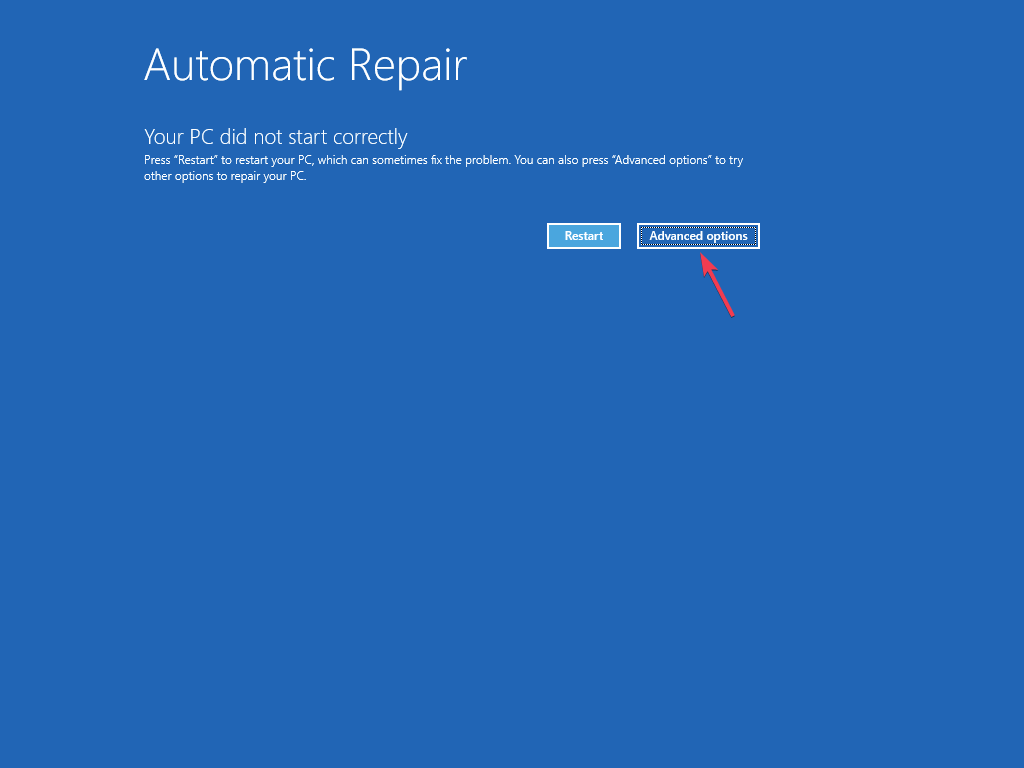
Now, click on Advanced options.
Click on Troubleshoot.
Again, click Advanced options.
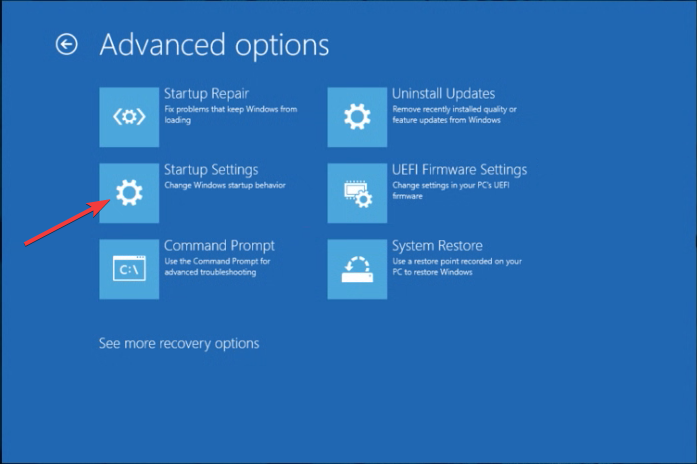
Select Startup Settings from the list of options.
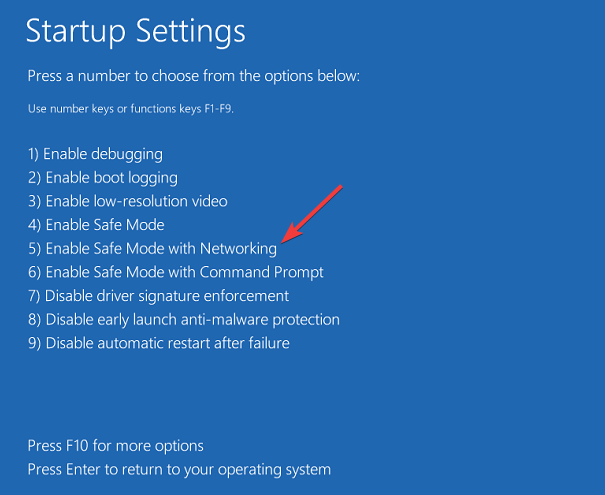
Press 3 or F3 to Enable low resolution video mode.
1.2 Lower the refresh rate
Once the OS loads, press Windows + I to open Settings, go to System from the navigation pane, and click on Display.
Now, scroll down and click on Advanced display under Related settings.
Finally, choose a lower refresh rate from the dropdown menu, one that’s compatible with the monitor and graphics card.
When stuck on a black screen after changing the refresh rate, your primary approach should be to revert to the previous stable configuration. Because otherwise, none of the troubleshooting measures can be executed.
2. Update the graphics driver
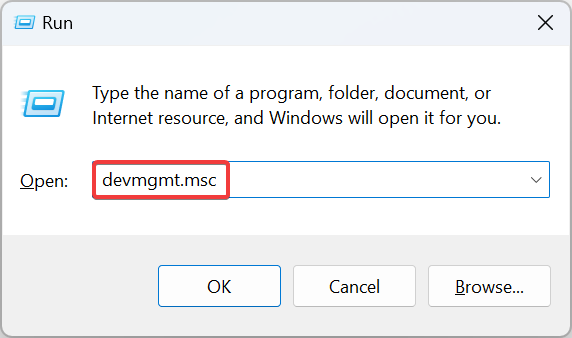
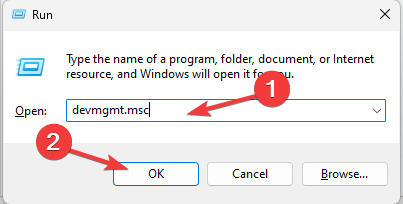
Press Windows + R to open Run, type devmgmt.msc in the text field, and hit Enter.
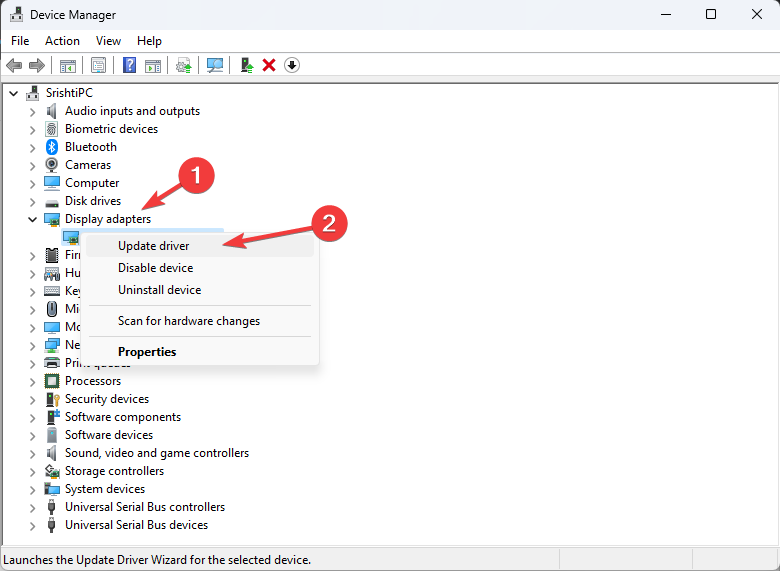
Expand the Display adapters entry, right-click on the active graphics adapter, and select Update driver.
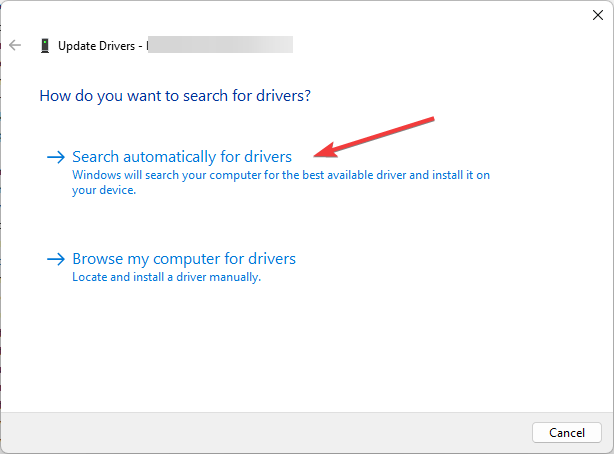
Click on Search automatically for drivers and let Windows locate and install best locally available version.
Besides, if Windows can’t find an update, head to the manufacturer’s website, locate the latest version, and manually install the driver. Here are the direct links to download pages for the three major manufacturers:
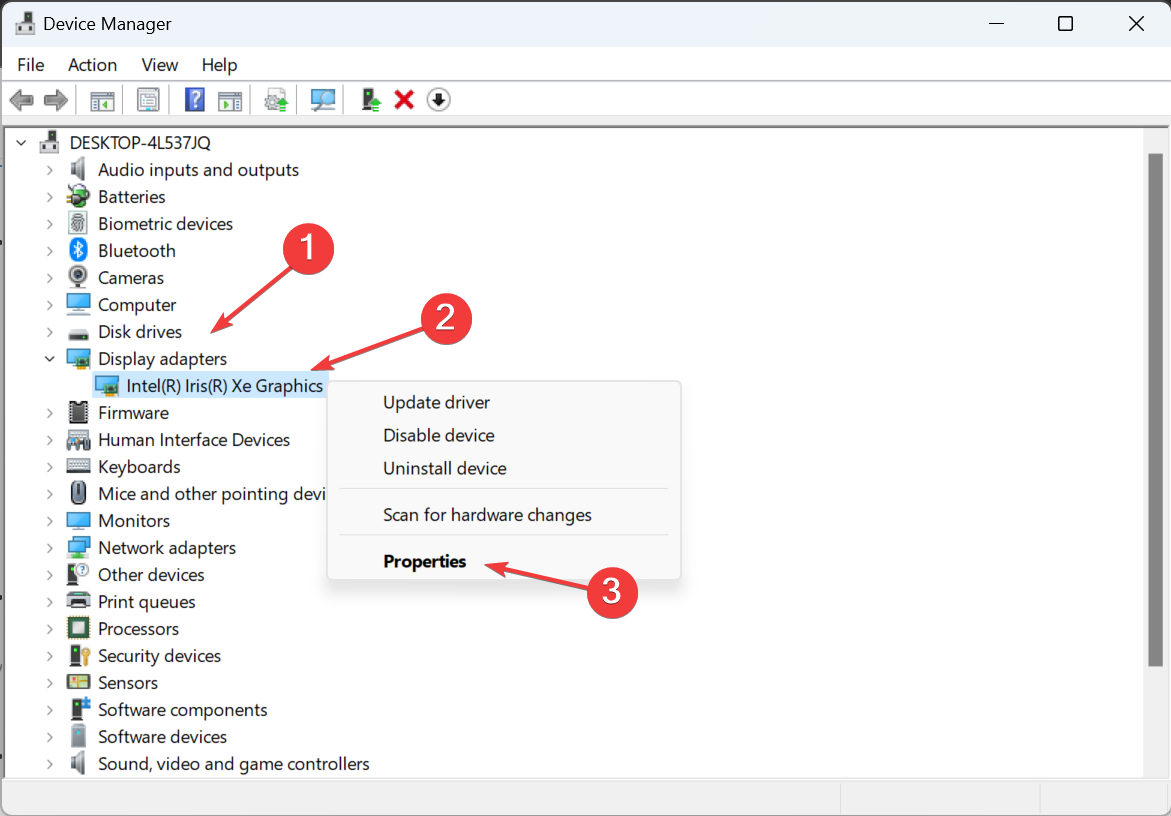
Press Windows + X to open the Power User menu, and select Device Manager.
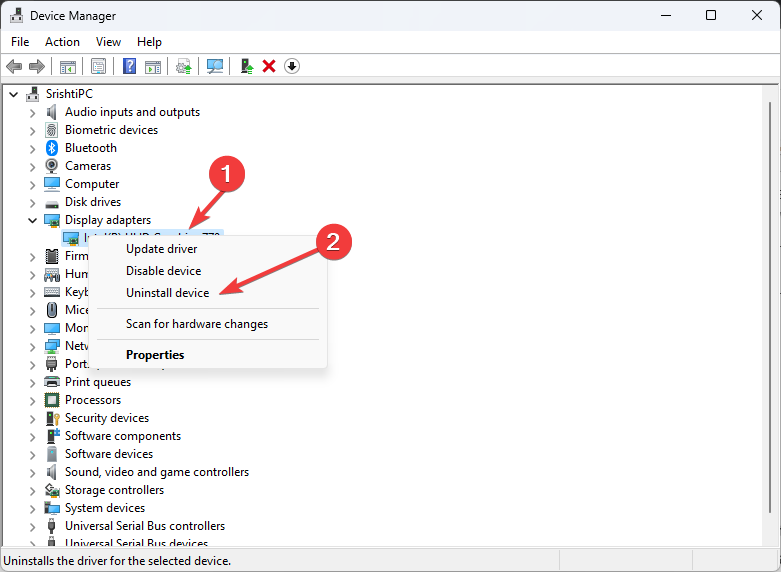
Double-click on Display adapters, right-click on the active one, and select Uninstall device from the context menu.
Tick the checkbox for Attempt to remove the driver for this device and click on Uninstall.
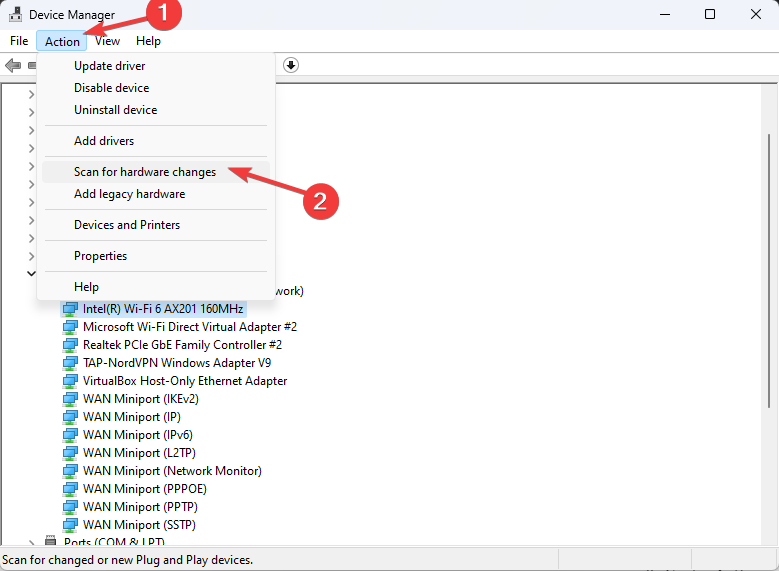
Reboot the device and Windows will automatically install a fresh driver.
If that doesn’t work, get the driver from the manfaucturer’s website, use a reliable driver uninstaller tool to get rid of all files, and then run the downloaded setup to reinstall the driver.
4. Disable G-Sync and V-Sync in the NVIDIA Control Panel
NOTE
This steps here only apply to users running the NVIDIA Control Panel. If you are not, move to the next solution.
Open the NVIDIA Control Panel, and go to Manage 3D settings from the left pane.
In the Global Settings tab, expand the dropdown menu next to Veritical sync and select Off.
Now, go to the Program Settings tab, select an app from the dropdown menu, expand the Monitor Technology dropdown menu, and select Fixed Refresh.
5. Uninstall Asus Monitor Calibration (for Asus PCs)
Press Windows + R to open Run, type appwiz.cpl in the text field and hit Enter.
Locate the Asus Monitor Calibration software from the list, and click on Uninstall.
Follow the on-screen instructions to complete the process.
Once done, reboot the PC and verify whether you can safely increase the refresh rate without the display going black.
If you changed the resolution and refresh rate and now have a black screen, it could be the Asus Monitor Calibration software to blame, and uninstalling the app should work. In case the problem persists, use an effective software uninstaller tool to get rid of the leftover files and Registry entries.
These are also the ways to fix things when you get a black screen after changing the refresh rate. Remember, it’s usually the graphics driver, the display, or the connection to blame. But based on users reports, we can’t negate the possibility of third-party apps triggering conflicts.
First, there are no dedicated Microsoft Teams Christmas Quizzes, but there are plenty of funny questions and answers so you can make your quizzes or polls.
There are plenty of interactive Christmas quiz ideas online, and we will show you some of them and how you can build some great ones.
What are the best Microsoft Teams Christmas Quizzes?
On the Parade website, we have found a great set with 50 Christmas-related trivia questions to choose from and entertain your family, friends, or colleagues on Teams.
The questions range from knowledge about beverages, traditions, stories, or events around Christmas.
Of course, only the right answer is provided, so you will have to fill in some wrong ones to make the quiz as fun or easy as you want.
The CountryLiving Christmas Quiz has 61 holiday-related questions but also provides more information about the answer.
For instance, do you know whether the Santa’s reindeer are male or female? Apparently, they should all be female since the male raindeers shed their antlers before Christmas, and only the females still have them.
The questions and answers cover all the Christmas themes and traditions, so you will have lots to choose from when creating your quiz.
Beano has hundreds of quizzes to enjoy and a dedicated page for Christmas quizzes.
You can play a few, and if you like any questions, you can get them for your poll on Microsoft Teams and share them with your friends, family or colleagues.
There is even a funny one testing you on how you decorate your home on Christmas, or the chemical formula of snow.
How can I make a Microsoft Teams Interactive Christmas Quiz?
Open Microsoft Teams and click on the Poll icon from the action bar below.
Now, add the question, the options one by one, and hit the Preview button.
If everything is OK, click the Send button and await the answers.
Now, everyone can vote and you will instantly get the statistics for the answers. However, only you, the host will know the right answer.
To create a Christmas quiz in Microsoft Teams, click the Poll icon, add your question, and click Send. Participants can vote, and only the host sees the correct answer.
Another way to share a Christmas quiz on Microsoft Teams is to open some great ones on YouTube and share your screen with all the participants. Some have great questions, and a short timer is added for people to answer before they provide the answer. Here are some of the best below:
We left a set of Christmas funny questions and answers that you can use to either break the ice in the Teams meeting or add as a finishing touch.
Q: What do you get if you cross Santa with a detective? A: Santa Clues!
Q: Why was the turkey in the pop group? A: Because it was the only one with drumsticks!
Q: What do snowmen wear on their heads? A: Ice caps!
Q: What do you call an old snowman? A: Water!
Q: Why did Santa’s helper see the doctor? A: Because he had low “elf” esteem!
Q: What did one snowman say to the other? A: Do you smell carrots?
Q: How does a snowman get around? A: He rides an ‘icicle!
Q: What’s a child’s favorite king at Christmas? A: A stocKING!
Q: What do you get if you cross a bell with a skunk? A: Jingle Smells!
Q: What do you call a cat on the beach during Christmas? A: Sandy Claus!
That’s it! We hope that now you have all the information you need to create the best Microsoft Teams Christmas Quizzes. You can create them straight into Teams by using Polls or by sharing your screen.
Sometimes it’s necessary to check logs on your PC in order to diagnose certain issues, and this is why many users want to know how to view Quick Assist logs with Event Viewer on their PC.
This is quite simple to do, and by doing so users can check all the remote sessions that they had or ensure that nobody was abusing this feature to get access to their PC.
Does Windows 11 have Quick Assist?
Yes, Windows 11 has Quick Assist preinstalled, and you can make remote connections out of the box.
How can I view Quick Assist logs with Event Viewer?
Use Event Viewer
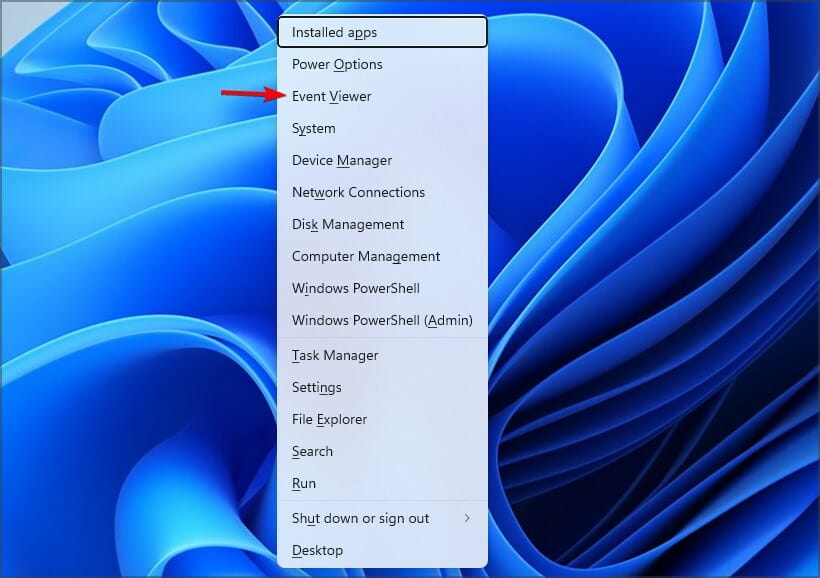
Press Windows key + X and choose Event Viewer from the list.
Go to Applications and Services Logs and then click on Microsoft.
Next, navigate to Windows and select RemoteAssistance.
Inside of it, you should see Quick Assist folder.
All your logs will be located there.
If Quick Assist logs aren’t available, you probably haven’t used this tool or it’s configured not to collect logs.
No, Quick Assist isn’t discontinued, it’s been moved to the Microsoft Store. By doing so Microsoft will achieve the following:
Improve the application security with frequent updates.
Minimize issues and errors.
Improve the passcode generation times.
Is Quick Assist the same as Remote Assistance?
Quick Assist is a successor to the Remote Assistance software. The latter was available on Windows XP and while it’s still available, it doesn’t offer the same features and convenience as Quick Assist.
As you can see, it’s pretty simple to view Quick Assist logs with Event Viewer as long as you know where to look for. By accessing the logs, you can find the reasons why Quick Assist is not working and fix other issues.
If you’re not familiar, we also have a guide on how to use Quick Assist on Windows 11, so you might want to visit it.
Do you know any other way to check these types of logs? If so, share them with us in the comments.
The MUTEX_LEVEL_NUMBER_VIOLATION BSOD error is rather uncommon in Windows, but this also makes troubleshooting all the more difficult. A quick Internet search doesn’t yield any productive results, nor do you get any solutions for it.
Also, it was primarily encountered on the earlier iterations of the OS and reported cases of MUTEX_LEVEL_NUMBER_VIOLATION on Windows 10 are few. So, let’s get straight to it!
What is the MUTEX_LEVEL_NUMBER_VIOLATION BSOD?
The MUTEX_LEVEL_NUMBER_VIOLATION blue screen of death error with a bug check value of 0x0000000D appears when a thread (operating system) attempts to acquire a lower level mutex that it doesn’t already own but can’t find one.
How do I fix the MUTEX_LEVEL_NUMBER_VIOLATION error?
Before we start with the slightly complex solutions, try these quick ones:
Restart the PC and verify whether the error code appears again. In some cases, BSODs are a one-time thing.
Check if any Windows updates are available and install them.
Disconnect all non-critical peripherals like the printer, headphone, earphone, and speaker, especially any that was plugged in recently.
Tip
If the BSOD appears every time you turn on the PC, boot Windows into Safe Mode and then proceed with the troubleshooting.
1. Repair the corrupt system files
Press Windows + S to open Search, type Command Prompt in the text field, and click on Run as administrator.
Click Yes in the UAC prompt.
Paste the following DISM commands individually and hit Enter after each: DISM /Online /Cleanup-Image /CheckHealthDISM /Online /Cleanup-Image /ScanHealthDISM /Online /Cleanup-Image /RestoreHealth
Next, run this command for the SFC scan: sfc /scannow
Press Windows + X to open the Power User menu, and select Device Manager.
Expand the Display adapters entry, right-click on the active graphics adapter, and select Update driver.
Click on Search automatically for drivers and let Windows find and install the best locally available driver.
If a newer version is installed, reboot the PC.
The MUTEX_LEVEL_NUMBER_VIOLATION crash in Windows usually appears due to driver conflicts, and updating the drivers does the trick. Remember, you will have to update all the drivers. This also helps with the SYSTEM EXIT OWNED MUTEX error.
Besides, if Windows can’t find a better one, head to the manufacturer’s website, locate the latest version, and manually install the driver.
3. Roll back recent driver updates
Press Windows + R to open Run, type devmgmt.msc in the text field, and hit Enter.
Double-click Display adapters, right-click on the active graphics card, and then select Properties from the context menu.
Go to the Driver tab, and click on the Roll Back Driver button.
Select a reason for the rollback or choose For another reason and enter one in the text field, then click on Yes.
Similarly, check the other devices and roll back their drivers until the error is fixed.
If the latest driver version is triggering the error, roll back to the previous stable version. Also, you can always manually install a previous driver version from the manufacturer’s website if the Roll Back Driver button is greyed out.
4. Uninstall conflicting apps
Press Windows + R to open Run, type appwiz.cpl in the text field, and click OK.
Select any recently installed application from the list, and click Uninstall.
Follow the on-screen instructions to complete the process.
Reboot the device and check for improvements.
In case the MUTEX_LEVEL_NUMBER_VIOLATION error reappears, keep uninstalling apps until you find and remove the conflicting one. After that, reinstall the apps that were removed in the process.
Press Windows + I to open Settings, go to Windows Update from the navigation pane, and click on Update history.
Scroll down and click on Uninstall updates.
Click the Uninstall button next to the recently downloaded update.
Again, click Uninstall in the confirmation prompt.
Reboot the device and check for improvements.
If it reappears, uninstall all updates downloaded around the same time the MUTEX_LEVEL_NUMBER_VIOLATION error first appeared.
6. Perform an in-place upgrade
NOTE
The steps listed here are for Windows 11. In case you are using the previous iteration, learn how to perform a repair upgrade on Windows 10. For users running even older iterations, head to the next solution.
Go to Microsoft’s official website, select the OS edition and product language, and then download the Windows 11 ISO.
Double-click the ISO, wait for a few seconds, and click Open in the confirmation prompt.
Run the setup.exe file.
Click Yes in the UAC prompt.
Click Next to proceed.
Check Microsoft’s license terms and click Accept.
Make sure the setup reads, Keep personal files and apps, and click on Install.
Wait for the process to complete. It may take a few hours.
7. Install the latest iteration of Windows
When nothing else works, it’s time you upgrade the OS. At the moment, Windows 11 is the latest iteration. So, first, use the PC Health Check app to verify whether your system is compatible. If it is, install Windows 11.
Besides, if the device is not compatible with the latest iteration, you should still be able to download Windows 10. So, go with that instead because the MUTEX_LEVEL_NUMBER_VIOLATION blue screen error usually affects outdated, unsupported iterations of Windows.
Before you leave, discover the best PC repair software and get one to prevent similar errors from appearing.
For any queries or to share more solutions with us, drop a comment below.
Remove all the external hardware except the Keyboard and mouse, then restart your computer.
NOTE
If you are stuck with the blue screen, you need to restart your computer and get to the advanced menu first. However, if you can log in to your computer, you can skip the steps to enter the Advanced menu.
1. Run the Windows Memory Diagnostic tool
Restart your computer, and when you see the manufacturer logo like Dell or HP, press & hold the Power button for about 5-7 seconds to turn off your computer.
Press the Power button to start your PC.
When your computer restarts, as you see the manufacturer’s logo, press & hold the Power button again to restart. Repeat the steps twice until you see Windows Preparing Automatic Repair.
Once you see the Automatic Repair page, select Advanced options.
On the Choose an option screen, select Troubleshoot.
Click Advanced options.
On the Advanced options screen, choose Startup Settings.
To select Enable Safe Mode with Networking, press F5 and click Restart.
Your computer will reboot in safe mode, then follow these steps to run the diagnostic scan:
Press the Windows key, type windows memory diagnostic in the search box, and click Open.
Select Restart now and check for problems (recommended).
Your computer will restart, and the tool will run the test.
Once the scan is complete, your PC will reboot and take you to the login screen. Once you sign in, you can see the scan results on the screen. If the results are not on the desktop screen, open Event Viewer to check the details.
If the test comes with an error there is a problem with memory modules, remove dust & debris, and reseat the RAM modules, then run the diagnostic check again. In case the scan results come up with errors again, you might have to replace one or more modules.
Running a memory diagnostic tool can also help you fix issues like the BSoD error 0x00000154; read this guide to learn about other solutions.
2. Run the CHKDSK command
Restart your computer; when you see the manufacturer logo, press & hold the Power button for about 5-7 seconds to restart your PC.
Press the Power button to turn on your computer.
Repeat the steps twice until you see Windows Preparing Automatic Repair, then click the Advanced options.
On the Choose an option screen, select Troubleshoot.
Choose Advanced options from the Troubleshoot page.
From the Advanced options screen, select Command Prompt.
Open the Command Prompt window, copy & paste the following command to check and repair the file system issues on the system drive of a Windows computer, then hit Enter:chkdsk c: /f
Close the Command Prompt window, then reboot your computer.
3. Run SFC & DISM scans
Open Command Prompt using the same steps mentioned in Solution 2.
Copy & paste the following command to repair the corrupted system files and hit Enter:sfc /scannow
Type the following command to restore your Windows image and press Enter:Dism /Online /Cleanup-Image /RestoreHealth
Reboot your computer to let the changes take effect.
If you’re looking for an easier alternative, we suggest you try specialized repair software, as it will save a significant amount of time and effort.
4. Update/reinstall the affected driver
First, check the code you received to understand which drive you need to update.
Now, restart your computer in safe mode using the steps mentioned in Solution 1. Press Windows + R to open the Run window.
Type devmgmt.msc and click OK to open the Device Manager app.
Click the category to expand, then right-click the driver and select Update driver.
Choose Search automatically for drivers.
Follow the on-screen instructions to complete the process.
If there is no update available for the driver, follow these steps to reinstall the driver:
Go to the category, expand it, then right-click the driver and choose Uninstall driver.
Next, click Action, then select Scan for hardware changes from the drop-down menu.
Restart your computer in safe mode using the steps mentioned in Solution 1.
Press the Windowskey, type control panel, and click Open.
Select Category as View by and click Hardware and Sound.
Go to Power Options, then select click Choose what the power buttons do.
Select Change settings that are currently unavailable.
Under Shutdown settings, check if Turn on fast startup (recommended) is selected. If it is selected, remove the checkmark or vice versa.
Click Save changes.
6. Uninstall the latest Windows updates
If you can’t reach the login screen, restart your computer in safe mode using the steps mentioned in Solution 1.
Press Windows + I to open the Settings app.
Select Windows Update and click Update history.
Next, click Uninstall updates from the Related settings section.
Locate the latest update, and click Uninstall to remove it from your PC.
Restart your computer to save the changes.
Uninstalling the updates can help you fix other BSoD errors like 0x00000078 BSOD in Windows 11; read this guide to learn about other solutions.
7. Reset BIOS to default settings
Restart your computer as soon as you see the manufacturer logo; press & hold the Power button for about 5-7 seconds to restart your PC.
Press the Power button to turn on your computer.
Repeat the steps twice until you see Windows Preparing Automatic Repair, and click the Advanced options button.
Select Troubleshoot from the Choose an option screen.
On the Troubleshoot page, choose Advanced options.
From the Advanced options screen, select UEFI Firmware Settings.
Now, in the BIOS menu, go to File, then select Apply Defaults and Exit.
Click F10 to save and exit the menu.
The BIOS settings are different for every computer, depending on the system manufacturer, so you need to find similar options in BIOS to reset it to default.
8. Perform a system restore
Reboot your computer, then when you see the manufacturer logo, press & hold the Power button for about 5-7 seconds to turn off your computer.
Press the Power button to restart your PC.
Repeat the steps twice until you see Windows Preparing Automatic Repair, then click the Advanced options.
Click Troubleshoot from the Choose an option screen.
Select Advanced options.
Choose System Restore from the Advanced options window.
Now, select Choose a different restore point and click Next.
Choose the selected restore point and click Next.
Click Finish.
Your computer will restart and restore it to the chosen version. If you see the System Restore didn’t complete successfully message, it could be due to an outdated driver; read this guide to learn about the solutions.
If nothing worked for you, you might want to reset your computer to fix all the system inconsistencies once and for all.
To conclude, to fix the EMPTY_THREAD_REAPER_LIST BSoD error on Windows 11, update your Windows & system drivers to the latest version, run an SFC scan to repair corrupted files, or edit the power settings.
To learn more about the BSoD errors and causes to prevent them from interrupting your computing experience, read this guide.
If you have any questions or concerns about the subject, feel free to mention them in the comments section below. We will be happy to interact with you.
Nintendo 3DS emulators for PC are a great way to play your favorite handheld console games on a larger screen with improved features.
In this comprehensive guide, we will discuss some of the best Nintendo 3D emulators for PC and delve into their features and performance to help you make an informed decision.
What features should you look for in an emulator?
Compatibility – Make sure you choose an emulator that supports a wide range of Nintendo 3DS games.
Performance, graphics, and resolution – Ensure the emulator comes with high-resolution graphics options for visual enhancements and offers good performance on your PC.
Customizable controls – Should allow you to map keys or have support for a wide range of controllers for a personalized gaming experience.
Developer support and updates – Make sure the emulator is actively supported by developers and should get regular updates to address bugs, and issues.
Simple interface & multiplayer functionality – Should have a user-friendly & easy-to-navigate interface and support online or local multiplayer features.
Citra is the best freeware open-source Nintendo 3DS emulator for Windows computers, which is written in C++ with portability in mind.
It also works on macOS, Linux, and Android and can efficiently run homebrew and commercial games.
To run this emulator successfully, you need a computer with Windows 10 (64-bit) or higher, macOS Big Sur or higher, with graphics hardware OpenGL 4.3, or Vulkan 1.1.
It works with 100% efficiency, supports high-resolution rendering, and you can play at 60fps and 400*200 resolution. The wide range of features includes hardware controller support, save state, and in-built cheat support.
The only downside of this emulator is that it uses decrypted ROMs, therefore you can’t use the backups in 3DS or 3DZ format.
More features of Citra
Easy to use and actively under development
Has an active & supportive community, including forums and Discord channels
No$GBA, aka No Cash GBA, is another efficient 3DS emulator that works on Windows 10, XP, and even MS-DOS. You can use it as a Game Boy Advance emulator for Windows.
It comes with a wide range of customization options, including save types and multiple cartridge readings.
This freeware Nintendo DS emulator comes with multiplayer support and can load multiple NDS ROM files for linking games.
It is capable of running both commercial and homebrew Nintendo DS games, like Pokemon Diamond without any glitches in graphics.
The only downside of using this emulator is that it is relatively complex and has a less user-friendly interface.
More features of No$GBA
Comes with debugging tools that can be valuable for developers or users
Supports external controllers
Allows users to save and load game states at any point
Actively under development and receives regular updates
RetroArch – Can also be installed on Android phones
RetroArch is an open-source, cross-platform frontend Nintendo 3DS emulator, which can be installed in Windows, macOS, Linux, Android, and iOS.
This emulator for PC is fast, doesn’t hog your system resources, and doesn’t need any additional resources to run. It can run on Windows 7 with Pentium 4, 32 MB RAM, and any compliant OpenGL 2.x.
RetroArch allows you to run classic games on various computers and consoles and has an intuitive user interface.
This emulator has advanced features like shaders, rewinding, machine translation, next-frame response times, and blind accessibility.
However, the availability of excessive options may overwhelm a user and can also be seen as a drawback of this emulator.
More about RetroArch:
Comes with a Recording/Streaming option via Twitch.tv, YouTube, or Discord
Easily customizable and has multiple controller support
Is available for free and is in active development
Available in popular stores like Google Play, Amazon App, Steam, & Samsung Galaxy Store
3DMOO is a 3DS emulator that lets you play a wide variety of games for the Nintendo 3DS portable console on your PC.
It is an open-source 3DS emulator that can also be installed on Linux and is only used for running simple homebrew games at low speeds.
You can run this software on Windows XP, Vista, 7, 8, 8.1, 10 & 11, and it uses special algorithms and graphics acceleration to unlock the computing power.
The additional features of the tool let you change the output resolution and other visual parameters to enhance the image quality.
The disadvantage of using this 3DMOO 3DS emulator is that it needs original ROM files to run the console games.
More about 3DMOO:
Free to use and comes with support for cheat codes
Can be used as an experimental Nintendo 3DS emulator
To sum up, these are some of the best Nintendo 3DS emulators available for your Windows computer, and each of them has its own strengths.
Whether you choose a feature-rich Citra or the reliable No$GBA, the goal remains the same, i.e, recreating the magic of Nintendo games on your computer.
Choosing the Nintendo 3DS emulator for your PC depends on your preferences, system specifications, and the gaming experience you want. However, remember to check the official website for an emulator before making an informed decision.
If you are looking for emulators for other Nintendo versions, like Nintendo Switch emulators, we have a guide for you.
Or in case you are looking for multiple options in a single software, consider using an all-in-one emulator. You can explore more handheld gaming options with this guide on the best Nintendo DS emulators for PC to compare features across both DS and 3DS platforms.
Which one is your favorite Nintendo 3DS emulator? Tell us your thoughts and experience using it in the comments section below.
Microsoft ruffled feathers a few years ago when it announced the end of support for Windows 10 would happen on October 14, 2025. While Windows 10 will mark its ten-year anniversary in 2025, some users remain perturbed with the idea of having to eventually switch to Windows 11 and it appears Microsoft is listening.
While outlining a handful of alternative options for Windows 11 migration that include purchasing new PCs or migrating to Windows 365, Microsoft also revealed it would be implementing an Extended Security Update Program for Windows in a similar vein as it did for Windows 7.
The Windows 10 ESU program would work comparable to the Windows 7 ESU program in that organizations could now purchase a yearly subscription to security updated for the older OS. Yearly commitments to the ESU program would extend for three additional years after the official end of support deadline for Windows 10 for enrolled devices.
What will the Windows 10 ESU include?
Organizations that choose this option will receive critical and/or significant security updates.
Windows 10 users enrolled in Windows 365 services will get a chance to apply their ESU to devices connected to a Cloud PC running Windows 11 with no additional cost.
Windows 10 instances in Azure Virtual Desktop will also be eligible for the ESU program on virtual machines, again, at no additional charge beyond the subscription fee.
What won’t the Windows 10 ESU cover?
Microsoft’s Windows 10 ESU lifeline only extends to security patches and will not include “new features, customer requested non-security updates, design changes, or technical support” beyond extended security updates, no matter how much your company begs.
Microsoft hasn’t changed its stance on EOS for Windows 10 ending in 2025, but it’s also acknowledging that many of the operating system’s users may simply not abandon ship based on the company’s timeline.
Between the potential release of a backported Windows 11 Copilot experience and this new optional Extended Security Update program, Windows 10 is getting a new lease on life. Microsoft is also bolstering its new ethos around removing arbitrary restrictions to its most widely used services with these recent changes.
Microsoft’s executive vice president and consumer chief marketing officer Yusuf Medhi is celebrating a year’s worth of pre-generative artificial intelligence services from the company with a blog post highlighting what’s next for Microsoft Copilot.
Celebrating Copilot
We started with the introduction of Bing Chat, and the feedback was incredible! Right away, people began to change how they search on the Internet, shop, code, prepare for job interviews, improve their gaming skills, and create beautiful documents and images. We proceeded to incorporate these capabilities into Microsoft 365, Microsoft Edge and Windows, unlocking new scenarios with ever greater context and intelligence for people.
After a marketing pivot to rebrand, the disparate AI services Microsoft was quickly accumulating under the general umbrella of Copilot, the company is now poised to offer a hefty update to a unified platform.
While each version of Microsoft Copilot that accompanies a platform or service form the company will be tailored for specific experiences and situations, Medhi does offer some broader updates on what general platform will receive in the coming months.
GPT-4 Turbo – Soon, Copilot will be able to generate responses using OpenAI’s latest model, GPT-4 Turbo, enabling you to tackle more complex and longer tasks. This model is currently being tested with select users and will be widely integrated into Copilot in the coming weeks.
New DALL-E 3 Model – You can now use Copilot to create images that are even higher quality and more accurate to the prompt with an updated DALL-E 3 model. These capabilities are available to you now by visiting bing.com/create or by prompting Copilot to create an image.
Inline Compose with rewrite menu – With Copilot, Microsoft Edge users can easily write from most websites. Just select the text you want to change and ask Copilot to rewrite it for you. Coming to all Edge users soon.
Multi-Modal with Search Grounding
Multi-Modal with Search Grounding – We are combining the power of GPT-4 with vision with Bing image search and web search data to deliver better image understanding for your queries. This new capability will be available soon.
Code Interpreter – We are developing a new capability that will enable you to perform complex tasks such as more accurate calculations, coding, data analysis, visualization, math and more. We are gathering feedback on these capabilities from a select set of users and plan to make it widely available soon.
Code InterpreterDeep Search
Deep Search – Coming soon to Bing, Deep Search harnesses the power of GPT-4 to deliver optimized search results for complex topics. Activating Deep Search expands search queries into more comprehensive descriptions to deliver more relevant results.
Those are just a handful of features Microsoft is sharing about the future of its Copilot platform. Back in April, Microsoft also shared concept and demo information about a much more localized version of Windows Copilot that managed Windows functionality more acutely than the current web-wrapper version present in Windows 11. Presumably, Copilot will gain Samsung/Bixby-like device specific capabilities in the future as well.
HP Instant Ink is a subscription service that lets you print as much as you want for a fixed monthly fee. But is it better than regular ink? We unpack all the benefits of using this special ink in our comprehensive review.
What is the difference between instant ink and regular ink?
Instant ink is used in specific HP printer models, while regular ink is compatible with most printers. HP Instant Ink is also subscription-based.
HP printers enrolled in the Instant Ink service have special chips that track usage and calculate monthly credits. They must also have Wi-Fi or Bluetooth capabilities.
How does HP Instant Ink work?
Overview
HP Instant Ink is an affordable way to enjoy a wide variety of printing options. The service’s main point is to ensure continuous printing and the convenience of not having to worry about the individual cost of ink cartridges or toner cartridges.
With HP Instant Ink, you’ll receive a replacement cartridge before you run out of ink, so you can keep printing without interruption. You can enroll for the service when you purchase a compatible HP printer.
1. Sign up for the service
You can sign up for the service when you buy a compatible printer or at any time after your purchase. Simply navigate to your browser, go to the HP Instant Ink page, and click on Get Started. You’ll be prompted to sign in with an HP account or create one if you don’t have one.
First-time HP printer users with Instant Ink service get a free 6-month subscription. This allows you to test out the service so that you can get a feel of what’s in store before you commit to one of the plans.
2. Buy a plan
You pay a monthly fee for the number of pages you want to print each month. If you sign up for an HP Instant Ink plan within 50 pages and get a free six-month trial, you’ll get charged when you have exhausted the 6-month worth of papers.
HP detects when you’re low on ink cartridges and automatically sends you refills when they run out. Just make sure your subscription is up-to-date.
3. Print all the documents and photos, you want
Once you’re all set up, you can start printing, scanning, or faxing, depending on what your HP printer can do. You don’t have to worry about regulating the number of photos and regular paper because each page costs the same.
What kinds of printers are eligible for HP Instant Ink?
HP offers many types of printers with its subscription service. These include multifunctional devices such as photo printers, which can scan documents and print them.
Laser printers capable of printing in black-and-white or color, and inkjet printers, suitable for home use, and others not included in this list. If you have doubts whether your HP printer meets the criteria, you can check out the official website for HP printers compatible with instant ink.
What Instant Ink subscription plan is best for me?
Light printing
Occasional printing
Moderate printing
Frequent printing
Business printing
Features
– Prints up to 10 pages Roll over up to 30 unused pages to the next cycle – Get an additional set of 10 pages for $1
– Prints up to 50 pages Roll over up to 150 unused pages to the next cycle – Get an additional set of 10 pages for $1
– Prints up to 100 pages Roll over up to 300 unused pages to the next cycle – Get an additional set of 10 pages for $1
– Prints up to 300 pages Roll over up to 900 unused pages to the next cycle – Get an additional set of 10 pages for $1
– Prints up to 700 pages Roll over up to 2100 unused pages to the next cycle – Get an additional set of 15 pages for $1 and a spare set of cartridges
Pricing
$0.99/Monthly
$3.99/Monthly
$5.99/Monthly
$11.99/Monthly
$24.99/Monthly
The best Instant Ink subscription plan for you depends on your printing type, how much printing you need, and how often. However, to get the best value, the more pages you print each month, the more value you’ll get out of each plan.
As a subscription service, Instant Ink is designed to be flexible and easy to use. You can change or cancel your plan at any time.
Is it cheaper to use HP Instant Ink?
The HP Instant Ink model is designed to make printing easier, more convenient, and more affordable from all your devices.
It’s an all-you-can-eat printing model where you pay a flat monthly fee. You don’t have to worry about ink cartridges or toner cartridges or change paper sizing to save on print paper because everything is included in the price of your plan.
In addition to ink and toner savings, the service offers access to helpful tools such as HP Instant Ink expert support and recommendations for when to replace cartridges based on usage patterns.
And if you want to reap more discounts, HP has a customer loyalty program where you get a referral code and if anyone signs up for the Instant Ink service with it, you both get a free month of service.
What are the pros and cons of HP Instant Ink?
Pros
No more running out of ink – You’ll receive a replacement cartridge before your printer runs out of ink so that it’s never too late to refill your printer when it’s time.
Easy ordering and billing – HP Instant Ink has an easy-to-use HP Smart app installed on your smartphone or tablet.
Free shipping – Your order will be delivered to your door for free. You get to save money and time by getting your ink delivered to you.
Excess rollover – If your monthly allotment is not fully used up upon your next subscription, the remaining pages will be rolled over to the next month, so you get your subscription’s worth.
Customizable plans – If you’re using less or more than the allotted amount of paper, you can always downgrade or upgrade your plan to suit your needs.
Cons
HP-limited – The HP Instant Ink service only works with HP printers. If you have an older printer from another manufacturer, or thinking about buying a new printer, you won’t be able to take advantage of this service.
Expensive if you don’t use it regularly – If you don’t print very often then it’s much cheaper to buy new ink cartridges from a different printer manufacturer rather than refilling them.
No unlimited printing – You only print as per your plan. The minimum amount of pages per month is specified and once you exhaust it, you have to pay more to print. If you must cancel printing,do it promptly to avoid using up your allocation.
Can I still use my printer if I cancel HP Instant Ink?
You won’t be able to print more pages or access any of the plan’s other benefits. What’s worse is that once you’ve enrolled and activated the HP Instant Ink service, you cannot use any other traditional cartridges on the same printer.
If you’re enrolled in Instant Ink, you can cancel your subscription anytime. You can also choose not to renew if you wish to end your service with HP. When you cancel your subscription, your HP Instant Ink account will be deactivated.
While HP Instant Ink may not be ideal for everyone, some of its features may be a turn-off for some people. If you print a lot and want convenience, it could be your best option.
Better yet, you’ll find the HP Deskjet 4155e the perfect match for you to use with this service. This is because it is portable and prints both in black and in color.
However, if you’re more concerned about saving money every time you print, you might do better with traditional printers. It ultimately comes down to individual needs.
If we were to choose whether to enroll in the HP Instant Ink service or go for traditional printers and cartridges, HP wins. It takes the headache out of running a business, but more importantly, it allows us to run it exactly how we want to.
The security that comes with having a set monthly fee that covers the cost of printing, convenient access to printer ink, and less worry about when to get a refill is a huge relief for us. What makes HP’s Instant Ink service so appealing is that it cuts out any guesswork.
What about you? Would you say this ink service revolutionizes how we print, or is it just another ploy by HP to monopolize the market? Let us know your thoughts in the comment section below.
The Wirecast Facebook server error will prevent you from streaming on Facebook, so it’s important to fix this problem as soon as possible.
This can be a major issue if you stream frequently and Facebook is your platform of choice, so let’s take a closer look at this error and see how we can fix it.
Why am I getting a Wirecast Facebook server error?
Facebook has removed support for scheduling through third-party software which results in this error.
Authorization issues can sometimes lead to this and many other issues.
The Wirecast app doesn’t have all the necessary permissions on Facebook.
Go to the page that you wish to use for streaming.
Next, click on Live video.
In the Create live video event click on Select.
Enter the event name, and start date and click on Next. After that, click on Create event.
Click on Streaming software. You should now get the Stream key and Server URL. Copy them and save the changes.
Next, open Wirecast and go to Output Settings.
Set Destination to RTMP Server. Paste the Server URL to the Address field and the Stream key to the Stream field.
Save changes.
How do I live stream on Facebook with RTMP?
Stream with RTMP is simple, and it requires you to create a live video event and set your output to Streaming software. After that, you’ll get the server URL and unique key that you use to configure the streaming software.
We explained this process in detail already in Solution 3, so be sure to check it out.
Wirecast Facebook server error is caused by recent changes to Facebook Live its event scheduling feature. However, this issue can be fixed by using RTMP or by adjusting your settings.
If you’re an audiophile who loves FLAC files, then you’re probably familiar with how difficult it can be to edit the files, and the property requested was not found error is not new to you.
Having encountered the same issue in Windows 11, we compiled this guide to help others in a similar predicament.
What does the property requested was not found mean?
This error message appears when you attempt to play, view, or edit your audio files most notably the FLAC format. The most likely scenario is that the file is corrupt or the audio format is unsupported.
Also, if your computer has recently been through a major change or problem, such as an upgrade, virus scan, or disk defragmenting, some files may be missing on your computer that are causing this miscommunication.
How do I fix the property requested was not found error?
Try the following basic troubleshooting steps before moving on to the more advanced solutions:
Check for app updates from the Microsoft Store or the official website.
1. Perform a DISM and System File Checker scan
Hit the Start Menu icon, type cmd in the search bar, and click Run as administrator.
Type the following commands and press Enter after each one:DISM.exe /Online /Cleanup-Image /Restorehealthsfc /scannow
System files are sensitive so you should always handle them with utmost care. Using specialized software can automate this process, making it faster and safer.
2. Run the MediaPlayer troubleshooter
First, verify that Media Player is enabled.
Hit the Windows key, type Control Panel in the search bar, and click Open.
Click on Programs.
Select Turn Windows features on or off.
Find the Media Features option, check it, and hit OK.
Hit the Windows + R keys to open the Run command.
Type in the following command in the dialog box and hit Enter: msdt.exe -id WindowsMediaPlayerConfigurationDiagnostic
Click on Next and wait for the wizard to troubleshoot any issues with Media Player.
3. Repair/reset the media player app
Hit the Windows key and click on Settings.
Click on Apps on the left pane then Apps & features on the right pane.
Locate the media player app (Groove was the most common), click on the three vertical ellipses, and select Advanced options.
Click on Repair.
Go back and click on Reset if the repair option failed.
4. Create a new user profile
Press Windows + R to launch the Run console, enter netplwiz in the text field, and click OK.
Click Add in the User Accounts window.
Select Sign in without a Microsoft account (not recommended).
Click on Local account button.
Enter a username and password (optional) for the new user account, and a hint, in case you set a password. Once done, click on Next.
Click on Finish to create the Local account.
When creating a new user profile, it’s usually to test whether the same error occurs in a different account. This could help you isolate the issue whether it is profile-related or app-related.
If the property requested was not found error disappears in the new profile, you need to repair your old profile and try again.
Click on the Start Menu icon, type Control Panel on the search bar, and click Open.
Select Uninstall a Program under Programs.
Find the problematic app, click on it, and select Uninstall.
Confirm uninstallation in the next pop-up.
6. Uninstall recent Windows update
Press the Windows + I keys simultaneously to open Settings.
Navigate to Windows Update, then go to Update history.
Click on Uninstall updates.
Select the most recent update, then click Uninstall.
If you notice the property requested was not found error began after a recent update, it could mean there are some compatibility issues. Removing the new update could help you resolve this issue.
7. Reset your PC
Hit the Windows key and select Settings.
In the left window pane, select System, then click on Recovery on the right pane.
Click on Reset PC from the right side.
Choose the type of factory reset you need. You can keep your files or completely delete all the files, apps, and settings on the PC.
Select the option you want to reinstall Windows: Cloud download or Local reinstall.
Now, wait for Windows to prepare the setup and click Yes when prompted.
Next, accept the Licence Agreement and wait while Windows downloads the required updates.
Select between keeping your files and apps and removing them. Since you want to perform an in-place upgrade, leave the recommended settings, i.e., keep your files and apps.
Now, click the Install button to start the in-place upgrade.
Finally, wait for Windows to copy the necessary files to upgrade your device and restart your PC.
You just need to be careful as some programs can handle this format without a problem, but others might have trouble with it. Generally, dealing with audio files can be difficult. Worse is when it involves a complex format like FLAC.
It’s possible some components of your FLAC file are corrupted and this issue will prevent you from editing it. You can try your luck with audio repair software and see if the issue goes away.
In case you have additional ideas that will help other users, don’t hesitate to leave a comment down below.
For some users, Windows 11 keeps adding new keyboard layouts even though they didn’t accept or acknowledge the change. The Windows Report software team replicated this issue and know what to do to prevent Windows 11 from adding new keyboard layouts on your PC.
Why is Windows 11 adding keyboard layouts on its own? This usually happens when you’re using a non-native language & keyboard combination. Fot instance, if you’re using the US display language and a French keyboard layout, Windows 11 will probably add the English keyboard as well. Here’s what to do if Windows 11 is adding a new keyboard layout you don’t want.
How do I prevent Windows 11 from adding keyboard layouts?
1. Remove the keyboard layouts you don’t need
Click the Start button and select Settings.
Select Time & language from the tabs from the left pane, then choose Language & region on the right.
Click the three horizontal dots icon from the language you want the keyboard removed and select Language options.
Click the Add a keyboard button next to Installed keyboards and select the same layout from the list that you have trouble removing.
Close the Settings app and restart the computer.
Now, retrace the steps above and go to Language options.
Click on the layout you added earlier, and select Remove from the menu.
Once again, restart the computer and see if the keyboard layout keeps showing up.
We know it looks counterproductive but the reappearing keyboard layout is a known but that can be fixed by adding and manually removing the problematic layout, as highlighted in the solution above.
Click the Search bar, type control panel and open the app from the results.
Now, click on Region, then go to the Administrative tab from the new window.
Next, click the Copy settings button (you need administrative privileges to access it).
Finally, verify if the Input language is correct, then check both boxes below, Welcome screen and system accounts and New user accounts, and click on OK.
At this point, if you see any input language that you don’t want or recognize, perform the first solution from this guide to remove it, then perform this solution again.
For instance, if you want to remove the Belgian keyboard layout for French, the code is 080C:0000080C, and so on.
Lastly, right-click the layout key, and rename it with a NO or anything else after it.
Restart your PC to acknowledge the changes.
The point is that Windows won’t be able to recognize this layout and it won’t be able to add it again. However, if you change your mind, you can retrace the steps above and rename the key again.
To sum up our guide, if you want to stop Windows 11 from adding keyboard layouts, first, delete the keyboard that keeps reappearing, then, delete the language from Word or Excel, change the Copy settings. As a last resort, you can remove the keyboard layout from the Registry by renaming its key.
The instruction at 0x00 referenced memory error appears when launching applications. A few of the affected ones include Steam games, EA games, Age of Empires, Watch_Dog, and few built-in processes.
The error message reads, The instruction at 0x00 referenced memory at 0x00. The memory could not be written. Though there might be a slight variation depending on the referenced memory’s path.
What is the instruction at referenced memory error?
This is usually a memory-related issue highlighting that the memory couldn’t read the assigned app files. It can also arise due to corrupt system files, problems with the disk, running low on RAM, missing or corrupted Visual C++ Redistributables, or misconfigured graphics settings.
How do I fix The instruction at 0x00 referenced memory?
Before we start with the slightly complex solutions, try these quick ones:
Check for any pending Windows updates and install them.
Perform a clean boot to identify the underlying cause behind the error and then disable or remove it altogether.
1. Repair the corrupt system files
Press Windows + R to open Run, type cmd, and hit Ctrl + Shift + Enter.
Click Yes in the UAC prompt.
Paste the following DISM commands individually and hit Enter after each: DISM /Online /Cleanup-Image /CheckHealthDISM /Online /Cleanup-Image /ScanHealthDISM /Online /Cleanup-Image /RestoreHealth
Now, run the following command for the SFC scan: sfc /scannow
Reboot the computer.
Often, when it’s the corrupt system files to blame for The instruction at 0x00 referenced memory error, run the DISM commands and SFC scan to replace all such files with their cached copy already stored on the PC.
Corrupt system files can certainly be dangerous, fortunately, there are third-party apps that will help you automatically fix this problem.
2. Restore settings in the graphics control panel
NOTE
The steps listed here are for the NVIDIA Control Panel. If you have another graphics adapter, say Intel or AMD, run the dedicated tool to restore the settings.
Launch the NVIDIA Control Panel, and go to Manage 3D settings from the left pane.
Click the Restore button on the right under Global Settings.
Reboot the device, then relaunch the application that threw the error and check for improvements.
3. Run the Check Disk utility
Press Windows + S to open Search, type Command Prompt, right-click on the relevant result, and select Run as administrator.
Click Yes in the UAC prompt.
Paste the following command and hit Enter: chkdsk /r
If asked to schedule a scan the next time you restart the PC, hit Y and press Enter.
Restart the computer, let the scan run and fix issues, then check whether the error is fixed.
It’s imperative to manually repair the disk if it has bad sectors. Also, you can use an effective sector repair tool to fix The instruction at 0x00 referenced memory application error quickly.
4. Check for RAM issues
Press Windows + R to open Run, type mdsched.exe in the text field, and hit Enter.
Click on Restart now and check for problems.
Let the scan run and after the PC reboots, look for improvements.
If the built-in Windows Memory Diagnostics doesn’t help fix The instruction at 0x00 referenced memory error, you can always go with a dedicated RAM optimization tool.
Also, we recommend trying the open-source MemTest86, a reliable software that helps identify most RAM-based errors. Since it runs an extensive set of scans, we recommend letting the tool work overnight. If any issues are found, consult a hardware professional.
5. Repair/install the Microsoft C++ Redistributables
5.1 Repair the C++ redistributable (if already installed)
Press Windows + R to open Run, type appwiz.cpl in the text field, and hit Enter.
Select one of the redistributable packages listed here and click on Change.
Click the Repair button in the setup and wait for the process to complete.
Similarly, repair the other Visual C++ Redistributable packages.
5.2 Install the C++ redistributables
Go to Microsoft’s official website, and download the latest Visual C++ Redistributable packages corresponding to the OS architecture, i.e., 32-bit or 64-bit.
Run the setup and follow the on-screen instructions to complete the installation.
Press Windows + S to open Search, type View advanced system settings, and click the relevant result.
Click the Settings button under Performance.
Go to the Advanced tab, and click on Change under Virtual memory.
Untick the checkbox for Automatically manage paging file size for all drives, then select No paging file, and click Set.
Now, choose Custom size and enter the virtual memory size in the fields underneath using the following formula based on the available physical RAM (we took 4 GB as an example):
Initial size: 1.5 x Available physical RAM x 1024
Maximum size: 3 x Available physical RAM x 1024
Once done, click Set and then on OK to save the changes.
Increasing the virtual memory helps with The instruction at 0x00 referenced memory error when the PC has no available RAM to offload inactive processes. Regarding the size, Microsoft recommends that you set it at 1.5x and 3x the available RAM.
Go to the official Windows page, select the OS edition and product language, and then download the Windows 11 ISO.
Double-click the ISO, wait for a few seconds, and then click Open in the confirmation box.
Run the setup.exe file.
Click Yes in the UAC prompt.
Click on Next to proceed.
Check Microsoft’s license terms and click Accept.
Finally, verify that the setup reads, Keep personal files and apps, click Install, and wait for the process to complete. It may take a few hours.
An in-place upgrade remains the most effective troubleshooting measure against all OS-related issues, including The instruction at 0x00 referenced memory app error. It basically reinstalls all the Windows files without affecting the stored files and apps.
If nothing works, it’s likely a dying disk to blame. In this case, it’s best that you replace the disk as soon as possible, copy the data from it to another functioning drive, and, if required, install Windows all over again. Also, get the other hardware components and connections inspected by a professional.
Games crash all the time but when Fortnite Chapter 5 does the same on your PS5 and worse, it’s account-related, this can be a peculiar issue. Lucky for you, we examined all possible loopholes and bring you this report on how to go about it.
Why is Fortnite not loading on PC?
Fortnite Chapter 5 is a new update with a ton of new content so this may be one of the reasons why it is crashing. Running Fortnite on an unsupported OS may also be an issue. However, from our investigations, this seems to be an issue with accounts where data is yet to be synced.
How do I fix Fortnite Chapter 5 crashing on my PS5?
A few basic troubleshooting steps to start off with include:
There, you’ll be able to view both theConsole Storageand theExtended Storage.
Click on each of them and check the free disk space.
If you don’t have enough, make sure you delete other saved data.
To do so, go back to your PS5 Settings, and navigate to Saved Data and Game/App Settings.
Choose from Saved Data (PS5) or Saved Data (PS4).
Select Console Storage and click on Delete.
Tick the box next to the files you want to delete and select Delete.
5. Reinstall Fortnite
Launch the Epic Games Launcher.
Select the Library tab in the left pane.
Click on the Settings button next to Fortnite, it looks like a set of gears.
Select Uninstall.
Confirm your action.
Go to where Fortnite is located on File Explorer. There shouldn’t be anything there, but if you do see the Fortnite folder, delete it.
Now restart your computer and try launching Fortnite on your PS5.
6. Reset your PS5
Turn off your PS5 console.
Search for and locate the small reset button on the back of your controller.
With a small tool try to push the button inside.
Hold the button down for roughly 3-5 seconds.
Now press the PS button on the front to sync it again.
Alternatively, you can delete the controller and pair it again by going to the PS5 Home Screen and locating Settings.
Next, go to System and select Accessories.
Here select General and Bluetooth Accessories.
Under the heading Registered Accessories locate and select your controller and from the menu choose Delete.
When prompted to forget the device, select OK then pair your controller once again.
Since there’s no official fix yet, the above are just some of the things you can try to make sure your Fortnite Chapter 5 experience is as smooth as possible.
If these scenarios sound familiar, you may want to clean up your system files frequently to avoid corruption which can easily lead to launching errors on Fortnite.
We appreciate the WindowsReport community we have built so if you’ve experienced this error and have managed to fix it with a solution not mentioned here, we’d appreciate your feedback. Drop us a line below.
Exec format error message usually appears if you’re using Linux or Windows Subsystem for Linux on your Windows PC.
This error message will prevent you from running certain commands in the Terminal. This usually affects developers and it can cause issues with the production, so it’s important to fix the issue as soon as possible.
What is an exec format error in Docker or Ninja?
The error appears if you build an image on a specific architecture and try to run it on a different one.
If your scripts don’t have a shebang line at the beginning, you might get this error.
Your file isn’t compiled properly which results in this error.
How can I fix the exec format error?
1. Make sure you use the same architecture for the Docker image
Build a Docker image on the same architecture.
Images built on ARM architecture won’t work on x86 systems and vice versa.
Use Docker BuildKit to ensure that your images are compatible with other platforms.
2. Add shebang to the script
Open your script and make sure you add a shebang like this: #!/bin/bas sudo java -jar "/home/ubuntu/myfile.jar"
Next, add the execution permission to the script with chmod: chmod +x start.sh
Next, run the following command: gcc my_file.c -o my_file
Check if the problem is resolved.
How to exec a docker image?
Start the Terminal and run the following command to run the container: docker run -d --name mynginx nginx:latest
Next, check the status of container with the following command: docker ps
After that, enter the following to access container shell: docker exec -it mynginx /bin/bash
Now you can run the commands inside the shell.
Exec format error can cause problems for developers, but in most cases, it’s just a problem of using different architectures when making Docker images. Missing shebangs in script files can also cause this problem, so be sure to add them at the beginning of your files.
Discord Rules are basically a set of conditions set by the admin that members must ideally adhere to when interacting in the community. To ensure seamless setup, Discord allows setting up the rules channel on both the PC and mobile app. Discord rules are not mandatory, but they allow better organizational control and make all members aware of the do’s and don’ts of the server.
Tip
We have taken up the process right from the start, i.e., from the creation of the server, followed by configuring the rules channel and then setting up rules. If you are already done with a part of it, simply head to the relevant subheading and proceed with the process.
How do I create a Discord channel rule?
1. Create a server
Launch the Discord app, and click on the Add a Server icon near the left.
Click on Create My Own.
Select whether you are creating a server for a community or friends, or skip the step.
Upload a photo (not mandatory), enter a server name in the text field, and click on Create.
2. Create the rules channel
After you have set up a server, right-click on it, and select Create Channel from the context menu.
Select Text as the Channel Type, enter rules in the Channel Name field, and then click on Create Channel.
3. Set up the Discord rules channel permissions
Click the Edit channel (gear) icon next to the rules channel on the left.
Go to Permissions from the navigation pane.
Under Advanced Permissions, enable the following general channel permissions:
View Channel
Similarly, disable the following under Text Permissions:
Send Messages
Send Messages in Threads
Create Public Threads
Create Private Threads
Once done, click on Save Changes in the prompt.
4. Add rules to the channel
Click on the rules channel in the left pane.
Enter the rules you want to set up for the channel in the text field, and hit Enter. To go to the next line while drafting rules, hit Shift + Enter.
That’s it! The Discord rules channel is now created with optimal permissions to prevent any spamming. Remember to mention the rules in a bulleted list, use simple words, and keep the sentences short. It ensures enhanced readability.
To add bold formatting in order to highlight critical sections of the rule, include two asterisks (*) both before and after the relevant text. Also, you can use emojis, GIFs, and stickers to keep Discord’s rules channel a lively space.
If confused while writing Discord rules for the dedicated channel, it’s recommended that you check what others are using. This will save a lot of time and help you come up with a systematic set of rules.
As an example, you can add the following two rules:
Treat everyone with respect. Absolutely no harassment, witch-hunting, sexism, racism, or hate speech will be tolerated.
No spam or self-promotion (server invites, advertisements, etc) without permission from a staff member. This includes DMing fellow members. There are no read receipts so no response should not result in spamming.
For more, check our list of the best Discord rules templates and simply copy-paste them into your Discord rules channel.
That’s all about the Discord rules channel and a few useful templates you can simply copy and paste. Remember, the idea is to keep the rules simple, clear, and engaging. And nothing does it better than emojis and GIFs!
Besides, for some users, the Discord rules screening is not working, and subsequently, new members are not presented with the rules. Here, simply make sure you are connected to a community server and go to the Safety Setup tab.
For any queries or to share your favourite rules templates with our readers, drop a comment below.