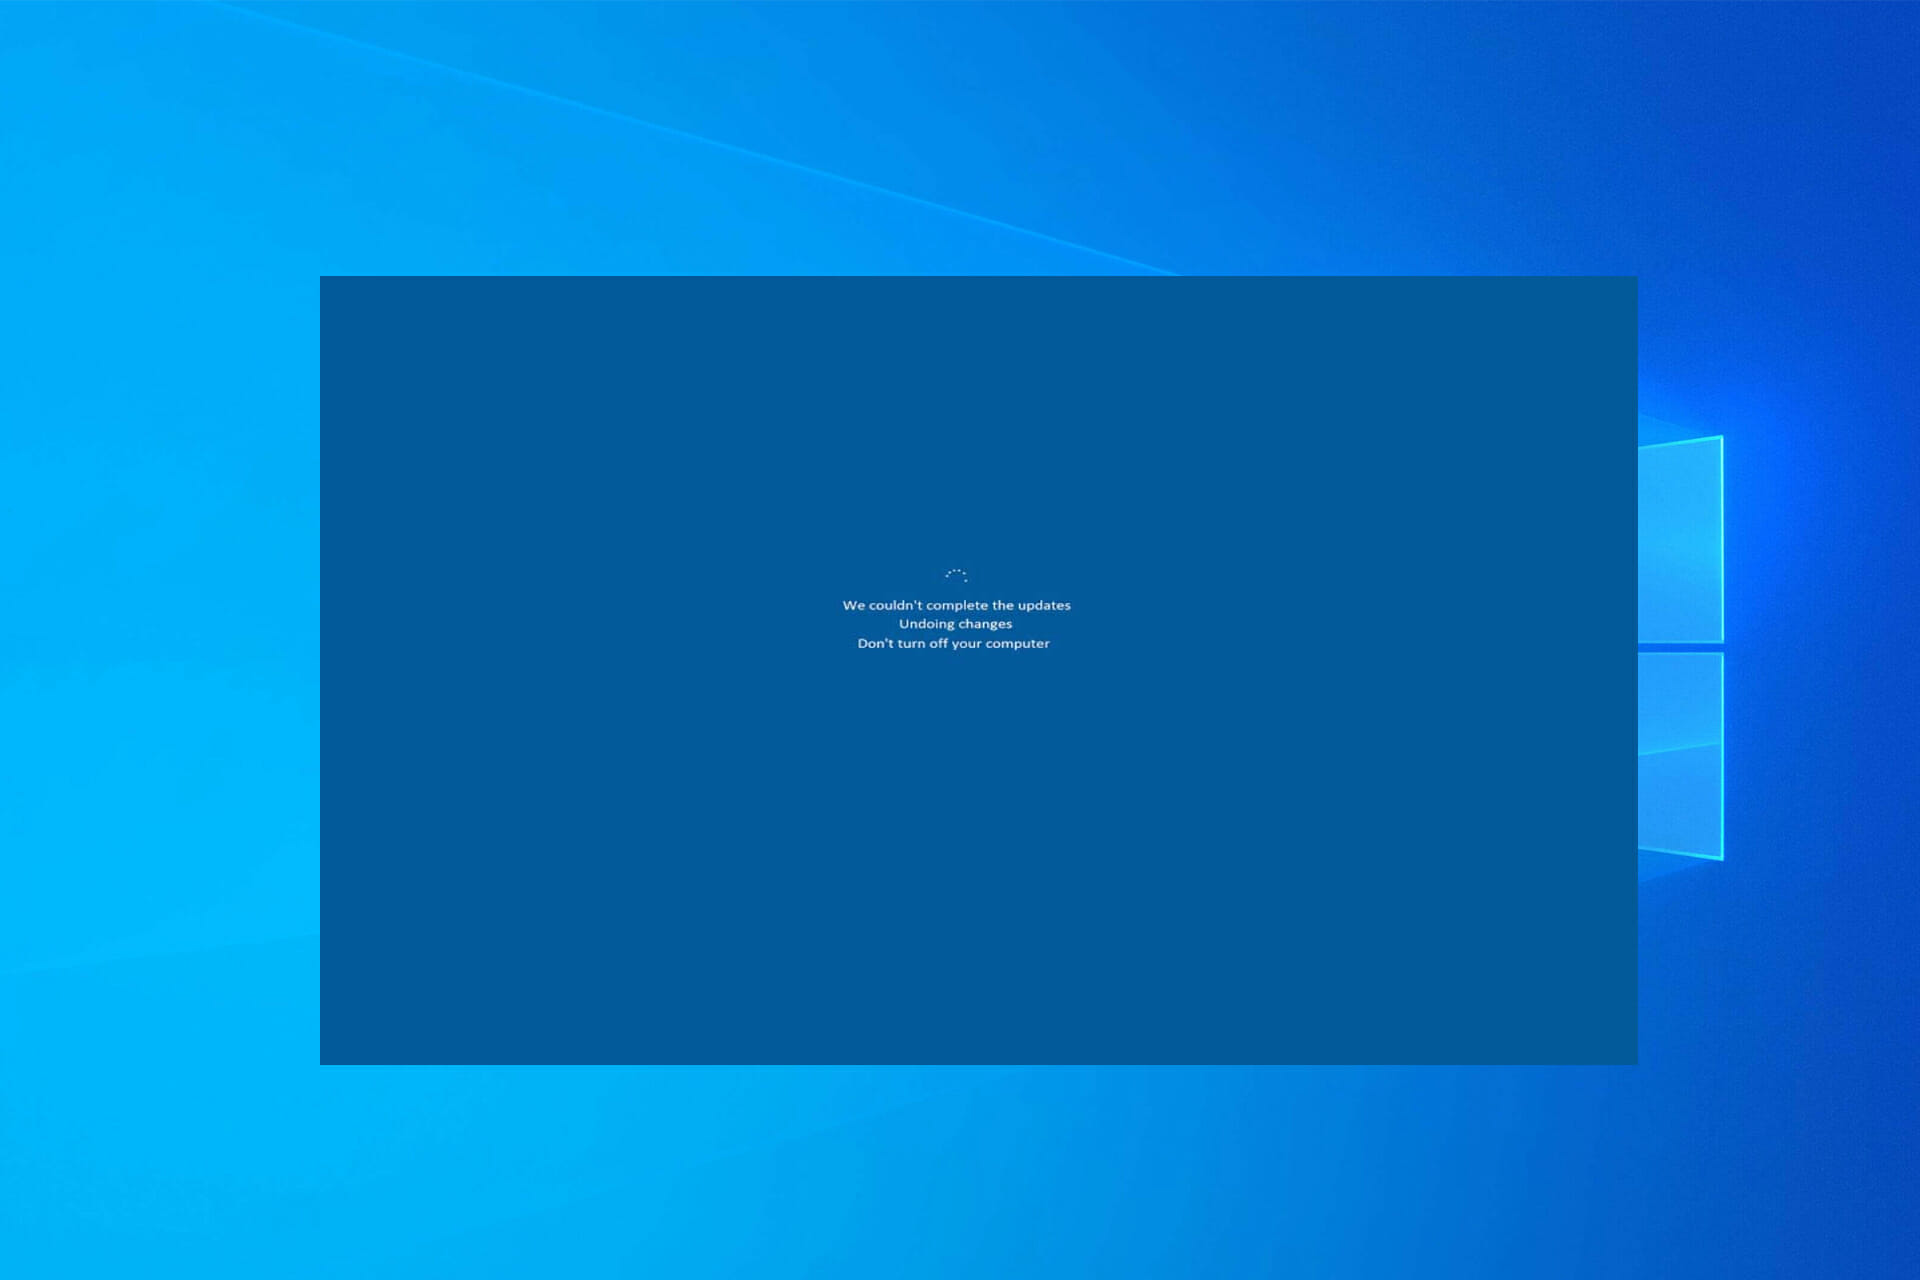
As we are used to, Windows automatically downloads and installs the latest updates. Unfortunately, the process is becoming untenable for some Windows 10 users, as their PCs display an error message stating: We couldn’t complete the updates undoing changes.
This problem is not limited to just a single version of the OS, as some users are also complaining of the undoing changes made to your PC error on Windows 11. Thankfully, it is not an issue that is impossible to fix, as we will show in this guide.
Moreover, here are the error variations that you may encounter and fix with the solutions below:
We couldn’t complete the updates undoing changes server 2012 r2, 2016, 2019
We couldn’t complete the updates undoing changes stuck (in loop)
We couldn’t complete the updates undoing changes don’t turn off your computer
We couldn’t complete the updates undoing changes windows 8.1, 7, 10, 11 stuck
Why does my computer keep saying undoing changes made to your computer?
There are various reasons for we couldn’t complete the updates undoing changes error. Most of them have to do with issues with the update while some are down to system files.
Below are some of the causes of this error:
Faulty system files – Broken or corrupt system files lead to all sorts of problems, including this issue. The only way around this is to repair these files with built-in tools or dedicated software.
Issues with Windows update – At times, this problem might occur because of some glitches with the update you are trying to install. To fix this, you might need to pause the updates for some time.
Disabled Windows services – There are some Windows services that are crucial to the successful installation of updates. If these services are disabled, it can lead to this issue.
How do you fix we couldn’t complete the update undoing changes?
1. Repair in Safe Mode
Restart your computer and keep pressing F8 or SHIFT + F8 as your PC loads to go to the Advanced startup screen.
Click Choose an Option and select the Troubleshoot option.
Choose Advanced options.
Now, select Startup Settings.
Press the number corresponding to Enable Safe Mode.
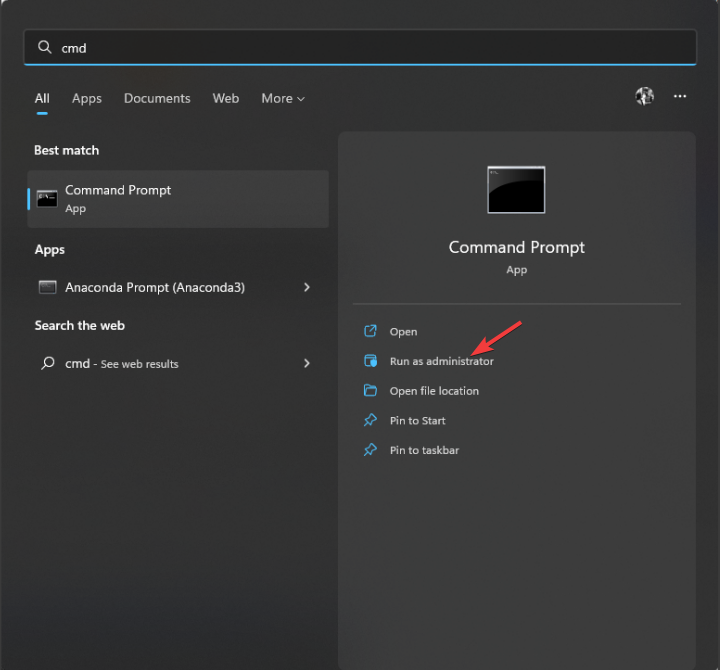
When, your PC boots in Safe Mode, press the Windows key, type cmd, and choose Run as administrator under Command Prompt.
Type the command below and press Enter to run it: net stop wuauserv
Now, open File Explorer and go follow the path below: C:/ Windows/SoftwareDistribution
Finally, delete all the files and subfolders in this location and restart your PC.
If we couldn’t complete the updates undoing changes loop is taking forever on your PC, we advise repairing it in Safe Mode. The steps above will help reset the update and should make it install easily when you restart your PC again.
2. Run SFC and DISM scans
Press the Windows key, type cmd, and select Run as administrator under Command Prompt.
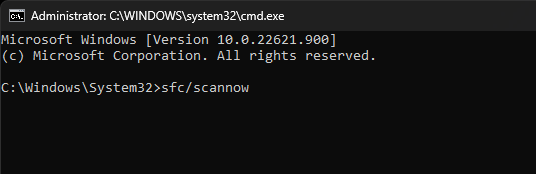
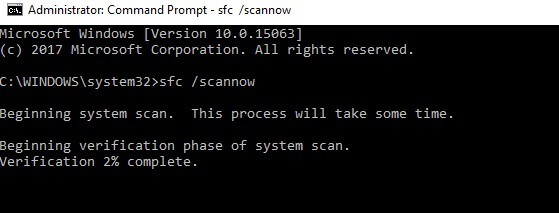
Type the command below and hit Enter: sfc/scannow
Wait for the scan to complete, copy and paste the command below and press Enter to run it: DISM /Online /Cleanup-Image /RestoreHealth
Wait for the scan to complete and restart your PC.
Corrupt system files make just about everything fails. It is not surprising that they are among the chief causes of we couldn’t complete the updates undoing changes issue. Running the SFC and DISM scans should help restore these files.
Note that whether the SFC scan is successful or not, you should still run the DISM. After the DISM scan completes, you can now run the SFC scan again.
Alternatively, you can try dedicated tools that will scan your PC and repair any errors related to Windows updates, missing DLL files, or corrupted registry entries.
3. Remove third-party antivirus software
Press the Windows key + S, type control, and select Control Panel.
Select Uninstall a program under Programs.
Now, click the antivirus and select the Uninstall button at the top.
Sometimes, we couldn’t complete the updates undoing changes don’t turn off your computer error gets stuck on your PC.
In this case, it might be down to your antivirus software. So wait patiently for the process to end and uninstall the software.
If you want a faster solution, then you should try using a dedicated tool like Iobit Uninstaller. It lets you easily uninstall third-party programs thanks to its straightforward interface.
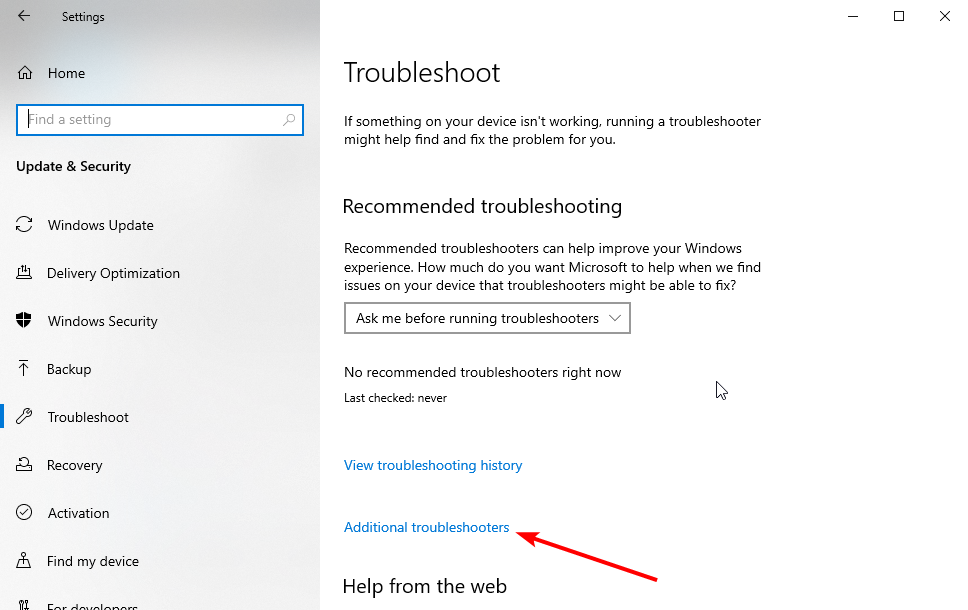
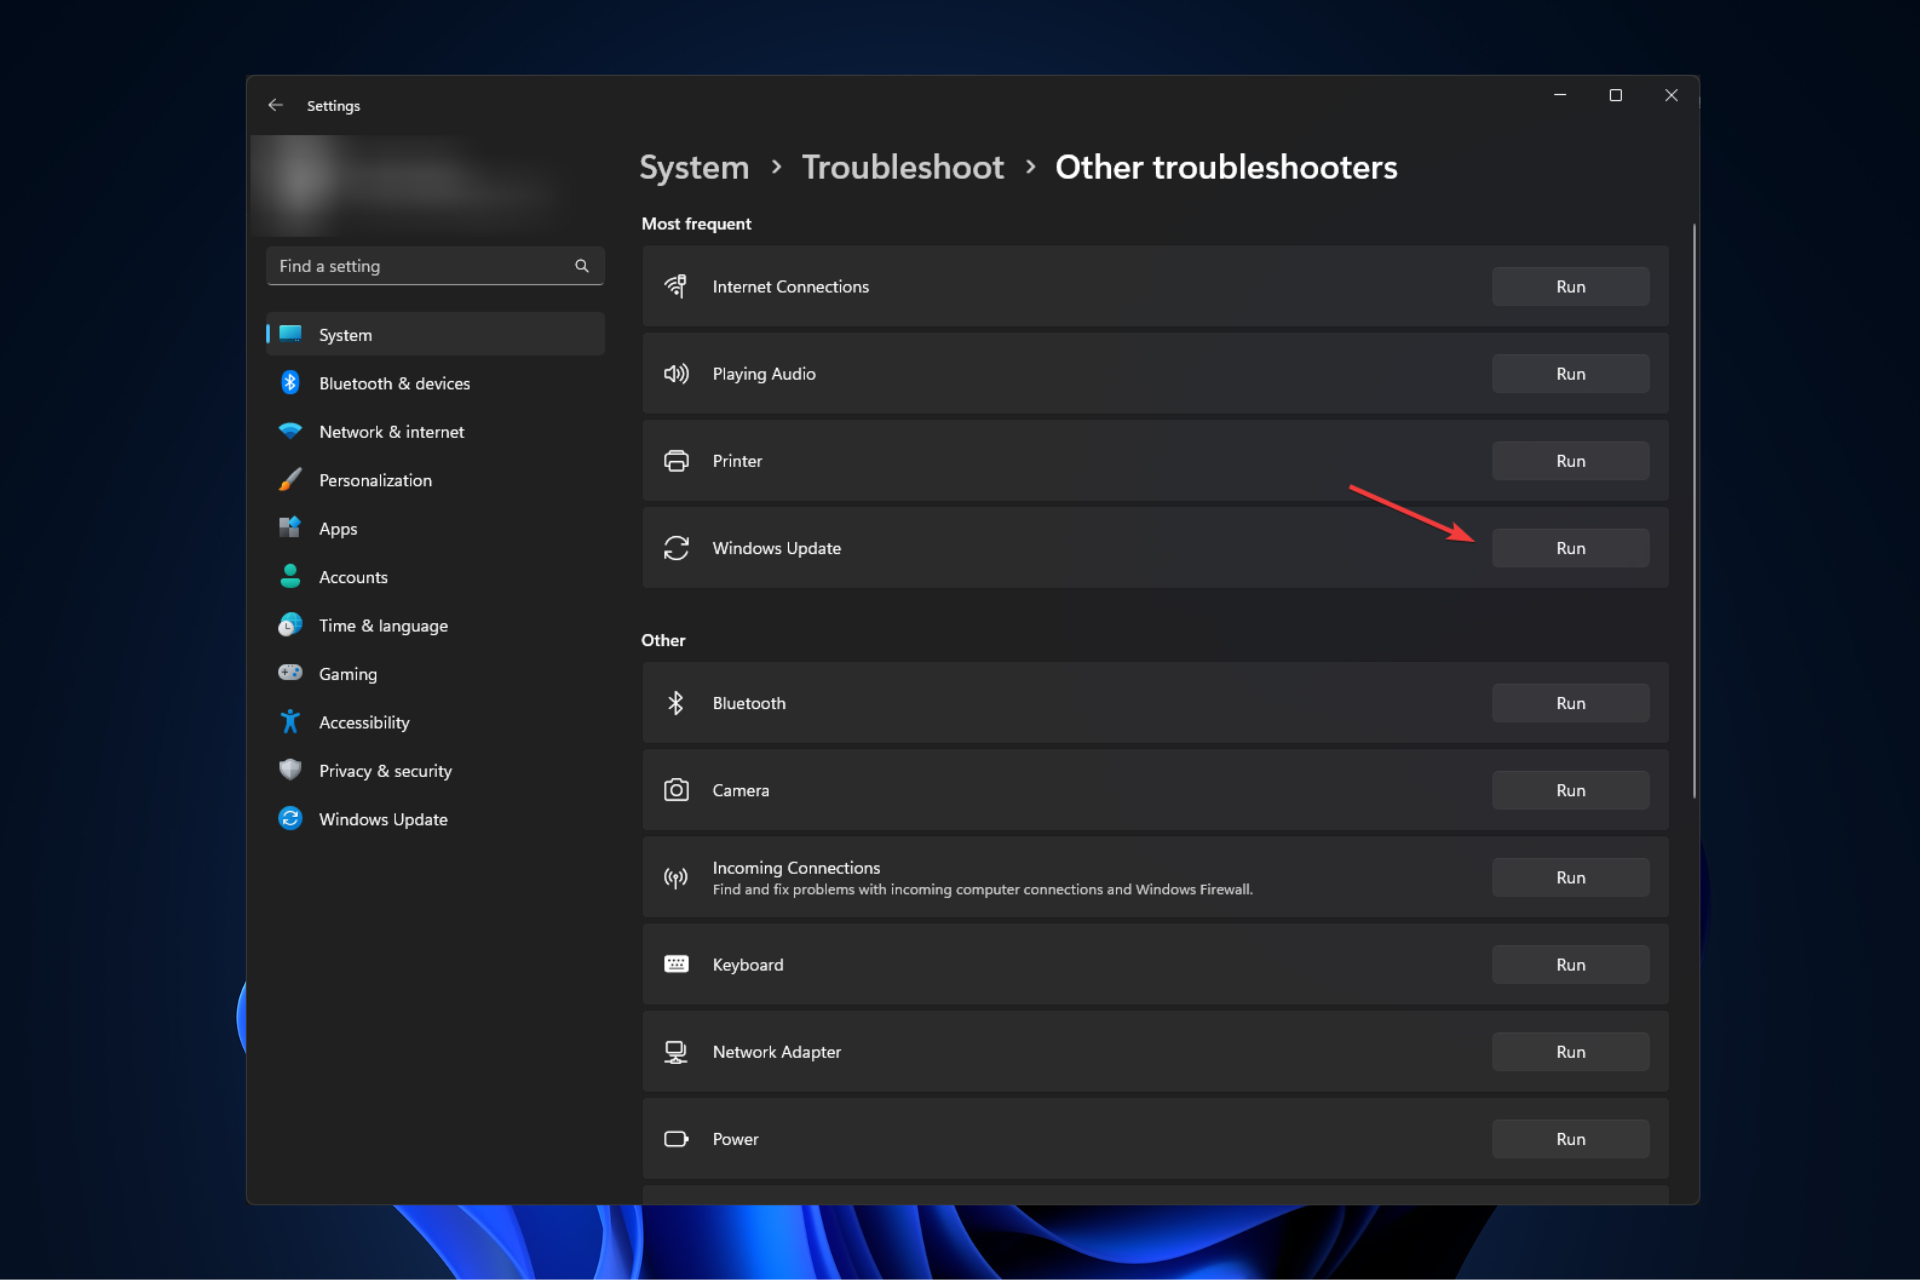
Press the Windows key + I and select the Updates & Security option.
Choose Troubleshoot in the left pane and click Additional troubleshooters.
Now, select Windows Update and click Run the troubleshooter.
Finally, apply any recommendations and fixes.
The Windows update troubleshooter helps to solve numerous update-relatedissues including we couldn’t complete the updates undoing changes error. If this issue is just down to minor glitches, this tool will give recommendations on what to do.
Press the Windows key + R, type services.msc, and press Enter.
Find and right-click the App Readiness service.
If it is disabled, click the Start button. If it is running, click the Restart button.
Now, find the Windows Update and Windows Update Medic Service services and repeat Steps 2 and 3 for them.
Finally, open File Explorer, follow the path below, and delete all the files and subfolders in the location permanently: C:/ Windows/SoftwareDistribution
At times, you might be facing we couldn’t complete the updates undoing changes issue because of some disabled processes. Enabling these processes and restarting your PC should restore normalcy here.
The problem can be frustrating as it can sometimes take a long time to clear up. Hopefully, you were able to fix it with this guide.
If the issue persists or shows up with another update, you might need to wait till another update that will fix it is released.
Also, if you are still having problems installing updates check this guide. Please, feel free to let us the fix that helped you solve this problem in the comments below.
Whether you’re using it or not, banner or poster making software is the norm in the advertising and digital media field.
There is designing software that can support you in creating impressive banners or posters for your digital projects or online creatives. In addition, the use of intriguing visuals is one sure way to make potential customers click on ads.
Now, the ads can be digital or offline (print ads), but having a stunning poster makes all the difference in the world for your clients.
Which app can I use to edit a poster?
You can use multiple apps to edit and create a poster for your digital project or website. For instance, you can refer to the Adobe editing software if you require professional apps, or simply use free online designing software such as Canva.
Here are the best ones that we have picked for you:
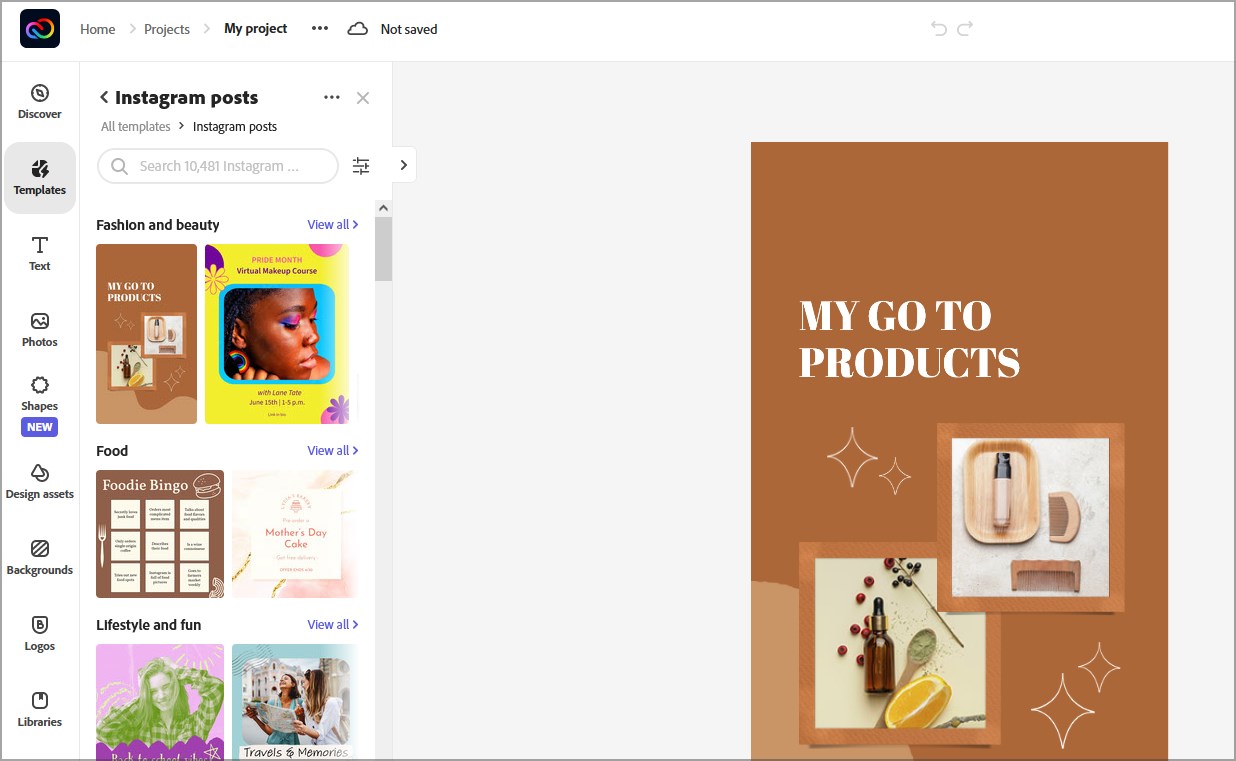
Adobe Express has appeared in our previous graphic designing guides and makes an appearance here as well.
It is a free online tool from Adobe that lets you create posters, banners, and short creative videos for free.
There is a premium plan that comes with other Adobe editing software, but for a free version, it does offer a decent set of tools to get you started.
Adobe Express offers all kinds of graphic designing templates, from Facebook cover templates to YouTube banners and from invitation templates to poster design templates.
It is an online tool and requires registration. To create a poster, you can begin by selecting the poster template, and you can select the variation inside the editor from the right-side pane.
Customization options offered by Adobe Express include the ability to add a brand logo, photo, icon, and dynamic text elements.
There is a color option if you want to experiment, plus the layout option lets you customize the border and layout designs.
The resize tab includes shortcuts to different sizes if you want to change the form factor from poster to something like the A5 sheet or letter size.
Other great features:
Available in any browser
Most features are free
Templates
Easy to use
Adobe Express
Create posters, banners, videos, and rich content to increase brand awareness!
If you don’t want to install editing software to create flyers on your PC, online image manipulation tools like Canva offer enough features to get you started.
Canva is a premium tool but also offers a free trial. Whether you want to create a poster or a wedding invitation, Canva has tons of built-in templates with fully customizable layouts on offer.
Canva can also print posters and wedding invitations for you and deliver them to your doorsteps.
To use Canva, one needs to register first, which is free. Once the template is selected, you can further customize the template by adding elements like images, grids, frames, shapes, illustrations, etc.
The text tool offers an excellent collection of fonts, while the background tab lets you change the color, texture, and default color palette.
The flyers can be downloaded to your computer in multiple formats, including PDF and PNG.
Other great features:
Various photo effects
The abundance of built-in templates
Supports various vector objects
Extensive font collection
Canva
Create outstanding banner designs with the help of a tool that offers lots of free templates and elements.
Fotor is extensive graphic design software that has numerous design tools to make unique banners, flyers, or posters in no time.
This banner design platform is free and can help you develop professional banners for business purposes or various digital projects.
Using this complex design tool will cover all your needs regarding social media visuals, such as banners for Facebook or Instagram or flyers to promote your brand online.
You also have a photo editing and collage elements that help you create eye-catching posters with AI photo effects, background remover, or text and coloring tools.
In addition, there is a design section that is a real help for the creative stage. You can thus choose from multiple templates such as banners, social media posts, backgrounds, or flyers.
In case you’re not familiar with such instruments, rest assured that you have video tutorials for any products offered on this platform.
It’s worth noting that you have useful tools like the brand kit or PNG photo maker to boost your creative skills and design the most impressive projects.
Other great features:
Available online in any browser
Over 100,000 templates
100+ editing tools
Extensive stock photo collection
Fotor
Handcraft your digital banner designs or flyers using this free graphic design tool.
CorelDRAW is often overshadowed by the industry leader Adobe Suite when it comes to vector graphic designing solutions.
However, CorelDRAW has held its own for a long time, and now the new version of the suite is available for users.
CorelDRAW offers a no-nonsense toolset focused on better workflow. The tool offers a tailor-made user interface along with excellent customization options.
For poster designing, CorelDRAW offers an excellent set of tools to create graphics, illustrations, layouts, photo editing, and font management.
It also comes with the healing clone tool, knife tool, web graphics tools, and support for multiple monitors along with 4K resolution and stylus support.
You can create a custom color palette for your designs, and the creative vectors tools let you refine your vectors using smear, Twirl, Attract and Repel tools.
There is a built-in Project Timer feature that enables you to keep a tab on hours spent on each project which is useful for freelancers.
Other great features:
Ability to create vector designs
Collaboration features
Powerful photo editing
Support for Google Fonts
Corel Draw
Smoothly create highly customizable designs with a built-in time management feature.
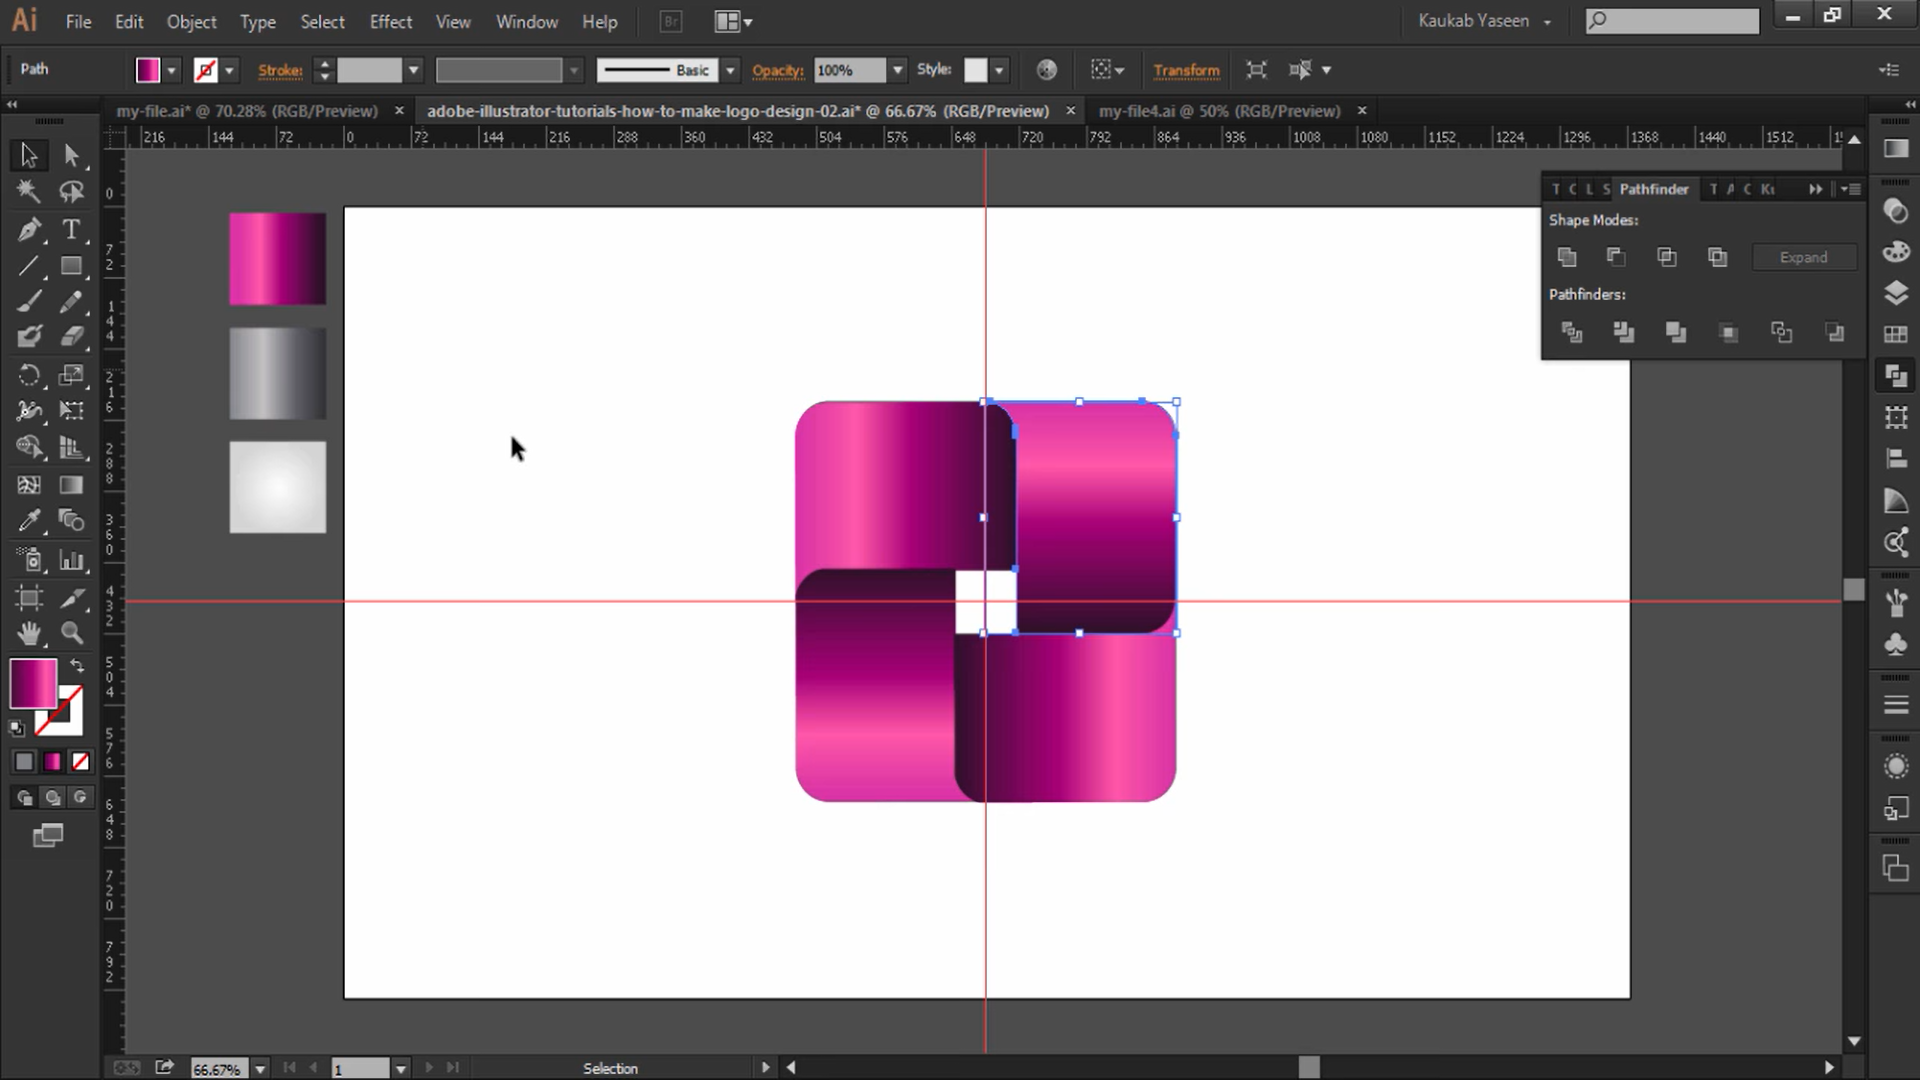
Adobe Illustrator excels when it comes to creating vector illustrations. It has been an industry standard for a long time and offers a quality set of tools to users.
As part of the Adobe Creative Cloud suite, Illustrator can be used as more than just an illustration tool.
It’s a versatile tool that can serve for logo creation, icons for websites and mobile apps, digital ad banners, and flyers.
The Illustrator comes with all the tools you need to create a stunning flyer, including shape tools, text tools for adding stunning typography, freehand drawing tool to turn imported photos into artwork, and more.
Moreover, this proficient tool comes with various drawings, icons, or logos that will provide valuable aid in creating expressive posters.
Another benefit worth mentioning includes working from the iPad to create vector graphics for memorable marketing banners. Plus, with many layers and colors, it’s almost impossible not to succeed.
All in all, this professional graphics tool is suitable for any artist that needs to craft persuasive content for promotional purposes, from logos to large elements.
Other great features:
Industry-leading vector editing software
Various tools to choose from
Color and opacity preview in real-time
Easy project sharing for review purposes
Adobe Illustrator
Team up with the industry-leading illustration tool and create breathtaking banners and posters!
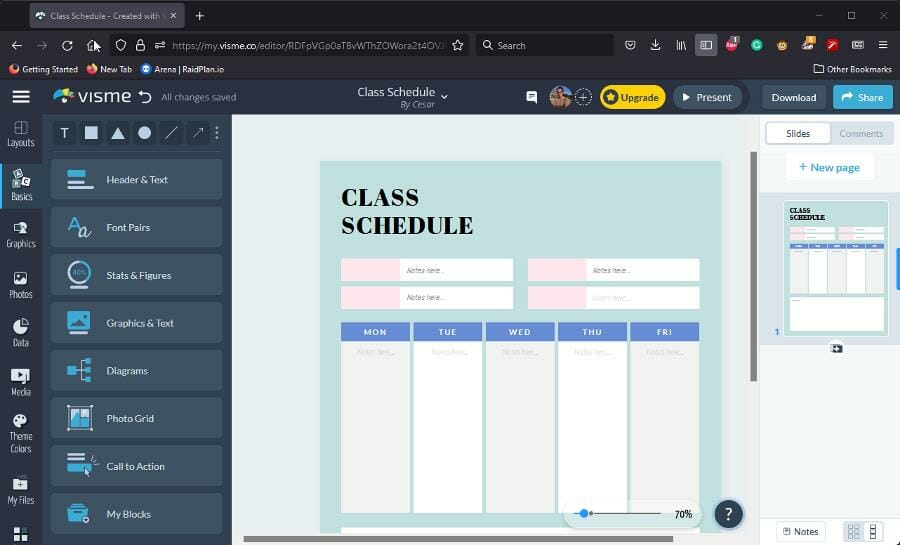
VISME is a photo editing and designing app that offers all-in-one services to create eye-catching posters and visuals.
This unique design online platform is used by millions to create astonishing art materials, including creative posters to transmit the message to the public.
First of all, you can simply utilize this platform by signing up and starting using it, as it offers an interactive interface with easy menus.
There are great functionalities you can use to create your art visuals, such as poster templates, social media graphics, branded content, documents, and much more.
Moreover, you can use the collaboration feature that allows teams to work efficiently using asset management tools and real-time feedback.
It’s worth mentioning that VISME is the right place to create and share your poster art and bring your ideas to life in no time.
Other great features:
Interactive animation features
Strong collaboration utility
Plenty of art materials
Creative templates and themes
Learning hub
VISME
Make your posters stand out from the crowd with this design solution.
This poster-making resource is a tool for anyone who needs to craft unique outcomes with minimum skills.
Using this platform, you can make professional posters, flyers, graphics, and other visuals for different themes or projects in a few minutes.
You can only access the platform by signing in and start creating any poster visuals for multiple areas like marketing, school work, or even for life events.
So, whether you’re promoting an event, creating a new product, or sharing a message, this solution will help you fully engage your audience.
There are helpful capabilities you can make use of, such as custom color schemes, text editing tools, and audio and video integration buttons.
All said here, you can browse any templates to create eye-catching posters, download them fast on your PC or share it on social media for others to see.
Inkscape is a completely free tool designed for drawing and editing different art visuals online.
Mainly, you can use a plethora of pencils and brushes to draw your poster and customize it to emphasize your vision and communicate it to your public.
Compared to other tools, the selling point of this platform is the drawing aspect because it offers object manipulation instruments like shape tools, pencil tools, etc
Additionally, you can benefit from coloring and strokes to give your poster more energy. Plus, there are object manipulation tools like grouping objects or layers.
It is practical to create your posters using its text editing support, color fill, and sketch creative instruments.
If you feel confident about your drawing skills, this platform is the right place to design the most authentic posters.
Of course, you can create any kind of poster or banner by using Microsoft Word. You can select its size, insert text, images, and more.
However, we remind you that Word is more of a text processing and editor software and less of a publishing tool for professional posters and banners.
If you are a graphic designer looking for the best tools to create posters, look no further.
We have gathered the best software for creating posters, banners, murals, and signs that are not only easy to use but also have a light in your pocket.
What is the best software for making flyers and posters?
You have a plethora of options to create flyers using practical software. Still, the greatest option for this is Adobe Suite with Illustrator or Photoshop.
These professional tools can be used as a poster editor or to create quick flyers in minutes. Plus, even if you’re not experienced, there are many tutorials on how to use the software and create unique posters.
Whether you want to create a poster for your college or office event or your client and personal brand promotion, knowing what poster-creating software to use is important.
We have made things a little easier for you with this guide by listing the best software to create a poster with its pros and cons listed.
Batman is one of the most loved superheroes of all time. So, it’s no surprise that Batman fans love the idea of collecting things that remind them of their superhero.
From Batman and Robin to the latest Dark Knight Trilogy, there is a range of movies that almost every Batman fan has enjoyed. Well, there was also a TV series that was quite popular and must not have been missed by any fan.
With Christmas comes the time to party, have fun with friends and family, and have lots of gifts. While receiving gifts is great, offering gifts is an etiquette no one must forget. So, buying Christmas gifts for Batman fans would be a great idea this winter.
While there are a plethora of gifts available for Batman fans like a Batman mirror, classic logo shirt, or the BatmanhHandbook, gifting a tech device will take the excitement to a level up. Tech devices are interesting, trendy, and most importantly, useful.
We hand-picked a few of the tech Christmas gifts for the Batman Fans that are sure to surprise your loved ones.
What are the best Christmas gifts for Batman fans?
Smartwatches are trending, so what about one from the Batman series? The ONE61 Studio Batman Smartwatch gives that retro vibe with some interesting sound bites from the all-time caped crusader. The fitness goals are transformed into a whole new game experience.
What’s more? It also keeps the users on track with its alerts. It features fitness apps that built-in users to work around their daily work-school routine. Moreover, it works hands-free using Bluetooth connectivity and good-quality speakers.
No Black Knight is complete without its bat symbol so this simple logo T-shirt will make every Batman fan happy, even if he already has another Batman T-shirt.
This one is a great quality product with a nice design and is 100% made out of cotton so it can be very comfortable to wear. You can machine wash it safely without damaging the logo.
A portable speaker is a must-have Batman gift. And, if it looks like the Warner Brothers Batman Portable Speaker, then it’s double the fun. This pretty little blue gadget enables users to lay music from the device. It’s a long-lasting product that doesn’t break easily.
It features a Batman design that adds to the fun. It works with a 3.5mm jack and its own connection cable. Best of all, it offers Built-in sound quality.
This custom Batman View-Master VR viewer offers a stunning virtual reality adventure. The gameplay features Gotham city that’s under attack and three characters (the Joker, the Riddler, and Two-Face) who carry out shrewd plans to coerce the city. Players must defeat the devils and save the city.
The best thing is, the VR adventure comes with original voices from Batman. To start playing the game, users need to download and launch the app on a compatible smartphone.
Headphones make for a great gift idea for both Batman fans and music lovers. How? Simply grab a Batman on Ear Headphones with Built-in Mic this Christmas and surprise your loved ones. It comes with 40mm drivers that offer a rich and elaborate audio experience.
Listening is a sheer pleasure with padded ear cushions. Adjustable headband makes it comfortable to keep it on for hours. The built-in microphone helps to receive calls when listening on most smartphones and makes it a great Christmas gift for Batman fans.
Batman gifts do not have to be expensive but should be rather a well-thought gift for loved ones. These are some of the best Christmas gifts for Batman fans that will also be useful for them. So, pick one from the list that goes best with your loved one this Christmas.
All Windows users, at some point, have had problems with a Blue Screen of Death (BSOD). Some Windows 10 users have reported encountering the MSDN bugcheck IRQL_NOT_LESS_OR_EQUAL error.
These can be caused by incompatible drivers or hardware malfunctions, and Windows 10 users have not seen the end of it.
In this guide, we will try to shed some light on the IRQL_NOT_LESS_OR_EQUAL error in Windows 10 and the best solutions for it.
What does IRQL_NOT_LESS_OR_EQUAL mean?
The Stop Code IRQL_NOT_LESS_OR_EQUAL basically means that a process, application, or installed driver is trying to access a part of the system that it doesn’t have permission.
When a device driver or kernel process tries to access a memory location to which it isn’t authorized to have access, the operating system will issue an error. The same is true if a piece of software is corrupted and tries to access the wrong memory addresses.
Also, it could arise due to conflicts between two drivers when both try to write a memory allocation simultaneously. If any of this happens, the OS crashes with the IRQL_NOT_LESS_OR_EQUAL BSOD error.
BSOD IRQL_NOT_LESS_OR_EQUAL causes
The error may be caused due to overclocking or software meant to enhance the computer’s performance. Problematic drivers are also a probable underlying cause.
Also, if the system files are damaged or corrupt, the OS may throw this or other BSOD errors. Besides, problems with the RAM or other hardware are just as likely to cause the Blue Screen IRQL_NOT_LESS_OR_EQUAL error.
Here are some of the other cases you encounter the error in Windows:
IRQL_NOT_LESS_OR_EQUAL ntoskrnl.exe, netio.sys, MSDN bugcheck: As a quick reminder, this executable file is the kernel (core) of the operating system and usually indicates that the issue is pretty severe.
IRQL_NOT_LESS_OR_EQUAL Overclock: Many gamers confirmed that they often experienced this error after overclocking their computers. As a result, disabling overclocking may fix this error.
IRQL_NOT_LESS_OR_EQUAL after RAM upgrade in Windows 7, 10, 11: Some users reported that this BSOD error occurred shortly after they upgraded their RAM. Make sure that the new RAM is compatible with your device and that it’s properly installed.
IRQL_NOT_LESS_OR_EQUAL after Windows update, on boot, on startup: In rare cases, this error may occur after installing the latest Windows updates. As a result, uninstall the updates and check if the issue persists.
IRQL_NOT_LESS_OR_EQUAL and Memory_Management: Sometimes, these two BSOD errors go hand in hand. Users reported that when the first error occurs, the second one follows it after reboot.
IRQL_NOT_LESS_OR_EQUALvirus: Perform a virus scan with your antivirus in order to remove any malicious software.
Let’s now find out how you can fix IRQL_NOT_LESS_OR_EQUAL in Windows 10 and the latest iteration.
How do I fix stop code IRQL_NOT_LESS_OR_EQUAL?
1. Start your computer in Safe Mode
Press the Windows key, click on the Power button, hold the Shift key, and then select Restart.
Click Troubleshoot from the options listed here.
Next, click on Advanced options.
Choose Startup settings.
Click the Restart button.
Now, press 4 or F4 to launch Windows in Safe Mode.
By using this method, you can boot your Windows 10 computer with the bare minimum of features, drivers, and processes. This ensures that you are using a clean environment with no third-party drivers and applications.
This method can have one of two outcomes: either the system will work as intended, which indicates that the problem must lie in one of the installed third-party apps or drivers, or it will once again crash, telling that the problem has a deeper root, maybe within the hardware.
Once you have an answer to this question, you can move on and troubleshoot the IRQL_NOT_LESS_OR_EQUAL error in Windows 10.
2. Use a dedicated repair tool
The simplest way to go about any system errors is to employ the help of professional repair software. These powerful tools allow you to perform in-depth scans and replace any broken files in just a few minutes.
3. Check your memory and hardware
Type Windows Memory Diagnostic in the Search bar, and then click on the relevant result.
Select Restart now and check for errors.
If it returns an error, then you have your answer. Replace the RAM on your computer, and everything should be working properly. On the other hand, if the scan didn’t return any errors, then the problem resides elsewhere.
NOTE
If your motherboard’s BIOS has the Memory Caching feature, then you should disable this feature. Remember that operating in the BIOS environment can be dangerous, so do not attempt to modify other settings if you don’t know what they do.
The next step is to check the hardware You will need to unplug all non-essential devices from your computer (which basically means everything except your mouse and keyboard) and then disable their drivers.
After a reboot, check to see if all the drivers are still disabled and, one by one, re-enable and reconnect the devices. Do not plug in or enable more than one device at a time!
If the error does not appear, then that device and driver are clear, and you can move on to the next one. Do this until you have either added and enabled all the devices or the BSOD appears.
If the latter happens, this means that the driver enabled last is the underlying cause. Boot your PC into Safe Boot, completely uninstall it, and then update the driver. Also, if the Windows 10 Stop Code IRQL_NOT_LESS_OR_EQUAL appears after a driver update, try rolling back the driver.
4. Refresh or restore
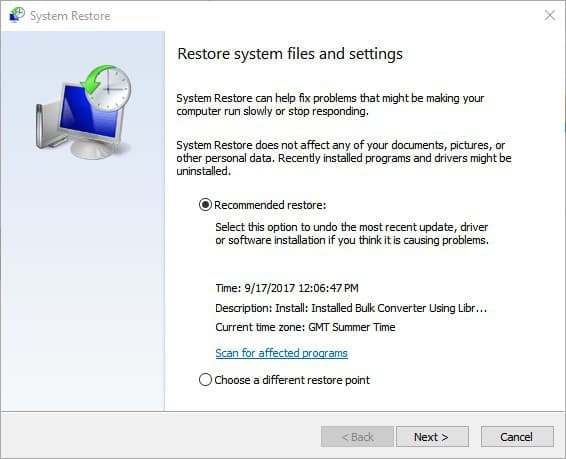
Press Windows + R to open Run, type rstrui.exe, and then click on OK.
Click Next in the System Restore window.
Now, choose a restore point from the list and click Next. Ensure the selected restore point was created before you first encountered the error.
Verify the restore details and click on Finish to start the process.
A System Restore is a viable option if the error manifests itself after you have installed multiple drivers and third-party software. For this to work, you would need to have created a restore point before installing the software.
5. Repair your registry to fix corrupted files
Press Windows + R to open Run, type cmd in the text field, hold the Ctrl + Shift key, and click OK.
Click Yes in the UAC prompt that appears.
Now, paste the following command and hit Enter:sfc /scannow
Wait for the scanning process to complete, and then restart your computer. All corrupted files will be replaced on reboot. If you prefer to repair your registry automatically, you can use a reliable registry cleaner tool.
Now, verify if the IRQL_NOT_LESS_OR_EQUAL in Windows 10 VirtualBox is fixed.
Press Windows + S to open the Search menu, type Command Prompt, and click on Run as administrator.
Click Yes in the UAC prompt.
Now, paste the following command, replace C with the drive letter in your case, and press Enter:chkdsk C: /f
Once the command is run, execute this one while again replacing the drive letter, if required:chkdsk D: /r
Speaking of corrupted files and errors, your disk may also trigger the IRQL_NOT_LESS_OR_EQUAL error. If you already applied the first solution listed in this guide and checked your RAM, try checking your disk as well.
To do that, the Check Disk utility, pre-installed in Windows, comes to your aid. Simply run it, and things should be up and running if it were issues with the disk causing the IRQL_NOT_LESS_OR_EQUAL error in Windows 10.
7. Run a full system scan
Enter Windows Security in the Search bar, and click on the relevant result.
Click on Virus & threat protection.
Next, click on Scan options.
Now, select Full scan, and then click on the Scan now button.
Malware may cause various issues on your computer, including the IRQL_NOT_LESS_OR_EQUAL BSOD error. Perform a full system scan to detect any malware running on your computer.
If everything else fails, and the error still appears even after you have exhausted all alternatives, the only thing left to do is to perform a clean Windows install.
This means you will need a Windows installation disk or USB drive and install a fresh version of Windows 10. But as mentioned, this should be left as a last resort since all the data stored on your computer will be lost.
The application has been blocked from accessing graphics hardware is an error message that can appear at the bottom right of the Windows 10 and 11 desktops.
The error message appears when some users try to play Windows or browser games.
It is a graphics issue that stops games from running. So if you are a gamer, you should pay attention as we shall be showing how to restore your computer to proper functioning.
What does Application has been blocked from accessing graphics hardware mean?
The exact cause of the issue may vary for some users, while for others, the application blocked from accessing graphics hardware is associated with the drivers.
It could be that the drivers are outdated and need updating, or they are corrupted and need to be replaced.
Moreover, this issue can appear if you don’t have the necessary privileges, which may result in Access is denied message. If you can, try using an administrative account and check if that helps.
Also, this issue can also occur if your Nvidia graphics card is not detected. Users reported this issue in Chrome, Firefox, and games, but luckily for you, today, we’ll show you how to unblock an application from accessing graphics hardware.
Here are a few other instances where users have encountered this error:
GTA 4, Apex Legends, Eve online, PhoenixMiner has been blocked from accessing graphics hardware
Application has been blocked from accessing graphics hardware in Firefox
Application has been blocked from accessing graphics hardware in AMD, Nvidia processors
Application has been blocked from accessing graphics hardware windows 10, 11
Application has been blocked from accessing graphics hardware OBS
Nvcontainer.exe blocked from accessing graphics hardware
Whichever is the case, we shall be sharing the best solutions in this article.
How do I fix application has been blocked from accessing graphics hardware?
1. Run a System File Checker Scan
Open the Start menu with the Windows key + X keyboard shortcut.
Click Windows Terminal (Admin) to open the Prompt’s window.
Input the script below, then hit Enter. DISM.exe /Online /Cleanup-image /Restorehealth
Now, enter the script below and hit Enter to initiate an SFC scan that might last for about 20-30 minutes. sfc /scannow
Restart Windows if the system file scan fixes files.
The blocked application can be due to corrupted graphics card system files. So the System File Checker, which scans for and repairs corrupted system files, can potentially resolve the issue.
2. Reinstall the Graphics Card Driver
Some users have stated that the error message appears after a Windows 10 build update and the graphics card driver might be misconfigured after an update. Thus, reinstalling the video card driver might resolve the issue.
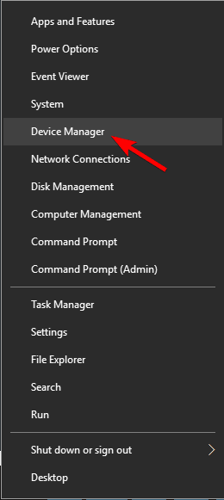
1. Press the Windows key + X keyboard shortcut, and select Device Manager on the Win + X menu.
2. Double-click Display adapters to expand that category.
3. Right-click the graphics card and select Uninstall device.
4. Then click the Uninstall button.
5. Right-click on Display adapters and select Scan for hardware changes to reinstall the driver.
Alternatively, you can get a dedicated driver updater software like Fortect Driver Updater if you need more assistance. It can save you time and hassle with automatic updates and additional optimization features.
3. Edit the Registry
Enter regedit in Cortana’s search box and select Run as administrator.
Then browse to the path below. HKEY_LOCAL_MACHINE \ SYSTEM \ Control \ Set001 \ Control \ \GraphicsDrivers
Right-click a space on the right of the window and select New, then QWORD (64-bit) Value. Alternatively, select DWORD (32-bit) Value if you have a 32-bit Windows platform.
Type TdrDelay as the QWORD or DWORD title, enter 8 in the Value data text box, and click the OK button.
Restart the laptop or desktop.
Increasing the TDR (Timeout Detection and Recovery) time is another possible resolution for the application blocked from accessing graphics hardware error. Users can raise the TDR time to about eight seconds.
System Restore can fix numerous issues as it undoes system changes after a selected restore point.
So that utility might also fix the application has been blocked error if users can select a restore point that will roll Windows 10 back to a time when the error message did not pop up on the Windows 10 desktop.
Users can’t roll Windows 10 back to previous build versions with System Restore. However, the Settings app will temporarily include an option to restore the last version.
Then users can still restore a previous Windows 10 version for about ten days after a build update.
To do that, click the Type here to search button on the taskbar. Then enter update in the search box, and select Recovery options to open Settings.
Press the Get started button under the Go back to the previous Windows 10 version subheading.
How do I give the application access to graphics hardware?
Running the software with administrator access is one of the best approaches. The software will then have access to several capabilities, including graphics hardware.
Right-Click on the program and choose Run as administrator from the context menu to run it with administrator privileges.
That is it for our fixes. Please note that we have not written these solutions in any particular order. Therefore, we expect you to try what feels the most appropriate to your case.
These resolutions might kick-start games that the application has been blocked error message pops up for.
If you have another resolution that fixes the same issue, feel free to share it below.
Windows operating system runs various processes in the background with the foreground apps. However, it doesn’t equally provide them with resources, such as memory and CPU.
If your apps are crashing or freezing, it could be because background services use too much CPU. To resolve this, it would be best if you changed the CPU priority assigned to foreground apps.
In this guide, we will talk about the different methods to set CPU priority for foreground apps. Let’s get started!
How can I prioritize CPU to prefer foreground apps on a Windows PC?
1. Use the Registry Editor
Press Windows + R to open the Run window.
Type regedit and press Enter to open Registry Editor.
Follow this path: Computer\HKEY_LOCAL_MACHINE\SYSTEM\CurrentControlSet\Control\PriorityControl
Double-click on Win32PrioritySeparation and change the Value data to 26. Click OK.
Restart your computer.
2. Use the Task Manager
Press Ctrl + Shift + Esc to open Task Manager.
Go to the Details tab, go to the app you want to prioritize, right-click on it to choose Set priority, then click High.
Press the Windows key, type Control Panel and click Open.
Select Category from View by.
Click System and Security, then click System.
On the next window, click Advanced system settings.
Go to the Advanced tab, and click Settings under Performance.
On the next window, go to the Advanced tab and click on the radio button beside Programs under Processor scheduling.
Click Apply and OK.
4. Use the Command Prompt
Press the Windows key, type CMD, and click Run as administrator.
Type the following command and press Enter after replacing the Process Name with the full name of the process with its extension and changing the Priority Level to High or AboveNormal: wmic process where name=”Process Name” call setpriority “Priority Level”
So, these are the methods you can use to set CPU priority to prefer foreground apps on Windows 7, 10, and 11. Try them and let us know which worked for you in the comments below.
Microsoft Store is great if you want to download apps or games for Windows, but sometimes it can encounter issues, such as error 0x000001f4.
This error can affect various games and apps. If you encounter it, you might not be able to download the desired software.
In some instances, Microsoft Store is not loading at all due to this error. Since this can be a big problem, in today’s guide we’re going to show you how to properly fix it.
What is error 0x000001f4?
This is a Microsoft Store error, and it occurs when trying to access Microsoft Store on Windows. Usually, the error will appear when you try to download a certain game.
Users reported the problem with GTA, but the issue can occur with almost any other game or app. The error is similar to 0x80131505, but fixing it is simpler than you think.
How can I fix the 0x000001f4 Microsoft Store error?
1. Run the app troubleshooter
Open Settings. Do that quickly with the Windows key + I shortcut.
Navigate to Update & Security.
Next, click on Troubleshoot.
Click on Additional troubleshooters.
Select Windows Store Apps and click Run the troubleshooter.
Wait for the troubleshooter to finish.
2. Reset Store cache
Press Windows key + R.
Next, enter wsreset and press Enter.
Wait for the process to finish.
3. Enable metered connection
Click the network icon in the bottom right. Now select your network connection.
Press Windows key + X and choose PowerShell (Admin).
Now enter the following command: Get-AppXPackage *WindowsStore* -AllUsers | Foreach {Add-AppxPackage -DisableDevelopmentMode -Register “$($_.InstallLocation)\\AppXManifest.xml”}
Close PowerShell and restart your PC.
What platforms are affected by this issue?
You can experience this problem on both Windows and Xbox. If you’re on Xbox, the issue is probably related to a bad update.
To fix it, you just need to perform a soft reset and choose the Reset and keep my games & apps option. After that, the problem should be gone.
These are just a couple of solutions that you can use if you encounter Microsoft Store error code 0x000001f4.
The error will prevent you from downloading games and apps, and users reported this problem when trying to redeem codes for GTA, so this is most likely a server-side issue.
If the problem persists, you might have to wait it out since the issue may be caused by the server and not your PC.
Microsoft launched its App Store with the release of Windows 8. Microsoft Store offers thousands of apps on its platform. Some users reported that an error code 0xD000000D restricts them from opening Microsoft Store.
In most cases, a buggy Windows 10 update was the potential cause behind the issue.
Some users have reported similar issues on Microsoft forums.
When I click on my store icon, it pulls up and says it can’t connect and then tells me this. The error code is 0xD000000D, in case you need it. What can I do to get it corrected?
If you are also affected by this issue, we have listed some troubleshooting tips that can help you eliminate this annoying error.
How can I fix the Microsoft Store code: 0xd000000d?
1. Adjust the Date and Time
To adjust the date and time settings, right-click the clock icon available on the taskbar. Click Adjust Date/Time option.
Select the Date & time tab from the new window and click Change from the Change date and time section.
Enter the new date and time and click Change to save the new settings.
Check to see if you can access Microsoft Store.
2. Use Windows Apps Troubleshooter
Open the Settings app from the Start menu and select Update & Security option.
Click Troubleshoot and select Windows Store Apps.
Click Run the troubleshooter button available on the Windows Store Apps option.
Wait until your system completes the troubleshooting process. The troubleshooter will display all the errors on your screen.
Apply this fix, wait until the issues are resolved and close the window.
Reboot your system and check whether the code: 0xd000000d is gone.
3. Install pending Windows updates
Go to the Start menu and open the Settings app.
Select Update & Security and click Check for Updates.
Wait for a while and your system will provide a list of all the available updates.
Finally, restart your system.
4. Sign in to a Microsoft Account
Press Windows + R keys to open the Run dialog. Type ms-settings:emailandaccounts and hit the Enter button.
Once Your email and accounts tab opens on your screen, click Add a Microsoft account under the Accounts used by other apps section.
Those who already have an account should click Sign in with a Microsoft account.
Enter your login credentials to connect your Microsoft Account.
Restart your system and open Microsoft Store again to check if the problem still persists.
5. Resetting Windows Store using Command Prompt
Navigate to the Start menu and type Command Prompt. Right-click on the first result and select Run as Administrator.
Type WSRESET.EXE in the Command Prompt window and press the Enter key.
Once the reset process is complete, restart your system.
However, if none of the aforementioned solutions worked for you, try performing a System Restore. This process will restore your system to a previously stable state.
We hope you managed to fix the error code: 0xd000000d on your Windows PC. Let us know how it went in the comments section below.
BSOD errors such as Win32k Power Watchdog Timeout will cause your PC to crash and lose unsaved data, so it’s important to fix them, and this guide will show you how to do that.
Problems with your drivers or third-party software can cause this issue. Issues with your RAM or loose connection can also cause the crash. Corrupt files and outdated BIOS can also lead to this error.
How do I fix Win32k Power Watchdog Timeout?
Before we start, if you recently added any hardware to your PC, you might want to remove it. The same goes for USB peripherals, only keep your mouse and keyboard connected during the troubleshooting.
1. Use specialized BSOD repair software
The fastest way to fix Win32k power watchdog timeout is to use specialized software that can fix BSOD errors automatically. These tools are able to perform a system-wide scan and quickly replace any broken files they encounter.
2. Rollback updated device drivers
1. Right-click on Start and select Device Manager.
2. In the Device Manager, double-click on the relevant entry, right-click on the problematic device and then select Properties.
3. Now, navigate to the Driver tab, and then click on the Roll Back Driver button.
4. Choose a reason for it, and then click on Yes at the bottom.
3. Check and remove third-party apps
Press Windows +R to open Run, type appwiz.cpl, and then click OK.
Right-click on the conflicting program and select Uninstall.
Follow the required steps to remove that program.
The software that generally causes the error is virtual image managers such as VirtualBoxor Daemon Tools, for instance.
4. Use the Windows Memory Diagnostics tool
Press Windows + R to open the Run command, type mdsched in the text field, and then click OK or hit Enter.
Select the Restart now and check for problems (recommended) option.
This solution will restart your computer and automatically fix any memory error. As an alternative, if the error is not solved, then you might need to change your memory modules or interchange the slots.
Press Windows + S to open the Search menu, enter Terminal in the text field, right-click on the relevant search result, and then select Run as administrator.
Click Yes in the UAC prompt.
Press Ctrl + Shift + 2 to open the Command Prompt in a new tab.
Type in the following command, and then press Enter:sfc /scannow
Wait for the scan to complete, and then restart the computer.
6. Update your BIOS firmware
Press Windows + R to open Run, type msinfo32, and then press Enter.
Find BIOS Version/Date and then verify your firmware version.
Go to the motherboard manufacturer’s website, select your motherboard and then navigate to Driver & Utility.
Go to BIOS & Firmware section and then download the latest version.
Unzip and extract the BIOS file to your computer.
Examine the content of the readme file from the BIOS folder.
Copy the BIOS update file to an empty USB drive or on your computer.
Restart the computer, and enter BIOS by pressing F2 or the dedicated key on your device.
Go to the BIOS update section, and select the file from your flash drive to start the update.
Wait for the process to finish.
Back up your important files to an external device before performing a BIOS update. Before using this solution, verify the version of your BIOS firmware, and make sure to download a later version. Once done, the BSOD Power Watchdog Timeout error will be fixed.
The WIN32K POWER WATCHDOG TIMEOUTis an error affecting many Windows users, but you should be able to fix it with our solutions.
Objects made of wood have a different kind of energy and they make for very nice gift ideas. In a world where plastic is the most common material used to manufacture products, wood brings something different and new.
If you really want to impress your loved ones, why don’t you offer them a special Christmasgift made of wood?
Now, if you don’t have any ideas about what to get for them, here are three gift suggestions that perfectly combine wood, tec, and affordable price tags.
Desk docking stations are great for helping your loved ones to keep their desks clutter-free. They can use it to store their smartphones, key cards, wallets, and whatnot. It’s a very practical accessory on their desks.
This wood docking station, in particular, is made of solid ash-tree covered in non-toxic protective finishing. It perfectly fits any home design, from classic designs to modern styles.
This docking station is easy to assemble and is compatible with all kinds of accessories as it has multiple compartments.
Editor’s Note: If you’re interested in other gift ideas and tools to get your PC ready for Christmas, check out our wide collection of guides.
Last but not least is this amazing wireless bamboo mouse and keyboard combo. It’s made of bamboo wood and you can wirelessly connect both the keyboard and mouse to your Windows 10 computer.
This set is resistant to sweat and stains and lasts for more than 50 million cycles thanks to its hard and gloss-coated bamboo finish.
So, which of these gift ideas are you going to put into practice? Let us know in the comments below.
With the holidays fast approaching, choosing the best Christmas gifts for 12-year-olds could be a top priority for parents and guardians. Making the right purchase decision from the myriad of available gift items today could seem exhausting and time-consuming.
But how about settling for the cool tech gifts for 12-year-olds? Yes, pre-teens just like every other, love tech tools, and picking one of such would so thrill their hearts.
With hundreds of technology gadgets to select from, making the right choice might, however, pose a little challenge. But acquiring a tech gift that will be both cool and appreciated should be the goal.
Therefore, this article presents some carefully selected Christmas deals on the best tech gifts for 12-year-old children to make them love you all the more.
Which are the best tech deals for 12-year-old children?
The Xbox controller has an easy-to-use app with so many possibilities for maneuvering, and rigorous gaming sessions.
It has a compatibility feature with Windows 10 using USB, Xbox One S, and Xbox One as well as four slots for the interchangeable detachable paddles.
The Xbox Elite controller’s hair-trigger lock aids faster moves using the set of 6 thumb-sticks and the set of 2 D-pads. Definitely, expect pre-teens to fall in love with the Xbox Elite almost immediately to make the cool tech gifts for 12-year-olds ever.
For a wonderful flying experience, this cool tech gift for 12-year-olds is the right choice with fancy designs looking like something drawn out of the movie, Star Wars.
The Force1 UFO 4000 LED mini drone offers precisely that experience, and much more.
Its high-caliber flight system control and long-lasting batteries keep the drone running for some minutes navigating, and it is an excellent choice when considering how acrobatics are involved.
The Fire TV Stick will surely get anyone excited and when presented as the cool tech gift for 12-year olds the excitement should know no bounds even for individual or family entertainment.
Fire TV stick when connected to Wi-Fi connections or HDMI ports on the TV gives access to the best movies, TV shows, music, games, sports, and photos on the go.
Users can stream, view programs and browse millions of websites, access thousands of TV channels using the Alexa voice remote, controlling content with the voice.
The When in Rome Travel Trivia board game with Alexa keeping a record of milestones achieved come with the inclusion of voice acting.
It incorporates more than 30 minutes of gaming plus over 20 hours of interactive dialogue while Alexa provides an endless variety of quiz questions plus keeps track of scores.
Users can operate using the Alexa smartphone app, Alexa smart speakers, Echo, and Echo dot to create excitement and fun for purchasing cool tech gifts for 12-year-olds.
The Fujifilm Instax Mini 9 camera is definitely the ideal cool tech gift for 12-year-olds this season to snap all fun activities.
Fujifilm Instax camera is packed with lots of exciting moments with 40 sheets of film, a camera case, a selfie lens, and 10 hanging frames.
It also has a 64-photo album, 10 clips, and string, 5 plastic stand-up frames, a microfiber cleaning cloth, and lots more. Give this cool tech Christmas gift to your preteens for a memorable snapping experience this season.
Acquire the Occer binoculars for fun-filled bird watching and other gazing schedules to experience the awesomeness of this high-powered waterproof binocular.
It has a 25mm objective lens with a wide field of view and 12× magnification to get a closer peek at objects.
The Occer compact binoculars have adjustable eyecup convenient even for those wearing eyeglasses. It offers an exceptional image-capturing ability providing an amazing experience as a cool tech gift for 12-year-olds.
The Ariana Grande wireless cat ear headphones offer preteens a must-have, attention-grabbing, and cool tech gifts for 12-year-olds this Christmas.
It’s sure going to get your preteens noticed. The cat ear headphone possesses crystal clear speakers in cat ear shapes with an inbuilt microphone to answer calls.
The all-variety Bluetooth compatible device has USB-connected rechargeable batteries that can guarantee up to 5 hours of playtime, hands-free.
Getting a cool tech gift for 12-year-olds shouldn’t be a nightmare. True preteens could be quite demanding and insatiable, but these tech presents will surely evoke a smile from preteens making them the toast of their peers.
So wow your 12-year-olds this Christmas 2020 with some of the awesome tech gifts listed above but get ready for sincere appreciation.
Those having a vlogger at home would know how passionate they are about their activity. Finding some of the best Christmas gifts for vloggers will be a sort of encouragement for their budding talent.
YouTube is the chief platform for vloggers to showcase their talent, and so, it’s good to buy gifts that will be relevant and useful.
Maintaining a vlog won’t be easy, as costs start building up. Hence, gifts like a camera, microphone, or tripod would be handy for them.
So, what better time than Christmas to surprise the vlogger you have in mind with something that has been out of his/her reach till now?
Here’s a list of some of the best Christmas gifts for vloggers that we recommend getting this year.
Where there’s a professional quality camera, there’s a need for a good tripod too. As the name suggests it comes from the e-commerce giant Amazon.
The AmazonBasics 60-inch lightweight tripod is a lightweight tripod that’s designed to be portable. It can fit cameras of different sizes and of weight up to a maximum of 6.6 pounds.
The limbs of the tripod can stretch between 20 inches and 40 inches. The middle limb can also be turned to stretch the length of the tripod up to 60 inches.
What’s more? It also comes integrated with two bubble levels. One of which is above the legs indicating when the base is level. The other is the level on the camera plate indicating that the camera is level.
With that bag as a bonus, this tripod is more than just regular stuff for YouTubers. It’s a perfect Christmas gift for most of them.
Without a good microphone, vlogging is like a half-baked cake. While there are hundreds of microphones available online, the Blue Yeti USB microphone is a notch up in comparison.
For those who just want to plug in and play, not wasting hours adjusting the audio settings, this is just the right catch this Christmas.
Blue’s Yeti is a USB microphone with the old-world charm that’s breaking the stereotypes of the conventional home microphone. It’s complete with a beautifully carved big-footprint table stand.
It features an inbuilt gain dial for those who are recording low or far-off sounds and handy for averting late processing.
The Volume knob is for the live monitoring headset amp, the Mute option to pause recording, and the pattern switch to choose between the four functioning modes.
Overall, it records clearly and in full in even different patterns. That’s why it’s one of the best YouTube gifts for creators who want nothing but the very best.
While vlogging requires a good laptop to upload recordings, a memory card is equally important. The new version of the SanDisk Extreme 32GB 90 Mbs SDHC memory card introduces V30, a new speed rating under the brand.
This 32GB card is graded at 90MB/s read speed and 40MB/s write speeds based on SanDisk. There are higher versions of 90MB/s V30 cards available in 32, 64, 128 and 256 GB memories.
SanDisk also features a 16GB Extreme 90MB/s card minus the V30 rating. The 128 and 256GB cards come with 60MB/s write speed.
The 90MB/s 64GB SDXC card is graded UHS Speed Class 3 (U3) making it perfect for 4K video recording. It demands a minimum of 30MB/s persistent write speed.
The card comes with a gold embossing that features the 90MB/s read speed. The lot number is marked on the back of the card and, no less important, SanDisk Extreme cards come with a lifetime warranty.
A good quality camera is the first essential thing a YouTuber needs. While a camera phone is good to start with, as the vlog gains popularity, a professional camera becomes a must.
This Canon G7x II mirrorless camera offers DSLR type creativity and premium photo quality in any light conditions.
For those of you who don’t know, it features a 1.0 type sensor, Canon lens with bright f/1.8-2.8 aperture, and high-quality DIGIC 7 processing.
The 20.1MP CMOS sensor with a back illumination offers gorgeous, fresh, and clear images in any light. 24mm 4.2x optical zoom and ISO up to 12,800 offer amazing shots in any environment.
The Dual Sensing IS technology takes the cake offering crisp shots and steady movies.
EOS-like in-camera diffraction correction and Auto Lighting Optimizer ensures superior jpeg in low lights. Quick startup and intuitive 31-point AF allows users to capture the spontaneity around.
Sharp focus with MF peaking, Touch AF for cinema-type focus pulls, amazingly steady movie footage recording at full zoom, or the ability to shoot premium quality Full HD 60p movies, are some of its other major features.
Video editing is one of the critical aspects of vlogging and that calls for an expert editor to help enhance the recordings. Corel VideoStudio Ultimate X10 is a unique video editor that’s compatible with 360-degree VR films.
It also comes fully equipped with Multicam editing, multipoint motion tracking, time-remapping, 4K support, and lots more.
It’s a user-friendly and solid program for consumers that features the usual timeline, transitions, and audio editing.
New utilities feature 3D titles, an upgraded interface, fisheye lens correction, picture-in-picture tools, an exclusive pan, and zoom option, and so on.
This program features a clear and straightforward interface, that’s equipped with amusing features. This makes it a great buy in terms of Christmas gifts for vloggers.
Vlogging is fun, but it can slowly transform into a full-time profession where there’s passion. To take vlogging to the next level, a few pieces of equipment are a must.
This list includes all the basic yet extremely important tools to give any vlogger a great start. Bring his/her dream to reality with these handpicked Christmas gifts for vloggers.
The driver \driver\wudfrd failed to load for the device error occurs after upgrading your OS. Some of the updated Windows drivers can be incompatible with your hardware after the upgrade.
This can be a frustrating error, but there are a few ways to fix it, and this guide will help you with that.
What failed WudfRd?
Incompatible drivers are the most common cause of this error, therefore it’s advised to replace them.
How do you fix WudfRd failed to load?
1. Update incompatible drivers
Press the Win + X and open Device Manager.
Incompatible drivers listed in the Device Manager will have an exclamation mark beside them.
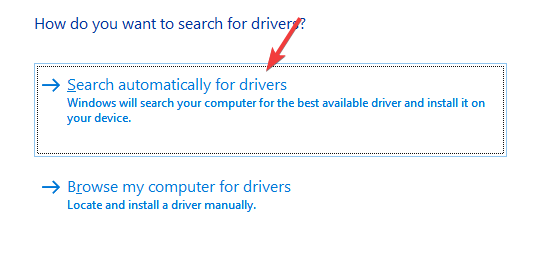
Right-click on each driver and select Update driver.
Wait for your Windows to finish updating the driver and repeat the steps for the other ones.
It’s probably quicker to update multiple incompatible device drivers with a third-party driver updater tool, a lightweight solution for a very common problem.
All you need to do to get your drivers up and running is launch the software, and it will automatically scan your PC. It will then proceed to update the old drivers, fix the broken ones, and identify and install the missing ones as well.
3. Check the Windows Driver Foundation Service settings
Open Run by pressing the Win Key + R.
Enter services.msc in Run and press Ok.
Double-click the Windows Driver Foundation to open its properties window.
Select Automatic from the Windows startup type menu if that setting is currently disabled
Press the Apply and OK buttons to confirm the new setting
The Windows Driver Foundation service is an essential one for drivers. As such, check that this service is enabled with an Automatic startup.
4. Reinstall USB Controllers
1. First, press the Win key + X hotkey and select Device Manager.
2. Double-click USB Serial Bus Controllers to expand the USB controller list as below.
3. Now, right-click each USB Controller and select Uninstall device. Press the OK button to confirm.
5. Finally, restart the Windows OS. Windows will automatically reinstall the USB controllers.
Error 219 often pertains to USB (Universal Serial Bus) drivers. As such, reinstalling USB controllers is another potential fix for error 219.
5. Switch Off Hard Disk Hibernation
Press the Win key + X hotkey and selecting Power Options to open the Settings window.
Click Additional power settings to open the Control Panel.
Then click Change plan settings.
Then click Change plan settings and Change advanced power settings to open the window in the snapshot below.
Click Hard disk and Turn off hard disk to expand those settings as shown below.
Select Never for the On battery setting.
Press the Apply and OK buttons to confirm the new option.
Why don’t you make sure you never have any driver problems? Take a look at this list of the best driver backup software tools and never worry about driver problems again.
This isn’t the only problem you can encounter, and many users reported that Windows Driver Foundation is missing, but we have a special guide that addresses that issue.
Those are five resolutions that will probably resolve Wudfrd failed to load error. If you have any further potential fixes, please share them below.
Various processes in our computer run in the background to support the OS and other system apps. One such process is browser_broker.exe.
In this guide, we will talk about browser_broker.exe and how to determine whether it is safe for your computer.
What do I need to know about browser_broker.exe?
Browser_broker.exe is a legit component of the Microsoft Windows operating system. You can find it in the System32 folder. It is launched by svchost.exe when we open Microsoft Edge.
It is one of the four processes used by Microsoft Edge to function. This executable file often spikes CPU usage and takes a lot of memory. However, it is secure.
How do I check if browser_broker.exe is safe?
Check file location – The file’s original location is in the System32 folder. To check that, you can open Task Manager, go to the file and click Open file location.
Verify the file size – If the installed file size is not between 0.024 and 0.036 MB, it could be ingenuine.
Check the file name – Go to the file location, and check the file name carefully, as the names chosen by the malicious file are usually very similar to the original files.
How do I fix browser_broker.exe issues?
1. Perform Disk Cleanup
Press Windows + R to open the Run console.
Type cleanmgr and press Enter to open Disk Cleanup.
On the Drive Selection window, click OK. It will scan your C drive for unnecessary space-hoarding files.
On Disk Cleanup, select Clean up system files and click OK on the following window.
Again on the Disk Cleanup window, select Files to delete and click OK.
Press the Windows key, type CMD, and click Run as administrator.
Type the following command and press Enter: sfc/scannow
Restart your computer when done.
If the manual procedure somehow doesn’t help you, you can try using a dedicated repair tool, to run a thorough scan of your PC and replace any broken elements found with healthy files from its regularly-revised database.
3. Run the DISM command
Press the Windows key, type CMD, and click Run as administrator.
Copy and paste the following command and press Enter: DISM.exe /Online /Cleanup-image /Restorehealth
So, these are the things that you must know about the browser_broker.exe process running on your computer. However, if you want to know whether a process is genuine, you can also use a third-party task manager.
Did you find the information about this process helpful? Please let us know in the comments section below.
The Error code 100 is often accompanied by this message: Sorry we could not reach the Netflix service. Please try again later. If the problem persists please visit the Netflix website.
Since Netflix Error 100 is usually connected to the information stored on your device that needs refreshing, there are a few solutions you can try before thinking of calling off your subscription plan.
How do I fix Netflix error code tvq-rnd-100 and Netflix Error 100?
1. Sign out of Netflix
From the Netflix home screen, select Sign Out.
*If you own a profiles-based account, make sure to select the Switch Profiles option first.
Sign back in and reload Netflix.
2. Restart your device
Since Netflix is compatible with an extensive array of devices, you might want to check the Netflix Help section for specific instructions. Nevertheless, the general steps include:
Disconnect your device from the power source
Wait for a couple of minutes
Plug the device back in
Reload Netflix
For devices running on Windows, simply press the Power button from the Start menu and choose to Restart.
If you are using a mobile device like an iPhone or other similar apparatus, follow these steps:
Press and hold the side button and the volume buttons simultaneously
Use the top slider to turn your device completely off
Wait for a couple of minutes
Press the Sleep/Wake button to turn your device back on
Reload Netflix
If this didn’t solve the Netflix error code tvq-rnd-100, go on with reinstalling the Netflix app.
3. Reinstall the Netflix app
Just like with all apps, in order to enjoy its full capacities and error-free behavior, you need to make sure that you run the latest version of the Netflix app and remove all instances of the outdated one.
To upgrade to the latest Netflix version, follow these steps:
Uninstall the current version (you can either do this manually from the Control Panel or by using a dedicated removal software such as IObit Uninstaller) of the app
Select the Microsoft Store from the Start menu
Locate the Netflix app with the search function
Click on Install
If you are using a mobile device like an iPhone or other similar apparatus, follow these steps:
Press and hold the Netflix app
Tap the X in the top left corner of the Netflix icon to delete it
open the App Store
Locate the free Netflix, Inc. app with the search function
Tap the cloud icon to enter your credentials
Install the app
Looking for the best software to backup your iPhone? Check out this amazing guide.
4. Free some space in the My List library
You might run into a variation of the Error code 100 under this format: tvq-details-queue-100.
This usually indicates that you have reached your allowed quota of selections included in the My List library. Since the My List feature can store up to 500 titles per profile, we recommend you follow these steps:
Go to Netflix.com/MyList, or sign in to the Netflix app and scroll to My List
Manually review your selections to check it you have reached this limit
Remove a few titles either by selecting the checkmark icon available on the website
Or simply select Remove from My List if you are using the app
5. Adjust the maturity level of your Netflix profile
Another variation of the Netflix Error 100 is: tvq-dl-100 which usually indicates that the content you are trying to view exceeds your profile’s maturity level.
To remove this conflict, simply adjust your parental controls with these steps:
Open the Account section and select Settings -> Parental Controls
Choose the profile you want to adjust
Select Change to adjust the desired settings
Click Save to submit the changes
The freedom to play, pause, and resume your favorite shows that Netflix brings can be addictive. Don’t let random errors like Error code 100 get in the way of your binging, instead use the solutions listed above to quickly fix it.
You might also come across the following variations:
Unable to connect to Netflix. Please try again or visit: www.netflix.com/help
Netflix Error tvq-cdp-100
Netflix Error tvq-dl-100
Sorry, something went wrong. Please try again later.
Netflix Error tvq-details-queue-100
Netflix error code tvq-rnd-100
If for whatever reason, you are unable to access certain Netflix libraries, here’s a quick extra tip: use a VPN that is optimized for streaming or feel free to pick one from our top VPNs for Netflix guide.
For more information, don’t miss our latest guide on Netflix error code E100 for more useful information.
How do I fix an unexpected error on Netflix?
While errors can be caused by various reasons, you can use the general troubleshooting steps in this article to narrow down the issues pool. Try to sign out and back into your account, reinstall the Netflix app, and always restart your device.
Christmas brings family and friends together. If your friends or family members are taking the plane to come to your place, then make sure that you offer them gifts they’re allowed to take on the airplane on their way back.
As you all know, there are many restrictions when it comes to air travel due to safety concerns. You really don’t want your friends to leave their gifts behind simply because they’re not allowed to take them on an aircraft.
If you travel by air with gifts to visit your friends this Christmas, then you want to make sure you are allowed to take them on the plane.
To avoid unpleasant situations, we compiled this list of Christmas gifts safe for flying. Let’s dive right in.
What are the best Christmas gifts allowed on planes?
Beats wireless headphones
If you bought a pair of Beats headphones to gift as a Christmas present, rest assured, your friend can take them on the airplane. These are that kind of gifts easy to pack in a suitcase.
If you haven’t already, here are some cool Beats headphones that will ship before Christmas:
As our gadgets are getting tinier and tinier, getting a smartwatch to gift on Christmas is a great idea. Not to mention that your friend can take the watch on the plane without any problems.
When choosing a smartphone, don’t forget to take into consideration the operating system that your friend relies on. If he/she uses Windows, getting an iOS-based smartwatch may not be such a good idea due to sync limitations.
What is a good gift to send overseas? Smartwatches are some of them. Here are some nice smartwatches that you can get this Christmas:
Sleep monitor, messages, calendar, GPS, heart rate monitor, and music player, all these functions in a chic watch that can be worn either by him or her.
A docking station is an unsual gift but a practical one nevertheless. Nowadays, we all use more than one gadget at a time — be it at home or at the office. For this reason, there are a lot of cables on our desks.
A good docking station allows you to keep your desk clutter-free while enjoying multi-port connectivity.
Here are some hot docking stations you can get right now from Amazon:
If you get Files failed to validate and will be reacquired on Steam, it means that the file verification has failed. This can be a problem, but there are a few ways to fix it.
How do I fix files that failed to validate and will be reacquired?
1. Clear download cache
Open Steam and go to Settings.
Select Downloads.
Now click the Clear download cache.
2. Perform a Clean Boot
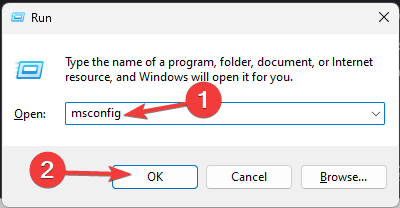
Press the Windows key + R to start Run, type msconfig, and press Enter or click OK.
On the General tab, select the Selective startup option, then uncheck Load startup items and check Load system services and Use original boot configuration.
Now, go to the Services tab and select the Hide all Microsoft services option.
Click Disable all to deselect the third-party services.
Press the Apply and OK buttons, then click the Restart button on the dialog box window that opens.
If the problem is resolved by disabling services, it means that a specific service is causing a problem, so you need to enable services one by one until you find a culprit.
For some users, the issue was caused by Cloudflare WARP or GoodbyeDPI so if you have them, remove them.
3. Turn Off Windows Defender Firewall
Click Start, input windows firewall, and select Windows Defender Firewall.
Now, click on Turn Windows Defender Firewall on or off.
Click Turn off Windows Defender Firewall for both private and public networks and hit the OK button below.
The Windows Defender Firewall can and does conflict with Steam for some users. Thus, Steam’s failure to validate error can be due to firewall blocks.
It’s the best time of the year to shop for the best board games for Christmas Deals are pouring in and there could be no better time than now to grab them.
Board games are a perfect way to perk up the dull winter evenings with friends and family. While it would be a fun session with loved ones, it’s a perfect form of brain exercise as well.
There is no dearth of board games, and it can be quite puzzling to choose the right one. So, we handpicked some of the best board games to buy for Christmas 2022 and make it easier for you.
What are the best board games to buy as Christmas gifts?
This is a great game for immersing yourself and your family in the Christmas spirit. It comes with a candy cane, train, teddy bear, reindeer, scrooge, and more.
It can be played with a minimum of 2 people and can include up to 6 players. There are two versions included: the traditional one and the one-hour tradition.
Nonetheless, this can also be a great gift for anyone looking to add some joy and fun time spent with loved ones.
This is another great game for both adults or kids. You will find it extremely captivating without ever wanting it to end. Although this game can definitely last for hours on end, this can be a big no for some players.
The game has a beautiful design and it’s perfect for the whole family. No one gets left behind.
It works well with two players but when played with four players the game becomes even more exciting and captivating.
There’s rarely any childhood memory without Scrabble. It’s the quintessential word game that’s been helping to learn new words mixed with fun. This time, Scrabble has launched its stylish new addition, celebrating its 70th anniversary.
The game sports a sleek board with golden and black tiles featuring gold letters. Wordplay is not just fun, but it’s about style too with this chic game that makes for the Best Board Game to Buy for Christmas.
As the name suggests, it’s a growing tension as the game progresses. As the questions are thrown, the players may be unable to answer immediately despite having it on the tip of their tongue. For instance, “name 5 famous actors from 90s in 15s”, or “Which are the top 10 countries in size?”, and so on.
With 200 cards and 400 subjects to play with, Tension is one of the best board games to buy this Christmas and keep the kids busy.
Photosynthesis is one of the easiest board games to play that’s perfect for any age. The player is the mother nature who takes care of a forest containing trees of all sizes. These trees are ready to plant.
The challenge is to find the right place to so and grow the plants, as the moving sun changes the way shadows form on the planted trees.
The aim is to create a strategy where your planted trees do not affect other players. What better than this strategy game to perk up your Christmas?
This is a strategic game, considered a version of Russian roulette. It can be played in 2 to 5 players and one round takes about 15-20 minutes.
It is suitable to play either with friends or family, and both kids and adults can take part in the drawing. The whole idea is to take out cards until somebody draws an exploding cat card. Unless one player defuses the cat with an action card, all players lose.
It is worth mentioning that reviewers noted inappropriate language for children used on certain cards, although the game is advertised as suitable for all aged 7 and above.
The London Board Game is based on the intricacies of the London Underground system. The goal is to visit six famous London spots including places like the statue of Eros (Piccadilly Circus), and the V&A museum (South Kensington), and then return to the mainline station.
Whoever returns first is the winner. So, those with a penchant for races will find this one of the best board games for Christmas.
Board games are fun, especially when played with friends and family. These games do not just challenge you mentally but also create a bond over a game session. They also come in handy when other games like Monopoly GO are constantly crashing so you have a pool to choose from.
So, check the list above for the best board games to buy for Christmas and brighten up the festive evenings with your gamer friends and loved ones.
Christmas is just a few days away and if you are still searching for what to gift out, let’s offer some assistance. Now, how about some intriguing Christmas gifts for Overwatch fans?
Overwatch games keep increasing in popularity and acceptance in the gaming world for console lovers or PC Masters.
Ever heard of; It’s High Noon or Nerf this? Those are a few of the many phrases from Overwatch games that have become popular in Overwatch communities, making the round.
To help narrow down your search, this article presents some exciting Overwatch game gift ideas for Overwatch fans this Christmas.
Get an awesome Overwatch character t-shirt for friends and fans this season. Get characters such as Hanzo, Sombra, Ana, Genji, Pharah, etc. It comes with sizes for males and females for short/ long sleeves, tank tops, etc.
Easy slip-on for indoor wear offer wool comfortable wear anytime and for all sizes. They’re comfortable and snug, and they will show your love for the Overwatch yetis wherever you take them.
More so, they are also practical since the soles are not slippery, so wearing them on smooth surfaces will be easy.
Don’t let that Overwatch fan you know miss out on all-important cues when playing an Overwatch game. Razer headset offers exceptional audio cues such as ‘High Noon’ by McCree, Man O’ War by Razer, etc.
The Razer Overwatch gaming headset comes with noise isolation features in the closed-ear cups to ensure the best sound quality.
The mic inclusion helps for perfect communication when playing with friends. It has a 3.5mm microphone and audio jacks and is compatible with PC and other gaming devices.
The Overwatch Soldier 76 mask props party cosplay allows one to experience exciting playtime leaving in the world of Overwatch.
The gear is easy to fit using the elastic clasp at the rear. The large eyes and heads give better connections. Users can make a choice of Overwatch props based on characters.
Get an exciting top-quality choker necklace Overwatch Logo, or your favorite Overwatch hero; Reaper, Hanzo, Junkrat or Tracer.
The necklace is made of stainless steel and PU leather, and the inscription details don’t look cheap at all, so they make for great jewelry even outside gaming events.
Gift out the Heroes wallet with Widowmaker, Reinhardt or Roadhog etched on the surface. The wallet is made from pure leather and helps celebrate Overwatch heroes.
Show your love for the franchise every time you try spending, and look at the heroes to prevent you from making bad purchases.
Allow friends and loved ones experience the fun with your favorite Overwatch status this season. Statues include the reaper statue with his BAMF buckle belt in the popular screaming ‘die, die, die’ position.
Help increase someone’s beauty with the Overwatch hair bows. It offers an awesome Christmas gift for Overwatch fans. It offers hair bows characters with Mei, Widowmaker, Reapers heroes.
How else can one evoke excitement in friends except through these awesome Christmas gifts for Overwatch fans? Enjoy a HIGH NOON this season with a friend and loved one with any of the above Overwatch gift ideas.
Is Voicemod Soundboard not working on your Windows 11 PC? Fret not, as you are not alone.
This popular app lets you add spice to your content on Discord, Skype, Zoom, or Fortnite with fun voiceovers, meme sound effects, and more.
But, sometimes, it just stops working and disappoints app lovers. While simply restarting Voicemod may sometimes help fix the issue, in most cases, it does not.
Alternatively, you can uninstall the Voicemod app and reinstall its latest version from its official website, which should fix the issue in most cases.
And if you want to ensure your drivers are always up to date, use Outbyte Driver Updater. It’s a light, discreet app that can run in the background and auto-update drivers as soon as a new version is released.
Outbyte Driver Updater
Get peak PC performance by keeping all your drivers updated with minimal effort!
Is your Microsoft Store VPN not working? The issue of a VPN blocking the Microsoft Store is quite common on modern Windows PCs.
To resolve this issue, go to the next section.
Has anyone found a solution to the problem with Microsoft Store not working while running on a VPN? For some reason having a VPN running confuses Windows and it doesn’t recognize that there is a connection to the Internet. Everything else I have installed on my PC works just fine while a Windows app on a Windows PC gets confused by Windows.
How can I fix my Microsoft Store VPN not working issue?
1. Try out a non-interfering VPN solution
Microsoft Store is clearly supposed to work with a VPN. Therefore, the issue most often resides in your current VPN solution.
This is a top recommendation for those looking to try a VPN for privacy and perfect compatibility with various desktop and mobile platforms.
It clearly includes Windows and all Microsoft Store apps, Mac OS, Android, iOS, and Linux. You may even set your router for VPN-protected access across the entire network.
The VPN also comes with the best security features you can find on a VPN, consistent speeds for P2P torrenting, and the ability to bypass content restrictions.
Therefore, don’t hesitate to try out this Kape Technologies VPN.
Private Internet Access
Private Internet Access is fully compatible with Microsoft Store apps. Claim the best deal right away!
There you go, these are some simple methods that you can try if your VPN blocks Microsoft Store apps on your PC.
If our solutions didn’t work for you, and your Microsoft Store VPN is not working still, try disabling your VPN temporarily or consider switching to a different VPN client.
Sometimes we get, We could not complete the install because an update service was shutting down the error when trying to update Windows. This means there is an issue with your Windows Update service. However, it can be fixed in no time.
This guide will discuss all the available fixes after discussing the reasons behind the issue. Let’s get started!
Why does the We could not complete the install because an update service was shutting down error appear?
There can be various reasons for this Windows update error to occur. We have mentioned all the popular ones here:
Incorrect date & time – If your computer shows the incorrect time and date, this might cause the issue.
Apps or settings – There could be an app or setting which is conflicting and not letting the Windows update. Look for any recent changes in settings or newly installed apps.
Program records – If program records on your computer are corrupt, then they can alter the system files, hence causing the issue.
What can I do to fix We could not complete the install because an update service was shutting down?
Before working on detailed troubleshooting steps, let us first try these simple fixes to resolve the issue:
Restart your computer.
Uninstall third-party antivirus.
If these don’t work for you and you still can’t update Windows, try the methods mentioned below:
1. Restart the Windows Update service
Press Windows + R to open the Run window.
Type services.msc and press Enter to open the Services window.
Locate and double-click on the Windows Update service.
Change its Startup type to Automatic and change the Service status to Start.
Click Apply and OK. Restart your computer.
2. Run the System File Checker & DISM command
Press the Windows key, type CMD, and click Run as administrator.
Type the following command and press Enter: sfc/scannow
Let the process complete, and restart your computer.
If the issue persists, fire up Command Prompt again.
Copy and paste the following commands and press Enter after each command. DISM /Online /Cleanup-Image /CheckHealthDISM /Online /Cleanup-Image /ScanHealthDISM /Online /Cleanup-Image /RestoreHealth
Once the scan is complete, restart your PC.
As the manual steps can be challenging sometimes, you can easily try using a specialized repair program to scan your computer and automatically replace broken or missing files with brand-new files.
3. Rename Software distribution and Catroot2 folder
Press the Windows key, type CMD, and click Run as administrator.
Type the following commands to stop and restart Windows Update, BITS, Cryptographic, and Windows Installer services, and press Enter after each command: net stop wuauservnet stop bitsnet stop cryptsvcnet stop msiserverRen C:\windows\softwaredistribution softwaredistribution.oldRen C:\windows\system32\catroot2 catroot2.oldnet start wuauservnet start bitsnet start cryptsvcnet start msiserverexit
Choose Windows 11 (multi-edition ISO) from the drop-down menu for Download Windows 11 Disk Image (ISO). Click Download.
Select the product language, and click Confirm.
Now click Download.
Follow the on-screen instructions to complete the process.
So, these are methods that you need to follow to get rid of we could not complete the installation because an update service was shutting down error. So, try them and let us know which worked for you in the comments below.
There are two groups of Windows 10 users: those who like and enjoy UWP apps, and those who detest them. Either way, there’s something for everyone, even though the number of available apps is quite limited. At least, if everything works as intended.
Some users reported various errors and issues regarding the Microsoft Store. Those include faulty apps, configuration/cache errors, certain files that got corrupted, and so on, and so forth.
Moreover, sometimes a simple troubleshooting isn’t enough and you’re compiled to perform some advanced workarounds in order to get the things going.
For that purpose, we provided you with some of the fundamental solutions that should help you address a multitude of the Windows Store issues. Including configuration corruption, that’s the most commonly reported problem.
So, if you have any issues in this matter, make sure to check the steps below.
How can I fix the Windows Store configuration issue?
Run Troubleshooter
The first step you should take is run the built-in, remodeled and unified troubleshooting tool. The Windows 10 Creators Update brought up some interesting new features, and joining of all scattered tools in one place is quite an improvement.
There, amongst others, you can find the specified troubleshooting tool for the Windows Store, which should, hopefully, let you resolve your issues.
In order to run this tool, follow the instructions below:
Press Windows key + I to summon the Settings app.
Open Update & security.
Click Troubleshoot.
Navigate to Windows Store apps and click to run the troubleshooter.
Follow the instructions until the end.
If the problem is still there, you’ll be forced to check the additional steps in order to address it.
Use specialized Diagnostics tool
If the Windows Store built-in troubleshooter fails, you can always use the downloadable Diagnostics tool provided by Microsoft. This specialized tool will scan and fix all of the possible issues. Additionally, this is the last automatized workaround on the list, so, if it falls short, you’ll need to switch to a bit more complex, manual approach.
If you’re not sure how to utilize this nifty tool, the instructions below should get you going:
Download the Store Diagnostics tool from this link.
Run the tool.
Follow the on-screen instructions.
After the procedure is finished, restart your PC and look for changes.
If the problem is persistent, make sure to move down trough the list.
Uninstall problematic app
If you’re certain that the problem at hand emerged after the installation of a certain app, you should get rid of it. All apps go trough the check procedure, but there’s a chance that some of them may inflict issues. Now, there’s a question what can be affected by the faulty app and to which extent, but, it’s better to be safe than sorry.
In order to uninstall a Windows Store app, follow the instructions below:
Press Windows key + I to open the Settings app.
Click System.
Choose Apps & features.
Highlight the troublesome app.
Click Uninstall.
Restart your PC and look for changes.
In addition, if the app that causes errors and performance issues is a Windows native, preinstalled app, this article should help you get to know how to uninstall it.
Reset Windows Store configuration
As you probably know, Windows’ native tools and features can’t be reinstalled as some 3rd-party programs. Indeed, you can get rid of some preinstalled bloatware, but reinstallation can’t be performed. Luckily, there’re some other ways to address Store-related issues.
One quite useful function is WSReset.exe. Once you run it, this function extension will reset the Windows Store configuration, clear cache and undoubtfully, repair some of the issues at hand. However, we can’t be sure will it completely resolve some of the more advanced issues.
This simplistic procedure can be done by following these steps:
In the Windows Search bar, type WSReset.exe.
Right-click on the result, and choose to Run as Administrator.
You’ll be prompted with the ”The cache for the Store was cleared. You can now browse the Store for apps.” screen.
Open the Windows Store and look for improvements.
Have in mind that, on some occasions, this procedure won’t be enough for corrupted system files. There into play comes DISM.
Run DISM
DISM is a built-in tool that can be run trough Command Prompt. Basically, it scans for the corrupted system files and restores their health. Moreover, the Deployment Image Servicing and Management tool can, if the update features are unavailable, use installation media with system setup to fix system errors. Since there’s a great chance that something corrupted the Store-related files, this tool should come in handy.
For that purpose, we are presenting you with both ways in which you can utilize DISM.
Right-click Start and run the Command Prompt (Admin).
In the command line, type the following command and press Enter:
DISM /Online /Cleanup-Image /RestoreHealth
Wait for some time until the process is finished and restart your PC.
If the Windows Update is broken, you can create a media installation tool and use it in combination with DISM:
Mount your Windows 10 installation media USB or insert the DVD.
Right-click the Start menu and run the Command Prompt (Admin).
Under the command line, type the following commands and press Enter after each:
dism /online /cleanup-image /scanhealth
dism /online /cleanup-image /checkhealth
dism /online /cleanup-image /restorehealth
After everything is finished, type the following command and press Enter:
Change X value with the letter of the mounted drive with the Windows 10 installation.
After the procedure is finished, you should restart your PC and look for changes.
Re-register the Store app
As we already concluded, the Windows Store app can’t be reinstalled so the basic reinstallation process is out of the question. However, you can at least re-register it. Namely, with this PowerShell procedure, you should be able to restore the app to its default state, while removing all of the possible corruptions.
Follow the procedure below to re-register the Store app:
Right-click Start and open PowerShell (Admin).
In the command line, copy-paste the following command and press Enter:
The Windows Store cache folder is the folder where all of the Store-related temporary files are stored, so it’s safe to say that those can be the instigators of the problem at hand if they get corrupted.
So, the only way to resolve this problem is to get your hands dirty, navigate to the given folder and delete/rename the cache folder. However, have in mind that you’ll need administrative permission in order to do so.
Follow these instructions and you should be able to do so in no time:
Right-click the taskbar and open the Task Manager.
Under the Processes tab, locate Store and Store Broker processes and kill them.
Navigate to this location:
C:Users/(Your User Account)AppDataLocalPackagesWinStore_xxxxxxxxxxxxxxxxxxLocalState.
There you should find Cache folder. Rename it to CacheOld or any other silly name of your liking.
Create a new folder and name it Cache.
Restart your PC and check for changes.
That should be enough to resolve a multitude of the above-mentioned problems. However, if the things are getting out of hand and you’re still prompted with various Store-related error messages, some of the recovery procedures should be taken into the consideration.
At the end, if you have any alternative solution or questions regarding the ones we presented, do tell us in the comments section.
If you’re still on the hunt for a nice Christmas gift that won’t break the bank, why don’t you get a USBChristmas light charger cable? It’s practical, you can use it to charge your phone from your Windows computer and light up your desk at the same time.
In this quick buying guide, we’ll list some of the most interesting Christmas light charger cords that you can purchase right now.
Hurry up and hit the buy button now — there are just a few days left until Christmas and you want your Christmas chargers to be delivered on time.
Editor’s Note: If you’re interested in other tools to get your PC ready for Christmas (or gift ideas for that matter), check out our wide collection of guides.
What are the best Christmas light charger cords to buy?
This nice USB cable is 46 inches long which should be more than enough for most users. It packs 10 LED multicolored lights that will illuminate when you use the cable.
The cord is compatible with all iPhone models. Simply plug the cable into your computer, connect it to your iPhone and watch your desk light up.
In case you’re looking for the most convenient lighting USB chargers, this charger cable from YCTech comes with a colorful design and strong battery life for any iPhone device like iPhone 13, 12, 11 Pro, 8, 7, and beyond.
This unique LED cable is recognized for effective performance, and it will not only charge up your phone efficiently, but it will look fabulous doing it as well.
The users reported particular scenarios when the charger didn’t stop after it fully charged the device, so you may need to verify this element first.
We really like this cactus LED charging cord. It throws a really nice and warm green light on your desk when you use it.
This 46-inch long colorful tech accessory is very durable and you can use it with any charging port. It will also brighten up your mood even when you’re feeling stressed.
Let us explore the Microsoft Store acquiring license error and tell you all you need to know.
The transition from old standard programs to new metro apps would be much smoother without day-to-day issues plaguing Microsoft Store.
One of those problems occurs when users try to download or update a specific app. Unfortunately, they’re shortly prompted with the Microsoft Store Acquiring License Error prompt, and the process stops.
What does it mean to acquire a license on Microsoft Store?
This is a standard Microsoft Store error, often followed by the error code 0x803F7000, but that’s not the rule. This makes Microsoft Store almost entirely unusable and out of sync with its primary purpose.
It is often triggered by the following:
A bug in the app – This simply means your specific copy may be corrupted and need a change or fix.
Cache issues – An overload on your Microsoft Store cache data may trigger a stuck-on acquiring license problem.
While there may be other causes, these are the most frequent among users.
The following solutions would come in handy if Microsoft Store failed while acquiring a license, if Microsoft Store is getting a license error, or if Windows Licensing failed to update critical data for Microsoft Windows Store.
How can I fix the Microsoft Store Acquiring License Error?
1. Reset the Microsoft Store cache
Press the Windows key + R to open the Runelevated command line.
In the command line, typeWSReset.exe, and pressEnter.
This will restart Microsoft Store.
Microsoft Store, like any other Windows Shell app, collects the related data and configuration files.
Sometimes, the corruption of the named files prevents the installation of the new app or even the store’s initialization.
There are various ways to address this, and we enlisted most of those in this article. However, before we move to a ted complicated troubleshooting steps, let’s try a straightforward command.
WSReset.exe is a native Microsoft Store file that resets the Microsoft Store settings to their default values.
Therefore, it clears the cache and can come in handy with halts in Microsoft Store-related processes. For example, the Microsoft Store Stuck on Acquiring License Error should be gone now.
2. Run the Microsoft Store Troubleshooter
Right-click Start, and open Settings.
Select Update & security.
Choose Troubleshoot from the left pane.
Scroll to the bottom and highlight the Microsoft Storetroubleshooter.
Click on theRun the troubleshooter button.
Another viable solution might lie in the Windows 10 revamped troubleshooting menu.
As you might know, after the Creators Update, Windows 10 got a dedicated unified menu with all troubleshooting tools in one place.
And there, between the plethora of various troubleshooters, is Microsoft Store Troubleshooter that might help you with the Acquiring license issue.
3. Double-check time, date, and region settings
Right-click on the Start menu, and open the Settings app.
Choose the Time & languagesection.
SelectDate & timefrom the left pane, then toggle on Set time automatically and Select time zone automatically.
Now, chooseRegion & languagefrom the same pane, and changeCountry or region to United States.
Exit Settings, and look for changes in the Store.
Users too often neglect the importance of proper time and date settings. Those are correlated with Microsoft Store’s adequate functioning, so ensure that both date and time are correctly set.
Furthermore, region settings can also affect the Microsoft Store, and the best way to be sure that Microsoft Store will work on your PC is to set the United States as your region.
This should resolve the halt, and you should be able to install apps from Microsoft Store seamlessly.
On the other hand, if you’re still stuck with the same problem, make sure to continue with the remaining steps.
4. Disable the antivirus
Click on the hidden access arrow in the Taskbar.
Click on your antivirus icon, hover over Avast shields Control and select Disable for 10 minutes (This step varies for different antivirus software).
Furthermore, we can’t skip the possibility that a third-party antivirus is blocking your Microsoft Store from connecting to a remote server.
Sometimes the problem lies in the servers themselves. Still, the Microsoft Store Acquiring License Error is frequently caused by a pesky overeager antivirus that prevents the app from updating or downloading.
Some tech-savvy users advised uninstalling the third-party antivirus, but we’ll settle with disabling real-time protection.
After you’ve done that, open Microsoft Store and look for changes. If the problem is persistent, move to the next step on the list.
Right-click on the Command Prompt and run it as an administrator.
Type the following command in the command line and press Enter: sfc /scannow
Wait for the procedure to end, and try downloading apps from Microsoft Store again.
If you want to solve this process more safely and quickly, then you should opt for a dedicated repair tool to scan your computer and replace damaged or missing files with new parts from its repository.
6. Re-register Microsoft Store
Right-click the Start button, and open PowerShell (Admin).
In the command line, type (or copy-paste) the following command and press Enter: Get-AppXPackage | Foreach {Add-AppxPackage -DisableDevelopmentMode -Register “$($_.InstallLocation)AppXManifest.xml”}
This will force Windows to reinstall the default apps and restore the changes one of the latest updates has made.
After it’s done, close PowerShell and restart your PC.
That should do it. We hope that at least one of these steps helped you resolve the issues with Microsoft Store and app installation.
If you have an alternative solution or question regarding the Microsoft Store Acquiring License Error other than the ones we provided, feel free to share it with us in the comments section below.
If you can’t download your favorite games from the Microsoft Store fast enough, we may have the solution for you. We will show you how to speed up Microsoft Store downloads.
Many Sea of Thieves players complained about slow download issues and one resourceful gamer even came up with a solution.
This issue affected many players, especially after the recent Sea of Thieves update, but you can now fix it by following the instructions listed below.
The good news is that you can use this workaround to improve the downloadspeed of all the games you’re trying to install from the Store.
This solution will also help you download Store updates much faster.
If you like to play games on your PC, check out our list of the best tank games.
How can I speed up Microsoft Store downloads?
1. Limit the download bandwidth
1. Press the Windows Key and type settings in the search bar.
2. Click on the result to launch the Settings page.
3. Navigate to Windows Update and select Advanced Options.
4. Go to Delivery Optimization and select Advanced Options.
5. Now, you need to enable the option Limit how much bandwidth is used for downloading updates in the background.
6. Take the slider to 100%.
7. The next step is to uninstall the game you want to speed up.
8. Lastly, re-download the game you just uninstalled, from theMicrosoft Store.
If you want to fix slow downloads on the Microsoft Store, you can limit the download bandwidth. By doing this, you’ll disable Windows’ Dynamic Download optimization feature, which automatically limits your download speed.
Keep in mind that this workaround applies only to the Store and won’t speed up third-party game downloads.
If you’re still experiencing slow download issues after following the instructions above, restart your modem/router and then run the WSRESET.EXE command. This should fix the issues and increase the Microsoft Store download speed.
To do this, you need to go to Start > type WSRESET.EXE and hit Enter.
If you noticed other slowdown issues on your Windows computer, the following troubleshooting guides may help you fix these problems:
If you have any other suggestions or questions on how to speed up Microsoft Store downloads, don’t hesitate to leave them in the comments section below and we’ll be sure to check them out.
Many Windows 10 & 11 users enjoy casual games from Microsoft Store, but sometimes there can be issues and games won’t download.
Our readers also report getting the Try that again. See the Details message when trying to download games from Microsoft Store, so let’s see if we can solve this.
Microsoft Store is a crucial component of Windows, but many users reported certain issues while trying to download games. Read on to find out what to do if Microsoft Store won’t download games on your PC.
Why won’t the Microsoft Store let me download a game?
If you can’t install apps from Microsoft Store, it’s possible that the store cache is damaged, so you’ll need to recreate it. Also, be sure to check your login credentials and make sure everything is correct.
It’s possible that Microsoft Store isn’t working because there’s a server issue, and if that’s the case, your only option is to wait until the issue is resolved.
In some instances, Microsoft Store won’t open at all, thus preventing you from downloading anything. Luckily, there are ways to fix this, and in today’s guide, we’re going to show you how to do it.
Speaking of issues with Microsoft Store, here are some common problems reported by users:
Other Microsoft Store download issues:
Can’t download from Microsoft Store Windows 10 – You need to change your storage location for new apps to your system drive.
Windows 10 Store not downloading apps – This can be caused by your antivirus, so you might want to disable it temporarily.
Can’t install apps from Windows Store – This problem can occur due to third-party applications; perform a Clean Boot and check for problematic applications.
Mirosoft Store stuck on downloading – If this happens, reset Window Update components and try again; also, install the latest updates and check if that helps.
How do I fix Microsoft Store not downloading games?
1. Remove your SD or microSD card, or save files to your C drive
1.1 Check the errors on the external drive
Press the Windows key + E to launch File Explorer.
Right-click on your SD card drive, choose Properties, and go to the Tools tab.
Click on Check under Error checking and follow the instructions.
Users report that this issue started occurring when they inserted an SD card or microSD card, so it’s advisable that you perform error checking on your card if your Microsoft Store can’t download games.
After doing that error 0x800700006 should be resolved and things should go back to normal again.
1.2 Save the apps on your system drive
Press the Windows key + I to open the Settings app.
Go to the System section.
In the left pane, select Storage. In the right pane, in More storage settings select Change where new content is saved.
Now set New apps will save to your local hard drive.
After doing that, the problem with Microsoft Store games should be completely resolved.
If that doesn’t help, some users report that changing your download location from PC to SD card and back to PC works, so you might want to try doing that as well.
2. Check your antivirus
Sometimes your antivirus can interfere with your system and prevent you from downloading Microsoft Store games. However, you might be able to fix this problem simply by changing your antivirus settings.
Simply disable certain antivirus features, such as firewalls, and check if that solves the problem.
If that doesn’t work, you can disable your antivirus entirely and check if that helps. If it doesn’t, you might want to consider removing your antivirus completely.
Users reported issues with McAfee antivirus, and according to them, removing the antivirus solved the problem.
Keep in mind that this issue isn’t limited to McAfee, and other antivirus tools can also cause this problem.
If removing the antivirus solves the issue, you should consider switching to a better antivirus that doesn’t interfere with your apps.
3. Restart the Windows Update services
Press the Windows key + X and select PowerShell (Admin) from the list of results.
Type or paste the following commands and press Enter after each one to run them:
net stop wuauserv
net stop bits
rename c:\windows\SoftwareDistribution SoftwareDistribution.old
net start wuauserv
net start bits
According to our readers, sometimes you might be able to fix the problem with Microsoft Store simply by resetting Windows Update services.
After doing that, try to start Windows Store again and check if the problem with Microsoft Store games is still there.
4. Install the latest updates
Click the Start button and select Settings.
Go to Update & Security section.
Click Check for updates button.
If you have problems downloading Microsoft Store games, the issue might be related to one of the missing updates.
Any new updates will be downloaded automatically in the background and installed as soon as you restart your PC. Once your system is updated, check if the problem is still there.
5. Log out of Microsoft Store
Click the Start button, type microsoft store, and open the app from the results.
Click the user icon in the top right corner and select your account.
Click the Sign out button.
Select the user icon and choose Sign in from the menu.
Select your account from the list and click Continue.
Enter your password and you’ll be signed into Microsoft Store again.
According to users, if you’re having issues while downloading Microsoft Store games, you might want to try logging out and logging back in.
After making these changes, check if the problem with Microsoft Store games is resolved.
Press Windows key + R and type msconfig, then press Enter or click OK.
Go to Services tab and check Hide all Microsoft services. Now click Disable all.
Go to Startup tab and click Open Task Manager.
Right-click the first item on the list and choose Disable from the menu. Repeat this step for all items on the list.
Now close Task Manager and go back to System Configuration window. Click Apply and OK to save the changes.
Restart your PC.
To fix the problem with Microsoft Store Games, some users are recommending performing a clean boot.
Sometimes startup applications can interfere with your system, and that can lead to this and many other problems.
Once your PC restarts, check if the problem is still there. If not, it’s almost certain that one of the disabled apps or services was causing it.
If you want to find out which app was the cause, enable disabled applications and services one by one or in groups.
Once you find the problematic application, remove it, and check if that solves your problem.
7. Create a new user account
Press the Start button and select Settings.
Go to the Accounts section.
Go to Family & other users in the left pane. In the right pane, choose Add someone else to this PC.
Select I don’t have this person’s sign-in information.
Now choose to Add a user without aMicrosoft account.
Enter the desired username and click Next.
If you can’t download Microsoft Store games, the problem might be your user account. The user account can get corrupted sometimes, and that can lead to this and many other problems.
After you create a new user account, switch to it and check if the problem is still there.
If the new account isn’t affected by this issue, you might have to move your personal files to it and start using it instead of your old account.
8. Perform a System Restore
NOTE
This solution will restore the system to an earlier point in time. All the applications you installed after this point will disappear.
Press Windows key + S and enter system restore. Choose Create a restore point from the menu.
Now, sselect System Restore.
Click Next.
If available, check Show more restore points. Select the desired restore point and click Next.
Follow the instructions on the screen to restore your system.
If you’re having problems with Microsoft Store Games, you might be able to solve the problem by performing a System Restore.
Thanks to this feature, you can easily restore your PC to an earlier state and fix many problems including this one. After your system is restored, check if the problem is still there.
If you want a safer and faster option, then you could easily choose and use automatic repair software. These tools allow you to scan for and quickly repair any broken files they encounter.
How do I fix Microsoft Store not downloading games in Windows 11?
Although Windows 11 has some new and improved features doubled by an updated design, its core is not so different from the one of Windows 10.
That is why you will discover that all the solutions we’ve highlighted above will work seamlessly on the new OS.
Not being able to download Microsoft Store games or apps not showing up can be a big problem for many users, but we hope that you managed to solve your problem with one of our solutions.
The annoying issue when Zoom is not responding is usually not serious, thankfully. When Zoom cannot detect a camera, you don’t see it in its settings.
Other times, Zoom detects your camera, but the video box only displays a grey area, and there’s no output. These troubleshooting steps will help you fix this problem quickly.
Why does my Zoom keep freezing and not responding?
Different factors can cause Zoom to not respond to issues. Listed below are some of the well-known causes:
Activities of other apps: In most cases, if Zoom is not responding during or when joining a meeting, it might be because of the background apps. Zoom might stop responding if you have some apps using your PC camera or an app that consumes too many resources. The solution here is to close these apps and relaunch the Zoom app.
Driver issues: Sometimes, Zoom might not respond when turning on the camera. This can be due to a faulty or outdated camera driver. Also, it can be due to problems with your display drivers. You can fix this by rolling back or updating your drivers.
Hardware problems: If you are facing this issue while using an external webcam, the problem might be because of this camera. The solution here is to switch to one of the best webcams for Windows.
How can I fix Zoom if it’s not responding?
Below are some basic troubleshooting steps to try before making changes to your PC in a bid to fix this issue:
Restart your PC
Close other apps running in the background
Change USB webcam
If this does not solve the problem, you can now delve into the solutions below:
1. Force stop Zoom
Press the Windows key + X and select the Task Manager option.
Right-click the Zoom app.
Now, select the End task option and relaunch Zoom.
The first thing to do if the Zoom app is not responding is to restart it. This will clear up the glitches causing the problem. It can also come in handy if the Zoom app is not launching.
2. Roll back your drivers
Press the Windows key + X and select the Device Manager option.
Click the arrow next to the Display adapters option to expand it and double-click each driver.
Select the Driver tab at the top and click the Roll Back Driver option.
Now, go back to the Device Manager window, expand the Cameras option, and repeat Steps 2 and 3 for the drivers.
If you noticed that Zoom is not responding after updating your driver or PC, it might be due to incompatible or faulty drivers. You must roll back your drivers and restart your PC to fix this.
Right-click the Start icon and select the Device Manager option.
Expand the Display adapters option and right-click each of the drivers there.
Now, select the Update driver option.
Choose Search automatically for drivers option and install any available update.
If Windows can’t find any available driver and you still face the problem, choose the Browse my computer for drivers option instead in Step 4.
From here, choose Let me pick from a list of available drivers on my computer.
Choose your default display driver and click the Next button.
Finally, go back to the Device Manager window, expand the Cameras option, and repeat Steps 2 to 7.
Another known cause of the Zoom not responding problem is an outdated driver. You can download the latest drivers from your PC manufacturer’s website if you don’t want to use the built-in driver updater.
Doing this procedure manually is not very hard, but it can still go wrong, and if you install the wrong driver, you will be right back where you started. However, you can do this procedure easily by using specialized software.
4. Reinstall the Windows Zoom client
Press the Windows key + I and select the Apps option. To open the Start menu.
Scroll down the applications list and select the Zoom app.
Now, click the Uninstall button and follow the onscreen instructions to complete the removal.
Reinstalling the Zoom app can also help you fix other issues related to the app, like error code 4502 and error code 3003; read these guides to learn more.
5. Use a Zoom alternative
If the Zoom not responding issue continues after reinstalling it, you’ll probably have to consider using an alternative service to hold your video conferences. There are many video conferencing software, some even more powerful than Zoom, so make sure to check them out.
There you have it: Everything you need to fix Zoom if it’s not responding. All that is left is for you to follow the instructions in this guide. Elsewhere, Zoom may crash when screen sharing but we’ve already detailed how to bypass this issue.
Are you getting the RepUx.exe – Application Error: The application was unable to start correctly (0xc0000022), and you don’t seem to know the cause or what fix to apply?
You don’t have to worry, as this article will provide you with simplified steps on how to fix this and similar application error codes, such as the Citrix ceip.exe error.
What causes RepUx.exe application error codes?
The RepUx.exe application error is one of the most common errors that Carbon Black Defense Sensor users encounter.
From our research, the following are some of the most common reasons for the RepUx.exe application error:
Missing DLL Files – The DLL file got missing during a system or software update or through malicious programs, hence causing the RepUx.exe error code.
Your computer has been infected by viruses or malware – When your computer is infected by viruses, it can affect performance, and in other cases, this causes programs to malfunction.
Your PC’s access rights are not set correctly – This error can also be triggered when a Windows application is unable to access the other files that are necessary to make it work.
Now that you know some of the potential reasons behind the RepUx.exe application error, let’s proceed to how you can fix this problem.
How do I fix RepUx.exe application error codes in Windows?
Before anything, try these quick procedures:
Restart your PC to auto-troubleshoot all basic issues with the PC.
Turn off all third-party startup apps that may disrupt Windows processes.
If these fail to change anything, then please go ahead and proceed to these tweaks below.
1. Exclude path from Windows Defender
Left-click the Start button, type windows security, and click Open.
Select the Virus & threat protection and click on Manage settings.
Click Add or remove exclusions.
Then, click +Add an exclusion.
Select the following paths: C:\Program Files\Confer\C:\ProgramData\CarbonBlack\C:\Windows\System32\drivers\ctifile.sys
Close the Windows security and check if the issue persists.
The best way is to add Carbon Black Cloud sensor files to the exclusion list of the Windows Defender. Hence, none of its activities or components will be flagged as malicious for your PC.
2. Run the SFC and DISM Scan
Right-click the Start button, type cmd, and click Run as administrator.
Press Enter after typing the cmd line below: sfc/scannow
Await the completion of the process (it may take a while).
Then, run the following command: DISM /Online /Cleanup-Image /RestoreHealth
Restart your computer after closing the Command Prompt.
The SFC scan is a command line tool that thoroughly checks your system for potentially damaged files. If the SFC tool is not working, you should consider performing a DISM scan.
Avoid interrupting the scanning process. Once the DISM scan is complete, check if the problem is fixed.
You also have automatic alternatives to use that run a full scan of your PC and then proceed to replace any damaged components with healthy parts from its database.
3. Check your permissions
Press the Windows + E keys to open File Explorer.
Right-click on the problematic directory (RepUx.exe) available on My PC and choose Properties from the menu.
Then, navigate to the Security tab and click the Edit button.
Select your user name from the list and ensure that you check the box next to Full control under the Allow column in the Permissions sections.
Then click OK.
This fix is one of the simplest. However, if you can’t find your user name on the list, you’ll have to add it manually and then change its permissions.
The Xbox One S was released by Microsoft prior to the release of Xbox One X.
Each of these consoles is packed with media features such as 4K streaming and Blu-ray player, plus support for the Xbox One games library.
It is part of the Xbox One generation which means it can play all Xbox One branded video games, including titles that are backwards compatible with Xbox 360 and Xbox.
Thus the console can play digital and physical disc versions as the Xbox One X.
The Xbox One S also supports HDR for enabled video games.
It also comes with a built-in 4K Blu-ray disk drive for playing CD/DVD and 4K HDR Blu-ray discs, but at a lower resolution compared to the Xbox One X.
If you’re having trouble with your Xbox One S not reading discs, check out the solutions below and see if they help.
How can I fix Xbox One S not reading discs?
1. Disc won’t play or gives back errors
If you have a problematic disc out of your collection, try the solutions below to resolve the Xbox One S not reading discs:
Clean the disc with a soft and slightly damp piece of cloth (must be clean as well). Do this by holding the edges without touching the surfaces of the disc
Play the disc on another console (if available) so you can see where the problem is.
If the problem is reading CD/DVD/Blu-ray discs and not game discs, ensure the Blu-ray player app has been installed successfully before trying again
Check that the DVD/Blu-ray disc is from the same location you bought your console
Replace the game if none of the above preliminary solutions help.
Note: If you have issues with your UHD Blu-ray discs and your Xbox One S won’t read discs, especially for those in North America and Europe, the console complies with UHD Blu-ray requirements.
However, it is known that a limited number of such discs manufactured in early 2016 may not play on the Xbox One S.
This has since been corrected but if it persists, check with the support team of the title’s studio for assistance.
2. Xbox is not reading discs, isn’t recognizing or won’t play when inserted
This happens when the settings for Instant-On power mode can render a small number of consoles unable to read discs, or the disc drive needs servicing. However, try the solutions below:
Change power modes and power cycle the console. To do this:
Press the Xbox button to open guide
Select System
Open Settings
Then click Power & Startup
Click Power mode and startup
Select Power mode
Choose Energy saving
Perform a hard power cycle by holding down the Xbox button for 10 seconds, then press the button again to restart it
Try the disc again and wait to see if the Xbox One S console will read it. If it reads, revert back to Instant-On power mode
If this doesn’t work, request a repair from the Xbox Online Service Center.
3. The console makes a grinding noise when the disc is inserted
If you hear grinding noise when you insert or try to play the disc, then your Xbox One S console needs service, in which case you can request a repair at the Online Service Center.
4. Position the Xbox One S properly
If the Xbox One S won’t read discs, check that you have correctly placed the console horizontally on a flat and stable surface.
The console isn’t meant to operate in a vertical position as this affects disc drive performance.
A proper stand is also needed if you want to place it vertically.
Ensure the surface is stable, don’t place it on speakers or subwoofers, and check that the space is well-ventilated, uncluttered, cool, and away from direct heat sources.
5. Use your finger to drag the disc in
This is a trick most users have shared online. If your Xbox One S won’t read discs, put a finger through the middle of the disk, then put the disk in the console and let the console try and drag the disc in.
If it builds resistance, take your finger out of the disc and the console should drag it in a little bit faster than usual. Check if your console reads the disc and that the game loads.
You can also try putting in the disc multiple times and see if it is read.
Did any of these solutions help? Let us know in the comments section below.
What do you do when your Xbox disc is unreadable?
Clean the disc with a soft cloth, restart the console. This problem can also appear when you’re not using the same profile used to purchase the game. If the disk is unreadable, fix this issue with our expert guide.
The 22H2 update for Windows 11 has been available for a while yet, some users have reported error 0x8007001f on Windows 11 while trying to upgrade.
This error is common, and we already wrote about Windows 10 update error 0x8007001f. However, in today’s guide, we’re going to focus exclusively on the latest version of Windows.
Why does 0x8007001f error occur on Windows 11?
There are multiple reasons for this, but here are a few common ones:
Corrupted user profiles – If any user profile on your PC is corrupted, you’ll get this error. To fix it, you need to remove user accounts that are affected.
Corrupted system files – In case your system files get corrupted you won’t be able to perform updates. If that happens, it’s crucial that you repair corrupted system files.
How can I fix the 0x8007001f error on Windows 11?
1. Run the SFC utility
Open Windows 11’s Run dialogue by right-clicking Start and selecting that accessory’s shortcut on the menu.
Enter the following Run dialogue command: cmd
Press the Ctrl + Shift + Enter key combination to open Command Prompt as an administrator.
First, type this image repair command in the Prompt and press Enter: DISM /Online /Cleanup-Image /RestoreHealth
Input and execute this command for the System File Checker scan: sfc /scannow
Wait for the scan to show a Windows Resource Protection outcome in the Command Prompt. It could take about 20 minutes or so.
This is an advanced solution, so before proceeding back up your registry.
Press the Windows key + R and enter regedit. Press Enter.
Navigate to the following key: Computer\HKEY_LOCAL_MACHINE\SOFTWARE\Microsoft\Windows NT\CurrentVersion\ProfileList
Now go to the keys with long names. Check ProfileImagePath in order to verify the name of the account. In our case, that’s WindowsReport.
Next, delete all other keys with long names except the one that matches your profile. To do that, right-click the key you want to remove and click Delete.
4. Disable Core Isolation
Press the Windows key + S and enter security. Select Windows Security.
Navigate to Device security and click on Core isolation details.
Now set Memory integrity to Off.
If the update process completes successfully, and you don’t get the 0x8007001f Windows 11 version 22H2 error, be sure to enable this feature again.
Error 0x8007001f on Windows 11 can cause various issues and prevent you from upgrading, so be sure to fix it using our solutions. In case you’re having a different issue, visit our Windows 11 update error guide for more solutions.
Xbox One allows console users to invite their friends and others to play along through invites. To join the party, the console user should accept the invite. However, several Xbox One users have reported that Xbox invites are not working.
Similar Xbox One game invites-related issues are posted in the Reddit community.
I realize this might be way simpler than im making it, but whenever i get an invite I press the Xbox home button like it says to launch it. Problem is, nothin happens after that
Here are a couple of troubleshooting tips to help you solve the issues with the Xbox invites not working.
Why can’t I invite someone to a game on Xbox?
1. Check your NAT type
Network Address Translation (NAT) helps users with a private-public IP address and vice versa. Check the NAT type on your Xbox One to fix this issue.
On your Xbox One, go to My Games and Apps.
Select Settings and then Network.
On the Network Settings screen, under Current Network Status, the NAT Type field shows your current NAT type.
Select Test NAT Type option.
After the test is completed, you will see the results of your NAT type.
If your NAT type is open, click on Continue.
If it is not Open and shows Moderate or Strict and then continue to troubleshoot.
Recovery options exist, so you don’t have to turn to a clean reinstallation whenever the system shows critical signs. That’s one of the best things about Windows PC.
However, what happens when even the recovery option gives you a hard time? Some users who, for particular reasons, tried resetting Windows PC have had difficulties. The re-appearing error is Insert your Windows installation or recovery media.
If you’re in this group and the error is reoccurring after multiple tries to reset Windows 10, try out the solutions we provided below.
Why does the Windows installation or recovery media and restart your PC message appear?
Below are the two main reasons for the insert your Windows installation or recovery media to continue error:
Corrupt system files: If you insert your Windows installation disc and restart your computer prompt, the system files needed for the reset process are likely corrupt or broken. The solution here is to restore and repair these files.
Presence of malware: Another cause of this problem is the activities of malware on your PC. It can change the system files or give off a false alarm. You need to perform a deep virus scan using one of the best antiviruses for Windows PC.
How can I fix insert your Windows installation or recovery media error?
1. Use a dedicated repair tool
As this is a system-related problem, it might be pretty hard to solve, and that’s why, if you can still boot your PC normally, we recommend using a dedicated tool to repair it.
2. Run SFC and DISM scans
Click the Start button, type cmd, and select Run as administrator.
In the command line, type the command below and press Enter: sfc/scannow
After the process is finished, type the following commands, one by one, and press Enter after each to perform a DISM scan: DISM /online /Cleanup-Image /ScanHealthDISM /Online /Cleanup-Image /RestoreHealth
Whether viruses or something else deleted some essential files, the recovery option will lack the resources to restore your PC to factory values. This can lead to the insert Windows installation or recovery media error.
Because of that, we recommend running System File Checker and DISM, respectively. These two utilities are built into the system and run through the elevated command line.
3. Perform a virus scan
Press the Windows key, type virus, and select Virus & threat protection.
Select Scan options.
Now, select the Full Scan option and click the Scan now button.
One of the major causes of the insert your Windows installation or recovery media prompt is file corruption caused by viruses. Whether you can fix the files or not, performing a deep virus scan is recommended to eliminate any malware on your PC.
To make sure you remove even the most stubborn viruses quickly, we recommend using a third-party antivirus in ESET NOD32. This unique software will search even the deepest corners of your PC and remove any malware that can cause problems.
4. Run Reset this PC from a recovery menu
Reboot your PC 3 times in sequence until the Advanced Recovery menu appears, and choose Troubleshoot.
Click on Reset this PC.
Choose to keep your files and continue with the procedure.
Suppose you are getting the insert your Windows installation or recovery media error message while trying to reset your PC from Settings. In that case, you might want to try doing it from the Advanced recovery menu.
Run the Media Creation Tool executable file after the download finishes.
After you accept the license agreement, check the Create installation media box and hit Next.
Click Next or change the language and version of the OS if needed.
Now, select the USB flash drive option and click Next.
Ensure you insert the USB flash drive into your PC, select the correct drive on the list, and hit Next.
The system will now download the Windows kit and create a bootable image on your USB drive. Wait patiently until the process is finished.
You can either boot from that media or access it by pressing the Windows key + E to start File Explorer.
Now, look for the removable drive and click on the Setup.exe file.
The installation process will start shortly. Follow the onscreen instructions to complete the process.
Finally, if none of the solutions was helpful, you can only reinstall Windows 10 from scratch.
Of course, if there’s a way to back up your data, you should do it before formatting the system partition. That’s why backing up your data regularly is of utmost importance. If, for any reason, you can’t create bootable media, try to do it on another PC.
If you’re unsure how to perform the procedure, our guide on reinstalling Windows 10 will provide all the information needed.
That should do it. If you have any questions or suggestions concerning the insert your windows installation or recovery media error, we encourage you to share them.
So, you’re still looking for a nice Christmas present for your best friend? Well, if he/she is also a dog lover, look no further. In this guide, we’ll list four cool tech gifts ideas that you can get this Christmas.
Who said technology and animals don’t get along? We’re sure the gadgets listed below will enhance the bond that your friend has with his/her furry friend.
This cool gadget allows you to play a game of catch with your dog even when you’re at the office. All you need to do is fill the toy with your dogs’ favorite treats and hit the toss button.
Other key features include:
Livestream video to keep an eye on your pet
2-way chat and barking. You get notifications when your dog’s barking.
Setting up this gadget is very simple: plug into a power outlet or your Windows computer, get the Furbo app and connect it to your Internet network.
Similar to Furbo, PetChatz allows you to interact with your pet friends even when you’re not home. This gadget supports two-way video chats, treat dispense as well as calming aromatherapy if your dog is agitated.
The PetWatch video recording feature allows you to see what your pet is doing while you are away. This device is pet safe, there is no edge for your dog to chew on and it can withstand bite forces of over 100 lb of pressure.
This glowing dog collar is excellent if your friend often walks his/her dog in the evening. You’ll be able to quickly see where you dog is, and vehicle drivers will see your dog well in advance.
The gadget is USB rechargeable so you can simply plug it into your Windows computer to charge the battery. Expect to get 5 hours of illumination for every hour you keep the device on charge.
There are several light modes available: steady mode, rapid flashing, and slow flashing.
Speaking of fluorescent dog collars, you can also get this clip-on LED light that makes for a perfect dog collar charm for when your furry friend is playing out in the dark.
This USB rechargeable pet nail grinder is a practical Christmas gift idea for pet lovers. It’s safer than regular nail clippers and you can use various openings depending on your pet’s nail size.
Noise and vibration levels are very low, so the nail grinding process is not a traumatic one for your pet.
Microsoft introduced us a while back to the concept of an application store for downloading and installing apps. From the Microsoft Store, we can easily download and/or update any apps made for Windows in just a few clicks.
But of course like any other app this has some errors either from installation or from trying to download an app. We have compiled a list of the possible Microsoft Store errors you might encounter while using the app.
The error codes that you receive on Microsoft Store might be for several reasons like Error code 0x8024600e when trying to install or update Microsoft Store apps or Error code c101a006 when you might have a temporary server malfunction.
I will explain in a few lines what we can do to fix some of the error codes we get from the Microsoft Store when using Windows.
How can I fix Microsoft Store error codes?
Error code 0x8024600e
This error occurs when trying to install or update Microsoft Store.
Let’s press and hold the Windows button plus the R button.
In the Run dialog box type Regedt32.exe and press Enter on the keyboard.
If there is a server malfunction then this error will occur.
Do the steps you did for the Error code 805ab406 above.
Error code 805a0193 – There is a problem completing your request
This error might pop up when you try to connect to a Wi-Fi network and you have wrong network settings.
If there is a server malfunction you will have to wait for Microsoft to resolve it.
If you have a Wi-Fi problem then try to connect to a different Wi-Fi and see if it works and verify that you have an internet connection.
Error code c101a7d1
This error usually appears when an application license is not listed in your history or it may also occur when a service malfunction prevents Store from checking the history. Another reason why you may get this error is when you update an app and the content of the license is not valid.
Cancel the update you are trying to do on the app.
Uninstall the app you have.
Try to download the app from Store again.
Error code d0000011
This error appears when the phone is manually unregistered from the option Remove this phone on www.windowsphone.com.
First, you need to back up your phone.
Do a hard reset on the phone.
Complete the phone setup
Restore the phone.
Error code 8000ffff – There is a problem completing your request. Try again later
This error will pop up when the app has been removed from the Store.
The solution will be to uninstall the app and try to download it again.
Error code 805a01f7
You will get this error when there is a temporary server malfunction.
Wait for the server to get back online and try again(no estimated time for waiting in this particular case).
Error code 805a01f4
This error is the same as the above. You will have to wait until the server is functioning correctly.
Error code 805a0194
Wait until the server is operational.
Error code D0000011
This specific error occurs when the phone was manually removed from windowsphone.com.
Do the same steps as Error code d0000011
Error code c101abb9
You will have to wait until the server malfunction is fixed.
In this case, the most common solution is deleting the Software Distribution folder. In case you’re not sure how to do that, just follow these instructions:
Right-click the Start menu and run the Command Prompt (Admin).
In the command line, type the following commands and press Enter after each:
This error appears when a certain package fails to open. Therefore, you’re not able to download any apps or games from the Microsoft Store. To solve the error code 0x80073CF0, do one of the following actions:
Delete SoftwareDistribution folder.
Restore Store cache. (Click Win key + R, type WSReset.exe, and press Enter).
Run the WUReset script. (This script is mainly used for dealing with Windows updates, but it could also be useful in this case).
Error code 0x80073CF2
This error usually appears when you’re trying to update a certain Microsoft Store app. It’s unlikely to appear when your downloading new apps.
To deal with the error code 0x80073CF2, try some of the following solutions:
Run the DISM tool (Deployment Image Servicing and Management).
Error code 0x80073D00
The list of Microsoft Store error codes continues with 0x80073D00. You’ll notice this error when you’re actually trying to open a certain app. The app will fail to open, telling you it can’t be opened because it’s currently updating. To resolve this issue, perform some of the following actions:
Reset the app that gives you this error
Reinstall the app that gives you this error.
Reset the Microsoft Store.
The same error code also appears on the Xbox One, and prevents apps from opening. Some people suggest resetting the console to default, or removing your profile and adding it again. However, you can also try the Xbox One Diagnostics tool. Just follow the instructions, and hopefully, you’ll find what you’re looking for.
Error code 0x80073D01
According to Microsoft, this issue mainly occurs if a certain package deployment operation is blocked by policy. So, what does it mean? It means you did some dirty work in the Group Policy Editor, and blocked Application Control Policies or the Allow deployment operations in special profiles policy.
If these policies are indeed blocking your apps, you’ll need to set up a Roaming User Profile on your User Account. Check Microsoft’s Official Guide for managing Roaming User Profiles for additional info.
On the other hand, if no such policies are blocking your apps, the issue lays in your User Account. You’re either using a temporary User Account, or you’re signed-in locally. Either way, just log in with your ‘permanent’ User Account, and you should be fine.
Error code 0x80073CF4
I’m not sure if this qualifies as an issue at all. Simply, if you don’t have enough disk space on your hard drive to install a certain app, you’ll receive this error.
The obvious solution, in this case, is to clean your disk drive and free some space for the app you want to install. Windows 10 allows you to change the folder where the new apps are saved. So, if you don’t want to delete anything from your drive, you can always move the new app to another one.
And here’s how to do that:
Go to Settings
Go to System > Storage
Click Change where new content is saved
Under the New apps will save to section, select another hard drive.
This problem occurs as soon as you open the Microsoft Store. It’s not specifically related to updating or downloading apps, but it affects the Store as a whole.
To resolve this problem, try some of the following workarounds:
This error appears when the Store Service is unable to download the app package. It usually appears when you’re installing new apps, but it’s also possible to occur during updating the existing ones.
To resolve this problem, try some of the following solutions:
Check your internet connection. If you’re not able to connect to the internet normally, check this article to solve the network issues.
This error prevents you from downloading apps and games from the Microsoft Store. There’s still no confirmed solution for this issue, but you could try some of the basic solutions:
Reset the Microsoft Store (run WUReset.exe)
Use Microsoft Store Troubleshooter. Go to Settings > Update & Security > Troubleshoot. Now, find Microsoft Store Apps, click it, and choose Run the troubleshooter. Just follow further on-screen instructions and let the wizard complete.
Error code 0x800700B
This issue is usually connected to updating Microsoft Store apps. So, there’s a bigger possibility to encounter it while updating your currently installed apps, than while downloading the new ones.
Here’s what you can try when dealing with this issue:
Clear the Microsoft Store Cache
Use Microsoft Store Troubleshooter from the Settings app
Run the SFC scan. Open the Command Prompt (Admin) > enter the following line and press Enter: sfc/scannow
Run DISM
Use Powershell. Open Powershell (Admin), enter the following command and press Enter: Get-AppXPackage -AllUsers |Where-Object {$_.InstallLocation -like “*SystemApps*”} | Foreach {Add-AppxPackage -DisableDevelopmentMode -Register “$($_.InstallLocation)AppXManifest.xml”}
Error code 0x80073CF7
This error shows up when you’re trying to install an app from the Microsoft Store. But also, it could also show up when you’re trying to uninstall an app from your computer, as it fails to unregister the package.
To deal with this problem, try some of the following solutions:
Run the SFC scan.
Delete OLE folder in Registry Editor. Go to Search, type regedit, and open Registry Editor. Go to the following path: HKEY_CURRENT_USERSoftwareMicrosoft. Find the OLE folder, and delete it.
Run Microsoft Store Troubleshooter from Settings.
Delete the Software Distribution folder.
Error code 0x80073CF9
This is another error code that usually appears while you’re updating existing Microsoft Store apps. We’ve already covered this issue broadly, so you can check out the article for more detailed solutions.
Error code 0x80073CFA
This is another issue that appears when uninstalling Windows 10 apps, rather than during the installation process. Here are some basic steps you can take in order to resolve this problem:
Reset the app
Run the SFC scan
Run DISM
Error code 0x80073CFC
Another error that doesn’t affect installing or updating Windows 10 apps. This issue actually prevents a certain app from launching. So, there are two obvious solutions to this problem:
Reset the app
Reinstall the app
Error code 0x80073CFD
This installation issue usually prevents installing or updating Microsoft Store apps because of an incomplete system build. In that case, perform some of the following actions:
Update to the latest version of Windows 10. If you’re running Windows 10 Insider Preview, make sure to install the latest Preview build.
Make sure your internet connection is working properly.
This updating error could render some of your apps unusable. Here’s a fix that helped some users, and it might help you, as well:
Go to Settings.
Go to Apps.
Now, find the app that doesn’t work, click it, and select Move.
Move the app to the hard drive where your system is installed.
As you can see, this error could easily be caused by solving the above-mentioned error 0x80073CF4. So, be careful while moving your apps.
Error code 0x80073CFF
You can get this error if the package you’re trying to install doesn’t meet one of the following requirements:
The app is deployed using F5 in Visual Studio on a computer with a Microsoft Store developer license.
The package is signed with a Microsoft signature and deployed as part of Windows or from the Microsoft Store.
The package is signed with a trusted signature and installed on a computer with a Microsoft Store developer license, a domain-joined computer with the AllowAllTrustedApps policy enabled, or a computer with a Windows Sideloading license with the AllowAllTrustedApps policy enabled.
Although it’s a rare occurrence, you may encounter it when installing some less-popular apps from the Microsoft Store. To deal with it, do the following:
Go to search, type PowerShell, and open PowerShell (Admin)
Paste the following line, and press Enter: Get-appxprovisionedpackage -online | where-object {$_.packagename -like “*windowscommunicationsapps*”} | remove-appxprovisionedpackage -online
To resolve the error 0x80d0000a, simply run the WSReset.exe command.
Check out our detailed guide for fixing this Microsoft Store error for more detailed info.
Error code 0x80073D02
This issue usually occurs in Windows 10 Insider Preview and prevents users from installing apps from the Store. The best solution for this problem is simply resetting the Microsoft Store using the WUReset.exe command.
Error code 0x80073D05
There are a few things you could try when dealing with the error 0x80073D05. Here’s what you need to do:
Run the Microsoft Store Troubleshooter from the Settings.
Run WSReset.exe.
Open PowerShell (Admin), paste the following command, and press Enter: Get-Appxpackage –Allusers
After that, find Microsoft.Windowsstore, and copy PackageFullName (ctrl + c).
Now, execute the following command: Add-AppxPackage -register “C:Program FilesWindowsApps<PackageFullName>” –DisableDevelopmentMode (NOTE: Remember to replace <PackageFullName> with the actaul PackageFullName, you just copied.
Error code 0x80073CF3
This issue occurs when you’re trying to update a certain app. Here are the possible causes of this problem:
The incoming package conflicts with an installed package.
A specified package dependency can’t be found.
The package doesn’t support the correct processor architecture.
To resolve this issue, you need to re-register the Microsoft Store:
Go to Search, type PowerShell, right-click Powershell, open as administrator
Enter the following command, and press Enter: Get-AppXPackage | Foreach {Add-AppxPackage -DisableDevelopmentMode -Register “$($_.InstallLocation)AppXManifest.xml”}
Restart your computer
Error code 0x80070057
To resolve this installation issue from the Microsoft Store, we recommend running the Microsoft Store Troubleshooter from the Settings app. A few users have confirmed this solution worked for them.
Error code 0x80073D0A
To resolve this issue, turn of your Antivirus and Windows Firewall. In case you don’t know how to turn off the Windows Firewall, just follow these instructions:
Go to Search, type firewall, and open Windows Firewall
Now, click on Turn Windows Firewall off or on
Go to Turn off Windows Firewall
Error code 0x800B0100
This is actually a Windows Update error, but users have spotted it in the Microsoft Store, as well. Which is kind of strange. Anyway, to resolve this problem, try some of the following solutions:
Run Windows Update Troubleshooter
Run Microsoft Store troubleshooter
Run the SFC scan
Run the DISM tool
Error code 0x80072efe
This error causes the Microsoft Store to crash. To resolve the 0x80072efe error, try some of the following workarounds:
Run the WSReset.exe script
Run Microsoft Store Troubleshooter
Error code 0x803F8001
This issue prevents apps from updating. However, the solution for the error code 0x803F8001 can’t be simpler. Just uninstall the app, head over to the store, and install it once again.
Once you reinstall the app, you’ll be able to update it from this point forward without any problems.
Error Code 0x803F700
Users who reported this error said they were unable to access, download, and install apps in Microsoft Store. Try some of the following workarounds to fix this issue:
Run Microsoft Store Troubleshooter
Disable Windows Firewall
Reset Store cache
Reset App Packages
Check out our detailed guide for fixing the 0x803F700 Microsoft Store error for more info.
Error Code 0x80246019
This error code is actually pretty easy to solve, all you have to do is reset the Store from the Settings app. If you’re not sure how to do that, just check out our detailed guide for fixing this Microsoft Store error for more detailed solutions.
And finally, the last error code in this lengthy article of Microsoft Store error codes is the Microsoft Store error 0x80D05001. Here’s what you need to do to address it:
Use the Windows Apps troubleshooter
Run the SFC scanner
Disable third-party Internet Security tools
Check out our detailed guide for fixing this Microsoft Store error for more detailed solutions.
So these are the steps that you can do to fix the error codes you get on the Microsoft Store. Please write to us below for any other ideas on the subject.
Some users who recently upgraded to Windows 10 reported that their original LG external DVD drive is not working on their PCs.
This dilemma is critical as some software installation files can be on disks. With the drive not working, you won’t be able to run these files or play multimedia DVDs.
Thankfully, you can fix this issue by following the steps in this guide and getting back to playing any DVD you want.
Why is my external DVD drive not working?
Below are some of the causes of the LG external DVD drive not working issue:
Outdated driver: The first thing you need to check if the LG Slim portable DVD writer is not recognized on Windows 10 is the display driver. If any of these is outdated, it could cause the issue. The solution here is to update your driver to the latest version.
Glitches with hardware connectivity: In some cases, this issue might be due to minor glitches in your connection. Running the Hardware and Devices troubleshooter should fix this quickly.
Wrong power setting: Another known cause of the issue is the power management feature of your PC. If your PC is set to turn off your Root USB when it needs to save power, the LG Ultra Slim Portable DVD writer might not be light blinking when connected. You need to turn off this feature to restore normalcy in this case.
How can I fix the LG external DVD drive if it’s not working?
1. Update your drivers
Press the Windows key + R, type devmgmt.msc, and click OK.
Click the arrow next to Display adapters and right-click the driver there.
Now, select Update driver.
Finally, choose Search automatically for drivers and install any available updates.
Display drivers play an essential role in the smooth running of virtually everything on your PC. So, if the LG Slim portable DVD writer drive is not working, it might be causing the problem.
If the Windows driver updater cannot detect the latest driver for your PC, you might need to go to the manufacturer’s website to download and install it.
Alternatively, you can use the ever-reliable to download all the outdated drivers on your PC automatically. This should fix this issue and the potential problems that drivers can cause.
All you need to do is to download and install Outbyte Driver Updater, and you will be able to update your drivers in a few clicks.
Outbyte Driver Updater
Fix your DVD driver quickly and automatically by using Outbyte Driver Updater!
Press the Windows key + S, type cmd, and select Run as administrator under Command Prompt.
Type the command below and hit Enter: msdt.exe -id DeviceDiagnostic
Wait for the command to finish running and apply any recommended fixes.
The built-in troubleshooter on Windows can detect and fix many problems on your PC. For example, it has proved effective in dealing with the LG SP80NB80 DVD writer drive not working issue.
3. Change the power setting
Press the Windows key + X and select the Device Manager option.
Expand the Universal Serial Bus controllers option and double-click the USB Root Hub option.
Click the Power Management tab at the top.
Lastly, uncheck the box for Allow the computer to turn off this device to save power and click the OK button.
Your PC employs different ways to save power to give you maximum experience. However, if turns off your USB port, it might lead to the LG external DVD drive not working issue.
Following the steps above and restarting your PC should restore regular service here.
Press the Windows key + R, type regedit, and click OK.
Navigate to the path below in the left pane in it: HKEY_LOCAL_MACHINE\SYSTEM\CurrentControlSet\Services\atapi
Right-click on atapi, and select New > Key.
Type Controller0 and press Enter.
Now, right-click on the Controller0 key, and select New > DWORD(32-bit) Value.
Type EnumDevice1 as the name and press Enter.
Then right-click on EnumDevice1 and select Modify.
Set the Value data to 1 and click OK.
Close the Registry Editor and restart your PC.
If you still can’t fix the LG external DVD drive not working issue after trying the solutions above, you might need to create a new registry key for it.
With this, we can conclude this guide on how to fix the LG external DVD drive if it is not working. We believe you have everything needed to fix this issue for good, provided you follow the instructions in this guide.